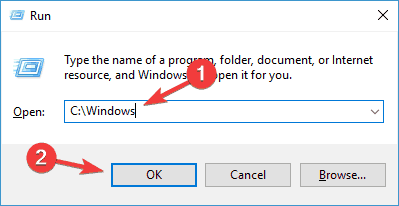
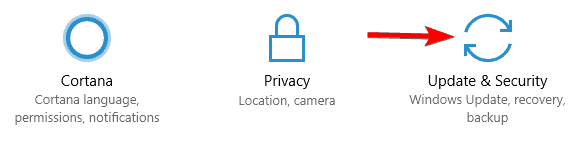
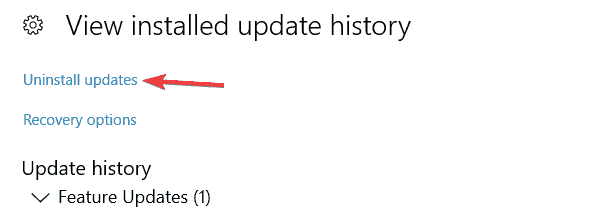
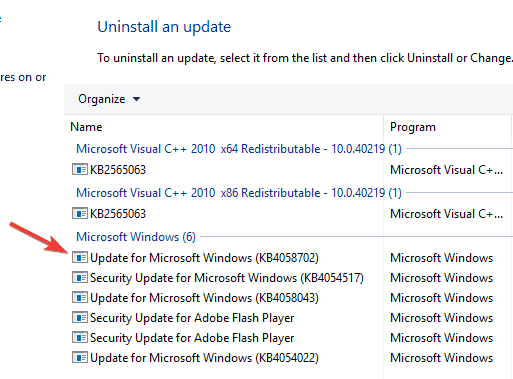
The Windows cannot find file, make sure you typed the name correctly and then try again error can pop up in 2 instances. Some people can’t open File Explorer because of it, while others can’t open specific apps.
Here’s how to fix it:
How to fix Windows Cannot find file, make sure you typed the name correctly
Here’s a quick video of the steps you can take. You can find more details in the written steps below.
1. Select File Explorer’s This PC option
1. Press the File Explorer icon on the Windows taskbar.
2. Select the View tab in the snapshot directly below.
3. Press theOptions button and select Change folder and search options from its menu.
4. That option will open the window directly below. Select This PC from the Open File Explorer to the drop-down menu.
5. Press the Apply and OK buttons on the Folder Options window.
Fixing the Windows cannot find make sure you typed the name correctly and then try again error for File Explorer is more straightforward.
Some Windows users have resolved the issue by adjusting the Open File Explorer setting to This PC.
2. Reregister Windows 10 apps
2.1 Get the App package using PowerShell
Right-click the taskbar and select Task Manager.
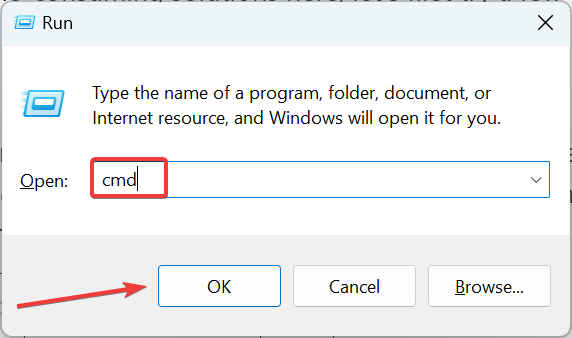
Click File and select Runnew task to open the window directly below.
Enter PowerShell in the Open text box and select the Create this task with administrative privileges checkbox.
Then click OK to open the window below.
Input the following command in PowerShell and press the Enter key. Get-AppXPackage | Foreach {Add-AppxPackage -DisableDevelopmentMode -Register "$($_.InstallLocation)AppXManifest.xml"}
Thereafter, reboot the Windows 10 platform.
Reregistering an app is a little like reinstalling it as that deletes app data, but you don’t need to install it again.
2.2 Reset the apps
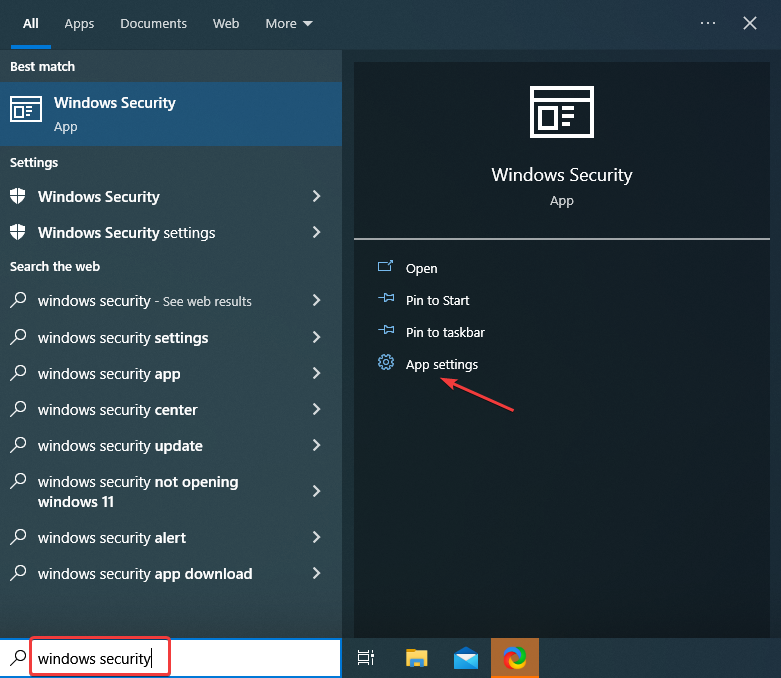
Press the Start button, and then click the Settings icon.
Click Apps to open the app list in the snapshot directly below.
Select an app to reset.
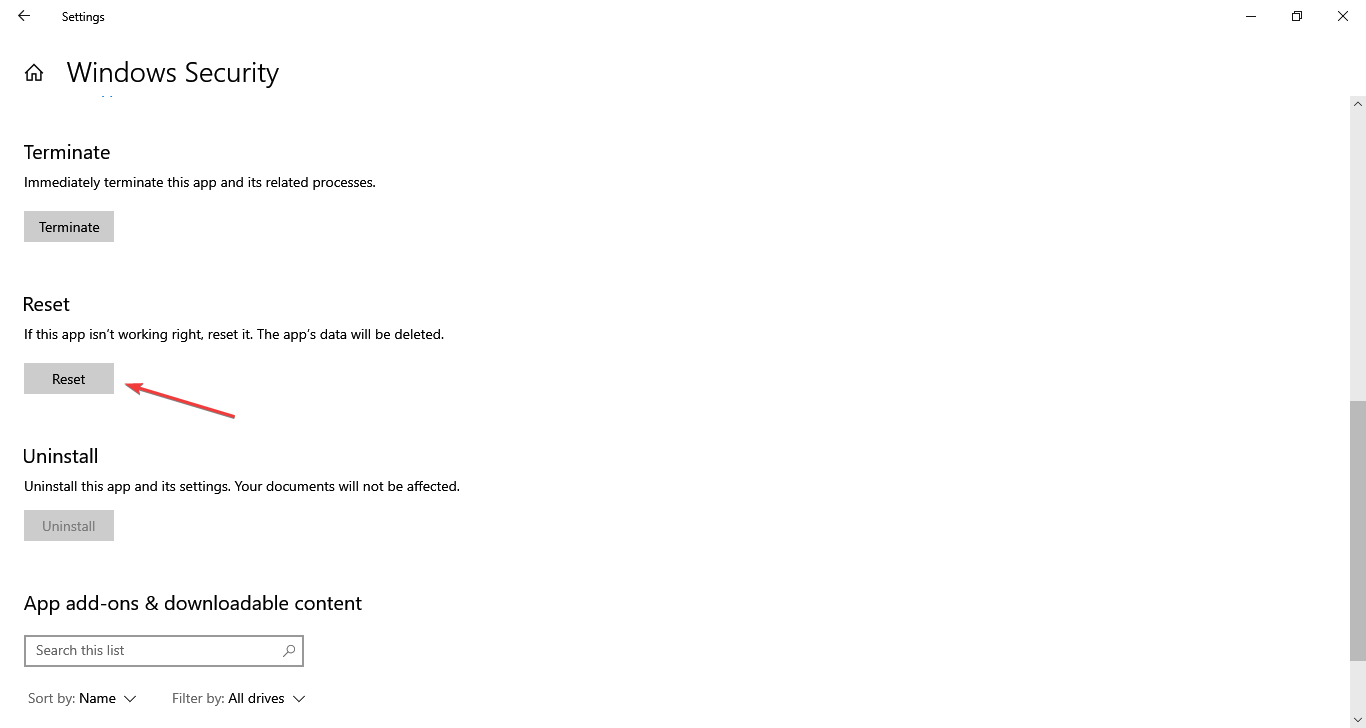
Click Advanced options to open the app’s Reset option.
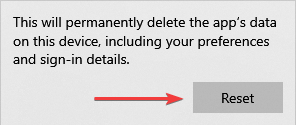
Press the Reset button, and click Reset again, to reregister the selected app.
Browse to the folder location of the program that’s showing the error in File Explorer. If the software has a desktop shortcut, you can right-click that icon and select Open file location.
Select the program’s EXE in File Explorer, and press the F2 key.
Then enter another title for the file, and press the Return key.
A particular error is followed by the message Windows cannot find c:program make sure you typed the name correctly. Renaming EXE files is one resolution for errors that include software paths.
Those are a few resolutions that can fix the Windows cannot find make sure you typed the name correctly and then try again error for File Explorer, apps , and other desktop software. Check out our dedicated post for further details on how you can fix Windows 10 apps that aren’t opening.
If you have any additional questions, feel free to leave them in the comments section below.
If your mouse cursor freezes, jumps, or disappears during your games or while doing something at work, then this tutorial will help. The reason why your mouse keeps freezing could be a post-updated bug.
This may also happen when using a wireless mouse, or when your touchpad is not working properly. Luckily, fixing this issue is pretty simple, and in today’s guide, if a mouse lags on your PC, the solutions from this guide will surely help you.
How do I keep my mouse from freezing or glitching?
1. Disable the disappearing feature in Windows 10
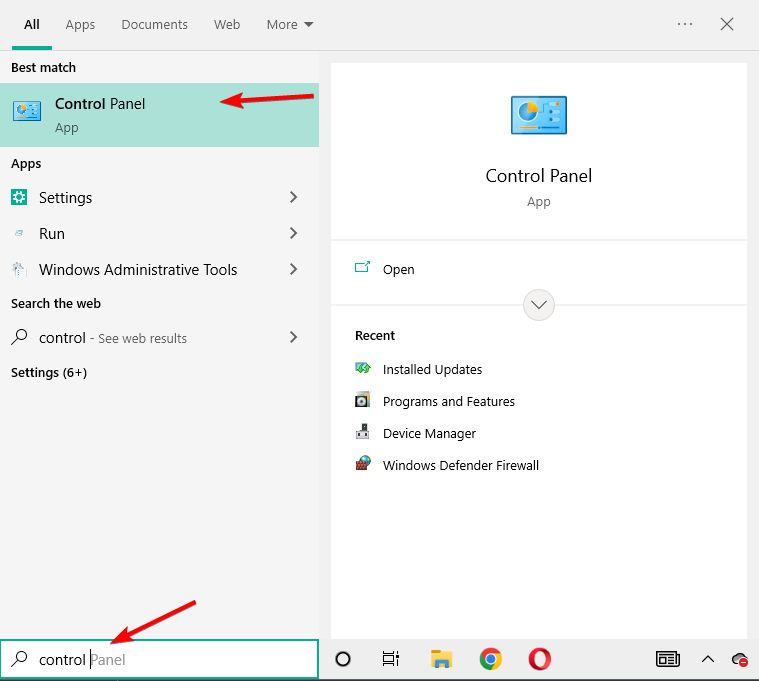
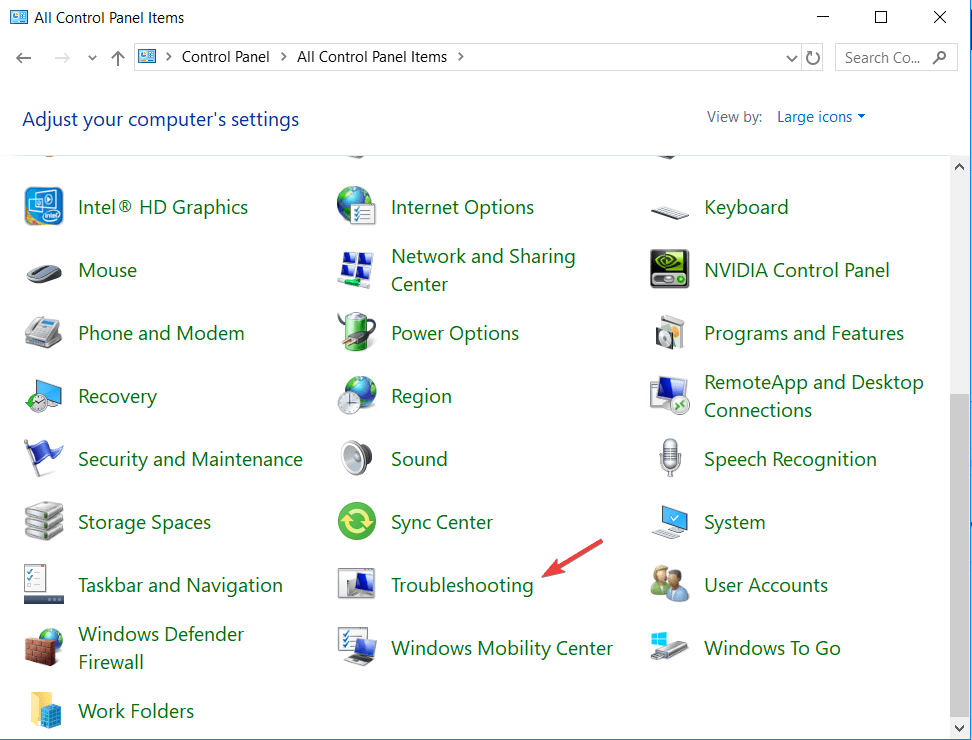
Press Windows and type control inside the search bar. Click Control Panel from the list.
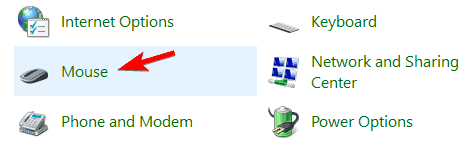
Left-click on the Mouse icon.
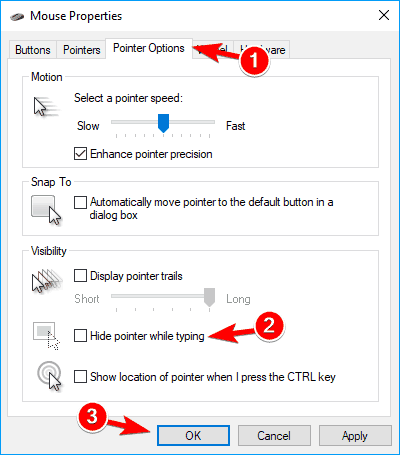
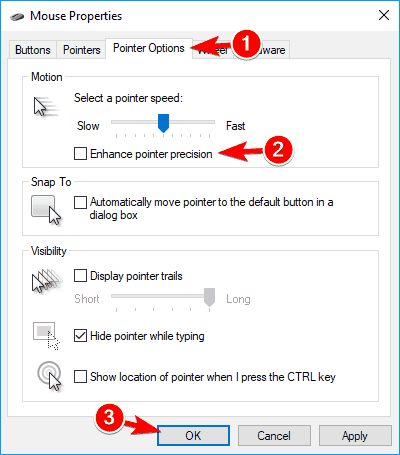
A window with Mouse Properties should open; you will need to left-click on the Pointer options tab on the upper side of the window.
You will have to uncheck the box next to Hide pointer while typing.
Left-click on the OK button on the lower side of the screen.
Close every window you opened and reboot the Windows 8 or Windows 10 device.
Windows has a built-in feature that is supposed to make your cursor disappear while you are typing.
2. Reinstall your mouse driver
Sometimes the mouse freezing or glitching problem can occur due to your mouse driver. Several users reported that their mouse was recognized as a PS/2 instead of USB mouse, and that caused various issues to appear.
Therefore, reinstalling your driver should fix the problem in no time.
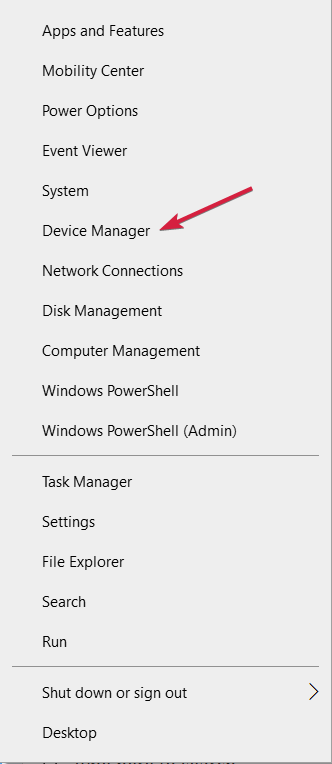
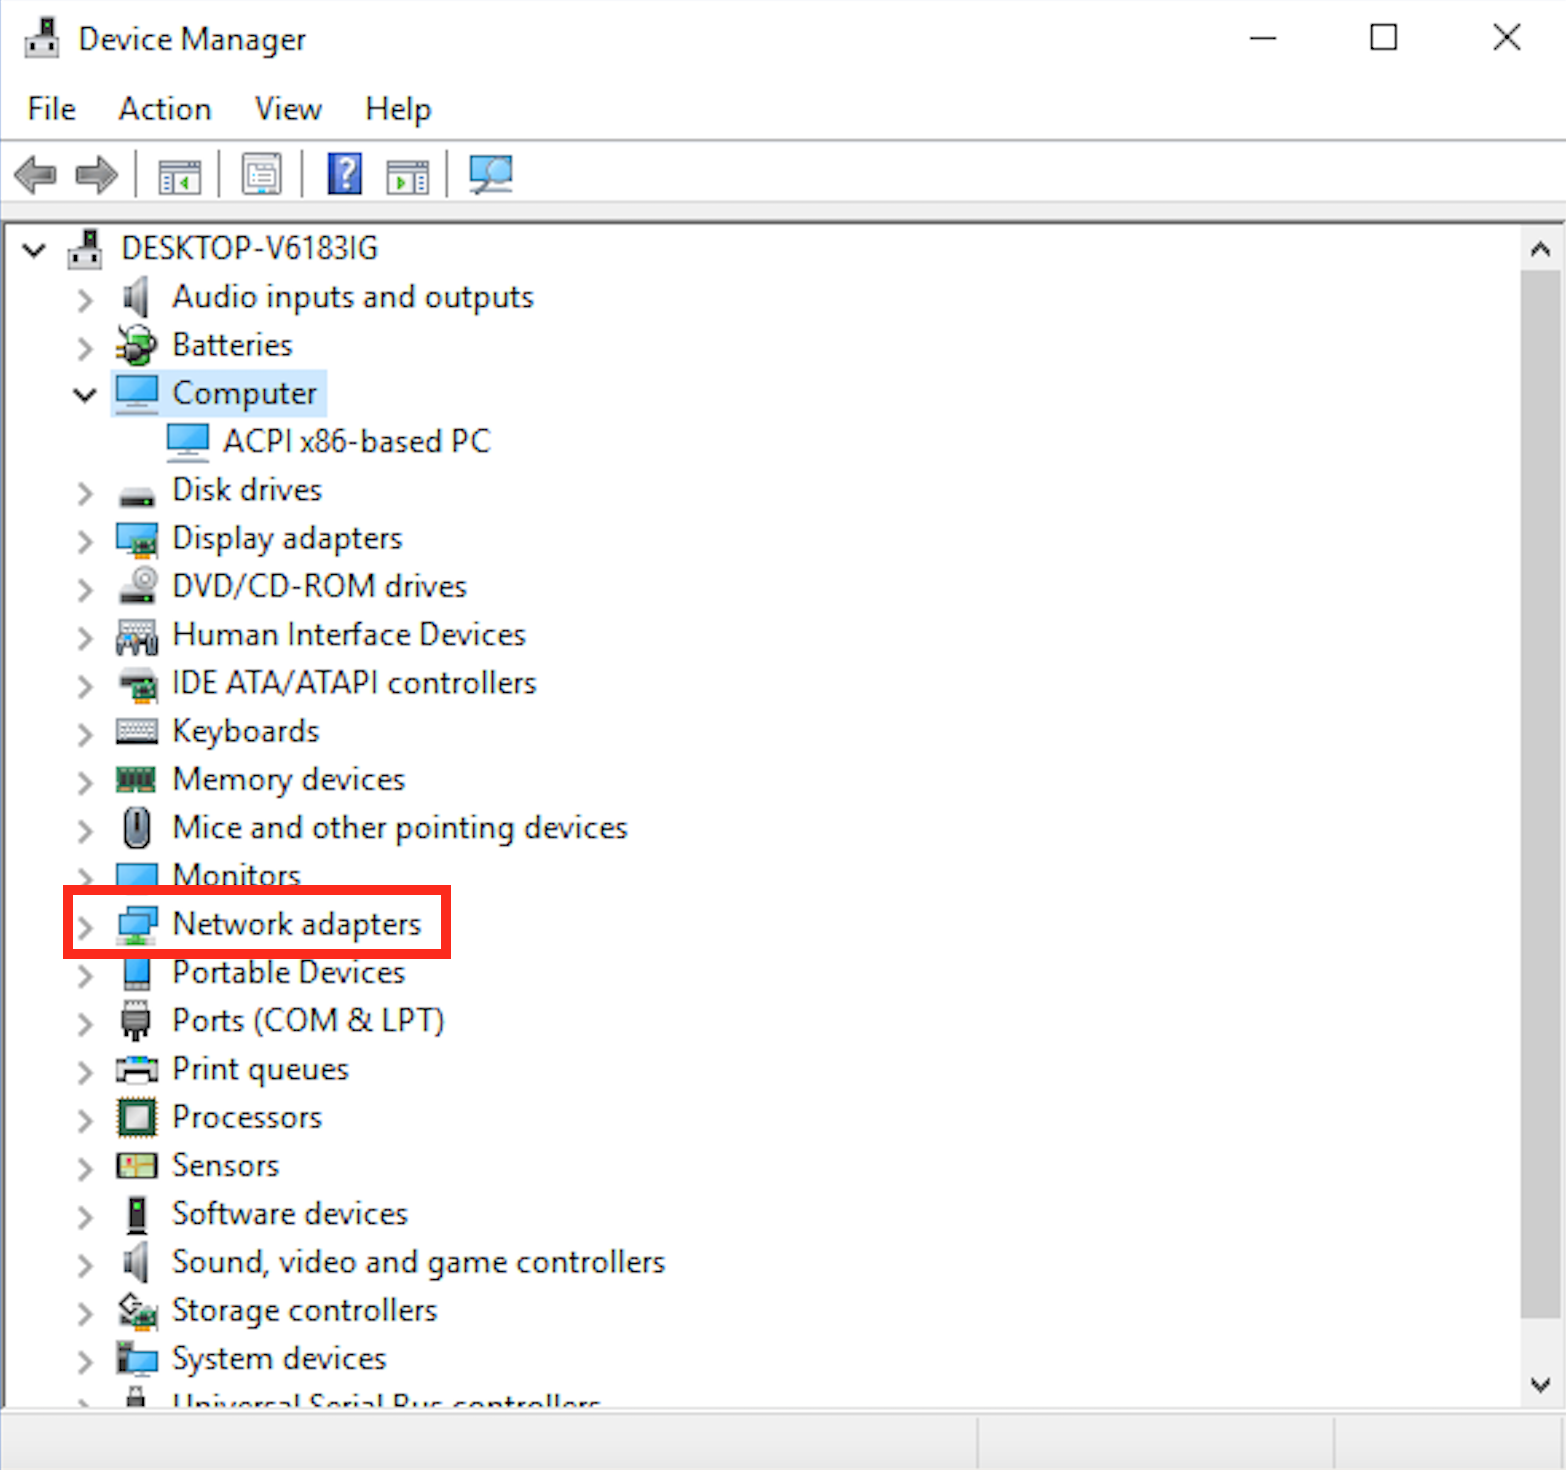
1. Right-click the Start icon then select Device Manager.
2. Expand the Mice and other pointing devices section,
3. Right-click your mouse driver, and select Uninstall device.
4. When the confirmation message appears, click on Uninstall.
5. Restart your computer to automatically reinstall the driver and fix the mouse keep freezing error in Windows 10/11.
3. Fix the unexpected jumps or freezing issues in Windows
Open Control Panel.
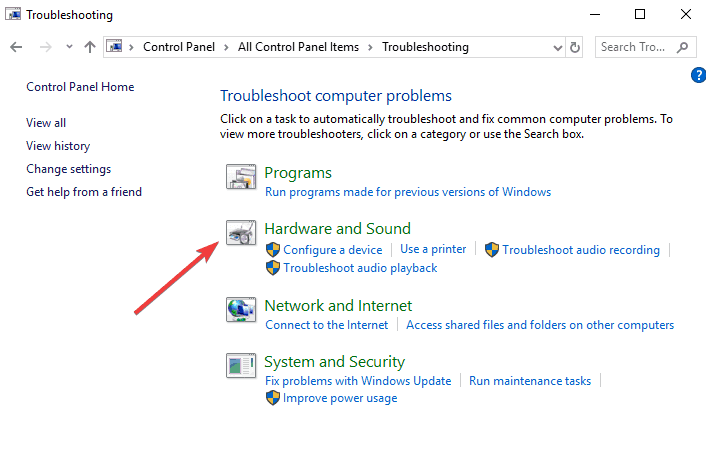
Select the Troubleshooting option.
A Troubleshooting window will show, from the right side of the window left click on the Hardware and Sound option.
Now in the Device category left click on Next button for the Hardware and Devices.
A scan will begin and after it is finished you will need to left-click on Apply this fix.
Close the windows you have open.
Reboot your device and see if the mouse keep freezing laptop error is gone.
4. Uncheck the Enhance pointer precision feature
Open Control Panel and navigate to Mouse section.
Navigate to the Pointer Options tab and disable Enhance pointer precision feature. Now click on Apply and OK to save changes.
After turning off this feature, problems with your cursor should disappear.
5. Disable HP Control Zone
If your cursor freezes, jumps, or disappears, your problem might be related to HP Control Zone. Several users reported that they fixed the issue simply by disabling HP Control Zone. To do that, follow these simple steps:
Navigate to Mouse section in Control Panel.
Go to HP Control Zone tab and disable HP Control Zone. Click on Apply and OK.
After disabling this feature, your mouse problems should be resolved. Keep in mind that HP Control Zone might not be available on your PC, unless it’s an HP device.
6. Remove AdAware
Sometimes, third-party applications can cause issues with your mouse. Many users reported that their cursor freezes, jumps, or disappears due to AdAware.
This is a solid anti-spyware application, but sometimes it can cause various issues. Users reported that uninstalling AdAware fixed the issue for them, so feel free to try that.
If you want to continue using this app, update it to the latest version and check if that solves the issue.
7. Disable additional mouse drivers from Device Manager
According to users, problems with your cursor can occur due to multiple mouse drivers on your PC.
If your cursor freezes, jumps or disappears, you might have to disable additional mouse drivers on your PC. To do that, follow these steps:
Open Device Manager and navigate to Mice and other pointing devices section.
If you see multiple entries in this section, you’ll need to disable all devices that you’re not using.
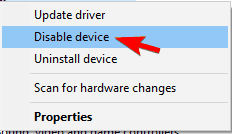
To do that, simply right-click the device you want to disable and choose Disable device from the menu.
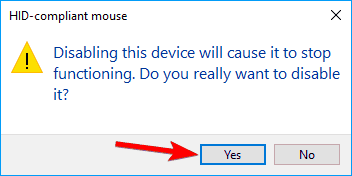
A confirmation window will now appear. Click on Yes to proceed and fix the mouse keep freezing for a second.
After removing additional devices, the problem should be completely resolved.
8. Roll back to the previous driver
Sometimes issues with your cursor can appear due to new drivers. According to users, this issue can appear if you recently updated your mouse or touchpad driver.
If your cursor freezes, jumps or disappears, you need to roll back to the older driver. You can do that by following these steps:
Open Device Manager and locate the problematic device. Double-click the device to open its properties.
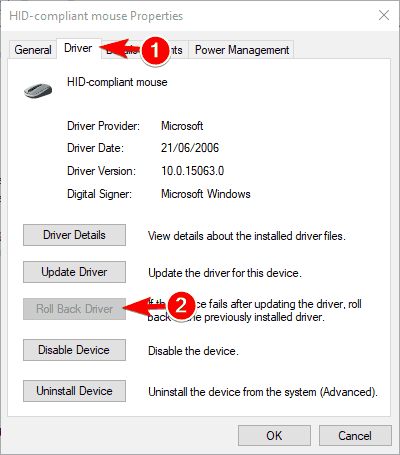
When Properties window opens, go to the Driver tab and click on Roll Back Driver button. The mouse keep freezing when playing games issue will be solved.
After rolling back to the older driver, check if the problem is resolved. If Roll Back Driver option isn’t available, you might have to reinstall the driver by following the steps from Solution 4.
It’s worth mentioning that Windows can sometimes automatically update your drivers and cause this issue to reappear.
According to users, sometimes Realtek HD Audio Manager can cause problems with your cursor.
If your cursor freezes, jumps or disappears, you need to prevent Realtek HD Audio Manager from starting automatically with your PC.
To do that, follow these steps:
Press Ctrl + Shift + Esc to open the Task Manager.
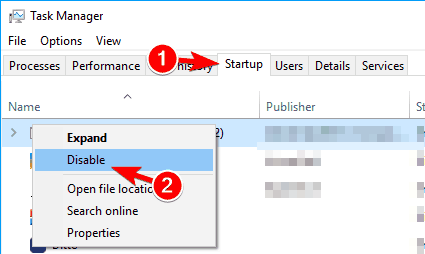
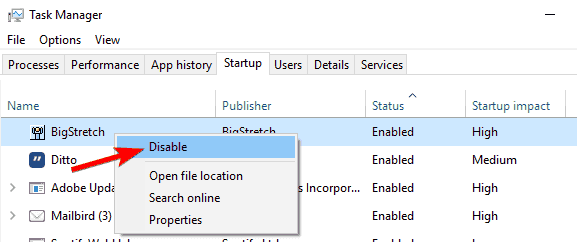
When Task Manager opens, go to the Startup tab. Locate Realtek HD Audio Manager, right-click it and choose Disable.
After doing that, restart your PC and check if the issue reappears.
10. Make sure that your device is enabled
If this issue appears on your laptop, you need to check if your device is enabled. To do that, follow these steps:
Go to Control Panel > Mouse.
Navigate to the last tab on the right and make sure that the device is enabled.
After doing that, your mouse will reappear, and everything will start working again. Keep in mind that you might have to perform these steps using your keyboard.
This error is not the only one that can bother you. There are many cursor-related problems that one could get on a Windows PC, the most common being, cursor moving to the left while typing.
A freezing mouse can also get your mouse stuck in the corner, but we have a whole article dedicated to this issue.
Let us know in the comment section if these solutions were helpful in fixing various mouse cursor problems.
Just like the previous versions of Windows, Windows 10 comes with some of the default apps such as a text editor, calendar, and Calculator. Speaking of which, some users are having certain issues and report that Windows 10 Calculator won’t work.
We have all used Windows Calculator, it’s a simple application that allows us to perform a quick calculations, so it’s unusual to see that the Calculator application isn’t working for some users.
If you’re having problems with Calculator on Windows 10 here are a few solutions that might help you.
Why does my Calculator not work on Windows 10?
There are many problems with Calculator that can occur on Windows 10, and in this article, we’ll show you how to fix the following issues:
Windows 10 Calculator doesn’t run, start, launch
Many users reported that the Calculator app won’t start at all on their Windows 10 PC.
According to them, the application is completely unresponsive.
The calculatorwon’t open on Windows 10
This is another variation of this problem, and many users reported that their Calculator app is unable to open.
This can be an annoying problem, but you should be able to fix it with one of our solutions.
Windows 10 Calculator opens then closes
Few users reported that Calculator on their PC opens and then instantly closes.
This is a standard problem, and you might be able to solve it by fixing corrupted files.
Windows 10 Calculator not working administrator
In some cases, the Calculator app might not work even if you’re using an administrator account.
To fix this problem, you need to reinstall the application.
Windows 10 Calculator crash, closes
Many users reported that their calculator frequently crashes or closes.
This can be an annoying problem, but you can fix it by using one of our solutions.
How can I fix the calculator not working in Windows 10?
1. Re-register Windows 10 apps using PowerShell
In the Search Bar type PowerShell and right-click PowerShell app from the list of results.
From the menu choose Run as administrator.
When the PowerShell starts, paste the following line and press Enter to run it:
This will re-register all Windows 10 apps on your computer. Wait for the process to finish and then try running Calculator again.
2. Create a new user account
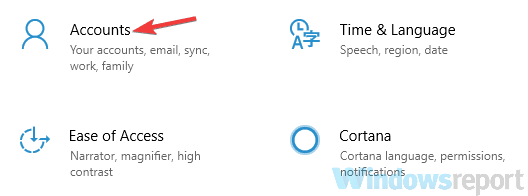
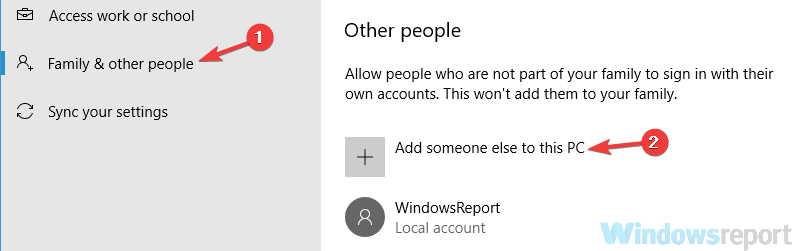
In the Search bar type add user and choose Add, edit, or remove other users from the list of results. You could also do that by going to the Settings > Accounts >Family & other users.
In the Family & other users section click the Add someone else to this PC.
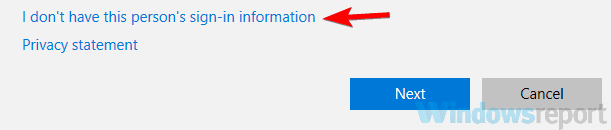
Click on I don’t have this person’s sign-in information.
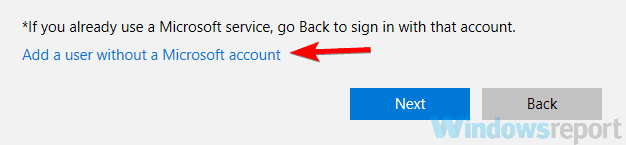
Now click on Add a user without a Microsoft account.
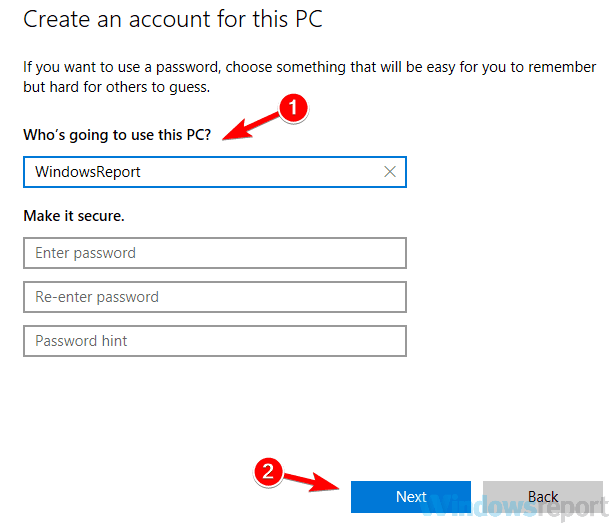
Now you need to enter username and password for local account.
After you’ve created a new account switch to it.
If everything works, you can delete your old account, but remember to copy your personal files and documents to your new account. This might be a bit drastic solution, but it should help you if the Calculator doesn’t work on Windows 10.
3. Perform an SFC scan
Press Windows Key + X to open Win + X menu. Now choose Command Prompt (Admin) from the list of results. If Command Prompt isn’t available, you can use PowerShell (Admin) instead.
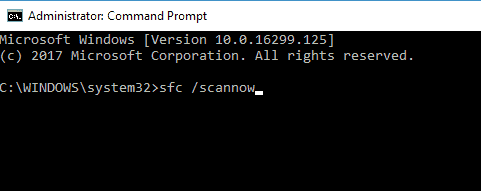
When Command Prompt opens, enter sfc /scannow and press Enter.
SFC scan will now start. The scanning process can take up to 15 minutes, so don’t interrupt it.
Once the scan is completed, check if the issue is resolved. If SFC can’t fix the problem or if you’re unable to run SFC scan, you need to use DISM instead.
To do that, start Command Prompt as administrator.
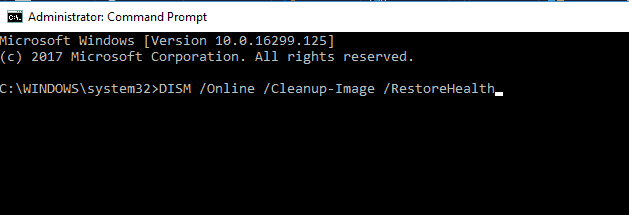
Now paste DISM /Online /Cleanup-Image /RestoreHealth command and run it.
Wait while Windows performs the DISM scan.
The scan process can take up to 10-20 minutes, so don’t interrupt it.
Once the DISM scan is finished, the issue should be resolved. If you were unable to run an SFC scan before, run it after running a DISM scan and check if that solves your problem.
4. Install the missing updates
Press Windows Key + I to open the Settings app.
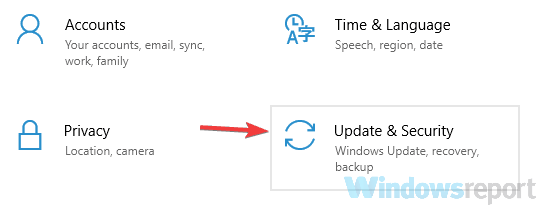
When the Settings app opens, navigate to the Update & security section.
Click on the Check for updates button. Windows will now check for available updates. If updates are available, they will be downloaded automatically in the background.
Installing the latest updates can fix bugs and glitches that can cause the Calculator to stop working.
5. Reinstall the Calculator app
Open the Microsoft Store from the Start menu and reinstall the Calculator app. If you need more guidance, be sure to check our article on how to reinstall Windows Store apps.
6. Uninstall the Calculator app
If establishing a new user account in Windows Calculator does not resolve the issue, you can uninstall it.
Because you can’t do it the ordinary way, you’ll need to use an advanced method to reinstall Windows Calculator using an excellent uninstaller application like IObit Uninstaller.
IObit Uninstaller is a helpful uninstallation tool for PCs that runs great on Microsoft Windows apps. It removes any unwanted programs with all associated files for better PC performance.
Simply launch IObit Uninstaller after downloading it and choose All programs from the left panel. You’ll notice a list of all your applications there, where you’ll easily select the Calculator app, and click the trash icon to completely remove it from the Windows operating system.
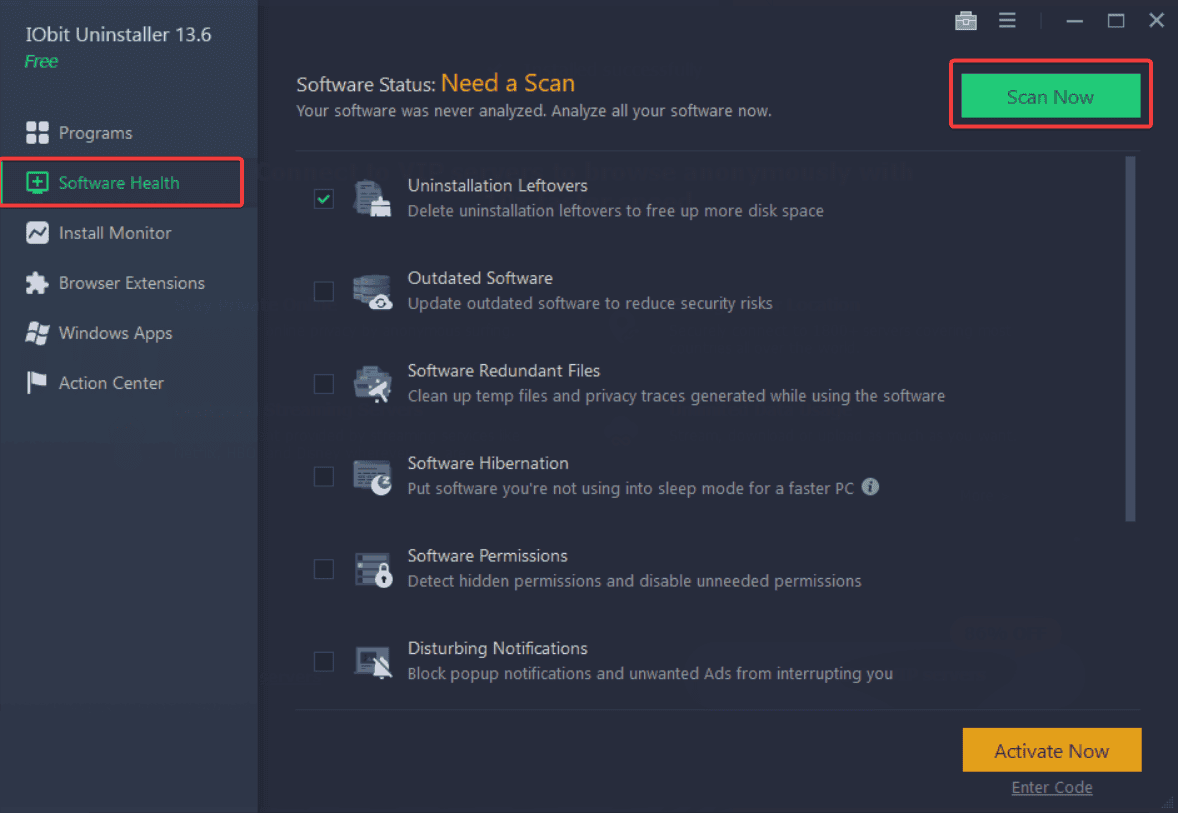
After downloading the tool, run it and let it scan your PC.
If the troubleshooter finds any issues with your apps, it will automatically fix them.
If Calculator doesn’t work in Windows 10, using the Windows app troubleshooter is one of the simplest and fastest ways to fix it.
8. Turn off your firewall
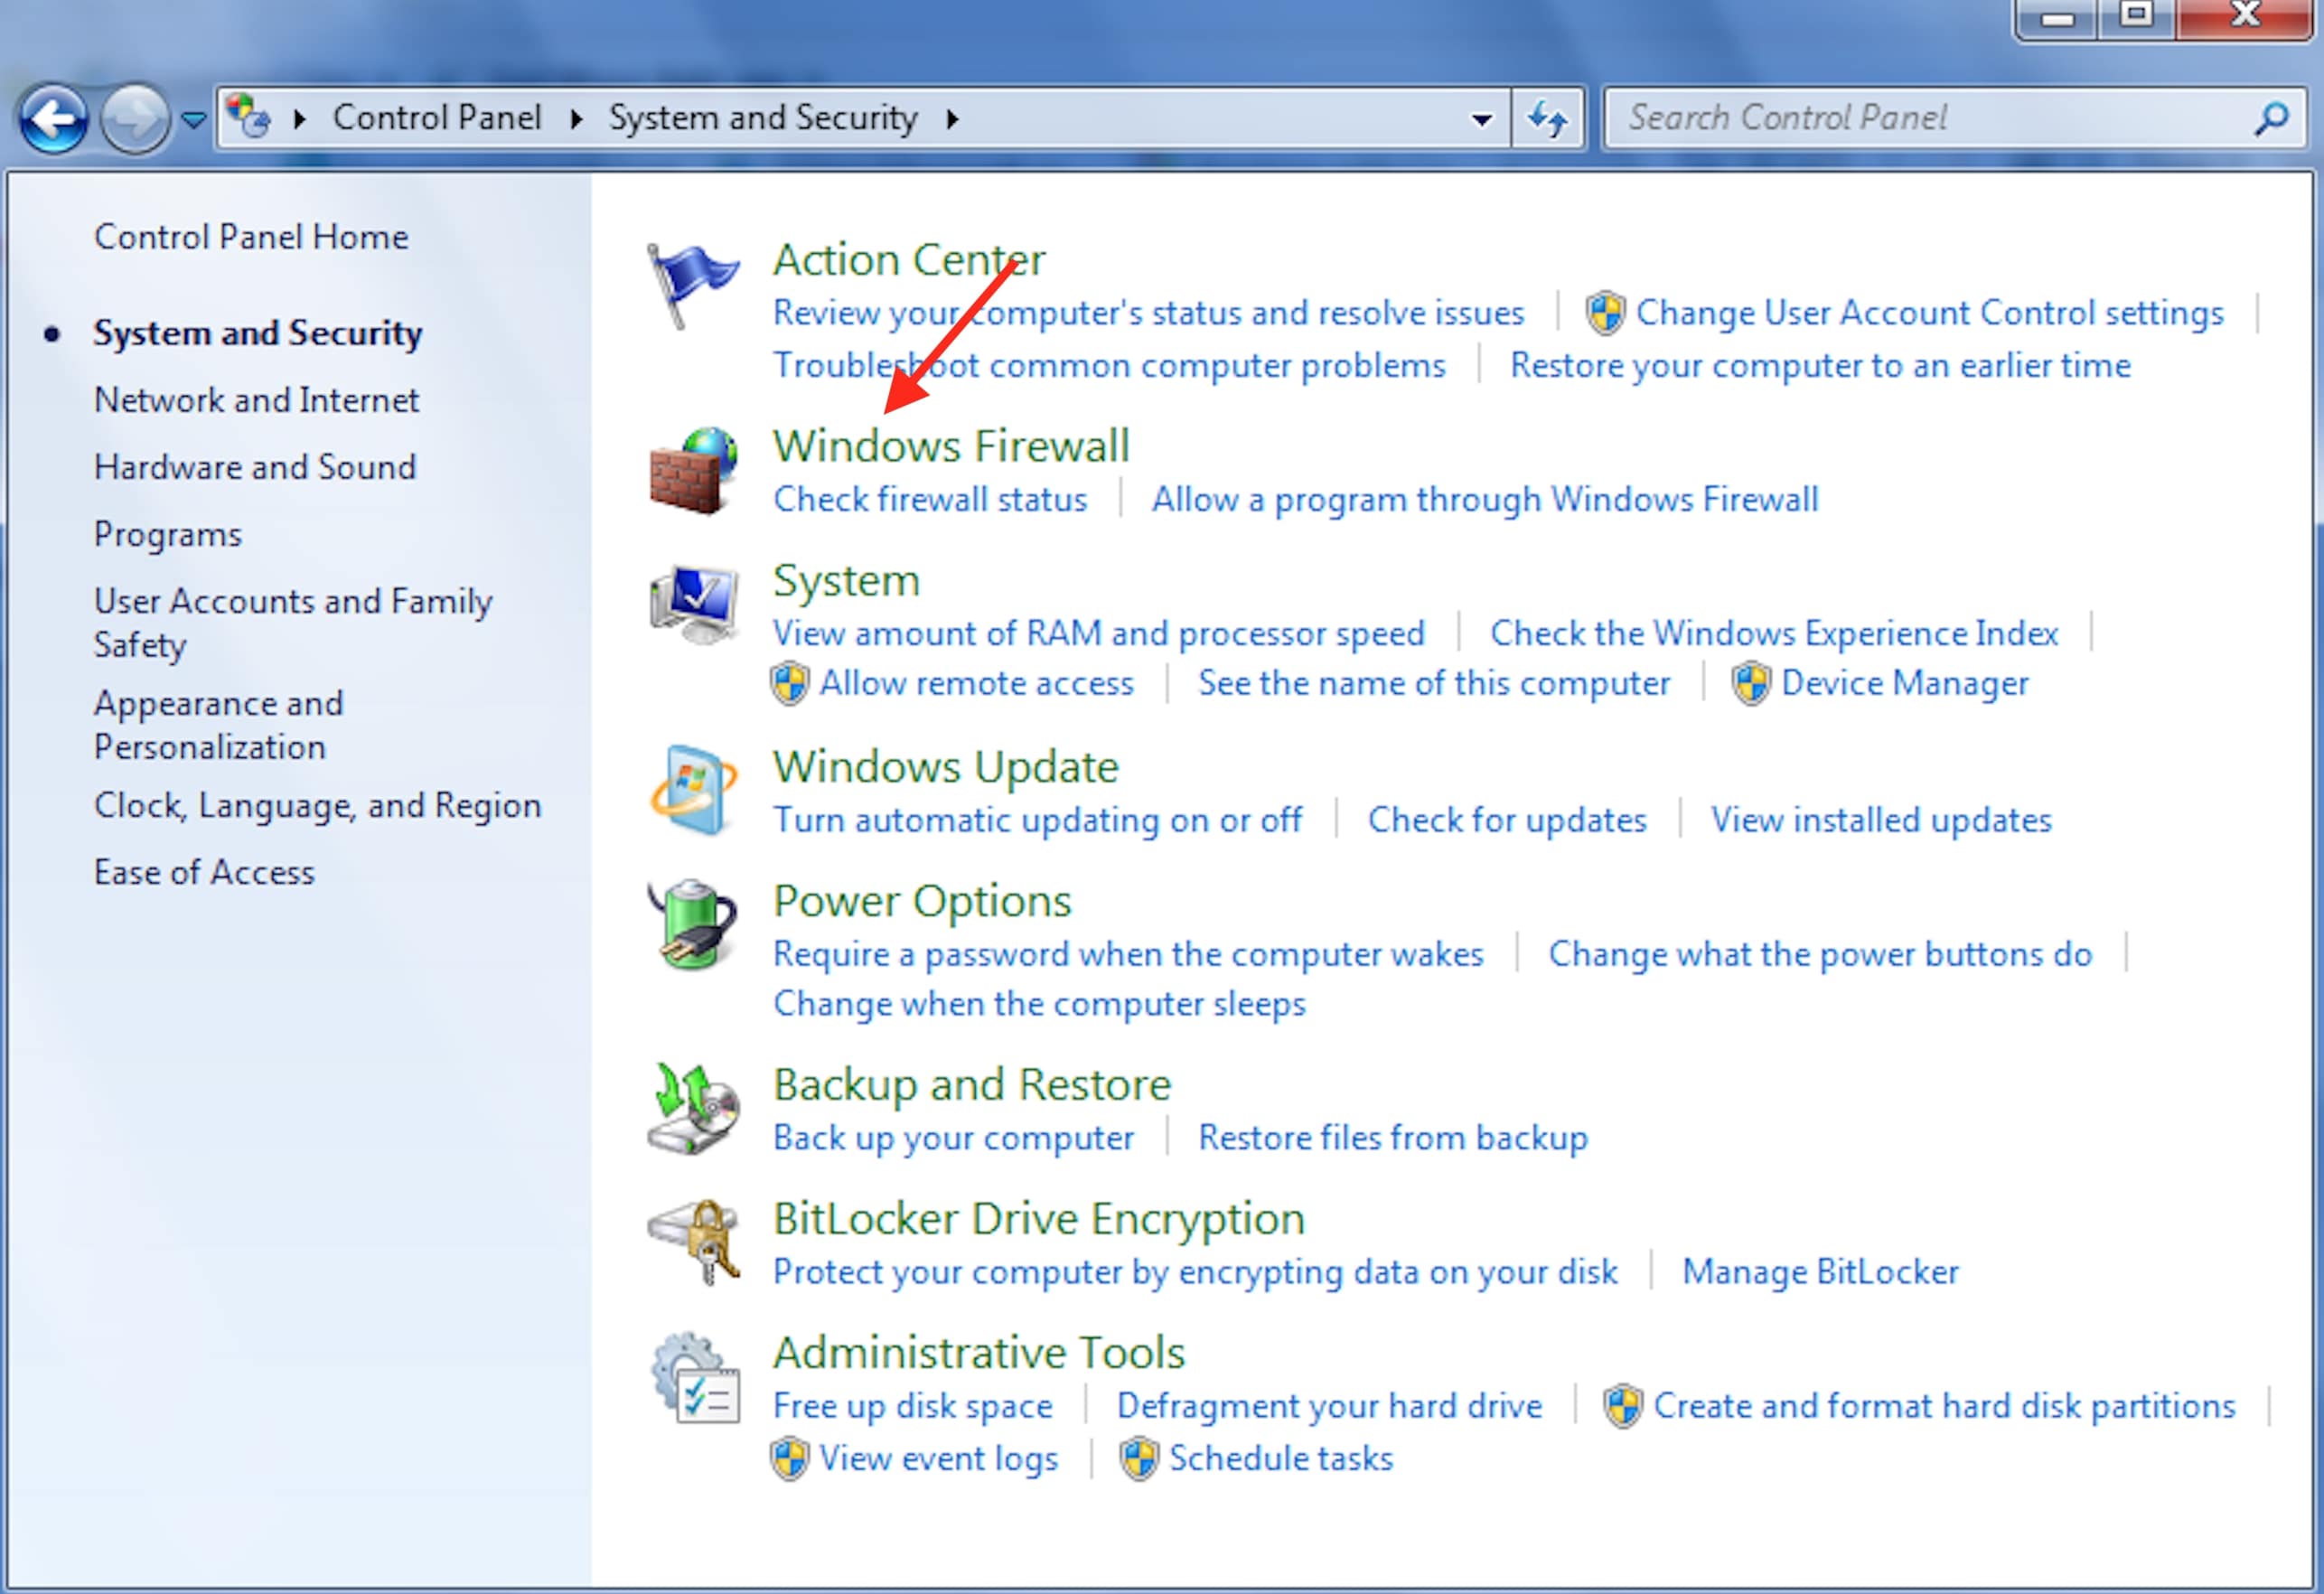
Press Windows Key+ S and enter firewall. Select Windows Firewall from the list of results.
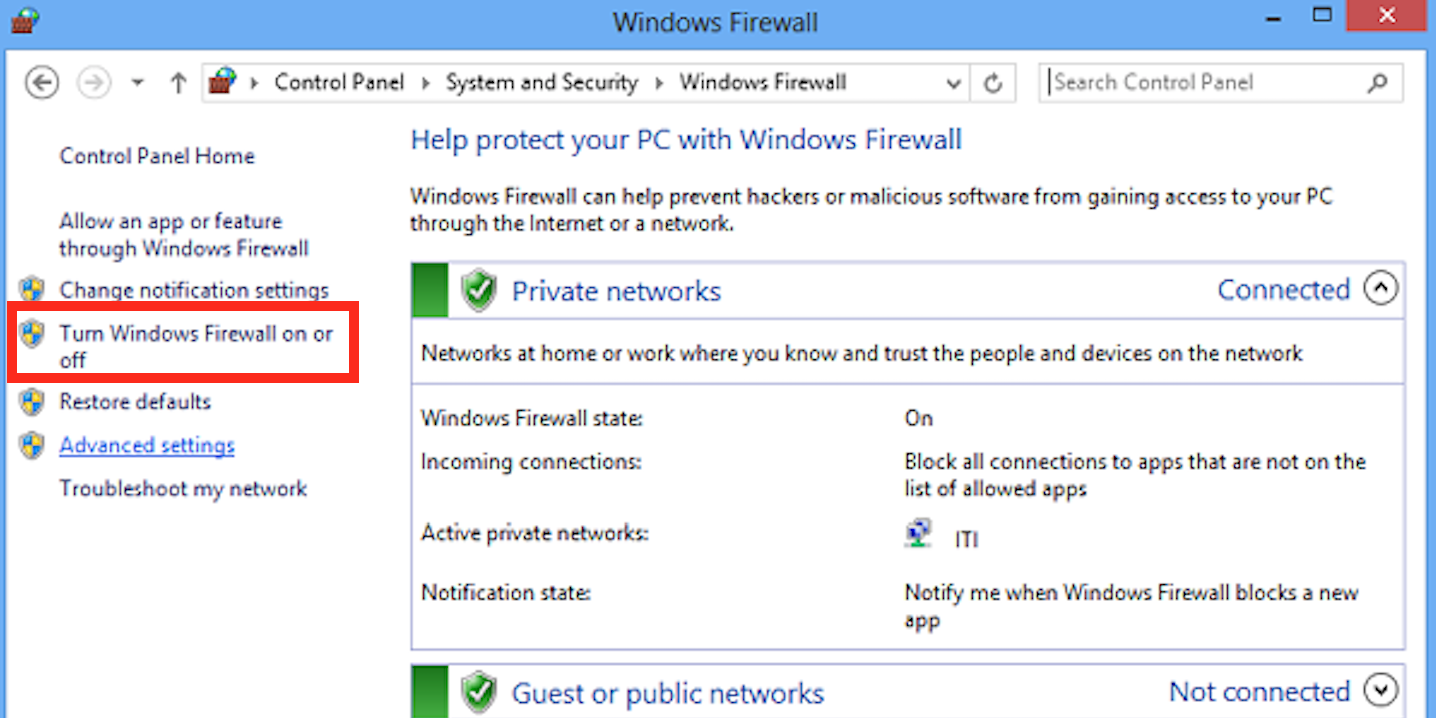
Click on Turn Windows Firewall on or off in the menu on the left.
Now select Turn off Windows Firewall (not recommended) for both Private and Public network settings. Click on OK to save changes.
After disabling your firewall, check if the issue still appears. If not, you might want to enable your firewall and create a security exception for the Calculator app and check if that solves the problem. In case you use a third-party firewall, as a part of antivirus software, try disabling it instead.
9. Enable User Account Control
Press Windows Key + S and enter user account control. Select Change User Account Control settings.
Move the slider to the default position and click on OK to save changes.
Few users reported that Calculator doesn’t work if User Account Control is disabled, so by enabling it you should be able to fix the problem.
10. Reset the Calculator app
1. Open the Settings app. You can do this by inputting settings in the Windows Search box and pressing Enter.
2. Go to the Apps section. A list of all applications will now appear.
3. Select Calculator and click on Advanced options.
4. Now click onthe Reset button.
5. Select Reset again in the confirmation window. After doing that, the problem should be resolved and you’ll be able to use Calculator without any issues.
When your Windows 10 calculator is not working properly, another quick fix is simply resetting the Calculator app.
This can be done via Settings in just a few clicks and should solve any problems related to the app.
11. End RuntimeBroker.exe process
Sometimes background processes can cause issues with the Calculator app. If Calculator doesn’t work on your Windows 10 PC, the cause might be the RuntimeBroker.exe process.
To fix the issue, you need to end this process by doing the following:
Press Ctrl + Shift + Esc to open Task Manager.
When Task Manager starts, locate Runtime Broker, right-click it, and choose End task from the menu.
After ending the Runtime Broker process, check if the issue is resolved. Keep in mind that this is just a workaround, so you might have to repeat this solution if the issue reappears.
Tip
We covered Calculator updates and issues in the past, so if you’re having any other problems with it, be sure to check our Calculator hub for more information. If you’re having additional Windows 10 issues, we advise that you check out our Windows 10 errors hub for more helpful articles.
That would be all, I hope this article helped you with calculator problems in Windows 10. If you have any comments or questions, just reach out to the comment section below
Live video game streaming is a booming industry. As a result, streaming services like YouTube and Twitch have seen a massive increase in new live game streamers and viewers in recent years.
But, live streaming requires a high-speed stable internet connection and tons of bandwidth which is still an unbuyable luxury for many.
One alternative to live game streaming is to upload recorded gameplay to YouTube and other streaming services. PC gaming is all about sharing, but to do that, you need the right game recording software for Windows 10.
How do you record games on Windows 10?
There are a series of ways to record your games on your PC. You can download one of the best free game recorder software for Windows 10 or use a premium-level tool.
Your Windows PC has a built-in recorder that you can use to record your games easily:
On your PC, launch the game you want to record.
Press Win Key + G.
Click on the Record button (red dot) to start recording.
When you’re finished, just click on the square button to stop the recording.
If you had a memorable in-game moment but didn’t press rec beforehand, you can use the Alt+Win Key + G to record the last 30 seconds of gameplay on your PC.
We have compiled a list of the best game recording software for Windows 10 so that you can spend the best of your time honing your gaming skills.
The Icecream Screen Recorder may not sound as delicious as the real desert, but it offers powerful screen recording features to capture your gameplay on PC.
Apart from being a great game recorder for Windows 10, it can also be used to record webinars, video chat, audio, and pretty much anything on your screen.
Icecream Screen Recorder has an easy-to-use interface that one can get used to without prior knowledge of the tool.
Users can start recording with a click of a button. The area selection lets you capture the entire screen or specific parts according to your needs.
The inbuilt editor allows you to trim the created videos, convert files to different formats, and add annotations and markups along with watermarks.
When recording your screen, you can show or hide your cursor and desktop icons, disable the screensaver, and more. On top of that, you can slow down or fast-forward your recordings.
The software also comes with a scheduling feature. You can add a time and date, and Icecream will automatically start recording.
Let’s quickly look at its key features:
Multi-Platform Support
Record from Webcam and Screen Simultaneously
Integrated Video Editor to trim your clips and speed the action up or down
Intuitive User Interface
Convert your recorded videos to any format
Supports mouse click animation effects
Powerful shareware features to easily share your gameplay with your peers
The software has a free version, as well as a licensed version which is a one-time purchase. You can try the premium version within a free trial.
Icecream screen recorder
Capture your gameplay and tweak it to perfection before sharing it with the entire world!
Bandicam is one of the most popular game recording tools available for Windows.
To begin with, the user interface won’t give you any trouble in navigation whatsoever. You can record videos in 4K Ultra HD resolution and capture up to 144 FPS videos.
The video compression in Bandicam works in real-time while retaining close to 90% of video quality.
The recorded files can be saved in AVI and MP4 formats. You can record separate streams of audio from the game and the mic to create a perfect balance between the two on the editing table.
The HDMI input option allows you to record the gameplay from Xbox and PlayStation devices. You can further customize hotkeys, show a mouse cursor, add a mouse click effect, and add a webcam overlay in the settings.
Bandicam lets you stream dynamic videos with different effects, such as an integrated chroma key effect that works in real-time. You can add all sorts of fun backgrounds to your webcam footage.
On top of that, it comes with minimal effects and animations, voice mixing, and real-time drawing features. These are great for creating unique content and keeping your audience engaged. You can combine them in countless ways to showcase your unique style.
Let’s quickly look at its key features:
Intuitive User Interface
Simultaneous Webcam and Screen recording
Record Internal and External Audio
Record Gameplay in 4K Ultra HD / 144 FPS
Directly Upload to YouTube
Supports Recording on Xbox, PlayStation, smartphones, IPTV, etc
Bandicam has a free trial version as well as a premium version. There are multiple packages available, depending on how many devices you want to use it on.
Bandicam
Capture any movement on your PC screen and render it as a high-quality video with this lightweight screen recorder!
Movavi Screen Recorder is one of the best recording software for PC that has a full set of features that let you create dynamic videos and enhance real-time interactions with your audience.
The software lets you record your screen and webcam at the same time. You can overlay your webcam footage on top of your gaming footage or use one at a time.
Moreover, you can also pick specific settings for audio recording. You can use real-time audio from your microphone or add another audio track to your video recording.
Movavi is a great choice for gameplay as it has a feature that lets you show keystrokes and mouse in real-time as you play. This can make your stream even more engaging as you can show your audience exactly what you’re doing as you do it.
Additionally, if you want your videos to be more instructional, you can do that with the draw feature. You can easily draw on top of your videos in real-time or after recording them.
Movavi Screen Recorder also has some essential video editing features for post-production. You can trim, cut, improve audio quality, and more. Also, You can save your final video in the format of your choice.
If you are a professional streamer, this software may be one of your best bets because it comes with a video recording schedule. You can pick a time and date, and the software will automatically start recording.
The software does not require an Internet connection, so if you want to record your gameplay for offline games and post it later, you can also do that.
Other key features include:
Built-in guides
Free updates
Responsive support team
Movavi has a free version with some limitations, but it allows you to live stream with no problem. The only inconvenience is that it places a watermark on all your videos.
You can get a subscription plan with a 30-day money-back guarantee, so you won’t lose any money if you are unsatisfied.
Movavi Screen Recorder
Record your games and integrate dynamic real-time webcam footage, mouse maps, and keystrokes.
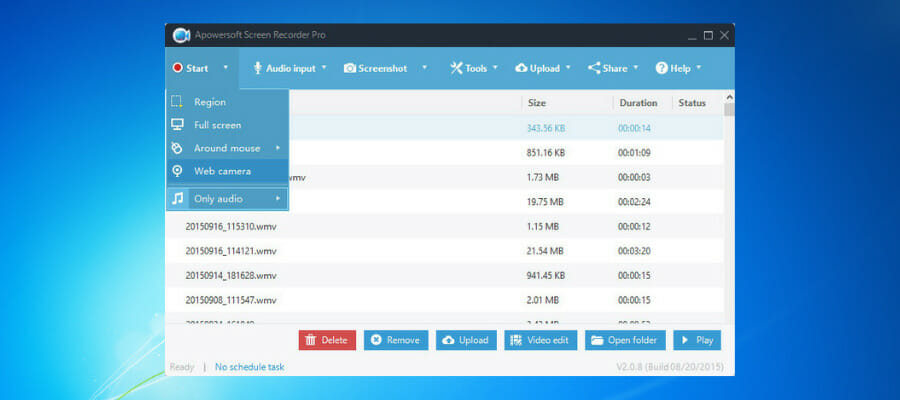
Apowersoft Screen Recorder Pro is similar to Filmora and offers a matching set of functionality. The user interface of this game recorder app for PC is the simplest of the lot, with all the necessary tools shown on the home screen.
Click the start button to start recording after customizing audio and video options like microphone / internal audio, video bitrate, and FPS and saving file format.
The built-in video editor offers many editing options, including trim, merge, visual effects, and the ability to add watermarks.
Apowersoft Screen Recorder Pro supports multiple video formats for export, including AVI, WMV, FLV, MKV, MOV, MPEG, VOB, and WebM.
The edited clips can be uploaded to your server over FTP or directly to video streaming sites like YouTube.
Let’s quickly look at its key features:
Easy-to-use UI
Built-in Video Editor
Upload directly over FTP or to YouTube
Multi-platform support
Record gameplay at 60 FPS
Ampowersoft Recorder has multiple subscription plans. You can try all its features through the free trial.
Apowersoft screen recorder
Easily capture and edit your gaming sessions with this intuitive tool!
FBX Game Recorder is a free game recorder for Windows 10 computers and offers all the basic game recording features you would expect from a pro tool.
This software can record gameplay at 144 FPS and in a maximum of 1440p Quad HD resolution videos.
This software is easy but requires user registration after installation to log in. FBX game recorder only works with video games, so you won’t be able to record other stuff on your screen.
You can select the video encoder (software/hardware), FPS, video resolution, audio options, webcam capture, and hotkeys layout in the settings tab. There is a built-in video editor, which is very basic and limited to video trimming.
FBX game recorder works efficiently on both powerful and old-slower computers based on the game recording settings.
Let’s quickly look at its key features:
Free Game Recorder
Minimal Impact on Performance
Records videos in 1440p QHD / 144 FPS
Built-in video editor
Simple user interface
This software provides various real-time annotations like GIFs, stickers, captions, and other types of effects that can enhance the watching experience of your audience.
NVIDIA ShadowPlay is an in-house game recorder from NVIDIA, and it only works on NVIDIA graphics cards installed on PCs.
It comes bundled with GeForce Experience, can record 60 FPS gameplay, and supports a maximum video resolution of 4K.
There is an instant replay mode that can record the last 30 seconds of gameplay footage on PC at any given time by pressing a hotkey. You can also create 15 seconds GIFs and share 4K resolution screenshots on social media.
ShadowPlay also supports live broadcasting to YouTube, Twitch, and Facebook Live. Unlike other game recorders, NVIDIA’s offering uses GPU to handle video encoding, not the CPU, offering better performance.
One of the greatest features of this game recording software is that it automatically highlights key moments during gameplay, such as match-winning. This is great as you are sure to keep all worth-sharing footage.
If you are using NVIDIA GPU, give it a shot to see how it performs.
Let’s quickly look at its key features:
Free Game Recorder
Video Capture in 4K / 60 FPS
Live Broadcasting Support
Tools to create GIFs and screenshots
The NVDIA community offers extensive tutorials, guides, and ideas about making the best of this software.
OBS is a game streaming and recording tool for Windows and is ideal for anyone looking for a free open-source utility with advanced features. OBS can use both GPU and CPU for encoding videos.
The recording options are straightforward with OBS. Also, the recorded videos are saved in MP4 or FLV format, and it uses your GPU for high-quality streaming on YouTube, Twitch, and Facebook Live.
What’s more default resolution for game recording is set to 1080p at 30 FPS but can be customized by the users.
We must mention that OBS is open source and free to download gaming screen recorder for PC, so you don’t have to spend any money to use it full-featured.
You can record from the webcam during live streaming and add live commentary as it supports audio recording from the game and mic.
Radeon ReLive is to AMD what ShadowPlay is to NVIDIA. A game recorder from the GPU manufacturer that only supports AMD units and allows you to capture gameplay in 1440p QHD resolution at 60 FPS.
AMD ReLive also utilizes the GPU for video encoding, leaving your CPU for other tasks. Live streaming works fine and offers chat integration for YouTube, Facebook, and Twitch.
The audio tracks can be recorded from both game and external mic and saved as individual tracks.
The basic settings can be tweaked from the Global tab, including the recording option, saving folder, audio capture devices, customizing hotkeys, audio volume boost, etc.
Proceed to the Recording tab to change video resolution, recording bitrate, encoding type, instant replay option, etc.
The Radeon ReLive is not the easiest game recorder, but once you get used to it, it can be a good alternative to have on the side if not as the primary recording tool.
Your Windows 10 PC and laptop come bundled with a Game DVR tool that can be accessed from the Xbox app. Game DVR is a basic game recorder that can capture gameplay footage in 1080 resolution at 60 FPS.
Open Xbox, go to Settings> Game DVR tab and enable Record from Game DVR option. To capture gameplay, press the Windows key + G to launch Game Bar.
Open the game and click the record button. The recording will automatically stop and be saved if you exit the game.
Saved gameplays are available in the Menu > Game DVR section of the Xbox app. For editing tools, Game DVR has a built-in video trimming option.
This easy game-recording software uses GPU acceleration for video encoding and works best on a computer with a dedicated GPU.
Let’s quickly look at its key features:
Free built-in game recorder for Windows
Captures 1080/60 FPS videos
Built-in sharing options
How do I record gameplay on Windows 10 for free?
Use free game recording software. If you use Windows 10, the built-in tool comes pre-installed and is completely free, but you can also try out our recommendations.
Most of these tools have free versions or trial periods when you can test them out without having to pay.
What do YouTubers use to record their games?
Most YouTubers use high-quality game recording software to record their games. Some of the recorders popular among them are Camtasia, Bandicam, and OBS.
With some of these tools, you can record the full screen and select the areas you want manually. Lastly, these tools also double as video editors.
What is the best clipping software for gaming?
Gamer recording software is also referred to as clipping software. The best of them is the Icecream Screen Recorder. This is thanks to its perfect combination of the right features.
So, these are some of the best game recording software available for Windows 10. Whether a professional video game player or a hobbyist, having the right tools to record the gameplay is necessary to grow your audience.
Most game recording software tools are either fully or partially free or offer a limited free trial. Make sure you take all of them for a spin before committing to the one that meets your needs.
Feel free to let us know the one you enjoy using in the comments below.
If you want to show a video on your website there are multiple ways to do that. However, if you want to add the custom video using HTML5 you need to use the video tag.
Some users have reported that they get the Browser does not support this video tag error while trying to add a video to their website.
This browser issue can occur due to several reasons including incompatible video format as well as wrong syntax.
Follow the troubleshooting tips given below to fix the Browser does not support the video tagerror in Firefox, Chrome, and other web browsers.
Quick Tip:
If you’re looking for a privacy browser that’s less prone to glitches, we can recommend Opera One. It supports the WebM video format, and HTML5 video and audio formats are compatible with most apps.
It takes fewer resources than most of its counterparts, while still offering free VPN, ad-blocker, and battery-saver features. Not only that but Opera One comes with a built-in AI and has a modular AI-ready design for current and future AI technologies integration.
Opera One
With WebM and HTML5 video support, Opera will keep you away from common video tag errors.
How can I fix your browser does not support the video tag?
1. Change MP4 to H264-MPEG-4 AVC format
If your video is in MP4, it is possible that a browser like Chrome may not support the format anymore.
This issue can only affect the Chrome browser and you might be able to play the same video on other browsers like Firefox and IE.
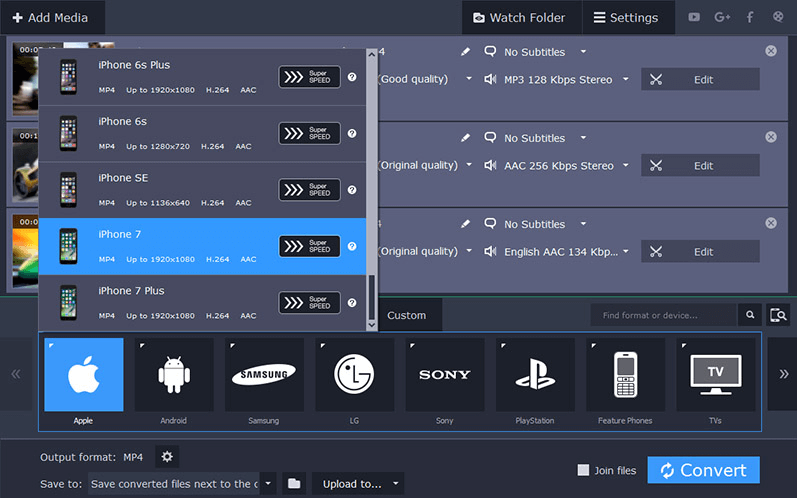
The solution here is to change the video format using a video converter and convert the MP4 video into H264-MPEG-4 AVC. However, if that does not work, you may want to add a custom piece of js code to force Chrome to show Mp4 videos without the error.
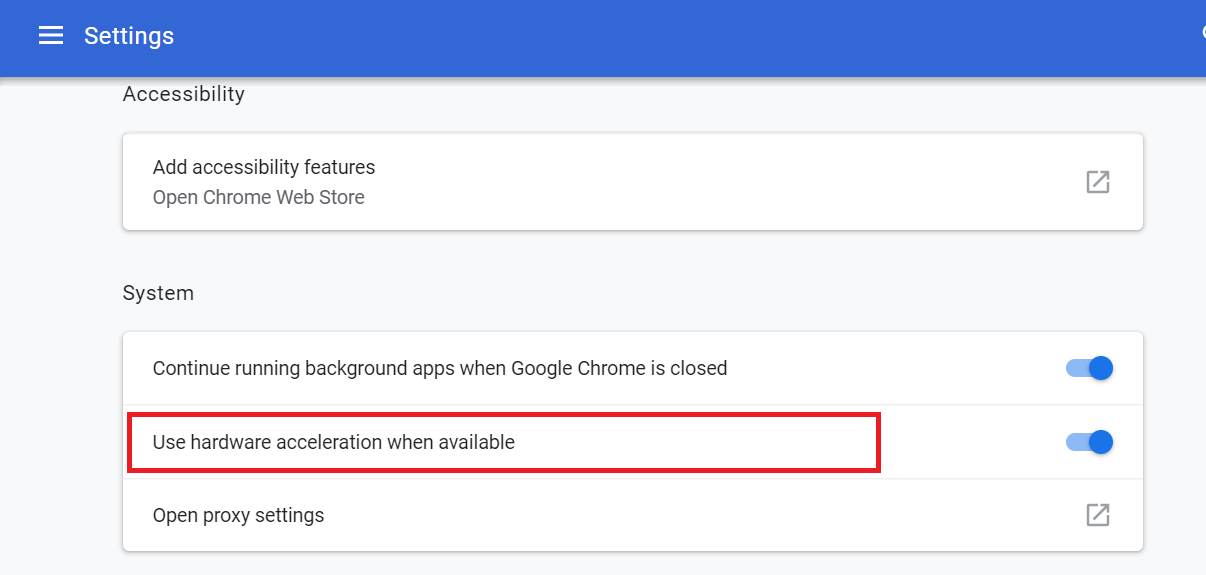
2. Disable Hardware Acceleration
For Firefox
Launch Firefox and click on the Menu.
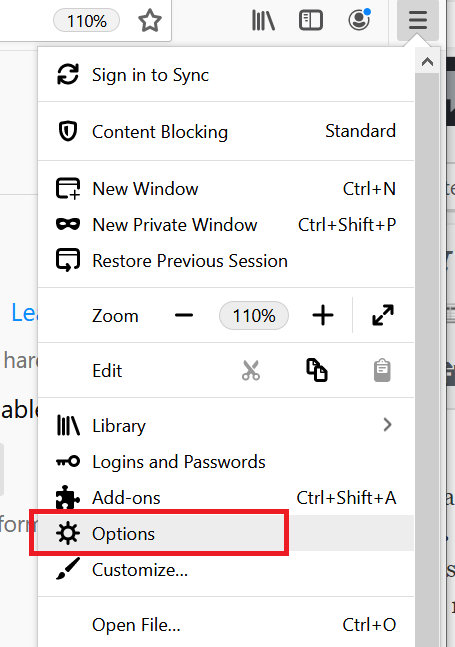
Select Options.
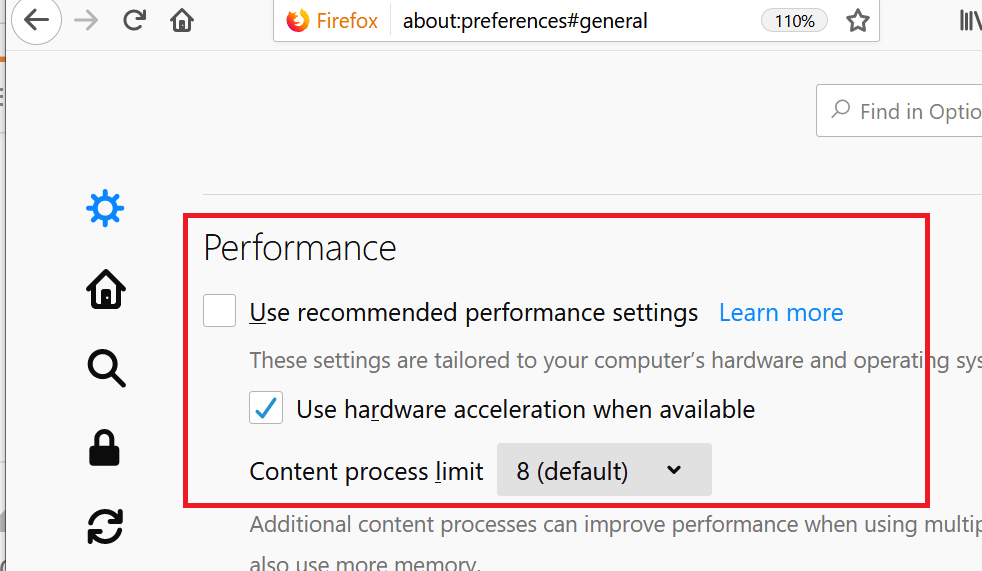
Under Options, scroll down to the Performance section.
By default, Use recommended performance settings option is enabled.
Uncheck Use recommended performance settings option.
Now uncheck Use hardware acceleration when available.
Close the Firefox browser and relaunch it. Try to use the video tag again and check for any improvements.
You have found this article because your Chrome address bar is missing.
The Chrome Address Bar is designed to make the browser easy to use, and packs in some essential features like typing autocomplete, among others.
However, users are complaining that the Address Bar is missing in Chrome. With this comes the difficulty of performing simple tasks like URL search on the browser.
Be at rest if you face this problem, as this detailed guide contains seven viable solutions. You only need to follow the steps listed, and your Address Bar will be back on Chrome.
The address bar is always at the top of your browser, but when it disappears, it could be for any of the following reasons:
The settings for your browser have changed
The computer is infected with malware
You have placed your browser in fullscreen mode
Your browser files are corrupted
Regardless of the cause, you should successfully rectify this error using the solutions we recommend in this article.
Quick Tip:
If you are having errors in Chrome, we would suggest trying another browser. We highly recommend Opera One, as you can easily import your bookmarks and saved info from Chrome, and it is compatible with Chrome extensions.
What’s more, the Address Bar is ideally placed for easy access. Finally, it is a highly secure browser with its VPN, ad blocking, and native AI features, ensuring you are virtually safe and organized.
Opera One
Switch to Opera One from Chrome with all bookmarks, passwords, and extensions.
Click the menu button (three vertical dots) in the top right corner.
Click the Help option, and select About Google Chrome.
This should automatically update your browser, and you may be required to restart the browser.
2. Activate Bookmarks Bar
Click the menu button, and select the Settings option.
Choose the Appearance option on the left pane, and toggle on the Show bookmarks bar switch.
Now verify that your Address back is displaying.
3. Exit full-screen mode
The full-screen mode, by default, hides the Address Bar, your PC Taskbar, and other browser and PC elements. It only shows the content of the page you are viewing and nothing more.
Press the F11key on your PC to deactivate the full-screen mode. This should return all the missing elements on Chrome, including the Address Bar.
4. Force stop Chrome
Press the Windowskey + X and select the Task Manager option.
Right-click the Google Chrome app on the list of running apps, then select End task.
Now, relaunch Chrome and check if the Address Bar is back.
5. Uninstall and reinstall Chrome
Press the Startbutton, type control panel, and then select the Control Panel app.
From the options, click Programs.
Select Programs and Features.
Lastly, locate the Chrome app and right-click on it, and select Uninstall.
The impact of malware on a PC can run as deep as affecting the performance of your browser.
You can use the full scan option of the Windows Defender to perform a deep scan and remove possible viruses causing the Chrome Address Bar to be missing.
For a more intense search that will dig out viruses that are nearly impossible to erase, you can use the renowned TotalAV antivirus.
It is a super-secure, no-nonsense software that digs deep into your system and removes the most stubborn viruses. It offers both offline and online security and protects your PC from attacks.
Starting from crypto wallet protection to secure online shopping and safe webcam streaming, it offers premium security as if it is nothing.
It might just be all you need to get Chrome working perfectly again.
Where is the Chrome menu bar?
In Chrome, the menu is usually hidden within the Chrome menu icon.
To expand and open up the menu, click on the three vertical dots at the top-right side of your browser.
There’s nothing special about a modern browser when it is not easy to use. And that ease of use is taken away when the Address Bar is missing on Chrome.
As always, we have explained how you can get the address bar back and return that unique edge to your browser. If you are facing other issues aside from this, you can check out our guides on troubleshooting chrome issues for well-detailed solutions.
Lastly, tell us the fix that worked for you in the comments section below. You can also state any effective fix you have tried that is not on this list.
Just like any other operating system, Windows has its share of problems. One particular issue that users reported was the DVD driver issues in Windows 10.
If this happens, your PC won’t recognize DVD drive, or you might experience other issues. This can be a big problem especially if you use optical media frequently, so let’s see how to fix it.
Why can’t I play DVDs on Windows 10?
Here are some of the most common reasons for DVD issues on Windows 10:
Drivers – CD/DVD driver for Windows 10 isn’t necessary in order to use the device. However, sometimes other drives can come into conflict with your drive.
Loose cables – If DVD isn’t detected, it’s possible that it’s not connected properly. Check your cables and make sure that both power and SATA cables are tightly connected.
How can I fix DVD driver issues on Windows 10?
Before we dive deeper into this issue, you can do the following check to rule out any common problems:
Check your cables – Open your PC case and check if all cables are properly connected to your drive. Loose cables are rather common problem, so we advise you to check them.
1. Delete the IDE ATA/ATAPI controllers from Device Manager
Press Windows key + X to open Power User Menu. Select Device Manager from the list.
Once the Device Manager opens, go to View and choose Show hidden devices.
Locate ATA Channel controllers and uninstall them all by right-clicking them and choosing Uninstall from the menu.
Optional: Users also suggest removing Intel (R) Serial ATA Storage Controller, so if you have it make sure that you remove it as well.
After you’re done close Device Manager and restart your PC.
Users reported that this problem can be easily fixed by uninstalling IDE ATA/ATAPI controllers from Device Manager.
If you don’t have ATA Channel available in the Device Manager, be sure to delete SATA controller and restart your computer. When your computer restarts, the DVD drive should appear again.
Some users are also suggesting to remove your DVD drive from Device Manager, so you might want to try that as well.
In addition to deleting devices from Device Manager, some users are also recommending that you update drivers for your DVD drive.
To install DVD driver for Windows 10, visit the drive manufacturer’s website and download the latest drivers for your device.
Update drivers automatically
If you don’t want the hassle of updating drivers manually, we strongly suggest doing it automatically by using Outbyte Driver Updater.
After several tests, our team concluded that this is the best automated solution. Below, you can find a quick guide on how to do it:
Locate your DVD on the list. Right-click and choose Change drive letter.
Click on Change.
Now select a new letter and click on OK .
3. Create new registry keys
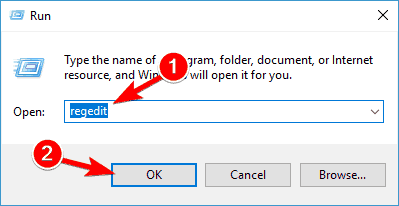
Press Windows key + R and enter regedit.
Press Enter or click OK to start Registry Editor.
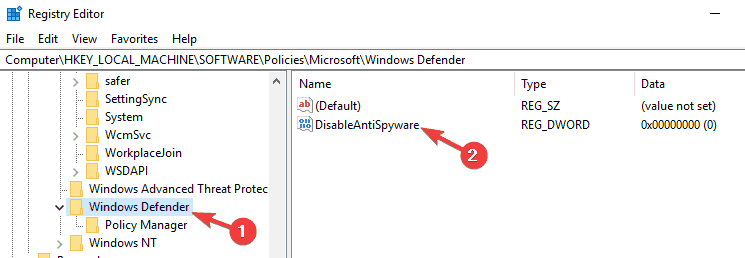
Once Registry Editor opens, go to the following key in the left panel: HKEY_LOCAL_MACHINE/SYSTEM/CurrentControl/SetServicesatapi
Right-click atapi and select New and then pick Key.
Enter Controller0 as the name of the new key.
Select Controller0 and in the right pane right-click the empty space and select New and then DWORD (32-bit) Value. Enter EnumDevice1 as the name of new DWORD.
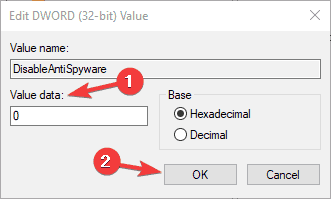
Double click EnumDevice1 DWORD to open its properties. Enter 1 in Value data input field and click OK to save changes.
This can also help if your PC throws the CDrom.sys error. Once you make these changes, check if DVD drive is still not showing in Device Manager on Windows 10.
Press Windows key + R and enter regedit. Click OK.
Navigate to the following path: HKEY_LOCAL_MACHINE\SYSTEM\CurrentControlSet\Control\Class\ {4D36E965-E325-11CE-BFC1-08002BE10318}
Locate LowerFilters and UpperFilters. Right-click each of them and choose Delete.
After doing that, check if the DVD drive is still not detected in Windows 10.
Missing DVD drives in Windows 10 can be a big problem, but you can easily fix it by using one of our solutions. This is a common issue, and many reported that DVD player is not working after upgrade, but hopefully these solutions should help with that.
If you have any other suggestions or questions, don’t hesitate to leave them in the comments section below and we’ll be sure to take a look.
Antivirus usage for home personal computers is as important as you would assume, but some users don’t fear viruses or malware at such a rate they would spend money on protection.
Now, we can understand that. You can always use Windows Defender as a go-to antimalware solution. It’s built-in and modestly reliable. However, things change in the business category.
When it comes to business and server protection from malicious software, you’ll probably need a more advanced tool for the job. Just look at the recent ransomware crises and you should have a clear idea of the dangers that roam within the Internet of Things.
Does Windows Server need antivirus?
Back in the day, we would worry about worms or viruses, which, in comparison with malicious software nowadays, appear as a pesky gag. Neo-hackers are not joking, as the era of a hoax is behind us.
They’re up to no good, and that means that they want your money or your data in order to get your money. And with outdated systems or a lack of proper protection, everything is up for grabs.
For that purpose, if you’re any kind of professional who relies on servers and business networks, you’ll need to tie up loose ends.
Antivirus for Windows Servers protects data on Microsoft Windows servers against all types of harmful activities. This idea was designed specifically for high-performance business servers that are exposed to excessive loads. Here are some amazing picks:
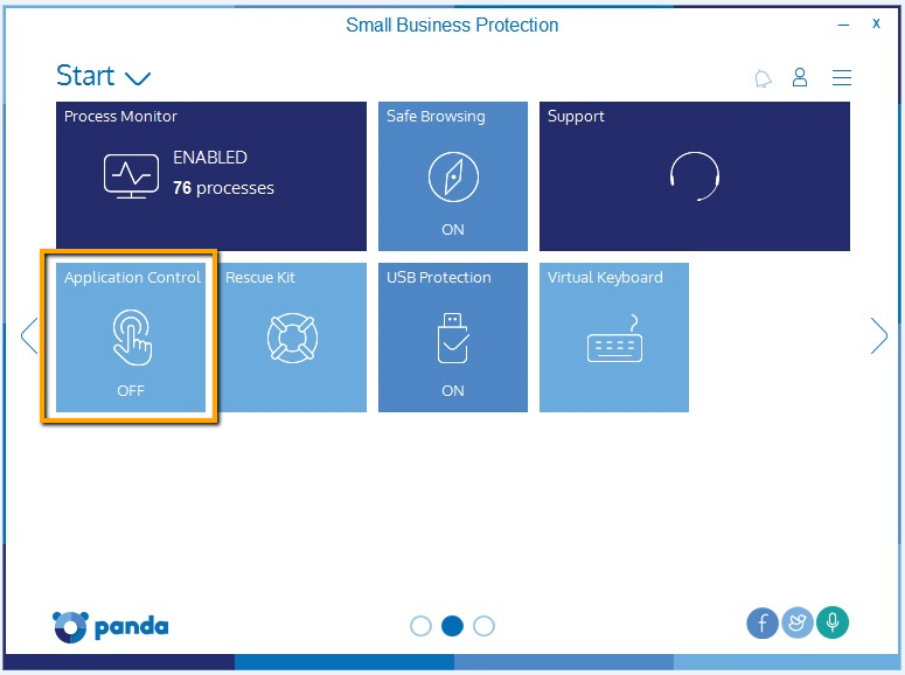
Panda Small Business Protection – focused on online footprint
Bitdefender GravityZone – has the most features
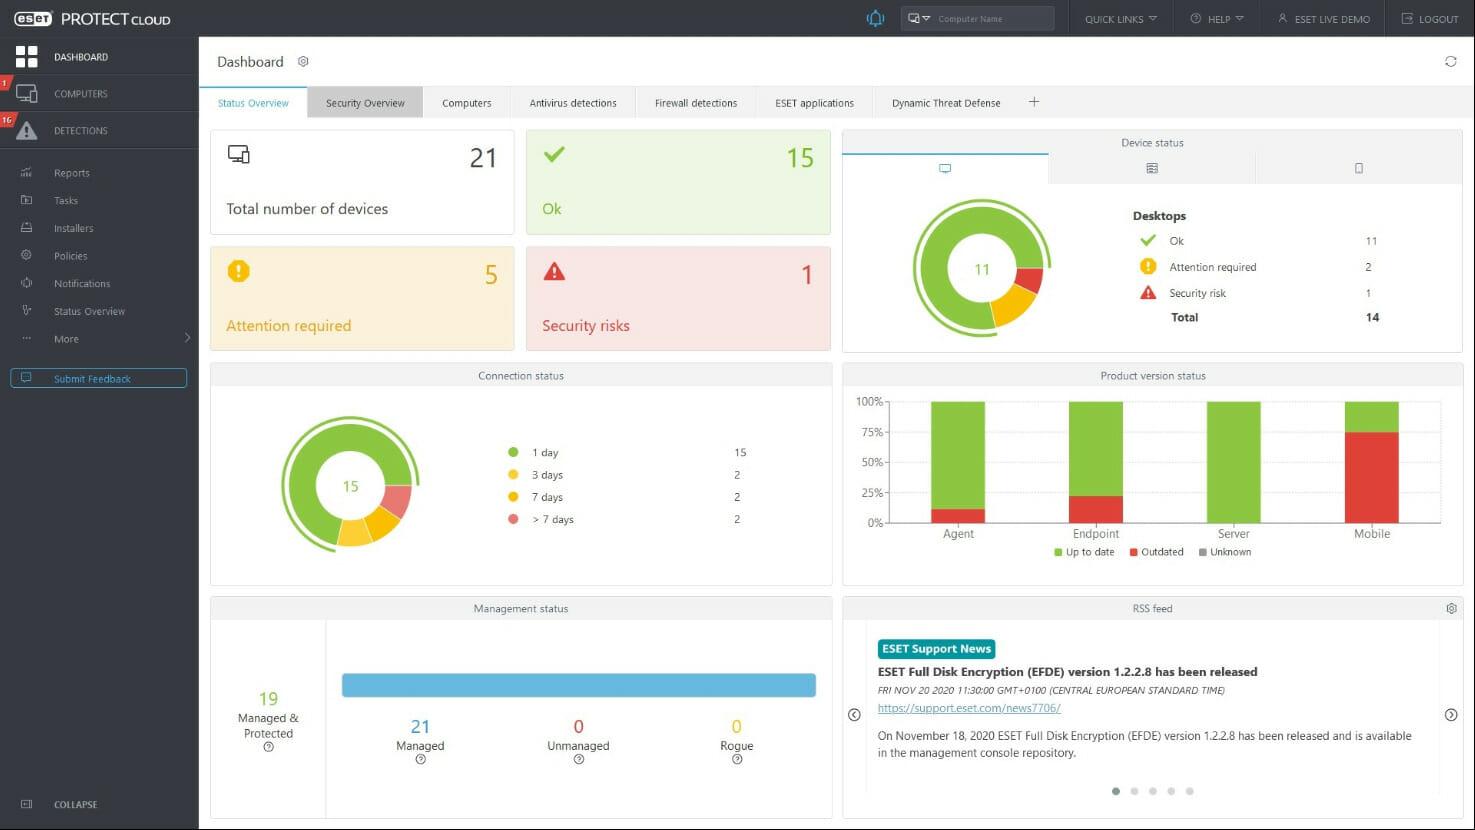
ESET PROTECT Complete – best overall security
Vipre Endpoint Protection – covers a large number of threats
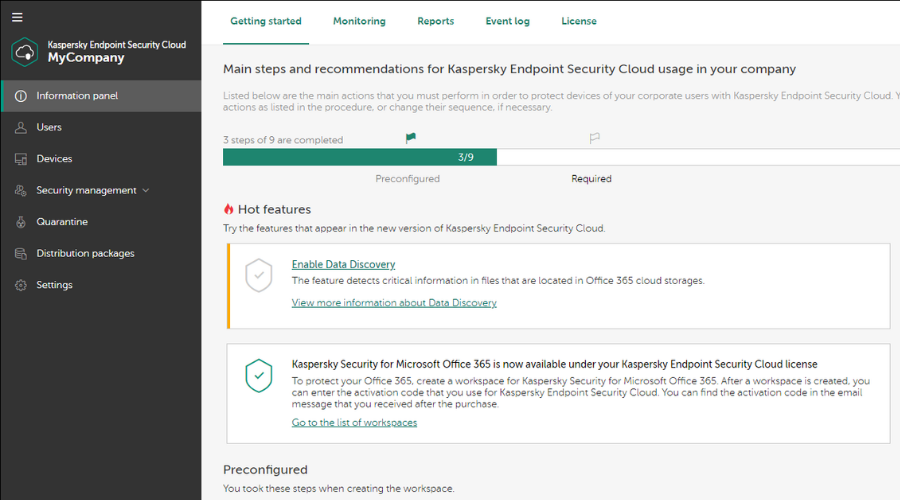
Kaspersky Endpoint Security Cloud – has an incredible database
Malwarebytes for Teams – tailored for collaboration
Windows Defender – basic features
Meaning, get an anti-virus that can protect your intellectual and material property. We’re up to help you with a list of best-suited software solutions. Check them out below.
Panda Small Business Protection is a professional antivirus for Windows Servers that protects against Internet-borne threats.
Because fraudsters’ goals are expanding beyond private users and major organizations, a solution to keep your online company safe is critical.
Freelancers and micro e-businesses are targeted on a regular basis since they are easy targets for the bad guys and account for approximately 80% of the business sector in the United States.
As a result, Panda Security has created a solution for tiny and medium-sized businesses: Small Business Protection. An antivirus that is tailored to your company’s requirements: low-cost, speedy, and compatible with any Windows PC.
These are some of the features offered by Panda Small Business Protection:
Technical Support
Personalized auto-configuration
Cloud Antivirus
Lightweight
Automatic updates
Panda Small Business Security
For freelancers and micro-businesses, a security solution that meets basic requirements, to safeguard your small business while focusing on its development.
Bitdefender GravityZone Business Security is one of the most popular antivirus solutions for business practice and server security management.
It’s so feature-rich that you’ll easily get lost in the bundle of different security features which include:
Antimalware
Firewall
Web Advisor and Access control
Detailed Policy Editor
Encryption
Anti-phishing protection
Smartphone protection (Advanced version)
Application control
Everything is governed by a management console (Dashboard) which is designed with professionals in mind.
Nonetheless, once you’ve got the hold on basics, you’ll have an easy time organizing protection and other segments in a seamless manner.
Bitdefender GravityZone uses machine learning to stay on top of the most current developments in malware and new technologies that might put your business at risk.
The most distinctive features of Bitdefender are overwhelming customization, good reporting, and high-end augmented anti-malware functionality.
Drawbacks are the lack of support for handheld devices and the overcomplicated setup.
Bitdefender GravityZone has your back with its fantastic deal, which gives you a 50% discount regardless of the type of plan you choose.
Bitdefender GravityZone
Bitdefender Gravity Zone is what Bitdefender Antivirus Plus is for the common PC: The best antivirus solution!
Though probably best known for the home user solution, ESET offers extremely reliable and complete business software as well.
ESET PROTECTION Complete is, as the name suggests, an all-inclusive tool, that covers all the security needs of your business, whether small, medium, or large.
Using ESET’s complete business antivirus, you’ll secure your network against zero-day threats, malware, phishing, and spam managed from an easy‑to‑use cloud-based console.
Specifically for Windows Server, this solution offers file and mail server protection; additionally, you get cloud app protection, full disk encryption options, and modern endpoint protection
ESET offers discounts for two-year and three-year subscriptions based on the package you need. If you’re already a customer, you may take advantage of the ESET group discount, which gives you a discount on every package you’ve already purchased.
ESET PROTECT Complete
Powerful and scalable security solution for your business network running on Windows Server, plus useful protection components.
Protecting an entire network or a server is nowhere near the same as protecting a single PC, so using a might not be the best course of action.
On the other hand, If you use a dedicated business solution like Vipre Endpoint Protection, then you are indeed talking about total security.
This software is also great for the new work dynamics, offering Vipre Encrypt.team specially designed for protecting your business while working with remote teams around the world.
Vipre offers powerful endpoint security delivering protection against today’s most sophisticated online threats, and this includes threats via email, threats from the latest types of malware, and more.
Besides, your servers will receive protection from threats that haven’t been even established enough on the market, Zero-Day, ransomware, and more.
Vipre Endpoint Protection
Not even the newest cyber-threats will stand a chance against the protection that you will get from Vipre Endpoint Protection!
Not so many security software companies can compete with the legacy and innovative nature of Kaspersky. Over 250 thousands of corporate clients rely upon the protection that Kaspersky offers.
And most of them are satisfied with what they get. Kaspersky Endpoint Security Cloud is mostly oriented toward small businesses, but you can expand its reach.
These are some features you can expect from Kaspersky Endpoint Security Cloud:
Covers Windows-powered systems and servers
Antimalware protection
Firewall
Data loss protection
Browsing protection
Remote administrative management
Mobile devices support both Android and iOS
Application management
Everything is controlled from the web-based console which is well-designed and uncluttered. This decreases resource usage, which is an issue for some other anti-virus solutions.
Additionally, it’s a well-known fact that the Kaspersky virus database is, without precedent, the largest database there is.
Because of that and other advanced technologies this tool utilizes, virus recognition is at the top of the class. Plus, it offers specially designed security for Microsoft Office 365.
Kaspersky Endpoint Security Cloud tool’s best point, in our modest opinion, is advanced support for mobile devices.
Besides the protection, Kaspersky has made huge improvements in sensitive data discovery and monitoring cloud services with its Cloud Discovery feature.
One distinctive drawback is price, but if you’re up to sophisticated and user-friendly security software, you’ll need to spend some money.
If you’re interested, you can inform in detail about the offerings and pricing, by navigating to the official website.
Kaspersky Endpoint Security Cloud
This tool for businesses even offers advanced support for mobile devices, the most vulnerable network devices.
Malwarebytes for Teams is intended to safeguard small enterprises’ data and devices on Windows Servers. It provides real-time threat detection and response, as well as priority phone and email assistance.
You don’t need any cybersecurity or IT experience to manage security for your team with Malwarebytes for Teams; it’s simple to use and has straightforward features.
This software keeps your devices running smoothly, it uses the system’s idle resources to scan for threats ahead of time so you won’t have any downtime. Plus, it offers monthly reports on the threats removed.
Malwarebytes works well on servers, especially if you use their corporate server platform, which is optimized for use with server file systems.
With flexible licensing, you may cover up to 20 devices, with support for additional devices as needed. Each device is given its own unique protection, ensuring that your team is working behind a secure fence.
These are some of the features offered by Malwarebytes for Teams:
Monthly Reports
Device Alerts
Priority Support
Mobile Admin app
Advanced anti-virus, anti-malware, anti-spyware
Brute Force Protection
Tamper Prevention
Slack and MS Teams integration
Malwarebytes for Teams is not yet available for free download and evaluation. If you’re unfamiliar with Malwarebytes features and want to give it a go, you may sign up for a subscription and if you are not satisfied, you have a 60-day money-back guarantee.
Malwarebytes for Teams
Protect your small business and essential data in minutes, with no costly IT infrastructure, and you’ll be up and running right away.
It used to be that Windows was affected by security flaws and malware threats that could only be mitigated by third-party antivirus software.
However, Microsoft has made a deliberate effort to strengthen Windows security over the years, not least with the addition of Windows Defender as a default feature in Windows.
This is no longer the case because Windows Defender now competes with any reliable standard antivirus solution even for Windows Servers.
The AV-Test, an independent antivirus testing lab, gives Microsoft’s solution a good grade, but AV-Comparatives is less enthused, awarding Windows Defender a standard rating for malware protection in its most recent tests.
These are some of the features offered by Windows Defender:
Windows Hello provides secure sign-in.
OneDrive backups are done automatically.
Microsoft Defender Endpoint Security
Blocking of potentially unwanted applications
That’s still proper security, and Windows Defender has the extra benefit of being a hassle-free solution that comes pre-installed with Windows, as well as being free. Windows Defender is all you need if you only want basic protection that works.
This brings us to the end of the list. We recommend that you test these solutions before selecting which one to buy.
To avoid program conflicts and boxing, do not download them at the same time, but test them individually and safely uninstall them whenever you want to make a new installation.
Why use Server malware protection?
The intelligent analyzer detects any malicious character in programs with a high degree of certainty, even if the code of the malware is not contained in the antivirus database.
When a breakdown or forced shutdown occurs, these applications normally restart to provide steady system safety while the diagnostics system determines the cause of the breakdown.
Anti-Virus Protection for Windows Servers records what is accessed, utilized, altered data is examined, and any corrupted files are eradicated.
Furthermore, suspicious files or records are quarantined before being subjected to further investigation. The request scans a certain section of the system based on a plan or an instruction.
If you have a server, you should utilize antivirus for Windows Servers. Because your company’s or even your clients’ sensitive data might be on your server, you should constantly keep your Windows Server safe and up to date with security patches.
Most of these tools will do a good job, but for better insight, it’s recommended to inform yourself before you pay for something. Don’t forget that security is paramount and choose wisely.
Are you looking for TFTP Server to transfer configuration files, system images, and OS firmware updates on a larger scale? Your search ends here.
There are a lot of options available, which makes it challenging to choose the one for you. Therefore, we have analyzed some of the best Windows 10 TFTP servers to download.
What are the advantages of using TFTP servers?
It is a fast transmission method with low traffic overheads.
One of the most robust and straightforward TFTP servers, SolarWinds is an excellent option to download and upload executable images, push OS and firmware updates, and backup network device configuration files.
This TFTP server for Windows 10 has advanced security settings to ensure complete control. In addition, it comes with multi-thread support and can quickly transfer files up to 4 GB.
If we talk about the interface of this TFTP server, it has a simple layout with a clean and minimalist interface.
Let’s look at the critical features of SolarWinds TFTP:
Allows you to download and upload images simultaneously from different network devices
It enables you to authorize a range of IPs or an IP address
Helps you keep your firewalls, switches, and routers up to date, configured, and backed up
Comes with an IP restriction feature to avoid unauthorized access requests
Another lightweight TFTP server for Windows, TFTPD64/32, is an open-source IPV6-compatible app with TFTP, SNTP, DNS, DHCP, and Syslog servers.
The application comes in two variants, 64-bit and 32-bit. It has extensive features, including security tuning, early acknowledgments, progress bars, directory facility, interface filtering, etc.
This TFTP server and client are compatible with TFTP option support such as size, timeout, and block size. With all the extensive features available, this application can deliver maximum performance when transferring files.
Let’s look at some of the key features:
Collects records on configured devices and displays to users
Comes with a DHCP server, which provides unlimited static or automatic IP address assignment
Easily transfers messages and backup Syslog
Allows you to keep track of file transfers with the help of logs
Spiceworks is a visually pleasing network administration app with a TFTP server for Windows 10. This app keeps device settings up to date and ensures that all the network configurations are standard across every network device in an organization.
With its backup and restore feature, one can quickly restore important files if things go awry. In addition, this TFTP server comes with a side-by-side comparison view to check the changes made in configuration files.
One of the best features of this open-source TFTP server is that it excels in saving config files and loading firmware into network devices.
Let’s look at the key features of Spiceworks TFTP server:
Ensures all devices can push out updates and are updated
All available devices are listed, which makes managing them easy
Can push firmware updates to all compatible devices swiftly
Keeps track of network activity in real-time and notifies if any change exists
haneWin TFTP server, based on RFC 1350, is a shareware available to download for Windows 10. With multi-threaded architecture, it is one of the best TFTP servers for Windows, as it is highly reliable and delivers high performance.
This TFTP server installer file comes in both 32-bit and 64-bit versions. With the pipe option, the received data can be directly fed to the other applications, and the output of an app can be transmitted to a file on the server.
It can implement access control to the server depending on the IP address, server directories, and operation requested for data security. In addition, this free TFTP server can run as a service and doesn’t require a user to log on.
Let’s look at the critical features of haneWin TFTP server:
Comes with support for Intel/PXE style multicast operation
Has a control panel applet to monitor and configure with ease
Can run on the command line, making it useful for scripting
A multi-threaded TFTP server, WinAgents TFTP is designed to function 24*7 as a background service.
It has various features such as server port ranges, size, timeout changes, and block number rollover for large files.
WinAgents TFTP server can transmit files using TFTP protocol through firewalls, and routers, where Network Address Translation mode is active.
With high-performance architecture, remote server administration, and a reliable cache system, it is one of the most scalable TFTP servers to download on Windows 10.
The interface of this TFPT server is simple. This tool is free for 30 days and can run on 32-bit and 64-bit systems.
Let’s look at the critical features of WinAgents TFTP:
Allows using UDP 69 port for transmitting files
Can create stock copies of flash images, device settings, and config files
Configures UDP port for connections to send files via firewalls
We hope you find an accessible TFTP server for Windows from the list presented in this guide. If you have any other free TFTP servers that you use, feel free to share them in the comments below.
Steam offers automatic updates for the installed games. However, you may sometimes encounter an error while installing or updating a game, and Steam will display the following message: An error occurs while updating [game title].
Even though there are a few variations to this exact error, the underlying message is the same: you will not be able to run the game. So, let’s find out how to fix things when an error occurs while updating Steam games.
Why is Steam failing to update?
Here are some of the reasons you may encounter the error:
Corrupt game files – If you are facing problems with a particular game, it could be the game files to blame.
Issues with the download cache – Often, Steam’s download cache is corrupt or the configurations are incorrect, leading to the An error that occurred while updating the message.
Antivirus or firewall blocking the update – A third-party antivirus or firewall is often found to affect Steam. A simple solution would be to allow the app.
Unstable Internet connection – If the connection drops every few minutes, you will have trouble updating or installing games on Steam. Here, the error message usually reads, An error occurred while updating (no Internet connection) in Steam.
Some of the games affected by the error are:
An error occurred while updating Destiny 2 (app running) – Destiny 2 is a popular Steam game, and issues updating it can affect the user experience.
An error occurred while updating Red Dead Redemption 2 (app running) – Another standard game reported by many to throw the error while updating.
Sea of Thieves: An error occurred while updating – Several users reported issues with Sea of Thieves, and for some, the download button was missing.
An error occurred while updating Apex Legends – Apex Legends, one of the most played games, often throws errors, and our solutions will help fix things. Also, some reported that Apex Legends wouldn’t launch at all.
How can I fix the error while updating on Steam?
Before we move to the slightly complex solutions, let’s first try a few quick tricks:
Restart the computer.
Run Steam with administrative privileges. To do that, right-click on the Steam launcher/shortcut, and select Run as administrator.
Turn off the modem/router for a minute, turn it back on, and check if you can download/update games.
If you have any third-party antivirus or firewall installed, disable it and verify whether you still receive the An error occurred while updating message in Steam. In case things work out, we recommend switching to a more reliable and user-friendly antivirus and effective firewall.
If you get the An error occurred while updating (shared library locked) message in Steam, ask the other person to either quit Steam or log out for a while.
If none of these did the trick, try the solutions listed next.
1. Terminate related processes
Press Ctrl + Shift + Esc to open the Task Manager and locate the following processes:
The game itself
werfault.exe
wermgr.exe
Any Steam process
Now, select each of these individually, and click on End task.
That’s it! The easiest way to fix issues updating a game in Steam is to terminate the game itself and any related Windows process.
2. Quit Steam
Locate Steam in the System tray, right-click the icon, and select Exit.
Now, relaunch Steam, and verify if you can update the game that earlier threw the error.
3. Clear the Download Cache
Launch the application, click on the Steam menu at the top-left corner, and select Settings.
Navigate to the Downloads tab, and then click on Clear Download Cache.
Click OK in the confirmation prompt.
After Steam relaunches, log in with your credentials.
Now, check whether the An error occurred while updating invalid platform message in Steam disappears. If not, head to the next method.
4. Change the download Region
Launch the application, click on the Steam menu, and select Settings.
Now, head to the Downloads tab, choose another country/place from the Download Region dropdown menu, and click OK to save the changes.
You may have to try a few regions before things get working again.
In some cases, you get the An error occurred while updating message in Steam, when there are issues with the download region. The one currently selected could be down or overloaded, and changing it should do the trick.
Launch Steam, click on the Steam menu, and select Settings.
Head to the Downloads tab, and then click on Steam Library Folders.
Choose the current library where the problematic game is installed, click on the ellipsis and select Repair Folder.
Click Yes in the UAC prompt.
Wait for the repair process to complete.
In case you are getting the An error occurred while updating (disk write error) message in Steam, it could be a problem with the library, and repairing it would work for most. Also, verify the drive storing Steam files doesn’t have Write Protection enabled.
6. Verify the integrity of game files
Launch Steam, navigate to the Library, right-click on the game that’s not launching, and click on Properties.
Now, go to the Local files tab, and click on Verify integrity of game files.
Wait for the process to complete.
If nothing worked till now, you might want to check our guide on Steam disk write error for more solutions.
That’s all there is to the problem! By now, you should have gotten things up and running, and the An error occurred while updating message in Steam shouldn’t appear anymore.
If you have any questions or want to share another solution, please comment in the section below.
A large number of users have reported that their HP All-in-One PC screen turned black all of the sudden. This issue seems to appear randomly.
Here is what one user had to say about this issue on HP Forums:
I have got all-in-one HP Desktop. The model is HP 23-Q0105A 23″ Touch AIO. While I’m working with this desktop, suddenly the screen goes black although s tiny power indicator at the right cornet bottom is on. When I move the mouse or press any key, the screen does not come back. Can anyone please advise what the solution is ?
We already covered the black screen with cursor on Windows 10 in another guide, but today we’re going to focus on HP All-in-one black screen issue on Windows 10.
Why does my HP computer turn on but the screen stays black?
This is a pretty common issue, and it’s usually caused by one of the following components:
Motherboard – Multiple users reported that a faulty motherboard caused this issue on their HP device. If you encounter a black screen and beeping on an HP all-in-one computer, your hardware is a likely cause.
LCD panel – This is another hardware problem. If this issue occurs, your display won’t work, while your PC will boot normally. This can lead to various HP All-in-one screen issues.
Inverter – Although unlikely, in some rare cases issues with your inverter can lead to a black screen on HP devices.
How do you fix a black screen on an all in one computer?
1. Connect an external monitor
Turn off your PC.
Connect the external monitor to it.
Boot the PC.
If nothing happens, press the Windows key + P a few times to change the projection mode
This isn’t the best solution, but it will help you determine if your LCD panel is working or not.
Once you get in touch with HP personnel, they will explain you further steps.
We hope this guide helped you solve your issue. If you experience a black screen after login on an HP all-in-one computer, then the issue is most likely a corrupt user profile or a bad driver.
Please let us know by using the comment section found below.
The Kingston SSD is one of the most used drivers, but some complain it is not detected by their PC. The Drive may not show in Disk Management or it is not detected in BIOS.
If you’re facing something of the sort, we got you covered. In this guide, we’ll explain step by step how to make your PC recognize your Kingston SSD. Let’s get right to it.
How can I fix the Kingston SSD not detected?
Before proceeding to the solutions in this section:
Test the Kingston SSD drive that is not showing up on another computer. The problem might be with the drive if it does not work.
You can also test with another cable on different ports. If it passes these hardware tests, you can explore the solutions below:
1. Change onboard SATA mode
NOTE
Note that some steps and parameters might vary depending on your BIOS. However, the general concept should be the same.
Press the Windows key, click the Power icon, and select the Restart option.
Power on your PC and press the appropriate key (F1, F2, F10, or F12, depending on your PC) to enter BIOS.
Select the System or Hardware Configuration option.
Then, navigate to the AHCI or SATA Mode.
Choose Enable AHCI if you find it there. If not, set the SATA Mode to AHCI.
If your Kingston SSD is not detected on BIOS, it might be because your PC’s SATA mode is still set to the old IDE configuration. You must change the settings to the modern AHCI mode to fix it.
2. Initialize the drive
Press the Windows key + R, type diskmgmt.msc, and press Enter.
Right-click your SSD drive and select Initialize Disk.
Select all the partition style and click OK.
Right-click the newly allocated space and choose New Simple Volume.
Select the proper size and drive letter and that’s it.
3. Set disk drive letter
Press the Windows key + R, type diskmgmt.msc, and hit Enter.
Right-click on the SSD drive and choose Change drive letter and path…
If it does not have a drive letter, click the Add… button. If it has, choose the Change… button instead.
Choose the drive letter you want and click the OK button to save the changes.
Finally, restart your PC.
The drive letter is essential for your PC to access the SSD. So, if your Kingston SSD is not detected, changing or adding a drive letter might help fix the issue.
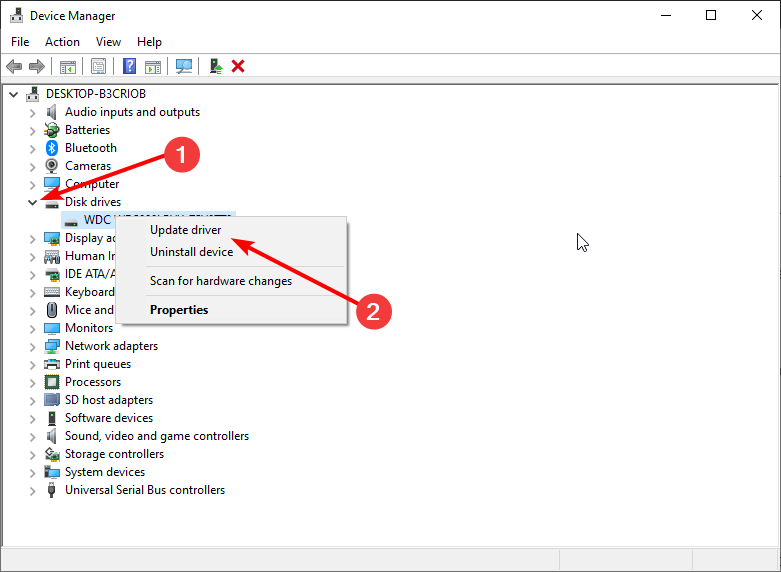
Press the Windows key + X and select Device Manager.
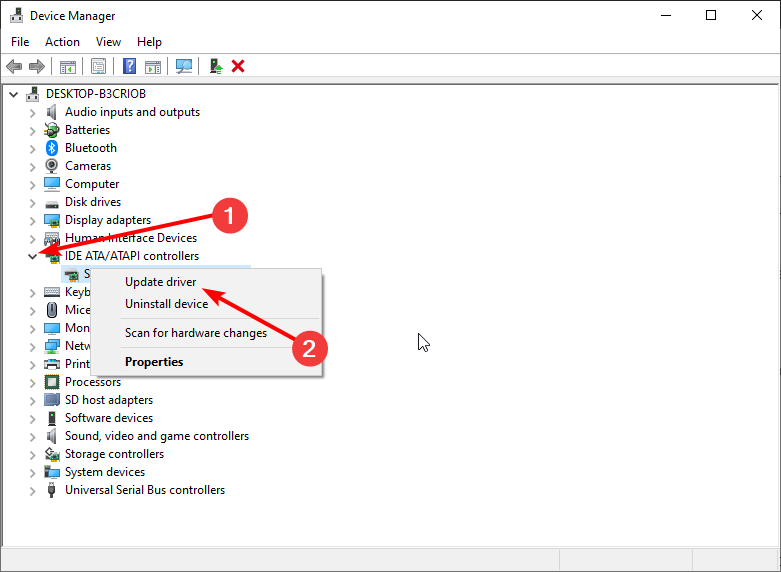
Click the arrow next to the Disk drives option to expand it and right-click the driver there.
Choose the Update driver option.
Now, select Search automatically for drivers and install any available update.
Go back to the Device Manager window and expand the IDE ATA/ATAPI controllers option.
Right-click the driver there and select Update driver.
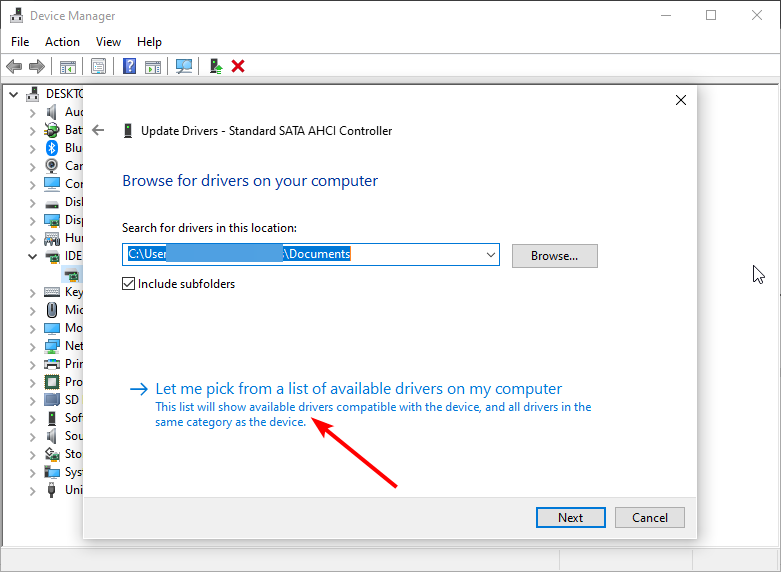
Choose Browse my computer for drivers.
Now, select Let me pick from a list of available drivers on my computer.
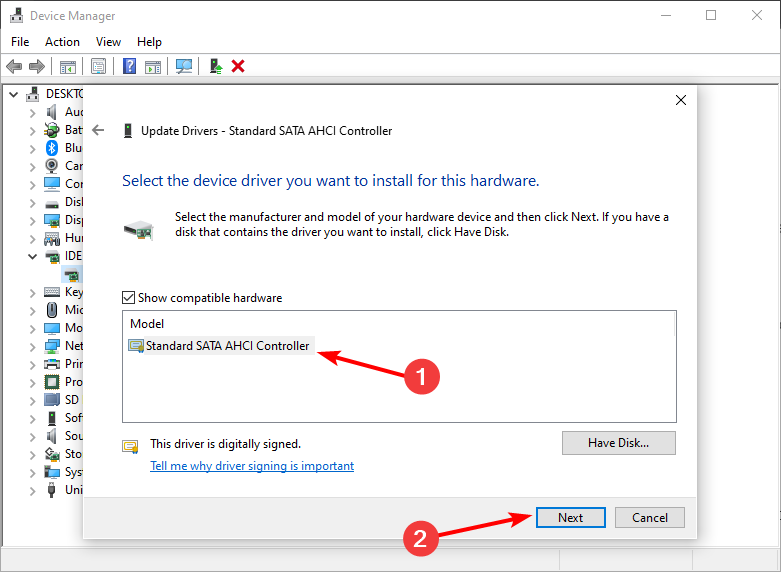
Finally, select the Standard SATA AHCI Controller option and click the Next button.
To avoid these kinds of errors and performance issues as much as possible, try keeping your device drivers up to date.
To make this easier, you can use a driver updater tool like Fortect Driver Updater. It’s designed to scan and update your drivers automatically, so you won’t run into errors caused by drivers in the future.
5. Run the Memory Diagnostic tool
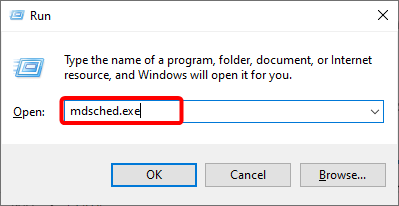
Press the Windows key + R, type mdshed.exe, and hit Enter.
Select Restart now and check for problems (recommended) option.
Now, wait for the diagnosis to be complete and follow the recommendations.
If your Kingston SSD is not showing up in Disk Management on Windows 10, it might be due to some issues with the drive. The Memory Diagnostic tool should help detect these issues and recommend possible solutions.
6. Download the Kingston SSD Manager
Head to the Kingston SSD Manager page and pick the app version you want. We recommend the up-to-date one unless your drive is very old.
Hit the download button to get the exe file.
Install the app on your PC.
Go to the Health tab to run a quick troubleshooting test on your SSD. The app will tell you how to fix any issues found.
Another option is to download and install the Kingston SSD Manager. This app will show you if there is a problem with your drive.
The reason why your Kingston M.2 SSD might not be detected could be incorrect BIOS settings, a defective drive, outdated drivers, or a missing drive letter.
Following the steps outlined above should help you fix it. Good maintenance practice can also help with slow SSDs and overall better performance.
Feel free to let us know if the solutions in this guide helped you get past the issue in the comments below.
Users have been reporting that VirtualBox LDPlayer is blocking Windows updates, and they wish to uninstall it entirely to get things up and to run.
Users usually see VirtualBox (LDPlayer) Uninstall this app now because it isn’t compatible with Windows 10 when trying to troubleshoot things. And there are a few practical ways to uninstall the app in no time.
What is VirtualBox LDPlayer?
LDPlayer is a software tool that emulates the Android operating system to run mobile games on a computer.
Apart from running Android on your PC, it also includes several powerful gamer-oriented features, for instance, keyboard mapping controls and support for the most recent video games.
Other features include selecting the device’s virtual location, simulating screen rotation, and accessing the Google Play Store, among other things.
How can I uninstall VirtualBox LDPlayer?
1. Use Control Panel
Press Windows + R to open Run, type appwiz.cpl in the text field, and hit Enter.
Now look for the LDPlayer app, select it, and click Uninstall.
Follow the on-screen instructions to complete the process.
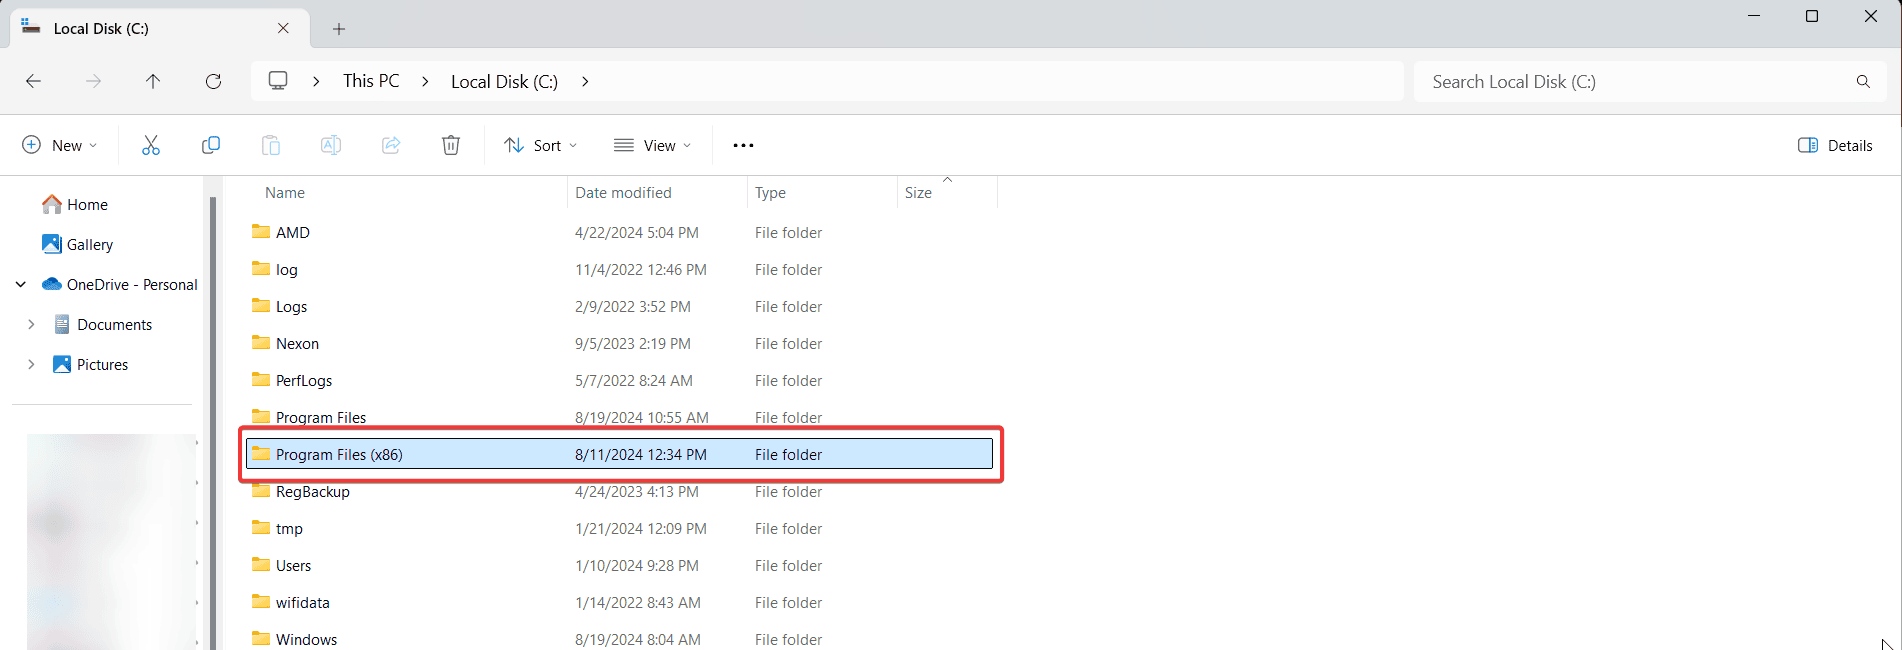
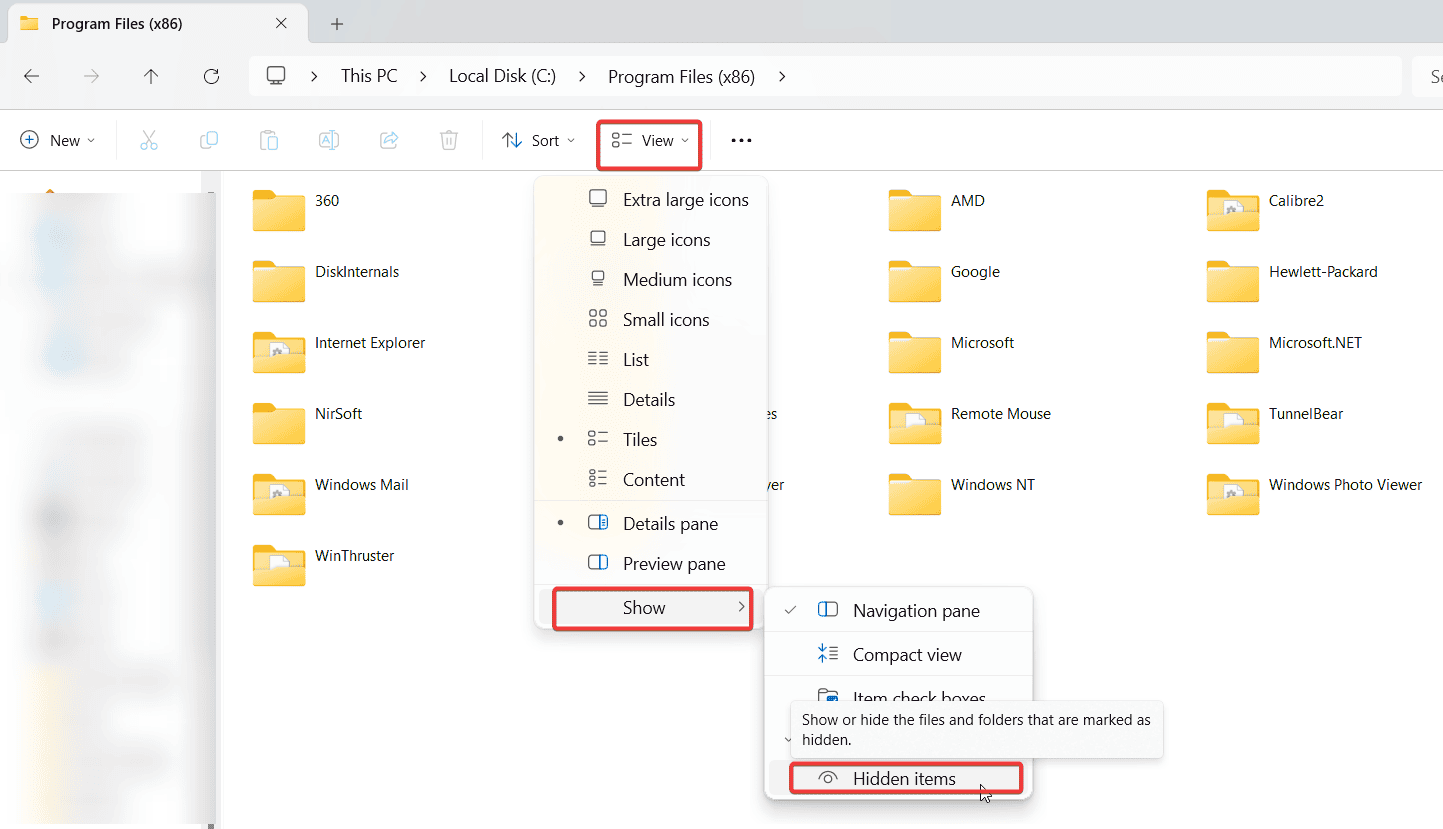
Once done, press Windows + E to open File Explorer, paste the following path in the address bar, and hit Enter: C:\Program Files
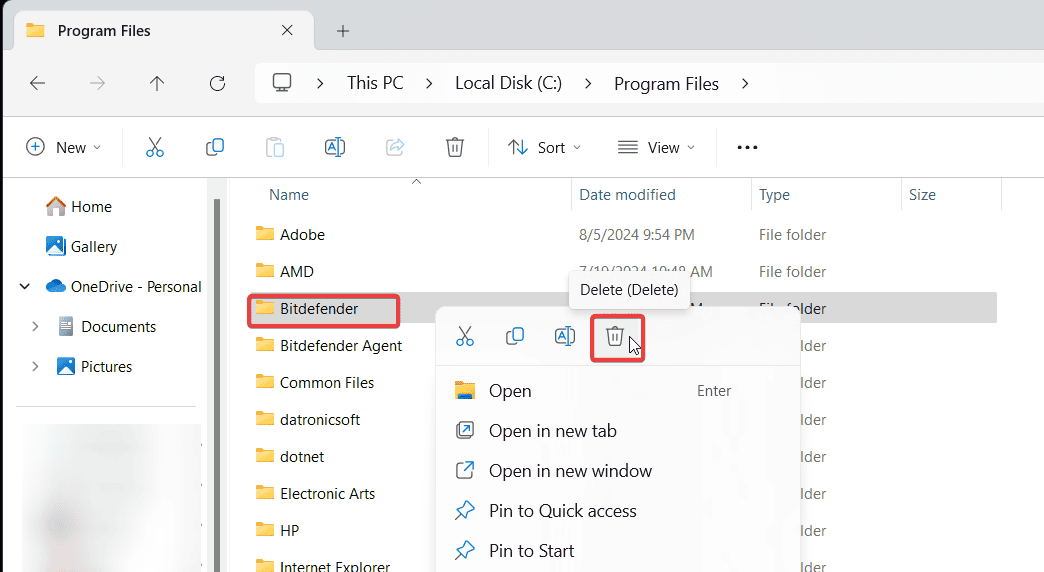
Now, right-click on the LDPlayer folder, if available, and then select Delete.
This way, you can easily uninstall Virtualbox LDplayer if it’s not compatible with Windows 10.
2. Use the Windows settings app
Press Windows + I to open Settings, and chooseApps.
Locate LDPlayer, click on it, and then select the Uninstall button.
Again, click Uninstall in the prompt.
Follow the on-screen instructions in the uninstall setup to complete the process.
Now, navigate the following path in File Explorer, and delete the LDPlayer folder:C:\Program Files
Once done, restart the computer for the changes to full effect.
An uninstaller tool would be best if you are looking for a quicker alternative to uninstall VirtualBox LDPlayer. These not just uninstall a specific application but also remove any associated files and delete the Registry keys created by it.
This way, the PC’s performance improves considerably after the uninstall, and more storage space is freed. So, check the best uninstaller tools and get one today!
CCleaner is a great maintenance device tool that has a software uninstaller feature and can easily help you uninstall a program or a group of programs just by clicking a button.
CCleaner
Excellent device management tool with a straightforward interface and various useful features.
Resolution not fitting the screen is a common problem reported by Windows users, particularly those with a dual monitor setup. Scaling settings as well as driver issues might be at fault.
If you are also troubled by this issue, here are a couple of troubleshooting tips:
What can I do if the screen doesn’t fit the monitor on Windows 10?
1. Manually change the display size
1.1 Adjust display on Intel Graphics
Type Intel in the search bar and click on the Intel Graphics Command Center option.
Click on the Display icon in the left pane in the Intel Graphics Command Center.
Click the General Settings tab, and adjust the Resolution. We recommend setting it to the Recommended value.
Click on Keep if you can see the image on all the screens or Revert if not.
If the issue persists, click on Custom Resolution, add a button beside the resolution value Display, and click Yes to acknowledge the warning message.
Here you can manually change the height and width of the display. Again, the goal is to adjust the screen size to fit the monitor.
Click on the Adjust desktop size and position tab from the left pane; from the right pane, click the Size tab under Apply the following settings, and tick the Enable desktop resizing box under resize the desktop if the display setting did not provide a proper fit section.
Save the changes and check if Windows 10 fits the screen.
1.3 Adjust display size in AMD control panel
Right-click on the desktop and click on AMD Radeon Settings.
From the ADM Radeon Setting window, click the Display tab.
Use the HDMI Scaling slider to adjust the HDMI scaling.
The preview should be visible on the screen in real time. Set the scaling to your preferred position, and that’s it.
We hope this guide helped you fix your screen doesn’t fit your monitor on Windows. If you need any more help, don’t hesitate to ask in the comments below.
When Windows Defender isn’t working, it’s most likely due to system file problems, or because you have or have had a third-party antivirus installed on your PC. Also, Windows Defender may not open if the Security Center is disabled.
No matter the specific issue, the solutions below should help you sort it out.
Type the following command and hit Enter, then wait for the scan to complete: sfc /scannow
The System File Checker repairs corruption in system files. You can use it to verify whether Windows Defender is corrupted or not.
If you can’t run an SFC scan or if SFC can’t fix the problem, you might want to try using a DISM scan instead. To do that, just follow the next step.
1.2 Run a DISM scan
Start Command Prompt as administrator, as shown in the previous step.
When Command Prompt opens, enter the following command and press Enter to run it: DISM /Online /Cleanup-Image /RestoreHealth
DISM scan will now start. This scan can take up to 20 minutes, so don’t interrupt it.
2. Clean boot your computer
Press Windows Key + R and enter msconfig. Press Enter or clickOK.
The System Configuration window will now appear. Go to the Services tab and check Hide all Microsoft services. Now click the Disable all button.
Navigate to the Startup tab and click Open Task Manager.
Now you’ll see a list of startup applications. Right-click the first entry on the list and choose Disable. Repeat this step for all startup applications.
Once you disable all startup applications, go back to System Configuration window and click Apply and OK. Now choose to restart your PC.
Sometimes third-party applications can interfere with Windows and cause this problem to appear. However, you can find the problematic application by performing a Clean boot.
3. Remove third-party antivirus tools
If you have another antivirus installed on your PC, it can interfere with Windows Defender. To make it work, uninstall said antivirus. Then make sure it’s completely gone by following the steps below:
3.1. Delete leftover files from Program Files
Open File Explorer (press Windows + E or search for it in the Start menu).
Go to This PC and then open the C: drive.
Open both Program Files and Program Files (x86) folders.
Look for folders related to your antivirus software (e.g., Norton, Avast, McAfee) and delete them by right-clicking the folder and selecting Delete.
In File Explorer, click on the View tab and check the box for Hidden items to show hidden folders.
Delete any files and folders related to your antivirus.
3.2. Use an uninstaller software
Download and install a reliable uninstaller software such as IObit Uninstaller.
Go to the Software Health Section.
Locate your Uninstallation Leftovers and Select Scan Now.
Select and delete any remaining files or registry entries found by the scan.
Uninstall the remnants of your previous antivirus, restart your computer and Windows Defender should be automatically enabled.
2. Type services.msc in the Run dialog box and hit Enter or click OK.
3. In Services, search for Security Center.
4. Right-click on it and select Restart.
5. Once you restart the required services, check if the problem with Windows Defender is resolved.
In order for Windows Defender to work properly, you need to have certain services enabled. If those services aren’t running properly, Windows Defender won’t be able to turn on at all.
However, you can always start the necessary services by performing the steps above.
5. Change your group policy
NOTE
If you’ve got a Windows Home version installed on your PC, you will not have access to the Group Policy Editor. However, you can follow our expert guide to install it.
Press Windows Key + R and enter gpedit.msc. Now press Enter or click OK.
When Group Policy Editor opens, in the left pane navigate to the following path: Computer Configuration/ Administrative Template/ Windows Components/ Microsoft Defender Antivirus
In the right pane, double click Turn off Microsoft Defender Antivirus.
Select Not Configured and click on Apply and OK to save the changes.
Sometimes Windows Defender won’t turn on because it’s disabled by your group policy. After making these changes, it should work.
6. Modify your registry
6.1 Use the Registry Editor
Press Windows Key + R and enter regedit. Press Enter or click OK.
When Registry Editor opens, navigate to this key in the left panel: HKEY_LOCAL_MACHINE/SOFTWARE/Policies/Microsoft/Windows Defender
In the right pane, look for DisableAntiSpyware DWORD and double click it.
If the DWORD isn’t available, right-click the right pane and choose New and selectDWORD (32-bit) Value from the menu.
Set Value data to 0 and click OK to save the changes.
6.2 Use Command Prompt
Start Command Prompt as an administrator.
Now enter the following command and press Enter to run it: REG ADD "HKLMSOFTWAREPoliciesMicrosoftWindows Defender" /v DisableAntiSpyware /t REG_DWORD /d 0 /f
If you’re an advanced user and you prefer using the command line, you can do this from Command Prompt or PowerShell by performing the previous steps.
Some users are also suggesting deleting the DisableAntiSpyware DWORD key, so you might want to try that as well.
7. Restart Windows Defender
Type Windows Security in the Search bar, and click on App settings on the right.
Now, scroll down, locate the Reset button, and click on it.
Again, click Reset in the confirmation prompt that appears.
8. Install a better antivirus
Windows Defender is a decent security solution for your PC, but it can’t match the services and features of a third-party antivirus.
If you’re using the Internet for shopping, banking, work, and communication, you must protect your sensitive data with a top antivirus like the one recommended below.
This tool supports all major platforms, including Windows and Android, and provides advanced banking and privacy solutions.
Over 110 million users trust TotalAV’s multilayered protection solution in the world so make sure you try it. You can benefit from a 30-day trial period right now.
TotalAV
Make sure to fully protect your PC with a top antivirus solution like TotalAV.
Can’t run CMD as administrator and getting an error instead? This guide is for you. Besides using an account with no admin rights, your antivirus, or corrupt system files could also cause this.
Follow the steps below to get this error fixed ASAP:
What should I do if CMD is not running as administrator?
Begin with a simple PC restart and check if your antivirus is blocking CMD or related processes. It might show up in Threat History or the Quarantine list.
Press Windows + R to open Run, type cmd, and click OK to run Command Prompt with standard privileges.
Paste the following command and hit Enter:powershell -command "start-process cmd -verb runas"
This way, you can run CMD as administrator from the command line in Windows 10 and 11.
2. Create a Command Prompt shortcut on your desktop
Press Windows + E to open File Explorer and navigate the following path: C:\Users\Default\AppData\Local\Microsoft\Windows\WinX\Group3
Run the Command Prompt shortcuts here and make sure that they work. If they do, copy both to your desktop and run them from there.
Since there are two shortcuts, you have non-administrative and administrative Command Prompt available. You can easily recognize the administrative Command Prompt as its window will be labeled Administrator: Command Prompt once you start it.
Alternatively, you can create a new shortcut on your desktop without copying anything. To do that, follow these steps:
First, Right-click your desktop, select New and then click on Shortcut.
In the text field, enter cmd.exe and click Next.
Enter the desired name of the new shortcut and click Finish.
Now you have to force the new shortcut to run with administrative privileges. Here’s how you can do that:
Right-click the newly created Command Prompt shortcut and choose Properties from the menu.
Go to the Shortcut tab and click the Advanced button.
Check Run as administrator, and now click OK.
Save changes.
You can double-click the new shortcut, and the Command Prompt will start with administrative privileges.
Remember that this is a workaround, but this solution should be helpful until you fix the core problem.
3. Disable all non-Microsoft context menu items
Go to the ShellExView website, scroll to the bottom, and download the third-party application.
After launching the program, you need to find all non-Microsoft entries in your context menu and disable them.
According to users, sometimes your context menu can cause this problem to appear. For example, if you can’t run Command Prompt as an administrator, perhaps other applications are causing this error.
Sometimes applications will add their entries to the context menu, which can lead to many other problems. And, ShellExView should come to your aid in this case.
Almost any application can cause this problem, but a few users reported issues with Express Zip File Compression (NCH Software). So if you’re using it, disable its entries from the context menu.
Keep in mind that this is an advanced solution, so you’ll need to get familiar with ShellExView a bit before you can fully apply this solution.
Press Windows + I to open Settings, and click on Accounts.
Select Family & other people from the left, and click on Add someone else to this PC.
Choose I don’t have this person’s sign-in information.
Select Add a user without a Microsoft account.
Enter the desired username for the new account and click Next.
Sometimes your user account can get corrupted, and that can cause an issue with Command Prompt. Repairing your user profile is difficult, but you can fix the problem simply by creating a new user account.
After creating a new user account, switch to it and check if the problem is still there. If the issue with Command Prompt doesn’t appear on the new account, move your files there and start using it instead of your old one.
5. Install the latest updates
Press Windows + I to open Settings and navigate to the Update & Security section.
Click the Check for updates button in the right pane. Windows will now check for updates and download them in the background.
You will have to restart the computer for the updates to install completely.
According to users, sometimes, you can’t run CMD as an administrator due to specific bugs in Windows. However, Microsoft is usually quick to fix any major bugs that affect the user experience. So, check for updates, and install them if any are available.
6. Run CMD as administrator from Task Manager
1. Press Ctrl + Shift + Esc to open the Task Manager.
2. Go to the File menu and select Run new task.
3. Type cmd.exe in the text field.
4. Check the Create this task withadministrative privileges box, and click OK.
5. Command Prompt will be launched on your PC.
The Task Manager can provide a solid alternative if you can’t run CMD as an administrator directly. Basically, you need to launch Task Manager and configure it to open Command Prompt.
Safe Mode is a particular segment of Windows that runs with default settings, and it’s usually a good place to start the troubleshooting process.
For example, if you can’t run Command Prompt as an administrator, perhaps you should be able to solve the problem by accessing Safe Mode.
Once you enter Safe Mode, try launching CMD as administrator, and if you see a black screen, run the following two commands while replacing the password in the second command with the one you want to set:
net user Administrator /active:yesnet user Administrator password
This fix has been confirmed by users and would help get things running when you can’t run CMD as an administrator.
Also, as an additional piece of advice, you may run CMD as an administrator in folder by right-clicking anywhere in the blank portion and selecting Open in Terminal.
Alternatively, Windows 10 users can navigate to the desired folder and press Alt + F + S + A.
Tell us which solutions worked for you in the comments section below. Also, if you managed to fix things with another method, do let us know.
More and more Windows Defender users are reporting they can’t turn on Microsoft’s built-in antivirus program due to various errors, the most common being the Unexpected error. Sorry, we ran into a problem. Please try again
The error could be due to several reasons, and the long list of solutions can confuse many. But there are a few tried and tested ones that seem to work for most users, and we will be exploring these today.
Before we proceed, here are a few similar errors, the solutions here will fix:
Windows Defender security center not working – If Windows Defender is not working, the problem might be with the services. So be sure to restart them and check if that helps.
Windows Defender unexpected error please try again – This is another common problem that can occur in Windows 10.
Windows Defender keeps stopping – Many users reported that Windows Defender keeps stopping on their PC. If you encounter this problem, check for issues with the Registry.
Quick Tip:
Windows Defender is not the best security tool out there. There are many safer bets for you, that include lots of other features and extra layers of protection.
We suggest switching to specialized antivirus software. You should look for one that uses advanced AI and machine learning to detect even the newest threats out there.
TotalAV
This is the ultimate protection software that will keep your sensitive data, and important files private and safe.
How do I know if a Microsoft security alert is real?
It’s actually quite simple and quick, given you know the ways to identify one. The appearance often helps verify if a security alert is fake. The ones from Microsoft will be well-designed, have no typos, and will have the option to ignore/close the prompt.
Secondly, the place where the security alert appears is another critical factor. Microsoft wouldn’t send alerts while you are on a browser or other third-party apps. Besides, Microsoft wouldn’t ask you to contact an email address or a number.
How can I fix the Windows Defender unexpected error?
Before we head to the slightly complex solutions, here are a few quick ones to get things up and running:
Restart the computer.
Check for updates and install if any are available. There was a bug in Windows that Microsoft addressed and released a patch for it. So, updating should fix the problem in your case, as it did for other users.
Remove any third-party antivirus installed on the computer to fix the Virus and threat protection unexpected error.
If none of these work, head to the solutions listed next.
1. Use antivirus-specific removal tools
Completely uninstall your old antivirus programs using this antivirus removal tool. There should be one on the software’s website. Then restart your computer, and Windows Defender should be able to install the latest updates and get things running.
In addition to antivirus removal tools, you can also use uninstaller tools for this job.
If you’re not familiar, uninstaller apps are specially designed to uninstall any program and remove all its files and registry entries from your PC. Therefore, we suggest you opt for the best uninstaller software on Windows.
2. Run an SFC scan
Type Command Prompt in the Search bar, and click on Run as administrator.
Click Yes in the UAC prompt.
Now, paste the following command and hit Enter: sfc /scannow
Corrupt system files are a common reason behind the Unexpected error in Windows Defender, and a simple SFC (System File Checker) scan should fix things.
3. Reset Windows Security
Press Windows + R to open Run, type powershell, and then press Ctrl + Shift + Enter.
Click Yes in the UAC prompt.
Paste the following command and hit Enter to execute it: Add-AppxPackage -Register -DisableDevelopmentMode "C:\Windows\SystemApps\Microsoft.Windows.SecHealthUI_cw5n1h2txyewy\AppXManifest.xml"
4. Modify the Registry
Press Windows + R to open Run, type regedit, and then click OK.
Click Yes in the UAC prompt.
Now, paste the following path in the address bar and hit Enter: Computer\HKEY_LOCAL_MACHINE\SOFTWARE\Policies\Microsoft\Windows Defender
Locate the DisableAntiSpyware or DisableAntivirus on the right and double-click on it. If you can’t find one, right-click on the blank portion, hover the cursor over New, select DWORD (32-bit) Value, and then name it as DisableAntiSpyware.
Next, enter 0 under Value data and click on OK.
This method has helped several users fix things when the Windows Security Unexpected error showed up. But make sure to be extra cautious and not make any changes other than the ones described here.
5. Perform an in-place upgrade
Go to Microsoft’s official website, and click on the Download tool now button under Create Windows 10 installation media.
Once downloaded, launch the setup, and wait for it to get things ready.
Now, click on Accept to agree to the license terms and conditions.
Choose Upgrade this PC, and click on Next.
Now, wait for the download the complete and follow the on-screen instructions to complete the process.
An in-place upgrade fixes a wide range of issues, including the Windows Defender Unexpected error. Though it will take some time, things should run smoothly after completion.
Also, the solutions here would work in case of the Exploit Protection Unexpected error in Windows.
If you’re looking to upgrade the PC’s defense system, take a closer look at this list of the best antivirus software with lifetime licenses and choose the one that best suits your requirements.
Tell us which fix worked for you in the comments section below.
Cards Against Humanity is a popular party card game, but did you know that you can play it online?
That’s right, you can play Cards Against Humanity online multiplayer in your web browser, and today we’ll show you how to do it.
Is there an online version of Cards Against Humanity?
Yes, just as we’ve mentioned above, the popular card game also has an online version that you can play with your friends.
Maybe you don’t have the original card game box, you don’t like to carry it, or maybe you forgot it before leaving, so this can save you in such a situation.
Can I play Cards Against Humanity with friends online?
Yes, there’s a free version of Cards Against Humanity that you can play with your friends online, and the game allows everyone to remotely see the game, while your hand is kept private.
Quick Tip:
Playing Cards Against Humanity is incredibly simple in your web browser, but for the best performance, we recommend using a browser such as Opera GX.
As for resources, you can easily limit RAM, CPU, and bandwidth usage inside the browser. It also has Twitch integration or the GX Control feature to optimize your games.
Opera GX
Play one of the most fun social games online via the best web browser created for gaming by now.
One of the most popular websites for playing Cards Against Humanity on Browser for free is none other than Pretend You’re Xyzzy. It allows you to play the game with other people in real time, thus mimicking the real-life game very closely.
Keep in mind that this web app has a humble user interface, so it might not be the most user-friendly for playing Cards Against Humanity with pictures.
Copy the link and send it to your friends, or add AI players.
Optional: Configure the rules of the game and which packs will be used.
Where can I play Cards Against Humanity online for free?
A good choice would be Pretend You’re Xyzzy, which allows you to play Cards Against Humanity for free in your browser. The website has got a simple interface and can be used to access and play your favorite game easily.
That being said, the next time one of your friends or acquaintances is looking for a Cards Against Humanity online free multiplayer, you’ll know how to help them.
Cards Against Humanity can be fun, and if you never played it before or want to play it online with some friends, be sure to use one of the following methods from this article.
The Kaspersky Antivirus software is among the most highly rated antivirus utilities for Windows. However, an outdated Kaspersky Antivirus package isn’t much good.
Kaspersky Antivirus doesn’t always update for some users and displays a Databases extremely out of date message to highlight that. This is how you can fix a KAV utility that isn’t updating.
Besides these unquestionable advantages, do note that you can pick from installing the latest updates manually or automatically, with no errors to worry about on the process.
What can I do if the Kaspersky update failed?
1. Check your Kaspersky subscription’s expiry date
Note the Kaspersky software only gets updated for its subscription period. Thus, it might just be the case that you need to update your Kaspersky subscription.
As such, check your Kaspersky Antivirus subscription’s expiry date.
2. Check the software’s update settings
Open the Kaspersky Antivirus window.
Click the gear button on the KAV window.
Click Additional > Update to open the update settings.
Select the Download and install new versions automatically option if it isn’t selected.
In addition, click Configure user account settings on Update settings.
Select Current user if you configured Kaspersky to run updates for another user, and press the Save button.
Most users probably assume that Kaspersky will update automatically. However, note that there is a Download and install new versions automatically option in Kaspersky Antivirus.
If that option hasn’t been selected, there aren’t any automatic updates. You can check that option is selected as described above.
3. Adjust the Date and Time settings in Windows
Press the Cortana button on the taskbar to open its search bar.
Enter date and time in the search box so that you can selectChange the date and time.
You can adjust the date and time by switching the Set the time automatically option off.
Then press the Change button to open the window shown below.
Check a totally reliable clock for the time, and adjust the date and time settings on that window accordingly. Then press the Change button.
Kaspersky update issues are often due to the Windows date and time settings. Kaspersky Antivirus might not update even if you’re system clock is slightly off the actual time by a few hours.
As such, check your Windows 10 time and date settings as described above.
4. Deselect Battery Saving for Kaspersky Antivirus
First, click Settings to open the Settings window.
Select Performance on the left of the window.
Then deselect the Disable scheduled scan tasks while running on battery power option to turn off Battery Saving.
Note that Kaspersky Antivirus has a Battery Saving option that turns off updates for laptops that aren’t plugged in.
So, if you’re using a laptop, Battery Saving might be why Kaspersky isn’t updating. Use the above steps to turn off Battery Saving for KAV.
5. Uninstall other antivirus software tools
Open the Run accessory by pressing the Windows key + Rkeyboard shortcut.
Input appwiz.cpl in the open text box and press Enter to open the Programs and Features Control Panel applet.
Select an antivirus utility that isn’t Kaspersky software and click Uninstall.
Then click Yes to provide further confirmation.
It’s not a good idea to have more than one antivirus utility installed. If you do have another antivirus package running, that software might conflict with Kaspersky Antivirus and block the updates.
You can remove alternative antivirus software from Windows as described above.
6. Select the Do not use Proxy Server option
Click the gear button at the bottom left of the software’s window to open Settings.
Click Additional on the Settings window.
Then select Network to open networking options.
Click Proxy server settings to open a window that includes proxy server options.
Then select the Do not use proxy server option.
If you are utilizing a proxy connection, double-check the proxy server settings for Kaspersky on the Proxy Server window.
Kaspersky not updating might also be due to proxy server settings. If you’re not utilizing a proxy connection, check that the Do not use proxy server option is selected.
7. Try out reliable alternatives
There is another perspective you should consider when you encounter errors from updating the Kaspersky antivirus. Use alternative software that will offer you protection from viruses, extra theft protection and password management.
Sometimes the best choice would be to replace the product with a more reliable one: on this purpose we come up with a few alternatives you may want to consider. Check this list out and tell us which one fits better your needs
Those are a few tips that will probably get Kaspersky Antivirus updated. Some of those resolutions might also fix other Kaspersky Lab software that isn’t updating.
Let us know which one worked for you in the comments area below.
If you’re still a Windows 7 user and you really want to save your favorite online show for watching it later, then screen recorders are able to do exactly this and more.
Screen recording software also allows you to record a webcam chat with your friends and capture live-streaming videos.
There are various screen-capturing tools for videos and images on the market and in order to be able to pick the ideal one, it’s recommended to carefully check out their features and compatibility with your current operating system.
A high-quality and easy-to-use screen recording tool will be all you need to get things done, so get ready and check our list including the best screen recorder for Windows 7 available on the market.
Does Windows 7 have recording software?
No. Windows 7 doesn’t have a pre-installed, built-in screen recorder.
The built-in tool was introduced just, later on, allowing Windows 10 users to record their screens with the Game Bar app, which is also available in Windows 11.
While that’s not the case for Windows 7, it does not mean you cannot record your screen at all, you just need to install third-party software to do so.
What do you need to start recording your screen?
? Screen recording tool: software to capture and ideally edit your content with – find below plenty of useful options with customization tools for creating all kinds of content
?️ Microphone: if you want to create highly interactive content for guides, tutorials, reviews, and reactions, a great microphone is mandatory for all of those
? Webcam: just like microphones, webcams aren’t mandatory, but they help you interact more directly with your audience – as a creator, you want to put yourself out there
One last thing to take into account is the amount of storage space you have available. Make sure you have an HDD or SSD with as much storage as you can possibly afford since recordings take up a lot of space.
SSDs are capable of more than double the loading speeds compared to an HDD. Windows will boot significantly faster, and software or games will load almost instantly.
Loom for Windows 7 PC is a free and premium screen and video recording software and browser extension that may be used to rapidly and efficiently express ideas.
You may use this program to enhance productivity more efficiently and inspire coworkers or classmates to solve tasks more easily.
Loom gives you the option of capturing the entire desktop or just the current tab. It also allows you to share anything with anybody by just sharing the video URL and allowing people to respond to certain moments with emojis and comments.
Loom allows you to record the material on your computer screen as well as footage of yourself narrating or lecturing alongside the topic.
You can modify the Loom’s recording quality from full HD to the lowest resolution possible, display mouse click on the recording, display a countdown while you record the video, flip the camera, show the control menu, and record audio in mono in the settings.
Loom Screen Recorder is a wonderful replacement for those tedious, endless emails and awkward meetings that never finish.
If you are a teacher or student, you can even acquire the professional version for free with the additional features. The interface is quite simple and can be grasped with little effort, and since it’s a lightweight tool, it’s surely one of the best and safe to use on your Windows 7 PC.
Let’s quickly look at its key features:
Screen and webcam recording
Content embedding
Browser Extension
Easy customizable
From 720p up to HD and 4K resolution
Loom Screen Recorder
Because of its small size, this lightweight screen and webcam recorder with feature-rich capabilities is ideal for Windows 7 PCs.
Icecream Screen Recorder is a highly professional, streamlined screen recording software. This tool is the embodiment of versatility providing all the functionalities offered by other similar programs in a simplified and easy-to-use manner.
It’s a sort of all-in-one app designed to fit even the most capricious user and it seamlessly blends with the Windows architecture including older versions such as Windows 7 or Windows Vista.
Icecream Screen Recorder offers you the ability to crop a portion of a page or simply record the entire window. This is just one of the many customization options you’ll find in the software.
It can also record online videos and capture them in various video formats made to be uploaded on YouTube, Vimeo, or Dailymotion.
The recording process is really accessible, requiring only the simple press of a button to start and stop. It cannot get any easier than that.
During the process, add annotations like arrows or circles to highlight certain things on tutorials or presentations.
Icecream Screen Recorder will also take screenshots of anything on the screen, and it will save them either straight into the HDD or to the destination folder of your choice.
These screenshots can be stored in a variety of file formats that work with different image editing software.
Webcam and microphones may be recorded too. Freely choose whether you want to record your webcam and screen, or just the mic.
Let’s quickly look at its key features:
Great screen recorder
Capture audio, video, and the screen
Annotate videos
Record webinnars
Add your own watermark
Share your work on popular platforms
Icecream Screen Recorder
Screen recording on Windows 7? You bet! Pair your Win 7 PC with Icecream Screen Recorder and enjoy seamless recordings!
This is one of the best screen recording software tools out there and it’s totally free, user-friendly, and quick.
Movavi software is currently being used worldwide for recording and editing audio and video streams, capturing screen and desktop activity in HD format, creating video guides, and more multimedia tasks.
You will also be able to edit and convert your videos with a few tools that are available in the program. This software is a fast and reliable choice to record screens in Windows 7.
All you have to do is install the screen recorder and it will run automatically after installation. Then you have to set the capture parameters, and you will be able to record desktop videos in Windows 7.
Note that you can set up the screen parameters and capture only certain parts of the desktop. This is really useful when making tutorials or presentations because it lets you focus on the subject of the matter.
Besides the recording features, Movavi Screen Recorder also has simple editing tools to do some basic finishing touches to the content.
After you’re done editing, save the file in any convenient format! The software supports all of them, so it is compatible with most social media and content platforms such as YouTube, Vimeo, etc.
Another great thing that will help with presentations is being able to draw while recording. Point out different things with arrows or doodle an explanation for your colleagues and coworkers!
Movavi Video Editor lets you be more organized. Choose a date, a time, and schedule a recording, or set the time limit of the session.
Let’s quickly look at its key features:
Draw on videos
Create screencasts
Schedule your recordings
Display the keystrokes and mouse pointer
Record audio and the webcam
Movavi Screen Recorder
Capture your Windows 7 screen easily in just one click and benefit from some other awesome features with Movavi!
Apowersoft Screen Recorder Pro is a great screen recorder that is perfect for making tutorials and training videos. It supports both internal and external audio sources and various formats.
To take a screencast, all you have to do is click the red Start button on the top left-hand corner and the screen recording suite will countdown from 3 to 0.
You can also record yourself while you’re playing your favorite games by simply clicking the webcam icon and the software will instantly switch to picture-in-picture mode.
Overall, Apowersoft is the ideal program for creating professional screen recordings and screencasts on your Windows 7 PC.
The software records from multiple sources, including your own internal and external devices such as a musical instrument, a webcam, or a microphone.
There is also a built-in video editor that allows you to do some basic editing to the footage after it’s been recorded in order to cut out or fix any problems.
When it comes to compatibility, the tool supports various video formats, including AVI, MKV, SWF, FLV, 3GP, and many others.
Different recording modes such as Full Screen, Custom Area, Around Mouse, and Select Window offer users plenty of different ways to create content.
Let’s quickly look at its key features:
Different recording modes
Record webam, audi, and video
Plenty of video formats
Real time screencast editor
Task and session scheduler
Apowersoft Screen Recorder Pro
Record the Windows 7 screen and share your best moments with the entire world!
With Bandicam Screen Recorder you have the ability to capture what is happening on your computer screen such as images or videos. You can also record gaming on your desktop in HQ video.
Your videos will be watermarked on the free version of the program, but the watermark will be removed if you pay to register.
Bandicam allows you to change the number of frames per second. You can also choose the video and the audio codecs.
As a gamer, you can record sessions, showing off your skills in high resolution, up to 4K, and sharing these videos directly to YouTube in 720p or 1080p.
The software lets you immortalize your favorite moments. Easily capture screenshots and save them in multiple popular formats, such as JPG, BMP, or PNG.
Resize specific areas manually, or choose from the predefined formats, then capture only that selected area, along with audio or webcam if you wish.
To record images or videos, all you have to do is set up the software and customize options such as codecs, frame rate, and quality.
Additionally, it works flawlessly with other applications that utilize the DirectX and OpenGL graphic engines.
Let’s quickly look at its key features:
Chroma key
Capture webcam, microphones, and other devices
Real-time screen drawing
Scheduled recordings
Mouse effects
Bandicam
Capture any movement on your Windows 7 screen and render it as a high-quality video with this lightweight screen recorder!
Action! – free tool that supports really high frame rates
Action! is a professional high-definition screen and game recorder. It will provide you the opportunity to record your live video experience at a fantastic quality. The software is ideal for gamers.
Entirely a one-of-a-kind software with really high frame rates and a user-friendly integration, Action! boasts an intuitive screen recorder that lets you perform various functions within a centralized platform.
It is excellent for users who are wary of getting involved with more complex platforms. The program includes fullscreen or regional recording to highlight important parts of your gameplay or presentation.
You also have the ability to capture screenshots and save web player videos. Another essential feature is real-time recording, which is used to stream games on different platforms such as Twitch, YouTube, etc.
Additionally, it comes with a built-in video manager that displays essential functions, including deleting, browsing, sharing, and uploading.
Record music for future playback, or to use in other videos. The easy-to-understand layout will highlight the number of recordings and the total file size of the group.
You can also set up hotkeys to use all of the software’s features on the go while presenting, live streaming, or recording a certain video.
Those of you who utilize Windows 7 will be pleased to know about PassFab Screen Recorder, an all-in-one screen-capturing tool that is perfect for creating all kinds of content.
No matter if you want to create a commentary of a sports game, want to record yourself debating a subject, or simply wish to create a tutorial. This great app makes the whole process a breeze.
Because it’s compatible with all microphones and webcams, there’s no need to worry about hardware problems.
PassFab Screen Recorder also lets you choose between recording your webcam, microphone, or computer screen.
Actually, you can do all of those simultaneously! The picture-in-picture option even allows users to record separate windows at once. Record reactions and showcase the source video!
Adjust the size of the windows, and their placement, and switch between the webcam and the other content at will. There’s nothing you can’t do.
Show your level of creativity through your videos, because the software doesn’t just capture the screen, it is a way to express oneself.
The tool is compatible with most Windows versions and builds, including Windows 7 32-bit and 64-bit.
If you are planning to teach, there are options to capture the mouse or the keystrokes, for the viewers to get a better idea of what’s going on in the recording.
Tip
You can also get 30% off by entering the code GAME-30-OFF during the purchase!
If you want to create professional videos, you need to filter out all the unnecessary programs from the screen and avoid recording that during the sessions. Nobody wants to see some silly notifications or random pop-ups.
➡ A script always helps
You don’t have to read a three-page long essay, but creating a small script of the things you’re going to say, and the way in which you’re going to say them, really helps.
Also, try not to ramble about things that aren’t important to the subject of your video. Stay on target and you will keep people interested.
Since you can record certain parts of the screen, leaving a notepad open with a small script where the viewers cannot see is the way to go.
➡ Watch out for the length of the video
Sometimes, content can be too lengthy, and it becomes boring, or it can be too short, missing out on important information and leaving the viewer unsatisfied. Make sure you find a good balance between those two.
For example, on YouTube, the ideal video length is 10 minutes, and on average, the ones who are between 7 and 15 minutes long do well on the platform.
Other social media platforms such as Facebook work better with short-form content. Clips generally do well if they are around 90 seconds long.
➡ Audio and video quality matter
Never use the built-in microphone and camera from your laptop, since they are mediocre at best. Buy professional equipment if you are planning to create professional content.
The best microphones you can buy come from Blue Yeti. Here’s a detailed list if you want to check all of them out.
As for the webcam, one that records at least 1080p is a must. If you want to go all out, find one that can capture 4K videos and 60 FPS.
➡ No background noise
Background noise can be really annoying, so make sure you download some noise-canceling software to filter out disturbing sounds.
Not everyone has access to a soundproofed room, so most of the time there will be some background noise while recording audio.
The sounds usually come from computer or laptop fans and other devices. Some microphones have noise-canceling features but most of the time that’s not enough to completely remove background noise.
All the programs that we have presented above come with high-quality features and capabilities for streaming videos, recording videos, and they are all compatible with Windows 7.
You can add them to any version of the OS, be it Starter, Home Premium, Professional, Enterprise, or Ultimate.
These apps will provide high-quality footage, live video and audio streams, easy captures, and lightning-fast processing as well.
Make sure you test them out, look at their different features, and choose the one that fits your needs the most. Tell us about your choice in the comments section as well.
If your screen suddenly turns bluish, you’re not alone. Many Windows 11 users experience this strange color shift where the monitor has a blue tint. This issue often results from display calibration problems, driver glitches, or active features like Night Light or HDR.
Below are the most effective ways to fix blue tint in Windows 11, ordered from simplest to most advanced.
Press the Windows key + X and select Device Manager.
Click the arrow next to the Display adapters option to expand it and double-click the driver.
Now, click the Driver tab at the top.
Click the Update Driver button.
Finally, select the Search automatically for drivers and install any available update.
If your hardware is not the cause of the blue tint of the computer screen on your ASUS laptop or other products, it is likely a driver issue. Updating your driver should restore normalcy in this case.
If you started noticing the problem after updating your driver, you could click the Roll Back Driver button in the driver tab.
Alternatively, you can use professional software in Fortect Driver Updater to update your drivers automatically. As soon as you install this program, it will scan your device for any outdated drivers and provide an accurate report of what elements some new files.
You have a database of over 18 million files to download new patches from and schedule your updates so you can keep your PC running like new.
2. Uninstall the display driver
Turn off your internet connection, launch Device Manager, and expand the Display adapters option.
Right-click the driver there and select Uninstall device.
Check the box for Delete the driver software for this device and click the Uninstall button.
Now, restart your PC, and the default driver will be installed.
At times, updating or rolling back your display adapter might not fix the blue tint issue on your Samsung monitor or laptop, or any other product. In this case, the problem might be broken or faulty drivers.
Uninstalling your driver should solve this problem.
Press the Windows key + I and select the System option.
If the Night light is on, toggle it back to disable it.
Alternatively, click the Night light settings option if the Night light is on.
Use the Strength slider to reduce the blue light presence until it meets your preference.
The recently-introduced feature called Night Light can have a part in all of this. This nifty feature allows you to reduce the blue-light presence on the screen, making the display easier on the eyes.
It can also prove as a viable workaround for the problem at hand. You can enable this feature, and it’ll automatically reduce the blue tint.
However, the screen might look too reddish for one’s taste so you can tweak it to your liking.
4. Check Display Cable and Port Connection
A loose or damaged HDMI/DisplayPort cable is a common reason your monitor has a blue tint.
Unplug and firmly reconnect the cable on both PC and monitor sides.
Try a different port on your GPU or another HDMI/DisplayPort input on your monitor.
Swap in another cable if available, especially if you’re using a second monitor and only one screen is affected.
5. Turn Off HDR Display Mode
Incorrect HDR settings can make your screen appear too cool or even fully blue.
Open Settings > System > Display
If HDR is supported, toggle off Use HDR
Reboot your PC and check if the color looks normal
Re-enabling HDR after the reboot may work if it was a temporary glitch.
6. Recalibrate Display Colors
Windows allows you to manually fix color imbalances through its calibration tool.
Press Windows + R, type dccw, and hit Enter
Proceed through the wizard until you reach the Color Balance section
Adjust the Red, Green, and Blue sliders until the screen no longer looks overly blue
This is one of the most direct ways to fix blue screen color issues manually.
7. Reset Color Profile in Color Management
If you’re using an ICC color profile or a custom color configuration, it may be the cause.
Search for Color Management and open it
Under Device, choose your display
Check Use my settings for this device
Remove the current profile, then add back the system default or leave it empty
Restart your PC afterward to make sure the change takes effect.
8. Turn Off Windows Color Filters
Color filters are part of Windows’ accessibility features and can shift screen colors if accidentally enabled.
Go to Settings > Accessibility > Color filters
Make sure the toggle is switched Off
Use the shortcut Windows + Ctrl + C to disable any active filters instantly
This fix is especially useful if you’re wondering why your screen is blue all of a sudden.
9. Use Your Monitor’s Built-In Reset
Some monitors apply color presets that override system settings.
Press your monitor’s physical Menu or Settings button
Look for Color Temperature or Color Mode
Choose sRGB or 6500K if available
Avoid settings like Cool, which may exaggerate blue tones
Factory reset the display settings if necessary
This is effective when the blue tint persists even after OS-level adjustments.
10. Power-Cycle the Monitor
A quick reset can clear signal bugs that cause color issues.
Turn off the monitor
Unplug the power cable and video cable for 30 seconds
Plug everything back in and turn it on
This is a fast way to clear minor sync or detection problems.
Why is my monitor a blue tint?
The blue tint on the computer screen can be caused by hardware or software issues. Below are some of the causes as reported by users:
Hardware issues: One of the first things to check when your computer shows a blue tint is that the problem is down to your monitor or connecting wires. You can confirm this by clicking an external monitor on your PC.
Driver problems: Outdated or faulty display drivers can also cause this blue hue to show on your PC. Again, rolling back or updating your driver should fix the issue here.
We have reached the end of this detailed guide. So if you want to know how to get rid of blue tint on a monitor Windows 10, you have all the information you need in this guide.
If you are facing other display-related issues like a distorted screen on Windows 10, check our excellent guide to fix it.
Discord is a messaging app you can download or utilize within browsers. Whether you’re utilizing a browser or desktop version, you might notice a red dot in Discord, or that the Discord notification won’t go away.
If it’s also happening for you, make sure you completely verify today’s guide. Before discovering what you can do to solve this problem, let’s take a look at some useful related information.
What does a red dot on the Discord icon mean?
There are two types of red dots in Discord.
➡ One red dot appears when users have unread messages. That red dot includes a small white dot and highlights there are unread messages. The red dot usually appears when you have unread messages.
➡The second type of red dot with a black line on it pops up within the Discord desktop or web app. That red dot is one of the four status indicators you’ll see on your user name.
The app’s red dot with a line is a status indicator which means do not disturb.
Why do I have a Discord notification but no message?
It can be because someone has messaged you and then deleted the message. Thus, even if you try to mark the message as read, Discord won’t see the sent message, thus keeping the red not on, or even causing Discord to freeze.
However, there are ways to get rid of it. Follow along to find them out!
How to get rid of red dot on Discord?
1. Toggle the unread message badge setting off
1. Hit the Windows key, type Discord, then open the first result.
2. Click on the User Settings button, in the left bottom of the Discord window.
3. Next, click Notifications on the left side of Discord.
4. Then, turn off theEnable Unread Message Badge option.
5. Thereafter, restart the app.
The first thing you need to do is turn off the Enable Unread Message Badge option from Discord’s built-in Settings. This is a quick and easy solution if the Discord red dot won’t go away, so be sure to try it.
2. Mute channels
Hit the Windows key, type Discord, then click on the first option.
Click your server button on the left side of Discord.
Select Notifications Settings (marked as a bell), from the top of your Discord window.
Hover the mouse on the Mute Channel option.
Then select the Until I turn it backon option.
Muting a channel will disable unread message notifications for that channel. You’ll still receive red dot unread message notifications for channels that aren’t muted.
3. Select the Mark as read option
Use the following keyboard shortcut, then type Discord, and open it: Windows + S.
Open Discord, then right-click on the desired server.
Choose to Mark as Read.
You can mark messages as read for all channels within a server to eliminate red dot unread message notifications. We recommend doing that for all your Discord servers.
After this, the red dot on the Discord icon will go away. Keep in mind that this is just temporary, and the red dot will appear after you get new messages.
4. Change your status to remove red dot with line
Hit the Windows key, type Discord, then open the first result.
Click on your Avatar User button.
In the opened menu, select the Online option to replace a red dot with a line in Discord.
So, it’s pretty straightforward to get rid of the red dots in Discord.
You can remove unread message red dot notifications with three alternative methods, but there’s only one way to get rid of an online status red dot.
Choose whichever method you prefer for removing unread message red dots in Discord.
Now that you have tackled the issue and want to work in peace with distraction on Discord, you might consider changing the status to invisible; read this guide to learn more.
Update reminders could be annoying sometimes, but how annoying is it when you constantly get the reminder about the same update, even if you’ve installed that update before? This is the case when Windows update keeps reinstalling.
So if your computer is receiving the same update repeatedly, we maybe have a solution.
Why is my Windows 10 constantly updating?
If Windows keeps installing the same update, it could be triggered by different factors. Here are the most common:
Badly installed updates – This error mostly happens when the OS cannot install the update correctly. Sometimes, these updates need deletion.
Problematic updates – While updates are welcome additions, there are a few cases of bad updates, which can cause bugs on your computer.
Windows unable to detect updates – Even after an update is installed, in some rare cases, the OS may be unable to detect it, leading to fresh installation attempts.
Speaking of Windows Update issues, users also reported the following problems:
Windows 10 keeps installing updates – According to users, Windows 10 keeps installing the same updates on their PC. You must stop the Windows Update service and delete the SoftwareDistribution directory to fix this problem.
Same Windows update keeps trying to install – This is another problem that Windows users can encounter. If you’re having this issue on your PC, you should be able to fix it using one of our solutions.
Windows 10keeps downloading the same updates – This is also a common problem with Windows 10. If Windows 10 keeps downloading the same update, you can fix the problem by removing the problematic update or by using System Restore.
Now let us explore the best solutions.
What can I do when Windows Update keeps installing the same update?
1. Delete the SoftwareDistribution directory
Press Windows Key + X and select Command Prompt (Admin) from the menu.
Type the following scripts, pressing Enter after each one: net stop wuauserv rename c:windowsSoftwareDistribution softwaredistribution.old net start wuauserv exit
Press Windows Key + R and enter C:\Windows, press Enter, or click OK.
This will open the Windows folder, search for SoftwareDistribution and delete it.
Finally, restart your computer.
Now all backups and downloads of Windows Update are deleted, and your problematic update, and you shouldn’t face this issue anymore.
2. Remove the problematic update
Open the Settings by using the Windows Key + I shortcut.
When the Settings app opens, click the Update & Security section.
Now click View installed update history.
Select Uninstall updates.
Lastly, double-click an update to remove it.
After uninstalling recent updates, check if the issue persists. If this solution solves the problem, you’ll need to prevent Windows from downloading the problematic update again.
After doing that, your problem should be resolved entirely.
3. Reinstall .NET Framework
Usually, uninstalling and then reinstalling or repairing the.NET Framework should resolve many problems, but specific systems may encounter errors or failure for various reasons.
When installing, removing, or cleaning the traces of the.NET Framework, a cleanup program named CCleaner is available to complete all necessary tasks.
This process requires you to remove all fires related to .NET Framework 4 and download it again as a Windows update.
The tool will clean up the system by removing files, folders, registry keys and values, and Windows Installer product registration information for the.NET Framework.
After removing .NET Framework 4, you can download it automatically as a Windows update, and the problem should be resolved.
Go to Start, type command, right-click on Command Prompt, and select Run as administrator.
A new cmd window appears. Type the line below and hit Enter: sfc /scannow
Finally, wait until the scan and repair process is finished.
6.2 Running DISM
Go to Start, type command, right-click on Command Prompt, and select Run as administrator.
A new cmd window appears. Type the line below and hit Enter: DISM.exe/Online /Cleanup-image /Restorehealth
Also, if the DISM can’t obtain files online, try using your USB or DVD installation. Insert media, type the command below, and hit Enter (be sure to replace /C:/RepairSourceWindows with the path of your DVD or USB). DISM.exe/Online /Cleanup-Image /RestoreHealth /Source:C:RepairSourceWindows /LimitAccess
That is all you should do if the Windows update keeps reinstalling on your devices.
Lastly, please reach the comments section below if you have any additional comments or questions or if this solution somehow didn’t work.
USB-C not working on Windows 11 is a common issue caused by software, hardware, or settings problems affecting charging and data transfer.
This guide covers USB-C port troubleshooting on Windows 11 to fix USB Type-C port not working or not charging issues and restore proper device connection. For broader USB solutions, see our Windows 11 USB device recognition guide.
What should I do if USB C device is not recognized on Windows 11?
Frequently, simply rebooting your Windows 11 PC clears RAM, stops interfering background apps, and fixes minor issues, helping the system detect a USB-C device, so it’s the easiest first step before trying more advanced solutions if the problem continues after several restarts.
2. Reinstall your USB driver
Using Device Manager to update or reinstall drivers is the easiest way to do it.
Right-click on the Start menu and select the Device Manager option.
Expand the Universal Serial Bus devices option.
Right-click on your device, and select Uninstall.
Restart the computer. When the computer is restarted, the driver will automatically be reinstalled.
One of the first things you need to do to fix the USB-C port not working issue is reinstall your USB drivers.
3. Clean your USB port
It would help to clean the USB port with a paintbrush or a microfiber cloth and then retry the connection.
The USB port on a computer may get blocked with particles or dust over time. When this happens, your gadgets may stop communicating, and your Windows 11 will not be able to recognize USB C.
4. Enable trusted devices
Connect to your Windows 11 PC with a USB C cable.
Click on Trust when prompted on your phone.
Some gadgets, such as the iPhone, offer an additional authentication layer to ensure that the user’s identity is verified.
Therefore, you must unlock your iPhone before connecting it to your Windows 11 PC for the first time. The user will be asked to trust the linked device by iOS. Your iPhone content will display on your PC after you’ve been authorized.
5. Edit the power management settings
Right-click on the start menu and select the device manager option.
Expand the Universal Serial Bus devices option, right-click on your device, and select properties.
Navigate to the Power Management tab, uncheck Allow the computer to turn off this device to save power, and click ok.
6. Disable the USB hang setting
Click on the start menu, type power plan, and select the Edit power plan app.
Click on Change advanced power settings.
Expand USB settings, select disable under the USB selective suspend setting.
Click the start menu, type Windows security, and select the Windows security app.
Click on Virus & Threat Protection on the left pane, and select the Quick Scan option on the right.
While the app is scanning, you can minimize the windows and continue with whatever work you perform on your PC.
8. Check for Windows update
Click on the start menu, type Windows Update, and select the Windows update settings option.
If there are any updates, click on download and install.
Restart your PC.
9. Replace your USB C Device
If the USB C port is verified to be functional, the problem may be with the device you’re connecting. If Windows isn’t detecting the device, you may consider replacing it with something different.
A USB hard disk, for example, can only be recognized when the device has not failed. Therefore, before you contemplate replacing your device, ensure you have tested it on another computer if possible.
Unfortunately, determining why a USB device has stopped functioning is difficult. To explore, you should review the device’s user manual or, if feasible, explore the device’s manufacturer assistance options.
What is the USB Type C?
In simpler terms, USB C is a specific USB connector with its cable and circuitry. USB C is used to carry both power and data, just like any other USB cable.
The design of USB Type C differs significantly from that of its predecessor, USB A. The Type C is oval and perfectly symmetrical, so there’s no danger of accidentally inserting it into the incorrect port. The following are the primary characteristics that distinguish USB C from other standard cables:
Speed
Power capability
Supported data protocol
The transmission speed is determined by the device to which it is connected. For example, a USB Type C cable connected to a USB 3.1 port gives a transfer rate of 10 GB per second. The USB 3.2 connector will transport data at a rate of 20 GB per second, while the Thunderbolt 3 port will reach 40 GB per second.
When it comes to electricity, USB Type C can charge laptops, cellphones, portable devices, and power banks. Type C is identical to Type A in that it only produces 2.5 watts of electricity. However, if the device supports PD, or Electricity Delivery, the USB-C port may supply up to 100 watts of power.
USB-C on Windows 11: FAQ
Why isn’t my USB-C device recognized on Windows 11?
This usually happens because of outdated or corrupted drivers, loose connections, or hardware problems. Restarting your PC, reinstalling USB drivers via Device Manager, and checking the cable and port for dirt or damage often solve the problem. Also, ensure your device is unlocked or trusted if it requires authentication (like an iPhone).
What are the power settings affecting USB-C ports in Windows 11?
Windows can turn off USB devices to save power, which may cause ports to stop working temporarily. To fix this, open Device Manager, find your USB device under “Universal Serial Bus controllers,” right-click, select Properties, go to the Power Management tab, and uncheck “Allow the computer to turn off this device to save power.” Also, disable USB selective suspend via Power Options to keep ports active.
Does Windows 11 support all USB-C features?
Windows 11 supports USB-C standards, but the actual features (like power delivery, data speed, or video output) depend on your hardware. Your USB-C port and connected device must support these features. Windows 11 alone doesn’t guarantee them. Check your device specs to confirm what USB-C functions it supports.
Are there any known issues with USB-C ports after Windows 11 updates?
Some Windows 11 updates have caused USB-C port problems due to driver incompatibilities or power management bugs. If your USB-C port stops working after an update, try rolling back the driver, checking for further updates, or running Windows Troubleshooter. Keeping your system and drivers updated usually resolves these issues.
How can I check if my USB-C port supports DisplayPort or HDMI?
Not all USB-C ports support video output. To check, look up your PC or motherboard model specs on the manufacturer’s website for “DisplayPort Alternate Mode” or “video output over USB-C.” Alternatively, check your device manager or user manual. If it supports video, you can connect monitors using compatible USB-C to DisplayPort or HDMI adapters.
Summary
Like with many minor PC issues, when Windows 11 is not recognizing your USB C, you do not need a technician; you can simply follow the solutions above and have your PC working perfectly again.
Please note that these fixes are not in any particular order, but we highly recommend that you try every solution before buying or replacing your USB-C device.
Tell us what solutions have worked for you. We look forward to reading your comments.
If you use the file hosting service and you don’t delete that data, your browser might start moving slower and you can even get errors such as Your in-browser storage for MEGA is full.
How do I fix my browser storage Mega is full?
1. Delete the Mega.nz cookies
1.1 On Chrome
1. Launch Chrome.
2. Click the three dots icon at the top right corner in Chrome, and openSettings.
3. Under Privacy and security, choose Site settings to open the content permissions.
4. Then click onView permissions and date stored across sites.
5. Enter mega.nz in the search box.
6. Click on mega.nz, then select the three points menu and select Clear data. The your in browser storage for mega is full in Incognito mode issue will be fixed.
The first fix for the Out of HTML5 offline storage space error involves deleting the Mega.nz cookies from your browser.
Depending on your preferred browser, the process will be slightly different, but the steps are mostly the same.
1.2 On Opera One
If you’re having Your in browser storage for mega is full in Opera One or Opera GX, you can fix it by doing the following:
Open Opera One. Click the Opera One menu and then select Settings.
Navigate to Privacy & security. Now select Cookies and other site data.
Go to See all cookies and site data.
Locate mega.nz on the list and click the Delete icon.
If you ever wondered how to clear in browser storage for Mega, then the methods above should be able to help you.
2. Delete cache using File Explorer
Press the Windows key + E to start File Explorer. Enter the following line in the address bar and hit Enter: %LOCALAPPDATA%\Google\Chrome\User Data\Default\Cache
Now, use the Ctrl + A key shortcut to select all the contents, right-click on a file and select Delete.
After doing this, the Your in browser storage for MEGA is full message in Chrome will be gone.
For Opera One users, do the following, repeat the same steps, but go to the following directory Opera One Software\Opera One Stable
Now you just need to delete all directories inside of the Opera One Stable folder.
3. Reset Google Chrome
Click the three dots in the top right corner, and openSettings.
Go to the bottom of the Settings window and select Advanced.
Scroll down to the Reset and clean up option, under System.
Click on Restore settings to their original defaults
Finally, press the Reset settings button.
Resetting Google Chrome might fix the Insufficient disk space for MEGA running in Chrome, so be sure to try it.
For Opera One/Opera GX, do the following:
Click the Menu button and then select Settings.
Go to the Browser in the left pane. In the right pane go to Restore settings to their original defaults.
Click Reset to confirm.
4. Download Mega files with a specialized tool
Alternatively, users might find that they can download large files with the MegaDownloader software. That’s a dedicated download manager for mega.nz with fewer file download shortcomings than Chrome.
Thus, the in-browser storage for MEGA is full error might not arise for users who utilize that software as it doesn’t store cookies.
Users can add that software to Windows by clicking Download on the MegaDownloader page.
5. Free some drive storage
Press the Windows key + E to start File Explorer.
Click on This PC, right-click on the drive you want to clean up, and choose Properties.
Click on Disk Cleanup under the Properties window.
Select the types of files you want to delete and click OK (you can delete temporary files, log files, files in your recycle bin, etc.).
Click on Clean Up System Files and wait until the cleaner calculates everything. It will give you even more free space by cleaning some unnecessary system files.
Check the Windows Update Cleanup and hit the OK button.
Go to More Options and click on Clean up under System Restore and Shadow Copies (This command deletes all previous system restore points, except the most recent one.).
If you’re getting Your in-browser storage for Mega is full, your download will continue automatically after you free up some space message, then freeing up some space is the way to go.
You can’t even imagine how easy it is to switch to a different browser without losing any data. The Opera One browser has organizing capabilities to ease downloads and Mega Storage.
With the built-in ad blocker, various messengers integrated right in the sidebar, and workspaces to group tabs together you get to manage your browser space easier.
Browser storage is closely related to the amount of storage space that you have on your PC. Unfortunately, you can’t control how much storage space is available to your browser.
The only way to increase the browser storage is by increasing the overall storage space by removing files and apps that you don’t use, or by getting a larger drive to store your files.
Those are some resolutions that might fix your Mega in browser storage error.
You might also want to check the best personal cloud storage services that come as a great alternative to Mega.
Don’t forget to tell us whether one of the solutions gets you through the problem. If you have any other suggestions or questions, feel free to leave them in the comments section below.
Thanks to web apps like Excel Online, accessing and editing your workbooks online shouldn’t be an issue. However, it is not all rosy, as users have been facing issues such as the Excel Online not working and can’t open files error.
The inability to open workbooks from Microsoft Excel or SharePoint is troubling users. As reported, they are usually met with the We’re sorry we can’t open the workbook in the browser error and can’t proceed.
This will provide some tips on how to solve this quickly and effectively.
Why won’t Excel open in the browser?
There are various reasons your workbook might not open in Excel on your browser. This can be because of an issue with the browser you are using.
Also, it might be because you have Sharepoint disabled. And to make a file accessible online on your browser, you need to have the feature enabled.
How can I fix the Sorry we can’t open your workbook in Excel online error?
1. Try with a different browser
Let’s start by migrating to Edge or IE. Yes, we know those might not be browsers of your choice, but they work the best with other web-based Microsoft applications.
Additionally, you can install specific IE-specific add-ons which might allow you unprecedented access to your workbook, be it SharePoint or Excel.
Alternatively, you can give Opera One a try. This Chromium-based browser checks all the boxes regarding reliability and safety.
So, how about a browser that’s privacy-oriented and feature-rich? It won’t cost you anything but some time to install and try.
Besides, the browser is customizable to fit various needs, thanks to the extensive add-on support and it comes with a built-in AI.
Opera One
Thanks to this fast, efficient, and highly customizable web browser, open, edit, and work on your SharePoint workbooks without any issues.
Excel will display a notice known as a #REF error if a formula makes reference to a cell that does not now exist. This is typically the result of removing cells that a calculation is referring to.
Fixing your #REF errors is likely to solve the We’re sorry we can’t open the workbook in the browser error.
1. Launch Excel and open the problematic workbook.
2. Press Ctrl + F then click theReplacetab.
3. Type#REF! inside theFind what field.
4. Leave the Replace field empty.
5. Finally, click Replace All. The function will delete all #REF Excel errors and thus fix the issue.
3. Turn on Sharing
Click on the Review tab.
Choose the Share Workbook tool.
Check the Allow Changes box and confirm changes.
Usually, some parts of the file are not supported for sharing, but you should still be able to show the central part of the file in the web-based application.
However, you need to enable sharing for the said file before we can access it online. This option is disabled by default, and you should allow it for an Excel sheet or SharePoint file to be accessible online.
With this, you should be able to fix the error that couldn’t open the workbook in Excel Online.
Finally, you can try editing the file copy instead of the original file. That allowed some users to access the file online, even though it still might not work in the likes of Chrome or Firefox, so have that in mind. Again, you choose to edit the copy, which should help.
Once the error appears, click Edit a copy, and you can merge everything locally. Don’t forget to use a different name, or the original file will be replaced upon saving otherwise.
The solutions are also effective if you are experiencing the following errors:
This workbook contains too many objects (charts, shapes, pictures, etc.)
We’re sorry. We can’t open the workbook in the browser because it uses these unsupported features: workbook protection
We’re sorry. We can’t open the workbook in the browser because it uses these unsupported features: scenario manager
Sorry, We can’t open your workbook in Excel Online because it exceeds
We’re sorry. We couldn’t open your workbook in the browser because it uses these unsupported features: charts or objects with external references (links to other workbooks)
We’re sorry. We can’t open the workbook in the browser because it uses these unsupported features: XML maps
With that said, we can conclude this article. If you have any questions or alternative workarounds, feel free to tell us in the comments below.
Blue Screen of Death errors can cause many problems on Windows 10; unfortunately, these errors can sometimes be hard to fix. The PNP detected fatal error is a good example.
Since these issues can be problematic, we’ll show you how to fix the Blue Screen of Death problem with the stop code PNP_DETECTED_FATAL_ERROR.
The PNP_DETECTED_FATAL_ERROR is a blue screen issue and can cause many points on your PC. This problem can be annoying since it suddenly forces your PC to restart.
What is a PnP error?
This is a BSOD error that different factors may trigger but is usually related to plug-and-play devices on your computer. Some of the significant characteristics for the error include:
Problematic Windows update – Windows updates are a huge factor; in some cases, the updates may be buggy, and at other times you may not have gotten the latest updates.
Outdated or faulty drivers – Since these devices are peripherals, they need drivers for proper interaction. Therefore, you may expect this error when your drivers are outdated or bad.
A computer system can instantly identify any hardware device without setting up hardware like dip switches or jumpers. These easily attachable devices are called PnP (Plug and Play) devices. PnP devices include mice, display monitors, keyboards, memory cards, USB flash drives, and hard drives.
Speaking of this failure, users reported the following problems:
Problem with PNP devices Windows 10 – There are many problems with PNP devices that can occur, but if you encounter any of issues, be sure to try some of our solutions
PNP blue screen – PNP error will always show a blue screen and force your PC to crash; your drivers most likely cause this, so be sure to update them
BSOD PNP_DETECTED_FATAL_ERROR – This is a BSoD error, and like many other BSoD errors, it can be hard to solve; however, this issue is often caused by software and driver issues, so you might want to remove specific applications and check if that helps.
PNP_DETECTED_FATAL_ERRORNorton, ntoskrnl.exe – Many users reported that Norton antivirus caused this issue on their PC; if that’s the case, remove Norton from your PC and install a different antivirus instead
PNP_DETECTED_FATAL_ERRORafter Windows update – Sometimes you can encounter this error message after a Windows update; if that’s the case, you need to find and remove the problematic update from your PC and check if that solves the problem
How do I fix the PNP_DETECTED_FATAL_ERROR?
Before trying these fixes, do the following:
Unplug and replug your peripherals
Reboot the device
Ensure that there are no problems with your hardware, like the RAM, for instance
In many cases, these are simple ways to undo common computer issues.
1. Use a repair tool
BSOD errors are hard to troubleshoot manually. Fortunately, there are dedicated tools that will find the cause and possible solutions to computer errors, including blue screens.
2. Update Windows 10
Press the Windows Key + I to open the Settings app.
When the Settings app opens, navigate to the Update & Security section.
Now click the Check for updates button.
Windows will now scan for available updates and download them automatically in the background. Once the updates are downloaded, they’ll be installed as soon as you restart your PC.
3. Remove your antivirus
On Windows search, type the control panel and select Uninstall a program.
Click on your antivirus from the app list and select the Uninstall button.
Follow the wizard to complete the uninstallation.
If removing your antivirus solves the problem, you should consider switching to a different antivirus solution. We recommend you use any of these best antiviruses for Windows 10.
You should also follow the same steps to remove any problematic software. You may automate the process using any of the best uninstaller software.
Windows 10 requires drivers to recognize your hardware. If a specific driver is out of date, you won’t be able to use that hardware, and you’ll get a BSOD error such as PNP DETECTED FATAL ERROR.
Updating drivers is pretty simple, and you can do it simply by visiting your hardware manufacturer’s website and downloading the latest drivers for your device.
Many users reported that the Intel DPTF Manager driver was causing the issue. If you have this driver, we advise you to roll back to the previous version and check if that solves the problem.
Downloading all drivers manually can be a long and tedious process. Therefore we strongly recommend you use a tool that allows you to update all your drivers automatically.
Restart your computer a few times during the boot sequence to start Automatic Repair.
Select Troubleshoot.
Choose Reset this PC, and select Remove everything. If you’re asked to insert Windows 10 installation media, do that.
Select only the drive where Windows is installed and click the Reset button.
Follow the instructions and wait for the reset process to complete.
The PNP-detected fatal error could cause specific problems, but it can be easily fixed by updating your drivers or removing your antivirus software.
The solutions discussed should come in handy for problemS with PNP devices on Windows 10, the stop code PNP detected fatal errors, and PNP detected fatal errors on different manufacturers and platforms like Dell, Virtualbox, HP, and Intel devices.
Nothing changes if you already have a personalized domain email address on Outlook.com, but just as long as the email is set up in Outlook. Just a quick note, you won’t be able to complete the email setup on a mobile web browser, you’ll need to set it up on a PC.
“Starting November 30, 2023, Microsoft 365 Personal or Microsoft 365 Family subscribers will no longer be able to create a new personalized email address associated with their Outlook.com mailbox.
After November 30, 2023, Microsoft 365 Personal or Microsoft 365 Family subscribers who remove their personalized email address from their Outlook.com account will not be able to add it back. The feature will no longer be available to you.”
If you are a Microsoft 365 Personal or Family subscriber and want to create a custom Outlook.com email address after November 30, 2023, you will need to upgrade to a small business plan, like M365 Business Basics.
M365 Business Basic works out to about $432 a year for 6 accounts ($72 a year per account), which costs substantially more than the $99 a year offered by a M365 Family account. However, if you run a one-person office, it’s almost the same price for a M365 Personal ($69) as it is for M365 Business Basic ($72).
Set up a personalized email address
Until November 30, 2023, you can still add personalized email addresses to M365 Personal and Family accounts, but you have to act fast. Here’s what to do.
Under Personalized email address, select Get Started.
Add a domain on Business Basic
Microsoft 365 Business Basic offers the best value compared to other plans because it provides businesses with professional email, cloud file storage, and access to the web and mobile versions of your favorite Microsoft/Office apps.
When you purchase M365 Business Basic, you have the option of using a domain you already own or buying one when you sign up. Here’s what to do.
If your domain registrar uses Domain Connect, Microsoft will automatically verify your domain and connect your Microsoft 365 account.
Still need help?
If you run into issues trying to set up your personalized email address, Microsoft is still working on adding descriptive error messages and is open to suggestions on how to fix this known issue. Here are a couple of things you can do.
1. Go to https://account.live.com/names/Manage. If you have more than 10 aliases on your Microsoft account, you will need to remove some before you can add a personalized email address.
2. Go to https://account.microsoft.com/security and click UPDATE INFO. If the alias that you are trying to add is already listed on this page, you will need to replace it with a different address before you can finish creating your personalized email address.
Microsoft notes that you might not be able to create a personalized email address for a child account, but they are working to fix this issue. Microsoft 365 subscribers can check out the new YouTube channel aimed at helping M365 for small business owners.
So what do you think about Microsoft’s decision to get rid of custom domains? Let us know in the comments!
Today, Microsoft announced that Teams progressive web app (PWA) for Linux has reached broad availability. If you are using either Microsoft Edge or Chrome on Linux, then you will be able to access the new Teams PWA experience.
“Linux customers who rely on Microsoft Teams for collaboration and communication needs told us they want the full richness of Teams features available for their users in a secure way. This can now be achieved using the Teams PWA”. says Microsoft.
With this in place, Linux users will be able to get the latest Microsoft Teams features quicker as it closes the gap between the Teams desktop client on Linux and Windows.
What’s more, Linux users will now get to access more features such as gallery view, reactions, the raise-a-hand feature in meetings, and custom backgrounds. On top of that, the PWA experience will also provide you with desktop-like app features like system notifications for chat and channel and a dock icon with respective controls.
While on the Edge browser, the PWA for Linux can be used with Conditional Access configuration and applied through Endpoint Manager which will in turn allow users to access the Teams web application securely.
Generally, Ethernet cable connections are widely known for being secure. However, many users complain about their Ethernet disconnecting on Windows 7.
This can be a very frustrating issue, as it can disrupt your internet connection. If you are using a Dell system, you can check our guide to Ethernet not working through the Dell dock.
What causes Ethernet to disconnect on Windows 7?
There can be many reasons for your Ethernet to disconnect randomly. It could be due to driver issues or hardware problems. Let’s take a look at each of these possibilities one by one.
Overload on the network – Multiple devices connected to the same network utilize a significant amount of bandwidth that affects Ethernet connection.
Faulty hardware –In case you have a faulty Ethernet card, it could be causing the issue.
The cable may be the culprit – The loose or damaged cable between your computer and the router can cause an intermittent connection.
Configuration settings – Invalid configuration settings can also be the reason for your Ethernet to disconnect on Windows 7 because they can disrupt the connection.
Now that you are well aware of nuisances that result in the disconnection of the Ethernet on Windows 7 let’s move on to the possible solutions that can help you fix this issue once and for all.
How do I keep Ethernet from disconnecting on Windows 7?
Before moving on to the detailed solutions, we suggest you check the basics to resolve the problem. Try these workarounds:
Check your cable connection and make sure that it is not loose and properly plugged in. Also, check if the cable is damaged or not. If yes, then replace it.
If you have tried out all the above-mentioned preliminary checks, yet the issue persists, move on to the detailed solutions given below.
1. Run Troubleshooter on Network Adapter Settings
Type Troubleshooting in the search bar and click on it to open up the application.
Now, click on the View all option, present inside the left panel.
Scroll down and click on Network Adapter.
In the Network Adapter window, click on Advanced.
Check the box next to Apply repairs automatically, then click on Next.
Then, the troubleshooter will initiate. It might take a few minutes to run, and you will receive a comprehensive report in the end.
Running the troubleshooter on network adapter settings is likely to resolve the issue of the Ethernet getting disconnected at random intervals. In case you are still experiencing the said issue, try out further solutions given below.
2. Tune the Power management settings for the network adapter
Type device in the Search bar, and click on Device Manager to open it.
Inside the Device Manager window, double-click on Network adapters to expand it.
A popup window will open up. Enter the Power Management tab within the popup window.
Within the Power Management tab, uncheck the box present beside Allow the computer to turn off this device to save power.
Lastly, click on OK to save the changes that you just made.
At times users have specific power-saving options enabled, which cause the Ethernet to get disconnected randomly.
In this case, altering those power-saving settings for the Ethernet adapter will for sure resolve this issue. If you can’t seem to spot the Power management tab, you can check our guide to fix the Device Manager missing Power management tab.
3. Don’t use a Proxy server
Type Internet Options in the search bar, and open up the application.
Enter the Connections tab present within the Internet Options window.
Now click on the LAN settings option present at the bottom left corner.
Deselect the box present beside Use a proxy server and click on OK to save the changes.
Often proxy servers interrupt your Ethernet connection by blocking your PC’s IP address from servers you usually connect to.
Hence, not making use of proxy servers is one great way to ensure a smooth Ethernet connection that won’t disconnect from time to time.
4. Turn off Windows Firewall
Click on the Start button and then on the Control Panel to open up the application.
Then, click on Windows Firewall.
Inside the Windows Firewall tab, click on Turn Windows Firewall on or off, present in the left panel.
Next up, make sure both radio buttons of Turn off Windows Firewall (not recommended) are marked, and then click on OK to save changes.
A firewall does a great job in terms of providing protection against malicious spyware however, at times, it might interrupt the Ethernet connection on your PC.
In this case, disabling the Windows Firewall is your best bet. Switching off the Windows Firewall will enable you to enjoy a seamless Ethernet connection on Windows 7.
5. Add administrative and local services via Command Prompt
Click on the Start button, type Command Prompt and click on it to open up the application.
Copy and paste the following command, then press Enter. net localgroup Administrators /add networkservice
Then, again copy and paste the following command, then press Enter. net localgroup administrators /add localservice
Lastly, type the following command and then press Enter. exit
Once you have run the commands mentioned above, simply restart your computer to see if you have managed to fix the Ethernet connection.
Running the commands mentioned above on Command Prompt is likely to result in a smoother and more secure Ethernet connection on Windows 7.
We hope that this guide helped you in resolving your problem. If you have any further questions, please let us know in the comments section below.
Windows 11 removed the Search bar from Taskbar in order to optimize the user interface. However, it seems that we’re getting something similar in form of a Windows 11 desktop search bar.
You might not have noticed it for a while, but the Redmond-based tech company is still trying to push as many users as possible into defaulting to Edge when it comes to browsers.
The search bar works as an address bar, and it allows you to visit any page or search the web right from the Desktop.
Once you enter your search term, the Edge browser will automatically open and search for your query.
Thus, if you aren’t a fan of the idea of a new way to browse the web but do not appreciate Microsoft forcing you to use Edge, voice your concerns in the Feedback Hub.
How do I put the search bar on my desktop Windows 11?
Use ViveTool
In order to enable your desktop search bar, first of all, you need to install the Windows 11 Build 25120 that we’ve highlighted above. That is a Dev build so you need to be an Insider.
Next, you will need a tool called ViveTool and we’re going to show you how you can use it and get the Windows 11 desktop search box.
If you’re seeing the message There might be a problem with the driver for the WiFi adapter in Windows 10, it means your network adapter isn’t functioning properly. This guide offers fast and effective ways to fix WiFi adapter driver issues and get your internet back online.
How do I fix There might be a problem with the driver for the WiFi adapter?
Choose Troubleshoot. In the right pane, select Internet Connections and click Run the troubleshooter.
Follow the on-screen instructions to complete the process.
2. Update your drivers
1. Right-click the Starticon, then select DeviceManager from the list.
2. Expand the Network adapterssection.
3. Right-click the wireless driverand select Update driver.
4. Click the Search automatically for drivers option.
5. Wait for the process to finish up and reboot your PC.
A great fix for the There might be a problem with the driver for the WiFi adapter message is to update your drivers. The easiest way to do this is via Device Manager, as shown above.
If you want to prevent driver-related issues in the future, we advise you to use professional driver updater software.
A dedicated tool will automatically find outdated drivers and update them, so if you want your PC to run smoothly, be sure to try this application. It will also keep your system safe from permanent damage by manually downloading and installing the wrong driver versions.
Right-click your network adapter and choose Properties.
Locate AVG network filter on the list and disable this feature.
Users reported this problem with AVG antivirus and Kaspersky, and in order to fix the issue, it’s advised to disable AVG network filter feature. If that doesn’t help, you might have to remove your antivirus software.
5. Make sure that the necessary services are running
Press Windows Key + R and type services.msc. Click OK or press Enter.
Locate WLAN AutoConfig service and double-click it.
Head over to the Dependencies tab and check all the services on the list. Memorize or write down all the services.
Now go back to the Services window and make sure that all these services are running.
In addition, be sure to set their Startup type to Automatic. Keep in mind that you need to do this for all services from Step 3.
Look for Show more restore points option and enable it.
Select the desired restore point and click Next.
Follow the on-screen instructions to complete the process.
There might be a problem with the driver for the Ethernet / Wi-Fi adapter message can be quite problematic, but we hope you solved the issue using one of our solutions.
If you’re looking for the best browser for low-end PCs, you’re in the right place. You no longer have to worry about slow performance and heavy resource usage.
We found the lightest browsers that won’t hog your resources. Find below all details about speed, RAM usage, as well as features so you can have all the info you need to make the best choice.
What are the best browsers for old PCs?
Here’s a quick look at our top 5 contenders. If you want more details and additional suggestions, we got them in the rows below.
Opera One is perhaps the greatest browser to use on your old Windows PC running Windows 7 and later versions for fast page-loading speeds and advanced AI tools.
Useful features:
Adblocker that loads webpages up to 90% faster
Free VPN included
Keyboard shortcuts instead of pointing and mouse-clicking
Tracker blocker that prevents data collection
Intuitive and distraction-free browser experience
It is optimized to consume as few resources as possible. It blocks ads which reduces website loading speed by a lot.
Plus, with a VPN built into the browser, you can ensure that your IP will not be tracked across the web, and at the same time will allow you to act region-restricted content without issues.
NOTE
Keep in mind that Opera One officially ended support for older Windows OS including XP and Vista. You may have to download older versions that aren’t as secure as the latest development.
UR Browser is a highly versatile browser that’s perfect for old computers. In addition, it packs many modern features that will help you quickly and safely surf the Internet.
Main features:
Your data is not shared with Google
The browser relies on privacy-friendly search engine Qwant
Built-in ad blocker
You appear as a different user on the Internet
The built-in VPN fully encrypts your connection
This browser loads webpages faster than any other browser you used on your good old PC.
UR Browser doesn’t load any trackers or ads. As you all know, ads and cookies often slow down your browser. This issue is even more prevalent on old computers.
UR-Browser also blocks dangerous websites that may install malware on your PC. In addition, automatic HTTPS redirects and the built-in virus scanner will stop virtually any cyber threat that may target your PC.
UR Browser
The UR Browser is an ideal choice if you still use an old computer. Third parties won’t be able to profile you.
K-meleon browser’s UI design is comparable to Firefox, and the software has extensive customization options for its toolbars, menus, and hotkeys. This makes it a great option to use on your outdated PC.
Main features:
Highly extensible
Very low RAM impact
No malware and adware
It runs on Windows 95, XP, Vista, and other platforms that predate Windows 7. The software has a recommended 256 RAM system requirement.
You can easily change the skin, buttons, toolbar, and even the menus from this software, not only making visual changes, but also an improvement in usability.
Pale Moon is a browser forked from Firefox’s source code. This is a stripped-down version of Firefox that runs on Windows XP and Vista.
Useful features:
Independent from Mozilla and Google
Supports all web standards in existence
Open-source
Supports complete themes
This lightweight browser has its own add-on ecosystem, and even though the classic Firefox add-ons can work, there might be compatibility issues here and there.
The browser also shares many of Firefox’s customization options for tabs, page content, etc.
If you find that this is not a priority for you, then you won’t regret giving Pale Moon a try.
The latest Firefox versions are not supported on older versions of operating systems anymore. However, this is still the best browser for slightly outdated Windows 7 desktops or laptops.
Other useful features:
Strong privacy settings
Very good processing speeds
Cloud backup services
Included screen-capture tool
Great mobile features
Stability is key for this browser, while the customization features ensure that you can make this software feel like your own with just a few clicks of the mouse.
Mozilla claims that Google Chrome hogs 1.77x more RAM than Firefox, and if you used Chrome for more than a few days, your system has felt its effects. So where does that leave Firefox, one might ask.
When it comes to add-ons, Firefox offers thousands of options that include a variety of elements, from functionality-related enhancements to operational improvements.
Midori (green in Japanese) is a lightweight browser that is not known very well across the web but offers a low impact on system resources and very good speeds as well.
Other useful features:
RSS support
Spell checker included
Remembers tabs open in the previous session
Font and display customization
Midori’s developers have designed this software to be a streamlined alternative to more bloated browsers. While this browser packs less than alternative browsers, it has only 37 megabytes.
If you’re looking for a different kind of browser, then Mypal Browser might be just what you need. The browser is designed to be compatible with older operating systems, and it still works on Windows XP.
Main features:
Mature fork of Firefox
Uses the Goanna rendering engine
Support for Pale Moon and legacy extensions
Perfect for older PCs and operating systems
There are two versions of this software, one based on Firefox Quantum, and while this is the more modern version, it’s unstable but it still works.
The other version is based on Pale Moon, but the development of that version has been abandoned, so while it works, it might be out of date.
Mypal Browser uses the Goanna rendering engine, thus ensuring maximum performance, even on older hardware.
The browser supports Pale Moon extensions, as well as legacy Firefox extensions that were released before Quantum. Customization is also a big part, and every part of the interface is customizable.
Overall, this is a great browser, especially if you’re on an older PC and you haven’t upgraded yet to a modern operating system.
Falkon is a lightweight web browser and it’s available on multiple platforms. The software is using QtWebEngine for rendering.
Main features:
Available on multiple platforms
Uses QtWebEngine
Lightweight
Available in portable version
Regarding the features, you can find all the standard features, such as bookmarks, history, and tabs. If you want, you can show your bookmarks or browsing history in a sidebar, which is a nice touch.
Falkon can be installed system-wide or you can install the portable version and use it to run it from a flash drive.
It’s worth mentioning that the software uses DuckDuckGo as the default search engine, so your search queries will remain private and secure from third parties.
The browser has limited extension support, so you probably won’t find your favorite extensions available. Overall, it’s a great browser, but it has a couple of limitations.
Another lightweight browser that is worth checking out is Lunascape Orion. The software uses a special technology that delivers faster startup and JavaScript operations.
Main features:
Multiple Rendering Engines
Fast Startup and JavaScript
Add-on Compatibility
Floating Sidebar
Split-Screen Tab Views
Each engine is configurable, so you can access the similar settings that you have available on other browsers. In addition to rendering engines, the software supports various add-ons.
It allows you to use Firefox, Internet Explorer, and Lunescape add-ons. Thanks to the floating sidebar, you can run multiple Gecko add-ons simultaneously and display them separately from the browser.
If you’re looking for a multi-platform web browser, SeaMonkey is a perfect choice. The software works on all versions of Windows, starting from Windows 7.
Other useful features:
Lightweight themes
HTML editor
Web development tools
IRC chat
However, you’re not limited only to Windows, and you can use it on Mac OS X 10.9 or newer and Linux. In fact, it’s a great alternative to conventional explorers if you’re looking for a lightweight browser for Mac.
Regarding the requirements, this browser is quite lightweight, and it needs 1GB RAM and 800MHz CPU.
Extensions are also available, allowing you to customize your browser with additional features. Thanks to the Data Manager feature, all your data such as cookies, permissions, preferences, passwords, and autofill data will be located in a single place.
We have to mention feed detection which allows you to easily subscribe to certain websites. Lastly, there’s a built-in email client, so you won’t have to use any third-party tools.
Overall, this is a pretty versatile web browser with a wide array of features, so it’s worth checking out.
Slim Browser is designed to be fast and responsive while delivering an ad-free browsing experience. In addition to blocking the ads, the software also offers extensive tracking protection.
Useful features:
Instant photo framing and upload
One-click Facebook integration
Web page and text translation
Weather forecast
The browser supports customization via extensions, and it’s compatible with all Firefox extensions, so you can enhance it any way you want.
To make accessing your favorite sites faster, the software supports URL aliases, so you can open the desired website simply by typing a few letters.
You can also find other interesting features, such as a web page screenshot tool that allows you to take a screenshot of the whole page or just one of its segments.
To answer this question, our team of testers has downloaded and installed all of the browsers we will cover in this article.
Each browser variant has been benchmarked using the Base Mark Web 3.0 test while using the same system, with the same configuration and number of running programs.
To understand the results, a higher score value implies better browsing speeds for the browsers presented below.
Browser
Benchmark Score
1. UR Browser
1413.48
2. Opera One
835.6
3. Falkon
800.6
4. Slim Browser
675.43
5. SeaMonkey
658.35
6. MyPal
609.81
7. Maxthon
581.35
8. Firefox
567.65
9. Pale Moon
533.02
10. K-Meleon
332.91 - Browser wasn't able to run WebGL 2.0 Test
11. Lunascape Orion
No benchmark tests chould be run
12. Midori
No benchmark tests chould be run
At the top of our list, we have UR Browser with a benchmark score of 1413.48, making it the fastest browser for all PCs and an excellent option for low-specced PCs worldwide.
Following close behind, we have Opera One with a score of 835.6, making it the second-fastest browser for PCs with low system resources.
Another essential factor to consider is your PC optimization, which can also increase the usability of all apps, including the browser.
What browser uses the least RAM?
Opera One takes the cake and has proven to have the least impact on your resources. If you’re wondering which browser is best for 1GB RAM, you’ll be pleased to know that it only uses around 600MB.
The tests that we concluded were made using the same laptop while also playing the same youtube video at the same quality (720p).
Here are the results:
Browser
CPU Usage
Memory Usage
Opera One
0.7 - 1.0 %
400- 620 MB
UR Browser
0.8 - 2.0 %
657 - 651 MB
Falkon
2.3 - 3.1 %
387 MB
Slim Browser
1.9 - 2.8 %
410 - 420 MB
SeaMonkey
2.2 - 3.1 %
336 - 353 MB
Maxthon
2.2 - 3.1 %
290 - 336 MB
Firefox
1.4 - 2.3 %
415 - 478 MB
K-Meleon
1.4 - 2.5 %
160 - 170 MB
Lunascape Orion
2.2 %
259 MB
Midori
2.4 - 3 %
355 MB
Pale Moon
1.5 - 2.9 %
539 MB
Mypal
2.6 - 3.1 %
569 MB
As you can see from the tests we performed, the browser that stands out with the most negligible impact on system resources is Opera One, using only 0.7 to 2.0% of the CPU and around 600MB.
This makes it the best browser for 1GB RAM PCs. It’s also the best browser for 2GB RAM PCs, for that matter.
In the same idea, this browser will also perform perfectly and offer you greater browsing speeds on a 4GB RAM system as well, making it the best browser for 4GB RAM laptops and PCs.
Close behind we have UR Browser that uses 0.8-2.0 % of the CPU’s power, and 650MB memory usage. This option could be fit to run on a 1GB RAM PC but loses in front of Opera One because of the security and stability differences.
The rest of the browsers, even if some are more lightweight than others, have shown varied results, so the decision might come down to the exact circumstances you find yourself in.
Taking the system usage data for each of these browsers and combining this information with the results of the benchmark tests, we can come to a set of very specific conclusions:
These are the best browsers for laptops or desktops with less than 4 GB RAM and CPU specifications with lower clock speeds.
Summary
As you can see, a few browser options can increase your PC’s usability, no matter how old. The best part is that some have great design and security features, so you won’t go missing in these departments.
The best bet on all fronts is the UR Browser, followed closely by K-Meleon and Pale Moon.
The rest of the options we presented are more resource-heavy and could cause problems on an old system, but the extra features could prove helpful if they work on your system.
These browsers are compatible with a broader range of Windows platforms than most software and won’t hog a considerable percentage of system resources, even on outdated desktops and laptops.
You can also explore modern lightweight options by checking this guide on alternative browsers for Windows 11 which highlights efficient tools that work smoothly even on modest hardware.
Encountered an error, A running process may be interfering with the correct operation of AoE2 DE, while Playing Age Of Empires 2: Definitive Edition? You are not alone; it happens to the best of us.
This guide will discuss how to fix this issue so you can play your favorite real-time strategy game without any hindrance. But first, let us know why this error occurs in the first place.
Why does a running process may be interfering with the correct operation of AoE2 DE error occur?
Users usually face this issue because of the antivirus software installed or security settings enabled on their computers. The problem could also be due to game overlays or active processes.
Security tool: Sometimes, your antivirus software or Windows Defender flags some associated files of the game as a threat and tries to stop them from running.
Active processes: Some unnecessary processes may use up the RAM needed to run the game smoothly, hence the issue.
Game Overlays:Game overlays can be a great way to connect, read chat, and view events in your Activity Feed, but it is not always optimized for all the games. Therefore, it could make your game freeze or even crash.
What can I do if a running process may be interfering with the correct operation of AoE2 DE error?
Before jumping into serious troubleshooting, here are a few things you can do to resolve the problem:
Restart your computer.
Ensure your Windows is up to date.
Disable all unnecessary active processes before running the game.
Try to run steam/the game with admin rights, as the issue could have occurred because the game didn’t have enough permissions to run.
If you have an antivirus installed on your computer, you must add the whole game installation folder to the exclusion list.
Steps to whitelist a folder can be different for every antivirus tool; we have mentioned adding a folder to the exclusion list for Avast for you.
Launch Avast and go to Settings.
Select General> Exceptions.
Go to File Paths> Browse.
Locate the game installation (.exe) file and add it.
Click OK and turn on real-time protection.
3. Disable the Antivirus
If adding an exception doesn’t work, try disabling the antivirus while you play the game. Here we have mentioned the steps to disable Avast for you:
Go to the system tray and click the Avast icon.
Click Avast shields control, you will get options to disable. Choose accordingly.
Click OK to confirm the action. The antivirus will be disabled for the chosen time. Please make sure you enable antivirus on your computer once done playing the game
So, in this way, you can fix a running process may be interfering with the correct operation of AoE2 DE error.
You can reach out to the Age of Empires support team if the issue persists. They will ask you to provide specific details, including your antivirus software’s name, DxDiag, mdmp file, and recent crash logs. If you are unsure how to find this information, you can check out this support article from the Age of Empires website.
If we have missed any solutions that helped you resolve the issue, please mention them in the comments below.