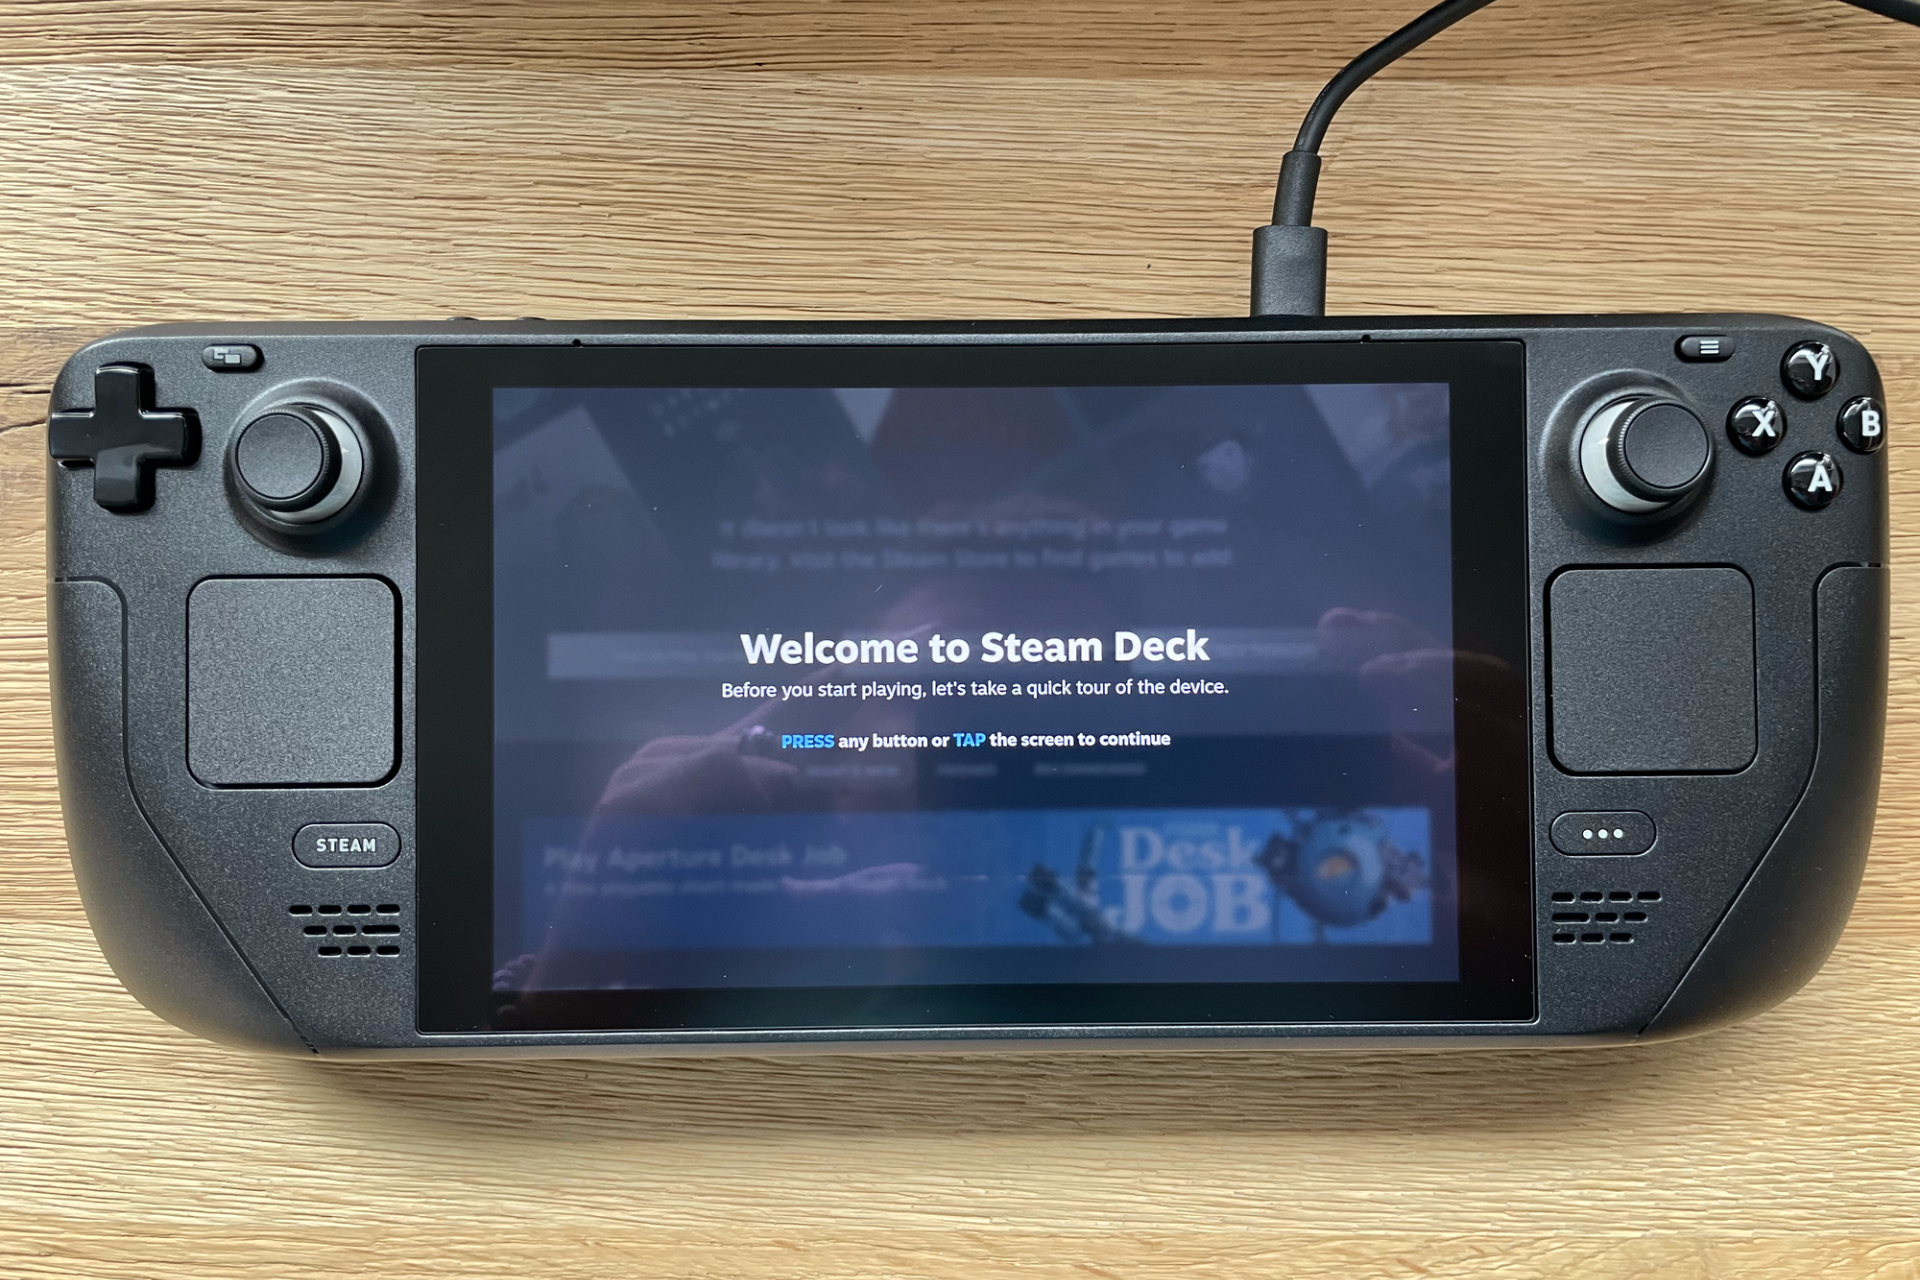
If your Steam Deck can’t reach Steam servers, you won’t be able to play any games or download new content. Luckily, there’s a way to fix that issue.
Why can’t I connect to Steam servers?
Issues with your device or Internet connection will cause this problem. Sometimes there might be an issue with the servers that is preventing the connection.
How do I fix my Steam Deck if it can’t reach Steam servers?
1. Restart the Steam Deck
Press and hold the Steam Deck’s power button.
Select Restart.
Try connectingagain.
2. Enable Developer Mode
Go to Settings.
Select the System tab and then activate the Enable Developer Mode option.
3. Disable Wi-Fi Power Management
Go to Settings.
Select the Developer tab, then deactivate the Enable WiFi Power Management option.
Select Restart now.
Can I use the Steam Deck without Wi-Fi?
If the game you have in mind always requires an Internet connection as you play it on Steam on your PC, it will require the same thing on SteamDeck either.
Of course, you can the device without the Wi-Fi, but what you can do on the Steam Deck will be limited. To learn more, we have a guide on how to use Offline Mode on Steam Deck, so don’t miss it.
Even the PC version of Steam has such problems, so the fact that the Steam Deck also has the Can’t sign in issue shouldn’t come as a surprise.
Because you are a Windows user, the Network Credentials screen shows as a security box that requests a login and password. The network location’s settings influence whether or not functions like file and printer sharing, network discovery, and public folder sharing are enabled or disabled.
Windows 10 and Wi-Fi seem to have a dispute of their own. Firstly, users reported a bag of issues concerning Wi-Fi after a major update, and now, once the issue is dealt with, some of them can’t force Windows 10 to preserve the network credentials. It seems that Windows keeps forgetting network credentials every time users reboot the system.
Typically, Windows will remember these credentials and will not ask for them again after the first time. As a result, in this case, the Remember my credentials option in the Windows Security prompt appears to be faulty. Typing the credentials for the same connections again and over may be tedious for anybody.
The default storage place for the credentials is Windows Vault, as indicated by the icon towards the top of the window. This is merely a general name for your hard drive’s hidden Credentials folder.
This sounds like a minor annoyance but it’s actually quite hard to address and it requires an in-depth troubleshooting approach. Luckily, we found some viable solutions and presented them below.
In case you’re having a hard time with Windows 10 remembering network credentials, make sure to check them out.
Quick Tip:
A simple and fast solution it’s to start using a smart password manager that will autosave and autofill your credentials whenever needed. A great tool we use is NordPass for its amazing security.
With NordPass you no longer have to remember passwords. Store an unlimited number of passwords, and securely keep card information and other sensitive data.
NordPass
Great security to keep all your passwords safe in one place.
Let’s start with the simplest solution for the issue at hand. Reset your router in order to clear the possible halt. If you’re frequently switching networks, your system is freshly installed, or you changed your SSID name and security measures lately, there’s a good chance that the system isn’t able to preserve your credentials.
This can be resolved in a simple manner, by simply forgetting the established network and re-establish it later.
This, of course, applies to the Wireless network and the dedicated password appointed to it. Here’s how to reset the troubling Wi-Fi network and resolve the issue at hand:
Click on the Wireless icon in the Taskbar’s Notification area.
Right-click on your Wi-Fi network and click Forget.
Restart your PC.
Open the list of available Wi-Fi networks and click on your network.
Check the ”Connect automatically” box and click Connect.
Restart your PC again and look for improvements.
On the other hand, if Windows 10 won’t preserve your Wi-Fi password after some time, we advise you to continue with the below-enlisted alternatives.
2: Install proper Network adapter drivers
We all know how many issues Windows 10 users experienced due to faulty drivers. Windows 10 will provide you with the latest generic drivers suiting your Network adapter.
However, they might not suffice, taking into consideration that the older Wi-Fi protocols won’t work as intended with the latest routers and their protection protocols. So, you’ll need to obtain drivers which are, preferably, provided by the OEM.
If you’re not sure how to download, install and configure proper network drivers on Windows 10, follow these instructions closely:
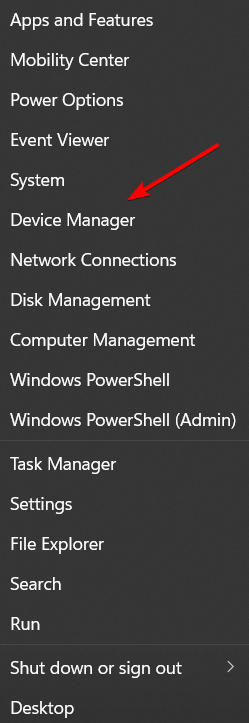
Right-click on the Start menu and open Device Manager.
Navigate to Network adapters and expand this section.
Right-click on your WLAN (Wireless) adapter and Uninstall it.
Restart your PC and open Device Manager again.
The drivers should install automatically or, if they won’t, click on the ”Scan for hardware changes” at the Toolbar.
Instead of that, you can also navigate to the official support site and download the proper WLAN drivers.
Make sure you have the most up-to-date versions of your drivers. There are third-party solutions that can do this automatically for you.
A professional tool like Outbyte Driver Updater is an efficient solution for automatically updating any type of Windows driver. Otherwise, it takes time and requires significant knowledge of the drivers you’re looking for.
You may rely on Outbyte Driver Updater to make such enhancements to ensure a proper update with the most recent Network adapter drivers because it can also back them up and even repair corrupted driver locations.
3: Check your router
Now, let’s move from the system settings and inspect the router settings. There are various things that can inflict constant prompts, asking for your credentials. But, the main suspects are security protocols and SSID’s name.
Namely, certain media access wireless sets support only certain security protocols. This implies that you won’t be able to use, say, 802.1 set with the WPA2 encryption.
A mere accessing your router settings opens the opportunity for a few troubleshooting steps:
Switch between the security protocols: from WPA/WPA2 to WEP and vice versa.
Change your SSID name. Don’t use scarce Unicode letters.
Update your firmware.
Eventually, reset your router to factory settings.
If you’re not sure how to access your router, make sure to google it. There are various IP access and passwords which allow you to enter the advanced router settings. And they’re always distinguished one from the other.
4: Inspect Credential Manager
All your Windows credentials, including the Wi-Fi ones, are stored in a secure place called a Credential manager. In there, you can manage them and delete them. And that’s just what we’ll need to do while troubleshooting the ”Windows 10 forgets network credentials” error. Also, make sure that, in case you’re using a server, your domain name is properly inserted.
Now, in order to access the Credential Manager, you’ll need administrative permission. Once you’re there, you can delete your credentials and re-establish them again.
Follow these instructions to delete Windows 10 Wi-Fi credentials in the Credential Manager:
In the Windows search bar, type Credential and open Credential Manager from the list of results.
Select Windows Credentials.
Select Wi-Fi-related credential input and expand it.
Click Remove underneath it and restart your PC.
Configure the Wi-Fi connection again and look for changes.
Besides the password itself and related credentials, there might be a problem with the dedicated service, too. the WLAN configuration service is the one we rely on to auto-configure and preserve Wi-Fi-related options.
Like every other major service, this service is also prone to malfunctions, meaning that it can bump into a halt. Also, due to some kind of misuse or virus infection, it can stop working as intended.
Besides that, you can delete all preserved settings stored in the system partition. By doing so, you should be able to overcome the halt usually imposed by the configuration failure or a faulty update.
Here’s what you’ll need to do:
Press Windows key + R to summon the Run elevated command line.
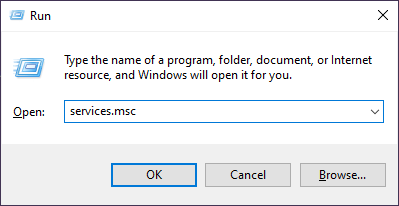
In the dialog box, type services.msc and press Enter.
Navigate to WLAN AutoConfig and Wi-Fi Direct Services Connection Management services and stop both of them.
Now, don’t close the Services window and navigate to the system partition. Most of the time is C: so this is the exact path
C:\ProgramData\Microsoft\Wlansvc
If you can’t see ProgramData, make sure to enable Hidden items by selecting View from the Toolbar and checking the ”Hidden items” box.
Once you’re there, delete all content from the Wlansvc folder with the Profiles as the only exception.
Navigate to Service again and start both WLAN AutoConfig and Wi-Fi Direct Services Connection Management services.
Restart your PC and look for improvements.
6: Disable Secure Boot and third-party antivirus tools
Finally, if none of the previous steps worked for you, we see only 3 options remaining (a clean reinstallation is not one of them for obvious reasons):
Disable Secure Boot in the BIOS/UEFI settings.
If your antivirus has a security tool that oversees Wi-Fi connection, disable it.
Update your Windows 10 and hope the resolution is provided.
The Secure Boot is a safety measure that prevents a computer from loading untrusted files. At the first look, this doesn’t have anything to do with the system’s inability to preserve the Wi-Fi network credentials.
However, certain users managed to resolve the issue by disabling it. It should be found in the BIOS settings menu, somewhere within the Security section. It’s worth a try, even though we can’t confirm whether Secure Boot affect the error or if something else is at hand.
If you’re not sure how to disable it, follow the steps we provided below:
In the Windows Search bar, type Recovery and open Recovery options.
Under the Advanced Startup, click Restart now.
Select Troubleshoot and then Advanced Options.
Choose UEFI Firmware settings and click Restart.
Now, you should roam around until you find Secure Boot and disable it.
Start your PC and the error should be gone.
Wrap-up
That should be it. In case you’re still unable to fix your issue, we advise you to send a ticket to Microsoft and present your problem to them. It’s a long shot, but a step forward towards the resolution, nonetheless.
In case you have questions or suggestions regarding the ”Windows 10 forgets network credentials” error, make sure to post them in the comments section below.
Are you looking for the best Steam Deck games to play in 2022? Valve has verified several thousand games officially for this device. But, in this article, we will feature the best ones.
Steam Deck is a newcomer in the console world for gamers who wants portability. Like Nintendo Switch, it has a small size. But, in terms of functionalities, it is ahead.
Unlike Nintendo Switch, Steam Deck allows you to play PC games on a small portable device, and if necessary, these can be played on a bigger screen as well.
Can you play any games on Steam Deck?
You can access all of the games available on your Steam library from a Steam Deck device. Technically, yes. You can play any game on this console thanks to its fantastic hardware capacity.
However, not all games will work well because of many limitations. Some games will indeed work well. But, there are games that don’t run smoothly on a mid-level gaming PC. These may not work perfectly on Steam Deck, either.
So, for your convenience, we have prepared a list of the best Steam Deck games that will work great on this device and can give you great enjoyment.
Can Steam Deck run AAA games?
Yes. In fact, Steam Deck can run some AAA games really well and better than expected. Though some titles struggle to deliver a smooth experience, most modern AAA ones still run perfectly.
BlueTwelve Studio developed this amazing indie adventure game called Stray. After getting released in 2022, it has gained a lot of popularity among a class of gamers.
Currently, Stray is one of the best Steam Deck games to try out. In this game, you will play as a Cat who will have to escape a walled cyber-city by unlocking the mystery and avoiding danger.
The Stardew Valley is one of the best indie simulation role-playing games for Steam Deck. Eric Barone is the developer, and ConcernedApe is the publisher of this fantastic game.
Here, you will have to grow your inherited farm from your grandfather. While playing, you will have to face a lot of puzzles and challenges. Overall, it is a very enjoyable and playable game on a device like Steam Deck.
If you like zombie survival games, you will like Project Zomboid. The British Canadian independent developer Indie Stone has developed this open-world indie isometric horror survival game.
In this game, you will play as a survivor. You will have to build defenses and survive. There is a lot of fun in this game which is very much playable on Steam Deck.
Who doesn’t know about Apex Legends? This free multiplayer battle royale-hero shooter game has been developed by Respawn Entertainment and published by the famous Electronic Arts.
As it is a battle royal game, you know what to do. You will have to fight with competitors to earn reputation, fame, and glory. Recently, it has been verified by Valve as Steam Deck optimized.
If you want to enjoy a modern high-end racing multiplayer game on Steam Deck, F1 22 is indeed one of the best choices. This is a fantastic game published by EA Sports and developed by Codemasters.
You will have to race with other players in this game. There are a lot of elements like creating a team, career mode, race head-to-head, etc. All of these indeed will give an excellent experience on Steam Deck.
Terraria is a multiplayer action-adventure game developed by Re-Logic. After its initial release in 2011, it got the attention of gamers. Even in 2022, it is doing great.
Right now, Terraria is one of the best games for Steam Deck. Valve has also verified its compatibility on this platform which is excellent news for the fanboys.
7. Valheim – Best multiplayer experience with Viking culture
Being inspired by the Viking culture, the developer Iron Gate AB developed the Valheim, and Coffee Stain Publishing published this masterpiece.
If you want to explore a mystical world with other players and have a lot of different feelings, it is probably the best option for your Steam Deck console.
The Left 4 Dead 2 is one of the best multiplayer games for Steam Deck. If you prefer zombie apocalypse games, this title is one of the perfect choices right now.
In addition, the Left 4 Dead 2 is fully compatible with Steam Deck. Whether you play on the console itself or on the large display, you will get amusement by playing this exciting game.
If you want to play some decent old games on Steam Deck, The Witcher 3: Wild Hunt is one of the best choices. The CD Projekt developed this game and published it in 2015.
The Witcher 3 features a world where a lot of magical things exist. You will play as a professional monster hunter and kill monsters and solve a lot of puzzles. This open-world game runs really well on this small console.
The Euro Truck Simulator 2 is probably the best option if you prefer open world Truck Simulator game. Even though it has been out there for a decade, it still appeals the gamers.
This old game is a Steam Deck verified title that runs well without any issues on this console. In this game, you will start as a truck driver and explore various roads, even can create your own company. Overall, it is a very enjoyable game.
War Thunder is another old game that is still entertaining gamers. It was first released in November 2012 by Gaijin Entertainment. Even though 2016 was its official release year, it was out there as a beta version for a very long time.
This is a free-to-play game that features modern military combats. Recently, Valve has verified it as a compatible title for Steam Deck.
12. PAYDAY 2 – Complete missions with exciting gun fights
The PayDay 2 is another old game that is a verified title for Steam Deck. This game was released in 2013 by Starbreeze Publishing AB. Overkill – a Starbreeze Studio was behind the development of this item.
This action game has a lot of exciting elements like missions, gun fights, etc. It is not a free game. But, the price is very affordable. So, if you like, you can get the game easily.
The Brothers – A Tale of Two Sons is another game from 2013 that has the quality to entertain gamers even these days. Starbreeze Studios AB is the developer company behind this game.
Here, the gamer will have to guide two brothers on their journey in the fairy tale kingdom. In this journey, they will face a lot of challenges.
The ARK: Survival Evolved is one of the best Steam Deck verified games out there for adventure lovers. The title states the genre of the game. It’s a survival open-world game that Studio Wildcard published in 2017.
In this game, you will have to survive on an island and do whatever it takes. The game has various enemy characters, predators like Dinosaurs, and primeval creatures. Overall, it’s a very thrilling game you can play on your Steam Deck device.
For the spider-man fans, this is an amazing title. Currently, Marvel’s Spider-Man Remastered is the best Steam Deck verified game for these specific fanboys.
The gamer will have to play as Spider-Man here and save the people and city from enemies as we saw in other similar games.
No Man’s Sky is one of the best games verified by Valve for their newly launched console. It is an action-adventure survival title developed by Hello Games. Since its initial release in 2016, this game has gained tremendous popularity.
This game features a galaxy to explore where gamers will find a lot of elements like lifeforms, planets, dangerous challenges, etc.
17. Dying Light – Best zombie survival horror game
If you prefer survival horror games, there are no better options than Dying Light for Steam Deck. Since Valve has confirmed its compatibility, you can be sure of a smooth experience.
The game has been developed by Techland and published by Warner Bros. Interactive Entertainment. Since its release in 2015, it has won many gamers’ hearts. Dying Light is an FPS game that features a post-apocalyptic open world filled with flesh-hungry zombies.
The RimWorld is an excellent indie top-down strategy game where a gamer will need to build, manage and develop a sci-fi colony. Ludeon Studios is the company behind this title.
Right now, RimWorld is one of the best strategy games you can play on Steam Deck.
The Orcs Must Die! 3 is an action tower defense strategy game that was developed by Robot Entertainment and published by the same company in 2020.
In this game, you will need to fight and make a defense against massive hordes of orcs. Overall, this title can give you a smooth experience and amusement on a device like Steam Deck.
Dota 2 is a game by Valve, the company behind the platform Steam and Steam Deck. It’s a free multiplayer game that features online battles.
Another thing is that this is the most played Steam game that millions of gamers play daily. You can enjoy this excellent item on your Steam Deck device at no cost.
The Splitgate is another free Steam Deck multiplayer game. Unlike Dota, it’s an FPS game that features a sci-fi world.
1047 Games is the company behind the development and publishing of this game. As it doesn’t cost you to play, you can easily try it out on this console.
The Star Fix Adventures is a 2002 action-adventure game published by Nintendo. It was a top-rated game years ago and is still a very desirable choice for old game lovers.
As Steam Deck is like a PC, you can emulate this on this device to get the classic gaming experience.
Valve is adding new games regularly to the verified list. According to the latest report, there are over 5000 Steam Deck verified games. This number may not be the same when you read this article.
This article has featured the best Steam Deck games to play right now. If you have any recommendations, you can write them down in the comments box.
A Many users have attempted several times to install LastPass on Chrome and the plugin is failing to show up or activate.
They have a LastPass vault and login, but the plug-in is needed to make the vault interact with both username and password boxes.
Others think they created a LastPass account and installed the web browser extension. In spite of that, the LastPass icon doesn’t show in their web browser toolbar.
So it seems that the number of problems with LastPass installation on Chrome has increased lately.
But don’t worry, we’ve got you covered. In this article, we’re getting the hang of this behavior and helping you address the issue.
Quick Tip:
Sometimes, the fastest way to fix is to change to another password manager. RoboForm is our recommendation for security and smart features.
RoboForm only takes moments to import all your passwords, offers unlimited saved passwords, and easily backs up and syncs passwords across platforms.
RoboForm
This efficient password manager makes it easy to store passwords and sensitive data.
2. Check that LastPass isn’t disabled from view in the extension bar
On your computer, open Chrome.
Select the three vertical dots next to the profile icon.
Click More tools, then click Extensions.
Copy and paste chrome://extensions into the navigation bar in Chrome.
Simply turn the setting on to enable LastPass.
Remember that extensions are small software programs that tailor Chrome functionality to your preferences. Let’s assume that LastPass is only listed but not enabled in your browser’s extensions.
So you have to change that right away if you want the LastPass icon to display in your web browser toolbar.
If you happen to find that LastPass is not listed at all, try reinstalling it. Go to the LastPass extension and simply click Add to Chrome. You’ll then see the new extension in your browser as a button on the toolbar.
3. Confirm that other Chrome extensions aren’t interfering
Open Chrome, and in the top right, select More.
Click More tools, then choose Extensions.
Uncheck the Enabled box to temporarily disable your other Chrome extensions.
Do not click the trash button to remove them.
You are now presented with a confirmation box. Confirm your action.
You may re-enable LastPass.
Note: Re-enabling extensions in Chrome is as easy as returning to the Extensions screen and ticking the box next to Enable.
4. Check if another plug-in is interfering
Go to chrome://extensions in your Chrome address bar.
Use the menu button in the top right corner of Chrome to access More tools.
Go to Extensions, and scroll to the plug-ins list.
Click on them one by one.
Then, just click the slider to toggle the plug-ins off.
Re-enable LastPass now and check if the issue persists.
So these are the exact steps to complete in order to fix LastPass installation problems on Chrome. For further help with this, use the comments section found below.
The Steam Deck and the AYN Odin Pro have taken the gaming community by storm, but which is better? Keep reading for an in-depth comparison of the two handheld gaming consoles to find out which one is best for you.
The Odin Pro was developed by AYN Technologies and surprised many skeptical users with its performance and retro emulation.
It can be hard to come by Steam Decks and is considered quite expensive for a handheld gaming device. Let’s examine how the alternative Odin Pro holds up against the Steam Deck.
Can AYN Odin run Steam?
The Odin can run Steam using Steam Link which allows users to connect to a computer that’s running Steam. However, users will need a PC that is on the same Wi-Fi network as their Odin device.
Another method is to install Windows OS on the Odin device. With Windows on Odin, users can download and install Steam and should be able to have access to their games without issue.
Is the Steam Deck worth it?
If you have an established gaming library on Steam, then the Steam Deck is definitely worth it. The popular handheld gaming device allows users to take their favorite games with them on the go. Users can also connect with the Steam community and chat with their friends.
In terms of size, the Steam Deck is significantly larger than the Odin Pro. However, the small size and weight of the Odin Pro make it more portable and convenient to carry around. Its small size also makes it easier to hold and more comfortable to game for long periods of time.
The Odin Pro and Lite have more color variations whereas the Steam Deck only comes in black. Both gaming devices are similar in that they both have built-in controllers with analog sticks, shoulder buttons, and face buttons. However, the Steam Deck hosts extra buttons and two trackpads.
Power
There’s no question that the Steam Deck is more powerful than the Odin Pro if the price difference didn’t already give it away. The Odin Pro is equipped with Snapdragon 845 whereas the Steam Deck has a custom AMD APU and 8 RDNA 2 CPU.
The Steam Deck also offers more RAM and storage with the options for 64GB, 256GB, and 512GB and a micro SD card slot. The Odin Pro offers 64GB, 128GB, 256GB, and also a micro SD card slot.
Because the Odin Pro is less powerful, its battery last longer. The Odin Pro is equipped with a 6600mAh battery and the Steam Deck has a 5200mAh (40Wh) battery. Many users report that the battery on the Steam Deck drains quickly, especially when playing demanding games.
When it comes to the performance of the latest and most popular games, the Steam Deck takes the cake. With a Steam OS, the device can run most AAA games seamlessly as well as the majority of the games on Steam.
The Odin Pro on the other hand is perfect for retro gamers that want to play nostalgic GameCube and Wii games. The Odin Pro also runs on Android OS so users can play most Android games.
Price
Many users point out that you get what you pay for with the Steam Deck and the Odin Pro. The Steam Deck is quite a bit more expensive with prices starting at $399, but it is more powerful than the Odin Pro.
However, the Odin Pro is perfect for those who are looking for something cheaper but still offers high-performance retro gaming. The Odin Pro starts at $289, however, there is also the Odin Lite starting at $199.
What other Steam Deck alternatives are there?
One of the most popular alternatives is the Nintendo Switch, which also has a Lite version.
Another powerful handheld alternative to the Steam Deck is the AYANEO Air, which has received rave reviews over its power and performance.
Our conclusion
There are many factors to consider when comparing the Steam Deck vs. the Odin Pro. Ultimately, it’s up to you to decide what you want out of a handheld gaming console after reviewing our guide.
If you want a console with the power and performance to handle AAA games, then the Steam Deck is for you. However, if you’re a retro gamer, then perhaps the Odin Pro is best.
We hope this article shed some light on Steam Deck vs. Odin Pro and their differences. Let us know in the comments which handheld gaming console you prefer and why.
A fingerprint scan sounds fantastic if you have confidential data on your computer and don’t want anybody to access it. Unfortunately, the Windows Hello fingerprint is not working for some users.
The message states that We couldn’t find a fingerprint scanner compatible with Windows Hello fingerprint so let’s see how we can resolve this issue.
Why did my fingerprint scanner stop working on Windows?
If the associated drivers are faulty, outdated, or incompatible, your fingerprint reader will not function properly. In addition, some system files may get corrupted, which prevents you from using the fingerprint reader.
Moreover, your fingerprint reader software or other software might be causing the Windows fingerprint not working issue. If you have recently reinstalled Windows from Microsoft, be sure to update the chipset firmware for your computer.
Not being able to use your fingerprint can be a security risk, and in this article, we’re going to cover the following issues:
Windows 10 fingerprint blocked – The fingerprint reader is completely unresponsive, no matter what actions you may take.
Windows Hello fingerprint setup not working – It can be a problem since you won’t be able to use fingerprint login at all.
Fingerprint scanner, the reader doesn’t work with (Windows 10) – This issue affects both built-in and USB fingerprint readers.
Windows 10 fingerprint greyed out – The fingerprint option can become grayed out and be fixed by reinstalling your fingerprint reader drivers.
Windows Hello isn’t available on this device – This message usually occurs if you don’t have a fingerprint reader or if it doesn’t work correctly.
HelloWindows 10 fingerprint without a PIN – It’s impossible to use fingerprint scanning without setting up a PIN or using Windows Hello.
Windows 10 fingerprint login not working, not available, missing – If the fingerprint feature isn’t working or missing, be sure to try some of our solutions.
Windows 10 fingerprint stopped working – Fingerprint scanning stopped working suddenly, can be fixed by resetting fingerprints.
HP, Dell, LenovoWindows 10 fingerprint reader not working – According to users, a fingerprint reader isn’t working on isn’t related only to these brands, and it may appear on almost any PC.
Windows 10 fingerprint and PIN not working; Can’t use fingerprint or PIN login – These may be fixed by recreating your PIN and fingerprint.
Windows fingerprint not working after password change – A faulty driver is the primary cause of the fingerprint scanning feature in Windows not functioning correctly.
This option is currently unavailable: Windows Hello fingerprint – Disabling the fingerprint driver has been the solution to this problem for several people.
Windows fingerprint not working after update – Remove the Synaptics device from the installed devices in Device Manager.
Could not find a fingerprint scanner compatible with Windows Hello – Updating your drivers is one possible solution to the problem in which your fingerprint is not available while using Windows Hello.
What can I do if the fingerprint reader is not working in Windows 11?
After updating to Windows 11, many users started complaining on the Microsoft Answers website that their fingerprint reader stopped working and they could no longer use it to log in:
I upgraded to Windows 11 from my Windows 10 laptop meeting all the requirements. Since then I’m unable to use my fingerprint scanner on my laptop. After a day, the sign-in settings on the settings app are also not opening. I re-installed my biometric drivers but it didn’t work out. Please help me fix this issue. Is this a bug and will it be fixed in the next updates?
As several users with ASUS laptops reported this issue, one might assume that there are some compatibility issues with the drivers for the respective readers.
However, one user responded in the same thread that the fingerprint reader from his ASUS laptop works well.
Anyway, this doesn’t seem to be an isolated incident since other users complained on the Acer community website about the same problem:
My Acer 5 fingerprint reader was working great with Windows 10. When I changed to Windows 11 it stopped working. There are no options available for the Windows 11 sign-in window (Settings, Accounts, Sign-in Options). Is there a fix available or will one be available in the future? Will the fix be automatically installed by Windows Update?
In this case, the user updated the fingerprint reader’s driver from the Device Manager Biometrics section and solved the problem immediately.
We don’t have an official solution, but this is likely a case of driver compatibility issues that will be gradually updated as Windows 11 matures.
Many users reported the same issue, so it’s safe to declare this does not happen strictly when switching to a new OS. Regular feature updates can trigger incompatibility issues as well.
To rule out this possibility quickly, we suggest you revert to recent updates and check Windows Hello’s functionality.
Here’s how to do that:
Open the Settings app from the Taskbar, press Windows + I, then select Update & Security.
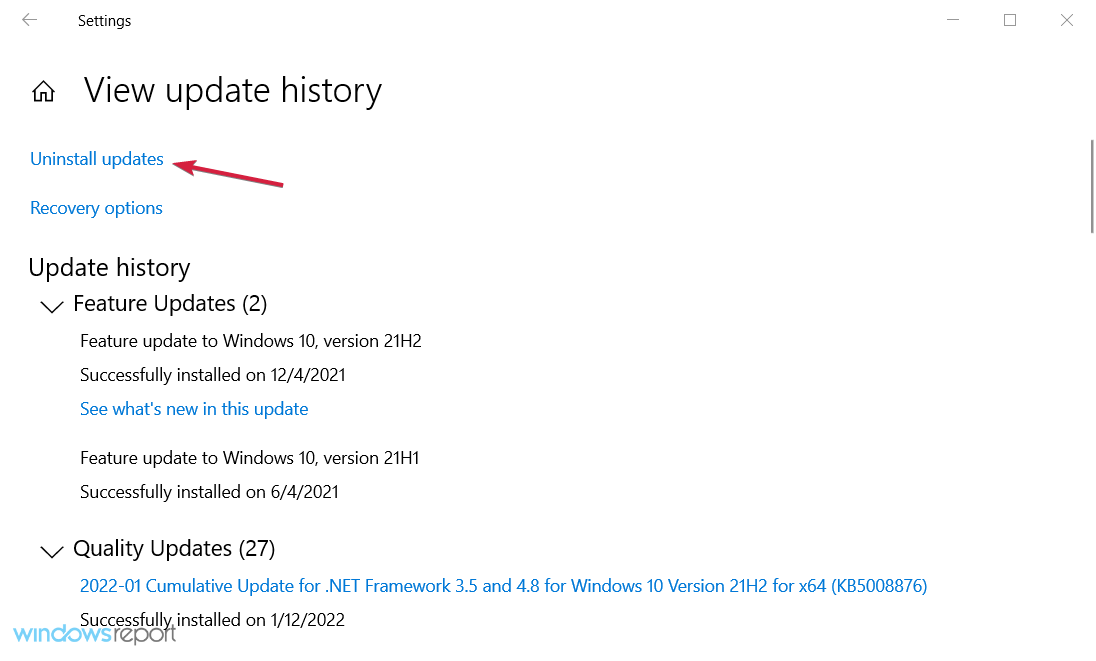
Navigate to the Windows Update section and select View update history.
Click on Uninstall updates to unfold the list.
Now, locate the update or updates you want to remove and click on Uninstall.
If the issue is solved, you might want to run the Windows Update Troubleshooter before trying to reinstall the problematic update to avoid triggering the same behavior.
How do I fix my fingerprint on Windows 10?
1. Rollback drivers/use default drivers
1.1 Rollback the fingerprint scanner driver
Right-click the Start button and choose Device Manager from the list.
Locate your fingerprint driver and double-click it to open its properties. If the Biometric driver is missing, check out our guide to fix it.
Click the Roll Back Driver button.
1.2 Use the default driver from Windows
Open Device Manager like before.
Find your fingerprint scanner driver. Right-click it and choose Uninstall device.
Check Delete the driver software for this device and click Uninstall.
1.3 Update your drivers
Often, it’s better to use the latest driver optimized for Windows 10, so make sure you visit your fingerprint scanner manufacturer and check for the latest Windows 10 drivers.
It’s also worth mentioning that in some instances, older drivers can work better than the latest ones, so you might also try some older drivers.
Updating drivers manually is risky, so we recommend you download and install dedicated software to do it automatically.
2. Switch to a local account/ create a new account
Press Windows + I to open Settings and click on the Accounts icon.
In your account, click Sign in with a local account instead.
Fill out your password and click on Next.
Set your username and the password for your local account, and click Next.
Click on Sign out and finish.
You can try creating a new account and setting up the fingerprint scanner. After that, just delete the latest version and switch back to the old one.
Right-click the Start icon then select Device Manager.
Go to the Universal Serial Buscontrollers section and double-click on USB Root Hub.
Navigate to the Power Management tab and uncheck Allow the computer to turn off this device to save power. Click on OK to save the changes.
Repeat these steps for all USB Root Hub devices that you have on your PC.
Your system may be turning off your USB device to save power. By deactivating this feature, your fingerprint reader will still be active.
4. Update HP Support Assistant
If the fingerprint reader doesn’t work in Windows 10, the problem might be the HP Support Assistant application. If you have this application on your PC, update it to the latest version.
You can do that by running the application and choosing the update option or downloading the latest version from HP’s website.
After the application is updated, restart your PC, and the fingerprint reader will start working again.
Remember that this solution works only if you’re using an HP device. If you have a PC from another brand and you don’t have an HP Support Assistant on your PC, then this solution doesn’t apply to you.
5. Use a different fingerprint reader
360° readability with anti-spoofing protection
FIDO and U2F certifications
Compatible with Dashlane, LastPass (Premium), Keeper (Premium), and RoboForm, for websites
If the issue persists, you can use a different fingerprint reader. Sometimes, your fingerprint reader might not be compatible with your computer’s hardware configuration or operating system.
Therefore, before buying a new fingerprint reader, ensure the device is compatible with your machine.
We recommend getting the Kensington VeriMark USB Fingerprint Key, a tiny fingerprint reader fully compatible with Windows.
Open the Settings app using the Windows + I shortcut. Then click the Apps section.
Locate the fingerprint reader software on the list, select it, and click the Uninstall button.
Follow the instructions on the screen to complete the uninstallation process.
After removing the fingerprint software, you will need to remove the fingerprint driver from your PC.
Next, restart your PC. Windows 10 will install the default driver, and the issue should be resolved. If you have trouble opening the Setting app, look at our comprehensive article to solve the problem in no time.
7. Remove fingerprint scanning and update the fingerprint driver
7.1 Remove the fingerprint scanning option
Open the Settings app and click on the Accounts section.
Select the Sign-in options from the menu on the left.
In the right pane, go to the Windows Hello section and click on the Remove button under Fingerprint.
Remove the fingerprint driver as explained in Solution 2.
Download and install the latest driver for your fingerprint reader, as shown in Solution 1.
7.2 Register new fingerprints
Open the Settings app, click Accounts, then the Sign-in options.
Make sure that you have a PIN set up. If not, set up your PIN by clicking the Windows Hello PIN option and creating one.
Go to the Windows Hello section and click on Add another button.
Follow the instructions on the screen to add another fingerprint.
Still not working? Here’s another comprehensive guide that could help you fix the Windows Hello problem once and for all.
8. Remove and recreate your PIN
8.1 Remove the PIN
Open the Settings app, go to Accounts, and then click on the Sign-in options.
In the PIN section, click the Remove button.
Click the Remove button again to confirm.
Enter your Microsoft Account password and click on OK.
8.2 Add your PIN again
Go to the Sign-in options and click on the Add button in the PIN section.
Enter your password and click on the Sign in button.
Enter the desired PIN in two input fields and click on OK.
9. Update your BIOS
The problem might be your BIOS if the fingerprint doesn’t work in Windows 10. However, if your device has a built-in fingerprint reader, you might be able to fix this problem by updating your BIOS.
The BIOS update is an advanced procedure; if you’re not careful, you can cause irreversible damage to your PC.
In addition, many users are recommending updating your chipset drivers, so make sure you try that too. You can update your drivers using our first two solutions from this guide.
How do I reset my fingerprint reader?
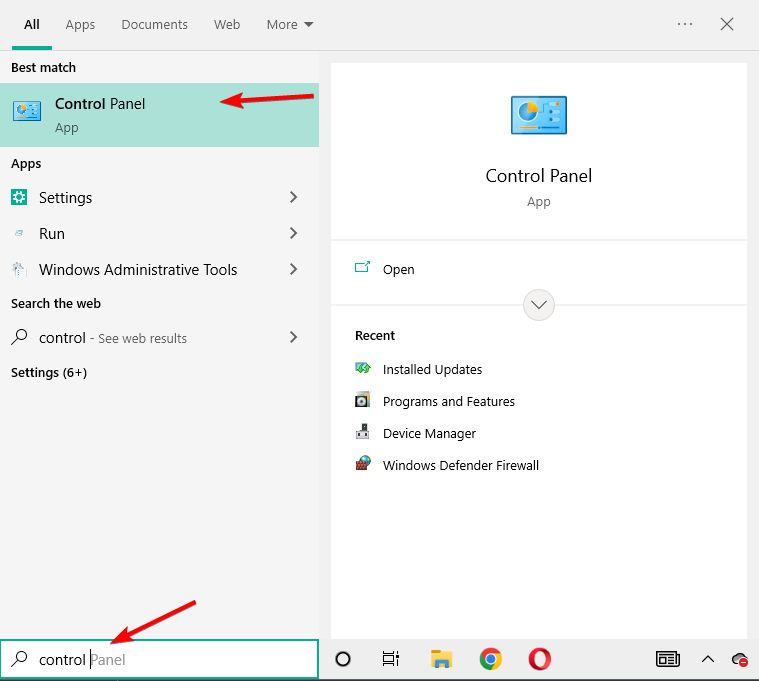
Press Windows, enter control and open the Control Panel result.
Type Biometrics in the Control Panel Search box and click the Biometric Devices option.
Select Change Biometric Device Settings, and then click the Biometrics Off button. Save the changes made.
Repeat steps 1 through 3, then, select the radio button labeled Biometrics On to reset your fingerprint reader. You may change the fingerprint you use to log in and any other parameters on the same Biometric Devices screen.
We hope you managed to fix the fingerprint scanning for your Windows 10 device using our solutions.
The latest OS has some new great features, and users are getting more excited about it. Unfortunately, some claimed that they have no power options available on Windows 11. It seems like an annoying error, but we’re here to deliver the best solutions to fix it quickly.
From what users describe, there are times when the power slider is missing in the desktop taskbar and the Settings.
Let us now tell you all you must know.
Why there are currently no power options available?
There are some essential reasons why Windows 11 power settings are missing, and you should take into consideration each of them:
Glitched Power Options menu – This one of the most popular causes why this issue occurs. It doesn’t have anything to do with system file corruption. In this case, the problem is likely caused by a Windows Update.
System corruption – It can be caused by several situations, like random and temporary software bugs.
Poor OS or drivers updates – It is mandatory to keep your operating system and drivers updated. Any update incompatibility can harm the general usage, even fundamental aspects like power settings.
How do I fix missing power plans in Windows 11?
1. Check for OS updates
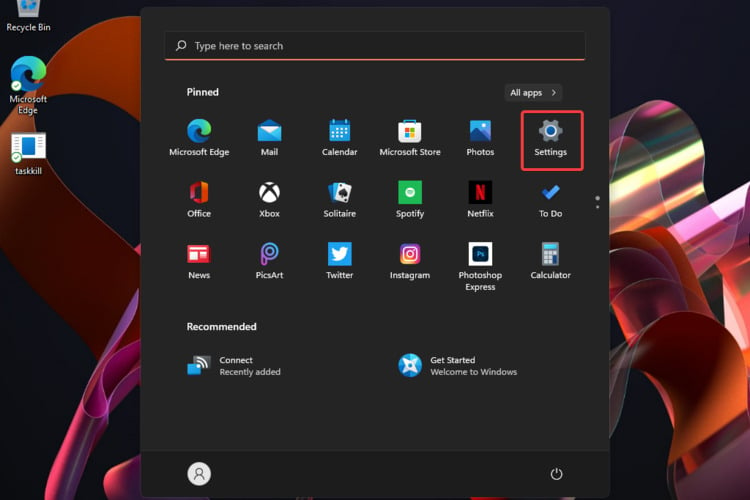
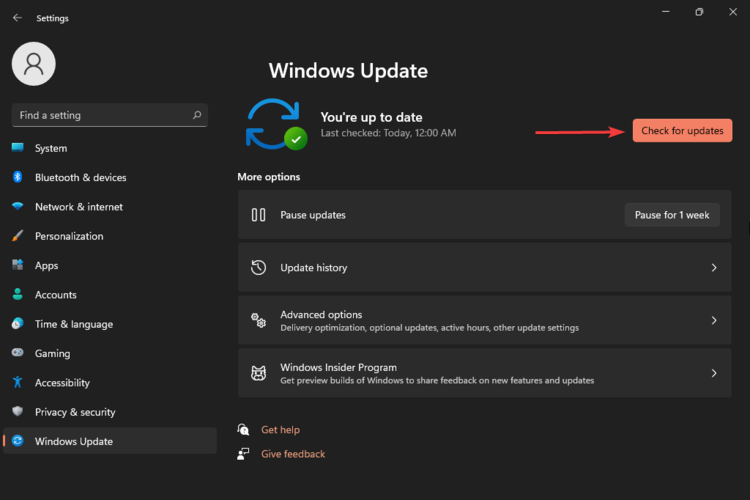
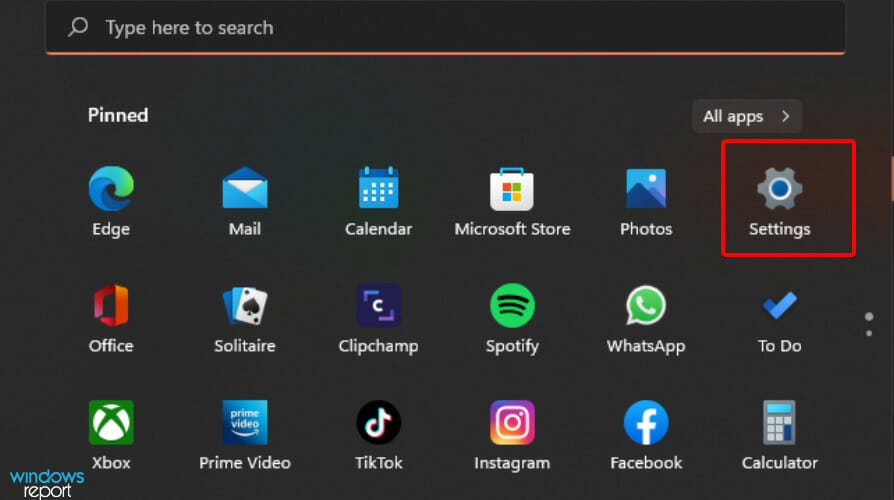
Hit the Windows key, then open Settings.
Go to Windows Update.
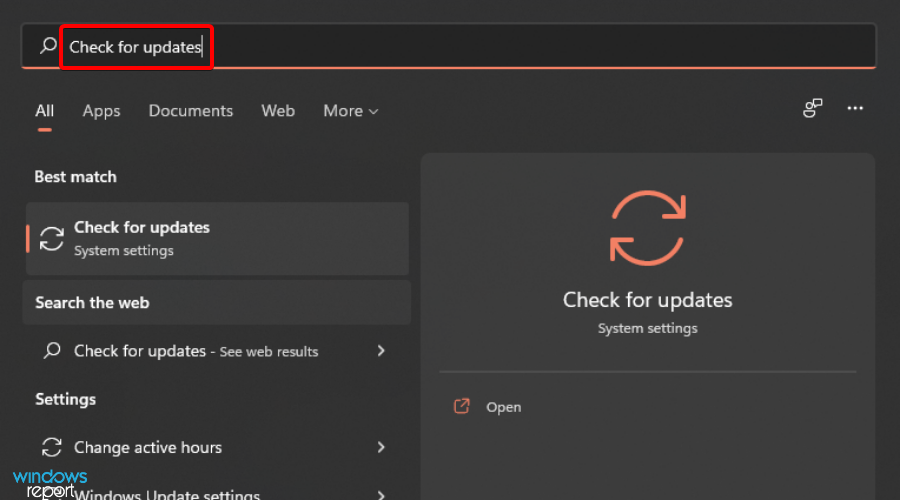
Choose to Check for updates.
For the times when a basic feature is missing from your OS, you should scan for Windows updates. It will automatically look for available options and start downloading and installing them.
To make sure your operating system goes through the correct process, you should restart your PC at the end of this process.
2. Switch to the Balanced Performance Plan
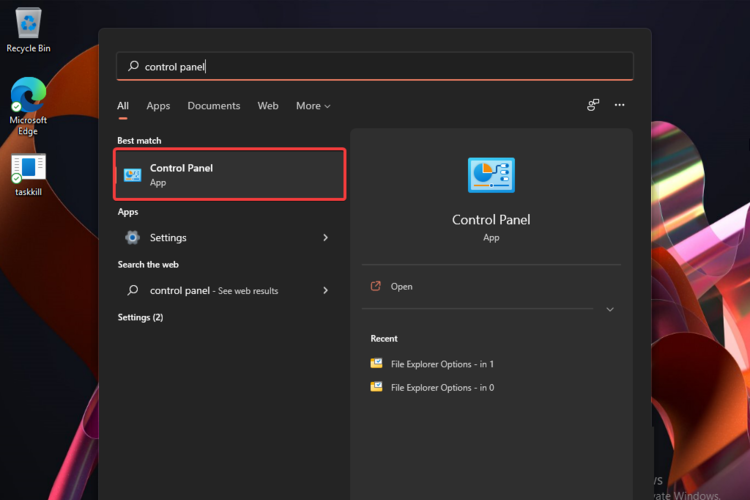
Press the Windows key, type Control Panel, then click on it.
Click on Hardware and Sound.
Look at the Power Options section, then select Choose a power plan.
Make sure the Balanced option is marked. If not, do so.
Reboot your PC for a total refresh.
If there are still no power options available on Windows 11, try the next solution.
3. Update the battery driver
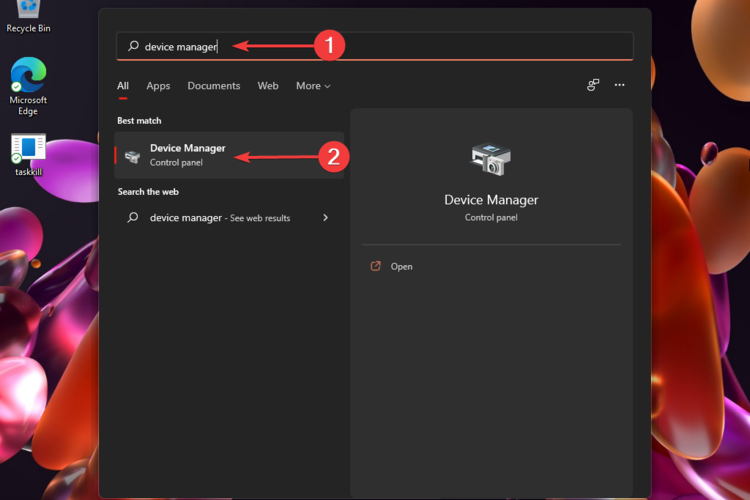
Hit the Windows key, type device manager, then open it.
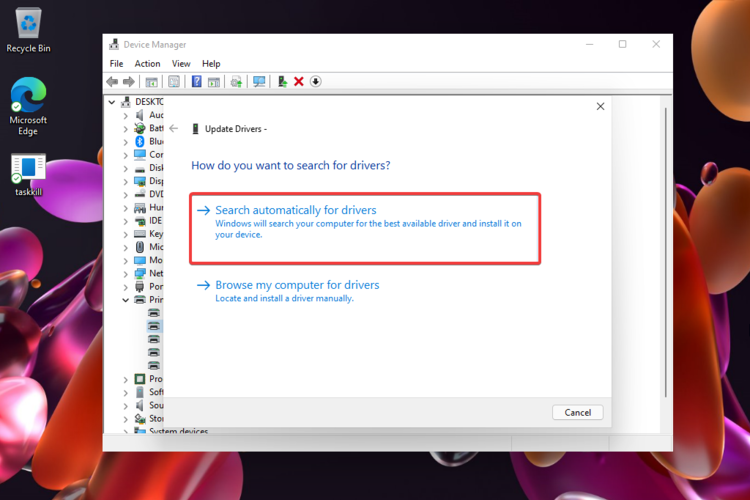
Expand the Batteries section, right-click on the needed driver, and select Update driver.
In the opened window, choose to Search automatically for drivers.
Windows will automatically search for available options and install them on your device.
Your OS Device Manager will automatically install the battery driver, which can help you get the missing battery symbol back to Windows 11.
Scroll down to the Power section, then click on the Run button.
You’ll be notified if any issues are discovered, then Windows will automatically fix them.
Because our presented issue is strongly related to power usage, running the Power troubleshooter might help you. With this option, your OS will automatically scan for problems, diagnose them, then fix them.
In the next window, you should choose to Keep my files so that you won’t lose any important data. However, note that this option will remove apps and settings.
Choose how you would like to reinstall Windows. We recommend the Local reinstall, but if you feel like having some corrupted system files, go for the Cloud download option.
Click on Next.
Choose the needed additional settings, then click on Confirm.
Click on the Reset button.
Wait a bit until the reset is prepared.
Your PC will restart and you should wait a few minutes until the process is completed.
If none of the above methods worked, we recommend resetting your operating system. Remember that this option will refresh and resolve any problematic Windows version, replacing it with a brand-new model.
How do I get to Power Options in Advanced Settings?
Right-click on the battery icon on the Taskbar.
Select Power and sleep settings.
Now you should have a couple advanced power settings in the Settings app.
Can I hide Windows 11 power settings?
From what we know, at the moment, there aren’t available options that would allow you to hide Windows 11 power settings. These are some design-related aspects, so they come by default with your new OS.
However, if you’re interested in personalizing your digital environment, you can do that with some File Explorer and folder options.
We ensured the research through the most popular forums and selected only the most valuable solutions for Windows 11 power settings missing issue.
Lastly, the error message There are currently no power options available is common among lockdown browser users, so you may consider uninstalling the browser.
Some of these issues include Microsoft PowerPoint security notices popping up during presentations which can be rather bothersome for users.
How can I turn off the PowerPoint security notice?
1. Make your security notices invisible to the audiences
Ensure the computer that is running the presentation is connected to another monitor that only the audience can see in order to get rid of PowerPoint’s security notice message. This is how to do it:
Select the Slide Show tab.
Click on the Monitors group.
Click on the Use Presenter View check box.
Back in the Monitors list, choose the monitor you want the audience to watch.
Run the presentation.
Note: There’s a possibility you may need to modify some monitor display settings beforehand:
Press Home.
Type in Control Panel and open it.
Check the Display Settings dialog box.
Select the monitor icon which corresponds to the monitor your audience will watch.
Check the box labeled Extend my Windows Desktoponto this monitor and confirm your action.
Open your PowerPoint presentation.
Select the Slide Show tab.
Click on the Start Slide Show group.
Select either From Beginning or From Current Slide.
2. Prevent the Microsoft Powerpoint security notice via Settings
You can prevent the Microsoft PowerPoint Trust Center from sending security notices on your screen during presentations by moving your file into a trusted location on your PC. This can be done via PowerPoint’s built-in Settings.
Moreover, you could retain the location of this trusted folder, and simply place all future presentations there. This way, you won’t have to repeat the below-mentioned steps again and again for each future presentation.
1. Launch the PowerPoint app on your device.
2. Navigate to the File tab.
3. Click on Options.
4. A dialogue box called PowerPoint Options will open. Click on Trust Center.
5. Select Trust Center Settings.
6. Click on Trusted Locations.
7. Choose the Add new location option and choose the folder where your presentation is being kept, if its not already there in the first place.
We hope that you found our solutions helpful and managed to remove Powerpoint’s security notice message that prevented you from making presentations in peace.
Some Instagram users have received an error while commenting, liking, or following the page or profile. The error message read Try again later: We limit how often you can do certain things on Instagram…. and forbids the user from doing a few things.
This usually happens to the newly created user profile, who tries to follow most of their favorite people daily. Instagram detects this behavior as similar to the bot behavior and restricts the profile.
Instagram sets a few limits to all the user’s profiles and pages on how many posts they can like, how many comments they can post, or how many people or pages they can follow in a day. You may also get the we limit certain activity to protect our community if you’re in violation of some policies.
Technically, when Instagram puts a restriction, it will last for around 24- 48 hours. After which, you can use the Instagram profile as usual and till it does not cross the limit. Otherwise, you may have to face this error again.
How do you remove limits on Instagram?
1. Change the Instagram password
Firstly, open the Instagram app on your system or simply visit the Instagram website on a web browser app like Chrome, etc.
After you have opened the app or reached the homepage, log in using your credentials.
Once you are successfully logged in, click the Profile Icon on the top-right corner of the Instagram homepage.
Now select the Settings option from the list.
Click Change password on the left menu.
Enter the values in the Old Password, New Password, and Confirm New Password text boxes.
Finally, click the Change Password button at the bottom.
This will change your Instagram password.
2. Reinstall the Instragram app
Press the Windows and I keys simultaneously which opens the Settings app.
Select Apps on the left side panel.
Click the Installed apps option on the Apps page.
Type Instagram on the search bar at the top of the Installed apps page.
Now click the horizontal ellipsis icon of Instagram from the results populated.
Select Uninstall from the list.
Click Uninstall again on the confirm small pop-up window below it.
This will start uninstalling the Instagram app from the system.
Now open the Microsoft Store app.
Search for the Instagram app by typing Instagram in the search bar.
Click the Install button on the Instagram page.
This starts downloading and then installing the Instagram app on the system.
3. Create a backup profile
Such things happen usually with many profiles which are newly created because users tend to start following many of their friends and favorite celebrity profiles.
This causes to occur the error on their Instagram and restricts them from doing certain things. The small workaround is to create a backup profile by visiting the Instagram website and clicking the Sign up button at the bottom, and providing all the necessary details to create a new profile.
Another small tip is the most active account does not get many errors like restrictions on doing certain things, whereas a new or hardly used account will face such problems. So try to engage in Instagram using your primary account most of the time.
If this error is caused due to any technical glitch in the Instagram app, you can always report this to Instagram. Go to the Profile icon on the top right corner and select the Settings option. Then, click Help and tap on Report a problem.
Now, describe the technical issue briefly, and you can also attach any screenshots of the issue taken from the Instagram app and send the report to the Instagram support team. They will analyze and rectify it as soon as possible.
5. Use Instagram automation tools
There have been a number of Instagram automation tools like SocialPilot, Later, Kicksta, etc. which can be used for the user’s benefit. These are used to keep control over how many likes, comments are being done by the user. It also keeps track of how many pages and profiles are being followed.
They also help the user for scheduling the best possible time for their posts, stories, and reels on their Instagram profile. They help in managing hashtags and other Instagram features, too.
We hope you found this article informative. Please leave us a comment below.
Adobe Acrobat Reader is one of the world’s most well-known PDF readers and editors. It has been with us for quite some time now, and it is constantly receiving updates to make it more and more relevant.
Unfortunately, no software is without issues, as some users have reported on the official Adobe forums that they are receiving an error message when using Adobe Acrobat Reader DC:
Can someone help me troubleshoot why Adobe Acrobat Reader isn’t responding? When I open a PDF, I get an error message that tells me the program is unable to respond and needs to quit and to click okay to close, I then click okay and nothing happens, having to click multiple times. I have uninstalled and reinstalled and the same issue occurs. Before this, I attempted to repair it and scanned for issues. I’m running Windows 10 on a PC.
Since the program is so well-known, we have decided to look over some troubleshooting steps and compile them into an easy-to-read list so that you can solve your problem immediately.
Why is my Adobe Acrobat Reader not responding?
This issue can happen for several reasons, including running an outdated software version, low on system resources, or corrupted app files. For example, you’ll sometimes encounter Adobe Acrobat Reader crashes when trying to open specific files.
Here are some of the issues reported by users related to Adobe Acrobat and Acrobat Reader:
Adobe Acrobat not responding when signing
Adobe Acrobat not responding when combining files
Adobe Acrobat not responding when opening PDF
Adobe Acrobat not responding when printing
Adobe Reader not responding scrolling
Adobe Acrobat not responding when saving
This isn’t the only issue; many reported that the fill and sign PDF is not working, which leads us to believe that a corrupted installation causes this.
How do I fix Adobe Acrobat Reader DC not responding?
1. Update Adobe Acrobat Reader DC manually
Visit the official website and look for the latest patch version. Download updates manually and then double-click to install them. Once installed, reboot your PC and check.
We strongly recommend that you always run updated software on your system. It is the best way to protect yourself against security vulnerabilities and benefit from the latest fixes and compatibility updates.
Something to note is that you should always download the latest version of any software from official sources, or where that is not possible, from reputable websites.
You can easily download Acrobat Reader DC from Adobe’s website, so waste no more time.
Adobe Acrobat Reader DC
Worried that Adobe Acrobat Reader DC is not responding? Updating it will help you fix the issue in no time!
Go to the following file path: C:/Program Files(x86)/Adobe/Acrobat Reader DC/Reader
Locate AcroRd32.exe.
Right-click AcroRd32.exe and go to Properties.
Go to the Compatibility tab, check the box where it says Run this program as an administrator, and click on OK.
Try relaunching Adobe Acrobat Reader DC.
4. Disable protected mode
Launch Adobe Acrobat Reader DC, click the Edit menu, and select Preferences.
Navigate to the Security (Enhanced) tab and uncheck the box next to Enable Protected Mode at Startup.
Click Yes in the confirmation prompt that appears.
How do I unfreeze Adobe without losing data?
The easiest way to do that is to terminate the application from the Task Manager and then relaunch it. In most cases, it should get things up and running. You may also reboot the system if that doesn’t work.
Reinstalling the tool won’t affect the files stored on the computer, and you will be able to access the ones stored on the cloud as well, given you sign in with the same account.
By following these steps, you should be able to get rid of the annoying Adobe Acrobat Reader DC not responding issue and read and edit your PDF file in peace.
Also, find out the best PDF readers if you plan to dump Adobe Acrobat and switch to a new one.
If you know of any other fixes and solutions for this issue, let us know by leaving us a message in the comments section below.
Users have been searching the world wide web to find a solution on how to change their child’s password in the Microsoft Family account.
This used to be a feature from the formerly known Family Safety but the option of resetting a password using a parent account is no longer available in Microsoft Family.
With so many children that are now virtually learning from home and are more connected to technology than ever, being able to access their account even though they no longer have the password has become a necessity.
So, what are you supposed to do when you find yourself in a situation like this? Keep reading and find out all the ways you can resolve this issue once and for all.
Why should you have a dedicated account for your child?
First of all, with a separate local or family account, you can manage the contents and access to different apps and information.
So, in a word, it’s all about the safety of your kid and how he or she interacts with the computer while you’re not around.
Here are a few short pieces of advice that you can consider when managing your child’s account.
➡ Supervise the childas often as possible
Depending on his or her age, you will need to keep an eye on the activities the kid is allowed to perform on the computer.
That’s why, if you can’t be there at all times, it’s better to consider using the Family options from the Windows Security app.
Use Family options for access to setting up your family group of users and more
To get there, click the Start button, type security, and click on Windows Security. Then, the last option from the left pane list is Family options.
From there, you can click on View family settings which will redirect you to your account, where you will be able to set up your family group of users.
➡ Limit the PC time
Choose an appropriate daily allowance
Again, consider the age of your child when deciding how much screen time he or she can get in front of the PC.
This may vary from a few minutes to hours on a daily or weekly basis. You know what’s best for your kid, but too much time on a game or just in front of the screen can get him tired or even addicted.
There are specialized apps out there, including Microsoft Family Safety, which you can use to limit the time spent on the PC automatically, and after that, switch to a lock screen.
Quick Tip:
Besides Microsoft Family, another great way to manage your family’s passwords is with a password manager. We recommend NordPass for its great features.
NordPass is great at monitoring passwords. It syncs easily across multiple devices and comes with a family plan so you can control the websites your kids’ visit.
NordPass
Easily manage passwords for the whole family from one place.
Fill out the form and hit Next at the bottom of the page.
Microsoft will review your request and respond within 24 hours.
3. Use Command Prompt
Click the Start button, type command prompt and select Run as administrator.
Enter the following command, where username is the account you wish to change password and newpassword is the new password for the account; if the username is more than one word, you’ll need to place it inside quotes: net user username newpassword
Press Enterto run this command and you’ll now see a message that it was completed successfully.
Use the new password to log into the account.
4. Use Control Panel
Click the Start button, type control panel and selectControl Panel from the results.
Go to User Accounts.
Select Change account type.
Select the User Account for which you want to change the password.
Click on Change the password.
After you’ve completed the boxes, click on the Change passwordbutton.
Use the new password to log into the account.
What are other child lock options to take advantage of?
➡ Reset the password using one of the Microsoft games
If your child doesn’t already play a game with his Microsoft account, download a game on your device and choose the forgot password option.
Enter the email address for the security code to be sent to, and from there you’ll be able to change his password.
➡ Create a new account
If none of the above options worked, you can try deleting the whole family account or just the child account and create a new one.
Click the Start button, type user, and select Add, edit, or remove other users.
Next, click on Add someone else to this PC and follow the procedure to add the new account that your child will be using.
We hope that this guide was the answer you were looking for and that you and your child can now enter the Microsoft account.
It’s easy to lose a password, moreover when it’s not your own. The children don’t pay attention to these details or they might have changed it when you left your laptop unattended.
That’s why you should try to keep your accounts safe from their reach and lock your screen for their own safety.
Interested in finding out more about how to keep your kids safe with Microsoft’s Family Safety? You can also monitor the location, receive constant reports for each child, and limit the screen and app times accordingly, so don’t postpone all these.
For any suggestions, questions, or thank you notes, use the comments section below and we’ll get back to you.
After the installation and initial configuration of the server of choice (be it 2012, 2016, or 2019), the next step is to install Active Directory (AD) on your server.
Besides centralized domain management, this directory service has many directory-based uses. So, if you were wondering how to install Active Directory in Windows Server, follow the steps below.
How do I install Active Directory on Windows Server?
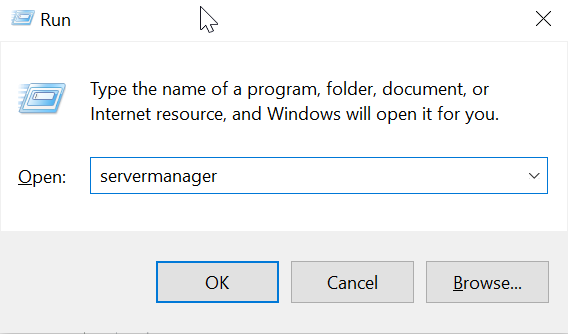
1. Press the Windows + R keyboard buttons at the same time to open the Run dialog, type servermanager in it, and then press Enter.
Alternatively, you can also open the Server Manager menu via Taskbar, by clicking on its icon.
2. SelectAdd roles and featuresin the dashboard.
3. Once you see theRoles Features Wizard, select the Role-based or features-basedoption and then clickNexttwo times in a row.
4. Now, clickActive Directory Domain Services and then press on Add features.
6. Add the features you want to install and then clickNext.
7. Check everything before hittingInstall.
8. Now, press the Windows key + R to bring the Run command line and type services.msc. Press Enter.
9. Under Services, locate theRemote Registryservice. Right-click on it and chooseStartfrom the contextual menu.
10. Open the Server Manager again.
11. From Notifications, selectPost-deployment configuration and then clickPromote this server to a domain controller.
12. In theDeployment Configurationtab, chooseRadial options and then clickAdd a new forest.
13. Insert your domain name and then clickNext.
14. ChooseForest functional levelandDomain.
15. Enter and confirm a password forDSRM (Directory Services Restore Mode), and then clickNext.
16. In a few new windows, confirm NetBIOS name select the locations for theDatabase,SYSVOLfolders, andLogfiles.
17. ClickNextand then finally clickInstall.
18. Reboot the Windows server.
Installing the Active Directory on Windows Server is a lengthy but easy-to-follow process that can be done by anyone, as it doesn’t require a lot of technological knowledge.
The entire installation is done via the built-in Server Manager tool on your device. Upon installing the Active Directory, you can also configure it to your liking, as show in the steps above.
Along the way, you might need to make certain configuration changes depending on the features you require.
Before you go, you should know that issues such as An account with the same name that exists in Active Directory can appear as well, but we have a guide that addresses them.
These were instructions on how to install Active Directory on Windows Server. If you have any questions, make sure to post them in the comments section below.
YouTube is one of the best streaming sites we have today. However, an increasing number of users report that they constantly run into the issue of YouTube TV error licensing this video. In this article, we will show you how to fix the problem.
There may be a playback issue when you watch videos on YouTube TV that reads, Sorry, there was an error licensing this video. This hurts YouTube TV’s streaming as well as other video-related material.
Why does my YouTube TV say error licensing this video?
There are several potential causes for the YouTube video licensing problem, including:
A network flaw or error or problems with an internet connection
Operating system issues (for computer and Chromebook users)
Corrupted data from the YouTube TV app
Corrupted data from a Google Account
How do you fix Sorry, there was an error licensing this video?
1. Update the YouTube app
If using your mobile phone:
Visit the App store (Google Play Store or Apple App store).
Locate the YouTube app.
Choose Update.
If using another device:
Go to System settings and choose System Update.
Choose Updates, including those for the YouTube TV app, that are still pending will be installed.
2. Update your Google Chrome browser
Launch Google Chrome and click on the three dots menu.
Go to Help, then About Google Chrome, from the drop-down menu list.
You will see the current version of your browser in a pop-up tab that appears. There will be an Update button if it is out of date. To update, click on it.
3. Restart your router
Remove the power cord from the outlet, unplugging your router.
Give it a minute or so to sit.
Reconnect the router’s plug and turn it on.
4. Sign out, then sign in again to your YouTube account
How to sign out
Launch the YouTube app.
Click on your profile photo and then select Sign Out.
How to sign in
Launch the YouTube app.
Now click on Sign in and follow the on-screen instructions to sign in.
5. Update the Widevine CMD Component in Chrome
Use your Chrome search bar and type chrome:/components.
To verify the update under the Widevine Content Decryption Module section, scroll to the bottom of this page and click the Check for update button.
Go back and see if the YouTube TV licensing error problem is still present.
Most of the time, it is not required. The only exception would be if you were viewing a channel that simultaneously streamed and broadcast (including any encoding delays of a few seconds or minutes). Sky News Live is one illustration.
Youtube TV is one of the most popular TV streaming options available today. However, just like other streaming options, you might encounter challenges such as the YouTube TV error licensing this video error or even it stops working.
Fortunately, as discussed above, you can quickly fix the issue without any problems. Let us know which solution worked for you in the comments area below.
If you’re wondering how to boot from a USB drive in VMware, you’re very close to finding a definitive answer. All you need to do is read through this article to find it.
Being able to boot from a USB drive inside VMware is extremely important, allowing you to access your VM even if the virtual system becomes corrupted.
Is it safe to boot a VM from USB?
It is worth mentioning that booting from a USB device is not part of the VMware characteristics of the older versions, as it is considered a possible threat to the integrity of your system.
Even though that is the case, there is a trick that you can apply to get access to this feature even with an older version of VMware.
If you want to find out the trick mentioned above and the updated steps you need to take in order to boot from a USB device inside VMware’s latest release, read on.
As you cannot directly boot from USB in VMware, you need to use a trick. The workaround for this is using a dedicated third-party tool called Plop Boot Manager.
The tool is free and easy to use, and can do the job for you in a few simple clicks. This is the only method that works for VM versions that came out before VMware 11.
1. Download the latest version of Plop Boot Manager from the official website. The downloaded file will be in ZIP format and contain an .ISO file, which is the one we need.
2. Plug the USB drive in a USB port on your PC.
3. Open VMware, click File and select New Virtual Machine. This will start the New Virtual Machine Wizard.
3. Choose the Typical option and then click Next.
4. Now it’s time to navigate to the location of your ISO file.
5. Click Installer Disc Image File (ISO) and then press Browse.
6. In the Browse window, navigate to the location ofPlot Boot Manager.
7. Select the .ISO file and click Open.
8. Set theguest OSas Linux, then, under the Versionsection, chooseUbuntu and clickNext.
9. Choose a name for your virtual machine and clickNext.
10. Select the desired disk size and clickNext.
11. Click theCustomize Hardware button and select USB Controller from the left side menu.
12. Tick the box next to the option Automatically connect new USB devices and then click Finish.
Earlier this week, Microsoft identified a bug that was causing some users running on Windows 11 21H2 to experience some issues when signing in. Further detailing that this occurred to those who installed KB5016691 and then added a new Microsoft account to their devices. However, those with Azure or Active Directory services did not encounter this problem.
But Microsoft has now patched the issue using Known Issue Rollback (KIR), though it might take up to 24 hours to resolve the problem. They have also indicated that restarting your device after applying this fix might help hasten the process. ” For enterprise-managed devices that have installed an affected update and encountered this issue can resolve it by installing and configuring a special Group Policy. The special Group Policy can be found in Computer Configuration -> Administrative Templates -> KB5016691 220722_051525 Known Issue Rollback -> Windows 11 (original release),” says Microsoft.
Microsoft has further provided a workaround for the issue, highlighting that it will resolve itself within a short span of time. Users will need to wait for the lock screen to appear again so that they can sign in as they usually do.
Have you experienced the sign-in issue? Let us know in the comment section below.
Microsoft has typically been holding all its events on digital spaces ever since the COVID-19 hit. But this year in July, they announced that they will be holding their first in-person conference since the pandemic, Microsoft Ignite which is slated to run from October 12-14 in Seattle, at the Seattle Convention Center starting from 9 AM PT. However, they also detailed in the FAQ section of the event that though it is an in-person event space will be limited.
Registration for the event is now open on the conference’s homepage, with the option to attend it either virtually or in person. Attending the conference virtually is free but still requires registration while those who intend to go to the event in person will have to incur an approximate cost of $1,895 depending on the pass option you select while registering as detailed on Microsoft’s FAQ page.
We are yet to establish what Microsoft has in store for us during the three-day conference, but there were some indications that the event could also feature the release of new Surface devices and even the Windows 11 22H2 update.
Besides the conference in Seattle, Microsoft is also planning spotlights across multiple locations where we expect deliberations revolving around the news and announcements from the Keynote and Core Themes, along with market-specific discussions.
Several Steam Deck users have requested to know how to reset their Steam Deck to factory settings. From findings, some users are finding it challenging to boot, while some are experiencing other breaking issues.
Better still, this article is for you if you have installed another operating system and would like to get back to using the standard Deck SteamOS.
It might interest you that, in Steam Deck, the real meaning of reset or factory reset is regarded as re-imaging.
This process can wipe all user info, operating systems, or installed games and applications and replace them with stock SteamOS.
For whatever reason, you need to activate steam deck factory reset, steam deck factory reset from bios, or steam deck factory reset SD card, you can read further to know better.
Can you reinstall SteamOS on Steam Deck?
Yes, it is possible to reinstall SteamOS on Steam Deck. However, you want to be careful to have a backup for your essential data to be on the safe side.
Although a reinstall will keep your game library and data intact, do not resist the urge to back up your data.
How do I factory reset my Steam Deck?
In order to factory reset your Steam Deck, you need to download the recovery image via Steam Store to an USB flash drive and boot from it on your device.
1. Prepare a USB of about 8GB minimum space to download the recovery image.
2. Visit the Steam Store to download the recovery image.
3. Select therecoveryfile and write it to your USB drive to format the contents of the USB drive.
4. Once it’s done, selectCloseand ejectthe USB drive.
5. On Linux you can use Balena Etcher to write the recovery file to your USB.
6. Otherwise, you can write the recovery file to your USB via the command line by entering the following:bzcat steamdeck-recovery-1.img.bz2 | dd if=/dev/stdin of=/dev/sdX oflag=sync status=progress bs=128M(set /dev/sdX to the USB device you inserted)
7. Use aUSB-C adapter or hubto plug in theboot disk.
8. If your Steam Deck is not already powered down, shut it down.
9. Hold the Volume Down and the Power Buttonsimultaneously until you hear the chime, and you’ll be booted into the Boot Manager.
10. In theBoot Manager,boot from theEFI USB Device (your USB key).
11. Do not panic, as the screen will go dark while booting (within a minute).
12. Once the booting is completed, you will be on adesktop, and you can navigate using thetrackpad and trigger.
Hold the Volume Up button to access the Steam Deck BIOS and simultaneously press the Power button. Your Steam Deck should boot into the BIOS menu.
If you follow the instructions as outlined and illustrated in this article, you should have no problem with the Steam Deck boot menu or Steam Deck recovery image as it may.
You can also check our detailed guide on Steam Deck stick drift issue for further solutions to fixing your Steam Deck.
Let us know how best this guide has helped you by using the comments area below.
The Command Prompt tool is the last remnant of DOS (a former command-based operating system) preserved in Windows. You can open software and run handy tools, such as the System File Checker, with it.
For example, you can run SFC by entering sfc /scannow without specifying any path. To open third-party software in Windows 10, you usually need to input an entire directory in the Command Prompt.
What is the path environment variable in Windows?
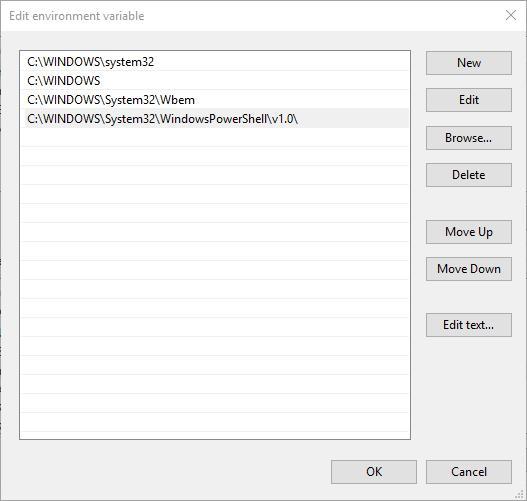
The Edit environment variable window enables you to add new paths to third-party software to open the programs without entering their complete directories in the Command Prompt.
The path environment variable tells your system where to find the SFC, but not the software. Moreover, this variable could be a handy setting for those who often use the Command Prompt.
Microsoft even replaced the Edit System Variable dialog in earlier Windows platforms with a new Edit environment variable path window in Windows 10.
Users can edit this system path variable, and we will show you how to do this in the guide below.
How can I edit the path on Windows 10?
The easiest way to edit the path variable in Windows 10 is through the View advanced system setting. There you can add, edit, or delete a path variable.
After that, you can set the path that’s of interest to you and modify it in any way you want.
1. Press the Windows key on your keyboard or the Start button on your taskbar to open the search box.
2. In the Windows search box, type advanced system settings and click on the result.
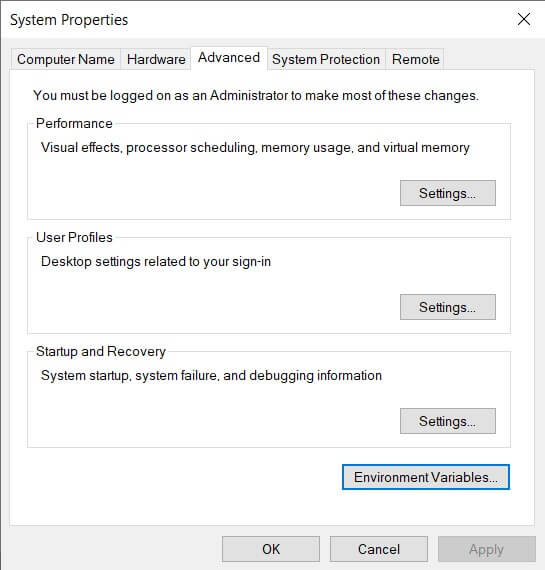
3. When the System properties window opens, select View advanced system settings.
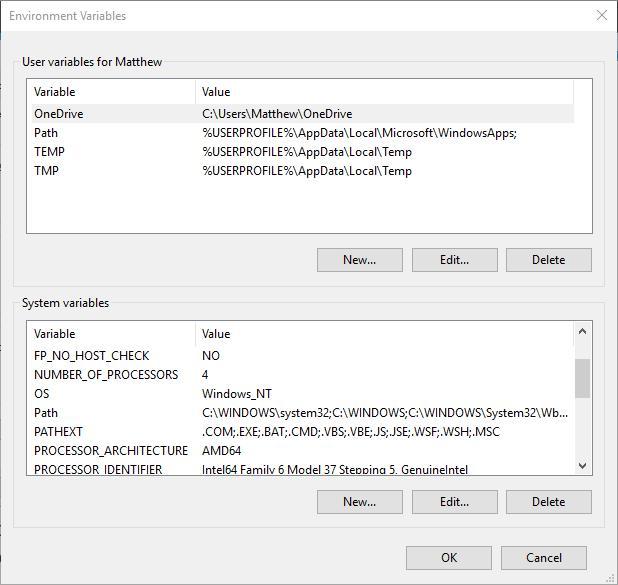
4. Press the Environment Variables button to open the window shown below.
5. You need to select the Path in the System variables box. Selecting the Path and pressing the Edit button opens the window shown directly below.
6. The Edit environment variable window above includes the following path: C:\Windows\system32
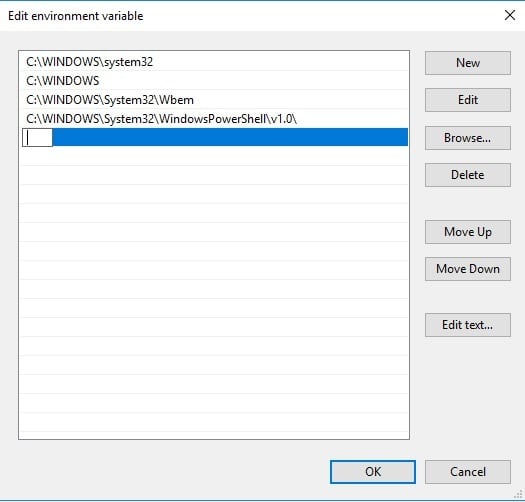
This is where the System File Checker tool is. To add your own path, press the New button.
7. Enter C: in the empty space and press the Browsebutton to select a folder (If you don’t enter something in the space for the new path, your selected folder directory replaces the path listed above it).
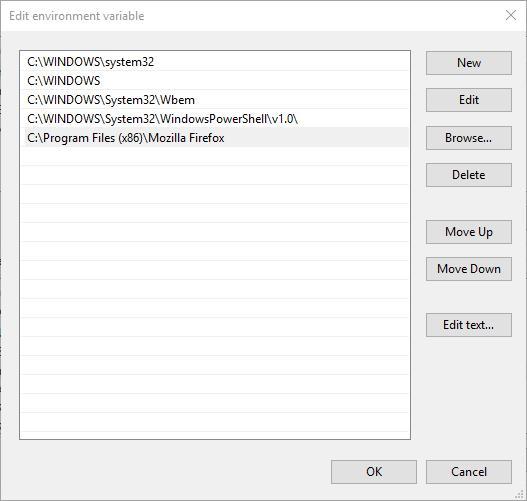
8. Select a folder that includes third-party software in the Browse for Folder window. For example, we selected a folder that includes Firefox.
9. Press the OK button on the Browse for Folder window to confirm the selection (The Edit environment variable window will include your selected path as in the snapshot below).
10. Click the OK button on the Edit environment variable window to close it.
11. Press the OK buttons on the Environment Variables and System Properties windows to close them.
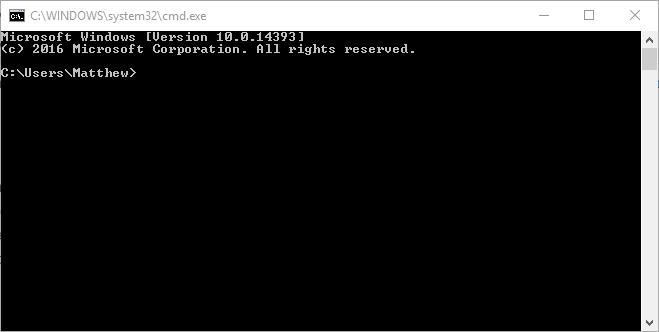
12. Re-open the Windows search box and type cmd in it, then right-click on the result and select Run as Administrator, to open the app as below.
A program’s executable doesn’t always match the exact software title. For example, we found that Opera’s executable was Launcher. As such, check the software’s executable title in File Explorer and then enter that in the Command Prompt.
You no longer need to enter C:\folder\sub-folder\sub-folder software title to open a program. This certainly comes in handy if you’re unsure of the software’s path.
This is a fairly simple process, and after following the steps above, setting, editing, or changing the path environment variable in Windows 10 should be more or less a formality.
Windows 11 brought new additions, overhauls, and improvements, but the default refresh key is still F5.
In this guide, we’ll show you 2 easy ways to refresh your desktop quickly.
How do I refresh my computer in Windows 11?
1. Refresh Windows 11 via the context menu
A quick and handy method to refresh your Windows 11 device’s screen is to use the built-in context menu. This menu can be accessed whenever you right-click on your desktop.
From the context menu, depending on your Windows build, you will find the refresh option in two different places, as we will show you.
1. Navigate to your Desktop.
2. Right-click on any empty space on the Desktop to open the context menu.
3. If you are using the Windows build 22000.65 o or a newer one, you can find the Refresh button right here in the options. All you need to do is select it.
4. In case you’re using an older build, you need to click on Show more options (or press Shift + F10).
5. You should now see the Refresh option and can click on it.
As you can see, for previous builds, the Refresh option wasn’t removed; it was just hidden under another set of options, which you can toggle by following the steps above.
Interestingly, some users stated that the feature was still in the right spot for them, so perhaps it depended on the Windows 11 version you were using.
Not all the changes are final! We aren’t at the operating system’s final release, so everything is subject to change. Voice your opinion on the MS forums, as Microsoft needs all the feedback it can get to make Windows 11 the perfect system.
2. Use your keyboard
Press the F5 key on your keyboard to refresh your desktop.
Some keyboards or laptops require you to use Fn + F5 shortcut.
As we have mentioned right in the opening of this article, on most keyboards, the refresh button is the F5 key. For more information on how to activate it, check our previous section.
If you encounter any problems with the newly released operating system, we encourage you to do a factory reset. Here’s a great guide dedicated to resetting Windows 11 to factory settings.
That’s about it for this article. We have plenty of ways to refresh the desktop like you used to do in the previous Windows versions. Keep in mind that issues can sometimes occur, such as desktop that keeps refreshing.
If you have any other information we didn’t manage to include, please share it with us in the comment section below.
Many game enthusiasts have requested to know how to open multiple accounts on Steam Deck while playing the diverse or same game.
Some of the claims harvested are that it can be annoying to input their passwords every time they access the app.
This is why users are interested in discovering how they can make Steam Deck add accounts to the existing account(s).
Otherwise, logging in to the same account every time you turn on your PC becomes a drag. You can read further to learn how to set up and switch between multiple accounts on Steam Deck.
Can you switch accounts on the Steam Deck?
It is possible to switch accounts on the Steam Deck. What’s more, the individual accounts you open on a Steam Deck are capable of storing their own local save data and settings.
On your first launch of the steam app, you will be logged into your primary Steam account. You can log into multiple steam accounts by double-clicking the corresponding file anywhere on your start menu, Desktop, Taskbar, and so forth.
Can two Steam accounts play the same game?
Yes, two Steam accounts can play the same game simultaneously. To play the same game on two Steam accounts, you must own a copy of the game on each.
Although each Steam account library can only run games on one PC at a time, the library can be used to play the same game on all the PCs you own or share the game with.
How do I switch multiple accounts on my Steam Deck?
Enter your login details and log into your primary steam account
Tick the Remember my password or create a new Windows user. (For your secondary Steam accounts)
Wait for Windows to finish setting up.
Start the Steam app on the new Windows user.
Log into your secondary Steam account and check the Remember my password box.
Sign out from your secondary Windows user and sign back into your main Windows user.
Initiate the command below to launch Steam and also log into your secondary account: runs /savecred /user:<DOMAIN>\<USER> "C:\Program Files(x86)\Steam\steam.exe"
Replace <DOMAIN> with the domain name of your PC.
Change <USER>with the username of the windows user you just created
Change the file path to your steam.exe in your install directory: C:\Program Files(x86)\Steam\steam.exe
Save the command in a .bat file on your desktop.
Whenever you double-click the file, Steam will launch and automatically log into the associated secondary account.
Unless it is an online game, you can save your game on disk for offline use after its installation. This means you can play while Steam Deck is offline.
You can explore the steps in this article to learn how to set up multiple accounts on Steam Deck.
You can also check our detailed guide on how to change Steam Deck’s Resolution. If you forget your Steam password, this guide has seven possible ways to recover them.
Do not hesitate to use the comments section below if you have questions or comments.
Several features come with using Google Chrome, one of which is that you can access the Chrome tab audio control settings. With this, users can adjust volume for individual tabs on the Chrome browser.
However, some users have reported they find it challenging to locate the chrome tab audio control or use it.
Hence, this article should provide users with possible ways to access chrome’s tab volume control and disable the sound on a tab. Work your way down the steps below to know which one you find easy to access.
Can I change the volume of individual tabs & Windows in chrome?
It is possible to adjust the chrome individual tab volume level of a video/audio on YouTube, Vimeo, Netflix, etc. The holdback is just that, not every website allows users to use chrome tab volume control.
However, you can rely on the Chrome volume control extension whenever this happens.
How do I control the volume on a Chrome tab?
1. Use Volume Master Extension
Visit the Google Chrome web store to download & install the Volume Master extension on your web browser.
After the installation, locate the Volume Master extension icon on the Extension bar at the top of your screen.
Launch any tab to play audio.
Click on the Volume Master extension icon.
Drag the volume slider to control the volume of the playing audio or video.
You can follow this same step to adjust the volume for other tabs.
2. Use Windows Volume Mixer
Right-click on the Sound icon on the taskbar.
Select Open Volume mixer and adjust the browser volume you are using here.
You can adjust different browser audio by using Windows Volume Mixer.
The Steam Deck hasn’t been getting that many bad reviews, which means it’s a trustworthy portable machine for gaming. This device ships with SteamOS 3.0, an in-house-built modified Arch Linux distribution.
Valve, however, keeps reminding everyone that their new device is a PC, not a locked-down console. And it actually is, with Valve allowing users to install Windows 10 and 11 on Steam Deck and its drivers.
So, if you have been planning to install them, read through the following sections to learn all about them. As for those still wondering: is it worth installing Windows on Steam Deck?, rest assured this guide can help.
How can I download the Steam Deck Windows drivers?
NOTE
If you haven’t installed Windows on Steam Deck yet, download the Media Creation Tool, create a bootable MicroSD card, and then use it to install Windows. Once you’ve finished with the OS, you can also copy the drivers to the card and install them.
After downloading the drivers, right-click on individual folders and select Extract All. Then, do it for all the drivers.
Paste these on the MicroSD card and then plug it into Steam Deck.
Please turn on the device, open the folder where the drivers are stored, launch the setup, and install them.
If you have just installed Windows on Steam Deck, it won’t be able to connect to the Internet. You must download and extract the driver files on a computer.
However, if you have a USB-C hub with an Ethernet port, use it to connect to the Internet. Once the OS has been established, you can then directly download and install Windows drivers on Steam Deck.
Will there be Windows drivers for Steam Deck? is one of the frequent questions users have. Yes, as you can see above, there are Windows drivers for Steam Deck. When the handheld gaming console was first launched, Valve confirmed it could run other operating systems, including Windows.
While initially, it only supported Windows 10 due to a lack of TPM support, the recent updates to the SteamOS now allow users to download Windows 11 as well.
And the best part, Valve has already released the Windows drivers for the console. The drivers currently available for download are:
Steam Deck Wi-Fi drivers
Audio drivers for Steam Deck
Steam Deck AMD Drivers
Steam Deck GPU Drivers
The audio driver was not available in the early days after launch, but these, too, can now be installed. This allows your Steam Deck to work as a fully functional Windows device.
How do I update my Steam Deck driver?
Until the compatibility aspect is fully polished, you can use Steam Deck’s Windows Resources page to download the latest version of all the drivers.
As many of you might have noticed when downloading them, the last update date is listed for some drivers.
Another critical thing to note is that since SteamOS now allows the installation of Windows 11, the available Steam Deck driver would also work on the latest iteration.
If Steam Deck doesn’t work as expected after you install Windows, you can reinstall SteamOS. The dual boot option is currently unavailable on Steam Deck, but we will update the guide once the functionality is released.
There are none for those looking for Steam Deck controller drivers to use the console to play games. Ensure you have the Steam app installed on the computer and that things are good.
Also, Valve has not launched the Steam Deck Linux drivers separately, so you must use the installed ones.
Game of Thrones is now getting the custom Xbox treatment in the latest round of official custom Series S consoles. This one is more elaborate than most, featuring an Iron Throne display stand for the Xbox. The console itself features a Game of Thrones-themed motif, with the Targaryen three-headed dragon insignia prominently displayed.
Unfortunately, you won’t be seeing this in a store where you can buy it. The only way to nab this beauty is to win it in the official sweepstakes over on Twitter.
As you can see, the contest runs through October 26, 2022, so we will have to wait awhile to find out who will be the lucky fan that gets to take this home. This custom console celebrates the launch of the new HBO original series Game of Thrones: House of the Dragon.
Not all device migrations go smoothly. Device settings not migrated is a widespread problem in Windows 11, and it can appear while upgrading from Windows 7 and 10.
The problem may also occur if you have already installed the operating system and a new update is installed. When upgrading to Windows 11, your device must also meet system requirements and other essential elements to function correctly.
Suppose you wish to retain your data, files, photos, and applications from a previous installation of Windows. In that case, you must select the option Keep personal files and apps when upgrading to Windows 11 for the first time.
When you upgrade to Windows 11, the installer checks your computer to see if there are any applications or settings that will not work well with the OS.
If there are some issues, the installer presents you with a list of these applications and settings, so you can follow up on them after your upgrade is complete.
Why did my device settings fail to migrate to Windows 11?
Several reasons your device settings did not successfully migrate to Windows 11.
Some of the reasons include:
Malfunctioned or corrupted driver – This means that one or more of your driver’s migration processes has been interrupted or prevented from launching when the System was updating the OS or any other system feature. Should this be the case, proceed to our expert guide on how to remove a corrupted driver.
Driver incompatibility issues – When this happens, it’s often because of a specific compatibility problem with one of your drivers. In such cases, you will most likely need to install an updated driver version.
Outdated drivers – Sometimes, obsolete drivers can also be responsible for this problem. You should check for any new updates and try updating the device driver so that your PC gets compatible with Windows 11.
Faulty devices – Another common reason for this issue is a defective device connected to your computer. You will have to disconnect them and see if that helps.
Partial or ambiguous match – Device settings may also fail to migrate if there is a partial migration or a new ambiguous match that is not recognized.
What can I do if my device settings have not migrated to Windows 11?
1. Update the driver
Press the Windows + I keys simultaneously to open Settings.
Search for Device Manager and click Open.
Navigate to your selected driver, right-click and choose Update Driver Software…
Press the Windows key, search Device Manager, and click Open.
Navigate to your desired driver, right-click and select Uninstall.
Windows will automatically reinstall the driver as soon as you restart the PC.
3. Roll back to previous drivers
Press the Windows + I keys simultaneously and select Settings.
Navigate to System and select About on the right pane.
Next, select Device Manager.
Expand the device drivers, right-click and select Properties.
Navigate to the Drivers tab, select Roll Back Driver, then press OK.
Select your reason for the rollback, then press Yes.
Restart your PC for the changes to take effect.
Sometimes, you might the device not migrated error about your hardware devices like the keyboard, USB, mouse, and SSD. In this case, it is better to remove any recent drivers update and roll back to the last one that worked well
4. Update Windows
Press the Windows key and search Check for updates.
Hit Check for updates.
If you have any pending updates, proceed to Download & install and then restart your System.
Outdated or wrongly updated operating System causes all sorts of problems, including error messages like device settings not migrated from previous OS installation. Installing the proper updates should fix the issue in this case.
Device migration is the process of transferring data from one device to another. This process happens with device upgrades, load balancing, and hardware issues.
To ensure the process is successful, the original device you are transferring data from must have the requirements to perform the tasks needed for the migration.
Can I roll back to Windows 10 if the device settings fail to migrate?
If none of these options work, you can always roll back to Windows 10. If the device settings are more important than Windows 11, installing Windows 10 might be worth it cleanly.
Blackbird has announced it will be joining Microsoft at IBC 2022 to show off its browser-based professional video production software. The cloud-native video production suite can be accessed on any platform via a web browser. Its fast and scalable platform offers easy and collaborative access for any video production team.
Blackbird can be deployed on the Azure public cloud in minutes with just a few clicks. Blackbird also supports Azure Blob storage for video ingest and publishing enabling a fully transparent workflow. The video production software is also integrated with Azure Media Services to easily handle all streaming and video-on-demand needs.
A growing number of organizations are leveraging the Microsoft and Blackbird partnership for video production such as Deltatre and the National Rugby League (NRL). During IBC Blackbird will demonstrate how the software runs on the Azure platform and integrates with other media services for fast and efficient live content.
Google’s critical security alert scam has been making the rounds. It can be hard to tell if it’s a real warning or a phishing attack.
Cyber criminals are tricking users into calling a toll-free number or visiting a website. Once a user falls into the trap, they will be prompted to provide their personal information. This includes credit card details and social security numbers.
Scams are getting more advanced, especially with Google given the number of people who use Google services. You may have also come across the Google voice scam so be sure to check out ways to prevent it.
Why am I getting critical security alerts from Google?
Google sends critical security alerts to your email address when they suspect that you may be at risk. You could be potentially compromised by a phishing attack or malware infection.
Such alerts mean that there is a high likelihood that someone knows your password. If so, the exposed information could be used to access your account or device without your permission.
Is the critical security alert from Google real?
If you’ve received a notification from Google about a critical security alert, rest assured that it’s legitimate. However, you also need to be weary of what a fake email looks like. It is almost identical to the real thing, but contains a link to a malicious website instead of the real one.
The sites look similar and can be hard to tell apart at first glance. But, if you spot any red flags such as misspelled words or unusual formatting, don’t click on them.
Does Google send security alert texts?
Google will send an alert to your email if they detect a security breach. You may also get the alert in form of a notification on your browser. It is best to respond immediately after potential data exposure to secure your account.
Select the Investigate suspicious activity on your account option.
Now in the list that appears, select a setting you suspect has unfamiliar changes and rectify it.
How can I prevent Google’s critical security alert scam?
To avoid falling victim to the Google security alert scam, you need to stay vigilant. Scams always have some red flags. These tips below will help you prevent such scams:
Don’t open suspicious attachments – If you were not expecting an attachment, avoid opening any. Unsolicited attachments could contain malicious code.
Check your account activity – Your account activity is a detailed trail of what you have been doing. It will show you all the logins and accesses made on your account in recent months. If you notice any unfamiliar sign-ins, your account may have been compromised.
Change your password – Changing your password is important in case someone has been using it without permission. Also, use strong passwords.
Enable two-factor authentication – Using multi-authentication software is a good security step in general. However, it’s especially important if you think your account may have been compromised. It will require anyone trying to access your account from an unverified device or IP address to enter a code. You will receive the code via text message or Google Authenticator.
Aside from the Google critical security alert scam email, you may also come across the Paypal Bitcoin scam email. Luckily, we have an article on how to spot and avoid it too.
As always, it is a good idea to install a reliable antivirus program that can detect any malicious activities from miles away and help secure your data.
Alternatively, you can opt for secure browsers that have security measures in place to avoid viruses and online threats.
Microsoft continues to highlight its indie game developer community through its ID@Xbox program and is once again, asking folks to come and celebrate them via the /twitchgaming: ID@Xbox Fall Showcase this September.
When Microsoft and Twitch partnered up last year to celebrate gaming developer talent, gamers and fans were treated to a showcase that included trailers and gameplay from titles such as Floppy Knights, Sam & Max Save The World, Stardew Valley and more.
This year the /twithgaming: ID@Xbox showcase will be kick off with a pre-show from Black Girl Gamers who will be running through some gameplay of Versus Evil’s multiplayer deception madness game, Eville, while the main event will feature updates for Metal: Hellsinger, You Suck at Parking, and more.
Good things are bound to happen when you mix ID@Xbox and /twitchgaming! Here we are once again to showcase updates and new announcements of amazing games coming to Xbox from independent developers. – Jessica Ronnell, Sr. PM – Events, Community & Partner Oboarding at Xbox
The pre-show kicks off Wednesday, September 14th at 9:30 a.m. PT and you can check out the 90-minute action stream at twitch.tv/blackgirlgamers or during the co-stream on Twitch.tv/twitchgaming or Twitch.tv/xbox.
In addition to the pre-show and main event, the Fall Showcase is said to have deep dives, announcements, interviews, and other trailers for fans including gameplay from Ghostbusters: Spirits Unleashed. September 14th at 10 a.m. PT. Here’s how you can join in.
Valve has released a portable gaming device called the Steam Deck. The Steam Deck, available in February 2022, functions similarly to the Nintendo Switch. This device may be played handheld or by hooking up to a display.
Whether when using trackpads or thumbsticks, Steam Deck is perfect and designed for extended play sessions. It has full-size controls placed just where you need them.
Let’s go in-depth and tell you all you must know about this new exciting device.
Has the Steam Deck been released?
On February 25, 2022, Steam Deck was made available and is now being sent to Canada, the United States, the United Kingdom, and the European Union.
Additionally, the device is available via Komodo in South Korea, Japan, Hong Kong, and Taiwan, and it seems that other regions will follow.
According to Valve, which claimed to have resolved the initial supply chain problems, everyone who has reservations about purchasing the Steam Deck would receive it by the end of the year.
What is the Steam deck price?
Steam Deck’s price varies depending on your version; three variations are based on the device’s storage capacity.
The different price ranges are below:
Price
Capacity
$399
64GB
$529
256GB
$649
512GB
Steam Deck models’ lowest cost is marketed with a 64GB embedded multi-media card storage solution. However, the more expensive models include faster NVMe SSD storage. In addition, at least one MicroSD card may be used with all three models to expand capacity.
When can I expect my Steam Deck?
Since reservations for Valve’s Steam Deck were available last year, there has been a significant demand for it. And if you’re still expecting an order email to arrive, Valve promises everyone will get their Steam Decks before the end of the year.
You may receive your Steam Deck even if you make a new reservation. You may calculate when your order comes for a more pressed time.
How powerful is the Steam Deck?
The custom APU designed by Valve and AMD for the Steam Deck is well suited for portable gaming. It is a Zen 2 + RDNA 2 powerhouse that offers more than enough performance to play the most recent AAA games with minimal power.
Whether gaming with trackpads or thumbsticks, the Steam Deck was designed for extended gameplay activity, with full-size controls placed exactly where you need them.
Your complete Steam Library appears after you log in to Steam Deck, like on any other PC.
Will there be a Steam Deck 2?
If you love Steam Deck, you can begin anticipating a Steam Deck 2, already announced to be in development.
Is the 512GB Steam Deck worth it?
When comparing the Steam Deck models, storage should be your priority. Although the virtual delights are all nice, they are unnecessary.
Having adequate room to load the games you like playing is crucial. At the release of Steam Deck, the most practical and affordable option is the $529 256GB model for most consumers.
However, choose the $649 512GB Deck if your budget allows since it is unquestionably the best.
We do not recommend the $399 64GB variant since it has a slower boot and run time unless you’re on a tight budget.
How much RAM does a Steam Deck have?
You can expect an LPPDR5 RAM of 16 GB. Additionally, it features 8 RDNA 2-based compute units.
Does Steam Deck have a mic?
Two microphones are integrated into the display face of the Steam Deck.
However, the internal microphone is turned off when a headset is connected to the 3.5mm connector using the Steam Deck. This happens since it expects all associated headsets to have a microphone.
Yes, it is. The 7-inch touch screen on the Steam Deck features a 60Hz refresh rate and 1280 by 800 resolution.
Does Steam Deck have SSD?
The 256GB and 512GB models of the Steam Deck are specified in the original Steam Deck requirement to include a PCIe Gen3 x4 SSD.
Additionally, even the 64GB model with eMMC storage may be updated with a fresh SSD.
Can Steam Deck run all Steam games?
At release, a pocket of games does not run on Steam Deck. These included Apex Legends, Dead by Daylight, Fall Guys, Destiny 2, PUBG, Siege, Paladins, Smite, Black Desert Online, DayZ, and Hunt: Showdown.
However, most Steam games you love work flawlessly on the new device, and you should try out some of the most compatible Steam Deck games.
That is all you will need to know about this new device.
Have you got yours yet? Lastly, let us know your favorite games to play on the new device.
WoT, short for World of Tanks, is a popular war strategic shooter released in 2010. If you’ve never played it before, it’s exactly what it sounds like. You get to control a tank (armored vehicle) and wreak havoc on your enemies.
The game still has a lot of popularity, despite receiving a lot of complaints regarding slow matchmaking, unbalanced gameplay due to the pay-to-win model, and a somewhat toxic community.
Yet players seem they can’t get enough and keep coming back. But aside from the issues listed above, which could be fixed by the upper management, WoT also faces a series of technical challenges.
Namely, those are high ping, jitter, and, you’ve guessed, packet loss.
Why is WoT so laggy?
Most of the time, you can experience much lag in games when your wireless connection is unstable, your game crashes or the graphics settings are not suitable.
Other potential factors can be the distance between you and game servers or network congestion in case there are too many players on the same connection.
Some users reported WoT issues regarding lag and packet loss specifying the next errors:
World of Tanks high ping
World of Tank lag, WoT blitz loss problem
World of Tank Blitz unstable connection
One may wonder if VPN can improve packet loss. Most certainly, VPNs can improve packet loss, but only if it occurs on the ISP’s side (bandwidth throttling or improper routing).
What is packet loss in WoT?
As with many other online services, packet loss in WoT happens whenever data packets you send or receive never make it to your destination.
As a result, other issues might occur, such as rubberbanding, delayed movement, or connection timeouts.
The thing is, packet loss isn’t necessarily evil, as it’s a quite natural phenomenon. Some packets simply get lost, the Internet isn’t the airtight vessel we like to believe it is.
That’s why most of the time, packet loss solves by itself. One of the main causes of packet loss is network congestion, and that’s why waiting is the best way to fix it. Simply avoid peak hours and you should be fine.
If you need to know how to fix packet loss in WoT, you can use a VPN for World of Tanks even if sometimes it might not work.
However, sometimes packet loss is a recurring issue and other times it even follows a pattern. That’s precisely when simply waiting just isn’t enough anymore.
In case you’re wondering what is pathping, it is a useful Windows CMD tool that lets you perform a traceroute of your connection, while also returning ping and packet loss values for each of the hops.
However, you can simply skip the traditional pathping test and use WGCheck to see if there’s anything wrong with your WoT client and network.
Note that using a VPN can be quite effective fix to this whole packet loss situation. However, it won’t work every time, especially not if the packet leaks happen on your side, or on the game servers.
Thus, it can only help you if your ISP causes packet loss by either routing the network improperly or throttling your bandwidth.
Nevertheless, a VPN can help you with more than just improving packet loss. For instance, it can circumvent geoblocking, boost your online privacy, and secure your connection.
The reasons why you have high ping scores in WoT have to do with a flawed network connection that also can generate packet loss.
To wrap it up, detecting packet loss in WoT isn’t difficult, considering that there’s a dedicated tool for the job.
You just launch WGCheck, select the game and server you’re having trouble with, and let it detect any issues.
When it comes to fixing, things might be a tad more complicated. Mostly because packet loss has a comes-and-goes nature, which means that it usually fixes itself.
However, sometimes this issue might start to follow a pattern, which is when you’d want to step in.
Because of this issue, users are wondering what is a good ping for WoT. To give you an answer, below 100 is the score you need for optimal gameplay in this war universe.
Using a VPN works most of the time, since many ISPs don’t have proper network routing, and some of them even throttle your bandwidth. These are exactly the cases when a VPN can solve packet loss.
As there’s the chicken or egg dilemma, there’s also the question of whether art (which movies and TV shows certainly are) should be available to all, without the price tag.
A lot of avid followers of the media don’t have the access or funds to enjoy the latest projects and they turn to Popcorn Time and similar online tools to stream media, both contemporary blockbusters, TV shows, feature films, and documentaries, respectively.
However, even though the ethics side is unclear, the anti-piracy law is, as always, pragmatic and rigid.
So, today we’ll try to explain why one should use VPN when using Popcorn Time. Also, we made sure to offer some renowned VPN solutions that should do the job. Make sure to check it out below.
Do I need VPN for Popcorn Time?
Let’s skip on the whole morality scheme and stick with theft of intellectual property and boundaries imposed by the law.
There’s good reasoning behind saying that Popcorn Time is an illegal streaming service. Of course, it depends on the country you’re living in and the related law imposed.
However, to stream pirated movies or TV shows by using the torrent peer-2-peer sharing, without paying for them whatsoever is, indeed, a violation of digital distribution laws.
We won’t judge nor endorse this, but, let’s say that, hypothetically, you want to try out Popcorn Time. It’s not always as simple as it looks.
So based on everything we said, the answer to the question is simple: yes, you’ll need a VPN tool to utilize Popcorn Time.
Especially if you’re concerned with regulations and possible consequences of, to some extent, breaking the law. We prepared a list of VPN solutions that should come in handy for the tasks at hand.
? Can you get caught using Popcorn Time?
Firstly, certain countries or individual ISPs might block access to the download site, so you won’t be able to download the desktop client in the first place.
Also, even if you are able to do so, the aforementioned forces might stand in your way when you try to stream enlisted movies or TV shows.
Last but not least, you might as well play everything like no one’s watching, but they just might watch.
? Is Popcorn Time safe with VPN?
For sure, yes. With a VPN you can hide the IP address by switching the region/country and avoid geo-restrictions while preserving your privacy.
As we mentioned above, it’s actually advised that you connect to a VPN while using Popcorn Time in order to safeguard your online presence.
ExpressVPN is another quite popular and omnipresent tool in this niche. It’s well-adjusted for both newcomers and more experienced users, with all the tools for the job.
It also comes in the premium version, with remarkable bandwidth speeds and unlimited data. It’s widely advertised as the go-to solution by various tech and security-oriented publications.
ExpressVPN has over 160 server locations in over 90 countries which make it a good candidate when it comes to surpassing restricted content.
The tool masks your Ip address and actual location so your activity will not be tracked down by your ISP. This means they will not be able to place any restrictions on your traffic and you will get a fast connection at all times.
ExpressVPN includes a split tunneling feature as well. It lets users pick which applications they want to route via a virtual private network and which ones will use local traffic.
This is another reliable and secure VPN service with private DNS on each server and top-level AES-256 encryption.
Along with that, it has a special set of security tools that block trackers and other malicious third parties. You can find it under the name Threat Manager within the main menu.
You also have hundreds of servers positioned in more than 100 countries, including Africa and the Middle East
ExpressVPN uses its own protocol which is built to be faster and more secure.
Let’s quickly look at its key features:
Simple to use with tutorials and user-friendly design
Consistent high performance in bandwidth speeds with the low latency readings
Bulletproof encryption
Multiplatform support for up to 5 devices simultaneously
Unlimited bandwidth and data
ExpressVPN is a subscription-based service with three plans available. Users have plenty of payment options including credit cards, payment platforms, and cryptocurrencies.
ExpressVPN
This trusted VPN ensures high-quality streaming on Popcorn Time.
Private Internet Access is simply the best VPN for streaming online. When it comes to truly liberating the internet and allowing free, unhindered access to worldwide content, PIA is your best bet.
Cleverly bypassing even the strictest of censorships, this VPN tool will tear one boundary after another in order to allow you to enjoy unrestricted access via a US-based IP address.
Its effective IP hiding feature is best designed for accessing Popcorn Time servers without ever exposing your identity or your real location.
You will be able to browse anonymously and enjoy the full advantages of high-grade encryption based on cryptographic algorithms and state-of-the-art security technologies.
Streaming on Popcorn Time is easy with PIA thanks to its multiple gateways with servers across 45 countries, including the US, UK, Japan, and more.
PIA is very careful with user data, having a strict no-logs policy. They do not store or sell any of your data or activity.
The tool lets you enjoy seamless streaming without any interruptions with the help of an integrated Adblocker.
Enable it and you will be able to load pages faster and won’t have to sit through unwanted advertisements.
Plus, enjoy unlimited bandwidth and no throttling to enjoy the unlimited and uncensored internet
Let’s quickly look at its key features:
Includes a 7-day money-back guarantee
Tunneling technology to encrypt your traffic
Lo-logs policy for truly private and anonymous streaming
Supports up to 10 devices simultaneously
Integrated ads, trackers, and malware Blocker
Integrated firewall and filtering capabilities
Pia has three major subscription plans. You get the best deal if you pick the 3-year subscription. The service includes 24/7 customer support.
Private Internet Access
PIA is the best for streaming online, crafted for Popcorn Time!
The same basically goes for NordVPN. Highly regarded as one of the best VPN solutions out there, with a substantial base of everyday users and various tech enthusiasts high-grading it.
The pricing might be a bit off, but certain users with premium needs will find this Tefincom & Co., S.A.-owned tool just a good fit in regards to the value versus price ratio.
NordVPN is ranked as one of the fastest VPN services with high download and upload speed rates. This is due to its high worldwide server coverage, but also because they use its own, performance-oriented VPN protocol, called WireGuard.
Not only will you be able to enjoy Popcorn Time regardless of your location, but you will be able to do so in a secure and fast manner.
NordVPN does not keep any logs of your private data and does not follow your traffic activity.
Another useful benefit to take into consideration, especially when you want to access geo-restricted content is the obfuscated servers provided by NordVPN.
These change your data packets so your ISP or streaming services providers will not be able to tell that you are using a VPN in the first place.
This means that the chances of you getting blocked or restricted because of VPN usage are extremely low.
Let’s quickly look at its key features:
Above-average privacy options
Great integration with the majority of apps
Fast and reliable bandwidth
Military-grade encryption
Convenient and user-friendly interface
Smart Play feature specially intended for streamers
Hundreds of servers in 60+ server locations all around the globe
NordVPN services are available under three major subscription plans. Each plan includes a 30-day money-back guarantee.
NordVPN
Looking for a VPN that works great with Popcorn Time? Check out NordVPN
Surfshark is a great choice for users that want to connect multiple devices to Popcorn Time. This VPN service places no limit on the number of platforms you can connect to with one subscription.
This Surfshark LTD-owned VPN service has over 3000 servers worldwide, covering all major areas. So you will get access to content all around the globe regardless of your actual location.
The VPN can also improve your connection and let you get better video quality if you connect to a better server for your configuration.
Surfshark is also very secure. No third party will be able to track you or detect any of your online activity.
They have a strict no-logs policy which means that they do not store any of your data.
Surfshark VPN also lets you hide your IP address so you can enjoy a seamless connection at all times. Your ISP won’t be able to place any throttling on your traffic as they won’t detect your actual traffic data.
This means that you will get high speeds even if you exceed a certain amount of traffic.
Other key features of Surfshark include:
Kill switch in case the connection drops
Private DNS on all servers
AES 256 encryption
Adblocker
Anti-tracking
Surfshark is one of the most budget-friendly VPN services on the market. It is subscription-based, but you can try it out for free and see how it works for you.
Surfshark
Surpass geo-restrictions and enjoy Popcorn Time content all around the world.
Owned by Kape, CyberGhost is mostly our weapon of choice in these matters. We’re, indeed, endorsing it but that doesn’t cast a shadow on the overall reliability and functionality of this VPN tool.
Cyberghost allows you to stream as much content as you want. You get high speeds and good quality all month, as the service does not place any limits on bandwidth usage.
The tool has hundreds of locations across the whole globe, allowing you to connect from anywhere and surpass geo-restrictions.
The tool uses powerful 256-bit encryption and other security features such as Public Wi-Fi shields and a kill switch to make sure no data about your identity or activity gets leaked.
The tool includes anti-tracking features which block in real-time any potentially malicious websites.
Cyberghost also has a split tunneling option that lets you use both local and virtual server traffic. You get to decide which applications or services to use with the VPN and which one to connect through your local network.
This can boost speed rates and let you connect to your local services while also browsing internationally.
The tool has multiple secure protocols including L2TP-IPsec and PPTP. It also supports OpenVPN.
Let’s quickly look at its key features:
4 encryption protocols
Great server speeds
No logging or registration needed
58 countries with 600 servers spread all over the globe
Ease of use (utilizing this intuitive UI doesn’t require any pre-acquired knowledge)
Multiplatform support (you can use it on your PC/Mac and handheld devices)
Ad-blocker and anti-malware included
It comes only in the premium version which is, obviously, regulated by a monthly subscription. However, you can try it out for 7 days free of charge and decide on your own.
CyberGhost VPN
This VPN works like a charm with Popcorn Time, it’s affordable and simple to use!
It’s possible to get through Popcorn Time using a VPN that has geo-blocking capabilities and can hide VPN traffic with optimized servers.
These features are included mostly with premium VPN accounts, so you have to prioritize your security on risky streaming platforms or while torrenting files on the web.
Can free VPNs work for Popcorn Time?
As long as they are able to provide enough servers to ensure good speed rates, free VPNs should be just fine.
However, considering that privacy is one of the major concerns that you want to take care of with a VPN, make sure to check whether your VPN keeps track of your data.
Many users report that free VPN, although allowing you to change your IP and connect to various locations, keep track of and even sell your data to third parties (generally for marketing purposes).
For this reason, we advise you get a premium-level VPN because they implement a transparent privacy policy, most of them with 0 activity logs.
Apart from that, another downside of free VPNs is that they place restrictions on traffic. Some even have a limited number of servers that you can use on a daily and won’t allow a connection once you run out.
That should do it. We’re certain that most VPNs will provide you with enough tools to use Popcorn Time privately and without boundaries. However, the ones we enlisted above check all the boxes.
If you have an alternative VPN you’ll gladly recommend, be sure to do so in the comments section below.
If you’re trying to watch Thai TV shows from outside of Thailand, you probably know that it’s not exactly easy to do so.
Despite that many Thai TV channels offer their live streams to customers for free, there’s a catch. You must be physically in Thailand to watch them.
Fortunately, Thai TV show enthusiasts have quickly figured out a way to circumvent this restriction: using VPNs.
Although VPNs are generally regarded as the ultimate privacy-protection tool, many choose to use these services for bypassing geo-restrictions.
Before we start, it’s important we mention that all VPNs in this article are fit to be used outside of Thailand, to access Thai content.
With that in mind, read along to learn about the VPN services with Thailand-based servers.
Does Thailand allow VPNs?
Yes, it’s sure legal to use a VPN in Thailand. You can access restricted websites like streaming platforms or services from far away regions.
From case to case, it’s possible to encounter region-blocked content in Thailand due to government laws and ISP monitoring users’ activities.
??? Do I need a VPN in Thailand?
You may need to use VPN protection in Thailand because of web access restrictions.
There are specific websites you can’t reach in this country such as gambling sites, social media content that is considered harmful to the country, or adult content.
??? Which VPN works in Thailand?
You can have multiple VPN software for this country, as they are available for public use. For instance, the first pick in our list will definitely work.
But not all VPNs can bypass Thailand’s geo-blocking. In any case, some of those who offer virtual/physical servers in Thailand has a pretty solid chance.
ExpressVPN should be your first solution to connect to Thailand servers due to its extensive server locations and supersonic speeds.
The VPN will offer you innovative privacy and unlimited bandwidth. This way, you’re able to access blocked websites or services in Thailand from any location you are.
It also includes strong encryption and private DNS for each server. With TrustedServer technology, you enjoy free access to restricted content with a high-speed connection.
You can as well block ISP throttling and government limitations for content in this country. That gives you online freedom and the opportunity to use the unlimited bandwidth network.
More so, you can utilize this VPN service with multiple OSes such as Mac or Windows devices, mobile systems, tablets, or even routers.
ExpressVPN main features:
Access for all blocked websites anywhere
AES-256-bit encryption
DNS leak protection
VPN Speed test
Split tunneling benefit
Zero logs policy
ExpressVPN
Take advantage of exhaustive privacy while navigating free content using Thailand servers connection.
Surfshark is an awesome VPN service, there’s no way around it, and a great addition to our list.
Besides its Thailand servers that make it relevant to our cause, Surfshark is also one of the few (actually it’s currently the only one) VPNs that can spoof your GPS location.
You heard us right. So, not only will your IP address be changed to match a location in Thailand, but your GPS coordinates will also match your IP, making it extremely difficult for others to pinpoint your exact location.
Furthermore, like any great VPN service, it also features many privacy/security capabilities that will help you keep your online identity safe. Just take a look below.
Surfshark’s key features:
Zero-logging policy enforced
Military-grade encryption
More than 3200 fast servers in 65 countries
Private DNS on every server
P2P/torrenting allowed on all servers
Unlimited devices on the same account
Camouflage mode (obfuscation)
Surfshark
Not only does Surfshark have Thailand-based servers, but it will also spoof your GPS location.
CyberGhost is an excellent all-around VPN service brought to you by Kape Technologies that has servers in Thailand.
More precisely, it currently has a single server in Bangkok, but we can expect this amount to increase at any point, given CyberGhost’s ever-growing server network.
If you need a VPN that can protect your privacy, keep your connection secure, and let you watch Thai TV shows without restrictions, then CyberGhost VPN is definitely what you’re looking for.
CyberGhost VPN’s key features:
Zero-logging policy
256-bit military-grade encryption
6200 servers in over 84 countries
Unblock various streaming services
Access geo-restricted content
P2P/torrenting supported
CyberGhost VPN
Looking for VPNs with Thailand-based servers? CyberGhost VPN might be just what you need.
Yet another Kape Technologies-signed VPN service that offers a Thailand (Bangkok) server, ZenMate VPN promises to deliver more than just geoblock bypassing capabilities.
It has high-speed servers in 71 different countries, and its privacy/security features can definitely keep your online identity safe and your connection airtight against various malicious agents.
This VPN software can unblock many streaming services and websites with restricted content from this Asian region.
That being said, this solution is worth a shot for its network connectivity and region-blocked access from any country.
ZenMate VPN’s main features:
Strict no-logging policy
Strong 256-bit encryption
2400 servers in more than 71 countries
Supports P2P/torrenting
Unlimited devices on the same account
ZenMate VPN
Having a hard time finding VPNs with servers in Thailand? You should check out ZenMate VPN.
VyprVPN may be the last on our list, but that doesn’t make it any less competent than other VPNs we’ve mentioned.
It has a Thailand server (Bangkok) and thus can help you bypass geo-restrictions and watch your favorite Thai TV shows in no time.
But that’s not all. VyprVPN also has a great set of tools that can help you protect your privacy and keep your connection safe while connected to its servers. Take a look at its key features below.
Hence, this VPN tool ensures ultimate anonymity and expansive security tools in order to secure your digital presence.
VyprVPN’s essential features:
Enforces a strict zero-logging policy
Chameleon VPN to prevent detection
VyperDNS to prevent DNS leaks
VyprVPN Cloud
More than 700 VPN servers with over 200k IP addresses
Dynamic server switching
Supports P2P/torrenting
VyprVPN
Are you searching for VPNs with servers in Thailand? Why don’t you give VyprVPN a try, for a change?
There are some people that have questions like does ExpressVPN have Thailand or how do I access a website in Thailand? For all of these, we have an explanation down below.
In case you’re still wondering how to mask your IP with Thailand addresses, this is how to accomplish it:
This short guide should respond to how do I change my VPN to Thailand question, so go ahead and navigate without blocks.
As you can see for yourself, there are plenty enough VPN services that offer servers in Thailand, regardless of what you need them for.
While all of the VPNs we’ve listed here are great at circumventing Thai geo-restrictions, there are subtle differences between them.
You can visit the traveling section to learn more about using a VPN while traveling. Check out our VPN hub to discover more about the perks of using a VPN regularly.
Ultimately, your needs and expectations from a VPN service will help you make the best choice.
If you’re looking for a quick Conan Exiles lag fix, just use a VPN, since it’s the fastest solution.
Conan Exiles is a survival game that takes place in the lands of Conan the Barbarian. It has a single-player mode as well as a multiplayer version for players who prefer online co-op and PvP. You can play it on Windows, PlayStation 4, Xbox One, and Steam.
If you have high ping and want an easy way to fix Conan Exiles lag, you can download and install a powerful VPN to connect to its servers. A VPN is not only great for securing your Internet traffic and protecting you against identity theft, but you can also lower your ping with a VPN.
What you need is a reliable virtual private network solution that comes equipped with fast VPN servers and top-of-the-line security features. Plus, you can reduce packet loss with a VPN during gameplay.
Why is Conan Exiles so laggy?
Conan Exiles lag can be caused by various connectivity problems, such as a restricted network at the office, school, or on campus, bandwidth throttled by your ISP, or even incorrect IP configuration over Wi-Fi.
You may find yourself during battle rage in the following scenarios or issues:
Conan Exiles high ping can result in Conan Exiles ping 9999, and the game freezes
Conan Exiles lag spikes can be the cause of Conan Exiles’ lagging PC, thus it may be GPU overheating
Conan Exiles PS4 lag and potential Conan Exiles lag fix Xbox One can be resolved with a VPN
Conan Exiles server lag Conan Exiles lag when moving are connection latencies from the server
Although it is not the fastest VPN on the market, ExpressVPN is one of the most popular VPNs for gaming because it helps with network congestion and ISP throttling your connections.
However, speed isn’t always the be-all and end-all when it comes to VPNs, and it depends on what you’ll be using yours for. If your VPN is always on, speed is critical, but if you only use it occasionally – for public hotspots, torrents, or avoiding your browser being tracked – speed isn’t as important.
Because of its large selection of servers in the United States, ExpressVPN is ideal for Conan Exiles.
ExpressVPN is encrypted with the best level of encryption available, AES 256-bit. It’s virtually unbreakable, so no worries there.
On their website, you also get a kill switch that stops all traffic if your connection drops, as well as a DNS leak test option. ExpressVPN handles DNS leaks automatically.
More about ExpressVPN:
Strong security and privacy
Secure apps for virtually any operating system or devices
Lightway VPN protocol added for better performance
Large, secure server network
Good streaming and torrenting performance
Dedicated VPN router app
Excellent support and refund policy
Although the settings are limited, we have run numerous leak tests and found no DNS leaks in Conan Exiles. According to the official website, ExpressVPN does not log any data and will never do so. The main advantage of using ExpressVPN is its transparency.
ExpressVPN
Fix connection latencies within the game servers by connecting to this gaming-optimized VPN.
The easiest way to deal with Conan Exiles lag spikes is by using Private Internet Access (PIA). It’s a premium VPN solution developed by Kape Technologies, which has numerous VPN servers optimized for gaming, streaming, and torrenting. You can also use it to evade geoblocks.
PIA provides anti-DDoS protection and defends your Wi-Fi connection from hacker attacks. You can use it to host game servers, protect your browsing sessions with an integrated ad blocker, and speed up your Internet connection for gaming.
Furthermore, PIA supports port forwarding, split tunneling, and a kill switch. And, if you ever stumble upon any technical issues when trying to fix Conan Exiles server lag, you can take advantage of the 24/7 live chat support.
More about PIA:
+3,300 VPN servers in 48 locations
Compatible with Windows, PS4, Xbox One
10 simultaneous device connections
An ideal Conan Exiles VPN solution
30-day money-back guarantee (no free trial)
Private Internet Access
If Conan Exiles is always lagging, use this VPN tool to quickly lower ping.
NordVPN offers a simple solution for repairing Conan Exiles server lag. It’s a VPN solution made by Tefincom & Co., which comes with high-speed VPN servers worldwide and top-notch security options. It’s ideal for fixing Wi-Fi packet loss.
NordVPN uses CyberSec, an exclusive piece of technology that protects your browser from phishing and other malware. It can fix Xbox packet loss and bypass VPN blocks by switching to obfuscation mode.
With support for the OpenVPN protocol, NordVPN can encrypt your gaming traffic without sacrificing network speed, making it ideal for fixing Conan Exiles lag. Plus, you can easily switch off your VPN.
More about NordVPN:
+5,100 VPN servers in 59 countries
Can be used on Windows, PS4, Xbox One
Up to 6 connections at once
A great VPN for Conan Exiles VPN
30-day money-back guarantee (no free trial)
NordVPN
Get rid of high ping and lag in Conan Exiles by turning to this trustworthy VPN.
Surfshark is the most affordable VPN for gaming, and to use it to play Conan Exiles is the best option for beginners.
We tested the app on a Mac, Windows PC, iPhone, and Android, and the design is very user-friendly. The speeds are quite good, and we typically experience a 20% speed drop when connecting to the nearest servers.
Unlimited devices are a big plus because they allow you to share them with family members or online friends.
There are some drawbacks to streaming, such as connection drops, but we haven’t had any problems when streaming on Discord or YouTube Conan Exiles.
More about Surfshark:
Country of registration: British Virgin Islands
Clients supported: iOS, Android, Windows, macOS, Linux
Number of servers: 3,200+
Simultaneous connections: Unlimited
Free unlimited global bandwidth
When compared to larger VPNs like PIA, it lacks servers in less popular countries, and the server selection is limited to a country and city.
Surfshark
Whitelist split tunneling lets you choose which sites should be routed outside the VPN tunnel.
CyberGhost VPN is another great solution for reducing server lag in Conan Exiles. Operated by Kape Technologies, this VPN tool has an extensive network of servers to help improve your gameplay and minimize jitter.
When using CyberGhost VPN, you can connect to the recommended VPN server to achieve maximum speed. It’s an excellent virtual private network service for fixing Conan Exiles lag and dealing with network congestion.
You can either redirect all network traffic through VPN or enable split tunneling to isolate Conan Exiles VPN traffic from other applications that are directly connected to the web.
More about CyberGhost VPN:
+6,500 VPN servers in 89 locations
Compatible with Windows, PS4, Xbox One
7 simultaneous device connections
An ideal Conan Exiles VPN solution
45-day money-back guarantee (1-day free trial)
CyberGhost VPN
Quickly fix Conan Exiles lag on PC, PS4, and Xbox using this dependable VPN.
✅ When Conan Exiles keep freezing PC try to update game patches often to avoid it ✅ Conan Exiles loading time can be long due to servers being overloaded, but it can be fixed if you connect to a private server in one of the VPNs optimized for gaming. ✅ Conan Exiles optimization is mostly done when you download and install the latest card graphic drivers for the game to be managed more easily. ✅ Conan Exiles graphics settings can be toggled in the Steam launch options and the in-game settings for the best FPS and lag-free performance in Conan Exiles.
To find out more about this game, check out our Conan Exiles Hub. Follow our Gaming VPN section to fix in-game ping and packet loss issues.
However, the best and quickest way to improve your gaming experience in Conan Exiles is to use a VPN that has fast servers, fixes ISP throttling, and provides dedicated IPs.
To summarize, if you’re experiencing latency issues and are looking for a quick Conan Exiles lag fix, you can’t go wrong by getting a powerful VPN solution with high-speed servers and practical security features, especially DDoS protection.
It doesn’t matter on which platform you wish to play this game since all are exposed to vulnerabilities and lag due to connection issues. You can use a VPN to not only reduce high ping but also minimize packet loss.
Speaking of the game, if you are facing other game errors like Authentication failure, we have a separate guide on it.
Network administrators might need to block user access to certain Windows 10 programs for various reasons.
There are a few ways that network administrators, and anybody else, can block users from running certain software on their desktops or laptops.
Users can apply locks to folders or add passwords to programs with third-party software. However, users can also block access to programs in Windows 10 without any third-party software as follows.
How can I restrict access to only certain programs for users on Windows 10?
1. Block Software from running by editing the Registry
Users can stop certain programs from running by editing the registry. It might be worth setting up a system restore point before editing the registry so you can undo the changes if required. Then, follow the guidelines below.
First, press the Windows key + R hotkey.
Enter regedit in Run’s Open text box, and select the OK option.
Next, open this registry path: HKEY_CURRENT_USER\SOFTWARE\Microsoft\Windows\CurrentVersion\Policies.
If there isn’t an Explorer key under Policies, right-click the Policies key on the left of the window to select New > Key. Enter ‘Explorer’ as the key name.
Select the new Explorer key. Then right-click an empty space on the right of the Registry Editor window and select New > DWORD (32-bit).
Enter ‘DisallowRun’ as the title for the new DWORD.
Double-click the new DisallowRun DWORD to open its Edit DWORD window.
Enter ‘1’ in the Value data box as shown directly below, and click the OK button.
Next, right-click the Explorer key to select New > Key.
Then input ‘DisallowRun’ as the title for the new subkey.
Right-click the new DisallowRun subkey to select the New and String Value context menu options.
Now enter ‘1’ as the string value name.
Double-click the 1-string value to open the Edit String window. Then enter the exact name of the software’s executable file that you need to stop running in the Value data box as shown directly below.
Click the OK button to close the Edit String window.
Close the Registry Editor window.
Now, the blocked program will display the error message shown below when users try to launch it.
Some users might not need to set up an Explorer key if there’s already one there under the Policies subkey. If so, users can skip the step for setting up a new Explorer key.
Open the Computer HKEY_CURRENT_USER Software Microsoft Windows CurrentVersion Policies Explorer path in the Registry Editor. Then, add the DisallowRun subkey to the existing Explorer key instead.
To set up blocks for more software, users will need to enter different names for string values within the DisallowRun key. For example, the string value names within the DisallowRun key for the second and third program blocks will need to be 2 and 3 as shown below.
If you’re establishing a seventh program block, enter 7 as the string value title.
2. Block user access to programs in Windows 10 via Group Policy Editor
Windows 10 Pro and Enterprise include the Group Policy Editor tool, with which users can stop programs running without editing the registry.
Users can adjust a Run only specified Windows applications setting with the Group Policy Editor. Moreover, you can configure access to some software to only be restricted for all or only certain users.
1. Press the Win + R keys at the same time on your keyboard to open the Run dialog.
2. Enter gpedit.msc in the text box, and then click the OK button to open the Group Policy Editor.
3. Navigate to User Configuration > Administrative Templates > Templates on the left of the Group Policy Editor window.
4. Double-click onRun only specified Windows applicationsto open that setting’s window.
5. Select theEnabledoption on the Run only specified Windows applications window.
6. Press theShowbutton to open a Show Contents window.
7. Then click a line on the Show Contents window to enter the executable file name of the program to block. Some users might need to open the software’s folder to check what exe file name they need to enter.
8. Press theOKbutton.
9. Click theApplyandOK buttons on the Run only specified Windows applications window. These guidelines will block the program for all users on a device.
10. To block the software for a specific user, you’ll need to add theGroup PolicyObject Editor snap-in to the Microsoft Management Console. Then you can configure policies to apply to specific users as follows.
11. First, press the Win key + Q keyboard shortcut.
12. Enter mmc.exe in the search box, and select to open mmc.exe.
13. Click Yes on the UAC prompt window that might open.
14. Then click File > Add/Remove Snap-in to open the window shown directly below.
15. Select Group Policy Object Editor on the left of the window.
16. Press theAddbutton.
17. ClickBrowse on the Select Group Policy Object window that opens.
18. Select the Users tab.
19. Then select an account to apply the policies to.
20. Press theOKbutton.
21. Click theFinishoption.
22. Select theOKoption on the Add or Remove Snap-ins window.
23. ClickFile>Save Ason the console window.
24. Enter a file title in the Save As window, and click theSavebutton.
25. Thereafter, double-click the saved MSC file to apply the block program policies to the selected account group.
That will launch the Group Policy Editor window from which you can select to block a program as outlined above.
That’s how users can block access to programs in Windows 10. You can unblock the software by erasing the new string values in the registry or disabling the Run only specified Windows applications setting.
However, to ensure that you can always undo registry changes, set up system restore points before establishing program blocks. Then, you can reverse changes made even to admin accounts by rolling Windows back to the restore point.
We hope you found this article helpful and managed to restrict user access to programs you don’t want them to open. Besides, you can block Internet access for specific apps in Windows to enjoy seamless network connectivity.
Let us know in the comments section below if you have any questions.
This is a nuisance for users who do not wish to use those apps and want them home from their computers as soon as possible.
Can I uninstall the built-in Windows 10 apps?
Yes, you can actually get rid of preinstalled apps that come with your Windows 10, even though the traditional method does not work.
There is a workaround for this and it involves using Powershell. Read on to find out more.
How can I delete Windows 10 apps for all users?
If you’re looking to remove the default apps from a Windows 10 image, you can quickly do that with PowerShell. It is a built-in command line tool that can modify your PC via commands.
With PowerShell, you can remove built-in UWP apps from all your laptop’s or desktop’s user accounts. You can quickly uninstall one or all the preinstalled apps for all the user accounts on your device through the usage of the remove-appxpackage all users script command.
1. Press the Windows button on your keyboard to open the Windows search box.
2. Type PowerShell in the search box.
3. Right-click on the result and select Run as Administrator from the list of options.
4. PowerShell will now be opened on your device and you can begin typing commands into it.
5. Input the following command and then press Enter to run it: Get-AppxPackage | Select Name, PackageFullName
This command will display a list of all the apps that are installed on your Windows 10 PC. Each of them will have a specific package name in the column on the right, called PackageFullName.
This is an example of a package full name: Microsoft.XboxApp_41.41.18005.0_x64__8wekyb3d8bbwe.
You can copy the package names for all the apps and note them down in a text document of your choosing, such as Notepad.
Note that you can shorten the package full names by including wildcards (**) around them. For example, you can enter *xboxapp* instead of Microsoft.XboxApp_41.41.18005.0_x64__8wekyb3d8bbwe for the Xbox app .
6. Now you can begin uninstalling apps. You can choose to uninstall an app for one or all users on your device.
In order to only remove an app from a single user account, you would type the following command, and then press Enter :Get-AppxPackage PackageFullName | Remove-AppxPackage
7. However, to uninstall the app from all user accounts you need to include -AllUsers in the command. Thus, the command becomes: Get-AppxPackage -AllUsers PackageFullName | Remove-AppxPackage
For example, to uninstall the Xbox app you would enter the following: get-appxpackage -AllUsers *xboxapp* | remove-appxpackage
8. Now, if you want to uninstall all the preinstalled apps for all user accounts, you need to type the following command: Get-AppxPackage -AllUsers | Remove-AppxPackage
Can I reinstall the preinstalled apps on Windows 10?
You can also reinstall those built-in apps if required. To do so, you need to use PowerShell with admin rights once more.
Once you open PowerShell, type Get-AppxPackage -allusers | foreach {Add-AppxPackage -register "$($_.InstallLocation)appxmanifest.xml" -DisableDevelopmentMode} and press Enter.
To reinstall a single app, enter Add-AppxPackage -register "C:Program FilesWindowsAppsPackageFullNameappxmanifest.xml" -DisableDevelopmentMode in PowerShell instead.
So that’s how you can uninstall preinstalled Windows 10 apps you really don’t need for all users. Just make sure the other users don’t need the apps before you uninstall them using the remove-appxpackage all users command.
Better yet, you can remove common group apps if you just want to get rid of them from your Start Menu to ensure other users are not affected.
If you have any other questions or suggestions, feel free to leave them in the comments section below.
Blizzard‘s Looking-Glass is a handy network troubleshooting tool that can help you figure out if there’s something wrong with your connection. Needless to say, it only works with Blizzard services and games.
However, considering that Blizzard’s services are mostly online, having such a tool can save you a lot of hassle.
Although we have other articles explaining how to run a packet loss test with pathping, using a dedicated tool such as Looking-Glass can be much easier.
Instead of looking up servers for the game or service that you have problems with, you can just turn to this tool. It’s easy enough that even PC novices can use it without too much effort.
What is Looking Glass used for?
The Blizzard Looking Glass tool is great for checking for downstream issues on some ISPs to verify packet loss, traceroute, and the Blizzard ping test. This Looking Glass speed test starts from the Blizzard servers and shows the route to your servers, including the pathping IP.
If all the results are coming back as 100% loss, this just means the test is being filtered or blocked by the browser. Due to the global impact of recent world events on network bandwidth, there are tons of things impacting everyone’s latency to all games.
The greater the distance between the client and the servers, the greater the impact. In your tests, the ping should be normal until it reaches your ISP, and that’s where all the issues start, with ISP throttling.
How do you install Looking Glass?
Unfortunately, you can’t download the Looking-Glass tool to your PC, as it’s exclusively an online service. However, accessing it is not exactly rocket science.
You just have to navigate to the correct address and you should be facing Blizzard’s network diagnostics tool in no time. Its design is minimalistic and embraces a dark theme, so it’s easy-going on your eyes, as well.
Wait for the test results to appear in the Test Result section.
What do Looking Glass sites show you?
The Battle.net account checker can be helpful to verify your account in the browser by login in through the Battle.net Authenticator. It offers an additional layer of security against unauthorized account access on up to three Battle.net accounts.
Blizzard’s Battle.net Looking Glass response times and packet loss may experience significant spikes. If you have issues with this connection and your gameplay suffers as a result, you should run a Battle.net client troubleshooting, and a Battle.net speed test.
▶ Traceroute By testing the connection from our servers to your computer, trace routes can help identify where connection problems occur. A traceroute report shows the exact path a data packet takes to reach its destination. Any of the following issues in your traceroute report may indicate a problem with your connection:
(asterisk) symbols for timeouts
The number values range from low to high.
The figures are consistently high.
▶ Ping A ping test, unlike a traceroute, does not record the path the packet took. A ping test will notify you if our servers are unable to reach your computer. If you notice any of the following issues in your ping report, it may indicate a connection problem from your ISP servers to your location: ?Packets loss ?Fast response time A ping may fail due to network security rather than actual connection issues.
You can only choose between Korea, the United States, and Europe, as far as regions are concerned. The services menu is richer and holds the following options you can test for ping and packet loss:
Some users report getting 100% packet loss from Blizzard’s Looking-Glass network diagnostics tool. However, this shouldn’t be a serious reason for concern, since most of the time it’s just a matter of interpretation.
For instance, we’ve run the test several times and got 100% packet loss on a bunch of nodes (intermediary). On the bright side, the service (World of Warcraft) worked flawlessly.
On the other hand, other users reported Looking-Glass’s results showed 0% packet loss, while the game or service was impossible to access or play.
Our advice would be to take it with a pinch of salt.
If you want to check if there’s any discrepancy between the standard test (pathping) and Looking-Glass, run both and compare the results. You might be surprised.
If that’s the case, using a VPN won’t only fix packet loss, but also improve ping by routing your traffic away from your ISP’s improperly routed network. Also, if your ISP is throttling your bandwidth, using a VPN should improve things a lot.
Note that having a VPN can help you in several ways, other than improving packet loss and ping. VPNs can give you a tremendous online privacy boost, secure your connection, and even circumvent geoblocking.
2. Troubleshoot your connection manually
✅Check if there’s any faulty software or hardware component on your end (PC, cables, router, drivers).
✅Repair/update/upgrade/replace any faulty component as needed.
✅Switch to wired instead of Wi-Fi (Wi-Fi leaks packets more frequently than wired).
✅Call your ISP and ask them to look into their routing (probably won’t do anything).
✅Contact Blizzard if there’s something wrong on their end.
Note that keeping your end of the connection (home network) in top shape can spare you a lot of headaches. Merely upgrading your cables from, say, CAT 5 to CAT 6, might trigger a dramatic change in speed.
Looking-Glass can be useful at times
The bottom line is that if you don’t want to get your hands dirty performing network diagnostics for Blizzard services, Looking-Glass can be exactly what you’re looking for.
You select a region and the service you’re testing against and let it run its course.
Frequently Asked Questions
What is Blizzard Looking-Glass?
Blizzard’s Looking-Glass is a network diagnostics tool that only shows you information that’s relevant for Blizzard services and games, such as packet loss, and ping.
Yes, but only if your ISP’s network is poorly routed or if the ISP is throttling your bandwidth. Check out our best VPNs to improve ping.
However, note that it might return some inaccurate results, whether it’s scaring you with high packet loss values when the game works flawlessly or telling you there’s nothing wrong when you can barely access the service.
We now have yet another nifty gadget to add to our collections, one that promises to be your best gaming buddy for years to come. But a common issue plaguing devices is Steam Deck stick drift.
Though after Steam Deck, Valve’s handheld gaming PC, finally made its way to the general public, the overall response so far seems to be positive, except for this issue are a few other minor ones.
However, the Steam Deck stick drift is a relatively common problem in controllers, and we will be looking at ways to fix it in the guide. For those who didn’t know, the Nintendo Switch console is notorious for displaying this problem.
Does Steam Deck have stick drift?
Many users have reported stick drift with Steam Deck, which has led to issues with games requiring precision. A user even shared a video of stick drift on their handheld gaming device.
Some reported Steam Deck left stick drift, while the right one was problematic for most. However, the issue has not been reported by all users, so there’s a good chance that your Steam Deck wouldn’t show signs.
Also, Valve has confirmed that the issue started after a recent firmware update and has been identified and appropriately addressed. So, it shouldn’t be the case for new devices being shipped out.
In case you are facing Steam Deck stick drift, find out all the ways to fix it in the next section.
How can I fix the Steam Deck stick drift?
1. Update the software
NOTE
Before updating the software, ensure you are in Game mode and connected to the Internet on Steam Deck.
Turn on Steam Deck, and press the Steam button on the console.
Tap on Settings in the navigation pane.
Now, navigate to System and tap on Check for Updates to scan for a newer version for SteamOS.
If an update is listed after the scan, click on Apply.
Wait for it to be downloaded, tap Restart, and then allow your Steam Deck some time to apply the changes.
A patch to fix the Steam Deck stick drift issue was released recently, and Valve recommends that you install it to get rid of the problem. And so far, it has seemed to work for most users.
2. Check for dust buildup
Though this shouldn’t be the case in the initial days, you may check for dust buildup near the stick to fix drift issues in Steam Deck.
The easiest way to remove any dust particles or grime lodged here would be to wipe the area around the stick with a soft and dry cloth.
3. Contact the Steam support
If nothing helps, it could be a hardware issue, and we recommend contacting Steam Deck Support for more help.
In no case should you open the gaming device to fix things since that could affect its overall functionality and even render the Steam Deck useless. Instead, you should let the experts deal with it!
How do you calibrate a Steam Deck joystick?
Press the Steam button on the console, and then tap on Power.
Select Switch to Desktop here.
Now, open Steam.
Tap on the Big picture mode icon near the top-right.
Next, select Controller Settings under Controller.
Choose your controller after it’s detected.
Tap on the Calibrate button.
Now, drag the slider for the problematic stick to the right until the center dot becomes black.
Once done, tap on OK, and then restart Steam Deck for the changes to effect.
Calibrating allows you to modify the Steam Deck joystick deadzone. And this was a legit workaround for many before Valve rolled out the update the fix Steam Deck stick drift.
That’s it! You now know how to fix the stick drift issue and Steam Deck joystick calibration. So, from now on, you wouldn’t encounter the frequent disruptions affecting the gameplay and will enjoy the console the way it’s supposed to be.