Active Server Page Extended (ASPX) is a file extension designed for the Microsoft ASP.NET framework.
The ASPX files are usually generated by the web browser and contain scripts and codes. Your web browser uses the codes and scripts to decide how to show the web page.
If you did not intend to download the ASPX file, it is most likely that you don’t know what program to use to open the file.
In this article, we take a look at a few tools that can help you open and view the ASPX file with ease.
How can I open a .aspx file?
1. Change the file extension
If you intended to download a PDF or image file, but the website delivered an ASPX file, try renaming the file. If you were expecting a PDF, then rename the file as file.pdf or file.png in case of an image.
This issue usually occurs when the website doesn’t properly name the generated file, and you end up with a server-side file.
If the issue persists, try to access the same website with a different browser to see if it is a browser-specific issue.
Adobe Dreamweaver is a popular web development platform, and like other Adobe products, this is paid software. However, if you already have it installed, you can use it to open the ASPX files.
Dreamweaver allows you to quickly create and publish web pages almost anywhere with support for HTML, CSS, JavaScript, and more.
You can create, code, and manage dynamic websites with a smart, simplified code engine. The code hint allows you to quickly learn and edit HTML, CSS, and other web standards.
Adobe Dreamweaver
Never worry again about opening ASPX files with this incredibly powerful and yet easy-to-use website creator for both Windows and Mac!
If you want to work with the downloaded ASPX file, you can make use of free IDEs like Microsoft Visual Studio. Using the tool, you can open and edit ASPX files on your Windows and Mac systems.
Visual Studio is a fully-featured IDE offering the entire toolset from initial design to final deployment. For improved accuracy and productivity, it comes with the IntelliSense code suggestion feature.
For simple modifications to .aspx files, you are better off using the Notepad++ app. It comes with advanced features and supports CGI format.
Notepad++ is based on the powerful editing component Scintilla and is written in C++, ensuring a higher execution speed and small program size.
1. Navigate to the Notepad +++ official website.
2. Download the latest app version from the list.
3. Run the installer to install the code editor.
4. Launch Notepad +++.
5. Click on File.
6. Select Open and browse your PC for the .aspx file.
7. Edit the .aspx file however you like.
The ASPX files are used by Microsoft’s ASP.Net server-side web application framework. If you come across a file with an ASPX extension, you can use the tools listed in the article above to open and edit the files.
We hope you learned everything you wanted to know about .aspx files on your devices. Let us know in the comments section below if you encountered any difficulties opening or editing them using our recommended software.
New to Revolut? Want to top up your account and you don’t know how? Well, you came to the right place.
Adding money to Revolut is pretty simple and straightforward, but a lot of new users encounter issues when trying to top up their accounts.
If you’re in the same boat, keep reading and you’ll find all the info you need.
How do I add money to my Revolut account?
1. Add money by card
1. First, you’ll need to open the Revolut app on your Android or iOS device.
2. You’ll see an Add money button on your home screen. Tap on it.
3. Now add your card details (your 16-digit card number, expiry date, CVC code,billing postal/ZIP code).
4. After that, enter the amount you want to top up.
5. Your money deposit will instantly appear in your Revolut wallet.
Adding money to your Revolut wallet via card is very simple and can be done directly via your phone application. All you need to do is enter your card details and the sum you want to top up, and the money will be deposited into your account.
Keep in mind that if any of the card information is wrong, your deposit will fail the security checks and it will take up to 5 days to get your money back in the bank account.
Optionally, if you need local and international transfer details, you can go to Account details, under the Profile section of the app.
Now select the currency that you want to add to your account.
Make sure to select the same currency in Revolut as the currency of your bank account to avoid any exchange rates.
Depending on which currency you transfer, you’ll have to use your unique local account details, IBAN details, and SWIFT details. For your funds to go straight to your account, make sure that the reference/description of your transfer is the 8-digit reference number highlighted in pink with no other text.
If you don’t select the correct currency in the app, your transfer might not arrive.
Also, you can receive transfers from family, friends, or even your employer directly into your Revolut account by using the transfer details mentioned in step 2.
Some Revolut users have reported that they are receiving the We are sorry, something has gone wrong. Please try later. error message and are unable to top up their account:
I used Revolut since almost a month now and it worked perfectly until yesterday. I don’t receive the verification code but the message “We are sorry, something has gone wrong. Please try later”. I tried many times but it sill doesn’t work for no reason. I noticed regular similar issues on the forum but I can’t find any answer. Could someone help me?
If you’ve encountered the same error, make sure that the card/bank information is correctly set up and that you didn’t change your credential by mistake. Also, check if you selected the correct currency.
If there’s no problem with the credentials and info, try the next steps:
Log out and log in back again.
Check in the iOS/Android store for app updates.
Clear the app‘s data.
Uninstall and reinstall the app.
Check for firmware updates.
Adding money to your Revolut account is not very hard, but you’ll have to pay attention to personal information and currency. If any of the info is entered incorrectly, your deposits won’t work.
Aligning printer cartridges are necessary when you have installed new cartridges or if the printer has not been in use for quite some time.
Typical symptoms when you know there is something wrong with the cartridge alignment are when the print output is showing jagged lines or if the print isn’t perfect, particularly along the edges.
Can I align print cartridges?
Fortunately, setting things right here is easy as a few simple steps are all that you need to ensure the print quality is spot on the next time you print any pages.
However, while the basic steps are the same for almost all printers, there might be a few steps unique for each printer brand.
Here are the steps we have mentioned for some of the most used printer brands named HP, Canon, Epson, and Brother printers.
Before we begin, you will also do well to ensure you have the updated printer software for the particular model installed on your PC instead of relying solely on the one that Windows 10 comes with.
What happens if a printer does not have aligned print cartridges?
A printer that has alignment problems will not print papers accurately. Images and text can print at an angle or they may not print at all. A printer can become misaligned if there is any paper stuck in the device, improper installation of cartridges, and using low-quality cartridges.
Furthermore, a printer can become misaligned after the device completes a large print job.
The printer software generally comes included with the means to align print cartridges though mentioned below are the more general ways of doing the same and are equally effective as well in achieving the desired result.
How do I align print cartridges in Windows 10?
1. Align print cartridges for HP printers
Aligning print cartridges for a HP printer can be done via the built-in HP Printer Assistant. You need to manually configure it to do the job.
The process will also require printing of a test page, so ensure the printer is ready and that the tray is properly fed with enough paper. Also, in extreme cases, you might have to perform the alignment process a few times until the print of optimum quality is achieved.
Moreover, the manual process will involve printing of test pages comprising of horizontal or vertical lines or a combo of both. You will then be required to enter the number of lines as is required for the system to align the print heads accordingly.
1. Launch the HP Printer Assistant software, or launch the app for the printer installed on your device.
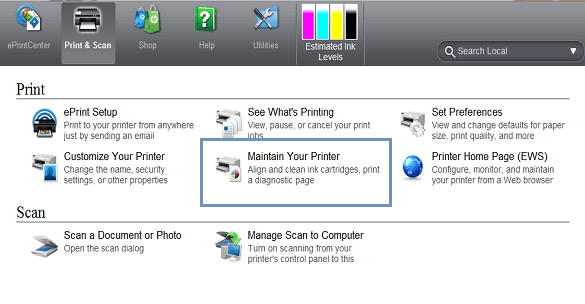
2. Select Print & Scan and click on Maintain Your Printer under the Print section.
3. This will launch the Toolbox windows that applies to your printer.
4. In the Toolbox windows, select Device Services. Here you will find the list of options needed for printer maintenance.
5. Click on Align Ink Cartridges and follow the on-screen instructions to finish the process.
Launch the Run dialog box. This can be done by pressing and holding on to the Windows + R keys or just typing Run in the Cortana search box and selecting the app from the search result shown.
In the Run dialog box, type Control Printers and hit OK.
Select the printer installed on your device or the one you are having issues with. Right-click on it and select Printing Preferences.
In the Printing Preferences windows, select the Maintenance tab > Custom Settings.
Select Align heads manually if you’d like to go for a manual process or deselect it if you want it to be done automatically.
Click on Ok and follow on-screen instructions in either case.
As has been stated earlier, there is going to be a test page with several patterns printed. You will then be required to count the vertical or horizontal lines or both and enter the best combination in another window that shows up.
The software is going to make adjustments to the settings using the info you have provided.
3. Align cartridges for an Epson printer
Launch the Run dialog box as before.
Type Control Printers and click on OK.
In the Devices and Printers page that opens, right-click on the Epson printer that you wish to set right the alignment for and select Printing Preferences.
In the window that opens, click on the Maintenance
Click on Print Head Alignment.
This launches the Print Head Alignment dialog box. Follow on-screen instructions to set things right.
4. For Brother printers
Launch Run as before and type Control Printers.
Click on OK to launch the Devices and Printers
Right-click on the Brother printer that needs its printer cartridges realigned and select Printing Preferences.
In the Printing Preferences window, select Features.
Click on Printer Services. This will open the HP Toolbox.
In the Toolbox windows, click on Align the Print Cartridges.
To prepare your printer properly, you should also check your printer ink levels so alignment tests produce accurate results.
Also, as stated above, there are going to be test pages printed and you will have to make the right input based on the test page print to align the print cartridge accordingly.
So there you have it, quite a comprehensive guide to get your cartridges aligned for some of the most well-known printers on Windows 10 PCs.
Everyone knows and can agree that VPNs are among the best online privacy and security tools. Not to mention the fact that you can use them to circumvent geo-restrictions.
On paper, VPNs might sound like pure awesomeness, as they’re the multi-tool of the online privacy practitioner.
However, a burning question still pops up every now and then in users’ minds: can VPN affect Internet speed?
Does VPN affect Internet connection?
Essentially, what a VPN does is hide your online activity and keep it only for yourself. That we all know. But how about we take a look under the hood and understand how it can achieve that?
First thing first, a VPN is a network of servers that you can connect to, which will keep all your Internet traffic private.
Picture your default, public Internet connection as a transparent tube that constantly passes data.
If your ISP, a hacker, a government agency, or anybody else with the means to snoop on your activity, decided to take a peek, there would be nobody around to stop them.
The data flows through the transparent tube and it’s there for anyone with eyes to see.
Now imagine that using a VPN would run a smaller, opaque tube, straight through the transparent one. While you’re using the VPN, all your traffic goes through the smaller, shielded tunnel, instead of floating around visibly.
Naturally, this means that your data becomes private, away from prying eyes. On the downside, since it’s the same amount of data running through a smaller tube, the flow might not be as fast.
Why does VPN slow down my Internet speed?
Firstly, we could say that the main reasons for your VPN slowing down your Internet connections are the following:
➡️ Number of servers (more servers = less network congestion)
The brief analogy we used above misses some essential aspects. For starters, VPNs not only hide your traffic but also encrypt it.
So even if someone would be able to take a glance at the traffic that passes through the obscured tunnel, it would be for nothing.
All your data is protected using complex encryption and decryption algorithms. This security measure also puts a strain on the servers, and implicitly on your Internet connection.
Then there’s the distance. Imagine that you need to access a website located in the US, and you’re already in the US. The time it takes for your computer to establish the connection shouldn’t be too long.
However, if you use a VPN server located in Germany, for instance, things change.
Instead of drawing a straight line between you and the destination website, the connection hops through a German server, and the virtual distance between you and the website increases.
Last but not least, your Internet speed might also depend on the quality of the VPN servers.
If your VPN uses cheap, low-power servers, or if they throttle the bandwidth, your connection’s speed will decrease dramatically.
? Does McAfee VPN slow down Internet?
Yes, you can expect Internet slow speed while using this VPN because it secures your traffic through additional servers to give you online privacy.
? Does VPN slow down Internet on iPhone?
This is also true because the VPN needs to redirect your traffic to another network before connecting to the server. Hence, that may slow down your Internet connection.
? Does Norton VPN slow down the Internet
Norton VPN will certainly reduce your Internet speed. As stated by other users, this particular VPN is among the slowest tools in terms of connection speed.
? Does ExpressVPN slow down Internet?
No, it doesn’t. According to our tests, this VPN offers a truly fast connection so we didn’t notice any slow-down times.
Even though it’s common to have a speed reduction when connecting the VPN, this software provided quick Internet navigation.
Connect to a fast, low-ping server (location isn’t important).
Enjoy your fast, un-throttled Internet connection.
ExpressVPN is an excellent all-around service from Kape Technologies. While it will still affect your Internet speed at times, depending on your server of choice and the encryption algorithms you use, the slowdown will be little.
It has a wide network of servers all around the world, so you can be sure that you can always find the best server suited for your needs.
This VPN also doesn’t throttle bandwidth, so you can enjoy unrestricted Internet access no matter where you are.
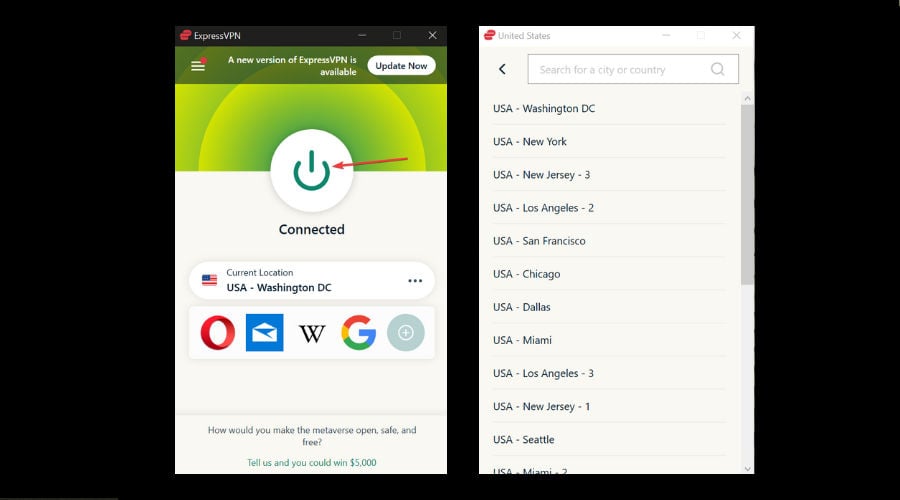
As you can see, the slowdown is not exactly huge, considering that we’re connected to a US server through wireless, from Europe.
ExpressVPN
If your VPN slows down your Internet connection, consider this ultra-fast VPN solution.
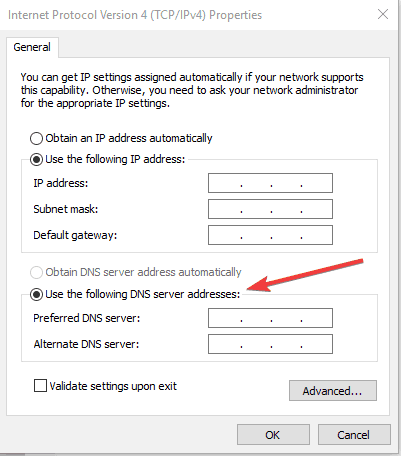
As you may know, your ISP assigns you a DNS address when you sign up for an Internet subscription.
However, more often than not the ISP-assigned DNS is not the best and might slow down your Internet connection by a great deal.
If that’s the case, you can switch to a free DNS such as OpenDNS, Cloudflare, or Google Public DNS. This, in turn, can make your Internet connection faster.
Just as a quick side note: Express has its own DNS for each server that you can easily toggle straight from the client.
3. Use wired connections instead of wireless
If possible, you should always pick wired connections instead of wireless. Wired connections aren’t prone to interference, and as a result, you’ll get better speed and a more stable connection.
That goes especially if you’re also using a VPN. We already know that wireless is slower than wired and that VPN affects Wi-Fi connections. Put together, you get the worst of both worlds.
With all that in mind, we can safely say that yes, VPN can impact your Internet speed positively.
You should also keep in mind that the percentage of the slowdown is not a constant, and can wildly vary depending on various factors.
On the downside, you can’t do anything to remove the slowdown altogether.
The good news is that you can keep it in check by always choosing an efficient VPN service.
Or, choosing wired over wireless connections, using a public DNS if your ISP-assigned one is too slow, and connecting to fast servers that are close to you.
Which VPN increases Internet speed?
It is likely to increase your connection speed using the right tools. Thus, there are really fast connection VPNs that will increase your Internet speed:
ExpressVPN– Lightning server connection in 94 regions
Lastly, you can check out the best VPNs that won’t slow down your connection as much. Visit our VPN hub to discover more awesome guides and tools to keep your online identity safe.
Frequently Asked Questions
Does having 2 routers increase Internet speed? It depends on your current setup and Internet plan. If your connection is already slow, adding a second router will probably slow it down even further. However, sometimes adding a second router can improve your Wi-Fi speed.
Why does my VPN slow down my Internet speed? A VPN can slow down your Internet speed for a number of reasons: encryption, decryption, the distance between you and the server, and the quality of the servers.
How to increase your Internet speed while using a VPN? Try using wired connections instead of wireless, change your ISP-assigned DNS to a public one, and try choosing servers that are geographically close to you.
One of these features is Jump lists, and if you’re missing it we’re going to show you how to enable Jump Lists in Start Menu in Windows 10.
What are Jump Lists?
Jump Lists were first introduced in Windows 7 and they allowed you to see recent documents or to access certain features from apps that are pinned to your taskbar or to your Start Menu.
For example, if you have a text editor pinned to your taskbar you can see recent files simply by right-clicking its icon on the taskbar.
Jump Lists work the same way for Start Menu apps, and if the app has support for Jump Lists, it will have a small arrow next to it. By hovering your mouse over it, you can reveal your recent documents or certain features.
As you can see, this was quite a useful feature, and it’s a shame to see that they aren’t working in the Start Menu on Windows 10, but there’s a way to fix that.
How can I enable Jump Lists in the Windows 10 Start Menu?
1. Open the Run dialog by pressing the Windows Key + R.
2. Type in regedit and click OK to open the Registry Editor.
3. Locate the following key on the left pane:HKEY_CURRENT_USERSoftwareMicrosoftWindowsCurrentVersionExplorerAdvanced
4. Create a new 32-bit DWORD called EnableXamlJumpView and set its value to 1.
5. Close the Registry Editor.
6. Restart your PC.
Although Jump lists are working with taskbar icons in Windows 10, you can enable them in the Start Menu as well by changing the registry.
We have to warn you to be careful when changing the registry because you can damage your Windows 10 installation.
After restart, Jump lists should be working in the Start Menu, although they look a bit bigger than on Windows 7.
On Windows 10, you can quickly check your Jump Lists for every app or program pinned to the taskbar. All you need to do is right-click on the respective app or program and you’ll see a list of all the recent files and folders that you accessed.
There you go, that should do it. If you have any questions or suggestions related to this post, feel free to use the comments section below.
Many reputable VPNs use 256-bit encryption for your connections, the most reliable encryption protocol. It is practically hacker-proof and enables your information to stay hidden.
When you surf the web via a trusted VPN, hackers won’t be able to access your passwords, financial details, and email information.
Other security protocols, such as DNS leak protection and Killswitch features, enable users to surf the web anonymously. These protocols hide an IP address and prevent hackers from accessing user keystrokes when browsing online.
What is the best VPN to stop hackers?
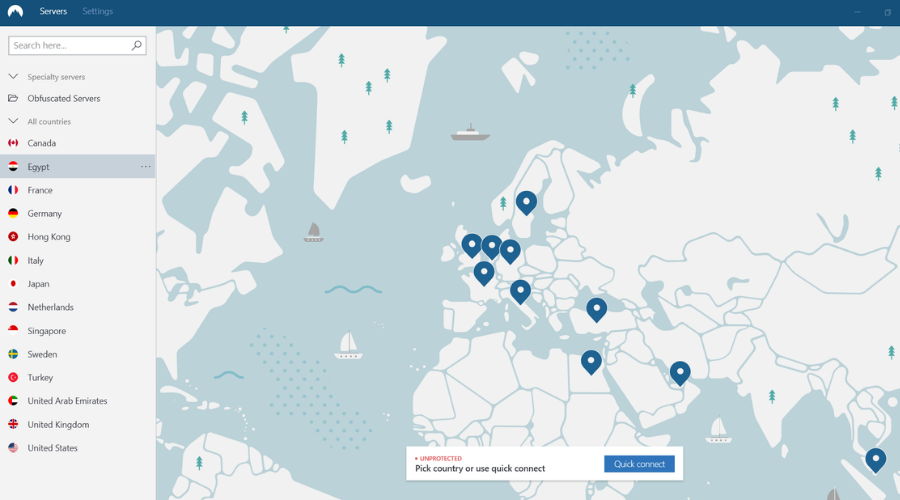
? ExpressVPN– A VPN that protects you against online tracking
? NordVPN– Protects small businesses from phishing
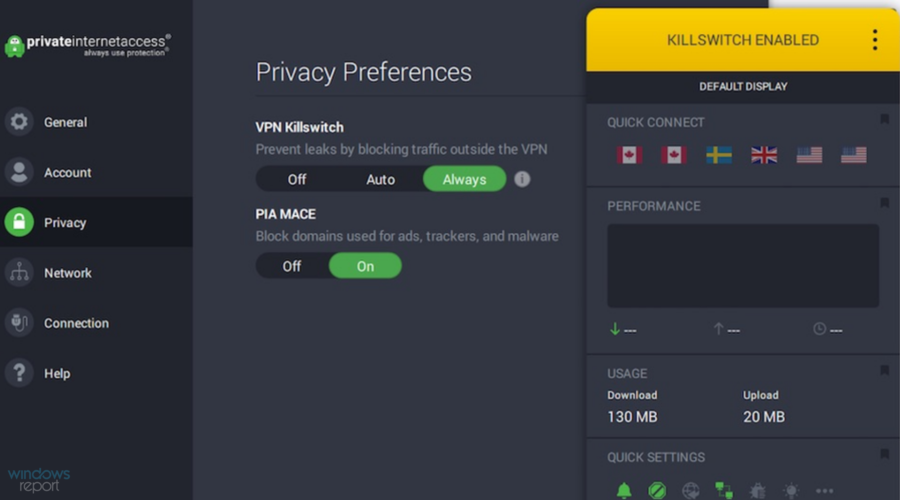
? Private Internet Acces– Has all available security protocols to protect you against hackers
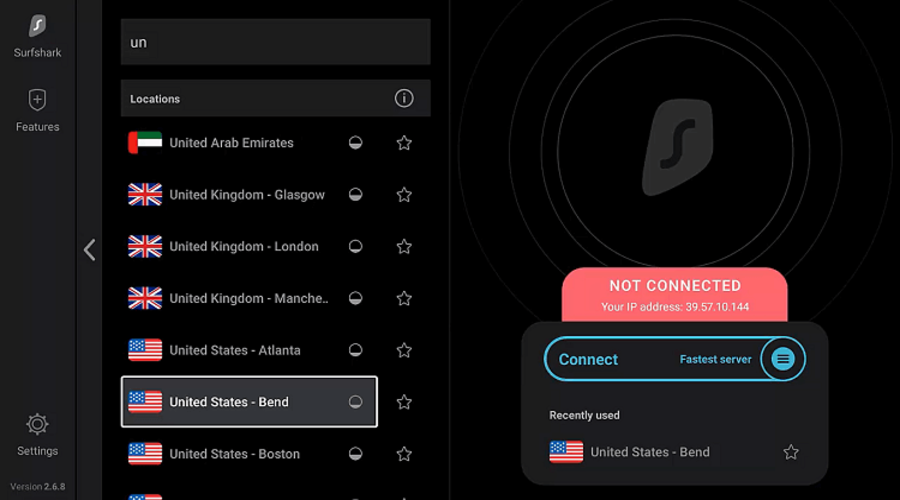
?️ Surfshark– Best protection against public wifi hacking attempts
?️ Cyberghost– We believe Cyberghost is the best anti-hacking VPN while browsing
Now that we have listed them, let’s look at the most important security-related information about each of those VPNs.
Express VPN protects your data by connecting you to secure virtual servers. The VPN service is one of the best on the market and is well known for its strong encryption and transparent privacy policy.
With this service, you can enjoy fast-paced connections regardless of location. ExpressVPN has 160 server locations in 94 countries.
Along with protecting your data and identity with secure protocols and private DNS, Expres VPN also encrypts your traffic so you can surpass any geo-restrictions.
You can access localized websites worldwide and enjoy restricted content from video-on-demand platforms without being detected.
ExpressVPN implements secure features, such as a kill switch that blocks all traffic data in case the connection drops. It can also mask your IP address so no hacker can track your whereabouts.
Other key features of Express VPN include:
Split tunneling
24/7 support
Dedicated apps for multiple devices
Unlimited bandwidth
Lets you connect up to 5 devices simultaneously
ExpressVPN is a subscription-based service with a 30-day money-back guarantee for each plan.
Express VPN
Secure your online activity and enjoy unrestricted browsing with unlimited bandwidth.
NordVPN offers lots of security-rich features that can stop hackers from dead on their tracks. Users are provided with over 5,500 servers located in 59 countries to choose from.
The VPN uses strong 256-bit encryption to keep your information safe, and it also hides your IP address from hackers and your ISP.
CyberSec technology-powered, NordVPN is unmatched in terms of security, plus it has an automatic kill switch and a strict no-logs policy for more privacy.
You can test all these features and be more risk-free thanks to its 30-day money-back guarantee.
NordVPN
Secure your connection with over 5500 servers in 59 countries to choose from!
When it comes to your safety on the web, Private Internet Access has leverage over all its competitors.
This world-class VPN provider relies on tunneling technology to provide multi-layered security, which basically means that it uses encrypted tunnels to create multiple layers of privacy around you.
Perfectly suited to protect your identity through IP cloaking, PIA also protects your traffic data with the highest level of encryption, making it your trusted partner in the battle against hackers.
Secure VPN tunnels shielded by the most advanced protocols like Wireguard, PPTP, OpenVPN, and L2TP/IPSec make your connection as safe as it can get.
You can choose to connect on any of the 3292 + servers spread across 46 countries and never worry about your identity being exposed, your location compromised or your traffic and online activities tracked.
Let’s quickly look at its key features:
Extreme privacy and most encryption
Secure connection to servers from all over the world
Keep your data safe and private even on public Wi-Fi
Unlimited bandwidth and fast download speeds
Built-in ads malware blocker
Integrated firewall
Secure VPN Protocols (Wireguard, PPTP, OpenVPN, and L2TP/IPSec)
Protect up to 10 devices with one subscription
Private Internet Access
Be one step ahead of hackers and stay protected with PIA!
Surfshark is a VPN service provider with 1700+ servers in 63+ countries worldwide. This makes it convenient to find a VPN connection that is close to your vicinity.
Surfshark takes security seriously by providing AES 256-bit encryption, the same type of encryption used by most governments for their communication.
The use of IKEv2 and OpenVPN protocols also provides ideal protection against hackers and other unwanted entities.
A kill switch option ensures that your privacy will stay intact if the VPN connection is ever down, and with a strict no-logs policy, you should have peace of mind in knowing that no one is watching or recording any of your activity.
The VPN shines in the area of device availability, allowing you to connect to as many devices as you like.
You can also stop the service with a 30-day money-back guarantee.
Surfshark
Want the best protection against hackers and such? Surfshark is what you’re looking for.
Boasting over 6400 servers in 90 countries, CyberGhost is a trusted VPN service provider that has over 30 million users. According to Windows users, even hackers use CyberGhost to protect their information and identity.
Security-wise, CyberGhost protects data with 256-bit military-grade encryption; this ensures your information is unreadable to hackers, government, and ISP operators.
The DNS leak protection and kill switch options provide an even more secure connection and prevent the leakage of your passwords to hackers.
Meanwhile, this VPN enables connection to 7 simultaneous devices and includes a 30-day money-back guarantee.
CyberGhost
Keep hackers at bay and secure your digital life with the best VPN!
VPNs work best to stop hackers when combined with additional security software, hence, you need to utilize quality antivirus solutions as well as anti-malware tools.
This will prevent malware attacks and safeguard your personal information and online identities.
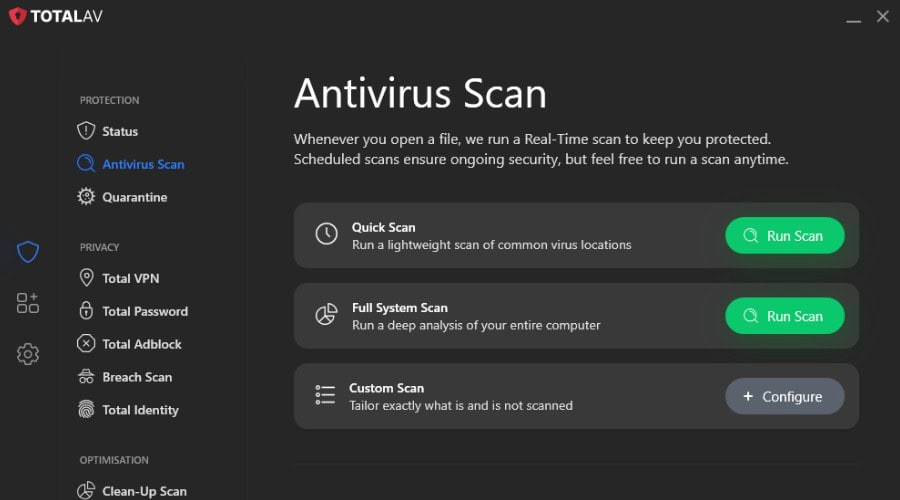
TotalAV’s higher plans bundle a Safe Browsing VPN with the antivirus, so you get both from one app. Real-time protection stops malware as it arrives, WebShield blocks phishing and malicious sites, and every download is scanned before it opens.
The VPN is a bundled extra rather than a full VPN service, so it is best seen as a way to encrypt your connection on public Wi-Fi rather than a replacement for the dedicated VPNs elsewhere on this list. The free version lets you scan a PC before you buy.
Safe Browsing VPN bundled in the higher plans
Real-time protection against malware
WebShield blocks phishing and malicious sites
Downloads scanned before they open
Free on-demand scanner
TotalAV
Protect your PC against all threats with this up-to-date antivirus.
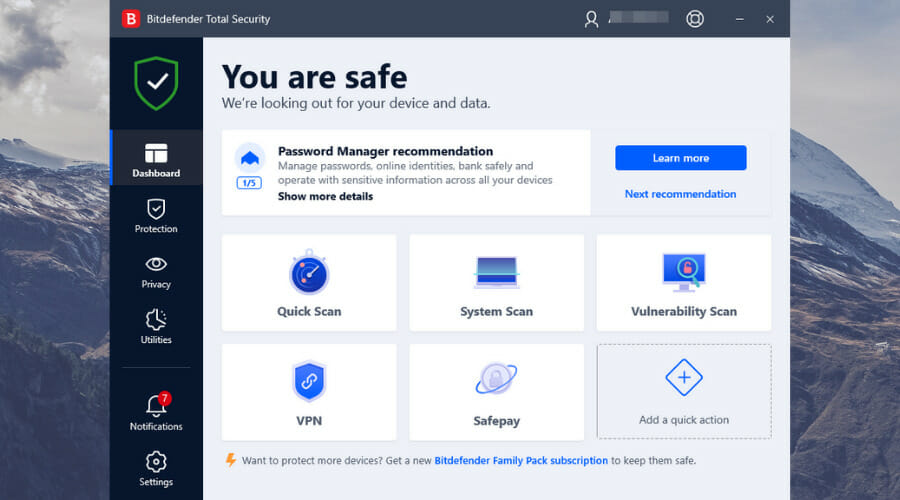
Bitdefender is rated as one of the top antivirus programs in the cybersecurity world. With this antivirus software, you can be guaranteed continuous protection against viruses, malware, and spyware used by hackers.
Meanwhile, in the latest AV Test results, Bitdefender was benchmarked and scored highly on protection, performance, and usability metrics.
This makes Bitdefender a reliable antivirus that can be combined with VPNs to protect your computer against hackers.
Also, Bitdefender is easy to use due to its minimal design GUI. Some of its key features include:
Bitdefender VPN
Antivirus, anti-malware, anti-theft
Firewall
Complete data protection
Rescue mode
File Shredder
Bitdefender Total Security
Protect your system with one of the best antiviruses on the market.
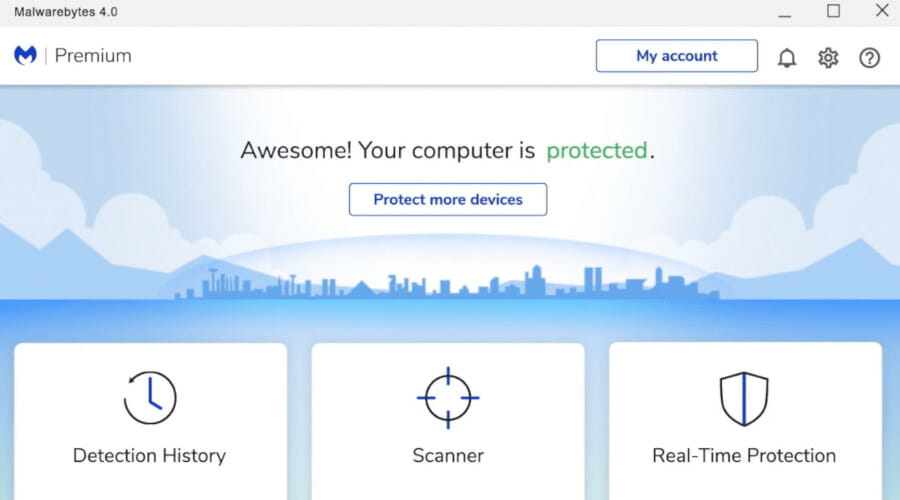
Malwarebytes is an excellent malware security software that detects and removes malware and advanced threats, preventing them from taking over your system.
In addition to its specialized ransomware protection feature, Malwarebytes is efficient in removal of PUPs (Potentially Unwanted Programs). Some of its key features include:
Anomaly detection
Behavior monitoring
Application hardening
Web protection
Malwarebytes
Keep your computer secure in real-time with this light and powerful antivirus.
Note that the popularity of VPNs in the last decade has come with a lot of misconceptions since many people do not really know what a VPN does and its mechanism for protecting devices.
Among these misconceptions is the idea that VPNs protect against hackers and viruses.
VPN is software that enables safe passage through which data travels from your PC to the web server you’re trying to connect. This is particularly important as hackers and malicious programs cannot access this safe passage, so your data is protected.
As encryption technology makes your data unreadable, your ISP, hackers, and even security agencies cannot access your information.
What software prevents hackers?
You can find many effective programs to safeguard your PC from risky hacking attacks. Some of them are described above, so don’t miss them.
All said you have particular anti-hacking software for Windows devices that secure the OS from phishing attacks, spyware, and more to go.
VPNs bring valuable security features to the table; however, we believe they can best stop hackers when combined with strong antivirus software for maximum protection.
What anti-hacking tools do you use? Share your experience with us in the comments section below.
Can you be hacked while using a VPN?
The answer to this is Yes and No. A hacker cannot directly access your system if you’re using a trusted VPN, but your information can be acquired in several ways.
If you download malware-infected files from a suspicious website while browsing anonymously, this will infect your system with malware and your VPN would be powerless to stop it.
Also, you may click on a link online that may have malicious spyware in hidden code.
Your VPN does hide your internet activities and data from hackers. However, the spyware downloaded and installed would record your keystrokes, mouse clicks, and other computer patterns.
This is one reason why you should not download a free VPN. Many hackers use these free VPNs as bait to lure unsuspecting users to download malware or trackers on their systems.
➡️ Can hackers see your incognito history?
They can, indeed, if you don’t use any security methods like VPNs or antivirus. Hackers can track Incognito history through different cyber practices.
➡️ Does Incognito mode stop hackers?
No, for sure. The Incognito mode helps you hide specific information, like browser history or cookies, but it doesn’t protect your IP address.
That means hackers can break into your system using your unprotected IP address.
➡️ Can hackers see what I Google?
More than probable, yes. There are experienced hackers who use complex strategies to track sensitive data. So, seeing your Google queries may be a piece of cake.
➡️ Can browsing history be tracked through a VPN?
A VPN should encrypt your connection so that your personal browsing history is private and inaccessible to others.
For extra protection, you should consider a VPN with threat security to stop advanced attacks from skillful cyber criminals.
Why is it best to combine an antivirus with a VPN?
It is essential you combine antivirus and a trusted VPN service to ensure complete protection of your system. This is because they both go hand in hand while ensuring secure connections, online security, and privacy.
Many computers either come with antivirus or users download some form of antivirus. This is essential as antivirus removes malware, viruses, and malicious software from your system.
Another important feature of antivirus is it prevents exploit attacks. A hacker can exploit vulnerable patches in the computer software to hack your system. Using a VPN alone cannot secure your system from exploit attacks.
Since a VPN majorly hides your IP address and encrypts your internet connection, you need trusted antivirus software to shield you from malicious software, phishing websites, and other online malware. So the bottom line is antivirus and VPN are complements of each other.
If your emails are suddenly sent to the Deleted Item folder instead of Inbox, it can happen due to two reasons: if you have applied new rules or if the account is compromised.
To resolve the issue you may want to know how to check which rule has been applied in Outlook.
However, this can also come in handy if you have a number of rules applied that filter emails to the Deleted Items folder which also includes important messages.
In this article, we show you how to check which rule has been applied to your Outlook client.
How do I determine what Outlook rule was applied?
1. Check through Manage Rules and Alerts
1. Launch the Outlook client if it is not already running.
2. Move back the email from the Deleted Items folder to the inbox.
3. Click on File.
4. On the Info tab, click on Manage Rules and Alerts.
5. Open the Rules and Alerts dialogue box.
6. Open the Email Rules tab.
7. Run the rules one by one which should not take much time.
8. You can run the rule from the Run Rules Now dialogue.
The find out rules in Outlook, you need to check through the Manage Rules and Alerts tab in the app. In the Rules and Alerts window, you will find a list of all your message rules. You can see all the existing rules here.
For Outlook 2013
If you are on Outlook 2013, some settings can be different.
Click on File and select Manager Rules and Alerts.
Open the Email Rules tab.
After running the rules, make sure you close the Manage Rules window.
After closing the window, you should see the messages moving out.
Considering you have multiple rules applied, do the following.
Create 8 Deleted folders in the Outlook client. You can have any number of folders. We have created 8 folders to manage 23 rules.
Modify all the rules that deleted the emails.
Next, assign the rules randomly to one of the 8 folders. You can assign 3 rules per folder.
Next, clean up the deleted folder by deleting unwanted emails and leaving out the ones you want to save.
Move back all the remaining emails from the Deleted Items folder to Inbox.
Select all the rules from the Rules Manager and run them against the Inbox.
Now check which folder got the emails that you didn’t want to reach the Deleted Items folder. Narrow down the number of rules to use.
Move other rules back to the Deleted Items folder.
Spread the rules you narrowed down in step 8 across folders.
Finally, re-run the rules from the Rules Manager and you should find the rule that is causing the issue.
At times, Outlook email rules can be applied to the emails that you did not intend to send to the Deleted Items folder. Also, by following the steps in this article, you can check which rule was applied in Outlook to fix the issue.
If you have any other questions or suggestions, leave them in the comments section below and we’ll be sure to check them out.
Does your computer give you a warning that the Local Disk C has insufficient space, or are you unable to download or install the most recent updates for Windows 11?
If so, your C drive is already full, and you need to create some more space for normal operations. Many users encounter the problem of their windows 11 C drive getting full automatically.
But why is it the case? Why is Windows 11’s C drive getting full automatically and how can this problem be resolved?
In this article, we are going to discuss some of the ways you can solve the problem of your Windows 11 C drive getting full automatically.
Why does C drive get full automatically in Windows 11?
All programs and downloads are by default saved in the Local Disk C which is the system drive in the majority of Windows versions.
This may be one factor causing Windows 11’s C drive to fill up with data. Here are a few additional causes that could erratically take up your C drive capacity:
The Local Disk C may have stored user information like images, downloads, or private data
Your files might overtake the system space due to malware or virus problems
Most files are saved in the C disk by default, as was already indicated. As a result, you might have unknowingly saved large files
Cache, temporary downloads, and junk files from Windows could be present on the local drive C
How do I stop C drive from getting full automatically in Windows 11?
1. Perform a Disk Cleanup
Press the Windows + E key combination to launch File Explorer.
Click on This PC, right-click on C drive, and then select Properties.
Press the Windows key + E to launch File Explorer.
Navigate through your folders selecting the files you would like to transfer.
Press the Ctrl + X key combination to cut the files.
Navigate to the external drive you have connected above and press the Ctrl + V key combination to paste the files.
Wait for the process to complete and then safely remove the external drive.
5. Delete temporary files
Press the Windows + R key combination to launch the run command.
Type %temp% in the run text field and then press OK.
Press the Ctrl + A key combination to select all files and then press Shift + Del to permanently delete the files.
If asked for Administrator access, click Continue.
6. Upgrade your hard drive
Although this solution is extremely obvious, it is still worth mentioning. If you’re struggling with low space on your drive, you should think about replacing your drive with a higher-capacity one.
Or, at least, use an external drive to back up every non-system file from the C drive on this one.
7. Scan your computer for viruses
Click the Windows Start icon and then select Settings.
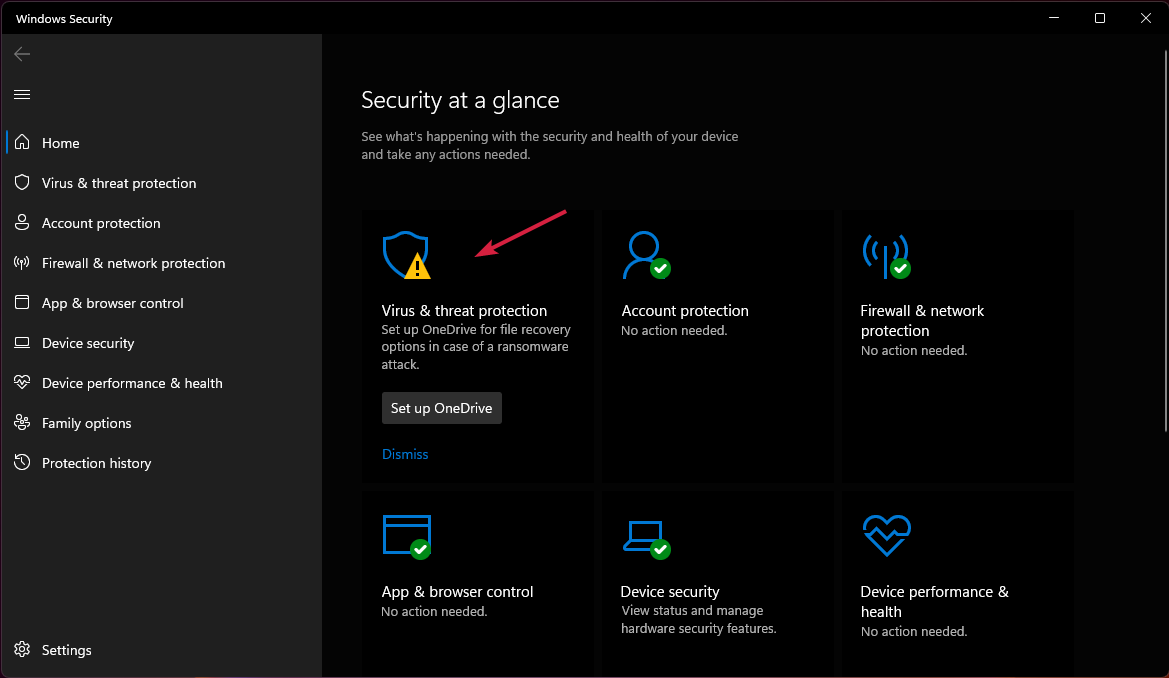
On the menu that appears, click on Windows Security and then select Virus & threat protection.
Click the Quick scan button.
For a more thorough option, click the Scan options button and then select Full scan.
Windows Defender is a great built-in antivirus but if you want the best results you should consult our list of the best antiviruses for Windows 11.
What is eating up my C drive space?
Press the Windows key + I to launch Settings.
Click on System and select Storage on the right side.
Here, you will see what is eating up your C drive space.
Selecting Show more options will show you the additional files, including programs, documents, images, and temporary files, which are using up space.
In Windows 11, you can quickly determine what’s consuming up space on your computer by utilizing the Storage settings.
Following the procedures above, you can check what files are occupying space on your Windows 11 hard drive.
How to free up space on Windows 11?
You can free up space in Windows 11 by deleting any unnecessary files from your computer. Additionally, look for large applications that you do not need or no longer use.
Ensure that these applications are uninstalled. You should also make sure that you have updated your operating system to eliminate any issues or loopholes that might be consuming space.
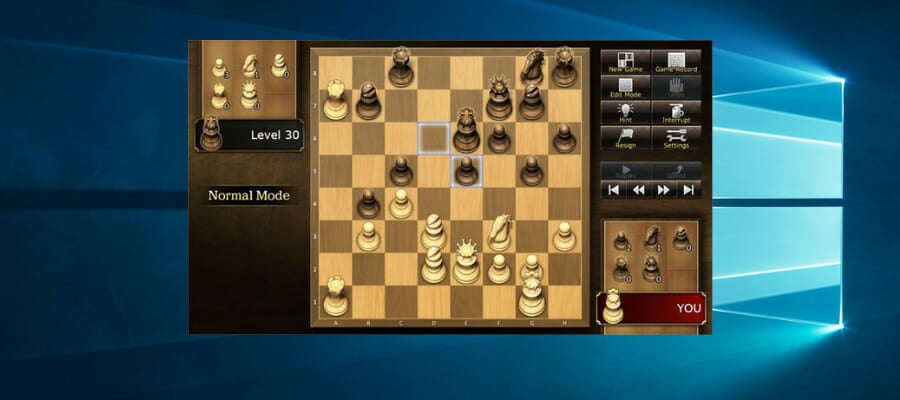
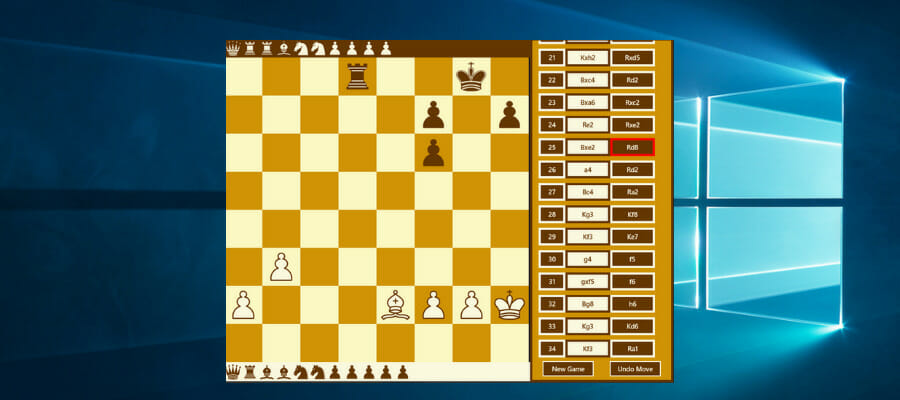
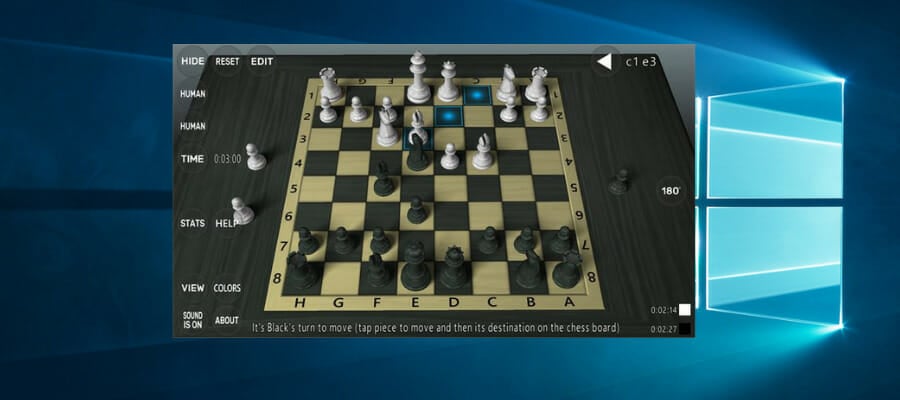
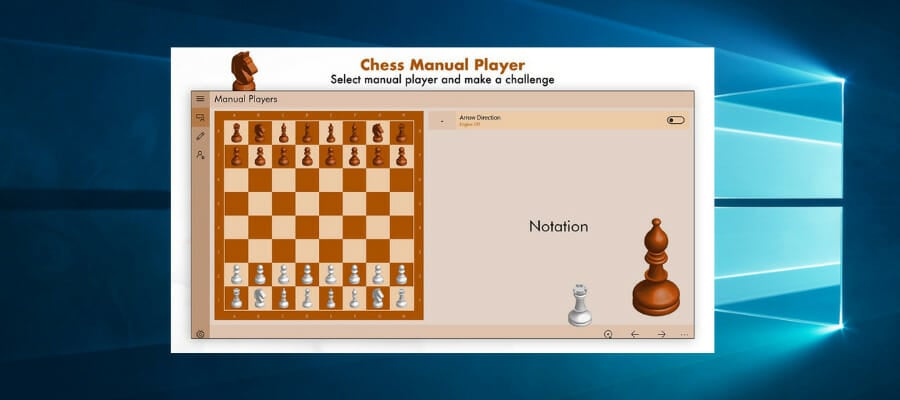
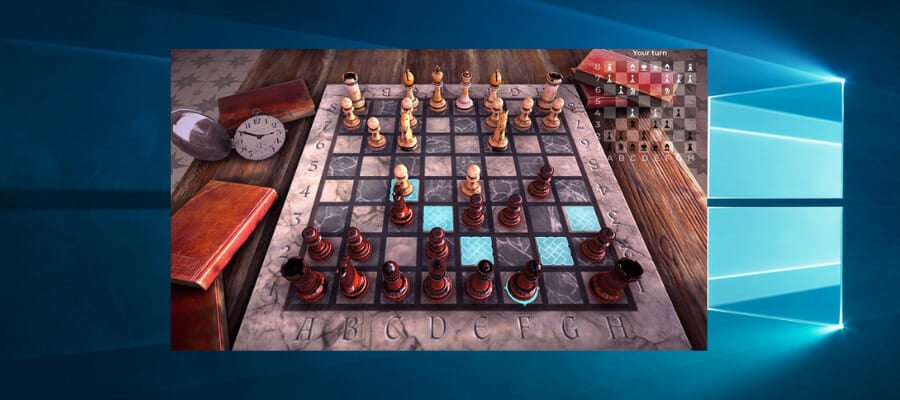
Chess is a game that has fascinated players from all over the world, so there is no wonder that more and more people want to learn how to play it.
While there are many basic chess apps, the best chess software comes with extensive tutorials that will enhance your game.
Some programs even have championship chess engines that have taken on the world’s most popular players. This is where chess training software for Windows steps in, so we encourage you to embrace the challenge.
Best tips on how to train your chess skills
Whether you’re just starting to understand the basics or you’re a seasoned player, you can’t stop training your skills for a better outcome in matches with your friends, online, or in competitions.
In that respect, we have a few pieces of advice that will help you achieve great results when you’re training.
➡ Pick the best training for your level
If you’re a beginner, you need to start with the basics, and even if they sound too easy, don’t go too fast over any information. Let it settle and use it repeatedly.
More experienced players should address their weaknesses if they are aware of them, without neglecting the other aspects of the game.
➡ Always focus on your tasks
Although it sounds obvious, when you’re training or learning (and that stands for everything, really) concentrate on the task at hand.
If you can’t focus 100% on your training or learning, postpone the lesson until you find the level of concentration required. Otherwise, you won’t be able to assimilate the information.
➡ Try playing with better players
Although it’s very satisfying to have only victories, competing against weaker opponents will not raise your game level.
Playing is the best form of exercising what you’ve learned but you will soon understand (if you didn’t already) that any moves can be countered by a more skilled opponent.
DecodeChess is the first AI teacher when it comes to chess. It analyzes every move from a match and gives insights for you and about your opponent’s moves as well.
Improve your game sense and strategic thinking with the most advanced chess analysis software.
DecodeChess provides real-time suggestions when playing against any opponents. Moreover, see what their intentions are and create counter-moves to win any situation,
The AI algorithm of DecodeChess makes the perfect combination of a grandmaster and one of the strongest engines available, Stockfish 12. While you provide the engine with personal feedback for your own moves, the AI will understand better and create better suggestions for you.
The computer AI can adapt to your own game style and create personalized recommendations. It will respond accordingly to create a balanced game experience.
If your ELO rating is up to 2000, you are always wondering where you can improve your skills and how to create better situations in matches, this software is the right choice for you.
DecodeChess’s main key features are:
In-depth explanation of every suggested move
Providing learning frameworks
Threats explanation and move to prevent them
Human-like opponents with different difficulties
Better moves suggestions
Real-time analysis
DecodeChess
Your ideal companion when it comes to chess game insight.
Chess Tutor is a chess training software from Stefan Meyer-Kahlen which created the Shredder Classic series (18 times the World Computer Chess Champion).
Well, yes, you will learn from a real pro and the teaching method is tuned to every level of understanding.
These courses are based on the internationally successful The Steps Method by Brunia/van Wijgerden. They are separated into three distinct parts: Step 1, 2, and 3.
The first step brings you the basics and contains 23 lessons, 1800 exercises, and 66 games. The 2nd Step is about tactics and positionings and contains 21 lessons, over 1900 exercises, and 84 games.
The 3rd step will train your skills for openings and endgames and other fundamental tactics. It contains 23 lessons, 2150 exercises, and 93 games.
And talking about teaching methods, the lessons are not simple videos that you will forget the day after.
Everything is interactive and the lessons are presented in match conditions, on the board so that you can understand every move and its consequences.
And after a lesson, you can set it into your mind by performing a few exercises. The first ones are extremely easy and will gradually increase in difficulty.
You can try them for free by downloading the demo versions.
Here are some of this training app’s most important features:
Separate modules for gradual learning
Courses based on the acclaimed method by Brunia/van Wijgerden
The training includes interactive exercises and games
Lessons are presented in match conditions
Dedicated for each level of understanding and skill
Chess Tutor
Chess Tutor will become your ideal personal trainer in the world of competitive chess.
Fritz is one of the best chess programs that has beaten some of the game’s greatest players from Kasparov to Kramnik.
Note that it comes with the Rybka chess engine that’s ideal for tournament players and is compatible with Windows, Linux, Android, and iOS.
The latest addition to the series has an expanded database that includes more than 1.5 million historic games and a new 64-bit engine.
Fritz 17 provides more advanced training options and some great playing modes. The software offers tutoring for all stages of a game.
The program highlights things that you missed during the match at the end of a game and gives you an ELO rating for your opening, middle, and end game.
In addition, Fritz 17 also provides access to ChessBase web tools such as on-demand chess videos and Live Database.
Let’s take a look at the top features of this chess training app:
Enhanced search engine with evaluations technology
Success control and measure your progress options
Generous library of pre-made repertoires
Fat Fritz included (to emulate human strategic analyses)
Rybka chess engine
Fritz 17 Chess
Compete against the most famous players with the Rybka chess engine that will prepare you for amazing tournaments.
Rybka is a groundbreaking chess engine program that won consecutive WCCC championships (Fritz is also based on that engine).
Mr. Rajlich, one of the great chess players, developed the original engine and has now enhanced it with Rybka 4.
Deep Rybka 4 is a multiprocessor version that’s available with alternative Fritz, Chess Assistant, and Aquarium GUIs. There’s also Rybka 4 version without a GUI that you can add a compatible UI to such as Arena.
Note that this software is developed for more advanced chess players. It primarily provides players with detailed evaluations of playing positions. Deep Rybka 4 also gives you an in-depth analysis of games.
Other bonuses of this program are its extensive game database and the one-year Classic membership. Deep Rybka 4 Aquarium also comes with a copy of the Openings Encyclopedia 2010 that includes comprehensive evaluations of all the chess opening moves and positions.
Let’s take a look at its most important features:
Improved tactics and understanding of the attack on the king
Extensive library of 1.5 million games
Classic membership for Playchess.com included one year
32 and 64-bit versions are available
More precise and more powerful engine
Deep Rybka 4
Train your chess play and strategy using software that won consecutive WCCC championships!
The Grandmaster Edition is a highly instructive tool that includes a valuable course on chess basics delivered by 8-time national chess champion, Josh Waitzkin.
With the help of tutorials, players can apply their newly acquired skills in either single-player or multiplayer mode.
Its most impressive feature is the game database that includes over 600 k games that also includes the most important plays in the history of classic and modern chess.
If you’re a fan of aggressive play, you will also benefit from an attacking chess course commented by the famous Grandmaster Larry Christiansen.
The only problem is that this software is officially supported only on Windows Vista or Windows XP. However, readers reassured us that it actually works on more recent versions of Windows.
Take a look at its most notable features below:
Comprehensive tutorials on chess basics taught by Josh Waitzkin
Multiplayer and single-player modes are available
Extensive analysis of the most important chess games yet played
Generous database of 600,000+ games (both modern and classic)
Chessmaster: Grandmaster Edition
Join the national champion Josh Waitzkin in a quest to master the latest chess techniques and strategies.
Dragon 2 is one of the most advanced chess training platforms based on the NNUE (Neural Network Updated Efficiently) technology.
The new version is a big improvement over the previous Komodo 14.1, evaluated at a strength of 210 elo in standard mode.
And that is thanks to the embedded neural network that can evaluate the situation more accurately and provide some tactics that usually go past other solutions.
According to the publisher, Dragon won the 2021 TCEC Swiss championship in normal chess, simply because it can now play in a more human-like style.
That’s because its game relies on learning, not just on algorithms that, in many cases, don’t work on a real board.
Dragon 2 added a new interesting feature called MCTS Optimism that will make the software more confident in its decisions and less confident in predicting your moves.
The new version also includes more levels, Personalities, and an Auto-Skill feature that will attempt to match your level, ideal when you’re training.
Lucas Chess might not have a world-beating chess engine but is better software for novice players than some of the alternatives here. The program is also freeware, which is a big bonus.
One of the best things about Lucas Chess is that it has 36 chess engines for you to play against with various game modes.
Furthermore, payers can also add more engines so long as they’re based on the UCI protocol. The software has various lessons for players and includes AI training partners and training positions.
The tutoring engine gives players a limited number of hints to win matches. Trans-Siberian railway is one of the software’s more novel chess training options that are based on a train trip through Russia.
Overall, Lucas Chess has plenty of training options; and as freeware, it’s better valued than most chess programs.
You finally know how you can train and have the tools to do so, but you could also use some advice on how to become the next Kasparov.
Take note of a few interesting strategies that will get you to an advanced level quickly:
➡ Don’t rush to make a move
You have probably seen a good move, but don’t be too hasty to make it. Look around and see if you have other, better ones, at your disposal.
Patience and enhanced analysis of the other player’s game are the best scripts for success, so take your time even if you’re playing a timed game.
➡ Don’t forget about castling
Castling is one of the most important defense moves and the earlier you perform it, the sooner you’ll be prepared for attack.
The move also brings the rook into play faster and we don’t need to stress how valuable is an active rook on the table.
➡ Bring your pieces into action
At the beginning of the game, the most valuable pieces stand behind the peons but the sooner you get them out, the sooner you will get the initiative to attack.
We’re not saying that this should be performed randomly but you should act upon your designated strategy.
➡ Start with a strategy
Always have a plan in mind, a strategy to follow. Of course, it can change in the course of the game because it will be influenced by the opponent’s moves.
However, it’s always better to have a plan from the beginning that you will be able to follow through by anticipating the other player’s moves.
➡ Play as much as you can
Many programs in our list are interactive but keep in mind that there are also online chess platforms where you can play with people from all over the world.
Practicing is the best way of testing your strategies so get yourself into competitions as much as possible.
This concludes our guide that includes chess programs for Windows with extensive training options and guides for players in addition to numerous playing modes.
The chess engine programs are invaluable coaches that provide detailed feedback which will take your game to a whole new level.
However, you can also take a look at our selection of the best free chess apps that you can use to play on any device.
Which one did you choose? If you’ve tested similar training tools, make sure you give us a hint in the comments section below.
Scrollbars are ubiquitous in all types of computers and by default, rolling the mouse wheel down scrolls down a page. But some users want to reverse the scroll direction in Windows 10.
Read on to find out what options you have to change the mouse scroll’s direction on your device.
Can I reverse the mouse scroll direction?
Windows 10 used to have a Settings option that you could use to configure the scrolling direction with.
However, an update removed the Reverse scrolling direction setting. So how can we now configure the mouse wheel’s scroll direction in Windows 10?
Well, there are two easy alternatives you can try out, as you will see from the guides below.
How do I change the mouse scroll direction in Windows 10?
1. Edit the Registry
Even if there’s no longer a Reverse scrolling direction option via Settings in Windows 10, you can still customize the mouse wheel’s scroll direction with a registry edit.
For that, you’ll need the mouse VID ID which is listed in Device Manager.
1. Press the Win + S keys at the same time on your keyboard to open the search box.
2. Type device manager in it and click on the first result to open the app.
3. SelectMice and other pointing devicesand double-click your mouse.
4. Click on the Details tab, which includes the drop-down menu shown directly below.
5. SelectDevice instance pathfrom the drop-down menu.
6. Right-click the value in theValuebox and select Copy.
7. PressOKand close theDevice Managerwindow.
8. OpenNotepadand paste theVIDIDin Notepad.
9. Press the Win + R keys to open the Run dialog.
10. Enter regedit in Run’s text box to open the Registry Editor app.
11. Open this registry location: HKEY_LOCAL_MACHINESYSTEMCurrentControlSetEnumHID
12. This is where theVIDIDcomes in handy. Click the key that matches the VID ID inNotepad.
13. Now you can select a Device Parameters key that has a FlipFlopWheel DWORD as shown below.
14. Next, double-click FlipFlopWheel to open an Edit DWORD window.
15. Enter 1 in the Value data text box and pressOK.
16. Close the Registry Editor window (You’ll need to restart Windows for the changes to take effect).
17. Click the Start button and roll your mouse wheel up. That will scroll the Start menu’s bar slider down. Roll the mouse wheel down to scroll back up the menu.
18. To revert back to the default setting, select theFlipFlopWheelDWORD in Registry Editor window and enter 0 in the Value data box.
Did you know that you can improve your scrolling experience significantly with the smooth scrolling feature? Learn more from our dedicated article.
AutoHotkey is software that users can set up macro scripts with and with which they reverse the scroll direction.
This is freeware software you can add to Windows by pressing the Downloadbutton on the program’s website. Set up a reverse scroll direction script as follows:
Press the Cortanabutton and enter Notepad in the search box. Select to open Notepad.
Now you can enter the script in Notepad. Copy and Paste this script in Notepad: WheelUp:: Send {WheelDown} Return WheelDown:: Send {WheelUp} Return
Click File > Save as to open the Save as window and select All Files from the Save as type in the drop-down menu.
Enter a file title for the script and make sure to include .ahk at the end of it. For example, you could save it as Scroll Direction Script.ahk.
Select to save the script to Desktop and press the Savebutton. That should add an AutoHotkey script icon to the desktop as shown below.
Close Notepad and double-click the AutoHotkey script shortcut on the desktop to run it.
Click the Start button and roll the mouse wheel up to scroll down the menu.
To close the script, right-click the taskbar and select Task Manager. Select AutoHotkey Unicode on the Processes tab and press its End taskbutton.
These are two ways that you can reverse the mouse wheel’s scroll direction in Windows 10. Now, the scrollbar slider will move down when you roll the mouse wheel up and vice versa.
Let us know if you found this guide helpful and write down any questions you have in the comments section below.
Microsoft Excel is part of Microsoft 365 business-oriented programs and acts as the default spreadsheet of the suite.
However, like all other files created by any of the programs belonging to the suite, it too can encounter the occasional error.
What does this error message say?
Such would be the case with some users that have been reporting a constant error in Microsoft Excel.
I have upgraded to office 2016 and I constantly get the error message Microsoft Word / Excel is trying to recover your information Now, everything does work. I can open the documents and they are fine, but these error messages keep coming up. It also comes up when just browsing files in file explorer. If I want to just select a file to move it this message comes up and then goes after a few seconds. But it happens on EVERY document I click on and is really annoying.
Read on to find out how to fix your Excel files and get them working properly again.
How can I get rid of the information recovery error in Excel?
First of all, check whether this is a general occurrence, or if it just happens when you try opening a particular file. If you observe that this is a general issue, consider doing one of the following solutions.
1. Check whether your antivirus software is up to date or conflicting with Excel
Updating your antivirus software varies based on what antivirus you use. Additionally, try to shut down the antivirus and see if Microsoft Excel has any issues then.
Please check the manufacturer’s website for more details on how to update or shut down your antivirus software.
2. Disable the Preview Pane in file explorer
While no explanation exists as to why this happens, it seems that many users found disabling the Preview Pane useful in getting rid of this error message.
1. Press Windows + E.
2. Go to the View tab
3. Click on Preview Pane to disable it.
3. Perform a clean boot
You must first make sure you are signed in as an administrator:
1. Press the Windows key to open the search box.
2. Type in MSConfig.
3. Select System Configuration.
4. Go to the Services tab of the System Configuration dialog box.
5. Click to select the Hide all Microsoft services check box.
6. Click Disable all.
7. Go to the Startup tab of the System Configuration dialog box.
8. Click Open Task Manager.
9. Disable all items on the list.
10. Close Task Manager.
11. Click OK to confirm all changes.
12. Restart the PC.
4. Install the latest updates for Microsoft Excel
1. Open Microsoft Excel.
2. Click on File.
3. Select Account.
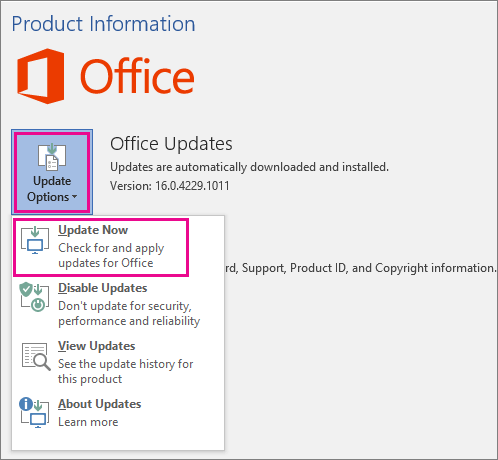
4. Click Update Options.
5. Click Update Now.
6. Let the updates run their course.
5. Make sure that your system has enough RAM to run Excel
While this may seem simple enough, you need to make sure your PC meets the minimum system requirements to run Microsoft Excel.
This is especially the case when you have a dated PC and a version of Microsoft Excel that is relatively new.
6. Install the latest updates for your Windows System
1. Press the Windows key on your keyboard.
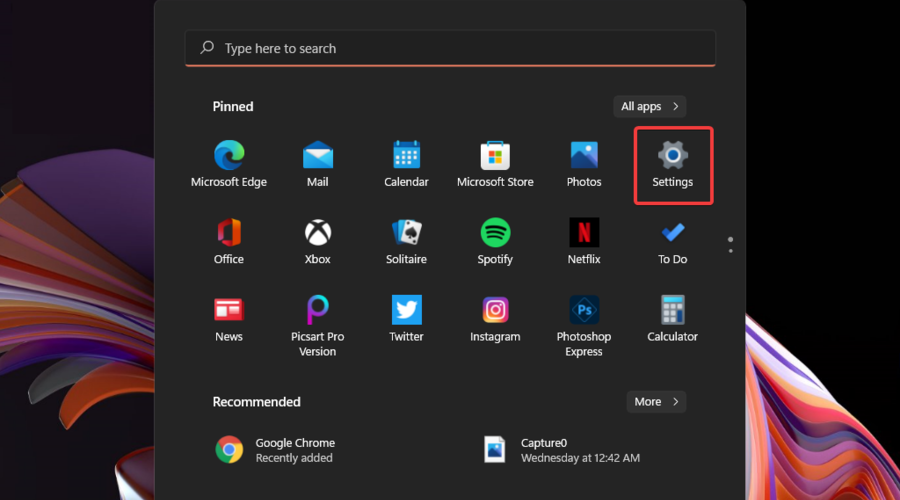
2. Select Settings (The cogwheel-shaped button in the start menu).
3. Select Updates & Security.
4. Click on Check for Updates.
5. Let the updates run their course.
6. Restart the PC.
7. Disable add-ins
1. Open the Excel sheet.
2. Go to the File menu.
3. Click on Options.
4. Click on Add-ins.
5. Select Excel add-ins and click on the Go button.
Do you also receive an error stating that Microsoft Excel is trying to recover your information? Did you try a solution not mentioned in this list that worked?
Let us know in the comments section below if our article helped you get rid of this error on your device.
Virtual reality is all the rage right now. As a result, you have a bunch of tech companies diving headfirst into the industry, trying to be the one that capitalizes on virtual reality.
You have Apple developing their virtual reality headset and Microsoft working on something that can be in enterprise situations. But the one company that’s been doing pretty successfully for a while now is Meta.
Meta launched the Oculus Quest 2 (also known as the Meta Quest 2) in October 2020 as a follow-up to the original Quest. It’s a popular device with various titles, from rhythm games to RPGs like Zenith: The Last City.
The Quest 2 headset supports Valve’s Steam gaming platform, so you can play some of your favorites from there. But there have been problems between the Quest 2 headset and Steam.
Why does SteamVR not work with Oculus Quest 2?
There could be a lot of different reasons why problems arise between Steam and an Oculus Quest 2 headset. However, the most common problem does not have the latest Steam version.
Other problems include corrupted files and drivers on your Quest 2 headset. It’s also possible that other apps on your computer are getting in the way.
The first thing you should do is restart your computer. That’ll solve most issues. However, if the problem persists, try out any of the following solutions.
How do I get the SteamVR to work on Oculus?
1. Disable apps
Some of the apps on your Windows computer may be interfering with SteamVR. It’s recommended that you first close or uninstall those apps to see if they’re the ones causing the problems.
SteamVR problems often come from antivirus, anti-spyware, and VPN software. If that’s the case, turn off or uninstall those programs. It would help if you did the same to file-sharing software like Dropbox.
Firewalls should be turned off. If turning off the firewall seems to have solved the problem, we recommend adding SteamVR permission.
Open up Windows Security and select Firewall & network protection.
Click Allow an app through firewall.
Click Change settings, then select the Allow another app button.
Click Browser and search for SteamVR.
Once SteamVR has been added, click the Add button.
Click the OK button on the next page. Then close it.
2. Update Steam
First, open Steam.
Click the Steam menu in the upper left-hand corner.
Click Check for Steam Client Updates.
A window will appear, checking if there are any updates to download. If there is, Steam will automatically install the update, then close and re-open. (Otherwise, it’ll state that the Steam client is already up to date).
3. Run as administrator
Right-click on the Steam desktop icon and select Properties in the context menu.
A small window will appear; select the Compatibility tab.
Under the Settings section, click the box next to Run this program as an administrator.
Click Apply,then click the OK button.
Launch Steam.
4. Verify the integrity of SteamVR
Go to your Library on Steam.
Next to Search by type, click the double bar symbol if SteamVR doesn’t appear in the game list.
Under Hardware Support, click VR.
SteamVR will appear under tools. Right-click it and select Properties.
Select Local Files in the new window.
Select Verify integrity of tools files. Let Steam check the integrity of SteamVR. Click Close when done.
5. Reinstall SteamVR
On Steam Library, right-click SteamVR and hover over Manage.
Click Uninstall.
Select Uninstall in the new window.
Select SteamVR and click Install.
Can you run SteamVR without Steam?
Yes, you can. According to the helpful community on the Steam forums, you can run the SteamVR startup files and install them onto another device, like the Oculus Quest 2. From there, you can run SteamVR without needing to open Steam.
Other reports state that SteamVR may try to integrate itself with the Steam app, but it should still work regardless.
Feel free to comment below if you have any questions regarding the above processes. Also, do not hesitate to comment about guides you’d like to see or information about any other app on whichever platform.
Some users seem to be interested in how to split-screen in Windows 11. And if you’re one of them, keep in mind that you can do it in different ways.
Fortunately, these take only a few seconds, so do not worry about performing them. And if you change your mind, you can quickly go back to the default aspect.
There are multiple reasons to split your Windows 11 screen, but we selected only the best of them. Take a look at the following section and discover them.
Why should I split the Windows 11 screen?
To be more efficient in your workplace, there might be times when you need to run two monitors, either we talk about connecting a new one or using VMware support.
Splitting the screen allows you to do this on a single one, dividing your PC screen into two or more halves so you can view different windows at the same time.
This will definitely create more screen real estate and also build a more efficient workflow. And note that having a large monitor is an important advantage to clearly view your split sections.
How can I split the screen in Windows 11?
1. Use Snap Layouts
The Snap Layouts feature allows users to able to split the screen into two, three, or four sections. It is built-in and easy to use, as you will see in the lines below.
1.1 Split the Windows 11 screen into two sections
You can easily split the screen in two different sections using Snap Layouts. To be able to do this, you first have to enable Snap Layouts from the Windows Settings Menu.
Afterwards, you can use the Maximize button on your folder’s window to split it in two.
1. Click on the Windows key, then open the Settings menu.
2. Go to System, then navigate to Multitasking.
3. Look at the Snap windows section and turn it On.
4. To explore various options, you can expand this section by clicking on it.
5. There, checkmark whatever you need. Keep in mind that you can choose multiple options.
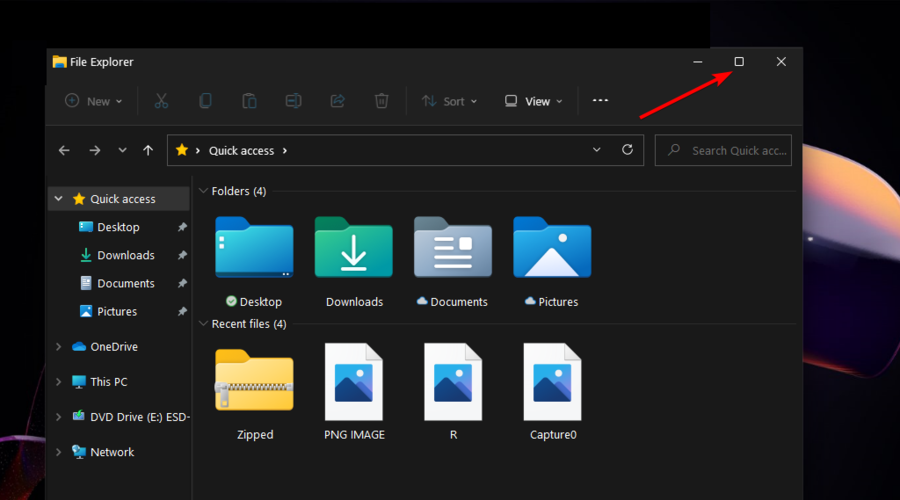
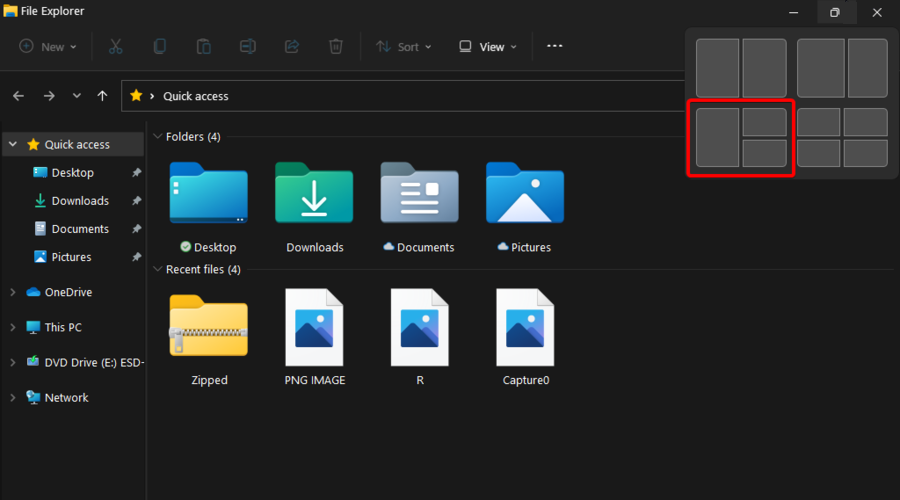
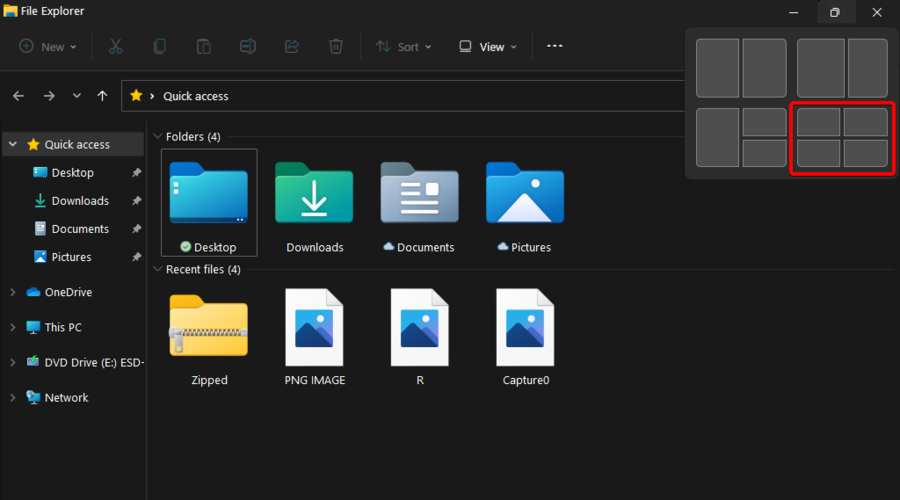
6. To split the screen into two sections, you have to open the folder you want to split and hover the mouse cursor over the maximize button, near the top-right corner of a window.
7. Select the first layout to split the window in two sections.
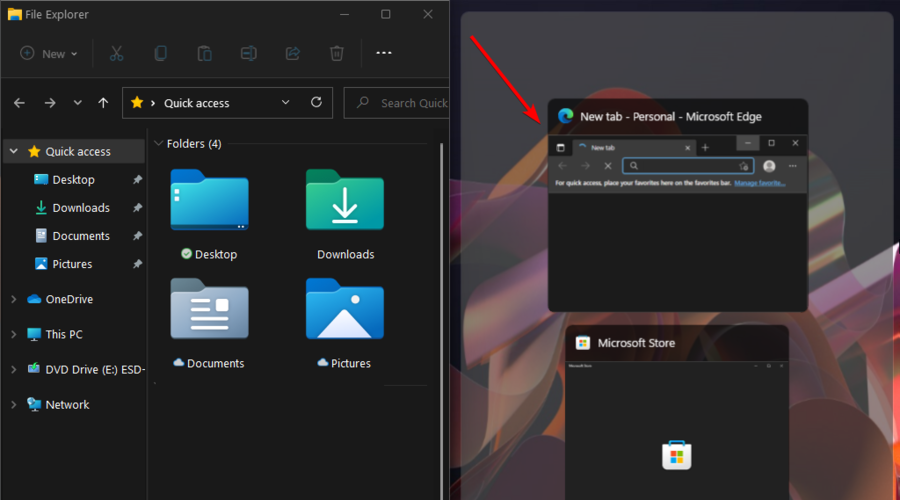
8. Now, your current app window will snap into the selected half of the screen, and the other open apps will be displayed as thumbnails in the other half.
9. Click on the one that you want to add to the other half of the screen.
10. You’ll now see two app windows. And the best part is that you can access and work on them simultaneously.
1.2 Split the screen into three sections
Hover the cursor again over the maximize button, then choose either of the three parts from the left-bottom section (We recommend selecting the biggest one).
Now, the current window will fit the part you selected earlier. You’ll also see the other open windows shown as thumbnails. There, choose the window that requires the most attention.
After you’ve selected the needed window, your screen will take up the left half.
Similarly as before, the other open windows will be displayed as thumbnails in the remaining quarter.
You’ll have to choose again which app you want to be displayed in the last quarter.
1.3 Split the screen into four sections
You’ll have to hover the cursor again over the maximize button.
The process will be pretty similar to what we’ve discussed before. But you’ll have to choose the needed quarter from the last option.
Select the other apps to be on the split screen accordingly.
To split the screen into two sections, you’ll need to use the following keyboard shortcut: Windows + Left or Right keys.
If you want to split the screen into three sections, apply the already mentioned keyboard shortcut. Remain on the least important window, then use again the same combo.
For a four sections screen splitting, you’ll need to follow all the above steps. Then, click again on the most expanded window, and use again the following keyboard shortcut: Windows + Left or Right arrow key.
Once the main windows display on the screen, the other open windows will appear on the opposite side.
Choose the ones you want to add to the other side of the screen.
Now, your screen will be split into different sections.
2.2 Use the mouse
2.2.1 Split into two sections
To split the Windows 11 screen into two sections, you’ll have to hold and drag the needed window to either of the sides as far as the cursor would go.
When you’re able to see a hazy outline, release the cursor. This shows the portion to be taken up by the app in the background.
Now, choose the second window you need.
After the two desired windows appear on your screen, to resize them, drag the line that separates them.
2.2.2 Divide into three or four sections
Hold and drag the window you need to the corner.
Again, once you see a hazy outline in the background that covers a quarter of the screen, release the cursor.
Now, the main window and the other apps will appear on your screen. Select two of the most important ones to add to other sections.
You’ll now have three windows on the screen.
Note that you’re able to resize the windows by dragging the line that separates the windows, just as you did earlier.
You can similarly split the screen into four sections.
Record the screen – Also, thanks to the latest Microsoft OS version, recording the screen will be a piece of cake. To get the best out of this option, you should try a screen recorder app with webcam overlay support.
We ensured delivering only valuable options and information, so make sure if you apply them, you’ll be surprisingly pleased. Additionally, you can try DisplayFusion which can also split-screen your PC screen without the need of following manual steps.
As you can see, besides split-screen, you can benefit from other incredible Windows 11 screen customizations. Of course, the latest OS design comes up with plenty of new features, so take your time to them out.
Any other questions or thoughts? We always support you to share them with us by leaving a comment in the section below.
If your mobile hotspot isn’t working on Windows 11, you won’t be able to share your PC’s internet connection with your phone or other devices, which can be a real hassle when you’re without Wi-Fi.
This issue is often triggered by things like outdated Wi-Fi drivers, recent Windows updates, network security glitches, or even misconfigured DNS settings.
Let’s break down how to troubleshoot and get it working again.
How can I fix the mobile hotspot not working in Windows 11?
Before we start, you can disable the mobile hotspot and try to download the latest Windows updates and check if that solves the issue.
1. Update your PC’s Wi-Fi driver
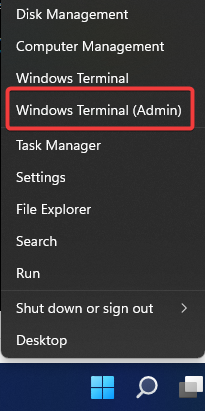
Hold the Windows key and press X at the same time. Select Device Manager to bring up that utility’s window.
Next, double-click Network adapters to extend that Device Manager category.
Right-click your PC’s WiFi network adapter to select an Update driver option for it.
Click Search automatically for drivers to initiate an automatic driver scan and update. This will ensure that the Windows 11 mobile hotspot not working issue will be gone.
A newer driver might still be available for your PC’s network adapter even if the Update Driver determines the best one is already installed.
Scanning your PC with a driver updater utility will tell you if your network adapter has an updated driver.
2. Remove recent updates
Open Settings by pressing the Windows key + I.
Next, go to Windows Update and select Update history.
After that, navigate to Uninstall updates.
Locate a recent update and click Uninstall.
Follow the instructions on the screen to complete the process.
You might have to remove a recent feature update to fix this, and we have detailed steps on how to do that in our guide on how to uninstall Windows 11 update.
3. Change the hotspot password and connect to it again
Open Settings and go to Network & Internet. In the right pane, click on Mobile hotspot.
In the Properties section click on Edit.
Enter a new hotspot password and save changes.
Next, go to your phone, and forget the current hotspot.
After that, try connecting with a new password.
4. Change DNS settings on the device you’re trying to connect
On your phone, go to Settings and then Network.
Select your hotspot connection.
Set IP Settings to Static.
Set DNS 1 to 8.8.8.8 and DNS 2 to 8.8.4.4. Alternatively, you can use 1.1.1.1 as DNS 1.
Save changes.
Keep in mind that these steps could be different on your phone.
Does Windows 11 support mobile hotspot?
Yes, Windows 11 fully supports mobile hotspots, but in order to use it, you need to ensure that your Wi-Fi adapter supports this feature.
How do I reset my mobile hotspot?
Access the Settings app on your Android device, then go down to the System section and select it.
Expand the Advanced section.
Choose Reset Options.
Tap Reset WiFi, mobile & Bluetooth.
Follow the on-screen steps to reset the hotspot.
If the Windows 11 mobile hotspot is not working, that’s most likely an update issue and it can be resolved by removing that update. To learn more about this feature, we have a guide on how to properly set up a Windows 11 mobile hotspot.
Windows 11 has a new feature called DNS over HTTPS that you can use to perform encrypted DNS lookups to bypass certain Internet activity blockages.
In fact, a lot of governments and ISP monitor a user’s DNS traffic to apply bans and censorship. That’s where the DNS over HTTPS steps into place and goes around any of these imposed limitations.
What is DNS over HTTPS and what does it do?
When you’re browsing online and you go to a website, your PC is communicating with a DNS (domain name system) server to get the IP address of the website.
Well, such a DNS inquiry can be monitored by your government or even by the ISP but if you use a DNS over HTTPS (DoH) that lookup is encrypted and can no longer be interrogated from outside.
You should know that if you’re using a Chromium-based browser like Chrome, Edge, Firefox, or Opera, you already have support for DoH.
But that will cover only the browsing activity, not the transfers from the other apps that you’re running on your PC.
By embedding that feature in the OS, you will be sure that all the DNS inquiries will be encrypted.
Can I use the DNS over HTTPS feature on Windows 11?
It’s not the first time that Microsoft is testing the DoH feature. It first appeared in the Windows 10 preview build 20185 for Windows Insiders but it was pulled back pretty fast. Now, with Windows 11, the Redmond giant is taunting the feature again.
The preferred DNS encryption option offers the following choices:
Unencrypted only – Equivalent to an OFF feature, really
Encrypted only (DNS over HTTPS) – Only use DoH servers
Encrypted preferred, unencrypted only – If no DoH servers are available, switch to standard unencrypted DNS
What are the DNS over HTTPS servers available on Windows 11?
There is a tricky part to DoH encryption and that is that the data has to pass through a DoH server for encryption.
However, there are not a lot of servers that support DoH and can be used by default by Windows 11. In fact, Microsoft provided a short list of servers that can provide the DNS-over-HTTPS feature. Here are some popular ones:
For IPv4
Cloudflare: 1.1.1.1 and 1.0.0.1 DNS servers
Google: 8.8.8.8 and 8.8.8.4 DNS servers
Quad9: 9.9.9.9 and 149.112.112.112 DNS servers
For IPv6
Google: 2001:4860:4860::8888 and 2001:4860:4860::8844
Cloudflare: 2606:4700:4700::1111 and 2606:4700:4700::1001
Quad9: 2620:fe::fe and 2620:fe::fe:9
Things will get pretty crowded very soon unless something motivates the birth of a lot more of these.
How can I enable DNS over HTTPS on my Windows 11 device?
1. Via Internet Settings
Go to Settings.
Select Network & Internet.
Choose the Ethernet/Wireless option.
Click on Edit DNS server assignment.
Select Manual from the drop-down menu.
Toggle the switch for IPv4 ON.
Enter a DNS address in the Preferred DNS section. You can choose one from those previously mentioned in the article.
In the Preferred DNS encryption section, choose Encrypted only (DNS OVER HTTPS).
Enter a DNS address in the Alternate DNS section.
Change this one to Encrypted only as well.
Click on Save to apply the changes.
The easiest method to use this feature is via Internet Settings. The process is simple and easy to follow, and does not impose any risk to your PC.
2. Modify the Group Policy
Microsoft allows you to configure the DNS over HTTPS feature in Windows 11 through the group policies as well.
Once you enable DoH, the DNS serverspolicy can be seen in the right pane, and you can set the IP Address in line with the provider that you want to use.
1. Press the Windows button on your keyboard to open the Windows search box.
2. Type group policy in the search box.
3. From the results, click on Edit Group Policy.
4. Go to the following path: Computer Configuration/Administrative Templates/Network/DNS Client
5. Select Enable.
6. Click on the drop-down menu from the Configure DoH options to select the preferred option.
It’s Always Sunny in Philadelphia is a quirky American sitcom that follows The Gang, a group of 5 people with questionable morals, who are always up to no good.
If you’re living or traveling to Canada, you might have a hard time trying to watch It’s Always Sunny in Philadelphia unless you have the DVD collection. You can also rent it from Prime Video or iTunes.
To get around this problem and watch It’s Always Sunny in Philadelphia from Canada or any other part of the world, you can use a VPN.
A virtual private network solution changes your IP address and associated geo-position, giving you the possibility to connect to a VPN server and gain a new identity associated with a new location.
Use the credentials provided by ExpressVPN to log in and launch the client.
As we mentioned earlier, there is no shortage of streaming apps where you can watch It’s always sunny in Philadelphia. However, there is a catch.
The content offered by these services is often submitted to regional locks, other geo-restrictions, marketing decisions, and the list could go on and on.
In order to gain access to particular catalogs, titles, and so on, you need a powerful ally that can circumvent such limitations. And what better tool to fight off censorship that a streaming-optimized VPN?
Our recommendation is ExpressVPN, a VPN perfectly built to unlock video content in Canada and beyond.
2. Connect to a US or UK-based server
Once you logged into the ExpressVPN app, it’s time to expand the server list.
Comb through the results and pick a United States (if you’re using Hulu) or a United Kingdom-based (if you go for Netflix) server.
If you happen to notice a streaming tag next to your choice, even better. Go for it!
Once the connection is active, go to the streaming platform of your choice and enjoy It’s always sunny in Canada.
Tip
Couldn’t find a server location with the streaming tag next to it? Don’t worry! Simply go for the server with the lowest ping from the US, and respectively UK (according to your streaming platform).
3. Choose your favorite video streaming platform
3.1. Disney+
We have good news for those of you who were wandering the following: Is Always sunny on Disney Plus Canada? It sure is and you can enjoy it right away. All you need is a Disney+ subscription, of course.
3.2. Hulu
Hulu offers a one-month free trial, with subscription plans starting at $5.99/month (the first month is free).
What countries have it’s always sunny on Netflix? It’s none other than the Kingdom, of course.
If you already have a Netflix account and want to make the most of it, we suggest using a VPN to unlock all popular Netflix libraries, including Netflix UK.
? How can I watch It’s Always Sunny in Philadelphia Season 15 in Canada?
There are many SVoDs and just as many ways to watch this all-time favorite show. Amazon Prime, Apple TV, Google Play, iTunes, Disney Plus, JustWatch, all of them host episodes from It’s always sunny.
But where to watch It’s always sunny all seasons? Hulu remains the best option and if you’re living or traveling to Canada, you need a reliable VPN in order to watch It’s Always Sunny in Philadelphia online.
Once you have the VPN app installed, it’s quite simple: connect to a VPN server from the US, then start watching It’s Always Sunny in Philadelphia using Hulu.
To view more TV shows online with a VPN, you can check out our Streaming VPN section. Go back to our Unblocking Hub to see what else you can unblock with a VPN.
Since Elden Ring came out on February 25, we’ve shown you a lot of tips that can be used to fix some of the most common bugs that gamers are struggling with. But many have of late reported that Elden Ring is not launching.
However, all these guides are futile if you can’t even get the game to start, an issue reported by many people who went ahead and purchased Elden Ring.
And even though some of these problems still haven’t been patched yet, some workarounds might help you enjoy your new experience.
So, if you can’t launch Elden Ring, we can show you a few tricks that helped other players in the same situation. But before we do, let’s first find out the underlying cause.
Why does my Elden Ring not launch?
As with any game, verify that Elden Ring is compatible with your system and meets at least the minimum requirements. Because if it’s not, you would be unable to launch the game.
If Elden Ring started throwing errors recently and has not been launching since chances are that the game or system files are corrupt. Also, any recent changes made to the settings, game, system, or new applications installed can just as well be the underlying cause.
Besides, please verify that you are running the latest version of DirectX and the graphics driver since it has been found to lead to Elden Ring not launching in Windows.
How can I fix Elden Ring not launching on Windows?
1. Close other non-essential programs
Press Ctrl + Shift + Esc to open the Task Manager and locate all the non-critical programs and processes.
Now, select them all individually and click the End task button.
Do so for all the other programs as well.
Many applications or processes are often found to conflict with the functioning of the Elden Ring and lead to it not launching.
Even otherwise, it’s not recommended that you have too many programs running in the background (especially for older PCs) since it affects the performance.
2. Create a Windows Firewall exception for Elden Ring
Press Windows + S to open the Search menu, enter Allow an app through Windows Firewall, and click on the relevant search result.
Click on the Change settings button.
Next, click on Allow another app.
Now, click on Browse.
Locate the launcher (.exe file) for Elden Ring, select it, and then click on Open.
Click on Add.
Make sure you have both Private, and Public checkboxes ticked for the game, and then click on OK to save the changes.
Many reported that the firewall prevented Elden Ring from launching, and allowing the game did the trick. Also, if you have third-party firewall software installed, check the official website for the exact steps to whitelist a program.
3. Update your GPU drivers
Press Windows + R to open the Run command, enter devmgmt.msc in the text field, and click OK.
Locate and double-click on the Display adapters entry.
Right-click on the graphics adapter, and then select Update driver.
Select Search automatically for drivers here.
If a better version cannot be found, select Search for updated drivers on Windows Update.
Next, click Advanced options.
Select Optional updates.
Click on Driver updates.
If an update for the graphics driver is listed, tick the checkbox for it, and click on Download & install.
Outdated drivers won’t just lead to Elden Ring not launching but also affect the performance of the game along with other applications on the computer. So, it’s recommended that you always keep the graphics drivers up-to-date.
If an updated version cannot be found, look for the latest one on the manufacturer’s website.
A third-party driver updater like Outbyte Driver Updater is recommended as it has a massive database of drivers that goes beyond GPU and is helpful for the functioning of the whole system.
Outbyte Driver Updater
An automated solution for keeping all your device drivers up-to-date.
Press Windows + I to open Settings and select Windows Update from the left.
Click on Check for updates on the right.
If Windows finds an update after the scan, click on Download & install to get it.
If Elden Ring is not launching and a white screen is displayed instead, updating the OS and the graphics driver would help.
5. Run Elden Ring as an administrator
Locate the Elden Ring launcher, right-click on it, and select Properties.
Go to the Compatibility tab, tick the checkbox for Run this program as an administrator, and click OK.
Not granting the required permissions to Elden Ring can often lead to it not launching on the computer. In this case, it’s best to configure the game to run with administrative privileges.
Now, right-click on Elden Ring and select Properties.
Navigate to the Locat Files tab from the left and click on Verify integrity of game files.
Wait for the verification process to complete.
Once done, restart the computer and check if Elden Ring Steam restart required problem is resolved. If not, head to the following method.
7. Repair your system files
Press Windows + S to open the Search menu, enter Terminal in the text field, right-click on the relevant search result, and select Run as administrator.
Click Yes in the UAC prompt.
Now, press Ctrl + Shift + 2 to open Command Prompt.
Paste the following two commands individually and hit Enter after each to run the DISM tool:DISM /Online /Cleanup-Image /ScanHealthDISM /Online /Cleanup-Image /RestoreHealth
Now, execute the following command to run the SFC scan: sfc /scannow
DISM (Deployment Image Servicing and Management) and SFC (System File Checker) are effective scans to identify and rectify corrupt system files and Windows image issues.
After you are done running the two, check if Elden Ring is now launching without any problem.
8. Make sure you are running the latest version of DirectX
When writing this article, the newest version available is DirectX 12, so make sure you run it. In case you are not, download and install DirectX on your computer.
Microsoft has of late started releasing DirectX updates through Windows Update. So, you now don’t need any third-party application or need to visit a website for it. Just make sure you are running the latest version of the OS.
9. Run Elden Ring in a Clean Boot Environment
Press Windows + R to open the Run command, type msconfig in the text field, and click OK.
Navigate to the Services tab, tick the checkbox for Hide all Microsoft services, and then click Disable all.
Now, go to the Startup tab, and click on Open Task Manager.
Locate all programs configured to launch at startup, select them individually, and click Disable.
Once done, head back to the System Configuration window and click Apply and OK to save the changes.
Click Restart.
Windows will now open in a clean boot environment, with only the critical services, drivers, and processes running. So if Elden Ring is now launching fine, the issue lies with either of the three.
If Elden Ring is still not launching, the problem lies with the game itself and reinstalling it would be the only viable option.
Elden Ring is still at the beginning of its life, and there are many more bugs waiting to be discovered by unsuspecting players.
Some of the problems flagged within the game already received patches, and until we get updates for everything, we’re just going to have to rely on workarounds now and then.
Does Elden Ring work on Windows 11?
Yes, Elden Ring runs fine on Windows 11. While you would find many posts and guides saying that it doesn’t, many users are playing the game on the latest iteration.
System Requirements for Elden Ring (Image source: Steam Store)
Ensure you check all these factors if Elden Ring is not launching and enjoy the experience once it starts working fine.
If you see the Cannot proceed until the game is fully installed message on Elden Ring, ensure the installation process is completed before launching the game. If that’s already done, the solutions listed earlier will help.
Old School RuneScape (OSRS) is an excellent game that you can play on browsers and the client. Jagex updates this game frequently to make sure it keeps running smoothly. But some users complained that OSRS is not connecting to the update server and is stuck.
This failed connection can be frustrating, as it stops users from playing the game. Fortunately, as we did with the RuneScape not loading issue, we have provided effective solutions to this error.
Why is RuneScape not connecting to the update server?
The major reason RuneScape fails to connect to the update server is an antivirus or firewall blocking the connection. Another possible cause is server downtime from RuneScape.
These two issues are easy to fix with just a few steps, as we will show in the subsequent sections of this article.
Why do I keep getting disconnected from RuneScape?
If you keep getting disconnected after connecting to RuneScape, it is mostly down to insufficient system resources. You can fix this by closing other apps that might use your PC’s resources.
Also, it can be due to an unstable internet connection. A change of network should solve the problem in this case.
How do I fix RuneScape not connecting to the update server?
1. Check RuneScape server status
Launch your browser and type RuneScape server state.
RuneScape errors like unable to connect: login server offline and OSRS error connecting to the server, please try a different world are usually down to server downtime.
If you’re getting Runescape unable to connect: login server offline error, it’s rather likely that there’s an issue with the server.
As mentioned earlier, antivirus software or firewall on your PC is the major cause of RuneScape server errors like error_game_js5connect – unable to connect to update server.
If OSRS client is stuck on connecting to the update server, temporarily disable the antivirus or firewall and connect it back after starting your game.
3. Check your network hardware
If the RuneScape web server is not reachable, be sure to check your network hardware. A few users reported that their router caused the issue.
To fix the problem, you might have to reset your router or, in some instances, replace it with a new one. This also works when OSRS is unable to connect to the update server on mobile.
How long is server maintenance RuneScape?
Server maintenance is necessary in order to ensure that the game runs properly. During the maintenance, you won’t be able to log in at all.
As for the length of the maintenance, it takes a couple of hours, and according to the developers, it can last around 6 hours.
RuneScape server errors can quickly dent your gaming spirit. Thankfully, it is not an issue that is difficult to fix, as we have shown.
Today we’ll walk you through some of the best game vendors/distributors out there.Whether you prefer hardcore shooter games or calming strategy games, there is something for everyone.
With PC as one of the most popular ways to play games, there are tons of gaming distribution services to choose from. Keep reading to find out our picks for the best ones.
What are the best apps & websites to download PC games?
Steam is the largest virtual distribution platform for gaming, so it’s no surprise that it tops our list. The game catalog hosts over 50,000 games, so there’s something for everyone. Steam is free to download and install and offers free and paid games to users.
The Steam platforms have access to all the latest and most popular games for PC. Users can join a community about their favorite games and connect with players from all over the world. Steam offers an in-app chat that users can access while gaming and players can earn achievements.
Steam updates game in your library and provide the latest gaming news so users can keep up with their favorite games. However, if you’re having issues with Steam games not launching, we have a guide for that.
GOG (formerly Good Old Games) is a website for both games and movies. The platform is a subsidiary of CD Projekt, the company that developed the Witcher franchise.
Users can easily install games with one click and there is no need to install a separate client. There are also automatic updates that users can toggle on or off. GOG offers DRM-free video games for Windows, macOS, and Linux.
Origin is another well-known host client for popular games and is developed by Electronic Arts. Like Steam, Origin is free to download and install and also offers access to both free and paid games. Users can store their games on the cloud storage to save space.
There is also an in-app chat for users to connect with friends while gaming. This feature also allows users to broadcast their gameplay online to share it with others on video streaming services like Twitch. Origin is available across PC, Mac, Xbox, PS, iOS, and Android devices.
Battle.net is online gaming and social networking client developed by Blizzard Entertainment. The gaming service was the first of its kind in its release in 1996. Battle.net hosts some of the world’s most popular games like World of Warcraft, Overwatch, Diablo, and more.
Users can chat with friends using the built-in messaging system and can buy merchandise of their favorite games from the online store. If you are unable to open the Battle.net launcher in Windows 10 or 11, we offer solutions for that.
G2A is a rapidly growing digital marketplace for games. The site offers a platform for buyers and sellers to connect. The community provides users with extremely low prices for resold games which users can purchase and download using a redemption code.
Not only does G2A offer games for users to digitally download, but also software, prepaid codes, and much more. G2A offers tons of specials and deals for users to get the best prices on popular games.
The Epic Games Store is a virtual storefront created by Epic Games for Windows and macOS. Users can access the Epic Games Store either from the online website or in its standalone client that users can download.
Users can purchase and download popular AAA games and the platform also offers a wide range of free games. For game developers, the Epic Dev Community makes it easy to post questions and share games.
Ubisoft Connect provides an online environment for players to connect with others and download their favorite Ubisoft games. The service is free to download and install across PC devices as well as Android and iOS devices.
With the Loyalty Program, users can earn rewards that unlock unique character mods and appearances for popular games. Players can also keep their progress across all their devices with Ubisoft Connect so users can switch consoles and pick up where they left off.
Game Jolt is a gaming social media platform available on the web, iOS, Android, and a desktop app. Users can join a social community for their favorite games and content creators. The site offers the ability to share content and chat with others.
In addition to being able to download games, users can also participate in contests for prizes. These competitions encourage users to create and develop indie video games for others to play.
The Microsoft Store is a digital distribution platform that comes pre-installed on Windows devices. The app store offers programs for not only gaming, but for productivity, movies and TV, social media, music, and so much more.
The Microsoft Store works in conjunction with the Xbox Games Store, meaning any games purchased on an Xbox will also be available on your Microsoft Store account. Users can also use their Xbox Game Pass to download games from the Microsoft Store.
Softonic is another massive web platform where users can find and download apps from any category for their device, including games. In addition to offering software and apps for PCs, users can also explore news, reviews, and articles on Softonic.
Users can find games for Windows, macOS, Android, and iOS devices. Softonic offers a wide selection of both free and paid games to download.
GamersGate is a well-known platform based in Sweden for users to buy and download popular games. Developed in 2004, the platform is among one of the older gaming distribution sites and offers both indie and AAA games.
Users can also find helpful gaming and strategy guides on GamersGate. Games are offered at a heavily discounted price making them affordable and accessible for everyone.
Green Man Gaming is an online video game distributor and publisher based out of London. The site partners with gaming publishers to get discounts and affordable prices on some of the most popular games on the market.
There is a Green Man Gaming community that users can join on Discord. In addition to offering a hub for guides and overviews, there is a blog and forum for users to access. Because Green Man Gaming is also a gaming publisher, game developers can reach out and work with the company to publish and promote a game.
Itch.io is a simple and straightforward side to find both free and paid indie games to download to your PC. The site offers a community for gamers and indie game developers to share content and chat. Game developers can also upload their own games for users to try.
Itch.io also offers Game Jams where users can host and participate in game creation. Game Jams come in many different themes and time frames to complete the game.
AllGamesAtoZ is a massive online platform that offers users free games to download for macOS, Linux, and Windows. The site offers the widest selection of free games from a huge range of genres so there is something for everyone.
In addition to offering free games for PC platforms, AllGamesAtoZ also offers games for Android, iOS, Xbox One, and PlayStation consoles.
Humble Bundle is not just an online storefront for video games, users can also purchase ebooks, software, and more. The site operates on a monthly subscription basis, however, any games downloaded with a subscription belong to the user forever, even if the subscription is canceled.
Humble Bundle works closely with charities, and they donate a portion of the proceeds for every product sold. Users can choose where the money from their purchase goes and can even choose to donate the entire cost of their purchase to charity.
Mega Games offers a great selection of free games for players to download to their PC. Users can also keep up with gaming news and leave reviews for their favorite games.
Founded in 1998, Mega Games has grown to be one of the largest gaming sites. In addition to popular games, Mega Games offers guides for fixes, cheats, guides, and mods all in one place.
Softpedia is an online website that offers a wide range of games from every category for users to choose from. The site goes a step further and even provides game cheats and demos for users. Many players prefer Softpedia because of its reasonable prices and simple interface.
After purchasing a game from the Softpedia library, users can download the game to their PC. Softpedia offers games that are compatible with Windows, macOS, Linux, and Android.
Ocean of Games was developed by Ocean Software and offers a wide variety of categories of games for players to download. There is also a community forum page where users can connect while gaming. Ocean of Games supports both single-player and multiplayer games
However, many users report that some of the games are not frequently updated and older versions are still available to play despite bugs.
Yes, most game distribution services are free to use and download. Users may only need to pay for the individual games they download. Some services even offer selections of free games so users don’t need to pay anything to download and enjoy gaming on their device.
We hope you enjoyed our top picks for the best PC apps to download games. Let us know what your favorite site or platform is to download games for your PC.
Windows 10 users have often criticized Microsoft over its privacy policy and it doesn’t seem like they’ll ever lack opportunities to continue doing so.
Read on to find out how to tell if you have a keylogger and how to disable it on your Windows 10 device.
Does Windows 10 have a keylogger?
Windows 10 does not have an actual keylogger, instead, the built-in Windows diagnostic service is used to improve keyboard prediction service and inking recognition for future updates.
Microsoft is collecting data to improve its service, but many users have not consented to it. The contents of every keystroke are sent through to Redmond servers.
It’s not the first time Microsoft has to consider privacy concerns. Many users have requested a switch to turn off all data and telemetry collection.
The fact is, Windows has had telemetry since its first editions. It helps Microsoft know what features to focus on and be aware of those not being used.
The Redmond giant explains this is done to improve the user experience. However, users feel that the OS is actually spying on them:
W** is Windows 10 so sinister? All I here about is ads, tracking and mandatory updates that restart the computer no matter what youre doing. Now keyloggers. It also ran slower than a turd coming out on a freezing morning. Im glad I downgraded. There’s no way in hell I will ever use this bul***** free spyware.
The lack of transparency and the absence of an option to control exactly how their data was used, made users complain about this feature.
How can I disable the keylogger in Windows 10?
A new feature was added to Windows 10 since the April Update, letting you disable what is considered to be its built-in keylogger. Microsoft also added a new feature that lets you see what data is being backed up on your device.
That being said, if you’re worried about your data privacy, you can quickly turn off the Windows 10 keylogger from the Settings page.
1. Press the Start button on your taskbar.
2. Choose Settings from the list of options.
3. Navigate to the Privacy tab.
4. Go to the Inking & Personalization section.
5. You’ll land on a Getting to know you section, where Microsoft explains that Windows and Cortana use your voice and writing patterns in order to make better suggestions.
Toggle it off to clear all the collected data from your device and inking dictionary.
6. Now, navigate to Privacy > Diagnostics and Feedback.
7. Under Diagnostic data, select Required diagnostic data. In doing so, you will turn off the Windows 10 keylogger and prevent it from sending information about your PC to Microsoft.
After you make this choice, the Improve inking and typing setting will be automatically turned off as well.
However, many users are convinced that all the workarounds used to block Windows 10 from sending private data to Microsoft don’t actually work. As a result, they have decided to switch to Linux.
This is not a surprising piece of news, as a recent survey confirmed that 60% of Windows users would consider switching to macOS for more privacy.
We hope that our article helped you find out more about the built-in keylogger on Windows 10 and the steps you need to follow to disable it.
You probably are not able to update the Photos app on Windows 10. However, we will show you all you must know.
If you have any problems with the Windows 10 Photos app, we’ve prepared some solutions to make your life easier.
Since Microsoft introduced the new Photos app and Windows 10, users have found it strange to accustom to the new app instead of the standard Photo Viewer.
On top of that, the new app also caused a lot of issues for users. So, if you’ve recently encountered a problem with Windows 10 Photos app, keep reading this article for potential solutions.
It’s possible that the Photos app is not opening because your installation is damaged, so you might want to repair it or create a different user profile.
Also, outdated app versions trigger most issues. If this method fails to fix the problem, run the Windows Store App troubleshooter, and restore the app package.
Did Microsoft Photos change?
The interface of Windows’ primary picture program has undergone a rather significant redesign thanks to a recent upgrade to Microsoft Photos.
Now let us show you the best resolutions for Microsoft photos not working and restore things to normal.
How can I fix Photos app issues in Windows 10 and 11?
1. Update Windows
Open the Settings app using hotkeys Windows + I.
On the bottom left pane, click on Windows Update.
Click on the Check for updates button, and if any updates are found, download and install them.
Most of the time, you can’t do anything about the problem because it’s system-related. However, if that’s the case, Microsoft will eventually come up with the solution.
So, all you need to do is update your system, and if the fix is available, you’ll receive it through Windows Update.
Windows updates should be installed automatically, but you can also check manuallyif you don’t want to wait for the system to do it.
2. Update the Photos app
Open the Microsoft Store app.
Search for microsoft photos and click on the Microsoft Photos option.
If there is an update, you will be able to install it.
This is similar to the Windows Update. If there’s some component of the Photos app that conflicts with your system, developers will probably find a solution for it.
But instead of Windows Update, the fix might be delivered to you through the app update because the app’s newer version might fix the issues for you.
3. Restore the libraries to default
Press the Windows key + E to open File Explorer or click on its icon on the Taskbar if it’s there.
Click on the three horizontal dots beside View and select the Options property.
Select the View tab, scroll down, tick the Show library option, then click OK.
In the left pane, right-click on Libraries and click on Restore default libraries.
Open your Photos app again, and you should be able to see images. If you cannot open the Photos app, follow the next solution.
Windows 10 Photo app is connected with libraries in your File Explorer, so if there’s some library problem, the app won’t show any photos and videos.
To solve this problem, you have to restore libraries to default, and hopefully, everything will work again.
If downloading and installing the latest Windows updates did not solve your issue, you might want to consider a completely different solution.
To fix this issue, consider professional photo editing tools to improve your photos using powerful editing features, organizing automation, etc.
There are plenty of photo editing and photo management tools on the market. Each software solution is tailored to specific needs, and you won’t have as many problems while managing your photos.
And why not choose one with many bonus tools? File Viewer Plus is a powerful tool that lets you easily capture, edit, share, and organize photos.
It comes with a highly intuitive interface that is easy to use even if you have no prior knowledge of other photo viewing programs.
With File Viewer Plus you have access to hundreds of file formats, not only photos and videos. Multiple uses might just come in handy when encountering unknown formats.
Why only open and view files when you can also edit them? This software comes with a built-in editor and convertor for numerous types of files. Get multiple features and much more from this simple yet smart software.
File Viewer Plus
Use an improved photo viewer for Windows that comes with lots of unique and useful features.
Navigate to the following path: HKEY_CURRENT_USER\Software\Classes\Local Settings\Software\Microsoft\Windows\CurrentVersion\AppModelRepository\Families\Microsoft.VP9VideoExtensions_8wekyb3d8bbwe
Right-click on the Registry key Microsoft.VP9VideoExtensions_8wekyb3d8bbwe and select Delete.
Repeat the process for each one of the old entries.
Click on Troubleshoot on the left pane, select the Windows Store apps option, and choose Run the Troubleshooter.
Follow further on-screen instructions to finish the process.
Reboot your computer.
If there is any corrupt file in the Photos app, the Troubleshooter should deal with it; however, if the problem remains, move on to another solution.
This solution helps you update the Photos app without Microsoft Store and restore the Shift key functionality.
7. Restore the Apps package
Right-click the Start Menu button and open Windows Terminal (Admin).
Enter the command below and press Enter: PowerShell
Now, enter this command and press Enter: Get-AppXPackage -AllUsers | Foreach {Add-AppxPackage -DisableDevelopmentMode -Register "$($_.InstallLocation)AppXManifest.xml"}
Restart your computer.
If you cannot open the Photos app (or any other Windows 10 app), you need to perform the steps above using PowerShell.
8. Restore the Photos app
Right-click the Start Menu and select Windows PowerShell (Admin).
Enter the command below and press Enter: get-appxpackage *Microsoft.Windows.Photos* | remove-appxpackage
Finish the process and reboot your computer
How do I download the Windows 10 Photos app?
Open the Microsoft Store app.
Search for microsoft photos and click on the Microsoft Photos option.
Once the app opens, you will have the option to download it if the Photos app is not installed on your Windows 10.
You may also reinstall the Photos app on Windows 10 using the script below on Command Prompt without the Microsoft Store: $manifest = (Get-AppxPackage Microsoft.WindowsStore).InstallLocation + ‘AppxManifest.xml’
That’s all; your Photos app should work fine after performing these solutions. If you have any comments or questions, use our comments section below.
In this article, let us explore the error code DR1001, its causes, and fixes. Need For Speed Heat is a motor racing game in which players may pick their automobiles and race with their other gamer buddies.
The game gives the impression of traveling about places such as Miami, Florida, and others by building a fictional metropolis similar to actual locations. If you love playing NFS, you may like some racing games that can be played online or offline on your Windows PC.
What is error code DR 1001?
While playing online with other gamers, users encountered an issue where they got disconnected from the session with the error code DR1001. This error code might be due to the following factors mentioned below:
NFS Heat game server’s down – This error code appears when the game’s server is momentarily shut down.
Some technical glitches – When playing the game, these things happen if there is a technical problem with the gaming application.
Driver issues – The most common driver affecting the game is the display driver. If they are outdated or corrupt, you may experience this problem.
Outdated OS – Users who play the game on an outdated Windows version also experience the problem.
A few options listed below can help you resolve the problem.
Quick Tip
An alternative to improve this situation significantly is using a VPN source. ExpressVPN allows you to choose which applications and devices you prefer to direct your connection over the VPN server and which you don’t.
Another feature worth mentioning is that ExpressVPN can help you enhance your gaming experience by minimizing ping, fixing ISP throttling, and lowering latency.
ExpressVPN
A VPN service that helps you improve gaming speeds with its high-quality features.
We recommend you take the following steps before venturing into the solutions we explored:
Check the connection – A bad internet connection can trigger the problem, so you may save much troubleshooting time simply by changing your connection.
One of the most popular chess apps for Windows 8 users, Chess Lv.100, has been updated to make use of Windows 8.1 support
Without a doubt, chess is my favorite puzzle and brain game and I play it almost on a daily basis. Be it on online websites or, of course on my Windows 8 tablet, enjoying some of the best chess apps from the Windows Store, I never get bored playing it. Some of you might still feel nostalgic about Chess Titans, so read our article on how you can get it back if you want it so badly.
Now, to get back to Chess Lv.100 app, which is one of my favorite apps to play in Windows 8 and Windows RT, as well. Recently, I discovered that the chess app has been updated, though even until now, a release note hasn’t been made available. But, my best guess is that the developer has added Windows 8.1 support. What this means for this app is that possibly you’ll be able to use the bigger-sized tiles on the start screen. I also suspect that some bug fixes have taken place, as well as improvements in the stability of the app.
Tip
If you want to pass every level and improve your overall chess skills, you should use tools that analyze each move. DecodeChess is an AI-based software that tells you all your mistakes, available strategies, and your opponent’s goals.
To be able to play Chess Lv. 100 app on your Windows 8, Windows 8.1 or Windows RT device, you will need to have a resolution of 1280×1024 or higher. Here’s how the developer describes his chess app:
The Chess has 100 adjustable playing levels based on the engine “Crazy Bishop” with very high quality graphics! Adjustable playing strength from 100 levels! You can choose the strength of the computer from 258 to 2300 in ELO rating. Level 1 is extremely weak, and Level 100 is extremely difficult to beat! The Chess has 100 different levels of play from beginner to expert! Challenge to win medals by defeating computer! You will be rewarded new board style and pieces design by collecting medals.
The developer, Unbalance Corp. has also issued a statement for those that might have trouble with the game graphics:
When you upgrade to Windows8 from Windows7, we have confirmed in some cases, game graphics can not be displayed properly depending on the setting of the graphics driver. In such case, problem might be solved by installing the latest graphics drivers that support Windows 8, or initializing the settings of your graphics driver. Regarding the situation of your PC for Windows 8 graphics driver, please contact your computer manufacturer.
It might be a wild guess, but probably the same issue has been encountered by those who have upgraded from Windows 8 to Windows 8.1. Anyway, all that is behind now, so follow the link from below to download and install on your device the Windows 8.1 updated Chess Lv.100 app.
In case you didn’t know, right after this article was written, the app received an important update which solved some graphical issues, especially for touchscreen users. However, the game already worked really well and it is still one of the most downloaded free apps in Microsoft Store.
In case you play Chess Lv. 100 for a long time, you can try other AI-based chess games which will put your brain to new challenges. Some of them are totally free but others include some paid features that will make you unlock new levels and achievements and are working great in Windows 10.
Keeping all your emails at your disposal can help you save time and better organize your daily tasks.
So, when Gmail is not working in Outlook, you need to find out why these two mail clients cannot intercommunicate.
Discovering the proper fix alone might take some time, which is not ideal, especially if you have something better to do.
But that’s why we are here for. Thus, during the following guidelines, we will try to outline the most straightforward way in which you can fix the Gmail that is not working in Outlook.
We’re primarily referring to the situation when the mail client keeps asking for a password whenever you try to access or add a new Gmail account.
If you’re currently struggling to resolve similar issues, let us tell you some other confirmed fixes:
Outlook cannot connect to Gmail IMAP server – Users complain about repeatedly getting a message that they cannot log onto the IMAP server. If that’s your issue too, go to Less secure app access in Gmail Security settings and turn it On.
Outlook 2016 won’t connect to Gmail – Even if you go through the proper setup for getting to Gmail, it doesn’t mean that you’re a stranger to this error. Apply the above steps to see if they help.
Quick Tip:
You can fix network problems for your Outlook email account by using Opera One as an efficient workaround.
This browser is suited for connection issues due to its VPN support, meaning that you can change your IP address and access Gmail in a few clicks. Also brings you a free integrated AI and modular AI-ready design.
Opera One
Bypass the Outlook connection problem with Gmail using this fully private and integrated browser.
This is not a very rare issue that Outlook users have been facing. Notably, you will find multiple error reports confirming Gmail is not working in Outlook issue.
Here are some of the common reasons that trigger this problem.
Your Gmail account isn’t properly set up with Outlook.
Google is considering Outlook to be an insecure application that is trying to access your data.
IMAP isn’t enabled in Gmail.
An incorrect username and password could also trigger this problem.
Why is my Outlook not accepting my Gmail password?
Here are the reasons why Outlook isn’t accepting your Gmail password.
There is some issue with your Outlook credentials.
Your Gmail account has 2 step verification enabled.
You haven’t turned on Allow less secure apps option in your Google account.
Your Outlook app might be outdated.
Your PC is infected with a virus or malware.
How do I fix Gmail if it’s not Working in Outlook?
1. Try out a more reliable email client
As you’re used to, we’re here to assist you with valuable tips. However, if you lack time to address the error, don’t hesitate to try out a different email client.
Many alternative Windows 10 email client apps have a similar UI and user experience, so you will adjust in no time.
We recommend looking for an email client with powerful encryption and security, as well as good contact management features.
You can find email clients with similar task management features to Outlook, including scheduled emails, calendars, and support for meetings.
2. Enable IMAP from Gmail and use App Password to log in
Login to your Gmail account.
Access the Settings page.
From Settings, switch to Forwarding and POP/IMAP tab.
Just make sure that IMAP is enabled.
Save your changes.
Open your Outlook app.
From Outlook, click on File and select Add Account.
Choose the Manual setup or additional server types, and afterward, choose Next.
When asked, select Pop or IMAP and fill out the below details.
Enter your name.
The email address.
Complete the Logon Information field
Incoming mail server: imap.gmail.com
Outgoing mail server: smtp.gmail.com
Click on the More Settings button.
From the window displayed, switch to Outgoing Server and select the My outgoing server (SMTP) requires authentication option.
Switch to the Advanced tab, and from the drop-down menu, select use SSL to encrypt your connection.
The IMAP port number must be 993; similarly, the port number for SMTP must be 465.
Save your changes.
Access your Gmail account, click on your profile image, and choose my account.
Pick Sign-in & security and choose Connected apps & sites.
From there, enable the Allow less secure apps field.
Save your changes and return to Outlook.
Now you should be able to connect your Gmail account from Outlook.
In a few words, the problem can be handled by enabling IMAP from Gmail and using App Password to log in the app password is a one-time password that replaces the classic two-step verification.
If none of the solutions above worked, another alternative is to use another Gmail provider. Our recommendation is MailBird.
MailBird is a great Gmail inbox because it provides the user with a unified inbox for multiple accounts, tons of external app integrations, and multi-language support.
If you are using Gmail from multiple devices, then IMAP (Internet Message Access Protocol) is the way forward. You can use Gmail IMAP for your work computers or smartphones as the messages or emails do not remain on the local device but on a server.
On the other hand, if you have a poor internet connection and want to access your Gmail from one device, you can opt for Gmail POP (Post Office Protocol) as it attempts to store your emails on a local drive. For most people, though, IMAP suits better.
So, there you go. The steps above should help you properly configure your Gmail account so that it can be recognized and accessed by Outlook afterward.
However, if you still have problems while trying to connect to Gmail from Outlook, don’t hesitate to contact us.
Try to offer as many details as possible because we can find better solutions to apply based on this info.
The easiest way to get in touch with us is by using the comments field available below.
Have fun playing chess in Windows 10 with these top apps that we have handpicked from the Windows Store.
Initially, we featured only four chess games and apps for your Windows 10 tablet but in time we have discovered more that we want to share with you.
Chess is the sport of the mind. This wonderful game that millions of people around the world play and enjoy has not been upgraded to Windows 10 as part of the Windows Games collection.
Nonetheless, those passionate about chess can still rejoice at the thought that there are lots of great quality chess apps to choose from.
Some of you might still long for the Chess Titans game from Windows 7, so use these Windows 10 chess apps with all confidence, as they will not disappoint you.
We’ll be taking a look at some of these chess games for Windows 10 and see which are the very best and deserve to be your opponents and chess companions at the same time.
Your Windows 10 devices will definitely be much more complete with these apps, and we hope that they will please you.
Quick Tip:
If you want to improve your chess skills, we recommend you get a companion that knows more than any of us. DecodeChess is a tool that helps beginners understand chess strategies better.
DecodeChess is an AI-based software that analyzes your moves and tells you any mistakes, the best moves you can do, and suggests real-time strategies.
One of the best-looking chess apps we’ve seen so far, The Chess offers users one of the best experiences of chess in Windows 10.
The app looks awesome, and it gives users the possibility to choose the pieces that they play with (both style and black or white), as well as turn the opponent’s pieces upside down, for a more natural look.
Chess allows you to play versus the computer or versus a human player, and the game can be rated, so you can earn levels and experience.
One other interesting feature of the game is the possibility to create a custom game by adding any pieces to the table and continuing the game from there.
The game is perfect for more experienced players, as it provides players with more of a challenge than other chess games.
And because of this and its other features, we think this is one of the best chess games for Windows 10.
The Chess Lv 100
Level up your chess skills learning with a highly downloaded app that can help any passionate player.
Full Court Chess 32is a minimalistic simple chess simulation for players who want as light an experience as possible.
And this game is as light as it gets. It allows you to focus on your tactics, without any possible distractions.
But as the game is light in design, it’s also light in features. Because it practically has none. As soon as the app starts, you start the game of chess against the computer.
You can’t change anything, you can’t play against another player. So, you’ll choose this game only if you want a quick chess round in your spare time.
Full Court Chess 32
Try out this simplistic yet very practical software to exercise your tactics and moves close to perfection.
Chess 3D is another decently designed 3D chess simulation. It’s very similar to 3D Chess Game, only figures and board are a little differently designed.
Feature-wise, these apps are almost identical. Chess 3D also allows you to play against the computer or another So, player, or watch the computer simulation of the round.
But what separates Chess 3D from other apps is the price. So, if you really like this game, you can purchase it.
But if you don’t want to spend a dime on a Windows chess simulation app, you’ll probably look elsewhere.
With these apps at your disposal, you can both play chess and learn the beautiful game that it is.
You will have matching opponents and when you finished training your skills, you will be able to defeat anyone at chess.
Chess 3D
Take advantage of lively chess simulation software and become the smartest at your game.
3D Chess Game – Great 3D experience when against players
3D Chess Game is perhaps the best 3D chess simulation you can find in the Windows Store. Of course, it doesn’t offer advanced gameplay or graphics, by today’s standard.
But when you compare it to other games, 3D Chess Game surely stands out by its design.
This app is also very functional. It allows you to play against the computer or against another player. But it also allows you to run an AI vs AI simulation and pick up some moves on the way.
Another great feature of this app is touch support, which makes 3D Chess Game a perfect choice for your Windows tablet.
Chess Royale is the most suited app to enjoy a classic game of chess on a Windows PC. With simplistic and pleasant graphics, you can enjoy your time learning new paths.
The app doesn’t come with dozens of features, but in exchange can offer a powerful opportunity to improve your tactics, playing against robots or with other experimented opponents.
More so, the game has an intuitive interface and easy controlling options in order to provide a stable UI for beginners.
Other benefits consist of a manual players option, an editor menu where you can choose your side, or challenge robot players to practice along until your moves are witty and hard to beat.
Another challenging 3D chess game is Checkmate and Gambit, designed to look as realistic as possible. Playing a chess simulator like this on your PC trains your brain or strategic thinking.
The app has all you would need, from beautiful graphics to standard chess rules that can help beginners to better understand the game. Hence you can play with the computer and try until you improve your skills.
Coming up to the features, this app offers a real-life game experience, standard chess rules, themed background, and colorful 3D graphics to impress even the kids.
Moreover, the game is specially created to help players grow up their level and more importantly, to develop intelligent or effective fast-thinking.
Thus you can check out this realistic chess simulator if you need a life-like feel, or exercise your mind against the opponent.
Chess Play & Learn is a match for all chess fans who live for the game. This chess app is quite special due to its functionality and performant interface.
Hence the rules are the standard for chess, and you can play it manually against other players, or challenge the computer to train your mind before considering any human competition.
Regarding the functionalities, the app includes movement tracking, two players mode, save function, 10 difficulty levels, and realistic graphics. In other words, it covers any aspect you may need to enjoy great matches.
Playing chess is a great option to relax after any stressful tasks, and engage your mind in a very logical activity. Thereby choose this app if you need to strengthen up your strategic thinking or visual memory while playing games.
Chess V+ is the last picked solution, but clearly not least because it is actual and offers a great chess experience for any player, beginner or master.
When it comes to game initiation, this app has a clear mindmap for any player who didn’t play before or has very little experience.
Thus the game offers progress hints, legal moves, piece move knowledge, over 20 levels of difficulty included, and more. Regarding features, you have an AI engine, understanding complex chess rules, support for other boards and pieces, or undo/redo moves.
All in all, this chess app is a great solution for any player in need of a rounded virtual game that can train minds.
If you’re still learning how to play this beautiful game, these apps won’t help a lot, because each app is designed for players who already know their game.
Even ChessTactics is unsuitable for beginners because it features some advanced problems you’ll probably find hard to resolve.
So, if you’re just starting, I recommend visiting our friends over at Remote Chess Academy. You’ll find numerous books, tutorials, and additional learning material that will take your chess game to another level.
Alternatively, if you want a tool to help you see your mistakes, see the best strategies and how to win every game, an AI-based companion, DecodeChess, is the perfect choice for you.
Tell us what you think about our picks. What is your favorite chess app for Windows 10? Let us know in the comments below.
If you bought a brand new Sony Smart TV and you’re not really used to it, adding and deleting apps can get a bit overwhelming.
Despite having an easy-to-use menu and a bunch of apps pre-installed, adding new ones can get confusing fast, if you don’t know what you’re doing.
First, you’ll need to know that your Sony Smart TV uses the Android OS, so if you already own an Android smartphone, things should be pretty similar.
Check out the steps below if you want to learn more on how you can add or remove apps on your Smart TV.
Prerequisites for adding apps to Sony TV
Before you start, you have to make a few general checks:
First, make sure that your Sony Smart TV is connected to the Internet.
Check if your device is Android powered or not. Some Sony Smart TVs (usually, before 2015) don’t have Android OS.
To access the Google Play Store, you must have an active Google account.
After that, you can start installing new apps on your TV.
How can I manage apps on my Sony Smart TV?
1. Add Apps to Sony Smart TV
If you made sure that your Sony Smart TV is connected to the Internet with a stable connection, you can begin installing apps on it.
To do that, you need to navigate to Google Play Store and manually select to add the apps that are compatible with your Sony TV.
1. On your Sony Smart TV’s remote control, press on Home.
2. Go to Apps.
3. Under Apps, select Google Play Store.
4. Now select the search bar and use the Voice Search feature or the on-screen keyboard to search for the app you want to download and install.
5. In the Google Play Store, you’ll only find the apps that are compatible with your device. Some apps that work on your smartphone can’t be installed on your TV because they aren’t optimized for it.
6. After you searched for a certain app, a list of similar apps will show up. Choose the one that you want to install.
7. Now select Install.
8. After that, your Sony Smart TV will start downloading and installing your app. Wait for the process to finish and then you will find your app under Home > Apps.
We have to mention that if you have an older Sony Smart TV, you won’t be able to directly download new apps through the Google Play Store.
Instead, you’ll have to use Set Top Box (STB) like Google TV (NSZ-GS7). Bear in mind that not all apps are available because they are not optimized for a big-screen TV.
If you own a 2013/2014 Sony Smart TV, you could also use the Opera Store to install new apps.
You can uninstall or hide an app directly from the Apps menu:
In the Apps menu, go to the app that you want to uninstall or hide.
Press and hold the Enter button from your remote control on the app you want to uninstall.
Now you’ll be presented with two options: Uninstall application or Hide application. Choose the option that is best for you.
2.2 Via Google Play Store
You can also uninstall apps from the Google Play Store:
On your remote control press the Home button.
Go to Apps.
Under Apps, select Google Play Store.
In the Google Play Store, navigate to My Apps.
Now look for the app that you want to uninstall and select it.
Choose Uninstall and then confirm by pressing OK.
2.3 Hide pre-installed apps
It’s worth mentioning that some of the pre-installed apps can’t be uninstalled. Depending on your TV’s model number, you’ll have the option to hide the Featured apps:
On your Sony Smart TV, go to Settings.
Now navigate to Apps > System Apps > Sony Shelf > Notifications.
Switch to OFF and the Featured apps section will disappear from your home screen.
Alternatively, you can follow the steps:
On your Sony Smart TV, go to Settings.
Go to Apps > Sony Select > force close it.
Switch Notifications to OFF.
Note: you can also do it by going to Settings > System preferences > Home screen > Recommendations Raw > turn OFF all the apps.
As you can see, installing or uninstalling apps on your Sony Smart TV isn’t hard at all. The easiest way is through the Google Play Store, but you can also do it using the other methods.
If you have any other suggestions or questions, don’t hesitate to leave them in the comments section below.
Today we’ll walk you through the steps for updating Roblox on a Windows PC or Mac. Moreover, if the updates don’t go as smoothly as planned, we’ve also got in-depth troubleshooting steps outlined below.
Let’s get started.
How to update Roblox
How to update Roblox on Windows PC?
Roblox can be also be updated from the Microsoft Store if you want to use it on your Windows PC. In case you downloaded Roblox from the Microsoft Store, head directly to it for an update.
Also, with the necessary permissions granted, Microsoft Store will automatically update apps, so you don’t have to manually check and install them every time.
1. Press Windows + S to launch the Search menu.
2. Enter Microsoft Store in the text field, and click on the relevant search result.
3. Click on the Library icon near the bottom-left corner.
4. Press on the Get updates button.
5. If there are any updates for Roblox, they will automatically be installed.
How to update Roblox on Mac?
Updating Roblox on Mac is slightly tricky and time taking because you will have to uninstall the current version, and download and install the latest one from the official website.
But make sure to keep the program up-to-date if you don’t want to miss out on critical features, patches for known bugs, and other performance enhancements.
How can I fix the Roblox update error on Windows 10/11?
1. Clear browser cache and cookies
1.1 Opera One
Launch the browser, click on the Opera One icon near the top-left corner, hover the cursor over History, and select Clear browsing data from the menu.
Select All time from the Time range dropdown menu.
Tick the checkboxes for Cookies and other site data, and Cached images and files, and then click on Clear data at the bottom.
1.2 Google Chrome
Launch Chrome, press Ctrl + H to launch the browser history, and select Clear browsing data from the left.
Next, click on the Time range dropdown menu, and select All time.
Now, tick the checkbox for Cookies and other site data, and Cached images and files, and then click on Clear data at the bottom.
Wait for the process to complete, and then restart the browser for the changes to fully come into effect.
1.3 Mozilla Firefox
Launch Firefox, click the hamburger icon near the top-right corner, and select History from the flyout menu.
Select Clear recent history.
Now, tick the checkboxes for Cookies and Cache, and then click on OK.
1.4 Microsoft Edge
OpenEdge, and pressCtrl + Shift + Delete to launch the Clear browsing data window.
Tick the checkboxes for Cookies and other site data and Cached images and files, and then click on Clear data.
If one browser won’t work due to certain limitations, try out another. Just, don’t forget to grant all the required permissions to Roblox in order to successfully run.
If you are worried about deleting certain browsing data, use a dedicated utility like CCleaner. It sorts your browsing data into more specific categories and you can easily select what exactly you want to remove and keep.
2. Restart the PC
Restarting your PC and accessing the app again should resolve Roblox update issues. A majority of bugs and glitches in Roblox are easily addressed by restarting the system.
In addition to that, we suggest signing out and then signing back into the platform. This is a long shot but might help occasionally.
3. Add Roblox as an exception to the Firewall
Press Windows + S to launch the Search menu, enter Allow an app through Windows Firewall, and click on the relevant search result.
Click on the Change settings button.
Click on Allow another app.
Now, click on Browse.
Locate the Roblox launcher, select it, and then click on Open.
Click on Add.
Finally, tick the checkboxes under both Private and Public for Roblox, and then click on OK to save the changes.
As already mentioned, Roblox updates are administered automatically. And, since the update process requires an uninterrupted connection, you’ll need to check the firewall and router settings.
In addition, don’t forget to troubleshoot the connection. Here are some common steps you can take to resolve possible connection issues:
Use a wired connection instead of Wi-Fi.
Restart your router.
Manage router settings. Make sure ports are open and enable UPnP and QoS if available.
Press Windows + E to launch File Explorer, navigate to the following address while replacing the Username here with the one on your computer:C:\Users\Username\AppData\Local
Delete the Roblox folder and restart your PC. You might need administrative permission to do so.
All Windows apps store chunks of application data in order to speed up the loading and preserve certain configuration inputs. However, the cached data tend to pile up quickly and it might slow down the game or, in this case, prevent updating. So, delete the cache and check if it fixes the Roblox update error.
5. Run Windows store apps troubleshooter
Press Windows + I to launch Settings, and click on Troubleshoot on the right.
Click on Other troubleshooters.
Locate the Windows Store Apps troubleshooter, and click on the Run button next to it.
Follow the on-screen instructions, and choose the appropriate response when prompted.
Even though this is a long shot, the dedicated troubleshooter just might help. This tool, due to the growing importance of Microsoft Store and the UWP concept, has a dedicated troubleshooter for everything concerning Microsoft Store and its respective apps.
If this too doesn’t work, head to the last method to fix Roblox update error 280 in Windows 10/11.
6. Reinstall the game
Press Windows + R to launch the Run command, enter appwiz.cpl in the text field, and click OK to launch the Programs and Features window.
Locate and select Roblox, and then click on Uninstall.
Follow the on-screen instructions to complete the process.
You can now download Roblox from the official source like you did the last time.
Finally, if none of the previous steps proved helpful, reinstalling the game completely might help you. Now, some users advised clean reinstallation.
You can use a reliable memory cleaner software tool, which will also delete the registry entries. Once done download and install the game again.
Seemingly, after this procedure, the game started normally including updates. If you’re still stuck with the error, posting the ticket on the dedicated bug-reporting forum might help.
If you happen to use a previous iteration and are wondering how to fix the Roblox update error on Windows 7/8, the above-mentioned steps apply in that case too.
How do I fix the Roblox update error on Mac?
1. Run Roblox from your web browser
In case you are having trouble updating the Roblox app, try the web version. But remember to use a fast and reliable browser for the best gaming performance.
We recommend Opera GX, a gaming-oriented browser, that has all the critical features to optimize your gaming experience. Users who accessed Roblox on Opera GX reported fewer issues when compared to other browsers. So, you should give it a try!
2. Check the Roblox version compatibility with your OS
Roblox Client will only work on a 10.10 (Yosemite) and above, and Roblox Studio will install only on Mac OS 10.11 (El Capitan) and higher versions, as reported on the Roblox’s official website.
If this set of criteria is not met, it explains the issues you’re having while running Roblox on Mac.
3. Disable VPN and extensions
Oftentimes, it’s a built-in or third-party VPN that leads to issues with the network connection, and in turn the Roblox update error. So, make sure that you are not using a VPN when accessing the platform.
Also, disable/uninstall any third-party extensions installed on the browser, since some of these are found to conflict with the functioning of Roblox.
4. Launch Roblox from the Dock
If you encounter this issue while playing the game on the website, launching Roblox from the Dock could prove helpful.
It has helped fix the issue for a lot of users who reported facing the Roblox update error on Mac. If this method doesn’t work, head to the next one.
5. Delete the cache
Click on Go in the Toolbar at the top, and select Go to Folder from the menu.
Paste the following path in the text field, and click on Go:~/Library/caches
Now, press Command + A to select all the files here.
Click on File in the Toolbar, and select Move to Bin from the list of options.
When you launch Roblox the next time, a fresh set of files will automatically be installed.
6. Reinstall Roblox
6.1 Uninstall
Navigate to the desktop, click Go on the Toolbar, and select Applications from the list of options.
Now, enter Roblox in the search field, select all the relevant entries, and then drag them down to the Bin.
You can also clear the Bin, if required.
6.2 Reinstall
Open Safari or any other browser of your choice.
Log into your Roblox account.
A prompt will appear regarding installing the application.
Follow the on-screen instructions to complete the setup process.
That’s it! Once the program is reinstalled, the Roblox update error would be fixed, and you shouldn’t encounter it anymore.
This guide covers all the steps required to fix the dreaded Roblox update error on Windows and Mac. We hope it has proven helpful, and you can now play the game normally.
Additionally, if you were looking for solutions that will help you start the game, check what you can do if you encounter the An error occurred while starting Robloxmessage.
IPVanish not working with Netflix might seem like a minor inconvenience. However, it’s a known fact that Netflix users turned to VPN services precisely for their Netflix-unblocking capabilities.
Therefore, noticing that IPVanish stopped working on Netflix can be sort of a deal-breaker.
Fortunately, we might be able to teach you a trick or two to fix this issue without breaking a sweat.
How can I fix IPVanish not working with Netflix?
Try another server
One of the most common misconceptions about VPNs is that all of their servers work the same way.
This usually leads to customer disappointment when they discover that in reality, things are wildly different.
For instance, connecting to a VPN server in Germany wouldn’t be able to unblock US Netflix libraries, or might even render Netflix entirely inaccessible.
To avoid situations like that, make sure you connect to appropriate servers (e.g. US servers for US Netflix).
If you notice that the server you’re on doesn’t work as it should, simply disconnect from it and pick another one.
It doesn’t take too long and might save you a lot of headaches.
Clear cached data
Having cached data build-ups on your web browser may trigger some connectivity/functionality issues with some websites, including Netflix.
This might lead you to believe that IPVanish might not be working with Netflix, when in fact your web browser triggers this issue.
To avoid this situation clearing your web browser is usually more than sufficient. Here’s how to do this on Chrome:
Click the More button (three dots stacked vertically)
Select Settings
Scroll down until you see the Privacy and security section
In this section click the Clear browsing data button
Select Cookies and Cached images and files
Click Clear data
Close and reopen Chrome
Connect to IPVanish
Head to Netflix
Check if you’re still experiencing connection issues
If you’re using the Netflix Windows 10 app, simply uninstall the app from your computer and reinstall it.
Uninstalling the app should also remove any conflicting cached data as well.
After you reinstall it, reconnect to IPVanish and try using the app once more.
Log into Netflix without VPN
Log out of your Netflix account
Disconnect from IPVanish
Restart your web browser
Optional: clear your browser data (check method #2 above)
Access Netflix once more
Log into your account (without being connected to a VPN)
Reconnect to the IPVanish VPN server
Check if you can use Netflix as intended
For some reason, Netflix can have a hard time processing VPN-based log-in requests from time to time.
If that’s the case, disconnecting from IPVanish before you log in to your Netflix account should do the trick.
After you manage to log in, you should be able to use Netflix with IPVanish as usual.
Change and flush DNS
If your Internet Service appears unreliable, switching your DNS service might be a way to see what is the problem. If your ISP is bad at maintaining its DNS servers up and operating with no hitches, you may encounter slow uploads and service while the DNS request gets stuck.
Unfortunately, you still have to flush any lingering old DNS data from your PC, but we’ve got you covered.
1. Right-click your Start Menu.
2. Select Network Connections.
3. Click the Change adapter options button.
4. Right-click your default Internet connection.
5. Select Properties.
6. Highlight Internet Protocol Version 4 (TCP/IPv4).
7. Click the Properties button.
8. Select the Use the following DNS server addresses radio button.
9. Use 8.8.8.8 and 8.8.4.4 in the Preferred, respectively Alternate DNS server fields.
10. Click the OK button to confirm your settings.
11. Now you need to flush the DNS records. To start off, press the Start button on your taskbar to open Windows Search.
12. Type cmd in the search box and right-click on the first result, then select Run as Administrator.
13. Once Command Prompt opens, type the commands below, each followed by the Enter key on your keyboard:
ipconfig /flushdns
ipconfig /registerdns
ipconfig /release
ipconfig /renew
netsh winsock reset
14. Restart your PC.
This technique helps you change your DNS from your ISP-assigned one. Oftentimes, ISP-assigned DNS addresses are restricted.
Turning to a public one such as Google Public DNS (the one we used above) usually circumvents these limitations.
After your PC finishes its boot sequence, make sure to connect to IPVanish and check if it works with Netflix.
If the issue was caused by cached DNS data, everything should be taken care of now, and Netflix should now work with IPVanish.
Switch protocols
Another misconception is that VPN protocols are all the same, when in fact they’re wildly different.
Even OpenVPN TCP is different from OpenVPN UDP. Not a coincidence is the fact that these two are the most used VPN protocols.
However, UDP is better when it comes to streaming video content.
Therefore, if you notice that IPVanish is not working with Netflix, you might want to change the protocol.
By default, IPVanish uses IKEv2, so you might want to go through all protocols until you reach one that works for you.
Every time something unusual happens, the Windows or other types of servers create a log for that event. In fact, you can configure it to make such logs on your requirements, based on a certain period of time or on other events.
These documentation files contain information about network usage, traffic, packet loss, and other such performance metrics.
That’s why, event logs are fantastic if you want to keep an eye on network performance, and they can prevent any future issues from occurring.
If you’ve been wondering how to check a network event log, you’ve come to the right place, as we’re going to show you the best network log event viewers on the market. So let’s get started!
What is the best event log network monitoring software?
The Site24x7 network monitoring tool is an excellent event log viewer because it analyzes over 60 performance metrics of your systems and provides extensive reports
It is an SNMP-based solution that will quickly identify all the devices within your network by using an IP range or with the CIDR (Classless Inter-Domain Routing) technology.
Basically, you don’t even need to access the logs created by your server because the On-Premise Poller tool automatically extracts data like traffic, bandwidth, packets, error, discards, and other performance data from your network.
And based on these data and your easy-to-set-up filters for any performance metrics you want, you will be able to create elaborate logs to present or share with your peers.
The ultimate goal is to protect or maintain your network in top shape parameters and Site24x7 will definitely help you with that.
You don’t have to take our word for it because the free trial version of the software is available for testing all the features we mentioned here. Note that this network log event viewer works in Windows 11 as well.
Take a look at Site24x7’s best features:
Discovers all the devices on your network based on IP or CIDR
Cloud-based, single dashboard control
Monitors more than 60 performance metrics
Efficient device and interface filtering
Extensive logging and data display features
Site24x7
This excellent tool will provide all the syslogs you need to assess all the network components accurately.
Network log event viewing is one of the best features of Log360 but it can do a lot more than that.
For instance, the app tracks all the events from all your network devices. We’re talking about file and web servers, and a lot more.
Moreover, it even logs events from your cloud platforms, like AWS (Amazon Web Services), Microsoft Azure, Salesforce, and others.
By customizing alerts according to your specific needs, you will be able to receive reports on any network, and log created by your devices.
Log360 is also a very good security tool because it also tracks any changes made to sensitive data within the devices on your network, producing alerts. Moreover, this network log event viewer works not only in Windows 10, but you can try it in different iterations.
And as ticketing may also be an important checkmark on your list, the solution can integrate services like ServiceDesk Plus, Jira Service Desk, Kayako, and more.
Take a look at some of its best features:
Advanced network log reporting
Customizable alerts and profiles
Analyzes logs from any network devices, including file servers and databases
Monitoring file integrity
Monitors various cloud platforms
Log360
Get this complete log event manager and keep your network devices safe and secure.
PRTG Network Monitor is a highly known and reliable network error event viewer that also comes with useful event log features.
Logs are extremely important for helping you diagnose problems and disruptions in order to get to the bottom of any network issue.
The software lets you monitor your bandwidth, databases, server, local network, cloud, and more with ease, so you can keep a close eye on your network.
PRTG Network Monitor also has a detailed report feature, so it doubles as a network log event viewer, which makes it perfect for troubleshooting.
Let’s review some of its best features:
Detailed log event reports
Monitor bandwidth, databases, server, local network, cloud, and more
No additional plugins or downloads needed
Easy to use solutions for businesses
Manage all your applications and get detailed statistics
PRTG Network Monitor
Analyze the log events as thoroughly as you need with this reliable and complex network monitoring tool.
Solarwinds Network Performance Monitor comes with a log monitoring tool, designed to collect event log data.
Using Syslog, SNMP traps, and system event logs you can monitor event log data in real-time and see them in the user interface.
This software also allows for system alerts in case any log events record unusual data. The alerts may be personalized based on severity and set to trigger external scripts, ensuring an immediate response.
You will benefit from these best features:
See all events and alerts on your network in one view
Comprehensive network fault monitoring
Availability, real-time, and historical statistics from SNMP-, API-, or WMI-enabled devices
Spiceworks Network Monitor provides log monitoring events for all needed applications. The software is easy to configure, and you get your network log event viewer ready in a matter of minutes.
All data about servers, routers, switches, printers, and more can be seen in the Spiceworks Connectivity Dashboard.
With this tool’s advanced capabilities, you will be able to catch the problems fast and solve them as fast as possible.
Today we’ll show you two ways to disable TLS 1.0 in Windows. TLS 1.0 is an outdated encryption protocol that has been fully replaced by TLS 1.2 and TLS 1.3, both of which are now the industry standard.
Support for TLS 1.0 was officially deprecated by Microsoft in 2020, and most modern websites no longer rely on it.
While current systems may still have it enabled for compatibility, it’s considered a security risk due to known vulnerabilities in older implementations. Disabling it now helps ensure safer, more up-to-date browsing and system communication.
How to turn off TLS 1.0 on Windows 10
1. Disable TLS 1.0 via Internet Properties
Users can manually disable TLS 1.0 through the Internet Properties window. What you need to do is uncheck the use TLS 1.0 option from the Advanced Settings tab.
This is the easiest method to accomplish this, and does not require a lot of tech knowledge, nor imposes any risks to your PC.
1. Press the Windows key + S keyboard shortcut, which opens the search utility.
2. Input internet options in the search text box.
3. Click on the first result to open the window in the shot directly below.
4. Navigate to the Advanced tab.
5. Scroll down to the Use TLS 1.0 option shown directly below.
Users can also edit the registry to disable TLS 1.0. To do so, launch the Run accessory with its Windows key + R keyboard shortcut.
Input regedit in Run, which will open the Registry Editor.
Then open this registry key path in the Registry Editor: HKEY_LOCAL_MACHINE\SYSTEM\CurrentControlSet\Control\SecurityProviders\SCHANNEL\Protocols
If users can’t see TLS 1.0 and Client subkeys, they’ll need to create them. Right-click Protocols, select New > Key and then enter TLS 1.0 as the key title.
Next, right-click TLS 1.0, select the New & Key options, and then enter Client as the title for the second subkey.
Thereafter, select the Client key; and right-click an empty space on the right of the Registry Editor to select New > DWORD (32-bit) Value.
Enter Enabled as the new DWORD’s title.
The default value for the Enabled DWORD is 0, which disables TLS 1.0. Users can double-click Enabled to edit its value with 0 (TLS 1.0 off) or 1 (TLS 1.0 on).
Thereafter, close the Registry Editor and restart Windows.
Can I disable TLS 1.1 on Windows 10?
If you’re looking to disable other TLS versions on your PC, such as TLS 1.1, TLS 1.2, or 1.3, you can apply the same methods as above.
For example, when modifying Internet Options, you need to uncheck the option for Use TLS 1.1 or whichever other you want to be removed.
So, there are a couple of ways users can disable TLS 1.0 in Windows. Disabling TLS 1.0 will probably have very little impact on browsing as 94 percent of websites now support TLS 1.2.
Many users have complained about Windows 11 Remote Desktop being very slow and increasingly becoming rampant. Various things can make the Remote Desktop connection very slow on Windows 10/11.
Sometimes, it can be a network connection issue in the client’s computer, Windows update issues, or display requirements issues.
Fortunately, the RDP laggy local network issue is not impossible to fix. Hence, we shall discuss how you can fix the Remote Desktop if it’s slow on Windows 11.
Why is Microsoft Remote Desktop so slow?
Network connection issues: A fast internet connection helps you connect faster with the Remote Desktop. Otherwise, the Microsoft Remote Desktop will be super slow. It can lead to a frozen Remote Desktop connection. Likewise, using the Remote Desktop over a local network can make the RDP laggy over local network. Connecting to the internet via a cable network can be annoying because it makes your network extremely slow.
Having many users on the same VPN connection: Users often complain about having a laggy Remote Desktop connection while connected to VPN. Consequently, the connection speed is slow and Remote Desktops can be slower over a VPN.
Using third-party Remote Desktop apps: Many users complain about the remote desktop connection being slow while using third-party Remote Desktop software. Many RDP software users download and use, but they tend to be wrong. So, when you use such an app, your Remote Desktop connection can be slow.
How do I fix Windows 11’s Remote Desktop if it’s very slow?
1. Check your network connection
A stable and fast internet connection can help you establish a fast RDP connection. Hence, we recommend you perform a power cycle on your router to make it properly and efficiently.
2. Change Remote Desktop settings
Click on Start and search for Remote Desktop Connection.
Select Remote Desktop Connection from the results.
Click Show Options in the bottom-left corner of the screen.
Go to the Display tab, reduce the size of the remote desktop and in the Colors column, choose a High Color (16-bit).
Go to the Experience taband change the connection speed into Modem (56 kbps).
Uncheck Persistence bitmap caching and click on Connect.
3. Use a third-party software
A faster and simpler solution is using a dedicated remote access program. Parallels Access is a software that offers you reliable remote access to your computer from anywhere you want. You can access all your applications and files in a single place.
It gives you the ability to browse all your files in one location and manage them. You can sort files by name or size, move or copy them, delete files or folders, and search for files wherever they are stored.
Another great feature is that you can share files with your other people. If you want to send a particular file to someone, you can share it with Parallels Access without any cloud service. You can share files from your PC or even from your mobile with no size limit, immediately available for download.
Parallels Access
Access your computers from any location with Parallels Access amazing features.
Type in gpedit.msc to open the Local Group Policy Editor.
Go to Computer Configuration and select Administrative Templates.
Click on the System, then go to Internet Communication Management.
Double-click on the Internet Communication settings, and turn off Automatic Root Certificates Update.
Tap on Enabled and click OK.
6. Connect to a free and fast VPN network
Using a VPN network with lots of traffic can affect the bandwidth that goes through your device. So, we recommend you connect to a stable VPN network to avoid Remote Desktop lagging over the VPN.
7. Switch to WLAN
It’ll be beneficial to switch to WLAN to fix the RDP laggy local network issue. A wireless connection will help you connect faster.
Using a cable connection can often easily disrupt the network’s flow if the cable has issues. Hence, switching to WLAN is a much better alternative.
8. Update Windows
Click on Start.
Select Settings from the options.
Click on Windows Update, then select Check for updates.
Windows will automatically search and download updates if there are any available.
How can I improve my Microsoft Remote Desktop performance?
Allow RDP through Windows Defender Firewall
Click Start and search for Control Panel.
Click on the Control Panel and select System and Security.
Tap on Windows Defender Firewall.
Click Allow an App or Feature Through Windows Defender Firewall.
Select the Remote Desktop option and Click OK.
It will help improve the RDP performance on your computer.
After we received builds 22621.590 and 22622.590 (KB5017846) for the Windows 11 Beta Channel last week, Microsoft thought the time had come for some new software.
Back then, developers managed to fix the issue causing Control Panel to not launch from the Start menu, Search, or if pinned to the taskbar in the previous flight.
So, as you expected, the Redmond-based tech company is fighting two brand new builds to the above-mentioned Channel.
However, before we get into it, be sure to also check Windows 11 Dev build 25193, just to make sure you are all caught up with what happens to the most recent OS.
What can we expect from builds 22621.598 and 22622.598?
As we’re pretty sure everyone got accustomed to, a few weeks back, Microsoft began flighting two separate Windows 11 Preview builds for Insiders on the Beta channel for a staggered release.
Fast forward to the present day, the Redmond tech giant has released an update with builds 22621.598 and Build 22622.598 (KB5017390).
These two builds have a lot in common, just like there are clear differences between them, so we are just going to sit down, breathe deep, and check out the changelog together.
Changes and Improvements in Build 22622.598
[Settings]
For the time being, you will no longer be able to uninstall apps with inter-dependencies (e.g., Steam and gaming apps running on Steam) or repair Win32 apps under Settings > Apps > Installed apps. You will still be able to modify and uninstall Win32 apps without inter-dependencies.
Fixes in Build 22622.598
[File Explorer]
Fixed an issue leading to a small set of Insiders with “launch folder windows in a separate process” not being able to launch File Explorer in the last two flights due to an explorer.exe crash.
Fixed an issue where you couldn’t interact with the top part of File Explorer (with the address bar) when File Explorer was full screen (F11).
Fixed an issue where command bar items like copy, paste, and empty recycle bin may unexpectedly not be enabled when they should be.
Fixes for BOTH Build 22621.598 & Build 22622.598
We fixed an issue that creates a duplicate print queue. Because of this, the original print queue stops working.
We fixed an issue that affects Roaming User Profiles. After you sign in or sign out, some of your settings are not restored.
Known issues
[General]
Clicking the network icon on the Lock screen does not work and will crash the Lock screen and may require you to reboot to login. After logging in, you can switch between wireless networks as needed.
What can I do if KB5017390 fails to install?
Press Win+ I to access Settings.
Select the System category and click on Troubleshoot.
Press the Other troubleshooters button.
Press the Run button next to Windows Update.
Be sure to report any other issues you might come across, in order for Microsoft to address and improve the overall OS experience for us all.
There you have it, folks! Everything you can expect if you are a Windows Insider. Leave a comment below if you found any issues since installing this build.
It also offers the Razer Synapse software to the users; however, sometimes, the Razer Synapse software may fail to detect the headset connected to the computer.
In this article, we have listed all the possible solutions to help you fix the Razer Synapse not detecting your headset in Windows.
But first, let’s see what to expect. Users complained more often about specific software versions, so you can expect similar issues if running one.
Why is Razer Synapse not detecting my headset?
If you are faced with this problem, there are a few triggers. Here are the most common:
The device is not properly connected – You should ensure that you connect directly to your device and not through a USB hub.
Old corrupted files – If your software is corrupted, you should try a clean reinstall, which will fix the problem.
Outdated drivers – Once you have outdated drivers, there is a higher tendency to face errors using the device. You should simply scan for and install the latest drivers.
Incompatibility – You may be using a Razer device not supported by your Synapse version.
While this is not an exhaustive list, you should be able to get your headset detected and working with the solutions we offer.
What Razer versions are mostly affected by this error?
Razer Nari not showing up in Synapse (Users mostly complained about the Essential and Ultimate editions of Razer Nari)
Then, Razer Kraken not detected (Editions X and Kitty of Razer Kraken are more likely to be impacted)
Finally, the software itself (Razer Synapse 3 and 2 are commonly known for not detecting headset)
How do I fix Razer Synapse if it doesn’t detect the headset?
1. Check for hardware issues
Disconnect the headset from your computer.
Connect the Razer headset to a different computer that has Razer Synapse installed.
Check if Razer Synapse detects the device.
If the headset is not detected, you may have to contact Razer support to get the device repaired or replaced.
The most frequent problem for this issue is a hardware glitch so check your headphones first for any potential malfunction.
Also, be sure to use one of the Razer Synapse 3 supported devices; if not, you may have compatibility issues. This is invaluable if Razer Synapse 3 is not detecting your headset.
Scroll down and click on Bluetooth (This fix applies to Bluetooth devices).
Click the Run the troubleshooter button.
Follow on-screen instructions and apply any recommended fixes.
We know this might seem futile, but running a dedicated troubleshooter fixed the problem for many users, so make sure you try it out.
3. Reinstall device drivers
Press Windows Key + R.
Type devmgmt.msc and click OK to open Device Manager.
Expand the Audio inputs and outputs.
Right-click on your Razerheadset, Uninstall Device, then click Yes to confirm the action.
Restart the computer, and Windows will reinstall the device driver.
That is a pretty straightforward solution, but it doesn’t work all the time because after uninstalling the driver, Windows 10 will install a generic one.
You can also go to the manufacturer’s website and get the correct driver for your headset, but that takes a bit of time and skill.
Alternatively, use third-party software that will do that automatically for you with minimum effort and time. The solution we recommend below is safe and fast.
Outbyte Driver Updater
Install the latest driver updates and repair all corrupted drivers with this amazing tool.
From the list of installed programs, select Razer Synapse, click Uninstall and then click Yes to confirm the action.
Reboot the computer.
Download the latest version of Razer Synapse from the Razer website.
Run the installer and install the app.
Connect your Razer headset to your computer and check the Razer Synapse detects the devices.
The Razer Synapse not detecting headset issues usually occurs when you run an outdated version of Razer Synapse. By following the steps above, you should be able to fix this issue.
How do I add a Razer headset to Synapse?
This process is straightforward. Just connect your device to your computer, which the software should detect automatically. If this does not happen, then you can troubleshoot using any of the solutions we have covered above.
That is it for this guide. We hope you have been able to solve any issue of Razer Synapse not detecting your headset.
Remember that we have not made these solutions in any particular order, so you should pick what feels most appropriate.
Please leave us a note below if you have any other solutions for this problem.
You have found this guide because your Media Feature Pack install failed; here is all you should know.
The Windows Media Feature (WMF) Pack is a Windows 10 N and KN package. Users must install the Windows Media Feature Pack to enable certain multimedia technologies available within these editions.
For some users who try to install that package, an error message pops up that says The update does not apply to your computer. Consequently, the WMF pack doesn’t install.
WMF pack installation issues often arise because users aren’t installing the package with the correct method for their Windows 10 versions.
There are now two different WMF installation methods for newer and older Windows 10 N build versions. So, some users are getting a bit confused by that.
Why can’t I install Windows Media Feature Pack on Windows 10?
You do not have the rights – This would have been an easy guess, but to make this installation, you must be logged in as an admin.
Using the wrong installer – You must download the correct installer package for your Windows 10 N version. Before installing the package, you must be sure about your PC’s Windows 10 N platform version.
Bad internet connection – You should eliminate the possibility of internet connections before jumping into any complex resolutions.
These may not be the only triggers, but they are a good starting point, and regardless of the cause, you should find the solutions below helpful.
How can I fix Windows Media Feature Pack installation issues?
1. Make sure you’re signed in as an administrator user
Press the Windows + S keyboard shortcut to open a search tool.
Type Control Panel within the search tool, and click Control Panel in the results.
Then click Change account type in the Control Panel.
Select the Administrator option if your user account is a standard one.
Press the Change Account type button.
Restart Windows after changing your account type to sign in to your admin account.
After switching to the administrator account, check if you still can’t install Windows Media Feature Pack.
2. Install Windows Media Feature Pack via Optional features
Open the search utility in Windows, which you can do by clicking the magnifying glass taskbar button.
Input the keyword Apps within the search box, and click Apps & features.
Next, click Optional features.
Press the Add a feature button.
Select the Media Feature Pack checkbox.
Press the Install button.
Restart Windows 10 after installing the Windows Media Feature Pack.
3. Run the Internet Connections troubleshooter
First, open Settings.
Next, open Update & Security, then click Troubleshoot in Settings.
Click Additional troubleshooters to view a list of troubleshooters.
Select Internet Connections and clickRun the troubleshooter.
Then go through the troubleshooter to fix any connectivity issues that might generate WMF pack installation errors.
This resolution could resolve install failed errors that might arise for some users while attempting to install the Windows Media Feature pack via Apps & features in Settings. A stable Internet connection is required to do so.
4. Download a Windows Media Feature Pack installer
Select the Media Pack edition on the drop-down menu for your Windows 10 version.
Click the Confirm button.
Select the 64-bit Download or 32-bit Download option depending on your PC’s system architecture.
After that, open the folder to which you downloaded the Media Pack installation file within File Explorer.
Finally, click the Windows Media Feature package installer to proceed with the installation.
You must download the correct installer package for your Windows 10 N version. Before installing the package, you must be sure about your PC’s Windows 10 N platform version.
This is the right way to install the Windows Media Feature package for Windows 10 N versions 1903, 1809, 1803, and 1709. If you’re utilizing an older Windows 10 version, update your platform to the most recent build you can.
5. Try installing Windows Media Feature Pack via PowerShell
Press Windows Key + X and select Windows Power Shell (Admin).
First, input the command below and press Enter. DISM /Online /Get-Capabilities
Identify the Windows Media Feature Pack name listed within the results.
Then type in this command and press Enter to install the package. DISM /Online /Add-Capability /CapabilityName:<Windows Media Feature Pack name>
You’ll need to replace <Windows Media Feature Pack name> in the above command with the actual pack name listed in the results. Then your order might look something like this:
This is an advanced solution, but it should help if you can’t install Windows Media Feature Pack.
6. Run an efficient troubleshooter
If you still can’t install Windows Media Feature Pack even with the correct installation method for your Windows N platform, check out an efficient troubleshooter.
It’s known to help you automatically repair issues when you’re blocked from installing or removing programs, so don’t hesitate to check out the link below.
After downloading, click the MicrosoftProgram_Install_and_Uninstall.meta.diagcab file in the folder you saved it to. Click Advanced and select the Apply repairs automatically option in the troubleshooter.
Then, don’t hesitate to press the Next button to go through the troubleshooter.
So, ensure you’re trying to install Windows Media Feature Pack with the correct installation method for your Windows 10 N version when you can’t complete the procedure.
How do you check if Media Feature Pack is installed?
Open the settings app.
Click on Apps and select Optional features.
Scroll through the Installed features; if Media Features Pack is among the features listed, it is installed.
If the Media Feature Pack install fails, you should be able to get it properly installed using any of the solutions that we have discussed in this article.
While we have not written them in any particular order, we recommend you try the PowerShell option as a last resort since it will be the most complex for the regular Windows user.
If the problem was Media Feature Pack not installing, install error, or Media Feature Pack not showing, these solutions should come in handy.
Has any of the above methods worked for you too? Please let us know how the procedure went for you in the comments area below.
Using the remote desktop in Windows 11 by default is set not to allow access without a password. It indicates that if you don’t have a password, the remote desktop won’t work by default because of the settings in the Security policy.
So, Windows requires users to have a password to use the RDP (Remote desktop). However, there are some ways you can enable and use the Windows 11 remote desktop without a password.
The Remote Desktop allows users to configure their remote connection’s security policy to suit their needs.
Without having to do any deep troubleshooting, Windows allows Remote Desktop without a password if you select the blank password option.
Nonetheless, this article will take you through how to access Remote Desktop without a password on Windows 11.
Can you use Remote Desktop without a password?
The simple answer is yes. The Remote Desktop comes with numerous connection options but the default RDP does not allow access without a password.
Likewise, the Remote Desktop connection without a password is also available in the Security Policy settings.
Furthermore, you can use the Remote Desktop by adjusting some settings in the registry and the Windows command. It helps you break the Remote Desktop default settings and allows you to access it without a password.
A more straightforward option is using a good dedicated remote software. Parallels Remote Application Server (RAS) provides secure virtual access to desktops on any device, from anywhere.
It offers an intuitive experience and enhances productivity by delivering a single workspace to access all the applications you need. It helps you simplify managing any difficulties with streamlined controls.
Parallels Remote Application Server (RAS)
Optimize efficiency with easy remote access across your devices and networks.
6. Double-click onAccounts: Limit local account use of blank passwords to console login onlyand click onDisabled.
7. Click onApply, thenOK.
The first and easiest recommended way to access Remote Desktop on your Windows 11 device without a password is via the Group Policy Editor tool. It is a built-in tool that is perfectly safe to use.
What you need to do is disable the Accounts: Limit local account use of blank passwords to console login only security option.
2. Use the Registry Editor
Press Windows + R key to open the Run window.
Type Regedit in the search space and press Enter to open the Windows Registry Editor.
Navigate to: HKEY_LOCAL_MACHINE\SYSTEM\CurrentControlSet\Control\Lsa
Right-click on the option and click on New.
Select the DWORD(32-bit) value and name it LimitBlankPasswordUse.
Double-click on LimitBlankPasswordUse, and then change the data to 0.
Doing this can help you use the remote desktop connection without a password on Windows 10/11.
3. Connect Remote Desktop without password through CMD
Click Start and search for cmd.
Right-click on the option and select Run as administrator.
Copy the following command, paste it into CMD, and press Enter: Reg.Exe add "HKEY_LOCAL_MACHINE\SYSTEM\CurrentControlSet\Control\Lsa" /v LimitBlankPasswordUse /t REG_DWORD /d 1 /f
You should be able to use Windows 11 remote desktop without a password.
What is the default password for Remote Desktop Connection?
The default user for the Remote Desktop is ServerAdmin, and users can get the default password by checking the computer management utility. Follow the steps below to use Computer management:
Click on Start and type computer management in the search space.
Select the Computer management utility from the search results.
Navigate to Local Users and Groups, then select Users.
Right-click on the default Desktop User (ServerAdmin).
How do I enable Remote Desktop without admin rights?
Press Windows + Rkeys to open the Run window.
Type gpedit.msc in the search space and press ENTER to open Local Group Policy.
Navigate to Computer Configuration, then select Windows Settings.
Click on Security Settings and select Local Policies.
Click the User Rights Assignment option and enable the Allow to log on through Remote Desktop Services option.
Doing this will give a non-admin user the right to enable and use the Remote Desktop without admin rights.
Upgrading to Windows 10 can mess with your screen resolution. Maybe it’s stuck on low, or the option’s grayed out.
This usually happens because of outdated drivers, GPU scaling issues, or conflicts with system updates. Regardless, if you can’t change your display resolution, here’s how to fix it.
What do I do if I can’t change the display resolution?
1. Update the operating system
Click the Start menu and select the Settings app.
Click on Windows Update on the left pane.
Now, if there are updates, you should click Download & install.
2. Uninstall and reinstall the display driver
Right-click the Start menu and select Device Manager.
Expand Display adapters, then right-click the name of your display driver and choose Uninstall device.
Confirm that you wish to continue with the uninstall.
Once driver files have been uninstalled, restart your computer to install the generic display driver automatically. Users have claimed that this procedure helped them fix the resolution issue on their PCs.
3. Update Bluetooth drivers
Right-click the Start menu and select Device Manager.
Click Display adapters, right-click your graphic devices, and select Update driver.
Click on Search automatically for drivers.
Restart the computer and check.
Note that you may also download drivers by visiting your manufacturer’s website. So, for HP drivers, for instance, I will have to visit the HP website.
4. Install drivers in compatibility mode
Download the driver from the manufacturer’s website.
Right-click the Start menu and select Device Manager.
Right-click on the driver and click on Properties.
Click on the Compatibility tab and check the box Run this program in compatibility mode for and select Windows 10.
Once this is done, restart the computer and check if the issue persists
5. Roll Back Graphics Driver
Right-click the Start menu and select Device Manager.
Right-click on the driver and click on Properties.
If it is not greyed out, select the option to Roll Back Driver.
If the display control panel cannot change the resolution, go to the NVIDIA menu as shown above, and modify the resolution from the Display option.
Why is the resolution greyed out?
Many people who installed or updated to Windows 10 noted that the screen resolution choice is now grayed out. However, your graphics card is the most likely culprit of this situation. The most recent driver for your graphics card is available for download on the website of the company that made your computer.
If you can’t change the display resolution on a second or third monitor, or you can’t change it to 1920×1080, you should try any of our recommended solutions to resolve the problem.
Were you able to adjust the screen resolution after using one of these fixes? Let us know in the comments section below.