Installer Encountered An Error 0x800f0905: Solved

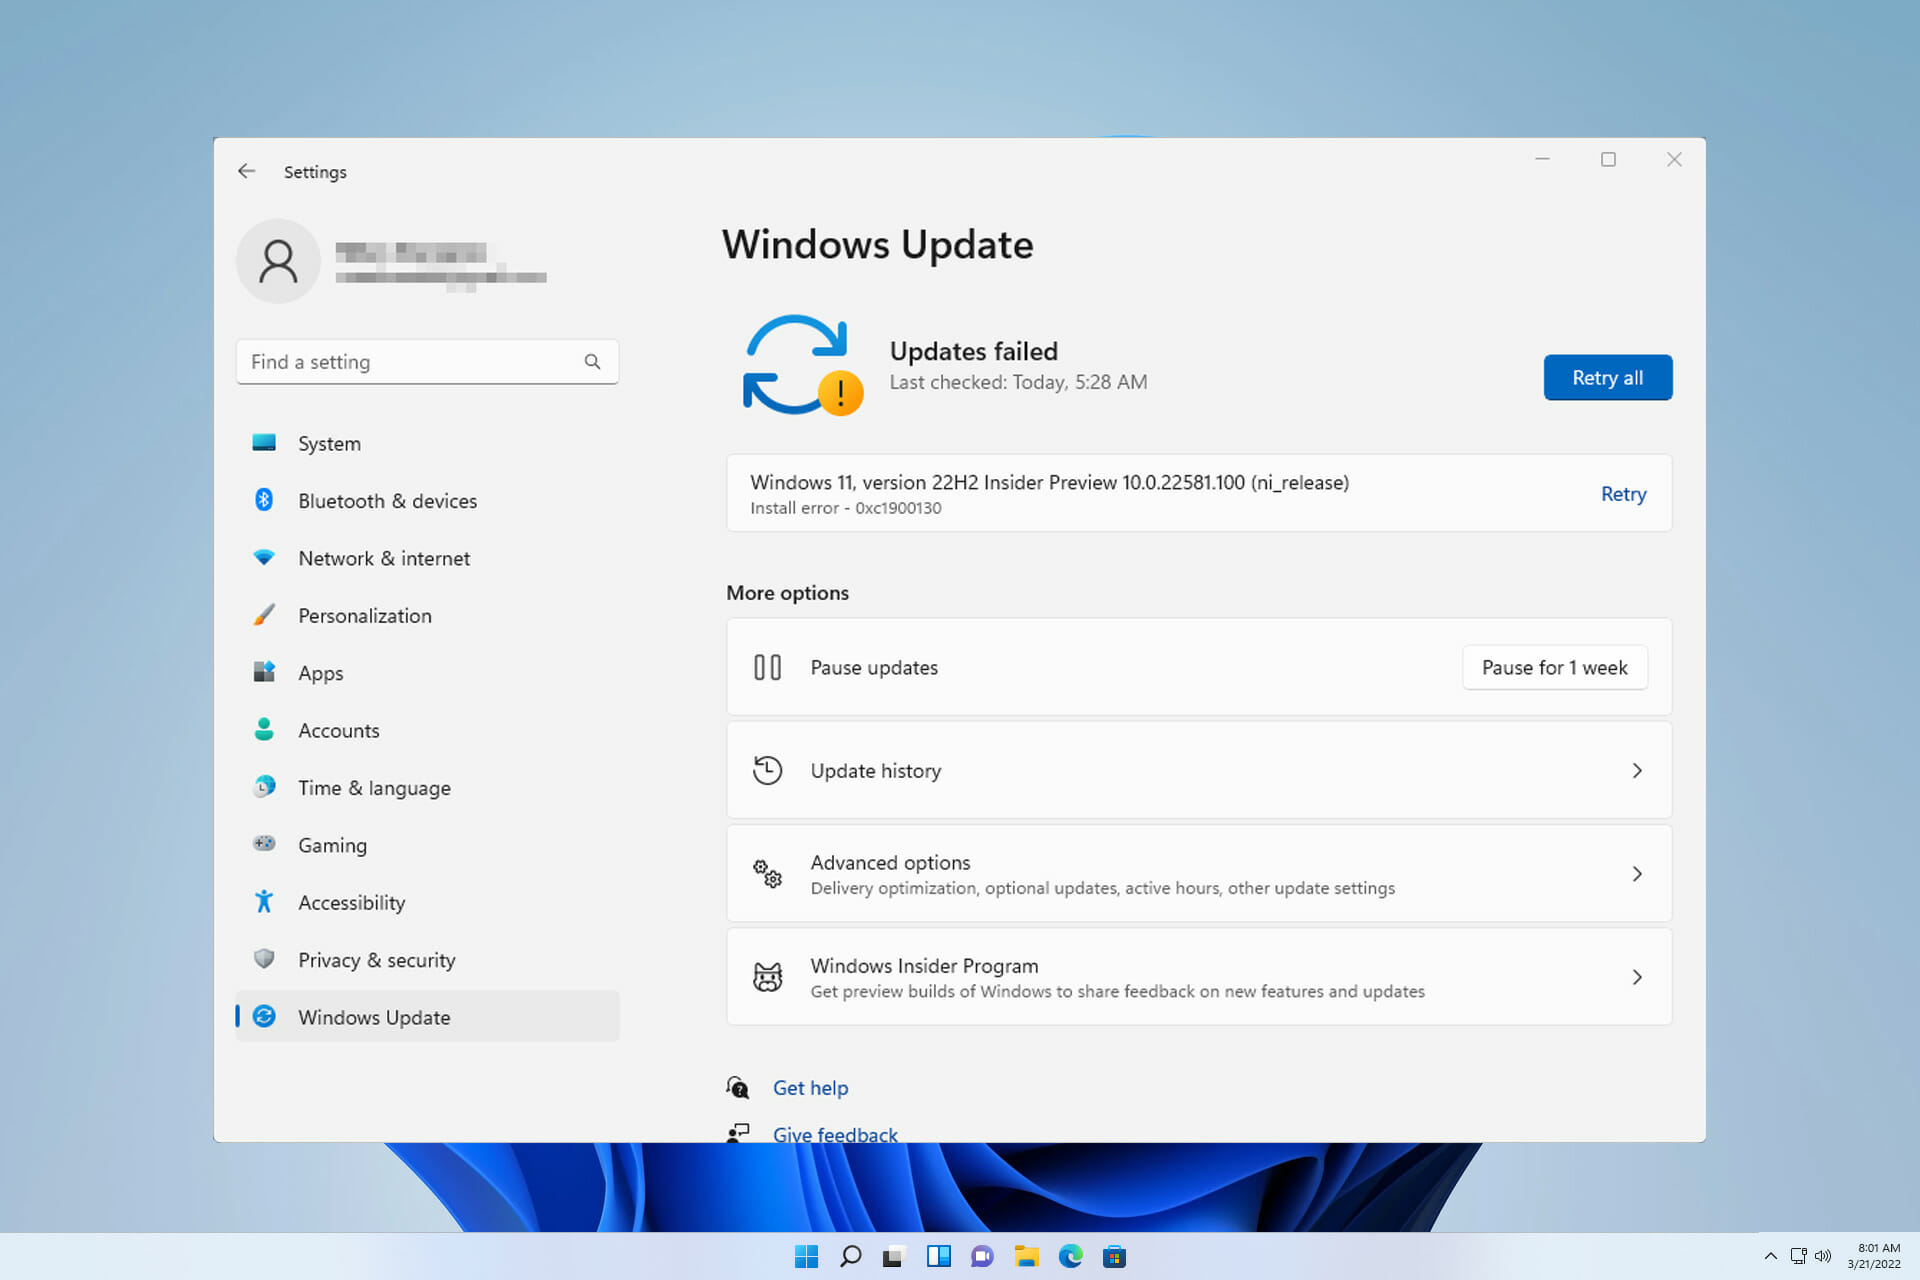
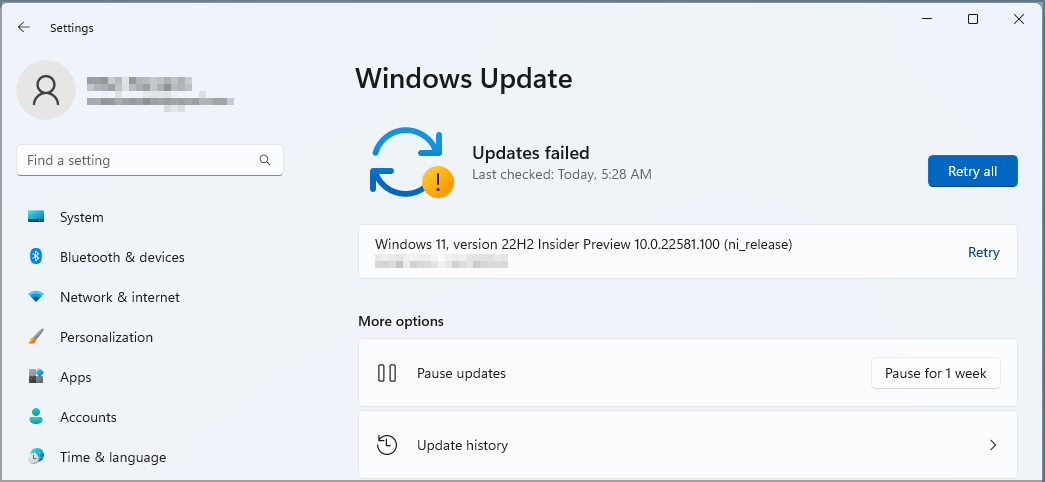
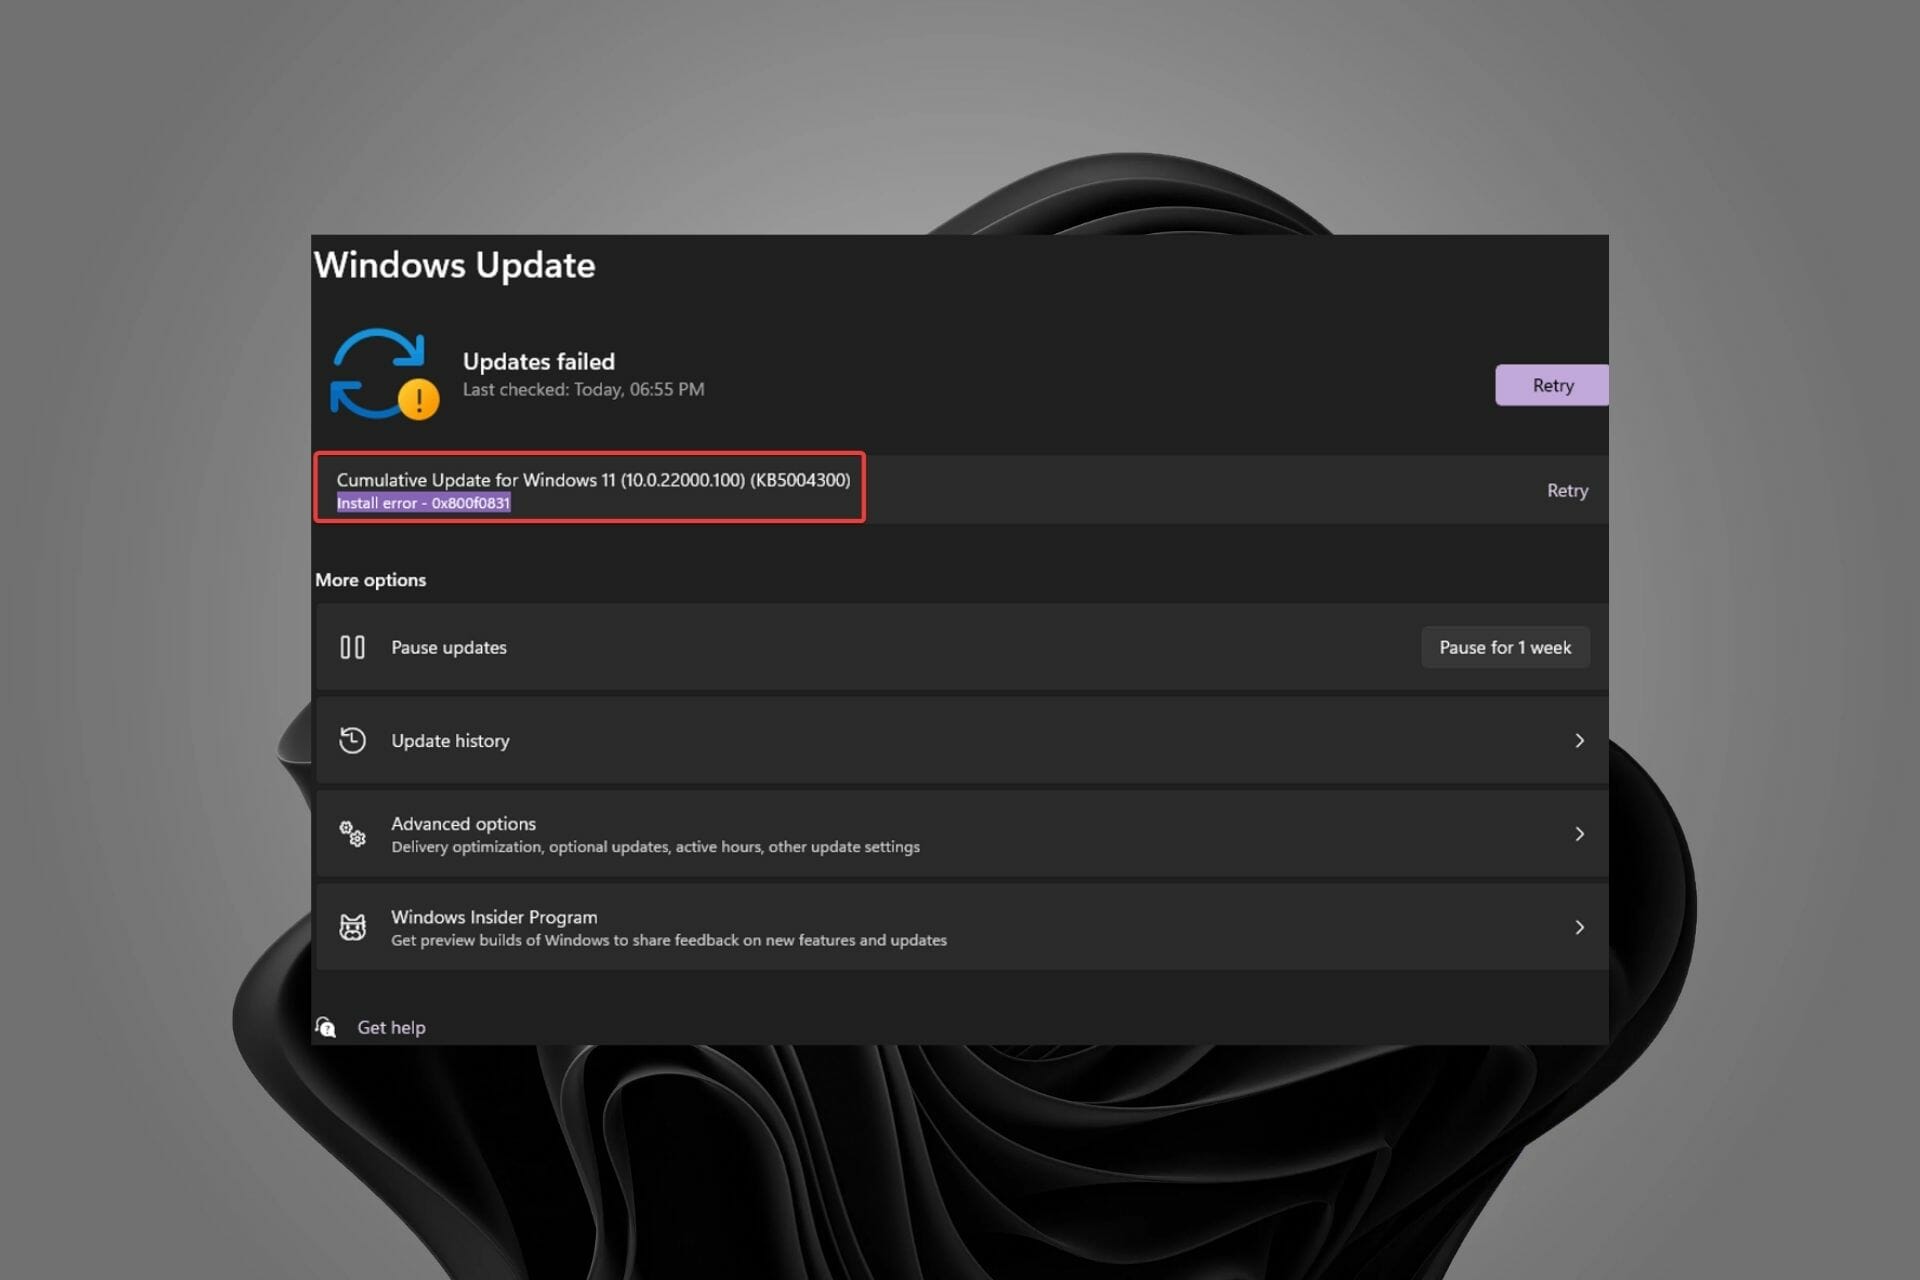
If you’re a Windows user, you’re probably familiar with the 0x800f0905 error while trying to update Windows. Below, we’ll explain how to fix this in just a few easy steps (applicable for Windows 10 &11).

The error message signals the operating system is unable to install the requested updates. This could happen ue to corrupt system files, update component errors, or misconfigured settings.

Here’s how to fix it:

How can I fix Installer encountered an error 0x800f0905?

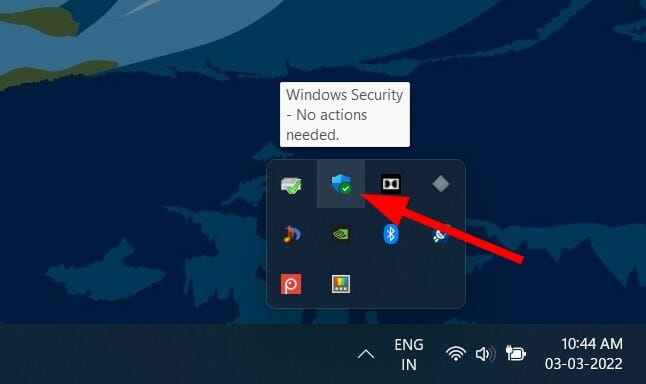
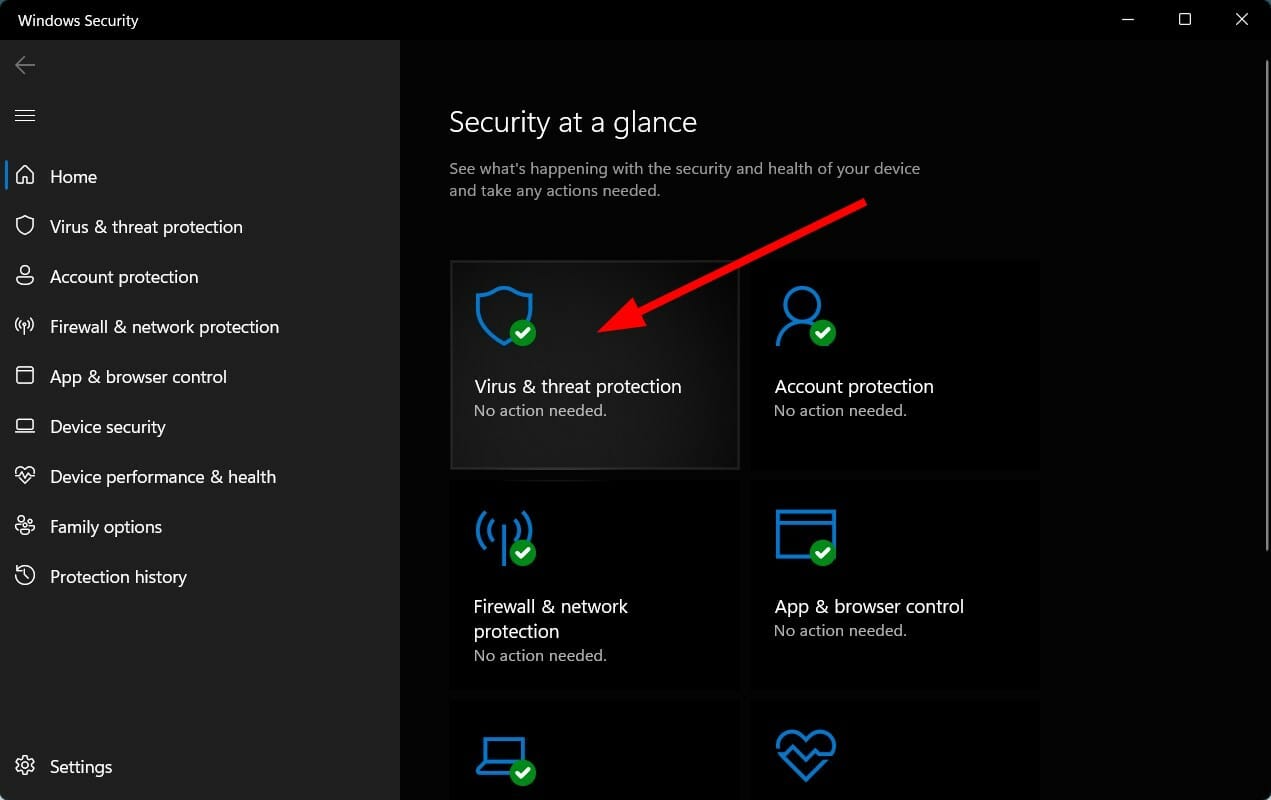
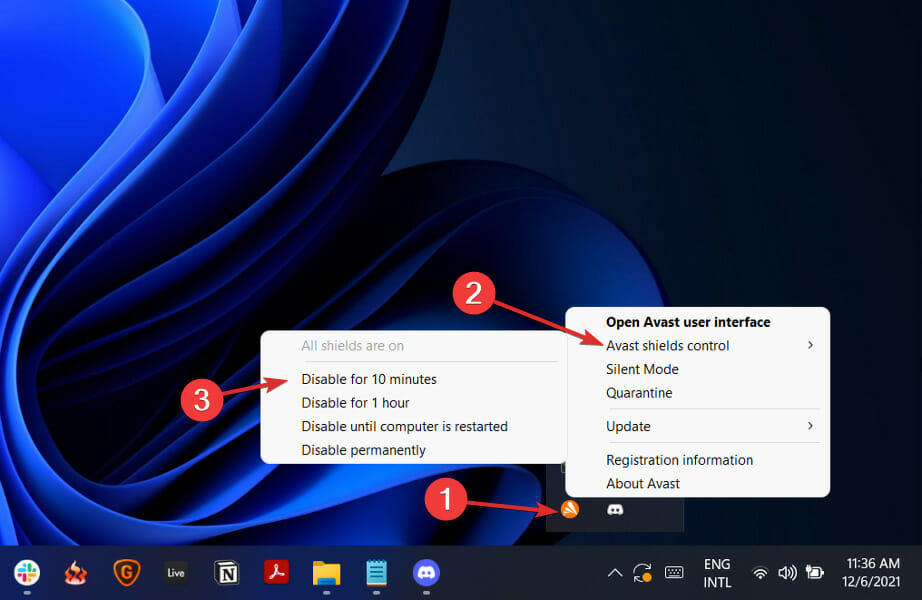
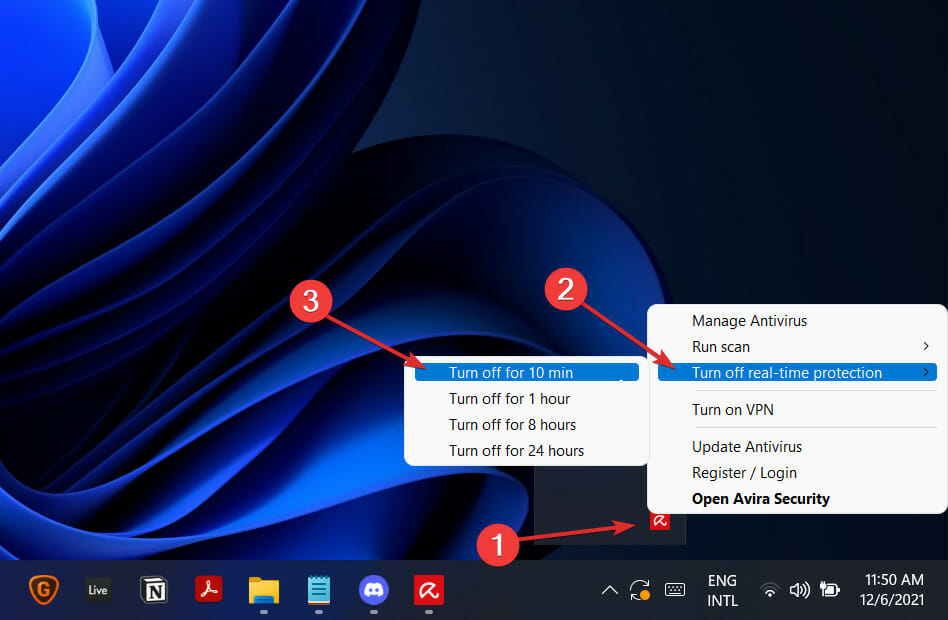
Start by disabling any third-party antiviruses (some might interfere) and VPNs. You can use Windows Security until the updates are installed. If these tricks won’t help, keep reading.

1. Run the Windows Update troubleshooter

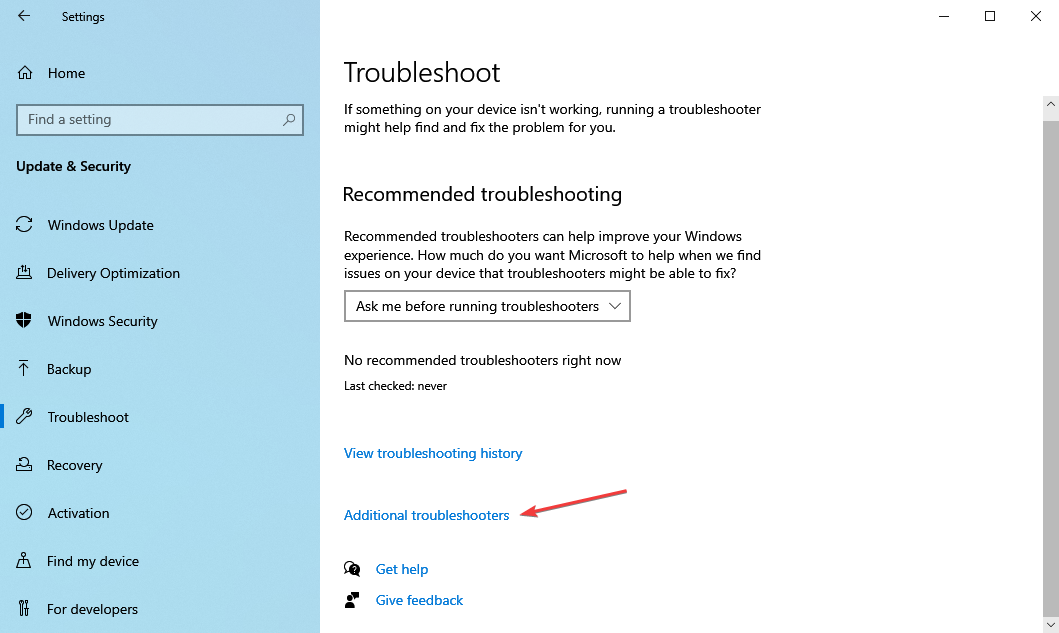
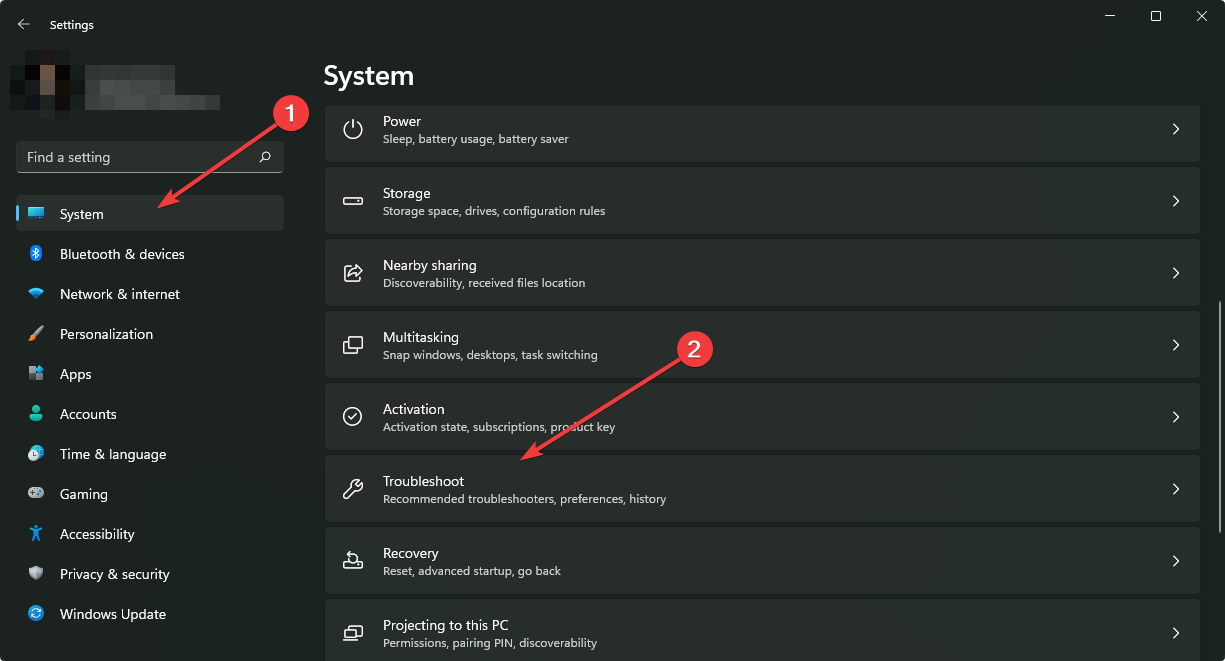
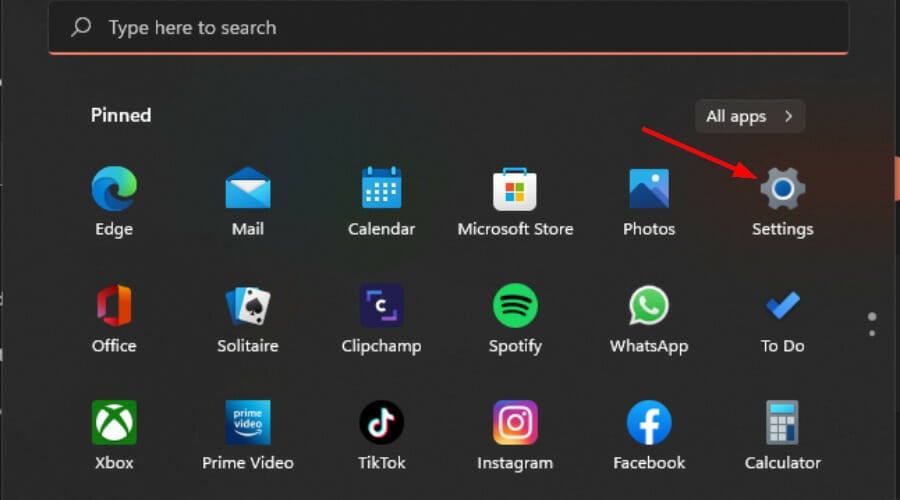
  1. Press Windows + I to launch the Settings app.
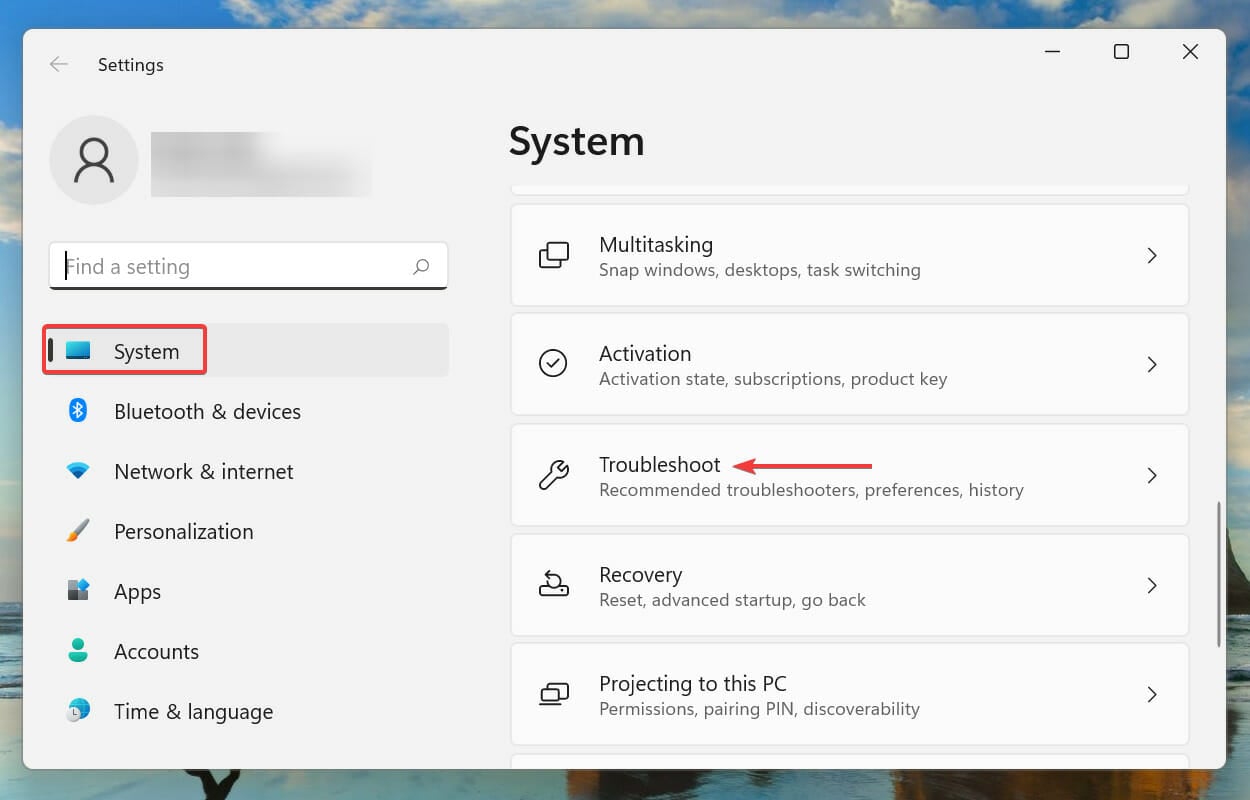
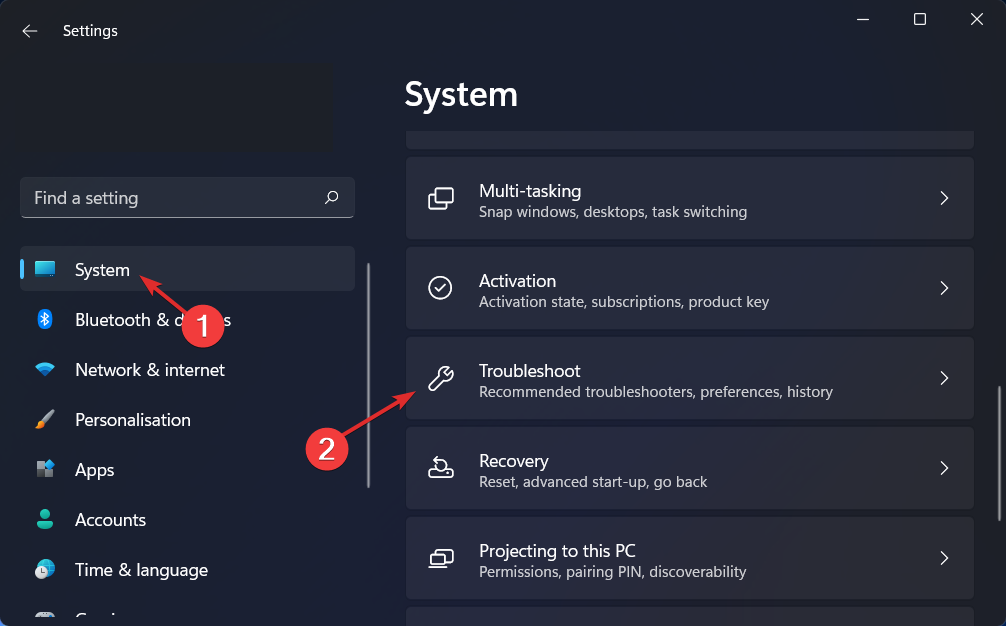
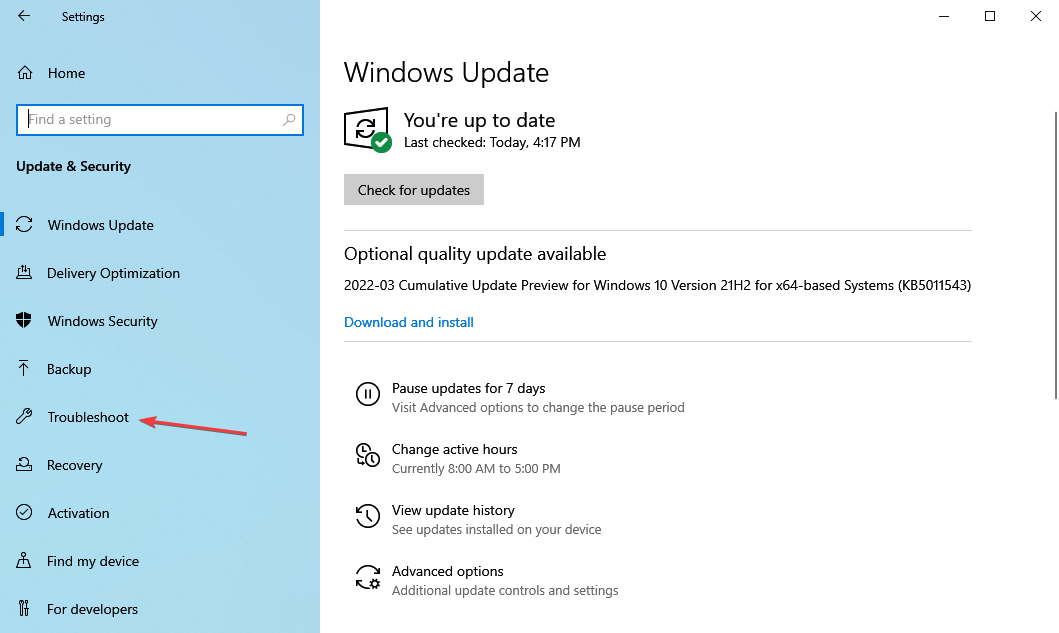
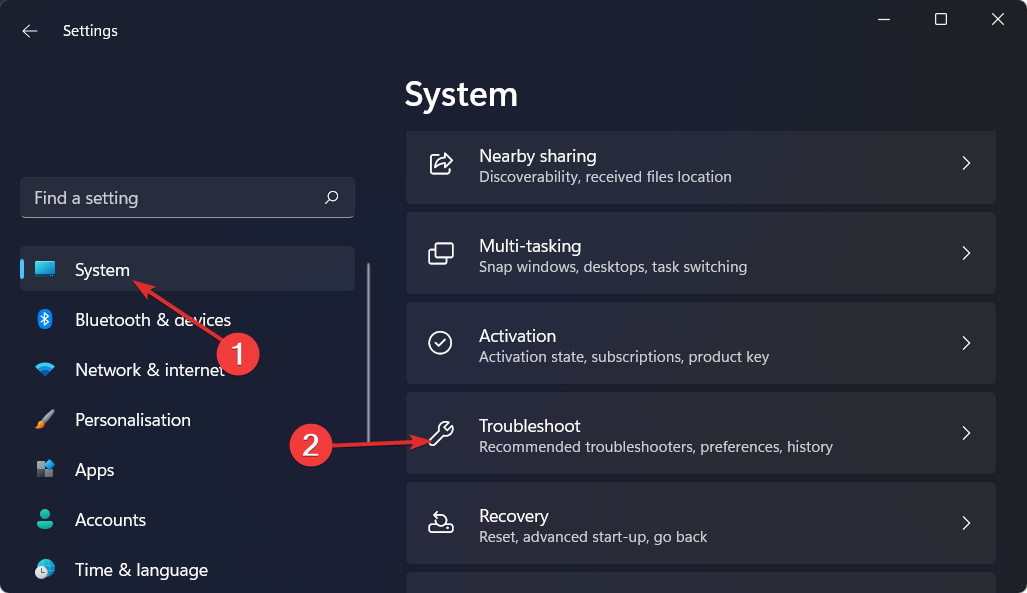
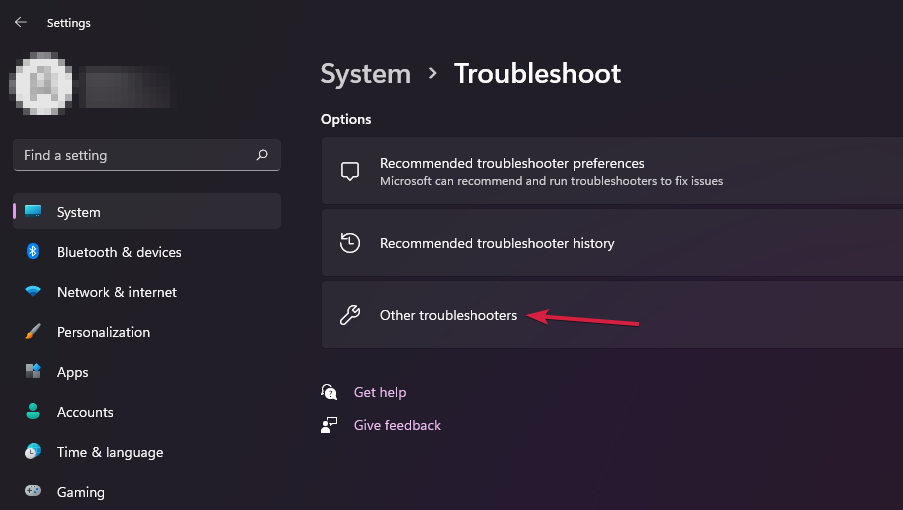
  2. Click on Troubleshoot on the right in the System tab.Troubleshoot to fix installer encountered an error 0x800f0905
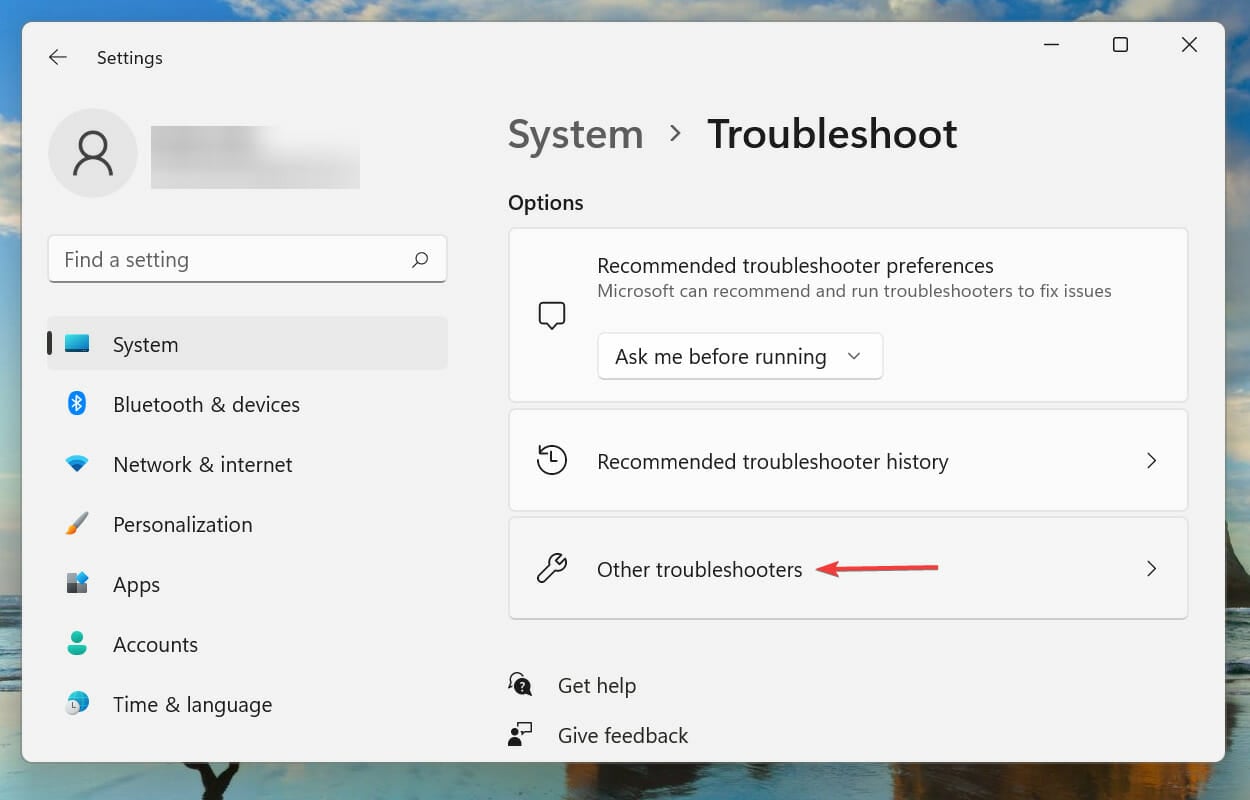
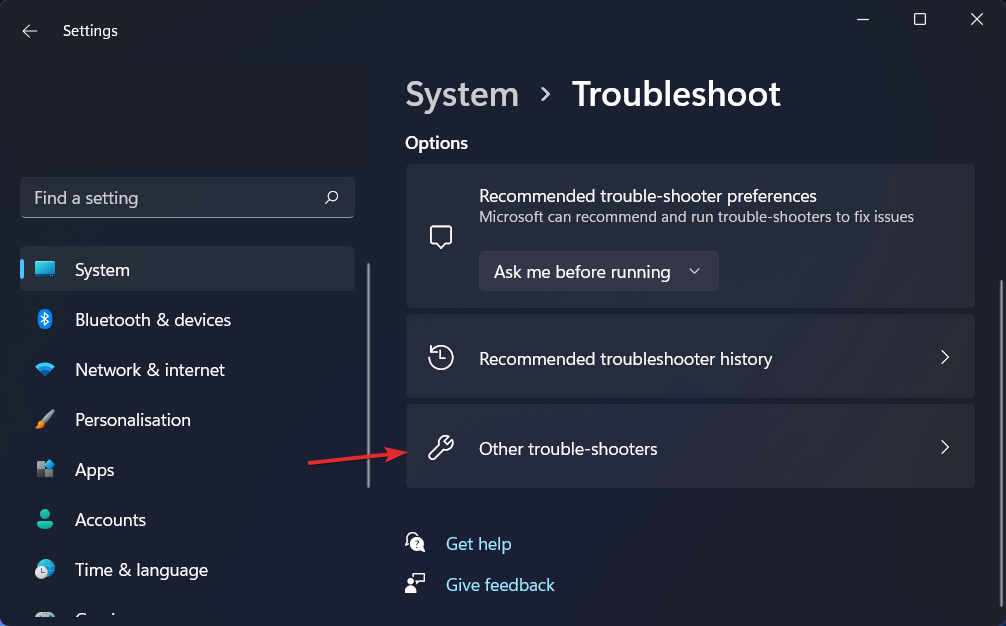
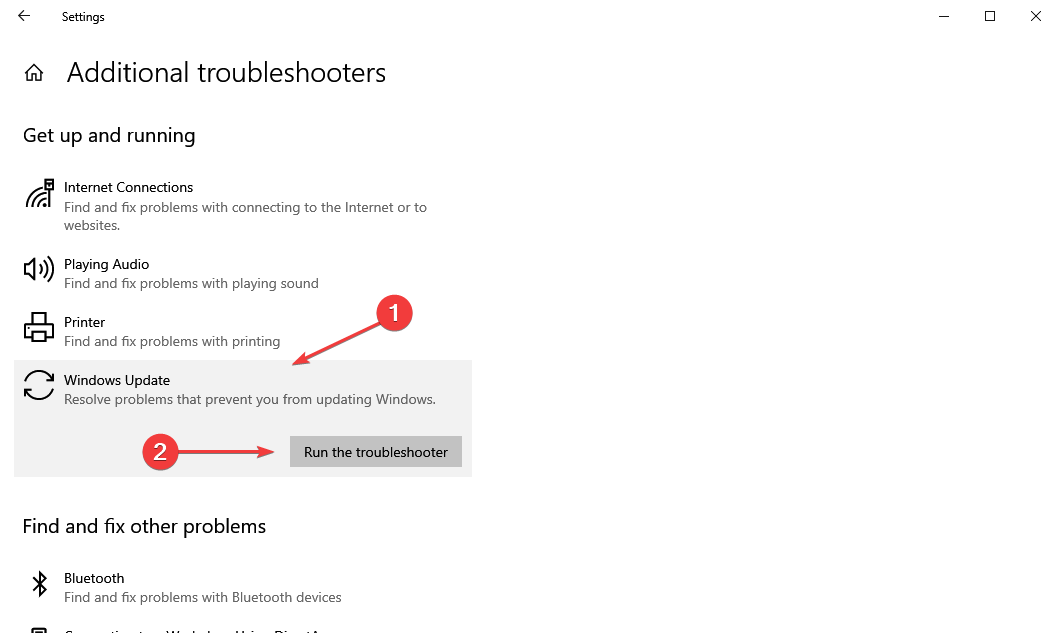
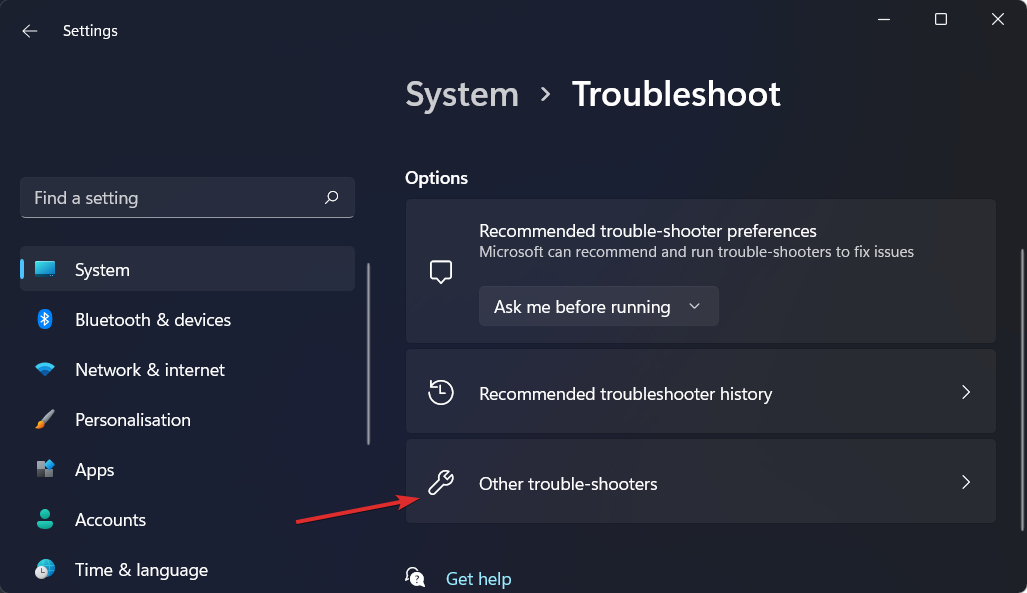
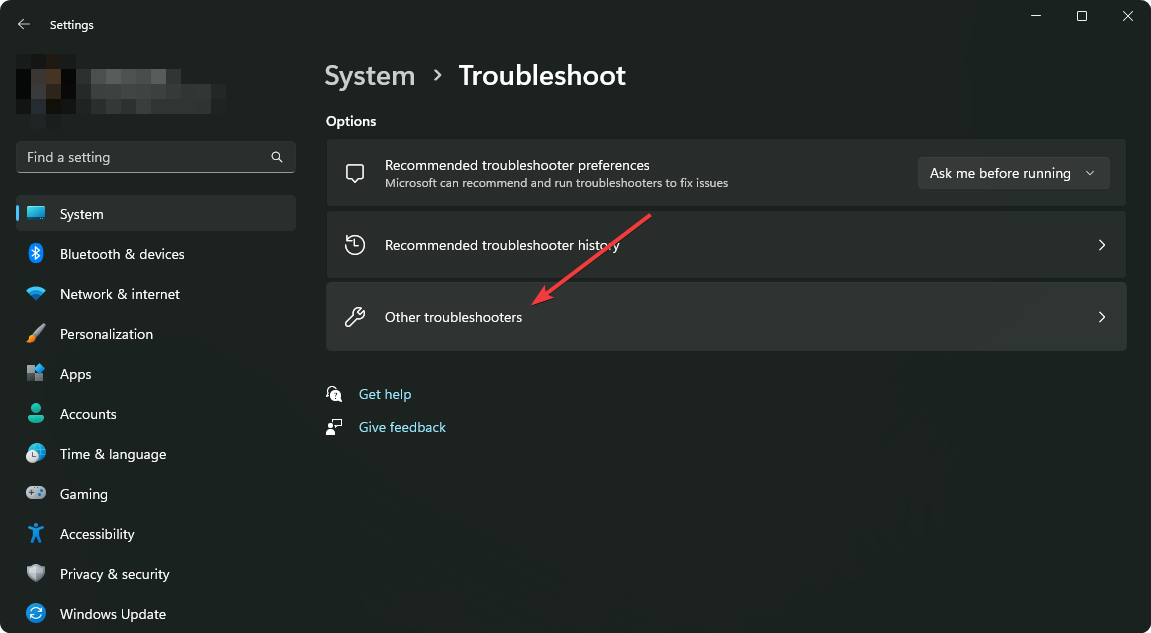
  3. Next, click on Other troubleshooters.Other troubleshooters
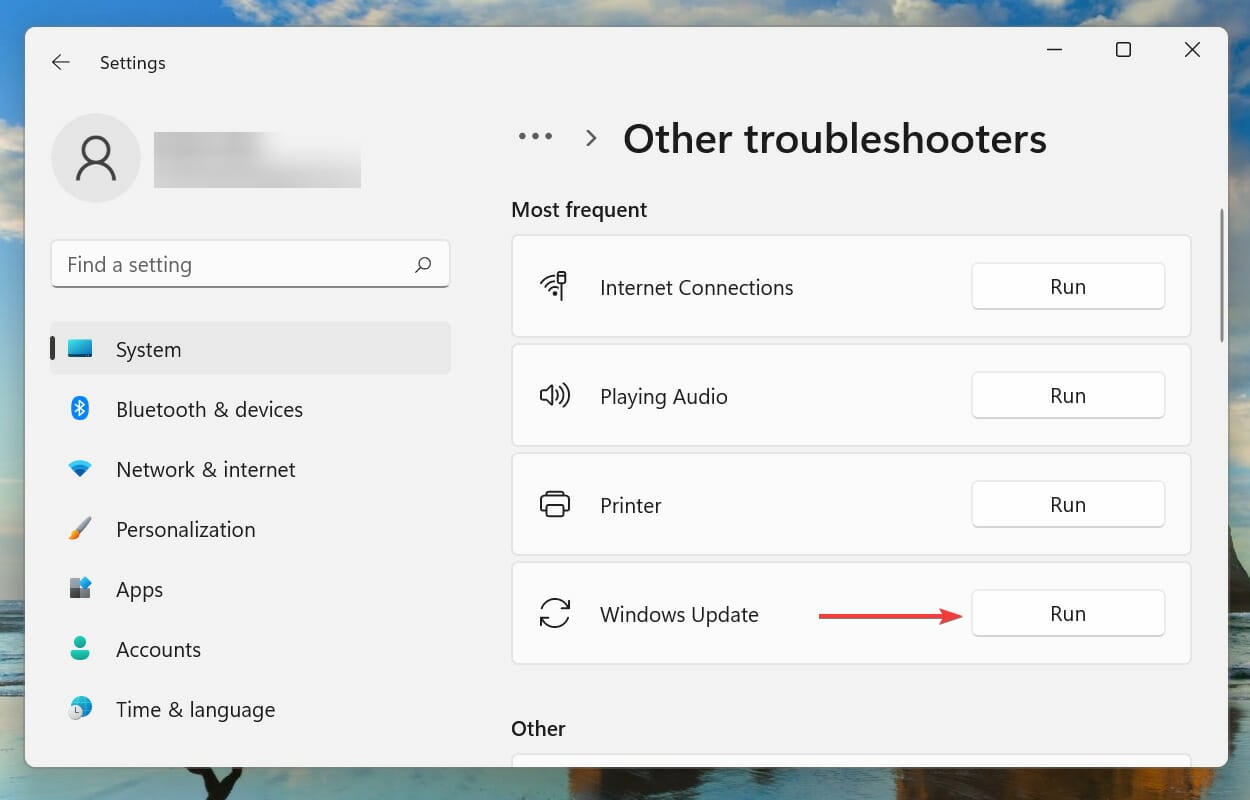
  4. Locate the Windows Update troubleshooter and click on the Run button next to it.Run Windows Update troubleshooter
  5. Windows will now detect and fix problems that might be leading to the 0x800f0905 error encountered by the installer.

Alternatively, you can try dedicated third-party repair software to automatically fix Windows Update-related errors.

2. Reset Windows update components

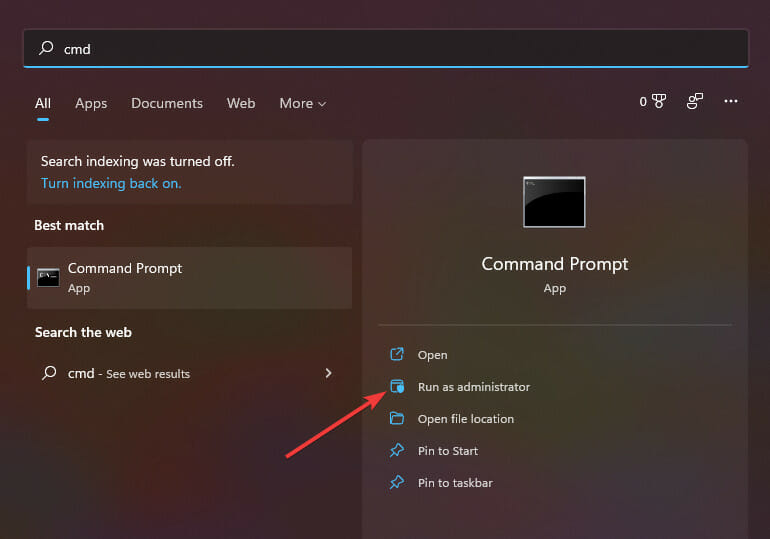
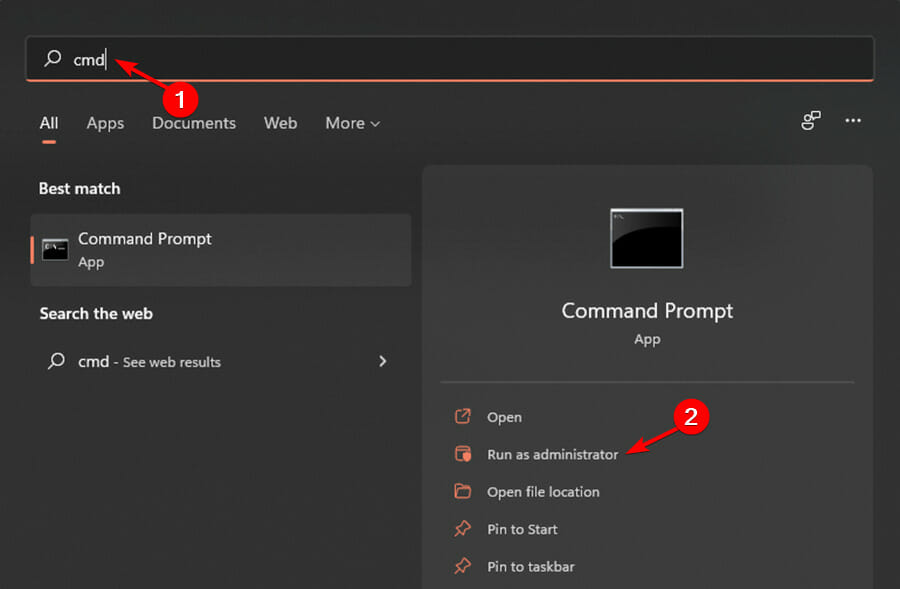
  1. 1. Press Windows + S to launch the Search menu, enter Windows Terminal in the text field at the top, right-click on the relevant search result, and then select Run as administrator from the context menu.

    Launch elevated Windows Terminal
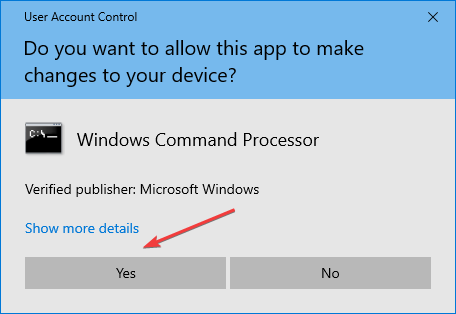
  2. 2. Click Yes on the UAC (User Account Control) prompt that pops up.

  3. 3. Up next, click on the downward arrow at the top, and select Command Prompt from the list of options. Alternatively, you can press Ctrl + Shift + 2 to launch the Command Prompt tab.

    Launch Command Prompt to fix installer encountered an error 0x800f0905
  4. 4. Now, type/paste the following commands to stop the BITS and Windows update service, and hit Enter after each to execute them:

    net stop bits

    net stop wuauserv

  5. 5. Next, enter the following command to delete the qmgr*.dat files:Del “%ALLUSERSPROFILE%Application DataMicrosoftNetworkDownloaderqmgr*.dat”

  6. 6. Now, enter the following commands to rename some critical folders:

    Ren %Systemroot%\SoftwareDistribution\DataStore DataStore.bak

    Ren %Systemroot%\SoftwareDistribution\Download Download.bak

    Ren %Systemroot%\System32\catroot2 catroot2.bak

    If this is your first attempt at resetting Windows Update components, skip this step.

  7. 7. Paste the following commands and hit Enter to reset the BITS and Windows Update services:

    sc.exe sdset bits D:(A;;CCLCSWRPWPDTLOCRRC;;;SY)(A;;CCDCLCSWRPWPDTLOCRSDRCWDWO;;;BA)(A;;CCLCSWLOCRRC;;;AU)(A;;CCLCSWRPWPDTLOCRRC;;;PU)

    sc.exe sdset wuauserv D:(A;;CCLCSWRPWPDTLOCRRC;;;SY)(A;;CCDCLCSWRPWPDTLOCRSDRCWDWO;;;BA)(A;;CCLCSWLOCRRC;;;AU)(A;;CCLCSWRPWPDTLOCRRC;;;PU)

  8. 8. Next, paste the following command and hit Enter:cd /d %windir%\system32

  9. 9. You will now have to execute each of the following commands to reregister the BITS and Windows Update files to fix the 0x800f0905 error encountered by the installer:

    regsvr32.exe atl.dll

    regsvr32.exe urlmon.dll

    regsvr32.exe mshtml.dll

    regsvr32.exe shdocvw.dll

    regsvr32.exe browseui.dll

    regsvr32.exe jscript.dll

    regsvr32.exe vbscript.dll

    regsvr32.exe scrrun.dll

    regsvr32.exe msxml.dll

    regsvr32.exe msxml3.dll

    regsvr32.exe msxml6.dll

    regsvr32.exe actxprxy.dll

    regsvr32.exe softpub.dll

    regsvr32.exe wintrust.dll

    regsvr32.exe dssenh.dll

    regsvr32.exe rsaenh.dll

    regsvr32.exe gpkcsp.dll

    regsvr32.exe sccbase.dll

    regsvr32.exe slbcsp.dll

    regsvr32.exe cryptdlg.dll

    regsvr32.exe oleaut32.dll

    regsvr32.exe ole32.dll

    regsvr32.exe shell32.dll

    regsvr32.exe initpki.dll

    regsvr32.exe wuapi.dll

    regsvr32.exe wuaueng.dll

    regsvr32.exe wuaueng1.dll

    regsvr32.exe wucltui.dll

    regsvr32.exe wups.dll

    regsvr32.exe wups2.dll

    regsvr32.exe wuweb.dll

    regsvr32.exe qmgr.dll

    regsvr32.exe qmgrprxy.dll

    regsvr32.exe wucltux.dllregsvr32.exe muweb.dll

    regsvr32.exe wuwebv.dll

  10. 10. Execute the following command to reset Winsock: netsh winsock reset

  11. 11. Finally, execute these commands to restart the BITS and Windows Update service:

    net start bits

    net start wuauserv

  12. Resetting the Windows Update components is one of the best fixes for any issues related to updating the OS.

    Though the process is slightly longer, it’s known to eliminate the install error – 0x800f0905 encountered by installer in Windows for a lot of users.

3. Fix file corruption with SFC

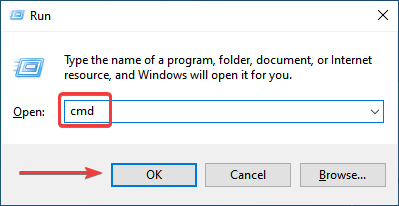
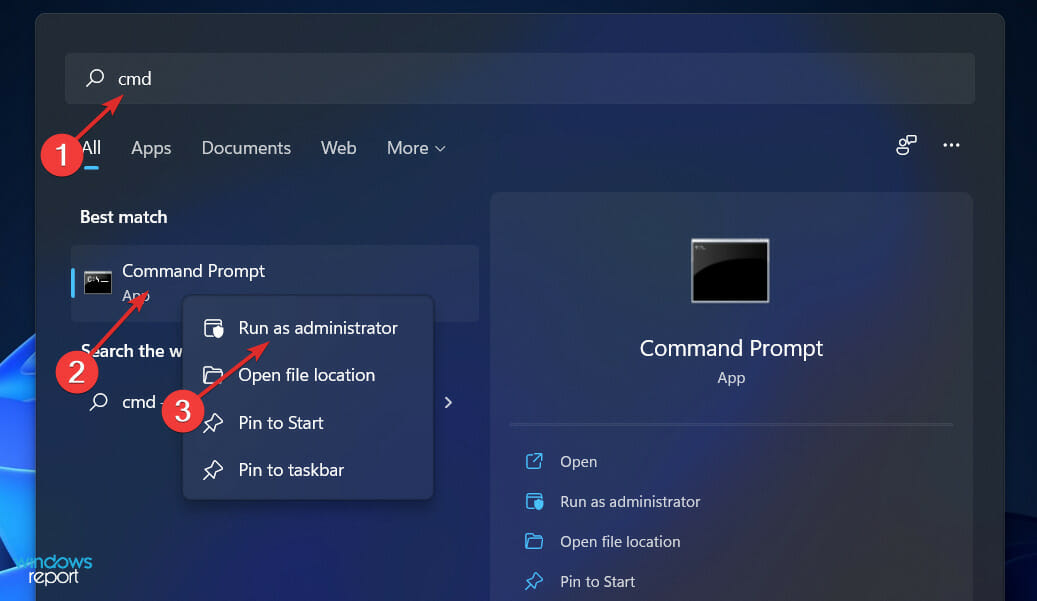
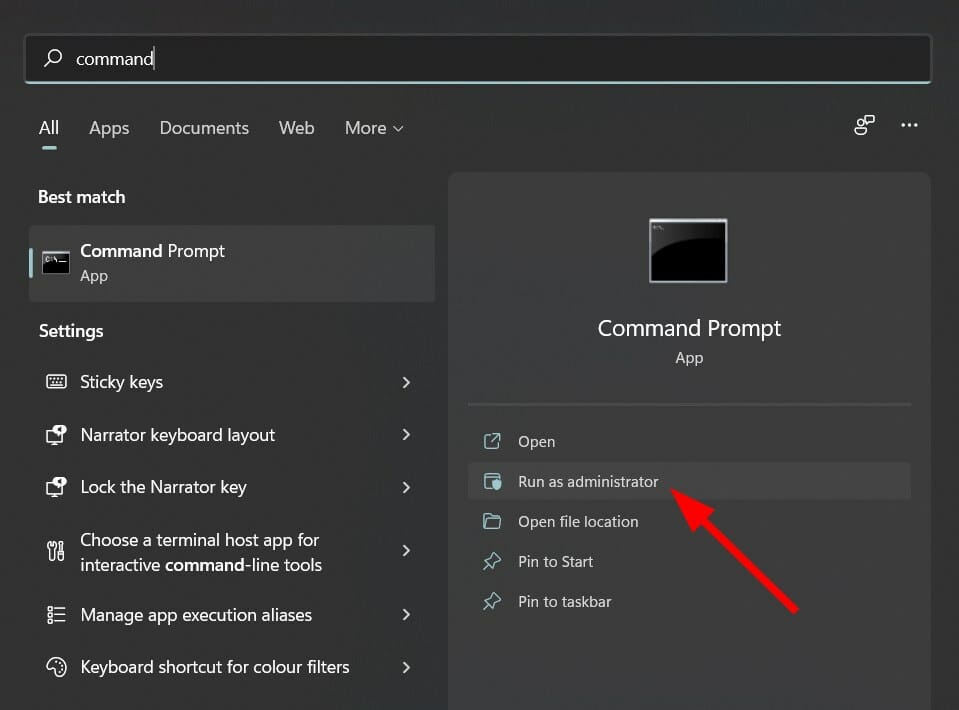
  1. Open the Command Prompt as an administrator.run cmd as admin
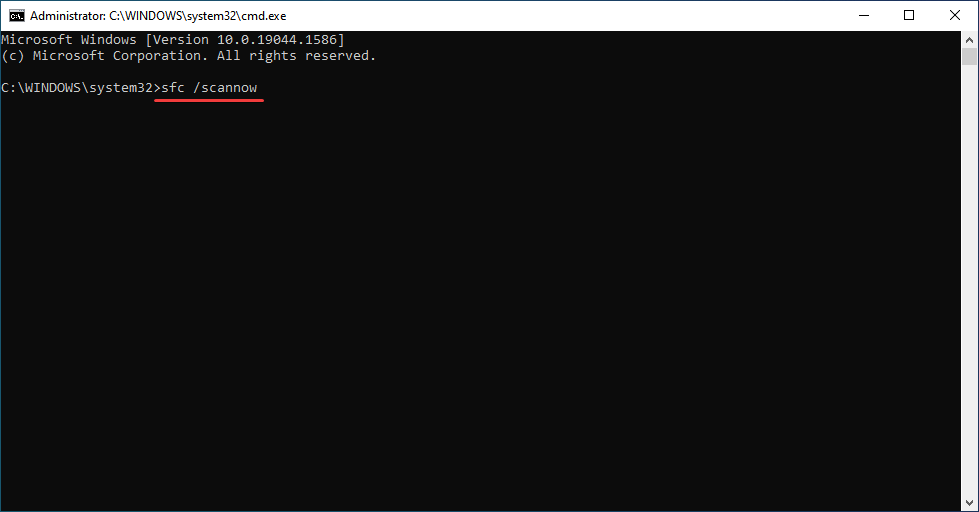
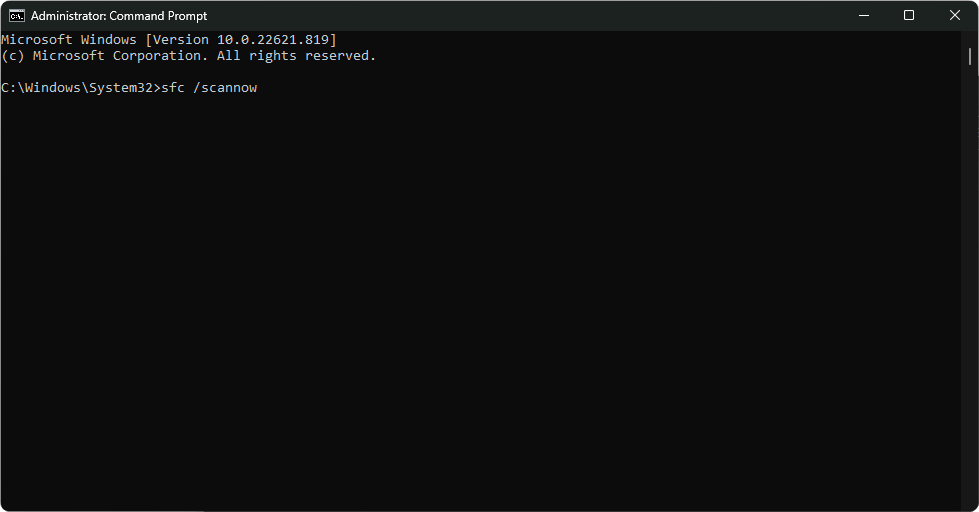
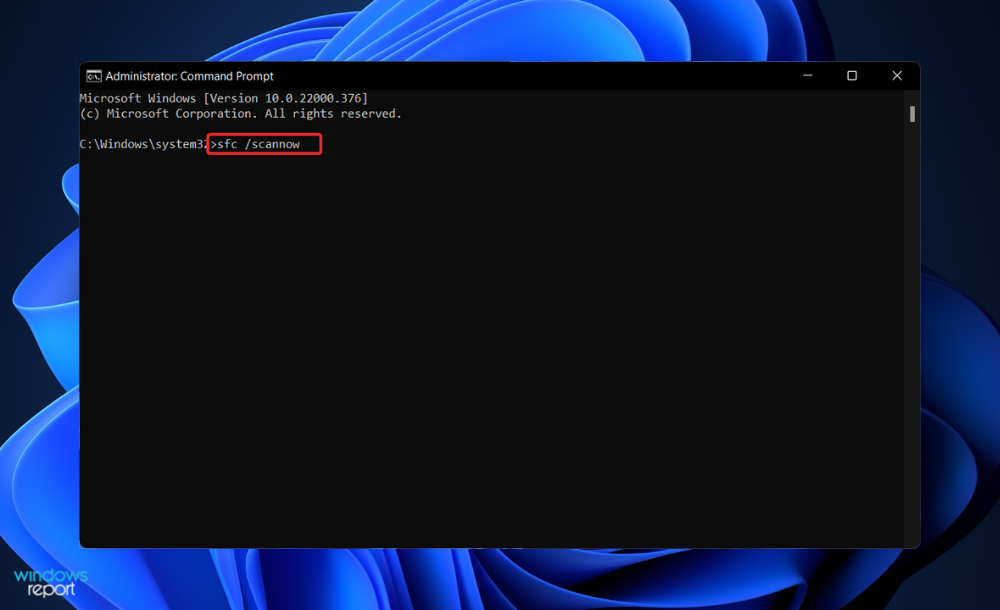
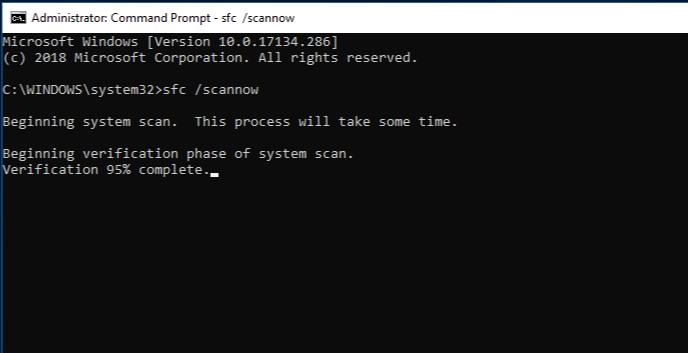
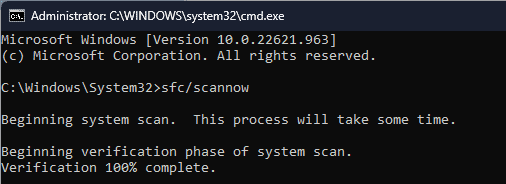
  2. Type sfc /scannow and press Enter.SFCSCANNOW CMD
  3. Wait for the scan to complete.
  4. Try running the updates again.

This command scans and fixes system file corruption which could very much lead to installer error 0x800f0905.

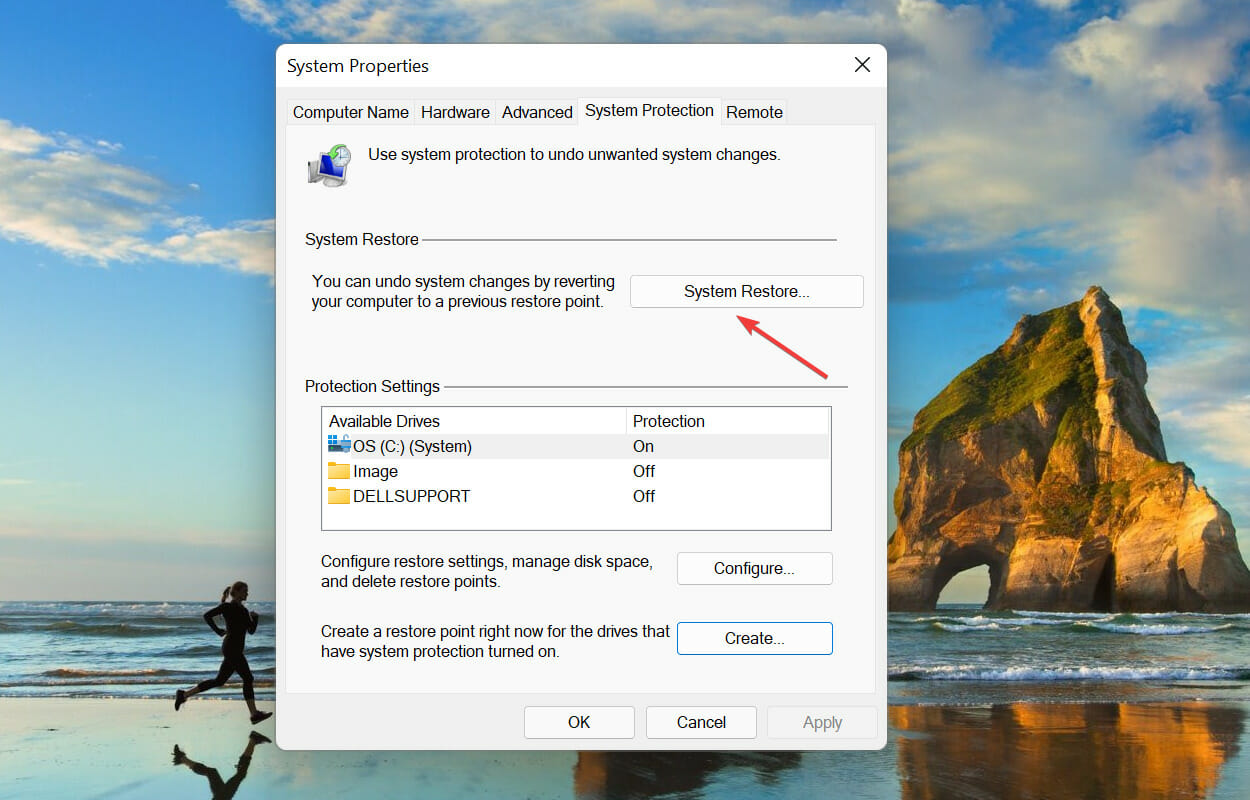
4. Perform a system restore

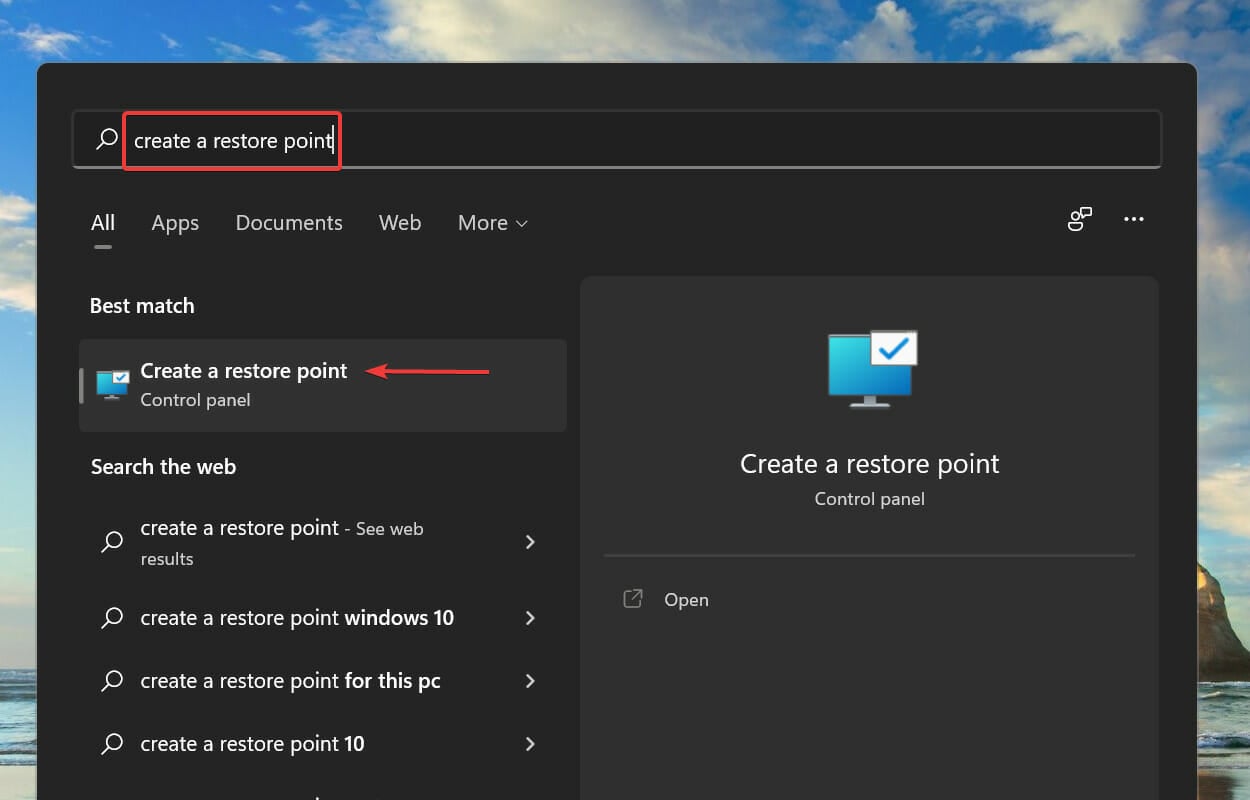
  1. Press Windows + S to launch the Search menu, enter Create a restore point in the text field at the top, and click on the relevant search result.Perform system restore to fix installer encountered an error 0x800f0905
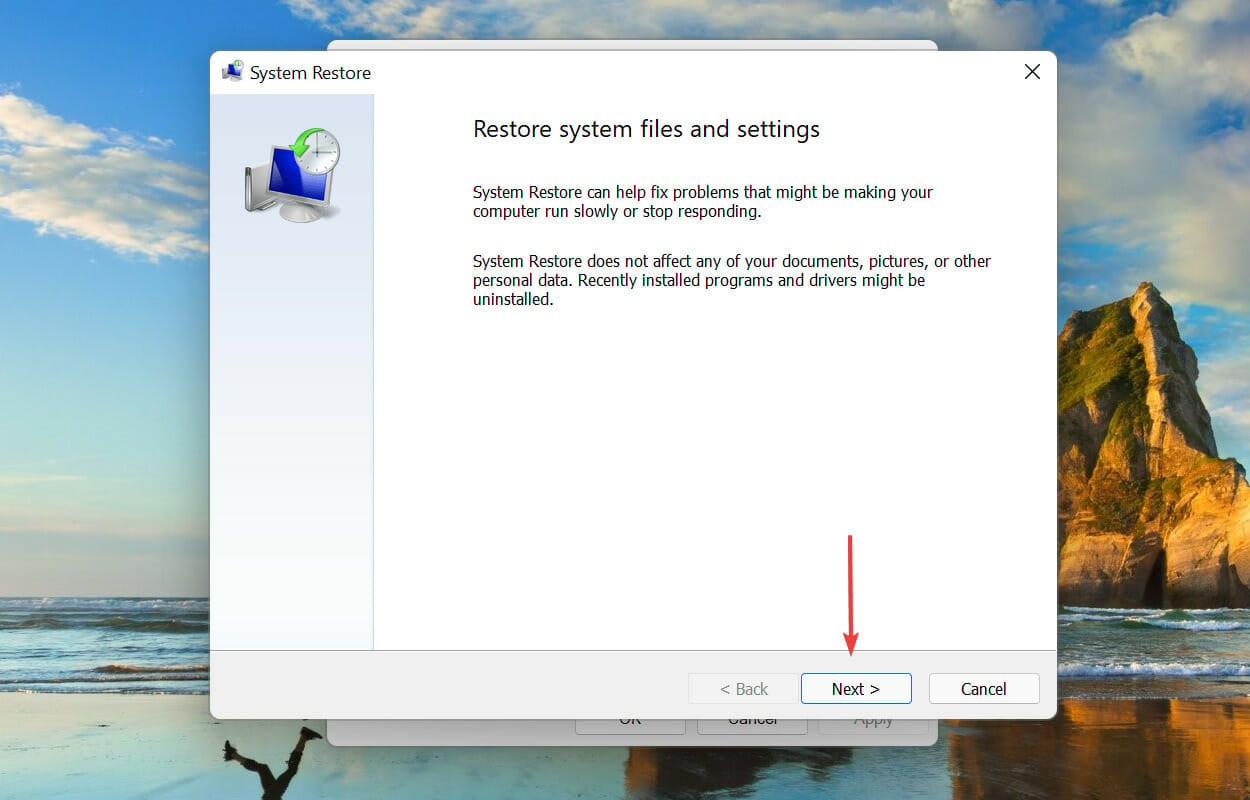
  2. Next, click on System Restore.System restore
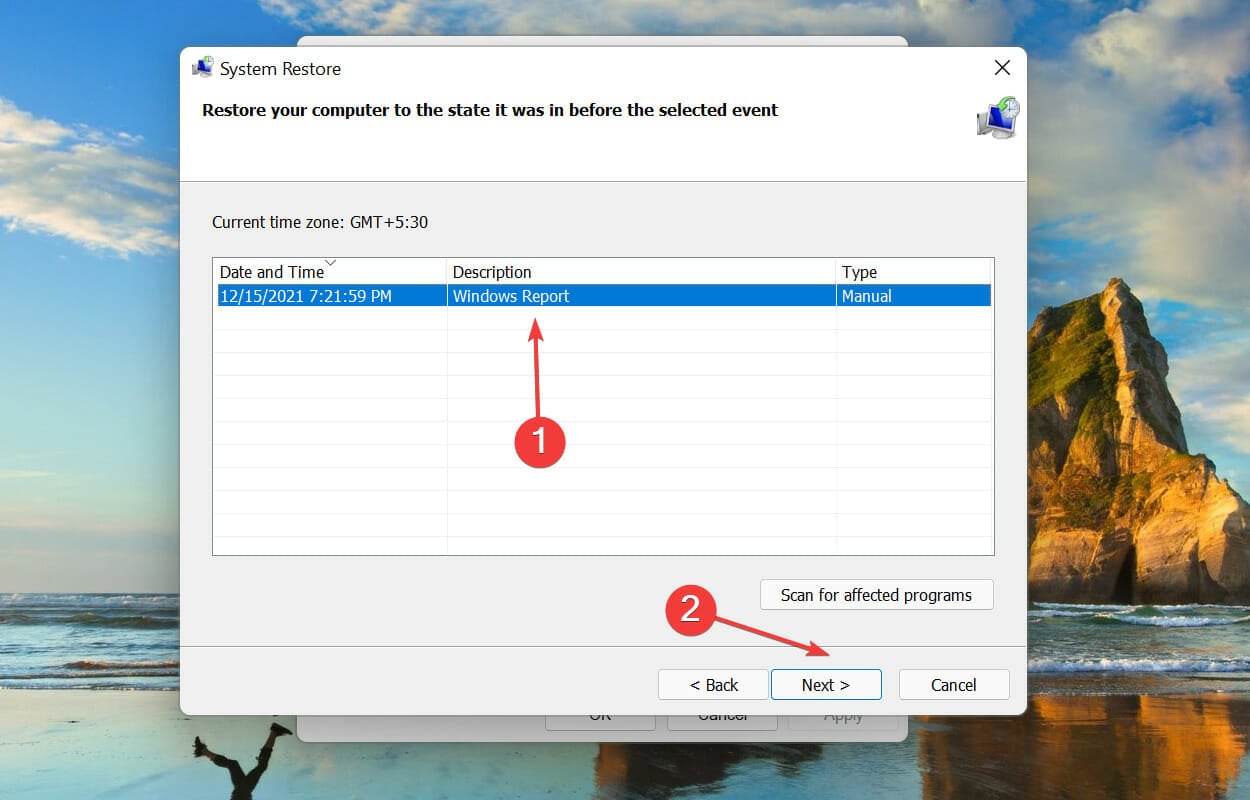
  3. If no recommended restore points are listed, click on Next.Choose a restore point
  4. Choose a restore point from the ones listed here and click on Next.Choose a restore point
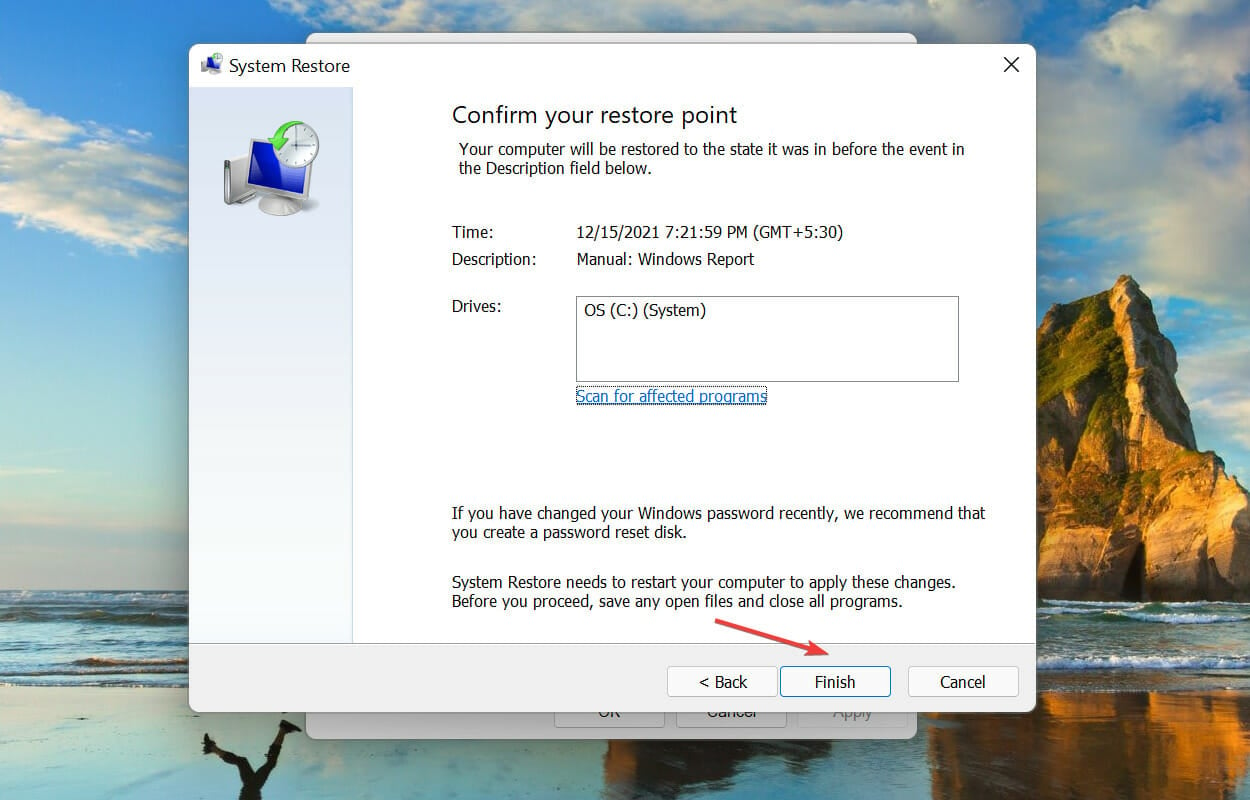
  5. Finally, review the restore settings and click on Finish to start the process.Start system restore process to fix installer encountered an error 0x800f0905
  6. Your computer will restart during the process, so save any open files.
  7. After the computer restarts, check if the 0x800f0905 Windows Update error encountered by the installer is fixed.

System restore takes your computer back to a state where the error didn’t exist altogether. For example, say it’s misconfigured settings or a conflicting application causing the error, and restoring the system works perfectly here.

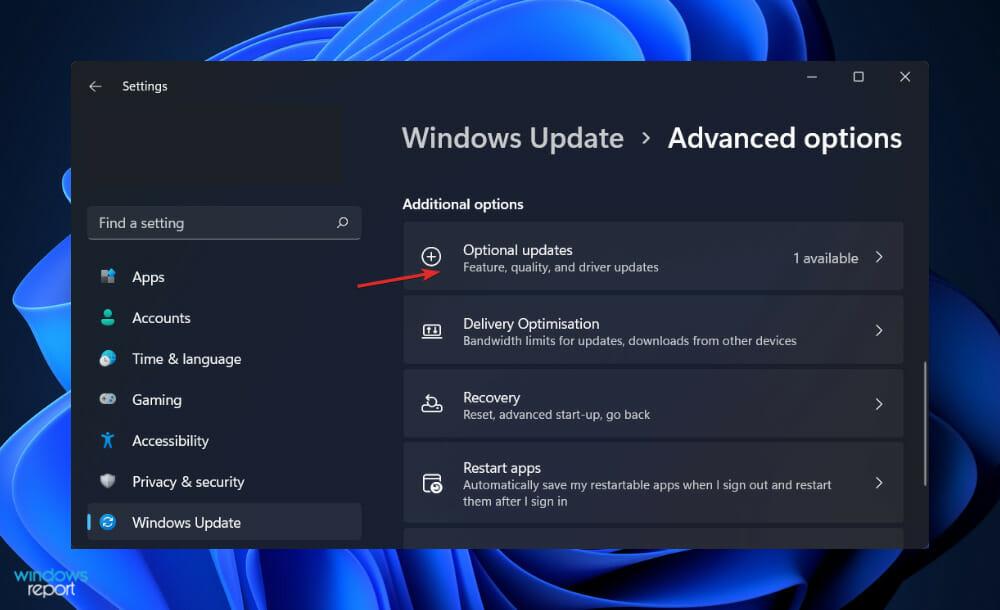
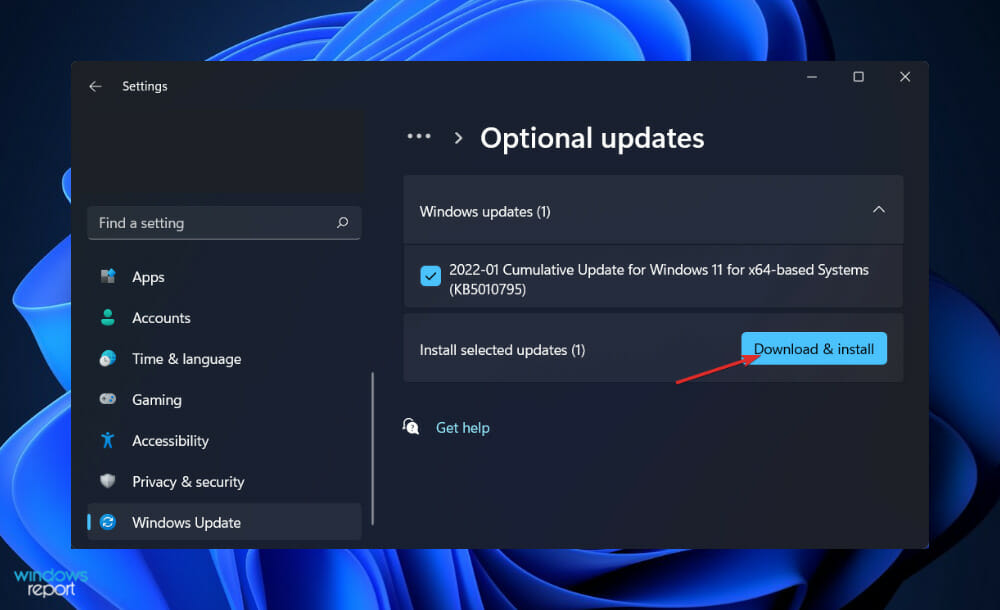
5. Manually install the updates

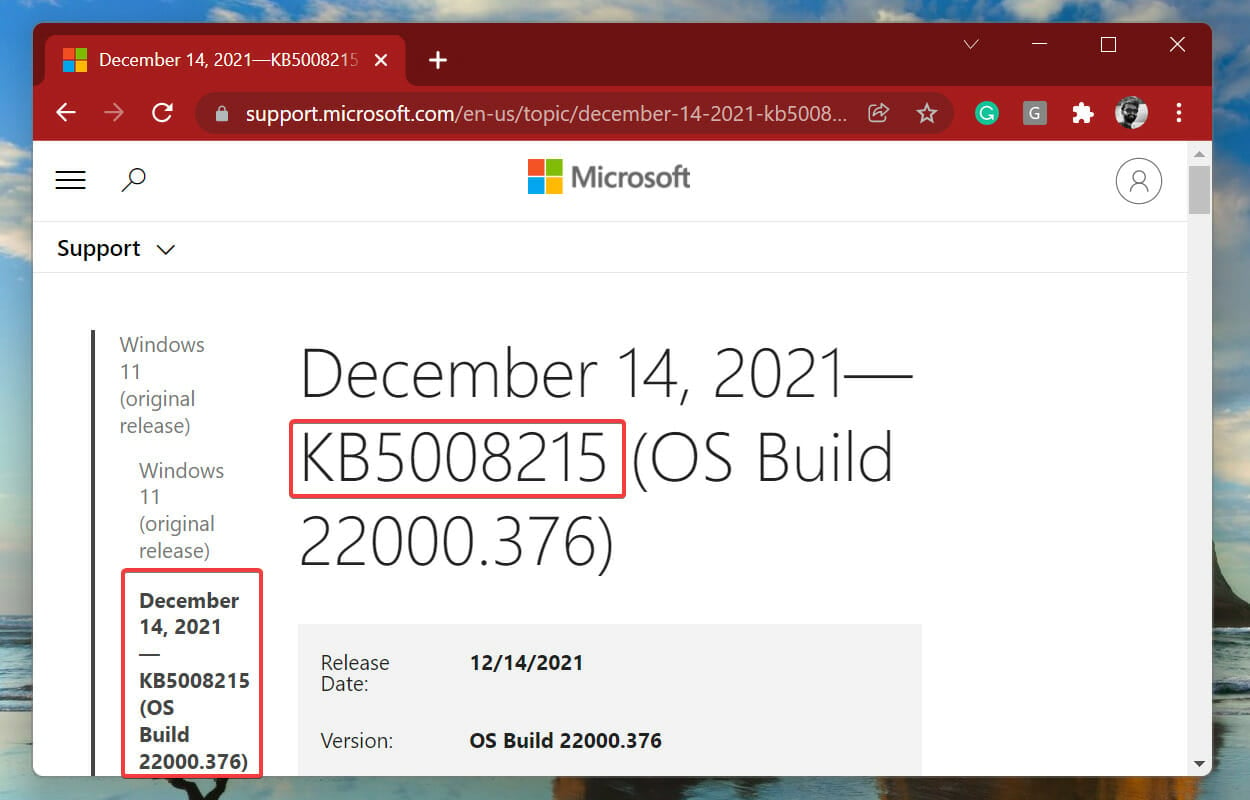
  1. Go to Windows 11 update history and identify the latest version’s KB (Knowledge Base) number. The KB number below is for the last update when writing this article; it could be different for the update you install in the future.Manually install updates to fix installer encountered an error 0x800f0905
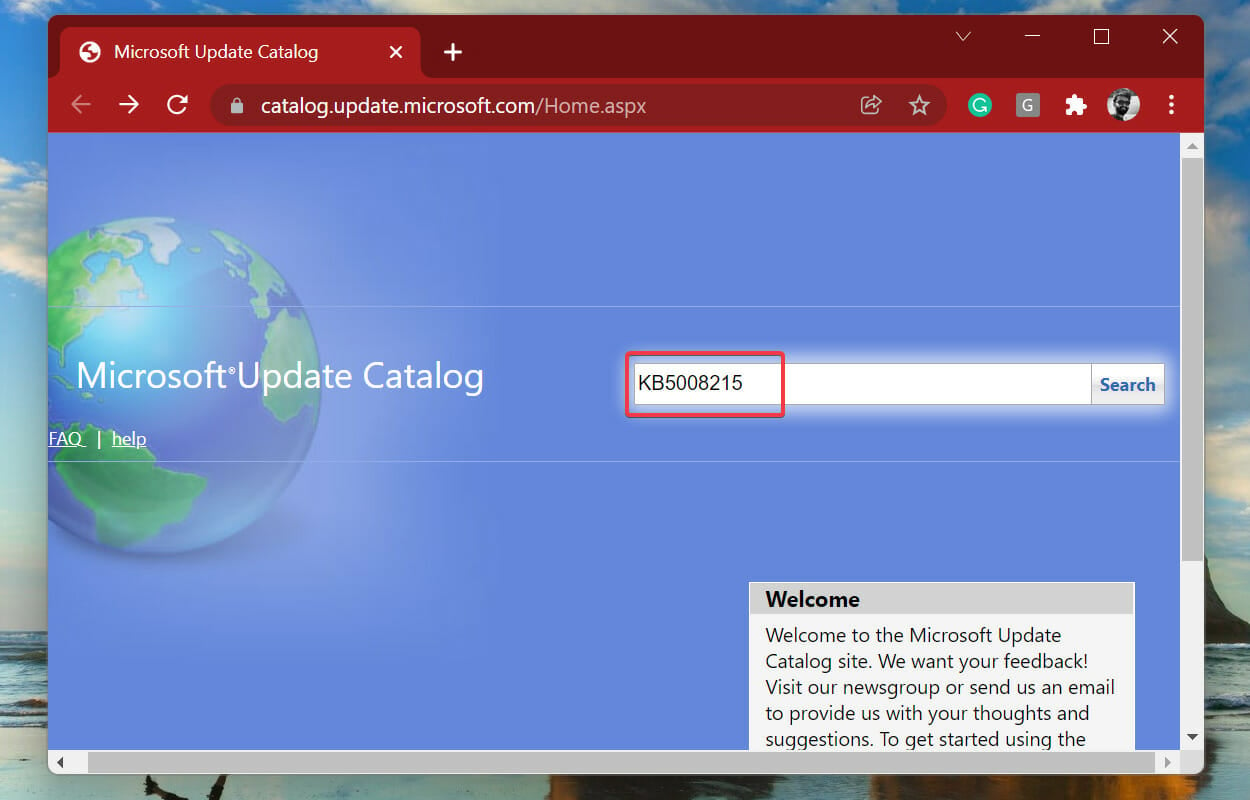
  2. Now, go to the official Microsoft Update Catalog, paste the KB number in the search box, and then hit Enter.Enter KB number
  3. Click on the Download button next to the update that matches your system.
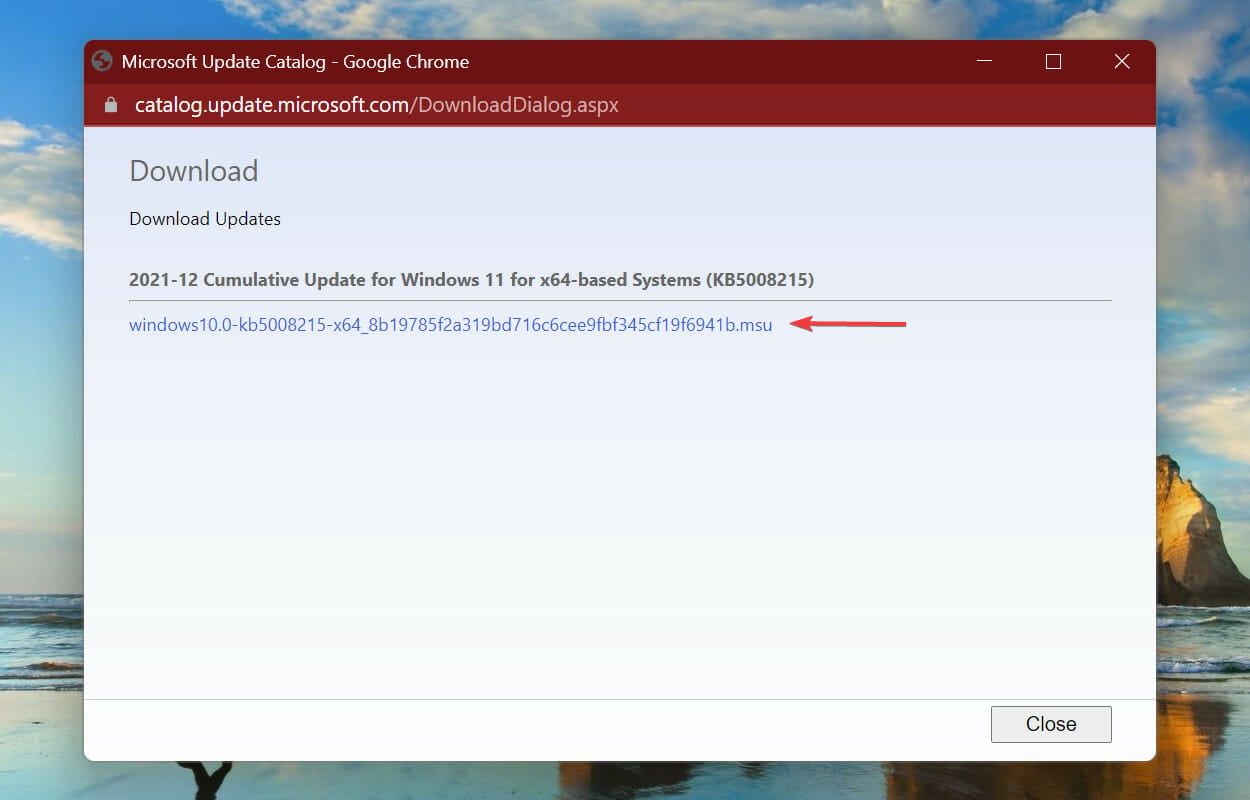
  4. Next, click on the link to download the file.Download update to fix installer encountered an error 0x800f0905
  5. Double-click on the downloaded file to launch the installer setup, and follow the on-screen instructions to complete the process.Run the setup

After manually downloading and installing the Windows update, the 0x800f0905 error encountered by the installer should be eliminated.

6. Perform an in-place upgrade

  1. Go to Microsoft’s official website, scroll to the Download Windows 11 Disk Image (ISO) section, select Windows 11 (multi-edition ISO) from the dropdown menu, and click Download.download
  2. Choose a language, preferably English (United States), and then click Confirm.choose language
  3. Now, click on the 64-bit Download button.64-bit download to fix installer encountered an error 0x800f0905
  4. After it’s downloaded, double-click on the file.ISO file
  5. Click Open in the confirmation prompt.open
  6. Now, run the setup.exe file.setup.exe to fix installer encountered an error 0x800f0905
  7. Click Yes in the UAC prompt.
  8. Now, click Next.next
  9. Click Accept in the Applicable notices and license terms window.accept to fix installer encountered an error 0x800f0905
  10. Finally, verify that it lists Keep personal files and apps, then click on Install.install to fix installer encountered an error 0x800f0905
  11. Now, wait for the installation to complete. It may take some time and should let the process run uninterrupted.

That’s it! If none of the previous methods worked, performing an in-place upgrade should most certainly get things up and running when receiving the Installer encountered an error 0x800f0905 message.

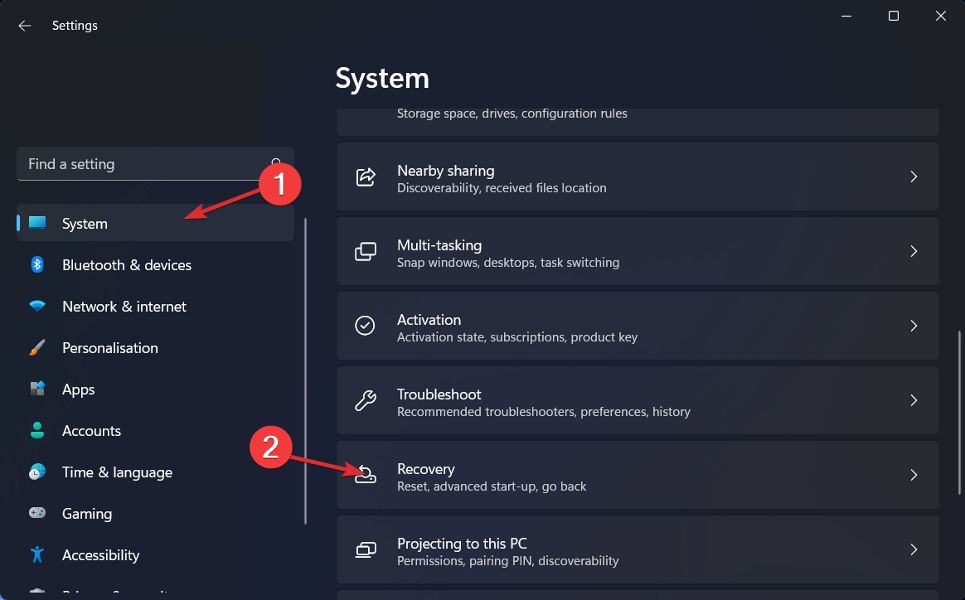
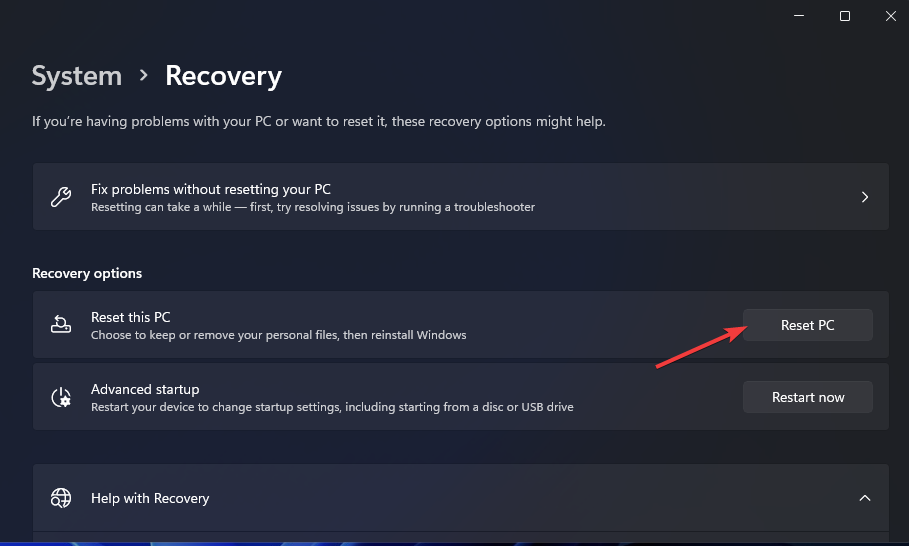
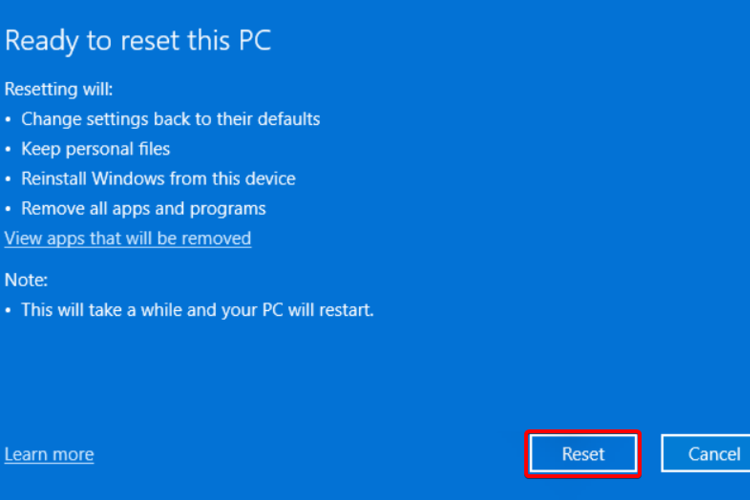
If it still doesn’t work, you can factory reset Windows 11 or even roll back to Windows 10.

Tell us which fix worked or whether you had to reset Windows 11 in the comments section below.

How Long Do Windows Updates Take? Easy Tool to Find Out

Here is a question that we are sure many of you have asked at a certain point in time: how long does it really take for Windows to download and install an update?

We are, of course, talking about Windows 11, as we can all remember that Windows 10 took a heavy time toll when updates were available.

At the Windows 11 launch event, Panos Panay mentioned that Windows updates are 40% quicker to download, compared to the previous OS, and also install faster.

Read on to find out how long a Windows Update takes on Windows 10 or 11.

How can I see how long Windows Updates take?

Instead of timing these actions with the built-in stopwatch, as some do, having the system show you this information would be a more than welcome feature.

But while Microsoft hasn’t included such an integration yet, know that there is still a way you can find out how long a Windows update will take to install.

Windows 11 can actually predict how much time it will take to install available updates. And although that feature is not yet available to all Insiders, you can enable it relatively simply using the ViveTool app.

This process is easy, will take up only a few minutes of your time, and after you install it you will be able to check the estimated updates installation time in the Windows 11 operating system.

Here’s how you use this tool:

  1. Download the ViveTool from the GitHub website.
  2. After you finished downloading, extract the archive into a folder.
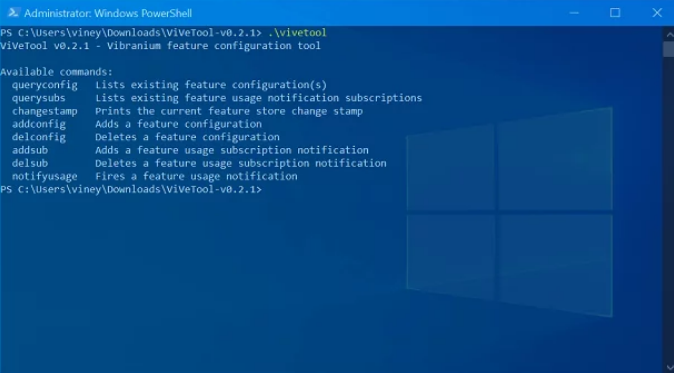
  3. Open the Windows Terminal as an Administrator on your Windows 11 computer, then go to the folder where you have extracted the downloaded tool and run it.
  4. Use the following command:
ViVeTool addconfig 25704915 2

5. Restart your computer for the changes to apply.

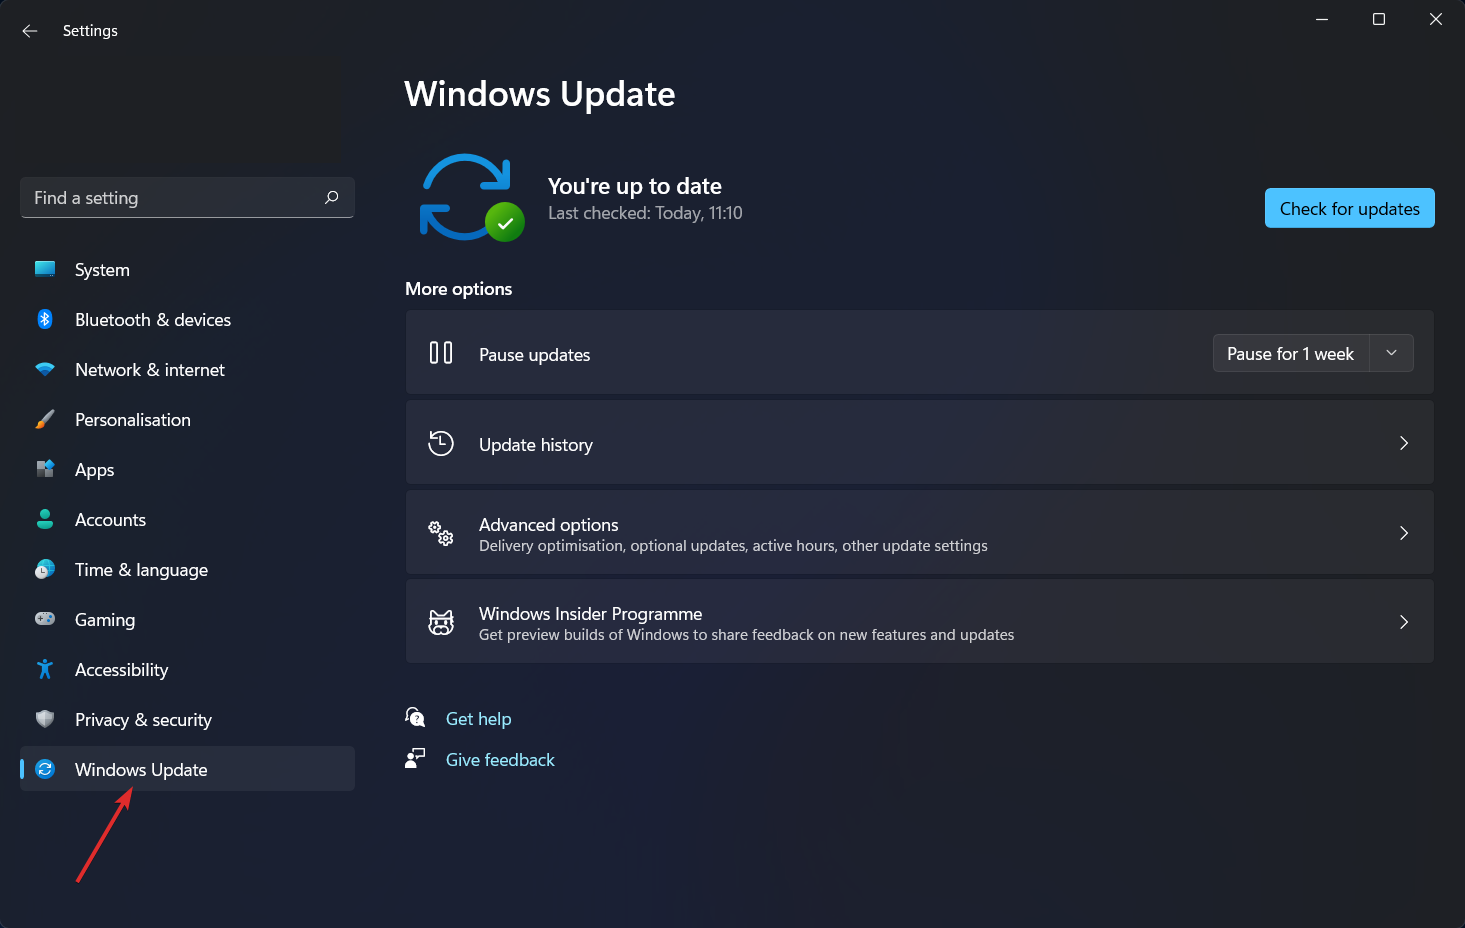
All that’s left to do now is to open Windows Settings, click on Windows Updates, and check for available updates.

When Windows 11 prompts you to restart the system to apply patches, open the Start menu and press the power button. You will see the approximate installation time next to Shut Down and Restart buttons.

Have you downloaded and used this awesome tool yet to find out how long do Windows Updates take? Share your experience with us in the comments section below.

6 Best Budget Monitors For Photo Editing

It goes without saying that you will need a monitor to both edit and evaluate the photos you capture. However, if you want to touch up your photos professionally, then you cannot just use a standard monitor.

For a proper editing job, you will need to choose your monitor carefully. If you are a little lost about which monitor to get, then this list of best monitors for photo editing should help point you in the right direction.

What to consider when choosing a good monitor for photo editing

Our team of testers, with 15 years of combined experience have tested a wide variety of products, both hardware, and software to create unbiased and thorough lists that will help you make an informed buying decision.

As in the case of any device or software that ends up on their task lists, the monitors presented in this guide have been compared both with the competition, and amongst themselves, and then pushed to the limits in single testing processes as well.

This timeline not only ensures that the choices we made are the best on the market, but also that they operate and offer the exact capabilities the producer presents them with.

Tip icon Tip
Editor’s tip:

To ensure that your needs are met by any investment that you’re going to make, it is important to consider the following elements:

➡ Price
➡ Display
➡ Resolution
➡Color gamut
➡ Customization

Price

As in the case of everything else, what is an acceptable price for a good monitor for photo editing will depend on factors like your own perspective, and financial setting.

Even though we can’t provide you with 5 options specifically for your case, our experts have tried to cover the entire price spectrum, to ensure that you will find a good option for your situation.

Display size

As it ultimately comes down to personal preference, considering that you’re planning on using the monitor for photo editing, having enough space is crucial.

The actual size requirements will vary from case to case, but because photo-editing software usually offers a wide range of features, options, menus, and sub-menus, it is safe to assume that it could be better to have more space rather than less.

This list will provide you with a variety of options that will ensure that no matter what your space requirements are, you will be able to choose one of the monitors we present you with.

Resolution

Resolution is extremely important when editing photography, with the exact requirements varying here as well. As in most cases, bigger is almost always better, especially if you’re dealing with this subject on a professional level.

A good resolution to aim for would be 4K in that regard, but lesser values could also be useful if you’re just dabbling in photo editing as a hobby.

Color gamut

Color gamut, along with the resolution of the monitor you choose is also incredibly important, especially if you’re a professional in this field. Having a wide color gamut enables you to observe, edit, and customize your photos to look as best as possible.

The color gamut, a fancy way of saying ‘the amount of the color spectrum that your monitor can output’, will dramatically influence not only your results but also how many changes you will be able to apply to your photography.

Customization options

Customization options that are built into your monitor can prove to be a great advantage while processing photos on your PC.

Besides the obvious improvement when it comes to the quality of your work, having great customization options also enables you to make the most out of any photo editing software, without relying on complicated options found inside the program.

Note: All the prices and offers in this article are subject to change, so be sure to check the official product page to get the latest deal. If the product/offer you’re looking for is no longer available, you can try to find it on its official manufacturer page or get another one from our list.

What are the best budget color-accurate monitors?

ASUS ProArt PA278QV

  • 24.1-inch
  • 1920 x 1200 IPS display
  • 100% sRGB color gamut
  • Good viewing angles
  • ASUS exclusive ProArt Preset and ProArt Palette
  • Restrictive menu options

Since photo editing is your passion, the ASUS ProArt Display PA278QV is clearly worthy of your attention, being one of the best budget IPS monitor for photo editing.

This beautiful device offers a 24. 1-inch (1920 x 1200) IPS display with international color standard 100% sRGB and 100% Rec. 709 wide color gamut.

Moreover, you’re about to enjoy extensive connectivity with DisplayPort, HDMI, D-sub, Audio in, Earphone jack plus four USB 3. 0 ports.

Designed specifically for artistic work, it has been designed to output incredibly vivid colors and the clarity at which it does makes it a must-have for any artist.

In order to ensure that your imagination and field of view are not affected in any way while using this display, the IPS display is created without a wide frame.

For colors to look especially crisp and true-to-life, the wide color gamut is evident even further by the use of 300 cd/m²  maximal brightness output, and a very good response time of 5 ms. To add to this, the display is Calman Verified and pre-calibrated inside the factory or incredibly immersive and deep color spectrums.

If you think that the art-related features on this device are enough already, you must know that this Asus monitor also offers you personalized editing with the ProArt Preset option and a ProArt Pallete feature which allows even further customization and setting of parameters.

To make sure that your eyes don’t get overly tired while working on your precious art project, the monitor also comes bundled with the useful Asus Eye Care Technology, which ensures that the blue-light emission levels are kept in check.


Philips 276E9QDSB

  • 27-inch
  • 1920x1080 IPS display
  • 124% sRGB colour gamut
  • HDMI, DVI-D, VGA, and audio out connectivity
  • Adjustable monitor position and tilt angle
  • Not the best built-in speaker quality

This Philips 276E9QDSB monitor is also amazing. We are talking about a monitor with a Full HD 1920×1080 IPS panel, making this option one of the best budget sRGB monitors on the market.

Being one of the best budget 27-inch monitors for photo editing, this option from Philips offers more than enough space for you to perform your editing process.

Its wide-viewing angles and brightness of 250 cd/m² make it stand out from the crowd. As for the Free Sync technology, it provides fluid, artifact-free gaming performance that also implies the smooth operation of any good photo editing software.

There are a wide variety of sizes available for this device, so if you would like to have e 22-inch or 24-inch option, you can do so.

Another important element is choosing if you want a flat or curved version, which can make a huge difference in the overall experience. You can choose these options on the seller’s Amazon page.

The Phillips 276E9QDSB has a 93% NTSC color gamut coverage, ensuring that your photos will look incredible if you know what you’re doing while editing them.

Another useful feature for those long hours spent in front of the PC is the LowBlue mode, which reduces the amount of blue light emitted by the display. Added to this, the monitor also includes a Flicker-Free technology, ensuring that your eyes will not be affected by the refresh rate of the monitor’s image.

As with other monitors on this list, the monitor has a very thin bezel, which doesn’t bother you while working on editing photos, and also maximizes the size of the display, without making the monitor unnecessarily big.

Moreover, the 4-year advance replacement policy (for models sold in the U.S.) coming from Philips is an aspect to take into consideration.


BenQ SW2700PT

  • Exceptional clarity and fine detail
  • Accurate color reproduction
  • Custom calibration
  • B&W content previews in three preset modes
  • Eye Care for comfortable viewing
  • No pallet master software on the driver CD

One of the best monitors for photo editing, the BenQ 27-inch 2K photographer monitor SW2700PT2k comes with a 27-inch screen, 14 bit 3 LUT, Rec. 709, and 99% Adobe RGB.

This is quite impressive considering it is half the price of most monitors designed for graphic and photo editing. Photography has skyrocketed in popularity over the years.

The BenQ SW2700PT offers every element you need in order to create amazing photos on your PC and optimize them in any way you want.

This means that more and more people are looking for monitors that are capable of editing high-end photos. However, not everyone can afford a $1000 plus monitor.

Thus, this BenQ is the perfect tool for people who are looking for an affordable monitor that still offers top features.

With the 1.07 Billion colors this monitor is capable of displaying, photographers should have no trouble accurately editing their photos.

Another very useful feature that this monitor offers is the ability to easily switch between Adobe RGB, sRGB, and Black & White modes, with the handy Puck buttons.

To ensure great image quality, the display comes pre-calibrated both from the perspective of hardware, palette master element, and color advantage.

Added to this, it features a useful Eye Care option that optimizes the image so your eyes don’t hurt after long usage times. It does this by using blue light filters, and a zero flicker technology.

As for the design, the monitor looks great. It comes with shade hoods that can be used to reduce glare from a side or overhead lighting.


BenQ PD3200U

  • Exclusive AQColor technology
  • View files side-by-side with DualView
  • Eye care technology
  • Great pre-calibration
  • New firmware update
  • Questionable internal speakers

This monitor is capable of displaying exceptionally clear and bold colors, which makes it perfect for both designers and photo editors. It has a Rec. 709 color space and has wide viewing angles.

For color spectrums, you will want to know that this monitor has Adobe RGB, sRGB, and the Rec. 709 mentioned above.

These elements ensure that no matter how complex your photograph is, and how many spectrums of colors it contains, the monitor will be able to present it to you with high fidelity.

You will also have 32 inches and 4k resolution to work with. A large screen and high resolution are essential for photo editors.

The BenQ monitor is one of the most desirable displays on the market as not only is it highly functional, but it is also relatively affordable.

Other important features include IPS technology, 60HZ, 4ms response time, and 1000:1 contrast ratio.

In order for you to always be comfortable while using this monitor, it comes with a series of ergonomic features. You can adjust the monitor by twisting, tilting, and turning without much effort.

Added to this, you also get a KVM switch that comes in extremely useful in case you want to add this monitor to a multi-display setup.

While this monitor is perfect for photo editing, the average refresh rate and response time do not make it perfect for gaming. Nevertheless, it is still far above average.


ASUS ProArt PA329C

  • Professional-grade 32-inch 4K/UHD display
  • Extensive connectivity
  • Response time is 6ms (gray to gray)
  • ASUS Eye care technology
  • Ergonomically-designed stand
  • Increased brightness at certain levels

This Asus display definitely earns its spot on this list as it is both powerful and slick-looking, ensuring that no matter where you choose to use this display, it will look great without being an eye-sore.

With a powerful 4k support and a 10- bit IPS display, Asus ProArt is the best budget 4k monitor for photo editing, offering amazing depths of color and also a wide range of customization options to make the experience even more suited to your needs.

The IPS or In-Plane Switching feature in this display is a unique technology that allows LCD monitors to show bolder colors and wider viewing angles, while not taking away from the crispness of the image itself.

When it comes down to color accuracy, ASUS claims that this amazing monitor is pre-calibrated for 100% color accuracy on the scale of sRGB. It has color support of Rec. 709.

The company has also added a technology called Eye Care, which is designed to completely eliminate screen flickers, while also controlling the amount of blue light the screen emits.

This combined with its minimal ocular harm technology ensures that users have maximum viewing comfort, while also protecting their eyes from excessive strain after long usage.

In the connectivity department, this monitor also impressed us, with a DisplayPort 1.2, HDMI 2.0, and a USB Type-C connection.


Is it a good idea to invest in a good monitor for photo editing?

The short answer is a resounding Yes.

No matter if you’re an enthusiast of photography and want to have the capability to edit your work without being limited by color outputs, or a professional who spends hundreds of hours a month producing incredibly qualitative photos, investing in a good monitor is always a good idea.

For hobby-ists

In case you’re doing photo editing as a hobby, or simply want to edit your own photos before posting them on your social media, having a monitor which shows you the exact way the work will be posted, while also protecting your eyes from long-term damage, can prove to be a useful tool.

Of course, a good monitor that’s capable of offering you true quality in your photo-editing process will also be great for gaming, movie watching, and exploring the web. Because of this, you’re not investing in a device that can only offer one type of service, but you improve your entire PC experience considerably.

For professionals

As in the case of the users that want to dabble in photo editing software, professionals not only get a device that can render incredibly impressive and immersive photos but can take advantage of all the other perks a good monitor can offer.

No matter if you’re spending long hours creating astonishing pieces of art, editing photos, watching your favorite Netflix shows, or simply exploring the web, having a good visual interface will ensure that your eyes will be both safe, and captivated by the process entirely.

These are some of the best monitors for photo editing that you can grab right away. To help you find the monitor that fits your specific budget, we showed you our top picks.

No matter if you’re looking into a good quality monitor for your day-to-day activity, or are interested in some of the best monitor options found on the market, this list has you covered.

Even more, this specific list is part of our generous selection of great monitor deals. Take a closer look, then tell us your favorite monitor for editing photos in the comments area below.

0x80070422 on Windows 11: How to Fix This Error Code

Windows 11 update issues can appear with a variety of error codes and, more often than not, they show up when you least expect them.

Despite the fact that their origins may differ, diagnosing these problems is something that anybody can do.

The 0x80070422 update error frequently happens when you are attempting to install a batch of cumulative updates. As you may anticipate, this prohibits you from downloading Windows updates in their entirety.

We have discovered several effective methods for resolving the 0x80070422 Windows 11 error. In this regard, we shall list all of the options, each with its own explanation.

Why am I getting the error code 0x80070422 in Windows 11?

Microsoft gives very little information in the explanation of the issue and does not present any alternatives to the Repeat option, which is the only choice available. However, in most cases, it is ineffective in resolving the inconvenience.
update check   windows 11 update error 0x80070422

Due to the fact that it happens when looking for or installing updates, the problem is tied to the update process. The primary cause of the error code 0x80070422 is that the principal Windows Update service is not functioning or does not start when it is required to do so.

It is possible that the service has been deactivated by the device administrator or by third-party software built for Windows configuration.

For Windows Update to function effectively, an Internet connection is required. If you are experiencing troubles with your Internet connection, the update procedure will fail automatically.

Another reason you have to consider is incompatible files or apps that might be interfering with the update process. Malware is known to cause all sorts of trouble, and it wouldn’t be a surprise if one of them is behind the error you’re experiencing.

That’s why we encourage you to use the best antivirus solutions for Windows 11 to protect your computer.

How do I fix the error 0x80070422 in Windows 11?

1. Set Windows Update Service to run automatically

  1. Press the Windows key + R on your keyboard to open the Run app.
    run search bar   windows 11 update error 0x80070422
  2. Type services.msc in the respective field and click OK.
      windows 11 update error 0x80070422
  3. Under Service Manager Windows, right-click on Windows Update, and select Properties.
    windows update properties   windows 11 update error 0x80070422
  4. Set the Startup type field to Automatic, then click OK.
    startup type ok   windows 11 update error 0x80070422

After you have completed the preceding steps, you must restart your computer in order for the modifications to take effect completely. The 0x8007042 error will be resolved once your PC has been restarted.

2. Disable IPv6

  1. Open Control Panel and go to Network and Sharing Center.
    control panel netwrok sharing   windows 11 update error 0x80070422
  2. Find your connection, click on it, then choose Properties.
    internet properties   windows 11 update error 0x80070422
  3. Now you should see the list of items. Find Internet Protocol Version 6 (TCP/IPv6) and uncheck it. Finally, click OK to save the changes made.
    iv6 ok   windows 11 update error 0x80070422

It is necessary to reboot your computer as the final step in order for the alterations to take full effect. Once your computer has been restarted, the 0x8007042 error will be resolved automatically.

Use Registry Editor to disable IPv6

  1. Press Windows + S on your keyboard to open the Search bar and type in regedit. Lastly, choose the most relevant result.
    regedit   windows 11 update error 0x80070422
  2. Under HKEY_LOCAL_MACHINE, click on System, followed by CurrentControlSet, and finally Services.
    hkey local   windows 11 update error 0x80070422
  3. Scroll down till you find the TCPIP6 subholder and click on it.
    tcpip   windows 11 update error 0x80070422
  4. Right-click on Parameters on the left pane, and choose New, then DWORD (32 BIT) Value.
    dword   windows 11 update error 0x80070422
  5. In the name field enter DisabledComponents, then right-click on it and choose Modify.
    disabled components   windows 11 update error 0x80070422
  6. Enter ffffffff as Value data and press OK to save changes.
    ffffff ok   windows 11 update error 0x80070422

Close the Registry Editor and restart your computer to complete the process. If you want to activate IPv6, navigate to the same key as in step 2 and modify the value of DisabledComponents to 0 or simply delete the DisabledComponents key entirely from your configuration.

3. Run the SFC and DISM tools

  1. Press Windows + S on your keyboard to open the Search bar and type in cmd, then right-click on the most relevant result to Run it as administrator.
    cmd run   windows 11 update error 0x80070422
  2. Type or paste in the following command and press Enter: sfc /scannow
    sfc scan   windows 11 update error 0x80070422
  3. After the previous process has completed, type in the next command and press Enter: DISM /Online /Cleanup-Image /RestoreHealth
    dism   windows 11 update error 0x80070422
  4. Type or paste in the following command, one by one, pressing Enter after each:
    net stop wuauserv net stop cryptSv net stop bits net stop msiserver Ren C: \Windows\SoftwareDistribution SoftwareDistribution.old Ren C:\Windows\System32\catroot2 Catroot2.old
    net start wuauserv net start cryptSvc net start bits net start msiserver

    net stop   windows 11 update error 0x80070422

Close the Command Prompt and restart your computer to complete the process. After it has rebooted, try installing the updates that you had originally planned to install.

4. Perform Repair Upgrade

  1. Download Media Creation Tool from Microsoft.
  2. Run MediaCreationTool.exe by double-clicking on the item.
    media creation tool   windows 11 update error 0x80070422
  3. Choose Upgrade this PC now.
    upgrade windows 11   windows 11 update error 0x80070422
  4. During the process, select Keep personal files and apps.
  5. Let it install then restart your device.

As you might expect, this process will completely reinstall Windows without damaging your personal files or programs on your computer. Once the PC has rebooted, attempt to install the updates that you had originally intended.

5. Restart Network List Service

  1. Press Windows + S on your keyboard to open the Search bar and type in run, then double click the first result to launch the Run app.
    run search bar   windows 11 update error 0x80070422
  2. Now type in services.msc to launch Windows Services.
      windows 11 update error 0x80070422
  3. Locate Network List Service, right-click on it and select Restart.
    netwrok restart   windows 11 update error 0x80070422

Once you have performed the steps outlined above, you can proceed with the installation of the appropriate updates.

Can I disable Windows Update Medic Service in Windows 11?

In Windows 11, Microsoft added a new service named Windows Update Medic Service (WaaSMedicSVC), which stands for Windows Update Medic Service.
medic service   windows 11 update error 0x80070422

Everything about this service is designed to repair any damage that has occurred to the Windows Update components, allowing you to continue receiving Windows updates without interruption.

The service is therefore in charge of overseeing any fixes and ensuring the security of the Windows Update Components.

As soon as your Windows 11 system starts up, the OS creates a job in the Activity Schedules that runs on a daily basis, and this daily task starts with the SIH client.

Identifying and repairing any faulty system components is the responsibility of the SIH client. These components are necessary for the automatic updating o any Windows and Microsoft software installed on your machine.

It connects to the Internet to determine how relevant the repairs are, and then, depending on the results o the analysis, it downloads the necessary changes to finish the process.

This service can be disabled at any moment, and you can do so using the Service Manager. However, when you try to disable it through the Service Manager, you receive an Access Denied prompt.

Furthermore, the service is only temporarily stopped since the Windows operating system automatically switches on the update at some time.

The Windows Update Medic Service may be turned off in two ways: by utilizing a freeware program such as a Windows Update Blocker, or by editing the registry.


As expected, the methods provided above should resolve the majority of occurrences of Windows Update error 0x80070422. However, if they do not function, the issue is more serious than we initially thought.

It is possible that you will need to rollback to your Windows 10 operating system or restore your computer to a prior functional version of the OS in order to fix the corrupted data.

If you bump into the same 0x80070422 error code even in Windows 10, we’ve already put up a guideline on how to correct the problem.

As an alternative, you might try resetting Windows 11 first. For more information, learn how to restore Windows 11 to its factory settings.

In addition, certain third-party repair applications can help you resolve a broad range of Windows update difficulties, including the 0x80070422 error. These top-rated Windows update repair programs are also deserving of your time and consideration.

Please share your thoughts on this subject in the comments section below.


7 Top Deals On Surface Laptops And Tablets

If you’re looking to buy a new Surface device to replace your old tablet or get a Surface device for the first time, it’s time to act.

Microsoft has already started publishing the list of Black Friday & Cyber Monday Surface deals that you can take advantage of this year. Although these offers are already expired, Microsoft comes with new and fascinating discounts, and trust us, you really don’t want to miss these deals.

As always, keep in mind that the offer is valid while stocks last. So, if you’ve been thinking about getting a new Surface device for a while, hit the buy button before the offer expires.

Let’s dive in and check out the hottest Microsoft Surface deals of the moment.

Which are the best Microsoft Surface deals?

We’re about to show you some of the Redmond tech behemoth’s products that are presently on sale as part of Black Friday and Cyber Monday deals, as well as the ongoing Christmas offers.

For example, the Microsoft Surface Pro 6 today is a perfect example of what it feels like to have the power of a full-sized PC in something no thicker than a mobile device.

With a compact and slim design, carrying it around has never been easier, and the slim finish makes it a great accessory for office environments.

Of course, this device isn’t just about looks, since the inside is impressive as well, making it a perfect companion for periods of intense work.

And the best part is you can actually save around $200 if you choose to get one from Amazon, which makes it a great early Christmas present.

Microsoft  Surface Pro 6

  • All connections, including USB-A, USB-C, and a full-size SD card slot
  • Get up to 40% more graphics performance than the previous model
  • Robust laptop, powerful tablet, and a portable studio, all in one device
  • Build for efficiency and fast responsem with the Intel Core i5 processor
  • Smooth graphic experience thanks to the NVIDIA GTX GeForce GPU
  • Up to 15.5 hours of battery life
  • The price tag

To offer some assistance, if you were on the hunt for an ultra-slim and versatile design. the Surface Pro X adapts to you, transforming from ultra-thin laptop to powerful tablet, to portable studio.

It’s powered by Qualcomm, and the new custom Microsoft SQ1 processor delivers multitasking laptop performance, long battery life, and fast LTE and Wi-Fi connectivity.

And even though this is not one of the cheaper alternatives out there, right now you can cop this bad boy for $619 less than what it normally costs.

Microsoft Surface Pro X

  • Long battery life, and fast LTE and Wi-Fi connectivity
  • Equipped with the new custom Microsoft SQ1 processor
  • More ways to connect, with USB-C and USB-A ports
  • Improved speed and performance to do what you want
  • The price tag

Elegance and simplicity are the names of this Microsoft Surface laptop.

With an ultra-lightweight design, this model is ideal for those that want to show off a certain degree of elegance wherever they go, including school or work.

Like the previous entry, this laptop isn’t just about looks, since the 32GB of RAM and fast SSD will make all of your programs run at lightning-fast speeds.

Microsoft Surface Pro

  • 10-inch PixelSense: Display designed to be viewed, touched, and written on
  • Multi-tasking USB C, fast charging surface connect, and headphone jack.
  • All-day battery life, with up to 9 hours of unplugged power
  • Use it in Laptop, Tablet, or Studio Mode
  • The price tag

Even though it’s not one of the top laptops in the world, the Microsoft Surface Pro still made a great impression on consumers ever since it was first launched.

The focus point of this device is just how lightweight it is, along with its capacity to easily switch between laptop and tablet mode.

Microsoft Surface Pro 8

  • Can connect to displays, docking stations, as well as accessory charging
  • Next-gen, best-in-class laptop with the versatility of a studio and tablet
  • Faster than Surface Pro 6, with a 10th Gen Intel Core Processor
  • More ways to connect, with both USB-C and USB-A ports
  • Type, touch, draw, write, work, and play more naturally
  • The battery doesn't last for very long

The Surface Pro 8 can now be yours for an amazing discount price, but you’ll still get the same premium product as you would at any other time of the year.

The offer is valid for the following hardware configuration: Intel Quad-Core i7-1185G7, 16GB RAM, 256GB SSD, USB-C 4.0, Wi-Fi 6, Win 11.

It also has a Mytrix Digital Pen, so you’re pretty much all covered when it comes to hardware. Furthermore, the package includes the Platinum Surface Pro Signature Type Cover.

Microsoft Surface Pro 7

  • Intel Core i7, 16GB RAM, NVIDIA GPU and a 256GB Solid State Drive
  • Keep creativity flowing when you draw with the improved Surface Pen
  • Work at 20 degrees down in Studio Mode or upright in Desktop Mode
  • Stunning touchscreen with 13.5 million pixels of true-to-life color
  • The undiscounted price tag

Let’s say you were waiting for a discount window to get your hands on a Surface Pro 7. Well, you’ll be pleased to know that your chance has finally come.

Keep note that the regular price of this device would normally put a dent on any budget, so getting it while the price is slashed by so much is almost a must.

Take advantage of this deal, and get yourself the equipment that will let you turn your imagination into art.

These are some of the best Surface offers available right now so you might want to take advantage of them.

What Surface device is the one you will definitely buy this season? Let us know in the comments section below.

Install Error – 0x80242fff: What is it & How to Fix it?

Windows 11 is the latest, and like with any other operating system, issues will happen sooner or later.

Updates are essential as they come with features, and users should not ignore or stop them at all, but sadly, many reported install error 0x80242fff on Windows 11 while downloading updates.

There are several ways of getting away with the error. In this article, we will discuss several ways to correct it.

Why does 0x80242fff appear on Windows 11?

Most of the causes of error 0x80242fff are within the computer system. It includes corrupt files in the file system, inactive Background Intelligent Transfer Service, failed updates, and incorrectly installed updates and network settings.

This error disturbs many users during updates, and we already covered how to fix Windows Update errors on Windows 11, but for more solutions, we suggest you keep on reading.

How can I fix the install error 0x80242fff on Windows 11?

1. Reset Windows Update components

  1. Disconnect your network cable or disconnect from Wi-Fi.
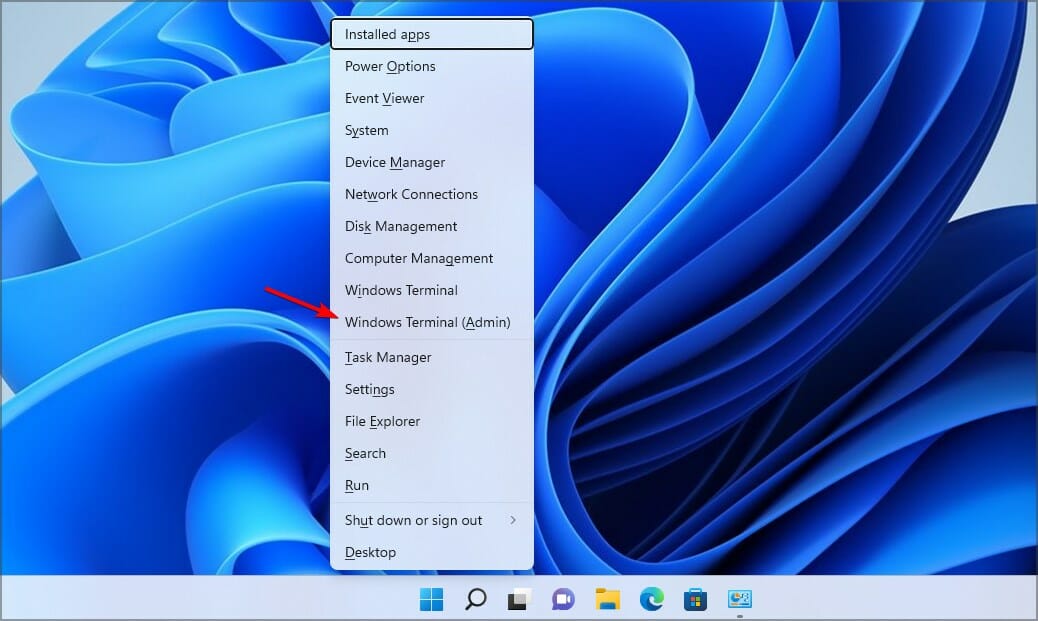
  2. Now press Windows key + X and select Windows Terminal (Admin).
  3. Run the following commands:
    net stop wuauserv
    net stop cryptSvc
    net stop bits
    net stop msiserver
    ren C:\Windows\SoftwareDistribution SoftwareDistribution.old
    ren C:\Windows\System32\catroot2 catroot2.old
    net start wuauserv
    net start cryptSvc
    net start bits
    net start msiserver
    exit
  1. Connect the network cable or connect to a Wi-Fi network.
  2. Restart your PC and try to perform the update again.

2. Use a dedicated repair tool

System errors are likely to occur at some point, and there could be a number of perpetrators behind this malicious scenario.

There is an entire world of possibilities that can cause system glitches, ranging from broken or missing system files to outdated or otherwise damaged DLLs, conflicting settings, and program incompatibilities.

Assume you have problems with the Microsoft Store and Windows Update, even if you have a reliable internet connection, and you receive the install 0x80242fff error code. In that case, nothing beats running a full scan using a specialized repair tool and letting it repair each issue as it arises.

3. Restart the services

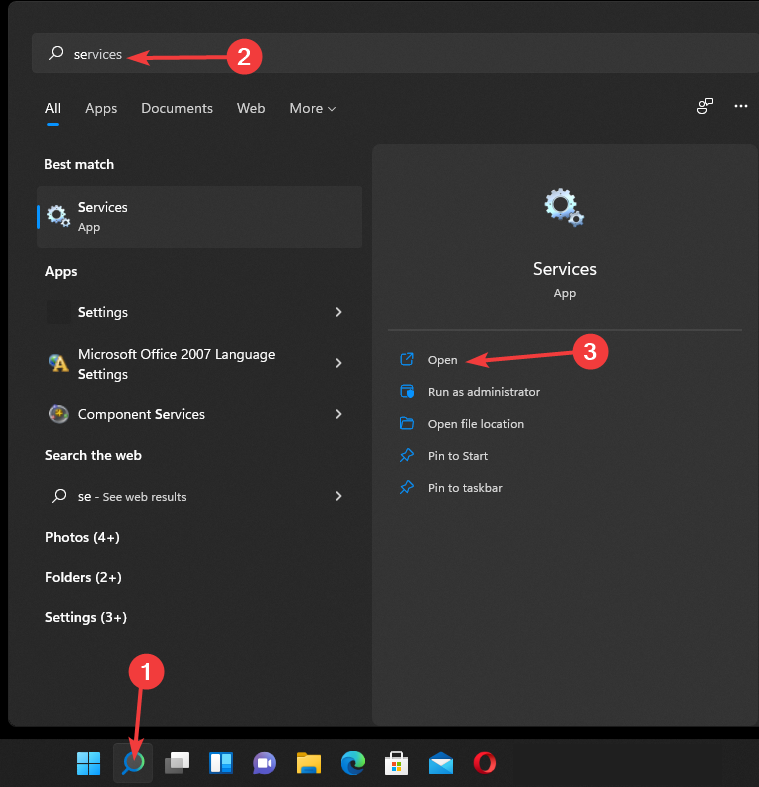
  1. Go to the Search box, type Services, and click Open.
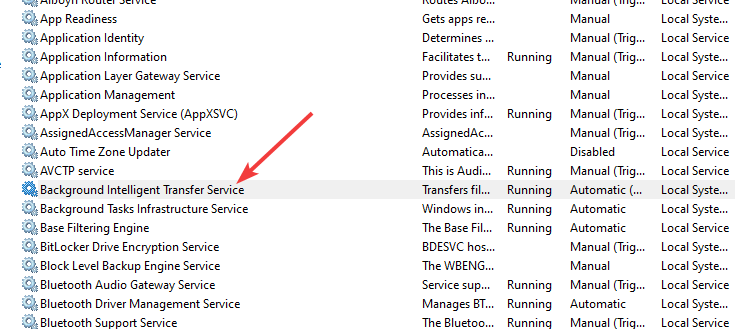
  2. Select the Background Intelligent Transfer Service.
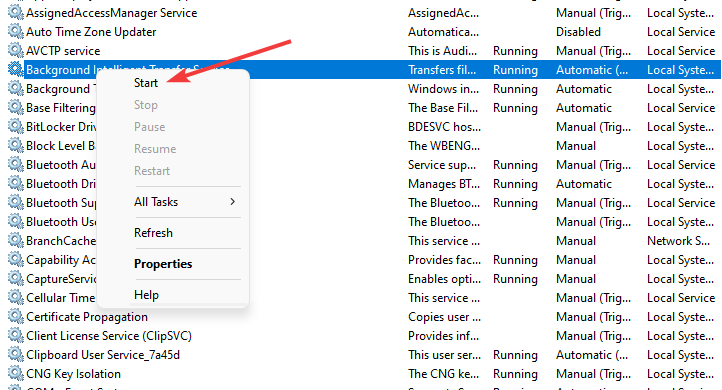
  3. Double click on the service to open it and click the Start button. If the service is on, stop it and restart the service again.
  1. Repeat step 2 but this round select Windows Update.
  2. Click the Start button.
  3. Apply the same steps to Workstation.
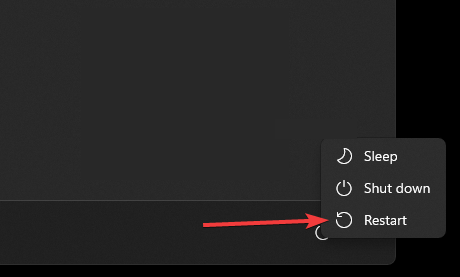
  4. Restart your PC.

Starting this service makes sure that the updates run smoothly. Starting them gets rid of the error.

4. Run DISM and SFC commands

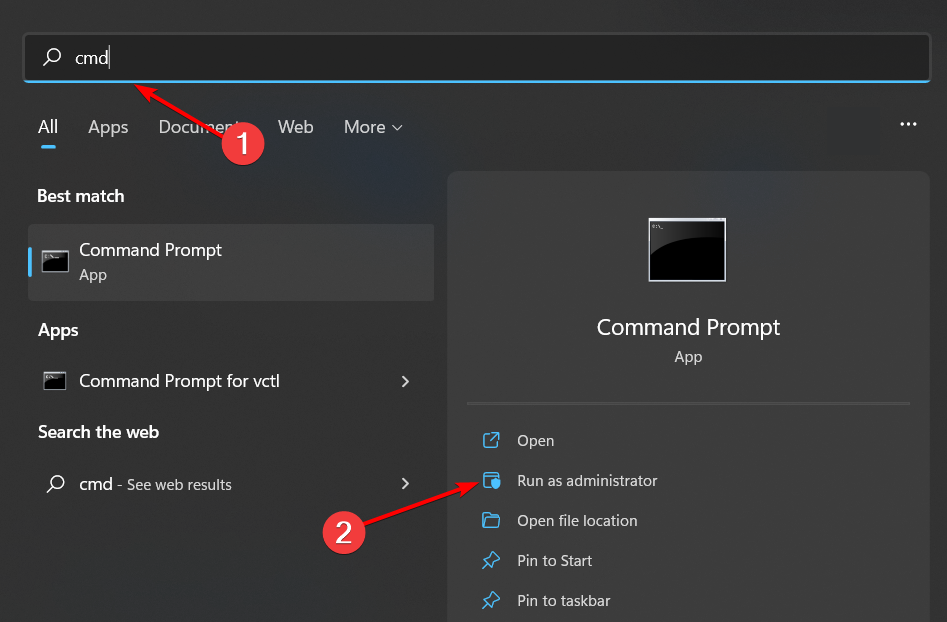
  1. Go to the Search box, type Command Prompt and Run as administrator.
  2. Run the following command: sfc /scannow
  3. Wait for the process to finish.
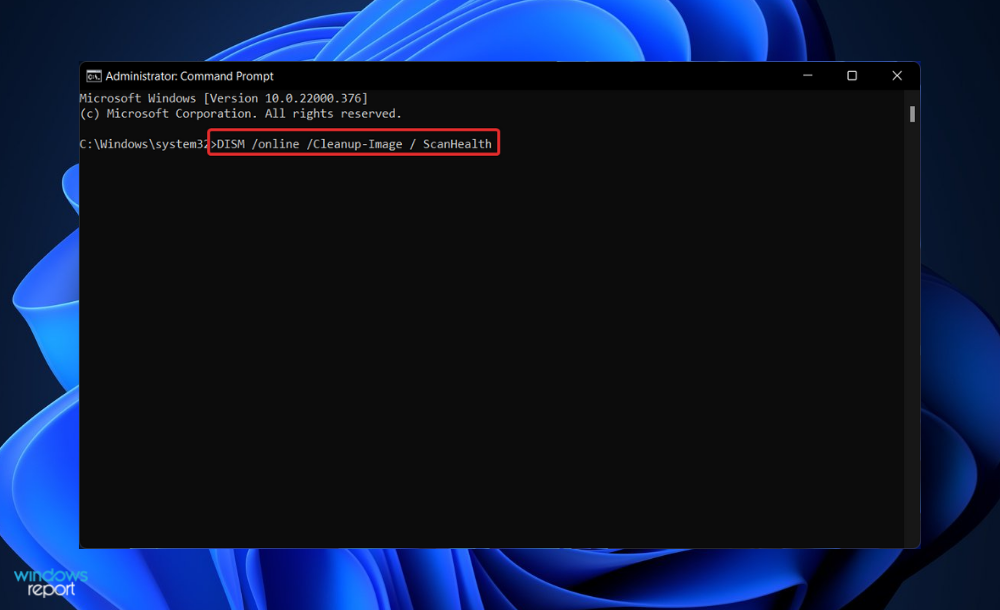
  4. Repeat step 1, run the following commands below, and hit Enter for each command: DISM /Online /Cleanup-Image /CheckHealthDISM /Online /Cleanup-Image /ScanHealthDISM /Online /Cleanup-Image /RestoreHealth

These commands check the existence of any corrupt files and fix them.

5. Install the Windows Updates from the Microsoft catalogue

  1. Press Windows key + I to open the Settings app.
  2. Navigate to the Windows update option.
  3. Click on the Check for updates button. Note the KB of the updates pending.
  4. Go to the Microsofts catalog page.
  5. Enter the KB number of the update and press Enter.
  6. Click on the download button and install the executable file to get rid of the error.

6. Check Windows Updates Troubleshooter

  1. Press Windows key + I on the keyboard to open the Windows settings.
  2. Navigate to the System tab.
  3. Click the Troubleshoot options.
  4. Select Other troubleshooters.
  5. Click the Run next to the Windows Update to start the process.
  6. Follow the screen prompts to the end of the process. It will let you know the problems causing the error on your PC.

7. Perform an in-place upgrade

  1. Visit Windows 11 download page.
  2. In the Create Windows 11 Installation Media section click Download Now.
  3. Once the tool is downloaded, run it.
  4. Click Accept to proceed.
  5. Select Upgrade this PC now and click on Next.
  6. Follow the instructions on the screen to complete the process.

We have to mention that the upgrade process can take more than an hour, so be patient and don’t interrupt it. Once the process is finished, you’ll have a fresh version of Windows 11 installed.

What is the importance of PC updates?

Windows updates make our PCs safe from cyber-attacks and malicious users. Microsoft releases different versions of updates to minimize the security risks.

It also allows users to enjoy and test new features released through the updates.

We hope the above solutions solved install error 0x80242fff on Windows 11. In most cases, you need to reset the required components, and that’s it.

In case the problem is still there, you can take a look at our Windows 10 update error 0x80242ff guide for more easy-to-follow solutions. They may be applied by Windows 11 users, too.

This isn’t the only installation error you can encounter, and we also covered error code 801c03ed and error 0X8007013, so don’t miss out.

What method did you use to fix this problem? Let us know in the comments section below.

7 Best Laptop Bags on Sale for Black Friday & Cyber Monday

Nowadays, laptops have become significant tools in the lives of most people. Perhaps their mobility is what makes them so common among users.

Therefore, the single next most important thing after purchasing it would be to ensure your laptop remains safe from outward factors when you’re on the move.

You probably want an accessory that can ensure and promote the longevity of your laptop, whether for work, pleasure, or both.

Approach the important investment of buying a laptop bag with the same detail and concern you did with your computer.

What should I look for in a laptop bag?

If you are carrying around your laptop and accessories that you need when you travel to the office, a bag is the best way to go. There are a few things you should keep in mind before buying it:

➡ Its size should be large enough to comfortably accommodate your laptop and other essential objects, yet small enough not to become disturbing. Long story short, the size of your portable device should dictate the size of the bag as well.

➡ Durable fabric is mandatory in this case. Your laptop is something you use every day and you can’t make any compromises when it comes to protecting it. Plastic casing is also an option you may consider if you like the idea of extra coverage.

➡ Don’t hesitate to pick a lightweight bag. Because laptops and all of their accessories can be heavy on their own, at least the bag should be as lightweight as possible. Handles and straps must sit comfortably on your shoulders and carry the weight of the bag with ease or go for a rolling model. With these in mind, our list of rolling laptop bags for easy transportation cannot disappoint you.

➡ Water resistance is a plus too. Chances are to encounter rainy weather in your daily commute. Bags should protect your laptop even in heavy downpours. If yours is not waterproof, then consider investing in a rain cover.

Are messenger bags good for laptops?

Messenger bags are ideal laptop bags because they allow you to take your device and its accessories on the go without too much fuss.

If they are intelligently designed and durable enough, these bags can house up to 17.3-inch laptops while still offering lots of additional storage space for your wallet, smartphone, keys, and more.

They are all kept safely away from the laptop compartment to avoid scratching as you reach in to grab what you need.

What are the best laptop bags to get?

Newhey laptop bag

  • The water-resistant canvas and superior cowhide leather prepare the bag for long-term use
  • Plenty of room for organization
  • Zippers, magnetic snaps, and a padded laptop sleeve keep the computer steady and secure
  • Convenient for use in business, travel, work, school, you name it
  • The magnets for the straps can stop working as they should

Its makers made the Newhey shoulder bag of horse leather and fortified it with scratches and disordered wrinkles. This gives the wearer a look that stands out among his/her counterparts.

The canvas material blends with the grey/brown color to present the fashion of retro and wildness.

Even more, the bag comes with an adjustable and removable strap. Aren’t you comfortable with the length of your strap? The satchel bag lets you shorten or lengthen it as per your wishes.

You can detach it all together and use the padded handle to ease fatigue. Instead of alcohol/turpentine, use moisture lotion to complete its upkeep. That way, you do not discolor or dry out the leather.

ZMSnow

  • Smooth PU leather with the zippers closure breed a superior-quality laptop bag
  • Durability and water resistivity keep the ZMsnow handbag in shape; suitable for prolonged use
  • Multi- pockets-1 main strap pocket, a zip compartment, and the other two compartments give plenty of room for daily items
  • Professional design-A stylish design for women covers the soft foam padding that protects your computer
  • An Adjustable strap
  • Multi-purpose women laptop bag
  • The bag has a 3-way carrying and is available in brown and grey
  • The zipper could be si not as reliable

Women with laptops have had a reason to smile since the birth of this synthetic leather laptop bag.

The fair sex has had to deal with the struggle of carrying around their machines in laptop backpacks or the alleged men’s laptop bags.

Now, they’ve got a classic accessory that they can call their own. An integration of traditional with modern style brings out a simple but elegant handbag meant for a classic woman.

Estarer Laptop Messenger Bag

  • Made of water-resistant canvas
  • Main compartment with ZIP closure
  • Adjustable shoulder strap
  • Interior pockets made of polyester

With this Estarter bag, you’ll have the possibility to carry all your essentials.

This roomy laptop bag has a main pocket to fit your laptop. The bag comes in various sizes, starting from 14″ all the way to 17.3″.

It has a fron pocket with dedicated room for cards and pens making it easy for you to stay organized.

This bag definitely suits one who’s frequently on the go and needs to carry a lot of stuff, because besides fitting your laptop, it leaves a lot of extra room.

CoolBell Convertible

  • Genuine leather
  • A lightweight design makes it easy to carry the bag
  • A telescopic belt in the laptop compartment provides additional protection for your computer
  • A bit overpriced

The leather laptop bag list would be incomplete without the fashionable CoolBell bag. It’s in the manufacturer’s best interest to achieve the best in detail of material, design, color, sales, sewing, and service.

It’s an authentic good that focuses on quality and is loaded with amazing features. It is fitted with a wide dimension (18.8*5.1*13.7). You can practically fit a laptop or tablet of any size.

Also comes with a 3-way carrying advantage. Transform the bag into a shoulder bag, a backpack, or a messenger bag. Hide the straps when necessary.

The luggage belt design works at your convenience during a journey. Free your hands by fitting your CoolBell bag on your luggage trolley.

KomalC

  • Made from fine buffalo leather that’s reinforced with high-quality canvas
  • Snap closures are concealed for easy access
  • Rustic vintage look
  • The padded laptop compartment adjusts to hot weather
  • 2 front pockets to fit wallets, small books, cell phones, etc.
  • Multi-purpose use: laptop bag as well as a briefcase or courier bag
  • It can leave stains

When a young girl develops a passion for handmade leather and fuels her creativity to create globally-recognized products, that’s exquisite.

Exquisite is also the quality of leather and craftsmanship employed in making the KomalC laptop bag. Even more, of the 25 processes that drive the bag to completion, 80% is done by hand.

Every single detail in this product displays the trouble and effort its artisans underwent to make it. Such is what you would call one of the best laptop case offers.

Cuero DHK Vintage

  • It has three compartments
  • The adjustable strap has a shoulder pad to carry with comfort
  • Serves both men and women
  • The leather can be too thin

The Cuero is a unisex bag that’s made from genuine goat hide leather. Mostly, it comes in dark brown color. It’s a  great laptop bag, handmade by some of the finest Indian artisans.

The big middle compartment fits large laptops and files. On top of that, it looks amazing and you can easily carry it around.

Viosi Mens RFID leather bag

  • Enhanced leather and strap treatment to ensure superb quality
  • The bag has an under flap organizer, 3 exterior pockets, and 3 pen holders
  • The interior comprises 3 pockets, 2 pen holders, and a padded laptop holder
  • Certified by TUV. The RFID shielding protects your credit cards from Identity theft
  • The bag can leave a stain

Only one word perfectly describes the Viosi bag. Unique. This bag may appear typical from the outside but don’t let the simple look fool you. The cushioned inside is where your focus ought to lie.

One thing is for sure. If your belongings are damaged, it would be because of a thousand other things but not from knocks and bumps. The classic interior design sees to this. Even more, locks are made of antique brass.

For more options to pick from, check out this list including some great business laptop bags for travel. Nice aesthetic designs and durability are both guaranteed.

Which laptop bag is your final choice? Let us know in the comments area below.
There is a System Repair Pending which Requires a Reboot [Fix]

SFC (System File Checker) is a command-line tool that you can use to verify that your critical system files are intact and uncorrupted. It’s a useful troubleshooting tool, but sometimes, it can present problems.

Sometimes, sfc scannow is not working or in our case today, you get an error message that says: there is a system repair pending which requires reboot to complete.

Why am I getting There is a system repair pending which requires reboot to complete errors?

The error message indicates that something went wrong during the update process, and it needs to be fixed before you can use your computer again. But, why does it happen? Here are some possible reasons:

  • Pending repair – The most common reason is that there is some sort of pending repair that needs to be completed before you can continue using the computer. The system file repair changes will take effect after the next reboot. 
  • The repair process was interrupted – If the repair was interrupted due to a power failure or something else, you may get this error. In such cases, you may need to restart your computer manually.
  • Corrupt boot files – In some cases, there are corrupt files in Windows system folders and they cannot be read properly by your computer’s operating system

Does sfc scannow require a reboot?

Sfc scannow is a native Windows command that can repair common causes of Windows crashes, including conflicts with programs, services, and drivers. You don’t need to run the Command Prompt with administrator privileges to execute this command.

The program can also detect and fix file system errors and restore corrupted files. It’s a good idea to run Sfc scannow if you’re experiencing problems with your computer or certain applications.

Sfc scannow does not require a reboot. It is not a required step for most issues, but it does not hurt to run it. However, it may be necessary to restart some applications after running the utility.

How can I fix the there is a system repair pending which requires reboot to complete error?

As always, we recommend starting off with the preliminary checks:

  • Close the Command Prompt window and try executing the sfc scannow command again.
  • Try restarting your computer and see if this fixes the error. If your PC is stuck on restarting, we have a remedy for that too.

1. Delete pending files

  1. Hit the Windows key and select Settings.settings windows 11
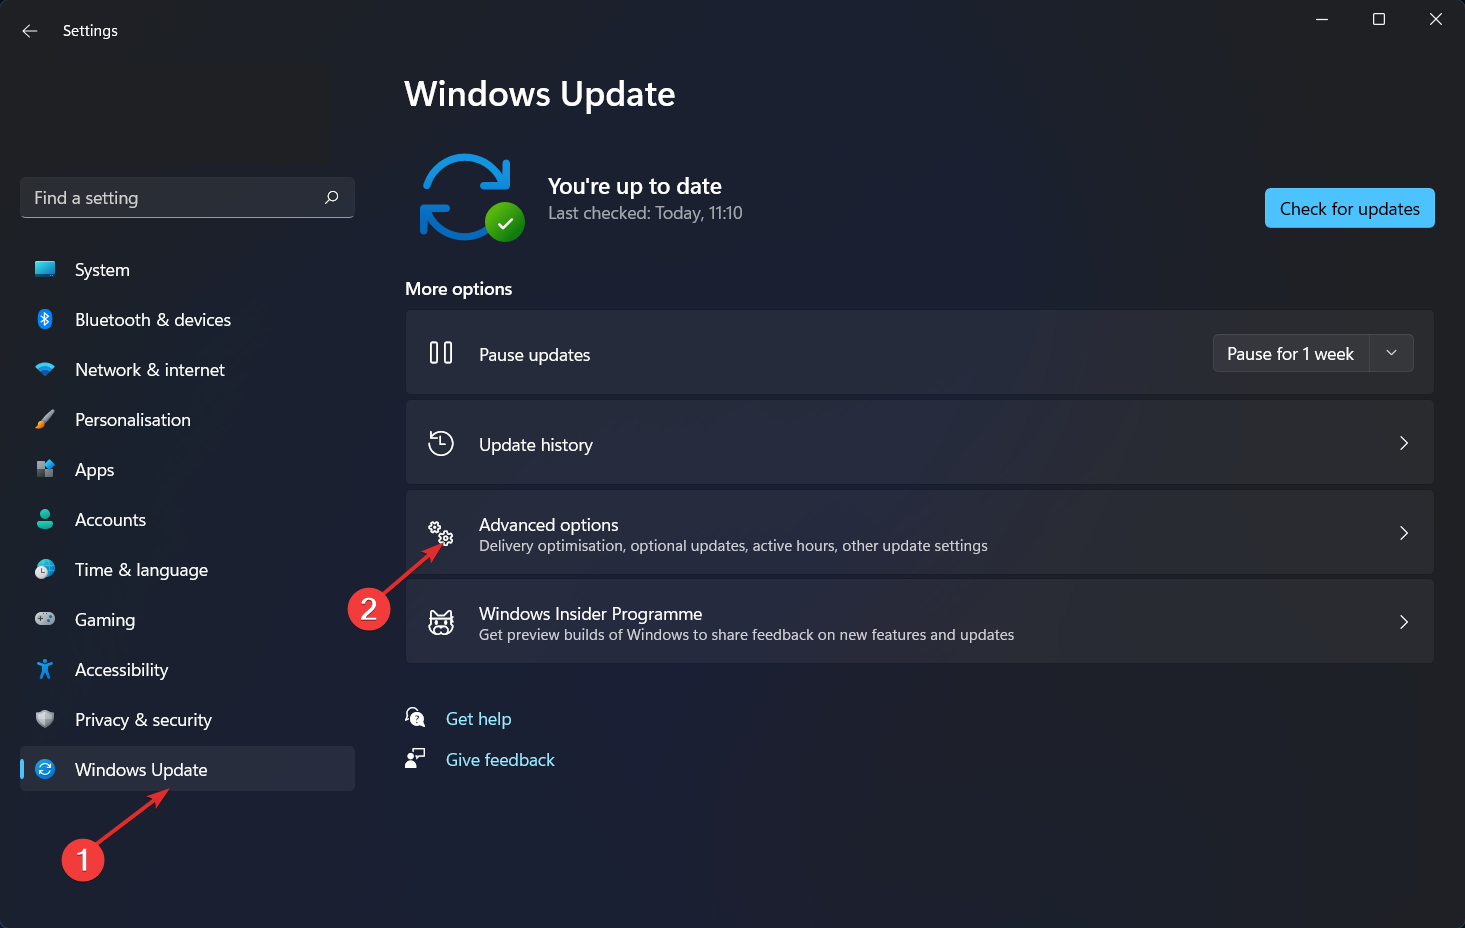
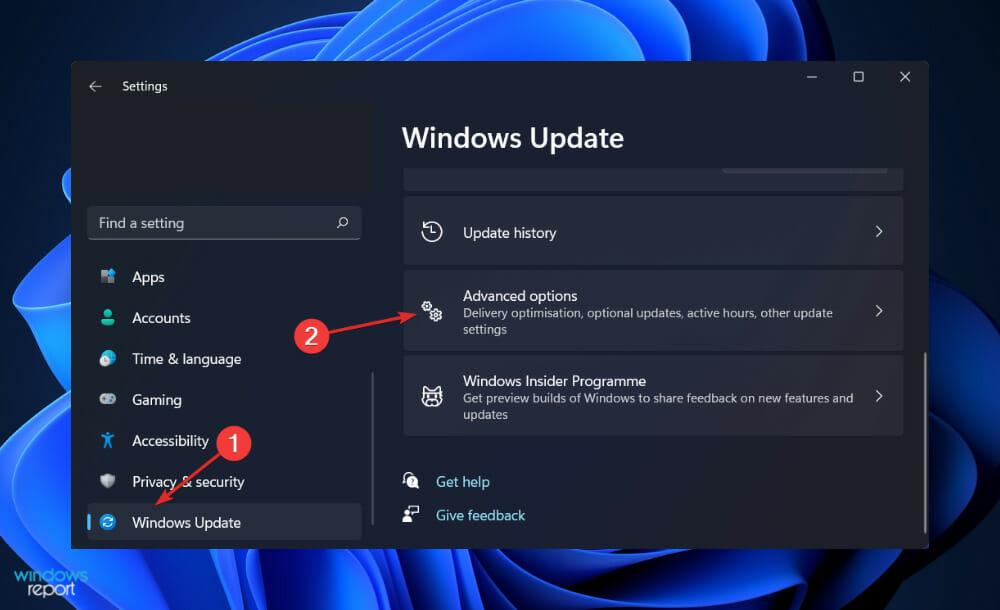
  2. Navigate to Windows Update and select Advanced options.
  3. Under Advanced startup, select Restart now.
  4. Select Troubleshoot.Choose an option - Troubleshoot
  5. Click on Advanced options.advanced options
  6. Next, click on Command Prompt, type and Enter the following command: DISM.exe /image:C:\ /cleanup-image /revertpendingactions
  7. Restart your PC and run the sfc scannow command in an elevated command and check if the error persists.

If these steps seem too complicated, we recommend using an automated tool to scan the system file integrity for you and repair most issues on your computer.

2. Run the DISM command

  1. Hit the Windows key, type cmd in the search bar, and click Run as administrator.cmd-admin hp printer won't scan
  2. Type the following command and press Enter: Dism /Online /Cleanup-Image /RestoreHealthdism

Some types of corruption in system files are not automatically repaired by SFC, but they can be fixed by using the Deployment Image Servicing and Management (DISM) tool.

3. Run the CHKDSK command 

  1. Hit the Windows key, type cmd in the search bar, and click Run as administrator.cmd-admin hp printer won't scan
  2. Type the following command, replace the C letter with your drive’s letter, and press Enter: chkdsk C: /fchkdsk

The chkdsk command is a very useful tool to repair file system errors. It can be used to check the integrity of a drive, as well as fix any bad sectors.

4. Delete the pending Registry entry

  1. Hit the Windows + R keys to open the Run command.
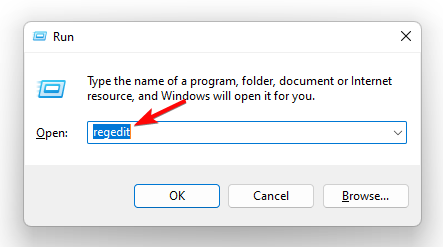
  2. Type regedit and press Enter.run regedit command
  3. Navigate to the following location: HKEY_LOCAL_MACHINE\SOFTWARE\Microsoft\Windows\CurrentVersion\
  4. Find RebootPending key, right-click and select Delete.

5. Run the SFC command in Safe Mode

  1. Hit the Windows key and select Settings.settings windows 11
  2. Navigate to Windows Update and select Advanced options.
  3. Under Advanced startup, select Restart now.
  4. Select Troubleshoot.Choose an option - Troubleshoot
  5. Click on Advanced options.advanced options
  6. Next, click on Command Prompt, type and Enter the following command: sfc /scannow
  7. Restart your PC and check if the error persists.

If none of the above methods prove to be successful, it means you have not done a system repair recently and that the current system image has become damaged beyond repair. As such, a clean install may be your only option.

The good news is that you can still recover your data from the damaged drive using professional data recovery tools.

Should you encounter any other related issues such as the device does not recognize the command, we have a dedicated guide to help you address this problem.

Let us know of any other additional solutions you may have tried that worked for you in the comments section below.

Surface Duo on Cyber Monday Deals & Sales [Up to $900 OFF]

Microsoft has been teasing the general public with the Surface Duo ever since it was first announced, and it seems that Black Friday is full of surprises for gadget buyers everywhere.

Microsoft has decided that it would be a great idea to go ahead and put it up for sale during the Black Friday shopping season, and we have nothing against the decision.

Save up to $900 dollars when buying the new Surface Duo

While the discount may seem unreal, it isn’t, as long as certain conditions are met of course.

For starters, you get a straight-up discount of $200 when buying the Surface Duo in this period, starting on November 22.

You can get up to an extra $800 discount through Microsoft’s program of trading in an eligible device.

  • The best of Microsoft 365, together with Android™ apps
  • Mobile productivity, powered by two screens
  • Flexibility to do more with multiple modes
  • Original design, created by Surface
  • The off-season price tag

Of course, other discounts are available on other retail stores as well, some may be better than Microsoft’s, especially since not everyone qualifies for that extra $700 discount.

The Surface Duo is well worth it, so enjoy a new dimension of control and portability by getting the best deals on this amazing device.

⇒ Surface Duo deals on the Microsoft Store

⇒ Surface Duo deals from $350 on Wallmart

⇒ Surface Duo deals from $400 on Amazon


Microsoft is constantly preparing new and better deals, and so are other retailers as well, so if you want to get the best deals on your favorite device, bookmark this article, since we are constantly updating it.

Microsoft gets right back to work after the holiday with new Windows Insider builds for Dev (25252) and Beta (2262x.1020) Channels

Last week Microsoft announced that there would be no new Windows Insider builds due to the US Thanksgiving holiday, but they didn’t let that slow them down for long, announcing new builds for both the Dev and Beta Channels today.

Neither channel is getting drastic updates, instead offering “a handful of improvements and fixes,” but both come with a number of fixes and improvements.

Windows 11 Insider build 25252 for the Dev Channel

For the Dev Channel, the build number is updated to 25252, and adds a glanceable VPN status notification to the active network connection icon in the system tray, and continues trying out different variations of a search button/bar in the taskbar:

From there, it’s the usual assortment of fixes, you can check them out in the blog post.

Windows 11 Insider build 22621/22623.1020 for the Beta Channel

For the “features rolling out” version of this latest Beta Channel build, that is 22623.1020, Narrator is getting new Braille displays and new Braille input and output languages.

Fixes for 22623.1020 include a change to the spelling dictionary:

  • The spelling dictionary now uses a language-neutral word list and syncs across all devices that use the same Windows account (Microsoft accounts and AAD) is now available to all Windows Insiders in the Dev Channel. Users can toggle this feature via Settings > Accounts > Windows backup > Remember my preferences > Language preferences.

and a few more, as well as a set of fixes for both 22623.1020 and 22621.1020, including these four new fixes:

  • New! We combined Windows Spotlight with Themes on the Personalization page. This made it easier for you to discover and turn on the Windows Spotlight feature.
  • New! We provided the full amount of storage capacity of all your Microsoft OneDrive subscriptions. We also displayed the total storage on the Accounts page in the Settings app.
  • New! We gave Microsoft OneDrive subscribers storage alerts on the Systems page in the Settings app. The alerts appeared when you were close to your storage limit. You could also manage your storage and purchase additional storage, if needed.
  • New! We added the organizational messages feature. With it, third-party companies could provide content to their employees. They did not need to use the default behavior of Windows.

Again, you can check out all the details over on the Windows Insider blog post.


[Solved] Activation Error 0xc004c003 on Windows 10 & 11

A lot of Windows users have been getting error code 0xc004c003 after upgrading to Windows 10 or doing a fresh install.

This error is related to the Windows activation process and can happen for a different number of reasons, each with its own fix.

In this article will go over each reason you might get error code 0xc004c003 when trying to activate Windows 10 on your machine and how to fix it, so without further ado let’s get started.

How to fix error code 0xc004c003 in Windows 10?

In order to use Windows 10, it’s important to activate it, but many users reported error code 0xc004c003 while trying to activate Windows. Speaking of activation issues, users reported the following problems:

  • 0xc004c003 product key blocked Windows 10 – This message can appear if your product key isn’t valid. If this happens, make sure that you have a genuine copy of Windows. If your copy is genuine, maybe you should report this problem to Microsoft.
  • Microsoft error code 0xc004c003 – This error can occur if the activation servers are busy. If that’s the case, simply wait for a couple of hours and try to activate Windows 10 again.
  • 0xc004c003 Windows 10 activation error – Sometimes this error can occur if you didn’t perform the upgrade to Windows 10 properly. However, you can easily fix this issue by performing an in-place upgrade.
  • Error 0xc004c003 the activation Server Determined – This is just a variation of this error, but you should be able to fix it using one of our solutions.
  • 0xc004c003 after hardware change – Your Windows license is closely related to your hardware, and if the problem is caused by a hardware change, the best solution would be to contact Microsoft.

Solution 1 – Use slmgr.vbs command

Due to the high number of Windows 7 and 8.1 users that are upgrading to Windows 10 the activation servers might get overloaded and refuse some connections.

The majority of users who have received error code 0xc004c003 reported this as the reason and have been able to easily fix it by retrying to activate Windows 10 at a later time.

If you’re sure you upgraded to Windows 10 from a legally activated copy of Windows 7 or 8.1, wait for a couple of hours and then try again to activate Windows 10.

You can do this by opening the Settings windows from the Start menu and selecting the Update & security section. From the left pane select Activation and click on the Activate button.


Did you know you can activate your Windows 10 with your Windows 7, 8, 8.1 key? Learn how to do that here!


You could also force Windows 10 to activate. To do so, follow these steps:

  1. Right click on the Start menu button and select Command Prompt (Admin). This will open the Windows command prompt with administrative rights which means that you have to be using a Windows user with administrator privileges.
  2. In the command prompt window type the command slmgr.vbs –rearm and execute it by pressing the Enter key. Wait for a couple of minutes and reboot your PC.0xc004c003 after hardware change

Solution 2 – Contact Microsoft after hardware change

When you first activate Windows 10 it registers your hardware configuration with the Microsoft activation servers.

This way when you reinstall Windows 10 you won’t need to enter a product key because activation will be done using the Digital Entitlement method which verifies that your hardware is registered.

The activation process using the Digital entitlement method can be broken when replacing major components in your machine, like the motherboard or the hard drive.

If you did make any changes to your computer and Windows 10 refuses to activate you’ll have to contact Microsoft Customer Support and let them know about the hardware changes.


Solution 3 – Be sure to upgrade to Windows 10 using Windows Update

If you own a Windows 7 or Windows 8.1 license and want to switch to Windows 10 the recommended method is to first upgrade using Windows Update.

This way your valid license key will be converted to a Digital entitlement for your machine and you’ll be able to reinstall Windows 10 on the same computer without using a product key.

To fix this reinstall your previous Windows version, make sure it is activated and then upgrade to Windows 10 using Windows Update or by following the instructions found at www.microsoft.com/en-us/windows/windows-10-upgrade.


Solution 4 – Check if your product key is valid

If you manually entered a product key in order to activate Windows 10 then it might not be valid for activation. In this case, you’ll have to use a different key to activate Windows.

If you purchased this key contact the vendor and ask them to replace it or offer you a refund.


Epic guide alert! Everything you need to know about finding the Windows key using CMD!


Solution 5 – Perform an in-place upgrade

If you’re having error code 0xc004c003 and you’re unable to activate Windows 10, you might be able to fix the problem by performi>ng in-place upgrade.

If you’re not familiar, this is a great method to upgrade to a new version of Windows while keeping all your files, settings and applications.

Several users reported that this method worked for them, so you might want to try it out.

To perform an in-place upgrade, do the following:

  1. Revert to the previous version of Windows and install all the updates necessary to upgrade to Windows 10. Be sure to check if the current version you’re using is fully activated.
  2. Download and run Media Creation Tool.
  3. Select Upgrade this PC now and click Next.
  4. Media Creation Tool will now prepare the necessary files.
  5. Select Download and install updates option. Keep in mind that this option isn’t mandatory, so you can skip it if you want.
  6. Windows 10 will now download the necessary updates and check if your PC meets the requirements. This could take a while, so keep that in mind.
  7. Now click Change what to keep option and choose which files you want to keep. Now click on Next and Install.
  8. You’ll now inst>all Windows 10. This process can take up to an hour, so be patient.

After performing an in-place upgrade, your Windows 10 installation should be activated and ready to use.


Solution 6 – Keep trying to active Windows 10

If you’re unable to activate Windows 10 due to error code 0xc004c003, the issue might be caused by Microsoft’s activation servers.

If you upgraded from a genuine and activated version of Windows, you shouldn’t experience any issues, so it’s quite possible that the issue is related to Microsoftn> servers.

To fix the issue, you just have to wait until the problem is resolved. In the meanwhile, you can try to activate Windows 10 every hour or so.

Several users reported that they fixed the issue by being persistent, so be sure to try that.


Solution 7 – Update your BIOS

Your Windows 10 license is closely related to your hardware, and if you can’t activate Windows 10, the problem might be your BIOS. Your BIOS is in charge of our hardware, and in order to fix this problem, it’s advised to update your BIOS.

BIOS update will bring new features to your hardware, but it might also fix any incompatibility issues that your hardware has with Windows 10.

There are several ways to upgrade BIOS, and we wrote a general guide on how to flash your BIOS, so be sure to check it out for instructions.

To see how to properly update your BIOS, we strongly advise you to check your motherboard manual for detailed instructions.

It’s worth mentioning tha>t BIOS update can be a potentially dangerous procedure, so be extra cautious while updating your BIOS.

If you’re not careful, you can cause permanent damage to your motherboard, so extra caution is advised.

Several users reported that BIOS upgrade fixed their problem with activation, so you might want to try it.


Accessing BIOS seems scary? Make things way easier with the help of this handy guide.


Solution 8 – Check your Internet connection

In order to activate Windows 10, you need to have an active Internet connection, so before you try to activate Windows, be sure to check if your Internet connection is working properly.

If your network connection is in order, try restarting the connection and check if that helps.

In addition to restarting your connection, you can also restart your PC and check if that solves the issue.

If the problem still persists, perhaps you just have to wait it out. Several users reported that their Windows 10 got activated on its own simply by waiting for a few days, so you might want to try that as well.


Solution 9 – Use Command Prompt

According to users, you might be able to fix error code 0xc004c003 simply by running a single command in Command Prompt. According to users, you can reveal your product key by doing the following:

  1. Press Windows Key + X to open Win + X menu. Now choose Command Prompt (Admin) from the list. If Command Prompt isn’t available, you can also use Powershell (Admin).
    Microsoft error code 0xc004c003
  • When Command Prompt opens, enter wmic path SoftwareLicensingService get OA3xOriginalProductKey command. Now you should see your product key.
    0xc004c003 product key blocked Windows 10
  • Press Windows Key + I to open the Settings app and go to Update & Security section.
    0xc004c003 Windows 10 activation error
  • Navigate to Activation section in the left pane and choose Change the product key from the right pane.
    Error 0xc004c003 the activation Server Determined
  • Now enter the product key that you got from Step 2<!–em> and click Next.

This guide will help you become an expert in Command Prompt!


Solution 10 – Contact Microsoft

If you’re still unable to activate Windows 10 due to error code 0xc004c003, you might want to contact Microsoft. Several users reported that Microsoft call center managed to fix their problem, so if none of the aforementioned solutions work be sure to call the official Microsoft’s support for your area and explain them the problem.


READ ALSO:

How to Disable HP Battery Alert 601 Error

Many HP laptop users get the 601 battery alert, but there’s a way to disable it. This error usually signals that your battery is drained but can also occur randomly, even when the laptop is charged.

Here’s how to get rid of it:

How can I disable HP 601 battery alert

  1. Turn off your HP computer.
  2. Now, turn on your PC and hit the ESC key to open the Startup Menu.
  3. In the Startup Menu display, hit the F2 key to launch the HP PC Hardware Diagnostics menu.
  4. Click Component Tests in the main menu.
    component hp battery alert
  5. In the list of Component Tests, click Power.
    power
  6. In the list of Power Tests, select Battery.
    option
  7. On the Battery Test, click Run once. The Battery Test begins.
  8. Follow the wizard to manage your computer’s battery.

Battery testing is a process in system diagnostics that enables HP users to check their PC for battery performance to optimize usage. 

If the battery fails the test, then it is the cause of the HP alert with the error code 601. The best thing to do is to replace the battery so that you can enjoy using the PC again. You can also calibrate it if it is still usable for some time.

The HP battery alert 601 can be frustrating. But the test above will tell you if it is a false alarm or if your b truly needs to be replaced.

Error Code 0x80004005 on Windows 11: How to Fix it

Users reported getting error 0x80004005 in Windows 11 when trying to update or activate their OS. If you’re facing this problem, keep reading. We’ll show you all the steps necessary to fix it in no time.

How can I fix error code 0x80004005 in Windows 11?

1. Use the Update Troubleshooter

  1. Hold the Windows key + I to open the Settings app, navigate to System, then Troubleshoot from the right side, as depicted below.system-troubleshoot-option windows 11 airpods microphone
  2. Once you are inside the Troubleshoot menu, tap on the Other trouble-shooters option in order to find more of them.other-troubleshooter-option windows 11 airpods microphone
  3. Scroll down to the Windows Update troubleshooter and click Run next to it.run-windows-update error 0x80004005 windows 11

When the troubleshooter has finished looking for faults, it will show you the specific bug that happened and how to remedy it. Make sure to follow the presented instructions step by step.

2. Check your PC drivers

  1. Launch the Settings app, go to the left panel, and choose Windows Update. Then, click on Advanced options from the right side.windows-advanced  windows 11 dynamic refresh rate not working
  2. Tap on Optional updates under the Additional options section.optional-updates-option  windows 11 dynamic refresh rate not working
  3. Now choose Driver Updates from the drop-down menu, and select all the boxes next to the updates shown to you. Finally tap on the Download and install button. In my specific case, there are none left. no-update windows 11 dynamic refresh rate not working

3. Start in Clean Boot

  1. Hold the Windows key + R and type or paste in msconfig then click on OK.msconfig error 0x80004005 windows 11
  2. Next, head to the Boot tab in order to check the Safe boot option.boot-safemode error 0x80004005 windows 11
  3. Navigate to the tab that says General and make sure that Selective startup radio button is checked and uncheck Load startup items.load-startup-general error 0x80004005 windows 11
  4. Click on the Service tab and check the box Hide all Microsoft services then tap on Disable all.service-hide error 0x80004005 windows 11
  5. Under the Startup tab, click Open Task Manager and disable all the startup items.open-taskmanager error 0x80004005 windows 11

4. Reset Windows update components

  1. Press the Windows key + X and select Terminal (Admin).terminal admin option windows 11
  2. Type the following commands one by one, pressing Enter after each command to stop the Windows Update services:
    • net stop wuauserv
    • net stop cryptSvc
    • net stop bits
    • net stop msiserver
  3. After stopping the services, type the following commands and press Enter after each to rename the folders:
    • ren C:\Windows\SoftwareDistribution SoftwareDistribution.old
    • ren C:\Windows\System32\catroot2 catroot2.old
  4. Restart the Windows Update services by typing the following commands and pressing Enter after each:
    • net start wuauserv
    • net start cryptSvc
    • net start bits
    • net start msiserver

Once all commands have been executed, type exit and press Enter to close the Command Prompt window and restart your computer.

These commands reset Windows Updates and should fix errors like 0x80004005.

Why is it important to update my OS?

You’re probably familiar with those obnoxious reminders on your computer screen. Every time you open your computer, they notify you that your apps and drivers are no longer up to date.

They always rear their ugly heads at the most inconvenient of times, when you’re in the middle of something important. As a result, you should follow their instructions and keep your computer up to date.

check for updates error 0x80004005 windows 11

A significant advantage of installing updates is that it takes only a few clicks, and if your system is configured correctly, you won’t even have to do that. You can set your PC or Mac to install updates if you so desire automatically.

To find out more about how to troubleshoot today’s error, take a look at our position on how to fix update error 0x80004005.

Alternatively, we have also prepared a guide on how to fix unspecified error 0x80004005 in case the error pops up in other scenarios as well besides the update and activation cases.

Was this guide useful for you? Did you manage to fix the error code 0x80004005 on your Windows 11 device?

Let us know in the comments section below and share it with your friends if they encounter the same problem as you did. Thanks for reading!

0x800f0989: What is This Error Code & How to Fix it

With Windows 11 finally released, users have been trying to get their hands on the latest version. And the easiest way here is to upgrade to the latest iteration via Windows Update. However, many reported encountering the Windows 11 install error – 0x800f0989.

The error, as expected, would prevent you from installing Windows 11 on your PC. This would put you in a pickle and force you to go with the other ways to upgrade.

But before you do that, do check out the following sections to understand the underlying causes, and the most effective fixes for Windows 11 install error – 0x800f0989.

Why is the Windows 11 install error – 0x800f0989 encountered?

You could get this error for several reasons, but since you are eligible for the upgrade via Windows Update, it shouldn’t have to do with your PC not meeting the system requirements for Windows 11.

The primary reason here is a minor bug with the OS that’s preventing you from installing the update, and a simple restart should eliminate that. Other than that, if the critical services responsible for downloading updates are not running, you are likely to encounter issues.

Also, problems with the Windows Update components can prevent you from installing the update and upgrading to Windows 11.

So, let’s now walk you through the solutions to fix Windows 11 install error – 0x800f0989 and help you upgrade to the latest iteration.

How do I fix the Windows 11 install error – 0x800f0989?

1. Restart the PC

  1. Navigate to the desktop, press Alt + F4 to launch the Shut Down Windows box, and select Restart from the dropdown menu.Restart Windows 11 to fix windows 11 install error - 0x800f0989
  2. Click on OK at the bottom.Confirm

A simple restart should fix the Windows 11 install error – 0x800f0989, in case it’s a bug with the OS that causing the error. After restarting the computer, check if you are able to install Windows 11.

2. Remove non-critical external devices

In many instances, it was malfunctioning or an incompatible external device connected to the PC that caused the Windows 11 install error – 0x800f0989. If that’s the case, you can try to identify and remove this device.

To do that, first, turn off the system, remove all non-critical devices, like the printer, speaker, headphones, and just keep the mouse, keyboard, and monitor connected. Now, check if you are able to install Windows 11.

If it works, reconnect the devices after upgrading to the latest iteration, and update the drivers for each of them.

3. Update Windows 10 and install all driver updates

  1. Press Windows + I to launch the Settings app, and click on Update & Security from the options listed here.Update & Security
  2. Next, click on the Check for updates button on the right.Check for updates to fix windows 11 install error - 0x800f0989
  3. While the pending updates are being installed, click on View optional updates.View additional updates
  4. Now, click on Drivers updates.Driver updates to fix windows 11 install error - 0x800f0989
  5. Tick the checkboxes for the all the driver updates listed here, and click on Download and install at the bottom.Download and install
  6. Once done, restart the computer for the changes to fully come into effect.

If you don’t have the latest version of Windows 10 installed, there’s a chance that you might encounter the Windows 11 install error – 0x800f0989 when trying to make the upgrade.

Also, make sure to install the available driver updates since this would eliminate issues with hardware malfunctioning or incompatibility.

To update the drivers, you can also use a reliable third-party app. We recommend using Outbyte Driver Updater, a dedicated tool that will automatically keep all the drivers updated and prevent such errors from occurring in the future.

⇒ Get Outbyte Driver Updater

4. Run the Windows Update troubleshooter

  1. Press Windows + I to launch the Settings app, and click on Update & Security.Update & Security
  2. Next, select the Troubleshoot tab from the navigation pane on the left.Troubleshoot to fix windows 11 install error - 0x800f0989
  3. Click on the Additional troubleshooters option to view all the available ones.View additional troubleshooters
  4. Next, click on the Windows Update option, and then on the Run the troubleshooter button.Windows Update to fix windows 11 install error - 0x800f0989
  5. Now, folow the on-screen instructions and choose the appropriate response when prompted to complete the process.

Microsoft offers several built-in troubleshooters to diagnose and eliminate issues with Windows and connected devices. In this case, the Windows Update troubleshooter could help resolve the Windows 11 install error – 0x800f0989.

5. Perform the DISM and SFC scan

  1. Press Windows + R to launch the Run command, enter cmd in the text field, hold the Ctrl + Shift keys, and then either click on OK or hit Enter to launch an elevated Command Prompt.cmd
  2. Click Yes on the UAC (User Account Control) prompt that pops up.Click Yes
  3. Next, paste the following command and hit Enter to run the DISM tool.DISM.exe /Online /Cleanup-image /Restorehealth
  4. Once done, paste the following command and hit Enter to run the SFC scan.sfc /scannowCommand Prompt to fix windows 11 install error - 0x800f0989

The SFC (System File Checker) scan and DISM (Deployment Image Servicing and Management) tool are very effective when it comes to eliminating corrupt system files or replacing the missing ones.

And these two are found to fix a lot of errors, apart from Windows 11 install error – 0x800f0989.

Also, make sure to first run the DISM tool and then the SFC scan, since the former identifies and eliminates certain issues that might prevent the latter from doing the intended task.

6. Uninstall third-party antivirus

  1. Press Windows + I to launch Settings, and select Apps from the options here.Apps
  2. Now, click on the installed third-party antivirus, and then select Uninstall from that options that appear.Uninstall
  3. Again, click Uninstall in the prompt that pops up.Uninstall to fix windows 11 install error - 0x800f0989

Certain third-party antiviruses are known to conflict with the functioning of the OS, and can cause the Windows 11 install error – 0x800f0989. In this case, it’s best that you remove any third-party antivirus installed on the system, and then try to upgrade to the latest iteration.

In case this too doesn’t work, head to the final method.

7. Install Windows 11 using the installation assistant

If nothing else works, don’t lose hope! There’s always the option to install Windows 11 using the installation assistant. Though not as simple as the Windows Update method, this too would get the latest iteration installed on your PC.

Upgrading to Windows 11 with the installation assistant

Do remember to download the PC Health Check app beforehand, and verify if your system supports Windows 11, though that shouldn’t be an issue since you already got an update for it.

More so, you can create a bootable USB drive for Windows 11 and upgrade using it. Besides, it might also come in handy if you have to repair critical issues that do not allow the OS to boot.

These are all the ways you can fix the Windows 11 install error – 0x800f0989. And once done with these, you can finally upgrade to the latest iteration, and enjoy a sleek-looking, better performing OS.

Also, read our comparison of Windows 10 and Windows 11, to better understand how the two differ and the new features that have been introduced in the latter. And in case you encounter the 0x800f0988 error while updating Windows, the same fixes should work.

Tell us which fix worked and your first experience of Windows 11, in the comments section below.

How to Fix Adobe Acrobat Reader Installation Errors Like “Newer Version Already Installed”

If Adobe Acrobat Reader is not installing on your Windows PC, you might see errors like “newer version already installed,” “installation failed,” or “did not install successfully.”

These usually happen due to admin rights issues, leftover files, or Windows installer problems.

Here’s how to quickly fix these common Adobe Acrobat Reader installation errors.

How can I fix Adobe Reader if it won’t install on Windows

1. Open the Program Install and Uninstall Troubleshooter

  1. Download the Program Install and Uninstall troubleshooter.
  2. Click the MicrosoftProgram_Install_Uninstall.
  3. Press the Next button to initiate the troubleshooter.
    next adobe acrobat wont install windows 10
  4. Select the Installing option.
    installing
  5. Then select the Adobe Acrobat Reader DC app and click the Next button.
    select

This is a simple solution, but it might help if the Adobe Reader fails to install on Windows 10.

2. Install the program with the hidden admin account

  1. Press the Windows key, type cmd, and click Run as administrator under Command Prompt.
    cmd adobe acrobat wont install windows 10
  2. Type the command below and hit Enter: net user administrator /active:yes
    net user
  3. Now, download the Adobe Acrobat Reader DC from this link.
    download
  4. Finally, run the installer and follow the onscreen instructions to complete the installation.

If Adobe Reader won’t install on Windows, it might be because you don’t have the administrative privileges to install it. Using the hidden account gives you all privileges needed to install the app.

Finally, it is essential to state that you need to download the installer from the link above. This is because it has worked for many users, unlike other installation channels.

3. Uninstall previous Adobe Reader software

  1. Press the Windows key + R, type control, and click the OK button.
    control adobe acrobat wont install windows 10
  2. Choose the Uninstall a program option under Programs.
    uninstall a
  3. Right-click the Adobe Reader app and click the Uninstall button.
    uninsatall
  4. Now, follow the instruction to complete the removal.
  5. Finally, go to the official website to download and install the app.

You might receive error messages if you have a copy of Adobe Reader on your PC before trying to install a newer version. Removing the app on your PC is better than downloading the Adobe Reader Offline Installer for Windows.

However, to make sure you completely uninstall the previous version of the app, it’s recommended that you use a dedicated removal tool in CCleaner.

By using this tool, you remove the programs entirely, without leftovers or old registry files.

4. Create a new installation folder for Adobe

  1. Open File Explorer and click on your Local disk (C:)
  2. Click the New folder icon at the top and name the folder Adobe.
    new folder
  3. Now, run the Adobe installer and set the installation folder to the folder created in Step 2 instead of Program Files (x86).

This solution is effective if you cannot install Adobe Reader’s newer version already installed error message. Some users have found the problem due to a lack of the necessary rights to install the program in the Program Files (x86) folder.

Hence, creating a new folder on your Local disk for the installation should bypass the error.

Why is Adobe Reader not installing?

The reasons Adobe Reader won’t install on Windows are within a close circle. Below are some of the prevalent ones:

  • Lack of privileges: If the Adobe Acrobat DC installation failed on Windows, it might be because you don’t have administrative privileges. The solution here is to run the installer as an admin.
  • Previous incomplete installation: If you are unable to install Adobe Reader’s newer version already installed error, it might be because you have an incomplete installation of the app on your PC. You need to uninstall the previous file using an uninstaller software and install a new version of the app.
  • Problems with the Windows installer: In some cases, the problem might be with the Windows installer. Running the Program install and uninstall troubleshooter should diagnose and fix the issues.

Our solutions for the Adobe Reader won’t install on Windows. However, if you follow them correctly, you should be able to install the PDF reader easily.

If you are facing other issues like Adobe Acrobat Reader not responding issue, check our detailed guide to fix it quickly.

Learn more about Adobe issues, including software not being genuine or apps showing as unavailable, by checking out these helpful guides: Adobe software not genuine and Sorry, this Adobe app is not available.

Feel free to let us know the solution that helped you fix the issue in the comments below.

Error 0x80070 (0x8007010a): What is it & How to Fix it

Are you getting the Windows 11 install error code 0x80070 and you are looking for solutions to fix it?

If so, then you are in the right place. Because in this guide, we will give you a set of effective solutions that will help you possibly fix this Windows 11 install error code 0x80070.

Users of older Windows versions are migrating over to Windows 11 at a rapid pace. Thanks to all the new features such as new wallpapers, revamped icons, centered Taskbar, Android app support, and more, Windows 11 is too good to be missed.

While some users are completely loving the performance and new aesthetics of the Windows 11 OS, there are some users who are facing one issue or the other.

The Windows 11 install error code 0x80070 is not a specific error code. Meaning that there are different versions of this install error code, namely 0x8007007f, 0x8007012a, 0x80070570, etc.

It is basically a prefix to the series of error codes you may experience on your PC. Whatever it may be, it is indeed annoying and frustrating as it prevents you from using the best features of Windows 11.

This guide lists down all the solutions that you can follow to resolve the Windows 11 install error code 0x80070. Let us check them out.

What is the Windows 11 install error code 0x80070?

Windows 11 install error code 0x80070 usually appears for users trying to install Windows 11 using the installation assistant.

It happens during the initial phase of the installation of the Windows 11 OS. For some, this Windows 11 error code 0x80070 appears when they try to update their PC.

You may come across an error warning pop up saying “Something went wrong.” This error code will prevent you from installing Windows 11 on your PC or installing new updates.

Here are a few key reasons why you may come across Windows 11 install error code 0x80070:

  • You do not have sufficient administrator privileges to install Windows 11.
  • Your antivirus software is conflicting with the installation.
  • Outdated drivers could also cause issues while installing the new Windows 11.
  • Insufficient storage space.
  • Corrupt or damaged system files.
  • Damaged Windows 11 installation assistant file.

The above reasons give you an idea of which problems to troubleshoot if you ever come across or face Windows 11 install error code 0x80070.

Now, let us take a look at the solutions that can help you fix this problem.

How can I fix the Windows 11 install error code 0x80070?

1. Scan for corrupt files

  1. Open the Start menu.
  2. Search for Command Prompt and open it as an administrator.command prompt
  3. Type the below command and hit Enter.sfc /scanowsfc scan now
  4. Your PC will start scanning for corrupt system.
  5. After the process completes, reboot your PC.
  6. Again open command prompt.
  7. Type the below command and hit Enter:chkdsk C: /f /r /xchkdsk
  8. Once the process completes, enter the below command and press Enter: DISM.exe /Online /Cleanup-image /Restorehealth
  9. You will see “The operation completed successfully” message.
  10. Reboot your PC.

The presence of corrupt system files can trigger this error on your PC and prevent you from installing Windows 11 on it.

System files may get corrupted due to faulty installation or because of viruses. In such a case, we would advise you to first run the SFC Scan and DISM commands in order to detect and fix corrupted files on your PC.

2. Use a dedicated tool

Specialized software helps you resolve Windows update errors, and activation errors, replace any corrupted files, remove duplicates, and can even help you with Windows 11 install error code 0x80070.

3. Reinstall Windows 11 Installation Media

  1. Visit Microsoft official website to download the Windows 11 installation media.
  2. Click the Download Now button.windows 11 install error code 0x80070 1
  3. Double-click to open the installation media and follow the onscreen instructions to install it on your PC.
  4. Open the Windows 11 installation media and check if this fixes the issue or not.

There is a probability that the previous download of the Windows 11 installation media was interrupted and did not download all the necessary files.

To rule this out, we would advise you to follow the above steps and download the Windows 11 installation media and then reinstall it again to check if this fixes the issue or not.

4. Scan PC for virus

  1. Click on the upward arrow button on the bottom-right taskbar.see all apps
  2. Click on Windows Security.windows security
  3. Select Virus & threat protection.virus and threat protection steam error e502 l3
  4. HIt the Quick Scan button and let Windows Security scan your PC for virus and malware.quick scan
  5. You can also select the Scan options button.scan options
  6. Under Scan Options, choose Full scan to deeply scan your PC for virus or malware.full scan

While we don’t have any third-party antivirus applications installed on our PC, we made use of the Windows Security Defender. TotalAV is an effective antivirus tool that gives you anti-phishing and multi-layer malware protection as well.

But the above steps would give you an idea that you need to perform a scan to check for any viruses or malware present on your PC.

There is a strong chance that a virus or malware is affecting the smooth functioning of your PC and also triggering the Windows 11 install error code 0x80070.

The virus must be blocking the Windows 11 installation media from installing a new copy of the OS. This happens commonly, and we would suggest you scan your PC for viruses before you apply an advanced solution.

5. Reinstall Windows 11 Installation Media

  1. Visit Microsoft official website to download the Windows 11 installation media.
  2. Click the Download Now button.windows 11 install error code 0x80070 1
  3. Double-click to open the installation media and follow the onscreen instructions to install it on your PC.
  4. Open the Windows 11 installation media and check if this fixes the issue or not.

There is a probability that the previous download of the Windows 11 installation media was interrupted and did not download all the necessary files.

To rule this out, we would advise you to follow the above steps and download the Windows 11 installation media and then reinstall it again to check if this fixes the issue or not.

6. Disable Windows Firewall and Security

  1. Open Control Panel.
  2. Select Windows Defender Firewall.windows defender firewall
  3. From the left-side select Turn Windows Defender Firewall on and off.turn off windows firewall
  4. Check the box next to Turn off Windows Defender Firewall on the Domain and Public network settings.turn off defender
  5. Press OK to close the tab.

On one hand, while the antivirus software on your PC protects you from viruses and malware, on the other hand, it is the main culprit for preventing tools from accessing system files.

So, after a quick virus scan, if you find that there is no virus or malware affecting your PC, simply follow the steps above to disable Windows Defender and Security to fix this problem.

If you have any third-party antivirus software installed on your PC, then you can disable it and check if that fixes the Windows 11 install error code 0x80070.

7. Turn on User Account Control

  1. Open the Start menu from the Taskbar below.
  2. Search for Control Panel and open it.control panel
  3. Click on User Accounts.user accounts
  4. Select Change User Account Control settings.change user account control settings
  5. Drag the slider downwards till it says Never notify me.never notify
  6. Click OK to save changes.
  7. Now run the Windows 11 Installation Assistant and check if this fixes the issue or not.

8. Clear temporary folder

  1. Press Win + R buttons to open the Run command.
  2. Type %temp% and hit Enter.temporary command on run
  3. Press Ctrl + A to select all files.delete temporary files
  4. Press the Delete button your keyboard or right-click and select Delete.

9. Reset Windows

  1. Press Win + I buttons to open Windows Settings.
  2. Scroll down and select Recovery.recovery-page how to enter recovery mode windows 11
  3. Under Recovery options, press the Reset PC button.reset
  4. Choose the type of factory reset your wish to perform.type of reset
  5. Choose the option how you would like to reinstall Windows.
  6. Click Next.
  7. Hit the Reset button.

If the previous methods did not resolve the issue, you should only reset your PC as a last resort. This is one of the different ways in which you can reset your PC.

Do note that if you reset your PC, it will restart a few times, but that is normal and a part of the process.

How can I resolve other installation error codes in Windows 11?

Based on the underlying problems, you may encounter different types of Windows 11 installation error codes.

However, we would suggest you apply the above fixes in order to fix them, as error codes generally pop-up because of corrupt system files, viruses, or limited permissions.

Moreover, you are also free to make use of other third-party repair tools that you have at your disposal and check if they help you fix the problem.

But if none of the methods work for you, instead of getting annoyed or frustrated, the best thing to do is downgrade your PC to Windows 10, as Microsoft might be coming up with a fix for the error code.

In the meantime, do take the time to report this problem on the official Microsoft support page. Hopefully, you will get help from the support staff.

Let us know in the comments below which one of the above solutions helped you fix the problem. If there is any other way that resolved the issue for you, feel free to share that as well.

How to Install Java on Windows 11 (Step-by-Step Guide)

Need to install Java on your Windows 11 PC for apps like Minecraft or enterprise software? Here are all the steps you need to follow to quickly run Java safely on your computer.

How can I install Java on Windows 11?

  1. Open any browser, navigate to the Java download page for Windows, and locate and download the installer.Download Java
  2. Once the download is complete, launch the setup and click Yes in the UAC prompt.
  3. The Java installation wizard will appear on your screen. Click Next to proceed. Java welcome
  4. The next screen will ask you to confirm the installation folder. Click on Next to proceed. Java location
  5. Once installation is complete, click on Close. Java success

Java is now successfully installed on your device. To confirm the same, you can run the following command in Command Prompt: java - -version

Does Windows 11 work with Java?

Yes, Windows 11 supports Java, and you will need JRE (Java Runtime Environment) to run many applications.

Java SE 16.01 and the version released later are compatible with Windows 11. However, there might be issues for those released earlier, so we recommend you stick to the latest version.

Is Java 11 still supported?

Java 11 remains one of the most significant releases, with most applications relying on it. The version also features LTS (Long Term Support).

Though more recent versions offer new and advanced features, some users stick with Java 11 since more applications were developed using it. But it’s a personal choice.

FAQs

Which Java version is best for Windows 11?

Java 17 is the most stable long-term support version. Java 21 is also available for newer apps.

Is Java free to install?

Yes, Java SE from Oracle and OpenJDK versions are free for personal and most commercial uses.

Do I need to restart after installing Java?

No restart is needed. Just open a new terminal window to confirm the installation.

Can I install multiple Java versions?

Yes, but it’s best to configure which one the system uses by adjusting environment variables.

Summary

That’s it! You know now that the install process for Java JRE 11 and other versions in Windows is pretty effortless and shouldn’t take more than a few minutes.

Also, find out what to do if JAR files are not opening in Windows.

If you have encountered any other errors while downloading Java, feel free to comment below.

7 Best Wi-Fi Mesh Systems Deals

Wi-Fi connectivity and signal strength problems are some of the most frequent Internet issues encountered by Windows 10 users.

We’ve all experienced Wi-Fi disconnects, errors, invalid IP address alerts, and problems that seem to go on and on.

Oftentimes, the root cause of most of your wireless issues is poor coverage. The good news is that you can quickly fix that with the help of a reliable mesh system.

Since this seems to work in most cases, we decided to search for the best Wi-Fi mesh systems. Scroll down to check the list and make a choice right away.

How to select the best mesh routers?

Our team of expert testers, with a combined experience of 15 years, has tackled a variety of testing tasks for any device you could imagine.

Their experience comes into play as a very important element when choosing the products we described in this guide, and a large variety of factors have been taken into consideration.

The options that have been chosen offer great quality and cover the entire spectrum of price ranges, thus enabling everybody to find something that fits their needs both financially and otherwise.

What are the best mesh router deals?

NETGEAR Orbi Pro

  • Coverage up to 6,000 sq. ft.
  • Supports 60+ simultaneous device connections
  • QoS and WPA3 latest Wi-Fi security
  • Ultrafast AX6000 (up to 6Gbps) gigabit speed
  • Supports up to 6 satellites
  • Problems with customer support

If you’re looking to set up a mesh network for your business, you have to look for security features and NETGEAR Orbi Pro may be perfect for that job.

That’s because it features business-grade security with 4 SSIDs linked to 4 separate VLANs and also supports stand-alone DHCP servers to assign IP addresses for complete network segmentation.

Plus, the latest QoS and WPA3 latest Wi-Fi security features will ensure additional protection against any intrusions.

And if you’re worried about bandwidth, this mesh router network is capable of dedicating any SSID to 2.4GHz devices and thus it prevents any congestion.

Google Wi-Fi – AC1200

  • The 3 pack covers up to 4500 square feet
  • Simple setup in a few steps
  • Works with all Google Wi-Fi points
  • Parental controls for screen time management
  • Can be updated without consent

When you’re dealing with large spaces and multiple floors, you need to cover all the corners, and this 3-pack Google Wi-Fi system really does the job.

It’s perfect for a home setup because the three access points cover up to 4500 square feet, enough for a big house but you can always extend it seamlessly.

Also, it’s very simple to set up with easy-to-follow instructions in just a few steps so you don’t need to have any special training.

We know your kids will not enjoy this feature too much but with the Google Wi-Fi mesh, you will be able to limit their screen time by using the built-in parental controls.

TP-Link Deco Mesh S4

  • Up to 5,500 square ft. coverage
  • Whole-home coverage and 100+ devices
  • Works with Alexa
  • 2 Gigabit Ethernet ports (6 in total for a 3-pack) 
  • Doesn’t support WPA AES encryption

Forget about dead zones in your home because Deco S4’s three units work together to create a Wi-Fi mesh network that can cover up to 5, 500 square feet.

Deco S4 allows you to enjoy roaming throughout the house, with a single network name and password because when you leave the range of an access point you will be switched to the next more powerful one instantly.

You will also benefit from fast AC1200 speeds and this mesh is capable of providing connectivity for up to 100 devices at once.

And with advanced parental controls, you can limit online time and block inappropriate websites for each family member separately.

Amazon eero 6

  • Built-in Zigbee smart home hub
  • Covers up to 5,000 sq. ft.
  • Wi-Fi speeds of up to 500 Mbps
  • Quick and easy setup
  • Compatible with Alexa
  • Low Wi-Fi speed

The Amazon eero 6 system offers whole-home Wi-Fi 6 coverage with up to 500 Mbps speeds by using one router and two range extenders.

It supports over 75 devices simultaneously and you can set it up in a few minutes without any network engineering knowledge.

It’s important to know that eero 6 also doubles as a Zigbee smart home hub, so it will be really convenient to connect and control all your smart home devices using Alexa.

The system offers coverage of up to 5,000 square feet but if you need more, you can always add more access points to get to that space you need.

TP-Link Deco mesh M5

  • JD Power Award
  • TP-Link Adaptive routing technology
  • Secure Wi-Fi mesh network
  • 24/7 technical support
  • Wallet-friendly price point
  • Only available in white

This TP-Link Deco mesh Wi-Fi system relies on three units working together to create a mesh network that can cover up to 5,500 square feet.

If this isn’t impressive enough, keep in mind that this system can support over 100 connected devices – all at the same time.

Setting the system up is very easy. Simply download the TP-Link Deco app, plug in your system, and follow the on-screen instructions.

Moreover, you can easily prioritize Internet access for particular devices, filter Internet content, and even pause the Wi-Fi, if that’s your wish.

Linksys WHW0303 Velop mesh

  • Apple HomeKit-enabled
  • Up to 6,000 square feet coverage
  • Reliable Wi-Fi coverage for gaming and 4K streaming
  • Simple setup
  • Tri-band connectivity speeds
  • Remote administration issues

If you own a huge house, then Linksys WHW0303 Velop mesh router is the right choice for you. This device covers up to 6000 square feet (more than the first two devices on this list).

Thanks to its intelligent mesh technology, Velop finds the best channel and frequency for your devices and virtually eliminates lag issues.

Moreover, it looks really elegant thanks to its compact minimalist design that blends in with any home environment.

Tenda AC1200 home mesh

  • Links up to 90 wireless devices
  • Eliminates dead-zones
  • High-speed Internet coverage
  • Industry-leading 3-year warranty
  • Easy to install
  • Cannot stream music through Amazon Echo Dot

Tenda AC1200 home mesh system is fully compatible with all the major modem models and ISP networks in the world.

The best part is that it can support up to 90 connected devices at the same time and it covers up to 6,000 square feet.

It automatically connects your devices to the strongest access point even when you are moving throughout your home, so give it a try.

This Wi-Fi mesh packs a series of features that allow you to monitor network status information, control Internet access for children, and more.

We’ll end our list here. However, we’ll keep an eye on new Wi-Fi mesh systems and update this post with the latest offers as soon as they’re available.

If you’re still on the lookout after you considered the products above, you can also check out our best mesh routers list for other suggestions.

Don’t hesitate to make a choice and let us know more about it by using the comments area below.

Windows 11 Update Broke My Computer: How to Fix Errors

Following the installation of a cumulative update from Microsoft via Windows Update, you may discover that your machine faces a Windows 11 error after update. Thus it is rendered unstable or altogether unusable as a result.

There are a variety of reasons why this could occur, but many of the solutions are the same regardless of the underlying problem.

The majority of the time, after installing an update, your computer will restart either automatically or at a time of your selection using Active Hours. On rare occasions, an update is not completely installed, even after restarting the computer for the first time.

Follow along as we will show you what to do in order to fix the Windows 11 update broke my computer issue, then we’ll see why it is adamant to update your operating system. Keep up with us!

What can I do if a Windows 11 update broke my computer?

1. Uninstall the latest update

  1. Press the Windows key + I then select Windows Update from the left-hand navigation bar followed by Update history.windows-update-history-choice windows 11 error after update
  2. Scroll down until you meet the Uninstall updates button and click on it.uninstall-upd windows 11 error after update
  3. Click on the first update from the Microsoft Windows list and then hit Uninstall.uninstall-latest windows 11 error after update

2. Use a third-party tool

System issues can be quite hard to fix at times. It is always a good idea to employ the help of professional repair software.

These tools are equipped with powerful scanning capabilities that allow them to quickly identify any problem within your system and deploy the right fix for it.

3. Pause updates

  1. Press the Windows key + I to open the Settings app, then navigate to Windows Update as we have shown below.windows-update windows 11 dynamic refresh rate not working
  2. Now click on the down arrow next to Pause updates and select a desired period during which your OS won’t update itself.pause-updates windows 11 error after update

4. Run Windows troubleshooter

  1. Tap on the Windows key and I simultaneously then navigate tot System followed by Troubleshoot as we have shown below.system-troubleshoot windows 11 error after update
  2. Click on Other troubleshooters.other-troubleshooters windows 11 error after update
  3. Now click on Run next to Windows Update. Let the troubleshooting process to complete then follow the on screen steps. That’s it!windows-update-run windows 11 error after update

The troubleshooting wizard will attempt to identify and resolve any Windows Update issues that may have occurred. After the scan is complete, return to the main page and check for updates once again.

5. Disable your antivirus

  1. Click the arrow from your taskbar and right-click on your antivirus icon. Next, choose Avast shields control followed by Disable for 10 minutes.disable-antivirus-icon xbox controller not recognized windows 11
  2. If you have other antivirus applications installed, you can temporarily disable the app by following the same procedures as described above, or ones that are comparable.avira-disable-icon xbox controller not recognized windows 11

Why is it important to update my company’s OS?

The benefits of software updates go beyond simply providing security upgrades. They frequently include new and improved functionality, as well as speed improvements, all of which improve the end-user experience.

windows update windows 11 error after update

Developers are continuously looking for ways to make the software even better so that users can work even more efficiently. Sales and marketing workers, for example, rely on software to work from home and communicate with clients and potential consumers in a variety of different ways.

Upgrading systems appears to be a costly endeavor, however, the reality is that older systems have more faults – and as a result, incur more expenditures.

Costs associated with system and software failures can quickly grow to levels that much exceed the cost of upgrading a system or implementing new software and hardware. Failing to upgrade your software may come to regret your decision later. Keep in mind that there is a cost to doing nothing!

People’s ability to work with or for an organization might be hampered by outdated and inadequate processes and software, resulting in frustration. Out-of-date technology provides the impression that your company is out of touch with current trends.

The likelihood that your antivirus application was the source of the problem is high if the problem no longer occurs. You should consider picking another compatible antivirus solution for Windows 11 to protect your computer, or use TotalAV as we strongly recommend it.

The likelihood that your antivirus application was the source of the problem is high if the problem no longer occurs. You should consider picking another compatible antivirus solution for Windows 11 to protect your computer.

If the error message that you received contains the 0x800f020b number attached to it, check out our article on how to fix Windows 11 update error 0x800f020b and apply more specific solutions to this error in particular.

Alternatively, if you see the 0x8024a203 code, we recommend that you take a look at our post on how to fix the Windows 11 update error 0x8024a203 in order to solve the problem in the most efficient manner.

And lastly, in the case that you encounter the 0x8024a205 error number, we have already prepared a guide on how to fix the Windows 11 update error 0x8024a205. Make sure not to miss it since it could save you precious time!

In order to improve our future posts, leave us a comment in the section below and let us know whether you have other solutions in mind or which one worked for you best if your latest Windows 11 update broke your computer. Thanks for reading!

Modern Setup Host High CPU Usage: How to Fix it in 3 Steps

Modern Setup Host is an important part of the Microsoft Windows operating system, which is responsible for automatically installing updates on your computer. It’s also used by other programs to install, update and uninstall software on computers.

Normally, the service runs in the background and performs various tasks. If you have noticed high CPU usage by this process, then you need to know what it does, why it uses more resources than expected, and how to fix the problem.

Why is Modern Setup Host using so much CPU?

Modern Setup Host will always use some CPU, but if it starts to use too much CPU, there may be other reasons such as:

  • The Windows update is too large – If you see this problem, it’s likely because your computer is using a lot of CPU time to process the update. This can make your computer slow down dramatically.
  • Background processes – Modern Setup Host already uses a lot of resources since it requires extra processing power from your computer’s CPU. If other resource-hungry processes are running concurrently, they will compete for the available CPU.
  • Virus infection – Virus infections are fairly common for Windows users, and can often result in CPU-heavy processes that take up a lot of the computer’s resources. A reliable antivirus should suffice.
  • Unoptimized hardware configuration – If your computer does not have a suitable hardware configuration, Modern Setup Host will run slowly, resulting in high CPU usage.
  • Insufficient RAM – If you’re running low on memory, Windows will use more CPU as it tries to free up memory.
  • Third-party application conflict – Some third-party applications can conflict with Modern Setup Host and cause it to use excessive CPU in Windows 11.

Is it safe to disable the Modern Setup Host?

Because the Modern Setup Host is a system service, it may be constantly running although its presence on your computer doesn’t cause any problems. However, you may want to disable it if you’re experiencing issues. 

The service is designed to help you upgrade faster, but it can also slow down your computer if it’s not properly configured or if you have too many apps installed. 

If you’re not planning on installing new apps or you don’t care about having the latest security patches, you can turn off this service.

However, we don’t recommend disabling this service unless you know what you’re doing because some programs may not work properly without it. Not to mention, security updates are critical for your system to protect you against all kinds of attacks.

How can I fix Modern Setup Host high CPU usage?

As always, it’s recommended you first carry out some preliminary checks such as:

  • Close any background processes that may be taking up CPU from the Task Manager.
  • Remove any bloatware or uninstall suspicious third-party applications that may be eating up your RAM.
  • Check whether you have enough RAM or clear some hard drive storage.
  • Finally, try restarting your PC to clear any problematic files. Take immediate action if your PC fails to restart.

1. Run the Windows Update troubleshooter

  1. Click on the Start menu and select the Settings app.settings windows 11
  2. Select Troubleshoot on the System tab in Settings.going system and troubleshoot windows 11 settings
  3. Then click Other-troubleshooters.going other troubleshooters win11
  4. Click the Run option for the Windows Update troubleshooter.windows update troubleshooter

2. Run the DISM and SFC commands

  1. Hit the Windows key, type cmd in the search bar, and click Run as administrator.cmd-admin hp printer won't scan
  2. Type the following command and press Enter: Dism /Online /Cleanup-Image /RestoreHealthdism
  3. Wait for the command to be executed then type the next one and hit Enter: Sfc /scannowsfc scannow command
  4. Restart your PC.

3. Perform a clean boot

  1. Hit the Windows key, type msconfig, and open System Configuration.
  2. Switch to the Services tab.
  3. Select Hide all Microsoft services.
  4. Click on the Disable all button then hit the Apply button to save the changes.
  5. Go back and click on the Startup tab and select Open Task Manager.
  6. In the Startup tab of the Task Manager, Disable all the Enabled startup items.
  7. Close Task Manager and restart your PC.

If none of these work and you’re sure that your PC has enough RAM to support the update and that you have enough disk space available, then try restarting your PC in Safe Mode. 

In Safe Mode, only critical processes are loaded, so it’s possible that the large update will pass by without causing any issues. If restarting in Safe Mode works, then it’s likely that something else on your PC is causing problems with processing the update.

Also, if your computer has multiple cores, make sure that Modern Setup Host is running on a different core than your other apps. This helps ensure that your PC runs smoothly and doesn’t cause any disruption to other processes.

Elsewhere, users complained about the Modern Setup Host not working but we have a comprehensive article that addresses this issue.

Let us know in the comment section below if you have been successful in fixing the high CPU usage with Modern Setup Host.

Windows 11 22H2 Download: 2 Different Ways to Install it

Microsoft recently released the much anticipated 22H2 version for Windows 11, and users have been nothing but anxious to get their hands on the latest update.

The biannual updates by Microsoft usually introduce new features and are meant to enhance the OS experience as a whole.

And as was the case with the release of Windows 11, 22H2 will also be rolled out in a phased manner. So, even if you don’t find it right away, check again in a couple of days, and Windows 11 22H2 should be available.

So, without waiting any longer, let’s find out how you can install the 22H2 version from Windows 10 and Windows 11.

How do I download the Windows 11 22h2 version?

You can download and install the Windows 11 22h2 version directly from Windows Update, or, alternatively, from the official Microsoft website. From there, you can get the 22h2 iso file.

Here is how to do it via Windows Update:

1. From Windows 11

  1. Press Windows + I to open the Settings app and select Windows Update from the navigation pane.Windows Update
  2. Now, click on the Check for updates button on the right.check for updates
  3. After the scan, if you see the Windows 11 22H2 version listed, click on Download & install to get it.download & install to get Windows 11 22H2

That’s it! Wait for the download to complete, and then restart the computer for the installation to go through successfully.

2. From Windows 10

  1. Press Windows + X to open the Power User menu and select Settings.settings
  2. Click on Update & Security.update & security to install Windows 11 22H2
  3. In the Windows Update tab, click on Check for updates.check for updates
  4. If Windows 11 22H2 is available, click on the Download and install button.download and install to get Windows 11 22H2
  5. Restart the computer when prompted to complete the installation process.

Those on Windows 10 will have a slightly harder time upgrading to Windows 11 22H2 since they will first have to verify if their computer meets the system requirements for Windows 11 by downloading the PC Health Check app.

Though if it does, there couldn’t be a better time to upgrade to Windows 11.

That’s all for now! Do not forget to check our comprehensive review of Windows 11.

Tell us whether you managed to install Windows 11 22H2 and your analysis of the latest update in the comments section below.

FIX: Windows 7 & 10 Activation Error 0xc004f063 [4 Ways]

Numerous users have posted about the Windows Activation error 0xc004f063 on Microsoft’s forum. That error arises for some users when they try to activate Windows platforms with product keys.

When the error arises, the Windows Activation windows displays an error 0xc004f063 message. The error details for that issue state:

The Software Licensing Service reported that the computer BIOS is missing a required license.

This issue can arise on the Windows 10, 8.1, and 7 platforms.

How can I fix Windows Activation error 0xc004f063?

1. Scan system files

Some users have confirmed that a System File Checker scan can fix error 0xc004f063.

  1. Launch your Run accessory with its Windows key + R keyboard shortcut.
  2. Type cmd within Run’s Open box.
  3. Press the Ctrl + Shift + Enter keyboard shortcut to open the Command Prompt with admin rights.
  4. First, run a Deployment Image Servicing Management scan by entering DISM.exe /Online /Cleanup-image /Restorehealth and pressing Return.
  5. Input the sfc /scannow command, and press the Return key to initiate the scan.
    sfc /scannow command Windows Activation Error 0xc004f063
  6. Restart Windows after the System File Checker scan is complete.

Alternatively, you can use automated PC repair software to scan and fix your system. The utilities have their database of Windows system files and can replace any damaged or missing file with a new and well-functioning version.

2. Open the Activation troubleshooter

In Windows 10, you can utilize an Activation troubleshooter to fix error 0xc004f063.

  1. Open the Type here to search utility by pressing the Windows key + S keyboard shortcut.
  2. Type activation in the search box.
  3. Click Activation settings to open Settings as shown directly below.
    The Activation tab Windows Activation Error 0xc004f063
  4. Click Troubleshoot on the Activation tab.
  5. Select the Apply this fix option if the troubleshooter has a resolution for you.
  6. Thereafter, restart Windows after applying the fix.

3. Activate Windows via the Command Prompt

Try activating Windows within the Command Prompt instead.

  1. To do so, open the Command Prompt as outlined within the first resolution.
  2. Enter this command in the Prompt and press Return: slmgr /ipk <Windows Key>. Replace <Windows Key> in that command with your actual product key.
  3. Then input the following command: slmgr /ato.
    slmr /ato command
  4. Restart Windows after executing the command.

4. Recreate the Windows Licensing Store

To fix a corrupted Windows activation file, try this fix.

  1. Enter cmd into Windows 10’s search utility.
  2. Then right-click the Command Prompt icon in the search utility to select its Run as administrator option.
    Run as administrator option Windows Activation Error 0xc004f063
  3. Enter the following series of separate commands and press Return after each one:
    • net stop sppsvc
    • cd %windir%ServiceProfilesLocalServiceAppDataLocalMicrosoftWSLicense
    • ren tokens.dat tokens.bar
    • net start sppsvc
    • cscript.exe %windir%system32slmgr.vbs /rilc
  4. Then exit the Command Prompt’s window.

Those resolutions will likely resolve Windows Activation error 0xc004f063. However, if you still can’t activate Windows, contact Microsoft support. Microsoft’s Customer Service phone page includes a list of toll-free support contact numbers.

Give us your feedback on which method you used to fix this activation issue by leaving us a message in the comments section below.

For more information about such errors, we have a dedicated Windows Activation Errors Hub.

If other errors are what are troubling you, check out our Windows 10 Errors page.

FIX: Windows 10 Activation Error 0xc03f6506 [3 Quick Ways]

Windows 10 Pro includes some handy tools and features that aren’t available within the Home edition. Users will often need to upgrade to Pro as Home is more typically included with laptops and desktops.

However, activation error 0xc03f6506 can arise for some users when they try to activate Windows 10 Pro after upgrading to it. That error message states, The last product key you entered can’t be used on this copy of Windows (0xc03f6506).

That’s the error message which the Activation tab in Settings displays. However, the issue can also arise when users try entering a product key. Then the error message will state:

Unable to upgrade your edition, We can’t upgrade your edition of Windows. Try upgrading your edition of Windows again. (0xc03f6506).

In either instance, the error code is the same. As a consequence, users can’t activate Windows 10 Pro after upgrading to it. These are some of the potential resolutions that can fix activation error 0xc03f6506.


How do I fix Windows Activation error 0xc03f6506?

1. Edit the registry

Editing the ProductName and EditionID registry strings can resolve error 0xc03f6506.

  1. Right-click Windows 10’s Start button and select Run to open that accessory.
  2. Type regedit in the Open box and click OK to launch the Registry Editor.
  3. Navigate to the following registry location:
    • Computer > HKEY_LOCAL_MACHINE > SOFTWARE > Microsoft > Windows NT > CurrentVersion.CurrentVersion key Windows 10 Activation Error 0xc03f6506
  4. Double-click the EditionID string to open the window shown directly below.Edit String window Windows 10 Activation Error 0xc03f6506
  5. Erase the current Core (Windows 10 Home) value. Then enter Windows 10 Pro in the Value data box to replace it.
  6. Click the OK option.
  7. Double-click the ProductName string.
  8. Erase Windows 10 Home in the Value data box. Input Windows 10 Pro as the replacement.
  9. Press OK to exit the window.
  10. Next, open this registry key:
    • HKEY_LOCAL_MACHINESOFTWAREWOW6432NodeMicrosoftWindows NTCurrentVersion.WOW6432Note CurrentVersion registry key Windows 10 Activation Error 0xc03f6506
  11. Change the EditionID and ProductName string values there exactly the same as you did for the fifth and eighth steps.
  12. Thereafter, exit the Registry Editor window.
  13. Restart Windows after editing the registry.

2. Disconnect net connection

  1. Alternatively, try activating Windows 10 with your net connection severed. Open the Run accessory.
  2. Input ncpa.cpl in the Open box within Run.
  3. Click OK to open the window in the shot directly below.
    The Network Connections applet Windows 10 Activation Error 0xc03f6506
  4. Right-click your net connection there and select Disable.
  5. Thereafter, try activating Windows 10 again with the key.

3. Activate Windows 10 via the Command Prompt

  1. You’ll need to have bootable Windows 10 drive media for this method. If you do, insert the bootable Windows 10 media in the laptop or destkop.
  2. Enter cmd in Run. Then press the Ctrl + Shift + Ener key to open Command Prompt as an administrator.
  3. Enter the bootable drive’s letter in the Prompt’s window, such as D:,and press Return.
  4. Then enter this command:
    • setup.exe /auto upgrade /pkey xxxxx-xxxxx-xxxxx-xxxxx-xxxxx.
    • Replace xxxxx-xxxxx-xxxxx-xxxxx-xxxxx with your actual product key.
      setup.exe command Windows 10 Activation Error 0xc03f6506
  5. Press the Return keyboard key to initiate that command.

So, that’s how you can activate Windows 10 Pro when error 0xc03f6506 arises. It’s not essential to activate Windows 10. However, it is better to activate the platform so you can make the most of all its options and features.

Let us know what fix helped you with this activation error by leaving us a message in the comments section below.


[wl_navigator]

8 Fixes for Twitch is not Working on Xbox One Error

Twitch is the world’s biggest destination for live video game broadcasts, attracting well over 100 million unique monthly viewers who use up to 20 billion minutes of gaming content monthly.

However, the service isn’t just for watching as it boasts more than 2 million broadcasters monthly, small or big, who stream any and every game they can and anyone can get in on the fun.

The Xbox One has built-in streaming capabilities, so you can get to peek into other people’s channels, watch them play and make things, and just be fascinated by the whole experience. The most rewarding part is exploring and playing with the tool sets used by streamers.

However, broadcasting Xbox One gameplay via Twitch is now commonplace, just like playing video games itself is as long as you have a console, an Internet connection that is fast, a television set to connect to your console, and an Xbox One controller to play games and navigate Twitch.

While all these may be set up, users have raised concerns that Twitch won’t broadcast on Xbox One.

To this end, we put together a list of solutions you can use and see whether you’re able to broadcast again using the Twitch app and Xbox One console.

What can I do if Twitch is not working on Xbox One?

1. General troubleshooting

  1. Ensure you have a wired connection even though there’s a wireless one, as wired is better
  2. Check that your Xbox Live account is in good standing (no low reputation)
  3. Check that you are signed in with Adult privacy settings and that no Child profiles are signed in at the time of broadcasting
  4. Ensure the Twitch connection exists on the Xbox connection: go to Settings>Connections. Mouse over the check mark and click Disconnect, then uninstall and reinstall the app and retry activation (twitch.tv/activate)
  5. Perform a hard reset by pressing the power button on the front of your Xbox One console for 10 seconds, then remove power for 30 seconds and restart the Xbox One console.

2. Reinstall Twitch app

To do this, you need to disconnect the app from Twitch, then delete app data from the Xbox One console, and finally uninstall and reinstall the app. Use the steps below:

  1. Disconnect your Xbox connection from Twitch by going to twitch.tv/settings/connection
  2. Go to My Games & Apps on your console
  3. Select Twitch app
  4. Press Menu
  5. Select Manage app
  6. Navigate to Saved Data
  7. Select the appropriate gamertag
  8. Press Menu
  9. Select Delete saved data
  10. Find the app and press Menu to open the app menu
  11. Select Uninstall
  12. Reinstall Twitch app

3. Reset stream key

  1. Go to tv/yourusername/dashboard/streamkey
  2. Click Stream key tab to reset stream key
  3. Click Show Key
  4. Reset the key just once! Do not reset your stream key multiple times to avoid a 15-minute lockout.

4. Check Xbox One set up for Twitch broadcast

If Twitch won’t broadcast on Xbox One, check if the following are set up properly:

  1. Your (profile) presence is set to Online
  2. Under the Settings app, check Privacy and online safety, See if you’re online to ensure they are set to Everybody
  3. Check that Broadcast gameplay is set to Allow
  4. Navigate to Settings and check Preferences, Allow broadcasts and Game DVR uploads to ensure the box is checked.
  5. Check that you are playing a game. Twitch won’t broadcast to Xbox One without first launching a game
  6. In the Settings app under Privacy and online safety, Share content made using Kinect is set to Allow
  7. Check that Kinect, Kinect on is checked (in the settings app)
  8. To include Kinect audio in your broadcast, ensure the Use Kinect microphone for chat is checked

5. Troubleshoot errors

If Twitch doesn’t broadcast on Xbox One, you may get an error code, like 0x00031196. If you get this error, make sure you open the game (not demo games or apps) before selecting Broadcast in Twitch, then try and broadcast again. Otherwise, do the following:

  1. Sign out of your accounts except for the one you’re trying to broadcast with, then try to broadcast again
  2. Check your account permissions
  3. Go to your profile
  4. Select Privacy settings
  5. Select Custom
  6. Ensure Broadcast Gameplay is allowed and try to broadcast again
  7. Reboot your console and try to broadcast again

6. When Twitch shows ‘Broadcasting’ but it doesn’t display

To resolve this, do the following:

  1. Reboot your console and try broadcasting again
  2. Switch from wireless to a wired internet connection
  3. Reboot your console and try broadcasting again

To reboot your console, do this:

  1. Go to settings
  2. Select System
  3. Select Power & Startup
  4. Select Turn Off Xbox
  5. Wait for the console light to stop flashing, and turn it back on.

7. Clear MAC address

    To fix Twitch won’t broadcast on Xbox One, if the above solutions don’t work, clear your MAC address. To do this:

  1. 1. Scroll left on the Home Screen to open the guide

  2.     2. Select the Gear Icon

  3.     3. Select All Settings and then select Network

  4. 4. Click on Network Settings and then select Advanced settings

  5.     5. Select Alternate MAC address and click the Clear button

  6.     6. Select Restart. The console will restart.

  7.     7. Perform a power cycle by turning off Xbox One and unplugging it then wait for a minute, and plug it back in, then turn it on again. Snap Twitch, then select Broadcast and see if it helps.

8. Unlink your console and activate Twitch again

  1. Unlink your Xbox One with twitch.com/settings
  2. Go to your Apps and delete your “saved data” from the cloud/console
  3. uninstall the twitch app
  4. Hard reset your Xbox One by holding the power button on your console for 5-10 seconds then started back once it’s reinstalled the twitch app
  5. To activate your Xbox One with Twitch, go to a laptop or desktop to key in the activation code
  6. Try broadcasting again

Were you able to resolve the Twitch won’t broadcast on Xbox One issue? Let us know in the comments section below.

HP Laptop Microphone not Working: Access it With 5 Steps

Issues with the microphone are common, but you can replace it if it’s an external one. However, things are a lot more tricky when the HP laptop microphone is not working.

The issue affects almost every model from the manufacturer, including the microphone not working on HP ProBook. So, let’s find out about the problem and the solutions that work.

Why is my mic not working on my HP laptop?

Here are some of the reasons the HP laptop microphone is not working:

  • Misconfigured permissions – If the problem is limited to an app, for instance, the HP laptop microphone is not working on Zoom, it could the app permissions to blame.
  • Outdated, corrupt, or incompatible drivers – Issues with the driver, too, could lead to several problems with the microphone, and it’s usually the outdated drivers to blame.
  • Incorrect sound settings – In case the microphone picks up feeble audio, chances are that your sound settings are misconfigured, and resetting the sound settings should do the trick.
  • Hardware issue – Though rarely the case with an internal microphone, you can’t altogether rule out the possibility of a hardware malfunction.

How can I fix HP laptop microphone if it’s not working?

Before we attempt the slightly intricate solutions, here are a few quick ones you might try:

  • Restart the computer and check if the microphone now starts working.
  • Disconnect every non-critical peripheral connected to the PC, especially an external webcam, since it fixed things when the HP laptop microphone was not working.
  • Make sure you are running the latest version of Windows. If any updates are available, install them.
  • If the microphone can pick up sound, but the output is very low on the other end, it could be dust accumulation. So, locate the microphone, and clean the crevice with a soft cloth.

In case none of these worked, the solutions listed next surely would.

1. Check the permissions

  1. Press Windows + I to open Settings, select Privacy & security from the navigation pane, and click on Microphone under App settings.microphone
  2. Now, ensure the toggle for Let apps access your microphone is enabled, the app(s) you are facing issues with is listed here, and the toggle for it is individually turned on.let apps access your microphone to fix hp laptop microphone not working

Some users reported that the HP laptop microphone was not working in Google Meet, and the problem lay with permissions, which, when provided, fixed things immediately. Also, check for other apps as well.

2. Update the drivers

  1. Press Windows + R to open Run, type devmgmt.msc in the text field, and click OK.device manager
  2. Expand Audio inputs and outputs, right-click on the microphone here, and select Update driver.update driver to fix hp laptop microphone not working
  3. Select Search automatically for drivers and wait for Windows to install the best available driver.search automatically for drivers

When it comes to issues with hardware, updating the driver works in most cases when the HP laptop microphone is not working.

Also, you may check the manufacturer’s website for driver updates in case one hasn’t made its way to Microsoft yet. Besides, you could use reliable software.

We also recommend Outbyte Driver Updater (100% safe and tested by us) to download all the outdated drivers on your PC automatically.

This tool will prevent file loss and help you to avoid permanent damage to your PC caused by downloading and installing the wrong driver versions.

Launching Outbyte Driver Updater will trigger a complete system scan to detect all outdated, broken, or missing drivers.

You will then get to choose which ones to fix and which ones to leave as it is, and the program will then proceed to download and fix them accordingly.

If there’s a new update for your microphone driver, the Driver wizard will install it automatically. However, if there’s no recent update or the problem persists even after installing the update, move on to another solution.

⇒ Get Outbyte Driver Updater

3. Set up the microphone for speech recognition

  1. If you have an external microphone, connect it to the computer and proceed.
  2. Press Windows + I to open Settings, go to Time & language from the left, and then click on Speech.speech settings
  3. Now, click on Get started under Microphone.get started to fix hp laptop microphone not working
  4. Choose Cortana can’t hear me.cortana can't hear me
  5. Select your microphone from the list, click Next, and follow the on-screen instructions to complete the process.choose microphone
  6. Once done, disconnect the external microphone, and the internal one should work fine now.

Reconfiguring the microphone can help fix problems, and it works for many users. Besides, if you were wondering how to test the microphone on an HP laptop in Windows 10 and 11, this is one way.

4. Uninstall the microphone driver

  1. Press Windows + X to open the Power User menu, and select Device Manager from the list.device manager
  2. Expand the Audio inputs and outputs category, right-click on the microphone, and choose Uninstall device.uninstall device to fix hp laptop microphone not working
  3. Now, click on Uninstall in the confirmation prompt.uninstall
  4. Once done, restart the computer, and Windows will automatically install a fresh driver.

5. Run the troubleshooter

  1. Press Windows + I to open Settings, and click on Troubleshoot on the right.troubleshoot
  2. Click on Other troubleshooters.other troubleshooters
  3. Now, click on the Run button next to the Recording audio troubleshooter.recordind audio to fix hp laptop microphone not working
  4. Wait for it to run a diagnostics test, and follow the on-screen instructions to complete the troubleshooting process.troubleshooter

That’s it! The dedicated troubleshooter should get things up and running if nothing has worked. And the HP laptop microphone will now be working just fine.

If the problem persists, we recommend you contact HP Support since it could be a hardware-related problem and requires a manual inspection.

Before you leave, don’t forget to check how to adjust the microphone sensitivity and get the perfect audio quality.

Please tell us which fix worked for you in the comments section below.
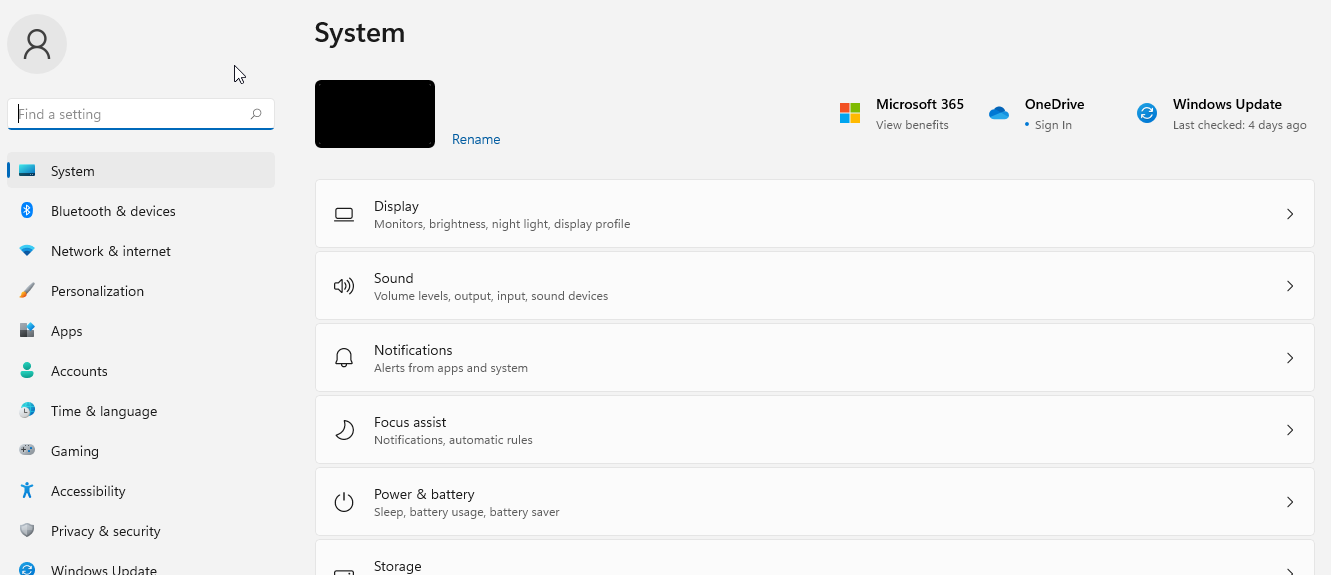
0xc004c060 on Windows 11: How to Fix This Activation Error

Activating your copy of Windows is critical since it allows you to access a bunch of tools apart from receiving regular updates. Several users have reported encountering the 0xc004c060 activation error in Windows 11.

This is one of the common Windows activation errors and it was encountered on the previous versions as well. Here, a few questions arise that we have taken up in the next section and your subsequent actions will depend on the answers to these.

So, before you go ahead and purchase another licensed version, we recommend you read the following sections and try the methods listed here to fix the Windows 11 activation error 0xc004c060.

Why am I ecountering the Windows 11 activation error 0xc004c060?

The first thing is to confirm whether you are using a genuine copy of Windows and that the license key is valid. Also, check if it was obtained from an official source and that the key is for the installed edition of the OS.

If there’s an issue with any of these, you are likely to encounter the Windows 11 activation error 0xc004c060. So make sure to verify these and if you find it all in order, proceed to the next section.

In case you obtained the key through unreliable means or believe that the installed copy is a pirated version, you will need to purchase a valid key from Microsoft.

Apart from that, misconfigured settings, the absence of critical services, or even a bug in the current version can lead to this activation error.

Now that you have a basic understanding of the error and the underlying causes, let’s walk you through the most relevant fixes for it.

How do I fix the Windows 11 activation error 0xc004c060?

1. Update Windows 11

  1. Press Windows + I to launch the Settings app, and select Windows Update from the list of tabs in the navigation pane on the left.Windows Update to fix windows 11 activation error 0xc004c060
  2. Next, click on the Check for updates button on the right.Check for update
  3. If an update is listed after the scan, click on Download & install to get it.Download & install to fix windows 11 activation error 0xc004c060

2. Run the built-in troubleshooter

  1. Press Windows + I to launch the Settings app, and click on Activation on the right in the System tab.click on
  2. Click on the Activation state option here.Run Windows activation troubleshooter to fix windows 11 activation error 0xc004c060
  3. Now, if the installed Windows is not activated, you will find the a troubleshooter here. Run it and then follow the on-screen instructions and choose the appropriate response when prompted.

Once the troubleshooter is done running, restart the computer for the changes to come into effect and check if the Windows 11 activation error 0xc004c060 is fixed.

3. Start critical services

  1. Press Windows + R to launch the Run command, enter services.msc in the text field, and either click on OK or hit Enter to launch the Services app.Launch Services
  2. Locate the Software Protection service, right-click on it, and select Properties from the context menu.Software protection service
  3. If the service is not running, click on the Start button under Service status, and once it starts running, click on OK at the bottom to save the changes.Start service to fix windows 11 activation error 0xc004c060

4. Run SFC scan and DISM tool

  1. Press Windows + S to launch the Search menu, enter Windows Terminal in the text field, right-click on the relevant search result, and select Run as administrator from the context menu.Open Terminal to fix windows 11 activation error 0xc004c060
  2. Click Yes on the UAC (User Account Control) prompt that pops up.Click Yes
  3. Now, click on the downward-facing arrow at the top, and select Command Prompt from the list of options. Alternatively, you can hit Ctrl + Shift + 2 to launch Command Prompt in a new tab.Command Prompt to fix windows 11 activation error 0xc004c060
  4. Now, type/paste the following commands one at a time and hit Enter after each to run the DISM tool:DISM.exe /online /cleanup-image /scanhealth DISM.exe /online /cleanup-image /restorehealth DISM.exe /online /cleanup-image /startcomponentcleanup
  5. After running the DISM tool, execute th following commands to run the SFC scan: sfc /scannowRun SFC scan to fix windows 11 activation error 0xc004c060

5. Activate Windows 11 via Command Prompt

  1. Press Windows + X or right-click on the Start button in the Taskbar, and select Windows Terminal from the Quick Access menu.Launch Windows Terminal
  2. Now, click on the downward-facing arrow and select Command Prompt from the menu.Open Command prompt
  3. Execute the following command, and if it works, you will receive a prompt mentioning that the Windows is activated:slmgr.vbs /atoExecute command to fix windows 11 activation error 0xc004c060
  4. If the previous command didn’t work, execute this one to remove the product key:slmgr.vbs /upkExecute slmgr.vbs /upk command
  5. Now, paste the following command and hit Enter. Make sure to replace the X’s here with the product key that you have:slmgr.vbs /ipk XXXXX - XXXXX - XXXXX - XXXXX - XXXXXAdd product key

6. Reinstall the previous iteration and then upgrade to Windows 11

If you did a clean install of Windows 11, and have been encountering the 0xc004c060 activation error, it’s time you reinstall the previous iteration and then make the upgrade.

In some cases, what helped users was rolling back to the iteration for which the key was actually meant, and then installing Windows 11 via the Windows Update, once it’s available.

Since the Windows 11 rollout is in a phased manner, you may have to wait for a little but upgrading to it via Windows Update should help eliminate the 0xc004c060 activation error in Windows 11.

Do I really need to activate Windows 11?

Ideally speaking, you should always use an activated version of Windows 11. However, you can use the OS without activating it as long as you want but this violates the Microsoft Service Agreement.

Activation settings in Windows 11

Also on an unactivated version, you will be missing out on certain built-in apps and feature updates, though you should receive the critical ones. Also, there will also be a message on the bottom-right corner of the screen saying that Windows isn’t yet activated.

So, if you are looking for a complete experience, activating Windows 11 is a must, and you should do it right away. If you are having trouble activating a genuine version, try the fixes here.

That sums up troubleshooting the Windows 11 activation error 0xc004c060, and by the time you reach this part of the guide, the error should be eliminated. Also, you now understand the intricacies and importance of using an activated version.

Besides, find out how to fix the Windows 11 activation error 0xc004f213, in case you receive this error.

Tell us which fix worked and the edition you were having trouble activating, in the comments section below. Also, if you managed to fix the error using another method, do not hesitate to add that as well.

Stop Windows 11 Update Notifications in 5 Different Ways

There are a lot of ways to customize Windows 11 but some important tweaks that a lot of our readers are performing are to stop the update notifications and automatic installation.

So, in this article, you will find out how to stop Windows 11 update notifications forever on your device.

How often does Windows 11 check for updates?

Windows 11 automatically checks for updates every day but the exact time might vary. If there are new ones, the system will trigger a notification to let you know about them.

This can be useful if you want to keep your OS updated at all times, but if they only annoy and disturb you, here’s how you cand stop them quickly.

How can I stop Windows 11 update notifications?

  1. Click the Start button and go to the Settings menu.
  2. Click on the Windows Update section and select Advanced options.
  3. Set off the Notify me when a restart is required to finish updating option.
  4. Now you won’t get any Windows 11 updates notifications.

Want zero pop-ups across the system? Follow this guide to disable the Notification Center in Windows 11 and silence alerts beyond update prompts.

How do I block Windows 11 automatic updates?

1. Use Windows 11’s Settings

  1. Click on Start and select Settings.
    Settings Win 11
  2. Go to Windows Update.
    Windows update
  3. Click on Pause for 1 week.
    Pause for a week

This is the easiest way to pause Windows 11 updates and the handiest one as it takes less than a minute.

But you’ll have to go through these settings every 7 days so if you are looking for something more permanent, move on to the next solution.

2. Change the network settings

2.1. Disable the download update option

  1. Go to Start and click on Settings.
    Settings Win 11
  2. Head over to Windows Update.
    Windows update
  3. Click on Advanced Options.
    Advanced options
  4. Switch the toggle off for the Download updates over metered connections option.
    Download over metered connections option

2.2. Switch on the network metered connection

  1. Once again, click on Start and select the Settings option.
    Settings Win 11
  2. This time, go to Network and Internet.
    Network & internet
  3. Click on the network (Wi-Fi or Ethernet) of your PC.
    Network & internet - Ethernet
  4. Switch on the Metered connection toggle.

Microsoft implemented this change in their OS by default so that Windows cannot auto-download updates over metered connections.

3. Use the Local Policies

  1. 1. Go to Search, look for gpedit.msc and click on the Group Policy Editor once it is displayed in the search results.

    open gpedit in Win 11
  2. 2. On the left pane, under Local Computer Policy, click on Computer Configuration.

    Computer config gpedit
  3. 3. Double-click on Administrative Templates.

    windows 11 Administrative templates
  4. 4. Select the Windows Components option.

    Windows components
  5. 5. Locate Windows Update and open it.

    Windows update windows 11
  6. 6. Now select Manage end user experience.

    Manage end user xp gpedit
  7. 7. Double-click on the Configure Automatic Updates option.

    windows 11 Configure automatic updates
  8. 8. Select the Disabled option to turn off automatic updates on your Windows 11 PC.

    block windows 11 update setting gpedit
  9. 9. Click on Apply and OK to save the settings.

  10. More experienced users can block Windows 11 updates via the Group Policy Editor. The process is easy, and the built-in tool is perfectly safe to use.

4. Disable the Windows 11 Update Service

  1. Use the Windows + R keys to open the Run dialog box.
  2. Type services.msc in the text field and hit Enter.
    services msc - run box
  3. Locate Windows Update and double-click it to open the Properties tab.
    Windows update
  4. Under the General tab, select Disabled from the drop-down menu from Startup type.
    Startup type - disabled
  5. Click on OK and Apply to save the settings.

If you ever want to change the settings, just follow these exact steps but choose the Automatic option from the startup type.

5. Use the Registry Editor

  1. Press the Windows + R keys to open the Run box.
  2. Type regedit and hit Enter.
    Regedit command
  3. Navigate to: HKEY_LOCAL_MACHINE\SOFTWARE\Policies\Microsoft\Windows
    Regedit - Windows
  4. Here you need to create the WindowsUpdate and AU (Automatic Updates) folders. Right-click and choose New > Key to create the WindowsUpdate folder.
    WindowsUpdate
  5. Now, under the newly created folder, right-click again, choose New > Key and rename the folder AU.
    AU
  6. The location should now look like this: HKEY_LOCAL_MACHINE\SOFTWARE\Policies\Microsoft\Windows/WindowsUpdate/AU
    Windows-WindowsUpdate-AU
  7. Right-click on the white space and select New > Dword (32-bit) Value to create the NoAutoUpdate value.
    NoAutoUpdate
  8. Now right-click on the newly created value NoAutoUpdate value and select Modify.
    Modify value
  9. Set the value to 1.
    Modify value to 1
  10. Click on OK and restart the PC for the changes to take place.

There are a lot of questions regarding automatic updates and notifications and we are hereby answering the most important:

  • How can I remove the Windows 11 update pending restart notification? – You can stop updates that require you to restart your PC easily by simply blocking updates from Settings. You only have to select Pause updates from the dedicated menu to stop any following updates.
  • Can I stop a Windows Update in Progress? – Yes! Go to the Settings menu and select the Windows Update section, then click the Pause button for the ongoing update.
  • Can I remove specific updates? – Of course! All you need to do is head on to the Windows Update center and choose which updates you want to uninstall, then click on Uninstall update.

We do recommend keeping your OS updated to avoid and prevent errors and security bugs from occurring.

Just remember, none of these changes is permanent so if you ever change your mind and want to let Windows update itself automatically, all you need to do is revert the changes you made.

Get more control over your device and learn how to disable Windows 11’s driver update in order to avoid downgrading your GPU on your device.

We hope this guide helped you block Windows 11 automatic updates. If you have any questions or suggestions, head on to the comment section below and we’ll get back to you.

Fix: Product Activation Failed Error in Office [Excel, Word]

Microsoft product activation failed errors can manifest because of various reasons. And failure to activate your Microsoft product means that the program in question will operate adequately.

Therefore, it is necessary to fix these errors sooner rather than later by configuring the program correctly.

To fix these issues, you have two options; either hire a professional or fix it yourself.

While the latter is much cheaper, it requires some tech knowledge, which is where this list of 7 detailed fixes for the Product Activation Failed error comes into play.

What happens if Microsoft Office is not activated?

Suppose the Microsoft Office suite is used without a license. In that case, you will gradually lose access to its features until you cannot use even the most essential elements, like viewing documents.

Because this error appears across apps, users have wondered how to remove the dreaded product activation failed error in MS Office 2016, 2013, and 2010 versions.

Users have also complained on online forums regarding a product activation failed error appearing in both Excel and Outlook.

How do I fix the Microsoft product activation failure error?

1. Switch to your active Microsoft account

This is the most direct cause of Microsoft product activation failed notifications, affecting users who have multiple Microsoft user accounts, especially if they signed into both versions on their PC.

It also affects users who have purchased a subscription product, even if the subscription is still active.

If you switched your active Account to another without an active Microsoft product subscription, you’d see the product activation failed notification.

  1. Hit the Windows key or click on the Start button to open the Start Menu.
  2. Type the program in question into the Search bar.search bar
  3. Click on the Program from the search results.Microsoft office
  4. From the upper-right corner, click on the Accounts button.accounts button
  5. Log into or switch to your Account with an active subscription.switch accounts

2. Update your subscription

Note icon NOTE
Before 2016, Microsoft products used to be one-time purchases. Nowadays, however, users are encouraged to buy digital licenses. Using an expired license would result in the product activation failed error notice.

Follow the steps below to update your product license: 

  1. First, hit the Windows key or click on the Start button to open the Start Menu.start menu windows
  2. Type the program in question into the Search bar and click on the top result.Microsoft office
  3. Next, click on Sign in and fill in your credentials.

Your product license should then be updated automatically if free. If it is a paid product, you’ll need to make a payment. Once the license is renewed successfully, the product activation failed error message will disappear automatically.

3. Remove other copies of Office from your PC

  1. Press Windows + R to launch the Run window.
  2. Type Control in the open prompt, then hit Enter or click on OK.control input in run command
  3. Locate and click on Uninstall a program, found under Programs.control panel
  4. Type the program’s name in question into the search bar located in the top-right-hand side corner of the window.control panel search bar
  5. If multiple program versions appear, right-click the version you aren’t using and click on Uninstall.control panel uninstall
  6. Click the Windows + F4 keys to open the Window Shut Down prompt.
  7. Click on the drop-down menu and select Restart.Windows shut down prompt
  8. Hit Enter or click on OK.Shut down windows

4. Run the program with administrator privileges

  1. Close all instances of the program.
  2. Hit the Windows key or click on the Start button to open the Start Menu.
  3. Type the program in question into the Search bar.search bar windows
  4. Right-click on the program, then click on Run as administrator.run as administrator
  5. Click on Yes in the security prompt.security prompt windows

5. Check your date/time settings

Even though it might seem counterintuitive, your PC’s date and time settings could cause activation failures if they aren’t correct. Here is how to fix it.

  1. Close all instances of the program in question.
  2. Right-click on the time and date located in the bottom right corner of your screen.
  3. Click on Adjust date/time.adjust date and time
  4. Make sure Set time automatically and, if shown, Set time zone automatically are enabled.set time zone
  5. If the Set time zone automatically option is grayed out, manually select your time zone from the drop-down menu under it.setting time zone in Windows
  6. Restart the program in question.

6. Update the program in question

The recommendation is always to use the latest version of your Windows programs, as it is commonly the root of most sudden problems. Here is a step-by-step guide to updating the program.

  1. Open the program in question.
  2. Locate and click on Account.update program in Windows
  3. Under Product Information, click on Update Options, then Update Now.update the program

7. Reset Microsoft settings

Your Microsoft settings affect how the program works. Thus, wrongly configured settings can instigate the product activation failed error. To fix it:

  1. Close all programs.
  2. Hit the Windows key or click on the Start button.
  3. Locate and click on Settings.settings windows
  4. Locate and click on Update & Security in the Settings window.update & security windows
  5. Click on Recovery, located in the left-hand side menu.
  6. Under Reset this PC, click on Get Started. reset pc

This process might take some time to conclude, so be patient and don’t worry about it too much. The process will do it soon enough.

You’ll notice that each of these fixes depends on the issue at hand with your Microsoft product and why it failed to activate.

While this product activation failure issue can be irritating, they’re easy to fix if you follow the steps outlined above. Did the guide help you get rid of your product activation issues? Let us know in the comments section.

Windows 11 Update Error: Why it Fails & How to Fix it

Windows 11 automatically downloads and installs updates to keep your system safe and stable. However, sometimes, these updates might fail to install, and you may have a Windows 11 Update error.

The Windows Update error is a broad description that includes many problems, issues, and mistakes preventing the update process from going smoothly.

Generally, in most cases, users encounter issues with Windows Update not working on Windows 11 when installing new updates on their computers.

It contains a long list of error codes, but they prevent you from updating your PC. Some of the common error codes include 0x800f0816 and 0xc1900101.

Why am I getting a Windows 11 Windows Update error?

Windows updates are core to your computer and laptop’s performance. They are there to ensure that your computer is running at its full potential.

However, there can be many reasons you may not be able to install the latest Windows Updates on your computer.

Some of the reasons include:

  • Network settings – One of the reasons is that you may have turned on the Metered connection setting for your network connection. This setting will prevent Windows 11 from downloading updates connected to that specific network.
  • Hardware issues – Solving these problems means finding the driver’s location, downloading the updated version, and installing it on your computer. You can find updated drivers for your hardware at their respective manufacturer websites.
  • Insufficient disk space – Windows 11 is a RAM-hungry OS, so you must ensure your PC always has sufficient space to accommodate the updates. So the first thing to do is free up some disk space so Windows has room to create the files it needs to run.
  • Corrupt files – If you have corrupt system files on your PC, it could also cause Windows Update to fail. If this is the case, you’ll need to repair the corrupted system files before attempting to install updates again.

If you experience any of these issues, do not fret; there are many solutions you can attempt to fix the problem.

This being said, let’s see our seven ways to fix the Windows Update error and get back to your daily tasks.

How can I fix the Windows Update not working on Windows 11 issue?

1. Enable the Windows Update Service

  1. Press Windows + R keys simultaneously to open the Run dialog box.
  2. Type services.msc in the dialog box then press OK.
  3. Double-click on Windows Update.
  4. Select Automatic in the Startup type option, then press Start.
  5. Press the Apply button to effect the changes, then click OK.

This solution also works for the 0x8024d001 Windows Update error but the highlighted guide provides more solutions.

2. Use a third-party tool

Corrupt or missing files usually cause update errors. Specialized software is helpful because it is designed to replace corrupted files with new Windows files and components.

A third-party tool can solve Windows 11 Windows Update errors by scanning your PC for missing or corrupted files that could be causing these issues with your operating system. Once it has narrowed down the problem, it will repair the affected areas using its massive database.

3. Run the Windows Update Troubleshooter

  1. Press the Windows + I keys simultaneously to open the Settings app.
  2. Select System on the left pane and then Troubleshoot on the right pane.system-troubleshoot windows 11 error after update
  3. Navigate to Other troubleshooters.
  4. Click the Run button next to Windows Update.

Another quick fix is to run the Windows Update troubleshooter. We have a dedicated guide on it if you need more info about this tool.

4. Free up disk space

  1. Press the Windows key, select System, then click on Storage.
  2. Select Storage Sense and toggle it on.
  3. Click on Storage Sense again and select Run Storage Sense now.

Ensuring you have sufficient disk space can also help you avoid the Please insert the external storage media and press OK; read this to learn more.

5. Run DISM and SFC commands

  1. Press the Windows key, type cmd in the search bar, and click Run as administrator.
  2. Type in the following command and press Enter:
    DISM /Online /Cleanup-Image /ScanHealth
  3. Once the command has been executed, type and Enter the next one:
    sfc /scannowsfc-scannow win + x not working windows 11
  4. Wait for the order to be completed and restart your PC.

6. Disable Windows Defender temporarily

  1. Press the Windows + I keys simultaneously to open Settings.open settings
  2. Type Windows Security in the search box and select Open.
  3. Navigate to Virus & threat protection.virus and threat protection steam error e502 l3
  4. Select Public network.
  5. Toggle Microsoft Defender Firewall off.

7. Manually update the Windows Update

  1. Open your browser and navigate to the Microsoft Update Catalog.
  2. Search for the specific security update that’s bringing up an error and click on Download.
  3. Locate the downloaded update file and run it as administrator.

I’m still getting the Windows 11 Update error, what can I do?

If you have tried all the solutions listed above but are still getting the Windows 11 Windows Update error, you should proceed to do a clean boot.

To perform a clean boot, follow the steps below:

  1. Press Windows + R keys to open the Run dialog box.
  2. Type in msconfig, and hit Enter.
    how to fix windows 11 update error
  3. Navigate to the Services tab in the System Configuraton window.
  4. Check the box next to Hide all Microsoft services and click Disable all button.
  5. Press the Windows key, type Task Manager in the search bar, and click Open.
  6. In the Startup tab, click each entry and Disable them individually.
  7. Exit Task Manager and go back to the Startup tab in the System Configuration window, then select OK.
    how to fix windows 11 update error
  8. Restart your PC.

What Windows Update errors can I get on my PC?

Many Windows update errors might pop up on your screens. Some of them are the following:

  • Windows 11 update error 0x800f0922 – When you utilize a virtual private network (VPN), the operating system can have trouble establishing a connection with the servers that host Microsoft Windows updates.
  • Update error 0x800f0988 in Windows 11 – By running the Windows Update troubleshooter from your settings, you will be able to fix this error.
  • Windows 11 update error 0x800f081f – If there are problems with the .NET Framework, you may face the following 0x800f081f error with the Windows 11 upgrade.
  • Update error 0x80072ee7 Windows 11 – There is a possibility that improper TCP/IPv4 settings led to the occurrence of error 0x80072EE7. This indicates that the computer cannot resolve a link for the Windows Update because it cannot locate the correct IP address.
  • Windows 11 update error 0x800f0831 – This is due to corrupted system files, a VPN that’s been improperly set up, or trouble with the Windows Update service, among other potential causes.
  • Update error 0x8000ffff in Windows 11 – The inaccessibility of the Microsoft servers is one of the most common causes of the 0x8000ffff error code.
  • Windows 11 update error 0x800f0816 – If you get this error, you need to enable or restart the Windows Update Service.
  • Update error 0xc1900101 in Windows 11 -The error code 1900101 is quite general and almost always signals an issue with a driver.

Why is Windows 11 failing to install?

There are a few reasons why the installation may fail, including:

  • Antivirus software – Some antivirus programs from third parties have elements that can obstruct the installation of Windows 11.
  • Old and non-essential apps – Microsoft also cautions users not to let outdated software prevent them from upgrading to Windows 11.
  • Inadequate storage space – Windows 11 needs a minimum of 64 GB of storage. To be safe, we advise having 70-90 GB of free storage.
  • Outdated graphics card driver – A damaged or out-of-date graphics driver might also ruin the installation of Windows 11. Your PC’s most recent graphics card driver should be installed before trying the Windows upgrade again.
  • TPM 2.0 – Version 2.0 of the Trusted Platform Module is necessary to operate Windows 11. On Windows devices, the TPM 2.0 component provides privacy and security-related functions.

Will a clean boot delete my files?

No, stopping unnecessary services and processes will not remove your files. Clean booting does not access, modify, or delete personal data from your computer.

A clean boot is a troubleshooting technique that starts Windows with the minimum drivers and startup programs so that you can determine whether a background program is interfering with your game or program.

It helps eliminate software conflicts (for example, you might encounter a problem installing a program or an update).

However, as a precaution, you will need to make a backup of your files. To do this, you can use a software program that will allow you to back up your entire system.

You can also delete backup cache files to free up more disk space if you still face the Windows Update error.

Can’t install Windows 11 even though I meet the requirements?

While the minimum requirements are essential in installing the OS, other factors should be considered.

Earlier in this guide, we shed light on some of them, including old and non-essential apps, compatibility issues with antivirus apps, and outdated drivers. Before retrying the upgrade or installation, you should ensure none of these are an issue.

Taking note of these will help you if Windows 11 installation has failed even with no error code.

We hope you know how to fix Windows 11 update errors. It is important to note that we have not made these solutions in any particular order, and we expect that you pick the solutions that seem most appropriate to your case.

For further solutions, you may also refer to our guide on fixing the Windows Update error 0x8024a21e. We also have a great guide on install error – 0x800705b9, so don’t miss it for more solutions.

We also have a guide on error code 0x80010105, so don’t miss it for more information.

If you were experiencing this error, we hope one of our solutions was able to come to your rescue. Feel free to share any additional tips in the comments section below.

Laptop Keeps Disconnecting From WiFi: Use These 6 Solutions

WiFi is one of the most used mediums to connect to the Internet and is preferred by many over wired connections. However, it is not as reliable as Ethernet, and many wondered why their laptop keeps disconnecting from WiFi.

Issues with the WiFi network are common, but they are all fixable if the problem is not with the hardware. So, let’s find out how you can fix things.

Why is WiFi disconnecting frequently on laptops?

Here are a few reasons the laptop WiFi disconnects frequently:

  • Outdated drivers – When running an outdated driver, you are bound to get into issues, and the WiFi may keep disconnecting from time to time.
  • Issues with the network properties – Misconfigured network settings may also lead to a drop in Internet connection or the laptop disconnecting from the WiFi.
  • Power settings – If you have power saving settings enabled for the laptop or the network adapter, it may lead to issues with the connection.
  • Hardware issues – There is also the possibility that the integrated network adapter is malfunctioning, so you will have to purchase a new and reliable WiFi adapter.

What are the most frequent WiFi disconnect errors?

It seems that WiFi Ralink cards have big problems in Windows 10 or older. But here are some other frequent instances:

  • WiFi gets disconnected after sleep – If you want to save power, you can do so by using Sleep Mode, but this can interfere with your connection
  • WiFi disconnects when connected to an external monitor – This can occur when you have outdated drivers
  • Err_internet_disconnected pop-up – This isn’t a severe problem, and you should be able to fix it with one of our solutions
  • WiFi disconnects randomly/ keeps dropping – This is a variation of this problem, and many users reported frequent and random disconnects
  • WiFi getting Limited access – If you get the Limited access message, you’ll be able to connect to the wireless network, but you won’t be able to access the Internet at all
  • WiFi not getting connected/ detected – This problem might involve your router that is not working properly
  • WiFi disconnects with VPN/ when other devices connect – Sometimes problems with WiFi can occur if you have multiple devices in your WiFi network; also, the VPN may cause these issues

How can I fix my laptop if it keeps disconnecting from WiFi?

Before we go around trying the slightly intricate fixes, here are a few quick tips and tricks that might work:

  • Make sure the laptop is within the range of the router. In case it’s far away, move the two closer.
  • Restart the computer and router, and verify if the laptop still disconnects from WiFi.
  • If your router supports dual-band, i.e., 2.4 GHz and 5 GHz, try connecting to the other band. Some old laptop models don’t support the 5 GHz band, which could be why the laptop keeps disconnecting from WiFi.
  • Check for Windows updates and install the latest available version.
  • If two WiFi networks are available, and you have both saved on the computer, forget the other one and only keep the primary network. This works when the computer detects a stronger signal and automatically switches the network.
  • Make sure you don’t have an antivirus or security software enabled on the PC. In case you have one, please disable it and verify whether the problem is fixed. If it is, we recommend you uninstall the program, and switch to a more effective antivirus.

In case none of the solutions here worked, head to the ones listed next.

1. Update the network drivers

  1. Press Windows + R to open Run, type devmgmt.msc, and then click OK.device manager
  2. Now, expand the Network adapters entry, right-click on the WiFi adapter, and select Update driver.update driver to fix why does my laptop keep disconnecting from wifi
  3. Now, choose Search automatically for drivers and wait for the update to complete.search automatically for drivers

Your primary approach when the laptop keeps disconnecting from WiFi and won’t reconnect is to update the network drivers. It’s also recommended that you check the adapter manufacturer’s website for the latest driver version.

If Windows didn’t find any compatible drivers, you can try using a driver updater tool, that will find and update any outdated driver from your PC.

2. Reconnect to the WiFi network

  1. Press Windows + I to open Settings, go to Network & Internet from the navigation pane, and click on WiFi.wi-fi settings
  2. Choose Manage known networks.manage known networks
  3. Click on Forget next to the WiFi network that disconnects frequently.forget to fix why does my laptop keep disconnecting from wifi
  4. Once done, turn off the router and then power it back on after a few minutes.
  5. Head back to WiFi settings, and click on Show available networks.show available networks
  6. Click on the one you removed earlier, and click on Connect.connect to fix why does my laptop keep disconnecting from wifi
  7. Finally, enter the password, and then click Next.enter pin

If your laptop keeps disconnecting from a specific WiFi network, it could a problem with the connecting properties, and reconnecting should fix things.

3. Tweak the Power options

3.1 Change adapter’s power settings

  1. Press Windows + X to open the Power User menu, and select Device Manager.device manager
  2. Right-click on your installed network adapter and choose Properties from the menu.properties
  3. Navigate to the Power Management tab, uncheck Allow computer to turn off this device to save power, and click on OK to save changes.
    Laptop keeps disconnecting from WiFi

3.2 Change the device’s power settings

  1. Press Windows + S to open Search, type Control Panel in the text field, and click on the relevant search result.control panel
  2. Click on System and Security.system and security
  3. Next, click on Power options.power options
  4. Click on Change plan settings.change plan settings to fix why does my laptop keep disconnecting from wifi
  5. Now, click on Change advanced power settings.advanced power settings
  6. Expand Wireless Adapter Settings, double-click on Power Saving Mode, and then choose Maximum Performance for both On battery and Plugged in.maximum performance to fix why does my laptop keep disconnecting from wifi
  7. Once done, click OK to save the changes.

That’s it! After you are done, restart the computer and check whether the problem is resolved. If yes, you now know why the laptop keeps disconnecting from WiFi.

4. Disable or remove your security software

If WiFi is getting disconnected frequently, that can be due to your security software. Many third-party antiviruses may interfere with Windows and cause various problems to appear.

To fix this problem, it’s advised to disable your antivirus and check if that solves the issue. If disabling the antivirus doesn’t solve the problem, you might have to remove your antivirus software.

Almost all antivirus companies offer removal tools for their products, so be sure to download a removal tool for your antivirus and use it to remove all files associated with your antivirus software.

5. Change the network type

  1. Press Windows + I to open Settings, navigate to Network & Internet, and then click on WiFi.wi-fi
  2. Click on the network here.current network
  3. Now, make sure to choose the Private network option to configure the WiFi accordingly.private network to fix why does my laptop keep disconnecting from wifi

6. Reset network settings

  1. Press Windows + I to open Settings, select Network & Internet from the left, and then click on Advanced network settings.advanced network settings
  2. Click on Network reset.network reset to fix why does my laptop keep disconnecting from wifi
  3. Now, click on the Reset now button, and confirm the change.reset now

If nothing has worked, resetting the network properties will do the trick when the laptop keeps disconnecting from WiFi. This will also help when the Internet disconnects while gaming on Windows 11.

Before leaving, find the best WiFi booster software to improve signal strength.

If you have any queries or know of another solution, drop them in the comments section below.

Windows 11 Snipping Tool Missing: 6 Ways to Get it Back

Have you recently upgraded to Windows 11 only to see the Snipping Tool missing or not working on your PC? Many reported the problem, but strangely, others seemed to have the tool running just fine.

There are various reasons the Windows 11 Snipping Tool is not working. But there are some quite strange solutions, as you will later find out. First, keep in mind that most issues with Windows default programs can be easily solved with the help of specialized tools.

Why can I not find the Snipping Tool in Windows 11?

Here are some of the reasons the Windows 11 Snipping Tool is missing:

  • A bug in the OS – Users who reported the problem early on when Windows 11 was released found a bug in the OS itself that caused the problem, and an update for it was released.
  • Corrupt system files – If the system files are corrupt, chances are that Snipping Tool and a bunch of other pre-installed apps would fail to work.
  • Misconfigured settings – There are certain settings that, when disabled, will affect the tool’s functioning.

How can I fix the missing Snipping Tool on Windows 11?

Before we try the slightly complex solutions, here are a few quick ones that might work:

  • Restart the computer and check if you can access the Snipping Tool.
  • Update the OS to the latest available version since a patch was released for a bug that led to the Snipping Tools not running in Windows 11.
  • Scan your PC for malware and viruses using the built-in Windows Security. Also, you could use a reliable and effective antivirus. These are generally up-to-date with the recent bugs and threats and help seamlessly eliminate them.

If none of these work, head to the fixes listed next.

1. Open it from Windows.old folder

  1. Press Windows + E to open File Explorer, navigate to the C: drive, and then open Windows.old directory.
    windows.old to fix windows 11 snipping tool missing
  2. Select the Windows folder, and then open the System32 folder.
  3. Search for Snippingtool.exe and launch the program.

If you recently upgraded to Windows 11, there must be a Windows.old folder with the Snipping Tool shortcut. And you can run it directly from here. If the folder doesn’t exist or you deleted it, head to the next fix.

2. Turn on notifications

  1. Press Windows + I to open Settings, and click on Notifications in the System tab.
    notifications
  2. Now, make sure the toggle for Snipping Tool is enabled.
    enable notifications

3. Change the date and time

  1. Press Windows + I to open Settings, and select Time & language from the navigation pane.
    time
  2. Choose Date & time.
    date and time
  3. Toggle off the switch for Set time automatically.
    turn off time automatic
  4. Click on the Change button next to the Set the date and time manually option.
    change time
  5. Set the time to anything before October 30, 2021.
    change date and time
  6. Click Change and check if this fixes the problem or not.

There is another temporary solution provided by the Microsoft tech community. If the Snipping Tool isn’t working on your Windows 11 PC, change the date on your PC to anything before October 31, 2021.

This specific date is advised because of the app’s digital certificate, which was valid till October 31, 2021. However, a new update solved the problem, but if you are still experiencing it, then changing the date and time would be worth a try.

4. Modify the Group Policy Settings

  1. Press Windows + R to open Run, type gpedit.msc in the text field, and hit Enter.
    gpedit.msc
  2. Under User Configuration, expand Administrative Templates, select Windows Components, and then choose Tablet PC on the right.
    tablet PC
  3. Select Accessories.
    accessories
  4. Now, double-click on the Do not allow Snipping Tool to run policy.
    modify to fix windows 11 snipping tool missing
  5. Next, choose Disabled from the options at the top, and click on OK to save the changes.
    policy

That’s it! If nothing had worked and Snipping Tool was still missing in Windows 11, it could have been a misconfigured policy to blame. But the problem will be fixed by now.

5. Reinstall Snipping Tool in Windows 11 via PowerShell

  1. Press Windows + S to open Search, type PowerShell in the text field, and click on Run as administrator.
    powershell
  2. Click Yes in the UAC prompt.
  3. Paste the following command and hit Enter:get-appxpackage Microsoft.ScreenSketch | remove-appxpackage
    command
  4. Once done, execute the following command:Get-AppXPackage Microsoft.ScreenSketch -AllUsers | Foreach {Add-AppxPackage -DisableDevelopmentMode -Register “$($_.InstallLocation)\AppXManifest.xml”}
    reinstall to fix windows 11 snipping tool missing
  5. Once done, restart the computer for the changes to come into effect.

You can also install Snipping Tool in Windows 11 using PowerShell when missing, a method that has worked for many users.

6. Download from Microsoft Store

  1. Press Windows + S to open Search, type Microsoft Store, and click on the relevant search result.
    microsoft store
  2. Search for Snipping Tools, and click on Install to get it.
    snipping tool
  3. Once the installation is complete, you can easily open and access Snipping Tool.

Also, if you can’t find Snipping Tool, search for Snip and Sketch, though the two have been integrated and go by the former’s name in Windows 11.

If nothing works, we recommend you wait for an update from Microsoft. Until then, use effective screenshot-capturing software.

Do not forget to share other solutions that fixed the issue in the comments section and help fellow Windows 11 users.

Fix: Ark Survival Evolved not Loading on Xbox One

Whether you’re playing from a disc or you downloaded a digital version of the game, there’s always a chance that Ark Survival Evolved won’t load on Xbox One.

When this happens, it is likely that there’s a problem with the operating system on your console, or a problem with the most recent update installation.

Before you try the other solutions listed below, try to restart the game or your console, update the console, and test/troubleshoot your network connection.

FIX: Ark Survival Evolved not loading on Xbox One

  1. Remove and re-add your profile
  2. Clear the local save and re-sync with the cloud
  3. Verify that the game was purchased by this account
  4. Reset your console’s operating system
  5. Uninstall the title, reboot the console, and reinstall
  6. Check for a game-specific ban
  7. Restore the console to factory defaults
  8. Reinstall the game and try again

Solution 1: Remove and re-add your profile

If the issue relates to one profile on your console, the profile data may be corrupted. Follow the steps below:

  • Open the guide on your console
  • Select System> Settings > Account > Remove accounts.
  • Select the account you want to remove (the one that’s experiencing the gameplay issue), and then select Remove.

Once the account has been removed from your console, download your profile again to create a fresh version of the account data:

  • Open the guide on your console
  • Select your gamerpic in the upper-left corner of the screen, move all the way down and select Add new.
  • Type in the email address and password that you use to access your Microsoft account (the same account that you just removed).
  • Ensure don’t select Get a new account unless it is necessary as this creates a brand-new Microsoft account.
  • Follow the console prompts until you are returned to the Home

Once you have completed the process of re-creating your profile on the Xbox One console and have returned to the Home screen, try playing your game again.

Solution 2: Clear the local save and re-sync with the cloud

It’s possible that the local save for your game has become corrupted. If so, deleting the local save and re-syncing with the cloud may correct the problem.

Delete the local save by doing the following:

  • Open the guide on your console
  • Select My games & apps
xbox one games&apps
  • Highlight the game title, and then press the Menu button on your controller.
  • Select Manage game.
  • Scroll to the right, highlight the saved data for your gamertag under Saved Data, and then press A on your controller.
  • Select Delete from console to remove the local save of this game.

After you delete the local save, restart your Xbox One console, re-sync your saved games to the cloud. Your saved games are automatically stored in the cloud while you’re connected to Xbox Live.  Try playing the game again to see if re-syncing with the cloud fixes it.

Solution 3: Verify that the game was purchased by this account

If you want to play a downloaded game on your console, the account that purchased the game should be the same one you’re using to sign in to Xbox Live. To verify the account that was used to purchase the game, check your Xbox Live purchase history.

Sign in to your Microsoft account. Follow the instructions that are provided. Your last five transactions will be displayed under Order history.

Many games will not work without a license, so if you don’t have a license for this game, or if the account that purchased this game is not loaded on your Xbox One console, then it will fail to start.

Solution 4: Reset your console’s operating system

There may be a problem with your console’s operating system that is preventing the game from playing properly. You can reset your console’s OS without deleting your games or apps.

  • Open the guide on your console
  • Select Settings
  • Select All Settings
  • Select System
xbox one system settings
  • Select Console info & updates
  • Select Reset console
reset xbox one
  • On the Reset your console screen, select Reset and keep my games & apps. This will reset the OS and delete all potentially corrupted data without deleting your games or apps.

Note: Don’t select Reset and remove everything at this point. This option resets the console to factory settings, and all user data, including accounts, saved games, settings, home Xbox associations, and all games and apps will be deleted. You should only use this option as a last resort in some troubleshooting cases.

If the console reset is successful, you may be prompted to repeat some general console set-up steps before you are returned to the Home screen, then try playing your game again.

Solution 5: Uninstall the title, reboot the console, and reinstall

It’s possible that the installed game data is corrupted, so you need to uninstall and then reinstall the game to correct it.

  • From the Home screen, select My games & apps.
  • Highlight the game title that you want to uninstall.
  • Press the Menu button  on your controller.
  • Select Manage game.
  • Highlight the game title and press the Menu button again.
  • Select Uninstall.
  • Once the game is uninstalled, restart your Xbox One console, and reinstall the game

Here’s how to reinstall the game:

  • Return to the My games & apps
  • Select the game title from Ready to install
  • Select Install (check the progress bar for the status)

Solution 6: Check for a game-specific ban

Game developers can build game-specific security into their titles and enforce their community policies to help ensure fair and respectful gameplay – and there’s no appeals process.

If you are still experiencing gameplay issues, confirm that you have not been banned from the game. The method by which you are notified of a game ban varies by developer and may include an in-game message, connection error, or blocked access to certain game features.

Solution 7: Restore the console to factory defaults

If your console is up to date and you keep experiencing the gameplay issue, you may need to reset your console to the factory defaults.

Warning: This erases all accounts, apps, games, saved games, and settings, and anything not synchronized with Xbox Live will be lost. Your console syncs with Xbox Live automatically when it’s connected to the service.

  • From the Home screen, Press the Xbox button  to open the guide.
  • Select Settings.
  • Select All settings.
  • Select System.
  • Select Console info & updates.
  • Select Restore factory defaults (Remove and reset everything)
restore factory default settings xbox one
  • Read the warning message, and then select Yes.

Once the reset is complete, do the initial console setup process, and you may be prompted to run a system update. Once all of this is done, you should be able to access the Home screen.

Solution 8: Reinstall the game and try again

After restoring your console to factory defaults, try installing the game again to see if this fixes the gameplay issue. If you’re installing from a disc, insert the game disc in the console and install the game.

If you’re installing from Microsoft Store, do the following:

  • Sign in using the account that originally purchased and downloaded the game.
  • Open My games & apps.
  • Select the game title from Ready to install.
  • Select Install.

Once the game is installed, try playing the game to see if the gameplay starts.

Are you able to play Ark Survival Evolved again? Let us know in the comments section below.

RELATED STORIES TO CHECK OUT:

Windows Update Bitlocker Issue: Info & Solutions

We’ve recently been talking about how Windows updates actually end up breaking more stuff than fixing, so we’re about to continue on the same trend.

Remember that, in case you are one of the affected users, we’ve shown you how to fix Windows 10 broken audio after installing KB5015878.

And, since we were discussing operating system-related problems, it’s time to let you in on another one of the Windows issues.

Microsoft confirms BitLocker problems after a Windows Update

The Redmond-based tech giant known as Microsoft has finally officially confirmed what some users have been reporting for quite a few days now.

Judging from a recent notification posted on the Windows Health Dashboard, the latest security update for Secure Boot DBX (KB5012170) causes devices to boot directly into BitLocker recovery.

And, as you would have imagined, this will automatically prompt affected users to enter their recovery keys immediately.

Furthermore, besides the fact that it officially acknowledged this nasty bug, Microsoft also provided temporary workarounds for affected and yet-to-be-affected systems.

What can I do if my PC boots directly into BitLocker?

  • Those who have already installed KB5012170 and are now getting BitLocker recovery prompts must enter their BitLocker recovery keys. The official guidance is available in the documentation from Microsoft.
  • Those who are yet to install KB5012170 or restart their systems after applying the update can temporarily suspend BitLocker to bypass the bug:
    • Run Command Prompt as Administrator and enter the Manage-bde -protectors -disable %systemdrive% -rebootcount 2 command.
    • Install KB5012170.
    • Restart your computer two times.
    • BitLocker should be back running after the second restart. You can verify its status using the Manage-bde -protectors -Enable %systemdrive% command.

The tech colossus stated that the BitLocker bug does not affect all computers, as users initially thought when faced with this issue.

In fact, according to Microsoft, users who have successfully restarted their computers twice after applying KB5012170 will not get the above-mentioned BitLocker recovery prompt.

Another very important fact to take into consideration when talking about this is that the bug does not affect Windows 10 systems at all, only Windows 11.

But wait, there’s more! There is another issue with KB5012170, one that is causing is the 0x800f0922 error when you attempt to install the Security update for Secure Boot DBX.

With no current official solution, while the company investigates the problem, users can actually bypass the problem by updating UEFI to the latest versions.

Since we’re talking about updates, don’t forget to check out the latest Patch Tuesday rollout and discover everything that is new.

This month, August 2022, Microsoft released updates for a total of 121 CVEs, so make sure you are up to date with everything that is going on.

And, another important piece of information, Windows 11 is now fully supported on ARM with Arm64EC, just in case you want to run it on your Mac device.

What can I do if KB5012170 fails to install?

  1. Press Win+ I to access Settings.
  2. Select the System category and click on Troubleshoot.w11 troubleshoot
  3. Press the Other troubleshooters button.other troubleshooters windows 11
  4. Press the Run button next to Windows Update.windows update troubleshooter

There you have it, folks, the fix for the Windows Update Bitlocker issue! Everything you can expect if you are an Insider.

Leave a comment below if you found any issues since installing this build.

File System Error (-1073741515): 4 Tested Methods to Fix it

File system error (-1073741515), which translates to error type 0xC0000135, describes the inability of an executable program to run due to missing essential components or wrongly configured system files.

These faulty system files or missing components create Registry errors within your Windows operating system, which result in system crashes, slow PC performance, program malfunctions, and more.

Let us address the causes and essential fixes.

What causes File system error (-1073741515)?

A range of factors can trigger this error, and at the top of these are the following elements:

  • Registry errors – Registry errors occur mainly when new applications are installed over existing ones without completely uninstalling the previous one and its components.
  • Errors in Windows Explorer – This is a Windows directory system, and malfunctioning this component will often trigger the error. this of
  • Malicious Software – These could be viruses, adware, and spyware. In many cases, you will need an effective antivirus to fix the problem.

While these are the primary elements, there may be some other less significant triggers. Regardless of the cause, the solutions we show should help resolve the error.

How can I fix the File system error (-1073741515)?

1. Use a dedicated troubleshooter

System errors, like BSoDs, can be vague, and their cause can’t always be pinpointed. So a specialized troubleshooter will scan your system in search of bugs, eliminating them and fixing potential vulnerabilities.

2. Use Windows Repair to fix the error

  1. Download Windows Repair Pro.
  2. Look in the newly unzipped folder created in your desired location and open the folder tagged files (…windows repair v…files); after installing the .inf file, restart your PC.
  3. Alternatively, install the .exe file.
  4. Launch and click on the Repairs and then select Start Repairs.
    file system error (-1073741515)
  5. Ensure that all boxes for All Repairs are checked. Then click Start Repairs.
  6. Restart your computer.

On restarting your PC, you should now be able to open applications and administrative tools without experiencing the File System Error 1073741515.

3. Refresh/Reset Windows 10

  1. Hold Windows Key + I to open the Settings app, then select Update & Security.
    file system error (-1073741515)
  2. Click Recovery, then under Reset this PC, click Get Started to initiate the reset/refresh.
    refresh windows 10
  3. Please take note of the prompts as they appear and choose whether to keep your files or erase them.
    file system error (-1073741515)
  4. After completing the refresh, your PC configurations should be set to default, and all registry pile-ups should be cleaned up.
  5. Reinstall and launch your applications; the File System Error – 1073741515 should be gone.

Performing a PC refresh or reset on Windows 10 will reinstall the operating system and remove all third-party applications while leaving all personal data unaffected.

4. Get rid of spyware

  1. Download Malwarebytes.
  2. Follow the prompts to install it on your computer.
  3. In the anti-malware software interface, click on the Scan button to initiate a quick or full system scan and follow the on-screen prompts.
  4. After the system scan is complete, check the Select all box, and click Quarantine to delete all threats on your computer.
    file system error (-1073741515)

Performing a quick scan with Malwarebytes’ anti-malware tool ensures that File system error 1073741515 does not occur again.

Malwarebytes optimizes your computer by removing all traces of malware, adware, and spyware to ensure the smooth running of your machine.

⇒ Download Malwarebytes

Having completed the quick scan, launch your installed applications, Windows Troubleshooter, and Administrative tools, and everything should now work fine.

The File system error 1073741515 you have been experiencing on your Windows 10PC should be gone.

Lastly, if you have subject-related questions or suggestions, feel free to post them in the comments below.

Fix: Error While Adding Guest on Xbox One

Xbox One allows you to play your favorite games together with your friends in split-screen mode on a single console. To do that, the other user needs to have a Guest account, but users reported an error while adding a Guest account to Xbox One, so let’s see how to fix this problem.

How to fix Xbox One guest account not working?

Fix – Xbox One guest account not working

Some games require Xbox Live account in order to play them online, but if you want to play a game with a friend that doesn’t have an Xbox Live account, you can create a Guest account. Keep in mind that Guest account is just a temporary account, and it will be deleted as soon as the Guest signs out. By using a Guest account you can play the game with a friend, but any progress that you made won’t be saved to the Guest account. This is a useful feature, but few users reported that they can’t create a Guest account on their Xbox One, so let’s see how to fix it.

1. Clear the cache

Xbox One stores all sorts of temporary files in its cache, and sometimes those files can get corrupted. Problems with cache can cause all sorts of errors, but you can easily fix them by clearing the cache. To do that on Xbox One, follow these steps:

  1. Press and hold the power button on your console to turn it off.
  2. Unplug the power cable from your Xbox.
  3. Keep pressing the power button on your console to drain the battery completely.
  4. Connect the power cable again and wait until the light on power brick changes from white to orange.
  5. Press the power button again to turn on your console.

By doing so the cache should be cleared and you’ll be able to add a new Guest account to your Xbox One without any problems.

2. Add a new user to your Xbox Live account

If you can’t add a Guest account to your Xbox One, you might want to consider adding a new user. To do this you’ll need a Microsoft account, so be sure to create one. To add a new user on Xbox One, do the following:

  1. Scroll left on the Home screen to open the Guide.
  2. Go to Sign in tab and select Add & manage at the bottom.
  3. Now select Add new.
  4. Enter your Microsoft account login information.
  5. Read the Microsoft Service Agreement and Privacy Statement and select I Accept.
  6. Now follow the instructions on the screen to configure Sign-In & Security settings.

After doing that you should be able to use this new account as a Guest account. This is just a workaround, but according to users it allows them to play in split-screen mode with their friends, so you might want to consider using it.

Xbox One error while adding a Guest account can stop you from playing games with your friends, but you should be able to fix the problem simply by clearing the cache. If that doesn’t work, consider creating a new Microsoft account instead of a Guest account.

READ ALSO:

Windows Update Troubleshooter Stuck On Resolving Problems: Fix

It is possible to use the Windows Update troubleshooter in Windows 11 to automatically resolve Windows update-related issues such as if it returns errors when it is launched or if it simply will not run.

Follow along as we will show you what to do if your Windows Update Troubleshooter is stuck on resolving problems.

What are some common Windows Update Troubleshooter issues?

One of the most common issues is that the feature is unable to locate anything, as it becomes stuck at the initialization stage of the diagnostic.

Among the other common issues that users complain about include becoming stuck on addressing errors, becoming stuck on starting the bits service, or failing to work at all. It may also appear that the troubleshooter service registration is missing or corrupt.

We have a general guide on what to do if the Windows Update Troubleshooter is not working that you can check out.

You can try using the Reset Windows Update Tool, which repairs damaged update components and often resolves troubleshooting loops by restoring services and folders to their default state.

How can I fix the Windows Update Troubleshooter Stuck on Resolving Problems issue?

1. Restart your computer

Asking a computer guru how to fix an issue you’re having with your Windows computer is a good way to start because they’ll most likely ask whether you’ve tried resetting your machine first.

Despite the fact that it may appear to be a glib answer, restarting a computer can effectively handle a multitude of issues in many situations and situations.

Keep in mind that this approach is not limited to Windows-based computers, but is applicable to a wide range of computing devices, including smartphones and tablets.

Try resetting your wireless router, iPad, Android phone, and other devices including software. Also, try closing and reopening the program.

Ultimately, the response is that resetting a computer wipes away the present state of the software, including any faults that may have emerged, and allows it to start over from the beginning.

The process of starting from a clean state is less time-consuming and more efficient than the process of identifying and fixing any problems that may be occurring, in some circumstances, it may even be impossible to fix problems without first starting from a clean state.

2. Run SFC

  1. Press the Windows + S key and type in cmd. Lastly, right-click on it and choose Run as administrator.
    cmd run as admin cmd line
  2. Type or paste in the following command and press Enter: sfc /scannow
    sfc-scan asus motherboard fan control service stopped working

Once you’ve finished waiting for the process to finish, restart your computer, then check whether the Windows Update Troubleshooter is stuck on resolving problems issue persists.

3. Run DISM

  1. To go to the Search bar, hold down the Windows + S keys at the same time. To execute cmd as an administrator, type cmd into the search bar and right-click on the most relevant result.
    cmd run as admin cmd line
  2. Type or paste in the following commands and press Enter after each: DISM /online /Cleanup-Image / ScanHealth DISM /Online /Cleanup-Image /RestoreHealth
    dism asus motherboard fan control service stopped working

Relax and wait patiently for the completion of the entire process to be completed. The process could take up to ten minutes, so please keep this in mind.

Following completion of this step, restart your computer to confirm that the modifications have been applied properly.

4. Update drivers

  1. Press the Windows key + I to open the Settings app, and click on Update & Security from the left panel followed by Advanced options on the right side.
    update-advanced subnautica not saving settings
  2. After you have found the Additional options area, click on Optional updates to proceed to the next step.
    optional-update subnautica not saving settings
  3. Next, tap on the Driver Updates option then select all the driver updates you are displayed and lastly click on Download & install.
    install-update subnautica not saving settings

For more step-by-step instructions on running troubleshooters, see our full guide on how to run the Windows 11 troubleshooter.

However, despite the fact that Windows is often in charge of driver updates, if you are encountering a problem, you can manually search for updates. For automatic scans of outdated drivers, we strongly recommend a dedicated tool such as Outbyte Driver Updater.

Now that we presented to you the most likely fixes for the Windows Update Troubleshooter is stuck on resolving problems issue, let’s move on to the importance of keeping your device updated.

Why is it important to update Windows?

You’ve probably seen those obnoxious pop-up reminders on your computer screen. Your applications and drivers are constantly being notified when they are out of date. They always tend to rear their ugly heads and remind you of your flaws when you’re in the middle of something essential.

As a result, you should follow their instructions and keep your computer up to date. If your computer is performing slowly, such as if Windows XP is still installed, it may be time to upgrade to a newer operating system.

In truth, they’re designed to keep hackers from exploiting flaws in the system, making our computers safer. They may fix the coding that allows hackers to break into our computers and install malicious software, as well as delete important files.

If you opt to disregard the message, all of the projects you’ve been working on that you haven’t had time to update your program will be jeopardized. One of the benefits of installing updates is that it is as simple as pressing a button, and if everything is set up correctly, you will not even need to do so.

You may set your computer to automatically install updates. A single click on the Start button, followed by the Control Panel, is all it takes to start a Windows PC. Automatic Updates should be selected from the drop-down menu and set to Automatic.

Microsoft produces new operating systems every few years, and keeping yours up to date will help you. You may verify that your computer’s operating system is compatible with the most latest and innovative programs by upgrading the operating system.

Why is it important to update PC software?

Hackers look for security weaknesses, also known as software vulnerabilities since they allow them to compromise a system.

A software vulnerability is a security flaw or hole in a software program or operating system that has been discovered by the developer.

Hackers can take advantage of the flaw by building code that specifically targets the flaw in question. Malware, which is an abbreviation for harmful software, is used to bundle the code.

In rare cases, an exploit might infect your computer without your knowledge or consent, such as when you visit a malicious website, read a compromised email, or play infected games.

You most likely have a large number of papers and personal information stored on your devices. Cybercriminals are interested in your personally identifiable information, which can include everything from emails to bank account details.

This means they can use it to commit crimes in your name, or they can sell it on the dark web in order to enable others to commit crimes in your name. If you are the victim of a ransomware attack, your data may be encrypted.

It’s possible that you’ll have to pay a ransom in order to recover the encryption key. Alternatively, you could pay a ransom and not receive your money back.

Cyber security is mostly concerned with you, but there are other people to consider as well. If your device becomes infected with a virus, you run the risk of spreading it to your friends, family, and business contacts. It is for this reason that you should keep your software and systems up to date.

If you have successfully fixed today’s error, we recommend that you check out our guide on how to use the Windows Update troubleshooter.

Speaking of security, in the case that your Security center is not opening in Windows 11, you should take a look at the article linked in order to fix the issue right away.

Alternatively, Windows Defender can experience issues in Windows 11 as well. Make sure to solve the problem as soon as possible to ensure your computer’s privacy.

Was this guide helpful for you to solve the Windows Update Troubleshooter is stuck on resolving problems issue? Let us know in the comments section below. Thanks for reading!