4 Ways to Delete a User Profile on Windows 10

If you have a corrupt user profile on your Windows 10 it’s safer to delete it and create a new one. Whatever your reason, in this article, we will show you how to delete a user profile on Windows 10 safely and quickly.

Why can’t I delete a user profile in Windows 10?

If you have already tried to remove a user profile from Windows 10 and didn’t succeed, here are some of the reasons for not being able to do that:

  • No rights – You can’t delete a profile without administrative rights. We have a guide on how to make yourself an administrator on Windows 10. After doing so, come back here to delete the user profile.
  • The user account is still present – Before deleting a user profile, its corresponding account should be deleted first. In some cases, the user account keeps reappearing even after you deleted it.
  • The account is linked – If you are trying to delete the profile of a Microsoft Account linked with the Access Work or School accounts, you might not be able to remove the account.

So, you will have to get these issues out of the way before deleting the account and the user profile.

How do I delete a user profile from Windows 10?

1. Use the System Properties

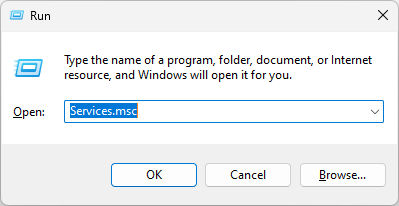
  1. Press the Windows + R key combination to open the Run console.
  2. Type or paste SystemPropertiesAdvanced into the box and hit Enter.
  3. In the Advanced section, go to the User profiles menu, and click on Settings button.
  4. Now, select the user profile you want to delete and click the Delete button.
  5. Click the Yes button to confirm the deletion.

This is the most effective solution because it also removes the user account in the process.

2. Use the Settings app

  1. Click the Start button and select Settings.
  2. Now, click on Accounts.
  3. Click on Family & other users from the left pane, then scroll down on the right until you get to Other users. Select the user account you want to delete and select Remove.
  4. Now, click on Delete account and data.

With this procedure, you will also delete the account and the user profile.

3. Use the Registry Editor

  1. Press the Windows key + R to start Run, type regedit, and press Enter or click OK.
  2. Navigate to the following path in Registry Editor: HKEY_LOCAL_MACHINE\SOFTWARE\Microsoft\Windows NT\CurrentVersion\ProfileList
  3. Now, go through all the profile subkeys on the left and look at the ProfileImagePath on the right to identify the right profile. Once you have found the one you want to delete, right-click its subkey from the left and delete it.

4. Delete the user profile data

  1. Press the Windows key + E to start File Explorer.
  2. Got to the following path: C:/Users
  3. Select the profile you want to delete and hit the Delete button to remove it. Make sure you have administrative privileges to delete the profile folder.

That’s it! We hope our solutions helped you delete the user profile on Windows 10 and all the associated data.

If you need extra info, check our article on what to do if the profile was not deleted completely on Windows 10.

For any other questions or solutions, use the comments section below; we will get back to you as soon as possible.

Can You Use Zwift on PC/in Browser??Best Zwift Computer Setup

Zwift is a popular online app for cycling and running. But it also rises a few questions. For instance, does Zwift work on PC or laptop? Can you use Zwift on a browser? If you’re also wondering how Zwift works, you’re in the right place.

It’s a lot like an MMO video game where people from all over the world join to race each other. You’ve probably heard a lot about the Zwift browser, also known as the Zwift Companion browser, and obviously how to use Zwift and Zwift Companion. Know that it’s not what you think.

Zwift Companion is simply another app that you can use in conjunction with your main Zwift app. It acts as a controller, making it easier to manage certain features and in-game actions such as maps, chat, and so on.

So, if you were hoping to use Zwift in browser, you’ll be a bit bummed. It turns out you can’t. There are still heated arguments around this topic. Here’s what a user had to say about this in the Zwift forum:

Zwift does not run in a browser at all and does not use browser technologies for the game experience. The graphics and the game engine are not based on web technologies and they run native on the hardware. That is what drive the system requirements. The game does a lot of internet communication like all games now a days. That does not make them web app.

Can I use Zwift in browser?

First things first, let’s see what devices can run Zwift. The app can run on Windows, macOS, iOS, Apple TV, and Android devices.

It runs natively on your PC and it provides a bunch of different environments where you can exercise, so no more wondering if you can use Zwift on a computer or laptop. You can bike ride in France, in the desert, and even in a theme park with a lot of Tokyo influences.

While you won’t need a full-fledged gaming PC, you won’t be able to run Zwift in browsers either. It is an app that runs on your computer and as such, it’s incompatible with all browsers.

Here’s why:

  • it uses a proprietary game engine that is not web-based
  • Zwift is resource intensive and it relies a lot on hardware acceleration
  • it’s not HTML5-optimized

Can you use Zwift Hub without the app?

Nevertheless, you can use Zwift Hub without the app and have access to all sorts of data, statistics, and screens. So, the launcher is web-based and can be accessed through a browser.

There are also extensions that you can install on a Zwift browser to enhance your experience. What’s more, you can share your outcome with web services like Strava.

So you’ll also be able to enjoy the best Strava extensions and add-ons, among others.

  • Opera GX – best Chrome extensions for gamers (Yes, you will be able to install extensions from Chrome Web Store)
  • Opera Browser – turbo extension or Turbo Button available
  • Firefox – best Strava extensions
  • Chrome – Helpful exercise extensions
  • Brave – Protects your privacy

The difference between Opera and Opera GX is that the former is more streamlined.

Fortunately, Opera still has great features like integrated music players and support for social media platforms. Since Zwift connects to Facebook, you can share Zwift results there and message friends on Opera.

The third place goes to Mozilla Firefox and its support for ZwiftMap for Strava.

So, Strava is an online service that lets you track your physical exercise using some social media-like features. You can connect Zwift to Strava using the aforementioned ZwiftMap for the Strava plug-in.

While using Strava, the extension replaces the maps with Zwift’s animated maps. It’s not a crazy game-changing extension, but it’s still nice to have the ability to customize your experience.

In addition to ZwiftMap for Strava, Chrome also has other Zwift extensions. Another interesting one is Zwift Charts which provides demographic and performance charts for in-app events

It provides useful information on who’s competing and where for example.

And finally, Brave does the same thing as previous entries as it can also support Chrome extensions. The developer even posts instructions on how to do this on their website.

What is the best Zwift computer setup?

All you really need is a PC that runs Windows 7 (64-bit) or higher that has an Intel Core 2 Duo processor and 8GB of memory. For Apple computers, all you need is macOS 10.10 or higher with the same hardware.

If you have an iPhone, you’ll need to have an iPhone 5S or higher. And for Android devices, you’ll need to check the Google Play Store to see if it’s compatible with Zwift.

Feel free to comment below if you have questions about web browsers. Also, feel free to leave comments about guides you’d like to see or information on browsers and their features.

0x0000000a: How to Fix This Blue Screen Error

Stop: 0x0000000A error, also known as IRQL_Not_Less_or_Equal, is a kind of Blue Screen of Death (BSOD) that usually occurs during Windows startup or when a computer wakes from sleep or hibernation.

If you’re having trouble with this error and don’t know what to do, we’ve found some solutions that could help fix the error and restore your computer’s optimal performance.

What causes the 0x0000000a error on Windows?

Here are some common causes of the 0x0000000a error:

  • Faulty hardware, such as RAM or hard drive: If the RAM or hard disk drive is not functioning properly due to defects or damage, this can lead to the 0x0000000a error.
  • Incompatible or outdated drivers: If your device driver is corrupted or outdated, it may not work correctly or may conflict with other drivers or software on the computer. This can trigger the 0x0000000a error.
  • Hard disk drive issues: If the hard drive has bad sectors or disk errors, it can cause data corruption and lead to system crashes.
  • Corrupt system files or registry entries: If your system files or registry entries become corrupt, it can cause system instability and lead to the 0x0000000a error.
  • Malware or virus infections: Virus and malware can corrupt system files and modify device drivers, which can cause BSOD errors.

It’s worth noting that a combination of factors can cause the 0x0000000 error. So it’s important to find out what is causing the 0x0000000a error before trying to fix it.

How do I Fix the 0x0000000a Error in Windows?

1. Boot your Computer into Safe Mode

  1. Press Windows + R to open Run, type msconfig, and hit Enter.open msconfig
  2. Go to the Boot tab and check the Safe boot option under the Boot options.Choose safe mode
  3. Then, click Apply and OK.Apply changes
  4. Select Restart in the confirmation box to reboot your PC.Restart

After the PC restarts, it will automatically boot into Safe Mode. This disables all third-party drivers and programs and only loads essential programs. If you continue to experience the 0x0000000a error, it may be due to a hardware malfunction.

To disable the safe mode, navigate to the System Configuration window again and uncheck the Safe mode option, click Apply, and OK.

2. Run SFC and DISM scan

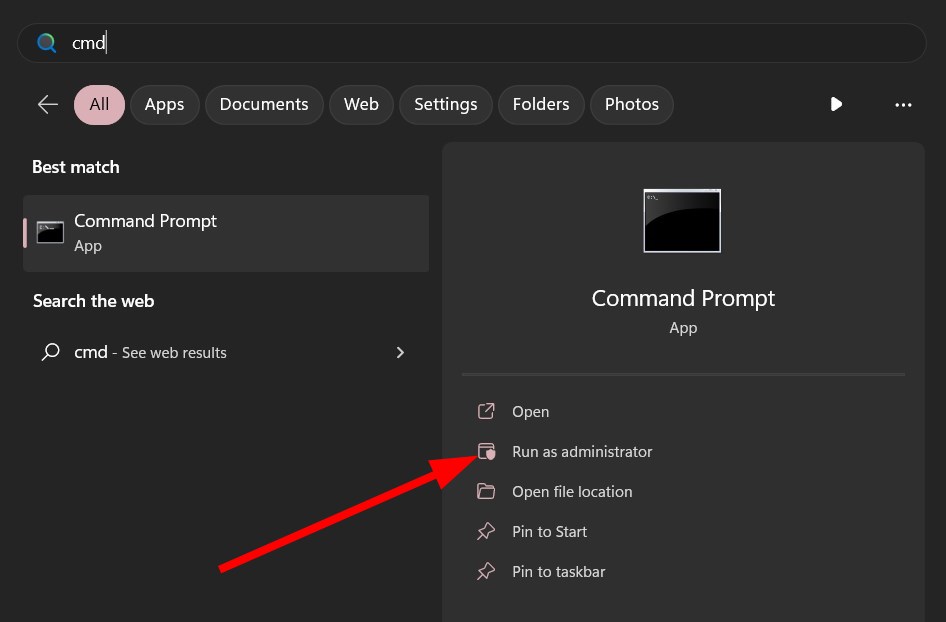
  1. Left-click the Start button, type Command Prompt in the search box, and select Run as Administrator.cmd_admin
  2. Click Yes on the User Account Control (UAC) prompt.
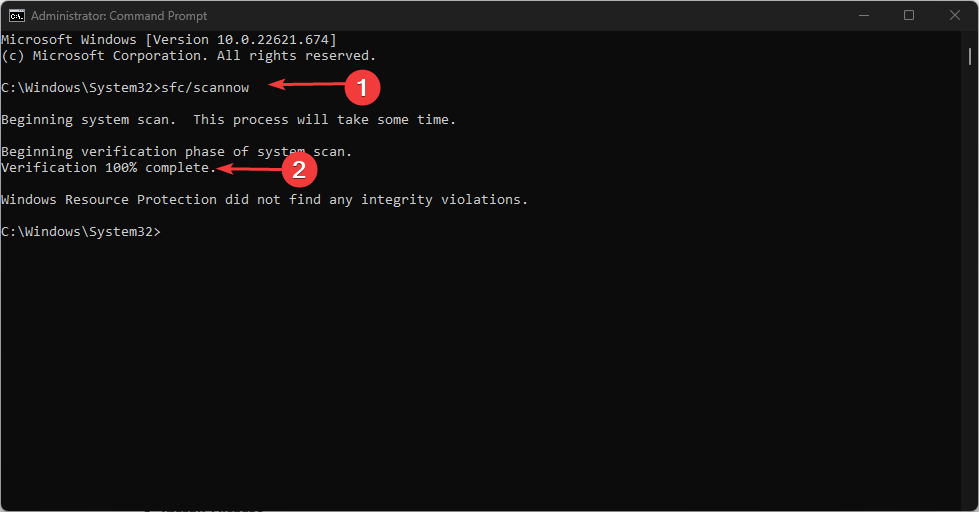
  3. Type or paste the following and press Enter.sfc /scannowsfc scan
  4. Once the scan is complete, run the following commands and press Enter after each:DISM /Online /Cleanup-Image /ScanHealth DISM /Online /Cleanup-Image /RestoreHealthDISM scan and recover
  5. Wait for the scanning process to complete, then restart your PC and check if the BSoD error 0x0000000a error is fixed.

You can also use a dedicated repair tool to fully scan your device and diagnose the system issues without running any complex tasks.

3. Update the device drivers

  1. Open Windows Search, type device manager, and click on Device Manager from the search result.open Device Manager
  2. Look for an outdated or faulty driver with a yellow exclamation mark in the Device Manager window, right-click on it, and select Update driverUpdate_driver
  3. On the next window, select Search automatically for drivers.search for updates
  4. The system will let you know if there’s a newer driver available. Just follow the on-screen instructions to install it.
  5. Then, restart your computer and check if the problem is resolved.
  6. If Device Manager cannot find the driver updates, visit the manufacturer’s website and manually download the latest driver.
  7. Once the download is finished, install the driver and restart the computer.

If you require an efficient method to update all PC drivers automatically, know that you have the ideal tool for it.

Outbyte Driver Updater is an effective application that can entirely scan the operating system and find outdated drivers, and then install the latest official version immediately.

4. Run the Windows Memory Diagnostic tool

  1. Press the Windows + R keys together to open the Run dialog box, type in mdsched.exe, and then hit Enter to access the Windows Memory Diagnostics Tool.mdsched
  2. Click on Restart now and check for problems (Recommended) to restart your computer.check for problems
  3. After the computer restarts, the memory diagnostics tool will scan for memory problems.
  4. Once the scan is complete, sign in to your PC to view all the detected results.

5. Check your Hard drive for Errors

  1. Click on the Start button, type Command Prompt in the search box, and select Run as Administrator.elevated cmd
  2. Click Yes in the UAC prompt box.
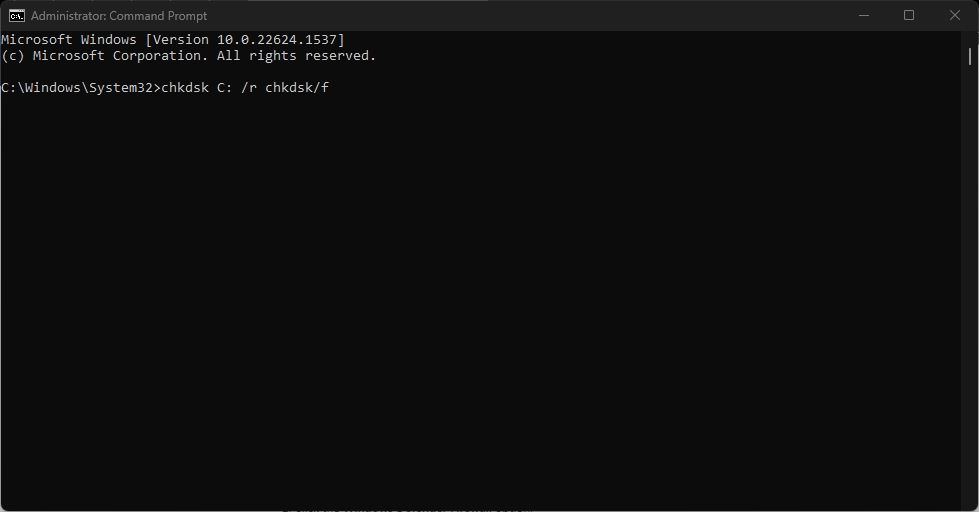
  3. Type the following command, replace C with the drive letter of your system drive and press Enter.chkdsk C: /f/r/x chkdsk
  4. If you see a prompt to schedule the scan on the next restart, type Y and press Enter.schedule scan
  5. Then, restart your PC and wait for the hard disk to be checked.

CHKDSK utility will scan the hard drive for errors and then attempt to repair any problems it finds.

6. Restore your PC

  1. Press Windows + R to open Run, type rstrui.exe, and hit Enter.rstrui.exe
  2. In the System Restore control panel, click Next to continue.sys_restore
  3. Select the system restore point that is the most recent and click Next.choose restore point
  4. Finally, click Finish to restore your PC.finish

Also, check out our guide on how to fix the STOP: 0x0000001a error, if you encounter this issue as well.

If the solutions listed above did not fix the problem, you can try resetting or clean-installing Windows.

If you could resolve the issue using a different method, please share it in the comments section below.

Enter for a chance to win this custom Redfall Xbox Series X console

Ahead of Redfall‘s May 2 launch (just a few short weeks away now!), Bethesda is giving away a custom Redfall-themed Xbox Series X console. As you can see in the post below, the console will come with a matching controller. A Redfall-skinned controller by itself will also be given away as a secondary prize.

You can enter for a chance to win this by participating in an interactive adventure over on Bethesda.net. And you can read the complete rules and regulations here. The competition is open through the game’s release date (May 2, 2023).

Redfall is getting general praise from critics who have been able to preview the game ahead of its official release. One of the most highly-anticipated games of 2023, Redfall is the latest FPS creation from Arkane Studios, the team behind Prey, Dishonored and Deathloop.

Redfall Bite Back Edition

Windows 11 NTFS vs. ReFS: Which One is Better & Why?

NTFS has been the default file system of Windows PCs, but Microsoft is introducing something juicy in ReFS. This new file system might be coming to Windows 11, and users are eager to know what an NTFS vs ReFS comparison will look like.

In this detailed guide, we will show you the better option between these two file systems.

Does Windows 11 support ReFS?

The talks of Windows 11 supporting ReFS (Resilient File System) are still tentative and a work in progress. The file system is not yet officially available on Windows 11 PCs.

However, insiders in the Devs Channel and Windows Server now have access to the file system. Hopefully, it will be official sooner than later.

Does Windows 11 still use NTFS?

NTFS (New Technology File System)is still the default file system on Windows 11, just like it has been since Windows NT. It is still, without a doubt, one of the most popular file systems.

While there are talks of ReFS replacing NTFS, that might not be happening completely anytime soon. So, your Windows 11 PC will still use NTFS for some time.

Windows 11 NTFS vs ReFS: The comparison

1. Reliability

As expected for any file system employed on Windows PC, these two options are pretty reliable. However, being the latest invention, ReFS packs in some new data protection features.

At the top of this list is the ability to verify and repair file corruption by itself. Your files can sometimes get corrupted on NTFS due to sudden power termination.

In this case, you must run the CHKDSK command to repair the bad sectors. However, with ReFS, it does not need the command.

Instead, it repairs the files automatically, reducing the impact of bad sectors on your data. So, in this aspect of the Windows 11 NTFS vs ReFS, the latest file system edges it.

2. Scalability

With the age of NTFS, it is obvious that it was designed when large sets of data were not too prevalent. However, things have changed recently, and servers now handle very large data and need to do it with speed.

windows 11 ntfs vs refs n

To clarify things, NTFS can handle a maximum file size of about 256 TB and volume size. ReFS, on the other hand, supports up to 35 PB (35000 TB)maximum file and volume size.

So regarding scalability in this Windows 11 NTFS vs ReFS comparison, ReFS comes up triumph.

3. Performance

This is another stronghold of ReFS. It is considerably faster than NTFS and boasts more speed acceleration features.

One of these features is Block cloning and Sparse VDL, which helps better performance on virtualized workloads on Windows Server. Another excellent feature is the ability to split the volume into logical tiers for performance and capacity.

refs

With this feature, whenever you need to write data to your disk quickly, it will first go to the performance tier to perform the task faster before moving to the capacity tier.

Finally, to make this data acceleration obvious, the file system is better paired with SSD. So, it is not close in this section of our Windows 11 NTFS vs ReFS comparison.

4. Features

4.1. NTFS

Various excellent features make NTFS stand out. Among them is file system compression, which allows you to compress files at the file system level.

Another is file system encryption, with which you can encrypt your files. There is also the Offloaded Data Transfer feature that helps to speed up file copying and movement.

Below are some other NTFS features:

  • Disk quotas
  • Transactions
  • Page file support
  • Extended attributes
  • Supported on removable media
  • Bootable

4.2. ReFS

ReFS also has some features that are unique to it. A major one is the Block Clone which it uses to perform file copying as a low-cost metadata operation.

This helps to speed up file copying. There is also Sparse VDL and Mirror-Accelerated Parity, all working to make it considerably faster.

Lastly, some features are common to NTFS and ReFS. Some of them are BitLocker encryption, access-control lists, reparse points, failure cluster support, and data deduplication, among other features.

Hence, in this aspect of our Windows 11 NTFS vs ReFS comparison, the two file systems have more in common than differences.

Is ReFS better than NTFS?

While NTFS has served well and continues to deliver, this Windows 11 NTFS vs ReFS comparison shows that ReFS is considerably better. It triumphs in performance, reliability, and scalability, among other determining factors.

However, you will have to wait a bit longer before using it on your Windows 11 PC.

As an extra, if you are getting a Windows 11 file system error, check our detailed guide to fix it.

Feel free to let us know your experience with any or both of these file systems in the comments below.

SCCM Application Error 0x87d00607: How to Fix It

The Microsoft SCCM (System Center Configuration Manager) is a Windows tool used to deploy, manage and install updates on computers in a network. Sometimes while deploying apps, you may get application installation error 0x87D00607.

In this guide, we will cover some of the expert-tested solutions right after discussing the causes.

What causes the SCCM application installation error 0x87D00607?

A few reasons can typically cause this SCCM error; some of the common ones are listed here:

  • Software distribution failure – When the SCCM client fails to install or distribute the software package to the target device due to either network connectivity issues, insufficient disk space, or incorrect package content, you might see this error.
  • Unsupported architecture – If the software package is incompatible with the target device’s architecture, you might get this error.
  • Invalid command-line parameters – If the SCCM client receives invalid command-line parameters, it may fail to install the software package and return with this error.
  • Permissions issues – If the user account running the SCCM client does not have sufficient permissions to install the software package, it may lead to this installation error.
  • Incorrect package content – If the software package contains corrupted files, the SCCM client may fail to install it, leading to this error.

Now that we know the causes; let’s move to the fixes of the issue

What can I do to fix the SCCM application installation error 0x87D00607?

Before engaging in advanced troubleshooting steps, you should consider performing the following checks:

  • Remove NAP (Network Access Protection)
  • Reboot the primary SCCM server
  • Ensure the date & time are correct on both the client and server.
  • Check if all the updates are installed on SCCM.
  • Verify if the app you are trying to install has dependencies. If yes, then ensure they are included in source files.

If these small tweaks didn’t help you resolve the error, let’s move on to the detailed troubleshooting steps to fix the issue.

1. Change the default browser

  1. Press Windows + I to open the Settings app.
  2. Go to Apps, then select Default apps.Apps Default apps 0x87d00607
  3. Locate the other browser which you want to make default. Click Set as default.Set as default
  4. Restart your computer.

At the same time, changing your browser altogether can potentially help you fix this error code due to its high-end navigation and enhanced security capabilities.

For instance, you have integrated VPN support for more privacy and fully stable browsing that can help you with SCCM problems.

Opera

Activate this sleek browser and use it as default to bypass unpleasant errors anytime.
Check price Visit website

2. Uncheck the Enables this distribution point for pre staged content option

  1. Go to SCCM and go to Distribution Point’s properties.
  2. Click General and remove the checkmark next to Enable this distribution point for prestaged content.SCCM 0x87d00607
  3. Now wait for a couple of minutes and check if the issue persists.

3. Modify Boundary group settings

  1. Launch SCCM, and navigate to this path: Administration\Overview\Hierarchy Configuration\Boundary Groups
  2. Switch to the Reference tab, locate the Site assignment, and place the checkmark next to Use this boundary group for site assignment.Disable 0x87d00607
  3. Click OK.
  4. Now wait 5-10 minutes and check if the issue is resolved.

4. Select HTTP for Client connections

  1. Open SCCM. Click to expand Site Configuration from the left pane.
  2. Select Servers and Site System Rules.
  3. Click the Management point from the right pane.
  4. Switch to the General tab, and select HTTP for Client connections.Enable HTTPS  0x87d00607
  5. Click Apply and OK to confirm the changes.

5. Unblock the required ports of the client machine

  1. Press Windows + R to open the Run console.Firewall Run command
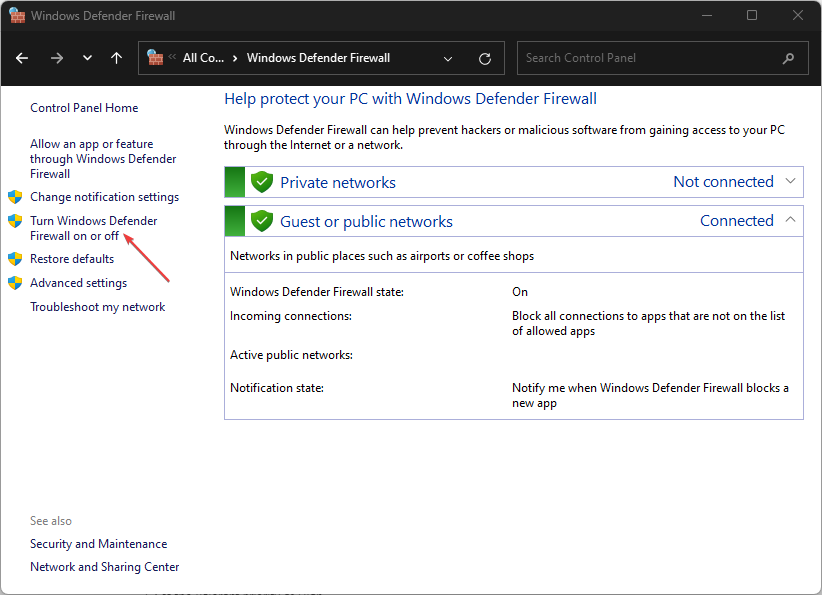
  2. Type firewall.cpl and click OK to open Windows Defender Firewall.
  3. Click Advanced settings from the left pane.Advanced settings
  4. On the Windows Defender Firewall with Advanced Security window, go to Outbound Rules.New Rule Outbound 0x87d00607
  5. Under Actions, click New Rule…
  6. On Outbound Rule Wizard, select Port and click Next.Port New
  7. Under Does this rule apply to TCP or UDP option, select TCP. For Specific remote ports, type 3268 and click Next.TCP next 0x87d00607
  8. Click Allow the connection and click Next.Allow next
  9. For When does this rule apply, select Domain, Private, and Public and click Next.Domain Next 0x87d00607
  10. Now set a name for the rule and description if you need and click Finish.Finish

6. Unblock the files of the app

  1. Locate the folder with the source file, right-click it, and select Properties.
  2. Go to General, locate Security, and remove the checkmark next to Unblock.Unblock 0x87d00607
  3. Now click Apply, then OK to save the changes.

7. Enable fallback source location

  1. Right-click the package and select Properties. Switch to the Content tab, and place a checkmark next to Allow clients to use a fallback source location for content.Allow clients to use a fallback source location for content  0x87d00607
  2. Locate Deployment Options, place a checkmark beside Download content from distribution point and run locally.
  3. Click Apply to confirm the changes.

8. Modify the installer file in SCCM

  1. Launch SCCM, locate the package, right-click it, and select Properties.
  2. Place a checkmark next to Allow clients to use distribution points from the default site boundary group.Allow clients to use distribution points from the default site boundary group 0x87d00607
  3. Select Download content from distribution point and run locally from the drop-down for Deployment Options.
  4. Click Apply to save these changes and try to install the app.

9. Check if SMS_DP is present in IIS

  1. Press the Windows key, type IIS and select Internet Information Services (IIS) Manager to launch it.
  2. From the Connections pane, select the server.
  3. Select ISAPI & CGI Restrictions, go to Actions, and click Open Feature.IIS 0x87d00607
  4. Check if SMS_DP is present. If not, click Add option.
  5. On the next window, for ISAPI & CGI path, mention this path: SMS_DPC:\Windows\system32\inetsrv\smsfileisapi.dll
  6. For Description type, SMS_DP and click OK.

So, these are methods you can follow to fix the SCCM application installation error 0x87D00607. Try them and let us know what worked for you in the comments section below.

How to build your first Power Automate Desktop flow

Power Automate Desktop Flows is a powerful tool that allows users to automate repetitive tasks, such as data entry or file management, and can help improve efficiency and productivity.

What is Power Automate Desktop?

Power Automate Desktop is a desktop application that allows users to automate repetitive tasks by creating workflows. This tool is part of the Microsoft Power Platform, which includes Power BI, Power Apps, Power Pages, and Power Virtual Agents.

How do Power Automate Desktop Flows work?

Power Automate Desktop Flows work by recording your mouse and keyboard inputs and then playing them back on demand. You can use the recorder to record your actions, create custom workflows using the flow designer, or use examples and templates provided by Microsoft. Once you have your workflow set up, you can trigger a flow manually or set up triggers to start the flow automatically.

Installation

The first step in getting started with Power Automate Desktop is to install the application. The software is available for free and can be downloaded directly from the Microsoft website. Once the software is installed, you will need to create an account or sign in with your existing Microsoft account.

Creating a New FlowPower Automate Desktop flow

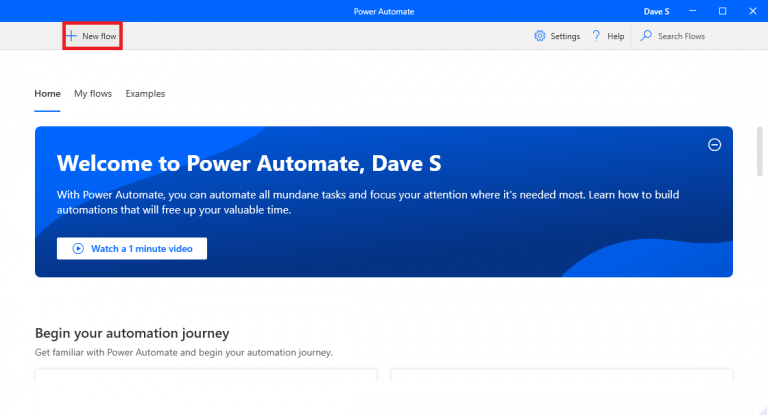
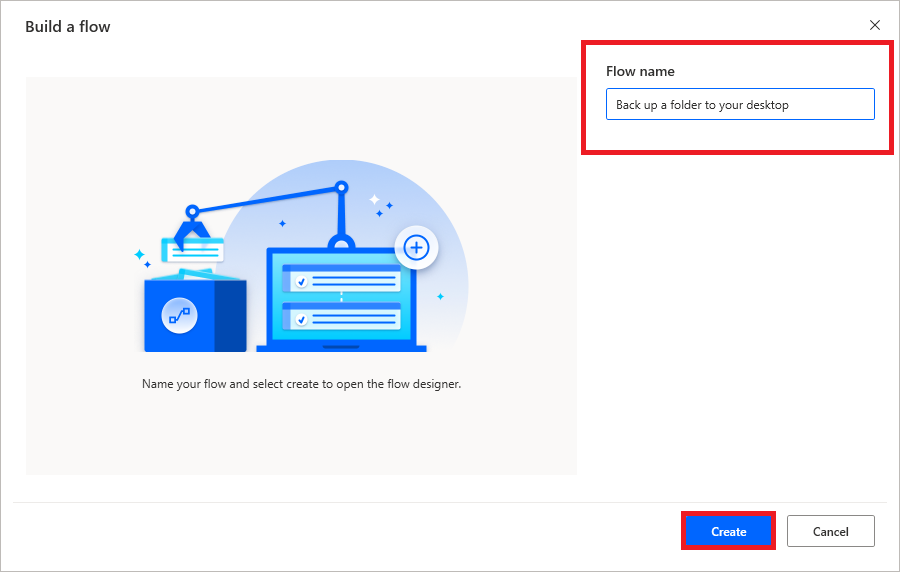
After you have installed Power Automate Desktop, you can begin creating your first flow. To create a new flow, click on the New flow button at the top of the Power Automate Desktop window. Next, you will be prompted to create a name for your new flow, click Create once you name the Power Automate Desktop Flow. This will open a new flow in the designer, where you can add and configure different Actions to a flow.

power automate desktop flow

Adding Actionspower automate desktop flow

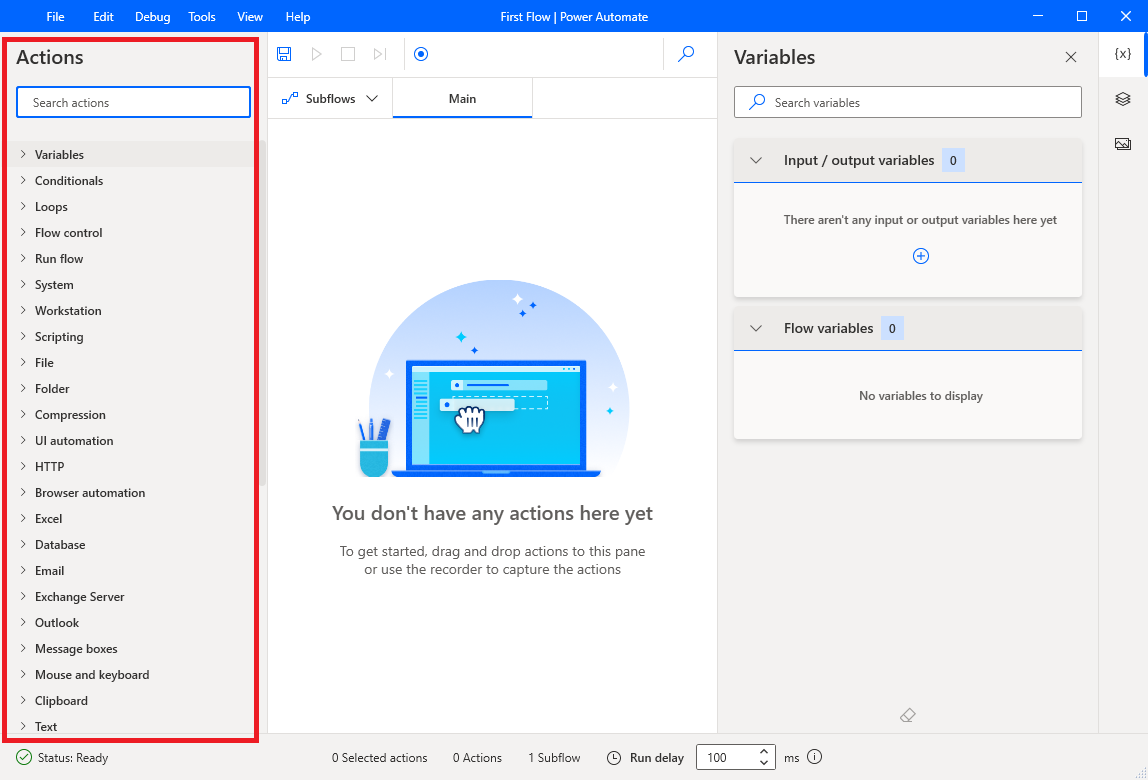
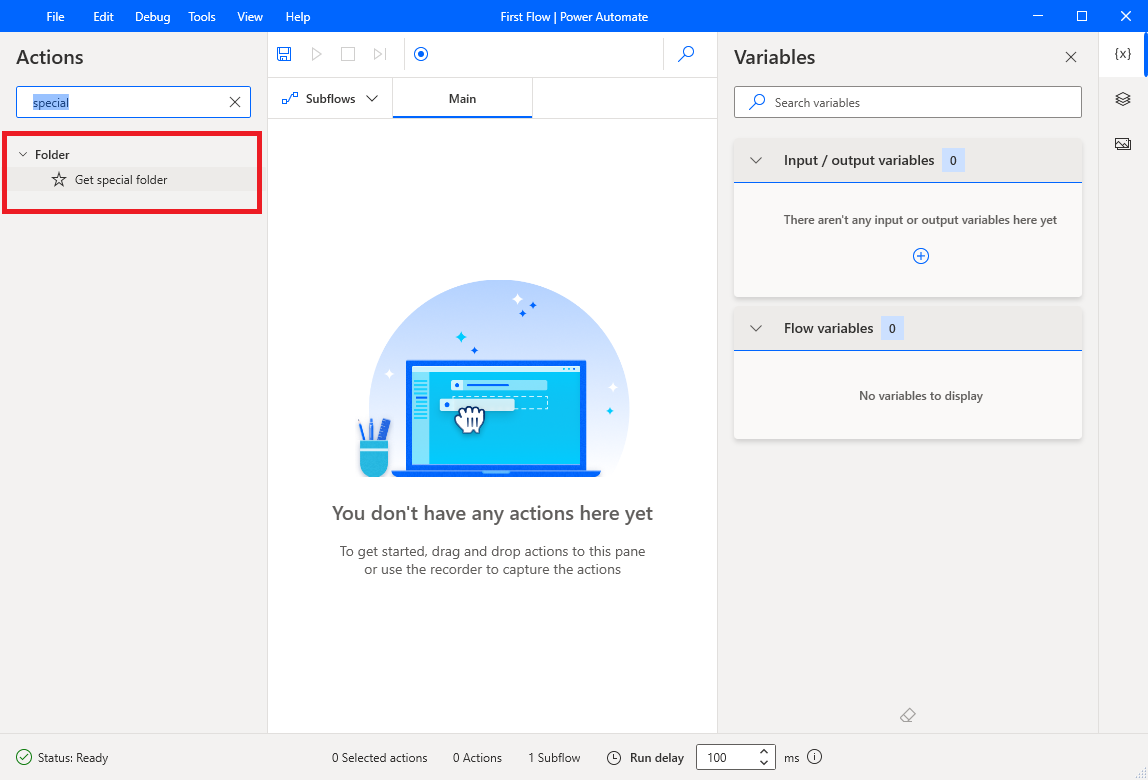
The next step in creating a flow is to add Actions. Actions are individual steps in the flow that perform a specific task, such as opening a file or copying data from one location to another. To add an action, use the search box to find existing Actions in the designer, or click the Action you wish to perform from the list of available options below the search box. power automate desktop flow

This example the instructions provided here to build your first flow to test out in Power Automate Desktop. This flow creates a back up of a folder and saves it to your desktop on your PC.

Configuring Actions

power automate desktop flow

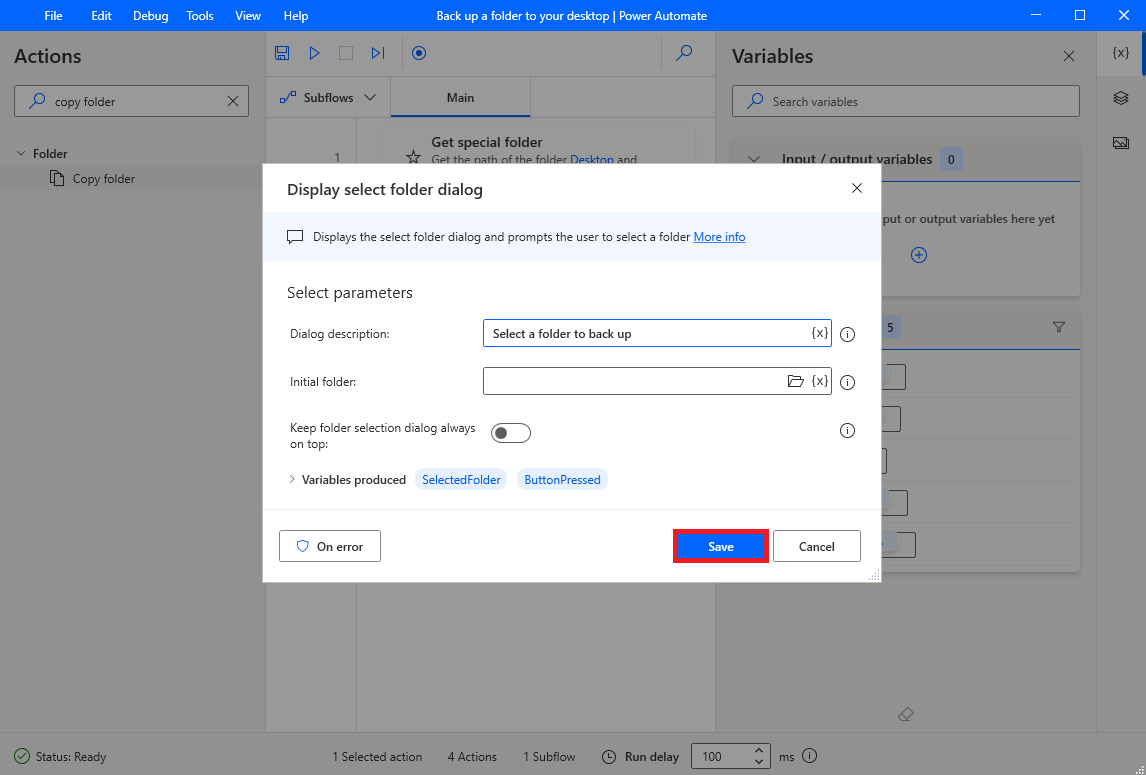
Once you have added an Action to your flow, you will need to configure it to meet your specific needs. This may include specifying the file location or setting the input parameters for the action. To configure an Action, double-click on the Action in the designer and use the configuration panel to edit the variables as needed. Click Save when you are finished configuring the Actions of the flow.

Execute a flow

power automate desktop flow

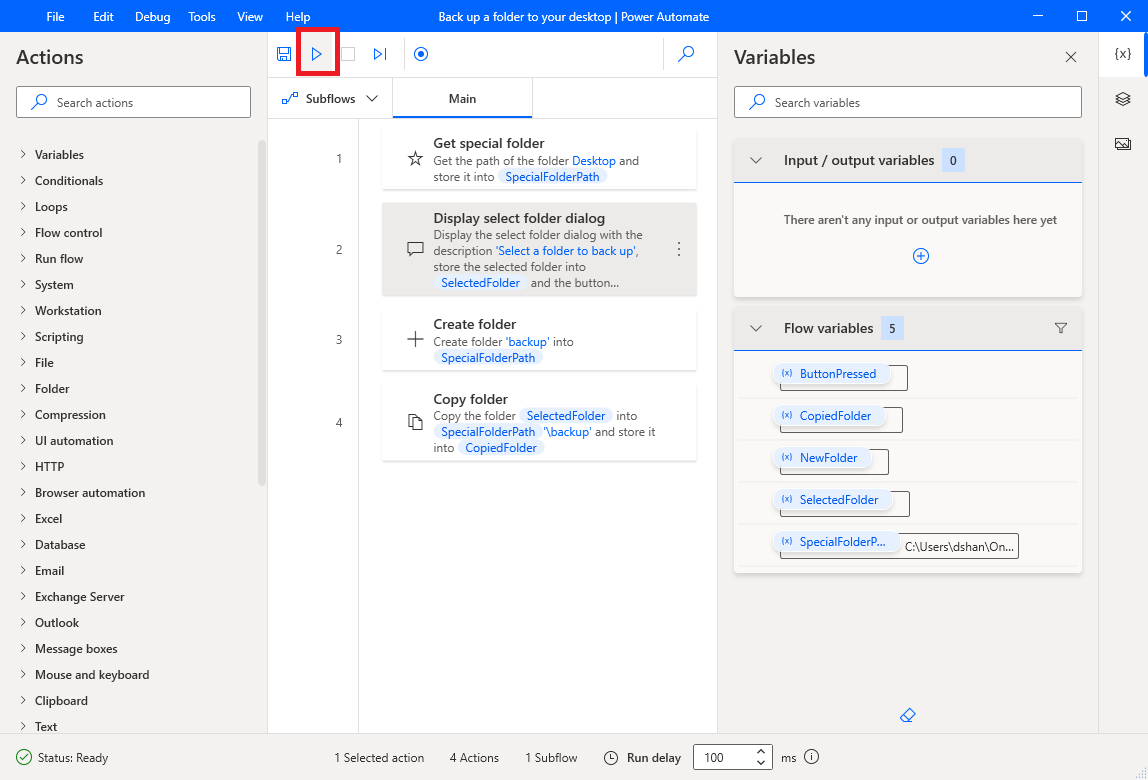
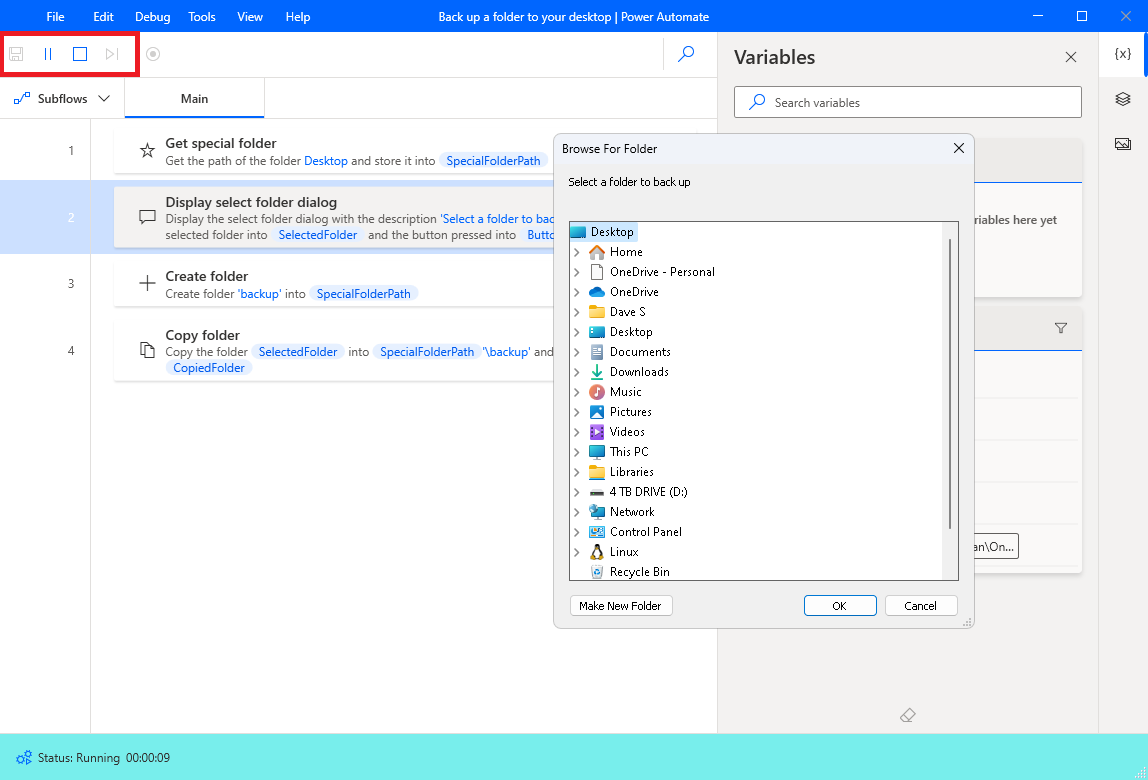
Once you have created and configured your flow, you can execute it by clicking on the “Run” button as shown in the Power Automate Desktop window. This will start the flow and perform the specified actions in sequence. You can also choose to your pause or stop your flow at anytime by using the corresponding buttons at the top. In addition, you should see a turquoise stripe at the bottom of the window, indicating that that your flow is currently running.power automate desktop flow

Conclusion

Power Automate Desktop is a powerful tool that can help automate repetitive tasks and improve productivity. In this guide, we covered the basics of getting started with Power Automate Desktop, including the installation process, creating a new flow, adding actions, configuring actions, and executing a flow. We hope that this guide has been helpful in getting you started with Power Automate Desktop and that you find it useful for your workflow.

Microsoft brings over 20 Snapchat Lenses to Teams

Microsoft has partnered up with Snapchat to bring Snapchat filters with the aim of dazzling up Teams video meetings more. This integration adds 26 of Snapchat’s most popular Lenses, among them Bear in Love, Cat on Head, the Sunset Lense, and more.

This new addition has been incorporated into the Microsoft Teams app, as a Teams user you’ll not need to download a separate app or even an add-on to access the Snapchat Lenses. Teams users can find these Snapchat Lenses directly within the video effects section.

Microsoft indicated that:

Lenses allow users to add augmented reality (AR) effects to video calls, bringing livelier human interaction to meetings. AR captures and processes information about our physical environment and then overlays it with virtual objects and information, allowing us to see and experience the world in a different way.

It is worth noting that this feature is limited to Teams for Work users. What’s more, you should also be running on the “classic” Teams version, rather than the recently launched new Teams client that’s in public preview.

Want File Explorer to work well? Don’t install KB5025310

It’s that time of the month. Microsoft is back with builds for insiders. Just like those in the Canary and Dev channels, users on Beta also get Build 22621.1546 and Build 22624.1546 (KB5025310).

While the builds come with a lot of exciting updates and fixes, like how Redmond officials are doing by improving the search performance in Settings and setting up the print screen key to open Snipping Tool by default, it comes with one little defect. 

As noted from the blog post, you may be encountering a problem when pressing Shift + Right-click on a file or folder as the Show more options option won’t pop up. 

It’s unclear when Redmond officials will solve this problem, but we’re monitoring the Windows release health page closely to see once they’ve investigated it. With that said, however, that doesn’t mean that File Explorer won’t run if you have this KB installed on your desktop, still. 

Other than that, as mentioned, Microsoft also acknowledges issues in live captions and the search on the taskbar, given the fact that its Bing search engine is integrated within the bar. 

If you have the Bing button in the search box on the taskbar and you restart your computer, you may see the daily rotating search highlight for some time before getting the Bing button back.

So, what other features are coming in Windows 11 KB5025310, you may ask? They can’t be all bad, can they?

What other features are coming in KB5025310? 

[General]

  • In the previous flight, we documented that Content Adaptive Brightness Control (CABC) works on desktop PCs – however, it does not. We have updated that blog post. Content Adaptive Brightness Control (CABC) also needs to be enabled by the OEM (the manufacturer of the device). As a result, this feature is not available on all laptop or 2-in-1 devices.

[Settings]

  • Improved the performance of search within Settings.
  • Pressing the print screen key will now open Snipping Tool by default. This setting can be turned off via Settings > Accessibility > Keyboard. If you have previously modified this setting yourself, your preference will be preserved.
  • A limit of 20 most recent tabs has been introduced under Settings > Multitasking to show tabs in ALT + TAB and Snap Assist.

[Input]

  • Fixed an issue where text input features like touch keyboard, voice typing, and emoji panel might not launch.
  • Fixed an issue where the buttons in the Pinyin IME’s settings flyout were hard to see when they had focus if a contrast theme was enabled.

[Task Manager]

  • Fixed an issue where some of the details in the Performance page wouldn’t display properly until you resized the window or changed pages back and forth.

Have you installed Windows 11 KB5025310 from the Beta channel? Let us know in the comments!

0x00000b11: How to Fix This Error on Windows 10 & 11

Many users have complained that Windows cannot connect to the printer, Error Operation failed with error 0x00000b11 when trying to print something on their network-shared printer.

This is a perpetual issue on Windows 10 & 11. In this guide, we will discuss some of the tested methods to fix the error on your computer.

What does the 0x00000b11 error code mean?

This error code is a printer connecting error that occurs when your computer tries to connect to a network printer on a remote PC. The connection between the shared printer and remote computer seems OK.

This problem started appearing on Windows 11 & 10 computers when Microsoft released the  CVE-2021-1678 vulnerability security patch. Many users have also reported getting this error after installing the Windows Malicious Software Removal Tool x64 – v5.111 (KB890830) update.

What causes the 0x00000b11 error code on Windows 10 & 11?

There could be various reasons for this error code to occur; some of the common ones are mentioned here:

  • Outdated printer driver – If the printer driver is outdated, missing, or corrupted, this could lead to printer error. You must keep the printer driver up to date to avoid all sorts of errors.
  • Bad Windows updates – Sometimes, Windows updates can various issues; if the issue has started after updating Windows, you need to consider uninstalling the latest update.
  • CVE-2021-1678 – If the migration for CVE-2021-1678 is enabled, it might lead to this error. This will ensure your network is not exposed to PrintNightmare and MSHTML vulnerabilities.
  • Faulty hardware – A defective network card or hardware component can cause this error. Check your hardware for any signs of damage or malfunctioning, and consider replacing it if necessary.

Now that we know about the causes, let’s move to the fixes to resolve the error asap.

How can I fix the 0x00000b11 error code on Windows 10 & 11?

Before engaging in advanced troubleshooting steps, you should consider performing the following checks:

  • Restart your computer.
  • Turn off your printer, unplug the power cables, wait for 30 seconds, and plug it in to restart.

1. Uninstall the last Windows update

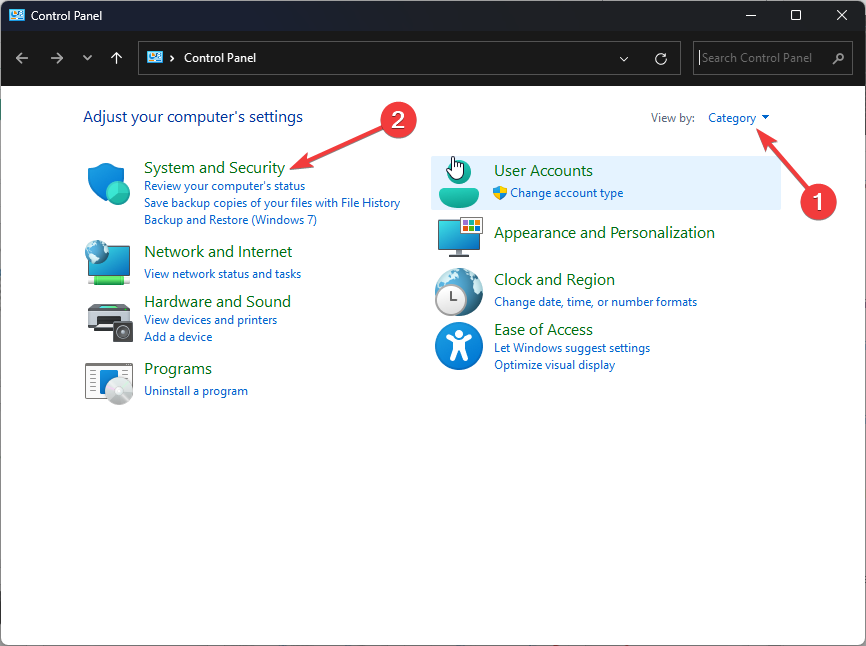
  1. Press Windows key, type control panel, and click Open.Control Panel start menu 0x00000b11
  2. Select View by as Category, and click Programs.Programs
  3. Click View installed updates.View installed updates  0x00000b11
  4. Locate the update you want to uninstall and click Uninstall.

2. Install pending update

2.1 Windows 11

  1. Press Windows + I to open the Settings app.
  2. Go to Windows update, and click Check for updates.Windows Update Check for updates - 0x00000b11
  3. Download and Install the update if available. You will have to restart the computer. Please click Restart when prompted.

2.2 Windows 10

  1. Press Windows + I to open the Settings app.
  2. Go to Update & security.Update and security 0x00000b11
  3. Click Check for updates and then Download and Install to install the updates. Restart your computer when prompted.Download and install

3. Restart the Printer Spooler service

  1. Press Windows + R to open the Run window.Services Run Command 0x00000b11
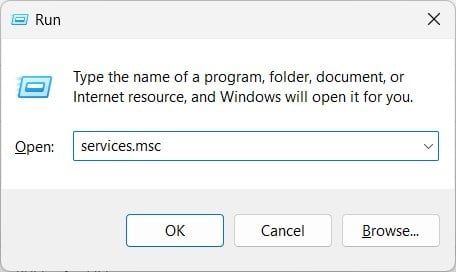
  2. Type services.msc and click OK to open Services.
  3. Locate and right-click the Printer Spooler service and select Restart.Restart Printer spooler
  4. Now close the Services app.

4. Run printer troubleshooter

4.1 Windows 11

  1. Press Windows + I to open the Settings app.
  2. Go to System, and click Troubleshoot.troubleshoot 0x00000b11
  3. Click Other troubleshooters.Other Troubleshooters
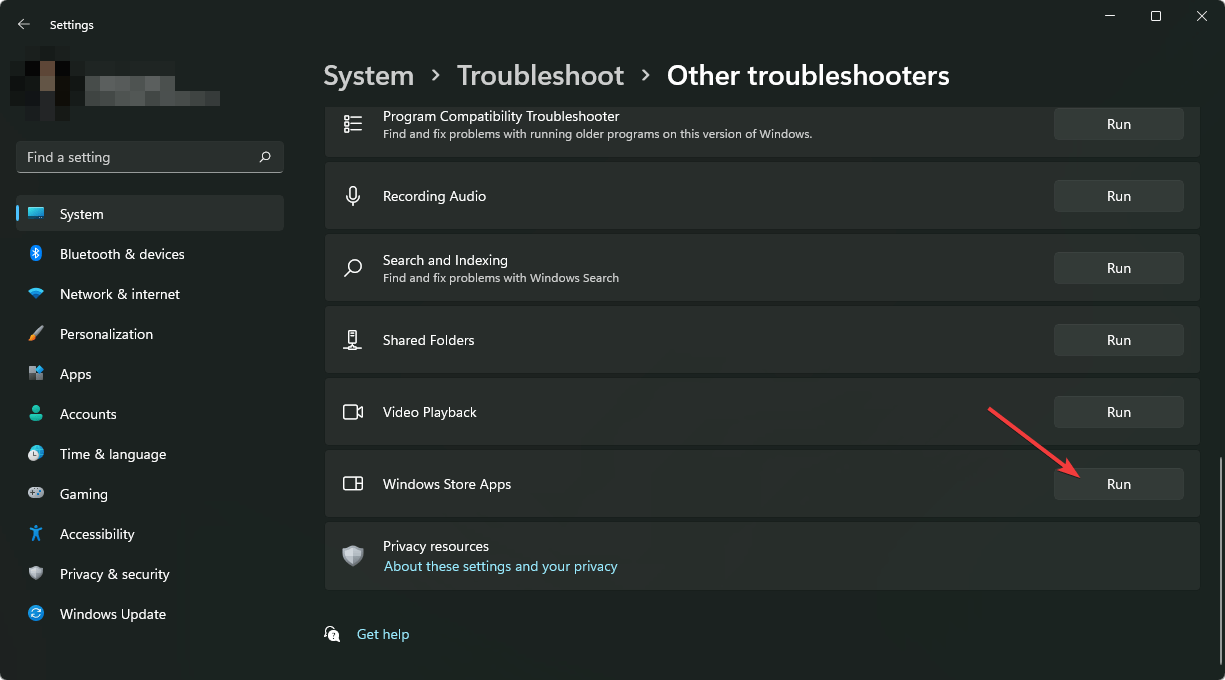
  4. Locate the Printer and click Run.Printer Run troubleshooter 0x00000b11
  5. Follow the on-screen instructions to complete the process.

4.2 Windows 10

  1. Press Windows + I to open the Settings app.
  2. Go to Update & security.Update & Security
  3. Click Troubleshoot and select Additional troubleshooters.Troubleshoot - Additional troubleshooters 0x00000b11
  4. Locate the Printer and click Run the troubleshooter.Run the troubleshooter
  5. Follow the on-screen instructions to complete the process.

5. Disable CVE-2021-1678 migration

  1. Press Windows + R to open the Run dialog box.REGEDIT RUN COMMAND
  2. Type regedit and hit Enter to open Registry Editor.
  3. Navigate to this path: Computer\HKEY_LOCAL_MACHINE\System\CurrentControlSet\Control\PrintAdd a DWORD 0x00000b11
  4. Right-click Print, click New, then click DWORD-32 bit Value.
  5. Name it RpcAuthnLevelPrivacyEnabled, double-click it to Modify. Set the Value data to 0, Base to Hexadecimal and click OK.Modify value
  6. Restart your computer to let changes take effect.

6. Add local printer driver

6.1 Windows 11

  1. Press Windows + I to open the Settings app.
  2. Go to Bluetooth & devices and click Printers & Scanners.Devices - Printer and scanner Windows 11 0x00000b11
  3. Select Add device.Add a device 0x00000b11
  4. Locate The printer that I want isn’t listed and click Add manually.Add mnaually
  5. On Add Printer window, select Add a printer using a TCP/IP or hostname and click Next.Printer listed
  6. Follow the onscreen instructions to complete the process.

6.2 Windows 10

  1. Press Windows + I to open the Settings app.
  2. Go to Devices.Click Devices 0x00000b11
  3. Click Printers & Scanners from the left pane, and select Add a printer or scanner.Add scanner printer 0x00000b11
  4. Click The printer that I want isn’t listed option.Printer is not listed
  5. On Add Printer window, select Add a printer using a TCP/IP or hostname and click Next.Add a printer
  6. Follow the onscreen instructions to complete the process.

7. Reinstall printer driver

  1. Press Windows + R to open the Run console.Device Manager RUN COMMAND
  2. Type devmgmt.msc and hit Enter to open Device Manager.
  3. Go to Print queues and expand it. Right-click the printer driver and select Uninstall driver.Uninstall driver 0x00000b11
  4. Click Action and select Scan hardware for changes. Scan for hardware changes 0x00000b11

Windows will reinstall the appropriate driver. Once done, restart your computer to confirm the changes.

We also recommend reading our article on Printer Error 0x000003e3 because the problem is similar.

So, these are some of the methods you can follow to fix the Error Operation failed with error 0x00000b11. If you have questions or suggestions, please let us know

Teams Animated Backgrounds: How to Download & Use

Microsoft recently introduced the ability to use an animated background in Teams, something that had been missing from the popular video-conferencing apps. Zoom already supports animated backgrounds. And with Microsoft introducing the functionality, users are all excited! 

The built-in functionality might be missing for some, given that it’s a gradual rollout. For organizations, IT administrators need to set the update policy to Show preview features for dynamic animations to work. 

Does Teams support animated GIFs?

Microsoft Teams supports sharing GIFs as a message. The option is available underneath the message text field. Click the GIF icon, and choose any to share. Besides, you can search for more.

But Teams does not allow users to set GIFs as background in meetings. The only formats supported are .jpg, .png, and .bmp. But converting it to the PNG format will allow you to use any GIF as an animated background in Microsoft Teams.

How do I set an animated background in Microsoft Teams?

1. Use the default animated background

  1. In the pre-join screen, where you choose the audio and video settings, click on Effects and avatars.effects and avatars for microsoft teams animated background
  2. Now, under Video effects on the right, choose the desired animated background in Microsoft Teams. The dynamic backgrounds have a small video icon at the bottom-left corner of the preview image.video effects

That’s how you set up a background animation before a meeting in Microsoft Teams and enhance the meeting experience. Virtual backgrounds are good. But the best static backgrounds, too, are a great addition!

Besides, to change the background filters during a meeting, click the More icon > choose Effects and avatars > select a video background. You can similarly change the background in Teams’ mobile app.

But the animated backgrounds have a few limitations, as listed in the official blog post:

  • Require 8 GB RAM
  • The CPU must have four logical processors
  • There are limited options, and only Microsoft’s pre-defined backgrounds are available.

2. Create an animated background (from .gif file)

Note icon NOTE
This method only works with older versions of Teams. If you recently updated the app, the path provided here won’t be found, nor would the steps work.
  1. Download any GIF file from the web that you want to use as the animated background in Teams meetings. We picked one from Giphy.
  2. Select the file, press Ctrl + C to copy it, and then hit Ctrl + V to paste it in the same location. We do this since two copies are needed.
  3. Go to the View menu, select Show, and then enable File name extensions.file name extensions
  4. Now, right-click one of the files and select Rename.rename for microsoft teams animated background
  5. Change the file extension from .gif to .png.gif to png
  6. Click Yes in the confirmation prompt.
  7. For the other file, rename it to filename_thumb.png, where filename is the actual file name. For instance, giphy.png becomes giphy_thumb.png.
  8. Now, paste the two .png files in the following location:
    • Windows: %AppData%\Microsoft\Teams\Backgrounds\Uploads
    • Mac: Library/Application Support/Microsoft/Teams/Backgrounds/Uploads
  9. Once done, restart the computer, and the newly created backgrounds for Teams meetings will be available along with the default backgrounds.

You can always set up custom backgrounds in Microsoft teams, both static and animated. This way, Teams users can make meetings more fun!

Tips for getting the most out of Teams animated backgrounds

  • Make sure your PC meets the minimum system requirements for animated backgrounds.
  • Get animated backgrounds from official and reliable sources.
  • For low-end devices, the performance might be affected. So, you may consider switching to the Ultimate Performance power plan.
  • Use filters and effects when facing performance issues, or there are other apps running on the PC.

While video filters are a great introduction to Microsoft Teams, the limited number of animated backgrounds is still a problem. But we should expect more in the coming days!

If you plan to download some exciting ones, check our curated guide listing the best Microsoft Teams Halloween backgrounds.

For any queries to share your thoughts on animated backgrounds in Microsoft Teams, drop a comment below.

Redeem custom Microsoft Rewards gift card amounts

As you know, Microsoft Rewards has been around for a while now. For those unfamiliar with it, you can sign up for a Microsoft account on a web browser, and then perform various tasks online.

Of course, these tasks include but are not limited to searching on Bing, answering quizzes, and participating in various Microsoft-hosted events.

Be sure you know how to block autoplay videos on Edge next time you are online, for a smoother experience.

Also, if you want to send files using the Edge Drop feature, we can show you how to do it. Now, let’s circle back to Microsoft’s Rewards service.

You can create your custom gift cards with Microsoft Rewards

After performing one of the above-mentioned tasks for Microsoft, you then collect points that you can redeem for, among other things, digital gift cards for Microsoft products and other companies.

That being said, keep in mind that those gift card redemptions are currently limited to only small amounts, like $5, $25, and $50.

This can be frustrating for people that put in more work and would like to redeem bigger prizes, so Redmond’s gears started turning.

Mikhail Parakhin, Microsoft’s head of Advertising and Web Services made a special announcement today, one you will surely get a kick out of.

He posted on Twitter that Microsoft is testing a new system where Rewards members can put in their own amounts for gift cards.

In theory, the system should now allow for more reward cards to be redeemed because users won’t have to wait to get to the $25 gift card level from Amazon when they only need to get to $20.

Redmond officials also claim they are testing this new system on a flight. This means that only a limited amount of users are actively testing it.

And, after all the work on it is done, it should become available for all Microsoft Rewards users in a couple of weeks.

Remember that the Microsoft Rewards service recently got linked with the new AI-generated Bing Image Creator.

Furthermore, exactly as you would have expected, putting in rewards points lets users generate artwork in Bing Image Creator faster.

What is your opinion on Microsoft’s latest change with the Rewards service? Share your thoughts with us in the comments section below.

Firefox will no longer push your CPU past the breaking point

After the massive print nightmare episode, you would think Microsoft has learned to better manage issues that its systems are still dealing with.

On that note, know that you won’t have to worry anymore about a bug affecting Mozilla products on Windows operating systems, after more than half a decade.

Speaking of Mozilla, the company promised its users more privacy through MAC and VPN. Also, if you are using Firefox and run into the Couldn’t Load XPCOM error, we can show you what to do.

Microsoft and Mozilla team up to fix this CPU problem

As we’ve said in the beginning, it would seem that a bug nearly half a decade old has finally been fixed by Microsoft and Mozilla. 

This annoying issue was related to the Windows Defender and its Antimalware Service Executable (MsMpEng.exe) service which would lead to high CPU usage on Mozilla Firefox.

And, as a result, resource usage was noticeably higher compared to other browsers such as Google Chrome and Microsoft Edge.

As you can see from the screenshot below, taken at the time of initial reporting of the bug, you can see average CPU usage when reloading YouTube six times.

However, you no longer have to worry about such scenarios. The bug was recently resolved by the efforts of Microsoft and the Mozilla development team.

According to the Redmond tech giant, this will be deployed to all users as part of regular definition updates, which are packaged independently from OS updates.

This even includes systems such as Windows 7 and 8.1, even though these platforms should not have had the performance issue with Firefox.

Why? Well, it’s because developers said that the ETW events that cause it do not exist on these older versions of Windows. Clearly, Windows 10 and Windows 11 users were the most affected.

Later, it was announced that the recent Microsoft Defender March-2023 definition update (Platform: 4.18.2302.x | Engine: 1.1.20200.4) fixed the issue.

Also, apparently, it has also been found that there is further scope for improvements to the processor usage in Firefox when compared to Chrome.

It’s not excluded to see such performance improvements in upcoming browser updates and it won’t just be exclusive to Microsoft Defender alone.

have you had to deal with this annoying issue on your Mozilla Firefox browser? Share your thoughts with us in the comments section below.

Lenovo Laptop Black Screen: How to Fix It in 5 Steps

Lenovo laptops are widely regarded for their high quality, but they have quirks. Sometimes a laptop doesn’t turn on even if the Power Light does or the screen isn’t showing you anything.

The latter is especially common. Some models, like those from the Lenovo Yoga series, have malfunctioning touch screens, while the display on other lines may go completely black.

What causes the black screen in the first place?

Your Lenovo laptop’s screen going black can be caused by a lot of things, from faulty hardware to some kind of software glitch. It’s hard to pin the error down to just one thing.

The following list consists of the most likely culprits and things you should look for.

  • You have faulty hardware – The faulty hardware could be a lot of things. It could be a malfunctioning hard drive, or something’s wrong with one of your laptop’s peripherals.
  • Something is wrong with your display – Like the previous point, the laptop’s screen could have some broken component, or it was improperly installed during manufacturing.
  • The laptop’s power supply unit isn’t working properly – You can check if something is wrong with your power supply unit by downloading an app like AIDA64 Extreme and running some tests.
  • Your software is out of date – Be sure to keep up with any and all updates Microsoft rolls out. These patches often address problems that can cause the black screen error.
  • Malware has infected your computer – Computer viruses can wreck your system files causing all sorts of problems. Run some antivirus software to clean it up.
  • Corrupt files are preventing normal operation – Even if you get rid of a computer virus, the corruption it leaves behind can still prevent normal operation. Run an SFC scan to clear it up.

How can I fix my Lenovo laptop’s black screen error?

Try out one of the following fixes. If one doesn’t work, move on to the other.

  • The first thing you should try is to restart your computer. Rebooting is a tried and true method that often fixes any software problems you may be having.
  • We recommend removing any extra peripherals you have attached to your laptop, like mice, keyboards, speakers, or whatever. Those devices may have corrupt drivers causing the error.
  • Press the Windows, Ctrl, Shift, and B keys simultaneously, then immediately let go. This will refresh your laptop’s display and should get it working again.
  • If none of the previous solutions work, you may have irreparable damage. You’re better off connecting your Lenovo laptop to an external monitor and using that display instead.
  • If you do manage to fix the problem, it’s recommended that you perform a System Restore and revert your Windows 11 computer to an earlier state to undo the errors.
  • If all else fails and you still have the black screen error, you can either see if Lenovo is willing to fix it, or you can try resetting your laptop back to its factory settings.

1. Perform Startup Repair

  1. Launch the Settings menu. Stay on the System section, scroll down, and select Recovery.
  2. Click the Restart Now button next to Advanced Startup.
  3. When your computer restarts, click Troubleshoot then Advanced options.
  4. On the final page, select Startup Repair.
  5. Give your computer enough time to restart. When it comes back, select Administrator, enter the admin password, and click the Continue button.

2. Update Windows

  1. Launch the Settings menu and go to the Windows Update section.
  2. Click the Check for Updates button to see if there is a patch available.
  3. If there is, select Download & Install.

3. Update drivers

  1. Like in the previous solution, open the Run command.
  2. Enter msconfig into the Run, then click OK.
  3. Go to the Boot tab. Click the box next to Safe Boot, then OK.
  4. In the new window that appears, select Restart.
  5. Open the Device Manager when your computer finishes rebooting.
  6. Expand the Monitors entry.
  7. Right-click your monitor. In the context menu, select Update driver.
  8. Select Search automatically for drivers to automatically install new drivers.

This updating process may be tricky for some users and that’s the reason why we suggest the expert driver software below.

4. Restart explorer.exe

  1. Launch the Task Manager and go to the Details tab.
  2. Scroll down until you find explorer.exe.
  3. Click End Task in the upper right-hand corner.

This solution is meant more for preventing future black screen errors. After this, the error shouldn’t happen again.

5. Double-check power settings.

  1. Right-click the Windows icon and select Run.
  2. Type in powercfg.cpl, then click the OK button.
  3. Click Choose what the power buttons do on the left side menu.
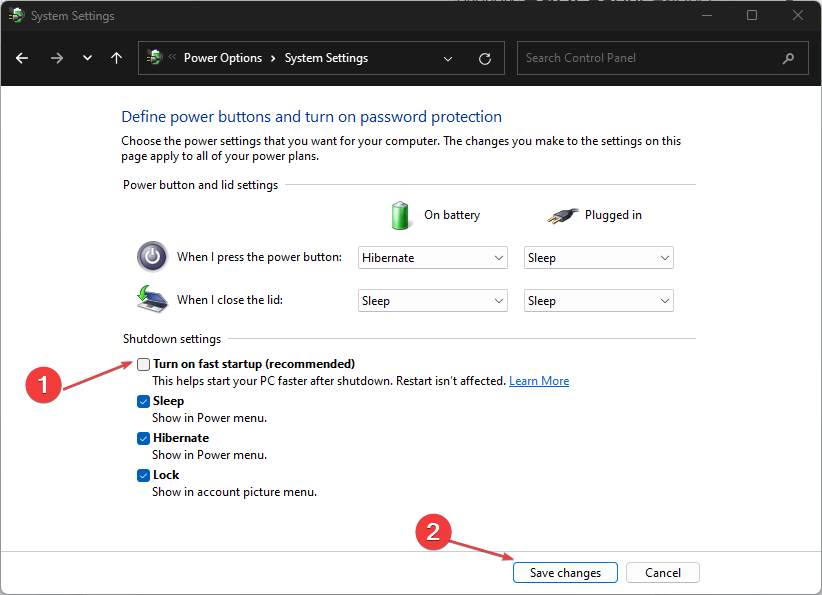
  4. Now, click Change settings that are currently unavailable at the top of the window.
  5. Toggle off the box next to Turn on fast startup to disable the feature.
  6. To finish up, select the Save Changes button at the bottom.

What can I do if data is lost in the process?

While fixing the black screen error, you may lose some valuable data. But don’t worry; there is a way to restore that lost data with some data recovery software.

You have the likes of Stellar Data Recovery, which can deep scan your system to locate lost files and recover media from USB. There’s also Disk Drill if you want to customize your scan.

Once you’re done, we strongly recommend backing up that data so you don’t lose it again. There are many options, like OneDrive or Microsoft Azure, with many alternatives.

For example, you have Vembu Backup, which comes with its built-in recovery tool, and Acronis, which people like for how easy it is to use.

Feel free to comment below if you have other Lenovo laptop problems. Also, leave comments below about reviews you’d like to see or information on other Lenovo products.

Visual Studio Code Extensions: 15 Best for 2026

Visual Studio Code is a mini version of the Visual Studio IDE that is lightweight, can use a plethora of extensions, supports all languages, and much more. When it comes to extensions, you should be aware of the best Visual Studio Code extensions to improve your productivity.

For Visual Studio IDE users, we already have a guide that lists some of the best extensions for Visual Studio. In this guide, we will give you a bunch of Visual Studio Code extensions that will help improve your efficiency and productivity. Let us get right into it.

What are the best Visual Studio Code extensions?

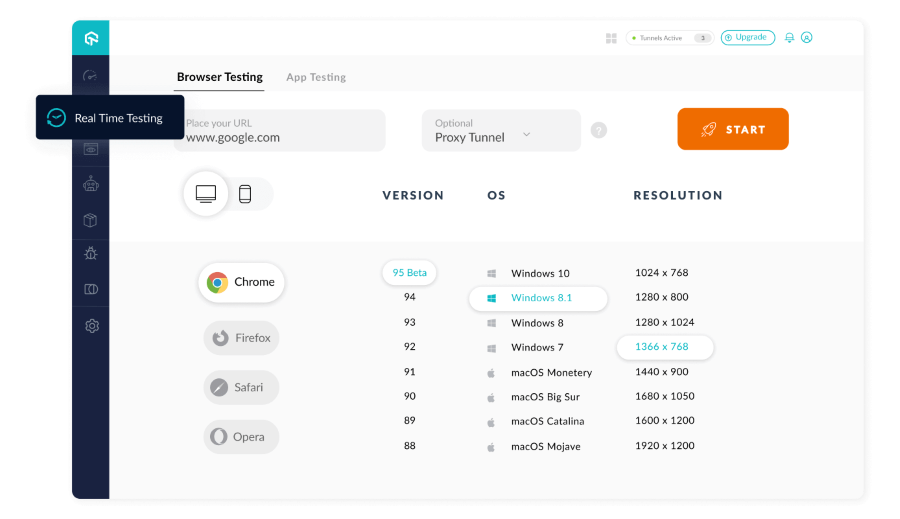
LambdaTest – Offers real-time cross-browser testing

LambdaTest is a cross-browser testing extension that can be pretty useful for developers. You can test public or locally hosted websites and web apps.

You can write your codes in Visual Studio Code and use this extension to perform live testing of your app on an online browser. It supports almost all web browsers and lets you test your app on a real device and OS.

Some of the best features of LambdaTest Visual Studio Code extension are:

  • Offers automated browser testing.
  • Live testing on Android and iOS simulators.
  • Based on cloud infrastructure for blazing fast testing.
  • Most detailed Test Analytics & Observability Suite.

⇒ Get LambdaTest

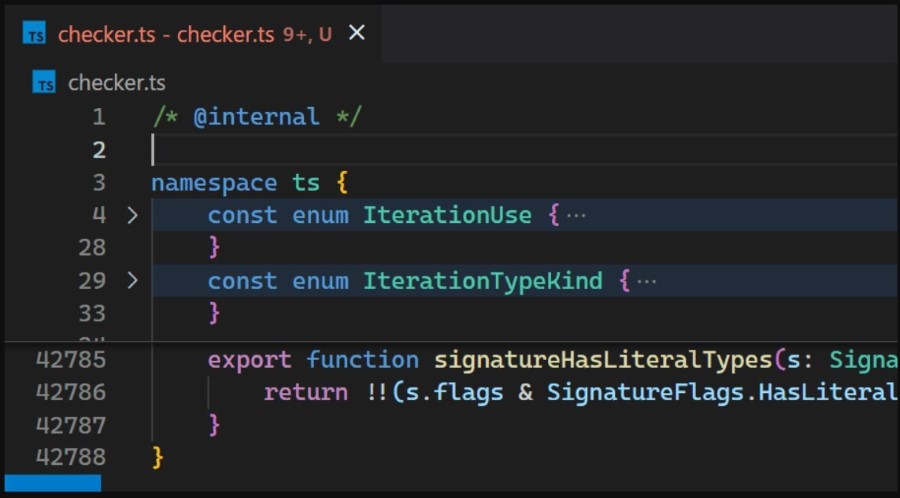
Bracket Pair Colorizer 2 – Paints corresponding brackets with same color

With Bracker Pair Colorizer, you will be able to paint the corresponding brackets in your code with the same color.

This could help you identify easily when working with functions, nested components, and objects with brackets or parentheses. Use this extension to find matching pairs and improve navigability and accessibility.

Some of the highlighting features of Bracket Pair Colorizer include:

  • Lets you locate matching pairs.
  • Improves accessibility.
  • Lets you color functions so that it is easy for others to understand.

⇒ Get Bracket Pair Colorizer 2

Better Comments – Make human-friendly comments on your code

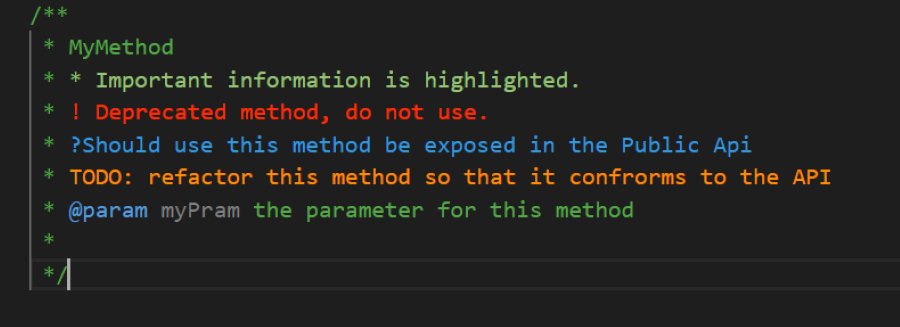
You can use the Better Comments Visual Studio Code extension to make human-friendly comments in your code. This makes it easier for others to understand the source code.

To enter easier comments, all you need to do is after a double forward slash // and your characters such as * (for highlighted text), ! (for errors and warnings), ? (for questions), TODO (for to-dos), etc.

Here are the key features of Better Comments:

  • Support multiple languages.
  • Lets you add user-friendly comments easily.
  • It is easy to use and execute.

⇒ Get Better Comments

Prettier – Make your code prettier

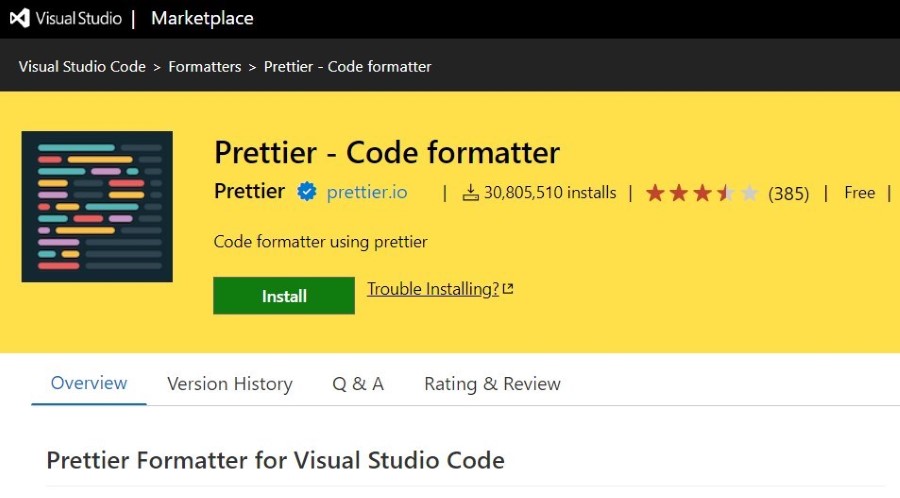
If you wish to keep your codes consistent, you can use the Prettier Visual Studio Code extension. You can configure settings and save them with shortcuts.

When you save your configuration, Prettier will automatically format your codes based on that and fix issues in your codes. It supports multiple languages such as JavaScript, TypeScript, Java, JSON, CSS, HTML, and more.

Here are some of the best features of Prettier:

  • Installation is pretty easy.
  • Makes it easier to keep your codes consistent.
  • Wraps code whenever necessary to keep them inside the max length.

⇒ Get Prettier

Relative Path – Find the location of your file automatically

If you are working with a large repository, then the Relative Path Visual Studio Code extension can be of great help.

You can use this extension to find the relative path of the file. All you need to do is type the file name, and the extension will locate the file from the current location.

Below are the best features of the Relative Path extension:

  • Finds the location of the file using the file name.
  • Lets you access any file location, especially in a large repository.

⇒ Get Relative Path

GitLens – Learn who changed what and why in your code

Using the GitLens Visual Studio Code extension, you will be able to learn important information about your codes.

You can understand who, what, and why the changes were made to them. The process takes a few seconds, and the extension also gives you a file revision history.

Some of the best features of GitLens are:

  • Gives you who, what, and why changed the codes.
  • Displays the revision history of the changes to your codes.
  • Offers a sidebar for easier navigation.
  • You can integrate with GitHub, GitLab, Gitea, Gerrit, and more.

⇒ Get GitLens

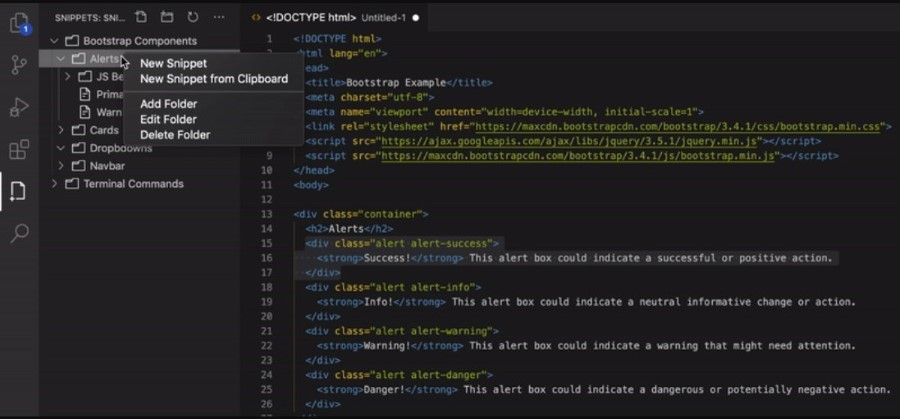
Snippets – Easily enter repeating codes

Snippets extension lets you write your codes faster by entering the repeating codes, such as loops complex HTM structures, and more easily.

You can use Snippets to expand the functionalities of code snippets by allowing you to organize snippets, create a snippet, open or edit snippets, and much more.

Check out the best features of Snippets:

  • You can use VS Code editor to create a snippet.
  • Organize and edit snippets.
  • Enter repeating codes such as loops, etc., easily.

⇒ Get Snippets

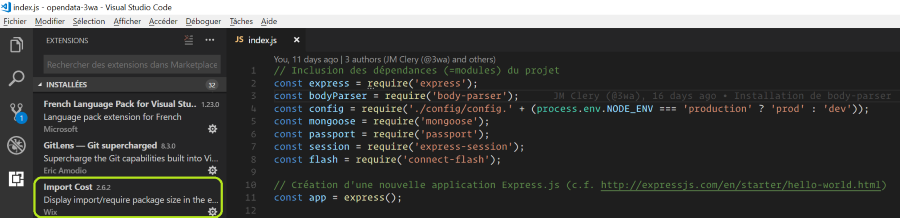
Import Cost – This lets you weigh the size of your package

You can use the Import Cost Visual Studio Code extension to handle the size requirements of your imported package.

You can be well aware of the size of the imported package and negate the problems and issues arising because of the size of the added dependencies on your imported package.

Here are the best features of the Import Cost extension:

  • Supports default importing.
  • Entire content importing is supported.
  • Selective and submodule importing.
  • Supports both JavaScript and TypeScript.

⇒ Get Import Cost

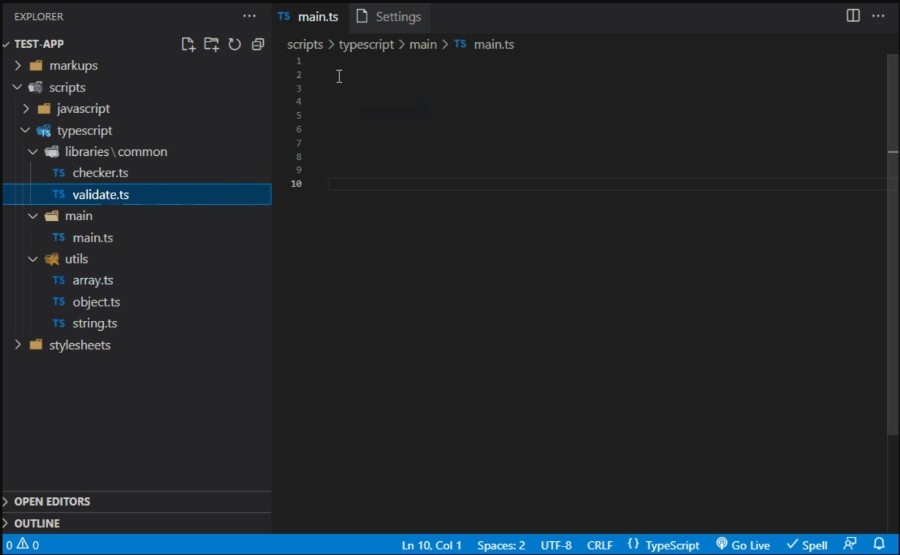
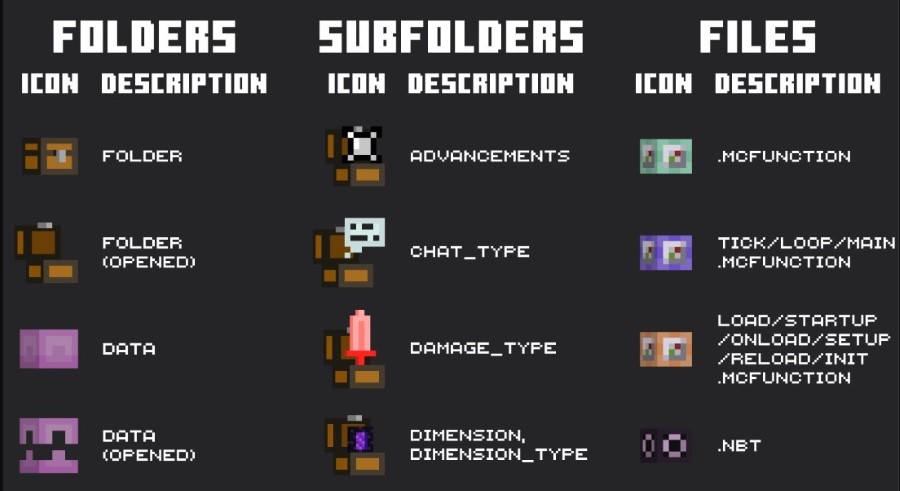
Datapack Icons – Get Minecraft-themed icons

If you are a Minecraft lover and coder, you will love the Datapack Icons, which can be applied to folders, sub-folders, and files.

It is easy to use and great to give you a package of the Minecraft look and feel. The Datapack Icons are specially made for data pack devs.

Here are the key highlights of the Datapack Icons:

  • Designed for Datapack icons.
  • Gives you a Minecraft-themed look.
  • You can apply the icons for folders, sub-folders, files, etc.

⇒ Get Datapack icons

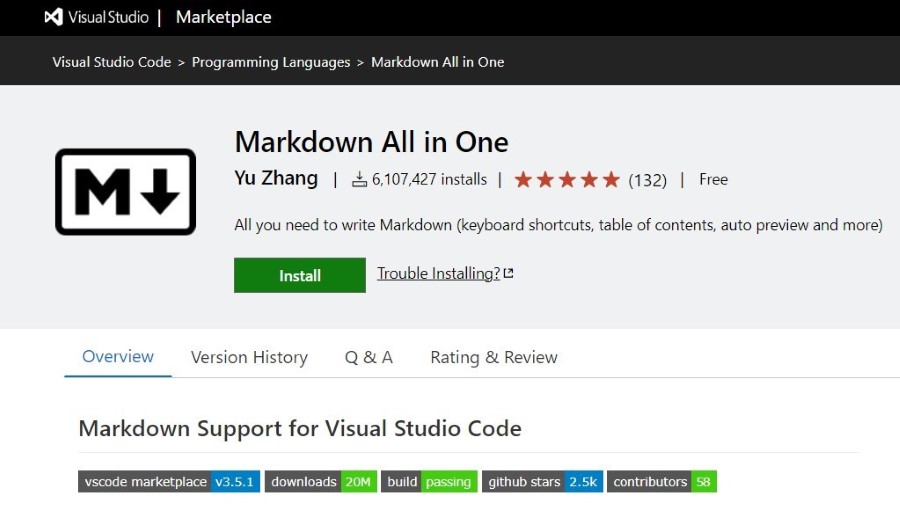
Markdown All in One – Improves overall productivity and speed

You can use the Markdown All in One shortcut to enhance overall productivity and speed across different technical domains.

Markdown All in One Visual Studio Code extension provides easy-to-use shortcuts and auto-preview of the content.

Here are some of the notable features of Markdown All in One:

  • Use shortcuts to alter text and add things.
  • Offers syntax autocomplete.
  • You can toggle bold, italic, strikethrough, and format.

⇒ Get Markdown All in One

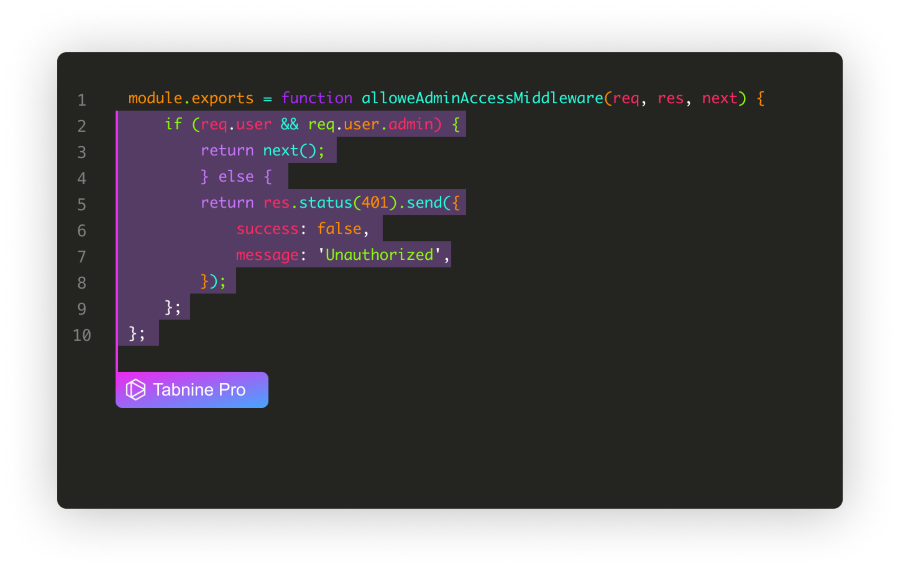
Tabnine – Great extension for beginner developers

If you are a beginner developer, you can use the AI-powered Tabnine Visual Studio Code extension. It helps improve overall productivity.

It supports all languages, helps in real-time whole-line completion, generates your entire function without needing to exit your editor, and writes what you are looking for, and Tabnine will suggest the right code for you.

here are the best features of the Tabnine extension:

  • Offers you real-time whole-line completion.
  • Lets you use natural language to code completion.
  • Supports all languages.
  • Best for beginners.

⇒ Get Tabnine

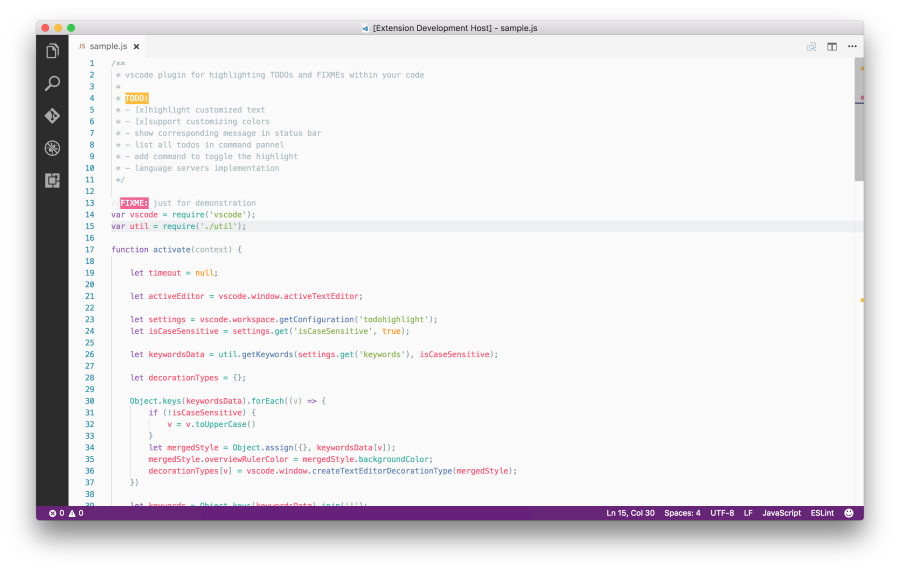
TODO Highlight – Get notified for the notes that aren’t addressed

With TODO Highlight, you will be able to rectify the fixes within your codes. TODO Highlight Visual Studio Code extension stands out the TODOs that need your attention, and you can address them at your convenience.

This extension lets you give different colors to your TODOs for easier identification, customize the keywords based on your convenience and more.

Here are the best features of TODO Highlight:

  • Apply different colors for different TODOs.
  • Reminds you of notes that need your attention.
  • The annotation can be previewed in a separate file.

⇒ Get TODO Highlight

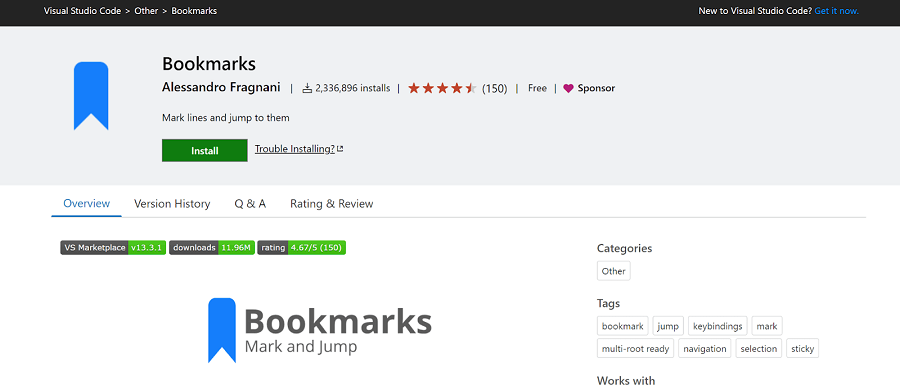
Bookmarks – Add bookmarks to your code for easier navigation

Bookmarks Visual Studio Code extension lets you add a bookmark to your code. This makes it easy for you to go back and forth between your code lines and make the tweaks.

The Bookmarks extension comes with robust technical support that will help you with any query, a dedicated sidebar, views the list of all bookmarks in a file and project, and more.

Here are some of the key highlights of the Bookmarks extension:

  • Add a bookmark to your code line.
  • Easily navigate between important commands in your code.
  • Lets you select lines and regions with bookmarks.
  • Offers a dedicated sidebar with easier access.

⇒ Get Bookmarks

Auto Rename Tag – Lets you automatically rename paired HTML/XML tag

Using the Auto Rename Tag Visual Studio Code extension, you can easily rename the paired HTML/XML tags.

Notably, when you rename one HTML/XML tag, then using this extension renames the paired HTML/XML tag.

Some of the best features of Auto Rename Tag:

  • Helps improve your efficiency.
  • Improves accessibility for projects where lots of tags are involved.
  • Gives you the same functionalities as Visual Studio IDE.

⇒ Get Auto Rename Tag

Code Spell Checker – Checks your English to avoid embarrassment

You can make use of the Code Spell Checker Visual Studio Code extension if you aren’t good at English. It will make sure that your code is free from petty English errors.

Nobody’s perfect, and there is no need to be perfect in English. However, if you are presenting our work to an English customer, it becomes necessary to make them understand your lines of code.

Here are the best features of the Code Spell Checker:

  • Checks your English and make the fixes.
  • Works effectively well with codes and documents.
  • Words not in the dictionary will be outlined with a line and can be added later.

⇒ Get Code Spell Checker

That is it from us in this guide. We have listed some of the best Visual Studio Code extensions you can use in 2023.

You can set up your editor quickly by following this guide on how to install Visual Studio Code on Windows before exploring the extensions listed above.

You can read our guide that lists the differences between Atom and Visual Studio Code. It will help you decide which one is the better one for you. We also have a guide explaining how to open multiple files in Visual Studio Code.

Feel free to let us know in the comments below which one of the above extensions you chose for Visual Studio Code.

Best Web Browsers to Watch Paramount Plus in 2023 ? No App

Wanting to get a piece of the streaming pie, the multinational movie studio Paramount Global launched its on-demand streaming service known as Paramount+. Pairing it with a full-fledged Paramount Plus web browser is the way to go if you want to enjoy top video quality. From browsers with AV1 support to anti-buffering tips, you’ll find a bit of everything here.

Paramount Plus has an official app on platforms like Apple TV, Roku, and video game consoles. However, you will need to need the right operating system to watch it.

And we’re not just talking about video quality or avoiding a grainy Paramount Plus experience. We’re talking about full compatibility. For example, you won’t be able to watch on Paramount Plus if you’re on Linux.

Instead, you’ll need to use either a recent macOS version or Windows 8. But we recommend you go for Windows 10 or above straight on to avoid that infamous grainy look. So, in comes the big question.

? Can I watch Paramount Plus without the app? For sure, as long as you have the best browser for Paramount Plus Here’s a quick preview of our top picks:

  • Opera – Best browser for Paramount Plus (top video quality)
  • Microsoft Edge – Light on resources for flawless streaming
  • Google Chrome – High-speed but occasionally grainy video playback
  • Safari – Play Paramount Plus on macOS
  • Firefox – Great for Paramount Plus Watch Party features

Can you watch Paramount Plus on a web browser?

Yes, in addition to the official app, you can watch movies and shows from Paramount Plus on a web browser. However, do note that only a select few browsers support it.

According to official requirements, you can only pick your Paramount Plus web browser among these four: Microsoft Edge, Google Chrome, Safari, and Mozilla Firefox. This takes into account both desktop and mobile.

We beg to differ. In fact, we were so convinced that we would have a more qualitative experience by exploring other options that we made our own tests.

The studio claims to have not rolled out widespread support for alternatives such as Brave or Opera but we think differently.

In fact, Opera performed beautifully, proving once again it’s an excellent browser for accessing high-traffic websites such as streaming platforms.

So for this guide, we’ll break down which options are worth it and help you pick out the best Paramount Plus web browser on the market.

What is the best browser for Paramount Plus?

1. Opera – Best browser for Paramount Plus video quality

Paramount Plus is available on numerous devices and if you’re anything like us, you’d want a browser that’s equally versatile to be able to harness this awesome feature. Opera is the answer you were searching for all along.

Naturally, Windows 10 and 11 are supported by the streaming service and Opera. However, you will be able to take it even further. For instance, you can install Opera on RokuTV and enjoy an excellent streaming experience.

If you also count its amazing built-in unblocking capacities (VPN-powered), Opera is the best browser for paramount plus out there, even though it’s not officially recommended by the platform.

However, you can contact the service and tell them that you want the support, which, hopefully, they’ll add.

Opera

Opera

It’s easy to watch Paramount Plus without the app, at excellent video quality rates thanks to Opera!

2. Microsoft Edge – Light on resources|fast streaming

Native apps on Windows 11 have a reputation for performing poorly. But things change when it comes to Edge, as it’s one of the best regarding streaming content.

Edge is all about the right combination of performance, security, and battery usage. If you want to take a closer look at how it performs against other known browsers, our in-depth comparison of Brave vs Chrome vs Edge might come in handy.

Now, battery usage isn’t really important if you’re using a desktop computer. But many people like to stream movies on their tablets or laptops. Edge doesn’t take up a lot of resources.

You won’t have to worry too much about buffering or problems with the connection as long as your internet holds up. And to protect you while streaming, Edge has high-quality security features like InPrivate mode.

It ensures your browsing history isn’t saved and deletes passwords, cookies, and form data, to name a few.

⇒ Get Edge

3. Google Chrome – High-speed performance

Chrome is usually the default browser on all Google devices that support and people still stick with it. The main reason for this popularity is Chrome’s high-speed performance which results in excellent video playback.

So, in comes the big question. Why can’t I watch Paramount Plus on Chrome? Well, Chrome takes up a lot of CPU resources, so you must close other apps and windows to get the most out of it.

It’s not just Paramount Plus. For instance, YouTube videos often buffer in Chrome, in addition to a grainy Paramount Plus experience.

If you do manage to get past that, you will be able to enjoy other perks such as customizing your experience with extensions.

For example, Paramount Plus Picture in Picture lets you stream a movie on service in a mini-window so you can browse the internet simultaneously.

There’s also Paramount+ Extended which lets you adjust speeds, skip intros, and hide spoilers. And there’s ParamountPlusSkipper to skip ads.

⇒ Get Chrome

4. Safari – Play Paramount Plus on macOS

For Macs, Safari is unsurprisingly the best browser for streaming Paramount Plus. Like Chrome, it’s one of the fastest browsers on the system. In addition, it incorporates well with macOS and uses few resources to ensure fast speeds.

Safari is arguably faster than Chrome because how of this. Plus, macOS security features are also utilized by the web browser. Safari is not a resource hog, so your battery life stays long-lasting.

Chrome’s extensions are fantastic, and while Safari does have them, the Apple browser doesn’t have anything specifically for Paramount Plus, so it fails in that regard.

That said, as long as you don’t mind not having any good extensions, Safari is a solid browser for Paramount Plus.

⇒ Get Safari

5. Firefox – Great for Paramount Plus Watch Party features

This browser doesn’t do anything spectacular or unique with the service but you can watch Paramount Plus just fine on Firefox and that’s what we’re all about, right?

There are no known buffering or quality issues. Firefox is also a nice option if you intend to make the most of Paramount Plus Watch Party features. Thus, you will be able to use up to three simultaneous streams if you’d like to watch a movie with other people.

UltraWideo allows you to change the aspect ratio of streamed content so it can fit your screen. Unfortunately, apart from a few examples, Firefox extensions don’t offer unique compatibility.

⇒ Get Firefox

? Which is better: Disney/Amazon Prime/Netflix/Peacock or Paramount?

Is Paramount Plus or Netflix better? Though to say, considering Netflix is a giant and also a touch cookie to crack. Its reigning days may be over, though, given the fierce competition piling up at its doors.

How about the others? Which is better Peacock or Paramount? Or maybe Disney?

Paramount Plus is an excellent streaming service for its massive library on par with Disney Plus and low price. It’s one of the more affordable services, and you can watch recent movie releases.

For starters, you can watch the recent movie Sonic the Hedgehog 2 and Jackass Forever. In addition, you have a ton of exclusive shows on there, like the Halo adaptation and RuPaul Drag Race All-Stars.

Ultimately, it’s a matter of personal taste and of course, budget. Feel free to comment below if you have any questions and do let us know if there are any other topics on which you’d like to see more information.

Error 0x800702e4: What Is It & How to Fix It

A consistent and reliable application deployment process is critical to the success of your enterprise. This includes ensuring that applications are installed correctly, with all the necessary dependencies and configuration settings.

However, the deployment process may fail with the error code 0x800702e4. This can happen if you don’t have a well-defined process to ensure applications are deployed correctly and consistently. We share how to fix the installation error in this article.

What is error 0x800702e4? 

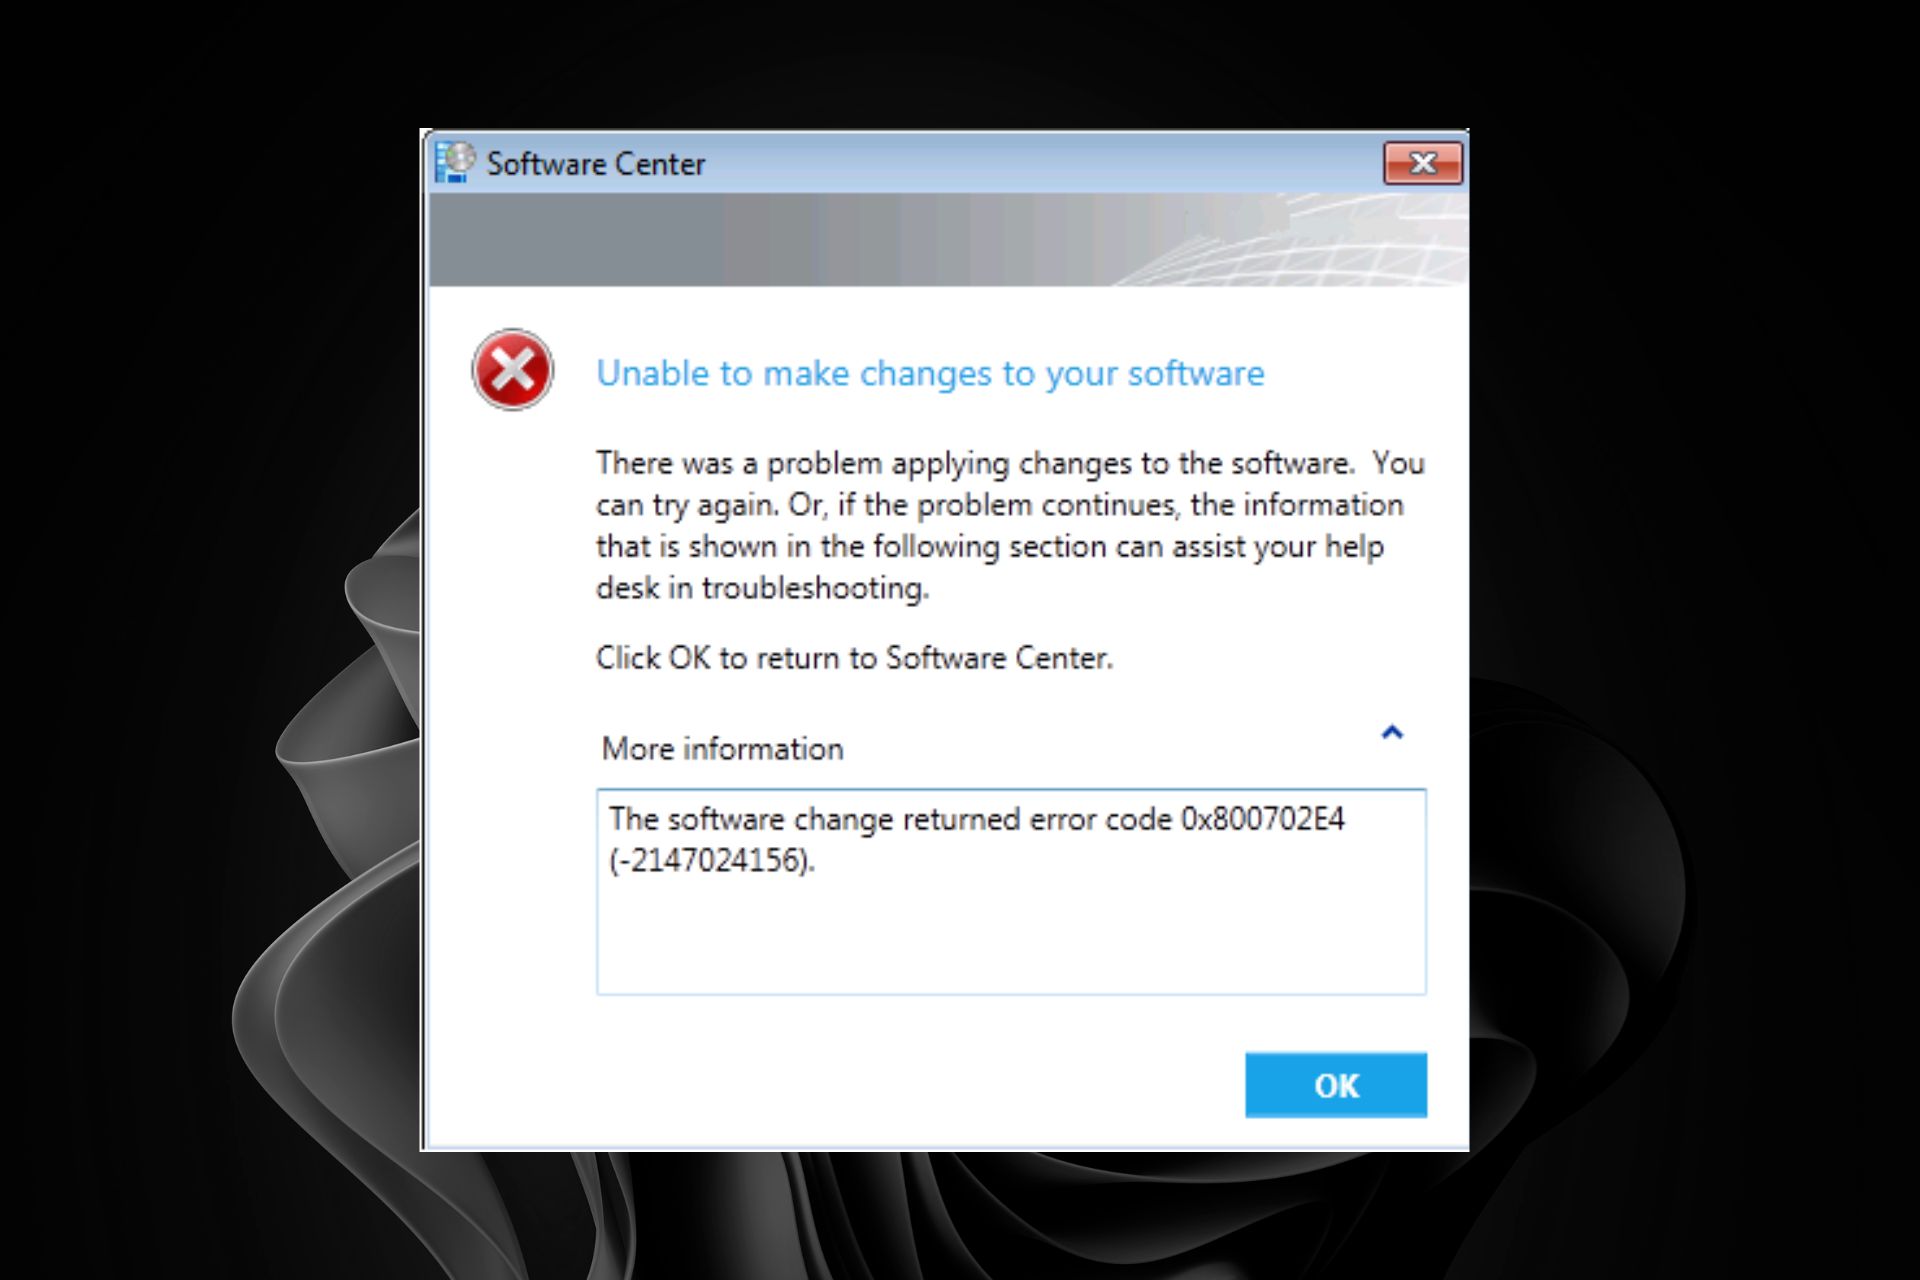
The error 0x800702e4 occurs when users try to deploy an application in SCCM, but it fails. Usually, the main reason behind this issue is that the application installation files are unavailable in the deployment package or the content location.

However, this is not the only reason. It can be due to many reasons, such as the following:

  • Incompatibility – The installation will fail if the application is incompatible with the operating system.
  • System requirements – The most common cause of application deployment failure in SCCM is the missing prerequisite software on the target computer. 
  • Conflicting software versions – You may have installed a newer version of an application than what is available in your software library and need to update the software library before deploying it again on your client computer(s).
  • Wrong environment – If you are deploying an application to a device collection that is not in the correct environment, this will cause an error. For example, if you have a collection set to Production but are trying to deploy it from the Development environment, this will cause the deployment to fail.
  • Insufficient permissions – You will get this error if you have not given the user account the correct permissions. 
  • Improper user assignment – In SCCM, applications can be assigned to users or groups. If you have not assigned an application to any user or group, it will not appear in the Software Center. 
  • Corrupt/missing source files – If something is wrong with your source files or they got corrupted, it might give this error message. 

How do I fix error 0x800702e4?

A few basic checks before making any permanent changes include:

  • Verify that the network connection between the client and server is working properly. 
  • Check if the software is compatible with the device’s operating system version where you want to install it.
  • Verify that the package is not corrupt or damaged, and try reinstalling it.

1. Adjust administrator privileges 

Most applications are configured to be installed per user, which usually doesn’t have the required permissions. Assigning administrative privileges to the user account used for installing applications could easily resolve this issue.

The downside to this method is that granting permissions to unauthorized users can have repercussions for the enterprise.

2. Change the deployment type 

Changing the deployment type from user-based to system-wide is another hack to ensure your apps install successfully.

This will ensure that whenever you run the setup.exe file, it will be as an administrator and will not prompt for elevation every time it runs.

3. Change logon requirements

Sometimes apps fail to install because the user’s account required to act is not logged on. You can adjust the settings so the applications will install whether the user is logged on.

Check out what to do if you encounter error code 0x80041010 where SCCM fails to connect to the management point.

That’s all we had for this article but do leave any additional thoughts in the comment section.

0x80280013 PIN Error While Trying to Log In [Fixed]

Windows has numerous options to log in, and PIN seems the most preferred among users. However, things can go downhill quite fast when this option doesn’t allow you to sign in. PIN errors can be frustrating, especially if you’re trying to gain access to your computer.  

This can happen if your system is unable to verify your PIN correctly. To help you navigate the 0x80280013 error when you try to sign in, this article will provide information that will help you troubleshoot issues you may be having with your PIN. 

What is error code 0x80280013?

Error code 0x80280013 is a common error when you try to log in to Windows. This error occurs when the user attempts to log in using their PIN.  Usually, the trigger is a problem with the function that manages PIN information.

If you have tried to log in to Windows with your PIN, but the system doesn’t accept it, you can try a few things. However, before you try to fix the error 0x80280013, you need to find out why it happened.

One of the most common issues people encounter is that they don’t remember their PIN. Other reasons include:

  • Wrong PIN – If you’re entering your PIN incorrectly, the system will automatically lock itself and display a password error message.
  • Corrupt Windows updates – We all know that Windows updates are sometimes plagued by bugs that can interfere with common features and Windows functions.
  • Fast Startup – If you’ve enabled Fast Startup on your device and you’re using a PIN as your sign-in method, it’s possible that something went wrong during one of its transitions of logging off and restarting.
  • Corrupt NGC folder – This folder is automatically created when you set up a PIN. It stores all your data about your PIN. If it gets corrupted, you may have trouble signing in.

How do I fix error code 0x80280013?

Before you try the slightly technical solutions, check the following:

  • Ensure you have updated all your drivers.
  • Check whether there are any pending Windows updates and do the necessary.
  • Restart your PC and check if the error appears.

1. Delete the NGC folder

  1. Enter Safe Mode for these steps unless you’re able to login using other options.
  2. Hit the Windows + E keys to open the File Explorer.
  3. Navigate to the following location: C:\Windows\ServiceProfiles\LocalService\AppData\Local\Microsoft
  4. Locate the NGC folder, right-click on it, then select the Delete icon from the context menu.

2. Disable Fast Startup

  1. Still in Safe Mode, hit the Windows key, type Control Panel in the search bar, and click Open.control-panel-search fallout new vegas runtime error
  2. Click on System and Security.System and security
  3. Next, select Power Options.
  4. Click on Choose what the power buttons do from the list of options on the left.
  5. Press on Change settings that are currently unavailable.
  6. Uncheck the Turn on fast startup box and then click on Save changes.

Fast startup can be a great solution if you’re experiencing a slow boot issue, but sometimes, it can cause problems. Since it lets you bypass critical steps during a shutdown, some data may fail to be written properly to the hard drive.

When you boot your PC, these files may be corrupt and present an issue during startup hence why you may spot the error 0x80280013.

3. Uninstall recent Windows updates

  1. Hit the Windows key and select Settings.settings windows 11
  2. Click on Windows Update and select Update history on the right pane.update-history restart to repair drive errors
  3. Scroll down, and under Related settings, click on Uninstall updates.uninstall-updates-w11 computer-recognize-logitech-unifying-receiver
  4. This will take you to the most recent installed updates.
  5. Select the topmost update and click on Uninstall.uninstall-update-latest computer-recognize-logitech-unifying-receiver
  6. Restart your PC and check if the problem persists.

4. Reset the PIN

  1. Press the Windows key + I to open the Settings app.settings windows 11
  2. Now, select Accounts on the left pane. Next, click on the Sign-in options.
  3. Select PIN (Windows Hello).
  4. Click on Change PIN.
  5. Enter the Existing PIN once and the New PIN two times.

If none of these methods are able to fix the PIN error 0x80280013, you may have to reset your PC to factory settings. In the future, you should consider other log in options, such as passwords or enabling automatic login. If your PC is not accessible to third parties, you have nothing to be worried about.

Also, remember to change your password and username regularly to prevent unauthorized access. In another related issue, you may find that the Windows Hello PIN option is unavailable, but we have already discussed in detail how to restore it in our article.

For any additional suggestions on this topic, leave a comment down below.

0x40010004 Task Scheduler Error: 3 Ways to Fix It

The Windows Task Scheduler is a Microsoft Windows operating system component that allows users to schedule the execution of programs or scripts at specified times or after a time interval. However, this process doesn’t always go as planned.

You may encounter an error 0x40010004 where scheduled tasks are not running at startup. When you encounter this error, the application cannot start because of some issue with the service or its dependencies. 

Find out what stops the scheduled tasks from running and how to fix it.

What is error code 0x40010004?

0x40010004 is a Task Scheduler Error displayed when the Windows operating system encounters an error while trying to load or create a task for execution. Scheduling tasks can be helpful for any number of reasons. 

For example, if you want to run a script that performs maintenance on your system, such as cleaning up temporary files or defragmenting your hard drive, you can schedule it in the Task Scheduler.

When you run a task from Windows Task Scheduler, it will first check if all prerequisites have been met before starting the execution of your task. Your task will not be executed if the prerequisite criteria are not met. 

Windows Task Scheduler has many prerequisites for running automatically scheduled tasks, such as:

  • Permissions – The user must have permission to access resources on remote computers. This means that if you want to schedule a task to run on a remote computer, you must use an account with administrative privileges.
  • WMI Service – The WMI service is required when you want to run tasks on remote computers or other non-domain computers. This is because the Task Scheduler uses WMI to obtain information about the state of the computer on which it is running.
  • SCCM – If you’re scheduling a bunch of tasks, you’ll need to use SCCM for deployment and monitor the status of clients to ensure all scheduled tasks are executed.

How do I fix error 0x40010004?

If you have a task that’s not running, check the following first:

  • Make sure your task is scheduled to run at the correct time and date. Sometimes when Windows is not syncing your time and date settings, it may interfere with the scheduling of tasks.
  • Ensure there are no conflicts with other tasks or events on your computer. If there are conflicts, you may need to adjust how often you want the task to run or when you want it to be active.
  • Check for any network connection or internet service provider (ISP) issues.
  • Ensure you have administrative privileges on your PC. Your computer may be unable to run certain tasks without administrator access.

1. Enable the task manually

  1. Press the Windows + R keys to open the Run command.
  2. Type taskschd.msc in the dialog box and hit Enter.
  3. Click on the task that brought about the error 0x40010004, then select Properties.
  4. Navigate to the Triggers tab, and check if the task is enabled. If not, hit the Edit button.
  5. Finally, check the Enabled box and press the OK button.

If you are facing a similar issue, like Task Scheduler failed to launch an action, we advise you to check out this detailed guide for solutions.

2. Restart the Task Scheduler service

  1. Press the Windows + R keys to open the Run command.
  2. Type services.msc in the dialog box and hit Enter.run services.msc command
  3. Right-click on the Task Scheduler service and select Properties.
  4. Set the Startup type to Automatic from the drop-down menu and click Start.
  5. Lastly, click Apply and OK, then restart the PC.

3. Edit the registry

  1. Press the Windows + R keys to open the Run command.
  2. Type regedit and hit Enter to open the Registry Editor.
  3. Navigate to the following path: HKEY_LOCAL_MACHINE\SYSTEM\CurrentControlSet\Services\Schedule
  4. Right-click on any black space on the left pane, select New, and click on DWORD (32-bit) Value.
  5. Name it Start, then make the Value data 2.
  6. Close the Registry Editor and restart your PC.

Before performing this step, ensure you have created a restore point. Editing the Registry sometimes doesn’t go as planned and can have crippling effects on your PC.

The restore point will act as a cushion so you have a safe point of return if things don’t work out.

However, you can also utilize a practical system repair tool that can repair registry-related issues and help you to finally solve this Task Scheduler issue.

To ensure you minimize the occurrence of errors such as 0x40010004 in the future, check out our task scheduling tips to ensure this process runs with no hiccups.

If the built-in Task Scheduler isn’t giving you the desired results, perhaps Task scheduler software may be what you need.

For any suggestions regarding this topic, drop us a comment down below.

6 Ways to Fix Office Update Error 30015-26

If you have encountered Office Update Error 30015-26 while updating your Office app, this guide can help! We will discuss some of the tested solutions to fix the issue right after discussing the causes.

What causes the Office Update Error 30015-26?

There are various reasons for this Office update error; some of the common ones are mentioned here:

  • Corrupted system files – If the system files on your computer are damaged or missing, you might face this error. To fix it, you must repair the system files via Command Prompt.
  • Connectivity issue – If your internet connection is weak or unstable, Office might not be able to connect to the server to download the update, hence the error. Check your internet connection or use another one.
  • Corrupted installation files – If the previous installation files for Office are corrupted, then a conflict could lead you to this error. You need to repair the Office app to fix it.
  • Insufficient space – If your computer is low on disk space, then the update will not be downloaded successfully, hence the error. To retrieve space, remove unnecessary files and apps from the PC.
  • Third-party app interference – This error could appear if any third-party apps create conflict and doesn’t let Office connect to the server. Consider removing unwanted third-party apps.

Now that we know the causes, let’s move to the fixes to resolve the issue.

What can I do to fix the Office Update Error 30015-26?

Before engaging in advanced troubleshooting steps, consider performing the following checks:

If these simple tweaks didn’t fix your issue, let’s move to the detailed steps.

1. Disable antivirus temporarily

  1. Press the Windows key, type windows security, and click Open.Windows Security open Windows key - Office update error 30015-26
  2. Go to Virus & threat protection and click Manage settings.Manage settings Office update error 30015-26
  3. Locate Real-time protection and toggle off the switch under it.Real time protection off
  4. Click Yes on the UAC prompt.

Once you have updated Office successfully, follow the same steps to enable Real-time protection, as it is important to keep your Windows secure.

2. Disable Firewall

  1. Press the Windows key, type control panel, and click Open.Control Panel start menu
  2. Select View by as Category and click System and Security.System and Security CP Office update error 30015-26
  3. Click Windows Defender Firewall.Windows Defender Firewall Office update error 30015-26
  4. Select Turn Windows Defender Firewall on or off.Turn off Defender Office update error 30015-26
  5. Now for both Private network settings & Public network settings, select the radio button beside Turn off Windows Defender Firewall (not recommended) and click OK.Disable Firewall
  6. Once Office is updated, please follow the same steps and select the radio button next to Turn on Windows Defender Firewall for both Private network settings & Public network settings. Click OK to confirm.Enable Firewall

3. Run an SFC scan

  1. Press the Windows key, type cmd, and click Run as administrator.CMD elevated
  2. Type the following command to repair system files and press Enter: sfc/scannowSFCSCANNOW CMD Office update error 30015-26
  3. Your computer will scan, repair and add missing or corrupt system files.
  4. Now copy and paste the following commands one by one to repair the Windows OS image and press Enter after every command: dism /online /cleanup-image /scanhealth dism /online /cleanup-image /checkhealth dism /online /cleanup-image /restorehealth
  5. Once the command is complete, restart your computer to let the changes take effect.

If this process takes too long or doesn’t work, you can better use a dedicated application that will diagnose your PC in a minute, detect any damaged files on your system, and offer a detailed summary of the issues that will be solved efficiently.

4. Repair the Office app

  1. Press the Windows key, type control panel, and click Open.Control Panel start menu Office update error 30015-26
  2. Select View by as Category, and click Programs.Programs
  3. Under Programs and Features, click Uninstall a program.Uninstall a program
  4. Select Microsoft Office or 365 and click Change. Click Yes on the UAC prompt.Change Microsoft Office
  5. From the next window, select Quick Repair and click Repair.Repair Microsoft 365
  6. Follow the onscreen prompts to complete the process.

5. Run Program Install and Uninstall troubleshooter

  1. Go to the Microsoft troubleshooter page.Troubleshooter Office Office update error 30015-26
  2. Click Download troubleshooter.
  3. Once downloaded, double-click the file to run the Program Install and Uninstall troubleshooter.
  4. On the next window, click Advanced.Click Advanced Troubleshooter Office update error 30015-26
  5. Place a checkmark next to Apply repairs automatically and click Next.Apply repair
  6. Click Installing as we were facing while installing or updating.Installing troubleshooter
  7. From the Select the program you are trying to install page, choose Microsoft Office and click Next.Select program and click Next
  8. Once done, restart your computer.

6. Reinstall the Office app

6.1 Uninstall the app

  1. Press the Windows key, type control panel, and click Open.Control Panel start menu
  2. Select View by as Category, and click Programs.Programs Office update error 30015-26
  3. Under Programs and Features, click Uninstall a program.Uninstall a program Office update error 30015-26
  4. Select Microsoft Office or 365 and click Uninstall.Uninstall Office
  5. Click Uninstall. Uninstall Microsoft Office Office update error 30015-26

Please wait until the program disappears from the list.

6.2 Reinstall the app

  1. Now go to the Microsoft Office website and sign in using your Microsoft account.
  2. Go to Services & subscriptions.Services & subscriptions Office update error 30015-26
  3. Locate Office under Products you’ve purchased and click Install.Install office
  4. Double-click the setup file and follow the onscreen instructions to reinstall the Office app.

We also recommend reading our article on Office Update Error 30088-26 because the problem is similar.

So, these are methods you need to follow to fix the Office Update Error 30015-26. Try them and let us know what worked in the comments section below.

Visual Studio vs Visual Studio Code: What’s Different?

Based on the language you are comfortable working with, most choose between Visual Studio vs Visual Studio Code. If you are in the same boat as several others and are confused about the differences between Visual Studio vs VS Code, this guide is here for you.

Here, we will give you the differences that will help you decide which tools to go for. Visual Studio is an Integrated Development Environment (IDE), on the other hand, VS Code is a rich text editor. However, the differences don’t end here. Let us discuss them.

Visual Studio vs Visual Studio Code: What are they?

1. Visual Studio

Microsoft Visual Studio is an IDE launching pad for developers that can use the tool to build, edit, and debug code. Once they are done with the process, they can easily publish the app.

An IDE is a robust tool far superior to a text editor, as it can let you do other things apart from just writing and editing your code.

An IDE such as Visual Studio gives you the flexibility of running the code or even going a step ahead and downloading plugins to automate the process. We have a bunch of Visual Studio extensions that you may want to know about to improve your productivity.

Visual Studio was introduced by Microsoft in 1997. It comes with support for C#, C, C++, Python, F#, .NET, HTML, CSS, JavaScript, and others. Do note that the support for Java was removed in 2017.

You can run Microsoft Visual Studio on Windows and Mac. It is offered in three editions; community, professional, and enterprise. The Visual Studio community version is free to use.

The installation on Windows is a bit complicated, but it is simpler on macOS. You can use Visual Studio to develop web, mobile, and desktop apps. It comes with .NET, with Unity, Azure, and Docker support by default. The .NET Core, Android, iOS, and macOS are optional.

To get started quickly, you can follow this simple guide on how to run code in Visual Studio and learn the basics.

2. Visual Studio Code

VS Code short for VS Code is a light version of Visual Studio. It is an open-source, lightweight text editor available for Windows, Mac, and Linux.

You can even use it on a web browser by visiting this website. The VS Code supports JavaScript, TypeScript, and Node JS.

However, you can use it to code in any language you want. To do that, you need to download relevant extensions, since it is a light version, the support doesn’t come built-in.

Since this is a mini version of VS, you don’t need much space on your PC to install it. Space around 200-250MB will do the job.

The VS Code also comes built-in with a debugger and IntelliSense. But to get the IntelliSense, compiler, and debugger features, you need to make use of extensions.

It supports languages such as C++, Java, C#, PHP, Go, and Python. VS Code is a text editor and falls in the same category as Atom, Sublime, and Text Wrangler. The things that make it more efficient are its robust features.

Visual Studio vs Visual Studio Code: Differences

Now that we have a basic understanding of what Visual Studio and VS Code tools are, let us go through the differences that will help you decide which suits your needs.

Visual StudioVisual Studio Code
Visual Studio is an Integrated Development Environment (IDE) tool.Visual Studio Code is a text editor and is used to edit codes.
The Visual Studio processing code is slower and varies across platforms.The processing speed of Visual Studio Code is slightly higher comparatively.
There is a free version of Visual Code, but also has better paid IDE variants.Visual Studio Code is completely free of cost and is open source.
It cannot be used on a web browser.You can use VS Code on a web browser.
IntelliSense is pretty advanced and the best in Visual Studio.IntelliSense isn’t that powerful in Visual Studio Code.
The download size and process are a bit complicated, especially on Windows.The download size and process are fairly simple for VS Code.
It requires more space on your PC to work smoothly.It doesn’t require much space as it is a light version of Visual Studio.
Visual Studio can run only on macOS and Windows.Visual Studio Code can run on macOS, Windows, and Linux.
Not many plugins are available for Visual Studio.There is a wide range of plugins and extensions available for VS Code.

You can follow this step by step guide on how to install Visual Studio Code on Windows to get up and running quickly.

Visual Studio vs Visual Studio Code: Pricing

One of the first things that might cross your mind when discussing using the Visual Studio and VS Code tools, is pricing, which we have discussed below:

1. Visual Studio pricing

Speaking of the best things, the Visual Studio IDE tool has a free version called Community. You can use it just like millions of other users.

Some of the notable features of VS are built any app for any platform, lets you design, edit, debug, and compile in a single tool, gives you access to thousands of extensions, and supports multiple coding languages.

Furthermore, if you wish to have advanced IDE functions, you have to go for the paid version of Visual Studio. Here are some of the pricing details you should know about the Visual Studio paid versions.

  • Visual Studio Community version
    • It is available free of cost.
  • Visual Studio Professional version
    • Visual Studio costs $45/month or $1,199/year.
    • After the completion of one year, a developer needs to pay $799 to use it yearly.
  • Visual Studio Enterprise version
    • It will cost you $250/month or $5,999/year.
    • After the completion of one year, a developer needs to pay $2,569 to use it yearly.

2. Visual Studio Code

Visual Studio Code is an open-source lightweight version of Visual Studio. It is free of cost and can be used by anyone and everyone.

Also, you can use it on a web browser on the go. It is the best way to keep up with your everyday work and create new apps.

This cost-saving aspect of Visual Studio Code might be one of the strongest deciding factors if you are looking for casual coding or are a freelancer.

Visual Studio vs Visual Studio Code: Verdict

For most developers, Visual Studio Code is the perfect choice for so many reasons that are listed below:

  • It comes with cross-platform support.
  • VS Code is available free of cost.
  • Thanks to Electron Framework, the apps developed via VS Code are lean and can be updated seamlessly.
  • VS Code is faster compared to Visual Studio.
  • You can replicate many of the functions of the IDE on VS Code.
  • There is a wide range of extensions available for VS Code.
  • The download size is another factor in considering VS Code.
  • You can even use it on your web browser.

However, serious developers still prefer Visual Studio IDE for coding for the reasons listed below:

  • You don’t have to rely on official or third-party extensions to expand its functionalities.
  • It is feature-rich by default, giving you access to important functions out of the box.
  • Collaborating with the entire team is an easy job.
  • You can perform heavy-duty coding and compiling using Visual Studio IDE.
  • Visual Studio, when used in conjunction with UNITY, can help build cross-platform games, AR/VR apps, and more.

So, to make things much clearer, if you are a freelancer or a coder leaning towards cross-stack development, then you should go for Visual Studio Code.

Moreover, remember it is free, so if you aren’t into spending much, VS Code should be your choice.

VS Code has replaced Visual Studio IDE around the world for most coders, however, if you want a full-stacked coding tool that doesn’t rely much on extensions and offers complex functionalities, then you can go for Visual Studio.

Lastly, if you still can’t decide between the code editors, we advise you to try out both platforms and decide which one suits your needs.

You can check out our guide that explains how you can easily update Visual Studio to the latest version with a few simple steps.

Besides we also have a comparison guide between Atom and Visual Studio Code. It will help you decide which one to go for based on your needs.

Make Image Background Transparent in PowerPoint [2 Ways]

Pictures are an essential part of PowerPoint presentations. Of course, other Office alternatives have the same feature, but none comes close to PowerPoint. Today, we look at how to make an image background transparent in PowerPoint.

If you have a picture that you want to blend into the background, making it transparent is a great way to do it. It allows them to fade into the background. This is a great way to add depth and interest to your presentations and make them visually appealing. In today’s article, we share how to go about it.

Can you make a picture transparent in PowerPoint?

Yes. You can make a picture transparent in PowerPoint. This can be useful if you have an image that you want to place on top of another slide or over the background. That way, you can place the picture over another object and see through it.

Other compelling reasons to use the transparency feature include:

  • Make text stand out – If you have text on top of a picture and want the text to stand out more than the picture, making the image transparent will allow the words above it to show prominently.
  • Keep your audience focused on your message – Pictures can sometimes distract from the main message. Allowing the picture to take a back seat will enable your message to take center stage.
  • Add visual appeal – A presentation full of text can become monotonous and boring. Adding pictures but keeping them transparent adds visual appeal while keeping content readable.
  • Save space – You have to keep presentations short and sweet. If your presentation has too many slides, your audience can get bored quickly. Instead of having too many slides with text and pictures separate, combining the two will save you space.

How do I make the background of a picture transparent?

1. Use PowerPoint built-in tool

  1. Launch your PowerPoint app.
  2. Click on Insert on the top toolbar, then select This Device or your preferred location.
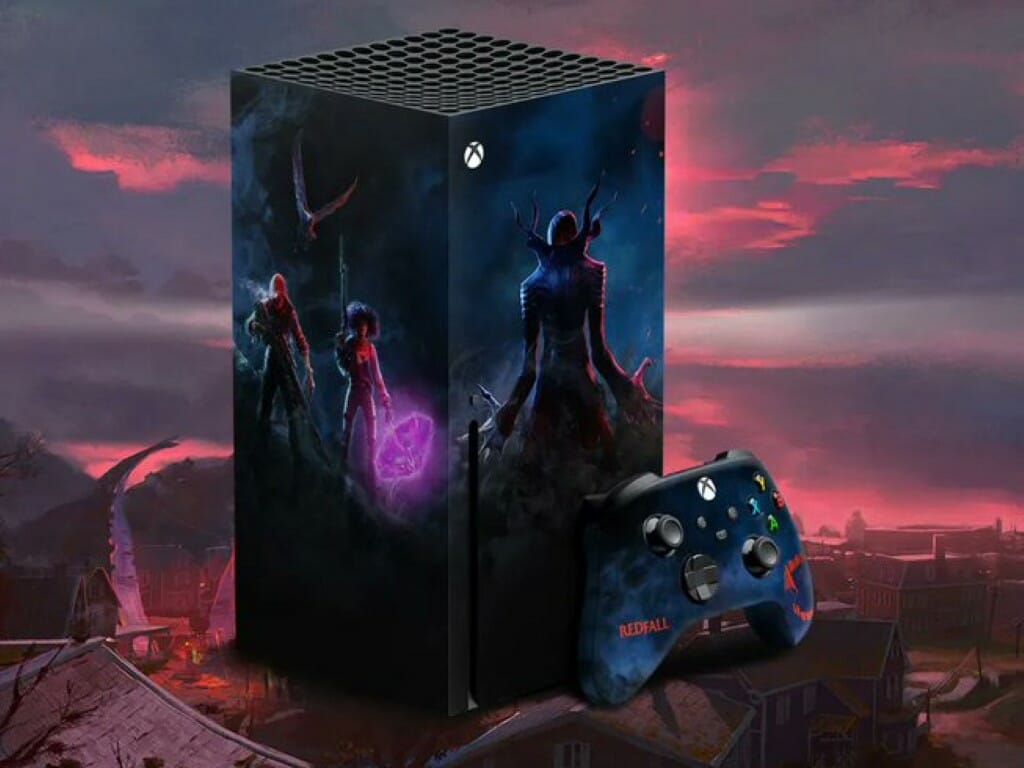
  3. Once you have inserted the picture, a new Picture menu will be activated.
  4. Click on the Picture Format and select the level of transparency from high to low from the options.

While making a picture transparent in PowerPoint is great, it is important to note that this feature is only available in the newer versions of Office starting in 2021. It would be best if you also were an Office 365 subscriber.

So if you see that the picture transparency feature in PowerPoint is not showing, you are most likely using an older version.

2. Use third-party software

If you feel that PowerPoint’s native tools are too basic or don’t generate desired results, you can always go for third-party software. 

The easiest way is to use a third-party software, probably something like Photoshop or GIMP, but the downside to this method is that it takes up extra storage space on your computer.

On the upside, you get to enjoy other extra features from these image editing tools not available in PowerPoint.

Another option is to use Microsoft Paint. We have already covered how to make images transparent in Paint. Once you’re done, save the image and import it to your PowerPoint slide.

You may also be interested in background remover software, so check out our detailed list for the complete scoop.

Should you encounter issues with saving while on PowerPoint, we have answers on how you can easily solve it.

Let us know your preferred method to make your picture background transparent in the comment section below.

Fix: Operation Failed With Error 0x00001B

It is not uncommon to run into a few errors on a computer. 0x00001B is one such error that users have complained about more recently.

They claim that printing is no longer possible. When they open Windows Explorer on their computer, they can see the shared printer on my PC. But when trying to connect to it, the connection fails with the message Operation failed with error 0x0000011B.

What is operation failed with error 0x00001B?

This error is generic and may happen with several systems or software. Any of the elements listed below often triggers it.

  • Missing or bad files – Users have observed that new peripherals on the device may throw this error when some system files are corrupt or missing.
  • Hardware issues – If the hardware on your system or a device connected to your PC has an issue, you may get the error message.
  • Driver or firmware issues – Another common trigger is outdated or bad drivers on your computer. Since drivers help communicate between hardware and software, you may expect errors if they are obsolete.

While a few other minor factors will trigger the 0x00001B error, we have mentioned the most common. Let us now explore easy fixes.

How do I fix error 0x00001B?

This problem may not always need a complicated solution, but here’s what you can do:

  • Before trying any, restart your computer and any other devices that may have triggered the problem.

1. Edit Registry settings

  1. Press Windows + R, type regedit, and hit Enter.
    0x00001b
  2. Navigate to the path below:
    HKEY_LOCAL_MACHINE\System\CurrentControlSet\Control\Print
  3. Right-click Print, choose New and select a Dword that matches your system architecture.
    0x00001b
  4. Name the new Dword RpcAuthnLevelPrivacyEnabled, double-click it, and give it a value of 0.
    0x00001b
  5. If your printer triggers the problem, finally restart your print spooler.

If you think the steps above are too technical and need an efficient way to tweak your registry, you can utilize the dedicated system repair tool.

2. Uninstall KB5005565

  1. Press Windows + I to open the Settings app.
  2. Click Update & Security.
  3. Select the View update history, then choose Uninstall updates.
    0x00001b
  4. Click on Security Update for Microsoft Windows (KB5005565) and select Uninstall.

If the problem is not resolved, you may remove the KB5005627 and KB5005563 Windows updates by following the steps above.

3. Update your OS

  1. Press Windows + I to open the system Settings.
  2. Click on Update & Security.
  3. Select Windows update from the left pane and choose Check for updates.
    0x00001b

Windows updates often come with fixes and security patches. If you have not updated your computer in a while, Run an update, but if the problem starts just after an update, uninstall the update with the steps we showed in Solution 2.

4. Run a hardware file scan

  1. Press Windows + R, type cmd, and hit Ctrl + Shift + Enter.
  2. Type the script below and hit Enter.
    sfc /scannow
  3. Wait for the scan to run and restart your computer.

Scans like the SFC are important fixes, especially if a corrupt system file triggers the error.

That is as much as we will cover in this guide. The 0x00001B error is not a very severe computer problem; you should efficiently resolve it with any of the solutions we highlighted.

Please use the comments section below to tell us what worked for you.

0x80042306 Error Code: What Is It & How to Fix it

Windows users are reporting a new error 0x80042306 when creating a Restore point. This is a common error message, and it usually happens when you try to upgrade to a newer Windows version.

This could be because there is not enough space on the drive, or because no recent changes have been made to the computer. Nevertheless, it is an error that can make the upgrade process unsuccessful, so let’s look at how we can resolve it.

What is error 0x80042306 shadow copies? 

Error 0x80042306 indicates that Shadow Copies for Shared Folders is not working. Shadow copies (also known as System Restore Points) are a special type of restore point created by Windows Vista and later versions of Windows. 

They’re designed to capture the state of your computer at a certain point in time so that you can revert to it if something goes wrong with your system. 

The error comes from the VSS or the Volume Shadow Service, which is responsible for creating and maintaining the shadow copies. It may not be running or may have stopped unexpectedly. 

Other reasons for this error include:

  • Network connectivity issues – Problems with the network or firewall settings can prevent your computer from accessing shared folders on other computers.
  • Corrupted system files – Corrupted system files can result in errors when trying to access shared resources on another computer.
  • Incorrect permissions – If you have been granted administrative rights but do not have permission to access a shared folder, you may receive this error message when you try to open it using Windows Explorer.
  • Damaged partition table – If the partition table isn’t on the disk or it’s damaged, then Windows won’t be able to create any system restore points.

How do I fix error 0x80042306?

Before trying the advanced fixes, check the following first:

  • Disable all startup programs and try again.
  • Ensure you have enough hard drive space to create a restore point.
  • Run System Restore from Safe Mode if it doesn’t work while running normally.

1. Run the CHKDSK utility 

  1. Hit the Windows key, type cmd in the search bar, and click Run as administrator.cmd-run-admin-w11 unexpected kernel mode trap windows 11
  2. Type the following command and hit Enter. Remember to replace the C letter with your drive’s letter: chkdsk C: /f

2. Run the SFC scan

  1. Hit the Windows key, type cmd in the search bar, and click Run as administrator.cmd-run-admin-w11 unexpected kernel mode trap windows 11
  2. Type the following command and hit Enter: sfc /scannow

There are also feasible solutions to diagnose any corrupted system files on your PC and fix them automatically that can help you repair Windows issues that determine the 0x80042306 error message.

3. Restart the Volume Shadow Copy service 

  1. Hit the Windows + R keys to open the Run command.
  2. Type services.msc in the dialog box and hit Enter.run services.msc command
  3. Locate Volume Shadow Copy service, right-click on it, and select Properties.
  4. Next to Startup type, click on the drop-down menu, select Automatic, then click on Start.
  5. Click Apply and OK to save changes.

The Shadow Copy service runs in the background and creates copies of files and folders as they change. This allows you to restore older versions of files, even after they’ve been overwritten by newer versions. 

The service also creates a snapshot every time you install new software or make changes to your system configuration, so that you can recover from bad updates or other problems.

4. Restart the Windows Backup service

  1. Hit the Windows + R keys to open the Run command.
  2. Type services.msc in the dialog box and hit Enter.run services.msc command
  3. Locate Windows Backup service, right-click on it, and select Properties.
  4. Next to Startup type, click on the drop-down menu, select Automatic, then click on Start.
  5. Click Apply and OK to save changes.

Microsoft Windows Backup Service is a built-in service that performs backup operations on the computer. If for some reason it had stopped, System Restore may not have any files to restore.

5. Perform a clean boot

  1. Hit the Windows key, type msconfig, and open System Configuration.
  2. Switch to the Services tab and select Hide all Microsoft services.
  3. Click on the Disable all button, then hit the Apply button to save the changes.
  4. Go back and click on the Startup tab, select Open Task Manager then click OK.
  5. In the Startup tab of the Task Manager, Disable all the Enabled startup items.
  6. Close Task Manager and restart your PC.

Sometimes, System Restore may not bring up an error, but you’ll find that the process is excruciatingly long. If so, we have an article on how to speed up the process.

We also share tips on what to do if your System Restore is unsuccessful so be sure to check out our expert article on the same.

For any additional thoughts on this topic, share them with us in the comment section below.

Ndis.sys BSoD: How to Fix It in Windows 11 & 10

If you have encountered a blue screen of death with stop code ndis.sys, then this guide can help! We will cover all the troubleshooting methods to fix this annoying BSoD error right after explaining what ndis.sys is and discussing the causes of this error.

What is ndis.sys?

NDIS (Network Driver Interface Specification) is a legit system driver for Network Interface Controllers. It handles communication and connections between all connected devices and components over the computer’s network.

The ndis.sys file is an essential system file developed by Microsoft. It is related to NDIS and serves as a collection of system driver configurations that Windows uses to establish communication with hardware and connected devices. The file is usually found in the C:\Windows\System32\drivers folder.

What causes the ndis.sys BSoD error on Windows 11 & 10?

There could be various reasons for this blue screen of death error; some of the common ones are mentioned here:

  • Corrupted device drivers – If your network drivers are corrupted or damaged, it might lead to this BSoD error. You must update, reinstall, or roll back the driver to fix the issue.
  • Malware infection – A virus on a computer can destroy essential system files, which might cause all sorts of trouble, including this one. To fix it, run a malware scan.
  • Corrupted system files – If the system files are corrupt, it could cause issues while performing normal functions on the computer, including this error. To fix it, you need to repair system files.
  • Hard disk issues – If any hardware is not seated correctly on the motherboard or is damaged, you might face this error. Check if the components are all perfectly placed.

Now that we know why this happens, let’s go to the actual solutions to fix the BSoD error on Windows 11 and 10.

What can I do to fix the ndis.sys BSoD error on Windows 11?

Before engaging in advanced troubleshooting steps, you should consider performing the following checks:

If these quick fixes didn’t work for you, let’s move to the solutions below.

1. Run the Windows Memory Diagnostic tool

  1. Press the Windows key, type windows memory diagnostic, and click Open.Windows diagnostic tool ndis.sys
  2. On the Windows Memory Diagnostic tool window, click Restart now and check for problems (recommended).memory-diag-tool 3
  3. The Windows Memory Diagnostic tool scans your memory for any issues. Your computer will restart, and the tool will verify and test the RAM. memory-diag-tool

Once done, your PC will restart again. You can see the results in the Windows Memory Diagnostic notification. If it detects that one of your memory modules is malfunctioning, perform the test again. See if the memory module is connected correctly. If so, you will probably need to replace it.

2. Scan your computer for malware and viruses

  1. Press the Windows key, type windows security, and click Open.
  2. Go to Virus & threat protection and click Scan options.V& T Scan options ndis.sys
  3. Now select Full scan and click Scan now.Full scan - Scan now ndis.sys
  4. The tool will scan your computer for infection. Once the scan is complete, it will show you the malicious files. Delete them when prompted to fix the issue.

Microsoft Defender is the built-in antivirus in Windows 10 and 11 but is not infallible. If you have the option, scan your PC with a third-party antivirus as well.

3. Run Disk Cleanup

  1. Press Windows + R to open the Run dialog box.cleanmgr Run command
  2. Type cleanmgr and click OK to open Disk Cleanup.
  3. On the Disk Cleanup: Drive Selection window, select C drive and click OK.C drive select Disk cleanup
  4. Now click Clean up system files.Cleanmgr 3
  5. Again on the Disk Cleanup: Drive Selection window, choose C drive and click OK.
  6. Under the Files to delete section, select all the entries and click OK.Cleanmgr 4 ndis.sys
  7. Next, click Delete Files.Delete Files

4. Troubleshoot the network drivers

4.1 Roll back a driver

  1. Press the Windows + R to open the Run command box.Device Manager Run command ndis.sys
  2. Type devmgmt.msc and click OK to open Device Manager.
  3. Go to Network adapters and expand it.
  4. Right-click the driver listed and select Properties from the context menu.Properties Network Adapater ndis.sys
  5. Go to the Driver tab on the Properties window and click Roll Back Driver.Rollback driver ndis.sys
  6. Select the reason for rolling back on the next window and click Yes.Rollback YEs

The network drive will be rolled back to the previous version. If the Roll Back Driver option is grayed out, that means you don’t have an older driver to revert to, and you should go to the next solution below.

4.2 Reinstall the network driver

  1. Open Device Manager with the steps mentioned above.
  2. Go to Network adapters and expand it.
  3. Right-click the driver listed and select Uninstall driver from the context menu.Uninstall Network Driver ndis.sys
  4. Click Action and select Scan for hardware changes to reinstall the driver.Action scan for hardware changes

5. Perform a clean boot

  1. Press Windows + R to open the Run console.ms config run command
  2. Type msconfig and click OK to open the System Configuration window.
  3. Go to the Services tab, place a checkmark next to Hide all Microsoft services, and click Disable all.Clean boot Disable all ndis.sys
  4. Switch to the Startup tab, and click Open Task Manager.Open task Manager Clean boot ndis.sys
  5. Right-click all the Enabled items one by one and select Disable. Close Task Manager.Disable Startup Task Manager ndis.sys
  6. Next, on the System Configuration window, click Apply and OK.CLEAN BOOT 5
  7. Click Restart. Restart clean boot ndis.sys

Now your computer will restart with minimal drivers and startup programs. If the issue doesn’t appear, the background or third-party app is causing it. Please remove it.

6. Perform SFC and DISM scans

  1. Press the Windows key, type cmd, and click Run as administrator.CMD elevated ndis.sys
  2. Type the following command to repair system files and hit Enter: sfc/scannowSFCSCANNOW CMD
  3. Copy and paste the following command to repair the Windows OS image and press Enter: DISM /Online /Cleanup-Image /RestoreHealthRestore health ndis.sys
  4. Restart your computer to let the changes take effect.

In addition to the steps, you can also choose an automatic tool capable of detecting damaged files, Windows errors, and BSoD errors in a short time. With such tools, you can launch the software to start the complete scan, find out system issues, and repair them with a single click.

7. Check your disk for errors

  1. Press the Windows key, type cmd, and click Run as administrator.
  2. Type the following command to check your hard disk for bad sectors and try to repair them to make them readable within the file system and hit Enter: chkdsk /f /rCMD CHKDSK ndis.sys
  3. Restart your computer.

8. Perform System Restore

  1. Press Windows + R to open the Run console.rstrui command Restore point ndis.sys
  2. Type rstrui and click OK to open System Restore wizard.
  3. Select Choose a different restore point in the System Restore window and click Next.Next Choose a different restore point
  4. Select the restore point and click Next.Choose a point ndis.sys
  5. Click Finish to initiate the restoring process.Finish

If the procedure is not successful, you can read our guide on what to do if System Restore is not working on Windows 11.

What can I do to fix the ndis.sys BSoD error on Windows 10?

To fix this blue screen of death error on Windows 10, you can follow the methods mentioned above for Windows 11.

If these methods don’t work for you, you can reset your PC using this guide to resolve this problem on your Windows computer.

So, these are methods that you can use to fix the ndis.sys BSoD error on Windows 10 & 11. If nothing has worked for you, you need to perform a clean installation of Windows.

We also recommend reading our article on how to fix the NDIS_INTERNAL_ERROR because the problem is similar. For any other questions about this BSoD error, please let us know in the comments section below.

What is Error 0x80029c4a & How to Quickly Fix It

Several of our readers have run into the error code 0x80029c4a when they want to launch certain apps or programs.

If the app Is not properly installed, the related background service will not start, hence displaying this error code. Thankfully, there are several proven ways to get around the run time error 0x80029c4a.

What causes the error code 0x80029c4a? 

The error 0x80029c4a can be triggered in several instances for a variety of reasons. Here are a few of the common causes: 

  • Missing DLL files – If the core components or DLL files are missing from your Windows PC, you will encounter the 0x80029c4a error. 
  • Corrupt system files – Corrupt or missing system files are known to cause multiple issues, including the error code 0x80029c4a. 
  • Incorrect registry keys – If the registry keys are incorrect or have been deleted accidentally, the error code 0x80029c4a might occur when performing certain actions on your PC.  
  • Driver issues – If the device drivers of your Windows PC get outdated or corrupt, then you are likely to face multiple issues.
  • Conflicting apps – Some third-party antivirus software and Windows Firewall can conflict with the program and generate the error in question. 

Now that we know the possible reasons behind the error code 0x80029c4a, let’s now proceed to check out the different ways to fix the error code 0x80029c4a on your computer.

How do I fix the error code 0x80029c4a in Windows?

Before moving on to the complex solutions, we recommend trying these basic workarounds:

If you still encounter the 0x80029c4a error code upon opening apps on Windows, implement the troubleshooting methods mentioned below.

1. Repair the system files

  1. Press the Windows key, type cmd in the search bar on top, and choose Run as Administrator from the search results. 0x80029c4a
  2. Type or paste the following command and press the Enter key to run the System File Checker scan. sfc /scannow0x80029c4a
  3. Wait until the SFC scan is complete, then type or copy-paste the following command and press the Enter key. DISM /Online /Cleanup-Image /RestoreHealth0x80029c4a

The SFC utility along with DISM (Deployment Image Servicing and Management), will scan your PC to find the corrupt and missing system images, which cause the 0x80029c4a error, and will replace them with their cached copy. 

Running SFC and DISM after restarting your Windows PC in Safe Mode gives quick and reliable scan results.

As an alternative to this, you can opt-in for a dedicated system repair software that can handle various Windows issues within a few clicks.

2. Start the relevant Windows service

  1. Use the Windows + R keyboard shortcut to bring up the Run command window, type the following command in the text box, and then press Enter. services.msc0x80029c4a
  2. Locate the Security Center service in the list of all services available on your PC, right-click it, and choose Properties.0x80029c4a
  3. In the General tab of the Properties window, examine the Service status. If the service is Stopped, press the Start button to start it.0x80029c4a
  4. Press the Apply button to save the changes and OK to exit the properties window.

Background services play a pivotal role to ensure that the related application works flawlessly on Windows. For instance, If you encounter the 0x80029c4a error code in the Windows Defender app, manually starting the Security Center service can do the trick. 

3. Clean boot your Windows PC

  1. Launch the Run dialog box using the Windows + R shortcut. Type the following command in the text box and press the Enter key. Msconfig0x80029c4a
  2. In the General tab of the System Configuration window, uncheck the box for the Load startup items and enable the one preceding the Load system services option.0x80029c4a
  3. Then switch to the Services tab, enable the Hide all Microsoft services checkbox present on the bottom left, and click the Disable all button.0x80029c4a
  4. Click the Apply button to save the changes and OK to exit the System Configuration window. Now restart your PC as you would normally do to enter the clean boot mode.

Now try to launch the same application, which resulted in the 0x80029c4a runtime error code. If you do not encounter it this time, it indicates that software conflicts with the third-party apps or recent Windows updates on your PC. You should uninstall the conflicting third-party programs to resolve the 0x80029c4a error code.

4. Run the System Maintenance tool

  1. Press the Windows key to launch the Start menu, type control panel in the Search bar, and click the Control Panel icon from the result section.
  2. Set the View by option to Small icons and choose the Security and Maintenance option. 0x80029c4a
  3. Expand the Maintenance section and click Start Maintenance.0x80029c4a

The System Maintenance tool in Windows will now diagnose the underlying issues and optimize the system performance and the apps installed on your computer, eliminating the causes behind the 0x80029c4a error. 

5. Perform System Restore

  1. Press the Windows key to launch the Start menu, type create a restore point in the search box, and select the relevant search result. 0x80029c4a
  2. In the System Properties window, click the System Restore button located under the System Protection tab.0x80029c4a
  3. Press the Next button.
  4. Choose the suitable restore point where the programs were functioning properly and press the Next button.0x80029c4a
  5. Initiate system restoration by pressing the Finish button on the Confirm your restore point window.

Restoring your system to an earlier point in time will revert all the changes made in your computer that could be the possible cause for the error code 0x80029c4a.

So, these are the solutions that will help resolve the error code 0x80029c4a, and you will be to launch the apps successfully. You can refer to this guide if you are looking for effective solutions to resolve the error code 0x80070006. 

Also, if you have any queries or suggestions for us, please feel free to reach out to us in the comments section below.

How to Fix 0xc19001e1 Windows Update Error in 6 Steps

Are you getting a Windows update error 0xc19001e1 when trying to update your PC? If so, then this guide is for you. Several users have reported getting the Windows update error 0xc19001e1 when installing the latest update.

This update error can be caused for several reasons, which we will discuss in this guide. The update error 0xc19001e1 is an annoying Windows update error that automatically gets paused when you try to update your PC. Let us discuss the solutions one by one.

What is causing the Windows update error 0xc19001e1?

Before proceeding with the solutions, we have many reasons that could trigger the Windows update error 0xc19001e1.

  • Corrupt system files: System files are important for your PC to perform optimally. If system files are corrupt or missing then it could give rise to multiple issues.
  • The Windows update service isn’t running: If there is an issue with the Windows update service, then this could give rise to update issues.
  • The Firewall is blocking the update: Often, aggressive Windows Firewall or antivirus settings can block the installation of Windows updates on your PC.
  • Windows Update components are at a fault here: Corrupt or problematic Windows update components can also cause multiple issues with the installation of the latest Windows updates.
  • There isn’t enough memory space: Chances are that the update isn’t getting installed because there is not sufficient space left on your PC.

Let us go through the solutions and try to resolve the Windows update error 0xc19001e1.

How can I fix the Windows update error 0xc19001e1?

1. Disable Windows Firewall

  1. Open the Start menu by pressing the Win key.
  2. Open Windows Defender Firewall.
  3. Click on the Turn on or off Windows Defender Firewall option from the left pane.
  4. Check the radio buttons Turn off Windows Defender Firewall (not recommended) options for both the Public and Private networks.

You should ensure that the Windows Defender Firewall isn’t blocking any background operations.

In that case, we suggest you disable the Firewall or any other antivirus software on your PC and check whether this resolves the issue.

However, we suggest that if this doesn’t work, you should re-enable the Defender Firewall, as it will protect you from threats.

2. Use the Windows Update troubleshooter

  1. Press the Win + I keys to open the Windows Settings menu.
  2. Click on Troubleshoot.
  3. Select Other troubleshooters.
  4. Click on the Run button next to the Windows Update option.
  5. Wait for the troubleshooter to detect the issues.
  6. Apply the prompted fixes.
  7. Restart your PC.

3. Run SFC and DISM commands

  1. Press the Win key to open the Start menu.
  2. Open Command Prompt as an admin.CMD elevated fwpkclnt.sys
  3. Type the below command and press Enter. sfc /scannowSFCSCANNOW CMD
  4. Wait for the process to complete.
  5. Type the below commands and press Enter after each one. Dism /Online /Cleanup-Image /CheckHealth Dism /Online /Cleanup-Image /ScanHealth Dism /Online /Cleanup-Image /RestoreHealth
  6. Restart your PC.

SFC and DISM commands can help you fix the corrupt or missing files on your PC. However, in most cases, they aren’t that effective, especially when dealing with issues such as the Windows update error 0xc19001e1.

In such a case, we advise you to use a dedicated tool that will be able to fix Windows errors, fix BSoD errors, or even detect malware or PUA threats from your PC.

4. Reset Windows Update components

  1. Open the Start menu by pressing the Win key.
  2. Open the command prompt as an admin.CMD elevated fwpkclnt.sys
  3. Type the below commands and press Enter after each one.net stop bitsnet stop wuauservnet stop appidsvcnet stop cryptsvcRen %systemroot%\SoftwareDistribution SoftwareDistribution.bakRen %systemroot%\system32\catroot2 catroot2.baknet start bitsnet start wuauservnet start appidsvcnet start cryptsvc
  4. Restart your PC.

5. Clean up disk space on your PC

  1. Press the Win + I keys to open the Settings menu.
  2. Click on Storage.
  3. Delete all the files and apps from your PC by selecting them from their respective categories.
  4. Click on Storage Sense.
  5. Choose the option under Cleanup of temporary files.
  6. Alternatively, you can delete your unwanted personal files from File Explorer.

You should ensure you have sufficient space left in the drive where you have the Windows OS installed to install the latest Windows updates.

6. Ensure the Windows Update service is running

  1. Press the Win + R keys to open the Run dialogue.
  2. Type services.msc and press Enter.Services Run Command
  3. Open Windows Update service.
  4. Press the Start button under Service status to run it.

In order for the latest Windows updates to work smoothly, you need to ensure that the Windows Update service is running without any issues.

You can follow the above steps to check if the Windows update service runs perfectly fine.

That is it from us in this guide. For users facing the Windows update error 0x80888002, we suggest you check out our guide for help.

You can also refer to our guide on Windows update error 0x8007000B to fix the problem at your end. Well, for users facing the update error 0x8024402c, you should refer to the solutions to resolve the problem.

Feel free to let us know in the comments below which one of the above solutions resolves the problem for you.

Spotify Overlay Not Working on Windows 11? How to Enable It

Music is a huge part of our lives. Some people cannot work without music playing in the background, as it boosts their productivity. Spotify is a top music streaming app and is available on Windows, making it a highly downloaded program. 

One of its major features is its overlay, which lets you quickly switch to the next song without opening the app. However, it may not be working at times. If this is the case, you’ll find this article insightful in helping you figure this out.

Why isn’t my Spotify overlay working?

Spotify overlay is a feature that allows you to control playback by hovering your mouse over the album artwork. It doesn’t work on all systems, but if it does work on your system, it’s a convenient way to listen to music.

Since Windows 11 was released, Microsoft has been working tirelessly to change its design, so you may have noticed a change in where some features are positioned. However, some of the main reasons why your overlay is not working include:

  • Multiple instances of Spotify – If you have multiple instances of Spotify open at once, then this can cause problems with your overlay being displayed properly.
  • Your device isn’t compatible – You may be using a device that does not meet Spotify’s system requirements hence why the overlay feature is unavailable.
  • Geographical restrictions – Spotify isn’t available in some countries, so the feature may not work well if you’re in a certain region.
  • Conflicting apps – If you have recently installed an application similar to Spotify, it may be interfering with how some features are displayed.

How do I enable Spotify overlay in Windows 11?

We recommend you check off this basic list before proceeding to the complex solutions:

  • Ensure you’re running an updated version of Spotify.
  • Check under Spotify settings to ensure you have enabled the overlay feature.
  • Close all other applications using up memory or CPU, like browsers or other music programs.
  • End all Spotify processes from the Task Manager, then reopen the app.
  • If you have any third-party overlays installed, try disabling them temporarily and see if the problem persists. 
  • Check and install any Windows updates if available.
  • Try a VPN and check whether the problem is with your location.

1. Run the Windows Store apps troubleshooter 

  1. Hit the Windows key and click on Settings.settings windows 11
  2. Navigate to System on the left pane, then click on Troubleshooters.Open system troubleshooter
  3. Select Other troubleshooters.other troubleshooters
  4. Find the Windows Store Apps troubleshooter and click the Run button.clicking run windows store apps troubleshooter

2. Clear Spotify cache

  1. Hit the Windows + E keys to open File Explorer.
  2. Navigate to the following location by pasting it on the address bar. Note that because this is the cache folder, it may be hidden. If so, follow the steps to reveal hidden folders: AppData > Local > Packages > SpotifyAB.SpotifyMusic_zpdnekdrzrea0 > LocalCache
  3. Right-click on the Spotify folder and select the Delete icon to clear the cache.

3. Reinstall Spotify 

  1. Hit the Windows key, type Control Panel in the search bar, and click Open.control-panel-search fallout new vegas runtime error
  2. Navigate to Uninstall a program under Programs.going uninstall program control panel
  3. Locate Spotify, right-click on it, and select Uninstall.
  4. Launch the Microsoft Store and download Spotify.

Sometimes reinstalling the application will allow the app to register all the updates, and the overlay feature will work again.

4. Try an older version of Spotify

Spotify constantly releases new updates for its app to fix minor bugs and improve performance. However, sometimes these updates can cause problems too. 

If you have the latest version, try returning to one or two versions. Some users have reported that going back to an older version of Spotify solved their issues with Spotify overlay not working properly in Windows 11. 

If that works, then it’s likely that your issue is related to the latest update.

5. Use a third-party overlay tool

If you’re at this step and still can’t get the Spotify overlay to work on your Windows 11, it may be time to try another alternative. 

There are many options available for you to choose from; however, some are better than others. If you want to use one of these overlays with Spotify, we recommend using ModernFlyouts. 

This app is available in the Microsoft Store, so you can be sure it has already passed rigorous security and compatibility tests.

While you’re still here, check out our article on how to navigate playback issues on Spotify or a Spotify login error code 409.

If you’re more of a browser person and prefer the web version, we have an awesome list of Spotify extensions that will elevate your listening experience.

Let us know if you have been able to fix this issue and what solution did it for you in the comment section below.

Error 0x80242020: What Is It & How to Quickly Fix It

Many users have complained about receiving error 0x80242020 when downloading apps from Microsoft Store or games from the Xbox app. This usually occurs due to a corrupted cache or apps on Microsoft Store.

In this guide, we will discuss some available fixes to resolve the error right after explaining the causes. Let’s start!

What causes the error 0x80242020 on Microsoft Store or Xbox app?

There could be various reasons for this error code to appear; some of the common ones are mentioned here:

  • Corrupted cache – If the Windows Store cache has corrupted files, it could interfere when the store tries to connect to the server. To fix it, you need to reset the Windows Store cache.
  • Outdated Windows Store – If the Windows Store version is obsolete, it could result in a corrupt installation. To get rid of this error, use PowerShell to reinstall Windows Store.
  • Internet connectivity issues – If the internet connection is weak or unstable, Microsoft Store or Xbox app will not be able to connect to a server, hence the error. To fix this, you need to troubleshoot your internet connection.
  • Outdated Windows version – If your Windows operating system has updates pending, which could cause various issues, including this one. Make sure there are no pending Windows updates.
  • Insufficient storage space – If your computer doesn’t have enough storage space, it could lead to several issues, including not being able to download or update apps via Microstore Store.

How can I fix the error 0x80242020 on Microsoft Store or Xbox app?

Before engaging in advanced troubleshooting steps, you should consider performing the following:

1. Run the troubleshooter

  1. Press Windows + I to open the Settings app.
  2. Go to System, then click Troubleshoot.System - troubleshoot 0x80242020
  3. Click Other troubleshooters.Other Troubleshooters
  4. Locate Windows Store Apps and click Run.Windows Store Apps Run Windows 11  0x80242020

2. Change storage location

  1. Press Windows + I to open the Settings app.
  2. Go to System, and click Storage.System - Storage Windows 0x80242020 11
  3. Next, click Advanced storage settings and Where new content is saved.Where new content is saved 0x80242020
  4. Locate New apps will save to, and select the local drive with sufficient space.New apps will save to Windows 11

3. Reinstall Xbox or Microsoft Store app

  1. Press the Windows key, type PowerShell, and click Run as administrator.Powershell 2 0x80242020
  2. If the error comes up on the Xbox app, copy and paste the following commands to reinstall the Xbox app and hit Enter: Get-AppxPackage Microsoft.XboxApp | Remove-AppxPackage Get-AppXPackage *WindowsStore* -AllUsers | Foreach {Add-AppxPackage -DisableDevelopmentMode -Register "$($_.InstallLocation)\AppXManifest.xml"}
  3. If the error is on Microsoft Store, type the following command to reinstall the Microsoft Store app and hit Enter: Get-AppxPackage -allusers *WindowsStore* | Remove-AppxPackage Get-AppxPackage -allusers *WindowsStore* | Foreach {Add-AppxPackage -DisableDevelopmentMode -Register “$($_.InstallLocation)\AppXManifest.xml”}
  4. Restart your computer.

4. Clear stored cache

  1. Press Windows + R to open the Run dialog box.Run command wsreset.exe - 0x80242020
  2. Type WSReset.exe and click OK to clear the cache on Microsoft Store.

5. Terminate/Repair Microsoft Store or Xbox app

  1. Press Windows + I to open the Settings app.
  2. Go to Apps, then click Installed apps.Apps - Installed apps 0x80242020
  3. Locate Microsoft Store/Xbox, click three dots, and select Advanced options.Microsoft Store Advanced options 0x80242020
  4. Click Terminate.Terminate Windows 11
  5. Under Reset, click Repair.Repair Windows 11  0x80242020

6. Update Microsoft Store or Xbox app

  1. Launch Microsoft Store.
  2. Click Library from the left corner.Xbox Update Windows 11 0x80242020
  3. Scroll and find the Xbox app or Microsoft Store.
  4. Click Update.

7. Reset Windows Update components

  1. Press the Windows key, type CMD, and click Run as administrator.CMD elevated 0x80242020
  2. Copy and paste the following commands one by one and hit Enter after every command: net stop bits net stop wuauserv net stop appidsvc net stop cryptsvc
  3. Type the following command to delete qmgr*.dat files and press Enter: Del "%ALLUSERSPROFILE%\Application Data\Microsoft\Network\Downloader\qmgr*.dat"
  4. Copy and paste the following commands to rename the SoftwareDistribution and catroot2 folders and hit Enter after every command: Ren %systemroot%\SoftwareDistribution SoftwareDistribution.bak Ren %systemroot%\system32\catroot2 catroot2.bak
  5. To reset the BITS service and Windows Update service to default, type the following command and press Enter: sc.exe sdset bits D:(A;;CCLCSWRPWPDTLOCRRC;;;SY)(A;;CCDCLCSWRPWPDTLOCRSDRCWDWO;;;BA)(A;;CCLCSWLOCRRC;;;AU)(A;;CCLCSWRPWPDTLOCRRC;;;PU) sc.exe sdset wuauserv D:(A;;CCLCSWRPWPDTLOCRRC;;;SY)(A;;CCDCLCSWRPWPDTLOCRSDRCWDWO;;;BA)(A;;CCLCSWLOCRRC;;;AU)(A;;CCLCSWRPWPDTLOCRRC;;;PU)
  6. Type the following command and hit Enter: cd /d %windir%\system32
  7. To register the BITS and Windows Update-related DLL files, copy and paste the following commands one by one and press Enter after every command: regsvr32.exe atl.dll regsvr32.exe urlmon.dll regsvr32.exe mshtml.dll regsvr32.exe shdocvw.dll regsvr32.exe browseui.dll regsvr32.exe jscript.dll regsvr32.exe vbscript.dll regsvr32.exe scrrun.dll regsvr32.exe msxml.dll regsvr32.exe msxml3.dll regsvr32.exe msxml6.dll regsvr32.exe actxprxy.dll regsvr32.exe softpub.dll regsvr32.exe wintrust.dll regsvr32.exe dssenh.dll regsvr32.exe rsaenh.dll regsvr32.exe gpkcsp.dll regsvr32.exe sccbase.dll regsvr32.exe slbcsp.dll regsvr32.exe cryptdlg.dll regsvr32.exe oleaut32.dll regsvr32.exe ole32.dll regsvr32.exe shell32.dll regsvr32.exe initpki.dll regsvr32.exe wuapi.dll regsvr32.exe wuaueng.dll regsvr32.exe wuaueng1.dll regsvr32.exe wucltui.dll regsvr32.exe wups.dll regsvr32.exe wups2.dll regsvr32.exe wuweb.dll regsvr32.exe qmgr.dll regsvr32.exe qmgrprxy.dll regsvr32.exe wucltux.dll regsvr32.exe muweb.dll regsvr32.exe wuwebv.dll regsvr32.exe wudriver.dll
  8. To restart the Windows Update services, type the following commands one by one and press Enter after every command: net start bits net start wuauserv net start appidsvc net start cryptsvc
  9. Restart your computer to let the changes take effect.

So, these methods can be used to fix the error 0x80242020 on Microsoft Store or Xbox app. Try them and let us know what worked in the comments section below.

Windows Migration Assistant: How to Download & Install

The Windows Migration Assistant is a tool developed by Apple to transfer all the contents of a Windows PC to a Mac. In this article, we will show you how to download Windows Migration Assistant and use it on your Mac.

What is Windows Migration Assistant, and what does it do?

As mentioned above, Windows Migration Assistant is an Apple software that usually comes preinstalled on your Mac to help you migrate the data from your PC to your macOS device.

However, to transfer the files, you will also need to download and install the app on your PC.

The Windows and macOS systems are very different OSes, so here’s what Windows Migration Assistant can help you move:

  • Transfers the emails, contacts, and email settings from Outlook and Windows Mail to the Mail app on Mac.
  • Moves the appointments and reminders from your Windows PC to your Calendar and Reminders (Requires migrating to a Mac with macOS Ventura) app on Mac.
  • It transfers the music, podcasts, audiobooks, movies, and TV shows in their respective apps on Mac.
  • Imports all the bookmarks and homepages from any of your browsers to Safari.
  • Translates the desktop pictures, language, and location settings to System Settings or System Preferences (If the Mac is using macOS Ventura, known Wi-Fi networks will be moved as well).
  • Transfers all the documents and other files from your home directory.
  • It copies all the non-system files from the system and other drives to the Shared folder of your home folder.

So, Windows Migration Assistant will only transfer, copy or import data and settings, not entire applications.

How do I download Windows Migration Assistant?

  1. Launch the browser of your choice on your PC and go to the official download page for Windows Migration Assistant.
  2. Scroll down and click the link corresponding to the Windows Migration Assistant version for your OS.
  3. Hit the Download button to download Windows Migration Assistant.
  4. Double-click the executable file and hit the Next button to install the app.
  5. Follow the on-screen procedures to install Windows Migration Assistant and hit Finish at the end.

How do I use Windows Migration Assistant?

  1. You may receive a warning to close some applications needed for the data transfer. After you comply, hit the Continue button.
  2. The app will detect and warn you about special conditions on your system and you will have to fulfill these requirements as follows:
    • The PC is set for automatic Windows updates
    • The firewall is preventing your Mac from connecting to your PC
    • Your laptop is running on battery power
  3. Next, you will be asked if you want to provide permissions for the app to send app usage data to Apple and it’s not necessary to accept.
  4. The app will now search for your Mac and you will have to turn your attention to it.
  5. Launch Migration Assistant on your Mac. You will find it in the Utilities folder of your Applications folder.
  6. Follow the on-screen instructions, and when you’re asked how you want to transfer your information, select the From a Windows PC option and click Continue.
  7. Select your PC and click on Continue.
  8. Now, you will receive a passcode that you will need to enter on both computers.
  9. Lastly, your PC will be scanned, and you will get to choose which data you want to transfer and hit Continue to perform the action.
  10. The procedure will take a few minutes to a few hours, depending on the number and capacity of your files.

Of course, the two computers must be connected to the same wired or wireless network or directly connected with a cable.

We hope our article provided sufficient information for Windows Migration Assistant download and usage.

You might also be interested in reading our guide on how to transfer your Windows Settings to a new computer safely.

If you have any questions or suggestions, feel free to use the comments section below.

Screen Goes Black When Connected to External Monitor [Fix]

Imagine this scenario: you just bought a brand new 4K monitor, and you’re ready to connect to your gaming laptop, so you enjoy playing video games in a gorgeous resolution.

But then, when you connect the external monitor to your computer, your laptop’s main screen goes black. So what gives? Put it: you have a severe connection problem that needs to be fixed quickly.

What causes this connection problem with my monitor?

Your computer’s monitor going black can be caused by many things, from faulty hardware to out-of-date software. Below is a list pointing out some of the more common culprits.

  • You have some faulty hardware – Malfunctioning hardware is a common problem and can result from corrupt files or bugs in your RAM. We recommend running an SFC scan.
  • The laptop has a faulty power supply – If the power supply is causing problems, contact the manufacturer. Apps like AIDA64 Extreme can also be used to diagnose power supply issues.
  • Graphics drivers are out of date – You must always download the latest patches. Out-of-date drivers are often the culprit behind a lot of computer problems. Luckily, updating is really easy to do.
  • The computer is lacking the latest Windows 11 update – Lacking important updates means you’re missing out on important fixes. Always stay up-to-date with Microsoft’s Patch Tuesdays.
  • Your computer is way too hot – Overheating can be a computer killer, so always make sure your machine runs at an optimal temperature. Disabling startup apps can lower the temperature.
  • You’re using the wrong ports – Your HDMI may have been inserted into the wrong port. Double-check your cables are going into the right place.

How can I stop my external monitor from going black?

There are several ways to fix this error. Most of the time, it’s usually something that was overlooked. All you need to do is adjust some settings. But there are instances where it’s a more serious problem.

  • The first thing that you should do is double-check your cables and connections. Perhaps one of the cables wasn’t properly entered into the port, or the monitor isn’t on.
  • Likewise, try using different cables. You have some faulty cables, so if you have an extra one lying around, plug that one in. If worse comes to worst, you might have to buy another cable.
  • While trying out different cables, you might also want to use another port, like plugging into a DisplayPort input instead of an HDMI.
  • If you insist on using an HDMI cable or if it’s all you have, we recommend connecting to an external monitor while your computer is hibernating or in sleep mode.
  • You can also try turning your computer off first and then connecting the second monitor to it. Once connected, turn your computer on.
  • It’s also possible the problem is a software issue. Be sure to install the latest Windows 11 Update from Microsoft. They carry a multitude of fixes.
  • Recovery software like Kernal Data Recovery can restore important system files that may have been deleted. Windows 11 has its native tool, but you’re better off using a third-party app.
  • And if all else fails, you must run a system recovery to revert your computer to its factory settings. Instructions on how to do this can be found on Microsoft’s website.

1. Use the main monitor instead

  1. Right-click your desktop, and in the context menu that appears, click Properties. If you don’t see Properties, select Display Settings instead.
  2. Now you will see your two monitors next to each other. Drag the second monitor over to your main screen. Click the box next to Make this my main display.
  3. Also under the screens, switch the drop-down menu to Extend these displays if you want to use both.
  4. Click the Apply button to finish up.
  5. If you’re still having trouble, click the Identify button underneath the images. A large number should appear in the bottom left corner for each connected monitor.

2. Update drivers

  1. Launch the Device Manager and expand the Monitors entry.
  2. Right-click the monitor driver. In the context menu that appears, select Update Driver.
  3. Click Search automatically for drivers to instantly install drivers.

In case you require an automatic process to update your monitor drivers and get the latest official version, the software below is the right fit.

3. Double-check Windows Presentation mode

  1. Hold down the Windows key and press the P key once. This will cause the Windows Presentation Mode selection screen to appear on the right side.
  2. See if the Second screen only option is selected. If it is, switch it to any of the other options – namely Duplicate or Extend.
  3. Wait a few seconds for the changes to take effect.

4. Perform a system reset

  1. Launch the Settings menu. Stay on the System tab, scroll down, and click Recovery.
  2. Click the Restart Now button next to Advanced Startup.
  3. In the new page that appears, select Troubleshoot.
  4. On the following page, click Advanced options.
  5. Next, select Startup Repair.
  6. Give your computer enough time to finish up. When done, you will be taken back to the login screen.

What can I do if the laptop isn’t detecting my second monitor?

If your laptop is having difficulty detecting a second monitor, you could perform any of the previously mentioned solutions, like installing new drivers or performing a system restore.

It’s also recommended that you run the Hardware and Devices troubleshooter, which can be found in the Control Panel if you don’t want to revert your computer to its factory settings.

If you own a High DPI monitor, you should learn how to fix the scaling issue on Windows 11. According to online reports, the scaling issue causes on-screen content to look blurry and even flicker.

You can fix this problem just by tweaking the Windows Display settings or adjusting the DPI Scaling feature on each app; however, the latter option can be pretty time-consuming.

And before you leave, find out how to fix things when the screen turns off while charging, a problem reported with the internal display and an external monitor.

Feel free to comment below if you have other display problems. Also, leave comments below about reviews or specific guides you’d like to see for Windows 11.

FIX: Ccmsetup Failed With Error Code 0x80041010

Error code 80041010 signals a malfunction in the Windows Management Instrumentation (WMI) subsystem, which SCCM relies on for remote management.

It could be caused by a damaged WMI databes or corrupt registry settings. Even though it is not a common error, we were able to gather information about it and how you can fix it.

Just follow the steps below.

resolve these issues.

How do I fix error 0x80041010?

1. Repair WMI

  1. Hit the Windows key, type cmd in the search bar, and click Run as administrator.cmd-run-admin-w11 unexpected kernel mode trap windows 11
  2. Type the following command to switch folders where the WMI repository is located: c:\windows\system32\wbem
  3. Next, type and Enter the following command: dir /b *.mof *.mfl | findstr /v /i uninstall > moflist.txt & for /F %s in (moflist.txt) do mofcomp %s
  4. If you’re still experiencing the error, proceed to run the following commands: Net Stop winmgmt C: CD %SystemRoot%\System32\wbem RD /S /Q repository regsvr32 /s %SystemRoot%\system32\scecli.dll regsvr32 /s %SystemRoot%\system32\userenv.dll for /f %%s in (‘dir /b /s *.dll’) do regsvr32 /s %%s scrcons.exe /regserver unsecapp.exe /regserver winmgmt.exe /regserver wmiadap.exe /regserver wmiapsrv.exe /regserver wmiprvse.exe /regserver mofcomp cimwin32.mof mofcomp cimwin32.mfl mofcomp rsop.mof mofcomp rsop.mfl for /f %%s in (‘dir /b *.mof’) do mofcomp %%s for /f %%s in (‘dir /b *.mfl’) do mofcomp %%s

2. Reset WMI

  1. Hit the Windows key, type cmd in the search bar, and click Run as administrator.cmd-run-admin-w11 unexpected kernel mode trap windows 11
  2. Type in the following commands and press Enter after each one: winmgmt /salvagerepository winmgmt /verifyrepository winmgmt /resetrepository

3. Increase WMI memory

  1. Type regedit in the search bar and open the Registry Editor.opening registry editor windows
  2. Locate HKEY_LOCAL_MACHINE\SOFTWARE\Microsoft\WBEM\CIMOMregistry editor wmi
  3. Locate the value High Threshold On Events section and doubled click to open it.high threshold
  4. If the value is too low (e.g., under 512MB), increase it to 1024 or 2048 (representing 1GB or 2GB of memory).

Running out of memory could also lead to WMI errors, so make sure you allocate enough. This tweak could help you get rid of error code 0x80041010.

These commands will check for any inconsistencies and rebuild if necessary.

Elsewhere, you may also come across the SCCM task sequence error, so check out our recommended fixes for the same. The SCNotification may also fail at times, but we have answers on how to get it back up.

That’s it from us, but share any additional thoughts in the comment section below.

How to Fix Work Folder Sync Error 0x8007017c

Users have complained more recently about the Windows folder sync error 0x8007017c. This error takes away from the user experience, but it can be fixed.

How do I fix error code 0x8007017c?

We recommend the following quick actions before going into any other solutions:

  • Restart your device – A quick restart is advisable because it shuts down problematic processes and may help resolve the syncing issue.
  • Create more space – This may mean getting new storage or deleting some files so that the syncing process can run smoothly.

1. Perform a Windows update

  1. Press Windows + I to open the system Settings.
  2. Click on Update & Security.
  3. Select Windows update from the left pane and choose Check for updates.

In most instances, this solution will work because Windows released the following three updates to help you resolve the problem easily:

2. Update drivers

  1. Press Windows + R, type devmgmt.msc, and hit Enter.
    0x8007017c
  2. Expand Network adapters, right-click on your network driver, and click Update driver.
    0x8007017c
  3. Select Search automatically for updates.
    0x8007017c
  4. Restart your computer after the update.

The process above is a manual update procedure. You recommend you try an automatic update using third-party tools like Outbyte Driver Updater.

This way, you are sure you will always have the correct drivers, and they will never remain outdated.

⇒ Get Outbyte Driver Updater

3. Disable on-demand File Access

  1. Press Windows + R, type gpedit.msc, and hit Enter.
  2. Navigate to the path below:
    User Configuration\Administrative Templates\Windows Components\Work Folders
  3. Click Work Folders and double-click on Specify Work Folders settings.
    0x8007017c
  4. Choose the Enable radio button, and select Disable from the On-demand file access preference dropdown.
  5. Finally, restart the computer.

4. Disable your antivirus

  1. Click on the hidden access arrow in the Taskbar.
  2. Click on your antivirus icon, hover over Avast shields Control and select Disable for 10 minutes (This step varies for different antivirus software).

What is the 0x8007017c OneDrive error?

  • Driver issues – Corrupted or outdated network drivers will usually trigger the error. Because these drivers are essential for proper syncing to take place, they must be updated.
  • Network issues – For syncing to work, you should have a stable network connection. When users use bad or weak networks, the error is often triggered.
  • Insufficient disk space – Syncing also requires some available space. If you have run out of disk space, it will trigger this error.
  • Antivirus conflicts – We always encourage using antivirus, but sometimes, they may treat legitimate files as threats, especially if your antivirus is not perfectly compatible with the OS. This will trigger the error.
  • File corruption – Users with corrupted files or system resources would also experience this problem since the computer may no longer be able to read the files.

FAQs about Error 0x8007017c

Can system corruption cause Error 0x8007017c?

Yes. Damaged system files may prevent OneDrive from functioning properly. Running SFC and DISM scans often resolves the problem.

Do I need admin rights to fix Error 0x8007017c?

In some cases, yes. Certain fixes like modifying group policies, resetting OneDrive, or applying registry changes require administrator access.

Is Error 0x8007017c a security threat?

No, it’s not a virus. It’s a Windows/OneDrive sync error. However, keeping your system updated ensures security patches also fix related issues.

Most antivirus software can be temporarily disabled. Since Windows comes with the Windows Defender, you should be safe even when you have your third-party antimalware tools disabled. However, you should turn them back on as soon as possible for optimal protection.

The file sync error code 0x8007017c should not trouble you after you have gone through these four fixes.

Lastly, we are curious to know which of them worked for you. Please tell us using the comments section below.

Autopilot Error 0x81036502: How to Fix It in 4 Steps

Windows Autopilot is a tool that simplifies the deployment and management of Windows devices. However, users report the Autopilot failing at the Enrollment Status page- error 0x81036502, and it can also be a timeout issue.

Hence, this guide will delve into the causes of this error and offer solutions to rectify it. Also, you may be interested in our guide on fixing Autopilot.dll WIL error reported on Windows 11.

What causes the Windows Autopilot Reset Error 0x81036502?

Error code 0x81036502 occurs due to a communication failure between the device and the Autopilot service in the cloud. Here are some common causes of this error:

  • Incorrect date and time settings – The device’s date and time settings may be inaccurate, which can cause issues with the Autopilot service. Also, the error can occur if the computer’s clock is not synced correctly with the time zone.
  • Improper registration – If the Autopilot service is not registered appropriately on your device or an incorrect Autopilot profile on the computer can cause the error.
  • Service outage – The Autopilot service may be experiencing an outage or other technical issues with the Microsoft Endpoint Manager service not being available can cause the error to occur.
  • Antivirus or security software interference – Antivirus or security software on your PC may interfere with the Autopilot reset process.

These causes are liable to vary on different computers. To resolve the error, proceed with the troubleshooting steps below.

How can I fix Windows Autopilot Reset Error 0x81036502?

Here are some preliminary checks you can perform:

Proceed with the following advanced troubleshooting if the error persists.

1. Uninstall third-party antivirus app

  1. Press the Windows button, type Settings and Enter.
  2. Click the Apps category and click on Installed apps.
  3. Find the third-party antivirus app, right-click it, and click Uninstall.
  4. Follow the on-screen prompt to uninstall it.

Installing various antivirus apps on a device causes the antivirus apps to malfunction, so it is advisable to uninstall other antivirus software.

You can read about how to disable Windows Defender if you encounter issues.

2. Run an SFC/DISM scan

  1. Press the Windows button, type Command Prompt, and select the Run as administrator option to open it.
  2. Click Yes if the UAC Windows prompt appears.
  3. Type the following and press Enter: sfc /scannow
  4. Then input the strings and press Enter: Dism/Online/Cleanup-Image/RestoreHealth
  5. Wait for the process to complete, restart your PC and check if the error persists.

The SFC/DISM scan will locate and fix corrupt system files on your Windows device. Check our guide about how to run an SFC scan on Windows.

Alternatively, you can better run a dedicated system repair solution that will detect Windows-related issues in minutes, will scan automatically, and repair any issues that cause the error code 0x81036502.

3. Update Windows OS to the latest version

  1. Press the Windows + I key to open the Windows Settings.
  2. Select the Windows Update and click on the Check for updates button. Wait for the process to complete, and select the Download & Install button for available updates.

Updating the Windows OS will download all the system requirements to complete the reset process and fix bugs impeding it.

4. Reset Windows

  1. Press the Windows + I key to open the Windows Settings.
  2. Choose System and click on Recovery.
  3. Select the Reset PC button from the right side pane.
  4. Select the Keep My Files option or Remove everything option, to perform a full Windows reset.

The process above will restore Windows OS settings to factory default and delete third-party apps. We have a step-by-step guide on reinstalling Windows 11 OS on your computer.

In addition, you can read about how to fix Windows Update error 0xc1900223 on your PC. Also, do not hesitate to check our detailed guide about why Windows 11 update fails and how to fix it on Windows 11.

Should you have further questions or suggestions, kindly drop them in the comments section below.

Fix: PAGE FAULT IN NONPAGED AREA Error 0x00000050

The PAGE FAULT IN NONPAGED AREA stop error 0x00000050 can appear when requested data is not found in memory. It may cause the system to restart frequently, get stuck, or crash suddenly. Fortunately, this guide has some steps to help you resolve the error.

Also, you may be interested in the operation failed error 0x00004005 and how to fix it on Windows 11.

What causes the 0x00000050 error code?

The Stop 0x00000050 (parameter 1-4), PAGE_FAULT_IN_NONPAGED_AREA error can occur when Windows cannot access the needed page for the process it started to run. Some notable factors that can cause the error are:

  • Corrupt or faulty device drivers – When the device drivers are outdated, they can become corrupt and faulty, causing issues with the activities of the drivers across the computer. So, it can result in the bug check error 0x00000050.
  • Faulty hardware – Running into the error is usually related to corrupt or defective RAM on the computer. They affect the communication between the system and the services running on it.
  • Interference from third-party Antivirus software – The system can often be interrupted by the activities of antivirus software. Features such as Firewall may block the tasks of the services operating on the system, prompting errors when using it.
  • Corrupt system files – When the system files are corrupt, they affect the functionality of the system and cause errors.

These factors can vary on different PCs. Regardless, we’ll take you through basic steps to resolve the error and restore your system.

How can I fix the 0x00000050 error code?

Before attempting any advanced troubleshooting steps, go through the following:

If you can’t resolve the error, go ahead with the solutions below:

1. Update drivers via Windows update

  1. Press the Windows + I key to open Settings.
  2. Select Windows Update and select the Advanced options.
  3. Click on the Optional Update button.
  4. Click the drop-down button on the Driver Update and checkmark the list of updates available.
  5. Select the Update and Install button and wait for the drivers to install.

Installing driver updates allow users to fix errors or bugs affecting the devices and update drivers to improve performance.

Our readers can read about ways to diagnose and fix Windows Update not loading on Windows 11.

Alternatively, it’s possible to manage all your drivers in a more efficient way, using trustworthy software to update drivers automatically.

Outbyte Driver Updater will start by fully scanning your system and detecting outdated drivers. Afterward, you can update them by pressing one click.

⇒ Get Outbyte Driver Updater

2. Rollback recent driver updates

  1. Press Windows + R key to open the Run dialog box, type devmgmt.msc, then press Enter to open the Device Manager.
  2. Open the device driver you recently updated, right-click on the driver, and select Properties from the drop-down menu.
  3. Navigate to the Driver tab, select the Roll Back Driver option, and click OK.
  4. Restart your PC and check if the error persists.

The above steps will remove the faulty hardware updates causing the error and resolve compatibility issues. You can check our article about how to uninstall updates on Windows 11 for more steps.

3. Run the CHKDSK command

  1. Left-click the Start button, type Command Prompt, and click the Run as administrator option.
  2. Click Yes on the User Account Control prompt.
  3. Type the following commands and press Enter: chkdsk C: /r chkdsk/f
  4. Restart your PC to see if the Blue Screen of Death 0x00000050 error appears.

The Chkdsk command will scan the disk drives on your PC and repair corrupt hard disks causing the error. Check our guide on what to do if Command Prompt keeps crashing on your PC.

4. Disable Windows Firewall

  1. Left-click the Start button, type control panel, then press Enter.
  2. Click the Windows Defender Firewall option.
  3. Click the Turn Windows Defender Firewall on or off option from the left pane.
  4. Go to Private network settings and Public network settings, then click the radio buttons for the Turn off Windows Defender Firewall (not recommended) option.
  5. Restart your PC.

Disabling the Windows Firewall will resolve any interference it’s causing. Check our article about how to disable the Windows Defender Firewall on Windows 11.

5. Perform an SFC scan

  1. Left-click the Start button, type Command Prompt and click on Run as administrator.
  2. Click Yes on the User Account Control prompt.
  3. Type the following and press Enter: sfc /scannow

The scan will repair corrupt or missing system files responsible for the error. You can read about how to fix SFC scannow not working on your Windows device.

In addition, we have a comprehensive guide about error 0x000000CB & how to fix it on Windows 11 easily.

If you have further questions or suggestions, kindly drop them in the comments section below.

USB Drive Showing as Unallocated? 2 Ways to Fix It

USB drives having unallocated space means you can no longer access the data stored on the drive or save new data. When the USB drive becomes unallocated, it will have very little storage space available or will not be visible in File Explorer.

If you are looking for ways to allocate the unallocated storage space of a USB drive, keep reading below.

Why does my USB drive have unallocated space?

If the removable drive is showing an unallocated error despite having files and folders, here are the possible reasons for it:

  • Malware infection – A virus attack or malware infection spread from an unprotected computer can result in unallocated disk space. Scan the removable drive with a third-party antivirus to get rid of the viruses.
  • Incomplete deletion of data – Any interference when deleting the data stored on the USB can be why the USB drive suddenly has unallocated space.
  • Unsuccessful partition – Unsuccessful attempts to partition the USB drive or change the partition system can be why the pen drive shows unallocated status.
  • Failed formatting attempt – Incorrect formatting or accidentally deleting the partitions can also cause the external drive to become unavailable for data storage.

Regardless of why the USB drive is showing an unallocated disk space problem, the methods discussed in this guide will help you easily fix it.

How do I fix unallocated space on the USB Drive?

Note icon NOTE
Before proceeding with the given methods, we recommend you back up the data stored on your pen drive.

1. Create a new volume using Disk Management

  1. Use the Windows + R shortcut to launch the Run dialog box, type the following command in the text box and press the Enter key to access the Disk Management utility. diskmgmt.mscUSB drive not showing as allocated
  2. Look for your unallocated USB drive, generally represented as Disk 1 and marked with a black strip. Right-click the unallocated disk and choose the New Simple Volume option from the context menu.USB drive not showing as allocated
  3. Press the Next button on the New Simple Volume Wizard to create a new volume.
  4. Now set the size for the new partition by incrementing or decrementing the value, and press the Next button again.USB drive not showing as allocated
  5. Choose the drive letter you wish to assign to the new partition and press the Next button.
  6. In the Format partition settings, choose the File system from the drop-down, provide a new name as Volume label, and press Next.USB drive not showing as allocated
  7. Verify the settings and press the Finish button to create the new partition.

Once the process is completed, the USB drive that was previously shown as unallocated will now appear as a volume and will be represented by a drive letter.

Disk Management is an in-built tool that lets you manage the storage devices currently attached to your PC, including a USB disk. Thus, you can use the feature to create a new partition on your USB disk to fix the unallocated space problem.

2. Use DiskPart to partition the USB drive

  1. Press the Windows key, type cmd in the search bar on top, and choose Run as Administrator from the result section.USB drive showing as unallocated
  2. Press the Yes button on the User Action Control pop-up to launch the Command Prompt with administrative privileges.
  3. Type or paste the following command and press the Enter key to access the Disk Partition utility in the Command Prompt. diskpartUSB Drive Showing as Unallocated
  4. Choose Yes on the User Action Control prompt.
  5. Next, execute the following command to view the list of disks and their number currently connected to your PC. Note down the disk number for the USB drive with the unallocated space. list disk
  6. Type the following command and press the Enter key to select the USB drive. Replace # with the relevant disk number. select volume #USB drive showing as unallocated
  7. Type and press the Enter key to execute the following command to create a primary partition. Replace n with the partition size. create partition primary size=nUSB drive showing as unallocated

You can use DiskPart, the disk-partitioning command-line utility, to create a new partition and get back the unallocated space on your USB drive.

These are the two ways to create a new volume to fix the USB drive showing unallocated status. Also, if the USB drive gets detected but is not accessible, implement the solutions listed in this guide.

So, were you able to fix the USB drive showing an unallocated issue by the two methods discussed in this guide? Do let us know in the comments below.