Trace SNMP Traffic Using the Best Monitoring Tools [Full guide]

Simple Network Management Protocol or SNMP is a framework widely used for managing devices on the network as it comes with a set of operations for monitoring and managing the network.

You can trace SNMP traffic with the best monitoring tools to leverage the protocol to better monitor devices’ key metrics, receive timely alerts, and take polling. 

How does SNMP monitoring work?

SNMP monitoring works by sending protocol data units, known as SNMP Get requests to network devices. Network monitoring tools track these communications and fetch data from SNMP.

You may use SNMP monitoring to keep an eye on network and bandwidth usage and monitor other important issues such as uptime and traffic status.

What are the best tools to trace SNMP traffic?

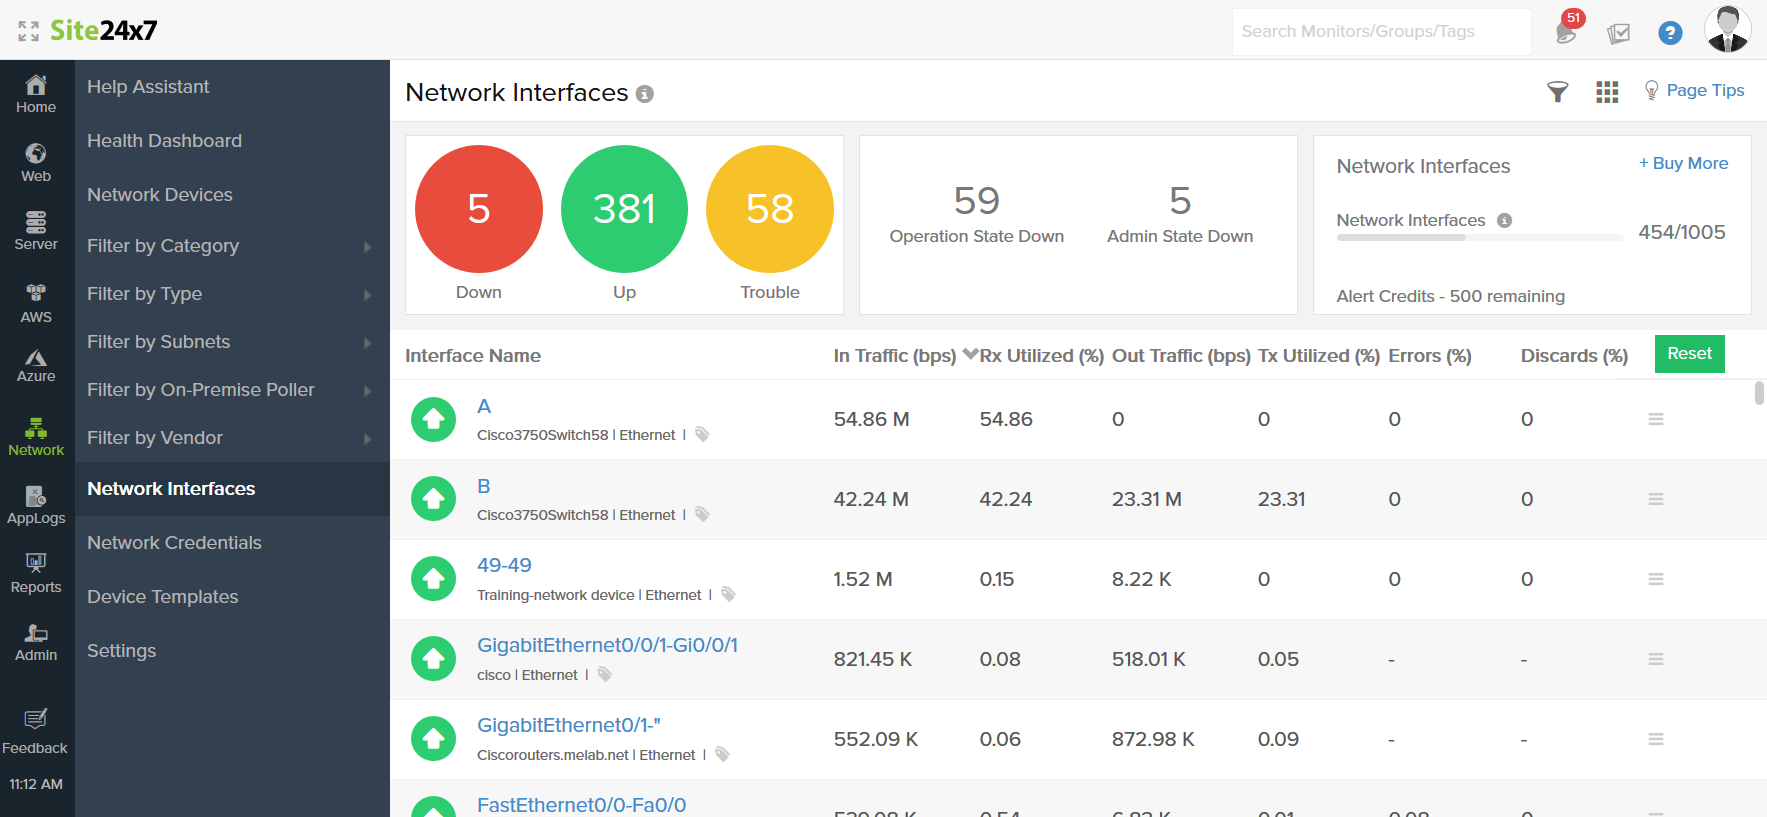
Site24x7 – Best for tracing SNMP traffic
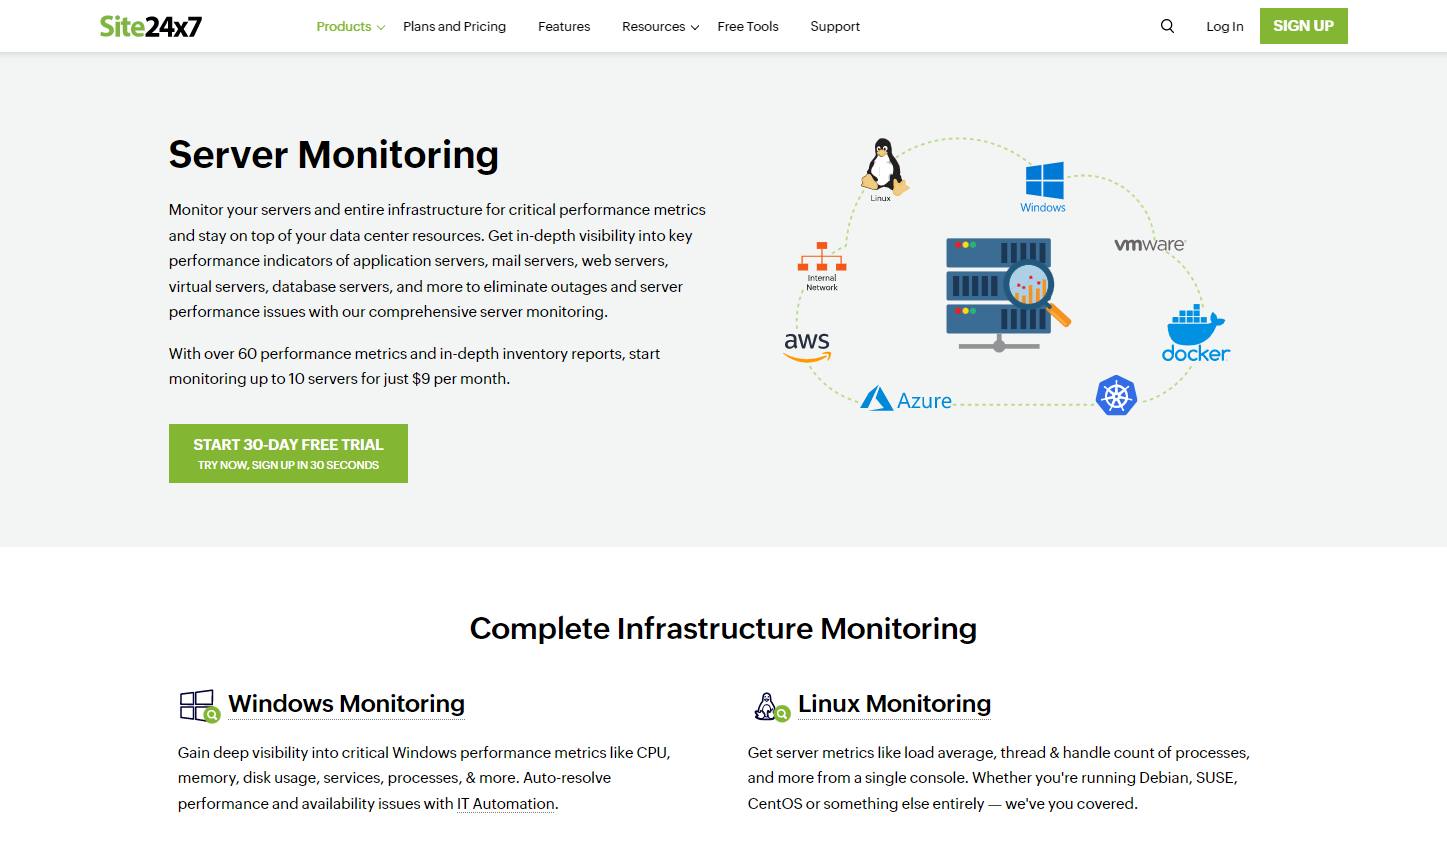
If you’re looking for the best SNMP monitoring software, Site24x7 can take care of that with excellent results.

Moreover, SNMP traffic tracing is only a small feature offered by this complex tool that will provide all the options to manage your network performance.

Whether they are application servers, mail servers, web servers, virtual or database servers, Site24x7 offers more than 60 performance metrics of up to ten servers.

This solution also helps you analyze the Microsoft applications’ performance. The list includes IIS, SQL, Exchange, Office 365, and a lot more.

All the data is easily accessible from a single command center, even if you’re running Debian, SUSE, CentOS, or another system.

Server monitoring can be also implemented by using plugins and the ones for Nagios, MySQL and Apache are included but you can also build your own.

Key features of Site24x7:

  • Easy SNMP traffic monitoring
  • Apache, MySQL and Nagios plugin integrations
  • Control everything from a single dashboard
  • Monitor more than 60 performance metrics
  • Manage customer accounts and endpoints securely

Site24x7

Track the SNMP traffic easily and monitor over 60 metrics with this great tool.
Check price Visit Website

ManageEngine OpManager – Great for SNMP management
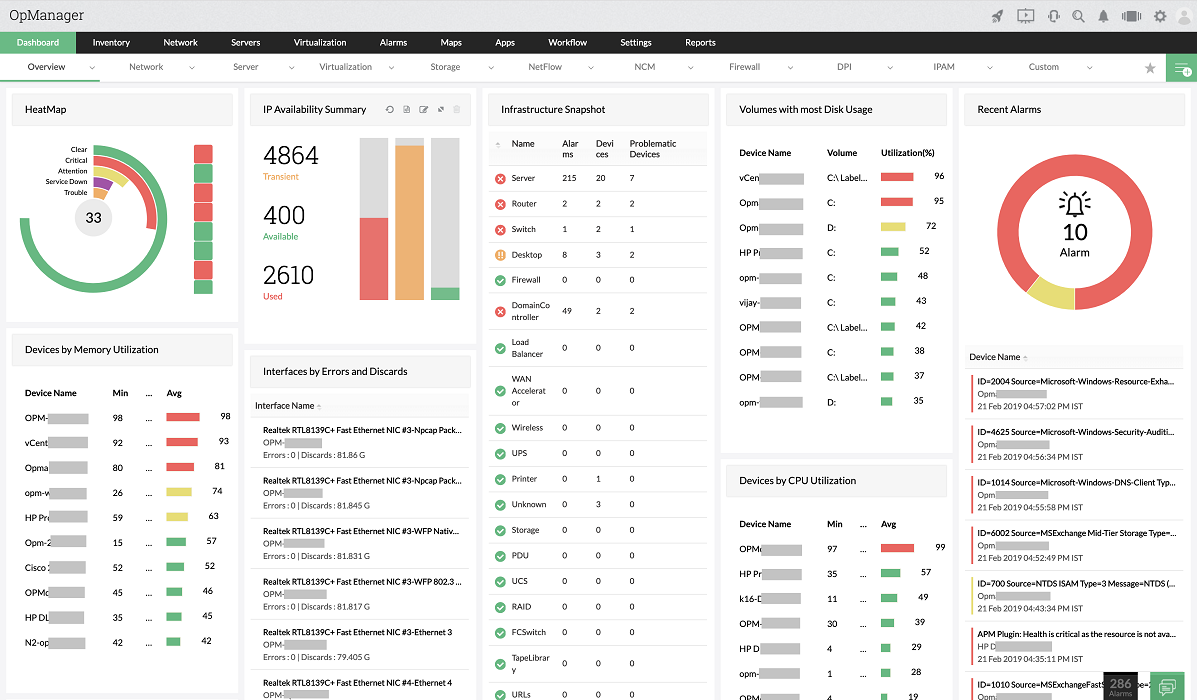
ManageEngine OpManager offers comprehensive and scalable SNMP Trap processing for large IT networks.

Using the SNMP trap as the passive monitoring technique, you can gather information related to performance deviation and device health-related issues when it happens between two polls.

With a robust rule-based trap processing engine, ManageEngine OpManager can handle around 300 SNMP traps per second.

It allows you to easily create SNMP trap processes, troubleshoot trap queries in real-time using SNMP, and with SNMP trap forwarding, you can forward traps received in OpManager to any other NMS.

Key features of ManageEngine OpManager:

  • Offers granular control over SNMP traps at Varbind level 
  • Easy to create SNMP trap processors 
  • Troubleshoot trap queries in real-time using SNMP trap view 
  • Forward received traps to other NMS platforms 

ManageEngine OpManager

Keep your network healthy with this network management tool with SNMP message trapping.
Free trial Visit Website

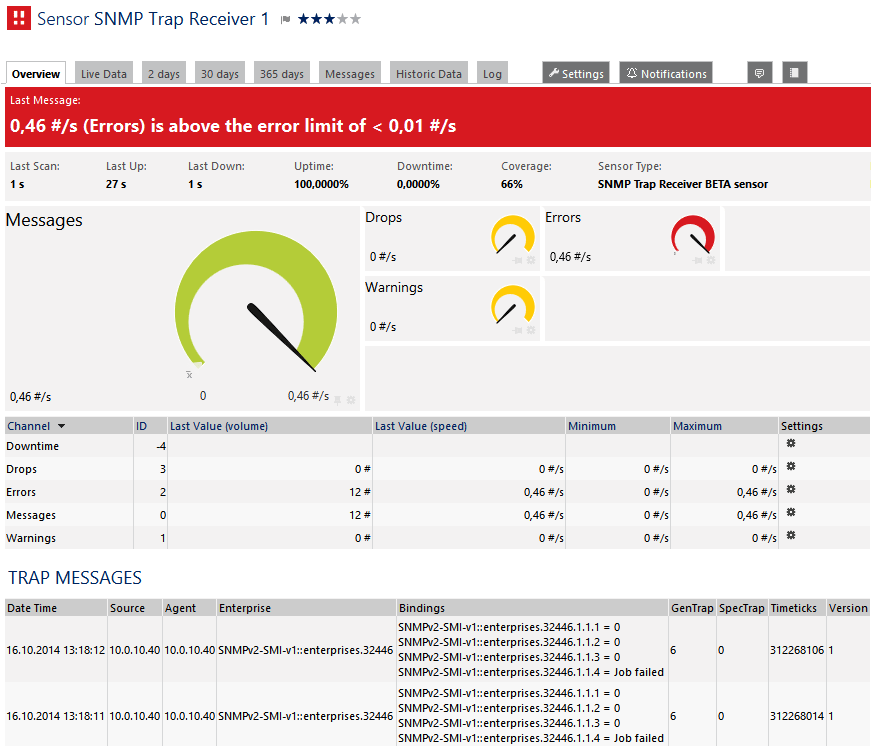
PRTG Network Monitor – Quick alerting

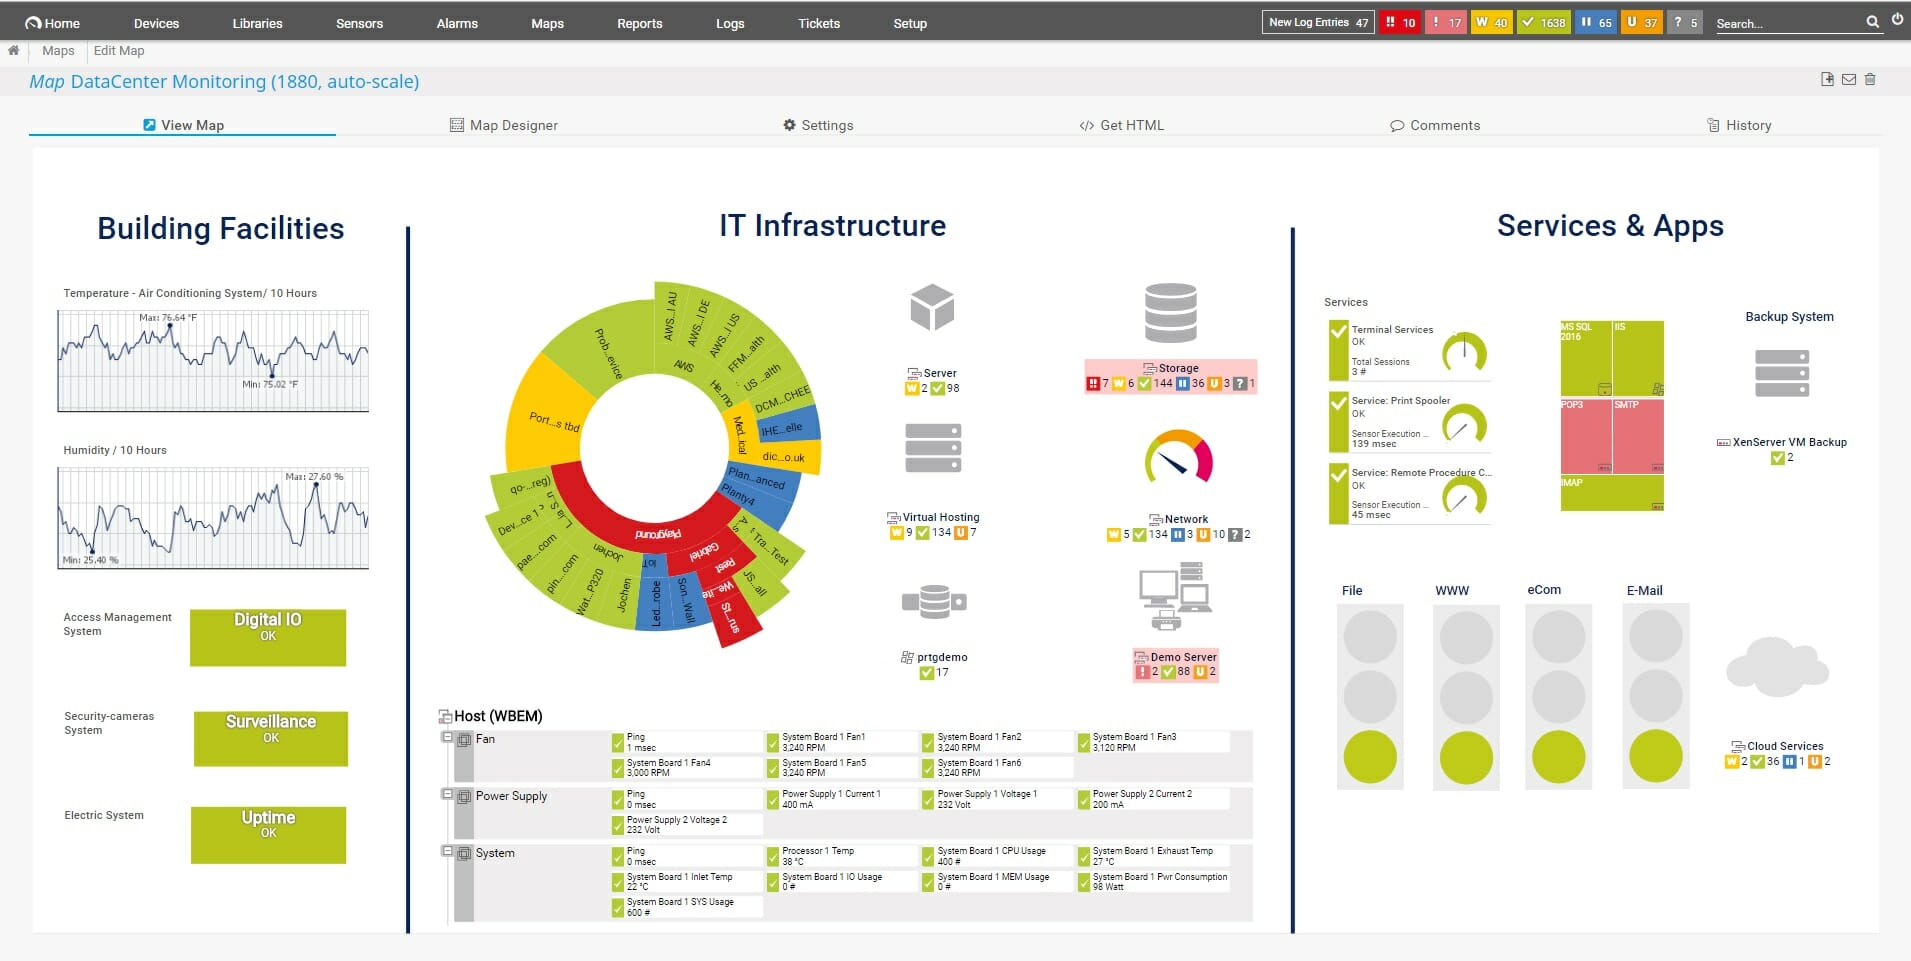
PRTG Network Monitor is an all-in-one network monitoring solution that offers multiple monitoring methods, including SNMP monitoring.

Unlike other tools in the market, it uses sensors as the basic monitoring element of the tool. Each sensor is tasked with monitoring different components such as CPU load, storage allocation, temperature, etc.

The users can create sensors to trace SNMP traffic on a device that provides traffic data to monitor traffic using Simple Network Management Protocol. 

PRTG Network Monitor allows you to define the displayed sensor name with port name templates. All the sensors support IPv6 protocol and have a very low impact on the network performance.

The auto-discovery feature creates SNMP traffic sensors for all the interfaces whose SNMP traffic counters are above 0.

Key features of PRTG Network Monitor:

  • SNMP compatible with a large range of manufacturers
  • Built-in alert feature with a custom threshold value 
  • Management console with a dashboard view 
  • IPv6 compatible and low impact on system performance 
PRTG Network Monitor

Easily trace SNMP traffic on your network with this poweful and easy to use tool.
Free trial Visit Website

Kaseya Network Monitoring and Visualization – Highly customizable
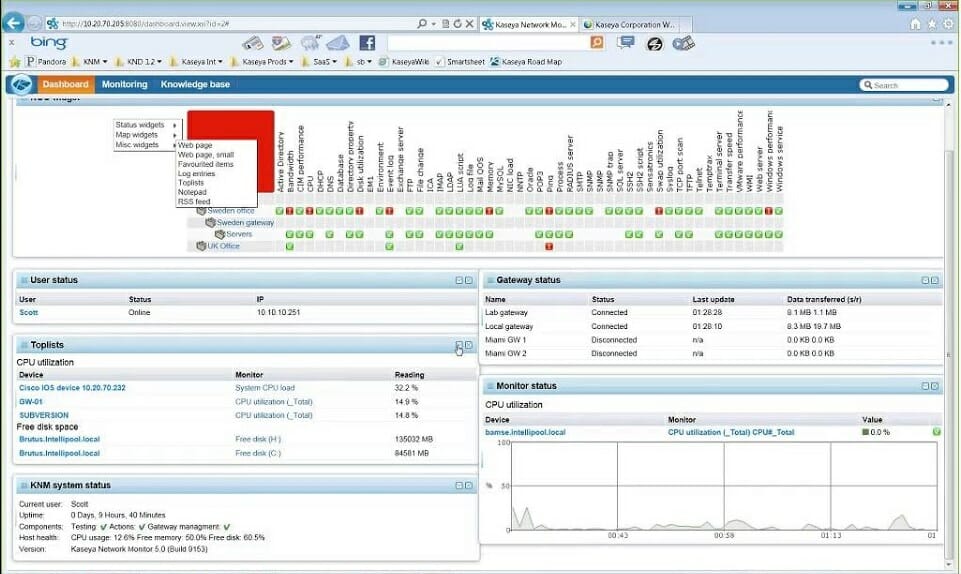
Kaseya Network Monitoring solution makes it easy to perform standard SNMP device monitoring for different types of devices, including routers, switches, and printers on your network.

It provides SNMP monitoring for network devices, routers and switches, and printers.

The VSA Network Topology Map provides complete IT Network visualization. Integrated Kaseya VSA, a network, and remote monitoring package that tacks everything from hypervisors to routers and firewalls.

Key features of Kaseya Network Monitoring:

  • SNMP monitoring for network devices, routers, switches, and printers
  • VSA Network Topology Map for complete IT network visualization 
  • Customizable automation programs with Lua
  • Excellent set of monitoring utilities 

⇒ Get Kaseya Network Monitoring

SNMP monitoring is a commonly used method to monitor large networks with several hundred or even thousands of sensors.

Apart from network usage monitoring, SNMP can also monitor other network parameters such as CPU usage, temperature, and other readings on requested queries and devices.

Skimming through loads of SNMP traps can add too much stress to everyday IT operations.

SNMP traffic monitoring tool can help you set alerts for specific SNMP traps and filter unwanted trap-based alerts while also other vital data related to your network performance.

Take a look at our selection of the best server monitoring software because you might get more information and product ideas.

Leave us your insights on the products if you’ve tested them. Other suggestions are also appreciated so use the comments section below.

How to integrate ChatGPT with Slack

If ChatGPT-powered Bing’s integration with Skype and Edge on mobile isn’t enough, prepare for the next big thing in the workforce. The hotly-discussed chatbot is coming to Slack, a Salesforce-owned instant messaging service for professionals.

The company just rolled out its beta waitlist for Slack ChatGPT, which will be coming within the Slack App directory.

Noah Desai Weiss, Slack’s chief product officer, also promised that the move could give customers new superpowers by helping them tap the collective knowledge of their organization’s channel archives.

OpenAI has been a great Slack customer, and we’re even more excited for them to be an amazing Slack partner. The ChatGPT app for Slack deeply integrates the power of OpenAI’s cutting edge large language models into Slack’s conversational interface. There couldn’t be a more natural fit.

If anything, this could be a million-dollar move that changes the way we work remotely. While the news has been met with some perplexing receptions, it’s still a highly-anticipated technology that could help you summarize threads, compose important messages and even research information from the outside.

The app was built on top of Slack’s trusted platform, and will be available alongside more than 2,600 other integrations in the app ecosystem. This ensures customers have granular controls to safely manage third-party access of Slack data. Any data that the app has permission to access will not be used to train ChatGPT’s language model.

How to integrate ChatGPT with Slack

1. Open OpenAI’s website for Slack.

2. Fill in your details

3. Click Join waitlist.

The news itself came amidst Salesforce’s announcement of Einstein GPT, its world’s first generative AI for CRM. Together, the two forces combined ChatGPT’s enterprise-grade tech with the company’s private AI models, so here’s hoping for a much better experience than the polarizing-viewed Bing AI chatbot.

It’s also worth noting that Microsoft, the tech giant behind its Teams platform, has spent over $10 billion in OpenAI, ChatGPT’s company, so it could be interesting to see this feature rolling out on Slack, notably a direct rival to Teams.

What are your thoughts about this feature? Let us know in the comments!

7 Best SNMP Monitoring Tools

Managing an entire network or a server can be a challenging task, but it doesn’t have to be if you use the proper tools for the job.

To do this, you’ll need software that supports SNMP monitoring, and in today’s article, we’re going to show you the best SNMP monitoring tools on the market.

How does the SNMP monitoring works?

First, SNMP is an acronym that is translated by Simple Network Management Protocol and it’s a layer included in the Internet protocol suite that is used by virtually all communication devices.

SNMP basically talks to all devices within a network by sending and receiving messages called PDUs (Protocol Data Units).

And based on this exchange, the system is able to retrieve any information from the devices about traffic and other metrics.

Therefore, an SNMP monitoring tool is essential to assess the availability and health of a network environment and offers the most important data for IT administrators.

What are the best SNMP monitoring tools?

Site24x7 – Best SNMP monitoring

The Site24x7 network monitoring tool is SNMP-based so you’re right on target with this complex solution.

To discover the devices on your network you may either specify an IP range or use the Classless Inter-Domain Routing (CIDR) technology.

Of course, you are also able to set discovery rules and device and interface filters and that will definitely provide a more accurate discovery.

Once you identified and added the devices, the On-Premise Poller tool quickly starts retrieving data like traffic, bandwidth, packets, error, discards, and other performance data from them.

Setting up threshold limits for selected performance metrics at the device and interface level will further help you fix any possible breach and keep the network healthy.

Although it can monitor your entire network with more than 60 performance metrics, Site24x7 also helps you with Microsoft applications.

These include key products like Exchange, IIS, SQL, Windows server backups, SharePoint, Office 365, Active Directory, Failover Cluster, and Hyper-V.

Site24x7 features:

  • Discovers all the devices on your network based on IP or CIDR
  • Cloud-based, single dashboard control
  • Monitors more than 60 performance metrics
  • Efficient device and interface filtering
  • Extensive logging and data display features

Site24x7

Use this SNMP-based tool to discover all the devices on your network and monitor their activity quickly.
Free trial Visit Website

ManageEngine OpManager – Complete SNMP reporting

If you’re looking for a professional-level SNMP monitoring tool, you can’t overlook ManageEngine’s Op Manager.

The solution uses asynchronous SNMP trap messaging to extract all the management information on all the network devices.

It comes with all the tools needed to monitor availability and network performance. That will make it easy for the IT staff to manage and correct any network faults in your devices.

First, OpManager will automatically identify all the devices that are connected to your network at any given time, a crucial feature to keep everything organized. You may even schedule the device discovery to automate the process.

With OpManager you will then get comprehensive reports for key performance metrics, such as network availability, response times, throughput, and resource usage.

Then, the SNMP agent running on a machine will provide a report of any network faults. Actually, OpManager’s monitor SNMP alerts you well in advance of network issues such as breakdowns and slowdowns.

And everything is displayed on a single dashboard that can be customized with over 200 performance widgets.

ManageEngine OpManager features:

  • Automatic and scheduled network device discovery
  • Key performance metrics reports on network availability, response times, throughput, and resource usage
  • Asynchronous SNMP trap messaging
  • Single web-based dashboard accessible from any location in the world
  • Simple and easy implementation for any organization size

ManageEngine OpManager

Keep your network in top shape and fix any performance issues in record time with this great tool.
Free trial Visit Website

Paessler PRTG Network Monitor – Wide array of sensors

PRTG supports SNMP protocol, and it comes with several SNMP sensors, including Cisco, HP, Dell, and Synology. Of course, support for custom SNMP sensors is available as well.

The software supports alerts via email SMS, or push notifications, so you’ll be notified as soon as any issues appear in your network.

Thanks to the auto-discovery feature, you can easily detect all devices available for NSMP monitoring, and with extensive reports, you’ll keep a close eye on neatly organized data.

The software also offers extensive bandwidth, database, application, cloud, server, LAN monitoring, and much more.

Paessler PRTG Network Monitor is an extensive and professional monitoring software, and if you’re looking for reliable SNMP monitoring software, PRTG is the way to go.

Paessler PRTG Network Monitor features:

  • SNMP monitoring support with Cisco, HP, Dell, Synology sensors
  • Alerts via email, SMS, and push notifications
  • Automatic discovery
  • Bandwidth, database application monitor
  • Cloud, server, LAN monitor

PRTG Network Monitor

This tool includes all the sensors from major manufacturers and offers LAN monitoring.
Free trial Visit Website

ManageEngine NetFlow Analyzer – Ideal for bandwidth monitoring

ManageEngine NetFlow Analyzer snmp monitoring tools

Another great software for SNMP monitoring is the ManageEngine NetFlow Analyzer. The software uses flow technologies such as NetFlow, sFlow, IPFIX, Netstream J-Flow, and AppFlow.

The application works as a bandwidth monitor, and it can provide you with real-time information regarding your network bandwidth. The information is clearly displayed and easy to read, to detect issues easily.

ManageEngine NetFlow Analyzer will allow you to easily view your network traffic, devices, interfaces, access points, and all other network hardware.

The software can also detect a wide array of security issues thanks to the Continuous Stream Mining Engine technology, and you can even detect network anomalies and zero-day threats.

Overall, ManageEngine NetFlow Analyzer offers great features when it comes to network monitoring, and if you want to monitor SNMP devices, this might be the best tool for the job.

ManageEngine NetFlow Analyzer features:

  • Bandwidth monitor
  • Real-time information
  • Detailed and easy-to-read reports
  • Ability to view all network devices in the network
  • SNMP monitoring

ManageEngine Netflow Analyzer

Get the latest flow technologies and extract all the management information with ManageEngine.
Free Trial Visit Website

Solarwinds Network Bandwidth Analyzer Pack – Great alert system

Solarwinds Network Bandwidth Analyzer Pack snmp monitoring tools

If you’re looking for SNMP monitoring software, Solarwinds Network Bandwidth Analyzer Pack might be just what you need.

The software can track the status of your SNMP device so you can easily see data such as response time, availability, network bandwidth performance, and traffic patterns.

Support for advanced alerts is available, and you can customize the alerts and be notified about the most crucial ones.

As for alerts, they can be delivered by email or text, and they offer extensive information.

The software also supports intelligent mapping thanks to Orion Maps, to easily visualize your entire network, network devices, and nodes.

Overall, Solarwinds Network Bandwidth Analyzer Pack is a great software for SNMP monitoring, so be sure to try it out.

Solarwinds Network Bandwidth Analyzer Pack features:

  • Ability to monitor SNMP devices
  • Bandwidth monitor
  • Extensive alert system
  • Intelligent mapping

⇒ Get Solarwinds Network Bandwidth Analyzer Pack

Kaseya VSA – Good automation features

Kaseya VSA snmp monitoring tools

Kaseya VSA software allows you to manage your IT environment with ease. With this software, you can view all devices on your network as well as the status of your endpoints.

The software supports SNMP monitoring, and it can also generate reports and visualize all important data in dashboards allowing you to keep track of important information.

Speaking of visualizing information, you will see all discovered endpoints on the network topology map. Kaseya VSA also supports automatization, so you set automated tasks that can fix common problems.

The software can also automate patch management in order to eliminate security vulnerabilities. For extra security, there is also available to control the access with 2-factor authentication.

Kaseya VSA offers a wide array of features, and we just covered some of the most basic ones. If you need a professional SNMP monitoring tool, Kaseya VSA might be the right choice for you.

Kaseya VSA features:

  • Support for SNMP monitoring
  • Detailed reports
  • Network and domain discovery
  • Automatization support
  • Remote endpoint management

⇒ Get Kaseya VSA

Pulseway – Great for mobile devices

pulsesay snmp monitoring tools

Pulseway is another remote monitoring software optimized for mobile devices so that you can always keep track of your network.

The software can easily and automatically detect all your network devices, and you should be able to easily see all your endpoints and deploy Pulseway.

In addition to network discovery, the SNMP monitoring feature is also available. The software supports automatization to create smart triggers and easily fix common issues automatically.

Additional features include patch management, so it’s easy to ensure that OS and third-party applications are up to date.

The remote control feature is available from both desktop and mobile clients, allowing you to easily fix all sorts of issues. Overall, Pulseway is a great monitoring software, so you should consider it.

Pulseway features:

  • Optimized for mobile applications
  • SNMP monitoring
  • Automatization and smart triggers
  • Remote control
  • Auto-discovery

⇒ Get Pulseway

These are some of the best SNMP monitoring tools that you can use, so be sure to consider all of them.

We have to mention that all the tools listed above can be used on Windows 11 without any problems and some of them have cloud-based interfaces that will work on virtually any system.

As we’re on the subject, you may also go through our selection of the best server monitoring software because you might find other tools that match your needs.

Do you have any other ideas about other software that worked for you? Let us know about them in the comments section below.

Error Code 264 in Roblox: Quickest Fixes

Roblox is a popular online sandbox gaming platform for Windows and Apple iOS. However, some players have reported an error code 264 issue for Roblox. That error message says:

Disconnected… Same account launched game from different device. Reconnect if you prefer to use this device. (Error Code: 264).

As a result, players can’t play Roblox whenever that issue occurs.

Some other players have reported this error even when playing Roblox on one device. In this case, corrupted cache data for the game is another possible cause for error code 264.

How do I fix error code 264?

1. Log out of all Roblox accounts

Ensure you’ve logged out of all Roblox accounts on all devices you play the game. For example, select Settings at the top right of Roblox to log out on a Windows PC and click the Logout option.

Login to Roblox page roblox error code 264

When you’ve logged out of all your Roblox accounts, try logging back in on just your Windows PC. You can log back in from this Login to Roblox webpage.

Clearing cache and logging out & logging in can help you fix similar issues like error code 267; to learn more, read this guide.

2. Clear Roblox’s cache files

  1. Press Windows + X to select the Run shortcut option on your Power User menu.
    Run option roblox error code 264
  2. Type this text into Run: %temp%\Roblox
  3. Click OK to open a Roblox data folder.
    OK button roblox error code 264
  4. Press the Ctrl + A key combination to select everything.
  5. Then press the Shift + Delete hotkey to delete the selected data entirely.
  6. Click Yes on the Delete Multiple Items window.
    Yes option roblox error code 264
  7. Finally, log out and back into your Roblox account.

Clearing app cache can help you fix similar issues like error code 403; to learn about other solutions, read this guide.

Note icon NOTE
You can try clearing the Temp folder if a Roblox data folder doesn’t open. First, enter %temp% in Run, then select to delete everything in the Temp folder.

3. Flush the DNS cache

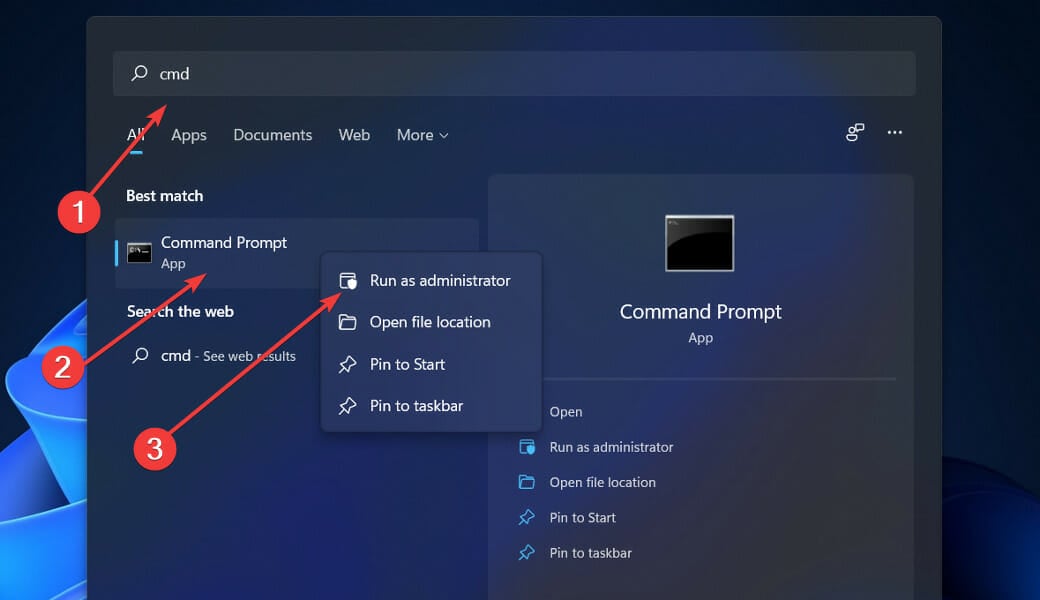
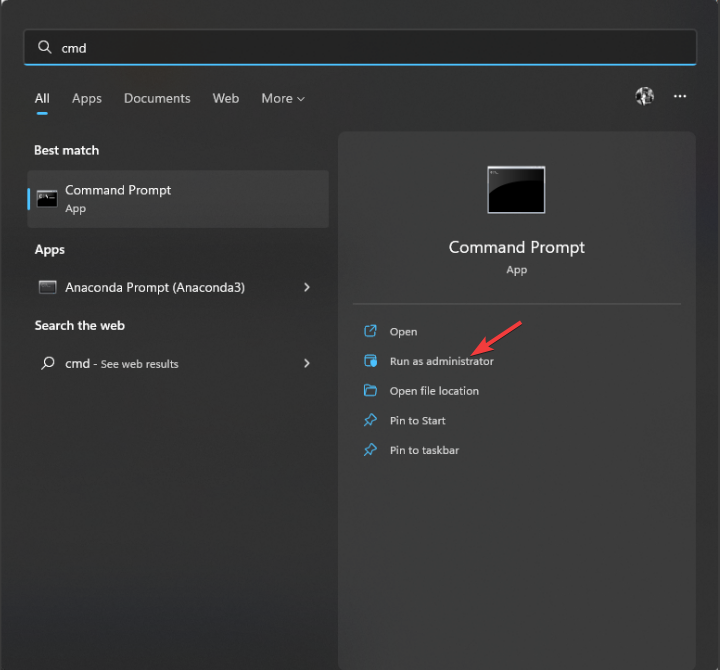
  1. Please open the file search tool in Windows (click the magnifying glass on your taskbar to view it).
  2. Next, input cmd within the Type here to search box.
  3. Select Run as administrator on the right side of the search tool to launch Command Prompt.
    Run as administrator roblox error code 264
  4. Type in this flush DNS command and hit Return: ipconfig /flushdns
    ipconfig command roblox error code 264

This solution may also fix the Roblox Error Code E01 but this guide will provide additional solutions.

How to fix Roblox error code 264 for iPad?

Try applying the abovementioned method to fix error code 264 for playing Roblox on an iPad. In addition, you can log out of the Roblox iPad app by tapping its … button and selecting Log out at the bottom of the menu.

If that’s not enough, we recommend clearing the Roblox app’s data by reinstalling it. You can reinstall the Roblox iPad app in the following steps:

  1. First, tap the Settings app on your iPad.
  2. Select General and iPhone Storage within Settings.
  3. Then select the Roblox app from there.
  4. Next, tap the Delete App option for Roblox.
  5. Finally, tap Get on the Apple Store page for Roblox to reinstall the app.

There aren’t many confirmed potential resolutions for fixing the Roblox error code 264 issue. However, resetting your Windows browser and switching to an alternative DNS server might be worth trying.

If you cannot play Roblox due to error code 524, it could be due to network congestion; read this guide to learn more about it.

You can contact Roblox support if you still need to fix error code 264 after applying the resolutions specified above. To do so, fill out the form on this Contact Us page.

Before you leave, check some quick tips to optimize your PC for gaming and get the best experience. And don’t forget to read about Roblox Error Code 1001, the scariest prank doing rounds on the Internet.

You can talk about the Roblox error code 264 by entering comments ago. Have you found another way to fix error code 264? If so, let us know about it below.

Fastest Browsers to Access High-Traffic Websites

There’s nothing wrong with wanting to cut corners, especially when you want to access high-traffic websites faster. First and foremost, you need a resilient and trustworthy browser to access a busy website.

The good news is, that there are a few great options available if you want to know how to access a site when it has high traffic:

  • Opera One – Resource-friendly browser to open heavy traffic websites easily
  • Chrome – Faster page loading for priority on websites
  • Edge – Improved compatibility to access busy websites
  • Vivaldi – Fully-featured browser to load & access websites faster
  • Brave – Private browser to access blocked sites without VPN
  • Firefox – Best way to open high-traffic sites when the server is busy
  • Puffin – Rendering websites on cloud servers

Let’s take a closer look at what they offer.

What is the best browser to access a busy website?

1. Opera One – Best browser for busy websites

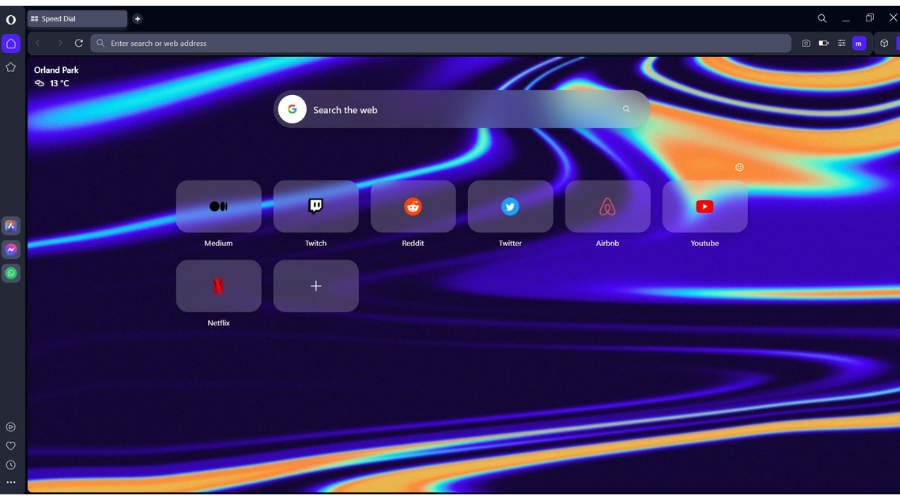
opera one interface

Using the Chromium-based rendering engine, the Opera One browser is the fastest on the list. 

We tested it numerous times and it always ranks better than Chrome when it comes to swiftness.

Plus, Opera One’s features, such as the ad blocker, battery saver, Turbo mode, and VPN, help to optimize and accelerate the browser’s performance.

Main features:

  • Low resource usage
  • Built-in ad-blocker for faster page loading
  • Opera Turbo feature to compress data
  • Option to turn off images and browser sessions
  • Extend battery life with battery-saver mode

Opera One

Opera One is the go-to browser for busy websites thanks to its low resource usage and built-in adblocker for faster page loading.

2. Google Chrome – Faster page loading

google chrome interface

Chrome loads pages much faster than most of its competitors. Best of all, most of the website codes are compatible with the browser.

While there could be some website issues occasionally due to high traffic, Chrome manages it well with most websites most times.

As a matter of fact, the mobile version of Chrome is more capable when it comes to loading busy websites.

Major features:

  • Follows the latest World Wide Web rules for displaying websites
  • Incorporates more recent technology and the latest web coding benchmarks
  • Effortless integration with all Google products
  • Wide choice of extensions
  • Useful tools for troubleshooting broken websites

⇒ Get Google Chrome

3. Microsoft Edge – Improved site compatibility

microsoft edge download page

When talking about opening a heavy-load website, the updated and swanky Microsoft Edge browser does pretty well.

It runs fast thanks to its efficient Chromium engine. Edge loads web pages quickly and smoothly.

Apart from its unique privacy features, it’s also known for its site compatibility.

Key features:

  • Improved performance in terms of memory and disk usage
  • Saves memory on tabs when not viewing
  • Extensions like The Great Suspender help faster web page loading
  • Option to optimize new tab page experience
  • Effortlessly loads some Microsoft-specific links

⇒ Get Microsoft Edge

4. Vivaldi – Fully-featured browser

vivaldi user interface

Vivaldi’s hibernating tab function optimizes its overall speed and performance.

It frees up the system resources by keeping the selected tabs open but not running.

Best of all, this Chromium-based browser works with most of the extensions offered by the Chrome web store.

Main features:

  • A customizable browser that does not need extensions as extra load
  • Reduced RAM usage
  • A great option for power users
  • Improved web applications management
  • Faster page loading even with several tabs open

⇒ Get Vivaldi Browser

5. Brave – Private browser

brave user interfae

A good alternative to Chrome and Edge, Brave is another great option if you want to access busy sites.

Despite the robust privacy and security features, Brave does not compromise on speed and emerges as one of the fastest and most intuitive browsers.

Its powerful built-in ad blocker ensures complete privacy and security of your personal data as you browse through websites.

Main features:

  • Efficient usage of memory resources
  • No privacy extension required
  • Shows no latency at high page loads
  • Private browsing available for unreachable websites
  • Fewer extensions increase the speed

⇒ Get Brave Browser

6. Mozilla Firefox – Privacy-focused browser

firefox user interface

An outstanding browser for daily tasks like working on emails or browsing, Firefox records a good speed and performance.

Furthermore, its strong privacy feature gives it an edge over Edge or Chrome. 

It helps you to access unreachable websites using 3rd party servers without worrying about the security of your data.

Main features:

  • Easy to use
  • Wide choice of extensions
  • The Reader View option frees up a cluttered webpage
  • Lesser memory usage
  • Uses just enough memory for better performance

⇒ Get Mozilla Firefox

7. Puffin – Rendering websites on cloud servers

puffin browser download page

The best part about Puffin is that it shifts the device workload to its own cloud servers, thus, facilitating faster page loading.

Moreover, with its robust privacy policy, it protects devices from web threats that you may come across while trying to access a high-traffic website.

As a bonus, you can also stay updated with the latest happenings across the world, with its Newsfeed.

Key features:

  • Top-notch security
  • Excellent data-saving ability
  • Uses minimum resources
  • Simple interface with minimum load
  • Easy to use

⇒ Get Puffin Browser

How do I access high-traffic sites?

  1. Go to Google search and type the name of the website.
  2. As the website name appears, click on the three dots next to it. click on three dots next to website
  3. Here, go to the bottom right and click on Cached. click on Cached

To access a website that fails to open due to excess traffic, you can use a CDN (Content Delivery Network) service.

It’s a collection of geographically distributed proxy servers that work along with data centers to bring the cache copy of the website to your location.

For example, to use a free service like CoralCDN, simply add .nyud.net at the end of your website URL. This will open Google’s cache of the said website with all the content in place.

You may often come across situations when you click on a URL and the page opens to an error code. There can be many different reasons why a site is unreachable:

How do I access a website that is down?

You can visit the Wayback Machine page for Internet archives to access a website that is down. 

So, when a website is unreachable, you can try changing the browser to the one from our recommendations to access the desired content easily.

However, if you are unable to connect to websites due to browser security verification loops, you can refer to our detailed post for solutions.

If you are still struggling to open a website due to any other errors, do let us know in the comments box below.

5 Best Software to Check Ports [Open Ports & Advanced Scanners]

Software that allows checking open ports and act as advanced scanners are great for performing vulnerability assessments in your network.

Finding and solving these vulnerabilities, digital and non-digital, is essential in ensuring that the network is working properly.

In this article, we will present you some of the best software you can use to check open ports so make sure to keep on reading.

What are the best software to check ports I can use?

ManageEngine OpUtils – Best network monitoring tool

OpUtils is a comprehensive IP address and switch port management tool that enables effective switch and system port scanning capabilities.

Businesses can either use OpUtils as a standalone product or integrate OpUtils with OpManager, a ManageEngine network monitoring tool where you can monitor and manage your entire network infrastructure while also monitoring and managing IP Addresses and switch ports. 

You can also specify a timeout value for the scan and choose to run a Basic or Advanced scan. The Advanced scan option will provide detailed information on open ports, including the service name and version.

This is extremely useful to identify potential security vulnerabilities by recognizing the open ports that attackers could use to gain access to sensitive information.

You can scan a single IP address or a range of IP addresses to see if they are open or closed. It also identifies the ports blocked by firewalls or other network devices, real assets to troubleshoot network connectivity issues.

OpUtils monitors your network devices, including servers, routers, printers, and switches, in real-time. The software offers threshold-based alerts and notifications that help determine and resolve issues before they escalate into critical problems.

With the Switch Port Mapper feature, the solution enables you to map the physical connectivity of your network devices, such as switches, routers, and servers. You can also identify the devices that are connected to each switch port and can help troubleshoot network issues related to them.

You also have a bandwidth monitoring feature for real-time usage monitoring across your network, allowing you to identify bandwidth-hogging applications or users and take corrective measures.

Key features of ManageEngine OpUtils:

  • Enables you to remotely power on network devices
  • Allows you to back up, store and restore the configuration files of your network devices.
  • Helps you to avoid IP conflicts and provides an accurate view of IP usage across your network.
  • Monitors the network’s bandwidth usage and generates utilization reports for various parameters.
  • Resolves domain names to IP addresses, helping administrators identify network devices.

ManageEngine OpUtils

Monitor the key performance of your network performance and scan your ports safely!
Free trial Visit Website

PRTG Network Monitor – Complex port monitoring

PRTG Network Monitor is widely used in the monitoring software industry and is without a doubt our number-one choice also.

With the help of this tool, you can monitor all the infrastructure including network links, applications, servers, and devices that are connected to the network.

The software has two kinds of port sensors included that can monitor and report back their activity.

By doing this, you will be able to easily see which port is open or closed, and even how long it took for the connection to happen.

Key features of PRTG Network Monitor:

  • Scan and add private IP addresses automatically thanks to the IP scanner with auto-discovery feature
  • IP sensor to check the reachability with your IP Network
  • Complex network analysis
  • Pre-configured SNMP sensors that are compatible with multiple vendors

PRTG Network Monitor

Monitor up to 100 port sensors for free with PRTG Network Monitor in order to get the best view of ports status at all times.
Free trial Visit website

SolarWinds Network Performance Monitor – Easy installation

SolarWinds Network Performance Monitor is our next recommendation thanks to the OS detection feature.

The tool allows you to detect the closed and open ports and you’ll see the results in a comprehensive report.

Moreover, the tool offers mapping features, nodes configuring, SNMP trap receiver, interactive dashboard and customizable notifications.

All in all, SolarWinds Network Performance Monitor is the perfect tool to use for measuring performance metrics, port status, and bandwidth usage.

Key features of Solarwinds Network Performance Monitor:

  • Comprehensive network visualization maps
  • Customizable and flexible notifications
  • Easy-to-use dashboard
  • Detailed monitoring of F5 BIG-IP family of products

⇒ Get Solarwinds Network Performance Monitor

Angry IP Scanner – Fast port scanning

Angry IP Scanner is one of the fastest and most reliable port scanners out there. With this tool, you will easily scan the IP address and the ports in range.

Angry IP Scanner has a cross-platform utility, which means that is compatible with both Windows and Mac and other operating systems as well.

The scan results can be saved and exported in several file formats CSV, TXT, XML, or IP-Port.

Moreover, the Angry IP Scanner offers access to NetBIOS information, IP address ranges, web server detection, and many more.

Key features Angry IP Scanner:

  • Reliable cross-platform IP scanner
  • Pings and optionally resolves hostname, scans ports, and determines MAC address
  • NetBIOS information gathering
  • Can save and export data in multiple formats

⇒ Get Angry IP Scanner

Network Scanner by LizardSystems – Ideal for home usage

This software is widely used in corporations where large IT networks are present but can just as well be used in small home networks with a lesser number of devices.

Network Scanner by LizardSystems will scan the IP addresses and devices along with the allocated number of computers and subnets.

Thanks to the Terminal Services Manager you will also be able to see the details of the users connected, the sessions, and their active processes as well.

Key features of Network Scanner:

  • A great choice for network administrators and regular users.
  • Scan multiple computers per minute.
  • Excellent filtering options.
  • Network resource audit to check access rights to resources. 

⇒ Get Network Scanner by LizardSystems

With this last software, we will conclude our list of the best software to check ports and perform scans.

Most of the tools presented here are cross-platform compatible, meaning they work with Windows 10 and other operating systems as well.

If you have additional recommendations, we would love to hear them in the comments section below.

7 Best VPNs for Windows 10: Free & Paid

In this article, we’ll rank the top VPN apps for Windows 10 PCs, laptops, and tablets, making it easy for you to choose the best one for your needs.

Whether you’re looking to secure your online activity, access geo-blocked content, or maintain privacy while browsing, we’ve reviewed the most reliable VPNs that work flawlessly with Windows 10

What are the top VPNs for Windows 10?

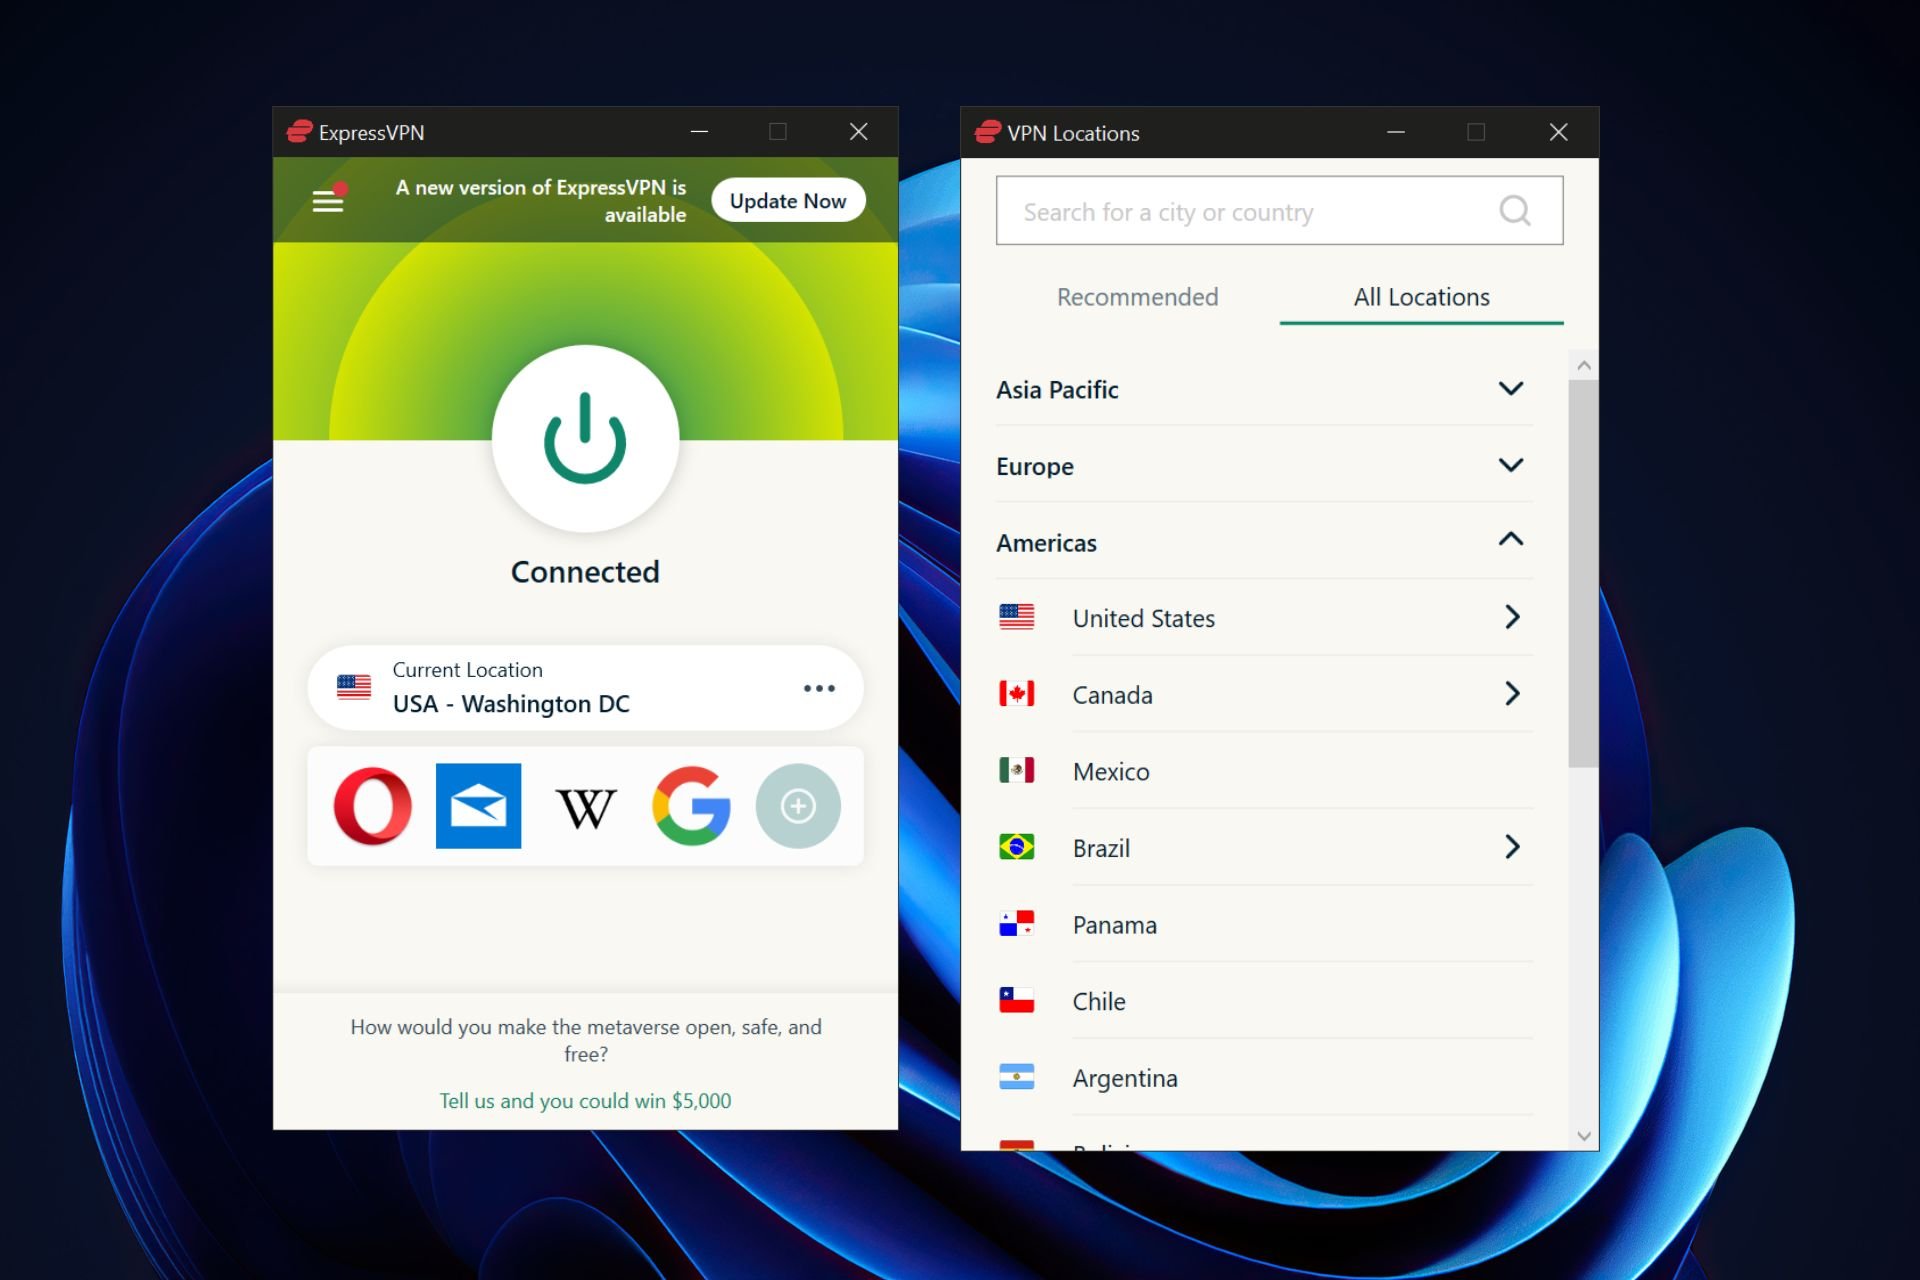
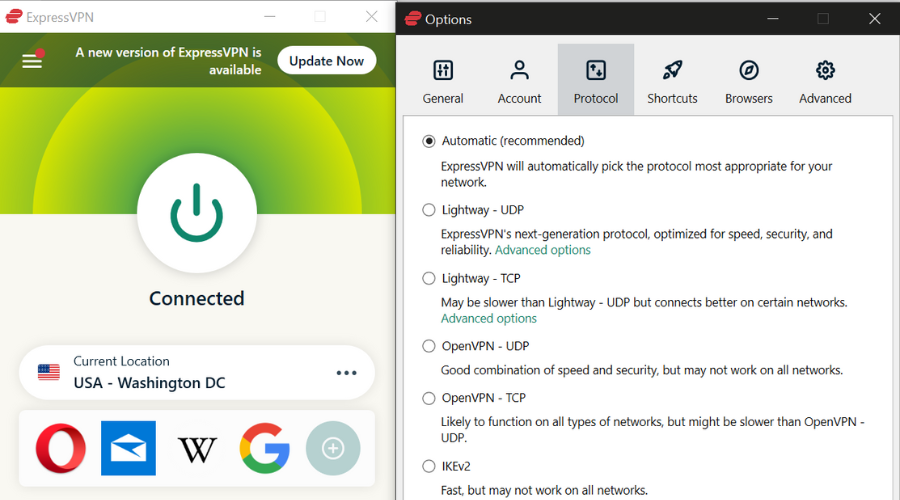
1. ExpressVPN – Best VPN for Windows 10

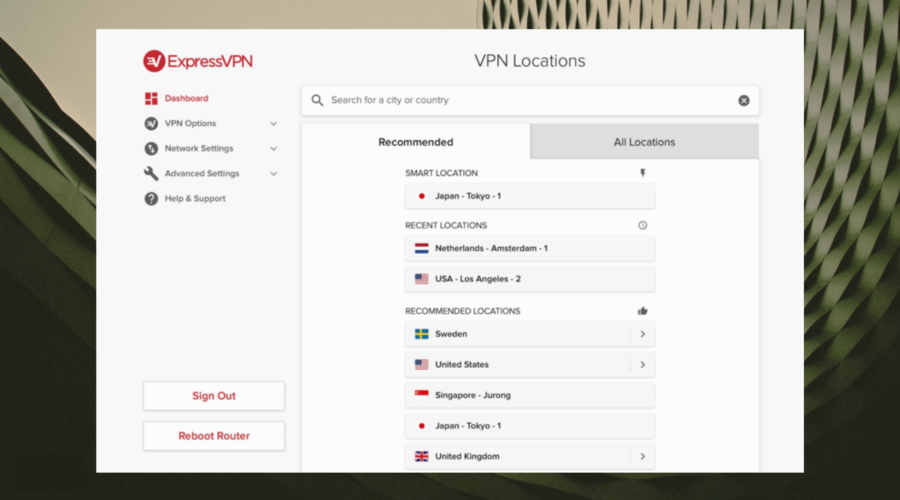
expressvpn

ExpressVPN has over 3,000 VPN servers in 160 locations. It also runs zero-knowledge DNS servers to ensure your online traffic remains private. China users can run ExpressVPN, too.

You can use this VPN app to unblock Netflix US and other streaming services and engage in torrenting activities safely. It supports a kill switch called Network Lock and a Smart DNS feature called MediaStreamer.

More about ExpressVPN:

  • Windows, Mac, Linux, iOS, Android, Chrome, Firefox, Edge, routers
  • Up to 5 simultaneous connections
  • A zero-logging policy backed by TrustedServer technology
  • 24/7 live chat support
  • 30-day money-back guarantee
  • 7-day free trial for iOS and Android
expressVPN

ExpressVPN

Get unlimited VPN data & zero censorship internet with ExpressVPN!
Check price Visit website

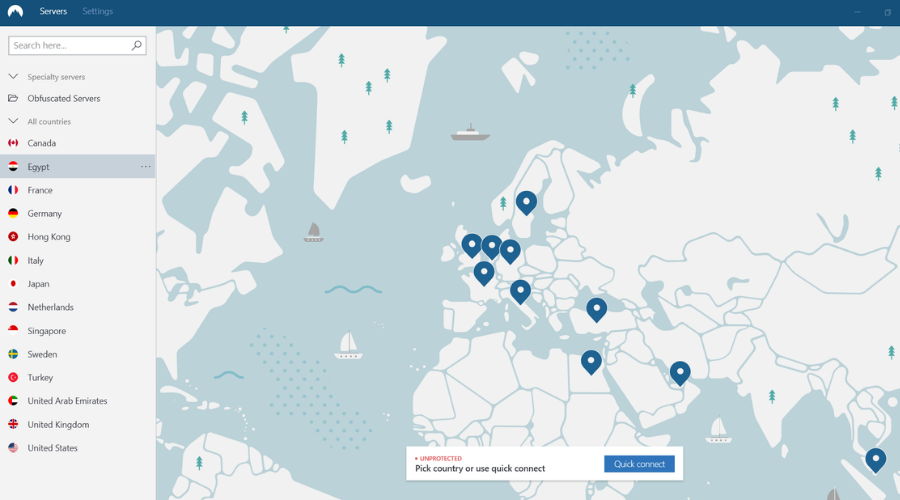
2. NordVPN – Best for security

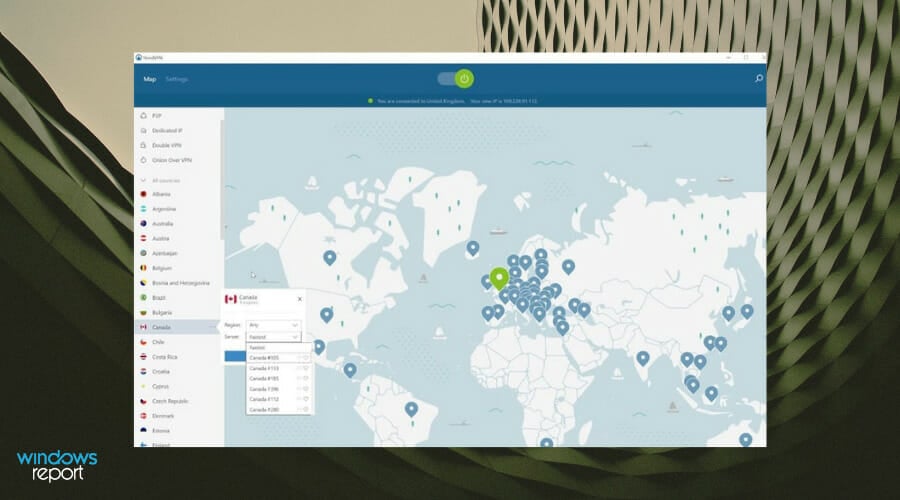
To raise your security and privacy level, look no further than NordVPN. Its reputation precedes itself, delivering consistent results in the VPN market.

NordVPN has more than 5,400 VPN servers in 59 countries. You can use the OpenVPN and NordLynx protocols, obfuscation mode, P2P, Double VPN, and Onion-over-VPN servers.

More about NordVPN:

  • Windows, Android, Mac, iOS, Android TV, Linux, Chrome, Firefox, routers
  • Protect up to 6 devices at once
  • No logs or leaks
  • 24/7 live chat support
  • 30-day money-back guarantee (no free trial)
NordVPN

NordVPN

Boost privacy and security with NordVPN. Unlock content and browse safely!
Check price Visit website

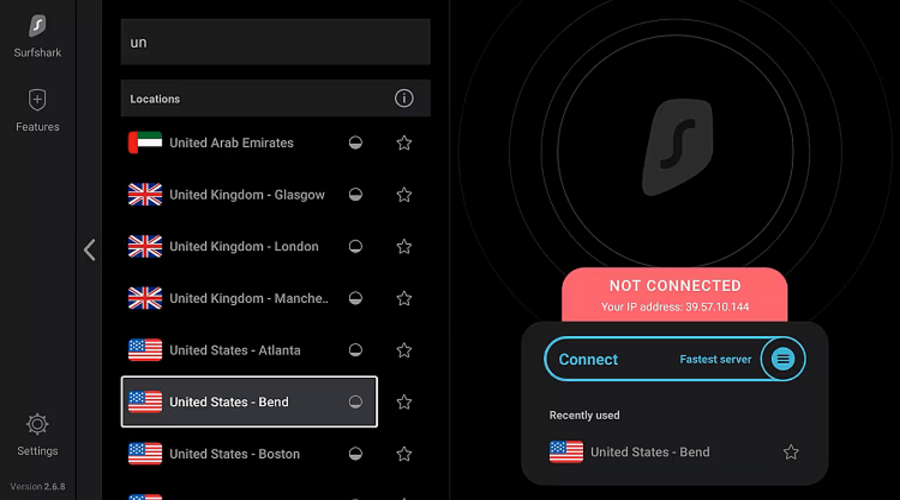
3. Surfshark – Best for multiple devices

Surfshark is another fan favorite, thanks to affordable subscription plans, advanced security features, and the fact that you can set it up on any number of devices. It’s actually the best VPN for multiple devices.

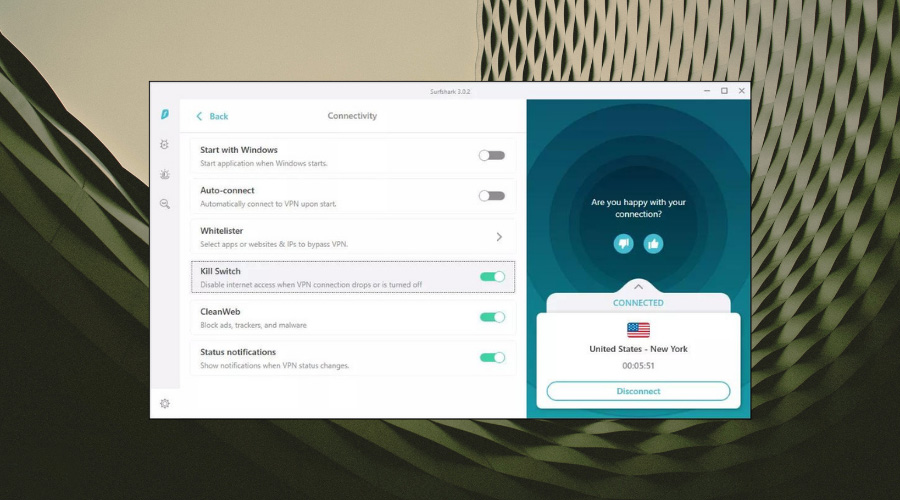
Moreover, Surfshark has a malware blocker called CleanWeb, a kill switch, multi-hop VPN connections, split tunneling, and obfuscated servers (Camouflage Mode).

More about Surshark:

  • Mac, Windows, Linux, iOS, Android, Chrome, Firefox, routers
  • Unlimited simultaneous connections
  • A strict no-logging policy
  • 24/7 live chat and email support
  • 30-day money-back guarantee
  • 7-day free trial for Android and iOS
Surfshark

Surfshark

Connect unlimited devices with Surfshark for top security and unrestricted streaming.
Check price Visit website

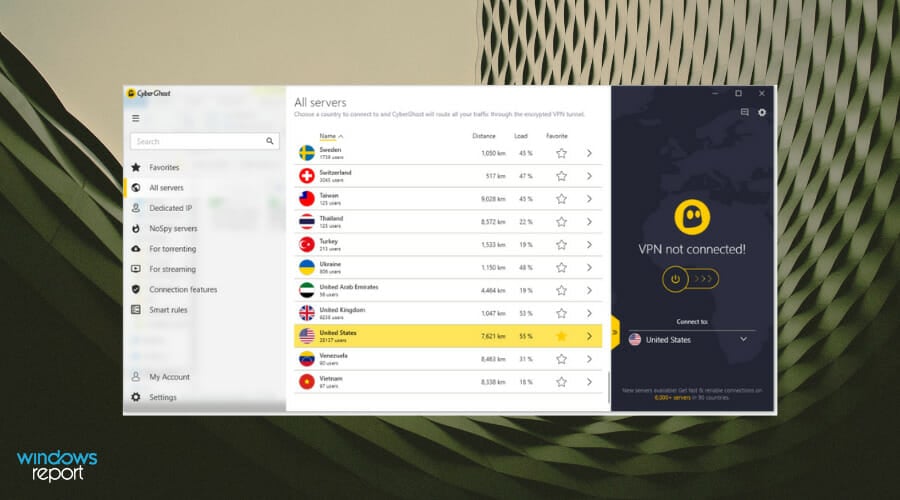
4. CyberGhost VPN – Best free VPN

CyberGhost server locations

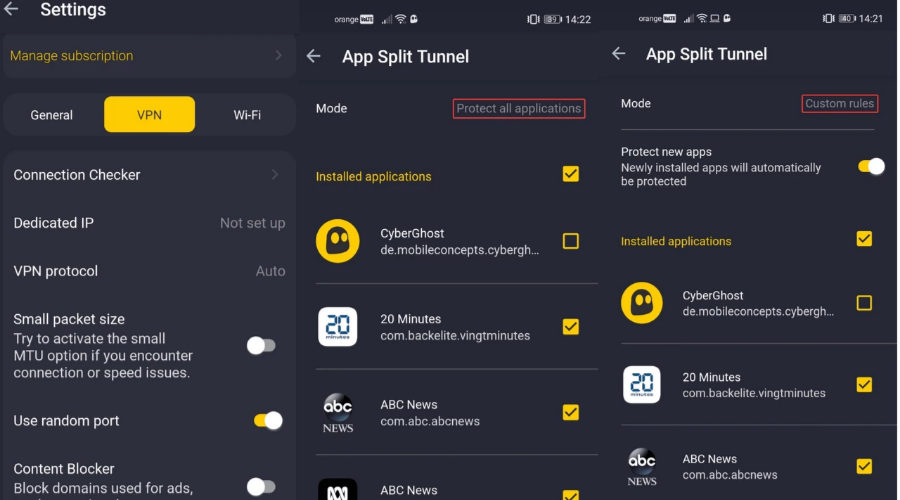
You can use CyberGhost to unblock the best Netflix libraries, including Netflix US, UK, and Canada. Plus, you can set it up on devices without native VPN support by using its Smart DNS feature.

The app successfully unblocked restricted websites in our evaluation, without error. Discover our experience with this VPN service in our detailed CyberGhost VPN review.

More about CyberGhost VPN:

  • Windows, Linux, Mac, iOS, Android, Chrome, Firefox, Fire TV, routers
  • 7 device connections at the same time
  • No identifying or traffic logs
  • 24/7 live chat support
  • Up to 45-day money-back guarantee
CyberGhost CTA

CyberGhost

Try CyberGhost VPN’s free trial for secure, safe browsing and streaming!
Check price Visit website

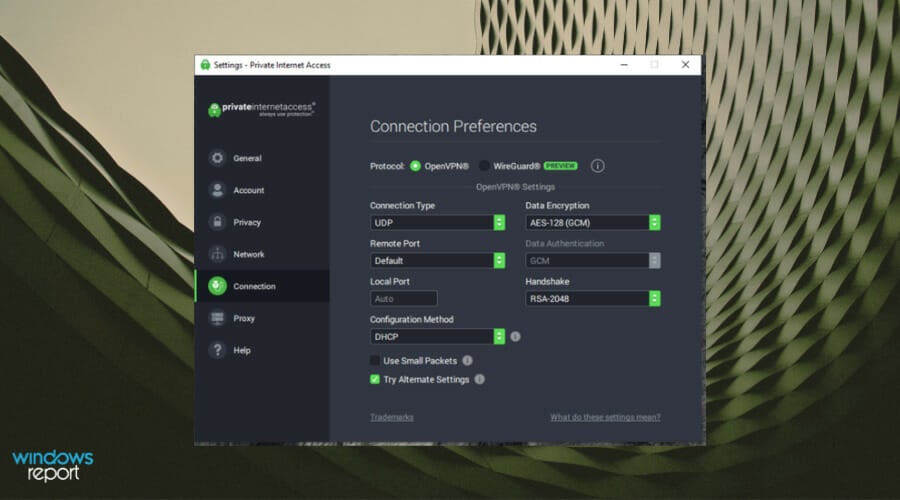
5. Private Internet Access – Best for anti-censorship

PIA vpn user dashboard for gameloop

Private Internet Access has become a name in the VPN industry thanks to fast network connections and superior encryption methods.

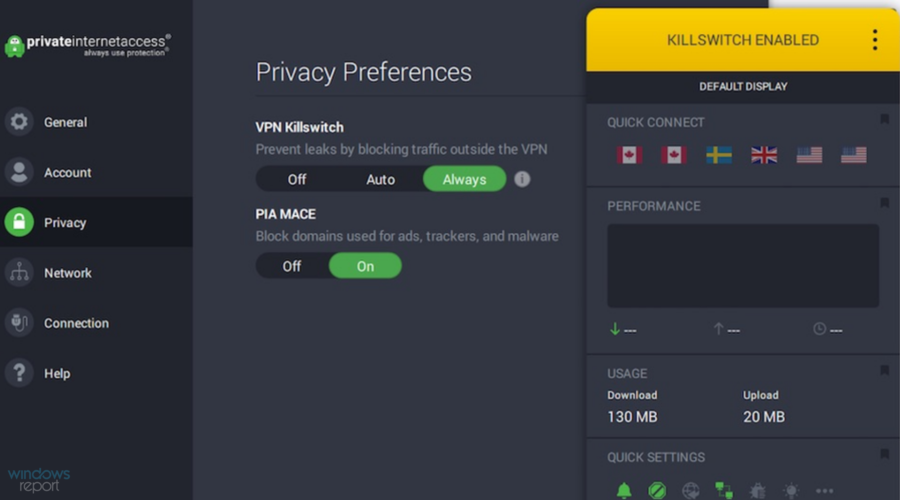
It also supports port forwarding, split tunneling, static and dynamic IP addresses, and a browser malware blocker called PIA MACE.

More about PIA:

  • Windows, iOS, Android, Mac, Linux, Chrome, Opera, Firefox, routers
  • 10 simultaneous device connections
  • A zero-logging privacy policy
  • 24/7 live chat support
  • 30-day money-back guarantee (no free trial)
PIA

PIA

Enjoy fast, secure browsing with Private Internet Access. No censorship, just freedom!
Check price Visit website

6. IPVanish – best for speed and file sharing

IPVanish is a great choice if you want fast connections, even for file sharing. It supports P2P, offering excellent performance. With over 2,000 servers in 75 locations, it offers unlimited bandwidth with no speed throttling.

Moreover, the intuitive app interface and wide device compatibility makes it a great choice not only for your Windows 10, but for the other devices you use internet on.

More about IPVanish:

  • Platforms: Windows, Mac, iOS, Android, Linux, Fire TV, routers
  • Unlimited simultaneous connections
  • Advanced security with AES-256 encryption
  • Automatic kill switch and DNS leak protection
  • 24/7 live chat support
  • 30-day money-back guarantee
IPVanish

IPVanish

Enjoy a high-speed VPN for streaming and secure file sharing!
Check price Visit website

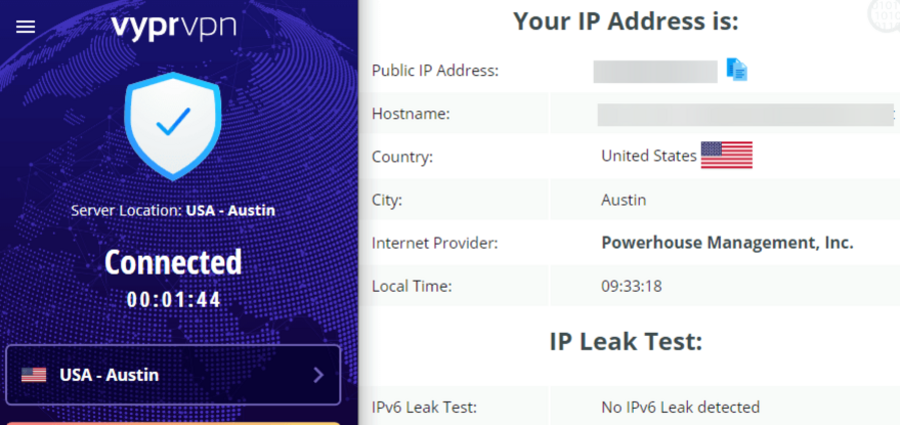
7. VyprVPN – Great for bypassing restrictions

VyprVPN is a great option if you want to bypass online restrictions an censorship. For that, it uses it proprietary Chameleon protocol with built-in obfuscation.

In essence, this hides the fact that you use VPN. The tool operates its own server network, ensuring robust privacy wth no third-party involvement.

VyprVPN

VyprVPN

Unlock the internet securely and bypass restrictions with VyprVPN!
Check price Visit website

To conclude, using a VPN boosts your online security by protecting your identity, unblocking content, and securing your data.

For better privacy, try VPN extensions or the Windows 10 VPN client. For full control, opt for a commercial VPN instead of built-in options like adding VPN connections.

Lastly, remember that VPNs are key for privacy, but backing up your data is equally important. Learn more with our backup software for servers guide. Have experience with any VPNs? Share your thoughts in the comments!

Microsoft Edge Flickering on Windows: Fixed

Microsoft Edge is nowhere near what it used to be when it was first launched a few years back. It is one of the best browsers for all devices, boasting many features. But many reported the Microsoft Edge flickering problem.

Complaints against it are mounting, and so is the clamor for a solution. Unfortunately, while the Microsoft Edge flickering issues continue to be pervasive, a sure-fire solution is still elusive.

There are a few workarounds available that can be of help. However, before we get to the solution, it could be worth shedding some more light on the problem itself.

Why are my tabs flashing orange?

If you were wondering what it means when your screen flashes, the problem is hard-coded in the browser itself if it can be referred to as such. This feature is designed to be beneficial by drawing attention to anything Edge feels you should be attending to.

So any changes in a dormant tab, such as getting logged out automatically or a download that has finished, will set the tab flashing and will continue until you click on it.

By that time, another tab might have started blinking, and you could soon be reduced to playing a nice game of whack-a-mole. Not bad, except that you didn’t ask for it.

This brings us to the next logical question, how to get rid of it. There aren’t many options here, though you can try the ones listed below, which worked for many users.

Quick Tip:

Switch to another reliable browser until we resolve the issue with Edge. As you get familiar with the design, in Opera One you can navigate between various tabs, workspaces, tab islands and built-in social media chat.

The browser has versions for PC, mobile, Mac, or Linux. Besides, you can synchronize the Opera One browser across all your devices and it has a built-in AI

Opera One

Sync devices and use tab management in groups and workspaces to avoid flashy orange tabs.
Free Download Visit website

How do I fix Microsoft Edge flickering issues?

1. Change flag settings

Note icon NOTE
Flags are experimental features in Edge and can be removed by the developers after they make their way to the stable builds. So, if you can’t find Vulkan, check the browser settings for the option, and in case it’s not there, move to the next solution.
  1. Launch Edge, paste the following path in the address bar, and hit Enter:edge://flags/edge flags
  2. Search for Vulkan, click on the dropdown menu next to the relevant entry, and select Disabled.disable
  3. Finally, click on Restart for the changes to come into effect.restart

If you have Microsoft Edge flashing, the easiest way to fix things is to disable the relevant flag. The fix was shared by one of our readers and will help others facing the Microsoft Edge screen glitch.

2. Disable content on the Edge home screen

  1. Launch Edge, click on the Page settings icon, and choose Custom from the Layout dropdown menu.page settings
  2. Now, turn off the toggle for Recent Bing searches, Show greetings, Office sidebar, and New tab tips.disable content to fix microsoft edge flickering
  3. Finally, under the Content dropdown menu, choose Content off.content off

That’s it! Once you are done disabling all forms of informational or other display items from Microsoft Edge, flickering should automatically stop. In case it doesn’t, head to the next solution.

3. Uncheck visual notifications

  1. Press the Windows key + R to open the Run prompt.
  2. Type control in the run box and click the OK button.
    run tabs flashing edge
  3. Click on the Ease of Access option.
    ease
  4. Select the Ease of Access Center option.
    ease center
  5. Click on Use text or visual alternatives for sounds.
    use visual tabs flashing edge
  6. Uncheck the box for Turn on visual notifications for sounds (Sound Sentry) checkbox is activated.
  7. Click on Apply to exit the dialog box.
    turn on

This should prompt your browser to play a notification sound instead of Microsoft Edge flickering screen on the laptop. At least many have claimed this worked for them. Once done, verify whether this fixes Microsoft Edge flickering in Windows 10.

If Microsoft Edge keeps flickering, the next solution might do the trick.

4. Choose a Light theme

  1. Click the menu button (three horizontal dots) at the top right corner.
  2. Select the Settings option.
    settings tabs flashing edge
  3. Choose the Appearance option in the left pane.
    appearance
  4. Select the Light theme.
    light theme

Again, this is believed to have worked for many in preventing the Microsoft Edge flickering in Windows 11 and the previous iterations. So, if you have Microsoft Edge white flash, switching to the light theme would help.

How do I toggle tabs in Edge?

  1. Press the Windows key + I to open the Settings app on your PC.
  2. Select the System option.
    system
  3. Choose Multitasking in the left pane.
    multitasking
  4. Click the dropdown in the Alt + Tab section and choose your preferred option.

The Microsoft Edge screen flickering issue can quickly dent your browsing experience. Fortunately, it is not difficult to fix. But remember to verify whether the problem lies with the browser or if the screen is flickering in Windows.

Also, find out what to do if Edge is slow or laggy and the most effective fixes to eliminate webcam flickering in Windows. Besides, many reported that Microsoft Edge keeps flashing black screen, and the problem is usually easy to resolve.

Feel free to let us know the fix that helped you solve the issue in the comments below.

Error 0x80070057 in Windows Update: 7 Easy Fixes

We suppose you are reading this article because you installed the latest Windows 10 OS version on your computer and want to fix error 0x80070057.

We’ve got a piece of good news for you: if you carefully follow the steps listed below in the order they are described, you can get on with your Windows 10 usage in no time at all.

What is error 0x80070057 in Windows Update?

The 0x80070057 Windows 10 update error points to a problem with the system storage, usually the storage drive. So, your primary approach should be to check for issues with it. Here are a few reasons you are getting the error:

  • Issues with the file system: If you have an incorrect file system, one not compatible with Windows, it will lead to issues downloading and installing OS updates.
  • Corrupt system files: When the system files are corrupt, it affects the PC’s performance and may even trigger BSOD errors.
  • Third-party apps blocking the update: Oftentimes, a third-party app, usually a security software, may be blocking the updates and causing error 0x80070057 in Windows update.

How can I fix the Windows Update error 0x80070057?

Before we start making complex changes, here are a few quick ones to try:

  • Restart the PC.
  • Make sure to disable any antivirus or security software installed on the computer. A few users reported that disabling Cybereason Ransomware did the trick for them.

If these don’t work, move to the solutions listed next.

Tip icon Tip
For you to fix the 0x80070057 error code, you will need to have administrator rights on Windows 10 for the Group Policy Editor, not available in Home edition. Also, you will need to have administrator rights to run the required command lines in the Command Prompt window.

1. Configure Automatic Updates

  1. Press Windows + R to open Run, type gpedit.msc, and hit Enter.
  2. Now that you have the Local Group Policy Editor in front of you, double-click on the Computer Configuration icon present in the right side.
  3. Now double-click to open the Administrative Templates folder.
  4. From the Administrative Templates folder, double-click to open Windows Components folder.
  5. From within the Windows Components folder, double-click to open Windows Update folder.windows update group policy editor
  6. In the Windows Update folder, search for Configure Automatic Updates, and make sure it is set to Not Configured.configure automatic updates group policy editor
  7. Once done, again press Windows + R to open Run, paste the following command, and hit Enter:gpupdate /force
  8. Let the process finish, and then reboot your Windows 10 computer.

2. Repair your partition/ Run Disk Cleanup

  1. Right-click on the problematic partition, and choose Properties.
  2. Go to Tools, and under Error checking, click on the Check button to check your drive for system errors.
check drive system errors

Error 0x80070057 often occurs when the partition that you reserved for your OS is damaged. Fortunately, you can quickly fix this issue by running a dedicated hard drive repair software to restore your partition health.

Temporary files and other junk files may also cause your hard drive and OS partition to behave erratically. You can fix this by running Disk Cleanup.

3. Run the Windows Update troubleshooter

If you’re looking for a quick and reliable method to fix Windows update errors, you can try running the built-in Windows Update Troubleshooter.

This tool quickly scans and repairs Windows Update components so that you can then install the available OS update without any problems.

4. Download the latest Servicing Stack Update (SSU)

First of all, you need to see what OS version you’re using: 32-bit or 64-bit Windows. To do this, go to Settings > System > About > scroll down to System type.

Now, go to Microsoft’s Update Catalog and simply download the version of the latest SSU.

5. Reset Windows Update components

  1. Launch Command Prompt as administrator and then paste the following commands and hit Enter after each:
    • net stop bits
    • net stop wuauserv
    • net stop appidsvc
    • net stop cryptsvc
  2. Delete the qmgr.dat update files by running this command:Del "%ALLUSERSPROFILE%Application DataMicrosoftNetworkDownloader*.*"
  3. Clear the Windows Update cache by executing these commands:rmdir %systemroot%SoftwareDistribution /S /Q rmdir %systemroot%system32catroot2 /S /Q
  4. Now, you’re going to register all the Windows Update DLL files on the Windows Registry. All you need to do is enter the following commands and then hit Enter after each one:
    • regsvr32.exe /s atl.dll
    • regsvr32.exe /s urlmon.dll
    • regsvr32.exe /s mshtml.dll
    • regsvr32.exe /s shdocvw.dll
    • regsvr32.exe /s browseui.dll
    • regsvr32.exe /s jscript.dll
    • regsvr32.exe /s vbscript.dll
    • regsvr32.exe /s scrrun.dll
    • regsvr32.exe /s msxml.dll
    • regsvr32.exe /s msxml3.dll
    • regsvr32.exe /s msxml6.dll
    • regsvr32.exe /s actxprxy.dll
    • regsvr32.exe /s softpub.dll
    • regsvr32.exe /s wintrust.dll
    • regsvr32.exe /s dssenh.dll
    • regsvr32.exe /s rsaenh.dll
    • regsvr32.exe /s gpkcsp.dll
    • regsvr32.exe /s sccbase.dll
    • regsvr32.exe /s slbcsp.dll
    • regsvr32.exe /s cryptdlg.dll
    • regsvr32.exe /s oleaut32.dll
    • regsvr32.exe /s ole32.dll
    • regsvr32.exe /s shell32.dll
    • regsvr32.exe /s initpki.dll
    • regsvr32.exe /s wuapi.dll
    • regsvr32.exe /s wuaueng.dll
    • regsvr32.exe /s wuaueng1.dll
    • regsvr32.exe /s wucltui.dll
    • regsvr32.exe /s wups.dll
    • regsvr32.exe /s wups2.dll
    • regsvr32.exe /s wuweb.dll
    • regsvr32.exe /s qmgr.dll
    • regsvr32.exe /s qmgrprxy.dll
    • regsvr32.exe /s wucltux.dll
    • regsvr32.exe /s muweb.dll
    • regsvr32.exe /s wuwebv.dll
  5. You can now restart the relevant services by running these commands (don’t forget to hit Enter after each one):
    • net start bits
    • net start wuauserv
    • net start appidsvc
    • net start cryptsvc

6. Run DISM and SFC commands

  1. Open Command Prompt as administrator, type the following command, and then hit Enter:DISM.exe /Online /Cleanup-image /Restorehealth
  2. Now use the System File Checker tool by executing this command:sfc /scannow
  3. Once done, restart the computer, and check for Update again.

If you’re experiencing error 0x80070057 Windows 11 or even the other iterations, Microsoft recommends you run the DISM tool and SFC scan.

7. Uninstall third-party tools

Some users confirmed that uninstalling third-party software helped them fix the problem. So, if you recently installed new apps on your computer, uninstall the program and then check for updates again to see if this fixed the problem.

Follow the steps above and get the Windows Update feature up and running in just a few minutes of your time.

Where else can I find this error?

Now, error code 0x80070057 is primarily linked to the Windows 10 upgrade, but unfortunately, it can transcend this scenario to plague even more platforms, apps, and actions. Let’s take a closer look.

  • Windows Update client failed to detect with error 0x80070057 (In some cases, there is a more comprehensive message displayed: There were some problems installing updates, but we’ll try again later. If you keep seeing this and want to search the web or contact support for information, this may help: (0x80070057).
  • 0x80070057 related to Windows 10 installation
  • Error 0x80070057 the parameter is incorrect
  • error 0x80070057 on Xbox
  • Windows 10 activation error 0x80070057 (If this error prevents you from using your license key, you might be forced to activate Windows again).
  • Error 0x80070057 Google Earth
  • 0x80070057 in Windows 7
  • We couldn’t format the selected partition error 0x80070057

Another common Windows Update error is 0xc1900130, and we have a dedicated guide on it for you to check out.

If you have any questions about this guide, feel free to write in the comments section below.

Location Is Not Available Access is Denied: 4 Methods to Try

Certain error messages, or rather notifications, are meant to protect your files. But being prevented from accessing, copying, deleting, or modifying a file/folder because of inadequate permissions is no fun. And the Location is not available error does present a similar situation.

When you get the Access is denied error that reads Location is not available on desktop in Windows 10, it’s usually a trivial issue and can be fixed in no time. Let’s find out all about it.

Why am I getting Location is not available access is denied?

Here are a few reasons you might be getting the error:

  • Missing ownership: When you don’t have the drive or folder ownership, this might trigger errors when trying to access it.
  • Permissions were changed: Sometimes, the folder or drive permissions change inadvertently, thus resulting in Location is not available on Windows 10.
  • Third-party app blocking access: When Location is not available if the location is on this PC, it could be third-party applications, usually antivirus or security software, preventing access to certain folders and files.
  • Issues with the drive: A hard drive with bad sectors or malfunctioning hardware, too, can lead to the problem.

How do I fix Location is not available on Windows 10?

Before we start making major changes, here are a few quick things you can try:

  • Restart the computer and check whether the Location is not available folder is now accessible.
  • For an external hard drive, connect it to another PC and check whether the affected folder can be opened. If yes, the permissions are misconfigured, or a third-party app is blocking access.
  • Disable Windows Security, the built-in antivirus, or any third-party antivirus you may have installed.
  • Check for corrupt system files on the PC, and run the DISM tool and SFC scan to fix things.
  • If you haven’t updated the OS in a while, check for pending Windows Updates and install them.

Let’s now head to the solutions listed next.

1. Change permissions

  1. Right-click on the folder/drive that’s throwing the error, and select Properties.properties
  2. Head to the Security tab, and then click on Advanced.advanced
  3. Click on Change.change ownership to fix location is not available
  4. Type your current username in the text field, click on Check Names, and then OK.check name
  5. Now, tick the checkboxes for Replace owner on subcontainers and objects and Replace all child object permission entries with inheritable permission entries from this object, and click OK.replace owner to fix location is not available
  6. Click Yes in the confirmation prompt.confirm
  7. Again, click OK to save the changes.
  8. Next, open the folder/drive Properties, head to the Security tab, and click on Edit.edit
  9. Click Add.add
  10. Enter the username you used earlier, and click on Check names followed by OK.user name
  11. Select the user account, tick the checkbox for Full control, and click OK.full control to fix location is not available
  12. Click OK on all subsequent windows for the changes to come into effect.

That’s it! In most cases, reconfiguring the permissions and taking ownership of the affected folder/drive should fix the Location is not available error in Windows.

2. Check the disk for errors

  1. Press Windows + R to open Run, type cmd, and hit Ctrl + Shift + Enter.cmd
  2. Click Yes in the UAC prompt.
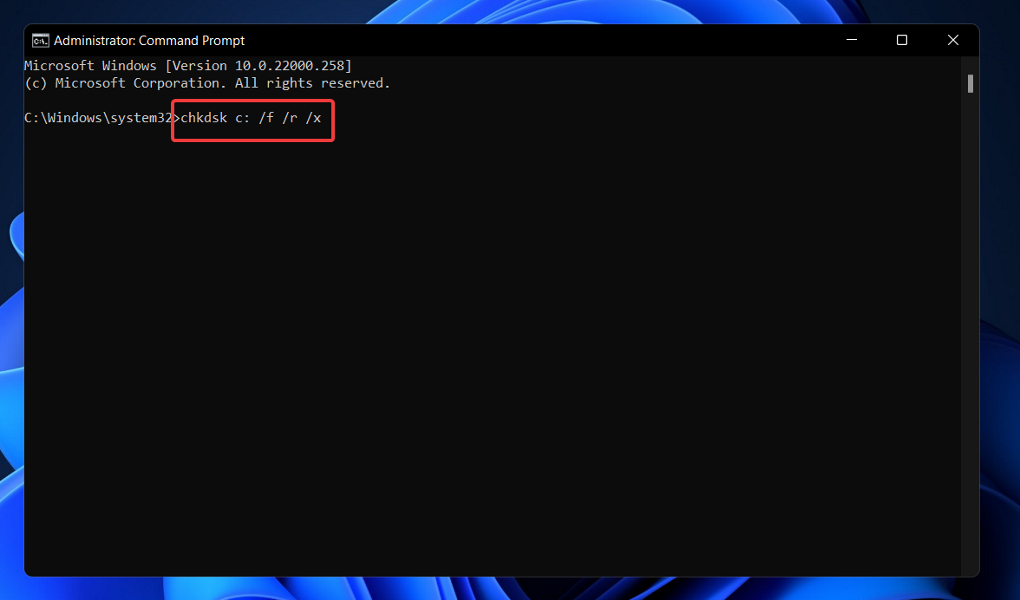
  3. Now, paste the following command and hit Enter:chkdsk /rcheck disk to fix location is not available
  4. Hit Y and press Enter to schedule the tool.confirm
  5. Restart the computer, let Check Disk run, and it will automatically fix issues with the drive.

For the Location is not available The parameter is incorrect error, the best fix is to run Check Disk, a built-in tool, in Windows. It can fix a range of issues, in addition to identifying and repairing bad sectors.

3. View hidden folders and hide protected files

  1. Press Windows + S to open Search, type File Explorer Options, and click on the relevant search result.file explorer options
  2. Go to the View tab, select Show hidden files, folders, and drives under Hidden files and folders, tick the checkbox for Hide protected operating system files (recommended), and click OK to save the changes.hide protected files to fix location is not available
  3. Restart the computer and check if you can now access the folder that earlier threw the error.

4. Perform in-place upgrade

Note icon NOTE
Before proceeding, make sure you are connected to the Internet and have a decent Internet speed because the method requires downloading Windows.
  1. Go to Microsoft’s official website, and download the Media Creation Tool for Windows 10.media creation tool
  2. Run the setup, click on Yes in the prompt, and let it get things ready.getting
  3. Click Accept to agree to the license terms.accept
  4. Now, choose the Upgrade this PC now option, and click Next.upgrade this PC now to fix location is not available
  5. Wait for the setup to download Windows, and then follow the on-screen instructions to complete the in-place upgrade.in-place upgrade to fix location is not available

The in-place upgrade usually takes a few hours to complete, but it wouldn’t delete any files, remove any apps, or reconfigure the chosen settings. The PC would be the same as before, except that all issues with the OS would be eliminated.

Tip icon Tip
If nothing works, you can always use a reliable File Manager in Windows. The error is found to affect the built-in File Explorer, but third-party tools continue to work fine. So, try that until you identify the underlying cause or Microsoft fixes the problem in the subsequent updates.

One of the solutions here should help get rid of the Location is not available error in Windows 10. If none do, it could be an issue with the hard drive, one that requires physical inspection. So, you might consider consulting a hardware expert on the matter.

And while we are on the subject, find out what to do if the File Explorer is slow, a problem reported by many.

For any queries or to share another solution that worked for you, drop a comment below.

Best VPN for Laptop [Out of 25 Tested in 2026]

A virtual private network (VPN) protects your privacy while online and secures your Internet connection by creating an encrypted environment. Using a VPN for laptop is an easy way to protect yourself from ISP or vicious attacks from hackers, that is why a lot of users install VPNs on their PC right after they buy it.

What makes VPNs popular among computer and Internet users is that all the traffic on the network flows through the VPN without being seen by anyone, including your internet service provider.

VPNs prevent other people from intercepting your Internet traffic. They are very useful when you’re using public Wi-Fi or traveling as they hide your actual IP address and you can’t be tracked easily online.

A VPN is also good when your personal and/or professional security is at stake, as an investigative journalist, or if your profession also requires heightened safety so that you can communicate with others across the world.

If you’re looking for the best VPN software for laptops, you need to check for affordability, reputable service, performance, encryption and transparency, support (tech or otherwise), ease of using the VPN, among other features.

What are the best VPNs for laptops?

Express VPN – Best VPN for laptop overall

This Express VPN International Ltd. service ranks number one among its rivals judging from independent and user reviews, as well as ratings.

It is the number one trusted leader in VPN with high speed, ultra-secure protection, ease of use, and instant setup.

With ExpressVPN, you can access any content across 94 countries and unblock the sites and apps you love, avoiding hacking or tracking using powerful encryption, backed by 24/7 support through live chat.

You also get blazing-fast VPN speeds on a huge network of over 1700 global VPN servers, unlimited bandwidth, and an easy-to-use VPN service for Windows and other operating systems.

Zero restrictions on streaming and downloading from anywhere while your IP is hidden, plus offshore privacy protection with no activity or connection logs are also part of the package.

Other features include protection from hacking and surveillance with 256-bit AES encryption, DNS/IPv6 leak protection, kill switch, and split tunneling.

ExpressVPN

Want the best privacy protection for your laptop? Don’t waste any more time and get ExpressVPN.
Check price Visit website

NordVPN – most advanced privacy features

Developed by Tefincom & Co., S.A., NordVPN is everything you need to protect your privacy online.

As one of the best VPNs for laptops, NordVPN offers features such as double VPN combinations to encrypt your Internet traffic, and CyberSec technology to protect yourself from intrusive ads and malicious online threats.

Even more, its DNS leak protection ensures data protection. As for the no-logs policy, you’re assured your data isn’t tracked or monitored.

You can also secure your browsing on Chrome or Firefox, enjoy a secure streaming experience with SmartPlay technology, and join the NordVPN network of over 5400 servers in 59 countries globally.

The benefits of using NordVPN include lightning speeds, ease of download and installation, plus you can connect up to 6 devices simultaneously and protect your privacy on the go with mobile apps.

You also get a dedicated IP address for better connectivity and a faster VPN experience, plus if you need any assistance, NordVPN’s customer service is on standby to assist you anytime.

NordVPN

Wasting sleep trying to find the best VPN for your laptop? Look no further, check out NordVPN.
Check price Visit website

Surfshark – best for multiple devices

Surfshark is one of the few VPN providers to offer unlimited access to all types of devices. If you are a laptop user, you can easily get connected to the web using this VPN’s large number of servers – 1700+ in over 63 countries.

Your local IP address is totally masked when you’re using this VPN’s servers. You’ll also have access to top-notch AES 256-bit encryption.

When you need to hide your local IP address at a Wi-Fi hotspot, this Surfshark LTD VPN solution is a secure, reliable choice.

Your privacy will also be protected by their strict no-logs policy, which makes sure that your activity on the Internet is only known by you.

In addition, there’s a kill switch feature that protects you if the service ever disconnects.

One of the top benefits that you’ll receive when using Surfshark is the fast speeds that you’ll get with their servers.

They also offer one of the best ways to access Netflix with 14 Netflix libraries available.

Besides being able to connect with your laptop that uses macOS or the Windows operating system, you also have access to apps for Android and iOS, which can come in handy if you only have your smartphone with you.

The support team at this VPN is available 24/7 if you ever have any issues.

Private Internet Access – largest server network

Private Internet Access (PIA) offers top-notch security and privacy for all those eager to find the best VPN software for laptops.

Developed by the online privacy company Kape Technologies, PIA uses advanced encryption algorithms and proudly adheres to a strict no-logs policy.

Creating your account only means revealing an email address and your payment information. However, even these can be done anonymously if you feel safer this way.

Private Internet Access supports multiple VPN technologies such as PPTP, L2TP/IPsec, SOCKS5, OpenVPN, and even the new WireGuard.

Most users still prefer the OpenVPN protocol, which is open-source software, therefore its code has zero vulnerabilities.

It’s also worth noting that PIA doesn’t log user activity and includes DNS leak protection. On top of that, it has a secure killswitch to ensure your data isn’t leaked even if VPN connection drops.

Private Internet Access

Enjoy optimal protection on your laptop with Private Internet Access. Currently available at a major discount!
Check price Visit website

CyberGhost VPN – best-in-class encryption

CyberGhost is a favorite among the best VPN software tools for laptops as it protects your privacy on a multi-platform privacy solution.

Features include the highest encryption available with 256-bit encryption technology, hiding of your IP, and Wi-Fi protection if in a public area.

You also get a strict no-logs policy that doesn’t track your Internet activity, multiplatform apps for all your devices, security for transactions and conversations, plus access to over 6400 VPN servers in 89 countries.

The benefits of using CyberGhost include access to restricted content, protection for all your devices, ad blocking, malware blocking, and the highest possible speeds you can get on a VPN.

? Which VPN is free and best for laptops?

Good VPNs should have up-to-standard encryption, no logs policy, proven connection speed, and a decent number of servers. Not many free clients include all these, but we have a reliable option:

Tunnel Bear – proven zero logs and great free version

TunnelBear is an intuitive VPN service created by McAfee LLC with dedicated applications for multiple platforms, including Windows-operated laptops.

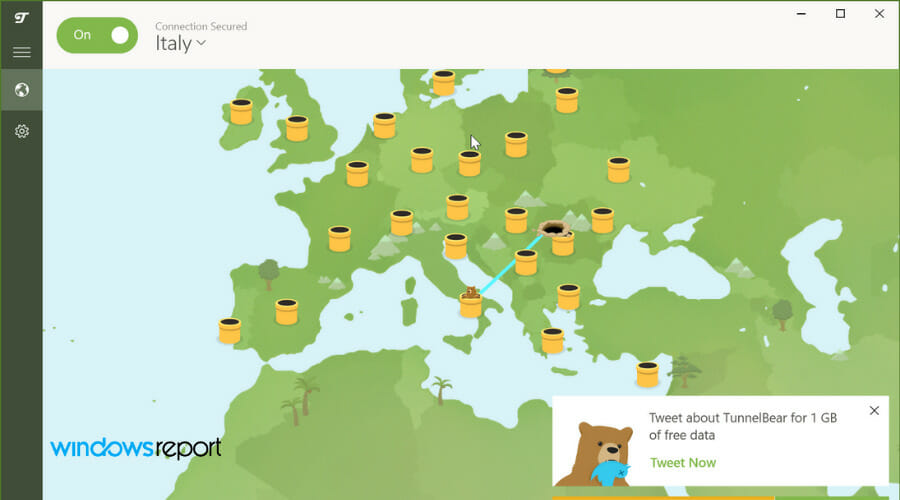
This VPN has a simple, yet witty and fun user interface that lets you connect to a private server at the press of a button.

Users can connect to an automatically determined server or pick the location of their choice manually.

This VPN service places no limit on data usage and secures your connection with military-grade AES-256-bit encryption.

TunnelBear keeps your data private even in case the connection drops. It blocks all traffic data until you are able to reaccess a VPN server.

With proven fast speed rates, Tunnelbear offers a map view of all its VPN locations that are spread across 49 different countries.

It

TunnelBear is a very reliable VPN that has both free and paid versions. The free version has a daily data limit but is a good option in terms of privacy and speed. The paid version has two plans, for personal and business use.

Is it good to have a VPN on your laptop?

Yes, a VPN protects your data when connected to the Internet, so you are less likely to be tracked down by malicious third parties.

Thanks to the encryption, your connection will be secure even on Public Wi-Fi.

There are other key benefits of using a VPN, including the possibility to bypass geo-blocks, stop ISP throttling and improve connection speed.

How do I set up a VPN on my laptop?

Most VPN clients come with easy-to-install native applications for all major operating systems, so you’ll be able to set it up in no time:

  1. After you decide which VPN to use, head to its official website and get a subscription. We use ExpressVPN because it’s very reliable, fast, and easy to use.
  2. Download the dedicated app to your device and install it.
  3. Launch ExpressVPN and click on the power button in the main UI to connect to a server.

A VPN will tunnel and encrypt your traffic through its secure servers so no information about your activity or identity can be leaked.

Good VPNs like the ones we mention in this article can be used on any type of laptop model, including Dell laptops or Lenovos.

Ready to start using the best VPN software for laptops? Let us know your favorite pick.

If there’s one you use that didn’t make the list, tell us about it by leaving a comment in the section below.

Windows 11 Pinned Apps Not Showing: Get Them Back in 4 Steps

We all often pin apps, programs, and websites to the Taskbar for quick access, which seriously saves a lot of time otherwise spent searching and launching them. However, many users have reported that pinned apps or their icons are not showing in Windows 11.

This could be due to a bunch of reasons, having to do with a corrupt icon cache, issues with the Windows Explorer process, or misconfigured Local Group Policy Editor, amongst other issues. All these can be easily fixed, and you can have the pinned item back in no time.

So, let’s go through the most effective methods to fix the pinned apps not showing error in Windows 11.

What can I do if pinned apps aren’t showing in Windows 11?

Before we head to the slightly complex solutions, restart the computer and verify whether Windows 11 disappeared apps are now available; check for corrupt system files.

1. Restart the Windows Explorer process

  1. Press Ctrl + Shift + Esc to launch the Task Manager.Task Manager to fix windows 11 pinned apps not showing
  2. Locate the Windows Explorer process, right-click on it, and select Restart from the context menu.Restart Windows Explorer to fix windows 11 pinned apps not showing

If you were wondering how to fix taskbar icons not showing in Windows 11, remember that the Taskbar is bundled with the Windows Explorer (explorer.exe) process, and problems with the latter can lead to pinned apps not showing in Windows 11.

Just restarting the process should fix the error for you. Also, this would work when pinned apps are not showing on taskbar in Windows 10.

2. Update the graphics driver

  1. Press Windows + S to launch the Search menu, enter Device Manager in the text field at the top, and click onthe relevant search result that appears.Device Manager
  2. Now, double-click on the Display adapters entry here.Display adapters
  3. Right-click on the graphics adapter, and select Update driver from the context menu.Update driver to fix windows 11 pinned apps not showing
  4. Select Search automatically for drivers from the options that appear in the Update Drivers window.Search automatically for drivers
  5. Wait for the system to find the best available driver and install it.

An outdated graphics driver is another likely issue behind pinned apps not showing in Windows 11. So, it’s best that you update the graphics driver and verify if the error is eliminated.

Also, you can try other ways to update the driver, in case the Device Manager method does not work and Windows 11 icons are still not displaying correctly.

3. Delete the icon cache file

  1. Press Windows + E to launch File Explorer, paste the following path in the address bar, and hit Enter. Just make sure to replace Username with the actual user account in your case. Or you could simply navigate the path.C:\Users\Username\AppData\LocalLocal
  2. Now, click on the View menu, hover the cursor over Show, and select Hidden items from the flyout menu.Show hidden items
  3. Select the IconCache.db file, and hit the Del key.Del IconCache.db to fix windows 11 pinned apps not showing
  4. Restart the computer for the changes to fully come into effect.

The IconCache.db has a copy of every app icon, and when required, Windows directly retrieves it from here instead of going through the app files. If it’s corrupt, you may find the app icon not showing in Windows 11.

Once you delete the cache file and restart the computer, it will be recreated which will remove any corruption.

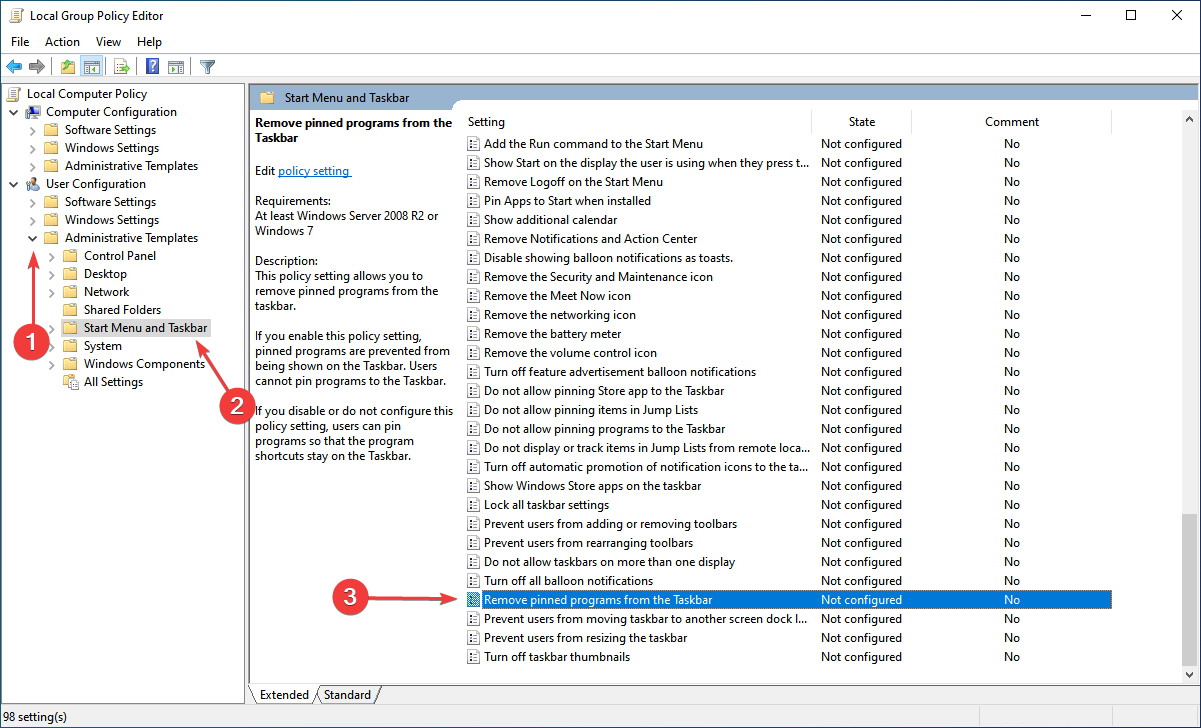
4. Reconfigure Local Group Policy Editor

  1. Press Windows + R to launch the Run command, enter gpedit.msc in the text field, and click on OK to launch the Local Group Policy Editor.gpedit.msc
  2. Next, click on Administrative Templates under User Configuration, double-click on Start Menu and Taskbar, and then double-click on the Remove pinned programs from the Taskbar policy on the right.Remove pinned programs from the Taskbar to fix windows 11 pinned apps not showing
  3. Set it to Not Configured, and click on OK at the bottom to save the changes.Not Configured to fix windows 11 pinned apps not showing
  4. Restart the computer for the changes to apply.

That’s it, the pinned apps or icons not showing in Windows 11 error should now be fixed, and you can easily access your favorite apps with a click.

Also, several users have faced the taskbar apps disappearing error in Windows 10, and others said the Xbox app kept repinning itself to the taskbar after a restart. If so, the linked guides will help you fix it.

Do not hesitate to tell us which solution worked for you in the comments section below.

Windows 10 Start Button Not Working: 9 Ways to Enable It

If your Windows 10 Start button is not working, you might have some issues accessing certain features on your PC.

Start Menu is an integral part of Windows, but unfortunately, many reported that Start Menu isn’t working at all for them.

This can be a major problem, and in today’s guide, we’re going to tackle this issue and show you how to fix it properly.

Why is the Start button not working on Windows 10?

There are several reasons why the Start menu isn’t working on Windows 10, and here are the most common ones:

  • System glitches – If Start menu has disappeared or you’re having any other issue with it, it’s possible that there’s a glitch on your system.
  • Issues with the Windows Explorer process – In case this happens, you just need to open Task Manager and end restart the process.
  • Corrupted registry – Sometimes corrupted registry can cause this issue. You can use Registry Editor to fix the issue.

Start Menu is integral to Windows, but many users reported various issues. Speaking of issues, here are some common problems that users reported:

  • Windows 10: Start Menu and Cortana not working
    • Start Menu and Cortana are closely related, and if one of those features isn’t working, try installing the latest updates and check if that helps.
  • Windows Start button not working on Windows 10, quit working on Windows 10
    • Many users reported that the Start button stopped working on their Windows 10 PC.
    • To fix this problem, you might have to use Powershell and re-register all preinstalled applications.
  • Start Menu button is frozen, won’t open on Windows 10
    • This is another common problem with Start Menu; a temporary glitch usually causes it.
    • Sign out of your account and log back in to fix the problem.
  • Start Menu crashing in Windows 10, missing in Windows 10
    • According to users, sometimes Start Menu could be crashing or even missing on your PC.
    • You might have to create a new user account and switch to it to fix the problem.

What to do if Start Menu and Taskbar are not working on Windows 10?

There are all sorts of issues that can occur with the Start Menu, and many reported an unresponsive Taskbar in Windows 10.

This can be a problem, but it can be fixed by restarting the Windows Explorer process.

In some rare instances, you might get a Critical error in Start Menu, and if this happens, it’s advised to repair your profile or installation.

Luckily for you, fixing these issues isn’t hard, and in today’s guide, we’ll show you how to do it.

What can I do when the Start button is not working in Windows 10?

1. Check for Windows updates

  1. Press Windows Key + I to open the Settings app.
  2. Now go to the Update & Security section.
    Windows Start button not working Windows 10
  3. In the right pane, click the Check for updates button.
    Windows 10 Start Menu and Cortana not working

Updates will be downloaded automatically in the background if any updates are available. Once your system is up to date, check if Windows 10 Start button and search are still not working.

2. Use the PowerShell to fix this issue

  1. Press Windows key + X and choose Windows PowerShell (Admin).
  2. Paste this into PowerShell:
    Get-AppXPackage -AllUsers | Foreach {Add-AppxPackage -DisableDevelopmentMode -Register "$($_.InstallLocation)AppXManifest.xml"}Windows 10 Start Menu and Cortana not working
  3. Press Enter to run it.

That would be all, and your Start button should be working now.

You can try this workaround if your Windows button is not working. This isn’t a permanent solution, but it gets the job done and fixes the issue temporarily, so if the problem manifests itself again, you might need to repeat this process.

For the permanent solution, make sure that you check for the latest Windows 10 updates regularly.

3. Sign out of your account

  1. Press Ctrl + Shift + Del.
  2. Now click the Sign out button.
    start menu button not working
  3. Wait for a few moments and sign back into your account.

After signing back in, check if the problem is still there.

Sometimes, Windows 10 Start Menu and Taskbar are not working due to glitches. But, according to users, the simplest way to fix this problem is to sign out of your account and log back in.

Since your Start Menu and Start button aren’t working, you’ll need to sign out using the steps we mentioned

4. Restart Windows Explorer

  1. Press Ctrl + Shift + Esc to open Task Manager.
  2. Locate Windows Explorer on the list.
  3. Right-click it and choose Restart from the menu.
    Start Menu button frozen

Once Windows Explorer restarts, check if Windows 10 Start Menu is still not working. Remember that this is a temporary solution, so you’ll have to repeat it once the problem reappears.

Many users reported that you could fix the problem with the Start Menu button simply by restarting Windows Explorer.

The Start Menu is a part of Windows Explorer, and by restarting Windows Explorer, you’ll force Start Menu to restart as well.

5. End certain processes

  1. Press Windows Key + X and choose Windows PowerShell (Admin) from the menu.
  2. When PowerShell starts, run the command below and hit Enter. cd C:\Users\Your_username_here\AppData\Local\Packages\Microsoft.Windows.Search_cw5n1h2txyewy
  3. Next, type the following two commands and hit Enter after each one.
    Taskkill /F /IM SearchUI.exe
    RD /S /Q Settings

After the commands execute, the damaged files will be rebuilt, and you should be able to use Start Menu again without issues.

Sometimes Windows 10 can’t open Start Menu or Search due to certain Cortana files. According to users, you can fix this problem simply by deleting these files from PowerShell.

These are just temporary files; your PC will recreate them, so there’s no need to worry.

6. Modify your registry

  1. Press Windows key + R and enter regedit. Press Enter or click OK.
  2. In the left pane, navigate to this key: HKEY_LOCAL_MACHINE\SYSTEM\CurrentControlSet\Services\WpnUserService
    Windows Start button quit working Windows 10
  3. In the right pane, double-click Start DWORD, set Value data to 4, and click OK.

After making these changes, restart your PC and check if the problem is resolved.

Occasionally, issues with the Start Menu button can occur due to Dropbox. Note that Dropbox can sometimes interfere with Windows processes, leading to this and many other problems.

However, you should be able to fix this problem by making a few changes to your registry.

7. Create new values in your registry

  1. Start Registry Editor.
  2. In the left pane, navigate to this key: HKEY_CURRENT_USER\Software\Microsoft\Windows\CurrentVersion\Explorer\Advanced
  3. In the right pane, right-click the empty space and choose New and then DWORD (32-bit) value.
  4. Enter EnableXamlStartMenu as the name of the new DWORD.

After doing that, close Registry Editor and restart Windows Explorer from the Task Manager. Once the Explorer restarts, your Start Menu should be working again.

The problem might be related to your registry if you’re having issues with the Start Menu button. According to users, they managed to fix this problem simply by creating new value in their registry.

8. Enter Safe Mode

  1. Open the Settings app and go to the Update & Security section.
    Windows Start button not working Windows 10
  2. From the menu on the left, choose Recovery. In the right pane, click Restart now button in the Advanced startup section.
    Windows Start button quit working Windows 10
  3. A list of options will appear. Choose Troubleshoot and then choose Advanced options. 
  4. Next select Startup Settings, and click the Restart button.
  5. Once your PC restarts, select any version of Safe Mode by pressing the appropriate key.

Once you enter Safe Mode, check if everything is working. If so, restart your PC, boot back to your account, and check if the issue is resolved.

According to users, you might be able to solve this problem simply by entering Safe Mode. This is quite simple to do, following the above steps.

9. Create a new user account

  1. Open the Settings app and go to the Accounts section.
    Windows Start button not working Windows 10
  2. Navigate to Family & other people in the left pane. In the right pane, click Add someone else to this PC.
    Start Menu button frozen
  3. Choose I don’t have this person’s sign-in information, then Add a user without a Microsoft account.
  4. Enter the desired user name and click Next.
    Start Menu crashing Windows 10

After creating a new user account, switch to it, and check if that solves your problem.

If the problem doesn’t appear on the new account, you’ll need to move your files to the new account and check if that solves your problem.

We believe you must have repaired the Start Menu button not working issue by now. Note that these solutions are not written in any particular order, and we recommend starting with whatever solution looks most appropriate to your situation.

Remember that this isn’t the only issue you can encounter, and many reported that Windows Tiles won’t show in Start Menu.

If you have any comments, suggestions, or maybe some other solutions for this problem, write them down in the comments section.

Fix: Your Organization’s Data Cannot Be Pasted Here

Seeing the “Your organization’s data cannot be pasted here” message in Outlook or Office? This error usually means clipboard actions are blocked by your organization’s security policies.

It can also happen due to outdated apps, character limits, or protected files. Below are proven ways to fix it fast.

How to Fix the “Organization Data Cannot Be Pasted Here” Error

1. Create a New File

Copy the content into a blank document using plain text paste. Save it and retry. This helps if the original file is corrupted or flagged.

2. Change Intune Copy-Paste Policy

  1. Log into Microsoft Intune.
  2. Go to Client apps → App protection policies.
  3. Select the policy in use.
    Intune policy settings
  4. Expand the Data Transfer section.
  5. Set Restrict cut/copy/paste between apps to Any app.
    Intune restrict clipboard

3. Reinstall Microsoft Office

  1. Open Settings.
    Windows Settings
  2. Search for and open Control Panel.
    Control Panel
  3. Click Uninstall a program under Programs.
    Uninstall a program
  4. Select Microsoft Office and uninstall it.
    Uninstall Microsoft Office
  5. Download and reinstall Office.

4. Use Clipboard in a Web App Instead

If using Outlook desktop causes issues, log into Outlook Web or Word Online and try pasting there. Many web-based apps bypass Intune restrictions applied only to installed software.

5. Remove Conflicting Security Apps

Some third-party security software or clipboard managers might interfere. Temporarily disable or uninstall them, especially if this started after a recent update.

6. Repair Office Installation

Go to Settings → Apps → Installed apps → Microsoft Office, click Modify, and choose Quick Repair. If that fails, use Online Repair.

FAQs

What does “Your organization’s data cannot be pasted here” mean?

It means your IT admin has restricted copy-paste actions between apps or devices using tools like Microsoft Intune.

How do I remove copy-paste restrictions set by my organization?

If you’re an admin, change the Intune policy to allow clipboard sharing between any app. Otherwise, ask your IT team to adjust permissions.

Can I bypass this error on my personal device?

If the device is enrolled in corporate management, you can’t bypass the restriction without admin rights.

Does reinstalling Office fix the issue?

Yes, if the error is due to corruption or outdated settings, reinstalling Office can help restore default clipboard behavior.

Wrapping up

If none of these fixes work, contact Microsoft Support for further assistance.

If the issue appears while copying from certain websites, follow this guide on bypassing browser copy restrictions.

Let us know in the comments if these steps helped resolve the error.

Dual Boot Menu Is Not Showing: How to Get It Back

There are times when you’d need to run another operating system to get things done on the same PC. Dual boot lets you select which operating system loads when you start your computer. Sadly, our readers report that the dual boot menu not showing on their PC.

Why is the dual boot menu not showing?

The dual boot menu not showing while booting up can occur for many reasons. Some notable causes of the problem are:

  • Fast startup is enabled – The fast startup option allows the system to boot directly into the default operating system. So, not disabling the fast startup option during dual boot may cause the issue.
  • The dual boot option is disabled – Because not all systems have two operating systems installed, the option isn’t enabled automatically. Hence, you may not see it.
  • Corrupt system files – Corrupt system files on your PC can cause the boot manager to malfunction, resulting in the dual boot option not showing during startup.

Whatever the cause, we’ll discuss getting the dual boot menu to appear again on your PC.

How do I get the Dual boot menu to show back?

Apply the following preliminary checks before proceeding with any advanced troubleshooting steps:

  • Ensure the second operating system is present on the PC and it’s bootable.
  • Disconnect USB devices and peripherals and verify whether GRUB menu is not showing Windows 10 dual boot.

If the dual boot option is still missing, go ahead with the solutions below.

1. Enable the Boot Menu via the Command Prompt

  1. Left-click the Start button, type command prompt, and click the Run as administrator option.
  2. Click Yes on the User Account Control prompt.
  3. Type the following command and press Enter: bcdedit /set {bootmgr} displaybootmenu yes 
  4. You’ll see a prompt informing you that the operation was completed successfully. Then, restart your PC and check if the dual boot option appears.

If you have been wondering how do I enable dual boot, the above will do it, prompting the dual boot menu to appear whenever you start your PC. This should, in all likelihood, fix things when the dual boot menu is not showing Windows 10 and Ubuntu.

Read about fixing the run-as-administrator option if it’s not working on your PC.

2. Configure the Default Operating System in Startup and Recovery

  1. Press Windows + I key to open the Settings app.
  2. Go to System and select the About tab from the left pane.
  3. Navigate to the Related links menu and click on Advanced system settings.
  4. On the System Properties page, go to the Startup and Recovery tab and click the Settings button.
  5. Click the drop-down button for the Default operating system and choose your preferred OS.
  6. Check the box for Time to display list of operating systems and set it to 30 seconds, then click OK to save the changes.
  7. Restart your PC and check if the dual boot menu appears.

Configuring the default operating system and setting a time limit for showing the list of operating systems fixes things when the dual boot menu is not showing Windows 11 and Ubuntu.

3. Disable the Windows Fast Startup option

  1. Click the Start button and type control panel, then open it.
  2. Click on System and Security, then select Power Options.
  3. In the left pane, click on the Choose what the power buttons does option.
  4. Click on Change settings that are currently unavailable.
  5. Under Shutdown Settings, uncheck the Turn on fast startup (recommended) option.
  6. Click the Save changes button.
  7. Restart your computer to see if fast startup is disabled and the dual boot menu appears.

Disabling Fast Startup prevents the system from loading the default operating system from the boot and shows the boot menu.

If the Dual Boot menu not showing after the Windows update is probably because Fast Startup was reactivated. Read how to disable fast startup on Windows 11 for more information.

4. Restore the Dual Boot menu via the System Configuration tool

  1. Press Windows + R key to open the Run dialog box, type msconfig, and click OK to open the System Configuration utility.
  2. Go to the Boot tab, select the OS to set as default, and click the Set as default button.
  3. Under the Timeout tab, set the value as 30.
  4. Click OK and Apply to save the changes.
  5. Restart your PC and check if the dual boot menu appears.

Tweaking the System Configuration utility restores the Boot Manager and sets it to appear for 30 seconds during startup. This has helped many when Windows 10 dual boot menu is not showing.

In addition, our readers can check our article on how to fix a PC stuck on Choose an operating system prompt after the Windows update.

Our readers can check our guide on how to Dual Boot Windows 11 and Linux Mint on a single device. Also, you may be interested in our guide on Dual Boot Windows 11 and macOS on a single device.

For any other queries or to share what worked for you, drop a comment below.

How Google hesitated on moving forward with AI powered search

Shortly after taking up the role of CEO of Google in 2016, Sundar Pichai declared that from then on, Google – which was worldwide known for its search engine – would become the AI-First company.

The statement was made at the Google I/O developer conference and was one of the first moves for Pichai after assuming the top-dog position at the company. Two years earlier, Amazon surprised Google by launching its voice assistant Alexa, which quickly became a household name. While this constituted a major coup for Amazon, it was very disheartening for Google to witness, according to the Wall St Journal report. At the conference that followed, Google released its competitor, Google Assistant, as Pichai straddled the initiative to focus more on the development of helpful AI.

Today, in a similar situation, Google has been once again beaten to market in a space they should have dominated. However, this time the challenge has come from OpenAI, a much smaller San Francisco startup, not a tech giant like Amazon. ChatGPT, a bot that can write on almost any subject as if generated by a human, was unveiled in November and has captured the public’s attention. Its development relies upon a technological breakthrough pioneered by Google several years ago. This is significant because, two years before, Google had presented LaMDA, another similar technological advancement.

The outlook is not encouraging for Google as its primary competitor, Microsoft, is providing a significant financial investment of $10 billion towards OpenAI, and has released a new version of Bing that has Artificial Intelligence chat features that surpass those of ChatGPT—which may have far-reaching implications for the future of online search.

Google has built a reputation for being more conservative when it comes to its AI endeavors, a legacy forged over the years by the debates over the bias and accuracy of its systems and the termination of a staff member who asserted its AI had achieved sentience in the previous year.

Executives faced heightened trepidation regarding the potential backlash that a public display of AI products might incur because of past episodes. This fear was amplified due to the significant amount of revenue generated by Alphabet Inc’s search-advertising business; they yielded almost $283 billion in revenue in the past year.

Without question, Google failed to capitalize on the market in which it should have had a commanding lead. As a way to rectify the situation, the firm launched Bard, its artificial intelligence chatbot. Unfortunately, the endeavor proved to be unsuccessful, with the bot supplying incorrect answers in its initial launch and causing Google a total loss of $100 million.

Windows 11 Ads: How to Get Rid of Them in 5 Easy Steps

We all know how ads can be annoying sometimes. How ads pop up at the most unwelcoming times; how they lead you to unwanted platforms; worst still, some ads are known to pose malware threats.

So, if you’ve been wondering how to get rid of the constant Windows 11 ads but don’t know how, here’s the help you’ve been waiting for.

Why do I get ads in Windows 11?

Despite the urgency of the need to want to get rid of Windows 11 ads, we think it is worth knowing what triggers these ads and why you get them:

  • Features added from the recent Windows update – Features like News and Interests can make it difficult to use your PC without sending a notification. Also, it can prevent you from using the PC.
  • Adware on your browser – When the adware is installed on a user’s PC or browser, they may notice ads appearing frequently. Sometimes it’s difficult to get rid of them, and they might be malevolent.
  • Cross-promotion of Microsoft products – Microsoft included even more ads in Windows 11 to promote their products in the user interface. However, you may block them.
  • Your computer’s program notifications – Microsoft has numerous titles for these adverts, such as sync provider notifications or tips and suggestions, and they are displayed on Windows 11.

Several other causes may prompt ads to pop up on your Windows 11 PC. Nevertheless, you can fix the problem by tweaking your computer.

How can I remove Windows 11 ads?

Before engaging in any advanced troubleshooting or settings tweaks, try the following checks:

  • Check if the issue still exists by restarting Windows in Safe Mode.
  • Disable background apps that are active on your PC.

Having confirmed the above checks, but the ads keep popping up on your Windows 11 PC, you can try any of the steps below to remove Windows 11 ads.

1. Remove Windows 11 Lock screen ads

  1. Press the Windows button to open the Start menu, then click Settings.
  2. Now, go to the Personalization tab and click on Lock screen from the options on the right pane.
  3. Next, uncheck the box beside Get fun facts, tips, tricks, and more on your lock screen.  

It is only when your Windows lock screen is set to Picture or Slideshow that you can turn off the adverts on it. There is, yet, no way to stop the adverts on it if it is set to Windows Spotlight.

2. Remove ads from Windows 11 Start menu

  1. Click on the Windows icon to open the Start Menu.
  2. Locate the promoted app you want to remove. Right-click on the app and then select Unpin from Start or Uninstall from the options.

Since some of the promoted apps are installed on your PC, while Windows 11 only pin others as shortcuts to their pages from the Microsoft Store, you can use the above steps to remove Start menu ads.

3. Remove ads from File Explorer

  1. Press the Windows key + E to open File Explorer.
  2. Click on the See more menu button at the top (its button looks like three suspension °°° dots). Next, click on Options.
  3. In the Folder Options window, select the View tab and uncheck the Show sync provider notifications box. Then, click OK.

Your Windows 11 File Explorer, just like Windows 10, is also an ad space. Follow the steps above to remove Ads from Windows 11 File Explorer.

4. Remove suggestions from the Settings app

  1. Press the Windows key + I to open the Settings app.
  2. Select Privacy & Security from the sidebar and click on General from the options under Windows Permissions.
  3. Turn off the Show me suggested content in the Settings app toggle to disable suggested content.

Due to recent upgrades, the Settings app can suggest things across Windows 11 to help you find features or advice for content and applications in various ways.  

5. Remove ads in your Windows 11 browser

  1. Open the Chrome browser on your computer, click on the Menu button, and choose Settings from the drop-down menu.
  2. Click on Privacy and security. Scroll down and click on the Play button next to the Site settings option to expand it.
  3. Navigate to the Content tab, then click the Pop-ups and redirects option.
  4. On the Default behavior section, choose the radio button next to the checkbox for Don’t allow sites to send pop-ups or use the redirects option.
  5. Close your browser and check if the pop-up ads have been disabled.

Disabling the option that blocks browser ads from showing on your desktop is one of the viable ways to remove ads from your PC.

And that’s it on how to remove Windows 11 ads from your PC. We have to state, though, that Windows 11 ads are not as bad as most people take them.

Unlike other programs or platforms wherein ads cannot be turned off, Windows 11 ads can be removed, and you can use any of the steps provided above to do this.

For Windows 10 PC users, you can find out how to turn off ads on your Windows 10’s lock screen and other methods here.

If you have any questions or suggestions, please let us know by using the comments section below.

How to Get Rid of Ghost Touch Bubbles in Windows 10 & 11

One rare error with touchscreen PCs is the ghost bubbles effect. When this happens, the computer flashes bubble spots around the screen while the mouse cursor bounces around them.

If your PC is currently experiencing ghost touch bubbles, this article will provide you with the best steps to help you get rid of ghost touch bubbles in your Windows PC.

What causes ghost bubbles in Windows?

Ghost bubbles are a pretty rare occurrence in Windows. Here are some of the common causes of ghost bubbles in Windows:

  • Faulty Windows update – You may notice the ghost touch bubbles in your PC after installing an update. Uninstalling or rolling back the update would help resolve the error.
  • Faulty screen hardware – In some cases, ghost touch bubbles are not software-related problems but hardware. If your PC’s touchscreen is faulty, it can cause ghost bubbles to appear.
  • Virus or malware – In some cases, ghost touch bubbles might appear in Windows due to viruses or malware in a computer. You can scan your PC for viruses to determine if your PC is corrupted.

After filtering out the probable causes, let’s go to the actual solutions to fix this problem.

How can I fix ghost bubbles in Windows?

Try these steps first before anything else:

  • Check your PC for hardware problems. You can contact your manufacturer’s hardware support or take it to any certified technician to get your screen hardware checked out.

Ghost touch bubbles will render your PC useless as it won’t respond to user input. Here are a couple of fixes you can attempt to help resolve this error.

1. Disable the visual touch feedback

  1. Press the Windows key + I to open the Settings app.
  2. Then, click on Ease of Access and navigate to Vision.
  3. Click on Cursor & Pointer, and scroll down to locate the Change Touch Feedback option.
  4. To disable Touch Feedback, click the toggle the Change Touch Feedback button to Off.
  5. Close the Settings app and restart your PC.

2. Change the Power Management settings

  1. Right-click the Start button and select Device Manager.
  2. Locate Human Interface Device, double-click on it, and select the HID Compliant Touchscreen.
  3. In the popup window, navigate to the Power Management tab, and uncheck the option of Allow the computer to turn off this device to save power.
  4. Click OK, and restart your PC.

If your power management tab is missing, here is a complete guide showing how to restore the power management tab.

3. Roll back the latest Windows update

  1. Press the Windows key + I to open the Settings app.
  2. Select Windows Update and click the Update history tab.
  3. Then, click on Uninstall updates.
  4. Click on the update you wish to remove, and select Uninstall.
  5. Restart your PC and check if the error persists.

Oftentimes, while attempting to update your Windows PC, you might run into errors that are triggered after the update. Rolling back or removing these updates can help get rid of ghost touch bubbles in Windows.

4. Run the Hardware Troubleshooter

  1. Press the Windows key + R, type in the following command in the dialog box, and hit Enter to open the Hardware and Devices troubleshooter: msdt.exe -id DeviceDiagnostic
  2. In the popup window, click on the Next button.
  3. When the scan is completed, Windows will indicate if it found any problems with your Hardware and automatically fix them.
  4. Then, check to see if the issue persists.

While trying to run the hardware troubleshooter, you can run into the human and devices troubleshooter is missing. Be sure to read our guide on how to fix it.

5. Reinstall the Human Interface Device

  1. Right-click the Windows icon and select Device Manager.
  2. Locate the Human Interface Devices, and click on it to expand the selection, then right-click on the Touchscreen option and select Uninstall.
  3. Then restart your PC and Windows will automatically install a generic driver for the Human Interface Device.
  4. Check to see if the issue persists.

Windows use the Human Interface Device to accept user input. If the driver is faulty, your device will be unable to accept user input and thus trigger the ghost touch bubbles in Windows.

Uninstalling and reinstalling the device can help resolve the ghost touch bubbles in Windows.

6. Disable the HID Compliant Touchscreen

  1. Right-click the Windows Start button and select Device Manager
  2. Locate the Human Inteface Devices option, and select HID Compliant Touchscreen. Right-click on the HID Compliant Touchscreen, and select Disable.
  3. Then, close the Device Manager window and restart your PC.

If you’ve attempted all troubleshooting techniques and you’re still unable to get rid of ghost touch bubbles in your Windows PC. Your last option is to get your laptop’s touchscreen checked.

Fixing ghost bubbles in Windows is a relatively easy task that requires little to no technical knowledge. With the steps listed above, you should be able to rid your PC of ghost bubbles.

After disabling the touchscreen driver, you can restore full touch functionality anytime by following this guide on how to enable Tablet PC touch input on Windows 11 safely.

We also recommend reading our guide on how to fix the touchscreen on Windows 11 if it’s not working.

If you’ve got alternative solutions on how to fix ghost bubbles in Windows, you can drop them in the comments below.

Fix: Join Button Not Working/Missing in Teams

Teams is a great collaboration app that allows you to use two Teams apps on your Windows 11. While all this is fascinating, users have now reported that the Teams join button no longer works.

You can’t join the same meeting with a second device. The join button is present for some, but they can’t get in. In others, the button is completely missing. If this sounds like a similar predicament you have encountered, keep reading as we uncover some solutions.

Why am I not able to see the join button in Teams meeting?

The Teams meeting feature is a great way to share ideas, see what others are working on, and collaborate with colleagues. But if you’re not seeing the join button in Teams meetings, here’s why:

  • Network connection issues – If there is an issue with your network connection or server location when attempting to connect, this feature won’t work.
  • Wrong version – While you can use any Teams version, some older versions may be incompatible with newer features hence why some features may be missing.
  • Buggy update – Not all updates are good. Sometimes, app updates come with buggy features that can interfere with the normal functioning of the application.
  • Corrupt cache – It is also possible that the Teams app has accumulated cache over time which has since become corrupted. This could be causing the Teams join button not to work.
  • Wrong account – Since you can login to Microsoft Teams with multiple accounts, the join button may be missing because they are two different accounts.

What can I do if the Teams app is missing the join button?

We recommend you try the following basic workaround before the complex solutions:

  • Sign out from both devices, then sign in again.
  • Ensure that both devices are signed into the same Microsoft account.
  • Check for any available updates for the Teams app and download them for both devices.
  • Switch to a different internet connection if available. For instance, you can create a mobile hotspot and rejoin the meeting from both devices.
  • Verify that your computer is not behind on the time and date.
  • Try using the Teams web version and see if there is a difference.
  • Attempt to join the meeting using other alternatives. For instance, you can use a code, an invite link, or the calendar.
  • Finally, try restarting your PC to clear out any temporary glitches.

1. Clear Teams cache 

  1. Hit the Windows + R keys to open the Run command.
  2. Type %appdata%\Microsoft\Teams in the Run dialog box and then select OK.
  3. Select all files and folders in the %appdata%\Microsoft\Teams directory and hit the Delete button.
  4. Restart Teams and check if you’re now able to hang up calls.

2. Disable antivirus temporarily

  1. Hit the Start menu icon, type Windows Security in the search bar, and click Open.
  2. Click on Firewall & network protection, then select Public network.league of legends black screen after champion select
  3. Locate Microsoft Defender Firewall and toggle the off button.turning off Microsoft Defender Firewall Windows

If you have a third-party antivirus installed, also ensure you disable it temporarily and try again.

3. Repair/Reset teams 

  1. Hit the Windows key and click on Settings.settings windows 11
  2. Click on Apps on the left pane, then select Apps & features on the right pane.
  3. Navigate to Microsoft Teams app, click on the three ellipses, and select Advanced options.
  4. Hit the Repair button.
  5. Try joining your Teams call and see if the issue persists.
  6. If you’re successful, there’s no need to reset, but if the issue is still present, repeat steps 1 to 3, and this time, hit the Reset button.

4. Reinstall Teams

  1. Hit the Start Menu icon on the Taskbar and click on Settings.settings windows 11
  2. Click on Apps on the left pane, then select Apps & features on the right pane.
  3. Navigate to Microsoft Teams app, click on the three ellipses, and select Uninstall.uninstalling microsoft teams
  4. Launch the Microsoft Store, search for the Teams app, and click Install.
  5. Follow the on-screen prompts and try again.

If the above steps don’t yield the desired results and the Teams join button is still not working, we recommend that you reach out to the Microsoft support team. They should be able to come up with a solution for the issue.

Still, on Teams’ errors, you may also come across the Caa20002 error code, or the vertical scroll bar can’t be found but worry not, as we have already covered various ways to address these issues.

Aside from errors, you may also want to jump on the AI bandwagon and enable Teams integration with ChatGPT.

Let us know of any other solutions not mentioned here that have successfully eliminated this error.

Starfield release date finally set for September 6

The Starfield release date has at last been announced. We thought we would have to wait until the upcoming special Starfield showcase event (which itself was also given a broadcast date of June 11th) Bethesda has been promising since January’s Xbox Developer_Direct to find out when we’ll finally get our hands on the game. Instead, Xbox and Bethesda have revealed the launch date ahead of the showcase and, well…it’s a bit later than many of you were probably hoping for.

While the bulk of the speculation hinted at a May or June Starfield release date, the game will be coming out on September 6. This obviously misses the first-half target most were expecting. While it may be a bit disappointing, at least Xbox gamers will have Redfall to keep them occupied beginning May 2.

Starfield promises to be an open-world roleplaying sci-fi adventure like no other. And while the wait for it has been grueling, it is most likely soon to be over. Here’s hoping it will be well worth it (and don’t forget about the Starfield Direct on June 11).

0xC004d302: How to Fix This Activation Error

Some of our readers have recently reported that they received one of the windows activation errors, such as the 0xC004D302 error code on their Windows PC and as a result, some functions stopped working.

This error appears on a computer running Microsoft Windows non-core edition. It can be triggered when the trusted data memory is reactivated. You can work your way through this article to fix the issue.

What causes the 0xc004d302 error?

Below are some of the potential reasons behind the 0xC004d302 windows activation error code:

  • Fake or incorrect product key – One of the most common reasons you are receiving the 0xC004d302 error code is because the product key you entered is not valid or is incorrect.
  • Issues with RSA MachineKeys – This error can be triggered during activation if there are changes in the default permissions of RSA MachineKeys.
  • License files (Token.dat) are corrupt – The Windows activation files are stored in the Token dat file of the operating system. If these files get damaged, this error may occur after activation.
  • Using different commands for activation – If you have executed the Slmgr. vbs/rearm command, and you try to run another command for activation, such as /dlv or /dli, before restarting your PC; the error will appear.

Now that you know some of the potential reasons for the 0xC004d302 activation error code, you can explore the solutions in the next section to help you fix the issue.

How can I fix the 0xC004d302 error code?

Before engaging in the advanced troubleshooting fixes provided in this article, you should consider performing the following preliminary checks, which can help you prevent the error next time:

Having confirmed the above checks and you still require further assistance, you can explore the dedicated fixes on how to fix the 0xC004d302 error.

1. Run an SFC scan

  1. Press the Windows key, type cmd in the Search box, and select Run as administrator.
  2. In the CMD window, type the following command in the text field and press Enter: sfc /scannow
  3. The scanning process may take some time, so wait till the verification reaches 100%.

Running the System File Checker scan could help fix the error since one of the underlying causes is the presence of corrupt license files (Token.dat).

2. Edit the Windows Registry

  1. Press the Start button and type Registry in the Search box, and open the Registry Editor application.
  2. Navigate to the following location: Computer\HKEY_LOCAL_MACHINESYSTEM\CurrentControlSet\Services\sppsvc
  3. Go to the right panel and right-click on SkipRearm. Select the Modify option, and a dialog box with Edit DWORD 32-bit folder should appear.
  4. Set the Value Data to 1 and click the OK button.
  5. Restart your PC.
  6. Now, go to the Start menu, search for Command Prompt, and select the option to Run as an Administrator.
  7. Type the following command and press Enter: slmgr –rearm
  8. Now check if the issue is resolved.

If the Registry Editor is not working well, check out this guide dedicated to solving errors while accessing the Registry to get it working.

3. Perform a System Restore

  1. Press the Windows key + R key to open the Run box, type rstrui in the text box and press Enter.
  2. Click on choose a different restore point and then press the Next button.
  3. Now, select Restore my computer to an earlier time option and then click Next. when the error didn’t happen.
  4. Click the Next button, and then click on Finish.
  5. Check to see if the problem is fixed.

The System Restore tool can revert your system to a previous point.  By this, you should be able to fix the issue.

4. Use a specialized tool

Not scanning your PC for corrupt, malfunctioning, or missing files can lead to multiple system errors that can be hard to tackle.

Thus, using dedicated third-party software can be a great solution because it is a program designed to scan and repair system components automatically.

And that’s it on how to fix the 0xC004d302 activation error code. You can work your way through any of the solutions provided above.

In the case where CMD is not working in Windows 11, here is an easy fix to apply. Additionally, if the Windows product key is not working, you can explore our dedicated guide on how to fix it.

If you have any questions or suggestions, do not hesitate to use the comments section below.

Windows Detected a Hard Disk Problem: How to Fix This Error

There have been several reports of hard disk problems from some of our readers. Recently, Windows detected a hard disk problem that has now topped the list of errors and has got most of our readers worried.

Fortunately, we have gathered some simplified fixes for this error. You can read through this article to know what works for you.

What caused Windows detected a hard disk problem error?

If you want to prevent a problem like this from occurring again, knowing what the cause could be would be very useful:

  • Hard drive or disk failure – This error can also manifest whenever a computer suffers hard disk failure wherein stored information becomes inaccessible.
  • Damaged or corrupted system files – Some users also claim that this error may be triggered by corrupt or damaged system files. Eliminating these files should fix the error.
  • Malware or virus infection – If your hard drive is infected with viruses or malware, it can damage your computer and steal information from it. Get the best antivirus solution here.
  • Logical error – This error can also be caused by logical damage to the hard drive file structure or the software, making your data inaccessible.
  • System registry error – Registry errors can cause several problems, such as preventing your computer from restarting, shutting down, and causing hard disk failure.

Regardless of the causes, you should be able to resolve the Windows detected hard disk problem error using the solutions we recommend below.

How can I fix Windows detected a hard disk problem error?

Before diving into advanced solutions, you should consider performing the following troubleshooting processes:

  • Check if your PC is not overheating or making any strange noise.
  • Back up your files to prevent loss of data. You can also use professional and free backup software.
  • Uninstall recently installed programs.

Having confirmed the above checks and if you still require further assistance, you can explore the advanced solutions provided below.

1. Run the SFC scan

  1. Click the Windows icon, then type cmd in the text field, and choose Run as administrator.
  2. In the Command Prompt window, type the following command in the text field and press Enter: sfc /scannow
  3. The scanning process may take up to 15 minutes, so wait till the verification reaches 100%.

The System File Checker is a Microsoft tool that is used to verify the integrity of system files and also repair files that are scanned to have problems.

Often, many users decide to run an SFC scan by using a dependable third-party tool because they will automatically repair your corrupt system files by locating brand-new ones.

2. Use the Check Disk utility

  1. Click the Start button, then type cmd in the text field, and choose Run as administrator.
  2. Next, type the following command (replace C with your drive letter) and press Enter to run it: chkdsk C: /f /r /x
  3. Follow the prompts that come afterward to restart your PC.

Hard disk failure is one of the major causes of this problem as reported by some users. However, the Check Disk Utility (CHKDSK) can be used to fix any disk errors. If the error persists, check the next fix.

3. Use the System Restore

  1. Power down the PC a few times by using the Power button until the Automatic Repair message comes up.
  2. Navigate to Troubleshoot.
  3. Click on the Advanced options, and choose System Restore.
  4. Next, choose your username and type in your password.
  5. Click on Next, choose the desired restore point, and follow the on-screen instructions to restore your System.
  6. Now restart your PC and check whether the issue persists after the System Restore.

A System Restore will help you to fix the Windows detected a hard disk problem error by reinstating your computer to its previous state before the error.

With these, you should be able to fix your PC’s Windows detected a hard disk problem error message.

Alternatively, if you’re getting the Windows found errors on the drive warning message, you can check our post for quick fixes to apply.

To be on the safe side, you should consider running a Disk Cleanup to improve your hard drive’s performance and soundness.

Finally, some readers claim that our article on Windows 11 not recognizing SSD helped them to resolve the issue swiftly. It might be worth a check for you too.

If you have any questions or suggestions, do not hesitate to use the comments section below.

Can’t Change Your Monitor Refresh Rate? How to Force It

In some cases, Windows users have reported that they cannot change their refresh rate, which prevents them from maximizing their PC’s display capabilities. If you need help changing your monitor’s refresh rate, this article will provide the steps to help you if you can’t change the monitor refresh rate on Windows 10.

Why can’t I change the monitor refresh rate?

The following are some of the common reasons why you can’t change the monitor refresh rate on Windows 10:

  • Outdated/Incompatible drivers – If your system runs an incompatible version of your graphics card, you might need help to change your monitor refresh rate.
  • Incompatible display cable – If the display cable is faulty or incompatible, you might be unable to change the refresh rate on your monitor.
  • Incompatible monitor – If you’re trying to max out your refresh rate, your monitor must be capable of running the desired rate.
  • Wrong display configurations – If your PC’s display isn’t correctly configured, you’ll find it hard to change the refresh rate of your PC.

Now that we know why this happens, let’s apply the solutions below to fix it.

What can I do If I can’t change the monitor refresh rate?

Before we proceed with more advanced troubleshooting techniques, here are some quick fixes you can attempt:

  • Make sure you are using the right cable for the specifications of your monitor and PC. For instance, if you are using DVI, you need a dual-link DVI cable to use 144 Hz.
  • If you use a USB monitor, connect it to a USB 3.0 port.
  • Change your display cable or try the monitor on another PC.
  • Check to see if your monitor supports the required refresh rate. You can do this by searching for your monitor’s specs online.
  • Make sure you install all the pending Windows updates.

If those quick fixes couldn’t resolve the error, here are a couple of advanced solutions you can attempt:

1. Update your graphics card driver

  1. Press the Windows key + S, type in Device Manager, and hit Enter.
  2. In the Device Manager window, locate and click on the Display adapters tab. Select your graphics card, right-click, and select Update driver.
  3. In the next popup window, select Search automatically for updated driver software.
  4. Close the Device Manager window and restart your PC.

Alternatively, you can download the graphics card, i.e., Nvidia or Intel, from the manufacturer’s official website and install it manually.

If none of the methods mentioned above doesn’t suit your expertise, you can try third-party software to download the latest driver versions from its database automatically.

⇒ Get Fortect Driver Updater

2. Change your adapter settings

  1. Press the Windows key + I to open the Settings app.
  2. Click on System, and navigate to the Display tab.
  3. On the right pane, scroll down and select Advanced Display Settings.
  4. In the next window, click on Display adapter properties for Display 1.
  5. In the properties window, navigate to the Monitor tab. Under the Monitor Settings, click on the Screen refresh rate drop-down menu and select your desired refresh rate.
  6. Click OK, and close the Settings app.

If you’ve been unable to change the refresh rate on your PC, you’ll find it hard to play games optimally. Games are graphics intensive, and some require the highest system configurations. Even more, some of you might be wondering: Is variable refresh rate good for gaming? Rest assured that you’ll find the answer in our dedicated guide.

This can be a big problem, especially if your monitor is stuck at 60Hz on Windows 11, and you can’t fully utilize your GPU.

You might also be interested in reading our guide on how to enable dynamic refresh rate in Windows 11.

Luckily, with the steps listed above, you should be able to change your PC’s refresh rate.

Svchost.exe Error 0x745f2780: How to Fix It

The Svchost.exe error 0x745f2780 is a common issue that occurs when Windows fails to load the necessary files and registry keys required for the correct operation of your computer. 

Your system may have been infected with malware that prevents it from running correctly.  It could also be caused by a program you installed on your computer recently. To fix this error, we explore some possible solutions in this article.

Why am I getting the Svchost.exe error 0x745f2780?

Some of the most common causes for this error include:

  • Bad registry file – When Windows encounters a bad registry file, it will try to repair it automatically. This process can take some time and can create errors along the way.
  • Corrupt software update – A corrupt Windows update is the most common cause of the Svchost.exe error. This can happen when an update fails to install properly or has bugs.
  • Malware infection – The most common way to get this error is from a malicious website that has infected your computer with a virus or malware. 
  • Improperly configured programs – Another possible cause is that you may have accidentally used an incorrect path when installing or uninstalling software or hardware drivers for your computer’s operating system.

How do I fix the svchost.exe error?

A few workarounds that could help you resolve this issue before any technical solutions include:

1. Restart the Windows Update service

  1. Hit the Windows + R keys to open the Run command.
  2. Type services.msc and hit Enter.run services.msc command
  3. Locate Windows Update service, double click on it and select Properties.
  4. Navigate to the General tab, under Startup type, select Automatic from the drop-down options, and click the Start button.windows update - startup type - automatic
  5. Next, click Apply and then OK.

2. Re-register Windows update DLL

  1. Hit the Windows key, type cmd in the search bar, and click Run as administrator.cmd-run-admin-w11 unexpected kernel mode trap windows 11
  2. Type the following commands and press Enter after each one: REGSVR32 WUAUENG.DLL REGSVR32 WUAUENG1.DLL REGSVR32 ATL.DLL REGSVR32 WUCLTUI.DLL REGSVR32 WUPS.DLL REGSVR32 WUPS2.DLL REGSVR32 WUWEB.DLL

3. Delete corrupted Windows update files

  1. Hit the Windows key, type cmd in the search bar, and click Run as administrator.cmd-run-admin-w11 unexpected kernel mode trap windows 11
  2. Type the following command and press Enter: net stop WuAuServ cd %windir% 

4. Uninstall recent Windows updates

  1. Hit the Windows key and select Settings.settings windows 11
  2. Click on Windows Update and select Update history on the right pane.update-history restart to repair drive errors
  3. Scroll down, and under Related settings, click on Uninstall updates.uninstall-updates-w11 computer-recognize-logitech-unifying-receiver
  4. This will take you to the most recent installed updates.
  5. Select the topmost update and click on Uninstall.uninstall-update-latest computer-recognize-logitech-unifying-receiver
  6. Restart your PC and check if the problem persists.

How do I know if my Service Host is a virus?

First, it’s important to understand that service hosts are not viruses. They’re just programs that run on your computer and allow the software to be installed or updated. 

A virus is a piece of software that infects other files, programs, and data. Malicious software can be written to do many things, such as steal information, change settings on your computer, or even damage your hard drive.

To test whether or not your computer has been infected with malware, run antivirus software on it first. If no problems are found after running scans for malicious software, you should feel safe.

Another way to check if your Service Host or svchost.exe is a virus is by checking its location. Any other location should call for suspicion unless you moved it. It will usually be located in the following folder: %SystemRoot%\SysWOW64\ or %SystemRoot%\System32

If the problem persists, you may try to restart the computer in Safe Mode. This will help you isolate the cause of the problem and allow you to run an antivirus scan on your system again.

Make sure you also check out our detailed article on other svchost.exe errors that you may encounter in both Windows 10 and 11.

We’d love to hear any additional solutions you may have on this error, so leave us a comment below.

Fix: I2C HID Device Driver Not Working in Windows 11

If you downloaded the I2C HID Device Driver but it’s not working on your Windows 11 PC, you’re in the right place.

What can I do if the I2C device driver is not working in Windows 11?

Before we head to the slightly complex solutions, here are a few quick ones to try:

  • Restart the computer.
  • A user suggested that accessing the BIOS, and then rebooting Windows helped fixed things when the I2C HID device Dell touchpad was not working. So, you might try it as well, even with other devices. To enter the BIOS, press F2, F10, F12, or Del as soon as the display lights up when you turn on the PC.

1. Update your driver

  1. Right-click on the Start icon in the Taskbar or press Windows+ X to launch the Quick Access menu and select Device Manager from the list of options from the pop-up menu.
    device-manager i2c hid device driver not working
  2. Locate and double-click on the Human Interface Devices option.
    hid-driver i2c hid device driver not working
  3. Right-click on the I2C HID Device and select Update driver from the context menu.
    update-i2c-driver i2c hid device driver not working
  4. Select the Search automatically for drivers option as Windows will find the best drivers on your system.
    search-automatically-i2c i2c hid device driver not working

Upon completing the installation of the update, restart the computer to check if the I2C Device driver not working error has been repaired. We strongly recommend that you use a specialized tool to do automatic scans for out-of-date drivers on your PC.

Using a dedicated tool will help with I2C HID device driver download in Windows 11 and eliminate the problem in no time.

⇒ Get Fortect Driver Updater

2. Reinstall the I2C HID device driver

  1. Right-click on the Start icon in the Taskbar or press Windows+ X to launch the Quick Access menu and select Device Manager from the list of options from the pop-up menu.
    device-manager i2c hid device driver not working
  2. Locate and double click on the Human Interface Devices option.
    hid-driver i2c hid device driver not working
  3. Right-click on the I2C HID Device and select Uninstall device from the context menu.
    uninstall-i2c-driver i2c hid device driver not working

If you were wondering how do I reinstall I2C HID, the Device Manager comes to your aid. Restart your computer after you have uninstalled the driver and Windows will now reinstall and update the driver to the most recent version that is currently available.

It will also clean up any corrupted driver files that may have been present at the time of installation and trigger the I2C HID device driver download in Windows 11 on Dell and other devices.

3. Check if there are any hardware issues

  1. Press the Windows key + S to open the search function, type in cmd, and right-click on the most relevant result to run it as administrator.
    cmd-search-admin kernel security check failure windows 11
  2. After the Command Prompt launches, type in the following command and press Enter:
    chkdsk C: /f /r /x

    chkdsk kernel security check failure windows 11

In this case, Check Disk will do a study of the disk and then correct any faults that it discovers, assuming that the disk is not already in use.

4. Update Windows

  1. Press the Windows key + I to open the Settings app, then click on Windows Update in the left panel.
    windows-update-settings kernel security check failure windows 11
  2. If you have any new updates to download, click on the Install now button and wait for the process to finish, otherwise click on the Check for updates button.
    checl-for-updates kernel security check failure windows 11

If you are running an older version of Windows 11, it is possible that this is a contributing factor to the error, which can be rectified by updating the operating system. Most likely, the bug will be addressed in a subsequent update of the software.

Also, when you update the OS, it checks for missing driver updates and downloads them. So this could be the way forward for the I2C HID device driver download in HP.

5. Run System Restore

Note icon NOTE
No files will be deleted as a result of System Restore. However, newly installed apps, changes in settings, and driver updates may be removed due to the process.
  1. Press the Windows key + S, search for Create a restore point, and click on the most relevant search result.
    create-restore-point-search i2c hid device driver not working
  2. The System Protection tab will automatically open. Click on System Restore under it.
    system-restore i2c hid device driver not working
  3. The recommended restore point will be selected by default, but you can select another one by clicking on the Choose a different restore point option. After this, click on Next at the bottom.
    next-restore   i2c hid device driver not working
  4. If everything looks fine, click on the Finish button at the bottom.

Following a successful restoration of your system, the I2C HID Device driver issue will be promptly resolved by the operating system, without the need for further action.

What do HID devices do?

Many often ask what the I2C HID device driver is. In computing, a Human Interface Device (also known as HID) is a type of computer peripheral typically used by people and accepts input from them and outputs to them in response to that input.
hid-devices   i2c hid device driver not working

When you hear the phrase HID, you’re probably thinking of the USB-HID specification.

The standard was developed to allow for greater innovation in PC input devices. It’s also simplifying the process of installing such devices. Before this,devices such as mice, keyboards, and joysticks were typically designed to conform to strict protocols.

Although the HID protocol has its limits, all modern major operating systems will identify standard USB HID devices. such as keyboards and mice, without the need for a specialist driver to be installed on the computer.

Once your I2C HID Devie Driver not working issue is fixed, you may be interested in further customizing your touchpad. For more information and a guideline, see our article on how to set touchpad gestures in Windows 11.

Comment below and tell us which approach worked the best for you. Thanks for reading!

Microsoft announces new open source Azure AI tools

In its commitment to Open Source Technology Microsoft has announced a handful of tools on Azure AI to make building more intelligent apps both easier and more accessible. Tools to fine-tune AI deployments highlight the offerings.

Foundation Models in Azure Machine Learning allows users to fine-tune pre-trained open-source models from Hugging Face throughout Azure ML.  The partnership with Hugging Face was announced last Spring.  Responsible AI Toolbox additions were announced last week. The Responsible Mitigations AI Library and the Fairlearn fairness assessment tool are open-source tools to make the adoption of responsible AI practices easier.

There’s also been new capabilities added in Vision Services and the Florence foundation model in Azure Cognitive Services. With these new capabilities, developers are able to improve content discoverability through automatic captions and video summaries.  Features such as background removal, and retrieval of images are able to be fully automated.  Users can also track movements and analyze environments in real-time.

To learn more check out the Azure Open Source Day Blog.


The Xbox Series S Oreo edition unboxing pics have surfaced

In one of the more…interesting gaming promotions in recent memory, Xbox teamed up with Oreo to create the Xbox Series S Oreo edition. Going by the pics, this playful console looks pretty sweet (pun intended), and features a standard, fully-functioning Xbox Series S with the Oreo cookie shell attached.

Xbox has definitely been showing off its whimsical side of late; only a day ago we reported on leaked images of an upcoming Xbox Series S toaster. Whether this product is real or not only time will tell.

The Xbox Series S Oreo edition was part of a promotional giveaway which also included in-game Oreo-themed skins and other content in Sea of Thieves, Forza Horizon 5, and Halo Infinite. The promotion was only run in Europe, and there’s no indication that it will be repeated in other territories. If it sounds familiar, it’s because this isn’t the first time Xbox and Oreo have teamed up—an Oreo-inspired Xbox One was given away a few years back as well.

You can check out more Xbox Series S unboxing pics over at neogaf.com.

Featured image via neogaf. 

7 Easy Ways to Fix Srttrail.txt BSOD Error in Windows 11

BSOD errors are the most frustrating of all since these cause the OS to crash and lead to the loss of unsaved data. When you encounter one, the Startup Repair utility comes to aid. But that, too, is an ineffective fix against the srttrail.txt error in Windows 11.

The error is generally encountered when you turn on the computer, but there’s a possibility of it occurring even when the system is in use. The message reads, Automatic repair couldn’t repair your PC SrtTrail.txt in Windows 11. After it occurs, you will find the log file at: C/Windows/System32/Logfiles/Srt/SrtTrail.txt

This path is mentioned and presented with two options, Shut Down or Advanced options. If you choose the former, Windows will enter an endless reboot loop.

The error could happen due to several reasons, with each having a specific fix, as discussed in the following sections. By the time you reach the end of the article, the srttrail.txt error in Windows 11 should be resolved.

What is a Srttrail TXT error?

The Srttrail.txt error indicates an issue with the automatic repair system. From here on, users can run the Advanced Repair or shut down the computer. And the former is generally the ideal fix for the Srttrail.txt error in Windows 11.

If you are wondering what it is, the Srttrail.txt file is a log kept by Windows of the instances it couldn’t boot properly. Also, for those trying to go for SrtTrail.txt Windows 11 download, the file is already stored on the PC and cannot be downloaded on the web.

What causes the srttrail.txt error in Windows 11?

If you are wondering what causes SrtTrail txt error, we have listed all possible reasons below.

  • Conflicting software: Many programs may trigger the BSOD error, and the only solution is to uninstall the program responsible for it.
  • Corrupt system files: A PC with corrupt system files does not function well, has slow performance, and often crashes with a BSOD.
  • Malware or virus infection: When a computer is infected with malware or virus, you are just as likely to encounter the error.
  • Issues with the hardware: A hardware component, for instance, the RAM, or even an external peripheral, when not connected properly or malfunctioning, can lead to the BSOD error.

How can I fix the srttrail.txt BSOD error on Windows 11?

1. Disconnect non-critical devices

Your primary approach when dealing with BSOD errors is to disconnect the non-critical external devices. Many incompatible devices are known to conflict with the functioning of the OS, thus leading to errors.

After disconnecting the devices, restart the computer and check if the srttrail.txt error in Windows 11 is fixed. If that’s the case, reconnect the removed devices one at a time and restart the computer to identify the one causing the problem.

2. Disable Automatic Repair

Note icon NOTE
To execute the fix, press the power button to turn on the system, and as soon as the OS is about to boot, hold the power button pressed to turn the system off.

Repeat this thrice, and the Automatic Repair will kick in the fourth time.

Wait for it to complete, and you will then have two options listed, Shut Down and Advanced Options. The following fix starts from this window.
  1. Select Advanced Options from the Automatic Repair window.Select Advanced options to fix srttrail.txt in windows 11
  2. Click Troubleshoot.Troubleshoot
  3. Next, again select Advanced Options from the two listed here.Advanced options to fix srttrail.txt windows 11
  4. Click on Command Prompt.Command Prompt in Advanced options
  5. Now, paste the following command and hit Enter to disable Automatic Repair.bcdedit /set {default} recoveryenabled NoDisable Startup Repair to fix srttrail.txt windows 11
  6. After the command is executed, restart the computer.

After disabling Automatic Repair, check if the srttrail.txt error in Windows 11 is eliminated.

3. Repair Master Boot Record (MBR)

Note icon NOTE
You now know how to reach the Advanced Options and all the fixes from now on will start from this window only.
  1. Launch the Command Prompt window from Advanced options.Select Command Prompt
  2. Paste the following command and hit Enter.bootrec.exe /rebuildbcdExecute command to fix srttrail.txt windows 11
  3. Next, execute the following command.bootrec.exe /fixmbrPaste command
  4. Finally, type/paste the following command and hit Enter to execute it.bootrec.exe /fixbootRun command to fix srttrail.txt windows 11

Once done, restart the computer and check if the srttrail.txt error in Windows 11 is fixed.

The Master Boot Record or MBR, is stored on the first sector of the storage drive and contains the necessary code required for the system to boot. If there are problems with it, you are likely to encounter issues booting the OS.

4. Verify device partition

  1. Go to the Advanced options window and select Command Prompt from the listed options.Command Prompt
  2. Paste the following command and hit Enter.bcdeditExecute bcdedit command to fix srttrail.txt windows 11
  3. Now, check if partition=C: is listed next to device and osdevice.Check partitions
  4. If that’s not the case, execute the following commands one a time.bcdedit /set {default} device partition=c: bcdedit /set {default} osdevice partition=c:Change device partitions to fix srttrail.txt windows 11
  5. Now, restart the computer.

5. Run SFC and Check Disk scan

  1. Select Command Prompt from the options listed in the Advanced options windows.Click on Command Prompt
  2. Next, type/paste the following command and hit Enter to run the SFC scan.sfc /scannowRun SFC scan to fix srttrail.txt windows 11
  3. Once the scan is complete, execute the following command to run the Check Disk utility.chkdsk /r c:Run Check Disk utility

After running both commands, restart the computer. If Windows couldn’t repair srttrail.txt, running an SFC scan might do the trick. Also, it might work as a SrtTrail.txt Windows 10 fix.

The SFC (System File Checker) scan is used to identify corrupt system files. And if any are found, they are replaced with a cached copy stored on the computer. The limitation here is that only the system files are scanned, which is where the Check Disk utility comes into the picture.

The Check Disk utility scans your drive for any corruption and bad sectors and effectively eliminates both. Since it scans the whole drive, the utility takes more time as compared to the SFC scan. Thus it’s recommended that you first run the SFC scan and if the error is not fixed, go with the Check Disk utility.

6. Check system hardware

If the methods listed above haven’t worked, the problem could likely be with the hardware itself. In which case, you would be required to either get it repaired or replaced.

But, before you do that, let’s first make sure that all connections are properly done. For this, remove and reconnect your hard drive, battery, and RAM while wiping any dust fragments during the process. Make sure you remove and reconnect these while the system is turned off.

For the RAM, you could run Windows Memory Diagnostics or Memtest86+, two highly effective tools for identifying and eliminating issues with the system memory.

If that, too, doesn’t fix the srttrail.txt error in Windows 11, check if any of the hardware components are damaged and get them either repaired or replaced.

7. Reset your Windows 11 PC

In case the hardware components seem to work fine, you have no other option but to reset Windows 11 to its factory settings.

There are various ways you can do this, but since you cannot boot the OS, we recommend either going with the Command Prompt method or selecting the Reset this PC option in the Troubleshoot window.

Reset Windows 11 to fix srttrail.txt windows 11

Resetting the PC will remove all saved applications and configured settings, though you have the option to keep the files. Once the PC is reset, it should work the same way it did when you first purchased it and the srttrail.txt error in Windows 11 would be fixed.

In case the reset feature is not working, check our dedicated guide to eliminate the underlying problem.

How do I prevent BSOD errors in Windows 11?

BSOD errors are regarded as one of the most dreaded and intricate ones owing to the prolonged troubleshooting time and the lack of available information.

The stop code following the error doesn’t divulge much about the underlying cause, which makes it further difficult to diagnose and eliminate the issue.

BSOD errors chart

A few simple tips and tricks will come in handy to prevent or eliminate most of the BSOD errors in Windows 11 as well as the previous iterations.

Always keep the installed drivers up-to-date, make sure all the connected peripherals are compatible, do not install shady third-party apps that might potentially harm the system, and never make unnecessary changes to the Registry.

If you have any malfunctioning or problematic programs installed, learn how to uninstall apps in Windows 11.

How do I fix the automatic repair loop in Windows 11?

An automatic repair loop, as the name suggests, is when your computer tries to fix things with Automatic Repair but is unable to, and it goes on in a loop.

Though fixing the automatic repair loop in Windows 11 isn’t as tricky as it sounds, and all you have to do is identify and eliminate the root cause behind it. This includes issues with the Registry, problematic files, incompatible hardware, or malware.

That’s all there’s to the srttrail.txt error in Windows 11 and the most relevant fixes for it. Once you are done executing the methods listed above, the error should be eliminated, and the system will be up and running in no time.

In case you are encountering the error on the previous iteration, find out how to resolve the srttrail.txt error in Windows 10.

Do not hesitate to tell us which fix worked for you in the comments section below.

PowerToys v0.68.1 ships with bug fixes

Last week, Microsoft released PowerToys 0.68.0 which featured two nifty features, the Mouse Jump and Paste as Plain Text utilities. The update also featured the usual fixes and improvements.

However, Microsoft has released another version bumping Powertoys to version 0.68.1. The release is fairly minor because it doesn’t feature any new utilities. The update is a patch release and mainly focuses on fixing bugs discovered.

Here’s the full changelog:

  • #24446 – Support Ctrl+V as activation shortcut for Paste As Plain Text, as requested by some users. Warning: Overriding a default system shortcut might have unintended consequences.
  • #24437 – Paste As Plain Text – Support pasting multiple times as Ctrl+V does (on pressing activation key while holding modification keys)
  • #24491 – Set Paste As Plain Text default shortcut to Ctrl+Win+Alt+V to avoid conflicting with new Windows volume mixer shortcut.
  • #24600 – Add PowerToys Run setting to disable thumbnails generation for files in order to narrow down the root cause of the crash.

If you already have PowerToys running on your device, it should automatically notify you of this update. Alternatively, you can get this update today by launching your app, then clicking on General followed by the Check for Updates, and then the Install Now button.

This version of the app is also available on GitHub as well as the Microsoft Store if you do not have it already.

Have you experienced any of the issues highlighted above? Let us know in the comments.

Microsoft PowerToys
Microsoft PowerToys

Paramount Plus Fatal Error: 5 Safe Ways to Fix It

Many users have been facing the Paramount Plus Fatal error when streaming their favorite movies or TV shows on their browsers, Apple TV, Android TV, and other platforms. 

In this guide, we will explain all the tested methods to fix the error right after discussing the causes of the issue. Let’s get started! 

What causes the Paramount Plus Fatal error?

There could be various reasons for the error to occur; some of the common ones are: 

  • Network connectivity issues –  If you have an unstable or weak internet connection, it could cause a fatal error on Paramount Plus. Check your internet connection or talk to your ISP to resolve the issue.
  • Outdated app – If you are using the old or obsolete version of the Paramount Plus app, it could cause an issue. To fix it, you must ensure you have the latest app version.
  • Corrupted files – If the files related to the Paramount Plus app are damaged or corrupted, then you might see this error.
  • Server issues – Sometimes, the Paramount Plus server may be down or face some problems, which could lead to this error. 

What can I do to fix the Paramount Plus Fatal error? 

Before moving to the advanced troubleshooting steps, you need to go through preliminary checks: 

  • Restart your device. 
  • Check your internet connection.
  • Sign out and sign in from the Paramount Plus app.
  • Finally, check your Paramount Plus subscription.

1. Check the cables & reset your router 

  1. Check if the cables are correctly plugged in and are not damaged. 
  2. Next, to power cycle your router, unplug it, remove the modem, and wait 2-3 minutes. 
  3. Replug the router into the power socket and let it start again.

2. Restart the app

  1. On the Paramount Plus app, click OK on the error page to close it.
  2. Try to play the video again. If the error appears again, close the app.
  3. Wait for a few seconds, and go to Settings.Settings
  4. Now select Apps.Apps paramount plus fatal error
  5. Choose the Paramount Plus app and click Force stop.Force stop
  6. If you are not using the app but using the browser to access Paramount Plus, press Ctrl + F5 to refresh the browser. 

Forcing the app to close can help you clear out other issues like Paramount Plus error code 3205; read this guide to learn the other detailed steps.

3. Update the app or your browser

  1. If you are using the app on your TV, go to the App Store, and click Paramount Plus.
  2. Click Update and wait for the process to complete. 
  3. If using a browser, go to Settings.Settings Chrome paramount plus fatal error
  4. Check if it is updated to the latest version; if not, install the updates.Setting up to date Chrome

4. Reinstall the app

  1. Go to Settings on your TV. Settings
  2. Select the Apps.Apps paramount plus fatal error
  3. Locate and select the Paramount Plus app. Choose the Uninstall option.Uninstall app 1 paramount plus fatal error
  4. Once uninstalled, go to the App Store and, search for Paramount Plus, install it. Paramount install

5. Contact Paramount Plus support

paramount plus fatal error

If nothing has worked for you, you can contact Paramount Plus support. Explain to them the issue and steps you have taken so that they can help you fix the problem.

We also recommend reading our guide on how to fix Paramount error code 3005 and how to troubleshoot error code 3002 for further solutions.

So, these are methods to fix the Paramount Plus Fatal error. Try them and let us know what worked in the comments section below. 

12 Best Microsoft Teams Backgrounds For Meetings

Post-pandemic, the trend of remote work and virtual meetings has increased. Finding the appropriate backgrounds for your Microsoft Teams meetings is essential to set the right tone.

You can create a professional image that can create a great first impression and help you focus on the task.

In this guide, we will explore the best Microsoft Teams backgrounds for professional or personal meetings. Let’s dive in!

How can I add background to your Microsoft Teams meetings?

  1. Launch Teams and join your meeting.
  2. Once you are in the meeting, go to the three-dot menu in the meeting controls and choose Show background filters.Background filters
  3. Select the Add new button and choose the Add image option.
  4. Select the image you want to set from your computer; you can preview it and adjust it as needed.
  5. Click Apply.

What are the best Microsoft Teams backgrounds for meetings?

A Galaxy Far, Far Away

 Galaxy Far, Far Away -  best Microsoft Teams backgrounds for meetings

If you are a Star Wars fan and about to get on a call with people who share the same enthusiasm about the series, then it can be fun to use them as backgrounds for your meetings.

It can provide you with a visually engaging background. You can go for Starfield, Snoke’s Star Destroyer, Tatooine, or a Star Wars logo.

Using any backdrop can help you create a sense of escape from the mundane.

⇒ Get Galaxy Far, Far Away

The Simpsons Couch

The simpsons couch

Remember The Simpsons? If you are about to get on a call with the fans of the show or popular culture in general, then choosing this background could be a great conversation starter.

It can be a fun and memorable reference to the show that could bring memories of the popular animated show. If the purpose and context of the call create a lighthearted and playful tone, this could be a great choice.

⇒ Get The Simpsons Couch

Pixar Movies

best Microsoft Teams backgrounds for meetings - UP

Who doesn’t love and remember the cute and heart-touching story of the UP movie? The movie is known for its vibrant and colorful visuals; using it as background could add an interesting element to your video call.

If the purpose of the call is to send a positive message about friendship and perseverance, then this could be a great way to do that.

This background can create an uplifting and motivating atmosphere for your call. You can use the living room from the UP image to your video meeting as a backdrop and be a part of Carl’s journey in fulfilling his wife’s dreams. Wouldn’t that be awesome?

Embrace the Nature

Nature backgrounds

If you are a nature lover, these are for you! Nature backgrounds can be calming and relaxing, thereby choosing one can help create a sense of serenity and tranquility which can help reduce stress and anxiety for you and the participants on your video call.

Whether you like snow, rain, or the beach, you can add them as your virtual background in a video meeting on Teams.

⇒ Get Embrace the Nature

Simple office setting

Simple office setting -best Microsoft Teams backgrounds for meetings

If you want something plain and simple, an uncluttered background for your next video meeting on Teams, then you can use this one.

This can be the best backdrop for your online events as the background look aesthetic, professional, neutral, and less distracting.

It can help you protect your privacy and maintain confidentiality, preventing your participants from seeing any sensitive information that may be visible in the surroundings.

⇒ Simple Office setting

Borderlands 3

Borderlands 3

If you are Borderlands 3 fan, too, then we have the good news! You can add these fun backgrounds to your next video chat with friends with the same compassion for the game.

These backdrops allow you to virtually hang out with Mordecai, Brick, and Tina, making your home office look less boring. With its colorful and stylized graphics, you can add a visually interesting and appealing background for your video call.

⇒ Get Borderlands 3

Game of Thrones

Game of Thrones - best Microsoft Teams backgrounds for meetings

This is for everyone who fantasized about sitting on the Iron Throne after watching Game of Thrones; now it is possible, at least virtually.

This collection of the best Game Of Thrones scenes and logos can be a fun and visually appealing way to create a pop culture reference.

You can add this as your video call backdrop if you are on a call with Game of Thrones fans, as it could help you break the ice and create a sense of camaraderie among the participants.

⇒ Get Game of Thrones

Airbnb Homes

Airbnbs

If you are missing traveling and staying in your favorite Airbnb, we can help! You can virtually work from home from your favorite Airbnb Homes and create a sense of novelty and adventure.

This beautiful collection will satisfy your wanderlust without spending a dime. Airbnb homes are known for comfort and artistic & eclectic decor; if you want to create a casual and friendly atmosphere for your video call, this can be a great choice.

⇒ Get Airbnb Homes

Libraries

Libraries -best Microsoft Teams backgrounds for meetings -

A wall of amazing books looks sophisticated and can be an interesting conversation starter. You can position yourselves in front of a stack of books, and it could depict a sense of professionalism and academic expertise.

Libraries are known for a quiet atmosphere; choosing this as your background can help you create a sense of calm and focus that can help to improve the quality of video calls and reduce distractions.

⇒ Get Libraries

Meeting rooms

If you are at work or a business meeting, it is very important to look professional and committed. With these meeting room backgrounds, you can depict how serious you are about the work, set the context and remind the participants of the purpose of the call.

These Microsoft Teams backgrounds will help you stay focused on the agenda of the meeting, therefore, could be the best for professional meetings.

⇒ Get Meeting rooms

Marvel background

If you and your participants are fans of the Marvel Cinematic Universe or superheroes, then using a Marvel background can be a great way to break the ice.

Depending upon the scene you choose for your online event, you can create a sense of drama, action, and suspense that can be captivating and engaging.

The superheroes are known for their bravery, courage, and perseverance; if you want to inspire and motivate your participants or talk about leadership, teamwork, and problem-solving, you can choose any.

⇒ Get Marvel background

Warner Bros Backgrounds

Warner Bros backgrounds can provide a visually exciting and engaging experience for your video call. If you and your participants are Warner Bros work’s fans, it can be a fun and memorable reference and a great conversation starter.

A wide range of options are available; you can choose any of them depending on the purpose and context of your call, thereby setting the mood as per your call.

⇒ Get Warner Bros backgrounds

So, these are the best Microsoft Teams backgrounds that you can use to elevate the virtual presence to the next level.

While on the subject, you may also check our list of the best Teams Halloween backgrounds. Or, you can always set animated backgrounds in Teams.

You can choose any of these and add a touch of personality, professionalism, and creativity to your video calls.

Try them and let us know your favorite in the comments section below.

4 Ways to Turn Off Metered Connection in Windows 10

When using a limited data plan or mobile hotspot, setting up a network connection as metered on Windows 10 can help conserve internet bandwidth and save data. 

However, there may be times when you want to turn off the metered connection and use the internet at its full capabilities. 

In this guide, we will discuss some of the methods to disable the setting on Windows 10. Let’s get started!

What can I do to turn off the metered connection on Windows 10?

1. Use the Settings app

  1. Press Windows + I to open Settings.
  2. Go to Network & Internet.Network & Internet Windows 10 set up as metered connection
  3. Select the Ethernet or WiFi which you want to set as metered.
  4. Click Properties.Properties turn off metered connection windows 10
  5. Under the Metered connection, locate the Set as metered connection option.Metered connection turned off
  6. Toggle off the switch to turn off the metered connection.

2. Use the Command Prompt

  1. Go to the Search bar, type CMD, and click Run as administrator.Command Prompt Windows Run as Administrator
  2. Type the following command after replacing Your WiFi Name with the name of your WiFi and Press Enter: netsh wlan set profileparameter name="YOUR_WIFI_NAME" cost=Unrestricted
  3. Then, restart your computer to let the changes take place.

3. Use the Registry Editor

  1. Press Windows + R to open the Run dialog box.REGEDIT RUN COMMAND
  2. Type regedit and press Enter to open Registry Editor.
  3. Navigate to this path: Computer\HKEY_LOCAL_MACHINE\SOFTWARE\Microsoft\Windows NT\CurrentVersion\NetworkList\DefaultMediaCostturn off Metered connection Windows 10
  4. Locate and double-click on Ethernet or WiFi to modify. For example, change the Value data from 1 to 0.
  5. Click OK.

4. Use the Group Policy Editor

  1. Press Windows + R to open the Run console.GPEDIT  turn off metered connection windows 10
  2. Type gpedit.msc and press Enter to open Group Policy Editor.
  3. Navigate to this path: Computer Configuration\Administrative Templates\Network\Windows Connection Manager
  4. Locate and double-click the Set metered network option.
  5. Select Disabled and click OK to save the changes.
  6. Close the Group Policy Editor.

So, you can use these methods to turn off the metered connection on Windows 10. Please let us know in the comments section below if you have questions or concerns about metered connection.

Windows Cannot Find Updater.exe: How to Fix It

If you’re attempting to update an application, you might run into the Windows cannot find updater.exe error. When this error pops up, the desired application will be rendered inoperable. 

If you bump into this error message, it’s nothing to worry about. This article will provide you with the necessary steps to resolve the error. 

Why does updater.exe crash?

There are a lot of reasons causing updater.exe to crash. Usually, a updater.exe error is commonly associated with corrupted Windows files. However, here are some other reasons triggering this error:

  • Missing executable: If the updater.exe file isn’t available in the specified file path, Windows cannot locate the executable. In this case, this can trigger the error. 
  • Corrupt drivers: If you don’t know how to install a driver, you might have messed up the process, which can corrupt the drivers. Corrupt drivers can prevent Windows from locating updater.exe. 
  • Malware or virus: Some skilled hackers can utilize Windows updates to spread viruses. If you have an infected PC, the malicious code might prevent Windows from locating updater.exe. 
  • Software conflicts: In rare cases, running too many background apps affects the ability of Windows to locate updater.exe. 

What can I do if Windows cannot find updater.exe?

Before moving to advanced troubleshooting techniques, here are some quick checks:

  • Ensure you have a stable internet connection if it’s a live update.
  • Close all background applications. Here is a guide on how to turn off all background apps.
  • Make sure you install the latest drivers. 

If those quick fixes didn’t resolve the error, here are a couple of advanced techniques you can try.

1. Perform a Clean Boot

  1. Left-click the Start button, type in msconfig, and select System Configuration from the displayed results.
  2. In the System Configuration window, select the Services tab. Check the box to Hide all Microsoft Services and select Disable all.
  3. Navigate to the startup tab and select Open Task Manager.
  4. Right-click on all enabled programs in the Task Manager window and select Disable.
  5. Close the Task Manager.
  6. In the System Configuration window, select OK, and restart the computer.

Performing a clean boot will ensure your PC boots up with only the required services and applications, eliminating third-party and background processes. 

2. Scan for malware or virus

  1. In the search bar, type in windows security and press Enter.
  2. Select the Virus and Protection tab and click on the Scan options on the right side of the window.
  3. Select the Full scan option and click the Scan now button.

Once this step is completed, Windows Defender will scan the entire PC for threats and isolate and eliminate them. 

We have a list of other antivirus and anti-malware software suitable for all Windows versions to check if this fails.

3. Run the SFC/ DISM scans

  1. In the Windows search bar, type in cmd and press Enter.
  2. Type the following commands and click Enter: sfc /scannow 
  3. Then, type this and press Enter: DISM /Online /Cleanup-Image /RestoreHealth
  4. Close the Command Prompt and restart your PC to take effect.

If the scan detects errors, it’ll display a message detailing its findings. Typically, it’ll try and fix the errors automatically. If the SFC scan fails to work, then read this guide to troubleshoot the causes. 

Another efficient and intuitive way that we recommend is using a trustworthy tool to restore your PC’s health automatically. It may help you run a scan of your entire system to fix Windows Registry problems and replace any damaged components of the OS as well, optimizing your device altogether.

4. Restore PC to latest restore point

  1. Press the Windows key, type Create a Restore Point, and press Enter.
  2. Select the System properties tab in the popup window, and click on System Restore (If the option is greyed out, you have no existing system restore points).
  3. Check the Choose a different restore point and hit the Next button to select a previously created one.
  4. Choose the desired restore point and select Next.
  5. Follow the onscreen prompts to navigate the process of restoring to the previous point.

Once you’ve finished this process, the system will restart and boot up from the last working state of the computer. 

If you don’t have an existing restore point, read this detailed guide on how to create a restore point in Windows 11.

If you have more questions or suggestions, feel free to leave them in the comments below.

How to Turn On Or Off A Metered Connection on Windows 11

Setting a network connection as metered on Windows 11 is useful to limit data usage and conserve internet bandwidth. This can be helpful when you are on a limited data plan or using mobile data.

This guide will discuss ways to turn on or off metered network connections on Windows 11. 

How can I turn on or off the metered connection on Windows 11?

1. Use the Settings app

  1. Press Windows + I to open Settings.
  2. Go to Network & Internet.
  3. Click the WiFi or Ethernet, depending on the connection you want to set as metered.
  4. Click the network and toggle on the switch for Metered connection.Set as metered connection Windows 11
  5. To disable toggle off the switch anytime you want.

2. Use the Command Prompt

  1. Press the Windows key, type CMD, and click Run as administrator.DOS COmmand Prompt
  2. Copy and paste the following command, replace your WiFi name with the name of the WiFi, and press Enter after every command: netsh wlan set profileparameter name=YOUR_WIFI_NAMEWIFINAME
  3. Type the following command, replace the WiFi network name with the name of your WiFi to enable a metered connection, and press Enter: netsh wlan set profileparameter name="Wi-Fi network name" cost=FixedCMD FIXED WLAN
  4. To disable a metered connection, copy and paste the following command, replace the WiFi network name, and press Enter: netsh wlan set profileparameter name="Wi-Fi network name" cost=UnrestrictedCMD set as metered connection Windows 11

3. Use the Registry Editor

  1. Press Windows + R to open the Run window.REGEDIT RUN COMMAND
  2. Type regedit and press Enter to open Registry Editor.
  3. Navigate to this path: Computer\HKEY_LOCAL_MACHINE\SOFTWARE\Microsoft\Windows NT\CurrentVersion\NetworkList\DefaultMediaCost
  4. Double-click Ethernet or WiFi from the right pane. 
  5. Change the Value data from 0 to 1 to enable the metered connection. Click OK.Ethernet set as metered connection Windows 11
  6. To disable the metered connection, change the Value data from 1 to 0. Click OK.WIFI disable metered connection Windows 11

So, these are methods that you can turn on or off the metered connection on Windows 11. Please let us know in the comments section below if you have any questions or concerns about metered connection.

When will Hogwarts Legacy come out on Xbox One & PS4?

Avalanche Software, the game developer behind Hogwarts Legacy, announced that it has pushed the release date of the hotly-anticipated game on older-gen consoles of Xbox One and PS4 to May 5, 2023.

Hogwarts Legacy has faced several pushbacks in release dates, especially for older consoles. For Xbox One and PS4, it was previously set to in 2021, then to February 2023, then to April of the same year.

What’s all the fuss with Hogwarts Legacy?

The action-packed open-world RPG game takes the players to the 1800s in Hogwarts castle. As a fifth-year student, you’ll learn different magical abilities to help you uncover a deeply-buried ancient secret of the world you’re living in.

Hogwarts Legacy is an immersive, open-world action RPG set in the world first introduced in the Harry Potter books. For the first time, experience Hogwarts in the 1800s. Your character is a student who holds the key to an ancient secret that threatens to tear the wizarding world apart. Now you can take control of the action and be at the center of your own adventure in the wizarding world. Your legacy is what you make of it.

Reception has been overwhelmingly positive towards Hogwarts Legacy, despite being critically perplexing in the eyes of the critics.

The game has sold over 12 million copies within the first two weeks with over $850 million made globally, according to Warner Bros’ figures. While the game has been released on Windows, PS5, and Xbox Series X/S on February 10, 2023, it’s going to take a little while for it to arrive for the majority of people.

As for Nintendo Switch users, the game will arrive on July 25, 2023.

Are you excited about Hogwarts Legacy on Xbox One and PS4? Let us know in the comments!

Windows Keeps Booting into OOBE: How to Force it Out of It

When users turn on their Windows computers for the first time, they are greeted with the Windows Out of Box Experience. It is a series of screens where users must accept the license terms, connect to the internet, login, and sign up for a Microsoft Account. 

However, if you are stuck with the OOBE screen every time you start your computer, then it could be frustrating. This guide will discuss the various methods to fix Windows that keeps booting into the OOBE issue. 

Why does my Windows keep booting in OOBE?

There could be several reasons why Windows restarts in an OOBE environment; some of the common ones are: 

  • Corrupted installation files – If the installation files for Windows are corrupted, the setup process could fail, hence the error.
  • Incorrect configuration settings – Misconfigured system settings can also be the reason for setup failure. Therefore, you get stuck with the OOBE screen.
  • Hardware issues – Failing hard drives or other damaged components could cause the Windows installation process to fail. Hence, you see the screen. 

How can I fix the Windows keeps booting into the OOBE issue?

Before moving to the advanced troubleshooting steps, go through these preliminary checks:

  • Restart your computer.
  • Remove the unwanted external peripherals.

1. Perform an Automatic Repair 

  1. Power on and off your computer three times. 
  2. Then, on the 3rd time it restarts, it will take you to the Preparing Automatic Repair page, then boot in Advanced startup.
  3. On the Choose an option page, click Troubleshoot.Choose an option - Troubleshoot -Windows keeps booting into OOBE
  4. Click Reset this PC.Reset this PC
  5. Now select Keep my files.
  6. Click Cancel.
  7. Choose your account, enter your password, and click Continue. 
  8. Now click Reset. 

2. Use the Command Prompt

  1. Press the Windows key, type CMD, and click Run as administrator.DOS COmmand Prompt
  2. Copy and paste the following command to come out of audit mode and press Enter: sysprep /oobe /generalize
  3. Restart your computer. This will reset the Windows licensing state to default. You need to enter your license key again. 

3. Use the Run window

  1. Press Windows + R to open the Run dialog box. Run command to Generalize - Windows keeps booting into OOBE
  2. Type the following command and press Enter: %WINDIR%\system32\sysprep\sysprep.exe
  3. Now on the next window, place a checkmark next to Generalize and click OK. Generalize Windows keeps booting into OOBE
  4. Finally, reboot your computer and check if the issue persists. 

The System Preparation tool can help you fix the OOBEEULA error; to learn more about the issue, read this guide.

4. Reinstall Windows 

4.1 Create an installation media 

  1. On a different computer, go to Windows 11 download page.
  2. Under Create Installation Media, click Download now.Create Windows media Windows keeps booting into OOBE
  3. Double-click the downloaded file and click Yes on the UAC prompt. 
  4. Plug in a USB flash drive with 8 GB of free space.
  5. You will get the Windows Setup wizard; click Accept to agree to the license terms. Accept the terms
  6. On the Select language and edition page, choose Language &  Edition and click Next. Windows 11 edition
  7. On the Choose which media to use page, select USB flash drive and click Next. Click Next media
  8. Follow the onscreen instruction to create an installation media and click Finish on the last screen. 

4.2 Reinstall Windows on your PC

  1. Plug the USB drive into the affected computer, and restart your computer. 
  2. Press F2, F10, or the designated key when your PC boots up, depending on your device manufacturer. 
  3. Go to the Boot menu and Change the boot order in the BIOS. Select USB flash drive. Boot-order Windows keeps booting into OOBE
  4. When prompted, press any key to continue booting. 
  5. When the computer restarts, you will get Windows 11 setup wizard. 
  6. Select the Language to install, Time & currency format, and the Keyboard or input method on the next screen. Choose accordingly. Click Next.English US
  7. Click Install and follow the onscreen instructions to complete the process.Install now

So, these methods can be used to fix the Windows keeps booting into OOBE. Try them and let us know in the comments section below.