Microsoft Journal is one of the essential Windows apps that recently received a significant upgrade and now delivers a more user-friendly and feature-loaded experience. But, many report that Windows Journal cannot open specific files on their PC.
The error message, in this case, reads, There was a problem trying to open the journal followed by the file name. It lists two possible causes, file corruption and change of location, and we will be looking at that and other possible solutions.
What can I do if Windows Journal cannot open?
NOTE
Before you proceed, verify if the problem lies with just one file or all of them. In case it’s the former, start from Solution 1, while for the latter, directly head to Solution 3.
1. Check if the file exists in the location
Press Windows + E to open File Explorer, paste the following path in the address bar while replacing the username with the current one, and hit Enter:C:\Users\Username\OneDrive\Documents\Journals
Check if the file you are having trouble opening is saved here.
If not, find it and move the file back here.
Your primary approach when Windows Journal cannot open is to verify that the file is stored in the default location. If this doesn’t help, head to the following method.
2. Move the file to another location
Navigate to the Journals folder by navigating the following path:C:\Users\Username\OneDrive\Documents\Journals
Select the file throwing the error, and press Ctrl + X.
Now, go to any folder, preferably on another partition (create a partition if required), and press Ctrl + V to paste the file.
Open the file from here, and click on No Thanks in the prompt in Windows Journal.
Several users fixed the problem by moving the problematic file to another folder when Windows Journal could not open it. So, make sure to give it a try.
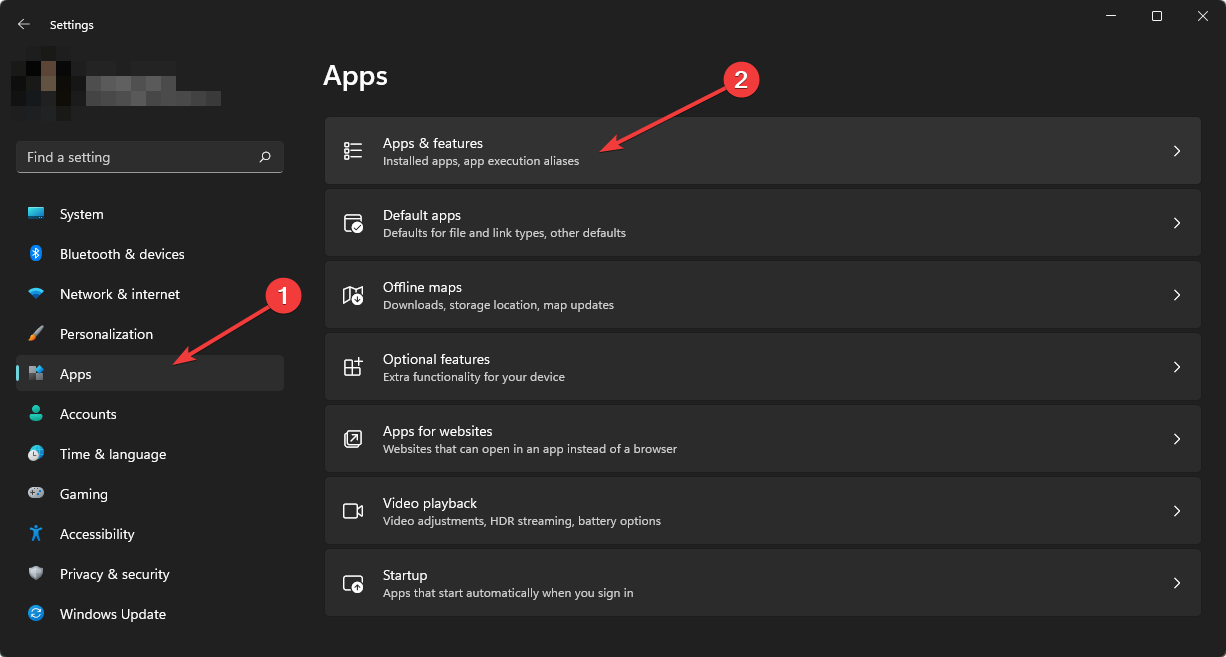
Press Windows + I to open Settings, select Apps from the navigation pane, and click on Installed apps on the right.
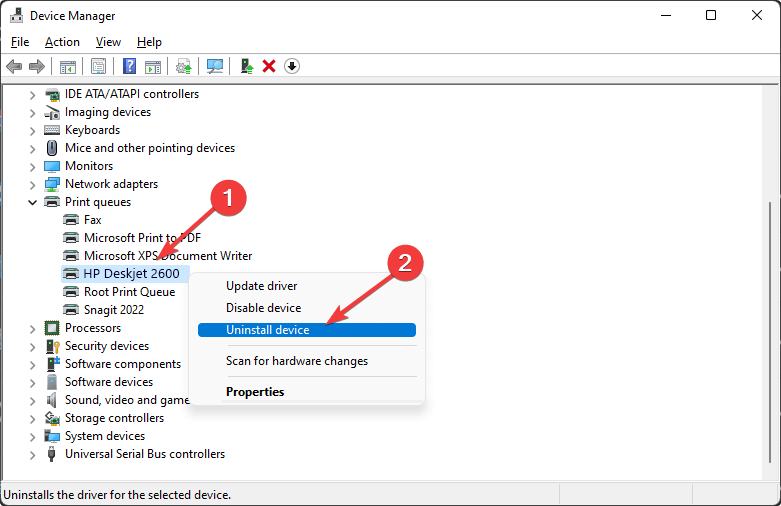
Locate Journal here, click on the ellipsis next to it, and select Uninstall.
Again, click on Uninstall in the prompt, and wait for the process to complete.
Now, go to the Microsoft Store, click on Get in Store app, and download Journal.
Once done, launch Microsoft Journal, and open the file that earlier threw the error.
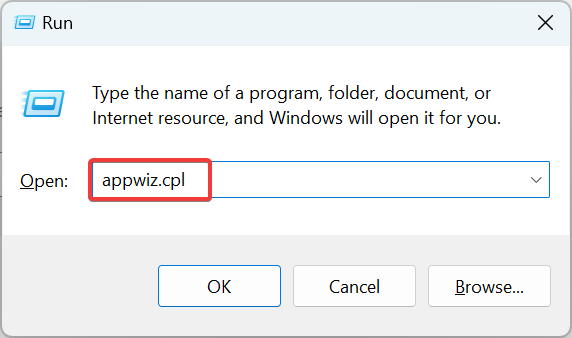
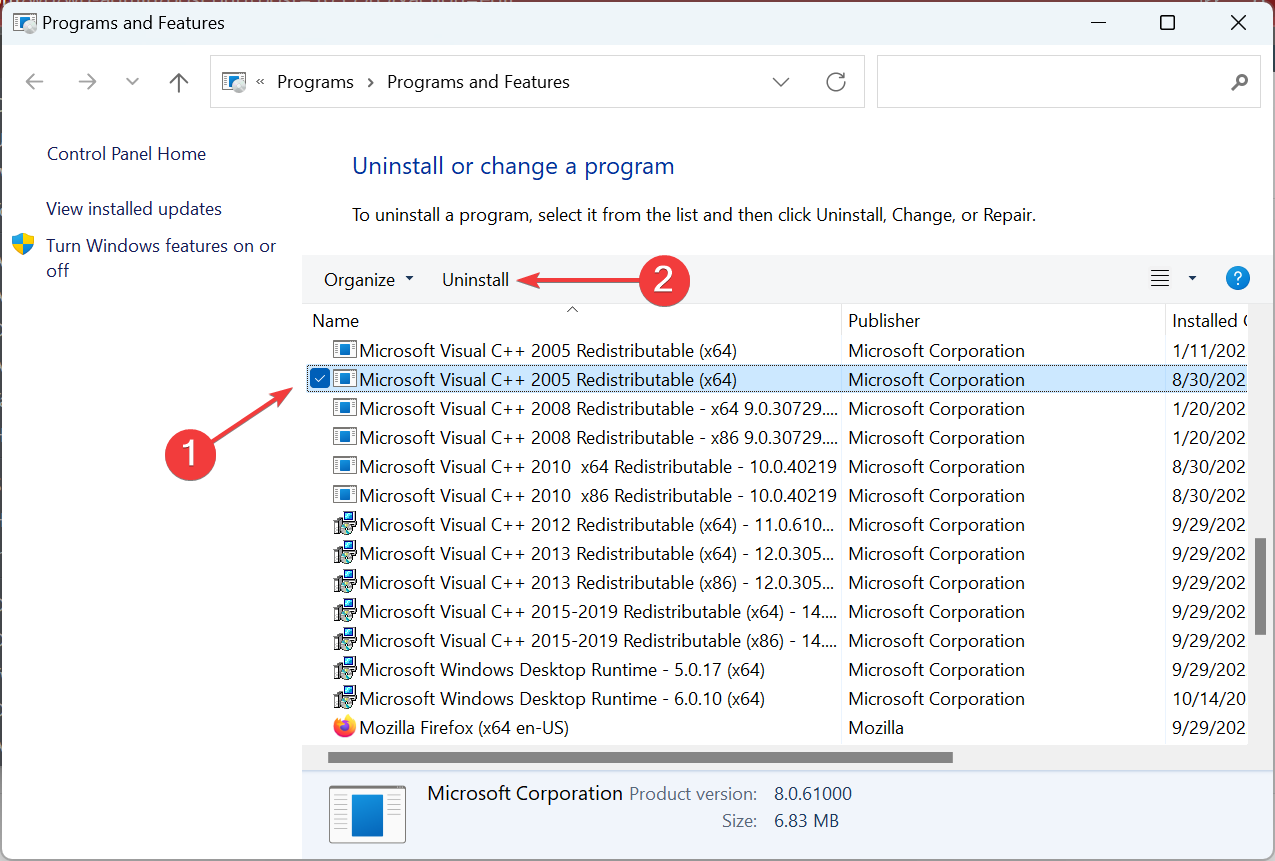
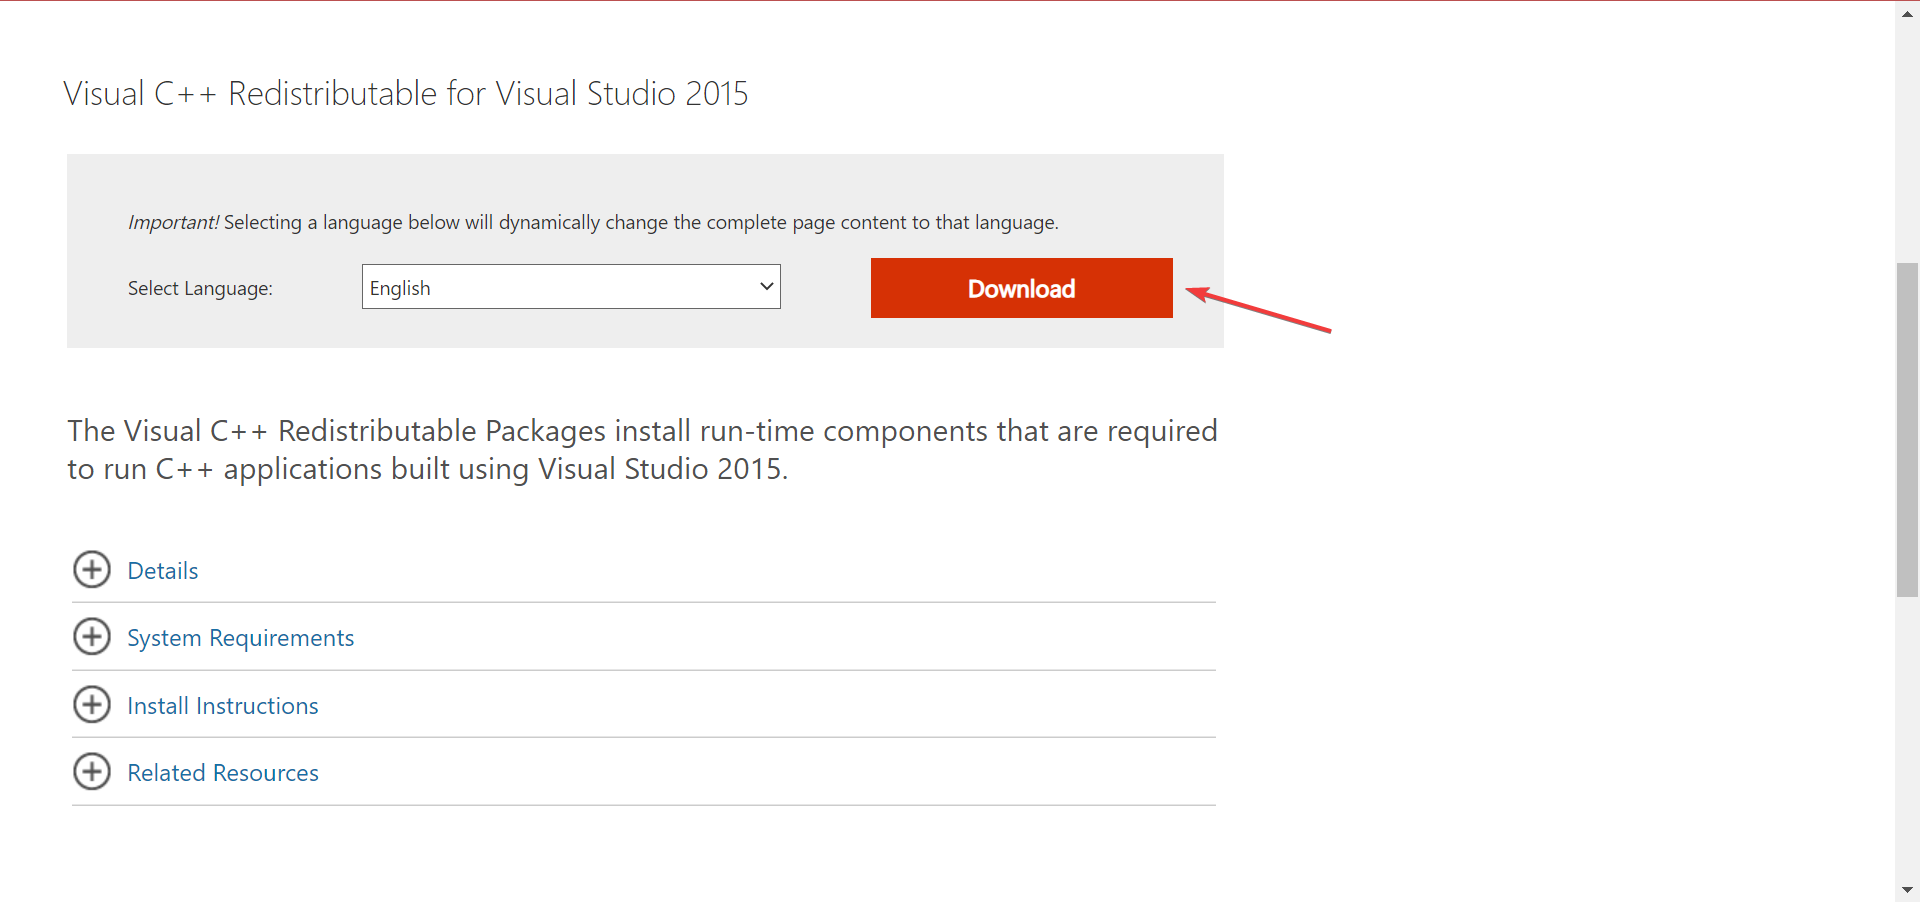
If nothing so far has worked, it’s likely a problem with the Windows Journal app itself when it cannot open files, and reinstalling it should do the trick. You can also download Windows Journal from the official website.
4. Go with a similar app
When all else fails to work, the last option is to use an alternative to Journal. There are several useful journal-keeping apps that work pretty similarly to the one offered by Microsoft.
Also, several users went for diary apps in Windows since these are slightly more straightforward. But the eJournal app, after receiving updates, has become the user’s first choice.
If Windows Journal cannot open files, you know how to fix things quickly. And in case you were looking for academic writing software, we have just the ones. Besides, do not forget to share which solution worked for you in the comments section.
Windows has default icons for files and folders displayed in File Explorer and other programs. These icons serve their purposes but can become tiresome to look at. Hence, understanding how to change file icons on Windows will help you customize the file’s appearance to a desirable one.
One of the best things about Windows is that it is highly customizable and allows users to create their desired display features. Hence, you can customize and change folder icons to something else, making them more appealing.
Furthermore, customizing your files by adding file tags and changing folder icons helps you locate your files faster and makes your computer more personal.
Likewise, you can customize the icons of specific files and folders for distinctiveness, providing an easy way to arrange your icons on your PC.
Nonetheless, you can customize other icons on your computer to suit your preferences. For instance, users can change the recycle bin icon on Windows 10/11 to another icon to make it look more appealing.
How do I change the file and folder icons on Windows?
1. Change folder icons to a new Windows icon
Click the File Explorer icon on the taskbar or press the Windows + E keys simultaneously to launch the app.
Navigate to the folder to customize, right-click on it, and select Properties from the drop-down.
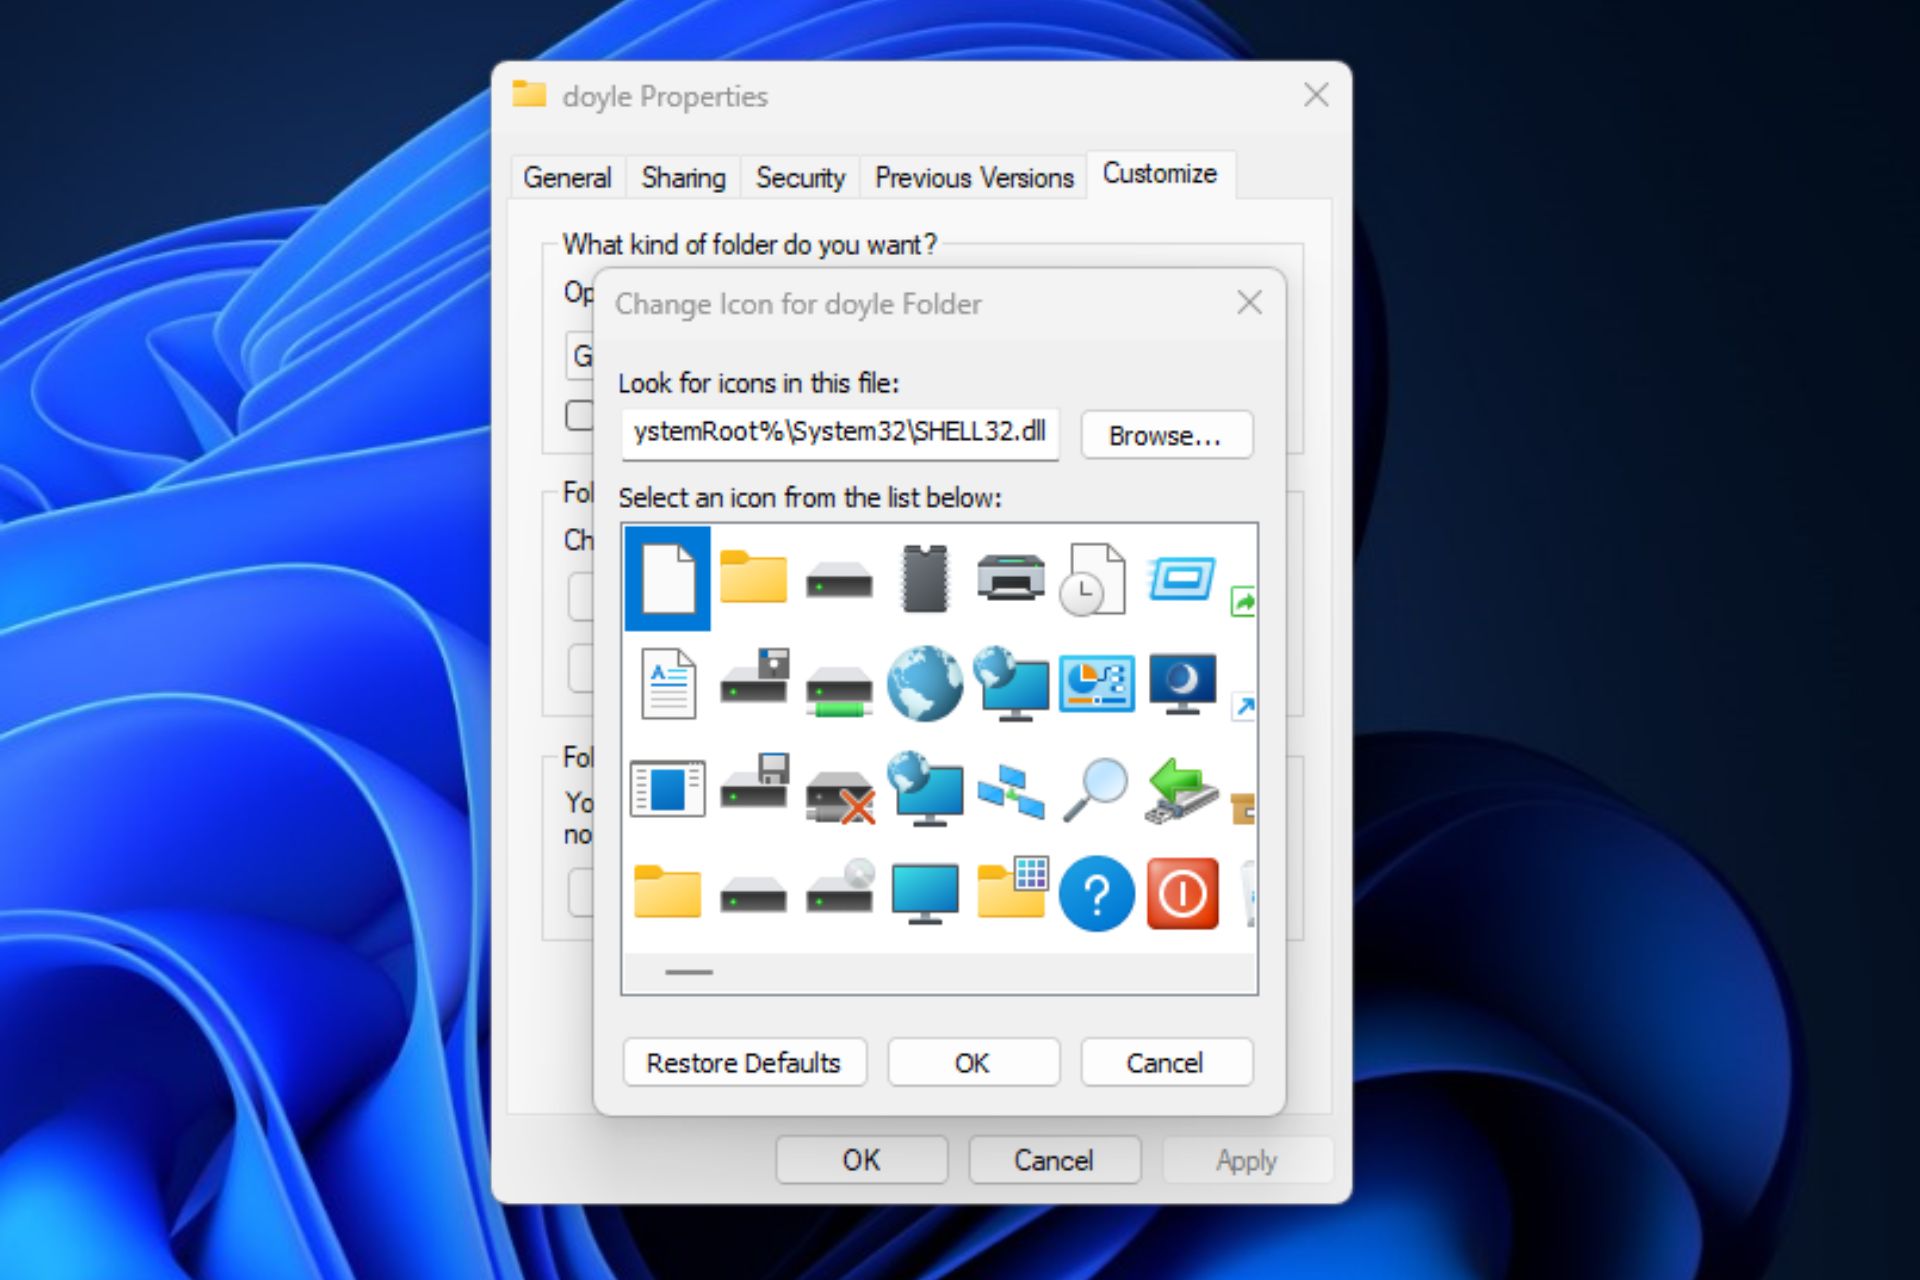
Click the Customize tab and the Change Icon button on the Folder icons window.
Select an icon from the list and click OK to save the changes.
Right-click on any space on the desktop and click on Personalize from the drop-down.
Click on the Themes option from the right side of the screen.
Scroll down to the Related settings tab and click on Desktop icon settings to open its window.
Click on the Desktop icon you want to change and click on the Change Icon button.
Scroll to the right to view all icons on the list provided by Windows, or click the Browse button to select an icon from Files.
Click on your desired icon from the list, then click on the OK button to confirm the process.
Click on Apply to save the changes, then click on the OK button to exit the Desktop icon Settings window.
The desktop icon should change. Changing a Desktop icon like Recycle Bin, Control Panel, Network, and User’s Files, allows users to personalize their Desktop.
You can download Windows 7 updates only through offline install options. However, the chances are that you can encounter Windows 7 update error codes during the process.
If you have Windows 7 Service Pack 1 installed on your PC, you need to download and install each update. Thus, Microsoft has considered how time-consuming and expensive it can be to install each update independently.
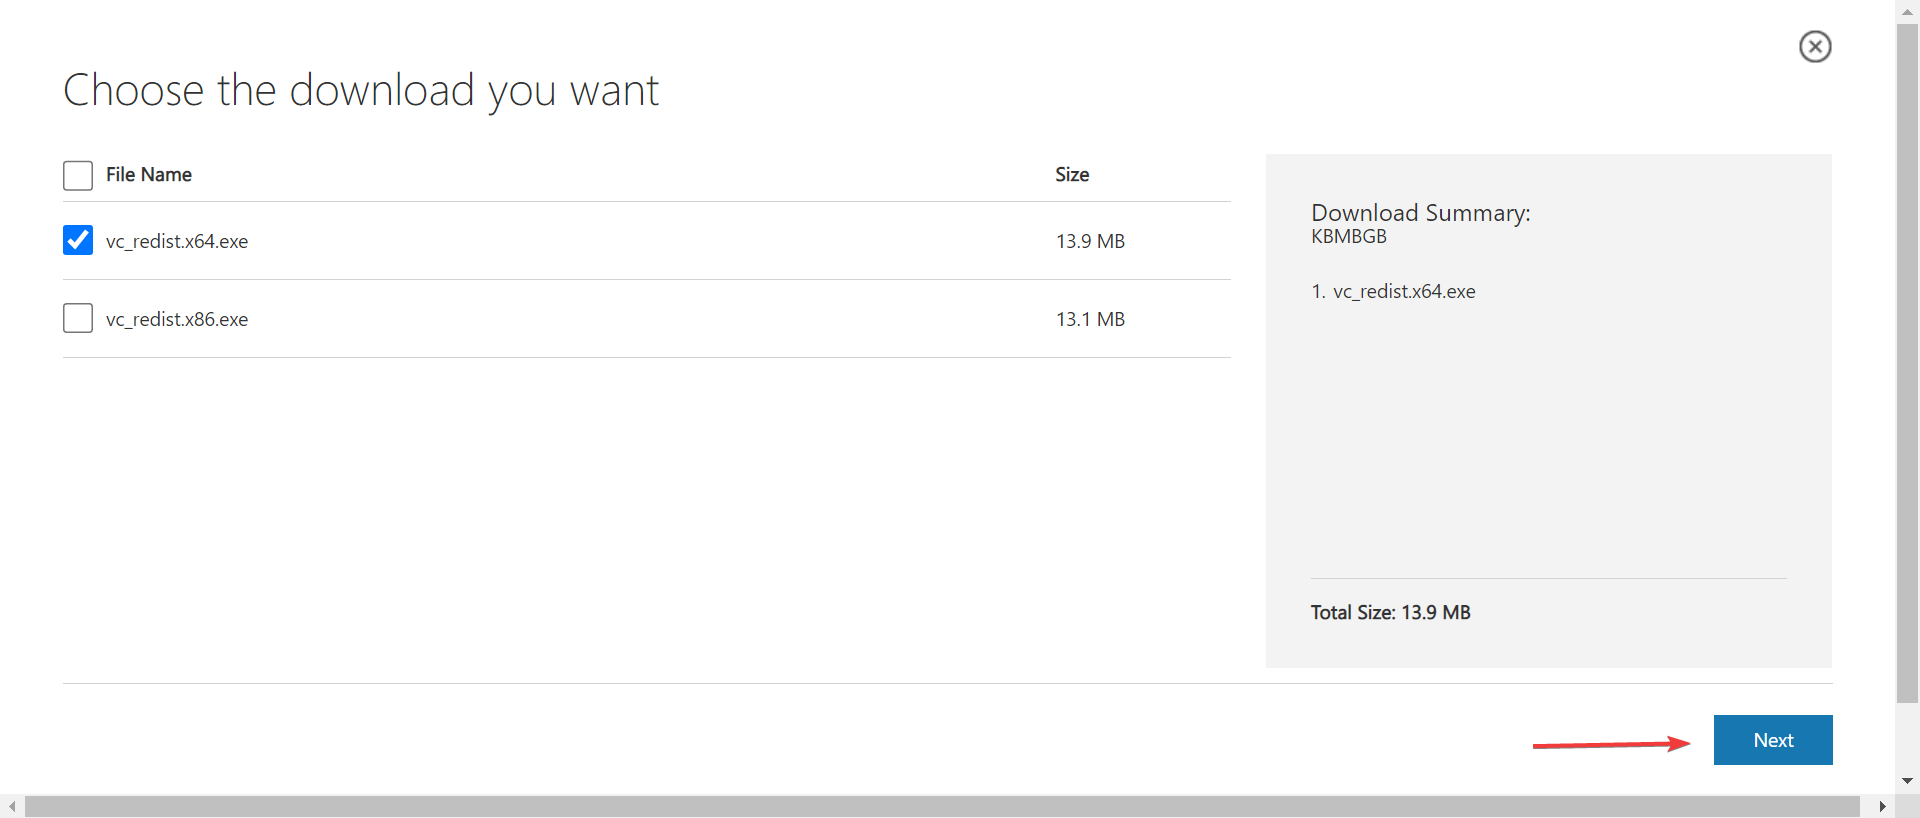
Click the Download link that matches your version of Windows 7.
Double-click the .exe file you downloaded and followed the instructions to install SP 1. Windows may restart a couple of times.
Before downloading and installing all the Windows 7 updates, you must have Windows 7 Service Pack 1 installed on your PC. It’ll allow you to access the Windows 7 SP1 Convenience Rollup and download all updates.
2.Check if you’re using a 32-bit or 64-bit version of Windows 7
Left-click on the Start button, right-click on Computer from the menu, and select Properties from the drop-down.
Go to the System type field and check if it indicates 32-bit or 64-bit Operating System.
Checking the System type will help determine which Convenience Rollup to download.
Go to the downloaded file, double-click on it to run it, and follow the installation wizard to install the Convenience Rollup.
Please note that the update may take a while, so wait patiently. This option is the last approach to downloading all Windows 7 updates with the offline install.
Conclusively, you can check how to upgrade from Windows 7 to Windows 10 on your PC without having any problems.
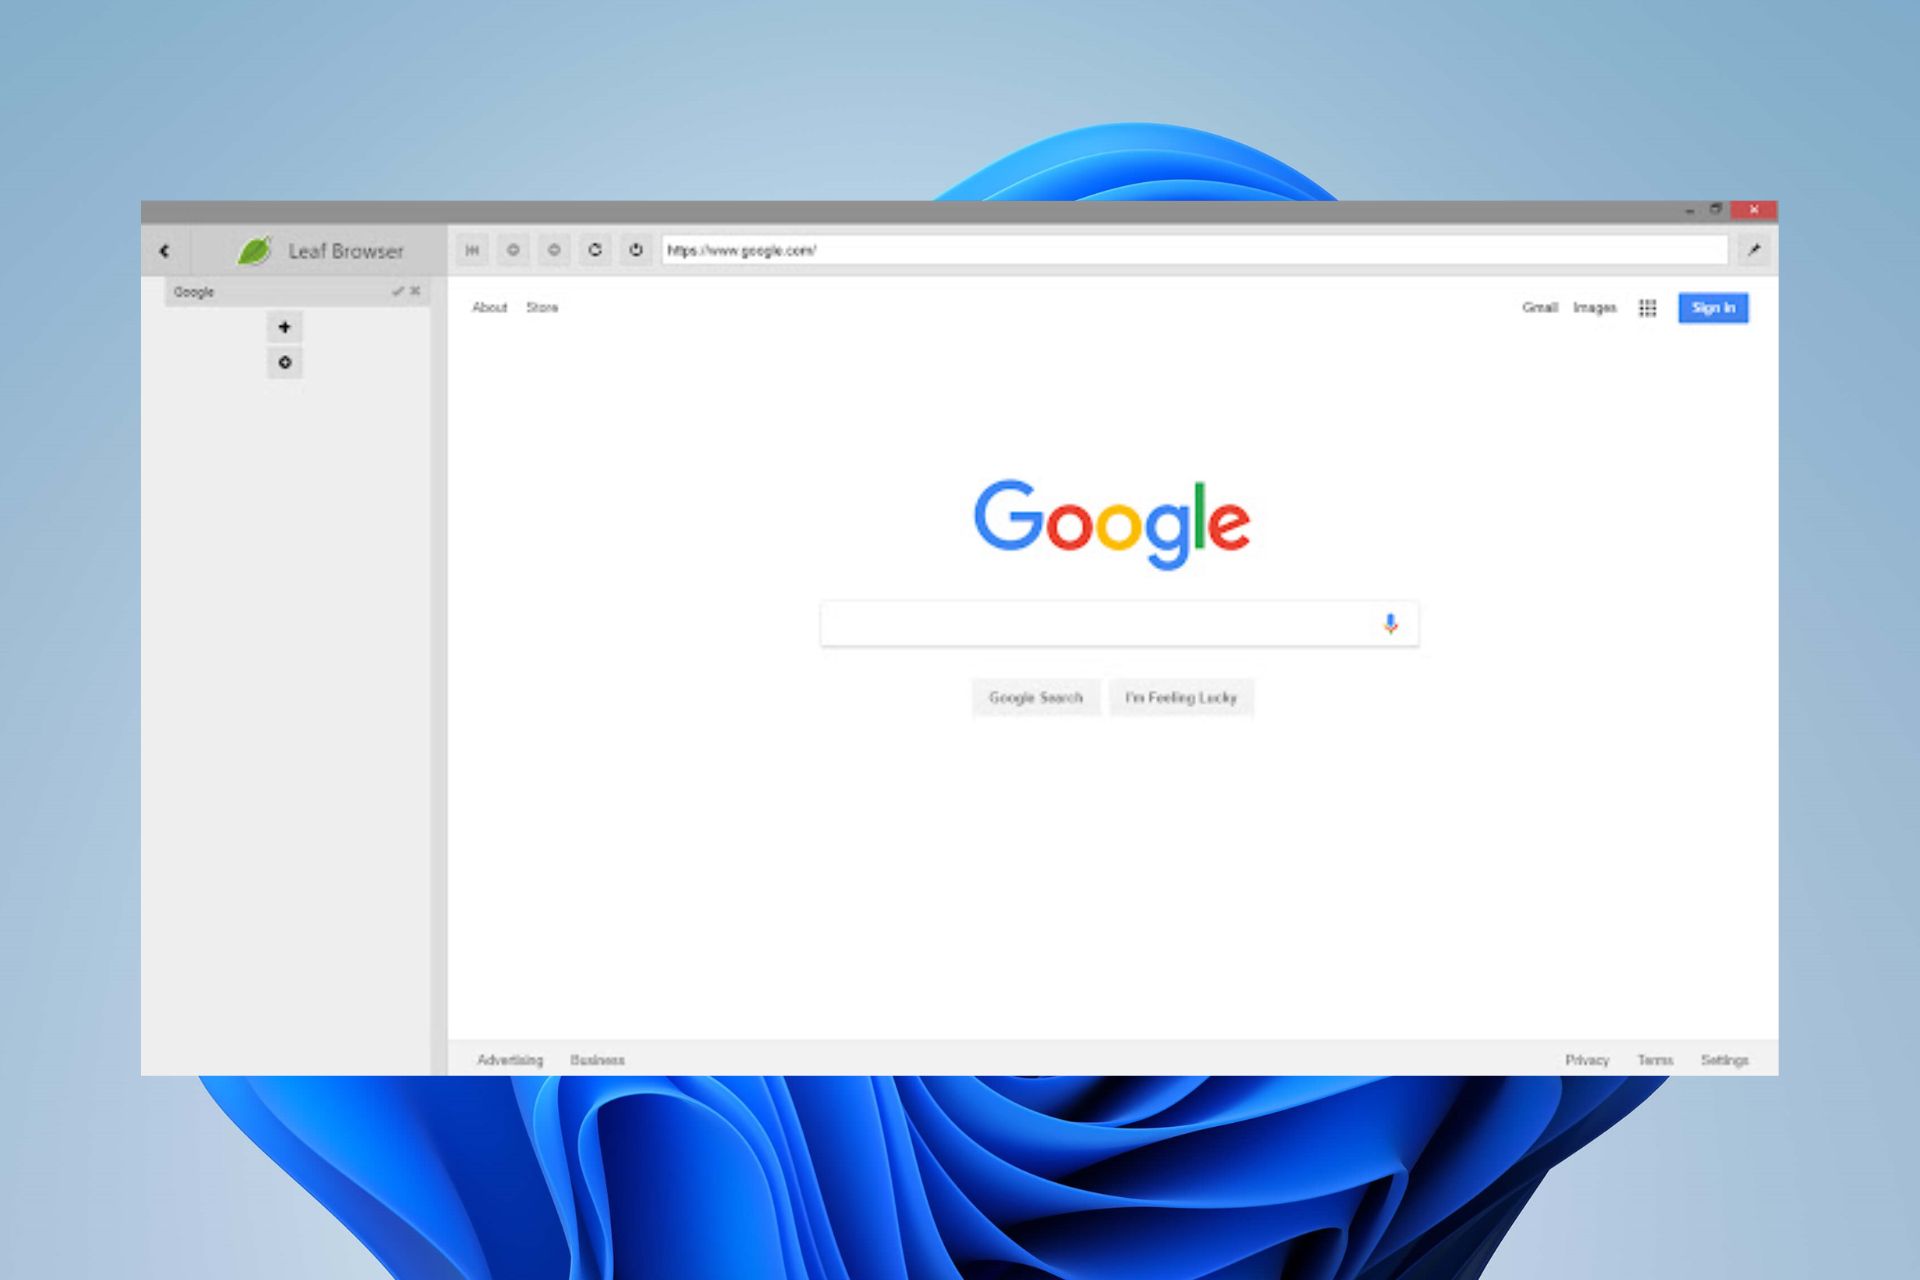
Accessing blocked sites can be hectic sometimes if you don’t have the right tool or browser to unblock them. Thus, users sort out unblocked browsers for open blocked websites and games for help. However, the Leaf browser is one of the best-unblocked browsers for unblocking sites with restricted access.
What is a Leaf browser clone, and why do I need it?
Clones are experimental browsers designed to run on another browser as an extension or plugin. They are not independently available as a sole browser. However, the Leaf browser clone is an unblocked browser that you can add to your Chrome extension to access blocked sites.
Furthermore, many features make the Leaf browser a choice to consider. Some are:
Secure internet access – Leaf browser clone is a secure browser that allows users to surf the internet unnoticed. Also, users can access sites through secure networks that prevent any risk of data loss online while preventing online tracking when you browse.
Online anonymity and privacy – Users can browse through the internet with the Leaf browser while hiding their IP addresses and masking their online presence. It gives you access to websites with geographical restrictions.
Unblock restricted websites– Surfing the internet with Leaf browser helps break through site restrictions preventing you from accessing content on the site. So, it is a browser to open blocked websites inaccessible with a standard browser.
Fast internet access – Leaf browser offers a quick and efficient internet experience. It allows users to surf the internet swiftly while unblocking blocked sites.
Multiple tabs – Users can access numerous sites concurrently on the Leaf browser clone without experiencing any problems or lag.
There are many other features that users get to enjoy from adding the Leaf browser clone to their Chrome browser.
How do I download and use the Leaf browser for sites unblocking?
Users can download and add the Leaf browser to Chrome as an extension to unblock websites. First, however, we recommend you follow the preliminary steps below to prepare your device for the process:
Make sure your Operating System and your Chrome browser are updated.
Temporarily disable antivirus software on your PC.
After going through the steps listed above, proceed with the instructions below to download the Leaf browser.
1. Download as an extension
Double-click on the Chrome browser icon.
Go to the Chrome Webstore, type Leaf browser into the search space, and select the first search result.
Click the Add to Chrome button.
Click the Add extension button on the new prompt to confirm the action, then exit the Chrome web store page.
Click the Extension center button in the top-right corner of the screen, select Manage Extensions, then click on the Leaf browser from installed extensions.
Input the URL and search.
Clicking the Leaf browser extension will automatically enable and allow you to unblock blocked sites.
Also, you can stop the browser by clicking on the Leaf browser extension icon in the Extension Center.
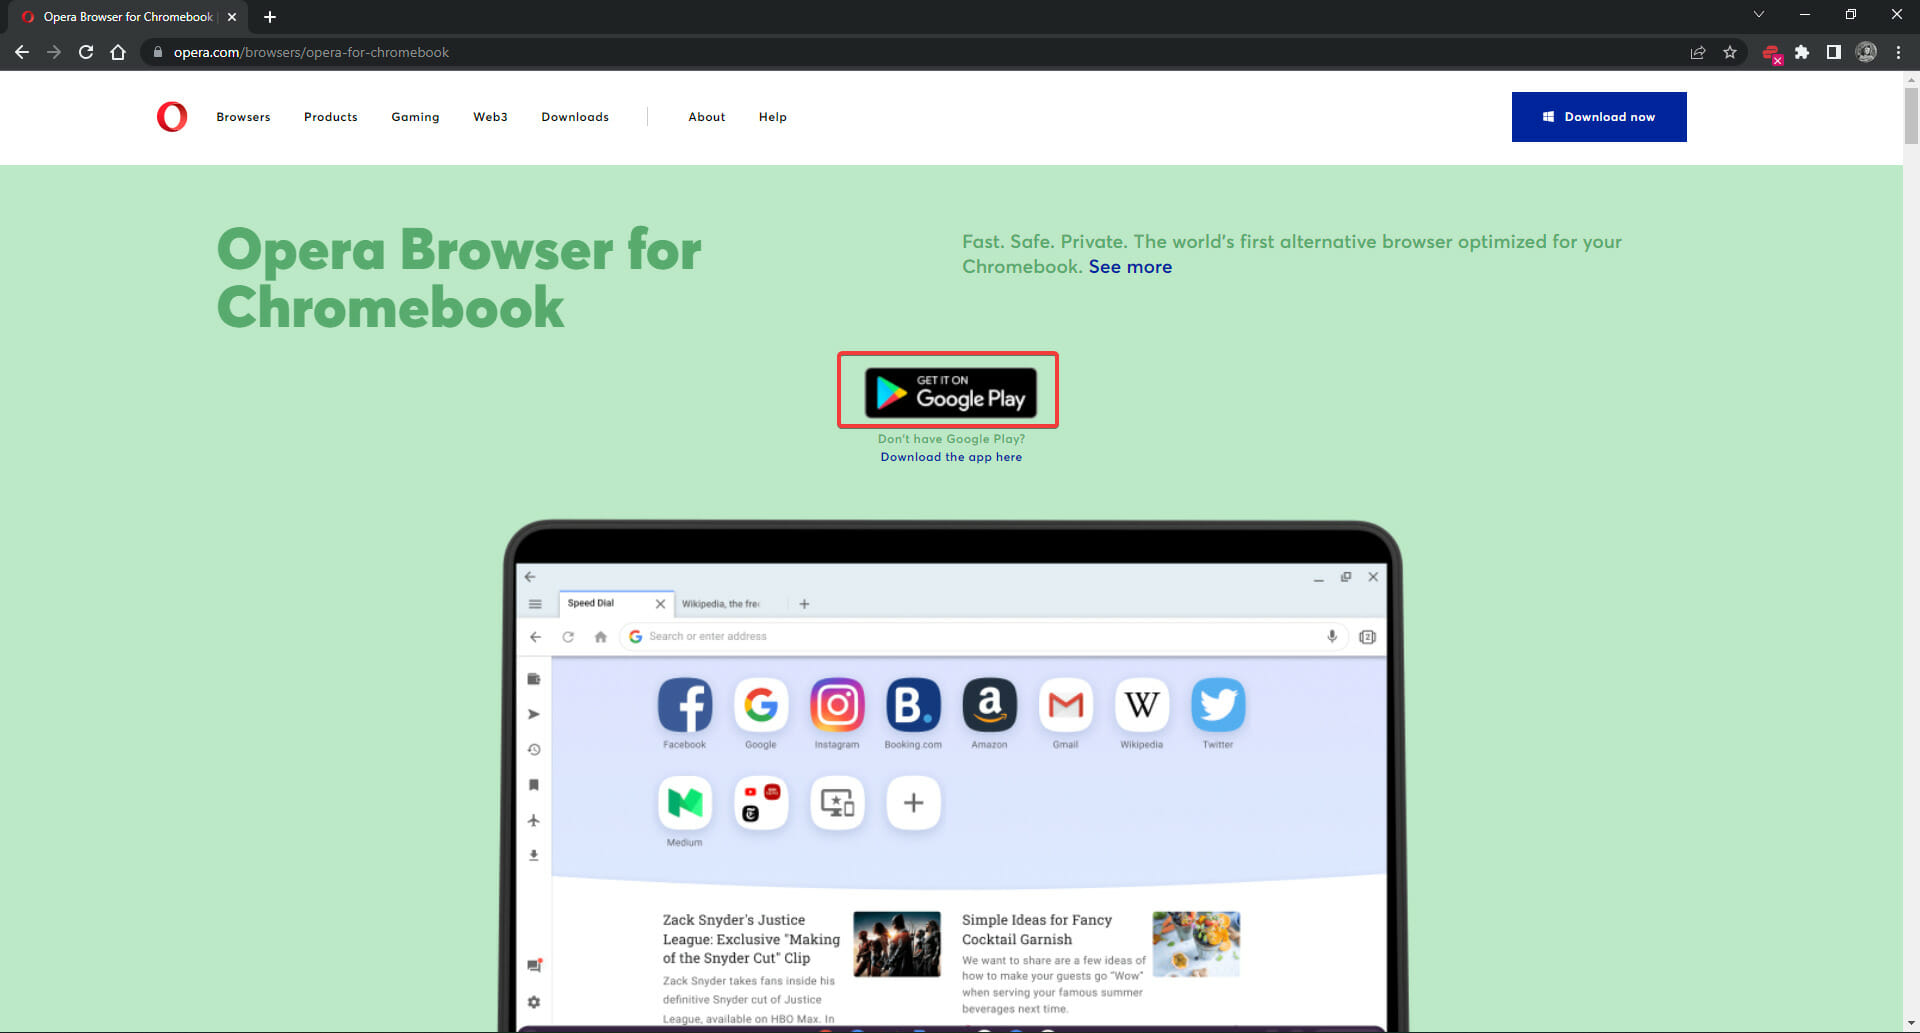
Opera is the first alternative browser fully optimized for Chromebooks. It offers users another choice other than Google Chrome.
The browser introduced its unique features previously unavailable for Chromebooks, such as the free VPN, ad blocker, and themes.
Opera for Chromebook is very similar to the standard Opera browser with some tweaks to make it refined for Chrome OS. The Chromebook version of the browser is closer to the Opera browser offered for Android devices.
Keep reading for a closer look at Opera’s best features and discover why it’s the perfect alternative browser for Chromebooks.
Even though Chromebook runs mostly web apps from Google, you can also install Opera on it. As you may know, many Chromebooks can run Android apps.
As a result, you can install Android apps on Chromebook, including Opera. The process is more straightforward than you think, and in today’s guide, we’ll show you how to do it.
Our readers also asked about Opera for Acer Chromebook. The installation process is the same for any Chromebook, whether it is manufactured by Acer or any other brand.
Opera
Surf the web safely with this flexible browser and have enhanced navigation on your Chromebook device.
You are now ready to explore all the great features Opera for Chromebook offers. If you’re interested in downloading Opera for Windows 11, we have a guide on that as well.
Should I use Opera over Chrome?
Opera has a wider range of features which makes it a better browser than Chrome. Here are the main ones:
➡ Productivity
Opera for Chromebook has all the unique features of Opera that users know and love, such as the integrated messaging system. Users have access to WhatsApp, Telegram, and Facebook Messenger run from the sidebar.
With Flow, users can switch between devices with the ability to instantly share files, videos, links, and more across all platforms. This feature is perfect for users on the go who often switch between their smartphone and PC when browsing.
Reading mode is incorporated into Opera for Chromebook, allowing users to zoom in easily and present a reader-friendly experience. Users can also adjust the background color to make it easier to read at night or in the dark.
Chromebooks are known for their user-friendly and sleek interfaces, and Opera is the perfect browser to go along with it. The browser allows room for customization without going overboard. For example, users can adjust between light and dark mode and choose from various colors to personalize their theme.
Opera on Chromebook has a handy sidebar feature so users can easily access features. This allows users can add or remove features to the sidebar for a fully personalized web browser.
➡ Speed and security
Like the mobile app for Android, Opera for Chromebook has a data-saving mode that compresses data to speed up web surfing. This feature is perfect for those using Chromebooks who don’t want their browser to consume PC resources.
The adblocker prevents ads and cookies from weighing down web pages and speeds up browsing. Moreover, this feature also helps block annoying cookie dialogs from popping up on most websites.
Opera VPN is free and protects user data on public networks. Users can browse with peace of mind using the unlimited VPN.
Private mode allows users to surf the web and leave no trace on their devices. In addition, history and data are not stored when browsing in private mode.
This browser is the perfect alternative browser for Chrome OS because it’s lightweight and easy to use. If you’re someone looking for a browser option that’s not Google Chrome for your Chromebook, then Opera is the perfect fit.
Opera Browser
Try Opera’s fully optimized browser for Chromebook.
How do I make Opera my default browser on my Chromebook?
Open Opera.
Click the Menu button in the top-left corner (the Opera icon) and select Settings.
Scroll down to Default browser, and click Make default.
How do I download Opera for my Chromebook for school?
This, unfortunately, isn’t possible by default, depending on your school policy. Your administrator manages which applications can be installed on school devices; only he can manage apps.
To install Opera, you need to contact the administrator and wait for him to approve Opera.
As you can see, installing Opera on Chromebook is pretty simple, as long as you have the necessary privileges.
Windows is a highly customizable Operating System with many appearance features that give your PC a unique appearance. The Aero theme is one of the features users can use. Hence, we’ll take you through how to enable Aero on Windows 11. Also, users can download Windows themes from here.
What is the Windows Aero theme?
Windows Aero (Authentic, Energetic, Reflective, and Open) is a GUI (Graphic User Interface) introduced for Windows Vista and found in Windows 7. It helps users enhance graphical effects on their PCs.
However, the Windows Aero theme is a component of Windows Aero that uses numerous Windows animations and transparency effects on your PC. It creates transparent decoration effects and also changes your desktop’s background color, transparency, brightness, and screensaver.
Why is Windows Aero not working?
A couple of factors can cause Windows Aero not to work on your PC. Some are:
Your version of Windows doesn’t support the Aero feature – Windows Aero won’t work on your computer if the version running in it doesn’t. So, users need to confirm if their Windows can work with the Aero feature.
Desktop Windows Manager is disabled – The DWM is a component that helps create a graphical user interface (GUI) on Windows and enables the operating system to use visual effects. So, Windows Aero can stop working due to Desktop Windows Manager issues on your PC.
Transparency is disabled – Windows Aero may not work if the transparency effects are disabled on your PC. Transparency is an essential feature needed to use Aero because it uses it for transparency effects. Thus, Windows Aero won’t work if it can access the transparency effects option.
Issues with Windows Aero cache – Users can experience problems using Windows Aero if its cache file is corrupt. It’ll affect its performance and may prevent it from working.
How do I enable or disable Aero in Windows 11?
1. Enable/Disable Aero lite
Press the Windows + E to open FIle Explorer and navigate the following path: C:\Windows\Resources\Themes
Copy and paste the Aero theme file to a new location.
Right-click the file, select Rename and change the file from aero.theme to aerolite.theme.
Right-click the file, click Open with, and select Notepad.
Replace the following lines: ; Windows - IDS_THEME_DISPLAYNAME_AERO_LIGHT,DisplayName=@%SystemRoot%\System32\themeui.dll,-2060 with DisplayName=Aero Lite
Replace this line: Path=%ResourceDir%\Themes\Aero\Aero.msstyles with Path=%ResourceDir%\Themes\Aero\Aerolite.msstyles
Click File and Save.
Double-click the Aerolite.theme file to enable the theme.
To disable the Aero lite theme, follow these steps:
First, press Windows + I to open Settings.
Select Personalization and choose Themes.
Locate the Aero lite theme, right-click and delete it.
The Aero shake is another feature that declutters the desktop by grabbing and shaking a window to minimize all other windows in the background.
However, the causes may vary in numerous Windows computers and are not limited to a specific Windows version.
Nevertheless, you may experience numerous problems with Windows themes and graphics customization. Hence, we recommend you read how to fix themes not syncing on Windows 11.
Having an adblocker these days is crucial to having a good experience online. The number of ads that some websites use can become annoying, affecting even the most patient users.
Some adblockers are better than others, though, and some browsers are more efficient at using them.
This article will explore some of the best AdBlock browsers for Windows with powerful and merciless adblockers.
Is there a browser that blocks all ads?
Without any extra extensions, your browser will probably block 99% of the ads. Opera One is one of the few browsers that have a built-in adblocker and that can still perform wonderfully.
Here are all the browsers that can block ads:
Opera One – Best browser with a built-in ad blocker
UR Browser – 3 privacy levels and built-in ad blocker
Epic Browser – Great ad-blocking features
Avast Secure Browser – Stable browser with ad block but slow speed
Does Windows 10/11 have a built-in ad blocker?
If you were wondering about built-in ad blockers, you should know that neither Windows 10 nor Windows 11 have one. But you can circumvent that issue by installing a browser with a VPN already ready to be used.
Alternatively, you could invest in a wonderful stand-alone VPN service that will protect your device no matter your OS.
Below you can see some of the best browsers that can help you to avoid annoying ads.
What browser has built-in AdBlock?
Opera One – Best browser with a built-in ad blocker
Opera One has a dedicated built-in ad blocker that detects and blocks ad scripts when you request a webpage. As a result, web pages load faster, and users no longer need to install third-party addons.
According to tests, content-rich pages load up to 90% faster when the adblocker is enabled. As you can see, these numbers are pretty impressive. This means that you can use Opera One even on an old PC.
Opera One’s robust and reliable adblocker can also block malicious ads enhancing browser security.
If you want to support your favorite websites, you can add them to your list of exceptions, and the browser will allow them to load ads.
Another critical aspect of Opera One is that you can customize it almost endlessly, with themes, modes, sidebar display, and keyboard combo.
To round this browser off even better, Turbo Mode will ensure that the best possible speeds are attained, depending on the task. Choosing an AdBlock browser for PC has never been easier.
Moreover, Opera One is now rebranded with an interesting-chromatic interface and built-in AI assistant called Aria to help users with all kinds of information.
Additional features:
Integrated adblocker to eliminate distractions, optimize web pages loading times and streamline your browsing experience
Integrated VPN tool to anonymize your browsing and unblock geo-restricted content
Integrated snapshot tool to capture your screen effortlessly
Customizable workflow and workspaces with instant messaging and social media apps like Twitter, Facebook, or Instagram to chat, explore and stay in touch with the latest news without leaving your browser’s windows
Opera One
Get 0 interruptions with Opera’s powerful built-in adblocker!
UR Browser – 3 privacy levels and built-in ad blocker
UR Browser is one of the best browsers available on the market.
This software option stands out from the crowd because of its incredibly versatile user interface, fast loading speeds, and access to a wide range of customization tools, including add-ons and extensions.
You can find a great range of specific and powerful adblockers to use with UR Browser, and once you install them, the annoying pop-ups and ads will be gone completely.
This software option is one of the best ad-freebrowsers for Windows 10 and 11.
One of the most important factors when judging browsers on their usability level is the speed for loading webpages, how well they perform streaming, and how fast they can download files.
Additional features:
Extremely fast at loading webpages no matter their complexity
Performs downloads up to 4 times faster than other browsers
Streams online video perfectly without any lag
Offers compelling encryption services
UR Browser
Enjoy fast, private, and ad-free browsing with a top-range browsing solution!
This browser is as private as private can be. It makes a list for its top-notch ad blocking features, but in reality, it does much more.
The Epic browser uses Chromium to power its incredible performance and rendering and blocks fingerprinting, trackers, ultrasound signaling, crypto mining, and more.
With a focus on privacy and security, it is not surprising that it comes equipped with a VPN. You would be able to pick from browsers in 8 countries.
You can access blocked sites like Pandora regardless of your location. Also, your privacy is guaranteed because the browser uses top-of-the-class encryption tech to encrypt your information.
Opera One not only provides you with these two elements but also integrates a quick access toolbar for social media and messenger while also ensuring that no pop-ups bother you.
Another alternative is UR Browser, which, even though it can not be compared directly to the number of built-in features of Opera One, still provides some excellent capabilities and is worth a try.
In this article, we found out why Opera One and UR Browser are the best options if you want a stable, fast, secure, and dependable browser.
These two browsers give you the speed of Chrome and Firefox combined, with a lower system impact than in both options. For a cross-platform adblocker, try Total Adblock.
Please let us know your opinion about these browsers with adblocking capabilities using the comment section below.
Firefox is a great browser, but many users reported getting the message: A web page is slowing down your browser.
This message will slow down your browser or make it unresponsive, thus affecting the whole browsing experience, which makes it imperative to resolve or eliminate the underlying cause at the earliest.
In today’s article, we’ll show you the best ways to solve the problem, so keep reading.
Quick Tip:
If you keep getting A web page is slowing down your browser message, maybe you should consider switching to Opera One. This web browser is light on your resources, and it can handle multiple tabs.
Speaking of tabs, Opera One has the ability to organize your tabs in workspaces and tab islands. Also the browser comes with a native AI and a modular AI-ready design.
Opera One
Browse the web faster with no delays thanks to different settings you can apply.
There are several reasons why a web page is slowing down your Firefox browser. In most cases, it is the corrupt or excessive cache files causing the issue. Or, the webpage might not be optimized well and lead to A web page is slowing down your browser.
Oftentimes, the webpage might have certain large files or excessive ads, loading which will take time, and it would appear as if the browser is slowing down. Besides, the installed conflicting extensions might also be the culprit.
What is slowing down my Firefox browser?
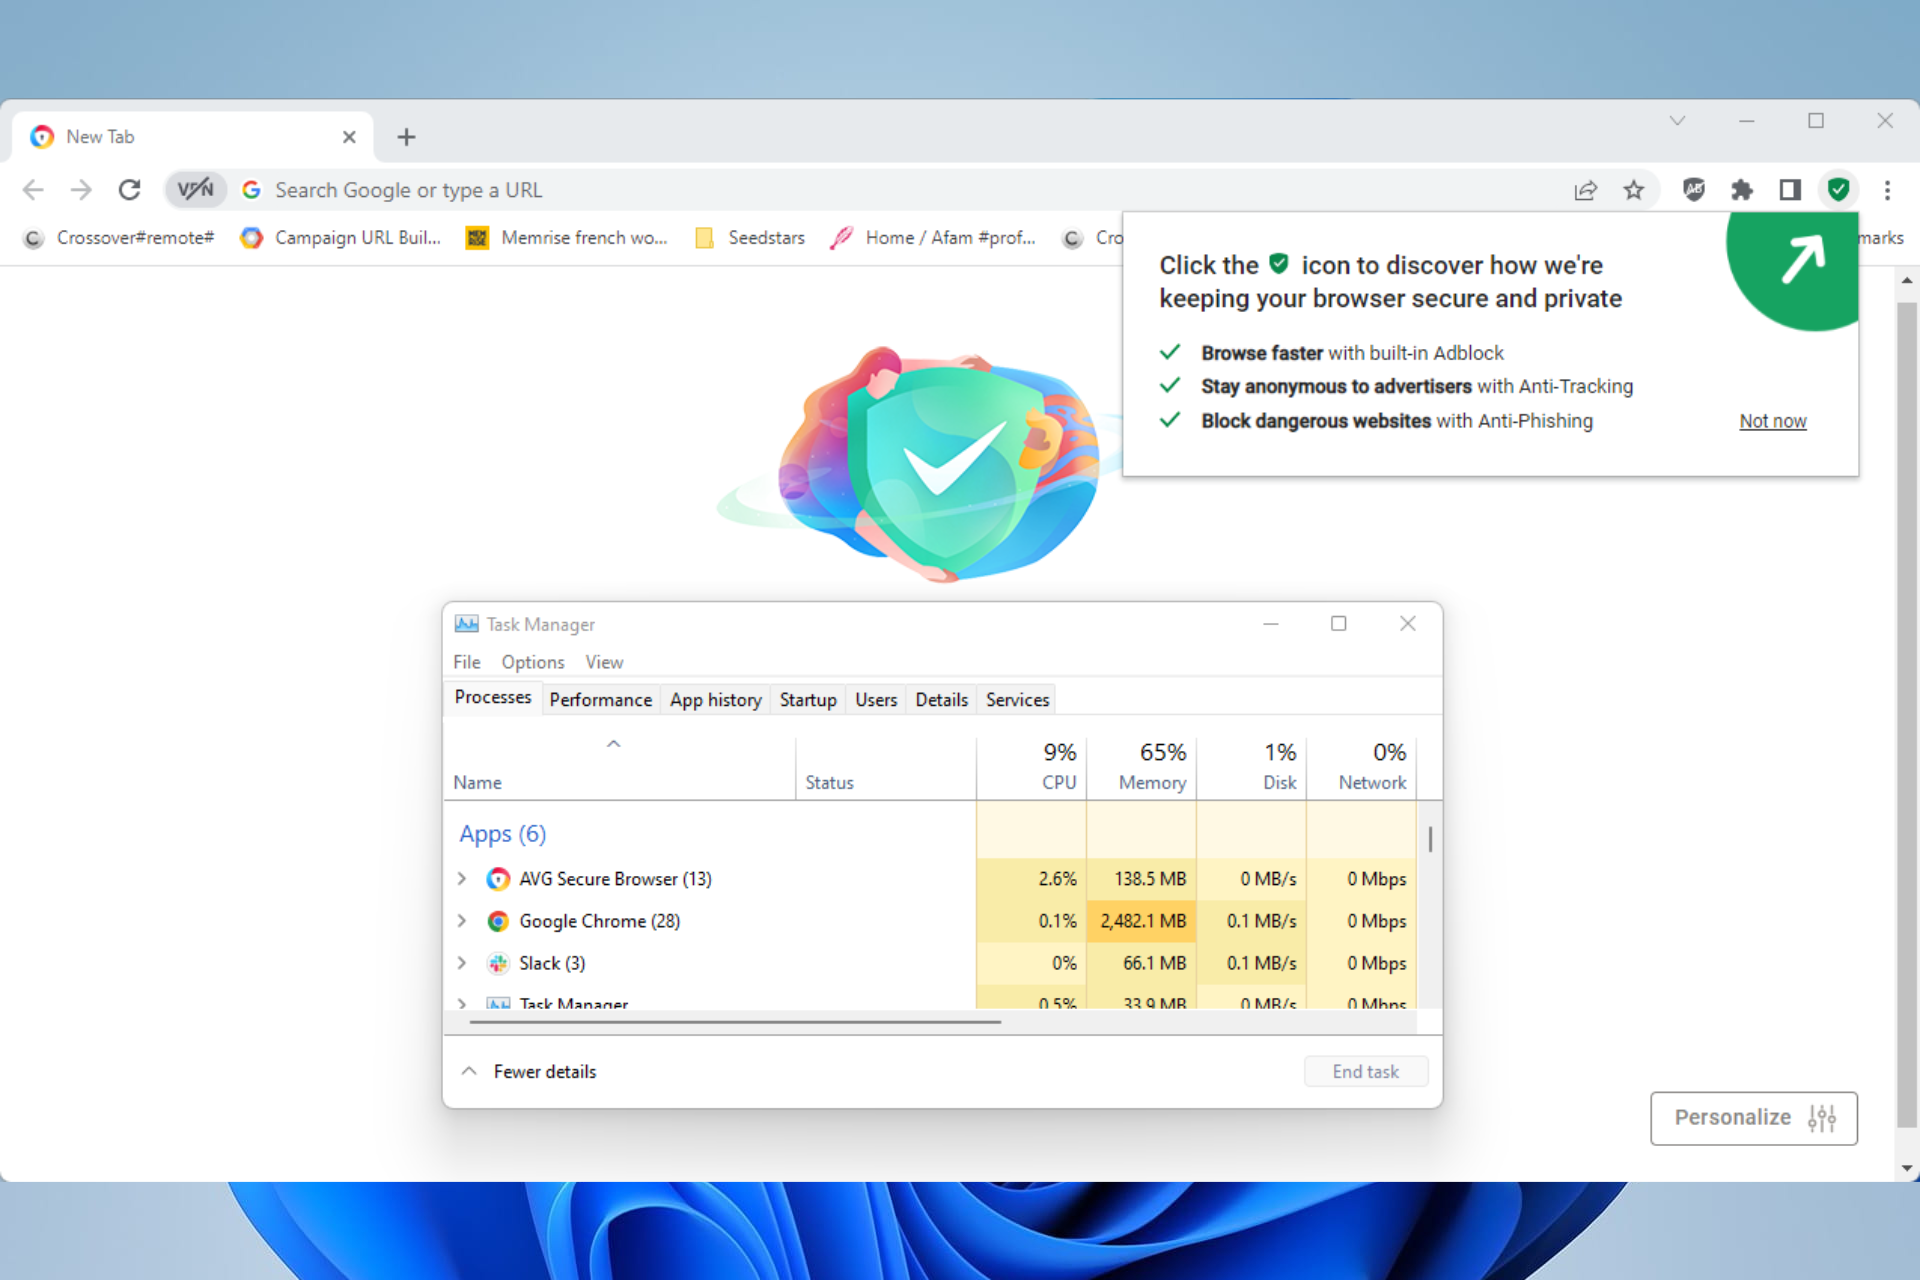
The easiest way to tell what’s slowing down Firefox is to look through the Task Manager and identify the processes consuming the maximum resources.
Some of these would be tabs, while others are the extensions installed on the browser. Once you have identified the resource-consuming processes, terminate them, and things should start working fine on Firefox and other browsers.
How can I fix A web page is slowing down your browser error on Firefox?
1. Make sure that tracking protection is enabled
1. Launch Firefox.
2. Click the Menu button.
3. Choose Settings from the list.
4. Go to Privacy & Security in the left pane.
5. In the right pane, select Strict.
A few users reported that the problem was caused because tracking scripts were slowing down certain pages, but after switching to the Strict mode, the A web page is slowing down your browser problem was resolved.
2. Change the hidden Firefox settings
Paste the following path in Firefox’s address bar and hit Enter:about:config
Click on Accept the Risk and Continue.
Search for dom.ipc.processHangMonitor, click on the toggle next to it to set the configuration to False.
Once done, check if the web page slowing down issue in your browser is fixed. If it persists, head to the final solution.
3. Refresh Firefox
Click the hamburger icon button, and select Help.
Next, click on Troubleshoot Mode.
Click on Refresh Firefox in the prompt.
Again, click on Refresh Firefox to confirm.
Once done, the web page slowing down the problem in the browser would be fixed.
Firefox is generally slow when you have an unstable Internet connection or the ISP is unable to deliver the promised speed. Though Firefox is much better, you are less likely to come across A web page is slowing down your browser problem here than in Chrome.
Also, if the browser hasn’t been updated in a while and you are using an outdated version, performance issues are bound to come up after a while. Besides, having too many extensions or even a few problematic extensions could cause the browser to slow down.
A web page is slowing down your browser message can appear for various reasons, but we hope that you solved that issue using one of our solutions.
We tested the most battery-friendly browsers and will share the results, explaining what affects battery usage.
Before we dive in, remember that, while the numbers are important, it’s not just about the math. Consider the features each browser offers.
Sometimes, a bit more battery use is worth the extra tools and extensions.
Which browser uses the least battery? Test Results
▶ TLDR: our general conclusion is:
Opera One: Best all-around choice with great speed and performance without compromising on features.
Microsoft Edge: Ideal for situations where every minute counts, but with fewer features.
Now, let’s check out the test.
Test Type: Battery consumption with multiple browser tabs
Device Used: ASUS TUF Gaming F17 laptop
Screen Brightness: 200 nits
Testing Process: Varied web workloads, repeated until battery depletion
Measurement: Minutes of operation (higher is better)
Browser
Test score in minutes
Microsoft Edge
529
Opera One
521
UR Browser
496
Brave Browser
485
Firefox
471
Chrome
452
As you can see from the table presented above, at the top of the list, we have Microsoft Edge with a score of 529, followed closely by Opera One, which scored 521.
Since the difference between the first 2 is quite small (8 minutes) and even the gap between Edge and Chrome isn’t huge, we suggest you consider the following factors when you decide which one to use:
Edge is objectively faster, but has far fewer features than Opera One
UR Browser is not that far away from Opera One either. What might slow it down are its more rigorous (and adjustable) security and privacy features
Close behind we have Brave Browser, which focuses on speed and privacy with aggressive ad-blocking and Tor integration
Firefox is quite down the line but it’s still a great choice if you want privacy
Chrome was the least performant, losing 77 minutes to Edge, but it has a lot more features than Edge and much more room for integrating productivity and work tools
Now, let’s discuss the features and benefits each of these browsers includes.
Opera One browser is known for its integrated ad-blocking feature and VPN. That adds to its speed and performance while still being secure and private.
Whether it’s streaming games or video, the browser can keep you going for a really long time.
It enforces security by protecting it from fraudulent sites, malware, and phishing attacks. The built-in ad blocker limits the ads which, in turn, leads to a really fast browsing experience.
Opera
Enjoy built-in ad-blocking, VPN, and privacy features without draining your device’s resources.
3. Microsoft Edge – Fastest browser with a low amount of features
Even though it is not the most energy-efficient browser, Edge is better than its predecessor.
It is safe and secure too, having enough protection and privacy features onboard for you to carry on sensitive tasks.
It can ward off phishing or malware attacks and has the least likelihood of being hacked.
Edge is also constantly being upgraded to offer its users a smart experience. Developers too will find it easy to test their websites and online apps, besides allowing for a consistent experience across the board.
4. Brave Browser – Stable browser that doesn’t affect your CPU that much
Brave is a free web browser with ad-blocking being its biggest USP, something that naturally translates to better browsing speeds.
No wonder the company claims to have up to 8-times the speed advantage over contemporary browsers such as Chrome. That said, the browser is also known to provide an extended battery experience as well.
Another key feature of Brave is the secured environment it provides for you to carry on with your browsing. Apart from ads, Brave also blocks the tens of trackers that are often present on even the most popular of sites.
5. Mozilla Firefox – Expanded customization with a large number of addons
Firefox, developed by Mozilla Foundation and Mozilla Corp., is among the most popular browsers today.
The browser also supports a host of plugins that further adds to the browser’s appeal.
It also offers several themes that allow you to personalize your browsing experience, while the thousands of extensions it supports only adds to the browser’s appeal.
What is the best browser for battery life on Windows 11?
The best browser that can extend your Windows 11 device’s battery life is Microsoft Edge, which was capable of running our benchmark tests for 529 minutes. Close behind, we have Opera One with 521 minutes of operating time for the same test.
Even though Edge scored better running times than its competitor, when considering all aspects of what the browsers offer, we suggest you use Opera One for better results. In addition, the built-in VPN and adblocker ensure your online security is respected at all times.
What is the best browser for battery life on Mac?
Our testers have concluded that the best browser to use on Mac regarding battery life is OperaOne, followed close behind by Safari.
Their recommendation is based on the amount of incredibly-useful features that it has, making the Mac experience more immersive and readily customized.
If you don’t want to optimize your online experience, Safari is still an excellent native browser for Mac devices.
To answer this question with confidence, our team of testers has taken both of these browsers through rigorous benchmark tests and will present the results to you.
Their tests were performed in the same exact OS conditions, on a separate system, with a fresh installation of the respective browser being used.
Each browser was tested with 10 identical tabs open, and here are the results:
Browsers
CPU
RAM
Chrome
5 – 13 %
1783MB
Firefox
3.1 – 4%
847MB
As you can see, Firefox uses 3.1 to 4% of the CPU, and 847MB of RAM, thus clearly taking the lead when it comes to resource consumption.
Chrome uses 5 to 13% of the CPU in the test and a whopping 1783MB of RAM, making it too resource-intensive if your goal is to save battery.
So, if you’ve been looking for the most power-efficient browser, give it a shot with one of these.
What is the best browser for battery life on iOS?
Regarding iOS devices, the best browser for battery life is Safari. This native browser ensures your device can browse the internet efficiently and doesn’t affect your battery levels.
As an alternative to that, you could also try downloading Dolphin Browser. Even though some users have complained about stability issues, some are very happy with their choice.
This makes for a list of browsers that are among the most energy-efficient. We hope that you’ve found the best one for your needs.
It can definitely take time to find the most suited and advantageous oil painting software that will allow you to create fantastic works of art.
If you are looking for ways to take your art to the next level while maintaining the natural and classic touch of oil painting, we have some oil painting software recommendations for you that are worth giving a try.
In this article, we’ve put together a list of the best oil painting apps that you can use on your Windows 10 or Mac PC, so make sure to keep on reading.
Adobe Fresco offers a larger collection of vectors and brushes that help you deliver a natural painting. Moreover, the drawing experience offered by this software is close to the classic way of drawing with oil.
If you are a beginner or a professional, Adobe Fresco comes with such tools that will help you discover, or why not, rediscover the joy of painting.
Thanks to the world’s largest selection of brushes available through Adobe Fresco you can work with watercolors and oil in order to create fantastic works of art.
You can isolate parts of a layer and turn selections into masks, which will enhance your productivity visibly.
Adobe Fresco
Start your work on any oil painting project with this reliable tool and create amazing works of art!
With an approach that will help you create unique oil paintings, Clip Studio Paint will definitely stand out from the rest.
Thanks to the highly customizable degree of the app, you will be able to create the exact brushes and other tools you feel are necessary and in the manner that will best fit your painting needs.
This app is one of the number one choices for many professionals thanks to the incorporated workflow, which will enhance your productivity and its elegant and intuitive interface.
Clip Studio Paint
Create unique oil paintings with a tool that has the exact features you need. Ready to give it a try?
The appearance and feel of the classic way of the painting are perfectly emulated by Corel Painter.
All the available brushes and canvas textures are designed to help you achieve the most natural alike oil painting image.
With a modern, easy-to-navigate interface, you will not spend a lot of time learning your way around the app and creating a productive workflow.
Moreover, Corel Painter is based on a powerful learning system that enhances your work and it’s also compatible with other Photoshop apps that you use daily.
Corel Painter
Create amazing oil paintings with this powerful and complex software. Try it out right away!
Some of our readers have complained about errors they encounter when installing or upgrading an existing version of Windows. The error message saying Windows could not prepare the computer to boot into the next installation phase is one of these errors.
Why can’t Windows boot into the next installation phase?
The main culprit for this error is BIOS not supporting the version of Windows you’re installing. It indicates that your hardware is not compatible with the version of the OS it’s trying to install.
Furthermore, other factors that may prompt Windows not to boot into the next phase of installation are:
Corrupt system files or software – When you have a corrupt system file or software on your PC, it can affect the installation of Windows or upgrade an existing version of Windows.
Issues with BIOS settings – Windows installation on your PC can run into errors due to some file corruption in the BIOS. It causes problems with your computer and the new OS you’re installing on it.
Many unnecessary devices plugged in – Sometimes, having many nonessential devices connected to your PC can affect the installation or upgrading process. Likewise, if the BIOS version isn’t strong enough, it’ll act up if it’s overworked by these devices, resulting in Windows not being able to boot to the next installation phase.
However, these causes may vary on numerous PCs but can be resolved by troubleshooting some settings on your computer.
What can I do if Windows cannot boot into the next phase of installation?
Before proceeding with any advanced troubleshooting steps for fixing the error, go through the preliminary check below:
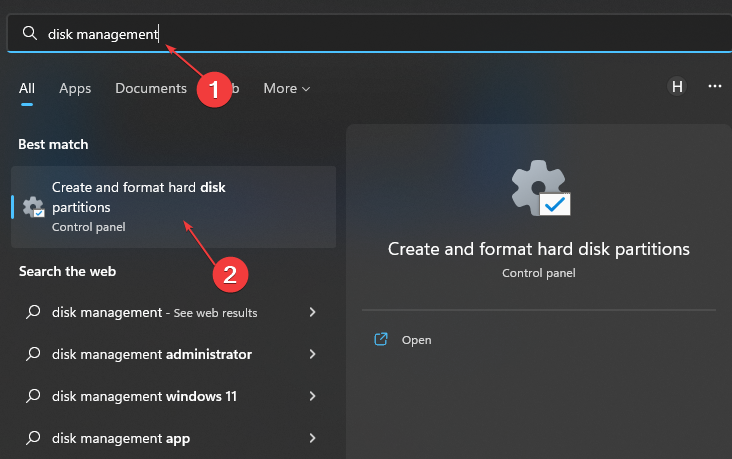
Left-click the Start button, search for Disk Management and launch the Create and format hard disk partition.
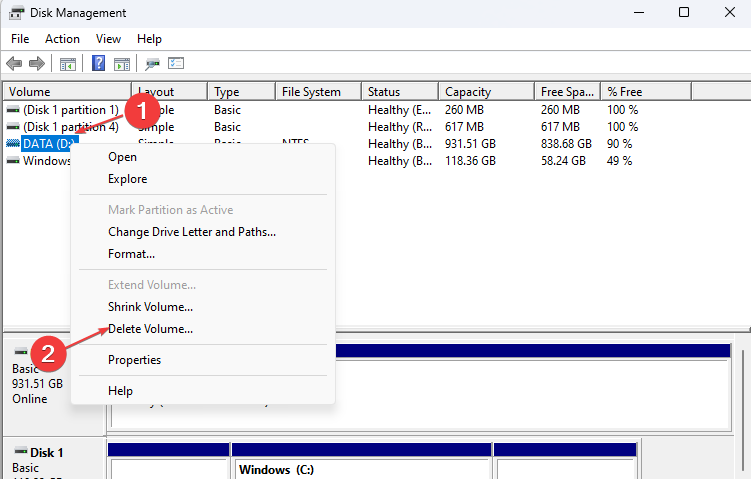
Right-click the drive with the Partition you want to delete and click on the Delete Volume option from the drop-down.
Click the Yes button to confirm that you want to delete the selected partition data.
Deleting the partitions on your PC allows it to recreate and reformat. Likewise, it frees up memory space for installing a new OS. So, you can fix the Windows but cannot prepare the computer to boot into the next installation phase.
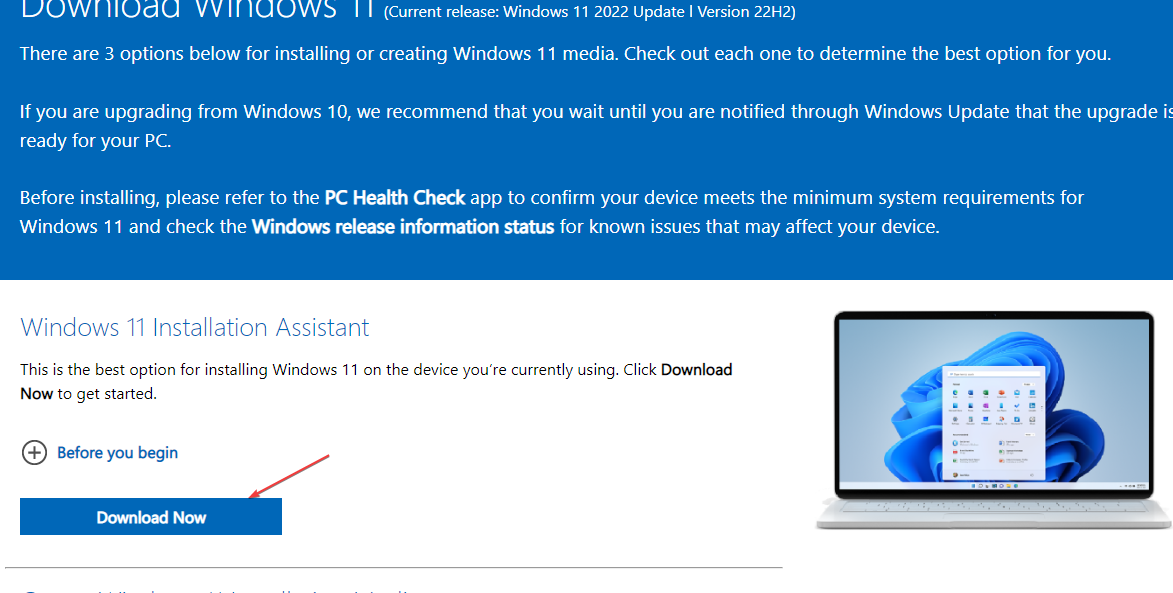
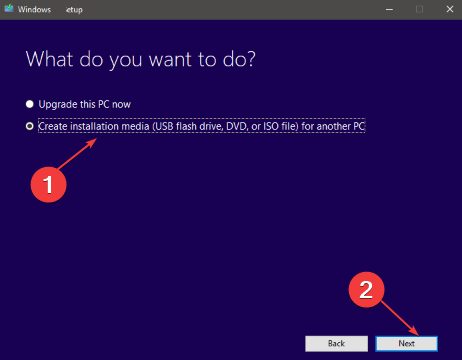
Select Create installation media (USB flash drive, DVD, or ISO file) for another PC option and click Next.
Select the language, architecture, and edition of Windows 10. It’s essential to choose the correct architecture, 64-bit or 32-bit, or you can select both.
Select the USB flash drive option.
Select the removable drive you want to use from the list.
After the Windows 10 installation files have been downloaded, your computer will create a bootable USB that will be compatible with devices using UEFI or BIOS.
Installing Windows via a bootable USB drive can fix the problem. If you encounter any issues creating the drive, read how to create a bootable USB drive for Windows 11
Robinhood is a popular American financial services company. It operates as Robinhood Financial, trading commission-free stocks, ETFs, and options, and Robinhood Crypto, used to buy and sell cryptocurrency.
The platform trades only US-listed stock; namely, they trade only what can be found in the American exchanges.
According to Robinhood, they don’t support stocks that trade on foreign exchanges. That being said, they do support certain American Depository Receipts (ADRs) and some stocks that trade on Canadian and Israeli exchanges.
It is also worth noting that depending on your location, you may also be eligible to trade certain cryptocurrencies through Robinhood Crypto.
Why do I get This stock is not supported on Robinhood message?
On fri i bought 9 shares of vtl. Now today it doesnt show in my list of stocks i own. When i went to look at my buy sell list it shows there i bought it and i went to veiw it and it doesnt say its supported on robinhood.
This is a common situation when trading stock – namely, users buy stock that becomes unavailable on the platform they are using.
As mentioned before, Robinhood only trades US stock. However, if a certain stock is unavailable from the very beginning, the user should not see a Buy button.
As it is, this particular user might have had the option to buy, but then the not supported message appeared after a few days.
Also according to Robinhood, this might happen for a few reasons:
The exchange has paused trading.
The stock was delisted from the major exchanges and trades in the OTC market.
It’s a foreign security, which we don’t support.
The security is undergoing acorporate action (i.e. merger).
What can I do if my stock is no longer supported?
If a stock is delisted and no longer supported by Robinhood, users are able to sell it in the market, without being able to purchase additional shares.
Also, since trading prices are no longer visible for that stock, users have to find references elsewhere.
If you have problems with supported stocks on Robinhood, there’s no need to worry since it isn’t the only service of its kind on the market, with many more being available that can do the same thing as Robinhood, or more.
For example, TradingView is also perfectly capable of free stock trading, it has a fast and easy account opening process, it is a great mobile trading platform that is also available as a web app.
TradingView
Stock trading can be done from the safety and comfort of your own home. Enjoy the benefits of TradingView!
We hope our answer was helpful and that your portfolio was not affected to a high extent. Feel free to give us your feedback in the comments section below.
In a world where pretty much everything exists in a digital format, keeping all of your data safe is your biggest concern.
It doesn’t matter if you want to keep it safe or want to have it available in multiple locations, keeping your data is of the utmost importance.
That is why dedicated software programs such as ACRONIS Cyber Protect Home Office exist. This handy little tool will quickly restore your files or the entire system at any time.
More so, if backing up data is something you need, then with this ACRONIS tool, you’ll be just two clicks to start a full disk image backup.
Additionally, AI-based technology stops ransomware and cryptojacking, so you don’t have to worry about your information getting into the wrong hands.
Read on to find out which Acronis Black Friday sale deals you can get this year.
What are the best Acronis BlackFriday & CyberMonday deals in 2023?
ACRONIS Cyber Protect Home Office is a product worthy of your attention. This is an innovative solution that natively integrates cybersecurity and data management to protect endpoints, systems, and data.
Why it is innovative? Well, we are talking about full-image and file-level backup, along with automated URL filtering and patch management.
As for the advanced AI-based behavioral detection engine, it makes a statement on its own when it comes to zero-day attack prevention.
Acronis Cyber Protection Operation Centers use a unique technique to continually monitor the cybersecurity landscape and issue notifications on possible threats of any sort.
You will receive real-time notifications on malware, vulnerabilities, natural disasters, and other worldwide events that may have an impact on data security, allowing you to avoid them.
Using the data protection map, you can rest assured that vital data is safeguarded for compliance reporting. Get detailed information about stored data and utilize automated data classification to track the status of crucial files security. You will be notified whether or not your files have been backed up, allowing you to better secure your data.
Acronis Cyber Protect Home Office
From all current ACRONIS promotions, find the one that suits your needs right away!
Eliminate the cost and complexity of administering several programs by combining dependable backup and powerful anti-malware in a single full-featured solution.
It basically protects everything – photographs, data, apps, systems, and the devices they’re on – with an easy-to-use interface that can be accessed from anywhere.
Furthermore, it stops any danger from disturbing your digital life, from disk failure to lost/stolen devices to the most recent cyberattacks — even never-before-seen ones.
When you are on a tight budget, it’s time to take advantage of some great offers. Yes, you can purchase this data protection and file recovery tool for a great price tag.
These Acronis Cyber Protect Home Office deals are simply unbeatable.
ACRONIS Essentials – for flexible backups, active disk cloning, and ransomware protection
ACRONIS Advanced – for quick recovery, cloud backup and features, automatic replication of data in the cloud, Microsoft 365 backups
ACRONIS Premium – for blockchain certification of files, electronic signatures on files, ability to add up to 5TB of cloud storage
Acronis Cyber Protect for Business
Every organization needs comprehensive cyber security. Acronis’ vision and solutions are built upon balancing the Five Vectors of Cyber Protection, abbreviated SAPAS.
Overall, having a modern cyber security deal it’s the best decision to take nowadays, especially when dangers are just around the corner regarding online transactions and files transfer.
Don’t hesitate to take advantage of 2023’s Acronis deals. Which one of these Acronis options meets your demands? Let us know your choice in the comments area below.
For tablets, the Windows Security button is a physical control located on the device. When pressed, it starts a secure attention sequence, the same as when you press Ctrl+Alt+Delete.
For Windows desktops and laptops, this is a secure sign-in setting that needs to be activated. Here’s all you need to know about enabling it:
How can I enable Windows Security on a PC?
1. Tablet computers
Tap on Start to get Settings, then Control Panel.
Go to Mobile PC, followed by Tablet PC Settings.
On the Tablet PC Settings page, tap on Buttons, then Button Settings For.
Now look for the Screen orientation of your button.
Go to the Tablet button list, tap Windows Security, then Change.
From the Press options, choose Log On option to set the action for the button.
Tap OK when prompted and close the settings windows. You can now press the button to get the login screen.
The programs closing by themselves issue is another one on the long list of problems on Windows 11. This issue can be incredibly frustrating as it prevents users from using most third-party apps.
The causes of the problem vary, with different variations reported by users. To make things easy, we have gathered encompassing and surefire solutions that can quickly get rid of the apps closing immediately after opening issue on Windows 11 in this guide.
Why does Windows 11 keep closing programs?
There are different reasons for the programs closing by themselves issue on Windows 11. It can be down to a system fault or some problems with third-party apps.
Below are some of the prevalent causes:
Problems with third-party apps: If Windows 11 keeps your programs, it could be because an app is running a counter-program. You can fix this by enabling Safe Mode and try using the app that keeps closing again. If you are able to pinpoint the faulty app, you can now remove it using one of the best uninstaller software.
Faulty system files: System files are important in the smooth running of programs and apps on your PC. Thus, if they are faulty or corrupt, you can encounter this issue. Your one-way ticket out of this is to repair and restore these corrupt system files.
Presence of malware: A virus can continue closing your programs automatically. This is because they are built to disturb your activities and cause problems on your PC. You need to quickly perform a deep virus scan either with Windows Defender or one of the best antivirus software.
How do I stop apps from automatically closing on Windows 11?
1. Run the Windows Apps troubleshooter
Press the Windows key + I and select System in the left pane.
Choose the Troubleshoot option.
Now, select Other troubleshooters.
Finally, click the Run button before the Windows Store Apps option.
At times the reason your programs keep closing by themselves on Windows 11 issues with apps from the Microsoft Store. To correct this, you must run the Windows Store Apps troubleshooter and apply the recommended fixes.
2. Repair system files
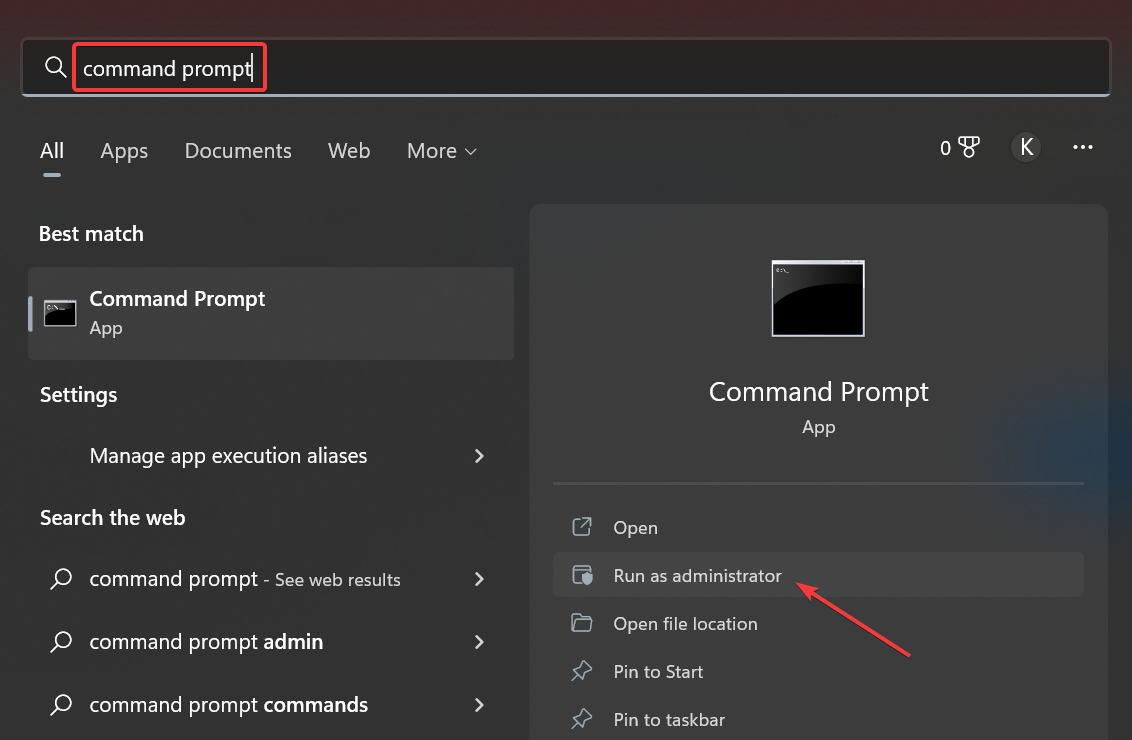
Press the Windows key, type cmd, and select Run as administrator under Command Prompt.
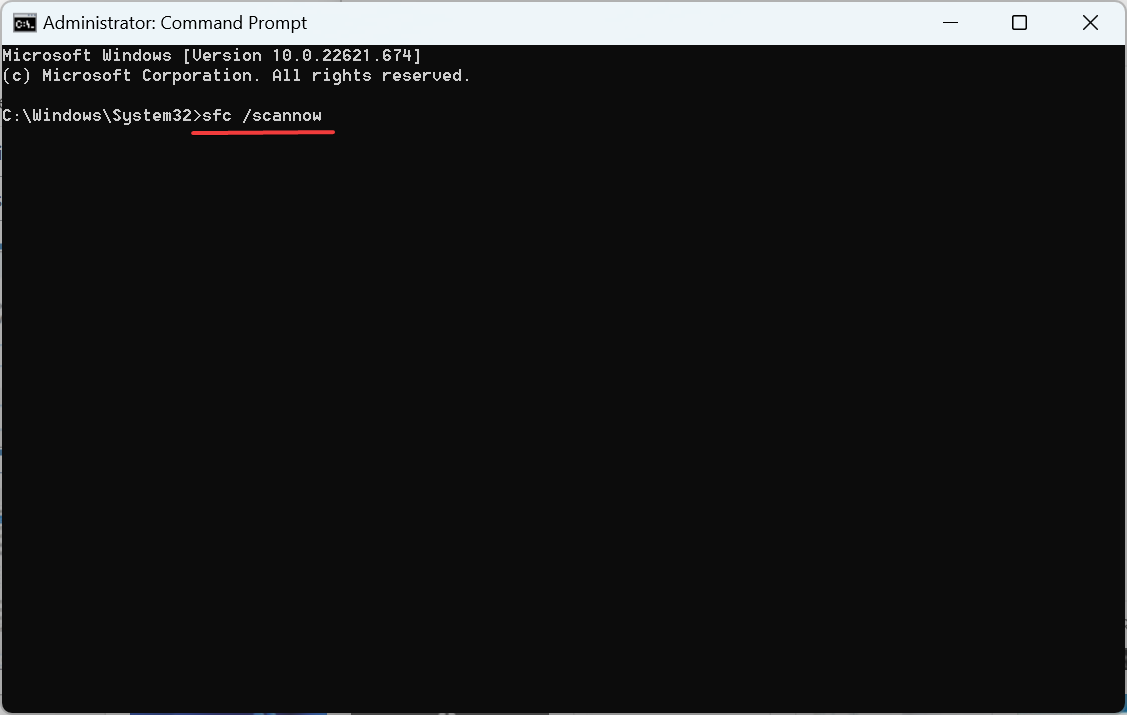
Type the command below and press Enter: sfc/scannow
Wait for the command to finish running, then copy and paste the commands below and press Enter after each: DISM.exe /Online /Cleanup-image /ScanhealthDISM.exe /Online /Cleanup-image /Restorehealth
Wait for the commands to finish running and restart your PC.
SFC and DISM scans are built-in tools that can fix corrupt or broken system files that might cause your programs to close on Windows 11. Sometimes, the SFC scan alone should do. However, you can still run the DISM scan to be sure.
Alternatively, you can use a professional system file fixer to scan and repair these files that do not require you to type any command.
3. Scan for malware
Press the Windows key, type virus, and select Virus & threat protection.
Click Scan options.
Choose your preferred scan option and click the Scan now button.
A virus can cause all sorts of issues on your PC and can be the reason your programs are closing by themselves. Choose the Full Scan or Microsoft Defender Offline option to run a deep scan.
Another option is to use a third-party antivirus like TotalAV to remove even the most stubborn malware. The good thing about this tool is that it is lightweight, fast, and effective.
It might be all you need to secure your digital life.
TotalAV
It protects your computer from all types of malware and gets rid of all related issues.
Press the Windows key + I to open the Settings app and select the System option in the left pane.
Choose the Recovery option.
Click the Restart now button before the Advanced startup option.
Now, when your system restarts, choose to Troubleshoot > Advanced options.
Select the Startup settings option.
From here, click the Restart button.
When your PC restarts, press the appropriate key to enable Safe Mode with the desired feature.
The Safe Mode helps narrow down the possible factors causing the programs to close by themselves on Windows 11. If this issue does not occur here, you should know the problem is not a system fault.
So, you can restart your PC and perform a clean boot to know the third-party app or process causing your programs to restart.
Press the Windows key + R, type msconfig, and hit Enter.
Choose the Services tab at the top, check the box for Hide all Microsoft services, and click Disable all.
Select the Startup tab and click Open Task Manager.
Right-click each of the apps there and select Disable.
Return to the System configuration window and click the Apply button followed by OK.
Finally, restart your PC.
The programs closing by themselves issue can be down to the activities of third-party apps and processes. Performing a clean boot allows you to start your PC with only the necessary services.
If this fixes the issue, you can enable these apps and services in batches to know the faulty one.
6. Uninstall recent Windows updates
Press the Windows key + I and select Windows Update in the left pane.
Choose the Update history option.
Select Uninstall updates.
Finally, select the update to remove and click the Uninstall button at the top.
If your apps started closing automatically after updating your PC, you might need to remove the update to make it work.
Should things get back to normal after removing it, you will need to wait till another batch of updates is rolled out before applying them.
The programs closing by themselves issue can be pretty annoying. Thankfully, it is not an issue that is impossible to fix, as evidenced by the fixes in this guide.
If you encounter other issues like Windows 11 apps not opening, check our well-detailed guide to fix it effortlessly.
Please let us know the solution that helped your programs usually work in the comments below.
Removing unwanted drivers from your Windows PC can save time and prevent technical issues. To make the process smoother, you can use a driver uninstaller tool.
This type of software scans your system and identifies old drivers, driver duplicates, or corrupt versions. It can automatically remove leftover files, ensuring proper functionality and freeing up space.
Below, we’ll show you the best options on the market.
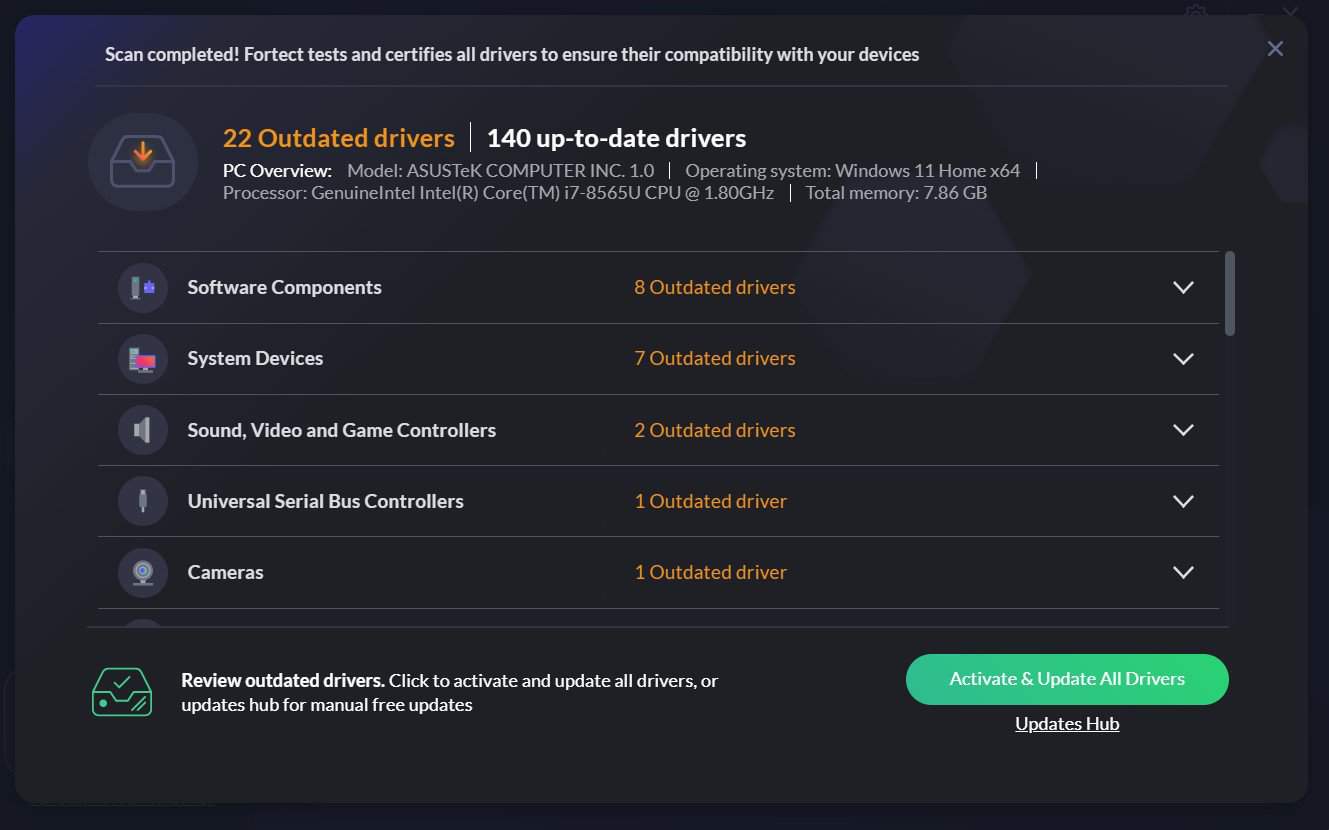
Driver Boosteris one of the best driver updater tools. In addition to removing old and outdated drivers from our PC, you can use this software solution to find the newest drivers online that are compatible with your devices and operating system.
Here are the key features of Driver Booster:
Find and remove outdated device drivers from your PC
Optimize your computer for gaming using Game Boost
Inspect driver information suc as publisher, date and associated device
Create driver backups and system restore points as a precaution
Update drivers at an accelerated rate
Set your PC to auto-shutdown or restart after the drivers are updated
Schedule Driver Booster to automatically scan drivers
Driver booster
Download Driver Booster for faster, hassle-free driver updates!
Revo Uninstaller Pro, and it can be used to remove anything, from generic programs, to Windows Apps, browser extensions, drivers, and more, all without leaving a trace that they were ever there.
In the case of drivers, you know how important it is when reinstalling a driver that the previous install needs to be completely gone.
With Revo Uninstaller Pro, you don’t have to worry about residual data and files, since it will all be deleted along with the driver itself, turning your PC into a completely clean slate.
Here are some of the perks of using Revo Uninstaller Pro:
Removes programs, Windows apps, browser extensions, drivers, and more.
Offers two kinds of uninstalling processes for you to choose from
Deletes programs and drivers without leaving a trace
Comes in both a normal and a portable version
Can force-uninstall stubborn programs
Revo Uninstaller
Uninstall programs completely and optimize your PC!
Driver Fusion is a driver uninstaller that provides a complete solution for your system to help you update, monitor, and manage your drivers and devices as well.
Using the health check option, you will be able to analyze your system’s health, and the program can automatically fix all detected issues.
Driver Magician is a driver removal software that will help you uninstall unnecessary drivers from your system effortlessly and this way you will be able to save some valuable time.
This program offers a professional solution for device drivers backup, update, removal and restoration as well. It’s compatible with Windows operating system.
The program works by identifying all the hardware that you have installed on your computer, and it extracts the associated drivers from the hard disk, backing them up to a location that you chose.
Here are the key features of Driver Magician:
Driver Magician comes with a built-in database of the latest drivers with the ability to go online and receive the driver updates.
You will be able to back up device drivers of your system in four modes.
The tool lets you restore device drivers from backup with a simple click.
You will be able to update device drivers of your PC to improve system performance and stability.
There’s also the option of Live Update device identifier database and driver update database.
You will be able to back up more items such as Desktop and My Documents.
With this tool, you can restore more items from the backup, and you will also get detailed information of the hardware drivers.
Guru3D Driver Sweeper is a great remove driver software that will sweep all driver leftovers from your computer. Removing your drivers on a correct way is essential because driver leftovers are able to cause stability-related issues and startup problems.
You can use Guru3D Driver Sweeper if you want to update and remove drivers from the computer.v
Here are the key features of Guru3D Driver Sweeper:
Guru3D Driver Sweeper can be used in two ways, and both of them will clean all the files.
You can use the official uninstaller of the drivers, and you can also run this program to select what to clean.
You will be able to select more drivers at the same time for cleaning.
The current supported drivers are NVIDIA (Display and Chipset), ATI (Display), Creative (Sound) Realtek (Sound), Ageia (PhysX) and Microsoft (Mouse).
This software can be used in Normal mode, but for absolute stability, it’s recommended to use the Safe mode.
It’s also recommended to make a backup or a system restore before using this tool.
Device Cleanup Tool removes drivers for non-present devices from the Windows, device manager. It’s critical to remove these drivers because each device that was once attached to your system leaves an entry in the Device Manager.
When you are using the Windows Device Manager, you will be able to delete drivers only one by one. But, with Device Cleanup Tool you can delete multiple drivers or all the non-present devices.
Here are the key features of Device Cleanup Tool:
View a list of all devices and uninstall drivers
The “last used time” comes from the write time of the device’s registry key
Using Device Cleanup Tool will save you space, time and effort as well
There’s also a command line version of Device Cleanup Tool called Device Cleanup Cmd
These are the top picks for the best driver removal tools and no matter which one you decide to get, you’ll be able to keep your system clean and running smoother.
However, if you want a faster and more reliable solution, then you might want to use the one of the driver uninstaller software from this guide.
If you have any other suggestions or questions, don’t hesitate to leave them in the comments section below.
You may notice that your GPU often spikes when in an idle state. This may happen on the Windows operating system.
Usually, when this problem occurs, you may notice that the GPU usage jumps from 0% to 100%. You may have seen 100% CPU usage in idle. That is somehow common. But, the problem with the graphics card is rare. This article will help you to solve the high GPU usage issue in an idle state on Windows.
Why does GPU utilization spike when it is in an idle state?
Usually, high GPU usage problems may occur for varieties of reasons. However, if you dig deeper, you will find these as the most common culprits:
GPU-hungry background apps: Even though your PC is idle, there may be some background tasks utilizing a lot of GPU power.
Software Bug: Some software may have bugs that trigger this problem.
Old graphics driver: Incompatible or outdated graphics drivers may not be able to handle modern Windows or other processes properly.
Before trying the actual methods, we suggest you check the following things:
Make sure your graphics card is not physically damaged.
You are not using any GPU tweaker, or you have not made any bad configuration using such tools.
After ensuring these steps, go through the following methods to fix high GPU usage issues when you are not doing anything on your PC.
1. Update Windows
Press Windows + I on the keyboard.
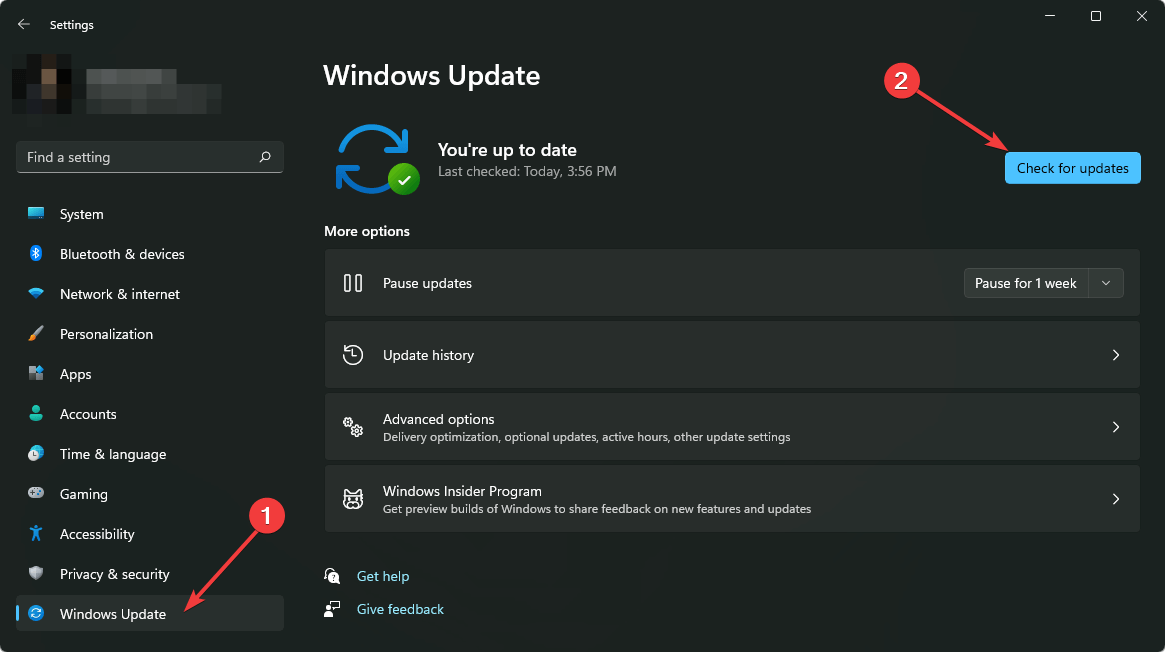
Go to Windows Update and click on Check for updates.
If any updates are available, click on Install/Download button.
If necessary, restart your PC after updating.
2. Update graphics card
Open the Start Menu.
Type Device Manager and press Enter.
Right-click on the Display Driver and choose Update.
Choose the preferred method to update.
The bad thing is Windows Device Manager often fails to detect the latest driver for the graphics card. As a result, the above steps may not be practical. So, we suggest you use an automated driver updating tool.
These tools can scan and detect outdated or missing drivers on your PC. You can update them with just a single click using this tool. Otherwise, they can do this thing automatically according to your preferred schedule.
Updating drivers doesn’t only solve 100% GPU utilization issue in an idle state but also solves GPU crash issues while gaming.
3. End background tasks
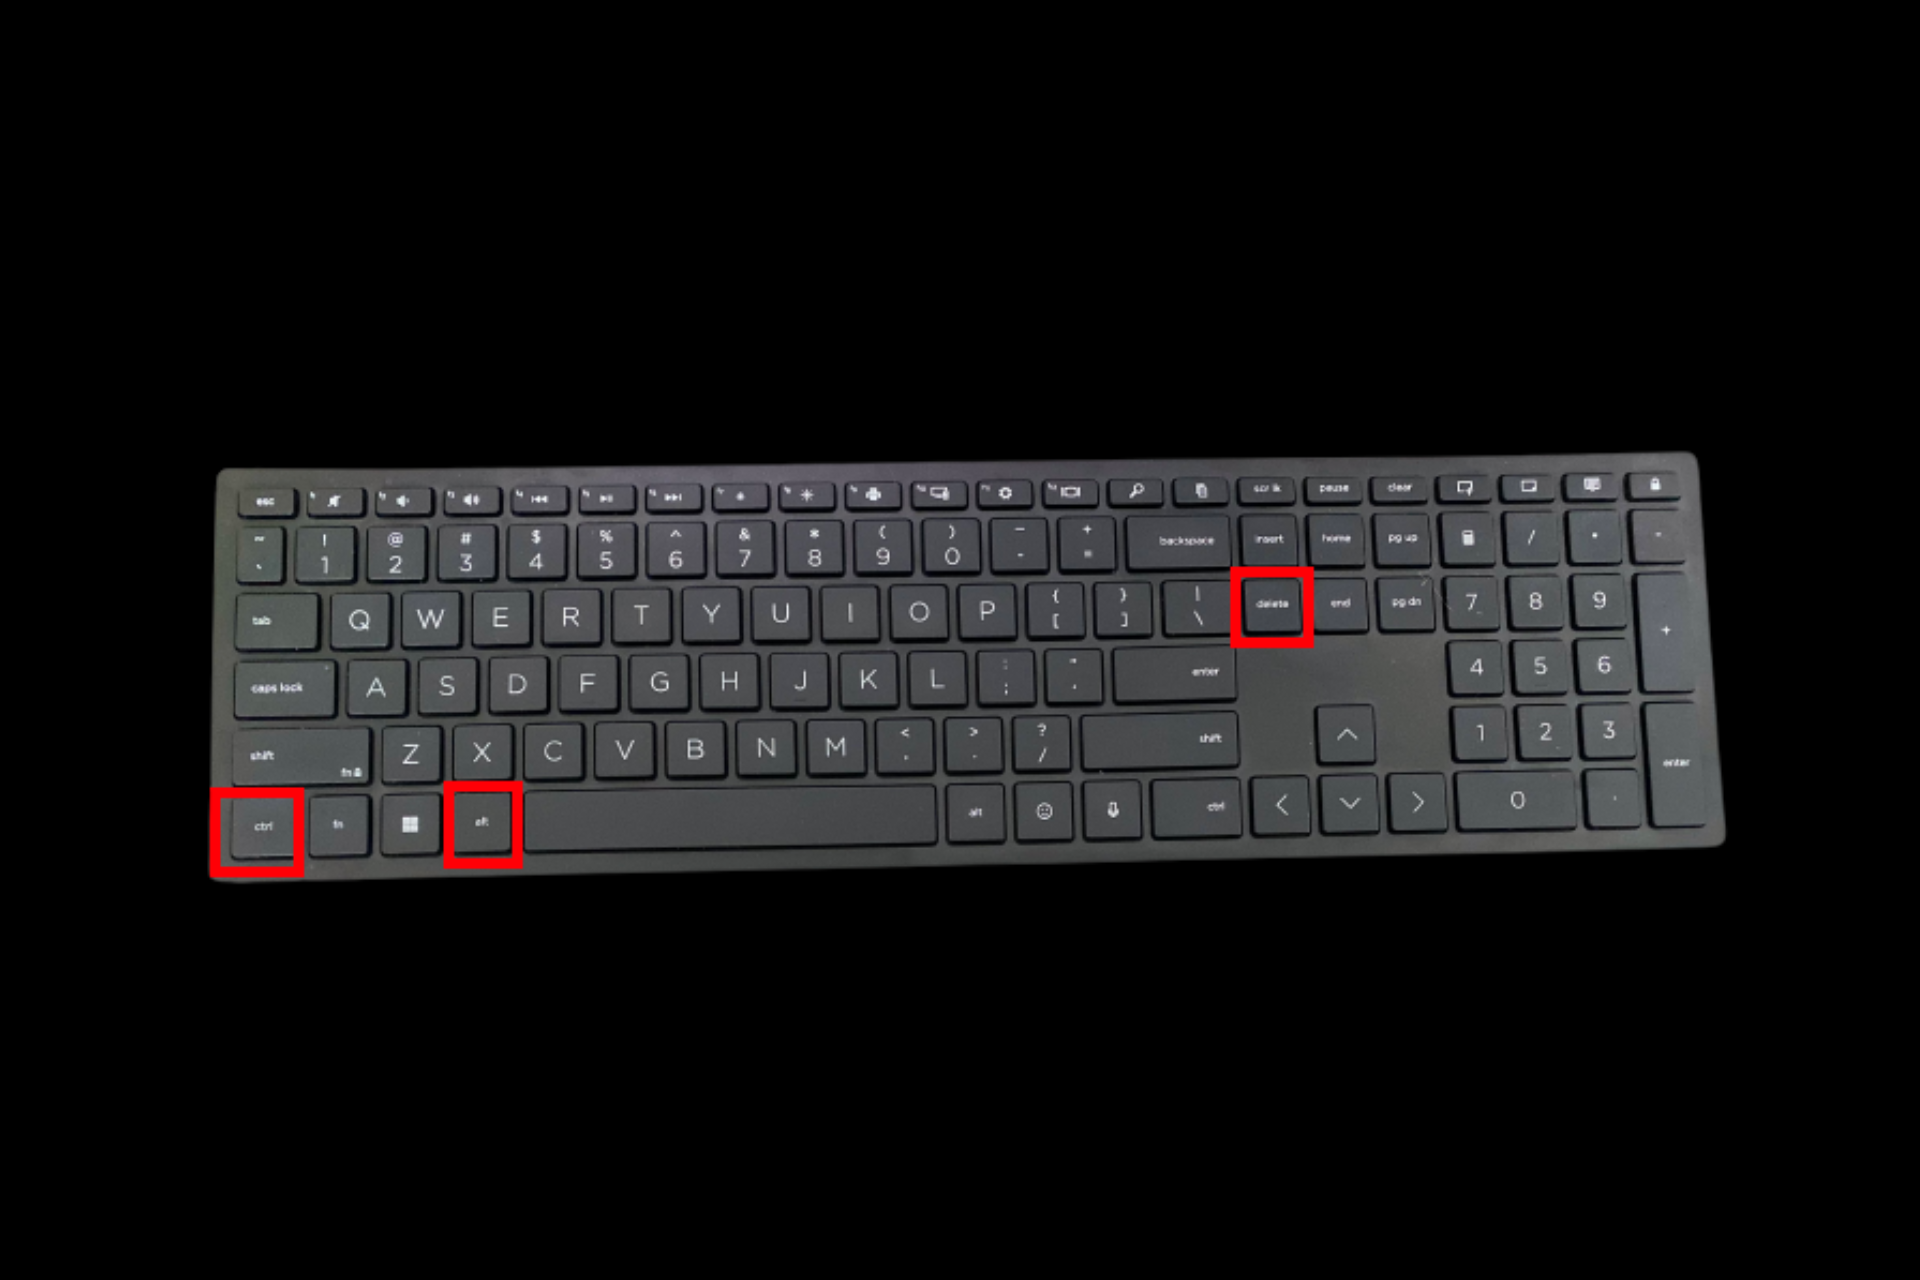
Press CTRL + ALT + Del and click on Task Manager.
Find the most power-hungry task, select it and click on End process.
Do the same for all other resource-hungry processes.
This process may temporarily fix the sudden GPU spikes problem that appears in an idle state. However, after the next bootup, it may return. So, the better idea is to update the software or uninstall it completely.
Click on the three vertical dots and choose Uninstall.
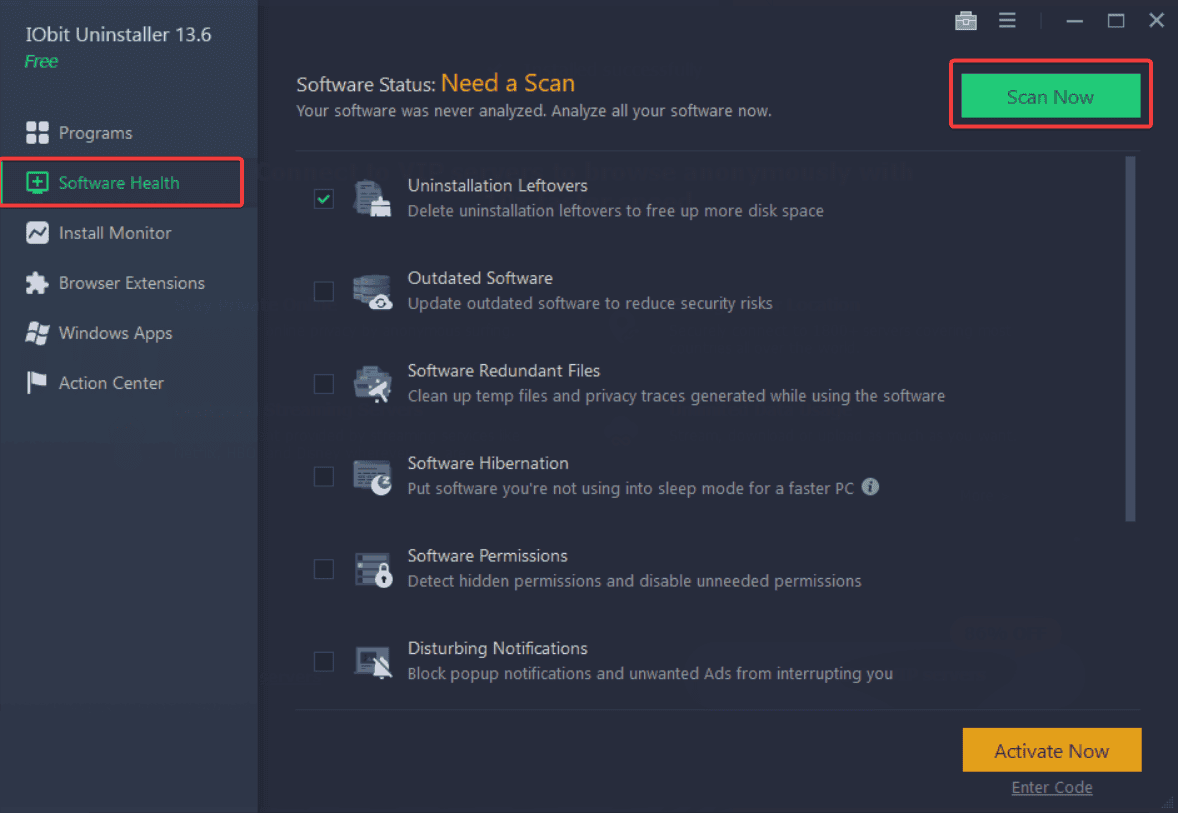
The built-in uninstaller always leaves some leftovers on your PC. So, you can consider using a tool like IObit Uninstaller. It can altogether remove any software from your computer.
Problematic software can cause various problems, like high CPU usage when GPU usage is low or vice versa. Uninstalling them will solve such situations.
5. Re-install the graphics driver
5.1 Uninstall graphics driver
Open the Device Manager like before.
Find the display adapter, right-click on it and choose Uninstall device.
Check Attempt to remove the driver for this device and click on Uninstall.
Download the appropriate item and install it on your PC.
To install more conveniently, you can also depend on specialized driver updating software. After installing the appropriate driver, restart Windows. It should solve the GPU spikes issue when idle state.
6. Scan the PC with a good antivirus/malware software
If you see a malicious program, uninstall it, as shown in method 4. Virus issues often cause your computer to have high GPU and CPU usage problems.
For best security, you can consider using TotalAV which is currently the best choice for PC users. If necessary, you also can know about the best antimalware tools and use any of them you want.
This article has featured the best methods to solve GPU spikes when idle on Windows. If you know any better method, you can write it down in the comment box.
Have you ever gotten a Blue Screen of Death? If you have, then you know just how frustrating it can be. Well, there are different variations of the error, and the ntoskrnl.exe BSOD in Windows 11 seems to be bugging users more recently.
The ntoskrnl.exe BSOD crash error can occur for several reasons, including hardware and software issues, as well as driver problems. This article will provide useful information on how to fix the ntoskrnl.exe BSOD error in Windows 11.
What is Ntoskrnl.exe BSOD?
Misconfigured system files in your Windows OS usually cause a ntoskrnl.exe BSOD error. The ntoskrnl.exe file is part of the Microsoft Windows NT kernel (NTOSKRNL), and it’s used to control access to several resources, including memory and processor time.
One of the most common causes of a ntoskrnl.exe BSOD error is a damaged or missing system file. Various events, including malware infections and hardware failures can cause these.
Other causes include:
Hardware issues – You may have a faulty CPU or GPU in your hands and have no option but to upgrade your graphics card.
Outdated drivers – Using old drivers can cause issues such as BSOD. The best solution is to use a specialized tool.
Corrupted BIOS settings – You may end up with a corrupt BIOS if you’ve changed the settings recently and didn’t properly save them before rebooting Windows.
Virus or malware infection – It’s always recommended to have a good anti-malware program to scan your computer for malware.
Corrupted system files – Windows relies on many files to run smoothly, and if one of these files gets corrupted or damaged, you need to repair the corrupt system files, or the entire system will crash.
Symptoms of this problem include:
You experience frequent crashes and system slowdowns.
Unusual error messages may appear on the screen, such as driver_power_state_failure ntoskrnl.exe.
The system hangs while starting up, shutting down, or when you are trying to open a program.
Is Ntoskrnl.exe necessary?
The ntoskrnl.exe process is an executable file that belongs to Windows Kernel-Mode Drivers developed by Microsoft Corporation for the Windows NT operating system family as well as subsequent server versions.
The kernel is the core of Microsoft Windows and is responsible for handling hardware requests and allocating resources to applications.
It’s also responsible for managing memory on your PC. This means that any errors with this file can cause a range of problems for your computer.
What can I do to fix the Ntoskrnl.exe BSOD error in Windows 11?
Here’s what you should first do:
Clean up temporary files, especially if you’ve been using your computer for a while. You may have accumulated a lot of temporary files that are no longer needed.
Click on Windows update, then select Check for updates.
Download and install if any are available.
2. Run a System File Checker scan
Hit the Windows key, type cmd in the search bar, and click Run as administrator.
Type the following command and press Enter: sfc /scannow
Running the SFC scan will repair/replace any corrupt system files and should get things up and running in the case of ntoskrnl.exe BSOD IRQL_NOT_LESS_OR_EQUAL in Windows 10.
3. Run the CHKDSK command
Hit the Windows key, type cmd in the search bar, and click Run as administrator.
Type the following command, replace the C letter with your drive’s letter, and press Enter: chkdsk C: /f
4. Disable overclocking
Overclocking is a process in which you increase the performance of your CPU by increasing its clock speed. However, if you have overclocked your CPU too much, then your computer might crash due to overheating.
The problem with overclocking is that it puts more stress on your system’s hardware and may cause instability or crashes. If you’re getting BSOD errors after overclocking, you should try reducing the frequency of your processor and see if that fixes the problem.
If you’re having issues with your PC, it’s always best to start in Safe Mode. This will stop all non-essential processes and services from running, which may help reduce the chance of running into this error.
By doing so, you can scan for viruses or malware on your computer and see if it is causing issues.
Aside from BSOD errors, the file can also cause a Driver power state failure, so we recommend that you always keep your drivers up-to-date.
How do I fix Ntoskrnl exe missing or corrupt?
Here are a few ways you can fix a missing or corrupt Ntoskrnl.exe:
Run the Check Disk tool: If the file exists but can’t be accessed due to issues with the drive, running the Check Disk utility should do the trick.
Restore to the last know good boot configuration: When you are unable to boot the PC due to a missing or corrupt Ntoskrnl.exe, the best option is to boot into the last known good configuration from the BIOS.
Unplug peripherals: Certain peripherals, especially keyboards, are found to trigger the error. Some users shared that unplugging the keyboard when the PC is being turned on and then reconnecting it after Windows boots helps.
Hopefully, these solutions have been able to resolve the issue, and the ntoskrnl.exe BSOD error is a thing of the past in your Windows 11.
Feel free to drop us a comment down below if you have tried any additional solutions that we have not mentioned.
If Windows 11 is not responding or keeps freezing, you’re not alone. Many people experience similar issues, with the most common causes being outdated OS and corrupt system files.
Memory issues and outdated drivers can also be at fault. Luckily, none of these are critical problems, and with a few tweaks, you’ll be able to fix them. Check out our tested solutions below.
How to fix Windows 11 not responding
We advise you to restart or force shut down your PC before trying other fixes. This is because the issue might be a minor glitch with some processes, which a simple restart can fix.
If that does nothing and Windows 11 stays completely unresponsive, follow the more advanced steps below.
1. Disable the Search icon on Taskbar
Right-click the Taskbar and choose Taskbar settings.
Toggle the switch for the Search option backward to disable it.
Now, restart your PC.
If your Windows 11 desktop screen is not responding, it might be down to the Search icon on the Taskbar. Some users reported that removing the icon solved the issue quickly.
2. Update Windows 11
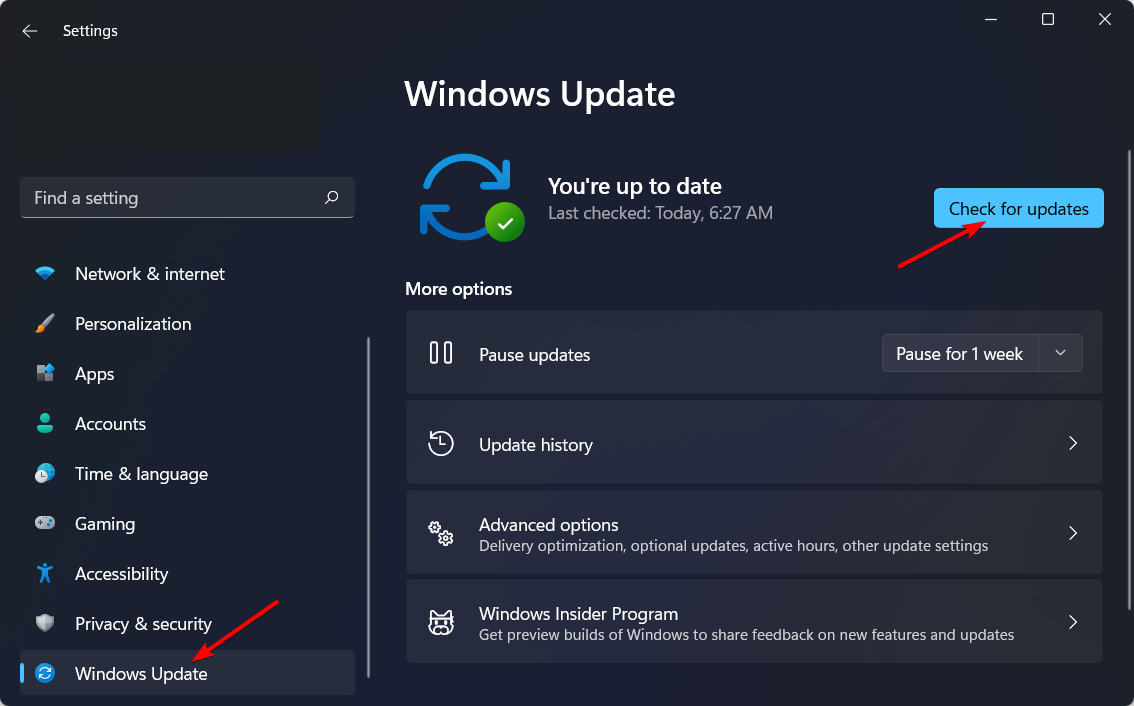
Press Windows + I to launch the Settings app, and select Windows Update from the tabs listed in the navigation pane on the left.
Click on the Check for updates button on the right to scan for any available newer versions of Windows 11.
If an update is listed after the scan, click on the Download & install button.
3. Perform a clean boot
Press the Windows key + R, type msconfig, and press Enter.
Click the Services tab at the top, check the box for Hide all Microsoft services, and click Disable all.
Select the Startup tab at the top and click Open Task Manager.
Right-click each of the apps there and select Disable.
Go back to the System Configuration window and click Apply, followed by OK.
Finally, restart your PC.
Performing a clean boot disables all third-party apps and services from starting up. This should fix the Windows 11 not responding on startup issue.
If your PC typically works on a clean boot, you can now start enabling the apps and services in batches to know the one causing the problem.
Press Windows + S to launch the Search menu, enter Windows Security in the text field, and click on the relevant search result that appears.
Click on the Virus & threat protection option.
Now, click on Scan options to view all the different types of scans available.
Select the Full scan option and then click on the Scan now button at the bottom.
Now, wait for the scan to complete, and once it’s done, check if the Windows 11 desktop not responding issue is resolved. Also, while we have used the built-in Windows Security to scan for malware, you can use any reliable third-party antivirus for Windows 11.
7. Perform DISM and SFC scan
Press Windows + S to launch the Search menu, enter Windows Terminal in the text field, right-click on the relevant search result, and select Run as administrator from the context menu.
Click Yes in the UAC (User Account Control) prompt that pops up.
Next, click on the downward-facing arrow near the top and select Command Prompt from the list of options. Alternatively, you can hit Ctrl + Shift + 2 to launch Command Prompt in a new tab.
Now, type/paste the following command and hit Enter to run the DISM tool:Dism /Online /Cleanup-Image /RestoreHealth
Next, execute the following command to perform the SFC scan:sfc /scannow
The DISM (Deployment Image Servicing and Management) tool and SFC (System File Checker) scan can fix many errors arising due to corrupt or missing system files, problems with the Windows image, or installation files.
8. Run the Windows Memory Diagnostic tool
Press Windows + S to launch the Search menu, enter Windows Memory Diagnostic in the text field, and click on the relevant search result.
Click on the Restart now and check for problems(recommended) option.
9. Uninstall recent updates
Go to Settings.
Select Windows Update.
Pick the Update History section.
Click Uninstall updates and remove the most recent updates.
Keeping the system up to date is essential, but if the issue only appeared after you updated Windows, consider reverting. Sometimes, updates get buggy and until that’s addressed by Microsoft, you can fix the freezing issues by going back to a previous version.
10. Run a CHKDSK scan
Press Windows + S, type cmd, right-click Command Prompt, and select Run as administrator.
Type this command and press enter: chkdsk /f /r /x.
Once the process is complete, restart your PC.
That’s it! By the time you execute the methods listed here, the desktop not responding problem in Windows 11 should be fixed. Unfortunately, if that’s not the case, you are left with no option but to reset Windows 11 to its factory settings.
TIFF is a non-compressed image file format that preserves picture quality. It’s a good file format for storing photos.
Some users might need to combine multiple TIFF images into single multi-page TIFF files for cataloging and sharing. This is how you can merge TIFF files with alternative tools on a Windows PC.
How can I merge TIFF files?
1. Combine TIFF files with general image-editing software
Some image editors, like Adobe Photoshop, enable users to combine multiple images into single PDF documents. Adobe Photoshop incorporates a PDF Presentation feature that’s ideal for combining TIFF images within a single output document. Its users can also combine multiple photos into one image.
Aside from its PDF features, Photoshop incorporates a multitude of advanced image-editing features few other software can match. It enables users to replace backgrounds, add duotone effects, move and duplicate objects, create double exposure effects, and much, much more!
Other Adobe Photoshop features
It enables users to set up amazing slideshows for images
Users can add visually appealing quote graphics to images
Adobe Photoshop’s text and border guided edit enables users to add border overlays to pictures
The Smart Sharpen feature in Photoshop quickly reduces halo and noice effects in images
Adobe Photoshop
Easily and efficiently combine TIFF files by using this powerful image processing tool.
Click the Choose file buttons to select TIFF images to combine. You can combine up to five TIFF images with this tool.
Press the Combine My File button.
A Save As window will automatically open when it’s finished combining images. Select a folder to save the multipage TIFF file to.
Then select the Save option to download the file.
Open the folder you saved the multi-page TIFF file to in File Explorer.
Then right-click the TIFF file and select Open with.
Select to open the file with Windows Photo Viewer, which is a multi-page image viewer.
You can click the left and right arrow buttons to flick through the image pages.
Note: You’ll need to open the combined image file with a multi-page image viewer to view all pictures incorporated within the file.
Software like Windows Photo Viewer, IrfanView, and XnView will display all picture pages within a combined image file. However, Photos only display one image.
4. Merge TIFF files into one with TIFF-editing software
You can also create multipage TIFF files with dedicated TIFF-editing software. Advanced TIFF Editor Plus is one such utility for viewing, converting, and editing TIFFs, and other image formats..
It also packs in text recognition (OCR) and virtual printer features to boot.
Click File > Merge Files.
Choose Add Files to choose the images to include within the multipage TIFF.
Select a folder to save your files to.
Click OK to combine the selected files.
Advanced TIFF Editor Plus is not freeware software. However, you can still utilize its trial package for one month. You can combine many TIFF images without getting the registered Advanced TIFF Editor Plus if you make the most of its one-month trial package.
Some users prefer using PDF over Word documents, but did you know that you can save a secured PDF as a Word document? It’s actually easier than you think.
We will explore in this article the exact steps you need to follow to convert a locked PDF to WORD, so make sure to keep on reading.
How can I convert a protected PDF to Word?
1. Use Soda PDF
Soda PDF is widely used thanks to the available features and tools designed to make your work easier.
With this tool, you can quickly edit, share, sign, encrypt, and convert PDF files while keeping all the information intact.
Soda PDF can convert multiple formats including HTML, TXT, GIF, DOCX, TIFF, JPG, PNG, BMP, and many more.
In order to convert secured PDF to Word, make sure to follow these steps:
Another quick way to save a secured PDF as a Word document is to use an online converter.
There are several tools that you can use, depending on the complexity of your PDF file, but we suggest you try pdfFiller.
This PDF converter tool will do the job just perfectly because it has great speed scores and will keep your data secured.
Moreover, many users consider it much simpler to convert secured PDF to Word online due to not having to download new software and learn how to use it.
Moreover, you can host fillable forms, add watermarks, images, videos, and many other features while protecting your documents with advanced encryption.
We hope that the solutions presented here helped you quickly convert your file. Please share with us in the comments section below which solution has worked best for you.
Ever find yourself in a situation where you want to remove all your files from your laptop or computer? You’re not alone. There are many reasons why you might want to do this.
Perhaps you’re selling the computer or want your old data erased for security reasons. Unfortunately, many people don’t know how to factory reset a Dell laptop on Windows 10. Thankfully, we have those answers.
Restart your Dell PC and press CTRL + F8 while it boots to enter Advanced options.
Select Troubleshoot.
Click on Reset your PC.
Now follow the on-screen instructions to complete the reset.
Why should I factory reset my PC?
If you’re having trouble deciding whether or not to factory reset your PC, there are a few other reasons why this procedure might be beneficial for you:
Malware – You should factory reset your PC if you suspect it has been infected with malware. It can be tough to remove malware manually, so we recommend you factory reset your PC.
Fixing problems on your PC – A factory reset often fixes problems that you might have with your computer. For example, a factory reset could fix a corrupted operating system.
Makes it easier to sell or give away your PC – If you’re selling or giving away your computer, then a factory reset is one of the best ways to clean up your hard drive so that no personal information remains on it.
Revert settings to their original state – If you’ve made changes to how Windows works, such as changing the default apps for certain tasks or adding new fonts for text display, a factory reset will restore these settings back to their original state.
Improve performance – If your PC is slow to start up, slow to load programs and other apps, or if it’s constantly freezing, a factory reset could fix these issues.
Factory resetting won’t solve every problem with your PC, but it’s certainly worth trying if nothing else has worked.
Does factory reset delete everything on a Dell laptop?
Factory resetting a Dell laptop allows you to remove all personal information from your device and return it to its original state when you first bought it. This can be useful if you’re selling or giving away your laptop since it doesn’t contain any sensitive data anymore.
Factory resetting your computer will allow you to keep your files or delete all the data on your hard drive, including any installed applications and files. The last option erases all user data and settings on your laptop, but it doesn’t delete Windows or other software that came with your computer.
How long does it take to factory reset a Dell laptop?
A factory reset usually takes between 30 minutes to 2 hours, depending on your laptop’s speed and the reset method used. The Cloud download option generally takes longer because it needs to download Windows files.
Will a factory reset remove Windows 10 from my Dell laptop?
No. A factory reset removes personal files, apps, and settings but keeps the Windows 10 operating system installed so your laptop can start fresh.
Can I factory reset my Dell laptop without a password?
Yes. You can reset your Dell laptop from the boot menu or Windows Recovery Environment without logging in, making it ideal if you’ve forgotten your password.
Do I need an internet connection to factory reset my Dell laptop?
Not always. If you choose the Local reinstall option, the reset uses existing system files. However, for Cloud download, a stable internet connection is required to fetch the latest Windows version.
And that’s how to factory reset your Windows 10 Dell laptop. If you are using a more recent version of Windows, we also have a guide on factory resetting Windows 11.
In case you run into a hurdle and, for some reason, you can’t reset your Windows 10, we have a dedicated article on how to bypass this issue.
Do let us know of any other issues you may have encountered in the comment section below.
Python is a great programming language, but error loading Python DLL on their PC. This problem can lead to other issues, such as Python runtime error for example.
If you are also troubled by this error, here are a couple of troubleshooting tips to help you resolve this issue once and for all.
Why does the error loading Python DLL appear?
There are multiple reasons for this issue, but the following are the most common ones:
User error – Sometimes not running the proper file or not having your script configured properly can lead to DLL errors. This can also lead to PIP not recognized and other errors.
Lack of administrative privileges – If you don’t use administrative rights while running Python commands, sometimes you might encounter this error. You can do that by using administrator account.
Version incompatibility – Older versions of Python aren’t always compatible with scripts made using the latest version, which results in this error.
How can I fix the error loading Python DLL?
Before we start fixing this problem, there are a couple of quick checks that you need to perform:
Use the correct directory – Many users reported this issue because they used build instead of dist directory. Not using correct directory can lead to The specified module could not be found and other problems. To avoid this issue, always use dist/main
Check your Python version – If you compiled your script with a newer version, older versions of Python might not be able to run it. This is especially true for Windows 7 since it doesn’t support Python 3.9 or never.
Start the console as administrator – Before you run your script, that the command line as administrator and check if that helps.
1. Add your configuration to the Python script
Open your Python file.
Copy the configuration parameters to the top of the file.
Save changes.
Many users reported that moving the configuration parameters from a separate file or the spec file, fixed the problem for them, so be sure to try it.
This solution can help you if you’re getting an error loading python dll python310.dll or python39.dll anaconda message.
2. Use different parameters with pyinstaller
Start your console.
Now enter the following command: pyinstaller --upx-exclude"vcruntime140.dll" myscript.py
Press Enter to run it.
Users also reported that the following commands worked for them, so feel free to try them as well: pyinstaller --onefile file_name.py pyinstaller --noupx file_name.py
This is a simple and easy solution if you’re getting error loading python DLL in pyinstaller.
3. Add Temp directory to the list of exclusions
Press Windows key + S and enter windows security. Select Windows Security from the list.
Go to Virus & threat protection. Next click on Manage settings.
Click on Add or remove exclusions.
Click on Add an exclusion and select Folder.
Select the following directory: C:\Users\your_username\AppData\Local\Temp
Error loading python dll loadlibrary pyinstaller: formatmessagew failed can cause a lot of problems, but this solution might help you fix them.
Press Windows key + R and enter %appdata%. Press Enter.
Navigate to pyinstaller directory.
Delete all files from it.
This is a simple workaround and it can be helpful if you’re getting error loading Python DLL in Ultimaker Cura or AWS CLI.
The Error loading Python DLL can be problematic, but we hope you managed to solve it. If you believe that this issue is caused by a lack of permissions, our Python permission denied error guide should be able to help you.
We have a new guide on what to do if python27.dll is missing, so don’t hesitate to check it out for more information. For a related issue, see our guide on Python error OXZEP7 software with quick, step-by-step fixes.
Did you find a different solution for this problem? Let us know in the comments section below.
Disappointed by seeing green check marks on desktop icons? Why do you see these check marks on your desktop icons? Well, there’s no need for an alarm as they are not harmful.
Nevertheless, some users find it helpful, and others do not. This article is for you if you fall in the category of users who don’t like the check marks. We will explore why they appear and how to get rid of them successfully.
Why do my desktop icons have green check marks?
You may have noticed that some of your desktop icons have a green checkmark, and some do not. The reason for the green check mark is:
This a visual reminder that your files are backed up on OneDrive in case something happens to your computer or hard drive.
It also indicates that your local copy of the file is synchronized with the cloud version.
You can also share the files with others in your organization or collaborate on projects with coworkers.
It gives you the go-ahead to delete the local files as they are already on OneDrive, so that they won’t take up space on your computer.
Backing up your files is extremely important because of the following reasons:
Secures files – Having multiple copies of your files ensures that you still have others stored elsewhere if one copy is lost, damaged, or destroyed.
Recovery and restore – A backup allows you to recover a deleted file even if there is no other copy of it elsewhere on your computer or an external drive.
Saves storage space – If you have limited space on your PC, you can always transfer files to OneDrive and delete the local file to free up disk space.
How can I get rid of the little green check marks on my desktop icons?
First off, try the following before proceeding to the multiple-step solutions:
Right-click on your Desktop and refresh.
Close and open OneDrive.
Try restarting your PC.
1. Don’t backup the Desktop folder
Launch OneDrive and go to Settings.
Click on the Backup tab, then locate the Desktop folder.
Hit Stop backup.
Stopping backup means all files on the Desktop will no longer be backed up on OneDrive.
Launch the OneDrive icon by clicking on the system tray.
Click on Help & Settings in the pop-up menu.
Select Pause syncing and choose a suitable time option for you.
3. Disable OneDrive
Launch the OneDrive icon by clicking on the system tray.
Select Settings.
Click on the Account tab, then select Unlink this PC.
Confirm by clicking Unlink account in the dialog box that pops up.
4. Remove OneDrive from Startup
Hit the Windows key, type Task Manager and click Open.
Navigate to the Startup tab and locate OneDrive.
Right-click on it, then select Disable.
You can also delete the folder from your desktop as it has already been backed up in OneDrive. It’s always a good idea to free up disk space as it can make your PC run faster and improve performance.
Alternatively, you can stop using OneDrive as your backup solution and switch to other local backup software that won’t leave any green check marks on your folders.
In another similar occurrence, for users who like the check mark, sometimes you’ll find that the green check mark is missing in OneDrive. If so, we have the perfect article to help you resolve this issue.
WinZip Driver Updater is a program designed to help you update the drivers on your computer. It scans your computer for outdated or missing drivers, then downloads them from the internet to be installed correctly on your machine.
In this modern age, it is essential to keep your drivers updated, and if there are tools that can help you do so automatically, even better.
What is WinZip Driver Updater, and do I need it?
WinZip Driver Updater is a software that promises to help you update your system drivers. This tool can help identify the correct driver for your PC and manage updates via a single click.
However, before downloading it, you should consider using WinZip Driver Updater because many reviews claim this application is duped and faked.
This is why we have created an honest WinZip Driver Updater review to help you decide whether or not to use it.
Many people have downloaded WinZip Driver Updater. However, some users have reported that this program may cause problems on their PCs. On the other hand, others also claim that it is one of the best tools for updating drivers, so there are a lot of mixed reactions.
Its usability has some pretty good features, so depending on what you are looking for in a driver updater tool, it may or may not be for you. Some of its key features include:
Easy to install and use – WinZip Driver Updater key does not require special skills or knowledge; download it from the official website and install it on your computer or run the software.
Free – The software comes in a free version with decent features to scan for corrupt drivers and replace them.
Boosts PC performance – WinZip Driver Updater promises to maximize the functionality of your PC and ensure it is at optimum levels.
Free
Pro
Free trial
Yes
Yes
Scheduled driver updates
Yes
Yes
Automatic backup and restore
Yes
Yes
Free driver scans
Yes
Yes
Single-click driver installs
No
Yes
Email support
No
Yes
Can WinZip be trusted?
We all know we should be careful about what we download and install on our computers. But unfortunately, there are many malicious pieces of software out there that can cause you nothing but trouble.
The first concern is that WinZip has been known to bundle its software with third-party applications. It’s, therefore, understandable that some people may be wary when trying to install it on their machines.
When it comes to whether WinZip Driver Updater is legit, the answer is yes. But, you have to pay attention to details. There is a similar program with an identical name, but that is actually a virus. So, be sure to check out our guide on how to remove the WinZip Driver Updater virus from your PC.
WinZip
Easy-to-use software that ensures an optimum level of your PC by finding the correct drivers.
As with any software, you should always be cautious when downloading programs from the internet. Many viruses out there pose as legitimate programs but are actually malicious software designed to steal your personal information or damage your computer.
By now, you must be aware that some software can find its way into your PC without you downloading them. Most of the time, such software contains malware. That’s why we recommend installing a comprehensive antivirus program to detect such issues.
The best way to ensure that you are downloading a secure version of WinZip is to only download from official sources such as the official website.
If you have a lot of programs on your PC, you may sometimes experience problems related to drivers. For example, they might be outdated, corrupted, or missing. Unfortunately, the only way to solve this problem is to download and update the drivers manually or automatically.
Fortunately, auto-updating drivers are much more manageable. And you can do so with the help of the WinZip Driver Updater program. However, if you’re skeptical, there are other free driver updater tools. You can try them out, as they do the same job.
DLL or Dynamic Link Library is a file class containing critical information often shared by multiple applications. Of late, many users shared that the clb.dll file is missing in Windows.
Remember, missing DLL files is not an unusual scenario. And when the clb.dll file is missing, users reported being unable to open the Registry Editor, which presents a significant problem. So, let’s walk you through the solutions.
What can I do if the clb.dll file is missing?
1. Get the missing dll file
The easiest way to fix things when clb.dll is not found is to get it manually. While several websites claim to offer the clb.dll for Download, we don’t recommend using them due to security concerns.
It’s always better to use a safe and reliable DLL repair tool that will automatically get the missing DLL files. Use any of these, and the problem should be gone in no time.
A safe option as a dependable repair tool we strongly recommend software that has a substantial database of new components ready for replacement purposes when your PC has corrupt or missing files.
2. Run DISM and SFC scan
Press Windows + S to open the Search menu, type Command Prompt, and click on Run as administrator.
Click Yes in the UAC prompt.
Now, paste the following three commands one at a time and hit Enter after each to run the DISM tool:dism.exe /online /cleanup-image /scanhealthdism.exe /online /cleanup-image /restorehealthdism.exe /online /cleanup-image /startcomponentcleanup
Once done, execute the following command to run the SFC scan:sfc /scannow
If you want to get the missing clb.dll file manually, the DISM (Deployment Image Servicing and Mangement) tool and the SFC (System File Checker) scan will aid. Running these would get the missing dll file and replace any corrupt system files.
3. Reinstall Visual C++ Redistributable
Press Windows + R to open Run, type appwiz.cpl, and hit Enter.
Locate the Microsoft Visual C++ Redistributable entry, select it, and click on Uninstall.
Follow the on-screen instructions to complete the process.
Go to Microsoft’s software page, and download the ISO file for Windows 11. If you are running Windows 10, the Media Creation Tool can also be downloaded from the official site.
Once downloaded, launch the ISO, and on Open.
Now, run setup.exe.
Click Yes in the UAC prompt.
In the Windows 11 Setup, click on Next.
Click Accept to agree to the license terms.
Now, wait for the setup to get things ready and check for updates. Once that’s done, make sure the setup lists Keep personal files and apps and then click on Install.
Once done with the in-place upgrade, the missing clb.dll file will be available on the computer, and you wouldn’t lose any other programs or files during the process.
What is CLB DLL?
The clb.dll or Column List Box is an important file that ensures that Windows programs run correctly. It’s an executable file loaded to the memory as soon as you boot the OS.
First introduced in Windows Vista, the file has made its way into all subsequent iterations. And given the inability to launch the Registry in its absence, fixing things become all the more important.
Before you leave, do not forget to find out how to fix all DLL-related errors in Windows. Besides, tell us which of our solutions worked or even if you used another one in the comments section below.
When 8-year-old Nash Johnson decided he wanted an Xbox so he could play online with his friends, he did what any responsible elementary school student would do: he went out and applied for a job.
Specifically, the Lexington, Ky. student went online and filled out an application for a dishwasher’s position at Drake’s, a local restaurant that bills itself as “a restaurant that loves beer and a bar that loves food.”
“I’m very good at washing the dishes,” Nash said in an interview as reported by WRAL.
There was only one snag in Nash Johnson’s plan: you have to be at least 16 years old to legally work. Luckily for Nash, the application presented a loophole. The application asked only for “age range” rather than specific age. So Nash stated on his resume that he was under 18.
“That kid is not afraid to fail. He’s a go-getter,” Nash’s mother Belinda said. She added that “Financial literacy is really important in our household.”
While Drake’s couldn’t hire Nash, they invited him to orientation nonetheless. There, he was presented with that Xbox he so dearly wanted. It just goes to show that with perseverance, dreams really do come true.
The Windows Feature Experience Pack is a standalone package in Windows designed to deliver new features and improvements automatically.
While it streamlines updates, some users may prefer to remove it. Here’s how.
How can I remove the Windows feature experience pack?
Press Windows + R to open Run, type powershell in the text field, and hit Enter.
Click Yes in the UAC prompt.
Paste the following command and hit Enter to view the various installed packages: dism /online /get-packages
Locate the Windows Feature Experience Pack, select its name and version, and copy it.
Now, execute the command below while replacing Package to Remove with the one you copied earlier:dism /online /get-packages /packagename:Package to Remove
That’s it! If you were earlier wondering how to remove the Windows Feature Experience Pack, it is now successfully uninstalled, and the same will reflect in Settings.
Microsoft developed the Windows Features Experience Pack to deliver faster updates, independent from Windows OS updates to certain apps.
This includes Snipping Tool, the Print Management Console, Text input features, among many other features. And more are expected to be added in the coming days.
Why do I have Windows Feature Experience Pack?
Many users wonder why the Windows Feature Experience Pack is on their computers. The answer is simple, it is a package from Microsoft, and every user who regularly updates the OS has it.
Initially released in the Beta channel, the pack was first introduced in 2020 in Windows 10 and found a place in the latest iteration.
Before you leave, do not forget to check out what’s new in the Online Service Experience Pack for Windows 11. Also, please share your thoughts on the Feature Experience Pack and whether you uninstalled it in the comments below.
The weekend draws near, and that means it’s time for another round of free games for the weekend with Xbox Free Play Days. The games on offer this week will be available for subscribers of Xbox Live Gold and Game Pass Ultimate from Thursday, November 10th through Sunday, November 13th. Let’s go ahead and check out the lineup. (All game descriptions via the Xbox Store).
The latest Dragon Ball game lets players customize and develop their own warrior from 5 races, including male or female, and more than 450 items to be used in online and offline adventures. Create the perfect avatar, learn new skills and train under the tutelage of your favorite Dragon Ball characters. Help Trunks fight new enemies and restore the original story of the series. Join 200+ players around the world in the Toki Toki City hub and fight with or against them, and compete in online tournaments!
Just Die Already is an old people mayhem sandbox game created by the designers of Goat Simulator.
You are an old retired person in a near future where people aren’t having any children. There isn’t anyone to pay for pensions due to those ungrateful millennials who prefer playing video games instead of doing actual work. With no one to cover your living costs, you – just like all other old people in this world – have no other choice but to survive on your own. How will you survive in a world that wants you to Just Die Already?
Overcooked!, Overcooked! 2 and all additional content are blended together and remastered in this delicious definitive edition!
Enjoy hundreds of levels of cooperative cooking chaos across increasingly perilous and obscure kitchens.
Overcooked! Goes Online
For the first time ever, online multiplayer has been fully integrated into Overcooked! Revisit your favourite kitchens from the first game in stunning 4K and ONLINE!
A Visual Feast!
Both games have been taken to the next level with stunning, enhanced 4K visuals – this is the best that the Overcooked! series has ever looked.
Tasty New Content!
New levels, new chefs and new mayhem – all exclusive to Overcooked! All You Can Eat.
As you can see, it’s a fun lineup for this week’s Xbox Free Play Days selections. If you would like to learn more about the Xbox Free Play Days program, head over to the FAQ page.
If you’ve dabbled anywhere near code, you probably already know how vital Git is for the modern programmer. A handy, open-source version control system, Git makes maintaining your development projects a breeze.
If you’re a Windows user, you’ll have to install the Git tool on your PC to get going with the version control system. In this article, we’re going to cover exactly how you can do that.
How to install Git on your Windows PC
To start with Git on Windows, head to the official Git website and grab the tool’s installer from there. Then, depending on your system, download the 32-bit/64-bit installer from the website.
Now, launch the installer to get started with the installation. Follow the on-screen instructions; for instance, choose Vim when selecting a default browser and click on Next.
On the next option, select Let Git Decide (this lets Git set up a default branch name), and then click Next.
For the next option, select Git from the command line and 3rd-party software, and click on Next; this decides how Git integrates into your system. Next, click on Use bundled OpenSSH and click on Next. Next, implement the following instructions similarly (also, choose None when choosing credential helper) and click on Next. Finally, click on Install.
The installation will take anywhere from a few seconds to a minute; click on Finish to finalize everything, and then you can start using Git.
When you’re done, click on the Launch Git Bash checkbox and select Finish to complete the installation officially.
Check the Git installation on your Windows
If you checked the Launch Git Bash checkbox before terminating the installation dialog box, Git Bash should get launched automatically. Alternatively, you can launch it manually. Head to the Start menu search bar, type in “git” and select the best match (it should be Git Bash).
Once you open the Git Bash app, type in the following command in the bash and hit Enter:
git --version
The bash should give you the current version of Git running on your Windows as soon as you run the following command. This means Git has been installed successfully on your PC.
Installing Git on your Windows PC
Git has gradually become famous as the go-to tool for storing and managing your codebase. It’s only natural, then, as you get the convenience of Git on your Windows computer. The next step would be to get GitHub for your PC, a web-based interface that uses Git to make the most out of your system.
DisplayPort to HDMI adapter helps you connect your HDMI device to a DisplayPort-supported monitor. At times you may see a No Signal error when trying to connect your DisplayPort to HDMI adapter to your PC or monitor.
First, you should know that not all DisplayPort to HDMI adapters are reversible. In other words, if you buy a HDMI to DisplayPort adapter instead, which is cheaper, it might not work as a DP to HDMI adapter as well! So, make sure you’ve bought the right cable.
How do I get my DisplayPort to work with HDMI?
1. Check your HDMI and DisplayPort
If you see No Signal text on the screen when using the adapter, it could be due to a loose HDMI connection to the adapter or the DisplayPort interface.
Remove the HDMI cable connected to the adapter and plug it in again. Once done, make sure the HDMI cable connected to your PC is also firmly connected.
Be careful when applying pressure on the port, as it can damage the interface. If possible, try connecting the HDMI adapter to a different monitor or device. If it works, you may have a faulty HDMI port to repair.
2. Manually enable HDMI Input
At times your monitor may fail to auto-detect the HDMI connection, especially when you are using an adapter to convert DP signals to HDMI. Changing the input option manually can fix the problem.
1. Make sure you have connected DisplayPort to the HDMI adapter with the HDMI cable to your monitor.
2. Press any of the control buttons on your monitor. Physical control buttons are usually placed under, back, or at the side of the panel.
3. Select the Menu icon.
4. Use the arrow keys and navigate to Display.
5. Select Input using the > key.
6. Select HDMI under Input options and select the Okay option to save the changes.
If the issue is not with the monitor configuration and the DisplayPort, check your DisplayPort to HDMI adapter. Some adapters are not compatible with certain monitors and input options.
As we have discussed in our best DisplayPort to HDMI adapters guide, not all the adapters are made the same. While most adapters can work with 1080p contents, very few adapters are capable of carrying 4K contents from your PC.
Try using your existing adapter with another system or monitor before you consider replacing the device.
4. Perform a monitor power-cycle
Power off your PC, and make sure to unplug the power cord.
Unplug your monitor’s power cord.
Disconnect all the input sources connected to the monitor and computer.
Leave the devices idle for a few minutes.
Next, reconnect the monitor to the PC with the DisplayPort to HDMI adapter.
Turn on your Monitor and PC.
Other DisplayPort to HDMI issues you may encounter
DisplayPort to HDMI adapter/converter not working
DisplayPort to HDMIno signal/monitor not detected (If there is no HDMI signal detected from your device, you can try the tested fixes we already prepared for you.)
HP DisplayPort to HDMI not working Windows 10 (Lenovo, Dell, and other major manufacturers are equally impacted.)
DisplayPort to HDMI adapters offer excellent flexibility to connect HDMI-enabled monitors to your PC’s DisplayPort.
If you fail to establish a connection, make sure to enable HDMI input manually from the monitor. If not, check the DisplayPort/HDMI port and the adapter for hardware failure.
Tell us which fix worked for you in the comments section below.
Canon printer not connecting to Wi-Fi? Network-connected printers give you the flexibility to print from anywhere without having to connect your device to the printer physically. That is all good, as long as it works.
Several users have reported their Cannon printer failing to connect to a Wi-Fi network. Depending on the kind of device and kind of printer you are pairing, the reason for this problem can vary.
In this article, we explore a few troubleshooting steps to help you resolve the Canon printer not connecting to the Wi-Fi issue.
Why is my Canon printer not connecting to WiFi?
This issue can occur due to various reasons such as the following:
Outdated drivers – Drivers are an important computer component that allows your peripherals and your OS to communicate successfully. However, when one driver is out of date, communication will be lost.
Printer errors – You will have to check for any red or blinking lights on your printer to see if it has run into an error, if this is the case, performing a power cycle will do the trick.
Faulty printer configuration – Resetting your printer to default settings might be the best and only effective solution in this case.
Internet issues – Check your router to see if it has encountered any errors that need to be addressed.
How to connect Canon printer to WiFi?
To connect your Canon printer to your Wireless network, use the built-in Wi-Fi button on the printer and then install the Canon printer app on your smartphone to complete the setup.
If you still fail to connect the printer to your Wi-Fi network, try the steps below.
What do you do when your Canon printer won’t connect?
1. Update printer drivers
The first cause that should be checked in case your Canon printer doesn’t connect is the driver status. You might need to update them, so the guide below will support you with the process.
1. Right-click the Starticon then select Device Manager.
2. Expand the Print queuessection, right-click the printer driver, and select Update driver.
3. SelectSearch automatically for drivers.
4. Next, expand the Network adapters section, right-click the wireless driver, and select Update drivers. If you have more, do this for all of them.
5. Like before, choose to Search automatically for drivers, then reboot your PC once the process is done.
In addition, Outbyte Driver Updater is a popular driver update utility that can update all the drivers of your PC with one click.
Upon installation, it performs a full scan to find out how many out-of-date drivers you have. You can then proceed to update one or all the drivers at once.
It also has millions of driver files data available for download. You can manage the downloads, create a backup and save all of your drivers in a compressed zip file, and schedule driver scan, updates, and notifications.
Key features of Outbyte Driver Updater:
Lightning-fast scans for driver
One-click update for all drivers
Built-in backup and schedule manager
Tweaks functionality for PC overall performance
Outbyte Driver Updater
This powerful driver tool ensures that you will never encounter printer problems related to drivers.
Make sure the printer is not displaying any errors such as flashing lights, or error codes on the screen. If the printer is in an error state, try using the error code to fix the problem.
These errors usually occur due to a paper jam, if the ink has run out, or other issues. Make sure to address the error before proceeding with other steps.
3. Perform a power cycle
Turn off and unplug your printer.
Next, unplug your wireless router for 15 seconds.
Power on the router by connecting the necessary cables.
Once you have the router fully powered on, plug the printer back in and power it on.
Connect the printer to the network and try to print any document.
4. Check for printer connection issues
If your Canon printer is not connecting to the phone, check if the printer is showing the connection as Active. Next, check if the signal strength is less than 80%. If it is below 80%, try to move the printer and router closer.
In case, moving the printer or router is not possible, look for and remove any obstacles between the two devices.
If the connection is Active and signal strength is more than 80%, try to disable temporarily disable the firewall on your computer. Try to print again and check for any improvements.
If the printer responds after disabling the firewall, you will need to open the printer ports for network communication. Check your printer’s documentation for instructions on how to do it.
Check if the printer’s network settings are reset to the factory default. If so, you will see the connection as Active, and the network will be BJNPSETUP. In this case, the printer needs to reconnect to the network.
In case you see a connection is an inactive message, and the printer displays a wrong SSID, try reconnecting the printer to the network. This usually happens if you have set up a new router or changed the password.
5. Reset the printer
Press the power button to turn off the printer.
Disconnect the data cable from the printer if it has one.
Next, unplug the power cord and leave the printer idle for 10 minutes.
Reconnect the data cable to your printer.
Reconnect the power cord to the wall outlet. Make sure to connect it to the power outlet directly and not through a surge protector.
Press the Power button to turn the printer back on.
Try to print again and check if the problem is resolved.
6. Uninstall Canon printer
Press the Windows key + R to open Run.
Type control and click OK to open Control Panel.
Go to Programs > Programs and Features.
Select the Canon printer series MP Drivers from the list. Click on Uninstall.
Confirm the action by click on Uninstall.
Proceed with on-screen instructions to completely uninstall the printer.
Once the printer is deleted from your system, you need to reinstall it.
How to connect canon mg3600 printer to Wi-Fi
Connect using Smartphone
Make sure to download the Canon Printer app on your Smartphone or PC and install it.
Press and hold the Wi-Fi button on the printer until the ON lamp flashes.
Open the Wi-Fi setting on your smartphone and connect to the Canon Printer’s temporary Wi-Fi connection.
Next, launch the Canon Printer app on your smartphone.
Tap on Yes when you see the Do you want to search for available printer message.
Select your printer’s Wi-Fi and then enter your Wi-Fi password.
Tap on, OK. The printer will now scan and connect to your Wi-Fi router.
Next, tap on OK when a dialogue box appears.
When you see the Do you want to search for available printers message, tap on Yes.
The Canon printer not connecting to Wi-Fi issues can occur due to several reasons.
To fix the problem, try to update the printer driver. If the issue persists, check for network issues, or as a last resort, try to uninstall and reinstall the printer and drivers.
The recently redesigned Photos app for Windows 11 makes it easier to organize and share your precious media no matter where your photos and videos come from. With the new iCloud integration now Apple users can seamlessly add their media to the Photos app. To get started, make sure your Photos App is up to date, and install the iCloud for Windows App from the Microsoft Store. Once you’re signed in to the iCloud app choose to sync your photos and all your photos will appear in the new Microsoft Photos app.
Regarding operating systems, some people prefer using Windows, while others lean more toward Apple‘s OS.
The part that raises problems for users is that Mac and Windows users often need to collaborate. Unfortunately, Apple .pages files do not work on Windows PCs.
If you’re struggling with the same problem, in this article we’ll show you how to open Apple files on your Windows 10 PC.
How can I open Apple files in Windows 10?
1. Change the extension to .zip
Enable extensions by accessing the View tab then check the File name extensions checkbox.
After changing the extension to .zip,openit with an archive opening application
Open the .jpgfiles and now you are able to see the content of the .pagesfile.
If you want to know more about how to open MAC files on Windows 10, then this is another efficient solution.
To modify the file, you need to use a converter, change the .pages file into a .docx, and insert the newly converted file into Microsoft Word.
To use an Apple file or a .pagesfile, you must copy it on your Windows computer or laptop. If you want to remove it from your USB key, generate a copy in case anything goes wrong.
Now that you have the .pages file on your PC, you can change the extension of the file into a .zip extension.
2. Use Adobe Reader
There are several online tools available that can convert documents. The best way would be to visit icloud.com, create an Apple ID, and log in with it. Then, select the Pages icon from the main screen.
Take your Apple file and convert it into a PDF format. Then use the best pdf viewer, Adobe Reader, to open the newly converted file and read the contents.
On the top bar, select the Upload icon and choose the file from your computer. Repeat this process for all the documents you want to view. This is a rather simple way to open Apple files on your PC.
In the top bar again, look for the settings icon and select Download a Copy. You will be presented with a couple of options. Choose PDF, and a PDF file will be downloaded to your computer now.
Regarding methods to open Apple files on Windows 10, we’ve just presented you with a tested solution, and we also recommend you have the latest version of Adobe Reader installed.
Whether you choose to use Adobe Reader or you want to apply a different method, we hope that you get the job done as fast and easily as possible. And if you’re interested in easily opening TFX files on your PC too, rest assured our guide can help.
If you have any other solutions, please don’t hesitate to list them in the comments section below.
A great number of Kodi media player users stumbled upon yet another installation error, namely Failed to install the add-on from the zip file.
The error appears to occur only with the latest Kodi version, and only when trying to install a Kodi build. The problem is that these builds are necessary in order for Kodi to work properly.
If you’re upgrading from Kodi 18.2 to Kodi 18.6, there’s a good possibility you made this mistake while downloading specific add-ons from a zip file. You may encounter this issue, particularly if you attempt to install certain Wizards. The Wizards are required to install specific Kodi builds.
The two builds that typically produce this problem are Streamline and No Limits. However, encountering this issue with a variety of other different builds is also possible.
Luckily, there are a few simple methods that one can go through in order to solve the problem.
How to fix Kodi error Failed to install addon from the zip file?
1. Install the zip file locally and retry the build installation
Open theSettings menu.
Go toSystem Settings > Logging.
From the right menu select Show event log and see exactly what file the player failed to install.
Google search the file.
You will most probably find a .zip file on GitHub.
Download the file on your device.
Then go back to the Kodi home screen > Add-ons > click on the package icon.
Click on Install from zip file > find your downloaded file.
Some users reported that downloading the zip file locally took a very long time, but in the end, the build installation was successful.
2. Create a temp folder
Another easy solution to the zip installation problem was to create a temp file inside the Kodi package.
Users who have tried this mentioned that they also checked the error log files as explained above and that the error message specifically said to create this file. According to the reports, the file path should look like this:
AppData/Roaming/Kodi/temp.
After creating the file, repeat the installation process, and see if it goes through.
Forsmart TV/ Fire TV Stick,go to Settings > Applications > Manage Installed Applications > Kodi > Clear Cache.
Because you keep your existing add-ons and Kodi settings, deleting the cache is a better option than cleaning the entire data.
If you’re using the desktop version of Windows OS, we recommend that you use specific software to clean temporary or unwanted files.
Clearing the cache has proven to be a very good option in most cases, and effective not just for this particular situation, but also to keep your device up and running smoothly.
This is just a side solution, and hopefully an unnecessary one. But if the initial installation is faulty, you’ll keep having problems with the program so it’s better to have a clean copy.
Many users jump straight to this step, just to be sure that they have the latest version and a good one, but it’s worth giving a try to the other ones as well.
Tip
If you’re a fan of this popular media player, we encourage you to go to our website and bookmark our separate Kodi section for easy access. Additionally, we have a good selection of articles from the entertainment industry in our Streaming Hub.
So these are our easy solutions. If you have another suggestion on how to fix the Failed to install add-on from zip file error on Kodi, please share it with us in the comments section below.
Internet Explorer (IE) may, at certain inconvenient times, display a black screen instead of the particular web page requested by the user.
The black screen appears suddenly when you are using your web browser. Unfortunately, it is an endlessly irritating problem. Similar issues have been faced with Firefox and Google Chrome browsers.
You can use a couple of solutions to this problem, which we will discuss below.
Why is my Internet Explorer showing a black screen?
Possible causes of the black screen problem in Internet Explorer could be that the web page may have a feature or features which trigger rendering conflicts with the graphics processing unit (GPU).
Additionally, third-party software add-ons and extensions you have added to your IE browser could also be causing the same rendering conflict.
Lastly, the graphics processing unit (GPU) and some software add-ons, when handling certain web page features, may cause the display of a black screen in Internet Explorer.
Whatever the reason, we shall show you how to fix it.
Quick Tip:
You can start the tweaking with our solutions below, but first, because it’s a lot easier, we recommend Opera One, a browser less prone to errors and more reliable overall.
It’s possible to customize Opera One precisely like you want. In addition, many features like an Ad blocker, a VPN, and AI are natively included.
How do I fix the block screen issue in Internet Explorer?
1. Turn off hardware acceleration in Windows
Click the Windows Start button, type internet options, and select the Internet Options app.
Select the Advanced tab, and under Accelerated Graphics, turn on the feature Use software rendering instead of GPU rendering by checking its box.
Click OK and restart your computer for the changes to take effect.
Internet Explorer uses the internet display and connection settings in the Windows operating system. So rendering tweaks is a good solution when Internet Explorer opens a black screen.
2. Check for pending Windows updates
Click on your Start menu, type check for updates, then select the Check for updates app.
Click the Check for updates button.
At the end of the check, if there are any updates, they will be automatically downloaded and installed. In addition, you may be required to click a Download & Install button or restart your computer after the update.
Maybe your PC is not set to perform updates automatically; this could be why Internet Explorer is showing a black screen.
Microsoft has tried to fix this issue by automatically setting Windows 10 Home PCs to receive updates. However, users running older versions still have an option to opt out of automatic updates.
Failing to update your OS can sometimes cause incompatibility issues since a patch for the same problem you are encountering may even have been released. So it is a good idea to always check for any available updates.
3. Uninstall or remove add-ons and extensions you added to your IE browser
Launch Internet explorer.
Select Tools, select Toolbars, then Disable add-ons.
You should click on Disable after every add-on and then the Done button.
It’s a prudent practice to limit the number of add-ons you use. So, some periodic housekeeping implying deleting add-ons no longer in use will also help.
Disabling add-ons can benefit different black screen issues, including Internet Explorer PDF black screen and internet browser black screen.
While Microsoft has produced a better and more modern browser in Edge, they will not practically delete the old IED from your computer. However, if you still use it, you can expect not to have any support from Microsoft.
Also, because it is a retired browser, you will be unable to download it from the official Microsoft website.
So, yes, you can still use it, but with zero support.
And there you have it, the best fixes for Internet Explorer black screen.
Even though these fixes should help fix this black screen problem in the Internet Explorer browser, they have not been written in any particular order. Therefore, we expect that you pick solutions according to your preferences.
We highly encourage switching to a more reliable and modern browser so that you encounter fewer errors and have a much-improved user experience.


 NOTE