7 Best Windows 11 Migration Tools For Easy Data Transfer

A data migration tool is a piece of software that moves data from one storage space to another. The software does this by preparing, extracting, and transforming data and ensuring that it will be compatible in the new location.

There’s a variety of reasons why you would need to migrate data. You might want to consolidate data from different sources into one to save space or perhaps the storage equipment needs to be upgraded.

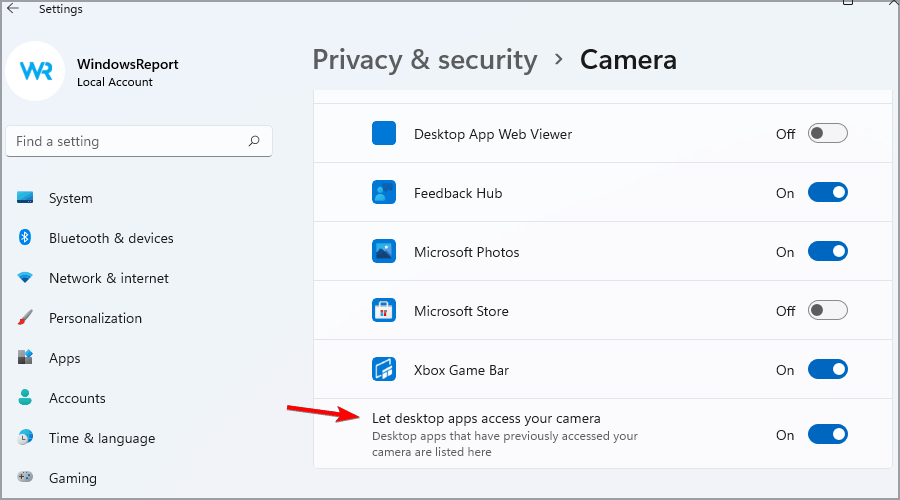
Some migration tools offer the ability to recover from a damaged or dead computer.

Other times it’s not that serious. You might want to keep your data, settings, and apps from one Windows computer and keep it all intact as it’s moved over to the new Windows 11 machine.

Whatever the case may be, a data migration tool is handy to have.

Does Windows 11 have a built-in migration tool?

Windows 11 does not have a data migration tool installed, which is strange because Microsoft made a lot of apps found on previous operating systems native to this new system.

The last migration tool on Windows was Windows Easy Transfer, but that was way back on Windows Vista and 8.1.

Nowadays, the closest approximation would be to upload files onto your OneDrive account and download them to your new computer.

However, you won’t be able to upload apps or your computer’s settings onto OneDrive which is something migration cools can do.

Without a dedicated migration tool, you’ll be forced to manually download every single app that was on your old computer and change all the settings to what you had before. It’s a tedious job that will take forever to do.

Save yourself the hassle and get yourself a migration tool. This list will showcase some of the best migration tools on the market today.

What are the best Windows 11 migration tools?

Zinstall – Easy to use migration tools

Zinstall products are known for combining powerful migration capabilities with incredible ease of use and there are a few to choose from.

They allow even users with no technical knowledge to transfer their applications, profiles, settings, accounts, and all files, to a new computer.

Zinstall products fully support Windows 11 and can easily transfer from one Windows to another, such as from Windows 10 to Windows 11, or from Windows 8.1 to Windows 11 (or other combinations).

For example, Zinstall can migrate from a Windows 10 HP desktop to a Windows 11 Dell laptop.

Zinstall WinWin is the most popular Zinstall product and performs the migration almost completely automatically. You only need to specify which computer is the new one, and which is the old one. It does not require any special cables.

All you need to do is have both computers online, and even a Wi-Fi connection is fine. Or, you can use a wired / cable connection as well.

Zinstall Migration Kit Pro is the more advanced version. One of its more interesting features is the ability to transfer directly from a broken computer’s hard drive directly, even if it won’t turn on.

It also supports several other, more advanced, transfer scenarios, such as corporate migrations to a new domain or to Azure.

Here are some of their best features to consider:

  • Migrates programs as configurations, not only files
  • Very easy to use, with friendly interfaces
  • Migrate full computers even on Wi-Fi networks
  • Transfer directly from a broken computer’s hard drive directly (on Zinstall Migration Kit Pro)
  • Support for many transfer scenarios, even for corporate usage

Zinstall

Easy to use, powerful transfer software that will migrate your programs and files to a new computer / Windows 11.
Free trial Visit website

LapLink PCmover is one of the most premiere migration tools on the market and holds the distinct honor of being highly recommended by both Intel and Microsoft.

You’ll be able to migrate everything you choose (including apps and cloud directories) with lightning speed. It also comes with an undo feature to fix any missteps.

There are some exceptions to what it can move. Antivirus and anti-spyware apps will not be moved and neither will trial software. Files with DRM (Digital Right Management) like music may need to be deactivated on the old PC before being moved.

If you want to try out PCMover, you can download the Windows Store Edition straight from the Microsoft Store. It involves a step-by-step setup that’s easy to follow and the ability to choose which file you want to transfer over. The Store Edition has even free 24/7 support.

However, if you want the ability to migrate apps, you’ll have to purchase one of the many enhanced versions of PCMover from LapLink.

If you get stuck, you can connect with one of Laplink’s PC migration experts, available 24 hours a day, for help. Alternatively, you can purchase a physical copy that includes a high-speed transfer cable and free SafeErase software.

Look at some of its best features:

  • Recommended by Microsoft and Intel
  • Full instruction for installation and setting up
  • Can migrate apps with PCMover
  • Professional assistance available
  • The physical copy includes a transfer cable and SafeErase software

Laplink PCmover

The PCmover app from Laplink offers you all the tools you need to order to successfully and efficiently migrate your data.
Check price Visit website

AOMEI Backupper Professional – For private and professional usage

A great alternative to PCMover is AOMEI Backupper Professional It comes with great features like Universal Restore, which can fully restore the original system onto the new PC, even if the hardware is different.

The tool also allows you to choose multiple endpoints where you can store your files and create file backups to your Google Drive, external hard drives, or some other kind of cloud storage destination.
AOMEI Backupper supports many older versions of Windows operating systems, going as far back as Windows XP, so if you have old files that you want to restore from many years ago, this migration tool can do it.

It’s also easier to operate than PCMover and you don’t even have to pay for the ability to move apps. The ability to migrate apps comes with the free trial version.

AOMEI Backupper has other useful capabilities like encrypting and compressing images as well as wiping out a disk drive after it’s done migrating everything for that extra layer of protection.

Paid versions of AOMEI add even more features, a PXE boot tool for booting multiple computers from a microsystem, and a lifetime of free upgrades.

Let’s review some of its key features:

  • Image encryption and compression
  • Automatic backup functions
  • Simple interface that can be used by professionals and regular users as well
  • Choose multiple endpoints where you can store your files

AOMEI Backupper Professional

This software ensures that your data migration process goes smoothly and quickly, so don’t hesitate to try it out today!
Check price Visit website

FastMove

As a moving app, FastMove comes with six distinct features that make it a great choice. For one, it has fast and lossless data migration for PCs. To facilitate this speed, you’ll need a USB drive to move the files, settings, and drivers from one computer to the next.

And because it’s done through the USB driver, all your customized files, folders, and browser change go along with it. You won’t have to upload to a cloud server and take up space.

FastMove also supports moving programs and user accounts/settings. This will free up a massive amount of time as it’s all done seamlessly. It can even transfer device drivers so you’ll be able to use your device straight from the box with no conflicts at all.

You can purchase a plan that will give you a certain amount of copies to use across multiple computers. Or you can also try out the free trial. See for yourself just how fast the app is and how easy it is to migrate data.

FastMove

FastMove is another versatile and powerful software that covers all your needs when going through a data migration process.
Check price Visit website

Paragon Hard Disk Manager Advanced

The Paragon Hard Disk Manager is a pretty robust app with tons of features. For starters, it’s a top-of-the-line partitioning function for efficient storage usage.

This is particularly useful if your internal drive is low on available space and is a common problem for people who have different systems and data types.

It can merge or restore partitions as well as edit sections in the hex editor. Paragon can also perform a test to locate and point out any bad areas in the partitions. The app can also change data stored in hardware and have it be compatible with an SSD.

Its Drive Copy feature even creates an exact and uncompressed replica of your system’s hard drive. While transferring, the Hard Disk Manager wipes any personal data left behind on the hard drive to ensure total privacy. The app can also restore any files if the need arises.

Hard Disk Manager also supports numerous bus interfaces and file systems. It must be pointed out that there is no free trial available, but you can try out the Product Tour which allows you to see the app in action on a web browser.

Paragon Hard Disk Manager

Use this app today to easily perform data transfers from a PC to another device without worrying about wasting time.
Check price Visit website

Acronis Cyber Protect Home Office

Acronis Cyber Protect Home Office is less of a dedicated migration tool and more of a software suite. So if you’re looking for a migration tool that can do more, Acronis is among the best. It’s a great tool for students and professionals who work remotely from their home office.

It can back up folders and files and place copies in cloud storage. The app has a great UI with tabs on the left-hand side that are clearly labeled so you see all the features and tools the suite can perform.

Acronis’ Archive tab analyzes your folders for unused or particularly large files and offloads them to an external drive or cloud storage destination. This deletes the file from local storage. You can set it to run through your files automatically or select files individually.

Acronis comes with a powerful cyber protection feature – protecting you from data threats and cyber attacks. It’s integrated with advanced anti-malware technology that offers real-time protection, active ant-virus scans, web filtering, and video conference app protection to stop bad actors from hacking into your Zoom meeting.

As great of a migration tool as it is, there are some negatives. Unsurprisingly, Acronis is a pretty expensive app and has been known for being somewhat slow to upload files. But keep in mind that you get a lot for your buck.

Acronis Cyber Protect Home Office

Use this amazing suite today to cover all your data migration needs and more!
Check price Visit website

EaseUS Todo PC Trans

Like AOMEI Backupper, Ease US Todo PCTrans works with old Windows systems and can transfer those files onto a Windows 11 computer.

The free version alone is pretty extensive. PCTrans offers a single click solution to automatically migrate files from one computer to another without losing any data.

The tool supports common apps like Microsoft Office, Photoshop, Google Chrome, and more.  It can move data, files, different kinds of apps, and accounts between computers, recover forgotten files from a dead computer and transfer them between local disks.

The free version can only transfer up to 500MB of data and two programs before you need to upgrade to a paid version. If you decide to upgrade, the Home version allows you to transfer an unlimited amount of data, programs, and user accounts.

The Business version adds the dead computer feature which allows you to migrate data from a seemingly non-functioning to a working machine. Each of the paid versions has a free trial so you can try out all the features before purchase and 24-hour support.

The company also offers Todo Backup and a tool called Migrate OS to SSD/HDD that lets you copy a system drive to an SSD or HDD. Alternatively, Migrate OS can clone an HDD to an SSD without needing Windows to be installed.

Ease US Todo PCTrans

Simplify data migration processes with this intuitive and effective application.
Check price Visit website

How else can I better my Windows 11 experience?

There are an insurmountable amount of third-party apps for Windows 11. The vast majority of what’s already on Windows 11 is outclassed by a third-party app.

And even if you’re happy with the apps native on Windows 11, you can still create a better experience with yourself by changing the settings on your machine.

Windows 11 has some pretty strict requirements as to which computers will be able to run it. If you ever want to try out Windows 11 on an old PC without having to install Windows 10 first, it’s recommended that you download the Windows 11 ISO file straight from Microsoft so you can try it out.

Also, be mindful of Microsoft’s ever-increasing efforts to block certain apps. The company doesn’t want you to download apps that are not verified by Microsoft. Either that or the still buggy nature of Windows 11.

Feel free to leave a comment below if you have any questions on other Windows 11 apps. Also, leave comments about reviews that you’d like to see or information on other Windows 11 features.

5 Best Sound and Volume Boosters For Windows 11 [Free & Paid]

Looking for the best volume booster for Windows 11? If your laptop or PC still sounds too quiet at 100%, the right sound booster can help you raise the volume, improve clarity, and enhance your overall audio experience.

Whether you’re watching movies, listening to music, or gaming, the tools below will help you turn up the volume in just a few clicks.

What are the best sound boosters for a Windows 11 PC?

Here’s a quick look at the best options (more details below):

Boom 3D– Immersive 3D surround sound
– 31-band equalizer
– Noise filtering
– Ambience effect
– Advanced audio player
– Genre-based presets
Ashampoo Music Studio– Audio recording
– Sound optimization
– Volume adjustments
– CD ripping & burning
– Wide file format support
– Integrated library
FxSound Enhancer– Parametric EQ
– Customizable effects & presets
– Enhances volume and clarity
– Supports HD formats (FLAC, ALAC, DSF)
Letasoft Sound Booster– Amplifies system-wide volume
– Supports most apps
– Sound normalization
– Hotkey support
– Simple and clean interface
DeskFX– 20-band equalizer
– Real-time audio enhancement
– Customizable presets
– Numerous audio effects
– Free home version available

Boom 3D – Immersive 3D surround sound

boom 3d user interface

With Boom 3D you can play media with outstanding 3D effects such as virtual surround sound. Plus, it has a wide range of presets to match different genres and listening types.

It also lets you adjust music pitch by 5 semi-tones, reduce harsh sounds, and more.

Some features that we like:

  • Ambience effect
  • Intensify 3D soundscape
  • Noise filtering
  • 31 band equalizer
  • Advanced audio player
  • Volume booster

Boom 3D

Boost your audio and bring your movie or game experience to a mind-blowing level.
Free Trial Visit Website

Ashampoo Music Studio – Comprehensive audio editor

volume booster Windows 11

Originally designed for audio editing and conversion, Ashampoo Music Studio stands strong when it comes to its volume booster capabilities.

It supports various file formats, and has an integrated media library that lets you manage your music collection and make volume adjustments as you go.

Some features that we like:

  • Audio recording
  • Sound optimization
  • Audio CD Ripping and Burning
  • Audio Conversion

⇒ Get Ashampoo Music Studio

FxSound Enhancer – Robust premium audio enhancer

fx sound enhancer user interface

FxSound Enhance is designed to improve the overall audio experience on your PC. It lets you adjust the balance of bass, treble, and other frequencies. It also simulates a surround sound environment.

We like it because it enhances the overall volume and clarity of the audio by applying dynamic compression and amplification. Furthermore, FxSound Enhancer supports high-definition audio formats, such as FLAC, ALAC, and DSF.

Some features that we like:

  • Parametric EQ
  • New Sound Quality Improvements
  • Customizable Effects
  • Customizable Presets

⇒ Get FxSound Enhancer

Letasoft Sound Booster – Clean and simple interface

volume booster Windows 11

Letasoft Sound Booster lets you amplify the volume of the whole system or individual apps on your Windows PC. It helps you even out the volume of different audio files. 

We also love it because it works with most media players, instant messengers, games, and other applications and can also boost the volume of online videos and games.

Some features that we like:

  • Volume boost
  • System-wide hotkeys
  • Easy-to-Use Interface
  • Sound normalization

⇒ Get Letasoft Sound Booster

DeskFX – Tons of audio effects

deskfx user interface

DeskFX is an audio equalize that helps you adjust the levels of different frequency bands in an audio signal. It boosts or cuts the level of specific frequencies to achieve a tonal balance or to compensate for deficiencies in the sound.

One key feature is its ability to enhance audio playback in real time. DeskFX also comes with several preset settings, which can be used to achieve a desired tonal balance quickly.

Some features that we like:

  • Numerous audio effects
  • 20-band equalizer
  • Customizable presets
  • Free home version

⇒ Get DeskFX

How do I make my volume louder on Windows 11?

There are several ways to make the volume louder on Windows 11:

  • Use the Volume Mixer – The volume mixer of Windows 11 gives some additional options for increasing your audio volume.
  • Use the keyboard volume controls – Many keyboards have volume controls built in. Usually, there will be a volume up, down, and mute button. These can be used to adjust the volume on your computer.
  • Use the Action Center – If you click the speech bubble icon on the Taskbar at the bottom right, you’ll find quick controls for your volume and other settings.
  • Use the Settings app – While this may be a long way, you will have more volume options under the sound settings.
  • Using third-party apps – Specialized audio tools may give augmented volume. These may be video-playing apps or standalone equalizers. A few of these will increase the volume beyond 100%.

It’s worth noting that depending on the audio output device you are using, some of these methods may not work or work differently. You, however, will have the option of setting audio independently for different apps.

Summary

And that is as much as we will discuss in this guide. With these volume booster tools for Windows 11, you’ll be able to increase volume if it’s too low and also adjust sound settings for perfect ambience.

It’s important to note that increasing the volume on your PC beyond a certain level can cause distortion or damage to your speakers or audio equipment.

It’s also essential to adjust the volume carefully and avoid prolonged exposure to loud volumes to avoid hearing damage.

The Windows 7 and 8.1 Patch Tuesday updates for January 2023 are live

Even though the main focus right now is on Windows 11, the majority of Windows users still don’t feel like abandoning its predecessor (Windows 10).

That being said, be sure to check out the latest versions of Windows 10, which is 22H2, and also Windows 11, which has also reached version 22H2.

And, as you surely know by now, the Redmond-based tech colossus also releases security updates for some of the obsolete operating systems, during Patch Tuesday.

That means that not only Windows 10 and 11 users will receive updates during this time. We’re also looking at Windows 7, Windows 8, and various Server versions as well.

We’ve already presented the 98 new updates that became available, along with the official download links, so all that remains is going a bit more in-depth.

Without any further ado, let’s take a closer look at what Windows 7 and Windows 8 users were given to work with on the January 2023 Patch Tuesday.

What’s new in the January 2023 Patch Tuesday?

The Redmond-based tech colossus has just released Patch Tuesday updates for Windows 8.1, in the form of KB5022352, and Windows 7, in the form of KB5022339.

Keep in mind that they each come with a whole host of improvements and known issues with some pretty neat workarounds.

Also, remember that Microsoft, as of yesterday, terminated all ESU for both Windows 8.1 and Windows 7 operating systems.

Windows 7

KB5022339 

Improvements

  • Authentication might fail after you set the higher 16-bits of the msds-SupportedEncryptionTypes attribute. This issue might occur if encryption types are not set or if RC4 Encryption type is disabled on the domain.
  • Resolves a known issue that affects apps that use Microsoft Open Database Connectivity (ODBC) SQL Server Driver (sqlsrv32.dll) to connect to databases. The connection might fail. You might also receive an error in the app, or you might receive an error from the SQL Server.

Known issues

  • After installing this update and restarting your device, you might receive the error, Failure to configure Windows updates. Reverting Changes. Do not turn off your computer, and the update might show as Failed in Update History.
  • After this update or a later Windows update is installed, domain join operations might be unsuccessful and error 0xaac (2732): NERR_AccountReuseBlockedByPolicy occurs. Additionally, text stating An account with the same name exists in Active Directory. Re-using the account was blocked by security policy might be displayed.

Windows 8.1

KB5022352 

Improvements

  • Authentication might fail after you set the higher 16-bits of the msds-SupportedEncryptionTypes attribute. This issue might occur if encryption types are not set or if RC4 Encryption type is disabled on the domain.
  • Starting in this release, we are displaying a modal dialog box to remind users about the End of Support for Windows 8.1 in January 2023. This reminder does not appear on managed devices that run Windows 8.1 Pro or Windows 8.1 Enterprise.
  • Resolves a known issue that affects apps that use Microsoft Open Database Connectivity (ODBC) SQL Server Driver (sqlsrv32.dll) to connect to databases. The connection might fail. You might also receive an error in the app, or you might receive an error from the SQL Server.

Known issues

  • After this update or a later Windows update is installed, domain join operations might be unsuccessful and error 0xaac (2732): NERR_AccountReuseBlockedByPolicy occurs. Additionally, text stating An account with the same name exists in Active Directory. Re-using the account was blocked by security policy might be displayed.

These older, now obsolete versions of the Windows operating system are no longer safe for use, and it is highly recommended you upgrade to a supported version.

And, since the time has come to say goodbye, it is about time you figure out the next steps you will need to take.

Have you encountered any issues after downloading and installing these new security updates for Windows 7 and 8.1?

Share your experience with us in the dedicated comments section located below.

Microsoft 365 Basic set to launch featuring 100 GB of storage and more at $1.99 per month

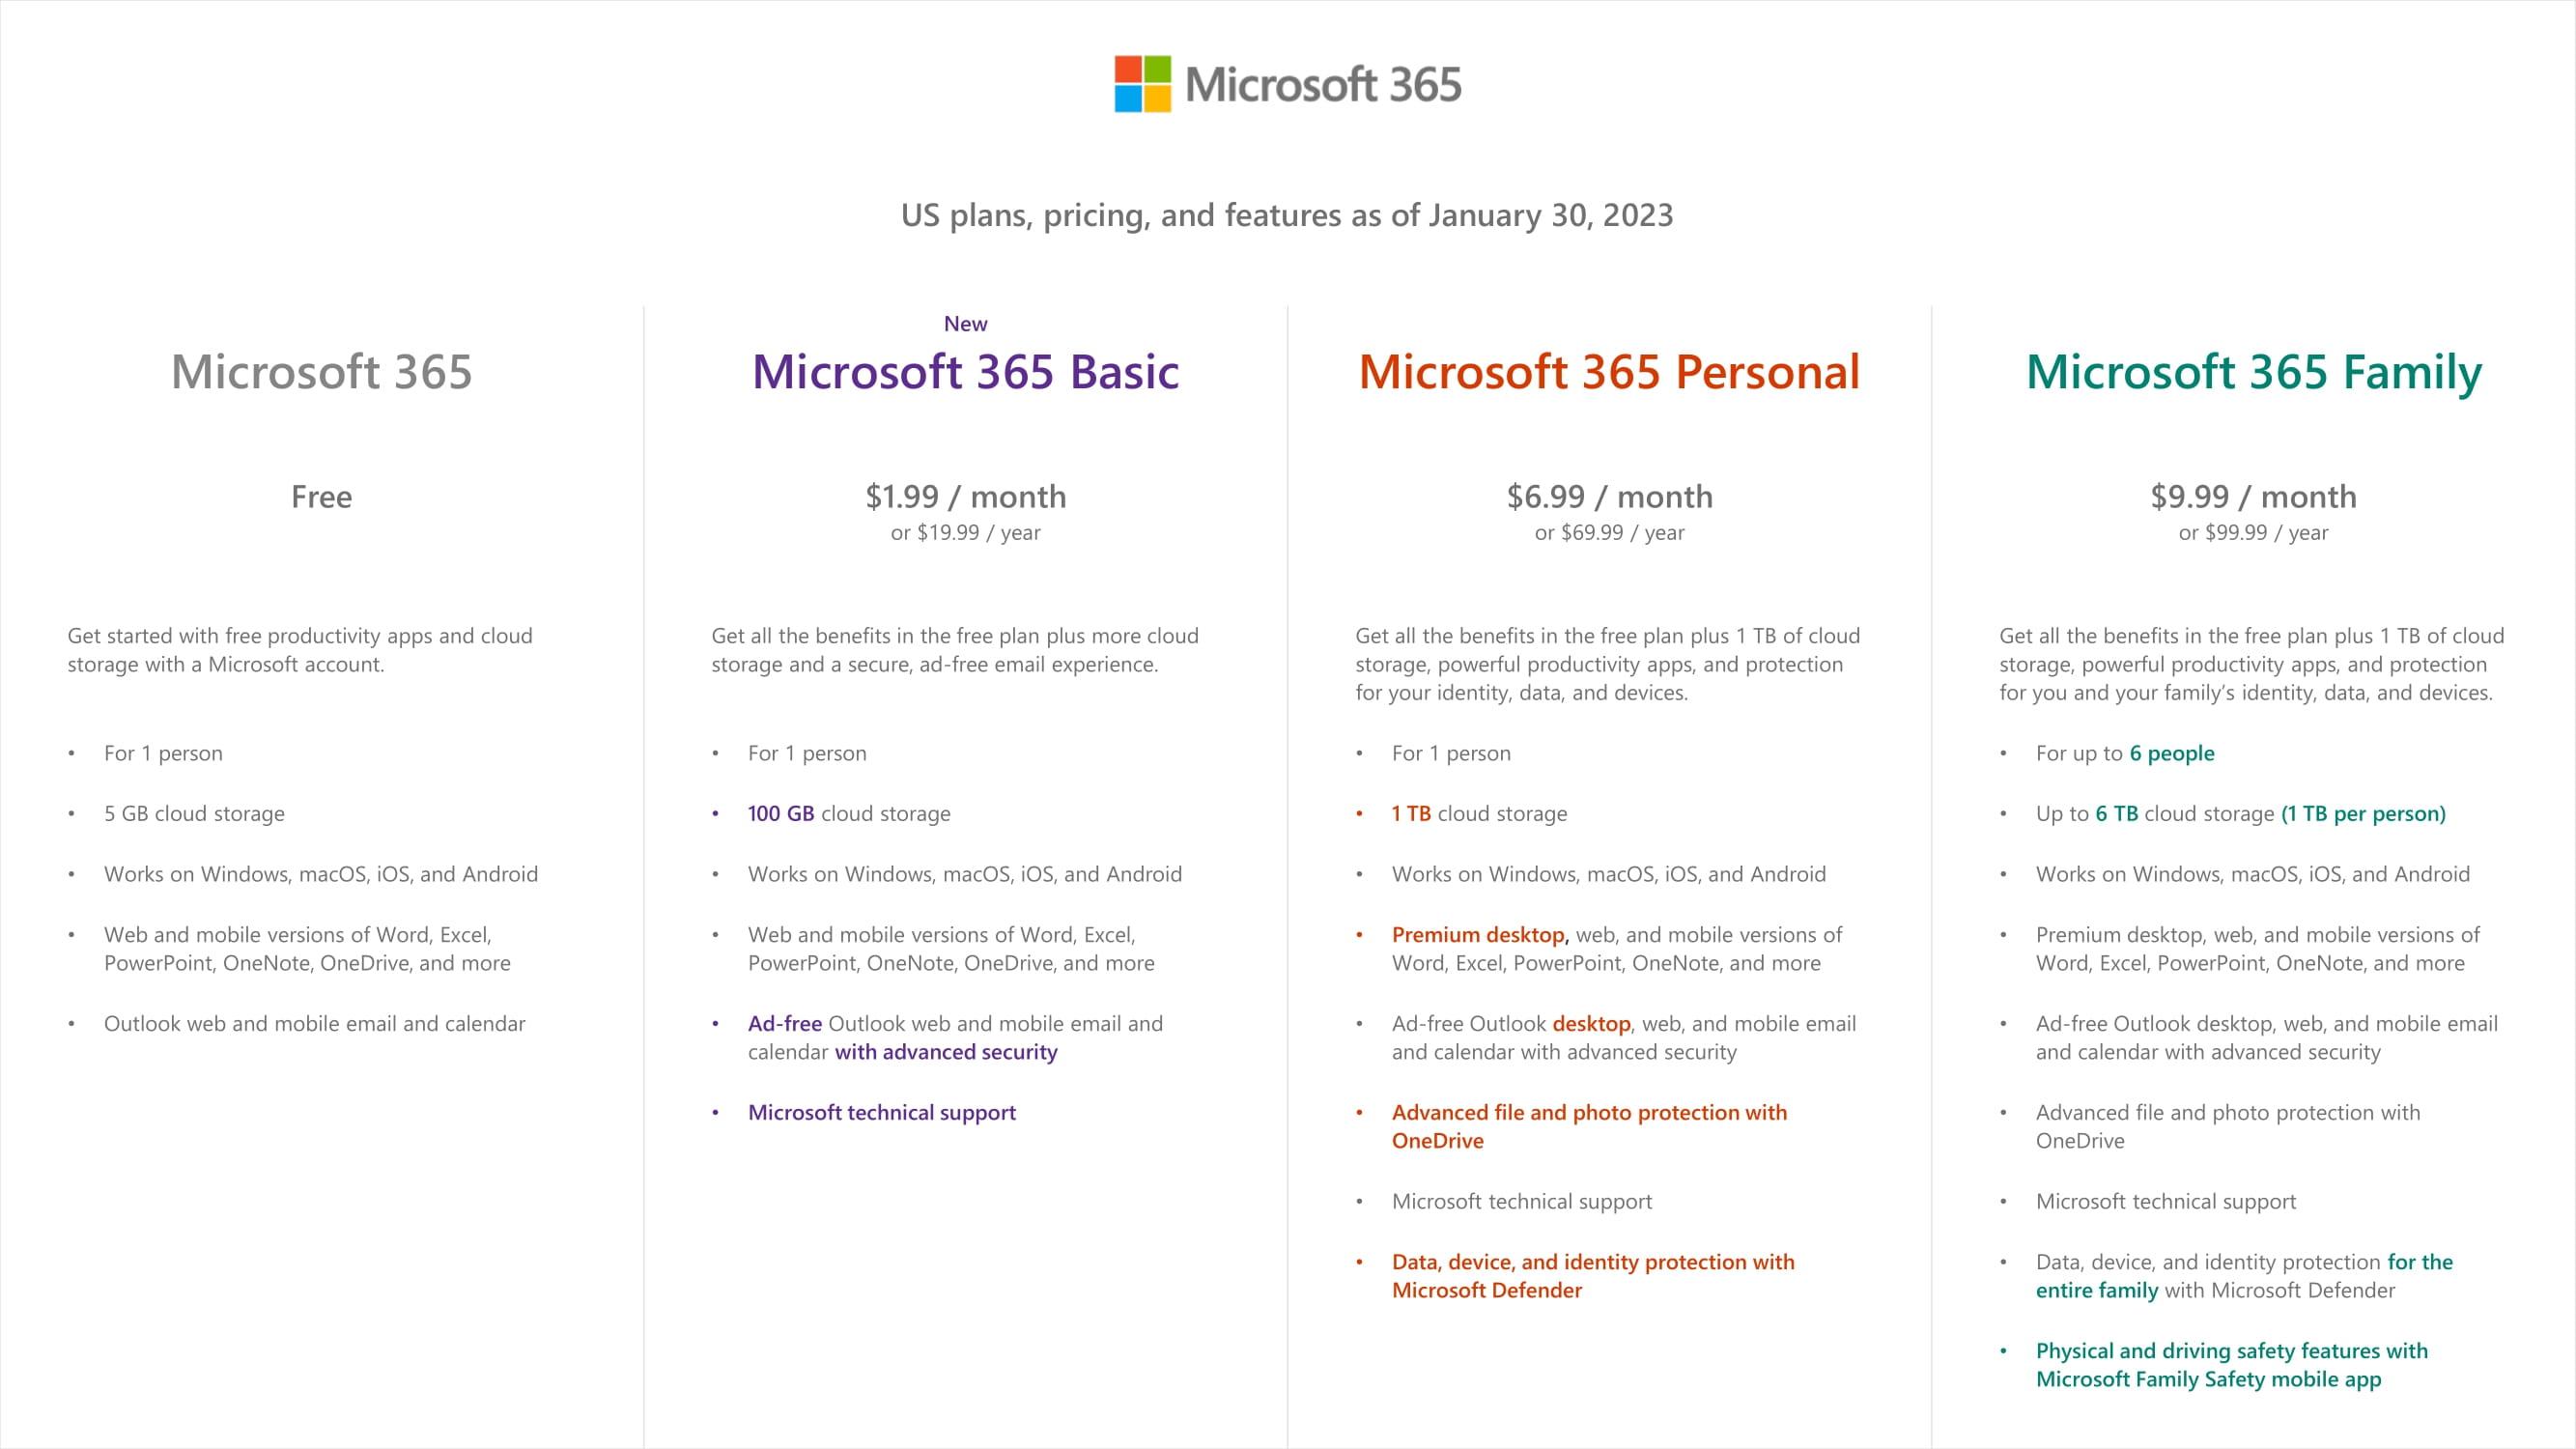
Microsoft has announced that it will be launching a new Microsoft 365 subscription dubbed Microsoft 365 Basic. The company is set to make this release on January 30. To access this new offering you either need to make a monthly payment of either $1.99 or $19.99 annually. What’s in store for you once you subscribe to this plan?

First off, the free option will still be available even after Microsoft launches this new basic subscription The only difference is that it will have more features in comparison, that is, 100 GB of storage, an Outlook email as well as improved security features.

That said, you can still make use of the free Microsoft 365 tier which will feature all the benefits that it has been providing throughout. However, if you are looking for a little bit more, you can subscribe to the Microsoft 365 Personal option at $6.99 per month. Here’s a closer look at the Microsoft 365 plans and the benefits each one comes with:

Microsoft

When comparing the new Basic plan to the Personal one, you’ll notice that besides the obvious difference in storage, the Basic plan won’t grant users access to the desktop versions of Word, Excel, and PowerPoint apps. However, you can access these apps both on the web and from your mobile phone.

In related news, the much anticipated Microsoft 365 app (previously the Office app) is set to launch later this month on mobile and Windows. Share your thoughts with us regarding this new consumer tier in the comment section.

Via: Techcrunch

Equalizer APO Not Working on Windows 11: 4 Quick Solutions

Equalizer APO is a popular open-source equalizer software that allows users to customize the sound of their computer’s audio output. However, some users have reported issues getting Equalizer APO to work correctly on Windows 11.

In this article, we’ll explore why Equalizer APO may not work on Windows 11 and provide some quick solutions.

Does Equalizer APO support Windows 11?

The short answer is that Equalizer APO is not officially supported on Windows 11. The software was last updated in 2020 and has not been updated to include support for Windows 11.

However, there are a few merits of using this tool. Some of which include:

  • Customizable sound – With Equalizer APO, users can create custom equalization settings to enhance the sound of their music, movies, and games. Users can create their equalization presets, or use presets created by other users.
  • Global audio equalization – Equalizer APO is a system-wide audio equalizer that can equalize the sound of all audio played on your computer, including music, movies, and games. This eliminates the need for different equalization settings for different programs or files.
  • Open-source software – Equalizer APO is open-source software that is free to use, distribute and modify.
  • Customizable interface – Equalizer APO has a graphical user interface (GUI), allowing users to create their visual representation of the equalizer settings.

Since users may face APO and sound drivers errors, let us explore fixing and making it work on the newest Microsoft client OS.

How do I fix Equalizer APO on Windows 11?

Tip icon Tip
Before going into the solutions, you must note that although Equalizer APO is a popular choice for many users, there is other equalizer software that you can use on Windows 11. Some of them have excellent compatibility with the system.

1. Enable Audio Enhancements in System sounds

  1. Press Windows + I to open the Settings app.
  2. Navigate to Sound.
  3. Scroll down and select All sound devices.
    equalizer apo not working windows 11
  4. Click on any of your Output or input devices.
    equalizer apo not working windows 11
  5. Lastly, under Audio Enhancement, select Device Default Effects.
    equalizer apo not working windows 11

2. Use compatibility mode

  1. Right-click on the Equalizer APO executable file and select Properties.
  2. Click the Compatibility tab, tick Run this program in compatibility mode for, then select Windows 10 from the dropdown menu.
  3. Click on Apply and OK.

3. Reinstall audio drivers

  1. Right-click on the Start menu and select Device Manager.
    equalizer apo not working windows 11
  2. Expand Sound, video and game controllers, right-click on your audio driver, and select Uninstall device.
  3. When prompted, confirm your choice.
  4. Restart your computer, and the driver will reinstall.

If you want other options than following the manual method, you can try specialized driver updating software to execute this process automatically.

4. Disable Hardware Acceleration

  1. Press Windows + I to open the Settings app.
  2. Navigate to Sound.
  3. Scroll down and click More sound settings.
  4. Right-click on one of your devices and select Properties.
    equalizer apo not working windows 11
  5. Go to the Advanced tab, then untick Allow hardware acceleration of audio with this device, click Apply, and OK.

Since this app is not officially compatible with Windows 11, you may need a few extra steps to get it working well.

Hence, the solutions above should be effective enough if Equalizer APO is not working on your Windows 11 device.

Finally, let us know in the comments section which of the fixes worked for you.

Surface Audio Dock Review: An all-in-one docking station that undercuts competition

Starting at $249.99

Microsoft’s newest docking solution seems to have found the sweet spot between functionality and aesthetics. We’ve come a long way from the lock in place Surface Pro 3 and 4 docking station which propped Microsoft’s flagship tablet computer erect in a single functional use position, and while relatively minimalistic, it wasn’t portable or transferable for most users.

Microsoft has since reiterated on the design to bring users the Surface Dock and Surface Dock 2 which maintained an industry-like appearance of cord connected brick of ports that included several modern USB connectors, HDMI, mini-display port, ethernet, and audio jacks.

Microsoft Audio Dock - Ports

Microsoft’s latest dock now adds an audio component as its newest upgrade and does so while undercutting its most well-known competitor in a very niche sector.

Microsoft Audio Dock 2023
TECH SPECS
Dimensions Width 6.6 x Depth 3.16 x Height 3.19 in
(167.6 mm x 80.2 mm x 81 mm)
Weight 22.9 oz. (650 g) (Package not included)
Colors Matte Black
Speakers (qty) Tweeter: OD25.9 x H11.6mm
Woofer: L54 x W48.8 x H41.5mm
Sound pressure level output Up to 90dB SPL
Frequency response 70Hz~20kHz for music playback
200Hz~8kHz for conference
Dock connections 1 USB-C® (USB3.1 Gen 2, power up to 7.5 W)
Support DP alt mode, up to Dual Display1
1 USB-C® (USB3.1 Gen 2 data only, power up to 7.5 W)
1 USB-A 3.2 (USB3.1 Gen2)
1 HDMI 2.0 port with 4K@60Hz
Support MST in USBC and HDMI port
Support USBC PD charging (up to 60 W)
Compatibility Operating System:
Windows 11 Home/Pro, Windows 10, MacOSConference Software*:
Microsoft Teams, Zoom, Google Meet
Connection to PC USB-C
USB cord length 39.4 in. (1 meter)
Buttons/Controls Microsoft Teams button, Mute button, Volume up button
Microphones Two omni-directional microphone arrays
Audio codec Codec RK2108
Amp TAS5805
Microsoft accessory center Speaker performance customization and microphone settings (Available only on Windows)
What’s in the box Microsoft Audio Dock
Power Supply Unit & AC cord
Quick Start Guide
Safety and warranty documents
Warranty2 1-year limited warranty

Look and Feel

The Audio Dock is spiritually reminiscent of a Google Nest speaker as its wrapped in woven fabric, presumably to enhance the audio output experience. While it’s roughly the same size as a Google Nest audio speaker when positioned horizontally, the Audio Dock does away with the home decor facade and only comes in a single matte black color scheme emphasizing desktop utility over environmental ambience.

The Audio Dock may not win any awards for complementing aesthetic decor, it does match the Microsoft color branding of other desktop accessory efforts that include Modern Keyboards, Arc mice, Modern Webcams, Presenter+, Modern headsets and even Xbox controllers.

Microsoft Audio Dock with Accessory

The design of the Audio Dock builds on Microsoft’s previous efforts with the Microsoft Modern USB-C speaker by kicking everything up several notches. Where the Modern USB-C speaker emphasized portability with its sleek design, the Audio Dock increases the speaker bay by 2/3 the size which adds considerable weight to the docking station by comparison.

However, when comparing it to Microsoft’s previous docking station, the Surface Dock 2, the Audio Dock feels only a bit heavier surprisingly. Perhaps, the reduction in port selections between the two may contribute to the relative weight comparison as the Surface Dock 2 offers four USB-C, 2 USB-A, and ether net port and an audio jack as its connectors while the Audio Dock only provides connections for 2 USB-C, 1 USB-A, and an HDMI 2.0 slot with support for up to 4K at 60Hz.

Perhaps in an effort to assist in cable management and minimalist aesthetics, all ports and connections are tucked away at the back of the Audio Dock.

Microsoft Audio Dock desk presentation

The Audio Dock also does away with the proprietary Surface connector and opts for a more ubiquitous USB-C connector that can power devices at up to 60W while allowing it much more utility for a wider user base than its predecessor. The USB-Connector can also be tucked away into a compartment underneath the dock itself for further tidiness and portability when necessary.

Performance

Identical to the Surface USB-C speaker, the Audio Dock comes with a dedicated tactile Teams button, speaker button, play and volume controls located at the top of the device and while the dock does a decent job of getting loud, it is a bit light in the bass department. The mids and highs are clear and crips, and it’s evident the speaker excels at vocal reproduction particularly designed for podcast and conferences with audio. Don’t get me wrong, music playback is good but it’s not on par with more dedicated speaker solutions.

The Audio Dock also serves as a mic that does a great job of picking up most audio while simultaneously surprising other background elements. The Audio Dock won’t replace a dedicated mic, but for the times when a headset may be charging, or you want to free your ears from hours of headset use, this dock slots in well.

Microsoft Audio Dock Teams

Microsoft continues to extend utility of its devices through the Modern Accessories software hub and users can make a few tweaks to the audio output from there such as prompt volume and audio settings for Teams communication.

The other product in this niche sector the Audio Dock competes with is the Logi Dock which offers a plethora of ports and connectivity selections that include display, HDMI, 2 USB-A, Bluetooth pairing, four USB-C slots and a Kensington lock. However, the audio and mic quality of the device still feels a step down from the Audio Dock.

For those familiar with switching audio inputs, using the Audio Dock is relatively straightforward and easy. For anyone who lives in a Team world, the Audio Dock becomes as second nature as pressing any audio controls on a dedicated keyboard.

Summary

While the Logi Dock does offer more ports and dedicated webcam control option, it’s also $150 dollars more than the Microsoft Audio Dock while delivering a less than stellar comparative audio experience. The design of the two devices are very similar and take up relatively the same space both on a desk and underneath with their dedicated power bricks, but the Audio Dock has the added advantage of being tuned for video conferencing, especially with Teams.

At the end of the day, more docking solutions should incorporate audio and save users from having yet another input to manage via Bluetooth, wired or through Wi-Fi. The convenience of a port station with audio alone would sell the product category while bringing competition to actual audio experiences that could net users similar sounds akin to more dedicated speakers such as Bose, JBL, and Sony.

Easy Fixes to YouTube Pause Button Won’t Go Away [Android]

If you are using the YouTube app on your Android phone, you are familiar with the few navigation options to go backward, forward, pause, and resume the video available in the app.

However, at times the YouTube pause button won’t go away. And the same goes for the progress bar. In fact, users have reported even more troublesome situations.

So, let’s have a closer look at some of the most common misdemeanors:

  • YouTube app pause won’t go away – Obviously, YouTube mobile pause won’t go away here. Whenever this happens, the YouTube app pause button stays on screen.
  • YouTube Overlay won’t go away Android
  • Can’t get pause button off YouTube – YouTube pause button won’t go away on Android
  • YouTube shorts pause button not disappearing
  • YouTube vanced pause button won’t go away

Now, the big question is why does the play button stay on YouTube? Let’s take a closer look at the possible reasons and then, see how to remove the Play pause button from YouTube shorts.

Why is the Pause button stuck on YouTube?

If you are also noticing a small X icon at the bottom right corner, the issue could be occurring due to the Accessibility feature in Android. Here’s a good lead for your troubleshooting endeavor.

But what if that’s not it? Obviously, there can be many other reasons why the YouTube pause button won’t go away.

From cache piling up to occasional software glitches, and conflictual or faulty settings, you cannot rule anything out.

Finally, if the YouTube pause button is not disappearing, you might be running an older or deprecated version of the app. So make sure you update YouTube to the latest version available.

In this article, we walk you through a quick step-by-step guide to help you fix the YouTube pause button not disappearing on the Android issue.

How do I get rid of the pause button on YouTube?

1. Disable the Accessibility menu

From YouTube settings

YouTube pause button not disappearing
  1. Launch the YouTube app on your Android phone.
  2. Tap on your Profile.
    YouTube pause button not disappearing
  3. Select Settings.
  4. At the bottom, tap on Accessibility.
  5. Toggle the switch to turn off the Accessibility player.

Relaunch the YouTube app and check if the YouTube pause button not disappearing on the Samsung device issue is resolved. If the issue persists, follow the next set of steps.

From Android Settings

YouTube pause button not disappearing
  1. Open Settings.
  2. Tap on Accessibility. Use the search feature to find the Accessibility setting.
  3. Tap on Switch Access.
  4. Toggle the Use service switch to turn it off.
  5. Go back to the Accessibility section.
  6. Open Accessibility Menu and turn it off as well. Skip if you don’t see this option.

Restart your device and open YouTube. Check if the pause button issue is resolved.

2. Clear cache

YouTube pause button not disappearing
  1. Tap on Settings.
  2. Tap on Apps.
  3. Search for and open YouTube.
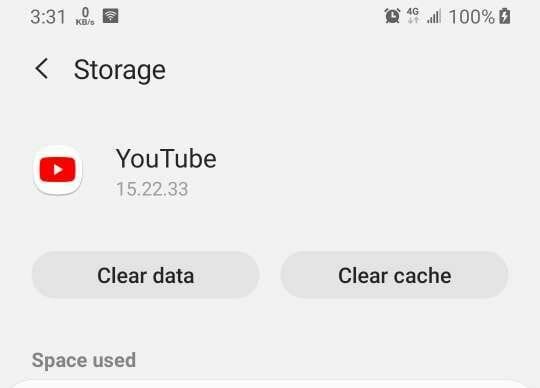
  4. Tap on Storage.
  5. Tap on Clear cache.

If the YouTube pause button won’t go away, clearing your cache can improve things. After the job is done, relaunch the YouTube app and check for any improvements.

3. Update the app

Disable YouTube accessibility Player
  1. Open Play Store.
  2. Search and open YouTube.
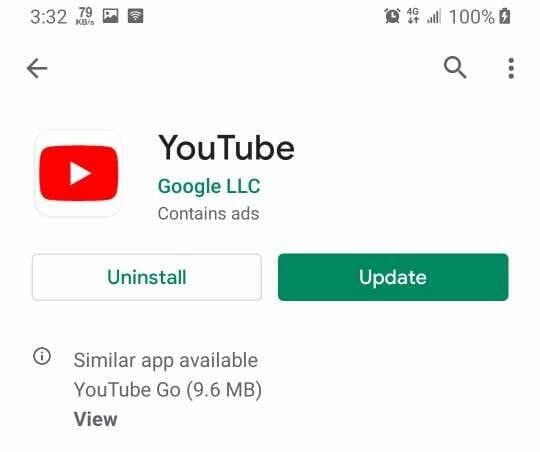
  3. Tap on Update to download and install the updates.
  4. Once updated, relaunch the app and check for any improvement.

4. Disable Picture-in-Picture mode

Disable YouTube accessibility Player
  1. Open Settings.
  2. Tap on Apps.
  3. Search for and open the YouTube app.
  4. Scroll down to the Advanced section.
  5. Tap on Picture-in-Picture.
  6. Toggle the switch for Allow Permission to turn it off.

For some, the YouTube picture in picture mode is not working at all and if that is also your case, it makes even more sense to disable it.

However, disabling Picture-in-Picture means you won’t be able to access the YouTube app in overlay mode while multitasking.

5. Reinstall the app updates

Disable YouTube accessibility Player
  1. Tap on Settings.
  2. Tap on Apps.
  3. Search for and open YouTube.
  4. Tap on the three dots (top right corner).
  5. Select Uninstall updates and confirm the action.
  6. Open the Play Store.
  7. Search for YouTube and tap on Update.

The YouTube pause button not disappearing issue occurs if you have the accessibility option enabled in your YouTube app.

If you prefer to use the Accessibility option, then make sure to set a time limit for how long the on-screen navigation buttons appear under the Accessibility option.

Even more, don’t hesitate to check out our guide on how to easily resolve YouTube Music pause issues on Android and iOS.

Download the January 2023 Patch Tuesday security updates

It’s January, the first month of 2023, and the time has come again for us to open our virtual arms and extend a warm welcome to the latest batch of security updates from Microsoft.

Keep in mind that these updates actually bring an entire array of changes for both Windows 10 and Windows 11, regardless of whether it is a newer or an older version.

This January 2023 Patch Tuesday batch of updates is expected to fix some of the issues that were still pending, and in the article below we will be looking to see exactly what we get.

We have included a detailed changelog for each cumulative update, and we will also be providing you with direct download links from Microsoft’s Windows Update Catalog, so you know that they are secure.

With that being said, remember that, alternatively, you can always use other methods to get the latest updates, including:

  • The Windows Update menu on your OS
  • The WSUS (Windows Server Update Service)
  • Group Policies set up by your admins if you’re part of a larger network.

Now that we got this out of the way, let’s have a closer look at the January 2023 Patch Tuesday updates rollout from Microsoft.

What do the first Patch Tuesday updates of 2023 bring?

Windows 11

There really isn’t further need for introductions, since most of you are already running Windows 11 on your devices.

You might also like to know that the 22H2 version of Windows 11, the operating system’s first major update, is now ready for downloading and installing.

Beware, however, of the great number of bugs and glitches that will test your patience when discovering all the new features coming to Windows 11.

Cumulative update name

KB5022287

Changes and improvements

  • This update addresses issues that affect the Local Session Manager (LSM). These issues might allow users who do not have admin rights to perform actions that only an admin can.
  • This update addresses a known issue that affects apps that use Microsoft Open Database Connectivity (ODBC) SQL Server Driver (sqlsrv32.dll) to connect to databases. The connection might fail. You might also receive an error in the app, or you might receive an error from the SQL Server.
  • This update addresses an issue that might affect startup on some Windows devices. They might receive an error (0xc000021a) and have a blue screen.

[DIRECT DOWNLOAD LINK]

Windows 10 versions 21H2, 21H1, and 20H2

Windows 10 version 22H2 is the latest major version of Windows 10, and as such has the most experimental features on it.

Fortunately, most bugs that were first present when it was first made available have been weeded out, and this version of Windows 10 is far more stable.

Cumulative update name

KB5021233

Changes and improvements

  • This update contains miscellaneous security improvements to internal OS functionality. No additional issues were documented for this release.

Known issues

  • Devices with Windows installations created from custom offline media or custom ISO image might have Microsoft Edge Legacy removed by this update, but not automatically replaced by the new Microsoft Edge. This issue is only encountered when custom offline media or ISO images are created by slipstreaming this update into the image without having first installed the standalone servicing stack update (SSU) released March 29, 2021 or later.
  • After installing this update, apps that use ODBC connections utilizing the Microsoft ODBC SQL Server Driver (sqlsrv32.dll) to access databases might fail to connect. You might receive an error within the app or you might receive an error from SQL Server, such as The EMS System encountered a problem with Message: [Microsoft][ODBC SQL Server Driver] Protocol error in TDS Stream or Message: [Microsoft][ODBC SQL Server Driver]Unknown token received from SQL Server.
  • After installing this update, some Windows devices might start up to an error (0xc000021a) with a blue screen.

Windows 10, version 1809

This version of the Windows operating system is outdated and will no longer receive any updates from the Redmond tech company.

Therefore, users that are still running this old version on their devices are strongly advised to choose a more recent one to update to.

If you still want to use Windows 10 and are not willing to upgrade to 11, you don’t have to do so right away. After all, Microsoft announced that the support for Windows 10 will go on until 2025.

Cumulative update name

KB5022286 

Improvements and fixes:

  • This update addresses an issue that might affect authentication. It might fail after you set the higher 16-bits of the msds-SupportedEncryptionTypes attribute. This issue might occur if you do not set the encryption types or you disable the RC4 encryption type on the domain.
  • This update addresses an issue that affects cluster name objects (CNO) or virtual computer objects (VCO). Password reset fails. The error message is, There was an error resetting the AD password… // 0x80070005.
  • This update addresses an issue that affects Microsoft Defender for Endpoint. Automated investigation blocks live response investigations.
  • This update addresses a known issue that affects apps that use Microsoft Open Database Connectivity (ODBC) SQL Server Driver (sqlsrv32.dll) to connect to databases. The connection might fail. You might also receive an error in the app, or you might receive an error from the SQL Server.

Known issues

  • After installing KB5001342 or later, the Cluster Service might fail to start because a Cluster Network Driver is not found.

Windows 10, version 1607

Windows 10, version 1607 has reached the end of service for all of its available editions. Update to the latest version of Windows 10 in order to keep your system protected.

Cumulative update name

KB5022289 

Improvements and fixes

  • This update addresses an issue that might affect authentication. It might fail after you set the higher 16-bits of the msds-SupportedEncryptionTypes attribute. This issue might occur if you do not set the encryption types or you disable the RC4 encryption type on the domain.
  • This update addresses an issue that affects cluster name objects (CNO) or virtual computer objects (VCO). Password reset fails. The error message is, “There was an error resetting the AD password… // 0x80070005”.
  • This update introduces a Group Policy that enables and disables HTML Application (HTA) files. If you enable this policy, it stops you from running HTA files. If you disable or do not configure this policy, you can run HTA file. To configure this Group Policy:
    • Open the Group Policy Editor.
    • Select Computer Configuration > Administrative Templates > Windows Components > Internet Explorer.
    • Double-click Turn on DisableHTMLApplication.
    • Select Enabled.
    • To save the policy setting, select OK or Apply.
  • This update addresses a known issue that affects apps that use Microsoft Open Database Connectivity (ODBC) SQL Server Driver (sqlsrv32.dll) to connect to databases. The connection might fail. You might also receive an error in the app, or you might receive an error from the SQL Server.

[DIRECT DOWNLOAD LINK]

Drawing the line, this is pretty much what we are dealing with in terms of security updates for the month of January 20232, as a part of the Patch Tuesday rollout.

Have you noticed any issues after downloading and installing these security updates for your version of the Windows operating system? Let us know in the comments section below.

How to Install Valorant on the Xbox App: A Step-by-Step Guide

Valorant is a popular 5v5 tactical shooting game that you can play with your friends and have a blast. While players enjoy the game immensely, it is prone to issues just like other games. Some players aren’t able to play Valorant on their Windows 11 PCs, for them we have a guide that will resolve the issue.

On the other hand, there are some players that are looking for ways how to install Valorant on the Xbox app. Here we will give you a step-wise guide in this regard.

What are the best FPS settings for playing Valorant with max FPS on a Windows PC?

After you have met the minimum PC requirements for playing Valorant on your Windows PC, check out the in-game graphics settings that you can tweak to get the best FPS gameplay:

  • Display mode: Fullscreen
  • Resolution: Native
  • Max FPS always: Off
  • Multithreaded Rendering: ON
  • Material Quality: Low
  • Texture Quality: Low
  • Detail Quality: Low
  • Vsyncs: OFF
  • Anti-Aliasing: None
  • Anisotropic Filtering: 1x
  • UI Quality: Low
  • Vignette: OFF
  • Improve Clarity: OFF
  • [BETA] Experimental Sharpening: OFF
  • Bloom: OFF
  • Distortion: OFF
  • Cast Shadows: OFF

In case you are having trouble getting the best FPS for Valorant gameplay on your Windows PC, we have a guide that lists some effective solutions to fix the low FPS issue with Valorant.

Can you play Valorant on Xbox?

Valorant is a PC-exclusive title. This means that it is available only for PCs. So, it is not available on any other platform in the market, which includes consoles like PlayStation and Xbox.

You can either play the game via the Xbox app on Windows PC or download the game directly from the official website since it is available for free.

How can I install Valorant on the Xbox app?

  1. Download the Xbox app on your PC.
  2. Open the Xbox app.
  3. In the search box, type Valorant and press Enter.
  4. If the search result did not yield any result, then you need to click on the Game Pass button on the left side.
  5. Scroll down and click on the Shooter category option.
  6. Click on the Install button for Valorant.
  7. Click on Install.
  8. After the installation is completed, click on Continue linking.
  9. Click on Link existing account button if you already have a Riot games account. If not then, create a new one and then link it.
  10. You can choose between a Riot account, Google account, Facebook account, or Apple account to link.
  11. Follow the on-screen prompts to complete the linking process.
  12. Accept the agreement.
  13. Click the Install button.
  14. Select the location where you would like to install the game. Click Install.
  15. The game will begin downloading via the Xbox app.

The above is the complete process of installing the Valorant game on your Windows 11 PC using the Xbox application.

What can I do if I cannot install Valorant via the Xbox app?

Here’s an effective tip that will help you if you aren’t able to install the Valorant game via the Xbox app:

1. Reset the Xbox app

  1. Press the Win + I keys to open the Settings menu.
  2. Click on Apps on the left side.
  3. Click on the Installed apps on the right.
  4. Locate the Xbox app.
  5. Click on the 3-dot icon for the Xbox app and select Advanced options.
  6. Scroll down and click on the Repair button.
  7. The repair process will begin and will fix any issues with the app.
  8. Launch the Xbox app again and check if this resolves the issue or not.

Often a bug or glitch present in the Xbox app or any app for that matter can cause unexpected issues. In such a case, you can make use of the repair process that allows you to fix such petty problems and also fix issues such as not being able to install Valorant on the Xbox app.

2. Reinstall the Gaming Services

  1. Open the Start menu by pressing the Win button.
  2. Type Powershell and open Windows PowerShell as admin.
  3. Type the below command and press Enter. get-appxpackage Microsoft.GamingServices | remove-AppxPackage -allusers
  4. Execute the below command and press Enter. start ms-windows-store://pdp/?productid=9MWPM2CQNLHN
  5. Restart your PC.

Well, these are some of the ways that will help you install the Valorant game from the Xbox app. Also, the above section helps you with steps on how to install Valorant on the Xbox app.

You can check out our guide to learn how you launch and force the Valorant game to update. We also have a guide that lists 4 ways to run Valorant on your Windows 11 PC.

For users facing the error retrieving settings from the server in Valorant error, we have a guide that will help you resolve the problem.

If you are getting Valorant error code VAL 51, then you should check out our guide and fix the problem.

We would like you to check out the guide on 20 Valorant error codes, what they mean and how you can resolve each one of them.

Users who aren’t able to enter matchmaking, can refer to our guide and get rid of the problem.

Let us know in the comments below if following the above steps you were able to install the Valorant game using the Xbox app or not.

Snipping Tool Shortcut not Working: Troubleshoot & Fix Easily

Snipping Tool in Windows OS is a handy little utility. So, is there a snipping tool shortcut as well? For sure. Unfortunately, many users complained that the snipping tool shortcut is not working as intended occasionally.

If you were wondering what’s the shortcut key for the snipping tool, it couldn’t be easier. You can access it by pressing the Windows + Shift + S shortcut key on your keyboard.

It allows the users to take snapshots of their screens and save or print them directly from the interface. However, some users have reported a snipping tool shortcut not working issue in Microsoft Community Forums.

After upgrading to Windows 10 the screenshot shortcut (Windows key + Prt Scr) stopped working.
I’ve tried to look for a setting but I haven’t found anything related.

In comes the big question. Why won’t the snipping tool work? We shall try to answer that as follows.

Why is my snipping tool shortcut not working?

As you can probably guess, disruptive updates are a potential culprit. So, if you start noticing suspicious behavior after having installed recent updates, you might want to revert them. The lack of updates can have the same effect, so balance is key.

Corruption is usually responsible for Windows glitches, so you might want to repair any corrupted sys files sooner rather than later.

Obviously, wrong or conflictual settings are not to be excluded, so you might want to take a closer look at notifications, among others to solve this frustrating issue.

And speaking about issues here’s what other users dealing with similar scenarios reported:

  • Windows 10 snipping tool shortcut not working
  • Snipping tool hotkey not working
  • Windows 11 snipping tool shortcut not working
  • Windows + Shift + S not working
  • Snipping tool shortcut not working Windows 7
  • Lenovo snipping tool shortcut not working
  • OneNote snipping tool shortcut not working

How do I fix snipping tool shortcut?

Before we dig in, here are some useful steps you might want to try:

➡️ First, Run Store Apps Troubleshooter.

To do that, Open Settings and select Update & Security, then Troubleshoot. Expand the list and locate Other troubleshooters. Finally, press Run next to the Windows Store Apps option.

➡️ Update Windows, respectively update the Snipping tool via the Microsoft Store app.

For the latter, simply open the Microsoft Store and click the 3-dot menu. Select Download and Updates, then push Get Updates.

➡️ Disable the Focus Assist from the Action Center

If neither works, read on, we have more useful fixes for you.

1. Check Shortcut Key Properties

  1. From the desktop, right-click on the Snipping Tool icon and select Properties.
  2. If you don’t have the shortcut on the desktop, type snipping tool in the search bar.
    • Right-click on Snipping Tool Icon and select Open File Location.
  3. Right-click on Snipping Tool icon and select Properties.
  4. In the Properties window, click on the Shortcut tab.
  5. In the Shortcut Key: field, if it shows as None that means you don’t have any shortcut keys set to access the tool.
  6. Click on None and press any key on your Keyboard.
    • Note that you cannot use Windows Key + S combination as it is reserved for something else already.
  7. Click on Apply and OK to save the changes.
  8. Close the properties window and press the Shortcut key that you assigned to launch the Snipping tool and you should be able to access the tool without any issues.

2. Enable Clipboard History and try again

  1. Launch the Start menu and look for Settings.
  2. Next, open the Settings app and go to System.
  3. Select Clipboard and make sure you enable this option.

The Snipping Tool is meant to send screenshots to your clipboard by default. If this option is disabled on your PC, it can be a clear indicator of the snipping tool shortcut not working situation.

3. Enable notifications

  1. Open the Settings app and go to System, just as you did before.
  2. This time, select Notifications.
  3. Finally, make sure you set the toggle next to Snipping Tool to ON.

4. Use the New Snip and Sketch Tool or try the Prt Sc Key instead

  1. Microsoft is trying to replace the Snipping Tool with the new Snip and Sketch app.
    • As a result, Microsoft has now dedicated the Shift + Windows Key + S shortcut to the new Snipping Tool.
  2. Press the Shift + Windows Key + S shortcut key and you should be able to access the new Snip and Sketch tool.
    •  Alternatively, if you don’t want to use the long Shift + Windows Key + S  combination to open the Snip and Sketch tool, you can use the PrtSc (Print Screen) key to do the same.
      • Here is how to do it.
      • Click on Start and select Settings.
      • Click on Ease of Access.
      • Under the Interaction section, click on Keyboard.
      • Scroll down to Print Screen Shortcut and enable Use the PrtScn button to open the screen sniping option.
        Enable PrtSc key snipping tool Shortcut
  3. That’s it. If you press the PrtSc key on your keyboard, it will open the Snipping Tool.

5. Repair or Reset the Snipping Tool

  1. Launch the Settings app on your PC and locate and navigate to Apps, then Apps and Features.
  2. You can choose to Repair, or Reset the app by pushing the corresponding buttons.
  3. Note that the first one will not delete your app’s data while the second (Reset) will.
Tip icon Tip
While you’re on this screen, you may also choose to uninstall the Snipping tool. If you do, you can reinstall it easily from the Microsoft Store.

6. Run SFC and/or DISM scans

  1. Press the Windows key to open the Windows Search box and type in CMD.
  2. Click on Run as Administrator to open an elevated Command Prompt window.
  3. Input the following command: sfc /scannow
  4. If you want to go straight for the section option, paste this command instead: DISM /Online /Cleanup-Image /RestoreHealth
  5. Press Enter to run the command. The repair process will begin.

That’s about it! We hope you were able to solve your Snipping tool shortcut not working issue with the help of our solutions.

Nevertheless, if nothing seems to cut it, you can always use a third-party app for the job. We have prepared a fine selection of the best snipping tools you can try today!

Xbox and Bethesda Developer_Direct officially livestreaming January 25th, with Starfield to get a standalone show

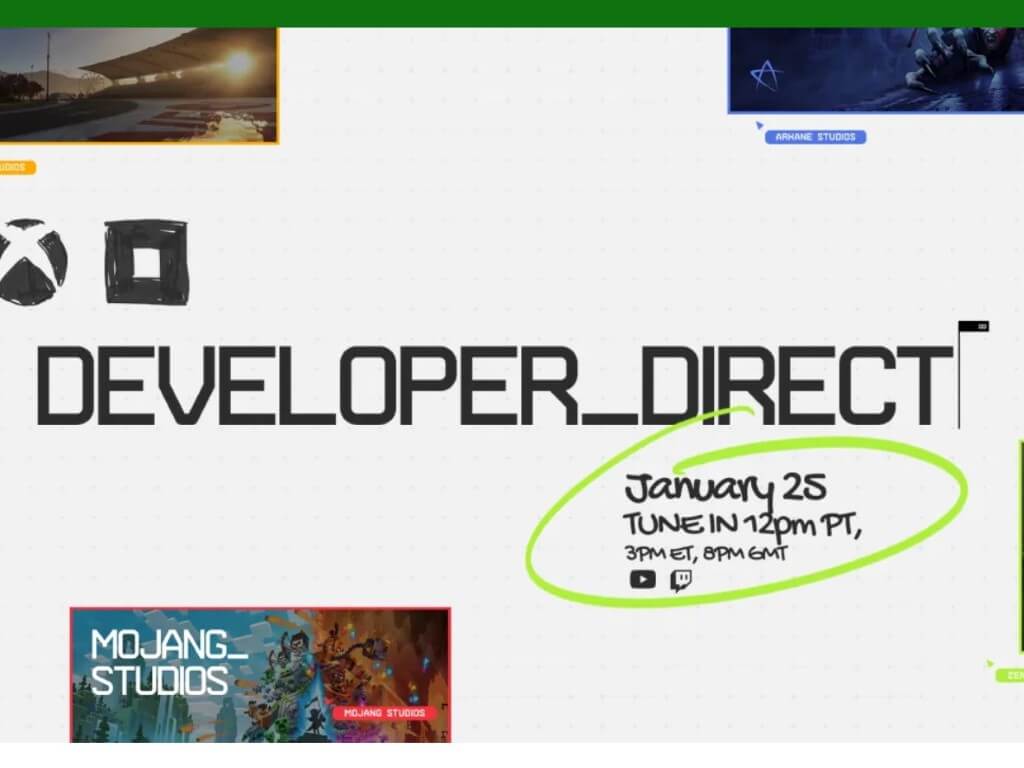
After weeks of speculation it is now official: Xbox and Bethesda will be livestreaming a Developer_Direct showcase later this month. The event will be streamed on Wednesday, January 25th at 12pm PST/3pm EST according to Xbox Wire. Tune in to the Xbox Twitch and YouTube channels, or the Bethesda Twitch and YouTube channels to watch.

Among the highlights we can expect from the show are closer looks at—and potentially release dates for—some of the year’s most anticipated Xbox titles including Redfall, Forza Motorsport and Minecraft Legends.

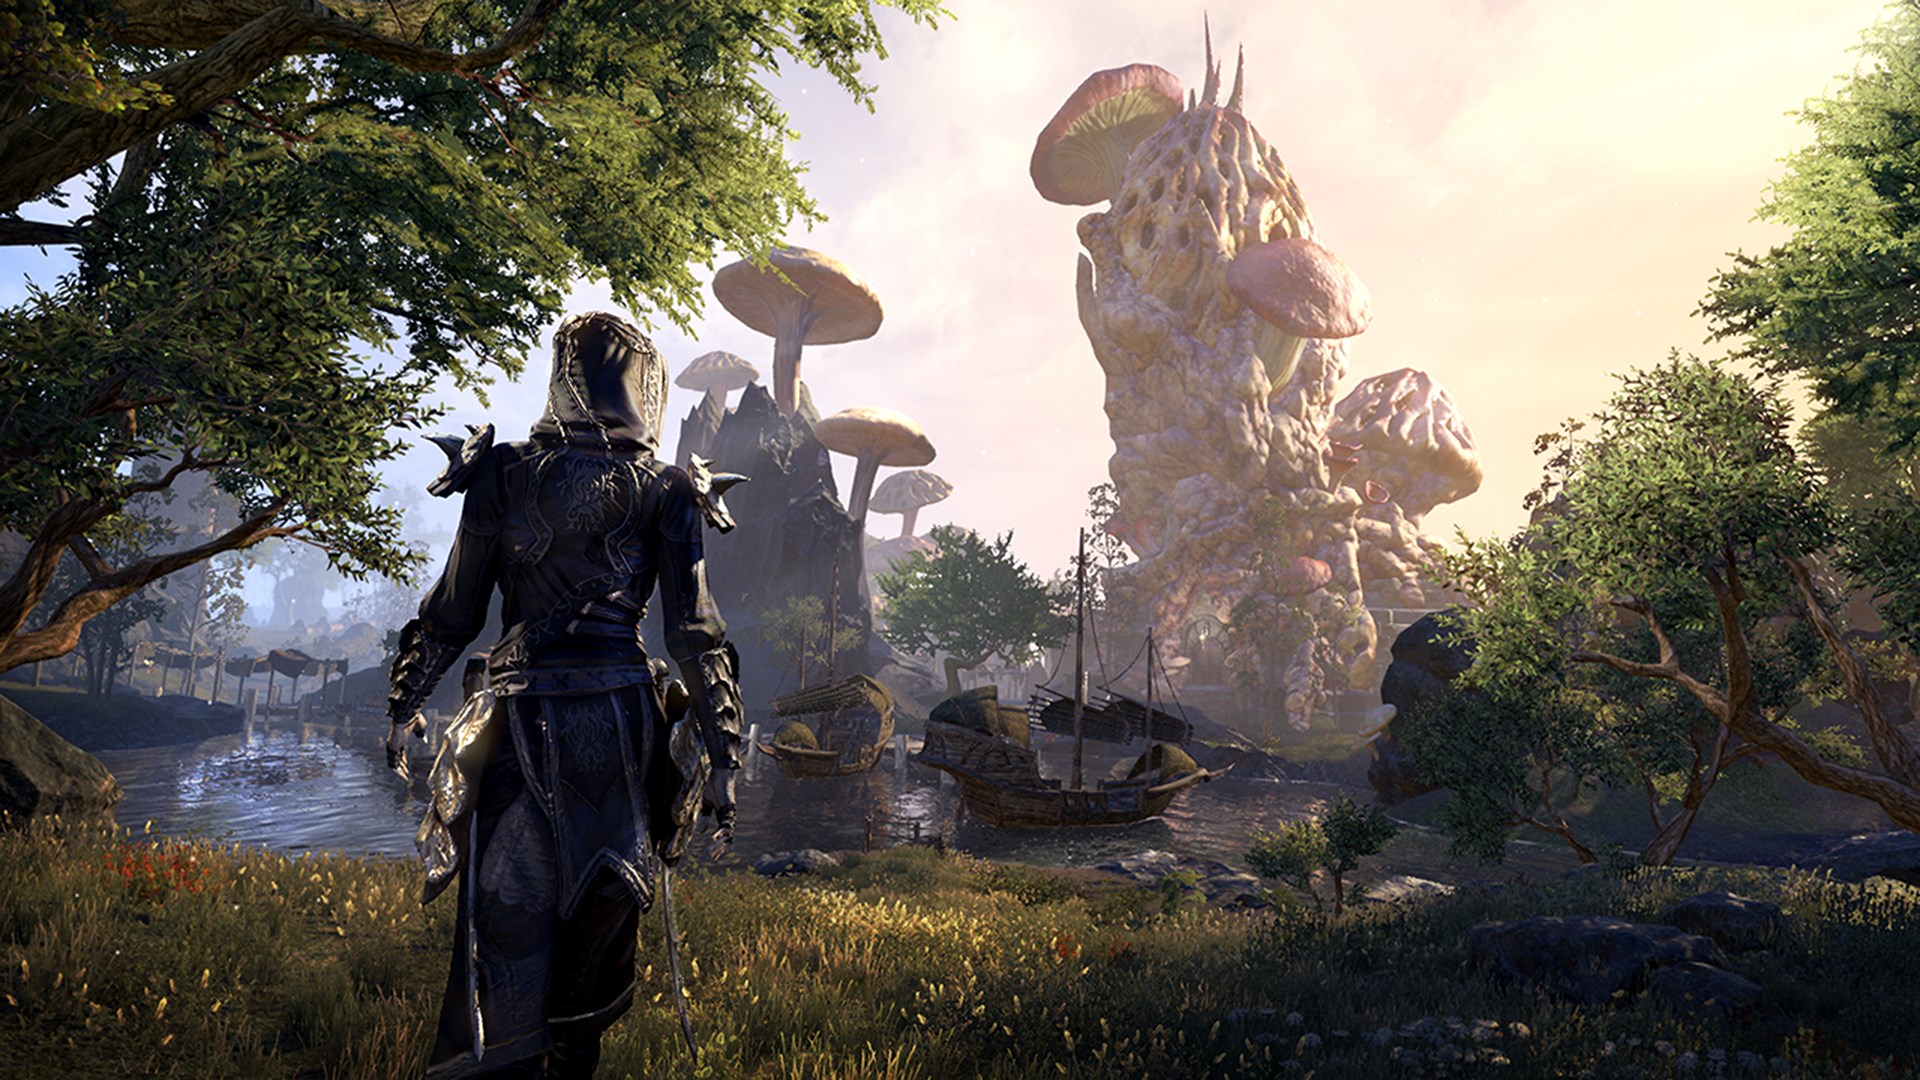
Also to be showcased will be the next major Chapter update for The Elder Scrolls Online (ESO), which will be unveiled by Zenimax Online Studios director Matt Firor in a standalone ESO Chapter Reveal Event following the Developer_Direct showcase.

The Elder Scrolls® Online
Via Xbox.com

You may have noticed one name so far absent in all this: Starfield. That’s because “To dedicate the proper amount of time for a deep dive into Bethesda Game Studios’ Starfield, a standalone show is in the works.”

That is exciting news for all those who have been eagerly awaiting more on one of the most anticipated games in recent memory. 2023 is shaping up to be a big year for Xbox, and the official announcement of the Developer_Direct just adds to the excitement.

Featured image via Xbox Wire. 

Customize & Configure Windows 11 File Explorer [How to]

Many users want to customize File Explorer in Windows 11 in order to adjust it to their needs. If you’re looking to do so, today’s guide will show you how to properly do it.

How can I change the appearance of the File Explorer?

1. Change the File Explorer theme

  1. Hit the Windows key and click on Settings.settings windows 11
  2. Click on Personalization on the left pane then select a theme.

2. How to organize files in File Explorer Windows 11?

  1. Hit the Windows + E keys to open File Explorer.
  2. To arrange the files/folders, click on Sort, and in the drop-down that appears, select an option.
  3. You can also go further and choose to Group by.
  4. To change the file/folder icon size, click on View at the top.
  5. Select one option from Extra large icons to Small icons.

For us, one of the most useful features is sorting in Windows 11 File Explorer and we use it frequently to find newly created files.

Don’t forget to check out our article on more folder settings that will further help you stay organized.

3. Hide/show File Explorer panes

  1. Hit the Windows + E keys to open File Explorer.
  2. Click on View then select Show.
  3. Here, you can check all options that you want to hide.

4. How do I customize the Windows 11 Navigation Pane?

  1. Right-click the Navigation Pane. Be sure to click outside of any open directories.
  2. You’ll see a context menu.
  3. From there you can choose the types of directories you want to show.
     navigation pane settings
  4. You can also choose to show all folders on your PC in a tree view for quick access.
  5. If you wish to remove folders from Quick Access, right-click them and choose Unpin from Quick Access.
    unpin from quick access
  6. Pinning is just as easy, and you just need to right-click the directory you want to pin and choose Pin to Quick Access.
    pin to quick access

6. Activate single-click for folders/files

  1. Hit the Windows + E keys simultaneously to open File Explorer.
  2. Click on the three horizontal ellipses on the right and select Options.
  3. Navigate to the General tab, check the Single-click to open an item (point to select) option then click
  4. Apply and OK to save changes.

7. Change privacy and advanced settings

  1. Open Folder Options again.
  2. In the Privacy section, you can toggle if you want recently used files and folders to be available in the Quick Access section.
     privacy folder options. png
  3. Navigate to the View tab.
  4. In the Advanced settings section you can change various hidden settings, such as showing icons instead of thumbnails, hiding protected operating system files, and more.
    file explorer options advanced settings

You can unlock even more customization features by learning how to enable access to File Explorer Options, which lets you adjust deeper folder and view settings in Windows 11.

8. How can I customize the File Explorer toolbar / ribbon in Windows 11?

Unfortunately, Windows 11 doesn’t have the ability to customize the toolbar, so you can’t add or remove any items from it.

However, you can customize your File Explorer and restore the classic File Explorer ribbon. Customization options can vary slightly depending on your Windows edition,see how Home, Pro, and Enterprise compare feature-wise

If you’re having problems and, for some reason, the search in File Explorer is not working or the group by option is greyed out, check out our expert article for answers.

If you’re looking to customize Windows further, don’t miss our guides on how to customize Windows 11 Start Menu and our guide on how to customize the lock screen in Windows.

Let us know of any other ways to configure File Explorer in Windows 11 that you use to improve your experience in the comment section below.

How to move Microsoft Authenticator App to a new phone

The Microsoft Authenticator app is a security application that allows users to authenticate their identity when accessing their Microsoft account or other accounts. It provides an additional layer of security by requiring users to enter a code or approve a notification on their phone before being able to access their account.

If you are considering migrating the Microsoft Authenticator app to a new device, there are a few steps you will need to follow.

In this article, we will provide a guide on how to move the Microsoft Authenticator app to a new phone or tablet. This process is helpful for those who have lost their device or are upgrading to a new one.

Migrate the Microsoft Authenticator App

We will move Microsoft Authenticator to a new phone in two segments. First, let us back up the authenticator data on the cloud and then recover it on the new phone.

Enable backup on your old phone

In this section, we will back up your Microsoft authenticator’s data on a linked cloud service.

1. Open the Microsoft Authenticator on your current phone and tap on three vertical dots to access the settings.

move Microsoft Authenticator App to a new phone

2. Scroll to the Backup section and turn on Cloud backup. Your data will be backed on OneDrive. iPhone users will have to login into their iCloud.

move Microsoft Authenticator App to a new phone

3. Make sure you have access to the Recovery account email which is mentioned below it.

move Microsoft Authenticator App to a new phone

Your account, the metadata, username, and password are backed up. They are encrypted with JSON Web Encryption blob (JWE) and later the data is hashed using SHA-512 as a final layer of security. Then they are stored on the OneCloud/iCloud.

Recover Microsoft Authenticator on the New Phone

Now we will install the Microsoft Authenticator and then recover the data backup which we made in the last section. You can move the data to a new phone or get it back on the same phone after re-installing the authenticator.

1. Install Microsoft Authenticator for Android or iOS

2. Launch the Authenticator app and tap on Restore from backup from the welcome screen.

move Microsoft Authenticator App to a new phone

3. Sign in to your account which you used earlier on the Microsoft authenticator.

move Microsoft Authenticator App to a new phone

4. Select a way to verify your identity. Select the third option for emailing a code to your trusted email.

It is generally the recovery email for your email account associated with the authenticator app.

move Microsoft Authenticator App to a new phone

5. Enter your email associated with the account and tap Send code.

move Microsoft Authenticator App to a new phone

6. Find the verification code and type it here; tap Verify to start the backup recovery process.

move Microsoft Authenticator App to a new phone

7. You have successfully moved Microsoft authenticator to a new phone.

move Microsoft Authenticator App to a new phone

Moving Microsoft Authenticator to a new device

Make sure to have access to your email associated with the Microsoft authenticator and you will never have a problem moving the 2FA application to any device.

There is no limit to how many times you can move the authenticator around. Enter the correct password in a few attempts to avoid getting detected by Microsoft as a malicious activity. They may lock your account to safeguard the data.

Xbox Friends & Family Plan may be about to launch in the U.S.

Word is that the Xbox Friends & Family Plan may be poised to finally come to the United States and other territories. Apparently ads for the Xbox Friends & Family Plan have appeared on the Xbox PC app’s home screen, as reported by Game Pass Counter over on Twitter as well as others.

As you may recall, the Xbox Friends & Family Game Pass tier launched back in September last year in Columbia and Ireland. The Xbox Friends & Family Plan allows up to five individual users—each with their own account and gamer profile—access to Xbox Game Pass Ultimate under one membership, whether they are under the same roof or not. And all for a discounted price relative to having separate Game Pass memberships.

It seems likely that this could be announced during the upcoming Xbox and Bethesda Developer_Direct showcase event, which will be broadcast on January 25th.

6 Easy Fixes for Xbox App Not Launching Games in Windows 11

Xbox has been a hit amongst the gaming community, and their app for Windows paints a clear picture of the success. However, several users have reported that the Xbox app is not launching games in Windows 11.

Those with a Game Pass subscription encounter the error, but others also seem to encounter it. Here is our guide that lists out the underlying causes and the most effective fixes for this issue.

Why is the Xbox app not launching games in Windows 11?

There are many things at work to run your Xbox games, so here are some of the most likely reasons for this problem:

  • Corrupted Xbox app – Like any other Windows app, the one from Xbox might have some corrupted files which are preventing you launch any game. Repairing and resetting the app can bring it back to full functionality.
  • Gaming Services issues – Sometimes, Microsoft’s Gaming Services may encounter some problems or go through a maintenance process.
  • The system is not updated – The Xbox app is updated through the Windows updates, and if you fail to install the latest updates, that might impede its functionality.
  • Incorrect time zone – If the time and date are not correctly set on your PC, that be triggering the error and preventing the Xbox app from launching games in Windows 11.

No matter which of these is causing the error in your case, execute the fixes listed below, and one of them should get things up and running.

What can I do if the Xbox app is not launching games in Windows 11?

Before getting into more complicated procedures, let’s crosscheck some easy steps that could restore everything to normal:

  • Restart the Xbox app and your system. Although it seems like a waste of time, it might simply work
  • Install the latest Windows 11 updates. Just access the Windows Update menu from Settings and hit the Check for updates button to install all the latest ones.
  • Check the status of the Xbox Live services. If the server is having problems, just wait it out until Microsoft fixes it.

Now that we have gone through these preliminary measures, if the issue is still present, follow the solutions below in this order.

1. Update the Xbox app

  1. Press Windows + S to launch the Search menu, enter microsoft store in the text field at the top, and click on the relevant search result.Launch Microsoft Store to fix xbox app not launching games windows 11
  2. Click on the Library icon near the bottom left corner.Library
  3. Now, click the Get updates button to scan for newer versions of the Xbox app.Get updates to fix xbox app not launching games windows 11
  4. If one is listed after the scan, download it.

2. Set the correct time zone

  1. Press Windows + I to launch the Settings app and select the Time & language tab from the ones listed in the navigation pane on the left.Time & language
  2. Next, click on the Date & time on the right.Date and time
  3. Now, disable the Set time automatically option by clicking on the toggle.Disable set time automatically to fix xbox app not launching games windows 11
  4. Click on the Change button next to the manually Set the date and time option.Change time
  5. Now, set the correct date and time, and click on Change at the bottom to apply the changes.Change date and time to fix xbox app not launching games windows 11

Once you are done making the changes, restart the computer for these to come into effect fully. Now, check if the Xbox app is launching games in Windows 11.

We also have a comprehensive guide on how to change time and date in Windows 11 that will offer more information.

3. Disable Game Mode

  1. Press Windows + I to launch the Settings app and select Gaming from the list of tabs in the navigation pane on the left.Gaming
  2. Click on Game Mode on the right.Gaming Mode
  3. If it is enabled, click on the toggle to disable Game Mode.Disable gaming mode to fix xbox app not launching games windows 11

Game Mode is a feature in Windows that prioritizes the game and relevant processes over other background tasks and tends to terminate the latter. Also, it prevents the OS from downloading updates while playing a game.

But in some cases, it might terminate tasks critical to the game’s functioning. Therefore, it’s recommended that you disable Game Mode and check if the Xbox app is now launching games on Windows 11.

4. Restart the Xbox services and Gaming Services

  1. Press Windows + S to launch the Search menu, enter services in the text field at the top, and click on the relevant search result.Launch Services
  2. Now, please scroll down and locate all the Gaming Services entries here, right-click on them and select Restart from the context menu.Restart Gaming Services to fix xbox app not launching games windows 11
  3. Similarly, locate all the Xbox services here, right-click them, and select Restart.Restart Xbox services to fix xbox app not launching games windows 11
  4. If these are not running, right-click and select Start to run the service.Start service

This also helps fix the Palworld black screen during launch.

5. Repair/reset the Gaming Services app

  1. Press Windows + I to launch Settings and select Apps from the tabs listed in the navigation pane on the left.Apps
  2. Next, click on Apps & features on the right.Apps & features to fix xbox app not launching games windows 11
  3. Locate the Gaming Services app, click on the ellipsis next to it, and select Advanced options from the menu.Advanced options to fix xbox app not launching games windows 11
  4. Now, click on the Repair button.Repair app to fix xbox app not launching games windows 11
  5. Once the repair process is complete, navigate to the desktop, press Alt + F4 to launch the Shut Down Windows box, and select Restart from the dropdown menu.Reset PC to fix xbox app not launching games windows 11
  6. Click OK to restart the computer.Restart computer
  7. After the system restarts, check if you can launch the games that didn’t open earlier. If the error persists, go to Advanced options for the Gaming Services again and click on Reset.Reset to fix xbox app not launching games windows 11
  8. Click Reset on the confirmation prompt that pops up.Confirm reset

Usually, you should be able to get things working with a mere repair. When you repair an app, all its files are checked, and any corrupt ones are replaced. Apart from that, the Registry entries are verified and reconfigured.

That’s why it’s recommended that you restart the computer after repair to effect the changes made during the process entirely. Also, your data or configured settings will remain unaffected.

If repairing the Gaming Services app didn’t work, you also have the option to reset it. In this case, all data and configured settings will be removed, and the app will be as good as new.

After running both the repair and reset process, the Xbox app not launching games, Xbox Game Pass games not launching, or Xbox game pass games won’t launch on PC problem should be fixed.

6. Modify the Registry

  1. Press Windows + R to launch the Run command, type regedit in the text field, and either hit Enter or click on OK to launch the Registry Editor.Launch Registry editor to fix xbox app not launching games windows 11
  2. Paste the following path into the address bar at the top and hit Enter to open it. Alternatively, you can use the navigation pane on the left to find this key: HKEY_LOCAL_MACHINE\SYSTEM\CurrentControlSet\Services\GamingServicesNavigate path
  3. Right-click on the key and then select Delete from the context menu.Delete key to fix xbox app not launching games windows 11
  4. Click Yes in the confirmation prompt that pops up.Confirm deletion
  5. Now, go to the following path, and similarly delete this key as well: HKEY_LOCAL_MACHINE\SYSTEM\CurrentControlSet\Services\GamingServicesNetDelete the key
  6. After deleting both, restart the computer, and the problem should be resolved.

If nothing else has worked, deleting these two keys in the Registry Editor should fix the Xbox app not launching games, Xbox game pass games won’t embark on PC, or Xbox Game Pass games not tackling the problem.

But do remember not to make any other changes to the Registry since it could adversely affect the system’s functioning. Also, find out how to fix broken registry items in Windows 11.

How do you reset the Xbox app on Windows 11?

  1. Press the Win + I buttons to open the Windows Settings app.
  2. Select Apps from the left side and click on Apps & features from the right.apps and features
  3. Type Xbox in the search box and hit Enter.
  4. Click on the three-dot icon and select Advanced options.
  5. Scroll down and under the Reset section and click on Reset.
  6. Windows 11 will reset the app.

The Xbox Game Pass, or simply the PC Game Pass, as it’s now called, allows you to choose and play from over 100 games on the Xbox platform. But you will have to purchase a subscription for that.

Xbox offers three plans at the moment. Though each provides access to the same number of games, the ability to play them across devices drives the prices apart from other features.

So, if you have been planning to subscribe to it, go to the Xbox Game Pass’s official website, click on Join under the desired plan, and complete the payment.

These are all the ways you can resolve issues preventing the Xbox app from launching games in Windows 11. Once the problem is eliminated, you can enjoy your favorite set of games without any interference whatsoever.

Also, check out what to do if you cannot download games from Xbox Game Pass in Windows 11. Or, in case you cannot select a drive while downloading a game on Xbox, find out how to fix it.

We also have a guide on what to do if the Xbox App not working on a PC, so don’t miss it for more solutions.

Tell us which fix worked and your experience with Xbox in Windows 11 in the comments section below.

Microsoft’s VALL-E AI can learn your speech patterns in 3 seconds

AI and text-to-speech seem to be the spark in early 2023. Microsoft researchers have announced a new text-to-speech AI model called VALL-E that can simulate a person’s voice with just a three-second audio sample.  Once VALL-E learns a specific voice it can synthesize the audio of that person and keep their emotional tone.

VALL-E could be used for high-quality text-to-speech applications where changing the text transcript could allow the recording of a person to be edited to say something they originally didn’t.  Microsoft calls VALL-E a “neural codec language model” that builds off a technology called EnCodec.  VALL-E is different than other text-to-speech methods in that instead of synthesizing the speech by manipulating the waveforms, VALL-E generates discrete audio codec codes from text and acoustic prompts.  It uses EnCodec to break that information down into discrete components called tokens and matches training data and what it “knows” about a person’s voice to determine how it might sound with spoken phrases.

VALL-E was trained on an audio library assembled by Meta called LibriLight containing 60,000 hours of English language speech from more than 7,000 speakers, most were pulled from LibriVox public domain audiobooks allowing a good result with just a three-second sample.

Microsoft has set up a VALL-E example website so you can get a taste of the technology using dozens of audio examples of the AI model in action.

Via Arstechnica.com

Services and Controller App: What is & How to Fix High CPU?

The Services and Controller App is a non-essential Windows file that always runs in the background. While no one knows exactly what it does, one thing is for certain: you will definitely know when it is damaged or defective.

For example, some users have reported that when they open Task Manager, they notice that the Services and Controller App is taking up a lot of CPU.

This problem isn’t all that common, but it definitely hinders your ability to use your computer efficiently when it does happen. That is why we’ve created this step-by-step guide that will show you exactly what you need to do to fix this issue.

What is the Services and Controller App?

The Services and Controller App is one of the processes that run in the background on your PC. It is a non-essential process and should not register a high CPU usage.

However, this process can start using misbehaving if some third-party apps are meddling with your PC. If you are facing issues with the Services and Controller App, you will learn how to fix it in the next section of this guide.

How do I fix the Services and Controller App’s high CPU usage?

1. Uninstall Segurazo

  1. 1. Press Ctrl + Shift + Esc to open the Task Manager and go to the Processes tab.

  2. 2. Right-click Segurazo process and select End task.

    end task services and controller app
  3. 3. Now, press the Windows key + R, type appwiz.cpl, and click OK.

    appwiz
  4. 4. Right-click the Segurazo option and select the Uninstall option.

    uninstall
  5. 5. Finally, follow the onscreen instructions to complete the removal process.

Note: Not everyone has this program installed, so if you don’t see it in the Task Manager, it isn’t the cause of your high CPU usage. Also, the app can disguise itself as AntiVirus Service. Hence, you should check for that too.

2. Disconnect any USB device

Check your USB devices and device manager if you can get there, and disconnect your USB devices to see if the problem stops. This is especially the case if you have bootable USB devices or USB devices set with an autorun function.

3. Restart Windows Management Instrumentationwmi

  1. Press Start.
  2. Type in services and open the Services app.
  3. Scroll down to Windows Management Instrumentation.
  4. Right-click and select Restart.

4. Turn off the background slideshowbackground slideshow

  1. Press Start.
  2. Select Settings.
  3. Choose Personalization.
  4. Go to the Background tab.
  5. Check whether your Background setting is set to Slideshow.
    • If it is, change it to Picture or Solid Color.

By following these steps, you should be able to stop the Services and Controller App from using a high amount of CPU, even when standing idly.

Which one of these fixes did you use to solve your problem? Leave us a message in the comments section below.

Best Drawing App for Samsung Tablet: Top 6 in 2026

Samsung’s Galaxy Tab S tablets are undoubtedly among the best around alongside Apple’s iPads.

Those Android tablets have slick and responsive stylus S Pens that are ideal for unleashing artistic creativity. The Tab S7’s stylus pen has an especially good drawing performance.

As Android is the biggest mobile platform, there’s an abundance of drawing apps available for Galaxy tablets at Google Play.

The best drawing apps for Galaxy tablets include a plethora of handy art tools for a range of alternative picture types. These are a few of the best drawing apps for Samsung’s tablets.

What is the best drawing app for Samsung tablet?

Adobe Illustrator – Top artist’s solution

Illustrator is the foremost vector drawing software for Windows and Android.

It incorporates all its vector drawing tools within a streamlined and modern interface, which makes it more accessible for new tablet artists.

With this free app, you can draw complex illustrations, icons, logos, sketches, and more besides.

Illustrator’s primary toolbar includes five default brushes for users to choose from. Users can configure the size and opacity of each brush.

This app’s Brush settings panel includes additional configuration settings for roundness, taper, angle, pressure angle, and velocity dynamics that provide more creative control.

One of the best things about this app is its layers feature. Illustrator users can organize their drawings better by placing objects and shapes on alternative layers.

They can also adjust blend and opacity settings for layers to control how the colors interact.

Other useful Adobe Illustrator features

  • Royalty-free image assets are available for Draw at Adobe Stock
  • It includes perspective and graph grids for 3D drawing
  • Users can add vector shapes, shape stencils, and other materials into Draw with Capture
  • Illustrator Draw users can export drawings to Adobe desktop software, Creative Cloud, camera rolls, and Behance

Adobe Illustrator

Use this leading platform to create awe-inspiring art on your Samsung tablet.
Free trial Visit website

Clip Studio Paint – Exhaustive drawing tool

Clip Studio Paint is one of the most natural, paper-like drawing apps available for Android.

The CSP app comes preinstalled with some Android tablets, such as the Tab S7. Clip Studio Paint for Android isn’t a stripped-down mobile app, as it’s very much the full Windows desktop version.

Artists love Clip Studio Paint because of its powerful brush engine and customizable brushes.

There’s a good choice of brush presets available, and CSP users can configure their size, density, and stabilization as required. Furthermore, users can import a wide range of pens and pencils from Clip Studio Assets.

Clip Studio Paint is very well-optimized for tablets. It includes an Adjust pen pressure window from which you can fine-tune pen settings.

This app’s Touch gesture settings enable you to customize touch controls for the app. Galaxy Tab S tablet users can also utilize Air Actions with Clip Studio Paint.

Other useful Clip Studio Paint features

  • Clip Studio Paint’s vector layer feature enables users to adjust lines after drawing them
  • This app incorporates perspective, circular, and symmetry rulers for drawing
  • Enables users to draw repeating patterns with decoration brushes
  • It includes a wide variety of preset templates for comics
  • Users can utilize dedicated tools for creating speech bubbles

Clip Studio Paint

Try out this versatile software today to astonish your family and friends with art created on your Samsung tablet.
Free trial Visit website

Krita – Digital art creation

This solution is a digital illustration software that is tailored for artists or editors from multiple devices, including Samsung tablets.

You can efficiently utilize this tailored app to draw impressive crafts on your tablet and share your message in a unique manner.

It’s possible to create surprising digital artwork using its creative drawing instruments.

More exactly, you have a customizable brush engine, support for various files, a refined color range, and a simple UI anyone can use.

This comprehensive app contains everything you need, from coloring tools to animation and skinning instruments.

In this way, you may explore the whole spectrum of your imagination and create mind-blowing illustrations for anyone to enjoy.

Other useful features:

  • High-resolution canvas
  • Advanced brush engines
  • Color management workflows
  • Animation capabilities
  • Compatible with many platforms like Windows, Android, Mac, or Linux

Krita

Use this versatile Android-compatible painting tool for artists or amateurs.
Check price Visit website

SketchBook – Best sketching solution

Autodesk SketchBook drawing software for samsung tablet

SketchBook is a well-established Android drawing and digital art app that’s freely available.

This is an app with an elegant and uncluttered incognito UI design that makes it more accessible.

SketchBook pretty much has all the tools most digital artists will need for drawing all kinds of pictures.

SketchBook’s brush library packs in about 190 brushes. Users can select a wide variation of pencil and ballpoint, felt-tip, inking, and chisel pen brushes to draw with.

This app also enables users to set up custom brushes or download packs from SketchBook Extras.

This app also packs in some very useful features for technical (3D) drawings. It includes four perspective guide tools for drawing pictures with vanishing points and wide viewing angles.

Users can also utilize straight, curved, and ellipse rulers on SketchBook’s toolbar.

SketchBook’s Layer Editor is another great feature for complex drawings.

With that, users can draw objects in their pictures within different layers. The Layer Editor helps with organizing and editing picture content.

Other useful SketchBook features

  • This app includes horizontal, vertical, and radial symmetry tools
  • Includes a Gallery feature that stores sketches
  • SketchBook’s Distort tool enables users to distort object selections
  • Enables users to scan paper drawings into digital form with mobile cameras

⇒ Get SketchBook

ArtFlow – Optimized for Android

Best Drawing App for Samsung Tablet

ArtFlow is the ideal app to sketch or draw your best art designs using professional tools on Samsung devices.

This drawing and sketch application has a material design interface and comes with an improved workflow regarding panels and editing tools.

From all, this drawing app is quite mobile responsive due to its functionalities and new layers added in the 2.0 version.

It’s also important to know about the Samsung Pen.UP social network integration that is fully integrated with ArtFlow.

Using this drawing tool, you’ll get practical new features that will boost your creativity. For instance, there is a selection mask tool, improved brush engine, sRGB support, or canvas rotation.

Additionally, you have faster performance while using the app and up to 16 layers on multiple devices.

Other useful features:

  • Deform support transformation
  • Orientation support (landscape or portrait)
  • Optimized UI for mobile
  • Universal brush tools
  • Focal guide

⇒ Get ArtFlow

Dotpict – Creative pixel art solution

This drawing application is different from the others due to its niche. It offers pixel art creation you can draw on your Samsung device.

Firstly, you can mostly use this pixel art application for free and use its creative tools for crafting visionary images.

The big advantage of this solution is that your drawing pen is hidden so you can easily draw on mobile devices.

Hence, that gives you the freedom to play with different ideas and experiment with a high range of themes.

Dotpict has multiple layers that allow you to create detailed pixel art compositions and expose your artistic view in multiple views.

In addition, there is a minimalist interface that makes it easy to use. It offers a wide range of export options, such as PNG or GIF files to support pixel painting.

Other useful features:

  • Compatible with Android and IOs devices
  • Layers support
  • Animation creation tools
  • Minimalist pixel designs

⇒ Get Dopict

Those are three of the best drawing software for Samsung tablets to take your pick from.

SketchBook, Adobe Illustrator Draw, and Clip Studio Paint incorporate drawing and digital art toolkits few other Android apps can match.

Fix: Can’t Extract ZIP File on Windows 10 & 11 [Quick Guide]

There is no doubt that ZIP is one of the most popular compressed file formats used to save, encrypt, and share important files. In spite of that, there are times when a ZIP file won’t open on Windows 10.

Some described simply getting just another regular ZIP file as an email attachment. They downloaded it on their Windows 10 system and tried to extract its contents.

However, opening it by using WinRAR simply leads to an error message saying that The compressed folder is invalid or they simply can’t open the ZIP file in Windows 10.

Why can’t I open a ZIP file?

If you’re no stranger to these issues, do consider one of the following culprits: the malfunctioning of the application that is used to open ZIP archives, harmful virus attacks, Internet connection issues, and more.

Take a closer look below and learn a few simple ways to tackle this issue in Windows 10. One of these troubleshooting tips will most likely work for you as well.

What can I do if I can’t open ZIP file in Windows 10?

1. Try out a different file compression tool

Using helpful file compression solutions can provide effective file management for your archives and other file types you need to transfer or receive from various sources.

If you need to handle your ZIP files and extract batches of data regularly, then such software can be of great help to you.

It’s also advised to use other capable compression programs to open your ZIP files without problems, so be aware of the best file compression tools for Windows 10

2. Use a powerful antivirus to scan your PC

Even if you’re careful and use an antivirus tool, you can easily pick up a computer virus/malware through email attachments, sharing music, gaming, browsing, or other web activities.

Some computer viruses are programmed to steal data or damage files, so don’t hesitate to perform a scan by using a solid antivirus.

The ZIP format is clearly a target; it includes a high number of files that are unzipped before you get the chance to view them. It becomes a serious problem if the Zip file you need to view does not open.

In addition, you can benefit from superior antivirus features provided by other trusted antivirus solutions. To stay protected, you can always access high-end security tools.

You have multiple reliable antivirus software out there, with high detection rate functionality that will certainly provide a comprehensive scan for your files.

3. Make sure that your Internet connection is stable

Internet connection is stable

If you experience frequent Internet issues resulting in disconnection and reconnection to the network, take a second to analyze things.

An occurrence of interruption while downloading a ZIP file clearly is another potential cause of not being able to open or extract on Windows 10

If the Internet connection is unstable, don’t hesitate to follow a few troubleshooting tips, as here described:

  • Firstly, check the cable modem to see if it feels hot. If necessary, let it cool down for a few minutes.
  • You can also power off your PC, then turn off the modem by disconnecting the power cord from the back of the modem. Leave it unplugged for a few seconds, then plug it back into the modem.
  • If restarting the modem made no difference, do consider that the network card in your computer may also be unable to keep a stable Internet connection.
  • Finally, contact your ISP to make sure the problem is not on their end.

The fact that the ZIP file won’t open in Windows 10 is truly frustrating. This will prevent you from working efficiently, but you should be able to fix it by using our previously mentioned solutions.

To learn more about this file type, we have a great guide on how to unzip files on Windows 11, so don’t miss it.

In case you have any questions or suggestions regarding this problem, feel free to post them in the comments section below.

VLC Subtitles Not Showing? Here’s How to Fix it [SRT files]

VLC users can watch videos in foreign languages with subtitles that translate them. Subtitles also come in handy for non-foreign videos when you need to keep the volume down for some reason.

However, some users have posted on VLC’s forum about VLC media player’s custom subtitles not working, with subtitles not showing for videos played.

So, those users can’t watch videos with subtitles in VLC.

What can I do if subtitles are not showing in VLC?

1. Check subtitle settings in VLC

  1. Open VLC media player.
  2. Click the Tools menu.
  3. Click the Preferences option.
  4. Then select the Subtitles / OSD tab shown directly below.
    Subtitles /OSD vlc not showing subtitles
  5. Select the Enable subtitles option if it’s not selected.
  6. Select the Auto option on the Font size drop-down menu.
  7. Make sure the Force subtitle position option is configured to 0px.
  8. Select plain white for the Text default color option if that setting is configured differently.
  9. Click Save to apply the settings.

2. Reset VLC

  1. Click Tools in VLC’s window.
  2. Select the Preferences option.
    Interface tab vlc not showing subtitles
  3. Click the All radio button at the bottom left of the Interface tab.
  4. Press the Reset Preferences button.
  5. Select the OK option on the prompt window that opens.

3. Check the SRT file title matches its video’s filename

  1. Right-click Windows 10’s Start button to select File Explorer.
  2. Open the folder that includes an SRT subtitle file VLC doesn’t display.
  3. Move the SRT file into the same folder as its video.
  4. Right-click the video for the subtitle file to select its Rename option.
    Rename option vlc not showing subtitles
  5. Copy the video’s name by pressing the Ctrl + C option, and press the Enter key.
  6. Right-click the SRT file and select Rename.
  7. Press the Ctrl + V hotkey to paste the video file name, which will replace the current file title. However, make sure the file title includes the SRT extension at the end of it.

4. Convert the SRT file to UTF-8 encoding

  1. Right-click the SRT file in File Explorer and select Open with.
  2. Click the Choose another app option.
    Choose app window vlc not showing subtitles
  3. Select to open the SRT file with Notepad. Then check if the subtitle’s file content includes the right subtitle text.
  4. If the subtitle file’s content doesn’t look right, open the Convert files to UTF-8 web app in a browser.
  5. Click the Choose Files button.
  6. Select the SRT file that didn’t look right, which might not be UTF-8 encoded.
  7. Press the Open button.
  8. Then click the Convert to UTF-8 button.
  9. Click Download to save the file to your hard drive.

5. Download new subtitle files

  1. Open the Subscence website in a browser.
  2. Enter the film you need subtitles for in Subscene’s search box.
  3. Click the film link to open its subtitles language list.
    Subtitles language page vlc merge videos not working
  4. Select English, or another language, for the subtitle file.
  5. Click the Download English Subtitle button.
  6. Click Save to download the subtitle as a ZIP file.
  7. Open the downloaded ZIP in File Explorer.
  8. Click Extract all on the Compressed Folder Tools tab.
    Compressed Folder Tools tab vlc merge videos not working
  9. Press the Browse button to choose a folder to extract the ZIP to. The subtitle file should be in the same folder as its video and have a matching file name (with an SRT extension).
  10. Click the Extract option.
  11. Open and play the video you downloaded the subtitle file for in VLC.
  12. Click the Subtitle > Add Subtitle File options.
  13. Then select the subtitle you downloaded, and click the Open option.

That’s how you can fix VLC subtitles not working when VLC does not show subtitles.

Remember, however, that there are also other freeware media players you can play videos with subtitles with if the above resolutions aren’t enough.

[wl_navigator]

How to Make Emails Go to a Specific Folder in Gmail Easily

Gmail doesn’t precisely include folder options. However, Gmail users can set up labels to organize emails, which are the same as folders.

Then, users can set up filters that automatically move messages from specific email addresses into folder labels.

Users can open those filtered messages from their folder labels instead of the inbox. If you want to know how to make certain emails go to a folder in Gmail, be it emails from someone or even from a specific domain, you’re in luck.

The guidelines below will show you how to automatically move mails from inbox to label in Gmail by setting up folder labels in Gmail and using filters to direct emails to them.

How do I make emails go to a specific folder in Gmail automatically?

  1. 1. First, set up a folder label for Gmail emails to go in. To do that, drag the scroll bar on the left of Gmail’s tab down to the Create new label option.

  2. 2. Click More to expand the options shown directly below.

  3. 3. Next, click the Create new label option to open the window shown directly below.

  4. 4. Enter a title for the label in the first text box.

  5. 5. Press the Create button. Users should then see a new folder label on the left pane (under Drafts).

  6. 6. The next step is to set up a filter that will move messages from a specific email address into the new folder label.  To do that, open a message in the inbox.

  7. 7. Click the three-dot button shown directly below.

  8. 8. Select Filter messages like these to open the options in the snapshot directly below.

  9. 9. Click the Create filter button.

  10. 10. Select the Apply the label check box. Then click the Choose label drop-down menu to select the new folder label for the email.

  11. 11. Next, select Also apply filter to X matching conversations option to include all other messages with matching email addresses within the folder label.

  12. 12. Users can also select the Skip the Inbox option to ensure emails from that address don’t show up in the inbox. Instead, all emails from the address will go in the selected folder label.

  13. 13. Finally, click the Create filter option.

  14. Now the new folder label will include all the emails from the filtered email address, and those messages will disappear from the inbox. So, click the folder label on the left of Gmail to open the emails within it.

Folder labels can come in handy for organizing messages.

Instead of archiving and unarchiving emails or searching for messages from specific email addresses within the inbox, users can open them from folders set up for specific email addresses (or senders).

Thus, it can be easier to find emails from specific senders when they’re organized in folders.

Fix: Adobe Premiere Pro Not Using GPU [5 Ways]

Adobe Premiere Pro is a cult favorite among creatives so it’s not uncommon to find it in a handful of people’s PCs. That being said, it has its own fair share of glitches and one of them is not using the GPU.

The video editing software renders a lot of graphics so it is expected that the GPU is an essential ingredient if you want to get the best performance out of it. In this article, we look at ways to ensure that Premiere Pro is using your GPU so that you can enjoy using the program.

Why is Adobe Premiere Pro not using the GPU?

When you render, like when you export an image, Premiere Pro uses the GPU. Sometimes, this does not happen because of the following reasons:

  • No dedicated GPU – Whereas each PC comes with an integrated GPU, it can only do so much. You will need a dedicated GPU especially if your tasks require a lot of rendering.
  • Corrupted/missing driver – If for some reason your system ended up with corrupted drivers or during an update you have missing drivers, Premiere Pro may not use the GPU.
  • Unrecognized GPU – If you have a dedicated GPU but for some reason, your PC cannot detect the second GPU, Premiere Pro may not be able to use the GPU to render graphics.
  • Older GPU – If you have an older computer with a motherboard that doesn’t support the latest graphics technology, then Adobe Premiere Pro won’t be able to use the GPU.
  • Outdated drivers – Over time, drivers become outdated and the video driver becomes unsupported or incompatible. It is best practice to update your drivers regularly.

How can I fix Adobe Premiere Pro Crack not using the GPU?

A few checks that may be able to help before any advanced troubleshooting include:

  • Check if you have installed the correct version of Adobe Premiere Pro.
  • Ensure there are no conflicting applications using the same graphics card as Adobe Premiere Pro.
  • Make sure you have enough memory available for your machine (RAM).
  • Uninstall any third-party add-ons that may be interfering with Premiere Pro.

1. Adjust your graphic settings

  1. Click on the Windows key and click on Settings.settings windows 11
  2. Click on System on the left pane then select Display.System - Display- Photoshop not using GPU
  3. Under Related settings, click on Graphics.
  4. Select Adobe Premiere Pro from the list, and click on Options.
  5. Now, choose High Performance and click Save.

2. Enable hardware acceleration

  1. Run Adobe Premier Pro and then click on Files on the top left side and select Project Settings.
  2. Click on General from the extended drop-down menu.
  3. Hit on the arrow to open the drop-down menu, Renderer, under the Video Renderer and Playback section then select Mercury Playback Engine GPU Acceleration.
  4. Click OK to save the changes.

3. Update your graphics drivers

  1. Click on the Start Menu icon, type Device Manager in the search bar, and click Open.black-screen-installing-graphics-card-driver
  2. Navigate to Display adapters to expand, right-click on your graphics card, and select Update driver.update-graphics-driver video memory management internal windows 11
  3. Select Search automatically for drivers.

An easier method would be to install a driver updater utility especially if you’re not conversant with manually updating drivers. Powerful tools such as Fortect Driver updater can be of great welp when dealing with outdated drivers.

⇒ Get Fortect Driver Updater

4. Run Premiere Pro on your dedicated GPU

  1. Click on the Start Menu icon, type Device Manager in the search bar, and click Open.black-screen-installing-graphics-card-driver
  2. Navigate to Display adapters to expand, right-click on your graphics card, and select Disable device.
  3. Next, launch your dedicated graphics card control panel (In this case, Nvidia Control Panel).
  4. Select Manage 3D settings from the navigation pane on the left.manage 3d settings
  5. Choose a High-performance NVIDIA processor from the Preferred graphics processor dropdown menu.
  6. Restart your PC.

5. Reinstall Adobe Premiere Pro

  1. Hit the Windows key, type Control Panel in the search bar and click Open.launch control panel
  2. Select Programs and click on Uninstall a program.going uninstall program control panel
  3. Locate Adobe Creative Cloud application and click on Uninstall.Adobe Creative Cloud failed to initialize
  4. Select Remove to get rid of all damaged settings and third-party plugins.
  5. Wait for the uninstallation process to complete and then restart your computer.
  6. Redownload the Adobe Creative Cloud application and look for Premiere Pro.
  7. Click on the Install button alongside the app.

And that’s how to ensure Premiere Pro uses the GPU for rendering. If the issue was Premiere Pro export not using the GPU, or full video not exporting, you can try renaming the file and see if it helps.

That’s all we had for this article but should you experience any other related issues such as the Adobe error 16, feel free to refer to our comprehensive guide for a quick fix.

Let us know of any other tips and tricks up your sleeve in the comment section below if you were facing the same issue.

File Explorer Crashes in Windows 10? 10 Easy Ways to Fix it

File Explorer is a built-in application excessively used in Windows to access folders and files on the PC. Over the years, there have been significant upgrades to the app, but still, many report File Explorer crashes in Windows.

While there are several reports of File Explorer running slow, it could be linked to a trivial problem with the PC. Though when the application crashes, there’s a major underlying cause that needs to be eliminated right away. So, let’s find out all about it.

Why does File Explorer keep crashing?

Microsoft has already rolled out a series of cumulative updates to fix this issue, but many users still report Files Explorer crashes. Here are the most common causes of File Explorer crashes:

  • Corrupted system files: This is a common reason behind File Explorer crashing in Windows 11 as well, and it can be easily fixed with a couple of built-in scans and tools.
  • Malware or virus infection: A malware or virus is just as likely to cause File Explorer to crash in Windows, and an effective antivirus should bring the situation under control.
  • Corrupt Registry: The Registry plays a critical role on the PC, stores every vital piece of details, and helps users make changes to the computer. But if it’s corrupt, you are bound to face such issues and even BSOD errors.
  • Outdated drivers: Running an outdated graphics driver can trigger File Explorer crashes and even poor Windows performance.

How do I fix Windows Explorer crashing?

Before we head to the slightly complex solutions, here are a few quick tips that might help:

  • Restart the computer.
  • Check for any available Windows updates and install them.
  • A few users reported that running File Explorer and Edge at the same time caused the former to crash in Windows. Verify that, and if found true in your case, switch to a more user-friendly browser.
  • Verify whether you are facing File Explorer crashes only when running on battery power, not when the laptop is plugged into charging. If that’s the case, it could be a problem with the battery, and replacing it should do the trick.
  • Scan for malware using either the built-in Windows Security or a reliable third-party antivirus.

If none work, head to the fixes listed next.

1. Repair corrupt system files

  1. Press Windows + R to open Run, type cmd, and hit Ctrl + Shift + Enter.cmd
  2. Click Yes in the UAC prompt.
  3. Paste the following commands individually and hit Enter after each:DISM /Online /Cleanup-Image /CheckHealth DISM /Online /Cleanup-Image /ScanHealth DISM /Online /Cleanup-Image /RestoreHealth
  4. Now, execute the following command to run the SFC scan: sfc /scannowsfc scan to fix File Explorer crashes

If file explorer keeps crashing when opening, you may want to start by repairing/replacing corrupt system files. While running the DISM tool and SFC scan is a great fix, a specialized tool might do a more effective job.

Alternatively, you can use specialized repair software because it replaces severely damaged Windows system files with clean, up-to-date ones from their databases. You can allow it to perform this action without harming your user data.

2. Uninstall recent Windows Update

  1. Press Windows + I to open Settings, and click on Update & Security.update & security
  2. Click on View update history.view update history
  3. Click on Uninstall updates.uninstall updates to fix File Explorer crashes
  4. Select the last major update, and click Uninstall.select
  5. Click Yes in the confirmation prompt.uninstall to fix File Explorer crashes
  6. Once done, restart the computer for the changes to come into effect.

If File Explorer is crashing in Windows 10 after installing updates, it could be a bug to blame. And the best way out is to uninstall the buggy version and wait for a patch to be released. You can also disable automatic updates to make sure Windows doesn’t get it again.

3. Modify folder properties

  1. Right-click on the problematic folder in File Explorer, and then select Properties.folder
  2. Now, untick the checkbox for Read-only, then click on Apply and OK to save the changes.disable atttibutes to fix File Explorer crashes

This works if File Explorer crashes when opening Downloads or any other specific folder. Just disable the Read-only attributes, and things should be up and running.

4. Reinstall the graphics driver

  1. Press Windows + X to open the Power User menu, then select Device Manager from the list.
    File Explorer keeps closing
  2. Locate your graphics card driver, right-click on it, and choose Uninstall device from the menu.uninstall device to fix File Explorer crashes
  3. Tick the checkbox for Attempt to remove the driver for this device and click on Uninstall.remove driver

If File Explorer crashes, that might be due to your graphics card driver. To fix the issue, we recommend reinstalling your graphics card driver. If you want to remove all files associated with your graphics card, you might want to use Display Driver Uninstaller.

After removing the driver, you need to visit your graphics card manufacturer’s website and download the latest driver for your device.

Another great way to do it is to use a dedicated driver updater software, which will search for a working version and overwrite the faulty one. Usually, this type of software can choose which driver to install and which not.

This type of tool is beneficial when you are not sure about what version is needed. Instead of risking downloading the wrong version, and making things even worse, use one of the tools.

In this case, the following software app can be very helpful. It is an adequate tool that will easily monitor your device drivers and search for any kind of problem it might experience.

5. Change display settings

  1. Press Windows + I to open Settings, and click on System.system
  2. From the Change the size of texts, apps, and other items dropdown menu, choose the recommended one or a suitable value, but not 175%.change scale to fix File Explorer crashes

A few users reported that File Explorer crashes when searching was usually a result of a bug in the OS which messed things up if the Scale was set to 175%. So, change it and verify whether the problem is resolved.

6. Uninstall conflicting apps

  1. Press Windows + R to open Run, type appwiz.cpl in the text field, and hit Enter.appwiz.cpl
  2. Select the app(s) you installed around the same time the error first appeared, and click Uninstall.uninstall to fix File Explorer crashes
  3. Follow the on-screen instructions to complete the process.

Another quick fix if File Explorer crashes when renaming, moving, or deleting files is to uninstall the conflicting app or program. There are several of these, though if managed to identify a few and have listed them here:

  • Corsair’s iCue
  • Web Media Extensions
  • Autodesk
  • Malwarebytes

If you have any of these or a similar one, uninstall the app, and File Explorer should start running normally.

7. Remove items from the Quick Access menu

  1. Press Windows + E to open File Explorer, and identify items in the Quick Access menu that were recently deleted or a drive that’s no longer connected.quick access
  2. If you find any, right-click on them, and select Remove from Quick Access.remove to fix File Explorer crashes
  3. Now, restart the computer, and the problem shouldn’t appear again.

8. Clear File Explorer cache

  1. Press Windows + S to open Search, type File Explorer Options in the text field, and click on the relevant search result.file explorer options
  2. Click on the Clear button next to Clear File Explorer history.clear history to fix File Explorer crashes

If you face File Explorer crashes when opening PDF, maybe clearing the history might help as it did to other users.

9. Disable problematic context menu items

  1. Download ShellExView and start it.
  2. This is a portable application, so you can run it without installation.
  3. When ShellExView starts, click on Options and choose Filter By Extension Type.
    File Explorer crashes Windows 10 right click
  4. Select Context Menu and click on OK.
    File Explorer Quick Access crashing
  5. Now find a third-party application you want to disable, right-click it and choose Disable Selected Items. You can also select multiple items if you wish.
    File Explorer keeps closing
  6. Click on Yes to disable the selected application.
    Windows 10 Explorer crash loop
  7. After disabling the desired applications, you must go to Options, and then select Restart Explorer.
    File Explorer not responding, not working
  8. Finally, click on Yes to restart Windows Explorer.
    File Explorer won't open

After Windows Explorer restarts, the disabled applications won’t appear in your context menu anymore, and the problem should be resolved. According to users, the following items can cause this problem to appear on your PC, so be sure to disable them:

  • SpyBoy Search & Destroy Shell Extension
  • Carbonite Context Menu
  • AVG antivirus
  • Format Factory
  • Nvidia’s OpenGLshExt Class
  • ConvertToPdf Class by Foxit Software
  • WinRAR

According to users, File Explorer crashes can occur due to certain context menu items. Usually, third-party applications will add their features to your context menu, causing this problem whenever you right-click something.

To fix this issue, you need to use ShellExView software. This is a freeware application that allows you to disable context menu items. These are the common causes of this problem, but other third-party applications can also cause this issue.

10. Perform an in-place upgrade

  1. Go to Microsoft’s official website, and download the Media Creation Tool for Windows 10.media creation tool
  2. Run the setup, and click Yes in the UAC prompt.
  3. Wait for the setup to get ready.getting ready
  4. Click Accept to agree to the license terms.accept
  5. Choose Upgrade this PC now, and click on Next.upgrade this PC now to fix File Explorer crashes
  6. Wait for the download to complete and follow the on-screen instructions to perform an in-place upgrade.download

If the previous solutions didn’t help fix File Explorer crashes in Windows, an in-place upgrade should do the trick.

What happens when File Explorer crashes?

A File Explorer crash makes the whole screen go black, including the taskbar, the wallpaper, the desktop icons, and other similar elements. The reason, all these are tied to the explorer.exe process.

When that happens, press Ctrl + Shift + Esc to open the Task Manager and run a new task by the name, explorer.exe. As soon as it starts running, Windows will function normally.

How do I know if my File Explorer is corrupted?

There are several identifiable signs when File Explorer is corrupted. The most common are persistent crashes and extremely slow performance.

Also, the app’s display may seem a little off or distorted, certain files won’t open, and a few folders may go missing. Remember, this, too, can be fixed by using the solutions listed here.

Before you leave, do check some quick tricks and tips to speed up Windows.

Tell us which fix worked for you in the comments section below.

How to Remove Files from Dropbox Without Deleting Them from PC

Dropbox is a popular file-sharing and collaborative platform available on multiple platforms, making it an ideal file-sharing solution.

However, sometimes the user may want to remove files from Dropbox without deleting them on their computer.

Unless you specifically instructed Dropbox to act differently, the service will save your files both in the cloud and locally on your hard drive for offline access. Here’s how to remove files from Dropbox without losing them.

Does Remove from Dropbox delete files?

Dropbox, by default syncs all the files and folders in the Dropbox folder with your PC. If the user deletes files from their Dropbox online, Dropbox will resync the files and will remove any files that are deleted from dropbox.com.

If you want to delete files from Dropbox but not computer, you can use the Select Sync option to check the folders that you want to keep on your hard drive. This is how to unsync Dropbox without deleting files.

So, does deleting files actually delete them? There are in fact more things to consider. The first one is the recovery window, which allows you to retrieve deleted Dropbox files for 30 days or so before removing them for good.

Here’s another interesting aspect to consider: what happens if I remove Dropbox from my computer?

The good part is that uninstalling Dropbox will not remove the files from your drive, or your Dropbox account. So that’s another good way to delete files from dropbox but not computer.

How do I remove files from Dropbox without deleting them?

1. Delete from Dropbox.com but not the local Dropbox folder

Delete from Dropbox.com but not local Dropbox folder

If you want to delete a folder from the Dropbox account online but want the file to remain in your local Dropbox folder, Dropbox does not have the option to make it happen.

However, what you can do is move the file or folder from the local Dropbox folder to outside the Dropbox folder and keep it as a backup. Now, open the Dropbox account and delete the files you don’t want to free up some space.

Make sure to move the folder/file first from the local Dropbox folder and then delete the files from the account. If not, Dropbox will sync and remove the file from your local folder.

2. Delete files from your hard drive but keep them in your Dropbox account

Delete files from your hard drive but keep in Dropbox account
  1. Right-click on the Dropbox icon in the taskbar.
  2. Click on your profile picture or initials.
  3. Select Preference from the options menu.
  4. Open the Sync option.
  5. Select the Selective Sync option.
  6. On the left-hand side, uncheck the boxes of any folder that you don’t need on your computer’s hard drive.
  7. Once you have selected all the folders, click on Update.

Now you can delete all the files that you don’t want on your hard drive. While these files will still be available in your account on Dropbox.com, Dropbox will not sync the folder/files with your local folder.

Selective Sync allows you to free up space on your hard drive by deleting some files from the Dropbox folder without removing the files from the Dropbox account.

If Dropbox sync icons are missing from your Windows PC, you may need to perform a few extra steps. Don’t worry, we got your back even if the issue concerns the freshest Microsoft OS, with Dropbox not syncing on Windows 11.

3. Use Smart Sync

Note: Smart Sync is only available for Plus, Profession, and Dropbox Business users.

Turn on Smart Sync  

Use Smart Sync
  1. Sign in to the dropbox.com account.
  2. Click on your profile and select Settings.
  3. Open the General tab.
  4. Scroll down to Dropbox system extension, make sure it is set to On.
  5. Click the Dropbox icon in your system tray.
  6. Select your Profile.
  7. Go to Preferences > General.
  8. Click Enable to activate Smart Sync.

Save hard drive space automatically.

Use Smart Sync
  1. Click the Dropbox icon in your system tray and click on your profile picture.
  2. Go to Preferences > Sync.
  3. Choose your work Dropbox account.
  4. Toggle the On/Off settings under Save hard drive space automatically.

Enable the Save hard drive space automatically option will allow Dropbox to remove the file from your computer’s hard drive while saving a copy of the same in the Dropbox account online.

Dropbox will only delete the files that are not used in a few months by the user.

If I delete files from Dropbox will I get more space?

As previously mentioned, Dropbox will save all files and folders to your online Dropbox account and locally, on your machine.

The implications are as straightforward as they come, meaning that the files with take up space on your Dropbox account as well as your hard drive.

Sometimes the user may want to delete some files from their Dropbox account to free up space without deleting the files on their computer.

To remove files from dropbox without deleting them from your hard drive, you need to create a copy of the same and move it out of the local Dropbox account. Uninstalling Dropbox can also provide a solution to how to delete files from Dropbox but not computer.

In case you missed it, we also have a guide on how to download Dropbox for Windows 11, so feel free to check it out.

However, if you want to clear your local hard drive space by deleting Dropbox files without deleting the files from the Dropbox.com account, you can use the Selective or Smart Sync feature.

Back-up and Protect Your Data with Acronis Cyber Protect Home Office Software

Acronis True Image is now Acronis Cyber Protect Home Office and that’s because the developers added complete cyber protection features to the existing backup and recovery solutions.

In this article, we are reviewing the new Acronis Cyber Protect Home Office and its improved features.

What are the advantages of using Acronis Cyber Protect Home Office?

Basically, now, Acronis Cyber Protect Home Office is combining the previous award-winning backup and recovery features with security solutions.

This move will not only save you money for a distinct product but also reduces the complexity of the backup and protection process.

We don’t know any other backup solution with integrated anti-malware so Acronis Cyber Protect Home Office is an exciting prospect.

Another advantage of this software is that you can select the individual cyber protection components you wish to install.

However, if you later decide to include them, you may easily do that from the interface.

A great improvement is the cloud backup downloading. In other words, you can now download previously created backups from the Acronis Cloud to your system at any time.

What are Acronis Cyber Protect Home Office’s best features?

1. Seamless backup

First of all, Acronis Cyber Protect Home Office remains a top-notch backup solution as we know from Acronis True Image.

You can back up your entire PC or only the files you need to Acronis Cloud or any local destination, an external drive, or even a NAS.

And the data can be fully encrypted, and password protected so no one can access it besides you.

Even more, the backup process can be set to start automatically, and it will run in the background, without bothering you.

And if your system is troubled by errors or crushes, a simple click on the Recovery button will restore it to its previous glory.

With this tool, it’s also possible to create direct cloud-to-cloud backups of your Microsoft 365 account. That includes the emails and attachments from your Outlook.com mailbox and all of the files from your OneDrive.

Moreover, with Acronis Cyber Protect Home Office you can sync files between two computers so you can keep everything up-to-date on both.

2. New and improved cyber protection

Truth be told, Acronis True Image had basic security features, but Acronis Cyber Protect Home Office takes cybersecurity to a new level.

Not only that it assesses vulnerabilities, but it comes with full antivirus and anti-malware protection.

Now, the software secures your system against ransomware attacks, malware, illicit crypto mining, malicious websites, and even Zoom or Microsoft Teams injection attacks.

And the best part is that it won’t interfere with your existing third-party antivirus if you have one already installed.

That’s because it detects it, allowing you to make a choice if you activate the Acronis protection or let the other antivirus work.

According to a VB100 test report from Virus Bulletin, Acronis Cyber Protect Home Office has a 100% malware detection rate, so the tool covers all your security needs.

3. Easy archieving

Even though nowadays, we have several TB drives, sometimes, we still get to the bottom of the sack when it comes to storage.

Acronis Cyber Protect Home Office has a dedicated archieving tool that scans your home folder and sorts the files in the order of their sizes.
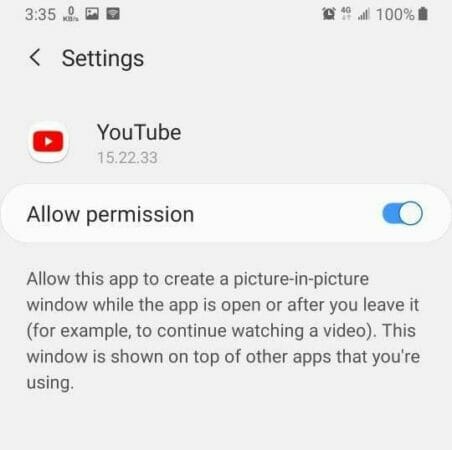
This way, you will be able to select the biggest ones, archive them, and store them in Acronis Cloud or on another drive.

It’s needless to say that this operation will save you a lot of space from your main drive to install that new software you really need.

4. One-click sync between two PCs or Acronis Cloud

If you’re working on a project on your office PC but you want to continue where you’ve left off at home, this tool will help you.

With Acronis Cyber Protect Home Office, you can sync the files directly between two computers or sync them in Acronis Cloud first.

The only condition is that both computers have Acronis Cyber Protect Home Office installed.

5. Other Acronis tools

As we mentioned above, during the installation or at any point, you can install a lot of other tools within Acronis Cyber Protect Home Office.

We will go through them and explain what they do and how they can help you.

Clone Disk

This feature allows you to clone your entire Operating System, applications, and data to a brand-new drive.

The resulting image is identical and bootable so it’s just like building the same system for another PC.

Rescue Media Builder

It’s a tool that helps you create bootable media for those times when you need to recover your system in case of critical errors or crushes and the system doesn’t load anymore.

Backup Download

This is actually a stand-alone tool that you can use to download any backups you created using Acronis Cyber Protect Home Office on another PC.

In other words, you don’t need to install the whole suite. If you log into your Acronis account, this is the only tool you need if you want to access the backups.
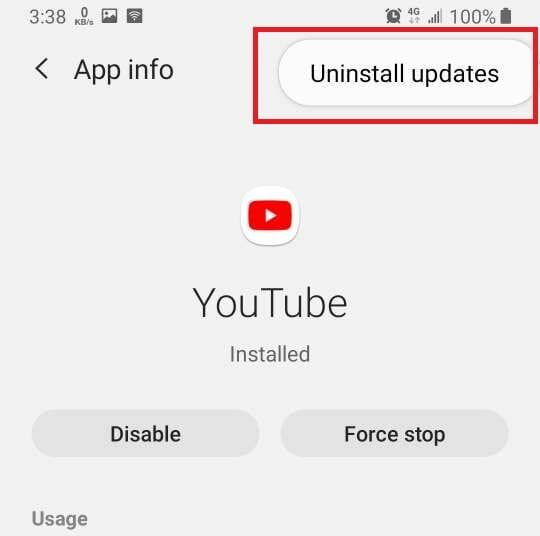
The main idea of the tool is fast reliable recovery if you have an unstable Internet connection.

Parallels Access

Parallels Access is a full product that allows you to connect to your system remotely from virtually any device.

Try&Decide

This is a sandboxing tool that allows you to make modifications to your system, try different software, and more, without affecting your present setup.

When this feature is activated, anything you do to your system won’t have any consequences.

And after you disable it or reboot your PC, you can actually decide if you keep the changes or completely discard them.

System Clean-up

As its name suggests, this is a cleaning tool that scans your system and cleans and removes any junk from your system or system components.

Any temporary files or traces will be completely destroyed, leaving you with a clean slate.

Acronis Secure Zone

With this feature, you can create a specially protected partition to store any backups. It’s extremely practical and easy to use.

DriveCleanser

If you want to sell your device and you need to erase everything from one or more partitions, this is the tool to use. That’s because it will completely wipe out all the data and partitions.

However, take note that Acronis DriveCleanser cannot wipe partitions on dynamic and GPT disks, so they will not be shown.

How to install and use Acronis Cyber Protect Home Office

  1. Go to the dedicated Acronis Cyber Protect Home Office website and click on the Download for Windows button (it is also available for Mac).
  2. After it finishes downloading, run the installer, select which components you want to get, and select Install.
  3. When the installation is over, you will be prompted to create an account or log in with an existing one. At this point, you may also insert the serial number and activate your copy if you already bought the license.
  4. After creating an account, we opted for the 30 days Free Trial.
  5. Done! We can now use it with full features for 30 days!
  6. By default, the dashboard will load up the Backup utility so we can start by creating a fresh one.
  7. First, you need to select what you want to back up from the left side, the source files or drive.
  8. Next, select a destination for your backup. As we’ve mentioned above, you can choose a local path, an external drive, a NAS, or Acronis Cloud (1 TB of free space available in the Free Trial).
  9. Finally, hit the Back up now button from the bottom right.
  10. That’s it! You can now close the window because it will all run in the background. You may even shut down your PC and when you restart it, the process will resume automatically.

In our tests, it took a little more than 3 hours to back up the whole system of 220 GB in Acronis Cloud.

Of course, backing up on a local or external drive will take much less. On the cloud, it all depends on the size of your backup and your connection speed.

Acronis Cyber Protect Home Office plans

If you decided to invest in this product, there are three possible plans available:

➡ Essentials – It is $49.99 per year for 1 computer and it doesn’t include the Cloud backup feature. However, it features all the other backup and recovery solutions and ransomware protection.

➡ Advanced – The cost is $54.99 per year for 1 computer and it includes 50 GB of cloud backup storage, disk cloning, ransomware, antivirus and anti-malware protection, Microsoft 365 backups, and more.

➡ Premium – For $124.99 per year for one computer, you get all of the above plus 1 TB of cloud storage (add up to 5 TB), blockchain certification, and electronic signatures of the files.

We remind you that Acronis Cyber Protect Home Office has a Free 30-days trial version so you can test it before committing to a plan.

⇒ Get Acronis Cyber Protect Home Office

Pros
Backup, recovery & security features in the same product
Extremely easy to set up and use
Compatible with Windows and macOS
Ransomware, anti-malware, antivirus and web protection
Vulnerability assesment
System cleaning and optimizing tools
Cons
The antivirus doesn't rival more potent third-party dedicated tools

Final thoughts

First of all, Acronis Cyber Protect Home Office is an excellent solution that can be used by anyone.

We already experienced the backup & recovery solution from Acronis True Image but the new software adds an important layer of protection.

And the ransomware, antivirus, and anti-malware component is a great compliment that will save you a lot of money.

Practically, you’re getting a complete backup solution and an antivirus for the price of one product.

In our tests, the app and all its additional tools worked flawlessly and smoothly, doing the exact job they were supposed to.

If you’re still undecided, you can check our list of the best backup tools for Windows 11 and get more suggestions.

Have you already tried Acronis Cyber Protect Home Office? Then tell us all about your experience in the comments section below.

Windows Microphone Volume Too Low: How to Fix It [Step-by-Step]

Microphone volums too low? Most commonly, this issue occurs suddenly, without changing its settings. Some users talk about its persistence even after reinstalling USB device drivers.

Therefore, if you have trouble regarding this type of feature, we’ll show you a series of suggestions to solve the microphone volume being too low.

What to do when the microphone volume is too low?

1. Increase volume from Sound settings

  1. Open Settings.
  2. Click on System.
  3. On the left side, select Sound.
  4. Scroll down to Input and select Device properties.
  5. Adjust the Microphone Volume boost slider as needed.

The volume on microphone in Windows 10 is too low. The issue can occur when the intensity isn’t set properly from the Sound settings. Thus, it must be synchronized on a suitable level.

2. Use microphone properties

  1. Open Control Panel.Open Control Panel
  2. Click on Sound.
  3. Select the Recording tab.
  4. Right-click on Microphone and select Properties.

2.1 Use the Levels tab

  1. Click on the Levels tab.
  2. Adjust the Boost level.

2.2 Use the Advanced tab

  1. Click on the Advanced tab.
  2. Uncheck the Allow application to take executive control of this device option.

Using microphone properties is useful because it allows you to perform advanced settings on your device. Also, it seems to be one of the greatest alternatives in order to fix your mic’s audio.

3. Run the troubleshooter

  1. Open Settings.
  2. Click on Update & Security.
  3. On the left side, select Troubleshoot.
  4. On the right side, click on Additional troubleshooters.
  5. Under the Find and fix other problems, scroll down to Recording Audio and click on it.
  6. Select Run the troubleshooter.

If you already checked the volume of your mic from the Sound settings, you may take a look at your Recording Audio’s Troubleshooter.

This will help you find any troubleshoot related to your microphone such as the static noise in a well-organized list.

4. Use drivers from manufacturer’s website

  1. Go to the manufacturer’s website, download and install the sound card drivers.
  2. Right-click on the driver executable/installer file.
  3. Select Properties.
  4. Click on the Compatibility tab.
  5. Mark checkbox next to the Run this program in compatibility mode for option.
  6. Select Windows 10.
  7. Install the device driver via Run as administrator.

This option will work if your microphone isn’t already set on the compatibility mode for running on Windows 10. Sometimes, the latest driver is not the one compatible with your computer.

5. Use the Communications Sound option

  1. Open Control Panel.Open Control Panel
  2. Click on Sound.
  3. Select the Communications tab.
  4. Checkmark the Do nothing box.
  5. Click on Apply, then on OK.
  6. Restart your PC to implement changes.

This option might help you because Windows can automatically adjust the volume of different sounds when you place or receive telephone calls on your PC.

These were the suggestions that we consider the best to fix the volume on the microphone being too low issue. Among all other options, we guarantee that ours is the greatest.

Moreover, you can always check a complete guide about how to fix the Windows 10 volume is too low problems on your computer. Read it entirely and find out some of the most valuable solutions.

Your opinion is critical to us, so leave a comment in the section below this article about which solution worked for you.

Fix: Middle Mouse Double Clicking on Windows PCs [9 Ways]

Your computer mouse is one of the most important components because you use it all the time in order to perform almost every task on your PC.

A number of users reported certain problems with their mouse, and one of the most troublesome issues was that the mouse double clicks on Windows 10.

There are many mouse problems that can appear on your PC, and in this article, we’ll show you how to fix the following issues:

  • Mouse clicks registering twice – This is a common problem, and many users reported that their mouse clicks twice; although this is an annoying problem, you should be able to fix it with our solutions
  • Wireless mouse clicks twice – This issue affects both wireless and wired mice. If you’re having this problem with your wireless mice, try connecting your receiver directly to your PC.
  • Mouse automatically clicks twice – According to users, sometimes their mouse automatically clicks twice. This is an unusual problem that can be caused by hardware issues.
  • Middle mouse button clicks twice – This is another mouse issue that users reported. According to them, their middle mouse button clicks twice sometimes.
  • Mouse clicks randomly – This is another common problem that users reported. According to them, their mouse can click even while hovering.
  • Mouse clicks too sensitive – Several users reported that their mouse clicks are too sensitive. This is most likely caused by your mouse configuration, but you should be able to fix this problem with ease.

How can I fix mouse double-clicking issues?

1. Rollback to the older driver

  1. Press Windows Key + X to open Power User Menu and select Device Manager from the list.
  2. When Device Manager opens locate your mouse or touchpad and double click it to open its properties.
  3. Go to the Driver tab and click the Roll Back Driver button.
  4. Wait for Windows 10 to roll back to the older version of the driver.

Few users reported that this issue appears with the mouse and touchpad after a certain Windows Update, and in order to fix it, it’s recommended that you roll back to the older version of the driver.

Alternatively, some users are suggesting using the default driver instead. To do that open the Device Manager, and locate your mouse or touchpad, right-click it and choose Uninstall.

After removing the driver restart your computer. When your computer restarts the default driver will be installed, and that should hopefully fix your problem.

2. Install Logitech gaming software

According to users, you can fix the problem with your mouse by installing Logitech Gaming Software.

After installing this tool the problem with double clicks was completely resolved. Bear in mind that this solution should only work with Logitech peripherals.

3. Use a professional third-party software

If your mouse keeps double-clicking, you might want to consider using a third-party software to fix it. Getting errors while trying to run certain software programs can be due to out-of-date drivers.


4. Change the mouse double click speed

  1. Open Control Panel. You can do that by pressing Windows Key + S in Control Panel and select Control Panel from the list of results.
  2. Change the view from Category to Large icons.
  3. Locate and click Mouse to change the mouse settings.
  4. Locate the Double-click speed section and change it by moving the slider. Some users claim that you need to reduce the double click speed while others claim that you need to set it to the highest value.
  5. After you’re done, click Apply and OK to save changes and check if the issue is fixed.

Users reported that this issue is caused by clicking speed settings. According to them, you can fix it by changing the double click speed. To do that, follow the steps mentioned above.

5. Change power management settings for USB Root Hub

  1. Start Device Manager.
  2. Go to the Universal Serial Bus controllers section and expand it.
  3. Double click USB Root Hub to open its properties.
  4. Go to the Power Management tab and uncheck Allow the computer to turn off this device to save power.
    Mouse clicks registering twice usb root hub properties
  5. Click Apply and OK to save changes.
  6. Repeat the same steps for all USB Root Hub devices listed in the Device Manager.

Users reported that if the mouse double clicks randomly you can fix it by changing the power management settings for USB Root Hub. To do that, simply follow the steps mentioned above.

6. Check if your mouse is working properly

  1. Select Mouse & touchpad settings from the menu.
  2. Locate Select your primary button and choose Right from the menu.

If you keep asking yourself why is my mouse double-clicking, then it might be because the left mouse button has worn out.

To test your mouse you can simply switch the left and right mouse buttons and check if the problem appears again.

Alternatively, you can do this by going to Control Panel and selecting the Mouse button. Once you open Mouse Properties, go to Button configuration section and check Switch primary and secondary buttons.

Click Apply and OK to save changes.

Middle mouse button clicks twice mouse properties

After you switch the left and right mouse button, try using your mouse for a while and check if the same problem occurs while using the right button as the primary one.

If the problem doesn’t appear, you might want to try connecting your mouse to a different PC or try a different mouse on your PC just be sure that your mouse isn’t working properly.

7. Connect your mouse or wireless receiver directly to the PC

According to users, sometimes this issue can occur because your wireless receiver was not connected directly to the PC.

If you’re using a USB hub, be sure to disconnect your wireless receiver or mouse and connect it directly to the PC.

Several users reported that their USB hub was the issue, but after connecting the receiver directly to the PC, the issue was resolved.

8. Install the latest updates

  1. Press Windows Key + I to open the Settings app.
  2. Now go to Update & security section.
    Mouse clicks randomly update & security
  3. Now click on Check for updates button.
    Mouse clicks too sensitive check for windows updates

Sometimes this problem can occur if your Windows is out of date. According to users, their mouse issue was resolved after downloading and installing the latest updates.

Windows will now check for updates. If any updates are available, Windows will download them in the background and install them once you restart your PC.

Several users reported that updating their Windows fixed the problem for them, so be sure to do that.

9. Disable Enhance pointer precision feature

  1. Navigate to the Mouse section in Control Panel.
  2. Go to Pointer Options tab and uncheck Enhance pointer precision feature. Click on Apply and OK to save changes.
    Mouse clicks registering twice mouse properties disable Enhance pointer precision

According to users, you might be able to fix this problem simply by disabling Enhance pointer precision. To do that, you need to follow these steps:

After disabling this feature your mouse might feel less sensitive, but problems with double-clicking should be resolved.

Or maybe you just need a new mouse. Check out this excellent guide to make the wisest decision and get the best USB-C mouse.

When the mouse double clicks it can be a truly inconvenient problem, and we hope that the solutions we presented you with, in this article helped you fix it.

We’d like to know your opinion on this subject, so drop us a commment in the dedicated section below.

10 Quick Ways to Fix Alexa Not Playing Music & Main Reasons

Troubleshooting the issue where Alexa won’t play music is tricky because it can originate from several places.

Your internet connection may be unreliable, but the problem could also be related to your Amazon account or a setting on your Alexa app.

Amazon offers solutions for fixing the Alexa won’t play music issue on this page, but they don’t resolve the issue often.

Why Alexa won’t play music?

There are quite a few reasons why your Alex won’t play music, the most common ones include poor internet connection, the device needs a reset or Alexa didn’t hear your command.

What can I do if Alexa won’t play music?

1. Improve your internet speed

Most times, Alexa won’t play music due to poor network speeds. To get better internet speeds, try out the following techniques:

  • Disconnect unused devices to decongest the Wi-Fi network.
  • Place your device on an elevated surface.
  • Reduce interference by positioning your connected devices away from metals, ovens, walls, etc.
  • Make use of your router’s 5 GHz channel.

2. Confirm that your subscription is active

  1. Visit the Amazon website on your internet browser.
  2. Sign in to your account.
  3. Click on your name above Account & Lists at the top of the page.
  4. Go to Memberships & Subscriptions. (It could also be called Your Prime Membership in some countries.)

3. Restart your Echo

  1. Power off the Echo.
  2. Disconnect it from the power source.
  3. Leave the Echo disconnected for half a minute.
  4. Connect the device back to a power source.

4. Choose Prime as your default music provider

  1. Launch the Alexa app.
  2. Tap the hamburger icon (three dots) on the top left-hand side of your screen.
  3. Open Settings.
  4. Go to Music.
  5. Select the Default Services option.
  6. Choose Amazon Music.

This solution works especially with multiple music players on your Alexa app.

5. Confirm that the song is available

Alexa won’t play music because the song you’re trying to stream is unavailable.

Amazon Prime Unlimited has more songs than Prime Music. To troubleshoot your Alexa in this scenario, attempt to play a different song.

If this other music plays without issues, then you can guess that the music you’re trying to stream is not unavailable.

6. Open your firewall ports

  1. Find your IP address.
  2. Open your internet browser.
  3. Type your IP address in the address bar and hit Enter.
  4. Enter your router username and password.
  5. In the Settings page, find the Port Forwarding area.
  6. Open the following ports:
    • 123
    • 443
    • 4070
    • 5353
    • 33434
    • 40317
    • 49317

7. Set your country in Amazon

  1. Visit Amazon’s Manage Your Content and Devices web page.
  2. Sign in to your account.
  3. Go to Settings.
  4. If there’s no Settings link, click Go to the Manage Your Content and Devices page.
  5. Go to Country Settings.
  6. If there’s no Country Settings, navigate to Preferences > Country/Region Settings.
  7. Hit the Change button.
  8. Update the country field to your current country.
  9. Select the Click here to learn more about other Amazon sites link.
  10. Click on Learn or Learn about.
  11. Set your country in the Update your default Kindle Store to Amazon section.

8. Disable explicit filter

alexa-wont-play-music-disable-explicit-filter
  1. Launch the Alexa app.
  2. Tap on the hamburger icon on the top left.
  3. Tap Settings.
  4. Go to Music.
  5. Under Account Settings, open Explicit Filter.
  6. Enable Explicit Filter by toggling the switch.

9. Deregister and re-register your Echo device

alexa-wont-play-music-deregister-echo
  1. Open the Alexa app.
  2. Go to Devices.
  3. Navigate to Echo & Alexa > Your device name.
  4. Scroll down and tap on Deregister.

After deregistering your Echo, register and set it up again. This can also solve the issue of Alexa randomly stopping.

10. Update your location, timezone, and language

alexa-wont-play-music-update-amazon-details
  1. Open the Alexa app.
  2. Tap on Devices.
  3. Go to Echo & Alexa > your device name.
  4. Ensure that your location, timezone, and language are correct.

Similar issues:

  • Alexa won’t play my playlist
  • Alexa won’t play Sirius XM
  • Alexa won’t play music on Sonos
  • Alexa won’t play music from Spotify
  • Alexa won’t play music from Amazon Music

Even more, to easily solve Alexa stopping randomly, take a closer look at our guide right away. Connectivity and compatibility issues are often the culprit.

Let us know which solution worked for you in the comments area below.

How to Extract EXE File on Windows (No Installation Required)

Need to access files inside a .exe installer without running it? Here’s how to extract EXE file safely in Windows using built-in tools or third-party utilities. Whether you’re trying to extract EXE file contents for inspection or repackaging, this guide covers simple methods that don’t require installation.


Methods to Extract EXE Files on Windows

1. Use Windows File Explorer

This method works with certain self-extracting EXE files.

  • Right-click the .exe file
  • Select Open with > Windows Explorer or choose Extract Allextract files
  • Pick a folder and extract the files

If the option doesn’t appear, or if extraction fails, review this Windows 10 overview to check for missing features or system issues.


2. Extract EXE File Using CMD (Command Prompt)

You can use the built-in expand or /extract commands.

  • Press Win + R, type cmd, and hit Enter
  • Run:
    expand path\yourfile.exe -F:* destination_folder
  • For Microsoft installers:
    yourfile.exe /extract:destination_foldercmd extract archive

If the file doesn’t respond, try this fix for EXE files not opening in Windows 10.


3. Use 7-Zip, WinRAR, or WinZip

These tools support most EXE-based installers and self-extracting archives.

  • Install a reliable archive extractor such as WinZip
  • Right-click the EXE file
  • Choose Open with > WinZip or select an extract option
  • Choose a destination folder and extract the contents

These tools let you extract EXE file without installing it. If your security software prevents the action, see this antivirus blocking EXE files guide.


4. Extract EXE File Online

You can upload the file to a web-based extractor.

If the file disappears after uploading or downloading, you may be facing a system issue. See this fix for EXE files deleting themselves.


5. Use Universal Extractor

Universal Extractor works with many EXE formats and requires no installation.

  • Download the portable version of Universal Extractor
  • Open the tool and select your EXE file
  • Choose a folder and start extraction

Some installers may still fail to open, especially if they rely on missing uninstallers. Check this fix for Windows cannot find uninstall.exe.


FAQs

Can I extract EXE files without running them?

Yes. Use 7-Zip, WinRAR, WinZip, Universal Extractor, or the Command Prompt method.

What is the safest method to extract EXE files on Windows 10 or 11?

7-Zip, WinZip, and the built-in /extract: command are widely compatible and secure.

Can I extract EXE files on a Chromebook?

You can’t run EXE files directly, but tools like Wine or Linux mode may help. See this guide on running EXE files on Chromebook.

What if I’m using Windows 7?

Older systems may not support some extraction tools. Follow this fix for EXE files not opening in Windows 7.


Final Tips

Always scan EXE files with your antivirus before extracting them. This helps prevent malicious code from being unpacked and potentially harming your system. If your antivirus mistakenly flags a file, make sure it’s a false positive before proceeding.

Keep in mind that not all EXE files contain extractable content. Some are compiled programs with no additional files inside. In those cases, extraction tools won’t yield usable results.

If you’re working with sensitive or private files, avoid using online extractors. Uploading executable files to third-party platforms can expose data to unnecessary risks, especially when the file contains proprietary or personal information. Use local tools like 7-Zip, WinRAR, or WinZip whenever possible.

Windows 11 Lock Screen Slideshow Not Working [Fix]

Due to the large number of processes that must run in the background to make it happen, the lock screen slideshow or Windows Spotlight may stop working for no apparent reason at times.

Windows 11, like Windows 10, allows you to customize the lock screen by displaying a slideshow of personal images. Although Windows Spotlight retrieves images from the Bing search engine, the Slideshow feature retrieves images from your local hard disk.

Many factors could be at play when the Windows 11 lock screen slideshow is not working, and we’ve compiled a list of all the alternative options you might want to consider.

What can I do if Windows 11 lock screen slideshow is not working?

Note icon NOTE
Ensure Windows is activated before attempting any other option, as failing to do so would prevent any slideshow from appearing.

1. Enable the lock screen slideshow manually

  1. Press the Windows key + I to open Windows Settings and go to Personalization, then to Lock screen.
    personalize lock screen windows 11 lock screen slideshow not working
  2. On the right side, you will see a drop-down button named Picture. Expand the list and select the Slideshow option.
    picture windows 11 lock screen slideshow not working

Images from the Pictures folder are automatically gathered when the program starts. In other words, you may want to include some images there in order for them to be displayed in the lock screen slideshow.

2. Check your images

By default, Windows 11 includes some photographs in the Pictures folder, allowing you to create a slideshow on the lock screen by selecting Show Slideshow on Lock Screen from the Start menu.

Although this is the case, if any of those photographs are accidentally destroyed, you may find yourself in this situation occasionally.

As a point of reference, this Pictures folder is the Library folder that appears when you first boot up your computer or create a new user account in Windows.

3. Re-add folders and images

  1. Press the Windows key + I to open the Windows Settings panel and go to Personalization, then to Lock Screen.
    personalize lock screenwindows 11 lock screen slideshow not working
  2. Click on the carrot arrow to expand the Personalize your lock screen drop-down menu and remove from the list the folders with pictures, by clicking on the Remove button next to them.
    remove windows 11 lock screen slideshow not working
  3. Next, click on the Browse button and choose the folder with images.
    browsewindows 11 lock screen slideshow not working

At the end of the process, restart your computer to see if it has resolved your problem.

4. Don’t turn off screen after slideshow

  1. Press the Windows key + I to open the Windows Settings panel and go to Personalization, then to Lock Screen.
    personalize lock screen windows 11 lock screen slideshow not working
  2. Click on Advanced slideshow settings to expand it, navigate to Turn off the screen after the slideshow has played for and select the Don’t turn off option.
    advanced menu windows 11 lock screen slideshow not working

When the slideshow is over, Windows 11 automatically turns off the screen to conserve energy. By following the abovementioned methods, you can avoid the need to conserve energy.

5. Open Power Options

  1. Press the Windows key + S and search for Control Panel. Click on the most relevant result.
    control panel windows 11 lock screen slideshow not working
  2. Go to Power options and click on the Change when the computer sleeps option.
    sleeps  windows 11 lock screen slideshow not working
  3. Select Change advanced power settings.
    change-advanced  windows 11 lock screen slideshow not working
  4. Expand the Desktop background settings then Slide slow, expand the list, and select the Available option.
    available windows 11 lock screen slideshow not working

When using a laptop, it is possible to enable or disable the slideshow depending on your power plan in order to conserve battery life. That being said, it can be causing the problem at hand with Windows 11.

6. Check indexing settings

  1. Press the Windows key + S and search for indexing options. Click on the most relevant result to open it.
    index option windows 11 lock screen slideshow not working
  2. Press the Advanced button and switch to the File Types tab.
    advanced windows 11 lock screen slideshow not working
  3. Look up the PNG and JPG options and make sure that both of them are ticked. If not, check the boxes next to them and click the OK button to save the changes made.
    png windows 11 lock screen slideshow not working

Windows may fail to index a specific path or folder, or kind of file as a result of malware, viruses, and other malicious software.

Alternatively, if the photos you’ve chosen are PNG or JPG and Windows 11 isn’t indexing those file formats, you may experience problems.

7. Check lock screen blocking in Registry Editor

  1. Press the Windows key + R , then type regedit and press Enter.
    regedit windows 11 lock screen slideshow not working
  2. Navigate to HKEY_LOCAL_MACHINE, then to Software and Policies. Go to Microsoft, then to Windows followed by Personalization.
    hkey windows 11 lock screen slideshow not working
  3. You may find a REG_DWORD named NoLockScreenSlideshow. If so, right-click on it and select the Delete option.

8. Allow lock screen slideshow in GPEDIT

  1. Press the Windows key + R , then type gpedit.msc and press the Enter button.
    gpedit windows 11 lock screen slideshow not working
  2. Navigate to Computer Configuration, then to Administrative Templates. Go to Control Panel followed by Personalization.
    comp adminsitrative windows 11 lock screen slideshow not working
  3. Double click on the Prevent enabling lock screen slide show setting and select either Not Configured or Disabled option, followed by the OK bottom.
    prevent enabling windows 11 lock screen slideshow not working

If you have this option selected, you will be unable to change the lock screen slideshow on Windows 11. As a result, it is necessary to double-check the settings to ensure that they are correct.

Confirm the removal, then restart your computer to make the changes take effect. Check to see if the slideshow is now functioning properly.

Why is Windows activation important?

Activation helps verify that your copy of Windows is genuine and hasn’t been used on more devices than the Microsoft Software License Terms allow.
activate windows windows 11 lock screen slideshow not working

The activation process is distinct from the installation one, which requires a product code to proceed. It also differs from post-installation registration in another way.

A licensed copy of Windows and a specific computer system are linked together through the process of Windows activation.

In principle, creating such a link should prevent the same copy of Windows from being installed on more than one computer, as was previously allowed with older operating system versions.

So, what exactly happens if you don’t activate your Windows 11 operating system? It’s true that nothing bad happens. There will be virtually minimal disruption in system functionality. The only thing that will be unavailable in this situation is personalization, such as the slideshow one.

What does the Windows Spotlight feature do?

Using the Microsoft Bing site as an example, Windows Spotlight will display your photographs and allow you to vote on which image should be used as the lock screen background on your computer’s Windows 11 operating system.
spotlight windows 11 lock screen slideshow not working
This enables Windows Spotlight to customize the lock screen’s appearance based on each user’s preferences.

The Windows Spotlight service may also learn from the apps and services you use, and over time, it can provide recommendations about which apps you should try out or which features of the Windows 11 operating system you should take advantage of.

The images typically depict identifiable, well-known locations such as famous historical or natural landmarks and rarely show human beings. Location information is occasionally provided, while photo credits are typically not.

If you were paying attention to the Windows slideshow and enjoyed it, you might be interested in learning how to set a live wallpaper in Windows 11. The live aspect of the desktop has proven to be extremely popular among users.

Using the themes and skins that Microsoft Windows 11 provides, you can further tailor your desktop experience. Check out the top ten greatest Windows 11 themes and skins to download, all of them are available for free download.

Besides, find out what to do when the lock screen background reverts to blue on your Windows 11 PC.

Alternatively, if you miss how the previous user interface looked like, you can make Windows 11 look like Windows 10 again.

Let us know in the comments section below which approach worked best for you and which feature of Windows 11 you enjoy the most.

How to Install Windows Updates in Safe Mode: 2 Easy Methods

Many users reported issues with Windows Update, such as missing Windows Update for example. If this happens, you might have to use Windows Update in Safe Mode.

So how do you install updates in the recovery environment, and should you use it for updates? Keep on reading to find out.

Should you install Windows updates in Safe Mode?

Microsoft advises against installing Windows updates in Safe Mode due to the following reasons:

  • Missing devices and components – Since not all devices and components are active in Safe Mode, this will result in only partial updates. In some instances, this can cause Windows 10 to not bot anymore.
  • Additional errors – If you try to install updates in Safe Mode, you might get ERROR_INSTALL_SERVICE_FAILURE on your PC.
Note icon NOTE
Microsoft recommends that you do not install service packs or updates when Windows is running in Safe mode unless you cannot start Windows normally.

The only acceptable situations are if you cannot start Windows normally or if Windows Update won’t work. Even so, if you do install a service pack or update while Windows is running in Safe Mode, immediately reinstall it after you start Windows normally.

How do I use Windows Updates in Safe Mode?

1. Use the Settings app

  1. Open the Start Menu. Next, click on the Power button.
  2. Hold Shift and select Restart.
  3. Click the Troubleshoot option.
  4. Select Advanced options.
  5. Choose Startup Settings.
  6. Click Restart. Once the PC restarts, press 5 to choose Safe Mode with Networking.

Once you enter Safe Mode, you just need to check for updates like you usually would:

  1. Press Windows key + I. Once the Settings app opens, go to Update & Security.
  2. Next, click on Check for updates.
  3. Wait while Windows downloads the latest updates.

By following these steps, you should now be able to get the latest Windows updates, even when you boot the PC in Safe Mode.

Restarting your device in safe mode can also help you fix Windows Update error code 0xc007000d; read this guide to learn more.

While this is not recommended, there are a few situations when this may be your only choice left.

2. Use Microsoft Update Catalog

Note icon NOTE
To use this method, you need to know the KB code of the update you want to install. You can find it in the Windows Update section.
  1. Visit the Microsoft Update Catalog page.
  2.  Enter the KB number in the search field.
  3. Locate the update that you want to download and click the Download button.
  4. Once the update is downloaded, run it to install it.

Windows Update in Safe Mode – Something went wrong

Speaking about limited choices, you might even encounter Windows Update errors when booting in Safe Mode. Such is the case with this one: Windows Update something went wrong. Try to reopen the settings later.

Here’s what to do if Windows Update says something went wrong:

  1. Open the Command Prompt in Safe Mode (You just need to access the Windows Recovery Environment, as you did before).
  2. Select Troubleshoot, Advanced options, Restart and Enable Safe Mode with Command Prompt.
  3. Don’t worry about privileges as you will be directed to an admin CMD instance by default in Safe Mode.
  4. The next step is to restart the Windows Update service.
  5. To do that, simply paste the following commands in the CMD window and press Enter after each: net stop wuauserv net stop bits net stop cryptsvc Ren %systemroot%SoftwareDistributionSoftwareDistribution.bak Ren %systemroot%system32catroot2catroot2.bak net start wuauserv net start bits net start cryptsvc
Note icon NOTE
A few users reported that they couldn’t complete these steps because certain services couldn’t be started in Safe Mode.

If you’re a Windows 11 user, also check out this guide on how to start Windows 11 in Safe Mode. You’ll immediately see that debugging your issues in Safe Mode works just like in Windows 10.

Did you find this guide useful? Let us know what other processes you want to run while in Safe Mode in the comment section below.

5 Easy Fixes to Instagram not Posting or Sharing to Facebook

Instagram and Facebook are among the largest social networks on the market, and since they are owned by the same company, they can also work together. This means that you can easily share a Facebook post to Instagram and the other way around.

However, many users reported that Instagram is not posting to Facebook or not sharing to Facebook for them. This can be a problem, but there are ways to fix it. We’ll show you exactly how to do that.

But let’s take a moment to understand why and hows this happens, to begin with. Why is Instagram not posting to Facebook? If you’re also wondering about it, know that you’re not alone. So, let’s find out together.

Why is Instagram not sharing to Facebook?

As always, cache accumulation can be responsible for a lot of havoc and this particular case makes no exception.

If Instagram won’t share or post to Facebook, you may be dealing with account corruption or an obsolete link that needs renewal.

Instagram not posting or sharing to Facebook is unfortunately a common issue. And speaking of issues, here’s what other users who faced similar problems had to say:

  • Instagram post not sharing to Facebook
  • Instagram reel not posting to Facebook – In this case, Instagram reels won’t share to Facebook no matter what you seem to do.
  • IG story not sharing to FB – Instagram story already shared to Facebook but not showing.
  • Instagram not posting to Facebook today
  • Instagram not automatically posting to Facebook
  • Sharing to Facebook isn’t available for this story – This is another variation of the Instagram story not sharing to Facebook case.
  • Instagram not connecting to Facebook
  • Facebook and Instagram not working
  • Can’t share Instagram post to Facebook business page

What do I do if Instagram is not sharing to Facebook?

1. Make sure that your Facebook account is linked properly

  1. Open the Instagram app on your phone.
  2. Now tap the three-bar icon in the top right corner and choose Settings.
  3. Navigate to Linked Accounts.
  4. If Facebook isn’t selected, select it, and enter your Facebook login information.
    linked account instagram not sharing to facebook

If your account is linked correctly but posts still won’t share, it may be related to a separate issue. In that case, see this guide on Instagram links not working for additional fixes.

2. Log out of Facebook and Instagram

  1. Log out of your Facebook account on your device.
    log out instagram instagram not sharing to facebook
  2. Now log out of Instagram as well.
    log out facebook instagram not sharing to facebook
  3. After logging out from both services, wait for a minute or two.
  4. Now log back into Facebook and wait for a minute.
  5. Log back to Instagram.

After doing that, the problem with Instagram posts not showing on Facebook will be resolved.

Now, if your Instagram account says it is already connected to a Facebook page, you might need to perform a few extra steps. Don’t worry, we got your back.

3. Unlink Facebook

  1. On the Instagram app on your phone, go to Settings > Linked Accounts.
  2. Select Facebook and tap on Unlink.
    unlink facebook instagram not sharing to facebook
  3. Wait for a minute or two.
  4. Now link your Facebook account again.

4. Clear cache and data for Instagram and Facebook apps on your phone

  1. Open the Settings app on your phone.
  2. Go to Apps.
  3. Select Facebook or Instagram.
  4. Now tap on Storage.
  5. Tap on Clear cache.
    clear cache instagram not sharing to facebook
  6. Be sure to do this for both Facebook and Instagram apps.

If Instagram posts still are not shared to Facebook, repeat the steps from above, but this time use the Clear data option.

This will delete all saved data related to these apps, so you’ll have to log in again to both of them.

5. Change your Facebook account password

  1. Open Facebook and tap on the menu icon located in the upper-right corner.
  2. Next, locate the Settings & Privacy option and go to Settings.
  3. Open Security and login and select Change Password.
  4. Finally, insert the new password and save the changes.
  5. Don’t forget to link your Facebook account with Instagram again by using the new password.

If Instagram is not sharing to Facebook, the problem is usually just a glitch in linking the two accounts. Many also reported that Instagram story is stuck on uploading, and we have a guide that addresses that.

However, you should be able to fix that by properly linking your account or by logging out of both Facebook and Instagram and logging back in.

Rebelle 6 Review: A Fully-packed and Innovative Painting Software

Escape Motions is known for its excellent painting tools for artists, making it easy for them to show their creativity. This is evident in the successful and popular Rebelle 5, which gained wide acceptance in no time.

Now, just like any creative mind, Escape Motions has taken things a step higher with the release of Rebelle 6. This tool promises many goodies, and many artists are anxiously expecting it.

But will it be worth it? This review will show you what to expect from the new Rebelle 6 and everything you need to know about the software. Read on!

What is Rebelle 6?

Rebelle 6

Rebelle 6 is a hyper-realistic painting software full of excellent and innovative features to make your painting experience captivating. 

Built on the superb foundation of the previous version, this tool comes with a series of additions that makes it easy for artists to express their ideas. 

It combines real-world color blending, wet diffusion, and drying to replicate the mode of interaction between natural media art and a canvas.

Who can use Rebelle 6?

Rebelle 6 is designed for CG artists and traditional painters. It is one of the tools you need to have if you want to merge your artistic skills with technology. 

That being said, anyone can use Rebelle 6 to create many types of paintings, as no prior experience with graphic software is required.

What are some of the best Rebelle 6 features?

Easy-to-use UI

As you can see from the image presented above, the UI (user interface) of Rebelle 6 is straightforward to understand, use, and navigate, making it highly accessible to artists of every level imaginable.

Besides, having everything on the screen lets you focus on creating and not searching for a specific tool in endless menus.

Fractal Image Processing 

One of the excellent additions to Rebelle 6 is Fractal Image Processing. This image recognition machine learning algorithm is built to maintain your image quality and sharp details.

This feature comes in handy when using the newly added Warp and Liquify tools. Also, it ensures your painting retains its quality while transforming and deforming layers or objects on the Canvas.

The Smudge & Liquify button allows you to choose from a variety of different effects that take effect directly on your drawing, as they are not used as filters:

  • Smudge – A classic smudge tool with an effect defined by the name itself
  • Liquify
    • Push – Moves pixels based on the movement of your brush
    • Expand – Expands the pixels found under your brush outwardly
    • Pinch – Pulls the pixels found under your brush inwardly
    • Push Left – Moving the brush up will move pixels to the left, while brushing down moves pixels to the right
    • Twirl – Twirls pixels based on the movement of your brush
    • Reconstruct – Works as a paint-on eraser and automatically returns pixels to the original state.
Liquify effects in use

Below, you will be able to see an example of the Fractal Image Processing tool in action:

Fractal Image Processing in action

As you can see, with the Fractal Image Processing feature, you can do anything you wish to your image without losing its quality and sharpness. 

Powerful Brush Creator

If you are used to creating your brush while designing, you will surely enjoy using this feature. It packs in different options for creating new brushes.

This feature provides you diverse options, from granulation and grunge to original textured brushes. Also, saving your brushes is possible to increase your painting speed.

Lastly, if you don’t want to create your brush, Rebelle 6 has more than 240 brush presets readily available for you to choose from.

New image filters and color range

This nifty feature allows you to adjust image filters and color range based on hue. With this, you can fully control how you change the colors in your artwork.

Realistic Papers and Canvases 

In a bid to completely mimic real-life paintings, Rebelle 6 comes with over 120 hyper-realistic papers, canvases, and other art surfaces. This gives you different backgrounds and natural materials for your designs. 

Here is an example of working with oils:

As you can see, the art you can create in Rebelle 6 is astonishingly looking like an actual oil painting.

No other software can provide you with this digital media experience, so be sure to explore it fully.

New Layer Masking Tools

Another excellent feature of Rebelle 6 is the layer masking tool. This tool allows you to control the visibility of a layer. 

To add a Layer Mask, you only need to right-click the layer in the Layers panel and have the whole feature available. This is similar to the layer feature found in other painting tools.

Grids and Guides

One of the well-known styles in traditional painting is the ability to customize and display grids and guides. Rebelle 6 brings this feature with extras.

With this feature, artists can now view grids and guides and snap to them. You can find this feature in the View menu, which will surely be helpful.

One of the benefits of these guides is that you can create them in the reference image preview. In addition, these created guides will now be automatically transferred to the canvas.

This makes your task easier and faster and is especially handy when tracing is prohibited. 

Reference Image Guides

Reference image guides are excellent additions to Rebelle 6, making it easy to proportion your drawing objects. You can find these guides in the usual Reference Image panel, which will be in the reference image and canvas.

This feature also helps to preserve the positioning of images.

Liquify and Warp tools

The liquifying tool creates mouthwatering artistic effects by retouching and deconstructing images. With this, you can transform and deform layers and objects on the canvas.

The Warp tool, on the other hand, helps you modify and reshape objects to any form of choice, as you can see from the video below.

Source: Escape Motions Blog

In addition, these tools deliver highly creative and clear image effects when combined with the Fractal Image Processing feature.

If you want to see an overview of all the new features added to the revolutionary Rebelle 6, feel free to do so below:

Now that we’ve covered all the aspects of this new software, let’s dive a bit into the technicalities of how you can use it, system requirements, and other helpful information.

System Requirements

Below you can find the minimum requirements to use the fantastic Rebelle 6 painting software:

  • Operating system: Windows (64-bit) and Mac OS X 10.14
  • Processor: Intel i5 or equivalent AMD processor and Apple M1 chip with Rosetta 2
  • RAM and memory: 4 GB RAM and 200 MB hard disk space
  • Graphics card: 1 GB RAM (with OpenGL 3.3 needed for Rebelle Pro)

It is worth noting that if your system meets the minimum requirements, the software can run on your PC, but it might process information slower than in other cases.

And for an overall better experience, we, of course, suggest having a system with the recommended system requirements:

  • Operating system: Windows 10, Windows 11 (64-bit), or Mac OS X 10.15 and newer versions
  • Processor: Intel i7, equivalent AMD processor, or Apple M1 chip with Rosetta 2
  • RAM: 16 GB
  • HDD space: 1 GB
  • GPU: 2 GB RAM
  • Graphic input: Compatible with Wacom or Windows Ink tablets, but also works perfectly with a standard mouse.

As you can see from the information presented above, you have no excuses for running Rebelle 6 on your PC.

If you’re unsure if the PC you own will be able to handle the workload, we recommend that you download the Demo version of Rebelle 6 and try it out for yourself.

How to download and install Rebelle 6?

Rebelle 6 has been available for download on the official website since December 15, 2022.

The installation process is as simple as they come, with easy on-screen instructions to guide you, but here are the steps required to do so without issues:

  1. Open the Rebelle 6 download page.
  2. Click on the Get Now button (if you are not upgrading from an older version).
  3. Click the Add to Cart button after choosing the software version.
  4. Click the View Cart and Checkout option from the top of the page pop-up.
  5. Click on the Continue Checkout green button, and enter your payment information.
  6. Install the software by opening the installer file and following the on-screen instructions.

Pricing

Rebelle 6 is available for 89.99 USD, while the Pro version goes for 149.99 USD.

If you are a Rebelle 5 user, you have the leverage of an unconditional 30-day money-back guarantee. Also, you will enjoy a 50% upgrade discount. 

Lastly, there is an educational package with a free Rebelle 6 license of up to 20 seats for classrooms. And Rebelle 5 Pro is offered at a 40% discount for individual lifetime licenses for students and teachers.

To help you decide, you can explore the differences between the Rebelle releases and see an in-depth overview of everything it offers.

Final thoughts on Rebelle 6

Pros
Amazing immersive painting and drawing
Free version is available
The created art looks and feels like actual paitings
Wide range of useful tools
Easy to accees features that streamline the painting process
Can be used by experts and beginners alike
Cons
The demo version is limited in features, but still offers a great experience

With the reviews from users flying around from users within the short time Rebelle 6 has been released, it is safe to say it is excellent software for every artist. 

Also, considering the numerous additions to the already stunning previous versions, this tool is designed to take your creativity to the next level.

What do you think about this software? Feel free to share your experience in the comments below.

How to Create M3U Files from URLs Online: Complete Guide

Here’s how to create and use .m3u playlists not only for traditional media players but also for IPTV or streaming devices such as Firestick. M3U (file extension.m3u) is a file format that stores a list of audio files and/or video files or just the online URL to the actual audio/video content.

How do I create and use M3U playlists?

1. Create an M3U file from URLs online

The basic method to create an m3u playlist is to create a .txt file on your computer, which you edit with Notepad (or your preferred text editor).

In this file, you will add, one by one, paths to songs, movies, channels, or video clips you want.

The m3u playlist is just a file that contains the index entries to each item in it, but it’s not a real audio/video file.

Each file path should contain a 2-line description that points to the online source. The syntax of the source should look like this:

#EXTINF:-1, Pro Sport 2

https://185.65.30.452:1223/Tv4243

The number following the “#EXTINF” section is the audio length in seconds. If the audio is being streamed online and no length is set, then you will see -1. The M3U URL is the relative path of the M3U file.

You can drag& drop audio/video files from your computer into the M3U playlist, then import them to your device using a preferred app or media player that supports the M3U file format.

We will discuss below how to create m3u playlists in specific media players.

2. Adding an M3U playlist to VLC

  1. Open VLC media player. You can get it from here if you don’t have VLC installed.
  2. Click on View on the toolbar >  Playlist.
  3. Right-click on the playlist window > Add files / Add folder and import audio files into a folder from your computer into VLC.
  4. Then, select Media on the upper-right > Save Playlist to File > specify the output path > rename the file and save the type as m3u playlist > Save.

You can find the m3u file format of many TV channels online – make sure you get both the #extinf and the URL. Also, you can convert YouTube channels to an m3u format using a video converter tool.

3. How to create an M3U playlist for IPTV

m3u playlist for iptv

To stream IPTV, use a multimedia player that supports M3U files. Depending on your device, there are apps available in the Apple Store or Google Store, such as TV Streams, IPTV, or Smart IPTV.

You can find dedicated IPTV playlists on GitHub. While most are free, they might expire eventually. Once synced with your device, you’ll have permanent access.

After downloading the app, simply add the IPTV playlist URL and start watching your favorite shows.

4. How to use M3U playlist on Kodi

create m3u playlist kodi

To use m3u playlists on Kodi you need to first install the PVR Simple Client add-on, which works with your IPTV subscription, and then you should have the M3U Playlist URL, which should be provided by your IPTV provider.

  1. Open Kodi> Settings.
  2. Click Add-ons > Install from the repository.
  3. Scroll down a little and choose PVR Clients > PVR IPTV Simple Client
  4. Click Install.
  5. After the installation is finished, open Settings again > Add-ons > My Add-ons
  6. Open PVR Clients > PVR IPTV Simple Client.
  7. Select Configure > click the option M3U Play List URL (in the General tab).
  8. Insert the m3u playlist URL offered by your provider. Also, if you have an XMLTV URL, you can insert it in the  EPG Settings option.
  9. Click OK the Exit Kodi.

Then re-open Kodi and go to TV > Channels. you should see here all the available channels via IPTV.

5. Using the M3U playlist on Firestick

To use m3u playlists on a Firestick you need to first install an app that will play the menu files. In this example, we will use Perfect Player and an additional app that you need to have.

  1. In the Firestick menu, go to Settings >  My Fire TV.
  2. Click Developer Options > Turn on the option Apps from Unknown Sources.apps from unknown sources
  3. Go back to your Firestick menu, and search for the app called Downloader. Install the open the app.
  4. Make sure to have at hand the APK URL path to the Perfect Player app.
  5. Type the URL when prompted.

Allow the app then install the files then click Done. You can also delete the file after the installation is finished.

To import the m3u playlists, open Perfect Player on your Firestick > go to Settings > General > Playlist. Here, you have to insert the URL offered by your IPTV provider.

We hope that you found the article helpful. If you have any suggestions on the topic, please use the comments section below.

Enable the Camera on Windows 11 [2 Easy Ways]

Many PCs come with a webcam, and sometimes you need to enable it or change its configuration to work as intended.

To protect your privacy, Windows 11 allows you to completely disable your camera, but you can also allow only certain apps to access it. This feature ensures that you can always be sure that your laptop’s camera is not activated remotely by any third parties.

These settings are easy to change, and they allow you to have maximum control over your privacy, so you won’t have to rely on webcam protection software. Using software is efficient as well, but it will never beat deactivating a feature entirely.

If you’re not familiar with webcam settings, or you deactivated it in the past but forgot how to access the setting, in today’s guide we’re going to show you how to enable a camera on Windows 11 PC.

How can I enable camera on Windows 11?

1. Use the Settings app

  1. Click the Start button in the Taskbar.
  2. Now select Settings.
  3. In the left pane, navigate to Privacy & Security. In the right pane, select Camera.
  4. Now make sure that Camera access is enabled.

2. Change which apps can access your camera

  1. Click the Start button and navigate to Settings.
  2. Go to the Privacy & Security and navigate to Cameras, just like in the previous solution.
  3. If you want to allow apps to have access to your camera, make sure that the Let apps access your camera option is enabled.
  4. Now you can select specifically which apps can access your camera.

How can I change camera settings on Windows 11?

  1. Click the Start button in the Taskbar, and select Settings.
  2. Navigate to Bluetooth & devices in the left pane. In the right pane select Cameras.
  3. Once you access this menu, you can add new cameras, disable your camera, troubleshoot issues, or rotate your camera.

Can I control if desktop apps have access to my camera?

In the privacy settings you can control which apps have access to your webcam, but that list is mostly populated with Universal apps that come from Microsoft Store.

This has left many users wondering if they can block Win32 apps from accessing their cameras. The answer is yes, you can block desktop applications from accessing your webcam.

In the camera privacy section, you have a Let desktop apps access your camera and you can use it to see which desktop applications have accessed your camera.

However, you can’t control which Win32 app has access to your camera, but you can stop all desktop applications from accessing your webcam by disabling this feature.

How can I disable my camera completely?

  1. Click the Start button and select Settings.
  2. Now go to Bluetooth & Devices and select Cameras from the right pane.
  3. Select your camera.
  4. Now click on Disable.
  5. When the confirmation dialog appears, click on Yes.

It’s pretty simple to enable your camera in Windows 11, not to mention that it takes just a couple of seconds to access webcam settings and to allow apps to use your webcam. Even if this guide is dedicated to Windows 10 users, those who own a Windows 11 computer can apply the included tips too, for more advanced features, we recommend giving a try to 3rd party webcam software.

Can my webcam record me without my knowledge?

If your PC is configured properly, only the specific applications can have access to your camera, so it’s unlikely that your webcam is spying on you.

However, this changes if your computer is infected by malware, and sometimes malware can override your system settings and record you without your knowledge.

There are several ways to combat this, and most users rely on a reliable Windows 11-compatible antivirus. If you want extra protection, you might want to consider disabling your camera or using a webcam cover.

To be sure that your privacy is protected, only allow apps that you completely trust to have access to your camera.

Are you controlling your webcam access settings and which apps are allowed to access your PC camera? Let us know in the comments section below.

Windows 11 Clipboard Not Working: How to Easily Fix it

Clipboard history is a useful Windows 11 feature for copying and pasting text and images. That feature saves up to 25 copied data clips. It enables users to copy multiple items with the Ctrl + C hotkey, which they can then select for pasting from clipboard history.

Many users have been upgrading to Windows 11 in recent months. Some who have recently upgraded to this platform have said that clipboard history doesn’t work for them.

Things were no different for Windows 10 users who complained about clipboard history issues too. Consequently, those users can’t open that feature with its hotkey in the new platform.

That doesn’t necessarily mean copying and pasting won’t work at all. They might still be able to copy and paste single items. However, the clipboard history feature that stores multiple copied items doesn’t work for them.

If clipboard history doesn’t work for you in Windows 11, you’re missing out on a revamped feature. These are some of the most likely fixes you may apply right away:

What can I do if the Windows 11 clipboard history is not working?

1. Make sure that Clipboard History is enabled in Settings

  1. Press the Start menu button on Windows 11’s taskbar.
  2. Then click the pinned Settings app on that menu.
    Settings app windows 11 clipboard history not working
  3. Select the Clipboard navigation option.
  4. Click the Clipboard history option’s toggle button on if it’s off.
    The Clipboard history setting windows 11 clipboard history not working
  5. Then try pressing the Windows key + V hotkey to bring up clipboard history.

2. Update Windows 11

Note icon NOTE
Users have confirmed installing the Windows 11 KB5006746 update can fix clipboard history issues. You can manually download and install KB5006746 from the Microsoft Update catalog, but it should become available within the Windows Update tab.
  1. Press the Windows and I keys at the same, which will open Settings.
  2. Next, select Windows Update on the left side of Settings.
  3. Click the Check for updates button.
    Check for updates button windows 11 clipboard history not working
  4. Press the Download and Install button for an available update.

3. Restart File Explorer

  1. Click the magnifying glass taskbar icon, which opens the search box.
    The magnifying glass button windows 11 clipboard history not working
  2. Type Task Manager within the search box to find that utility.
  3. Select Task Manager in the search tool to open its window.
  4. Click the Processes tab, and select the Windows Explorer process there.
    The Restart button windows 11 clipboard history not working
  5. Press the Restart button for Windows Explorer.

4. Clear clipboard data

  1. Open the Settings window as outlined in the first two steps of resolution one.
  2. Select Clipboard on the System tab.
  3. Press the Clear button.
    Clear button windows 11 clipboard history not working
  4. Open the Start menu, and select its Power and Restart options.

5. Enable the Allow Clipboard History Group Policy setting

  1. Right-click the Start taskbar icon to open a shortcuts menu.
  2. Select Run on the shortcuts menu.
    The Run option windows 11 clipboard history not working
  3. Enter this Group Policy command within the Open box: gpedit.msc
  4. Click OK to launch Group Policy Editor.
  5. Next, you’ll need to double-click Computer Configuration and Administrative Templates on the left side of Group Policy Editor.
    Local Group Policy Editor window windows 11 clipboard history not working
  6. Then select System and OS Policies to open the settings that you can see below:
    Allow Clipboard History setting windows 11 clipboard history not working
  7. Double-click the Allow Clipboard History setting.
  8. Click the Enabled radio button on the Allow Clipboard History policy window.
    The Allow Clipboard History window windows 11 clipboard history not working
  9. Select Apply to save the new policy.
  10. Press the OK button to exit the Allow Clipboard History window.

6. Edit the registry

  1. Open Run as outlined in the first couple of steps of the previous resolution.
  2. Type this text within the Open box: regedit.msc
  3. Select the OK option launch the Registry Editor.
  4. Then open this key within the Registry Editor: Computer\HKEY_LOCAL_MACHINE\SOFTWARE\Policies\Microsoft\Windows\System
    Registry Editor window windows 11 clipboard history not working
  5. Right-click System on the left of the window and select the New context menu option.
  6. Select the DWORD (32-bit) Value option on the submenu.
    The DWORD (32-bit) Value option windows 11 clipboard history not working
  7. Enter AllowClipboardHistory when naming the new DWORD.
  8. Next, double-click AllowClipboardHistory to open the window in the screenshot below:
    Edit DWORD (32-bit) Value window windows 11 clipboard history not working
  9. Then input 1 within the Value data text box, and click the OK option.
  10. Click the taskbar’s Start button.
  11. Select the Power option, and click the Restart button.

7. Clean-boot Windows 11

  1. Press the Windows key + X hotkey, which opens a shortcuts menu.
  2. Input this text in Run’s Open box: msconfig
  3. Press OK to launch the MSConfig’s system tool.
  4. Click the Selective startup radio button, and deselect the Load startup items checkbox.
    Load startup items checkbox windows 11 clipboard history not working
  5. If they’re not already selected, select the options for Load system services and Use original boot configuration.
  6. Select the Services tab at the top of the window.
  7. Click Hide all Microsoft services to select that checkbox.
    Hide all Microsoft services checkbox windows 11 clipboard history not working
  8. Press the Disable all button, which will deselect checkboxes for remaining third-party services.
  9. Select the Apply option.
  10. Click OK to close System Configuration.
  11. Finally, press the Restart button on the dialog box that pops up.
  12. Try activating clipboard history after clean-booting Windows 11.

Clean-booting Windows might stop a third-party program or service conflicting with clipboard history from running at startup. For example, a third-party app might have a Windows + V keyboard shortcut that conflicts with clipboard history’s hotkey.

You can restore your PC’s original boot configuration by selecting the Load startup items checkbox on MSConfig’s General tab. To re-enable all the third-party services, press the Enable all button on the utility’s Services tab.

Should I reinstall Windows 11 to fix clipboard history?

Reinstalling Windows 11 will probably fix clipboard history when it’s not working. However, that should only be a last resort resolution. Try all the other potential solutions before considering more drastic alternatives.

There are a few different ways you can reset Windows 11. Resetting the platform, via Settings, is the most straightforward method. Our guide on how to reset Windows 11 provides full details on how you can reinstall the OS this way.

Are there any alternatives to Windows 11’s clipboard history?

There are plenty of third-party clipboard managers for Windows platforms. Some of them have better features than clipboard history. Our list including clipboard managers for Windows 10 tells you about some of the best ones.

Windows 11 is a very young desktop platform at the moment. Some Windows 10 clipboard managers might not be compatible with the latest platform. We can confirm that the ClipboardFusion and Clipboard Manager apps in our clipboard manager guide are compatible with the latest OS.

However, many clipboard managers are freeware packages. Most of those that aren’t will at least have time-restricted trial packages you can download. So, don’t hesitate to check third-party clipboard managers run in Windows 11 without purchasing them.

Windows 11’s revamped clipboard history is much better than it was in its preceding platform. It’s worth trying to get clipboard history fixed before considering alternative third-party software.

Has clipboard history changed in Windows 11?

The big M has revamped the clipboard history in Windows 11. In Microsoft’s new desktop platform, that feature has numerous additional tabs and options. For example, users can press a Clear all button within the enhanced clipboard history.

The revamped clipboard history includes new Emoji and Kaomoji emoticon tabs. Those tabs enable you to select a variety of different emoticons. Selecting emoticons adds them to documents and text editors open within Word processors and browsers.

There’s a useful new Symbols tab in Windows 11’s revamped clipboard history. Clicking that tab brings up a selection of special symbols and characters. Users can select to add geometric, mathematical, language, and Latin symbols to documents among others.

The revamped clipboard history also includes a GIF tab. That tab includes a multitude of GIF images. There you can choose images to add to Word-processed documents and emails.

Therefore, clipboard history has changed a lot in Windows 11. It’s almost like a new feature with all the additional tabs it includes for selecting and adding GIF images, emoticons, and symbols to documents and text editors.

The clipboard history windows 11 clipboard history not working

The potential resolutions in this guide will probably do the trick for most users. We don’t promise those solutions are completely guaranteed for all users, but they’re some of the most widely confirmed resolutions.

Also, take a look at this guide on how to solve Windows 10 Clipboard issues for good. Once you solve your clipboard issue either for the whole system or for a specific app you installed, feel free to use the new and improved Windows 11 clipboard.

There might also be more ways to fix Windows 11’s clipboard history not working. If you’ve found another way to resolve that issue, feel free to share it in the comments section below.