Fix: GPU Spikes When Idle [From 0% To 100%]

You may notice that your GPU often spikes when in an idle state. This may happen on the Windows operating system.

Usually, when this problem occurs, you may notice that the GPU usage jumps from 0% to 100%. You may have seen 100% CPU usage in idle. That is somehow common. But, the problem with the graphics card is rare. This article will help you to solve the high GPU usage issue in an idle state on Windows.

Why does GPU utilization spike when it is in an idle state?

Usually, high GPU usage problems may occur for varieties of reasons. However, if you dig deeper, you will find these as the most common culprits:

  • GPU-hungry background apps: Even though your PC is idle, there may be some background tasks utilizing a lot of GPU power.
  • Software Bug: Some software may have bugs that trigger this problem.
  • Old graphics driver: Incompatible or outdated graphics drivers may not be able to handle modern Windows or other processes properly.
  • Malware problem: Malware or virus issues also may trigger this problem if you don’t have good antivirus software.

How do I fix GPU spikes when in an idle state?

Before trying the actual methods, we suggest you check the following things:

  • Make sure your graphics card is not physically damaged.
  • You are not using any GPU tweaker, or you have not made any bad configuration using such tools.

After ensuring these steps, go through the following methods to fix high GPU usage issues when you are not doing anything on your PC.

1. Update Windows

  1. Press Windows + I on the keyboard.
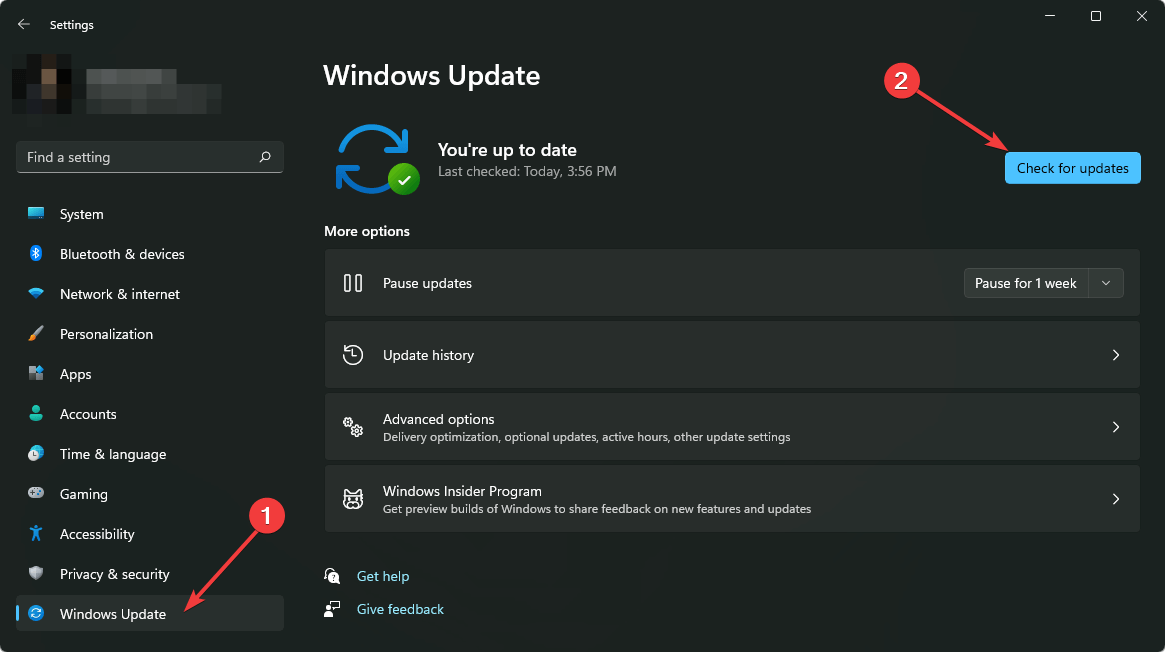
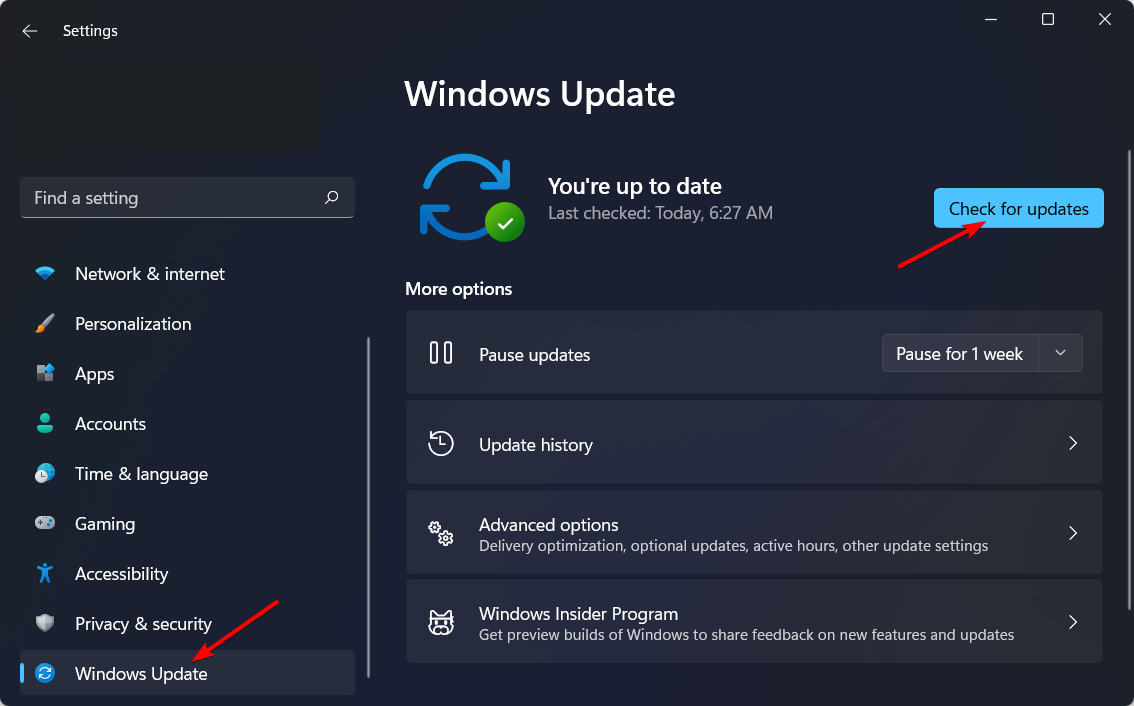
  2. Go to Windows Update and click on Check for updates.check for updates windows 11 settings
  3. If any updates are available, click on Install/Download button.

If necessary, restart your PC after updating.

2. Update graphics card

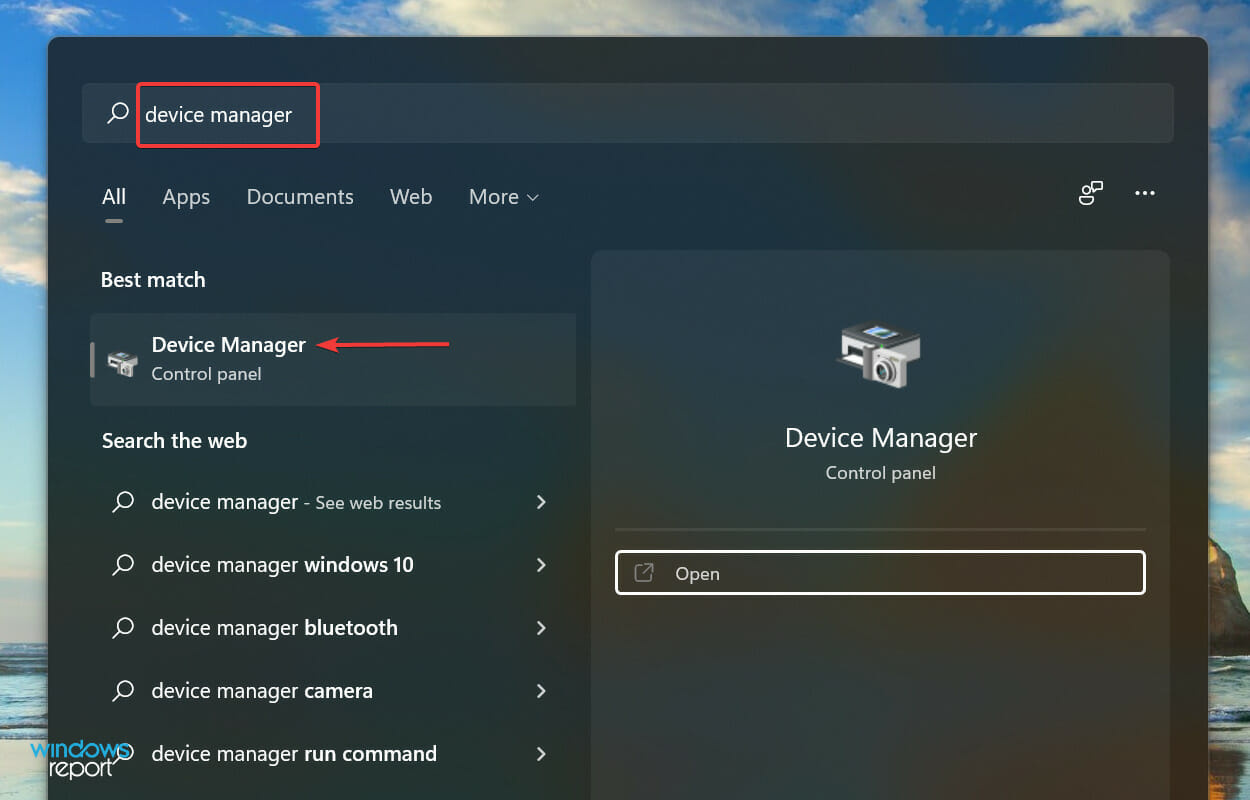
  1. Open the Start Menu.
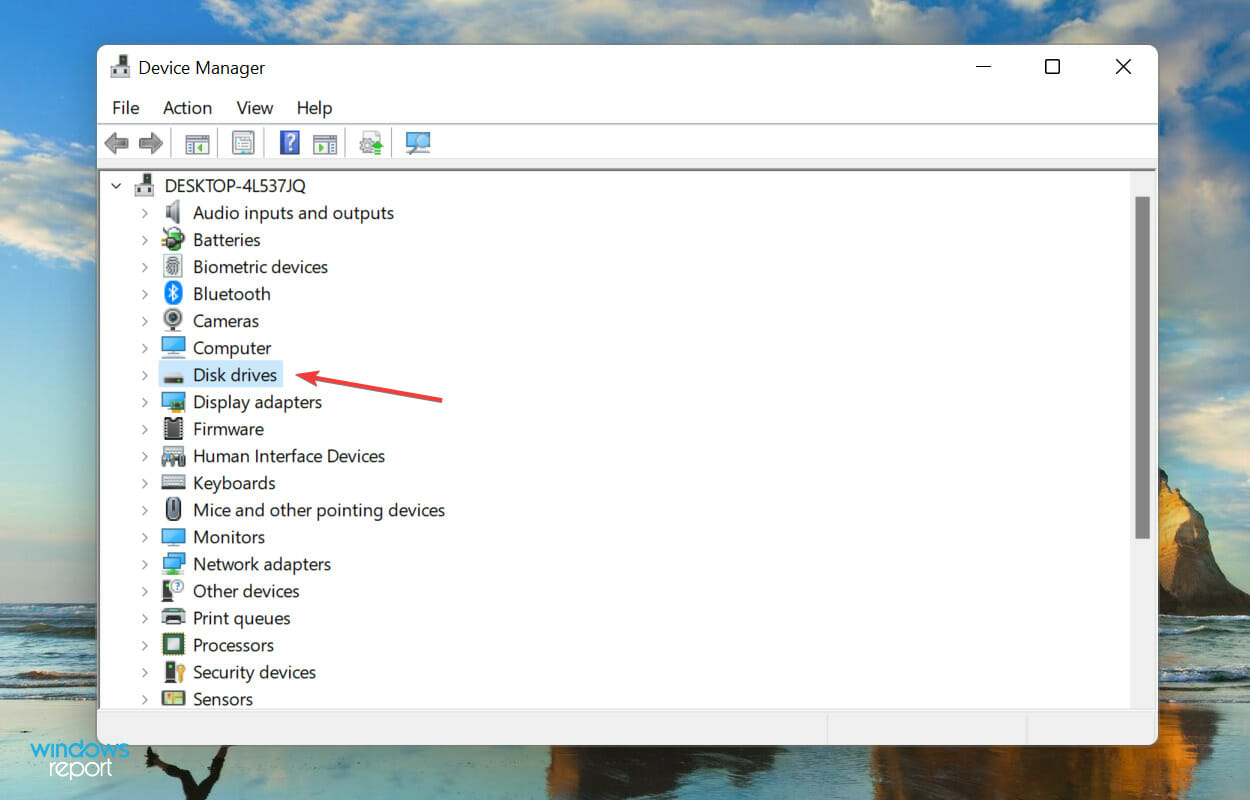
  2. Type Device Manager and press Enter.opening device manager windows 11
  3. Right-click on the Display Driver and choose Update.clicking update driver on graphics card on windows device manager
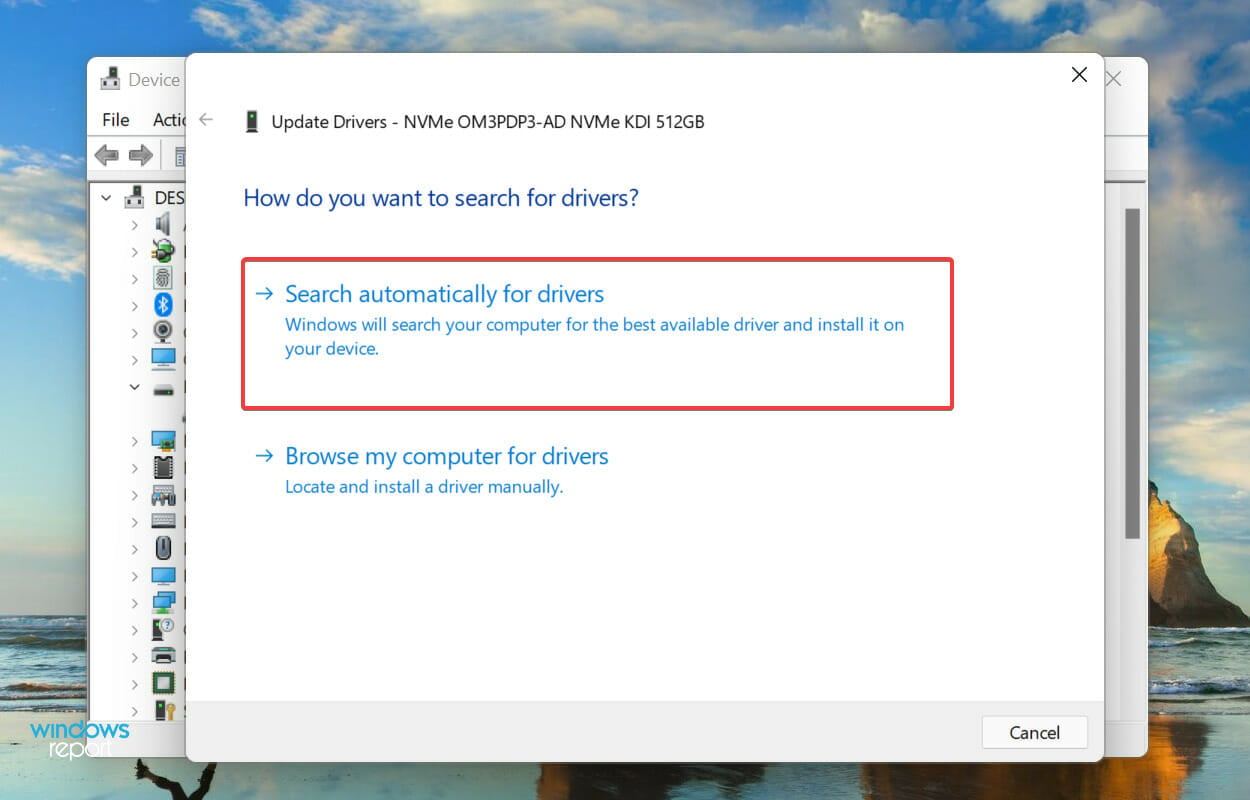
  4. Choose the preferred method to update.

The bad thing is Windows Device Manager often fails to detect the latest driver for the graphics card. As a result, the above steps may not be practical. So, we suggest you use an automated driver updating tool.

These tools can scan and detect outdated or missing drivers on your PC. You can update them with just a single click using this tool. Otherwise, they can do this thing automatically according to your preferred schedule.

Updating drivers doesn’t only solve 100% GPU utilization issue in an idle state but also solves GPU crash issues while gaming.

3. End background tasks

  1. Press CTRL + ALT + Del and click on Task Manager.
  2. Find the most power-hungry task, select it and click on End process.ending process windows 11 task manager
  3. Do the same for all other resource-hungry processes.

This process may temporarily fix the sudden GPU spikes problem that appears in an idle state. However, after the next bootup, it may return. So, the better idea is to update the software or uninstall it completely.

4. Uninstall problematic software

  1. Open Windows Settings.
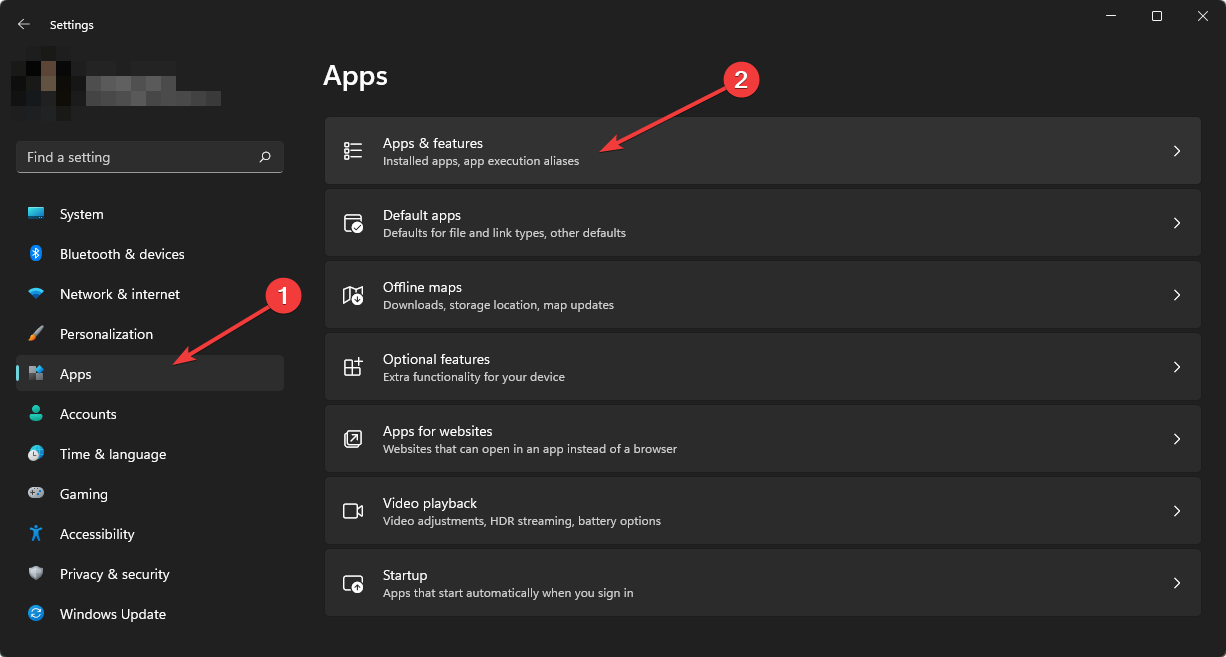
  2. Go to Apps and click on Apps & features.going apps & features Microsoft windows 11
  3. Search for the problematic software.
  4. Click on the three vertical dots and choose Uninstall.uninstalling smart game booster win11 settings

The built-in uninstaller always leaves some leftovers on your PC. So, you can consider using a tool like IObit Uninstaller. It can altogether remove any software from your computer.

Problematic software can cause various problems, like high CPU usage when GPU usage is low or vice versa. Uninstalling them will solve such situations.

5. Re-install the graphics driver

5.1 Uninstall graphics driver

  1. Open the Device Manager like before.
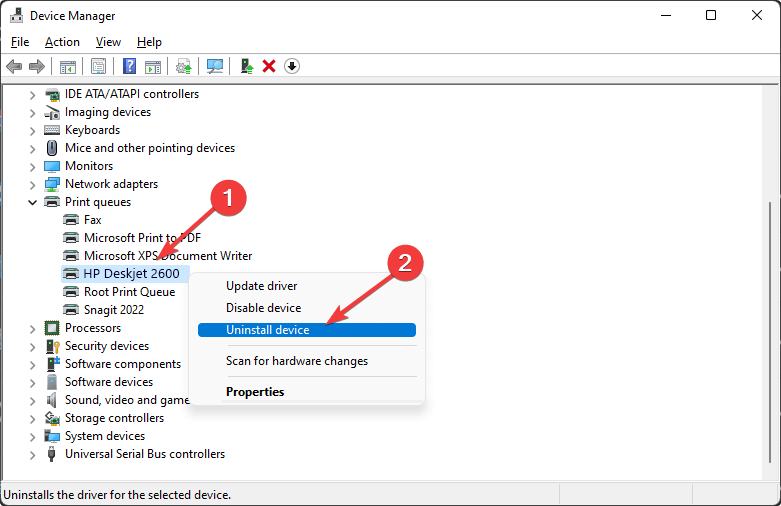
  2. Find the display adapter, right-click on it and choose Uninstall device.uninstalling graphics card device manager
  3. Check Attempt to remove the driver for this device and click on Uninstall.
  4. Restart your PC.

5.2 Install the driver again

  1. Go to the NVIDIA or AMD driver download page.nvidia download page
  2. Download the appropriate item and install it on your PC.

To install more conveniently, you can also depend on specialized driver updating software. After installing the appropriate driver, restart Windows. It should solve the GPU spikes issue when idle state.

6. Scan the PC with a good antivirus/malware software

  1. Install any of these best antivirus tools if you don’t have one already.
  2. Open it.
  3. Scan your whole computer.bitdefender scanning
  4. Remove any detected malware.

If you see a malicious program, uninstall it, as shown in method 4. Virus issues often cause your computer to have high GPU and CPU usage problems.

For best security, you can consider using TotalAV which is currently the best choice for PC users. If necessary, you also can know about the best antimalware tools and use any of them you want.

This article has featured the best methods to solve GPU spikes when idle on Windows. If you know any better method, you can write it down in the comment box.

Ntoskrnl.exe BSoD on Windows 11: Causes & How to Fix

Have you ever gotten a Blue Screen of Death? If you have, then you know just how frustrating it can be. Well, there are different variations of the error, and the ntoskrnl.exe BSOD in Windows 11 seems to be bugging users more recently.

The ntoskrnl.exe BSOD crash error can occur for several reasons, including hardware and software issues, as well as driver problems. This article will provide useful information on how to fix the ntoskrnl.exe BSOD error in Windows 11.

What is Ntoskrnl.exe BSOD?

Misconfigured system files in your Windows OS usually cause a ntoskrnl.exe BSOD error. The ntoskrnl.exe file is part of the Microsoft Windows NT kernel (NTOSKRNL), and it’s used to control access to several resources, including memory and processor time. 

One of the most common causes of a ntoskrnl.exe BSOD error is a damaged or missing system file. Various events, including malware infections and hardware failures can cause these.

Other causes include:

  • Hardware issues – You may have a faulty CPU or GPU in your hands and have no option but to upgrade your graphics card.
  • Outdated drivers – Using old drivers can cause issues such as BSOD. The best solution is to use a specialized tool.
  • Corrupted BIOS settings – You may end up with a corrupt BIOS if you’ve changed the settings recently and didn’t properly save them before rebooting Windows.
  • Virus or malware infection – It’s always recommended to have a good anti-malware program to scan your computer for malware.
  • Corrupted system files – Windows relies on many files to run smoothly, and if one of these files gets corrupted or damaged, you need to repair the corrupt system files, or the entire system will crash.

Symptoms of this problem include:

  • You experience frequent crashes and system slowdowns.
  • Unusual error messages may appear on the screen, such as driver_power_state_failure ntoskrnl.exe.
  • The system hangs while starting up, shutting down, or when you are trying to open a program.

Is Ntoskrnl.exe necessary?

The ntoskrnl.exe process is an executable file that belongs to Windows Kernel-Mode Drivers developed by Microsoft Corporation for the Windows NT operating system family as well as subsequent server versions. 

The kernel is the core of Microsoft Windows and is responsible for handling hardware requests and allocating resources to applications.

It’s also responsible for managing memory on your PC. This means that any errors with this file can cause a range of problems for your computer.

While the file process may be necessary, you must also know that Ntoskrnl.exe can cause high CPU usage.

What can I do to fix the Ntoskrnl.exe BSOD error in Windows 11?

Here’s what you should first do:

1. Check for Windows updates 

  1. Hit the Windows key and select Settings.settings windows 11
  2. Click on Windows update, then select Check for updates.check-updates lenovo-ideapad-keyboard-not-working
  3. Download and install if any are available.

2. Run a System File Checker scan

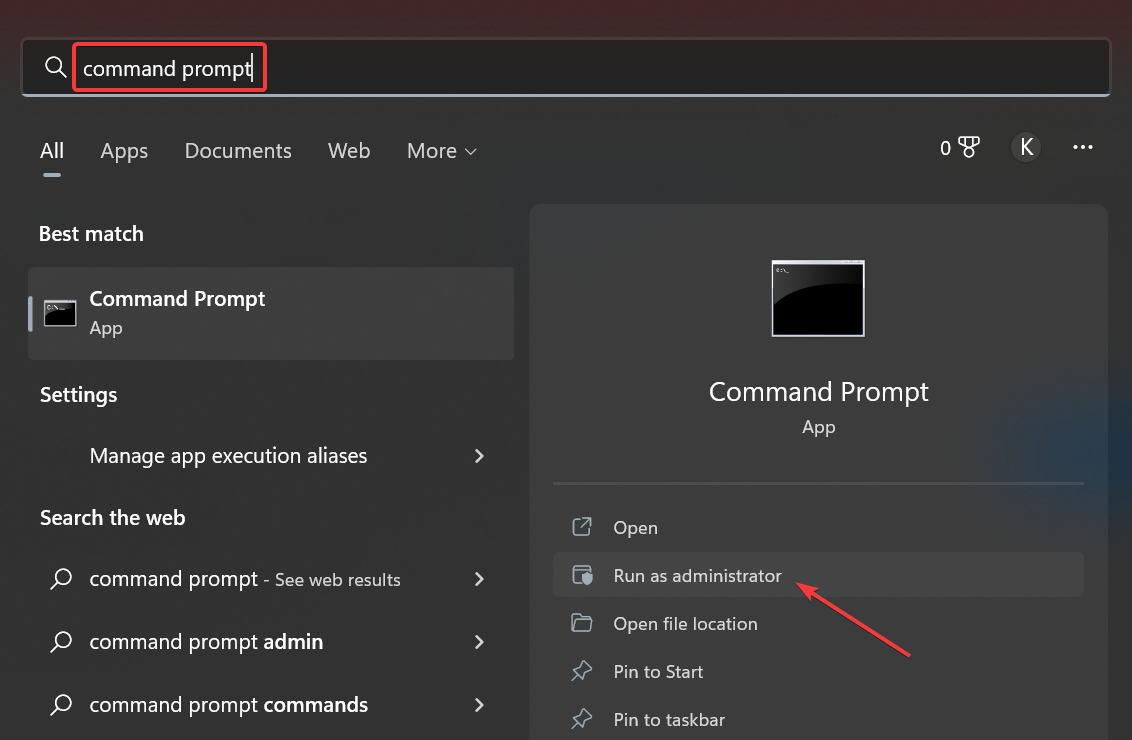
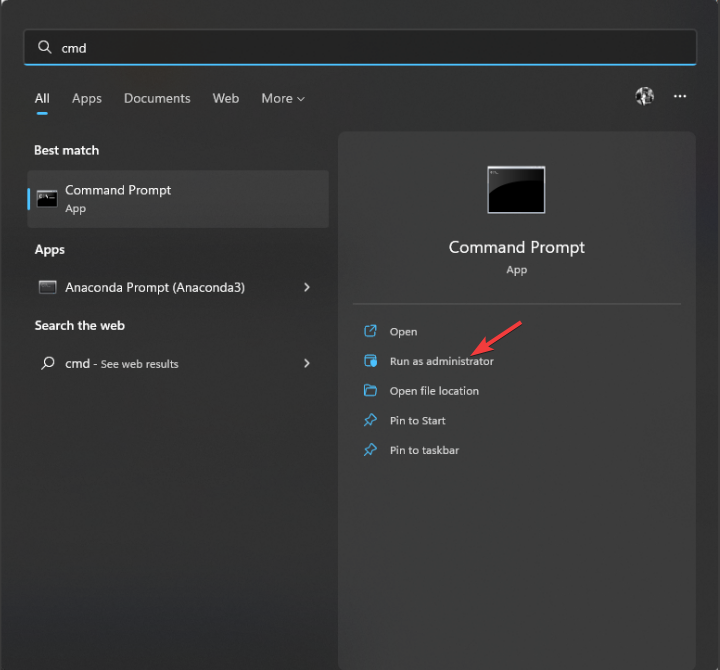
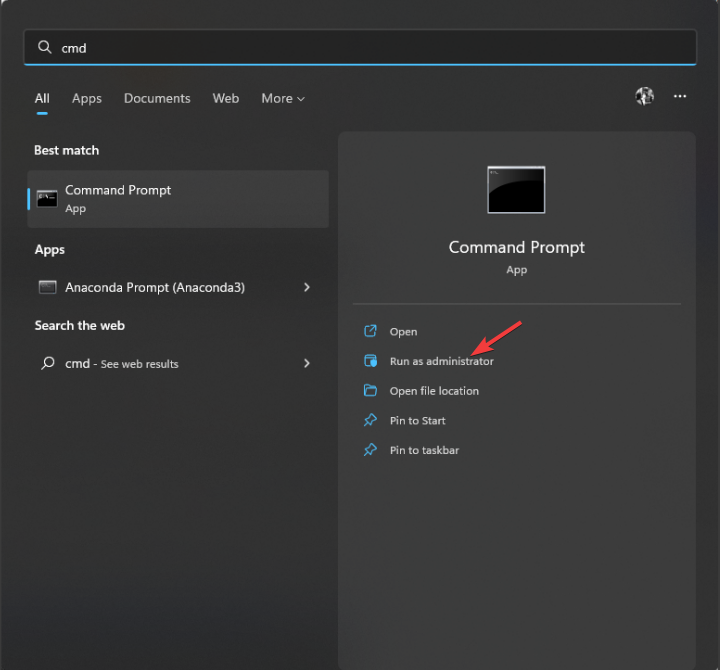
  1. Hit the Windows key, type cmd in the search bar, and click Run as administrator.
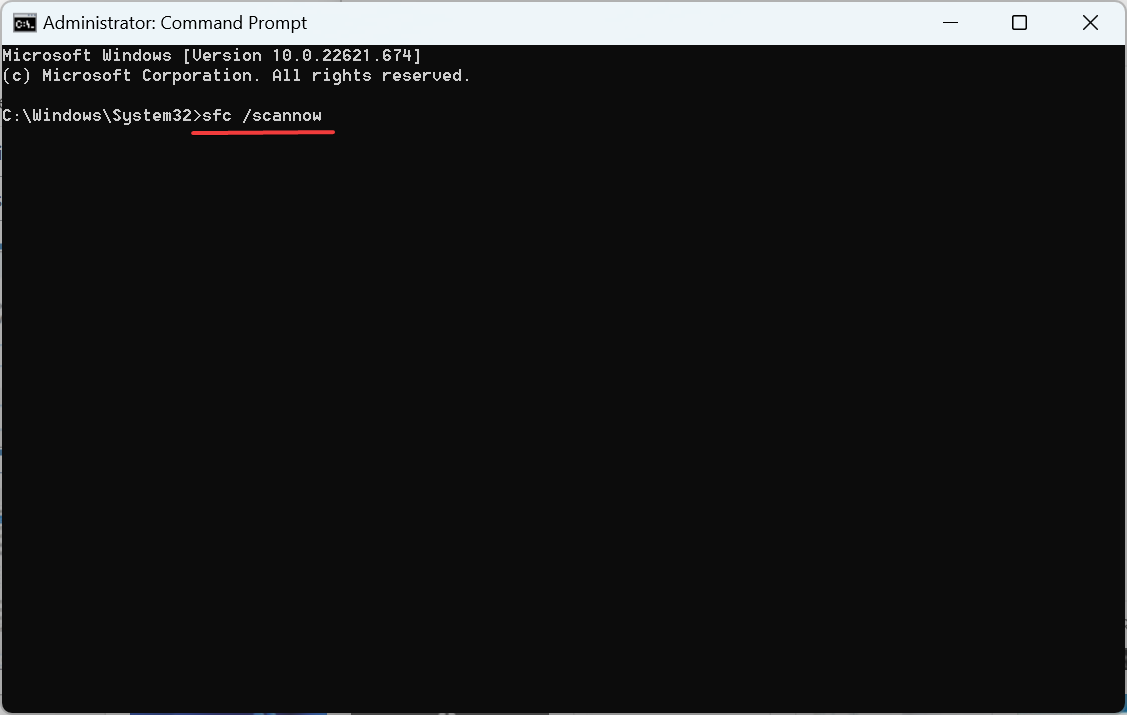
  2. Type the following command and press Enter: sfc /scannowsfc scan

Running the SFC scan will repair/replace any corrupt system files and should get things up and running in the case of ntoskrnl.exe BSOD IRQL_NOT_LESS_OR_EQUAL in Windows 10.

3. Run the CHKDSK command

  1. Hit the Windows key, type cmd in the search bar, and click Run as administrator.
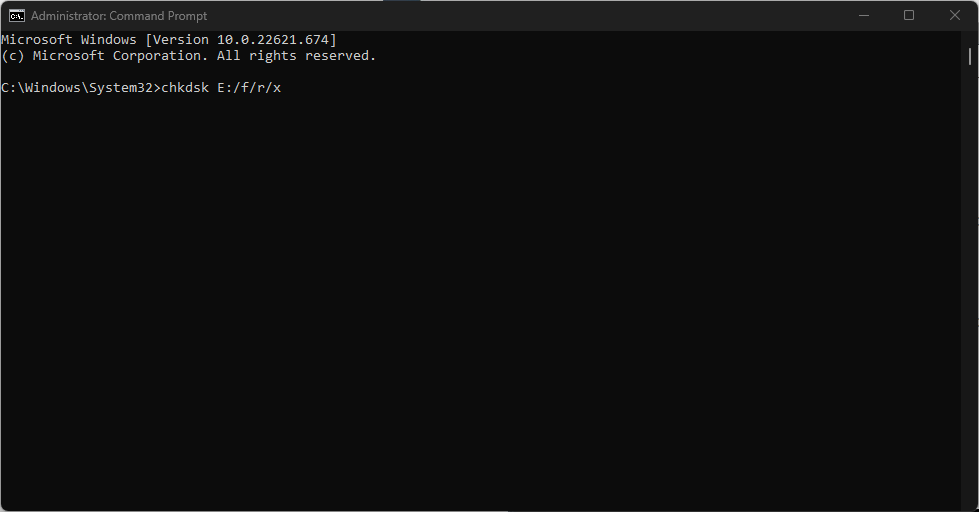
  2. Type the following command, replace the C letter with your drive’s letter, and press Enter: chkdsk C: /f

4. Disable overclocking

Overclocking is a process in which you increase the performance of your CPU by increasing its clock speed. However, if you have overclocked your CPU too much, then your computer might crash due to overheating.

The problem with overclocking is that it puts more stress on your system’s hardware and may cause instability or crashes. If you’re getting BSOD errors after overclocking, you should try reducing the frequency of your processor and see if that fixes the problem.

5. Boot to Safe Mode

If you’re having issues with your PC, it’s always best to start in Safe Mode. This will stop all non-essential processes and services from running, which may help reduce the chance of running into this error. 

By doing so, you can scan for viruses or malware on your computer and see if it is causing issues. 

Aside from BSOD errors, the file can also cause a Driver power state failure, so we recommend that you always keep your drivers up-to-date.

How do I fix Ntoskrnl exe missing or corrupt?

Here are a few ways you can fix a missing or corrupt Ntoskrnl.exe:

  • Run the Check Disk tool: If the file exists but can’t be accessed due to issues with the drive, running the Check Disk utility should do the trick.
  • Restore to the last know good boot configuration: When you are unable to boot the PC due to a missing or corrupt Ntoskrnl.exe, the best option is to boot into the last known good configuration from the BIOS.
  • Unplug peripherals: Certain peripherals, especially keyboards, are found to trigger the error. Some users shared that unplugging the keyboard when the PC is being turned on and then reconnecting it after Windows boots helps.

Hopefully, these solutions have been able to resolve the issue, and the ntoskrnl.exe BSOD error is a thing of the past in your Windows 11.

Feel free to drop us a comment down below if you have tried any additional solutions that we have not mentioned.

Windows 11 not Responding or Frozen: 10 Thorough Solutions

If Windows 11 is not responding or keeps freezing, you’re not alone. Many people experience similar issues, with the most common causes being outdated OS and corrupt system files.

Memory issues and outdated drivers can also be at fault. Luckily, none of these are critical problems, and with a few tweaks, you’ll be able to fix them. Check out our tested solutions below.

How to fix Windows 11 not responding

We advise you to restart or force shut down your PC before trying other fixes. This is because the issue might be a minor glitch with some processes, which a simple restart can fix.

If that does nothing and Windows 11 stays completely unresponsive, follow the more advanced steps below.

1. Disable the Search icon on Taskbar

  1. Right-click the Taskbar and choose Taskbar settings.
    taskbar settings windows 11 not responding
  2. Toggle the switch for the Search option backward to disable it.
    search
  3. Now, restart your PC.

If your Windows 11 desktop screen is not responding, it might be down to the Search icon on the Taskbar. Some users reported that removing the icon solved the issue quickly.

2. Update Windows 11

  1. Press Windows + I to launch the Settings app, and select Windows Update from the tabs listed in the navigation pane on the left.Windows Updates
  2. Click on the Check for updates button on the right to scan for any available newer versions of Windows 11.Check for updates to fix windows 11 desktop not responding
  3. If an update is listed after the scan, click on the Download & install button.Download & install

3. Perform a clean boot

  1. Press the Windows key + R, type msconfig, and press Enter.
    msconfig
  2. Click the Services tab at the top, check the box for Hide all Microsoft services, and click Disable all.
    hide all windows 11 not responding
  3. Select the Startup tab at the top and click Open Task Manager.
    startup task manager
  4. Right-click each of the apps there and select Disable.
    disable
  5. Go back to the System Configuration window and click Apply, followed by OK.
    apply ok
  6. Finally, restart your PC.

Performing a clean boot disables all third-party apps and services from starting up. This should fix the Windows 11 not responding on startup issue.

If your PC typically works on a clean boot, you can now start enabling the apps and services in batches to know the one causing the problem.

4. Uninstall conflicting programs

  1. Press Windows + I to launch Settings, and select the Apps tab from the left.Apps
  2. Click on Apps & features on the right.Apps & features to fix windows 11 desktop not responding
  3. Now, locate the problematic app, click on the ellipsis next to it, and select Uninstall from the flyout menu.
    Uninstall to fix windows 11 desktop not responding
  4. Again, click Uninstall in the confirmation prompt that pops up.Uninstall

5. Update the drivers

  1. Press Windows + S to launch the Search menu, enter Device Manager in the text field, and click on the relevant search result.Device Manager
  2. Double-click on the Display adapters entry here.Display adapters to fix windows 11 desktop not responding
  3. Right-click on the graphics adapter, and select Update driver from the context menu.Update driver to fix windows 11 desktop not responding
  4. Select Search automatically for drivers from the two options in the Update Drivers window.Search automatically for drivers
  5. Wait for your system to install the best driver available on the computer for the graphics adapters.

It’s recommended that you update the graphics driver in Windows 11 to eliminate the desktop not responding issue. If you haven’t previously downloaded the latest version, find out how to manually install the drivers in Windows 11.

6. Run a malware scan

  1. Press Windows + S to launch the Search menu, enter Windows Security in the text field, and click on the relevant search result that appears.Windows Security
  2. Click on the Virus & threat protection option.Privacy & threat protection
  3. Now, click on Scan options to view all the different types of scans available.Scan options
  4. Select the Full scan option and then click on the Scan now button at the bottom.Full scan to fix windows 11 desktop not responding

Now, wait for the scan to complete, and once it’s done, check if the Windows 11 desktop not responding issue is resolved. Also, while we have used the built-in Windows Security to scan for malware, you can use any reliable third-party antivirus for Windows 11.

7. Perform DISM and SFC scan

  1. Press Windows + S to launch the Search menu, enter Windows Terminal in the text field, right-click on the relevant search result, and select Run as administrator from the context menu.Windows Terminal to fix windows 11 desktop not responding
  2. Click Yes in the UAC (User Account Control) prompt that pops up.Click Yes
  3. Next, click on the downward-facing arrow near the top and select Command Prompt from the list of options. Alternatively, you can hit Ctrl + Shift + 2 to launch Command Prompt in a new tab.Command Prompt
  4. Now, type/paste the following command and hit Enter to run the DISM tool:Dism /Online /Cleanup-Image /RestoreHealthDISM to fix windows 11 desktop not responding
  5. Next, execute the following command to perform the SFC scan:sfc /scannowSFC scan to fix windows 11 desktop not responding

The DISM (Deployment Image Servicing and Management) tool and SFC (System File Checker) scan can fix many errors arising due to corrupt or missing system files, problems with the Windows image, or installation files.

8. Run the Windows Memory Diagnostic tool

  1. Press Windows + S to launch the Search menu, enter Windows Memory Diagnostic in the text field, and click on the relevant search result.Windows Memory Diagnostic to fix windows 11 desktop not responding
  2. Click on the Restart now and check for problems (recommended) option.Restart now and check for problems

9. Uninstall recent updates

  1. Go to Settings.
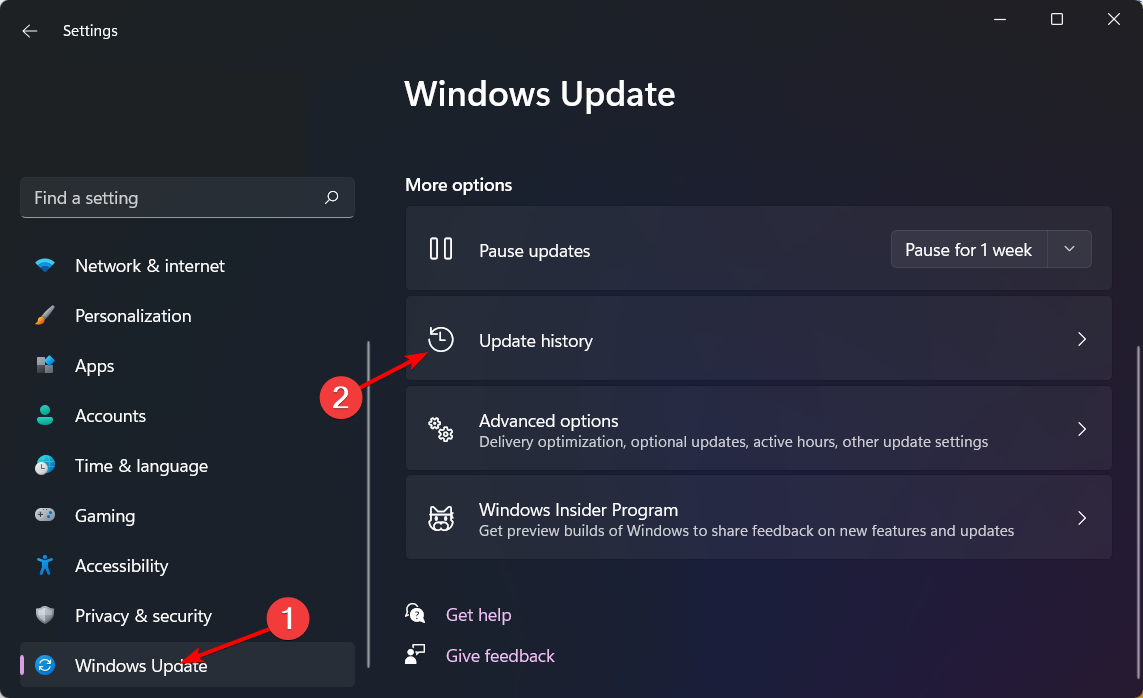
  2. Select Windows Update.windows update settings
  3. Pick the Update History section.update history
  4. Click Uninstall updates and remove the most recent updates.windows 11 uninstall updates

Keeping the system up to date is essential, but if the issue only appeared after you updated Windows, consider reverting. Sometimes, updates get buggy and until that’s addressed by Microsoft, you can fix the freezing issues by going back to a previous version.

10. Run a CHKDSK scan

  1. Press Windows + S, type cmd, right-click Command Prompt, and select Run as administrator.run cmd as admin
  2. Type this command and press enter: chkdsk /f /r /x.Run checkdisk
  3. Once the process is complete, restart your PC.

That’s it! By the time you execute the methods listed here, the desktop not responding problem in Windows 11 should be fixed. Unfortunately, if that’s not the case, you are left with no option but to reset Windows 11 to its factory settings.

If it’s not just the desktop but the whole computer, learn what to do if Windows 11 keeps freezing randomly.

Tell us which fix worked for you in the comments section below.

Combine TIFF Files Into One: Best Software

TIFF is a non-compressed image file format that preserves picture quality. It’s a good file format for storing photos.

Some users might need to combine multiple TIFF images into single multi-page TIFF files for cataloging and sharing. This is how you can merge TIFF files with alternative tools on a Windows PC.

How can I merge TIFF files?

1. Combine TIFF files with general image-editing software

Photoshop combine tiff files

Some image editors, like Adobe Photoshop, enable users to combine multiple images into single PDF documents. Adobe Photoshop incorporates a PDF Presentation feature that’s ideal for combining TIFF images within a single output document. Its users can also combine multiple photos into one image.

Aside from its PDF features, Photoshop incorporates a multitude of advanced image-editing features few other software can match. It enables users to replace backgrounds, add duotone effects, move and duplicate objects, create double exposure effects, and much, much more!

Other Adobe Photoshop features

  • It enables users to set up amazing slideshows for images
  • Users can add visually appealing quote graphics to images
  • Adobe Photoshop’s text and border guided edit enables users to add border overlays to pictures
  • The Smart Sharpen feature in Photoshop quickly reduces halo and noice effects in images
Adobe Photoshop

Adobe Photoshop

Easily and efficiently combine TIFF files by using this powerful image processing tool.
Check priceVisit website

2. Combine TIFF files with Online TIFF Combine

  1. First, open the Online TIFF Combine tool in your browser.
  2. Click the Choose file buttons to select TIFF images to combine. You can combine up to five TIFF images with this tool.
      The Online TIFF Combine utility combine tiff files  
  3. Press the Combine My File button.
  4. A Save As window will automatically open when it’s finished combining images. Select a folder to save the multipage TIFF file to.
  5. Then select the Save option to download the file.
  6. Open the folder you saved the multi-page TIFF file to in File Explorer.
  7. Then right-click the TIFF file and select Open with.
  8. Select to open the file with Windows Photo Viewer, which is a multi-page image viewer.
    Windows Photo Viewer combine tiff files
  9. You can click the left and right arrow buttons to flick through the image pages.

Note: You’ll need to open the combined image file with a multi-page image viewer to view all pictures incorporated within the file.

Software like Windows Photo Viewer, IrfanView, and XnView will display all picture pages within a combined image file. However, Photos only display one image.

3. Combine TIFF files into a single PDF

  1. Open the TIFF to PDF utility in a web browser.
    The TIFF to PDF utility combine tiff files
  2. Then click the Upload Files button.
  3. Hold the Ctrl key and select multiple TIFF files to include within the PDF.
  4. Press the Open button to upload them.
  5. When the images have uploaded, click the Combined button.
  6. Next, select a folder to save the PDF to.
  7. Press the Save button.
  8. Thereafter, open the folder you saved the TIFF image PDF file to.
  9. Double-click the PDF to open it with your default Portable Document Format software.

4. Merge TIFF files into one with TIFF-editing software

You can also create multipage TIFF files with dedicated TIFF-editing software. Advanced TIFF Editor Plus is one such utility for viewing, converting, and editing TIFFs, and other image formats..

It also packs in text recognition (OCR) and virtual printer features to boot.

  1. Click File > Merge Files.
  2. Choose Add Files to choose the images to include within the multipage TIFF.
  3. Select a folder to save your files to.
  4. Click OK to combine the selected files.
A Files Merge window combine tiff files

Advanced TIFF Editor Plus is not freeware software. However, you can still utilize its trial package for one month. You can combine many TIFF images without getting the registered Advanced TIFF Editor Plus if you make the most of its one-month trial package.

⇒ Get Advanced TIFF Editor Plus

So, there are a few different ways you can combine your TIFF images with online tools and offline software.

You can utilize Online TIFF Combine and Advanced TIFF Editor for creating multipage TIFF image files.

To combine TIFF files into one PDF, check out Photoshop or the TIFF to PDF utility.

Convert Secured PDF to Word: 3 Easy Ways

Some users prefer using PDF over Word documents, but did you know that you can save a secured PDF as a Word document? It’s actually easier than you think.

We will explore in this article the exact steps you need to follow to convert a locked PDF to WORD, so make sure to keep on reading.

How can I convert a protected PDF to Word?

1. Use Soda PDF

Soda PDF is widely used thanks to the available features and tools designed to make your work easier.

With this tool, you can quickly edit, share, sign, encrypt, and convert PDF files while keeping all the information intact.

Soda PDF can convert multiple formats including HTML, TXT, GIF, DOCX, TIFF, JPG, PNG, BMP, and many more.

In order to convert secured PDF to Word, make sure to follow these steps:

  1. Open your PDF file by uploading it to the Soda PDF official website.
  2.  Click on the Choose file button or simply drag and drop it.
  3.  That’s it, now you can download your PDF to the Word format.

Soda PDF

View and convert secured PDF files to Word easily with Soda PDF.
Free Trial Visit Website

2. Use an online tool

Another quick way to save a secured PDF as a Word document is to use an online converter.

There are several tools that you can use, depending on the complexity of your PDF file, but we suggest you try pdfFiller.

This PDF converter tool will do the job just perfectly because it has great speed scores and will keep your data secured.

Moreover, many users consider it much simpler to convert secured PDF to Word online due to not having to download new software and learn how to use it.

Moreover, you can host fillable forms, add watermarks, images, videos, and many other features while protecting your documents with advanced encryption.

⇒ Get pdfFiller

3. Use Google Docs

  1. Open Google Drive and click on the New option.
  2. Next, select the File upload button.
  3. Locate the PDF file and click on Open.
  4. Now you will see the PDF file in your Google Drive.
  5. Right-click on the PDF and select the Open with option.
  6. From the displayed options, select Google Docs.
  7. Now, click on File and select the Download menu.
  8. Finally, select Microsoft Word from the list and indicate a location on your device.

Converting a secured PDF file into a Word document can be done easily when following the exact steps we have indicated in this article.

How do I unlock a PDF without the password?

To unlock a PDF without the password you can enlist the help of PDF editors or online tools which will help you lift the encryption from your file.

You might also want to check our guide on how to open a PDF if you forgot the password that you set to protect it. We also have a guide on how to save a Microsoft Word document as a PDF, so don’t miss it.

We hope that the solutions presented here helped you quickly convert your file. Please share with us in the comments section below which solution has worked best for you.

7 Ways to Factory Reset Your Dell Laptop on Windows 10

Ever find yourself in a situation where you want to remove all your files from your laptop or computer? You’re not alone. There are many reasons why you might want to do this. 

Perhaps you’re selling the computer or want your old data erased for security reasons. Unfortunately, many people don’t know how to factory reset a Dell laptop on Windows 10. Thankfully, we have those answers.

How can I factory reset my Dell laptop?

1. Use Settings 

  1. Click on the Windows button and select Settings.
  2. Select Update & Security.
  3. Click on Recovery on the left pane, then under Reset this PC, click Get started.
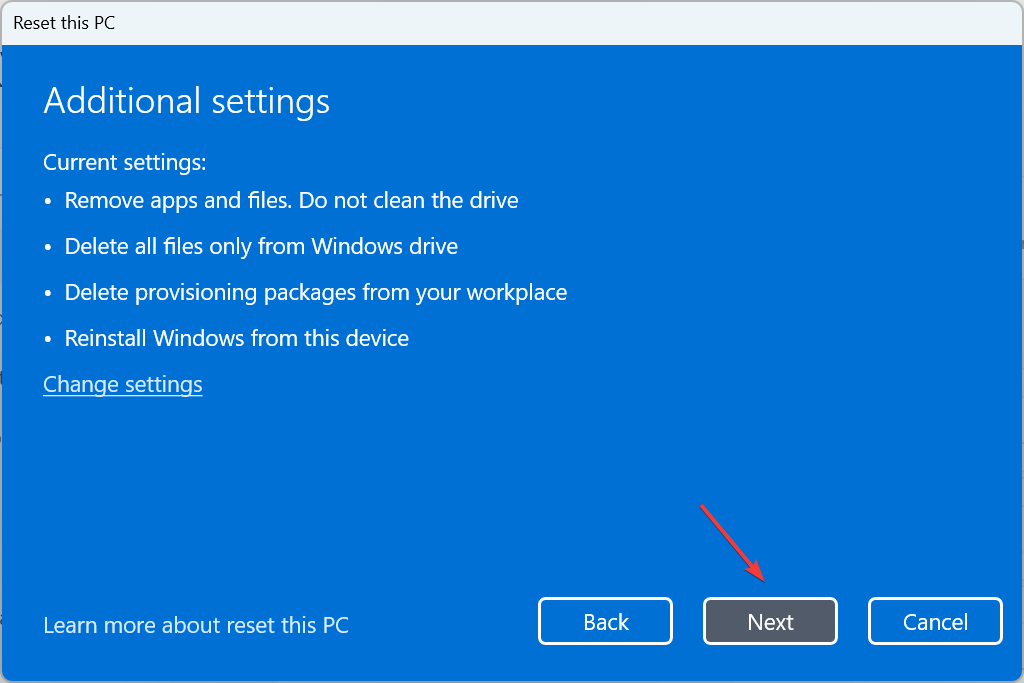
  4. Select the Remove everything option.
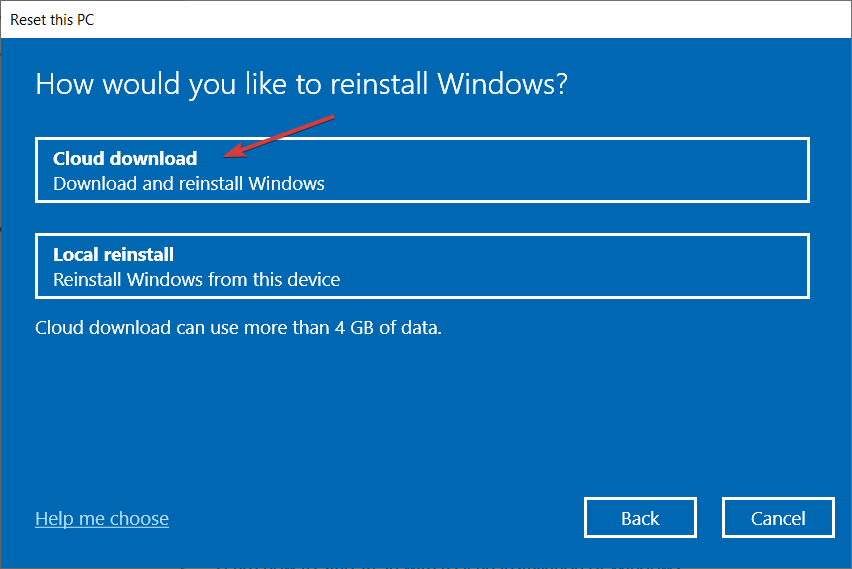
  5. Choose a Cloud download or Local reinstall.
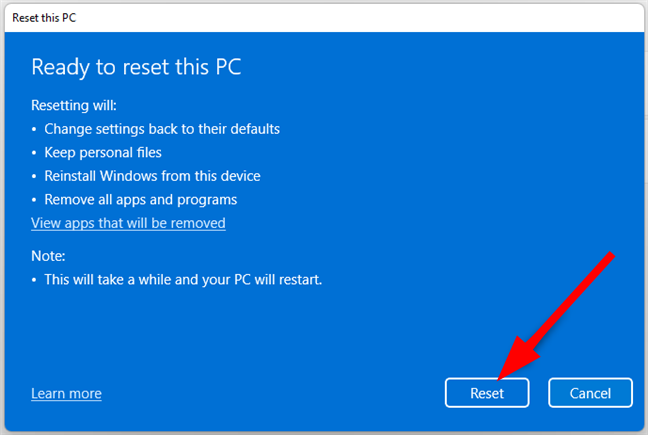
  6. Click Reset and wait for the process to complete.

2. Reset from Startup 

  1. Power on your Dell laptop and the login screen; don’t enter the password.
  2. Click on the Power button and select Restart while holding the Shift key.
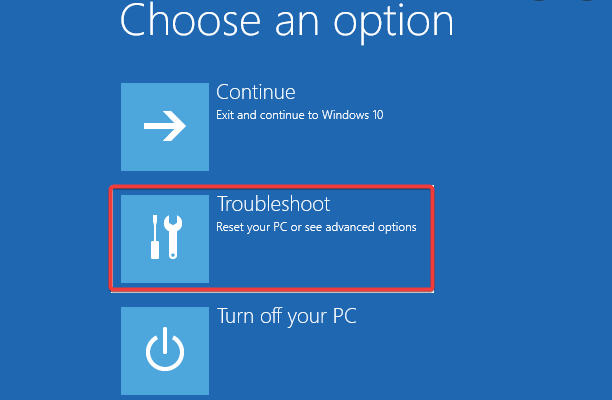
  3. Once the Windows Recovery page pops up, release the Shift key and select Troubleshoot.
    blue screen loop Windows 10
  4. Select Reset this PC.
    reset-pc sfc scannow not working
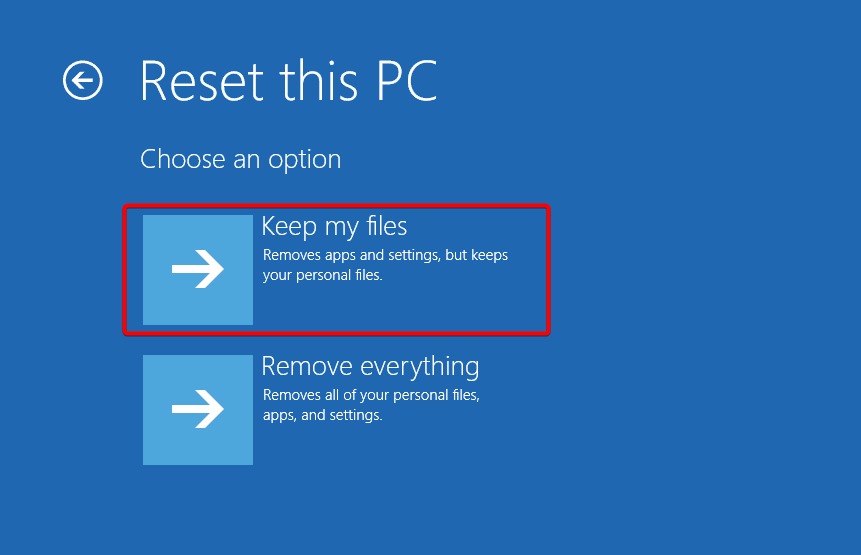
  5. Click on Keep my files or Remove everything.
  6. Select an account.
  7. Enter your password.
  8. Click on Reset.

3. Use Windows Recovery Environment

  1. Click the search icon on the taskbar, type reset, and select Reset this PC.
  2. Locate the Advanced startup option and click Restart now under it.
  3. Click on Troubleshoot.
    blue screen loop Windows 10
  4. Select Factory Image Restore.
  5. Follow the instructions on the screen to complete the rest of the steps.

4. Reset from Boot

  1. Power on your Dell PC, and when the Dell logo appears, hold down F8 until the Advanced Boot Options appear.
  2. Select Repair Your Computer.
  3. Choose your preferred keyboard and input language.
  4. Enter the username of the Administrator account you are using and leave the password section empty.
  5. Select Dell Datasafe Restore and Emergency Backup.
  6. Next, click on Restore My Computer.

Factory resetting your Dell laptop on Windows 10 from boot is more suitable for users who forgot their password.

5. Use the Command prompt

  1. Press the Windows + S keys, type cmd, and then click Run as administrator.
  2. Copy and paste the following command and press Enter: systemreset –factoryreset
  3. Select Keep my files or Remove everything and follow the on-screen instructions to complete the process.

6. Reset from BIOS

  1. Power on your Dell PC, and when the Dell logo appears, hold down F2 until the BIOS setup appears.
  2. Use the arrow keys to navigate the Boot tab, scroll down to the Secure Boot option, select Disabled, and hit Enter.
  3. Navigate to the Advanced tab, select the BIOS Auto-Recovery option, select Enabled, and press Enter.
  4. Hit F10 to save settings and restart the PC.
  5. Wait for the Dell logo to appear and hold down F12.
  6. Select the SupportAssist OS Recovery option and hit Enter.
  7. Click on Restore System.
  8. The Factory Image Restore window will pop up. Click Next.
  9. Choose whether to back up files or skip them.
  10. Agree to the factory reset.

If SupportAssist OS Recovery loads to a blank screen, follow this guide to fix it: Dell SupportAssist blank screen.

7. Use Dell Backup and Recovery Application

  1. Navigate to your browser and download the Dell Backup and Recovery Application.
  2. Install and run it.
  3. Click on Recovery.
  4. Restart your Dell PC and press CTRL + F8 while it boots to enter Advanced options.
  5. Select Troubleshoot.
  6. Click on Reset your PC.
  7. Now follow the on-screen instructions to complete the reset.

Why should I factory reset my PC?

If you’re having trouble deciding whether or not to factory reset your PC, there are a few other reasons why this procedure might be beneficial for you:

  • Malware – You should factory reset your PC if you suspect it has been infected with malware. It can be tough to remove malware manually, so we recommend you factory reset your PC.
  • Fixing problems on your PC – A factory reset often fixes problems that you might have with your computer. For example, a factory reset could fix a corrupted operating system.
  • Makes it easier to sell or give away your PC – If you’re selling or giving away your computer, then a factory reset is one of the best ways to clean up your hard drive so that no personal information remains on it.
  • Revert settings to their original state – If you’ve made changes to how Windows works, such as changing the default apps for certain tasks or adding new fonts for text display, a factory reset will restore these settings back to their original state.
  • Improve performance – If your PC is slow to start up, slow to load programs and other apps, or if it’s constantly freezing, a factory reset could fix these issues.

Factory resetting won’t solve every problem with your PC, but it’s certainly worth trying if nothing else has worked.

Does factory reset delete everything on a Dell laptop?

Factory resetting a Dell laptop allows you to remove all personal information from your device and return it to its original state when you first bought it. This can be useful if you’re selling or giving away your laptop since it doesn’t contain any sensitive data anymore.

Factory resetting your computer will allow you to keep your files or delete all the data on your hard drive, including any installed applications and files. The last option erases all user data and settings on your laptop, but it doesn’t delete Windows or other software that came with your computer.

Nevertheless, it is essential to back up any important files before performing the factory reset.

FAQs

How long does it take to factory reset a Dell laptop?

A factory reset usually takes between 30 minutes to 2 hours, depending on your laptop’s speed and the reset method used. The Cloud download option generally takes longer because it needs to download Windows files.

Will a factory reset remove Windows 10 from my Dell laptop?

No. A factory reset removes personal files, apps, and settings but keeps the Windows 10 operating system installed so your laptop can start fresh.

Can I factory reset my Dell laptop without a password?

Yes. You can reset your Dell laptop from the boot menu or Windows Recovery Environment without logging in, making it ideal if you’ve forgotten your password.

Do I need an internet connection to factory reset my Dell laptop?

Not always. If you choose the Local reinstall option, the reset uses existing system files. However, for Cloud download, a stable internet connection is required to fetch the latest Windows version.

And that’s how to factory reset your Windows 10 Dell laptop. If you are using a more recent version of Windows, we also have a guide on factory resetting Windows 11.

In case you run into a hurdle and, for some reason, you can’t reset your Windows 10, we have a dedicated article on how to bypass this issue.

Do let us know of any other issues you may have encountered in the comment section below.

Error Loading Python DLL: Resolved in 4 Easy Steps

Python is a great programming language, but error loading Python DLL on their PC. This problem can lead to other issues, such as Python runtime error for example.

If you are also troubled by this error, here are a couple of troubleshooting tips to help you resolve this issue once and for all.

Why does the error loading Python DLL appear?

There are multiple reasons for this issue, but the following are the most common ones:

  • User error – Sometimes not running the proper file or not having your script configured properly can lead to DLL errors. This can also lead to PIP not recognized and other errors.
  • Lack of administrative privileges – If you don’t use administrative rights while running Python commands, sometimes you might encounter this error. You can do that by using administrator account.
  • Version incompatibility – Older versions of Python aren’t always compatible with scripts made using the latest version, which results in this error.

How can I fix the error loading Python DLL?

Before we start fixing this problem, there are a couple of quick checks that you need to perform:

  • Use the correct directory – Many users reported this issue because they used build instead of dist directory. Not using correct directory can lead to The specified module could not be found and other problems. To avoid this issue, always use dist/main
  • Check your Python version – If you compiled your script with a newer version, older versions of Python might not be able to run it. This is especially true for Windows 7 since it doesn’t support Python 3.9 or never.
  • Start the console as administrator – Before you run your script, that the command line as administrator and check if that helps.

1. Add your configuration to the Python script

  1. Open your Python file.
  2. Copy the configuration parameters to the top of the file.
  3. Save changes.

Many users reported that moving the configuration parameters from a separate file or the spec file, fixed the problem for them, so be sure to try it.

This solution can help you if you’re getting an error loading python dll python310.dll or python39.dll anaconda message.

2. Use different parameters with pyinstaller

  1. Start your console.
  2. Now enter the following command: pyinstaller --upx-exclude"vcruntime140.dll" myscript.py
  3. Press Enter to run it.

Users also reported that the following commands worked for them, so feel free to try them as well: pyinstaller --onefile file_name.py
pyinstaller --noupx file_name.py

This is a simple and easy solution if you’re getting error loading python DLL in pyinstaller.

3. Add Temp directory to the list of exclusions

  1. Press Windows key + S and enter windows security. Select Windows Security from the list.
  2. Go to Virus & threat protection. Next click on Manage settings.
  3. Click on Add or remove exclusions.
    Add or remove exclusions - asus rog gaming center not working
  4. Click on Add an exclusion and select Folder.
  5. Select the following directory: C:\Users\your_username\AppData\Local\Temp

Error loading python dll loadlibrary pyinstaller: formatmessagew failed can cause a lot of problems, but this solution might help you fix them.

4. Delete files from pyinstaller folder

  1. Press Windows key + R and enter %appdata%. Press Enter.
  2. Navigate to pyinstaller directory.
  3. Delete all files from it.

This is a simple workaround and it can be helpful if you’re getting error loading Python DLL in Ultimaker Cura or AWS CLI.

The Error loading Python DLL can be problematic, but we hope you managed to solve it. If you believe that this issue is caused by a lack of permissions, our Python permission denied error guide should be able to help you.

Error subprocess-exited-with-error is also common in Python, but we have a separate guide that tackles it, so don’t miss it.

We have a new guide on what to do if python27.dll is missing, so don’t hesitate to check it out for more information. For a related issue, see our guide on Python error OXZEP7 software with quick, step-by-step fixes.

Did you find a different solution for this problem? Let us know in the comments section below.

Green Check Marks on Desktop Icons: How to Remove Them

Disappointed by seeing green check marks on desktop icons? Why do you see these check marks on your desktop icons? Well, there’s no need for an alarm as they are not harmful.

Nevertheless, some users find it helpful, and others do not. This article is for you if you fall in the category of users who don’t like the check marks. We will explore why they appear and how to get rid of them successfully.

Why do my desktop icons have green check marks?

You may have noticed that some of your desktop icons have a green checkmark, and some do not. The reason for the green check mark is:

  • This a visual reminder that your files are backed up on OneDrive in case something happens to your computer or hard drive.
  • It also indicates that your local copy of the file is synchronized with the cloud version.
  • You can also share the files with others in your organization or collaborate on projects with coworkers.
  • It gives you the go-ahead to delete the local files as they are already on OneDrive, so that they won’t take up space on your computer.

Backing up your files is extremely important because of the following reasons:

  • Secures files – Having multiple copies of your files ensures that you still have others stored elsewhere if one copy is lost, damaged, or destroyed.
  • Recovery and restore – A backup allows you to recover a deleted file even if there is no other copy of it elsewhere on your computer or an external drive. 
  • Saves storage space – If you have limited space on your PC, you can always transfer files to OneDrive and delete the local file to free up disk space.

How can I get rid of the little green check marks on my desktop icons?

First off, try the following before proceeding to the multiple-step solutions:

  • Right-click on your Desktop and refresh.
  • Close and open OneDrive.
  • Try restarting your PC.

1. Don’t backup the Desktop folder

  1. Launch OneDrive and go to Settings.
  2. Click on the Backup tab, then locate the Desktop folder.
  3. Hit Stop backup.

Stopping backup means all files on the Desktop will no longer be backed up on OneDrive.

2. Pause sync

  1. Launch the OneDrive icon by clicking on the system tray.
  2. Click on Help & Settings in the pop-up menu.one drive help & settings
  3. Select Pause syncing and choose a suitable time option for you.

3. Disable OneDrive

  1. Launch the OneDrive icon by clicking on the system tray.
  2. Select Settings.
  3. Click on the Account tab, then select Unlink this PC.
  4. Confirm by clicking Unlink account in the dialog box that pops up.unlink-acc onedrive red x

4. Remove OneDrive from Startup

  1. Hit the Windows key, type Task Manager and click Open.
  2. Navigate to the Startup tab and locate OneDrive.
  3. Right-click on it, then select Disable.

You can also delete the folder from your desktop as it has already been backed up in OneDrive. It’s always a good idea to free up disk space as it can make your PC run faster and improve performance.

Alternatively, you can stop using OneDrive as your backup solution and switch to other local backup software that won’t leave any green check marks on your folders.

In another similar occurrence, for users who like the check mark, sometimes you’ll find that the green check mark is missing in OneDrive. If so, we have the perfect article to help you resolve this issue.

We also have a detailed article on how to get rid of the red x mark on folders on OneDrive, so be sure to check out our guide.

In the comment section below, let us know which method worked best for you.

WinZip Driver Updater Review: How Safe is it?

WinZip Driver Updater is a program designed to help you update the drivers on your computer. It scans your computer for outdated or missing drivers, then downloads them from the internet to be installed correctly on your machine.

In this modern age, it is essential to keep your drivers updated, and if there are tools that can help you do so automatically, even better.

What is WinZip Driver Updater, and do I need it?

WinZip Driver Updater is a software that promises to help you update your system drivers. This tool can help identify the correct driver for your PC and manage updates via a single click. 

However, before downloading it, you should consider using WinZip Driver Updater because many reviews claim this application is duped and faked. 

This is why we have created an honest WinZip Driver Updater review to help you decide whether or not to use it.

Many people have downloaded WinZip Driver Updater. However, some users have reported that this program may cause problems on their PCs. On the other hand, others also claim that it is one of the best tools for updating drivers, so there are a lot of mixed reactions.

Its usability has some pretty good features, so depending on what you are looking for in a driver updater tool, it may or may not be for you. Some of its key features include:

  • Easy to install and use – WinZip Driver Updater key does not require special skills or knowledge; download it from the official website and install it on your computer or run the software.
  • Free – The software comes in a free version with decent features to scan for corrupt drivers and replace them.
  • Boosts PC performance – WinZip Driver Updater promises to maximize the functionality of your PC and ensure it is at optimum levels.
FreePro
Free trialYesYes
Scheduled driver updatesYesYes
Automatic backup and restoreYesYes
Free driver scansYesYes
Single-click driver installsNoYes
Email supportNoYes

Can WinZip be trusted?

We all know we should be careful about what we download and install on our computers. But unfortunately, there are many malicious pieces of software out there that can cause you nothing but trouble. 

The first concern is that WinZip has been known to bundle its software with third-party applications. It’s, therefore, understandable that some people may be wary when trying to install it on their machines.

When it comes to whether WinZip Driver Updater is legit, the answer is yes. But, you have to pay attention to details. There is a similar program with an identical name, but that is actually a virus. So, be sure to check out our guide on how to remove the WinZip Driver Updater virus from your PC.

WinZip

Easy-to-use software that ensures an optimum level of your PC by finding the correct drivers.

Winzip Driver Updater is it safe?

As with any software, you should always be cautious when downloading programs from the internet. Many viruses out there pose as legitimate programs but are actually malicious software designed to steal your personal information or damage your computer.

By now, you must be aware that some software can find its way into your PC without you downloading them. Most of the time, such software contains malware. That’s why we recommend installing a comprehensive antivirus program to detect such issues.

The best way to ensure that you are downloading a secure version of WinZip is to only download from official sources such as the official website.

If you have a lot of programs on your PC, you may sometimes experience problems related to drivers. For example, they might be outdated, corrupted, or missing. Unfortunately, the only way to solve this problem is to download and update the drivers manually or automatically. 

Fortunately, auto-updating drivers are much more manageable. And you can do so with the help of the WinZip Driver Updater program. However, if you’re skeptical, there are other free driver updater tools. You can try them out, as they do the same job.

We also have a review on the IObit Driver Updater, so be sure to check out its features and see if it is a good match for you.

Let us know what other software you’d like us to review in the comment section below.

clb.dll is Missing: How to Download & Fix it

DLL or Dynamic Link Library is a file class containing critical information often shared by multiple applications. Of late, many users shared that the clb.dll file is missing in Windows.

Remember, missing DLL files is not an unusual scenario. And when the clb.dll file is missing, users reported being unable to open the Registry Editor, which presents a significant problem. So, let’s walk you through the solutions.

What can I do if the clb.dll file is missing?

1. Get the missing dll file

The easiest way to fix things when clb.dll is not found is to get it manually. While several websites claim to offer the clb.dll for Download, we don’t recommend using them due to security concerns.

It’s always better to use a safe and reliable DLL repair tool that will automatically get the missing DLL files. Use any of these, and the problem should be gone in no time.

A safe option as a dependable repair tool we strongly recommend software that has a substantial database of new components ready for replacement purposes when your PC has corrupt or missing files.

2. Run DISM and SFC scan

  1. Press Windows + S to open the Search menu, type Command Prompt, and click on Run as administrator.command prompt
  2. Click Yes in the UAC prompt.
  3. Now, paste the following three commands one at a time and hit Enter after each to run the DISM tool:dism.exe /online /cleanup-image /scanhealth dism.exe /online /cleanup-image /restorehealth dism.exe /online /cleanup-image /startcomponentcleanup
  4. Once done, execute the following command to run the SFC scan:sfc /scannowsfc scan to fix clb.dll is missing

If you want to get the missing clb.dll file manually, the DISM (Deployment Image Servicing and Mangement) tool and the SFC (System File Checker) scan will aid. Running these would get the missing dll file and replace any corrupt system files.

3. Reinstall Visual C++ Redistributable

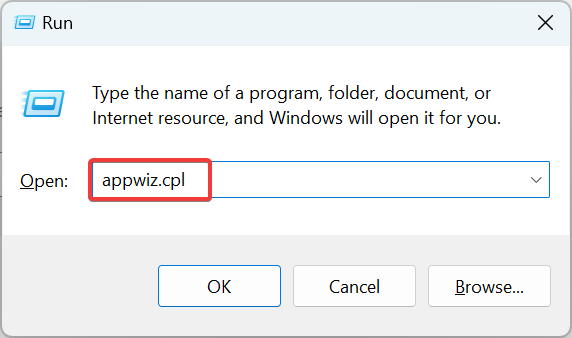
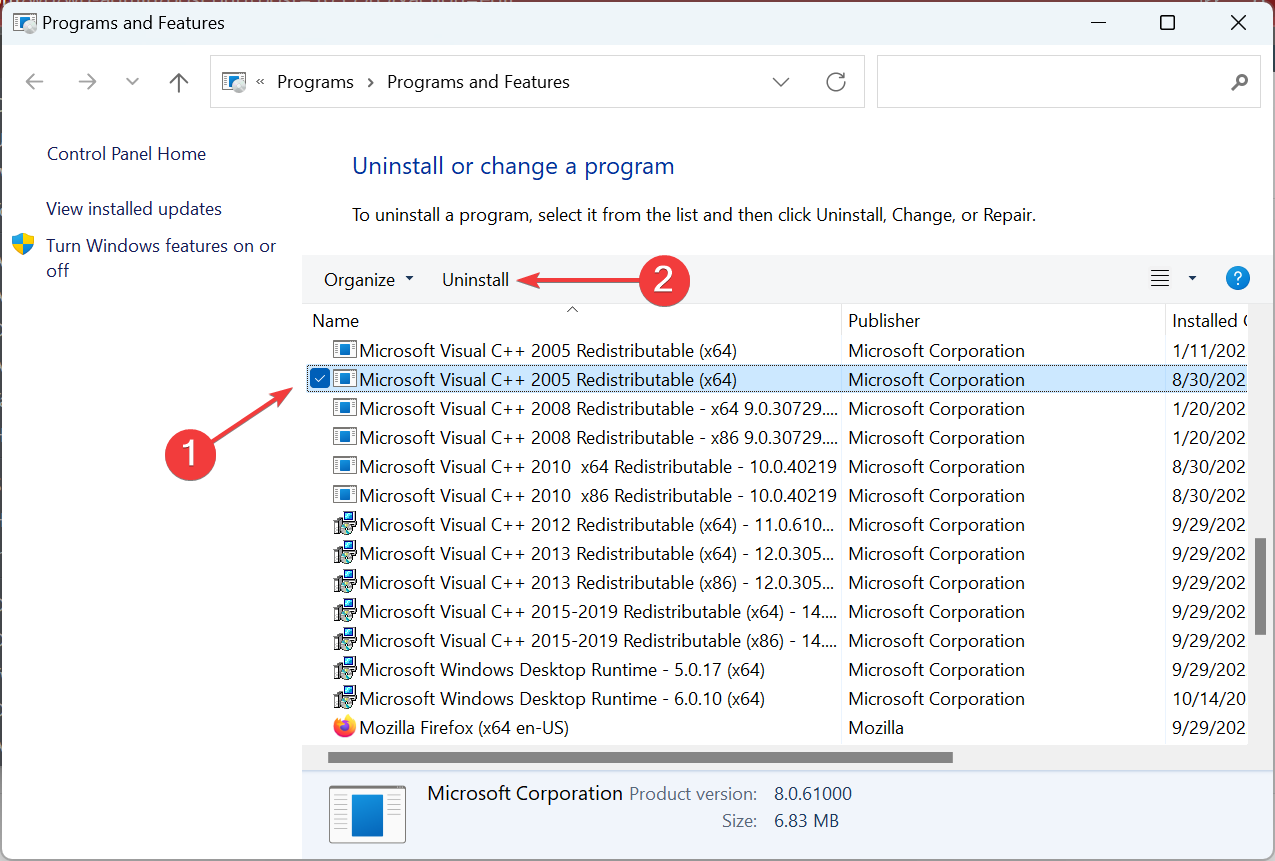
  1. Press Windows + R to open Run, type appwiz.cpl, and hit Enter.appwiz.cpl
  2. Locate the Microsoft Visual C++ Redistributable entry, select it, and click on Uninstall.uninstall to fix clb.dll is missing
  3. Follow the on-screen instructions to complete the process.
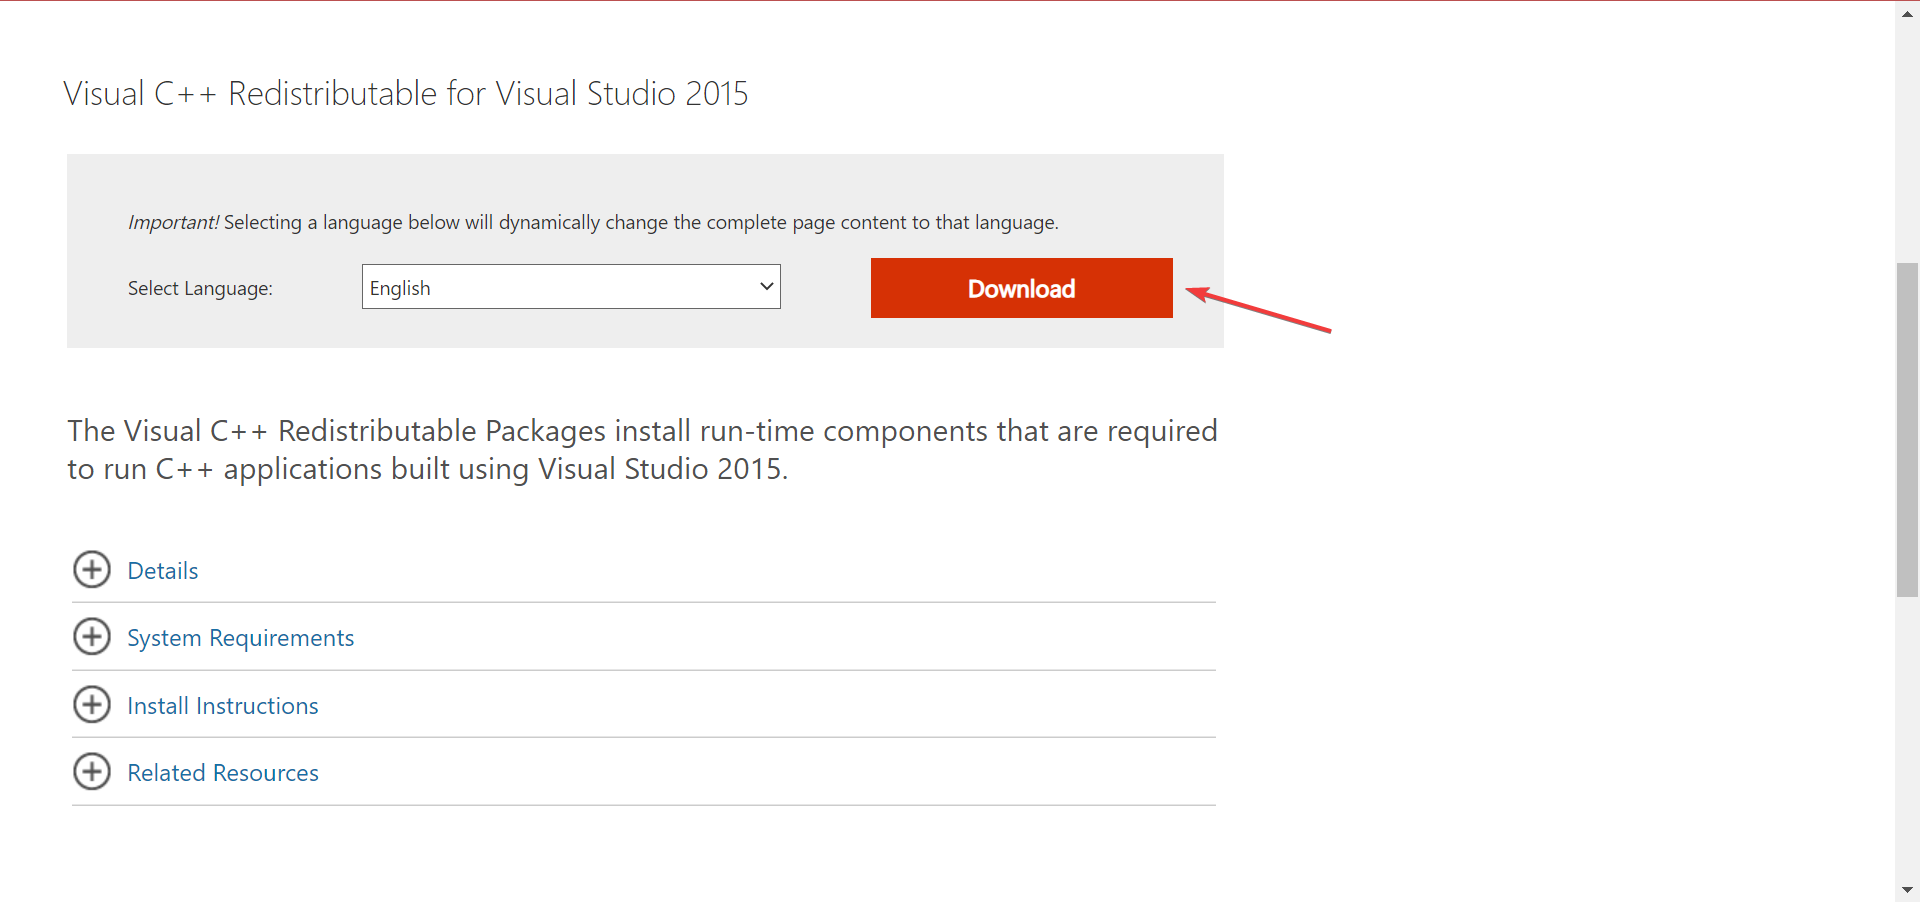
  4. Now, go to Microsoft’s official website and then click on Download.Visual C++ redistributable to fix clb.dll is missing
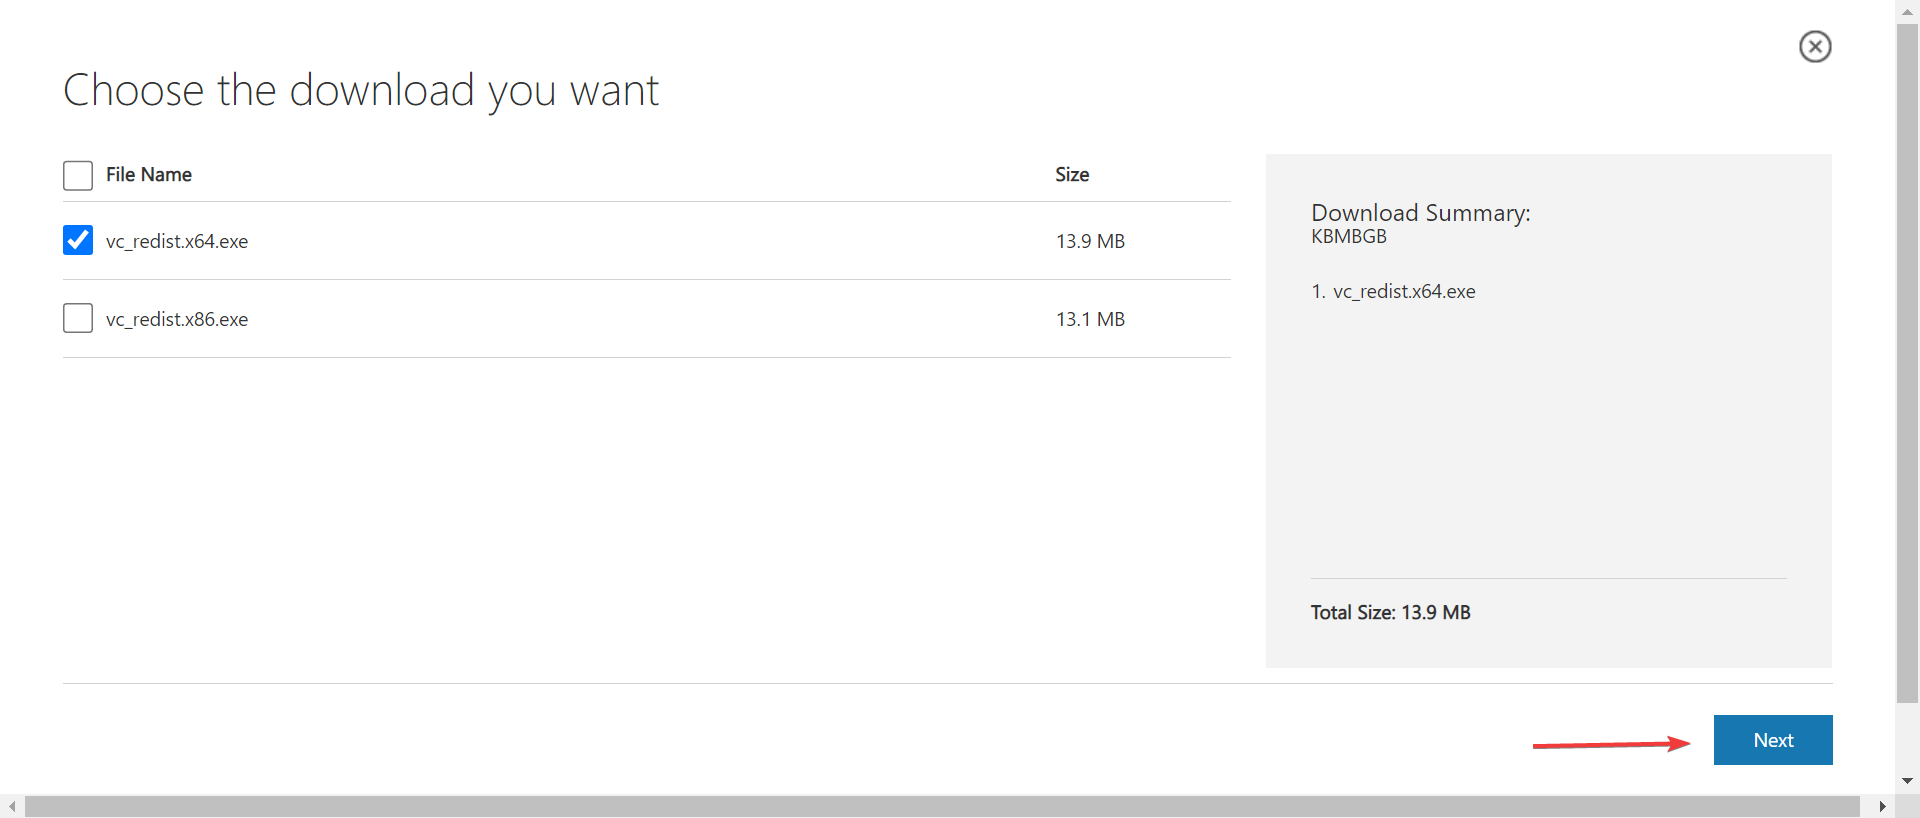
  5. Next, choose the architecture that matches the one you uninstalled earlier, and click Next.choose architecture
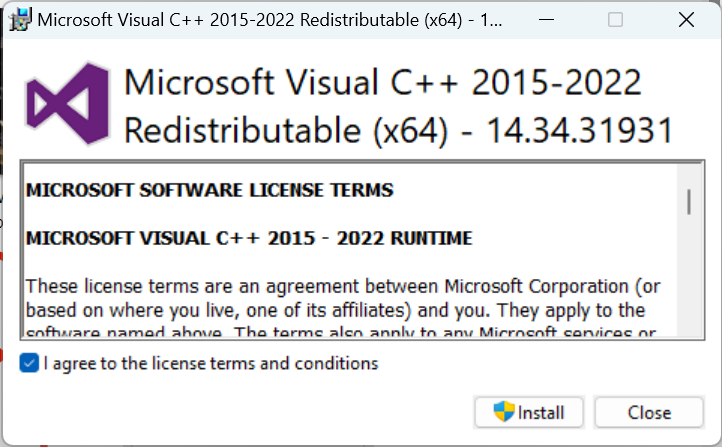
  6. Once downloaded, launch the setup and follow the on-screen instructions to complete the installation process.install to fix clb.dll is missing

Since the DLL file is a part of the Visual C++ Redistributable package, reinstalling would run things if clb.dll is missing.

4. Perform an in-place upgrade

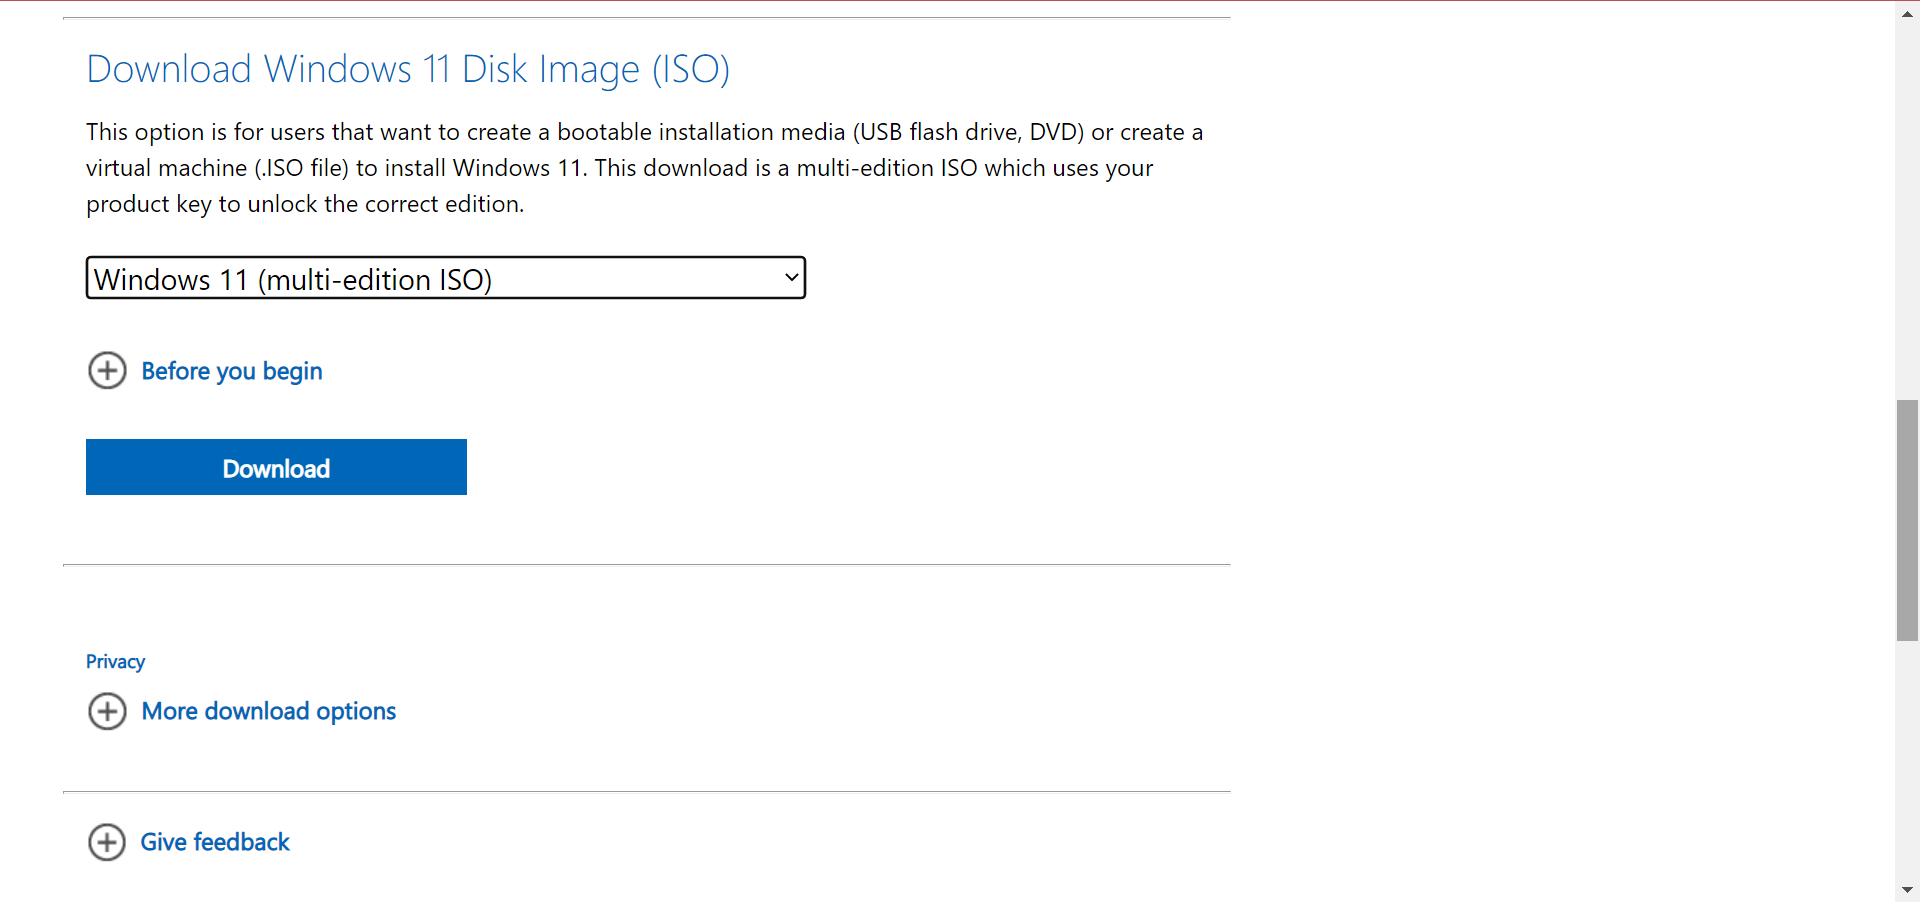
  1. Go to Microsoft’s software page, and download the ISO file for Windows 11. If you are running Windows 10, the Media Creation Tool can also be downloaded from the official site.windows 11 iso
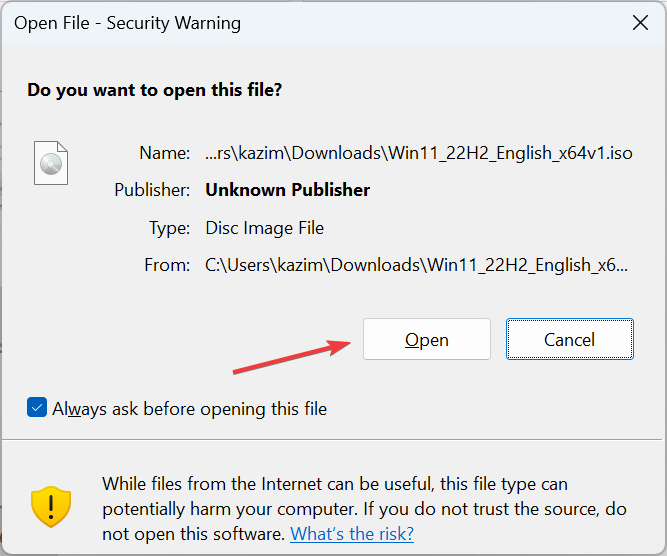
  2. Once downloaded, launch the ISO, and on Open. open
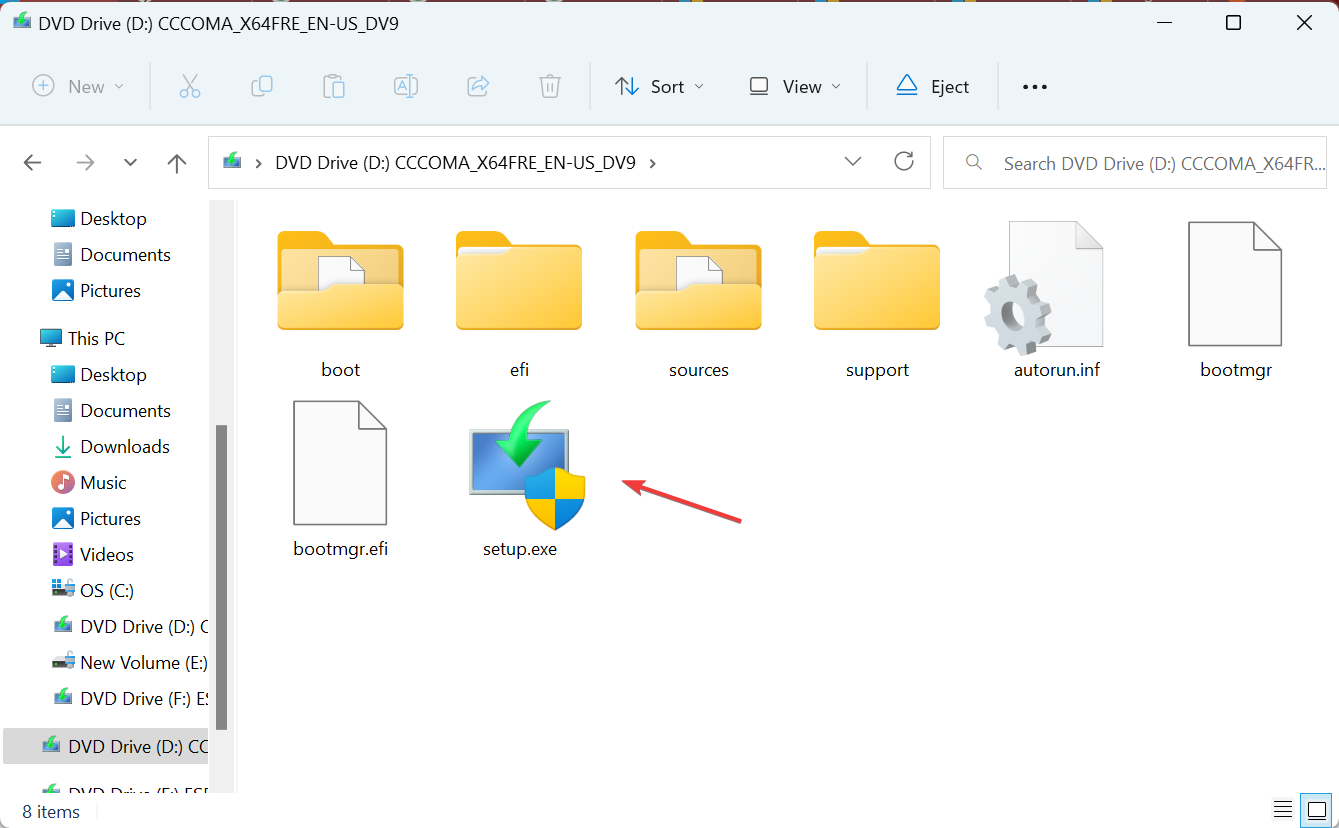
  3. Now, run setup.exe.setup.exe to fix clb.dll is missing
  4. Click Yes in the UAC prompt.
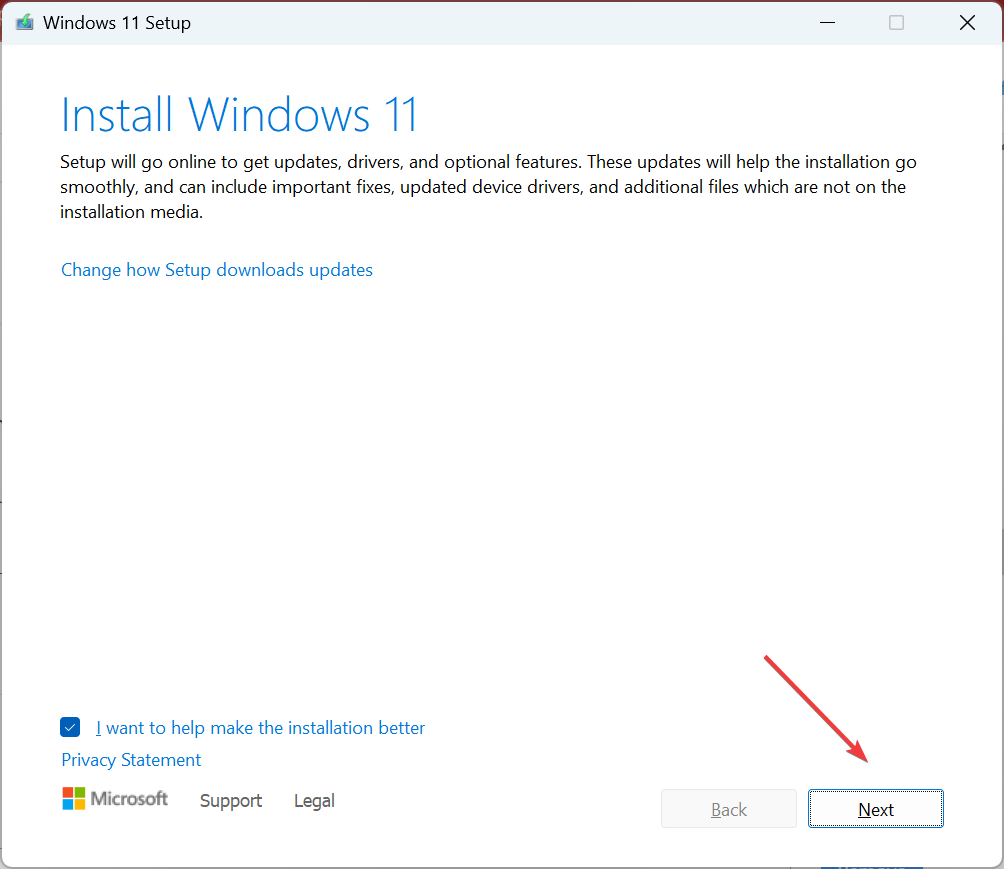
  5. In the Windows 11 Setup, click on Next.next
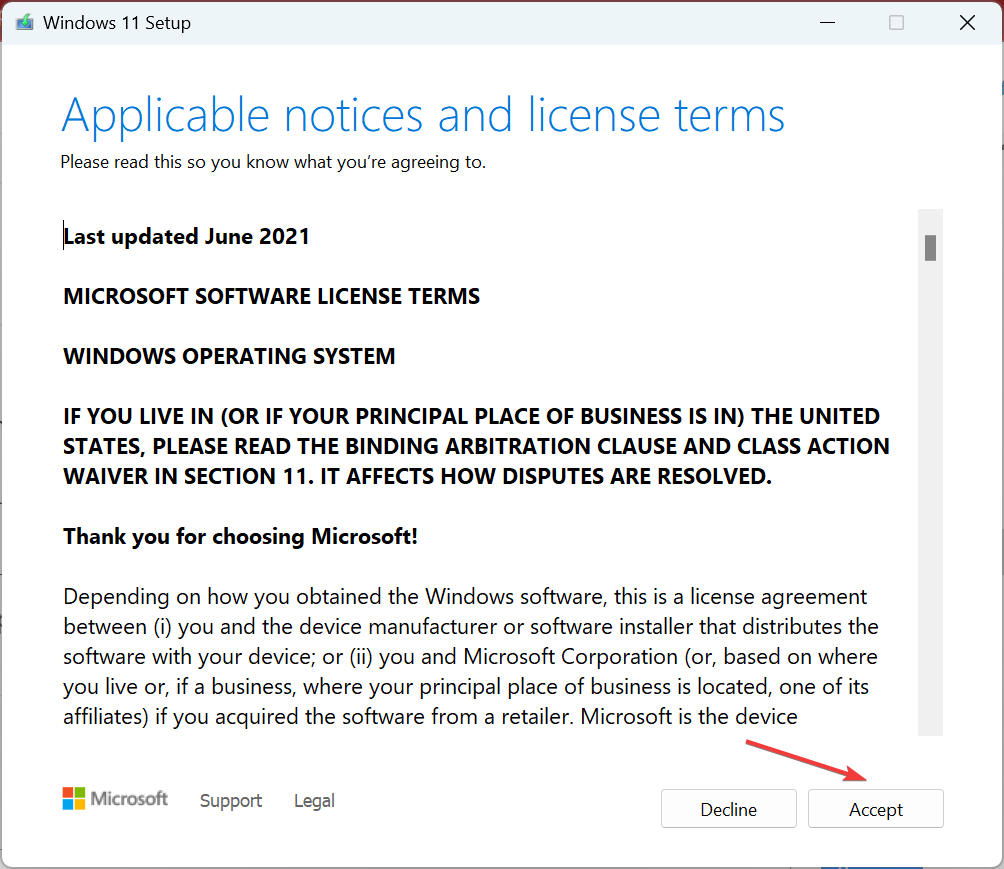
  6. Click Accept to agree to the license terms.accept
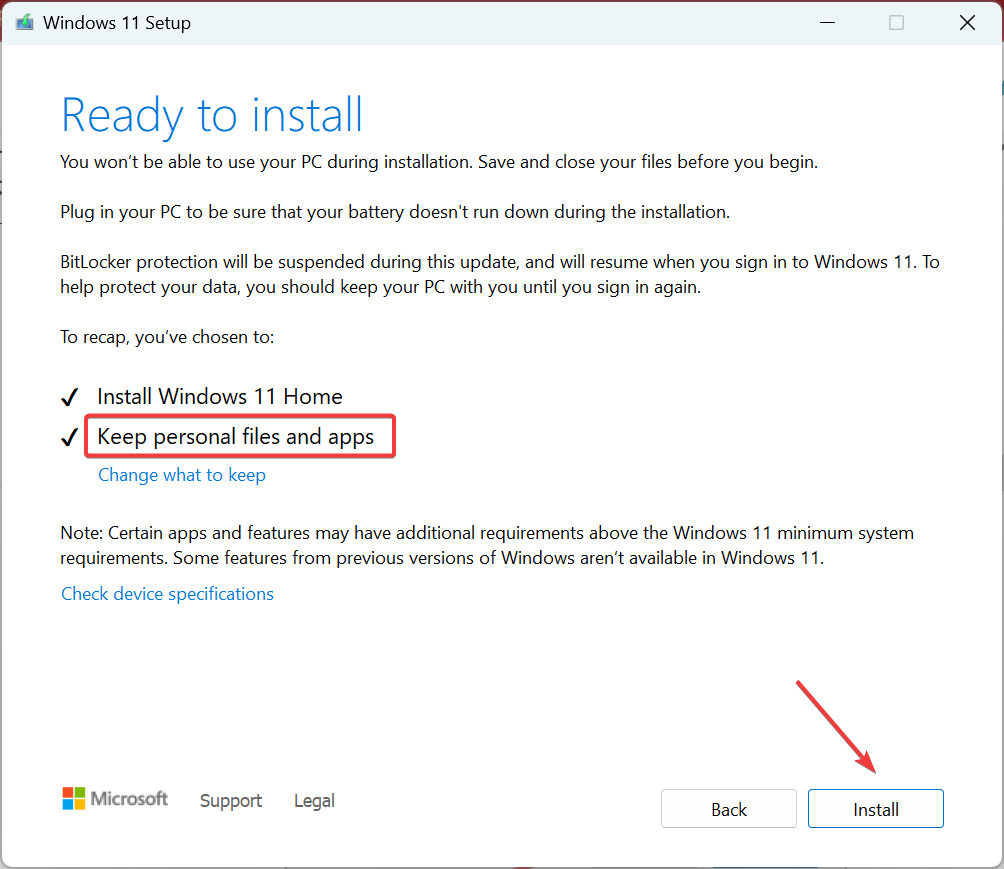
  7. Now, wait for the setup to get things ready and check for updates. Once that’s done, make sure the setup lists Keep personal files and apps and then click on Install.install to fix clb.dll is missing

Once done with the in-place upgrade, the missing clb.dll file will be available on the computer, and you wouldn’t lose any other programs or files during the process.

What is CLB DLL?

The clb.dll or Column List Box is an important file that ensures that Windows programs run correctly. It’s an executable file loaded to the memory as soon as you boot the OS.

First introduced in Windows Vista, the file has made its way into all subsequent iterations. And given the inability to launch the Registry in its absence, fixing things become all the more important.

Before you leave, do not forget to find out how to fix all DLL-related errors in Windows. Besides, tell us which of our solutions worked or even if you used another one in the comments section below.

8 year old applies for restaurant job so he can get an Xbox

When 8-year-old Nash Johnson decided he wanted an Xbox so he could play online with his friends, he did what any responsible elementary school student would do: he went out and applied for a job.

Specifically, the Lexington, Ky. student went online and filled out an application for a dishwasher’s position at Drake’s, a local restaurant that bills itself as “a restaurant that loves beer and a bar that loves food.”

“I’m very good at washing the dishes,” Nash said in an interview as reported by WRAL.

There was only one snag in Nash Johnson’s plan: you have to be at least 16 years old to legally work. Luckily for Nash, the application presented a loophole. The application asked only for “age range” rather than specific age. So Nash stated on his resume that he was under 18.

“That kid is not afraid to fail. He’s a go-getter,” Nash’s mother Belinda said. She added that “Financial literacy is really important in our household.”

While Drake’s couldn’t hire Nash, they invited him to orientation nonetheless. There, he was presented with that Xbox he so dearly wanted. It just goes to show that with perseverance, dreams really do come true.

Via WTHR.

Featured image via wthr.com. 

How to Uninstall the Windows Feature Experience Pack

The Windows Feature Experience Pack is a standalone package in Windows designed to deliver new features and improvements automatically.

While it streamlines updates, some users may prefer to remove it. Here’s how.

How can I remove the Windows feature experience pack?

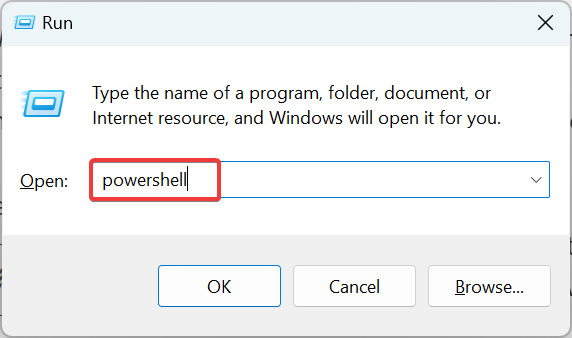
  1. Press Windows + R to open Run, type powershell in the text field, and hit Enter.powershell
  2. Click Yes in the UAC prompt.
  3. Paste the following command and hit Enter to view the various installed packages: dism /online /get-packagesget packages to uninstall windows feature experience pack uninstall
  4. Locate the Windows Feature Experience Pack, select its name and version, and copy it.
  5. Now, execute the command below while replacing Package to Remove with the one you copied earlier:dism /online /get-packages /packagename:Package to Remove

That’s it! If you were earlier wondering how to remove the Windows Feature Experience Pack, it is now successfully uninstalled, and the same will reflect in Settings.

What is Windows Feature Experience Pack 21H1?

Microsoft developed the Windows Features Experience Pack to deliver faster updates, independent from Windows OS updates to certain apps.

This includes Snipping Tool, the Print Management Console, Text input features, among many other features. And more are expected to be added in the coming days.

Why do I have Windows Feature Experience Pack?

Many users wonder why the Windows Feature Experience Pack is on their computers. The answer is simple, it is a package from Microsoft, and every user who regularly updates the OS has it.

Initially released in the Beta channel, the pack was first introduced in 2020 in Windows 10 and found a place in the latest iteration.

Before you leave, do not forget to check out what’s new in the Online Service Experience Pack for Windows 11. Also, please share your thoughts on the Feature Experience Pack and whether you uninstalled it in the comments below.

Play Dragonball Xenoverse and two other games free with Xbox Free Play Days

The weekend draws near, and that means it’s time for another round of free games for the weekend with Xbox Free Play Days. The games on offer this week will be available for subscribers of Xbox Live Gold and Game Pass Ultimate from Thursday, November 10th through Sunday, November 13th. Let’s go ahead and check out the lineup. (All game descriptions via the Xbox Store).

Dragon Ball Xenoverse

The latest Dragon Ball game lets players customize and develop their own warrior from 5 races, including male or female, and more than 450 items to be used in online and offline adventures. Create the perfect avatar, learn new skills and train under the tutelage of your favorite Dragon Ball characters. Help Trunks fight new enemies and restore the original story of the series. Join 200+ players around the world in the Toki Toki City hub and fight with or against them, and compete in online tournaments!

Just Die Already

Just Die Already
Just Die Already
Developer:
Curve Digital
Price:
$14.99

Just Die Already is an old people mayhem sandbox game created by the designers of Goat Simulator.

You are an old retired person in a near future where people aren’t having any children. There isn’t anyone to pay for pensions due to those ungrateful millennials who prefer playing video games instead of doing actual work. With no one to cover your living costs, you – just like all other old people in this world – have no other choice but to survive on your own.
How will you survive in a world that wants you to Just Die Already?

Overcooked! All You Can Eat

Overcooked! All You Can Eat
Developer:
Team17
Price:
$15.99

Overcooked!, Overcooked! 2 and all additional content are blended together and remastered in this delicious definitive edition!

Enjoy hundreds of levels of cooperative cooking chaos across increasingly perilous and obscure kitchens.

Overcooked! Goes Online

For the first time ever, online multiplayer has been fully integrated into Overcooked! Revisit your favourite kitchens from the first game in stunning 4K and ONLINE!

A Visual Feast!

Both games have been taken to the next level with stunning, enhanced 4K visuals – this is the best that the Overcooked! series has ever looked.

Tasty New Content!

New levels, new chefs and new mayhem – all exclusive to Overcooked! All You Can Eat.

As you can see, it’s a fun lineup for this week’s Xbox Free Play Days selections. If you would like to learn more about the Xbox Free Play Days program, head over to the FAQ page.


How to install Git on your Windows PC 

If you’ve dabbled anywhere near code, you probably already know how vital Git is for the modern programmer. A handy, open-source version control system, Git makes maintaining your development projects a breeze. 

If you’re a Windows user, you’ll have to install the Git tool on your PC to get going with the version control system. In this article, we’re going to cover exactly how you can do that.

How to install Git on your Windows PC

To start with Git on Windows, head to the official Git website and grab the tool’s installer from there. Then, depending on your system, download the 32-bit/64-bit installer from the website. 

Now, launch the installer to get started with the installation. Follow the on-screen instructions; for instance, choose Vim when selecting a default browser and click on Next.

On the next option, select Let Git Decide (this lets Git set up a default branch name), and then click Next. 

For the next option, select Git from the command line and 3rd-party software, and click on Next; this decides how Git integrates into your system. Next, click on Use bundled OpenSSH and click on Next. Next, implement the following instructions similarly (also, choose None when choosing credential helper) and click on Next. Finally, click on Install.

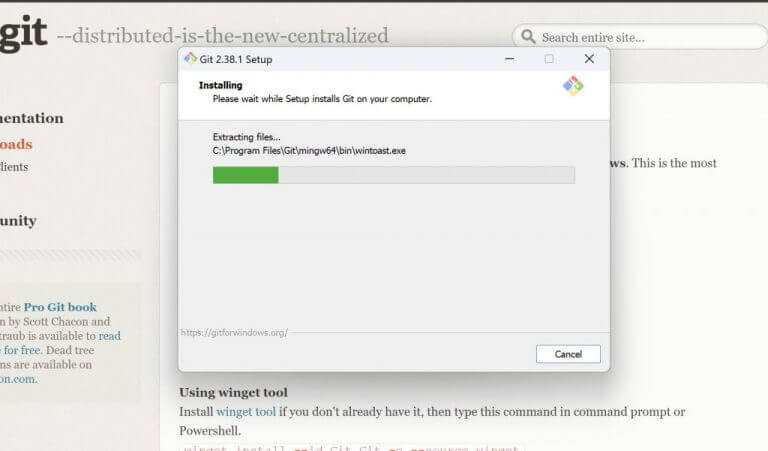
The installation will take anywhere from a few seconds to a minute; click on Finish to finalize everything, and then you can start using Git.

installing git on windows

When you’re done, click on the Launch Git Bash checkbox and select Finish to complete the installation officially.

Check the Git installation on your Windows 

If you checked the Launch Git Bash checkbox before terminating the installation dialog box, Git Bash should get launched automatically. Alternatively, you can launch it manually. Head to the Start menu search bar, type in “git” and select the best match (it should be Git Bash). 

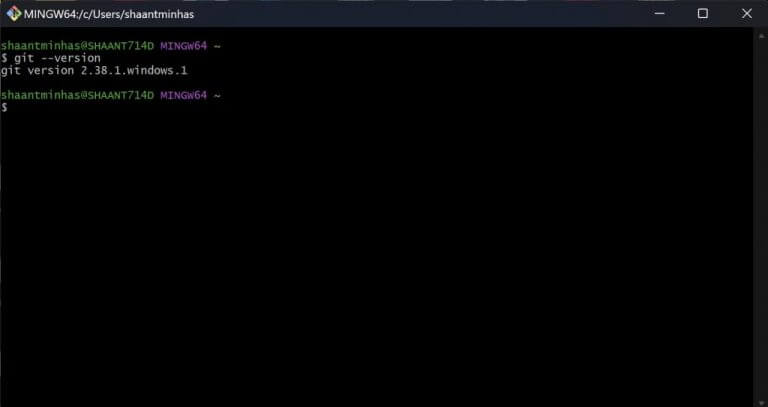
Once you open the Git Bash app, type in the following command in the bash and hit Enter:

git --version

git version

The bash should give you the current version of Git running on your Windows as soon as you run the following command. This means Git has been installed successfully on your PC.

Installing Git on your Windows PC

Git has gradually become famous as the go-to tool for storing and managing your codebase. It’s only natural, then, as you get the convenience of Git on your Windows computer. The next step would be to get GitHub for your PC, a web-based interface that uses Git to make the most out of your system.    

DisplayPort to HDMI is Not Working: 4 Tested Ways to Fix it

DisplayPort to HDMI adapter helps you connect your HDMI device to a DisplayPort-supported monitor. At times you may see a No Signal error when trying to connect your DisplayPort to HDMI adapter to your PC or monitor.

First, you should know that not all DisplayPort to HDMI adapters are reversible. In other words, if you buy a HDMI to DisplayPort adapter instead, which is cheaper, it might not work as a DP to HDMI adapter as well! So, make sure you’ve bought the right cable.

How do I get my DisplayPort to work with HDMI?

1. Check your HDMI and DisplayPort

If you see No Signal text on the screen when using the adapter, it could be due to a loose HDMI connection to the adapter or the DisplayPort interface.

Remove the HDMI cable connected to the adapter and plug it in again. Once done, make sure the HDMI cable connected to your PC is also firmly connected.

Be careful when applying pressure on the port, as it can damage the interface. If possible, try connecting the HDMI adapter to a different monitor or device. If it works, you may have a faulty HDMI port to repair.

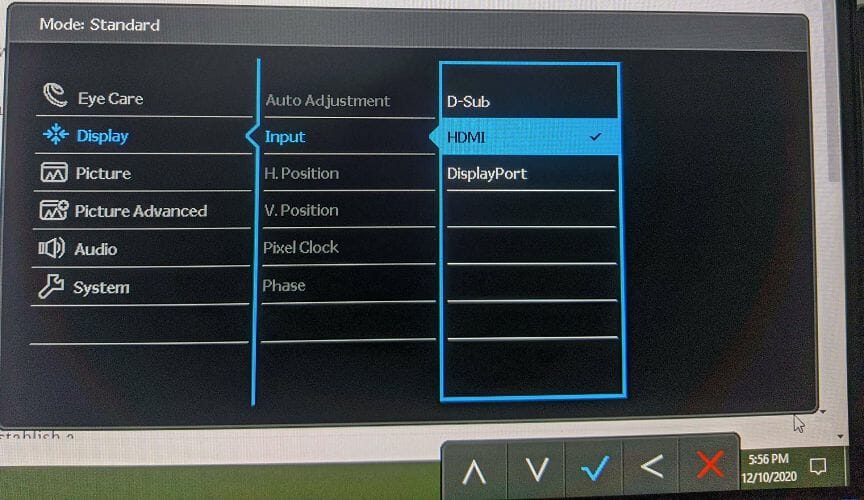
2. Manually enable HDMI Input

DisplayPort to HDMI not working

    At times your monitor may fail to auto-detect the HDMI connection, especially when you are using an adapter to convert DP signals to HDMI. Changing the input option manually can fix the problem.

  1. 1. Make sure you have connected DisplayPort to the HDMI adapter with the HDMI cable to your monitor.

  2. 2. Press any of the control buttons on your monitor. Physical control buttons are usually placed under, back, or at the side of the panel.

  3. 3. Select the Menu icon.

  4. 4. Use the arrow keys and navigate to Display.

  5. 5. Select Input using the > key.

  6. 6. Select HDMI under Input options and select the Okay option to save the changes.

3. Check your DisplayPort to HDMI adapter 

If the issue is not with the monitor configuration and the DisplayPort, check your DisplayPort to HDMI adapter. Some adapters are not compatible with certain monitors and input options.

As we have discussed in our best DisplayPort to HDMI adapters guide, not all the adapters are made the same. While most adapters can work with 1080p contents, very few adapters are capable of carrying 4K contents from your PC.

Try using your existing adapter with another system or monitor before you consider replacing the device. 

4. Perform a monitor power-cycle 

  1. Power off your PC, and make sure to unplug the power cord.
  2. Unplug your monitor’s power cord.
  3. Disconnect all the input sources connected to the monitor and computer.
  4. Leave the devices idle for a few minutes.
  5. Next, reconnect the monitor to the PC with the DisplayPort to HDMI adapter.
  6. Turn on your Monitor and PC.

Other DisplayPort to HDMI issues you may encounter

  • DisplayPort to HDMI adapter/converter not working
  • DisplayPort to HDMI no signal/monitor not detected (If there is no HDMI signal detected from your device, you can try the tested fixes we already prepared for you.)
  • HP DisplayPort to HDMI not working Windows 10 (Lenovo, Dell, and other major manufacturers are equally impacted.)
  • DisplayPort to HDMI cable not working
  • Mini DisplayPort to HDMI not working Windows 10
  • Onn DisplayPort to HDMI adapter not working
  • DisplayPort to HDMI TV not working (If your device does not recognize the TV HDMI, you can check our complete guide for safe and guaranteed resolutions).
  • Insignia DisplayPort to HDMI adapter not working
  • ALOGIC DisplayPort to HDMI not working

DisplayPort to HDMI adapters offer excellent flexibility to connect HDMI-enabled monitors to your PC’s DisplayPort.

If you fail to establish a connection, make sure to enable HDMI input manually from the monitor. If not, check the DisplayPort/HDMI port and the adapter for hardware failure.

Tell us which fix worked for you in the comments section below.

Fix Canon Printer not Connecting to WIFI with 6 Tested Tips

Canon printer not connecting to Wi-Fi? Network-connected printers give you the flexibility to print from anywhere without having to connect your device to the printer physically. That is all good, as long as it works.

Several users have reported their Cannon printer failing to connect to a Wi-Fi network. Depending on the kind of device and kind of printer you are pairing, the reason for this problem can vary.

In this article, we explore a few troubleshooting steps to help you resolve the Canon printer not connecting to the Wi-Fi issue.

Why is my Canon printer not connecting to WiFi?

This issue can occur due to various reasons such as the following:

  • Outdated drivers – Drivers are an important computer component that allows your peripherals and your OS to communicate successfully. However, when one driver is out of date, communication will be lost.
  • Printer errors – You will have to check for any red or blinking lights on your printer to see if it has run into an error, if this is the case, performing a power cycle will do the trick.
  • Faulty printer configuration – Resetting your printer to default settings might be the best and only effective solution in this case.
  • Internet issues – Check your router to see if it has encountered any errors that need to be addressed.

How to connect Canon printer to WiFi?

To connect your Canon printer to your Wireless network, use the built-in Wi-Fi button on the printer and then install the Canon printer app on your smartphone to complete the setup.

If you still fail to connect the printer to your Wi-Fi network, try the steps below.

What do you do when your Canon printer won’t connect?

1. Update printer drivers

    The first cause that should be checked in case your Canon printer doesn’t connect is the driver status. You might need to update them, so the guide below will support you with the process.

  1. 1. Right-click the Start icon then select Device Manager.

  2. 2. Expand the Print queues section, right-click the printer driver, and select Update driver.

    update-driver-printer canon printer no internet connection
  3. 3. Select Search automatically for drivers.

    automatically-search bluetooth not working windows 10
  4. 4. Next, expand the Network adapters section, right-click the wireless driver, and select Update drivers. If you have more, do this for all of them.

    update-network canon printer can't find wifi
  5. 5. Like before, choose to Search automatically for drivers, then reboot your PC once the process is done.

In addition, Outbyte Driver Updater is a popular driver update utility that can update all the drivers of your PC with one click.

Upon installation, it performs a full scan to find out how many out-of-date drivers you have. You can then proceed to update one or all the drivers at once.

It also has millions of driver files data available for download. You can manage the downloads, create a backup and save all of your drivers in a compressed zip file, and schedule driver scan, updates, and notifications.

Key features of Outbyte Driver Updater:

  • Lightning-fast scans for driver
  • One-click update for all drivers
  • Built-in backup and schedule manager 
  • Tweaks functionality for PC overall performance

Outbyte Driver Updater

This powerful driver tool ensures that you will never encounter printer problems related to drivers.
Free Trial Download Now

2. Check for printer errors

Make sure the printer is not displaying any errors such as flashing lights, or error codes on the screen. If the printer is in an error state, try using the error code to fix the problem.

These errors usually occur due to a paper jam, if the ink has run out, or other issues. Make sure to address the error before proceeding with other steps.

3. Perform a power cycle 

  1. Turn off and unplug your printer.
  2. Next, unplug your wireless router for 15 seconds.
  3. Power on the router by connecting the necessary cables.
  4. Once you have the router fully powered on, plug the printer back in and power it on.
  5. Connect the printer to the network and try to print any document.

4. Check for printer connection issues 

If your Canon printer is not connecting to the phone, check if the printer is showing the connection as Active. Next, check if the signal strength is less than 80%. If it is below 80%, try to move the printer and router closer.

In case, moving the printer or router is not possible, look for and remove any obstacles between the two devices.

If the connection is Active and signal strength is more than 80%, try to disable temporarily disable the firewall on your computer. Try to print again and check for any improvements.

If the printer responds after disabling the firewall, you will need to open the printer ports for network communication. Check your printer’s documentation for instructions on how to do it.

Check if the printer’s network settings are reset to the factory default. If so, you will see the connection as Active, and the network will be BJNPSETUP. In this case, the printer needs to reconnect to the network.

In case you see a connection is an inactive message, and the printer displays a wrong SSID, try reconnecting the printer to the network. This usually happens if you have set up a new router or changed the password.

5. Reset the printer 

  1. Press the power button to turn off the printer.
  2. Disconnect the data cable from the printer if it has one. 
  3. Next, unplug the power cord and leave the printer idle for 10 minutes.
  4. Reconnect the data cable to your printer.
  5. Reconnect the power cord to the wall outlet. Make sure to connect it to the power outlet directly and not through a surge protector.
  6. Press the Power button to turn the printer back on.
  7. Try to print again and check if the problem is resolved.

6. Uninstall Canon printer 

printer not connected error
  1. Press the Windows key + R to open Run.
  2. Type control and click OK to open Control Panel.
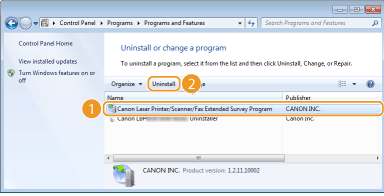
  3. Go to Programs > Programs and Features.
  4. Select the Canon printer series MP Drivers from the list. Click on Uninstall.
  5. Confirm the action by click on Uninstall.
  6. Proceed with on-screen instructions to completely uninstall the printer.

Once the printer is deleted from your system, you need to reinstall it.

How to connect canon mg3600 printer to Wi-Fi

Connect using Smartphone

  1. Make sure to download the Canon Printer app on your Smartphone or PC and install it.
  2. Press and hold the Wi-Fi button on the printer until the ON lamp flashes.
  3. Open the Wi-Fi setting on your smartphone and connect to the Canon Printer’s temporary Wi-Fi connection.
  4. Next, launch the Canon Printer app on your smartphone.
  5. Tap on Yes when you see the Do you want to search for available printer message.
  6. Select your printer’s Wi-Fi and then enter your Wi-Fi password.
  7. Tap on, OK. The printer will now scan and connect to your Wi-Fi router.
  8. Next, tap on OK when a dialogue box appears.
  9. When you see the Do you want to search for available printers message, tap on Yes.

The Canon printer not connecting to Wi-Fi issues can occur due to several reasons.

For more information on wireless printers, check out our guide on what to do if your printer won’t recognize your router.

To fix the problem, try to update the printer driver. If the issue persists, check for network issues, or as a last resort, try to uninstall and reinstall the printer and drivers.

iCloud integration in Photos app starts to roll out for Windows 11 users

Starting today you can connect your iCloud Photos to the Microsoft Photos App.  The feature had been available to just Windows Insiders since September.  You can get the integration now by updating the Photos App via the Microsoft Store, with a full rollout expected by the end of the month.

The recently redesigned Photos app for Windows 11 makes it easier to organize and share your precious media no matter where your photos and videos come from.  With the new iCloud integration now Apple users can seamlessly add their media to the Photos app.  To get started, make sure your Photos App is up to date, and install the iCloud for Windows App from the Microsoft Store.  Once you’re signed in to the iCloud app choose to sync your photos and all your photos will appear in the new Microsoft Photos app.

 Image Via Microsoft

How to Open Apple Files on Windows PC

Regarding operating systems, some people prefer using Windows, while others lean more toward Apple‘s OS.

The part that raises problems for users is that Mac and Windows users often need to collaborate. Unfortunately, Apple .pages files do not work on Windows PCs.

If you’re struggling with the same problem, in this article we’ll show you how to open Apple files on your Windows 10 PC.

How can I open Apple files in Windows 10?

1. Change the extension to .zip

  1. Enable extensions by accessing the View tab then check the File name extensions checkbox.
  2. After changing the extension to .zip, open it with an archive opening application
  3. Open the .jpg files and now you are able to see the content of the .pages file.

If you want to know more about how to open MAC files on Windows 10, then this is another efficient solution.

To modify the file, you need to use a converter, change the .pages file into a .docx, and insert the newly converted file into Microsoft Word.

To use an Apple file or a .pages file, you must copy it on your Windows computer or laptop. If you want to remove it from your USB key, generate a copy in case anything goes wrong.

Now that you have the .pages file on your PC, you can change the extension of the file into a .zip extension.

2. Use Adobe Reader

There are several online tools available that can convert documents. The best way would be to visit icloud.com, create an Apple ID, and log in with it. Then, select the Pages icon from the main screen.

Take your Apple file and convert it into a PDF format. Then use the best pdf viewer, Adobe Reader, to open the newly converted file and read the contents.

On the top bar, select the Upload icon and choose the file from your computer. Repeat this process for all the documents you want to view. This is a rather simple way to open Apple files on your PC.

In the top bar again, look for the settings icon and select Download a Copy. You will be presented with a couple of options. Choose PDF, and a PDF file will be downloaded to your computer now.

Regarding methods to open Apple files on Windows 10, we’ve just presented you with a tested solution, and we also recommend you have the latest version of Adobe Reader installed.

⇒ Get Adobe Reader

These are the most common options when you want to open Apple files on Windows PCs.

Whether you choose to use Adobe Reader or you want to apply a different method, we hope that you get the job done as fast and easily as possible. And if you’re interested in easily opening TFX files on your PC too, rest assured our guide can help.

If you have any other solutions, please don’t hesitate to list them in the comments section below.

Failed to Install Addon From Zip File on Kodi: Fixed

A great number of Kodi media player users stumbled upon yet another installation error, namely Failed to install the add-on from the zip file.

The error appears to occur only with the latest Kodi version, and only when trying to install a Kodi build. The problem is that these builds are necessary in order for Kodi to work properly.

If you’re upgrading from Kodi 18.2 to Kodi 18.6, there’s a good possibility you made this mistake while downloading specific add-ons from a zip file. You may encounter this issue, particularly if you attempt to install certain Wizards. The Wizards are required to install specific Kodi builds.

The two builds that typically produce this problem are Streamline and No Limits. However, encountering this issue with a variety of other different builds is also possible.

Luckily, there are a few simple methods that one can go through in order to solve the problem.

How to fix Kodi error Failed to install addon from the zip file?

1. Install the zip file locally and retry the build installation

  1. Open the Settings menu.
  2. Go to System Settings > Logging.
  3. From the right menu select Show event log and see exactly what file the player failed to install.
  4. Google search the file.
    • You will most probably find a .zip file on GitHub.
  5. Download the file on your device.how to install zip file kodi
  6. Then go back to the Kodi home screen > Add-ons > click on the package icon.
  7. Click on Install from zip file > find your downloaded file.

Some users reported that downloading the zip file locally took a very long time, but in the end, the build installation was successful.

2. Create a temp folder

Another easy solution to the zip installation problem was to create a temp file inside the Kodi package.

Users who have tried this mentioned that they also checked the error log files as explained above and that the error message specifically said to create this file. According to the reports, the file path should look like this:

  • AppData/Roaming/Kodi/temp.

After creating the file, repeat the installation process, and see if it goes through.

3. Clear the cache on your device

For Android devices, open Settings >Apps > Kodi > Clear Cache > click and confirm.

For smart TV/ Fire TV Stick, go to Settings > Applications > Manage Installed Applications > Kodi > Clear Cache.

Because you keep your existing add-ons and Kodi settings, deleting the cache is a better option than cleaning the entire data.

If you’re using the desktop version of Windows OS, we recommend that you use specific software to clean temporary or unwanted files.

Clearing the cache has proven to be a very good option in most cases, and effective not just for this particular situation, but also to keep your device up and running smoothly.

4. Uninstall and re-install the Kodi app

This is just a side solution, and hopefully an unnecessary one. But if the initial installation is faulty, you’ll keep having problems with the program so it’s better to have a clean copy.

Many users jump straight to this step, just to be sure that they have the latest version and a good one, but it’s worth giving a try to the other ones as well.

Tip icon Tip
If you’re a fan of this popular media player, we encourage you to go to our website and bookmark our separate Kodi section for easy access. Additionally, we have a good selection of articles from the entertainment industry in our Streaming Hub.

So these are our easy solutions. If you have another suggestion on how to fix the Failed to install add-on from zip file error on Kodi, please share it with us in the comments section below.

Why Is My Internet Browser Screen Black & How to Fix It

Internet Explorer (IE) may, at certain inconvenient times, display a black screen instead of the particular web page requested by the user.

The black screen appears suddenly when you are using your web browser. Unfortunately, it is an endlessly irritating problem. Similar issues have been faced with Firefox and Google Chrome browsers.

You can use a couple of solutions to this problem, which we will discuss below.

Why is my Internet Explorer showing a black screen?

Possible causes of the black screen problem in Internet Explorer could be that the web page may have a feature or features which trigger rendering conflicts with the graphics processing unit (GPU).

Additionally, third-party software add-ons and extensions you have added to your IE browser could also be causing the same rendering conflict.

Lastly, the graphics processing unit (GPU) and some software add-ons, when handling certain web page features, may cause the display of a black screen in Internet Explorer.

Whatever the reason, we shall show you how to fix it.

Quick Tip:

You can start the tweaking with our solutions below, but first, because it’s a lot easier, we recommend Opera One, a browser less prone to errors and more reliable overall.

It’s possible to customize Opera One precisely like you want. In addition, many features like an Ad blocker, a VPN, and AI are natively included.

Opera One

Connect to Opera VPN and test the servers.
Free Download Visit website

How do I fix the block screen issue in Internet Explorer?

1. Turn off hardware acceleration in Windows

  1. Click the Windows Start button, type internet options, and select the Internet Options app.
    internet explorer black screen
  2. Select the Advanced tab, and under Accelerated Graphics, turn on the feature Use software rendering instead of GPU rendering by checking its box.
    internet explorer black screen
  3. Click OK and restart your computer for the changes to take effect.

Internet Explorer uses the internet display and connection settings in the Windows operating system. So rendering tweaks is a good solution when Internet Explorer opens a black screen.

2. Check for pending Windows updates

  1. Click on your Start menu, type check for updates, then select the Check for updates app.
  2. Click the Check for updates button.
  3. At the end of the check, if there are any updates, they will be automatically downloaded and installed. In addition, you may be required to click a Download & Install button or restart your computer after the update.

Maybe your PC is not set to perform updates automatically; this could be why Internet Explorer is showing a black screen.

Microsoft has tried to fix this issue by automatically setting Windows 10 Home PCs to receive updates. However, users running older versions still have an option to opt out of automatic updates.

Failing to update your OS can sometimes cause incompatibility issues since a patch for the same problem you are encountering may even have been released. So it is a good idea to always check for any available updates.

3. Uninstall or remove add-ons and extensions you added to your IE browser

  1. Launch Internet explorer.
  2. Select Tools, select Toolbars, then Disable add-ons.
  3. You should click on Disable after every add-on and then the Done button.
    internet explorer black screen

It’s a prudent practice to limit the number of add-ons you use. So, some periodic housekeeping implying deleting add-ons no longer in use will also help.

Disabling add-ons can benefit different black screen issues, including Internet Explorer PDF black screen and internet browser black screen.

Can I still use Internet Explorer after 2022?

While Microsoft has produced a better and more modern browser in Edge, they will not practically delete the old IED from your computer. However, if you still use it, you can expect not to have any support from Microsoft.

Also, because it is a retired browser, you will be unable to download it from the official Microsoft website.

So, yes, you can still use it, but with zero support.

And there you have it, the best fixes for Internet Explorer black screen.

Even though these fixes should help fix this black screen problem in the Internet Explorer browser, they have not been written in any particular order. Therefore, we expect that you pick solutions according to your preferences.

We highly encourage switching to a more reliable and modern browser so that you encounter fewer errors and have a much-improved user experience.

Internet Explorer Not Connecting to Internet: Fixed

While you can still find Internet Explorer 11 on Windows 10, there is no way to use the old Internet Explorer as a standalone browser in Windows 11.

With that out of the way, we promise the most confusing part of this guide is done, and from now on, things will only get a lot easier.

So, Windows 11 comes with Edge pre-installed as the default browser, which is also why you will notice that Internet Explorer opens Edge instead.

You can still use the IE compatibility mode in Win 11 to open legacy sites and apps, but not the IE 11 itself as an autonomous desktop app.

That’s why conventional manipulations such as resetting IE settings, reinstalling, disabling add-ons, clearing cookies, and other similar techniques you’d apply to fix IE crashes in Windows 10 don’t really work as they simply no longer apply.

Don’t worry, we have a few tricks you can try. Here are 3 simple ways to make Internet Explorer connect to the Internet again, plus a little something on top.

So, let’s not waste any more time and get straight to it, shall we?

Why is Internet Explorer not connecting to the Internet?

There are a bunch of reasons why Internet Explorer is not connecting to the Internet. It could be the misconfigured browser settings or the network settings on your computer to blame.

Also, the installed add-ons have been found to affect the browser’s abilities if Internet Explorer 11 won’t load pages but Chrome will, though that’s a rare scenario. In which case, disabling these is the only way forward.

Besides, if you have a proxy set up or are using VPN software, it could be responsible for Internet Explorer not connecting to the Internet.

Will Internet Explorer still work after June 2022?

Though Internet Explorer will work for a while after the June 2022 deadline, it will start redirecting users to Edge, Microsoft’s recommended browser. Also, Edge offers an IE mode to access websites that have been developed for Internet Explorer and haven’t yet made the transition to the new browsers.

When you open Internet Explorer initially after the June 2022 deadline, it will display a prompt asking you to switch to Edge. This will continue for a while before Internet Explorer completely stops working on your computer.

If Internet Explorer is not connecting to the Internet, but Chrome does, the issue is clearly not related to any connectivity flaws, and resetting your network will have no impact.

Adding to the fact IE’s days are counted (and we mean that in a literal way, as the old browser will be officially retired in June 2022), it may be the right time to start looking for a new one.

Thus, switching to Opera One makes perfect sense. It’s a modern browsing instrument with enhanced rendering capabilities, serious performance optimizations, tons of customization options, and all the privacy and security features you could dream of.

Moreover, you can import all your preferences, passwords, settings, and so on and sync them across all your devices seamlessly. Also, it comes with built-in AI, VPN, Ad blocker.

Opera One

Why bother to fix connection problems in Internet Explorer when you can enjoy error-free browsing?
Free Download Visit website

How do I fix Internet Explorer not connecting to the internet?

1. Reenable Internet Explorer mode on Windows 11

  1. Press the Windows key + I on your keyboard to quickly open Settings.
  2. From the left pane, select Apps and go to Optional features.
  3. Use the search field under Installed features to locate the Internet Explorer mode.
  4. Press the arrow to unfold the options and select Uninstall.
  5. To reinstall the IE mode, simply return to the Optional features screen.
  6. Now, press the View features button next to the Add an optional feature listing.
  7. Search for Internet Explorer mode and choose Install.

If you see This page cannot be displayed but are connected to the Internet, this method will help fix the error.

2. Troubleshoot and reset your network

  1. Open the Settings once again and remain on the System tab.
  2. In the main area, select Troubleshoot.
  3. Extend the Other troubleshooters section.
  4. Hit the Run button next to Internet Connections. In the new window, select Troubleshoot my connection to the Internet.
  5. If there is no recommended fix, resetting your network can set the records straight.
  6. Return to the main Settings screen and this time, select Network & internet from the left pane.
  7. On the main area, click on Advanced network settings.
  8. Scroll until you see the More settings section and click the arrow next to Network reset.
  9. Finally, press the Reset now button.

If Internet Explorer cannot display the webpage in Windows 10, it could be the network settings to blame, and things should be up and running after the reset.

3. Tweak the Internet Properties

  1. Use the search field on your taskbar and type in internet.
  2. Select Change the search provider in Internet Explorer from the list of results.
  3. Here, you first need to select the Connections tab. Click LAN settings.
  4. In the new windows, click Automatically detect settings and press OK.
  5. Now, select the Advanced tab and check the box corresponding to the Use software rendering instead of GPU rendering option under Accelerated graphics.
  6. Press OK and restart your device.

In case you cannot access some websites in Internet Explorer 11, reconfiguring the Internet Properties might work.

If Internet Explorer is still not connecting to the Internet, you might be dealing with interferences caused by overzealous security software. Check the following solution for that.

4. Check your security software

Antivirus, firewall, and VPN – this is the holy trinity of cybersecurity and despite the obvious advantages, each of these apps can cause interferences and end up blocking legitimate programs while trying to keep you safe.

Permanently eliminating them is not recommended. However, you can determine if any of them are at the source of the problem and take further appropriate measures.

To temporarily disable the Microsoft Defender firewall, follow the steps below:

  1. Open the Settings and select Privacy & security in the left pane.
  2. Next, click on Open Windows Security.
  3. Choose Firewall & network protection.
  4. Head to Public network and switch the Microsoft Defender Firewall off.

To temporarily turn off your VPN, follow the steps below:

  1. Open the Settings and select Network & internet in the left pane.
  2. Now, choose VPN in the right-side menu.
  3. Finally, locate the VPN connection and select Remove from the menu.

If your VPN turns out to be the culprit, you can further prevent Internet Explorer not connecting to the Internet problems by switching to a more versatile privacy program.

Private Internet Security boats impenetrable confidentiality and uncompromised encryption for your data, online activity, and traffic. And it does so without getting in your way or interfering with other apps (as long as they are trustworthy and authentic, of course).

What about antivirus? Can I prevent IE from connecting?

Finally, the same goes for your antivirus solution. You don’t need to delete it, simply disable it for the time being and check if Internet Explorer is able to load web pages.

If so, use a specialized uninstaller tool to make sure no software leftovers remain to plague your system and proceed with the removal of your current security program.

Eset antivirus windows screen

Of course, leaving your system exposed to vermin, bugs, or hacking attacks is not the answer. Instead, you can download and install ESET HOME Security Essential.

This tolerant and lightweight software boats a modular architecture that allows you to seamlessly collaborate with other security programs without messing up your settings or complicating your life in any way. What’s not to like?

What is replacing Internet Explorer?

Microsoft Edge will be replacing Internet Explorer after the latter is discontinued. Microsoft officially ended support for IE on June 15, 2022.

Edge is a user-oriented browser with a bunch of great features for the best browsing experience. Also, the browser is not as resource-hungry as Chrome, so the computer’s performance won’t be affected. Besides, you may read a detailed review of Edge listing all the latest features.

That’s all there’s to the Internet Explorer not connecting to the Internet problem and about the browser being discontinued for good.

Also, find out what to do if Internet Explorer opens Microsoft Edge every time you launch the browser.

Tell us which fix worked for you in the comments section below.

Windows Sandbox Cannot Be Installed: 5 Ways to Fix It

Can’t enable Windows Sandbox from the Control Panel as the option is greyed out? When you hover over the option, it says Windows Sandbox cannot be installed virtualization is disabled in the firmware. No need to panic; this could be fixed in no time.

This post will discuss how to resolve this error in five easy ways. Let’s start!

What are the minimum requirements to run Sandbox on Windows?

  • Your machine should have either Windows 10 Pro, Education build 18305, or Enterprise. Windows Sandbox will not appear in the optional features if you have Windows Home Edition.
  • Virtualization enabled in BIOS.
  • Free disk space of at least 1 GB, preferably SSD.
  • Minimum two cores (Four CPU cores with hyperthreading recommended).
  • Minimum 4 GB RAM (8 GB RAM recommended).
  • AMD64 or ARM64 architecture.

How can I fix Windows Sandbox cannot be installed error?

1. Check if your device supports virtualization

  1. Press Windows +  R to get the Run console.
  2. Type taskmgr and press Enter.TASKMGR
  3. Go to the Performance tab, click CPU and check the processor name from the top.

2. Check if virtualization is enabled

  1. Press Windows +  R to get the  Run console.
  2. Type taskmgr and press Enter.TASKMGR
  3. Go to the Performance tab, and click CPU to check the Virtualization status under the CPU graph.Taskmgr Virtualization Enabled
  4. You will see Enabled or Disabled beside Virtualization.

3. Enable hardware virtualization from BIOS

  1. Press Windows + I to open Settings.
  2. Click System, then Recovery.
  3. Navigate to Advanced Startup, then click Restart Now.
  4. From Choose an option screen, click Troubleshoot.Troubleshoot
  5. Click Advanced Options.Advanced options
  6. Click UEFI Firmware Settings.UEFI
  7. On the UEFI Firmware Settings page, Click Restart.restart_boot_settings_uefi
  8. Press the Function key as per your device to enter BIOS Setup. 
  9. In BIOS Setup Utility, click Configuration, navigate to Virtualization Technology, and select Enabled.Virtualization Enabled
  10. Go to the Exit menu and choose Save changes and Exit.

4. Disable Hyper-V

  1. Go to the Start menu and type Windows features on or off.Windows Features on or off
  2. Click Open under Windows features on or off.
  3. Navigate to Hyper-V and uncheck all the boxes under it.Disable Hyper V
  4. Restart the computer to complete the process.

5. Enable the virtualization option if not available in BIOS

If the virtualization option is unavailable on BIOS, your device doesn’t support the feature.

However, you can check for BIOS updates using the device manufacturer app on your computer. For instance, if you have an HP computer, you can use the HP Support Assistant app to check for BIOS and other updates. If an update is available, update BIOS Setup Utility, and you might get the virtualization option.

Does Windows Sandbox require virtualization?

Virtualization feature is an essential part of the Sandbox because Windows Sandbox runs on an elevated space, so it can’t access advanced components like the Graphics processing unit. Therefore, it is vital to enable virtualization to bridge the gap and provide hardware acceleration in a virtual environment.

So, these are the fixes to resolve the Windows Sandbox not installed or greyed out issue. Try them to eliminate the problem so you can use Windows Sandbox to run apps in isolation.

If the Windows Sandbox copy paste is not working, this guide will help you fix the problem.

If there are other fixes we may have missed, then please mention them in the comments below.

How to Fix HTTPS Sites not Working/not Opening in Chrome

The HTTPS error can occur for numerous browsers, preventing websites with SSL certificates from opening. And when HTTPS is not working on Chrome, it could hamper your progress.

The HTTPS error message varies in alternative browsers. For example, the NET::ERR_CERT_AUTHORITY_INVALID and SSL Error Cannot connect to the real (website URL) HTTPS error message tabs open in Google Chrome.

Then, you’ll also see a red line crossing out the HTTPS text in the website’s URL in Chrome. These are a few potential fixes for the HTTPS error, specifically for Chrome. Why are HTTPS sites not opening in Chrome?

Why are HTTPS sites not opening in Chrome?

When HTTPS is not working in Chrome, it could be a problem at your end or that of the website’s administrator. On your back, it could be a VPN, an extension, or a program that has modified the network settings.

Also, certain antivirus or firewall software are known to label HTTPS links as suspicious and insecure. Besides, an outdated or corrupt DNS (Domain Name System) cache is as likely to lead to HTTPS not working in Chrome.

How do I fix HTTPS error on Chrome?

1. Clear the SSL Cache

  1. Press Windows + S to launch the Search menu, enter Internet Options in the text field, and click on the relevant search result.Internet options
  2. Navigate to the Content tab.Content
  3. Click the Clear SSL state button.Clear SSL state to fix https not working in chrome

We understand that having a tailored browsing experience due to cookies might be convenient and organized, but cookies do need to be cleared from time to time.

A PC optimization utility keeps your computer running as fast and efficiently as much as possible, and among other important tasks, it removes unnecessary cookies.

Because cookie cleaning software automates the process of eliminating unwanted files and apps, it makes cyberlife much safer.

Those cleaners will analyze your computer and show how much space it can recover and what you may safely erase. A cache and cookie cleaner is an excellent tool that may be the answer for fixing HTTPS errors in Chrome.

2. Flush the DNS Cache

    If you need to access HTTPS websites without any issues, a great method would be to flush the DNS cache. You can learn how to accomplish it with the next steps.

  1. 1. Press Windows + S to launch the Search menu, enter Terminal in the text field, right-click on the relevant search result, and select Run as administrator.

    https-error-google-chrome
  2. 2. Click Yes in the UAC prompt that pops up.

    https-error-google-chrome/
  3. 3. Press Ctrl + Shift + 2 to launch Command Prompt in a new tab.

  4. 4. Now, paste the following command and hit Enter to flush the DNS cache:ipconfig /flushdns

    flush dns to fix https not working in chrome

If the HTTPS sites are still not opening in Chrome, head to the next method.

3. Adjust the date and time settings

  1. Press Windows + I to launch the Settings app, and select Time & language from the tabs on the left.Time & language to fix https not working in chrome
  2. Click on Date & time on the right.date & time
  3. Click on the Change button next to Set the date and time manually.Change
  4. Use the dropdown menus to set the correct date and time, and then click on Change to save it.Change

Setting the correct time on your computer can also help you avoid the errors related to gws_rd=ssl; read this guide to learn more.

4. Update Google Chrome

  1. Click on the ellipsis near the top-right corner, hover the cursor over Help, and select About Google Chrome.About Google Chrome
  2. If there are any updates available, they will be automatically installed.Update to fix https not working in chrome
  3. Click the Relaunch button after the update for the changes to come into effect.

5. Disable VPN Software and third-party antivirus software

A VPN or a third-party antivirus is just as likely to be behind HTTPS not working in Chrome, and disabling these two, if you have them, has worked for a lot of users.

Simply open the programs and look for a toggle or setting to disable them. Once done, verify if the error is fixed. In case it’s not, you can re-enable the two.

Also, we recommend using an effective antivirus and a secure VPN for the best experience and to prevent such errors.

6. Reset the Chrome Browser

  1. Paste the following path in Chrome’s address bar and hit Enter:chrome://settings/reset
  2. Click on Restore settings to their original defaults.Restore settings
  3. Now, click on the Reset settings button.Reset settings to fix https not working in chrome

Resetting the browser would help if HTTPS is not showing in Chrome. Also, resetting the host file might do the trick here.

Resetting your Chrome will erase your bookmarks and history, but don’t worry, we got your back with these tools.

How to fix the HTTPS not secure message in Chrome?

Certain websites have a red padlock at the top-left corner in Chrome and throw the Not secure error message. The administrator hasn’t gotten the SSL certificate if the website doesn’t employ HTTPS.

A quick fix would be to enter https in the URL instead of http since some websites offer support for both. Or, you could try using a different browser, in case it’s a problem with the current one causing the error.

That’s all there’s to the HTTPS not working in Chrome issue, and by the time you reach this part, the problem will be long gone. These methods would also help fix the ERR_SSL_CLIENT_AUTH_SIGNATURE_FAILED error in Chrome on Windows 10.

Also, find out what to do if you keep getting the error message This website is not allowed. Tell us which fix worked for you in the comments section below.

Civ 5 is Not Launching? 5 Ways to Fix it

Civ 5 has been in the top 10 of every gamer as one of the best strategy games ever made. However, it seems that for some users, Civilization V is not launching or crashing on startup in Windows 10.

Users report that Civilization V won’t even run, they get the error message, and the application crashes.

Why is Civ 5 not opening?

Your computer may be missing specific DirectX files. DirectX is a visual component, and the appropriate version of the API should be installed.

Alternatively, corrupt game files are a tried-and-true explanation, which may be why a number of games cannot start up.

Civilization 5 is a great game, but sometimes specific errors can occur. Various problems can prevent you from running it, and users reported the following issues:

  • Civ5 is not launching – Try running the game in Compatibility mode and check if that solves the problem.
  • Civ 5 won’t launch after DirectX selection – This can occur if you don’t have the necessary DirectX files. Repair your Civilization 5 installation or install the required DirectX components.
  • Windows 10 Civ 5 won’t start – Update your graphics card drivers and check if that helps.
  • Civilization V quit unexpectedly – The problem might be your installation or third-party software. Repair your game and remove any incompatible software.
  • Civilization V is unable to start correctly – This is most likely caused by missing DLL files, which can be fixed by one of our solutions below.
  • Steam Civ 5 is not working – Users have recommended running the game in windowed mode and deactivating anti-aliasing.
  • Civilization V keeps crashing – Fix it by using one of our solutions, as they have been written explicitly for this situation.
  • Civilization 5 not running – It is recommended that you play Civilization 5 in compatibility mode.
  • Civ 5 not opening in full screen – A button labeled Full-screen resolution may be clicked from the game’s settings.
  • Civ 5 crashes on startup – This CIV 5 crashing issue might manifest itself if you are using an incorrect driver or one that is not up to date.

Keeping your Windows 10 up to date can fix this issue, so we advise you to update your OS first. If updating doesn’t help, you might want to try some of these solutions.

How do I fix Civ 5 not launching?

1. Update your graphics card driver

    According to users, you might experience issues with Civilization 5 if your graphics card drivers are outdated. Look into the practical steps below to update your graphics driver successfully. 

  1. 1. Open Device Manager from the Start Menu.

    Launch Device Manager to fix discord mic not working windows 11
  2. 2. Find the Display adapters section and expand it to find your driver.

    display adapters
  3. 3. Right-click on the driver device and select Update driver.

  4. 4. Choose the Search automatically for drivers option.

  5. 5. Wait for the drivers to be updated and then restart your PC.

Of course, the issue can be fixed by downloading and installing the latest drivers. Visit your graphics card manufacturer’s website, find your model, and download the latest drivers.

Although it sounds simple in theory, sometimes it’s more complicated, and you may do more harm by installing the wrong driver on your system.

The safer and easier solution is to automatically download and install Outbyte Driver Updater, a specialized solution that will automatically update and fix your drivers in a couple of seconds.

You don’t even have to click on anything because after installing; it will start working by scanning your system for driver problems or updates.

When the process finishes, you will see a complete list of the driver’s situation.

The only input required from you is to either click on the Apply & Update button or each box from the left of the driver names and hit the Update button from their right.

⇒ Get Outbyte Driver Updater

2. Remove Lucid Virtu

According to users, you might experience problems with Nvidia graphics if you have Lucid Virtu installed.

This solution applies only to Nvidia owners, so if you don’t own Nvidia graphics, you can skip this solution and try something else.

Many users fixed things when Civ 5 was not launching simply by removing Lucid Virtu from their PC.

Alternatively, you might be able to fix the problem by switching to the older version of Nvidia drivers.

To remove Lucid Virtu entirely, along with its associated files, it’s recommended to use a dedicated removal tool. Uninstalling from Windows Settings will leave behind leftover files. These will clutter your PC and may cause additional errors in the future.

Uninstaller software is created to find and remove all files associated with the app you want to delete. So you just select what you want to uninstall, and the software will automatically find and completely uninstall that app from your PC.

3. Uninstall your display driver

  1. Right-click the Start icon from your Taskbar, then select Device Manager.device-manager-w10 amd driver install problems
  2. Expand the Display Adapter section, find your Display Device driver, right-click it, and choose Uninstall device.
    Civ5 not launching
  3. Restart your computer.

Windows will now install the default driver for your graphics card, and the issue should be resolved.

4. Run Civilization V in compatibility mode

  1. Find the Civilization V shortcut and right-click it, then choose Properties from the menu.
    Civ 5 Windows 10 won't start
  2. Go to the Compatibility tab, check Run this program in compatibility mode, and select Windows 8 from the list. Next, click Apply, then OK to save the settings.
    Civ5 not launching

5. Update your BIOS

If Civ 5 is not launching, it can be an issue with the onboard graphics or an onboard and dedicated graphics card.

It can happen that BIOS doesn’t support Windows 10, and this can create a particular issue, so you might want to try updating it.

Before you start, we must warn you that updating the BIOS is an advanced technique, and if not done correctly, it can cause permanent damage to your computer.

If you don’t know how to do that, please, take your computer to the official repair center and ask them to do it for you. Otherwise, make sure to check out our guide on how to update your BIOS.

6. Verify the integrity of the game’s cache

  1. Open Steam, locate Civilization 5, right-click it and choose Properties.
    Civilization V quit unexpectedly
  2. Go to Local Files and click on Verify Integrity of Game Cache.local-files civ 5 not launching

When Civ 5 is not launching on Steam, a quick solution is to verify the integrity of game files. Keep in mind that this process can take a couple of minutes, so don’t interrupt it.

7. Install DirectX

According to users, problems with Civilization 5 can occur if you don’t have the necessary version of DirectX.

To fix the issue, you need to download and install the necessary version of Civilization 5. You can download the required DirectX right from Microsoft’s website.

Alternatively, you can check Civilization 5’s installation directory for the DirectX directory.

In there, you should find the DXSetup file. Then, the issue should be resolved by running the setup and installing DirectX.

8. Run the game in windowed mode and turn off Anti-aliasing

Many users reported issues while using Civilization 5 and DirectX 11.

According to them, the game cannot start, and the problem seems related to the anti-aliasing feature. So, to fix the issue, you need to check the game’s settings.

According to users, set the game to run in Windowed mode and turn off anti-aliasing. After that, the game should run without any issues on your PC.

It might not be necessary to run the game in windowed mode, so you can try disabling anti-aliasing.

9. Make sure that your Steam client is up to date

  1. Start Steam, then click on Steam in the top right corner and choose the Check for Steam Client Updates option.Civilization V keeps crashing
  2. The Steam client will check for available updates and install them automatically.

In case Civilization 5 is not working in multiplayer mode, updating the client should help.

Check out our guide on what to do if the Steam client update is stuck so you can get this fixed along the way.

10. Try running the game in Offline mode

  1. Start Steam, then click Steam from the toolbar and select Go Offline.
    Civ 5 Windows 10 won't start
  2. Click Restart in Offline Mode.
    Civ 5 won't launch after DirectX selection
  3. Once the Steam restarts, try rerunning Civilization 5.

11. Copy the missing DLL files

  1. Try running Civilization 5 from its installation directory.civ-5 civ 5 not launching
  2. Write down the name of the missing file. For example, it should be d3dx9_42.dll, but it can be a different file on your PC.
  3. Navigate to the DirectX directory and find that file. In our example, the file should be d3dx9_42_x86 or d3dx9_42_x64 (these files can sometimes have a prefix before them, such as Aug2009 or Dec2005).directx civ 5 not launching
  4. Run the file matching your system architecture (32 or 64-bit).
  5. You should see a list of files. Next, locate the missing file; in our case, that would be d3dx9_42.dll and copy it to the Civilization 5 installation directory.

What are the Civilization V system requirements?

When a hardware or software application runs smoothly and efficiently, the system requirements are the configuration the system must have for it to do so.

Failure to achieve these prerequisites can result in installation and performance issues. Thus the minimum system requirements for Civ V are as follows:

  • Operating System: Windows® XP SP3/ Windows® Vista SP2/ Windows® 7 
  • Processor: Intel Core 2 Duo 1.8 GHz or AMD Athlon X2 64 2.0 GHz 
  • Memory: 2GB RAM 
  • Hard Disk Space: 8 GB Free 
  • DVD-ROM Drive: Required for disc-based installation 
  • Video: 256 MB ATI HD2600 XT or better, 256 MB nVidia 7900 GS or better, or Core i3 or better-integrated graphics 
  • Sound: DirectX 9.0c-compatible sound card 
  • DirectX®: DirectX® Version 9.0c

The recommended requirements to run the game smoothly are:

  • Operating System: Windows® Vista SP2/ Windows® 7 
  • Processor: 1.8 GHz Quad Core CPU 
  • Memory: 4 GB RAM 
  • Hard Disk Space: 8 GB Free 
  • DVD-ROM Drive: Required for disc-based installation 
  • Video: 512 MB ATI 4800 series or better, 512 MB NVIDIA 9800 series or better 
  • Sound: DirectX 9.0c-compatible sound card 
  • DirectX®: DirectX® version 11

If you think your computer’s specifications suffice for the game to be installed and launched, then let’s move on to how you can make it work again.

Does Civilization V work on Windows 11?

Yes, Civilization V works on Windows 11. The game requirements are met by the platform. This is also confirmed on the GOG official website.

Why is Civ 5 not launching from Steam?

It must communicate with various other modules to get a game up and running.

Games have difficulty keeping up with the fast-paced environment of regular upgrades made by Microsoft and other graphics manufacturers. This makes it difficult for games to remain in sync with one another.

We recommend that you look at our guide with 8 methods to try if Civ VI is not launching from Steam.

For more information and potential solutions to this error, we recommend you check our post on Civ 5 video settings not saving.

We hope this guide helped you to run Civilization V on your Windows 10 computer. If you have any comments or questions, contact the comment section below.

How to Boot Your Surface Pro from USB: 3 Tested Ways

Booting your Surface Pro using a USB flash drive is a bit complicated but we’ve got you covered. Before diving into the solutions, back up any important data if possible.

How do I boot Surface Pro using a USB flash drive?

Before trying any steps, create a working bootable USB drive, make sure that the device is charged, and unplug any other USB devices except for the keyboard and mouse. If your Surface Pro is frozen or can’t boot up Windows, press and hold the power button till the Microsoft logo appears. Then, press the Windows logo, followed by the Ctrl + Shift + Win + B key combination.

1. Boot Surface Pro using a USB drive

➡ For Windows 11

  1. Insert a bootable USB flash drive into the USB port.
  2. Press Windows + I to get Settings.
  3. Go to System and choose Recovery.System recovery Surface Pro USB boot

4. Navigate to Advanced startup and click Restart Now.Surface Pro Boot from USB

5. You will see Choose an option screen; click Use a device>USB storage. Choose-an-option

Tip icon Tip
For Windows 11, if you don’t have the keyboard connected, on the login screen, locate the Accessibility icon and click on it. Choose On-Screen Keyboard.

➡ For Windows 10

  1. Press Windows + I to get Settings.
  2. Go to Update & Security.
  3. From the left pane, click Recovery.
  4. Under Recovery, navigate to Advanced startup and select Restart Now.Surface Pro Boot Restart Now

5. You will see Choose an option screen; click Use a device>USB storage.

Tip icon Tip
For Windows 10, if you don’t have the keyboard connected, locate the Ease of access icon on the login screen and click on it. Choose On-Screen Keyboard.

2. Configure the boot device order

  1. Turn off your Surface.
  2. Press and hold the Volume Up button
  3. With the Volume Up button pressed, press & release the Power button.
  4. Keep holding the Volume Up button till you get the Microsoft logo, or the Windows logo disappears.
  5. You will get Surface UEFI.
  6. On Surface Pro UEFI from the left pane, click Boot configuration.Surface pro
  7. Select USB Storage, drag it, and place it on top of the list.Change the order
  8. Click Exit, then Restart Now.

While adjusting UEFI boot settings, it is useful to confirm your exact device model. Here is a quick guide on how to tell what version of Surface Pro you have so that boot configuration steps match correctly.

You can access more startup options on your device by following this guide on how to get to the Surface Pro boot menu for clear steps.

3. Format USB as a bootable drive

  1. Take a USB drive (at least 16 GB) and plug it into your Surface Pro’s USB slot.
  2. Press the Windows key and type CMD and click Run as Administrator.CMD elevated
  3. On the Command Prompt, type the command mentioned below and hit Enter : diskpart
  4. Next, paste the command mentioned below and hit Enter. This will show you all the disks on the computer. list disk
  5. Type the following command and hit Enter (where X is the drive letter or number assigned to the USB drive). select disk X
  6. Type the following commands and press Enter after each of them: clean create part pri select part 1 format fs = fat32 quick active

FAQ

How do I boot a Surface device from a USB drive?

Shut down the Surface, press and hold Volume Down, tap Power, and keep holding Volume Down until the Surface logo appears.

Why does my Surface not recognize the USB boot drive?

Create the USB using FAT32, use a properly made bootable image, and plug it into the Surface’s USB port before powering on.

How do I enter the Surface UEFI menu?

Hold Volume Up, tap Power, and keep holding Volume Up to open UEFI. You can change boot order or enable USB boot here.

Why does Secure Boot block USB boot on Surface?

Secure Boot blocks unsigned images. Open UEFI, go to Security, and turn off Secure Boot so the Surface can load external boot media.

That’s it. This is how you can make your Surface Pro boot from a USB drive. Try these steps and let us know in the comments section below if the methods worked for you.

Once Windows loads again, learn how to use Surface Pen to write text for faster input and note taking.

5 Ways to Fix Printer has Experienced Configuration Problem

Printers are useful devices that allow us to get a hard copy of almost anything on the computer. But they are more prone to errors than you would imagine. A common one reported by users is, Your printer has experienced an unexpected configuration problem.

But like most printer-related errors, for instance, the printer not printing full pages or not responding to requests, this too is easily fixable. And we will walk you through these to get things up and running.

What is an unexpected configuration problem?

An error with the printer usually arises due to corrupt or outdated drivers. Also, several users reported that their spooler files led to it.

There are several variations of the error, each with a different error code. Here are a few of these:

  • 0x80070002 Your printer has experienced an unexpected configuration problem – A common problem encountered by many users.
  • 0x80070570 Your printer has experienced an unexpected configuration problem – The error code appears alongside the error message and helps identify the underlying cause.
  • 0x80040003 Your printer has experienced an unexpected configuration problem – Updating the driver usually helps fix things.
  • 0x8007000d Your printer has experienced an unexpected configuration problem – One of the many error codes, but our solutions would help.
  • 0x800705b4 Your printer has experienced an unexpected configuration problem – If you encounter the error, try running the built-in troubleshooter first.
  • 0x8007007e Your printer has experienced an unexpected configuration problem – Clearing the spool folder may do the trick.
  • 0x80004005 Your printer has experienced an unexpected configuration problem – Another error code that often troubles users.
  • 0x800706ba Your printer has experienced an unexpected configuration problem – It could be the DLL files to blame, and we have a solution.

What can I do if my printer has experienced an unexpected configuration problem?

Before we head to the slightly complex solutions, here are a few quick ones to try:

  • Restart the computer. Often, a simple restart would eliminate the bug responsible for the error.
  • Install the latest version of Windows. If the issue appeared after updating the OS, it’s likely a bug in the installed version, and installing the next one should fix things.
  • If you have trouble printing from a particular program, uninstall the app, and download it again.
  • Check if the printer manufacturer offers a diagnostic tool, download it, and let it fix problems. For instance, HP provides the Print and Scan Doctor diagnostic tool for such issues.

If these two don’t work, head to the ones listed below.

1. Clear the spooler files

  1. Press Windows + R to open Run, type services.msc in the text field, and then hit Enter.services
  2. Locate the Print Spooler service, right-click on it, and select Stop.stop service to fix your printer has experienced an unexpected configuration problem
  3. Now, press Windows + E to open File Explorer, paste the following path in the address bar, and then hit Enter:C:\Windows\System32\spool\PRINTERSdelete spooler files to fix your printer has experienced an unexpected configuration problem
  4. Next, press Ctrl + A to select all the files, and then hit the Del key.
  5. Then, again, head back to Services, right-click on the Print Spooler service, and this time, select Start.start

Once done, check if the Your printer has experienced an unexpected configuration problem error is eliminated. This is a simple and quick method and has worked for many.

2. Update the printer drivers

2.1 Update drivers manually

  1. Press Windows + X to open the Power User menu and select Device Manager.device manager
  2. Expand the Printers section, right-click on the driver throwing the error, and select Update driver.update driver to fix your printer has experienced an unexpected configuration problem
  3. Now, select Search automatically for drivers and wait for the best available one to install.search automatically for drivers

Drivers are a critical component and help the OS interact with connected devices. And an outdated driver can trigger issues, including the error that your printer has experienced an unexpected configuration problem.

Other than this method, there are a few more ways you can update the printer driver. But using a dedicated tool is, by far, the best option.

2.2. Use a professional tool

You can also bring your updates to date with a tool that automatically scans your device for programs that need to be updated and provide you with an accurate report on the matter.

3. Move the DLL files

  1. Press Windows + R, type cmd, and then press Ctrl + Shift + Enter.cmd
  2. Click Yes in the UAC prompt.
  3. Paste the following command and hit Enter:net stop spoolerstop spooler
  4. Press Windows + E to open File Explorer, paste the following path in the address, and hit Enter:C:\Windows\System32\spool\drivers\navigate
  5. Look through the folders here to locate the PrintConfig.dll file. Once found, right-click on it, and select Copy.PrintConfig.dll file to fix your printer has experienced an unexpected configuration problem
  6. Now, navigate the following path and paste the file here:C:\Windows\System32\spool\drivers\x64\3file
  7. Head back to Command Prompt, and execute the following command:net start spoolerstart spooler to fix your printer has experienced an unexpected configuration problem

Moving the PrintConfig.dll file fixed the Your printer has experienced an unexpected configuration problem error for many, so make sure to try it. Also, if you can’t find the DLL file, download one from the web. Just be cautious and use a trusted website.

4. Turn on printer sharing

  1. Press Windows + R to open Run, type control printers, and hit Enter.control printers to fix your printer has experienced an unexpected configuration problem
  2. Click on Printers & scanners.printers and scanners
  3. Now, choose the printer that throws the error.printer
  4. Click on Printer properties.printer properties
  5. Navigate to the Sharing tab, tick the checkbox for Share this printer, and click on OK to save the changes.turn on sharing to fix your printer has experienced an unexpected configuration problem

5. Add the printer all over again

  1. Press Windows + I to open Settings, navigate to Bluetooth & devices from the left, and click on Printers & scanners.printers & scanners to fix your printer has experienced an unexpected configuration problem
  2. Now, click on the problematic printer.printer
  3. Click on the Remove button.remove to fix your printer has experienced an unexpected configuration problem
  4. Next, click Yes in the confirmation prompt.confirm change to fix your printer has experienced an unexpected configuration problem
  5. Once done, unplug the printer, restart the computer for the changes to apply, and then replug it.
  6. Finally, head back to Printers & scanners settings, click Add a device and follow the on-screen instructions to complete the process.add a device

Once you are done adding the printer, the printer has experienced an unexpected configuration problem error will be gone for good.

For good measure, ensure you manage your device and printer settings to avoid common printer issues. Also, if you plan to upgrade to a better one, do not forget to check the best printers compatible with Windows 11.

Please tell us which fix worked for you in the comments section below.

PC Won’t Stay in the Sleep Mode: Use These 5 Simple Fixes

The PC won’t stay asleep issue takes away an elementary part of Windows systems. This is because many users prefer the option of shutting down their PCs and starting everything over.

If your computer keeps waking up from sleep on Windows 10, there might be a problem with Sleep mode. It can also be down to some settings or apps on your PC.

No matter the cause, this guide will show the surefire fixes needed to solve the problem.

Why won’t my PC stay asleep?

There are various reasons your PC won’t stay asleep when you set it to do so. Below are some of the common ones:

  • Wake timer activities: The first to check if your computer is not going to sleep or keeps waking up on Windows 10 is the wake timer. If you have them active, then your PC will wake up at the designated time. To prevent this, you need to disable the feature in your power options.
  • Network adapter wake properties: Another possible cause of this issue is the Wake On Magic Packet and Wake On Pattern Match features of your network adapter. These features allow your adapter to wake your PC from sleep at intervals. The solution here is to disable them.
  • Activities of third-party apps: Some third-party apps or processes can also cause this reason. This can be because they need your PC resources to run some operations. Finding and disabling these apps should help solve the sleep issue in this case.

What can I do if the PC won’t stay asleep?

1. Disable network adapter wake properties

  1. Press the Windows key + I and select the Network & Internet option.
    network pc wont stay asleep
  2. Select VPN in the left pane and click Network and Sharing Center.
    vpn
  3. Click on your active network.
    wifi
  4. Now, click the Properties button in the next window.
    properties pc wont stay asleep
  5. Click the Configure… button.
    configure
  6. Select the Power Management tab at the top and uncheck the box for Allow this device to wake the computer.
    power mgmt pc wont stay asleep
  7. From here, click the Advanced tab at the top.
  8. Select Wake on Magic Packet and choose Disabled from the dropdown under value.
    wake on magiic
  9. Choose the Wake on Pattern Match option and the Disabled option from the value dropdown.
  10. Finally, click the OK button to save your changes.
    wake on pattern

The PC won’t stay asleep issue can be down to some features that help speed up your connectivity. Unfortunately, these features need to be disabled to solve the problem completely.

2. Disable wake timers

  1. Press the Windows key, type power plan, and choose Edit power plan.
    edit power pc wont stay asleep
  2. Click Change advanced power settings.
    change advanced
  3. Click the + sign next to the Sleep option to expand it and do the same for Allow wake timers under it.
    sleep allow
  4. Now, click the dropdown before the On battery and Plugged in options and choose Disable for both.
  5. Finally, click the Apply button followed by OK to save the changes made.
    apply ok

The wake timers are the most prominent cause of the PC won’t stay asleep issue. This is because they can wake your PC based on the parameters they are on at intervals. However, with the steps above, you should be able to restore normalcy.

3. Disable specific devices from waking up your PC

  1. Press the Windows key, type cmd, and click Run as administrator under Command Prompt.
    cmd admin
  2. Type the command below and press Enter: Powercfg -devicequery wake_armedpowercfg command pc wont stay asleep
  3. This command will list all devices which can wake your PC from sleep.
  4. Now, type the command below for each device on the list. Again, remember to replace the devicename in the command with the actual device name. Powercfg -devicedisablewake "devicename"
  5. Close the elevated Command Prompt and restart your PC.

Some devices and apps can wake up your PC from sleep. This might be because they need resources to run some processes. The steps below should help disable them and fix the issue of the PC won’t stay asleep.

4. Run the troubleshooter

  1. Press the Windows key + I to open Settings and choose Update & Security.
    update and security
  2. Select Troubleshoot in the left pane and click Additional troubleshooters.
    additional trouble
  3. Choose the Power option and click the Run the troubleshooter button.
    run troubleshooter pc wont stay asleep

At times, a bug or minor power glitches might cause your PC not to stay asleep. The Power troubleshooter should find the causes of this issue and recommend potential fixes.

5. Disable Fast Startup

  1. Press the Windows key, type power plan, and select Choose a power plan.
    choose a power
  2. Click Choose what the power buttons do in the left pane.
    choose what pc wont stay asleep
  3. Now, click Change settings that are currently unavailable.
    change settings
  4. Uncheck the Turn on fast startup (recommended) box and click the Save changes button.
    turn on fast pc wont stay asleep
  5. Finally, restart your PC.

The Fast Startup, as the name implies, helps to improve your PC’s startup time. However, it might be why your PC won’t stay asleep. So, you need to disable it and restart your PC to fix the issue.

The PC won’t stay asleep issue can be frustrating, as it drains your computer quickly. But with the detailed solutions in this guide, you should be able to fix it for good.

If you are facing other issues like if the computer shuts down instead of sleeping, check our detailed guide for solutions to retake control of your PC.

Feel free to let us know the solutions that helped you solve this issue in the comments below.

SSD Not Showing up in Windows 11: How to Get it Detected

Several users have reported that SSD is not showing up in Windows 11 or it’s not recognized. If you connect the SSD for the first time, probably the disk is either not yet initialized or formatted. But for SSDs already in use, the problem lies elsewhere.

Before trying anything else, connect the SSD to another port, or try connecting it to another PC or port.

What can I do if SSD is not showing up on Windows 11?

1. Initialize the SSD

  1. Press Windows + S to launch the Search menu, enter Create and format hard disk partitions in the text field at the top, and click on the relevant search result that appears.Create and format hard disk partitions to fix windows 11 not recognizing ssd
  2. Check if the problematic SSD has a black bar at the top and says Not Initialized. If that’s the case, right-click on it and select Initialize Disk from the context menu.Initialize disk to fix windows 11 not recognizing ssd
  3. Select the desired partition style, i.e., either MBR or GPT. We recommend selecting GPT since it allows you to create more partitions, but there’s a drawback, too; it’s not recognized by Windows 8 and earlier versions.Choose partition style to fix windows 11 not recognizing ssd
  4. Once the SSD is initialized, right-click and select New simple volume from the context menu.New simple volume to fix windows 11 not recognizing ssd
  5. Click on Next to proceed.Next
  6. Enter the volume size in MB. We recommend you leave the default entry as is since it’s the maximum volume size and click Next.Choose volume size
  7. Choose a drive letter from the dropdown menu, and click Next.Choose drive letter
  8. Next, select a file system and volume label for the SSD, and click Next. If you are creating a volume for the first time, we recommend using the default entries on every step.Choose file system and volume label
  9. Finally, verify the details and click Finish.Finish

If an SSD has not been initialized or the data on it has corrupted for some reason, Windows 11 won’t recognize the drive. In this case, initializing the drive and creating a new volume would help fix the issue.

2. Assign/change the drive letter

  1. Press Windows + S to launch the Search menu, enter Create and format hard disk partitions in the text field, and click on the relevant search result.Create and format hard disk partitions to fix windows 11 not recognizing ssd
  2. Right-click on the SSD volume, and select Change Drive Letter and Paths from the context menu.Change drive letter and paths
  3. Next, click on the Add button. Finally, click on Change if the drive already has a letter assigned.Add drive letter to fix windows 11 not recognizing ssd
  4. With the Assign the following drive letter option ticked, select the desired Drive letter from the dropdown menu and click on OK to assign it.Assign new drive letter to fix windows 11 not recognizing ssd

If the volume on the SSD has not been assigned a letter yet, it wouldn’t be listed in the File Explorer. In this case, assign a drive letter using the above steps, and Windows 11 will now recognize the SSD.

Even if it has been assigned one but has some issues, changing it should help.

3. Check BIOS settings

Note icon NOTE
The steps listed here might be different on your computer, but they will give you a fair understanding of the process. Check the support or FAQ section on the manufacturer’s website to find the exact steps.
  1. Shut down your computer, and then turn in back on. When the display lights up, hit Del or F12 key or the relevant key for your system manufacturer to enter the BIOS settings.
  2. Locate and click on Storage and then select the Storage Option entry.Storage options to fix windows 11 not recognizing ssd
  3. Now, set the SATA Emulation to AHCI Mode and save the changes.AHCI mode

Once done, boot Windows 11, and the SSD should now be recognized. In case it’s still not listed, head to the following method.

4. Update the SSD driver

  1. Press Windows + S to launch the Search menu, enter Device Manager in the text field at the top, and click on the relevant search result.Launch Device Manager
  2. Double-click on the Disk drives entry to expand and view the problematic SSD.Disk drives
  3. Right-click on the SSD not being recognized and select Update driver from the context menu.Update driver to fix windows 11 not recognizing ssd
  4. Next, select Search automatically for drivers from the two options in the Update Drivers window.Search automatically for drivers to fix windows 11 not recognizing ssd
  5. Your computer will now scan for the best available driver on the system and install it for the SSD.

Outdated drivers are known to cause several issues with the device, the SSD. Updating the driver enhances the device’s performance apart from introducing new features and eliminating previously known errors.

But, one of the drawbacks of using the Device Manager to install the driver manually is that it only scans the drivers stored on the system. So, the update process might not go through if you haven’t downloaded a newer version.

You can always use a reliable third-party app if the whole process sounds like too much trouble. We recommend using Outbyte Driver Updater, a dedicated tool that automatically scans the available sources for the latest version and keeps the installed drivers up-to-date.

Outbyte Driver Updater

Avoid serious PC issues and keep all your device drivers up to date with Outbyte Driver Updater.
Free Trial Download now

The above methods will eliminate any issues leading to Windows 11 not recognizing the SSD. By reaching this part of the article, either the error will be destroyed, or you will have discovered that the SSD is faulty.

Why is Windows 11 not recognizing the SSD?

We went through several forums where users shared the problem and their valuable input. And based on that, we identified several issues as to why the SSD is not recognized in Windows 11. They are listed below:

  • Improper connections: The first thing to check if your SSD is not recognized on Windows 11 is the connection. If the SSD or the USB, in the case of an external drive is not connected correctly, you will encounter this issue.
  • Disk space unallocated: Another reason for SSD not being detected on Windows 11 issue is unallocated disk space. This denotes that your programs cannot write on the drive. You can fix this by creating a new partition on the drive.
  • No drive letter assigned: The drive letter is essential for your OS to communicate with your hard drive. So if Windows 11 setup doesn’t detect your SSD, you might need to assign or change its drive letter.
  • Misconfigured BIOS settings: Sometimes, your BIOS settings might be set to the old IDE compatibility mode. This can cause the new SSD to not show up in Disk Management on Windows 11. The solution here is to change the SATA mode to AHCI.
  • Outdated SSD drivers: Outdated drivers are the chief cause of many issues. So, it is not surprising that you can face this issue if your SSD drivers are not up-to-date; you need to update your drivers to get past the problem here.

Suppose you are, by any chance, able to identify the problem from the list, head to the appropriate method, and execute it. Otherwise, follow the steps in the sequence listed for quick troubleshooting.

Also, if you notice the hard drive missing after updating Windows 11, learn how to fix the problem.

Do not hesitate to tell us which fix worked or was the SSD was faulty in the comments section below.

Windows Cannot Run Disk Checking on This Volume [Fix]

Windows could not run disk checking on this volume because it is a write-protected error generally occurring when a book or the drive is damaged, corrupted, or in Read-Only mode. This implies that you can access the files stored in the drive but cannot make any changes.

This guide will help you fix this disk error with five simple troubleshooting steps.

Why can’t Windows run disk checking on this volume?

CHKDSK, the command-line utility, is used to check errors on a disk drive and possibly repair them. If any of the drives that you scanned comes with the CHKDSK write-protected error, these could be the reasons:

  • Your hard drive has a write protection tab, and it is enabled.
  • The USB drive has a physical switch to set it to Read-Only, and it is turned on.
  • Virus infection or hardware errors damaged the partition file system.
  • The attribute of the drive is selected as Read-Only.
  • Windows Registry Key value is incorrect.

Now that we know the situation, let us move on to the fixes.

What can I do if Windows cannot run disk checking on this volume?

1. Remove disk errors

  1. Press the Windows key and type CMD, and select Run as Administrator.CMD elevated
  2. Paste the following command and press Enter:

chkdsk E:/f/r/x

 Note: E represents the drive letter; change it accordingly.

2. Remove Write Protection via Diskpart Command

  1. Press the Windows key and type CMD, then select Run as Administrator
  2. Type the command mentioned below and press Enter: diskpartDiskpart
  3. Paste the following command and hit Enter. You will get the list of disks attached. list disk Windows Cannot Run Disk Checking on This Volume
  4. Type the command mentioned below and press Enter. Replace 0 with the number that your drive is listed under. select disk 0Windows Cannot Run Disk Checking on This Volume
  5. Copy and paste the command and hit Enter: attributes disk clear readonlyWindows Cannot Run Disk Checking on This Volume

3. Modify Read-Only settings in Registry Editor

3.1 If the StorageDevicePolicies key is present

  1. Press Windows + R to get the Run console
  2. Type Regedit to open Registry Editor.
  3. Paste the path mentioned below in the address bar: HKEY_LOCAL_MACHINE\SYSTEM\CurrentControlSet\Control\StorageDevicePoliciesRegedit
  4. Locate and right-click on the WriteProtect key and then click Modify.Regedit 2
  5. Edit the DWORD value, set the Value data to 0, and click OK to confirm.

3.2 StorageDevicePolicies key  is not present

  1. Press Windows + R to get the Run console.
  2. Type Regedit to open Registry Editor.
  3. Paste the path mentioned below in the address bar: HKEY_LOCAL_MACHINE\SYSTEM\CurrentControlSet\Control
  4. On the right panel, right-click in space and select New, then Key. Now, double-click on the key and name it StorageDevicePolicies.Add Key
  5. Select StorageDevicePolicies and go to the right panel, right-click and then select DWORD (32-bit).Regedit add key
  6. Name the new DWORD as WriteProtect and click Modify and set the Value data to 0.Write Protected

4. Scan your drive

  1. Navigate to This PC.
  2. Locate the drive, and choose Properties from the context menu.Disk Properties
  3. Go to the Tools tab.
  4. Under Error-checking, click Check. Please wait till the scan completes.Scan Disk

5. Format the volume via Disk Management to make it reusable

  1. Press Windows + R to get the Run console.
  2. Type diskmgmt.msc to open Disk Management.
  3. Select the partition you want to format, then right-click to choose Format.Disk Management
  4. Rename the Volume label, Allocation unit size, and File system, then click OK.

Note: Ensure there is a checkmark beside Perform a quick format.

So, these are fixes you can perform if you encounter Windows cannot run disk checking on this volume because it is write-protected. 

Let us know if any other solutions not mentioned here worked for you in the comments section.

Second Life Keeps Crashing: 2 Easy Fixes To Use

Second Life is an online virtual life simulator that can be accessed by personalizing your 3D avatar.

A good number of Second Life users have been reporting crashing issues with Windows 10, and the program isn’t opening for some of them. This guide will show you how to fix all varieties of this issue quickly and effectively.

Why does Second Life keep crashing?

There are a series of reasons Second Life keeps crashing or freezing on your PC. Some of the possible causes are listed below:

  • Outdated graphics driver: The Second Life not responding or crashing issue can be due to obsolete or faulty display drivers. This is especially common with users using NVIDIA drivers. You can fix this by updating the drivers.
  • Insufficient system resources: Second Life is demanding and takes its toll on your PC. So, you need enough RAM space, for example, and other system resources to run the game successfully.
  • Activities of third-party apps: Some apps might be interfering with Second Life either by drawing too many resources or running a counter-program to it. In this case, you need to perform a clean boot to stop the crash.

How can I fix Second Life crashing on PC?

Below are some preliminary troubleshooting steps to try before proceeding to the fixes in this section:

  • Clear out dust from your PC to prevent overheating
  • Ensure that your PC meets the requirement to run the program
  • Download the new test viewer

1. Clean boot your computer

  1. Press the Windows key + R, type MSConfig, and click the OK button.
    msconfig second life keeps crashing
  2. Select the Services tab at the top, check the box for Hide all Microsoft services, and click Disable all.
    services
  3. Click the Startup tab and select Open Task Manager.
    startup
  4. Right-click each of the processes there and select Disable.
    disable second life keeps crashing
  5. Go back to the System Configuration window and click Apply, followed by OK to save the changes.
    apply and ok

If you’re running too many apps and programs at the same time, this might impact the resources allocated to running Second Life.

Try using a clean boot to launch your PC with the required apps and processes.

2. Check your drivers

  1. Press the Windows key + X and select Device Manager.
    device manager
  2. Double-click the Display adapters option to expand it and right-click the driver there.
  3. Select the Update driver option.
    update driver second life keeps crashing
  4. Choose the Search automatically for drivers option and install the latest driver available.
    search auto

If your graphics card drivers are outdated, Second Life will keep crashing in Windows 10. If you don’t want to use the built-in driver updater, you can download the latest update to your driver manufacturer’s website.

Restart your computer and then relaunch the game.

Alternatively, you can download the latest drivers without stress using an automatic driver update.

⇒ Get Fortect Driver Updater

The Second Life keeps crashing issue is a problem many users face, especially those using old PCs. Thankfully, you can fix it quickly using the solutions in this guide.

If you need a general guide on how to fix game crashes on Windows 10, check our excellent guide for encompassing solutions you can always use.

If not, describe your issue in the comments box, and we’ll try to search more about this.

Can’t Encrypt A Folder? Here’s What to Do

File encryption is one of the best methods to protect your files, which is no secret. However, many users reported that the encrypt folder option is greyed out on their PCs.

The reason why your encrypt folder option is greyed out is most likely a wrong Windows version, a disabled encryption service or corrupt system files.

Follow the steps below to re-enable it:

How can I fix the encrypt folder option if it’s greyed out?

Make sure you use the Windows 11/10 Pro Version. The Home version doesn’t support folder encryption. If you do, but the option still isn’t working, follow the steps below:

1. Modify the registry

  1. Press the Windows key + R, type regedit, and click OK.
    regedit folder encrypt grayed out
  2. When Registry Editor opens, navigate to this key in the left pane: HKEY_LOCAL_MACHINE\SYSTEM\CurrentControlSet\Control\FileSystem
  3. Then, double-click the NtfsDisableEncryption DWORD in the right pane to open its properties.
    nftsdisable encrypt folder greyed out
  4. Set the Value data to 1 and click OK to save changes. If this value is already set to 1, change it to 0.
    value

After making these changes, restart your PC.

2. Enable the Encrypting File System (EFS) service

  1. Press the Windows key + R, type services.msc, and click OK.
    folder encrypt grayed out services run window
  2. Double-click the Encrypting File System (EFS) option to open its properties.
    can't encrypt services
  3. Set the Startup type to Automatic and click Apply and OK to save changes.
    folder encrypt grayed out properties

File encryption relies on the Encrypting File System (EFS) service. So, you need to enable it and restart your PC.

3. Repair system files

  1. Press the Windows key + S, type cmd, and select Run as administrator under Command Prompt.
    cmd admin encrypt folder greyed out
  2. Type the command below and hit Enter: sfc /scannowsfc scannow
  3. Wait for the command to finish running, type the command below, and press Enter: DISM /Online /Cleanup-Image /RestoreHealthdism
  4. Wait for the command to finish running and restart your PC.

Repairing system files can be easily done with specialized software. Tools such as Fortect will greatly simplify the process and allow you to repair any broken system files in a matter of minutes.

➡️ Try Fortect

4. Enable EFS with the fsutil command

  1. Press the Windows key, type cmd, and choose Run as administrator under Command Prompt.
    cmd admin encrypt folder greyed out
  2. Type the command below and hit Enter: fsutil behavior set disableencryption 0ftusil encrypt folder greyed out
  3. Now, restart your PC after running the command.

Another option to enable the Encrypting File System (EFS) service is to run the fsutil command. This should make the encrypt folder option available again on your PC.

Feel free to let us know the solution that helped you solve the encrypt folder being greyed out problem in the comments below.

How to Password Protect a Windows 11 Folder (Step-by-Step)

If you want to password-protect a folder on Windows, there are several ways to do it. While only Windows 11 Pro offers a built-in feature to lock folders with a password directly, users of other versions can still secure their folders using reliable alternatives. These include built-in tools, file compression with password protection, and trusted third-party software.

How to lock folder with password in Windows 11?

1. Use a Password-Protected ZIP Archive

One of the easiest ways to secure a folder is by compressing it into a ZIP file and adding a password using WinZip.

Steps:

  1. Download and install WinZip from the official website.
  2. Right-click your folder and select WinZip > Add to Zip file.
  3. In the Add window, check Encrypt files and choose AES-256 encryption.
  4. Set your password and click Add to finalize.

Windows’ default ZIP feature doesn’t support password protection. WinZip offers a secure and user-friendly alternative compatible with both Windows 10 and 11.

For advanced options like file splitting or secure sharing, WinZip also includes premium features. If you’re on Windows 11, follow this guide for password protecting ZIP files to explore more.

👉 Download WinZip and start protecting your folders with strong encryption.


2. Create a Lock Script Using Notepad

  1. Open Notepad on your PC.
  2. Copy and paste the script below:
cls
@ECHO OFF
title Folder Locker
if EXIST "Private" goto UNLOCK
if NOT EXIST Locker (
md Private
echo Folder created successfully
)
:CONFIRM
echo Are you sure you want to lock the folder? (Y/N)
set /p "choice="
if /I "%choice%"=="Y" goto LOCK
if /I "%choice%"=="N" goto END
echo Invalid choice
goto CONFIRM
:LOCK
attrib +h +s Private
echo Folder locked
goto END
:UNLOCK
echo Enter password to unlock folder:
set/p "pass="
if NOT %pass%==YOURPASSWORD goto FAIL
attrib -h -s Private
echo Folder unlocked
goto END
:FAIL
echo Incorrect password
goto END
:END
  1. Replace YOURPASSWORD with your actual password (no spaces).
  2. Click File > Save As, set Save as type to All Files, and name it:
  3. locker.bat
  4. Double-click the locker.bat file. A new folder named Private will appear.
  5. Add your files inside the Private folder.
  6. Run locker.bat again and press Y to lock the folder. It will disappear.
  7. To unlock, run locker.bat, enter your password, and the folder will reappear.

You can also password protect the Notepad file itself if you want to secure the script.

This method is simple but not foolproof. It doesn’t offer strong protection against experienced users.

3. Use Built-In Folder Encryption (Windows Pro Only)

If you use Windows 10 or 11 Pro, you can use the built-in Encrypting File System (EFS) to secure folders.

  1. Right-click the folder, select Properties.
  2. Click Advanced, then check Encrypt contents to secure data.
  3. Apply and confirm the changes.

This links folder access to your Windows user account instead of a password. For network sharing, make sure password-protected sharing is turned off in Windows 10 or Windows 11 as needed.


4. Use NordLocker to Lock Folders with a Password

The easiest way to fully password-protect a Windows folder is by using a trusted encryption tool from the makers of NordVPN.

How to use NordLocker:

  1. Download and install NordLocker from the official website.
  2. Create your Nord Account and set a secure master password.
  3. Launch the app and drag your folder into the NordLocker window.
  4. Your folder is now encrypted and locked with your password.
  5. To access it, just open NordLocker and log in with your password.

Why choose NordLocker:

NordLocker offers strong end-to-end encryption, works seamlessly on Windows 10 and 11, and supports both local and cloud-secured folders. It includes a free 3GB plan, with upgrades available for more storage and features.

👉 Try NordLocker for free and start protecting your sensitive folders today.

If you’re working with external storage, also check out USB stick password protection software for compatible options.


Final Tips

  • Windows does not natively support password protection for folders.
  • ZIP compression with encryption is the easiest workaround.
  • For stronger security, use trusted third-party tools like NordLocker.
  • Avoid hiding folders as a substitute—it offers no real protection.

FAQs

Can you password protect a folder without extra software?

No. Windows doesn’t offer native password protection for folders. You’ll need to use ZIP encryption or third-party apps.

Does NordLocker work offline?

Yes. You can encrypt and access files locally without cloud syncing.

What’s the best free folder lock for Windows?

NordLocker offers a free 3GB plan and is one of the most secure and user-friendly options available.

Is password protecting a ZIP file secure?

Yes, if you use AES-256 encryption with tools like 7-Zip or WinRAR.

How Does Windows Power Management Affect Overclocking?

Overclocking can boost your performance, but does Windows Power Management affect overclock? Remember that CPU overclock can crash games and cause other issues.

In this guide, we will find out how and if your power settings affect overclock performance.

How does Windows Power Management work?

Power Management (also known as Power Options on newer models) allows users to adjust how their computer uses power. For example, it will enable you to change the following settings:

  • Sleep timers – By adjusting certain settings, you can put your hard drive, display, or PC to sleep after a specific time to save power.
  • Power saving – Your USB devices, wireless adapter, and PCI Express devices can be configured to use a power-saving mode. By doing so, they’ll use less power if you’re not actively using them.
  • Multimedia settings – Optimize multimedia playback for high performance and quality or power saving.
  • Processor power settings – By changing these settings, you can adjust the maximum and minimum CPU state. You can also pick between different cooling methods.
  • GPU settings – Adjust the GPU settings for maximum performance or battery saving.

What’s overclocking, and should I do it?

Overclocking is when you adjust your hardware’s core frequency and voltage to improve performance. Unfortunately, the process produces extra heat, and if you’re not careful, your PC won’t turn on due to overheating.

If you decide to overclock your computer, download some stress test software to do benchmark tests on your PC and see what your device can handle.

Once you’ve done the benchmark tests, get some overclocking software because that’s the easiest way to do it without going into the BIOS firmware.

Does Windows Power Management affect overclocking?

Not really. In our findings, Windows Power Management doesn’t affect overclock, so you won’t get an FPS or a performance boost if we use a High-Performance power plan.

However, using the High-Performance plan will consume more electricity and generate more heat, putting unnecessary strain on your hardware.

You might get some performance improvements using High-Performance mode, but usually, they aren’t noticeable.

Are there any differences?

With the Power Saver plan, the stress test ran at a steady 16 FPS (frames per second), and the GPU ran at around 1030 Mhz, among other things.

With Balanced, we didn’t see any actual performance. The only thing that increased was the internal temperature. After that, it got hotter, and that’s about it.

And the High-Performance plan is the same as before: higher temperatures but no significant changes to GPU or CPU performance.

Unfortunately, we didn’t test the settings in the Ultimate power plan, but we expect to see similar results.

windows power management overclock overclock performance

Does Windows power plan affect performance?

No, the Windows power plan has minor effects on your performance; if it does, you probably won’t even notice them.

You can only notice a difference when using a laptop for gaming or other intensive tasks.

Looking at these basic tests, it doesn’t appear that a Windows computer’s power plan affects overclocking. However, we would probably see significant changes if we changed the fan limits. To learn more about that, visit our fan control on Windows 11 guide.

We hope that this guide adequately answers your question. Feel free to comment below if you have questions about computer performance.

The System Battery Voltage is Low: 4 Methods You Can Use

Errors with computers are common and are usually easily fixable. But one that baffled a lot of users was the System battery voltage is low message when they turned on the computer. The message is followed by another that reads, Battery is low Strike F1 to continue.

The message only highlights a problem with the battery voltage but doesn’t provide any context or steps to troubleshoot the problem. So, let’s find out what worked for others.

What does the system battery voltage mean?

The low system battery voltage indicates an issue with the CMOS (Complementary Metal Oxide Semiconductor) battery and that it doesn’t provide the required voltage. The battery plays a critical role in your PC by giving power to the BIOS firmware.

In most cases, the system throws this error when the battery is worn out after years of use. However, there is a high likelihood that the battery is defective or not properly seated.

The System battery voltage is low message on Dell devices is the most common, and here’s a list of the affected ones:

  • System battery voltage is low – Dell OptiPlex – A common setup known to throw the error.
  • System battery voltage is low – Dell OptiPlex 760 – Many users encountered the error message on this device.
  • Alert System battery voltage is low Dell OptiPlex 780 – In this case, you may also find the system clock falls behind.
  • System battery voltage is low – Dell OptiPlex 755 – Another dell device that throws the error, and updating the BIOS worked for many.
  • System battery voltage is low Dell OptiPlex 380 – Check our solutions to quickly fix the problem on Dell OptiPlex 380.

Can I replace the CMOS battery?

Yes, users can easily replace the CMOS battery in the computer. First, purchase one either online or from a local store. These are readily available and wouldn’t burn a hole in your pocket. A CMOS battery is the size of a coin.

Once you have it, check the computer’s manual or head to the OEM’s website for the exact steps and precautions.

You would find the steps posted in several forums, but we would still recommend you stick to those on the manufacturer’s website since these are specific to your device. For example, here’s a guide on replacing the CMOS battery in Dell desktops.

What can I do if the system battery voltage is low?

Before we move to the slightly complex solutions, here are a few quick ones you can try:

  • If the computer is still new, you shouldn’t receive the System battery voltage is low message. So, ignore it for a day or two and check if it disappears.
  • Dell has confirmed to some users that a surge protector can cause the problem. So, if you are using one, remove it, and plug the PC directly into the socket.
  • Please remove the battery and place it back in firmly. In some cases, it was a loose connection to blame, and adequately seating the battery did the trick.

If the three methods didn’t work, head to the ones listed next.

1. Replace the battery

While many would recommend this as the last solution, it works almost whenever you receive the Alert System battery voltage is low error, so you should try it first. In addition, the battery is cheap and readily available in most local shops.

The voltage rating of a CMOS battery is usually in the range of 3-3.5 Volts. So check that before purchasing a new one and follow the instructions available in the computer’s manual to replace it.

Just copy the BIOS settings or click a picture of every page since it will automatically reset after replacing the battery. This way, you can quickly revert to the previous settings.

2. Check the other components

Many users also reported issues with components attached to the motherboard or the connections themselves being responsible for the error.

check connections to fix system battery voltage is low

So, if you can open the computer without damaging the fragile and sensitive components, look and ensure everything is alright. Then, disconnect the parts one at a time and then plug them back in.

3. Update the BIOS

If the methods listed previously didn’t work, an outdated BIOS could trigger the error for no reason. And in this case, users reported that updating the BIOS fixed things.

However, remember that this is a complex process, and even a minor lapse could ruin the PC. Again, you can head to the computer’s manual for the exact steps to complete the update.

4. Take your PC to a repair shop

If nothing else helps fix the System battery voltage is low error in Windows 10, it could be a significant problem with one of the components or the CMOS battery holder.

The best option, in this case, is to take your PC to a repair shop and get it checked. The repair, if required, shouldn’t take long and the computer would be up and running in no time.

By now, the error should be fixed; for most of you, replacing the battery would do the trick. But since many had to resort to other methods, do give those a try.

Also, find out the best PC repair tools to automatically identify and, if possible, eliminate problems with the computer.

Please tell us which fix worked for you in the comments section below.

Focus Assist is Missing From Settings: 5 Ways to Get It Back

Focus assist is one of many features in Windows that helps you focus on what you’re doing without being distracted. Although you can disable notifications in Windows 11, this feature automatically blocks them from popping up or making sounds when you’re using an app in full-screen mode.

While it is a great feature, users have complained that it is conspicuously missing from Settings. Unfortunately, this happened after they upgraded to the latest version of Windows.

Why is Focus assist missing from Settings?

If the Focus assist feature is missing from Settings, it is probably because of one of the following reasons:

  • Buggy update – If you’ve recently upgraded to a new version of Windows, the feature may disappear because the latest update is problematic.
  • You’re running an old OS – If you’re using an older version of Windows, then Focus assist won’t appear in the Settings. You need to upgrade to Windows 11 or run an OS where the feature is supported.
  • Antivirus settings – You can check whether your firewall is blocking a program/feature. This can happen if it flags it as a security threat to your system.
  • Windows Update hasn’t been configured correctly – Another possible reason why Focus assist isn’t showing up in Settings could be because it hasn’t been configured correctly yet.

How can I get Focus assist back if it is missing from Settings?

First, let’s explore some basic steps before proceeding to any advanced troubleshooting:

  • Make sure that you haven’t accidentally turned off Focus assist in Settings.
  • Try restarting your PC.

1. Disable and enable Focus assist with Group Policy

  1. Hit the Windows + R keys to open the Run command.
  2. Type gpedit.msc in the dialog box, then hit Enter.gpedit-msc gpedit msc windows 10 home
  3. Navigate to the following location: User configuration/Administrative Templates/Start Menu and Taskbar/Notifications
  4. Double-click on Turn off Quiet Hours.
  5. Select Disabled, then Enabled again.

2. Disable the firewall temporarily 

  1. Hit the Windows button, type Windows Security in the search bar, and click Open.
  2. Click on Firewall & network protection, then select Public network.
  3. Locate Microsoft Defender Firewall and toggle the off button.Turn off firewall if canon printer driver not installing.
  4. Restart your PC and check if the issue persists.

3. Update Windows 

  1. Hit the Windows key and select Settings.settings windows 11
  2. Click on Windows Update, then select Check for updates.check-updates-w11 windows 11 blue screen
  3. Download and install if any are available.

4. Roll back to the previous Windows update 

  1. Press the Windows + I keys simultaneously to open Settings.settings windows 11
  2. Navigate to Windows Update, then go to Update history.windows-update-history logitehc unifying not working
  3. Click on Uninstall updates.uninstall-updates-w11 computer-recognize-logitech-unifying-receiver
  4. Select the most recent update, then click Uninstall.

5. Reset Windows 

  1. Hit the Windows key and select Settings.settings windows 11
  2. In the left window pane, select System, then click on Recovery on the right pane.
  3. Click on Reset PC from the right side.reset
  4. Choose the type of factory reset you need. You can keep your files or completely delete all the files, apps, and settings on the PC.keep-files sfc scannow not working
  5. Select the option you want to reinstall Windows: Cloud download or Local reinstall.choose cloud download windows 10
  6. Click on Next.verify details
  7. Finally, press the Reset button.

If the Focus assist feature was missing from your Settings page, we hope that you have been able to restore it with one of our solutions. Still, if the solutions don’t bear any fruit, we recommend checking out our top productivity apps to boost your productivity and help you stay focused.

You may also run into a problem where Windows 11 Power settings are missing, but we have already covered numerous ways to bypass this issue.

Also, check our guide on what to do if the Microsoft Store is missing from Windows.

Do let us know what solution worked for you in the comment section below.

OBS Not Capturing Game Audio: 7 Quick Fixes

OBS Studio is the software of choice for many players who record game streams. However, some users have posted on the OBS forum about the software, not recording game audio.

Consequently, their recorded game footage has no sound. There are a few potential fixes for OBS, not recording game audio.

How can I fix the OBS not recording game audio issue?

1. Use Adobe Audition instead

First, remember that there is alternative software you can record game audio with. Adobe Audition is among the best audio-recording software for Windows, offering an incredible array of easy-to-use features that make recording audio at a professional level easy.

With Audition, you can record your game sound, and also offers you the possibility to add commentary to the audio stream. The audio recording can then be merged with the recorded game clip, making the possibilities of editing your clips almost endless.

Using Adobe Audition if you can’t fix your OBS software, not being able to start a recording session is the first thing you should consider. The features contained in this app give you all the required tools to avoid audio issues.

Adobe Audition

This software ensures that you’ll never have audio quality problems with any of your recordings, and also allows you to mix and master your creation easily.
Free Trial Visit website

2. Check your OBS audio settings

  1. 1. Open the OBS software.

  2. 2. Click Settings to open that window.

  3. 3. Select the Audio tab shown directly below.

    settings window
  4. 4. Click the Desktop Audio Device drop-down menu if the right device is not selected there. Then select the right desktop audio device.

  5. 5. Then click the Microphone/Auxiliary Audio Device drop-down menu to select the right device there if required.

  6. 6. Alternatively, you can select the Default options on those drop-down menus to configure the software for your default sound devices.

  7. 7. Press the Apply button, and click OK to close the window.

  8. Users with multiple audio devices should check that OBS is correctly configured for the ones you’re actually utilizing.

    This should fix the game audio not recording issue in no time. Simply follow the steps above.

3. Set the speakers as the default audio device

  1. Try recording with your speakers as the default playback device instead of headphones. To do that, right-click the Speakers system tray icon and select Open Sound settings.
  2. Click Open Sound Panel in Settings to open the window shown directly below.
    Sound window obs not recording game audio
  3. Select Speakers on the Playback tab.
  4. Select the Set Default option.
  5. Click the Apply button.

4. Adjust the Encoding Settings

  1. Some users have confirmed they’ve fixed OBS audio recording by adjusting their encoding settings. Open the Settings window in OBS.
  2. Click Encoding on the left of the window.
  3. Select 128 on the Bitrate drop-down menu.
  4. Enter 3500 in the Max Bitrate box.
  5. Deselect the Use CBR option. Then your Encoding settings should exactly match the ones shown directly below.
    Encoding tab obs not recording game audio
  6. Press the Apply and OK buttons.
  7. Close and restart OBS to ensure new settings take effect.

5. Remove Nahimic

  1. Users have confirmed that the Nahimic audio manager software can conflict with OBS. To uninstall the Nahimic Windows 10 app, click Settings on the Start menu.
  2. Select Apps to open Apps & features.
    The Apps & features tab obs not recording game audio
  3. Select the listed Nahimic app.
  4. Press the app’s Uninstall button.

6. Check if OBS is muted

  1. Check if the OBS software has been muted in Volume Mixer. First, open the OBS software.
  2. Right-click the speaker icon to select Open Volume Mixer.
    Volume Mixer obs not recording game audio
  3. Then click the muted speaker icon for OBS if it’s muted.

7. Check audio track settings

  1. Sound can disappear from OBS recordings when you have multiple tracks selected. To check that, click Files in OBS.
  2. Click Output on the left of the window.
  3. Select Recording on the Output tab.
  4. Then make sure you have the same tracks selected for recording.

Our last fix for the OBS not picking up the game audio problem is to check your audio track settings. If the other solutions didn’t work, this one should do the trick instead.

Those are some of the confirmed resolutions to fix the OBS, not recording game audio. They’re not necessarily guaranteed fixes, but the above resolutions have fixed the issue for some users. Moreover, if you need some tips regarding noise gate settings, we have just the guide for you!