How to Search for a User on Steam

If you’re wondering how to find users on Steam, make sure you read this article completely. We’ve compiled a series of easy solutions, that anyone can perform.

Steam, the popular PC gaming platform, allows you to search for users and add them to your friends list in a few different ways. Finding a particular user on Steam or simply adding a friend can sometimes be tricky.

Follow our guide to check out the different ways of searching for friends on the Windows 10 Steam client.

How many users are on Steam and where are they from?

You should know that Steam hosts tons of users. Our research indicated that by 2019, the service had over 34,000 games with over 95 million monthly active users.

If you’re wondering where are the Steam users from, make sure you check what we have to say.

steam users graphic
Source: StatInvestor

According to our trusted sources, most users (14.43%) come from the United States. In addition, experiments showed a percentage of 11,64% of Chinese users, 9,57% of Russian users, and 4,77% of Brazilian ones.

Now, let’s see how you can find users on the Steam app.

How can I search for a user’s profile on Steam?

1. Search for Steam users using the Steam Community tab

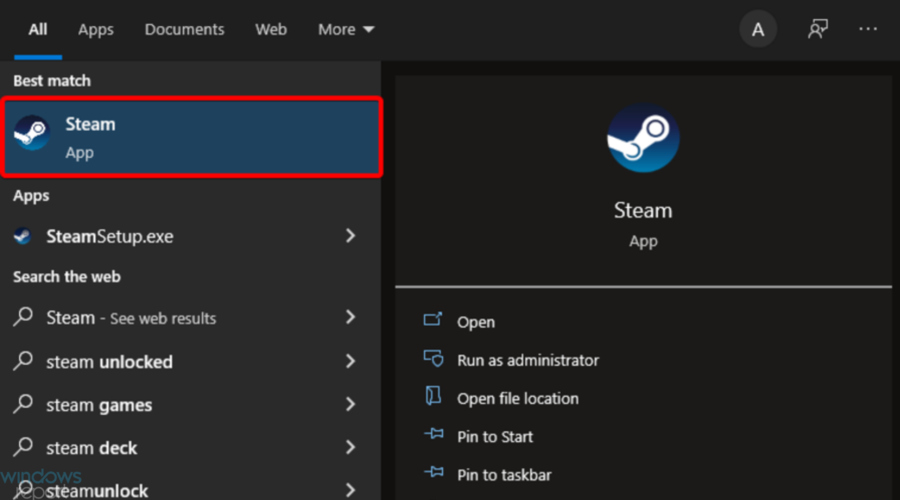
  1. 1. Hit the Windows key, type Steam, then open the app.

    open steam from search box
  2. 2. Head over to the Community tab, on the top side of your Steam client.

    go to steam community
  3. 3. In the right side of the window, in the Find People field, type the username or profile link, then press on the Enter key.

    find people on steam box
  4. 4. Steam will then display a list of users with that name.

  5. 5. Navigate to the list to locate the user you were looking for. To add the user as a Friend, simply click on the Add as Friend button.

    add steam user as friend
  6. An easy way to perform a Steam user search is via the app’s built-in Community tab. It allows you to search for users by username or profile link, and also add them as friends from the same window.

Before searching for other players, you may want to know your own account identifier. Learn how to find your Steam ID quickly to share it with friends or use it for account lookup.

2. Use your Steam Friends tab to search users

  1. Press on the Windows key, type Steam, then click on the first result.
  2. From the top menu, hover the mouse over your username, then select Friends.
  3. On the Friends tab, you can search through your friends on Steam.
  4. If you head over to Add a Friend, you can then search for a user on Steam and add them as a friend.

3. Search for Steam users you recently played with

  1. Press on the Windows key, search for Steam, then open the app.
  2. Next to the Community tab, hover the mouse over your username, then select Friends.
  3. From the left side of the window, click on the Recently Played With tab.
  4. Here you can search and check the users that you’ve played with on Steam.
  5. You can also add them as friends by clicking on the Add as Friend button

What percentage of gamers use Steam?

Experts also conducted research to discover what percentage of gamers use Steam, according to their gaming platforms.

As you can see, the majority of users (90,36%) are running Steam through the Windows 10 (64-bit) operating system.

In the second place, with 4,88%, we can identify gamers who come on Steam through Windows 7 (64-bit).

Other honorable mentions are Windows 8.1 – 64 bit (with 0.92%), macOS 10.16.0 – 64 bit (with 1.44%) and Windows 7 (with 0.21%)

percentage of users who play steam
Source: Statista

This is how you can find users on Steam. As you can see, the app offers several methods you can try to perform this action. In addition, you can always choose to add them as friends.

If you have any more questions or suggestions, leave them in the comments section below and we’ll be sure to check them out.

Fix: EA Anti-cheat Service Encountered an Error

Electronic Arts (EA)is implementing a new anti-cheating tool in order to ensure fair play among gamers. The tool has already been implemented in FIFA 23, but you can also download the standalone software by going to EA’s website.

Because this technology is so new, users have been experiencing various problems, specifically sudden service errors that prevent people from playing their games.

What is causing the anti-cheat service error?

If you look throughout the official EA forums, the company is investigating the problem. At the time of this writing, it’s still ongoing. The developer also asks people to go into the forums and write a report on their experiences. That said, there are some likely causes:

  • Bugs – A buggy code is the most likely culprit of the service error. Perhaps the developers working on the software overlooked something resulting in a bug causing errors.
  • Corrupted files – It’s possible that the EA Anti-cheat or game had its files corrupted during installation.

How do I fix EA anti-cheat service errors?

These solutions work equally for Windows 10 and 11. We first recommend trying out these simple tips: close the game and then open it again, download the latest Windows Update since malware on your machine or a bad previous update might be related, ensure that your computer is connected to the internet, and restart it.

1. Run as Administrator

  1. Close the game and the anti-cheat app.
  2. Bring up the EA app or Origin if you have the older version on your computer’s search bar. According to the developer, it has to be either of those two apps even if you got a game on Steam of the Epic Games Store.
  3. Click Run as administrator.
  4. If a window appears asking you if you want to make changes, select Yes.
  5. Launch the game as normal.

2. Run then uninstall the EA anti-cheat service

  1. Start by first launching the EA anti-cheat app and then close it right after.
  2. Open up Windows Explorer and go to your computer’s hardware. It’s usually labeled as C:
  3. Locate Program Files and double-click it to enter.
  4. Open the EA folder then enter the AC folder.
  5. Delete EAAntiCheat.Installer.exe.
  6. Launch the EA game from either Steam or Origin.

Doing this will automatically reinstall the anti-cheat software on your computer. At this time, FIFA 23 is the only game that can do this. You can always download the software separately from EA’s website.

3. Install version specific update

  1. Start by deleting the anti-cheat app by going to the Program Files on your computer. See the previous solution for instructions on how to do this.
  2. Now find out which version of Windows you have and the KB number.
  3. First, press the Windows and R keys on your keyboard to bring up the Run command.
  4. Type in Winver and hit Enter on your keyboard. You will see the Windows version number. In this case, it’s version 22H2.
  5. For the KB number, bring up the Command Prompt on the Windows search bar and click Run as administrator.
  6. In the Command Prompt, type in this command and hit Enter: systeminfo.exe
  7. Scroll down to Hotfix and copy the KB number. In this example, there are four. This guide will choose the earliest number (KB5017271) because that is the only one available on the Microsoft Update Catalog.
  8. Speaking of which, head on over to the Microsoft Update Catalog website.
  9. In the search bar, type in the KB number and the Windows version. In the image, you will see KB5017271 22H2.
  10. Click Search and you will see the latest updates available for your Windows computer.
  11. In this example, you will see two updates: one for ARM64 processors and the other for x64 processors. Download the one that fits best for your computer. For this guide, we will download the x64 update.
  12. Head over to the file’s location and double-click it to install it.
  13. Restart your computer. Afterward, install EA anti-cheat from the developer website.
  14. Open the game you want to play and the server error should be solved.

4. Enable Secure Boot

  1. Open the Settings app and click Update & Security.
  2. Click Recovery on the left-hand side, then the Restart now button under Advanced Startup.
  3. On the Recovery page, select Troubleshoot.
  4. In the following pages, click Advanced options then UEFI Firmware Settings.
  5. Select the Restart button to reboot your computer. Launch the game again to see if the server has been solved.

Note that Sims 4 users, for example, sometimes have problems with the game’s mods. This could be because the mod files are corrupted or become disabled after an update. You may have to repair the game using Origin’s in-app tool.

If you still use the Origin app, you may have encountered the error 14-8 too. This happens when there are internal conflicts or network connectivity issues.

We also have a guide that is troubleshooting IGOProxy64.exe Origin issue, so don’t miss it if you’re having additional problems.

Feel free to comment below if you have any questions regarding the above processes. Also, do not hesitate to comment about guides you’d like to see or information about any EA game.

How to Upgrade to Windows 11 Without Losing Data [5 Steps]

More and more users seem to be interested in upgrading their OS. In these terms, they frequently asked if it is possible to install Windows 11 without data loss, and the answer is yes!

Before anything else, ensure that you get it correctly, so do not hesitate to check out our complete guide on how to download Windows 11.

However, if you notice that your PC can’t run Windows 11, discover some methods on how to solve this error with ease.

Data loss is a serious problem, especially in the business environment, because it consumes time and sometimes even money to restore or recover information. But let’s take a look at some popular causes of losing data.

What are the most common reasons for data loss?

Many different factors can cause data loss, and each poses a unique problem for data recovery:

  • Human errors – We all make mistakes, some bigger than others. Without realizing it, you can overwrite important files or delete essential information. 
  • Malware and viruses – These can sometimes corrupt your operating system, stealing important data. Thus, you should keep your antivirus software constantly updated.
  • Hardware damage – Plenty of data loss cases happened because of hardware malfunctions. Hard drive failure is the most common explanation for this, and there are signs you should consider, such as frequent hard drive crashes, slow processing speeds, files not opening, or being randomly corrupted.
  • Software corruption – It seems like unexpected or improper software shutdowns can cause serious issues for your data. These will lead to data corruption or will simply delete your progress, wasting time and losing valuable information. 
  • Hard drive formatting – Last, but not least, consider that you can accidentally format your hard drive, which instantly causes losing data. Note that reformatting may also occur during system updates and result in related troubles. 

Before getting into the steps on how to install the new OS without losing data, you should check if your PC is eligible for Windows 11.

We have an excellent guide on how to download Windows 11 ISO or update from Windows 10 that also will help you find out if your PC is ready for the new OS.

Also, although the solutions we provide here were tested and work, there are a lot of other problems you may encounter, so before starting, you should create a backup of all your data to be on the safe side.

That being said, we’re going to show you some easy ways to install Windows 11 without data loss.

How can I upgrade to Windows 11 without losing data?

1. Use Windows Update to upgrade Windows 10 to 11

  1. 1. Click the Start button and select Settings.

    press the start button
  2. 2. Select Update & Security.

    go to update and security
  3. 3. Click on the Check for updates button.

  4. 4. Locate the Windows 11 update.

  5. 5. Click to download and install it. It will start to download and then, the installation will begin. You will also be prompted for a restart.

  6. 6. Watch the process carefully and when asked if you want to keep your files, you should stay on that path.

  7. The easiest way to upgrade from Windows 10 to Windows 11 without losing data is via Windows Update. Basically, you need to go to the Windows Update section and install Windows 11 from it as if it were a regular Windows 10 update.

2. Download the Windows 11 ISO

  1. Navigate to the official Windows 11 Downloads page and click on Select download from Download Windows 11 Disk Image (ISO), then pick Windows 11.
  2. Now click on the Download button.
  3. Select the language, then click the Confirm button. You will receive a download link and you will be able to click on the 64-bit Download button to get the Windows 11 ISO.
  4. Now you can create a bootable USB or DVD, or just right-click the ISO and select the Mount option.
  5. You will see a virtual drive in the File Explorer window. Just click on it and then double-click the setup.exe file to start the installation process.

The installation process will start, and along the way, you will be asked if you want to keep your files, so that’s what you need to choose.

3. Use the Windows 11 Installation Assistant

  1. Go to the Windows 11 Downloads page and click on Download now right below Windows 11 Installation Assistant.
  2. You will get an executable file and running it will start the installation process. Select Accept and install after you read the terms of agreement.
  3. Windows 11 will start downloading and installing so wait patiently until the process is over, then proceed with the instructions on the screen to finish.

This is the easiest way to install Windows 11 if your PC is meeting all the requirements because the Installation Assistant will perform all the tasks for you.

However, along the installation process, you will be asked if you want to keep your files so make sure you do that in order to preserve your data.

We also have a guide on how to install Windows 11 without using the Assistant so if you have any reasons to avoid this path, you will find out how to do that.

4. Use the Media Creation Tool

Note icon NOTE
For this solution, a USB drive with at least 8 GB of free space is required.
  1. Access the Windows 11 Downloads page and click on Download now under Create Windows 11 Installation Media, to get the Windows 11 Media Creation Tool.
  2. Run the file to start the Media Creation Tool app and accept the license terms to move forward.
  3. Uncheck the Use recommended box if you want to change the Windows language, then hit the Next button.
  4. Next, you can choose whether you want to create a bootable USB drive or just to save the Windows 11 ISO and use it later. If you select the first option, make sure you inserted a USB drive before clicking Next. We will select the first option because you already know how to download the Widows 11 ISO from the previous step.
  5. The only thing left to do is to select the drive you prepared and click the Next button.
  6. The app will start downloading Windows 11, then verify the download and ultimately create your Windows 11 bootable media you can use to install the new OS.

Although we already mentioned this in the previous steps, we can’t stress enough the fact that during the installation you will be asked whether you want to keep your files so you should follow that path.

If your PC is not prepared with TPM 2.0 and Secure Boot, this solution will not work for you because when the installation starts, those requirements will be checked.

However, we have a complete guide on how to install Windows 11 without TPM and Secure Boot that will help you avoid this issue. You can also install Windows 11 without a Microsoft account, as long as you follow the steps from our dedicated guide.

5. Use a Virtual Machine software

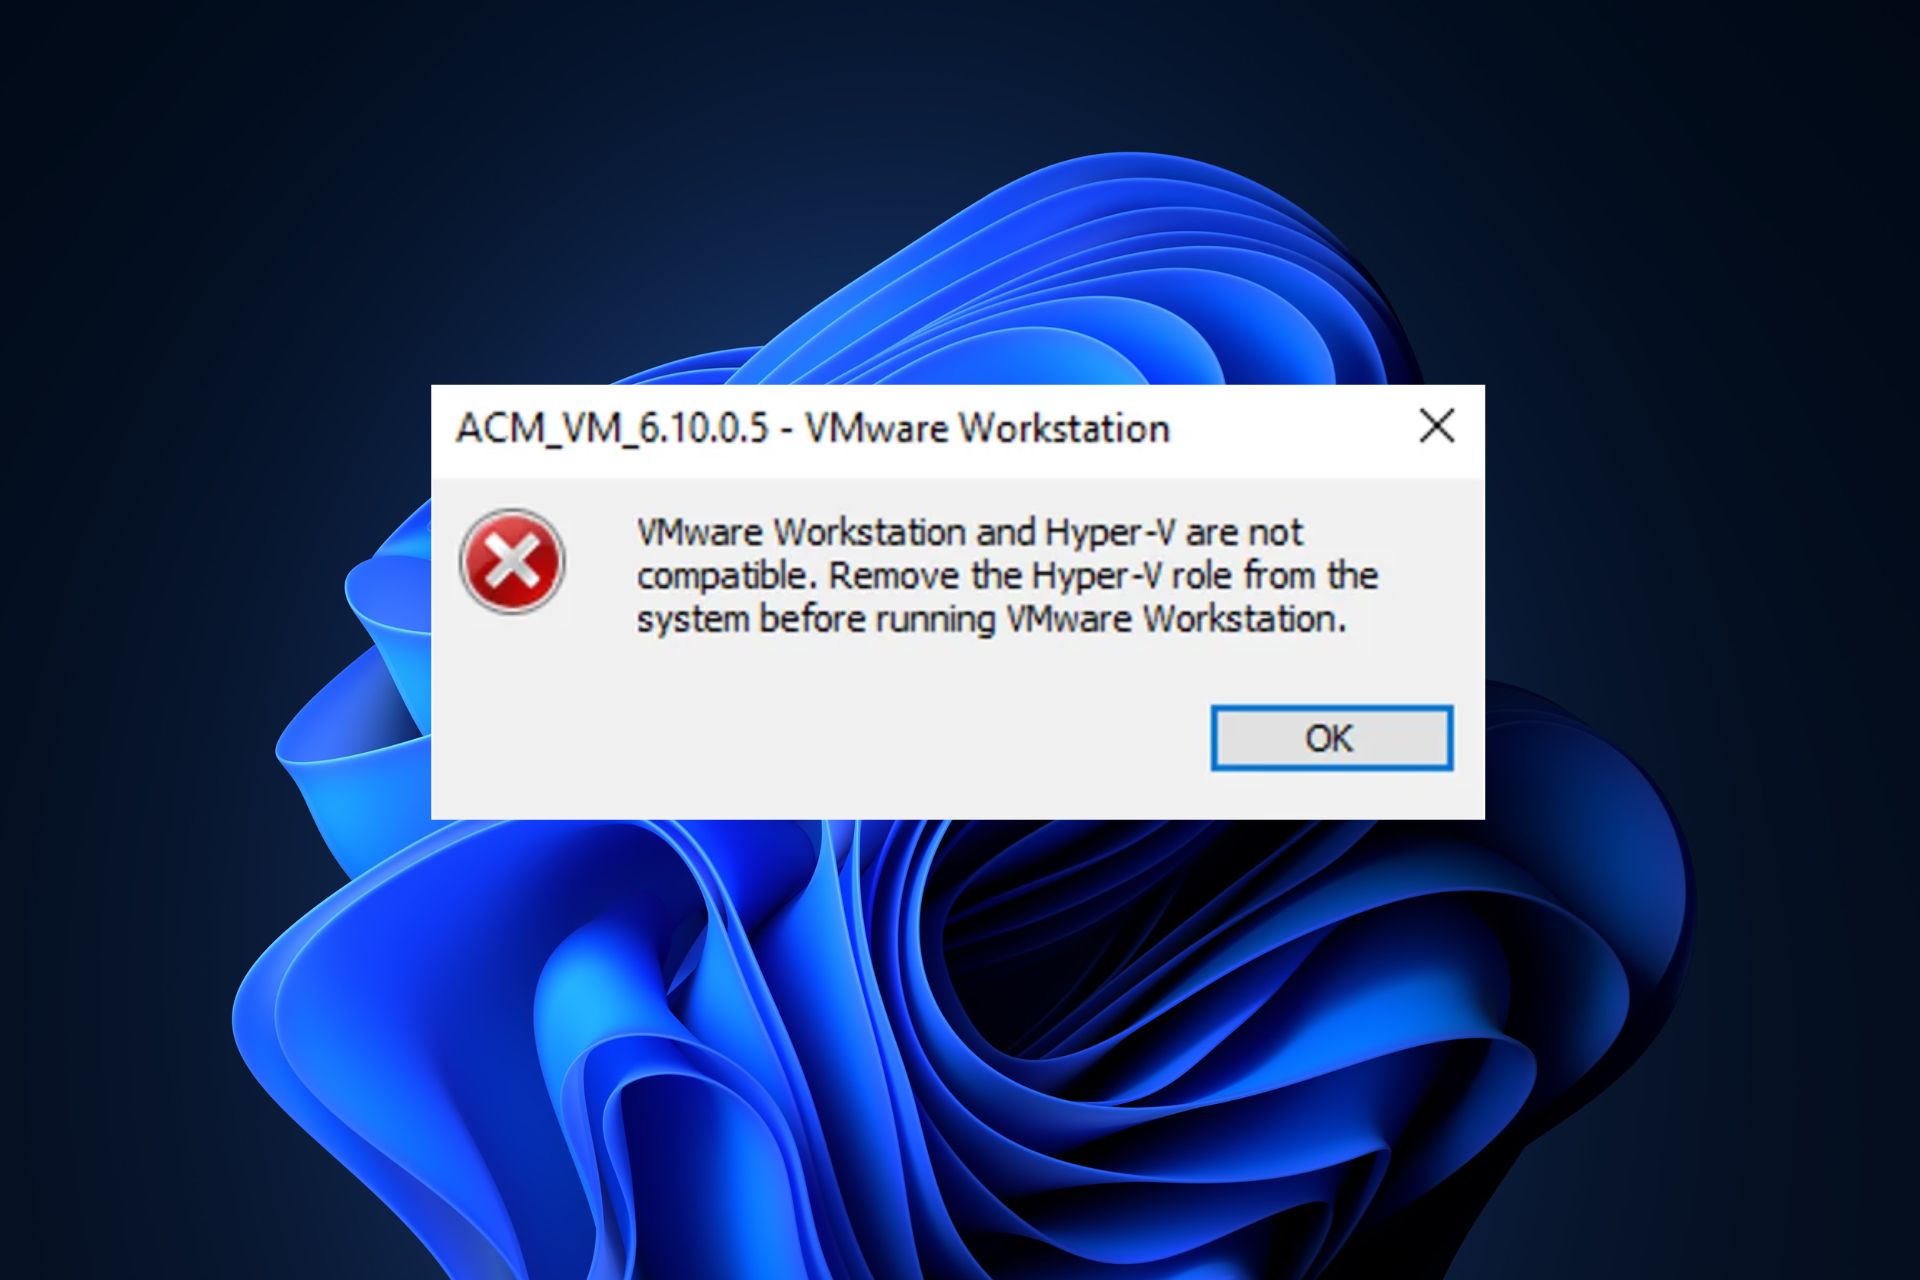
  1. Download VMware Workstation.
  2. Install it by following the on-screen instructions, then restart your PC.
  3. Use the Windows 11 ISO you downloaded in Solution 2.
  4. Setup your Virtual Machine.
  5. Open Command Prompt to check your PC’s virtualization, then enable it.
  6. Install Windows 11 on your Virtual Machine and power it on.

This is only a brief explanation of how to go through the process. For more detailed information, check out this guide on how to run Windows 11 on VM and test it to the limit.

How to update Windows 7 to Windows 11 without losing data?

We’re afraid that we don’t have great news in that department. If you’re still running Windows 7, you can’t just cross over to Windows 11 straight away.

Unfortunately, you will have to proceed with a fresh install of Windows 11. It’s not even possible to upgrade to Windows 10 for free.

However, you can purchase Windows 10 and then upgrade it to Windows 11 for free but if you want things to go smoothly, we strongly advise switching to the new OS directly.

We have a guide on how to upgrade your PC from Windows 7 to Windows 11 that will provide you with more details about this matter.

How can I prevent data loss in Windows 11?

You’ve seen at the beginning of this article some of the most common reasons for data loss, so here’s how to prevent such annoying situations:

➡ Use antivirus software – Be sure to use and constantly update the antivirus software on your OS. If you can’t decide which one is the most efficient, check these antivirus options for Windows 11 that you should try out today.

➡ Always keep your computer clean and dry – As we mentioned before, you might be losing data due to hardware and hard drive crashes. Thus, to maintain them safely and running properly, you have to ensure that your PC is avoiding any liquids or dirt.

➡ Back up your data – This option might be the most useful one because it guarantees success in any situation, no matter how scary it is. There are plenty of methods to do that, such as using a USB stick, an external hard drive, or Cloud Storage.

Also, we can suggest going through our list including the best local data backup software, and keeping your files secured at all times.

As you can see, there are some available and simple ways to install Windows 11 without losing important data. We ensured to deliver only the most secure options, so you won’t get into trouble.

In case you’re on Linux distribution, we have a guide on how to change from Endless OS to Windows 11 that can help you make the switch.

Any other thoughts related to this subject? If so, do not hesitate to leave a comment in the section below.

5 Ways to Fix the Unexpected Server Error in Overwatch 2

Overwatch 2 has had a ton of problems since its launch from game-breaking bugs to sudden disconnecting from matches. One common problem is the unexpected server error preventing you from logging into the game.

What causes unexpected server errors in Overwatch 2?

As other players will attest, you may see red text pop up when you try to log in that reads Unexpected Server Error Occurred. There are a couple of reasons why this happens:

  • Bugs – Unfortunately for players, Overwatch 2 did not launch in the best way possible. The free-to-play title has had problems since day one. All you can do is wait for Blizzard Entertainment to fix all the problems plaguing the title. We recommend following the Blizzard Customer Support Twitter account for updates.
  • DDoS attacks – Blizzard Entertainment has gone through multiple DDoS (Distributed Denial of Service) attacks. Basically, some bad actors are trying to shut down Overwatch 2 and preventing people from playing. The developer has been trying their best to combat these attacks. You’ll have to wait until Blizzard addresses the issue.
  • Tons of people – Many people are trying to play this game. Even if things run smoothly, you may get denied entry because of the people trying to get in.
  • Third-party apps – On the client side of things, it’s possible a VPN or antivirus app is blocking the game from connecting. For antivirus apps, you need one that’s compatible with your OS.
  • Out-of-date software – And it’s also possible that your Windows computer isn’t up to date. It could be missing an important update.

How do I fix unexpected server errors in Overwatch 2?

1. Change region location

  1. If Overwatch 2 is open, close it. Then log out of the Battlet.Net app.
  2. Launch Battle.Net and click the gear icon above the login credentials space.
  3. In the new menu that appears, you will see entries for the Americas, Europe, Asia, and China.
  4. Choose a different region besides the one you live in. So if you live in North America, switch to Europe, for example.

Doing this will have you connect to Blizzard servers in other parts of the world that hopefully have better queues. You may experience increased latency and drops in connection speeds, however.

2. Reinstall Overwatch 2

  1. In the Windows 11 search bar, bring up Overwatch 2 and select Uninstall.
  2. This will take you to the Uninstall or change a program section in the Control Panel.
  3. Highlight Overwatch 2 and select Uninstall/Change at the top of the window.
  4. Follow the prompts to uninstall Overwatch 2.
  5. Go back to Battle.Net and download the game again.

3. Add firewall permissions

  1. In the search bar, type in Allow an app through Windows Firewall.
  2. Hit Enter on your keyboard when you see the entry appear.
  3. Click Change settings at the top and then select Allow another app.
  4. Click Browse and search for Overwatch 2 in the File Explorer. Once found, double-click it and select the Add button at the bottom to give the game firewall permissions.

4. Update network drivers

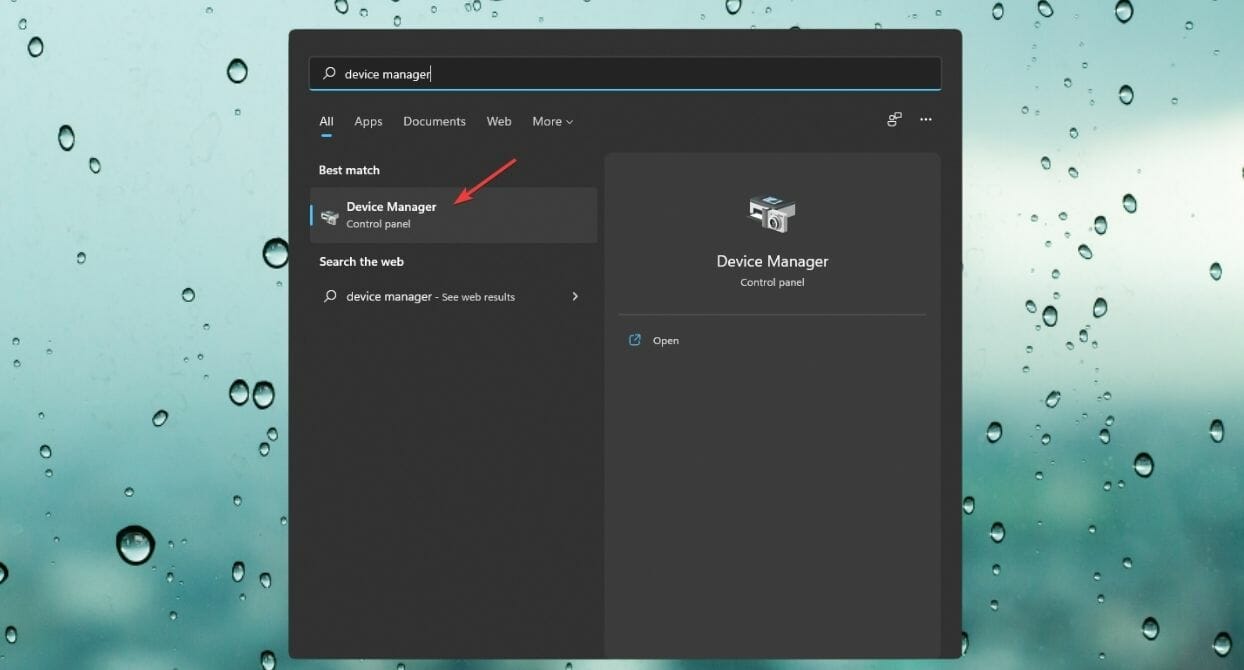
  1. Open the search bar on your Windows 11 computer and search for the Device Manager.
  2. Click the entry that appears.
  3. In the window that appears, locate and expand Networks Adapters.
  4. Right-click on the network card name present on your computer and then select Update driver. The image shows what it looks like on this computer.
  5. Select Search automatically for drivers. This will automatically download and install the drivers for that network card to your computer.
  6. Conversely, you can go to the network card’s manufacturer page and download the drivers from there. In this example, you would go to Intel’s website.

If Windows did find an update, you should be good to go and play Overwatch with no issues. This also helps with Voice Chat Error 1002 in Overwatch.

Otherwise, we recommend using a third-party tool for driver update searching.

Fortect Driver Updater is a tool specialized in automatically finding the latest updates for all outdated drivers on your computer. It’s fast and reliable, and it will help you in the long-term maintenance of your drivers.

⇒ Fortect Driver Updater

5. Clear out DNS

  1. Open the search bar and search for the Command Prompt.
  2. Select Run as administrator when it appears.
  3. A window may appear asking if you want to make changes. Select Yes.
  4. In the Command Prompt, type in this command and hit Enter on your keyboard. This will disconnect your computer from the internet for a brief moment: ipconfig /release
  5. Now type in this command and hit Enter. A message will appear saying that the IP address has been re-established on your machine: ipconfig /renew
  6. And finally, type in this command and hit Enter. A message will appear saying that the process has been successful: ipconfig /flushdns
  7. Close the Command Prompt and reconnect to Overwatch 2.

DNS or Domain Name System is an internet protocol that is used to identify computers across the internet. By clearing out DNS, or flushing, it removes everything from the cache, thereby refreshing it. Having the cache full can prevent connections, like towards Overwatch 2 servers, from going through.

You may also try to:

  • Just wait it out. That’s honestly the best thing that you can do. Wait for Blizzard Entertainment to fix all the problems hurting Overwatch 2, however long that takes.
  • Shut the game down and then open it again.
  • Turn off any VPN and antivirus apps that may be getting in the way.
  • Stay in the Overwatch 2 queue and wait until you’re allowed in.
  • Make sure your PC is connected to Wi-Fi or the Ethernet cable is connected. Be sure to check out what to do if you can’t find a Wi-Fi network.
  • Reboot your computer and see if that works. If your Windows 11 PC doesn’t restart, there is a series of solutions that you can try out.

With a prolific game company like Blizzard Entertainment, you have your fair share of titles to choose from and subsequent problems to deal with. World of Warcraft players had to deal with their game add-ons resetting after an update.

Solutions for this involve updating those add-ons and copying your account to a new one. Diablo 3 players sometimes have to deal with an avalanche of problems from the game freezing to cinematics not playing.

Fortunately, we have an in-depth guide for that. It may require you to open the Registry Editor to solve Diablo 3 issues.

Feel free to comment below if you have any questions regarding the above processes. Also, do not hesitate to comment about guides you’d like to see or information about any Blizzard game.

GPO Drive Mapping Best Practices: How to Do It Safely

As many of you surely know, Drive Mapping with GPO has basically replaced the good old Login-Script on Windows Servers. Also, it allows users to automatically map Network Drives via Group Policy if that is what they choose.

Needless to say that this saves you a ton of work in the long run and is the Best Practice on how to Map Network Drives on a Windows Server nowadays.

Why should I resort to Group Policy Drive Mapping?

IT admins will find this especially useful since the decisions and modifications they make impact the entire server.

This will make your life a lot easier and apply changes to multiple devices at the same time, instead of you having to do it over and over again.

Furthermore, mapping drives with Group Policy also brings with it the following advantages:

  • It’s much easier than logon scripts, as it has checkboxes and drop-down lists, so there is no need to understand scripting.
  • It’s scalable and as big as your Active Directory will grow logon scripts will scale with no problem.
  • It’s flexible, with item-level targeting you can target groups, users, OUs, operating systems, and so on.
  • The process itself is really easy.

That being said, we are also going to show you properly and safely do it, so that the entire process is understood.

We can also show you how to block Group Policy inheritance for a domain/OU, just in case that is the information you were looking for.

How can I properly map drives in Group Policy?

  1. From your Server Dashboard click on Tools, then Group Policy Management.
    group policy
  2. After selecting Group Policy Objects, right-click anywhere and select New, then right-click the newly created element and select Edit.
    group policy edit
  3. Select User Configuration, then click on Preferences, Windows Settings, and then Drive Maps. 
  4. Right-click anywhere and select New, then Mapped Drive.
    mapped drive
  5. Perform necessary changes, then press the Apply button.
    map drive

After completing the steps above, you need to link the GPO to be active. To do so, you need to drag it to the appropriate container where your users and computers reside.

For admins who prefer using Command Prompt instead of Group Policy, check out this complete guide to net use commands that explains how to map, manage, and disconnect network drives from the command line.

Keep in mind that it is also important that the Drive Map is linked to a container where both the user and the computer are included.

The last step is to either restart the computer on which you want the drive connected or open a cmd shell and type: gpupdate /force

This is pretty much the entire process so there is absolutely no need to feel discouraged or think it is some kind of daunting task.

You should definitely know that doing so actually modifies the settings of an existing mapped drive. It differs from the Replace action in that it only updates the settings defined within the preference item.

And, all the other settings remain as they are. That being said, if a drive mapping does not exist, the Update Action will create the drive.

The number one rule here is that every change you make to the path or drive letter or any other option will not be updated. In fact, you would need to delete the drive and re-map it again. With the Update Action that happens automatically.

However, what the Update Action doesn’t do is, for example, if you change the location of the share or its name.

Therefore you would need to use either the Remove Action to remove the old share and create a completely new share, or, you could use the Replace Action until all the PCs are updated.

We also made a thorough article on how to edit the Group Policy, in order to help you out a bit more.

Leave a comment in the dedicated section below if this guide has helped you better understand and map your own drives.

Enable TLS 1.2 in Windows 11: A Quick Security Fix

Transport Layer Security (TLS 1.2), also known as Transport Layer Security, is an encryption protocol designed to keep users’ data safe when the data is transferred over a network. The TLS 1.2 protocol is similar to the SSL (Secure Sockets Layer). 

Transport Layer Security (TLS 1.2) is mainly used by client-server applications to share data and information across a network without security breaches or information leaks. 

It functions to provide confidentiality, authenticity, and integrity by employing certificates between the computer applications sharing information. 

What is the command to check the TLS version in Windows?

  1. Press Windows + X.
  2. Select Windows Powershell.
  3. Enter the following command: Get-TlsCipherSuite.
  4. Press Enter. Y

You can check the version of TLS 1.2 in Windows using the command: openssl s_client -connect www.google.com:443 -tls1_2. You’ll be able to tell whether the version is supported if you get the certificate chain and handshake. Otherwise, you will get the handshake error message. 

How do you check which TSL protocol is being used?

  1. Press Windows + R.
  2. Press Enter.
  3. In the Internet Properties window, click on the Advanced tab.
  4. Scroll to the bottom of the page and check which TLS protocol is reviewed.

There are different TLS protocols, with the latest being 1.3. You can view the currently used ones by noting which ones have checked boxes.

How do I enable TLS 1.2 on Windows?

  1. Enable TLS 1.2 on Windows 11
  2. Enable TLS 1.2 on Windows 10
  3. Enable TLS 1.2 on Windows 7
  4. Enable TLS 1.2 on Windows Server 2019
  5. Enable TLS 1.2 on Windows Server 2016
  6. Enable TLS 1.2 on Windows Server 2012 R2

1. Enable TLS 1.2 on Windows 11

  1. Click on Windows + R.
  2. Press Enter.
  3. In the Internet Properties window, click on the Advanced tab.
  4. Scroll down and check for the TSL protocol in use
  5. Select Apply.
  6. Close the browser window and relaunch your Google Chrome browser.

2. Enable TLS 1.2 on Windows 10

  1. 1. Open Google Chrome.

  2. 2. Press the Alt + F keys.

  3. 3. Click on Settings.

    go to chrome settings
  4. 4. Go to Advanced.

    chrome settings advanced
  5. 5. Scroll down and select System.

  6. 6. Click on Open your computer’s proxy settings.

  7. 7. Press on Internet options and select Advanced.

  8. 8. Scroll down and click on security and tick the use TLS 1.2box.

    click to enable tls windows 10
  9. 9. Click OK.

  10. 10. Close the browser window and relaunch the browser.

  11. On Windows 10, TLS 1.2 can be easily enabled via Internet Options, directly from the Google Chrome browser. The settings will take effect as soon as you restart your PC.

3. Enable TLS 1.2 on Windows 7

  1. Go to the status bar, and click on the Windows button. Click on Run.
  2. Type Regedit on the run page.
  3. Click OK to access the Registry editor.
  4. Clicking the OK button will give you access to Windows options 
  5. For Windows 7, enter this registry key: HKEY_LOCAL_MACHINE\SYSTEM\CurrentControlSet\Control\SecurityProviders\SCHANNEL\Protocols.
  6. Click the Protocols folder, click on New and select Key from the drop-down menu. 
  7. Once you complete step 5, a new folder named New Key #1 will be created.
  8. Rename the folder as TLS 1.2.
  9. Right-click the TLS 1.2 tab, and click on New.
  10. Select Key from the drop-down menu.
  11. Once step 7 is complete, a new folder will be created named New Key #1.
  12. Rename the folder as Client.
  13. Right-click the Client Key, click on New, and select DWORD (32-bit) Value from the drop-down list. 
  14. Click on DWORD (32-bit) Value and a new file named “New Value #1”. Change the name to Disabledbydefault. 
  15. Once all the steps have been completed, reboot your system to activate the changes. 

4. Enable TLS 1.2 on Windows Server 2019

  1. Press the Windows+ R buttons to access Regedit.
  2. Press Enter. 
  3. Navigate to Computer\HKEY_LOCAL_MACHINE\SYSTEM\CurrentControlSet\Control\SecurityProviders\SCHANNEL\ 
  4. Right-click the right pane, and click on New.
  5. Select Key. 
  6. Name the new key TLS 1.2 and click on it.
  7. Click on New.
  8. Create a new key called Client.
  9. Right-click the client key and click on New.
  10. Select DWORD (32-bit) Value.
  11. Name the new file DWORD DisabledByDefault.
  12. Double-click it to open its properties 
  13. Make sure the base is hexadecimal and the value is zero.
  14. Create another new DWORD file and name it Enabled.
  15. Double-click it to ensure that the base is hexadecimal and the value is one.
  16. Repeat the same steps for the server key using the exact words: DWORDS and Values.
  17. Close the registry.
  18. Restart the system.

5. Enable TLS 1.2 on Windows Server 2016

  1. First, open the Windows Start menu.
  2. Type Regedit in the search bar to open it.
  3. Make sure you backup your current registry before making any changes.
  4. In the registry, go to Computer\HKEY_LOCAL_MACHINE\SYSTEM\CurrentControlSet\Control\SecurityProviders\SCHANNEL\Protocols
  1. Right-click the empty right pane and click on New.
  2. Select Key.
  3. Name the new key TLS 1.2 
  4. Right-click the empty right pane again and create two new keys named Client and Server.
  5. Select the Client key, click New, and select the DWORD (32-bit) value.
  6. Click the DWORD and rename it to DisabledByDefault.
  7. Right-click it, modify the base to hexadecimal and set the value to zero.
  8. Create another DWORD and name it enabled.
  9. Modify the base to hexadecimal and set the value to one. 
  10. Repeat the same steps for the Server Key and create DWORDS with the same values. 
  11. Close the registry and reboot your server. 

6. Enable TLS 1.2 on Windows Server 2012 R2

  1. Launch the regedit.exe program.
  2. Enter the path: HKEY_LOCAL_MACHINE\SOFTWARE\Microsoft\.NETFramework\v2.0.50727.
  3. Create a new entry named SystemDefaultTlsVersions.
  4. Set the DWORD value to one.
  5. Create another entry named SchUseStrongCrypto and set the DWORD value to one.
  6. Go to the path: HKEY_LOCAL_MACHINE\SOFTWARE\Microsoft\.NETFramework\v4.0.30319.
  7. Create an entry and name it SystemDefaultTlsVersions.
  8. Set the DWORD value to one.
  9. Make the same changes to the 64 bits OS location: HKEY_LOCAL_MACHINE\SOFTWARE\Wow6432Node\Microsoft\.NETFramework\v2.0.50727.
  10. Please create a new entry, and name it SystemDefaultTlsVersions.
  11. Set the DWORD value to one.
  12. Create another entry and name it SchUseStrongCrypto with the DWORD value set to one.
  13. Go to HKEY_LOCAL_MACHINE\SOFTWARE\Wow6432Node\Microsoft\.NETFramework\v4.0.30319.
  14. Perform the same modifications as the earlier locations.

For more information about how to enable TLS on Windows Server, check out our dedicated article.

How can I check if TLS 1.2 is enabled?

Transport Layer Security was introduced in 1999 as an Internet Engineering Task Force and has since evolved, with TLS 1.2 introduced in 2008. 

Transport Layer Security has two levels of operation: the TLS handshake protocol and the TLS record, and the TLS operates in the application layer. 

TLS 1.2 is more than just an upgrade; it is an essential step to ensuring safe data sharing. Older versions of the Transport Layer Security have become susceptible to attacks and security breaches easily avoidable with TLS 1.2. 

Ensure that the TLS version is updated to TLS 1.2. and TLS 1.2. is enabled on your system to protect your data. 

TSL 1.2 and 1.3 are enabled by default on Windows 11. You can also read this piece to learn more about how the protocol works.

The quickest way to check whether TLS 1.2 is enabled on your computer is to search for the presence of the registry key. HKEY_LOCAL_MACHINE\SYSTEM\CurrentControlSet\Control\SecurityProviders\SCHANNEL\Protocols\TLS 1.2\Client\EnabledAnd its corresponding value, 1.

How can I upgrade from TLS 1.0 to TLS 1.2 

  1. Search for Server from the top menu bar.
  2. From the list of options, select the server of your choice.
  3. Go to Server Management and select settings and packages.
  4. Click on the advanced tab and scroll down to the Nginx box.
  5. The TLS Versions will display a list of selected versions. Click on edit to make changes.
  6. Select your desired protocol depending on the requirements and click save changes.

Older TSL versions are less secure than the latest ones. So you can also read more about disabling the TSL 1.0 protocol. If your device runs the latest Windows version, version 1.3 will be present.

Sometimes, Windows 11 users can experience TSL errors. Our guide provides a comprehensive solution.You can easily restore your TLS settings by resetting them to their default configuration.

As earlier emphasized, TSL 1.3 is automatically enabled on modern Preview builds of Windows. As far as internet security deployment protocols go, TSL 1.3 is the standard. Its secure protocols are made in such a way as to facilitate endpoint-to-endpoint data transfer. That is, it provides an additional security layer for client-server communications.

The new protocol addresses most of the failings of previous versions, making cryptographic algorithms obsolete. As a result, the handshake protocol (client authentication) is greatly encrypted and enhanced.

In addition, TSL 1.3 sees a marked improvement in privacy. The implication is that the network’s visibility of your user details and information is severely limited.

Having made it this far in this article, you’re sure to have found multiple solutions to enabling the TSL 1.2 protocol on your computer. If you’ve found this article interesting and valuable, please share your experience in the comments below.

6 Ways to Fix uTorrent Not Installing on Windows 11

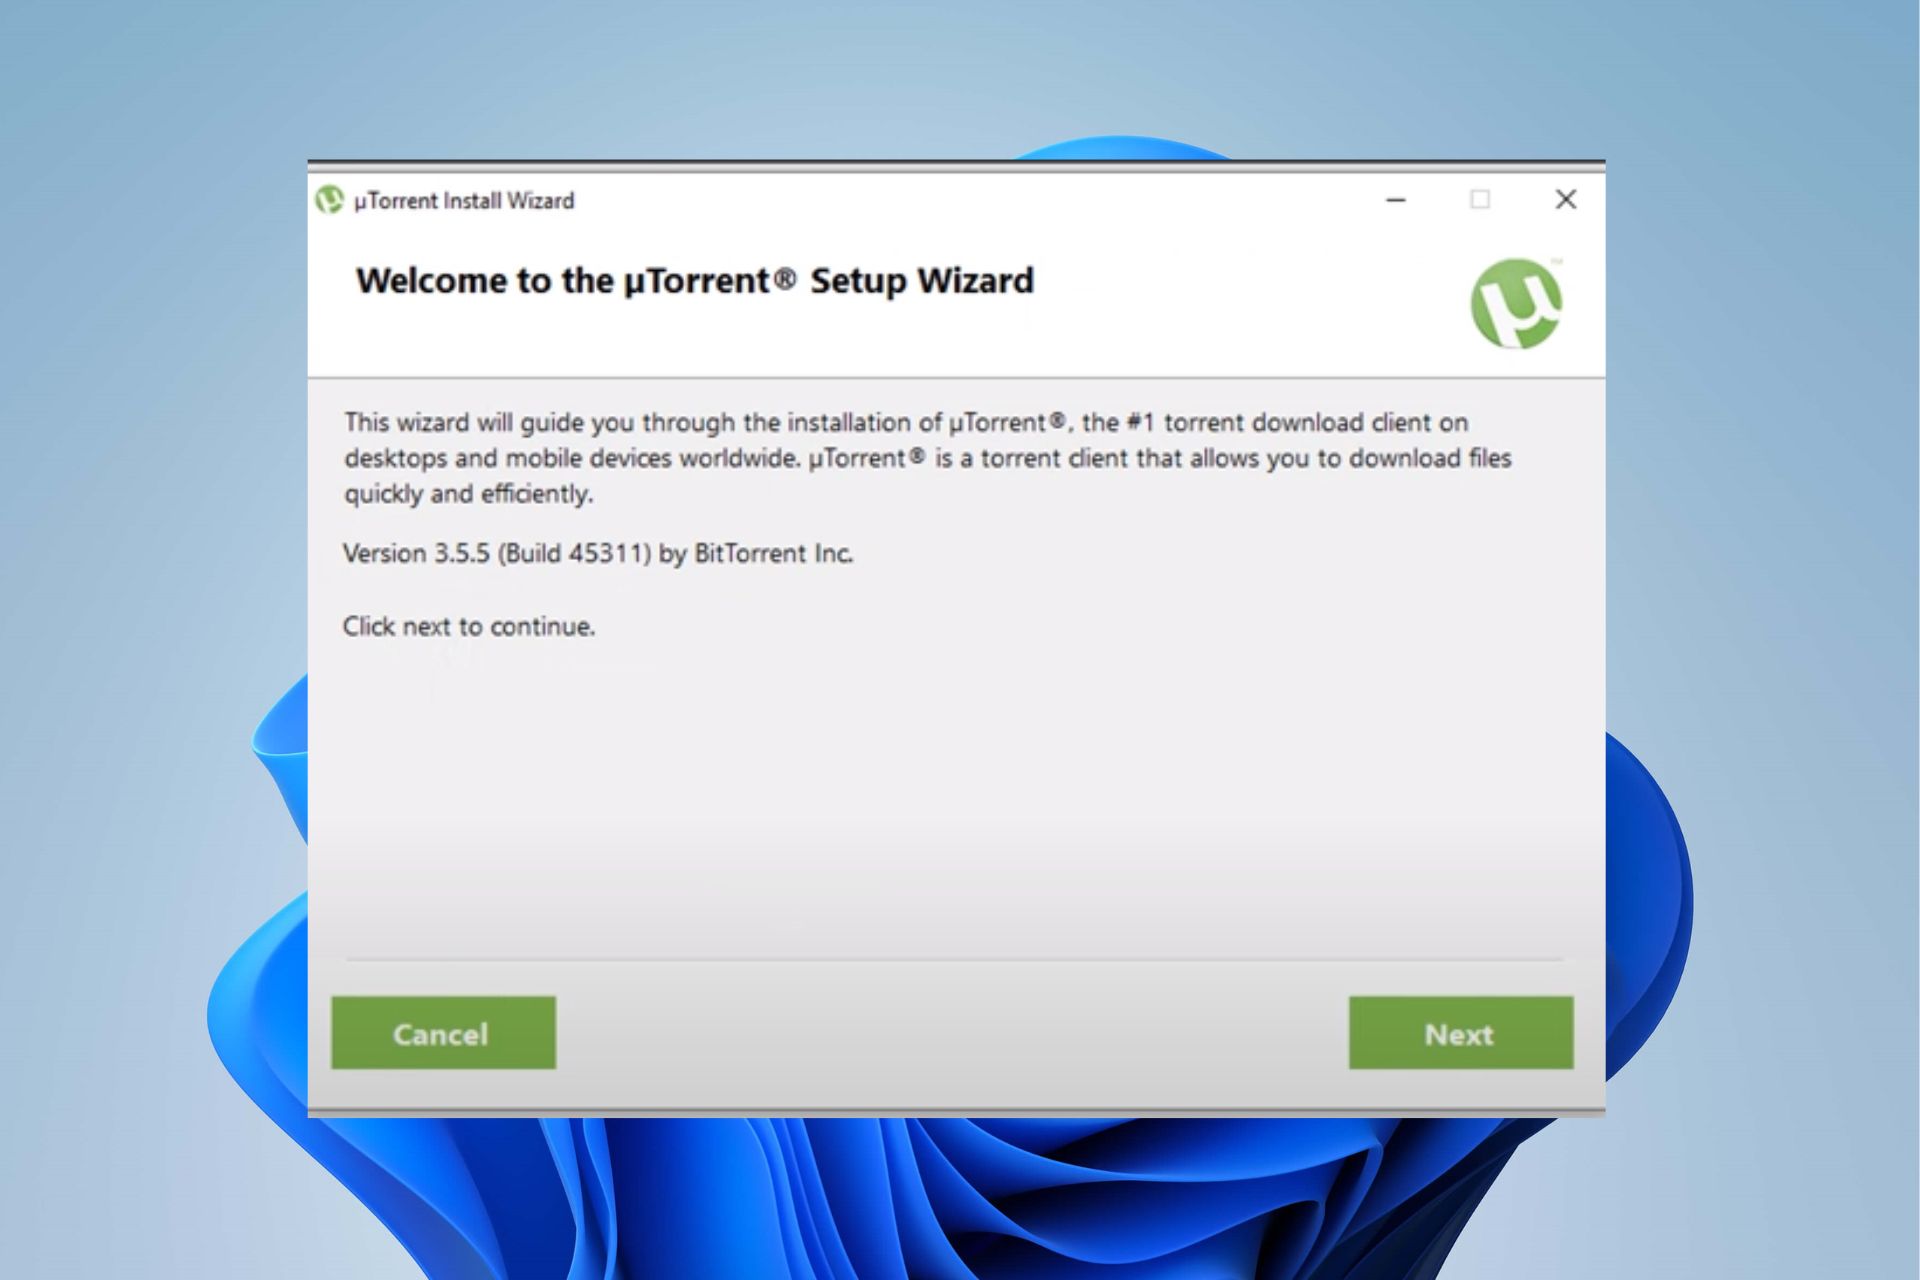
It is common to hear users complain about uTorrent not installing on Windows 11. An outdated operating system, interfering apps, poor internet connection, or insufficient storage can cause difficulties with software installation.

But don’t worry. In this article, we’ll explain all you need to know to make uTorrent install and run smoothly on your PC.

What can I do if uTorrent fails to install on Windows 11?

Before trying advanced fixes, make sure to stop or pause any other background downloads or installs. Do the same for apps you’re not currently using and try to free up some memory space.

If uTorrent still won’t install, keep reading:

1. Reboot your PC

  1. Click Start on the Desktop.
  2. Select Power from the drop-down.
  3. Click on the Restart option, then OK.

Restarting the computer will fix any boot errors that may affect the software installation.

Moreover, if you are running into problems with Windows 11 not restarting, read through our detailed guide to fix it.

2. Disable the Windows Defender Firewall

Tip icon Tip
This is just a temporary fix to make sure the firewall isn’t blocking uTorrent. However, be cautious. Don’t browse any suspicious web pages and consider adding uTorrent as an exception to the firewall instead of keeping it disabled when you use it.
  1. Click on Start, input Windows Security in the search box, and launch it.
  2. Click the Virus & threat protection option.
  3. Then select Manage settings under the Virus & threat protection settings tab.
  4. Toggle off the Real-time protection switch to disable the Defender Firewall.

Restart the computer and check if you can install the uTorrent software on your computer.

We advise you to toggle back on the Real-time protect switch if you still can’t fix the issue. However, you can read our article about Windows Firewall blocking your apps and how you can fix it.

3. Update Windows

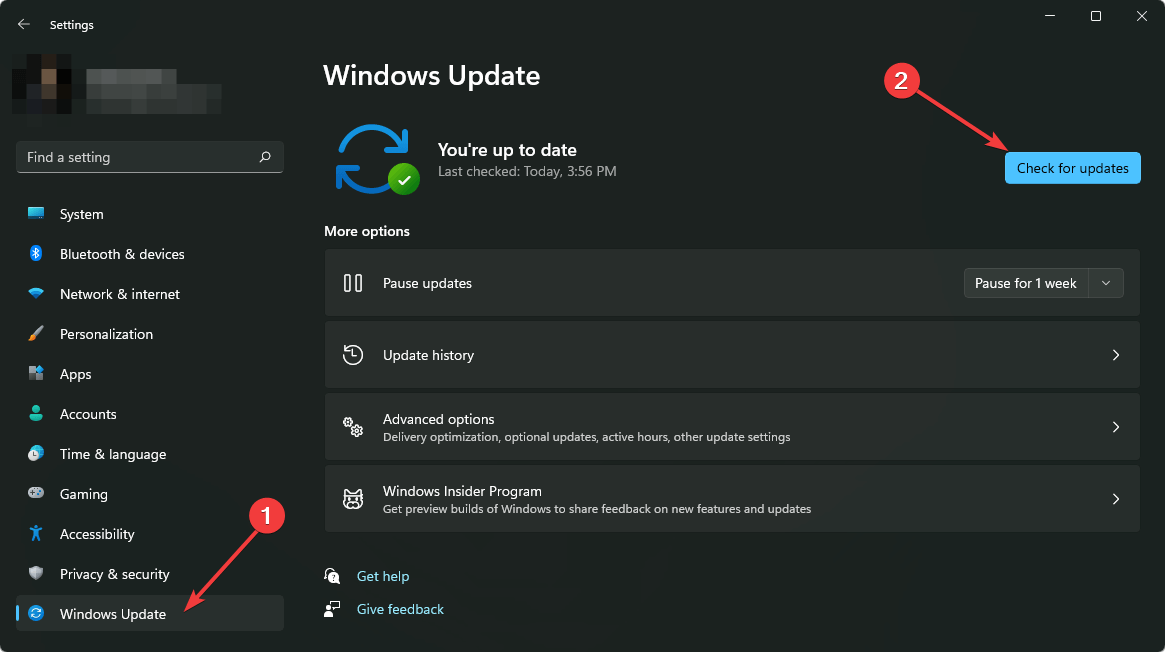
  1. Click Start and select the Settings app.
  2. Choose the Windows Update.
  3. Click on Check for updates on the Windows update page (if there are any updates available, Windows will automatically install them).

Updating Windows can fix bugs causing issues with the uTorrent installer. If you are having trouble connecting with the update service on Windows 11, you can read our guide for fixes.

4. End tasks for unnecessary apps

  1. Click the Taskbar and select Task Manager.
  2. Select the CPU and Memory usage in the Task Manager.
  3. Select the applications using lots of CPU and memory space on your PC.
  4. Click on End Task from the drop-down to stop them from running.

We recommend you restart your PC for the changes to sync. Read about other ways to open Task Manager on Windows 11.

5. Run the uTorrent installer as an Administrator

  1. Launch File Explorer on your PC, type uTorrent in the search space, and then press Enter.
  2. Select the uTorrent .exe file from the search result and right-click on it.
  3. Select the Run as Administrator option from the drop-down.

6. Try using a VPN

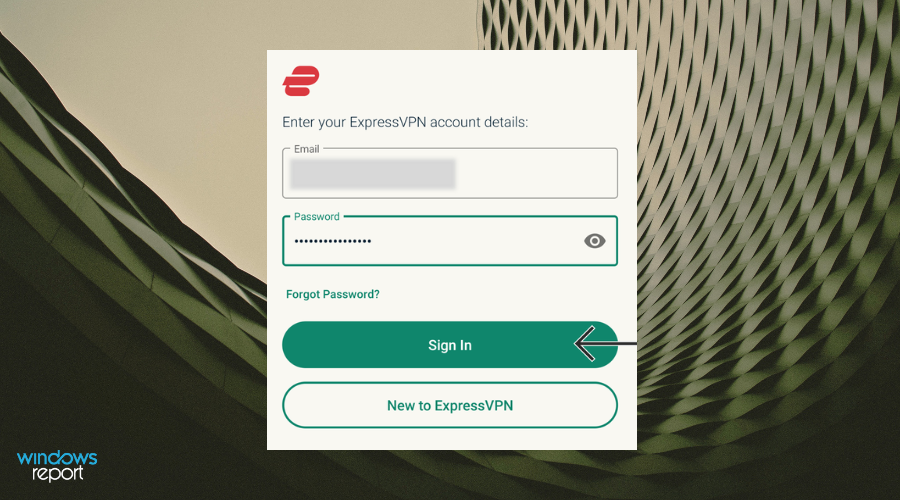
  1. Download and install a reliable VPN that can hide your data. We recommend ExpressVPN because it’s very private and fast enough for torrenting.expressvpn download page
  2. Install and login into your account.
  3. Click on the big power button to connect to a server.expressvpn uk server
  4. Go back to the official uTorrent download page and try installing it again.

This will work if your Internet Service Provider or Network admin is blocking access to uTorrent. The VPN hides your IP and online activity, so what you can no longer be monitored or restricted.

Close the File Explorer and check if you can install the uTorrent software. For users experiencing difficulties with File Explorer, read how to fix File Explorer issues on Windows 11.

Also, check our detailed guide on what to do if uTorrent is not responding and how to uninstall it on Windows 11.

If you have further questions and suggestions, kindly drop them in the comments below. We’d like to hear from you.

How to Disable the Overwolf Overlay

Overwolf is a popular software publishing platform that allows developers to develop extensions for popular games. The users can download the extensions from the Overwolf Apps Store. Now if you want to know how to disable Overwolf and the overlays, this article is for you.

You may want to disable Overwolf if it is creating conflict with other programs or games. Here is how you can do it on your Windows computer with a few clicks.

How can I disable the Overwolf overlay on PC?

1. Disable Overwolf overlays for specific games

  1. 1. From the desktop, click the System Tray icon to show the hidden icon.

  2. 2. Right-click on the Overwolf icon and select Settings.

  3. 3. In the Settings window, click the Game Overlays tab (from the left pane).

    Disable Overwolf overlay
  4. 4. Scroll through the games and locate the game for which you want to disable overlay.

  5. 5. Toggle the little switch to disable overlay for the game.

  6. If you don’t want the Overwolf overlays to appear for all the games but only specific games, you can customize the settings for each game.

    This will save you from the hassle of having to enable and disable Overwolf for each game.


2. Turn off the Overwolf overlay for the older version

  1. If the Overwolf overlays run, you can disable them from the System Tray.
  2. From the desktop, click the System Tray to show hidden apps (icon).
  3. Right-click on the Overwolf icon and select Settings.
  4. Select Overlay.
  5. Under the “Games“ section, click on Games Library.
  6. Use the toggle switch for “Enable Overlay” to turn off the overlays.
  7. Close the Overwolf window.
  8. Try to launch the game or app that was having an issue due to the Overwolf overlay.

If the issue persists, try restarting the computer. This should kill any running tasks.

How can I prevent Overwolf from autostarting when the PC starts?

  1. If you don’t want Overwolf to autostart after a restart, you can disable it from the settings.
  2. Right-click on the Overwolf icon and select Settings.
  3. Click the General tab from the left pane.
    Disable Overwolf overlay
  4. Toggle the switch for “Start Overwolf when Windows starts” to disable it.
  5. Close the Overwolf client.

The Overwolf overlays can be annoying on some games and by following the steps in this article, you can disable them on your computer.

What game do you prefer overlays on? Do let us know in the comments.

7 Ways to Fix FIFA 22 Not Launching on Windows 11

FIFA is one of the most widely played soccer games in the market. Like other games, FIFA lagging issues can make it annoying. Even more, FIFA 22 not launching on Windows 11 is a rampant problem that users report about the FIFA franchise. It means the game client isn’t opening.

FIFA 22 not initializing on your PC makes the game inaccessible due to reasons which can include outdated driver and system errors. Nonetheless, finding the game can be done in some ways, and we’ll take you through some as we go further into this article.

Why is FIFA 22 not opening?

Many factors can cause FIFA 22 not to open on your PC. An outdated game app is one of the main reasons you can encounter these problems with your game. However, there are a ton of other factors that can prevent your game from launching. They are:

  • System startup errors: During boot, your computer may run into issues, preventing it from booting up correctly. It can affect the programs on your PC and cause difficulties like FIFA 22 not loading.
  • Outdated operating system: Lack of access to updates can cause many problems for your PC, impacting your games like FIFA 22.
  • Outdated graphics driver: The graphics driver is responsible for whatever displays on your screen. You can run into issues with it if it is not up-to-date. It can prevent your games from loading graphic content. Take a closer look at our guide on how to update drivers on Windows 11.
  • Lack of enough system resources: Games like FIFA 22 need enough system resources to keep them running smoothly on your PC.

What can I do if FIFA 22 is not opening on Windows 11?

Before attempting any advanced troubleshooting, make sure you observe the following checks:

  • Connect to a stable and fast Internet connection. You should take immediate action if you further discover that your Windows 11 PC can’t find a Wi-Fi network.
  • Unplug external devices and peripherals from the USB ports as they may interfere with the game.
  • Close some background apps you’re not using currently to free up resources and space.
  • Restart your computer and check if FIFA 22 launches on Windows. If your Windows 11 PC fails to restart, check our quick solutions.

If all the checks are intact, but the game still fails to run, proceed to these fixes below.

1. Reboot your PC in Safe Mode

  1. Hold the Shift key while clicking the Restart option to load the Advanced Recovery Options page.
  2. Click on the Troubleshoot button and select the Advanced options.
  3. Click on Startup Settings and select the Restart option.
  4. Press 4 to Enable Safe Mode and wait for the computer to restart in Safe Mode.

Rebooting the computer in Safe Mode can fix startup issues deep-rooted in the system, causing problems with your game.

However, there are other ways you can employ if you can’t go with the above approach. Check our guide on ways to start Windows in Safe Mode without any issues.

2. Update Windows OS

  1. Click the Start button, then select the Settings app.
  2. Choose Windows Update.
  3. Click on Check for updates on the Windows update page (if there are any updates available, Windows will automatically install them).

Updating Windows can fix bugs causing issues with FIFA 22 on your PC. Also, you can check our guide if you cannot connect to the update service on Windows 11.

3. End task for background apps

  1. Click on the Start button, search for Task Manager, and launch it.
  2. Select the CPU and Memory usage option in Task Manager.
  3. Select those applications using lots of CPU and memory space on your PC.
  4. Click on the End Task option from the drop-down to stop them from running.

Restart your computer and check if the FIFA 22 not opening issue on Windows 11 persists.

You can check our article on how to give higher priority to specific apps in the Task Manager to improve your game performance.

4. Update your graphics driver

  1. Press Windows + R key to launch the Run window.
  2. Type devmgmt.msc in the text space and click OK.
  3. Select the Display adapters from the search results and click the driver you want to update from the drop-down.
  4. Right-click on it, click the Update driver software option and select Search automatically for drivers.

Restart your computer to implement the changes smoothly and check if you have resolved the problem.

If FIFA still does not start, try updating all drivers using a special tool. Outbyte Driver Updater automatically detects all outdated drivers and allows you to update each one individually.

Outbyte Driver Updater

Keep your system in top shape by having all drivers updated.
Free Trial Download Now

5. Run FIFA 22 as an Administrator

  1. Press Windows + S keys to open the Windows Search tab, type FIFA 22 in the search box, and open file location.
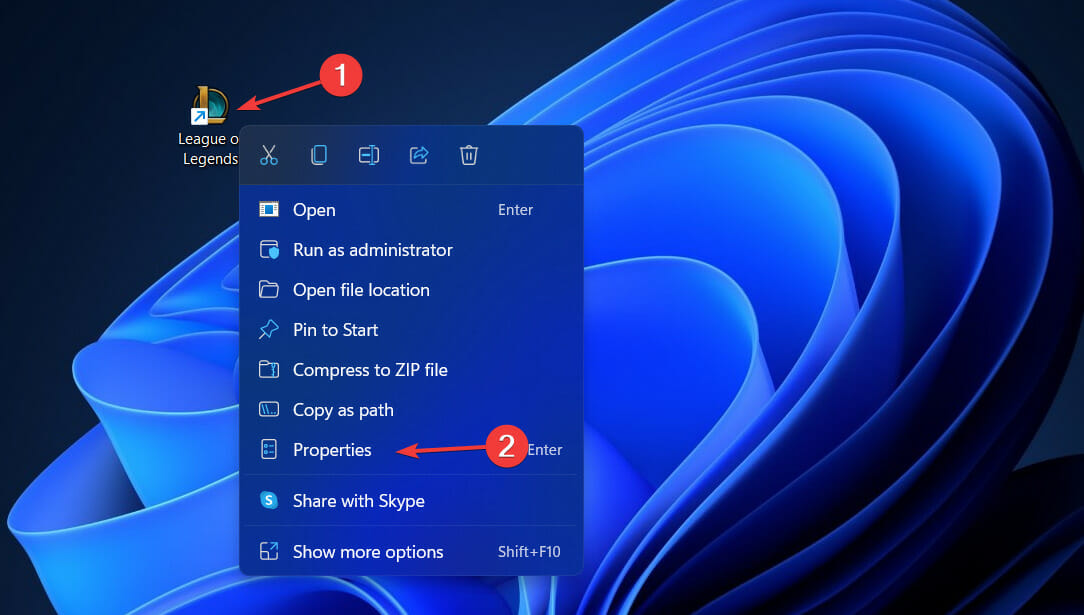
  2. Right-click the FIFA 22.exe file and select Properties.
  3. Choose the Compatibility tab, tick the box for Run this program as an administrator, and click Apply, then OK to save changes.

Read our article on what to do if an administrator blocks you from running an app on your computer if you encounter issues after enabling admin rights for the game.

6. Disable Windows Security for FIFA 22

  1. Click the Start button, search for Windows Security, and launch it.
  2. Select Virus & threat protection and then choose Manage Settings.
  3. Locate Exclusions and select Add or remove exclusions.
  4. Click +Add an exclusion and select both FIFA22.exe and FIFA22 folder.
  5. Return to Virus & threat protection and select Manage ransomware protection.
  6. Choose Allow an app through Controlled folder access.
  7. Add FIFA22.exe and FIFA22_Trial.exe.

If you can’t find Windows Security on your Windows 11, you can follow this guide to download it.

7. Uninstall and reinstall FIFA 22

  1. Press the Windows + I key to prompt the Windows Settings app.
  2. Select Apps and click Installed apps.
  3. Search for the FIFA 22 app and click on the options icon.
  4. Click on Uninstall.
  5. Download the FIFA 22 game on your PC and launch the setup file to reinstall.

Reinstalling the game will fix the issues causing it not to launch. Users should understand that reinstalling the game is recommended as the last resort, as you can lose your game data.

Nonetheless, you may be interested in reading about other issues users report about the game. Check how to fix FIFA 22 black screen issues on the PC.

Also, read our detailed guide on how to fix FIFA 21 in-game stuttering and freeze on your computer.

If this guide has been helpful, kindly leave a response on which worked for you. Also, if you have other suggestions that have worked for you apart from the listed solutions, we’d like to hear from you.

Posted in PC

Fix: Resident Evil 2 Is Not Working on Windows 11

Many players of Resident Evil 2 complain about the game not working on Windows 11. Although, other common bugs also plague the Resident Evil franchise, affecting its gameplay.

Additionally, players complain of instances where Resident Evil 2 fails to launch from time to time or crashes on start. Hence, we’ll explore the likely causes and provide solutions for them.

Why is Resident Evil 2 not working?

The dominant cause is the outdated Resident Evil 2 game. It impedes the game performance and your gameplay. Some other causative factors are:

  • Outdated Windows operating system: The outdated operating system may not be compatible with your computer’s current game version.
  • Issues with the graphics driver: The graphics driver on your computer can become outdated or broken. So, it can result in errors like Resident Evil 2 black screen on Windows 11.
  • Interference from other apps: The Resident Evil 2 client on your PC may encounter problems if other apps interfere with its functionality. So, it may not work due to some application activities.
  • Startup errors: Many things may go wrong with programs running on your computer if there’s a startup error. It affects how your computer relates to apps.

What can I do if Resident Evil 2 fails to work on Windows 11?

Fixing the game isn’t complicated, but we recommend you check the following before diving into further troubleshooting:

  • Ensure to close all other background apps consuming RAM.
  • Restart your computer to see if the issue persists.
  • Make sure your computer meets the minimum system requirements to run the game. The system requirements for the Resident 2 game might be worth checking here.

If after these checks, the problem persists, kindly use the advanced fixes outlined below.

1. Update your graphics driver

  1. Press Windows + R key to prompt the Run tab.
  2. Type the following into the text space: devmgmt.msc, and click OK.
  3. Click on Display adapters from the search results and select the driver to be updated from the drop-down.
  4. Right-click on the driver, select the Update driver software option, then click Search automatically for drivers.

Restart your computer after the updating process is complete. Also, we have a detailed article about how to update graphics drivers on Windows 11.

You can also easily update your drivers using a dedicated software like Outbyte Driver Updater. Its primary function is to scan your device for outdated or missing drivers that may affect your PC performance.

After providing you with a list of all your drivers, you don’t have to worry about choosing the right version because Outbyte Driver Updater locates the latest updates to all your drivers directly through its interface.

Outbyte Driver Updater

Avoid performance issues and let Outbyte Driver Updater keep your drivers updated with the most recent versions.
Free Trial Download now

2. End tasks for unnecessary programs

  1. Click on the Start button, search Task Manager, and launch it.
  2. Select the CPU and Memory usage option in the Task Manager.
  3. Click on the applications consuming lots of CPU and memory space on your PC.
  4. Hit the End Task option from the drop-down.

We recommend you restart your computer and check if the Resident Evil 2 issues persist.

You can check our pick of the best Task Manager software for Windows 11 to better manage all the activities on your computer.

3. Run Resident Evil 2 as an Administrator

  1. Press the Windows key + E hotkey to open File Explorer.
  2. Then locate the game’s file location, right-click on the .exe file, and select Properties.
  3. Then select the Compatibility tab and select the Run this program as an administrator setting on that tab.
  4. Click the Apply and OK options to save the changes.

It’ll allow the game to bypass security checks that may cause delays in its performance. If the Run as administrator option is not working, our guide might be worth checking out to fix it.

4. Update Windows OS

  1. Click the Start button.
  2. Select the Setting app and click on Windows Update.
  3. On the Windows update page, click on Check for updates (if there are any updates available, Windows will automatically install them).

Updating Windows will fix bugs that can cause issues with Resident Evil 2. Moreso, you can check our guide if you have issues with Windows Update and Security not opening on your PC.

5. Uninstall and reinstall Resident Evil 2

  1. Press Windows + I to open the Settings app.
  2. Select Apps from the Settings menu.
  3. Navigate to the Resident Evil 2 app and select it.
  4. Click on Uninstall.
  5. Download the Resident Evil 2 game on your PC.

Hopefully, reinstalling the game will fix the issues. However, it is the last resort we advise because you can lose your game data.

Also, we have a detailed guide on how to fix Resident Evil 5 not launching on Windows, so don’t hesitate to take a closer look.

If this guide has been helpful, kindly leave a comment or suggestion on what worked for you.

Posted in PC

Learn about Microsoft Graph and win prizes with this 30 day Challenge

Today, Microsoft is introducing a 30 Days of Microsoft Graph Challenge learning program for students, fresh graduates, and professionals. Through the program, participants will not only get to learn a new skill that will propel them to the next level in their careers but they also stand to win a bunch of rewards while at it. The challenge is scheduled to run from November 1 to November 30.

With Microsoft Graph, users can access the data and intelligence across Microsoft 365 core services which in turn allows them to build applications on top of the Microsoft 365 Platform. By taking part in this program, you will be subdued to two challenges. First up, is that all participants will be required to go through all the learning material provided throughout the entire month. The top 10 Cloud Skills Challenge winners will get the chance to record a YouTube short video for Microsoft 365 Developer YouTube channel which will be circulated on Microsoft’s official social accounts.

Next up, is the final and biggest challenge that participants will encounter. During the third week of the challenge, you will have to submit a capstone project proposal for an app scenario with Microsoft Graph. Microsoft has already provided top Microsoft Graph Scenarios, which you can pick a project from.

Alternatively, you can also come up with a unique scenario that you want to work on and submit it as a project proposal. It is worth noting that interested parties will have to comment out their capstone project proposal on GitHub to prevent the entry of similar projects. The top 4 winners who present their capstone projects will get one on one mentorship sessions from both Microsoft 365 Advocacy Directors as well as Microsoft Graph Product Group Directors. They also stand a chance to be featured on Show & Tell video series for Microsoft 365 Developer YouTube which will also be circulated across the company’s social media accounts.

Aside from the gifts, participants will also get access to a lot of learning resources, interaction with the experts on GitHub Discussions, and 8 Live Reactor Sessions. Register for the challenge to win these prizes and more. Anyone interested in taking part in this challenge must register for it, have a Microsoft 365 Developer account, have an active GitHub Student Developer Account, and a GitHub Student Developer Account.


Fix: Hyper-V Did Not Find Machines to Import from the Location

Hyper-V is a hardware virtualization product that allows you to create and run a software version of a computer (virtual machine). Regardless, users complain about many problems, such as Hyper-V not finding virtual machines to import from the location.

Moreover, Hyper-V importing virtual machines from a location can be affected by many factors, which include folder and file permission issues. Nonetheless, you can fix the error by troubleshooting some settings on your computer.

Is it possible to move virtual machines to another location?

The virtual machine is an emulation of the computer system. It uses software to run apps and programs instead of a physical computer.

However, it is possible to move virtual machines from one location to another in the same host system. Likewise, you move a virtual machine to a host system using a different operating system.

Furthermore, when you move a virtual machine, you move the entire files and directory that make up the virtual machine. So, you can transfer files between a virtual guest machine and the host machine.

If you run into any Hyper-V replication errors on your PC while moving the files, read our guide to help you fix them.

Where is the Hyper-V virtual machine located?

The Hyper-V Virtual Machine files are stored in the default locations. However, the cases may differ in the distinction of Host. The two host types are Stand-alone hosts and Clustered hosts.

Stand-alone hosts

A Hyper-V virtual machine can reside in one of two separate default locations for stand-alone hosts. Follow the directory below to find the locations:

  • Configuration files: C:\ProgramData\Microsoft\Windows\Hyper-V
  • Virtual Hard Disk (VHD) files: C:\Users\Public\Documents\Hyper-V\Virtual Hard Disks

However, you can move the files into a single location for easy import.

Clustered hosts

Hyper-V virtual machines can be in different default locations. The cluster uses shared storage known as the Cluster Shared Volumes (CSV) to store Virtual Machines in volumes. The locations are: C:\ClusterStorage\Volume1 C:\ClusterStorage\Volume2

Likewise, for virtual machines created with System Center Configuration Manager, it creates its path through: C:\ClusterStorage\Volume1\MyVM1 C:\ClusterStorage\Volume2\MyVM2

How do I import virtual machines into Hyper-V?

There are a couple of things you should check before attempting to use the fixes provided:

  • Familiarize yourself with which Hyper-V files and folder houses the Virtual Machine.
  • Get to know how to locate the files & folders and their respective functions.
  • Check for any limitations that may affect the Virtual Machine import to a different host.
  • Ensure the virtual machine files are in the expected virtual machine directory.
  • Check if the exported Virtual Machine folder is intact.

If none helps, proceed to the more advanced troubleshooting steps.

1. Import via Hyper-V Manager

  1. Launch the Hyper-V Manager on your device, then click on the Actions menu.
  2. From the menu, click the Import Virtual Machine option and select Next.
  3. In the Directory, select the folder that contains the exported files, and click the Next button.
  4. Select the Virtual Machine to import in the folder, choose the import type you’d like to use, and then click Next.
  5. Click Finish to complete the Virtual Machine import.

Importing directly via the Hyper-V Manager will bypass any error that may prompt failure to import a virtual machine.

2. Export the Virtual Machine again via the Hyper-V Manager

  1. Launch the Hyper-V Manager on your PC.
  2. Right-click on the Virtual Machine and click the Export button.
  3. Click the Browse button to open the directory and select a path to save the files.
  4. Click the Export button.

After exporting the virtual machine in the Hyper-V Manager, you can then import the virtual machine without having any difficulties or issues.

These are the best fixes if Hyper-V did not find the Virtual Machines to import from the location.

Also, users complain a lot about Hyper-V running out of memory errors on their PC. Our detailed guide will take you through some solutions to fix it.

If you have other suggestions or fixes that have worked for you, kindly leave them in the comments section. We’d like to hear from you.

GPO Filtering Not Applied (Unknown Reason): 3 Ways to Fix it

The Group Policy is an advanced tool that requires a bit of understanding before use. The Group Policy filtering not applied (unknown reason) is one of the problems users complain about. It indicates a concern with the target object you are trying to apply your GPO.

Moreover, a series of factors may be responsible for this error on your Group Policy, causing it not to apply your GPO (Group Policy Object) security or WMI filtering. Nonetheless, we’ll take you through how to fix the problem and get it working again.

What could be the causes of GPO not being applied?

Local Group Policy Filtering: not applied can occur in numerous cases – for example, while implementing a security or WMI filtering.

However, a factor that causes the GPO not to be applied is incorrectly assigning your security groups. Other notable causes are:

  • Configuration issues in the Group Policy: Users need to allow permission for some options in the GPO delegation. So, the Group Policy filtering may not apply if these options are not enabled.
  • GPO Setting is for the wrong object type: Applying filters to a group object needs you to specify the object type, and a mistake with that may result in filtering errors.
  • Group Policy Object (GPO) not linked to any Active Directory network: The GPO not applied error may occur if the GPO is not linked to any AD network. You can check out how to enable Active Directory users and computers in Windows 11 to set up your AD.

What can I do to fix the Group Policy filtering not applied?

1. Link the GPO to an OU (Organization Unit)

  1. Start your device and log in as an administrator.
  2. Click on the Start button, then select the Administrative tools.
  3. Navigate to the Group Policy Management console.
  4. Go to the desired OU you want to link to a GPO, right-click on it, and select the Link an existing GPO option.
  5. Navigate to the Select GPO tab below Group Policy Objects, then select the GPO you want to link.
  6. Then click OK to save the changes.

Restart your computer and check if you fixed the Group Policy not applying on Windows 11.

2. Check the Security Filtering settings in your Policy

  1. Click the Start button and select Administrative Tools from the drop-down.
  2. Select the Group Policy Management console.
  3. Navigate through the console and click the GPO you want to modify.
  4. Scroll down to the Security Filtering tab and click on Authenticated Users.
  5. Select the Remove option (it will remove the default permission granted to all authenticated users and computers).
  6. Click Add, then select User, Computer, or Group window.
  7. Click Advanced to browse the list of groups available in the domain.
  8. Select the group to apply the GPO, then click OK.

Allowing group members to apply a GPO will fix the Group Policy filtering not applied.

Editing the Group Policy can be tasking sometimes, so we recommend you read how to edit the Group Policy in Windows 11 for easy navigation.

3. Check if the Security Filtering has Read and Apply group policy permissions

  1. Click on Start and select Administrative Tools.
  2. Select the Group Policy Management console.
  3. Go through the console and click the GPO you want to modify.
  4. Navigate to the Delegation tab and click on the Advanced button.
  5. Then, click on Add and select the security group to apply.
  6. Go to the Permissions tab, select the Apply group policy option, then check mark the Allow option (Also, check the Allow box for Read).

The above configuration will apply the Group Policy filter to the selected group. Alternatively, users can check how to install Group Policy Editor on Windows 11 home.

Conclusively, we hope we have been able to help you fix the Group Policy filtering not applied (unknown reason) error. However, you may be interested in how to fix difficulties with accessing the Registry Editor on your PC.

For further questions and suggestions, kindly leave them in the comments below. We’d appreciate your feedback.

Microsoft news recap: Apple Music comes to Xbox, Office 365 becomes Microsoft 365, and more

Microsoft news recap is a weekly feature highlighting the top Microsoft news stories of the past week. Sit back, grab some coffee, and enjoy the read!

Apple Music is now available on Xbox consoles

Xbox One and Series X|S users can now use Apple Music on their consoles through an official, new Apple Music app for Xbox.

Office 365 rebranding to Microsoft 365 better positions the company for the future

A rebrand is in the works for Office 365, as it was announced at Ignite that it will become Microsoft 365.

New Microsoft 365 app

Xbox Cloud Gaming compatibility expands to offer more games on more devices

The latest update for the Xbox app on Windows has brought expanded compatibility, allowing Xbox Cloud Gaming to be used on more devices. ARM64 Windows PCs, in particular, are receiving full support.

Xbox Cloud Gaming compatibility expands to offer more games on more devices - OnMSFT.com - October 12, 2022

Meta and Microsoft partner up for new VR experiences

A partnership between Meta and Microsoft has formed to launch new VR experiences, including bringing Microsoft 365 to apps to the Meta Quest Pro, streaming a Windows Cloud PC, and more.

Meta and Microsoft partner up for new VR experiences - OnMSFT.com - October 12, 2022

That’s it for this week. We will be back next week with more Microsoft news.

How to Connect a Shared Printer in Windows 7 to Windows 10

Having to share a printer between a Windows 7 and a Windows 10 PC may be pretty complicated, but not impossible. That is precisely why we’ve created this step-by-step guide that will show you precisely what you need to do to share a printer between two PCs with different OS.

How do I share a printer from Windows 7 to Windows 10?

  1. Press on the Start button on the taskbar.

  2. Go to Control Panel.

  3. Navigate to Hardware and Sound > View Devices and Printers.

    WIndows 7 View Devices and Printers
  4. Right-click the printer icon.

  5. Click Printer Properties from the pop-up menu.

  6. Go to the Sharing tab.

  7. Click on Share this Printer.

  8. Click OK.

  9. It is quite simple to share your printer from Windows 7 to a Windows 10 device via Printer Properties. The two computers need to  be on the same network for this to work.

    However, in doing so, you need to ensure that your two operating systems are both running on either 32 bit or 64 bit.

What to do if I cannot connect to a shared printer from Windows 7 to Windows 10?

Normally, if you were to share the printer with another Windows 7 PC, then these steps would suffice. However, there are a few things you need to know about the differences between Windows 7 and Windows 10.

1. Install the required driver

Computers with Windows 7 provided by OCIO are using a 32-bit version while Windows 10 is using a 64-bit version.

If you need to share a printer connected to a Windows 7 computer and want to share it with a user using Windows 10, you’ll need to provide the 64-bit printer driver on the Windows 7 computer.

You can do this simply by following these steps:

  1. Connect the printer to Windows 7 computer.
  2. Press Start.
  3. Go to the Control Panel.
  4. Go to Device and Printers.
  5. Right-click on the printer and choose Printer Properties.
  6. Go to the Sharing tab.
  7. Click Additional Drivers… .
  8. Tick the option for x64 processor.
  9. Press OK to install the driver.
  10. Provide the required driver when promptshare printer.
  11. When finished, you can go to the Windows 10 computer to add the shared printer.

You can also use an automated solution that is faster and more secure. These specialized driver updaters will help you download the right drivers for your computer after just a quick scan.

2. Make changes to your registry

If you are still encountering issues, then there is one last workaround to fix things. It involves tweaking the Registry, so be careful while doing it:

  1. Open the Registry Editor on your PC.
  2. Go to HKLM\SOFTWARE\Microsoft\Windows NT\CurrentVersion\Print\Providers.
  3. Delete the Client Side Rendering Print Providers key.
  4. Restart the Print Spooler service.

By following these steps you should be able to now easily share any printer between a Windows 7 PC and a Windows 10 PC. Just remember that both computers need to belong to the same network, and you’ll be done.

Did you find our article to be useful? Let us know what other things you want to read about in the comment section below.

15 Most Common Steamvr Errors And How To Fix Them

If you use the SteamVR app and having several problems with it, this article is a great place for your relief. Here, you will find the solutions for the most common SteamVR errors. If you are interested, see the best VR browser games to play on Oculus Quest.

Why does my SteamVR keeps failing?

SteamVR works very smoothly with most compatible devices. However, the actual problems appear when you cannot use this app properly because of several errors. It can completely ruin your VR experience.

The SteamVR may fail or doesn’t work properly or entirely due to some common and critical reasons. It is hard to find out the root causes of some problems. But, in most cases, you will find these reasons:

  • Graphics card issue – An incompatible graphics card may cause a lot of problems when running SteamVR.
  • Driver problem – If the graphics card drivers are corrupted or not updated, you can expect to have trouble.
  • VR headset’s internal problem – There are not many issues that can cause a VR headset to malfunction but dropping it repeatedly from the head level may cause serious damage.
  • Outdated components – VR headsets are very demanding in terms of system requirements so maybe it’s time for an upgrade.
  • Improper connection – A proper cable connection makes all the difference.
  • Lack of permission for some specific tasks – Make sure you grant permissions to the apps you’re using, or they may not function properly.
  • Misconfigurations – Sometimes, it’s just all about setting up your VR headset right.

What are the most common SteamVR errors?

  • SteamVR Error 108 – Headset Not Detected – Rebooting your headset and your PC might get this problem fixed.
  • SteamVR Error 113 – Path Registry Not Writable – This error occurs if the system doesn’t have permission to edit some folders in SteamVR.
  • SteamVR Error 208 – HMD Display Not Found – This problem is often caused by problematic drivers.
  • SteamVR Error 200 – Driver Failed – Still a driver mismatch or corruption problem. A driver update is recommended.
  • SteamVR Error Code 203: SteamVR unexpected problem – If you’re using a game booster app, try to deactivate it because this may be the issue.
  • SteamVR Error 206 – Driver Not Calibrated – Obviously, another driver-related problem but you will be able to fix it with one of our solutions below.
  • SteamVR Error 207 – Driver Calibration Invalid – It’s a variant of error 206 and it has the same solution.
  • SteamVR Error 300 – SteamVR failed to initialize for unknown reasons – This is a light error and most of the time, restarting your PC will fix it.
  • SteamVR Error 301 – Connect Failed – In this case, it’s recommended to check if the VR service is running.
  • SteamVR Error 302 – Init Failed – As for any initialization error, restarting your PC and headset might fix the problem quickly.
  • SteamVR Error 306 – SteamVR failed to initialize for unknown reasons – It is similar to Error 300 and here we have a dedicated guide to help you.
  • SteamVR Error 436 – We have a dedicated guide on how to fix Error 436 in SteamVR so head over to fix this quickly.
  • SteamVR Error 1101-1112 – USB Error – As the name of the error suggests, you should check the USB connection.
  • SteamVR Home has stopped working error – This is a SteamVR Home error but our dedicated guide will help you fix it.

Whatever the error you’re facing, this article has the solutions for the most common SteamVR issues. To know about them, follow the next part of this post.

How do I fix SteamVR problems?

Before getting into any complex troubleshooting, make sure you get to this checklist of prerequisite measures:

  • Close SteamVR, power off your VR headset (if possible), power it up again, and restart SteamVR.
  • Make sure that all the cables are connected properly and replace the ones which look damaged.
  • Verify if your PC configuration, including the GPU, is on par with the VR requirements.
  • Reboot your PC. Sometimes, a simple solution like this can be the magic touch to fix everything.
  • Check your network connection, and that includes restarting your router.

Now that we’ve got over the simple things you can do, if the issues still persist, let’s go through our solutions below.

1. Update or reinstall your drivers

1.1 Update the graphics card driver

  1. Open the Start Menu on your PC, type device manager, and hit Enter.opening device manager windows 11
  2. Find and right-click on the graphics card and choose Update driver.clicking update driver on graphics card on windows device manager
  3. Then, follow your preferred method to update.

1.2 Re-install the graphics card driver

  1. Open the Windows Device Manager as shown before.
  2. Right-click on the graphics driver and choose Uninstall.Uninstall-graphics-adapter
  3. Make sure to check the Attempt to remove the driver for this device.
  4. Restart your PC.

We should mention that updating the drivers manually sometimes won’t work and you need to visit the manufacturer’s website to get the latest driver.

As you can see, this can be a bit of work, but there are also dedicated driver update software tools that do all the work for you automatically.

2. Get the latest Windows updates

  1. Press Win + I on the keyboard to open Windows Settings.
  2. Go to Windows Update and click on Check for updates.check for updates windows 11 settings

After updating, restart your PC and see if it has solved the SteamVR error or not.

3. Run SteamVR as administrator

  1. Locate the Steam shortcut or the launcher file. It should be on the installation location, or you can use the desktop shortcut.
  2. Right-click and choose Run as administrator.running steam as administrator

Sometimes, the lack of permissions can cause SteamVR errors and this solution will eliminate this problem from the get-go.

4. Chech the folder rights for SteamVR

  1. Press the Windows key + E to start File Explorer.
  2. Navigate to the SteamVR folder. You can usually find it at the following path: C:\Program Files (x86)\Steam\steamapps\common\SteamVR
  3. Right-click on an empty space and go to its Properties.
  4. Untick Read-only if it is ticked.unticking read-only folder properties windows
  5. Save the settings and exit.

Also, change the folder permission if necessary. Then, see if it has fixed the problem or not.

5. Reconnect your headset

  1. Unplug your headset.
  2. Remove all other extra USB devices.
  3. Open SteamVR.
  4. Go to Settings.going steamvr settings
  5. Click on Reset.
  6. Then, click on Remove all SteamVR USB devices.
  7. Connect your headset, and it will automatically install the drivers.

6. Run steam in Compatibility mode

  1. Right-click on the Steam shortcut and go to its Properties.
  2. Under compatibility mode, check Run this program in compatibility mode and choose an earlier OS.setting steam to run in compatibility mode
  3. Click on Apply and OK.

Now, see if it has fixed the SteamVR failed to initialize for unknown reasons or not.

7. Restart the VR service

  1. Press CTRL + ALT + Del on the keyboard and open Task Manager.
  2. Find the process called vrserver.exe and select it.
  3. Click on End Task to quit this process.ending vrserverexe task manager windows 11
  4. Run SteamVR again.

This procedure will restart the VR service and hopefully, the problem will be fixed.

8. Re-install SteamVR

  1. Open Steam.
  2. Right-click on SteamVR, hover your mouse over Manage, and choose Uninstall.uninstalling SteamVR
  3. Install it again.

9. Uninstall game booster

  1. Click the Start button and select Settings.
  2. Go to Apps and click on Installed apps.going installed apps windows 11 settings
  3. Search for the game booster software.
  4. Click on the three vertical dots next to it and then choose Uninstall.uninstalling smart game booster win11 settings

Game booster software is great because they improve the FPS and reduce lag. It also allocates resources to your particular game but, sometimes, it gets in conflict with some apps.

If the situation doesn’t improve by uninstalling the app, feel free to install it again.

10. Delete the SteamVR settings file

  1. Press the Windows key + E to open File Explorer.
  2. Navigate to the following location: C:\Program Files (x86)\Steam\config
  3. Find the steamvr.vrsettings file and delete it.deleting steamvr settings conig

Many of our readers asked: Is SteamVR compatible with Oculus Quest 2? The short answer is yes.

Now, users can easily enjoy SteamVR content on Oculus Quest 2. For this, users will have to simply connect the headset to the PC. Then, they can access the entire Steam library.

But if you encounter any issues, we have a great guide on how to fix SteamVR if it’s not working with Oculus Quest.

However, users also need the Quest app for PC for this. Also, there are some specific steps to follow to enjoy the Steam content on this VR headset.

You might also be interested in our list including the best SteamVR web browsers to enjoy VR content.

This article has shown you the solutions for the most common SteamVR errors. If you have any suggestions or opinions, feel free to write them down in the comments box.

How to Increase FPS in League of Legends (9 Proven Methods)

In this guide, you’ll learn exactly how to increase FPS in League of Legends on Windows, whether you’re using a laptop or a desktop. This will put an end to sudden frame drops and stutters and improve gameplay.

Boost Your League of Legends FPS: Step-by-Step Fixes

🎯 Why Is FPS Dropping in League of Legends?

Here are the most common causes of FPS dips during gameplay:

  • Outdated GPU drivers: League won’t run smoothly if your graphics drivers are old.
  • Background apps hogging RAM or CPU: Tools like Discord overlays, Chrome, or game boosters can reduce performance.
  • High graphics settings on weak hardware: Ultra or High settings may be too much for lower-spec devices.
  • Thermal throttling: If your GPU or CPU is overheating, Windows reduces performance to prevent damage.
  • Corrupted or missing game files: Damaged installations cause stuttering and lag, and can even lead to issues like League of Legends crashing the computer.

How can I increase FPS in LoL?

1. Disable full-screen optimizations to increase FPS in LoL

  1. Right-click on your League Of Legends application and choose Properties.
    league-properties league of legends fps boost
  2. Navigate to the Compatibility tab and check the Disable full-screen optimizations option.
    compatibility-disable league of legends fps boost

2. Set a high priority for the League of Legends service

  1. Open Task Manager by holding CTRL + SHIFT + ESC together.
  2. Find the League Of Legends task under the Details tab, right-click on it, hover over Set priority, and choose High.
    riot-high league of legends fps boost

3. Update your PC’s drivers

Option 1: Use Windows Update

  1. Open Settings and go to Windows Update followed by Advanced options.
    advanced-options league of legends fps boost
  2. Here, click on Optional updates and you will be shown the available driver updates that you need to install. Simply click the Download and install button after you check the boxes next to the updates.
    optional-updates-button league of legends fps boost

Instead of manually updating your drivers every time you face an error related to them, you can opt for third-party software that automatically updates, replaces, and fixes your device drivers.

Option 3: Update via Device Manager

  1. Press Windows + X and select Device Manager
  2. Expand Display adapters
  3. Right-click your GPU (e.g., Intel UHD Graphics, NVIDIA GeForce GTX, AMD Radeon)
  4. Select Update driver
  5. Click Search automatically for drivers
  6. Let Windows install any available updates
  7. Restart your PC

⚠️ Device Manager often says “best drivers are already installed” even when newer versions exist. It’s better to update manually for peak performance.

Option 3: Download the Latest Drivers Manually

Use your manufacturer’s official driver tools or support pages:

  • NVIDIA: Download drivers or use GeForce Experience
  • AMD: Use the Auto-Detect Tool or download manually
  • Intel: Use the Driver & Support Assistant or the Download Center
  • Laptops/Other GPUs: Check your device manufacturer’s support page (Dell, HP, ASUS, etc.)

This can also fix errors like the DirectX crash in League of Legends, which often stems from outdated or incompatible drivers.

4. Change the game’s settings to increase FPS in League of Legends

  1. 1. Launch League of Legends and log in to your account.t

  2. 2. Click on the wheels icon in the upper-right corner of the game’s window to access Settings.a

    go to settings in lol
  3. 3. Tick the box next to Enable Low Spec Mode.

    enable low spec mode in league
  4. 4. Navigate to the Interface section from the menu on the left.

    go to interface settings league of legends
  5. 5. Under Health and Resource Bars, ensure the box next to Enable HUD Animations is not checked. If it is, uncheck it.

  6. 6. Under Ability and Attack Display, disable the following options: Show Target Frame on Attack, Show Attack Range and Enable line missile display.

    disable the following attack and display options lol
  7. 7. Go to the Game tab on the menu on the left.T

  8. 8. Under Graphics, enable the Prefer DX9 Legacy Mode option.h

  9. 9. Now we need to modify some settings from within the in-game’s options. To do that, we need to launch a game. You can simply start a Practice Tool game for this.

  10. 10. Navigate to the Video tab on the menu from the left.

  11. 11. Make the following changes from this menu:

    • Uncheck Enable Screen Shake.
    • Change your display resolution to your monitor’s native resolution.
    • Move the slider for Graphics to Very Low or Low. This will automatically disable Shadow Quality as well.
    • Set the Frame Rate Cap to 60 FPS. It is important that the framerate is not set to Uncapped.
    • Uncheck Anti-Aliasing and Wait for Vertical Sync.
  12. If you’re playing on old hardware, lowering the graphical settings in the game’s graphics menu can provide a big increase in frame rate.

    For anyone experiencing unacceptably low frame rates in League (for example, less than 20 frames per second), the best course of action is to just set everything to Very Low (and disable Anti-Aliasing and Wait for Vertical Sync) and hope for the best.

    In case you’re experiencing really low framerates, you may want to consider lowering the game’s resolution, as your system’s GPU will have an easier time churning out lower-resolution frames.

    There are also a few small HUD options that, when turned off, can provide a frame rate increase to the player. You may find out more about them by selecting the INTERFACE option from the game’s settings.

    If you uncheck Enable HUD animations, Show Target Frame On Attack, Enable Line Missile Display, and Show Attack Range, you may see a significant improvement in performance, making the tweaks to your HUD worthwhile.

5. Clean the temp files on your PC

  1. Open the Windows search function and type %temp% inside it.
    temp league of legends fps boost
  2. Once you have entered the Temp folder, select all the files and delete them. Skip any files that won’t be able to delete.
    delete-temp league of legends fps boost

It’s possible that your hard drive is clogged with unnecessary files. If these files are not correctly deleted, they will cause slowness.

6. Disable Background Apps

Free up resources before launching the game:

  • Press Ctrl + Shift + Esc to open Task Manager
  • End high-resource apps like Discord, browsers, or update tools
  • Pay close attention to CPU and Memory columns

Some overlays can also contribute to related issues like ping spikes or stutters in online matches.

7. Repair the Game

Corrupted files = instant FPS drops.

  • Open Riot Client
  • Click your Profile icon → Settings
  • Select League of Legends, then click Repair

This can help with issues such as when League doesn’t launch after champion select or simply won’t start at all.

8. Switch to Fullscreen or Borderless Mode

Running in Fullscreen reduces background interference:

  • Open LoL settings → Video
  • Change Window Mode to Fullscreen or Borderless

If the game refuses to go full screen, try these steps to fix League not going full screen, especially if you’re using multi-monitor setups.

9. Disable Overlays

Overlays are known FPS killers. Disable the following:

  • Discord: Settings → Game Overlay → Turn Off
  • GeForce Experience: Settings → In-Game Overlay → Turn Off
  • Xbox Game Bar: Settings → Gaming → Turn Off Xbox Game Bar

For players using dual displays, overlays can also cause the dual-monitor bug in League where the game moves between screens or freezes.

How to Check FPS in League of Legends

Option 1: Use League’s Built-In Counter

  • Press Ctrl + F during gameplay
  • You’ll see FPS (and ping) in the top-right corner

Option 2: Use a Monitoring Tool

Tools like MSI Afterburner or GeForce Experience also display real-time FPS stats

If you need further assistance in boosting your LOL FPS, check out how to fix the League of Legends FPS drop in Windows 10 & 11.

Alternatively, here are the best game booster software tools for Windows 10/11 PCs that you need to check out before you change your PC altogether.

Was this guide helpful? Let us know in the comments section below as well as whether you have any other solutions in mind.

Fix: Group Policy Doesn’t Permit The Storage of Recovery Info

If you’re seeing the Group Policy does not permit the storage of recovery information error message on your PC, then you’re not alone. Users complain about running into this error when accessing their PC’s BitLocker and TPM recovery information.

However, this error occurs for reasons that may differ from other users. Also, it is common to PCs or any devices that use BitLocker Drive Encryption. Encryption software like BitLocker is integrated with the operating system and is used to encrypt an entire volume.

Why does the Group Policy not permit the storage of recovery info?

Issues with the Group Policy not permitting the storage of recovery info occur mainly because the setting to backup TPM recovery information to Active Directory is not allowed. However, other factors that may be responsible for the problem include:

  • Windows update issues: Some users complain about encountering the Group Policy error message after updating their Windows operating system.
  • Issues with Group Policy configuration: You may run into this problem if the Group Policy settings do not permit the creation of a recovery key.
  • Interference with peripherals like USB drives: You may encounter issues during your system start-up due to the USB devices plugged in. The PC may attempt to boot from one of the USB devices resulting in the BitLocker recovery error.

What can I do if the Group Policy does not permit the storage of recovery information?

Make sure you have the following procedures in check before performing any advanced troubleshooting:

  • Ensure that your computer is running on the Administrator account.
  • Disconnect USB devices that are connected to your PC and eject other peripherals. If the USB fails to eject on your Windows 11, hop on our guide for quick fixes.
  • Close background processes interfering with your device’s privacy and security settings, such as antivirus.
  • Restart the computer and check if the issue persists.

If, after all these checks, the issue persists, then proceed to the fixes below.

1. Back up TPM recovery information to Active Directory

  1. Press Windows + R keys simultaneously to open the Run window.
  2. Type in gpedit. msc, then press Enter.
  3. Navigate to the Computer Configuration tab, then open the Administrative Templates.
  4. Select System and click the Trusted Platform Module Services.
  5. Double-click the Turn on TPM backup to Active Directory, then click on the Enabled option.
  6. Check the box for Require TPM backup to AD DS option.

Restart your PC and check if the issue persists.

Editing the Group Policy can be tricky sometimes, and any mistake can fatally impact your computer. Check our guide on how to edit the Group Policy in Windows 11.

2. Back up BitLocker recovery information to Active Directory

  1. Press Windows + R keys simultaneously to open the Run window.
  2. Type in gpedit. msc, then press Enter.
  3. Navigate to the Computer Configuration tab, then open the Administrative Templates.
  4. Select Windows Components, then open the BitLocker Drive Encryption.
  5. Double-click the Turn on BitLocker backup to Active Directory option, then click on the Enabled option.
  6. Check the box for Require TPM backup to AD DS option.

We recommend you restart your device. The above steps can fix the backup BitLocker key protector if it’s not working.

Read about BitLocker not saving keys to AD for more information about BitLocker backup services.

3. Uninstall the recent Windows update

  1. Press Windows + I key to open the Settings app.
  2. Go to the Windows Update tab and select Update history.
  3. Click Uninstall updates and select the most recent update.
  4. Click on Uninstall.

Uninstalling the recent Windows update should help fix the issue.

Also, you can read our article about how Windows update causes BitLocker issues on your device for more details.

However, when using BitLocker, you may encounter a series of issues on your computer. So, we recommend you read through our article on how to fix BitLocker errors in Windows 11.

Also, we have a detailed guide on how to fix Windows asking for the BitLocker recovery key on Windows 11.

For further queries or if you have a suggestion on another fix that has worked for you, kindly leave them in the comments section.

How to Play PS4 Games on Windows PC: PlayStation Now vs Emulators

Want to play PS4 games on your Windows PC? You’ve got two main options: stream them with PlayStation Now or run them locally with a PS4 emulator.

One’s official and easy, the other gives you more control, and both have pros and cons. In this guide, we’ll show you how to use each and what to expect before diving in.

How can I play my PS4 games on my PC?

1. Play your PS4 games on PC with the PS Remote Play software

  1. 1. Navigate to the download page for PS Remote Play.

  2. 2. Tick the checkbox next to I agree to the “SIE application end user license agreement” and “Privacy policy”, and then click on the Download button.

    check the checkbox then press the download button for ps remote play
  3. 3. Double-click on the installation file that was downloaded to your PC to start the installation process.

  4. 4. Follow the on-screen instructions to install the app.

  5. 5. When the installation is complete, click the Sign in to PSN button and use your credentials to log in.

  6. 6. Now you need to configure your PS4 console. To start off, turn it on and go to Settings > Remote Play Connection Settings.

  7. 7. Tick the checkbox next to Enable Remote Play.

  8. 8. Go back to Settings and navigate to Account Management.

  9. 9. Lastly, connect your DualShock 4 controller to your PC via an USB cable.

  10. The best way to play your PS4 games on a PC is via PS Remote Play. It is an official software developed by Sony that allows you to do just that. Before you can use it, you need to ensure your console is up to date with the latest updates.

    Moreover, in order to run PS Remote Play on your PC, this is what you need to have:

    • Windows 10 or Windows 11
    • 7th Generation Intel® Core™ processors or later
    • At least 100 MB of disk space
    • At least 2 GB of RAM
    • Display resolution that is 1024 × 768 or higher
    • A sound card
    • An USB port & USB cable
    • A high-speed internet connection
    • A Playstation Network account
    • A Dualshock 4 wireless controller

For clear voice chat while using Remote Play or PS Now, follow this guide to join PlayStation Party Chat on PC and coordinate with friends from your computer.

2. Use PS Now to play PS4 games on a PC

  1. Download and install PS Now app from the official source.install ps now
  2. Connect the DualShock controller to the PC – see this guide to connect the PS controller to Windows.
  3. Start streaming and playing on your Windows PC.ps now pc

As for requirements, you will need a computer, a DualShock controller, a PS Now subscription, and, of course, a good Internet connection.

The PC hardware requirements are pretty low, with a minimum of Core i3 2.0 GHz and 2GB of RAM.

Gamers can play PlayStation 4 games directly on their PCs if they are using the PS Now service or PS4 Remote Play.

You can now access the same library of PlayStation titles through the updated PlayStation Plus service, which lets you stream and play games directly on your Windows PC. Learn how to set it up in our detailed PlayStation Plus on Windows guide.

For those who haven’t gotten a chance to brush up on modern gaming habits, game streaming implies that the actual games are run and processed on the service provider’s machines.

The visual information is sent via the Internet to users, who control the game remotely. This allows people to play high-end games that won’t run on older PCs, so there’s no need to upgrade a computer to play a game fully.

Hundreds of new or old games were released for PS4, PS3, and even PS2 that you can play on your Windows PC.

PlayStation Now can access exclusive PlayStation games, such as the critically acclaimed Uncharted series, and stream and play them on your PC.

Also, one of the biggest attractions of the PS Now service is that you can start playing on one device and resume playing on the other if you are signed in to your PlayStation account on both devices.

There you go! Now you know everything about playing PS4 games on a PC without a console or playing PS4 games on a PC with a keyboard and mouse.

Should I play PS4 games on a PC emulator?

As mentioned above, the software for emulating PlayStation 4 games on your PC exists, but don’t expect the same flawless experience. It can be a great alternative if you use issues like NP-31805-7.

That being said, there aren’t many of them, and they can’t emulate full games due to PS 4 being a more recent gaming system that takes a significant amount of resources.

Out of the available PS4 emulators for PC, the best ones to use would be PS4Emus, PCSX4, Orbital PS4 Emulator, or fpPS4 Emulator. There are others, but they are still pretty rudimentary or still in the early development stages.

If you’re interested in emulating other consoles, check out guides for the best PS1 emulators for PC, PS2 emulators, PS3 emulators, and even the top PS5 emulators for PC.

And if you prefer older games, we also have a guide on how to fix PSP error on PC, so don’t miss it.

Leave a comment below if this article helped you achieve your goals or if you encountered any problems while trying.

How to Save a GIF From PowerPoint

Do you want to create a PowerPoint presentation and are looking for a way to lighten up your content a little? Or you just had an idea for an animated GIF but didn’t know where to begin?

Then GIF files might be a good choice in addition to videos and pictures. Read on to find out how to save a GIF image in PowerPoint to your PC.

What is a GIF?

The GIF format is one of the oldest file formats for pixel images and it means graphics interchange format.

What makes GIFs stand out is that they can display motion. GIF works similarly to flipbooks: a stack of images is shown in quick succession.

This article explains below how you can easily save animated GIFs from a PowerPoint slideshow. All instructions listed here apply to PowerPoint in Microsoft Office 365.

How can I save a GIF from PowerPoint?

1. Make a GIF from a PowerPoint slideshow

  1. 1. Open your desired presentation in PowerPoint, and go to File.

  2. 2. Click on Export, and select Create an Animated GIF.

  3. 3. Set up the desired quality for the GIF. The default quality is Medium.

  4. 4. Choose the desired minimum Seconds spent on each slide.

    Convert slideshow to an animated GIF from PowerPoint slideshow
  5. 5. Select Create GIF.

  6. 6. Wait for PowerPoint to finish processing your animated GIF. The amount of time necessary depends on the size and quality you set for it.

    You will be notified when the GIF is done and be able to view it.

  7. The easiest way to save a GIF from PowerPoint is by creating a slideshow and turning it into a GIF. With the feature Export/Save As Animated GIF, you can now create your ideas in PowerPoint.

    Basically, you create the perfect presentation that you want to convert to a GIF, then select the amount of time you want every slide to last for, as well as the video quality, and that’s it.

    All animations and media (such as GIF) on your slides will be included in the saved GIF file.  In case you want to not include a slide into your GIF, you need to hide it from your slideshow presentation prior to creating the GIF.

2. Convert slides individually into GIF files

Convert an animated GIF from PowerPoint slideshow

  1. Open the presentation in PowerPoint, and select File.
  2. Click on Save, select the desired location, and change the File type to GIF.
  3. If you click on the Save button, you can save either the current slide or all slides as GIFs.
  4. Click on the Current slide option to convert each individual slide into a GIF.

3. Save GIFs in PowerPoint from the web

If you have a GIF from the web that you imported into PowerPoint, you can save it to your PC with a quick workaround, as seen on Reddit:

  1. Rename the PPTX file to a RAR extension. Basically, you need to change the file format.
  2. Open the new RAR file using a RAR reader.
  3. Extract the files to your desired location on your PC.
  4. Navigate to that location and you will find your GIF there.

The Create GIF function takes into account shapes, text, images, SVGs, videos, animated GIFs, 3D models, and all animations and slide transitions from PowerPoint.

It is advisable to let the PowerPoint file run as a slide show before exporting it. This will give you a clear idea in advance of how your animated GIF file will look.

We hope you managed to save a GIF from PowerPoint using our guide. Once they’re in your download folder you can go ahead and easily add GIFs to your Outlook email.

We also have a great article on how to open PPTX file in Windows 11 that we wrote recently, so don’t miss it.

Let us know in the comments section whether you had any trouble following our steps.

Spider-Man Miles Morales is coming to Windows PCs this November

There’s always a special feeling in the air whenever Sony signs off on another PlayStation-exclusive title to become available for PC gamers.

After we’ve seen the likes of God of War, the popular Horizon Zero Dawn, or the critically acclaimed Days Gone, another Sony blockbuster will please PC players starting this November.

Yes, we’re talking about the sequel to the 2018 Marvel’s Spider-Man game, featuring the funny and brave Miles Morales, Peter Parker’s personal close friend.

This one is a bit shorter than the first Spider-Man game, but nonetheless, Miles and his unusual superpowers will ensure you have the time of your life swinging through New York.

Check the system requirements for Spider-Man Miles Morales

You should know that Sony and Insomniac Games announced Marvel’s Spider-Man: Miles Morales for PC alongside the original Spider-Man title back in June.

After the popular Peter Parker arrived on the Windows platform in August, Miles’ entrance didn’t have a firm release date, until today.

So, in order not to keep you on tenterhooks much longer, this new Spider-Man title is letting go of its PlayStation exclusivity in just over a month, on November 18.

This is going to be a stable experience, considering that the PC porting team behind Spider-Man, Nixxes Software, is also handling this project while collaborating with Insomniac Games.

The Spider-Man Miles Morales PC version is specifically said to be bringing updated ray-traced reflections and shadows for an even better-looking map for swinging in.

However, before thinking about installing this awesome title, be sure to check the system requirements list, in order to avoid unpleasant surprises.

Let’s take a closer look at the official system requirements posted by developers, featuring both regular and ray-traced options.

Spider-Man Miles Morales

Know that support for ultra-wide displays, even supported in cutscenes, DLSS 3 and other upscaling tech, fully customizable graphics, and even handheld PCs like the Steam Deck is confirmed.

Also, the original game has been constantly receiving a steady supply of updates with bug fixes and graphics features since its launch in August.

That being said, it’s likely that many of those enhancements will be available in Spider-Man: Miles Morales at launch.

It’s time to pop open a virtual bottle of champagne and celebrate the fact that Marvel’s Spider-Man: Miles Morales is coming to both Steam and the Epic Games Store on November 18.

If you want to get your hands on it, prepare to match a $49.99 price tag. Also, pre-ordering will secure users early access to two suits, the Gravity Well gadget, as well as three skill points.

If you are thinking about playing this triple-A title on Windows 11, here are some tips to enhance the gaming experience.

You should have a great time since Microsoft said that it’s focusing all of its efforts to make Windows 11 a better gaming OS than its predecessor, Windows 10.

Excited about this new PlayStation exclusive coming to Windows PCs? Share your thoughts with us in the comments section below.

How to Refund a Gift on Steam

Besides being the world’s biggest video game digital distribution platform, Steam is full of other surprises. You can use it to chat with friends, see their gaming activities and even send them games as gifts.

Mistakes can happen, and you may sometimes need to refund a gift you’ve sent to someone.

Can I refund a gifted game on Steam?

Fortunately, Steam is very understanding when it comes to these types of mistakes. Thus, they made it possible to ask for a refund on a gifted game, as long as certain conditions are met:

  • No more than 14 days have passed since the gift was purchased.
  • The game was played for less than 2 hours or it wasn’t redeemed by the recipient.

Both the buyer and the receiver of the Steam gift can ask for a refund on it, no matter their motivations.

Why would I want to refund a gift game on Steam?

There are multiple reasons why people choose to refund gifts they sent on Steam. Here are a few possibilities:

  • You purchased a game prior to it going on sale and you want to refund the difference – Steam is unable to automatically help you in such a situation. However, a workaround exists in that you can refund the game and receive the full price back. You can then buy it back at a discounted price.
  • The game was purchased as a gift but you changed your mind and decided to keep it to yourself
  • You or your gift’s recipient don’t like the game anymore

Read on to find out exactly what you need to do to refund Steam gifts, depending on the circumstances.

How can I refund a gift on Steam?

1. Request a refund on Steam Support as the gift’s receiver

  1. 1. Go to Steam Help and log in with your Steam account.

    login to steam
  2. 2. Choose Games, Software, etc.

  3. 3. Locate and select the gifted game from the list. If you cannot find it, it means it was purchased outside the 14-day refund window and is ineligible for a refund.

  4. 4. Select the reason why you want to issue a refund for the game.

  5. 5. Click on I’d Like to Request a Refund.

  6. 6. You can write down additional information in the Notes box.

  7. 7. Choose the preferred refund method.

  8. 8. You will receive a confirmation email from Steam stating that they received your request.

  9. The recipient of the gift will have to initiate a refund on Steam Support to remove the item from their inventory.

    This can be done very easily via Steam Help, and you can also add additional details as to why you want to issue the refund.

2. Refund gifts on Steam as the buyer

On the other hand, if you were the one who bought the gift for somebody else and want to issue a refund, the process is slightly different.

  1. Go to Steam Help and sign in with your account.
  2. Click on Purchases.
  3. Type in the name of the purchase you would like to refund or simply locate it in the list. If the game does not appear in the list, then it is no longer eligible for a refund.
  4. Select the reason why you want to refund the gift.
  5. Click I’d like to request a refund.
  6. Fill out and then submit your request form.
  7. Wait for the confirmation email.

For standard purchases that are not gifts, see the complete guide here: How to Return a Game on Steam.

How can I redeem a Steam gift?

  1. Hit the Windows key, type Steam, then open it.
  2. From the main menu, click on Games, then choose to Manage Gifts and Guest Passes.
  3. Select the game from your Steam inventory, and click Add to my library…

For a complete walkthrough, you can also learn how to redeem a code on Steam and quickly activate new games or wallet funds.

What are Steam gifts?

If you don’t already know, when purchasing a game on Steam, manufacturers offer the option to gift the item to anyone on your friends list.

Then, the recipient will receive the gift as an attractive e-mail card with a personal message from you and instructions to redeem the game.

Keep in mind that a Steam gift purchase is a one-time transfer. So, after the recipient has redeemed and installed the gift, it is now a part of his or her Steam games collection.

Plus, do not forget that you’re allowed to only gift new purchases. In this matter, you won’t be able to transfer games you already own.

How can I become eligible for Steam gifts?

Becoming eligible for Steam gifts is extremely easy. You and your teammates will only have to own active Steam accounts and connect through the app.

You can purchase Steam digital gift cards for any user that you have had on your friends list for at least 3 days.

To discover more about the Gift Cards plans, we strongly recommend checking the related Steam official page.

Why can’t my friend receive my Steam gift?

As mentioned before, video games are a very popular gift. Even if Steam knows this as well and has a gift feature, this might sometimes not work as expected.

These are the most common causes that lead to this kind of error:

  • Your gift was refused: As this is the most common scenario that stays behind this particular problem, you should probably check your email or bank account. The app usually informs if your gift has been refused, and you’re also given a full refund for the purchase.
  • The gift is stuck: In this case, you should consider temporary bugs or glitches, so it is better to resend the gift and verify if the issue persists.
  • Game is already owned: Keep in mind that you can not gift a game that is already owned by the receiver, so make sure you check it first.

These steps stay the same regardless of whether you use the classic Steam client or the new Beta version.

By following the steps mentioned above you should be able to get a refund on all gifts you’ve made by accident on Steam.

Of course, you must remember Steam’s conditions, such as the 14-day refund window.

If you’re not much of a Steam fan, you could try some other digital game distribution platforms, such as Epic Games or GOG.

For any additional questions, do not hesitate to leave a comment in the section below.

How to Change Data Source in Power BI

Power BI is a very useful tool for creating a comprehensive view of your business data. You can visualize, shape, and share various sets of data with the help of this app.

So, a very important feature is making changes to an existing data source. Read on to find out how to change the data source on Power BI.

How can I change the data source in Power BI?

  1. 1. Click on File.

  2. 2. Go to Options and Settings.

  3. 3. Click on Data Source Settings.

    power bi source settings
  4. 4. Press on the Change Source… button.

  5. 5. Choose the File path for the file you want to be the new data source using the Browse button.

  6. 6. Click on OK.

  7. The easiest way to change your data source in Power Bi is via Data Source Settings. All you need to do is manually browse for the new data source and replace the existing one with it.

    This is the method we recommend you to use before any other, as it gets the job done most of the time.

Need more details about Power BI? Check out our comprehensive guide on how to install power BI on your PC.


Why can’t I replace the data source in Power BI?

However, quite a few users encountered an issue with changing the existing data source:

When I’m trying to change my existing data source (Microsoft Azure CosmosDB) to Blob Storage, the Change source is disabled. How do I workaround this? I have gone through various questions but none of them were similar to mine.

As this user from Stack Overflow forum said and as the image below shows, the Change Source button is disabled, but fortunately, there are workarounds available.

change source greyed out

What to do if I can’t update the data source via Settings?

  1. Click Edit Queries and add the new source table.power BI Edit Queries
  2. Click on the new source table and select Advanced Editor.
  3. Copy the commands with CTRL–C and click Done.
  4. Click on the old table and click on Advanced Editor.
  5. Select all the commands here, and paste the new source information using CTRL–V.
  6. Apply the changes.

In case the first method does not work when you try to replace your data source in Power BI, you should try the latter. It should fix any issues with the data source option being greyed out.

Changing the data source is an important feature to have. The inability to use this function could make the entire tool inoperable for many people.

Did you encounter a similar issue with Power BI? Did you find additional solutions on how to update the data source in Power BI? Let us know in the comment section below!

Fix: VMware Workstation and Hyper-V are Not Compatible

It can be quite annoying if you get the Hyper-V not compatible with VMware error after installing a virtualization application on a Windows machine.

This error is almost inevitable because Windows 11 cannot run another Virtual Machine creator alongside Hyper-V. Regardless, fixing the VMware and Hyper-V incompatibility issues is still possible.

Why is VMware not compatible with Hyper-V?

Whenever the Hyper-V role is enabled, the virtualization extensions are not exposed to type 2 hypervisors installed on a Windows machine, hence the incompatibility issue. However, other factors responsible for this error are:

  • Outdated or low-bit processor: VMware workstation and Hyper-V may not be compatible if you use an outdated processor for Windows Server 2012. Regardless of the Hyper-V feature you wish to use, a 64-bit processor of second-level address translation (SLAT) is a requirement for newer hardware.
  • Insufficient Memory: To run multiple Virtual Machines simultaneously, you’ll need enough memory of at least 4 GB of RAM or more for the host and other Virtual Machines.
  • Hyper-V is a Virtual Machine creator: Hyper-V is also a Virtual Machine creator and cannot run with another VM due to competition for resources. You may have to disable Hyper-V in Windows 11 in such cases.

What can I do if VMware is not compatible with Hyper-V?

You should ensure to perform the following preparatory checks before engaging in any troubleshooting or settings tweaks:

  • Ensure you have about 60GB and above of hard disk storage.
  • Your computer should have a minimum RAM of 4GB.
  • Get to know how to locate the files & folders and their respective functions.
  • Ensure that your processor is compatible with a 64-bit processor and supports AMD, Intel, and Qualcomm processors.

Having checked these and the issue persists, proceed to the advanced fixes below.

1. Uninstall Hyper-V in the Graphical User Interface (GUI)

  1. Click the Start button, input cmd, and launch the Command Prompt.
  2. Run the following command to open System Information to check if Hyper-V is installed and press Enter: msinfo32.exe
  3. If Hyper-V is installed, proceed to uninstall it with the next steps.
  4. Open Control Panel and click Programs and Features.
  5. Then, click Turn Windows features on or off.
  6. When the Windows features page opens, deselect the Hyper-V checkbox, and click OK.
  7. Restart the computer.

You can follow similar steps for Windows Server 2016. However, should you later need to re-enable Hyper-V, you can check our guide on how to Install Hyper-V in Windows 11.

2. Turn off Virtualization Based Security

  1. Press the Windows + R keys simultaneously, input gpedit.msc and click OK or hit Enter.
  2. Go to Local Computer Policy, then click on Computer Configuration.
  3. Select Administrative Templates and click on System.
  4. Then, click on Device Guard and double-click Turn On Virtualization Based Security (the status of this setting should show Not configured by default).
  5. A window should open, select Disabled and click OK to save the settings, then close the window.

Alternatively, if you can’t seem to access Virtualization-Based Security, you can read how to disable VBS on Windows 11 PCs and find some relevant solutions.

3. Disable Hyper-V using PowerShell

  1. Press the Windows key, type Powershell, right-click on PowerShell and select Run as Administrator.
  2. Type the following shell command in the PowerShell window and hit Enter: Disable-WindowsOptionalFeature -Online -FeatureName Microsoft-Hyper-V-All
  3. PowerShell will initiate the Hyper-V disabling process.
  4. If it is successful, you will be asked to restart your PC, type Y to confirm, and your PC will restart to apply the changes and enable a new feature.

If you want to re-enable Hyper-V in PowerShell, you can read through our guide on enabling Hyper-V in Windows 11.

You can also check our detailed guide on what to do if VMware workstation and Hyper-V are not compatible with Windows 11.

However, if the Hyper-V to VMware compatibility problems persists, you should consider checking our article to fix Windows 11 Hyper-V errors.

If you have new queries or suggestions about other fixes that have worked for you, kindly drop them in the comments section. We will appreciate your input.

How to Put Page Borders in Google Docs? Try 5 Easy Ways

The easiest way to add a border in Google Docs is by creating a 1-by-1 table. You can also create a border by drawing it or inserting a picture frame file into your document. In any case, let’s find out how to create borders on a Google document.

Are there decorative borders in Google Docs? Unfortunately, there are no decorative borders in Google Docs, but, as you will find below, you can create a border using the drawing feature or a single-cell table.

How can I put a page border in Google Docs?

1. Add borders for Google Docs by using a table

  1. Go to your Google Docs page, and in the Start a new document section, choose the Blank option.google docs blank document
  2. Now in the Menu, click on Insert, select Table, and choose a 1 x 1 grid.google docs table
  3. Resize the cell to fit your needs.
  4. In the top-right, you will have the border options: Background color, Border color, Border width, and Border dash. Again, you can change the format as you see fit.google docs border options

That’s it. You know, have a border on your document, and you can add text, pictures, and other things inside the cell created in step 2.

2. Make a border by using the Draw function

  1. 1. Launch Google Docs.

  2. 2. Open the document you want to add a border to or create a new one, depending on your needs.rnrnTo make a new document, simply u003cspanu003echoose u003c/spanu003eu003cstrongu003eBlanku003c/strongu003eu003cspanu003e in the u003c/spanu003eu003cemu003eStart a new document u003c/emu003esection.

    create a new google docs document
  3. 3. u003cspanu003eIn the u003c/spanu003eu003cstrongu003eMenuu003c/strongu003eu003cspanu003e, click u003c/spanu003eu003cemu003eInsertu003c/emu003eu003cspanu003e, select u003c/spanu003eu003cstrongu003eDrawingu003c/strongu003eu003cspanu003e, and choose u003c/spanu003eu003cemu003eNewu003c/emu003eu003cspanu003e.u003c/spanu003e

    click on insert drawing google docs
  4. 4. u003cspanu003eIn the top menu, click onu003c/spanu003eu003cstrongu003eu003cspanu003e u003c/spanu003eShapeu003c/strongu003eu003cspanu003e, select u003c/spanu003eu003cemu003eShapesu003c/emu003eu003cspanu003e, and choose how you want your border to look.u003c/spanu003e

    select a shape google docs
  5. 5. Once a shape is created, au003cstrongu003eu003cspanu003e u003c/spanu003eBorderu003c/strongu003eu003cspanu003e u003c/spanu003emenu will appear, and you can format the border.

  6. 6. u003cspanu003eIn the end, click u003c/spanu003eu003cemu003eSave and Closeu003c/emu003eu003cspanu003e. u003c/spanu003eThe border will appear on your document.

    save and close google docs
  7. 7. u003cspanu003eIf you want to change the format after you save it, click on the border in the document, and a menu will appear. Click u003c/spanu003eu003cstrongu003eEditu003c/strongu003eu003cspanu003e.u003c/spanu003e

    edit the border google docs
  8. A great alternative to add borders in Google Docs is to use the Draw function. Basically, you add a border image to your document, and then insert text into it.rnrnThis is the preferred method for many users, who want their end result to look as good as possible.

3. Add a document border by inserting a picture

  1. Find the image you want as a border using a Google Images search (make sure the image is a PNG with a transparent background).
  2. Download the respective image to your PC in an easily-accessible location.
  3. Inside the Google document, click on Insert from the top menu, choose Drawing, and then + New.
  4. Click the Image option from the toolbar at the top.
  5. Either drag and drop the border image you previously downloaded, or click the Choose an image to upload button.
  6. Click the Textbox option from the top toolbar.
  7. Drag and drop the text box inside the border image.
  8. Type the desired text in the box, and click the Save and Close button.

In the end, if you’re unsatisfied with the result, you can always download and insert a frame/border picture file as a background for the document. This way, you can create fun borders for Google Docs, making your document stand out from the crowd.

Just stretch it, if needed, and the resolution is high enough. After that, insert a text frame, and you’re ready.

You can follow these steps to achieve good results, even though this method is far more restrictive than the previously-mentioned methods.

4. Make borders in Google Docs for specific paragraphs

  1. Click the Format option from the top taskbar.
  2. Next, hover your mouse over the Paragraph Styles option, and choose Borders and Shading.
  3. Adjust the properties to fit your needs.
  4. Click Apply when you’ve finished editing the settings.

Even though this type of paragraph will not encase your entire document, it is a handy tool if you want to identify a specific part of the text.

Using this wisely in your design can make your document stand out from the rest.

5. Insert borders using watermarks

  1. On a new document page, click on Insert and select Watermark.
  2. Now, click on the Select Image button.
  3. If you have a border image you can use, you can upload that one but we’ve chosen to click on Google Image Search and look for page borders. After you’ve found the right one, click on Insert image on the bottom-right corner.
  4. Finally, uncheck the Faded box from the right to make the border more visible.

Can I create custom borders in Google Docs?

Yes, you have an unlimited amount of options for this task, but it is worth noting that for now, you can only create a PNG file with a transparent image and add it to your document by following the solution nr. 3 presented in this guide.

That said, creating free borders for Google Docs has never been easier. Following the method mentioned above will surely help.

These methods will be even better for teachers and educators; creating unlimited numbers of free teacher borders for Google Docs can also increase your pupil’s engagement and attention span, so it is worth the effort.

If you’re a Microsoft Word user, you’ll be happy to know that you can also create page borders and customize them within.

Will my custom border be automatically added to all pages in my document?

As the entire process of adding a border to your document is made manually, at this point, no method can apply it to all pages at once.

That means you will have to repeat the process mentioned in this guide for all the pages included in your document (if needed).

If you cannot load a file on Google Docs, we have an excellent article that will help you fix the problem immediately. Also, if you are affected by Error 150 in Google Slides, change the video permissions on YouTube and allow embedding.

We also recommend reading our guide on how to troubleshoot all Word margin issues for more information.

If you have any other suggestions or questions, reach out to the comments section below, and we’ll be sure to check them out.

Fix a Realtek Audio Driver That Keeps Reinstalling [5 Ways]

Since Microsoft introduced automatic driver updates, there’s been a surge in the number of complaints about driver-related issues from users.

One such is a Realtek audio driver that keeps reinstalling. Attempting to install Realtek audio driver leads to an infinite uninstall/install cycle. If this is the case with you, your solution is here.

Why does Realtek audio driver keep reinstalling on my PC?

There could be a number of reasons Realtek audio driver keeps reinstalling such as:

  • Corrupt Realtek driver: If there are errors within the Realtek driver, Windows tries to fix it by automatically reinstalling it.
  • Missing Realtek system file: A broken or corrupt system file can also trigger Windows to keep reinstalling Realtek driver.
  • Outdated driver: Not using the latest version of Realtek might also lead to continuous reinstallation.

Whatever causes Realtek audio driver to keep reinstalling, you can resolve the issue with the methods enlisted below.

How can I stop a Realtek audio driver that keeps reinstalling?

Before you start using the methods below, there are some preliminary checks you can perform that might help fix the problem:

If any of that didn’t stop Realtek audio driver from reinstalling, then you can proceed to the main fixes.

1. Roll back driver

  1. Press Windows + R key on your keyboard and select Device Manager from the resulting menu.
    Open Windows Device Manager
  2. Locate Sound, video and game controllers from the list, and double-click to expand it.
    Find realtek audio driver
  3. Right-click Realtek High Definition Audio and select Properties.
    realtek audio driver properties
  4. Switch to the Driver tab and select Roll Back Driver.
    roll back realtek audio driver
  5. Restart your PC.

If the Roll back Driver option is grayed out, it means you don’t have an older driver to roll back to.

However, you can update the present driver as it might help. Our article on Windows 11 drivers update can guide you through the process.

2. Disable Automatic Driver Installation

  1. Click the Windows or Start icon on your taskbar and select Settings from the Start menu.
    Open Windows Settings
  2. Go to System, then scroll down to click About.
    Disable automatic driver installation
  3. Next, click on Advanced system settings.
    Advanced system settings
  4. Switch to the Hardware tab and select the Device Installation Settings.
    device hardware installation settings
  5. Select No (your device might not work as expected) and click Save Changes.
    Disable automatic installation

By completing these steps, Windows will no longer install or update drivers automatically. To add new hardware in the future, you will need to install drivers manually or enable automatic drivers update again.

3. Update to Microsoft High Definition Audio Device

  1. Press Windows + X keys on your keyboard to open Device Manager.
    Open Windows Device Manager
  2. Scroll down to Sound, Video and game controllers, and expand it.
    Find realtek audio driver
  3. Right-click Realtek High Definition Audio, then select Disable device.
    Disable realtek audio driver
  4. Right-click Realtek High Definition Audio again and choose Update driver.
    Update realtek audio driver
  5. Select Browse my computer for drivers.
    Browse computer for driver file
  6. Click Let me pick from a list of available drivers on my computer.
    Browse computer to find driver
  7. Choose High Definition Audio Device and click Next.
    Choose microsoft HDA
  8. Click Yes on the dialogue box.
    Confirm high definition audio

If by chance you run into issues after updating to Microsoft High Definition Audio Device, then you should consult our guide on what to do when High Definition Audio Device has a driver problem.

4. Disable Windows access to Realtek system files

  1. Input the file path into the Search box and select the Best match result. C:\Program Files\Realtek\Audio\HDA
    Open Realtek system file
  2. On the folder, right-click anywhere that is blank and choose Properties.
    Realtek audio driver properties
  3. Switch to the Security tab, select SYSTEM, then click Edit.
    Open audio system settings
  4. Under Permissions for ALL APPLICATION PACKAGES, check the Deny checkbox in the full control option and click OK.
    Disable windows permission
  5. Select Yes in the dialogue box.
    Confirm access deny to Realtek files
  6. Restart your computer.

5. Manually uninstall and reinstall Realtek

  1. Press Windows + X key on your keyboard and select Device Manager.
    Open Windows Device Manager
  2. Locate Sounds, video and game controllers from the list, then double-click to expand it.
    Find realtek audio driver
  3. Right-click Realtek High Definition Audio, then select Uninstall device.
    uninstall realtek audio driver
  4. Choose Uninstall on the dialogue box.
    Confirm Realtek driver installing
  5. Restart your PC. Windows will automatically install Realtek audio driver now without the annoying loop.

If Windows does not automatically install Realtek after restarting your PC, you can do it yourself by following our guide on how to reinstall Realtek audio driver.

Hopefully, you should be able to stop Realtek audio driver from the reinstalling cycle with the methods above.

However, some users have claimed that after installing the Realtek audio driver, the Realtek Audio Manager is missing. If you encounter the same issue, you can restore Realtek Audio Manager by following our guide on how to fix missing Realtek HD Audio Manager.

Lastly, don’t hesitate to visit our article on how to get ASUS Realtek HD Audio Manager on Windows 11 for more information.

If you have any other solution that can fix Realtek audio driver reinstalling loop, drop us a message in the comments section below.

How to Change Region on PS4: Easy & Quick

Many of our readers are looking for an easy solution to change their PSN country on PS4. That’s because Sony offers personalized offers, deals, and additional content based on where you live.

Are PS4 or PS5 consoles region locked? Usually, your PS4/PS5 gaming console is not region-locked, so there’s nothing to worry about if you have any concerns.

Can you change the country on PS4/PS5? Yes, you can, and the easiest way to change regions on a PSN account is to set up a new account and select the country you want, even if it doesn’t match your location.

For this to be possible, You will need a VPN if you want to get another country’s IP addresses and make your PlayStation believe that you are located in the country you have selected.

How do I change my region on PS4/PS5?

1. Create a new PSN account and set the preferred region

  1. 1. Head over to the Sony Entertainment website.

  2. 2. Click the Start button.

  3. 3. Type an email address (one that’s not associated with another PSN account).

  4. 4. Define and confirm your password.

    set a PSN email password
  5. 5. Choose a country/region from the combo menu.

  6. 6. Select a state/province.

  7. 7. Configure your date of birth.

    PSN choose your country
  8. 8. Click Next.

  9. 9. Configure your notification settings.

  10. 10. Click Agree and Create Account.

    PSN account agreement
  11. 11. Configure 2-Step verification or skip it for now.

    PSN 2 step verification
  12. 12. Type your mobile phone number (you can also skip this step).

    Mobile phone verification PSN
  13. 13. Verify your email address.

  14. Once you set your region on your PSN account, it can never be changed again. However, you can instead create a new PSN account with the desired new region.

    This is an easy and quick method that can get you your desired result in no time, without having to pay for any third-party apps.

2. Use a VPN to change your PS4/PS5 location

You can use a VPN to change your geo-location and access the PlayStation 4 Store from another country. You might even get access to some exclusive game deals in this manner.

However, use this method at your own risk since you might unknowingly violate the PSN terms of service.

Here’s how you can set up a VPN on your router using Windows and connect your PlayStation 4 to the VPN.

  1. Purchase a premium VPN service. (We recommend ExpressVPN).
  2. Sign into your account.
  3. Access the ExpressVPN My Account area on the website.
  4. Under Setup your devices click on Router.
  5. For routers, you have 3 options. Choose one that fits your scenario.
  6. For an existing router choose your model and download the firmware for the router.
  7. Sign in to your Netgear router dashboard at routerlogin.net or 192.168.1.1.
  8. Select the Advanced tab.
  9. From the sidebar, select Administration > Router Update.
  10. Select Browse and choose the ExpressVPN firmware file you downloaded.
  11. Select Upload and follow the instructions to update your firmware. Your router will restart automatically.
  12. Connect your PS4 or PS5 to your router via Wi-Fi or LAN cable.
  13. Go to expressvpnrouter.com.
  14. Select Get Started and follow the on-screen instructions. Enter your activation code when prompted.

The steps above help you install ExpressVPN on your router. All devices connected to your router will automatically connect to the VPN server, including your gaming console.

An easier but less efficient way is to share your VPN connection from Windows 10 to your PS4 in wireless or wired mode. Please find out how in our VPN setup guide for PlayStation 4.

We recommend ExpressVPNbecause it’s the best VPN for gaming, featuring an impressive range of over 300000 VPN and proxy servers in 81 locations across 94 countries.

You can use ExpressVPN not only to change your PSN region but also to reduce your ping in multiplayer games.

Note that some routers allow you to turn them into VPN servers but won’t provide support for external VPN services. Thus, it’s best to ensure your router can handle third-party VPNs before trying this method.

Last but not least, connecting your PS4 to the Internet through a PC lets you use a standard PC VPN client. Moreover, it’s so easy to configure that you’d want to do it all over again.

ExpressVPN

Connect your PS4 and PS5 to a VPN router and enjoy all the benefits as on any other device.
Check price Visit website

3. Configure your PSN account

  1. Go to the PSN website.
  2. Log into your account.
  3. Agree with the Update notice.Update your PSN account
  4. Choose a City from the combo menu.
  5. Confirm your state/province.
  6. Type a postal code (look it up online).PSN residential address configuration
  7. Choose your Online ID.
  8. Type your first and last names in the corresponding fields.Profile creation PSN
  9. Click Done.

Now you’re all set; you have a US-based PSN account and can now see US content in the PS Store. However, note that all disc games are region-locked. Therefore, you won’t be able to play EU games (for instance) with a US-based account.

Fortunately for us, the PS4 itself isn’t region-locked. So you can load discs from any region as long as you have a suitable account to match them.

Now for the bad news. Even though you can see the US store content, you can’t buy it with your non-US funds. For this, you’ll need either one of these:

  • American credit/debit card
  • PayPal account that matches the address on your PSN account
  • PSN gift cards from third-party sources (these are the easiest to come by)

Last but not least, if you’re using your PS4 to stream from Netflix, you might encounter some issues.

While the library may display US content, you won’t be able to stream it, as Netflix will also perform an IP address check to detect your location.

What countries is the PS4/PS5 available in?

PlayStation 4 and the PlayStation 5 are available in over 100 countries, anywhere from Oman to the Czech Republic, Qatar, Turkey, Nicaragua, and many more.

If you would like to see a complete list, be sure to check the official availability section on the official PlayStation website.

To wrap up, changing the PSN country on PS4 might not be complicated. This is because Sony lets anyone in without making any IP or location-based queries to identify your region.

Sure enough, you won’t be able to purchase any US PS Store content without an American credit or debit card or a US PayPal account.

If you want to use your PS4 to change region, alter your PSN to change country, change your PSN account region, or use the PlayStation to change the location, now you know how.

We just showed you how to change the residential address in the PlayStation network, and how to change the region on the PS4 store,

However, third-party sources such as eBay have made it easy to purchase US digital PS Store credit, which also works great with purchasing US content without actually being in the US.

How to Open the Clipboard in Windows 11 [+Shortcut]

The Windows 11 clipboard is far much better compared to other versions in terms of features. It also comes with an emoji and GIF section that makes it more interesting and fun.

The quickest way to open Clipboard on Windows 11 is to press the Windows key + V, as shown below. Check out our comprehensive article to find out how to use the Windows 11 clipboard.

How can I open the Clipboard in Windows 11?

1. Use the clipboard shortcut on Windows 11

The easiest method to access the Clipboard feature on Windows 11 is to use the clipboard shortcut. You simply need to use Windows + V in that regard.

The Clipboard will open, showing all the text and images you have opened lately.

1. Enable clipboard history on Windows 11

  1. 1. Press the Windows + I keyboard shortcut to open Settings.

    go to settings
  2. 2. Click on System on the left pane.

  3. 3. Select Clipboard on the right pane.

    go to system
  4. 4. Toggle the Clipboard history button on.

  5. 5. Clipboard history is now enabled on your device and you can use the Windows + V clipboard shortcut to open it.

  6. Before you can use the dedicated Windows 11 clipboard shortcut to open the clipboard, you need to ensure that the feature is enabled via Settings.

    Do keep in mind that Windows 11 only allows a maximum of 25 entries so if you exceed that number, the oldest entries will be deleted. If you however wish to keep copied items on your clipboard for longer, you can choose to pin them.

    Pinning helps you keep your selected items even after you clear your Windows Clipboard history. Simply click on the pin icon next to the item you wish to keep.

How can I clear my clipboard history?

Sometimes, you may not want other people to access your history especially if using a shared computer. To clear your Windows 11 clipboard history, follow the steps below:

  1. Press the Windows + R keys to open the Run command.
  2. Type the following command in the dialog box and press Enter: cmd /c echo.|clip
  3. Your clipboard history is now cleared.

Alternatively, you can also clear from Settings by clicking on Clear clipboard data.

If you find yourself using the clipboard feature more often, it would be useful to also install a great clipboard manager to help you stay organized.

What’s even better is that a majority of these clipboard managers come with enhanced features that are absent in the Windows 11 clipboard such as data encryption and lots of customization options.

Should you encounter any other issues such as the clipboard history not working, we have a handful of fixes for you to try to get back to copying and pasting seamlessly.

Do you have any other clipboard tips that you use to make your work easier? Let us know in the comments section below.

Surface Duo Will Get Windows 11-Inspired Android 12L Update By The End Of 2022

We already knew that Microsoft was getting ready to update the Surface Duo the latest Android 12L operating system.

During the 2022 Ignite conference, Microsoft revealed that it’s finalizing the update and preparing to ship it in the next few weeks.

And, after learning that Surface Duo and Duo 2 are getting a new Android, the tech giant also stated other interesting facts about this upcoming update.

Also, since we are going to be talking about the combination of these two operating systems, you might also want to know how to install and play Android games on Windows 11.

Android 12L update inspired by the Windows 11 Fluent Design

It was said that the Android 12L for the original and second-gen Surface Duo foldable devices will introduce design elements borrowed from Windows 11.

The idea, it seems, is that the company now wants to move away from this paradigm and focus on making the Surface Duo smartphones an extension of our Windows PCs.

Recently leaked pictures reveal the first look at the upcoming Android 12L update for the original and second-gen Surface Duo devices.

We can see a Windows 11-like control and notification center will blurred backgrounds and new buttons, and a set of icons for the Settings app pulled from Microsoft’s operating system.

From the pictures, we can also see additional customization settings, such as color palette and accent colors, and there is a new feed section with widgets similar to those in Windows 11.

Clearly, Microsoft wants to make its Surface smartphones look as similar as possible to Windows 11 to provide a seamless experience and it’s not a bad job, to begin with.

Unfortunately, for the time being, we do not know whether the upcoming update will introduce notable changes for the curved display near the hinge or bring something similar to the taskbar-like dock found in Samsung’s latest Galaxy Z Fold.

There are also claims that Microsoft is working on an alleged Duo Connect mode, which is supposed to be a spiritual successor to the long-dead Continuum on Windows 10 Mobile.

Apparently, Duo Connect will let enterprise customers connect the smartphone to a larger display and use it in pair with the Windows 365 service.

At this moment, there is no information on whether Duo Connect will be a part of Android 12L or if it will arrive in future updates.

To summarize everything, Android 12L will be available for the first and second-gen Surface Duodevices, as announced at Ignite.

We don’t have an exact release date but expect it to land later this month or in early November. It’s safe to say this is a realistic release window.

However, you will surely also remember that the Surface Duo can, unofficially, dual-boot Windows 11, and its newer sibling is also getting there thanks to the recently released UEFI.

Before we end the article, we should also remind you that the Redmond-based tech giant has leaked a screenshot of the UI for the upcoming Windows 12 operating system.

This new Windows OS is allegedly going to be ready for release, or at least testing, in 2024. We’re eager to learn new details on the matter and keep you posted.

What other improvements do you think are coming with Android 12L? Share your opinions with us in the comments section below.

ASIO Driver for Windows 11: Download, Install & Enable

If you are new to ASIO and are looking to download the ASIO driver on your Windows 11 PC, then this guide will help you with that.

ASIO driver helps your PC communicate perfectly well with the connected audio devices. It also facilitates providing low-latency recording preventing audio latency issues with connected devices.

Let’s see how you can set it up.

How to download and install the ASIO driver in Windows 11?

Tip icon Editor’s tip
A quicker possibility to download the correct ASIO driver is to let a professional tool, like Fortect Driver Updater, do the job for you.
Besides choosing the right drivers, it can also provide a detailed list of your missing or outdated drivers and find them the latest update from its constantly revised database.

1. Download the ASIO driver

  1. Visit the official website of ASIO4all.
  2. Version 2.15 is the official version that supports Windows 11. Click on the driver in your language.
  3. Save it in the appropriate location on your PC.

Now that you have downloaded the ASIO driver installer, you can follow the next section that will help you to install the driver on your Windows 11 PC.

2. Install ASIO

  1. Open the folder where you have downloaded ASIO.
  2. Double-click on the EXE file.
  3. Click Next.
  4. Accept the terms of the agreement and click Next.
  5. Select the location where you would like to install the ASIO driver by hitting the Browse button.
  6. Click Install.
  7. ASIO driver will begin the installation process.

Once the process is complete, the ASIO drivers will be installed on your PC.

What is an ASIO driver?

ASIO in short stands for Audio Stream Input/Output. It is designed by the German music company Steinberg, who is also behind the popular audio workstation Cubase.

Most sound cards come with their own version of ASIO preinstalled, however, you can install it separately on your PC.

When ASIO is not used, the audio device that you plug into your PC’s jack is connected through DirectSound, which acts as a link for the signal path.

But DirectSound may not be featureful for a professional user. Because often DirectSound may not provide efficient processing, in turn resulting in latency. In such scenarios, the ASIO driver comes into the picture.

What ASIO does is it bypasses the normal audio pathway, that DirectSound uses and routes your audio connection to your PC, reducing latency.

Some of our readers also reported an Asio.sys error on their PCs but this guide will help you fix it.

Our readers also complained about an audio rendering problem in Windows 11. We also have a dedicated solution for the ASIO driver that may come in handy.

ASIO is after all software, and you would come across multiple problems as you use it. Here are a few of the problems and solutions that you would face using ASIO:

  • ASIO4ALL is not visible in the audio menu: This could possibly be because you haven’t installed the ASIO driver as an administrator. Simply uninstall the previous version and now install the program as an administrator and check if this fixes the issue or not.
  • Audio device flagged as Unavailable or Beyond Logic: Close any browser window that is open and playing video or audio. You can also fix this issue by unplugging and replugging the device.
  • Another application isn’t playing sound when ASIO is active: This is because ASIO is designed this way because it prevents mixing and thus reduces latency.

Apart from this, if the Windows 11 PC is not able to find your audio device, then you can try the solutions mentioned in our guide.

If there is a problem with audio rendering on your PC, then this guide lists some effective tips that will help you fix it.

Many users face challenges when trying to install or update ASIO drivers on Windows 10, especially when using music production software or external audio interfaces.

In some cases, you might even run into specific errors like when you can’t open asio3.sys due to a system conflict, which can prevent your DAW from launching or detecting audio hardware.

Let us know in the comments below if this guide helped you download and install ASIO drivers on your Windows 11 PC.

How to Change the System Language in Windows 11

Microsft has designed the new Windows 11 OS to offer an easy-to-use and good-looking interface that will work efficiently and provide quick access to all of its settings. This is exactly what Windows 10 was missing: fast access to the most basic settings without having to go through multiple menus to modify them.

Some users have reported that their Windows 11 language changes automatically, which can be annoying, especially if you’re working on your PC.

In this age, when everything happens so fast and the main goal is to complete all our tasks as quickly as possible, this is a breath of fresh air.

How can I change the system language in Windows 11?

1. Switch the Windows 11 display language to an existing language pack

  1. Right-click the Windows logo on your taskbar, and choose Settings.
  2. Click on Time & language.
  3. Choose Language & region from the list of options.
  4. Under the Windows display language section, click on the dropdown and choose the new display language.

2. Change the Windows 11 language to a new language pack

  1. 1. Click the Windows icon from the taskbar.

    press the windows button on taskbar
  2. 2. Choose the gear Settings icon.

    go to settings
  3. 3. Click on Time & Language from the sidebar.

    click on time and language
  4. 4. Choose the Language & region option.

    add a new language windows 11
  5. 5. Click the Add a language button.

    choose a language to install windows 11
  6. 6. Search for your preferred language, select it from the list, and press Next.

    choose your preferred language
  7. 7. Choose any options you want from the Optional features section.

    choose optional language features
  8. 8. Tick the box next to the Set as my Windows display language.

    set the language as your windows 11 display language
  9. 9. Click Install.

    click on install to change the display language windows 11
  10. If you want to change your system display language on Windows 11 to a different one that is not included in the pre-existing ones, you can easily do so.

    You can manually install the preferred language, as well as all related optional features. After, all that’s left to do is set that language to be your Windows display language, and you’re done.

How can I change the keyboard language on Windows 11?

Note icon NOTE
For these options to be available, you will need to have the language pack already installed on your PC.
If you don’t, simply follow the steps presented in the solution above and add the language you need first.

1. Use the taskbar

  1. Click on the language button, situated on the bottom right of the taskbar.
  2. Select what language you want to switch your keyboard to.

2. Using a keyboard shortcut

  1. Press the Windows + Space once to activate the taskbar Keyboard layout.
  2. While holding the Windows key pressed, tap space to choose the next available language.

You may also use the Alt + Shift combination but if Alt + Shift is not working, read the highlighted guide for fixes.

Region settings can influence which display and keyboard languages are available, so adjust them as needed using this guide on how to change location in Windows 11.

Why is the Language Switcher missing from my Windows 11 taskbar?

There might be situations where the language bar (switcher) is nowhere to be found in your Windows 11 taskbar, which implies that it has been deactivated.

To enable it again, follow these steps:

  1. Press the Windows icon on the taskbar.
  2. Choose Settings.
  3. Click on Time & language.
  4. Choose Typing.
  5. Select Advanced keyboard settings.
  6. Untick the box next to the Use this desktop language bar when available.
  7. Your Language Switcher should not appear in the taskbar.

As you can see, Windows 11 language customization is not a complicated process; you can access the settings using your keyboard or mouse. In case it keeps reverting to the default settings, try removing the unwanted display language in Windows 11.

What kind of language settings can I change in Windows 11?

Like other OSs before it, Windows 11 has two main settings categories for the language used on your PC.

➡ System (display) language – The system language, also known as the display language option, allows you to customize the language in which your operating system is presented. This includes the language displayed when observing any native menu, app, and option.

➡ Keyboard language – As the name suggests, the keyboard language is the language in which you will use your keyboard to write texts. This is a more localized option, enabling you to have your system’s language in your native language while writing texts in another language.

Switching between different keyboard languages is very easy by using the Alt+Shift hotkey, and we will also tackle this element in this guide.

Make sure you inform yourself regarding the Windows 11 system requirements to be able to run it without any issues. Even more, discover how to change Windows lock screen language in no time.

In case you’re having problems with display languages on Windows 10, don’t miss our guide on how to uninstall the language pack on Windows 10.

Have you had the chance to try it out? If so, share your thoughts on your experience in the comments section below.

Xbox Classics Revisited vol.6: action-platforming with a twist

Welcome to Xbox Classics Revisited. In this new series we aim to take a look back at the previous three generations—the original Xbox, the Xbox 360, and the Xbox One—of Xbox games. These mini-retrospectives serve as a tribute to some of the best gaming that Xbox has given us over the last 20+ years.
For those who were lucky enough to have been there for all of it, read on and savor the nostalgia. For those Xbox fans too young to remember Maude Flanders or Pepsi Twist: get ready to meet your Xbox gaming backlog.

Jet Set Radio Future (Xbox)—2002

The sequel to the Sega Dreamcast title Jet Set Radio as well as a reimagining of it, Jet Set Radio Future brought tons of style to the original Xbox. It had an eye-popping cel-shaded visual style (cel-shading was still a novelty at the time) and a killer soundtrack with rock, indie pop, and hip-hop thrown into the mix. All of this was set in an open-world futuristic Tokyo, with a gang of quirky, roller-skating characters with which to grind, powerslide and go aerial while covering the town in graffiti. All this is done to push back against the oppressive Rokkaku Group Corporation that is stifling free speech in Tokyo.
The game has been made backward-compatible with Xbox 360 but not, unfortunately, with the newer Xbox consoles. The series has been dormant for 20 years at this point. But fans of the game should take heart, for there may be reason to get excited once again in the near future. Read on and find out more later in the post.

Sunset Overdrive (Xbox One)—2014

Sunset Overdrive: Season Pass (2014) Xbox One box cover art - MobyGames

Sunset Overdrive is one of the most recognizable Xbox One classics, not to mention one of the most distinct games of its generation. It was created by storied developer Insomniac Games, and pulled inspiration from a trove of sources including comic book character Tank Girl, the Richard Matheson novel I Am Legend, vintage Halloween masks, and even Lego.
Set in an open world Sunset City in the year 2027, the game combines third person shooting with fast-paced exploration in which the player utilizes a range of abilities including wall running, air-dashing, zip lining, and more to get around.
The prospect for a sequel remains up in the air. Insomniac Games was acquired by Sony in 2019. Since that time there has been conflicting information from Sony executives regarding the status of the franchise.

Ollie Ollie World (Xbox One, Series X|S)—2022

OlliOlli World (2022) box cover art - MobyGames

This third entry in the side-scrolling skateboarding series is a real treat for fans of the genre and of indie games in general. With its colorful, hand-drawn visual style and satisfying gameplay, Ollie Ollie World has personality to spare, not to mention the makings of a modern classic. The game’s creative director, John Ribbins, has cited Jet Set Radio as a big inspiration.

While Ollie Ollie World may not have taken over the world when it released back in February 2022, it does currently enjoy a Metacritic score of 85 for both Xbox One and Series X|S versions.

Bonus: Bomb Rush Cyberfunk

Bomb Rush Cyberfunk is an indie-developed, undisguised love letter to the Jet Set Radio franchise. It comes courtesy of Dutch game studio Team Reptile, creator of Megabyte Punch and Lethal League. The game will be released in 2023 for Nintendo Switch and PC Steam, and possibly other platforms. Check out the trailer below; it speaks for itself.

Wrap up

We hope you’ve enjoyed these mini-retrospectives. What are some of your favorite classic Xbox, Xbox 360 and Xbox One games? Are any of them on this list? Let us know about your favorite Xbox gaming experiences in the comments below. And thanks for reading.

Featured image via Pixel Hunted. 

Microsoft Cloud for Financial Services expands with new updates

Microsoft’s recent expansion of Cloud Financial Services features should help the 41.1 percent of financial service respondents to an IDC survey deliver digital services faster while they accelerate their shift to the cloud.

As part of Microsoft’s Cloud Financial Services feature expansion, the platform will now offer a Compliance Program for Microsoft Cloud that includes the following:

  • Ask an Expert: Directly engage with Microsoft’s subject matter experts to address top-of-mind compliance concerns as well as accelerate regulatory assessment and approval cycles.
  • Risk and Control Mapping: Get support from Microsoft with cloud risk assessments to help you meet your due diligence needs.
  • Compliance Community: Learn about the latest regulatory compliance developments directly from Microsoft experts, industry peers, and thought leaders via ongoing virtual sessions, summits, and webcasts.
  • Proactive Risk Assurance: Receive proactive communication from Microsoft’s experts on external audit results, ongoing updates of Microsoft’s cloud estate, and changing regulatory compliance requirements.

In addition, a new banking customer agreement feature that offers customers self-scheduling of meetings on preferred channels called Intelligent Appointments is out of preview and generally available to customers. With Intelligent Appointments generally available to customers it can be paired with Virtual Appointments which is used in Microsoft Teams to send text reminders to join custom branded virtual appointments through mobile devices along with a few other admin scheduling tools to manage on-demand virtual appointments.

Microsoft is also putting a few newer features into preview (US and UK availability) that should help financial institutes leverage common data models, extract insights, derive new business models, and deliver differentiated customer experiences such as:

  • Onboarding application (retail banking and other verticals): Delivers a flexible and intelligent product onboarding experience with automated document workflows enriched by AI analysis to assist the document verification process.
  • Unified client profile (wealth management): Helps deepen client relationships with meaningful advice, providing relationship managers with a good understanding of a client’s financial status, investment portfolios, financial goals, important life moments, and other personal attributes.
  • Property and casualty insurance data model (insurance):  A dedicated property and casualty insurance data model captures new attributes including policy and coverage information, claims, and insurance providers and producers.
  • Wealth management data model (wealth management): An extension to the banking data model that captures new attributes including financial goals and investment instruments specific to wealth management.
  • Small business data model extension (retail banking SMB): Extends the data model foundation of Microsoft Cloud for Financial Services to represent individuals and allows linking small businesses to individual financial holdings.

Lastly, Microsoft’s Cloud Financial Services has also expanded its partner ecosystem to provide customers with systems integration (SIs) from Accenture/Avanade and PWC as well as independent software vendors (ISVs) ArganoArbela, ASC, Bambu, BioCatch, Mambu, Thought Machine and Wealth Dynamix.

The Windows 365 app goes live on Microsoft Store for Windows 11

Updated: 3/14/2023

This year, during Microsoft’s annual conference for developers and IT professionals, Ignite 2022, the company made a lot of announcements as well as enhancements to its products and services. Narrowing it down to Windows 365, it was announced that a new app was being launched, the Windows 365 app, and further indicated that it would be available on Microsoft Store for Windows 11.

thumbnail image 1 of blog post titled Experience the Windows 365 app: public preview available now

The Windows 365 app is designed for Windows 11 users to access their cloud PCS conveniently from their devices. Users can get to enjoy its offerings by downloading it from the Microsoft Store as it is now available in public preview.

According to a Techcommunity post by Microsoft:

With Windows 365 app, you can access your Windows 365 Cloud PC from the taskbar or the Start menu, enjoying a full Windows 11 experience while moving between your local and Cloud PCs. Supported by all Windows 11 devices, the app delivers high-performing and reliable experiences optimized for Microsoft Teams and your other Microsoft 365 apps.

In other related news, Windows 365 Government has hit general availability for Government Community Cloud and Government Community Cloud High organizations in the United States.

The Citrix HDX Plus for Windows 365, was introduced this year during Inspire 2022 to enhance support for a broader range of endpoint devices and peripherals and security and policy controls. The Windows 365 add-on is now available in public preview and set to reach broad availability later on in the year. It is currently available for all customers in the Microsoft Intune console.

Update

In March 2023, the Windows 365 app shipped to general availability for Windows 10 and Windows 11 users to download. Microsoft also indicated that the Windows 365 app will start shipping as part of Windows 11. Once this is in effect, you’ll no longer need to download it from the Microsoft Store.

PowerToys set to add settings backup and a hosts file editor

At the beginning of this month, PowerToys version 0.63.0 shipped. It was considerably smaller compared to the previous version, and focused on stability and efficiency on top of a couple of tweaks.

And now, two nifty features are set to ship to future versions of PowerToys. First up is the Settings backup feature, which will let users backup and restore their settings with just a single click at any time they want.

A screenshot showing backup settings in PowerToys

The feature can be accessed by users through the “General” setting page, where they can also get to select where to backup their data.

Next up is a feature that will let the users edit hosts file. Currently, users depend on the Notepad to work on the file, but with the new feature unpacks a user interface which in turn enhances efficiency and effectiveness.

1

The feature also adds new capabilities such as adding new entries and repositioning, filtering, disabling and pinging existing addresses. What’s more, users can add comments to the entries made. It has not yet been confirmed when and if these features will come to Powertoys.

Via: Neowin

How to Ignore Messages on Messenger on a PC

Facebook is one of the most popular social networks with millions of users. Just like any other social network, Facebook has its own instant messenger.

Sometimes you need to ignore certain Messenger messages on Facebook, and in today’s article, we’re going to show you how to do that.

How can I ignore messages on Messenger on my PC?

1. Ignore messages from the Facebook browser page

  1. 1. Open Facebook in your web browser and log in to your account.

  2. 2. Now open the chat window with the person or group that you want to ignore.

  3. 3. Click the down arrow next to their name and select Ignore messages from the list of options.

    click to ignore messages on messenger
  4. 4. When the confirmation dialog appears, click on the Ignore Messages button.

    confirm to ignore messages
  5. 5. You will no longer receive notifications for messages from that person from now on.

  6. An easy method to ignore Messenger messages on your PC is to do so directly via Facebook. Given the fact that Messenger is a built-in app from Facebook, it is natural that you can configure its settings from it.

    This method ensures that you don’t need to install the Messenger app on your PC, since you can simply modify chat settings from your web browser.

2. Ignore Messenger messages without opening a conversation

You can also ignore messages from the web Messenger by doing the following:

  1. Click the Messenger icon in the top right corner and click the expand button.
    messenger open facebook messenger ignore messages
  2. When the Messenger opens, click the three dots next to a chat that you want to ignore and choose Ignore Messages.
    ignore messages facebook messenger ignore messages
  3. When the confirmation dialog appears, click on Ignore Messages.

After doing that, all future messages from this person will be moved to the Filtered Requests section, so you’ll need to go there to see them.

While it’s possible to do this in any web browser, we recommend using Opera One. The browser is perfect for social media because it has integrated Facebook messenger.

In addition to Facebook, there’s also WhatsApp, Telegram, and VKontakte messenger available out of the box.

Other social networks such as Twitter and Instagram are also available, so you won’t ever miss anything from social networks.

The browser also has a snapshot tool, so you can take screenshots of any website and share them with others.

Adblocker is also available, and it will permanently block ads on all websites. For extra security, there’s a free and unlimited VPN available as well.

Opera One is built on the Chromium engine, so it’s quite similar to Chrome, and it even works with Chrome extensions. If you want a fast, reliable browser that is optimized for social networks, give Opera one a try.

⇒ Get Opera One

3. Use the desktop app

  1. Open the Facebook desktop app.
  2. Now right-click the conversation that you want to ignore.
  3. Select Ignore Messages.

After doing that, all your future messages from this contact or group will be ignored.

How can I see the ignored messages from Messenger?

After you ignore a conversation with a person or a group conversation, the messages will be stored in a section called Spam, under Message requests.

That is where all your spam Facebook messages can be accessed from. This includes messages from people that you ignored and messages from people who don’t have you on their friend list (as long as you configured this setting).

Can I undo ignore messages on Messenger?

Luckily, you can easily undo ignoring messages on Messenger. All you need to do is go to the Spam section under Message requests, open the conversation with the person you want to un-ignore, and send then a message.

The conversation will go back to normal and you will receive notifications from that conversation in the future.

Ignoring Messenger messages on Facebook is pretty simple, and you can do it simply by selecting the contact that you want to ignore and then choosing the Ignore messages option.

After following the steps from this guide, you won’t ever have to see any unwanted messages on Facebook.

We hope you managed to find out how to ignore messages on your PC or laptop. Write down in the comments section any questions you have about this topic.