Some Google Chrome, and other browser, users have posted on support forums about a Server Error in ‘/’ Application runtime issue that arises when they try to log in or open certain website pages.
Consequently, you can’t log in to or open specific web pages.
Why do I get a Server Error in ‘/’ Application?
While Chrome is a pretty responsive browser, and the Google page experience is satisfactory, for the most part, there are some straightforward causes for the Server Error in ‘/’ application:
Internal server issue – In this case, there’s nothing that you can do other than apprise the administrator and wait for the problem to be resolved.
Cookies or corrupt browsing data – If the error is encountered on all websites, it’s likely an issue at your end with the saved cookies or corrupt browsing data.
Misconfigured Chrome settings – Incorrect settings in Chrome can cause this issue, but one of the solutions below will help you fix it.
What are the other iterations of this error?
The error message states:
An application error occurred on the server. The current custom error settings for this application prevent the details of the application error from being viewed remotely (for security reasons). It could, however, be viewed by browsers running on the local server machine.
Some Server Error in ‘/’ Application runtime errors has different descriptions. However, they still occur in much the same way. Another Server Error description states:
An exception occurred while processing your request. Additionally, another exception occurred while executing the custom error page for the first exception.
Some users have been able to fix the Server Error in ‘/’ Application runtime error for Chrome with the resolutions listed in the following sections.
Quick Tip:
If you keep having problems with Chrome, try a more responsive browser, such as Opera One. It’s built on Chromium as well, which means all your favorite Chrome extensions are compatible.
Not only that but Opera One is updated very frequently, leaving no room for errors/bugs when you browse. It’s also very lightweight and packed with modern features.
Opera One
Browse the web securely, block ads, connect to VPN, and more!
How do I get rid of Server Error in ‘/’ Application?
Before started tweaking your browser, let’s make some preliminary checks that might fix the issue quicker:
Check if the website you are trying to access is down. Open the Downdetector website, select your country on the drop-down menu, and then input a website to check in the search box on Downdetector.
Update Google Chrome. It should be an automatic process, but then make sure you click on the update prompt and restart the browser to see if the error keeps popping up.
If the issue persists, start applying the solutions below to fix the problem.
1. Delete cookies for the page you can’t log in to
First, open the website where the Server Error in ‘/’ Application issue arises.
Click the padlock button on the left side of Chrome’s URL bar, and select Cookies.
Double-click the listed website where the issue arises.
Select Cookies and click Remove to delete them.
Next, click on the Done button.
Once done, check if the Server Error in ‘/’ Application – The resource cannot be found issue in Chrome is fixed. If not, head to the next method.
2. Clear Chrome’s browser data
Launch Chrome and press Ctrl + Shift + Del to open the Clear browsing data utility.
Select the All time option from the Time range drop-down menu.
Next, select all three data options here, and then click the Clear data button.
3. Reset Google Chrome
Paste the following path in the address bar and hit Enter: chrome://settings/reset
Click on the Restore settings to their original defaults option.
Click Reset settings in the confirmation prompt that appears.
Once done, verify if the Server Error in ‘/’ Application issue in Chrome is resolved. In case it persists, head to the next method.
4. Remove credentials
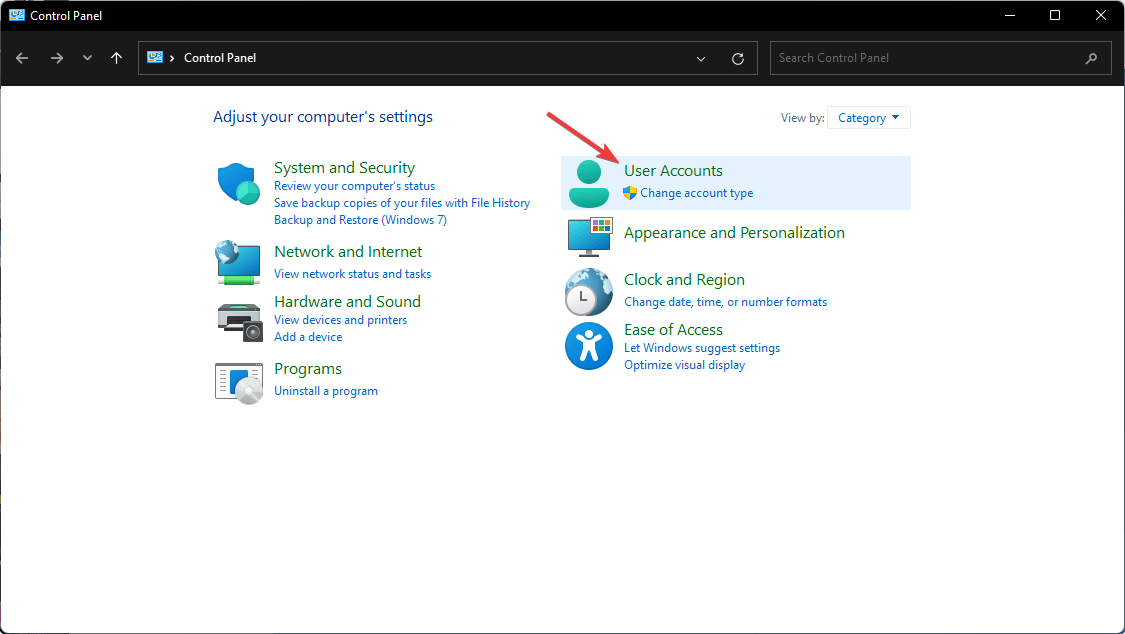
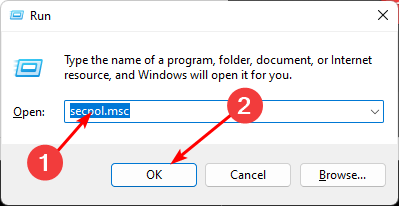
Press Windows + R to launch Run, enter Control Panel in the text field, and click OK.
Click on User Accounts.
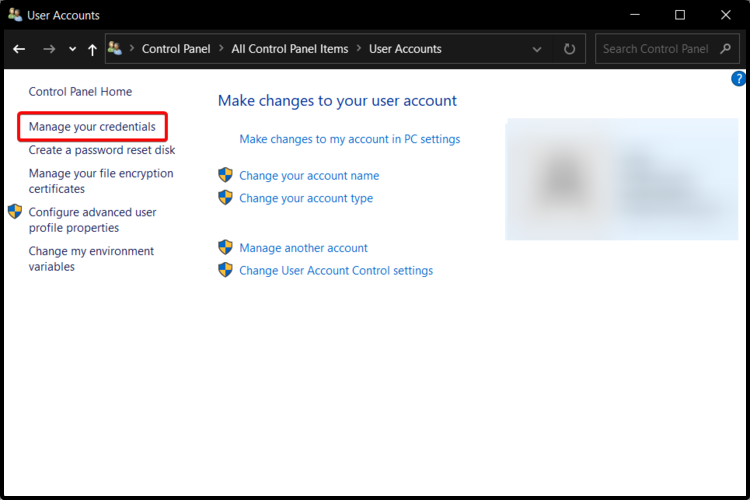
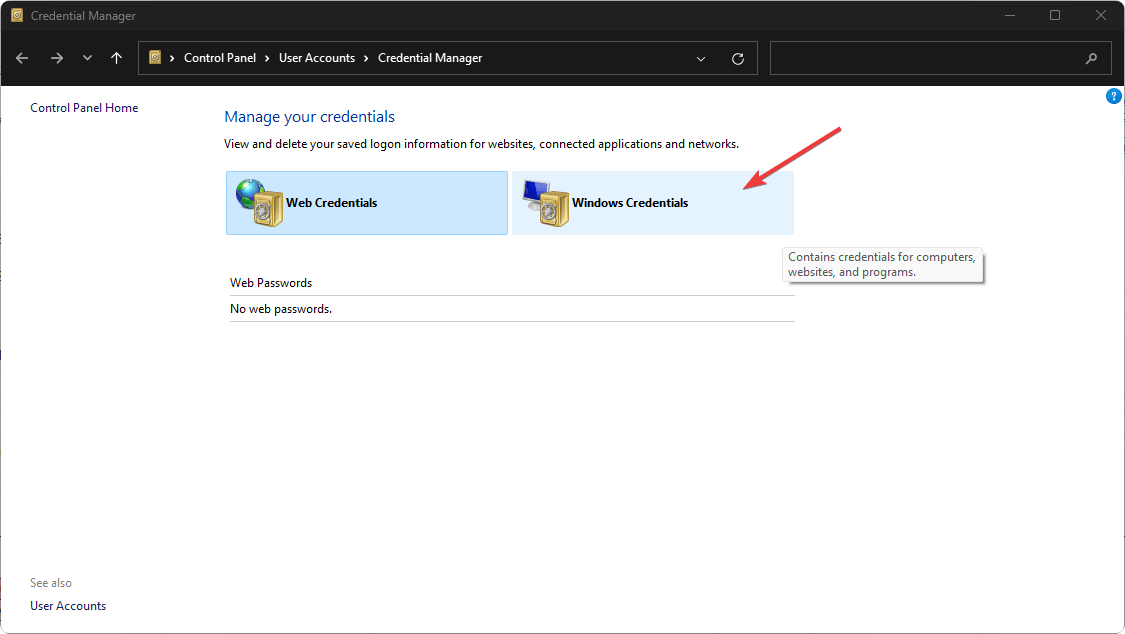
Then click Manage Windows Credentials under Credential Manager.
Select a listed generic credential to expand it and click Remove to delete the credential.
Click Yes in the Delete Generic Credential prompt window that opens.
Similarly, delete all the listed generic credentials.
If the previous methods haven’t worked, this one should fix the Server Error in ‘/’ Application issue in Chrome.
5. Reinstall Google Chrome
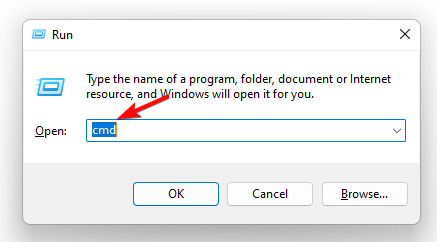
Press Windows + R to launch the Run command, type appwiz.cpl, and click the OK button.
Select Google Chrome, and then click on Uninstall.
Follow the on-screen instructions to complete the process.
Restart Windows after you’ve uninstalled the browser.
The above resolutions will fix Server Error in ‘/’ Application for some Chrome users. If you still see the error, consider emailing the website about the issue or try opening and logging in to the site with an alternative browser.
Skype screen sharing is a feature that allows you to share the screen of your computer with other Skype users. It’s a great way to collaborate on projects, show off your desktop, or have fun.
However, sometimes it may not work as expected. Screen sharing may be unavailable, especially if you use an incompatible version. If you’re in a similar predicament, we unpack various ways to ensure you can share your Skype screen again.
Why is my Skype screen sharing not working?
There are a handful of reasons you may be unable to share your screen on Skype. Below are some of the most common ones:
Unsupported version of Skype – If one party has an older software version, it might not be compatible with screen sharing. Only select versions of Skype support screen sharing.
Weak connection – If one of you has a weak signal or the internet connection is slow, it may prevent Skype from working properly.
System/hardware requirements – Your computer may not have adequate hardware or system requirements to support screen sharing.
Insufficient permissions – If you’ve tried to share your screen without having granted your webcam or access, then you may not be able to share. In some cases, your webcam is not working.
Your firewall may be blocking the connection – If you have a firewall or anti-virus software installed on your computer, it may be blocking Skype from accessing your webcam and microphone.
Bugs in the software – Sometimes bugs in software can cause problems like this, so make sure that you update all of your software before trying anything else.
Unsupported OS – Make sure that you’re using a supported operating system. Screen sharing only works on select platforms.
How do I enable screen sharing on Skype?
Before you attempt any of the slightly technical solutions below, we recommend you try the following:
Verify that you have adequate bandwidth and that your network connection is stable and working correctly.
Make sure your computer meets the minimum system requirements before trying to enable this feature in Skype.
Check on Skype’s status page whether there’s communication on the disruption of services.
Close any background apps or processes that may be hogging the bandwidth. You can also choose to limit bandwidth.
Check for any available Skype updates.
Reboot both computers and restart Skype again before attempting another session.
1. Turn on camera permissions
Hit the Windows key and click on Settings.
Navigate to Privacy & security then scroll down to App permissions and click on Camera.
Toggle Camera access on.
Also under Let apps access your camera, ensure Skype option is On.
2. Disable the firewall temporarily
Press the Windows key, search Windows Security and click Open.
Click on Firewall & network protection then select Public network.
Locate Microsoft Defender Firewall and toggle the off button.
If you have an antivirus enabled, you should also disable it temporarily and then try reconnecting.
3. Check for Updates
Hit the Windows key and select Settings.
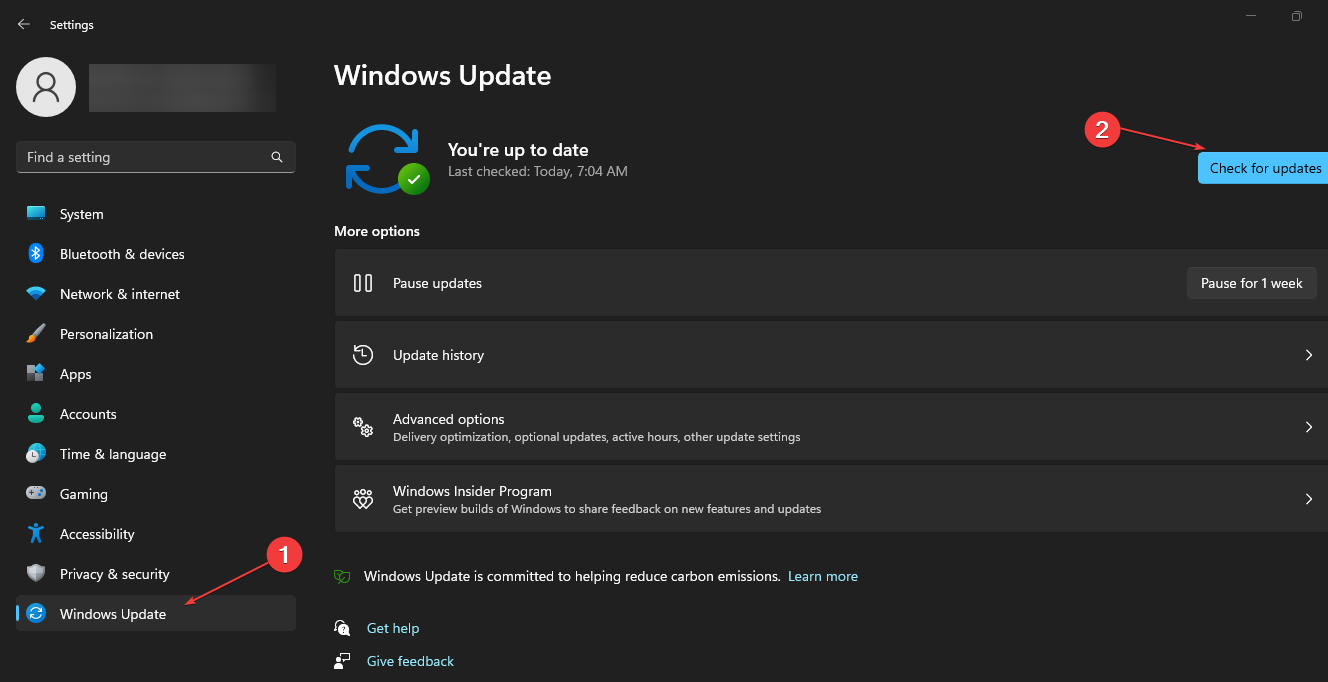
Click on Windows update, then select Check for updates.
Press the Windows key, search Windows Security, and click Open.
Select Virus & threat protection.
Next, press Quick scan under Current threats.
If you don’t find any threats, proceed to perform a full scan by clicking on the Scan options just below Quick scan.
Click on Full scanthen click on Scan now to perform a deep scan of your PC.
Wait for the process to finish and restart your system.
Also, perform a virus scan if you have a third-party antivirus enabled to ensure you cover all the bases. There may be some vulnerabilities that Windows Security may miss as it is not as comprehensive.
Thus, an antivirus solution we strongly recommend is TotalAV because it has an advanced scanning option and multilayered security, including antivirus, antispyware, and ransomware shield, which will keep your PC safe from digital threats at all times.
5. Reinstall Skype
Hit the Windows key and select Settings.
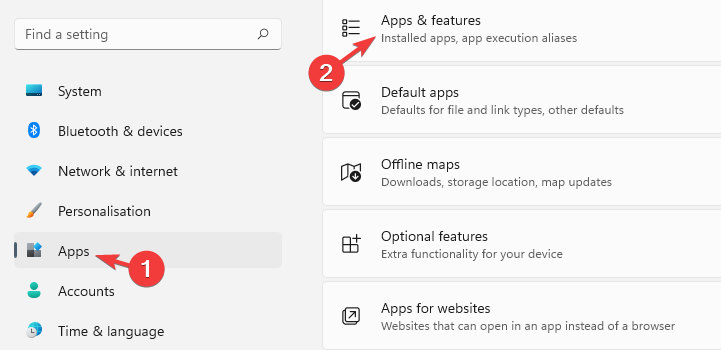
Click on Apps on the left pane then select Apps & features on the right pane.
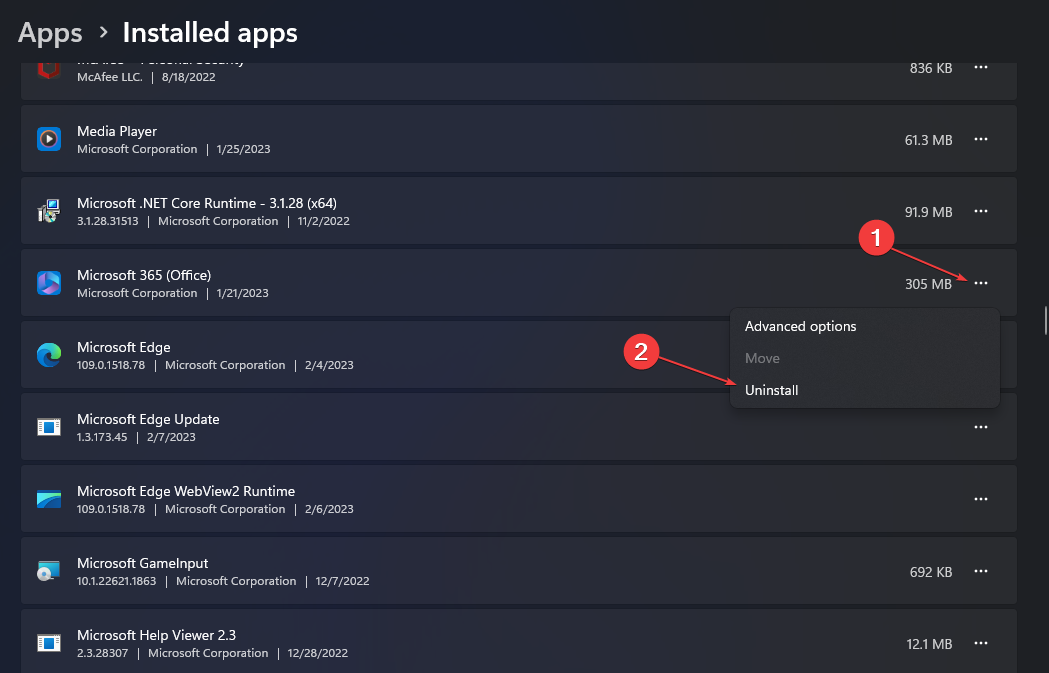
Find Skype, click on the three ellipses and select Uninstall.
Launch the Microsoft Store app, search for Skype, and click Install.
You may also run into an issue where Skype fails to make calls but worry not, as our expert article has the solutions.
If Skype keeps crashing, we also have answers in our guide detailing why this happens and how to fix it. While you’re still here, you may be interested in screen-sharing tools that promise to be worth your while.
We’d love to hear from you, so please let us know in the comment section below what solution worked for you.
HomeGroup was a feature released by Microsoft, first with Windows 7, which further made its way to Windows 10 as well. But for many, HomeGroup in Windows 10 is now missing.
This presents a significant problem, especially for those who had HomeGroup set up and relied on it for printer and file sharing. So, let’s find out why HomeGroup is missing in Windows 10 and how you can get things up and running.
Why can’t I find HomeGroup in Windows 10?
Microsoft removed HomeGroup from Windows 10, starting with Version 1803. The reason, there are several other viable and secure alternatives. The functionality can be performed using OneDrive or the Share function found in Windows.
However, it didn’t go down well with the users who relied on the HomeGroup feature, and with it missing in Windows 10, they had to look for ways that suited their requirements. But before you do that, try our solution.
What can I do HomeGroup is missing in Windows 10?
Open This PC, check the left pane if the Homegroup is available, right-click on it, and choose Change HomeGroup settings.
Click Leave the homegroup and save the changes.
Now, press Windows + R to open Run, type Control Panel, and hit Enter.
Click on Network and Internet.
Choose Network and Sharing Center.
Next, click on Change advanced sharing settings on the left.
Now, enable the Turn on network discovery and Turn on file and printer sharing options.
Scroll down, expand All Networks, enable Turn on sharing so anyone with network access can read and write files in the Public folders, and then click on Save changes.
Press Windows + S to open Search, type Services, and click on the relevant search result.
Double-click on the Function Discovery Provider Host entry here to open its Properties.
Choose Automatic from the Startup type dropdown menu, click on the Start button, and then on OK to save the changes.
Similarly, get the following services running as well:
Function Discovery Resource Publication
SSDP Discovery
UPnP Device Host
Finally, press Windows + E to open File Explorer, paste the following path in the address bar, and hit Enter:\\localhost
Create a folder here, right-click on it, and choose Properties.
Now, go to the Sharing tab, and click on Advanced Sharing.
Tick the checkbox for Share this folder, and then click on Permissions.
Make sure to provide Full control and click OK to save the changes.
Remember that this method isn’t the safest, so you might want to adjust your settings and only share files with specific users.
That’s it! With this method, you should be able to reactivate the HomeGroup sharing capabilities on Windows 10 in case it’s missing. Remember to follow the steps in the listed sequence to avoid running into issues.
Administrators can apply hundreds of different settings to objects in AD by establishing Group Policy Objects (GPOs) and associating the GPO to domains, sites, and organizational units (OUs).
You might be wondering how to block inheritance for such groups, so we will show you. We can also show you how to block inheritance for Windows 10 if interested.
What is GPO inheritance, and how does it work?
Well, as you might know, in Active Directory, GPOs are inherited automatically throughout the GPO application order.
So, if a Group Policy setting is enabled at the highest domain level but is not configured at the OU level, the highest domain level setting takes precedence and is applied.
That being said, equally, if a setting is not configured at the domain level and is disabled at the OU level, the OU setting is inherited.
If you were wondering about the order in which the Group Policy settings take effect, allow us to shed some light on that as well:
Local Group Policy settings are always applied first.
GPOs linked at the site level are applied next, followed by the GPOs linked at the domain level and OU level. Since GPOs linked to the OU are processed last, they have the highest precedence.
For nested OUs, GPOs linked to the parent OUs are applied first, followed by the GPOs linked to the child OU.
If multiple GPOs are linked to a container, then the GPO with the lowest link order will have the highest precedence.
To view the list of GPOs applied to a container, double-click the container and select the Group Policy Inheritance tab in the right pane.
How do I block Group Policy inheritance for a Domain/OU?
1. Press the Windows key to open the search box. Alternatively, you can press the Start button on the taskbar.
2. Search for group policy, and select the first result to open the Edit Group Policy app.
3. Go to Group Policy Management and locate the group policy, then access Domains and select your domain, and finally go to Default Domain Policy.
4. Under Domain Controllers, locate the domain you wish to stop inheriting settings.
5. Right-click on it and select Block Policy inheritance.
You can easily block the Group Policy inheritance for a specific Domain/OU via the Group Policy Editor. All you need to do is locate your domain in the list and apply the Block Inheritance setting to it.
You should know that, by default, both the Computer Configuration and User Configuration policy settings of a GPO are enabled and applied to all users and computers in the container in which the GPO is linked.
That being said, situations may arise where the GPO has to be disabled for a particular period. So, the answer is yes, you absolutely can.
In case you’re wondering How do I disable a GPO?, take a closer look at our detailed procedure.
Search for group policy, and open the Edit Group Policy app.
After selecting the GPO you want disabled, select the Details tab on the right-hand side.
Under GPO status, select All settings disabled.
Reboot your PC.
You can also modify such settings using PowerShell, if that is the software you are more comfortable with, just so you know.
This is all you need to know about this subject. We hope this article helped you solve whatever problems you are having. Leave a comment below and tell us how you feel about it.
You’ll notice the team also mentions in the post that the game has already hit gold status. (This means the game has completed the development stage and been granted the “seal of approval” from the first-party hardware makers). This typically happens a few weeks before launch, so the fact that Dead Island 2 has already “hit gold” would facilitate the new release date.
Another potential reason for bumping up the game’s launch might be Star Wars Jedi: Survivor, which recently saw its March release window pushed back to April 28th. Likely the new release date for Dead Island 2 is not entirely unrelated.
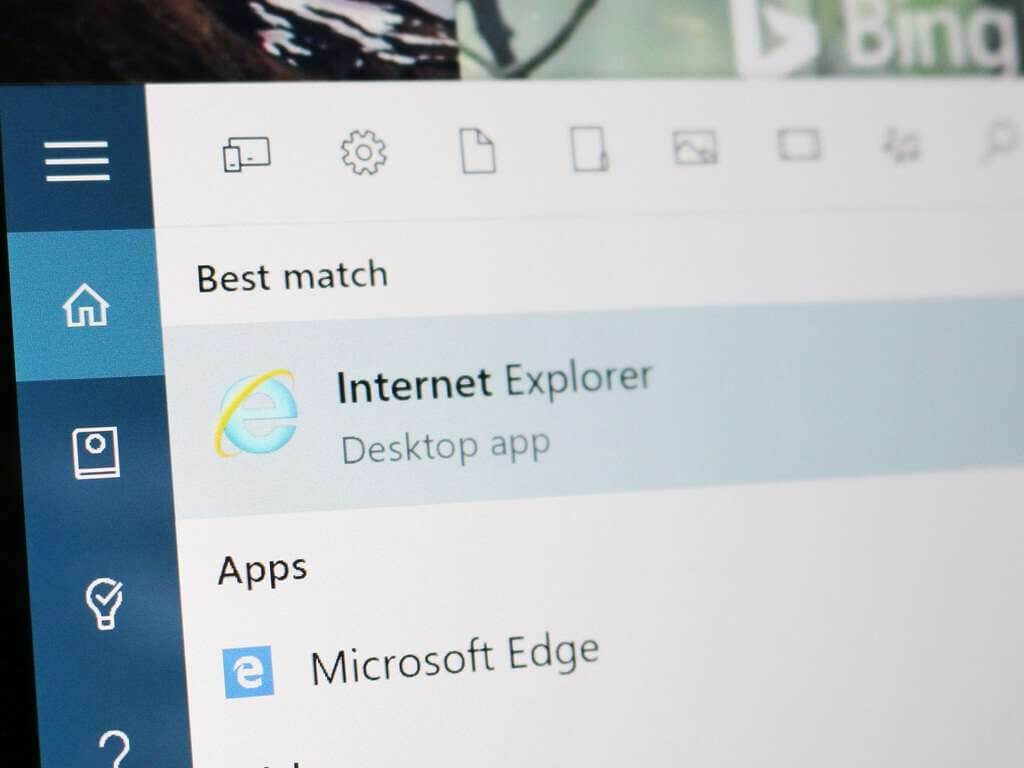
Last year, Microsoft announced its plan to cut support for Internet Explorer via a Microsoft Edge update. The set cut-off date was scheduled for February 14, this year. This means that Microsoft has now cut support for IE indefinitely.
The initial plan was to disable Internet Explorer 11 in Windows 10 via a software update, but Microsoft restrategized and opted to kill it off using an Edge update instead to make the switch simpler. Microsoft has been urging users to switch to the new Edge for quite some time and even rolled out an IE Mode update to make the transition seamless. What’s more, while making the transition your browsing data will also be moved to Edge.
Microsoft is now rolling out this update simultaneously to both consumer and commercial devices. It should be noted that you won’t be able to roll back to the previous version once the update is installed.
Users who continue using Internet Explorer from today will start seeing a “The future of Internet Explorer is in Microsoft Edge” banner and get redirected to Edge. Microsoft had previously indicated that:
If your organization still has dependencies on IE11, you must take steps now to complete your transition before February 14, 2023, or risk business disruption at scale when users lose access to IE11-dependent applications.
Remnants of IE11 such as icons on the taskbar will continue lurking for a few months to aid with the transition. Microsoft plans to get rid of the icons via a Windows Security “B” release update in June. Alternatively, the user can opt to remove them by installing the optional, preview “C” release which will be available by late May.
Microsoft’s employment-focused social network platform, LinkedIn becomes the latest tech firm to be affected by massive layoffs. The Information reports the platform’s recruitment department was hit by massive layoffs on Monday, though it doesn’t detail the exact number of people affected.
343 Industries was also hit last month though Microsoft promised to continue supporting Halo Infinite. This isn’t the first time LinkedIn has had to lay off its employees, at the height of the pandemic, the company let go of some of its employees to restructure and adjust to the tough economic times it was facing.
We are likely to see more layoffs in the next few months across various divisions and departments at Microsoft. GitHub has already been hit by layoffs, and further announced that the hiring freeze is still in effect coupled with several changes geared toward cost saving.
Sometimes, when you try to uninstall any product in the Windows Programs and Features tool, a new Windows Installer window appears and gives the Windows 10 error opening the installation log file.
It is accompanied by the message: verify that the specified location exists and is writable. This guide will show you how to quickly fix this issue and get back to removing programs efficiently.
Why does an Error opening installation log file message appear?
There are several reasons for the error in opening the installation log file issue. Below are some of the notable causes:
Windows Installer logging is enabled: The first thing to check if you are getting the error opening the installation log file while uninstalling is if the Windows Installer logging is enabled. If it is, you need to disable it.
Corrupt system files: This issue can occur if the log files needed to delete your app are corrupt. You need to repair these corrupt system files to get past this error message.
Disabled service: In some cases, the error opening the installation log file and verify that the specified log file location exists can be because the Windows Installer service is disabled. The solution to this is to enable service.
How can I fix the Error opening installation log file?
1. Use Command Prompt
Press the Windows key, type cmd, and select Run as administrator under Command Prompt.
Type the command below and hit Enter: set TEMP+%tmp%
Finally, rerun the installation.
You can get Windows 10 error opening the installation log file if the TMP and TEMP directories of the file are different, resulting in installer files being written to TMP.
But when trying to read those files using the TEMP value, the error is displayed. In this case, you need to confirm that both values refer to the same path using the Command Prompt:
2. Stop and restart Explorer.exe using Task Manager
Press the Ctrl+ Alt + Del to launch Task Manager.
Right-click the Windows Explorer option and select End task.
Now, click File > Run new task at the top.
Finally, type explorer.exe in the run box and hit Enter.
To fix Windows 10 error opening installation log file problem, you need to restart Windows Explorer. This will clear any glitch preventing you from completing the installation or removal process.
3. Reregister Windows Installer
Press the Windows key + R, type %windir%\system32, and click OK.
Locate the Msiexec.exe file and note the path.
Now, launch the Run utility, type regedit, and click OK.
Next, navigate to the path below in the left pane: HKEY_LOCAL_MACHINE\SYSTEM\CurrentControlSet\Services
Now, click MSIServer.
In the right pane, right-click ImagePath, and then click Modify.
Now, set the Value data to the Msiexe.exe path you noted in step 2 and add /V. For example, if the path is C:\Windows\system32\Msiexec.exe, you need to set the value data to C:\WINDOWS\System32\msiexec.exe /V.
Next, click the OK button and close the Registry Editor.
Click the Start icon and select the Power option.
Press and hold the Shift key and click Restart.
When your PC restarts, choose Troubleshoot > Advanced options.
Now, select Startup Settings.
Next, click the Restart button.
When your PC restarts, press 4 or F4 to Enable Safe Mode.
After your PC boots up, press the Windows key + R, type msiexec /regserver, and click OK to reregister the MSI installer on a 32-bit PC. If you running 64-bit, type %windir%\Syswow64\Msiexec /regserver and click OK.
Finally, restart your PC normally.
To reregister the Windows installer, verify the location of the Msiexec.exe file on your computer and in the Windows Registry. This should fix the error in opening the installation log file message.
4. Reinstall the Windows Installer
Press the Windows key + S, type cmd, and select Run as administrator under Command Prompt.
Type the following commands and press Enter after each: cd %windir%\system32attrib -r -s -h dllcacheren msi.dll msi.oldren msiexec.exe msiexec.oldren msihnd.dll msihnd.oldexit
Now, restart your PC and download the latest version of Windows Installer.
To reinstall the Windows Installer, you first need to rename the damaged Windows Installer files and then reinstall the Windows Installer. With this, you should be able to fix the error opening installation log file issue.
5. Disable logging
Press the Windows key + R, type regedit, and click OK.
Navigate to the path below in the left pane: HKEY_LOCAL_MACHINE\SOFTWARE\Policies\Microsoft\Windows\installer
Now, right-click the Logging option and select Delete.
After doing this, restart your PC and check if the issue is fixed.
Finally, wait for the command to finish running and restart your PC.
Sometimes, the error opening installation log file issue might be because of broken system files. Running the SFC scan will repair any corrupt file and restore normalcy on your PC.
7. Start the Windows Installer service
Press the Windows key + R, type services.msc, and click OK.
Right-click the Windows Installer service.
Now, select the Start option.
Another effective solution to explore if you are troubled by the error opening installation log file issue is to start the Windows Installer service. This is because the service is crucial to all file installation activities on your PC.
With this, we can end this detailed guide. Hopefully, you solved the problem with one of the fixes in this guide.
With Windows Hello, signing into PCs has become easier than ever. Unfortunately, this feature is not without flaws, as some users have reported that Windows hello is preventing some options from being shown.
Because of this, they cannot log in to their devices properly and instead have to use other log-in methods. If you also face this issue, be at ease, as this guide will show you how to get Windows Hello working quickly.
Why is Windows Hello preventing some sign-in options?
The Windows Hello preventing some sign-in options from showing can be caused by one of the following factors:
Outdated PC: This issue is usually caused by an outdated operating system. You can remedy this by updating your PC in the Settings app.
Fingerprint disabled: Sometimes, this error message can be because Biometrics is disabled on your PC. The solution to this is to enable the feature in Group Policy Editor.
Outdated driver: If your Biometrics drivers are outdated, you might get the Windows Hello is preventing some options from being shown error when you require it to sign in. The solution to this is to update your drivers to the latest version.
How can I fix the Windows Hello preventing sign-in options?
Below are some of the preliminary troubleshooting steps to try before delving into the solutions in this section:
Restarting your device or computer
Ensuring Windows Hello is correctly set up
Making sure you’re connected to the Internet
Turn Microsoft Modern Keyboard with Fingerprint ID off, then back on again
Redo your fingerprint
If these do not solve the problem, you can now proceed to the solutions below:
1. Set up Windows Hello again
Press the Windows key + I to open the Settings app and select Accounts.
Click Sign in options in the left pane.
Under Windows Hello, choose Fingerprint (you’ll get either face, fingerprint, or iris if your PC supports it).
Finally, sign in with a quick swipe.
The first thing to do if Windows Hello is preventing some options from being shown is to set up the whole thing again. This will clear up any roadblocks that may be causing the issue.
You may be asked to add a PIN before setting up Windows Hello.
2. Sign in with a PIN or password
Press the Windows key + I and select Accounts.
Then, select Sign-in options.
Now, follow the steps for each Sign-in method you wish to set up.
Try restarting your PC and see if everything works now.
If Windows Hello is preventing some options from being shown, your fingerprint didn’t scan correctly, or you used the wrong finger to sign in, you can use an alternative way to log in.
In this case, use a PIN or password to sign in and set up Windows Hello again, as in solution 1.
3. Run the Hardware and Devices troubleshooter
Press the Windows key, type cmd, and select Run as administrator under Command Prompt.
Type the command below and hit Enter to run it: msdt.exe -id DeviceDiagnostic
Then, finally, wait for the command to finish running.
Another cause of Windows Hello is preventing some options issues that could be hardware-related. To fix the hardware issues, run the Microsoft easy fix solution for devices and hardware that checks for common problems.
4. Remove the Windows Hello sign-in option
Press the Windows key + I and select Accounts.
Go to the Sign-in options in the left pane.
Now, click the Remove button under Windows Hello.
Finally, repeat the steps in solution 1 to set up Windows Hello again.
If the IR camera or fingerprint reader gives you errors, sign in using a PIN or password, then redo the fingerprint or scan.
If you’re using the Surface Pro 4, detach and reattach the cover, then try to use it again. Should reattaching the cover with Fingerprint ID not fix it, try typing or using the touchpad.
This should fix the Windows Hello is preventing some options issues on your Surface Pro 4.
5. Update your PC
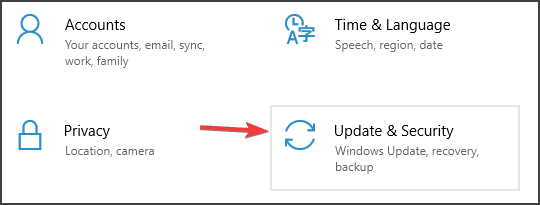
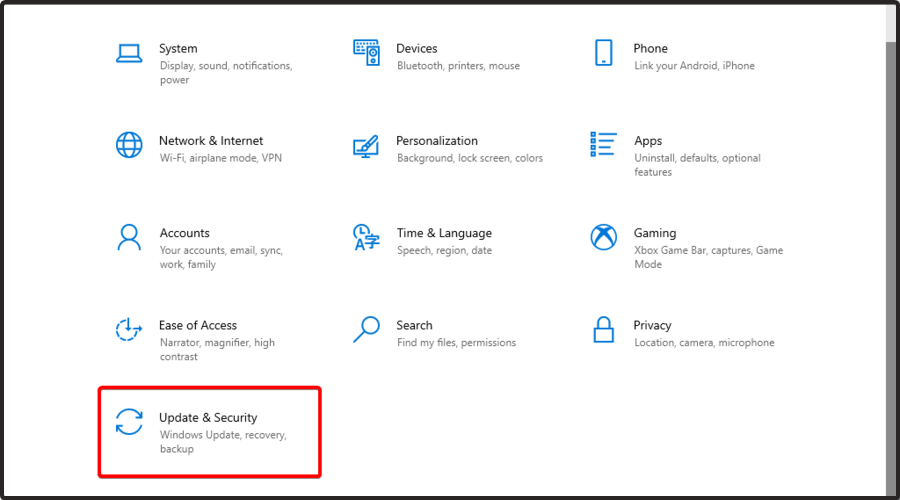
Press the Windows key + I and selectUpdate & Security.
Click the Check for updates button.
Finally, install any available updates.
An outdated operating system can lead to different issues, including Windows Hello preventing some options from showing. Hence, you must ensure that the latest updates for your device and Windows Updates are installed.
6. Reset your system
Press the Windows key + I and select Update & Security.
Select Recovery on the left pane and click Get Started under Reset this PC.
Finally, choose whether to Keep your files or Remove everything and follow the onscreen instructions to complete the process.
If the solutions above prove abortive in fixing this issue, you might need to reset your PC to default. This is because you might have made some changes to your PC affecting the feature, leading to Windows Hello preventing some options from showing issue.
Press the Windows key + R, type rstrui.exe, and click OK.
Click the Next button on the page that pops up.
Now, choose a restore point and click the Next button.
Finally, click the Finish button and follow the onscreen instructions to complete the process.
If Windows Hello is preventing some options from showing on your PC, it might be due to some factors that are to trace. In this case, the best thing to do is restore your system to a point where everything works well.
Apart from manually performing a system restore, you can also use dedicated repair software to replace malfunctioning or corrupt system files with healthy parts after its in-depth scanning procedure.
8. Check if Biometrics is enabled
Press the Windows key + R, type gpedit.msc, and click OK.
Navigate to the path below in the left pane: Computer Configuration > Administrative Templates > Windows Components > Biometrics
Now, double-click Allow the use of biometrics.
Tick the Enabled radio button.
Next, click the Apply button followed by OK.
Go back to the Biometrics window and double-click Allow users to log in using biometrics.
Tick the Enabled radio button.
Finally, click Apply, followed by Ok.
In some cases, Windows Hello prevents some options issuesbecauset the biometric setting is disabled. For example, this prevents your PC from registering your fingerprint.
You must enable the Group Policy Editor feature to get past the issue.
9. Update the fingerprint hardware driver
Press the Windows key + X and select Device Manager.
Click the arrow next to Biometric devices to expand it and double-click the device there.
Now, select the Driver tab at the top.
Click the Update Driver button.
Finally, choose Search automatically for drivers and install any available update.
Drivers serve as an essential linking block between your hardware and software. Hence, when your fingerprint sensor driver is outdated, you might get Windows Hello, which is preventing some options error.
Updating the driver to the latest version should do the trick here. If the Windows update can not get the latest driver, you can search for it on the manufacturer’s website.
Alternatively, you can use a specialized tool in Outbyte Driver Updater. This tool automatically updates your driver to make sure they never cause problems.
10. Perform a Clean Boot
Press the Windows key + R, type msconfig, and click OK.
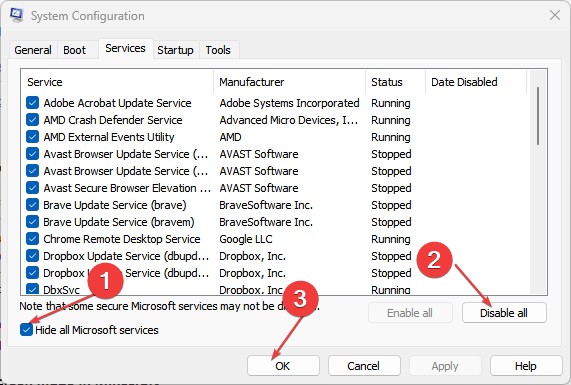
Select the Services tab, check the Hide all Microsoft services box, and click Disable all.
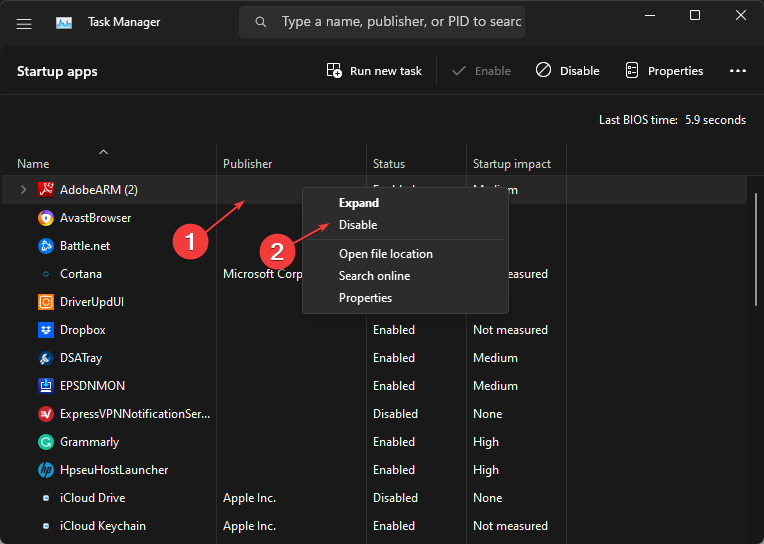
Now, go to the Startup tab and click Open Task Manager.
Right-click each of the apps there and select Disable.
Go back to the System Configuration window and click the Apply button, followed by OK.
Finally, restart your computer.
If you’re still unable to get the Windows Hello fingerprint error fixed, eliminate any software conflicts that may be causing the issue.
Performing a clean boot for your computer reduces software-related conflicts that can bring up the root causes of the Windows Hello fingerprint reader not working.
These conflicts can be caused by applications and services that start up and run in the background whenever you start Windows typically.
11. Install drivers in compatibility mode
Download the latest driver from the manufacturer’s website.
Save it on your local disk.
Right-click on the setup file of the downloaded driver.
Click Properties.
Click the Compatibility tab.
Check the box next to Run this program in Compatibility mode for.
Select the Operating System from the drop-down list.
The driver will install, then check its functionality.
With this, we can end this guide on the Windows Hello is preventing some options issues. You only need to follow the steps carefully, and things will return to normal.
Were you able to get the Windows Hello fingerprint reader to work again using any of these solutions? Leave there any other suggestions or questions you may have, as well.
Windows 10 is a great operating system, but it’s not perfect; you will experience an error sooner or later. For example, users reported a BSoD error on their PC caused by dxgmms, the .sys file.
This can be a big problem since your computer will restart every time you encounter this error, but you can fix this problem by using one of our solutions.
The dxgmms.sys error in Windows 10 can also occur due to hardware issues, similar to dxgmms2.sys. The latter one is more associated with your graphic driver.
There are several reasons for this problem, and in this article, we will explore some ways to help you fix it, so keep reading.
What causes dxgmms error?
If you have encountered this error., there are a few common triggers. Amongst these are the following:
Corrupted or outdated graphics card driver – If the driver is outdated, it may not be compatible with the latest version of DirectX, the software that the dxgmms error is related to.
DirectX version mismatch – The dxgmms error can also be caused by a mismatch between the version of DirectX installed on the computer and the version required by the game or application being run.
Overheating graphics card – When the graphics card overheats, it can cause the graphics card to shut down or become unstable, leading to the dxgmms error.
Conflicts with other software or hardware – Conflicts between software or hardware on the computer can cause the dxgmms error.
Windows operating system issues – A corrupted or damaged system file can interfere with the functioning of DirectX, causing the dxgmms error to occur.
What does dxgmms2 sys do?
Dxgmms2.sys is a Microsoft Windows system file that is part of the DirectX Graphics Infrastructure (DXGI).
It manages video memory and graphics card operations, including video display, memory management, and resource allocation.
The dxgmms2.sys file is crucial in ensuring the smooth and efficient operation of games, video playback, and other graphics-intensive applications.
Without the dxgmms2.sys file, these applications would not be able to access the graphics card resources they need to function correctly.
How can I fix dxgmms.sys error?
1. Use a dedicated tool for BSoD issues
Troubleshooting the causes and fixing computer errors such as BSoD can be difficult. Luckily, many software solutions were developed.
Specialized BSoD repair software is able to quickly scan your computer, identify the broken files and fix them or replace them with fresh ones.
2. Disable hardware acceleration in your browser
Click the Menu button in your browser’s top right corner and choose Settings.
Scroll down to the System section and uncheck Use hardware acceleration when available option.
Restart your browser.
Note: We showed you how to disable hardware acceleration in Google Chrome, but every modern browser supports this feature, so be sure to disable it for your browser.
3. Disable your integrated graphics card
Press Windows Key + X and select Device Manager from the list.
Expand Display adapters, locate your onboard graphics card, right-click it, and choose Disable device from the menu.
After doing that, close Device Manager and check if the problem persists.
Remember that this solution only applies if you have a dedicated and onboard graphics card. Another way to disable your onboard graphics is to use BIOS.
To see how to do that, we advise you to check your motherboard manual for detailed instructions. Then, if the problem still occurs, enable the graphic and follow the next solutions.
4. Update your graphics card driver
Few users reported that dxgmms2.sys error is related to your graphics card drivers. To fix this problem, it’s advised to download and install the latest drivers for your graphics card.
If you don’t want the hassle of searching for drivers on your own, you can use a tool that will do this for you automatically.
It will help you update drivers automatically and prevent PC damage caused by installing the wrong driver versions.Once installed, it will scan your PC for outdated drivers automatically.
5. Use Command Prompt to delete the problematic file
Open the Start Menu, click the Power button, hold Shift on your keyboard, and click the Restart option.
Select Troubleshoot and select Advanced options.
Next, choose Command Prompt.
Write and enter the following lines, hitting Enter after each one:
C:
cd windows
attrib -s -r -h DXGMMS1.sys /s
del DXGMMS1.sys /s /q
Close Command Prompt and try to start Windows 10 again.
This solution requires you to find and delete the problematic file. Since you’ll be removing a Windows 10 file, you might experience stability issues or, in the worst-case scenario, prevent Windows 10 from starting.
Before trying this solution, you might want to back up essential files and prepare Windows 10 installation media so you can reinstall if you’re unable to boot.
Users reported that this solution worked for them, but remember that it has certain risks.
6. Delete HID mouse from Device Manager
Press Windows Key + X and select Device Manager from the list.
Go to the View menu and select Show hidden devices.
Expand Mice and other pointing devices section. You should see several HID-compliant mouse devices, right-click each device, and choose Uninstall device from the menu.
When the confirmation menu appears, click OK.
Repeat these steps until you remove all HID-compliant mouse devices from your PC.
Unplug your mouse and restart your PC.
When the PC restarts, connect the mouse again. Windows 10 will automatically find and install the new drivers for it.
A few users reported that this solution worked for them, so we advise you to try it out on your PC and check if it solves your problem.
7. Disable your audio controller
Press Windows Key + X and select Device Manager from the list.
Expand the Display adapters section and double-click your graphics card.
Go to the Details tab and select Hardware Ids in the Property menu.
Write down the Value section because you’ll need it later.
Expand the System devices section in Device Manager and double-click the High Definition Audio Controller.
Go to the Details tab and select Hardware Ids from the Property menu.
Check the device’s Value section. If this device has the same values as your graphics card in Step 4, you need to disable this device. To do that, right-click the device and choose Disable from the menu. If you have multiple High Definition Audio Controllers, you need to check each and disable the one with the same values as your graphics card.
8. Change the TdrDelay value in your registry
Press Windows Key + R and enter regedit, then press Enter.
When Registry Editor opens, navigate to the path below: Computer\HKEY_LOCAL_MACHINE\SYSTEM\CurrentControlSet\Control\GraphicsDrivers
In the right pane, look for the TdrDelay value. If this value isn’t available, you need to create it.
Right-click the space in the right pane, choose New, select DWORD (32-bit), then enter TdrDelay as the new value’s name.
Double-click TdrDelay and set Base as Decimal and Value data to 10, then click OK to save changes.
Close Registry Editor.
By changing the TdrDelay value, your graphics card will reset only if the driver doesn’t respond after 10 seconds. In addition, by making these changes, you will prevent the dxgmms2.sys error from appearing.
9. Use –disable-gpu parameter
Right-click on Chrome and choose Properties from the menu.
Go to the Shortcut tab, locate the Target field, and add -disable-gpu at the end.
Click Apply and OK to save changes.
After doing that, start Chrome using the same shortcut.
Although this solution will fix the dxgmm2s.sys error, we have to mention that you need to use this shortcut every time you want to start Chrome.
10. Uninstall Windows updates
Press Windows Key + I to open the Settings app.
Once the Settings app opens, navigate to Update & security section.
Go to the Windows Update tab and click on Update history.
Click on Uninstall updates.
A list of installed updates will now appear.
Select the problematic update you want to remove and click the Uninstall button.
After removing the update, restart your PC.
Usually, Microsoft is frequently releasing new updates through Windows Update to address hardware and software issues, but sometimes an update can cause BSoD errors.
Blue Screen of Death errors can be severe if you have Windows 10 dxgmms2.sys error on your PC, try some of our solutions.
Please let us know in the comments section below if you have additional suggestions or recommendations.
A freezing touchpad is a pretty common issue that can hinder even the simplest of tasks. The good news is that it’s easy to fix, and to cut your time in half, we outlined below step by step instructions.
Luckily, no matter the root cause, with the steps below you’ll be able to fix it ASAP.
What can I do if my touchpad keeps freezing?
Before trying any of the suggested solutions, Restart the computer. A simple reboot can sometimes resolve software conflicts that cause touchpad freezing.
1. Run the Hardware Troubleshooter
Press Windows + X, type control, and hit Enter.
Click on View By in the upper right corner of the window and select Large Icons.
Select the Troubleshooting option.
Click on View all on the left of the window.
Now you only need to run the Hardware and devices troubleshooter, and Windows 10 will find and fix any issues regarding your laptop’s devices and reboot your PC.
The Hardware Troubleshooter in Windows is a built-in tool that can help diagnose and fix common hardware problems, including touchpad freezing issues. When you run the Hardware Troubleshooter, it will check for any common hardware issues and provide you with solutions to resolve the problem.
2. Uninstall recently installed software
Press Windows + X, type appwiz.cpl, and hit Enter.
Click on your most recently installed app from the program list and select the Uninstall option.
Lastly, follow the wizard to complete the installation.
Uninstalling conflicting applications can potentially resolve touchpad freezing problems if the issue is caused by software compatibility. Sometimes, other software installed on your device can interfere with the proper functioning of your touchpad, causing it to freeze or not work correctly.
So, to determine if a conflicting application is causing the touchpad freezing problem, you can try uninstalling recently installed software, starting with the most recently installed and working your way back.
After uninstalling each program, restart your device and see if the touchpad freezing problem has been resolved.
3. Update your drivers
Press Windows + X and select Device Manager.
Expand Mice and other pointing devices, click your touchpad driver, and select the Update driver option.
Finally, select the Search automatically for driver option.
Sometimes, the process of manually updating your drivers is not as straightforward as it looks because you may need to choose the correct driver version.
To facilitate this procedure, you can try a specialized application like Fortect Driver Updater to find the newest updates automatically after scanning your PC for outdated or missing drivers.
Right-click the driver’s installation file and select from there the Properties feature.
In the Properties window, click on the Compatibility tab on the window’s upper side.
Tick the Run this program in compatibility mode feature, then click on the drop-down menu under Run this program in compatibility mode and click on Windows 7 or whichever Operating system you have the driver for.
Click on OK.
Now run the driver’s executable file and install it as you usually would.
Reboot the Windows 10 PC.
Finally, see if the touchpad freezes after the reboot.
Type Windows Security in the Search bar, and click on the relevant search result.
Now, click on Virus & threat protection here.
Click on Scan options.
Lastly, select Full scan and click on the Scan now button at the bottom.
Running a virus scan can potentially detect and remove malicious software that may be causing the problem.
Touchpad freezing is a common problem faced by many computer users. However, several easy solutions can fix it. So, these steps will resolve the issue, whether outdated drivers, conflicting applications, or hardware problems cause it.
If you’d like to switch off certain components of your Touchpad like disabling the Palmcheck feature, you can too and check for improvements.
Finally, let us know which of these fixes worked for you in the comments.
Computer errors will appear sooner or later on every PC, and while some errors are relatively harmless, others can prevent you from installing new applications.
In today’s article, we’re dealing with the Network resource unavailable error message that occurs on Windows 10 or iTunes.
This error prevents you from installing or updating specific applications, so fixing this problem on your device is essential.
What does network resource unavailable mean?
The error message network resource unavailable usually means that the device or computer you are trying to access is unavailable or unreachable over the network. This can occur for varying reasons, including but not limited to the following:
Network connectivity issues – This can occur if there is a problem with the network cable, the network is down, or there is a routing issue.
Device not connected to the network – If the device you are trying to access is not connected to the network, you will not be able to reach it.
Device is turned off – If the device you are trying to access is turned off, it will not be available on the network.
Limited access permissions – The device may be configured only to allow access from certain devices or IP addresses, causing the error message to appear for unauthorized users.
Device is busy – If the device you are trying to access is busy with other tasks, it may not be able to handle additional requests, resulting in the network resource unavailable error message.
Incorrect network settings – If the network settings on your device are incorrect, you may not be able to access the desired resource.
DNS resolution issues – If the domain name system (DNS) cannot resolve the hostname to an IP address, you will not be able to access the desired resource.
Software bugs – Sometimes, the error message may be caused by a software bug in your operating system or application.
Maintenance or upgrades – The device or resource may be undergoing maintenance or upgrades, causing it to be temporarily unavailable.
How do I fix the network resource unavailable error?
Firstly, before going into these fixes, we recommend restarting your devices. A reboot can force some problematic programs to end and may resolve the network resource issue.
Also, ensure that all devices are correctly turned on because, for some users, the error occurs when necessary devices are off.
Lastly, before going into the solutions, you may consider waiting a few minutes are retrying. This is because unresolved server issues could trigger it. So, waiting it out may pay off.
1. Update network drivers
Press Windows + R, type devmgmt.msc, and hit Enter.
Expand any category with a yellow badge, right-click on the driver, and select Update driver.
Click the Search automatically for drivers option and follow the instructions.
Finally, perform these steps for all outdated drivers.
Outdated network drivers are a particular source of connection errors. Driver updates are released periodically to fix bugs, help communication issues, add new features, and increase your computer’s stability.
You could download the latest drivers yourself. However, the safest method to keep your OS running smoothly is to use a dedicated tool that checks periodically for driver updates and suggests the necessary actions.
One such tool is Outbyte Driver Updater. You can download it for free, set it up in just a few clicks, and let it update and fix your damaged drivers.
The main benefit of Outbyte Driver Updater is that it is a smart utility with an extensive driver database. In addition, it is proven to always install the best driver version for your specific hardware, removing the risks that come with faulty driver versions.
The lightweight tool allows it to run in the background and keep your drivers in check without worrying about using too many resources.
Most applications add new values to your registry once you install them. However, once you remove those applications, their registry values can remain on your PC, causing errors such as Network resource unavailable.
To fix this problem, you must find and remove those entries from the registry. Of course, you can do that manually, but modifying the registry is a complicated and potentially dangerous process affecting your system’s stability.
For this reason, we recommend you try dedicated uninstaller software. This type of utility scans your system and only removes damaged or unnecessary files.
Uninstallers are created to remove files and apps that are typically difficult to remove without assistance. They automatically find all leftover entries in your registry and remove them safely without affecting your system or removing anything else.
3. Check the Windows Installer service
Press Windows key + R and enter services.msc. Press Enter or click OK.
Locate Windows Installer and double-click it.
Set Startup Type to Manual or Automatic. Make sure that the service is running. If not, click the Start button to start it. Lastly, click Apply and OK to save changes.
After starting the Windows Installer service and making the required changes, check if the problem is resolved.
4. Download the Program Install and Uninstall Troubleshooter
Double-click on the downloaded MicrosoftProgram_Install_and_Uninstall.meta file.
Follow the wizard to complete the troubleshooting process.
Many users reported that Program Install and Uninstall Troubleshooter fixed the Network resource unavailable error for them.
This tool will fix corrupted registry files or keys that control the updated data. In addition, it can fix many problems that prevent new applications from being installed.
5. Edit the registry
Press Windows Key + R and enter regedit. Next, click OK or press Enter.
In the left pane, navigate to: Computer\HKEY_LOCAL_MACHINE\SOFTWARE\Classes\Installer\Products
Navigate through each subkey and look for the ProductName value in the right pane.
ProductName value will tell you the application’s name associated with that key. If you find the key related to the problematic application, right-click it, and choose Delete.
After doing that, close the Registry Editor and restart your PC.
After your PC restarts, check if the error is resolved. We have to mention that a few users reported that you can fix the problem by deleting the subkey related to Microsoft Security Client.
This solution might be a bit advanced, and if you don’t feel comfortable modifying the registry, you might skip it entirely.
6. Modify the installed applications
Press Windows + X, type appwiz.cpl, and hit Enter.
Select the application you think it’s problematic.
Now choose the Change or Repair option from the menu on the top.
Finally, follow the instructions on the screen to complete the process.
Nevertheless, this isn’t a universal solution since many applications don’t support this feature.
On the other hand, many applications misbehave once they are automatically updated. So you ensure they can’t interfere with the network settings by changing or even uninstalling them using the tool suggested in the 2nd solution.
The only problem is finding which app is causing the trouble, which can take a while.
Fix the network resource unavailable issue on iTunes
1. Delete iTunes entries from the registry
Back up your registry before proceeding (as suggested above, in the 6th solution).
Press Windows Key + R and enter regedit. Next, click OK or press Enter.
Press Ctrl + F. Enter itunes6464.msi or the name of the missing file. Then, only check the Data checkbox and click on Find Next.
Now you should find that file in one of the subkeys in the path below: Computer\HKEY_LOCAL_MACHINE\SOFTWARE\Classes\Installer\Products
Locate the parent key and delete it.
The key you need to delete will have an array of letters and numbers in its name. In addition, you can check the ProductName value in the right pane to be sure that the key you’re about to delete is related to iTunes.
After you delete the problematic key, you need to restart your PC. After that, you should be able to reinstall iTunes without any issues.
2. Completely remove iTunes and QuickTime
According to users, you can fix Network resource unavailable error by removing iTunes and QuickTime. However, both of these applications tend to modify your registry, and sometimes they can leave leftover files on your PC.
To completely remove these applications, we suggest you use dedicated uninstaller software. As mentioned at the beginning of the troubleshooting steps, this tool specializes in completely removing unwanted apps from your device.
After removing both iTunes and QuickTime, you should be able to install iTunes again without any errors.
The Network resource unavailable error can affect almost any application on your PC. Unfortunately, this error can be hard to fix, but the solutions in this article should help.
Please let us know in the comments section below if you have further suggestions.
You just got the Sekiro: Shadows Die Twice FDP system message 4161 error message, so we will explore fixing this with you.
The game was only recently released, but players have reported various issues with the game.
They range from sound not playing correctly, the occasional crash, the black screen at launch, or the low framerate issue.
We’ve compiled a list of fixes that could help you and keep the fun going for hours.
What are common Sekiro PC issues?
Sekiro: Shadows Die Twice, like many other games, can experience various technical issues on PC. Some of the most common issues experienced by players include:
Sekiro FDP system message 401171 – is an error code in Sekiro: Shadows Die Twice, indicating that the game has detected an unauthorized or abnormal change to its code or data.
Sekiro won’t launch PC – It refers to a problem where the game fails to start or load correctly. Various factors, including compatibility issues with your PC and outdated graphics card drivers, can cause this issue.
Sekiro stuck on loading screen – It refers to an issue where the game fails to progress from the initial loading screen and becomes unresponsive. Compatibility issues with your PC and outdated graphics card drivers also cause it.
Sekiro sound not working – It refers to a problem where the game’s audio fails to play correctly, causing it to be silent or have other audio-related issues.
Now we have this out of the way, let us explore some fixes.
How can I fix FDP system message 4161 and other issues in Sekiro?
1. Verify game files
Launch Steam, navigate to the Library, right-click on the game that’s not launching, and click on Properties.
Now, go to the Local files tab, and click on Verify integrity of game files.
Wait for the process to complete.
2. Update drivers
Press Windows + R, type devmgmt.msc, and hit Enter.
Expand the Display adapter, right-click your driver, and select Update driver.
Click Search automatically for drivers.
Lastly, repeat the process for audio drivers.
Updating drivers can help resolve the FDP system message 4161 in Sekiro: Shadows Die Twice because it can ensure that the game runs with the most recent and compatible drivers for your hardware.
Drivers are software components that allow your computer to communicate with the hardware components, such as graphics cards, sound cards, and controllers.
If you want to completely simplify the process of updating your drivers, we recommend you try specially-designed apps like Outbyte Driver Updater.
It is a tool that finds the latest updates for your drivers from its vast repository after it scans your computers for outdated, malfunctioning, or missing drivers.
Outbyte Driver Updater
Give Outbyte Driver Updater a try and let it find the best updates for your drivers instantly.
Right-click on the game’s shortcut, and select Properties.
Click on the Compatibility tab and check the box for Run as administrator.
Finally, click Apply and OK.
Running the game as an administrator can help resolve the FDP system message 4161 in Sekiro: Shadows Die Twice because it can provide the game with the necessary permissions to access and modify the system resources required to function correctly.
Some game components may require elevated permissions, and running the game as an administrator can ensure that these components can run without encountering any permissions-related errors.
Click on the Local Files tab, and select Uninstall Game.
Follow the on-screen instructions to complete the uninstall process.
Navigate to the game’s installation: C:\Users\[user name]\AppData\Roaming\Sekiro
Delete all remaining files and folders, then restart your PC.
Finally, reinstall the game.
Reinstalling the game can help resolve the FDP system message 4161 in Sekiro: Shadows Die Twice because it can remove any corrupted or damaged game files that may be causing the issue.
Over time, game files can become damaged or corrupted due to various reasons, such as hardware failures, software conflicts, or system crashes.
Also, when these files are damaged, they can cause problems with the game’s performance or stability, resulting in errors like the FDP system message 4161.
This is as far as we will go in this article. Any related issues should be fixed using our recommended solutions. First, however, we would like to know what exactly has worked for you.
Good news for Microsoft users. The hotly anticipated Mouse Gestures feature on Edge will become available to all users starting from the week of March 14, 2023 (beta channel) and the week of April 6 (extended stable channel).
The Mouse Gestures feature allows users to perform better on the browser, scroll freely, and perform high multitasks. Surely, a piece of good news especially for big monitor users.
“This feature provides an easy way for users to complete tasks like scroll forward or backward, open new tab, refresh page, etc. They can finish a task by pressing and holding the mouse right button to draw certain patterns on a webpage, instead of clicking the buttons or using keyboard shortcuts.”
The feature was previously present on Edge’s Spartan version before transitioning into a Microsoft-enhanced Chromium base starting in 2019.
Users have surely been feeling its absence, and they’ve been asking for it for years. Since its disappearance, many have resorted to third-party extensions and add-ons to resolve the problem or even to competitors’ products with built-in mouse gestures feature like Opera.
At that time, however, the functionality worked in Basic and Advanced categories. Each command performs different tasks like scrolling, closing tabs, returning to the homepage, reopening closed tabs, etc.
How to enable mouse gestures in Edge?
1. Natively
1. Open your Microsoft Edge browser.
2. Go to the upper right corner of your screen and click the vertical ellipsis ➜ Mouse Gestures to enable the feature.
3. From here, you can see customizable gestures and how each of them works, which you can also turn off easily.
In the meantime, if you want to try it out yourself, go to Microsoft’s page to become an Edge insider and experience all the planned features before they’re out.
2. With 3rd party add-ons
1. With your Edge browser open, click on the vertical ellipsis ➜ Extensions ➜ Open Microsoft Edge Add-ons website.
2. Using the search box on your left, type mouse gestures. Click Get on the desired add-on.
There are plenty of options to choose from, but we’re going with smartUp Gestures from zimocode, which has amassed 4.5 stars rating & over 100,000 users.
3. Click Add extension.
4. It will automatically redirect you to its setting page & activate it. From there, you can see all the features that it offers.
Are you excited about this feature? Let us know in the comments!
Sometimes, you may face a problem that shows a message like Windows 10 audio services is not responding. Fortunately, you can solve it easily.
If you encounter a sound-related problem on Windows 10, the first thing you may do is use the Playing Audio troubleshooter. However, it may fail by showing that the Audio services are not responding. This issue may indicate many things. But you can solve it by following the proper steps.
What causes Windows 10 audio services to be unresponsive?
There are several reasons that may cause this unwanted situation. It includes the following:
If the audio services are still not responding, proceed with the solutions below.
1. Update the audio driver
Open the Start Menu, type Device Manager, and press Enter to open Windows Device Manager.
Expand Sound, video & game controllers.
Right-click on the Realtek Audio or whatever your audio driver is and choose Update.
Pick the preferred method to update.
Expand Audio inputs and outputs and update drivers from there as well, if needed.
After that, restart your computer.
Now, try to play any audio file or anything that has audio. It should fix audio services not responding on Windows 10. If it didn’t work as intended, we recommend using a specialized tool.
2. Re-install the audio driver
2.1 Uninstall the audio driver
Open the Device Manager like before.
Find the audio driver, right-click on it, and choose Uninstall device.
Check Attempt to remove the driver for this device and click on Uninstall.
Restart your PC.
2.2 Install the driver again
Go to the sound card manufacturer’s website, like Realtek. If you have no idea, visit the motherboard manufacturer’s website.
Choose the model and download the audio driver.
Install the driver and restart Windows 10.
After completing the sound driver’s reinstallation, verify whether it has solved the Windows 10 audio services not responding issue or not.
Open the Start Menu, type the control panel, and press Enter.
Go to Uninstall a program, then click on View installed updates.
Now, uninstall the most recent update.
Restart Windows.
Please remember that this method only helps when you encounter an audio problem after installing an update. If not, skip it and follow the next methods.
4. Start/Restart the audio services
On the Start Menu, search for services.msc and press Enter.
Find the Windows Audio, right-click on it, and choose Restart. If the restart option is not available, choose Start.
Do the same for Windows Audio Endpoint Builder.
If the Windows 10 audio services not responding problem still persists, you may need to restart additional services.
It includes the DCOM Server Process Launcher, RPC Endpoint Mapper, and Remote Procedure Call (RPC).
5. Uninstall audio software
Open the Start Menu, type the control panel, and press Enter.
Click on Uninstall a program.
Find and uninstall any third-party audio software you have installed recently.
After uninstalling, restart Windows 10. It should help to get rid of the unresponsive audio services issues.
Following the above methods will indeed help. However, you also can consider doing a system restore. We also suggest you take steps to repair problematic system files if necessary.
If none of these things have fixed the audio services are not responding problem, consider doing a clean Windows installation.
One thing to keep in mind is that your audio services also may go through problems if there is a problem with any connected device that has the audio input or output feature. Some webcams may have a built-in mic, and that has problems. You can disconnect the webcam, too, in this case.
So, make sure to check these devices. If necessary, disconnect them and see if it helps.
This article has explained how to fix Windows 10 audio services not responding. If you know other better methods, feel free to let us know in the comments box.
Some browsers are not supported by some services, and can’t access them. Such is the case with Gov.UK.
Gov.UK is a site for the United Kingdom’s Sector of Information that contains information about government services. However, it was created to ensure that all the services have a single access point.
Nevertheless, not all browsers can access the site because it requires a safe and stable connection. Hence, we’ll discuss some of the best browsers that support the Gov.UK.
What is the safest browser to use in the UK?
Opera One is the best browser when it comes to online security and privacy. Hence, we recommend it as the safest browser in the UK that supports Gov.UK.
Also, it is available across different operating systems. Some features are a fast and secure internet connection, an inbuilt Adblocker, and a reliable free VPN service.
Not far from its competitors, Bra also stands out thanks to the built-in security features and optimization for data management. So, you can use Brave as well to access Gov.UK.
The top choice on our list is the Opera One browser, which may be used safely with the Gov.UK website. Few would argue that the Opera One browser is fully safe, considering its features and security safeguards.
Its primary security features are an integrated Adblocker that protects you from dangerous adverts, tracking protection, and a free proxy VPN. Its security protocols comply with the highest standards for your virtual life to be safeguarded.
These are the fundamental tools required for a secure online browser. Along with this, there are several additional features to make your browsing experience safe and secure, as well as the ability to install extensions from other web shops.
It implies you can tailor it to your threat model. Furthermore, it comes with a native AI and modular AI-ready design to help with the integration of other current or future AI technologies.
Opera One
Use it confidently on Gov.Uk and never miss anything from the news feed.
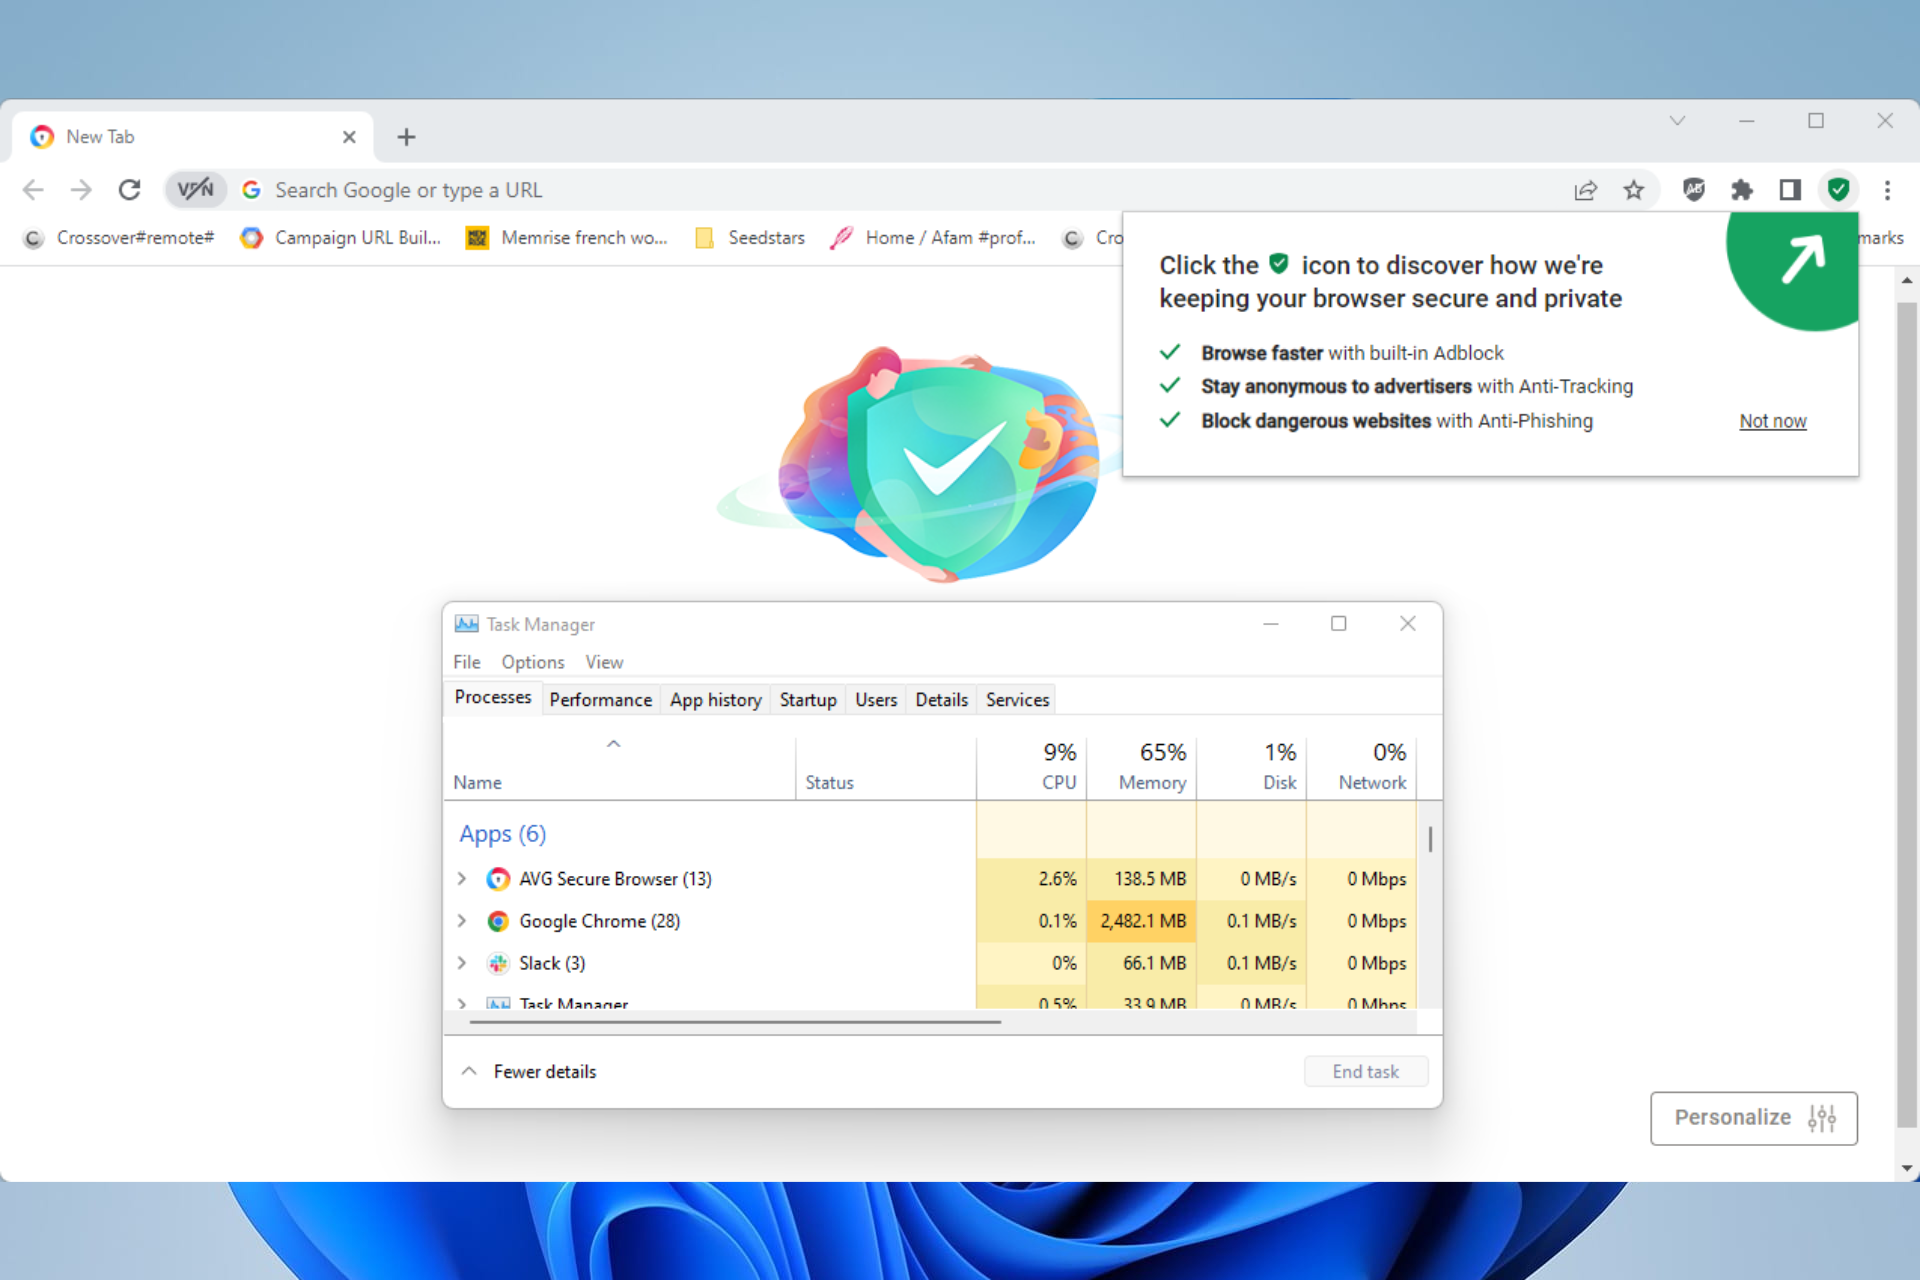
Safety along with stability are the two main factors that drive AVG Secure Browser. This robust combination is what qualifies it to access government services effortlessly and securely.
So, what exactly does it bring to the table? What makes it so special besides supporting Gov.UK websites? To begin with, it provides ironclad HTTPS encryption.
Sure, it’s not as unique a feature as it used to be a while back, but here’s the interesting part. While other browsers will settle for an anemic warning meant to discourage you from pursuing an insecure connection, AVG Browser will enforce HTTPS connections anywhere it can.
More security features unfold as you use and get to know this useful navigator such as an ad-blocker, a stealth mode meant to simply forget browsing history or tracking cookies, and more.
AVG Browser does not fall short on safety and privacy-focused features. Among its valuable characteristics, we simply cannot ignore its anti-phishing, anti-tracking, and anti-fingerprinting modules. Plus, it fully supports Gov.UK.
AVG Secure Browser
Surf your favorite web pages worry-free using this compatible and speedy browser.
Brave browser is one of the best browsers regarding online security and privacy. Hence, we recommend it as one of the safest browsers in the UK that support Gov.UK. Also, it is available across different operating systems.
Some features of the Brave browser are a fast and secure internet connection, an inbuilt Adblocker, and a reliable data privacy system. Also, it is an open-source, Chromium-based browser that allows it to perform quickly.
Another pro is that it has an inbuilt tracker-blocking feature that prevents intruders from monitoring your browsing activities.
Furthermore, the Brave browser offers services, not in other browsers, such as free VPN access and HTTPS. Hence, it is one of the best browsers that support Gov.UK.
Safari is one of the most resourceful browsers in the market. It is developed by Apple. It comes as the default browser for Apple devices.
Likewise, it is a reliable browser for accessing high-security sites like Gov.UK. Some notable features of Safari are lighting speed for loading websites, smooth internet access, and availability across different operating systems. These have made it a browser that supports Gov.UK.
Furthermore, the Safari browser has a user interface that makes your browsing experience remarkable. Also, it offers safe and private access to the internet without worrying about hijackers or intruders.
Moreover, the browser is easy to use for anyone, and it has a simple user interface. Likewise, it features a standard tab management system allowing users to control their browser tabs.
Note that the supported versions of the browser are Safari 12 and later. So, if your version is not supported, click the link below to get the latest version.
For a long time, Microsoft Edge has been the fastest browser in the market and remains the best. It is notable for how fast and smoothly it loads websites.
This feature has made it one of the best options for advanced websites like Gov.UK. However, it is a browser that supports Gov.UK and allows users to access it easily.
Some other features of Microsoft Edge are a customizable user interface, reliable security and privacy system, and inbuilt support for JavaScript errors. It is the default browser for Windows devices.
Furthermore, it is regarded as a dev tool because it supports JavaScript.
Google Chrome is a Chromium-based browser. It is one of the most relevant browsers in the world. Being a widely used browser, it offers several features that make it the best.
However, Chrome is a fast browser that offers a swift and smooth browsing experience. Also, it has a repository where users can download extensions to help them get more of the internet. Hence, it is one of the browsers that support Gov.UK and can safely help you navigate the site without errors.
Moreover, Chrome has standard security and privacy system. It helps protect user data and also blocks intruders from accessing your browser information.
Another tool in Chrome is the inspector. It allows you to access and debug your codes in the browser. Likewise, Chrome is available in different operating systems like Windows and macOS.
Firefox is one of the oldest browsers in the market. It is a resourceful browser that offers many features to its users. However, it is one of the browsers that support Gov.UK.
Furthermore, Mozilla Firefox is a Chromium-based browser with many features. Some features are a fast and secure internet connection, a highly customizable browser interface, and an easy-to-navigate interface.
Also, the browser comes with an inbuilt Ad Blocker that allows you to surf the Internet without interruption. Likewise, there are several plug-ins and extensions you can download and use on Firefox. It helps you to download browser extensions from Chrome because it is also a Chromium-based browser.
Some of our readers asked: Why am I getting an unsupported browser error? The unsupported browser error always occurs when you try to access a specific website with a browser it doesn’t support.
As this article mentioned, not all browsers are authorized to access some websites like Gov.UK. So, you can encounter this error when the website doesn’t support your browser.
Users should note that the latest versions of the browsers listed above are authorized and can support Gov.UK. However, using an old version may result in errors.
If you want the best from both worlds in terms of storage, you should use a laptop with SSD and HDD. Many users use SSDs for booting while the hard drive is used for file storage.
In today’s article, we’re going to show you the best laptop with both SSD and HDD that you can get, so let’s get started.
If you’re looking for a powerful gaming laptop with SSD and HDD, then this is the right model for you. The device runs on Core i7-9700K CPU and it can achieve up to 4.9GHz with Turbo Boost.
The screen is 17.3 inches which should be enough for gaming sessions. Speaking of gaming, there’s GeForce RTX 2070 8GB GDDR6 available. Regarding the memory, there’s 16GB 2400MHz DDR4 available.
As for the storage, you can find 256GB PCIe SSD and 1TB Hybrid Drive which should be more than enough for all your files.
Overall, this is an incredibly powerful laptop, and if you need a device with lots of space to store your files, this is a perfect choice.
Another great laptop with SSD and HDD is MSI GL73 8SE-010. It’s powered by Intel Core i7-8750H that can go up to 4.1GHz. As for the GPU, NVIDIA GeForce RTX2060 6G is used.
The display is 17.3 with full HD resolution and 120Hz refresh rate. As for the memory, there’s a single 16GB DRR4 2666MHz stick, but it can be expanded up to 32GB.
As for the storage, there’s a 128GB NVMe SSD and a 1TB hard drive available. Overall, this is a great device that should be able to give you a lot of space and hardware power for all your tasks.
This is a 15.6-inch device and it comes with a full HD IPS 144Hz display. It runs on Ryzen 5 4600H up to 4.5GHz and NVIDIA GeForce GTX 1650Ti GB.
Regarding the memory, there’s 16GB DDR4 RAM which should be more than enough for multitasking and gaming. As for the storage, there’s 512GB NVMe SSD and 1TB HDD.
This model offers great storage capacity, so you won’t ever run out of space with it. As for the performance, it will be great for all tasks and moderate gaming.
This is a 15.6 HD device, and it comes powered by AMD Ryzen 3 3250U CPU that can go up to 3.5GHz. With 16GB of DRR4 RAM, this model will be perfect for multitasking.
Regarding the storage, there’s a 256GB SSD and a 1TB hard drive so you should be able to store files without any issues.
Other features include a USB-C 5Gbps port, two Type-A 5Gbps ports, one RJ-45 port, HDMI 1.4b and a microphone/headphone combo. Overall, it’s a great laptop with SSD and HDD.
If you’re on a budget, this 15.6 HD laptop will be perfect for your needs. The device runs on Ryzen 3 3250U up to 3.5GHz. Regarding the memory, there’s 16GB DDR4 RAM, which is more than capable of multitasking.
As for the storage, there’s a 256GB SSD and a 1TB hard drive, so you’ll have more than enough space for all your files.
The laptop comes with Windows 10 Home preinstalled, and because it doesn’t have a dedicated GPU, it’s a perfect option for less demanding users.
Having a laptop with both SSD and HDD is great because you’re getting the best out of both worlds, and we hope that our guide helped you find the right model for your needs.
If you’re looking for a new drive, then consider getting one from our best SSDs to buy guide. What is your storage option of choice? Let us know in the comments below.
When installing or uninstalling a program, you may encounter the Error performing inpage operation message.
This issue can also occur when performing a system restore using restore points, which is much more severe.
If you are also troubled by this error, this is the article you need. In this guide, we have listed some troubleshooting tips to help you resolve the Error performing inpage operation messages in Windows.
Why does the Error performing inpage operation appear?
Below are some of the causes of the error performing inpage operation issue:
Outdated driver: If your USB driver is outdated or faulty, you can experience the error performing inpage operation 0x3e7 or on SCCM. The solution to this is to update your drivers to the latest version.
Faulty hard disk: In some cases, this issue might be due to problems with your hard disk. You might need a new hard disk to restore normalcy on your PC.
Corrupt files on hard disk: Sometimes, the error performing inpage operation or Steam or Excel can be traced to corrupt files on your hard disk. The solution to this is to run the Check Disk utility.
How do I fix the Error performing inpage operation?
1. Use a reliable third-party tool for your Windows Registry
A practical solution would be using a professional PC repair tool designed for Windows OS issues that automatically scans your device and repairs faulty files.
Registry settings also play a crucial role in your system’s health and stability. Therefore, monitoring these elements and addressing them when they are in critical condition is essential.
2. Use a System Restore point
Press the Windows key on your keyboard, type system restore, and click on Create a restore point option.
In the System Properties window, click the System Restore button.
Click Next when the System Restore window appears.
Check the Show more restore points box if available. This will list all the available restore points.
Select the most recent restore point and click Next.
Read the description and click the Finish button.
The restoring process may take a few minutes to complete depending on the restore point size.
3. Run the Check Disk utility
Press Windows key + X and choose Windows PowerShell (Admin) from the menu.
In the PowerShell window, type the following command and run it: CHKDSK /f C:
The check disk utility will scan the hard disk for common errors and apply available fixes.
After the scanning is finished, restart the computer.
Now try to install or uninstall the program that was triggering the error performing inpage operation error and check for any improvements.
4. Reset Windows 10
Press Windows key + I.
Go to Update and Security.
From the left pane, click on the Recovery tab. Then, under the Reset this PC section, click the Get started button.
In the Choose an option window, you will be presented with two options:
Keep my files: This option will remove apps and settings but keeps your files.
Remove everything: This option will remove your files, apps, and settings.
We recommend you select the Keep my files option first. This will reset the Windows OS while preserving the personal files.
However, if the issue persists, perform a complete reset using the Remove everything option.
Once done, check for any improvements.
If the issue persists, even after performing a complete reset, as a last resort, perform a clean install. Note that a clean installation will remove all the data from your computer.
Right-click on the Start button and select Device Manager from the list.
Click on the Universal Serial Bus controllers section to expand it, right-click on a driver, and select Update driver.
Now you can select Search automatically for drivers, or if you already have one, pick the second option.
If the system finds a new driver, it will install it. If not, that means the best one is already installed. However, you can click on Search for updated driver on Windows Update.
In the next window, click on the Check for updates button.
Install any new update, especially the optional driver updates.
Although it’s less likely, this issue can be caused by a problematic or old USB driver, updating them immediately would be a great idea.
If you didn’t follow this solution, we have a complete guide on updating drivers in Windows 10, and some tools can do that automatically.
6. Replace the hard disk
If the issue persists, check your hard disk for hardware issues.
Before replacing the hard disk, remove it from your computer and connect it to another computer.
If the computer fails to boot from the hard drive, you may need to replace the hard disk.
How is the Error performing inpage operation message related to System Restore?
Windows automatically creates a System Restore point whenever you install or remove the software from your PC. By doing so, you can restore the computer if anything goes wrong after installing new software.
This error prevents this from happening, and since you can’t use System Restore, you cannot install or delete the desired application.
How does System Restore work?
System Restore is a restoration feature that affects installed applications, updates, and system files. In case anything software-related causes instability on your PC, you can use this feature to fix it quickly.
Remember that the restoration feature doesn’t affect personal files, so if you accidentally delete them, you can’t recover them with this method.
The Error performing inpage operation message can occur due to system file corruption or hard disk issues, so you might want to look into it with HDD health check software.
Hard drives are susceptible to occasional failures, some leading to a total hard disk crash and, subsequently, costly data losses. One prominent issue is the Windows found errors on this drive that need to be repaired warning message.
And just like the fatal error external hard drive problem, it’s essential to act before the disk suffers severe damage. So, to help you get past the error, we have prepared the solutions to help you solve this issue in this guide.
Why does Windows found errors on this drive message appear?
A series of factors can cause the Windows found errors on this drive warning message. Below are some of the prevalent causes:
Presence of corrupt files: Sometimes, you might we found errors on a drive to repair these errors and prevent loss of data prompt on your PC because of corrupt files. You need to eliminate these files to solve the issue.
Corrupt disk sectors: In some cases, this issue can be caused by bad disk sectors. The solution is to repair the corrupt sectors using the Check Disk utility.
How do I fix the Windows found errors on this drive that need to be repaired?
1. Run the CHKDSK utility
Press the Windows key, type cmd, and click Run as administrator under Command Prompt.
Type the command (replace c with your drive letter) below and hit Enter to run it: chkdsk c: /f /r
Finally, press Y when prompted and restart your PC to start the process.
The bad disk sector is the most prominent cause of this issue. Thankfully, the built-in CHKDSK utility on Windows PCs can fix this.
2. Use PowerShell
Press the Windows key + X and select Windows PowerShell (Admin).
Type the command (replace C with your drive letter) below and hit Enter to run it: Repair-Volume C –Scan
If any error is detected, run the command below: Repair-Volume C –OfflineScanAndFix
Finally, restart the PC and check if the problem has been fixed.
Another built-in tool you can use when you get the Windows found errors on this drive warning message is the repair feature. Running the command, as shown above, should fix the issue.
3. Security and Maintenance Check
Press the Windows key, type control, and select Control Panel.
Choose System and Security.
Now, select the Security and Maintenance option.
Click to expand the Maintenance.
Finally, select the Drive status option and check if any hard drive issues are reported.
The Windows 10 Security and Maintenance section keeps you updated on issues affecting your computer’s general health.
It can thus help you identify problems with the hard drive hardware and software as long as your PC is booting. In addition, this helps detect the potential causes of the Windows found errors on this drive error message.
Create and insert a Windows 10 installation disc/USB flash drive
Boot your PC from the bootable drive. If your PC does not boot from the drive, you must enter BIOS to change the order.
Now, select your Language and other information and click Next.
Select Repair your computer in the bottom left corner.
Choose the Troubleshoot option under Choose an option.
Next, click Advanced Options.
Now, select the Command Prompt option.
Finally, type the command below and hit Enter to run it: chkdsk c: /f /r
If you cannot boot into your PC because of the Windows found errors on this drive warning message, the easiest way to fix it is to use an installation media. This will allow you to boot from it and repair your PC.
For hard drive errors, once repaired, you can revert to previous versions to and restore but if you get the there are no previous versions available, we know how to get your backup.
With this, we can conclude this detailed guide. All you have to do now is follow the instructions carefully, and the issue should be fixed.
Forgetting your login password is something that everybody does. Too many attempts can cause Windows to disable the sign-in option, but it can easily be overcome.
But let’s say you recover your password and try to log in again, only to be rejected once more. If this happens, this is a sign of a greater problem afflicting your computer.
Why did the sign-in option become disabled?
It’s rather rare for this problem to occur, so there aren’t a lot of culprits behind a disabled sign-in option. A lot of the time, it typically comes down to user error.
Too many failed sign-in attempts – If you try to sign in too many times, Windows will prevent you from doing so. It’s recommended that you wait for some time before trying again.
You have corrupted files on your system – Corrupt files can mess with system processes. Cleaning up your computer may require you to manually replace files.
Malware has infected your computer – Once you get access to your computer again, be sure to download some antivirus to thoroughly your computer.
How can I re-enable the sign-in option?
There are many different ways you can try to get past this error. But for the sake of brevity, we’re only going to cover the best 10. And that amount will be split across both easy and complex solutions:
If you forgot your password, all you have to do is select I forgot my PIN on the login screen. Follow the on-screen instruction to reset your information.
An error message may appear after repeated attempts to sign in, telling you to wait for two hours before trying again. Wait for that amount of time, then try logging in once more.
If you do manage to log into your account, it’s recommended that you create a new local account and use that one moving forward.
1. Restart Windows 11 in Safe Mode
Click the Power icon in the bottom-right corner. Hold the Shift key down and select Restart. This will boot Windows 11 with advanced startup options.
Under Choose an option, select Troubleshoot, then Advanced options.
Select Startup Settings.
On this final page, click Restart.
Next, you will be asked to press one of the function keys on how you want Windows 11 to boot. Press F5 to enable Safe Mode with an internet connection.
Windows 11 will boot in Safe Mode. Restart your computer and try logging in once more.
This solution is recommended to be done first as it allows you to bypass the error message and log into your computer. The following solutions aim to fix the problems causing this error in the first place.
2. Run System File Checker and DISM commands
Bring up the Command Prompt on the Windows 11 search bar. Click Run as administrator.
In the Command Prompt, type in the following command and hit Enter on your keyboard: sfc /scannow
Give your computer enough time to finish scanning.
Now type in the following commands, one after the other, and press Enter after each one: dism /online /cleanup-image /scanhealthdism /online /cleanup-image /checkhealthdism /online /cleanup-image /restorehealth
Like before, give your computer enough time to finish scanning.
Restart your computer when you’re done to finish up the process.
After applying the steps above, you must be able to access your device through the sign-in option. If that is not the case, you may need an alternative solution to fix it.
You can always rely on modern repair and optimization software that will fully diagnose your Windows OS and repair corrupted files, registry files, and other essential concerns.
3. Run the Check Disk command
Like the previous solution, launch the Command Prompt with the same administrator permissions.
Type the following command and hit Enter on your computer: chkdsk [driveletter] /f /r /x
Where it states [driveletter], enter the letter of your hard drive as shown below.
You might get a message stating the command cannot run because it’s in use. Schedule the scan for the next restart by pressing Y on your keyboard.
You should also perform the Check Disk scan on other hard drives if multiple drives are connected to your computer.
Right-click the Windows logo in the bottom right corner and select Run.
In the Run command, enter gpedit.msc.
Expand Windows Settings, and under this section, select Security Settings.
Expand Account Policies, then select Account Lockout Policy.
Double-click Account lockout threshold.
In the new Properties window that appears, set the value to 0.
Click Apply, then OK.
Configuring the Local Group Policy Editor is usually a feature exclusive to Windows 11 Pro, but it’s possible to get it running on the Home version.
Doing so requires you to run a specific batch file on the Notepad app.
5. Tweak AccountLockout in the Registry Editor
Start by launching the Registry Editor. If a User Account Control window appears, select Yes.
Expand HKEY_LOCAL_MACHINE, click SYSTEM, and then CurrentControlSetright after.
Open Services, and in the vast list, scroll down until you find RemoteAccess. Expand that as well.
Click Parameters, then select go to AccountLockout.
Double-click MaxDenials. Set the value data to 0, then select OK.
Restart your computer to apply the changes.
Facing similar issues like Account is disabled. Please see your administrator; take a look at this guide to find solutions.
6. Reset the account password
Log into another account that has administrator permissions on your computer.
Right-click the Windows logo in the bottom-left corner and select Run.
Type in control userpasswords2, then click OK.
Select the problematic account and click the Reset Password button.
Enter and confirm a new password for the account. Click OK to close the window.
Finish up by selecting Apply, then OK.
Be sure to check out Microsoft’s instructions on how to create administrator accounts on Windows 11 if you don’t have one or you don’t remember.
7. Delete the Ngc folder
Launch File Explorer.
Copy and paste the following address to the top bar of File Explorer: C:\Windows\ServiceProfiles\LocalService
Double-click the AppData folder. Make sure you’re using an administrator account moving forward. If you see a window stating that you don’t have permission, click Continue.
Open the Local folder, then double-click Microsoft.
Delete the Ngc folder. If Windows 11 asks for permission, give it.
Right-click on File Explorer. Hover over New and create a new folder. Name it Ngc.
Once that’s done, go to the Accounts tab of the Settings menu. Select Sign-in options.
Expand the PIN entry. Change your PIN.
Is it possible to run commands without being an administrator?
As you can see from the solutions, most of them require you to have admin-level permissions. This can make it difficult for users who aren’t admins to fix any error, but it is possible.
For example, if you want to flush out the DNS cache without admin rights, you can still open either the Command Prompt or PowerShell.
And be sure to check out our guide on what to do if registry editing has been disabled by the admin. The SFC scan mentioned earlier still works, regardless of the level of access you may have.
Feel free to comment below if you have questions about other Windows 11 errors. And please tell us if there’s a specific guide for any login or security issue you’d like to see.
With over 1 billion users, Gmail seems to be the email provider of choice for many. One of the reasons behind its surging popularity is its ease of use and integration with other Google products, such as Google Drive.
But like with any other application, users sometimes experience challenges, one of the most common being that the Gmail window is too wide, large, or small.
So if you’re having problems and wonder how can you get your Gmail screen back to its normal size, we got you covered. That’s what we’ll tackle today.
If the web browser you use, Chrome works properly and doesn’t have any errors on other pages except Gmail, make sure to check if you made any custom settings to that specific webpage.
The following user-reported issues are quite similar in nature:
Gmail margins too wide – Adjusting the window using this guide should fix this.
Gmail inbox too wide – Perhaps opening Gmail, going to Settings, and changing your Density and Reading Pane options will do the trick.
For the most part, it should be very easy to adjust how your email inbox or compose page are displayed in your browser. Just adjust the window size and display zoom. Read on to see how.
Quick Tip:
If you experience such problems regularly, try opening Gmail from another browser. Opera One is a great option, with integrated anti-tracking and VPN for private and secure emailing.
The browser runs on a Chromium engine and includes all the standard features you need. Plus, it also includes unique features such as native AI, workspaces and tab islands, modular AI-ready design.
Opera One
Display your Gmail inbox correctly with this responsive browser that grants secure emailing.
While holding the CTRL key, tap the - key located next to + and the Backspace keys on your keyboard.
Tap repeatedly until the window reduces to a size you are comfortable with.
2. Gmail screen too small
Hold the CTRL key on the keyboard
While holding the CTRL bolting, tap the +key located next to – and the Backspace keys.
Tap repeatedly until the window enlarges to your required size.
Please note that you can do this using the mouse with a scroll wheel. You will need to scroll either up (to increase the Gmail window size) or down (to minimize your Gmail size).
Xbox One users have, at some time or another, raised concerns over the Xbox One not reading discs, which is quite frustrating, especially when you want to unwind by playing your favorite title. Also, the problem is often accompanied by the 0x80820003 error.
Usually, this happens when the disc either won’t play or is not recognized after you insert it into the console. If your Xbox One Home screen tells you to insert a disc when one is already inserted, it doesn’t recognize your discs. So, here’s all you need to know.
Why is my Xbox One not reading discs?
Dust buildup: Dust buildup inside the console or over the laser lens in Xbox One can lead to it not reading the disc. Many prefer a dust cover for Xbox for this very reason.
Issues with the drive: As with any hardware, your Xbox one disc drive will likely stop working after some time, usually much sooner than the other parts, since its components are more sensitive and fragile.
The disc is damaged: A cracked disc or one with too many scratches will not be readable. But if there are no scratches and Xbox One is still not reading the disc, it’s a problem with the hardware.
Incorrect power settings: In some cases, it was misconfigured power settings that led to the problem, and reconfiguring it fixed things for most users.
What can I do if my Xbox One is not reading the game disc?
Before we head to the slightly complex solutions, here are a few quick ones to try:
Inspect the disc and look for any scratches. If there are many, clean the disc with a soft cloth and insert it again.
Clean the disc reader in Xbox One using a can of compressed air and a soft cloth. Be extra cautious when wiping the laser lens.
Change the orientation/position of the Xbox. For instance, if it’s placed vertically, switch to horizontal.
Place another game disc in Xbox One and check whether it reads the new one. Also, try placing a DVD for a movie and verify the same. Xbox has a laser lens for media and 360 discs, so if that has failed, the problem will be limited to such discs.
Press the power button on your Xbox One console for 30 seconds to turn it off, and again do the same to turn it on. Now, check whether Xbox one is still not reading the disc.
When you place the disc in the drive, the Xbox will pull it in. Try to hold on to the disc, maybe put your finger on the center for a second, and then release it.
A workaround that seemed to work for many is to place the Xbox One console at an angle, say 30-40 degrees from the horizontal.
If these didn’t work, move to the fixes listed next.
1. Perform a full shutdown
Choose the profile icon on your Xbox One, navigate to the System tab, and select Settings.
In the General settings, select Power mode & startup.
Next, choose Full shutdown.
Finally, choose Shut down in the confirmation window that appears.
A full shutdown usually helps fix many problems, including when Xbox One is not reading a disc. So make sure you try it.
2. Change power settings
Press the Xbox button on the controller, go to the System tab, and choose Settings.
Navigate to Power & startup, and then select Power mode & startup on the right.
Choose the Power mode dropdown menu.
Now, select the Energy-saving option.
Finally, press the Xbox button on the console for ten seconds, wait for it to turn off, and then turn on Xbox One again.
3. Clear persistent storage
Open the Xbox One Settings, go to Devices & streaming, and choose Blu-ray.
Now, select Persistent storage.
Select the Clear persistent storage option.
Once done, restart the console.
Clearing persistent storage has been found to fix things when Xbox One is not reading a disc. If this doesn’t work, head to the next solution.
4. Reset the Xbox
Open Settings on your Xbox one, go to System, and then select Console info.
Choose Reset console.
Finally, select Reset and Keep my Games & Apps.
Wait for the reset to complete.
That’s it! If resetting Xbox One doesn’t help eliminate problems behind the console not reading discs, it’s most likely a hardware issue to blame.
5. Change the hardware (only for experts)
If you have a fair understanding of the hardware and have identified that the problem lies with it, the knowledge could be put to use in this case. Just remember to be cautious and not damage any other functioning parts.
Here all you have to do is find a spare disk reader (from another Xbox One), remove the laser lens and spin motor, and replace the ones on the problematic console with these.
If nothing works, you are left with no option but to contact the support team. Whether to contact the game’s support team for a disc replacement or the Xbox Support team for a repair depends on the issue.
In case it’s only a particular disc, the former makes sense, while if the console doesn’t read any discs, the Xbox support will help.
Last year, Microsoft announced that it was intending to expand Microsoft Viva with a new Engage module. The module is deeply integrated with Teams to help build community and connections.
Viva Engage later hit general availability featuring a Communities Hub, Storyline, and Stories, all in place to enhance engagement at the workplace. The module is an enhanced version of the Yammer Communities app, and today, Microsoft has announced that Yammer is officially evolving to Viva Engage featuring new experiences.
Alongside the rebrand, during the Inspire event, Microsoft also announced a host of new experiences and capabilities coming to Viva Engage. Today’s announcement indicated that these capabilities have now begun to ship worldwide for Viva suite and Microsoft Viva Topics customers.
The new capabilities consist of a leadership corner “a space for leaders to connect with employees, showcase employee resource groups, and foster culture through discussions, storyline posts, events, and more.” It will also feature a new event style dubbed Ask Me Anything (AMA) events, designed to enhance engagement further.
Microsoft is also incorporating new Advanced Analytics to help users understand their reach and engagement in Viva Engage over a period of time. This will help them keep track of progress and establish trends.
Next month, the rebrand will also be reflected in the existing Communities app for Outlook. During the same period, “the Yammer mobile apps for iOS and Android will also be updated to Viva Engage to provide a native mobile-first experience that’s optimized for social sharing and rich media,” says Microsoft. However, you’ll need to update your app to access the new experience.
Event 4663 may indicate that a user has logged on to a domain computer using an account that is not authorized to be used to log on to the domain. This can occur if the account was disabled or removed from the Domain Admins group.
If you see this error regularly, it could be related to permissions on shared folders or drives and/or improperly configured user accounts with insufficient access rights. Still, it’s worth checking out because if left unattended, the user may gain access.
What is Event ID 4663?
Event ID 4663 is logged when a particular operation is performed on an object. This event can be viewed in the Security log and has a target of the security log. The Event ID 4663 will be recorded in the security log when a user attempts to perform an operation that requires administrator permissions.
The main categories of object types are as follows:
File system objects (for example, files, folders, or printers)
Kernel objects (for example, processes and threads)
Registry objects (for example, keys and values)
System objects (for example, drivers)
Objects on removable storage or devices
An attempt was made to access an object could mean:
Object is no longer present on the server – If you are having trouble accessing a file or folder, it means that this file or folder was deleted from the server.
The object is present on the server, but its name is not valid – It’s possible that the object may have been deleted or renamed since it was last accessed.
Object is present on the server, but in a different location – This error can occur if you try to access a file or folder that has been moved or renamed.
The object is present on the server, but your account does not have access rights – This error occurs when your user account does not have sufficient read/write privileges for you to do so.
How can I fix Event ID 4663?
First off, ensure you check the following:
Turn on your firewall to ensure unauthorized access is limited. Also, check out what to do if you’re unable to turn on Windows Firewall.
Check whether there’s a misconfiguration of the SACL (System Access Control List), which prevents users from accessing objects they should be allowed to.
1. Check and remove Event logs
Click on the Windows Search icon on the taskbar, type Event Viewer and click Open.
Navigate to the left-hand pane, expand the Windows Logs menu and select Security.
Scroll through the various logs and locate one with Event ID 4663.
Once you locate a log with Event ID 4663, make note of the Account Name that attempted to log in
Bring up the Search icon again, type Control Panel and click Open.
Select User Accounts.
Click on Manage your credentials on the left-hand side.
Select Windows Credentials in the new window.
Expand the unfamiliar user account, and in the drop-down menu, click Remove to get rid of that user.
The Event ID 4663 attempt may be due to an internal or external security breach, and a user account is being used by malicious software to access the system. This account may have been created by malware or by an attacker exploiting a vulnerability in network services.
2. Disable remote access
Hit the Windows key and click on Settings.
Click on the System tab and scroll down to Remote Desktop.
Toggle the switch next to Remote Desktop to disable the feature.
Next, hit the Windows + R keys to open the Run command.
Type regedit in the dialog box and hit Enter to open the Registry Editor. Select Yes if the User Account Control asks if you want to make any changes.
Navigate to the following location: HKEY_LOCAL_MACHINE\SYSTEM\CurrentControlSet\Control\Terminal Server
Double-click on fDenyTSConnections on the right pane to open it.
Set the Value data to 1, then click OK to finish up.
A Windows server can be accessed remotely if it is running a service. For example, if you want to access your server via Remote Desktop, you need to enable this feature.
Disabling remote access should be a temporary security measure until you determine whether the Event ID 4663 is a brute-force attack.
That’s all we had for this Event ID, but check out what we have in store. For instance, the Event ID 4648, where a logon using credentials was attempted, or Event 4502 that is related to WinREAgent.
Share any additional thoughts on this topic in the comment section below.
Having optimal security settings on your web browser is essential when browsing the internet. What’s more, numerous applications rely on a web browser or elements of it to function.
Therefore, apps or browser extensions may try to enhance your browsing experience by adding new features. But, many modern browsers come with built-in security features. You just need to find the right balance.
Thus, optimizing your browser security settings is crucial. Unfortunately, most people don’t use them to their full potential. This leads to severe vulnerabilities that can affect your system and data.
The reason people don’t do this is probably that they don’t know about them. A browser’s security features are hidden away within its settings menus, and unless you know what to look for, it can be tricky to reconfigure them.
But don’t let the complexity of the menus deter you from establishing good browser security settings. Failing to do so will put you at a high risk of getting infected by malware or targeted by hackers.
Credit: Clint Patterson/Unsplash
What and why are browser security configurations important?
It takes one wrong move or being complacent about suddenly losing personal information. An insecure browser can have spyware easily installed on it without your knowledge.
Bad actors can take control of your computer or use your machine to attack others on a network. For example, an insecure browser can start a domino effect that can bring down many computers and compromise many people.
The importance of browser security is something that you will often see championed by IT companies, cybersecurity corporations, and even government institutions.
The Cybersecurity & Infrastructure Security Agency from the United States encourages people to be aware of their browser security. On their website, they have an entire webpage dedicated to teaching people how to secure their web browser.
Fortunately, modern web browsers do a pretty good job at keeping their users secure and safe as they browse the internet. However, there are some things that you should know about before getting into the settings.
Credit: Pixabay/Pexels
→ Do your research beforehand if you decide to install a specific browser extension or add-on.
The vast majority of reputable extensions are recognized and endorsed by the browser company. That way, you know it’s a legitimate piece of software. It’s also recommended that you allow for automatic updates.
→ Any changes to add-on security are instantly updated. And if a website asks you to install an extension to view the website, don’t do it. This is incredibly risky and can easily lead to your computer getting infected.
→ Before getting into the various security settings of the major browsers, it’s important to lay out the security you may face using a web browser. In addition, it’s vital to stay educated.
What are some of the major security problems related to web browsers?
It’s crucial to go over the biggest threats to a web browser’s security. A lot can be avoided with basic common sense.
? Be wary of pop-up windows and redirects.
Pop-up windows can lead you down a path of unsafe websites or even download malware disguised as an app.
Redirects are also another vulnerability. Like pop-ups, a redirect can take you away from a secure page onto a malicious one or trick you into downloading malware.
Credit: Ed Hardie/Unsplash
? Your browser history can also be used against you. Bad actors can use it as a map to learn which websites you frequent and other browsing habits. This can lead to being targeted for phishing attacks.
You can combat this by frequently browsing your browser cache to remove any sensitive information. Clearing a browser cache can be done manually or automatically by changing some security settings.
? Vulnerable passwords are also a significant security risk. If someone can steal these passwords, they can get unfettered access to bank accounts, databases, or even entire networks.
Or worse of all, a bad actor may easily guess a weak password.
Credit: Jefferson Santos/Getty Images
If someone uses the same weak password for multiple websites, that makes gaining unauthorized access so much easier. So be sure to use different strong passwords for each website you frequent.
And if two-factor authentication is possible, you should take advantage of it. It’s one of the best forms of internet protection out there.
What are the safest browser settings I can use?
This guide will break down the best and safest settings that you can activate for some significant web browsers. The first half will focus on the PC-centric web browsers and then go on to the MacOS browsers.
There will be several commonalities between all the browsers, like activating their respective pop-up blocker. But there will also be information on what makes each browser’s security stand out. But first…
? Where are my browser’s security settings?
Browser security settings can be found in their respective Settings or Privacy menu. But, of course, it all depends on the browser itself, as every company behind one does things differently.
The most common method is to start by clicking on the three-line symbol on your web browser. Sometimes it also appears as three consecutive dots.
This is the menu and is usually found in the upper right-hand corner of the window. From there, you click on the Settings entry. A new tab will open, and you’ll see a Privacy and Security entry on the left.
Ultimately, the process to find your Settings tab will be different depending on the web browser you use, but that’s the basic run down. That said, not every single browser is built the same.
Firefox has been frequently cited as one of the most secure web browsers, even by cybersecurity companies like NordVPN. Opera also frequently updates its browser’s security and has extensive customization options.
Chrome browser security settings
Starting with Google Chrome, the security can be found by first:
Click on the three consecutive dots in the upper right-hand corner.
Then go to Settings.
Next, go to Privacy and safety, and you’ll have access to the browser’s privacy features.
So, what are the recommended security settings for Chrome?
? It would be best to turn on protection against phishing and malware to protect you while browsing. While you’re there, you should also turn off instant search.
? Instant search or Google Instant is the feature that allows Chrome to predict what you’re searching for. It’s great for convenience but allows the web browser to track what you enter.
? Chrome allows you to install uBlock Origin, an easy ad blocker on a computer’s CPU and memory. It’s also a few browsers that officially supports the extensions and comes highly rated.
? You can block unwanted plugins and pop-ups by going to the Content Settings section of the Advanced Settings menu. Then, click the box next to Don’t allow sites to send pop-ups or use redirects for pop-ups.
To stop plugins, turn on Ask when a site wants to use a plugin to access your computer. You should click the button next to Block third-party cookies to prevent further tracking.
? And lastly, turn off the Offer to save passwords feature to ensure your passwords aren’t vulnerable.
Internet Explorer browser security settings
Internet Explorer is no longer a thing – at least, not endorsed by Microsoft, however, it’s likely it still sees usage among hardcore fans or older systems.
? Like Chrome, Internet Explorer can block unwanted plugins and annoying pop-ups by going to the Internet Options section in the Tools menu. Next, select the Privacy tab and move the slider over to MEDIUM to block pop-ups.
? Then tick off the turn-on pop-up blocker box. To block the plugins, go to the Advanced tab and go down to Multimedia. If you see the boxes next to Play animations and Play sounds are checked, click the boxes to turn them off.
? Unique to Internet Explorer is the ability to turn off ActiveX Filtering which lets you browse the internet without running any ActiveX controls.
ActiveX refers to a lightweight app and program that allow animations to play or help out with installing updates. Unfortunately, Internet Explorer can stop websites from installing these apps.
Doing so can save you precious CPU power and protect you from intrusive software. Unfortunately, Internet Explorer is the only web browser to have this feature, and it doesn’t appear it will migrate to Edge.
Firefox browser security settings
Firefox is packed with security features that it shares with other browsers, and some are unique. Unfortunately, there are too many to go through at once, so here are the highlights.
? Firefox is the only other browser that can install uBlock Origins aside from Chrome. It’s also the only one that lets users control what data is collected and how it is used. This is a feature available on PC and Mac versions.
? You can control data collection by going to the Privacy & Security sections in the Options menu on PC or Preferences on Mac. In addition, there will be several boxes about data collection that you can uncheck.
? Firefox allows people to set a Master password that can be used to enter log-in information while being behind a robust security measure. In addition, you can set it not to save passwords and disables cookies.
? It can block unwanted add-ons and pop-ups and it’s overall one of the best browsers out there in terms of internet protection.
Edge browser security settings
Compared to the previous entries, Microsoft Edge is lightweight in terms of security features. We dare say, it’s nowhere near as robust as something like Firefox. Now that isn’t to say Edge has no security features.
? So, for example, you can still block pop-ups and turn off cookies by going to the Site Permissions menu. Blocking pop-ups will also prevent redirects from occurring.
? The ability to turn off passwords is available as well. This allows you to make sure that your payment information isn’t saved.
? Edge has the ability to run Microsoft Defender SmartScreen. This is a new feature that protects users against phishing attacks and other types of malware by screening potentially infected files.
If it detects a potentially suspicious app, SmartScreen will throw up a warning. It’ll advise you against downloading the app or prevent you from visiting a suspicious webpage.
How can I change privacy settings on my Mac?
macOS isn’t a web browser, and its security settings have nothing to do with Safari, but the settings are robust enough to warrant its section. Safari will be after.
In terms of security, the unique thing about macOS pertains to Apple products. The OS can disable automatic login after restarting the computer. It allows for multiple ways to change the login password too.
You can even control where apps are downloaded from. Like how Edge utilizes Defender SmartScreen to prevent websites from forcing apps on your computer, you can do the same on macOS.
You set it so that your Mac computer will only download apps from the App Store or an identified developer, a company that Apple recognizes as secure.
The other exclusive feature mentioned earlier is allowing users to use their Apple Watch to unlock apps or unlock the OS when being woken up from a static state. Once set up, you’ll begin to see requests on your Apple Watch to be approved.
All these extra are needed because Safari itself is like Microsoft Edge. It doesn’t have a lot of unique features but does share many with other browsers. 12
Safari browser security settings
Safari does see frequent updates. Constantly rolling out changes is essential because the world of malware is never static. Bad actors are always looking for ways to attack people and steal valuable data.
? Go to the Websites tab and find the requisite box to block both. You can also stop websites from tracking you by turning on Prevent cross-site tracking found in the Preferences menu.
? Speaking of website protection, Safari can stop JavaScript from running to put a pause on websites shoving malware in your face. And you can block phishing attacks from happening too.
That said, Safari on its own is pretty light on security settings. Perhaps Apple didn’t see a reason to include all those other tools and features with what macOS offers.
But considering how many browsers have Mac versions, it’s disappointing to see the native app be so light.
iPhone security settings
The iPhone’s inclusion in this guide may seem strange when everything up to this point has been about computers, but like macOS, it has a robust series of security settings that should be looked at.
The iPhone has the most advanced security settings of everything listed in this guide. This is because of the different security features housed inside. For starters, it has Face ID, a biometric authentication feature that scans your face.
It was a success that other smartphone companies copied the feature soon after. But, of course, Touch ID also scans your fingerprints for a secure and convenient way to open your phone.
Your iPhone can even tell you if your passwords have been compromised. This is a great feature not seen on any other browser or OS natively without using a third-party app.
You can turn this feature on by going to Security Recommendations on your iPhone and changing the weak passwords as you see fit.
And this only scratches the surface. Other significant security measures on iPhone include stuff like Find My and the built-in two-factor authentication.
3 ways a browser is compromised through a vulnerability
Vulnerabilities are an unfortunate part of life in the age of the internet. It’s something that everyone must be constantly vigilant about and aware of. But with so many of them, it’s hard to know which are the biggest ones.
What is the most dangerous of vulnerabilities? Well, there are three big ones that you should look out for. One of them is something that’s already been covered extensively in this guide before, and that’s plug-ins.
It bears repeating, but plug-ins and add-ons are a significant source of contention. Even the most reputable online sources have been hit by attacks and endangering user information.
Credit: Thomas William/Unsplash
These types of exploits are so common because of people who don’t update their plug-ins. Remember that bad actors are constantly updating their methods to attack people, which means you should be continually updating your defenses.
For example, back in 2020, there was an issue some browsers were having with NPAPI plug-ins. Therefore, it was strongly recommended that people update their plug-ins because of the vulnerability problem.
There are also attacks from an APT or advanced persistent threat. It’s an attack from malware located at an endpoint that will steal data as it’s entered from a user.
Something like this can occur in different ways, such as clicking on an email attachment that’s infected or inserting some random USB drive you found on the floor.
These are pretty simple to avoid. Good antivirus software is all you need to protect yourself from these attacks. They’ll be instantly detected by the antiviral app and immediately kicked out.
And the final major vulnerability to look out for relates to HTTPS. If you see HTTPS in your browser URL, you know that the website is secure. Of course, not all websites will have this, but that doesn’t mean they’re insecure.
You do have to watch out for them, however. Modern web browsers are good at protecting their users and will usually freak out with a warning telling you not to enter or refuse to connect.
That proactivity is good, but it’s also essential to heed the warnings that the browser throws up at you. People have been conditioned to click through all the signs to get to the page.
These bad actors know people can be lazy and not pay attention to what’s appearing on the screen. It can be annoying to have the web browser refuse to show what you want, but sometimes it’s for the best.
It’s strongly recommended that you do not ignore the warnings of web browsers. If you must access those web pages, use a different computer or even an entirely different internet connection.
The Kerberos pre-authentication failed error indicates that the user cannot log in to Windows or any other network resource. This error occurs when there’s a problem with the Kerberos pre-authentication process.
It can occur if you use an incorrect username or password if your computer is offline or not connected to the network, or if an error occurs when connecting to a domain controller.
Why am I getting the Event ID 4771 error?
This error means that you tried to connect to a server using Kerberos pre-authentication, but the server did not respond to your request. In Windows, Kerberos pre-authentication verifies a user’s credentials before the KDC authenticates them.
If the pre-authentication fails, the user will be prompted for their password. For some users, the error code was Event ID 4771. Kerberos pre-authentication failed 0x18 on their PCs. For this code, the issue is a bad password. However, for Event ID 4771, this can happen for several reasons:
Server clock mismatch – The likely cause is that your computer’s clock is out of sync with the server’s clock. This can happen if your computer was offline for a long time and returned online but failed to synchronize its clock.
Incorrect password – Most users who encountered the Event ID 4771 error admitted to having recently changed their passwords. However, for unique IDs such as Event ID 4771 status 0x12, it means that the user’s credentials have been revoked.
Cached credentials – Cached credentials are used to reduce login times and to improve security because they’re obtained automatically from the directory server. However, when you changed passwords, they may cause conflicts.
Wrong domain – Make sure that you’re logging on to an account from the same domain as the computer you’re connecting from; otherwise, there will be no way for Active Directory to verify your credentials correctly.
How can I solve the Event ID 4771 error?
1. Enable failed logon auditing
Hit the Windows + R keys to open the Run command.
Type secpol.msc in the dialog box and hit Enter.
Navigate to the following location: Security settings/Local Policy/Audit Policies/Audit Logon Events
Double-click on Audit logon events, select Success/Failure, then click on Apply and OK.
This will generate a security event whenever a user attempts to log into a domain-joined computer and fails. Failed logon auditing will allow you to see when users have attempted to log onto the network unsuccessfully and to identify any duplicates.
Then, you can rename the accounts with duplicate names on one or more servers, or create new accounts for them with unique names.
2. Delete cached passwords
Hit the Windows key, type cmd in the search bar and click Open.
Type the following commands and hit Enter after each one: psexec -i -s -d cmd.exerundll32 keymgr.dll KRShowKeyMgr
A list of stored usernames and passwords will appear. Delete them from your server and restart your PC.
This happens because the Kerberos subsystem caches the old password in memory. When you change the password, it doesn’t get cleared from memory until it expires.
The Kerberos client then tries to use the old cached password, which doesn’t work because it has been changed on the domain controller.
Hit the Windows key, type Powershell in the search bar and click Run as administrator.
Type the following command and hit Enter: auditpol /set /subcategory:”logon” /failure:enable
When you enable logon auditing, it helps you determine if someone is trying to gain unauthorized access to your systems by guessing passwords or attempting other brute-force attacks.
Hopefully, you have bypassed the Event ID 4771 Kerberos pre-authentication failed error with one of these methods.
You may also come across an Event ID 4768, where your Kerberos authentication ticket is requested. If so, don’t hesitate to check out our expert article.
In the comment section below, let us know what solution fixed this error for you.
Accessing the Windows Server can sometimes be a hassle, even for verified users. Sometimes, it’s the Windows Server Manager that’s not opening, while other times, you get a logon error dubbed Event ID 4625.
In such cases, it’s usually your password that is probably expired, so an update should do the trick. However, if that does not work, read on to find out how to bypass this logon failure.
What is Event ID 4625 failure reason?
The Event ID 4625 is a logon error that occurs when you try to access the Windows server. If accompanied by Event ID 4625 status 0xc00006d, you’ll know it’s a bad password.
Typically, this occurs because the system uses a cached password rather than an updated one you entered. This is because of how Windows stores password in a database.
When you log into a domain, it looks at this database to determine what your account’s password is. If it finds a match, then it just uses the stored version instead of prompting you for one.
Other reasons for this error include:
Insufficient permissions – The user may not have sufficient permissions to perform the action, or the Active Directory has been corrupted. Always check for Event ID 4625 null SID, as it will let you know whether it was a valid account.
Workstation restriction – A workstation restriction is an action that restricts the ability of a user to log on locally.
Change of accounts – This can happen if you use a domain account to log on to a computer and then log in with a local account. It can also occur if you change from a local account to a domain account or vice versa.
Logon Process from an untrusted logon processes list – User accounts are usually added to the Trusted Logons Group. If you get a logon error, the logon process has not been validated by the security system.
Account expiry – If the user account hasn’t been used for a long time, you may get the username does not exist error. It’s possible that the account has been marked as inactive by AD and needs reactivation.
How can I fix Event ID 4625 logon error?
Before you attempt any of the recommended solutions below, ensure you check the following:
Check that you have not misspelled your password.
Clear any cache that may contain any expired saved passwords.
Verify that the account you’re using to log on has enough privileges.
Check whether there’s a mismatch between the logon type and the account you’re using to logon.
Ensure you’re not using an account restricted to an internal IP address.
Confirm from your Administrator that your account is still active.
1. Rejoin the domain
Hit the Windows + R keys to open the Run command.
Type regedit in the dialog box and hit Enter.
Navigate to the following location: HKEY_LOCAL_MACHINE\SYSTEM\CurrentControlSet\Control\Lsa
Right-click on an empty space on the right and rename it as a NEW DWORD (32-bit) as LmCompatibilityLevel.
Double-click on it and set the Value data as 1.
Restart your PC and try logging in again.
2. Remove hidden credentials
Hit the Windows key, type cmd in the search bar, and click Open.
Type the following commands and hit Enter after each one: psexec -i -s -d cmd.exerundll32 keyngr.dll KRShowKeyMgr
A list of stored usernames and passwords will appear. Delete them from your server and restart your PC.
The logon types should provide more detail to help you narrow the type of failure. If you get the Event ID 4625 logon type 3, Event ID 4625 logon type 4, or Event ID 4625 logon type 8, you should be able to get more information on where the user tried to log in from.
Navigate to the following location: Local policies/Security options/Network security: Restrict NTLM: Incoming NTLM traffic
Double-click on Network security: Restrict NTLM: Incoming NTLM traffic, and in the drop-down menu, select deny all accounts, then press Apply, then OK to save changes.
NTLM is an authentication protocol used by Windows systems to provide additional security when users access resources on a network. It can authenticate users against an Active Directory domain controller without supplying a password.
However, it’s also the most easily attacked authentication protocol and can be disabled for improved security.
The most common reason administrators disable NTLM authentication on their servers is that users have trouble logging into their systems when they are away from their offices or behind a proxy server.
For maximum security on your Windows Server, we recommend that you enable the TLS protocol and avoid outdated versions with known vulnerabilities.
Elsewhere, you may also encounter the Event ID 4768 error, so be sure to check out our detailed guide for various fixes.
Please let us know if you have any additional solutions in the comment section below.
After Microsoft officially began rolling out Windows 11, many people were unable to make the upgrade because their devices didn’t meet the system requirements. Despite these strict set of hardware requirements, users have still identified loopholes that allow them to upgrade to the OS. However, users might not receive security updates.
The report indicates that the “System requirements not met watermark” has begun rolling out to users running on build 22621. This means that Microsoft has started issuing these warnings to users running on the Windows 11 2022 Update. There’s also a probability that Beta Channel Insiders might also be affected.
Microsoft started showing the “System requirements not met” watermark in the Dev Channel, it was placed at the bottom right of the screen close to the notification area of your Windows PC featuring the Windows version as well as the build number.
Have you spotted this watermark on your Windows 11 PC? Let us know below.
Yes, the Logitech MX Master 3 is a great choice for productivity usage. But despite it being a split product, users have complained about issues with the gesture button.
Based on observation, it seems the problem with the Logitech MX Master 3 gesture button is not peculiar to Windows users.
Why is my Logitech MX Master 3 gesture button not working?
There are many potential causes for this issue, but we will highlight the most common:
Wireless connection problems – The mouse can be connected to the computer via two methods, with the Unifying receiver plugged into the computer and using Bluetooth. If there is any issue with either of the two connections, the mouse gesture button will not work.
Problematic updates – Some of our readers complained that the problem with their Logitech MX Master 3 gesture button started after they installed an update on their system.
Now that we know why this happens, let’s go to the solutions below to fix it.
What can I do to fix the Logitech MX Master 3 gesture button?
Before going into more complex solutions, let’s perform some quick actions that might fix the problem:
Restart your system and see if the problem persists. Sometimes, this action may be enough to fix it.
If you’re using the Unifying receiver, try to plug it into another USB port on your PC.
Make sure that no other devices are connected to the Unifying receiver.
Turn off the Bluetooth connection, wait a few seconds, and turn it back on to both your computer and mouse.
If these simple steps didn’t fix the Logitech MX Master 3 gesture button, perform the solutions below.
1. Connect the mouse via Bluetooth
Check and confirm that the Logitech MX Master 3 power is switched on.
Press Windows + S to open the Search menu, enter Bluetooth and other devices, and click Open.
Toggle the Bluetooth switch to ON. Then click on Add device.
Under Choose the kind of device you want to add, select Bluetooth. This will help you search for the Logitech MX Master 3.
Long press the Connect button on the Logitech MX Master 3 for about three seconds. When you notice the connect light is flashing, check your system screen for discovered devices. Select the matching name for your mouse. After this, the system will automatically try to establish a connection.
When using this method, ensure your Logitech MX Master 3 is within range to allow connection via Bluetooth.
2. Update the mouse driver
Right-click on the Start button in the Taskbar, and then select Device Manager.
Expand Mice and other printing devices entry, right-click on the Logitech MX Master 3 device, and select Update driver.
Now, select Search automatically for drivers.
To save yourself the stress of going through the steps above, use Outbyte Driver Updater. It will handle all necessary driver updates required on your PC.
Aside from solving the issue with your Logitech MX Master 3 driver, it can also resolve driver issues with other devices connected to your system.
Outbyte Driver Updater
Try this program and easily scan your device and keep your device drivers always up-to-date.
After downloading, click the arrow beside the new file and then select Open.
Select INSTALL LOGITECH OPTIONS.
Choose whether to share analytics data or not. This option implies that, if you choose the YES, SHARE ANALYTICS DATA, information about your usage of the mouse will be shared with the manufacturer.
Wait for the system to start and finish the installation.
Login to your account or create a new one if you don’t have one already. Clicking this option will open your browser.
After login, reopen Logitech Options to connect your device. After a successful connection, assign your preferred shortcuts to the gesture buttons.
There you have it all. But then, before you go, it is important you know that the steps above may be performed in succession.
For instance, to ensure that the Logitech Options app connects to the system, you may use the Add/Remove Bluetooth Device option, which means you will be using the Connect via Bluetooth method highlighted above.
The Logitech MX Master 3 is one of the most inspiring choices out there. But if you need to replace it, find the best ergonomic mice.
Don’t forget to share your experience after trying the solutions we explained in this article. Likewise, drop your comment if you found another way to solve this.
Many players of Counter Strike Global Offensive (CS:GO) find it hard to play the game because of the issues affecting It. CS:GO freezing and stuttering is one of them.
Factors like freeze or stutter can cause the Counter Strike Global Offensive (CS:GO) game issues. The most common one is an outdated game client. When the CS: GO game client on your PC is not updated, it can result in errors because it won’t be able to fix bugs affecting it.
Furthermore, various other factors that may be responsible for the freezing or stuttering are:
Outdated graphics drivers – Because the game uses a lot of graphics abilities, issues like an outdated graphics card will affect it. You can check our guide on fixing outdated drivers error on Windows 11.
Interference with other apps – It is common for games to run into issues due to the activities of other apps running in the background on your PC. These apps can use up most system resources, leaving little or nothing for the game to use.
Compatibility issues – Users are liable to encounter problems like freezing or stuttering on CS:GO if the game is incompatible with the device. According to the game’s system requirements, the minimum and recommended specs are determined.
These causes can differ with various players, but you can fix the problem by tweaking some settings on your PC.
How do I fix freezing or stuttering in CS:GO?
Go through the following checks before proceeding with any advanced troubleshooting steps:
If you want fast and safe driver updates, we recommend you use Outbyte Driver Updater, a specialized tool that will find and update automatically every outdated driver.
Outbyte Driver Updater
Have all your drivers updated quickly and safely using this amazing tool.
Left-click the Start button, type Steam in the search bar, and launch it.
Click the Steam tab and select Settings.
Hit on In-Game, then check the box next to Enable the Steam Overlay while in-game.
Click OK to save your changes.
Restart the game client and check if the issue persists.
Enabling Steam Overlay will allow the game to run smoothly without glitches or freezing. If the Steam Overlay is not working on your PC, read our guide on ways to get it working.
Left-click the Start button, type Steam in the search bar, and launch it.
Click the Library tab and search for Counter-Strike: Global Offensive.
Right-click on the game and click Properties from the drop-down.
Click the Local Files tab and the Verify Integrity of Game Files button.
It will check the game files and repair any missing or corrupted files.
4. Disable Compatibility Mode
Press Windows + R to open the Run dialog box, copy and paste the following in the text bar and click OK: C:\Program Files (x86)\Steam
In the Steam directory, find the Steam.exe file, right-click on it, and select Properties.
Select the Compatibility tab and check if the box for Compatibility Mode is checked. If it is, uncheck the box and save the changes.
Restart the Steam client and check if the problem persists.
Disabling the Steam Compatibility Mode will solve any issues causing the game to freeze or stutter.
5. Check system requirements
You should check CS: GO system requirements to know if your PC can run it smoothly. Go to the Steam page to check for Counter Strike Global Offensive (CS:GO) system requirements.
Why is my game lagging even though I have fast Internet?
A slow Internet speed is not always to blame for lagging in games. Other factors, too, play a significant role here. For instance, latency, the time taken for data packets to reach the server from your end, could be high.
Also, if you are located at a considerable distance from the router, the speed will be lower, thus affecting the game’s performance. Many recommend switching to a wired connection when playing games for this reason.
Resource Monitor
Besides, if other background programs hog the network resources, the game might lag. You can verify this in the Resource Monitor and terminate the problematic program.
Is 144hz necessary for CS:GO?
It’s not necessary to have a 144Hz display, but it certainly would enhance the gameplay and make it more fun. Though many users who play CS:GO on a 60Hz monitor with a frame rate of 60 FPS, too, seem content.
For those into competitive gaming, a 144Hz monitor will certainly be a great addition, but you will have to shell out some extra bucks.
Setting the bandwidth on a Windows PC may help you limit how much data your computer can transfer at any given time. This is especially important if you’re trying to save money on your Internet bill.
If you have more than one computer on your network, they’ll always compete for available bandwidth. This can lead to slower performance and occasional connection dropouts if you don’t manage it properly. Here’s how to set limits and better manage your data usage.
How do I set bandwidth limits in Windows 11?
1. Use in-built router settings
Some routers can be configured to control bandwidth usage. For example, you can set your router to block any device that exceeds a certain percentage of your total bandwidth. This is useful to ensure that no one uses too much bandwidth at any time.
If your router does not have this option, you can opt to upgrade to a new router or proceed to the other recommended methods.
2. Use Settings
Hit the Windows key and select Settings.
Click on Network & internet on the left pane.
On your current Wi-Fi connection, click on Data usage.
Select Enter limit.
Set the limit type, from the choices ranging from Monthly to unlimited.
Choose the date for the data to be reset every month from the drop-down menu under Monthly reset date.
Now input the data limit and choose whether to limit in MB or GB and finally, click on Save.
3. Use Group Policy Editor
Hit the Windows + R keys to open the Run command.
Type gpedit.msc in the dialog box and hit Enter.
Navigate to the following location: Computer Configuration/Administrative Templates/ Network/QoS Packet Scheduler
On the right pane, double-click on Limit reservable bandwidth.
In the Limit reservable bandwidth window that opens, select the Enabled option and enter a number between 1 and 100 under the Bandwidth limit option.
Click Apply and OK to save the changes.
4. Use the Registry Editor
Hit the Windows + R keys to open the Run command.
Type regedit in the dialog box and hit Enter to open the Registry Editor.
Navigate to the following location: Computer\HKEY_LOCAL_MACHINE\SOFTWARE\Policies\Microsoft\Windows
Double-click on NonBestEfforLimit. If unavailable, right-click on an empty area on the right pane and select New DWORD (32-bit) then rename it as NonBestEfforLimit.
Set the Value data to any number between 1-100 then click on OK.
Remember that editing the registry manually can have serious, unintended consequences that can render your PC inoperable. You should back up the registry before making any changes to it.
If you make a mistake, you can use a previously saved backup to restore your registry to its previous state. If you’re not comfortable editing the registry, don’t do it. You can use a third-party tool to edit the registry for you. Otherwise, skip this section and move on to the next solution.
If you want more control over how to limit bandwidth usage, third-party tools will come in handy. Bandwidth monitoring tools can help you determine what kind of bandwidth you’re currently getting and how much more you need.
You can also use bandwidth limiter tools to limit access by specific users or applications so they don’t hog your available bandwidth.
To give you an idea, one program we stand for is PRTG Network Monitor because by using it, you can set channel limits to adjust threshold values and set off notifications when surpassed.
Moreover, it is a complex software with customizable band-limiting features, and you can keep track of connections and applications with the most bandwidth.
Benefits of bandwidth limiting
A bandwidth limit is the maximum amount of data allowed to pass through your computer network connection. You may have noticed that your system is using too much data, making it hard for you to keep up.
When setting a bandwidth limit on your PC, you should know that this can cause problems with some applications.
Nonetheless, there are still some reasons why you should set up bandwidth limits:
Keep track of your usage – If you’re on an unlimited plan, then you should still keep track of how much data you’re using every month — just in case something goes wrong with your ISP’s network.
Bandwidth theft – Bandwidth theft is when someone uses your Internet connection without your permission or knowledge. This can happen if your router has been hacked.
Avoid overage charges and extra fees – If your ISP has a monthly limit on how much data you can use before being charged extra fees, then setting a bandwidth cap will help ensure that you always stay under your limit.
Prevent saturation – If your computer is constantly downloading or uploading data, this can cause problems with other programs. Bandwidth limits prevent network congestion and keep bandwidth-intensive applications from monopolizing your system resources.
Hopefully, you’ve been able to set appropriate limits on your bandwidth usage with the help of this article.
Let us know which method you prefer to set bandwidth limits on your Windows 11 in the comment section below.
Joining an online meeting on the Zoom app can be a hassle sometimes because of some technical issues users report about the app. Zoom microphone not working on Windows 10 is an issue users complain about as it makes it impossible for other users to hear any audio from your device.
Outdated or corrupt audio driver – Audio devices and features on your computer depend on audio drivers to function. So, you may experience audio-related issues with your Zoom client if the audio driver is outdated. Also, the driver can become corrupt, causing it not to work as expected.
Issues with Zoom Access settings – Users can tweak the Zoom settings options and their system’s settings app to allow or disable functions. However, the Allow access to your microphone option for the Zoom app on your computer may be disabled, making it impossible for the app to use the microphone.
Problems with your mic’s hardware – In some cases, your system may suffer physical damages that can affect its hardware. Hence, the Zoom microphone may not work because your microphone hardware isn’t intact. Also, motherboard audio issues can cause the microphone not to work.
Wrong microphone selected or muted mic on Zoom – Zoom allows you to select an audio device from the list of available audio devices. So, the wrong device can cause microphone issues.
Regardless, there are a few ways to fix the issues on Windows 10, so we’ll take you through them.
What can I do if the Zoom microphone is not working in Windows 10?
We recommend you go through the following preliminary checks before trying any advanced solutions:
If you can’t fix the problem, proceed with the solutions listed below:
1. Allow access to your microphone
Press Windows + I key to open the Windows Settings app.
Click on Privacy.
Select Microphone from the left pane. Go to the Allow access to the microphone on this device, then click the Change button and make sure Microphone access for this device is On.
Toggle on the Allow apps to access your microphone option.
Close Settings and check if Zoom audio works.
Allowing apps to use the microphone on your PC grants them access to the full audio function.
If you’re looking for other alternatives to updating your drivers, you can try dedicated software to handle the updating process automatically.
2. Update your device drivers
Press Windows + R keys to prompt the Run window, type devmgmt.msc, and click OK.
Expand Sound, Video, and game controllers, right-click on the driver, and select Update driver from the drop-down menu.
Select the Search automatically for drivers option.
Repeat the procedure for other audio drivers on your computer.
Updating your audio driver will fix bugs impeding their activities and install the latest features to improve performance. You can check other ways of updating drivers on Windows 10 if you have any issues.
3. Try the Join Audio option
Launch the Zoom app and open your meeting.
Click on the Join Audio option in the bottom-left corner of the meeting window.
Select Join with Computer Audio in the prompt that appears.
The microphone should work on Zoom after allowing the Join with Computer audio. It gives Zoom access to use the mic.
This guide should be helpful if Zoom Microphone is not working on your Windows 10. Should further issues arise or you have more questions, kindly drop them in the comments section.
Many users encounter various errors when using the Microsoft Office app on Windows PCs.
One common issue is the “Microsoft Office unable to start” error with code 147-0, which typically prevents users from opening or accessing Office applications like Word, Excel, or Outlook. This startup error can stem from corrupted files, incomplete installations, or system conflicts.
Here’s is how you fix it:
How do I fix the Microsoft Office error code 147-0?
Press Windows + I key to open the Windows Settings app.
Click on Windows Update and tap on the Check for updates button. If there are any updates available, it will search for and install them.
Updating Windows fixes the bugs affecting the system’s performance and adds new features to help run its apps. Read about fixing Windows not connecting to update service if the error occurs on your PC.
Press the Windows + R button to open the Run dialog box, type in regedit, and then press Enter to open the Registry Editor.
Navigate to the following path. then delete the registry key in the folder: HKEY_LOCAL_MACHINE\SOFTWRE\Microsoft\Office\ClickToRun
Navigate to the following path and delete the registry key in the folder: HKEY_LOCAL_MACHINE\SOFTWARE\Microsoft\AppVISVHKEY_CURRENT_USER\Software\Microsoft\Office
Restart your PC and check if the error code 147-0 appears on Microsoft Office.
Press Windows + I key to open the Windows Settings app.
Click on Apps and click Installed apps.
Search for the Office app, and click the three dots button against it. Select Uninstall from the drop-down and then click on Uninstall to confirm the action.
Restart your PC, then reinstall Microsoft Office to check if the error persists.
Reinstalling the Office app can resolve the corrupt installation file issues.
When trying to install an update on Windows 11, you may often encounter an error message that says, Something didn’t go as planned. No need to worry-undoing changes. Please keep your computer on.
Many users have been reporting this issue where after downloading updates and attempting to install them, the PC gets stuck with the error message.
Why is my Windows 11 update stuck on something didn’t go as planned?
If your Windows 11 computer is stuck on something didn’t go as planned error, there could be quite a few possible reasons:
Interference with the antivirus –Malwarebytes is often the major cause behind the reason why your computer is stuck on something didn’t go as planned.
.NET Framework 3.5 is enabled – .NET framework is one such Windows Feature that may sometimes affect the update process.
Driversissues – If you have not updated the system drivers off-late or if they have gone corrupt for some reason, you may bump into the error.
Not enough memory – Sometimes, something didn’t go as planned error appears in Windows 11 due to limited space in the drive.
Update service not running – It could be possible that the Windows Update & Background intelligent transfer service is not running.
A bug in the update – Chances are that it’s a bug in the latest update causing the error.
How do I fix something didn’t go as planned error?
Before you proceed with the primary troubleshooting methods below, here are a few checks:
But, if none of the above methods help, here we have a few workarounds that will help you resolve the issue if your Windows 11 computer is stuck at something didn’t go as planned.
1. Uninstall Malwarebytes
Press the Win + I keys together to launch the Windows Settings app.
Click on Apps on the left and then click on Apps & features on the right.
On the next screen, go to the Apps list section on the right and look for Malwarebytes. Click on the three dots next to it and select Uninstall.
Now, click on Uninstall again to confirm the action.
Once the app is uninstalled completely, restart your PC, try to install the update, and check if you still see that something didn’t go as planned error in Windows 11.
2. Disable .NET Framework 3.5
To open the Run console, press the Win + R shortcut keys.
Type optional features and hit Enter to open Windows Features.
Go to the Turn Windows feature on or off, and deselect .NET Framework 3.5. Press OK to save the changes.
Now, reboot your PC and try to install the update once again, and check if this helps you fix the Windows update error.
Once the issue is fixed, you can turn on .NET Framework 3.5 again for the functions to work properly.
Press the Win + R keys together to launch the Run dialog. Type cmd and press the Ctrl + Shift + Enter keys simultaneously to launch the elevated Command Prompt.
Now, run the below commands one after another in the Command Prompt (Admin) window and hit Enter after each one:
Open the Run console by pressing the Win + R keys, type in services.msc, and hit Enter.
In the Services window that opens, look for Windows Update on the right and double-click on it to open its Properties dialog.
Next, under the General tab, set the Startup type to Automatic, and under Service status, press the Start button (if it’s highlighted). Press Apply and OK.
Now, as you return to the Services window, right-click on Windows Update and select Restart.
Repeat steps 2 to 4 for the Background Intelligent Transfer Service also.
Once you have restarted both the services related to Windows Update, close the Services window and reboot your computer.
Now, check if you can install the problem Windows 11 update and if the error is resolved.
Here, type in the name of the update, for example, KB5015882, and press the Search button.
On the next page, look for the update based on your system architecture (32-bit/64-bit) and click on Download.
Next, in the new window, click on the .msu link to download the update file. Follow the on-screen instructions to install the update.
Once the installation is complete, restart your Windows 11 PC and check if the installation has gone through successfully or if you still see that something didn’t go as planned error.
At the same time, if you have added any new hardware to your device, you should check for third-party driver updates.
Update any drivers, then try to run updates again and see if this resolved your issue. If it didn’t, continue to the next tip.
Alternatively, you can upgrade to Windows 11 using the installation assistant to help fix the error.
There are usually many drivers on the Windows PC that help it interact with devices and programs, and operate as expected. Sadly, drivers may develop faults, causing issues with the system. The Gdrv2.sys failed error on Windows 11 is one of the many errors a user can encounter if an installed driver on the computer is not working correctly.
Gdrv.sys is a driver in Windows but is not regarded as an essential part of the Windows OS. it is a part of the GIGA-BYTE Software driver. The driver allows your PC to communicate with the hardware or connected devices it is responsible for.
Furthermore, users can start or stop the Gdrv.sys driver process from Services in the Control Panel. It is not a Windows system file and doesn’t impact the system registry but may only affect the programs depending on it.
Moreso, the Gdrv.sys file is located in the C:\Windows folder on your PC. Sadly, some malware camouflages itself as Gdrv.sys, causing issues with the system. Hence, it is essential to check the Gdrv.sys process on your PC.
The following are some factors liable to cause the Gdrv2.sys failed error on Windows 11:
Corrupt system files – When essential system files are corrupted on your PC, they can cause problems with files like the Gdrv2.sys driver.
Malware and virus infections – The Gdrv2.sys driver may get infected by malware and viruses infecting your PC. Also, some malware camouflages itself as Gdrv.sys, prompting the error to appear.
There are other causes not mentioned above. Regardless, we’ll take you through ways to fix the error.
How can I fix Gdrv2.sys?
Before trying any advanced troubleshooting steps, go through the following:
If you can’t fix the problem, go ahead with the solutions listed below.
1. Run the SFC and DISM to repair damaged system files
Left-click the Start button, type Command Prompt, then select Run as administrator.
Click Yes on the User Account Control (UAC) prompt.
Type the following and press Enter: sfc /scannow
Type the following commands and press Enter: DISM /Online /Cleanup-Image /RestoreHealth
Restart your PC and check if the Gdrv2.sys failed error persists.
SFC and DISM scans will detect and fix corrupt system files causing network driver issues on your PC. Check our guide on what to do if Command Prompt keeps crashing on your PC.
2. Uninstall gigabytes apps and recently installed apps
Press Windows + I key to open the Windows Settings app.
Click on Apps and select Installed apps.
Locate the gigabytes apps, click the three dots button against it, and select Uninstall from the drop-down.
Then click on Uninstall to confirm the action.
Repeat the above steps for other apps you want to uninstall and restart your PC.
Uninstalling recently installed apps can resolve the interference they cause your system drivers.
Press Windows + I key to open the Windows Settings app.
Click on Windows Update on the left pane and click on Advanced options.
Then scroll down and click on Optional updates under Additional options.
Click on Driver updates and check if you see an update for the problematic driver.
Check the checkbox for the driver, and click on the Download & install button.
Restart your PC and check if the error persists.
Updating your drivers can fix bugs impeding their performance and resolve issues with the Gdrv2.sys driver.
Alternatively, you can use driver updater software, such as Outbyte Driver Updater, to find all your computer’s affected drivers and automatically replace them with brand-new versions.
Outbyte Driver Updater
Give Outbyte Driver Updater a chance to increase your device’s health by quickly updating your drivers.
A computer with an integrated Logitech webcam allows you access to many camera features. Sadly, many Windows users complain about issues they encounter with the lvrs64.sys, a file from Logitech Webcam Software essential to run the camera on Windows PCs.
Lvrs64.sys is the driver in charge of the integrated Logitech webcam on your Windows PC. Getting the Lvrs64.sys Blue Screen of Death error can occur due to many factors affecting the camera and other components like the microphone.
Some common factors that can cause the error are:
Incompatibility or unstable version of the driver – Users may encounter the Lvrs64.sys driver BSOD error if the driver is not compatible with the version of Windows you have installed or the current build you’re running. Also, an unstable driver version may pose some issues with how the system interacts with the driver.
Corrupt or missing system files – System files help your PC access the essential files for running programs, devices, and services smoothly. When you have corrupt system files or missing files, it can affect your system’s performance, causing the Lvrs64.sys BSOD error.
Malware or virus infection – Having malware or virus infection on your computer can disrupt the drivers running on it. It can cause the driver error due to its infection on the Logitech webcam on your computer.
These causes may vary on different computers. Fortunately, we have some basic steps to help you resolve the error and get your camera working.
How can I fix the Ivrs64.sys blue screen error?
Before proceeding with any advanced steps, go through the following:
If you can’t fix the problem, proceed with the solutions listed below.
1. Roll back the driver to the previous version
Press the Windows + X keys to choose Device Manager.
Double-click on Imaging devices to expand it, right-click on the Logitech webcam driver, then select Properties from the drop-down.
Navigate to the Driver tab and click on the Roll Back Driver button.
Select the reason for rolling back the driver, then click the Yes button.
Rolling back the webcam driver would undo all the driver updates and changes, causing the error. Also, it can resolve the compatibility issues from recent updates preventing you from using the Memory Integrity feature.
Press Windows + R keys to prompt the Run window, type devmgmt.msc, and click OK.
Double-click on Imaging devices to expand it, right-click on the Logitech webcam driver, then select the Update driver from the drop-down.
Select the Search automatically for drivers option and wait till the update finishes.
Restart your PC and check if the error persists.
Updating the webcam driver will resolve bugs impeding its functionality and install the latest features to improve performance. Check other steps for updating drivers on Windows 11 if you have any issues.
If you want to update your webcam driver faster, we recommend you try specialized software because it can do all the work for you.
Outbyte Driver Updater is one of the best driver updater programs that can help you scan your PC to find all the outdated drivers and quickly locate the latest updates from its vault.
Outbyte Driver Updater
Keep your PC running steadily and automatically update all your drivers with Outbyte Driver Updater.
Left-click the Start button, type Restore, and click on Create a Restore Point.
Then the System Protection tab, and click System Restore.
Choose a different system restore and click Next to select a specific Restore Point.
Select the last time you were able to install updates on your PC, and click Next.
Click the Finish button.
System Restore reinstates your PC to the select restore point and fixes issues causing the Lvrs64.sys BSOD error. Check how to fix Restore Point if it’s not working and if you have any issues running it.
4. Uninstall and reinstall your Webcam software
Press Windows + R key to open the Run dialog box, type appwiz.cpl, and click on OK.
On the Programs page, find the Webcam app from the list of installed applications, click on it, and select Uninstall.
Click Yes on the UAC prompt.
Close the wizard when the process completes and restart your PC.
Removing the Webcam will fix any corrupt installation or missing files issues causing the Lvrs64.sys BSOD error to appear.