Can A Power Outage Damage Your  PC? [4 Preventive Tips]

Our computers rely on power and voltage to stay on and work efficiently. However, if you live in an area with frequent power outages, you might wonder if power outages can damage your PC. 

This article will explain how power outages can damage your computer and what preventive measures you can take to avoid them. 

Can power outages damage computers?

Yes, power outages can damage your computer and cause data corruption and hardware malfunction. 

A sudden shutdown could end your processes in between, corrupting the system files and thereby corrupting the OS. When you try to restart the computer, the operating system will not be able to boot. 

Frequent power outages reduce the hard disk lifespan as it causes physical stress to the hard disk and other computer components.

The stress can further cause physical damage to the hard disk, including surface damage, head crashes, and spindle motor failures. 

What is the most likely consequence of a sudden power outage in a computer?

The motherboard and chips embedded inside a CPU are fragile, and if your computer shuts down suddenly due to a power outage, it can damage the components. 

The app and OS running before the power outage can also be damaged when interrupted. In some cases, the damage is so severe that you might have to reinstall your operating system. 

What happens if the power goes out while the PC is on?

If the power goes out while the PC is on, it can cause a sudden shutdown and lead to data loss and hardware malfunction. 

What can I do to prevent damage from a power outage on your computer?

1. Shutdown the PC 

If you already know there will be a power blackout in your area, don’t use your computer during that time. Also, ensure you shut down your computer and remove the power plug.

2. Use a surge protector 

You can use a surge protector to protect your computer against power surges during a power outage. The surge protector diverts the extra voltage to the ground, protecting your computer from damage. 

3. Use a UPS 

UPS - how does power outage affect computer

Getting a reliable Uninterruptible Power Supply (UPS) is an excellent way to protect your computer from power outages and surges. UPS provides backup power and prevents data corruption or loss and hardware damage.

4. Keep your drivers up to date 

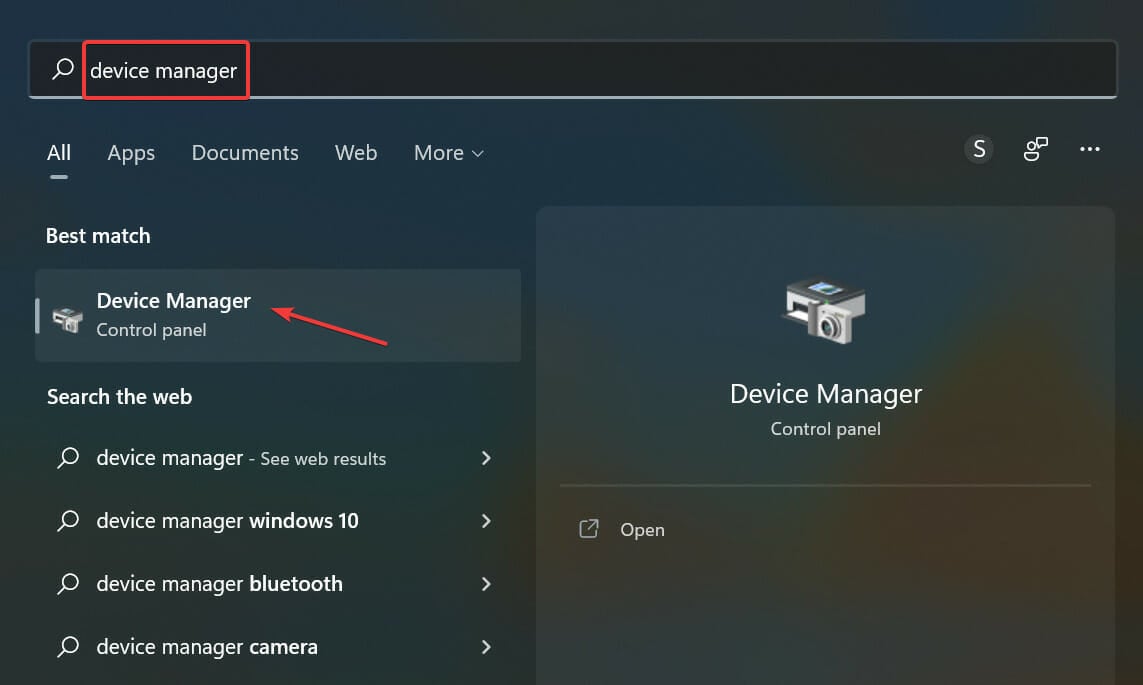
  1. Press Windows + R to open the Run window. Device Manager RUN COMMAND - how does power outage affect computer
  2. Type devmgmt.msc and press Enter to open Device Manager. 
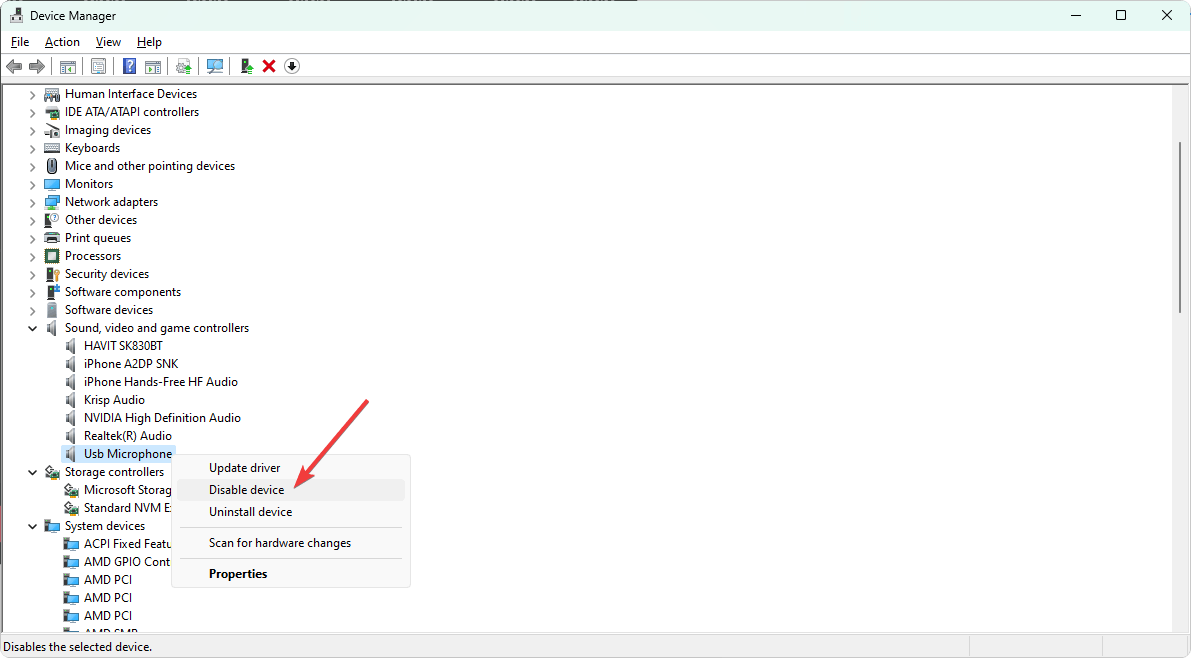
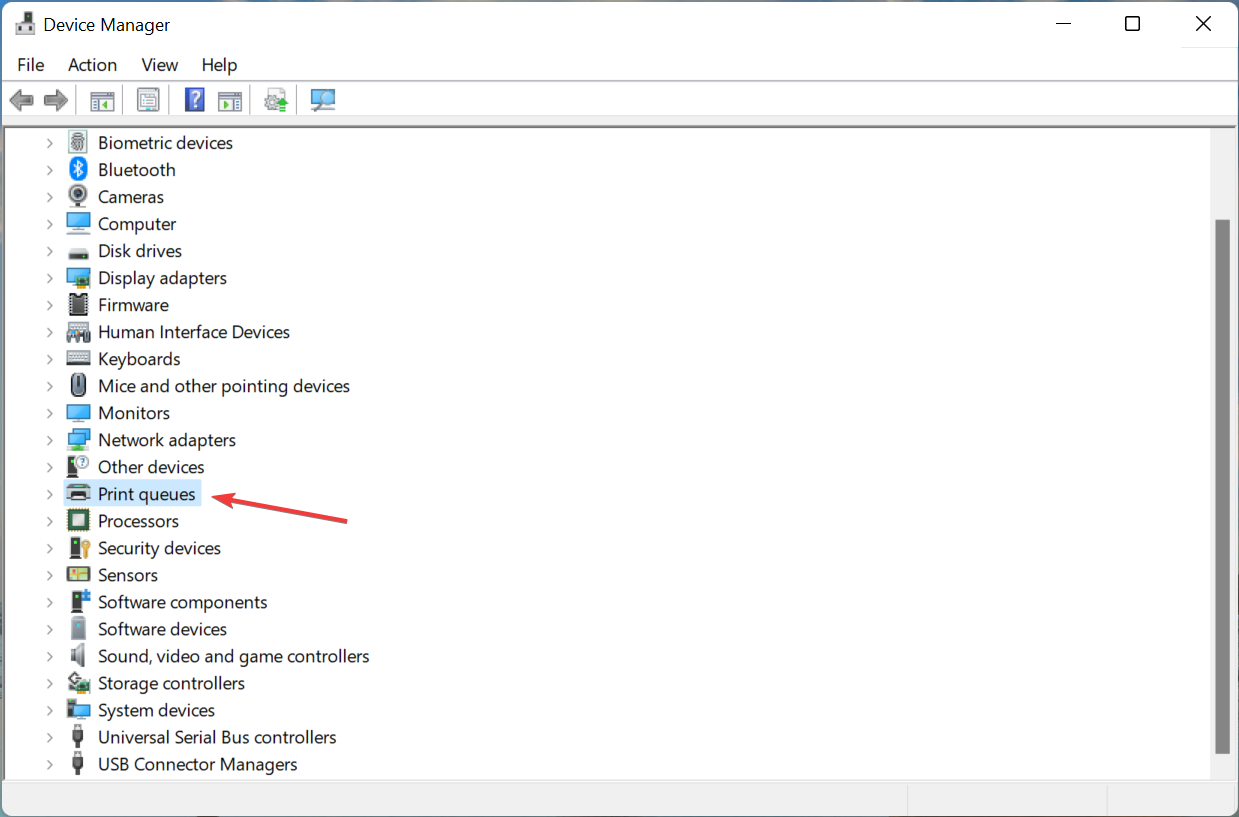
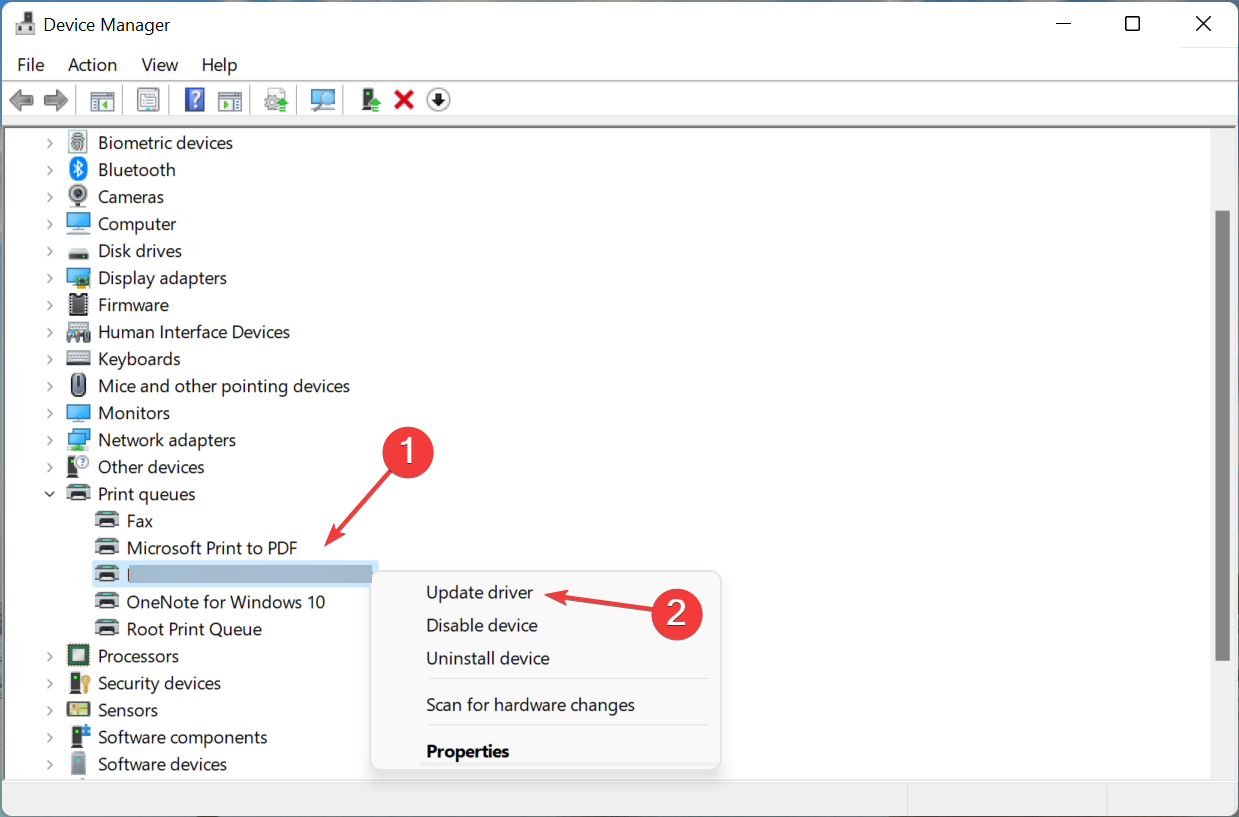
  3. Go to all the drivers listed one by one, right-click on them and click Update driver.Graphics Driver update
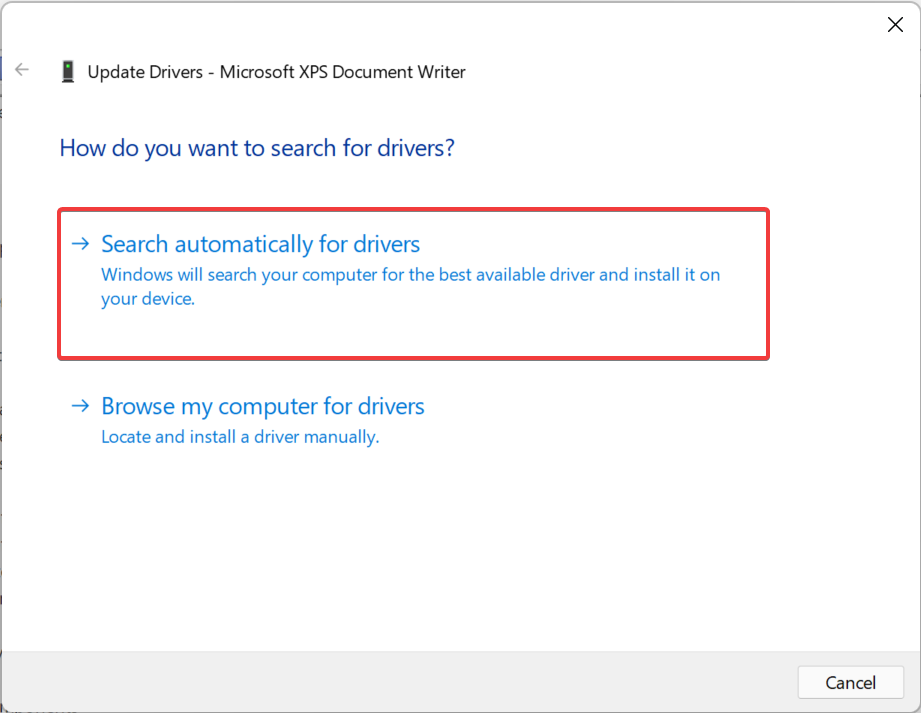
  4. Follow the onscreen instructions to complete the process. 

In case you require an easier method to update your drivers securely on your PC, you can utilize the automated tool Outbyte Driver Updater.

This practical software will scan the system for outdated or missing drivers and update them all at once or individually.

So, these are preventive steps you need to follow to ensure your computer is not damaged due to a power outage.

If you have any questions or concerns, please feel free to mention them in the comments below. 

Kodi Not Working / Not Opening on Windows 10 & 11: Why & Fix

Once an Xbox exclusive – nowadays a multi-platform fan-favorite media center. Kodi is one of the best multimedia players, with many different features, add-ons, and an amazing interface.

However, the app is not without issues, with users reporting that Kodi is not working on Windows 10. This can be pretty frustrating, but it is not an issue that is impossible to fix, as we will show in this guide.

How to address Kodi not working in Windows 10

1. Check drivers and DirectX

  1. Navigate to one of these sites depending on your GPU:
  2. Search for your GPU and download the latest drivers.
  3. Install your drivers and restart the PC.
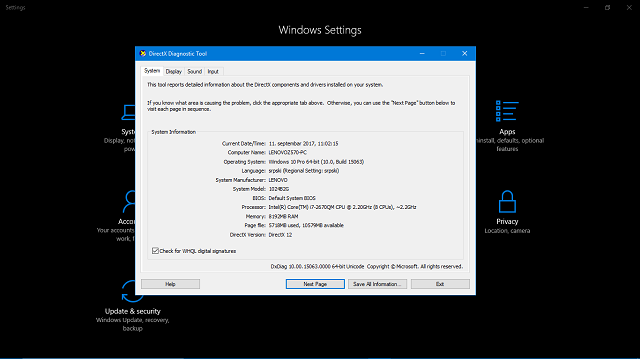
  4. Now, in the Windows Search bar, type dxdiag and open the first result.
  5. At the bottom, you’ll see the current DirectX version running on your PC.
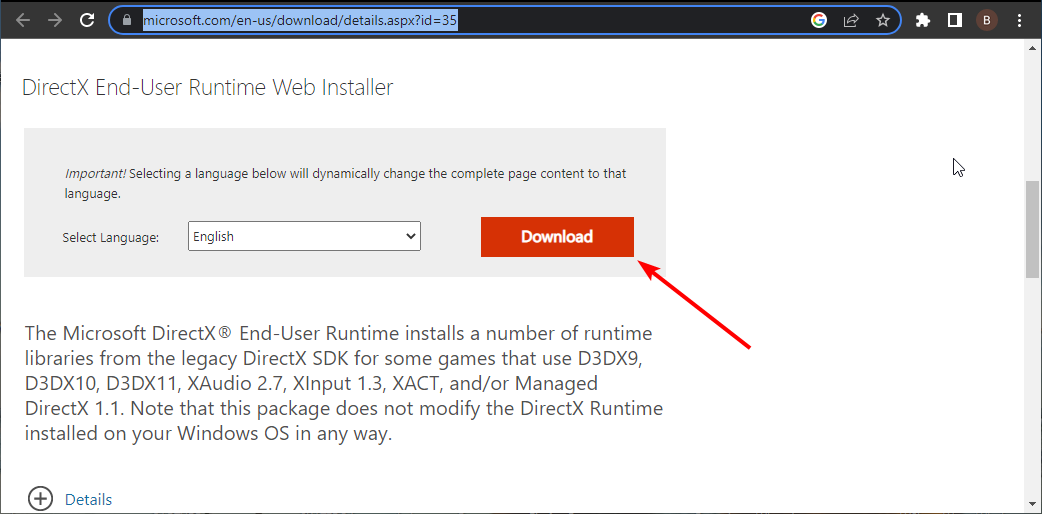
  6. The updates can be found here for all current and previous DirectX versions.
    download directx kodi not working windows 10

You need stable legacy drivers on your PC to use the Kodi player successfully. You’ll need to navigate to OEM’s official site to obtain the legacy driver for your GPU.

The lack of appropriate software support can affect Kodi’s usability, so check the drivers and DirectX, as shown above. After you’ve dealt with drivers and DirectX, check if Kodi is working.

2. Update Kodi

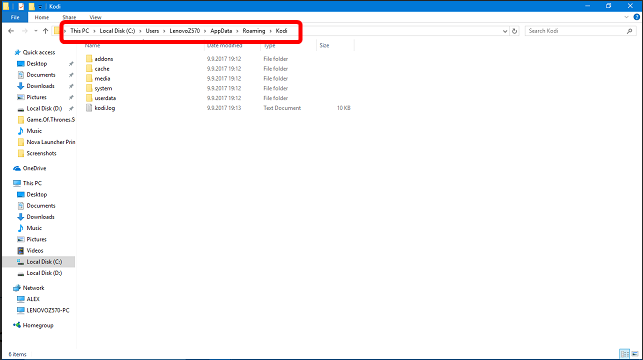
  1. Press the Windows key + E to open File Explorer and navigate to the path below: C:Users > <Your username> > AppData > Roaming
  2. Now, back up the Kodi folder.
    path
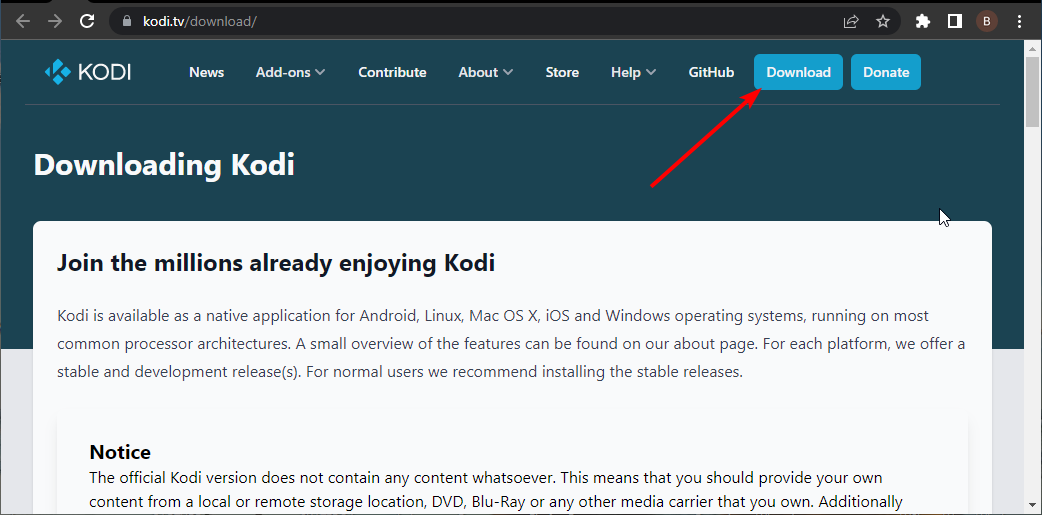
  3. Download the Kodi v17.4 Krypton installation file from this link.
    download kodi not working windows 10
  4. Right-click the installation file and Run as administrator.
  5. Finally, run Kodi and look for changes.

Updates are frequent, especially if you are enrolled in the beta version, and most of the time, the majority of critical issues are resolved after updates.

One of the stable versions of Kodi is 17.4 Krypton, so make sure to obtain it if you already haven’t. The update procedure equals the fresh installation, with a few differences.

3. Delete the Addons27.db file

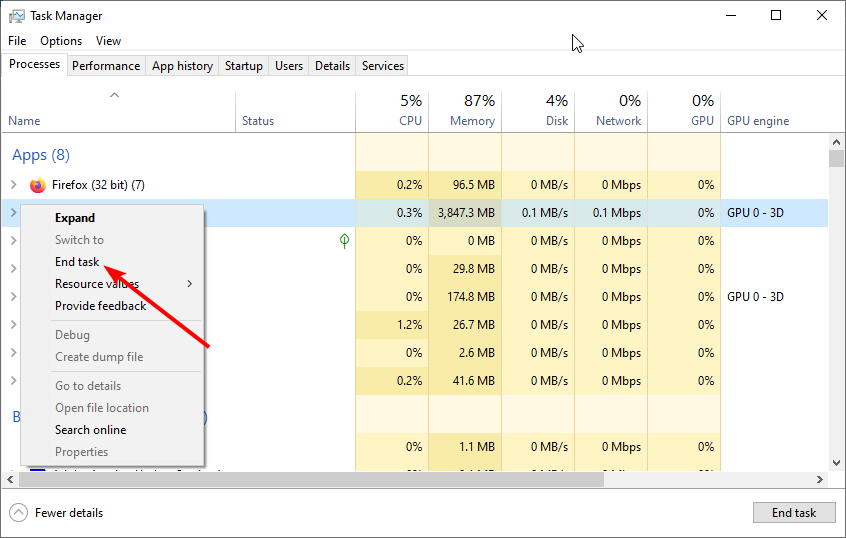
  1. Press the Ctrl + Shift + Esc keys to open Task Manager.
  2. Right-click all Kodi-related processes and select End task.
    end task
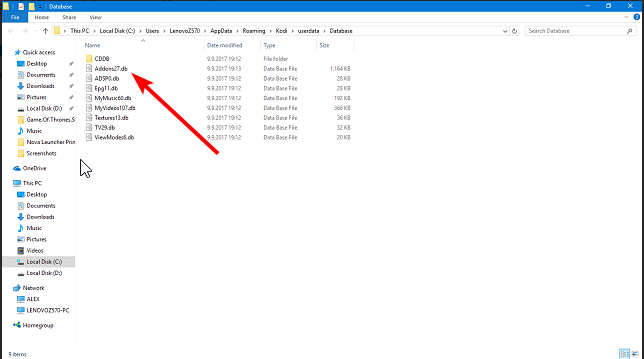
  3. Now, copy-paste the path below into the Windows Search bar or Windows Explorer address bar: %APPDATA%KodiuserdataDatabase
  4. Select the Addons27.db option and press the Delete button.
    addon27
  5. Finally, restart Kodi.

Kodi is great, but the abundance of add-ons that are not well-optimized is risky. And most of the time, the resolution for the problem we’re addressing today is somehow related to Add-ons.

To fix this Kodi not working issue, you should delete a configuration file that stores all the add-on-related data.

Now, you should be able to locate and install the add-ons that support the latest Kodi version, which is, as we already stated, v17.4 Krypton.

4. Disable Hardware Acceleration

  1. Open Kodi.
  2. Choose the cog-like Settings icon.
  3. Now, open Player Settings.
  4. Under the left pane, click on the bottom cog until you set the Expert mode.
  5. Select Videos.
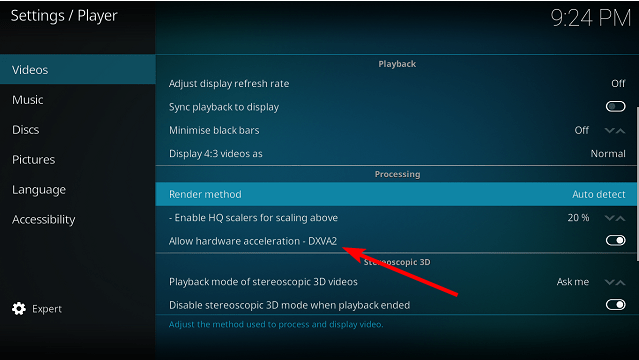
  6. Scroll down and disable Allow hardware acceleration DXVA2.
    hardware acceleration
  7. Restart Kodi and give it another go.

The system’s capabilities occasionally need a hardware push when it comes to the playback of high-resolution video files. And that push comes with the Hardware Acceleration feature.

However, this feature can cause Kodi not to work on Windows 10. In some cases, it can even lead to black screen issues. Hence, you need to disable this feature to fix this issue.

5. Reinstall Kodi

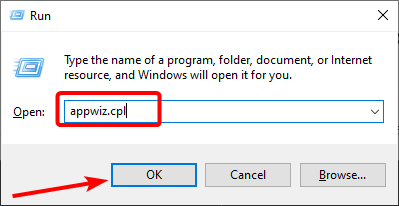
  1. Press the Windows key + R, type appwiz.cpl, and click OK.
    appwiz  kodi not working windows 10
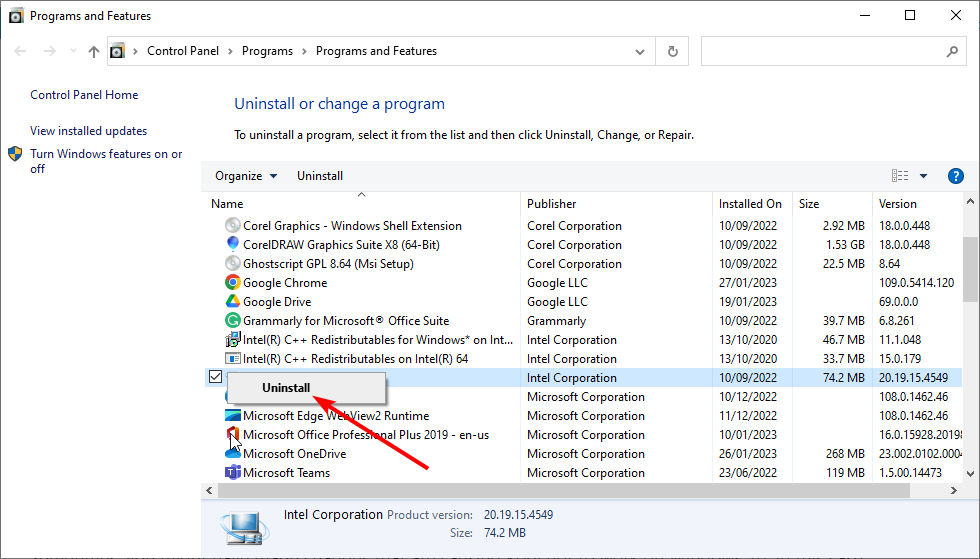
  2. Right-click Kodi and select the Uninstall option.
    uninstall
  3. Copy-paste the path below to the Windows Search bar or Windows Explorer address bar and press Enter: %APPDATA%Kodi
  4. Delete the Kodi folder.
  5. Finally, restart your PC and start the installer.

Sometimes, you might have made changes causing Kodi not to work on Windows 10. In this case, you need to uninstall and reinstall the app.

6 Install other or older version

Finally, if none of the aforementioned solutions served you justice, you should consider switching to an older Kodi version. We’re well aware that the portable version or older versions lack the usability of the full 17.4 Krypton, but they at least work.

Additionally, there’s a chance that further updates will sort things out, so this is just a temporary solution.

There you have it: everything you need to fix Kodi if it is not working on Windows 10. All you need to do now is to follow the steps carefully.

In the same vein, if your VPN is not working with Kodi, check our detailed guide to fix it quickly.

What’s your experience with the latest Kodi release version? Tell us in the comments section below.

How to Install & Use PowerToys on Windows 11

If you are looking for a way to install PowerToys on Windows 11, you are at the right place. This guide will discuss how to install PowerToys and use them to customize Windows for greater productivity. Let’s get started! 

Does PowerToys work on Windows 11?

Yes, PowerToys work on Windows 11, and it was made available on GitHub in 2019 and Microsoft Store in 2021. You can also download it using the Winget command on Command Prompt.

How can I install PowerToys on Windows 11?

Before installing the utility, you should consider performing the following checks:

  • A user account with administrator privileges on your computer.
  • Internet access to download the PowerToys installer.

1. Use the Microsoft Store 

  1. Go to the Microsoft PowerToys on the Microsoft Store website.
  2. Click Get in Store app. 
  3. You will be directed to Microsoft app. Click the Install button. Install PowerToys Windows 11
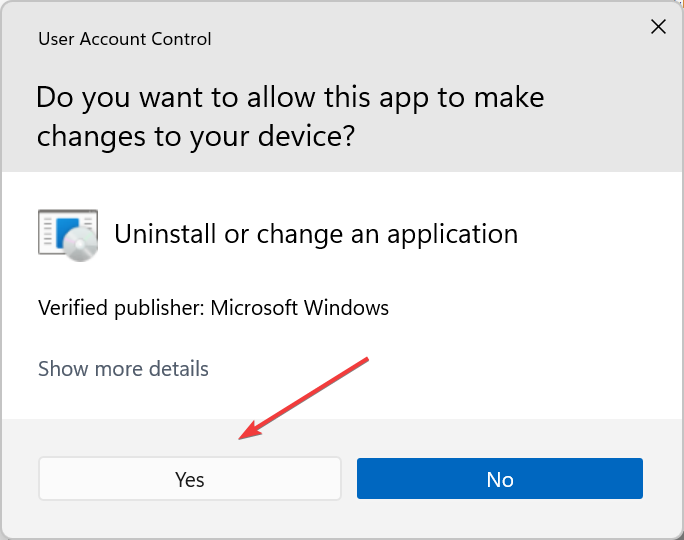
  4. Click Yes on the UAC prompt to complete the installation. 

2. Use the Winget command 

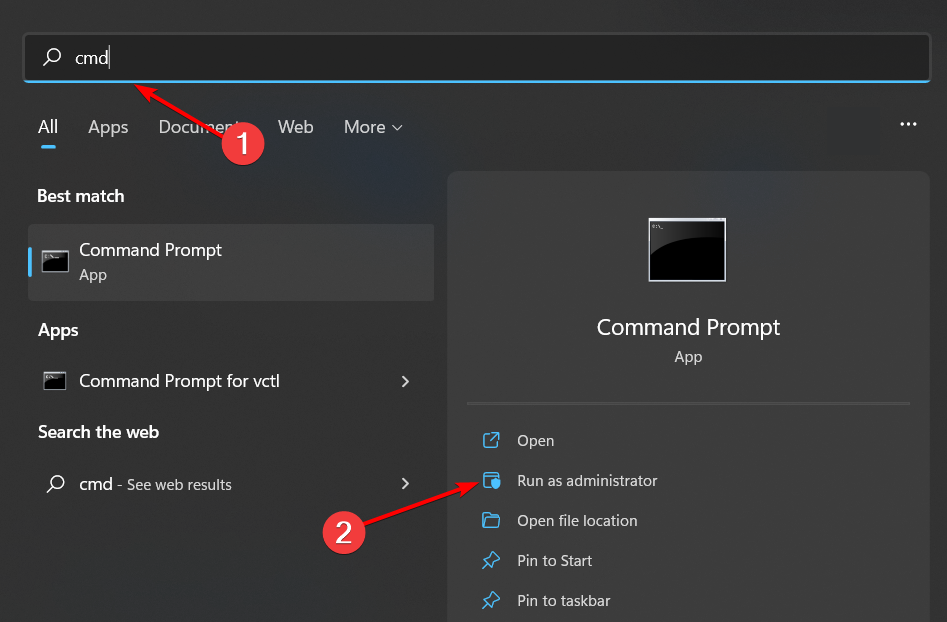
  1. Press the Windows key, type CMD and click Run as administrator. DOS COmmand Prompt - install Powertoys Windows 11
  2. Copy and paste the following command to install and press Enter: winget install --id Microsoft.PowerToysInstall PowerToys Windows 11 CMD
  3. If you get Do you agree to all the source agreements terms prompt, type Y.
  4. Wait for a few minutes, and PowerToys will be installed on Windows 11. 

3. Use GitHub 

  1. Open the PowerToys page on the GitHub website. 
  2. Go to the latest section, and click on the PowerToys executable file to download the installer. 
  3. Now double-click the installer file to initiate the installation. 
  4. Click the Install button when prompted. 

How can I use PowerToys on Windows 11?

You can launch PowerToys using the Search bar or Windows button. In addition, various tabs are available in the PowerToys utility to customize Windows 11. Let’s discuss them one by one. 

1. General 

General - Install PowerToys Windows 11

This tab lets you modify settings, such as options to Download updates. Toggle on the switch for Download updates and Always run as administrator option for optimal usage. In addition, this section lets you make changes to the app theme and customize other settings. 

2. Always on Top

Always on top

With this tab, you can pin the window you are using to remain visible. You can also customize the border color and thickness of the selected window. 

3. Awake

Awake

With the Awake tab, you can keep your computer awake on demand. You can select either Keep using the selected power plan, Keep awake indefinitely, or Keep awake temporarily. You can toggle on the switch for Enable Awake to keep the screen on always. 

4. Color Picker 

Install PowerToys Windows 11 - Color picker

The Color picker allows you to pick out a color from any running app and copy the clipboard. You can also add a new format using this section.

5. FancyZones

Fancy Zones

This tab allows you to create an advanced layout for resizing several windows and changing Zone behavior.

6. File Locksmith

File Locksmith

With the help of the Windows shell extension, File Locksmith allows you to check which files and directories are in use and which processes are using them.

7. File Explorer Add-ons 

File Explorer - Install PowerToys Windows 11

With File Explorer Add-ons, you can get a preview pane enabled for all kinds of files, including MD, SVG, GCODE, and PDF. 

8. Hosts File Editor

With this tool, you can quickly edit the hosts’ file, containing a list of IP addresses and matching domain names.

9. Image Resizer

With Image Resizer, you can change the size of the pictures in a batch. All you need to do is select images, right-click and select Resize pictures. 

10. Keyboard Manager 

Keyboard Manager

With Keyboard Manager, you can create new keyboard shortcuts and modify the existing ones. 

11. Mouse Utilities 

Mouse Utilites

With Mouse Utilities, you can get visual feedback when you click something. You can also locate your mouse pointer when needed.

12. PowerRename 

Power Rename

With PowerRename, you can rename files and folders in bulk without using PowerShell. All you need to do is select files and folders, right-click and select PowerRename. 

13. PowerToys Run 

Run - Install PowerToys  Windows 11

With PowerToys Run, you can quickly search and launch apps, files, and folders. You can also switch between open apps and windows.

 14. Quick Accent

Quick Accent

You can enable Quick Accent if you don’t have a keyboard with accented characters. To write accented characters, hold the key for the character to which you want to add an accent.

15. Screen Ruler

Screen Ruler

With Screen Ruler, you can easily measure the pixels on your screen based on image edge detection.

16. Shortcut Guide 

Install Powertoys Windows 11 - Shortcut guide

As the name suggests, it gives you a list of shortcuts. All you need to do is press Windows + Shift + I to get it on the screen. 

17. Text Extractor

Text extractor

The Text Extractor allows you to copy text from anywhere on your computer screen, even from videos and images.

18. Video Conference Mute

Install Powertoys Windows 11 Video Conference Mute

With Video Conference Mute, you can ensure your microphone is always on mute and the camera is off. 

So, this is how you can install and use PowerToys on Windows 11. For more information, be sure to visit our guide on the best PowerToys utilities. If you have any questions about PowerToys, please let us know in the comments section below. 

Fix Motherboard Not Getting Power (Easy Steps)

If your motherboard won’t power on, don’t panic just yet. Whether you’re dealing with a Gigabyte, ASUS, or any other brand, or your PC refuses to boot entirely, it doesn’t always mean there’s a serious hardware issue. This guide walks you through beginner-friendly troubleshooting methods using only built-in Windows tools and basic checks, no advanced tech skills required.

Why Your Motherboard Isn’t Getting Power

Several basic issues can cause a motherboard not to boot or receive power, such as:

  • Faulty outlets or unplugged power cables
  • Sleep or hibernate settings blocking startup
  • A power surge or incomplete shutdown
  • PSU-related configuration or wattage mismatch

If you’re curious about power mismatches, you can check your PSU’s wattage to ensure it matches your system’s needs.


How to Fix a Motherboard Not Getting Power

1. Check the Power Cable and Outlet

Start with the simplest check.

  • Confirm the power cable is plugged securely into the PC and the wall.
  • Use a known working wall outlet rather than a power strip.
  • If your power supply has a switch, make sure it is turned on.

If you suspect a faulty PSU, you can test your power supply using software without opening your PC.

2. Try a Power Reset

Resetting the internal power can often bring an unresponsive PC back.

  1. Turn off the PC and unplug it.
  2. Press and hold the power button for 15 seconds.
  3. Wait one minute, plug it back in, and try powering on.

This helps in cases where the motherboard will not power on due to static buildup or a failed shutdown.

3. Look for Signs of Power

Check for basic indicators when you press the power button:

  • Spinning fans
  • Lights inside the case
  • A single beep or startup sound

If you see or hear nothing, the motherboard might not be receiving any power at all. For persistent cases, check out this guide on Windows 10 power supply problems.

4. Run the Built-In Power Troubleshooter

If your PC sometimes powers on but doesn’t boot properly, let Windows try to fix it:

  1. Press Windows + I to open Settings
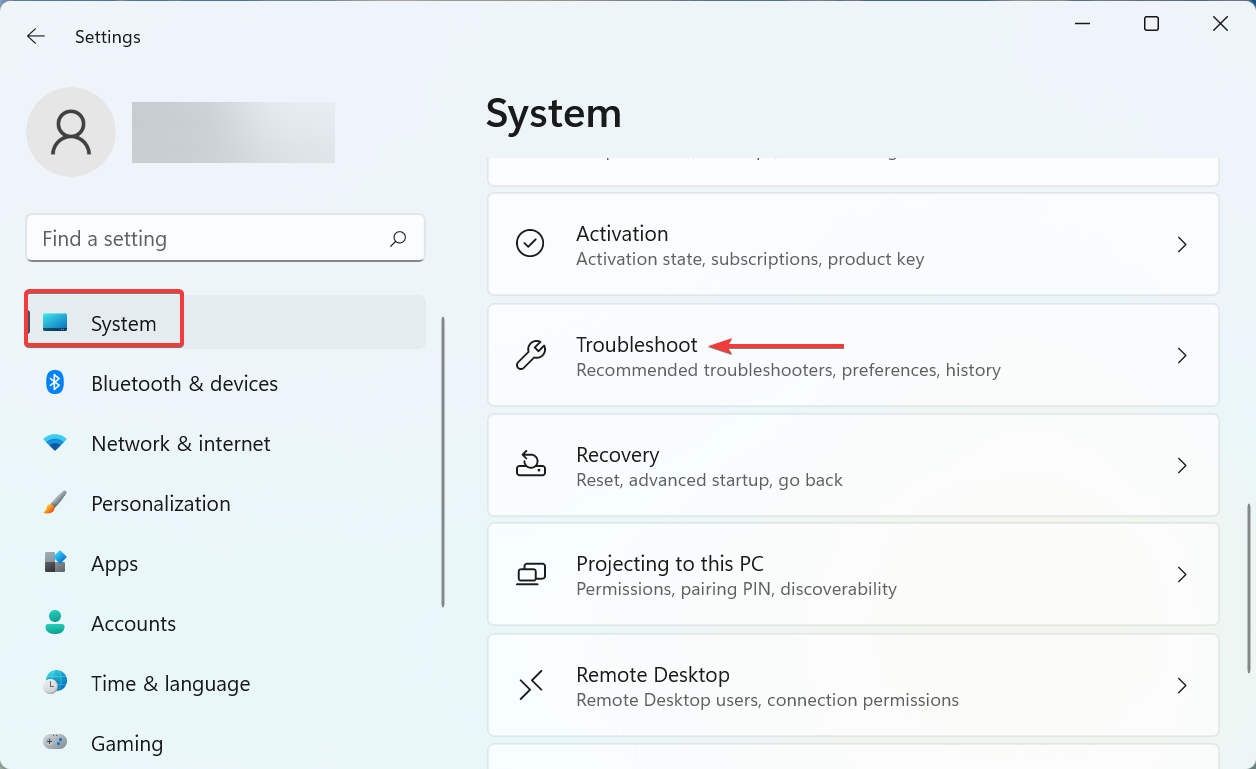
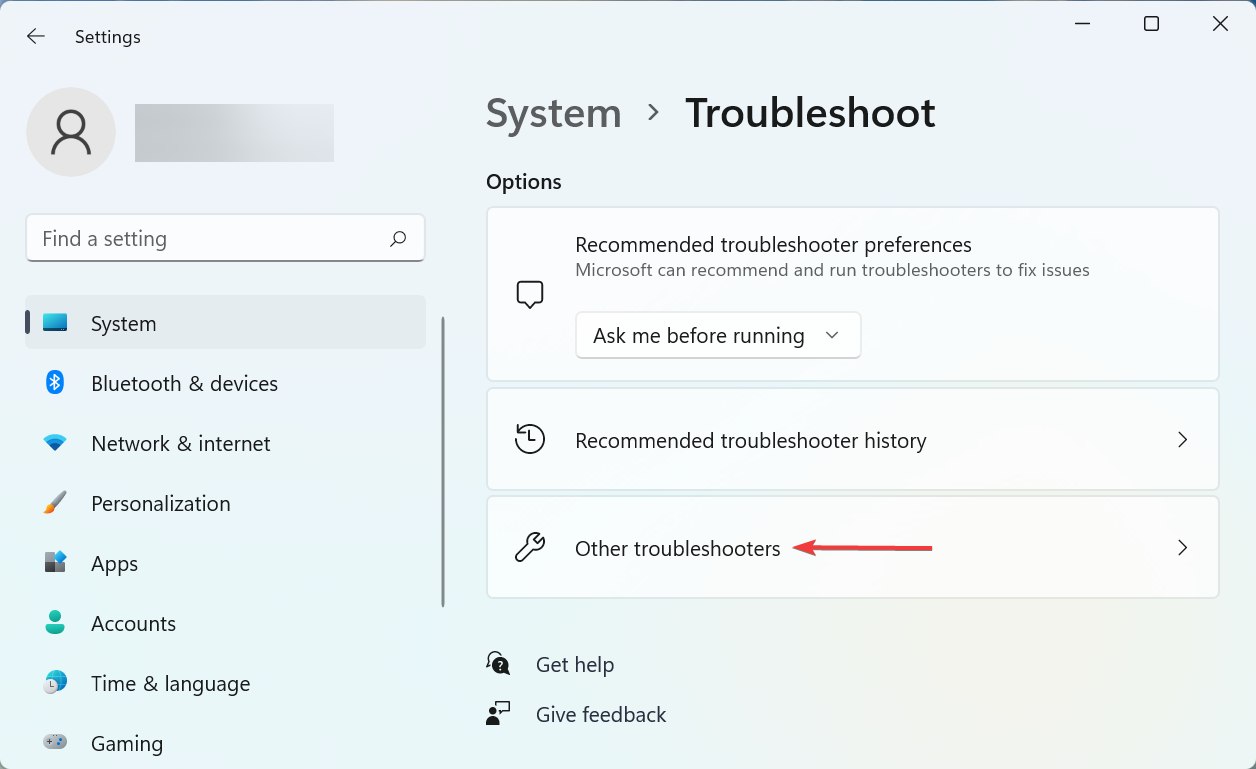
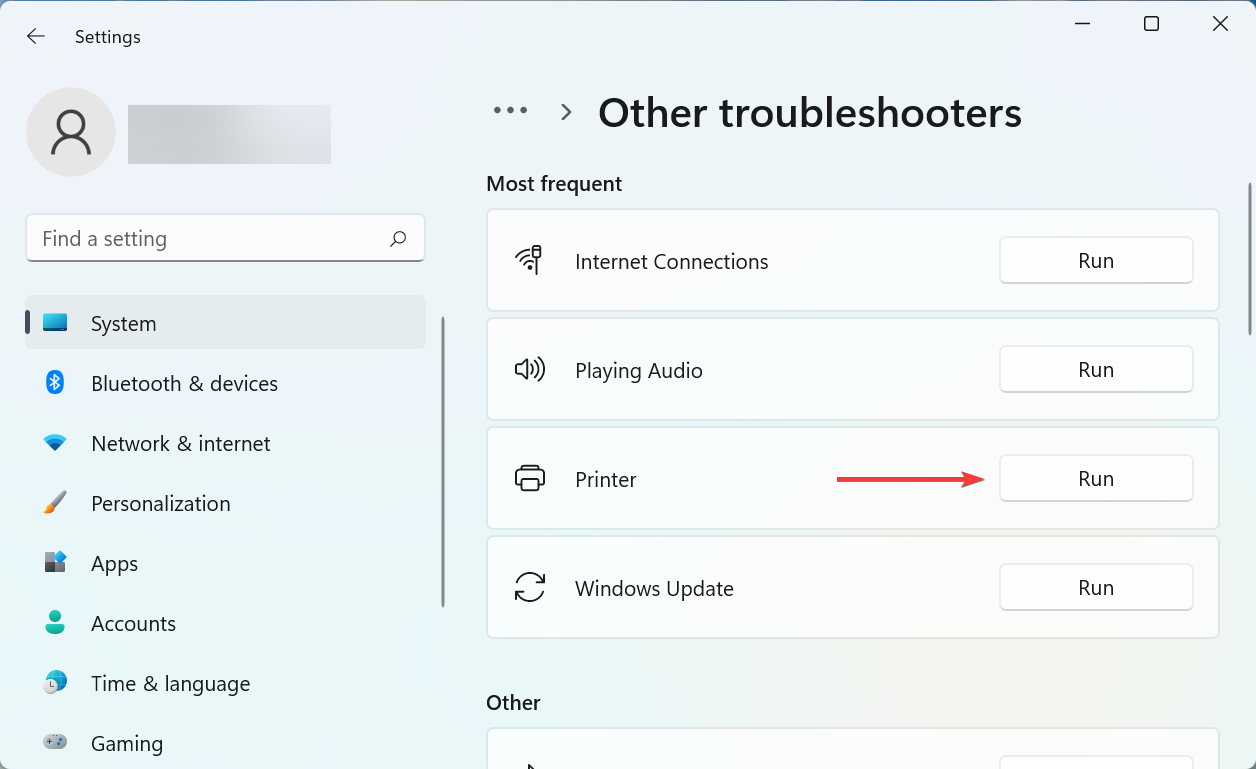
  2. Go to System > Troubleshoot > Other troubleshootersother troubleshooters
  3. Click Run next to Power

This troubleshooter can repair corrupted power plans and startup behavior.

5. Adjust Power Plan Settings

Sleep or hibernate mode can block startup if misconfigured.

  1. Open Control Panel
  2. Navigate to Hardware and Sound > Power OptionsPower options
  3. Select Balanced or High performance
  4. Click Change plan settings
  5. Set Put the computer to sleep to Never
  6. Click Save changes

These changes help avoid power states that cause the motherboard not to start the power supply.

FAQ

Will these steps delete any of my data?

No. All of the actions are non-destructive and do not affect your files or apps.

Do I need to open my computer case for these steps?

No. This guide uses only external tools and Windows features.

Is there a way to test my overall system health?

Yes. Use a computer performance test online to assess your system’s behavior once it boots again.

Conclusion

A motherboard not getting power doesn’t always mean it’s dead. These safe, beginner-friendly steps help you troubleshoot without tools or risk. Whether your motherboard will not power on or boot, a few simple checks can often bring your PC back to life.

iTunes Won’t Launch on Windows 10: Why & How to Fix

The iTunes client for Windows 10 allows iPhone users to manage their media files and updates from the Windows computer. However, some users have reported that the app has stopped working after updating their iTunes client.

If you try to launch the app, iTunes only shows the loading icon but does not launch properly. In this guide, we will show you the easy ways to fix this issue.

Why is iTunes not launching?

There are several factors that can cause the iTunes app not to launch on Windows 10. Below are some of them:

  • Faulty app: The first thing to check if the iTunes app is not working is if the app is broken. To do this, you need to repair your installation and see if Windows finds any faults.
  • Lack of privilege: In some cases, the iTunes app might not open because you lack administrative privileges. The solution to this is to run the app as an administrator.

iTunes won’t open windows 10

1. Repair iTunes

1.1. Use Control Panel

  1. Exit iTunes launcher or any other service if running.
  2. Locate the iTunes icon (shortcut) on the desktop and delete it.
  3. Press the Windows key + R, type appwiz.cpl, and click OK.
    appwiz itunes wont launch on windows 10
  4. Now, right-click iTunes and select the Change option.
    change
  5. Finally, select the Repair option and proceed with the on-screen instructions.

iTunes has a built-in option to repair corrupted or missing system files in case an issue occurs. You can run the repair tool from the Control Panel.

1.2. Repair From Settings

  1. Press the Windows key + I to open the Settings app and select Apps.
    apps
  2. Choose the iTunes option and click Advanced Options.
    advanced options itunes wont launch on windows 10
  3. Finally, click the Repair button to repair the iTunes client.
    repair

After the repair is complete, reboot the computer. Launch iTunes and check for any improvements.

2. Launch iTunes as Administrator

Users have reported that launching iTunes as the administrator helped them resolve the error. Launching iTunes as an administrator can fix any permission-related issues with the client.

Simply right-click on the iTunes desktop shortcut and select Run as administrator. If UAC asks for permission, click on Yes.

3.  Check for Hardware / Software Conflict

If you have recently installed a Bluetooth card or WiFi adapter, the driver or the software may be creating conflict with the iTunes launcher.

If the issue appears after installing new software, try to uninstall the software and launch iTunes.

4. Other Fixes to Try

Here are a few minor yet effective fixes that can help you resolve the iTunes-related issues on your Windows 10 computer.

  • Exit BTTray.exe Bluetooth utility from Broadcom if installed. You can check for the bttray.exe process in the Task Manager. Select the process and select End.
  • Remove any SD card inserted or an external hard disk connected to the PC.
  • Try to open iTunes in safe mode by pressing Ctrl  + Shift. Press the key combo and launch iTunes.
  • Disable Third-party antivirus temporarily and check for any improvements.

If you have installed new hardware, remove the hardware and uninstall the concerned drivers. Reboot the system and launch iTunes. If iTunes works without the hardware, you may have to update the hardware driver from the device manager.

That is about it for the iTunes not launching issue. Now, you only need to follow the steps carefully, and things should be back to normal.

If you are facing other issues, like iTunes won’t install on Windows 10, check our detailed guide to fix it for good.

Feel free to let us know the solution that helped you fix this issue in the comments below.

Enable Active Directory Users and Computers on Windows 11 + Video

Here’s how to enable active users and computers in Windows 11.The normal installation doesn’t include ADUC, but you can install it. Here’s how:

How can I install Active Directory Users and Computers in Windows 11?

Download Additional features

  1. First you need to open the Settings app. You can do so by pressing the Windows + I keys from your keyboard, then go to Apps from the left menu, followed by Optional features.apps-optional enable active directory users and computers
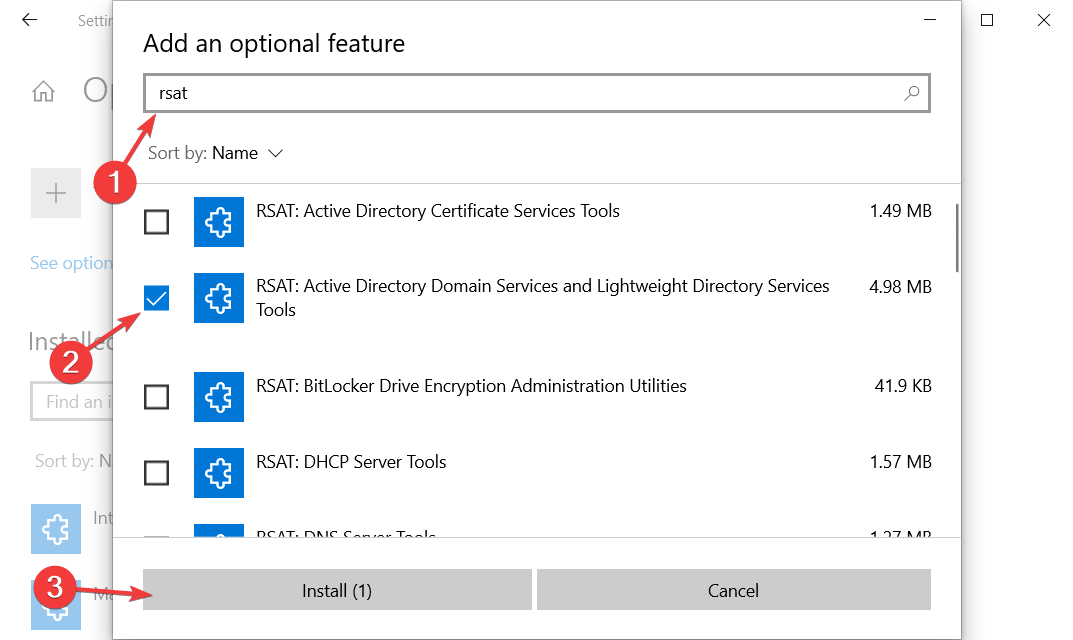
  2. Now click on the View features button and search for RSAT: Active Directory Domain Services and Lightweight Directory Services Tools and click Next in order to continue with the installation process.

How can I enable Active Directory Users and Computers in Windows 10 alone?

On both operating systems, the procedure to install and enable Active Directory Users and Computers is the same as for the other. The only difference will be that instead of the Next button, you will have an Install button.


Consequently, you can open Settings on Windows 10, then go to Apps . Then, go to Optional features, as we did above, and install the same package named: RSAT: Active Directory Domain Services and Lightweight Directory Services Tools.

ADUC will be downloaded and configured on your computer once the installation process has been completed. To double-check, press the Start button.

The Administrative Tools folder will be on the menu bar, and it should contain Active Directory Users and Computers information.

How does ADUC work?

When it comes to administration and end-users, Active Directory makes life easier while also increasing security for enterprises.

It centralizes and manages administrative privileges and rights. Administrators have centralized control over computer and user configurations thanks to the Active Directory Group Policy feature.

After authenticating once, users can access any resources in the domain for which they got access without having to authenticate again (single sign-on).

Also, files get stored in a shareable repository. This facilitates collaboration and a safe backup.

folder enable active directory users and computers

The Active Directory Domain Services (AD DS) service is the primary Active Directory service. It is included with the Windows Server operating system.

Domain controllers (DCs) are the servers that are responsible for administering AD DS. Organizations typically have numerous domain controllers, each of which contains a copy of the domain directory for the whole directory.

The changes to the directory on one domain controller – such as changing a user’s password or deleting a user account – replicate to other domain controllers.

This ensures they are all up to date with the latest information.

It’s critical to note that Active Directory is only available for Microsoft systems that are hosted on-premises.

Azure Active Directory, on the other hand, is for Microsoft environments in the cloud. But it performs the same functions as its on-premises counterpart.

Although Active Directory and Azure Active Directory are independent, they can function together to a certain extent if your firm has both on-premises and cloud IT systems (a hybrid deployment).

What’s in the Active Directory database?

This database contains information on the Active Directory objects that are present in the domain. Users, computers, programs, printers, and shared folders are all examples of AD objects.

A number of objects can contain additional objects (this is why some places describe AD as hierachal). The categorization of them into organizational units and the streamlining of security by grouping users are two common ways in which companies simplify administration and security.

These organizational units and groups are also objects that are saved in the directory. Attributes are characteristics of objects. Some characteristics are immediately noticeable, while others are more subtle.

For example, a user object typically contains attributes such as the person’s name, password, department, and email address.

It can also contain attributes not visible to the general public. These include Globally Unique Identifier (GUID), Security Identifier (SID), and last login time.

When a database is structured, it indicates that there is a design that dictates what sorts of information are stored in the database and how that information is organized.

A schema is a type of design that organizes information. It is no exception in the case of Active Directory, whose schema comprises formal definitions of every object class that can be generated in a forest, as well as formal definitions of every attribute.

Wrapping up

Important to understand is that it’s important to prepare the schema carefully upfront, because of the critical function that Active Directory plays in authentication and authorization. Modifying the schema of the AD database can have a significant impact on your organization.

Was this guide helpful? Do let us know in the comments section below and whether you have any other solutions in mind. Thanks for reading!

How To Remove Airplane Mode In Laptop [Step-By-Step]

Airplane Mode is a usual thing in many devices nowadays. And computers using Windows 10/8/8.1 aren’t different.

Airplane Mode is a very useful feature, especially for business people who travel by plane a lot, but it also could cause some problems, and we’re here to try to solve it.

How do I remove Airplane Mode in laptop?

As I already said in the introduction, the Airplane Mode is a built-in feature of Windows 10/8.1 and later systems being very handy for those who travel by plane. It allows you to use all offline features of the system, without connecting to the internet, allowing you to avoid huge additional costs.

But once you get off the plane, and your Airplane Mode is still turned on, you’ll definitely want to turn it off again, but what if you can’t? Don’t worry, try some of these solutions, and you’ll probably solve your problem.

1. Turn Off Airplane Mode from Networks pane

First, just in case you should check if you turned off Airplane Mode correctly, to turn off the Airplane Mode, do the following:

  1. While on Desktop, move the mouse cursor to the bottom right corner of the screen and go to Settings
  2. On the opened Settings pane in the right, click the wireless network icon from the lower section
  3. On the opened Networks pane in the right, move the button under the Airplane mode section to the left to turn the Airplane mode feature off
  4. In order to turn the Airplane mode feature back on, follow the steps from 1 to 3 while moving the button under the Airplane mode section to the right

2. Via Action Center in Windows 10

  1. Press and hold Windows Key + A and open Action Center
  2. Click Airplane Mode to turn it On/Off
Turn Off Airplane Mode

3. Turn off Airplane Mode from Settings

If you want to permanently turn off Airplane Mode, you can do so by going to the Setting menu and switch it off.

  1. Hit the Windows Key and select Settings from the start menu.
  2. Click on Network&Internet
    Turn off Airplane Mode from Settings Menu
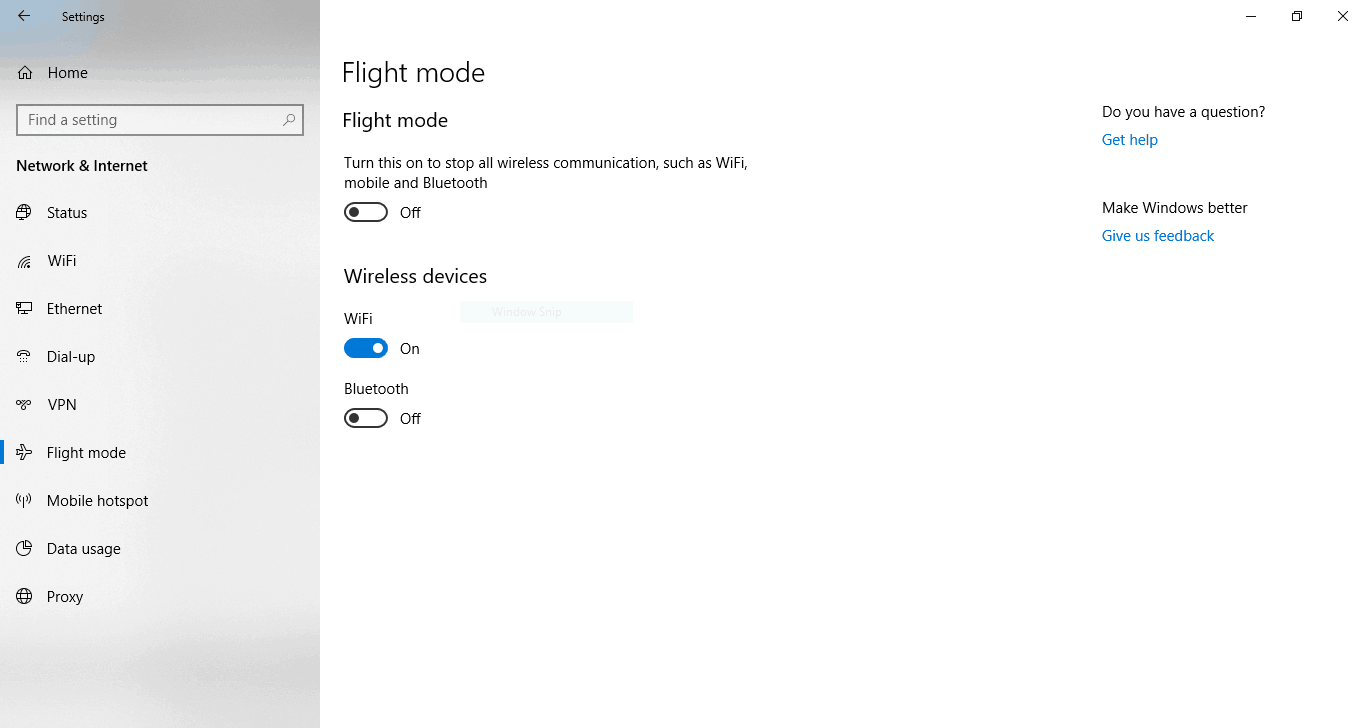
  3. On the left pane click Airplane Mode
    Turn Off Airplane Mode in Windows 10
  4. Turn it Off and close the Settings window.

What to do if you can’t turn off Airplane Mode?

In case you’re not able to turn it off at all, because the switch is grayed out, check if there’s no physical wireless On/Of switch on the device. If you find a physical switch device and it is set to Off, just switch it back to On and you should be able to turn off the Airplane mode on your laptop.

We have recently covered how to fix Airplane Mode errors, so you can find there some useful information. Some users also reported that Windows 10 switches to airplane mode on its own. If you encounter any issues, search on our site for a solution or leave a comment below.

An Error Occurred Applying Attributes Access Is Denied: Fix

Windows 10 has come with a myriad of teething problems here and there, but most, if not all of them, usually have a workaround or an accepted solution. One such is the error users get while applying attributes.

It usually appears with the message: An error occurred applying attributes to the file: Access is Denied. So, let’s find out all about the error and its solutions.

How can I fix the error occurred applying attributes issue?

1. Take ownership of a file or folder

  1. Right-click the folder that you want to take ownership, and select Properties.properties
  2. Navigate to the Security tab, and click Advanced.advanced
  3. Click Change. If you are prompted for an administrator password or for confirmation, type the password or provide confirmation.change
  4. Type the name of the person you want to give ownership to.
  5. Click Check Names. The account name for the person you assign ownership to is displayed. Then, click OK.check name
  6. If you want this person to be the owner of the files and subfolders that are contained in this folder, select the Replace owner on subcontainers and objects check box.
  7. Click OK.

Usually, the Windows 10 error applying attributes message comes up either because you don’t have the appropriate permissions or the file is encrypted. So, make changes to it, and you shouldn’t encounter an error while applying attributes.

2. Check if you have appropriate permissions

  1. Right-click the file or folder, and then click Properties.
  2. Click the Security
  3. Under Group or user names, click your name to see the permissions that you have.
windows 10 error applying attributes

To open a file, you should have the Read permission. To change the permissions of a file or folder, follow these steps (log on as an administrator to change permissions on files and folders):

  1. Right-click the file or folder, and then click Properties.
  2. Click the Security
  3. Under Group or user names click your name to see the permissions that you have.
  4. Click Edit, click your name, select the check boxes for the permissions that you must have, and then click OK.

Issues experienced when trying to access files and folders, such as Windows 10 error applying attributes, may be related to permissions, which determine whether or not you can access or change the files and folders.

3. Check if the file/folder is encrypted

  • Right-click the file or folder, and select Properties.properties
  • In the General tab, click Advanced.advanced
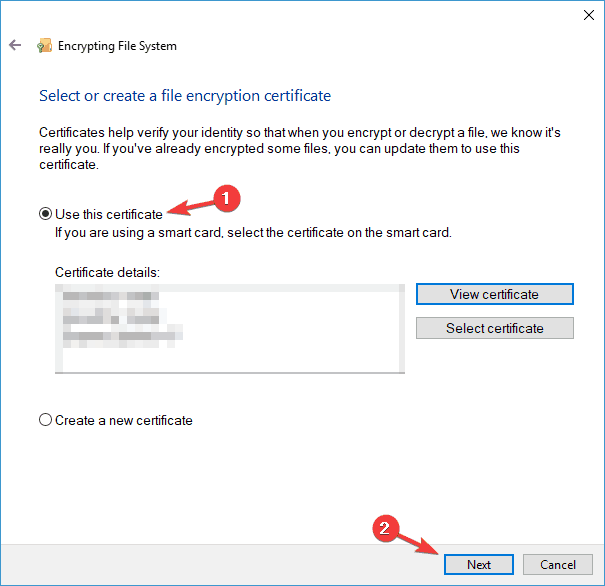
  • Check if the Encrypt contents to secure data check box is selected. If it is, then you will have to get the certificate that was used to encrypt the file or folder so as to open it.encryption to fix error while applying attributes

Encryption protects files and folders from unwanted access. You can’t open an encrypted file/folder without the encryption certificate, but you can easily verify the same.

4. Create a new user account

If your user profile is corrupted, Windows may prevent you from accessing files or folders, so you need to use a new user profile by first creating a local user account, which in turn creates a user profile.

Login to the new account you just created and see if you can access the file or folder. If the issue goes away, then it may mean your other user profile is corrupted. And in this case, we recommend that you switch the new account to administrator.

5. Run Microsoft Safety Scanner

Microsoft Safety Scanner is a tool designed to locate and remove malware from Windows PCs. It only scans when manually triggered, then you get to use it ten days after you download it.

However, it doesn’t replace your antimalware program. It helps remove malicious software from your Windows computer that causes the problem. To remove the Microsoft Safety Scanner tool, delete the msert.exe.

6. Recover files from Windows.old folder

  1. Press Windows + E to open File Explorer, then click This PC, and double-click the drive that Windows is installed on (typically, drive C).
  2. Now, double-click the Windows.old folderwindows.old folder to fix error while applying attributes
  3. Double-click the Users folderusername
  4. Double-click your user name.
  5. Open the folders that contain the files you want to retrieve. For example, to retrieve files in the Documents folder, double-click Documents and then move it to the concerned folder on the PC.
  6. Repeat these last three steps for each user account on your computer.

If you recently upgraded your computer to Windows 10 from an earlier iteration and did not format the hard disk, you might still be able to access your old files from the Windows.old folder.

And while we are fixing things, do not forget to check the best ways to boost the performance of Windows.

Let us know if any of these solutions helped fix the file permissions issue on your computer by leaving a comment below.

HDD Failure: Main Symptoms & What Can You Do?

Hard drives, no matter how good they are, will eventually fail. However, the hard drive gives you signs before complete failure, so you can always create a backup.

This guide will cover all the symptoms of HDD failure so you can identify the issue and learn how to fix it. 

What happens when an HDD fails?

When a hard drive fails, the disk will not be able to function correctly, and you can not access or store data. The reasons behind the issue could be mechanical failure,  firmware failure, or logical failure.

If your HDD has stopped working, you must buy a new one and use a third-party recovery tool to recover your data.

Can a failing hard drive be fixed?

The answer to this question depends on the reasons for which the issue occurs; some of the reasons are:

  • Mechanical issue – If your disk is damaged, you can consult an expert about repairing or replacing the damaged parts and restoring the disk to working condition. The recovery chances are low.
  • Logical failure – If the failure is due to corrupted software or firmware, then you can restore disk data or firmware with the help of a repair tool. The recovery chances are high.
  • Firmware failure – If the firmware is failed, it can’t be fixed. You need to replace the hard disk with the new one. 

How can I check if my HDD is failing? 

1. Slow computer and sudden crashes 

BSOD error

If you are getting a blue screen of death error now and then or have a very slow-performing computer that freezes while performing essential functions, you should create a backup of your important data and reinstall Windows. However, if the issue persists, the reason could be a failing hard disk. This can lead to errors such as ERROR_HANDLE_EOF.

2. Corrupted files on the hard drive 

Opening file error

If you are frequently getting error messages while opening files or data on your files is getting corrupted on its own, these are some symptoms of HDD failure. 

3. Strange Sounds 

Hearing weird noises, screeching sounds, or a repetitive sound known as the click of death could be a sign of hard drive failure. It is better to create a backup before the disk becomes unusable. 

4. Bad sectors on the disk

While running normal operations or opening files,  if you hear a ticking sound, it is a sign of a bad sector. A bad sector is a disk storage unit damaged beyond repair, and data stored on it is lost. If there is an increase in bad sectors on your hard drive, it is also a symptom of HDD failure.

To fix this, you need to either run the CHKDSK command (which you will see described in the solutions section below) or use a third-party tool to find and repair the bad sectors of a hard disk. 

What can I do if my hard disk is failing? 

1. Use a backup tool

You should always create multiple backup files of your sensitive data. You can use Windows backup tools, cloud backup solutions, or reliable third-party backup software.

2. Run the CHKDSK command 

  1. Press the Windows key, type CMD, and click Run as administrator. DOS COmmand Prompt - hdd failure symptoms
  2. Type the following command and press Enter: chkdsk /r c:cmd_CHKDSK - hdd failure symptoms
  3. Enter Y when prompted, and the scan will run. Once it’s done, restart your computer. 

3. Scan drive 

  1. Press Windows + E to open File Explorer. 
  2. Go to This PC, right-click on the drive you want to scan, and select Properties. C properties - cmd_CHKDSK - hdd failure symptoms
  3. Switch to the Tools tab, under Error checking, and click Check. Tools - Error Checking - C properties - cmd_CHKDSK - hdd failure symptoms
  4. On the next window, next Scan drive. Scan drive
  5. Once the process is complete, you will receive a message confirming the same.Scan drive complete

4. Buy a new HDD

If your HDD is damaged and can’t be used further, you must buy a new hard drive. If you don’t have a backup of your drive, you need a reliable recovery tool to retrieve the lost data. The software can recover your data from the damaged hard drive. You can then transfer it to the new one. 

So, these are symptoms of HDD failure and steps to repair the disk and save your data. If you have any questions or concerns, feel free to mention them in the comments section below.

Screeching Sound From Laptop Speakers: Use These 7 Fixes

You’re not alone if you’re dealing with a screeching sound from your laptop speakers.

Several factors can cause this common issue, but the good news is that it can often be fixed quickly and easily.

In this article, we’ll provide you with some practical solutions to help resolve the screeching sound from your laptop speakers, so you can get back to using your computer in peace.

Why are my speakers making a screeching noise?

There are several reasons why laptop speakers can produce a screeching sound. Here are some of the most common causes:

  • Damaged speakers – Physical damage to the speakers can cause them to produce a screeching sound. This can be due to being dropped, bumped, or otherwise impacted.
  • Loose connections – The speakers may be loose or not correctly connected to the laptop, causing the sound to come out distorted.
  • Outdated audio driver – An outdated audio driver can cause compatibility issues that lead to a screeching sound.
  • Background noise – Other programs or processes running on your laptop may interfere with the audio output, causing a screeching sound.
  • Malware infection – Malicious software can cause various audio and performance issues, including a screeching sound from the speakers.
  • Overloaded audio system – Playing high-quality audio on a laptop with limited resources can cause the audio system to become overloaded, leading to a screeching sound.
  • Faulty hardware components – A malfunctioning speaker or audio card can cause the speakers to produce a screeching sound.
  • Volume levels too high – If the volume on the laptop is set too high, it can cause the speakers to produce a screeching sound.

Now we are past possible triggers, let us explore some solutions.

How can I fix the screeching sound from laptop speakers?

  1. Run the audio troubleshooter
  2. Perform a clean boot
  3. Reinstall audio drivers
  4. Update audio drivers
  5. Use a generic audio driver
  6. Place your hard drive
  7. Check volume and BIOS settings

1. Run the audio troubleshooter

  1. Press Windows + R, type control, and hit Enter.
  2. Go to the View by option in the top right corner, and select Large icons.control panel
  3. Click Troubleshooting.troubleshooting control panel
  4. Click the View all option on the left pane, and locate Playing Audio.
  5. Run Playing Audio troubleshooter (opens a pop-up window – follow the instructions).

2. Perform a clean boot

  1. Press Windows + R, type msconfig, and hit Enter.
  2. Click the Services tab, select Hide all Microsoft services box, then select Disable all.
    clean boot windows 10
  3. Go to the Startup tab, and click Open Task Manager 
  4. Click on the start-up programs and select Disable.
  5. Close Task Manager, then click OK.
  6. Reboot your computer.

Performing a clean boot for your computer reduces software-related conflicts that can bring up the root causes of the computer screeching sound.

These conflicts can be caused by apps and services that generally start and run in the background when Windows starts.

You will have a clean boot environment after all these steps are carefully followed, after which you can try and check if the computer screeching sound goes away. If not, try the following solutions.

Can’t open Task Manager? Don’t worry; we’ve got the right solution on how to open Task Manager in Windows 10 or Windows 11.

3. Reinstall audio drivers

  1. Right-click Start and select Device Manager.
  2. Expand the Sound, Video, and game controllers option, right-click on the Sound card, and select Uninstall device.
    screeching sound from laptop speakers
  3. Restart your computer. Windows will attempt to reinstall the driver.

If you lack time to go through every single troubleshooting tip mentioned below, there’s a shortcut that you need to know about from the very start.

Well, it involves uninstalling and reinstalling your audio driver. In this case, you can complete the procedure by following the above steps.

However, let us remind you that downloading drivers manually may cause conflict with the PC. It’s enough to make a simple mistake and install the wrong one.

That’s one unfortunate scenario only, yet many things can happen when you’re not mainly used to such procedures. So, don’t hesitate to install the Outbyte Driver Updater tool to prevent all potential issues.

Let us tell you more about how it works. Instead of worrying about making the right choice, Outbyte Driver Updater performs an efficient scan for you from a database of over 18 million drivers.

Later on, it does what knows the best – you can see how the download is progressing, and before updating your audio drivers, the app will even perform a quick backup for safekeeping.

Outbyte Driver Updater

Reinstall all drivers automatically with this dedicated software with a comprehensive scan.
Check price Visit website

4. Update audio drivers

  1. Right-click Start and select Device Manager.
  2. Expand the Sound, Video, and game controllers option, right-click on the Sound card, and select Update driver.
    screeching sound from laptop speakers
  3. Select the option to Automatically search for updates.
  4. Restart your computer.

Another option is to update your audio drivers. You can apply the above steps or, even better, use the Outbyte Driver Updater tool we’ve told you about.

5. Use the generic audio driver

  1. Right-click Start and select Device Manager.
  2. Expand the Sound, Video, and game controllers option, right-click on the Sound card, and select Update driver.screeching sound from laptop speakers
  3. Select Browse my computer for driver software.install driver from computer
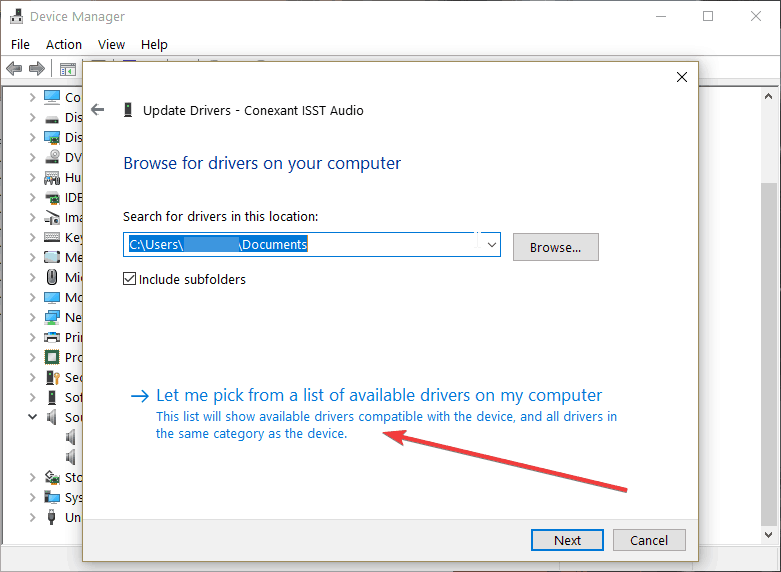
  4. Let me pick from a list of device drivers on my computer – that’s the option you need to choose next.
  5. Select the High Definition Audio device option and follow the installation instructions.

6. Replace your hard drive

If the computer screeching sound persists, then it may be a problem with the hard drive when the heads scrape the platters inside it.

Before you replace the drive, back up all your data from the computer, as the damage may cause data loss.

Check to confirm that it is not the hard drive, as it may be the computer fans making the noise as they also go bad. If you hear clicking sounds, then total drive failure is imminent.

Replace your drive ASAP after backing up your data, then restore it to your computer.

If it is the fans’ fault and not the hard drive, take off the side case and check if all fans are rotating. If there’s a dead one, you can replace it quickly and affordably.

While the side is open, you can also vacuum clean all air vents to remove any accumulated dust.

7. Check volume and BIOS settings

Sometimes the playback recorder may be set to Listen to this device, and this, along with mic amplification, can be set higher than usual, causing a feedback loop.

So the computer screeching sound you hear is an amalgam of the cooling fans, system sounds, and other ambient noises recycled through the mic and amplified continuously through the speakers.

Change the range of sound from high to optimum for the speakers to output.

You can also check your BIOS settings as sometimes – and on different computers – this is set to alarm when the CPU hits a specified level (degrees).

You can raise or lower this threshold and see if the computer screeching sound goes away.

Another reason for the computer screeching sound is your frame rates may be too high for the monitor, so you need to check the monitor refresh rate, usually at 500-60Hz, and set yours to match.

This will stop the noise from the capacitors on your graphics processor unit (GPU).

That would be all! Let us know if these solutions worked by leaving a comment in the section below.

HP Scan Software & Drivers Download → Scan and Capture, Smart

Does HP have a scanner software? We’re glad you asked. The HP Scan software goes as far back as the old days of Windows XP. And it’s been a staple of the OS, up until Windows 11.

So, what is HP scanning software called? The app is called HP Scan and Capture. There is also the HP Smart app or HP Easy Start software and we shall try to cover a bit of them as well.

The tool allows you to easily scan any document, edit it directly from your PC and share it with different applications.

However, users have faced compatibility issues over the years when downloading and installing the software. This is even more common in older versions of Windows.

How do I get my HP printer scanner to scan?

The scanning solution works only with the correct installation of the appropriate drivers, and the tool itself, downloaded from the official source.

If you already upgraded to the latest Microsoft OS, here’s how to download and install HP printer drivers on Windows 11.

The HP Customer Support base has some key tips for installing the HP Scan software. Note that if you’re downloading from a third-party source, you’re at risk of inadvertently installing malware.

Although some scanners come with pre-installed software for your PC, not all of them may be compatible with your version of Windows.

Some users have also found that downloading and installing the HP Scan software requires logging in via a cloud-based HP account.

In this article, you’ll learn how to download and correctly install the HP Scan and Capture software on Windows 10 and 11. You’ll also see whether or not you need an HP account to use it. Read on!

How do I get HP scanner software?

1. Download the official HP Scan software

  1. Visit the download page.
  2. Click on Get and wait for the system to complete installation.

2. Install and activate the HP Scan app

  1. After the download completes, click on Open.
  2. In the new window, click on the Settings menu.
  3. From the list of options, you can connect to other devices by clicking Select Device.

The app is also available to use on the Microsoft Store and Google PlayStore.

Users should note that the HP Easy Start App is an alternative software through which they can download the universal print driver (alternatively available here), or the HP Scan and Capture app.

That leaves us with the third app. Is HP Smart app any good? What is the difference between HP Smart and HP Easy Start?

HP Smart is mostly used for newer printers with network connectivity, but they essentially serve the same purpose, which is to scan images from a computer or printer camera.

If you install the Full Feature Software with all the necessary drivers to really do not need the HP Smart app.

How do I install HP Smart App on my PC?

For optimum functionality, HP recommends that users download and install the HP Smart/Easy Start app. To do this, follow the steps below:

  1. Go to the download page.
  2. Type in your HP printer version and press Enter in the search box.
  3. Click on Install HP Easy Start.

? Do I need an HP Smart account to scan?

In addition to a valid and stable Internet connection, it’s likely that the HP Smart requires you to create and log into an HP account in order to enjoy features such as Print Anywhere, or share files in the Cloud.

Nevertheless, you are not obliged to sign in to your HP account in order to scan and you can simply omit this step or skip it when prompted to do so.

You simply need to press the Cancel button and resume scanning instead.

How do I scan with HP without the app?

The HP scan software is useful to download and use in order to simplify things. However, it is not mandatory to use it and you can just as well scan without it or any other software for that matter (HP Smart, HP Easy Start, or third-party programs).

  1. If you choose to do so, simply locate and open the HP Printer Assistant on your PC.
  2. Select the Manage Scan to Computer option from the Scan menu.
  3. Finally, make sure you enable it and that’s it.

If you already upgraded to Microsoft’s latest OS, we have even more useful ways to enable Scan to Computer on Windows 11.

Thank you for reading! Your comments in the section below are welcome.

Esent Error [Event ID 455] On Windows: Quick Fix

The Esent Event ID 455 has reportedly been appearing in the Event Viewer for many users on Windows 10. The error seems to be frequently occurring after updating to the latest version of Windows 10.

The error can trigger several computer issues, including freezing when playing CPU and GPU-intensive tasks like games. At times, it may also lead to loud noise blasting through the speakers.

What is an Esent error?

When an issue occurs, Windows saves error details in logs to help the user identify issues if required. The main reason behind the Esent error also seems to be due to a missing log EDB.log file in the following location:

C:\WINDOWS\system32\config\systemprofile\AppData\Local\TileDataLayer\Database\EDB.log

If you are also troubled by this error, here is how to fix the Windows 10 error Event ID 455 Esent for good.

How can I fix the Esent Event ID 455 error?

1. Create missing folders

Note icon NOTE
If you are having trouble accessing the folders, grant the required permissions, and things should be good to go.
windows 10 error event id 455
  1. Open File Explorer and navigate to the following location:
    C:\WINDOWS\system32\config\systemprofile\AppData\Local
  2. Once in the folder, right-click on any empty place and select New, and click on Folder.
  3. Rename the folder as TileDataLayer (if the folder already exists, move to the next step).
  4. Open the TileDataLayer folder, and create a new folder named Database.

Leave the newly created folder for a few minutes. Upon opening the folder, you will see the EDB.log file and other log files now exist in the folder.

This should also fix the Esent Event ID 455 error message in Event Viewer. If the issue persists, restart your computer and try again to see if the error or freezing problems are resolved.

2. Create required folders using Command Prompt 

windows 10 error event id 455
  1. Press Windows + S to open Search, type cmd, and click on Run as administrator.
  2. Type the following command one by one and hit Enter to execute:
    cd config\systemprofile\AppData\Local
    mkdir TileDataLayer
    cd TileDataLayer
    mkdir Database
  3. The above command will create folders named TileDatalayer and Database.
  4. Once done, restart the computer, and verify if things are up and running.

In most cases, the Esent Event ID 455 does not always lead to errors and affects normal Windows operations. However, in rare instances, it may lead to Windows crashing and freezing problems.

To fix the error, all you need to do is create a few missing directories allowing Windows to create and save the EDB.log files.

Once you are done fixing the error, find out how to make Windows faster than before.

If the issue persists, begin by checking the reliability history and then move to the Event Viewer to diagnose the issue.

Slack Huddle vs Call: What is the Difference?

Slack allows you to easily communicate with your coworkers, but many want to learn about the difference between Slack huddle vs a call.

If you like comparison articles, then be sure not to miss our Slack vs Skype guide in which we compare these two services in detail.

So what’s the difference between calls and huddles in Slack? Keep on reading to find out.

What are the differences between a Slack Huddle and a Slack Call?

The huddle feature is a type of conference call, with the key difference between it and a typical conference call being that it is completely spontaneous without any predefined subject.

A normal conference call is scheduled for a specified time with a specific topic of hand and predetermined list of participants.

On the other hand, Slack huddles are informal meetings with no predetermined agenda that are open to everyone in your workspace.

Here’s a quick feature comparison:

FeatureCallsHuddles
VideoYesYes
Screen sharingYes, only one person can share the screen at a timeYes, up to two people can share their screens at a time
Drawing on shared screenYesYes
Thread for messagesNoYes
Emoji reactionsYesEmoji reactions, effects, and strickers
Live captionsYesYes
NotificationsYes, call ring for all inviteesYes, you'll get notified only if you're invited to participate in a huddle that is started

As you can see, huddles offer better functionality than calls, so it’s no wonder that Slack is retiring calls feature in favor of huddles.

Want to see how Slack stacks up against Microsoft’s platform? Check our full Slack vs Teams comparison for a detailed breakdown.

Calls will be available until March 30, 2023, but after that all calling functionality will go through huddles.

Further on, we will show you how to start a Slack huddle vs call, right after we understand better how the former work. Follow along!

How do Slack huddles work?

Short and easy audio calls, known as Slack huddles, allow you and other members of your team to speak with one another in real-time while working on a project.

Increasingly, the speed of technological disruption of traditional business techniques continues to grow with each new feature introduced by Internet businesses.

The huddle feature, for example, seeks to simulate regular conversations in the real workplace that aren’t necessarily focused on work-related issues, such as lunch breaks, but are nonetheless important (though they could be).

share screen slack huddle vs call

However, despite the fact that they can be about anything, they usually have a fundamental subject or a central issue that they are based around.

The term does not refer to a scheduled or organized meeting at which everyone is obligated to attend when used in this sense. They are unplanned and unstructured, and they are intended to do only one thing: to encourage discussion among those who participate.

Join any huddles that have already been established inside your organization, and you will be able to share your screen, engage in real-time discussions, and then leave anytime you choose. It’s precisely the same as a typical office conversation.

It has the capacity to accommodate up to 50 people at a time. That is appropriate since any amount larger than that produces a throng, with everyone talking over one another and no production at the conclusion of the session.

How can I use Slack huddle vs call in Windows 11?

1. Start a huddle

  1. Open a channel or DM, and you’ll find a headphone icon that you can toggle at the left bottom of the sidebar. After you toggle it, the huddle will start.
    start-huddle slack huddle vs call
  2. Next to the toggle, you have three buttons which can close your microphone, share your screen, and add participants to the call.
    features-huddle slack huddle vs call
  3. To close the huddle, simply click the same headphone toggle as in the first step. That’s it!
    turn-off-huddle slack huddle vs call

Huddles are as spontaneous as you can get. Your coworkers will see when you or another coworker had started a huddle.

2. Start a call

  1. Open a channel or a DM, then click on the channel’s name, or person’s name, in the conversation’s header.
    name-slack slack huddle vs call
  2. Now under their name you will find the button Start a call. Click on it to call the person, or people.
    start-call slack huddle vs call
  3. During the call, you will be prompted with a new window from which you can mute your microphone, turn on your webcam, share your screen and even send reactions. At the left-top corner you can also add more people to the call.
    features-call slack huddle vs call
  4. To leave the call simply click on the Leave button.
    leave-call slack huddle vs call

And that’s it! Calls are more complex than huddles, they allow you to open your webcam and share reactions with your coworkers.

Can my employer read my Slack messages?

When you use a company-provided digital device or work platform, your employer can easily monitor everything you do on that device or platform, including the emails, instant messages, and texts you send and receive.

It’s easy to see how employees could come to the incorrect conclusion that because they’re using Slack, the popular instant-messaging workplace collaboration platform, their direct messages (DMs) are only visible to individuals in their small user group.

slack privacy slack huddle vs call

Although Slack, which stands for Searchable Log of All Conversations and Knowledge, was originally intended to be a tool for team members to communicate with one another, it has evolved into a more social platform as well.

However, this does not imply that it does not gather a significant amount of data about you. The information that it collects will either be one that has been willingly provided to it or information that has been automatically created as a result of simply using it.

In addition, you should think about whether Slack is the best platform for the communications you’ll be sending. In most cases, if you wouldn’t say anything out loud in the presence of a coworker, you shouldn’t be posting it in there.

Even private channels and direct messages (DMs) could have their contents revealed at some point during a legal case or other similar forms of investigation.

For those occasions when you really need to send that scathing message, it may be worth considering using another, encrypted platform, or just not saying it at all, during these moments of remote working.

If you would like to use a more encryption-focused messaging app on your PC, we recommend you take a look at how to access Signal in Windows 11.

Alternatively, you should check out our simple guide on how to use Microsoft Teams in Windows 11 as its popularity has been growing over time amongst people.

And lastly, if you are now wondering how you can boost your privacy, read our article on five of the best security features in Windows 11 to assess what you will need on top of them.

Let us know in the comments section below if this article was helpful for you and whether you prefer huddles over calls in Slack. Thanks for reading!

5 Best Open Source Software For Enterprise Network Security

Open-source software is the core concept for development because it is free to modify and adapt to your needs. And nothing is more configurable than network security software. Here, you will find the best open-source tools for enterprise network security.

Why would I choose open-source software?

Cybersecurity tools protect enterprises from all threats and open-source software is a low-budget, flexible solution for that.

However, you will need to have a strong team with high technical expertise to configure and implement the solution.

We have chosen the tools below based on their features and readiness in terms of network security and integrations.

What are the best open-source network security tools?

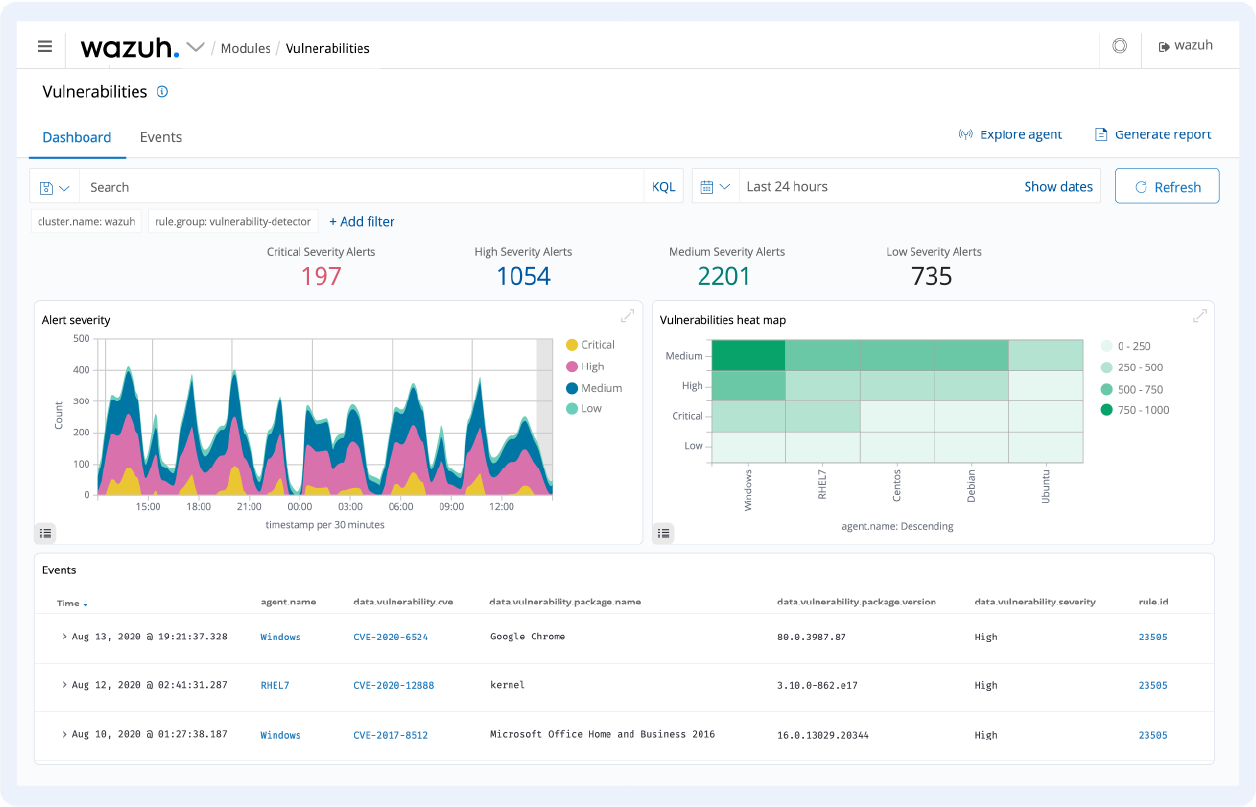
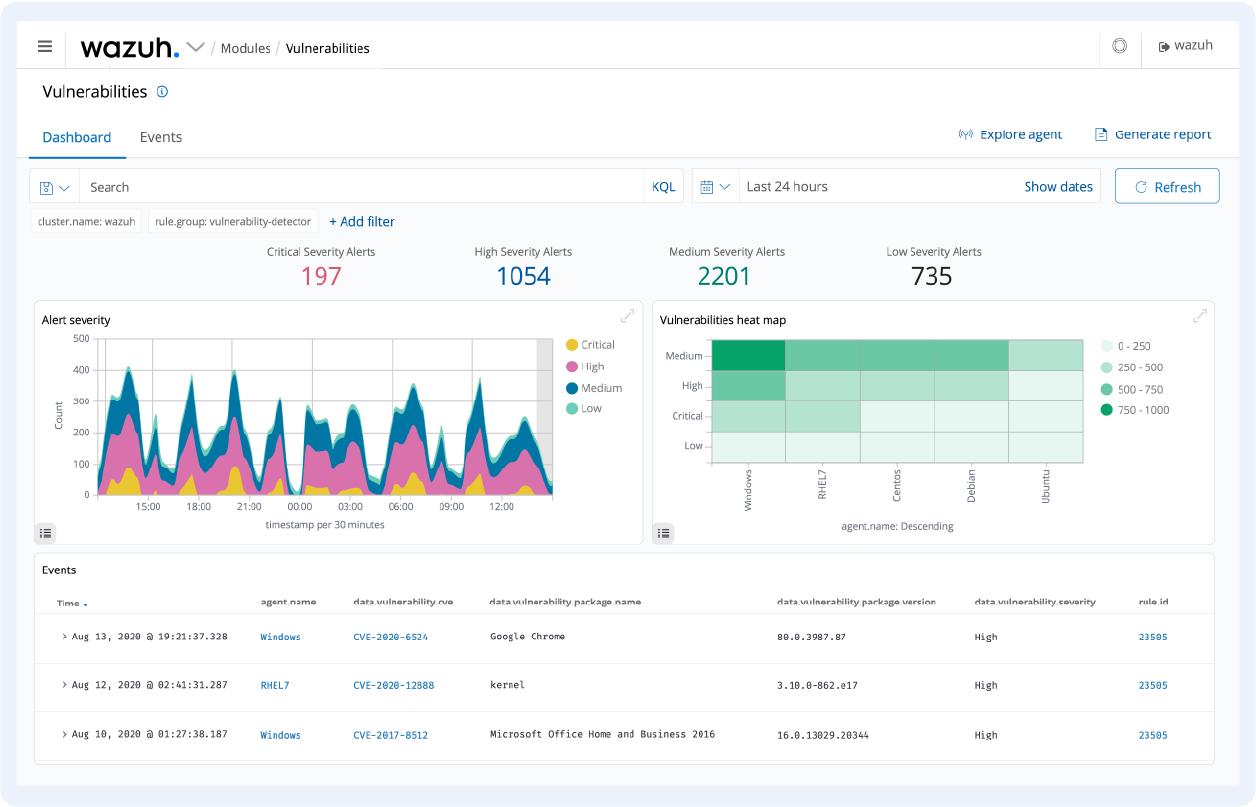
Wazuh – Best network privacy security

If you’re looking for the best open-source network security tool, the answer is Wazuh.

Of course, it’s an open-source solution that ensures protection for workloads across on-premises, virtualized, and cloud-based environments.

In other words, it’s an enterprise-level tool for both Cloud and endpoint security. Its agents for Windows, Linux macOS, Solaris, AIX, and HP-UX systems are capable of detecting any anomaly or rule-based transgression.

And it does that by scanning all the network components and their logs, to provide information for the central manager that will analyze and store it.

As a change in file content, attributes and permissions are viewed as privacy threats, Wazuh constantly monitors any such modifications.

However, it doesn’t just alert you, it’s also able to block access to the affected system or execute commands to remedy the situation.

Another strong advantage for Wazuh is the list of integrations with other services and tools such as YARA, AlienVault, Amazon Macie, VirusTotal, and many more.

The solution is free so that you can implement it immediately but if you need technical assistance, you will have to pay a fee.

Let’s review some of its key features:

  • Analyzes data received from the Windows, Linux macOS, Solaris, AIX, and HP-UX systems agents and processes it using threat intelligence
  • Review regulatory compliance, vulnerabilities, file integrity, configuration assessment, and not only Cloud security but Container security as well (for Docker hosts and Kubernetes notes and down to the container level itself)
  • Web user interface for data visualization, analysis, and management
  • Advanced threat intelligence features
  • Malware detection and log data analysis

Wazuh

Protect your network environment with a complete XDR and SIEM network cybersecurity solution.

AlienVault OSSIM – Great SIEM solution

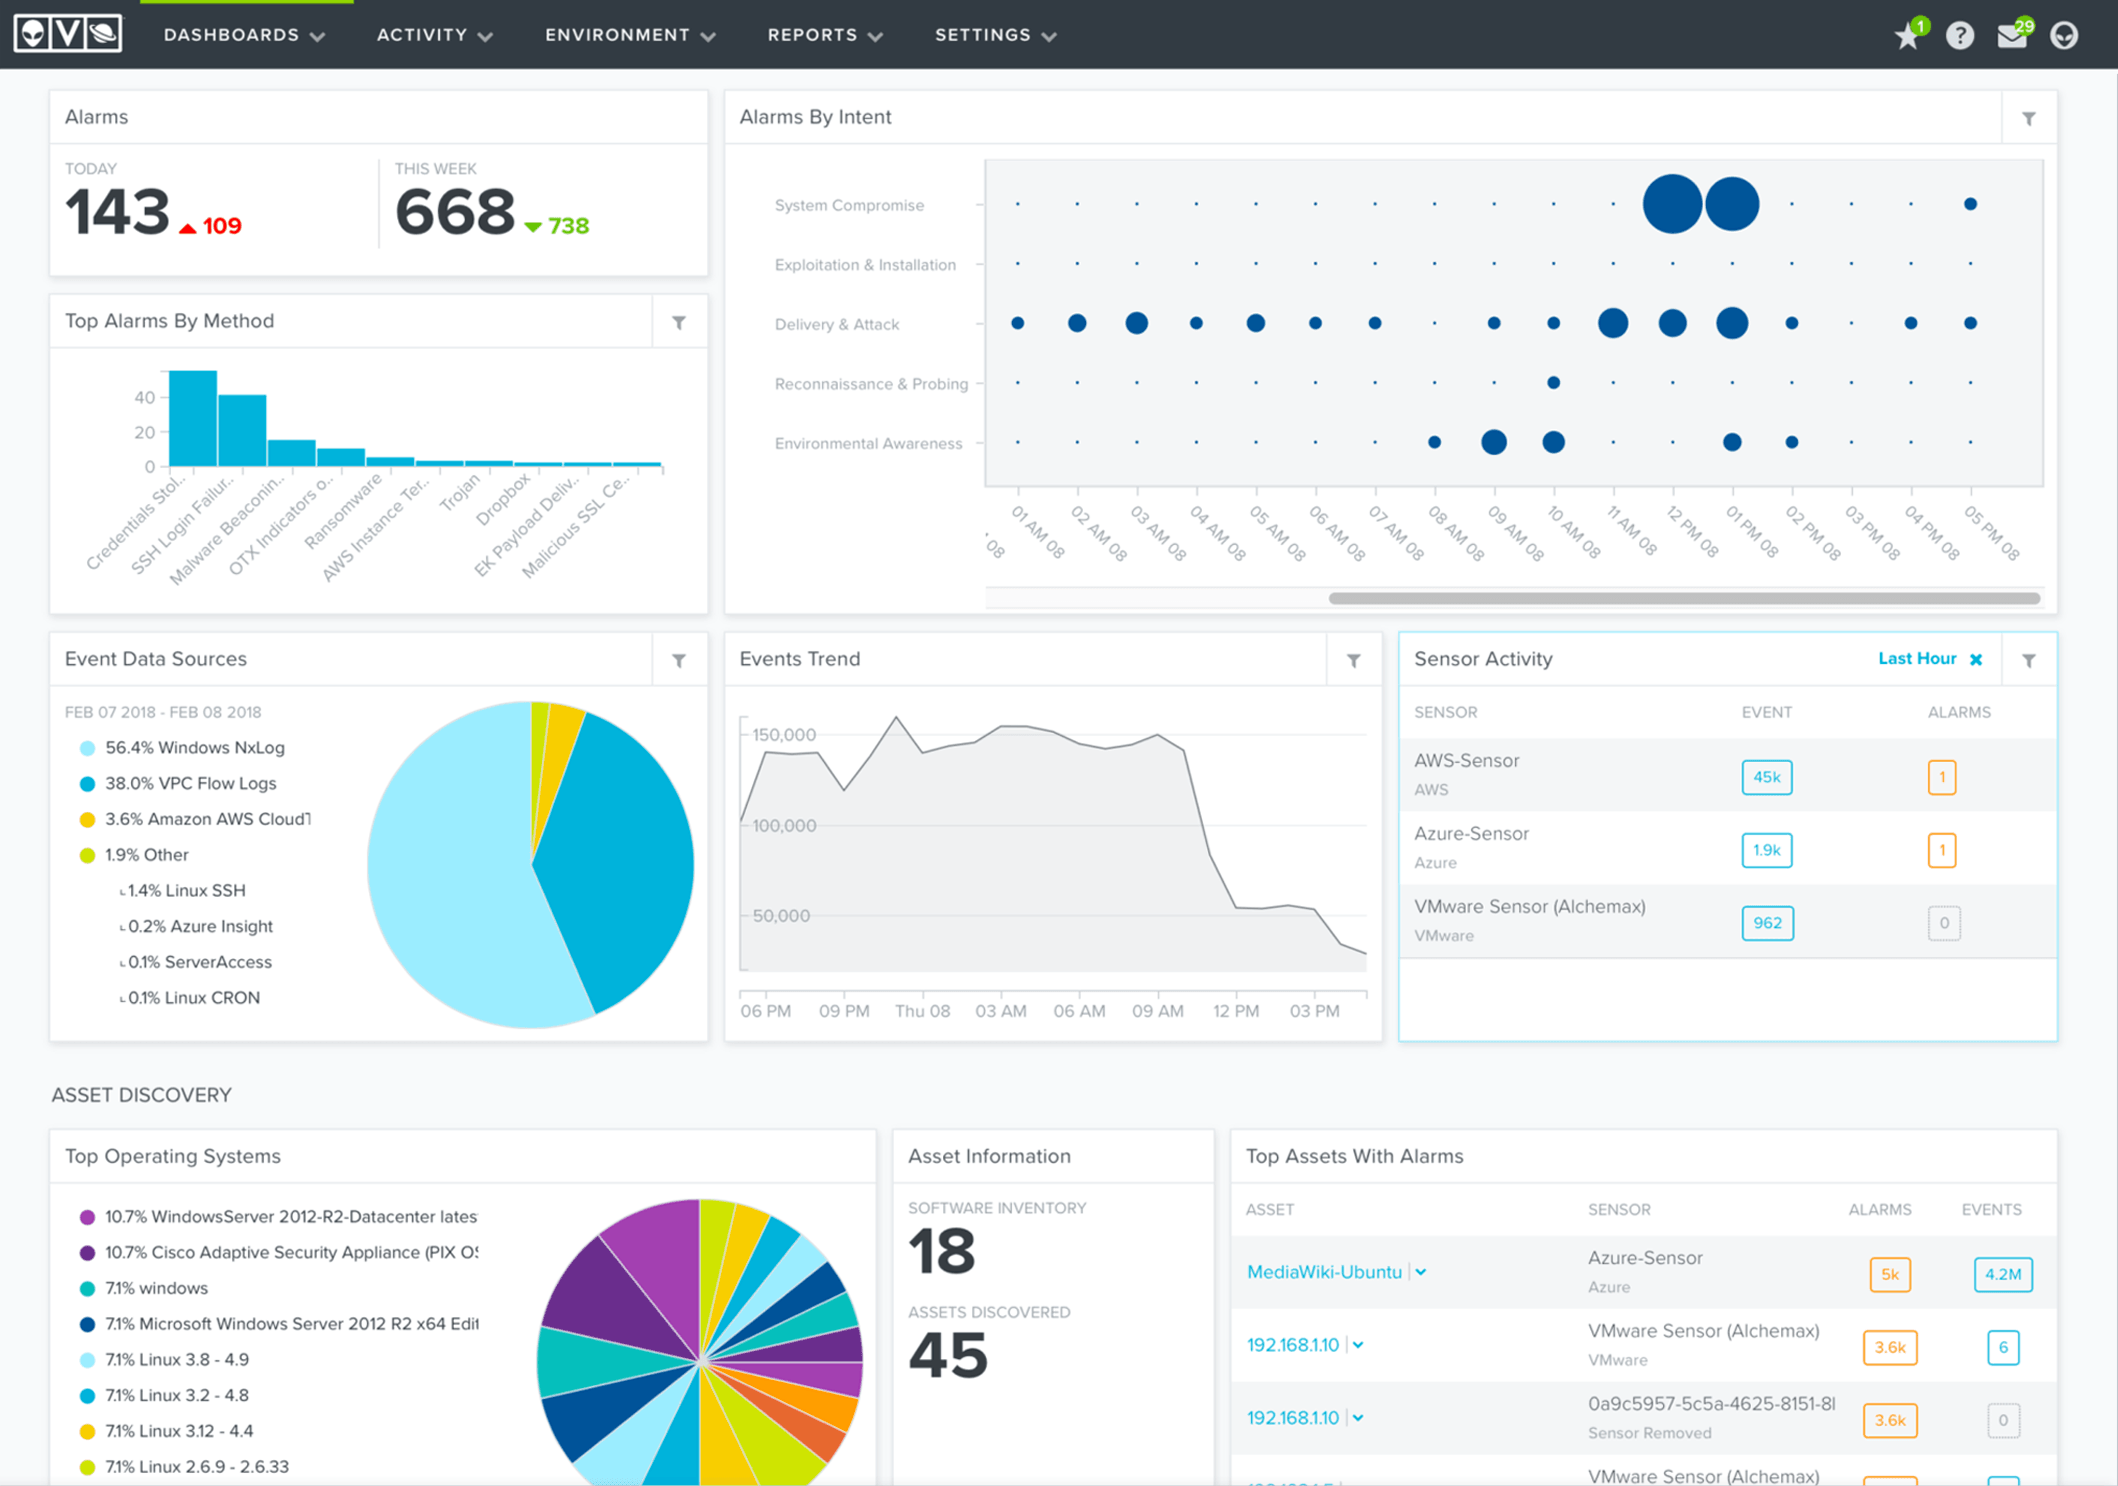
The OSSIM acronym from AlienVault OSSIM stands for Open Source Security Information and Event Management.

Compared to Wazuh, which also has XDR components to fight off the attacks, this solution only has SIEM features.

That means, it can detect network events and alert you so you can make the necessary changes to resolve the possible issue.

In short, AlienVault OSSIM offers asset discovery, vulnerability assessment, intrusion detection, behavioral monitoring, and SIEM event correlation.

The software is based on the proprietary Open Threat Exchange (OTX) that involves users contributing and receiving real-time information about malicious hosts.

Here are some of its most important features:

  • Monitors on-premises physical and virtual environments
  • Asset discovery and inventory
  • Extensive vulnerability assessment
  • Powered by Open Threat Exchange (OTX)
  • Community support via product forums

⇒ Get AlienVault OSSIM

OpenEDR – Ideal for endpoint malware protection

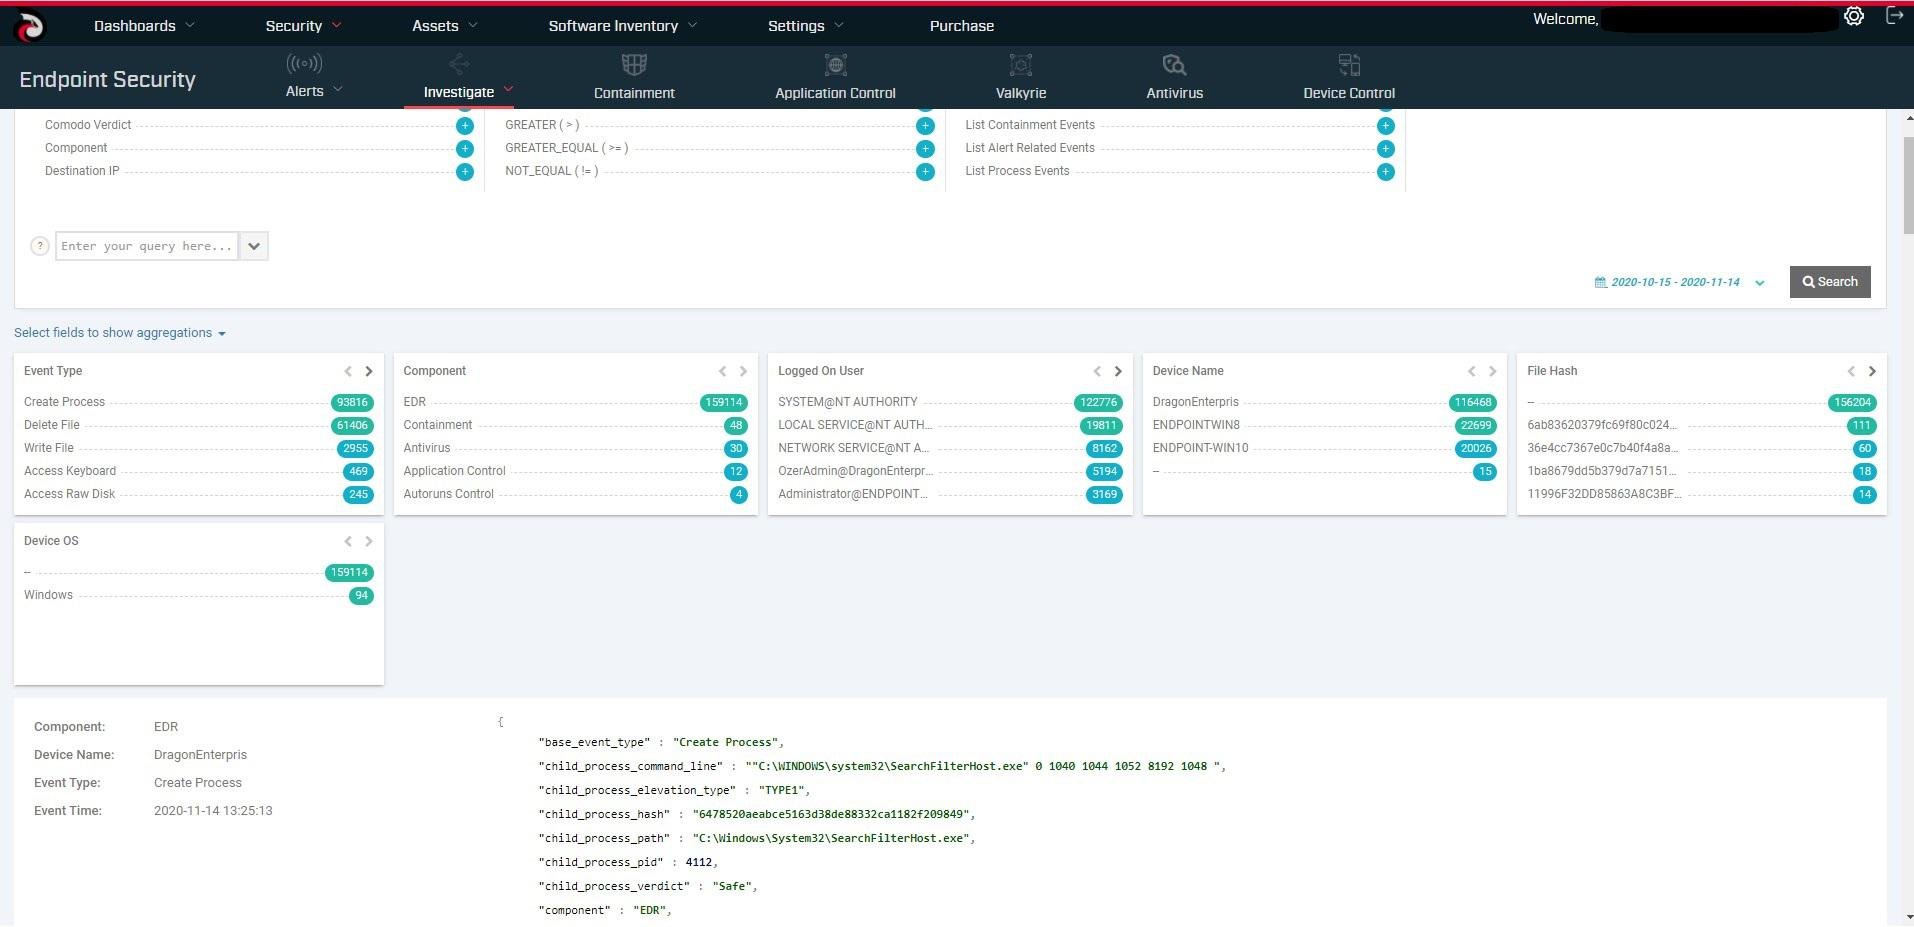
OpenEDR is a free, open-source endpoint detection and response software. It provides real-time analytic detection with Mitre ATT&CK visibility.

It basically offers event correlation and root cause analysis of malicious threat activity and behaviors to help you protect your network.

One of the best advantages of OpenEDR is that it can be deployed on any endpoint environment and has a cloud-based management console. 

And if you want to build integrations for it, it’s as simple as using its GitHub source code.

Let’s review some of its key features:

  • Enable continuous and comprehensive endpoint monitoring
  • Correlate and visualize endpoint security data
  • Perform malware analysis, anomalous behavior tracking, and in-depth attack investigations
  • Enact remediations and harden security postures to reduce risk on endpoints
  • Stop attempted attacks, lateral movement, and breaches

⇒ Get OpenEDR

Metasploit – Great for network penetration testing

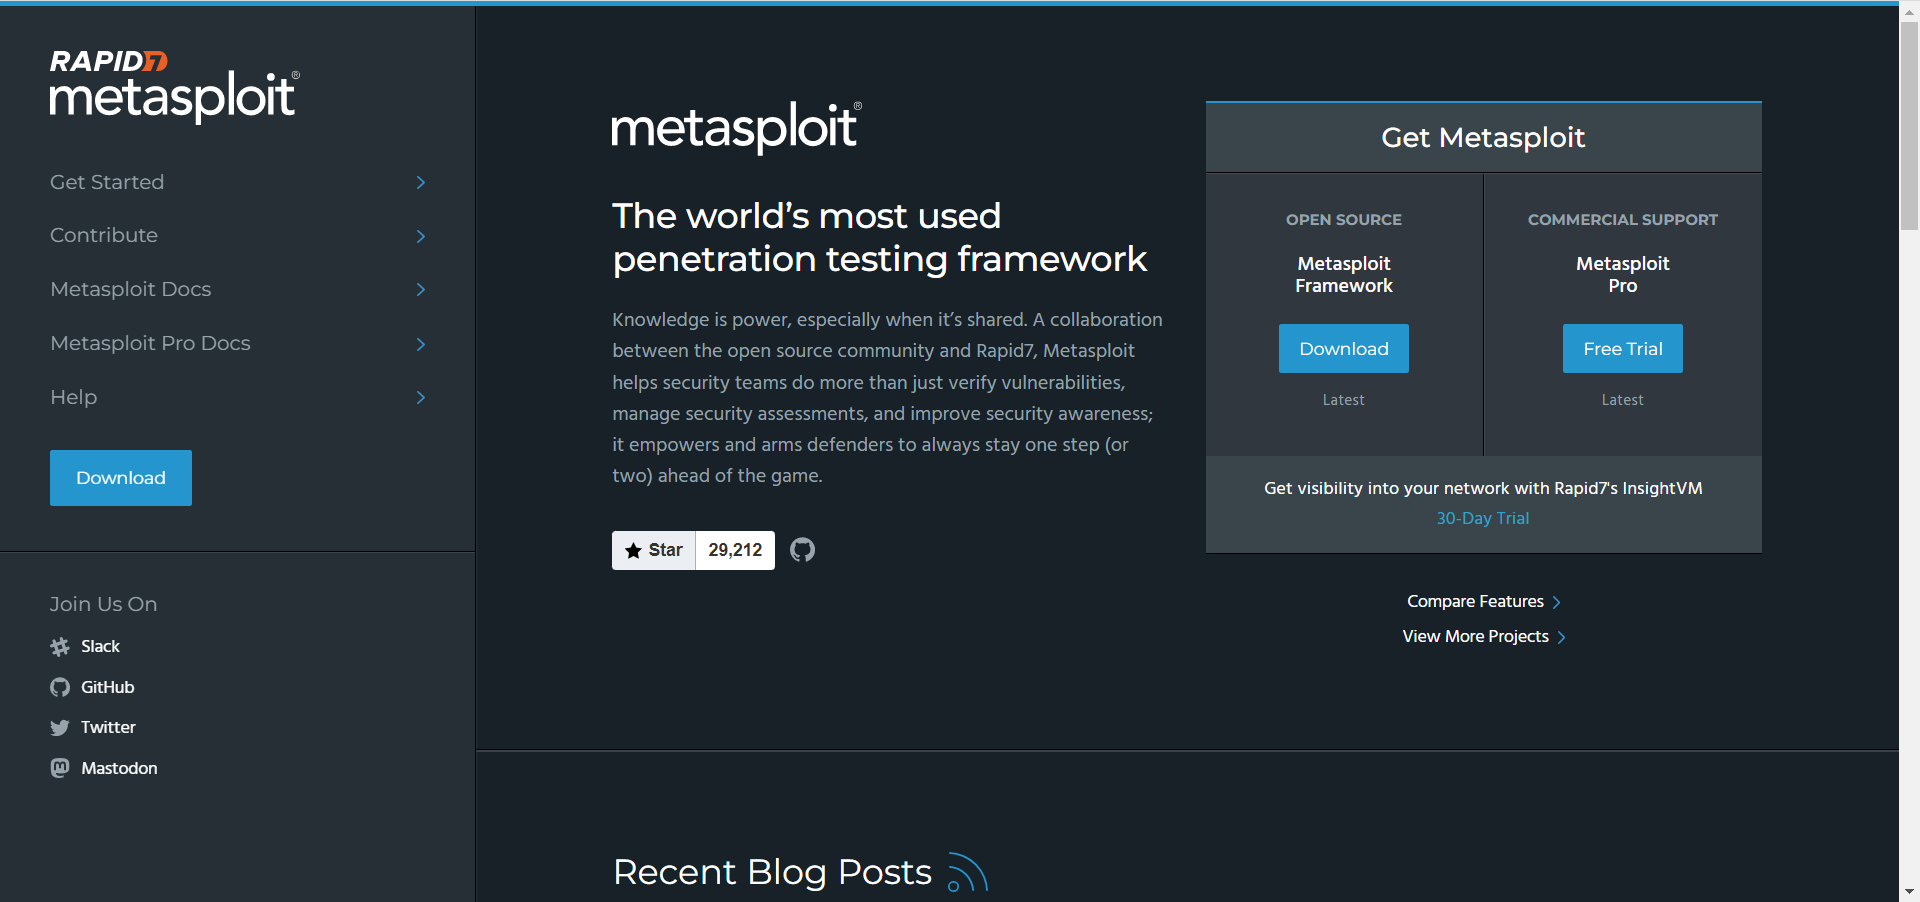
If you have a strong IT management team, Metasploit can be an excellent tool to test your network vulnerability.

The software can be used to run security assessments, anticipate attacks and improve overall cybersecurity awareness.

A great advantage is that it is very flexible. You can install it on Windows (64-bit), macOS, and Linux workstations.

Moreover, you will find ready-to-use installers for fast implementation. And then, Metasploit can automate almost all the phases of a penetration test, starting with exploit tactics and ending by collecting evidence.

Here are some of its best features:

  • Extensive penetration tests
  • Works on Windows, macOS, and Linux systems
  • Great implementation flexibility
  • Easy to deploy and use

⇒ Get Metaexploit

Nmap – Good for network scanning

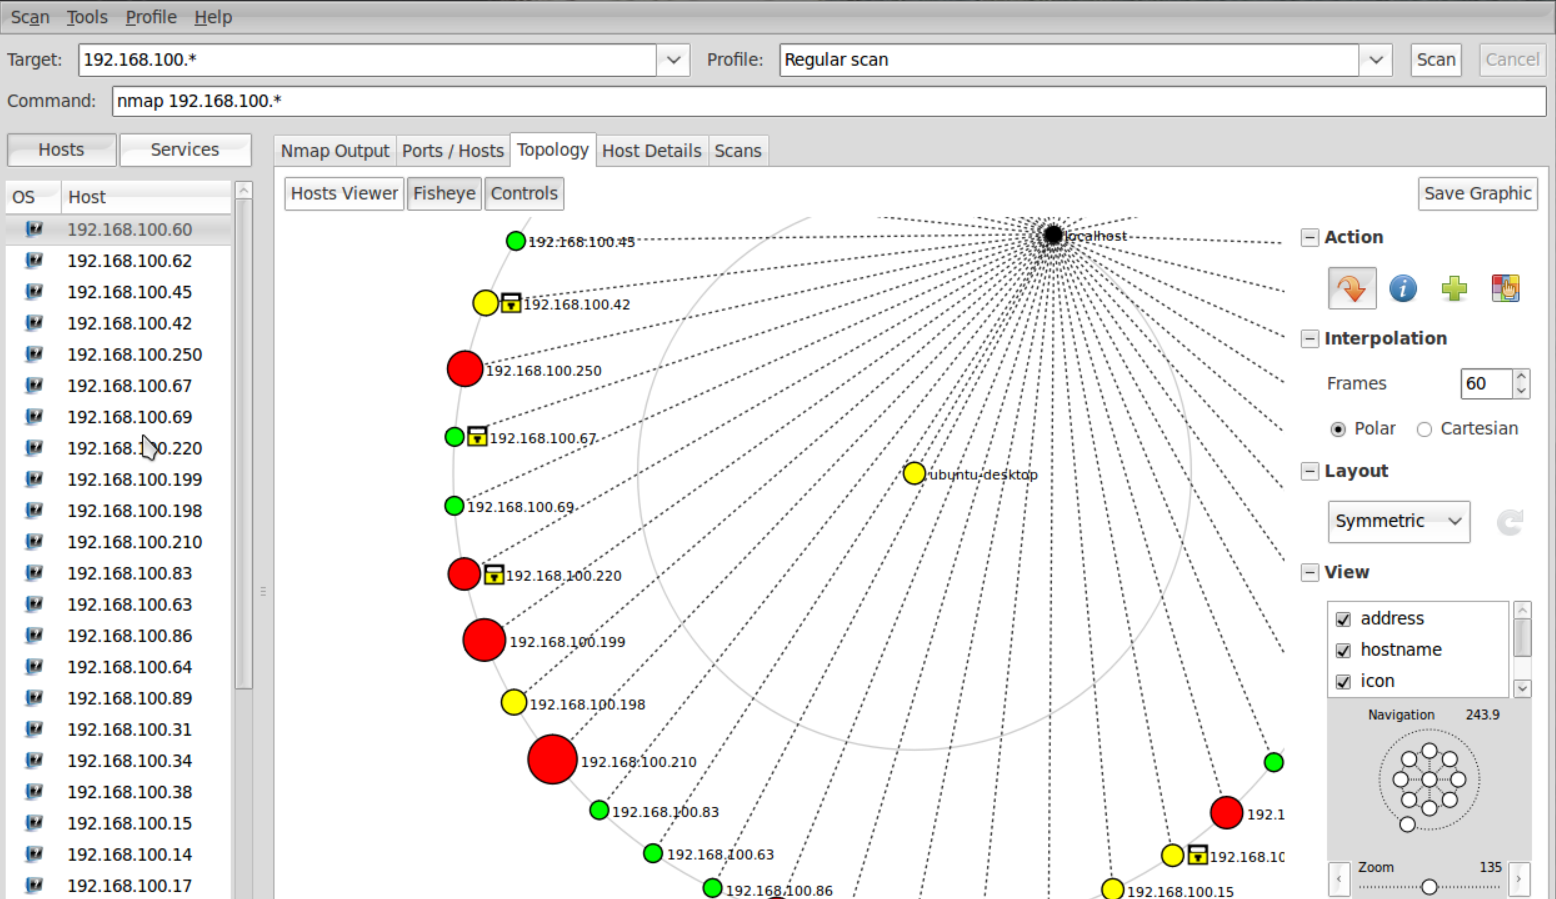
Besides appearing in Matrix Reloaded and Ocean’s 8 as a hacking tool, Nmap is actually a network mapping and visualization tool.

Network administrators can use it also for network inventory, managing service upgrade schedules, and monitoring host or service uptime.

Nmap uses raw IP packets to identify which hosts are available on the network, what services are offering, what OSes they are running, and a lot more.

The tools can scan large networks very fast, and runs on all major computer operating systems. You will find official binary packages for Linux, Windows, and Mac OS X.

It comes as a command line terminal but you may also install an advanced GUI and results viewer called Zenmap.

There are also other integrations available such as Ncat (a flexible data transfer, redirection, and debugging tool), Ndiff (for comparing scan results), and Nping (a packet generation and response analysis tool.

Check out its key features below:

  • Supports dozens of advanced techniques for mapping out networks filled with IP filters, firewalls, routers, and other obstacles
  • Scans huge networks of literally hundreds of thousands of machines
  • Most operating systems are supported, including Linux, Microsoft Windows, FreeBSD, OpenBSD, Solaris, IRIX, Mac OS X, HP-UX, NetBSD, Sun OS, Amiga, and more

⇒ Get Nmap

Cyberglobal – Honorable Mention

Cyberglobal is a team of security experts specially created to enhance the security of corporate systems. They employ state-of-the-art technology and a 24/7 Security Operation Center that allows them to be ahead of the most malicious factors that will target your enterprise.

Cyberglobal can provide you with powerful penetration testing services, in order to identify the vulnerabilities of your system and help you respond to threats in the best way.

You can run tests for web application, cloud, external, and internal networks testing, and even simulate attacks with the help of Red Team Exercises, which will create sophisticated attack scenarios, in order to provide a realistic assessment of your security.

This concludes our selection of the best open-source network security software for your enterprise.

We hope that our article helped you select the right tool for your needs and that now you have broadened your choices.

You might also be interested to check our list of the best open-source antiviruses for your system.

If you have any other suggestions of software that fits this category, let us know about them in the comments section below.


A Workstation is Out of Compliance: How to Force Policy Updates

Your workstation compliance policy should always be up to date to avoid risking your data. Workstation compliance is critical for two reasons.

First, it protects your data. An out-of-compliance workstation could carry malware or malicious code that might mess up your data.

Second, workstation compliance helps to protect your company’s reputation. If a workstation is out of compliance, it could cause a data breach or other incidents that might damage your company’s reputation. 

To learn more about updating your policy, read our related guide on how to fix Diagnostic Policy Service high CPU usage in Windows 11. 

What command prompts would you use to ensure policies are up to date?

1. Use Windows PowerShell or Windows Terminal

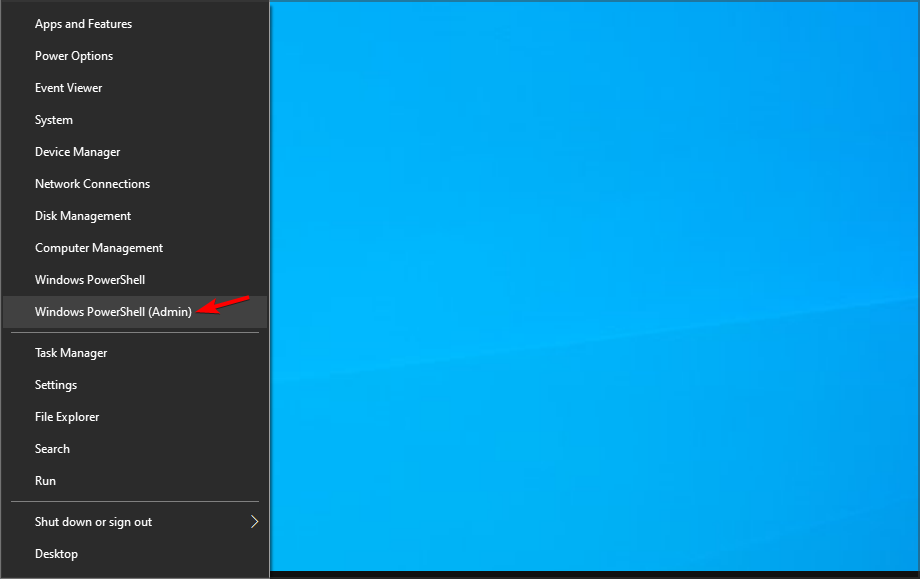
  1. Press the Windows + X and select Windows PowerShell (Admin) from the displayed list. On Windows 11, you may use Windows terminal (Admin).
  2. Type this command and press Enter: gpupdate/force
  3. Reboot your computer to apply all the new updates.

2. Use the Group Policy Management console

  1. Press the Windows + R on your keyboard to start the Run console.
  2. Type gpedit.msc and press OK or hit Enter.
  3. If you’re an admin managing a network, you may click on the Group Policy Management, right-click on a group or terminals, and select Group Policy Update.
  4. If you’re an administrator of a terminal, you may update the policies for the users by updating the policies from the User Configuration section.

How do you ensure all policies are up to date?

Unfortunately, even if your software tells you that all the policies have been updated, you can’t be sure until you test at least one terminal in a group.

Here are some guidelines on how to ensure that the policies are updated:

  • Review your company’s compliance policy – Make sure you are always up to date with any changes and enforce them on all the terminals
  • Check each workstation to see if it is compliant – You can do this manually use a compliance tool
  • Take action to remediate any non-compliant workstations – This may involve installing updates, applying patches, or reconfiguring the workstation

Fortunately, you can check our list including the best network management software. Most of the tools also have advanced features for automatic policy updates.

How do you improve compliance in the workplace?

➡ Communicate policies to employees – Employees should be made aware of all policies and should be allowed to ask questions and provide feedback

➡ Train employees on policies: This can be done through regular training sessions or an e-learning module

➡ Review compliance regularly: Compliance should be reviewed regularly to identify areas that need improvement

Keeping your workstation policy up to date and in compliance is important. If your workstation is out of compliance, you can force policy updates by following the steps in this article.

Doing so will help to keep your workstation and your company’s data safe and secure.

You might also be interested in consulting our list of the best SNMP monitoring tools for Windows 10/11 because they will help a lot with this process. 

Make sure to write any other questions, suggestions, or concerns in the comments section below. 

Failed To Load PDF Document Error in Chrome: How do I fix it?

Failed to load PDF document is an error that is most common in Chrome. However, in some cases, this error has been spotted in other tools that allow you to directly load a PDF file, such as Mozilla Firefox, Opera, and even Outlook mail client.

PDF being such a popular format, it has become quite rooted in our daily routine, be it at work or at home. This failed to load PDF document error will prevent you from directly viewing documents in your browser.

These are some of the most common scenarios you might encounter when a PDF has failed to load:

  • PDF failed to load with result: corrupted
  • an error occurred while loading the PDF
  • an error was encountered while processing the file. some features might not work.
  • Failed to download PDF document
  • failed to load PDF document in Chrome

Why can’t I load my PDF?

If you get the Failed to load PDF document error message in Chrome or other browsers, their built-in viewer is likely unable to open a secured PDF.

To fix the issue, update your browser to the latest version or try using a dedicated third-party PDF viewer.

This error could also be caused by some misconfigured setting or an issue with the browser. Several users also reported that the Send URLs of pages you visit to Google option in Sync and Google services was the culprit, and disabling it did the trick.

The solutions listed here should help you no matter the problem.

How do I fix a PDF that won’t load?

1. Change PDF settings in Chrome

  1. Open Chrome, paste the following path in the address bar, and hit Enter: chrome://settings/content/pdfDocuments
  2. Select the Download PDFs option here.Download PDF

According to users, if you’re getting the won’t open PDF file error message in Chrome, the problem might be your content settings.

By default, Chrome is set to open PDF files internally, but you might be able to circumvent this issue simply by choosing to open PDF files in a dedicated PDF viewer.

Downloading a file instead of opening it directly in your browser is also great if you want to make sure the file is not damaged or broken.

If the file you try to open is corrupted there are some ways you can fix corrupted or damaged PDFs on Windows.

2. Make sure that Google Chrome is up to date

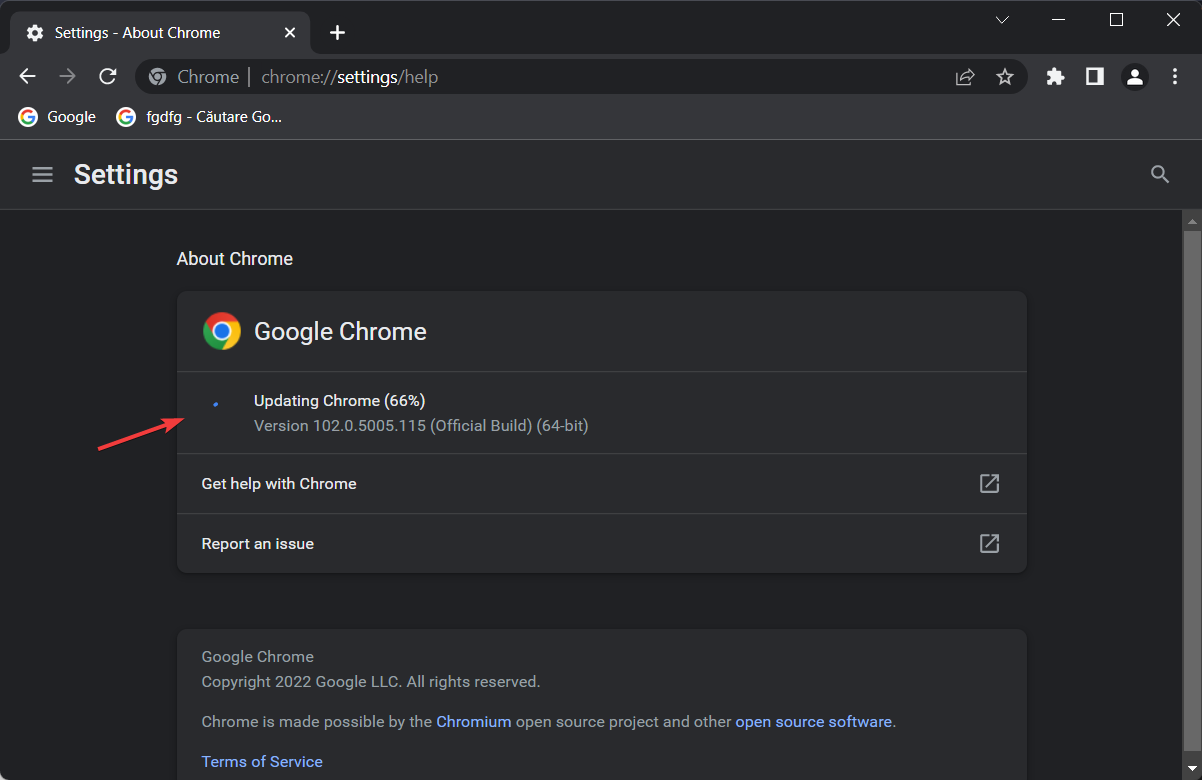
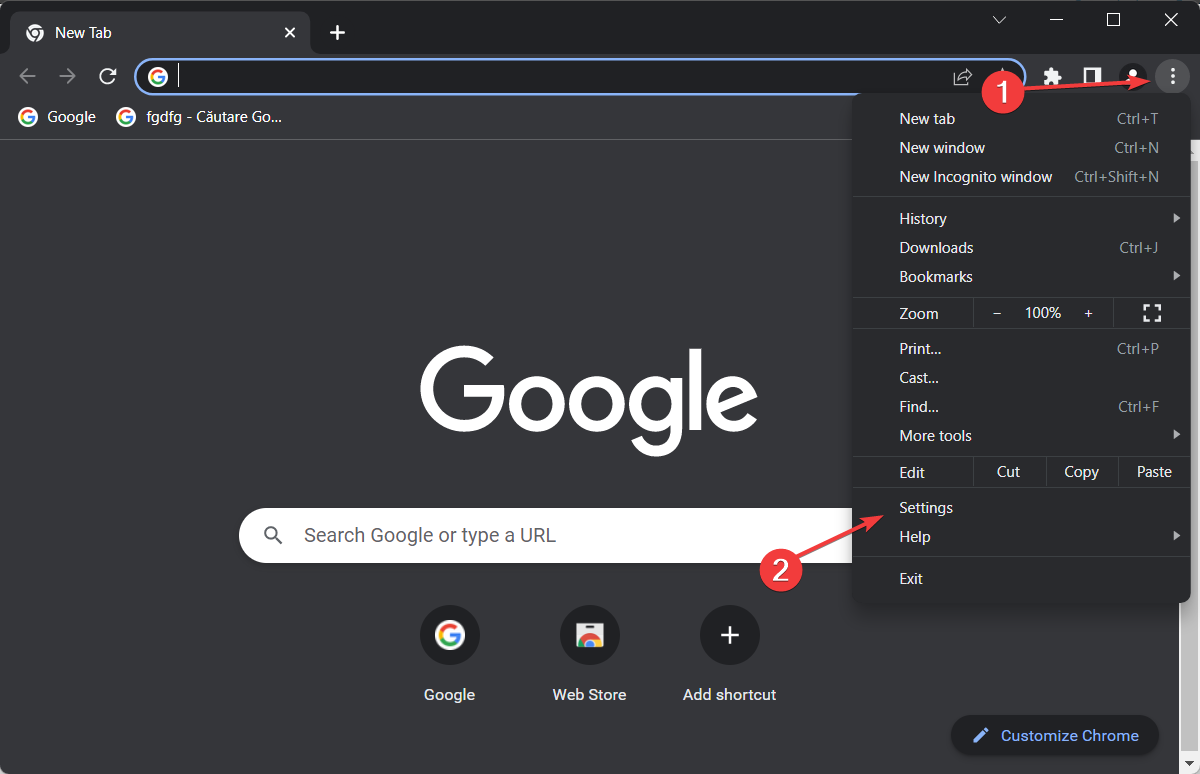
  1. Click the ellipsis near the top-right corner, and hover the cursor over Help.
  2. Select About Google Chrome.About Google Chrome
  3. A new tab will appear and show the current version of the browser installed.
  4. In addition, Chrome will now check for the latest updates and install them automatically in the background.Update to fix failed to load pdf document

According to users, sometimes, Failed to load PDF document in Windows 11 can appear if your browser is out of date. Certain glitches can appear once in a while, but the best way is to update your browser.

Google Chrome automatically downloads the missing updates in the background, but sometimes you might skip one for various reasons. Once the updates are installed, check if the problem is still there.

3. Try using third-party PDF readers

Sometimes, this error message can be related only to your browser. Although reading a PDF file in your browser is the most straightforward solution, it’s better to use a dedicated PDF reader.

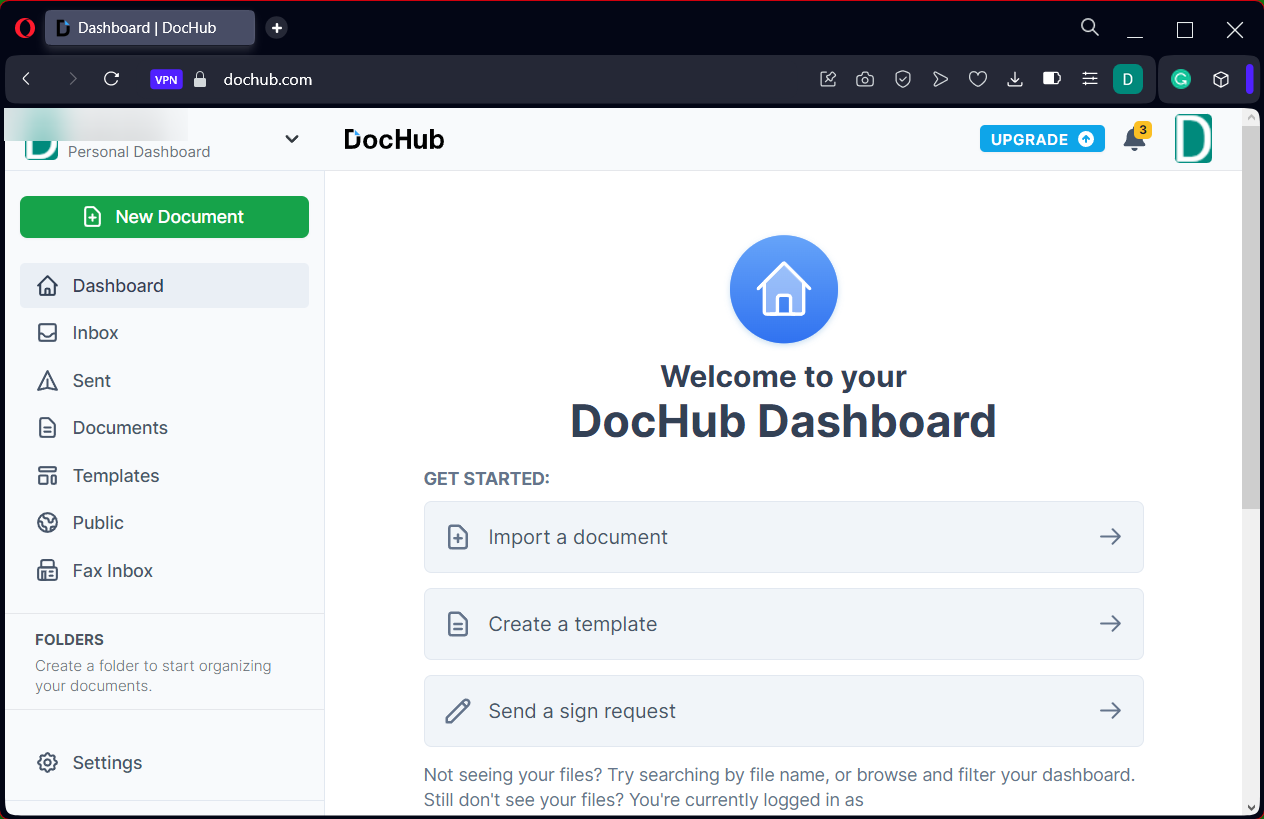
DocHub is a great PDF editor, and it offers many advanced features that you won’t find in your browser.

You can quickly view, create, edit, and convert your PDFs thanks to this excellent easy-to-use online platform.

Moreover, you can customize the content and layouts of your PDF documents and secure them with advanced 256-bit SSL encryption.

If you keep getting the error failed to load PDF document in Chrome, perhaps this is a perfect time to consider using a dedicated PDF reader.

⇒ Get DocHub

4. Remove problematic extensions

  1. Click the ellipsis in the top-right corner, hover the cursor over More tools, and select Extensions from the menu.Extensions
  2. You should now see a list of all extensions installed on the browser.
  3. To disable an extension, click the toggle next to its name. Repeat this for all extensions on the list.Disable extension

Some extensions might interfere with your browser and cause Failed to load PDF document messages while viewing certain files.

Once you disable all extensions, restart Chrome. If the issue doesn’t appear, it’s certain that one of your extensions is causing it. Enable the extensions one by one until you manage to recreate the problem.

Once you find the problematic extension, remove it and check if that permanently solves the Failed to load PDF document error on Salesforce.

5. Clear cache

  1. Launch Chrome, and press Ctrl + Shift + Del to open the Clear browsing data box.
  2. Now set the Time range to All time, and tick all the options here.
  3. Finally, click on Clear Data to remove the cache and cookies.
    Failed to load PDF document Opera

Your browser stores all sorts of files on the PC in order to display certain websites faster, but sometimes cache files can get corrupted, and this leads to various errors.

If you’re getting the error message, perhaps the issue is related to your cache, and in order to fix it, we advise you to clear it.

6. Reset Google Chrome

  1. Launch Chrome, paste the following path in the address bar, and hit Enter:chrome://settings/reset
  2. Click on Restore settings to their original defaults.Restore settings to their original defaults
  3. Now, click the Reset settings button to confirm.Clear cache to fix failed to load pdf document

According to users, sometimes, certain settings in your browser can cause this issue to appear. In case you can’t find the problematic setting, you can reset your browser to the default.

By doing so, you’ll remove all extensions, settings, and browsing history. In case you want to preserve some of your data, such as bookmarks, you should back them up or enable syncing.

After you reset the browser, check if the problem is still there. To restore your settings and browsing history, be sure to sign in to your Google Account, and all your data will be restored.

7. Reinstall Google Chrome

  1. Press Windows + R to launch the Run command, enter appwiz.cpl in the text field, and click on OK.appwiz.cpl
  2. Select Google Chrome, click the Uninstall button, and follow the on-screen instructions to complete the process.Uninstall Chrome to fix failed to load pdf document
  3. Once done, go to Chrome’s official website, download it, and complete the installation process.Download Chrome

If you have already tried to reset Google Chrome without success, you might want to try reinstalling it. Sometimes your installation can get corrupted, leading to this and many other problems.

To fix the issue, it’s advised that you reinstall Chrome completely. There are several ways to do that, and the best way to do it is to use uninstaller software.

Uninstaller software removes all files and registry entries associated with Chrome, ensuring that leftover files don’t interfere with future installations.

Once you remove Chrome, download, and install the latest version, the error will be fixed.

8. Use an alternative browser with PDF viewer

If nothing else on this list works you can always try using another browser that has a built-in PDF Viewer. Nowadays most browsers come fully equipped so it is not hard to find one for this task.

The easiest choice would be Microsoft Edge, as it is the default browser recommended by Microsoft. Due to this, many systems come with this browser already installed, so switching to it should be easy.

As with all modern browsers, Microsoft Edge will allow you to import your settings and bookmarks, making you feel right at home in no time.

The methods listed here would also work if you encounter the Failed to load PDF document on Outlook. Also, find out what to do if you cannot save PDF after editing.

If you’re a developer, you might’ve encountered an error PDF validation broken pipe message, but we have an article that covers this issue, so don’t miss it.

Which solution worked for you? Let us know in the comments section below!

3 Best XDR and SIEM Software for Network Cybersecurity

XDR (Extended Detection and Response) and SIEM (Security Information and Event Management) (SIEM) are cybersecurity solutions. They protect your endpoints and network from a wide range of threats, so you really need XDR and SIEM software to monitor your network and devices.

What is the difference between XDR and SIEM?

XDR and SIEM both extract and analyze data from multiple sources, including system and software file logs to detect any possible cyber threats.

However, while SIEM solutions only alert the responsible party about the intrusion, XDR includes advanced cybersecurity functionality to fix the problem.

What is better, XDR or SIEM?

Obviously, as XDR is capable of neutralizing threats and attacks throughout entire networks, it’s a lot more efficient.

As we cleared out what are these solutions, let’s see what are the best XDR and SIEM software for your enterprise network.

What are the best XDR and SIEM solutions for your network?

Wazuh – The best XDR and SIEM tool

Wazuh is a unified XDR and SIEM protection for endpoints and cloud workloads that offer the best match for network cybersecurity.

The key feature of this solution is that it unifies Cloud and endpoint protection. It secures public clouds, private clouds, and on-premise data centers at the same time.

Wazuh comes with lightweight agents for Windows, Linux macOS, Solaris, AIX, and HP-UX systems that detect hidden files, cloaked processes, unregistered network listeners, and more.

The tool scans the systems and logs, then sends the data to a central manager to be analyzed and stored.

It also monitors file integrity, so it identifies any changes in content or its attributes and permissions.

Of course, system and application configurations are monitored as well to detect compliance with security policies.

And if any anomalies are detected, Wazuh takes action against any active threats. For instance, it can block access to a system or be used to execute commands or system queries.

The solution is strong by itself, but it can be integrated with many other services and tools. The list includes YARA, AlienVault, Amazon Macie, VirusTotal, and a lot more.

Nevertheless, Wazuh is free and open source so you can test and implement it immediately. However, you may pay for technical assistance with any aspects of implementation.

Let’s review some of its best features below:

  • Analyzes data received from the Windows, Linux macOS, Solaris, AIX, and HP-UX systems agents and processes it using threat intelligence
  • Web user interface for data visualization, analysis, and management
  • You can review regulatory compliance, vulnerabilities, file integrity, configuration assessment results, cloud infrastructure events, and security incidents across containers, among others. Besides, container workloads are protected at two levels: Infrastructure and container level
  • Keeps track of data and application configurations to ensure they meet your security rules, standards, and/or hardening guidelines
  • It protects public clouds, private clouds, and on-premise data centers

Wazuh

This XDR and SIEM network cybersecurity solution offers complete protection for endpoints and cloud workloads.

Cynet 360 AutoXDR – Easy to use

Cynet is an XDR platform that offers effective protection and visibility across all your network, including endpoints, users, and SaaS applications.

The platform provides automated visibility, prevention, detection, correlation, and investigation and response through a single platform.

It does so by combining the action of four major interconnected components.

On the agent part, Cynet Protector comes with sensor technologies to detect and prevent threats across the environment.

It comes with EPP, EDR, Deception capabilities, network detection rules, user behavior analytics rules, threat intelligence, and a lot more.

The next component, Cynet Correlator, analyzes and correlates all data, including the ones from third-party sensors, and logs data into actionable incidents.

Finally, Cynet Responder assesses the priorities and produces the threat response and remediation actions across the entire environment.

A complementary component is CyOps, which is a 24/7 MDR service that provides monitoring, investigation, on-demand analysis, incident response, and threat hunting.

Let’s go through some of its most important features:

  • Collect and correlate alerts and related data to identify suspicious or problematic activity
  • Fully automate threat investigation and remediation
  • Ensures that your SaaS applications aren’t introducing security risks
  • 24/7 complementary MDR service
  • Easy-to-use platform for end-to-end protection

Cynet 360 AutoXDR

Respond immediately to any threats or vulnerabilities with a solution that provides all the tools.
Free trial Visit website

ManageEngine Vulnerability Manager Plus – Great vulnerability detection

If you’re looking for an XDR solution that can fight back network intrusions, ManageEngine Vulnerability Manager Plus offers clear solutions.

It is an enterprise-level tool that prioritizes threats and vulnerabilities and also offers built-in patch management.

The tool scans and identifies the vulnerabilities of all your local and remote office endpoints but also roaming devices.

Then, it analyzes and prioritizes areas that are more likely to be exploited by an attacker and covers the loopholes.

In order to preempt any such exploitations, you can use ManageEngine Vulnerability Manager Plus to download, test, and deploy patches automatically to your systems.

That includes Windows, Mac, Linux, and over 500 third-party applications by using an integrated patching module.

Let’s review its key features:

  • Obtain details on the cause, impact, and remedies of web server security flaws
  • Deploy pre-built, tested scripts without waiting for a patch to secure your network from zero-day vulnerabilities
  • Identifies unsafe software and uninstalls it from your endpoints in no time
  • Audit and maintain your systems in line with over 75 CIS benchmarks
  • CIS and STIG security guidelines compliance

ManageEngine Vulnerability Manager Plus

Fight back against network intrusions and deploy preemptive patches with this powerful software.
Check Price Visit Website

That was our selection of the best XDR and SIEM software tools to protect your enterprise network.

All the solutions above work for small to large businesses and offer configuration flexibility.

That being said, you might also be interested in our list of the best network security antiviruses for your business.

Which XDR solution did you choose? Tell us all about your selection criteria in the comments section below.

Printer Unable to Convert PostScript File: 5 Easy Fixes

Sometimes your Mac computer might not have the ability to convert PostScript files in a way that can be read by the printer. That’s why when trying to print PDF using Adobe Reader, you are getting this printer error:

Stopped – Unable to convert PostScript file.

You could obviously try to restart the computer and unplug the printer from the electrical socket for a few seconds, just to plug it back in. However, this workaround isn’t always successful and you might be after a permanent solution.

Because this problem can be rather frustrating, we’ve created a step-by-step guide with everything you need to do to fix it. That being said, continue reading the article below to find a solution to your problem.

What can I do to fix the unable to convert postscript file error?

1. Try to reset the printing system

Add button
  1. Go to Apple menu > System Preferences.
  2. Click Print & Scan.
  3. Right-click the blank space in the Printers list.
  4. Hit the Reset printing system option next from the menu that appears.
  5. Click Reset in the confirmation window.
  6. Enter your administrator username and password if asked.
  7. You may need to wait for a few minutes until the printing system is reset and the Printers list becomes empty.
  8. Restart your computer.
  9. Up next, return to System preferences > Print & Scan.
  10. Click the Add button (+) at the bottom of the list.
  11. Look for the name of your printer from the printer list and select it.
  12. Then, click Add to add your printer.
  13. Click Print Using, then select the name of your printer.

2. Print the file from Acrobat or Preview

Advanced menu

Open the Advanced menu in Acrobat print dialog. Then, waste no more time and select Print As Image.

Even though the quality of the printed document may differ as compared to regular printed files, it’s a compromise worthy to be considered when resetting the printing system failed.

3. Check for Acrobat updates

update Acrobat now

No less important, open Acrobat, then find your way into the Help menu and check for any updates. Follow the steps in the Updater window to download and install the latest updates.

Updating Acrobat is essential when it comes to making it compatible with your Mac OS. Once the updates are installed, try to print again and see if the issue persists.

4. Modify the PostScript Options

Print Dialog

You could also try to bring up the print dialog, click on the Advanced button, and then modify the PostScript Options at the top of the dialog. Any difference now?

5. Remove and reinstall the latest printer drivers

  1. From the Apple menu, select System Preferences.
  2. Then, select Print & Scan.
  3. A list of printers with drivers installed on your computer appears next, so click the printer you want to remove from the computer to highlight it.
  4. Click the Remove (-) button below the list of printers to remove the printer information from the list.
  5. Click OK.
  6. You may now close the Print & Scan window.
  7. Then, from the menu bar in the Finder, enter into Go > Go to Folder.
  8. While here, click Library, Printers, PPDs, Contents, and Resources.
  9. A list of the printer drivers should appear on your Mac. It’s time to click and drag the name of your printer model’s driver into the trash can in your dock.
  10. Up next, press and hold the Control button on your keyboard while clicking the trash can icon in the dock and select Empty Trash.
  11. Restart the computer for the changes to take place.
  12. Then, go to the appropriate Support Printer model page and download the latest driver for your printer.

On the same note, you have the alternative of managing drivers easily on your device. Using dedicated software to update the printer drivers ensure automatic install of the latest versions, without system issues.

⇒ Get Outbyte Driver Updater

Your printer’s drivers offer a world of options that you might not even be aware of. When getting this error message, don’t hesitate to remove the drivers by using the procedure described above. Then, reinstall the latest ones and check if the issue is solved now.

We hope these procedures helped you. If the error message continues to appear, check the printer‘s documentation or contact the printer manufacturer for support.

Download and Install Bcm20702a0 Driver in Windows 10

Drivers need to be updated regularly as they are essential parts required for the proper functioning of your PC. With the modern hardware available today, some drivers will come pre-installed in your PC because they are universal to the majority of devices.

The BCM20702A0 driver in Windows 10 is a very important driver, as it allows your device to communicate with the computer. If you have Windows 10 on your computer, then you definitely need to download the right version of the BCM20702A0 driver.

What is the Broadcom BCM20702A0 driver on Windows 10?

Bluetooth is a wireless technology standard for exchanging data over short distances. In order to use Bluetooth on your computer, you will need to install the corresponding drivers. This allows your OS to recognize the device and install all of the necessary software drivers needed for it to work properly.

The Broadcom BCM20702A0 driver is a component of the Bluetooth device, which is responsible for enabling the wireless connection between your computer and other devices that use Bluetooth technology.

This component is installed automatically in earlier versions of Windows but you can also download it since it works with most PCs.

How do I get Windows 10 to recognize my Bluetooth dongle?

In order to use a Bluetooth dongle, you will need a Bluetooth receiver. The receiver plugs into your computer and acts as a bridge between your device and the computer. The good news is that most computers come with built-in Bluetooth. The bad news is that it’s not always enabled.

Below is how to easily get your Bluetooth dongle recognized:

  • Check for compatibility – Make sure your Bluetooth device is compatible with Windows 10. If it isn’t, you won’t be able to get it working with the operating system. 
  • Switch USB ports – Some USB ports in your PC may not be working so trying different ports may help with better recognition.
  • Keep the device in range – Sometimes Bluetooth devices will begin to disconnect when they’re not within range. This can be because the device is too far away or because there are too many obstacles between them.
  • Uninstalling/reinstalling the drivers – If you have an old computer, you probably still have the same drivers that came with it. Uninstalling old drivers may help with recognition.
  • Disconnect other devices – Make sure the device is turned on and not paired with another device. If it’s connected to anything else, Bluetooth won’t be able to detect the device.

How do I download the BCM20702A0 driver?

1. Download from the manufacturer’s site

It is possible to download and install the BCM20702A0 driver on your computer if it is unavailable since not all PCs come pre-installed with the driver. 

The BCM20702A0 driver Windows 10 can be downloaded from different websites and platforms. But it is essential that you get an authentic and genuine version of this file.

2. Use Device Manager

  1. Click on the taskbar and select Device Manager.
  2. Locate the BCM20702A0 driver, right-click on it and select Update Driver Software.
  3. Select Search automatically for updated drivers.

3. Use a third-party tool

If you do not want to download the BCM20702A0 driver from its manufacturer’s website, use a third-party driver updating tool instead. It allows you to download all necessary device drivers automatically without visiting any websites manually. 

These tools can scan your computer for missing or outdated drivers automatically. Then they will download and install the best-matched drivers to your PC. When you use it to update the BCM20702A0 driver, you can enjoy a more stable and faster PC experience.

Hopefully, this article has been helpful in instructing you on how to download and install the BCM20702A0 driver in Windows 10.

You should be able to update the driver and access features for your device, help improve its stability and compatibility or resolve some issues that might be causing problems with your device.

The BCM20702A0 driver is not the only essential driver you need. Be sure to check out our article on how to download the FTDI drivers and learn more about their use on your device.

Don’t forget to check out our collection of driver updater tools that will make the work easier for you especially if you’re not big on manual updates.

Let us know if you have been successful in downloading and updating this driver in the comment section below.

5 Best Cyber-Security Tools For Complete Network Protection

Regarding your network environment, there is no effort spared for its protection. Luckily there are some powerful cyber-security solutions out there that can help you with all the tools you need for that.

In this article, you will find the best software tailored to any enterprise size and network.

How can cyber-security solutions protect my network?

Managing a small network makes it relatively easy to check on each asset individually. However, when you’re dealing with over 10 endpoints and other servers and equipment, things can get complicated.

Whether you need on-premise or cloud protection, patching your systems, or simply ensuring authorized entries, you need a network cyber-security tool to manage the workload.

We recommend reading our article about cyberattack statistics to get the complete picture of the threats you are facing.

With such management tools, you can automate all security events seamlessly from a single console.

What are the best network cyber-security solutions?

Wazuh – The best network vulnerability detection

When it comes to network security, Wazuh delivers the best approach to cyber-security. It protects
workloads across on-premises, virtualized, containerized, and cloud-based environments from a single console.

Wazuh has lightweight agents for Windows, Linux, macOS, Solaris, AIX, and HP-UX systems that detect any unusual or rule-breaking behavior on the system.

That includes cloaked processes, hidden files, unregistered network listeners, and many more security issues.

After it gathers information from the system and app logs, the software sends the data to a central manager to be analyzed and stored.

The apps and files are monitored constantly to detect any configuration or attribute changes and to supervise compliance with the security policies you have enforced.

After detecting such problems, Wazuh can block access to a system, execute predetermined commands, or make further queries on the affected systems.

The software is open source, so you can modify it to your needs, but it also supports a wide array of integrations such as AlienVault, Amazon Macie, VirusTotal, and a lot more.

Let’s review some of its best features below:

  • Ready-made Windows, Linux macOS, Solaris, AIX, and HP-UX systems agents
  • Advanced threat intelligence technology
  • Web user interface for data visualization, analysis, and platform management
  • Cloud and Container security, including Docker hosts and Kubernetes nodes and down to the container level itself
  • Extensive reports for compliance, vulnerability, and file integrity
  • It protects public clouds, private clouds, and on-premise data centers

Wazuh

Get complete endpoints and cloud workloads protection from an open-source tool with many integrations.

Acronis Cyber Protect – Extensive network security features

Acronis Cyber Protect is more than fit for this purpose if you’re looking for backup and anti-malware for all your devices.

It comes with AI-based ransomware protection and integrated patch management tools, so you don’t need to worry about any loopholes in your systems.

The solution can also provide vulnerability assessment and will allow your network manager to control the endpoints remotely.

Therefore, you will have full control of all your network environment and assets from a single console and fend off any cyber threats.

Here are just some of the best features of Acronis Cyber Protect:

  • Full antivirus and antimalware protection with AI-based ransomware protection
  • Integrated patch management and backup
  • Intuitive web-based interface with multi-tenant administration
  • Remote desktop capabilities
  • Multi-level encryption

Acronis Cyber Protect

Acronis Cyber Protect will ensure that all of your enterprise data is safe from both internal and external threats!
Free trial Visit website

Security Event Manager – Great log monitoring

Detecting failed logons and firewall events is a big part of network security and Security Event Manager covers that area very well.

It comes with hundreds of pre-built connectors that gather logs from various sources, compiles their data, and gathers them in a central location for you to investigate potential threats, prepare for audits, and store logs.

Basically you can create any network or user-based rules and program the too to respond accordingly.

For instance, you can respond immediately by blocking IPs, changing privileges, disabling accounts, blocking USB devices, terminating applications, and a lot more.

Here are some of its key features:

  • Advanced pfSense firewall log analyzer
  • Keep track of logon and logoff events with a centralized monitor
  • Advanced compliance reporting with predefined templates for PCI DSS, HIPAA, SOX, and more
  • Cross site scripting prevention tool
  • Blocks IPs, change privileges, disable accounts, block USB devices, and more

⇒ Get Security Event Manager

Endpoint Central MSP – Great patch management system

Endpoint Central MSP is a holistic endpoint management software for MSPs that helps you administrate desktops, servers, laptops, and mobile devices from a central location.

This tool comes with 50 pre-defined configurations and over 100s of scripts that will allow you to manage any and all types of customer environments.

You will be able to track granular asset data for hardware and software and pull critical information including usage statistics, blacklisted applications, warranty, licenses, etc.

And if you need to cater to a specific endpoint, you can do so with remote desktop features that include video and audio call support, file transfer, shortcuts, session recording, and more.

Here are some of its key features:

  • Automate patch deployment for over 850 first and third-party applications
  • Remotely deploy applications to client computers
  • Manage Windows, servers, Android, iOS, and Chrome devices
  • Manage up to 25 endpoints with the free version
  • Restrict and control the usage of USB devices

Endpoint Central MSP

Manage your endpoints securely and provide backup and patching to all network devices.

Perimeter 81 – Great network VPN

Perimeter 81 is an enterprise-level security platform you can use to monitor all traffic and network activity.

The tool comes with a Software-Defined Perimeter that allows you to restrict network access and provide secure channels to the shared systems.

With multi-layered security tools, including always-on encryption, two-factor authentication, and single sign-on, Perimeter 81 prevents data loss and unauthorized access to your network.

The devices are verified before accessing the network and the resources within, which translates to increased security.

Perimeter 81 is also a cloud-based VPN solution that is scalable to your growing network.

Check out these Perimeter 81 main features:

  • Secure remote access
  • OpenVPN, L2TP, IKEv2, and PPTP security protocols
  • Integration with all major cloud services and on-prem resources
  • Compatible with all major platforms, including Windows, Mac OS, iOS, and Android
  • 30-day money-back guaranteed policy

Perimeter 81

Secure your network with this professional enterprise VPN solution.
Check Price Visit Website

This concludes our list of the best network cyber-security tools for enterprise networks. While some of them focus on vulnerability detection, others come with active protection and backup.

All you need to do is to assess the needed level of security and features to make the right decision.

You might also be interested in our selection of the best enterprise cybersecurity tools in terms of antivirus and backup features.

Have you decided on a solution from our list? Tell us how you made your decision in the comments section below.

Full Fix: Default printer keeps changing in Windows 10/11

Using more than one printer is extremely annoying when the default printer keeps changing all the time. Before hitting the print button, you always have to check the current printer available, so you don’t use the wrong printer.

If you want to prevent your default printer from changing, you can use one of the workarounds listed below.

Why does my default printer keep changing?

Below are some of the causes of the default printer keeps changing issue:

  • Wrong settings: One of the most causes of this issue is wrong settings on your PC. To get past this, you need to make changes to the Registry Editor.
  • Outdated PC: In some cases, this issue can be caused by an outdated operating system. You need to update your PC to the latest version to fix this.
  • Faulty drivers: Your printer drivers are important to the effortless operation of your printers. So, when they are outdated or faulty, they can cause this issue. The solution to this is to reinstall or update your driver.

Speaking of printer problems, here are some issues that users reported:

  • Default printer keeps changing Windows 7, 8.1, 10 – This issue can appear on any version of Windows, but even if you don’t use Windows 10, you should be able to use most of our solutions.
  • Windows 7 default printer keeps changing to Adobe PDF – If this problem happens on your PC, you just need to set your default printer and the issue should be resolved.
  • Default printer keeps changing randomly, after reboot, log off – According to users, their default printer keeps switching after reboot. This can be caused by your drivers, so be sure to update them.
  • Default printer keeps switching, reverting back – Sometimes this issue can occur due to certain system bugs. However, you should be able to fix that by installing the latest updates.

Default printer keeps changing on Windows 10, how to fix it?

1. Turn off the option Let Windows manage your default printer

  1. Press the Windows key + I to open the Settings app and click on the Devices icon.
    Windows 7 default printer keeps changing to Adobe PDF
  2. Click on Printers & scanners on the left side and turn off Let Windows manage my default printer.
    Default printer keeps changing after reboot

By default, Windows 10 automatically manages your default printer. If your default printer keeps changing, you might want to prevent Windows from managing your default printer.

Many Windows 10 criticized Microsoft for adding such a feature. They suggested that a drop-down menu would have been much more useful, as it would have easily allowed them to select the printer of their choice.

2. Change the printer settings from the Registry Editor

  1. Press the Windows key + R, type regedit, and click OK.
    Default printer keeps changing Windows 7
  2. Go to the path below in the left pane: HKEY_CURRENT_USER\SOFTWARE\Microsoft\Windows NT\CurrentVersion\Windows
    Windows 7 default printer keeps changing to Adobe PDF
  3. Select LegacyDefaultPrinterMode and set the value to 1.

If your default printer keeps changing, the issue might be related to your registry. However, you can fix the problem by making some Registry Editor changes.

3. Uninstall the printer software for all printers

  1. Press Windows key + X and choose Device Manager from the results list.
  2. Locate your printer driver, right-click it and choose Uninstall device from the menu. If you can’t find your printer, make sure that you reveal hidden devices.
    Default printer keeps changing after reboot
  3. When the confirmation dialog appears, select Delete driver software for this device and click Uninstall.
    Default printer reverting back

If the two solutions listed above don’t work, uninstall the printers’ drivers and install the latest driver versions again. To uninstall the printer driver, follow the steps above.

After that, restart your PC, and the default driver will be installed again. If the default driver doesn’t work, your next step would be to install the latest printer driver.

To do that, you need to visit your printer manufacturer’s website and find the latest drivers for your model. After downloading and installing the latest driver, check if the problem is resolved.

If you’re having trouble finding the appropriate driver, you can always use professional tools to download the missing drivers automatically.

⇒ Get Outbyte Driver Updater

4. Remove old printer connections from your registry

  1. Start Registry Editor.
  2. Go to the path below in the left pane: HKEY_USERSUSERS_SID_HEREPrintersConnections
  3. Be sure to select your own user SID. Usually, your SID is the one that’s the longest, so be sure to select it.
    Default printer keeps changing randomly
  4. You should see some old printer connections. Delete them all.
  5. Now, go to HKEY_USERSUSERS_SID_HEREPrintersSettings key and delete the old printer settings.

If you used multiple printers with your PC, some old entries might still be in your registry. If your default printer keeps changing, the old entries in your registry might be the problem.

However, you can fix the issue simply by removing the problematic entries from your registry. Once you remove them, check if the problem with your default printer is resolved.

5. Check your USB and power cable

Occasionally, issues with the default printer can occur due to problems with cables. If the default printer keeps changing on your PC, check if your cables are working properly.

Sometimes your power or USB cable might be broken, which can lead to many other problems. Carefully inspect the cables and ensure your printer is constantly connected to your PC.

If you lose a connection even for a moment, Windows will change the default printer automatically. If your cables are damaged, replace them and check if that solves your problem.

6. Set the default printer manually

  1. Press Windows key + S, type control panel, and choose Control Panel from the list of results.
    Default printer keeps switching
  2. Navigate to Devices and Printers.
    Default printer keeps reverting back
  3. Select the printer you want to use as default, right-click it and choose Set as default printer from the menu.
    Default printer reverting back

According to users, if the default printer keeps changing, you might be able to fix the problem by manually setting the default printer.

7. Install the latest updates

  1. Press Windows key + I to open the Settings app.
  2. Now, go to the Update & Security section.
    Default printer keeps changing Windows 8.1
  3. Click the Check for updates button.
    Default printer keeps changing Windows 10

If the default printer keeps changing on your PC, the issue might be caused by certain bugs in your system. The best way to fix this problem is to install the latest Windows updates.

By default, Windows 10 usually installs the missing updates automatically, but sometimes you might miss an update or two. However, you can check for updates manually by following the steps above.

If any updates are available, Windows will download them automatically in the background. Once the updates are downloaded, just restart your PC to install them.

8. Create a new user account

  1. Open the Settings app and navigate to the Accounts section.
    Windows 7 default printer keeps changing to Adobe PDF
  2. Now, navigate to the Family & other people section and choose Add someone else to this PC.
    Default printer keeps changing after log off
  3. Select I don’t have this person’s sign-in information.
    Default printer keeps switching
  4. Now, select Add a user without a Microsoft account.
    Default printer keeps changing Windows 7
  5. Enter the desired username and click Next.
    Windows 7 default printer keeps changing to Adobe PDF

If you’re having issues with your printer, you might be able to fix the problem by creating a new user account.

After creating a new user account, switch to it and check if the problem is still there. If the issue doesn’t appear on the new account, you need to move your personal files to it and start using it instead of your old account.

9. Perform a System Restore

  1. Press Windows key + S, type system restore, and choose Create a restore point.
    Default printer keeps changing randomly
  2. Now click System Restore button.
    Default printer keeps switching
  3. When System Restore window opens, click Next.
    Default printer keeps changing Windows 8.1
  4. Check Show more restore points option if available, select the desired restore point and click Next.
    Windows 7 default printer keeps changing to Adobe PDF
  5. Follow the instructions on the screen to complete the restoration process.

If the default printer keeps changing on your PC, the problem might be caused by a recent update or change on your system. However, you can fix the problem by performing a System Restore.

Once your system is restored, check if the problem is still there.

We have come to the end of this detailed guide. We belive you should be able to fix the issue before exhausting the solutions in this guide.

Similarly, if your printer cannot be as default for some reason, check our detailed guide to fix it quickly.

Feel free to let us know the solution that helped you fix this issue in the comments below.

Razer Synapse Failed to Start on Windows 11 [Error Fix]

Has your Windows 11 Razer Synapse failed to install? We will explore some causes and solutions.

Razer Synapse is a handy device configuration app. With it, users can configure their Razer peripherals in Windows 11. So, that app is a pretty significant bit of kit for users with Razer devices to install after upgrading to the OS.

However, some have posted about issues when installing Synapse in support forums. Consequently, those users can’t get Synapse up and running in Windows 11.

Some have been able to fix Razer Synapse installation issues within Windows 11. So, you might be able to solve this problem as well.

Why won’t Razer Synapse open Windows 11?

To solve Synapse installation errors, it’s worth considering what the potential causes for them are. These are some of the more common ones to take into consideration:

  • Missing or outdated prerequisite software: Synapse installation issues can arise because Microsoft .NET Framework isn’t installed.
  • Conflicting background processes: Conflicting background processes and programs, especially Razer ones, can generate installation issues for Synapse.
  • Firewalls: Firewalls may cause installation errors for lots of software.
  • Razer device drivers: Synapse installation issues can also arise because of installed Razer device drivers.

Now that we have seen the causes, let us explore workable solutions. Also, note that some of these fixes will work if Razer Synapse is not working on Windows 11, opening on startup, or throwing unhandled exceptions.

What can I do if Razer Synapse failed to start on Windows 11?

1. Run Razer Synapse’s installer as administrator

  1. Click File Explorer’s taskbar icon.
    razer synapse failed to start windows 11
  2. Then open the folder that includes Synapse’s installer file.
  3. Right-click Synapse’s setup wizard and simply select the Run as administrator option for it.
    razer synapse failed to start windows 11

2. Close Razer background processes

  1. Press Ctrl + Shift + Esc to open the Task Manager.
  2. Select the Processes tab.
  3. Right-click any Razer processes and select the End task button for them.

3. Install .NET Framework 4.8

  1. Open the NET Framework 4.8 download page in a browser.
  2. Next, click the Download .NET Framework 4.8 Runtime button.
    Download .NET Framework 4.8 Runtime button windows 11 razer synapse failed to install
  3. Choose a folder to download the software, and click the Save button.
  4. Next, click the taskbar button for File Explorer.
    File Explorer button windows 11 razer synapse failed to install
  5. Open the folder you saved the .NET Framework setup file in.
  6. Then click the setup file for .NET Framework 4.8 to install.

For more details, check out this guide on how to install the .Net Framework.

4. Turn off Windows Defender Firewall

  1. First, press the Windows key along with S at the same time.
  2. Enter the keyword Windows Defender Firewall within the search box and click Windows Defender Firewall within the search results.
    razer synapse failed to start windows 11
  3. Then click Turn Windows Defender Firewall on or off within the Control Panel.
    Turn Windows Defender Firewall on or off windows 11 razer synapse failed to install
  4. Select both Turn off Windows Defender Firewall radio buttons.
  5. Click OK to exit the firewall settings.
  6. After that, try installing Synapse with the firewall disabled.
Note icon NOTE
Turn Windows Defender Firewall back on after you’ve tried to install Razer Synapse.

5. Disable third-party antivirus software

  1. Click on the hidden access arrow in the Taskbar.
  2. Click on your antivirus icon, hover over Avast shields Control and select Disable for 10 minutes (This step varies for different antivirus software).

If third-party antivirus software is installed on your PC, temporarily disable it before installing Synapse.

6. Uninstall Razer device drivers before installing Synapse

  1. Unplug any extra external Razer devices plugged into your desktop or laptop. 
  2. Next, press Windows + X keys and select the Device Manager shortcut.
    Device Manager shortcut windows 11 razer synapse failed to install
  3. Double-click the category in Device Manager that includes your Razer peripheral to expand it.
  4. Then right-click your Razer peripheral and select the Uninstall device option for it.
    Uninstall device option windows 11 razer synapse failed to install
  5. Next, select the Uninstall option to confirm.
    Uninstall option windows 11 razer synapse failed to install
  6. Repeat the previous three steps for all Razer peripherals you have.
  7. After that, try installing the Razer Synapse software again.
  8. Then you can plug your Razer devices into the PC to reinstall their drivers.

Alternatively, you can try Outbyte Driver Updater, which will scan your PC for any missing or outdated drivers, including Razer ones, and prompt you to update them.

7. Clean-boot Windows 11

  1. First, bring up the Run accessory by pressing the Windows key + R hotkey.
  2. Type this command within Run’s Open box and click OK.
    msconfig
    razer synapse failed to start windows 11
  3. Click the radio button for Selective Startup, and deselect the Load startup items checkbox.
  4. Ensure you’ve got both the Load system services and Use original boot configuration options selected.
  5. Next, select the Services tab and click the checkbox for Hide all Microsoft services to choose that setting.
  6. Press the Disable all button to deselect all those remaining third-party services.
  7. To save the new boot configuration, click the Apply option.
  8. Click OK to close the System Configuration utility.
  9. Select the Restart option on the dialog box that opens after exiting the MSConfig utility.
    The Restart button windows 11 razer synapse failed to install
  10. Try installing Razer Synapse after the restart.

We also have a guide that will show you how to download Razer Synapse, if you need more information. If Razer Synapse is not running, this clean boot fix may be your go-to.

Note icon NOTE
You’ll need to select the Load startup items checkbox on MSConfig’s General tab to restore the original boot configuration. Also, click Enable all on the Services tab to select all the third-party services.

The resolutions above cannot be promised to fix all Razer Synapse install errors for everybody. Software installation problems can arise for many reasons, and they’re not always straightforward to fix.

However, those potential resolutions are likely fixes for Synapse installation failed errors, which some users have confirmed to work.

So, it’s worth trying all the above tips before contacting Razer’s support service. Even more, check out our guide on what to do if Razer Synapse won’t open after installation.

Other Razer software has issues too, and we wrote how Razer Cortex is crashing the PC in our latest article, so don’t miss it.

Have you fixed a Windows 11 Razer Synapse that failed to install with an alternative resolution not specified here? If so, you’re more than welcome to share it in the comments section below.

How to Hide the Microphone Icon in Windows 11

If you are curious to know how to hide the microphone icon in Windows 11, this article is for you.

After enabling or setting up the microphone on Windows 11, you may have noticed that sometimes a mic icon appears on the taskbar. It helps to understand if any app or OS is using your mic. You also can control some basic functionalities by clicking on this icon.

However, you also may want to hide it from the taskbar. But is it possible? If yes, how?

Why does the microphone icon appear on the taskbar in Windows 11?

If your microphone is not working, you will not see such symbols on the taskbar. But, if it works perfectly, you may see the icon due to the following things:

  • Something is recording: When someone or something is using your microphone and probably recording your voice activity, either it can be by you or an app or a third party, the microphone button will appear on your taskbar.
  • Cortana: Cortana is a voice assistant from Microsoft which is built-in with Windows 11. It may use your microphone to determine your instruction to it. You may see the icon in this case unless you manually disable Cortana.
  • Other app’s mic usage: If any app, like a screen recorder, video or voice chatting app, etc., uses the mic, you will often see the microphone icon.

Is it possible to hide the mic icon?

Usually, there is no standard way to hide the microphone icon on Windows 11, as you may expect. However, if you do some tricks and follow some unusual methods, you can disable that icon.

How can I hide the microphone icon in Windows 11?

To hide, we have prepared some methods that you can try. Before that, make sure you have done the following things:

After ensuring the above things, follow these methods.

1. Disable some apps’ access

  1. Press Win + I on the keyboard to open Windows 11 Settings.
  2. Go to Privacy & security and click on Microphone.going microphone privacy settings windows 11
  3. Now, toggle the switch off next to the apps you want.disablking microphone access for an app windows 11 settings

Doing this will disable mic access to specific apps. If the icon frequently appears while you are not using your microphone, it means any of the installed apps are using it. Disabling the access will permanently hide the icon from your taskbar.

2. Disable at all

  1. Go to the Microphone privacy settings like before.
  2. Toggle the switch off next to the Microphone access.disabling microphone access for all apps windows 11 settings

It will prevent all of the applications from accessing your mic, which will also turn off the microphone icon on your taskbar.

3. Use Device Manager

  1. Open the Start Menu, type device manager, and hit Enter.
  2. Expand Sound, Video & Game controllers.
  3. Right-click on your microphone and click on Disable.disabling microphone windows device manager

From the Device Manager, you also can update drivers, including the mic driver. But, for best, it is wise to use a tool like Outbyte Driver Updater.

After disabling it, the microphone will be inaccessible for all services on your PC. So, there will be no mic icon appearing on the taskbar.

Else, if you are using an external microphone, you can keep it disconnected when you are not using it. This will ensure that no mic symbol appears on the Windows 11 taskbar.

If you are interested, learn how to solve the microphone volume that is too low on Windows 11.

The primary purpose of showing the icon is to make you aware that an app or service is using your audio input device. For example, it may be recording your voice or something.

To protect your privacy, till now, Microsoft has not brought an option to disable this feature. As a result, you cannot follow a standard method to put the symbol out of your sight.

So, when you apply our tricks to conceal the icon, it will also disable the microphone access so that your privacy remains protected.

This article has shown how you can hide the microphone icon in Windows 11. Please let us know in the comment box if you have an opinion.

How to Fix Google Chrome Not Responding or Opening Issues

Google Chrome is the most popular browser in the world, but this doesn’t mean it’s 100% bug-free. Thus, Google Chrome not responding instances are not as scarce as you’d think.

Indeed, Chrome is a very stable, fast, and reliable browser. However, users reported Chrome not working on several occasions. Needless to say, this can be frustrating as it prevents you from connecting to the Internet.

So, why is Google Chrome unresponsive? Let’s take a closer look and find out.

Why is Google Chrome not responding?

→ Sometimes, third-party applications can cause these problems to occur. To fix the issue, it’s advised to perform a full system scan and check if that helps.

→ If Google Chrome keeps freezing, the installation might be corrupted or to process might be stuck. Reinstalling the browser or using a task killer can help.

Sometimes the extensions for your browser might create problems with the browser itself, which can result in a notice saying that the page is not responding.

→ Take a deeper look at the extensions and do not immediately rule out your security software.

→ As always, the cache piling up can lead to anomalies and this is no exception.

Here are some similar problems that users reported:

  • Google Chrome not responding when uploading files, when trying to print, all the time
  • Chrome Save as not responding
  • Chrome keeps not responding, crashing, not working, freezing, or Chrome not opening
  • Chrome not responding on startup, on laptop
  • Chrome stops working after a few minutes, every few seconds
  • Chrome not loading pages

Chrome can become unresponsive or bugged on any device or OS that you use it. The following are some errors reported by users:

  • Google Chrome not responding in Windows 7, Windows 8, Windows 10, Windows 11
  • Google Chrome opens and closes immediately on Windows 10
  • Google Chrome not responding on Mac, Android, iPhone

This being said, let’s see how to fix the Google Chrome not responding error and get back to surfing the Internet. Keep on reading!

How do I fix Google Chrome not responding?

1. Use a better browser

If this isn’t your first problem with Chrome, we think that the easiest solution of them all is to simply make the switch to a better one.

Since exporting your bookmarks and settings is easy and fast, all that is left is to choose an alternative. We recommend Opera One. It’s based on Chromium so you will feel just at home with it.

But you will also have access to the Opera sidebar and lots of new features. Basically, you can organize yourself better and be more productive. It’s also quite fast. Probably faster than Chrome itself.

Opera One

Get a taste of a brand-new, freeze-free web experience that you will love.

2. Add Chrome to your firewall exception list

  1. If Google is not responding on a laptop, go to the Search function from your Taskbar and type Windows Firewall then hit Enter.
    Google Chrome not responding on startup
  2. In the left-hand pane, select Allow an app through the Windows Firewall.
    Google Chrome keeps crashing not responding
  3. Click the Change Settings button then select Allow another app.
    Google Chrome freezing
  4. Select Google Chrome then click Add followed by OK.

According to users, sometimes Google Chrome might not respond if there’s an issue with your firewall.

Your firewall is designed to restrict Internet access to certain apps, and in order to make sure that everything is working properly, you need to allow Google Chrome through your firewall.

Google Chrome should be automatically allowed to go through your firewall, but if it’s not, be sure to follow these instructions to fix the problem.

Most users don’t use Windows Firewall because of issues such as this. We recommend using one of these third-party firewalls for better and more customized protection.

3. Scan your computer for malware

One of the main causes of this problem can be malware infection. Malware can sometimes interfere with your browser and cause Google Chrome to not respond.

This can be a big problem, but you should be able to fix it by performing a detailed antivirus scan. To ensure that your system is protected, we advise you to use a good third-party antivirus solution such as TotalAV.

This antivirus offers great protection as well as advanced security features ensuring that your system is protected at all times.

A multi-layered approach makes this solution great: it combines traditional email signatures and scanning with Machine Learning and cloud capabilities. This means that it will detect viruses faster, better, and without being too resource-intensive.

⇒ Get TotalAV

4. Clear your DNS cache

  1. Press the Windows key + X to open the Quick Access menu.
  2. Now choose Command Prompt (Admin) or Powershell (Admin) from the list.
    Google Chrome freezing
  3. Type or paste the following commands and hit Enter after each one: ipconfig /flushdns netsh winsock reset

If Google Chrome is not responding, the issue might be your DNS cache. This is just a minor problem, and in order to fix it, you just have to remove the cache.

Finally, if you’re not able to open Command Prompt as an admin, take a closer look at our guide.

5. Uninstall and reinstall the browser

To completely uninstall Google Chrome, we advise you to use uninstaller software. This application will remove Chrome along with all files and registry entries associated with it.

Why is it a better choice? The default uninstaller is less effective because it removes some of the files that were installed originally. Various registry changes that occurred while using it and other files that were created are ignored.

Using specialized uninstaller software you will remove any program from the system and eliminate all the residual files instantly. It’s like you never had the software installed in the first place.

Hence, download an efficient uninstaller and remove Chrome. While you’re at it, you might as well select some other old and forgotten software. You can select multiple programs and it will remove them all.

6. Run an SFC scan

  1. Hold the Windows key + X to open the Quick Access menu. Next, choose Command Prompt (Admin).cmd-admin-w10 Google Chrome not responding
  2. When Command Prompt opens, enter the following command and press Enter in order to scan your files: sfc /scannow
    Google Chrome not responding Windows 8
  3. Once the scan is finished, check if the problem is resolved. If the issue is still there, you might want to try using DISM scan instead.
  4. To do that, just start Command Prompt as administrator and run this line: DISM /Online /Cleanup-Image /RestoreHealth commanddism-w10 Google Chrome not responding

Once the DISM scan is finished, check if the issue is still there. If the problem still persists, you might want to try running the SFC scan once again and check if that helps.

File corruption can also cause this issue to occur, and to fix the problem you need to repair the corrupted files.

This is relatively simple, and you can do it by running an SFC scan. Alternatively, you can also try these tools that repair corrupted files.

7. Make sure you’re running the latest Chrome version

  1. Open Google Chrome and click on the three-dot menu icon in the top right corner and choose Settings.chrome-three-dot Google Chrome not responding
  2. Next, scroll down the left-hand menu until you find the About section and click on it.about-chrome Google Chrome not responding
  3. On the right side, you will be shown whether you are running the latest version available.
  4. Click the Update button in case you need to update it.updating-chrome Google Chrome not responding

If Google Chrome is not responding on your PC, it’s possible that it’s out of date. Sometimes certain bugs can occur once in a while and cause issues with Chrome, therefore it’s crucial to keep Chrome up to date.

8. Clear the cache, browsing history, and cookies

  1. Open Google Chrome and click the Menu icon in the top right corner then choose Settings from the menu.chrome-three-dot Google Chrome not responding
  2. Next, type clear inside the Settings search bar and select the Clear browsing data result.clear-browsing-chrome Google Chrome not responding
  3. Set the Time range to All time and click on Clear data.clear-chrome Google Chrome not responding

Once Chrome cleans the cache, the Google Chrome not responding issue will be resolved.

Another common cause for Chrome to stop responding is your cache. If the cache is corrupted, that might lead to certain issues with Chrome, therefore we advise you to clean your cache.

You can also try CCleaner to clear the data for you!

9. Disable extensions

  1. Click the Menu icon in Chrome and select More tools followed by Extensions.ext-chrome Google Chrome not responding
  2. Locate the extension you have installed and toggle off the button next to them in order to disable them.toggle-ext-chrome Google Chrome not responding
  3. Once you disable all extensions, restart Chrome.

Google Chrome supports a variety of extensions that can enhance Chrome with new features.

Even though Chrome extensions can be incredibly useful, some extensions can be quite demanding in terms of resources, and others might be buggy and cause Chrome to stop responding.

To fix the problem, it’s advised to find and disable certain extensions and check if that helps. When Chrome restarts, check if the problem still appears.

If not, it means that one of the extensions was causing it. To find which extension is the problem, enable extensions one by one until you find the problematic one. Once you find it, remove it or update it and check if that solves your problem.

10. Check the proxy settings

  1. Press the Windows key + I to open the Settings app.
  2. Navigate to the Network & Internet section.network-w10 Google Chrome not responding
  3. Now, select the Proxy section from the left pane.
  4. Finally, disable all settings in the right pane to check if that helps.
    Google Chrome won't close

According to users, if Chrome is not responding, the issue might be your proxy. Proxy is a great way to protect your privacy online, but sometimes proxy can cause certain issues to occur.

After you disable the proxy, the issue will be resolved. Obviously, this will leave a hole in your privacy protection. Feel free to check out these best third-party proxy tools to compensate.

11. Reset Google Chrome

  1. Open Chrome and click on the three-dot menu followed by Settings.chrome-three-dot google chrome not downloading files
  2. Click on Advanced followed by Reset and clean up.reset-cleanup-chrom google chrome not downloading files
  3. Select the Restore settings to their original defaults option followed by Reset settings and wait for the process to end.restore-settings-chrome google chrome not downloading files

Still, resetting will erase your browsing history. No worries, we have the ultimate guide for restoring your browsing data.

What can I do if Chrome is not responding when uploading files?

Instead of using browsers, users may upload folders using the applications that come with cloud storage.

There are programs available for Google Drive, DropBox, and OneDrive that allow users to synchronize the storage on their local hard drives with the storage in the cloud.

These programs often set up a cloud storage folder into which users may drag and drop files and folders in File Explorer in order to upload content to the cloud.

The websites of the users’ cloud storage services provide users the ability to download the synchronizing applications.

For more solutions to Chrome not uploading files, check out our post on what to do if the folder upload is not supported by your browser.

We hope the solutions listed above helped you to fix Google Chrome’s responsiveness issues. If you’ve come across other workarounds, you can list the troubleshooting steps in the comments section below. Moreover, if Chrome keeps capturing your screen, we’ve got you covered.

How to Check What is Downloading on Your PC With 5 Methods

You are often left wondering how to check what is downloading on your PC, especially in the background.

Windows OS is incredibly complicated software, and most work happens quietly in the background. Windows also require the user to stay connected to the internet to download the latest Windows updates and security patches.

You may notice that your computer has utilized all the bandwidth to download something without asking the user.

While this may not be an issue for everyone, for those with limited internet bandwidth, it might cause difficulties, slowing down their bandwidth.

You can use bandwidth limiter software to monitor its status and prioritize any apps you need to use immediately.

If you are also bothered by these mysterious background processes hogging up your internet bandwidth, here is how you can tell if Windows 10 is downloading something in the background and stop it.

How can I check if something is downloading in the background on Windows 10?

1. Use Task manager

  1. Press Crtl + Shift + Esc to open the Task Manager.
  2. In the Process tab, click on the Network column. This will show the process using the most bandwidth.
    how to check what is downloading on your pc
  3. Check the process that is using the most bandwidth currently.
  4. To stop the download, right-click the process and click on End Task.

Ending the process from the Task Manager is a temporary fix. Open the program that is using the bandwidth, and stop any downloads.

2. Use Resource Monitor

  1. Press the Windows Key + R to open Run.
  2. Type resmon in the Run box and press OK to open the Resource Monitor.
  3. In the Resource Monitor window, click on the Network tab, and expand the Network Activity tab.
    how to check what is downloading on your pc
  4. As you can see in the above image, the process consuming the highest network data here is Google Chrome because I was streaming a YouTube video. However, you should be able to find other processes utilizing the internet using the same method.

3. Using the Settings app

  1. Press Windows + I to open the Settings app.
  2. Navigate Network & Internet, Data usage, then click on View usage per app.
    how to check what is downloading on your pc
  3. Now you should have displayed the apps, and you may be able to see what is consuming your data the most. That may be an indication of downloads or streaming activity.

4. Checking Windows updates

  1. Press Windows + I to open the Settings app.
  2. Click on Update & Security.
  3. You should be able to see if a download is in progress.

5. Check browser download

  1. Click on the three dots at the far top end of the browser (we used Chrome in this example), then click Downloads.
  2. You will be able to see a list if there are any ongoing downloads.

While this will vary depending on your browser, it is often an excellent place to look.

With any of the steps mentioned above, you should be able to tell what background apps are running downloads.

Keep in mind that this isn’t the only browser issue you can encounter and many reported that downloaded files are not showing on Desktop, but we covered that issue in another guide.

Tell us in the comments below which methods are the most convenient for someone needing to know how to check what is downloading on a PC.

The Windows Cryptographic Service Provider Reported An Error

Windows Cryptographic Service Provider error is an error related to signing documents and if you encounter it you won’t be able to sign documents. However, there are a few methods you can use to fix this issue.

How do I resolve the Windows Cryptographic Service Provider reported an error?

If possible, try using a different signature if this one is giving you an error. Alternatively, create a new signature if possible and check if that solves the issue.

1. Update the driver for the signature device

  1. Right-click the Start button and select Device Manager from the list.device manager
  2. Find your digital signature device.
  3. Right-click on the driver and select Update driver.
  4. Now you can choose to Search automatically for drivers, or the second option if you already have the correct driver that you downloaded from the manufacturer.

Outdated drivers can often cause Windows Cryptographic Service Provider reported an error code 2148086027, so be sure to keep them up to date to prevent any further issues.

2. Install the latest updates for Adobe Acrobat

  1. Open the Adobe Acrobat.
  2. Click on Help and then choose Check for updates.
    check for updates adobe acrobat
  3. Wait for available updates to install.

Alternatively, you can get the latest version of Adobe Acrobat from the official website.

⇒ Get Adobe Acrobat

3. Set Cryptographic Provider to CSP

  1. Open the SafeNet Authentication Client Tools. You can open it by going to its installation directory or by right-clicking the SafeNet icon in the system tray and selecting Tools from the menu.
  2. When SafeNet Authentication Client Tools opens click the ‘golden gear’ symbol in the top in order to open Advanced View.
  3. In Advanced View expand Tokens and navigate to the certificate you want to use for signing. They should be located under the User certificates group.
  4. Right-click on your certificate and choose Set as CSP from the drop-down menu. You’ll need to repeat Step 4 for all certificates that you’re using.
  5. Close SafeNet Authentication Client Tools and try signing the documents again.

After changing the Cryptographic provider, the Windows Cryptographic Service Provider Error encountered while signing message will be gone.

4. Remove unwanted certificates

  1. Press Windows key + R and type inetcpl.cpl. Press Enter to run it.
    The Windows Cryptographic Service Provider error the security token does not have
  2. Go to the Content tab and click the Certificates button.
    Windows Cryptographic Service Provider reported an error code 0
  3. Now you’ll see a list of your certificates.
  4. Select the problematic certificates and click the Remove button.
    The Windows Cryptographic Service Provider reported an error key does not exist
  5. Click close and then click OK.
  6. Close Internet Explorer and all Adobe Acrobat Documents.
  7. Try signing the documents again.

Once you remove unwanted certificates, check if the problem if The Windows Cryptographic Service Provider reported an error keyset does not exist error still appears.

5. Reinstall ePass2003 software

  1. Press the Windows key + I to open the Settings app. Now navigate to the Apps section.
    The Windows Cryptographic Service Provider error Adobe
  2. Find and remove ePass2003 software.
  3. Restart your computer.
  4. When your computer boots install ePass2003 again.
  5. When installing ePass2003 make sure that you select Microsoft CSP when choosing the CSP option.
  6. After installing ePass2003 again everything should be back to normal and Windows cryptographic service provider error should be resolved.

Once the software is gone, go ahead and check if The Windows Cryptographic Service provider reported an error Invalid provider type specified message still appears.

6. Modify your registry

  1. Press the Windows key + R and type regedit.
    registry editor
  2. Next, navigate to the following path if you’re using Acrobat: HKEY_LOCAL_MACHINE\SOFTWARE\Adobe\Adobe Acrobat\DC\FeatureState
    For Acrobat Reader go to:
    HKEY_LOCAL_MACHINE\SOFTWARE\Adobe\Acrobat Reader\DC\FeatureState
  3. Right-click the right pane and choose New and then DWORD (32-bit) Value.
    create TeamsAddin.FastConnect DWORD
  4. Set the name of the DWORD to ADC4325829.
  5. Double-click the ADC4325829 DWORD, and set the Value data to 1.
  6. Save changes.

7. Use your Smart Card or Active Key

  1. Insert the Smart Card or Active Key.
  2. Now press Windows key + S and enter control panel. Select Control Panel from the list.
    The Windows Cryptographic Service Provider error the security token does not have
  3. When the Control Panel opens, go to the User Accounts section.
    Windows Cryptographic Service Provider reported an error code 1400
  4. From the left pane, select Manage your file encryption certificates.
    The Windows Cryptographic Service Provider reported an error key not valid
  5. When a new window appears, click Next.
    The Windows Cryptographic Service Provider error Adobe
  6. Select Use this certificate option. If it’s not available, click the Select Certificate button.
    The Windows Cryptographic Service Provider error the security token does not have
  7. Now you’ll see Smart Card/Active Key screen. Login if needed.
  8. Click Next once your certificate is loaded.
  9. When you get to the Update your previously encrypted files window, check All Logical Drivers and update encrypted files.
  10. Click Next and Windows should update your certificates without any problems.

This is an advanced solution, but several users claim that it works, so if you have Smart Card or an Active Key, you might want to use it to fix the Windows Cryptographic Service Provider reported an error access is denied error code: 2147942405 message.

Windows Cryptographic Service Provider error can be problematic, but we hope that you managed to fix it using the solutions from this article.

This isn’t the only issue, and many reported Cryptographic Service high CPU usage. To learn more about Adobe Acrobat, visit our guide on how to add a digital signature in Adobe Acrobat.

We also covered At least one signature has problems error in Adobe Acrobat, so you might want to read it for more information.

Steam Content Servers Unreachable Error: 7 Quick Fixes

The Steam Content servers unreachable error is experienced by Steam users worldwide.

This problem is not caused by anyone exactly but there are some solutions we have given in this article that will resolve this error.

How can I fix the Steam Content servers unreachable error?

First off, try changing your download region form the Steam settings page. If that doesn’t work, you can try disabling your proxy server.

In case that doesn’t help, you can try updating Steam client to the latest version or try renaming clientregistry.blob file.


1. Change your download location

Steam content is grouped into different regions, and if you’re getting Content servers unreachable error, try changing your Download region in Steam.

  1. Open Steam and select Settings.
  2. Click on Downloads and go to Download region.
  3. Select a different download region.
  4. Then, restart Steam.

2. Disable proxy settings

Sometimes your proxy can interfere with Steam and cause Content servers unreachable error to appear. You can disable proxy by doing the following:

  1. Press Windows Key + R button.
  2. Type inetcpl.cpl and press Enter or click OK.
    inetcpl.cpl Content servers unreachable Steam download error
  3. Go to Connections and click on LAN settings.
    LAN Settings Content servers unreachable Steam download error
  4. Uncheck the option that reads Automatically detect settings.
    automatically detect settings Content servers unreachable Steam download error
  5. Start Steam again and check if the issue is still there.

3. Turn off Safe web

There is a setting called Safe web on your Wi-Fi router, and sometimes this feature can cause network problems. To make sure that there are no problems with Steam, be sure to open your router’s configuration page and disable this feature.


4. Run flushconfig

Sometimes resetting your configuration by running the flushconfig command can fix the Content servers unreachable Steam download error.

  1. Press Windows key + R.
  2. In the dialogue box, type
    steam://flushconfig
  3. Press OK.
    flushconfig Content servers unreachable Steam download error
  4. Confirm and press OK.
  5. Restart Steam.

5. Clear Pending Downloads

In the case that you have a lot of pending downloads on Steam, you should try clearing your download queue since it might help with Content servers unreachable error.

To do this, follow the steps below:

  1. Open Steam client.
  2. Go to the Library tab.
  3. At the bottom, you will see an option that reads Download paused. Click on it and all the pending downloads will appear.
  4. Remove the pending items from the queue one after the other.
  5. Once this is done, right click on the Games tab.
  6. Remove the games that are downloading and check if the problem is resolved.

6. Download the latest version of the Steam client

  1. Open Steam installation directory. By default it should be:
    C:Program Files (x86)Steam
  2. Navigate through until you find the following.
  • SteamApps (Folder)
  • Steam.exe (Application)
  • UserData (Folder)

Delete all the folders and files except the three mentioned above. Now, go to the Steam website and download the latest version of the Steam client and install it.


7. Delete clientregistry.blob

You can try deleting the registry of the Steam client in order to fix Content servers unreachable Steam download error.

  1. Close Steam Client.
  2. Go to your Steam directory.
  3. Find clientregistry.blob and rename the file to clientregistryold.blob.
  4. Restart Steam.
  5. If after this and the problem persists, follow the procedure below.
  6. Go back to Steam directory.
  7. Find Steamreporter.exe.
  8. Run it and restart Steam.

We hope that this article has been able to help you fix the Steam Content servers unreachable download error. If you found our solutions helpful, feel free to let us know in the comments section below.


How to Fit the Laptop Screen on TV Over HDMI: 3 Easy Methods

You must have found this guide because you need to know how to fit a Windows 10 laptop screen to your TV. We will explore some valid solutions.

You can connect your Windows laptop to a TV using an HDMI cable. This allows the users to display content from their screen onto the TV.

While connecting a TV and a computer appears simple, you may sometimes face difficulties with the display size.

Why does my Windows screen not fit my TV?

From research and user experience, we gather that a few things may cause a misfit in your Windows screen on a TV. The most common triggers include the following:

  • Resolution problems – The TV may have a different resolution than the computer, causing the screen to appear stretched or distorted.
  • Aspect Ratio mismatch – The TV’s aspect ratio may not match the aspect ratio of the computer, causing the screen to appear cut off or distorted.
  • Issues with Display Settings – The display settings on the computer may not be configured correctly, causing the screen to appear the wrong size.
  • TV Settings – The TV may have display settings incompatible with the computer, causing the screen to appear the wrong size.
  • Graphics Card problems – The graphics card in the computer may not be compatible with the TV, causing the screen to appear the wrong size.

Let us now explore possible ways to restore a fit between the Windows 10 screen and your TV.

How to adjust HDMI screen size on TV in Windows 10?

1. Change the PC resolution

  1. Right-click on a space on the desktop and select Display Settings.
  2. Scroll to the Display resolution section.
  3. Choose from the list in the dropdown menu (We advise that you choose the Recommended option).

2. Change the Scaling Options

  1. Right-click on a space on the desktop and select Display Settings.
  2. Scroll to the Scale and layout section, and change the value to 100% or 200%.
  3. Click on the Advanced scaling link below and input a value between 100% and 500%.
    how to fit laptop screen to tv Windows 10
  4. Click on the Apply button to save your changes.

These steps will help you to fit the Windows 10 laptop screen to your TV.

3. Adjusting your PC refresh rate

  1. Right-click on a space on the desktop and select Display Settings.
  2. Click on Advanced display settings.
    how to fit laptop screen to tv Windows 10
  3. Select the Display adapter properties for your chosen monitor.
  4. Select the Monitor tab and choose the optimal refresh rate, often 60 Hz.
    how to fit laptop screen to tv Windows 10

We have shown how to fit the Windows 10 laptop screen to your TV via HDMI by following the above steps.

Want more screen space after fixing the fit? Learn how to use 3 monitors on a laptop for a wider and more efficient workspace.

Please let us know if you could fit your laptop screen into the TV by following the steps in this article.

5 Best ISO Burner Software for PC [2026 List]

An ISO (disc image) is an archive file format primarily for DVD or Blue-ray discs, but you can burn them to flash drives. Some software publishers distribute software with the ISO format.

For example, Windows 10 has an ISO with which you can install the OS. However, an ISO isn’t much good if you don’t have it on a disc or USB drive.

There are plenty of disc-burning utilities for Windows that burn video and audio files to DVD or CD. However, not all of them include ISO options.

As such, it’s usually better to go for a dedicated ISO burner utility that will have more extensive disc image options. These are a few of the best ISO burners for Windows.

What are the best ISO burners for Windows 10?

PowerISO (recommended)

PowerISO is reliable and fast software that enables users to burn, extract, mount and even convert disc image files. The software has extensive options for disc image files, and you can also burn music to DVD with it.

PowerISO is compatible with Windows platforms from ’98 up. You can try out an unregistered version that has a 300 MB size limit for creating and editing ISO files.

PowerISO burns ISOs to a range of DVD, Blue-ray and CD disc formats. However, there’s a lot you can do with this software aside from merely burning files to DVD. Users can create disc image files from hard drive or disc. They can edit an ISO by adding or deleting files from it.

The software’s conversion options enable you to convert an ISO to BIN, or the other way around, and picture files to disc image formats. You can also make audio discs with the program, which is another bonus.

PowerISO

This wonderful ISO virtual disk reader supports all CD/DVD/BD image files.
Check price Visit website

Wondershare DVD Creator

With Wondershare DVD Creator, you can burn and edit DVDs from over 100 media formats into a BD folder, Blu-ray disc, ISO file, and more.

The program has a built-in video editor that lets you trim, crop, and apply special effects to your videos. Moreover, you can add subtitles, including .srt, .ass, and .ssa extensions, and protect your original work with a text/image watermark.

Wondershare DVD Creator has a simple and intuitive user interface, with all the functions categorized into four sections (source, menu, preview, and burn). The menus are customizable and enable you to personalize your DVD by adding frames, music, text, and drag-drop elements. Alternatively, you can choose a static or dynamic template from their library.

Other essential features of this ISO burner include:

  • Burn multiple videos of different formats at once
  • Fast conversion speed
  • Create DVD menu chapters both manually and automatically
  • Supports various disc types, including DVD-9, DVD-R/RW, BD-R, BD-100, and more
  • CD ripper function
  • Supports several audio formats, such as MP3, WAV, M4B, WMA, FLAC, and more
  • Over 100 free DVD templates
  • Slideshow maker
  • Windows 10/8/7/Vista/XP and Mac compatibility

This DVD burner is risk-free and safe to install on your system. It gets free updates periodically and new functions are added all the time.

Wondershare DVD Creator

Wondershare DVD Creator

Burn, create, and edit multiple DVDs thanks to this feature-rich ISO burner!
Check priceVisit website

Active ISO Burner

Active ISO Burner is freeware software with which you can burn ISOs to numerous disc formats. This is a lightweight program with a straightforward UI design. Active ISO Burner is compatible with most Windows platforms, and you can save its setup wizard by clicking the pertinent download link on this website page.

Active ISO Burner enables users to burn ISOs to DVD-R, DVD+R, DVD-RW, Blu-ray, HD DVD, CD-RW, CD-R and DL disc formats. The software includes multiple burning modes to select from.

The Burner Settings window includes a few handy After-Burn options with which you can select to eject the media, verify data or shut down Windows after the burning is complete.

Furthermore, users can also configure the SCSI transport and cache buffer size with the software.

⇒ Get Active ISO Burner

ISO Workshop

ISO Workshop is a freeware disc image burner for personal use. You can both create and burn ISO files with this software, and it also incorporates other handy tools.

Press the Download button on this website page to add the freeware version to Windows.

You can burn any disc image file type to CD, DVD or Blu-ray with ISO Workshop. Alternatively, you can copy a CD, DVD or Blu-ray disc to your hard drive with the software’s Backup Disc tool.

The software has a Make ISO tool so that its users can create an ISO from files and folders. Furthermore, this program includes an Extract Files tool for extracting files from ISOs; and it also converts BIN, NRG, IMG, PDI, and other disc image formats to ISO.

As such, this software pretty much has all the ISO tools you’ll need; but it doesn’t have any options for burning audio or video to DVD or CD.

⇒ Get ISO Workshop

ImgBurn

ImgBurn is highly rated Windows software with which you can burn almost anything to disc with. The software has probably been designed primarily for burning disc image files, but you can also burn audio and video to disc with it.

This disc burner is widely compatible with almost all Windows platforms. ImgBurn is also a freeware utility you can download from this web page by clicking Mirror 7.

ImgBurn users can burn ISO, CDI, CUE, BIN, PDI, CDD and other disc image file formats to DVD, Blue-ray, HD DVD or CD.

The software also burns all manner of audio file types to disc, and you can set up Blue-ray or DVD video discs with the utility. ImgBurn packs in tools to create ISOs from both files and folders or discs.

It includes a Verify tool to check discs with and configure their read speeds. The software is also chock-a-bloc with customization settings for its various operations, shell extensions, graph data, sound effects and more besides.

⇒ Get ImgBurn

Take your pick from those ISO burners. They’ve got the essential options for burning ISOs to disc and a lot of other handy tools on top for compiling, converting and extracting disc image formats. Check out this article for further ISO file format details.

How to Burn ISO Files in Windows 10 [Step-By-Step]

ISO files became a very important form of data over the past few years. The fact that Windows 10 Technical Preview installation  comes as an ISO image proves this claim even more.

wind8apps burn iso image in windows 10

So having an ISO burned on a CD could be useful, and in this article we’ll show you how to do that in Windows 10 Technical Preview.

How can I burn ISO in Windows 10?

Previous versions of Windows operating system, like Windows XP or Windows 7 had to use a third-party software not just to run or burn ISO files to CDs, but also to burn any other formats format of data to a CD or DVD.

But luckily, Windows 10 has its own burner, called Windows Disc Image Burner, and it could be used for burning regular data to CDs, as well as ISO files.

So if you want to burn an ISO image to a CD, you just have to do a few simple steps, and Windows 10 burner will do all the work for you. Here’s what you need to do to burn an ISO image to a CD:

  1. Click on the ISO image you want to burn on CD
  2. On the top of the screen of File Explorer, click on Manage, under Disc Image Tools
  3. Click on Burn
  4. Select your CD-ROM as Disc burner and click on Burn
  5. Wait until the process is complete and you’ll have your ISO image burned on a CD

Here’s a tip

Since the installation image of Windows 10 Technical Preview comes as an ISO file, you can use this technique to burn Windows 10 Technical Preview image on a CD, and install it on the boot, just like any other Windows operating system before.

Having your Windows 10 installation image on a CD will definitely keep it safe, and it will save you some hard disk space, as well.

If you are looking for a dedicated software to do this for you, we highly recommend Power ISO. This program comes with the following features:

  • Process ISO / BIN image files, make a bootable CD image file.
    • PowerISO supports almost all CD/DVD image file formats
  • Mount image file with an internal virtual drive, and then use the file without extracting it
  • Compress files and folders to a compressed archive.
    • PowerISO will scan and optimize the files during compression, and thus can have better compression ratio and faster compression speed
  • Split the archive into multiple volumes
  • Protect the archive with a password
  • Use the archive directly without decompressing.
    • PowerISO virtual drive can mount the archive directly.

⇒ Get PowerISO now

Of course, this is not the only ISO burner you can use. We already compiled a list of the best ISO burners that you can use on your Windows 10 computer.


Windows Cannot Access the Disk: 4 Ways to Allow it Access

Sometimes you can suddenly receive Windows cannot access the disk error. Usually, this type of error is associated with Windows Explorer, but other elements are associated with it.

Once you have the error message, any operation that needs to access your disk will be interrupted and terminated, which can quickly become frustrating.

This guide will run you through common triggers and the best solutions.

Why can Windows not access the disk?

There could be several reasons why Windows is unable to access a disk. However, some common reasons include the following:

  • Disk connection – The disk is malfunctioning or not correctly connected to the computer.
  • Corruption issues – For some users, a trigger may be that the disk is corrupted or damaged.
  • Busy disk compartment – Occasionally, you will run into this error if the disk is in use by another program or process.
  • Format issues – Additionally, users have run into the error because the disk is not formatted or Windows do not recognize the file system.
  • Problems with encryption – The disk is encrypted, and the user does not have the proper decryption key.

Regardless of the causes, you should be able to resolve the Windows cannot access the disk error using the solutions we recommend below.

What can I do if Windows cannot access the disk?

Before diving into any solutions, we recommend checking for an error message. In most cases, they will specify what triggers the issue, which may guide you on what troubleshooting solutions to try.

  1. Check your drive connection
  2. Run check disk in Command Prompt
  3. Run disk repair utilities
  4. Scan for viruses

1. Check your drive connection

First, please ensure that all cables are correctly connected between your storage devices and the computer. Then, unplug that disk or try a different line on a different USB port if you’re using external hard drives.

Next, you should restart your computer. If this doesn’t work, you should try connecting your storage device to other machines.

3. Run check disk in Command Prompt

  1. Click on the Start menu, type command, right-click Command Prompt, and select Run as administrator.
    windows cannot access the disk
  2. Type the command below and hit Enter (if you are prompted to dismount and schedule chkdsk on the next restart, press Y and Enter).
    chkdsk /r
    chkdsk Windows cannot access the disk
  3. Restart your computer.

3. Run disk repair utilities

3.1 Run the SFC utility

  1. Click on the Start menu, type command, right-click Command Prompt, and select Run as administrator.
    windows cannot access the disk
  2. Type the script below:
    SFC /scannow
  3. Exit the Command Prompt once it has been completed.

3.2 Run the DISM utility

  1. Click on the Start menu, type command, right-click Command Prompt, and select Run as administrator.
    windows cannot access the disk
  2. Type the script below:
    DISM /Online /Cleanup-Image /RestoreHealth
  3. Exit the Command Prompt once completed, and you may need to restart the computer.

4. Scan for viruses

  1. Type Windows Security in the Search bar, and click on the relevant search result.
  2. Now, click on Virus & threat protection here.
  3. Click on Scan options.
  4. Now, select Full scan and click on the Scan now button at the bottom.
    windows cannot access the disk

In closing, we recommend backing up data or even performing data recovery solutions if you fear losing valuable data.

You should also note that your solution would depend, in most cases, on your specific error message. But generally, these should be all easy steps you can follow.

They come in handy if Windows cannot access the external hard disk, SD card, or USB.

Lastly, we hope you managed to fix Windows cannot access the disk error using one of our solutions. In the meantime, let us know what issues you have encountered with your disk drive.

How to Download and Install Apps Without Using the Microsoft Store

You’re not alone if you’re trying to figure out how to download apps without the Microsoft Store. Whether the Store is blocked, buggy, or just not your thing, there are reliable ways to install apps, even official Microsoft ones, without ever opening it.

In this guide, you’ll learn how to get .appx packages directly, sideload Store-only apps, and install everything safely on your Windows device.

How can I download Microsoft Store apps without the Store?

1. Using Adguard and PowerShell

  1. Locate the web page of the Windows Store app that you want to download and copy its address.
  2. Visit the Adguard website.
  3. Paste the URL in the search field and click the Check icon on the right. Be sure to remove #activetab=pivot:overviewtab from the URL you pasted.
  4. Now look for a link that has appxbundle at the end. Click the one that has the latest version in its name.
  5. Wait for the download to finish. Then, save the file in a directory that you can easily access.
  6. You might get a warning that this file type is harmful. Just select Allow download option to continue.
  7. Once the download is finished, press the Windows key + X and select Windows PowerShell (Admin) from the menu.
  8. Now run the following command:
    Add-AppxPackage -Path “C:\Users\WindowsReport\Downloads\ee2546d7-f0e5-4aa2-be54-032299162322”
  9. If the app doesn’t install, you should get an error message similar to this. Check the name of the missing component. In our case, it was Microsoft.VCLibs.120.00.Universal.
  10. Go to the Adguard page you used to download appxbundle and download the missing component.
  11. In PowerShell, run the following command:
    Add-AppxPackage -Path "C:\Users\WindowsReport\Downloads\2d1aff29-2c22-4e80-be37-7c3db4d1573d"
  12. Now try to run this command to install the app:
    Add-AppxPackage -Path "C:\Users\WindowsReport\Downloads\ee2546d7-f0e5-4aa2-be54-032299162322"
  13. The app should be installed and ready to use if everything is in order.
Note icon NOTE
The commands will differ on your PC depending on the app and the download location of your PC.

2. Using Adguard without PowerShell

  1. Download the app you want to install using Adguard (as illustrated in solution 1).
  2. Open the directory in which the appx bundle file is stored.
  3. Go to View and check File name extensions.
  4. Now check if the file you downloaded has the appxbundle extension.
  5. If it doesn’t, right-click the file and choose Rename. Now add .appxbundle at the end.
  6. Double-click the file you renamed.
  7. Click on Install.
  8. Wait for the installation process to complete.

As you can see, installing Windows apps without using the Store is relatively simple. As long as you enter the correct commands, you should be able to do that without too many problems.

Is it possible to install Microsoft Store apps without Store?

Yes, you can download apps without the Microsoft Store, but do it carefully. This lets you install apps not available in the Store or ones that aren’t compatible with your device.

Just know that apps from unknown sources can be risky, some may not work properly, and you might miss out on updates or support. It could also violate app terms.

If your Store isn’t opening, try this guide to fix Microsoft Store not working. If your Microsoft Store isn’t working, there could be a few reasons behind it.

Sometimes the Microsoft Store goes missing after a Windows update, or it might be blocked by system policy on Windows 11. In some cases, you may need to reinstall the Microsoft Store manually on Windows 11 before trying alternate methods like downloading apps without it.

Once Microsoft Store is available again, learn the fastest way to browse, install, and update apps here: How to Use Microsoft Store.

Speaking of problems, we advise you to check our Microsoft Store doesn’t work guide if you cannot download apps.

Before you leave, don’t forget to check our guide and learn how to download apps from Office 365 with ease.

Did you find this guide useful? Feel free to let us know in the comments section below.

Quick Access Toolbar Disappeared: How to Restore it Quickly

The Quick Access Toolbar (QAT) is customizable, usually at the top of File Explorer’s window. This toolbar provides quick access to various File Explorer options and tools.

However, it’s not good if the QAT mysteriously disappeared from Explorer. If you can’t find this feature on your File Explorer, we will show you how to restore it in this guide.

Why is my Quick Access toolbar not showing?

The most common cause of the Quick Access Toolbar disappeared issue is the use of third-party software to customize File Explorer.

While these apps improve your File Explorer’s features and give it a stunning look, they can remove some of your most-used tools. The easiest way to fix this issue is to remove this software.

Restore an invisible Quick Access Toolbar using these methods

1. Move the Toolbar Below the Ribbon

If you can’t see any Quick Access Toolbar at the top of File Explorer‘s window, move the QAT below the Ribbon instead. The QAT will most likely disappear when you add third-party add-ons such as Clover to File Explorer.

Clover adds a new tab bar to the top of File Explorer as shown in the snapshot below.

file explorer

Thus, Clover is one program that removes the Quick Access Toolbar from the top of File Explorer. To get it back, right-click the Ribbon and select the Show Quick Access Toolbar below the Ribbon option.

file explorer restore invisible Quick Access Toolbar

2. Add New Options to the Quick Access Toolbar

You can remove all the options and icons from the Quick Access Toolbar. So it might seem like the QAT has disappeared if there are no buttons on it.

However, you can still select the Quick Access Toolbar’s small arrow icon shown in the snapshot below.

file explorer quick access toolbar

Click that arrow icon, and then select all the options on the menu to restore them on the QAT. Then you can select those options on the Quick Access Toolbar.

You can also add buttons to the QAT by right-clicking an option on the Ribbon and selecting Add to Quick Access Toolbar.

file explorer quick access toolbar restore invisible Quick Access Toolbar

Then the QAT will re-emerge below the Ribbon.

3. Remove File Explorer Customization Software

As mentioned, third-party customization software for File Explorer can remove the Quick Access Toolbar. That’s especially the case for programs that add new folder tabs to File Explorer and customize the UI.

QTTabBar, Clover 3, and Tab Explorer are three programs that add tabs to File Explorer.

As such, uninstalling File Explorer customization software will probably restore your Quick Access Toolbar. You can uninstall the programs by pressing the Windows key + R hotkey and entering appwiz.cpl in Run.

That will open the tab shown in the snapshot directly below. Then select a program to remove, and press its Uninstall button.

uninstall file explorer

4. Reset the Quick Access Toolbar

If you haven’t installed any File Explorer customization software, reset the Quick Access Toolbar. Resetting the Quick Access Toolbar via the registry will restore it to its original configuration, which will probably fix various QAT issues.

  1. Press the Windows key + R, type regedit, and click the OK button to open the Registry Editor.
  2. Navigate to this registry key: HKEY_CURRENT_USERSoftware MicrosoftWindowsCurrentVersionExplorerRibbonregistry reset file explorer UI restore invisible Quick Access Toolbar
  3. Right-click the QatItems DWORD and select Delete.
  4. Now restart your desktop or laptop. Your Quick Access Toolbar will then be restored to its default layout.

There you have everything you need to fix the Quick Access Toolbar disappeared issue. All you need to do now is to follow the steps carefully, and things should be back to normal.

Similarly, if the File Explorer is not responding on your PC, check our detailed guide to fix it.

Feel free to let us know the solution that helped you fix this issue in the comments below.

Two Way Firewall Antivirus: 7 Best for Windows 10 & 11

Using an antivirus is important if you want to protect your PC, and sometimes you might want to prevent certain applications from accessing the Internet.

To do that, you need to use a firewall, and today we’re going to show you the best two-way firewall for Windows 10.

There are two types of firewalls, and a one-way firewall will protect your PC from incoming threats.

On the other hand, a two-way firewall will prevent malicious applications that you might have on your PC from connecting to the Internet.

As you can see, a two-way firewall adds another layer of protection, so it’s a must-have tool if you want to protect your PC.

There are many standalone two-way firewall applications for Windows, but many antiviruses also have a built-in two-way firewall that can protect your PC.

What is the best antivirus with a two-way firewall?

TotalAV – Remote firewall security

TotalAV represents a multi-compatible antivirus that offers effective security against malware and prevents threats with its remote firewall.

With this famous software, you obtain real-time protection from cyber threats, virus definition updates, and a powerful firewall that can block any malicious website or program.

Using this security tool, you ensure full malware or spyware prevention that keeps you away from hackers or snooping activities.

Moreover, the software covers you with all the protection against malware or corrupted files that is downloaded on your PC.

You can as well benefit from complete web protection with tracking cookies block or data breach monitoring to be fully covered from cyber threats.

Let’s quickly look at its key features:

  • Zero-day cloud scan
  • Phishing scam shield
  • Remote firewall protection
  • Ransomware prevention
  • Tune-up tools

TotalAV

Benefit from this antivirus tool with a remote firewall that you won’t live without.
Check price Visit Website

Bitdefender Internet Security – Corrupted files removal

antivirus old pc

Bitdefender Antivirus is well-known security software that offers great protection, but unfortunately, this version doesn’t have a built-in firewall.

If you want an application that combines both antivirus and a two-way firewall into one, you should definitely consider Bitdefender Internet Security.

This tool has a built-in two-way firewall that will prevent malicious applications from accessing the Internet.

In addition, this application has full data protection so it will protect you from malware and spyware alike.

It’s also worth mentioning that Bitdefender Internet Security has multi-layer ransomware protection so your files will remain protected from malicious applications.

As for other security features, there’s phishing and fraud protection that will prevent hackers from stealing your personal information.

Let’s quickly look at its key features:

  • Safe Files feature to prevent applications from accessing certain files
  • Secure browsing feature to mark unsafe websites so you won’t visit them by accident
  • Rescue Mode can scan your system before Windows starts and remove hidden malware
  • Parental control, password manager, and a file shredder
  • Anti-theft protection for your device, phishing, and fraud protection
  • Malware and multi-layer ransomware protection
  • Social network and webcam protection

Bitdefender

Looking for a great antivirus with a built-in two-way firewall as well? Bitdefender Internet Security will tick all your boxes and more.
Check price Get it now

ESET HOME Security Premium – Machine learning security

ESET HOME Security Premium is one of the best solutions to get when you need the most reliable antivirus with a two-way firewall also included.

This feature will prevent unauthorized access to your company network, provides anti-hacker protection, and data exposure prevention, and enables defining of trusted networks.

Additionally, it can make all other Internet connections, such as public Wi-Fi, restricted by default. Moreover, it features an additional layer for protecting users from ransomware.

The ESET Exploit Blocker monitors exploitable applications, such as browsers, or email clients, and it focuses on exploitation techniques. When triggered, the threat is blocked immediately on the machine.

Some other important features include:

  • Host-based Intrusion Prevention System monitors system activity and uses a pre-defined set of rules to recognize and stop suspicious system behavior
  • Advanced Memory Scanner monitors the behavior of a malicious process
  • ESET Botnet Protection detects malicious communication used by botnets
  • ESET Network Attack Protection improves the detection of known vulnerabilities on the network level

ESET HOME Security Premium

Use an AI-based antivirus, with a reliable built-in two-way firewall, and multilayered defense features.
Check Price Visit Website

Panda Antivirus – Identity theft shield

Panda Antivirus is another security software that comes with a built-in two-way firewall.

The firewall feature is available in the Panda Antivirus Pro version, which is a major plus. In addition to a firewall, the application provides real-time protection for your Windows PC and Android device.

Fraud and identity theft protection are also included, so you can easily protect your personal data online. The Pro version offers great features, and if you need an antivirus with a built-in firewall, be sure to try it out.

For more security, there’s a Panda Internet Security version that offers unique features such as parental control and file backup.

This version also has a Data Shield feature so you can easily protect your data from ransomware.

For ultimate security, there’s the Panda Global Protection version. This version has a built-in password manager as well as file encryption and file shredder.

Panda Antivirus is a solid antivirus application, and with a built-in two-way firewall, it’s a full security solution for your Windows PC. Lastly, there’s a Tuneup feature that can optimize your PC.

Panda Antivirus

Keep your computer safe with Panda, featuring protection against viruses in real-time, and a two-way firewall.
Free trial Visit Website

Perimeter 81 – Remote firewall defense

Perimeter 81 is a sophisticated solution when it comes to firewall protection for enterprises and it offers a so-called Zero Trust Application Access feature.

It’s a tool that can prevent security gaps by ensuring identity-based access with encryption through the HTTP, RDP, and SSH protocols.

It’s simple for an IT manager to set it up and you can use any major encryption protocol to secure all resources and network layers.

And you can also differentiate the access to the resources, whether they are in the cloud or local to each user individually or as a group.

Its main features are:

  • Fully Monitored
  • Least-Privilege Access
  • Multi-Layered Security
  • Total Cloud Integration

Perimeter81

Gain total control of application security across your organization!
Check price Visit Website

ZoneAlarm Pro Firewall – First line PC defense

If your current security software doesn’t have a built-in firewall, you might be interested in ZoneAlarm Pro Firewall.

The application uses a two-way firewall and it allows you to keep a close eye on both inbound and outbound traffic.

ZoneAlarm will monitor your applications for suspicious behavior, and inform you if any security infringement occurs.

The application offers advanced-access protection that can detect advanced attacks such as SCM and COM attacks.

In addition, the application can also prevent silent outbreaks from gaining control over your PC.

It’s worth mentioning that your PC will be protected even during the startup phase thanks to the Application Control and Early Boot Protection features.

Let’s quickly look at its key features:

  • Anti-spam filter and wireless protection 
  • Automatic Wireless Network Security feature that detects the wireless network and automatically applies the best security policies
  • Identity and data protection that will protect your sensitive data from malicious users
  • Online backup so you can back up your data easily online
  • DefenseNet feature so you’ll get security updates in real-time and remain protected from the latest threats

Zone Alarm

Threat Traffic is monitored and blocked – inbound and outbound.
Check price Visit website

Avast Free Antivirus – Powerful virus scanning

If you’re looking for an antivirus with a two-way firewall, Avast Free Antivirus might be just what you need.

Avast Free Antivirus has a real-time scanner that can protect you from malware and ransomware.

The application also has a Wi-Fi vulnerability scanner so you can easily detect unsafe Wi-Fi networks.

In addition, the application has a built-in password manager, so all your passwords will be protected from hackers.

As well, the webcam protection will prevent malicious users from spying on you; the file shredder feature so you can permanently delete your files

Let’s quickly look at its key features:

  • Two-way firewall so you can easily block suspicious applications from accessing the Internet
  • Phishing and fraud protection that will prevent hackers from stealing your personal information
  • Spam protection and additional ransomware security layer
  • Sandbox mode allows you to run suspicious applications in a safe environment without affecting your PC

Avast Free Antivirus

Block unwanted access to your PC with firewall protection from Avast Free Antivirus.

Many antivirus solutions come with a built-in two-way firewall, and if you’re looking for such a solution, don’t miss out on our top recommendations.

If you want to discover even more solutions to keep your computer safe, take a look at these best antiviruses for Windows 10.

Which was is your favorite? Feel free to share your choice via the comments section below.

Windows 11 Not Printing In Color: 6 Quick Fixes

A printer is an important device in most offices as well as some homes. Though many offices are making a transition to a paper-free workspace, the printer must work effectively until then. But several users have reported that Windows 11 is not printing color copies.

Whenever you upgrade the OS, there’s a good chance of encountering compatibility issues. Maybe the installed printer driver or the relevant applications are not compatible with Windows 11.

Also, there are a few critical services that must be running for the printer to work effectively. Other than that, it could be a conflicting background process or problems with the cartridge behind the issue.

Now that you have a basic understanding of the causes, it’s time to find out what to do if Windows 11 is not printing in color.

What can I do if Windows 11 is not printing in color?

1. Restart the computer and the printer

Before we delve into the complex troubleshooting methods, first, restart both the computer and the printer. Also, make sure to disconnect the power supply to turn off the printer rather than pressing the dedicated button.

This method has worked for a lot of users, particularly in situations where the problem lies with a background process or some minor malfunction with the printer. Once done, check if the printer is now printing color copies in Windows 11.

2. Run the Printer troubleshooter

  1. Press Windows + I to launch the Settings app, and click on Troubleshoot on the right in the System tab.Troubleshoot to fix windows 11 not printing in color
  2. Next, click on Other troubleshooters.Other troubleshooters
  3. Locate the Printer entry here, and click on the Run button next to it.Printer troubleshooter to fix windows 11 not printing in color
  4. Now, follow the on-screen instructions and choose the appropriate response when prompted to complete the process.Troubleshooter

Another quick way to fix the Windows 11 not printing in color issue is to run the dedicated Printer troubleshooter. It will automatically identify what’s causing the problem and remove it.

3. Update the printer driver

  1. Press Windows + S to launch the Search menu, enter Device Manager in the text field, and click on the relevant search result that appears.Device Manager
  2. Double-click on the Print queues entry here to expand and view the available printing devices.Print queues
  3. Locate the problematic printer, right-click on it, and select Update driver from the context menu.Update driver to fix windows 11 not printing in color
  4. Next, select Search automatically for drivers from the two options here.Search automatically for drivers

Windows will now scan for the best available driver on the system and install it for the printer. Though the method is simple and quick, a major drawback here is that it only scans the drivers available on the computer, and not the online sources.

In case a better driver couldn’t be found, try the other ways to update the driver in Windows 11. Or you could check our dedicated guide that explains how to install printer drivers in Windows 11.

If these methods sound like too much trouble, you can always use a reliable third-party app. We recommend Outbyte Driver Updater, a dedicated tool that will automatically install the latest version for all the drivers installed on your computer, thus keeping them up-to-date.

⇒ Get Outbyte Driver Updater 

4. Run the Print Spooler service

  1. Press Windows + R to launch the Run command dialog box, type services.msc in the text field, and either click OK or hit Enter to launch the Services app.Services to fix windows 11 not printing in color
  2. Locate the Print Spooler service, right-click on it, and select Properties from the context menu.Print Spool properties to fix windows 11 not printing in color
  3. Now, click on the Startup type dropdown menu, and select Automatic from the list of options.Automatic
  4. If the service is not running, click on the Start button under Service status.Start
  5. Click on OK at the bottom to save the changes. save changes
  6. Finally, restart the computer for these to fully come into effect.

The Print Spooler service is critical for the effective functioning of the connected printer. It stores the tasks in the system’s memory until the printer is ready to execute them. Also, if the service is not running, you may not be able to access or see your printer.

5. Uninstall a recent Windows update

  1. Press Windows + I to launch the Settings app, and select Windows Update from the tabs listed in the navigation pane on the left.Windows Update
  2. Click Update history on the right.Update history
  3. Next, click on Uninstall updates under Related settings.Uninstall Updates to fix windows 11 not printing in color
  4. Locate the recent OS update, select it, and click on Uninstall.Uninstall to fix windows 11 not printing in color
  5. Click Yes in the confirmation prompt that pops up.Yes

If you started encountering the Windows 11 not printing in color problem after installing a particular update, there could be a bug in that particular version causing the problem.

To fix it, uninstall that update, and wait for the next version to release. In all likelihood, Microsoft would release a patch for the bug in the subsequent updates, and you shouldn’t face any more trouble.

6. Reinstall the printer

  1. Press Windows + I to launch Settings, and select the Bluetooth & devices tab from the navigation pane on the left.Bluetooth & devices to fix windows 11 not printing in color
  2. Click on Printers & scanners on the right.Printer & scanners
  3. Select the problematic printer from the list.select
  4. Click on the Remove button.remove to fix windows 11 not printing in color
  5. Click Yes in the confirmation prompt that appears.Click Yes
  6. Now, press Windows + R to launch the Run command, enter appwiz.cpl in the text field, and click on OK to launch the Programs and Features window.appwiz.cpl
  7. Locate all the programs related to the printer, select them, and then click on Uninstall at the top.Uninstall programs to fix windows 11 not printing in color
  8. Click Yes in case a UAC (User Account Control) pops up, and then follow the on-screen instructions to complete the process.Click Yes

After you have removed the printer, and uninstalled all related programs and drivers, reinstall it just like you did last time. And once it’s set up, you would be able to print color copies in Windows 11.

For most users, the first couple of methods should help fix the problem. And for the others, the last method is bound to get things up and running, provided there is no hardware issue. The fixes should also work if Windows 11 is not printing double-sided copies.

Also, find out what to do if your printer stops working in Windows 11. In case you are looking to purchase a new one, here’s our curated list of the best printers for Windows.

Tell us which fix worked for you in the comments section below.

Fix: System Cooling Policy is Missing in Windows 11

System cooling policy is the set of guidelines and rules used to manage the temperature of a computer system. The main goal is to keep the system cool and running smoothly. With Windows 11 coming feature-packed, users need all the help they can get to keep their systems running optimally.

If you find that the System cooling policy is missing from your PC, all you have to do is enable it. In this article, we show you different ways to make it reappear.

What is the System cooling policy? 

The System cooling policy is a set of instructions that tell a computer what to do when its internal temperature rises above or falls below a certain level. This includes its CPU and RAM components.

If you’re wondering why you can’t find the System cooling policy in Windows 11, it is because it’s not installed by default. Since it’s not enabled by default, you may wonder whether it plays an important role in your PC. The answer is Yes. Some of the benefits include:

  • Improve the performance of your computer – System cooling policy mostly applies to gaming given the graphic-intensive and CPU-intensive games. It helps keep the CPU cooler and allows it to operate at its full potential as the PC tends to overheat while gaming.
  • Reduce the number of computer crashes – A system crash can also cause your PC to overheat and shut down unexpectedly. This can be dangerous if you’re using your computer while it’s overheating.
  • Increase overall system efficiency – Running your computer with a properly functioning fan will keep it cooler and allow for more reliable performance.
  • Efficient Power usage – The better the airflow within your computer, the less power it uses, and the more efficient the airflow, the less energy is needed to keep everything cool and running smoothly.
  • Increase the lifespan of your hardware components – System cooling ensures that your computer stays cool throughout its entire lifetime. You don’t have to keep checking your CPU’s or GPU’s temperature.

Which is better active or passive System cooling policy?

System cooling policy has two settings: Active and passive. Active system cooling is the best policy because it can always provide the maximum amount of cooling.

If you have an active system, you can constantly monitor the temperatures of your CPU, GPU, and other components and make adjustments to achieve optimal performance. 

This is not possible with passive systems. This is because they cannot control the temperature of their components as well as active ones which rely on fans to move air across their heat sinks. That being said, it doesn’t mean Passive systems are useless.

Passive systems are better at keeping temperatures down when they’re under load, but they’re less effective at preventing overheating when a computer is idle. In such cases, you may need to tweak some settings to get the best power efficiency.

Passive cooling does not require an active cooler as it relies solely on convection for cooling. This means that there are no moving parts involved, hence making it more efficient than active cooling methods since there is no need for fans.

With active cooling, the fan speed can also be controlled by software in order to ensure that no overheating occurs. You’ll need more space than passive cooling offers in order to fit the components required for active cooling.

How do I get a System cooling policy?

1. Via Group Policy Editor 

  1. Hit the Windows + R keys to open the Run command.
  2. Type Regedit in the dialog box then hit Enter.
  3. Navigate to the following location: HKEY_LOCAL_MACHINE\SYSTEM\CurrentControlSet\Control\Power\PowerSettings\54533251-82be-4824-96c1-47b60b740d00\94d3a615-a899-4ac5-ae2b-e4d8f634367f
  4. On the right pane find Attributes, right-click on it and select Modify. If it is missing, right-click on an empty space and select New DWORD (32-bit) Value and rename it to Attributes.
  5. Now, double-click on Attributes, and under the Value field, add 2 to add the System Cooling Policy in the Power Options box.
  6. Press OK and close the Registry Editor.
  7. Hit the Search icon on the Taskbar, type Edit power plan, and click Open.
  8. In the Power Options dialog box that pops up, navigate to Processor power management and click to Expand.
  9. The System cooling policy option should now appear under the Processor power management section.
  10. In case it doesn’t restart your PC to effect the changes.

Remember that editing the Registry is risky especially if you don’t know what you’re doing. If you’re unsure, we recommend that you seek assistance from a tech expert or proceed to the next step.

2. Via Command Prompt

  1. Hit the Windows key, type cmd in the search bar, and click Run as administrator.cmd-admin hp printer won't scan
  2. Type the following command and hit Enter: REG ADD HKLM\SYSTEM\CurrentControlSet\Control\Power\PowerSettings\54533251-82be-4824-96c1-47b60b740d00\94d3a615-a899-4ac5-ae2b-e4d8f634367f /v Attributes /t REG_DWORD /d 2 /f
  3. Close the Command Prompt Window.
  4. Hit the Search icon on the Taskbar, type Edit power plan, and click Open.
  5. In the Power Options dialog box that pops up, navigate to Processor power management and click to Expand.
  6. The System cooling policy option should now appear under the Processor power management section.

Aside from the System cooling policy, you can also check out other recommended ways to reduce overheating on your Windows device.

If you encounter an issue where your PC is overheating while charging, don’t hesitate to check out our guide on how to address the problem.

Let us know if you have been able to restore the System cooling policy in the comment section below.