CMD is Not Working in Windows 11: How to Safely Fix it

Using a command prompt or CMD, developers test their codes, and a regular user runs various commands, such as SFC Scan, Disk Management, etc. However, many users have reported that on their Windows 11 PC, the CMD is not working.

CMD fails to work for different reasons, which we will discuss in this guide. Also, we will share with you many practical solutions to help you resolve the CMD not working in Windows 11 problem. So let us check it out.

What are the different ways to access the command prompt?

Here are the different ways you can use to open the command prompt:

  • Using Task Manager.
    • Open Task Manager.
    • Click Run new task.
    • Type CMD.
  • Open the command prompt from the Windows search option.
    • Open the Start menu.
    • Type command prompt and open it.
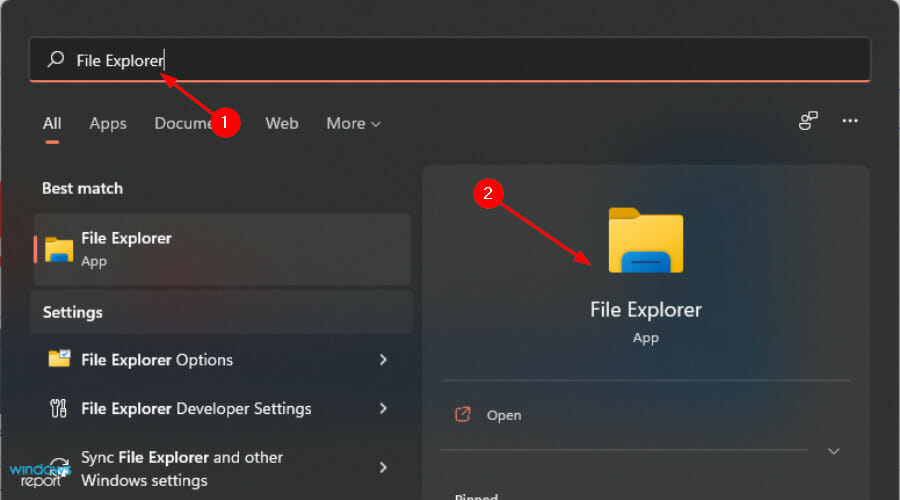
  • Open CMD from the File Explorer.
    • Open File Explorer.
    • Go to C:\Windows\System32.
    • Open the cmd.exe file.
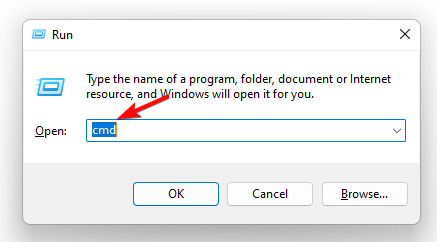
  • Use the Run dialogue to open the command prompt.
    • Open the Run dialogue.
    • Type cmd.
    • Click OK.

How can I fix CMD not working in Windows 11 problem?

1. Disable Antivirus or Firewall

  1. Open the Start menu by pressing the Win key.
  2. Type Windows Defender Firewall and open it.
  3. Click Turn off Windows Defender Firewall from the left pane.
  4. Check the Turn off Windows Defender Firewall (not recommended) radio option for both Public and Private networks.

Often having aggressive Firewall settings can lead to the blockage of important functions on your PC. We have shown the methods for the Windows Defender Firewall, but you can do the same with your antivirus software.

2. Use a specialized tool

Since CMD is not working in Windows 11, you can use the dedicated repair and optimization tool. This kind of tool will help you scan your PC and repair the missing or corrupt system files. You can also use it to fix damaged DLLs, fix BSOD errors, remove spyware or malware, fix system crashes, and more.

3. Edit the environment variable

  1. Press the Win + R keys to open the Run dialogue.
  2. Type sysdm.cpl and press the OK button.
  3. Switch to the Advanced tab.
  4. Click on the Environment Variable button.
  5. Choose Path.
  6. Click on Edit.
  7. Click on New.
  8. Type the following command: C:\Windows\SysWow64\
  9. Press OK.
  10. Restart your PC.

The environmental variable is a dynamic named value that affects how the processes work on your PC. Often you can tweak it and fix the problem associated with CMD.

4. Scan your PC for virus

  1. Press the Win + I keys to open the Settings menu.
  2. Select the Privacy and Security tab from the left pane.
  3. Click on Windows Security.
  4. Choose the Virus and Threat option.
  5. Then, hit the Quick Scan button.
  6. You can also select Scan options and select Full Scan for a deeper scan on your PC.

Chances are that your PC is infected with a virus or malware that might have disabled the CMD, so you cannot run high commands and fix the issue.

You can follow the above steps, scan your PC for viruses, and remove it to fix the CMD not working in the Windows 11 problem.

5. Run SFC Scan using PowerShell

  1. Press the Win key and open the Start menu.
  2. Type powershell and open Windows PowerShell as an admin.
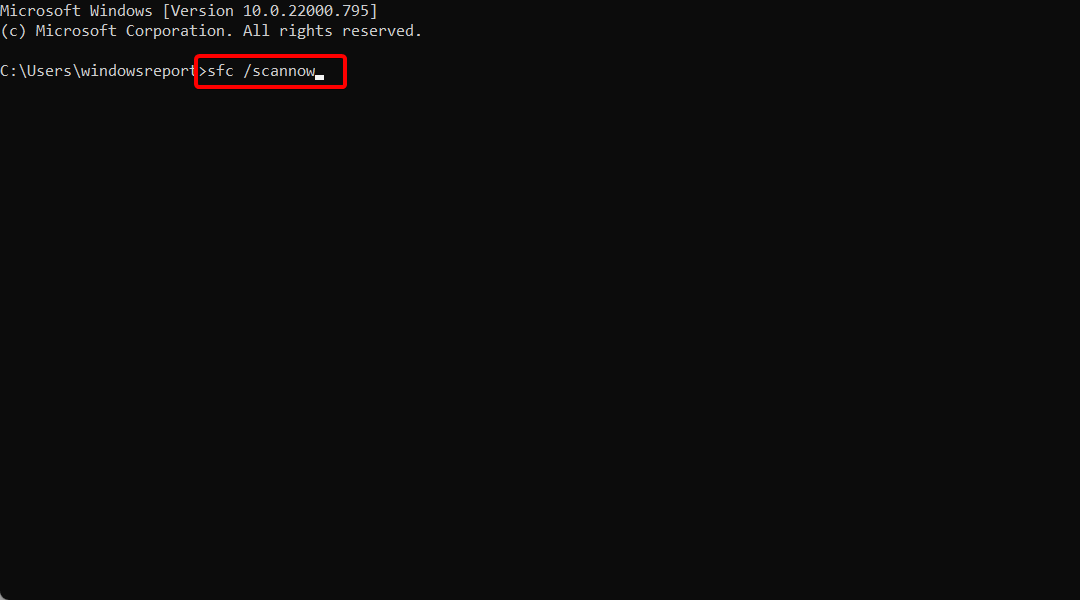
  3. Type the below command and press Enter: sfc /scannow
  4. Wait for the scan to complete.
  5. After completion, close Windows PowerShell.
  6. Restart your PC and see if this resolves the issue or not.

While you can use a specialized tool to fix corrupt or missing system files, you can also run the in-built SFC Scan command using Windows PowerShell.

This command helps fix the various issues related to system files automatically. It replaces the corrupt or missing system file with the new one without much input. Try running the command and see if this fixes the CMD not working in Windows 11.

6. Run CMD in safe mode

  1. Open the Start menu by pressing the Windows key.
  2. Click on the Power key.
  3. Press and hold the Shift key on your keyboard, and click on Restart.
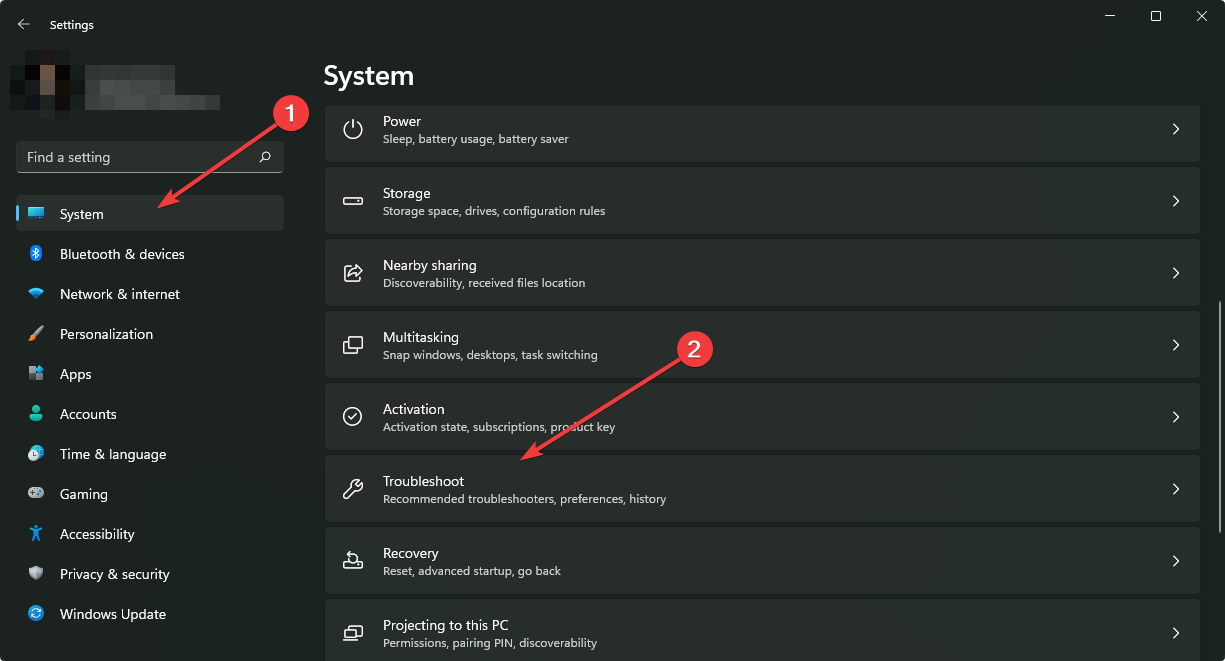
  4. Select Troubleshoot.
  5. Click on Advanced options.
  6. Select Command Prompt.

This could be helpful in ways when you want to run the command prompt urgently, and CMD is not working on your Windows 11 PC. Booting in safe mode will stop all the unnecessary background apps from running and give you a clean environment to work on.

Also, if the command prompt is working without any issues in safe mode, then there are some malware or virus-related issues with your PC.

We have a guide to help you understand the different ways to access Safe Mode on your Windows 11 PC.

7. Use system restore

  1. Open the Start menu by pressing the Windows key.
  2. Type create a restore point and open it.
  3. Hit the System Restore button.
  4. Click Next.
  5. Select the restore point and click on Next.
  6. Hit the Finish button to begin the system restore process.

If nothing works, then we would suggest you perform a system restore. This will help you go back to a time in your PC when everything was working fine.

However, note that the system restore will only work when you create a system restore point. For that, we have a dedicated guide to help you make a restore point on your Windows 11 PC.

That is it from us in this guide. Next, check out our guide to help resolve the CMD not running as an administrator in7 easy steps.

In the comments below, let us know which of the above solutions helped you fix the CMD not working in the Windows 11 issue.

Why Won’t my Xbox Controller Connect to my Phone? [Guide]

The Xbox controller is compatible with various devices, but many reported that Xbox controller won’t connect to their phone.

If you’re not a fan of phone gaming, you can also connect your Xbox One controller to PC with ease. However, in today’s guide we’ll focus on connectivity issues with Xbox controller and your phone.

Why isn’t my Xbox controller pairing to my phone?

There are several potential causes for this issue:

  • Temporarily glitches – Sometimes errors while establishing Bluetooth connection can appear. They can be fixed with a quick restart.
  • Missing updates – If your controller is out of date, it won’t work properly. To fix it, you need to update your Xbox controller to the latest version.
  • Network settings – Issues with network settings can cause this problem. Simply revert them to default and the issue should be gone.

What to do if Xbox controller fails to connect to an Android phone?

Before we start fixing on this issue, there are a couple of preliminary checks that you can perform:

  • Check for interference – Other wireless devices can interfere with your Bluetooth connection. To prevent that, move closer to your phone while using the controller.
  • Disconnect other Bluetooth devices– Sometimes having several devices connected to your phone can cause issues. Disconnect other devices, and connect your controller again.
  • Check the controller battery – Try to change the batteries or recharge it to see if that changes things.

1. Restart your controller

  1. Power off the controller by pressing and holding the Xbox button on the controller for a few seconds.
  2. Press the Xbox button again to power it back on.
  3. Try restarting your phone as well.

2. Update your controller

  1. Launch the Xbox Accessories app.
  2. Connect your Xbox controller to your PC by using a USB cable or the Xbox Wireless Adapter for Windows.
  3. You’ll see the message Update Required if an update is available. Simply install the update.

By updating your controller, you install the latest controller improvements. This way, you can be sure if it’s a software problem or a hardware one.

3. Reset your phone’s network settings

  1. Open Settings.
  2. Navigate to General management.
     
  3. Next, choose Reset.
  4. Lastly, pick Reset network settings.

Keep in mind that these steps might be different depending on the phone brand that you’re using.

4. Try to pair up your controller and phone again

  1. Open quick settings on your phone and select Bluetooth.
  2. If your Xbox controller is on the list, select it and choose Forget.
  3. Press and hold Xbox button on your controller for 3 seconds to activate the pairing mode.
  4. Now select your controller from the list of devices and wait for it to pair.

Hope that one of our solutions helped you get back on track and now you can play your favorite titles with the Xbox controller on your phone.

Keep in mind that there are other connection issues that can occur, and we covered some in our Xbox controller driver error guide.

If you have any other workarounds or questions, feel free to leave them in the comments section below and we’ll be sure to take a look.

Outlook Quick Print Not Working: 6 Quick Fixes

Outlook 365 includes a handy Quick Print option with which users can print PDFs and other file attachments.

However, some users have said in Microsoft forum posts that Microsoft Outlook is not printing PDF attachments.

In this article, we’re going to see what are the easiest and most efficient solutions if you can’t print attachments from Outlook and if there is a problem with the selected printer error shows up.

Why is Outlook Quick Print not working?

1. Check if the selected Printer is the default one

  1. Users can only print Outlook PDF attachments to their default printers with the Print attached files option selected. To check you’re selecting the default printer, open the Run accessory.
  2. Enter Control Panel in Run and press Return to open the window shown directly below.The Control Panel outlook 365 won't print pdf attachments
  3. Click Devices and Printers to open the Control Panel applet in the snapshot directly below. That Control Panel applet highlights the default printer with a green tick.Devices and Printer applet outlook 365 won't print pdf attachments
  4. If the printer selected to print PDFs is not the default one, right-click it and select the Set as default printer option.
  5. Then select the default printer in Outlook’s Print options window.

If you notice that the Quick Print option is not working in Outlook, it might be because your printer is not even set to be your default device for this particular action.

Follow the steps mentioned above then start Outlook 365 and try printing a PDF attachment to see if this solved your issue.

2. Install a third-party specialized software

If you can’t print PDFs from Outlook, follow this quick method:

  1. Open an email within Outlook.
  2. Then click the drop-down menu button for an attached PDF file.
  3. Select the attachments in the Save All Attachments window, and click the OK button.
  4. Open Acrobat Reader.
  1. Click File then Open to open the saved PDF document.
  2. Then click File, access Print to print the PDF.

If you cannot print a PDF file from Outlook 365, save your attachment on your PC and try printing it with a dedicated PDF software like Adobe Reader.

Simply download the software from Adobe’s official page, install it on your PC, and enjoy a plethora of additional features for PDF manipulation completely free.

⇒ Get Adobe Acrobat Reader

3. Delete Temporary Outlook files

  1. Some users have said that they’ve fixed Outlook not printing PDF files by erasing temporary Outlook files. Press the Windows key + E hotkey.
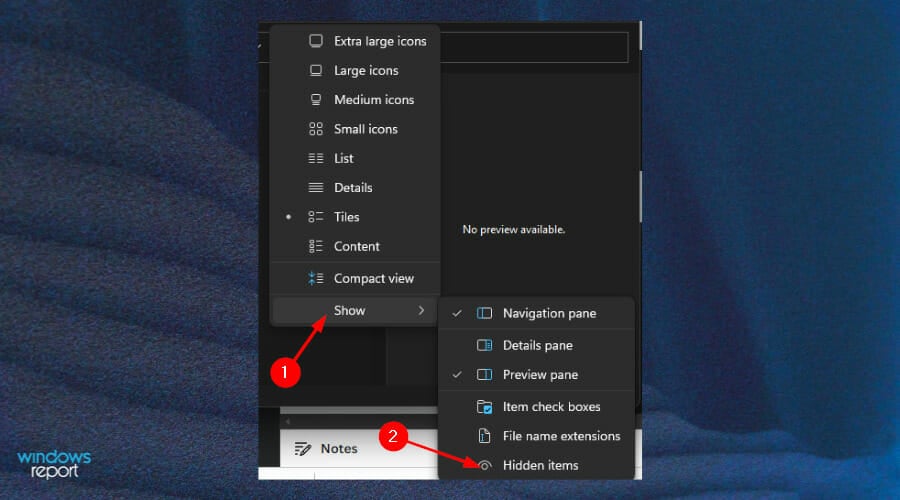
  2. Select the Hidden items checkbox on File Explorer’s View tab.Hidden items option outlook won't print pdf attachments
  3. Then enter this path in File Explorer’s address bar: C:Users%username%AppDataLocalMicrosoftWindowsTemporary Internet FilesContent.Outlook
  4. Select all the files within the Content.Outlook folder by pressing the Ctrl + A hotkey.
  5. Click the Delete button.

4. Repair corrupted PDF attachments

Of course, you can always try to repair the corrupted PDF attachments that you received in your email, before printing them.

There are specialized tools that can help you repair and recover files that have been corrupted or damaged for various reasons.

You can check our list of tested file repair software and pick the one that best suits your needs and you shall have your file back in no time and be able to print.

5. Open Outlook in Safe Mode

  1. To ensure there aren’t any conflicting add-ins, users can open the path below in Safe Mode then press the Windows key + R hotkey: id=urn:enhancement-53ce20e0 class=textannotation>Outlook
  2. Enter Outlook /safe in Run.The Run window outlook won't print pdf attachments
  3. Press the OK button.
  4. Select Outlook on the Profile Name drop-down menu.
  5. Select the OK option.
  6. Then try printing the PDF documents from Outlook in Safe Mode.

Using Safe Mode is usually a solution that can work magic if when you’re encountering errors and this case is no different, just follow the steps above carefully and you’ll get it fixed in no time.

6. Manually update the printer’s driver

  1. Access the search box on the taskbar, type in device manager, then select Device Manager.
  2. From the list select a category to see the devices, then click on the one you’d like to update.
  3. Select Search automatically for updated driver software.
  4. Select Update Driver.

Users who generally ask Why can’t i print a pdf file from my email, should know that they might need to update their printer drivers. Just follow the steps mentioned above and you should be able to solve the issue.

If Windows doesn’t find a new driver, you can try looking for one on the device manufacturer’s website and follow their instructions.

On the other hand, installing drivers manually may be daunting for some people. That’s why you can always rely on effective driver update solutions that will specifically perform it with minimal support from your side.

Those are a few tips that might fix Outlook printing for PDF attachments and we trust that if you follow our instructions correctly you’ll solve the issue.

Similar problems could happen in earlier versions of Outlook as well. For instance, some users are saying that Outlook 2016 quick print pdf not working. In this case, the same solutions should apply.

You might also be interested in our guide on how to print emails from Outlook to get more information.

Do you know other methods? Feel free to share them in the comments section below.

VirtualBox Shared Folder Permission Denied [Windows 11 Fix]

You are not alone if you encounter Permission Denied when accessing a Shared folder on a virtual machine via VirtualBox on Windows 11 host. Unfortunately, it is more common than you think. Thankfully, it can be fixed.

Here, in this guide, we will discuss how to fix this issue right after explaining the causes of its occurrence. Let’s get started! 

What causes the VirtualBox shared folder permission denied error?

There are several possible reasons for the permission denied error when accessing a shared folder in VirtualBox on a Windows 11 host. Some of the popular ones are: 

  • Lacking permission on the host – If the user account of the host machine doesn’t have read and write permissions on the folder you want to share, you might get this error.
  • Issues with VirtualBox settings – You can see this error if the shared folder doesn’t have the Auto mount option selected in the VM settings.
  • No admin rights – If the virtual machine is not running with administrative rights, you will also not have enough permissions to access the shared folder. This could give you the permission denied error.
  • VirtualBox Guest Additions – If there is an issue with the VirtualBox Guest Additions installed on the virtual machine, you can see this error.
  • Incorrect path to the shared folder –  If the path to the shared folder is not set correctly, you can encounter the Permission Denied error.

What can I do if VirtualBox shared folder permission is denied?

Before engaging in the troubleshooting steps, please make sure you go through these preliminary checks: 

  • You need to use a user account using administrator rights on the host machine.
  • Run the VM with admin privileges.
  • Check if you have the latest version of VirtualBox installed on your Windows 11 host.
  • Should have VirtualBox Guest Additions installed on the VM to share folders between the host and guest machines.

1. Allow access to the shared folder permanently between the Windows host and VM

  1. Open Terminal with admin rights on VirtualBox.
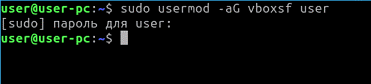
  2. Type the following command, replace $USER with the username, and press Enter. This command appends the user <username> to the vboxsf group, which is the owner of the shared folders: sudo usermod -G vboxsf -a $USERvirtualbox shared folder permission denied sudo usermod -G vboxsf -a $USER
  3. Log out of the VM machine, then log in.
  4. If the problem persists, reboot your VM and host machine. 

2. Check if the Auto mount is selected

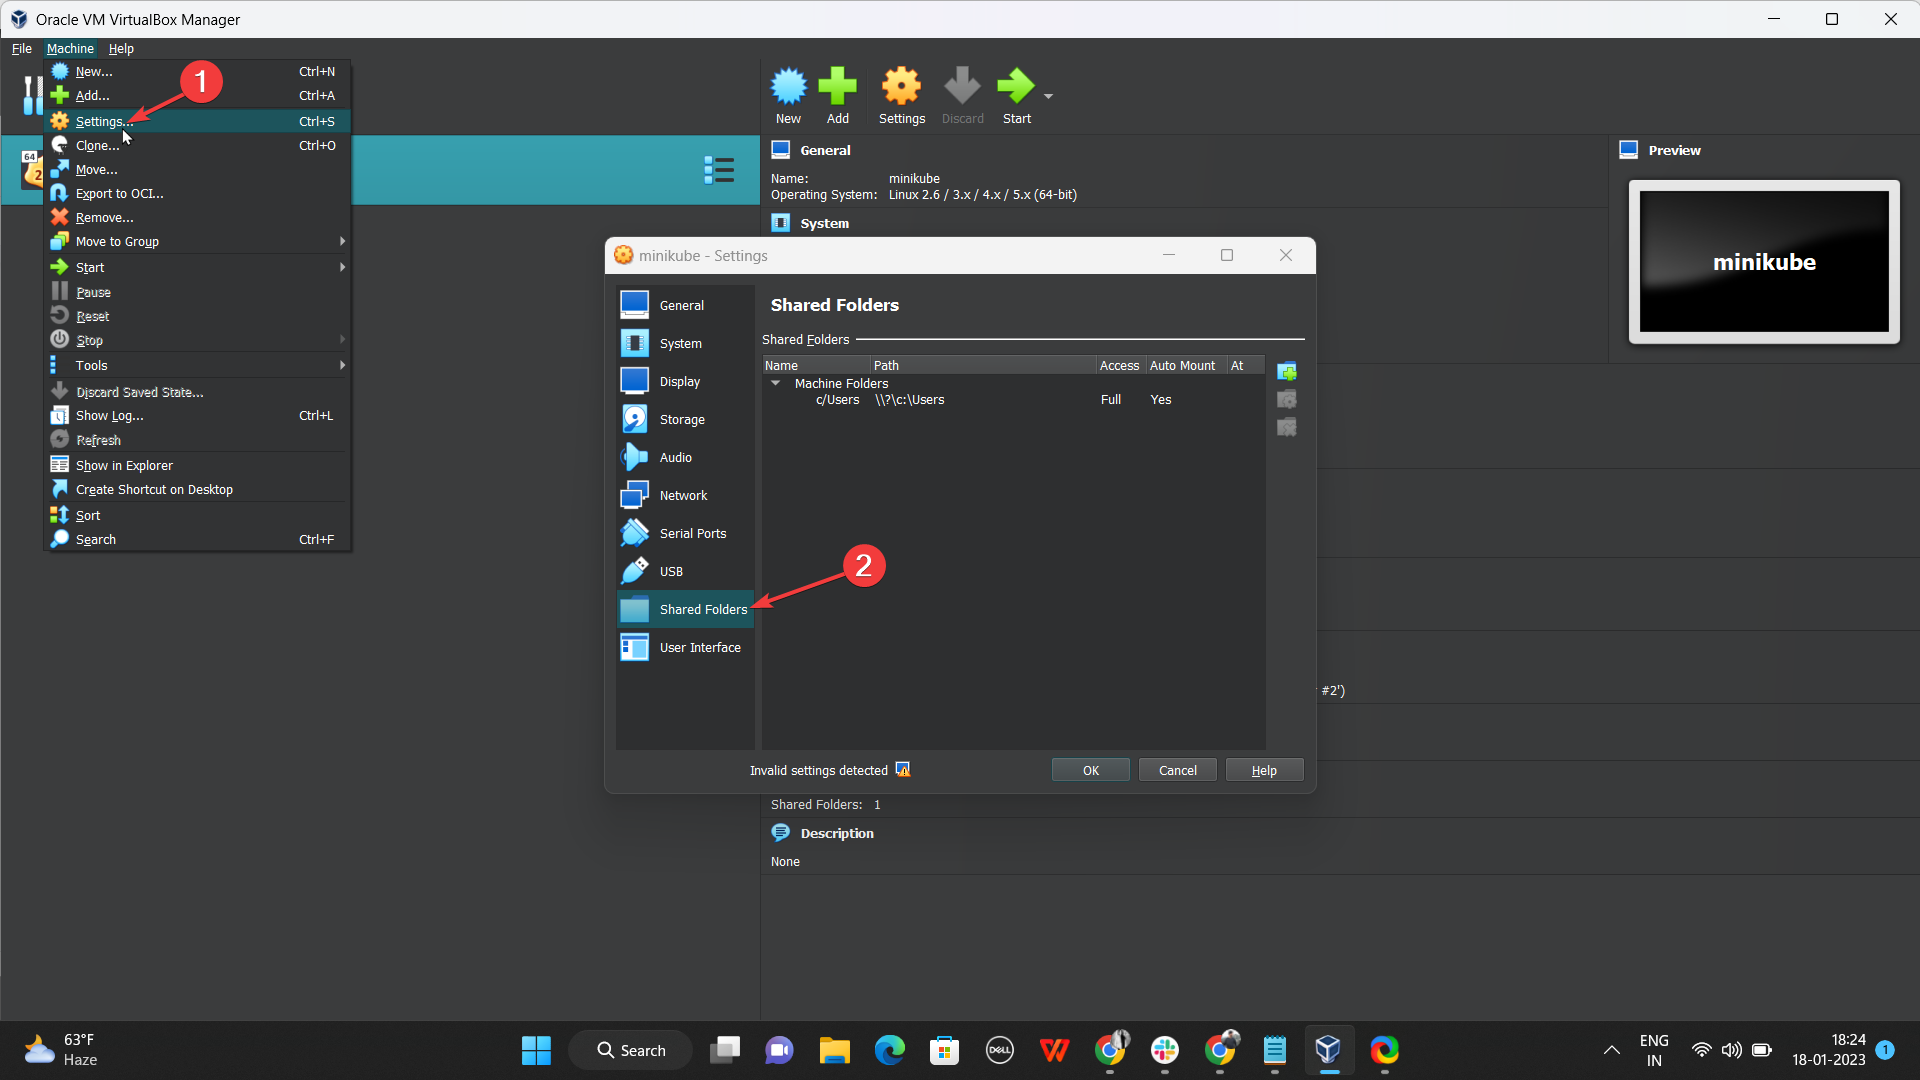
  1. Launch the VirtualBox. Go to the Devices, right-click on it, and select Settings.
  2. Click Shared Folders.virtualbox shared folder permission denied - Shared Folders
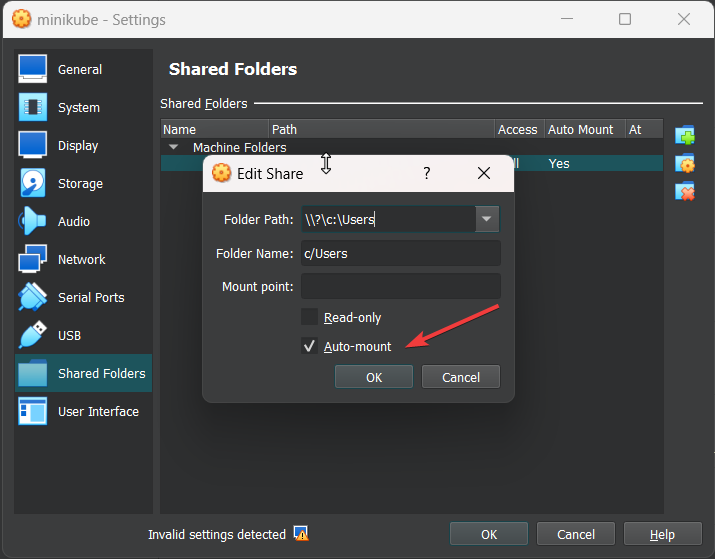
  3. You will get the Edit Share window; ensure there is a checkmark beside Auto Mount and click OK.auto mount
  4. Again click OK to close the virtual machine settings.

So, these are some methods to fix permission denied for the shared folder on VirtualBox. If none of the steps worked for you, it is advised you reinstall VirtualBox Guest Additions on VM.

Please let us know in the comments section below if you have questions or concerns about the error.

How to Download & Install CH340 Driver on Windows 10?

To communicate with the CH340 chip, the computer needs a CH340 driver. Look no further if you are looking for the easiest ways to download and install the CH340 driver on Windows 10. 

This guide will discuss some methods to download and install the driver in no time.

What can I do to download & install the CH340 driver on Windows?

1. Use the official website

  1. Go to the official website of the CH340 driver.
    ch340 -Download & Install CH340 Driver on Windows 10
  2. Choose the operating system.
  3. Click the Download button to download the driver setup file.
  4. Double-click the downloaded file to initiate the installation process. 
  5. On the next window, click Install.
    Driver setup
  6. Restart your PC to let the changes take effect. 
  7. To confirm the driver is installed,  press Windows + R to open the Run window. 
    Device Manager RUN COMMAND
  8. Type devmgmt.msc, and press Enter to open the Device Manager. 
    Device -ch340 driver windows 10
  9. Locate and click Ports(COM & LPT), and a USB-SERIAL CH340 (COMx) driver is listed. 

2. Use the Device Manager

  1. Connect the CH340 chip to your computer. Press Windows + R to open the Run console.
  2. Type devmgmt.msc, and press Enter. 
  3. Go to Ports(COM & LPT) and expand it. 
  4. Look for an Unknown device or USB-SERIAL CH340 (COMx), and right-click it to choose the Update driver option.
    Update driver Ports (COM & LPT) - ch340 driver windows 10
  5. On the next window, select Search automatically for drivers. 
    Search automatically for drivers
  6. Follow the on-screen instructions to complete the process. 

3. Use a reliable driver updater tool

Installing drivers manually can be tricky and time-consuming. Therefore, if you are unsure what to do, use a reliable third-party driver updater tool instead.

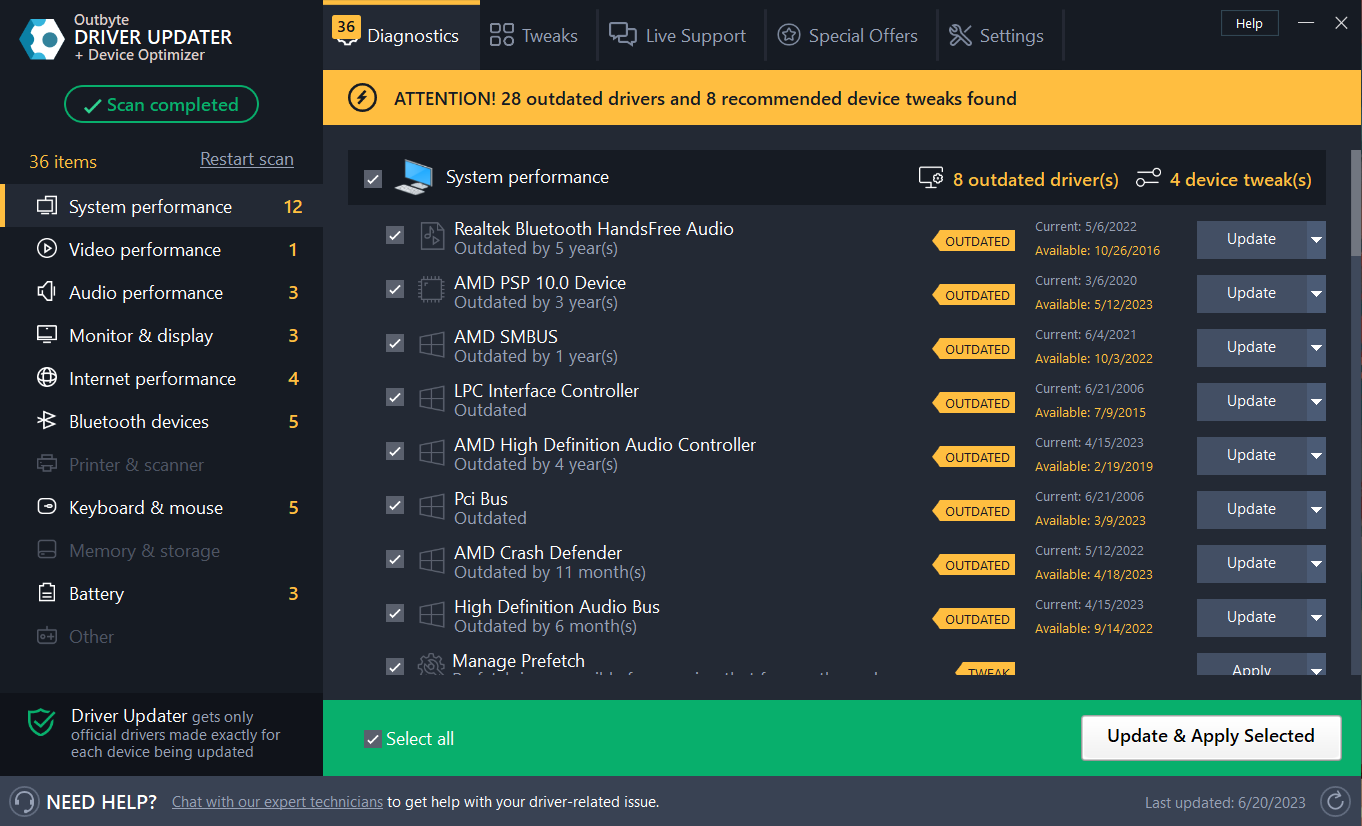
One such tool is Outbyte Driver Updater. It scans your computer and gives you a list of outdated drivers in no time. And, with its vast database of drivers, the tool keeps your device drivers up to date. For example, to install the CH340 driver, follow these steps: 

  1. Connect your CH340 chip
  2. Download and install Outbyte Driver Updater
  3. Click Scan to get a list of missing or outdated drivers.
  4. Once the scan is complete, you will get a list of drivers that need to be updated. Select them and click Update.
  5.  The tool will download and install the drivers now. To complete the process, follow the onscreen instructions. 

FAQs

Do I need the CH340 driver?

Yes, if your device uses the CH340/CH341 chip. Without the driver, your computer may not detect the board when connected via USB.

Is the CH340 driver safe?

Yes, as long as it’s downloaded from the official website or a reliable vendor.

Which operating systems support the CH340 driver?

It works on Windows (XP to Windows 11), macOS, and Linux. Most modern OS versions install it automatically.

Conclusion

Installing the CH340 driver is essential if your device relies on this USB-to-serial chip. Once properly set up, your Arduino boards and other hardware should connect seamlessly with your computer.

However, if your PC still struggles with detection, you may be facing broader USB recognition issues. In that case, check our guide on Windows 11 not recognizing USB or learn how to install USB drivers on Windows 10 for additional fixes.

How to Quickly Remove Bing From Chrome Permanently

Chrome is the most popular browser, but sometimes, your default search engine can change. Many users reported that suddenly Bing became the default search engine, and they want to know how to remove Bing from Chrome.

Unfortunately, Bing has a nasty habit of popping up uninvited as the default search engine, and it’s not the most private choice, so you may want to consider using a private search engine instead.

If that is the case, then you are most probably looking for a way to remove Bing from Chrome. That is precisely why we’ve created this in-depth guide, to show you exactly how to remove Bing from Chrome on Windows 10/11.

Why does Bing keep popping up?

If Bing keeps popping up in Chrome, it’s possible that your default search engine was changed. In most cases, it’s possible that you accidentally clicked the option to make Bing the default search engine.

Sometimes extensions or even applications can force your browser to use a specific search engine, so be sure to check them as well.

Why can’t I remove Bing from my computer?

Bing can be easily removed from any web browser simply by changing the default search engine from settings.

If changing the search engine doesn’t help, your next option is to check for any extensions that might be forcing you to use Bing.

In case you want to remove Bing from the search bar, that’s a more complicated task since the search engine is integrated into Windows.

Can Bing be uninstalled?

If you have any Bing software installed, you can uninstall it just like any other app by doing the following:

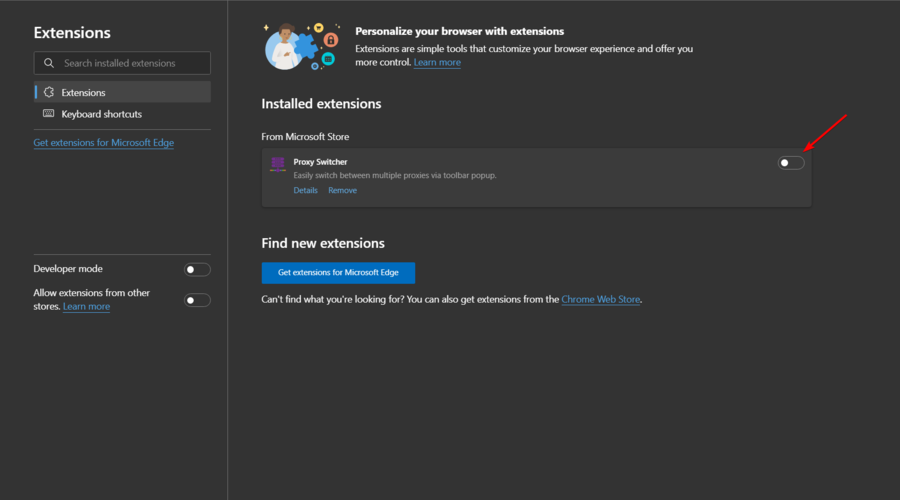
  1. Press the Windows key + X and select Apps and Features.
  2. Now locate Bing software on the list.
  3. Click Uninstall next to it to remove it.


If you want to remove it from the Search bar, you need to modify the registry. Do keep in mind that modifying the registry can lead to system issues, so be extra cautious. To disable Bing in search, do the following:

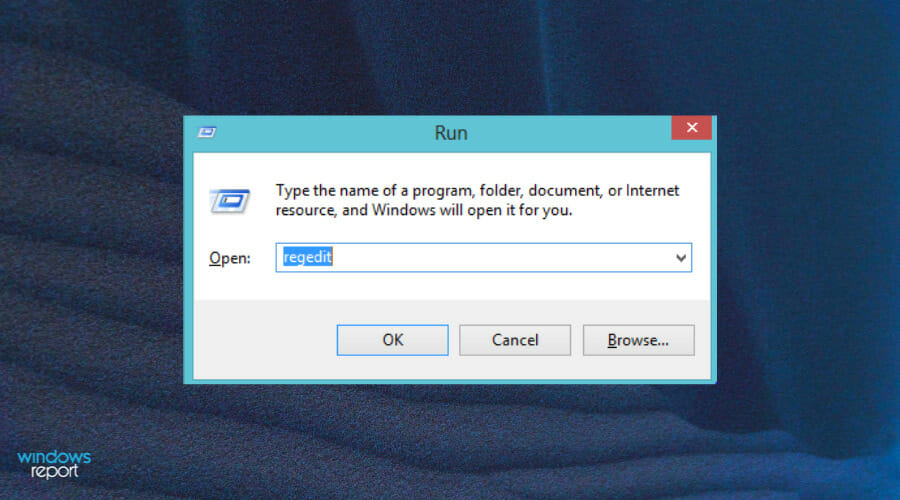
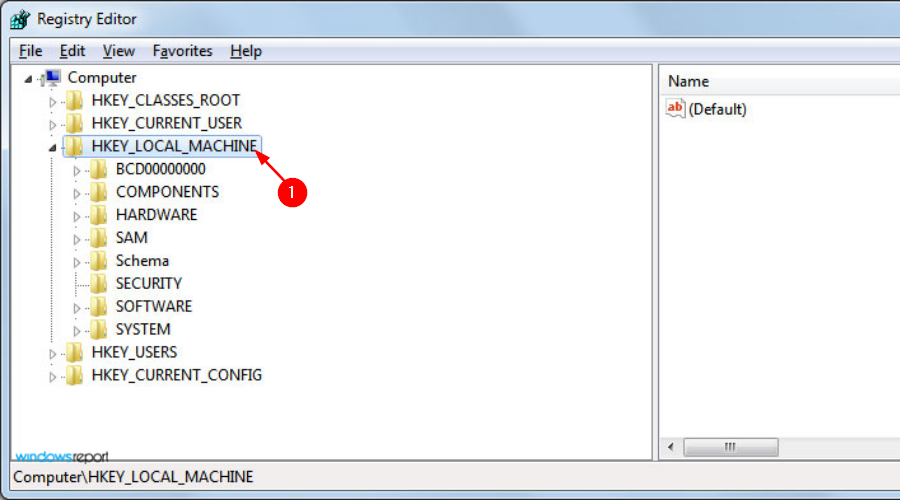
  1. Press the Windows key + R and enter regedit. Press Enter.
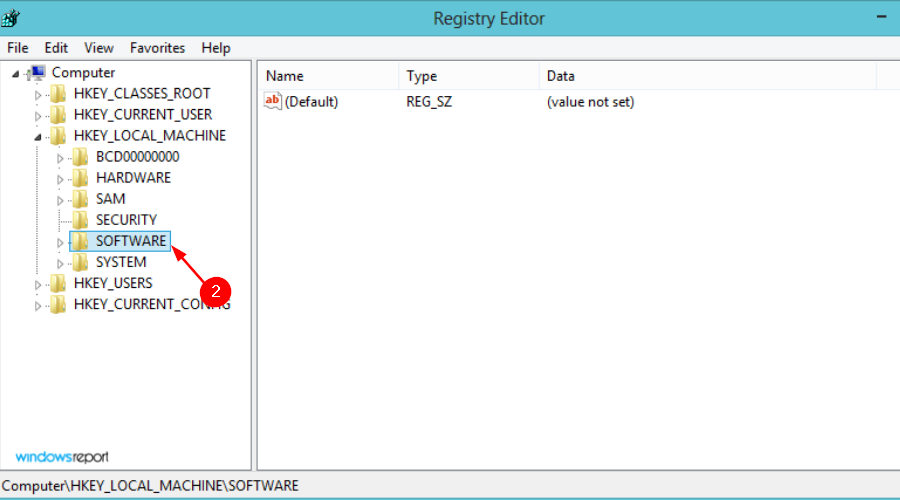
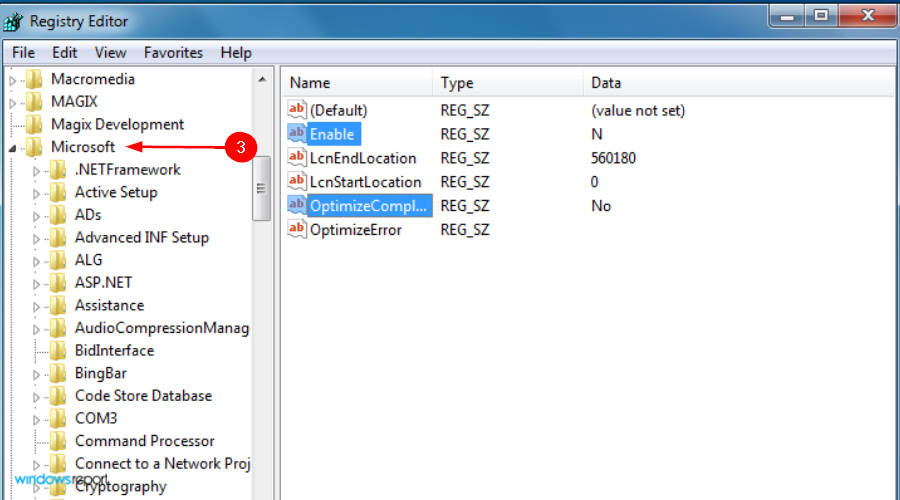
  2. Navigate to the following path: Computer\HKEY_CURRENT_USER\Software\Policies\Microsoft\Windows
  3. Right-click the Windows key and select New and then Key. Enter Explorer as the name of the new key.
  4. Navigate to the Explorer key. Right-click the Explorer key and select New. Now select DWORD (32-bit Value).
  5. Enter DisableSearchBoxSuggestions as the name of the new DWORD and double-click it.
  6. Set the Value data to 1 and save changes.


Quick Tip:

If you want a browser that gives you the full freedom to use whatever search engine you want without any strange interferences with Bing, try Opera One.

The UI is modern, with controls that are similar to Chrome. You’ll get plenty of extensions, built-in social media apps, an adblocker, anti-tracking features, and a built-in VPN.

Opera One

Set up your favorite search engine and remove Bing from your browser once and for all.

How do I permanently remove Bing from Chrome?

1. Change Chrome’s settings

  1. Open Google Chrome.
  2. Press the Menu button (the 3 horizontal lines in the top right corner). Go to Settings.
  3. Go to the On startup tab on the left.
  4. Select Open a specific page or set of pages.

  5. If Bing is listed there, right-click it and select Remove.

This is a universal solution, and it can help you to remove Bing from Chrome on Mac or any other platform.

2. Check your search engine settings

  1. Click the menu item and then select Settings.
  2. In the left pane, select Search engine. In the right pane, set the Search engine used in the address bar to anything other than Bing.
  3. Click on Manage search engines and site search.
  4. Locate all instances of Bing or unknown search engines and delete them.

If you ever wondered how to get rid of Bing on Chrome, this is the best way to do it.

3. Reset Google Chrome

  1. Open Google Chrome.
  2. Press the Menu button. Then, go to Settings.
  3. Select Reset and clean up.
  4. Click Reset settings to their original defaults.

  5. Click on Reset settings to confirm.

How do I prevent Bing from hijacking my browser?

To make sure that Bing isn’t hijacking your browser, you should always check your settings and ensure that new tab opens a blank page and not Bing.

While changing settings, it’s also a good idea to check search engine settings and ensure that it’s set to the desired one.

Lastly, check your extensions and make sure that you don’t have any unknown extensions installed.

Now you know how to delete Bing from Chrome, and we encourage you to give all these solutions a try and check if they work for you.

Additionally, the first set of steps can also be used to change the default search engine that Google Chrome uses. All in all, these changes should be permanent, and you don’t need to restart the PC afterward.

If you’re looking for a more private browsing experience, visit our best browsers and search engines for privacy guide for more information.

Are you aware of any other way to solve this problem? If so, share it in the comments section below so that other users can try it, as well.

Teams Breakout Rooms Not Working: 5 Ways to Gain Access

If Teams Breakout rooms not working it might be hard to organize attendees between meetings, but luckily there are a few ways to fix this problem.

Why is Breakout Room not working in Microsoft Teams?

This issue can appear if Teams or your operating system isn’t up to date. If the meeting experience isn’t enabled, you might encounter this issue. Corrupted cache or problems with Internet connection can also cause this issue.

What can I do if Teams Breakout Rooms are not working?

Before we go ahead with the advanced troubleshooting solutions, try restarting your PC or restarting Teams. Also, ensure that your connection is working properly.

1. Run Microsoft Teams as an admin

  1. Right-click on the Microsoft Teams app and select Properties.
  2. Switch to the Compatibility tab.
  3. Check the box for Run this program as administrator.
  4. Click Apply and OK.

2. Reinstall Microsoft Teams

  1. Press the Win key to open the Start menu.
  2. Right-click on Microsoft Teams and hit the Uninstall button.
  3. Visit the official website.
  4. Download Microsoft Teams on your PC.
  5. Launch the EXE files and let the installer load the files.

3. Clear the app cache

  1. Quit Microsoft Teams and all its related processes.
  2. Open the File Explorer.
  3. Navigate to the below-mentioned path: C:\Users\UserName\AppData\Roaming\Microsoft\Teams
    (If the AppData folder isn’t visible, you need to choose the option to show hidden items.)
  4. Delete the below-mentioned folders:
    • C:\Users\UserName\AppData\Roaming\Microsoft\Teams\Application Cache\Cache
    • C:\Users\UserName\AppData\Roaming\Microsoft\Teams\blob_storage
    • C:\Users\UserName\AppData\Roaming\Microsoft\Teams\Cache
    • C:\Users\UserName\AppData\Roaming\Microsoft\Teams\databases
    • C:\Users\UserName\AppData\Roaming\Microsoft\Teams\GPUCache
    • C:\Users\UserName\AppData\Roaming\Microsoft\Teams\Local Storage
    • C:\Users\UserName\AppData\Roaming\Microsoft\Teams\IndexedDB
    • C:\Users\UserName\AppData\Roaming\Microsoft\Teams\tmp
  5. Restart your PC.
  6. Launch Microsoft Teams and check if this fixes the issue or not.

4. Enable the new Meeting Experience

  1. Launch Microsoft Teams.
  2. Click on the three-dot icon at the top, next to your profile.
  3. Select Settings from the context menu.
  4. Click on General on the left pane.
  5. Check the box for Turn on new meeting experience (New meetings and calls will open in separate windows. Requires restarting Teams) option.

5. Try reconnecting your account

  1. Launch Microsoft Teams.
  2. Click on the Profile icon.
  3. Select Sign out.
  4. Click on Sign out.
  5. Select the account and sign in.

Sometimes, Microsoft Teams may not work as intended due to a corrupt user profile or issues with your account. You can try resigning in with your account. Otherwise, we suggest you check if you are getting the same Breakout room not working in Teams error with another account.

In case you want to learn how to take advantage of Breakout rooms in Teams for productive brainstorming sessions, read our dedicated guide.

You can also use the shuffle feature in Teams meetings breakout rooms or connect the meeting room system to Microsoft Teams.

Feel free to let us know in the comments section which of the above solutions worked and fixed the Breakout room not working in Teams error.

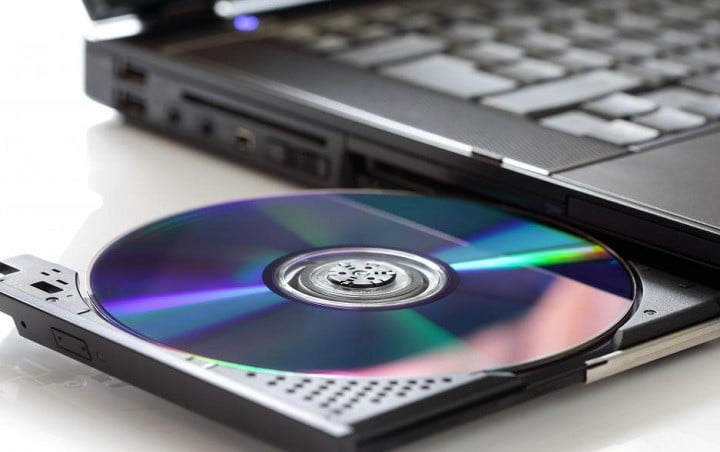
Laptop CD / DVD Drive Not Opening: 6 Quick Fixes

Even though fewer laptops include DVD optical drives these days, there are still plenty that do. If your laptop’s DVD drive button isn’t ejecting the disc, there are a number of potential fixes. Here are some suggestions that will help fix your laptop’s DVD drive eject the disc.

But first, here are some more examples of this problem:

  • CD drive not opening on a laptop 
  • DVD eject button not working 
  • Acer laptop DVD drive not opening 
  • CD drive not opening Windows 10 
  • Acer DVD drive not opening 

How can I fix the laptop’s CD / DVD drive not opening issue?

1. Eject the Drive in Windows

  1. First, you can still open a DVD drive in Windows. To do that, click the File Explorer button on Windows 10’s taskbar (or open Windows Explorer in earlier platforms).
  2. Click This PC on the left of the File Explorer window as in the snapshot below.CD drive not opening on laptop 
  3. Right-click your DVD drive listed there and select Eject from the context menu. The DVD drive might then open.DVD2

2. Close Software in Windows

If the Eject option didn’t open the drive, there might be some programs keeping it closed if a disc is already inserted. Even if the taskbar doesn’t include any open program windows, you might still need to close some background software as follows.

  1. Right-click software icons on the system tray and select a close or exit option on the programs’ context menus.
  2. You can right-click the taskbar and select Task Manager to open the window shown in the shot below.DVD3
  3. Now right-click programs listed under background processes and select End task to close them.
  4. When you’ve closed as much software you can, press the DVD eject button again.

3. Update the CD/DVD Drive Driver

The DVD drive device driver might have something to do with eject button not working. Updating the driver could feasibly fix the DVD drive. That will especially be the case after recently upgrading the OS platform, which can lead to device driver incompatibilities.

  1. Open Cortana and enter ‘Device Manager’ into the search box.
  2. Select Device Manager to open the window shown in the snapshot directly below.
  3. Click CD/DVD-ROM drives on the Device Manager window.DVD5
  4. Then right-click your DVD drive listed there and select Update Driver Software.
  5. Select Search automatically for updated driver software on the Update Driver Software window. Windows will then find the latest device drivers for the DVD drive.

Update drivers automatically

It is very important to choose the right driver versions from the manufacturer’s website. But since it can be hard to find the right drivers for your DVD drive, software dedicated to finding drivers automatically may come in handy.

These tools are developed to update drivers automatically and prevent PC damage caused by installing the wrong driver versions on your behalf.

⇒ Get Outbyte Driver Updater

4. Run the Hardware and Devices Troubleshooter

If you’re running Windows 10 Creators Udate (2017), and chances are you do, there’s a useful troubleshooting tool for resolving various issues. Including hardware-related problems. So, if none of the previous solutions resolve the issue, let’s try the hardware troubleshooter.

Here’s how to do that:

  1. Go to Settings.
  2. Go to Updates & Security > Troubleshoot.
  3. Scroll down and click Hardware & Devices. 
  4. Go to Run the Troubleshooter. DVD eject button not working 
  5. Wait for the process to finish.
  6. Restart your computer.

5. Reinstall the CD/DVD Drive Driver

If you don’t need to update the CD/DVD drive driver, you can reinstall it instead. You can do that by right-clicking your DVD drive on the Windows Device Manager window and selecting Uninstall > OK. Then when you restart Windows, the device driver is automatically reinstalled.

6. Force Eject

Some laptops have a force eject pinhole on their DVD drives. If you can find a small pinhole on your DVD drive, that’s probably the force eject button. Don’t confuse it with any larger headphone connection port that might be beside the DVD drive. If you’ve found a force eject hole, you can open the DVD drive as follows.

  • Shut down Windows to switch off the laptop.
  • Now unfold a paperclip so that it expands about one to two inches.
  • Next, you should insert the paperclip into the force eject pinhole on DVD drive.
  • Gently press the paperclip into pinhole until the DVD drive tray pops out.
  • Now you can pull the drive bay all the way out and remove any CD or DVD.

So that’s how you can fix a DVD drive that isn’t ejecting. If the DVD drive‘s eject button often doesn’t work, consider replacing it with an external Blu-ray drive for laptops.

Device Not Migrated From Previous Installation Due to Partial or Ambiguous Match [Fix]

The device was not migrated due to partial or ambiguous match is a common error that usually occurs after an update. The error message tells you the exact device causing the problem. For example:

Device PCIVEN_10EC&DEV_8168&SUBSYS_84321043&REV_064&100198e&0&00E4 was not migrated due to partial or ambiguous match.

Let’s see how we can fix it:

How do you fix not migrated due to partial or ambiguous match?

1. Update the driver

    In the next guided example, you can learn the easiest method to update your drivers manually or automatically using secured tools.

  1. 1. Press Windows + R to open a Run console, type devmgmt.msc, and press OK to open the Device Manager.

    device-not-migrated-partial-ambiguous-match
  2. 2. In the Device Manager, find the device mentioned in the migration error, then double-click it to open its Properties window.

    device-double device was not migrated due to partial or ambiguous match
  3. 3. Go to the Events tab and check whether there is a Device not migrated event.

    events-migrate device was not migrated due to partial or ambiguous match
  4. 4. Go to the Driver tab and select Update driver.

    update-driver device was not migrated due to partial or ambiguous match
  5. 5. Select the Browse my computer for driver software option and wait for the process to finish, then reboot your PC to fix the device that was not migrated due to partial or ambiguous match issue.

    device-not-migrated-partial-ambiguous-match/

Automatically install drivers

As you’ve seen, uninstalling the correct drivers is not very easy, and most likely, you will have to go to the manufacturer’s website for their newest version.

However, a way more straightforward solution is to employ a dedicated driver updating app that will automatically update all your drivers with just a few clicks.

2. Install the latest Windows updates

  1. Press Windows + I to open the Settings app, then choose Update & Security.
  2. Click the Check for updates button and let Windows install any new ones.
  3. Wait for the updates to be installed and restart your PC if requested. The Device was not migrated due to partial or ambiguous match issues will be fixed.

3. Run the SFC scan

  1. Click on the Windows Start button, type cmd, and select Run as administrator to start Command Prompt with full privileges.
  2. Type the following command and press Enter to start a System File Checker scan process: sfc/scannowscannow 0x80070002 windows update
  3. Wait until the process is over, then restart your PC if any changes are made.

4. Use the System Restore option

  1. Type restore point in the Search bar and click the Create a restore point option.
  2. Go to the System Protection tab, select System Restore and click Next.
  3. Select one of the restore points and click Next. Make sure you select one that was created before the update was installed.
  4. Click on the Finish button. Please wait for the process to finish and restore your PC to the state where it was working without any issues.

5. Update the audio driver

  1. Press Windows + X and select Device Manager.
  2. Expand the Sound category, right-click on Realtek(R) Audio, and select Update driver.
    device not migrated partial or ambiguous match
  3. Select Browse my computer for drivers.
    device not migrated partial or ambiguous match
  4. Select Let me pick from a list of available drivers on my computer.
  5. Pick any option that has no Realtek in the name and press Next.

6. Update the BIOS

Flashing your BIOS is complex, and you risk causing significant harm to your computer if you do not carry it out correctly.

There is no requirement for you to keep your BIOS up to date if you are not an expert user; however, if you are experiencing a hardware issue and the only way to solve it is to upgrade your BIOS, then you may be required to do so.

Thus, we recommend you check out our comprehensive guide on updating the BIOS in Windows 10 or 11 to avoid any issues.

Wrapping up

The Were not migrated from previous os installation due to partial or ambiguous device match error is usually linked to driver problems. Compatibility issues, corrupt or outdated drivers to be precise. That said, corrupt system files can also be at fault.

This problem affects various external hard drives; many reported this issue when using USB 3.0 devices. All brands can be affected by this issue, but many Seagate users reported this issue.

We hope that you managed to fix it by using one of our solutions. For any questions or suggestions, we will wait for your notes in the comments section below and get back to you as soon as possible.

The Best Driver Software Is Already Installed Error [Fixed]

Your hardware relies on drivers to work correctly; if your drivers are outdated, you can experience specific problems. These problems can be fixed by installing new drivers, but users reported a few issues while installing new drivers.

They are getting The best driver software is already installed error, and today we’re going to show you how to fix this problem on Windows 10.

Why am I getting the best driver software is already installed error?

There are a few possible reasons you might be getting this error message on Windows. A few common causes include the following:

  • Driver installed – Logically, you can expect this error if you already have the driver installed on your computer.
  • Compatibility issues – The driver you are trying to install is not compatible with your version of Windows or with the specific hardware you have installed on your system.
  • Driver corruption – The driver you are trying to install is corrupted or damaged and, in some cases, outdated.
  • Problem with Driver signature – The driver is digitally signed, and your windows version has the security feature of Driver Signature Enforcement enabled.
  • Lost or corrupt files – A system file may be missing or corrupted, causing the error.
  • Printer errors – The print job most likely causes this error, and there may be a need to delete the print queue.

Also, speaking of driver issues, here are some of the common problems that users reported:

  • The best driver for your device is already installed Windows 7, Windows 8, and Windows 10 – This error can appear on Windows 7, Windows 8, or Windows 10. If you encounter this issue, you should be able to fix it using our solutions.
  • Windows has determined that the best driver for this device is already installed – This is just a variation of the original error, and if you encounter it, download the latest drivers from your manufacturer.
  • Force install driver Windows 10 – Windows 10 has a new security feature called Driver signing. This feature is designed to prevent specific unauthorized drivers from installing. This can be a major issue, but you can fix it by disabling this feature.

So without further ado, let us explore some solutions.

What can I do if I get The best driver software is already installed error?

1. Install the drivers

  1. Press Windows Key + X to open Win + X menu, then select Device Manager from the list.
    The best driver for your device is already installed Windows 7
  2. Locate the device that you want to update. Then, right-click the device and choose Update driver.
    Windows has determined that the best driver for this device is already installed
  3. Select the Browse my computer for driver software option. This option will allow you to install the driver software manually.
    Force install driver Windows 10
  4. Choose the Let me pick from a list of device drivers on my computer option.
    Installing old drivers in Windows 10
  5. Click the Have Disk button.
    The best driver for your device is already installed Windows 8
  6. Lastly, click the Browse button, locate the driver on your hard drive, and click OK.
  7. After doing that, the driver will be automatically installed on your PC.

You can avoid The best driver software is already installed message simply by installing the required driver manually. To do this, you must download the driver and extract it to any folder on your PC.

2. Remove and reinstall the driver

  1. Press Windows Key + X to open Win + X menu, then select Device Manager from the list.The best driver for your device is already installed Windows 7
  2. When Device Manager opens, locate the driver that you want to remove. Then, right-click the device and choose Uninstall device from the menu.
    Force install driver Windows 10
  3. If available, check Delete the driver software for this device. Click Uninstall to confirm.
    The best driver for your device is already installed Windows 7
  4. Wait for the driver removal process to finish.
  5. Finally, restart your PC.

When your PC restarts, the default driver will be installed. Now try to install the driver again and check if the problem is resolved.

After uninstalling your drivers, we recommend reinstalling/updating them automatically. Downloading and installing drivers manually is a process that carries the risk of getting the wrong driver installed, which may lead to severe malfunctions in your system.

The safer and easier way to update drivers on a Windows computer is by using an automatic tool. We strongly recommend professional driver updater software that automatically identifies each device on your computer and matches it with the latest driver versions from an extensive online database.

3. Download the driver from the manufacturer

According to users, the error message can appear while trying to update their drivers from the Device Manager. So even though Device Manager is a handy tool, it won’t always download the best driver for you.

On the other hand, you can always download the driver right from your hardware manufacturer and install it on your own. These drivers usually come with a setup file so that they will overwrite the drivers from Device Manager.

Although you can install almost any driver using this method, it’s worth mentioning that this is an advanced solution. To install the driver manually, you’ll need to know the model of the device you’re trying to update to find the appropriate driver.

This can sometimes be hard, especially if you’re a novice user trying to install a driver for obscure old hardware.

Even though this method has its flaws, it will allow you to install the desired drivers without any problems or error messages for the most part.

4. Install the latest updates

  1. Press Windows + I to open the Settings app.
  2. Now navigate to Update & Security section.
    Windows has determined that the best driver for this device is already installed
  3. Finally, click the Check for updates button.
    Installing old drivers in Windows 10

Updates will be downloaded automatically in the background if any updates are available. Once the updates are downloaded, they will be installed once you restart your PC.

If you’re having trouble opening the Setting app, take a look at this article to solve the issue.

5. Try installing the driver from Safe Mode

  1. Open the Start Menu and click the Power button. Press and hold the Shift key and choose Restart from the menu.
    Installing old drivers in Windows 10
  2. Now, Navigate Troubleshoot, Advanced options, and Startup Settings.
  3. Then click the Restart button.
  4. A list of options will now appear. Finally, select Safe Mode with Networking by pressing the number 5 or F5 key on your keyboard.

Once you enter Safe Mode, try all our solutions and check if that solves the problem.

6. Disable the Driver Signature feature

  1. Open the Start Menu and click the Power button. Press and hold the Shift key and choose Restart from the menu.
    Installing old drivers in Windows 10
  2. Now, Navigate Troubleshoot, Advanced options, and Startup Settings.
  3. Then click the Restart button.
  4. Lastly, press 7 or F7 to select Disable driver signature enforcement option.

Microsoft has introduced several security features to make Windows 10 more secure, and one of these features is Driver Signature.

While this feature is valuable, sometimes it can interfere with your system and prevent you from installing specific drivers.

If you need additional info on how to disable driver signature enforcement on Windows 10, check out this dedicated guide to find out everything about it.

The best driver software is already installed is an annoying error message, but you can quickly fix it by installing the driver manually. If that doesn’t work, try to uninstall the current driver and install the desired driver again.

If you have any other questions, leave them in the comments section below, and we’ll check them out.

Easy Fix: Discord Game Detection Feature is not Working

Discord is a popular VoIP app for gamers and non-gamers to talk over voice, video, and text. The gaming community is extensively using the app as a reliable VoIP communication mode.

The built-in game detection feature in Discord allows you to broadcast the name of the current title you are playing. However, recently several users have reported that the Discord game detection is not working.

Being faced by many players, this is a pretty common error. Unfortunately, they don’t know much about what they can do to fix it.

If you are also troubled by this problem, in this guide you’ll find a few troubleshooting steps to help you resolve the Discord game detection not working in Windows computers.

Why is the Discord game detection not working?

The Discord game detection system may fail to detect non-verified games such as pirated games.

In some instances, this issue can also occur due to a Discord bug or incompatible app version. Also, keep in mind that you may have configured the wrong settings.

Some update issues may cause Discord to forget the list of manually added games at each startup. Thus, it will require you to go through the labor of adding all your games onboard each time you log in. 

Now, let’s see what you can do to easily solve our presented issue.

What can I do if the Discord game detection is not working?

1. Check the Discord game detection status

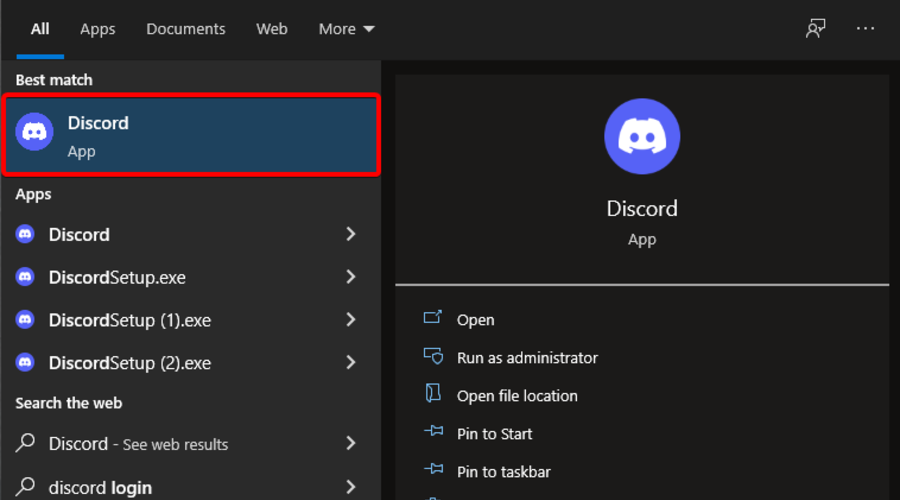
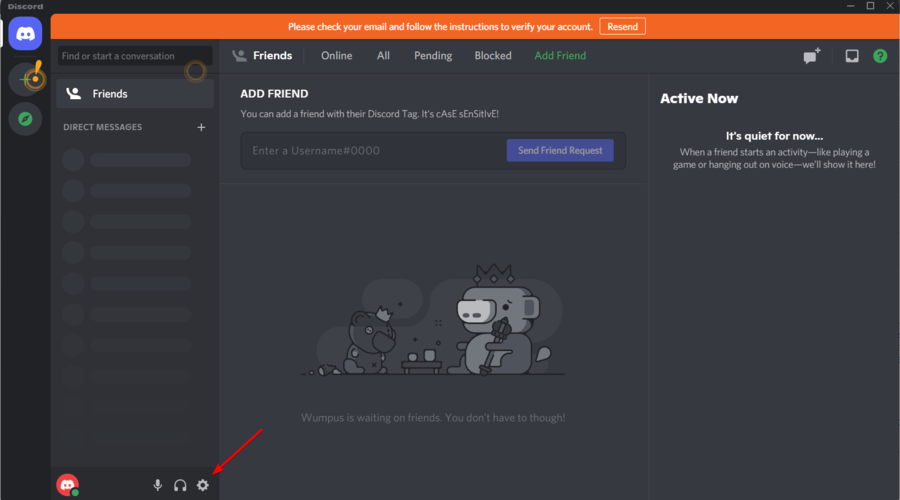
  1. Hit the Windows key, type Discord, then open it as in the picture below.
  2. Open the User Settings option by clicking the cog in the bottom left near the user profile.
  3. Go to the Activity Status tab from the left pane.
  4. Check the Display currently running games as a status message box.
  5. Close User Settings, relaunch Discord, and check if Discord not detecting game to stream issue is resolved. 

2. Manually add the game to Discord 

  1. To add your currently playing titles manually, use the following keyboard shortcut: Windows + S.
  2. Now, type Discord and open the first given result.
  3. Go to the Discord Activity Status.
  4. Click on the Add It button.
  5. Search for your game by entering its name and choose it from the list of options. 
  6. Click the Done button to save the changes.

If you want to have little fun, try changing the game title with something funky, and it will show up on your Now Playing status.

Discord allows you to manually select the currently playing game in the user settings if you experience the Discord not detecting application to stream issue. 

3. Verify if the game is genuine 

  1. Make sure the Discord app is running.
  2. Expand the System Tray, then right-click on the Discord app, then choose to Check for updates option.
  3. Discord will now check for pending updates. Proceed to install all the pending updates.
  4. Once the update is installed, relaunch the app and check if the can’t stream the game on discord issue is resolved.

While Discord can detect all Stream games automatically, it will not detect unverified games. Non-verified games include games that are installed through piracy.

Make sure all the games installed on your computer are genuine. You may also require to verify the license once to make sure the game is registered if not bought on Steam.

4. Reinstall Discord 

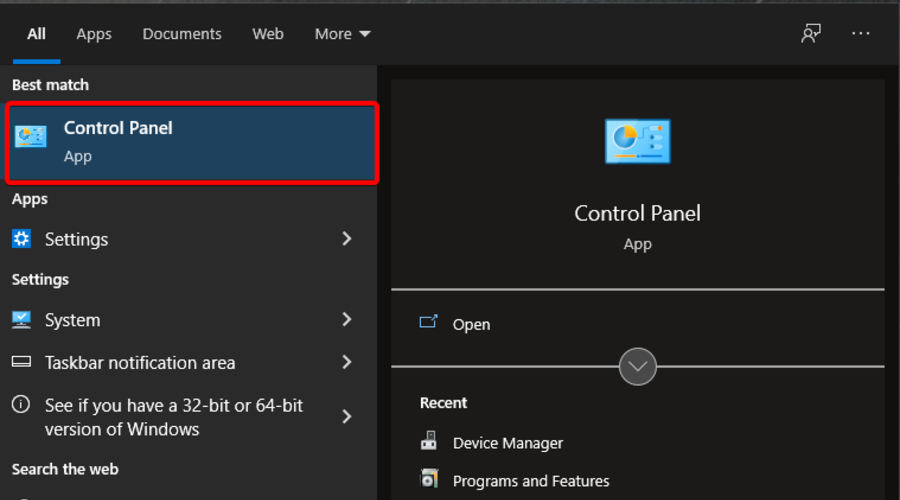
  1. Hit the Windows key, type Control Panel, then open it.
  2. In the Control Panel, click on Programs.
  3. Now, navigate to Programs and Features.
  4. Locate Discord from the list of installed apps. Select the app and click on Uninstall.
  5. Click on OK.
  6. Once uninstalled, reboot the computer.
  7. After the restart, go to the Discord download page and get the latest version available.
  8. Run the installer and follow on-screen instructions to install the app.

Once installed, relaunch the Discord and check if the game detection feature is working normally. 

What else should I know about the Discord game detection?

As a general rule and as mentioned before, the most efficient way to make your Discord game detection work is to turn on the toggle beside Display currently running game as a status message. Once enabling it, the list of games on your device will show in the library below.

Some users are wondering if this feature can be used on the mobile version. Well, if you’re also concerned about it, keep in mind that it is compatible with Android smartphones.

The tool will simply let Discord detect what Android game you’re playing. After that, you’ll receive the option of displaying the game as a status message.

If your Discord game detection is not working, these are the best methods to try.

In case of additional questions, don’t forget that the comment section below is always here for you.

PC not Getting IP address: Here’s How to Solve the Issue

Your IP address is important when you are connecting to the internet. However, some users have complained that the PC is not getting an IP address for some reason.

This prevents you from accessing the web and saps the life out of your browsing session. In this guide, we will show you to fix this frustrating issue for good.

Why is my IP address not detected?

Below are some of the prevalent reasons your PC is not getting the IP address:

  • Changed network: One of the major causes of the IP address not recognised issue is a changed network. The solution to this is to renew your IP address.
  • Faulty driver: In some cases, you might get the no IP address found error because of issues with the NIC driver. The quick way out of this is to uninstall and reinstall this driver.

How to fix IP address issues on Windows PCs

1. Renew IP address

  1. Log into your router and delete the DHCP lease for your PC.
  2. Press the Windows key + S, type cmd, and select Run as administrator under Command Prompt.
    cmd admin
  3. Type the following commands and hit Enter after each: ipconfig/releaseconfig release pc not getting ip address ipconfig/renewrenew
  4. Finally, wait for the command to finish running.

Sometimes, your PC might be getting the IP address because of a network change. These steps will renew the IP Address of your PC and will force the PC to request a new IP address and discard the old one.

2. Reinstall the network driver

  1. Press the Windows key + X and select the Device Manager option.
    device manager pc not getting ip address
  2. Click the arrow next to the Network adapters option and right-click the device to remove.
  3. Now, select the Uninstall device option.
    uninstall device
  4. Finally, click the Uninstall button to confirm the action and restart your PC.
    uninstall

Your network drivers might be why your PC is not getting the IP address. This might be because the driver is outdated or faulty.

The solution to this is to uninstall the driver and restart your PC.

3. Run the Internet Connections troubleshooter

  1. Press the Windows key + I to open the Settings app and select Update & Security.
    update and pc not getting ip address
  2. Choose Troubleshoot in the left pane and select Additional troubleshooters.
    troubleshoot
  3. Now, select Internet Connections and click Run the troubleshooter.
    run trouble

In some cases, the PC not getting the IP address issue can be caused by glitches with your network settings and components. In this case, the best thing to do is to run the built-in troubleshooter.

4. Restart the modem

Many times due to some technical fault or any network conjunction, the DHCP server inside the router is not reachable. Hence you must try to restart the modem to fix this issue.

Also, the IPv4 address might not be detected because of weak internet strength. So, you need to make sure you have an active and strong connection.

The PC not getting an IP address issue is not usually too serious. It only requires a tweak here and there, most time to fix it, as shown in this guide.

If you want to know how to scan and manage IP addresses on your LAN, check our detailed guide to do it quickly.

Feel free to let us know the solution that helped you fix this issue in the comments below.

Google Drive is Not Syncing on Windows 11: How to Fix it

Several readers have reported that Google Drive is not syncing on Windows 11. And since most people prefer using Google Drive for its enhanced safety and options, this issue ultimately affects many people.

Thankfully, this guide will give you many solutions that will help you resolve the Google Drive not syncing on Windows 11 problem.

Why is Google Drive not syncing on my Windows 11 PC?

After some research, we found many common reasons that would not allow Google Drive to sync on your Windows 11 PC.

  • Google Drive isn’t running in the background – You need to make sure that Google Drive is open and running in the background for the sync to initiate.
  • Check your internet connection – Also, you should make sure that the internet connection that you are using is working without any issues.
  • Google Drive syncing is paused – You might have accidentally paused Google Drive syncing process.
  • Check your Google Drive storage: If there isn’t much storage left in your Cloud storage, the syncing process will be halted.
  • An issue with your Google Drive account – Some users have reported that it wasn’t syncing on their Windows 11 PC because of the account issues.
  • Remove bandwidth restrictions – You should not have restricted bandwidth settings for Google Drive for upload or download.
  • Clear cache files – Corrupt cache files can often lead to multiple issues on your PC.

What can I do if Google Drive is not syncing issue on my Windows 11 PC?

1. Re-enable the sync process

  1. Right-click on the Google Drive icon on the Taskbar.
  2. Select the Pause syncing option from the context menu.
  3. Wait for a few moments.
  4. Right-click again on the Google Drive icon on the Taskbar.
  5. Select the Resume syncing option and see if this resolves the issue or not.

2. Delete the Desktop.ini file

  1. Press Win + E keys to open the File Explorer.
  2. Navigate to the folder where the files aren’t syncing.
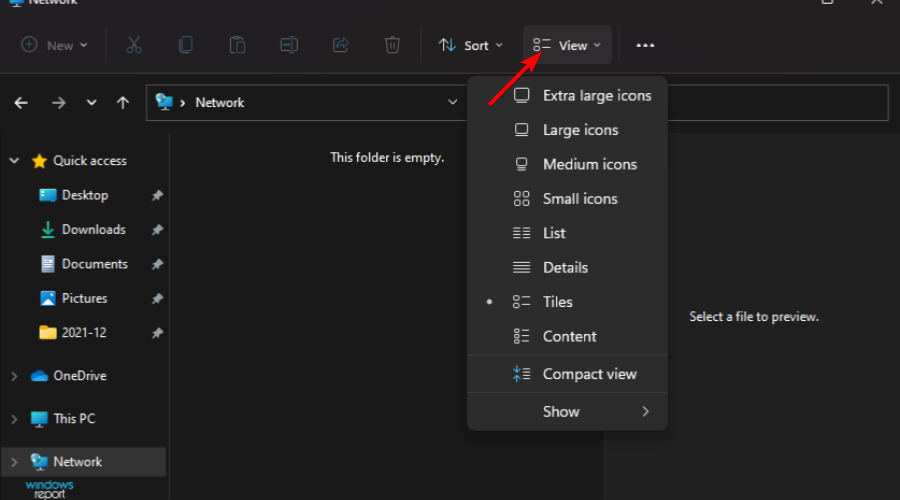
  3. Click the View button at the top menu bar.
  4. Select Show and click on Hidden items.
  5. If you see a Desktop.ini file inside the Google Drive folder and delete it.
  6. Refresh the folder by pressing F5.
  7. Restart your PC and see if you can sync to Google Drive.

Google Drive often creates a Desktop.ini file that prevents from syncing. However, you can safely delete it by following the above process and checking if this resolves the Google Drive is not syncing on my Windows 11 issue.

3. Reinstall Google Drive

  1. Press the Win key to open the Start menu.
  2. Open Control Panel.
  3. Click on Programs and Features.
  4. Select Google Drive and hit the Uninstall button at the top.
  5. Visit the official Google Drive download link.
  6. Install the program.
  7. Sign in with your account and check whether this resolves the issue.

If some installation files are missing for Google Drive, then this could result in the program misbehaving. However, you can quickly try reinstalling the program and resolving the problem.

4. Turn off Windows Firewall

  1. Press the Win key to open the Start menu.
  2. Type Windows Defender Firewall and open it.
  3. Click Turn Windows Defender Firewall on or off on the left.
  4. Select Turn off Windows Defender Firewall (not recommended) for both Public and Private networks.
  5. Click OK to save changes.

Chances are that the aggressive Defender Firewall settings are blocking the Google Drive sync process on your Windows 11 PC. You can turn off the Windows Firewall Defender and check if this resolves the Google Drive is not syncing on Windows 11 issue or not.

You can do the same with any of your third-party antivirus software. However, we suggest you immediately turn on the Firewall or antivirus as soon as you sync your files, as it protects you from being vulnerable to cyber attacks.

If you are confused about which antivirus to go for, we have a guide that lists some of the best and tested antivirus software you can use on your Windows 11 PC.

5. Run Google Drive as an admin

  1. Right-click on the Google Drive icon.
  2. Select Properties from the context menu.
  3. Switch to the Compatibility tab.
  4. Check Run this program as an administrator option.
  5. Click Apply and OK to save changes.

For some operations, Google Drive may ask you for admin permissions, which you can grant by following the abovementioned steps.

6. Check Google Drive storage

You should ensure that you have sufficient storage space in Google Drive. If there isn’t much space left, you won’t be able to move any files to your cloud storage, and the sync process will pause.

If the Google Drive storage is full, you can delete the unwanted files to make room for the file you wish to sync.

7. Check bandwidth settings in Google Drive

  1. Right-click on the Google Drive icon and select Settings.
  2. Click on Preferences.
  3. Tap on the Gear icon at the top-right.
  4. Scroll down and under Bandwidth settings, uncheck both Download and Upload rates.

For the sync to work correctly, Google Drive requires sufficient download and upload speeds. You can uncheck the bandwidth settings and check whether this resolves the issue.

8. Reconnect your account

  1. Right-click on the Google Drive icon and select Settings.
  2. Click on Preferences.
  3. Tap on the Gear icon at the top-right.
  4. Hit the Disconnect account option at the top.
  5. Follow the same steps and connect your Google account with Google Drive.

If there are some issues with your Google account, then you will also have issues with Google Drive. In such a case, we suggest you disconnect your Google account from Drive and reconnect it after waiting some time to fix the problem.

9. Clear the app cache

  1. Press the Win + R keys to open the Run dialogue.
  2. Type %LOCALAPPDATA%\Google and hit Enter.
  3. Right-click on the DriveFS folder and delete it.
  4. Restart your PC and see if this fixes the issue or not.

Cache files save all of your personalized settings for the app; if it gets corrupt, this could cause issues with your program.

In such a scenario, we suggest you follow the above steps, clear the app cache, and hopefully resolve the problem at your end.

10. Use the web version

If you are still having issues syncing your files to Google Drive on Windows 11, we suggest you use the web version. The web version is often free from such petty issues and works as efficiently as the desktop version.

11. Check if the Stream files option is enabled or not

  1. Right-click on the Google Drive icon and select Settings.
  2. Click on Preferences.
  3. Tap on the Google Drive button at the left.
  4. Click on the Stream files option and try syncing your files to see if this resolves the issue.

That is it from us in this guide. Finally, we have a guide to help you fix Google Drive’s unable-to-connect problem.

For users facing the wrong Google Drive quota issue, we suggest you refer to our guide and fix the problem.

We would also like you to check out our guide on fixing Google Drive that keeps crashing on Windows 10, 8.1, and 7. For users facing Google Drive saying you are not signed in error, please check out our guide by clicking the link.

You can also refer to our guide and fix the “Whoops! There was a problem previewing this document” Google Drive error.

Feel free to let us know in the comments below which one of the above solutions fixed the problem of Google Drive not syncing on Windows 11.

Windows 11 Map Network Drive Missing: How to Get it Back

A mapped network drive in Windows is the virtual representation of a remote folder. It is a critical feature for users as it enables them to access their files and folders from different computers without physically connecting to the target machine.

Troubleshooting network drive problems in Windows can be tricky, as you could encounter errors in multiple ways. 

Mapped network drives aren’t always reliable and sometimes may stop working correctly for some reason. There isn’t a single reason why it stops working, but there are a few common reasons why this problem occurs.

When mapping a network drive is unsuccessful, it may fail to show on File Explorer. This can be quite frustrating, especially when you need to share the files. The folder sharing might not be possible when you cannot locate them even if the two PCs are running on the same OS and are on the same network.

We will go over these reasons in detail below so that you can try and get it to appear again.

Why is my Windows 11 map network drive option missing?

If you’re trying to map a network drive in Windows and you can’t, it’s probably because the option is missing. That’s not necessarily a big problem, but it isn’t very pleasant.

The issue could be due to several factors that are all fairly easy to fix. Here are some of them:

  • A wrongfully mapped drive could also be the reason it is missing. You can quickly solve this by deleting it and start over afresh. To delete:
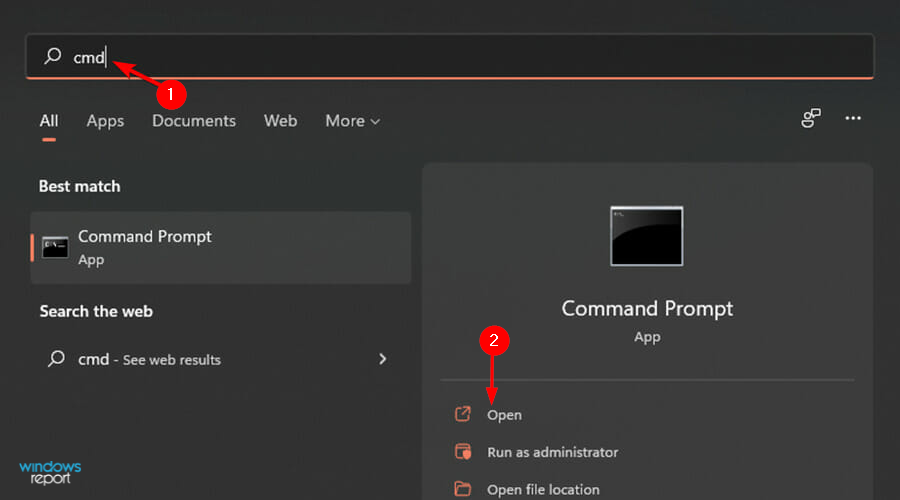
    1. Hit the Windows key, type cmd on the search bar, and open the Command Prompt.
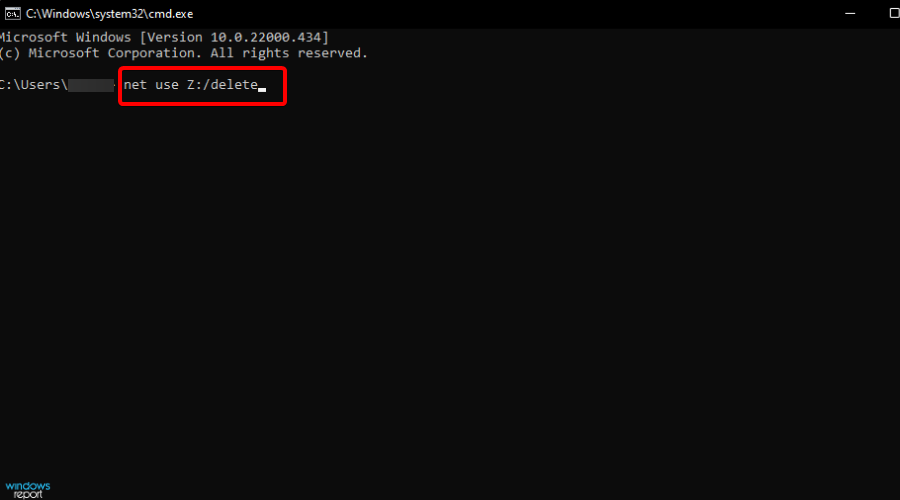
    2. Type in the following command depending on your assigned drive: net use Z: /delete
  • A typo in the drive mapping path. Check carefully and make sure that the full path is correct, including the share name and everything else. Make sure you don’t have a space before or after the “//” symbol.
  • The folder is hidden or located in a system directory. Make sure it isn’t located inside a hidden folder such as: C:\Program Files\ or C:\Windows\ On Files Explorer, you can navigate to the view tab to reveal hidden items and see whether you can locate them there.
  • Your network drive may be offline. This sounds obvious, but it’s an easy fix for when things go wrong, so we’ll start here. If you can’t see your drive in Windows Explorer or File Explorer, that means either your user account doesn’t have access to the drive or it’s not actually connected to your network.

If you’re sure you know where the drive is located and can see it there in File Explorer or Windows Explorer, and you still can’t access it from your computer, then try pinging the computer that has the drive.

A ping test will confirm whether or not the computer is online and help you determine if there’s a problem with your ISP (Internet Service Provider).

What can I do if my Windows 11 map network drive is missing?

1. Modify your Registry

  1. Press the Windows + R keys simultaneously to open the Run window.
  2. Type regedit and hit Enter. 
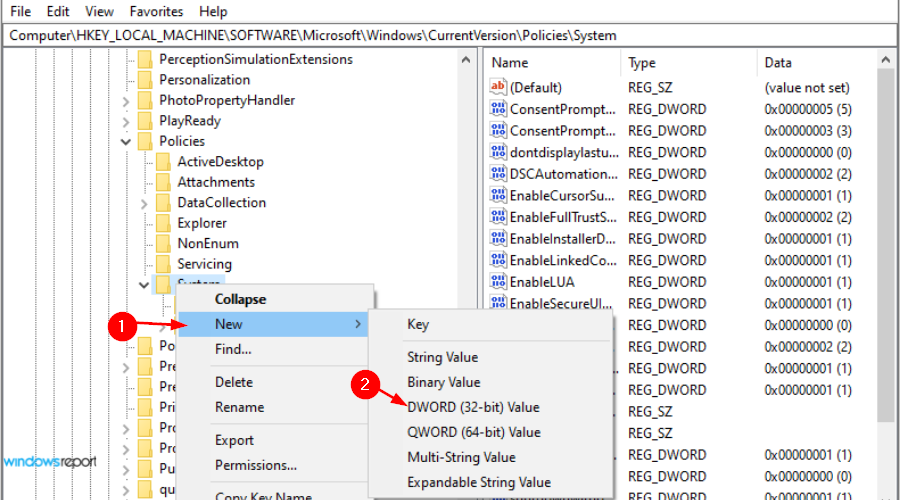
  3. Navigate to the following location: HKEY_LOCAL_MACHINE\SOFTWARE\Microsoft\Windows\CurrentVersion\Policies\System
  4. Under system, select new and click DWORD (32-bit) Value.
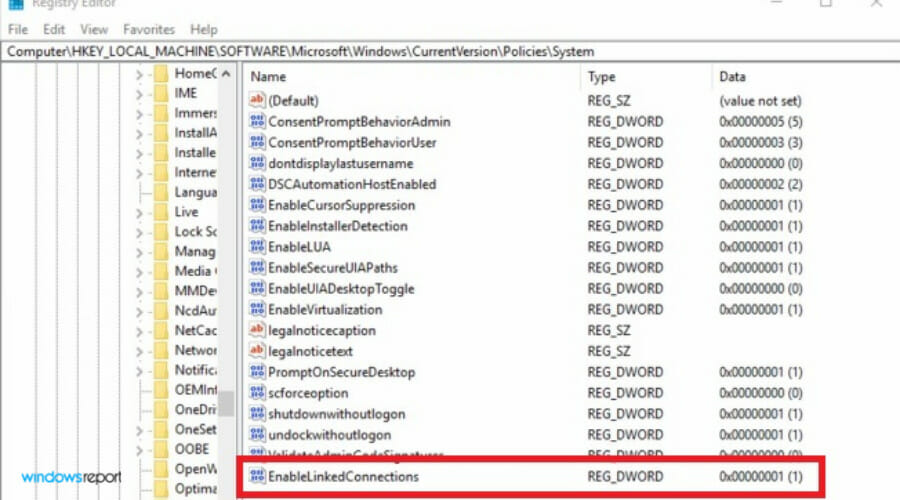
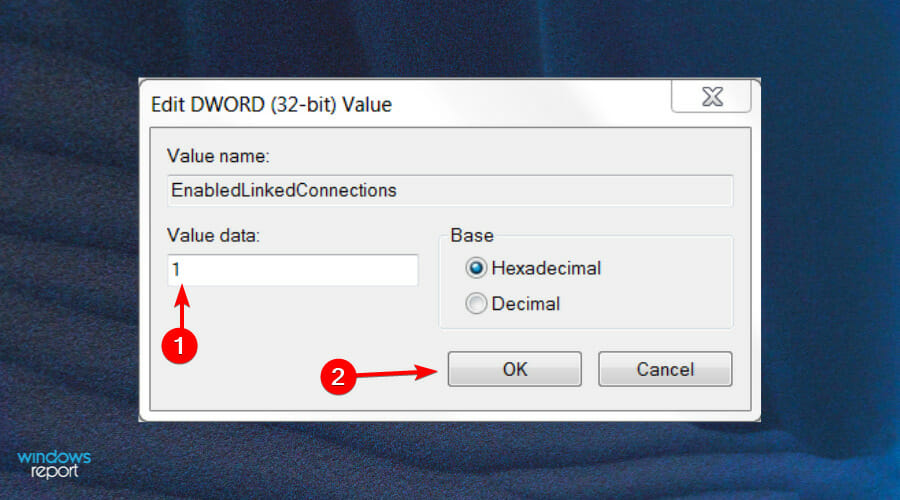
  5. Name the new value EnableLinkedConnections and press Enter.
  6. Under the Value Data field put 1, then press OK.
  7. Exit and restart your computer.

2. Manually update your drivers

  1. Hit the Windows + I keys to open the Start Menu.
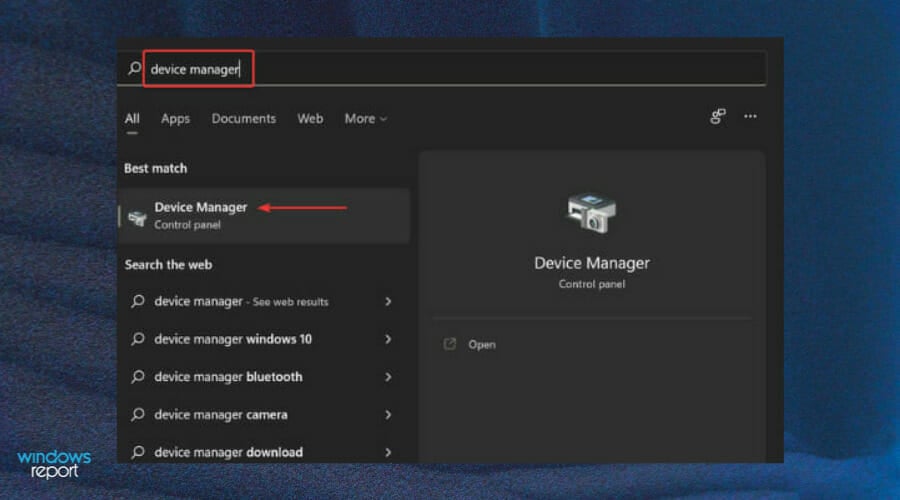
  2. Search and open Device Manager.
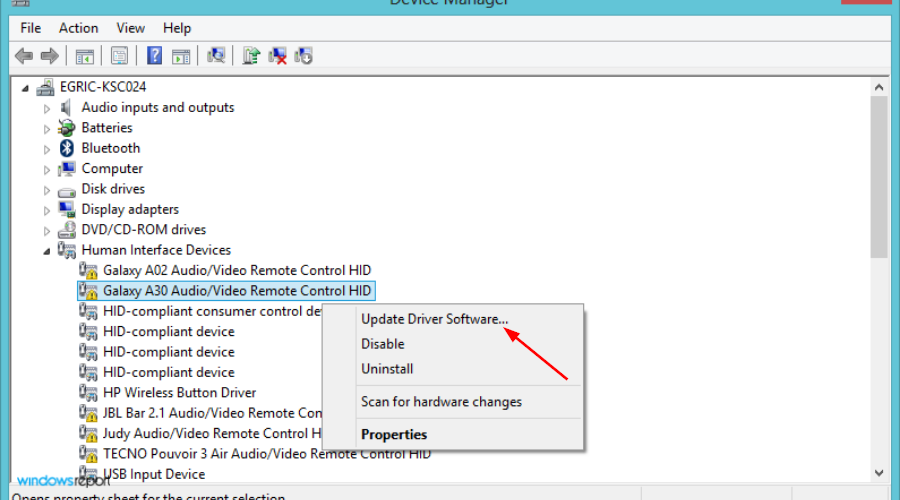
  3. Locate the driver you wish to find and right-click on Update Driver Software.
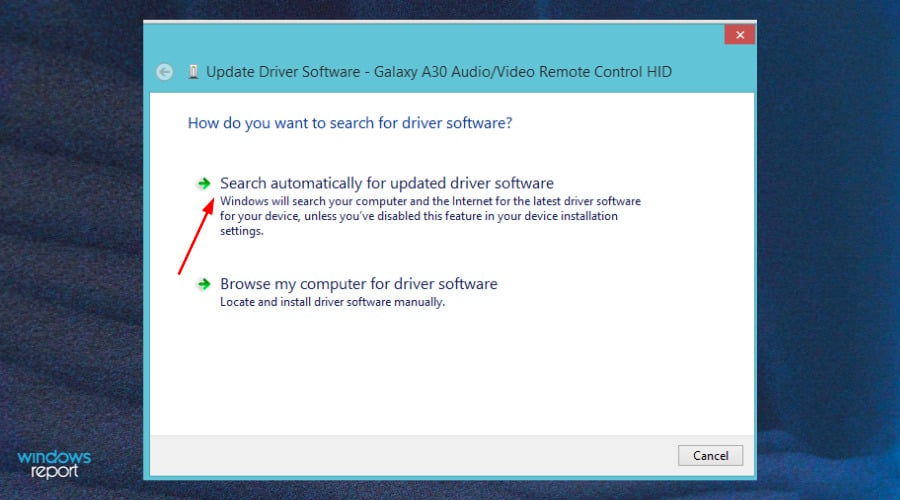
  4. Click on Search automatically for updated driver software.
  5. Once you find the missing drive, restart your device.

3. Show hidden items in File Explorer 

  1. Hit the Windows + I keys simultaneously to open the Start Menu.
  2. Search File Explorer and click Open.
  3. Click on the View tab.
  4. In the drop down menu, click Show then select Hidden items.

If you feel this step is cumbersome, you can use a third-party software tool such as AnyRecover that will easily locate the missing network drive.

Do I need to enable network discovery to map network drives?

If you’re trying to map a network drive on Windows 11 and it’s acting up, it could be because the network discovery feature isn’t enabled.

One of the most common problems with home networks is that they don’t work how you want them to. This can happen if you upgrade from a previous version of Windows or because you have a lot of devices connected and things get confusing.

To enable network drives:

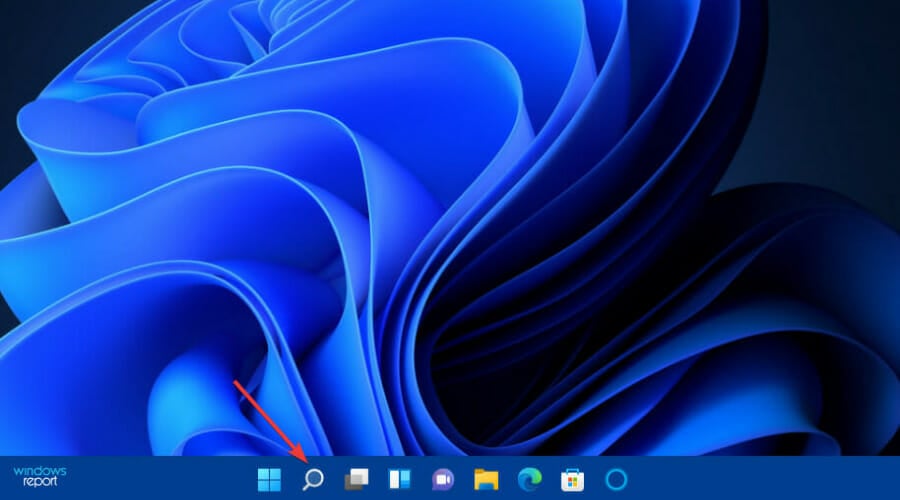
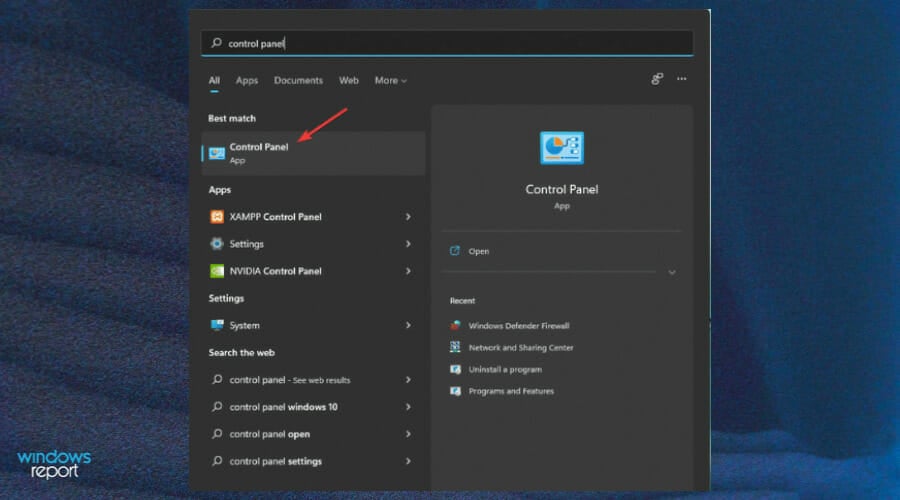
  1. Press the Search button on the taskbar.
  2. Type and select Control Panel.
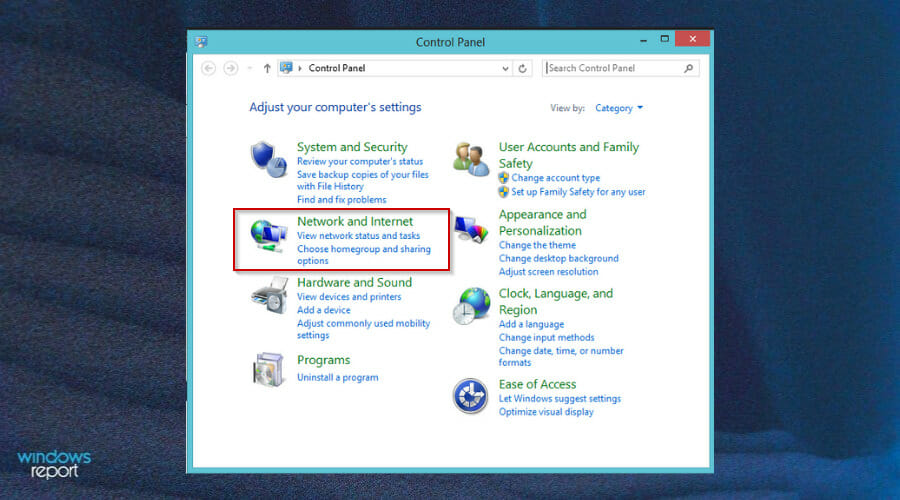
  3. Click on the View by menu and then select Network and Internet.Control panel
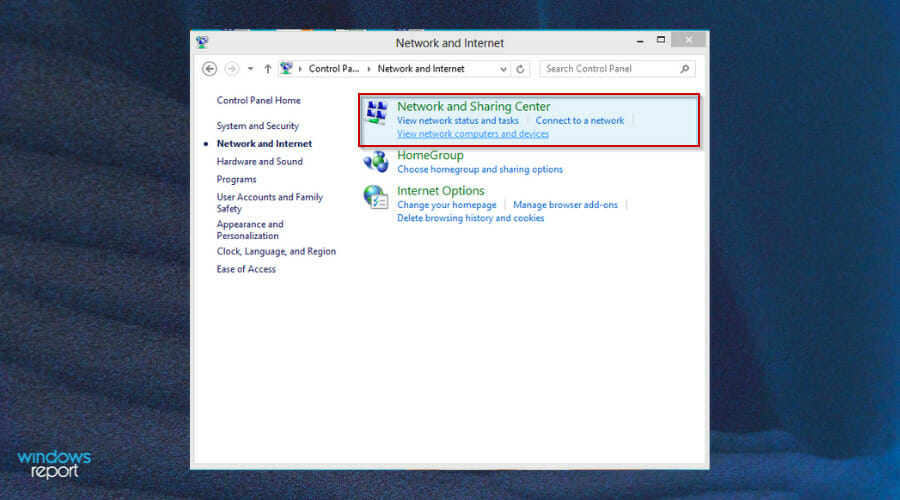
  4. Select Network and Sharing Center. control panel
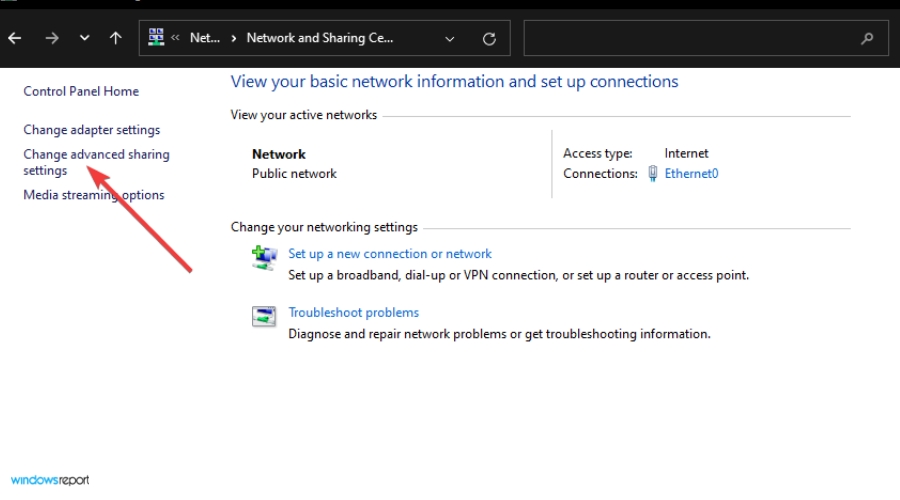
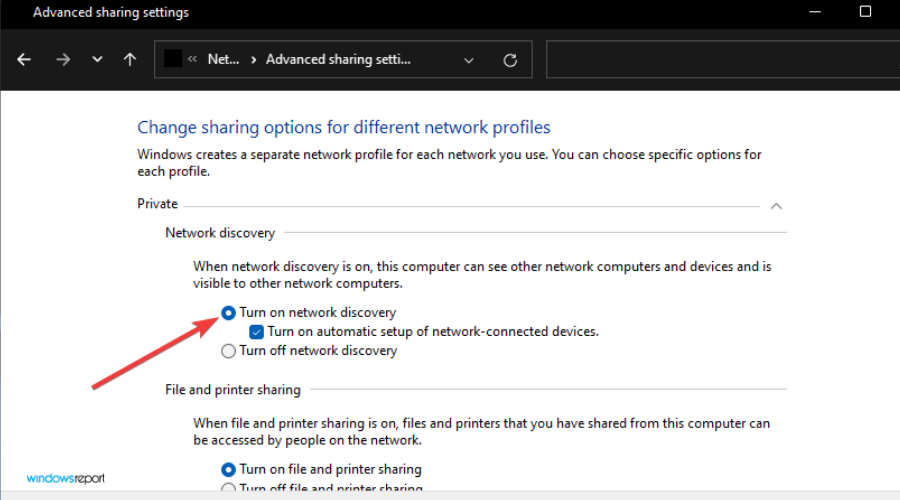
  5. Next, click Change advanced sharing settings.
  6. Select the Turn on network discovery option.
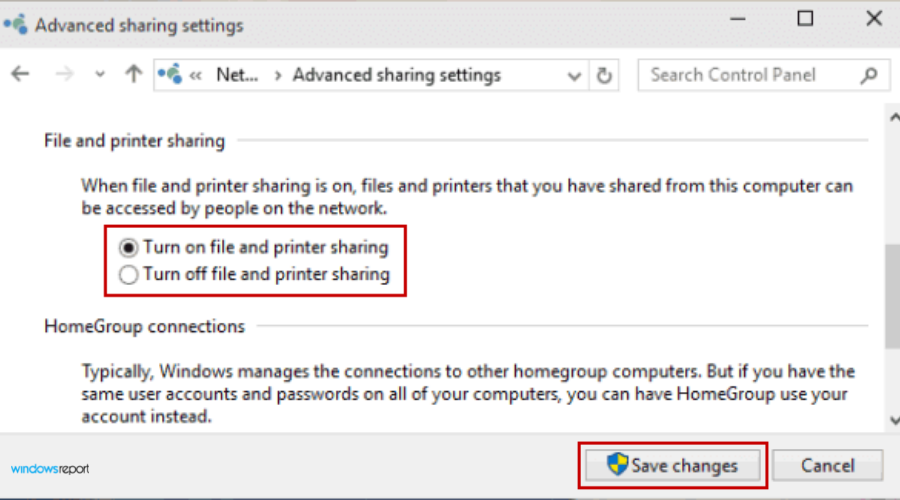
  7. Scroll down, select the Turn on file and printer sharing button.
  8. Click the Save changes button to apply the new settings.

You’re not alone if you’re getting the error that your mapped network drive is missing. In fact, a lot of people are getting this and the error_dev_not_exist error, but the fix isn’t too hard. Hopefully, if you encounter something similar to the one we mentioned above, this article will come in handy to help you resolve it. 

If the methods above didn’t work, you can try and map a network drive on Windows 11 again to fix this issue.

Besides, you may find NAS not listed under the Network tab, an issue arising out the of underlying causes. But it, too, is easy to fix! In case you’re using a WD device, we have a great guide on what to do if WD My Cloud is not showing on network, so don’t miss it.

Should you take an interest in mapping out shared resources, check out our article on how to map network drives over VPN.

We’d love to hear from you about the solutions that worked for you, so feel free to leave us a comment below.

Microsoft is trying to scrap NTFS for ReFS in Windows 11

We’re all Windows fans here, so let’s cut directly to the chase. We’re going to take a short journey back in time, then come right back.

As you well know, back in 2011-12, when Microsoft launched Windows 8, it also introduced a new file system called Resilient File System or ReFS.

However, it seems like Microsoft is getting ready to put NTFS aside and move on to more efficient ways to achieve the same goals.

Windows 11 is now getting ReFS support

This might be confusing to some, as we’re all accustomed to NTDS. Now, compared to New Technology File System (NTFS), ReFS promised more resiliency, and more performance, like on virtual machines (VMs).

Furthermore, developers are also promising higher data size support (up to 35PB vs 256TB on NTFS), among other benefits.

Just know that, so far, the next-gen file system was limited to Windows Server only. Microsoft actually limited ReFS support to only professional and enterprise-based Windows 10 SKUs back in 2017.

Leaping forward to 2023 though, things could be changing soon for the better in terms of ReFS support on client OS systems.

At first sight, it looks like the Redmond tech giant is beginning to work on enabling ReFS features on the new operating system, Windows 11.

For the time being the feature is still disabled on the latest Windows 11 Dev channel build 25281, but it can be enabled using a special velocity ID 42189933.

Also important is the fact that trying to install Windows 11 build 25281 without the feature ID enabled leads to the interruption of the setup with an annoying error message.

Windows enthusiasts that tried it are now taking to Twitter to share their experience, saying that the setup went well for the most part, though they did encounter a green screen of death (GSOD) once.

A lot of changes are still in store for the latest Microsoft-designed operating system and Microsoft keeps rolling them out one after another.

Make sure you keep up with what’s happening with Windows 11 22H2, especially with all the bugs and glitches that ruin the experience.

Also, if you are a Windows Insider, be sure to catch up with the latest Dev (build 25281) and Beta (KB5022363) Channel builds.

Before we conclude, if you haven’t yet moved to Windows 11 and were thinking about using Windows 10 a bit more, there’s something you should definitely know.

Microsoft announced that January 2023 is the last month you can buy a licensed copy of Windows 10 from the company.

This means that you will only be able to purchase it from retailers that still have it in stock. so keep that in mind when thinking about buying licensed Windows 10 software.

What is your take on this NTFS vs ReFS situation? Share your thoughts and ideas with us in the comments section below.

Microsoft extends partnership with OpenAI by making a “multibillion dollar investment”

Earlier this month, it was rumored that Microsoft was intending to make a $10 billion dollar investment into OpenAI. And now, Microsoft has officially announced that it is extending its partnership with OpenAI through a multiyear, multibillion dollar investment.

The long-standing relationship dates back to 2019 when Microsoft injected a $1 billion investment into OpenAI in a bid to solve the world’s toughest problems, and also build upon the San Francisco-based company premise of using AI to benefit everyone.

According to Microsoft’s Chairman and CEO, Satya Nadella:

We formed our partnership with OpenAI around a shared ambition to responsibly advance cutting-edge AI research and democratize AI as a new technology platform. In this next phase of our partnership, developers and organizations across industries will have access to the best AI infrastructure, models, and toolchain with Azure to build and run their applications.

The extension of the partnership between both companies will result in an increase in the number of investments that Microsoft makes in “the development and deployment of specialized supercomputing systems to accelerate OpenAI’s groundbreaking independent AI research.”

Microsoft will incorporate AI-powered experiences across its products and services as well as launch new categories of digital experiences that rely on OpenAI’s technology including the Azure OpenAI Service. It was reported that Microsoft was planning to integrate ChatGPT capabilities across its Office Apps and launch a ChatGPT-powered Bing.

Through this deal, Azure will become OpenAI’s exclusive cloud provider. To this end, Microsoft is yet to indicate how much of an investment it has made. However, if earlier reports are anything to go by and no alterations have been made to the deal. Microsoft will get 75% of the profits made by OpenAI till it is able to get back the initial investment made, after which it would then retain a 49% stake in the company.

Sam Altman, CEO of OpenAI further added that “The past three years of our partnership have been great. Microsoft shares our values and we are excited to continue our independent research and work toward creating advanced AI that benefits everyone.”

Microsoft has constructed and trained multiple AI supercomputing systems using OpenAI’s technologies such as GitHub Copilot,  DALL·E 2, and ChatGPT. It will be interesting to see how Microsoft will integrate ChatGPT capabilities across its products and services, especially after announcing its massive planned layoffs which will take place over the next three months.

Fresh Microsoft Edge Dev release adds a Search bar in Customize sidebar and more

Microsoft has released a new Edge Dev build, bumping it to 110.0.1587.11. The update unpacks several added features among them is the added capability that allows the browser to notify the user when an external program alters your start page and search engine settings without your knowledge.

What’s more, the update also features a Personalize my top sites in customize sidebar option in the Sidebar setting as well as a Search bar in the Customize sidebar that is in place to help users add sites easily. Moreover, you can now import passwords CSV file and hide duplicates in History.

As for iOS users, the update adds a new feature that allows them to block ads with a long press. Furthermore, they can now select and read using Read aloud. It is worth noting that this update is not accessible to Mac users just yet.

The update also features a ton of reliability fixes as well as policy updates be sure to check them out over at Microsoft’s blog post. In related news, Microsoft released another Edge Dev build earlier this month to fix the missing Start menu entries caused by the Defender issue. Moreover, the company has resolved the PDF printing issue with printer names containing CJK characters that users on the Stable build 109 might have been experiencing with a patch release.

As usual, the update should roll out to users automatically, however, if this is not the case, you can trigger the update manually by visiting Edge’s Settings menu, then click on Help and Feedback, select About Microsoft Edge, and then wait for the browser to download the update.

How to Allocate More RAM to Roblox [3 Simple Steps]

Are you experiencing lag or low performance while playing Roblox? Allocating more RAM to the game can improve its performance and provide a smoother gaming experience.

This article will show you simple steps to allocate more RAM to Roblox. These steps are easy to follow and can be done by anyone, regardless of technical experience.

Does more RAM help Roblox?

While there is not much downside to having additional RAM, it has many advantages. Some of them include the following:

  • Improved performance – Allocating more RAM to Roblox can improve the game’s performance by allowing it to run more efficiently. This can result in a smoother gaming experience, with less lag and less stuttering.
  • Increased stability – More RAM available to Roblox can also increase the game’s stability. This means the game is less likely to crash or freeze, which can frustrate players.
  • Better multitasking – With more RAM, Roblox can handle more tasks simultaneously; players can open multiple tabs, run other apps or programs, and still have a stable gaming experience.
  • Enhanced graphics – Allocating more RAM can also improve the game’s graphics, allowing it to load and render them more efficiently. This can make for a more immersive and visually pleasing gaming experience.
  • Better gaming experience – In general, allocating more RAM to Roblox can result in a better gaming experience overall. Players will enjoy the game without any lag or performance issues, and they will be able to do so with increased stability, better multitasking, and enhanced graphics.

How can I allocate more RAM to Roblox?

1. Using the Task Manager

  1. Press Ctrl + Shift + Esc to open the Task Manager.
  2. Launch Roblox and open the game you want to play on it.
  3. Click the Details tab on the Task Manager.
    How to allocate more ram to roblox
  4. Search for the RobloxPlayerBeta.exe task, right-click it, hover on Set priority, and change the value to High.

This process will increase the RAM allocated to Roblox and work for all games you play.

2. Close other apps

By closing other apps before running Roblox, you are reducing the amount of RAM used by other programs, which frees up more RAM for Roblox. As a result, Roblox has more memory available, which can improve its performance.

It’s also worth mentioning that if your computer is running low on RAM, the operating system may start to page out some of the data from the RAM to your hard drive, slowing down your computer’s and Roblox’s performance.

So, closing unneeded apps can help the operating system to use the available memory more efficiently.

3. Using the Command Prompt

  1. Press the Windows key + R to open the Run dialog box.
  2. Type cmd and press Enter to open the command prompt.
  3. Type the following command and hit Enter:
    "start "" "RobloxPlayerBeta.exe" -malloc=system"

This command will start Roblox and allocate more RAM using the system memory allocator.

Note that RobloxPlayerBeta.exe may be different depending on your version of Roblox, so be sure to check the Roblox support website for the correct file name.

Also, the -malloc=system flag might not work for all versions of Roblox, and on all operating systems, you can try different flags that suit your system and version of Roblox.

In conclusion, allocating more RAM to Roblox can significantly improve the game’s performance and provide a smoother gaming experience.

By following the simple steps outlined in this article, you can efficiently allocate more RAM to Roblox and start enjoying a better gaming experience.

Remember that the amount of RAM you allocate will depend on the amount of RAM your computer has available, so be sure to check your computer’s specifications before allocating RAM to the game.

File Count Over Limit in Sharepoint: How to Bypass It

Did you get the file count over the limit SharePoint notice? Here is what you should know.

SharePoint is a popular platform for document management and collaboration. However, it has a built-in limit on the number of files stored in a single folder.

This limit can be a significant obstacle for organizations that need to store large amounts of data.

This article will discuss bypassing the file count limit in SharePoint and storing more files in a single folder.

How many files can you have in a SharePoint folder?

The SharePoint list view threshold determines the number of files storable in a single SharePoint folder. The default list view threshold is 5,000 items per view, meaning a single folder can contain up to 5,000 files.

This threshold can be increased or decreased by an administrator. Still, it’s essential to keep in mind that increasing the point can harm the performance of SharePoint. It’s important to note that the list view threshold is a limit per view, not per folder.

So, if you have a folder with more than 5,000 files, you can still access them by creating multiple views with different filters.

However, using this method is advisable only if you have a specific need. Or, you may use them if you know the risks they can bring regarding performance and management.

Additionally, you should consider alternative solutions like archiving and storing documents in a different location if you need to store large amounts of files. Also, note that this is different from SharePoint syncing issues.

How do I overcome the SharePoint 5000 item limit threshold?

1. Increase the List View Threshold

  1. Navigate to Central Admin.
  2. Select Manage Web Applications under the Application Management option.
  3. Select any of the web applications for which you need to adjust the list.
  4. Click on General Settings, and select Resource Throttling.
    file count over limit sharepoint
  5. Lastly, edit the limit to whatever value you want and click OK.
    file count over limit sharepoint

2. Use folders

Using folders can help you overcome the SharePoint 5000 item limit threshold by allowing you to organize your items into smaller, manageable subsets.

This can be done by creating folders for different departments, projects, or other logical groupings of items and then moving things into the appropriate folders.

This will reduce the total number of items in a single list or library. It will also allow you to work more efficiently with your data.

Additionally, SharePoint allows filtering, grouping, and sorting of the items based on metadata columns, allowing you to manage your content more effectively.

Bypassing the file count limit in SharePoint can be helpful for organizations that need to store large amounts of data.

However, it’s essential to remember that there are limits to how much data can be stored in a single folder and that other limitations must be considered.

It’s always a good idea to consult with SharePoint experts or Microsoft support to ensure that your implementation is secure, efficient, and in compliance with relevant regulations.

Ultimately, finding a balance between storing data and maintaining your SharePoint environment’s stability and security is crucial.

Can’t Download Anything on Windows 10: How to Fix It

Do you need help downloading anything on your Windows 10 computer? Whether it’s a software update, app, or file, being unable to download, it can be a frustrating experience.

Users have expressed several reasons this problem might occur.

So, in this article, we will explore some common causes of this problem and provide solutions for how to fix them.

Why can’t I download anything on Windows 10?

There can be several reasons you can’t download anything on Windows 10. Some common causes include:

  1. Internet connection issues – A slow or unstable internet connection can prevent downloads from completing.
  2. Full hard drive – A full hard drive can prevent new files from being downloaded.
  3. Windows Store issues – Problems with the Windows Store, such as a corrupted cache or outdated version, can prevent downloads from working.
  4. Firewall or antivirus software – A firewall or antivirus software can block downloads if they detect a security threat.
  5. Browser issues – Issues with your browser, such as a corrupted cache or outdated version, can prevent downloads from working.
  6. Insufficient permissions – If the user account does not have the necessary permissions to download files, this can cause a download error.
  7. Outdated drivers – Outdated drivers can also cause download errors.

It’s important to troubleshoot and identify the cause of the problem to find the appropriate solution.

So, with this said, we recommend you try the fixes we explain below.

What should I do if I can’t download anything on Windows 10?

1. Clear the browser cache

  1. Launch your browser (we use Chrome, which may slightly differ from other browsers).
  2. On the Address bar, enter the path below and hit Enter.
    chrome://settings/privacy
  3. Click on Clear browser data.
    can't download anything windows 10
  4. Tick all the essential elements to be removed and select the Clear data button.
    can't download anything windows 10

2. Check your internet connection

An internet connection can stop you from downloading in Windows 10 if it is slow, unstable, or has low bandwidth.

Slow internet speeds can cause downloads to take longer to complete or fail altogether. However, an unstable connection can cause interruptions in the download process, leading to errors or incomplete downloads.

Low bandwidth can also prevent large files from being downloaded. Additionally, if there is network congestion, you may also experience slow download speeds.

Furthermore, a weak or unstable internet connection can also cause issues with the authentication process, preventing you from accessing the resources you want to download.

Hence, you may need to connect to a wired connection with a different ISP.

3. Free up hard drive space

3.1 Delete files with Storage Sense

  1. Press Windows + I to open the Settings app, then click on System.
  2. Select Storage and click on Configure Storage Sense or run it now.
    can't download anything windows 10
  3. Finally, select when you need each file type deleted under Temporary Files.

3.2 Move files to another drive

Moving files to another drive can help if you can’t download anything on Windows 10 because your hard drive is full. When a hard drive is full, it can prevent new files from being downloaded.

If the drive where your operating system is installed, also known as the C drive, is full, it can cause performance issues and errors that prevent downloads from working.

By moving files to another drive, you’re freeing up space on the C drive, which can improve the download process and prevent errors from occurring.

You may also consider purchasing additional storage.

3.3 Uninstall apps you don’t use anymore

  1. Press Windows + R, type control, and hit Enter.
  2. Select Uninstall a program.
    can't download anything windows 10
  3. From the program list, click on any program that you do not need, then select the Uninstall button.
    can't download anything windows 10
  4. Follow the wizard to complete the process.

4. Disable firewall or antivirus temporarily

  1. Click on the hidden access arrow in the Taskbar.
  2. Click on your antivirus icon, hover over Avast shields Control and select Disable for 10 minutes (This step varies for different antivirus software).
  3. Try downloading the file again.

Disabling the firewall or antivirus can help if you can’t download anything on Windows 10 because these security features can block downloads if they detect a security threat.

Unfortunately, some files detected as malicious may not always be and may constitute essential files for the user.

It is important to note that disabling a firewall or antivirus can make your computer vulnerable to security threats, so it’s recommended to use this solution only as a temporary fix and scan the downloaded files before using them.

5. Clear the Windows Store cache

  1. Open the Run dialog using Windows + R.
  2. Type WSReset.exe and hit Enter.
  3. Finally, wait for the command to execute. You will see the Command Prompt appear, then disappear. The Microsoft Store may open afterward.

This solution will be vital if you cannot download apps from the Microsoft Store on a Windows 10 device.

6. Update your drivers

  1. Press Windows + X and select Device Manager.
  2. Expand the Network adapter category, right-click on your network driver, and select Update driver.
  3. Click on Search automatically for drivers, and let the computer find your best options.
    can't download anything windows 10
  4. Finally, follow the same steps to update the graphics card driver.

Updating drivers can help resolve the inability to download on Windows 10 because outdated or incompatible drivers can cause various issues that prevent downloads from working.

It will fix these issues by providing the latest features and bug fixes, improving the hardware components’ performance and compatibility.

For example, updating your network card driver can fix connectivity issues, which can cause download errors.

Also, updating your graphics card driver can improve the performance of your computer, which can help prevent download errors caused by system overload.

A quick way to get rid of and also prevent driver-related issues is to employ a dedicated driver utility that does the updating for you.

We recommend Outbyte Driver Updater as it’s constantly updated with all the latest Windows drivers, plus it’s very easy to use.

Outbyte Driver Updater

Say goodbye to driver-related errors by always checking them with this efficient tool.
Free trial Download now

In conclusion, if you can’t download anything on Windows 10, the above solutions may help you resolve the problem.

If none of the above solutions work, consider contacting your internet service provider or the Microsoft support team.

Lastly, tell us what worked for you in the comments section below.

Looks Like You’re Stranded: How to Fix This Xbox App Error

If you’re an Xbox user, you may have encountered the frustrating Looks like you’re stranded error when trying to launch specific apps on your console.

This error can prevent you from accessing your favorite games. Unfortunately, it will occur most times when getting the game pass on PC but don’t worry; there are solutions.

Our guide will explore the causes of the Looks like you’re stranded error and provide steps to help you troubleshoot and fix the issue.

Why do I see the looks like you’re stranded error on the Xbox app?

There are several potential causes for the “Looks like you’re stranded” error on the Xbox app. Some of the most common include the following:

  • Network connectivity issues – This error can occur if your Xbox console has trouble connecting to the internet or the Xbox Live service. This may be due to a problem with your router or internet service provider or an issue with your console’s network settings.
  • Console or app updates – If your console or the app you’re trying to launch is out of date, this can cause the error to occur.
  • Xbox Live service outage – Sometimes, the Xbox Live service may experience an outage, preventing you from launching apps and causing the Looks like you’re stranded error to appear.
  • Corrupted game data – If the game data of the app you are trying to launch is corrupted, it can cause an error.
  • System cache: Sometimes, the system cache of your Xbox console can become corrupted, which can cause the error to appear.

Now we have covered common triggers, let us explore some of the best resolutions.

What can I do if I get the Looks like your stranded error on the Xbox app?

1. Restart your device

While this may feel like a general fix in many cases, users have reported it to be very effective for this particular problem.

So before diving into some more complex solution, restart the device and relaunch the app. Then, you probably will have resolved the issue.

2. Terminate, Restore and Reset apps

  1. Press the Windows key.
  2. Right-click on the Microsoft Store app and select App settings.
    Looks like you're stranded xbox app
  3. Lastly, one after the other, click the options for Terminate, Repair, and Reset.
    Looks like you're stranded xbox app

3. Clear the store cache

  1. Open the Run dialog using Windows + R.
  2. Type WSReset.exe and hit Enter.
    Looks like you're stranded Xbox app
  3. Finally, wait for the command to execute. You will see the Command Prompt appear, then disappear. The Microsoft Store may open afterward.

Clearing the store cache can solve the error by removing temporary files and data that may be causing issues with the Xbox and Microsoft Store apps.

4. Update store apps

  1. Click on the Microsoft Store icon on your Taskbar.
    Looks like you're stranded xbox app
  2. Click on the Library icon, then select the Update all button.
    Looks like you're stranded xbox app
  3. Lastly, verify that the problem has been solved when the updates are done.

Updating store apps can solve the error because updates often include performance improvements and bug fixes that can resolve issues causing the error.

An update might include new features, security patches, and other changes that can improve the app’s overall functionality and resolve the error.

It’s always a good practice to keep your apps updated to the latest version to avoid any errors or bugs.

5. Log out from the Xbox app and Microsoft Store app

As a last solution, you should log out of both applications.

Logging out of the Xbox and Microsoft Store apps can solve the Looks like you’re stranded error because it clears any cached login information and allows the user to sign in again with new credentials. This can resolve any issues with authentication or permissions that may be causing the error.

The Looks like you’re stranded error on Xbox can be a frustrating issue, but there are steps you can take to troubleshoot and resolve it.

If the error persists, don’t hesitate to contact Xbox customer support for additional assistance.

Lastly, with the information provided in this article, you should be able to get back to gaming and enjoying your Xbox in no time.

Show All Apps by Default in Windows 11 Start Menu [2 Tips]

Windows 11, the latest OS from Microsoft, comes with several new features and improvements.

One of the most notable changes in Windows 11 is the Start menu, which now has a more modern and streamlined design.

However, one feature that may take time to be obvious is the option to show all apps by default in the Start menu.

This guide will show you some tips on enabling this feature and customizing your Start menu to your liking.

How many apps can be displayed in the Start menu in Windows 11?

The number of apps displayed in the Start menu at once in Windows 11 can vary depending on the screen resolution and the Start menu size.

Generally, Windows 11 allows many applications to be shown in the Start menu, accommodating up to 512 apps. This is one of the many great features of the OS.

However, it depends on the Start menu size; by default, it shows around 20-30 apps, and if you increase the Start menu size, it can show more apps.

With this said, let us explore how you may display all your apps in the Start menu on the new operating system.

How do I get the Start menu to show all apps in Windows 11?

1. Using third-party tools

  1. Download the Windows 11 ExplorerPatcher tool.
  2. Install the tool and restart the computer.
  3. Right-click on your Taskbar and select Properties (This is a new potion that the app installs).
    Windows 11 show all apps by default
  4. On the right pane, select the Start menu, then click on the Open Start in All apps by default option.
    windows 11 show all apps by default

While this is effective, it will alter the look of the Taskbar and give a very similar Windows 11 look. So if you do not want this, you may try the solution below.

2. Open all apps in the default app menu

  1. Click on the Start menu or press the Windows key.
  2. Select All apps, or press the Tab key twice.
  3. This will display all your applications under the Start menu

The downside to this step is that you will have to do the process every time you want to view all apps. However, the advantage is that you do not need to download any third-party tools.

Our guide discussed ways to show all apps in the Windows 11 Start menu by default.

By following these tips, you can easily customize your Start menu and make it more efficient and user-friendly.

Whether you are a new user of Windows 11 or an experienced one, these tips will help you make the best of your operating system.

Remember, the Start menu is a powerful tool, and by customizing it to your needs, you can save time and increase your productivity.

Fix: ChatGPT Failed to Refresh Auth Token 403 Forbidden

When working with the OpenAI API, it is common to encounter a 403 Forbidden error while trying to refresh the auth token for ChatGPT. It can be quite annoying. Fortunately, this issue can be fixed.

Here, in this guide, we will discuss some of the steps necessary to troubleshoot the problem. Read on!

What causes the ChatGPT failed to refresh auth token: 403 forbidden error?

There are a few causes for a 403 forbidden error when attempting to refresh an auth token; some of them are mentioned here: 

  • Token may have expired or revoked – If the auth0 token used has been revoked or expired, then the user will need to request a new token.
  • Insufficient permissions – If you don’t have the necessary permissions to refresh the token, then you might get this error. You need to ask the admin for the correct permissions. Also, make sure you are using the right credentials.
  • Missing header or parameter – If the request made doesn’t have all the necessary parameters and headers specified in the API documentation, then you might get this error code.
  • Server issues – If the server has issues with the refresh token request, you can see this error code. In this case, the developer needs to check the server logs to check for errors.
  • IP blocked by the server – If there are too many requests made in a short span of time, then the IP could be blocked by the server, hence the error.

What can I do to fix the ChatGPT failed to refresh auth token: 403 forbidden error?

Before moving to the troubleshooting steps, make sure that:

  • Your internet connection is working fine. 
  • Check the expiration date of the current token. If it has expired, obtain a new token with the right permissions. To do that, you need to raise a request to the authentication server using the appropriate credentials. Now, replace the old token with the new one in your application’s code.
  • You need to check if the API key you are using is valid and has all the necessary permissions. Also, the key has access to the appropriate services, and it is not expired. 
  • Before making the request, check that you are using the correct endpoint. Check the URL for spelling and other errors. Moreover, ensure that you are using the correct method (e.g., GET, POST, etc.) for the specific endpoint.

1. Check Logs in the Auth0 dashboard 

  1. Go to Monitoring, and click Logs.
  2. Search for specific events to find all Failed Exchange of Refresh token errors; specifically, look for Log Event Type Codes 4.Monitoring Logs -ChatGPT failed to refresh auth token: 403 forbidden
  3. You will get the event type and description to understand why you got the error.

2. Check the request headers & rate limit

If the headers are not right, the server won’t authenticate the request and show you a 403 error. Therefore, check your request headers are formatted properly and include all necessary authentication information. 

On the API key, check the requests limit, and if you have reached the limit, you need to wait for some time to make a new request.

If nothing has worked for you, then contact the resource’s administrator and explain the issue. You need to provide the administrator with the auth token in question. The administrator will check the issue and provide a resolution.

So, these are methods that you need to follow to fix the issue of a 403 Forbidden error when trying to refresh the auth token for ChatGPT.

If you have any questions or concerns, please let us know in the comments section below. We will be happy to help! 

Bad Sectors Were Encountered During the Format [Windows 11 Fix]

While trying to format your hard drive through Command Prompt, you may often come across the result as, bad sectors were encountered during the format.

You may notice other symptoms of bad sectors in an HDD, SD card, or USB driver such as A disk read error has occurred, You are unable to read or write an SD card, etc.

What causes bad sectors were encountered during the format?

Some of the reasons why your hard drive may develop bad sectors during the format are:

  • Virus or malware infection – Sometimes, the bad sectors may show up due to a virus or malware attack on the drive or the computer itself.
  • Outdated hard drive – The bad sectors were encountered during the format error may also show up if the drive is old and worn out,
  • Multiple device usage – Have you used the same drive on multiple devices? That could be one of the reasons behind the bad sectors on hard drive.
  • Mishandling of the drive – If you have been inserting and ejecting the drive incorrectly, or turning off the smartphone or camera, it can lead to bad sectors.
  • Sudden power failure or system shutdown– It could be possible that during the format, the system shut down all of a sudden, or there was a power outage.
  • Low-quality SD card – Check if you are using a poor-quality SD card causing the bad sectors encountered during the format error.
  • Damaged drive – If the drive or the SD card is damaged, or has accumulated dust, or moisture, it could give arise to bad sectors.

How do I fix bad sectors on my hard drive on Windows 11?

You should try a few preliminary checks to rule out any major issues:

  • Restart your PC and check again.
  • Run an virus scan to quarantine your PC.
  • Make sure you are not using the drive on multiple devices.
  • Check for any power outage and wait till it’s back.

If none of the above methods help you to fix the bad sectors were encountered during the format issue, you can jump onto the below methods to repair the drive.

1. Run the CHKDSK utility

  1. Press the Win + R keys simultaneously to launch the Run console. Type in cmd and press the Ctrl + Shift + Enter keys to open the elevated Command prompt.
  2. Now, run the below command in the Command Prompt (Admin) window and hit Enter: chkdsk /r /f c:
  3. Here, replace c: with the drive you want to check for errors.
  4. You should now see the success message as: CHKDSK cannot run because the volume is in use by another process. Would you like to schedule this volume to be checked the next time the system restarts? (Y/N)
  5. Type Y to confirm.

Once done, restart your PC and Windows will allow the CHKDSK utility to fix any errors related to the hard drive.

2. Format the drive on a different PC

  1. Press the Win + E shortcut keys to open File Explorer.
  2. Select This PC shortcut on the left, and on the right, right-click on the drive that you want to format and select Format.
  3. In the Format dialog, go to the File system field, and select NTFS. Click on Start.

Now, wait while the process is completed, and once done, the drive should be formatted to NTFS and ready to use.

3. Use the Windows built-in troubleshooter

3.1 Use System Maintenance troubleshooter

  1. Go to Start and type Perform recommended maintenance tasks automatically in the Windows search bar. Select the result under Best match. Perform recommended maintenance tasks automatically
  2. In the System Maintenance window that opens, click on Advanced. click on advance
  3. Now, select Apply repairs automatically, and press Next. Apply repairs automatically
  4. The troubleshooter will now start looking for any errors. If any errors are found, it will apply the repair automatically.

Now, close the troubleshooter, reboot your device and check if you still come across the bad sectors were encountered during the format error.

3.2 Run the Hardware and Devices troubleshooter

  1. Press the Win + R keys to open the Run console. Type cmd in the search bar and press the Ctrl + Shift + Enter keys simultaneously to launch Command Prompt with admin rights. run cmd command
  2. Now, in the elevated Command Prompt, execute the below command and hit Enter: msdt.exe -id DeviceDiagnosticmsdt.exe -id DeviceDiagnostic
  3. This will open the Hardware and Devices troubleshooter. Here, click on Advanced. Hardware and Devices troubleshooter advanced
  4. Now, select Apply repairs automatically and press Next. apply repairs automatically
  5. The troubleshooter will now start checking for errors and if any detected, it will apply the repair automatically.

You can now close the troubleshooter, restart your PC and check if the bad sectors on hard drive are fixed.

4. Run the DISM command

  1. To open the Run console, press the Win + E keys together. Now, type cmd in the search bar, and press the Ctrl + Shift + Enter keys simultaneously to open the elevated Command Prompt. run cmd command
  2. Next, run the below command in the Command Prompt (Admin) window and hit Enter: DISM /Online /Cleanup-Image /ScanHealthrun DISM command
  3. Now, the DISM utility will start looking for any corrupted or missing files and repair or replace them accordingly. The process takes a while, so wait till it’s over.

Once done, restart your PC, and now, you should not see the bad sectors were encountered during the format error anymore.

5.Use the built-in properties tool

  1. Open the File Explorer by pressing the Win + E shortcut keys. Now, click on This PC on the left, and then, right-click on the problem drive, and click on Properties. open drive properties
  2. In the drive Properties dialog, select the Tools tab, and click on Check under Error checking. check for errors
  3. Now, in the Error Checking prompt, click on Scan drive. scan drive
  4. The scan will now begin, and it will analyze the drive for any errors. If any errors are detected, it will display the fix that you can apply to resolve the error.

Now, reboot your PC and try formatting the drive to check if any bad sectors are still present or if the issue is resolved.

But if the drive is completely damaged and unrepairable, it’s recommended to replace it with a healthy one.

Alternatively, you can reset your Windows device to its factory settings while keeping your data intact. This will help you to get rid of the error, bad sectors were encountered during the format.

However, if all of the above methods fail to fix the issue, you can perform a system restore to revert your PC to a previously working state.

For any other queries related to hard drives, do leave a message in the comments section below.

How to Enable or Disable Copy Paste in Application Guard

Wondering about the benefits of copy-paste in Application Guard? This is a security feature in Microsoft Edge that isolates potentially malicious websites in a separate environment to protect your device from potential harm.

While this feature offers an excellent level of security, it also restricts specific actions, such as copying and pasting text. So, in this guide, let us explore how to enable or disable copy-paste in Application Guard on Windows 10.

Should I enable copy-paste in Application Guard? Application Guard is a security feature that protects your device from malicious websites and other online threats.

Enabling the copy-paste feature in Application Guard will allow you to copy and paste text and files between the protected environment and your device.

This is useful if you need to transfer information or files between the two environments, but it also increases the risk of potentially harmful content being transferred.

So, if you are working with sensitive information or visiting potentially dangerous websites, it is probably best to keep the copy-paste feature disabled. Doing so will decrease the chances of data breaches or other security issues.

However, if you need to transfer files or information between the protected environment and your device, you may want to enable the feature to make it easier.

Ultimately, whether or not to enable the copy-paste feature in Application Guard depends on your specific needs and the level of risk you are comfortable with.

How can I enable or disable copy-paste in Application Guard?

1. Via System Settings

  1. Press Windows + I to open the Settings app.
  2. Select Privacy & Security on the left pane, then click Windows Security on the right.
  3. Now click App & browser control.
    copy paste application guard
  4. Select the Change Application Guard settings option in the Isolated browsing section.
  5. Lastly, toggle on the Copy and paste switch.

If you have a toggle on the option, you can copy and paste text and files between the protected environment and your device. If you have toggled off the option, the copy-paste feature will be disabled, and you will not be able to transfer information or files between the two environments.

2. Via the Registry Editor

  1. Press Windows + R, type Regedit and hit Enter.
    copy paste application guard
  2. Navigate to the path below:
    Computer\HKEY_LOCAL_MACHINE\SOFTWARE\Microsoft\Hvsi
  3. Click on the Hvsi folder, and if you do not have this folder, right-click on the main Microsoft folder, hover over New and select key. Then, name the new key Hvsi.
  4. Click on the Hvsi key, and double-click on the EnableClipboard option on the right pane. Finally, change the value to 1.

Making the value 1 will enable the copy-and-paste option. to disable it, make this value 0.

In conclusion, Application Guard is a powerful security feature that can protect your device from potential harm.

However, it does restrict specific actions, such as copying and pasting text. Following the outlined solutions, you can easily enable or disable copy-paste in Application Guard on Windows 10.

This feature will allow you to copy and paste text between the Application Guard environment and the host device. Disabling it will provide the highest security by preventing potentially malicious data exchange.

You might also be interested in our guide on what to do if you can’t paste in Paint on Windows 11.

For more questions or solutions that worked for you, leave a note in the comments section below.

How to Hide a Partition in Windows 11 [Easy Steps]

Windows is a partition-based operating system that allows you to set up multiple partitions on your computer. Each of these partitions is used to store data and programs, so they can be customized to suit your needs.

Another way to use these partitions is to hide them to maintain your privacy or better organize your files. In this article, we explore how you can keep your drive partitions from prying eyes.

Can a partition be hidden?

Windows operating system has been a popular choice since its release. One of the most important features of Windows is partitioning. You can create multiple partitions in your disk drive for different purposes like data storage, software installation, etc. 

While disk partitioning is not new, many users still don’t know the extent of usability when it comes to deleting, renaming, or even hiding these partitions. 

So, Yes, you can hide a partition. A hidden partition doesn’t appear in Windows Explorer and can’t be accessed by any program or tool. The partition is still there, but it is not visible and accessible to the user.

Why do I need to hide a partition?

Now that you know you can hide your partitions, it begs the question: Why would you need to hide these partitions? There are many reasons why you may want to hide a partition in Windows. Some of these reasons include:

  • Protecting data – The most obvious reason why people hide partitions is to prevent unauthorized users from accessing your hard drive contents.
  • Improve load times – The loading process of applications is dependent on how much space each file occupies. Also, if Windows Explorer is slow, this may solve the issue.
  • Keep malware off your PC – Malware tends to spread quickly once it gets onto a machine, so hiding a partition could prevent malware from spreading further.
  • Reserve system files – The system reserved partition in Windows 11 mostly contains important operating systems files. You can hide your partition to prevent this drive from filling up too quickly because it could cause problems with your computer. 
  • Organization – You can use this feature to create separate documents or applications that can be used by multiple users at once without affecting each other.

How do I hide a partition in Windows?

1. Use partition manager software

The easiest way to hide a partition is to use partition manager software. These tools will let you delete, create and format partitions on your hard drive. It also lets you change the size of existing partitions.

You can get an easy to use partition manager by visiting the AOMEI Partition Assistant Standard download guide.

If you’re looking for a reliable program to do the job for you, we recommend AOMEI Partition Assistant Professional. 

AOMEI Partition Assistant Professional

Feature-rich partition assistant software for home and office with automated disk operations.
Free trial Visit website

2.  Use Disk Management

  1. Right-click on the Start Menu icon and select Disk Management.
    Disk Management
  2. Next, right-click the drive you wish to hide and select Change Drive Letter and Paths.
  3. In the pop-up window that appears, click on the drive and hit Remove.

3. Use Group Policy

  1. Hit the Windows + R keys to open the Run command.
  2. Type gpedit.msc and press Enter to open the Group Policy.
  3. Navigate to the following location: User Configuration/Administrative Templates/Windows Components/File Explorer
  4. Go to the Standard tab and double-click on Hide these specified drives in My Computer.
  5. In the window that appears, check the Enabled box, choose Restrict X drive only replacing X with the drive letter you wish to hide under Options, and press Apply then OK.
  6. To unhide, select the Do not restrict drives option.
  7. Now close the Group Policy Editor and check whether the partition is hidden.

4. Use Diskpart command

  1. Hit the Windows key, type Diskpart in the search bar, and click Run as administrator.
  2. Type in the following command to list the number of drive partitions: list volume
  3. Next, type in select volume Y replacing Y with the corresponding number of the partition you wish to hide.
  4. Now type remove letter X replacing X with the corresponding letter of the Volume disk partition in 3 above.
  5. To unhide the drive in Windows 11, follow steps 3 to 4 but replace remove with assign when you want to display the drive.

How do I restrict access to a drive in Windows 11?

If you don’t want to hide your partitions and instead would like to restrict access, follow the steps below:

  1. Hit the Windows + E keys to open File Explorer.
  2. Right-click on the drive you wish to restrict and select Properties.
  3. Navigate to the Security tab and next to To change permissions, click on Edit, and hit the Edit button.
  4. Next, click Add or Remove to list the users you want to grant access to. Also, below, you can modify the permissions each user has by checking the Allow and Deny boxes to your preference.

That’s all we had regarding hiding your partitions in Windows 11. You may also be interested in how to compress your drive especially if you’re running low on space.

If you’re looking to optimize your PC, you’ll find disk management tools particularly helpful especially if you delete and create partitions often.

Let us know which method you find easier to hide your partitions in the comment section below.

Download & Install Intel Bluetooth Driver for Windows 11

Looking to download Bluetooth drivers from Intel? You’re in the right place. There are a few ways to do it, and in this guide, we’ll walk you through all of them.

Whether you like automated driver updaters, built-in Windows tools, or manual downloads, this article covers everything.

How can I download Bluetooth drivers from Intel?

1. Automatically update drivers

  1. Launch the Device Manager, then expand the Bluetooth entry.
  2. Right-click your computer’s Bluetooth driver and select Update drivers.
  3. Click Search automatically for drivers. The Bluetooth drivers will automatically download and install.

2. Update your drivers with a specialized tool

Alternatively, you can always rely on specialized driver updating tools to complete this task for you. These powerful tools allow you to run a powerful scan and identify any driver that needs to be replaced.

With just a few clicks you will have all your drivers updated and your system running at full potential.

3. Manually update via Intel Wireless Bluetooth Software

  1. Go to Intel’s website and click the recommended Intel Driver & Support Assistant hyperlink.
  2. On the following page, click the Download button for the Bluetooth drivers. Wait for the download to finish.
  3. Click Install once it is finished downloading. If a User Account Control window asks if you want to make changes, select Yes.
  4. Click Next in the installation wizard window that appears and follow the process.
  5. When choosing the setup type, select Typical as the recommended option, then click the Install button on the following window.
  6. Click Finish after it’s done.

Despite only downloading the Bluetooth drivers in this solution, we recommend clicking Download all on the Driver & Support Assistant page if other updates are available.

4. Restore the Bluetooth feature if missing after updating

  1. Download the latest driver package on the Intel drivers page (make sure the drop-down menu is set to Windows 10 and Windows 11).
  2. Click the Download button. Agree to Intel’s Software License Agreement when it appears.
  3. Double-click the file you just downloaded to run through the same installation wizard as shown earlier.

Some users have reported their Bluetooth functionality missing from Windows 11 after downloading the latest drivers. Follow this solution if Bluetooth indeed disappeared from Settings.

Why is it important to stay up-to-date with Bluetooth drivers?

Device drivers are what allow Windows 11 to communicate with a Bluetooth-enabled device and vice versa properly. Not having up-to-date software can cause a multitude of problems.

  • Your devices will be unable to communicate: This is by far the most important reason why you should update. You’re out of luck if your computer can’t detect the other device.
  • Missing drivers can cause the Bluetooth feature to disappear: Installing drivers can restore the functionality, but you may also have to check if the Bluetooth Support service is working.
  • You can flush out corruption: Corrupt Bluetooth drivers can also disable the software. New ones can restore the feature, or you can clear it out yourself with the system’s own tools.

What can I do if my Bluetooth devices are paired, but not connected?

A paired, but not connected device means it’s not working properly. There is something wrong with the connection. It can be your computer’s Bluetooth settings or a driver’s glitch.

We recommend running the Bluetooth troubleshooter if this happens to you. You should also know how to automatically connect Bluetooth devices to Windows 11. It’s pretty simple.

There are a couple of ways to go about it. You can set the Bluetooth service startup to Automatic or enable discovery for your devices.

Feel free to leave a comment below if you have any questions about other Bluetooth problems. Leave a suggestion about guides that you’d like to see or information on other Windows 11 features.

A Device Which Does Not Exist Was Specified: 5 Easy Fixes

Are you facing a problem with the message a device that does not exist was specified? We have done some deep research and prepared a solution for you. For details, go through this article.

Usually, this problem appears when you try to access a disk drive. If there is an issue, you will end up getting an error with the following error message:

Location is not available

Drive is not accessible

A device which does not exist was specified

If the external hard drive is not showing up, that is a different problem. It is because you will get this problem only when the disk appears, but there is something wrong. It can occur with any type of storage device, including SSD, HDD, or other external USB drives.

Why does the device which does not exist was specified occur?

Usually, this problem occurs due to the following reasons:

  • Problem with the driver letter: When you connect a drive to your PC, Windows automatically assign a driver letter. However, sometimes, it may not be assigned correctly due to internal problems. In this case, you may face a device that does not exist was specified problem with that hard drive or USB disk.
  • Hard disk or SSD issues: If there are too many bad sectors or some other issues on your hard disk or SSD, it may cause the problem.
  • Outdated driver: Outdated motherboard chipset drivers can also be a reason for this issue.
  • Lack of permission: If you do not have enough permission to access the disk drive, you also may get the error.
  • USB port problem: Faulty USB port can cause a device that does not exist was specified with any USB storage drives.
  • Problematic motherboard header: If the motherboard header is damaged or there is a problem with the SATA cable, it can trigger the problem.

How can I fix the device which does not exist was specified?

Fortunately, you can take some effective steps to eliminate this problem. However, before that, you must ensure the following things:

After ensuring these things, go ahead and follow these methods to fix a device which does not exist was specified.

1. Tweak permission

  1. Open this PC.
  2. Right-click on the problematic drive and go to its properties.
  3. Go to the Security tab and click on Edit.clicking edit to change permissions security tab disk properties
  4. Tick on Allow for Authenticated Users.allowing full control authenticated users disk properties security

Now, try to access the disk and see if it has solved the problem or not.

2. Uninstall the drive and try again

  1. Open the Start Menu, type device manager, and press Enter.
  2. Right-click on the problematic disk drive and choose Uninstall.uninstalling disk drive
  3. Restart your PC.

3. Change the drive letter

  1. Press Win + I on the keyboard to open Windows Settings.
  2. Go to System and click on Storage.going storage settings windows 11
  3. Go to Advanced storage settings and click on Disks & volumes.going disks and volumes under advanced storage settings windows 11
  4. Click on Properties for the problematic disk drive with the drive letter.going disk drive properties windows 11 settings
  5. Click on the Change drive letter.clicking change drive letter windows 11
  6. Choose a drive letter and click on OK.

Changing the driver letter is one of the most effective methods to solve a device which does not exist specified. So, it has a good chance of solving the problem for you.

4. Rescan the drive

  1. Press Win + R on the keyboard to open Run.
  2. Type the following command and hit Enter: diskmgmt.msc
  3. Click on Action from the menu and choose Rescan disks.rescan disks disk management windows

Rescanning may detect the disk again and may fix previous issues. However, if Windows doesn’t recognize the drive, learn how to detect a new hard drive on Windows.

5. Recreate disk partition

  1. Go to Disks & volumes as shown in method 3.
  2. Then, go to the problematic disk properties like method 3.
  3. Click on Delete.deleting disk drive windows 11 settings
  4. Go back.
  5. Click on Create volume and complete the steps.clicking create volume

Recreating the disk volume can fix a device that does not exist was specified. However, you will lose data as the disk will be cleaned and formatted.

If necessary, see how to solve the second hard drive not showing up on Windows.

Please note that this problem also may appear with an error code 10. In this case, you may get the message something like This device cannot start. (code 10) a device which does not exist was specified. Don’t get confused with any similar error code like Xbox Controller error code 10.

If none of the above methods work, it may indicate that the physical disk drive may have some problem. Or it can be the motherboard issues. In this case, we suggest you contact a technician to resolve it.

This article has described how you can get rid of the problem: A device which does not exist was specified for a Hard drive, SSD, or any USB storage. If you have any opinion or a helpful idea, let us know in the comment box.

Posted in Fix

Fix: This Email Address is Already Connected with Office 365

Microsoft’s Office 365 is a series of productivity apps that contain software that a lot of people use like Word, Excel, and Powerpoint.

The platform has its fair share of errors, but there’s one in particular that’s debilitating and that’s the inability to use your Outlook email elsewhere. The service may tell you the email is already in use.

Why does Outlook say the email has already been added?

There are multiple reasons why your Outlook app, or any Office 365 app for that matter, may tell you that your email address has already been added or is being used somewhere else.

The following is by means an exhaustive list, but a collection of likely scenarios.

  • Your Outlook email may be out of sync: If it’s out of sync, Windows may tell you that the account already exists. You will have to double-check your Office 365 settings.
  • You have currently signed into another device or platform: A simple mistake that can happen to anymore; you should sign out of all other devices.
  • The other email is already being shared with another account: This can happen if you try to add an email through the Add email account window.
  • You have corrupt files affecting your computer’s performance: If this happens, you can try resetting Windows 11 although this should be considered a last resort if all else fails.

How can I fix this Office 365 email error?

The complex solutions will also detail how to ensure the error doesn’t come back again. Before going into those, let’s go over the easier fixes first:

  • Log out from the other device or app. This should be the first thing that you should do. It’s a simple solution that solves many headaches.
  • Reinstall the Office 365 apps and log into them again. There could be some sort of glitch going on with the app. A simple reinstallation should fix that.
  • Create a different account on your computer. You can do this by going to the Accounts tab in the Settings menu. There should be an option called Add account.
  • You can also try using a different device, computer, or platform to log into your Office 365 accounts.
  • Make sure you have the correct credentials. If you forgot your credentials, it’s recommended you reset the password or contact your network administrator.

1. Reconfigure email via Control Panel

  1. Open the Control Panel and click the Mail entry. If you don’t see it, be sure to set your View By entry to Large Icons.
  2. In the new small window that appears, select Email Accounts.
  3. Click New in the Email tab.
  4. Tick the bubble next to Manual setup or additional server types. Then click the Next button at the bottom.
  5. Now tick the bubble next to Office 365, enter your email, then click Next.
  6. Enter your email password in the new small window that appears, then click OK.
  7. A Microsoft page may appear after this. Sign in with your Outlook account here as well.

2. Reconfigure both POP and IMAP email on Control Panel

  1. Open the Control Panel and return to the Account Settings as seen in the previous solution.
  2. This time, select POP or IMAP instead of Microsoft 365.
  3. Enter the information for your POP or IMAP email account, then click Next. Wait for your computer to finish setting up.

POP (Post Office Protocol) and IMAP (Internet Messaging Access Protocol) are two alternative ways to securely check your email on devices you don’t normally use.

Users have reported getting the same email error message when using one of these protocols.

3. Clear out the Windows 11 cache

  1. Open the Windows 11 Settings menu.
  2. Staying in the System app, click the Storage tab.
  3. Click Temporary files in the following section.
  4. Click the boxes next to each file type you want to remove, then select Remove Files.
  5. Click Continue on the small window that appears right after telling you that the files will be permanently deleted. Give your computer enough time to finish the process.

Do be careful during this process and make sure you’re not deleting anything important, especially files in the Downloads folder. It’s recommended that you move important files before deleting them.

4. Automatically clear out Windows 365 cache

  1. Launch the Office 365 app that you’re having trouble with. You may have to do this to all the apps if you’re having trouble with every single one.
  2. Click File in the upper left corner, then select Options.
  3. In the Options window, click Trust Center on the left-hand menu.
  4. Click Trust Center Settings in this new section.
  5. Check the box next to Next time Office starts, clear all previously-started web add-ins cache.
  6. Select OK then close the app.

This solution uses Microsoft Outlook and Excel as examples, but it works for all apps that are a part of Office 365.

5. Manually clear out Windows 365 cache

  1. Open the File Explorer and enter the following into the address bar: %LOCALAPPDATA%\Microsoft\Office\16.0\Wef\
  2. Go to that location on your computer and delete everything in there.

What can I do if SharePoint isn’t exporting to Excel?

If you’re not aware, some Office 365 users have complained about not being able to export data sheets from SharePoint to Excel. There may be a problem with the browser or the app timed out.

If it’s the latter, we recommend increasing the time-out value for Excel, so it lasts longer. Additionally, you should learn how to open Excel in Safe Mode if you encounter any problems.

You can try booting the entire Windows 11 system in Safe Mode or repair Microsoft Office 365. The files for the platform may have been corrupted.

Feel free to leave a comment below if you have any questions about other Office 365 problems. Leave a suggestion about guides that you’d like to see or information on the productivity apps.

How to Unlock a File on Windows 10 & Windows 11

Sometimes users can’t modify files in Windows 10 & 11 because they are locked. Windows displays variable error messages whenever users try to modify locked files along the lines of: The source or destination file may be in use, The file is in use by another program, The action can’t be completed because the file is open in.

All such file-locking errors prevent users from renaming, copying, deleting, and moving files when needed. Fortunately, it’s usually relatively straightforward to unlock a file with the methods below.

What is a locked file?

A locked file is one that Windows has temporarily restricted access to with its file-locking mechanism. The OS locks files in use by other programs or processes to ensure they can’t be simultaneously modified.

So, a locked file error means another program (process) is using the same file you’re trying to modify. Such an issue can also arise for shared files that can be edited by other users in a network environment.

Users can usually unlock files by ending the program processes utilizing them, as outlined in this guide’s resolutions. Terminating those processes will lift the applied file locking.

How do I unlock a locked file in Windows 10?

Before applying the resolutions below, check a few things first:

  • If the locked file is shared with other users via the internet or an organization-based network, check that nobody else is editing it.
  • Restarting your PC can often be a simple way to unlock a locked file. So, try restarting your PC to see if that unlocks the file.

If you still have problems with locked files in Windows, use the solutions below.

1. End background processes in Task Manager

  1. Press Ctrl + Shift + Esc to access Task Manager.
  2. Click Task Manager’s Processes tab if it’s not selected, then select the End task option for all open programs listed in the apps section.
  3. Disable non-essential third-party programs and services included within the background processes section by right-clicking them and selecting End task.
  4. Try modifying whatever file is locked again.
Note icon NOTE
Don’t disable anything within the Windows processes section. Disabling those more essential system processes will likely cause OS issues.

2. Restart Windows by Clean Booting

  1. Use the Windows + R keyboard key combination to start the Run command box.
  2. To access the MSConfig utility, type this text in Run and press Return: msconfig
  3. Check the Selective startup option on the General tab.
  4. Click System Configuration’s Services tab to view it.
  5. Select Hide all Microsoft services to exclude more important services then click the Service’s tabs Disable all button.
  6. Select Apply and OK, and select Restart in the dialog box.
  7. Try to edit the locked file after clean booting.

3. Use a dedicated tool

  1. Open the IObit Unlocker page, and select Free Download there.
  2. Browse to the folder the IObit Unlocker installer downloaded to within File Explorer.
    Free Download button unlock file windows
  3. Double-click the unlocker-setup.exe file for IObit Unlocker.
  4. Install IObit Uninstaller with its setup wizard.
  5. Open the IObit Uninstaller window with the desktop shortcut for that software.
  6. Click the Add button.
    Add button unlock file windows
  7. Select the locked file you need to unlock and click the OK option in the Browse window.
    Browse for Files window unlock file windows
  8. Press the Unlock button if the file’s status is indeed locked. The box at the bottom of the IObit Unlocker window shows the processes causing the lock.
    Unlock option unlock file windows
  9. Or you can click the small arrow button to select options for unlocking and modifying (renaming, moving, deleting, or copying) the file.
    Unlock operation options unlock file windows

4. Unlock files with PowerToys’ File Locksmith Tool

File Locksmith is another utility you can unlock files with, which is included within the Microsoft PowerToys software. That tool detects processes using a locked file and enables you to end tasks.

To utilize File Locksmith, install the latest Microsoft PowerToys version. Windows Report’s File Locksmith post includes instructions for using that tool and installing PowerToys via PowerShell.

How to unlock a file in Windows 11?

We outlined solutions on how to unlock a file in Windows 10, but all the methods above can be performed identically on Windows 11 as well.

Those methods will almost certainly enable you to unlock all your locked files in Windows 10/11. Then you’ll be able to modify the files however you need to again.

Closing background processes with Task Manager or clean booting will often work for unlocking files. However, It’s worth installing a third-party tool like IObit Unlocker or PowerToys since they make it easier to identify background processes locking files.

Microsoft Edge Quick Links Disappeared: Windows 11 Fix

Microsoft Edge is a full-featured web browser that’s designed for Windows devices. It has an intuitive, easy-to-use interface and is the perfect way to get things done online. One of these features is the quick links option that lets you quickly open your frequently visited sites.

However, it now appears that users can no longer locate their quick links after updating to the latest browser version. If you’ve faced a similar issue, this article explains how to restore quick links.

Why have my Microsoft Edge quick links disappeared?

Quick links take you to your favorites and other pages, such as History and Downloads. You may wonder what is behind this issue so below are some possible causes:

  • You deleted them – It is possible that you may have accidentally deleted your Microsoft Edge quick links. Deletion can happen with a single click of a button so try adding them again.
  • Windows update – This is the most common cause of this problem. If you’re running Windows and have recently accepted an update, it’s likely that this is the culprit.
  • Microsoft Edge update – Another likely reason that your quick links have disappeared is that Microsoft Edge has been updated. 
  • Corrupted browser – It is also possible that your version of the browser has been infected by a bug. This can cause issues such as Microsoft Edge not opening.
  • Problematic extensions – Sometimes you can install an extension that is incompatible with your browser or just problematic. This can cause changes in how your browser behaves.

How do I get quick links back on my edge?

Before you jump onto the slightly advanced solutions, try the following:

  • Check for any browser updates.
  • Sign out of your account and then sign back in.
  • Restart your Microsoft Edge browser.
  • Reboot your computer and here’s what to do if your computer won’t restart.

1. Clear cache 

  1. Open Microsoft Edge and click on the three horizontal ellipses at the top right corner.
  2. Click on Settings.
  3. Select Cookies and site permissions and click on Manage and delete cookies and site data.
  4. Expand See all cookies and site data.
  5. Select Remove all.

2. Disable extensions 

  1. Open Microsoft Edge and click on the three horizontal ellipses at the top right corner.
  2. Click on Extensions then select Manage extensions.
  3. Locate any recently added extensions and toggle the off button.

3. Reset Microsoft Edge 

  1. Open Microsoft Edge and click on the three horizontal ellipses at the top right corner.
  2. Click on Settings.
  3. Select Reset settings and hit Restore settings to their default values.
  4. Confirm Reset in the dialog box that appears.

4. Uninstall the latest Windows updates 

  1. Hit the Windows key and select Settings.settings windows 11
  2. Click on Windows Update and select Update history on the right pane.update-history restart to repair drive errors
  3. Scroll down and under Related settings, click on Uninstall updates.
  4. This will take you to the most recent installed updates.
  5. Select the topmost update and click on Uninstall.
  6. Restart your PC and load Edge again to see if the quick links are still missing.

If the quick links appear after you uninstall the updates, you can contact Microsoft and report that the latest update is causing the quick links to disappear from Microsoft Edge. 

Remember that Windows updates are critical especially to protect your system against threats. As such, keep checking for new updates as Microsoft releases them regularly to fix bugs and any known issues.

5. Reinstall Microsoft Edge 

  1. Hit the Windows key and select Settings.settings windows 11
  2. Click on Apps on the left pane then select Apps & features.
  3. Locate Microsoft Edge, click on the three ellipses, and select Uninstall.
  4. Confirm Uninstall in the dialog box that pops up.
  5. Now go to the Microsoft Store, search for Microsoft Edge and click Install.

How to remove quick links in Microsoft Edge?

Whereas most people marvel at quick links and customize them to fit their daily browsing needs, there is a section of users who find them annoying. 

Quick links are basically built-in advertisements for Microsoft products and services. They appear in the new tab page of Edge and are designed to show you relevant content based on your browsing habits. 

To remove the quick links, follow the steps below:

  1. Launch Microsoft Edge and open a new tab.
  2. Click on the arrow below the search bar to open Quick links.
  3. Next, click on the three horizontal ellipses next to each icon then click on Remove.
  4. Continuously repeat these steps until you have successfully removed all quick links.

Should you face any other related issues such as Microsoft Edge being laggy and slow, do not hesitate to check out our expert article on the same.

We also share some of the best Microsoft Edge themes to give your interface a whole new look in case you’re tired of the default one. To get more out of the browser, also check out how to create a collection of pages and group them by interests.

Before you go, we have a guide on how to restore Edge tabs if they disappear, so don’t miss it for more information.

Let us know if you have been able to solve this issue in the comment section below.

8K Wallpapers for Windows 11: Where & How to Get Them

Windows 11 is the most recent OS from Microsoft, and it comes with a host of new features and improvements. One of the most interesting new features is the ability to use 8K wallpapers on your desktop.

8K resolution offers a stunning visual experience with 7680×4320 pixels, which is four times the resolution of 4K and sixteen times the resolution of 1080p. This article will show you where and how to get 8K wallpapers for Windows 11.

How can I set 8K wallpapers on Windows 11?

  1. Right-click on the desktop and select Personalize.
  2. Click on Background.
    windows 11 wallpaper 8k
  3. Click on Browse to select a wallpaper from your computer.
    windows 11 wallpaper 8k
  4. Select the 8K wallpaper you want, then click Apply and Save changes.

It’s important to note that while 8K wallpapers look amazing on high-resolution displays, they can also take up a lot of storage space. They may not be suitable for computers with low-end graphics cards or lower memory.

Also, when using 8K wallpapers on Windows 11, it’s essential to ensure that your computer is powerful enough to handle the high resolution.

How do I download HD wallpapers for Windows 11?

1. Download from Unsplash

  1. Navigate to the 8k section of the Unsplash website.
  2. Hover over any of the wallpapers you need.
  3. Click the download icon to start the download.
    windows 11 wallpaper 8k
  4. Choose a location and click the Save button.

Unsplash is a free website that offers a collection of high-resolution images, including 8K wallpapers. You can find a wide variety of 8K wallpapers for Windows 11 on Unsplash, suitable for different desktops and laptops.

2. Use Reddit

  1. Go to the Reddit website and search for Windows 11 8k wallpapers in the search bar.
    windows 11 wallpaper 8k
  2. Look for a subreddit dedicated explicitly to Windows wallpapers, such as r/Windows11 or r/WindowsWallpapers.
  3. Browse through the subreddit’s posts to find 8k wallpapers for Windows 11.
  4. When you find a wallpaper you like, click on it to open the full-sized image.
  5. Right-click on the image and select Save image as to save it to your computer.
  6. Once you’ve downloaded the wallpaper, you can set it as your desktop background in Windows 11.

Reddit is a great place to find high-quality wallpapers, including 8K wallpapers for Windows 11. Several subreddits are dedicated to wallpapers, such as r/wallpapers and r/Windows11Wallpapers, where users share their favorite wallpapers.

3. Download from DeviantArt

  1. Go to the DeviantArt website.
  2. Search for Windows 11 8k wallpapers in the search bar.
  3. Browse through the results to find 8k wallpapers for Windows 11.
  4. When you find a wallpaper you like, click on it to open the full-sized image.
  5. Look for the download button or right-click on the image and select Save image as to save it to your computer.
    windows 11 wallpaper 8k
  6. Once you’ve downloaded the wallpaper, you can set it as your desktop background in Windows 11.

DeviantArt is a popular online community of artists and designers. You can find a wide variety of 8K wallpapers for Windows 11 on DeviantArt, created by talented artists worldwide.

4. Use Wallpaper Abyss

  1. Go to the Wallpaper Abyss website and search for Windows 11 8k wallpapers in the search bar.
  2. Browse through the results to find 8k wallpapers for Windows 11.
  3. When you find a wallpaper you like, click on it to open the full-sized image.
  4. Look for the download button or right-click on the image and select Save image as to save it to your computer.
  5. Once you’ve downloaded the wallpaper, you can set it as your desktop background in Windows 11.

Many websites, such as Wallpaper Abyss, WallHaven, and Wallpaper Engine, specialize in wallpapers. These websites offer a wide variety of 8K wallpapers for Windows 11, and you can easily filter and search for the resolution you need.

Using any of the resources we have provided in this article, you should be able to get your favorite 8k wallpapers for the new OS.

Please let us know what your preferred alternative is in the comments area below.

Fix: We Were Unable to Set Up Your Pin Error in Windows 11

Are you encountering an We were unable to set up your PIN error when trying to set up a PIN in Windows 11? This can be frustrating, but fortunately, it is often easy to fix.

Whether you’re a seasoned Windows user or new to the operating system, this guide will set you up and running quickly. So, let’s get started!

Why can’t I set up a PIN on Windows 11?

You cannot set up a PIN on Windows 11 for several reasons. Some common causes include:

  • Issues with the region – The PIN feature may not be available in your region or device.
  • System requirements – Your device may not meet the minimum requirements for setting up a PIN.
  • Syncing issues – You may have set a PIN too recently, and the system is still syncing your account.
  • Account problems – There might be a problem with your Microsoft account, such as an expired password, preventing you from setting up a PIN.
  • GP settings – You may have a group policy in the organization that prevents you from setting up a PIN.
  • Conflicting programs – Some other software or hardware conflicts might prevent the setting up of PIN.

Some users may also be faced with the problem of removing the PIN from Windows 11. Also, note that some of these fixes may be useful in Windows 10. So, let us now show you some of the best solutions.

What should I do if I get the error we were unable to set up your PIN in Windows 11?

Before any advanced fixes, you should consider the following:

  • If you are using a device provided by your organization, check to see if there is a group policy in place that prevents you from setting up a PIN. In most cases, you may need an administrator to help with this process.

1. Create a new user account

  1. Press Windows + I to open the Settings app.
  2. Click on Accounts on the left pane, then select Family on the right.
    we were unable to set up your pin windows 11
  3. Now scroll down and select Add someone.
    we were unable to set up your pin windows 11
  4. You can choose to input the email address or select create an account for a child.
  5. Simply follow the wizard to the end, then log in with the newly created account and see if you still get the Windows 11 we were unable to set up your pin error.

2. Use the command prompt to reset the PIN

  1. Press the Windows key + X to open the Power User menu, and then select Command Prompt (Admin) or Terminal (Admin).
    we were unable to set up your pin windows 11
  2. Type the command below and hit Enter. Replace [username] with your Windows username.
    net user [username] *
  3. When prompted to enter a new password, type in a new PIN and press Enter.
  4. Confirm the new PIN by re-typing it and press Enter.
  5. Close the Command Prompt window.

3. Reset your PC

  1. Press the Windows + I keys at the same time on your keyboard.
  2. Click on Windows update and select Advanced options from the right.
  3. Scroll down and click on Recovery.
    we were unable to set up your pin windows 11
  4. Click the Reset this PC button.
  5. Choose whether you want to keep your files or remove everything.
  6. Follow the on-screen instructions to complete the factory reset process.

A reset is also an effective troubleshooting method against the Your PIN is no longer available error.

If you have correctly followed through with this guide, the Windows 11 we could not set up your PIN error should have disappeared. The PIN is an important sign in option on Windows.

Since we have not made this guide in any particular order, we expect you to try the solution that seems most relevant to your case.

Finally, please let us know what worked in the comments section below.

Microsoft news recap: 10,000 job cuts over next 3 months, 250K Xbox Series X|S sold in Japan last year, and more

Microsoft news recap is a weekly feature highlighting the top Microsoft news stories of the past week. Sit back, grab some coffee, and enjoy the read!

Microsoft will officially cut 10,000 jobs over the next three months

Companies across the tech space are announcing mass job cuts, as they prepare for a downturn in the economy, and Microsoft is no exception, with the company planning to cut 10,000 jobs over the next three months, across a variety of divisions, with expectations it will impact game developers such as 343 Industries, as well as the HoloLens hardware team, to name a couple.

Over 250K Xbox Series X|S consoles sold in Japan in 2022

There’s been signs over the past year of Microsoft making in-roads into the Japanese gaming market with its Xbox Series X|S, and according to a new report, there were 269,737 sales of Xbox Series X|S consoles in Japan last year.

ChatGPT capabilities will be part of Microsoft’s Azure OpenAI Service soon

Announced by Microsoft CEO Satya Nadella, OpenAI’s ChatGPT is planned to come to the Azure OpenAI Service, allowing customers to bring AI models into their own applications.

That’s it for this week. We will be back next week with more Microsoft news.

0xc1190011f on Windows 11: How to Fix This Update Error

Are you getting the Windows update error code 0xc1190011f constantly? You are not alone. This article will introduce the most effective solutions along with helpful information.

While updating Windows 11 to 22H2, you may get a lot of error codes. However, in a recent case, we have seen that a lot of users have been encountering this error 0xc1190011f even after applying the common fixes for update problems. If you are already hopeless, don’t worry. You can fix it.

Why is Windows 11 showing the error code 0xc1190011f while updating?

You may consider the following:

  • Corrupted system files: If somehow, system files get corrupted, Windows may fail to update itself to the latest build.
  • Third-party antivirus or services: Third-party antivirus or other services may interrupt the update process, which may cause the error code 0xc1190011f.
  • Disk problem: Low disk space or disk storage problems may cause Windows update errors.
  • Corrupted update components: If the core update components get corrupted, you may face various error codes while updating Windows.
  • Other system issues: There are some other unknown core Windows problems that also may trigger this update error.

How can I fix the update error 0xc1190011f on Windows 11?

After doing some research, we have found effective solutions. However, before going through these ways, we suggest you do the following things:

After that, go through these methods to fix error 0xc1190011f.

1. Run update troubleshooter

  1. Press Win + I on the keyboard to open Windows Settings.
  2. Go to System and click on Troubleshoot.going system and troubleshoot windows 11 settings
  3. Click on Other troubleshooters.going other troubleshooters win11
  4. Then, click on Run next to the Windows Update.running windows update troubleshooter windows 11
  5. Finish any on-screen steps to complete the troubleshooting process.

2. Repair internal system components

  1. Open the Start Menu, and type cmd.
  2. Right-click on the Command Prompt and then click on Run as Administrator.
  3. Now, type the following command and hit Enter to execute it: sfc /scannowsfc scannow command
  4. Next, run the following commands one by one: dism /online /cleanup-image /checkhealth
    dism /online /cleanup-image /scanhealth
    dism /online /cleanup-image /restorehealth
  5. After repairing, restart your PC.

3. Disable delivery optimization and clear the files

3.1 Diable delivery optimization

  1. Open the Windows Settings.
  2. Fo to Windows Update and click on Advanced options.going advanced options windows update windows 11 settings
  3. Go to Delivery Optimization.going delivery optimization windows 11 update settings
  4. Turn it off by toggling the switch.disabling delivery optimization windows 11

After disabling, you will need to clear the existing related temporary files.

3.2 Clear delivery optimization files

  1. From Windows Settings, go to System and click on Storage.going storage settings Windows 11
  2. Click on Temporary files.going temporary files from Windows 11 storage settings
  3. Uncheck everything except Delivery optimization files.checking delivery optimization from temporary files storage settings
  4. Click on Remove files.

Now, try to update Windows 11 again and see if it has helped or not.

4. Clear SoftwareDistribution Folder

  1. Open the Command Prompt like before.
  2. Run the following command one by one: net stop wuauserv
    net stop bits
    net stop cryptSvc
    net stop msiserver
  3. Using File Explorer, go to the following location: C:\Windows\SoftwareDistributionsoftware distribution folder windows 11
  4. Delete everything from there.
  5. Run the following command: net stop wuauserv
    net stop bits
    net stop cryptSvc
    net stop msiserver
  6. Restart your PC.

5. Perform Clean boot

  1. On the Start Menu, type MSconfig, and press Enter.
  2. Go to the Services tab.
  3. Check Hide all Microsoft Services and click on Disable all.disabling non microsoft background items system config windows
  4. Click on OK.
  5. Restart your PC.

The clean boot will ensure that no third-party background task is active. It will help to understand if any of these services is responsible for the error 0xc1190011f on Windows 11.

If you find that this problem is not appearing in clean boot, enable the third-party services one by one and find out which one is the culprit. Then, keep it disabled or uninstall the related software.

6. Reset Windows

  1. Open the Windows Settings like before.
  2. Go to System and then Recovery.going recovery win11 settings
  3. Click on Reset PC.clicking reset PC win11 settings
  4. Go ahead and finish the process.

7. Upgrade using a media creation tool

  1. Go to Windows 11 Media Creation Tool download page.
  2. Click on Download under the Media Creation Tool section.downloading media creation tool
  3. Open it on your PC.
  4. Go ahead and choose your preferences to install the latest Windows 11 on your computer.

Installing the latest Windows 11, for example, version 22H2, using the Media Creation Tool, is very helpful for other problems as well. After doing this, you will not face any similar update error in the future. If necessary, learn how to use Media Creation Tool.

This article has explained how you can fix error 0xc1190011f while updating Windows 11. If you have any suggestions or opinions, let us know in the comment box.

How to Delete OST Files from Outlook: 4 Safe Ways

Outlook is a powerful email client that allows users to manage their email accounts, contacts, and calendar in one place.

However, as you use Outlook, it can create large files called OST files that can take up a lot of space on your computer. These files are used to cache your email and other data for offline access, but they can become corrupted or obsolete over time.

In this article, we will discuss some safe ways to delete OST files from Outlook to free up space and improve the performance of your computer.

What happens if I delete an Outlook OST file?

If you delete an Outlook OST file, Outlook will no longer be able to access the cached data stored in that file.

If you are working offline and delete the OST file, you will no longer be able to access your email, contacts, calendar, or other data cached in that file.

However, if you have a connection to the email server and the data is still on the server, Outlook will automatically download the data again and create a new OST file for offline access.

It is also important to note that if you delete an OST file associated with an account that is no longer in use, it will not affect your current Outlook data or operations.

How can I delete OST files from Outlook?

1. Delete the OST file manually

  1. Press Windows + R to open the Run dialog.
  2. Type the path below and hit Enter.
    %localappdata%\Microsoft\Outlook
    delete ost file outlook
  3. You should be led to where OST files are stored; you can delete them manually here.

This method involves finding the location of the OST file on your computer and deleting it manually.

2. Use a third-party OST file deletion tool

There are many third-party tools available that can help you delete OST files from Outlook. These tools are designed specifically for this purpose and can often delete multiple OST files simultaneously. OST Extractor Pro and OST Recovery may be excellent choices to try.

It’s important to note that some third-party tools may have additional features or options, so read the documentation or help files that come with the tool to learn how to use it effectively.

Also, before you decide to use any third-party tool, you should research, read reviews, and test the tool to ensure that it meets your needs and is reliable. Also, it’s always a good practice to back up your data before you make any changes.

3. Disable cached Exchange Mode

  1. Launch Outlook.
  2. Click on File.
    delete ost file outlook
  3. Navigate Account Settings and Account Settings.
  4. Select Microsoft 365 or Exchange, and click Change.
  5. Under the Offline Settings option, tick Use Cached Exchange Mode.
    delete ost file outlook

This will prevent Outlook from creating and using OST files. However, you will need to be connected to the email server to access your data.

4. Remove the Outlook profile

  1. Launch Outlook.
  2. Click on File.
    delete ost file outlook
  3. Navigate Account Settings and Manage Profiles.
    delete ost file outlook
  4. Click on a Profile and select Remove.

This method can be helpful if you want to delete multiple OST files simultaneously.

Deleting OST files from Outlook is a simple task that can free up space and improve the performance of your computer.

Following the safe methods outlined in this article, you can easily remove these files without damaging your Outlook data or causing other problems.

Whether you need to free up space on your hard drive or want to improve the performance of Outlook, removing OST files is a great place to start.

Lastly, always back up your data before making any changes to your Outlook files so you can restore them if something goes wrong.