The Razer Synapse is a unified configuration software. It allows the user to assign controls to their Razer peripherals. In short, it is a utility tool for configuring Razer peripherals like keyboards, speakers, mice, etc., and automatically saves your settings to the cloud.
Likewise, it is a widely used software, especially in the gaming community. However, users face difficulties using the software, and the Razer Synapse crashing is the most common.
Furthermore, experiencing crashes or freezing in Razer Synapse can happen for many reasons. Some common causes of this problem are outdated OS, broken Razer drivers, and others.
However, you don’t have to worry regarding issues with the Razer Synapse.
Thankfully, there are some fixes for Razer Synapse if it keeps crashing on PC, and we’ll discuss them with you in this article.
Why does Razer Synapse stop working?
Windows Defender Firewall: The Windows Defender Firewall is responsible for protecting the PC from malware attacks and threats whatsoever. So, it blocks programs and software that may harm the computer. However, the Firewall may mistake Razer Synapse for a threat and block its activities across the computer, resulting in the software crashing or freezing.
Issues with Razer device drivers: The Razer Synapse on your computer may crash or freeze if its drivers are faulty or broken. So, problems with the Razer driver may affect its performance.
Outdated Windows OS: Computer malfunctions often occur due to outdated operating systems. It indicates that the computer lacks the necessary updates and patches for fixing bugs affecting it. However, it may affect the programs running on it, for example, the Razer Synapse. It can cause issues with the current version of your software.
Installing Razer Surround with Synapse on your PC: Users complain about various issues with Razer Synapse when there is Razer Surround installed on your computer. So, you can experience Razer Synapse crashing issues if you already have Razer Surround installed.
How can I fix Razer Synapse if it keeps crashing?
1. Turn off Windows Defender
Click on Start in the bottom-left corner of your screen and type Windows Security in the search space.
Select Windows Security from the search results.
Click on Virus & threat protection on the Windows Security tab.
Then select Manage settings under Virus & threat protection settings.
Toggle off Real-time protection.
Click on Start and select Power, then click on Restart.
2. Update Windows
Click on Start.
Select Settings from the options.
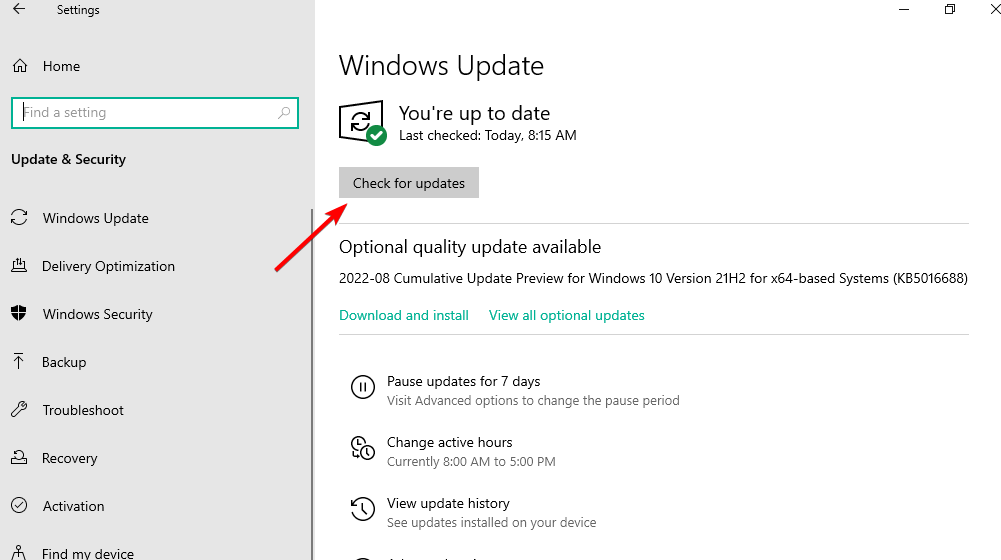
Click on Windows Update, then select Check for updates.
Windows will automatically search and download updates if there are any available.
3. Ensure you don’t install Razer Surround with Synapse
Press Windows + Rkeys to prompt the Run window.
Type appwiz.cpl, then click OK to open the Program and featureswindow.
Select Razer Surround and click Uninstall to remove it from your PC.
4. Uninstall and reinstall Razer Synapse and Razer device drivers
Right-click on Start and select Device Manager.
Double-click the Mice and other pointing devices option, right-click on the Razer devices in the category and select the Uninstall device option.
Double-click the Keyboards and Human Interface Devices category, right-click on the Razer devices in the category and select the Uninstall device option.
Click on the Delete the driversoftware for this device option for every Razer device.
Click on Uninstall to confirm (after the process is complete, unplug the Razer peripherals you have connected, then restart your PC).
Plug the Razer device back in. (Windows will automatically reinstall the drivers for the devices)
Download the latest Razer Synapse software. (Reinstall the Razer Synapse software following the prompts from the setup wizard)
You should be able to fix any issues causing the Razer Synapse to crash.
If the problem still occurs, we recommend you use a specialized tool. It will scan your device for drivers that need an update and find the most recent version from its database.
5. Uninstall the recent Windows update
Press Windows + Ikeys to open Settings.
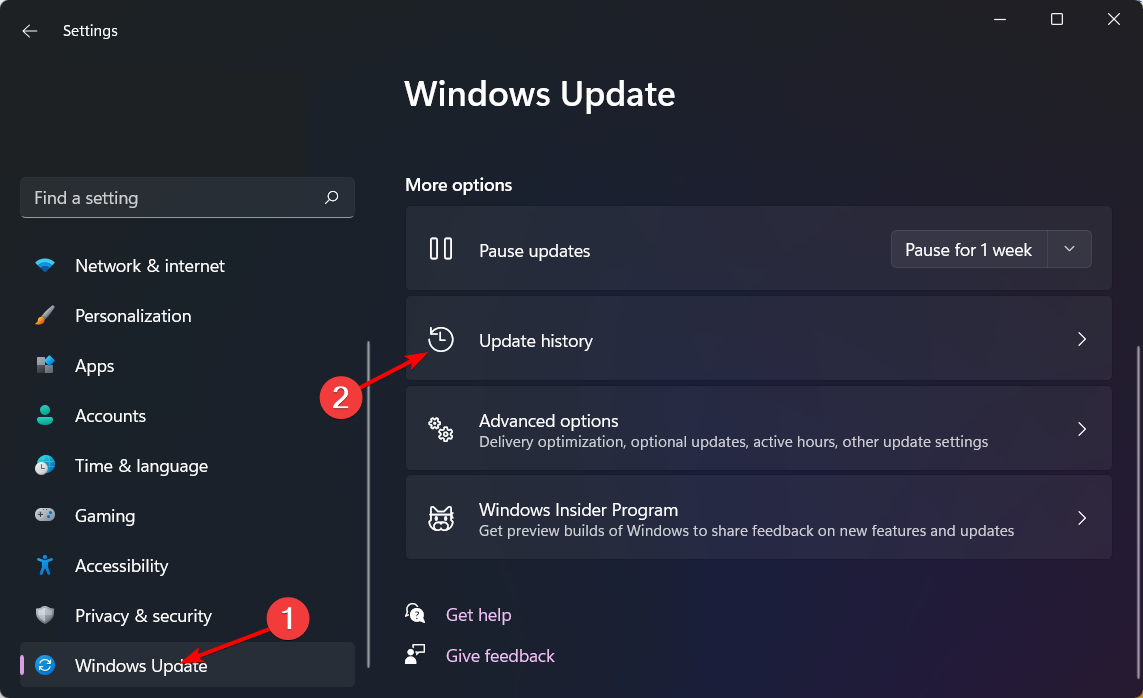
Go to the Windows Update tab and select Update history.
Click Uninstall updates and select the most recent update.
Click on Uninstall.
If the problem persists when trying the fixes above, uninstalling the recent Windows update should help.
Can Razer work without the Synapse?
Users should understand that virtually all devices with at least four onboard memory profiles can store macros on the onboard memory.
However, it’s still done only via Synapse. So, the simple answer is yes, but the user will be disadvantaged because you won’t have total control of some settings like DPI settings, program buttons, lightning timeout, etc.
In conclusion, we hope you’ve been able to solve Razer Synapse crashing issue on your device. We recommend you learn how to fix Razer Synapse if it’s not opening on Windows 10/11.
The Rainbow Six Siege FPS drops on your computer can result in lag and stuttering, affecting your gameplay. This is one of the leading issues, among others, that users have complained about when playing this game.
Tom Clancy’s Rainbow Six Siege is a first-person online tactical shooter video game. It was developed by Ubisoft and released for platforms like Microsoft Windows, PlayStation 4&5, Xbox Series, and others. It is an advanced game that requires a high-end PC to play smoothly.
Nonetheless, FPS issues on your PC affect almost all your games and reduce the performance of your game. If you are dealing with the same issue, don’t panic.
This article will take you through some solutions for Rainbow Six Siege FPS drop in 2022 and permanently fix the problem.
Why is Rainbow Six FPS dropping suddenly?
Outdated graphics driver on your PC: There are a lot of graphic elements in games like Rainbow Six Siege, and they also require a fast refresh rate. However, the graphics driver allows your PC to display screen content. So, if the graphics driver is outdated, it may not function correctly, thus affecting your game’s performance and resulting in Rainbow Six Siege FPS dropping to 0.
Systems requirements: Most people complain about the bad performance of games on their PC without checking if their PC is capable of running the game. Rainbow Six Siege, just like other games, has system requirements that determine the features a PC needs to have to be able to play it. Hence, you may experience difficulties like Rainbow Six Siege’s huge FPS drops if your computer doesn’t meet the system requirements.
Outdated operating system: Players can face some problems if their operating systems, for instance, Windows, are outdated. It impedes the ability of your PC to fix bugs and improve performance by updating.
Many background apps: Games like Rainbow Six Siege need enough system resources like RAM to run smoothly. So, it can result in issues if you have many apps consuming the system resources concurrently.
What can I do when FPS drops or lags while playing Rainbow Six Siege?
1. Check system requirements
Checking the system requirements for the game can help you decipher whether your computer can handle the game.
Users ask why they get FPS drops in Rainbow Six Siege without checking if the computer is durable enough.
We recommend you go to Ubisoft’s official website to read about Rainbow Six: Siege’s minimum and required system requirements.
2. Update the graphics driver
Press Windows + Rkeys to open the Run menu.
Type devmgmt.msc into the search space, then click OK.
Click on the Display adapters option from the search results, then select the driver from the drop-down menu.
Click the Update driver software option, and click on Search automatically for drivers.
Press Windows + Rkeys on your keyboard to open the Run window.
Type Regedit in the search space and press the Ctrl + Shift + Enterkeys to prompt the Registry Editor.
Click on the Game DVR option, double-click on the AppCaptureEnabled option, then select Modify.
In the Edit DWORD (32-bit) Value tab, change the Value data to 0, then Click OK.
5. Update Windows
Click the Start button.
Select Settings and click on Windows update.
On the Windows update page, select Check for updates. (If there’s an update available, Windows will automatically search for it and install it. Restart your computer)
Does scaling reduce the FPS?
Scaling can reduce your FPS rate because it puts more load on the GPU, making it work harder than it usually does. So, it causes your FPS to drop, lag, and stutter.
Connecting to a Remote Desktop session goes through some process that checks if the host or device is certified to connect to the RDS host server.
It ensures that the connection is secure and that no unauthorized system can connect to the Remote host. Hence, users can encounter error messages saying the Remote Desktop Session Host is not configured.
Furthermore, the Remote Desktop session (RDS) Host server vets every connection attempt to decide whether the device requires a Client Access License (CAL) or not. So, for some reason, you may be blocked from accessing the host server.
However, the Remote Desktop Session Host is not configured with any license server error message insinuates that you must configure the Session Host server’s licensing mode.
Likewise, Microsoft offers a grace period of 120 days that allows you to log into the Remote Desktop without a Client Access License (CAL).
After the 120 days grace period, you’ll need to configure a license server for the Remote Desktop session host server.
What is a Remote Desktop session host?
The Remote Desktop Session Host manages the Remote Desktop Services, session maintenance, and configurations.
Likewise, end-users can remotely access active Remote Desktop clients that run on different operating systems such as Windows, macOS, iOS, and Android.
Click on Start and type Windows Security in the search box.
Select Windows Security from the search results.
Click on Virus & threat protection from the Windows Security tab.
Then select Manage settings under Virus & threat protection settings.
Turn off Real-time protection.
Restart your computer for the changes to take effect.
3. Check the RDS CAL license compatibility
You may encounter Remote Desktop licensing issues if the RDS CAL is not compatible with your Windows server.
Is the Remote session safe?
The Remote Desktop sessions connect through an encrypted network that helps prevent security breaches or exposure of the system hosting the Remote Desktop Protocol Services (RDPS).
If your main email client is Microsoft Outlook, then you are most likely the owner of the Microsoft Office Suite, and you probably work in a company environment.
Because of this, the emails that you send and receive are generally of the utmost importance to others, and would generally need saving in one way or another.
One versatile file format that exists is the PDF, and this guide will show you how you can convert Outlook emails to PDF.
Normally, when you would want to save an Outlook email as a file, you’d do the following:
Open the message you want to save
Click on File
Go to Save As
Choose the location where you want to save the email to
Input a file name
Select a file type
The problem is that Outlook doesn’t include PDF as one of the default Save as types.
How do I convert Outlook emails to PDF?
1. Use the Microsoft Print To PDF utility
The Microsoft Print To PDF utility included in Windows 10 allows you to print any email message directly to a PDF.
You can do this by following these steps:
Open the message you want to save
Click on File
Select Print
Choose Microsoft Print to PDF
Select Print
The Save Print Output As box will open
Choose the location where you want to save the email to
Use the Save As feature in Word to save the email as a PDF file
2. Use a third-party Add-in for Microsoft Outlook
There are many Microsoft Outlook Add-ins available that will allow you to save emails directly to PDF. Additionally, there are many professional PDF readers and managers that will also install an Outlook Add-in during their setup process.
As far as strictly saving emails to PDF is concerned, this solution is indeed the fastest. However, having too many Add-ins installed can cause issues with your Microsoft Outlook client.
3. Use a third-party PST to PDF converter
Some of you may not know that Microsoft Outlook stores your emails on your PC as well in a designated location. These emails are saved in a PST file, which can only be opened using Outlook or PST-dedicated programs.
You could use a third-party PST to PDF conversion tool, as they are available as both downloadable clients for the PC, and as web apps online.
If you want a full-feature utility that lets you convert Outlook emails, contacts, calendars, and notes and is able to work with multiple PST file batches, we suggest you try SysTools Outlook PST to PDF Converter.
Have you found a new way to convert Outlook emails into PDF files? Let us know in the comments section below.
Google Drive is cloud storage service where you can save documents, images, videos, archives, and other files too. It provides a minimum of 15 GB of storage, and you can upgrade that to one TB.
However, Google Drive doesn’t include any options to search for duplicate files.
Duplicated files can waste quite a bit of your Google Drive storage space, so this is how you can remove them.
How can I remove duplicate files on Google Drive?
1. Manually remove duplicate files from Google Drive
2. Click on the icon in the upper right corner of the screen to change the view to List View.
3. Write copy in the search bar and press Enter. All the files that contain the word will appear in the list.
Alternatively, you can press the Ctrl + F keys on your keyboard and write copy in the text box that appears.
4. Select a duplicate file and press Delete on your keyboard or right-click on it and select Remove.
5. In order to remove multiple files at once, start by selecting one of them, then hold the Ctrl key and select the others. After, delete them as previously described in step 4.
Although Google Drive does not offer its users a built-in option to remove duplicate files, there is a workaround for this.
Duplicate files are likely to have the word Copy in front of them, given the fact that they are copies of others. Therefore, you can manually search for all the files that contain this word in their title and delete them.
Do note that, if the duplicate files have a different name, they cannot be found using this method and you might need to try out something else.
2. Remove duplicate files from Google Drive using third-party software
Clone Files Checker is freeware software that enables you to quickly find and delete duplicate files from your system disk and cloud storage.
As such, it’s a utility you can erase duplicate files from Google Drive with.
Click theDownload Clone Files Checker button on the software’s home page to save its setup wizard and install it. Then you can remove duplicate files in Google Drive as follows.
First, open Clone Files Checker and click the Cloud Scan tab at the top of its window.
Next, press the Load Drive button and enter your Google account details. Then you can select your Google Drive folders as in the snapshot below.
Select a drive or folder on the left of the window to scan.
On the right, you can select All Files to scan all the files. Alternatively, select Custom to choose more specific file types to scan.
Then press the Start Search button. A brief scan will show you duplicate files in the selected Google Drive folder as in the shot directly below.
Now press the Select Duplicates button to open the menu directly below. That includes a few options for you to select duplicate files such as Retain newest files in each group.
Click an option on that menu to select duplicate files.
Press Select Action to open the window below. Then you can select Permanent Delete to erase the selected duplicate files from Google Drive.
You can also select a Move Items to Trash Folder check box so the duplicates can be restored. Then press Continue to delete the files.
Open Google Drive in your browser. It will no longer include the duplicated files you deleted with Clone Files Checker.
Now you can save hundreds of megabytes of Google Drive storage. You can also scan for and delete duplicated files from your hard disk with Clone Files Checker much the same.
So Clone Files Checker is a handy utility to add to Windows.
Why is my Google Drive storage full?
It seems like the backup, the e-mails, and other files you stored on your drive exceed the space allocated. You can start deleting files from Google Drive or you can back them up on an external hard drive.
We hope you managed to find and remove duplicate files in your Google Drive. Let us know in the comments below what method you prefer.
You’re probably seeing the message There were some problems installing updates but we’ll try again later, or We couldn’t install this update, but you can try again followed by an error code. The Windows Update was not successful and that can have lots of reasons, from an inconsistent internet connection or server issues to software conflicts and corrupted system files.
How can I fix the Windows Update installation error?
1. Run the Windows Update troubleshooter
Press Windows key + I to open Settings.
Choose Update & Security.
Select Troubleshoot from the left pane.
Expand the Windows Update troubleshooter and click Run the troubleshooter.
Does this let you continue with your update installation? If not, try the next solution.
The Windows Update troubleshooter automatically detects and fixes most incorrect settings on your computer that bring the message there were some problems installing updates, but we’ll try again later.
Sometimes you can’t perform an update installation if your computer can’t find the correct IP address when trying to resolve a URL for the Windows Update website or the Microsoft Update website.
This error, usually coded as 0x80072EE7, may occur if the hosts’ file contains a static IP address, so running the Windows Update troubleshooter resolves any issues that prevent you from updating Windows.
2. Run the DISM tool
Click the search box, type command, and select Run as administrator.
In the command line, copy-paste the following lines and press Enter after each:
DISM /online /Cleanup-Image / ScanHealth
DISM /Online /Cleanup-Image /RestoreHealth
After it’s done, reboot your PC.
If you still can’t perform an update installation on Windows 10, run the DISM or Deployment Image Servicing and Management tool.
The DISM tool helps fix Windows corruption errors when Windows Updates and service packs fail to install due to corruption, like if you have a damaged system file.
Once the repair is complete, reboot your computer and perform an update installation again.
3. Manually reset Windows Updates components
NOTE
It’s recommended not to uncheck the update option Give me updates for other Microsoft products when I update Windows. Windows Updates downloads and installs updates required to run Windows efficiently.
Click the search box, type command, and select Run as administrator.
In the command line, type the following commands and press Enter after each:
Close the Command Prompt and navigate again to Task Manager to ensure that the Windows Update service abnormal resource consumption is reduced.
Try rerunning Windows Updates to check if the issue has been resolved.
Back up the registry before you modify it, then restore it if a problem occurs.
4. Run a System File Checker scan
Click the search box, type command, and select Run as administrator.
Type the script below and hit Enter. sfc /scannow
Restart your computer
A System File Checker scan checks or scans all protected system files and then replaces the incorrect versions with the genuine, correct Microsoft versions.
If the update installation issue persists, try the next solution.
5. Temporarily disable your antivirus security software
You can uninstall third-party software, such as a computer cleaner or antivirus, to check whether it can fix the issue.
For antivirus software, temporarily disable it because you need it to prevent your computer from security threats.
Immediately after fixing the update installation issue, re-enable your antivirus.
Suppose none of the previous steps proved to be a definite solution and Windows won’t install updates. In that case, we suggest navigating to Microsoft’s Update Catalog and downloading recent updates manually.
Besides the most recent system updates, some users suggest installing KB5001649 worked for them. So go to the Microsoft Update Catalog to download it and look for other updates specific to your system version.
Install only the updates specific to your Windows version (you can find this information in Settings > System > About).
How do I force a Windows Update to install?
Click the search box, type command, and select Run as administrator.
Paste the scripts below, hitting Enter after each one. net stop wuauserv net stop bits
Launch the File Explorer, and navigate to the following path: C:\Windows\SoftwareDistribution
Delete all the items in the folder.
Click the search box, type command, and select Run as administrator.
Run the following scripts hitting Enter after each one is typed in. net start wuauserv net start bits
Windows will automatically redownload the files necessary to update your computer to the newest OS build. Forcing updates, especially security intelligence updates are crucial for system stability and security.
What can I do if Windows 10 updates won’t install?
If the updates won’t install, it’s possible that Windows Update isn’t working correctly. This can be fixed by resetting the necessary components and trying again.
In some cases, you might get We couldn’t complete the updates message, which appears if an issue with your system prevents the update from completing. Sometimes this can be caused by antivirus software.
You should note that many of these problems are fixed using similar solutions, and many of our solutions will work for there were some problems installing updates error codes 0x8000ffff, 0x800f0922, 0x800f0831, 0x800f0922, 0x80070424, 0x800f020b, 0x80070422, and 0x80080005.
Problem 0x80070057 is another typical error on undesired updates. It is most commonly associated with the Windows 10 upgrade but can sadly extend to other platforms, apps, and actions.
We would like to know what solutions worked for you; please tell us in the comments section.
7. Open SwiftKey and sign in with the account you use on your Windows device.
8. Navigate to SwiftKey Settings.
9. Select Rich input from the list.
10. Go to Clipboard.
11. Enable Sync clipboard history.
12. Ensure the Remember copied items and Show last copied item as quick paste option on prediction bar options are enabled. If not, manually enable them.
The Redmond tech company’s latest update to SwiftKey allows users to sync their clipboard history between Android and Windows 10 or Windows 11.
Know that you could already sync your clipboard between Windows devices, but the functionality now spans across multiple platforms.
In order to use Cloud Clipboard to sync across devices, you need to first enable it on your smartphone and your PC.
You will be pleased to know that Windows 11 also supports clipboard syncing, so the feature should work with Microsoft’s upcoming OS.
It makes total sense to have clipboard content sync, with so many services syncing across devices.
And this will prove to be very useful, seeing how people frequently continue conversations or workflows across devices, thus being able to copy the text on one device and paste it onto another is a major improvement.
Microsoft had another form of clipboard syncing through the Your Phone app before, but having the option directly within a keyboard app may be a more natural option for people.
Are you excited to now use the Windows clipboard on your Android device as well? Share your opinion with us in the comments section below.
Experiencing a high ping in games is annoying because it affects your gameplay. It reduces the game’s performance and disrupts the fun of playing it. However, you can experience high ping in many games.
Games like For Honor need a reasonable response time to allow the game to communicate between your PC and its servers. High ping is a problem many players complain about. So, we’ll guide you through the steps to fix the high ping rate and improve For Honor gameplay.
Furthermore, pings mean the time it takes for your device to communicate with the client’s online server. It can be low, average, or high.
Why am I suddenly getting high ping?
Issues with the network connection: The ping rate in the For Honor game may increase if your network connection is slow or unstable. It affects the communication between the game and its servers.
Outdated network drivers: The network driver on your device enables a network device to communicate with a computer’s OS, likewise, other computers and devices. Hence, if the driver is outdated, you may experience problems connecting to the network device.
Low bandwidth: Playing games on your PC needs enough system resources to ensure good performance. So, if many programs are running on your system, they can consume the most bandwidth, leaving the game with little. So, low bandwidth can affect your game performance, causing For Honor characters to lag.
Before we start making complex changes, here are a few quick checks to perform:
Ensure you are connected to a network and have a high Internet speed. Also, you can switch to a wired connection to reduce ping.
Run For Honor with administrative privileges. To do that, right-click on the game launcher, and choose Run as administrator from the context menu.
If these don’t work, move to the solutions listed next.
1. Use a VPN
Since your internet connection is good, the issue might come from the server you are trying to connect to. If the For Honor server has problems, you will encounter them too.
To gain no lag and no high ping we recommend you use a VPN provider to connect to a server in a different country. The closest the country, the better the connection speed.
To make it facile for you, we have a list of easy-to-follow steps below (using PIA as an example):
Open PIA and click on the On/Off Button to automatically connect to a sever
If you want to connect to a specific country, search and select the one you want
Open For Honor again to see if the problem is still there.
Our Recommendation is Private Internet Access since it’s one of the safest and fastest out there. With a no-log policy, it’s 100% open source, and advanced features for power users, it’s our best choice.
Private Internet Access
Play your favorite games lag-free and gain access to geo-restricted content.
Navigate to the Windows Update tab and click on the Advanced options.
Select Additional options and click on Options updates.
Expand the Drivers updates section, then check the box.
Click the Download & install button.
Updating network drivers resolves issues with the network driver on your PC and makes it connect faster with network devices.
An outdated network driver can limit your bandwidth to incredibly low values. If Windows didn’t find any updates, we recommend you use Outbyte Driver Updater, which is specialized in finding outdated drivers.
3. End process for apps using more bandwidth
Press Windows + R simultaneously to open the Run window.
Type resmon in the text box and press Enter to open the Resource Monitor.
Click the Network option in the Resource Monitor window.
Check the Total volume to know the programs occupying most of your network resources.
Right-click on the program using much bandwidth, then select the End Process option from the function menu.
Click on End Process to confirm the action.
Restart your PC and check if the high ping issue persists.
We hope this article helps you solve the high ping issue in your game. However, you can also check our guide on how to fix For Honor’s common issues you may encounter when playing the game.
Today we’ll walk you through the steps of removing the background/ saving your image with a transparent background in GIMP.
There are actually a few different ways to achieve that – depending on your image, skillset and what exactly you want to do with the resulting image. We included all methods:
How do I make the background transparent in GIMP?
Fuzzy select tool
Launch the GIMP app on your PC.
Open the image you want to edit in GIMP.
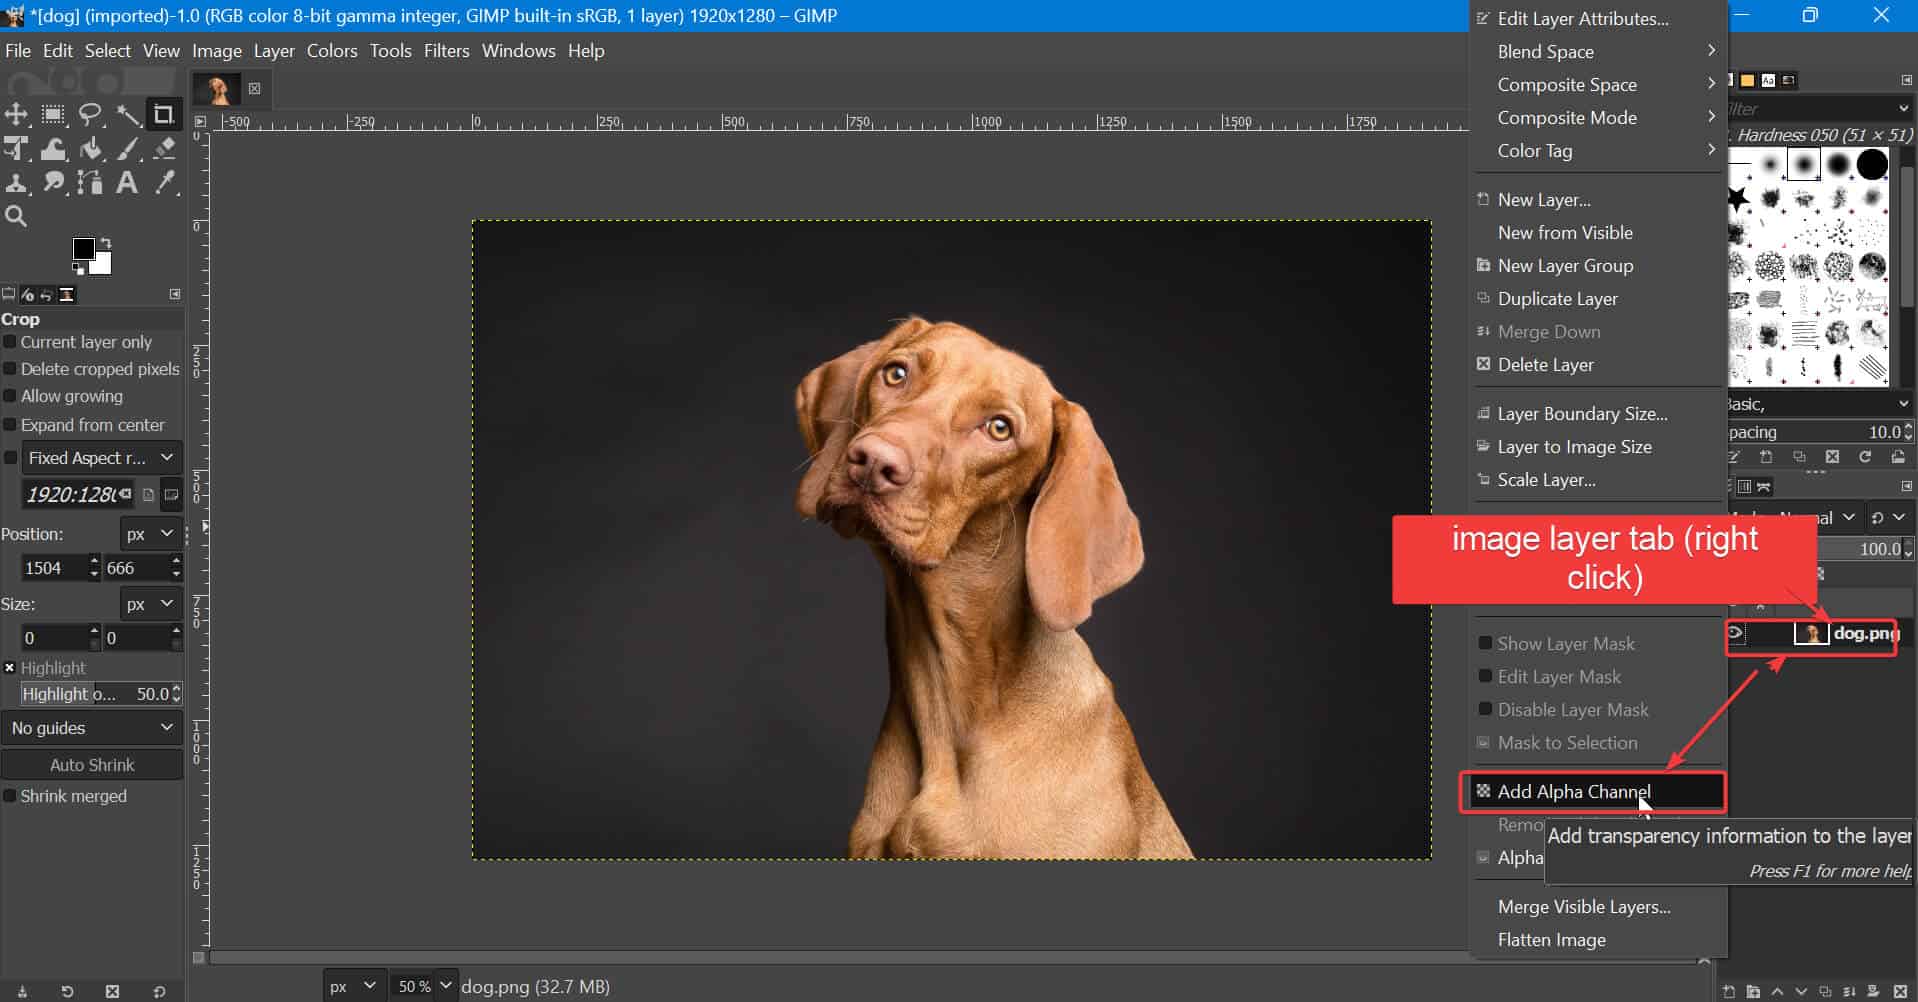
Right-click on the image layer from the Layer tab in the right sidebar and select Add Alpha Channel (if the option is greyed-out, it means you already have the Alpha Channel selected)
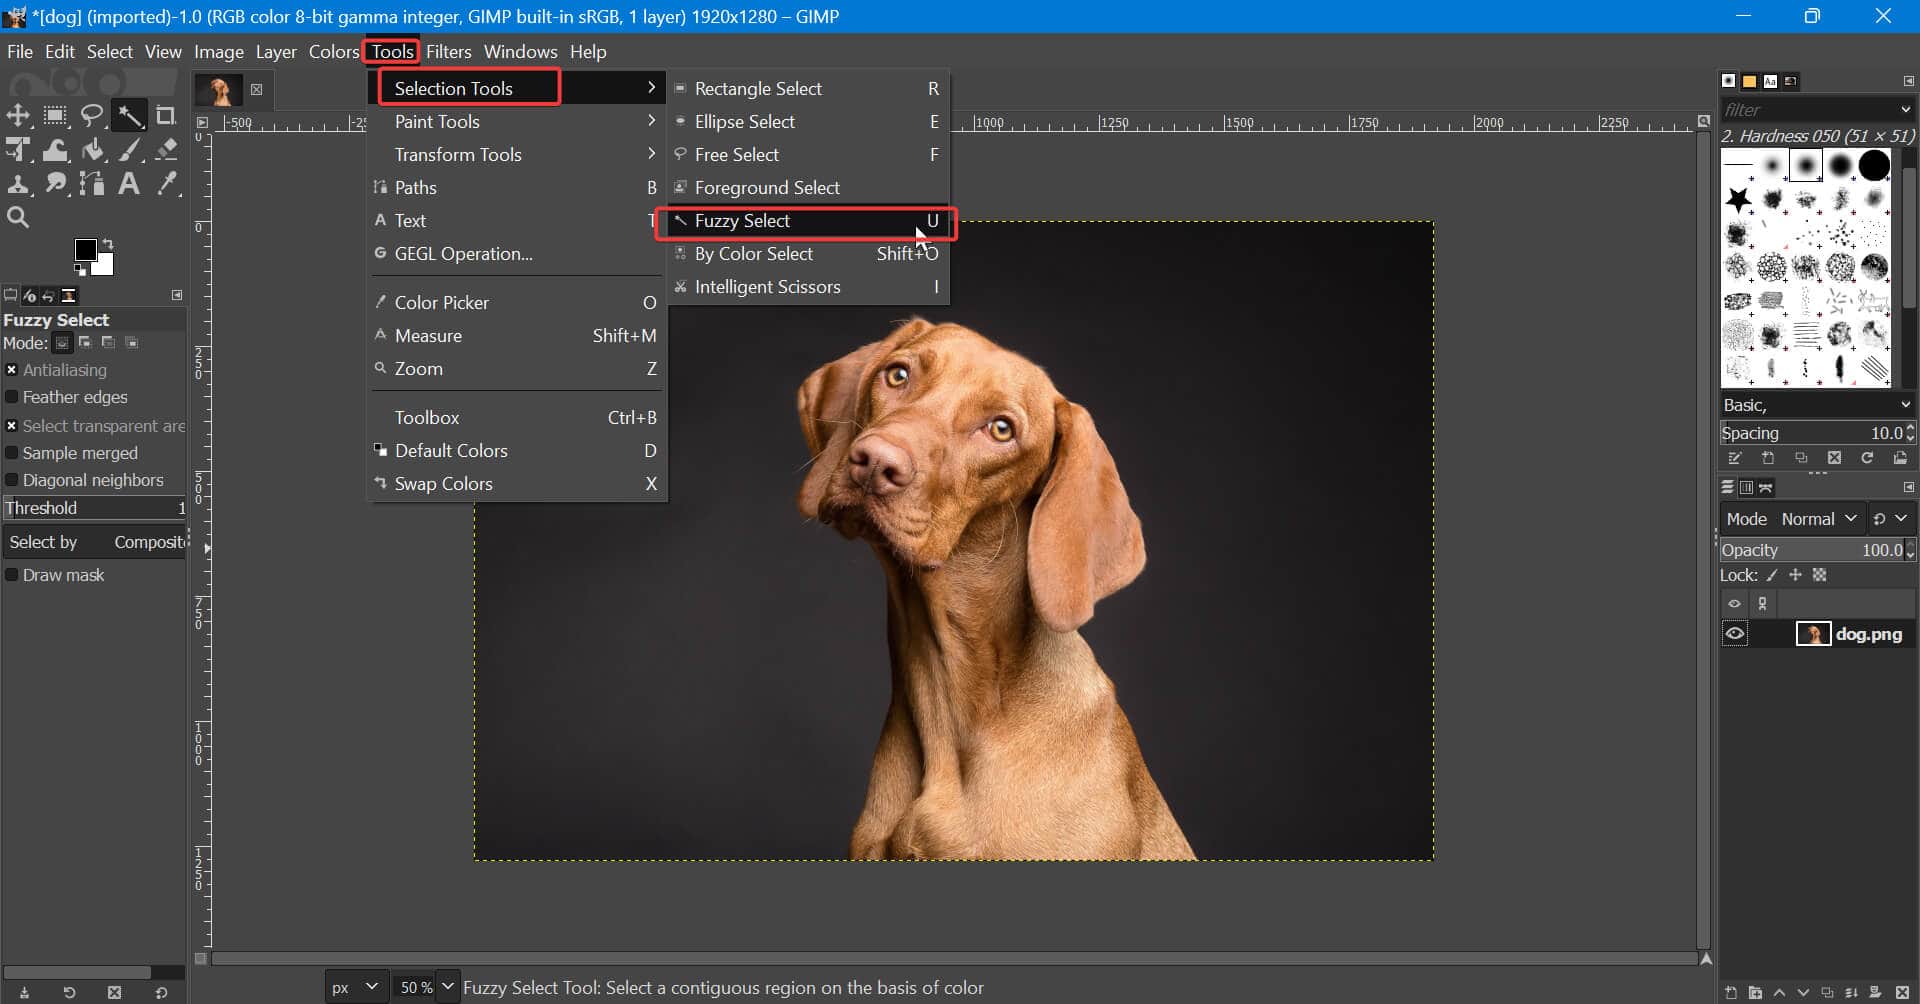
Navigate to the tools panel and click on the Fuzzy Select Tool (or press U on your keyboard).
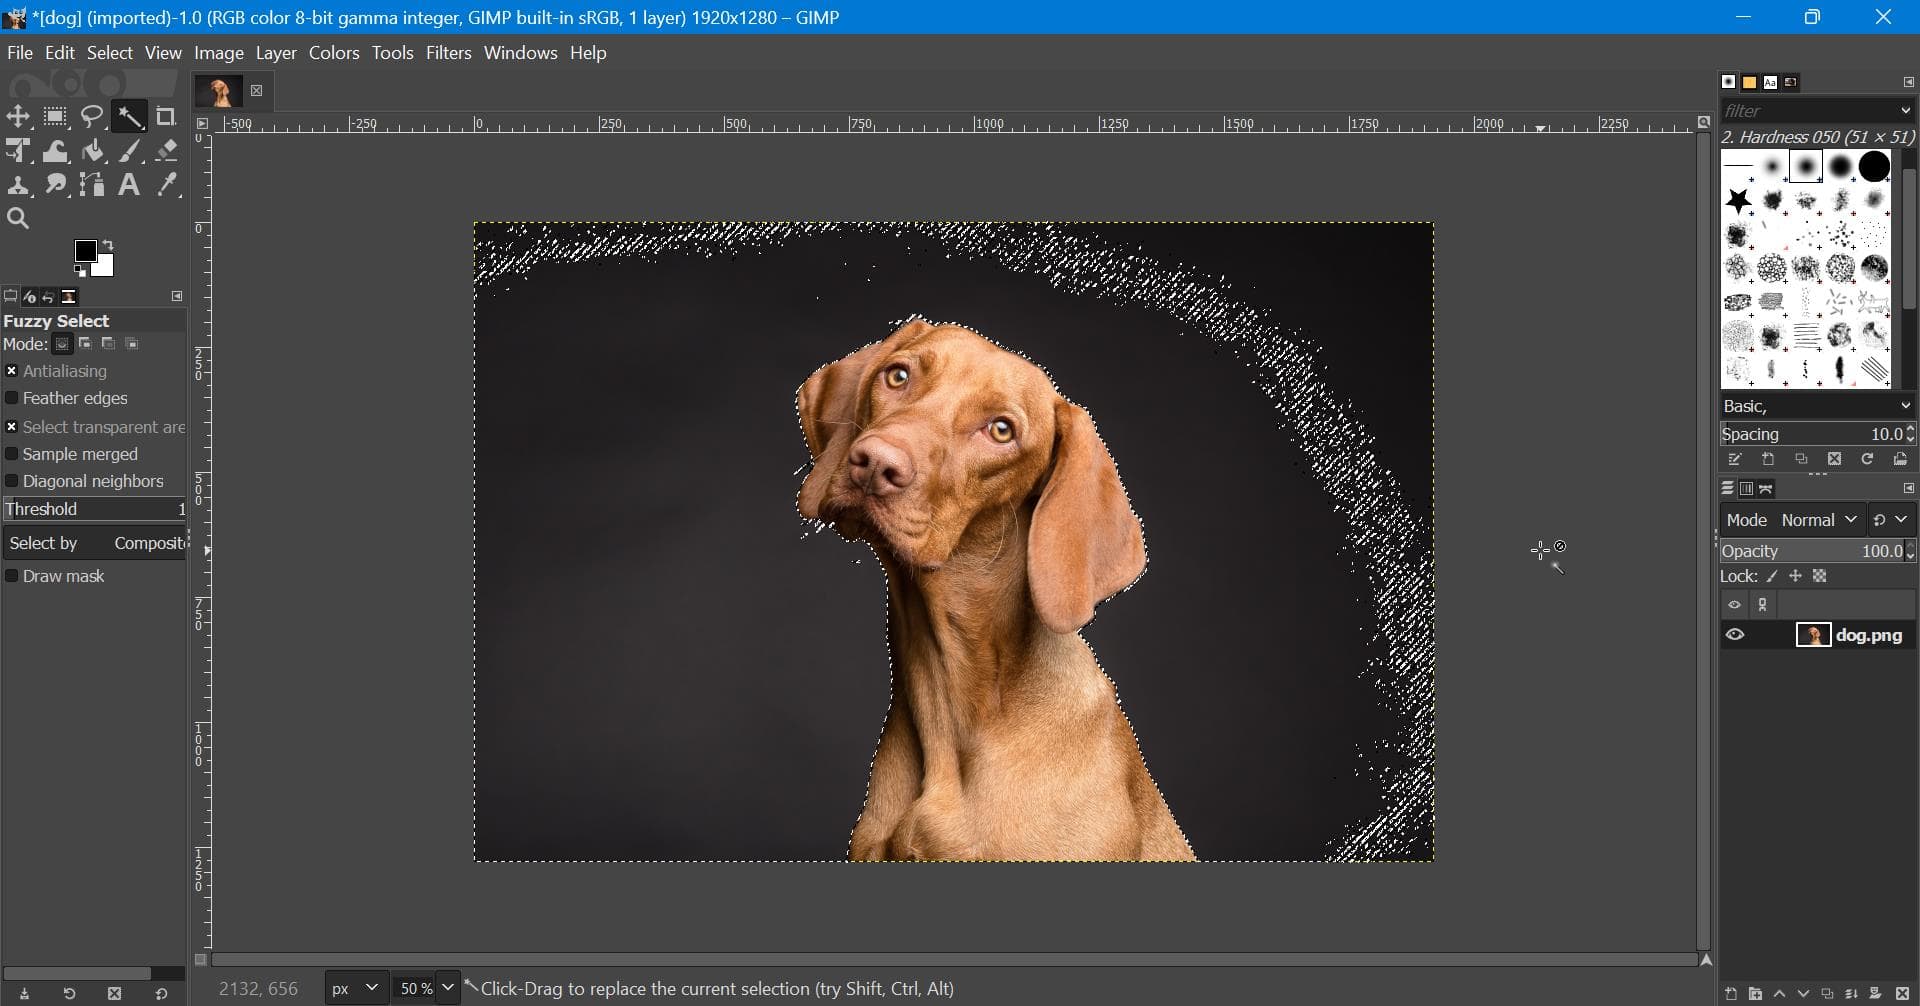
Click and drag on your subject to create a selection (keep dragging to increase or decrease it). You can add to your selection by holding Shift and clicking on another area.
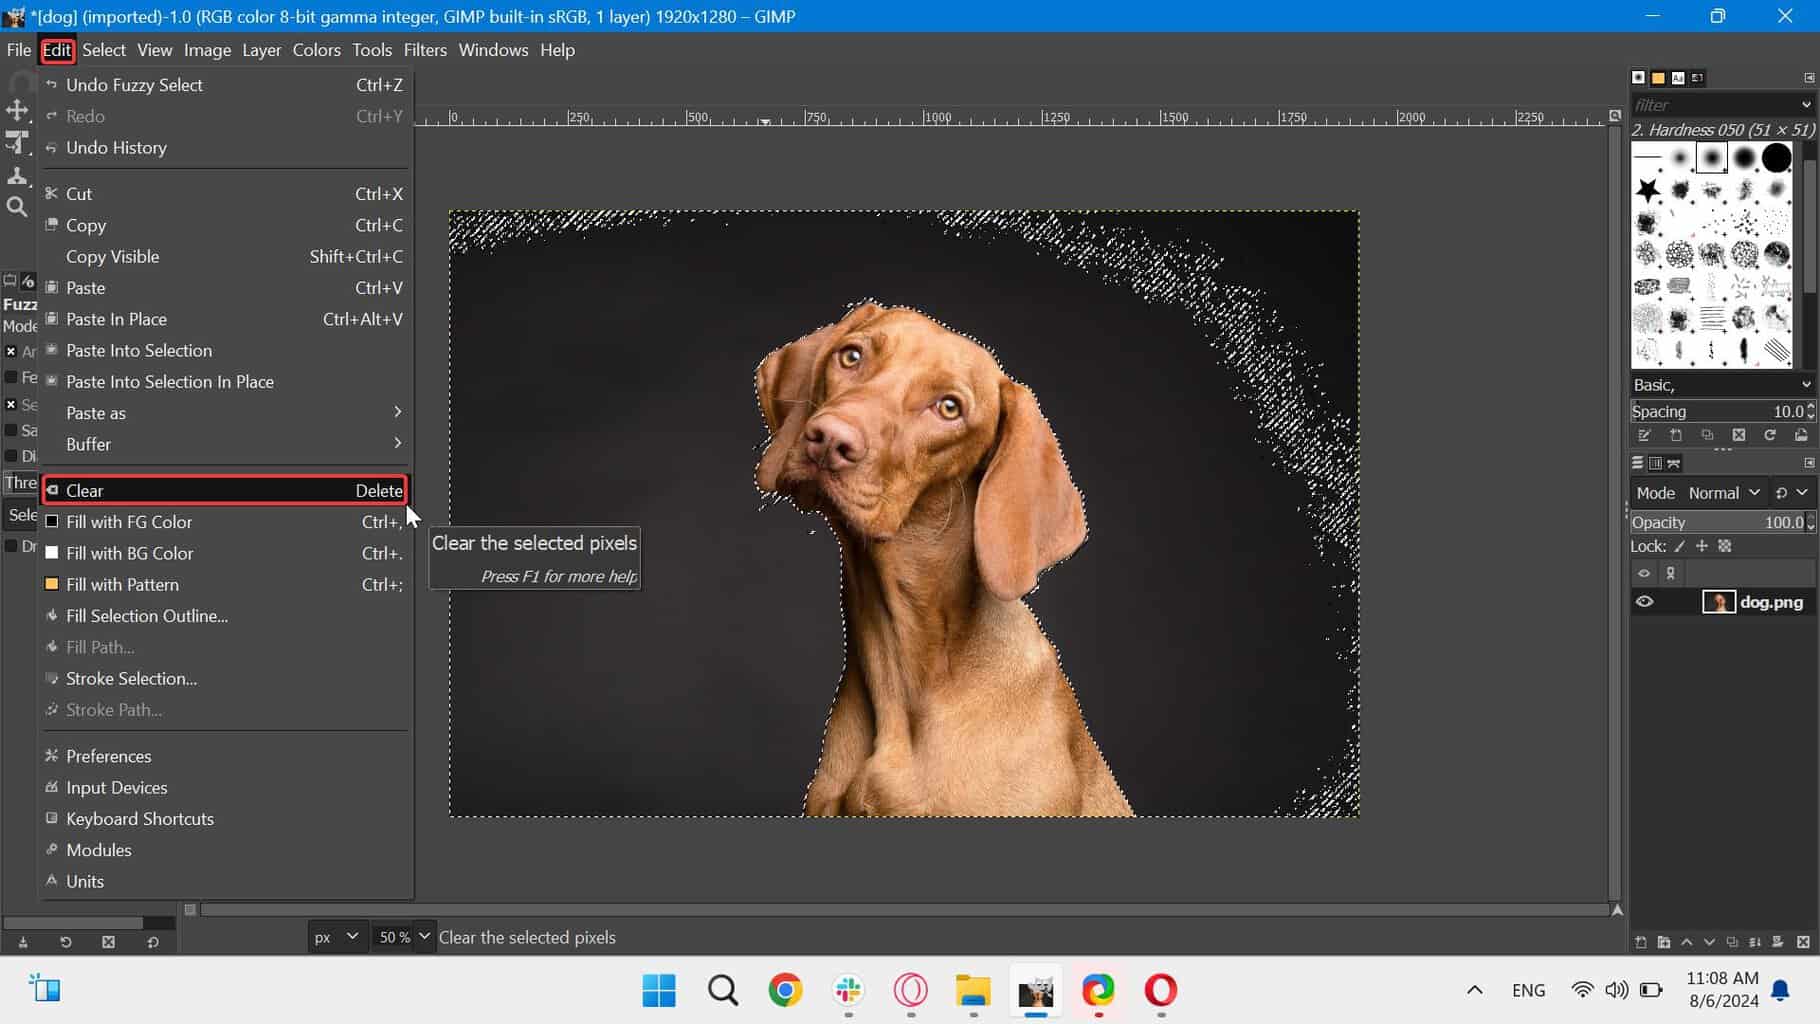
Press on Edit in the main menu and hit the Clear button. Alternatively, tap the Delete key on your keyboard to delete the background.
On PC, you can easily make the background transparent in GIMP using the Fuzzy Select tool. For this, you need to open the image as a layer, select the background using the tool, and then delete it.
The remaining result will be your image without a background.
It is advisable to have the Antialiasing, Drawmask and FeatherEdges options enabled in the Tools section.
By using this tool you can slowly make the background transparent in GIMP.
Click anywhere on the image where you want the background gone and start dragging until you reach the desired selection.
Press Delete on your keyboard.
Paths tool
Open the image.
Select the Paths tool.
Zoom the image to get a closer view of the details. Start clicking around the edges of your subject to create an outline.
Curve the lines between the points by dragging them.
If you stop at a certain point, resume the outline by clicking on the most recent point you created then continue.
Close the outline by clicking the first point and hold to unite with the last one.
This is a more time-consuming technique, but perhaps the most accurate one if you want to make the background transparent in GIMP.
Layer masks
Open the image.
Right-click on the layer and select Duplicate Layer from the available options.
Then, in the upper-right menu, go to Colors. Select Saturation, and drag the scale to zero. Click OK.
Go again to Colors. Select Curves and drag the margins of the curve to make the subject as black as possible, and the background as white as possible.
Then go to Colors and choose Invert.
Go to Edit and pick Copy Visible. Turn off the visibility of the layer.
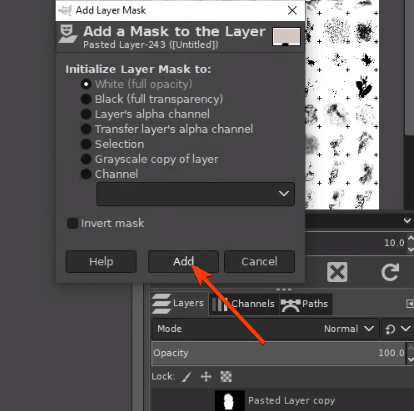
Next, right-click on the original layer and choose Add Layer Mask. Leave everything as default and click Add.
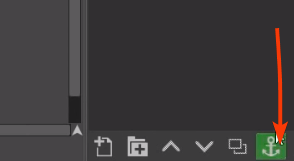
Then go to Edit and choose Paste. Also, in the right lower part of the screen, click on the green anchor icon. At this point, the black areas should remain visible, while the white areas become transparent.
Grab a white brush and fill in whatever imperfect areas you still have.
This is the most advanced technique to make the background transparent in GIMP, as you might have noticed. But it works fine when there are a lot of details on the subject’s outline.
It only works well when there’s a lot of contrast between the subject and the background.
Foreground Select tool
Open the image.
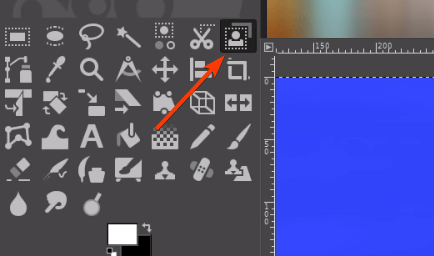
Grab the Foreground Select tool and manually draw a rough outline around your subject. It does not have to be perfect.
Then, brush in the subject without touching the margins. Toggle the preview setting to see how it looks.
Press Enter on the keyboard to convert it into a selection. Then, invert the selection by going to Select > Invert, and then press Delete on your keyboard to remove the background.
Can’t select the subject in GIMP
If you can’t select the subject or are struggling with imprecise selections in GIMP, try to:
Adjust Tool Settings: Modify Threshold and Feather Edges for better accuracy.
Refine Edges: Use Select > Feather or Grow/Shrink to refine selections.
Increase Contrast: Temporarily boost contrast for easier selection.
Combine Tools: Use tools like Fuzzy Select with Paths for precision.
Ultimately, if it’s too difficult to get precise results with GIMP, you can use an AI-powered alternative. InPixio offers a free version with basic background removal features, making the process easier, faster, and more precise with minimal effort.
For advanced tools, a paid subscription is required, but the free version is a great starting point for efficient and hassle-free background removal.
InPixio
Simplify the background removal with InPixio—easy, fast, and free!
And that should do it. You have five ways of removing the background in GIMP, both for the beginner and for the advanced user. We have a new guide on how to blur background in GIMP, so don’t hesitate to check it out.
If you have other suggestions for making a transparent background in GIMP, don’t hesitate to drop us a line in the comments section below.
Running your system without an antivirus is quite risky even if you are not connected to the Internet. You can still get a virus via Steam, Origin, or Uplay exploits.
Also, if you download games from suspicious sources, there is a high risk that they come with injected malware.
They might cause the addition of new toolbars to your browser and sometimes even steal your passwords from your social media accounts.
Nowadays anybody can be the victim of serious cyberattacks, and gamers are not excluded. Actually, they are more exposed to malicious viruses like worms or trojans, thus strong antivirus software is imperative.
Hence, considering powerful antivirus software will offer you protection against critical viruses, plus it may improve your gaming experience with Game Mode functionalities.
To prevent this, consider enhancing your protection with good antivirus. Check out these best antivirus software for gaming PCs and make your pick according to your needs.
– USB guarding tool – Quarantine and ransomware monitor
What is the best virus protection for a gaming PC?
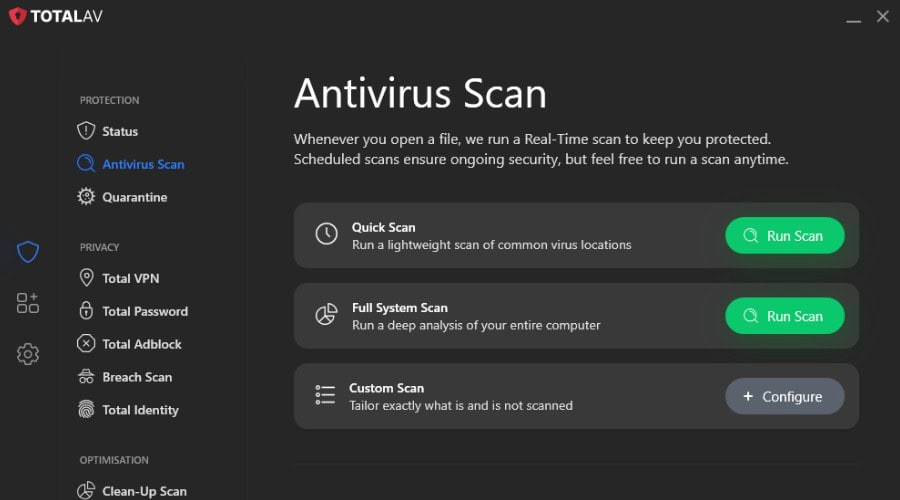
Total AV – Best system maintenance and browsing security
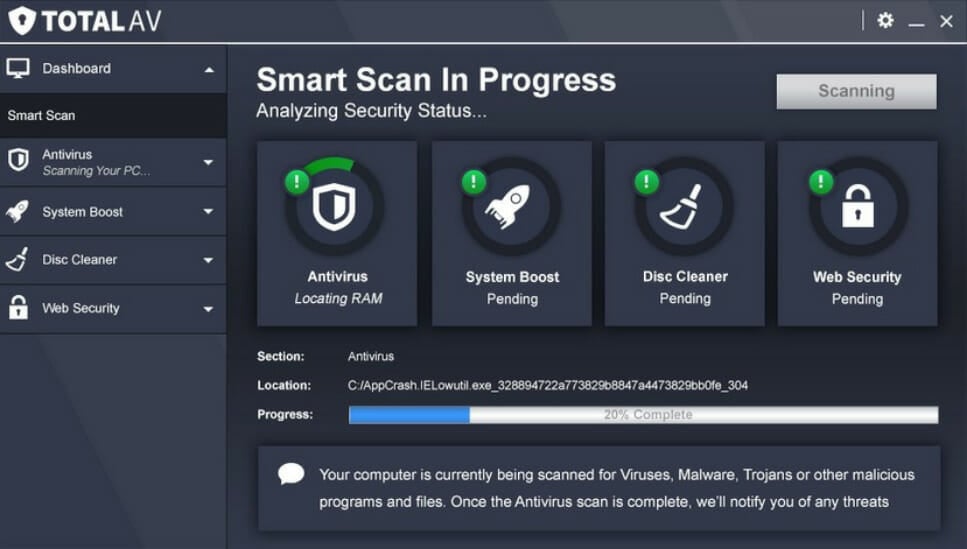
TotalAV is an antivirus program that provides real-time protection against any threats and attacks on your computer. Enhance your privacy, remove all viruses, and optimize your PC with one software.
With a built-in VPN which you can use to browse the web anonymously, it can also be used to connect to a different region via a different server in case your game lags or the server you are playing on is under maintenance.
You are safe every time you change your IP location and your connection will be encrypted to avoid exposure to online risks.
There’s nothing that bypasses your antivirus as they are scanned every time you try to access them. It also protects your PC from any attempts to steal your data. Downloads and executable files are checked before malicious scripts can infect your computer.
TotalAV will get rid of all those pesky ads and pop-ups that show up every time you browse the web or access a site.
Some of the best key features of TotalAV are:
Threat protection in Real-time
Password vault and manager
VPN and ad blocker
Enhance system performance by using built-in tune-up tools
Increased browser security via the WebShield feature
Total AV
Enjoy faster and smoother browsing with a great antivirus with amazing features.
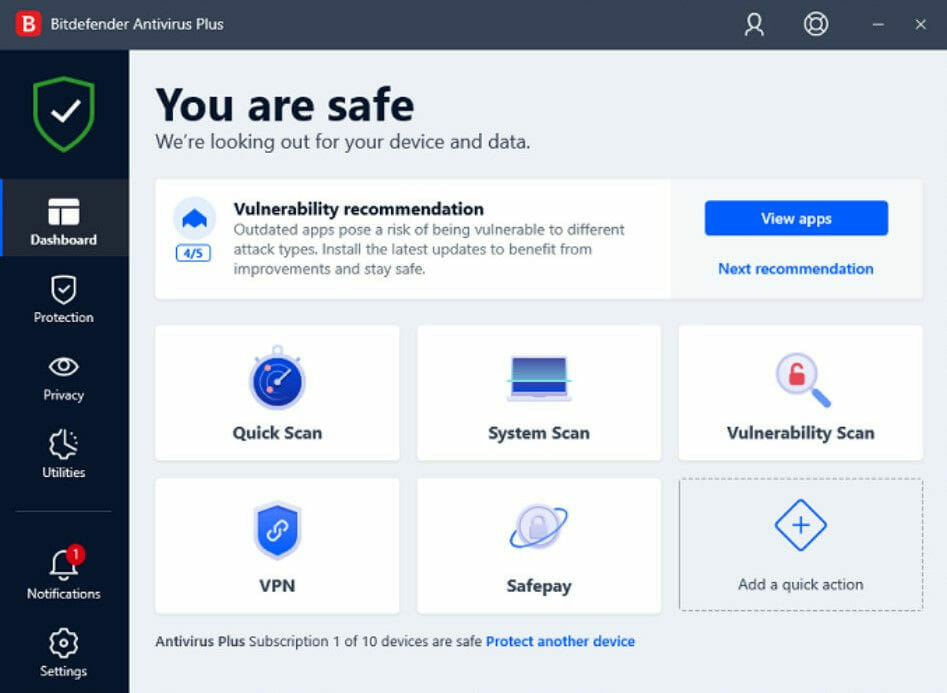
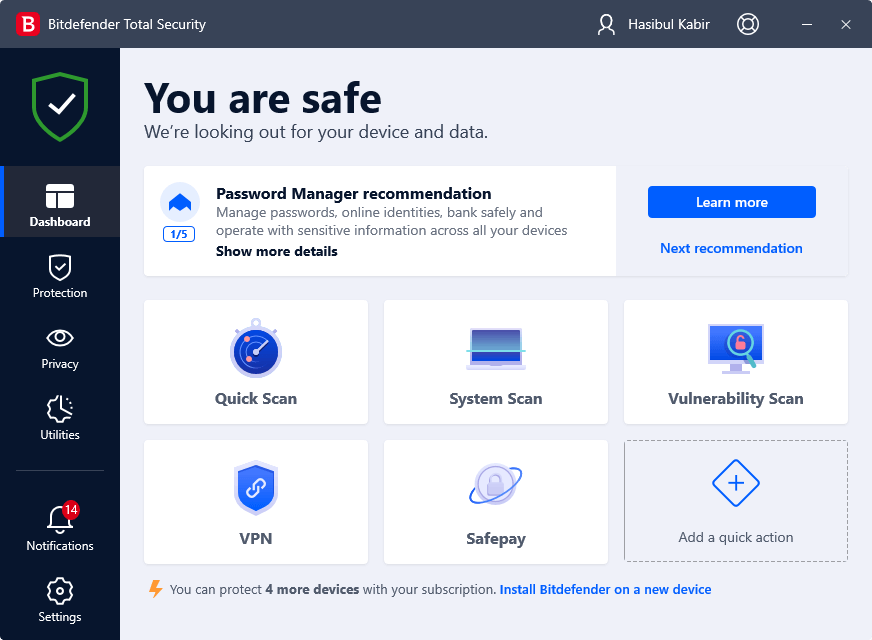
Bitdefender Antivirus Plus is the best full-featured security antivirus, but you should be aware that such a high level of protection doesn’t come cheap.
This is the robust and silent type of protection, and after installation, it goes into Autopilot mode by default, making all security-related decisions for you while you enjoy your favorite games.
The program will never bother you with alerts and pop-ups, and it won’t ask you to go through and configure its behavior.
Thousands of users trust this antivirus program because of the experience they’ve had with it throughout the years.
All tests have proven that it can detect every single threat including 213 zero-day malware samples and more than 20,000 widespread and prevalent malware discovered lately.
In addition, if you choose this performant antivirus solution you secure multi-layered protection from online threats, anti-phishing, or fraud actions. It also provides a Game Mode that will ensure your uninterrupted gaming sessions.
Let’s quickly look at its key features:
Can scan for vulnerabilities such as out-of-date software
Can also check formissing Windows updates and analyzes the strength of your passwords
Provides detailed reports about the vulnerabilities and specific security threats it has detected
Includes a Safepay option for conducting online transactions, which comes in very handy when you buy games
You can call up Bitdefender’s virtual keyboard to protect your system from keyloggers
Bitdefender Antivirus Plus
Enjoy gaming with no interruptions while Bitdefender silently protects you in the background.
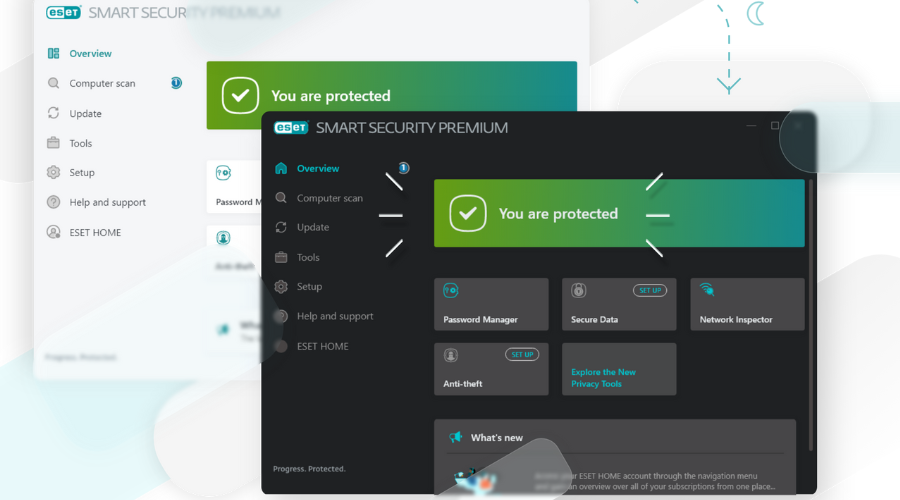
ESET HOME Security Essential protects against any type of malware, including viruses, ransomware, worms, and spyware. So it will be your best shot if you want a lightweight and unintrusive antivirus for your gaming PC.
The software’s efficiency has been demonstrated in numerous industry tests and the tool ranks among the top antivirus developers for more than 20 years.
With ESET HOME Security Essential, your gaming experience is safe and the tool’s permanent background activity won’t interfere with any of the ongoing system processes.
Moreover, this antivirus software can provide complex security services and lock your PC against online threats. Hence, your games can run smoothly without being affected by background running apps.
It’s also desirable to benefit from this antivirus program to secure all your devices and thereby enjoy your games from Windows, Mac, or Android OS.
ESET HOME Security Essential’s best key features are:
Gamer mode feature
Password vault and manager
Webcam protection
Sensitive data encryption
Real-time protection against any threats
Thus you can get a professionally verified antivirus to protect your PC from online malware and enjoy your gameplay without trouble.
ESET HOME Security Essential
Protect your gaming PC and stay away from cyber-attacks, plus secure your home network with ESET.
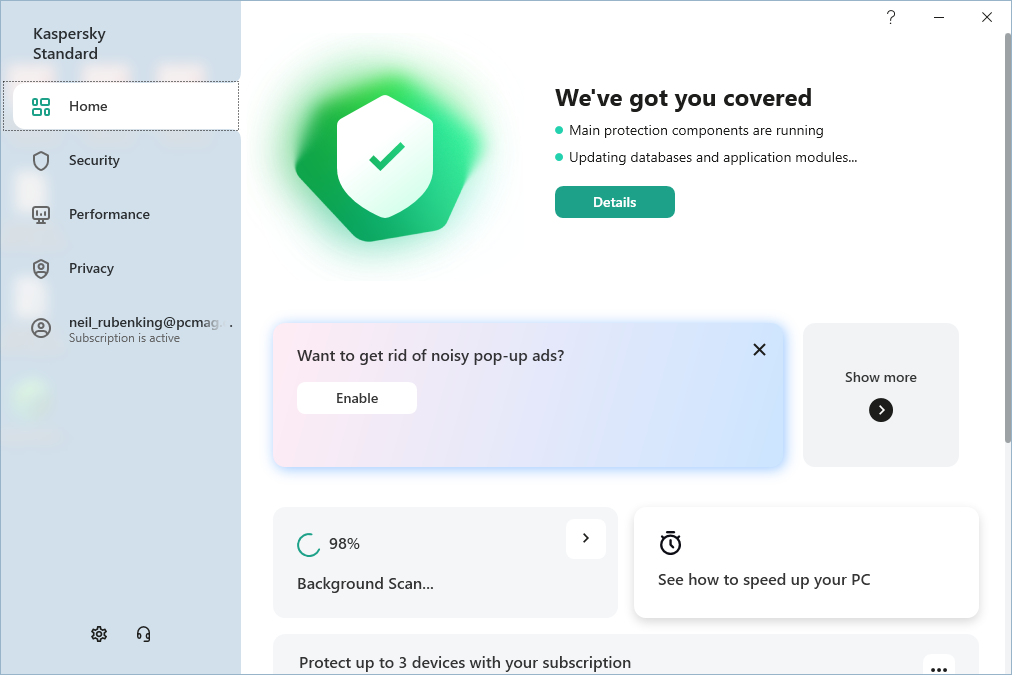
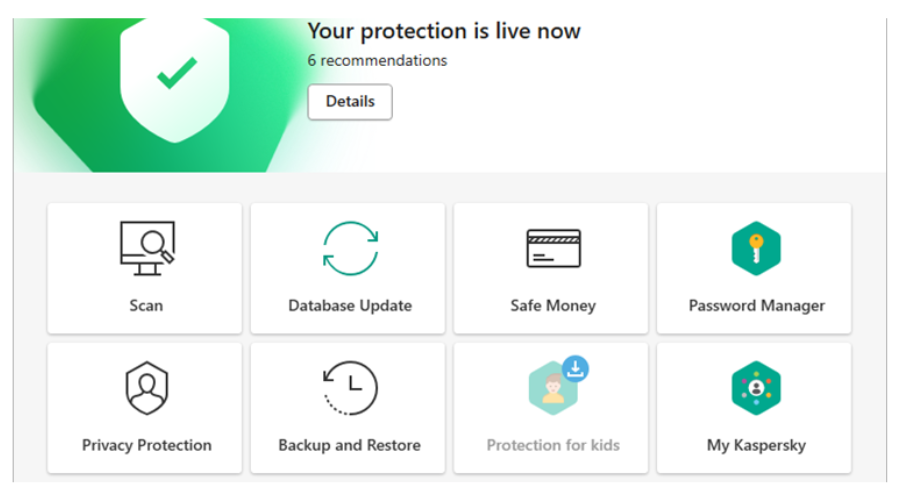
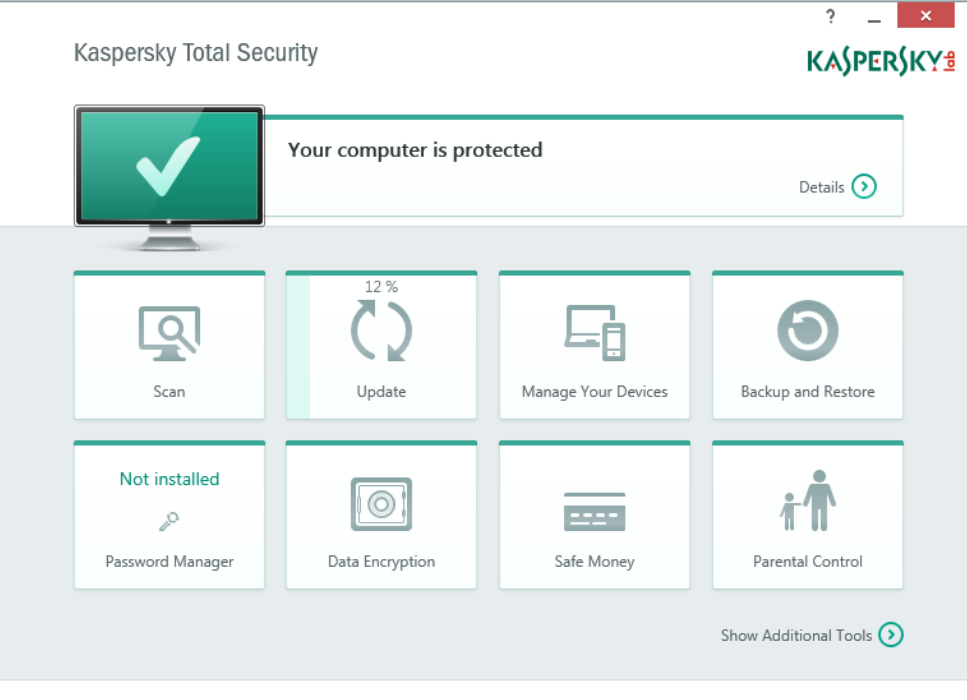
Kaspersky Total Security is packed with some handy utilities, and it’s worth the money.
The software is perfect for protecting gaming PCs. Most users will find that Kaspersky’s default settings are adequate, but if you are after some fine-grain control, you will find plenty of it in its various submenus.
You can also dig deeper by clicking on Advanced Settings to bring up even more options.
Let’s quickly look at its key features:
Integrated file shredder that overwrites deleted files (making them impossible to restore)
Encrypted folders to keep your valuable data secure
Password syncing among more devices
In-built PC clean-up tools
Of course, you can also find free alternatives to all these features, but having them all together in just a single place is more than convenient.
Kaspersky Total Security consistently performs among the best AV programs both in terms of identifying and blocking malware and having a minimal impact on system performance.
The only downside might be the fact that it can take several clicks to dig your way to a particular setting.
Kaspersky Standard
Get complete system security and maintenance package with this amazing antivirus
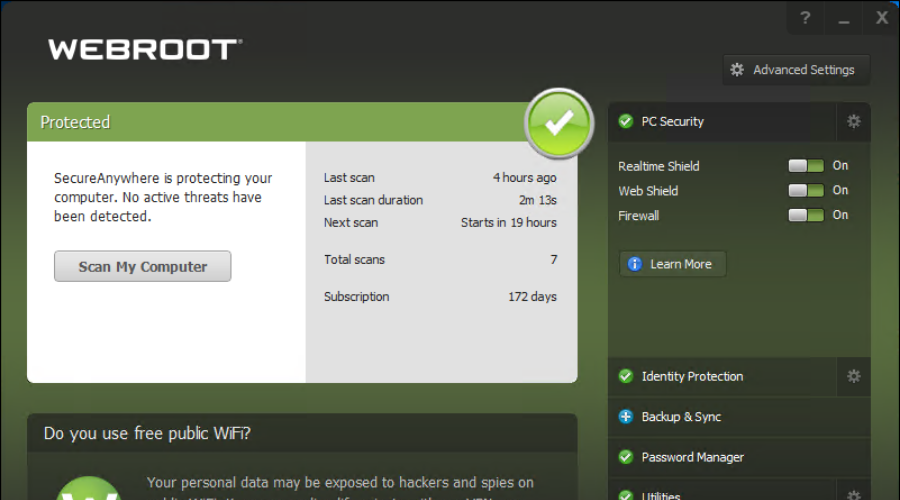
Webroot Secure Anywhere installs in under one minute and uses very little RAM or storage space. Actually, it uses only 5MB of RAM when idle, and less than 15% CPU when it’s scanning your system.
If you’re looking for a lightweight antivirus for gaming, then Secure Anywhere is the perfect choice for you.
As a matter of fact, there is a special version of Secure Anywhere for gamers. This antivirus version comes with a dedicated system optimizer that detects system issues in real-time and wipes away all traces of online activity making deleted files unrecoverable.
The software is cloud-based, so it will work best when there is an internet connection involved. Secure Anywhere features a series of adjustable settings that you can customize depending on your needs.
Some of Webroot’s best features are:
Lighting fast scans
Threat protection in real-time
Identity theft protection
Password management via a third-party software
Cloud-based with performance guarantee
Moreover, such an antivirus platform will comprehend all your security needs, from ransomware or malware attacks to phishing and identity full protection. It doesn’t promise a Game mode to boost your gameplay, but it will not slow down your system a bit.
Webroot AntiVirus
Lightweight system scans and usage with full security against threats.
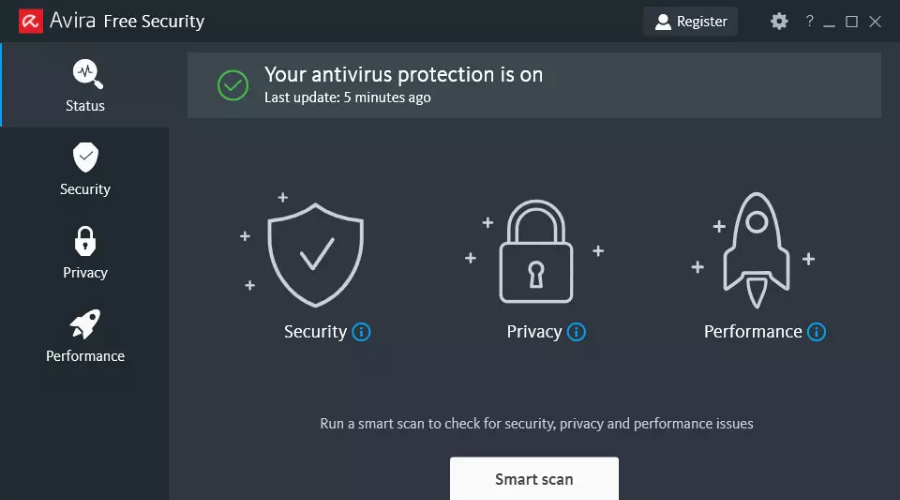
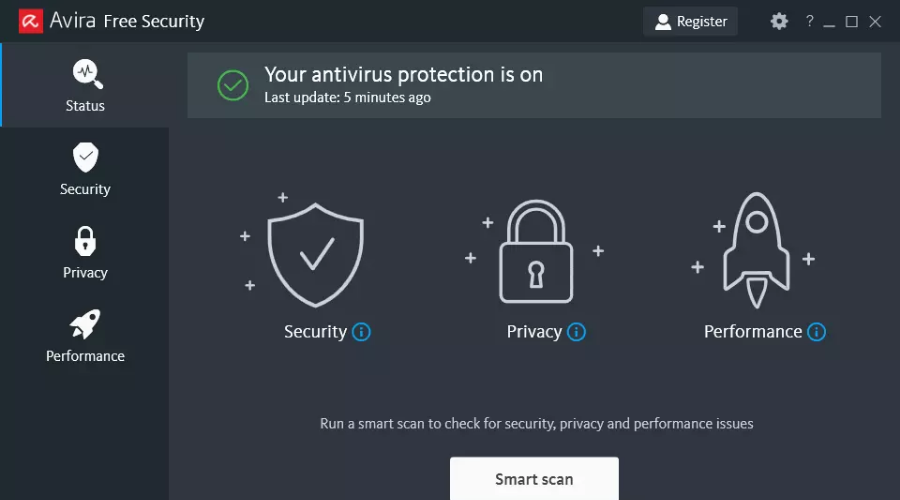
Avira is one of the best free antivirus software you will find. Its level of customization is very high, allowing you to customize many options.
You can configure how Avira scans for zero-day threats. However, if you select a high detection level, the risk of getting false positive reports increases.
More than 400 million people already downloaded Avira, and this fact alone confirms that this tool is a powerful and reliable antivirus.
The one thing that you will not get from the free version of Avira is a Game Mode. That’s why we strongly recommend that you go for Avira Pro.
Nonetheless, you can use this safeguard software to get valuable antivirus protection or anti-malware security in order to block viruses to infect your system.
Let’s check some of the key features of Avira:
Scan downloads and files
Blocks infected sites
Verifies USB devices
Detects PUA and offers priority cloud scanning
No ads
Ready to pay a little extra money to secure your gaming experience?
Avira Antivirus
Your gaming device deserves the best anti-hacking protection and this is certainly a sturdy choice!
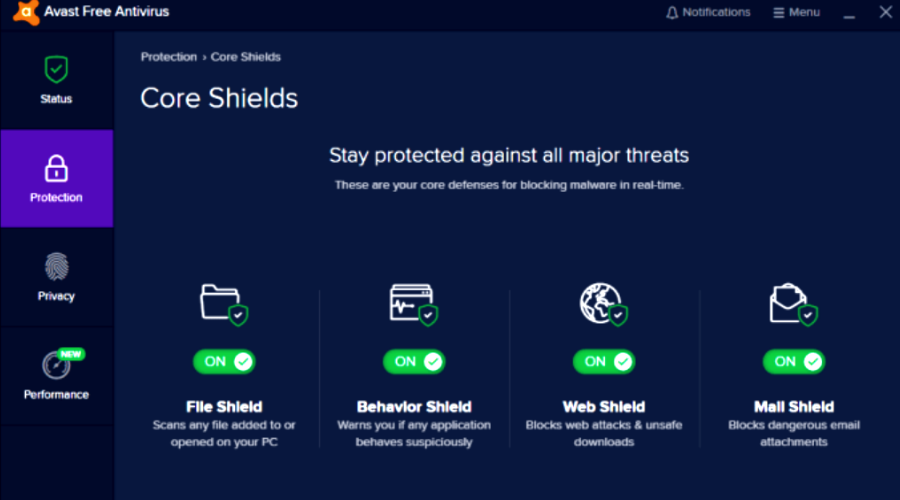
Avast antivirus tool comes with quite a lot of tools included in its free version, which makes it quite popular.
Regardless, like with all of the other entries, you get what you pay for, and upgrading to the premium version will indeed unlock this tool’s full potential.
Sporting real-time protection, frequent updates, and a pageant for stopping malware before it even has the chance to look at your PC, or the ability to detect Wi-Fi weaknesses, Avast Free Antivirus is truly a tool worth mentioning.
In case you opt for a premium version of the software, you’ll also get webcam protection, which might be useful in case you’re playing games on the network or on dedicated live streaming platforms.
Therefore, with Avast you’re all set regarding rounded online privacy and PC system optimization. If you also want extra safety there is a VPN Line service created for browsing freedom.
Benefits of using Avast:
SecureLine VPN for your safety
Premium cleanup
Anti-track to hide your identity online
Wi-Fi scanning and protection
Avoiding fake and unsafe websites
Avast Free Antivirus
Best free choice of antivirus with great threat protection.
The software provides an easy and quick installation process, and you will get immediate protection against emerging threats.
It is the most efficient protection againstspyware, malware, adware, Key logger, and Rootkits and it offers Fast Scan Technology.
The Advanced Monitoring feature prompts warn you in case any program makes illegal entries in critical registry locations.
It offers a complete USB block for total safety from external devices and uninterrupted external Drive scan and notification, automated removal of Malware.
That being said, this licensed solution mostly covers every area of digital security, including parental control to prevent your children to access bad sites.
Let’s quickly look at its key features:
AutoRun and Short-cut creation protection to minimize virus transmission to other PCs
Yes, any computer can be vulnerable to malware or online threats and gaming PCs make no exception.
Does antivirus slow down gaming?
Most of the time, antivirus software will not interfere with your game so you should be able to play without lag.
Does Norton slow down gaming?
According to different users, Norton can slow down your gaming sessions because it consumes a lot of RAM and other PC resources.
Finding the right level of AV protection for your PC is quite a personal thing. There are of course solutions that are much better than others.
Once you manage to separate the good from the bad, it will all come down to features, price, and other criteria that are important to you.
There is also the question if you really need to use a third-party AV program as long as you havethe benefits of Windows Defender which is free and built into Windows 10.
The advantage of running a security suite is that it provides a more comprehensive solution in a tidy package.
Blue Screen of Death errors is probably one of the most severe errors that you can encounter on your Windows 10 PC. They usually happen due to corrupt system files and hardware problems.
These errors will restart your PC and interrupt your work, and since they can be caused by faulty hardware, you must know how to fix the BUGCODE_NDIS_DRIVER error on Windows 10.
We’ve included some useful solutions to fix these errors for you in this article. Make sure you follow them closely and read everything before trying them out.
BUGCODE_NDIS_DRIVER is a Blue Screen error that can cause many problems on your PC. In addition to this error, many users reported the following issues as well:
BUGCODE_NDIS_DRIVER wireless adapter – This error mostly occurs due to your hardware, and the most common cause is your wireless adapter. If you’re having this issue, be sure to check your wireless adapter and its drivers.
Windows stopcode NDIS_DRIVER – This is just a variation of this error, and you can solve it by using one of our solutions.
Blue screen of death BUGCODE_NDIS_DRIVER – This is a Blue Screen of Death error, and just like all other Blue Screen errors, this one will force your PC to restart as soon as it appears.
BUGCODE_NDIS_DRIVER TP-Link – Many users reported this error while using TP-Link adapters. In most cases, the issue is caused by a faulty wireless adapter or a corrupted driver.
BUGCODE_NDIS_DRIVERCisco VPN Client – Several users reported this issue while using the Cisco VPN client on their PC. To fix the issue, you need to remove your VPN client or update it and see if that solves the issue.
What is an NDIS error?
NDIS is one of the most fatal errors you would encounter on your Windows PC. NDIS stands for Network Driver Interface Specification, a crucial part of your Windows system.
You must be aware that the drivers help facilitate communication between its corresponding hardware and PC, and if they run into an error, you will come across an NDIS error.
NDIS makes sure that all drivers are working perfectly fine. However, if you come across an NDIS error, there is some issue with your installed drivers.
Here are some of the common reasons NDIS errors could trigger.
There is a critical system file missing or corrupt.
The drivers are not updated.
Your PC is infected with viruses or malware.
A third-party program is problematic and causing the problem.
How can I fix the BUGCODE_NDIS_DRIVER BSoD error?
1. Use a third-party BSoD fixer
If you’re having trouble with blue screen crashes, try to use a dedicated repair tool. Professional software will scan your system for damaged files, and with just a few clicks, it will repair or replace them.
2. Update your Windows 10
Press Win + I to open Settings.
Click on Update & security.
Select Windows Update from the left pane.
Hit the Check for updates button.
3. Update your drivers
Right-click on the Start menu.
Select Device Manager.
Expand each section, such as audio, graphics, etc.
Right-click on your driver and select the Update driver option.
3.1 Update drivers automatically
To prevent BSOD errors, updating all drivers on your PC is advised. While you can manually update drivers on your PC, this process can sometimes take a while as you have to perform the same steps for all of your drivers.
Therefore it’s better to use third-party software such as Outbyte Driver Updater to update all drivers on your PC with a single click.
Outbyte Driver Updater
You need to keep your drivers updated at all times, and Outbyte Driver Updater will also make your PC faster!
4. Disable or uninstall your Wi-Fi adapter software
Right-click on the Start menu.
Select Device Manager.
Expand the Network adapters section.
Right-click on your driver and select the Update driver option.
5. Roll back to the previous driver
Right-click on the Start menu and select Device Manager.
Locate your Wi-Fi adapter and double-click it.
Navigate to the Driver tab and click the Roll Back Driver button.
Follow the instructions on the screen to roll back your driver.
After you’re done, restart your computer.
A problematic driver can cause the BUGCODE_NDIS_DRIVER BSOD error, and several users reported that the latest Wi-Fi adapter driver was the cause for this error.
According to users, rolling back to the previous version of the driver fixed the issue for them. To install the older version of the driver, do the following:
A few users reported that they could not roll back the driver, so to fix this problem, we advise you to check out our dedicated guide on Safe Mode.
5.1 How to access Safe Mode
Restart your computer while it boots. Repeat this step until you start the Automatic Repair process. Alternatively, you can just hold the Shift key and click the Restart button.
Choose Troubleshoot, then go toAdvanced options.
Then go to Startup Settings and click the Restart button.
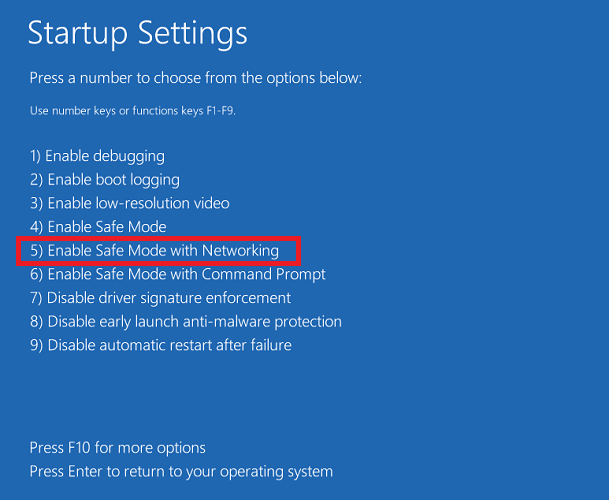
When your computer restarts, select Safe Mode with Networking by pressingF5 or 5.
Once you enter Safe Mode, roll back your Wi-Fi adapter driver. You can also uninstall the problematic driver and download the older version to fix this problem.
Select Selective startup and uncheck Load startup items.
Go to the Services tab. Check Hide all Microsoft services and click on Disable all.
Click Apply and OK.
If you get asked to restart your PC, choose not to.
Start Task Manager by pressing Ctrl + Shift + Esc.
Navigate to the Startup tab.
Right-click each entry on the list and select Disable from the menu.
After you’re done, close Task Manager and restart your computer.
Now you need to repeat the same process and enable each service and application one by one until you find the one that is causing this problem.
Wireless adapters are the common cause of the BUGCODE_NDIS_DRIVER error on Windows 10. So update your drivers and check if your wireless adapter is working correctly.
Several users reported that performing a Clean Boot before upgrading to Windows 10 fixed the BUGCODE_NDIS_DRIVER error.
Even if you performed a clean install of Windows 10, you could try Clean Boot to find problematic software causing this error.
How can I fix the bugcode NDIS Driver on Windows 11?
Update all drivers on your PC.
Check if any Windows update is pending. If yes, then install it.
Reinstall the network driver.
Scan your PC for viruses or malware.
Reset your PC.
Install Windows OS again.
Check for hard driver errors.
Perform a system restore.
Can I disable NDIS?
Right-click on the Start menu.
Select Device Manager.
Expand the Network adapters section.
Right-click on your driver and select the Disable device option.
There you have it from us in this guide. In the comments below, let us know which of the above solutions fixed the problem for you.
If your computer is malware-infected, you should remove the threat as soon as possible, because it can seriously harm your system, and it will put your privacy at risk.
Having an antivirus to protect you from dangerous threats such as spyware and malware is mandatory. Unfortunately, new types of viruses are coming out, and some of them can bypass some antiviruses.
If your antivirus couldn’t detect and block malware from infecting your PC in the first place, you need to use one of the following virus removal tools to clean it.
Good antivirus software can detect and remove all the well-known threats such as trojan, chromium malware, neshta, ransomware, or Segurazo. On top of that, they keep updating their databases to protect you against any emerging, new threats.
If you are trying to determine which is the best virus removal software for Windows 10, we have some great suggestions for you. All the following are good options, it all depends on your specific needs.
What is the best malware removal software?
Total AV – Best browsing security and system maintenance
TotalAV is an antivirus program that provides real-time web browsing protection, enhanced privacy, and virus removal. Enjoy all the security features you need to keep your system safe.
With multi-device compatibility, you can protect up to 3 devices with intuitive and easy-to-use interfaces across Windows, Android, Mac, and iOS.
Malware is one of the most common viruses, so you need protection against it. TotalAV features award-winning anti-malware protection to keep harmful things away from your PC.
It also protects your PC from any attempts to steal your data. Downloads and executable files are checked before malicious scripts can infect your computer. There’s nothing that bypasses your antivirus as they are scanned every time you try to access them.
A built-in VPN protects your privacy when accessing the Internet. Change your IP location and encrypt your connection to avoid exposure to online risks.
A VPN allows you to access even geo-restricted content. If you set your IP location to another country, it will treat you as if you are from that country and you will be able to see all its content.
Prevent snoopers and hackers from monitoring your browsing habits. Never tell anyone what sites you visit, what cards you use, or what you buy.
Annoyed by seeing too many ads online? TotalAV brings a TotalAdblocker so no more pesky ads, notifications, and pop-ups will show up.
Some of the best key features of TotalAV are:
WebShield for browser security
Real-time protection against threats
Tune-up tools for enhancing system performance
Password vault and manager
Zero-day cloud scanning
When no ads are shown, no ads will be loaded, so web pages will launch faster because they require less data to load.
Total AV
Enjoy faster and smoother browsing with a great antivirus with amazing features.
Bitdefender Antivirus removes all malware installed on your computer and prevents future attacks as well. It can detect, block, and remove all types of threats including ransomware, trojan malware, malicious software, and suspicious links.
This solution identifies malware installed on your PC and removes it in the blink of an eye. Bitdefender has had the best malware detection rate in the cybersecurity industry for years.
Artificial Intelligence-backed algorithms and other revolutionary technologies will instantly detect and remove threats, without affecting your PC’s performance.
Many attacks happen while you browse the web. It is established that the antivirus finds and blocks threats, but it also offers a dedicated browser security plugin.
Bitdefender traffic light has an advanced malware filter, phishing attack protection, and a link scanner. Moreover, it can identify trackers for Firefox, Chrome, and Safari.
This antivirus software keeps you protected from attackers at all times while still ensuring you have a good user experience. You can set up game, movie, and work modes to delay certain notifications such as scan reports. It can also pause unwanted background activities to boost the performance of your computer.
Other key features include:
Parental controls
Battery mode
Integrated VPN
Wi-Fi security
Password manager
File shredder
Bitdefender is one of the best virus removal software for Windows 10. It has a free version and several premium packages. You can pick the standard Bitdefender Antivirus Plus, or opt for Bitdefender Total Security or Bitdefender Internet Security.
Bitdefender
The world leader in digital protection is offering its services at a special price. Take advantage of the offer now.
ESET HOME Security Essential is one of the safest and most secure antivirus software on the market, providing privacy and protection for both businesses and home users.
Being constantly updated, the program can detect even the newest viruses that usually bypass other antiviruses. ESET is not only able to detect such threats, but it will also remove them.
For instance, ransomware infections are pretty hard to get rid of if you are not prepared. Eset is a powerful ransomware virus removal software because it uses a dedicated feature called Ransomware Shield that is able to quickly detect any malicious code before it does any damage to your PC.
Actually, the tool features several individual malware removal software that can tackle specific threats. ESET lists around 30 such tools on its website and constantly updates them.
It can detect and remove notorious threats such as all sorts of trojan threats. The software is also a good option for svchost virus removal on Windows 10.
The company also offers detailed information about each particular threat, including information about its origin, behavior, and ways to remove it.
You won’t have to worry about accessing suspicious sites anymore. ESET will make sure no unwanted guests will enter your system and steal your data.
Benefit from these awesome features on a multitude of devices and Operating Systems, thanks to ESET’s compatibility. One license ensures protection across all your gadgets.
Moreover, the program can encrypt your photos, and keep your network secure. remove any existing viruses from your computer, while also allowing you to make safe online payments.
Other key features include:
Webcam security
Scans new files as they download
Gamer mode
Parental control
ESET HOME Security Essential is licensed-based. It has multiple versions with specific protection features integrated. You can try any of them for free for 30 days.
ESET HOME Security Essential
Remove any threats and protect your device from future attacks with the most secure antivirus.
If nasty malware sneaked into your computer, Kaspersky Standard is here to save the day. The company offers a powerful virus and spyware removal tool that can detect and remove all threats.
Kaspersky’s Virus Removal Tool is a free product that detects a malware, adware, riskware, and other similar threats. After disinfecting your PC, don’t forget to restart your computer to remove any traces left.
After downloading the tool, simply open the downloaded file to install and launch the software. If you’re having problems launching the tool, try opening it in Safe Mode.
The user interface is very friendly and intuitive: all you need to do is hit the scan button and resume your work. The scanning process will continue in the background.
Kaspersky ensures safe navigation across the web. It offers protection of personal data, an advanced ad blocker, and online transaction protection.
Kaspersky offers Windows users a powerful password manager. You can use it to store other types of sensitive information like private documents or card information. It works with up-to-date encryption technologies.
Other key features include:
Integrated VPN
Public Wi-Fi data protection
Anti-Phishing
Mobile apps
Kaspersky offers multiple security plans, both for individual users and enterprises.
Kaspersky Standard
Try this complete protection service to protect your PC against malware and other viruses.
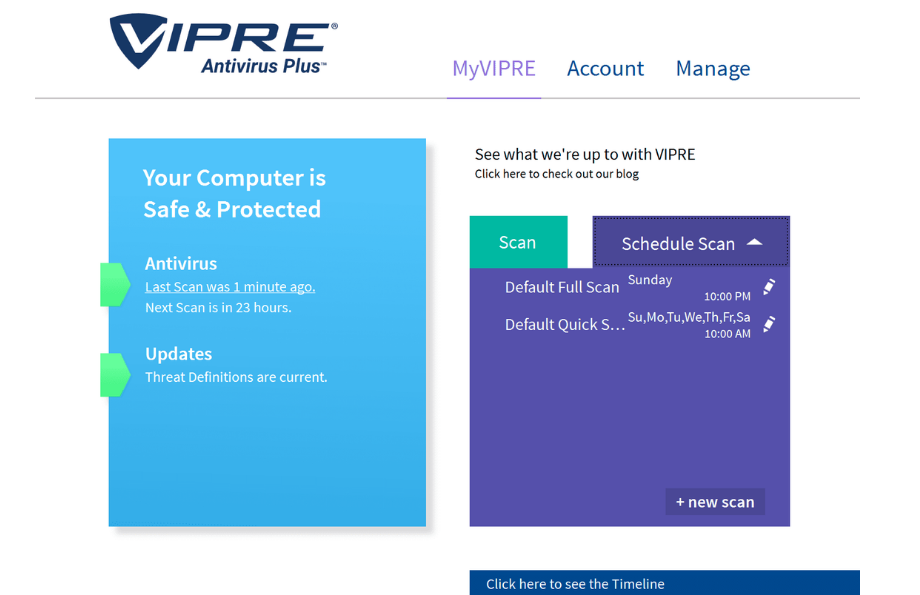
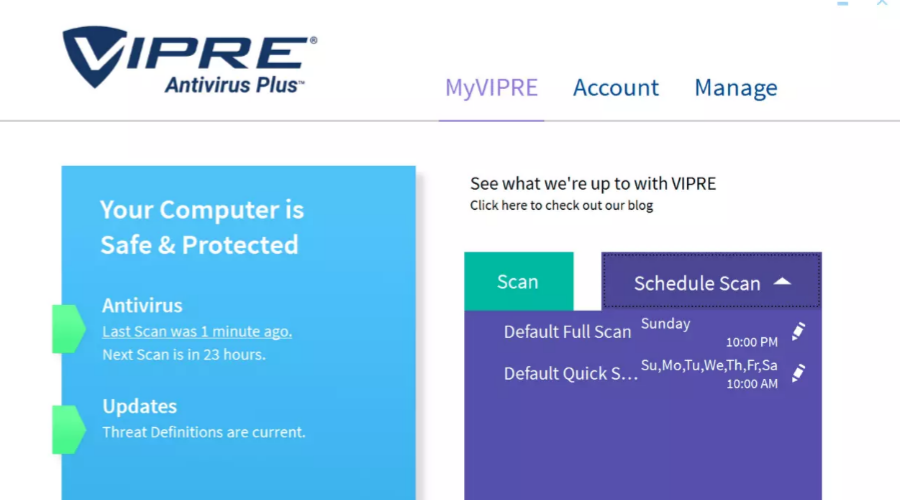
VIPRE is a handy solution to clean your PC if you are already infected with a virus. If malware disabled your VIPRE antivirus, you can still download VIPRE Rescue to clean your computer.
This software installs very fast without causing Internet security software conflicts. It is very straightforward and provides all the necessary tools for scanning, updating, and keeping threats away.
Vipre automatically scans any removable devices you connect to your PC. This prevents viruses from spreading from your drives into your PCs and can also help you remove the viruses while keeping your data intact.
Vipre can easily detect and stop web-based threats and keep your data protected in real-time.
Another useful feature this antivirus offers is the Secure file eraser. This allows you to remove any unwanted traces of uninstalled programs. It can help you remove malicious software such as the Chromium virus or Segurazo.
The tool runs a full system scan, analyzing each and every file, including registry entries, system processes, program files, etc.
You may find that VIPRE Rescue takes a bit longer to finish the scanning process, so if the process appears stuck, don’t cancel it. Just wait for a few more minutes.
Even if the process of scanning and cleaning your computer takes longer than expected, VIPRE Rescue Scanner provides you with accurate results.
If the malware infection is preventing your computer from functioning properly, boot it in Safe Mode and then download VIPRE Rescue, launch the app and allow it to clean your device.
Other key features include:
Low CPU usage
Malicious website blocker
Automatic updates for Windows 10 software
Email security
Firewall
Vipre has 3 different types of subscription plans. The basic plan includes all the features presented, and the other two have additional benefits such as an integrated VPN and a dark web scanner.
Vipre
Vipre provides award-winning security and privacy protection to MACs and PCs.
Avast Free Antivirus is, among many other things, a free malware scanner and remover. You can choose to use the free versions forever or upgrade to the premium or ultimate versions, which have more features.
Speaking of features, Avast Free Antivirus is no short of them. The software includes a malware scanner and removal tool, and the premium version includes a PC cleanup tool as well.
You will be able to detect and stop any type of malware, as well as quarantine suspicious files to prevent the spread of the virus before it’s too late.
In addition to the system scanner, Avast Free Antivirus will actively find malware and adware while you’re browsing the internet. It will constantly warn you and block dangerous and unsafe websites.
The program also comes with a VPN and other privacy-related measures that will keep your identity private and your personal information safe.
Avast provides a more secure browser alternative that is created to protect against and prevent all security problems that can happen while browsing. It comes with anti-phishing technology, advanced encryption for tons of websites, digital identity masking, and more.
On the topic of online security, Avast antivirus can detect and remove svchost.exe viruses at a higher rate than other similar software.
Other key features include:
Integrated PC cleanup utility
Mobile apps
Password security
Avast is one of the best options when it comes to free virus removal for Windows 10 because it offers up-to-date protection and tons of features free of charge. If you, however, need additional features, you can pick a premium plan.
Avast Free Antivirus
A great free solution that helps you protect your system against online risks.
Avira is completely free antivirus software that is really popular for its ability to keep away viruses, trojans, internet scams, and other harmful software from your device.
This powerful anti-virus tool protects and scans your computer for any intruders. It thoroughly scans and removes viruses, ransomware, banker trojans, and more. In addition, you will get a comprehensive list of information about each threat.
In addition to removing viruses, Avira can also clean your PC of leftover files, thus increasing its speed and performance.
You will also benefit from a free VPN to secure your online activities and keep your identity and location private.
This free virus removal tool also has a powerful PUA shield. PUAs (potentially unwanted software) usually pose as software solutions, but actually, steal data or use your computer’s resources for crypto jacking or other malicious activities.
For example, Segurazo virus removal for Windows 10 is an intrusive software that is often included in installers of legitimate tools. It poses as an antivirus and tries to convince you to buy a subscription to fully protect your PC. Avira can safely detect and remove it before it does any damage.
Avira has the ability to protect you in real time against suspicious websites. It can detect and block harmful websites before they load. Along with that, it has an integrated ad blocker that prevents intrusive and malicious ads from loading.
Other key features include:
Password manager
Runs on Windows, Mac, Android, and iOS
Cloud-based antivirus scanner
Ensures all apps are up-to-date
Avira is one of the best virus removal software for PC that you can download for free. It provides a powerful set of features that other antivirus tools of a similar range charge for. It does, however, have premium versions that come with additional features and improvements upon the original free features.
Avira Antivirus
Get rid of all types of harmful software easily and keep yourself protected with Avira Antivirus!
SpyHunter is a highly effective malware-removing tool created to help the average computer user in removing malicious threats from their PC.
As malware continues to evolve and become more sophisticated to avoid detection by anti-spyware/anti-virus programs, SpyHunter responds with advanced technology to stay one step ahead of today’s threats.
It offers additional customization capabilities to ensure that every user is able to customize SpyHunter for their specific needs.
SpyHunter has the ability to detect and remove rootkits, which are used to stealth install ransomware. It can also remove rogue anti-spyware programs such as Segurazo virus removal, trojans, and other security threats.
Rootkits use hidden and encrypted files and folders to avoid detection by traditional security software.
SpyHunter’s has an advanced rootkit detection technology that performs an instant rootkit scan.
Other key features include:
Lets you exclude certain apps from being detected
Responsive helpdesk
Constant updates
The tool will then ask the user to reboot the computer and will remove the found rootkits from the PC during the reboot process.
SpyHunter
Viruses will be a thing of the past once you get SpyHunter installed and running on your PC.
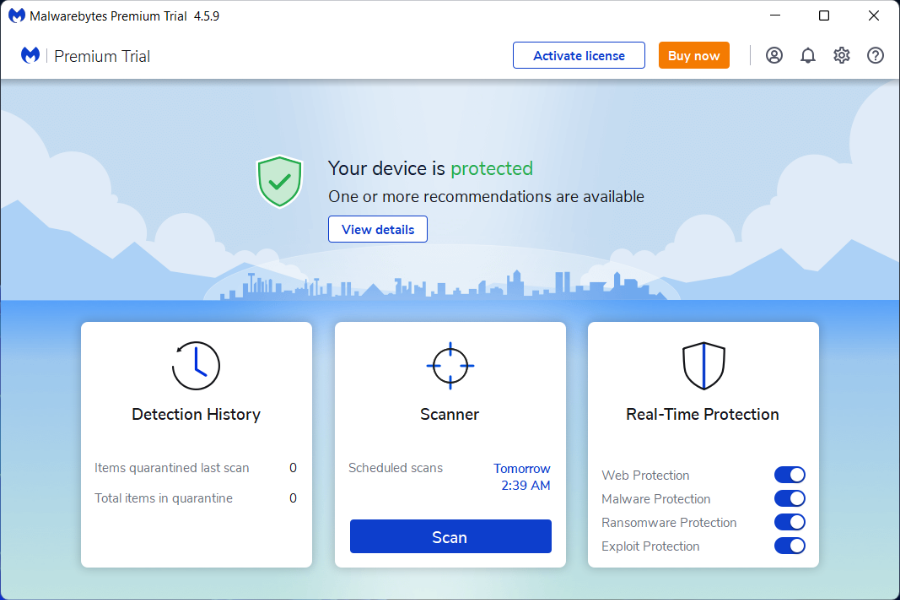
Malwarebytes is excellent security software that detects and removes malware and advanced threats, preventing them from degrading PC performance or attacking your system.
The software relies on four layers of malware-crushing technology: anti-malware, anti-ransomware, anti-exploit, and malicious website protection.
The tool can detect and remove all malware types, including adware and Trojans. The scanning process usually takes only a few minutes to complete.
In other words, the malware won’t be sticking around for too long if you scan your PC regularly.
Not only can Malwarebytes detect and prevent viruses, but it can also remove them with ease, even if you don’t have it on your PC at the time of the infection. It has a really good rate of trojan virus removal for Windows 10.
If your computer gets infected with a trojan. delf or other similar viruses that block your internet access, you can easily remediate the problem with Malwarebytes.
You need access to a secondary computer so you can get the Malwarebytes offline installer. Just add it to a removable disk and install it on the infected computer, run a scan, and remove all threats.
This is reportedly one of the best software to detect even the sneakiest viruses that try to take over your PC, like auto-typing malware. While there are manual solutions for auto typing virus removal for Windows 10 users, Malwarebytes can be an extra precaution against these.
Malwarebytes is a good option when it comes to other common threats that infiltrate your PC. It is reportedly one of the best free antivirus software for neshta virus removal as well as cloud net virus removal for Windows 10.
Other key features include:
Minimal impact on PC performance
Easy and customizable settings
Intrusive ads removal
Next-gen VPN
Malwarebytes Anti-Malware is light and doesn’t take up much space on your drive. You can test Malwarebytes 3 for free for 14 days and get full real-time protection.
After the 14 days are up, Malwarebytes 3 reverts to a limited free version that will only disinfect your computer after an attack.
Malwarebytes
Extensive antivirus scans are something few products can do properly, but Malwarebytes is not one of them.
Norton AntiVirus Plus is a very useful tool that removes deeply embedded and difficult-to-detect malware and unwanted software.
If malicious software remained undetected by traditional antivirus solutions, rest assured, Norton Power Erase will trace it and completely remove it from your computer.
Keep in mind that Norton Power Eraser uses an extremely aggressive scanning technology that sometimes may mark a legitimate program for removal, which you can undo easily.
The tool is very lightweight, quickly scanning your computer for threats. You can use it even if you have a Symantec product or any other antivirus solution.
If the malware infection is preventing you from starting your computer, you can run Norton Power Eraser in Safe mode.
Norton Antivirus includes a password management feature. You can use it to safely store all your passwords, credit card information, and other sensitive data.
Norton Power Eraser can identify potentially unwanted applications like adware, browser hijackers, or spyware. These infections can be hard to detect because they present themselves as regular, legitimate software, or pose as other software, using similar or identical names.
Such attacks often happen to Chromium browser users, but Norton can easily conduct a safe and full chromium virus removal on Windows 10 PCs, allowing you to continue using the great features provided by the legitimate Chromium browser.
Other key features include:
Cloud-based backup
Parental controls
Integrated VPN
Dark web monitoring
Norton Antivirus is subscription-based. It is compatible with Windows and macOS computers. They also offer mobile apps for Android and iOS.
McAfee Labs Stinger is a standalone tool that detects and removes specific virus categories. It is a useful additional tool when dealing with infected systems.
The Threat List of the tool includes a list of malware that Stinger is configured to detect. If the specific malware affecting your PC is not on Stinger’s list, it won’t detect it.
Stinger also includes a real-time behavior detection technology that monitors suspicious activity to detect malware in real-time.
You can also add a series of filters and choose what to scan, how to run the scan, and what happens after threats have been detected.
This utility can remove all traces of trojan, ransomware, and exploit viruses, as well as several potentially unwanted software like the previously mentioned chromium virus of the segurazo virus removal.
Stinger can scan your whole computer, or specific folders/drivers. You can the exact locations you want to scan by using the Customize my scanner feature.
Other key features include:
Compatible with Windows OS starting with Windows XP
Custom detections
This tool is great for removing specific threats, however, for maximum protection, we advise you to use a full-featured antivirus along with it. McAfee offers various options that are well-received by users.
⇒ Get McAfee Stinger
Keeping your computer secure is primordial nowadays. If your antivirus couldn’t block malware from infecting your computer in the first place, the virus removal tools listed above will definitely remove it.
Whether you use Overwolf as a developer to create extensions for games or end-user, depending on the situation, you may have to delete the Overwolf account and all the data associated with the account.
Deleting the Overwolf account is a straightforward process and there are no strings attached. In this article, we show you how to delete the Overwolf account and all the data in it.
How can I delete my Overwolf account?
1. On your desktop, launch the Overwolf client and sign in with the username and password of the account you want to delete.
2. From the home screen, click on theOverwolf tray icon.
3. Go toSettingsand click onPrivacy.
4. Scroll down to the Account Privacy Preferences section.
5. Here you will see the Delete Account button. Click on it.
6. Confirm the deletion.
7. That’s it. Close the Overwolf client and you are done.
You can easily delete your account on Overwolf using the app’s client. All you need to do is navigate to the account deletion section and press the Delete account button.
What else should I know about deleting my account on Overwolf?
Clicking on the Delete Account button is the first step in removing your Overwolf account. Here are a few more things to note to successfully delete the account.
Verifying email address
Overwolf requires the users to verify their email addresses to be able to remove the account successfully.
You may receive an email to verify the account, make sure you click on it to complete verification. Ignore if you did not receive any links from Overwolf.
The account is not deleted instantly
After clicking on Delete Account and signing out, your account will be suspended for 2 weeks.
Once the two weeks are over, your Overwolf account and all related data will be permanently removed.
You cannot reactivate the account
Once the Overwolf account is permanently removed after 2 weeks’ time, the user will not be able to reactivate the account.
All the actions related to the deletion of the account are permanent and irreversible.
This action will also cancel your in-progress data package requests.
So that was about how to delete the Overwolf account and all related data. However, do read the second section of the article to understand more about the risk associated with canceling the Overwolf account.
We hope you managed to find out what you were looking for. Let us know in the comments section if you have any questions.
Watching YouTube videos can be extremely fun, especially when it is something that you are passionate about.
However, you are still staring at a screen for hours, and that is not good for your eyes. This is why it is recommended that you use dark themes on your PC or smartphone.
How can I turn on Dark Mode on YouTube?
1. Enable Dark Mode from the web browser
1. Open YouTube on your web browser.
2. Click on yourprofile iconin the top-right corner of the screen.
3. Navigate to Appearance: Device theme and click on it.
4. Choose Dark Theme from the list of options.
5. The Dark Theme is now applied on your YouTube. If you want to change it back, simply choose the Light theme from the previous menu.
YouTube allows you to easily change its theme to Dark Mode via its built-in Settings. This method works the same way regardless of what web browser you are using.
Keep in mind that his method works even if you are not signed into YouTube. Just press the 3 dots next to the Sign-in button, and the Dark mode option will be there as well.
Additionally, this change will be saved to that particular browser only, and will not sync over to other browsers where you are logged in with the same Google account.
You can also enable total dark mode for all the content you visit using a particular browser. However, this method varies depending on the browser.
Before changing the theme, use this quick guide to login to YouTube so Dark Mode is saved to your account and syncs across devices.
2. Use a browser extension
Plenty of dedicated browser extensions will add a dark mode to your browsers, either just for YouTube or for browsing any type of content.
That being said, you should go ahead and try them out. Not only will they simplify the process of changing to dark mode on YouTube, but some will even bring some extra features as well. And don’t stop at YouTube, you can also switch on dark mode on your Microsoft Word.
Does YouTube have a Dark Mode?
YouTube implemented a Dark Mode a while ago so that users could enjoy their content for more. YouTube’s Dark Mode will make viewing videos more relaxing for the eyes.
The Dark Mode theme is available on the YouTube website and YouTube’s mobile apps for iPhone, iPad, and Android.
However, accessing YouTube’s Dark Mode isn’t displayed in plain sight. That is why we’ve created the above step-by-step guide that will show you exactly how to make YouTube Dark Mode.
Microsoft Exchange Server 2013 comes with a set of technologies and features that support people and organizations at work with a focus on communication and collaboration.
It also helps lower the cost of ownership if you deploy it on-premise or on the cloud.
With Exchange 2013, you can get a reliable email, calendar, and contacts, with helpful tips for managing your email services securely and efficiently.
It delivers a rich, business-class email experience across your computers and other devices with an easier setup and maintenance.
In addition, you’ll benefit from security and privacy with built-in antimalware protection and data loss prevention capabilities, plus many more features.
If you feel you want added security, you can get the best antivirus for Exchange Server 2013 or 2016 besides the built-in antimalware and antispam filtering it comes with for your mailboxes.
What is the best antivirus for Microsoft Exchange?
Panda’s Security Essential protects the productivity of your business with the best antivirus for Exchange 2013 and your workstations.
It features antispam and web filtering so you can say goodbye to saturated inboxes thanks to antispam protection against malicious messages in Exchange servers.
It also monitors and filters website categories that are unproductive or dangerous during working hours without installing add-ons on your browser.
As long as you have the necessary licenses, you can use the web console to enable protection for the Exchange Server and apply it to any Exchanger servers you are managing, as it supports Exchange 2003, 2007, 2010, 2013, and 2016.
You get protection in three modules: antivirus, antispam, and content filtering, which let you scan for viruses, hacking tools, and malware sent to the Exchange server mailboxes
The software also detects and neutralizes spam, and filters email messages based on the extension of attached files.
You can also monitor the status of the protection for the Exchange server in the window of the computer, plus reports generated by Panda Cloud Office Protection Advanced.
Panda Security Essential
Panda Security Essential is reliable protection software for your company.
Bitdefender’s GravityZone delivers top security for your mail servers on-premise and is proven as the best antispam protection for mail servers.
It ensures a secure messaging and collaboration environment while protecting physical and virtual mail servers.
Some of the key benefits of using Bitdefender antivirus for Exchange 2013 include simple and fast installation, real-time antimalware, antivirus, antiphishing, and antispam.
The software also covers any email transfer protocol used in Exchange, plus you enjoy the award-winning protection for your mail servers.
Features include multiple layers of security for messaging with behavioral analysis and zero-day threat protection, email traffic filtering with attachment, and content filtering.
Benefit from antimalware scanning which is offloaded to centralized security servers, on-demand scans, support for database availability groups, and cover for email transfer protocols among others.
For business or enterprise, you can deploy any or all security services in Bitdefender’s GravityZone including Security for Exchange.
Bitdefender GravityZone
Most secure tools protect your data from malware, adware, and other harmful software.
ESET HOME Security Essential’s Mail Security for Microsoft Exchange server is an antivirus that safeguards your email with simple set-and-forget protection against malware and spam.
Features include antivirus and antispam to eliminate all types of threats with high interception rates, or Local Quarantine of spam and undelivered messages.
They are accessible and manageable by mailbox owners via a standalone browser, plus optimization for virtual environments with snapshot independence and native clustering support.
You also get the benefit of fully managing your system remotely using ESET HOME Security Essential’s Remote Administrator web console.
ESET HOME Security Essential offers protection for your complex infrastructure and a wide range of combinations for handling every message with standard and advanced parameters.
device control to ensure no unauthorized offline media are used in your network or to allow different access levels and database on-demand scanning to conserve server resources.
ESET HOME Security Essential
Protect your devices and network from internet threats with ESET HOME Security Essential!
Vipre is a full cybersecurity software that can defend your system against popular attack vectors like endpoints, email, and networks.
This complete antivirus software provides high-quality security for both professional and personal activities.
Regarding email protection, you will get reliable support to defend your emails from serious malware threats like trojans and rootkits, spyware, and so on.
Vipre can deliver improved antivirus tools for your company’s safety by protecting the email database with multi-layered support and virus detection tools.
In addition, every business owner can benefit from endpoint security. This cloud-based product shows a dashboard with relevant information for each endpoint of your business.
The Network Protection functionality can successfully defend your company from malware like zero-day attacks or other advanced virus risks.
Hence, you should benefit from all the security benefits and shield users’ personal data, and avoid phishing attempts or data breaches.
Kaspersky Endpoint Security for Business protects your servers from crypto-lockers, malware, and spam which are usually distributed via email channels.
It comes for two types of business: Small (starting with 3 PCs) and Medium (starting with 10 PCs).
In order to prevent exposure to such risks and protect your business infrastructure, Kaspersky’s Security for Microsoft Exchange delivers a world-class mail server security solution against malware and spam for your mail servers.
Features include a powerful antimalware engine, comprehensive antimalware scanning capabilities, and intelligent spam detection.
It also includes a content-aware DLP module and Kaspersky Private Security Network support to prevent sensitive business data leakages.
Norton antivirus for Exchange 2013 provides email security software and prevents the spread of malware using Symantec’s malware prevention technology.
The software uses Symantec Mail Security for Microsoft Exchange directly to your on-premises infrastructure.
You get real-time email protection against malware, phishing, and targeted attacks, plus 99 percent spam blockage thanks to Brightmail technology.
Norton antivirus supports Microsoft Exchange server 2007, 2010, and 2013 in almost any scenario including hosting mode, on Microsoft Hyper-V, or VMware virtualization platforms.
Symantec Mail Security for Microsoft Exchange complements other layers of protection by preventing malware from spreading, and spam attacks while enforcing data loss prevention policies in your organization.
F-Secure Safe – Great server security and protection
This antivirus for Exchange 2013 offers protection using the F-Secure Email and Server Security, which can be licensed and deployed on a per-server basis or per-user or terminal connection basis.
Features include viruses and spyware protection, and DeepGuard for proactive and instant protection while monitoring behavior to stop potentially harmful activities in real time.
Moreover, the software also has web traffic scanning, browsing protection, spam control, software updater, and EMC CAVA environment support.
F-Secure’s antivirus for Microsoft Exchange protects incoming, outgoing, and internal mail traffic and public folders from malware and other threats while providing content and attachment filtering.
The email quarantine manager allows dedicated users to release, reprocess, and delete quarantined emails and attachments from the email quarantine.
This antivirus for Exchange 2013 uses the ScanMail Suite for superior protection for your Microsoft Exchange servers.
Most, if not all, targeted attacks start with phishing emails so your mail server’s security is more important today than ever before.
Unfortunately, most mail server security software relies on pattern file updates which don’t detect every type of malware.
They don’t have specific protections to detect malicious links, URLs, or document exploits used for attacks or advanced and persistent threats.
ScanMail Suite for Microsoft Exchange stops these attacks and phishing by using document exploit detection, enhanced web reputation, and sandboxing for defense which you won’t find with other security solutions.
It also blocks traditional malware with email, file, and web technology plus correlated global threat intelligence from Trend Micro’s Smart Protection Network cloud-based security.
Features include central management, data loss prevention, and role-based access, which give you benefits such as lower overheads and high performance for the fastest mail throughput speeds.
Age of Empires 4 is the fourth instalment of the Age of Empires game series. It is a real-time strategy video game with realistic environments that allows players to expand their empires.
However, Age of Empires 4 is not a perfect game. It develops issues and suffers from some bugs. The Age of Empires 4 error code: C00T01R-1X is one of the errors players report about the game.
Furthermore, games like the Age of Empires 4 are liable to encounter errors because the update process is continual. So, one or two bugs don’t make the game any less fun and enjoyable.
Also, you may encounter the Age of Empires 4 Error code: COOT01R-1X-13 52656C6903A8 stating that you are currently offline or not yet connected to Steam Xbox Live.
Nevertheless, the Age of Empires 4 error code C00T01R-1X can appear for various reasons. Network connection issues, game updates, etc., can affect how the game works and prompt error codes.
What is the error code C00T01R-1X?
The error code C00T01R-1X entails many errors and difficulties users may encounter when playing Age of Empires 4. It indicates network connection issues with the game.
Furthermore, the error code C00T01R-1X may appear in many instances in the game. It may indicate that you are either offline or not yet connected to Steam Xbox Live. Also, it can mean No connection, can’t play online, or save progress.
Also, the error code may pop up if the game’s server is down, preventing users from accessing it.
How do I fix the error code C00T01R-1X in Age of Empire 4?
1. Check your network connection
Your router may develop issues, and it may affect your connection. Hence, you can restart the router to help reset its connections and improve its performance.
Likewise, you can switch to a wireless connection if connected to a LAN network.
2. Update your game to the latest version
Launch your Steam Client.
Select the Library tab and right-click on the Age of Empires 4 game.
Then choose Properties from the drop-down.
Select the Updates option and select the Always Keep This Game Updated option.
Enabling this feature will help you install updates automatically.
Open the app and select Choose location to see the available IP addresses.
From the Recommended button, select your region.
Enjoy using the ExpressVPN service.
ExpressVPN is a VPN service that is safe to use for solving packet loss. It helps you reduce ping, easily resolve ISP throttling, and lower latency to boost your gaming experience. It has a great split tunneling feature that allows you to which programs you can route your internet connection over the VPN server.
You can also get a secure and private connection by using the Smart location feature in the app that can recommend the quintessential location for you based on anonymous metrics such as download speed, latency, and distance.
ExpressVPN
Enjoy your gaming experience with high-speed connectivity and strong data protection with ExpressVPN.
Unlike other games, the minimum PC requirements to run the Age of Empire smoothly will permit almost any modern PC to run the game.
However, for a much better gaming experience, it might be better to meet the recommended specs as specified below.
System requirements
Minimum
Recommended
OS:
Windows 10 64bit or Windows 11 64bit
Windows 10 64bit or Windows 11 64bit
CPU:
Intel Core i5-6300U or AMD Ryzen 5 2400G | CPU with AVX support
3.6 GHz 6-core (Intel i5) or AMD Ryzen 5 1600 | CPU with AVX support
Memory:
8 GB RAM
16 GB RAM
Graphics:
Intel HD 520 or AMD Radeon RX Vega 11
Nvidia GeForce 970 GPU or AMD Radeon RX 570 GPU with 4GB of VRAM
DirectX:
Version 12
Version 12
Storage:
50 GB available space
50 GB available space
The minimum requirements consist of the lowest features of the device that can run the game, while the recommended requirements consist of the best features for the game.
Users who want to scan their USB flash drives for any malware or threats before opening the files therein may find an antivirus with a USB scanner very handy.
With the USB scanner, you’re able to automatically scan any USB drive that is inserted into your computer or laptop with a simple click and see whether your USB is infected or not.
Third-parties software can help you prevent malware from spreading through your USB drive. Not only it can scan your USB drive, but also eliminate all types of threats, including worms, rootkits, and spyware from it.
More importantly, it protects you from unintentionally spreading malware to your home or other shared computers.
Here is the best antivirus with a USB scanner compatible with Windows 10, that will protect your computer from viruses and other malware threats that can sneak in through a USB stick.
TotalAV is a premium antivirus solution with a high-quality set of security features and an excellent detection rate.
This software offers various scanning options. You can scan temporary files for common viruses, or the full system for malware. You can also run a smart scan for tracking cookies and junk files and scan your external or USB devices.
Once the scanning process is complete, it allows you to take several actions on any found malware files, including delete, quarantine, whitelist, or even ignore them.
TotalAV has a WebShield characteristic that is designed to block phishing sites and online malware distributors. It prevents these threats from compromising your security and stealing your personal information.
You can proactively observe your personal email address and receive notifications in case your data is at risk. You can also clear any trace of your browsing activity and remove all your web browser tracking cookies.
TotalAV
Protect your USB and all other devices from viruses and online threats with TotalAV powerful solution.
ESET Antivirus with USB scanner is designed to secure your USB drive using the USB DriveSecurity to protect your system and networks.
The award-winning ESET Antivirus engine detects and eliminates malware and other Internet threats before they’re transmitted onto your portable drives.
This means that any files on your USB are malware-free and safe to share with others. DriveSecurity operates from the USB drive itself so you don’t have to install anything on a host computer.
Now you can share files, play games, or even collaborate knowing your USB drives are safe. It is fast, convenient, and compatible with Windows.
You can also use public or shared computers knowing your drive and sensitive data on it is safe from any attempts to install spyware or worms.
ESET Antivirus
ESET antivirus protects you across multiple platforms, and you can rest assured that your USBs are malware-free.
This antivirus with a USB scanner comes with the Panda USB vaccine, a free antimalware to block malware from spreading to your computer through USB flash drives.
There is an increasing number of viruses that spread via USB flash drives and other removable devices like memory sticks, digital cameras, and other devices.
Panda’s USB Vaccine offers a double layer of preventive protection that allows you to disable the autorun feature on computers as well as USB drives.
USB Vaccine disables the autorun file so it cannot be read, modified, or replaced by malicious code. It is a useful tool that offers a high degree of protection against infections from removable devices.
When applied to a USB drive, it will permanently block the innocuous autorun.inf file, preventing it from any action that may modify it, but, you can use the drive normally by copying files to and from it.
However, files will be prevented from opening automatically.
Panda
Use an antivirus with great device management, USB protection and real time monitoring.
An infected USB drive can ruin your computer when it is inserted without being scanned for any threats.
In order to protect your computer from the dangers of viruses and malware, you need to have an antivirus with a USB scanner.
Kaspersky PURE comes with three scanning options: Quick scan, Full scan, or Do not scan.
To configure the automatic scan of USB drives upon insertion, click Settings and select General Settings in the Scan section.
In the Scan removal drives on connection section, select either quick scan, full scan, or Do not scan options, the latter of which will not scan removable drives on their connection.
You can also specify the maximum drive size to scan. It is compatible with Windows platforms, Mac, and mobile devices as well.
Kaspersky
Use an antivirus with real-time protection against malware infections and ransomware from USB.
Avira is another great choice if you are looking for a free antivirus solution for your PC. It is comprehensive, professional-level cybersecurity.
Avira protection will block all online threats you can think of, like malicious websites, ransomware, and any spyware that you can get while surfing the Internet.
As per the USB flash drives or other media storage connected to your computer, the antivirus will block any infected device. So, you don’t have to worry when using a USB with documents from another PC.
You can choose between a full scan and a quick scan. The full scan checks your whole PC, searching even through the most obscure areas of your system, while the quick scan checks only the most vulnerable areas of your device.
Furthermore, Avira monitors and scans all the files you access or interact with and notifies you if they are safe or infected. In case of infection, this software won’t let the malicious file make changes to your PC.
Avira
Use a comprehensive cybersecurity solution that will scan and block infected USB devices.
Sophos antivirus with USB scanner is useful for scanning removable devices as it detects devices upon insertion, and when you access a file.
This program runs an on-access scan subject to the configuration you set up on your computer. You can also set up an on-demand scan and select the removable device you want scanning.
If you want to run an additional scan when you insert a USB drive, you can right-click on the USB drive, and then select Scan with Sophos antivirus.
Sophos has implemented remote app control which allows you to configure settings for your device, monitor it from a distance, and schedule anti-malware scans.
It also has a ransomware protection that restores your device if ransomware restricts your access to it. It constantly checks the processes that interfere with your PC and files. Thus, if any suspicious activity interferes with your PC, it will be blocked immediately from causing you damage.
Sophos
Use an antivirus with artificial intelligence threat detection that scans removable devices automatically when you insert them.
Whenever you plug an unknown USB drive into your computer, you’re risking your system because malware can spread or get into the drive itself.
Avast Free Antivirus with USB scanner has pre-defined scans installed such as the ability to scan any USB device connected to your computer.
It will detect potential auto-run programs that may try to launch when the drive is inserted. Avast Free Antivirus checks every file to determine its type and whether it should be scanned.
If you want to carry out a manual scan of USB drives instead, you need to select the Scan tab which will open the Scan screen.
The Quick scan option performs a scan of the C drive which usually detects the majority of malware found in files with dangerous extensions.
While a full system scan performs a detailed scan of all your computer’s hard disk and finds any possible infected programs, files, etc.
Avast Free Antivirus
A trustworthy program that protects your USB drives and devices safe from malicious activity.
This leading, powerful Bitdefender antivirus created the USB immunizer as a response to the growing malware issues, especially the autorun-based malware, which has been a nuisance e-threat globally.
Some of the autorun-based malware that has troubled USB drive users for years include the Trojan.AutorunInf, the Conficker worm, and/or Worm.Autorun.VHD.
Bitdefender introduced the USB immunizer becoming one of the antiviruses with a USB scanner with powerful action against malware detected once USB drives are inserted into a computer.
The USB immunizer disables threats before they access the computer and once installed, it constantly monitors and watches for newly inserted USB devices and immunizes them on the fly.
In the event that you plug in an infected USB drive accidentally, and it hasn’t been immunized, your computer won’t auto-execute the malware located in the USB device.
You can immunize a USB device as soon as it is plugged into the computer if you have the USB immunizer running, by ticking the automatically immunize USB drives box under the Options tab.
Each non-immunized USB drive plugged into your computer will be automatically immunized.
However, the USB immunizer only lists removable media as they are most prone to infections such as the autorun.inf type.
Trend Micro antivirus with USB scanner features real time virus scan with its USB Security tool so that if a threat is detected, an alert screen displays, and the infected files are isolated immediately.
USB Security also auto-updates on pattern files owing to the dynamic nature of threats, and automatically updates its pattern files, though you can also get manual updates.
It also keeps an interactive reference log of virus detection results where you can restore or delete any file on the quarantine list.
When it detects a virus, it cleans the infected file(s), but if the clean fails, the file(s) is automatically quarantined and you get a notification about it.
Which antivirus with a USB scanner do you use? Did it make the list? Share with us your favorite, and your experience with it in the comments section below.
Depending on your sound card or the current version of the sound driver, you can face some sound problems in Windows 10.
For example, users of Conexant SmartAudio HD Audio or Conexant ISST Audio noticed sound issues after upgrading to Windows 10.
If you’re one of them, we’ve compiled a few workarounds for this problem. Let us know which one worked for you.
What does Conexant ISST audio mean?
Conexant Systems, Inc. created the software Conexant ISST Audio.
The operating system receives instructions from a software package, which includes the audio driver. The instructions enable your sound card, speakers, and microphone to process sound inputs and outputs from your operating system.
With almost 98% of all installs now running this version, 9.0.134.1 is the most popular. UIU64a.exe is the primary program executable. The software installer consists of 3 files and is typically 9.64 MB in size.
Why am I having issues with Conexant ISST Audio driver on Windows 11?
Go to Search, type device manager, and open Device Manager.
Expand Sound, video and game controllers, right-click on your Conexant SmartAudio driver and select Update driver.
Click on Search automatically for drivers.
If you haven’t updated your drivers, we recommend you to head to the Device Manager and check for the updates of your drivers.
You can choose to search automatically for an updated driver or browse the computer if you have a driver file.
Follow the on-screen instructions, and don’t forget to restart your computer. Sometimes, a restart is required for the new driver to work.
Alternatively, you can use dedicated software that does this job while recommending the right updates. Remember that such a tool will be useful for future similar scans.
Right-click on the Speakers icon in the taskbar and open Playback devices.
Open your default playback device by double-clicking on it.
Go to the Advanced tab, and change the bitrate under Default sound format until you find the one that’s working.
Click OK.
5. Run the Audio Troubleshooter
Click on the Start menu and select the Settings app.
Click on Update & security.
Choose Troubleshoot from the left pane, and click on Run the troubleshooterunder the Recording Audio option.
How can I fix Conexant ISST Audio if it’s not working on Windows 11?
The techniques to fix this error on Windows 11 are fairly similar.
You must remember that both operating systems have a lot of similarities, and aside from sporadic UI variations, there won’t be many visually obvious distinctions.
As a result, we advise that you pick a solution and implement it on any Windows 11 devices you own.
Can I uninstall Conexant Isst audio?
Yes, it is possible to uninstall this driver. But you must note that drivers play a special function; once installed, the hardware they control would no longer function properly.
You simply have to look for and launch Device Manager in Windows. Select Uninstall device from the context menu when you right-click the Conexant High Definition SmartAudio driver.
That’s it, we’ve already shown you how to solve Conexant HD microphone problems, and now, I hope this article will help you solve sound problems.
These solutions will work if Cconexant isst audio is not working, is not connected, has no sound in HP, or if Conexant isst audio headphones do not work on your PC.
Let us know what solution has worked for you, and remember you do not need to try out all the solutions, simply test what seems most appropriate to you.
Windows 10 and 11 are definitely a great improvement when compared to the previous iterations in the Windows series. But, one of the problems that remained in all these is the Control Panel not opening.
The issue is certainly not new and has been faced by users for a long time. And it’s usually not the OS to blame but rather the Windows settings or how things have been configured.
So, let’s find out why Control Panel is not opening in Windows 10 and 11 and the best ways to fix things.
Why is Control Panel not opening?
Here are the primary reasons you are facing the problem:
Improper installation of the OS: Initial issues during installation might damage the essential software components, and as a result, the Control Panel or even the Settings app won’t open in Windows 11.
Corrupt user profile: When there are problems with the user profile, it will be evident through the performance and persistent errors. Creating a new account will work in this case.
Type Windows Security in the Search bar, and click on the relevant search result.
Now, click on Virus & threat protection here.
Click on Scan options.
Now, select Full scan and click on the Scan now button at the bottom.
Did you know that malware causes many problems for Windows-based PCs? You can easily get rid of these problems by eliminating the malware using a reliable anti-malware program like Windows Security, a built-in tool.
Press Ctrl + Shift + Esc to open the Task Manager and navigate to the Startup tab.
You will see a list of programs that automatically start running when the PC starts running. Right-click on them individually, and select Disable from the context menu.
Be careful and do not disable a program that may harm your PC in some way. Google is your friend, so use it.
There is a possibility that a program running at your PC’s startup is causing some sort of problem with the Control Panel and is behind it not opening in Windows 10. Disabling that program will do the trick in this case, though you will have to disable many others in the process.
3. Disable the Windows Error Reporting Service
Press Windows + R to open Run, type services.msc in the text field, and hit Enter.
Locate the Windows Error Reporting Service, right-click on it, and select Properties.
Select Disabled from the Startup type dropdown menu.
Now, click the Stop button, wait for the service to stop running, and then click on OK to save the changes.
If Control Panel is not showing in Windows 10, you may try disabling the Windows Error Reporting Service and verify if that makes a difference. For most of you, it should. In case it doesn’t work, head to the next method.
4. Run the System File Checker scan
Type Command Prompt in the Search bar, and click on Run as administrator to the right.
Click Yes in the UAC prompt.
Now, paste the following command and hit Enter: sfc /scannow
Wait for the scan to complete.
If Windows 10 Control Panel won’t open, running the SFC scan can help fix things. It will identify the corrupt system files and replace them with their cached copies.
To save you more time, you can always rely on specialized tools that will help you with the whole scanning and restoring process.
5. Clear the temporary files
Press Windows + R to open Run, type %temp% in the text field, and hit Enter.
Now, press Ctrl + A to select all the files here, and hit Del to clear them.
Choose the appropriate response in case a confirmation prompt appears.
When the Control Panel closes after opening, it could be the temporary files to blame. And clearing them should fix things.
Press Windows + R to open Run, type regedit in the text field, and click OK.
Click Yes in the UAC prompt that pops up.
Now, paste the following path in the address bar and hit Enter:Computer\HKEY_CURRENT_USER\Software\Classes\Local Settings\Software\Microsoft\Windows\Shell
Right-click on the BagMRU key and select Delete.
Click Yes in the confirmation prompt.
Similarly, delete the Bags key.
Many Windows 10 users confirmed that deleting the BagMRU and Bags folders brought Control Panel back. Before you tweak your Registry, don’t forget to first back it up. In case anything goes wrong, you’ll be able to restore a working copy of it.
7. Change display scaling
Other users confirmed that changing the display settings fixed the problem. As surprising as this solution may seem, it worked for many, so it’s worth giving it a try.
In case you scaled your display beyond 100%, this might explain why Control Panel is not available. So, if you are using any other setting for the text, or apps, scale it down to 100%.
8. Reset Windows 10
Most users who reported that the Control Panel is not opening in Windows 10 started facing the issue after an upgrade. In this case, it’s likely that Windows didn’t install properly.
And the best option here would be to factory reset Windows 10. You would lose the installed apps, configured settings, and saved files, but this is the method that worked for most.
How do I fix Control Panel if it won’t open on Windows 11?
When the Control Panel won’t open in Windows 11, your primary approach should be to run a malware scan using an effective antivirus compatible with Windows 11.
If that doesn’t work, try running the DISM (Deployment Image Servicing and Management) tool and the SFC (System File Checker) scan. These are effective at fixing corrupt system files, a likely cause behind the problem.
Microsoft doesn’t offer a shortcut key to open Control Panel in Windows, though the process to access it is simple, and there are several ways.
The easiest is to launch in from the Run command. Simply type Control and hit Enter. Other methods include the Search menu, Start menu, and Power User menu.
These are some of the working solutions that have fixed things when the Control Panel is not opening in Windows.
Sometimes, accidents can happen. You mistook one file for another and you deleted it from Dropbox. However, you needed that document, and now it is nowhere to be found.
Also, it might seem that you need that document after all. It is important for an app that stores data to have an option to recover lost files and folders.
Dropbox has this flexibility, so you can recover your files after you deleted them.
Moreover, we recommend keeping your data on hardware as well. There are situations when you don’t have access to the Internet and you need a certain document.
Not being able to recover your lost files could be a major issue for some users, but luckily, Dropbox has your back. So, today we will show you how to recover deleted Dropboxfiles.
How can I recover deleted files from Dropbox?
1. Launch the Dropbox app or go to Dropbox.com.
2. Go to Files.
3. Click onDeleted filesin the sidebar.
4. Selectthe name of the deleted file or folder you want to recover. It is worth mentioning that you can select multiple documents at once by clicking the checkbox icon.
If you don’t find your deleted file, type the name (or part of the name) of the document in the search box.
5. Click Restore. If you’re restoring a large number of files, this will take some time. It is worth mentioning that you can select multiple documents at once by clicking the checkbox icon.
If you recently deleted some files on Dropbox, you can recover them very easily from the Deleted files page.
Do note that you cannot recover files that were deleted more than 30 days ago using this method if you have a Basic, Family or a Plus account. Professional and Business accounts have the period extended to 180 days.
Also, it is worth mentioning that you can recover only the files where you have editing access. The read-only documents are deleted for good from the first click.
As you can see, there is nothing to worry about. You can recover your deleted files from Dropbox quite easily. Of course, if you click on Permanently delete, you will delete your files for good.
Can I recover permanently deleted files in Dropbox?
Unfortunately, permanently deleted files cannot be recovered under any circumstance. The same goes for files that were deleted more than 30 or 180 days ago, depending on your account type.
So, the delete function in Dropbox works like Recycle Bin in Windows. By clicking on Delete, you move the files to the trash.
Moreover, if you have a Business or a Professional account, you can search a certain document by any keyword from the file.
Regardless of your account, you can search for many types of documents, such as Word files, PowerPoint documents, PDFs, Notepad files, and so on.
Did you find our methods useful? Do let us know in the comments section below!
Antivirus signatures need to be up to date to prevent or remove threats easily. However, most antivirus companies provide offline virus definition signatures.
This means that new patches can be easily downloaded from any computer and then manually install the updates on a system or device with a limited or no internet connection at all.
In this post, we have compiled a list of the best offline antivirus software that can update your device offline. Most of the software is easy to install; hence, you can download and update it whenever necessary.
This article will cover offline antivirus software that doesn’t need constant Internet connectivity to perform the job.
Another category of software that we’ll focus on is the antivirus offline installer that can be fully downloaded from the Internet and then installed on another PC that isn’t connected to the Internet.
TotalAV keeps a local antivirus engine on the machine, so on-demand and scheduled scans still work when you are offline, while the cloud side improves detection whenever you are connected. Real-time protection, WebShield and the tune-up tools round it out.
TotalAV updates its definitions online and does not offer a downloadable offline update package, so it is not the right pick if that is the main requirement.
Local engine keeps scanning offline
Real-time protection and WebShield when online
Scheduled scans
Tune-up tools
TotalAV
Benefit from advanced protection even when you’re offline with this excellent antivirus software.
This is the Best Value for Windows PC Protection and it comes with different programs for PCs and Android mobile devices.
It is very compatible with Windows OS. This security software protects against malware on various devices and it is also very good for slow computers.
Bitdefender updates its offline definition files once every week, usually on a Friday. The update file is a setup installer; hence, run the installer file to install the updates.
Ensure you get the correct 32-bit or 64-bit version for the operating system Bitdefender software is installed on. As far as online protection is concerned, Bitdefender is indeed the top antivirus tool.
Review of its most important features:
Best threat detection rates
Light on your system but feature-rich
Dedicated browser for safe online banking
Bitdefender VPN for perfect identity protection
When it comes to offline updates, when the computer has no internet access, Bitdefender provides its users with a thorough tutorial on how to do it via a special app on its website.
With its unbeatable threat detection that can stop sophisticated malware and its innovative technologies that protect you against zero-day attacks, Bitdefender is the perfect antivirus for your PC.
Bitdefender Total Security
Trust this antivirus software built on advanced technology for real-time security even on a slow PC.
First of all, Avast Free Antivirus software is ideal for PCs and other devices. It offers great protection against online threats and thanks to the new Behavior Shield feature it provides enhanced security.
This antivirus supports offline updates and is compatible with Windows OS. In addition, the Avast VPS Definitions file will update versions 5-8 of any Avast product with a separate download for the older v4.
Avast Free Antivirus still remains the best option for users who don’t want to pay for using the software. It works offline and offers great protection for your PC against the occasional pop-ups.
Take a look at some of its best features:
Do Not Disturb mode with popup blocker
Centralized license management
Easy to use and maintain
Friendly and simple user interface
Behavioral Shield feature for app monitoring
Maintain your online identity completely hidden with Avast. The AntiTrack feature is exactly what you need when browsing online.
Moreover, some premium tune-up tools are always welcomed. Cleanup your PC, delete random files, and unused programs to make your PC run at the highest performance.
Avast Free Antivirus
Protect your device when you’re offline with this professional antivirus that can ensure optimum security.
Avira antivirus has become one of the best solutions for protecting your computer and it’s perfect for users who want an antimalware tool that can update offline.
One great feature of this offline antivirus is the Speed Booster which enhances the capacity of your computer by speeding up your system.
With Avira antivirus, your personal data is perfectly safe thanks to the Identity Protection feature that provides you with powerful passwords for your accounts that you don’t have to remember.
A very important element is also the fact that you get a free VPN that protects your personal information while you’re online and prevents other sites from tracking you.
Consider some of Avira’s top features:
Free VPN included
Performance and speed booster for your PC
Password protection for advanced privacy
Phishing and ransomware advanced protection
To simply update Avira antivirus offline, you just have to get the latest virus definitions version, put it on a USB stick and then select Manual Update from Avira’s interface.
Avira is an amazing antivirus, with plenty of features and security settings that will never let you down in a time of need.
Avira
Looking for great offline security? Rely on this lightweight antivirus with a variety of antimalware features.
Vipre Antivirus Plus might not come with a load of extra options, but just with the essential ones, even in the Advanced or Ultimate plan.
However, the product is a very reliable, next-gen solution to protect your devices and it offers offline updates.
Besides being easy to set up, Vipre uses the latest technologies to detect not just the newest malware known in the industry, but also emerging and advanced threats that can compromise your system.
With Vipre, you get real-time protection and scanning for all your apps and programs upon launch, to ensure they are safe.
Let’s see what are the top features of Vipre:
Automatic updates and maintenance
Malware, spyware, and ransomware detection and removal
Anti-spam protects against phishing and other email exploits
Webcam and microphone blocker
The Ransomware Protection feature blocks any type of exploit before it gets a chance to run on your device.
If you can’t use the automatic antivirus updates, you can download the latest program definitions from the official Vipre website.
Vipre Antivirus Plus
If you’re looking for a strong tool for a slow PC, trust Vipre to offer the security you need.
Kaspersky Internet Security is very good and compatible with Windows OS. It has everything you would need in a suite and its components are very effective.
This security software has a strong firewall that can give your system maximum protection against unknown connections. It has anti-malware security suitable to detect viruses before they infect your PC.
Kaspersky has a built-in VPN. You can use it to protect your identity online and access country-specific content.
Webcam protection, adult content blocker, screen-time management, and many more feature to discover on this amazing antivirus.
Let’s take a look at the best features of Kaspersky:
Secure password storing and management
File backup and encryption
Extra security for online banking transactions
Easy to setup and manage without any training
Protects your devices on multiple platforms
To update this software offline, download the zip file for the particular Kaspersky product you have. After extracting the zip, run the updater.bat file while waiting for the definitions to download.
After downloading the definitions, go to your software settings and update sources manually.
Kaspersky Standard
When it comes to an antivirus that does a great job even when you’re offline rely on Kaspersky.
McAfee is amongst the best internet security software for Windows 10 and its particular characteristic is that it has an offline updates feature.
To update offline, simply download the DAT executable file from the website, run it and follow the instructions written on the screen.
McAfee is popular for providing protection for a variety of online threats by using complex technology. In addition, it also comes with a secure Wi-Fi connection.
Check out its top features below:
File encryption for enhanced data security
Built-in secure VPN for protecting your identity online
File shredder included
Wi-Fi scanning and protection
Besides basic antivirus protection, it also provides lost wallet protection, personal data cleanup, and identity theft coverage.
With multi-device security, you will never worry that any of your data might be leaked or your banking accounts might be accessed.
McAfee Antivirus Plus
Trust this amazing tool with high-quality features to protect your Windows 10 PC.
This security software is the best for browser protection and also has one of the best antiviruses for Windows. It is compatible with Window OS.
It can protect your devices from ransomware, Trojans, and viruses and keeps all banking connections secured.
The F-Secure download page contains definition downloads for Windows and a rescue CD update. Hence, download the fsdbupdate9.exe which is under the manual update using fsdbupdate: Windows heading.
After downloading it, run the executable file to update spyware, antivirus, spam, and parental control definitions.
Take a look at some of F-Secure’s top features below:
30 years of experience in making security products
Protection against viruses, spyware, infected email attachments, and other malware
Automatic updates and real-time response
Advanced malware removal technology
F-Secure comes with plenty of features to increase your privacy. Virtual locations when browsing the web, tracking protection, as well as a personal VPN, are just some of them
More important, a kill switch is exactly what you need to prevent accidental leakage of your data during momentary VPN outages.
F-Secure
Online or offline, F-Secure will make sure it’s updated to counter the latest threats.
This is certainly one of the best free antivirus programs available. It has a proprietary Defense+ technology that usually assumes an unknown file is a potential threat which makes it almost 100% effective.
A lot of antivirus programs assume unknown files are safe and only get concerned about files that have proven to be a problem.
Always, check the Summary date for the last update. If you want to update Comodo, it is ideal to boot your PC in safe mode before you proceed.
Check out its top features below:
Patented Auto Containment
Comodo File Reputation Lookup
Host Intrusion Prevention System
Virus Scope Behavior Analyzer
Comodo Antivirus can be easily updated offline via an external device such as a USB or external drive. Just download the latest virus definitions and install them on the computer with Comodo.
Comodo is a great antivirus with a wide variety of features for businesses and individuals that want excellent protection against viruses.
ClamAV is free cross-platform and open-source software that effectively updates offline. This Antivirus software can easily detect different types of malicious software, including viruses.
It is mostly used on mail servers as a server-side email virus scanner.
Clam antivirus contains two definition files you can download, although the main.cvd is updated far less frequently than the daily.cvd, which is a more important download.
Consider some of ClamAV’s top features:
Open-source
Good anti-malware protection
Command line interface
Customization and additions are possible
ClamAV has great uses in malware analysis, malware detection and scanning. It targets the general public, malware analysts and system administrators.
ClamAV uses several anti-virus databases containing fingerprints of malware samples. Each scanning utility works with this set of databases.
This security software is the best choice for families who need to protect different types of devices because it’s compatible with Windows OS. It enables an offline update.
On the download page, there are several pattern files displayed, however, the consumer pattern at the topmost is all that is required to update your antivirus definitions.
Review of its most important features:
Protects and manages passwords
Keeps your children safe on the internet
Maintains a safeguard against internet and email scams
Includes Advanced AI learning
It protects all your connections and blocks viruses, spyware, and other malicious software to keep you from surfing the web and working online.
Prevent cybercriminals from holding your data hostage. Protect yourself against the latest ransomware that can encrypt your data until you pay the bad guys.
Just open your antivirus, select scan now and it should start scanning whether you are online or offline. If it doesn’t work and you must have an active internet connection, you should know that you are not completely protected against threats when offline.
Whether you are connected to the internet or not, your antivirus must protect your computer with full capabilities. If you are always moving and working offline, you might want to consider an antivirus that can provide real-time protection even when offline.
Below we talk about some security software that receives virus definitions updates when offline so wherever you are, your antivirus will always be prepared for the newest threats.
In conclusion, pick your favorite antivirus tools with offline update features and enjoy the complex protection of your device. You can download the updated signatures and run them offline.
Logitech is well-known for its great hardware. Unfortunately, issues can occur, and many reported that the Logitech microphone not working on their Windows PC.
We have come a long way from the days we were using Ventrilo, both software and hardware-wise, and today’s gadgets are as astonishing, as they are expensive.
Circling back to communications, there are a lot of users that rely on Logitech gadgets to make their lives and gaming experiences easier and more memorable.
However, if your Logitech microphone is now working on your Windows 10/11 PC, we have exactly what you were looking for.
Why is my Logitech microphone not working?
Well, it can be a plethora of reasons why your microphone refuses to work properly.
It could be that the audio drivers have become outdated, or the microphone itself no longer being functional and in need of replacement.
Also, the microphone can be muted, either directly from the headset, or from the system’s settings, so that is another area you want to look into.
Even if you’ve never dealt with these types of gadgets before, this guide will surely help you get to the bottom of the situation and get things back on track.
How can I fix my Logitech microphone if it’s not working in Windows 11?
1. Hardware troubleshooting
Before we get into the software part of the troubleshooting process, we first need to eliminate the hardware causes that might lead to the same result.
Check if the microphone is muted from the Mute switch on either the headset or the microphone itself, and also inspect the cable for any visible damage.
Just to be sure, connect the microphone to a different PC and see if you can get it to work. If, however, it does work on a different device, the problem is on your end.
Don’t worry, we have the solutions for this problem right here, so just carefully go through this guide and follow the instructions.
2. Activate app access to your Logitech microphone
Press Win + I to access Settings.
Select the System tab, then click on Sound.
Under Input, click on the microphone you are using.
Under General, select Allow in order to give your Windows app permission to use the microphone.
3. Check system sound settings
Search for Control Panel and open the app.
Select the Sound category.
On the Recording tab, select your microphone, then click on Set as default.
Click on the Properties button, in the bottom right corner.
Under Levels, drag the Microphone Array all the way up to 100.
4. Update the audio driver
Search for Device Manager and open the app.
Expand Sound, video, and game controllers, right-click on your audio device, then select Update driver.
Select Search automatically for updates.
Of course, you can always rely on a specialized tool to do these steps for you. Fortect Driver Updater is great at this task, you scan your system, identify the correct drivers for it, and update them all in just a few minutes.
The first big Windows 11 update, also known as Windows 11 22H2, is here with many goodies. It comes with lots of excellent features and much-needed improvements.
However, most updates’ early stages always feature users’ complaints about issues and bugs, and Windows 22H2 is no different. Some of these problems are compatibility issues that can be solved by upgrading one or two drivers.
Others require a significant tweak to the operating system that will be expected in subsequent patches.
This guide contains a list of the most common Windows 22H2 issues reported by users and the ways to fix them.
What is Windows 11 22H2?
The Windows 11 2022 Update, or Windows 11 22H2, has many intriguing features. It is the first significant update since the release of the latest operating system, and it packs in some promises.
Some of the new features you can expect from this update are improved touch gestures, a renewed Xbox controller bar, new pages to the Settings app, and so much more.
What are the common Windows 11 22H2 issues and how to fix them?
1. Compatibility issues with Intel Smart Sound Technology drivers
This is one of the most severe Windows 11 22H2 Update issues. This is because it can have devastating effects and lead to an error message accompanied by the dreaded Blue Screen of Death.
This problem is caused by compatibility issues for specific versions of the drivers for Intel Smart Sound Technology. Therefore, to protect users, Microsoft has decided to apply a compatibility hold on this issue’s devices.
With this, you won’t be offered the update until the issue is resolved. So to fix this Windows 11 22H2 problem, you need to check whether your device’s manufacturer has an updated driver.
According to official sources, the issue should be resolved by updating your Intel Smart Sound Technology drivers to version 10.29.00.5714 and later or 10.30.00.5714.
2. Copying files/shortcuts with Group Policy Preferences not working as expected
This issue is not just limited to the Windows 11 22H2 update. It has previously been reported on Windows 11 21H2 and Windows 10 21H2 and 21H1.
However, Microsoft has promised to resolve it and provide an update in one of its upcoming releases. In the meantime, you can check our detailed guide on fixing a corrupt local group policy for possible workarounds.
3. Issues due to new Daylight Savings Time in Chile
This Windows 11 22H2 Update issue occurred due to the change in the time zone in Chile on September 10, 2022. The Chilean government announced that the time would advance by 60 minutes.
This has led to issues and a series of complaints from users. However, this has been fixed in the KB5017383 update.
But if you are still facing this issue, you can try the workaround below:
First, press the Windows key and type Date and time.
Next, choose the Date and time settings option.
Now, toggle the switch for Adjust for daylight saving time automatically backward to deactivate it.
4. XPS documents with non-English language characters not opening
The XPS documents with non-English language characters not opening issue started since the KB5014668 update. The problem is not limited to XPS alone but also affects OXPS files.
Some of the popular languages affected are Chinese and Japanese. However, it has now been resolved in Windows update KB5017383.
5. Update is not installing, showing error 0x800f0922
This is not a new error and has been around since the Windows 10 20H2 update. Some users are experiencing it while trying to update to Windows 11 22H2.
The error 0x800f0922 shows up when users try to install the security update for Secure Boot DBX (KB5012170). However, it does not disturb other updates like those for cumulative security.
The primary workaround around this issue is to update your UEFI BIOS manufacturer’s website to get the latest version.
Though there is no official fix from Microsoft for this problem, as it promises more updates in the upcoming releases, you can still run the Windows Update troubleshooter, as it has proven to be effective in solving the issue in previous versions.
Below are the steps to follow to do this:
Press the Windows key + I to open the Settings app.
Choose the Troubleshoot option.
Finally, click the Run button before the Windows Update option.
The voice typing fails to open issue has been around since Windows 11 version 21H2. Unfortunately, this problem has continued with the Windows 11 22H2 Update, preventing users from opening voice typing with the Windows key + H shortcut.
However, according to the official health status page, the issue has now been resolved with a server-side change. So the feature should currently be working well again if you check.
If it does not, you can check if your microphone is enabled following the steps below:
First, press the Windows key + I and select Privacy & Security in the left pane.
Select the Microphone option under the Permissions section.
Toggle the switch for Microphone access forward to enable it.
If your microphone is enabled and you still cannot use the feature, read through this guide on Windows 11’s voice typing not working to fix the issue for good.
7. Inability to sign in after adding a new Microsoft Account user
Some users complained that they could not sign in after adding a new Microsoft Account. This happened after they installed the KB5016691 update.
This problem only affects the newly created account on the first sign-in attempt. Thankfully, Microsoft has yielded to users’ cries and resolved the issue.
Hence, the problem should disappear automatically on your PC after some time. However, you should note that it might take up to 24 hours. But you can make things faster by restarting your PC once or twice.
Should you still be troubled by this issue, then it might not be the Windows 11 22H2 update causing the problem. However, it might be a bug, and we have prepared a guide to fix the inability to log in with the Microsoft account issue on Windows 11.
So it won’t hurt to check it out.
8. Device startup into BitLocker Recovery
Some users report that their devices enter BitLocker Recovery after installing the Windows 22H2 Update. If your device is asking for your BitLocker Recovery key, sign in to your Microsoft account using this link to get it.
To bypass this issue, you can also suspend BitLocker temporarily following the steps below:
Press the Windows key + S and type windows terminal.
Right-click on it and select Run as administrator.
Now, click the dropdown at the top and select Command Prompt.
Type the command below and hit Enter: Manage-bde -protectors -disable %systemdrive% -rebootcount 2
With the Windows 11 22H2 update comes a bitter experience for Nvidia GPUs. Most have been complaining about noticeable FPS drops and other performance-related issues.
However, Nvidia has quickly released a GeForce Experience update to counter the issue. While the company claims it fixes all the performance-related problems with the Windows 11 22H2 Update, some users still claim the Beta version does nothing to mitigate the problem.
Users only hope that the expected Windows patch on October 11 fixes this issue. Fingers crossed!
How do I fix the Windows 11 update error?
Press the Windows key + R, type services.msc, and hit Enter.
Right-click the Windows Update option and select Properties.
Set the Startup type to Automatic.
Click the Start button under the Service status.
Finally, click the Apply button, followed by OK.
If you are facing the Windows 11 update error, it might be because the Windows Update service is disabled on your device. This solution should help restart and ensure you can install the necessary upgrades.
The ISDone.dll error usually shows up when installing highly compressed PC gamesYou’ll often see the message “ISDone.dll error: Unarc.dll returned an error code” which halts the installation. This is especially common with large titles listed among the top Windows 10 games.
This issue is mostly tied to system limitations or corrupted game installers. The error means your PC failed to unpack large archive files during installation. Here’s why it happens:
You’re low on RAM or available disk space
The game repack is incomplete or damaged
Antivirus programs interfere with the installer
Core files like ISDone.dll or Unarc.dll are missing or unregistered
Similar to other DLL errors in Windows, this one can also be triggered by faulty virtual memory or corrupt system files
How can I fix ISDone.dll errors on Windows 10?
1. Use a third-party DLL fixer
A reliable software solution helps you repair multiple computer issues. Especially when the cause is not really clear.
You can make use of these tools for problems like BSoD (Black Screen of Death), computer freezing, execution optimization, and much more.
2. Check the game’s system requirements
Press the Windows key + S and type system.
Choose the System information option.
Check if your device meets the requirement to run the game.
Before, proceeding to more sophisticated fixes, first check if your laptop or desktop meets all the game’s system requirements. Check that your PC meets the minimum RAM specification and that your hard drive has enough free space for the game.
Also, note that you’ll need a 64-bit Windows platform to run a game that’s only compatible with 64-bit platforms. If your platform is 32-bit, double-check the game’s Windows platform specification.
3. Run a System File Scan
Press the Windows key + S, type cmd, and select Run as administrator.
Type the command below and hit Enter. sfc /scannow
Next, enter the command below and press the Enter key: DISM.exe /Online /Cleanup-image /Restorehealth
The DISM scan will probably take about 30 minutes. When it’s done, restart Windows if Windows Resource Protection repairs files.
Sometimes, the ISDone.dll error unarc.dll error-1, error-12, error-14, and other variations of the issue can be due to corrupt system files. Using the tool built-in system files repair tools should help fix this.
4. Install the game in Windows Safe Mode
Press the Windows key + R, type msconfig, and click OK.
Click the Boot tab at the top.
Select the Safe boot option.
Tick the Minimal radio button.
Click the Apply and OK buttons.
Then select Restart to reboot Windows in Safe Mode.
Thereafter, install the game that’s returning the ISDone.dll error.
Remember to deselect the Safe boot option before you restart Windows.
The ISDone.dll error when installing games can be due to the activities of other applications. It might be because of a counter program preventing the installation.
But in Safe Mode, only the essential system programs and services run will run. Starting Windows in Safe Mode frees up RAM and minimizes potential third-party software conflicts with the game’s installer.
4. Expand the paging filing
Press the Windows key + R, type sysdm.cpl, and hit Enter.
Click the Advanced tab at the top.
Now, click the Settings… button in the Performance section.
Choose Advanced in the top menu.
From here, click the Change… button in the Virtual Memory section.
Uncheck the box for Automatically manage paging file size for all drives.
Select the Custom size radio button.
Now, enter a higher value in the Initial size text box than the value there.
The Maximum size value you can enter depends on how much RAM your laptop or desktop includes. Windows will restrict your page filing to three times the amount of RAM (about 12,000 MB for four GB RAM).
Press the OK button to close the window.
Expanding the paging filing will increase the amount of virtual memory. That expands the amount of hard drive space for virtual memory, which comes in handy when RAM is limited.
Thus, this could be a potential fix that might resolve insufficient RAM.
5. Switch off the antivirus software
Antivirus software might block some games from installing. So disabling third-party anti-virus might also fix the ISDone.dll error.
Many anti-virus utilities include a disable or turn off option on their system context menus with which you can temporarily switch them off. Windows Safe Mode might also disable third-party anti-virus software.
Click the Search icon in the Taskbar and type Windows Defender Firewall.
Choose the Windows Defender Firewall option.
Click Turn Windows Defender Firewall on or off in the left pane.
Select the Turn off Windows Defender Firewall radio buttons in the Private and Public sections.
Click the OK button.
Sometimes, the Windows Defender Firewall might be blocking your game installation, causing the ISDone.dll error. Disabling this feature temporarily should fix the issue in this case.
Remember to enable the Windows Defender Firewall after installing the game.
7. Re-register the ISDone.dll
Enter Command Prompt in the Windows search box.
Right-click Command Prompt and select Run as administrator.
Input regsvr32 Isdone.dll in the Command Prompt, and press the Enter key.
Then enter regsvr32 unarc.dll in the Prompt’s window, and press the Enter key.
Re-registering DLLs is one way you can repair corrupted DLLs that can cause the ISDone.dll error isacextract issue. In this case, you might need to re-register the ISDone and Unarc DLLs to restore normalcy.
How can I fix the ISDone.dll error on Windows 11?
Since the ISDone.dll error message revolves around system requirements, corrupt system files, and missing DLL files, the solutions for Windows 10 are basically the same for Windows 11.
So, you can start by using a dedicated DLL fixer to correct the issue and proceed to all the other fixes in this guide.
Where can I find ISDone dll?
You can find the ISDone.dll on multiple websites like dll-files.com. You only need to download and install it on your PC preferably in the Windows system folder.
However, some games might require you to move the ISDone.dll file into the applications folder for smooth installation.
Some users succeeded in solving this problem by just moving the installation folder to another location on the drive so you can try that too.
One, or more of those resolutions might fix the ISDone.dll error so that you can install and run the required game.
In addition, adding new RAM and erasing temporary files might also resolve the error message. If you have any suggestions for fixing the ISDone.dll error, please share them below.
Are you slammed with the WDF_VIOLATION error? We will tell you all you need to know. Blue Screen of Death errors usually indicate a hardware problem or one related to your PC’s drivers and should be taken seriously.
If left unresolved, these crashes will cause permanent damage, primarily to your HDD, but other components can also be affected. So, let’s find out how to get things up and running.
Why does the wdf_violation error appear?
A number of various factors could have brought on the wdf_violation on your Windows 10 computer.
Until the procedures to correct it are implemented one at a time, and the error does not appear after a given patch, there is no way to determine the precise factor that is the cause of this problem.
But the following are the most likely triggers:
Outdated or faulty software driver for Bluetooth devices – This is the primary reason, and you will be required to reinstall or update the driver.
Malware on PC – A PC scan should do the trick if this is the problem.
Corrupt system files – In this case, you will have to repair the corrupted file using a system utility.
Corrupt USB devices – Scan these, or disconnect them, and the problem will be resolved.
What are variations of wdf_violation error?
The wdf_violation issue is not the only one of this type. Here are some similar problems that users have encountered:
Wdf_violation in Windows 10 loop – In some cases, the PC may be in a wdf_violation loop that prevents it from entering Windows 10. To fix the problem, enter Safe Mode and try to delete the problematic driver.
Wdf_violation while using Lenovo – Lenovo users reported this issue, and if you’re using a Lenovo device, you can try some of our solutions and check if that solves your problem.
Wdf_violation in Windows 10 (HPlaptop) – A number of users reported this inconvenience on HP devices as well. There’s no universal solution for HP computers, so you can try any solution from our article.
Wdf_violation in Windows 8 – This error can appear on any version of Windows, and even if you don’t use Windows 10, you should be able to apply almost all solutions from this article to Windows 8.
Wdf_violation in Razer – Sometimes, this issue can occur due to your hardware or USB peripherals. If that’s the case, disconnect all your USB devices and try to start your PC again.
Wdf_violation on startup, crash – This problem can occur due to third-party applications on your PC, and to fix the issue, it’s advised to find and remove the problematic applications.
Can Corrupt Windows cause blue screen?
Almost anything, including broken system files, defective device drivers, and malfunctioning components, can result in a blue screen. And Yes! A faulty profile or corrupt Windows may cause a BSOD.
How do I fix the wdf_violation BSoD error on Windows 10?
1. Use a third-party BSOD fixer
A great practical solution to solve Blue Screen issues on your computer is to run effective PC health tools.
These tools are the best choices when you are dealing with PC issues like a BSoD, and you do not know the exact cause.
2. Remove the problematic software
Press the Windows Key + S to open search, type in Control Panel, and press Enter.
In the Control Panel window, select Uninstall a program.
Find the problematic software, right-click on it and select Uninstall.
Wait for the process to be over, and Restart your computer.
3. Update your drivers
Press the Windows Key and type in Device Manager.
Expand Display adapters, then right-click on your GPU.
Select Update driver.
Then, select Search automatically for drivers.
A quicker option to update your drivers is using third-party software.
Outbyte Driver Updater can scan your device and then searches the internet for the most recent update for your drivers. This way, it helps you prevent serious errors and performance issues.
4. Use the Check Disk command
Press the Windows Key to open the Start Menu.
In the search box, type Command Prompt and start it as administrator.
After the CMD launches, type in the following command and press Enter: chkdsk C: /f /r /x
Replace the X with the letter of your drive you wish to check.
Let the process complete.
Once you manage to boot Windows, many solutions can prevent the problem from occurring again. The most important one is performing a Disk Check.
Sometimes people aren’t sure what the exact cause is of their crashes. BSoDs can be hard to pinpoint. If a file on your device is causing problems, but you aren’t willing to completely restore the system, there are other ways.
Specialized repair software will scan your PC thoroughly for corrupted or problematic files. Once the culprit has been found, the tool will quarantine it and take other safety measures. It will most likely attempt to restore the file to an uncorrupted state.
If that isn’t possible, the software will replace it with an uncorrupted version from its database that is constantly updated and contains crucial Windows files.
Insert the installation DVD or USB and boot Windows 10 from it.
In the Windows Setup page, select the Language, Time and currency format, and the Keyboard inputs method, then click Next.
Now, click on Repair your computer and select Troubleshoot.
Click on Advanced Options.
Then, select Startup Repair to initiate the process.
The wdf_violation error will most likely cause the device to be stuck in the startup loop, which means that you won’t be able to access your desktop or any file that could help solve the problem.
If that’s the case, the only option is to create an installation media, set up the USB boot in the BIOS, and perform a Startup Repair using the CD/USB.
6. Disable USB ports in BIOS
Restart your computer.
During the restart, you will briefly see a message telling what key to press to open the BIOS/SETUP.
Press that key (it might be a different one from the image below, depending on your motherboard’s manufacturer).
Once the BIOS opens, you’ll need to go to Advanced Tab, then Miscellaneous Devices.
Next, select External USB Ports and Disable it.
Save the changes and restart your computer.
NOTE
This process might be different on your version of BIOS, therefore check your motherboard manual for detailed instructions.
Any USB device can cause a problem, so you might want to try disconnecting all the peripherals. There are even reports that cameras caused the issue.
To fix it, disconnect all the devices and plug them back in one by one to determine which one is the culprit.
7. Uninstall the Bluetooth driver in Safe Mode
Restart your PC a couple of times during the boot sequence. Alternatively, click the Power icon on the profile selection screen, press and hold the Shift key and choose Restart from the menu.
A list of options will now appear. Select Troubleshoot.
Then Advanced options.
Next, select Startup Settings.
Click the Restart button.
When your PC restarts, you’ll see a list of options. Press 4 or F4 to select Safe Mode.
Press Windows Key + X to open Win + X menu.
Now choose Device Manager from the list.
Now locate your Bluetooth driver, right-click, and choose Uninstall device.
Then, check Delete driver software for this device and click Uninstall to confirm.
Windows has a special segment called Safe Mode, which you can use to troubleshoot various issues. It uses the default drivers; therefore, it’s perfect if you can’t boot your system.
After entering Safe Mode, you must find and remove the problematic driver. Many users claim that a Bluetooth driver caused this issue for them, and you can remove it by doing as detailed above.
Then, restart your PC and try to start Windows 10 again. Remember that other drivers can cause this problem, so don’t focus only on the Bluetooth driver.
In some cases, the wdf_violation error can appear due to problematic software. Certain third-party applications might not be fully compatible with Windows 10, which can cause errors.
To fix the problem, it’s advised to remove the problematic application from the PC. Keep in mind that you need to remove this app completely to fix the problem permanently.
8. Perform a System Restore
Press the Windows Key + S to open search and enter system restore.
Choose Create a restore point from the list of results.
In the System Properties window click System Restore.
When the System Restore window opens, click Next.
If available, check Show more restore points option and select the desired restore point.
Now click Next to proceed.
Follow the instructions on the screen to complete the restoration process.
Another tool that can help you fix the wdf_violation BSoD error is System Restore. If you’re unfamiliar, your system automatically creates restore points after installing new software or an update.
You can use these restore points to restore your system and fix problems like this.
How can I fix Wdf_Violation on Windows 11?
While this is a problem common in Windows 10, users of the new Microsoft OS have also experienced the same issues.
The good news is that if you have followed our guide, you can also solve the Event 1000 application error issues in Windows 11.
This is because OSs are very similar, and except for minor UI differences, the recommended fixes should work on Windows 11.
What safety measures should I take in case of repeated BSoDs?
Unfortunately, nobody can predict problems like these. You must always be on guard and remember that the number one safety measure is regularly saving your work. Doesn’t matter if you are designing something, writing an article, or playing a game.
Take your time and save the changes you made once in a while. This will reassure you that you won’t lose too much progress made during work.
Creating restore points is also a good idea. If your data gets corrupted in any way, you can always go back to a restore point before the corruption occurred.
If you are unlucky enough to get a blue screen that compromises the system’s files, you will lose documents that might be important.
That’s why backing up the data is mandatory in an emergency. Plenty of tools will create regular backups and upload them into an external cloud to keep your data safe.
Can overheating cause a blue screen?
Yes! A system crash and a blue screen of death may result from an overheating gadget. To avoid this issue, ensure that your PC has sufficient cooling systems.
Wdf_violation BSoD errors can be problematic on Windows 10 and should be treated as a serious matter, but we hope that some of our solutions were helpful to you.
Please tell us in a comment below if you solved the issue following our suggestions or if there are some others we should include in our list.
What would teamwork in gaming be nowadays without the advanced means of communication? It is of paramount importance our hardware works properly when engaged in our favorite titles with our friends. Lately, many reported that the SteelSeries Arctis microphone is not working.
The problem is being widely reported and many are yet to find a solution for it. We will help you with that. Keep reading to find out all there’s to know when your SteelSeries Arctis microphone is not working!
Why is my SteelSeries Arctis microphone not working?
Here are the primary reasons you are facing the problem:
Issues with the drivers: When the driver is outdated, corrupt, or incompatible, the related device starts to throw errors or stops working altogether.
Improper connections: Loose connections or damaged cables are also common reasons users face problems with the SteelSeries Arctis microphone.
Misconfigured settings: If the PC’s audio settings are misconfigured, the microphone’s audio quality and functionality are affected.
Hardware malfunction: In rare cases, it could be a problem with the microphone’s hardware triggering the issue.
What can I do if my SteelSeries Arctis microphone is not working?
Before we proceed, perform these quick checks:
Ensure the microphone’s dedicated Mute switch/button is not turned on.
Check the cable for damages; if you find any, replace it.
If none work, move to the solutions listed next.
1. Check system sound settings
Search for Control Panel and open the app.
Select the Sound category.
On the Recording tab, select your microphone, then click on Set as default.
Click on the Properties button, in the bottom right corner.
Under Levels, drag the Microphone Array all the way up to 100.
2. Activate app access to your SteelSeries microphone
Press Win + I to access Settings.
Select the System tab, then click on Sound.
Under Input, click on the microphone you are using.
Under General, select Allow in order to give your Windows app permission to use the microphone.
3. Update the audio driver
Search for Device Manager and open the app.
Expand Sound, video, and game controllers, right-click on your audio device, then select Update driver.
Select Search automatically for updates.
4. Download & install the latest SteelSeries Engine software
Browse the SteelSeries website and download the latest software engine.
Run the executable and follow the on-screen instructions to finish.
Replug your SteelSeries Arctis 1 into your PC and run this software.
Yes, you can add a second microphone to your PC< depending on your preference. All you need is the extra USB slot and a working microphone.
Then, all you need to do is navigate the Settings app and press all the appropriate buttons in order to make it happen, as follows:
Press Win + I to access Settings.
Select the System tab, then click on Sound.
Under Input, next to Pair a new input device, click the Add device button.
If your microphone isn’t working for whatever reason, treat things calmly, as there is always an explanation for why software or hardware fails or refuses to work as intended.
Follow the steps above and fix this annoying situation using solutions that have been proven to work for other users as well.
Throughout time, a lot of Outlook users have reported problems with the Microsoft app and today we are going to take a closer look at one of them
Being able to actively track your meetings is important and when the app doesn’t do that, problems can often appear, especially in the business world.
But, you don’t need to worry, as you came to the absolute right place to see what can be done about Outlook not automatically tracking your meetings in Office 365.
Outlook not tracking your meetings on Windows 10/11 can happen for multiple reasons, so there really isn’t just one cause.
Remember that the meeting responses are being processed by another client, device, or third-party application.
That being said, the reasons are Outlook add-ons, mail archiving programs, or devices that use Collaboration Data Objects (CDO) to synchronize with your Microsoft Exchange mailbox or calendar.
Also included here are devices that use Microsoft Exchange ActiveSync (EAS) to synchronize with your mailbox or calendar.
How do I fix Outlook if it’s not tracking meeting responses?
1. Track meetings manually
Open Outlook.
Click on Calendar on the left side of the window.
Click on the Meetingoccurence tab, then click on Tracking.
Select View tracking status
Set meeting tracking to Tracking for occurrence, or Tracking for series.
Navigate to the following registry entry, then press the Enter key: HKEY_CURRENT_USER\Software\Policies\Microsoft\Office\16.0\Outlook\Options\Calendar
Right-click, then select New, and finally DWORD value.
Name it ForceMtgResponse, then press the Enter key.
Right-click on ForceMtgResponse and select Modify.
In the Value data box enter 1, then press the OK button.
3. Relog into your Outlook account
Click on the profile button located in the top right corner.
Click on Sign out.
Enter your credentials, then press the Sign in button.
How do I export Outlook meeting attendee responses?
It’s not hard at all, so don’t get discouraged. For years, Microsoft has bragged about how accessible its applications and platforms are, so you’ll have an easy time doing it.
That being said, if you want to print or export meeting attended responses elsewhere, select the dropdown arrow next to Trackingon the Meeting tab and choose Copy status to clipboard.
After you have copied the content, simply export it wherever you need, or print it. Dealing with Outlook can sometimes seem intricate, but Microsoft has protection protocols in mind as well.
Users have been reporting Outlook not tracking meeting responses for years now, but it seems that Microsoft can’t fix this once and for all.
Has this guide been helpful? Share your thoughts with us in the dedicated comments section located below.
Some users have reported pixelated screens after applying specific Windows updates. The icons appear to be bigger and the text is blurry and pixelated. Fortunately, this is not a big issue; you can solve it quickly, with just a few steps.
Follow along as we will respond to some of your most asked questions about the pixelated issue in Windows 10/11, then present six effective solutions for you to apply.
Why is my screen pixelated on Windows 10?
The most typical reason is a Windows upgrade that went wrong and resulted in a reasonably undesirable outcome. However, the reasons might be rather diverse.
Suppose you have more than one display attached to the computer (such as a standard monitor and a projector, for example). In that case, the displays may each have a unique ideal resolution, also known as a native resolution.
Since both displays utilize the exact resolution—which may not be the same as either screen’s native resolution—the sharpness of the image may be affected on both displays.
Here are some more variations of this issue that will also be covered in today’s article:
Windows 10 pixelated video – This problem usually occurs after installing Windows 10 updates.
Computer/ laptop screen is pixelated and freezes – In some cases, it can also happen that your screen freezes, besides being pixelated.
Pixelated screen on Windows 7 – This problem is common in Windows 7, as well.
Computer screen pixelated virus – Pixelated screen can easily be caused by malware.
1080p monitor looks pixelated Windows 10 – Check your graphics card drivers in order to make sure they are up to date.
Computer screen pixelated then crashes Windows 10 – Changing your refresh rate can be solution in this case.
Laptop screen pixelated then freezes – You can update your OS once again to apply a newer patch that will fix the issue.
Can a virus make my computer screen pixelated?
The performance of the desktop or laptop device, regardless of the operating system, is negatively impacted after the virus successfully infiltrates it.
During the initial phase of the virus’s impact, the look of the screen and Display, as well as the functionality of the drive and the keyboard, are severely impaired.
So the answer is yes, a virus can make your computer screen pixelated. But it’s not always the case. You can try to run a system scan using your antivirus to find out whether you are infected or not.
How do I fix a pixelated screen after a Windows update?
1. Change screen resolution
Press Windows + I to open Settings, then go to Display on the left.
Click Display resolution and choose your resolution. The laptop screen is pixelated issue will be fixed afterward.
2. Check if your drivers are compatible
Right-click the Start icon, then select Device Manager.
Expand the Display adapters section, right-click your adapter and then select Uninstall device.
Restart the computer, let Windows 10/11 detect the driver, install it by itself, and check if it fixes the issue.
If updating your drivers doesn’t help, you probably have some issues with your DPI(dots per inch) settings. The following solution will show you how to solve all DPI issues.
Right-click the Start icon, then click Device Manager.
Expand the Monitors section then right-click your monitor and select Update driver.
Let your computer find new drivers for your monitor.
If there are any new drivers available, let the wizard install them.
Restart your computer.
Although monitoring drivers cause issues less often, it’s still possible. Especially if you recently got a new monitor, or installed a new version of Windows 10.
While manual updating your drivers is the most popular solution, the recommended way is to update them automatically using a dedicated tool such as Outbyte Driver Updater.
The best thing about choosing this method is the time saved in looking for the right software. After scanning your device and it offers a list of compatible fresh drivers.
You can then update not just the monitor driver, but all outdated drivers, either one by one, or in bulk.
Press Windows + I to open Settings, then go to Display on the left side.
Now, choose one of the three options under Change the size of text, apps, and other items: Smaller – 100% = 96 DPI (Pixels/Dots Per Inch); Medium – 125% = 120 DPI (Pixels/Dots Per Inch); Larger – 150% = 144 DPI (Pixels/Dots Per Inch)
Setting the DPI size to a smaller percentage will decrease all items’ sizes on the Display, which will definitely help you if your screen is pixelated. If your monitor’s resolution changes suddenly on its own, you’ll want to know how to fix it.
5. Change monitor refresh rate
Press Windows + I to open Settings, then go to Display.
Go to Advanced display settings.
Next, click Display adapter properties for Display 1.
Go to the Monitor tab and select another refresh rate from Screen refresh rate.
Save the changes made then reboot your computer.
6. Update Windows
Press Windows + I then when the Settings app opens, select Update & security.
Finally, tap the Check for updates button.
Needless to say, your Windows 10 computer should be up to date.
Updating your computer brings many benefits, and possibly resolves some issues. So, check for updates, and it’s likely that this is the solution to your problem.
How can I fix a pixelated screen on Windows 11?
Press Windows + I then navigate to Windows Update followed by Update history in order to see all the Windows updates installed on your PC up til now.
Click Uninstall updates.
Click the latest Windows update then select Uninstall.
Why is my monitor suddenly pixelated?
Speaking about Windows updates, such files are usually behind a screen that suddenly gets pixelated. Don’t worry, we will explain everything.
Now, a grainy display in Windows 10 is generally triggered when using a non-native resolution to display images on your PC or laptop.
Your device struggles to fill the screen and adds more pixels to keep the image uniform. By rendering at such a large size, individual pixels become distinguishable and make the whole Display look grainy or fuzzy.
Now, this is a general definition, but there are particular cases to mention and such is the Windows 10 Update pixelated screen.
If the monitor was working just fine, but suddenly becomes pixelated after installing a Windows update, it’s clearly an indication of software conflict or incompatibility triggered by the recent changes.
You might want to revert them and check if the Display works fine in order to narrow down the list of potential culprits or update your drivers and graphics card adequately. Moreover, if the selection rectangle isn’t working properly, we can help out.
Why is my laptop screen going fuzzy?
There are two potential causes for a distorted and fuzzy image on the screen of a laptop computer: software faults or hardware problems. A virus or faulty graphics program would be examples of problems caused by software.
That’s about it, we hope at least one of these solutions helped you reset the pixelated Display back to normal. If you have any comments, questions, or suggestions, just let us know in the comments below.
HP Envy x360 is a premier laptop with 2-in-1 functionality and has been loved by users worldwide. But, some have been reporting issues with it. The most common is that the HP Envy x360 keyboard and mouse are not working.
In most cases, when a device stops working, we instantly believe that it’s the hardware at fault. Based on research, we found that it’s generally outdated drivers, misconfigured settings, or conflicting devices that affect the functioning of the keyboard and mouse, as is the case here.
So before you take your HP Envy laptop to a repair shop, try the methods listed here to fix the keyboard and mouse not working issue.
What can I do if the keyboard and mouse are not working in HP Envy x360?
1. Some basic checks
First, restart the laptop, and check if the problem is fixed. This particular method eliminates any trivial bug or conflicting process and has been a lifesaver for many.
If that doesn’t work, it’s time to identify whether the problem lies with the device or the system. One of the simplest ways to do that is to enter the system BIOS. In case the keyboard and mouse work there, they are most likely fine and need not be replaced.
In case both these methods don’t work, try the following solutions before taking your laptop to a repair shop.
NOTE
Before you move forward, boot Windows into Safe Mode to get the keyboard and mouse to work. In case these work for a while when you boot the OS, execute these methods within that time frame.
2. Disable the Intel (R) Integrated Sensor Solution device
Press Windows + S to launch the Search menu, enter Device Manager in the text field, and click on the relevant search result.
Double-click on the System devices entry.
Now, right-click on Intel (R) Integrated Sensor Solution, and select Disable device from the context menu.
Click Yes in the warning box that pops up.
The Intel (R) Integrated Sensor Solution driver has been found to conflict with a bunch of processes, and disabling it has fixed the HP Envy keyboard and mouse not working issue for many.
Remember to create a restore point before making the change. This will ensure that you can revert to the original settings, in case things don’t go as planned.
Press Windows + R to launch the Run command, type devmgmt.msc in the text field, and either click on OK or hit Enter to launch the Device Manager.
Now, double-click on the Keyboards entry.
Right-click on the keyboard that’s not working, and select Update driver from the context menu.
Next, select Search automatically for drivers.
Windows will now scan through all the relevant drivers on the system and install the best one.
Drivers play a critical role in the effective functioning of a device, and if they are outdated or corrupt, the device may stop working. If Device Manager couldn’t find an update, try the other methods to manually install the latest driver version in Windows.
Similarly, update the mice drivers, and check if the HP Envy keyboard and touchpad not working problem is fixed.
If you want to speed up the process, you can use a dedicated tool like Outbyte Driver Updater to update and fix corrupt drivers in bulk. You can set it up to regularly scan your drivers and automatically install updated versions whenever they become available.
Outbyte Driver Updater
Make your system run smoothly with no errors by using Outbyte Driver Updater to update all your drivers.
Press Windows + S to open the Search menu, type Control Panel, and click on the relevant search result.
Click on System and Security.
Now, click on Change what the power buttons do under Power options.
Next, click on Change settings that are currently unavailable.
Uncheck the box for Turn on fast startup (recommended) and click on Save changes.
Now, restart the computer, and check if the problem is resolved.
Fast Startup, though beneficial, has often been found to affect the functionality of connected devices and, in extreme cases, cause them to stop working. Disabling it has worked for some users, so try that.
5. Disable tablet mode
Another underlying cause, though it doesn’t make much sense, is the Tablet Mode in Windows 11. When it is enabled, the keyboard and mouse stop functioning for many. This method may not work for all, but there’s no harm in trying it out.
The process to disable Tablet Mode in Windows 10 and the latest iteration is different. While in the former, you could do it from the settings, in Windows 11, the screen has to be rotated to the normal position. Once the mode is disabled, spacing between the Taskbar icons will reduce.
Some users have reported problems with their Bluetooth mouse after a Windows upgrade, so we’re here to offer a couple of solutions for this problem. A Bluetooth mouse can cease responding when using the computer and that typically happens when it goes to sleep and is woken up by pressing a key or the power button, or if more than one Bluetooth mouse is attached to the same computer.
The Bluetooth host can occasionally lose contact with the mouse. As a result, the host rejects subsequent attempts to reconnect or changes the adaptive frequency hopping to a new frequency, losing device acknowledgment. While polling other devices, the Bluetooth host stops the flow control.
How can I fix Bluetooth mouse problems in Windows 10?
1. Update the Bluetooth Driver
Go to Search, type device manager, and open Device Manager.
Find your Bluetooth mouse, right-click on it, and select Update driver.
Click on Search automatically for drivers.
Restart your computer and try to connect your Bluetooth mouse again.
Installing the wrong driver versions can cause permanent damage to your system. Thus, we suggest updating drivers automatically by using a dedicated tool.
Click on the Start menu and select the Settings app.
Open the Settings app and click on System.
Navigate to the Power & Sleep tab, then uncheck both On battery power, stay connected to WiFi while asleep and When plugged-in, stay connected to WiFi while asleep options.
3. Check if the Bluetooth service is running
Press the Windows key + R to open the elevated Run command line.
In the command line, typeservices.mscand press Enter.
Navigate to Bluetooth support service; if it’s set to Started, it is okay. If not, right-click and choose Start.
4. Run the system troubleshooter
Click on the Start menu and select the Settings app.
Click onUpdate & security.
Choose Troubleshoot from the left pane, and click on Run the troubleshooter under the Bluetooth icon.
Follow the instructions.
5. Reconnect the Bluetooth mouse
Open the Control Panel, then go to Hardware and Sound.
Click Add a device.
Select your Bluetooth mouse, then hit Enter. To complete the procedure, adhere to the on-screen directions.
Note: Ensure the device is turned on and the batteries don’t need to be replaced.
Also, make sure your device is discoverable. Check if you installed the device using the correct program; if not, reinstall it and install it correctly.
6. Change your mouse frequency
Wireless mice are prone to frequency disruptions. And that’s exactly what can happen to your mouse, as well.
To change your mouse frequency, you’ll need to open your mouse utility software, look for the option for changing mouse frequency, and set the mouse frequency from 500 Hz to 250Hz.
7. Roll back your drivers
Go to Search, type device manager, and open Device Manager.
Look for your Bluetooth mouse, right-click and choose Properties.
Under the Driver tab, choose to Roll back driver.
Follow further on-screen instructions.
Restart your computer.
For users experiencing problems specifically with Logitech devices, this step-by-step guide on Logitech mouse not working offers targeted solutions that complement standard Bluetooth troubleshooting methods.
8. Change the Power management options
Go to Search, type device manager, and open Device Manager.
Double-click the USB Hub device in the Device Manager to open its properties.
Navigate to thePower Management tab and uncheckAllow the computer to turn off this device to save power. Click OKto save changes.
Note: Remember that you need to repeat these steps for all devices connected to the USB Hub.
9. Optimize the Bluetooth signal
Maybe your issue is technical, and nothing’s wrong with your configuration or software.
So, ensure nothing is blocking your Bluetooth signal if none of the solutions from the above work. Here are a few things to keep in mind:
First, place your wireless mouse closer to the wireless transceiver.
If your keyboard is also wireless, place both the keyboard and mouse at an equal distance from the transceiver.
Finally, turn the transceiver on its side or upside down.
10. Check for Windows Updates
Click on the Start menu and select the Settings app.
Click onUpdate & security.
On the left pane, click on Windows Update, and you may also click the Check for updates button on the right.
Besides regular system updates, Microsoft usually delivers various drivers through Windows Update. So, there’s a chance a new driver for your Bluetooth devices (mouse) is ready.
If you can’t install it through the Device Manager, you’ll probably want to try it through Windows Update.
Another benefit of installing the latest Windows 10 updates is system stability.
If a bug in your system causes your Bluetooth mouse to stop working, there’s a chance Microsoft will release a fix as part of some update.
Additionally, here are some more problems with your Bluetooth device that you can encounter along the way:
Bluetooth not working Windows 10 – If the Bluetooth connection doesn’t work correctly, you can try and update your Bluetooth drivers.
How do I fix the Bluetooth mouse if it’s not working on Windows 11?
On Windows 11, the steps to fix this error are very similar.
You must note that both operating systems have so much in common, and except for occasional UI differences, there will be few visually noticeable differences.
So we recommend you choose a solution and apply it to any of your Windows 11 devices, and it should be compelling enough.
How do I resync my wireless mouse?
This will vary from manufacturer. But generally, the USB receiver has a Connect button located someplace on it. Once you press it, the receiver’s light should begin to flash. The USB receiver flashing light should stop after pressing the Connect button on the keyboard or mouse.
And there you go. This article will come in helpful if your Bluetooth mouse is not working on Logitech, a laptop, a Lenovo or Dell device, or if it is not working but connected.
Users sometimes complain that the Bluetooth mouse is not working after a restart. Our guide should also help you fix this.
That would be all; I hope at least one of these solutions helped you to solve the problem with the Bluetooth mouse in Windows 10.
Lastly, if you have any questions or comments, write them down in the comment section below.
Games like Age of Empires 4 perform best when you have a good network connection and a stable computer performance. However, users complain about the Age of Empires 4 high ping issues that cause the game to lag and stutter.
The Age of Empires 4 is one of the series of historical real-time strategy video games. However, users report that the game suffers from high ping, which affects many parts of the game.
Furthermore, pings mean the time it takes for your device to communicate with the server. It measures how long it takes for a small amount of data to be transmitted from your device to an online server and back again. An outrageous rise in the ping rate can result in stuttering or lag in your device.
Fortunately, there are some ways to fix the high ping & stuttering in Age of Empires 4. As we go further into this article, we’ll discuss the causes and fixes for high ping in your game.
Why am I suddenly getting high ping?
Issues with your network connection: Sending a certain amount of data from your device to the online game server requires a fast, smooth, and reliable network connection. However, you can experience a rise in ping if the network connection is slow or unstable. It can cause the Age of Empires 4 account sign-in to fail and lag.
Firewall interference: The firewall checks the data packets transacted between your device and servers (sent and received), so it takes a lot of time to do so. Hence, you may experience high ping in your game if your game is not allowed through Windows Firewall.
Not enough bandwidth: When many apps are running on your device concurrently, the bandwidth allocated for the game won’t be enough to keep it stable. So, low bandwidth can cause the Age of Empires 4 game pass to be disconnected.
Navigate to the Windows Update tab and click on the Advanced options.
Select Additional options and click on Options updates.
Expand the Drivers updates section, then check the box.
Click the Download & install button.
Updating network drivers helps your PC connect faster with your network and fix issues like AOE 4 being unable to find or join matches and AOE 4 being offline.
Another option is to update all drivers using specialized software. Outbyte Driver Updater is a smart tool that automatically and safely detects and updates all outdated drivers on your system.
Outbyte Driver Updater
Solve most issues by updating your system drivers to their latest versions.
Windows 11 came with exciting changes, but some inherent issues that can affect your printer have surfaced.
One of these problems is that some of our readers discovered that the Microsoft IPP class driver is missing.
This means that the system cannot communicate with the printer correctly, and some of its features are not working.
First, let’s clear out what is an IPP driver and what it does in the printer-PC relationship, and then we will provide some solutions for this issue.
What is the Microsoft IPP class driver?
An IPP driver is an Internet Printing Protocol that allows the communication between a client device like a computer, a mobile device, etc., and the printer or print server.
It helps you send one or more print jobs and perform other tasks, such as monitoring the printer and the print job status or canceling a print.
It’s also a secure protocol used by a vast majority of printers, so it’s essential to install it for your printer to work correctly.
So, all the printer drivers have this protocol embedded nowadays, and if you can’t use the printer with all its features, it’s a problem with the existing driver.
If the Microsoft IPP class driver is not installed, let’s see how we can solve this problem with one of the solutions below.
What is the difference between IPP and HTTP?
IPP, or Internet Printing Protocol, is an internet protocol that establishes communication between the client device and a printer. It allows for tasks such as querying the status of a printer, getting the status of print jobs or canceling individual print jobs.
IPP can run over the internet or without it, and thanks to access control, authentication, and encryption, it is a more secure printing mechanism than others.
HTTP is another secure way of transferring or sending data between a web server and a web browser. For example, IPP makes use of HTTPS as its transport protocol.
How can I fix the missing Microsoft IPP class driver?
1. Run the printer troubleshooter
Click the Start button and select Settings.
Choose System from the left menu and click on Troubleshoot from the right.
Select Other troubleshooters.
Click the Run button to the right of the Printer section.
The system will identify if there is any problem with your printer and will suggest any further actions.
2. Remove and reinstall the printer
2.1 Remove the printer
Click the Start button and choose Settings.
Select the Bluetooth & devices from the left pane and click on Printers & scanners from the right.
Select your printer and select Remove.
2.2 Reinstall the printer
Click the Start button and choose Settings.
Select Bluetooth & devices from the left menu and pick Printers & scanners from the right.
Click on the Add a device button.
If the printer is connected correctly, it should be detected. Click on it and select Install. If not, you can click the Add manually button.
You have a lot of options to choose from. For example, if you have a local printer, select the first option and if it’s a network printer, select the fourth option. We went through with the first one because it’s more common.
The system will search through the available printer. If it gets detected, select the printer and click Next to install it. If it doesn’t, go back to the previous step, select the last option, and click Next.
Select the port your printer is connected to from the drop-down menu, then choose Next.
Select the printer brand and model, then hit Next. If you can’t find it, click the Windows Update button, and in a few minutes, the list will be populated with many other printer brands and models. If you already have the driver, select the Have Disk button.
Click the Finish button after installing the driver.
3. Get the latest driver from the printer manufacturer’s website
Visit the printer’s manufacturer support website. In our example, we navigated to the HP printers support website and entered the model and number of the device.
Download the needed software.
The downloaded file is self-installing, so running it will also install the printer automatically.
If installing the printer using the usual method, you should try getting the correct driver from the manufacturer’s website support page.
The process described above is just an example of how to do that, and it’s different for each manufacturer, so adapt your technique to find the correct one for your printer.
Moreover, if you’re not tech-savvy, we recommend using a dedicated driver updating tool. This software solution is ideal for those who want to keep their computer in tip-top condition and avoid any printer-related issues.
4. Enable the Internet Printing Client
Open the Start menu, type control panel, and open it.
Choose Programs.
Click on Turn Windows features on or off.
Please scroll down and find Print and Document Services, click on it to expand, then check the Internet Printing Client box.
5. Clear the spooler and restart the service
5.1 Stop the Print Spooler service
Click Start, type services, and open it.
Under Services, double-click Print Spooler.
Select Stop, then OK.
5.2 Empty the Spool folderand restart the Print Spooler service
Press the Windows + E to start File Explorer.
Navigate to the following path (administrative privileges are needed to access the folder): C:\\Windows\System32\spool\PRINTERS
Delete all contents in the folders if there are any.
Open the Start menu, type services, and open it.
Double-click the Print Spooler service again.
Click Start.
Go to the Startup type list and select the Automatic box.
Click Apply,then click OK.
How do I enable IPP on my printer?
Open Control Panel.
Choose Programs.
Click on Turn Windows features on or off.
Please scroll down and find Print and Document Services, click on it to expand, then check the Internet Printing Client box.
Go to View Devices and Printers in Control Panel.
Hit the Add a Printer option.
Click on The printer that I want isn’t listed link.
Select the Select a shared printer by name option.
Type in the address of your printer.
Click Next.
How to set your printer as the default in Windows 11?
Click the Search icon from the Taskbar, type control panel, and select the app from the results.
Find the Hardware and Sound section and click on View devices and printers.
Right-click on your device and select Set as default printer.
We hope our guide helped you fix the Microsoft IPP class driver missing on Windows 11, and now your printer runs with all the features.
We all have all sorts of applications that we use daily installed on our Windows 10 PCs. Unfortunately, a few users reported Windows Installer Service could not be accessed error while trying to install new applications.
This sounds rather serious, but always a way to fix this error. This guide will give you a bunch of solutions to help you resolve the problem.
Why is Windows Installer not working?
Here are some of the common reasons for Windows Installer not working issue.
The Windows Installer Engine is corrupted.
There is a virus or malware on your PC.
The Windows Installer service is missing some important files.
Some of the system files are missing or corrupt.
There is already an earlier version of the program installed on your PC.
How can I fix Windows Installer Service could not be accessed error on Windows 10?
1. Reset the Windows Installer Service registry
Press Win + R and type regedit, and click OK.
Click on File and select Export.
Select All as Export range, enter the name of the file and click Save. In case anything goes wrong, you can just run this file and restore your registry.
Once you’ve created your backup, close Registry Editor.
With registry backup created, you need to create a .reg file and add it to the registry. To do that, follow these steps:
Select Save as. Type the file name as repair.reg and set Save as type to All Files and click Save.
Close Notepad.
Locate the repair.reg file, right-click it, and choose Run as administrator.
If prompted, click Yes.
After you’ve added repair.reg to the registry, try to install the problematic application again and check if the Windows Installer Service could not be accessed error appears.
2. Start the Windows Installer Service manually
Right-click on the Start menu and choose Command Prompt (Admin) from the menu.
Type net start MSIServer and press Enter to run it.
To check if the Windows Installer Service is running, you need to do the following:
Open the Start menu, type Services, and open it.
Open Windows Installer service.
Check the Service Status to see if the Windows Installer service is running.
If the service isn’t running, click the Start button to start it.
Right-click on the Start menu and select Command Prompt from the menu.
If you own a 64-bit version of Windows, enter the following lines and press Enter after each line:
%windir%system32msiexec.exe /unregister
%windir%system32msiexec.exe /regserver
%windir%syswow64msiexec.exe /unregister
%windir%syswow64msiexec.exe /regserver
After you’ve entered all the lines, close Command Prompt and restart your computer.
If you own a 32-bit version of Windows 10, you need to enter the following commands:
msiexec /unregister
msiexec /regserver
Close Command Prompt.
Restart your computer. Now check if the Windows Installer Service could not be accessed error still appears.
4. Use regsvr32 command
Start Command Prompt as an administrator.
Type the below command and press Enter to run it. regsvr32 c:windowssystem32msi
Close the Command Prompt and try to install the problematic application again.
5. Use SFC and DISM commands
Right-click on the Start menu and choose Command Prompt (Admin).
Type the below command and press Enter to run it: sfc /scannow
SFC scan will now start. Remember that this can take about 15 minutes, so don’t interrupt it.
Once the scan is finished, check if the problem persists. If the issue is still present, or if you could not run an SFC scan, you might have to use a DISM scan instead. To do that, follow these steps:
Start Command Prompt as administrator.
Run the below command: DISM /Online /Cleanup-Image /RestoreHealth
The scanning process will now start. Remember that this process can take about 20 minutes or more, so don’t interfere with it.
Once the scan is done, check if the issue persists. If you were unable to run the SFC scan before, or if the SFC scan was unable to fix the problem, repeat it and check if Windows Installer Service could not be accessed error is still there.
Third-party software that can do this process automatically might be an easier and more reliable solution.
6. Uninstall the older version of the program you wish to install
If you already have the older version of the program you want to install on your computer, we advise you to remove that version from your PC before trying to install the newer version.
This is a simple solution, but it might work for you, so be sure to try it out.
If you can’t remove a particular application due to Windows Installer Service could not be accessed error message, you might be able to solve the problem simply by using an uninstaller software.
In case you’re not familiar, uninstaller software is an application that can remove any application from your PC.
In addition to removing applications, these tools will also remove all files and registry entries associated with the application you want to remove.
There are many options available, you can certainly find the best uninstaller software that fits your budget and specific needs.
Now navigate to the Log on tab and select Log on as Local System Account and check to Allow this service to interact with the desktop checkbox.
Save changes and restart your PC.
How can I fix Windows Installer Service could not be accessed on Windows 11?
Reset Windows Installer service.
Check if the Windows Installer service is enabled or not.
Delete the old version of the software.
Reset your Windows PC.
Perform a clean install.
Install the latest Windows Installer Redistributable.
Can I disable Windows Installer?
Open the Start menu.
Type services and open the app.
Locate the Windows Installer service and open it.
Under the Startup type drop-down menu, select Automatic.
Select Stop button for the Service status section.
Press Apply and OK.
Windows Installer Service could not be accessed error messages can create a lot of problems, but we hope that some of our solutions were helpful to you.
When trying to restore or recover your crashed HP computer, you may run into an HP Recovery Manager Restoration issue where it doesn’t complete. This is a problem that happens all the time, and there are some simple solutions to fix it.
Many HP users experienced a Blue Screen of Death, where the computer screen simply turns blue with an error message. You can’t access anything without restoring or recovering the machine.
For those stuck in this loop, this is a detailed look at some quick fixes you can handle on your own. Read this to the end to find out more.
What can I do if my HP Recovery Manager restoration is incomplete?
1. Check your HP Recovery Manager settings
Open the HP Recovery Manager.
This will take you to another screen with different options. Click the Advanced options button.
Select the Startup Settings option. Ensure that the Enable backup logging and Enable system restore options are activated.
If you’re having trouble restoring your system, try selecting the Create a recovery disk option and following the instructions.
Click OK to save your changes and close the window.
2. Use the Windows System Restore tool
Press Windows + R to open the Run command, type rstrui in the text field, and click OK.
Select the Choose a different restore point option, and click Next.
Now, select a restore point from the list and click Next.
Verify the restore details, and click on Finish to start the process.
After doing so, your computer should boot up normally, and the HP Recovery Manager restoration incomplete problem should be resolved.
3. Use HP System Recovery to reinstall your operating system
3.1. Back up your data
Open the Control Panel and select System and Security.
Go to Backup and Restore.
If this is your first time using Windows Backup, then choose Set up backup and follow the setup prompts.
If you’ve created a backup before, select Back up now to update it.
Wait for the backup process to complete.
3.2. Use the Boot Device Options
NOTE
The steps listed here may be different for your computer model, though the concept remains the same. If the keys listed here don’t work as intended, look for the correct ones on the manufacturer’s website or in the computer manual.
Shut down the computer. Disconnect all peripheral devices and remove all USB devices and media cards.
Turn on the computer and immediately press Esc repeatedly until the Startup Menu opens. Press F9 to open Boot Device Options.
Under Legacy Boot Sources, select ATAPICD/DVD Drive or Removable Device, and press Enter
The computer will restart, and then the Windows loading screen should appear.
Press any key when prompted, and then follow the on-screen instructions to restore the system from the recovery partition on your hard drive using HP System Recovery.
After the recovery process is complete, reconnect all the devices that were removed earlier.
Turn off the computer, then wait for 5 to 10 seconds to turn on the computer again, and verify that Windows starts correctly.
If prompted to sign in, enter your username and password, and then click OK.
After your computer restarts, select an account type and follow the instructions on the screen to set up Windows.
Now, check if the HP Recovery Manager restoration incomplete problem is resolved. If not, head to the next method.
Open the file and follow the on-screen instructions to install the tool.
Launch the tool and click on the System Tests button.
The test will start running. Let it finish until it reaches 100%.
Restart your computer once the test is complete.
Now, try using the HP Recovery Manager again, and verify if the restoration incomplete problem is resolved.
5. Contact HP Support for further assistance
If you’re struggling with the HP Recovery Manager Restoration incomplete error, don’t worry! You can always contact HP Support for help.
First, visit the HP Support website. You can enter your product number or search for your product manually. Look for the Contact HP Support link and click it. This will take you to a page with various support options.
Furthermore, if you want to speak to someone on the phone, select the Call HP support option. Alternatively, you can use the Get chat support option to chat with an HP representative online.
Whichever method you choose, someone from HP Support will be more than happy to assist you further with your HP Recovery Manager issue. So don’t hesitate to reach out for help.
We hope this article has helped you resolve the HP Recovery Manager Restoration Incomplete error.
The role of a hard disk in a computer system is extremely important because it holds all your valuable information and keeps the operating system working properly. And when the data on it is lost, a bad sector repair tool comes into the picture.
The data on the bad sectors may be temporarily or permanently lost depending on the cause of the problem.
Hardware errors are impossible to fix with software and can only be rectified by creating a backup and replacing the hardware itself. If the damage is caused by software errors then you can fix them by using bad sector repair software.
A hard drive contains millions of sectors that, over time, can get damaged or become inaccessible for a variety of reasons – logical corruption, physical damage to the disk, etc.
When a section of the hard drive is inaccessible, in the worst-case scenario, it can cause the operating system to crash. This is one of the most frequent root causes for Blue Screen of Death errors, aka BSoD errors.
So, let’s find out all about the issue and the best bad sector repair tools with a free download to fix things.
How to fix bad sectors permanently?
Bad sectors are the part of the hard drive which have been rendered unreadable. And over time, several of these may come up due to various reasons, for instance, improper shutdown, overheating, malware, or physical damage.
Frankly speaking, the possibility of fixing bad sectors is usually bleak, and this is where advanced third-party bad sector repair tools may come to your aid.
Check Disk
Though Windows offers a built-in utility, Check Disk, to automatically identify and eliminate issues with the hard drive. Also, you may defragment the hard drive, but that wouldn’t work for an SSD.
Stellar Data Recoverysoftware allows you to recover lost or deleted files, folders, photos, documents, videos, and other files, even if your hard drive was severely corrupted or due to accidental deletion or formatting.
It has been perfecting its software for more than 25 years. During this time, this company has received more than 100 awards for its top-of-the-line products.
This is one of the leading names on the market in regards to the recovery of files a hard drive failure or formatting and offers you 3 great options that cover users’ needs from basic users to the most advanced.
Stellar Data Recovery
Recover any file format on any storage device with the most powerful tool available on the market!
The Standard version of this software is designed for the average PC user that needs help in recuperating lost or corrupted files like Office documents, emails, spreadsheets, presentations, photos, videos, audio files, and others.
Stellar Data Recovery-Windows Standard is limited to recovering data up to 1GB which is more than enough for the average PC user.
It can also recover data from external storage devices such as external hard drives, SD cards, USB flash drives, Cameras, Camcorders, etc.
Stellar Data Recovery Standard offers an easy-to-use and very user-friendly interface in order to make it as easy as possible for you to quickly undo any data loss issues encountered. And it does so while preserving the original structure of the data.
All you need to do is connect the affected storage media (internal or external), launch the software and run a scan.
Stellar Data Recovery V8’s very performant search feature will help you to easily locate specific files by searching by custom filters like file name, size, file type, and even by last modified date and created date.
In order for you to dig even deeper inside the affected hard drive, Stellar Data Recovery Standard has a Deep Scan feature specifically designed to tackle damaged and formatted devices.
Sometimes we find that an entire partition of our hard drive is missing. This powerful software has a built-in option called Cannot Find Drive that can recover an entire partition at once and even allows you to preview the data before you recover it.
This version of the software is the ultimate bad sector repair tool, and includes all the options covered in the first two versions with a plethora of additional features:
Safe and risk-free data recovery from logically corrupt or inaccessible RAID 0, RAID 5, and RAID 6 servers
Data recovery for formatted or deleted volumes
Remote recovery – recovers data remotely over a network
It can create Virtual RAID when probable RAID construction fails
The tool can recover data from lost/deleted FAT, exFAT, and NTFS partitions
RAW recovery – of the entire RAID array
It can create images of your hard drive containing bad sectors
It facilitates recovery from hard disks with 2 TB or more storage capacity
Track hard-disk performance with SMART attributes (display data in real-time)
Set out threshold and Critical limits to monitor and analyze temperature, performance statistics, and health of hard disks
All the versions of the software have multiple languages support: English, German, French, Italian, Spanish, Japanese, and Chinese. You can easily change it either in pre-installation or post-installation from the Advanced Settings.
If your computer doesn’t boot and you see an error information message like operating system not found, missing operating system, or invalid partition table that shows you that there is something wrong with the MBR.
MBR problems can be caused by partitions being infected by a trojan horse virus that your antivirus didn’t remove completely or loading a corrupted backup image for your OS. This problem also occurs on some external hard disks.
Disk Genius is one of the oldest software on the market with a great reputation for repairing computers.
Disk Genius is not only a great utility to take care of your PC and system but also to run tests and apply fixes to your hardware. The Disk Utilities feature from Disk Genius is a great dedicated tool for repairing bad sectors on your HDD.
Another important feature of this tool is the backup & restore option, which allows you to save your system configurations before taking any disk repair actions.
Here is a quick overview of the most important processes that it can perform:
Check and repair bad sectors in Windows 10 on HDD, SSD, external HDD, and other storage devices
Disk and partition management: format, resize, split, clone, hide, extend
Create a WinPE bootable disk so you can access your disk when the system crashes or the PC has no OS
Backup and restore partition
Recover lost data from your disk and storage devices
These are only some of its key features, but they’re the most important if you want to keep your disk healthy.
From repairing the bad sectors to recovering lost files – Disk Genius is your disk guardian. You can get a free version from the official website.
Disk Genius
Reliable data disk utilities and data backup and recovery for Windows that you cannot get enough of!
No, formatting the HDD, or even an SSD, for that matter, won’t fix the bad sectors on it. Though it is beneficial as the bad sectors will be marked, and data will not be stored on it any further. This will minimize the loss of data stored in the bad sectors in the long run.
When you find a bad sector on the drive, the ideal approach is to repair it using a third-party tool or create a backup of the data and transfer it to a new hard drive.
And if faced with the problem, you now know the best bad sector repair tools to employ and get your hard drive to work seamlessly again. Some of the tools also support USB bad sector repair.
If you have any questions or suggestions, feel free to comment below.
One of the most important aspects of a company is communication. That is why modern times require modern solutions, and instant messaging apps are a common sight in office environments.
One such app is Slack, and it has pretty much everything you may need to make collaboration as efficient as possible.
One very helpful feature is its ability to allow communities, groups, or teams to join workspaces via a specific URL.
Trello is also a collaboration platform, albeit it is more visually inclined, which gives teams perspective on projects. In a somewhat similar fashion to Slack, Trello tells you what’s being worked on, who’s working on what, and where something is in a process.
Can Slack and Trello be linked?
Given how the two services can be of such great use for companies and coordinative work, it is only natural that you’d think about connecting the two services in one way or another.
One of the few ways you can link Trello and Slack together is via the Trello for Slack app.
The Trello app for Slack makes it easier for you to manage cards on your boards, change due dates, and attach conversations to cards straight from the Slack interface.
Are Trello and Slack the same?
Although both of these apps are used to manage workflow or projects, they do not provide the same duties in this regard.
Trello is a project management tool that makes it simple for teams to organize their work, while Slack is primarily an instant messaging platform that also includes some task management capabilities.
How can I connect Slack and Trello?
1. Install the Trello app for Slack
Go to theTrello pagein the Slack App Directory and click Add to Slack. Remember that you first need to log into your account and workspace in order to install any Slack apps.
Next clickAdd to Slack.
Choose a Trello team to link to Slack then click Installto finish the linking process.
2. Link the Trello and Slack accounts
Launch Slack select Trello from the Apps section.
Type /trello in the message field press Enter or click Send.
Click Link Trello account and selectAllow.
3. Add a Trello bot to Slack channels
Select a channel then type /invite @trello into the message field
Hit Enter or click Send to add the Trello bot to the channel.
4. Link Trello boards to Slack channels
Type /trello link and your board’s name or URL into the message field.
Hit Enter or click Send and select Link to Channel.
By following these steps, you should be able to make use of the entirety of Trello’s features straight from within the Slack app.
You can now better manage who you are talking to, and project assignment and management will also become a breeze.
Does Slack have a Kanban board?
Kanban boards are a tool for agile project management that is supposed to assist visualize work, restrict the amount of work that is now in progress, and increase productivity.
It can assist in the establishment of order in the day-to-day work of agile as well as DevOps teams. Kanban boards are helpful for technology and service teams because they help teams commit to the appropriate amount of work, in the right time period.
Your Kanban board is going to be built immediately into Slack, giving you a quick visual overview of all the tasks that are currently being worked on.
Do you think connecting your Trello and Slack accounts will result in increased work productivity? Let us know your opinions in the comment section below.