ExpressVPN Stuck On Connecting: 6 Ways To Fix

ExpressVPN is one of the leaders in the expanding niche of VPN solutions. However, as the case has shown so many times, programs that are dependent on too many various factors, often bump into a problem.

One of the repeating issues that plagued numerous users is the inability to connect to a remote VPN server of your choice. The connection bar just stops in the middle of the process and it gets stuck.

Different online use cases necessitate varying internet speeds and bandwidths. In general, web browsing and email require only 5 to 10 Mbps.

Depending on the type of streaming and the number of devices connected to the same network, streaming, online gaming, and downloads necessitate faster internet speeds.

Why won’t ExpressVPN connect?

Failure to immediately search the internet, thus after some time, you are unable to browse the internet while connected to ExpressVPN is a result of interference with certain VPN protocols by ISP.

If you can browse the internet again after connecting to a different VPN server location, there may have been a temporary problem with the previous VPN server location.

Keep in mind that ExpressVPN works in China but there are a few things to consider before using the Hong Kong route through ExpressVPN.

Insufficient connectivity at the chosen VPN server location results in outgoing packet transmission interference from your antivirus or online security application.

Also, check whether you are using the latest version of the ExpressVPN app, it’s important to have the latest updates with your trusted VPN provider for your designated device.

In order to fix this, we offer a few possible solutions below. So, if ExpressVPN gets stuck with every new try, make sure to check them out.

How can I fix ExpressVPN stuck while connecting?

1. Check the Internet connection

  1. Run the Windows Troubleshooter. Right-click on the Wireless or LAN icon in the notification area and click on Troubleshoot problems.
  2. If you’re using the Wireless connection, try using the wired connection instead.
  3. Restart your PC and router/modem.
  4. Reset modem/router settings to default values.
  5. Update the router/modem firmware.

First things first. Probably the most obvious thing you’ll need to check in order to unstuck ExpressVPN is the connection.

ExpressVPN cannot detect internet connection because there’s a bridge broken between your device and the network itself.

Make sure that your PC is able to connect to the Internet without ExpressVPN. If you’re unable to do so, follow the above instructions in order to repair the connection.

On the other hand, if you’re able to connect to the Internet but the problem solely applies to ExpressVPN, make sure to continue with the steps below.

2. Switch to another VPN with stable connections

The tool recommended below is not only one of the oldest virtual private network providers on the market but also one of the best choices when it comes to connection stability.

This solution offers client applications for mainstream operating systems. It’s up to you to grab any of these apps since you’ll want to protect as many devices as you’re allowed on a single account.

Being able to connect from 10 different gadgets is quite a major advantage. After all, with most popular VPN clients, you can only connect using five or seven at most.

No less important, this Kape Technologies VPN solution is also remarkably inexpensive when compared to other VPN providers around. It’s only up to you to try it out.

Private Internet Access

Private Internet Access is your top alternative when ExpressVPN is stuck on connecting. Enjoy the best deal right away!
Check price Visit website

3. Run application as admin

  1. Right-click on the ExpressVPN desktop shortcut and open Properties.
  2. Open the Compatibility tab.
  3. Check the Run this program as an administrator box and confirm changes.

In order to avoid possible limitations imposed by Windows, you should run the ExpressVPN desktop client with administrative permissions.

This should bypass the blockage and enable you to connect to the dedicated servers you’ve chosen.

This seems to be the case with various third-party programs that are fairly limited or even blocked by Windows due to quite strict UAC (User Account Control) settings.

If you’re not sure how to run ExpressVPN as an admin in Windows 10, make sure to check the instructions above.

4. Change the protocol and server

  1. Open ExpressVPN.
  2. Click on the 3-line menu and open Options.
  3. Select the Protocol tab.
  4. Choose one of the 5 protocols and confirm changes.express vpn stuck on connecting
  5. Try to connect again.

There are various protocols ExpressVPN utilizes in order to connect to a VPN server. These protocols are basically different methods and they differ in speed and security traits.

By default, ExpressVPN selects active protocol automatically, but that’s not always the most reliable way. When ExpressVPN still trying to connect automatically and it’s not responding try setting up the connection manually.

So, in order to fix the halt while connecting to a remote VPN server, make sure to switch between protocols manually. One of them might just work.

In addition, you’ll probably want to shift between the available servers until you reach the one that works. Due to heavy load, certain servers might be down or a lot slower than intended.

5. Disable antivirus and firewall temporarily

  1. Right-click on the antivirus icon in the notification bar and disable Real-time protection.
  2. In the Windows Search bar, type Firewall and open Windows Firewall.
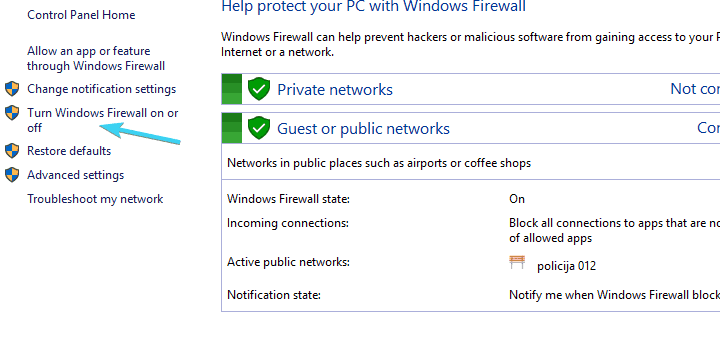
  3. Click on the Turn Windows Firewall on or off.express vpn stuck on connecting
  4. Disable Windows Firewall for both Public and Private networks.express vpn stuck on connecting
  5. Confirm changes and run ExpressVPN again.

If there’s one thing that keeps messing up various VPN and proxy solutions, that’s the third-party antivirus. Moreover, besides the antivirus, we can’t overlook the Windows Firewall.

Both security assets are strict towards the VPN solutions and can cause a halt within the program. So, you have two options here:

  • To temporarily disable antivirus and firewall.
  • To manually add exceptions for ExpressVPN.

Either way, that should eliminate stalls and you should be able to continue with the seamless use. If you decide to disable antivirus and firewall temporarily, follow these steps:

On the other hand, you can create an exception within the antivirus and Windows Firewall, respectively. That way, security software won’t suppress ExpressVPN.

6. Contact the support team

Finally, if none of the aforementioned solutions worked for you, make sure to contact the support team that’s available 24/7 through live chat.

express vpn stuck on connecting

ExpressVPN is marketed and advertised as a great VPN with premium support. So, make sure to use your given right as a customer and find out about the problem resolution firsthand.

When encountering ExpressVPN stuck or not connecting issue there could be more than one reason for it.

The protocol that you currently using, the antivirus, and the Internet connection itself may all affect the way ExpressVPN connects.

Is ExpressVPN legal?

Yes, ExpressVPN is legal. However, do keep in mind that P2P torrenting itself is illegal in a few countries, so make sure you know the laws in your country before employing in these activities.

While ExpressVPN is perfectly legal, using it for illegal activity will only cause problems in the long run.

It’s a valid point that they’re not sending the links or storing anything on a server. Nonetheless, they appear to be constant targets for legal threats and accusations, and many of them are short-lived.

Regardless of how you feel about the software you use and what you do online, it is better to stay legal than to risk anything that could be perceived as illegal.

To make sure the VPN is working as it should, don’t hesitate to connect to ExpressVPN and check your IP address. You have no reason to worry about it if it is secured.

Moreover, take a closer look at some of the most common VPN errors and their solutions for quick tips like the ones above.

That should do it. In case you have an alternative solution or questions regarding the ones we already posted, make sure to tell us in the comments section below.

Microsoft Edge Not Working on Windows 11: Full Repair Guide

Microsoft Edge is a fast browser that allows you to navigate the Internet easily. It is installed by default, but you can also get it free from the Microsoft Store.

Edge is the default browser for Windows 11. Even though many people want to change it to other browsers like Chrome, Firefox, or Opera One, the Microsoft-created browser is a decent option.

Compared with the older model, the new one is much more efficient, as Microsoft Edge gets a massive overhaul on Windows 11.

However, after upgrading their operating system to the latest version, some users reported troubles with the browser.

Why is my Microsoft Edge not working?

Older versions of Microsoft Edge can have problems, such as the browser being unable to open or respond to commands. Thus updating it is an adamant solution that you need to implement.

Problems with Microsoft Edge may be brought on by websites not supported by the browser, concurrently opening an excessive number of online pages, or using an outdated version of an extension for Microsoft Edge.

What issues does Microsoft Edge have in Windows 11?

Various manifestations indicate problems with Windows 11 Microsoft Edge. However, even though they come in different shapes and sizes, the effect is still the same, so the solutions are similar.

From what users describe, the most common ones are the following:

  • Microsoft Edge doesn’t open at all – So the first aspect to consider is that your browser might not open at all. Usually, this occurs when Microsoft Edge is oversaturated with cached data and history
  • Closes randomly – This one may appear as a consequence. After opening abnormally, Microsoft Edge can close by itself. Note that this one can also happen because of caches
  • Microsoft Edge is not able to open specific web pages – Happening randomly; some pages simply refuse to open at all
  • The browser takes a lot of time to load – Most of the time, this means that it will run extremely slow, taking a long time to open completely
  • Microsoft Edge won’t open from Taskbar – If you try to access Microsoft Edge from the taskbar and it doesn’t work, the problem is generally caused by a bug or a malfunction.
  • Microsoft Edge is not responding in Windows 11 – Make an effort to upgrade Edge so that you can be certain you are on the most recent version available.

Fortunately, none of them is unsolvable, and for better performance, you can always check how to enable Microsoft Edge Efficiency mode on Windows 11.

This guide is here to support you completely. We selected the best methods to help you fix Microsoft Edge problems in no time. However, if you want a more reliable browser overall, we recommend you try Opera One, which is highly customizable and has fewer errors.

How do I fix Microsoft Edge issues in Windows 11?

1. Make sure that Microsoft Edge is up to date

  1. Click the Microsoft Edge icon to open it.
  2. Choose the three horizontal dots, then click Settings.settings-edge windows 11 edge not working
  3. Click the three horizontal lines, and select About Microsoft Edge.about-microsoft windows 11 edge not working
  4. If there are any available updates, they’ll be automatically applied. up-to-date-edge windows 11 edge not working

This option is the simplest, the quickest, and the most efficient. Usually, your apps need to be updated entirely so they won’t get you into problems.

However, this one will work only if you can open Microsoft Edge. We suggest you keep reading for those who can’t open the browser.

2. Reset the browser’s settings

  1. Open Edge and select the Menu option, shown as three dots, followed by Settings.edge-ext are you sure you want to leave this page
  2. Select the Reset settings option from the left side, followed by Restore settings to their default values.reset-edge-option are you sure you want to leave this page
  3. Make sure you read the pop-up message thoroughly so that you won’t end up with unknown changes, then click Reset. reset-edge-yes are you sure you want to leave this page

Some of the Microsoft Edge problems on Windows 11 might be caused due to some random bugs. Settings will need to be refreshed, so we recommend you reset the browser’s default values.

3. Clear the browsing data

  1. Open Edge and click the three-dot menu, then select Settings.edge-ext are you sure you want to leave this page
  2. Navigate to Cookies and site permissions from the left menu, followed by Manage and delete cookies and site data on the right side.cookies-manage-edge unable to display rd web access
  3. Choose See all cookies and site data.
  4. Click Remove all, followed by Clear, and you are done!remove-all unable to display rd web access

As mentioned before, an oversaturated browser can cause serious troubles, such as not being able to open it or load certain web pages. Thus, clearing browsing data should help fix most Microsoft Edge problems and one of the significant steps to stop Edge from importing data.

4. Run the Windows Store Apps troubleshooter

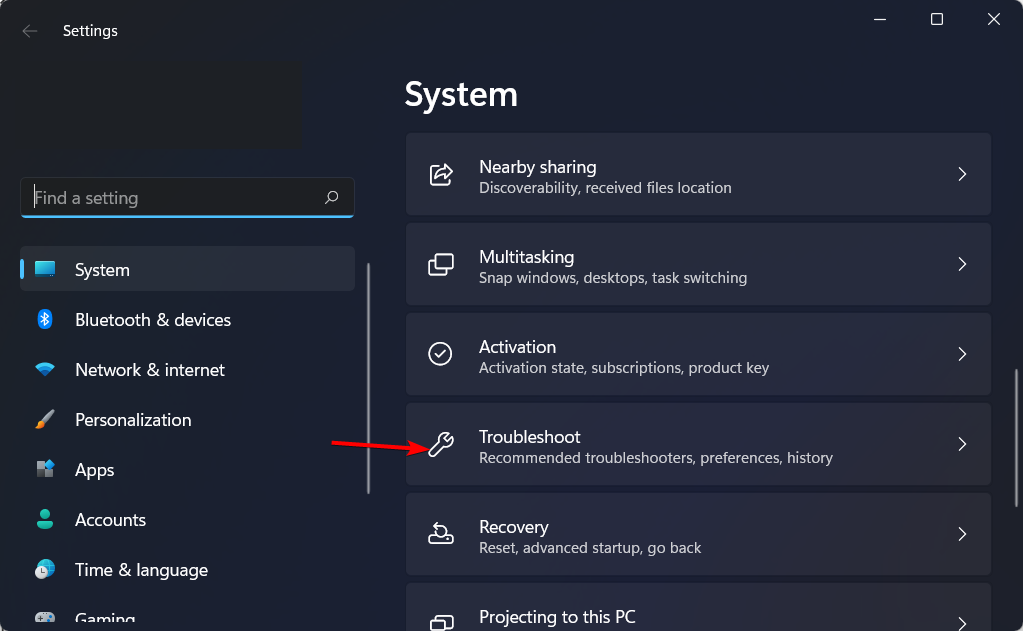
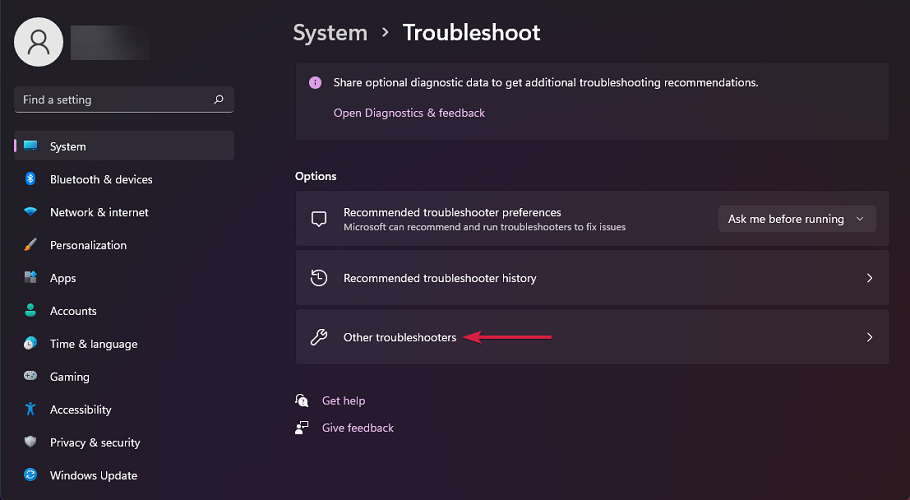
  1. Press the Windows key + I simultaneously, then scroll down to the Troubleshoot section and click it.troubleshoot-opt-w11 0xa00f4244 nocamerasareattached
  2. Select the Other troubleshooters option from the right side.
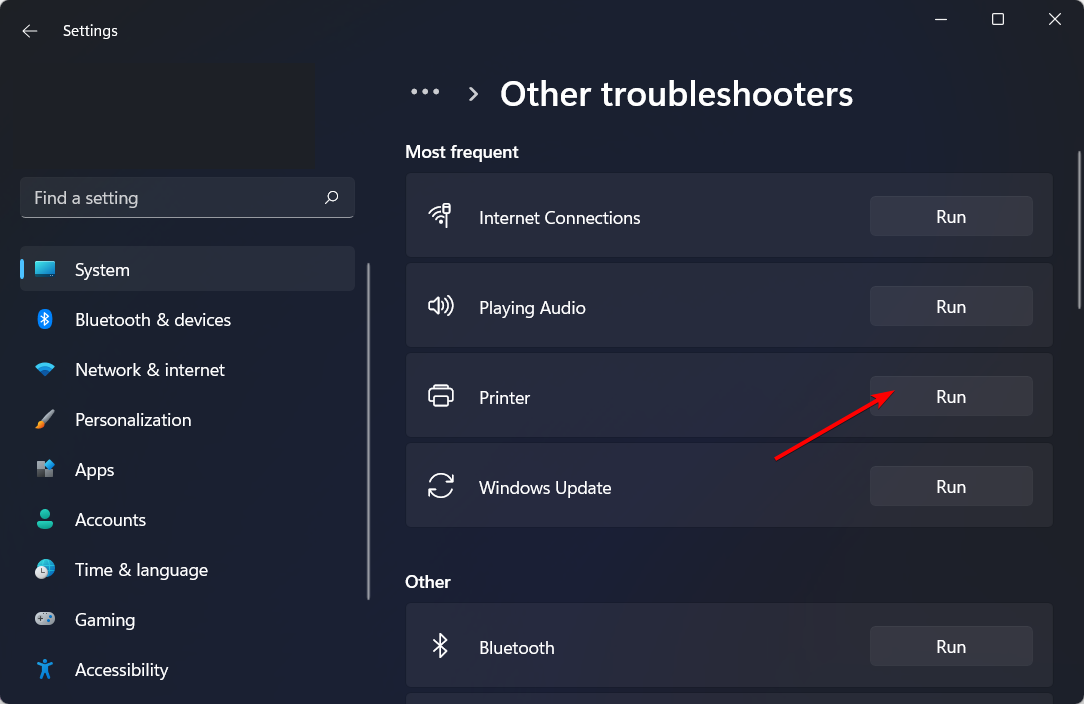
  3. Scroll down until you wind the Windows Store Apps section, then click the Run button next to it. The Windows 11 Edge problems will be solved afterward.run-store-apps windows 11 edge not working

With this option, you’ll have an automatic expert to locate and fix the problem. Thus, you don’t have to bother yourself with making adjustments.

5. Repair Microsoft Edge

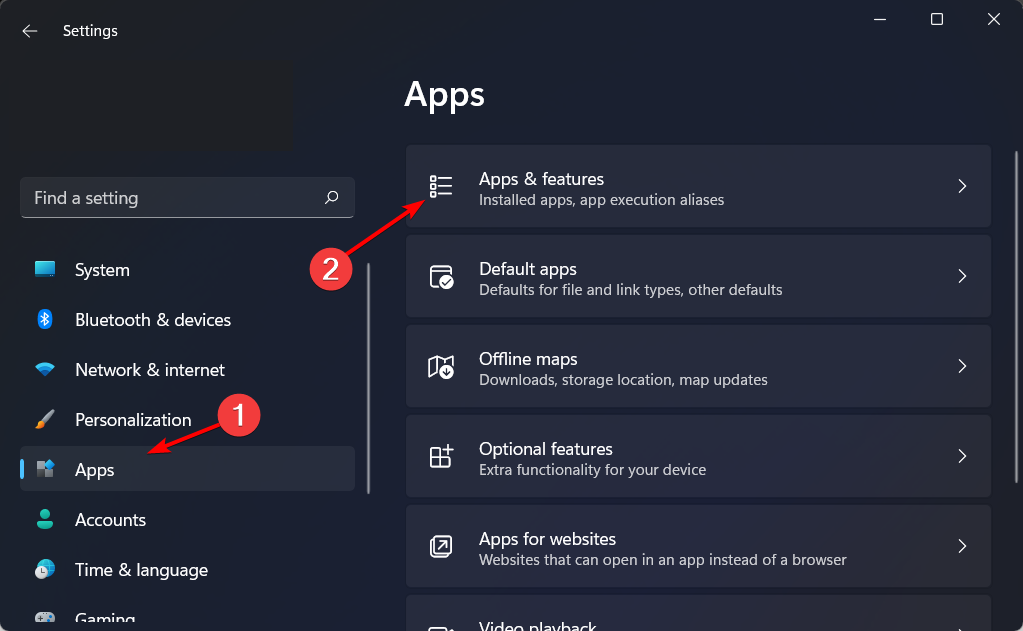
  1. Press Windows + I to open Settings, then navigate to Apps, followed by Apps and features.apps-features where is the chrome menu button
  2. Search for Microsoft Edge from the apps list, click the three vertical dots next to it, and select Modify.edge-modify windows 11 edge not working
  3. Choose Yes when you’re asked if Do you want to allow this app to make changes to your device?
  4. Ensure you’re connected to the Internet, then click the Repair button. The Windows 11 Edge problems that you encountered will now be fixed.repair-edge windows 11 edge not working

Note that after performing these steps, the repair shouldn’t affect your browser data and settings.

When a program is repaired, all files in the application’s folder are reviewed, and any corrupted or missing files are restored. This ensures that the software continues to function correctly.

In addition, the entries in the Registry may be examined and fixed up if that becomes essential. Finally, it will run through the program’s installation procedure once more, but it will make every effort to preserve any settings you have previously personalized.

We made sure to conduct thorough research through the most popular forums. Thus, this guide only offered valuable solutions to fix Microsoft Edge issues in Windows 11.

Why does Edge keep crashing in Windows 11?

The Microsoft Edge web browser frequently freezes or closes unexpectedly due to insufficient available resources or excessive processing activity.

We may fix the crashing problem by erasing the history and turning off any browser extensions that may be installed.

Check out our post on how to fix Edge crashes in Windows 11 to find a detailed, step-by-step guide that will walk you through the most efficient solutions.

Prevent Windows 11 Microsoft Edge from running into troubles

As you can see, there are various explanations for why your browser may get into problems in Windows 11, but there are also solutions for each kind of trouble.

However, we properly consider presenting a few suggestions to prevent it from crashing again.

  • Constantly update your browser – Internet browsers regularly release important updates to improve both the design and security.
  • Disable Add-Ons in a regular manner – It is true that add-ons enhance your online experience, but there is also no doubt that incompatible add-ons can get your browser into trouble. Thus, you should constantly disable them.
  • Clear data and history – As you can notice, an oversaturated browser is one of the most common reasons why it can not work properly. Thus, deleting data and history should be a regular process.
  • Make sure you always check for viruses and malware – Like any hardware or software component, Microsoft Edge might be harmed by various threats. Thus, it is always a good idea to ensure your system’s security.

For those who are unsatisfied with Microsoft Edge, you should look at an easy method to change the default browser on Windows 11.

Even though Microsoft made it more difficult for consumers to modify the default browser settings on Windows 11 in August of 2021, the pushback from customers has caused the Redmond giant to reevaluate its attitude on this issue.

Users could change the default browser to something other than Edge for the first time in Windows 11 build 22509, the first version of this operating system to offer this functionality.

Because we want to simplify your choice, check out these best browsers for Windows 11 that are highly customizable.

If you’re a fan of Edge, you might want to learn what is Microsoft Edge WebView2 Runtime.

In addition, feel free to share your opinion and thoughts by leaving a comment in the section below.

How to Change Your Epic Games Name

To change your Epic games name, the email address, you must first verify your identity using the credential.

And if you always play on a PlayStation, Switch, or Xbox, you must upgrade your account to a full Epic Games account to change your display name.

Immediately after you change your display name, your friends will begin to see the new name online and in games. Moreover, the name change on your Epic Games account reflects on Fornite and other Epic Games.

How do I change my Epic Games name?

  1. 1. Ensure that you’ve verified the email address that you use for Epic Games. If not, go verify it first.

  2. 2. Visit the Epic Games website, and log in to your account using your username and password.

  3. 3. Go to your Account Info page.

  4. 4. In the General Settings, click on the pencil icon.

  5. 5. Enter your desired display name in the provided field.

  6. 6. Confirm your name by entering it again.

  7. 7. Check the box to accept the terms.

  8. 8. Click the Confirm button at the bottom of the screen to confirm the name change.

  9. If you no longer like your Epic Games name, you can change it for free every two weeks. After you decided what other name you want to change yours to, all you got to do is hop on the official Epic Games website and change it.

How much does it cost to change your Epic name?

Name changes in Epic Games are free of charge. This means that you don’t get to use V-Bucks or money to them.

Changing your Fortnite name on a PS4 or Xbox One is different. It is because these consoles make use of your PSN ID or Xbox Gamertag, not your Epic Games name.

It costs $10 each time you change your Fortnite name on a PlayStation 4 or Xbox One. This is because you’re not only changing your Fortnite name but your console ID entirely to reflect across all games.

However, your first name change on these platforms is free of charge.

A change in Epic name doesn’t have any effect on your Xbox Live Gamertag or PlayStation Network display name. If those are what you want to change, you may reach out to Xbox or PlayStation support.

We hope that you managed to perform a name change. Let us know in the comments section below if our solutions helped you out.

5 Ways to Fix FPS Drops, Lag & Stuttering in Smite

A common complaint from users is about FPS (Frames Per Second) dropping in games. Smite’s random Frame rate drop when playing the game, may be caused by a weaker PC configuration, an outdated graphics card or running multiple apps in the background.

First, you may find turning off the FPS counter in Smite a very good idea. Capping your FPS in the Spite game may help you improve your game performance.

What can I do to stop FPS drops on Smite?

1. Update graphics drivers

  1. Press Windows + R keys to prompt the Run window.
  2. Type devmgmt.msc into the search space and click OK.
  3. In the search results, click on the Display adapters, and select the driver from the drop-down menu.
  4. Click the Update driver software option, and click on Search automatically for drivers.

Restart your computer and check if the FPS drop in your game persists. If there is no improvement, an alternative is to use software specialized in driver updates.

2. Check your system’s requirements

Experiencing the FPS drop issue on Smite may be because your device doesn’t meet up to the requirements for the game.

However, you can check for Smite system requirements to compare your computer.

3. Update Windows

  1. Click the Start button.
  2. Select Settings and click on Windows update.
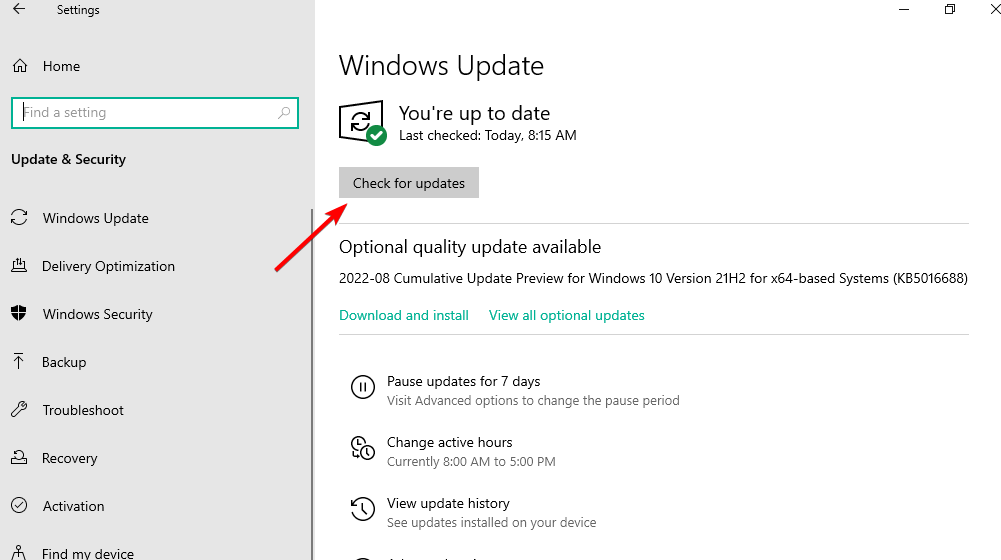
  3. On the Windows update page, select Check for updates. (If there’s an update available, Windows will automatically search for it and install it)

4. Disable Game DVR

  1. Press Windows + R keys on your keyboard to open the Run window.
  2. Type Regedit in the search space and press the Ctrl + Shift + Enter keys to prompt the Registry Editor.
  3. Click on the Game DVR option, double-click on the AppCaptureEnabled option, then select Modify.
  4. In the Edit DWORD (32-bit) Value tab, change the Value data to 0, then Click OK.

Launch your game and check if your FPS is stable.

5. End tasks for unimportant programs

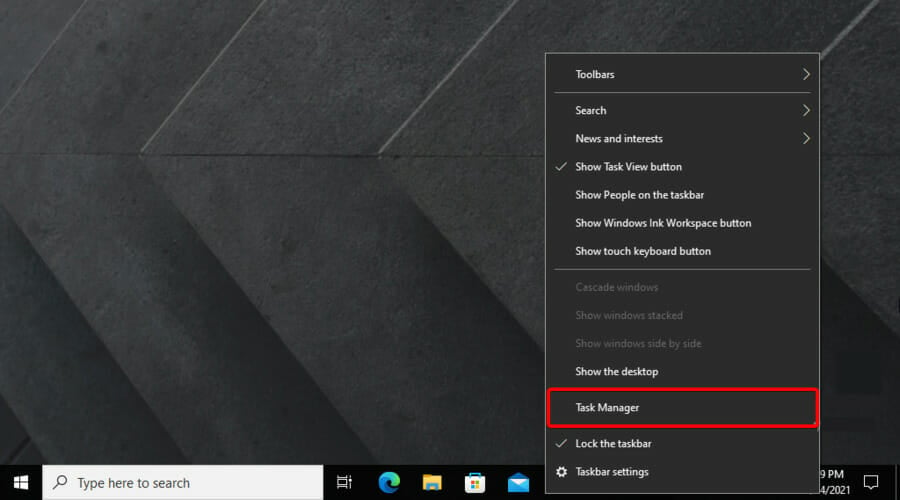
  1. Click on the Taskbar and select Task Manager.
  2. Select the CPU and Memory usage in the Task Manager tab.
  3. Click on the applications consuming lots of CPU and memory space on your PC.
  4. Click on the End Task from the drop-down that pops up.

Creating more system resources and RAM will help Smite run smoothly. Also, read how to fix your PC’s GPU memory full message.

Can CPU/GPU affect FPS on Smite?

The GPU and CPU performance can significantly affect the FPS on Smite. Also, the CPU on your computer determines the performance of other elements of game processing.

So, if the GPU and CPU are not working smoothly or consume more RAM, it can affect the FPS on Smite.

Increasing your ping rate to over 150 milliseconds can affect your game’s performance and cause lag or stuttering. However, a good ping speed or rate should be under 60ms.

You can also read through how to fix FPS drop, lag, and stuttering PUBG on your computer. Likewise, we recommend reading our article on how to fix Lost Ark’s low FPS on a high-end PC.

Nevertheless, you may be interested in checking how to fix Smite not responding or launching on Steam and solving it in a few steps.

If this guide has been helpful, leave your feedback in the comments section. We’d like to hear from you.

How to Create a Custom Keyboard Layout in Windows 10

Are you interested in customizing your own keyboard layouts or starting the layouts from scratch for any kind of reason, like setting the keyboard to a language Microsoft systems don’t have support for or including a symbol of your liking just by pressing a keyboard button?

In the tutorial below, we will see exactly how we can set an input method, remove an input method from our keyboard layouts and use the Microsoft Keyboard Layout Creator to customize the keyboard on Windows Windows 10 to our preferences.

How can I create a custom keyboard layout in Windows 10?

  1. Add a new keyboard layout
  2. Change keyboard input methods
  3. Use Microsoft Keyboard Layout Creator

1. Add a new keyboard layout

This tutorial shows how to add or remove keyboard input from Control Panel.

  1. Move the mouse cursor to the right side of the screen.
  2. In the search box type Control Panel.
  3. Click (left click) on the Control Panel icon that shows after the search is completed.
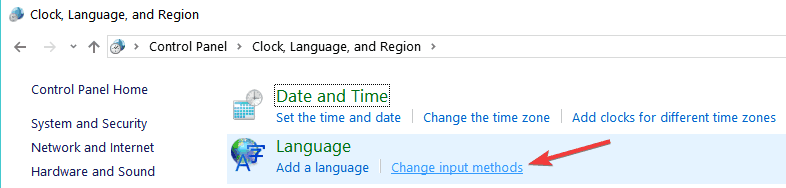
  4. After the Control Panel window opens click (left click) on the Language icon.
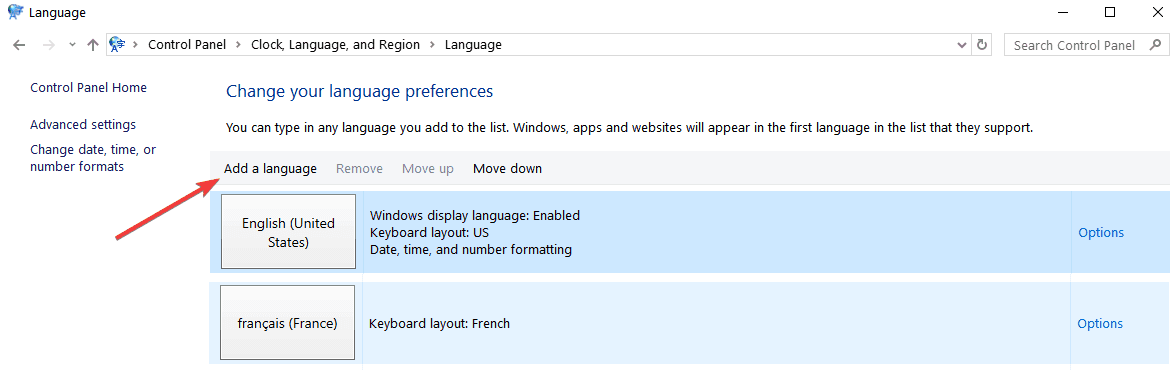
  5. Double click (left click) on Add a language situated in the middle side of the window you opened.add language keyboard layout windows 10
  6. Under the Input Method field click (left click) on Add an input method.
  7. Double click (left click) on an input method you prefer to add or just choose an input method and click on Add.add keyboard language windows 10
  8. You can repeat the two steps above to add another input language if you want.
  9. When you are finished you just need to click (left click) on Save on the lower side of the window.
  10. After you add an input method you will just need to switch the methods from the lower right side of the screen where it says what language is your keyboard set to operate.

2. Change keyboard input methods

You can also add or remove input methods using the PC settings feature in Windows 10, 8.1 as shown below:

  1. Open PC Settings by going with the mouse on the charms bar.
  2. Click (left click) on Settings.
  3. Or another way to open PC settings is by pressing and holding Windows and I buttons.
  4. Click (left click) on General situated on the left of the screen.
  5. Click (left click) on the Language Preferences link situated under the Language section on the right side of the screen.
  6. From here you can follow the steps presented in the first tutorial.
change keyboard input methods

3. Use Microsoft Keyboard Layout Creator

  1. 1. Download Microsoft Keyboard Layout Creator from the official website.

  2. 2. Install the app on your Windows 10 device.

  3. 3. Open the app.

  4. 4. Go to File > Load Existing Keyboard.

  5. 5. Choose the layout that you want to customize from the list.

  6. 6. Customize your keyboard layout by navigating to Project > Properties. From there, you can choose whichever options you want: a keyboard name, description, and language, as well as custom hotkeys.

  7. If you’re looking to create a custom keyboard layout on Windows 10, look no further than the Microsoft Keyboard Layout Creator app.

    All you need to do is download Microsoft Keyboard Layout Creator and then you can create your own keyboard layouts from scratch using it.

In the past, this application used to say that it did not support Windows 10, but nevertheless it worked just fine if you installed it. Now, it is fully optimized for Windows 10 and is perfectly safe to use.

Speaking of keyboards, there are various technical issues that you may encounter after connecting your keyboard to your computer or after enabling certain settings. We have various guides on our website that you can check out.

The three ways above showed you how you can customize the keyboard input in Windows 10. All you have to do now is go and try it for yourself.

Please write us below for any new ideas on how to customize your keyboard.


How to Add Bash Shell to Windows 10

Want to include the bash shell option in the folder (right-click) context menu so that you can access it quickly?

It is possible, and here in this article, you will check the detailed guide on how to do that.

What is Bash Shell?

Windows 10 Anniversary update introduced lots of useful and new features to make the operating system more productive for normal users as well as developers.

In this update, the company introduced the dark mode accompanied by Bash Shell, a Linux command-line tool produced specifically by keeping developers in mind, and it is really a big deal.

Here in this article, we will show all the steps that help in adding a new option in the right-click context menu to run the Bash on the desired folder using the Registry Editor.

How can I add Bash to Windows 10?

1. Edit the Registry

    By default, Ubuntu Bash is disabled, and users who want to use it on Windows 10 need to enable it manually.

    Once the Ubuntu Bash shell is enabled one can easily launch it right from the Start menu. In case, you’re a developer and use it frequently; then you will definitely love to have it in the folder right-click the context menu so that you can quickly launch the Bash console in any folder with one click.

    Before following the steps in the upcoming line make sure that the Bash Console is enabled and configured already. Bash Shell is only available in the Windows 10 Update 1607 and above build.

  1. 1. Press the Start button on the taskbar to open the search box and type regedit in it, then click on the first result to open the Registry Editor window.

    launch registry editor
  2. 2. In the registry editor, you need to head over to the following key:HKEY_CURRENT_USER\SOFTWARE\Classes\Directory


  3. 3. Here in this directory, you need to make a right-click on Directory > New > Key in order to create a new key, and then name it shell.

    create new registry key
  4. 4. Under Shell, you need to create another subkey and name it runbashshellhere.

    run bash shell here regedit
  5. 5. Now select the newly created subkey i.e. runbashshellhere and head over to the right pane.

    Here double click on the default value (unnamed) under runbashshellhere subkey and under Value Data, set its data to Run Bash Shell Here.

    run bash shell here option
  6. 6. Under runbashshellhere subkey, you need to create a new Expandable String Value.

  7. 7. Now double click on the icon (Expandable String Value) and Set its value data to the following data: %USERPROFILE%\AppData\Local\lxss\bash.ico

    set value data regedit
  8. 8. Now under runbashshellhere key, you need to create a new key and name it command.

    create a subkey named command
  9. 9. Here double click on the default value (unnamed) under the command subkey and under Value Data, set its data to: cmd.exe /c cd /d "%V" && bash.exe

    add bash to registry command value data
  10. 10. You have successfully added Bash to Windows 10.

    open bash windows 10

2. Via File Explorer

In case, you’re not comfortable editing the registry keys, then don’t worry. There is also an alternative method available to run the Bash Shell without touching a single registry quickly. Here is what you need to do:

  1. Simply launch File Explorer and head over to the folder of your choice.
  2. Type Bash in the Address bar of the File Explorer and hit Enter.

For example, if you are in C:\Windows, and use the address bar for the same, then the bash shell will launch on /mnt/c/Windows.

That’s about it. Hope you are now able to Add Bash Shell to Windows 10.

Why don’t you give a try to this amazing trick and let us know if you find it useful or not? If you have any queries drop them in the comments.

Why Is My IP Blocked From Craigslist? 4 Ways To Fix It

Craigslist blocks numerous IP addresses daily. That’s because people try to post too many times or write ads targeted at other locations than their own.

Your IP might also get banned if you try to scrape Craigslist for email addresses using automated software solutions that make too many requests from your location.

It’s an automated mechanism that protects Craigslist from spammers and bots, which is also used by other websites. Usually, the IP block is temporary, so you just have to wait a bit until you can post new ads again.

However, to fix this issue, you might have to hide your IP address. Speaking of which, we covered this issue in our how to hide IP address on the local network guide, so be sure to check it out.

This problem affects a lot of home users, but it’s particularly troublesome for business owners because they can’t post ads on Craigslist in many locations from the same account.

However, there are ways to fix it.

Does Craigslist ban IP addresses?

Yes, Craiglist bans IP addresses, especially if you violate its terms of service. If you get banned, you probably won’t be able to access it anymore.

If that happens, your only option might be to contact the administrators and ask them to unban you from the website. These are the most common situations when Craigslist IP is blocked:

  • Craigslist credibility check failed
  • Craigslist your request has been blocked
  • Craigslist this posting is being blocked

Why am I blocked from Craigslist?

This happens if you violate Craigslist’s terms of service. Usually, users get banned because they post too many ads, and that is seen as spamming.

Also, you can get banned if you send too many connections from your device. These are just the two most common reasons, but there are many others.

How do you get unblocked from Craigslist?

1. Use Opera One

  1. Download Opera One to use its free VPN that will mask your IP.
  2. Install and launch the web browser.
  3. Find Opera One’s VPN feature in the top left corner and toggle the button to enable it.
  4. Click on the dropdown list and choose a VPN server location.
  5. Go to Craigslist again. You should be able to access it.

Opera One is the best browser with a built-in VPN, which is completely free to use. As such, you can turn to its help if you want to bypass the IP ban on Craigslist and post ads as usual.

Using Opera One is an excellent choice if you’re looking for a free VPN. However, it doesn’t bring the same level of online privacy and digital security as a premium VPN like ExpressVPN.

Opera One offers great features, and it’s a perfect choice if you need to avoid too many requests and messages on Craigslist.

Opera One

Switch to this awesome web browser and use its totally free VPN to unblock Craigslist.

2. Use Tor Browser

  1. Download Tor Browser.
  2. Start the web browser.
  3. Set up the initial configuration.
  4. Go to Craigslist.

Tor is a free and open-source anonymous network that hides your IP address and location to help you access any restricted content on the web.

If Craigslist is blocking your IP, Tor might be the best way to circumvent this issue.

The best part about the Tor Browser is that you don’t have to configure any special settings. After the quick setup at the first launch, it makes you anonymous as soon as you fire it up.

You can’t control your location, though. However, you can pair Tor with a VPN to maximize your online security and privacy if your Internet connection is stable enough. It works great with ExpressVPN, for example.

3. Use a reliable VPN

  1. Sign up for a VPN subscription plan (We tested ExpressVPN).
  2. Download and install the VPN app on your device.
  3. Launch the tool and log in with your credentials.
  4. Connect to a VPN server*.
  5. Go to Craigslist using any web browser.

*If you want to post an ad on Craigslist in another location than your real one, make sure to connect to a VPN server from that location.

We recommend using ExpressVPN because it’s the best VPN for unblocking websites, including Craigslist when it bans your IP address. Owned by Kape Technologies, ExpressVPN has more than 3,000 VPN servers in 94 countries.

Besides accessing Craigslist, you can use ExpressVPN to watch Netflix US anywhere in the world, along with Hulu and other media streaming services. It has exclusive DNS servers and uses OpenVPN to encrypt your data.

Furthermore, you can set up ExpressvPN on all popular platforms, including Windows, Mac, Linux, Android, iOS, and even routers if you want to share your VPN account with all connected devices. It allows up to 5 simultaneous connections.

ExpressVPN offers amazing features, and it’s a perfect Craigslist VPN for all your needs.

4. Use a proxy server or Internet circumvention tool

  1. Download Psiphon.
  2. Open the tool and head over to Settings and select Psiphon Server Region.
  3. Choose a preferred location and click Apply Changes.
  4. Go to Craigslist using any web browser.

Psiphon is a free and open-source Internet circumvention tools, as well as one of the best proxy servers for unblocking websites. You can safely use it to bypass IP blocks on Craigslist. Plus, it lets you pick a preferred country.

On the other hand, you can’t choose a specific city when concealing your geo-location with Psiphon, unlike a reliable VPN like ExpressVPN. Plus, you can’t count on a proxy server to encrypt your data traffic the same way a VPN can.

Despite these minor flaws, this is still a great tool that can help you with Too many requests errors on Craigslist.

Few users reported that they can’t connect to the proxy server, but we covered that issue in a separate guide.

How do you find out who flagged you on Craigslist?

On Craigslist, you simply cannot find out who flagged you. Craigslist will not tell you anything, and their system is not open to debate or arguing your rights unless you are posting paid ads, which should not be flagged in the first place. 

The most common reason for flagging is posting ads too quickly, posting the same or very similar ad, and sounding insincere in your ad.

Is there a posting limit on Craigslist?

There is a 48-hour waiting period if it is not the same thing or in the same posting area, and there is no limit on posts on Craigslist if you are not using automated posting software to post repeatedly.

There is no limit to the number of live ads you can have on Craigslist. However, if you are a rental company and want to post 50 apartments for rent ads in a row, the situation may be slightly different.

How long does craigslist block your IP?

This can vary greatly depending on which rule you broke. Certain bans can last a day or two, while others can last for weeks.

If you made a major infraction, then you might get your account permanently banned.

In conclusion, Craigslist regularly blocks IP addresses, but the ban is usually temporary. If you can’t afford to waste time, however, check out the solutions above to easily change your IP and geo-location, in order to start posting new ads again.

The four types of tools above might seem similar, but they will help you if your request has been blocked on Craigslist. If you have trouble deciding what’s the best choice for you and your business, we suggest picking a trustworthy VPN like ExpressVPN.

In case you’re having more issues, you might want to visit our error 1005 access denied article to see how to fix it for good.

In addition to unblocking websites, ExpressVPN keeps you safe online from hackers and other online dangers. It’s the best in the business when it comes to torrenting, streaming, gaming, and secure browsing.

5 Easy Ways to Fix Discord Outbound Packet Loss

Discord is a popular gamer-oriented communication platform that lets you keep in touch with fellow gamer friends. You can create rooms, gather with others, and even make private channels within the rooms.

Once you finish setting it up, you can invite your friends and have a friendly chat. Alternatively, you can use voice, excellent during heavy gaming sessions, when quick typing messages is not an option.

All in all, Discord is fantastic, and you can use it for free. So far, so good, right? However, sometimes, you might experience specific issues, given that Discord is, after all, an online service.

Some of the trouble you might encounter includes high ping, packet loss, jitter, and even connection timeouts. You might think it’s not a big deal. However, VoIP services such as Discord suffer the worst concerning packet loss.

Has it ever happened to lose connection while talking to a friend suddenly? Have you ever heard or spoken these lines: I can’t hear you, You’re cutting out, Speak louder, or Are you still there?

If these seem all too familiar to you, it may be the fault of packet loss. So you do understand how annoying this could get, especially when you’re all focused on stealing the victory from your virtual enemies.

What is outbound packet loss?

Before we get to that, you must understand what packet loss is. Packet loss occurs whenever data packets on the network never reach their destination. So, for instance, you send a data packet to a server that doesn’t make it there.

The server doesn’t get the packet, so it keeps listening until the packet reaches it. In the meantime, you will experience lag or jitter. However, you will eventually lose connection if the packet loss is high.

Outbound packet loss occurs when the packets you send never make it to the destination, unlike inbound packet loss, which is typical for data you receive from the server.

Long story short:

  • Outbound = data that flows outward of your PC/network
  • Inbound = traffic that flows inward your network/PC

Why is my packet loss high?

Congestion is the main reason for network packet loss. Network congestion is the same as peak hour traffic because all networks have space restrictions.

However, in some cases, you may be connected to poor internet. Change to a better option, and you will have fewer lost packets.

Users have experienced Discord packet loss when talking and Discord screen share packet loss, but whichever the case is, you should try the following solutions.

How to fix packet loss in Discord?

1. Troubleshoot the connection

  1. Run an outbound packet loss test by clicking Start Test on the test website.
  2. Locate the hop that’s leaking packets.
  3. Take the necessary measure to correct the situation.

Depending on the troublesome hop, packet loss can occur in four different locations:

  • On your PC/home network
  • Your ISP’s network
  • The servers of the network distribution company
  • On Discord’s servers

Therefore, different fixes are applied depending on the location you’ve detected. Namely:

  • Check your hardware/software, including cables, and fix/repair/replace them as necessary
  • Call your ISP if the problem occurs on its servers
  • Ask your ISP to contact the network distribution company
  • Contact Discord’s support team and inform them of your findings

As you can see, there’s no immediate fix, but it sure beats standing around waiting for the situation to solve itself.

2. Use a VPN

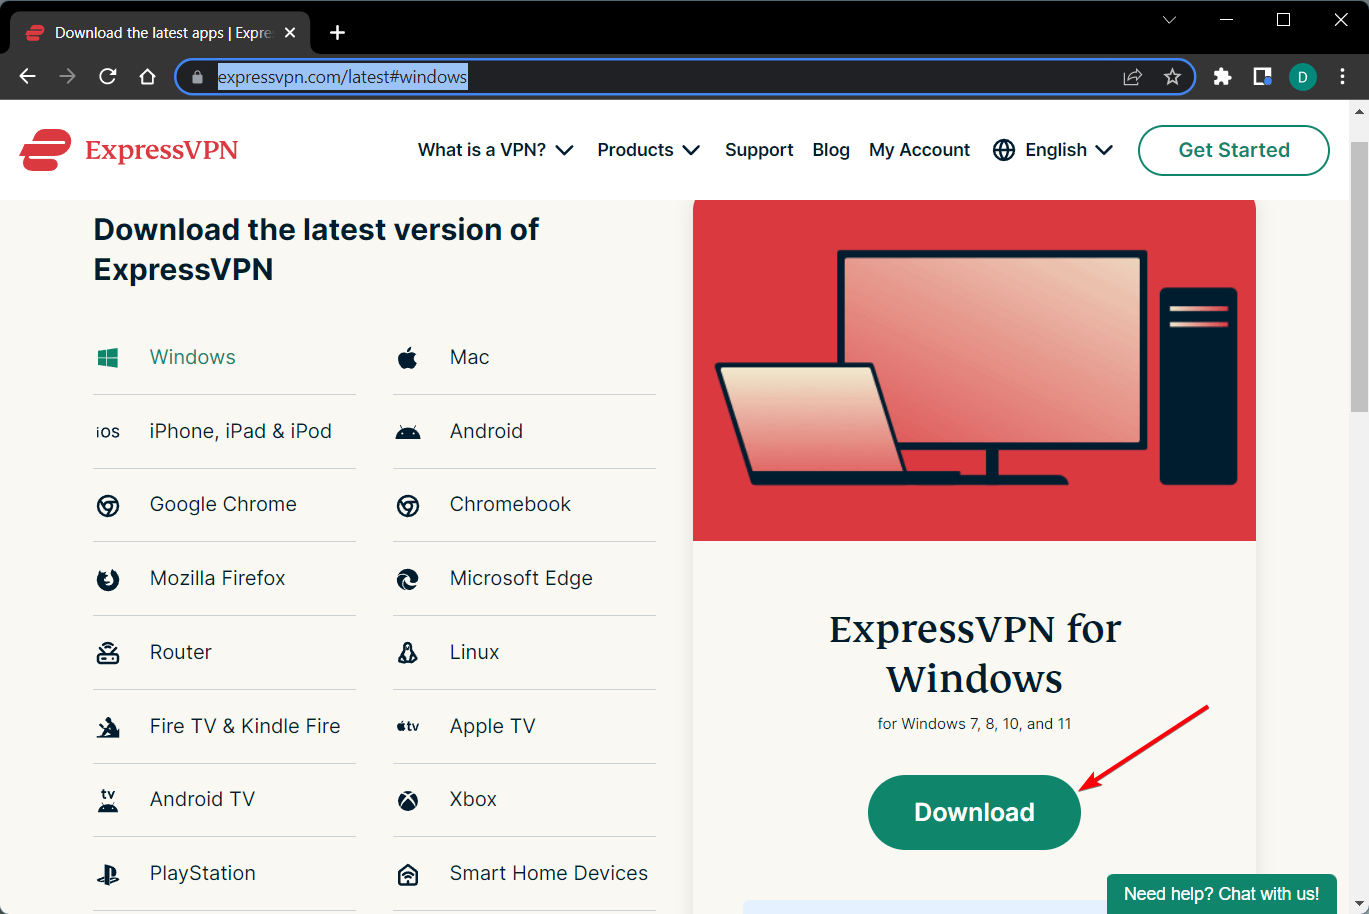
  1. Download ExpressVPN and install it.
  2. Launch it and connect to a server.
  3. Fire up Discord and check if you still have packet loss.

ExpressVPN is an excellent risk-free VPN service that provides some of the highest speeds for connections in over 90 countries.

It passed all of our tests with flying colors and can help you tackle several issues, including securing your connection, boosting your privacy, and unblocking geo-restricted content.

However, note that using a VPN won’t magically fix the packet loss issue every time. For this fix to work, the packet loss must occur on your ISP’s side.

If your home network leaks packets, a VPN won’t help you much. Unfortunately, the same goes for server-side leaks.

Do not hesitate to verify ExpressVPN’s key features:

  • Servers in 94 countries
  • Advanced leak protection
  • Network lock kill switch
  • Best-in-class encryption
  • Superior connection reliability
  • Optimized for speed

ExpressVPN

Leave all packet loss behind and use Discord safely with great speeds.
Check Price Visit Website

3. Configure your Discord app properly

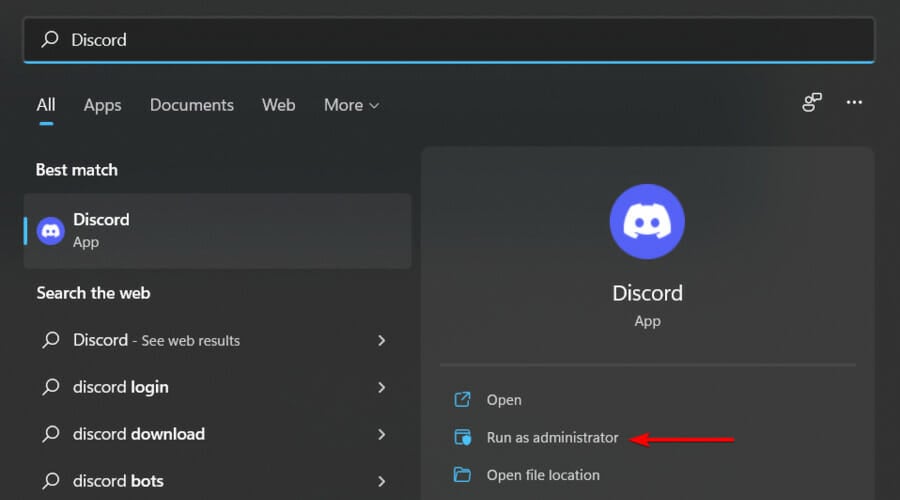
  1. Hit the Windows key, type Discord, then choose to Run as administrator.
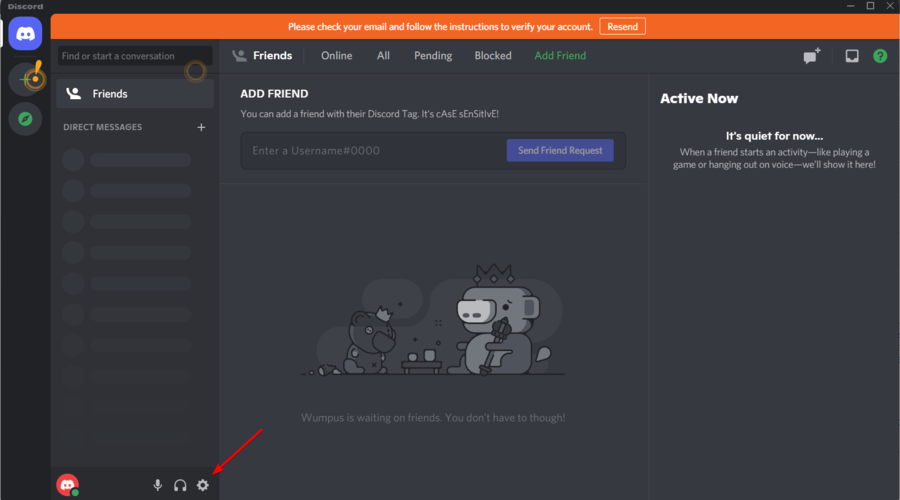
  2. Open the Settings menu (marked as a gear).
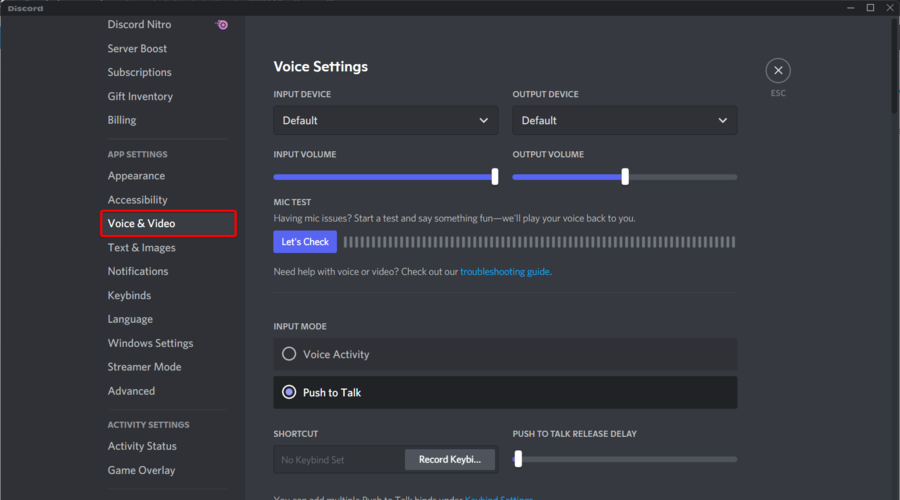
  3. Go to Voice & Video.
  4. Scroll down until you find the Advanced section, then turn off the Enable Quality of Service High packet Priority.
  5. Check if the packet loss persists.

4. Make sure Windows firewall doesn’t block Discord

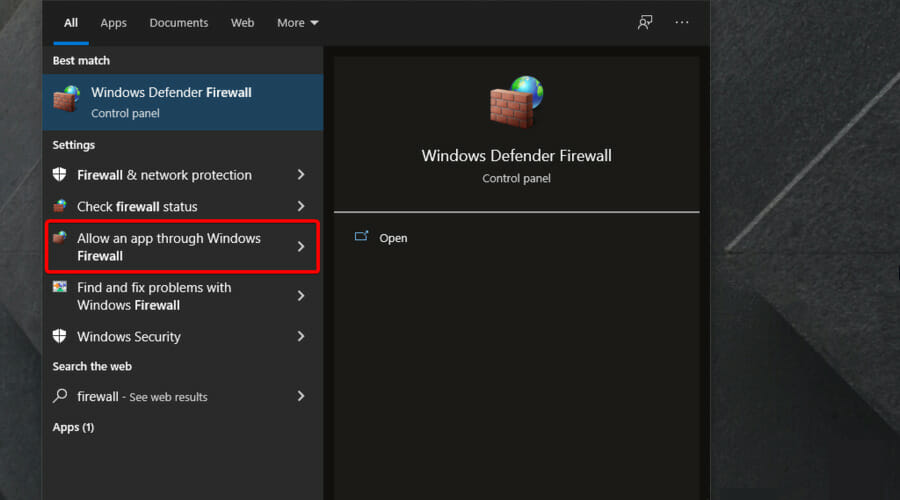
  1. Hit the Windows key, type firewall, and open Allow an app through Windows Firewall.
  2. Click on the Change Settings button.
  3. Select Allow another app.
  4. Browse to the Discord executable, then click on Add.
  5. Tick the Private and Public boxes.
  6. Check if the problem persists.

5. Use the Discord web app

  1. Close the Discord desktop app.
  2. Head over to the Discord website in your browser. Any of the best browsers for Discord users should work.
  3. Log into your account.
  4. Check if you still experience packet loss.

What causes outbound packet loss?

Many things can contribute to data loss on Discord and everywhere else. For instance, using Wi-Fi instead of wired connections can subject you to interference. This can lead to packet loss.

Another example would be network congestion. If your current network becomes crowded, it can’t handle all requests simultaneously. So, it starts queueing them, leading to packet loss.

Even Discord itself can be the cause of packet loss, especially if you didn’t take the time to configure it properly. That’s why packet loss is so annoying; it has a lot of possible causes and often no immediate fixes.

All things considered, like any other VoIP service, Discord can also be affected by packet loss. However, unlike other programs, it seems that Discord has a bunch of aces up its sleeve that let you circumvent the issue.

On the other hand, not even the fixes we’ve included in this article might not work.

That’s mainly because packet loss generally fixes itself, so in this situation, you might consider taking a break from the app and trying again later.

E3 to return in 2023, partners with ReedPop, who runs the PAX events

The Electronic Entertainment Expo has a rough couple of years and is looking to redefine its future with a return to an in-person event at the Los Angele Convention Center next June.

E3 suffered a reputational blow when both Sony and Nintendo opted out of hosting their annual gaming showcases at the convention prior to the pandemic. During the pandemic, E3 as a brand also ran into trouble simply hosting a digital-first experience during the pandemic with the Entertainment Software Association ESA assuming responsibilities in 2021, and then canceling a follow up event in 2022.

However, the ESA has partnered with ReedPop to produce an E3 event for the second week of June 2023 as it plans to welcome back developers, journalists, licensors, publishers, studios, indie manufacturers, distributors and more.

Acknowledging some of the shortcomings that have been simmering of the surface for some attendants prior to the forced pause due to the pandemic, the ESA has explained it’s looking to return memorable experiences next year via the following goals:

  • Make a better business event where it’s easier to connect, meet and conduct interviews
  • Make a better consumer experience where there are things for fans to actually do
  • Partner, support and be friends with everyone announcing games in and around E3, irrespective of whether they’re actually in the convention center

While the ESA seems excited to return to an in-person event in LA and promises “a week of titanic AAA reveals,” it is unclear how E3’s historically big presenters are taking the news.

As previously mentioned, both Sony and Nintendo have opted to control the media narrative by hosting their own games reveal events outside of E3 and following the pandemic-related cancelation by the ESA, Microsoft which stood as the last remaining tentpole has also found relative success in delivering Xbox news via virtual events.

Yes, E3 is much more than Sony, Nintendo and Xbox, but when it comes to game trailers, reveals, and premieres, those three made up a lot of the content that used to be exclusive to the ESA’s yearly June showcase.

5 Ways to Fix FPS Drops, Lag & Stuttering in Fallout New Vegas

Playing games on your computer requires certain features and resources to ensure you get the best gaming experience. Games like Fallout New Vegas are advanced, and they have requirements that PCs need to meet before being able to play the game.

However, you may encounter lots of issues with games on your PC. The FPS drop in Fallout New Vegas is a problem users complain of when playing the game on their computers.

Also, this issue reflects in different ways as per complaints on various Fallout forums. While some claim that the lag occurs on high-end PC, others claim it occurs on PS3 or Fallout New Vegas FPS drop when in combat.

However, you can experience the FPS drop and lag/stuttering issues in Fallout New Vegas for several reasons, irrespective of the device you use. It may be driver issues, OS issues, or game issues.

Hence, we’ll take you through some methods of fixing FPS drops, lag & stuttering in Fallout New Vegas on your device.

Why do I suddenly have FPS drops?

  • Requirement issues with your computer: Users are liable to encounter many issues with their game if their computer meets the standard stipulated as the minimum required for the game. Hence, such may be the case, resulting in the Fallout: New Vegas 120 FPS issue.
  • Outdated graphics driver: The drivers on your computer are responsible for processing and organizing the programs on your computer. So, not keeping them up to date may affect how they interact with the component they are responsible for.
  • Outdated OS: When your operating system is outdated, your computer will not be able to access updates and patches for improving its performance and fixing bugs. So, it may cause FPS issues.

Is New Vegas locked to 60 FPS?

Your game can be capped at 60 because VSync is active by default in the game settings. Although the game may not have a lock system, the presence of VSync may lock it at a 60-frame rate.

An easy way of uncapping or unlocking New Vegas is by disabling VSync in the game settings.

How can I make Fallout New Vegas run smoother?

1. Reboot your PC

  1. Click Start on your computer.
  2. Select the Power option.
  3. Click on Restart.

Restarting the PC is the simple fix for startup errors that prompt FPS in Fallout New Vegas.

2. Disable Game DVR

  1. Press Windows + R keys to prompt the Run window.
  2. Type Regedit in the search box and click OK.
  3. Alternatively, you can press the Ctrl + Shift + Enter keys to open the Registry Editor.
  4. Double-click Game DVR on the AppCaptureEnabled option, then select the Modify option.
  5. In the Edit DWORD (32-bit) Value tab, adjust the Value data to 0, then Click OK.

Relaunch your game and check if the FPS drop issue has been resolved on your game.

3. Update the graphics drivers

  1. Press Windows + R keys to prompt the Run window.
  2. Type devmgmt.msc into the search space and click OK.
  3. In the search results, click on Display adapters, then select the driver from the drop-down menu.
  4. Click the Update driver software option, and select Search automatically for drivers.

We recommend you restart your computer after the updating process is complete.

4. End tasks for unimportant programs

  1. Click on the Taskbar and select Task manager.
  2. Select the CPU and Memory usage in the Task Manager tab.
  3. Click on the applications consuming lots of CPU and memory space on your PC.
  4. Click on the End Task from the drop-down that pops up.

Please restart your computer after making the changes for them to take effect.

5. Update Windows

  1. Click the Start button.
  2. Select Setting and click on Windows update.
  3. On the Windows update page, select Check for updates. (If there’s an update available, Windows will automatically search for it and install it)

You may also want to check out our article about ways to fix Halo Infinite packet loss on your device.

When should I cap my FPS?

Capping your FPS should depend on your PC’s performance and capability to run the game smoothly. First-shooter games may experience stuttering and lag if the FPS fluctuates.

Also, if your FPS fluctuates significantly in your game, it’ll affect your gameplay. So, it would help if you capped your Frame per second (FPS) to ensure a stable performance and to help a weaker system run the game faster.

In conclusion, you can read our guide on downloading and playing Steam games simultaneously on your computer. Nonetheless, you may be interested in how to fix FPS drop, lag, and stuttering in PUBG.

We also have a great guide on how to fix Fallout New Vegas if it’s crashing on Windows 11, so don’t miss it.

If you find this guide helpful, leave suggestions or feedback in the comments section. We’d like to hear from you.

5 Quick Ways to Fix Missing file Privileges on Steam

You can get the Steam error: Missing file privileges when trying to accept a gifted game, transfer a gift from one account to another, or simply when trying to run specific games.

Even though the reasons for showing this error can vary, our team found some valuable solutions for you to try.

The methods we’ll talk about in this article start from the least to the most invasive, so we suggest you try out every one of them in the order they are presented until your error is gone.

What do missing file privileges mean on Steam?

Because it is essential always to be aware of the causes that lead to your favorite apps, remember that sometimes Steam might be missing file privileges because you don’t have full permission to run it.

Plus, as the Steam content system is divided into different regions, your client auto-detects what region you’re in and sets it as default. 

However, there are times when some servers have an overload problem so they might generate the missing file privileges error.

Many other reasons can explain today’s issue, like corrupted game files or misconfigured Steam library folders, but you’ll discover them only if you read this guide thoroughly.

What does insufficient privilege mean?

In Steam, you are not authorized to access the game if you have insufficient privilege. However, you may need the game to be shared by someone with the proper privilege levels.

How can I fix the Steam error: Missing file privileges?

1. Close the igfxEm Module

  1. Right-click on your Windows Taskbar, then select Task Manager.
  2. Click on More details at the bottom of the opened window – this will show you a detailed view of the processes running on your PC.
  3. In the Processes tab, search for igfxEm Module, select it and then click on the End Task button.
  4. Now, press the Windows key, type Steam, open the app, and check if the issue persists.

One way to fix the Missing file privileges error in Steam is to end the igfxEm Module by doing the above steps. This task is related to your Intel graphics cards.

2. Modify the download regions settings in your Steam

  1. Hit the Windows key, type Steam, then open the app.
  2. From the top-left window pane, click on Steam.
  3. Select Settings.
  4. Click on the Downloads tab.
  5. Modify the Download region from the right window pane using the dropdown list.
  6. Click on the OK button, and then you can retry the game.

3. Repair the Steam library folder

  1. Hit the Windows key, type Steam, and open the app.
  2. From the top-left corner of the window, click on Steam.
  3. Navigate to Settings.
  4. In the Settings menu, choose the Downloads tab.
  5. Choose the Steam Library Folders.
  6. Right-click on the folder found there, and then click on Repair Library Folder.
  7. Retry running/ downloading the game you had issues with.

Corrupted or misconfigured library folders might lead to the Steam error: Missing files privileges.

These are used to install games downloaded from the app. This can save you from downloading the games again when you change your HDD.

4. Verify if the game that gives you the error

  1. Hit the Windows key, type Steam, and open the app.
  2. From the main menu, click on Library.
  3. Right-click on the game that doesn’t run, and click on Properties.
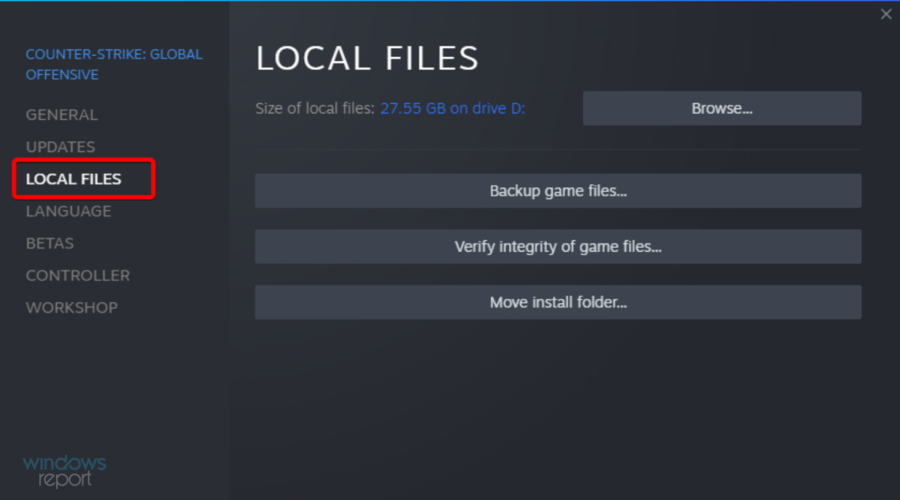
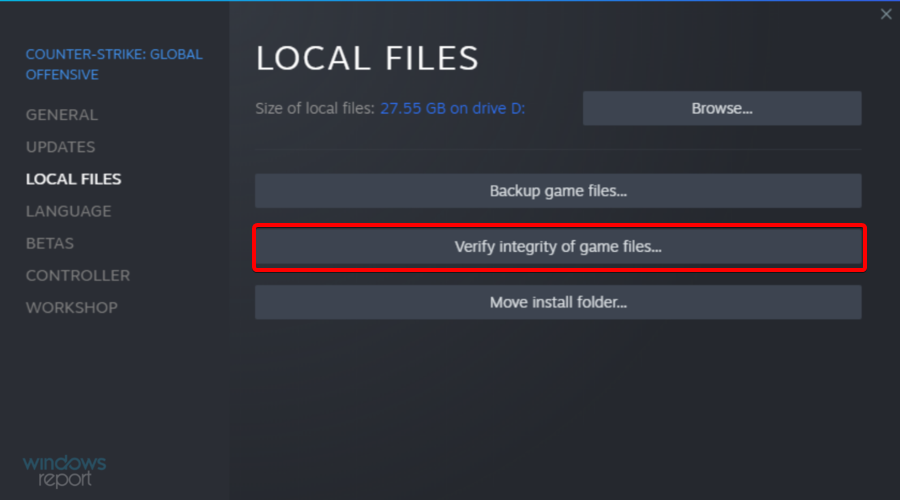
  4. Click on Local Files.
  5. Choose to Verify the integrity of the game cache.
  6. The process of checking the game cache will start and will take a few minutes to complete
  7. Retry running/updating the game with the issue.

Sometimes this error and various others are generated by corrupted game files. You can check the game files’ integrity by following the steps above.

5. Run Steam with administrator privileges

  1. Use the following keyboard shortcut: Windows + R.
  2. Copy & paste the following location into the box and click on OK:
    %ProgramFiles(x86)%
  3. Right-click on the Steam folder and select Properties.
  4. In the Properties window, choose the Security tab and click Advanced.
  5. Finally, click on the Change permissions button.
  6. For the first two elements in the list (Users and System), change permissions to Full Control by clicking on the Edit button and OK.
  7. Run Steam with administrator privileges, and check to see if the issue is fixed.

In some instances, Missing file privileges error can appear on Steam if you lack administrative privileges. However, you can fix that by doing the steps above.

How do I fix Steam’s missing file privileges on Windows 11?

Missing privileges in Steam can occur on all operating systems. The good news is that you can resolve it on Windows 11 if you follow the guide.

This is because both Windows 10 and 11 are very similar. Except for occasional UI differences, most of the steps are identical.

So if Steam is missing file privileges on Windows 11, follow the steps outlined in this guide.

How do I give Steam game permission?

  1. Log into your Steam account.
  2. Ensure you have enabled Steam Guard security by navigating to Steam > Settings > Account.
    steam missing file privileges
  3. Navigate to Steam > Settings > Family, then tick Authorize library sharing on this computer.

What other Steam files related issues should I be aware of?

Of course, the Steam error: Missing file privileges is not the only one you might face while running this app. Make sure you read the list below and discover the most popular of them:

This article explored the best methods to fix your Steam error: Missing file privileges. We hope that you fixed the issues with the options we provided.

Please let us know if these options were helpful by using the comment section below.

7 Best Antiviruses With Encryption to Secure Your Data

Encryption means transforming your data into code using a special algorithm. This coded data is unreadable unless the same algorithm is used to decrypt this data.

To keep it safe during the transfer, encryption is used. By turning the data into code, it cannot be decrypted until you know the exact algorithm that was used.

An antivirus with encryption helps you protect your data and the privacy of your files, ensuring that malicious users or your household members can’t access them.

Keeping your data encrypted, even if someone can see it, it won’t understand any piece of it. Even with the number of encryption options available today, decryption is impossible without the correct algorithm.

In this article, we explore some of the best antiviruses with an encryption feature that you can use to protect your files and data from unauthorized access by persons other than yourself.

Does encryption protect against viruses?

Yes, using encryption protects your data against most viruses. It is protected from theft and unauthorized access. Still, encryption is vulnerable to ransomware, since its attack is different from most viruses.

Ransomware takes encrypted or unencrypted data and encrypts it again making decryption impossible. The attacker then demands payment so that it can be decrypted later.

Encryption works in most cases, but not all. If you want to have full protection against all threats, we recommend you choose one of the antiviruses we listed below, since they provide a complete security system.

What are the best antivirus tools with encryption?

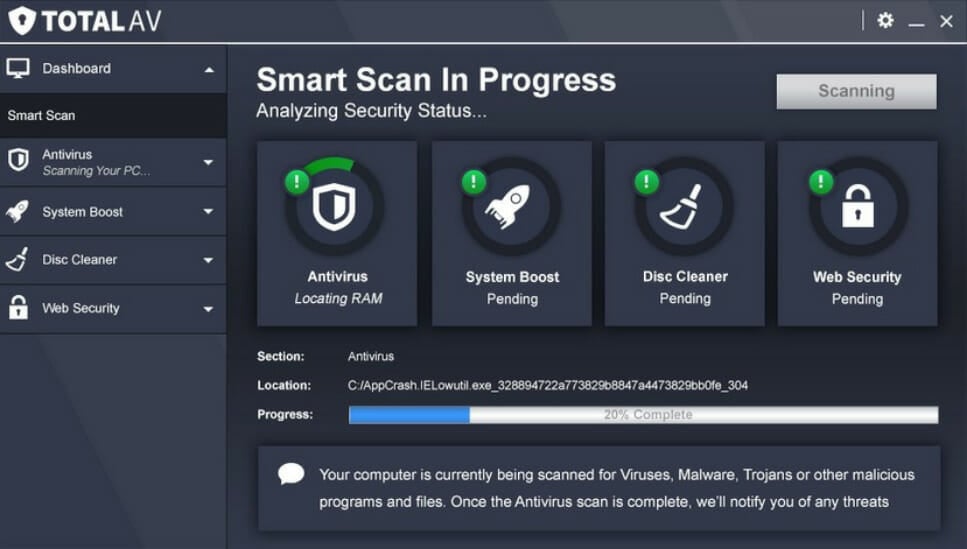
Total AV – Best browsing security and system maintenance

TotalAV is an antivirus program that provides real-time browsing protection, privacy enhancement, and antivirus. Enjoy all the security features you need to protect your system.

The malware virus is one of the most common, so you need strong protection against them. TotalAV offers award-winning anti-malware protection to prevent malicious content from infecting your PC.

It also protects you from any data stealing attempts. Downloads and executables are checked before running so no malicious scripts can infect your PC. Nothing gets past your anti-virus software because everything is scanned every time you open anything.

A VPN allows you to access even geo-restricted content. If you set your IP location to another country, it will treat you as if you are from that country and you will be able to see all its content.

Some of the best key features of TotalAV are:

  • Real-time protection against threats
  • WebShield for browser security
  • Zero-day cloud scanning
  • Password vault and manager
  • Tune-up tools for enhancing system performance
Total AV

Total AV

With this great antivirus, you will enjoy a better and safer browsing experience.
Check Price Visit Website

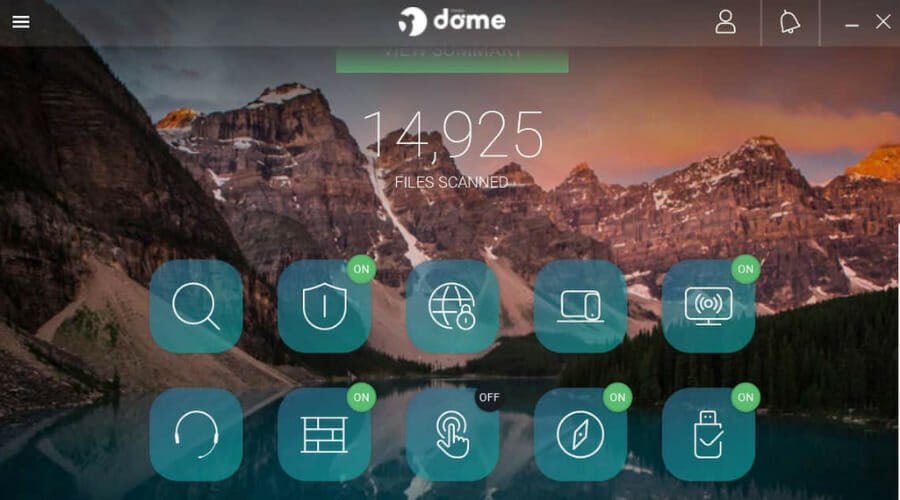
Panda Dome – Most intuitive and dependable

router antivirus

With the Complete or Premium plan, Panda Dome antivirus also has encryption features that will prevent unauthorized users from accessing protected data.

With Panda, you can protect the files you want using a password so that only you can have access to them.

It is easy to use and maintain, minimizes resource usage, gives guaranteed service availability, and constant system monitoring.

All encrypted files can be easily identified by the icon changes and the .pwde extension when needed.

Let’s review some of its greatest features:

  • Realtime virus and malware protection
  • VPN for private Internet use
  • Extended virus scan for remote devices
  • Parental control for Windows
  • Strong password generator
Panda

Panda

Password protect or encrypt your data with this light but resourceful antivirus right now.
Free trial Visit Website

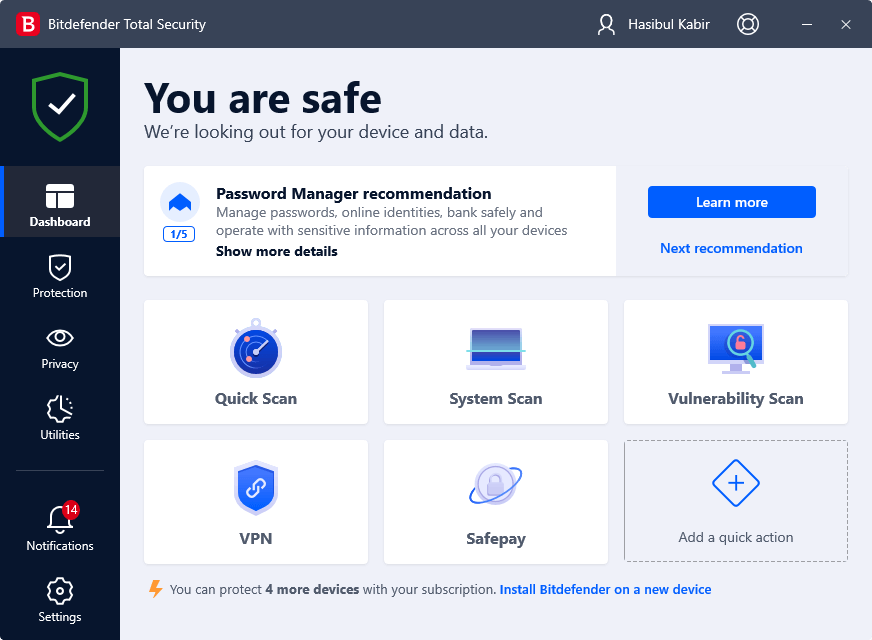
Bitdefender Total Security – Best virus protection and prevention antivirus

Bitdefender delivers continuous, powerful protection against any sophisticated threats, including both malware and ransomware.

It features the File Encryption feature, a solution that creates password-protected vaults on your computer for confidential and sensitive documents, preventing the loss of sensitive information.

The application provides you with remote management of encryption keys, plus provides centralized management for Windows BitLocker, ensuring optimal compatibility and performance.

Let’s see some of its key features:

  • Advanced artificial intelligence to anticipate, detect, and instantly block zero-day threats
  • Built-in optimization tools to enhance the PC performance
  • Advanced anti-phishing protection
  • Dedicated browser for online transactions
  • Game, movie, and work modes
Bitdefender  Total Security

Bitdefender Total Security

Encrypt your data and protect your PC from any threat with this multi-layered security tool.
Free trial Visit Website

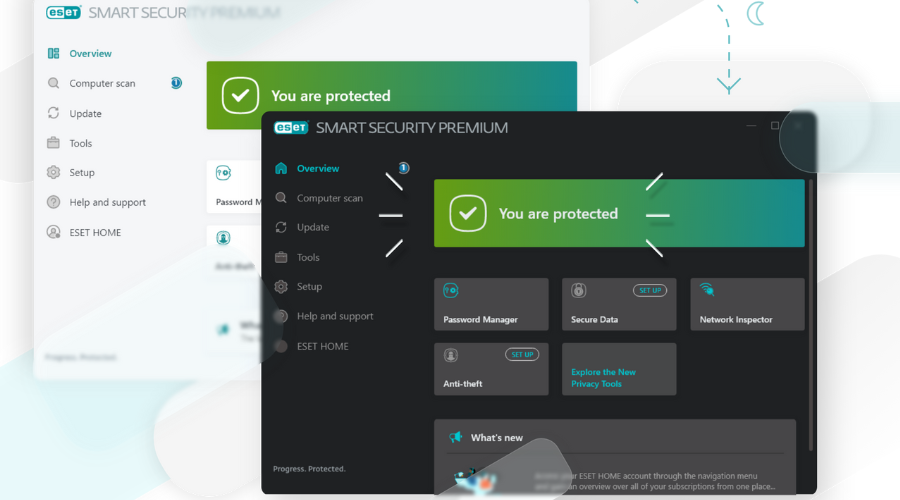
ESET HOME Security Premium – Most complex set of security features

ESET HOME Security Premium is able to protect against a great variety of dangerous threats like the latest versions of viruses, spyware, ransomware, and worms.

A feature that you’ll definitely enjoy about this antivirus is that it provides advanced protection without interfering with other programs or activities you’re performing online.

Thanks to a technology that blocks any type of pop-up ads you can stream your favorite TV show without any pesky interruptions.

Take a look at its best features:

  • Advanced ransomware and phishing protection
  • File and removable media encryption
  • Anti-theft features for your portable device
  • Protect multiple devices with different operating systems from the same license
  • Built-in password manager
ESET HOME Security Premium

ESET HOME Security Premium

This excellent antivirus with encryption features ensures protection against the most dangerous threats.
Free Trial Visit Website

Kaspersky Anti-Virus – Best anti-malware features

Kaspersky Anti-Virus gives you maximum protection for your computer against online threats, keeping your internet connection, webcam, and online transactions secure.

In addition to robust protection, this tool also offers file backup as well as file encryption for your files.

Kaspersky also allows you to manage your identity information such as passwords, update software, and delete unused apps.

With the business line of products, you get further features such as application control, mobile security, preconfigured security profiles, simple and intuitive cloud-based console, and more.

Take a look of some of Kaspersky’s top features:

  • Blocks inappropriate content for your family
  • Extra security for banking and other online transactions
  • Advanced privacy protection
  • Easy to install and maintain
  • Protects all your devices with one license
Kaspersky Anti-Virus

Kaspersky Anti-Virus

Kaspersky will help you safeguard and back-up your data but it will also protect you from any online threats.
Free trial Visit Website

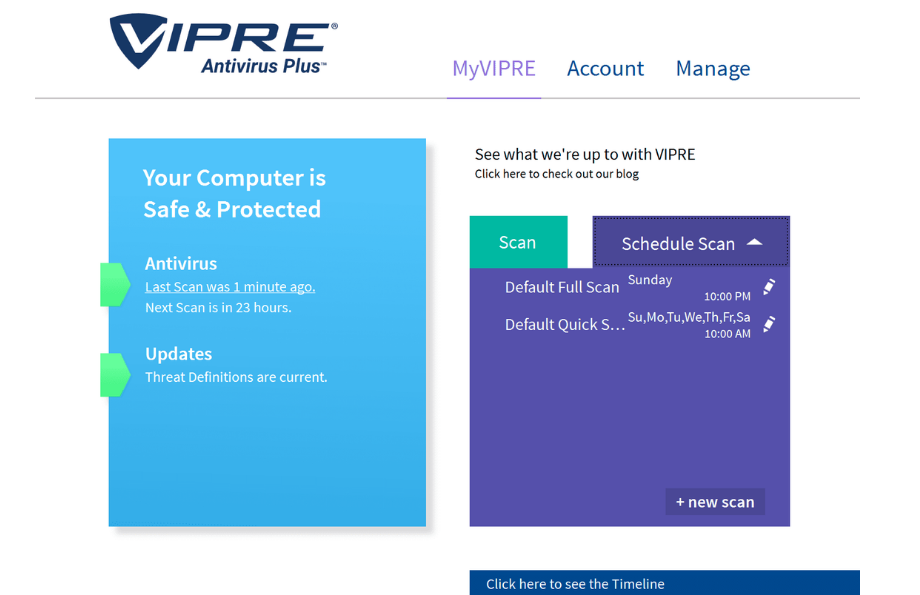
Vipre Antivirus Plus – Lightweight and easy to use

Every year, VIPRE earns top security ratings from the most important independent antivirus testing authorities.

That’s why we recommend VIPRE Antivirus Plus, a lightweight solution that is easy-to-use but ensures complete, real-time protection for your system.

This security software doesn’t come with a lot of features but it’s extremely efficient in what it does.

And that is mainly keeping your computer safe from viruses, malware, Trojans, worms, and any other threats, even if they are polymorphs (it changes its signature to avoid detection).

Let’s see what Vipre’s top features are:

  • Over 20 years of experience in security solutions
  • Free customer support
  • Easy to install and easy to use
  • Malware, spyware, and ransomware detection and removal
  • 30-day money-back guaranteed

Vipre

VIPRE not only uses encryption but also machine learning to identify threats before they hit.
Free trial Visit Website

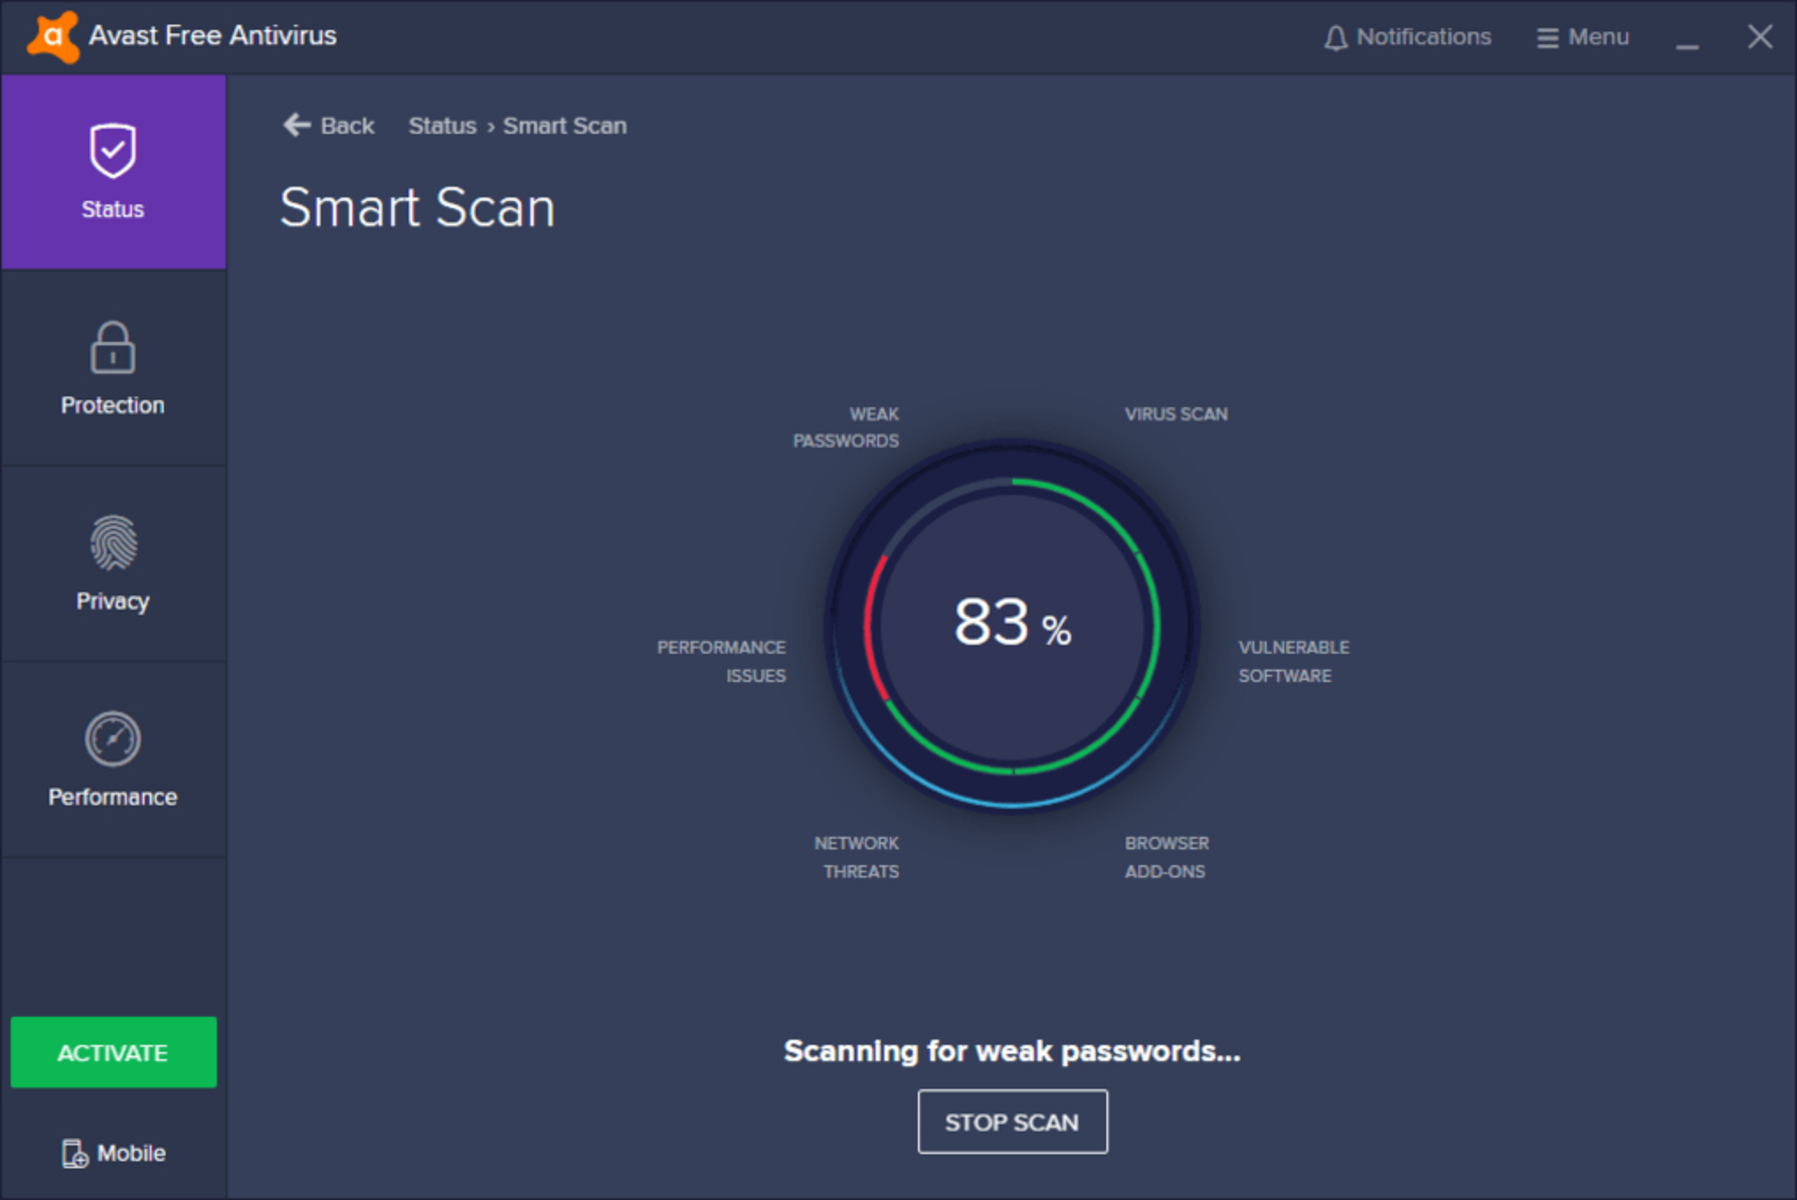
Avast Free Antivirus – Best choice of a free antivirus

You can rely on the Avast Free Antivirus in order to protect your PC from some of the most dangerous cyber threats, especially ransomware, which functions as a digital extortion element.

One of the best things about this antivirus is that it guarantees a smooth streaming experience for gamers and Netflix fans, thanks to the Do Not Disturb Mode mode, which blocks annoying popups.

In addition to checking your applications for malware, the Avast antivirus also keeps a watch on your programs just to make sure that they function properly at any given time.

Let’s see what its key features are:

  • Passive mode for running multiple security products in parallel
  • Do Not Disturb mode for blocking popups when you work or play
  • Behavior Shield for monitoring the apps and detecting unusual modifications
  • Wi-Fi inspector for detecting any possible weaknesses in your connections
  • Dedicated ransomware shield for advanced protection

Avast Free Antivirus

For the best free antivirus with encryption, rely on this professional software and benefit from an amazing experience!
Free download Visit Website

Has one of these antiviruses with encryption caught your eye? You should try more than one to make the right decision.

Some of the best lifetime license antiviruses also include encryption so make sure you try them out. That’s your chance to save some money and time in the process.

Let us know what your favorite security software is and why in the comments section below. The information might help other users like yourself.

5 Best Ways to Remove Audio from a Video without Losing Quality in Windows

Maybe you want to make a movie clear or to include your own track, the motivations can be diverse, but the outcome remains the same: sometimes it is necessary to remove audio from video.

And while there are some superpower video editing programs purposed for this task, many are so complex to use that it can be a bit overwhelming for the average user.

If you need to remove vocals from a video or audio, try one of these great vocal removal software.

What is the best way to remove sound from a video on Windows 10?

For many years, Windows Movie Maker was the go-to app for users tired of noisy background sounds until Microsoft deprecated it.

Fortunately, there are some lighter and friendlier third-party sound removal tools that will help you easily mute a video.

Not only do they mute any distracting sounds that get recorded when one is creating a movie with a camera but also allow you to insert matching sounds.

Our team has been looking for the best methods to remove audio from a video in Windows 10 and 11 and here are the shortlisted options.

We also included some online and free tools to do that so read our entire guide to learn how to remove audio from video.

How do I remove audio from an mp4 video?

1. Use Adobe Premiere Pro

  1. Download Adobe Premiere Pro for Windows 10.
  2. Once installed, launch the program.
  3. In the top bar menu, select File, then click on New.
  4. Import your video clips by pressing the CTRL+I keyboard shortcut or simply drag them into the dashboard.adobe premiere pro import video
  5. Once imported, drag and drop the video/videos into the timeline.adobe premiere pro dragging video in timeline
  6. When the clips appear in the timeline, right-click on them, and from the popping menu select Unlink. This will unlink the audio from the video on selected video clips.
  7. Select the audio layers you want to delete and delete them.

A super-easy way to remove sound from video without a watermark is by using Adobe Premiere Pro. Give it a try and you’ll see that by yourself!

Adobe Premiere Pro

Take your projects to the next level and remove sound from any video with this industry-leading video editor.
Free trial Visit website

2. Use Wondershare Filmora

  1. Download Wondershare Filmora.
  2. Load your videos to the software.filmora add a new video
  3. Drag the video from the file tray to the Video Timeline, then right-click it and select Audio Detach. Immediately, you’ll see a separate audio file in the Music Timeline.detach audio from filmora
  4. Now, just hit Delete on the keyboard to remove the audio.
  5. You can add some music files that fit this video, or just click Create to export only the video track. In the next window, pick the format to save it on your PC.filmora output

Wondershare Filmora is a great video editing software tool, especially for casual users who often look for a simple method to split audio from video.

There are plenty of video conversion packages that can perform this task. However, this tool distinguishes itself by being straightforward and surprisingly quick in doing its work.

3. Use VLC Media Player

  1. 1. Download VLC Media Player for Windows.

  2. 2. Open the VLC Player program.

  3. 3. Click on Media (as shown), then press on Convert/Save.

    vlc convert or save option
  4. 4. Select Add from the next screen.

    add file to vlc
  5. 5. Navigate to the current location of the video whose sound you want to remove. Select it from wherever it is then click Open.

    open mp4 in vlc
  6. 6. Again, click on Convert/Save.

    convert mp4 file in vlc
  7. 7. Under the Profile section, click the wrench icon, then select a suitable profile (we recommend MP4/MOV) under Encapsulation and hit the Create button.

    profile edition settings vlc
  8. 8. Moving on, go to the Video codec tab, name the profile and enable (simply check) the Keep original video track checkbox, then click Create.

    create video codec
  9. 9. Next head over to the Audio codec and this time you will deactivate the Audio provision by deselecting it.

    remove audio from video vlc option
  10. 10. It’s now time to choose where you want the new video file saved. Click Browse next to the Destination File, select the desired location, type a fitting name for this file, and click Start.

    choose vlc output
  11. 11. The app will now convert your original video and output it without its sound.

  12. 12. You can now open the new file with VLC (or any other video player) to confirm that the sound is gone.

  13. VLC is one of the best free cross-platform multimedia players that will not just play most multimedia files but also comes with significant video editing capabilities including an audio removal feature.

    Using the VLC tool a perfect solution if you want to remove sound from a video for free on your Windows 10 device.

4. Use TunesKit AceMovi Video Editor

  1. Download Acemovi Video Editor.
  2. Once the application is downloaded, install it.
  3. Start the application and import the desired video.
    acemovi logo
  4. Right-click the video and choose Detach Audio.
    remove sound from video acemovi
  5. Now right-click the newly created audio channel and choose Delete.
    delete audio acemovi confirm

If you want to remove audio from MP4, then this is the fastest and simplest option.

5. Use Free Online AudioRemover

  1. Go to the AudioRemover website.
  2. Click Browse to select the relevant video file.audioremover browse files on pc
  3. Press the Upload Video.upload video to audioremover
  4. Wait for the upload to finish.
  5. Finally, click the Download button to access the clean Video.download video without sound audioremover

If you want to remove audio from videos online for free, there are many services that allow users to eliminate audio from videos easily without re-encoding them.

One such tool is the AudioRemover, a handy online sound remover that supports multiple video file formats such as MP4, AVI, and MOV included. However, our personal favorite is the Online UniConverter.

This tool is quick to remove sound from videos and it even handles watermark removal. Plus, it’s absolutely free and you can use it straight away, in your browser.

How can I remove audio from a video online without a watermark?

  1. Access the Online Uniconverter webpage.
  2. Then, click on Choose Files to upload your video. You can attach files directly from your device, and use Dropbox, Google Drive, or even YouTube.uniconverter logo
  3. The muting process will start automatically, and this will take no more than a few seconds and, in the end, hit the Download button and store the muted video locally or choose to continue the fun and mute another one.download converted mp4 in uniconverter

Since the stoppage of Movie Maker, the best way to remove audio from MP4 or videos, in general, is to rely on third-party apps or online applications.

All the solutions listed above will get you the same result. The only thing left to do is to select the best one for you.

If your video is in MP4 format, you’re in luck because we also prepared a list including the best MP4 to MP3 converters for PC.

What is your method of choice? Feel free to share your experience with us by reaching out in the comments section below.

Fix: Nvidia Graphics Card is Not Detected on Alienware PC

Alienware PC is one of the best high-end laptops with advanced graphic features. However, most users have consistently complained about the Nvidia graphics card not being detected on their Alienware, an issue that affects the PC’s performance.

Some essential components, like the graphics card, must be present for your PC to work. The graphics card is one of the most crucial hardware components of the computer. It is responsible for the display features on your computer.

In other words, your computer won’t display any information or graphic images without the graphics card. Likewise, external GPUs can affect how the computer works.

Moreover, you may not detect external graphics cards, such as Nvidia graphics cards, on your computer for various reasons that vary on different computers.

However, factors like outdated drivers and OS can prompt errors, causing Alienware PC to use Intel instead of Nvidia. Also, the Nvidia graphics card may not be detected in the Device Manager if it is not enabled.

Nonetheless, there are some reliable ways of fixing the Nvidia graphics card not detected on Windows 10/11, and we’ll discuss them as we go further into this article.

Why is my Nvidia graphics card not being detected?

  • Outdated or corrupt Nvidia graphics driver: The device may find it difficult to detect the Nvidia graphics card if it is broken or outdated. In most cases, a corrupt driver can become invisible in the Device Manager.
  • Incorrect BIOS: It is also possible for you to experience the Nvidia graphics card not detected on your Alienware due to incorrect configuration in your BIOS.
  • Nvidia graphics card not enabled: For your device to detect and recognize the Nvidia graphics card, you need to enable it in your Device Manager. However, your Alienware PC may not locate it if it’s not active.

Why is my graphics card disabled?

Your graphics card may be disabled due to system boot errors or hardware issues. Likewise, toggling some features on your computer can affect the graphics card, prompting it to become inactive.

You can check our guide on what to do if the Nvidia driver does not install on your PC.

How do I fix my graphics card not detected on Alienware PC?

1. Update the Nvidia graphics driver

  1. Press the Windows + R keys to prompt the Run window.
  2. Type devmgmt.msc into the search space and click OK.
  3. In the search results, click on Display adapters and select the Nvidia driver from the drop-down menu.
  4. Click the Update driver software option, and select Search automatically for drivers.

Once you have completed the updating process, restart your computer to see if the problem persists.

2. Enable the graphics driver

  1. Press Windows + X keys and select the Device Manager.
  2. Navigate to your graphics card(Nvidia) and double-click on it to prompt its properties.
  3. Go to the Driver tab and click on the Enable button.

Ensuring that your graphics card is enabled will make it detectable by the Alienware PC.

3. Reboot PC in Safe Mode

  1. On the sign-in screen, press the shift key while holding the Power button.
  2. Hold the shift key to prompt the Advanced Recovery Options window.
  3. Click on Troubleshoot and select the Advanced options.
  4. Click on Startup Settings and select Restart.
  5. Press 4 to Enable Safe Mode. 

The computer will restart in safe mode. Rebooting your PC to the safe mode will help you fix issues deep-rooted into the system that may affect it.

4. Update Windows

  1. Click the Start button.
  2. Select Setting and click on Windows update.
  3. On the Windows update page, select Check for updates.

Check our list of the best Nvidia drivers to use on Windows 11.

How do I know if my graphics card is broken?

There are a few ways to know if your graphics card is damaged. However, if you experience stuttering or freezing on the screen, it may be due to a broken graphics card.

Likewise, if you notice inappropriate colors or patterns on your screen, it can indicate that your graphics card is broken.

To learn more about the problem, read our article about what to do if the Nvidia graphics card is not detected on Windows 10.

Also, users ask what graphics card does Alienware use? We recommend you check Dell’s Alienware laptop graphics cards page for graphics card specifications and comparisons to be able to choose the appropriate one for your Alienware.

Also, if the Nvidia driver is incompatible with your Windows version, you can check out our guide to fixing it here.

Let us know which procedure worked for you in the comments area below.

4 Easy Methods to Hide IP Address on Chrome

If you’re interested in hiding your IP address in Chrome, we’re here to help. We prepared 4 easy solutions: 3 of them are free but unsafe while 1 is paid and secure.

Concealing your IP address comes with several benefits. You can protect your digital identity when browsing the web and accessing websites that aren’t normally available in your country.

It’s also possible to circumvent geoblocking and access websites that blocked your IP address due to too many connections, as well as defeat government censorship.

If Google Chrome is your primary web browser, here’s how you can hide your IP address and freely navigate the Internet, without any restrictions.

Browsers that hide your IP

Chrome doesn’t have native support for masking your IP, but there are several browsers with built-in VPNs that can hide your IP and encrypt your data.

If you are interested in using a one-in-all solution, switching to a browser like that is a great choice.

Our top recommendation, in this case, is Opera One. Its built-in VPN is free, unlimited, and easy to enable/disable in just one click. It has a few different virtual locations you can choose from and switch between.

How can I hide my IP in Chrome?

If you want to mask your online identity right inside your browsers, here’s what you need to do.


1. Use a VPN browser extension

Private Internet Access is connected to Google Chrome
  1. Sign up for a PIA subscription plan.
  2. Add PIA to Chrome.
  3. Click the PIA icon.
  4. Enter your account credentials and log in.
  5. Press the big power button to connect.

Using a Chrome VPN extension is the best way to hide your IP address because you are also encrypting your data traffic. Let’s assume that you’re connecting to a public Wi-Fi that doesn’t require a password.

If you’re sending confidential data over unencrypted hotspots, such as email account credentials or online banking info, you risk exposing this information to hackers that might be lurking around.

However, the VPN encrypts your data so that, even if the cyber-criminals steal your info, they won’t be able to decipher it. Using a VPN for Chrome is particularly useful for hiding your IP address to send emails.

PIA offers dedicated apps for all major operating systems as well as a reliable extension for Chrome.

Using it, you will be able to encrypt your entire online traffic, be it in the browser, online games, or other apps.

pia logo

Private Internet Acess

Hide your IP in Chrome, encrypt your data, block malware, and unblock Netflix US with this high-speed VPN.
Check price Visit website

2. Set up a proxy browser addon

install a proxy from the Chrome Web Store
  1. Search for a proxy addon in the Chrome Web Store.
  2. Select a tool and add it to Chrome.
  3. Click its icon and connect to a proxy server.

Proxy servers act as a gateway between you and the Internet. They’re built to mask your IP address and help you access content that’s not normally available.

But a proxy server is less secure than a VPN because it doesn’t use encryption. So, if you’re attempting to send or receive sensitive data over the Internet, we strongly recommend using a VPN instead of a proxy.

Otherwise, you can find a lot of proxy browser extensions in the Chrome Web Store. A lot of people misunderstand proxies for VPNs (even Google does this sometimes), so make sure to not fall into that trap.

Check out our list for the best software to hide your Windows 10 IP.

3. Use a free online service that hides your IP

HideMyAss has a free online proxy service
  1. Go to HMA’s online proxy.
  2. Enter the site you want to access.
  3. Click Agree & Connect.

There are a few online services that you can use to hide your IP address in Chrome to access blocked websites, without having to install any add-ons and sign up for accounts.

The free online proxy of HideMyAss is a good example. You just have to specify the website from which you want to conceal your online identity. Plus, you can choose a preferred server, which is practical for bypassing geo-restrictions by using the IP address of a server from another country.

But this means that your IP address is blocked only for that website. If you open a new tab in Chrome and try to visit another page, it will read your true IP address. Still, using a free online service is a good way to hide your IP for Internet browsing.

4. Manually configure proxy settings

  1. 1. Click the Windows 10 Start button on the taskbar.

  2. 2. Type proxy settings in the search box and then hit Enter.

  3. 3. Navigate to the Manual proxy setup section, and then enable the Use a proxy server option.

    use a proxy server windows 10
  4. 4. Under Address and Port, enter the proxy server address and port number.

  5. 5. Click Save.

  6. Unlike Mozilla Firefox, Google Chrome doesn’t have built-in settings for changing your proxy configuration. It uses the Windows proxy options instead.

    So, if you set up a global proxy server on Windows, then Chrome will automatically use that configuration to establish the Internet connection. Therefore, you will be able to hide your IP in Chrome using this solution.

    This solution requires you to obtain proxy server addresses. If you don’t know where to get them, you can find a lot of free proxy server addresses on Google.

We suggest using Haschek’s Proxy Checker to make sure that the proxy server address is online, has a good response time, allows HTTPS, and truly acts as a blocker for your IP in Chrome.

If you can’t connect to a proxy on Windows 10, you can easily diagnose and fix the problem.

For more information, check out our dedicated article on how to set up global proxy settings.

What’s the best way to hide your IP address in Chrome?

Without a doubt, using a VPN for Google Chrome is the safest way to hide your IP. By design, a virtual private network solution protects your browsing traffic by encrypting everything you send and receive in Chrome.

Compared to a free proxy server, you don’t have to worry that the new IP address actually works. Plus, free proxy providers can monitor your traffic and share it with third parties, such as marketing agencies.

Furthermore, you can choose from numerous VPN servers from all over the world, which are stable, always functional, and don’t have network congestion.

And, depending on the VPN provider, you might be able to bypass the Netflix site error and unblock catalogs that aren’t normally available in your country (free proxies always get blocked).

Why should I use Private Internet Access?

We used Private Internet Access (PIA) in our example above because it’s the best all-around VPN.

Created by Kape Technologies, PIA hides your IP address in Chrome if you want to settle for its Chrome browser extension only.

Moreover, it has a built-in ad and malware blocker for web browsers called PIA MACE, designed to protect you from phishing attempts and other Internet dangers. You can also unblock Netflix US with PIA using high-speed VPN servers that don’t cause buffering.

But a paid premium subscription to PIA also gets you VPN desktop clients for Windows, Mac, and Linux, native VPN apps for Android and iOS, together with browser addons for Firefox and Opera One (in addition to Chrome).

You can even set up PIA on your router to share your VPN account with all connected devices. It uses 256-bit AES military-grade encryption, OpenVPN and WireGuard protocols, and private DNS servers.

If you insist on also using a proxy server over the VPN, you should know that PIA has built-in support for SOCKS5 and Shadowsocks.

And, if you ever stumble upon any technical difficulties, you can turn to its 24/7 live chat support.

Private Internet Access is much more than a browser extension and supports enough simultaneous connections to secure your entire household.

However, if you’re not yet ready to commit to a premium VPN service, you can use a proxy server for Windows 10, as long as you don’t use it for confidential browsing activities.

If you’re using an older OS edition, you can hide your IP on Windows 7. It’s also possible to hide your IP on Windows XP.

Does Chrome Incognito hide your IP address?

Many people believe that Chrome’s Incognito mode provides anonymous browsing, but unfortunately, that’s not the case.

The feature prevents cookies, history, and other browsing data from being stored on your device. In turn, other people who use the same device after you, won’t be able to see what you’ve been up to.

However, your IP remains visible the whole time, allowing websites you’ve visited, your ISP, and other third parties to monitor your activity.

We hope you managed to hide your IP on Chrome using our recommended solutions. Let us know in the comments section below what you think about this article.

How to Fix Minecraft Launcher Won’t Open on Windows 11 (2026 Guide)

If the Minecraft launcher won’t open in Windows 11, this guide will help you get back in the game in no time.

Users click the icon, but nothing happens. No error, no loading screen, and no response. This can be caused by corrupted launcher profiles, outdated Java versions, permission conflicts, or broken updates.

Here’s a step-by-step guide on how to fix the Minecraft launcher not launching in Windows 11.

How can I fix the Minecraft Launcher not working in Windows 11?

1. Run Minecraft as an administrator

  1. Right-click the Minecraft Launcher shortcut on your desktop and select Properties.
  2. Select Compatibility on the properties window that opens.
  3. Click the Run this program as an administrator setting.
  4. Press the Apply button, and click OK to exit the properties window.
  5. Try rerunning the game and see if anything has changed.

2. Update your graphics card’s driver

  1. Press the Win + X key combination, and choose Device Manager.
  2. Scroll through the list and toggle the Display adapters toggle.
  3. Right-click your graphics card, and choose Update driver.
  4. Click on the Search automatically for drivers option.
  5. Wait for the process to complete, and then check if these actions have solved your issue.

If you want to avoid all the steps mentioned above while also ensuring that drivers will constantly be updated automatically, using a good third-party driver updater software such as Fortect Driver Updater is an excellent option.

This software helps you scan your device drivers thoroughly and find them the most suitable update from its constantly reviewed database.

3. Disable firewalls and antivirus software

  1. Click the magnifying glass taskbar icon.
  2. Enter firewall within the search box.
  3. Select the Windows Defender Firewall.
  4. Then click the Turn Windows Defender Firewall on or off navigation option.
    Turn Windows Defender Firewall on or off option minecraft launcher won't open windows 11
  5. Click the Turn off Windows Defender Firewall radio buttons, and select OK to confirm.
    Turn off Windows Defender Firewall radio button minecraft launcher won't open windows 11
  6. Try opening the Minecraft Launcher with the firewall disabled.

Third-party antivirus software can also include firewalls. So, if you have installed third-party antivirus software, disable that utility. You can usually temporarily turn off third-party antivirus packages by right-clicking system tray icons for them and selecting disable context menu options.

Note icon NOTE
It’s recommended that users restore firewalls when they aren’t playing Minecraft.

4. Clean-boot Windows 11

  1. Press the Windows + X hotkey, and select Run.
  2. Now type in this Run command and click OK:
    msconfig
  3. Finally, click Selective startup to deselect the Load startup items checkbox.
    Load startup items checkbox minecraft launcher won't open windows 11
  4. Ensure you’ve selected the Use original boot configuration and Load system services options.
  5. Next, click Services at the top of the window.
  6. Select the checkbox for the Hide all Microsoft services option.
    The Hide all Microsoft services checkbox minecraft launcher won't open windows 11
  7. Click Disable all to exclude all other superfluous third-party services from the startup.
    The Disable all option minecraft launcher won't open windows 11
  8. Select Apply and OK to save the new startup settings.
  9. Press Restart on the dialog box that opens after closing MSConfig.
    Restart option minecraft launcher won't open windows 11
  10. Try opening the Minecraft Launcher after the restart.

5. Delete the Minecraft Launcher profile file

  1. Bring up Run with its handy Windows key + R keyboard shortcut.
  2. Type the following text into the Address bar and hit Enter:
    %AppData%
    The Roaming folder minecraft launcher won't open windows 11
  3. Then click the .minecraft subfolder to open it.
  4. Right-click the launcher_profiles.json file and select Delete (the trash can button).

6. Delete Minecraft Mods

  1. Bring up Run with its handy Windows key + R keyboard shortcut.
  2. Type the following text into the Address bar and hit Enter:
    %AppData%
    The Roaming folder minecraft launcher won't open windows 11
  3. Then open the .minecraft subfolder and open the Minecraft mods subfolder.
  4. Next, press the Ctrl + A hotkey to select all the mods in that folder.
  5. Then, click the Delete button on File Explorer’s command bar.
    The Delete button minecraft launcher won't open windows 11
  6. Alternatively, you can right-click the bin folder and select Delete to erase all mods.

7. Reinstall Minecraft

  1. Bring up the Run accessory’s window using Windows + R.
  2. Enter this Run command in the Open box and click OK:
    appwiz.cpl
    The appwiz.cpl command minecraft launcher won't open windows 11
  3. Select the Minecraft Launcher within the Programs and Features window.
    The Programs and Features applet minecraft launcher won't open windows 11
  4. Click Uninstall and Yes confirmation options to remove the selected software.
    Uninstall and Yes options minecraft launcher won't open windows 11
  5. Open the Roaming folder as specified within the first three steps of resolution four.
  6. Erase the leftover .minecraft folder by right-clicking it and selecting Delete.
    The Delete option minecraft launcher won't open windows 11
  7. Click the Power and Restart options that are on the Start menu.
  8. After that, reinstall the Minecraft game.

Once your launcher is working again, you can also try upcoming builds by following this guide on how to download and play Minecraft snapshot.

Why doesn’t the Minecraft Launcher work in Windows 11?

Conflicting programs are one of the more probable reasons why Minecraft Launcher won’t open. Numerous third-party programs, antivirus utilities, and background services are confirmed to conflict with Minecraft.

Aside from that, the Minecraft Launcher might not work because of game privilege issues and certain mods. This is because the launcher needs admin permission to utilize system resources fully.

Running the game with admin rights and ditching all mods can resolve such issues.

Frequently Asked Questions

Where is Minecraft Launcher located on Windows 11?

The new launcher is in the user folder because it is a Microsoft Store. appx file. Remember that your launcher and game versions are relevant because different game editions use other runtimes.

On Windows 10 or 11, saved Minecraft games reside in the AppData folder. Typically, it is in the following path:
%appdata%.minecraft
Let us now discuss some solutions. Note that these will help fix cases of Minecraft launcher won’t install, a Minecraft launcher crash on Windows 11, and Minecraft Bedrock Launcher issues on Windows 11.

What software is incompatible with Minecraft?

Minecraft has an extensive list of known incompatible software. Antivirus, firewall, parental control, and game enhancement software are the most likely programs to conflict with the Minecraft game.
Have you installed any of those programs? If so, you should at least disable them from your system startup. However, it’s best to uninstall them, preferably with a third-party uninstaller.

Does Windows 11 support Minecraft Java Edition?

Yes, Windows 11 supports Minecraft Java Edition. You should know that Windows 10 and 11 are very similar, and most programs on one will work on the other.
There are a few exceptions, but with the release of the latest OS, devs have been working to keep their applications updated and compatible with it.

Summary

Fixing a Minecraft launcher not opening issue on Windows 11 can take a few tries, but most problems boil down to corrupted profiles, outdated drivers, or system permission errors. Whether the Minecraft launcher refuses to open, crashes silently, or gets stuck without loading, this guide provides all the essential steps to troubleshoot it.

Still stuck? Consider reinstalling both the launcher and Java, or switching to a clean local user account. That’s how to fix a launcher not opening without guesswork.

Also, don’t miss our latest guide on how to fix Failed to get Minecraft access error transferring server message.

NordVPN Failed to Connect [10 Tested solutions to Fix It]

There are several reasons why your virtual private network (VPN) may not be functioning properly, but the majority of them are related to a few common issues.

Perhaps you can’t connect to the internet while using a VPN service, or only for a short period of time before the connection drops.

When you try to stream, torrent, or gaming you might get a proxy error message, or you might be unable to send emails.

Whatever the case may be, there are numerous technical issues that you may encounter while using NordVPN, but there are also numerous solutions.

Using a VPN is important, but some users reported that NordVPN won’t connect after an update. This can be a big problem and leave your privacy unprotected, so today we’re going to show you how to fix this problem.

Why is my NordVPN not connecting?

Your current antivirus and problematic applications often results in NordVPN won’t connect, thus you can use the fixes from the guide to correct that.

Not being able to use your VPN can be a problem, and speaking of NordVPN and connection issues, here are some similar problems that users reported:

  • NordVPN failed to connect on login – This problem can be caused by your antivirus, so be sure that NordVPN is added to the list of exclusions in your antivirus.
  • NordVPN failed to connect when registering – Once again, make sure that the antivirus has no interference in that.
  • The tls key negotiation failed to occur within 60 seconds – If that’s your problem, chances are the firewall is blocking access for the openvpn.exe binary.
  • NordVPN failed to connect due to the wrong password – In such a case, check your login credentials and verify if you exceed the maximum number of connections.
  • Internet doesn’t work with NordVPN – If you’re having this problem, perhaps you can fix it simply by removing problematic applications. Simply remove the respective apps and software and the problem should completely be resolved.
  • NordVPN can’t connect to any server – This is another relatively common problem with NordVPN. To fix this problem, be sure to use Command Prompt and renew your IP address to stop NordVPN from connecting forever.
  • NordVPN won’t connect to the Internet, stay connected – These are some issues that you can experience with NordVPN, but if you encounter them, be sure to try some of our solutions.
  • NordVPN not working after update – This is mainly caused by your login status. Open the NordVPN desktop app and relog with your credentials, typing them manually.
  • NordVPN could not open URL – Check the application tray, as the app might be already running there.
  • Failed to turn on NordLynx – Reinstall the app and try different server types afterward.
  • NordVPN extension failed to connect on Mac, Windows 10, iOS, Android, Linux – Again, you need to reinstall the app, reboot the PC, and relog once more.
  • NordVPN unable to connect in restricted country happens when you try to connect to China or Hong Kong server. Unfortunately, it’s an ongoing issue from the vendor’s side.

The good news is that these issues are extremely rare. NordVPN is a very reliable VPN service and technical problems are rare events.

Quick Tip:

ExpressVPN is the best alternative to NordVPN in terms of performance and dependability. It may even be more compatible with your needs. We recommend testing it if NordVPN is not responding.

It has an ultra-secure server array, a friendly interface, and impressive streaming capabilities. It’s one of the most trusted names in the VPN industry, protecting you and your data wherever you go.

ExpressVPN

Turn to this VPN provider if you encounter too many issues with NordVPN.
Check price Visit website

How do I fix NordVPN failed to connect?

1. Reinstall NordVPN

  1. Click the Start button and go to Control Panel. Starting Control Panel - external monitor not detected after sleep
  2. Go to Programs and Features next.
  3. In the program list, find NordVPN and select it.
  4. Press Uninstall.
  5. Confirm your choice by clicking Yes.
  6. Go ahead and freshly install NordVPN again and check your connection now.

In some instances, a corrupted installation can lead to this problem. If NordVPN won’t connect, it’s possible that your installation is damaged.

This can happen for various reasons, and in order to fix the problem, it’s advised that you uninstall NordVPN. Don’t hesitate to follow the above steps in that regard.

Once you reinstall this Tefincom & Co., S.A. VPN solution, check if the problem is still there.

2. Check your antivirus

According to users, if you’re having problems with NordVPN, perhaps the cause is your antivirus.

Sometimes NordVPN won’t connect if your antivirus is interfering with it, and in order to fix this issue, it’s advised to temporarily disable certain antivirus features.

If that doesn’t work, you can try disabling your antivirus altogether. In some instances that won’t be enough, so you might have to remove your antivirus.

Bear in mind that Windows 10 has Windows Defender as its default antivirus, so even if you choose to remove a third-party antivirus, you’ll still have some form of protection.

If removing the antivirus solves the problem, perhaps this is a good time to consider switching to a different antivirus solution.

There are many great antivirus tools on the market, and if you’re looking for a reliable antivirus that works with VPNs, we suggest browsing the list and picking your security suite.

3. Remove the problematic applications

According to users, if NordVPN won’t connect after an update, it’s possible that other third-party applications are interfering with it.

To fix the issue, it’s advised to completely remove this application from your PC. There are several ways to do that. Use the solution described above or uninstaller software to remove the VPN app completely.

By using the uninstaller software you’ll completely remove the selected application along with all of its files and registry entries.

By doing so, you’ll make sure that leftover files and registry entries don’t interfere with NordVPN in the future.

Once you remove the application completely, check if the problem is still there.

4. Official Glasswire troubleshooting procedure

Some users noticed this issue occurs when they use Glasswire and NordVPN. The good news is that this problem occurs in rare cases and it’s due to hardware issues or incorrect software settings.

Glasswire is a reliable tool and it’s fully compatible with Windows 10.

The company recently contacted us and provided users with official solutions to help you fix this technical issue.

For some reason, if you do a lot of host lookups, this may cause NordVPN to stop working. To fix this problem, use this solution:

  1. Right-click the bottom taskbar in Windows and choose Task manager then click on Services. Scroll to the G section and find GlassWire and stop it.
  2. Run Notepad as admin and open the config file: C:\ProgramData\GlassWire\service\stats\glasswire.conf
  3. Set hostname_enable_nslookup=false
  4. Save the file and start the GlassWire service again by right-clicking it in the task manager.
  5. Now GlassWire won’t look up hosts anymore, and NordVPN will work as usual.

If you encounter any other issues with NordVPN, you can use the Windows OS built-in VPN settings instead of the settings that the tool comes with.

Anyway, this quick solution should be enough to solve the problem.

5. Use the browser extension

If NordVPN won’t connect after the update, it’s possible to avoid this issue with this little workaround.

to users, it seems that NordVPN can only connect to a server once, but if you disconnect from the server, you won’t be able to connect until you restart your PC.

This can be a big problem, but many users reported that the browser extension works without any problems.

So if you’re having problems with NordVPN, try using the browser extension until you manage to find a permanent solution.

6. Disable IPv6

According to users, if NordVPN won’t connect after an update, it’s possible that the problem is caused by IPv6.

In case you don’t know, there are two IP address standards, IPv4 and IPv6, and sometimes the latter can be a problem.

Several users reported that they fixed the problem with NordVPN simply by disabling IPv6 altogether on their PC. This is actually quite simple to do, and you can do it by following these steps:

  1. Click the network icon on your Taskbar. Select your network from the menu.
    network taskbar nordvpn won't connect
  2. A new window will now appear. Click the Change adapter options in the right pane.
    adapter options nordvpn can't connect
  3. You should now see a list of available network connections on your PC. Right-click your network connection and choose Properties from the menu.
    connection properties nordvpn can't connect
  4. Locate Internet Protocol Version 6 (TCP/IPv6) on the list and uncheck it. Now click OK to save changes.
    disable ipv6 nordVPN can't connect

After doing that, the IPv6 will be disabled and the problem with NordVPN should be resolved. Bear in mind that you might have to restart your PC in order to apply changes.

7. Reset NordVPN

If NordVPN won’t connect after an update, it’s possible that one of your settings is causing the issue. To fix the problem, you need to restore all your settings in NordVPN to the default.

How do I reset NordVPN?

  1. Open NordVPN and go to Settings.
  2. Scroll all the way to the bottom and click on Show advanced settings.
  3. Now click on I know what I’m doing.
  4. Scroll down to the Diagnostics section and click the Run Diagnostics Tool.
  5. A new window will now appear. Click on Reset NordVPN.
  6. Wait for a few moments for the process to complete.

Once the process is finished, check if the problem is still there.

Can I turn NordVPN on and off?

You, you can. Simply select Settings from the home screen. Then, select More under Wireless and networks, choose the VPN, and toggle the active connection on and off.

8. Reset TAP NordVPN adapter

Sometimes issues with NordVPN can occur due to its virtual adapter. If NordVPN won’t connect, it’s advised that you restart your network adapter. You can do that by following these steps:

  1. Follow steps 1-2 from Solution 5.
  2. Now you should see the TAP NordVPN Windows adapter on the list of available connections. Right-click the adapter and choose Disable from the menu.
    disable adapter nordvpn
  3. Wait for a few moments, right-click the adapter again and choose Enable from the menu.

Once you enable the adapter, the problem should be resolved and you’ll be able to use NordVPN again.

9. Use Command Prompt

According to users, if NordVPN won’t connect after an update, the issue might a glitch with your network connection. However, you can fix the problem by renewing your IP address.

This is fairly simple, and you can do it by following these steps:

  1. Press Windows Key + X to open Win + X menu. Choose Command Prompt (Admin) or PowerShell (Admin) from the list.
    nordVPN command prompt
  2. Now run the following commands:
    • ipconfig /release
    • ipconfig /flushdns
    • ipconfig /renew
    • netsh winsock reset
    • netsh interface ipv4 reset
    • netsh interface ipv6 reset
    • netsh winsock reset catalog
    • netsh int ipv4 reset reset.log
    • netsh int ipv6 reset reset.log

After running these commands, check if the problem is still there. Bear in mind that you might have to restart your computer in order to apply changes.

10. Contact NordVPN

If the problem still persists, perhaps it would be best to contact NordVPN directly. NordVPN secured its spot as one of the best VPNs at the moment.

Speed, simplicity, and countless security features are all included, thus reliable customer support comes with it.

Several users reported that NordVPN sent them a patch, so if you’re having issues with NordVPN, be sure to contact their support team and they will help you fix the problem.

NordVPN is a great VPN client, but if NordVPN won’t connect, it’s rather likely that a third-party application is interfering with it. If other applications aren’t the problem, be sure to try all other solutions from this article.

How to Disable NetBIOS in Windows 10

NetBIOS is a somewhat obsolete broadband protocol. Yet, despite its vulnerabilities, NetBIOS is still enabled by default for network adapters in Windows.

Some users might prefer to turn off the NetBIOS protocol. This is how users can disable NetBIOS in Windows 10.

How can I turn off NetBIOS on my Windows 10 device?

1. Select the Disable NetBIOS over TCP/IP Option

  1. 1. Open the WinX menu by pressing the Windows key + X hotkey.

  2. 2. Select Run from the list of options.

  3. 3. Enter control.exe /name Microsoft.NetworkAndSharingCenter in the Open box, and then click the OK button.

    launch network connections in run
  4. 4. Then click Change adapter settings in the Control Panel applet that opens. The Network Connections window will open on the screen.

    network connections window
  5. 5. Right-click a network adapter there to select Properties.

    wifi properties change
  6. 6. Select Internet Protocol Version 4, and then press the Properties button.

    ipv4 settings
  7. 7. Click the Advanced button to open the Advanced TCP/IP Settings window.

  8. 8. Then select the WINS tab shown directly below.

    disable netbios over tcp/ip option
  9. 9. Select the Disable NetBIOS over TCP/IP radio button.

  10. 10. Press the OK button.

  11. The NetBIOS over TCP/IP networking protocol can be easily turned off on your Windows 10 PC using built-in Network settings.

    All you need to do is disable the NetBIOS option via the Advanced TCP/IP Settings window, and the protocol will no longer be used.

If your WinX menu is not working on Windows 10 and you cannot use it to apply our solution, check out our dedicated guide to find out how to fix it.

You can enable NetBIOS by following the same steps, just be sure to select the Enable option instead.


2. Turn off NetBIOS via Command Prompt

  1. Alternatively, users can disable NetBIOS with the Command Prompt. First, open the WinX menu.
  2. Select Command Prompt (Admin) to open the Prompt’s window.
  3. Next, input wmic nicconfig get caption,index,TcpipNetbiosOptions in the Prompt, as shown below, and press the Return key. That shows users a list of their network adapters.
    network adapter index windows 10 how to disable netbios
  4. Note the index number of the adapter you need to disable NetBIOS for and include that in the wmic nicconfig where index command. For example, to disable the NetBIOS for the network adapter listed as three, users would enter the following command: wmic nicconfig where index=3 call SetTcpipNetbios 2.
    The turn off NetBIOS command windows 10 how to disable netbios
  5. In the above command, three is the index number for the adapter and two disables NetBIOS over TCP/IP. Press the Enter key after entering the command to disable NetBIOS.

3. Edit the Registry

  1. Users can also disable NetBIOS for more specific network adapters by editing the registry. Open the Run accessory.
  2. Enter regedit in Run and click OK, which will open the Registry Editor.
  3. Open this registry path in the Registry Editor:
    • HKEY_LOCAL_MACHINE\SYSTEM\CurrentControlSet\Services\NetBT\Parameters\Interfaces.
      The Interfaces key windows 10 how to disable netbios
  4. Select a Tcpip registry key for a network adapter.
  5. Double-click NetbiosOptions to open the window shown directly below.
    The Edit DWORD window windows 10 how to disable netbios
  6. Erase 0 and enter 2 in the Value data box.
  7. Press the OK button.

If you want to enable NetBIOS, change 2 to 0.

FAQ

What is NetBIOS and why disable it?

NetBIOS is an outdated protocol that can expose your computer to security risks, so disabling it improves safety.

How to check if NetBIOS is enabled?

You can check through Command Prompt to see if NetBIOS is enabled on your device.

Can I disable NetBIOS without Command Prompt?

Yes, you can disable it via the Control Panel or Registry Editor for more control.

Is it safe to disable NetBIOS?

It’s generally safe unless your network requires it for file sharing or printer access.

Disabling NetBIOS can resolve security issues and improve network safety. However, users may experience problems with file sharing if SMBv1 is used over NetBIOS. For more details on how this can impact your network, check out SMBv1 File Sharing Broken Over NetBIOS.

So, there’s more than one way to disable NetBIOS in Windows. Users can choose whichever method they prefer.

Let us know in the comments field below whether you were successful in following our guide in order to turn off NetBIOS on your devices.

How to Open Torrent Files on Windows 10 & Mac

BitTorrent is a peer-to-peer file-sharing protocol for the distribution of video, music, software, and other digital media content. That’s why it’s imperative for most of us to know how to open torrent files in Windows 10.

The digital media content is distributed with torrent files, which contain the metadata for the downloadable files. The advantage of torrent files is that they enable faster downloads from multiple seeds.

So, let’s find out all there’s about torrent files, and the ways to download and open them in Windows 10.

How can I open .torrent files on my device?

To open torrented files, you’ll need BitTorrent client software, such as uTorrent. That is a P2P file-sharing utility with which you can download the content the torrent includes metadata.

Once you’ve downloaded a torrent, you can open its files, which are often included within a ZIP archive. If you don’t already have a torrent file, you can download them from websites such as Pirate Bay.

1. Open torrent files on Windows 10 PCs

  1. 1. First, open the download page for uTorrent in a browser.

  2. 2. Click the Download uTorrent Web button.

    download utorrent step 1
  3. 3. Next, open the setup wizard for uTorrent to install the software, and follow the on-screen instructions to complete the process.

  4. 4. Once done, open the folder that includes your torrent file, and double-click on it.

  5. 5. Thereafter, the uTorrent window will open. You can click the … button to select an alternative folder.

    download utorrent file location
  6. 6. Make sure you’ve selected all the file checkboxes within the Torrent Contents section.

  7. 7. Click the OK button to start downloading the torrent through uTorrent.

  8. 8. Wait for the torrent to fully download.

  9. 9. Thereafter, press Windows + E to open File Explorer, and navigate to the folder where the downloaded torrent is stored.

  10. 10. Torrent contents often get saved within ZIP archives. To extract the ZIP for a torrent, right-click it and select Extract all.

    download utorrent extract compressed window
  11. 11. Click Browse to choose a folder path to extract the torrent’s ZIP to. Press the Select Folder button.

  12. 12. Press the Extract button.

  13. 13. Open the extracted folder, which includes the torrent content. Torrent content will usually be music and video files, but can also be software.

  14. On your Windows 10 PC, you can easily open torrent files using uTorrent. It is a secure software that allows users to download, share and open torrent files.

To open music and videos, check out the VLC software. That’s a media player with which you can open almost any multimedia file format.

2. Open torrent files on macOS

  1. Go to the uTorrent for Mac page, and click the download button there.
  2. Install uTorrent using the downloaded setup file.
  3. Select your torrent file and click File, hover the cursor over Open with, and select uTorrent.
  4. After that, you can download the torrent’s content with uTorrent for Mac as outlined for the Windows version.
  5. To extract a Zip file that includes the downloaded torrent files on Mac OS X, you’ll need to open Finder.
  6. Open the folder that includes the ZIP, and double-click on it to extract the contents within the same folder.

So, opening a torrent is straightforward with uTorrent. You can also open your torrents with Vuze, BitTorrent, Bitcomet, Deluge, and other BitTorrent client software.

Is it safe to use torrents?

Various countries, including the U.K. and the USA, have blocked multiple torrent sites, such as Pirate Bay.

Even though torrent file sharing is legal, countries are still blocking torrent sites to clamp down on the distribution of copyrighted content that can arise from some of them.

So, you might need to install VPN software to get torrents from Pirate Bay and similar websites. Note that downloading copyrighted material via any means is illegal in numerous countries.

In case you were planning to get a game through torrent, check the best apps/websites to download games, and some of these are free. And if you are looking for quick ways to open SKV files on your PC, you may use Microsoft Excel, use a third-party spreadsheet program, or find more useful tips in our dedicated article.

If you found this guide helpful, don’t hesitate to contact us by using the comment section below.

How To Fix Overwatch Packet Loss, Lag Spikes & Rubberbanding

Overwatch is a vividly-colored intense team-based first-person shooter developed by Blizzard and Iron Galaxy. You get to join a 6-player team and tear your way through your enemies.

Each hero has its own special power and you can make use of it to defeat your opponents. Alongside using firepower such as pistols, cannons, rocket hammers, particle cannons, and such.

Bottom line is Overwatch can be quite enjoyable if you have the hardware. However, sometimes you might experience certain issues that could make your game experience downright awful.

By far, the most annoying one is packet loss. The fact that it seems to occur randomly and that there’s no immediate fix for it can definitely ruin your session.

Why do I keep getting Overwatch packet loss?

There’s no precise answer to this question, really. There are a lot of reasons why you might experience packet loss in Overwatch. One thing is certain, though: network congestion seems to be the common denominator for every packet loss scenario.

If that’s the case, then solving the issue would be quite simple: avoid peak hours. Or, if the congestion occurs on your ISP’s side, you could just use a VPN.

But truth be told, unless you run a packet loss test, there’s no way to identify the leak’s location.

Why is Overwatch lagging so badly?

Overwatch lag caused by hardware issues can be difficult to diagnose because they all revolve around the same premise. Your PC is incapable of producing a high framerate, thus you can set the best FPS settings for Windows 11 to change the tides.

The cause of this can range from as simple as your computer system not meeting the game’s system requirements to having too many applications running in the background and causing unnecessary stress.

When it comes to Overwatch rubberbanding, it’s always the ISP throttling, and rebooting your PC doesn’t help. Rubberbanding is a bad internet connection that causes Overwatch ping packet loss and spikes in packet loss, resulting in slow internet in Windows.

Turn on the ping visual indicator in the game to see what’s going on and why there’s constant packet loss. Overwatch 100 packet loss and permanent packet loss are also helped by port forwarding.

If anyone else on your network is using Spotify, it will consume all of your bandwidth for some reason, according to most players, resulting in packet loss only on Overwatch.

How do I fix Overwatch packet loss?

1. Use a VPN that bypasses ISP throttling

To fix Overwatch constant packet loss, you need to get access to other servers that are closer in range to your location. This can be done with a VPN that supports intensive gaming on your PC.

  1. Download ExpressVPN.
  2. Install it on your PC.
  3. Launch it and log into your account.
  4. Connect to the server. (Preferably the one ExpressVPN recommends.)
  5. Launch Overwatch.
  6. Check if the issue still persists after 2 hours of playing.

ExpressVPN is an excellent all-around VPN from Kape Technologies. You can use it to bypass various issues such as packet loss, network congestion, and even geoblocking.

When your ISP detects that you are streaming or gaming, it may decide to throttle your bandwidth. ISPs limit download speeds for bandwidth-intensive games to reduce network bandwidth usage.

As a result, the ISP can serve more internet users without increasing network capacity, resulting in a sluggish Overwatch experience.

ExpressVPN can help you avoid throttling because it prevents your ISP from determining where your traffic is coming from.

Aside from that, ExpressVPN can also help you keep your privacy safe, and secure your connection. More so, it can unblock geo-restricted websites and services so you can enjoy a censor-free Internet regardless of your location.

ExpressVPN

Connect to servers less crowded, and enjoy hassle-free Overwatch sessions with more stability.
Check price Visit website

2. Troubleshoot your connection manually

  1. Use the guide below to run a packet loss test.
  2. Identify the location of the packet leak.
  3. Take any of the following actions, depending on where the packet loss occurs:

?Check/replace/repair/update/upgrade any faulty component on your side (PC, router, cables).

?Use a wired connection instead of wireless (if possible).

?Contact your ISP and inform them if there’s something wrong on their side.

?Ask your ISP to contact the network distribution company if the issue is on their side.

?Contact Blizzard and inform them of your findings if there’s something wrong server-side.

As you can see, it’s not exactly difficult to troubleshoot your connection manually. However, some of our suggestions’ success rate depends on your ISP’s/network company’s/Blizzard’s willingness to solve the problem.

How to check packet loss in Overwatch?

  1. Launch CMD with administrator rights
  2. Go to Blizzard’s traceroute guide page
  3. Select Overwatch from the dropdown menuTraceroute guide Blizzard
  4. Type pathping x.x.x.x in the CMD window (x.x.x.x = IP address of the server you chose)Server addresses of Overwatch
  5. Wait for the test to complete

If you’re a bit tech-savvy, it’s quite simple to run a pathping test. If you follow the instructions above, you’ll get the results in no time and with minimum effort.

Once the Overwatch packet loss troubleshooting is completed, you’ll know whether you, your ISP is throttling or the Overwatch server leaks packets.

Remember that using a VPN is not a guaranteed fix, although it can improve packet loss if your ISP is throttling your bandwidth.

You can also visit our Gaming Hub if you want to discover more reviews, guides, and news.

Use a VPN if you suspect your ISP is throttling your connection. Try switching to a wired connection. Make sure your connection is in its top shape to reduce packet loss in Overwatch.

How do I reduce input lag in Overwatch?

Checking for packet loss in Overwatch is not necessarily complicated. Check out our guide on how to use pathping and you’ll be able to pull it off in no time.

The bottom line is even packet loss in Overwatch can be fixed. More often than not, it’s caused by network congestion and fixes itself without you even noticing it’s there.

Still, we highly recommend using a VPN for all the other reasons: improving ping, reducing jitter, improving your privacy, and securing your connection.

Fix: Path of Exile FPS Drops, Lag & Stuttering [5 Ways]

Path of Exile is a popular action-packed role-playing game, but users have recently reported that it’s lagging or stuttering. Path of Exile FPS drops can come from various causes.

The settings configuration, old drivers, or VSync might all be the culprits. Each of these causes has a workaround that will increase the frame rate and eliminate any stuttering.

Since the developers have optimized the game on consoles, you should not expect it to freeze or lag on these gaming devices. So, our main focus will be to offer fixes for Path of Exile FPS drops on PC.

Why is my Path of Exile so laggy?

Various factors can cause FPS drops, including your PC not meeting the system requirements, errors in the game files, and a slow internet connection.

Antivirus software, the Windows firewall, and old graphics cards can also cause lags.

How do I fix FPS drops, lag & stuttering in Path of Exile?

1. Check system requirements

Minimum requirements:

  • OS: Windows 7 SP1/Windows 8
  • Processor: Quad-core 2.6GHz x86-compatible
  • Memory: 8 GB of RAM
  • Graphics: GeForce GTX 650 Ti or ATI Radeon HD 7850
  • DirectX: Version 11
  • Network: Broadband Internet connection
  • Storage: 40 GB available space

Recommended requirements:

  • OS: Windows 10
  • Processor: Quad-core 3.2GHz x64-compatible
  • Memory: 16 GB of RAM
  • Graphics: GeForce GTX 1050 Ti or ATI Radeon RX560
  • DirectX: Version 11
  • Network: Broadband Internet connection
  • Storage: 40 GB available space

Most of the time, compatibility problems with your PC specifications might create such problems. So, before leaping to any assumptions, we recommend you thoroughly review the game’s system requirements and PC characteristics.

Above, we have presented the minimum and recommended system requirements for this game.

2. Update drivers

  1. To get the Quick Access Menu, right-click on the Start Menu.
  2. From the list, select Device Manager.quick access menu and device manager
  3. To expand the list, double-click on the Display adapters category.device manager and drivers categories
  4. Then, right-click on the name of the dedicated graphics card.
  5. Choose Update driver, then select Search automatically for drivers.search and update drivers automatically
  6. It will download and install the most recent version of the driver.
  7. After that, restart your computer to apply the changes.

Graphics card manufacturers offer graphics card driver updates to increase frame rates and optimize performance.

An outdated driver can create problems with your PC’s components, including sound cards, Wireless controllers, and imaging devices.

You should check your PC for graphics driver upgrades so that games and other graphics-intensive apps can operate correctly, whether you’re experiencing Path of Exile FPS drops or other similar issues like failed to connect to instance.

You can choose to use a specialized program that will help you update your drivers automatically. It can scan your PC to detect old drivers and download the latest version for them from its consistently revised database.

3. Turn Auto Settings on

  1. During gameplay, press the Esc key on your keyboard.
  2. Now, navigate to the Settings menu and select Video.Graphics settings
  3. Choose Auto Settings.
  4. Restart the game to see whether the frame drops or lags remain.

If you haven’t been able to resolve the frame drop problem, be sure you switch to auto settings in video settings by following the instructions above.

4. Eliminate background running tasks

  1. Use Ctrl + Shift + Esc to launch Task Manager.
  2. Now, pick the Processes tab to identify processes running in the background and consuming too many system resources. performance tab in task manager
  3. Select and then close the task by clicking End Task and then repeat for any unwanted tasks.ending a task in task manager

Unnecessary background running applications or programs can also take resources on the system, causing crashes, lags, stutters, FPS decreases, and other problems.

5. Stop Background Downloads

Background downloads can utilize a lot of your PC’s computational power, resulting in game lags, just as they might restrict the network bandwidth your game receives, creating connection troubles.

Background downloads should be paused or stopped while launching and playing Path of Exile on the client. After playing, you may continue downloading games or applying patch updates.

Why can’t I get more than 30 FPS?

If your FPS is limited to 30, VSync is likely to be set to double buffered. Please try turning it off or switching to triple buffered mode.

On the other hand, if the FPS is limited to 60, VSync is likely to be set to double or triple buffering. You should turn off VSync to restore your FPS.

The game is enjoyable, but frame dips can ruin the experience and leave you wondering what caused the problem.

The solutions listed above will help you in minimizing the use of system resources by other apps, allowing your PC to devote its full power to improve your gaming experience.

To avoid future difficulties, keep your system up to date and upgrade your PC components.

In the comment section below, let us know if you were able to fix Path of Exile FPS drops with the methods described in this article.

How to Disable Transparent Taskbar in Windows 10 [Easy!]

Want a more polished or solid look for your desktop? Windows 10 lets you easily enable or disable taskbar transparency with just a few clicks. Whether you’re aiming for a cleaner appearance or prefer an opaque taskbar, the setting is built right into the system—no third-party tools required.

In this guide, we’ll show you how to turn taskbar transparency on or off in Windows 10 and help you quickly customize the look of your taskbar to match your style.

How do I make the taskbar not transparent?

1. Turn off taskbar transparency in Windows 10 via Settings

  1. 1. Press the Windows key + I to open the Settings app.

  2. 2. Navigate to the Personalization section.

    personalization settings windows 10
  3. 3. In the menu on the left, select Colors.

    How to make Taskbar not transparent Windows 10
  4. 4. From the right pane, under the More options section, toggle Transparency effects off.

  5. 5. If you want to enable transparency once more, simply follow these steps and turn on the transparency setting.


  6. If you’re using Windows 10, you’ll be happy to know that you don’t need to use third-party applications or themes in order to make the taskbar not transparent.

    Windows 10 has a built-in setting that allows you to enable or disable transparency of your taskbar. As a result, you can disable transparency with a single click.

2. Use Classic Shell

  1. Download Classic Shell on your device.
  2. Install the software by following the on-screen prompts.
  3. The right click on the Start button and select Settings.
  4. Select the Start button tab and just check Disable taskbar transparency.
  5. Click OK and that’s it; uncheck the same option if you want to enable taskbar transparency on or Windows 10.

3. Use Aero Lite Theme

Another way in which you can complete this operation is by using a dedicated theme for Windows.

  1. Download Aero Lite Theme and unzip the theme on your device.
  2. Then save this file to path C:\Windows\Resources\Themes.
  3. Now just change the current Windows 10 theme to Aero Lite.
  4. Customize the new theme for setting a new background, for enabling / disabling taskbar transparency, and so on.
  5. Test the theme and if you don’t like it, just uninstall the same from Control Panel.

Several users claim that you don’t even have to download this theme in order to use it. According to users, the theme is still available on your PC, and you can activate it manually by doing the following:

  1. Press Windows Key + R to open the Run dialog. In the input field enter resources and press Enter or click OK.
    Disable Taskbar transparency Windows 10
  2. Navigate to the Themes directory and copy the aero.theme to your Desktop. Keep in mind that you might see this file only as aero if you don’t have file extensions revealed.
    Classic Shell disable Taskbar transparency
  3. Rename the file that you just copied to your Desktop from aero.theme to aerolite.theme.
    Windows 10 Taskbar opaque
  4. Now right click aerolite.theme file on your desktop and choose Open with.
    Transparent Taskbar and Start Menu
  5. Select Notepad from the list and click on OK.
    How to make Taskbar not transparent Windows 10
  6. Locate DisplayName line in the [Theme] section and change it to DisplayName=Aero Lite. Basically, you just need to change the value after the = sign to the desired name.
    Disable Taskbar transparency Windows 8
  7. Now locate [VisualStyles] section. Locate Path and change Aero.msstyles to Aerolite.msstyles. After doing that, save changes.
    Classic Shell disable Taskbar transparency
  8. Now move the aerolite.theme from your Desktop back to C:\Windows\Resources\Themes directory. If you get a security warning just click on Continue.
    Windows 10 Taskbar opaque

After doing that you should be able to access the Aero Light theme from the personalization section and change your theme to Aero Lite.

After switching to this theme, your Taskbar won’t be transparent anymore.


Perfect; so there you have it. These are the best ways to use when trying to disable taskbar transparency.

However, in Windows 10, you can make the taskbar not transparent by tweaking your PC’s built-in settings.

Anyway, use the comments field below if you had problems performing the steps explained in this tutorial and we will help you resolve the issues.

Surface Pen tip not Working but Eraser is: 9 Ways to Fix it

Microsoft Surface is a great device, but many users reported that their Surface Pen tip isn’t working. Surprisingly, the eraser works fine, but the pen won’t write or work. This can be a big problem, but there’s a way to fix this issue.

Surface Pen issues can cause many problems, and speaking of Surface Pen, here are some common issues that users reported:

  • Surface Pen driver error – This issue can occur if your driver is outdated or corrupted. Reinstall or update your drivers, and the case should be resolved.
  • Surface Pen no light – If the LED won’t light up on your Surface Pen, it’s somewhat likely that your battery is empty, so you’ll need to replace it.
  • Surface Pro 4 pen not writing, but buttons work – This problem can occur due to your battery, so be sure it’s working correctly.
  • Surface Pen tip doesn’t work, won’t write – If you encounter any of these issues, try some of our solutions and check if that helps.

Why is my Surface Pen tip not working?

  • The battery of the Surface Pen is dead or faulty.
  • You haven’t paired the Surface Pen to your Surface Pro.
  • There is a pending Windows update available that you haven’t installed.
  • You are using an incompatible app to use the Surface Pen.
  • The Surface Pen itself is faulty.
  • Another stylus or pen is connected to your PC and conflicts with the Surface Pen.

How do I fix the Surface Pen tip if it’s not working?

  1. Check the battery
  2. Install the latest updates, drivers, and firmware
  3. Remove and pair your pen again
  4. Disable the pen in Device Manager
  5. Reinstall the pen driver
  6. Perform a hard reset
  7. Make sure that other devices aren’t interfering with your touchscreen
  8. Run the troubleshooter
  9. Replace the Surface pen tip

1. Check the battery

Several users reported that the Surface pen tip is not working for them at all. The pen pairs with the Surface, but it’s unable to write.

A drained battery usually causes this, and to fix the problem, replace the AAAA battery with a new one, and the issue should be resolved.

Another method you can use is to unscrew the pen, just enough to cut power to it. Now wait a few seconds and screw the pen to power it up.

This method might work for some users, so you might want to try it out. In addition to replacing the battery, be sure to check if your battery isn’t inserted upside down.

Several users reported that their battery wasn’t properly inserted and that caused the issue to appear. After flipping the battery, the problem was fixed.

Sometimes, you must take out the battery and put it back in. For example, there might be some dust on the contacts of your battery, and that can cause this issue to appear, but by removing and reinserting the battery, the problem should be fixed.

In some cases, you might even have to clean your contacts manually in order to fix the issue.

2. Install the latest updates, drivers, and firmware

  1. Open the Settings app.
  2. Navigate to the Update & Security section.
    Surface Pen no light
  3. Now click the Check for updates button.
    Surface Pen driver error

If the Surface Pen tip is not working properly, the issue might be the lack of system updates. Windows 10 is a solid operating system, but sometimes issues can occur if you don’t have the latest updates installed.

The updating process is quite streamlined in Windows 10, and it will automatically download the missing updates, for the most part.

If any updates are available, they will be downloaded automatically and installed as soon as you restart your PC. After updates are installed, check if the problem is still there.

If the problem is still there, even after installing the latest system updates, be sure to install the latest firmware and driver updates for your Surface device. You can download the necessary files right from Microsoft’s website.

However, if you don’t want to download the drivers manually, you can always use third-party solutions to automatically update all your drivers.

Not only is this tool much easier to use, you always know that it will get the driver versions right and that they are always the latest available.

More so, Outbyte Driver Updater is called that way because it can also detect faulty or missing drivers and replaces them with the latest versions as well.

Lastly, the update and repair process is done mainly by the program, and as long as you have an Internet connection, the process can be fully automated as well.

⇒ Get Outbyte Driver Updater

3. Remove and pair your pen again

  1. Open the Settings app by pressing Win + I.
  2. Go to the Devices section.
    Surface Pen tip won't write
  3. Select Bluetooth.
  4. Locate your pen in the right pane and click the Remove button.
  5. Click Yes to confirm.

In some cases, there might be a glitch with your pen that is causing the Surface Pen tip not to work. This can occur for a number of reasons, but you can fix the problem simply by removing the pen and pairing it up again with your Surface device.

After doing that, you just need to pair your pen with Surface once again. Simply press and hold the button for 6 seconds until the light glows. Now pair the pen with your PC.

After doing that, check if the problem is still there. As you can see, minor glitches with Bluetooth can occur, but in most cases, you should be able to fix them simply by unpairing and pairing your pen with your system.

4. Disable the pen in Device Manager

  1. Right-click on the Start button and choose Device Manager from the list.
    Surface Pro 4 pen not writing but buttons work
  2. Locate your pen in the list of devices under the Bluetooth section.
  3. Right-click the pen and choose Disable device from the menu.
    Surface Pen no light
  4. When the confirmation dialog appears, click Yes.
    Surface Pen driver error
  5. After doing that, wait for a few seconds and right-click the pen again, and choose Enable from the menu.

If the Surface Pen tip is not working, the problem might be a temporary glitch with your system. This usually isn’t an issue, and in most cases, you can fix the problem simply by disabling the pen from Device Manager.

Once you enable your pen, check if it works with your Surface device. If that doesn’t work, perhaps you should try disabling the Intel(R) Precise Touch Device.

A number of users reported that disabling and enabling Intel(R) Precise Touch Device in Device Manager fixed the problem for them, so be sure to try that.

Keep in mind that this is just a workaround, so you might have to repeat it if you shut down your Surface.

5. Reinstall the pen driver

  1. Right-click on the Start menu and select Device Manager.
  2. Locate your Surface Pen in the list of devices, right-click it and choose Uninstall device from the menu.
    Surface Pen no light
  3. When the confirmation dialog appears, click Uninstall.
    Surface Pro 4 pen not writing but buttons work
  4. After the driver is removed, click the Scan for hardware changes icon and wait while the driver is installed.
    Surface Pen tip doesn't work

Sometimes your Surface Pen tip won’t work because of your driver. There might be an issue with your drivers, and that could lead to this and many other problems.

However, you can fix this problem simply by reinstalling the pen driver. Once the driver is reinstalled, check if the problem is still there.

6. Perform a hard reset

  1. Press and hold the Power button for about 25-30 seconds.
    • Be sure to completely shut down your device.
  2. Now press and hold the Power button and Volume Up button until you see the Surface logo on the screen.
  3. You should now see the UEFI menu.
    • Exit the UEFI menu and your PC will restart.

If the Surface Pro tip is not working properly, you might be able to fix this issue simply by performing a hard reset.

Once your device boots, check if the problem with the pen is still there.

7. Make sure that other devices aren’t interfering with your touchscreen

In some cases, your Surface Pen tip won’t work if other electrical devices are interfering with your touchscreen.

This is unlikely, but a handful of users claim that certain devices, such as lamps can interfere with their touchscreen.

To fix the problem, simply move away from these devices and your touchscreen and Surface Pen will start working again. This is an unlikely solution, but you can still try it out if you want.

8. Run the troubleshooter

  1. Open the Settings app by pressing Win + I.
  2. Navigate to the Update & Security section.
  3. Choose Troubleshoot from the menu on the left.
  4. Now pick Hardware and Devices from the list and click the Run the troubleshooter button.
    Surface Pen driver error

According to users, sometimes the Surface Pen tip won’t work due to certain glitches on your system. However, you might be able to fix those glitches automatically by running the built-in troubleshooter.

After the troubleshooter is finished, check if the problem is still there. In addition, you might want to try running the Bluetooth troubleshooter and check if that solves the problem.

9. Replace the Surface pen tip

  • Use a pair of tweezers to pull out the pen tip all the way out.
  • Gently press the new pen tip in the same location gently, and avoid applying pressure on the tip itself.

If none of the solutions we outlined above work, you might think of finding a Surface pen tip replacement.

You will be able to find some in the Microsoft Store but there are plenty of other resellers that have them in their inventory.

Just be careful to get the right tip for your exact model of Surface Pen because there are a few different kinds on the market.

How do I fix Surface Pen tip not if it’s not working on Windows 11?

  • Check for Windows updates.
  • Check if the Surface Pen is compatible with your Surface device.
  • The battery level of the phone is crucial. Check if that is okay or not.
  • Unpair and then connect it back to your Surface Pro.
  • Reset the Surface Pen.

Does Surface Pen work without a battery?

No. The Surface Pen does not work without a battery. You need to make sure that it is charged to 100% in order to use it.

It will stop working once the battery is dead, and you will have to replace it. According to Microsoft, the Surface Pen with a rechargeable battery will give you a battery life of about 15 hours.

Surface Pen issues can be problematic, but we hope that you managed to solve this issue by using one of our solutions.

Of course, if the pen doesn’t work even with a replacement tip, you may consider replacing the Surface Pen with a new one altogether.

For any other suggestions or questions, feel free to use our comments section below and we will get back to you as soon as possible.

Internet Explorer for Windows 11: How to Install & Use it

What surprised most users was that Microsoft revealed, after 26 long years, its intention to disable Internet Explorer in Windows 11. First, we will show you how to download and install it on this operating system.

While the browser wasn’t the most successful, if you don’t count the popular memes making the rounds over the Internet, plenty of users still expected Internet Explorer to appear in Windows 11.

Some say that they were hoping for at least an Internet Explorer 32-bit. But as the OS only runs 64-bit software, it seems this app has no place in the roster.

On that note, if you want to know more about how different Windows 11 is from Windows 10, look at our article.

Now let’s see how you can download Internet Explorer on Windows 11 and start using it as soon as possible.

Note icon NOTE
Starting on June 15, 2022, u003ca href=u0022https://windowsreport.com/internet-explorer-end-of-service/u0022 target=u0022_blanku0022 rel=u0022noreferrer noopeneru0022u003ethe Internet Explorer browser has officially gone out of serviceu003c/au003e. Thus, IE 11 will be retired for Windows 10 client SKUs, version 20H2 and later, and Windows 10 IoT, version 20H2 and later.u003cbru003eu003cbru003ePlease note that the products not affected by this retirement are:u003cbru003eu003cbru003e- IE Mode in Edgeu003cbru003e- IE 11 desktop on Windows 8.1u003cbru003e- Windows 7 (with Extended Security Updates)u003cbru003e- Windows Server LTSC (all versions)u003cbru003e- Windows Server 2022u003cbru003e- Windows 10 client LTSC (all versions)u003cbru003e- Windows 10 IoT LTSC (all versions)

Quick Tip:

An Internet Explorer update for Windows 11 will never come. Yet there are ways in which you can work around this issue.

As an alternative to this browser, you can use Opera One, a browser with a modern and friendly interface that can offer many features from pinboards, multiple workspaces, and an embedded ad-blocker to a free VPN.

Opera One

Check out Opera One, a browser that works great with Windows 11 and supports legacy devices.
Free Trial Visit Website

Can you get Internet Explorer on Windows 11?

Yes, you can download Internet Explorer for Windows 11 in just a couple of steps:

  1. Visit Internet Explorer 11’s download page and click on the Download button.
  2. The download process will now start automatically, and all you will have to do is wait for it to complete.

Remember that this download method might not work after officially discontinuing the software.

How do I enable Internet Explorer in Windows 11?

1. Enable IE Mode from Edge

  1. 1. u003cspanu003eOpen u003c/spanu003eu003cemu003eMicrosoft Edgeu003c/emu003eu003cspanu003e and click the u003c/spanu003eu003cstrongu003eellipsis buttonu003c/strongu003eu003cspanu003e on the top-right corner.u003c/spanu003e

    navigate to the edge menu
  2. 2. u003cspanu003eFrom the drop-down menu, select the u003c/spanu003eu003cstrongu003eSettingsu003c/strongu003eu003cspanu003e option.u003c/spanu003e

    navigate to settings on edge
  3. 3. u003cspanu003eNext, click on the u003c/spanu003eu003cstrongu003eDefault browseru003c/strongu003eu003cspanu003e option.u003c/spanu003e

    edge default browser settings
  4. 4. u003cspanu003eUnder u003c/spanu003eu003cemu003eInternet Explorer compatibilityu003c/emu003eu003cspanu003e, click on the drop-down menu next to u003c/spanu003eu003cstrongu003eAllow sites to be reloaded in Internet Explorer modeu003c/strongu003eu003cspanu003e and select u003c/spanu003eu003cemu003eAllowu003c/emu003eu003cspanu003e.u003c/spanu003e

    allow sites to be reloaded in internet explorer checkbox
  5. 5. u003cspanu003eNext, click on the u003c/spanu003eu003cstrongu003eRestart u003c/strongu003eu003cspanu003ebutton.u003c/spanu003e

    restart edge to apply changes
  6. If you’re looking to install and use Internet Explorer on your Windows 11 device as a default browser, that cannot be done anymore. However, you can enable Internet Explorer Mode via Microsoft Edge’s built-in settings.rnrnWhen sites require Internet Explorer, you will be able to useu003cspanu003e u003c/spanu003eu003cspan class=u0022vm-hook-outeru0022u003eu003cspan class=u0022vm-hooku0022u003eMicrosoft Edgeu003c/spanu003eu003c/spanu003e to reload the page using IE mode.

2. Open the site with Internet Explorer Mode on Edge

  1. Open Microsoft Edge, then click on the ellipsis button in the top-right corner to select the Settings option.
  2. Tap on the Add button from the Internet Explorer mode pages section.
  3. Type or paste the website address you want to see in Internet Explorer mode and click on the Add button.
  4. When you access the website, you will have the option to Reload in Internet Explorer mode. Note that if you don’t add the website URL first, you won’t see this option in the menu.
  5. If you want to load the website without the IE mode, delete the website by clicking the bin icon in the Settings menu.

You might also be interested in how to change the default browser in Windows 11. That will help you open external links with the same app.

3. Let Internet Explorer open sites in Microsoft Edge

  1. Follow the steps from the first solution until you reach the Default button option in Microsoft’s Edge settings.defautl edge button
  2. Under the Internet Explore compatibility section, click on the Let Internet Explorer open sites in the Microsoft Edge drop-down menu and select the preferred option between:
    • Never – Internet Explorer will never switch to Edge to load the website.
    • Incompatible sites only – Internet Explorer will still load the websites, but those designated for a modern browser will load in Microsoft Edge.
    • Always – Internet Explorer will always switch to Edge to load sites.open IE in
  3. Websites will now open in Microsoft Edge according to your configuration settings in the second step. You will know you are in IE Mode as a little Internet Explorer icon will appear in the address bar.

What does the Internet Explorer Mode in Edge have to offer?

According to Microsoft, IE Mode aims to provide its users with a method to use the legacy infrastructure of IE inside the chromium-based Microsoft Edge:

IE mode on Microsoft Edge makes it easy to use all of the sites your organization needs in a single browser. It uses the integrated Chromium engine for modern sites, and it uses the Trident MSHTML engine from Internet Explorer 11 (IE11) for legacy sites.

Microsoft Edge will replace the Internet Explorer 11 desktop app with its IE mode.

With this change, users can restrict their use of the Internet Explorer browser. Thus, it can only access those legacy sites that need it.

To make the transition easier, Microsoft even put out a PDF guide. It is intended for people and companies using IE as their default browser to prepare them for the app’s retirement.

table of contents for ie mode

Is IE Mode better than Internet Explorer?

The primary purpose of IE Mode is to make it easier for people and organizations to use one browser. Currently, Edge is the only browser with built-in compatibility for legacy sites and apps.

IE Mode will still be able to support a lot of Internet Explorer’s functionalities. Such as all document and enterprise modes, ActiveX controls, Browser Helper Objects, Internet Explorer settings, and the F12 developer tools.

Taking this into consideration, plus the fact that Edge also provides more features on its own, the browser and its IE Mode can be considered better than Internet Explorer.

Moreover, one of the most exciting things about Edge and its IE Mode is its economic impact on organizations.

According to a study by Forrester on The Total Economic Impact™ Of Microsoft Edge, the avoided cost of legacy application modernization from using IE Mode leads to almost $1.2M in total savings.

So, maybe this change isn’t so bad after all. However, I am weighing the fact that IE Mode can still support many of Internet Explorer’s functionalities and generate savings, productivity gains, and security for organizations.

And judging from the small number of users who would still need, for some reason, to use Internet Explorer, this won’t be recorded as such a significant loss for the operating system.

Does Windows 11 not support Internet Explorer?

It’s the other way round. Internet Explorer is not compatible with Windows 11, and you can’t run it. Even searching for Internet Explorer will display Microsoft Edge as a result.

search for internet explorer on windows 11

And this is because Microsoft intends to replace Internet Explorer with a new and redefined version of Edge.

Can I install Internet Explorer on Windows 11?

Firstly, we have established that installing it is pretty impossible. You can even download and install Internet Explorer 11 on Windows 11, and you will still be prompted with Microsoft Edge instead.

system requirements for internet explorer 11

If you take a closer look at the system requirements for Internet Explorer 11, you will find that it’s only for Windows 7 PCs with Service Pack 1.

And if you still have that old OS, we can help you with a complete solution for installing Internet Explorer on Windows 7.

Many users are wondering if they can install Internet Explorer on Windows 11. While the answer is yes, the application won’t run at all, so technically, you can install it without using it.

However, there are three ways in which you can use Internet Explorer. Follow along as we will explore them after seeing why Microsoft removed it from Windows 11.

Why did Microsoft remove the ability to use Internet Explorer on Windows 11?

Microsoft warned that the Long-Term Servicing Channel (LTSC) of Windows 10 would include Internet Explorer, even though a consumer removal took place.

timeline for the retirement of internet explorer 11

In the same blog post, Microsoft said that Internet Explorer is less secure than modern browsers. Moreover, they said that it doesn’t deliver an up-to-date browsing experience.

For these reasons, they are encouraging users to use Edge, a modern web browser based on Google’s open-source Chromium code:

Not only is Microsoft Edge a faster, more secure and more modern browsing experience than Internet Explorer, but it is also able to address a key concern: compatibility for older, legacy websites and applications.

Sean Lyndersay, Microsoft’s program manager for Edge.

On the official Windows 11 specs, Microsoft states that Internet Explorer is indeed disabled in Windows 11. As Microsoft Edge now includes the IE Mode feature.

So, Windows 11 has entirely removed this browser. And users that still use shortcuts such as iexplore are redirected to Microsoft Edge instead.

No surprise here, considering Microsoft is known for being constantly headed towards the future. Although it sometimes holds on to some of its past features and apps.

Can I run Internet Explorer on Windows 11?

Yes, you can use Internet Explorer in Windows, but you will have to install one of the older versions of the OS that the browser is compatible with. And honestly, that’s too much trouble for a browser far less secure than its replacement, Microsoft Edge.

If you still want to use Internet Explorer in Windows 10 or 11, IE Mode in Edge is the only option. And Microsoft has confirmed that it will continue to support the IE Mode functionality until 2029, and a year’s notice will be provided before discontinuing it.

That’s all for now! Internet Explorer may have been discontinued, but it’s not outright impossible to use it, as illustrated in the sections earlier.

With all this talk about Internet Explorer, don’t forget that there are a lot of other browsers out there. Check out the best browsers for Windows 11 and select one according to your needs.

If you plan to switch, check out the best extensions for Edge you need to install today.

Using Internet Explorer might be necessary, especially if you’re getting Your browser is not supported in Hikvision error.

Since Edge has replaced Internet Explorer, you might want to learn how to access Internet Options on Microsoft Edge.

Please share your thoughts on Microsoft discontinuing support for Internet Explorer and what you liked the most about it in the comments section below.

Fix: Laptop Battery is Not Charging after Windows 10 Update

Users have recently reported that their laptop battery is not charging after performing a Windows 10 or 11 update. This can be a frustrating issue, follow the solutions offered below to quickly solve this problem before resorting to replacing the battery entirely.

Windows updates are meant to provide improvements and fixes to your PC, however, there is a rare case where it may introduce an issue instead.

Try the following troubleshooting steps listed below to try to solve this problem and get your laptop up and running again. If you find your battery draining rapidly in Windows 11, we have a guide for that as well.

Why is my laptop not charging when plugged in after an update?

There are a number of reasons that can cause your laptop battery to act up and not charge even when plugged in. It could be due to an outdated battery driver or a faulty power adapter. If the issue occurs after a Windows update, then it’s likely due to problems with the update and your PC.

Running a battery report and troubleshooting will help you identify if there is something specifically wrong with your battery and the next steps you should take. Rolling back after the update may help fix this issue.

Laptop not charging after windows 10 update.

If you’re having issues with your laptop not working when unplugged, we also offer solutions for that problem.

Can a Windows update affect battery charging?

It’s rare for a Windows update to introduce bugs or issues with your PC but there is always a possibility. If you’re having issues with your battery charging after a Windows update then you can always restore it to the previous version. Keep reading to find out how below.

How do I fix my laptop battery if not charging after Windows update?

1. Run battery troubleshooter

  1. Click on Start and open Settings (or press Windows + I).
  2. Under System, select Troubleshoot. open troubleshooters.
  3. Click Other troubleshooters. click other troubleshooters.
  4. Under Other, Select Run next to Power. run power troubleshooter if laptop not charging after windows update.
  5. Allow the troubleshooter to run and fix any issues.

The built-in troubleshooter can help locate any issues related to your laptop’s power and battery. If any issues are detected, the troubleshooter will attempt to fix them.

2. Perform a system rollback

  1. Click on Start and open Settings (or press Windows + I).
  2. Under System, scroll down and select Recovery. go to recovery under system.
  3. If eligible for a system rollback, click on Go Back. rollback update if laptop not charging.
  4. Follow the prompts to revert to the previous update.

Windows gives users a 10-day grace period to roll back to the previous update. If your laptop battery is not charging after a Windows update, then you can use the Go Back function and revert the change.

3. Hard reset the battery

  1. Power your laptop down and remove any cords and cables. shut down laptop.
  2. Flip your laptop over and remove the back panel then take out the battery if possible.
  3. Return your laptop right-side up and press and hold the power button for 15 seconds.
  4. Replace the battery and back panel and reattach the power cable then power on your laptop. turn on your laptop after resetting the battery.

Some laptops have detachable batteries which make this solution a lot easier. However, most laptops have the battery located within the back panel which you will need to remove to gain access to it. Be sure to look up a guide for your specific laptop model to properly locate and remove the battery.

Keep in mind that if your laptop is still under warranty, then removing the battery and back panel may void it.

4. Update battery driver

  1. Click on Start and search Control Panel then press Enter. search control panel.
  2. Select Hardware and Sound then open Device Manager. Click hardware and sound to open device manager.
  3. Expand the Batteries drop-down menu then right-click on Microsoft ACPI-Compliant Control Method Battery.
  4. Select Update driver. update battery driver if laptop not charging.
  5. Click Search automatically for drivers.
  6. Restart your PC.

If your battery driver is out of date, then issues may occur with your laptop battery including not charging even when plugged in. You can also perform a driver update on the Microsoft AC Adapter driver.

If you don’t necessarily want to do this process manually, you can opt for a program that will do this automatically.

This way, you can finish these steps more securely and also save time because you don’t have to look for the latest update for your drivers anymore.

⇒ Get Fortect Driver Updater

5. Replace the battery

If you’ve tried everything and your laptop still won’t charge after a Windows 10 update, you may have to replace the battery. Usually, the laptop manufacturer’s website sells replacement batteries for your laptop model.

replace the laptop battery if it won't charge after windows 10 update.

Laptops with detachable batteries are much easier to replace because they are easily accessible. However, built-in batteries can also be replaced. Be sure to run a battery report to double-check the health status of your battery.

How do I run a Windows battery report?

  1. Click on Start and search Command Prompt then hit Enter.
  2. Type in the following command then hit Enter. powercfg /batteryreport
  3. Copy the file path provided and then open File Explorer. copy battery report file path.
  4. Paste the file path in the search bar and press Enter. copy and paste the file path.
  5. Choose how you want to open the .html file. open battery report.

The Windows battery report provides details about your battery, including the cycle count. Here, you can check if there is something wrong with the battery and if it needs to be replaced. Generating a battery report won’t fix the issue, but it will provide more information as to the status of your battery.

If your laptop is still under warranty, you can use this when filing a warranty claim to prove an issue with the battery.

We hope one of the above solutions helped you fix your laptop battery if it’s not charging after Windows 10 or 11 updates. Let us know in the comments below which step worked for you or if you have a suggestion for a different solution.

Fix: Microsoft Wireless Display Adapter not Connecting

Some Surface Pro 3 users have complained that they’re unable to connect their Surface to a smart TV via the Microsoft wireless display adapter after the upgrade to Windows 10.

So, we did a little research on this and found a couple of solutions for the problem with the Microsoft wireless display adapter in Windows 10.

How do I fix the Microsoft wireless display adapter if it’s not connecting?

1. Uninstall the driver, and let Windows install it

  1. Right-click the Start button and select Device Manager.
  2. Find the Wireless display adapter, right-click on it and go to Uninstall.
    Microsoft Wireless Display Adapter disconnects uninstall network adapter
  3. Reboot your computer.
  4. Press Win + I to open Settings.
  5. Select Update & Security, and Check for updates.
    check-updates lenovo-ideapad-keyboard-not-working
  6. Microsoft will likely install the Wireless Display Adapter driver again, and everything should work.

In some cases, just uninstalling the Microsoft Wireless Display Adapter driver and letting Windows 10 install it again automatically can help if the Wireless Display Adapter is not working.

Now you can turn on your TV and check if everything is OK. If the issue is still present, you can try using a dedicated driver update tool to do it automatically.

2. Reset the adapter

  1. On the adapter, press and hold the reset button for 10 seconds.
  2. When the message Ready to connect appears, open Action Center from the Taskbar.
  3. Select Connect, and select Microsoft Wireless Display Adapter in the list of displays.

If reinstalling drivers didn’t get the job done, you can try resetting the adapter. This will bring your Microsoft Wireless Display Adapter to its default settings, so it would now be changed if something was wrong.

3. Change the wireless frequency band

  1. Right-click the Start button and select Device Manager.
  2. Under Network Adapters, right-click on your wireless adapter.
  3. Select Properties, and go to the Advanced tab
  4. Under Property, select Preferred Band.
  5. Under Value, select the arrow, either 2.4GHz or 5GHz, and then OK.

If you’re using Surface 3, Surface Pro 3, Surface Pro 4, or Surface Book, you can communicate with the Microsoft Wireless Display Adapter on the 2.4GHz or 5GHz wireless frequency band.

However, you must have the 2.4GHz frequency band enabled if you want to pair your Surface device with the adapter.

So, if this frequency band is disabled, you won’t be able to use the Microsoft Wireless Display Adapter to project the screen from your Surface on your TV.

It’s also good to keep a closer eye on your Wi-Fi connection. We have a list of the best Wi-Fi analyzer tools for Windows 10 that will help you with that.

4. Reinstall the graphics card driver

  1. Right-click on the Start menu and select Device Manager.
  2. Expand Display adapters.
  3. Right-click on your GPU, then select Uninstall driver.
  4. Restart your PC, and your Windows will automatically install the default GPU driver.

And finally, maybe some issues with your graphics card (Intel HD Graphics, if you’re using Surface) usually prevent your Microsoft Wireless Display Adapter from working.

So, we’re going to do the same thing as we did in the first step, only with a different device.

Windows Update will install your graphics card driver again, and you’ll know if it was causing the Wireless Display Adapter not working issue.

5. Connect the adapter properly

  1. Connect the adapter to the USB port.
  2. Now connect it to the HDMI port.
  3. After doing that, switch to the HDMI input. This step is crucial, and your device won’t work until you switch to the correct input.
  4. Now you have to choose the device and add a wireless display.

If the Connect to a wireless display option is not showing, you might be able to fix the problem by connecting it properly. 

This is a basic solution, but several users reported it worked for them, so be sure to try it out.

6. Change your refresh rate

Your refresh rate can cause this issue. However, several users reported fixing the problem simply by opening their graphics adapter software and changing the refresh rate from 30Hz to 25Hz.

Users reported this problem with Intel Graphics, but the issue might appear with other graphics adapters as well.

7. Uninstall problematic software

Sometimes third-party applications can interfere with your Internet connection and cause various problems. For example, if you can’t connect to a wireless display in Windows 10, the cause might be your VPN client.

Many users reported that Cyber Ghost VPN caused this issue, and after removing the application, the problem was resolved.

If you continue using Cyber Ghost, we advise you to download and install the latest version and check if that solves your issue.

VPN applications aren’t the only apps that can cause this problem, so you might have to research before you find the problematic application.

8. Disable your antivirus software

The problem might be your antivirus software if the Microsoft Wireless Display Adapter is not working.

According to users, antivirus software such as AVG can sometimes interfere with your Internet connection and prevent Microsoft Wireless Display Adapter from working.

To fix the issue, users recommend temporarily disabling your antivirus and checking if that solves the problem.

Even if you disable your antivirus, your PC will remain protected by Windows Defender, so there’s no reason to worry. However, if disabling the antivirus doesn’t help, you might have to remove your antivirus.

It’s worth mentioning that antivirus tools can leave specific files and registry entries behind, so it’s recommended to use a dedicated removal tool.

Once you remove all files associated with your antivirus, the issue should be resolved.

Now you can reinstall the latest version of your antivirus or switch to a different antivirus solution and check if that solves the problem.

Problems with Microsoft Wireless Display Adapter can prevent you from enjoying multimedia on an external display. Speaking of issues, users reported the following problems as well:

  • Microsoft wireless display adapter bad quality, blurry, stutter
    • One common problem with this adapter is terrible picture quality.
    • In addition, many users reported blurry pictures.
  • Microsoft wireless display adapter disconnects, won’t stay connected
    • Common disconnects are also a problem with Microsoft wireless display adapters.
    • According to users, sometimes their adapter can’t stay connected.
  • Pairing failed Microsoft wireless display adapter
    • In some cases, you might not be able to pair your adapter.
    • Many users reported various paring issues while using this adapter.
  • Unable to connect to Microsoft wireless display adapter
    • This is just a variation of this problem, but many users said their PC couldn’t connect to their adapter.
  • No sound Microsoft wireless display adapter
    • Another common problem with your adapter might be the lack of sound.
    • This is an annoying problem, but you should be able to fix it with one of our solutions.
  • Microsoft wireless display adapter lag, latency, losing connection
    • Many users also reported latency issues with this adapter.
    • According to them, they are experiencing lag frequently.
  • Microsoft wireless display adapter black screen, blue screen
    • This is another connection problem, but you should be able to fix it with one of our solutions.

Why does Windows 10 not connect to a wireless display?

Here are some common reasons your Windows 10 PC couldn’t connect to a wireless display.

  • Your graphics driver is not updated – Keeping your device’s drivers updated at all times will ensure a smooth operation across the board.
  • The wireless adapter is facing some issues – Checking if your network settings are compatible with your setup is of paramount importance.
  • The wireless adapter isn’t connected correctly – In cases where the wireless adapter is not plugged in perfectly into the motherboard, the error mentioned above will appear.
  • Your antivirus is interfering with the connection process. Even though they protect us from any unwanted virtual visits, sometimes the security measures can get into the way of your PC working correctly.
  • Your PC settings and the wireless display settings do not match. Whether your wireless display settings match, or if they are not compatible for other reasons, the error mentioned above will be a result.
  • A third-party tool might be conflicting with the process – Checking and then double-checking that all the apps installed on your device are running without affecting your system badly.

How do I fix Microsoft wireless display adapter not connecting on Windows 11?

Here are some quick solutions that you can apply to fix the wireless display adapter not connecting to your Windows 11 PC.

  • Install the latest Windows updates.
  • Check whether your HDMI and USB connection is proper or not.
  • Ensure that the ports are working fine.
  • Update the adapter’s firmware.
  • Reset the adapter.
  • Disable Windows Firewall and check if this fixes the issue.
  • Reinstall the graphics card drivers.
  • Reinstall the Wi-Fi drivers.

To update firmware and tweak settings more easily, install the official Microsoft Wireless Display Adapter app, then use it to apply updates and reset or calibrate the adapter.

FAQs

Why is my Microsoft Wireless Display Adapter not connecting?

Common causes include outdated firmware, unsupported Miracast hardware, interference on the 2.4 GHz Wi-Fi band, or a poor HDMI/USB connection on your TV. Restarting both your PC and TV often resolves temporary glitches.

How do I fix connection problems with the Microsoft Wireless Display Adapter?

Make sure your PC supports Miracast, update the adapter’s firmware using the Microsoft Wireless Display Adapter app, change your TV’s input source, and reconnect the adapter to a different HDMI port. Also reboot your laptop and toggle the Connect (Win + K) panel again.

Does my PC need Wi-Fi to use the Microsoft Wireless Display Adapter?

No. The adapter creates a direct wireless connection using Miracast, so an internet connection is not required. However, Wi-Fi and Bluetooth must be enabled on your PC for discovery and pairing.

Why does the screen keep freezing or disconnecting?

This can happen due to wireless interference, outdated display or network drivers, or the adapter using the crowded 2.4 GHz band. Try updating drivers, moving devices closer, switching your router to 5 GHz, or resetting the adapter from the companion app.

Microsoft Wireless Display Adapter is a solid device, but sometimes issues can occur. Try some of our solutions if you have any problems with your Microsoft Wireless Display adapter.

Certain Affinity working on Halo Infinite Battle Royale and new Xbox title

Something big and new is coming for Xbox gamers.  Certain Affinity is an industry-leading game support studio founded by ex-Bungie employee Max Hoberman. They’ve been working on Halo since Halo 2, providing support for the campaign and multiplayer modes alongside Bungie and 343 Industries. Certain Affinity also built the area deathmatch gameplay in DOOM 2016 and provided support for Call of Duty Modern Warfare Remastered.

Earlier in the year, it was revealed that Certain Affinity is working with Xbox in a big way.  The studio is working on a brand new original title codenamed Project Suerte, but few details have emerged yet.  But Halo fans will be happy to hear that a brand new multiplayer mode codenamed Tatanka seems to be well into development.  The list of public APIs available do offer a few hints. The mode could be something in between the Warzone in Halo 5 and the traditional smaller battle royale style, with shrinking circles forcing players together.

In a recent interview with VentureBeat, incoming COO Paul Sams discussed a number of topics including teasing a large Halo project:

“The biggest thing we’re doing that’s public right now, for more than two years now we’ve been working on Halo Infinite doing something that–they’re very prescriptive about what we can say. But we’re doing something unannounced, and we’re doing lead development on that unannounced thing, from conception and design. It’s something big and new for the franchise. But I can’t say any more about it. That’s our single largest project of our three projects currently. We have close to 100 developers working on that.”

CEO Max Hoberman joined Sams to discuss the company’s plans on possibly introducing its own IP in the future and developing games in the studio.

It’s certainly aspirational for us to be able to do that. We see the benefits of building our own IP and owning our own IP. It’s something we’re committed to. Max can talk to it more. […] He’s done [building IP] more outside of the game space with his novel work, but he’s also been doing it at the company. Every single thing I’ve seen that’s come out from him has been really solid. 

You can check out Halo Infinite’s multiplayer free on Game Pass

Via WindowsCentral.com


6 Ways to Fix Createdxgifactory2 Could not be Located

Some players have posted on Steam’s forum about a procedure entry point createdxgifactory2 could not be located error. The entire error message states:

The procedure entry point CreateDXGIFactory 2 could not be located in the dynamic link library C: WINDOWS SYSTEM32 d3d11.dll.

That error message pops up when users launch the games. Although it doesn’t always crash games at launch, games will often crash a bit later after that error message pops up.

This guide will show you a bunch of solutions that have helped users fix the createdxgifactory2 cannot be located error. But, first, let us check out the answers.

Why does the createdxgifactory2 could not be located error appear?

Here are some of the most common reasons createdxgifactory2 could not be located on your PC.

  • There are some issues with your graphics driver.
  • The graphics driver isn’t up to date.
  • Some critical system files are missing or corrupt.
  • Important DLL files are missing from your PC.
  • Your PC is infected with a virus or malware.

How do I fix the entry point createdxgifactory2 error?

1. Use a specialized tool

When encountering the entry point createdxgifactory2 error, rest assured that scanning your system is the easiest thing to do.

Professional repair software can scan, identify, and quickly replace any broken system files they find.

2. Rename the dxgi.dll file

  1. Press the Windows + E keys to open File Explorer.
  2. Open the game’s folder.
  3. Right-click the dxgi.dll file and select Rename.
  4. Enter d3d11.dll as the new file title, and press the Enter key.

Renaming the dxgi.dll file for the game the issue arises is a widely confirmed fix for the procedure entry point error.

3. Copy the dxgi.dll file from the System32 folder

  1. Open File Explorer.
  2. Navigate to the below path: C:/Windows/System32
  3. Enter dxgi.dll in the folder search box.
  4. Select the dxgi.dll file, and copy it.
  5. Click Choose location on the menu to open the Copy Items window.
  6. Select the game’s folder in the Copy Items window.
  7. Click the Copy option.

Some users have also said that they got the procedure entry point error fixed by copying a new dxgi.dll file into the game’s folder.

4. Delete SweetFX files for the game

  1. Open File Explorer.
  2. Open the folder for the game the error arises.
  3. Delete all SweetFX files by holding the Ctrl key: dxgi.dll SweetFX_settings d3d9.fx d3d9.dll dxfi.fx Sweetfx_d3d9.dll SweetFX_preset
  4. Click the Delete button on the Home tab to erase selected files.

Another confirmed fix for the procedure entry point error is to delete SweetFX files in the game’s folder.

5. Rollback an updated graphics card driver

  1. Right-click the Start menu and select Device Manager.
  2. Expand the Display adapters category.
  3. Right-click the NVIDIA or AMD graphics card to select Properties.
  4. Select the Driver tab on the properties window.
  5. Next, click the Roll Back Driver option.
  6. A Driver Package rollback window will open.
    • Select the For another reason option.
  7. Click the Yes button.

If the procedure entry point error arises soon after updating a graphics card driver, try rolling back the driver.

6. Uninstall GeForce Experience

  1. Open Control Panel.
  2. Select Programs and features.
    Windows uninstaller the procedure entry point createdxgifactory2 could not be located
  3. Select GeForce Experience.
  4. Click the Uninstall /Change button and Uninstall to remove GeForce.
  5. Restart Windows after you’ve uninstalled GeForce.

Uninstalling GeForce Experience is another resolution a few users have said fixed the procedure entry point error for them.

What is the DXGI factory?

DXGI stands for Microsoft DirectX Graphics Infrastructure. The DXGI factory generates objects that enumerate adapters, help create swap chains, and associate a window with the Alt + Enter key sequence for toggling to and from the fullscreen display mode.

So, the primary goal of DXGI is to handle low-level tasks that can be managed without the need for DirectX graphics runtime.

The above resolutions have fixed the procedure entry point error for many users. So, there’s a good chance they’ll fix the same issue for you.

Make sure to give us any feedback regarding the subject in the comment section below.

Duplicate File Finder for Windows 10: Best to Use in 2026

There are computer problems that can resurface depending on the way that hardware components evolve. Finding and removing duplicate files stored on your Windows 10 computer is one of them.

More than a decade ago hard drives were pretty expensive, especially the larger capacity ones, so people opted for the smaller ones that were in a decent price range.

This meant that you had to keep an eye on the free space available and do regular cleanups to remove unneeded files stored on your hard drive.

Why do I need duplicate file finder software?

The first thing people used to look for was duplicate files as this was the most obvious way of freeing up space.

These same principles also apply if you’re using the latest version of the OS and having some great duplicate finder tools for Windows 11 can really make a big difference.

But as time went by and bigger hard drives became more accessible to the masses free space became a problem of the past. Most of us couldn’t be bothered to organize our files library.

Duplicate files can also be a problem when creating backups as the process will take longer to finish and you will need more space on the backup destination. This can also slow down the process of restoring a backup.

In this article, we are going to list a few Windows 10 compatible applications that you can use to find, compare, and remove duplicate files, freeing up precious storage space in the process.

What are the best tools to find and remove duplicate files?

Copernic Desktop Search – Great for searching files

If you are looking for a tool that will help you search files through multiple internal or external drives, all at the same time, then we recommend you use Copernic Desktop Search.

The software completes the search in no time so you will not have to wait long to see the results.

Copernic Desktop Search comes with the Preview function that allows you to first see the found file, before initiating any action. If needed, you can keep the software in the background.

If there are specific files you are searching for, the custom feature allows you to filter the results so that you can only see the desired files.

Here are some of its best features:

  • Keyword search for the most important types and categories of files
  • Searches within your PC and on the Internet
  • Quick file identifications
  • Available previews of the files

Copernic Desktop Search

Find all your hidden folders and open them in no time with Copernic Desktop Search. Get the best deal now!
Free trial Visit website

Duplicate Cleaner – Great filters for file identification

Duplicate Cleaner’s simple interface makes it easy to start searching for duplicate files on your PC. You can customize your search by the type of file, size, dates, and more.

You can specify which drives and folders to look in, and you even get an option to search inside Zip archives.

This software will assist you in selecting which duplicate files you want to delete. Its Selection Assistant allows you to select files by dates, drives, folders, and more.

You can select a favorite folder, and remove files that duplicate it in another place, or maybe select the smallest images, or the lowest quality mp3. In case you have made a copy of a directory – this is not a problem.

Duplicate Cleaner can scan popular music formats to find duplicates by Artist, Name, or Title. It supports formats such as MP3, OGG, WMA, M4A, AAC, FLAC, and WAV.

It is capable of listing details of the audio files found, including bit rate, sample rate, and length.

Duplicate Cleaner will show you that in the Duplicate Folder browser. Quickly see duplicated directories, and easily get rid of the ones you don’t want to keep.

You can also save Scan Profiles (just like presets in Winamp) and reuse different settings for different jobs.

Moreover, you don’t have to worry about the important System Files: several safeguards are offered to make sure that these files won’t be touched.

Here are a few of its most important features:

  • Multiple file type support
  • Create and save scanning profiles
  • Advanced filtering for audio files
  • Dedicated presets for images, audio and video
  • Quick scanning

Duplicate Cleaner

Safely delete duplicate files of all types and formats, with an assisted selection process and detailed reports.
Free trial Visit website

Duplicate Photos Fixer Pro – Best for finding duplicate photos

If you have a ton of photos on your drives, most likely, a lot of them will be duplicates, and Duplicate Photos Fixer Pro will help you get rid of them swiftly.

And best of all, it’s extremely easy to use. You just add the folders and photo albums from your PC and click on the Scan for Duplicates button.

In just a couple of seconds, the software is able to scan through thousands of photos and identify duplicates with great precision.

Duplicate Photos Fixer Pro is also great for photographers because it can spot also similar images and you can set the matching level for them.

This will work great if you performed burst from your camera and you only want to keep the best shots.

In the duplicates report, you will get the results in groups of images, so you can mark for deletion the ones you don’t need.

This tool has versions for Windows, macOS, and iOS, and it also has free limited versions for them to test before buying.

Let’s review some of its best features:

  • Advanced settings for similar image detection
  • Quick scanning and removal of duplicates
  • Available versions for Windows, macOS, and iOS
  • Simple and friendly interface
  • It can detect images from the GPS metadata

Duplicate Photos Fixer Pro

With this smart tool, you will get rid of those duplicate photos on any drive quickly and effortlessly!
Free trial Visit website

CCleaner – Great for optimizing your PC

We are sure most of you have already heard of CCleaner, perhaps the number 1 Windows application when it comes to cleaning junk from your computer.

But what most of you don’t know is the fact that it has a built-in duplicate file scanner that does its’ job really well.

It has the option to scan the files for duplicate filenames, matching sizes, content, or by their modified dates.

If you are already a CCleaner user, then this news can be good for you as you don’t need to look for and install other applications that will use more space on your drive. The Duplicate Finder in CCleaner can be easily found under the Tools tab.

The problem we have with CCleaner is that it has a lot of other extra features, features that you don’t need, features that you may never use, and that only take up space.

A new feature of CCleaner is the automatic software updater. Outdated software will make your computer more exposed to cyber threats.

CCleaner is commercial software but it does offer a free version with limited functionality.

Let’s see some of its key features:

  • Optimizes your PC performance
  • App and driver updater in the Pro version
  • Finds and removes duplicate files
  • Cleans your drives from unwanted files and apps

CC Cleaner

Find and get rid of duplicate files and use the other optimization features to keep your system running perfectly.
Free trial Visit website

dupeGuru – Dedicated modes of duplicate finder

dupeGuru has become the industry standard when it comes to searching for duplicate files under Microsoft Windows. It offers 3 versions of the app – the Standard edition, a Music edition, and one for Pictures.

The Standard Edition is the default one that can search through all your files, either by filename or the contents of the files.

It features a fuzzy algorithm that can detect files even if the name has been changed or if part of the content matches other files.

The Music Edition (ME) is dedicated to finding duplicate music files using the following file formats: MP3, WMA, AAC, OGG, and FLAC. It can scan the filenames, tags, and even the contents of music files.

The main advantage of this edition is the fact that it can detect duplicate music files even if they use a different encoder or are saved at a different bitrate, giving you the chance to locate and keep only the high-quality files.

The third version is called the Picture Edition (PE) and as the name suggests it can be used to find duplicate image files that use the JPG, PNG, TIFF, GIF, and BMP file formats.

The search engine in the Pictures Edition can match image files even if they use different file formats or have been resized or rotated.

It can even match files that have been slightly edited, helping you find the source of an edited image.

All editions of dupeGuru are free of charge and open-sourced and can be downloaded from their official website.

Here are some of its key features:

  • Dedicated modes for different file types
  • Advanced duplicate finder algorithm
  • Different versions for music and photos
  • Easy to use

⇒ Get dupeGuru

Duplicate Files Finder – Simple and easy to use

This is another lightweight tool aimed at finding and removing duplicate files stored on your computer.

This application has been around for some years now and even has a version compatible with older, pre NT versions of Microsoft Windows.

It hasn’t been updated in a very long time because well, it doesn’t need to be. It does its job really well, really simple, and really fast and you can use it even on legacy Windows versions.

⇒ Get Duplicate FilesFinder

Of course, there are many more software solutions out there that you can use to find and remove duplicate files. These are some of the best ones.

If you’ve upgraded to the latest OS, you might also be interested in how to find & delete duplicate files in Windows 11.

Do you have any experience using these tools? Don’t be shy to share it with us via the comments section below.

Word Can’t Do This Because a Dialog Box is Open: 3 Tested Fixes

Getting the “Word can’t do this because a dialog box is open” error? You hit OK, but it won’t go away. It usually means there’s another Word window open, a background process running, or a pop-up waiting for input. Add-ins, Protected View, or even missing files can trigger it too.

Here’s how to fix it and stop the loop for good.

1. Use the keyboard 

  1. Click OK when you see the error message.
  2. Press the Alt + Tab keys and cycle through the open windows.
  3. Repeat this action until you find the window which is causing issues.

2. Disable the Add-ins

  1. Launch Microsoft Word on your computer.
  2. Click File at the top left corner.
  3. Choose Options.
    word-can't-do-this-because-a-dialog-box-is-disable-add-ins
  4. Click on Add-Ins.
  5. Select the Manage tab below the Word Options window.
  6. Choose COM Add-Ins from the list.
  7. Click the Go button.
  8. Uncheck, and stop all the Add-Ins you feel might be causing the error.
  9. Click OK when you’re done.
  10. Restart Microsoft Word.

If you still get the error, follow the next step to disable all Add-Ins with Trust Center.

  1. Launch Word, and click on File.
  2. Click Options.
  3. Select Trust Center.
  4. Click Trust Center Settings.
    word-can't-do-this-because-a-dialog-box-is-open-trust-center
  5. When the Trust Center window pops up, choose Add-ins.
  6. Check the box next to the Disable all Application Add-ins option.
    word-can't-do-this-because-a-dialog-box-is-open-disable-all-app-add-ins
  7. Next, click OK.
  8. The Word Options window will redisplay, and select OK to finalize.
  9. Close and restart word to confirm if this approach worked for you.

3. Disable protected view

Note icon NOTE
Before you begin to disable Protected View, know that this method might open your computer to viruses. So you will use this method at your own risk if you still wish to continue. 
  1. Launch Microsoft Word.
  2. Select the File menu at the top-left corner of your PC screen.
  3. Click on Options.
  4. Select Trust Center from the menu to the left side.
  5. Click the Trust Center Settings at the bottom left corner.
    word-can't-do-this-because-a-dialog-box-is-open-protected-view
  6. Click the Protected View option.
    word-can't-do-this-because-a-dialog-box-is-open-uncheck-boxes
  7. Uncheck the boxes.
  8. Click OK.

Why is my Word document not closing?

  • Add-ins conflict with the app.
  • Your antivirus might be blocking the app.
  • The latest Office update might be buggy.
  • A corrupt or missing system file on your PC can also cause this problem
  • The normal.dot template file is causing the issue, which you can locate with the following path: %USERPROFILE%\Application Data\Microsoft\Templates\

How to close a Dialog Box in Microsoft Word?

  • Try pressing the X from the upper right corner or Cancel.
  • If the pop-up keeps appearing, close Word and rename the Normal.dot file.
  • Press the Ctrl+Alt+Del keys to open Task Manager and end the Word process.
  • Click on the Power button and select Restart.

Hopefully, methods one to four discussed in this article will get rid of the word can’t do this because a dialog box is open error.

If Word keeps acting up, you’re not alone. Whether you can’t remove highlights in Word, can’t save your documents, or can’t even edit them, these guides have you covered.

And if Word won’t open at all, check out this fix for Microsoft Word not opening in Windows 11.

As you can see, the methods and steps are not hard to apply because this error is not much of a big deal. Feel free to leave comments below.

5 Ways to Fix Games Crashing After Installing a new GPU

Getting a new graphics card is always exciting since you’ll now be able to experience smoother gameplay and play more recent games.

However, some users reported that games crash after installing a new GPU. This can be a big problem, and in this guide, we’ll show you the best ways to fix this issue.

Why is my GPU crashing games?

Well, all games depend on your GPU for the best performance you can experience. Here are some of the most common reasons your GPU might be crashing games on your PC.

  • It could be because of the increased GPU temperature.
  • You have overclocked your GPU.
  • The GPU drivers aren’t updated.
  • A faulty power supply could also result in the crashing of games.
  • Some critical system files are missing from your PC.
  • DirectX isn’t updated.
  • Your GPU itself is problematic.

How do I test my new GPU?

There are a few things that you can do to test if your new GPU is working fine or not.

  • Check if the cooling fans are moving freely or not.
  • Clean the dust off the GPU.
  • Download benchmark tools on your PC and run tests to see all the working features.
  • Use the DirectX Diagnostic Tool to check if all the graphics features your card supports are working or not.
  • You can also use the Windows Display settings to check if your graphics card is supported by your PC or not.
  • Play some games and check whether you are getting the optimal performance.

How can I fix games crashing after installing a new GPU?

1. Make sure that your drivers are updated

If you’re experiencing crashes with a new GPU, your drivers may be outdated. There are several ways to update them, but the fastest would be using specialized driver updater software.

These powerful tools allow you to scan your computer and update any broken drivers you encounter in just a few minutes.

2. Reinstall the drivers

  1. Press Win + X and choose Device Manager from the list.
    device manager
  2. Locate your graphics card driver, right-click it and choose Uninstall device.
  3. Check Remove driver software for this device if available and click on Uninstall.
  4. After doing that, install the latest drivers for your new graphics card.

A few users reported that switching to an older driver version fixed the problem for them, so you might want to try that as well.

3. Underclock your graphics card/RAM

If the games crash after installing a new GPU, your PC may not handle the current graphics card. One way to fix this problem is by underclocking your graphics card.

To do that, you need to use overclocking software that is compatible with your graphics card and reduces overclock values.

Some users suggest lowering the frequency by 100MHz since that might be able to fix the issue, so be sure to try that.

Others also suggested that you might be able to fix this problem by underclocking your RAM. To do that, follow these steps:

  1. Enter BIOS. To see how to do that, check our guide on accessing BIOS.
  2. Next, go to the Overclock section.
  3. Lower the RAM frequency. Some suggest using the default frequency for RAM.
  4. Save changes.

Remember that underclocking will slightly reduce your performance, but it might help fix the game crashes.

4. Turn off G-Sync

  1. Open the Nvidia Control Panel.
  2. Now go Setup G-SYNC in the left pane.
  3. In the right pane, uncheck Enable G-Sync and save changes.

Once you disable G-Sync, check if the problem is still there. If Nvidia Control Panel is not opening, our quick solutions will help you.

5. Check the power supply

You might have to check your power supply if the games crash after installing a new GPU. But, first, make sure that everything is connected correctly.

Next, you might want to test your power supply. Again, you can do that easily with specialized power supply testing software.

Lastly, be sure to check the power output. Your new graphics card might need more power; if that’s the case, you might have to upgrade your power supply.

Problems with a graphics card can be hard to fix, but we hope you managed to fix this issue with our solutions. Moreover, we encourage you to check out these great graphics cards for gaming.

How do I know if my GPU is failing?

Here are some quick checks you can go through that will help you determine if your GPU is failing or if it is time for you to get a new one.

  • You are coming across graphics glitches quite often.
  • Strange fan noise comes from the GPU.
  • Your PC is crashing multiple times.
  • You are experiencing significant frame drops while playing games.
  • Blue Screen of Death (BSoD) is another indication of your GPU dying.

Did you find a different solution to this problem? Feel free to share it with us in the comments section below.

Can’t Turn off Sticky Keys on Windows 10? Pick from 10 Solutions

Sticky Keys might be useful for some, but most Windows 10 users instantly turn this feature off because it interferes with their work.

A few users reported that Sticky Keys won’t turn off on their computers, and that can cause a lot of inconvenience. It’s not just on newer Windows OSs. The same happened on older versions, as well.

Not to mention that sometimes, Sticky Keys randomly turn on, which can indicate keyboard issues.

So in this article, we’ll try several solutions. We hope that before you reach the end, Sticky Keys won’t be an issue anymore.

What can I do if Sticky Keys won’t turn off in Windows 10?

1. Check your PC for malware

If you can’t turn Sticky Keys off, it’s possible that your PC is infected with malware. Not all malware is harmful, and some malware is designed just to annoy the infected users.

If that is the case, run a full system scan and check if that solves the problem.

We recommend you pick one of the best antivirus software because it can detect the latest malware signatures.

A good antivirus can save you from a lot of trouble by blocking threats before they get the chance to infect your PC, but they can also remove already existing malware with the least possible damage to your system files and apps.

Using an antivirus software such as TotalAV can be a great option here because it has a powerful anti-malware scanner. It has various scanning options, such as the system scan where it scans every single file on your PC, including program files, system files, cached files, and others.

Furthermore, it provides you with an overview of your entire system and allows you to generate security reports so you can see an in-depth list of your computer’s running processes.

TotalAV

A secure antivirus suite with outstanding malware detection rates that protects your device successfully.
Free Trial Visit Website

2. Reinstall your keyboard drivers

  1. Open Device Manager by pressing Windows + X and choosing it from the list.device-manager-w10 amd driver install problems
  2. Locate your keyboard driver, right-click it and choose Uninstall device.keyboard-uninstall sticky-keys-windows-10
  3. Now click the Uninstall button to confirm.

After the driver is removed, restart your PC and the default driver will be installed. Once that is finished, check if the problem still persists.

If the previous method doesn’t fix the issue, we recommend you use a dedicated tool. It is a faster and safer option for your device and you don’t have to worry about choosing the right driver.

Tools like Outbyte Driver Updater can update your drivers automatically by identifying each component on your computer and matching it with the latest driver versions from an extensive online database.

3. Reinstall the Synaptic pointing device

If you’re having problems with Sticky Keys on your laptop, the issue might be Synaptics pointing device. So it’s advised to reinstall this software.

The most effective way is to use an uninstaller application since it will safely and completely remove programs from your PC.

Unlike regular uninstall processes, uninstaller software will remove all files and registry entries associated with the application you no longer need.

Oftentimes, regular uninstalls leave behind residual files that only take up space and have the potential to cause errors. An improperly removed file may prevent you from reinstalling it.

There are many great options available, and the best uninstaller software can scan your whole computer and remove any lingering files. On top of that, they can also force remove stubborn (often malicious) programs from your PC.

Once you are sure your program is completely removed, you can reinstall it and see if the problem persists.

4. Change registry values

  1. 1. Press Windows Key + R on your keyboard to open the Run dialog.

  2. 2. Type regedit and then click OK or press Enter to run the command.

    Sticky Keys won't turn off Windows 8
  3. 3. Navigate to the following location: HKEY_CURRENT_USERControl PanelAccessibilityStickyKeys

  4. 4. In the right pane locate the Flags string. Double-click it and change its value to 506.

    regedit string
  5. 5. In the left panel, navigate to: HKEY_CURRENT_USERControl PanelAccessibilityKeyboard Response

  6. 6. Locate Flags in the right pane, double-click it, and set its value to 122.

    regedit edit string value
  7. 7. To the left, go to: HKEY_CURRENT_USERControl PanelAccessibilityToggleKeys

  8. 8. Finally, locate Flags in the right pane and set its value to 58.

    registry edit flags string
  9. If other solutions did not work, you can try a more advanced one. The Registry Editor allows you to modify any settings you want on your PC. You can turn off Sticky Keys from it by editing some String Values, as shown in the steps above.

We have to mention that changing your registry can cause certain issues with Windows 10 if you don’t do it properly, so before you start, make sure to create a backup of your registry.

If you can’t edit your Windows 10’s registry, read our handy guide and find the quickest solutions to the issue.

5. Change your keyboard power management settings

  1. Right-click the Start icon from your taskbar then select Device Manager.device-manager-w10 amd driver install problems
  2. Locate your keyboard and right-click it. Choose Properties from the menu.prop-keyboard sticky-keys-windows-10
  3. Navigate to the Power Management tab and make sure to uncheck Allow the computer to turn off this device to save power.
    Can't turn off Sticky Keys Windows 7
  4. Click OK to save the changes made.

Bear in mind that your keyboard might be listed in both Keyboards and Human Interface Devices sections, so you’ll have to repeat this process for both entries.

6. Replace your keyboard

If Sticky Keys won’t turn off on your computer, it might be due to a faulty keyboard. Users reported that this issue was fixed simply by replacing their keyboard.

Before you replace your keyboard, it’s advised to inspect it for hardware malfunctions. Sometimes certain keys such as Shift, Alt, or Ctrl can get stuck and that can cause this problem to appear.

Alternatively, you can also try the keyboard on a different PC. If the problem appears on another PC, it’s rather likely that the keyboard is faulty.

7. Disable Sticky Keys from Control Panel / Settings app

  1. Press Windows + I to open the Settings app then go to Ease of Access.ease-of-access sticky-keys-windows-10
  2. Select Keyboard from the left pane and disable Sticky Keys from the right side. You can also disable all other options.
    Sticky Keys randomly turn on

8. Press the Num Lock key

numlock key

Many users reported that the FN key is always pressed on their laptops. As you know, the FN key is designed to perform certain functionalities, and if it stays active, you might activate certain shortcuts by accident.

This behavior can interfere with your work, and in order to fix this problem, you just need to turn off the Num Lock button. Simply press the button and the problem should be resolved.

Keep in mind that this is just a workaround, but many users reported that it fixed the problem on their laptop, so be sure to try it out.

9. Press the right and left Shift keys at the same time

According to users, you might be able to fix this problem simply by using a quick keyboard shortcut: pressing both Shift keys simultaneously.

This sounds like a workaround, but few users claim that it works, so feel free to try it out.

10. Install the latest updates

  1. Press the Windows key + I to open the Settings app then navigate to the Update & Security section.update-securty-w10 opera keeps crashing
  2. Now click the Check for updates button.check-updates searchui windows 10

Windows will now check for available updates. The available ones will be downloaded in the background. Once the update process is finished, restart your PC to install the updates.

After updating Windows 10 to the latest version, check if the problem still persists.

By default, Windows 10 automatically downloads the updates, so you won’t have to repeat the process often.

As mentioned, not being able to turn off Sticky Keys on Windows 10 can be troublesome, but most users report that the issue was resolved using one of the solutions suggested in this article.

If you have any other suggestions or questions, don’t hesitate to leave them in the comments section below and we’ll be sure to check them out.

Windows 11 users will now be able to protect passwords better with Enhanced Phishing Protection

Last week, Microsoft announced that it’s beginning to roll out the Windows 11 2022 Update which features a ton of improvements. Among them is Enhanced Phishing Protection, a tool that is designed to identify malicious sites or applications that attackers use to access login credentials. Whenever the tool detects such an instance, it automatically notifies the admin through Microsoft Defender for Endpoint.

According to a new Tech Community blog post by Sinclaire Hamilton –

“Enhanced phishing protection is baked into the Windows 11 operating system and automatically detects when users type their password into any app or site. Windows understands in real-time whether that app or website has a secure connection to a trusted website; if not, Windows will let users know if they’re in danger. That means admins can know exactly when a password has been stolen and be equipped to better protect your organization. When Windows 11 protects against one phishing attack, that threat intelligence cascades to protect other Windows users interacting with other apps and sites that are experiencing the same attack as well.”

How does Enhanced Phishing Protection work? Windows will first analyze where you enter your password, then use SmartScreen to decipher the authenticity of the application or site. It then responds immediately and alerts the users that they are required to change their password immediately, this is regardless of whether they are using a Microsoft Account, Active Directory, Azure Active Directory, or local passwordSmartScreen. The tool will also notify the IT admin of the incident through the MDE portal for further investigation and mitigation of the issue.

thumbnail image 1 captioned Pop-up Windows Security window stating, This app made an unsafe connection that was reported to Microsoft for stealing passwords.

SmartScreen identifies and protects against corporate password entry on reported phishing sites or apps connecting to phishing sites, password reuse on any app or site, and passwords typed into Notepad, Wordpad, or Microsoft 365 apps.

IT admins can control which instances end users will receive warnings for these security breaches via CSP/MDM or Group Policy. The feature is however in audit mode by default, which allows admins to assess password usage through the Defender for Endpoint portal without notifying users.

The feature is currently accessible to users who have upgraded to Windows 11 22H2. However, for commercial customers looking to receive the Enhanced Phishing Protection alerts in the M365 Defender security portal, their license must have Microsoft 365 Defender security portal access.

Have you accessed this feature yet? Share your thoughts with us in the comment section below.

[Solved] Brother Printer Not Printing on Windows 10 & 11

Brother printers are typically a great, budget-friendly investment. They can print and copy many documents quickly, they’re very easy to hook up to a home network, they’re compatible with many operating systems, and they usually come with a fairly large amount of memory. 

But like any printer, you may have to look into it from time to time to ensure it’s working and not having any problems. Even the most diligent printer owners must deal with their machine’s occasional refusal to print. 

Sometimes, Windows cannot connect to the printer, and all that needs to happen is a quick clean-out of any paper jams that may be present inside the machine. 

Why is the Brother printer not printing?

When your printer starts acting up, it can be a real pain to start working again – but if you know what’s causing the problem, you can usually fix it easily. 

Here are some possible causes for your Brother printer not printing:

  • Paper tray is empty – Make sure you have paper in your printer. Also, check your paper and ensure you have loaded it correctly into the tray. If you have paper in the printer and you still have a blank page, exit the print job and then try to print again.
  • Toner cartridge is not installed properly – If the toner cartridge isn’t installed correctly or if its seal has been broken, it may not be able to print properly anymore. Go ahead and install a new one if necessary.
  • The tray has jammed – Open up the tray compartment and check for paper jams. Remove any jammed paper by hand or with tweezers before attempting to print again. 
  • Faulty USB – Check to see if you have a problem with your USB cable or power cord. Test the USB cable by plugging it into another USB port on the computer. 

Why is my Brother printer not printing in colour?

The most common reason for this happening is that your Brother printer doesn’t have enough ink to fill the cartridges. Most printers have either three or four separate cartridges, each containing a different colored ink.

Check to make sure that the ink cartridges are installed correctly and that they are not empty. If the ink cartridges are out of ink or improperly installed, the printer will not be able to print in colour. 

Also, try shaking up the ink cartridge to get rid of any bubbles that may be inside. Your Brother printer may be printing blank pages because of air bubbles.

Other times, you probably just need to change your printer settings. For some reason, the default settings on many printers are set to print everything in monochrome.

What can I do if my Brother printer is not printing?

1. Check cable connections

If you find that your Brother printer isn’t printing, make sure that the cable connections are secure. If a cable is loose or damaged, it might not be transferring data to the printer. Next, check if the power cord is securely plugged into the wall or surge protector. 

Try turning off and then on again the printer and computer to see if they revert to normal operations. If printing with a wireless or Bluetooth connection, make sure that both devices are on the same network, and that they’re connected preferably by an Ethernet cable. 

2. Clear print queue

The print queue is a list of documents that are waiting to be printed. Every time you send a document to your Brother printer, it gets added to the top of this list. The documents at the top of this list will be printed first.

Clearing the print queue will remove any jobs that haven’t printed yet and free up the space in the queue to allow new jobs to print. 

3. Disable other printers

If your Brother printer is not printing or responding to the computer, it is possible that there are other printers on your network currently receiving print jobs. Disabling other printers will clear out any clutter or confusion that might be causing this error. 

Once you have turned off all of your printers, go ahead and restart your computer. Your printer should then work just fine. Alternatively, you can set Brother printer as the default printer.

4. Update printer drivers 

  1. Hit the Windows key, type Device Manager in the search bar and click Open.
  2. Locate and Expand the Print queues section, then right-click on the Brother printer, and select Update Driver Software.
  3. Click on Search automatically for drivers.

If you specifically use the Brother MFC-L2710DW model, you can follow this Brother MFC-L2710DW driver download guide to get the correct package and ensure smooth installation.

You can either follow the steps above manually, or you can use a third-party tool. Fortect Driver Updater can do this process automatically, saving you time and effort.

It scans your device and offers you a list of devices that need to be updated. It replaces outdated drivers with the latest ones from its constantly revised database.

⇒ Get Fortect Driver Updater

5. Restart Print Spooler

  1. Hit the Windows + R keys simultaneously to open the Run command.
  2. Type in services.msc then hit Enter.
  3. Locate Print Spooler, right-click and select Restart.restart print spooler service

6. Run the Printer troubleshooter

  1. Press the Windows key and select Settings.settings windows 11
  2. Click on System, then select Troubleshoot.Windows update high CPU
  3. Select Other troubleshooters.
  4. Navigate to the Printer section, then click on the Run button.printer-run windows cannot connect to the printer

7. Reset the printer

If your Brother printer is not responding to the solutions listed above, it is possible that the printer has been locked up. In this case, you can attempt to reset it by unplugging the device and waiting for a minute or two. 

For a full reset, you will need to check the official website for your printer’s model number and follow the reset instructions. A full reset will cancel any print jobs and return all settings to their factory defaults. This means that all your personal files will be deleted, so make sure to backup your files before performing this step.

Why is my printer working but not printing?

  • Bad drivers – Your computer may use the wrong printer driver. If this is the case, use the correct Brother printer drivers to print instead of your computer’s default driver. We encourage you to check out our article on how to download Brother printer drivers for Windows 11.
  • Outdated OS – Make sure your operating system is up-to-date and your computer meets all its requirements. You can do this by running a diagnostic test on your computer or by calling customer service for help with checking compatibility issues.
  • Weak connection – Wireless connections tend to be weaker than wired connections. This is because of obstructions that cause disruptions.

Most of the time, the problem with a printer is simply a matter of troubleshooting and plugging in some cables. 

However, if you’re trying to troubleshoot this issue on your own and you can’t get your printer to cooperate, there’s no shame in calling Brother printer support for help. 

In case you have outgrown your Brother printer and are in the market for printers compatible with Windows 11, we have an awesome collection that is just the right fit. 

Let us know if you have been able to solve the issue in the comments section below.

Windows 11 Remove Keyboard Layout: 3 Quick Ways to do it

Keyboard layouts are a great way to input multiple languages into the computer without requiring specialized hardware. However, several users have reported that they can’t remove a keyboard layout in Windows 11.

Though this does not pose a significant problem, there is always a chance of mistakenly choosing the wrong keyboard layout.

Also, many users prefer an uncluttered PC with no unnecessary settings or applications that can hamper progress and, thus, the need to remove additional keyboard layouts.

So, if you have been trying but can’t remove the keyboard layout in Windows 11, here are the most effective solutions to the problem.

How can I remove a keyboard layout in Windows 11?

1. Use the Settings app

  1. Press Windows + I to launch the Settings app, and select Time & language from the tabs in the navigation pane on the left.Time & language to fix can't remove keyboard layout windows 11
  2. Click Language & region on the right.Language and region
  3. Now, click the ellipsis next to the language under which the layout you want to remove appears, and select Language options.Language options to fix can't remove keyboard layout windows 11
  4. Click the Add a keyboard button next to Installed keyboards.Add a keyboard
  5. Select the very same layout from the list that you have trouble removing.select layout
  6. Once done, close the Settings app and restart the computer.
  7. Now, again, head to Language options.
  8. Click the ellipsis next to the layout you had been trying to delete, and select Remove from the flyout menu.Remove to fix can't remove keyboard layout windows 11
  9. Again, restart the computer for the changes to come into effect.

Once the computer turns on, the layout will be removed. This method is very effective if you can’t remove the keyboard layout in Windows 11 on Dell, Lenovo, or HP.

The idea is to add the layout that keeps appearing and then manually remove it. Similar issues were encountered in the previous iteration, i.e., Windows 10. In case this method doesn’t work, head to the next one.

2. Use the Windows PowerShell

  1. Press Windows + S to launch the Search menu, enter Terminal in the text field at the top, right-click on the relevant search result, and select Run as administrator from the context menu.Terminal
  2. Click Yes in the UAC (User Account Control) prompt that pops up.Yes
  3. Now, paste the following command and hit Enter to list all the keyboard layouts added to the system:Get-WinUserLanguageListCommand to fix can't remove keyboard layout windows 11
  4. Note the value listed next to LanguageTag for the layout you want to remove.LanguageTag
  5. Next, execute the following four commands one at a time while replacing <LanguageTag> in the second command with the one you noted earlier:$LangList = Get-WinUserLanguageList $MarkedLang = $LangList | where LanguageTag -eq <LanguageTag> $LangList.Remove($MarkedLang) Set-WinUserLanguageList $LangList -Force
  6. For instance, if you want to remove the layout with LanguageTag as en-IN, the four commands become as follows:$LangList = Get-WinUserLanguageList $MarkedLang = $LangList | where LanguageTag -eq en-IN $LangList.Remove($MarkedLang) Set-WinUserLanguageList $LangList -ForceExecute to fix can't remove keyboard layout windows 11
  7. Once done, restart the computer for the changes to come into effect.

For those who prefer command-line applications to execute, this method should do the trick if you can’t remove the keyboard layout in Windows 11.

3. Modify the Registry

  1. Press Windows + R to launch the Run command dialog box, enter regedit in the text field, and either click OK or hit Enter to launch the Registry Editor.regedit to fix can't remove keyboard layout windows 11
  2. Click Yes in the UAC prompt that pops up.Click Yes
  3. Paste the following path into the address bar at the top, and hit Enter. Alternatively, you can navigate it using the left pane: Computer\HKEY_USERS\.DEFAULT\Keyboard Layout\PreloadPaste path
  4. You will now find a list of entries on the right, each denoting a particular keyboard layout added to the PC. Check Microsoft’s official website for the Keyboard Identifier to find the one you want to remove.
  5. Once you can identify the layout to be removed, right-click on it and select Delete from the context menu.Delete key to fix can't remove keyboard layout windows 11
  6. Click Yes in the confirmation prompt that appears.Yes
  7. Restart the computer for the changes to come into effect.

That’s it! You have now successfully removed the keyboard layout using Registry in Windows 11. The process is pretty simple, but make sure to identify the keyboard layout correctly and do not make any other changes to the Registry except the ones listed here.

How do I change the keyboard layout in Windows 11?

Changing the keyboard layout is pretty simple in Windows 11 and even the previous iterations of the OS. To change the keyboard layout for the same language, press the Ctrl + Shift and then hit the Shift key to select another.

If you want to select another language, press Windows + Space Bar and then hit Space Bar to navigate the listed entries and choose one.

That’s all there is to the concept and the most effective solutions if you can’t remove a keyboard layout in Windows 11. Also, these methods would help remove a keyboard layout in Windows 10.

Besides, find out what to do if the keyboard language changes automatically in Windows 11. The problem is due to a problematic update, conflicting applications, misconfigured settings, or a corrupted Registry.

In case you are still facing issues with keyboard settings, you can reset them to normal; read this guide for detailed steps.

If you have any other queries or know of a method not listed here, drop a comment in the section below.
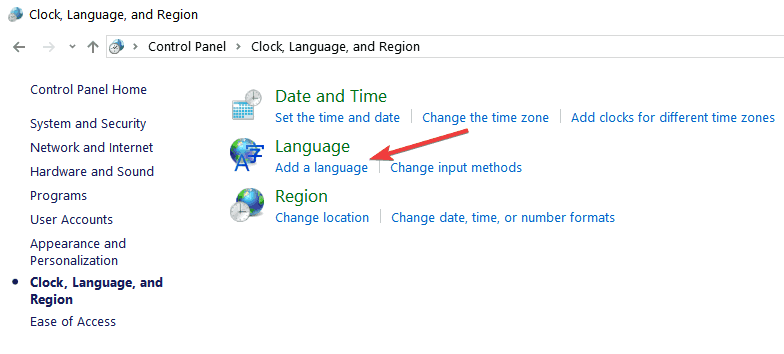
6 Easy Ways to Fix Windows Couldn’t Find Your Audio Device

The No audio output device is installed error occurs when Windows can’t find the audio device. You can see this notification above the system tray when hovering the cursor over the sound icon.

Consequently, no sound plays when Windows can’t find audio device hardware. Unfortunately, the issue often arises after system upgrades.

There are, however, a few potential resolutions for the Windows can’t find audio device problem, and we’ll discuss them here.

Why is my audio device not detected in Windows 10?

One of the most common reasons behind the We can’t find an audio device error in Windows 10 is improper connections, be it wired or wireless.

For wired audio devices, check that it is plugged in properly to the PC and that the cable or the port is not damaged. For wireless ones, check for issues with Bluetooth, run the dedicated troubleshooter, and other relevant ones.

Also, drivers have often been found to lead situations where your computer doesn’t recognize the audio device. In addition to that, the third-party apps installed on the computer may create conflicts.

Why am I getting We can’t find an audio device 0xc00d36 error message?

These types of errors are somewhat common, and many reported Music/Video error 0xc00d36c4. If this issue occurs, check your audio drivers, and update them if needed.

Another common reason is running unsupported video formats, which can be fixed by installing the required codecs.

Apart from that, there are many problems with sound, but you can always fix issues with audio devices in Windows.

How do I fix No audio output device is installed error?

1. Reinstall the sound card’s driver

  1. Press Windows + R to open Run, enter devmgmt.msc in the text field, and click OK.devmgmt.msc to fix windows can't find audio device
  2. Double-click Sound, video and game controllers.expand category
  3. Right-click the audio adapter and select Uninstall device.uninstall device to fix windows can't find audio device
  4. Click the Uninstall button in the confirmation prompt.uninstall
  5. After removing the device, restart the computer, and Windows will automatically locate and install the best available drivers.

Alternatively, you can replace corrupted audio adapter drivers with a dedicated third-party tool.

These tools will recommend compatible updates not just for your audio driver but for any outdated software it will find so that you can choose the preferred ones.

If you are using an external audio interface like the Focusrite Scarlett Solo, you can follow this Scarlett Solo driver download guide to install the correct package and fix missing audio device errors.

2. Run the Playing Audio troubleshooter

  1. Press Windows + I to open Settings, and select Update & Security from the left.update & security
  2. Next, select Troubleshoot from the navigation pane, and click on Additional troubleshooters on the right.additional troubleshooters
  3. Select Playing Audio and click the Run the troubleshooter button under it.playing audio to fix windows can't find audio device
  4. Now, follow the on-screen instructions, and choose the appropriate response when prompted to complete the process.troubleshooter

The built-in troubleshooter is an effective way of dealing with things when Windows can’t find the audio device and should eliminate the issue. Though it only works for problems reported to Microsoft and a patch introduced for it.

3. Re-enable the sound adapter

  1. Press the Windows + X and choose Device Manager.device manager
  2. Double-click Sound, video and game controllers to expand that category.sound, video, and game controllers
  3. Then right-click the audio adapter listed there and select Disable device.disable device to fix windows can't find audio device
  4. Click Yes in the confirmation prompt.yes
  5. To re-enable it, right-click the audio adapter and select Enable device.enable device to fix windows can't find audio device

If it’s a minor bug or trivial issues with the audio device, simply reinstalling it should fix things if you come across I couldn’t find your audio device. Then, make sure it’s connected and try again.

4. Check the Windows Audio Services are Enabled

  1. Press Windows + R, type services.msc in the text field, and click OK or hit Enter.services.msc
  2. Locate and double-click on Windows Audio to open its Properties.windows audio
  3. Select Automatic from the Startup type drop-down menu, and click on Start if the service is not running.start to fix windows can't find audio device
  4. Click OK to save the changes and close the window.OK
  5. Then double-click Windows Endpoint Audio Builder.windows audio end point
  6. Again, select Automatic from the Startup type drop-down menu, and click the Start button.run service to fix windows can't find audio device
  7. Finally, click on OK to save the changes.ok

Keep in mind that Windows Audio and Windows Audio Endpoint Builder are two services that need to be enabled for audio devices. And if the two are not running, you may encounter a bunch of issues, including We can’t find an audio device: 0x8889000f.

5. Perform a system restore

  1. Press Windows + R to open Run, type rstrui.exe in the text field, and click OK.rstrui.exe
  2. Press the Next button to open the list of restore points.next
  3. Select a restore point from the list, and click on Next.restore to fix windows can't find audio device
  4. Finally, click Finish to start the restore process.finish

System Restore is an effective tool to fix many issues with Windows. It simply reverts the system to a state where the error didn’t exist by modifying the configured settings and installed apps, though it doesn’t affect the files stored on the PC.

Choosing a restore point created before you first encountered the Windows can’t find audio device error is critical. And that’s why it’s recommended that you manually create restore points every once in a while to be able to revert things to normal in case of issues.

6. Factory reset Windows

If nothing else worked, you are left with no option but to factory reset Windows. And we recommend you clear everything from the PC when given the option since there’s a higher possibility of the error being eliminated in this case.

You may create a backup for the files using reliable cloud storage services to recover things after the reset, but that’s a personal preference.

Once the reset process is complete, things should be up and running, with Windows can’t find audio device error fixed.

How do I reinstall an audio device in Windows 10?

  1. Type Device Manager in the Search menu and click on the relevant search result.device manager
  2. Locate the audio device you want to reinstall, right-click on it, and then select Uninstall device.uninstall device
  3. Now, click Uninstall in the confirmation prompt.uninstall
  4. Once done, click on the Scan for hardware changes icon to reinstall the device and the relevant driver.scan for hardware change

That’s it! These are some resolutions that should fix the No audio output error when Windows can’t find audio device hardware.

If the above solutions don’t work, you may need to install an effective and reliable sound card.

This issue is related to No output devices found in Windows 11 message, so you might want to check that guide for more solutions.

We hope that this article was helpful. Please tell us what solutions worked for you using the comments section.