Some users have recently reported a Fable 3 black screen, which has caused concern about what could be wrong and the best fix.
Although this is a common issue for games on PC, we will identify the possible causes and ways to fix it.
What causes the black screen on Fable 3?
For users who experience Fable 3 black screen or not working, the following may be responsible for the error:
Using two monitors – A black screen issue can occur if you use two monitors simultaneously. Simply detach one of your monitors, and the problem should disappear.
Black screen due to overclocking – Black screen can occur because of a driver or overclocking issue, so it is advised that you update your drivers and remove all overclocking settings.
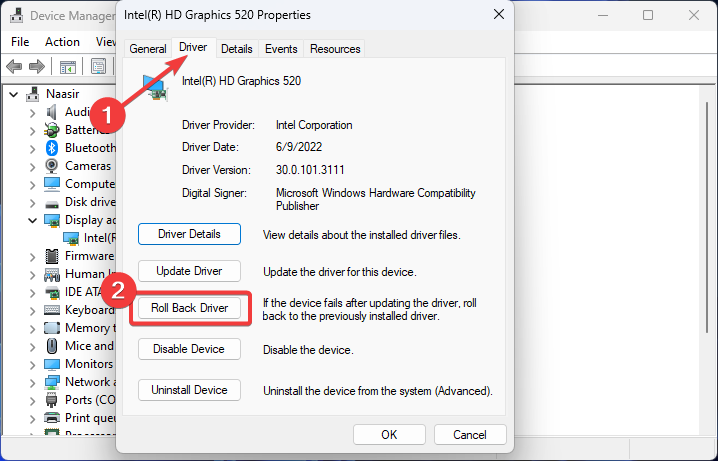
Black screen after Windows 11 update – This problem can sometimes appear after a problematic update. To fix the issue, try to remove the latest update by rolling back to the older version and check if that helps.
In case you need to learn more about what may be the reason for this issue, you can read further our article about how to fix the black screen after BIOS.
How do I fix the black screen in Fable 3?
Before proceeding to explore advanced fixes on Fable 3 screen not working, you should consider performing the following preliminary checks:
Check if there’s any damage to the graphics processing unit.
Unplug one of your monitors if you’re using two.
Restart your PC to check if you are experiencing the issue due to startup errors.
Having performed the above checks, and the error is persistent, you can try the troubleshooting tweaks provided below:
1. Update Windows
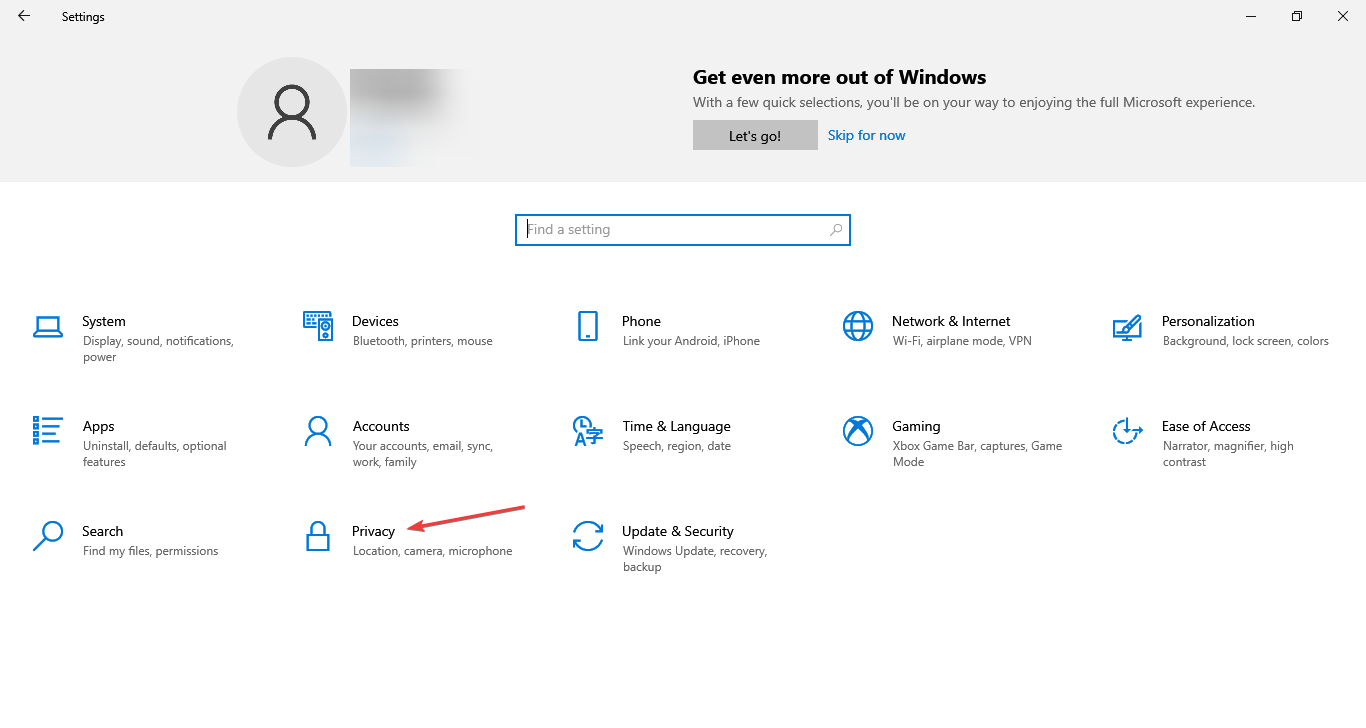
Press the Windows + I keys to open Settings.
Choose Windows Update and click on Check for Updates (apply the available updates and restart your computer).
Also, to facilitate this process you can use a specialized tool called Outbyte Driver Updater that will automatically find and update all outdated drivers.
Outbyte Driver Updater
Avoid these kinds of issues by keeping all drivers updated.
Resident Evil 4, just like every other game, is vulnerable to problems, one of which is the highly reported black screen issue on Windows 10. Users have reported that this error pops up during the gameplay or right at the startup.
While they can hear the audio, the screen goes pitch black. If you are also experiencing the same Resident Evil 4 black screen issue on Windows 10 and are looking for solutions to fix it, then this guide is for you.
Why am I getting a black screen when playing Resident Evil 4?
There could be several reasons why you are seeing a black screen when playing Resident Evil 4 on Windows 10. Here are a few of the most common ones:
There is an in-game bug – Chances are that the recent patch might have introduced a bug or glitch that is triggering the black screen issue.
The firewall is blocking Resident Evil 4 – Chances are your firewall or antivirus software is blocking Resident Evil 4 from launching and causing the black screen issue.
Some important game files are missing – If there was an interruption during the installation of the game, then this could be very well the reason why the game crashes and throws a black screen.
The game is not running with sufficient privileges – Some programs, such as games require sufficient privileges in order to run smoothly. Here’s how you can make yourself an admin in Windows 10.
Now that have some idea about what are some of the common reasons you could come across a black screen issue with Resident Evil 4 on Windows 10, let us go through the solutions to fix it.
How can I fix the Resident Evil 4 black screen issue on Windows 10?
Before going over to advanced troubleshooting methods, let us first check out the preliminary solutions and try resolving the problem or not.
Check and install the latest available Windows update. We have a guide that lists a bunch of solutions if you are having issues updating your Windows PC.
Verify if the game’s official server is down or going through maintenance.
Make sure that you have an active internet connection. If there is an issue with your Wi-Fi, check out our guide which will help you resolve the problem.
Restart your PC.
Let us check out the solutions that have helped users fix the problem at hand.
1. Verify the integrity of game files
Launch the Steam client.
Click on the Library tab.
Right-click on the Resident Evil 4 game and select Properties.
Switch to the LOCAL FILES tab.
Click on Verify integrity of game files.
Steam will begin verifying the game files and will repair missing or corrupt game files that might be triggering the black screen issue.
When you verify the integrity of your game files, it checks all the files you have on your computer along with the ones on the official Steam servers.
If it finds any missing or corrupt game files, then Steam automatically detects and replaces them with new ones and thereby, fixing the problem in the process.
2. Update the graphics driver
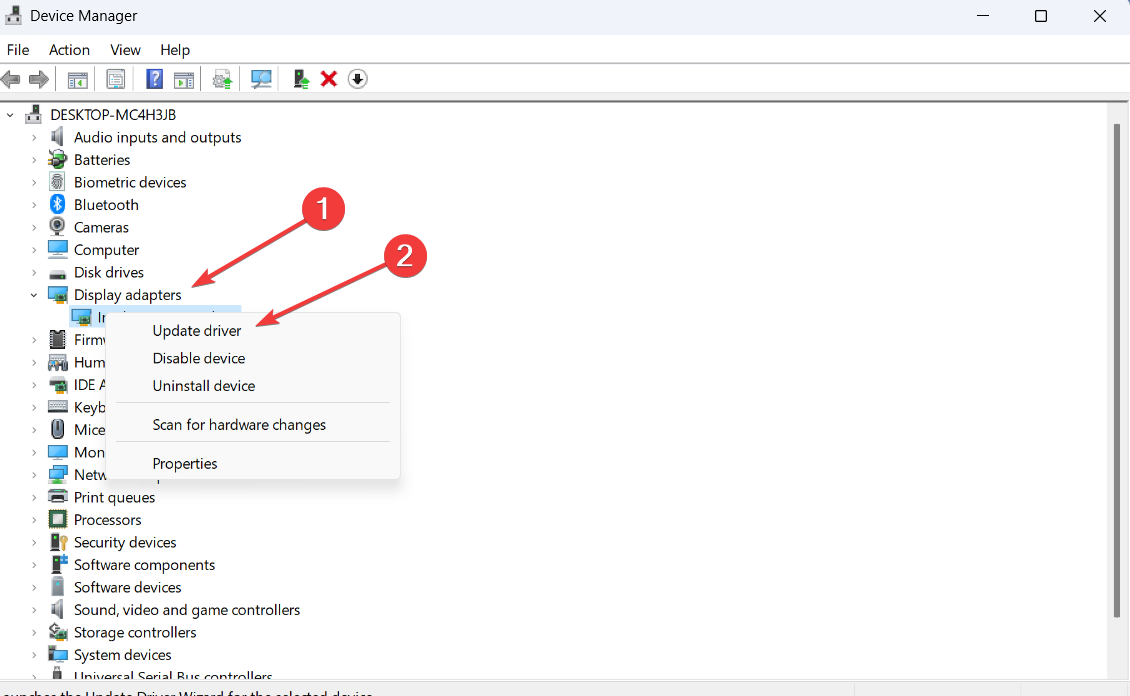
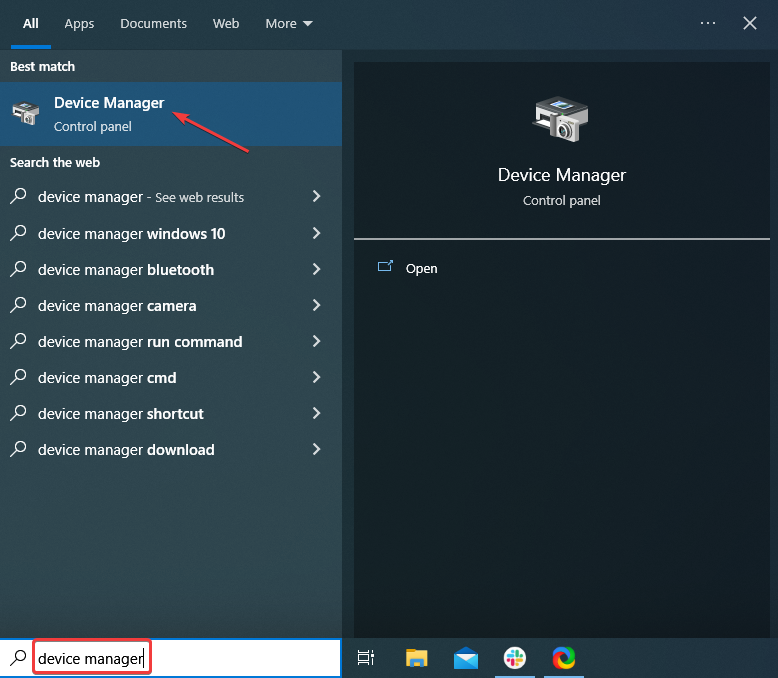
Right-click on the Start menu and select Device Manager.
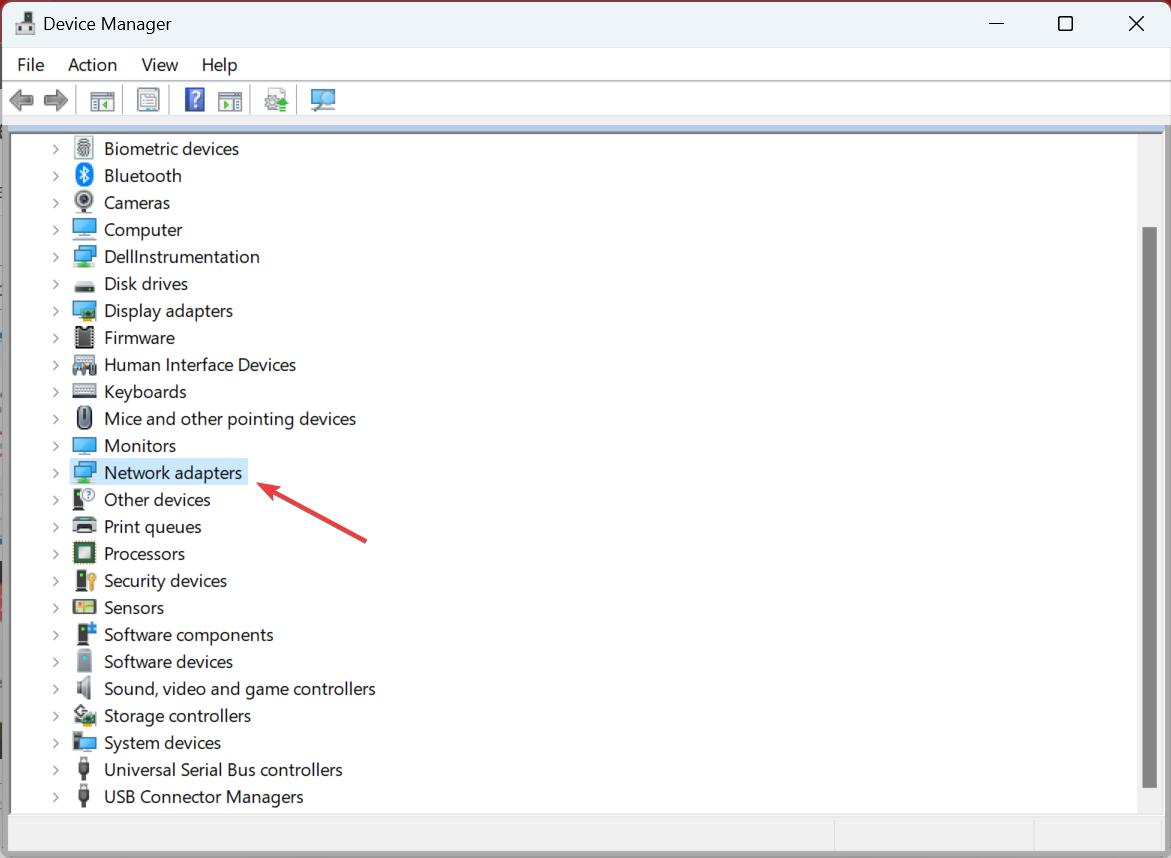
Expand the Display adapters section.
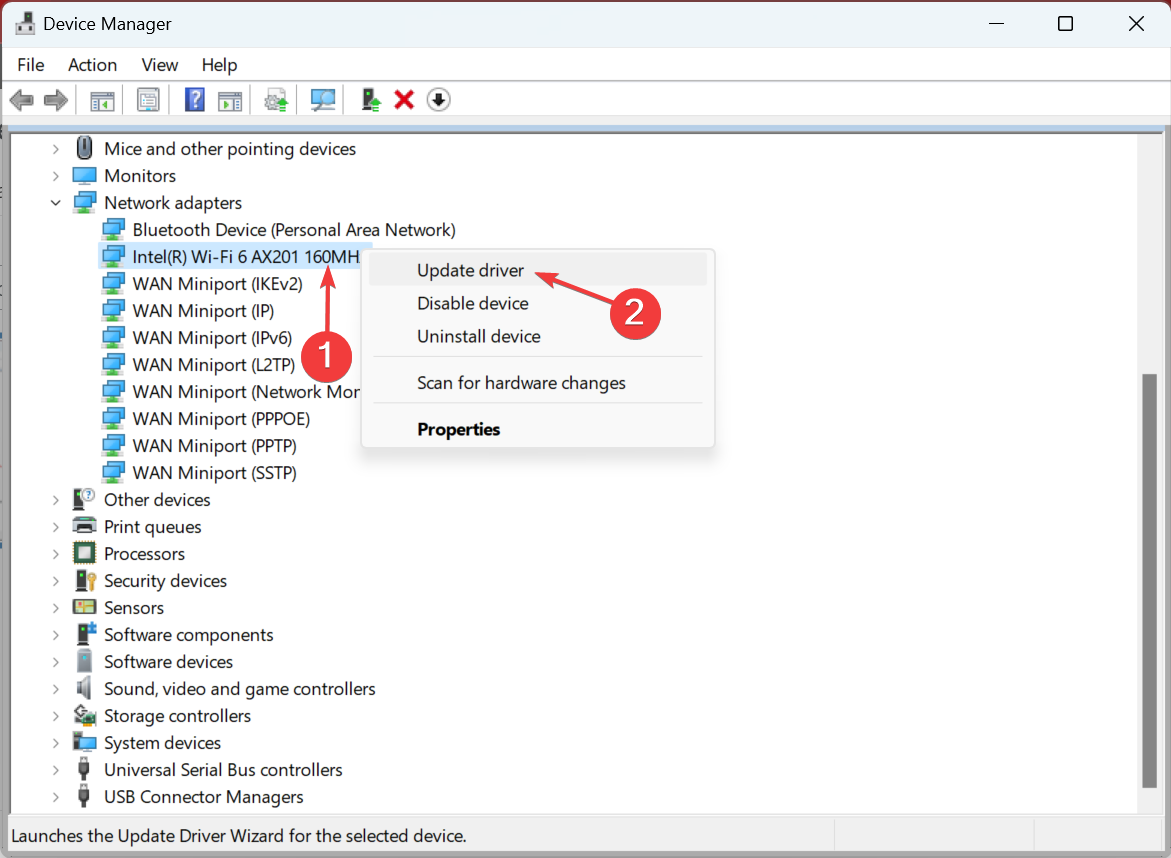
Right-click on your graphics card and select Update driver.
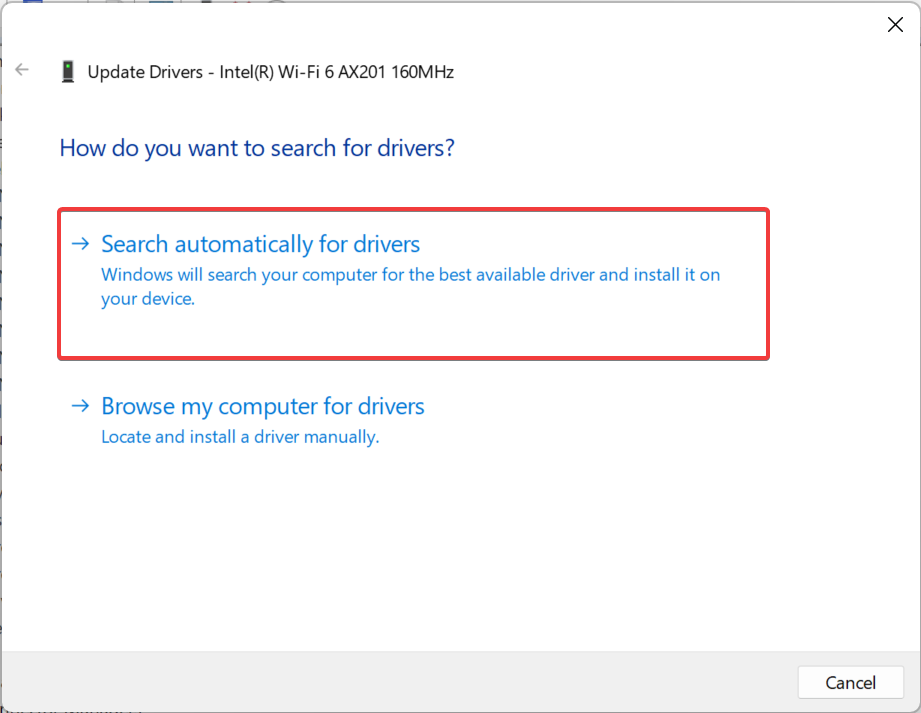
Choose the option to Search automatically for drivers.
Your PC will search for the update and if detected will prompt you to install the update.
While the above process will update the driver as it should, it requires a lot of steps to go through to update the driver.
To simplify this, you can use our recommended tool called Outbyte Driver Updater. Using this program, you can easily update all of your drivers with just a few clicks.
Outbyte Driver Updater
Try this great software to always keep your drivers updated with the most suitable versions.
Check the Run this program as an administrator box.
Hit Apply and OK.
One user has shared this solution as it has helped him fix the problem. Since some programs or games require admin privileges to run perfectly, you need to grant admin access by following the above steps and then check if this resolves the issue for you as well or not.
Some users reported that Windows 11 display settings are not working for them, and this can be a problem, especially if you need to adjust certain settings.
While this isn’t a serious problem, it can get quite tedious, but a couple of solutions can help you fix it.
Why won’t my display settings work?
Problems with the Settings app most likely cause this issue. Corrupted system files or corrupted user profiles can also contribute to this issue.
What can I do if the display settings are not working on Windows 11?
First of all:
Make sure you have the latest updates installed. Certain applications, such as MacType, can interfere with the Settings app, so close them.
You can also disconnect the second monitor, open Settings, and then connect the monitor again as a workaround.
Alternatively, you can use your GPU control panel to configure your display.
1. Restart File Explorer
Press Ctrl + Shift + Esc to open Task Manager.
Next, locate Windows Explorer, right-click it, and choose Restart.
The issue will be gone.
This is just a workaround, so you must repeat it if the issue reappears.
2. Disable the Print Spooler service
Press Windows key + R and type services.msc.
Locate the Print Spooler service and double-click it.
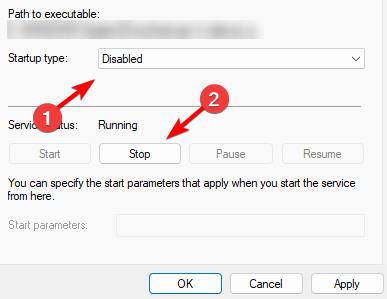
Click the Stop button to stop the service and set Startup type to Disabled.
Lastly, click on Apply and OK and check if that solves the problem.
3. Disable internal graphics
Restart your PC.
While it boots, keep pressing F2 or Del to enter BIOS.
Next, navigate to Settings and set Internal graphics to Disabled.
Save changes.
4. Reregister Windows apps
Press Windows key + R to bring up Windows 11’s Run dialogue accessory, and input PowerShell.
To open an elevated PowerShell app, press Ctrl + Shift + Enter.
Then input the following commands and hit Enter: Get-AppXPackage -AllUsers -Name windows.immersivecontrolpanel | Foreach {Add-AppxPackage -DisableDevelopmentMode -Register “$($_.InstallLocation)\AppXManifest.xml” -Verbose} Get-AppXPackage|Foreach{Add-AppxPackage -DisableDevelopmentMode -Register "$($_.InstallLocation)\AppXManifest.xml"}
Close PowerShell when the command finishes reregistering apps.
Press the Alt key + F4, and select Restart on the drop-down menu.
By performing this solution, you will reinstall the whole Windows Apps package and the problem should be over.
Press the Windows key + R combination to bring up Run’s dialogue box and enter this command in it: control userpasswords2
Click OK to open the User Accounts window.
Select the Add option.
Input an email address in the text box.
Click the Sign in without a Microsoft account option and pressNext.
Select the Local account option.
Fill out the required user account fields.
Then press the Finish button.
Select the added account in the User Accounts window and click the Properties button.
Click the Group Membership tab.
Select the Administrator radio button.
Click Apply and OK to save the account settings.
Press Alt + F4 to select Sign out. Then log into the new account to see if the issue remains there.
If that resolution works, migrate your user profile to the new account. Our guide on how to copy a profile includes full instructions for migrating a profile to a different account.
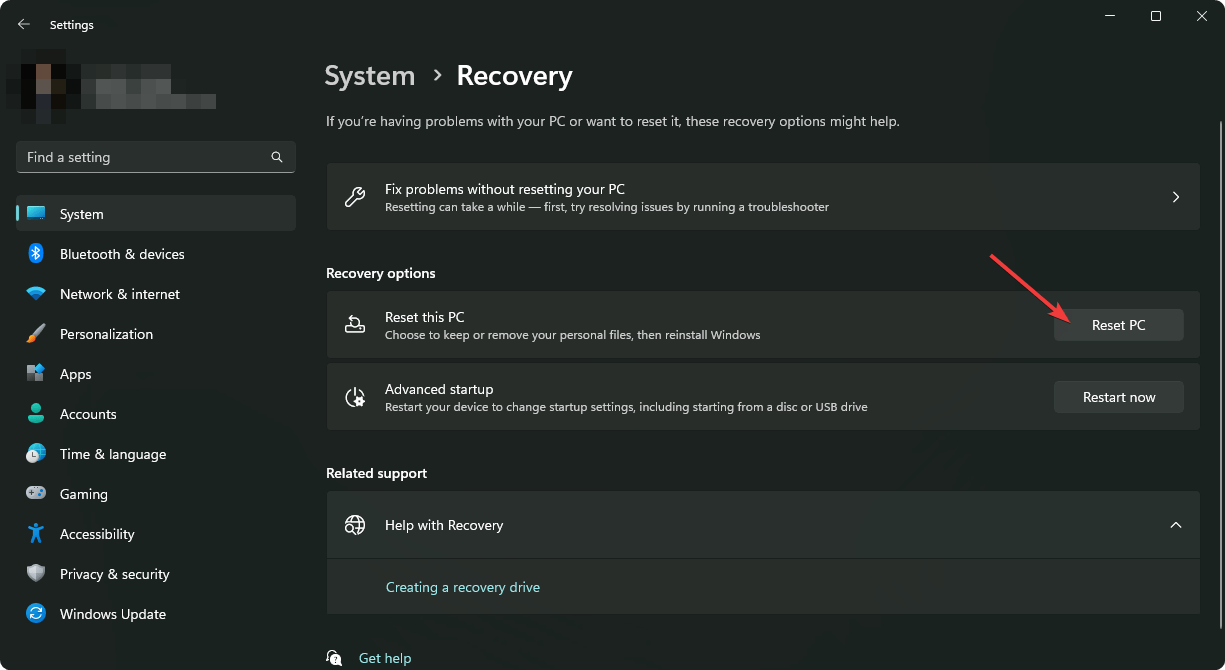
Press the Windows key + I to open the Settings app.
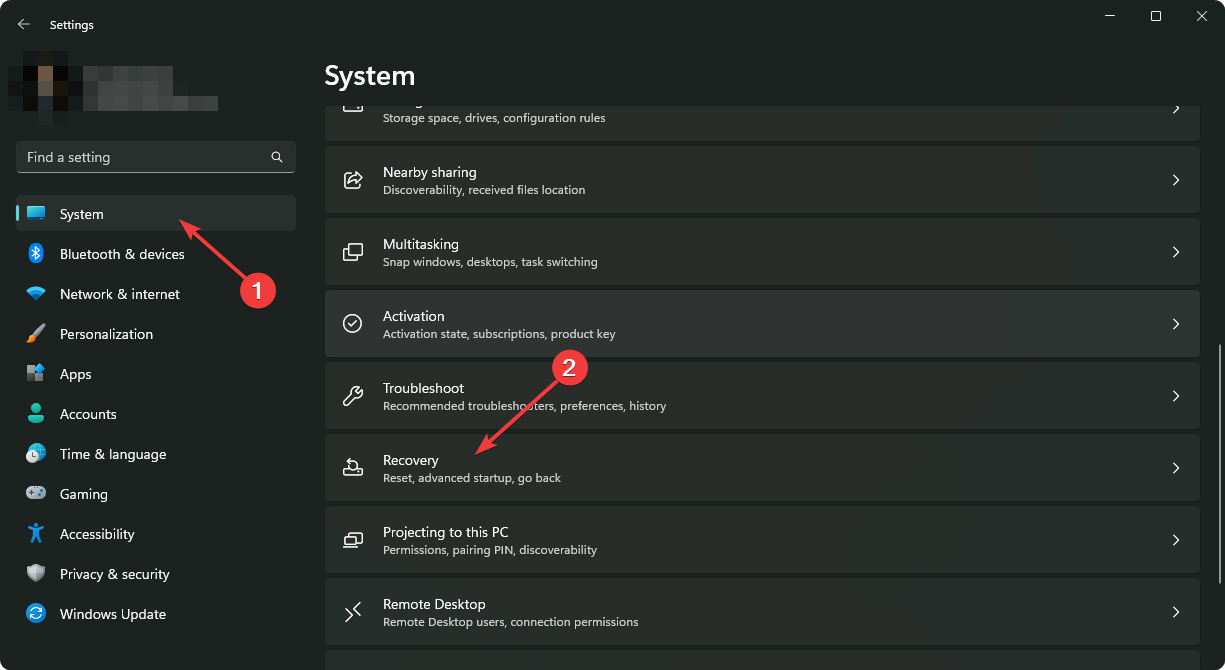
Next, navigate to System and select Recovery.
Click on the Reset PC button.
Select Remove everything.
Select Local reinstall. If that doesn’t work, you might have to use Cloud download.
Click on Next and then Reset.
Wait for the process to finish.
NOTE
This process will remove all files from your system drive (C:), so be sure to back up important data beforehand.
Why I can’t adjust the display resolution in Windows 11?
This is most likely an issue caused by display drivers or file corruption. Luckily, we have a dedicated guide that explains what to do if Windows 11 can’t change the display resolution.
Those resolutions can help if Windows 11 display settings are not working, so be sure to try them.
As this problem is mainly caused by wrong app associations, you should also consult our guide on how to remove them in Windows 11.
You’re also welcome to chat about the ms-settings:display error in the comments area below. There you can add questions and even share other resolutions for the ms-settings:display error.
The Quick Access feature on Windows 11 can run into issues, prompting We can’t get the list of your recent files right now. Please try again later. It means that you won’t be able to see recent files due to some issues.
Likewise, users complain that File Explorer frequently crashes whenever they use it on Windows 11. Hence, we will explore the issue’s possible causes and potential fixes.
Why is Quick Access not showing recent files in Windows 11?
The most prominent cause is that the Quick Access program is disabled on your computer. It results in Quick Access not working.
However, other factors can cause the recent files not to show in quick access Windows 11:
Outdated Windows – When Windows is not updated on your PC, it affects the programs and features. Moreso, not keeping your OS updated deprives it of the needed patches and updates for fixing bugs liable to cause problems.
Windows File Explorer issues – If your File Explorer is not working as expected, it impedes its functionality, like Quick Access. Also, full or corrupt file history can cause problems accessing recent files on Windows.
Outdated driver issues – It is possible that you will have a hard time accessing the recent files from Quick Access due to outdated drivers. Also, updating drivers like the graphics card can help avert display issues.
What can I do if Quick Access is not showing recent files in Windows 11?
Observe the preliminary checks below before proceeding with any advanced troubleshooting solutions:
Right-click on Quick Access, select three dots options from the top, and click on Options.
Select the View tab, click the Restore Defaults button, click OK to save the changes, and reset the Folder options to default.
This will restore the default configuration for folder options in Quick Access. It can fix the recent files not showing. Read this guide on how to fix File Explorer not opening on your PC.
Recently, some users have reportedly made inquiries as to know what it means to turn off the hard disk in Windows power.
Getting familiar with what the option brings to bear the fact that an opportunity in Windows 11 enables the user to turn off hard disk drives for a specified period.
What does turning off the hard disk mean?
Turning off the hard disk is a part of power management options that enable users to conserve their system’s energy.
Depending on the selected power plan, the user can decide to enable or disable it out of the box. For instance, it can be enabled in the Balanced and Power Saver power profiles and disabled in the Performance power plan.
Moreover, when enabled, your hard disk drive will be turned off after your PC is idle during the specified period. Turning off the hard disk is similar to enabling the Sleep Mode in a system.
Although, when next your software accesses the drive, it will take a few seconds before the drive starts spinning and give access to files.
How do I turn off the hard disk in Windows power options?
1. Use Control Panel
Click the Start button and type Control Panel and launch it.
Change the View by from Category to Small icons and open Windows 11 Power Options.
Click on Change plan settings.
Choose Change advanced power settings to access the disable hard drive feature.
To access the Turn off hard disk after setting if it’s greyed out, click on Change settings that are currently unavailable.
Edit the Turn off hard disk time for the On battery field and also for the Plugged in field.
Once done, press Apply and OK to save the changes and exit.
This should be an easy way to turn off hard disk in Windows power options. However, you can also learn how to tweak other system settings in Control Panel.
2. Use Command Prompt
Press the Windows key, input the cmd in the search space, and select Run as administrator.
Type the following command in the space and press Enter: powercfg -change -disk-timeout-dc 0
Replace 0 with the number of minutes you want your hard disk to turn off after idle for the On battery option.
Next, run the below command in the space and press Enter: powercfg -change -disk-timeout-ac 0
Now, replace 0 with the number of minutes you want your hard disk to turn off after idle on the Plugged in option.
Restart your PC for all the changes to take effect.
Many of our readers asked: Does turning off the hard disk affect SSDs? No, it doesn’t, since it has no moving parts, unlike the HDD.
For users willing to know how safe it is to turn off a hard disk on HDD, it is recommended to keep the disk spinning than to make it stop and start all the time. This will help prevent HDD wear out.
Why is Netflix not autoplaying your next episode? What can you do to restore normalcy? This article has answers to all your questions.
Why is Netflix not autoplaying my videos?
Some of the things that can go wrong and cause Netflix not to autoplay your videos include:
Device incompatibility:– Netflix does not support some devices. You may be experiencing this problem because your device is not compatible with Netflix.
Poor internet connection – Bad internet connection or mobile data usage can cause the issue.
Out-of-date Netflix app – Not using the latest version of the app can be a reason for autoplay not to work.
Apps and browser cache – Heavy web browser caches and apps cache can cause Netflix to malfunction.
Autoplay disabled – If autoplay is not enabled on your Netflix account, your videos will not play automatically.
Bugs on Netflix – Occasionally, the streaming platform gets hit by bugs. So this and other Netflix streaming error might be due to bugs.
Now that you know some of the reasons why Netflix is not autoplaying let’s see what you can do to fix it.
What can I do if Netflix isn’t autoplaying my videos?
Before you proceed to the major fixes in this guide, try some of these simple solutions, as they could be all you need to solve Netflix autoplaying problem on your device:
By default, Netflix does not allow autoplay videos via mobile networks. The way out is either to use a VPN to stream on Netlfix or connect through Wi-Fi network.
Whether you are using a smartphone, PC, or Smart TV, switching your device off and back on can fix most of Netflix’s issues on Windows and other devices.
Some devices don’t support autoplay when connected to smart TV with cables. Unplug cables, turn off your devices for a minute, and see if it works.
Go through the Netflix compatible devices list to check that your device isn’t on the list of unsupported devices. If it is, switching to a compatible device is your solution.
If these basic actions don’t solve it for you, you can move on to the following fixes to make Netflix autoplaying work again.
1. Enable autoplay on all devices
1.1. On Android, iPhone, and iPad
Open the Netflix app on your device and tap the Profile icon at the top right.
Choose the profile you want to edit and click Manage Profiles.
On the next screen, toggle on the switch next to Autoplay next episode.
1.2. On all other devices
Log in to your Netflix account on a browser, click the Profile icon in the upper right corner of your screen, and select Account from the drop-down menu.
Go to PROFILES & PARENTAL CONTROLS and click to expand.
Locate Playback settings and click Change.
Check the box next to Autoplay next episode in a series on all devices and click the Save button.
2. Clear browsing cache
2.1. On Chrome Browser
Click the three-dotted icon at the top-right of your browser and choose Settings from the options.
Go to Privacy and security and select on Clear browsing data.
Switch to the Advanced tab, check the boxes for Browsing history,Cookies and other site data, and Cached images and files, then click on Clear data.
Sign in again to see if Netflix now autoplay.
The solution above is for the Chrome browser but the procedure is similar on all major browsers.
You may also clear the browsing cache directly from Windows. Here’s a comprehensive guide you can follow to clear the cache on Windows 11.
2.2. On Android devices
Open Settings on your phone and scroll down to select Apps.
Locate Neftlix app from the list, tap to open, and select Storage.
Games like New World needs can run into issues on your PC for several reasons. The New World’s high ping is one of the issues users complain about when playing the game on their computers. It causes latency and stuttering in the game.
A slow network connection will prolong the communication time between your device and New World’s online server.
However, other factors can cause lags and stuttering in the New World. Some are:
Low bandwidth available for the game: Having many programs running on your PC makes it difficult for your games to get enough bandwidth.
Outdated drivers on your PC: You can experience lags in the New World game due to outdated drivers. Drivers like the network driver need to be updated to handle the network properties on your PC.
Issues with the game requirements: Playing games like New World on a computer that doesn’t meet the system requirements will prompt problems.
Issues with the router: if your network router is not working as it should, it’ll result in slow network connection speed, resulting in a lag in your game.
How do I fix high ping in New World?
The high ping issue in New World can be resolved by troubleshooting your device. Nonetheless, we recommend you observe the preliminary check below before proceeding:
Ensure you connect to a stable and fast network connection.
Power cycle your network router.
Close other programs that are running on your computer.
The above check should reduce the ping on New World. If you’re not able to fix the issue, proceed with the fixes below:
1. End process for apps using more bandwidth on your PC
Press Windows + R keys simultaneously to prompt the Run window, type resmon in the search space, and press Enter to open the Resource Monitor.
Click the Network option in the Resource Monitor window.
Navigate to the Total volume to check the programs using most of your network resources.
Right-click on the program with much bandwidth usage, then select the End Process option from the function menu.
Choose End Process to confirm the action and restart your PC to sync the changes.
The router can run into several errors, affecting its network connections. So, checking if your network connection is fast and working correctly can help fix high ping in New World.
Alternatively, switch to another network connection and see if the high ping issue persists in the game. It’ll fix the issues with New World being disconnected from the server.
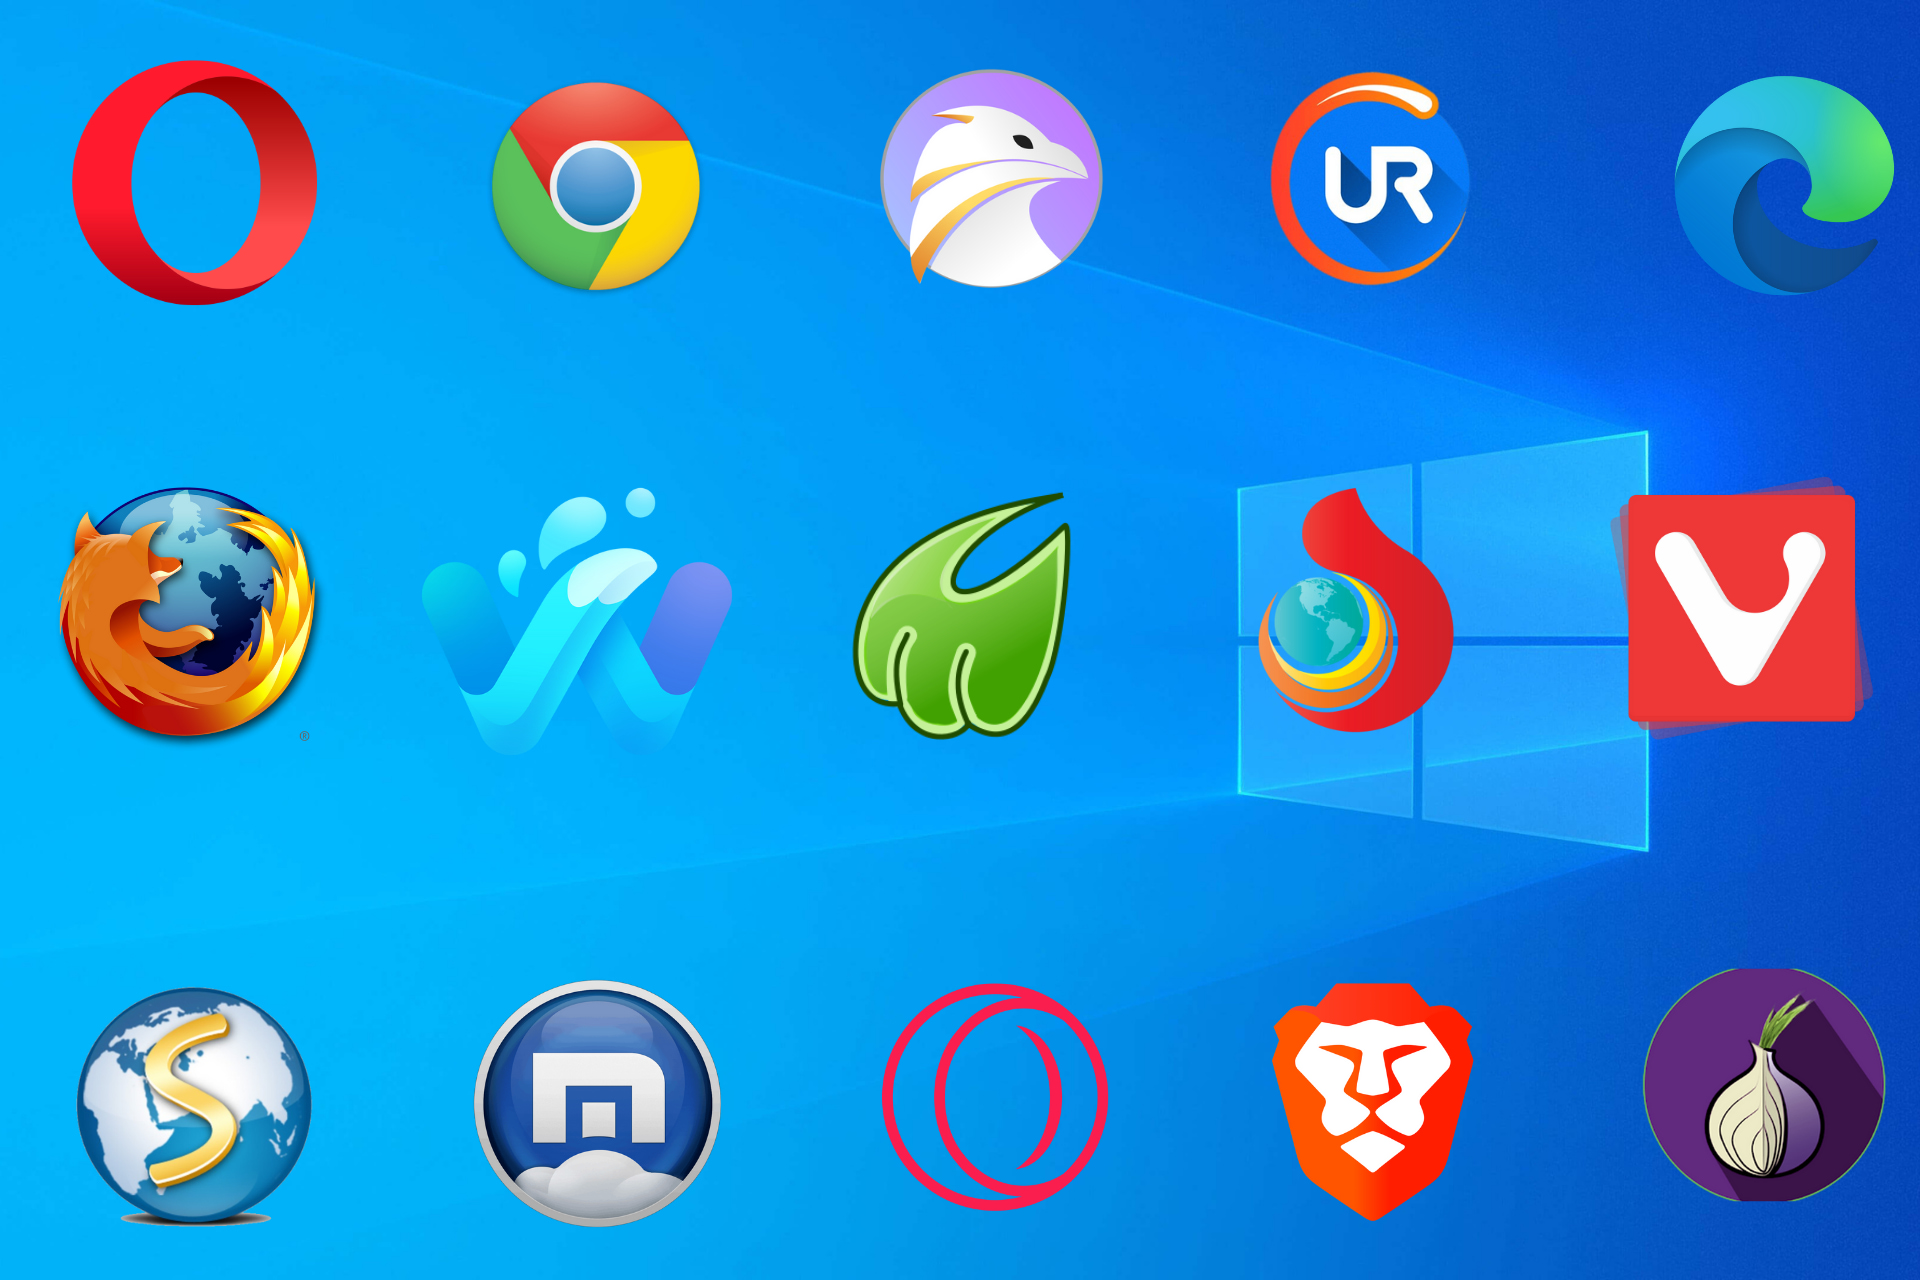
Portable apps come in handy when you don’t want to install them on your hard drive or want to use them momentarily. For example, there are a bunch of portable web browsers that you can use directly from your USB flash drive without the need to install them.
If you are looking for a mobile web browser with a built-in VPN feature, this guide is for you. Here, we will list some of the best portable VPN browsers you can install and add an extra layer of privacy to your browsing.
What are the benefits of using a portable VPN browser?
Before you check out the list, here are some benefits of using a portable VPN browser.
Carry it on your USB – Portable means you do not need to install them separately on your PC; they can be carried on a USB flash drive.
Protect your online activity – VPN hides your IP address and re-routes them to a different location, making you anonymous on the internet.
Safe for remote work – VPNs are also helpful to help you establish a safe connection for remote work.
Avoid bandwidth throttling – It Lets you escape data throttling.
Targeted ads are blocked – Using a browser with VPN makes sure that ads are not following your online activity, reducing targeted ads.
Let us now check out the list of some of the best portable VPN browsers you can get for your Windows PC.
What are the best portable VPN browsers?
Opera – Enjoy all features in the portable version
You are reading it right. One of the best web browsers, Opera, has an official portable version with a built-in VPN.
Are there any limitations in using a portable version of Opera than the full version? Absolutely no! You get to enjoy all the features, like the full version.
These features include a free VPN, access to social media apps such as Twitter, Instagram, WhatsApp, etc., on the sidebar, the option to search in tabs, an ad-blocker, a snapshot tool, a unit converter, battery saver mode, and much more.
Some valuable features of the Opera browser:
Built-in free unlimited VPN
Built-in adblocker
Social media apps on the sidebar
Battery saver mode
Opera
Excellent browser option with built-in VPN that doesn’t store any of your personal information or activity.
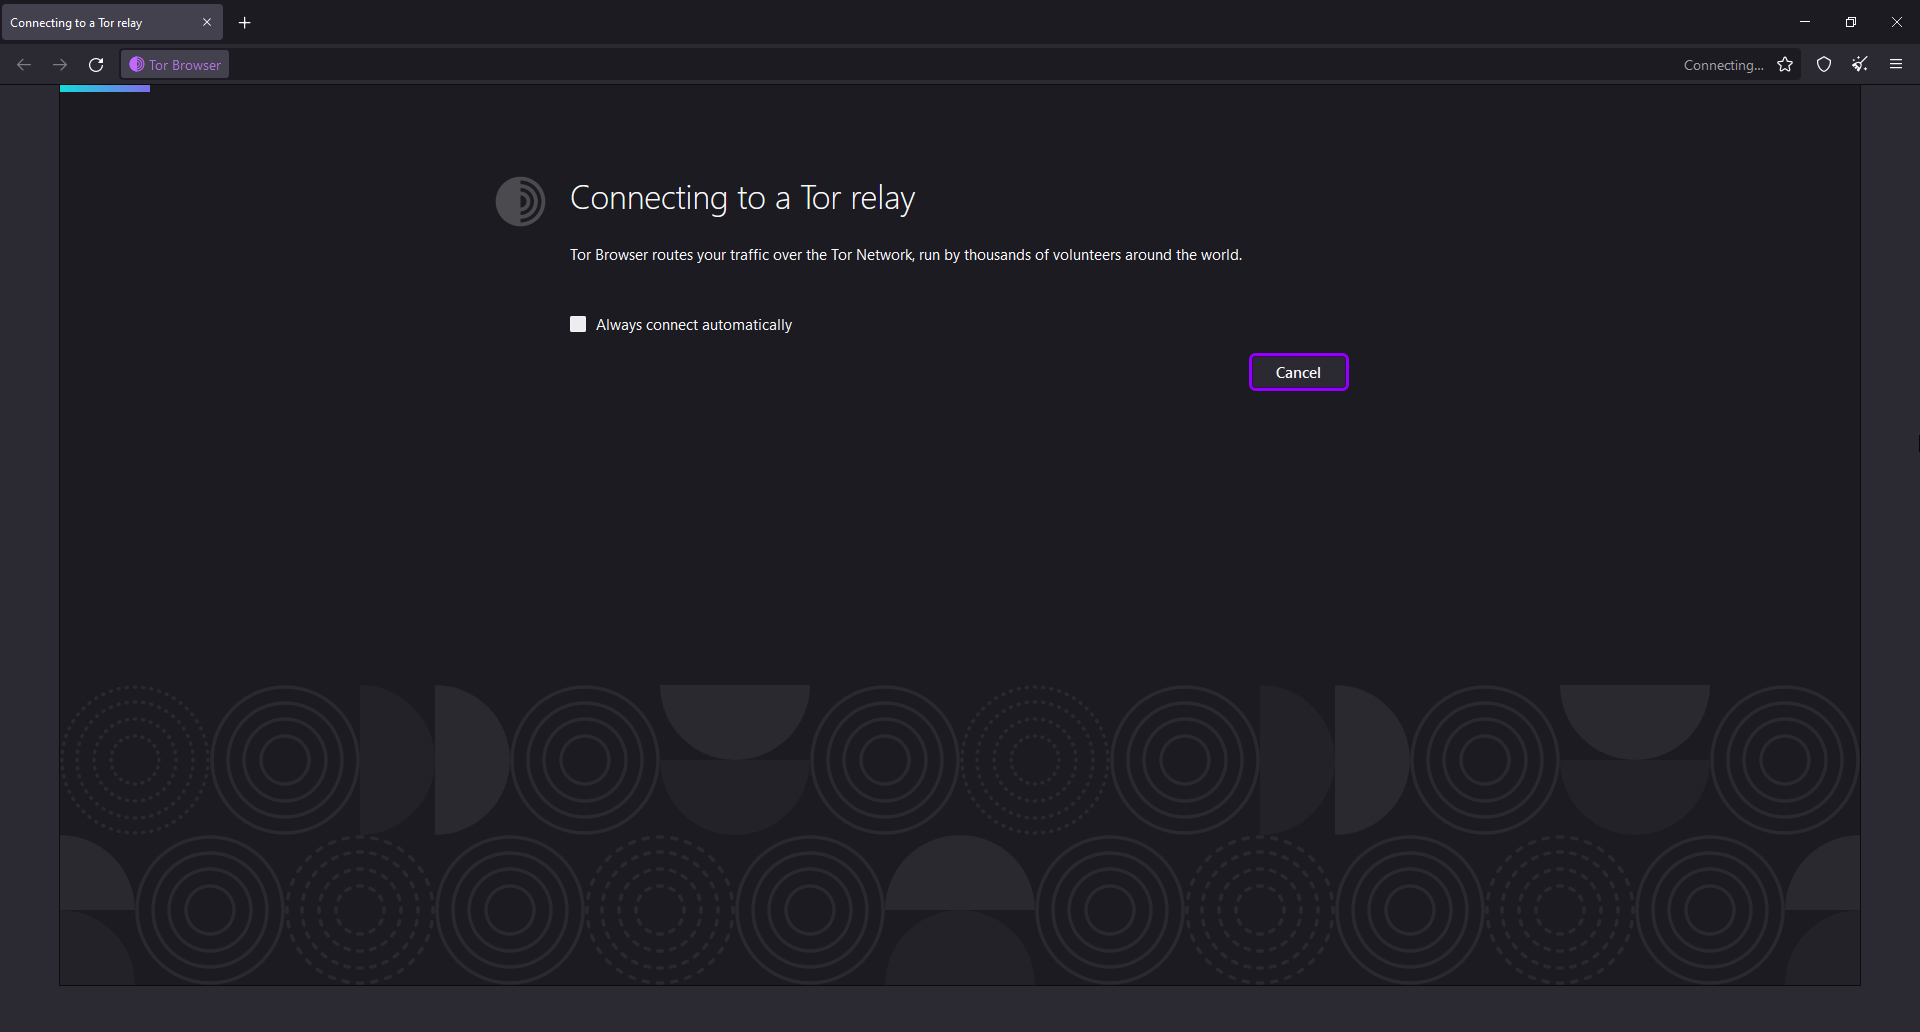
Tor has emerged as one of the most privacy-focused browsers available for multiple platforms. The best part is that you can install it on your removable media.
It comes with a built-in VPN (of course) but also offers many other privacy features that will make your browsing more secure and private than ever.
It blocks trackers, Tor prevents your online activity from monitoring, offers multi-layered encryption, encrypts all your traffic, etc.
To install Tor browser portable version, after you have downloaded the EXE file, during the installation process, select your removable media when asked where to install the Tor browser.
Aloha browser is a brilliant browser for mobile phones. However, a PC version is also available that offers solid encryption and comes with a built-in VPN.
It offers an unlimited VPN facility, ad-blocking features, inbuilt video player to play videos directly without the need to install a video player.
The best part about this is that it is pretty easy to set up. All you need to do is grab the EXE files from the official website, place it in your USB flash drive, double-click on them, and boom! It will get installed.
Some of the best features of the Aloha browser are:
You may not find many people using the Maxthon browser, but it is a browser that packs in many features.
There is an official portable version of the Maxthon browser, which you can download, place in your USB flash drive and start using.
Apart from the bunch of features on offer, such as night mode for night browsing, a snapshot tool for better screenshots, mouse gesture shortcuts, etc., it also features an in-built VPN that is unlimited and available for free.
Here are some of the notable features of the Maxthon browser:
Built-in VPN
Advanced screenshot tool
Mouse gesture shortcuts
Support for Chrome extensions
A rich collection of themes
Available across multiple platforms
⇒ Get Maxthon
That is the complete list of some of the best portable VPN browsers you can use without needing to install them.
Does Firefox have a built-in VPN?
No, Firefox does not have a built-in VPN, as is the case with most popular browsers except Opera.
Firefox users must rely on third-party VPNs or an extension available on the Add-Ons store. If you plan on using one with Firefox, check our created list of the best VPN extensions for Firefox.
Is Opera VPN untraceable?
Opera is one of the few popular and user-friendly browsers offering a free built-in VPN tool. But, for a long, users have been wondering whether the Opera VPN is effective and untraceable.
Opera relies on 265-bit encryption, the industry standard, to encrypt the traffic and create a secure tunnel. So, the Opera VPN is relatively stable, reliable, and safe, but it is certainly no match to some paid options. You can read our detailed analyses of Opera VPN.
In case you don’t have an issue installing a web browser and are looking for the best ones you can use on your Windows PC, we have a list prepped up for you, including browsers tested for speed and security.
Steam has lots of features that help players get the utmost gaming experience. The compatibility mode is one of these features of Steam, but users don’t know how to run a steam game in compatibility mode. However, it is an effective solution for Steam games not launching on Windows 11.
Is it OK to run Steam games in compatibility mode?
Running Steam in compatibility mode is one of the most controversial arguments in the gaming world. Some say it is not recommended, while others argue it is an excellent feature. Regardless, we’ll show you what you need to know about it.
Furthermore, it runs the program on a recent Windows using the settings from an earlier version of Windows. Some notable benefits of running Steam in compatibility mode are:
It serves as a means of backdating your system settings to access games not made for the current version you have.
It helps users fix errors. The installed version of the OS can’t run your game error can be fixed by running it in compatibility mode. It initiates the settings from an earlier version of Windows OS.
However, there are some issues with running Steam in compatibility mode.
It can affect the game’s performance by forcing it to use an emulation layer.
Some users complain about game crashes or malfunctions after running it in compatibility mode.
Factors such as outdated Windows OS, and issues with the Steam client, can be responsible for problems you encounter with running Steam in compatibility mode.
Nevertheless, you can run Steam in compatibility mode without experiencing problems with your apps. So, this article will guide you through how to successfully Steam games in compatibility mode on Windows 11.
How do I run Steam games in compatibility mode on Windows 11?
Tweaking your settings to run Steam games in compatibility mode on Windows 11 can be tricky. So, we recommend you go through the following preliminary check before attempting any changes:
Disconnect your PC from any remote connection.
Ensure the game client you want to run in compatibility mode doesn’t have any background activities.
Temporarily disable Windows Defender Firewall on your computer.
After observing the checks, go on with the steps below.
Left-click the Start button, input Steam in the search box, and select the Steam client from the search results.
Go to the SteamLibrary at the top of the screen and locate the game you want to run in compatibility mode.
Right-click the game title and select Properties from the drop-down.
Navigate to the Local Files tab, and click the Browse Local Files option.
Find the game’s executable file, right-click it, then select Properties from the drop-down.
Navigate to the Compatibility tab and check the box for Run this program in compatibility mode, then choose the operating system.
Some users are reporting that LibreOffice won’t open on Windows 10, no matter how many times they try. This can be troublesome for individuals who depend on the application as a free Microsoft Office alternative.
If you’re experiencing the same problem, don’t worry, we have you covered. This article shares with you 4 effective solutions to troubleshoot the issue in no time.
Why LibreOffice won’t open in Windows 10?
LibreOffice won’t open in Windows 10 due to one of the following reasons:
The application software isn’t up to date – Ensure that you’re using the latest version of LibreOffice. Sometimes bugs and glitches are fixed in newer releases.
Duplicate processes running in the background – If you have multiple processes running in the background, it can cause your LibreOffice app to crash or freeze.
Hardware acceleration – The feature can help make the API run smoother; however, if not configured correctly, it may cause issues.
Let’s take a look at how to fix the issue after we’ve identified the causes.
What can I do if LibreOffice won’t open in Windows 10?
Before moving on to more complex solutions, try these basic fixes to solve the LibreOffice won’t open on Windows 10 problem:
Make sure you have a reliable internet connection to avoid any app malfunctions.
If you’re using an older version of the app, try updating to the latest version.
Check that your system meets the minimum requirements for LibreOffice.
If the basic steps listed above can’t fix your issue, try the following methods.
1. Open LibreOffice via Run Command
Press the Windows key + R on your keyboard to open the Run Dialog window.
In the Run box, type or copy-paste the following command and hit Enter: %ProgramFiles%\LibreOffice\program\soffice
If you follow the steps correctly, the LibreOffice software should open on your Windows 10 PC. However, if it doesn’t, there are other solutions you can try.
2. Reinstall LibreOffice
Press the Windows + R key combination to open the Run Box.
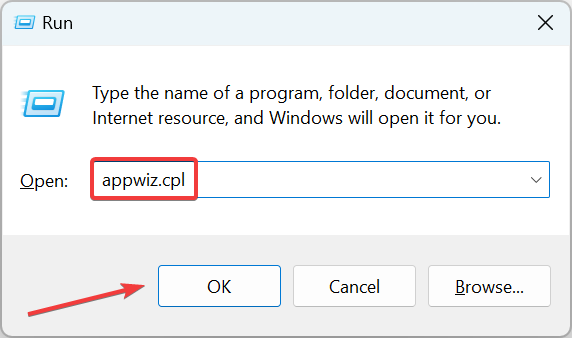
In the Run box, type or copy-paste the following and hit Enter: appwiz.cpl
Double-click the LibreOffice software and select the Uninstall option. Once this is done, restart your computer.
After restarting your PC, you need to visit the LibreOffice website to reinstall the software.
Thank you for reading this post. If you have any feedback or would like to share which of the methods worked for you, please leave a comment in the section below.
Why is my Windows Activation status not available?
Checking Windows Activation status can result in errors saying it is unavailable. The main reason for this is that the Software Protection service (sppsvc.exe) is disabled or not running as it should.
Furthermore, other factors that can cause the issue are:
Interference from third-party antivirus software or Windows Defender Firewall – It is common for users to encounter Windows Activation errors due to the activities of security software on their computers. They can impede the activation process and result in a series of problems.
Content of the Software Distribution folder – Windows Activation process can result in an error if the content of the Software Distribution folder is faulty or corrupt. Take a look at this guide for the best steps to delete the Software Distribution folder.
Motherboard or hardware replacement – When you replace your PC’s motherboard or hardware, it can make the activation status unavailable.
Network connection issues – You may encounter issues with the Windows Activation status if your network connection is slow or not stable. It gets you easily disconnected from the servers.
Now that we know what causes this problem, it’s time to find the best way to solve it.
What can I do if activation by phone is not available?
Resolving the activation by phone not available error on Windows 11 is not so hard to do. However, we recommend you go through the following preliminary checks:
Disable antivirus programs running on your PC that may influence Windows Activation.
Press Windows + I keys to open Windows Settings on your PC.
Locate and expand the Recovery option in the System tab.
Press the Reset PC button on the right side of the screen and select the type of factory reset you want to perform.
Click the Next button and click the Reset button.
Resetting Windows 11 can fix the issues affecting Windows Activation, prompting the activation by phone not to be available. Also, you can refer to our article to learn how to factory reset your PC.
Can I permanently activate my Windows for free?
Users can permanently activate Windows for free by following the steps below:
Press Windows + I key to launch the Settings app on your PC.
Click on Activation on the right pane of the screen.
On the activation page, select I don’t have a product key option.
Log in to your Microsoft account. (If your digital license was linked to your Microsoft account, then Windows will be automatically activated)
If you have further queries, kindly drop them in the comments section. Also, we welcome suggestions on fixes that have worked for you but are not included in this guide.
Do you have a high-end display and a powerful Windows 11 PC but don’t know how to optimize the display settings to get the best output?
If this is the scenario you are in and you are looking for a guide that would give you the best Windows 11 display settings, then you are in the right place. This guide will provide you with all tweaks and settings you need to make to get the best display output. So let’s get right into it.
How can I get the best display settings on Windows 11?
Before diving into the existing solutions, it is best to check for these elements which might resolve your problem:
Make sure you have the best display at your disposal. A great display already enhances the picture quality, and you can get the best output results by performing specific tweaks.
Ensure that the PC that you have has a lovely graphic card installed in it. Then, you can look at our guide, which lists some of the best graphics cards you can buy.
Finally, ensure you use a high-speed HDMI cable to get the best display performance, low latency, high picture quality, etc.
1. Select recommended resolution
Press the Win + I buttons to open Settings.
Select Display.
From the Display resolution drop-down, select the recommended option.
You must select the correct resolution as per your display’s resolution. This ensures that everything you see on your display is crisp, sharp, and accurate colors.
For example, a resolution of 800×600 enlarges everything on display, resulting in poor picture quality. On the other hand, a resolution of 1920×1080 gives a better outcome.
To know what maximum resolution your display supports, you can quickly check out the box it came with or go through the manual. You can also hop onto the internet and search for the resolution support over the internet for your display.
2. Tweak the scale and layout
Press the Win + I buttons to open Settings.
Select Display from the right side.
From the Scale drop-down, select the recommended option.
You must select the correct scale to read the text and correctly see apps and other items on your display.
If you have a high-resolution display, you can opt for an increased scale size, i.e., above 100%. While the increased size may not look nice, it improves readability. Moreover, if you have a high-resolution display, everything will look nice; there shouldn’t be anything to worry about.
3. Calibrate the colors
Press the Win + I buttons to open Settings.
In the search field, type Calibrate Display Color and hit Enter.
Click on the Calibrate Display Color option on the right side.
Follow the onscreen steps as the wizard prompts you to set the ideal color settings for your monitor.
Using the Calibrate Display Color wizard, your PC will be set to the best color settings supported by your display.
4. Use Night Light to reduce eye strain
Press the Win + I buttons to open Settings.
Select Display from the right side.
Click on the toggle for a Night light.
Also, when you click on Night light, you can select the strength of the warmer tone that will color on your display.
You can also schedule the Night light by using the Schedule night light toggle.
Do you feel fuzzy, or do your eyes strain when you work for a longer time on your PC? If yes, you can use the Night light settings to apply a warmer tone.
This reduces the blue light that goes directly into your eyes, and you can use the PC for an extended period without irritating your eyes.
5. Turn on HDR for enhanced picture
Press the Win + I buttons to open Settings.
Select Display from the right side.
Click on HDR.
Turn on the toggle for HDR video streaming.
This will help you stream HDR videos whenever available.
Do note that not all displays would support this feature. So, make sure that your collection supports HDR before turning on this feature.
HDR will enable an enhanced video viewing experience, as it details the bright and dark parts of the video to provide you with a true-to-life picture.
A window will show you the five best options for text. You need to select the best one as per your liking.
Follow the onscreen prompts.
Once done, hit the Finish button.
Tuning the text, as shown above, makes sure that you are being displayed the text on the screen in the best possible way or the way that you like.
If you use your PC or laptop for reading or writing content, then this setting or calibration is a good one to ensure that the texts are readable as per your needs.
7. Apply dark mode
Press the Win + I buttons to open Settings.
Select Personalization from the left side.
Click on Colors on the right.
For Choose your mode drop-down, select Dark.
This will enable dark mode on your PC.
The dark mode is the best theme setting you can apply if you want to eliminate the white colors that appear on Windows or apps.
This makes it easy on the eyes and protects your eyes from the bright white light. The dark mode also goes well with the backgrounds and wallpapers.
8. Change screen refresh rate
Press the Win + I buttons to open Settings.
Select Display from the right side.
Select Advanced display.
Select the appropriate refresh rate supported by your display for the Choose a refresh rate drop-down.
Windows 11 supports high refresh rate displays. Also, the best part is that it can dynamically switch content between different refresh rates, i.e., from 60Hz to 120Hz.
If your monitor or display supports a high refresh rate, you can follow the above steps and bump up the screen refresh rate to enjoy buttery smooth content viewing.
9. Adjust the power mode
Press the Win + I buttons to open Settings.
Click on Power and Battery.
Under Power mode, select the Best performance option.
This will ensure that everything at the highest level runs on your PC, including the performance or the display settings.
10. Change the text size
Press the Win + I buttons to open Settings.
Select Accessibility.
Click on Text size.
Use the Text size slider to adjust the size of the font.
Click the Apply button.
Adjusting the text size ensures that the text appearing on your display is appropriate and readable.
Apart from all these settings, you should also ensure that you keep the display driver up to date. You can do that from the Device Manager. But that requires some steps to follow.
An alternative is using an automated tool called Outbyte Driver Updater. Using Outbyte Driver Updater will ensure that the display driver and all other outdated drivers on your PC are up to date.
You must launch the app, scan for outdated drivers, and hit the update button. It is far more efficient and time-saving than the manual method.
Keep Windows up to date as well, ensuring that all the bugs present in the previous versions are resolved and that you are protected with the latest security.
If you are facing screen distortion issues, you can check out our dedicated guide that lists some of the best solutions to resolve the problem.
Also, if there are some other screen problems you are facing and want to resolve, you can check out our guide.
That is it from us in this guide. Let us know in the comments below if you tweaked the settings as mentioned above and if you were able to get the possible output from your display or not.
People often get confused when they want to choose between Windows 11 reset vs. clean install. Even though these two things will give you a fresh Windows environment, there are still differences.
This article will help you to understand resetting Windows and clean installation better so that you can decide the best option for you.
Windows 11 reset vs. clean install – What are the key differences?
Windows 11 reset
From Windows 8, Microsoft has introduced the reset feature. On Windows 11, this feature has gotten more polished. It is like a factory reset of a smartphone. It re-installs Windows 11, but you can keep or erase your files and apps if you want.
You don’t need bootable media to reset Windows 11. There is also no need to configure the partition. In some cases, resetting can be faster than a clean installation. However, sometimes, it may be a long process, depending on various factors.
While resetting, you can choose to keep your personal files or wipe the system drive as well as the entire partition, which is a great benefit. Also, no version changes occur on Windows for a reset.
Users also don’t need to worry about drivers if they do reset. Everything will work well after doing a reset.
Why should I reset Windows 11?
Usually, users do a system reset on Windows 11 due to the following reasons:
The clean installation gives a clean environment and a fresh Windows experience. However, unlike reset, it doesn’t let you keep your personal files. The clean installation also requires bootable media.
During the installation process, you will get the option to configure your partition. You can choose to keep your files on other drives or erase them if necessary. But, the drive where you will install Windows 11 will be erased, and no personal files will be kept.
You can pick a different version of Windows 11 while creating a bootable media. After doing a clean installation using that media, you will get the same version that you used there, not the old one installed on your PC.
Another thing is you will need to install missing drivers after Windows 11 clean installation. For this, you can use a specialized driver updater, as it can do this job quickly and automatically.
Why should I clean install Windows 11?
In general, users do a clean installation for the following reasons:
After looking at these differences mentioned above, you can choose the one that fits you well. If your PC is not working well and you want to keep your personal files and want to fix something, reset is the best option. It will save you from the hassle of driver installations and any reconfiguration.
However, if you want to reconfigure the partition and wish to start from scratch, a clean installation is the ideal choice.
In some cases, you may not be sure of what you should do. In this case, we suggest you reset your Windows 11 first. If it doesn’t solve your difficulties, do a clean installation.
This article explains the differences between Windows 11 reset vs. a clean install. If you have any opinions, let us know in the comments box.
Group Policy not syncing between domain controllers is one of the problems users complain about. It indicates that the changes or effects initiated across the domain controllers are not replicating between them.
Issues with one of the Domain Controllers can cause Group Policy replication issues. Some other notable causes of the Domain Controller not syncing are:
Latency or slow File Replication Service issues – Syncing between the Domain Controllers can be problematic if there’s an error with previous syncing processes on a Domain. Each Domain Controller needs to finish any syncing process on it before it can initiate other replication processes.
The Distributed File System (DFS) client is disabled – The Windows Group Policy not syncing between Domain Controllers can be due to settings issues. Features like the Distributed File System (DFS) need to be enabled to allow the files created to be synchronized across the Domain Controllers.
Network Connectivity to the Domain Controller – Syncing network connectivity issues can impede the files created on one Domain Controller to another.
The cause of Group Policy replication issues can differ on your part. However, the solutions below will help you fix the problem.
How do I force synchronize GPO between Domain Controllers?
Forcing GPO replication between Domain Controllers requires advanced troubleshooting. So, you should go through the following preliminary checks before diving into it:
Close and restart the Windows Group Policy.
Ensure that you connect to fast and stable network connectivity.
Reboot your computer and try syncing the GPO between DCs.
After following the preliminary checks above, and you’re unable to fix the sync problems, proceed with the steps below:
1. Enable the Distributed File System (DFS) in the Server Manager
Press Windows + R keys to open the Run window, type ServerManager in the search box, and press Enter.
Click on Manage and select the Add Roles and Features option to prompt the add roles and features wizard.
Click Next to start the setup.
Tick the Role-based or feature-based installation option, then navigate to the Server selection tab and select a server.
Navigate to Server Roles and go to File and storage services.
Check the box for DFS Namespaces and DFS Replication under File and iSCSI Services. Clicking the Namespaces will prompt another tab asking if you’d like to add features. Click the Add Features button in the prompt.
Click Next twice to confirm features and install them.
Replicate the same steps (except step 6) on the second Domain Controller.
If you want to learn about the Windows Clipboard rich text copy, paste, and edit feature, this article will help you. Clipboard is not a new thing on this OS. On Windows 11, the Clipboard has got significant enhancements, and you can get several advantages because of this.
Rich Text is a type of text that maintains its formatting even when you paste it into another software, particularly word processors. Usually, it keeps formatting information, including paragraphs, blockquote, lists, hyperlinks, etc.
Can I access rich text items from the clipboard history on Windows 11?
Yes, you can easily access history on Windows 11 Clipboard. It will allow you to pick any copied rich text items and paste them anywhere you want.
However, before that, you should enable the history feature. For this, press Windows + V on the keyboard and click on Turn on.
From now, you will be able to access recently copied items by pressing Windows + V on the keyboard.
How can I utilize Windows Clipboard rich texts properly?
Before knowing about the usage of Windows Clipboard for rich texts, please ensure the following things:
If everything seems alright, go through the below procedures.
1. Copy rich texts
Select the rich texts you want to copy.
Press CTRL + C on the keyboard.
Alternatively, you can right-click and choose Copy.
2. Paste rich text
2.1 Paste in the same device
Put your cursor on where you want to paste.
Press CTRL + V on the keyboard.
Alternatively, you can right-click and choose Paste.
By default, it will paste the last copied item. But you can choose which one should be pasted by access to the Windows Clipboard History. If you need, you also can increase the clipboard history size.
2.1 Paste on another device
Press Win + I on the keyboard to open Settings.
Go to System and then click on Clipboard.
Toggle on the button next to Sync across your devices.
Paste the texts on another device, as shown in method 2.1.
You only can paste on the devices with the same Microsoft account or the devices connected to your PC properly.
For example, you can connect your Android phone to Windows using the PhoneLink app provided by Microsoft. After connecting, you can copy and paste between Android and Windows.
3. Edit rich texts on Windows Clipboard
3.1 Modify text
Paste the rich texts on software that supports it.
Modify it according to your preference.
Copy it again.
Now, you can paste modified items on any supported tools. However, you can consider using Comfort Clipboard Pro.
This tool allows you to edit and delete clipboard items conveniently. Else, it has a lot of helpful features to give you the best experience. You won’t get this awesome experience from the built-in Windows functions.
3.2 Delete copied rich text
Press Win + V to access the clipboard history.
Click on the three vertical dots and click on the Delete button.
To copy-paste rich texts on Windows, you won’t need to do any more extra steps. By default, when you paste, Windows maintains the original formatting where possible. To enhance the experience, you also can consider using third-party clipboard managers for Windows.
If you need to paste formatted rich texts as plain texts, you can press CTRL + Shift + V. There may be different keyboard shortcuts for some different software.
Please note that software like Notepad doesn’t support rich texts. If you want to copy or paste such text formats, you must use any online or offline tools like MS Word, Google Docs, etc.
This article has featured the steps to copy, paste and edit the rich text in Windows Clipboard. You can let us know in the comment box if you have any suggestions or opinions.
Several users have recently complained about an issue regarding their storage not adding up in Windows 11. To some, it feels like the system’s storage on their hard drive suddenly vanished.
If your Windows storage usage settings is misreporting files by a huge amount, take your time to explore this article to troubleshoot the issue.
Why doesn’t storage space add up?
There is almost no straightforward cause for this. However, you may have hidden files and directories that contain system files unaccounted for in the calculation. Other probable causes are:
Too many tiny files stored on disk – Small files take up more space on the disk than the initial size. They occupy the initial size and take a chunk in the file system to save names and properties. Hence, these may be unaccounted for.
Unaccounted files in Recycle bin – If you have too many deleted files, they are stored in the Recycle bin. Hence, they are hidden and may cause a disparity in storage space.
Enabled System Restore points –When enabled, it creates new files regularly whenever updates are installed, and this consumes a large chunk of storage space, which may be unaccounted for. This may also cause Windows to be slow after Windows Restore.
Although the causes are not only limited to these, let’s explore the possible ways to troubleshoot the problem.
What can I do if storage space doesn’t add up in Windows 11?
Before proceeding to explore advanced fixes on account used space on the hard drive, you should consider performing the following preliminary checks:
Ensure to clear long and overdue files in your Recycle bin.
Uninstall all unnecessary applications and remove programs that are not useful to you.
Delete files in your download folders if they have not been opened for a long period.
Having checked the above and you still have a whooping amount of storage space that doesn’t add up, you can then explore the solutions provided below:
1. Check your System’s Cleanup recommendations
Press Windows + I to open the Settings app.
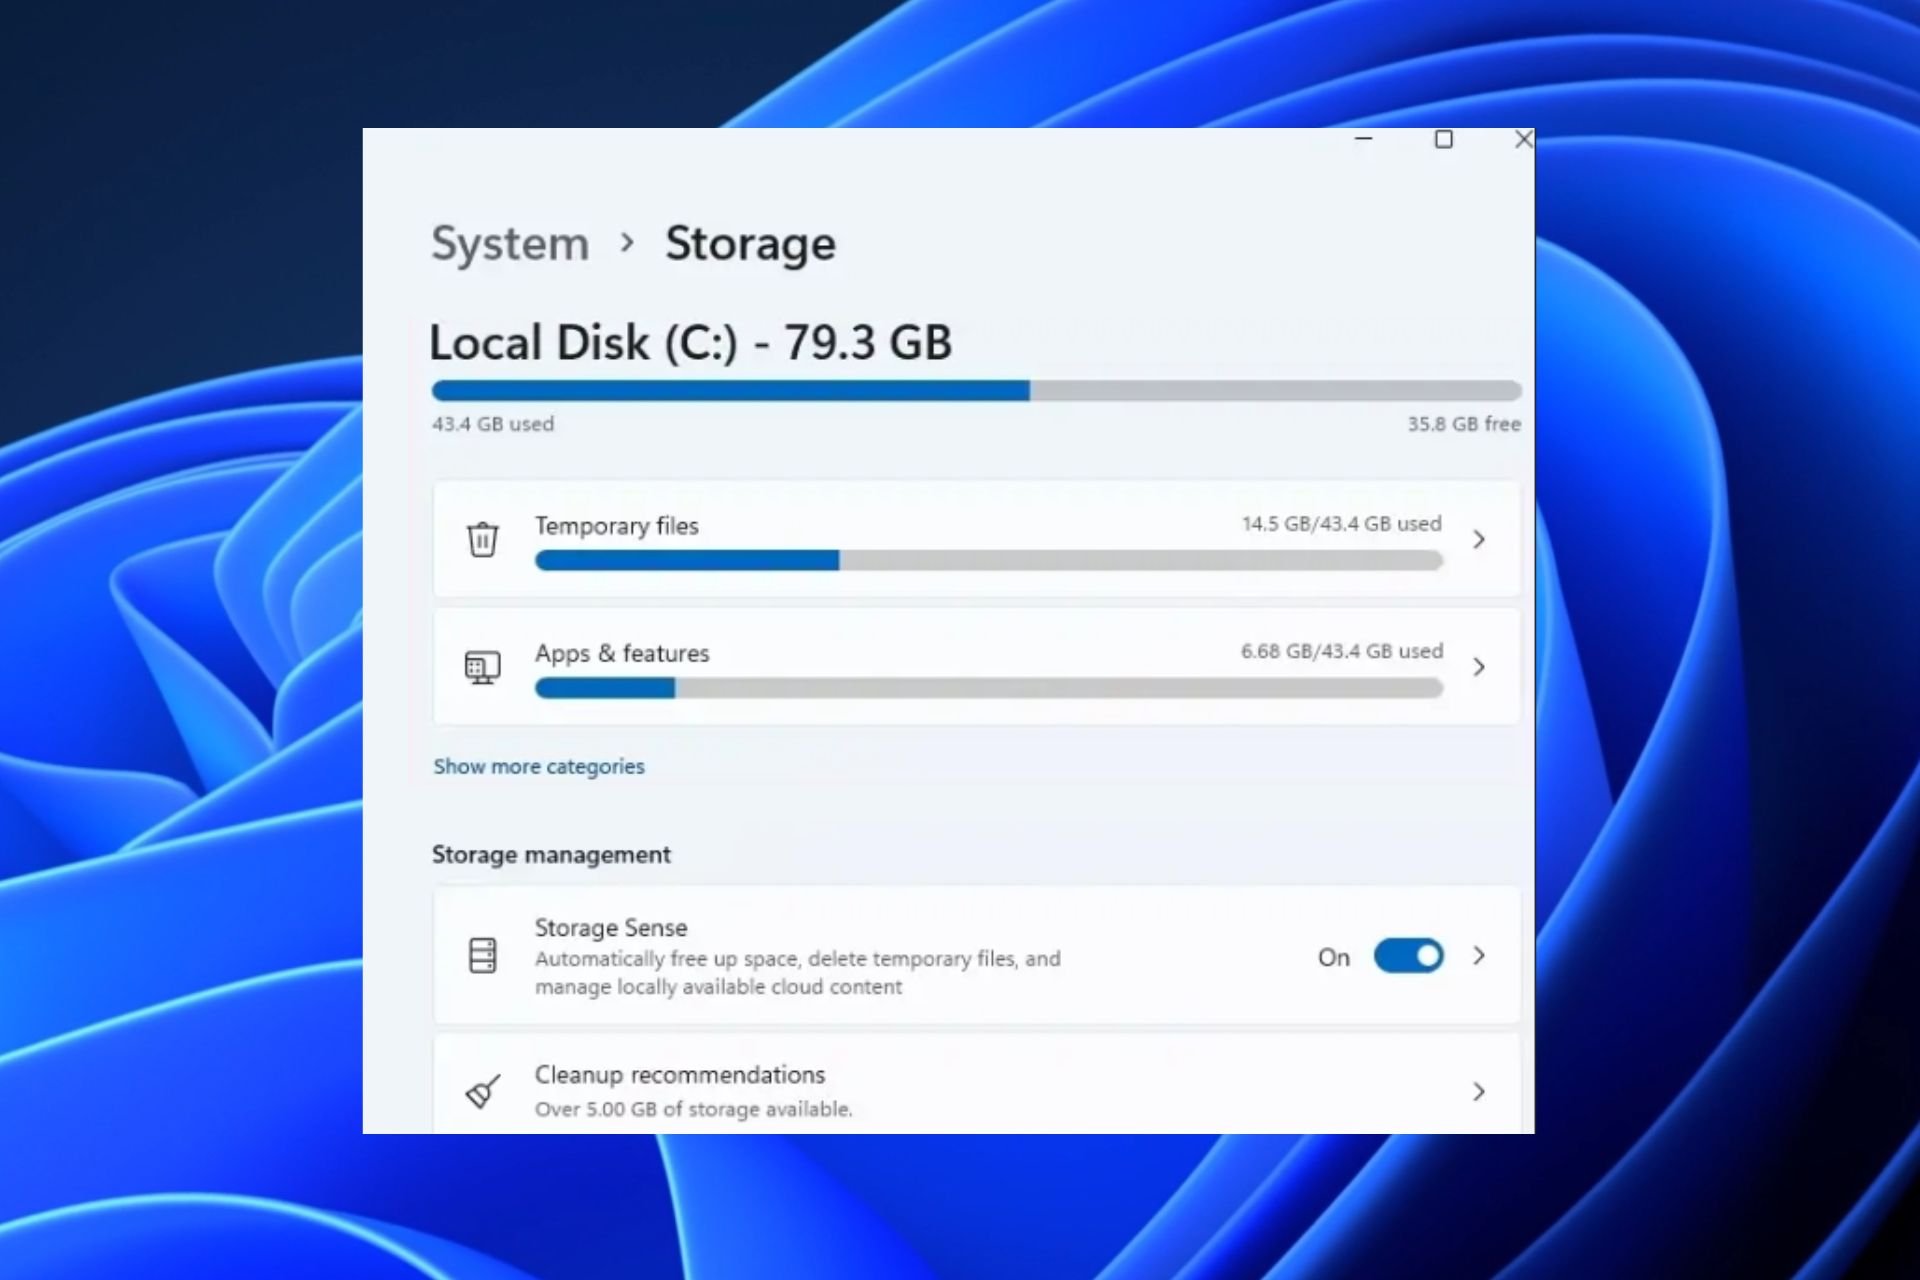
Select Storage on the right in the System tab.
Next, click on Cleanup recommendations under Storage management.
Select the files you want to delete and click the Cleanup button.
Alternatively, there are other ways you can clear out more spaces by removing other recommended files on Windows.
2. Remove temporary files
Open File Explorer by pressing the Windows + E keys simultaneously.
On the left pane, click on This PC and check the following directory to locate the temporary files folder: C:\Windows\Temp or C:\%userprofile%\AppData\Local\Temp
Select the files in these folders, then press the Shift + Delete keys to delete them permanently.
Enter the following command in the text field and press Enter: powercfg.exe /hibernate off
Running the above command easily frees up much space on the drive where the operating system is installed. Also, some hibernation files may be corrupt, so it is wise to clear them out.
4. Run System Maintenance Troubleshooter
Press Windows + R keys to open Run, type control, and click OK to open the Control Panel.
Search for troubleshooter and click on Troubleshooting from the search result.
Next, click on System and Security.
Click on System Maintenance to launch the troubleshooter.
Click Next.
The troubleshooter will start detecting the issue and recommend fixes if available.
Apply any fixes, close the Control Panel, then restart your PC and check for any improvements.
The storage problem on Windows 11 should be fixed. Alternatively, you can check out our list of the best PC maintenance software.
5. Uninstall unnecessary software
Press Windows and R keys to open Run, input appwiz.cpl, and click OK to open Program and Features.
Choose the program you want to remove, then click on Uninstall.
Choose the appropriate response to complete the process if prompted.
Alternatively, you can save up more storage space by using one of the best automated uninstaller software available for use by checking here.
A specialized program that we recommend you try using in this situation is CCleaner. It has a software uninstaller feature that allows you to easily uninstall programs or a group of programs with just a single click.
CCleaner
Let CCleaner help you uninstall applications in a more safe and easier way.
Press Windows + R keys to open Run, input sysdm.cpl in the text field, and click OK to open System Properties.
Next, open the System Protection tab and under Protection Settings, click on Configure.
Select the Turn on system protection option.
Next, under the Disk Space Usage section, drag the Max Usage slider to the extreme left.
Then, click OK to save the changes.
This should reduce the gap in the storage on Windows 11 if it’s not adding up due to system restoration files. Also, consider checking here for what to do if the Restore points fail to work.
However, avoid dragging the value to 0 because that would prevent your system from saving previous updates. Hence, you will have no Windows backups to roll back to if you ever need to.
7. Perform a disk cleanup
Press Windows + S keys to open the Start menu, type Disk Cleanup in the text field, and open Disk Cleanup from the list.
Select drive C: or any drive in which your operating system is installed, and click OK.
Check the boxes next to the type of files you want to delete. Click OK to confirm.
All the troubleshooting steps provided in this article are a great solution to fixing your Windows 11 storage space issue.
If any fixes have solved your problem, kindly let us know by using the comments below. Alternatively, please do not hesitate to use this section if you have further questions or suggestions.
It is common for users to experience Lost Ark high ping when playing the game. It makes the gameplay very poor and results in lag and stuttering. Moreso, users complain about Lost Ark’s low FPS on high-end PCs.
In this guide, we will explore the possible causes of this problem and provide solutions to fix it.
Why is my Lost Ark so laggy?
Experiencing notable lag in Lost Ark’s game indicates that t something wrong with your PC or the game. High ping spikes,, such as Lost Ark 5000 ping,, can occur due to many factors.
However, network connection issues are the main culprit for Lost Ark’s high ping. There are other causes:
Issues with the router: When your router is not working properly, it’ll affect its network speed. So, the ping rate in Lost Ark will increase, causing the game to lag.
Not enough bandwidth for the game: Games like Lost Ark need enough system resources and bandwidth to run smoothly. Hence, you encounter high ping spikes in the game if there isn’t enough bandwidth available for the game.
Many apps running in the background: When many apps run in the background on your computer, it’ll affect your game and make it lag or stutter. Also, they can cause network congestion on your PC.
Outdated drivers: If your device drivers are outdated, they tend to misbehave and cause problems with the programs running on your PC. So, not keeping your drivers updated can result in Lost Ark ping issues.
How do I fix high ping in Lost Ark?
We recommend you observe the following preliminary Check before attempting any advanced troubleshooting:
Disconnect other devices sharing your network.
Restart your router or connect to another network.
If the preliminary checks aren’t helpful, then you can try the solutions below:
1. Switch to another network/check your router or modem
Switching to another network connection can fix the network issues causing high ping in the game.
Likewise, performing a power cycle on your router is the best way to resolve its performance issues. Hence, the high ping issue in Lost Ark can be resolved by this.
2. End process for programs consuming bandwidth on your PC
Press Windows + R keys to open the Run tab, input resmon in the search box and press Enter to open the Resource Monitor page.
Select Network, then navigate to the Total volume tab to check the programs using most network resources on your PC.
Right-click on the program showing much bandwidth usage, then select the End Process option from the drop-down menu.
Click on End Process and restart your PC.
Having as much bandwidth on your PC will help provide enough for the Lost Ark’s game and fix the high ping. Also, you can read how to increase bandwidth on Windows 11 on your PC.
3. Update network drivers
Click the Start button and select Settings from the menu.
Go to the Windows Update tab and click on the Advanced options.
Click on Additional options and Options updates.
Expand the Drivers updates entry, then check the box.
Click the Download & install button and wait for the process to complete.
Updating your network drivers improves your connection speed and helps your PC connect faster with network servers. Check other ways to update network drivers on Windows 11.
You should try using a specialized program to ease this process and to make sure that you’re choosing the right driver.
Outbyte Driver Updater is a driver update tool that scans your device in detail for out-of-date drivers and subsequently updates them with up-to-date versions.
Outbyte Driver Updater
A professional tool that you can count on when it comes to updating your device drivers.
Press the Windows + I keys to open the Settings app.
Click on the Privacy & Security tab, then select the Windows Security option.
Click the Virus & threat protection option.
Scroll down and click on the Manage ransomware protection option.
Click the Allow an app through the Controlled folder access option.
Then click +Add an allowed app and Browse all apps.
Go to the game installation directory, select the executable file, then click Open.
Close the Settings app and restart your device.
The Windows Firewall can take a lot of time to process network traffic through the app, so allowing it to get past it will make it faster. We recommend you check how to fix Windows Firewall if you encounter issues.
Many users complain that their Dell laptop does not recognize headphones. This problem occurs due to issues with the hardware and the PC. Also, you can experience the laptop not using the headphone mic when it should.
This guide will discuss the likely causes and potential fixes for this issue.
What can I do if my headphones are not recognized on Dell laptops?
Start by checking your headphones for physical damage, make sure they’re plugged in the right port and try using other headphones to see if they work on your PC. If none of these fixes the problem, continue with the fixes below
1. Restart your PC
Click the Start button on the taskbar and select the Power option.
Click on Restart and OK.
Restarting your PC will help fix booting errors preventing your Dell laptop from recognizing headphones. Should your PC get stuck on the restart, look at the solutions in this guide to fix it.
2. Update the audio driver
Right-click on the Start button and select Device Manager.
Expand the Audio inputs and outputs, select your audio device from the left pane, right-click, and select Update driver from the drop-down.
Choose Search automatically for drivers and wait for automatic download and update.
Restart your computer to take effect.
Updating the audio drivers on your computer will fix bugs in the previous version preventing your Dell laptop from recognizing headphones. If you encounter an issue updating the driver on your PC, apply the fixes in this guide.
Besides the manual steps, a dedicated program, such as Fortect Driver Updater, can also be a great help because it scans your PC and updates not only your audio driver but all your device drivers with the newest versions.
3. Set headphones as the default output device
Press the Windows key, type control in the search bar, and click on it to launch Control Panel.
Select the Hardware and Sound option, then click on Sound.
Click on the Playback tab, select the Headphone device and click the Set default option.
Click OK to save the changes.
Setting headphones as the default output on your PC will allow it to use the headphones and can fix the problem.
Press Windows + R keys to open the Run window, type devmgmt.msc in the search box, and press Enter.
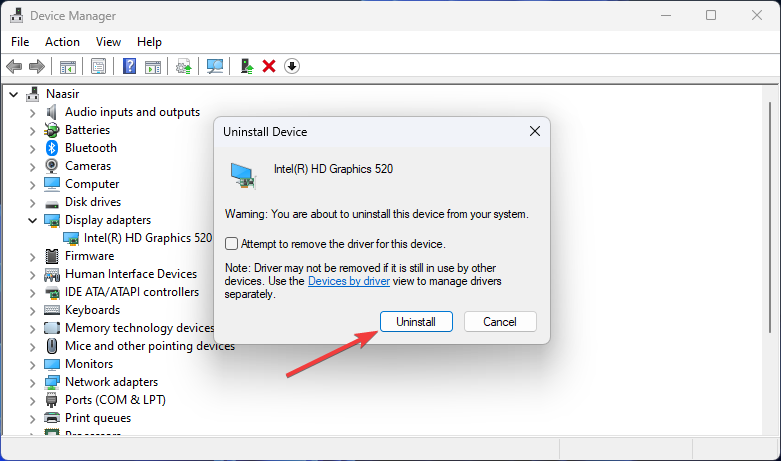
Expand the Audio inputs and outputs, right-click on the Realtek High Definition Audio and select Uninstall device from the drop-down.
Confirm the selection by clicking Uninstall.
Restart the computer.
Uninstalling the Realtek HD Audio driver on your PC will help Windows download the suitable driver version.
5. Update your Windows
Press the Windows + I keys to launch the Settings app.
Select Windows Update and click Check for updates. (Windows will search for and install them if there are any updates available)
Windows updates can help fix bugs impeding the performance of your PC. Sometimes Windows Update may not work, so try the fixes in this guide if you encounter this problem.
Dell laptops not recognizing headphones is a problem most users encounter, and it can be due to many issues. The main culprit for this problem is outdated audio drivers on your PC.
Sound configuration issues and an out of date version of Windows may also play a role. But if you follow the guidelines above, you should be able to move past this issue.
Do you need an antivirus solution against all kinds of web browser hijackers? Then this post is meant for you.
A browser hijacker usually takes over your browser settings and redirects you to sites that you never thought of visiting. It is a malware program.
Browser hijackings oftentimes come from browser extensions, toolbars browsers, or helper objects. They can cause your device to display content that you do not need or stop responding.
For instance, a browser hijacker can be pop-up ads, intrusive notifications, PUPs (Potentially Unwanted Programs), and more.
You can remove any add-ons recently installed on your device and scan for browser hijackers using an antivirus software solution.
In this post, we have listed some of the best and most trusted antivirus applications against browser hijackers.
What are the best antiviruses to block browser hijackers?
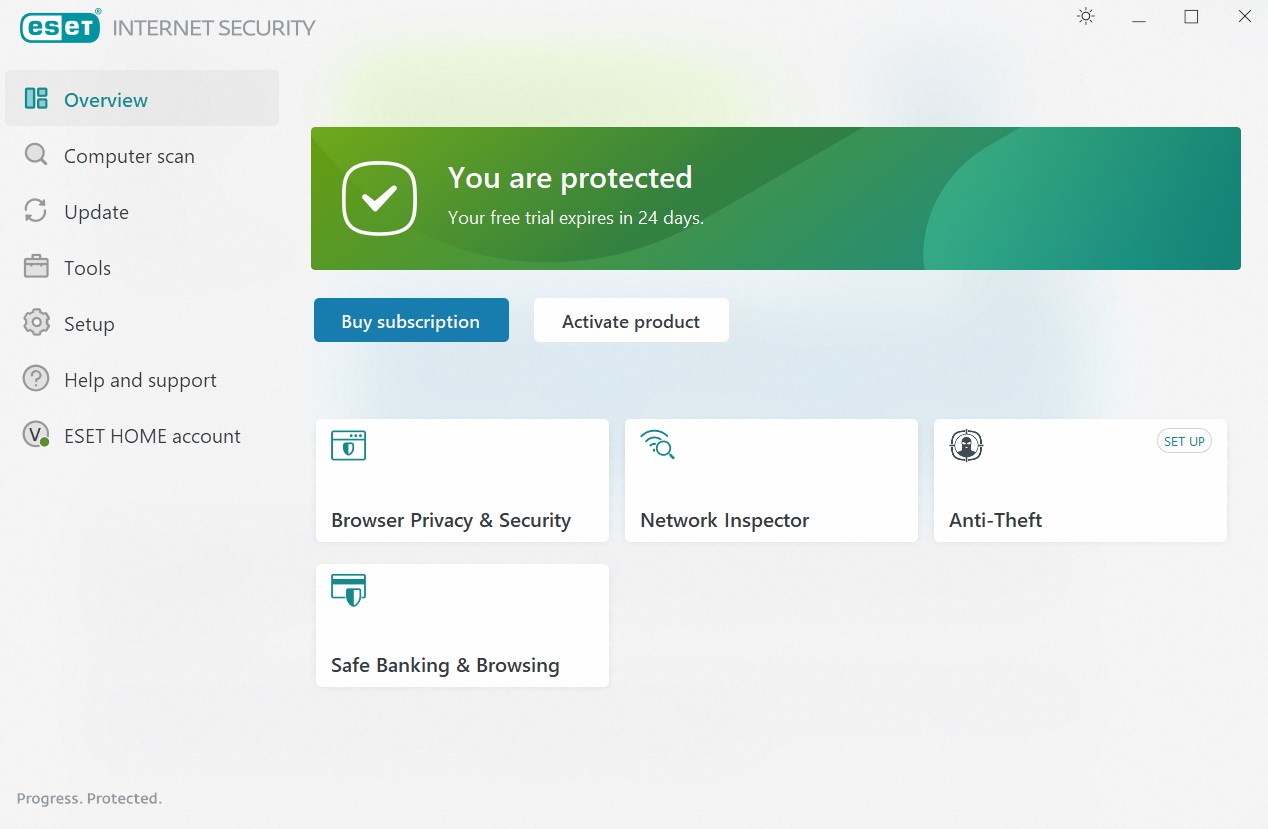
ESET is a PC protection company that has been in operation for about two decades now. It helps to keep threats at bay and offers great protection against malicious websites.
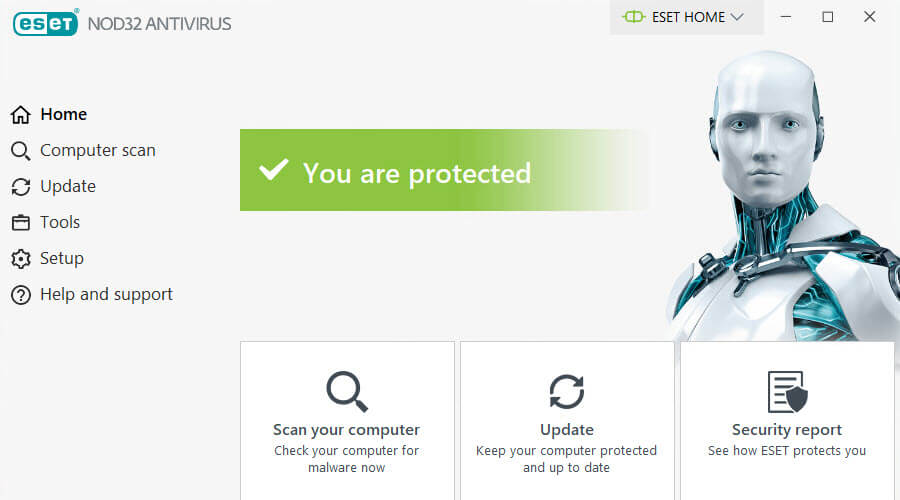
The ESET NOD32 is an antivirus software compatible with the Windows OS and uses very little of the computer’s resources.
It has an interface that is very easy to understand and use that offers lots of navigation features from which you can benefit.
Furthermore, it provides you with comprehensive protection against spyware, viruses, worms, adware, rootkits, and other digital threats.
Here are some of ESET’s core features:
Great prevention system that disables unauthorized modification
External hard drives and USB flash drives protection
Proactively blocking
Incoming and outgoing email scanning
Thorough scanning
Gaming mode
SysInspector to track system changes and for tech support use
Online safety tool advice
Software updates
ESET NOD32
Protect your computer from spyware, viruses, malicious software, and browser hijackers.
This is the Best Value for Windows PC Protection and it comes with different programs for PCs and Android mobile devices.
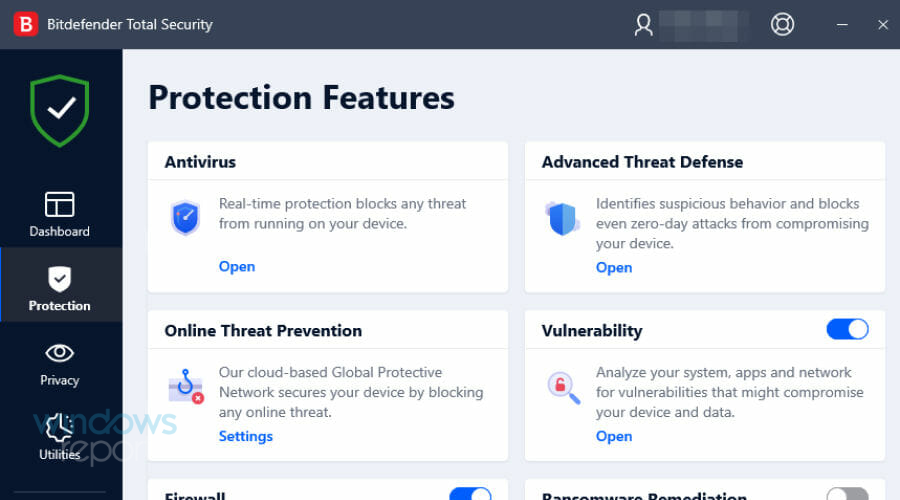
It is very compatible with Windows OS. BitDefender offers full protection and scans all files, and page URLs for malicious websites.
This security software protects against malware on various devices and it is also very good for slow computers.
It has a multiplatform system so all your devices can be secured at the same license and it comes with various security tools, including an anti-theft feature and parental control set.
Some of Bitdefender’s key features:
Ransomware protection
Good for file encryption
Quick product updates
A very easy installation
30-day free trial, within this period
Strong firewall
It offers safe pay during online transactions
Bitdefender Total Security
Get the best antivirus on the market, and protect yourself from the most harmful software with Bitdefender!
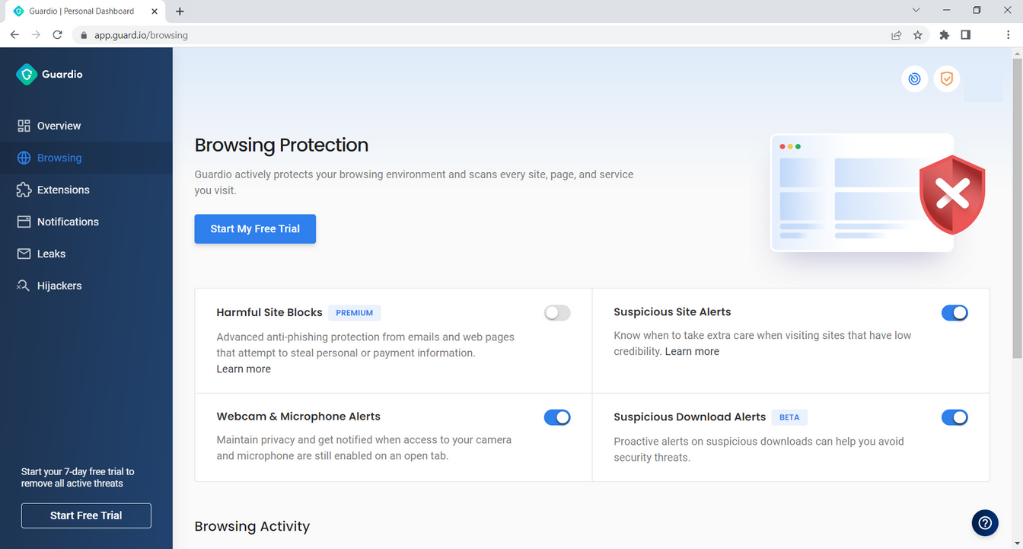
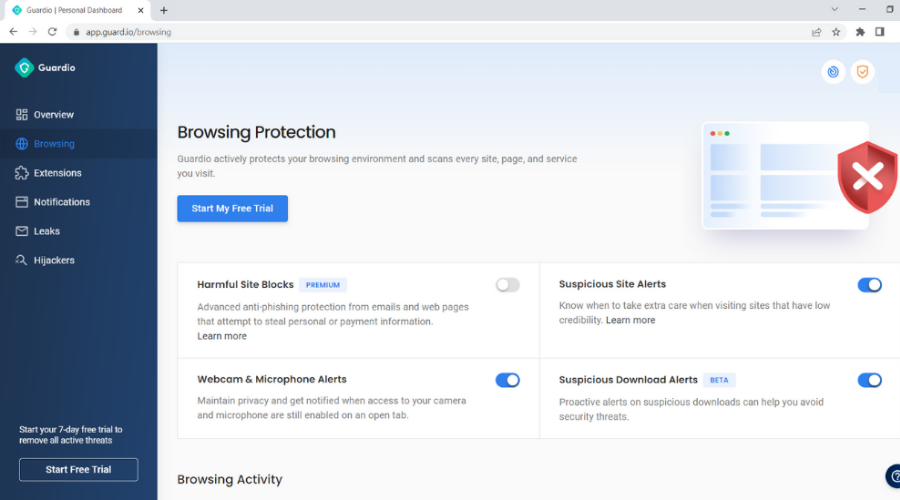
Guardio is a fantastic browser plugin that may significantly reduce browser hijacking and tracking. Even though it is not a standard antivirus, it offers several features that may protect your privacy.
You receive a free scan to discover what risks are on your device as part of the Guardio extension for the browser-free plan. The message you receive is genuine and serves as a reminder of what was discovered during your scan.
When Guardio detects that one of your search engines or tabs is being hijacked, it flags it as a danger, and you may regain control of your favorite tabs and search engine by upgrading.
There are a few ways malicious extensions may get into your device. Most of the time, you won’t even notice them.
They are either disguised as genuine extensions, such as weather applications or PDF converters, but you don’t have to worry because Guardio will eliminate any type of threat.
These are Guardio core features:
Alerts on harmful and suspicious sites
Block intrusive pop-ups
Searches for possible hidden hijackers
Information leak monitoring
Guardio
Real-time protection against browser hijacking, scams, and phishing sites with non-intrusive scans.
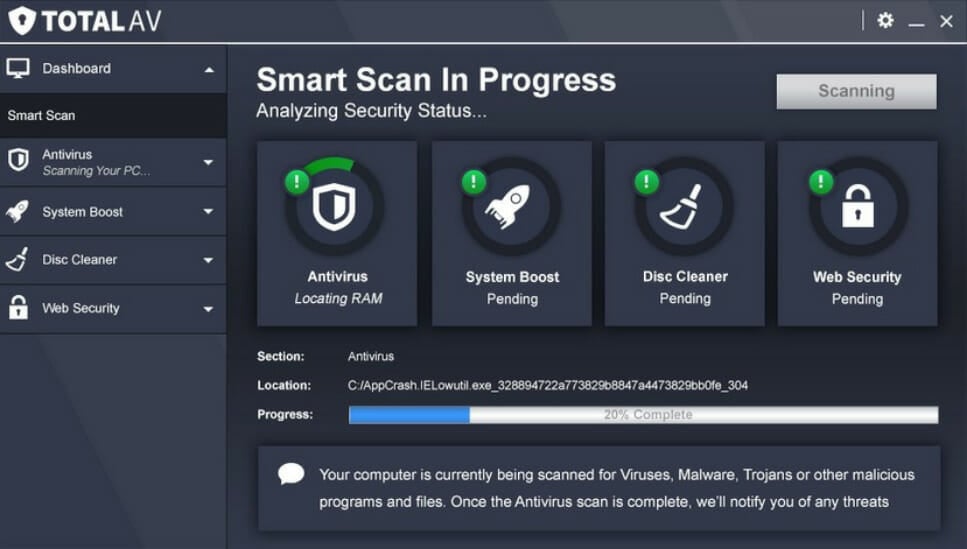
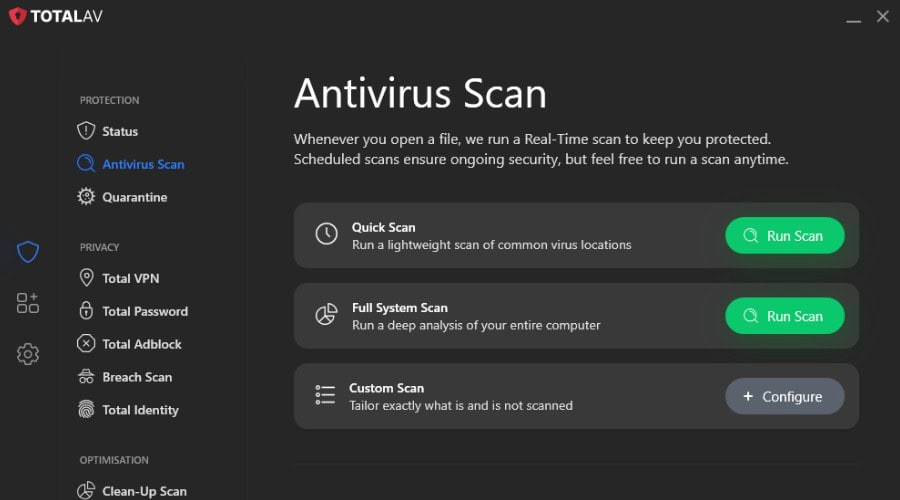
TotalAV is an excellent antivirus software that can safeguard your device against browser hijackers thanks to its various useful features.
It has a WebShield characteristic that helps you browse safely and securely because it defends your activity against phishing and scam sites that can harm your device and steal your personal data.
Moreover, it successfully blocks unlimited ads, including pop-ups, notifications, and in-play videos that obstruct the screen when you’re browsing the internet.
TotalAV can help you remove all your web tracking cookies and clear any remains of your online activity. It also keeps track of your email address and announces to you if your information is at risk.
Other great features of this program include:
Smart scans scheduling
Eliminate malware, spyware, adware, and many more
Real-time protection
Advanced cloud scanning
Quarantine suspicious files
TotalAV
Stop browser hijackers from taking hold of your device by using TotalAV antivirus software.
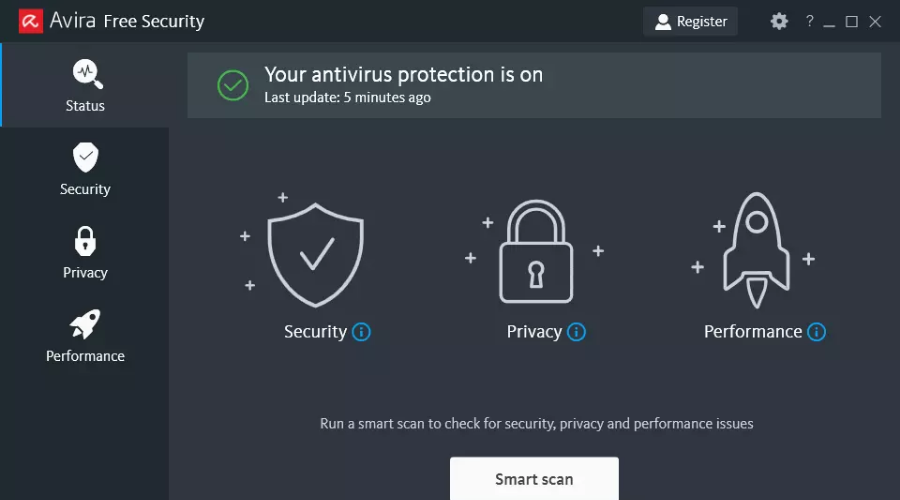
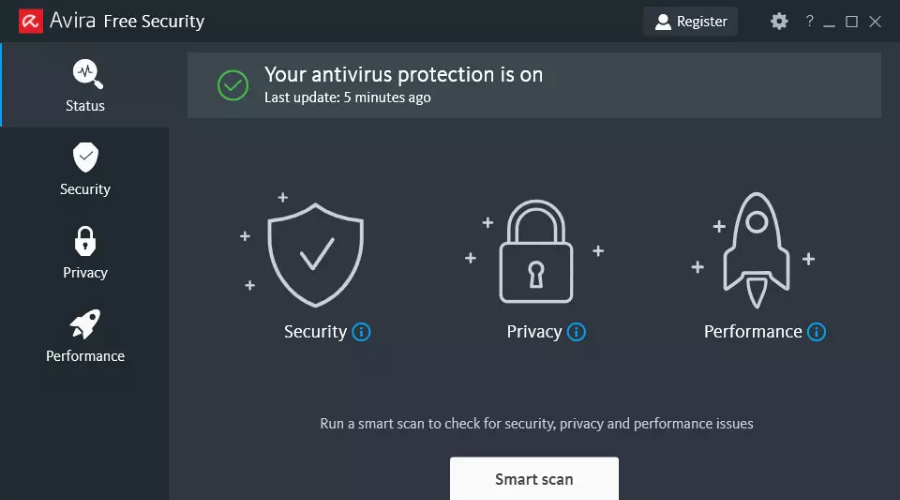
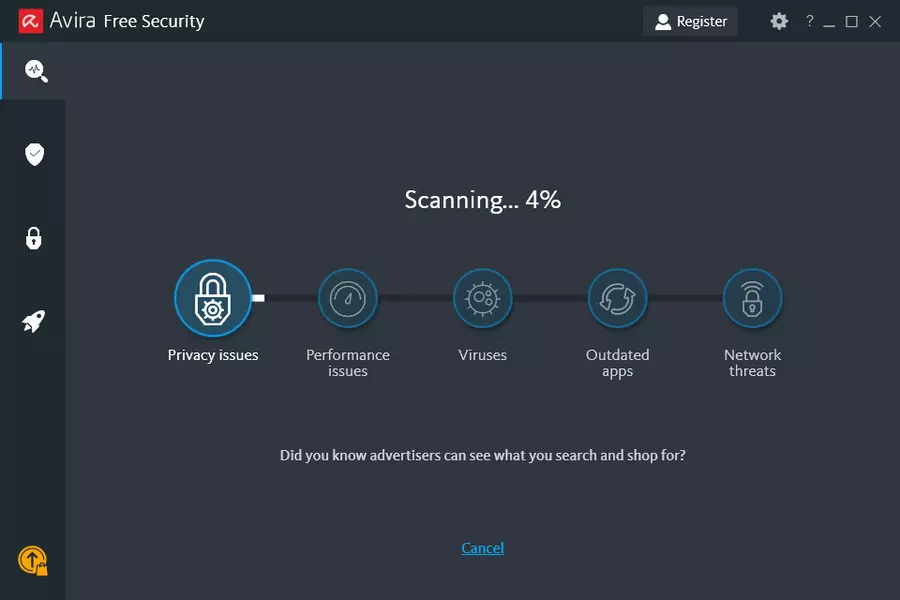
Avira Antivirus is a great freeware cybersecurity solution that can protect your computer from any type of browser hijacker.
The software can block with a high success rate all online threats, including spyware, ransomware, and malicious website that you may find while online.
Additionally, it includes a free VPN for enhanced privacy. You can use it to secure and make your online activities as anonymous as possible.
Other best features include:
Improves your PC’s performance
Password manager
Anti-Scam protection against phishing attacks
Protection against identity theft and financial loss
Built-in Firewall
Avira
Keep your PC secure from malicious and intrusive software that might come from your browser.
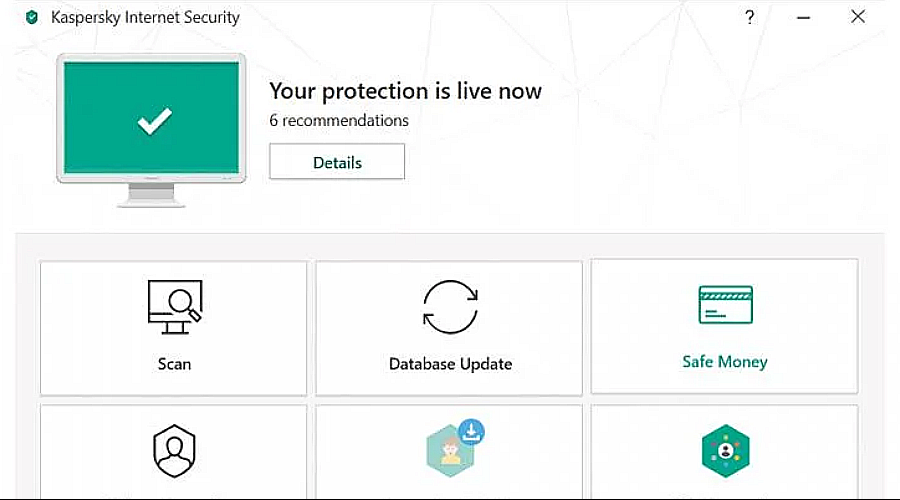
Kaspersky Internet Security is very good and compatible with Windows OS. It has everything you would need in a suite and its components are very effective.
This antivirus has a strong firewall that can give your system maximum protection against unknown connections. It has an anti-malware security suitable to detect viruses before they infect your PC.
It also has browser protection which helps to protect your device from reaching malicious websites.
Take a look at Kaspersky’s main features:
It got the best scores from about five labs
It has an awesome anti-phishing score
It has an advanced disinfection scan
It has a firewall with powerful application control
Protection for Windows OS and Android devices
Automated security patching
Webcam protection and so many other bonus features
Malicious software can easily be detected
RAM usage is low
Kaspersky Standard
Enhance your online security and stay safe from intruder apps with one reliable antivirus.
McAfee is amongst the best internet security software for Windows OS. It enables offline updates, and it will protect everything browser-related.
It has its own firewall that helps in deciding which content makes an entrance into your PC, its own VPN, it also secures your downloaded files and it has a password manager.
Overall, the software is going to keep you safe from the harmful bloatware, hijackers, and adware you usually get from mistakenly clicking malicious links.
It has a multi-factor password manager app so you can create unique passwords for your accounts online. It also has secure cloud storage and it ensures secure banking, shopping, and socializing.
Check McAfee’s core features:
Safe browsing of the web
Great customer service
Easy to use the web-based console
Guaranteed home network protection
Block malware, viruses, and all types of cyber threats
Regular updates
User-friendly interface
Affordable app
McAfee Total Protection
Browse the websafe using an antivirus that will definitely block any scams or risky websites.
This security software is one of the best internet security software. It ranks very high for protection and usability independent tests.
It protects your device from malicious websites. In addition, it is compatible with Windows OS. Not only is Norton a good browser antivirus, but it is also great for protecting your files.
The software will scan your PC, and provide you with a list of malicious software. In addition to that, it will also block anything and alert you of any suspicious activity on your computer or on a website.
Norton has wonderful protection tools and can detect malware easily no matter what type of device you use. In addition, it does not tax computer resources too much, so it is difficult to experience any lag while it runs
Here are some of Norton’s key features:
Operating system: Windows 10, 8.1, 8, 7
24/7 tech support
One license covers about five devices
Great Firewall
Organized interface
Advanced protection tools
It does not affect the speed of a PC
High-detection scores
Norton Security Premium
Protect your computer from malware, ransomware, and all online security threats.
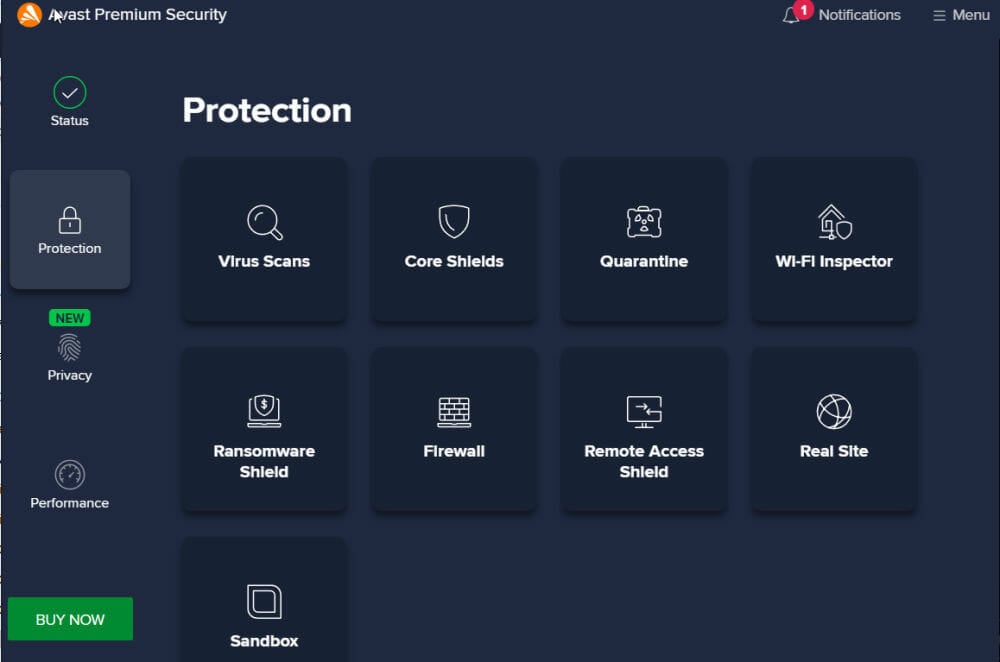
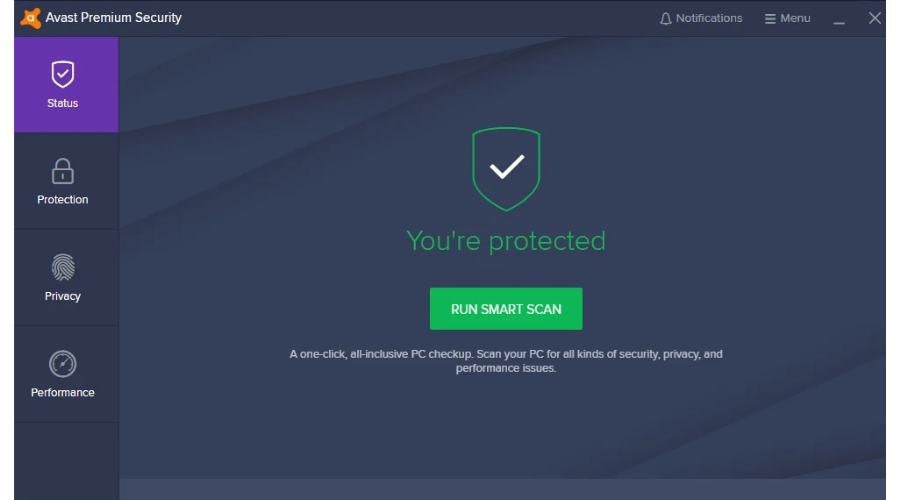
Avast Pro Antivirus does not require much introduction. It is quite popular among many users and one of the best security software available for Windows OS.
It has a password manager and DNS protection that prevents the hijacking of DNS, and also, helps in the protection against website redirects.
On top of that, it has multi-function security software that has an easy-to-use interface and it has a Wi-Fi-Scanner that continuously investigates and removes potential threats from your router and network.
Avast helps you detect when your application needs an update and updates automatically for you, maintaining your device at its peak performance.
Some of Avast’s core features:
A modern UI
Very light on the system
Good detection of malware capabilities
A customizable installer
Avast Pro Antivirus
Use one of the best antiviruses to protect your online activity from spoofed websites and more.
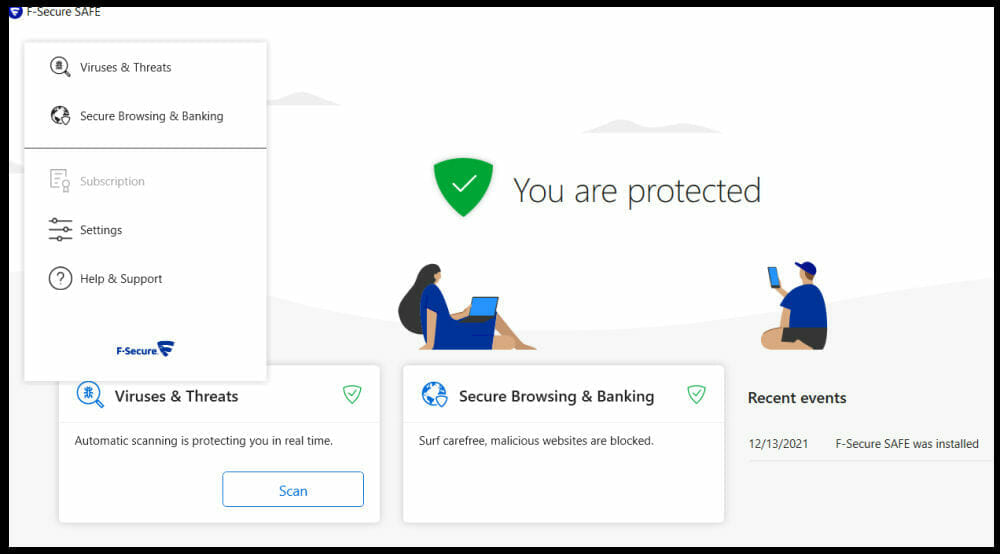
This security software is the best for browser protection and also has one of the best anti-viruses for Windows.
It is compatible with Windows OS. It can protect your devices from ransomware, trojans, and viruses and keeps all your banking connection secured.
It has an antivirus that protects your privacy and security, meaning all your devices are safe from viruses and spyware.
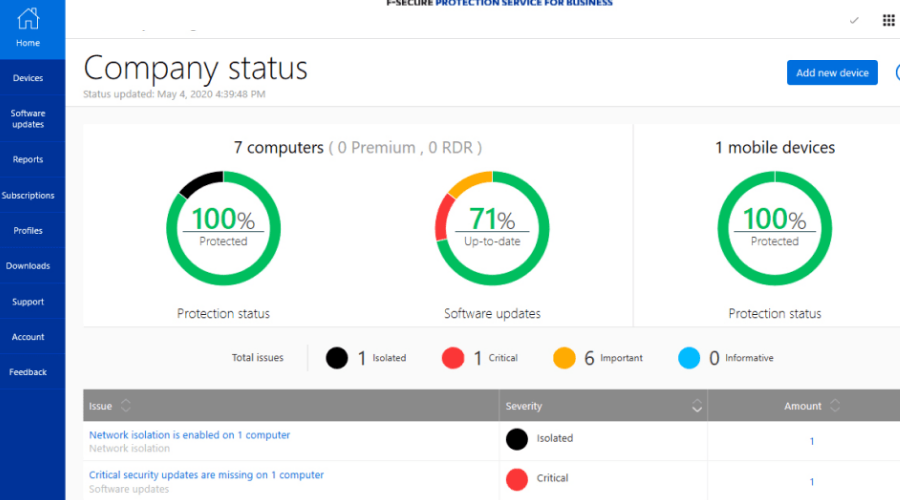
F-Secure has family rules, which means that with just one subscription, you can protect your family and set great boundaries for your children’s device use.
Here are some of F-Secure’s key features:
Instant notification once the virus is detected
Device finder feature
Multiple Windows devices protection
Effectively manages users and devices
F-Secure
Amazing browser protection against ransomware, trojans, and viruses that keeps your device safe.
If your computer is already infected with all kinds of toolbars, and unknown programs, check our dedicated guide and find out how to remove them for good.
In conclusion, you can protect your navigator against browser hijackers by using any of the antivirus software we mentioned above. Feel free to comment below if you have any questions.
If you’re not ready to invest and/or install a good, full-fledged antivirus software program, there are two other options you can try that are made readily available: free antivirus or free online scans.
An antivirus for online scans may not be a truly free solution, nor will it provide further benefits. But it will let you know of any potential threats or those already lurking in your system or network.
The difference with the free trial or free editions is the antivirus for online scans executes its work on a server on the internet.
Online scans are done differently depending on which antivirus you decide to use. Some will work via the Internet, while others let you download and scan for free.
In this article, we will present to you both online scan tools and free, or free trial antivirus solutions.
Can I scan my computer for viruses online?
You can definitely run an online scan of your computer because there are many online scanners available on the internet.
The safest and easiest manner is to choose a tool from a trusted antivirus software provider that can properly scan your device.
These antivirus tools include additional features, including all kinds of digital threat removal, future infection prevention, privacy violation detection, and many other useful characteristics.
What is the best antivirus for online scans to use today?
TotalAV’s free version lets you run an on-demand scan to find and remove malware, with no time limit, which makes it a handy first check when a PC is behaving oddly.
The scan covers running processes, downloads and the usual hiding places, and anything found goes to quarantine. Upgrading adds real-time protection so threats are stopped as they arrive, WebShield for malicious and phishing sites, and the tune-up tools. It runs on Windows, Mac, Android and iOS.
Free on-demand scan with no time limit
Real-time protection in the paid plans
WebShield blocks malicious and phishing sites
Windows, Mac, Android and iOS
TotalAV
Keep your computer free from viruses, and scan it for already existing malware.
Avira is another freeware antivirus, that can be successfully used to scan your computer for any online threats, and also to remove security issues if found.
Additionally, it includes a free VPN that you can use to surf the web, or for other online activities, in an anonymous and secure manner.
Furthermore, it features a password manager tool, in order to secure your online accounts with a safe and strong password, that you don’t even need to remember.
You can highly benefit from browser tracking protection that can block adware or aggressive ads that store your personal data.
Hence, this antivirus is completely developed to protect you from advanced online malware or cyberattacks in order to keep your critical data safe.
Let’s see other key features of Avira:
Improves your PC’s performance
Block all online threats
Prevent malware, ransomware, and spyware
Anti-scam protection
Avira Free Security
You can scan, remove, and protect your computer from viruses with a freeware antivirus.
There’s no way you can discuss antivirus software without mentioning Kaspersky at least once.
Kaspersky’s antivirus is also a standalone app that you have to download and run on your PC, in order to detect and prevent malware.
It is simple and easy to use, plus you get to perform a full system scan real quick and schedule regular scans if you like, though it does this bi-weekly by default.
Let’s quickly look at its key features:
Delivers reports presented in several sections such as malware, system protection, and then other issues
Proper scanning and cleanup of your system or PC
Customizable options for scanning (scheduling, depth, etc.)
Lightweight, standalone app
Kaspersky Standard
Find malware and prevent future threats with an efficient and optimized antivirus.
With Panda’s Cloud Cleaner, free antivirus for online scans, you can scan your PC for free using this advanced disinfector that is based on cloud scanning to detect malware that traditional solutions can’t.
It also gives you options for online scanning if you can start the infected computer, or if you cannot start it.
It’s worth knowing that you have a system-wide virus detection and guard the device against complex malware with minimal system impact.
Let’s quickly look at its key features:
Rescue USB to disinfect PCs that cannot boot up
Panda Cloud Cleaner Rescue ISO (for computers that won’t boot -> advanced users only)
Web and email support, backed by 24/7 year-round remote and chat support
Tune-up and virus removal tools
Maintenance and repair of your OS
Panda Cloud Cleaner
Powerful disinfection utility that uses collective intelligence to run a thorough scan and eliminate malware.
Avast Free Antivirus is a freeware solution that you can test on your computer, and continue using for as much as you want.
Although is free of charge, it includes a plethora of cybersecurity features to help you protect your computer against viruses and malware.
Moreover, it won’t just scan and check applications for malware, it will also continue to monitor their behavior to make sure they don’t suddenly go rogue.
Other great features that are worth mentioning:
Protection against viruses, ransomware, malware, and zero-day threats
Checks your home Wi-Fi network for vulnerabilities
Uses real-time protection
Available for multiple systems, such as Windows, Mac, Android, iOS
Avast Free Antivirus
Protect and scan your PC for vulnerabilities, with one comprehensive and free antivirus.
F-Secure’s Online Scanner scans and cleans your PC for free, getting rid of viruses and spyware. It also works even if you have other security software installed.
This antivirus for online scans is easy to use with a few clicks after which you download and run it.
You can also see details of where the malware is located, the malware type, and the number of infected files
Let’s quickly look at its key features:
It leaves nothing on your PC, plus it is completely free
A standalone program that automatically downloads the signature files before scanning your PC
If it finds infected files, F-Secure will request that you restart your computer so it can clean them
F-Secure
Effective scanning and removal features that keep your device safe from digital threats.
Ready for a test with any of these antivirus solutions for online scans? Or maybe you want a free app to also prevent issues not only to find them out.
If you have a VPN client installed on your PC, you may also want to install an Antivirus program to protect your PC against viruses and malware.
While there are a good number of antivirus software available for computers, it is important to install an antivirus tool that does not cause any issues with your VPN client.
VPN clients protect your computer from being injected with malware while visiting a third-party website and even protect your data using encryption.
Antivirus tools, on the other hand, work by keeping a record of all the known viruses utilizing the hash value of any file.
It is always recommended to use an antivirus with your PC. If you have a VPN client running, it will act as an added layer of protection against online threats and data theft.
That said, some antivirus may not work as expected with a VPN Client. This can be due to several reasons and one of the common reasons is the blocking of VPN connections by antivirus programs.
In antivirus software’s defense, the programs are designed to prevent and block unknown connections from and to the PC. However, this can become annoying if the connections are blocked too often.
One way to resolve this error is to add your VPN connection to the exception list in your antivirus settings, or you can install an antivirus that can deal with VPN connections without any trouble.
Today, in this article, we will walk you through the best antivirus solution to use with a VPN on the computer.
Most of these antiviruses come with a free trial or even free plans with limited features, so make sure you take them for a spin before committing.
TotalAV is a great security application that offers a full set of features and it is also very easy to use. It offers a VPN service that encrypts your browsing and increases your privacy.
It makes your activity anonymous and impossible to track by encrypting your connection. Even if your internet connection is disrupted, TotalAV maintains your anonymity thanks to its VPN killswitch.
You can access geo-restricted websites and content effortlessly and remain safe and secure on public WI-FI, preventing hackers from stealing your personal information.
TotalAV can protect your device against any type of digital threat, including malware, viruses, ransomware, and many others.
It can eliminate not only irritating ads, pop-ups, and notifications that block the screen on the websites you’re browsing but in-play videos as well.
Take a look at other key features of TotalAV:
Multi-device compatibility
WebShield
Schedule smart scans
Data breach monitoring
Block tracking cookies
TotalAV
Excellent antivirus solution with a VPN add-on that you can count on when it comes to protecting your device.
From tech reviewers to countless users, Bitdefender is also a top choice when it comes to antivirus software tools that not only provide effective protection against malware but also work with VPN clients.
Bitdefender comes with its own VPN client integrated that offers up to 200 MB of traffic daily. You also get file encryption, ransomware protection, and a game mode.
With complete real-time data protection, advanced threat defense, web attack prevention, anti-fraud, and rescue mode, Bitdefender comes with all the essential features to protect your PC from malware.
The initial disk scan is slow and can take a good amount of time to complete. The file scanning engines compare any suspicious files with its database and put them in quarantine.
From here, the user can delete or restore the file. If you feel the antivirus is affecting your PC’s performance, it allows you to turn off some of its security modules one by one.
Although, we recommend it be kept in autopilot mode for better protection.
Bitdefender Total Security maintains a perfect balance between performance, features, protection, and price making it an affordable yet practical choice for many.
Major key features that you’re about to enjoy:
Provides excellent protection
Minimal impact on system performance
Hardened browser feature
Multiple platform support
Affordable antivirus software choice
Bitdefender Total Security
Total Security offers complete protection for PC and mobile. You can easily use it with a VPN too!
With a user base of over 100 million, Eset is among the most popular Anti-virus companies around and Eset HOME Security Essential antivirus is the legendary program offered by the company for a long time now.
Eset focuses on the core tasks of removing and detecting malware and viruses from the computer; as a result, it comes with fewer features compared to the competition.
Therefore, features such as password manager, file shredder, and similar aren’t included. The software can detect and block ransomware, PowerShell access, and exploits with great accuracy.
The Device Control feature limits the risk of contamination when other devices are connected to the infected device via Bluetooth or USB.
Other features offered by Eset include a UEFI scanner that checks your PC’s firmware for viruses, new profile settings, and the ability to fine-tune your security.
The scanning time depends on whether you use the quick scan or full scan. The smart scan makes sure that all the newly added files are scanned while ignoring the already scanned files.
ESET HOME Security Essential can be used by both, beginners due to its ease of use, but it’s also great for advanced because it allows them to fine-tune their security settings.
The most important features are:
Minimal impact on system performance
Above-average malware detection
Gaming and Video modes
Multi-device license
Complete Device Control
ESET HOME Security Essential
A modern antivirus that represents a complete security solution alongside your VPN client.
Avira is a free antivirus with great features, for Windows computers. It protects you from all kinds of major threats without causing issues for your VPN client.
This antivirus also includes a free VPN. So, you might try to use the one included here and have an all-in-one reliable and comprehensive cybersecurity app.
Additionally, you can use the Password Manager tool to secure your online accounts with strong, and unique passwords you don’t even need to remember.
Kaspersky is another complete security solution that comes with a top-notch security feature to keep your computer protected from viruses and online threats.
Kaspersky can protect your PC as well as your smartphones /tablets using the mobile app. The user interface is simple, and the impact on system performance is minimal which makes it ideal to run on low-end PCs.
It comes with all the essential features including Parental Controls, a hardened browser, anti-spam, a virtual keyboard, and a firewall.
There is a free version of the software available with limited features but is suitable for anyone looking for temporary and basic security options.
Kaspersky has three modules that work round the clock to detect any suspicious files. The first one is file-signature scanning which matches any suspicious files with its database of known threats.
The second one is behavioral monitoring which keeps a tab on abnormal behavior from files and programs and the cloud-based analysis.
The virus detection engines do an excellent job of catching up to 98% of malware and viruses without any false positive identification that may otherwise result in the deletion of important files.
You can turn off security modules manually from the Protection page that gives access to File-anti-virus, web anti-virus, application control, firewall, private browsing, and more.
If you feel the Kaspersky is a memory hog, opt for the lighter Anti-virus version of the same which is less expensive but offers fewer features.
For all the features on offer, we can easily recommend Kaspersky Total Security and Antivirus to users who are looking for multi-device affordable anti-malware software.
Other great features include:
Almost perfect antivirus protection
Password manager and an on-screen keyboard to mask the password
Heimdal Security is relatively a new company that makes Thor antivirus software for computers. It was founded in 2011 hence like other older security companies on our list.
Heimdal offers three versions of Thor antivirus software that you can check in the price section.
Heimdal Thor offers complete protection to users ranging from anti-malware protection to Internet security, and it comes equipped with most of the essential features including a DarkLayer Guard feature.
The DarkLayer Guard feature can detect threats at DNS, HTTP, and HTTPS layers before they can reach your device.
The Vector Detection feature will autonomously detect and prevent malware infections. It can find hidden malware in your system and delete or block it immediately.
The X-Plot Resilience feature can auto-update apps and prevent any exploitation of your data.
Heimdal Thor is a new security software no doubt, but it can detect malware and viruses effectively without slowing down your computer.
Download the free trial that offers 30 days of access and later upgrade to the premium version if it meets your requirement.
If you want a lightweight antivirus that can protect your PC at a basic level, Norton AntiVirus Basic is a good choice.
It is among the top-quality anti-malware software offering industry-level protection powered by one of the largest threat monitor networks in the world.
Norton AntiVirus Basic can help you defend against ransomware, spyware, malware, viruses, and other online threats like phishing attacks with options like URL blocker, etc.
You can perform a custom scan, or quick scan, or schedule the scan at your convenience. The scheduled scanning process won’t start if your laptop is running on battery unless you manually start it.
Norton’s AntiVirus Basic is easy to use but it doesn’t lack features that may compromise your computer’s security. It is a highly-rated anti-malware software when it comes to threat detection and virus removal.
Avast Free Antivirus is another great solution that works great with any of your VPN clients. It is also freeware but with complete security features.
This antivirus can remove all types of viruses and other malware. In order to achieve maximum security, Avast Free Antivirus will also analyze unknown files to prevent malware infection.
Your Wi-Fi network is also protected, the software will automatically detect any weaknesses and unwanted connections on your home network.
Thanks to the Behavior Shield, Avast Free Antivirus will keep an eye on your installed applications and report to you any new suspicious behavior.
Key features include:
Do Not Disturb Mode for gaming
Behavior Shield that keeps an eye on your software to make sure they don’t suddenly change
Most of these antiviruses should work with your VPN client without any issues. Have you used any of these antiviruses before? Do let us know your pick in the comments below.
Most users won’t usually forget to protect their laptops and computers from malware that can wipe out or severely infect their programs or their work and compromise their whole system’s security.
But we don’t have to forget also to protect our IoT gadgets and gizmos and provide them with the same enhanced security.
There are a lot of Windows 10 IoT antivirus and antimalware tools, and to make your choice easier we picked the best of them that are able to provide your gadgets with increased antivirus protection.
What is IoT security software?
IoT security software is a tool that protects all devices that are connected to each other from attacks, viruses, and attempts to steal data.
A simple antivirus usually protects independent devices and must be installed on each one. With IoT security software, you can protect your devices simply by maintaining an active connection between all your devices.
You can check our list of the best IoT security software below.
What are the best IoT antiviruses and antimalware solutions?
TotalAV – Protects the devices that control your IoT
TotalAV does not install on smart-home gadgets, and it has no network scanner like TotalAV’s Connected Home Monitor, so it protects the other end: the phones and PCs you control those devices from. Real-time protection and WebShield keep malware and phishing off them, and the Safe Browsing VPN in the higher plans secures the connection on public Wi-Fi.
One subscription covers Windows, Mac, iOS and Android, so every device that has a smart-home app on it is protected.
Protects the phones and PCs that manage your IoT devices
Real-time protection and WebShield
Safe Browsing VPN in the higher plans
Password vault for device and app logins
Windows, Mac, iOS and Android
TotalAV
TotalAV features a great tool to scan and protect all your IoT-connected devices. Check it out now!
Bitdefender Smart Home is an Internet security solution that incorporates hardware, software, and cloud. It is designed to protect all your smart home-connected devices.
The tool is created for personal use and secures in real-time smartphones, smart TVs, and any other smart home appliances or gadgets connected to the Internet.
Bitdefender Box is 100% compatible with your Home network, and it provides maximum Internet speeds.
Other essential features included in Bitdefender Smart Home:
Vulnerability assessment and URL Blacklisting
Allows user access and control over the home network remotely, via a smartphone
The single mobile app used as a management console for all devices in your Home Network
Parental control option, ideal for monitoring your kids’ online activity and managing the screen time
Bitdefender Smart Home
Protect your smart home appliances and gadgets with Bitdefender Smart Home.
Avira Prime is one of the best antivirus to use to secure multiple devices and not only your computer because smartphones also need protection.
Avira Prime scans your entire system with one click for malware, weak passwords, outdated apps, and vulnerable networks within one single, easy-to-use interface.
It also includes a free VPN for privacy while online and also keeps your smart home secure from possible intrusion points.
Some of the best features:
Stops Android camera from rogue apps
Prevent advertisers from tracking your online activity
Norton is already providing online security to more than a billion IoT devices. Moreover, the company has revamped its products.
Today, Norton 360 provides now all-in-one security for all your devices, online privacy, and identity.
The product comes with multi-layered, advanced security that helps to protect against existing and emerging malware threats to your devices.
The Password Manager and the LifeLock Identity Alert System secure your most sensitive personal data, as well as alter you if any of these are used in any online processes without your consent.
Other notable features that help secure your home network:
VPN Filter that monitors against the installation of malware onto devices and systems connected to your router
It can provide bank-grade encryption to help keep your information like passwords and bank details secure and private
SafeCam to keep potential intruders via your webcam at bay
Parental Control option to control your kids’ online activity
Norton 360
Get the best multi-layered, real-time protection for all your home devices with Norton 360.
F-Secure equipped with the SENSE router allows you to protect and secure all your IoT devices with a single protection interface that will turn out to be really easy to use.
F-Secure is a combination of a security router, an advanced security application, and industry-leading cloud protection.
This antivirus solution has to be connected to an existing Wi-Fi router to provide security to a home network.
Check out the most important features that are packed into the F-Secure software:
Protects everything that is connected to your home network (from your computers and phones to smart TVs, baby monitors, and other devices)
Continuous motoring of all incoming traffic, to adapt the analysis, update the information in the cloud, and immediately block potential threats
Blocking certain devices is made based on the user’s normal behavior
Powerful 4× internal antenna for a stronger Wi-Fi signal
The router comes with 512MB of RAM and a 1GHz dual-core processor
Avast Premium Security is another developer of antimalware software currently used worldwide by over 50 million clients.
Its technologies combine rich data with AI and machine learning to continuously update IoT devices’ behavior and offer Avast clients the best vulnerability detection rate and protection against IoT threats.
Avast Premium Security has dedicated products, such as Avast Omni, that can protect your entire home network, securing all incoming traffic.
What’s more, the powerful on-device security for your smartphones, for instance, extends network protection beyond your household.
Notable features to convince you:
Webcam Shield to keep your built-in camera safe from spyware attacks
Real-time security, intelligent tracking of threats, and an extra layer of protection for your files, browser, network, and passwords
Complete security for your network, irrespective of its size
The mobile phone apps optimize device space and keep your transactions, or email private and secured
Comodo Antivirus is yet another software that has adapted its technologies to serve the IoT environment.
Comodo Antivirus provides the user with real-time monitoring, and sandboxing of unknown files. The software is light on system resources, as well as easy to install and use.
It obtains unique information from all connected smart devices so that the cloud server can analyze usage patterns to eliminate suspicious traffic.
And, most importantly, it also comes free of charge for one computer. However, if you have more devices (which is probably the case for a home network), you’ll have to enroll in a yearly plan.
Key features include:
Virus monitoring, auto-sandbox, and behavior analysis technologies
Real-time scanner constantly monitors all files and processes on your computer
These are the best solutions that provide enhanced cybersecurity for your IoT devices. Check out more details on their features by heading to their official websites and deciding which one best suits your needs.
TotalAV is an award-winning antivirus and security program that can keep your computer safe from harmful threats, including viruses, malware, ransomware, spyware, and other types of cyber threats.
It has an advanced cloud-scanning protection that immediately analyses suspicious files in real time. It also offers multiple scanning options to make sure you detect all the possible threats.
You can locate and eliminate Adware, which is an aggressive type of advertising software that is usually hard to remove.
TotalAV keeps your personal passwords safely stored within a vault, which means it provides you with an additional layer of protection.
Here are other key features of TotalAV:
Proactive monitoring
Quarantine suspicious files
Schedule smart scans
Multi0device compatibility
Block in-play video ads
TotalAV
Remove damaging threats from your system and keep it safe with TotalAV’s amazing features.
The new version of ESET Internet Security comes with improved multi-layered security as well as increased speed.
A newly added layer is the Unified Extensible Firmware Interface (UEFI) Scanner which proactively checks if malware is present in the software interface between an operating system and platform firmware.
ESET also updated the Connected Home Monitor feature, which now includes improved scanning for your smart devices.
There have been improvements to my.eset.com website for it to be updated with the Licence Manager feature which lets you view your expiry date.
Let’s see what its best features are:
Multi-layered security solutions
UEFI scanner
Webcam and router protection
Increased scanning speed
Free 30-day trial period
ESET Internet Security
ESET Internet Security comes with its own private browser for the ultimate online protection.
As if it was needed, Avast Antivirus changed its interface with a new, simpler, and more intuitive one. And now it also has a passive mode to run as a secondary security solution.
And as ransomware is creating havoc online nowadays, this tool, although completely free, has specialized in protecting yourself against it.
It actually introduced a new feature called the Behavior Shield. This means that the antivirus not only scans the apps but it also monitors them in time.
Another change is that the previous Game Mode has become the Do Not Disturb Mode while it mostly performs the same blocking of pop-ups when you are working and playing or watching a movie.
Let’s take a look at some of its most importantfeatures:
Completely free
Ransomware and spyware protection
App monitoring for unusual behavior
Do Not Disturb Mode for uninterrupted work or play
Simple and friendly interface
Avast Free Antivirus
Although it’s free, this version of Avast can stop even the latest threats from your PC.
Avira Antivirus is a well-known brand on the market. It’s intuitive, it’s secure and it’s spending fewer computer resources than previous versions.
The process of tracking ongoing security operations now is simplified, and the scan customization is optimized for a better user experience.
This version is completely free although it comes with a lot of great features. Only the free, included VPN is a reason enough to try it.
But if you add to that a free speed booster for your PC, a password manager, anti-phishing protection, the software update feature, and the PC cleaner tool, things get really interesting.
Let’s look at some of its best features below:
Antivirus and anti-phishing protection
PC cleaner tool that deletes any app and browser traces
Free VPN with 500 MB/month traffic limit
Dedicated speed booster for your PC
Easy to use and maintain
Avira
This antivirus comes with a lot of hard-to-refuse features and tuning tools for free!
Bitdefender is undoubtedly one of the best antiviruses on the market and that’s simply because it gets the best scores for malware protection from independent testing.
This tool works against all online threats, from viruses and Trojans to the dreaded ransomware or zero-day malware and spyware.
The security solution provides the latest threat intelligence technologies that identify and analyze network-level suspicious activity and blocks any attack.
Bitdefender is so complex that it also has an Autopilot feature. It’s actually a security advisor that can give you valuable pointers about the security situation of your system.
Take a quick below at its most important features:
Bitdefender Photon, a technology that adapts the antivirus to your hardware and software configuration to consume fewer resources.
Safe online banking
Microphone monitor and webcam protection
Wi-Fi security advisor
Bitdefender
Bitdefender has one of the most complete protection features for PC on the market.
One of the newest emerging antiviruses is Emsisoft Anti-Malware. This is an amazing tool that protects the most important parts of your system thus covering the back of smaller functions.
It is designed to run smoothly on computers with low specs. It is highly compatible with Windows 10 running on both x32 and x64 platforms.
Through the most notorious features, we will count dual-engine scanner, 4-layer protection, cleaning, and restoration features, user- friendly.
It also comes with a great price compared to other antiviruses from this list so you should definitely try it out.
Panda Security Essential also has new features upgraded. The new version has special algorithms to filter URLs and web surfing. An integrated USB protection is provided for you and your USB devices.
Now it also comes with a free VPN that can be used with limited traffic of 150 MB per day, enough to cover the most stringent privacy-related needs.
One of the latest changes is the optimization for all versions of Windows in order to cover all possible users.
Panda Antivirus is a software that comes with a 30-day free trial so you can definitely check it out before buying.
Let’s see what are its top features:
Real-time antivirus protection
VPN for private Internet use 150MB/day
Virus scan for external devices like USB sticks or external drives
Wi-Fi protection against external attacks
Windows, Android, and Mac compatible
Panda
Panda can make a difference when it comes to protecting your external devices and your privacy.
Modern life means carrying a lot of tasks online, from work and socialization to relaxation, information lookup, and payments or banking transactions and Kaspersky aims to secure all that.
This is an award-winning tool that will cover your protection and your privacy in a complete security package.
And when we’re talking about privacy, we’re referring to the included VPN with 300MB of daily traffic but also to the Safe Money feature that is encrypting all your online transactions.
This software also protects your webcam from any hijacking so you can keep yourself and your family safe at all times.
Let’s see what are this tool’s best features:
Free VPN with 300MB of traffic per day
Safe Money features for secure online transactions
Friendly interface
Webcam protection
Anti-ransomware and network security controls
Kaspersky
Kaspersky is the ideal antivirus for modern life’s security and privacy needs of your devices.
How about an antivirus that also offers a cloud storage backup for your files? We’re talking about Norton 360, a solution that also offers a smart firewall and a password manager.
It even provides a version for gamers that will protect you from DDoS attacks, it will safeguard your webcam, and a free, secure VPN to get you closer to game servers.
This tool also offers parental control and dark web monitoring to keep your family safe from any unsafe content.
Let’s make a runaround of its best features:
Free and secure VPN
Smart firewall with advanced features
Password management
Cloud backup storage
Easily customizable for any needs
Norton 360
This excellent tool not only that it protects your PC, but also offers secure cloud backup.
Malwarebytes is a very complex security tool that offers multiple threat protection.
You can use it as an antivirus solution, antimalware tool, anti-ransomware software, and so on. Name a cyber threat and Malwarebytes can handle it.
Thanks to its multiple-layer protection, Malwarebytes can successfully identify the threats lurking on the Internet and block them before they even reach your computer.
Whether you’re looking for a home antivirus solution or a business security tool, Malwarebytes is the right choice for you.
Take a look at its top features below:
Blocks malware, and other threats with multiple layers of security, including real-time protection
Warns you when you accidentally visit malicious or fraudulent websites
Scans and removes any malware from your PC
Minimal impact on performance
Simple controls and interface
Malwarebytes
Malwarebytes is a top-notch malware removal tool but it also works as an excellent antivirus.
Email transporting viruses are a huge concern especially to businesses because they lead to a loss of reputation if your employees accidentally send out infected mail to your clients or even partners.
Email security solutions should counter threats that take advantage of your email system to propagate malicious codes through attachments or spam, phishing, and leaking of confidential information.
If you’re on Yahoo Mail, you already know it comes with its own protection to keep you safe online, and a step ahead of any intruders or scammers, but there are other options you can choose from for email protection.
Yahoo Mail comes with SpamGuard which blocks billions of spam daily, image blocking, and malware protection, using the Norton antivirus software.
Because the propagation of email threats is more virulent today, you need a solution deployed in your network, and mail server to reduce the impact of malware and protect your company’s communication.
If you need a different or extra antivirus, here are the best antiviruses for Yahoo Mail you can try for protection.
Does Yahoo email scan for viruses?
A worth-mentioning benefit of using Yahoo Mail through webmail is that you can scan your emails for malicious viruses before they can even touch your device and cause serious harm.
Yahoo antivirus software turns on automatically virus scanning, which means it becomes effortless to use it on your attachments. You can easily use this platform to submit the file you want to scan for malware.
What are the best antiviruses for Yahoo Mail to use today?
Whether you read Yahoo Mail in a browser or a desktop client, the risks are the same: a convincing phishing link or an infected attachment. TotalAV’s WebShield blocks phishing and malicious sites before they load, and the real-time scanner checks attachments as they are saved.
The data-breach monitor in the higher plans warns you if your Yahoo address shows up in a leak, and the password vault keeps your mail login off the browser. Mobile apps for Android and iOS mean the phone you check mail on is covered too.
WebShield blocks phishing links from email
Attachments scanned as they are saved
Data-breach monitoring for your email address
Password vault
Android and iOS apps under the same subscription
TotalAV
Use this great TotalAV tool and stop worrying about any threats from your Yahoo Mail inbox.
Panda provides email protection to keep your company’s email traffic safe from all types of malware and spam, with cloud-based corporate email security and filtering.
With Panda Antivirus for Yahoo Mail, you can keep your employee’s inboxes virus-free, and spam-free, with guaranteed availability even if the mail server crashes.
Panda’s Email Protection provides multi-layer protection thanks to the advanced cloud-based scanning technologies that don’t need additional infrastructure to start operating.
It is easy to use and maintain, doesn’t require installation, cuts costs, minimizes resource usage, and allows centralized management from a web console. Platform updates are also done automatically and transparently.
You get guaranteed service availability, and email delivery during temporary server crashes as it has a backup service, with constant system monitoring.
Other features include two anti-spam protection modules – automatic and guaranteed – that maximize efficiency, prevent false positives, and guarantee 100 percent spam blockage, as well as email filtering by protection.
Panda Security Essential
Let Panda safeguard your Yahoo Mail with its various great features.
With Bitdefender Internet Security, you get protection from known and unknown security threats with award-winning antispyware, antispam, anti-phishing, content, and attachment filtering technologies.
Bitdefender is a great antivirus for Yahoo Mail as it secures your emails and blocks spam, which you can verify using the BDconsole tool in the antivirus.
When it finds infected items in your email archives, it may not clean them due to the fact that emails cannot be repacked.
The best way is to manually delete emails detected by Bitdefender, as it provides detailed information on the e-mail which contains an infected attachment.
Let’s see what are the best features of this security solution:
Privacy firewall that is blocking intrusions and filtering your network traffic
Webcam and microphone protection against hijacking
Free VPN (200 MB/day/device)
Safepay feature for secure online banking
Multi-layered threat protection
Bitdefender Internet Security
Bitdefender offers great e-mail protection and blocks spam from the very beginning.
Lately, there have been a lot of COVID-related scams online and on e-mail platforms, even on Yahoo Mail and Avira promises to take care of them without delay.
Although this is a free antivirus, it offers excellent protection but it also comes with unexpected features and benefits.
For instance, the solution comes packed with a free VPN solution. It’s limited to 500 MB/month of data but it’s still a welcome feature to protect your identity online when needed.
Avira also comes with software and driver updaters and a free password manager that will ensure that so much data will leak to wrongdoers.
Let’s take into consideration some of its key features:
Built-in performance optimizers for your PC
Free VPN (500 MB/month)
Anti-phishing and ransomware protection
Password manager included
One-click smart scanning
Avira
Protect your Yahoo Mail with a free but powerful antivirus that offers extra features.
As one of the well-known antivirus brands, Kaspersky comes with Mail Antivirus, a component that searches for dangerous objects in incoming and outgoing emails.
You can use this as your antivirus for Yahoo Mail and enjoy great security levels with its mail scanning that splits into mail traffic protection, heuristic analysis, scanning of compound files, and filtration of attachments.
Kaspersky Mail Antivirus starts on a system startup and resides in your computer’s memory, and by default, it intercepts each email and splits it into header, body, and attachment.
Then, it uses antivirus databases and a heuristics analyzer to scan the body and attachment for dangerous objects.
The best advice on protecting your computer from phishing scams is to use anti-virus software with real-time protection.
Emsisoft Anti-Malware protects you in three ways:
Real-time protection, blocking malware before it can be executed using the powerful dual-engine scanner and behavioral analysis
Improved surf protection that blocks access to many phishing sites when you try to access them
Behavioral Blocker
This reliable antivirus software can play a critical role in protecting you against encrypted email attachment malware.
Making use of behavior blocker technology will identify suspicious patterns of activity and stop the malware before it can execute.
Emsisoft will scan your files at the moment they are created, so when you save or open an attachment it would be immediately scanned. Thus, your existing e-mails are safe.
Emsisoft Anti-Malware will not scan and delete e-mails, which is rather a damaging feature and has to be disabled in any security solution that you are using.
In spite of the fact that the option is available on some tools, you are facing the risk of losing all your e-mails because of it.
Even if you happen to open a harmful email attachment, you can rest assured that you’ll be safely protected. Try it now and keep your system safe!
Emsisoft Anti-Malware
Great choice against any type of threat that can harm your e-mails.
Avast comes with Mail Shield, an additional layer of active protection that scans incoming and outgoing emails in real time for malware content.
As one of the best antivirus for Yahoo Mail, Avast’s Mail Shield is configured to provide optimal protection when it is on.
So, it is best to keep the shield on all the time, and only configure it if you have an advanced understanding of malware protection principles.
This tool also comes with an SSL scanning feature that enables the scanning of emails sent or received using an SSL/TLS encrypted connection.
You can also configure the Mail Shield by tweaking the Sensitivity option and filtering various variables like the Heuristics, and the use of Code Emulator for various depth levels of scanning.
Take a look at some of its best features:
Intuitive and friendly interface
Advanced application protection
Passive mode for using it as a secondary protection solution
Advanced ransomware protection
Do Not Disturb Mode for uninterrupted work or gaming sessions
That was our selection with the best antiviruses for Yahoo Mail and for other e-mail clients as a matter of fact.
You might also want to check our list of the best e-mail scanning software. They will help you remove the malware if you already were a victim of an attack.
Share with us your favorite antivirus for Yahoo Mail by leaving a comment in the section below.
Many Windows users believe they don’t need to pay for antivirus software since Windows Defender is free. Sure, it’s free and safe to use.
However, independent tests show that Windows Defender’s protection level falls below 90%, compared to 99% of the dedicated antivirus programs.
Besides, some malware programs advance with the advancement in technology, and the built-in Windows Defender might not stand up to such threats.
Whether it’s the latest ransomware encrypting all your files or browser hijackers grabbing your search page, you will need a first-rate antivirus package to keep threats at bay.
In this article, we bring you the best browser antivirus programs that will give you all-around protection.
Do I need an antivirus for web browsing?
If you don’t want to risk exposing personal data from your computer, including banking details, you should use an antivirus while web browsing. An antivirus will scan and block infected sites before you even click on them, as well as files and links that can contain viruses.
Scam sites are everywhere. The only way to avoid them is by having a decent antivirus that checks a site’s integrity before you enter it. A good antivirus will make your online browsing smoother and free from intrusive ads and pop-ups.
Here are the reasons why you should use antivirus when web browsing:
Anti-phishing, malware, and other threats protection
Check the site’s integrity and security before entering it
Real-time notifications about suspicious sites, links, and files
Firewall protection from any unwanted incoming connections
Protect the web surfing of your children with parental control
Block ads, pop-ups, and site notifications
Even though you can still browse without an antivirus, it’s still a good idea to consider the best antivirus programs on the market today. One might even catch your attention.
TotalAV is an all-in-one security program that offers multiple advanced features not only to help you browse safely and securely but to protect your device.
It has a feature called WebShield that constantly defends your device against all kinds of potential cyber threats and blocks them before they can even affect it.
It helps you stop intrusive hackers and malicious and untrustworthy websites from stealing your personal information.
You can schedule smart scans to run precisely at your set time and ensure that your system remains safe and secure permanently.
TotalAV eliminates all tracking cookies and no browsing activity of yours is left behind. Additionally, it blocks all intrusive ads, including pop-ups, annoying notifications, and in-play videos.
TotalAV
Great antivirus solution with full protection that keeps harmful threats away from your device.
Bitdefender Internet Security combines nearly flawless malware protection, antispam, and antiphishing components with a wealth of other integrated security features.
Just like its twin brother Bitdefender Antivirus Plus, this program also offers protection against malware, email attacks, and phishing, and also comes with a file shredder and a password manager.
Bitdefender Internet Security provides full protection and scans everything including email attachments and page URLs for malicious websites.
It can also block outsiders from scanning your system’s ports. Bitdefender Internet Security doesn’t support Windows XP and Windows Vista.
Using this antivirus from Bitdefender, you have banking data security, increased privacy with a VPN tool, an anti-tracker functionality to block suspicious websites, and more to go.
Bitdefender Internet Security
Use an antivirus that can block even the newest threats before they can cause you any trouble.
ESET HOME Security Essential takes a no-nonsense approach when it comes to keeping threats at bay. It is developed to protect your computer from all types of threats.
This antivirus features anti-phishing protection, email protection, browser protection, advanced heuristics & configuration settings, custom scan files, and a wealth of additional security tools.
You can also adjust the settings to tell the program which types of threats to scan which is faster and more specific.
Additionally, the software also offers an anti-theft tool that you can activate on all the devices that are licensed to run ESET.
When you log onto your anti-theft account on each device, you can track them through a web-based interface. It remains one of the best antivirus software and has a clean and clear interface.
ESET HOME Security Essential
Secure your browser with an antivirus that can protect you across multiple platforms.
Guard.io – Best protection against malicious websites
Guard.io is a browser extension tool perfectly suited for web protection against digital threats and malicious websites.
If you require an efficient antivirus created to guard browsing activities, then you can simply add this light browser extension to any of your current browsers.
This antivirus extension has multiple utilities that include email phishing protection and sensitive data-stealing attempts. You can block malicious sites and web pages that contain malware and corrupted files.
You will efficiently guard your online presence regardless of browser and use this secure extension for Edge, Google Chrome, or Firefox browsers.
At the same time, you’re able to monitor all your email accounts for data leaking threats and act shortly if there are data breaching invasions.
In addition to that, you have full coverage of the Google Chrome extensions, and thus you’re secured against infected web extensions.
Guard.io
Take complete digital security and prevent various attacks or viruses to compromise personal data and corrupting the system.
Vipre is an antivirus with award-winning endpoint protection, perfect for both home and business protection.
With real-time advanced threat protection, you won’t encounter any threats while browsing the web. Whether you are home, at work, or on the go, Vipre will remotely protect you from anywhere.
Vipre checks all files you download, all websites, and all emails that you receive or sends to make sure that you don’t leak sensitive data online. It even prevents sending emails to the wrong person.
Vipre provides multi-layered security solutions, such as machine learning capabilities and sandboxing technologies to verify all links and attachments before you click on them.
Since the antivirus focuses on the business and professional side of security as well, it provides additional layers for email security, data loss prevention as well as security awareness training to reduce either internal or external assault risks.
Vipre
Keep all your data secured and emails in order with this great antivirus.
If you are looking for an antivirus that will protect you as well as your kids when browsing, Norton 360 is the right choice for you.
Through innovative technology powered by artificial intelligence and machine learning, the antivirus provides features such as anti-spyware, malware, ransomware, and anti-phishing threats.
On top of this, web protection is essential for Norton 360. While today’s viruses are complex and harder to uncover, advanced security it’s able to stop the attacks right before it reaches your device
Norton 360 is perfect for home computers especially if you have children. The parental control feature gives you control over what they search, download and see online. This antivirus will keep them proactively engaged in important school subjects even if they are at school.
Also, the School Time feature gives you the ability to manage the learning environment and helps keep your children focused even when they are at school.
Norton 360
The perfect choice for your kids in terms of sites they access and files they download.
Kaspersky Bundle lives up to its name by offering more anti-malware protection features than any other antivirus program on the market.
The program comes packed with a bevy of extra protection features. It comes with browser protection that protects you from reaching malicious sites.
Kaspersky features a powerful firewall that blocks network attacks, a virtual keyboard that keeps your confidential data safe, and parental controls that protect your kids including an adult website filter.
Other extra features include helpful diagnostic tools that show your CPU and RAM usage and a password manager that integrates into Mozilla Firefox, Google Chrome, and Internet explorer.
By choosing this comprehensive antivirus, you’re covered from the most common digital threats like worms or trojans or advanced malware such as rootkits or rogues.
Kaspersky Standard
Keep your computer secure from hijacks with an antivirus that protects your privacy.
McAfee Antivirus Plus is rich in features and highly effective at preventing phishing attempts and fighting malware. It has anti-phishing protection and it gives you full control over its scanning behavior.
In your quest to find the best antivirus programs, you will not come across many that will beat McAfee Antivirus Plus.
It offers unlimited licenses across all of your devices. This means that you can protect all your Windows, Android, Mac, and iOS devices without paying for an extra license.
McAfee Antivirus Plus also comes with its own firewall which decides what content enters your PC and a file shredder that completely erases files.
In addition, this antivirus solution can offer you strong firewall support, a password manager tool, a file shredder for personal files, web protection, and reliable VPN protection.
F-Secure Antivirus is among the best antivirus software that can keep your computer safe from cybercriminals. F-Secure is not cheap but it’s second to none at detecting security threats.
It uses two anti-malware engines to increase threat coverage thus offering almost flawless malware detection.
F-Secure Antivirus is one of the fastest at scanning for threats and its interface is clean and bright. The company offers two antivirus products; F-Secure internet security and F-Secure Safe Antivirus.
The F-Secure Internet security adds browser protection, a network scanner, a URL scanner, parental controls, additional protection for Macs and mobile devices, and a web-based account.
Knowing you can ensure full security for your online shopping and banking activities is worth knowing. Every time you access monetary websites automatic protection will activate to keep your money safe.
Designed by a company that has been in business for over 20 years, Avast Free Antivirus delivers a perfect balance between virus removal and real-time protection.
Getting a good balance between these components is a huge problem for many antivirus products today. It comes with some top-notch features that other brands reserve for premium packages.
This includes a password manager and DNS protection that prevents DNS hijacking and protects against website redirects.
It also analyzes whether your applications are out of date and updates them for you. It’s a handy tool especially if you tend to delay software updates.
Avast antivirus offers enterprise-grade security for online navigation and benefits every user with AI protection and machine learning tools for increased online privacy.
Avira Antivirus Pro is one of the best antivirus products in terms of malware detection. It offers near-perfect malware protection at a very small price.
It blocks known malicious websites, constantly updates its database of malware signatures, scans all email attachments, offers a secure web browser, and has unlimited tech support.
The installation process is quick and straightforward. Besides protection, it repairs damage caused by malware to your files and also secures your finances and other private data.
You can employ this antivirus tool confidently for web defending against unsafe websites, plus advanced security to block zero-day ransomware attacks.
That being said, Avira is a practical method to entirely secure your online navigation and prevent viruses or personal information threats.
Avira Antivirus Pro
Avira offers you complete web protection for safe online shopping and banking.
Yes, it can be safe to navigate on specific websites without a high-detection antivirus. You can remain protected by browsing on secured websites and taking minimal precautions.
Regardless, we suggest using the multi-layered malware protection that is offered by the solutions above. This way, you can navigate online worry-free and avoid any risky malware or data phishing attacks.
All the programs on this list have spectacular features designed to protect you from all types of threats while offering unparalleled performance.
If you have been looking for the best browser antivirus software on the market, there you have it. Have you used any of these programs? Let us hear about your experience in the comments section below.
Microsoft Security Essentials is the built-in security solution developed and offered by Microsoft for business and personal purposes on older OS versions.
This is the basic antivirus software that can be used on Windows 7 for protecting your data and the actual firmware against malware attacks.
However, the Microsoft Security Essentials features lack some important capabilities when discussing web browsing protection or malware database, which means that depending on your own needs, you can find better alternatives.
Well, in that respect, during the following review we will compare Microsoft Security Essentials with some of the best third-party antivirus programs.
The top antiviruses that are currently available will be always in the development stage.
That means that specialized developers are working on finding the best security solutions for your business or for your personal Windows 10 system.
That doesn’t mean Microsoft isn’t trying to do its best for improving its security solution, but sometimes it will be better to choose an external (usually more specialized) service.
So, do you really need Microsoft Security Essentials?
If you’re running Windows 10, the answer is no. Windows Defender already provides real-time protection and you don’t need to install Microsoft Security Essentials as well.
Keep in mind that running more than one antivirus solution at a time may trigger various technical glitches. So, do avoid that.
On the other hand, if you’re still running Windows 7, you can install Microsoft Security Essentials to keep cyber-threats at bay.
Windows Defender for Windows 8.1, Windows RT 8.1, and Windows 10 provides built-in protection against malware. You can’t use Microsoft Security Essentials, but you don’t need to—Windows Defender is already included and ready to go.
If you’re looking to protect a PC with an older version of running Windows 7, you can use Microsoft Security Essentials to provide comprehensive malware protection that will help guard against viruses, spyware, and other malicious software. It provides free* real-time protection for your home or small business PCs.
Thus, below we will try to outline the most important differences between these top antiviruses and antimalware programs and the default Microsoft Security Essentials platform.
Hopefully, based on this review, you will be able to choose wisely the antivirus that best suits your needs.
Microsoft Security Essentials vs. top third-party antiviruses
ESET HOME Security Essential is a top solution if you have a modest PC configuration because it’s a light solution and has great Windows integration.
The difference between ESET HOME Security Essential and Microsoft Security Essential is pretty big in favor of the third-party solution but that is a paid one.
Both are on par when it comes to system resource consumption and although the Microsoft tool is already integrated, the ESET program is also extremely easy to install and use.
The bottom line is that ESET HOME Security Essential will offer a lot more sophisticated protection than the embedded Microsoft tool.
Let’s see what are its key features:
Minimal power usage
Easy to install, update, and even renew the subscription
Multiple platform compatibility
One account for all your devices and computers
Privacy protection against password theft
Tracking and locating your computer in case of device theft
ESET HOME Security Essential
For a reasonable budget, you will protect all your devices by using this trusted solution.
Bitdefender is one of the most appreciated antivirus solutions out there. The software is developed in Romania and was first released in 2011.
Since then, the devs managed to extend the actual platform and bring new security features that can protect your devices regardless of what you usually do on a daily basis.
It offers a wide range of feature, not only in term of anti – virus scanning but also VPN security, online banking protection and Parental control.
But not only, Bitdefender actively scans every file and email attachment immediately after you access them and it blocks every malicious file before you could even download it.
Let’s quickly look at its key features:
Web filtering technology
Protects your Wi-Fi connection
Online banking protection
Password manager
Anti-phishing and Anti-fraud
Bitdefender Security Essential
If you want the best security against all Internet threats, Bitdefender is your best bet.
Avira is maybe the best free alternative for Microsoft Security Essential. Unlike the other reviewed third-party antivirus programs, it is offering decent features even if you choose to download its free version.
The antivirus has a good score if we observe the latest AV tests so you can rely on the scan results that you will receive.
It will grant your browsing protection and your privacy all the time and you can customize its main scan engine.
For example, you can set the resources that will be used during certain scans and you can play with different add-ons. Its interface can be easily customized but it has a relatively intimidating user interface.
However, thanks to the tweaks that are available the antivirus can smoothly run even on low-end configurations.
Let’s see Avira’s top features to consider:
Firewall and VPN included
Extremely easy to use thanks to its friendly interface
Constantly good scores on the antivirus tests
Customizable search engine
Avira
The free version of Avira will still offer greater protection than the embedded Microsoft solution.
Kaspersky is another antivirus program that ranks high in AV tests. It is a light antimalware platform that can offer full security protection for your Windows 10 system.
Similar to Bitdefender, for full protection, you have to purchase the product; once more, you can choose from three different paid plans depending on what you plan to do on your computer.
Kaspersky is cheaper than Bitdefender but lacks some features and ranks a little bit lower in the latest AV tests.
However, it is lighter and still has a better antivirus database compared with what you get with the default Windows Security Essential software.
Let’s quickly look at its key features:
Secures your online banking process
Security for kids
Secure passwords manager
File backup & encryption
Kaspersky Internet Security
Keep your device secured and safe from any kind of cyber threats with the Kaspersky antivirus solution.
Among basic security features, Norton provides an extra 25 GB of secure cloud storage where you can add your personal files and data in order to increase the security settings for these selected files.
The antivirus also grants backups for your images, videos, and other similar packages and secures your banking initiatives, and protects the browser experience for your kids.
You can choose from 4 different pricing plans and you can also download a free version, but in that case, you will get only minimal protection.
However, the Norton AV tests are once more ranking higher than Microsoft Security Essential which means that with this third-party security solution you can better secure your Windows 10 system.
Other key features you might want to know about:
Anti-spyware, antivirus, ransomware, and malware protection
Firewall
Password manager
Dark web monitoring
PC cloud backup
Norton
An antivirus program with high detection ranking that offers anti-spyware, ransomware, and malware protection.
Malwarebytes will find infected files even when other antivirus programs will fail.
This is an anti-malware, anti-ransomware, and anti-exploit software that can successfully remove almost any type of virus and malware which tries or already managed to infect your files.
So, you should use Malwarebytes when everything else isn’t efficient enough.
From this perspective, it is way better than Microsoft Security Essential, though in this case, we are not discussing a classic antivirus program but specialized antimalware.
Other key features include:
Threat scan
Phishing and malicious URL protection
Remote or local remediation
Command-line interface
Dissolvable agent
Malwarebytes
A specialized antivirus program that helps you totally remove any type of virus and malware that can affect your PC.
McAfee is still working closely with Microsoft even if now Windows Defender is the built-in and default antivirus solution.
If installed correctly, McAfee will automatically disable Windows Defender from your computer; otherwise, you will have to do this process manually as the programs cannot properly work together.
Overall, McAfee offers better protection than Microsoft Security Essential with better results when AV testing is initiated.
McAfee features more options even though it isn’t offering too many customizations.
Take a look at other key features of McAfee:
Firewall
VPN
Parental control
Home network analyzer
Anti-spam
McAfee
Keep your device safeguarded with McAfee’s various useful protection features.
Avast Free Antivirus has Email Shield, Behaviour Shield, Auto sandbox, and far more configuration options and lower resource usage.
And that’s only for the free version, which is way more than you can get with the default Microsoft Security Essential program.
From this perspective, Avast Free Antivirus is comparable with Avira and maybe with AVG, another antivirus that offers sufficient features without purchasing the full program.
In that respect, AVG and Avast Free Antivirus are now sharing the same platform as they are part of the same company.
Both have a light system-performance impact, which ensures a great and updated antivirus database (comparable with Bitdefender and Kaspersky), but AVG comes with fewer useful extra features than Avast.
Let’s see some of Avast Free Antivirus key features:
Advanced online protection
Do Not Disturb Mode
Constant app monitoring
Doesn’t interfere with your system or apps
Avast Free Antivirus
Great antivirus solution with light system-performance impact that ensures full protection of your PC.
The overall idea is not that Microsoft Security Essential is the worst antivirus solution to use.
The conclusions are more complex and there are better solutions than Microsoft Security Essential even when discussing free platforms, such as the already described Avira, Avast, or AVG platforms.
If you choose to test these antiviruses you will see that even the resources used are in most situations fewer, a strange aspect considering that Security Essential is part of the Windows system.
You can share your own observations with us through the comments field below. Also, stay close as we will keep you updated with further security solutions available for your Windows 10 computer.
You are not alone if Windows 11 resolution keeps changing automatically on your computer. Windows 11 resolution pixelating and changing by itself after a Windows update is a common problem.
What causes Windows 11 screen resolution to keep changing and how can you fix it? All the answers you need are in this guide.
Why does Windows 11 resolution keep changing on my computer?
Several possible reasons can cause abrupt screen resolution changes in Windows 11. The most common ones are:
Faulty or outdated graphics driver – The leading cause of resolution problems on Windows 11 is a malfunctioning or out-of-date graphics driver.
Recent Windows update – Since Windows 11 multiple bugs issue is yet to be resolved, a recent update could mess up your screen resolution.
Malware and virus attacks – Both can be responsible for any Windows 11 error that could ever affect your computer. They can be the reason for this too.
Whether you can pinpoint the root of the problem or you can’t, below are some solutions you can employ to fix the problem.
What can I do if Windows 11 resolution keeps changing on my computer?
Before you proceed to the major fixes in this guide, try out these basic solutions to see if they could solve your problem:
Performing system restore is also another potential solution. Just make sure you back up your data before starting the process.
Scan your computer for malware and viruses attacks to detect and fix the problem.
If these fixes don’t rectify the issue, you can employ the advanced screen resolution troubleshooting methods below.
1. Reinstall the graphics driver
Press Windows + X on your keyboard and click on Device Manager.
Locate Display adapters from the list and double-click to expand it. Right-click on your driver and select Uninstall device.
Select Uninstall from the dialogue to remove the driver from your computer.
To reinstall the graphics driver, go back to your Device Manager, switch to the Action tab and select Scan for hardware changes from the drop-down menu.
Wait for Windows to automatically reinstall the graphics driver and restart your PC once the installation is complete.
Now, go back to the Device Manager and expand Display adapters to confirm that the driver has been reinstalled.
Press Windows + X on your keyboard and click on Device Manager.
Double-click to expand Display adapters, right-click on your graphics driver, and select Properties from the options.
Switch to the Driver tab and click on the Roll Back Driver button.
Select any of the answers under Why are you rolling back? and click Yes to continue.
Wait for Windows to roll back the driver and restart your PC.
If the roll back option is greyed out, it means you don’t have a previous version of the driver to roll back to. Move to the next solution.
After rolling back your graphics driver and the problem is fixed, you might want to prevent Windows from updating the driver again. Our comprehensive post on how to disable automatic driver update on Windows 11 can guide you.
Click on the Windows icon on your taskbar and select Settings from the Start menu.
Select Windows Update on the left pane and scroll down to Update history on the right.
Next, click on Uninstall updates under Related settings.
Click on the latest update under Microsoft Windows and click on Uninstall.
Click Yes on the confirmation box that pops up and wait for Windows to complete the removal.
Restart your PC.
7. Clean boot Windows 11
Press Windows + R keys on your keyboard, input the following command into the Run command box and click OK: msconfig
Under Selective startup, uncheck the Load startup items box, check the box next to Load system services and Use original boot configuration. Click OK to save the changes.
Next, switch to the Services tab, check the box next to Hide all Microsoft services at the bottom of the page, and click the Disable all button.
Next, switch to the Startup tab and click Open Task Manager.
Right-click each item under the Startup apps and Disable them one after the other.
Close the Task Manager and go back to the System Configuration window. Click on the Apply button then press the OK button to save all changes.
Restart your PC.
Those are the solutions that have helped many users put an end to screen resolution changing automatically on Windows 11.
You may have to try more than one of the solutions. If one doesn’t work for you, feel free to move to the next until you are able to fix the problem.
You might also be interested in reading our guide on how to correct low resolution on Windows 11. The guide is for Windows 10, but the solutions are the same for Windows 11.
If you have other methods that work, share them with us in the comments section below.
Origin is an app for downloading, playing, and managing games. Users report that Sims 4 won’t download on the Origin app when they try to. Also, you can encounter several error codes on Origin that can prevent you from downloading games.
Why can’t I download Sims 4 on Origin?
The most common cause of the problem is Windows Defender Firewall interference. It blocks Origins from initiating Sims download if it senses any malicious activity.
Other factors that can cause Sims 4 not to download on Origin are:
Issues with Origin’s data cache – It is possible for Origin’s data cache to become corrupt or old, causing issues with Origin. Hence, downloading Sims 4 on Origin may be stopped by inaccurate data.
Interference from third-party apps – Apps like antivirus running on your computer is liable to interfere with the activities of other apps. Antivirus software can stop the functionality of Origin if it detects any suspicious activity.
Network connection issues – Downloading Sims 4 on Origin may be difficult if your network connection is not working correctly. Problems with network connection mainly occur when your router is not functioning as it should. Also, network congestion can cause issues.
The cause of Origin not downloading Sims 4 on your PC may not be mentioned here. However, this article will provide solutions that can generally fix the issue.
What can I do if Sims 4 won’t download on Origin?
Before proceeding with any advanced troubleshooting for the issue, go through the following preliminary checks:
Power cycling the router or modem will help it restart and refresh, fixing problems causing it not to function. It allows the router to connect to the Internet faster.
Switching to another network connection can help you get past the issues in your present network.
After trying the above checks, and you can’t download Sims 4 on Origin, use the solutions below.
1. Allow Origin app through Windows Firewall
Press the Windows + I key simultaneously to open the Settings app.
Click on Privacy & Security, then select the Windows Security option from the left pane of the screen.
Select the Virus & threat protection option and scroll down and click on Manage ransomware protection.
Click on Allow an app through Controlled folder access.
Then click the + Add an allowed app button and Browse all apps.
Go to Origin’sin’s installation folder, select the executable file and click Open.
Restart your PC and check if the issue persists. Allowing the Origin app through Windows Firewall will prevent the Firewall from performing any scan or checks on it.
The exception breakpoint has been reached message can sometimes appear on your PC while trying to run a certain application or while trying to shut down your computer.
The error can be encountered with a wide range of applications, including games, browsers, and even cloud storage programs. But, it’s easy to fix, given you follow the right approach, and we help you do that in the following sections.
What is an exception breakpoint on PC?
A breakpoint is an intended halting or pausing location in a program that is placed there for the sake of debugging. This is done in the context of developing software.
Here are some of the reasons you are encountering the error:
Problems with the app itself – In some cases, users reported The exception breakpoint has been reached error with Skype on startup when not terminating the process before shutdown. Reverting to the previous version of the app fixed things here.
Corrupted system files – Corrupted system files can lead to a range of issues and affect the overall Windows experience. Running the DISM tool and SFC scan would help here.
Issues with memory allocation – Oftentimes, if sufficient memory is not allocated to the program or there are other similar issues with it, you may encounter the error.
Also, let’s find out the most common scenarios here:
The exception breakpoint has been reached in Cyberpunk 2077, Origin, Sims 4, Warzone, – This problem can occur if the application you’re trying to run isn’t up to date or its installation is corrupted.
A breakpoint has been reached when shutting down – Sometimes this issue can occur due to third-party applications. To fix it, you need to find and remove the problematic applications and the issue should be resolved.
The exception breakpoint has been reached on Firefox,Chrome – A common error encountered by many, and can be fixed with our solutions.
The exception breakpoint has been reached on Outlook,OneDrive, Google Drive– Chrome users have also reported encountering the error. Reinstalling the browser should do the trick.
Breakpoint error in Windows 10, 11 – The solutions below are applicable for both OS iterations.
Lghub.exe / msedge.exe the exception breakpoint – Run the DISM tool in order to fix the breakpoint.
The exception breakpoint has been reached 0x80000003 – You can also create a new user profile then move all your data on it.
How do you fix the exception breakpoint has been reached?
Before trying the comprehensive list of solutions, here are a few quick fixes to get things running:
Update the app that’s throwing the error. Or if that doesn’t work, head to the official website and download the previous stable version, in case you started encountering the error after updating it.
Install the latest available version of Windows 10.
If you have overclocked the PC, revert to the default settings.
In case you have third-party screensaver software running on the computer, uninstall the app.
If the error persists, try the solutions listed next:
1. Terminate the app before shutting down the computer
The users reported that simply terminating the application before shutting down fixed the problem for them. It is because the app was in some way affected when forcefully terminated by Windows while undergoing a shutdown.
1. Press Ctrl + Shift + Esc to open the Task Manager and locate the app that usually throws the error.
2. Select it, and then click on End task.
3. Once done, go ahead and shut down or restart the computer, and you shouldn’t see the error anymore.
This method is found to fix The exception breakpoint has been reached error for Skype, Origin, and Steam, amongst others.
2. Run the DISM tool and SFC scan
Press Windows + R to open Run, type cmd in the text field, and hit Ctrl + Shift + Enter.
Click Yes in the UAC prompt.
Paste the following commands one at a time and hit Enter after each to run the DISM tool:Dism /Online /Cleanup-Image /CheckHealthDism /Online /Cleanup-Image /ScanHealthDism /Online /Cleanup-Image /RestoreHealth
Now, run the SFC scan by executing the following command:sfc /scannow
If you see Exception Breakpoint, Breakpoint has been reached (0x80000003) error, the DISM (Deployment Image Servicing and Mnaagement) tool and SFC (System File Checker) scan would come to your aid and help eliminate all corrupt system files.
And if that was the underlying cause, things should now be up and running.
3. Set the Page file to automatic
Type Adjust the appearance and performance of Windows in the Search bar, and click on the relevant search result.
Navigate to the Advanced tab, and click on Change under Virtual memory.
Tick the checkbox for Automatically manage paging file size for all drives, and then click on OK to save the changes.
Once done, restart the computer for the changes to come into effect.
If you see The exception breakpoint has been reached error on MSFS, allow Windows to automatically manage the paging file size.
4. Scan your PC for malware
According to users, sometimes this issue can appear if your system is infected by malware. To fix the problem, it’s advised that you perform a full system scan and check if that solves your problem.
If you want to achieve maximum protection, we suggest that you try out professional antivirus software that also protects you against all types of malware.
The ESET NOD 32 toolkit has a small RAM footprint, therefore it is quite light on the PC. It has unbreakable security standards, identifies aggressive virus signatures, and provides great online protection.
The super-easy user interface allows you to quickly navigate to the task you want to perform. It’s one the most dependable AI ally you could have for your cyberlife.
Aside from the antivirus layer, the anti-malware method builds shields and checks for hidden bugs in your PC that are causing the breakpoint error to occur.
Press Windows + R to open Run, type netplwiz in the text field, and then click OK.
Click Add.
Now, provide a Microsoft-linked email address and then follow the on-screen instructions to complete the process.
Alternative, you could create a Local Account. For that, click on Sign in without a Microsoft account (not recommended).
Choose Local account.
Enter the required information in the text fields, and then follow the on-screen instructions to complete the process.
After the new account is created, sign in with it, install the problematic app here, and check if The exception breakpoint has been reached error is fixed.
In case the error doesn’t appear anymore, you can create a backup of the remaining data stored on the previous profile and move it to the new user account.
Today, we are going to tackle a Logitech G Hub problem that a lot of users reported. Apparently, the Logitech G Hub won’t find any games in some cases.
Well, there are certain factors that can trigger such behavior in the Logitech G hub application, so we’re going to look at some and understand where the issue originates.
According to prior reports and expert analysis, your G Hub will not detect your games for the following reasons:
Outdated or corrupted driver files – To prevent such issues, make sure to keep your drivers updated.
Outdated Windows version – In the long run, it’s essential to update your OS in order to to keep your device running smoothly and securely and avoid such issues. Refer to our below steps in this regard.
Malware or other harmful software – This is the result of not using a reliable antivirus program. We can only encourage you to choose a great antivirus tool with offline update features to improve your security.
Don’t worry, as complicated as the issue might seem to some, just know that the solutions to fixing it are as simple as they come.
How can I fix Logitech G Hub not detecting any games?
1. Force close the G Hub process and run as administrator
Press Alt + Ctrl + Del and select Task Manager.
Locate the LGHUB, LGHUB Agent,and LGHUB Updater, select them, and press the End Task button.
Right-click on your Logitech G Hub executable and select Run as administrator.
2. Update your GPU driver
Search for Device Manager and open the app.
Expand Display adapters, right-click the one you are using, then select Update driver.
Select Search automatically for drivers.
Not updating your GPU driver, or any device driver at all, your PC is prone to various serious errors and performance matters.
3. Remove malware from your PC
Press Win + I to access Settings.
Select the Privacy & security tab, then click on Windows Security.
Click on the Open Windows Security button.
Click on Virus & threat protection.
Click the Quick Scan button.
If your PC finds any threats, click on the Remove button.
Once the file is downloaded, double-click on it to open it and then tap on the Install button as we have shown below. That’s it!
A lot of people using Logitech products have reported issues with the G Hub software either immediately after installation or after receiving a Windows update or downloading certain files from the internet.
If you download malware, malicious third parties will stop your software from working properly and compromise your personal data.
Also, make sure to always keep your drivers, Windows, and Logitech G hub updated to the latest version, to avoid unpleasant surprises.
Leave a comment below if this article has helped you overcome this annoying Logitech G Hub issue.
Virtual reality has gained massive popularity over the years, and many users are wondering if they can browse the web in VR. While you’re at it, also check if your PC is ready for VR.
The short answer is yes, and in today’s article, we’re going to show you the best VR browser. So, without further delay, let’s get started.
Here are our top contenders for the best VR browser:
Opera One – Lightning-fast & great built-in features
Mozilla Firefox – One of the largest addon stores on the market
Microsoft Edge – Low impact on system resources
Servo – Great alternative to Firefox VR
Google Chrome – Fast browsing speeds & a wide range of extensions
Chromium – Best open-source browser (essential features only)
Can you watch VR videos in the browser?
Even though VR headsets have been on the market for a while now, most browsers still do not have the capability to play VR videos inside their software, but that’s not always the case.
The elements that stand out from the crowd on this topic would be Opera Developer 49, and Firefox VR.
Below we will break down each of these options, so make sure to read through the entire section.
Browser
VR capabilities
Top Features
? Opera One
✔️ Full support 360-degree VR headsets ✔️ Direct VR playback
Social network buttons on the sidebar
Firefox
✔️ VR headset on Viveport, Oculus, Pico & HoloLens platforms ❌ Firefox VR has been abandoned
Great tracking protection during browsing sessions
Edge
✔️ Supports the WebVR standard ❌ Available only for Windows Mixed Reality
Microsoft Defender SmartScreen support
Servo
✔️ Support for Windows with HTC VIVE
Optimized for developers
Chrome
✔️ Support for Oculus Rift, HTC VIVE & Windows Mixed Reality. ❌ You must first enable experimental WebXR features
Media control built into the browser
Chromium
✔️ Support for Oculus Rift and HTC VIVE
❌ Only provides very basic features
➡ Does Opera One support webVR?
Yes, Opera One does support webVR with their Opera Developer 49 version, being the first version to fully support 360-degree VR headsets.
This amazing feature will allow you to experience the best options of this browser in a lightweight and good-looking UI while using your VR headset seamlessly.
This build comes with Chromium 62, and a built-in VR 360 player for headsets like HTC Vive, Oculus Rift, and other devices.
As you can see from the video presented above, using the new Opera One VR feature will take your experience to the next level, so be sure to check it out.
➡ What happened to Firefox VR?
Firefox Reality was launched in 2018 and has provided users with the capability to access links and watch videos from their VR headset on Viveport, Oculus, Pico, and also HoloLens platforms through a variety of apps.
Opera One is one of the first browsers to support the support 360-degree videos in virtual reality headsets including HTC Vive and Oculus Rift. Moreover, it has direct VR playback built into the browser.
So, you will be able to watch virtual reality videos instantly through your VR headset.
Opera One automatically detects your headset and if you open a VR-compatible video in the browser, you will see a Watch in VR button that you can click in order to start the video in your headset.
However, it doesn’t have to be 360 degrees or a stereoscopic video to play it in your VR headset, you can play any video, even 2D ones. We dare say it’s the very best VR browser out there.
Other great features:
Available with all the major VR headsets including HTC Vive and Oculus Rift
Built-in VPN service with no bandwidth limit
Social network buttons on the sidebar
Great tab management improvements
Light and fast
Opera One
It’s the most suitable browser for VR and comes with practical features like VPN and AI app integration.
Mozilla Firefox – One of the largest addon stores on the market
Firefox is a well-known web browser with a long history. This best VR browser supports virtual reality thanks to the WebVR standard. It allows you to experience VR on your computer using Oculus Rift and HTC VIVE.
It’s important to mention that VR is also available on Mac computers with HTC VIVE, so you’re not just limited to Windows.
As for other features, you should know that Firefox prioritizes users’ privacy, and it comes with enhanced tracking protection.
Firefox is a non-profit browser, and if you’re looking for a browser that protects your privacy, and works with VR at the same time, then Firefox is just what you need.
If you want to experience virtual reality in your browser, you don’t need to download a special browser since you can experience it with Microsoft Edge.
The browser had WebVR standard support for a while, but the latest version of Microsoft Edge brings even better VR support.
The new version of the browser is based on Chromium, so it’s quite similar to Google Chrome, and it supports Chrome extensions.
Microsoft Edge is a great candidate for the title of best VR browser, but it’s currently available only for Windows Mixed Reality, so keep that in mind.
Servo is a web browser based on Mozilla Firefox, so it’s pretty similar to it. The browser is written in Rust, and it’s designed for developers so it closely follows the latest web standards.
The purpose of Servo is the provide an independent and modular web engine for developers. As for the VR, Servo offers support for it on Windows with HTC VIVE.
Servo is a unique VR web browser, but it’s not as user-friendly as one might think. However, if you are a developer who’s into VR, then you might want to try Servo.
Google Chrome – Fast browsing speeds and a wide range of extensions
Another browser that offers VR support to its users is Google Chrome. Keep in mind that the VR feature isn’t available out of the box, so you’ll have to enable WebXR services from the hidden settings page.
After doing that, you should be able to use Google Chrome with Oculus Rift, HTC VIVE, and Windows Mixed Reality.
As for additional features, you should know that Chrome offers tracking protection as well as a built-in ad blocker. Of course, there’s support for various extensions, so you can easily enhance your browser.
Overall, Google Chrome offers great features, but if you want to use it for VR, you’ll need to enable experimental WebXR features, so it might not be the best VR browser out there.
Other great features:
Available on all desktop and mobile platforms
Experimental VR support for Oculus Rift, HTC VIVE, and Windows Mixed Reality
Chromium – Best open-source browser with only essential features
Chromium is an open-source browser project, and while it has certain similarities with Chrome, the two are pretty different. Simply put, Chromium is Chrome with only the essential features.
Chromium offers support for Web VR standards so you can use it with Oculus Rift and HTC VIVE. However, the browser provides only the basic features, and you might find many features from Chrome missing.
Security and privacy are an essential part of Chromium, so it doesn’t rely on Google’s services, and if you have any privacy concerns, then Chromium is a perfect choice.
Chromium offers VR support, but the browser is designed for developers and more experienced users, so it might be more challenging to install than Chrome.
If you’re dealing with slow WiFi on your laptop, this guide is for you. We’ll walk you through 9 ways to increase internet speed. By the end, you’ll say goodbye to laggy video calls, buffering streams, and painfully slow downloads.
Whether you’re working, gaming, or just browsing, these fixes will help you get the most out of your laptop’s WiFi connection.
How do I fix slow Wi-Fi on my laptop?
To start with, power cycle your router, and move your laptop closer to it. Also, consider restarting your PC and disconnecting other devices connected to the same router.
If these won’t work, follow the advanced troubleshooting steps below.
1. Disable Location services
Press Windows + I to open Settings, and select Privacy.
Now, select Location from the navigation pane, and then click on Change under Allow access to location on this device.
Turn off the toggle for Location access for this device.
A few users managed to fix things when Wi-Fi was low only on one laptop by disabling Location. Do try it and check if it helps improve the speed in your case.
2. Re-enable the Wi-Fi adapter
Press Windows + R to open the Run dialog box, type ncpa.cpl in the text field, and click OK.
Right-click on the Wi-Fi adapter, and select Disable from the context menu.
Wait for a minute or so, then again right-click on the Wi-Fi adapter, and select Enable.
Keeping network drivers in check should fix slow internet errors regardless if you use WiFior Ethernet.
3. Update the Wi-Fi adapter drivers
Type Device Manager in the Search bar, and click on the relevant search result.
Double-click on Network adapters.
Right-click on the Wi-Fi adapter and select Update driver.
Select Search automatically for drivers.
Wait for the OS to find and install the best available driver on the PC.
If you have a metered connection set up, Windows will automatically adjust the data usage, which may in turn affect the experience. So, disable it and verify if the slow Wi-Fi problem using the guide below.
Press Windows + I to open Settings, and click on Network & Internet.
2. Click on Properties under the current Wi-Fi network.
3. Disable the toggle for Metered connection here.
5. Uninstall applications that consume high bandwidth
Press Windows + R to open Run, type appwiz.cpl in the text field, and click OK.
Select the application hogging the network and click on Uninstall.
Follow the on-screen instructions to complete the process.
6. Boost your WiFi signal
You can boost your Wi-Fi signal using an awesome software called Connectify Hotspot. This program allows you to transform your PC into a Wi-Fi hotspot just like with a router, only that it’s a lot easier to work with and has a comprehensive user interface and menus.
And if you choose the Hotspot PRO or MAX versions, you will also be able to share your 3G or 4G LTE networks.
Press Windows + I to open Settings, and select Network & Internet.
Click on Network reset at the bottom.
Click on the Reset now button.
If the problem lies with the network configuration, resetting it should do the trick. In case this, too, doesn’t work, you will have to go with either of the two solutions below.
8. Use a Wi-Fi Extender
A blind spot or a fluctuating signal might cause the problems with your slow Internet connection. You can fix that by using a Wi-Fi range extender.
We recommend NETGEAR Nighthawkbecause it creates a strong and steady Wi-Fi signal, exactly what you’re looking for.
It’s easy to set up, and you can connect it to the router using the WPS button or its designated app. Moreover, it’s a really small device that won’t interfere with any of your other setups.
NETGEAR Nighthawk has Wi-Fi coverage of up to 2500 square feet and can connect to more than 30 devices, including laptops, phones, tablets, or IP cameras. Its AX6000 Wi-Fi speed and smart roaming function recommend it as a professional device.
9. Get a new Wi-Fi card
If you are using an old laptop, it’s likely that the Wi-Fi card is not capable of handling high speeds. In this case, getting a new Wi-Fi adapter is the best way forward.
How do I change my laptop from 2.4 GHz to 5GHz?
Press Windows + R to open Run, type devmgmt.msc in the text field, and hit Enter.
Double-click the Network adapters category.
Right-click the Wi-Fi adapter and select Properties.
Navigate to the Advanced tab, select Preferred Band under Properties, and choose Prefer 5GHz band from the Value dropdown menu.
Once done, click on OK to save the changes.
Changing to a higher frequency can also help you solve issues like your Wi-Fi being slow when you connect to Bluetooth. And if your router is too old, we recommend consulting a professional who can recommend the best Wi-Fi adapter for your laptop.
In summary, slow Wi-Fi on laptops can stem from several factors like obstructions, misconfigured settings, router issues, outdated drivers, background applications, and VPN use.
The most common software used on every PC is the Internet Browser. Choosing the best and fastest browser for a PC will imply understanding the underlying elements.
Various browsers are available for Windows 10, however, every modern browser should, to some extent, meet your everyday needs. Loading web pages isn’t rocket science now.
However, some of them are more concerned with users. In contrast, others focus on third-party extensions for customization and functionality. So, in today’s guide, we will break down each of them and discuss how they compare.
Most options on the market tend to be a jack of all trades but are not always successful. With that in mind, let’s dive into the most important aspects when choosing a good browser.
How to choose the best browser?
Browsing speed – Loading webpages, buffering videos, etc., directly impacts the utility of the respective browser.
Extensions/Addons – As these elements can expand the capabilities of the browsers, having many extensions available for download is a huge plus.
Customization – Having great customization options allows you to make the respective browser feel like your own while ensuring a streamlined experience.
Privacy & security – Navigating the web fast is essential, but not more so than the privacy and security level your browser offers you while using it.
Impact on system resources – How well your browser will function also depends on what system configuration you’re using on your Windows 10 PC. Some browsers will affect your RAM and CPU more than others, so this is a crucial consideration.
User experience – The overall user experience will consider all the above elements and a score will be assigned.
Considering all the above elements will ensure that you choose the best browser for your PC and that the individual choice will cover all your needs.
Online privacy can not be attempted without a stable and safe security protocol.
Having all these options in one place is an excellent way to get a more visual overview of the features that interest you the most. In this case, the above table makes it easy to spot the top choices for the best browsers for Windows 10 privacy.
Choosing any of these options will ensure privacy online, but going for Opera or Opera GX will most likely keep you protected and safe while browsing your favorite online content.
So, which browser does not track? DuckDuckGo is the default search engine for the Tor browser. The Tor Browser clearly stands for browsing without tracking, surveillance, or restriction.
It’s hard to make an educated list of third-party browsers for Windows 10 and avoid mentioning Opera One. This lightweight browser kind of took Internet Explorer’s spot in the Big 3 group, alongside Chrome and Firefox.
It has made a lot of improvements over the years, but the focus on delivering the best and most secure performance even on slow internet speeds and privacy is still there.
Opera One comes with AI enhancements and built-in VPN support, the same as UR Browser. It’s simple to use and has the most customization options.
In conclusion, it’s so versatile that you can easily say it is an open playground if you decide to invest some time in making Opera look just the way you want.
Let’s quickly look at its key features:
Compressing web traffic for increased speed
AI prompts technology
Improved battery usage optimization
Efficient memory usage and customization options
Sync across devices
Opera One
Match your Windows 10 PC with a suitable browser that’s as modern and feature-rich as your OS!
AVG browser made it to the list for obvious reasons, such as its user-friendly interface, focus on privacy, and valuable malware prevention.
Firstly, it comes with anti-phishing tools to defend your PC against data leaks and requires supported websites to employ encryption to protect your data.
You can also navigate freely on every website and get HTTPS security and adware shield, plus free VPN anonymity for browsing safe.
In addition, there are digital security features that completely cover your activity. Namely, the digital fingerprint guarding and anti-tracking technology always assure your safety online.
Additional features:
In-built VPN shield
Privacy Cleaner to delete browsing data
Stealth mode to prevent history storage
Anti-fingerprinting
AVG Secure Browser
Switch to a 4x faster navigation, lightweight and private browser on your PC.
UR Browser is an open-source Chromium-based browser project. However, instead of just being another copy of Chrome, it brings various built-in tools to the table and a special focus on privacy and safety.
The focus on privacy is what made UR Browser the best choice for us, and we are certain you’ll find it as important in this day and age of the internet.
The story of Mozilla Firefox is the story of a phoenix raised from ashes. Chrome’s most prominent rival was down, with an outdated platform and lack of optimization.
However, since Mozilla delivered Firefox Quantum, everything started going in their favor. Still hard to challenge Chrome, but more than enough to be a valuable alternative.
And Mozilla Firefox is, in every sense of the word, a practical alternative to Google Chrome.
The famous Firefox is these days the jack of all trades and the master of none. Especially when it comes to performance, which, arguably, sometimes surpasses Chrome.
Let’s quickly look at its key features:
Fast, reliable extension support
Privacy centered features
Tab Containers’ extension available to prevent tracking
Finally, since it’s already there, preinstalled on Windows 10, we must mention Microsoft Edge.
Microsoft wanted to keep pace with the already-established browsers by replacing outdated Internet Explorer with the slick Edge.
However, until this day, users are hardly impressed with what Edge has to offer.
Until only recently, Edge was something that was there to install other browsers after reinstalling Windows 10. The Chromium-based Edge is already here and placed it in a much better spot.
The sole fact that Edge now has access to Chrome’s extensions makes it a very different beast in the competition.
In addition, running a first-party application on a system is always advantageous due to better integration with the rest of the system-wide features.
If this name rings a bell, it is because you have probably heard of and used Opera. Opera GX is a sister browser cut from the same block.
Hence it keeps all the stunning advantages users have enjoyed on the Opera browser. The most significant difference is that the GX version was made as a for-gaming browser.
It is the biggest and the best in this niche and includes very cool integrations for platforms like Twitch and Discord. This means you do not need to exit your tabs to use these services, making it a real multitasking monster.
We love the cool sound integrations. You get nice startup sounds and keyboard stroke sounds as well. And this is an addition to the standard offering you expect from any major browser.
Let’s quickly look at its key features:
Custom themes
Messenger integration
Music player integration
Opera GX
Take advantage of the fantastic built-in gaming tools in Opera GX and take your gaming on Windows 10 to the next level.
Google Chrome – Customizable with thousands of extensions
Google Chrome doesn’t need a unique introduction to start with. It’s the sovereign leader in the web browser market, which speaks volumes on its own.
It’s been there for ages, and people are already well used to it. The advantages of using Google Chrome on Windows 10 are also quite obvious.
The multi-platform nature of Chrome makes it an excellent choice for those who like to keep their browser in sync with all devices. One Google Account to rule them all.
However, we can’t say we look kindly on Chrome regarding privacy. Google’s bread and butter is the data they collect.
Profiling and tracking are some things that are frequently talked about and, for a good reason, negatively expose Google’s policies.
Vivaldi is the right choice if you’re looking for a multi-platform browser. The software has a built-in ad blocker and tracking protection, so you don’t deal with ads or tracking cookies.
The browser has an extensive interface, allowing you to stack tabs into two rows, which is perfect if you multitask.
That’s not all; you can also display two pages in a single tab, thanks to the split-screen feature. The interface is highly customizable, so you can make it as minimalistic or extensive as you want.
Any website can be added to the panel, allowing you to keep track of one page while browsing the other. Of course, thanks to the various available extensions, you can extend the browser even further.
Overall, Vivaldi is a fantastic browser, and if you’re a user who likes to customize the browser and fine-tune it, then this is the perfect choice for you.
Online privacy is important, and Brave Browser is the best choice if you want to preserve it. The software will automatically block malware and prevent tracking, so you can surf the web privately.
Of course, you can customize the level of protection as you wish. The browser will also block ads, so you won’t have to deal with them anymore.
Brave also has browser fingerprint protection that prevents websites from identifying you; if you want, you can even block scripts.
As for other features, we have to mention that the interface is customizable, so you can customize how your home page looks with just a few clicks.
Brave browser is an excellent choice for all users that need a browser that will protect their privacy, so be sure to consider it.
Another browser that focuses on user privacy is Tor. The browser has several privacy apps, such as HTTPS Everywhere and NoScript, that should protect your security.
The software is based on Firefox, so it has more or less all the features that Firefox has. However, it will automatically encrypt your traffic before sending it.
Doing so will keep your data and browsing history hidden from third parties, including your ISP. In addition, you’ll get a new IP address and be able to visit websites that aren’t available in your region.
The browser is straightforward to use, and a portable version is available, so you can use it without installing it on your PC.
Overall, this is an excellent browser for all users who want to protect their online privacy, so consider it.
If you need a browser focused on user privacy, you might want to try Maxthon. Unlike many other browsers, this one uses blockchain technology.
You can easily create and manage blockchain identities thanks to the blockchain identity manager. However, it’s important to mention that this browser also supports the NBdomain protocol.
With the VBox and NBdomain interface, the developers can build power apps that will run in the browser.
Regarding compatibility, you can easily import Chrome data to the browser, and there’s an extensive library of extensions to choose from, so you can easily enhance your browser.
Overall, Maxthon Cloud Browser is a unique browser, but it’s intended for users that rely on blockchain technology.
2019 saw the merger of the Midori project with Astian Foundation, followed by a complete redesign that used Electron instead of WebKitGTK. Midori browser is quick, lightweight, and safe and may be used on macOS, Windows, Linux, and Android, among other operating systems.
Midori Browser stands out from other internet browsers due to its integrated ad blocker, minimal RAM use, and low resource usage. It also incorporates a password manager and many more features.
One of the best features of the Midori Browser is the community, which has many Telegram users eager to assist others. In addition, the Astian Team individually engages with users, providing support, assistance, and a more intimate and direct relationship with users.
Your privacy is totally in your hands as you have the flexibility on what can be shared or not while browsing.
This is not one of your go-to browsers, and we may say it is struggling for a chunk of the market share, yet we have it on our list for a good reason.
The option to organize your favorite Web sites into distinct groups and launch them simultaneously is one of SlimBrowser’s most helpful features.
So, for instance, you can have a collection of your preferred sports websites and open them all in a single click instead of individual launches – indeed, a nifty little solution.
A spell checker and ad blocker are also included, and the browser features a function that is especially useful for managing several tabs. For example, you may move and resize each tiled window to see all open Web sites in a vertical or horizontal orientation.
It packs many features, leading to its downside: a clustered interface. However, if you can get past this, it becomes an excellent browsing option.
Falkon – Open source and Chromium-based with low RAM usage
The Falkon browser is an open-source and free internet browser. It’s built on the Qt WebEngine, a Chromium web browser wrapper; hence you can expect some of the fluidity and functionality associated with Chromium browsers.
It is famous for being the default browser for both openMandriva and KaOS. The user interface of the browser is the main reason we enjoy it. Even though it’s a lightweight browser, your user interface looks good. Just the functions you need are shown on your screen, leaving the rest clear.
If you wish to remove the advertising when surfing a website, the AdBlock addon included works effectively; it is very customizable and consists of a few cool features.
A huge omission is the lack of add-ons from Firefox or Chrome. It makes you a bit limited in feature expansion.
Waterfox is a 64-bit internet browser built on Firefox ESR. It marks a turning point in the history of browsers being the first to be made available in such a way. Other browsers often support only 32-bit browser versions.
Based on Firefox’s open-source project, the NPAPI plugin and the standard XUL Firefox extension work properly with Waterfox.
Since Waterfox integrates with Bing, it utilizes the Bing search engine by default, although any browser’s search engine may be changed to one that is more appropriate.
The pocket function was removed from Waterfox, and they brag that no telemetry data is collected or sent to Mozilla.
Finally, you may activate and deactivate JavaScript in Waterfox and change WebRTC settings from its main menu.
We have compiled two valuable sections to decide what browser will fit you best on Windows 10.
We considered various aspects in this section, including but not limited to the RAM and CPU, the latest update, and available software versions.
As you can see from the table above, Opera One and UR Browser are both excellent options. Opera One is the best browser for Windows 10 because of its security, speed, features, and privacy rapport.
What is the best browser for Windows 10 systems with low RAM?
As older systems might have under 2GB of RAM available for everyday usage, choosing a browser that doesn’t reduce much from that value will ensure that you can use your system without issues.
Here is our selection:
Maxthon Cloud Browser – The second place in our list is taken by Maxthon, which uses 290-336 MB of RAM and offers a good-looking UI.
SlimBrowser – Even though it’s essential in its design, this browser only requires 347 MB of RAM to run and uses the least CPU.
Midori – Close behind, we have Midori, which uses 355 MB of RAM but offers a better interface.
Falkon– This browser uses 387 MB of your system’s RAM and provides a more engaging experience when compared to the other option in this list.
This list will allow you to make an informed decision to find the best balance between RAM usage and the realizability of the respective browser.
What is the best browser for a Windows 10 laptop?
Choosing the best browser for a Windows 10 laptop will imply having all the tools you need for your device’s mobility not to be affected and providing good browsing speeds and customization options.
Here are our picks:
Opera One – This browser offers access to a fantastic array of features, including a VPN, ad blocker, social media and messenger integrations, etc. All these features and options ensure that your laptop’s mobility will not depend on the software you use to browse the internet.
UR Browser – Having a nice set of features that almost aspire to those of Opera, UR Browser is still a valid option for Windows 10 laptop users, as it offers excellent privacy settings, customizable UI, and even a built-in VPN service.
Mozilla Firefox – One of the most well-known browsers on the market, Firefox allows you access to a database of tens of thousands of extensions/addons, which ensures that you can extend the browser’s capabilities almost indefinitely.
Microsoft Edge – With the revamped architecture, UI, features, and capabilities, Edge has become one of the best browsers on the market and will work great for any Windows 10 operating system.
Opera GX – This version of Opera One, called Opera GX, includes all the capabilities of the mother browser but adds a series of great gaming-related features like a RAM and CPU limiter for in-browser gaming.
Choosing a browser from the list will require you to understand what kind of tools you need, depending on whether you want built-in tools or extensions.
That being said, if you want to choose an all-rounder without worrying about the details, Opera One is the best choice, followed closely by Opera GX in case you’re interested in gaming.
What is the best browser for Windows 10 with a VPN?
Protecting your online privacy should be at the forefront of everybody’s to-do list, so choosing the right browser with a built-in VPN for your Windows 10 OS is crucial.
Here are the best options available:
Opera One– Considering all aspects of this browser and the fact that it has a very powerful built-in VPN as well, Opera is by far the best choice in this category.
UR Browser – Even though it can’t be compared with our first choice, UR Browser still has a solid built-in VPN that ensures you can protect your online privacy with just a few clicks of the mouse.
Opera GX – This browser was created for gamers, but it still boasts the powerful built-in VPN from Opera, making it our second recommendation.
Epic Browser – Not as well-known as other options presented in this guide, this browser offers decent VPN capabilities and will save you the hassle of installing this extension or other third-party software with this capability.
Avast Browser – Even though the Avast Browser is not as well-known as the Avast Antivirus, the browser uses a built-in VPN service that will be able to mask your IP address.
We would kindly recommend Opera or Opera GX to ensure that the VPN service will be able to actually hide your online identity and even allow you to access geo-restricted content from across the world.
What is the best browser for Windows 10 battery life?
Your device’s battery life will depend on various factors like the number of processes running in the background, usage of resource-heavy apps, changes to the system settings, the brightness of your screen, etc.
We considered all these elements when choosing the best browser options, and here are the results:
Opera GX – Even though it is not the most RAM-friendly browser out there, Opera GX is the ultimate browser for extending battery life on your laptop by allowing you to customize and limit the usage of RAM, CPU, and even the network.
Opera One – Overall, this browser offers the best bundle of valuable features, including customization options that allow you to tweak the RAM and CPU consumption. Still, it can not be compared with our first choice.
UR Browser – Miles away from reaching the capabilities of Opera and Opera GX, UR Browser still provides some good customization options which allow you to change the battery consumption.
Microsoft Edge – This browser has evolved a lot since the Internet Explorer times and is now one of the fastest browsers on the market, and uses a low amount of CPU, thus increasing the device’s battery life
Which browser is safest?
A good browser should shield you against phishing websites, web trackers/cookies, spyware/adware, screen loggers/keyloggers, and dangerous adverts because there is a lot of malware, hackers, and data thieves online.
Tor Browser – The software is based on Firefox, so it has more or less all the features that Firefox has. However, it will automatically encrypt your traffic before sending it.
Mozilla Firefox – This browser is built around privacy and security. It allows you to browse without tracking and offers an excellent private browsing option.
Opera One – Overall, this browser offers the best bundle of valuable features, including customization options that allow you to tweak how you interact with the internet and protect your data.
A large number of built-in features, customization options, and outstanding stability will ensure that your online experience will be taken to the next level.
That was our list of browsers to use on Windows 10. Hopefully, it helped you with your choice. But, in the end, humans are creatures of habit, and it’s not common to switch from a browser you’ve used for years.
The best thing is that all of them are free, so you can test them in no more than 10 minutes and make an informed decision.
Which is the best browser for Windows? We hope we answered this question with our list, but the final choice will always be yours.
Finally, what’s your favorite browser to use on Windows 10? Tell us in the comments section below.
After looking at KB5018486, which Microsoft flighted to the Beta Channel, it’s time to focus on what Dev Channel Insiders received today.
In case you missed it, the tech giant has also released Windows 11 build 25231 Preview to all the Dev Channel Insiders.
This most recent build does not contain anything new, it has mostly fixes, and acknowledgment of a bunch more Known Issues that are listed below.
What has Microsoft fixed through Build 25231?
Microsoft specified that a new feature for Phone Link will be rolling out to Insiders today that will allow Samsung phone users to immediately access a hotspot.
Nothing too fancy this week. In fact, the builds that Microsoft released last week were much larger and had a lot more to offer.
That being said, let’s dive in and have a closer look at what the Remond company envisioned for Windows 11 Insider Preview Build 25231.
Changes and Improvements
[General]
The change that began rolling out with Build 25179 to the spelling dictionary so that it now uses a language-neutral word list and syncs across all devices that use the same Windows account is now available to all Windows Insiders in the Dev Channel. Users can toggle this feature via Settings > Accounts > Windows backup > Remember my preferences > Language preferences. This currently only works with Microsoft accounts today with AAD support coming later.
[Tablet-optimized taskbar]
Tablet-optimized taskbar which began rolling out with Build 25197 is now available to all Windows Insiders in the Dev Channel, as is the System Tray improvements that began rolling out with Build 25211 that include drag and drop.
[Input]
The cloud suggestion feature Simplified Chinese IME that began rolling out with Build 25217 is now available for all Insiders in the Dev Channel.
Fixes
[System Tray]
When moving your mouse over the sound icon on Quick Settings, the tooltip will now display when spatial audio is in use – not just that it is enabled.
[Settings]
Removed the backplate from UWP app icons in Apps > Default apps and Apps > Apps for websites.
Fixed the font used on the Wi-Fi section of Quick Settings when Wi-Fi was off, so that it’s consistent with the other text in Quick Settings
Fixed an issue believed to be the root cause of certain network cameras unexpectedly not being added when you selected them under Bluetooth & Devices > Cameras.
Improved DPI-awareness when launching setup.exe from a mounted ISO, so the initial logo while it’s preparing should no longer be blurry in certain cases.
Fixed an issue where sometimes you wouldn’t be able to use FIDO to unlock your PC if it was connected to an external display with the laptop lid closed.
Fixed an issue which sometimes led to crashes in certain apps (like Paint, and Windows Terminal) when attempting to display a tooltip.
NOTE
Some fixes noted here in Insider Preview builds from the Dev Channel may make their way into the servicing updates for the released version of Windows 11.
Known issues
[General]
Looking into reports that audio stopped working for some Insiders after upgrading to the latest flights.
Investigating reports of crashes with a few different apps and games in recent builds.
Investigating reports that various UI elements in apps appear to be disappearing and reappearing sometimes in recent builds.
Investigating reports that some apps like Microsoft Edge are unexpectedly showing thick lines on the side of the window after the last flight.
When using the latest ISO to install the Dev Channel build, you might get a SYSTEM_SERVICE_EXCEPTION bugcheck citing an error with win32kfull.sys. We’re working on a fix.
[Tablet-optimized taskbar]
The taskbar sometimes flashes when transitioning between desktop posture and tablet posture.
When using the bottom right edge gesture to see Quick Settings, the taskbar sometimes stays stuck in the expanded state, instead of dismissing to collapsed state.
[System Tray Updates]
Opening the hidden icons flyout can result in a File Explorer entry for it appearing in the taskbar. We’re working on a fix.
Chat apps aren’t flashing with new messages or opening a preview on hover in the system tray. We’re working on a fix.
[Start menu]
We’re investigating reports that folders in Start menu don’t open on the first try.
[Input]
Investigating reports that the text cursor becomes white on white when hovering over text fields, making it difficult to see.
[Widgets]
In right-to-left display languages like Arabic, content animates out of view before the widgets board resizes when clicking to expanded view of the widgets board.
What can I do if I can’t install Build 25231?
Press Win+ I to access Settings.
Select the System category and click on Troubleshoot.
Press the Other troubleshooters button.
Press the Run button next to Windows Update.
Don’t forget to report any other issues you might come across, in order for Microsoft to address and improve the overall OS experience for us all.
This is everything you can expect if you are a Windows 11 Dev Channel Insider. Leave a comment below if you found any issues since installing this cumulative update.
Usually, the error message states that The last USB device you connected to this computer has malfunctioned and Windows does not recognize it. So, let’s find out the solutions that worked for other users.
Before we head to the slightly complex solutions, try restarting your PC or use a different port. If it’s possible, test the USB device on another computer to see if the issue is with the system or the peripheral.
How can I fix USB device not recognized?
1. Use the Hardware and Devices troubleshooter
Click the Start button, type cmd and select Run as administrator from the results.
Type or paste the following command and press Enter to start the Hardware and Devices troubleshooter: msdt.exe-idDeviceDiagnostic
Click Next when the troubleshooter interface opens.
If the tool suggests a solution, click on Apply this fix to resolve it.
You won’t find the Hardware and Devices troubleshooter in the list of Windows troubleshooters from Settings, but the tool is still there and it can fix the USB not recognized problem in no time.
2. Update the chipset drivers
Click the Start button, type Device Manager, and open the app from the results.
Locate the drivers, right-click on each of them, and select Update driver.
You should always keep your drivers up to date to stay away from any errors generated by outdated drivers or incompatible ones. Sometimes, Windows will automatically install them.
Most of the time, you have to download drivers manually. But the process carries risk, and if you install the wrong driver, it may lead to serious malfunctions.
If the USB device malfunctions and is not recognized in Windows 10, you can always reinstall it along with the relevant drivers.
1. Press Windows + R to open Run, type devmgmt.msc in the text field, and hit Enter.
2. Double-click on the Univeral Serial Bus controllers entry.
3. Now, right-click on every device that reads USB Root Hub, and select Uninstall device.
4. Finally, click Uninstall in the confirmation prompt.
4. Check Power Management for USB Root Hub
Right-click on the Start button and select Device Manager.
Go to the Universal Serial Bus controllers section and find USB Root Hub.
If you have multiple USB Root Hubs you’ll have to repeat this step for each one of them.
Right-click USB Root Hub and choose Properties.
Go to Power Management section and make sure that Allow the computer to turn off this device to save power is unchecked.
Save the changes and repeat the steps for all USB Root Hubs that you have in Device Manager.
If the last USB device you connected threw the USB device not recognized error in Windows 10, check its Power Management settings.
5. Run the DISM tool and SFC scan
Type Command Prompt in the Search bar, and click on Run as administrator.
Click Yes in the UAC prompt.
Now, paste the following and hit Enter after each to run the DISM tool:DISM.exe /Online /Cleanup-image /Restorehealth
Once done, execute the following command to run the SFC scan:sfc /scannow
If the USB device not recognized in Windows 10 message keeps popping up, it could be the corrupt system files to blame. And running the DISM tool and SFC scan should fix things in this case.
6. Change USB selective suspend settings
Type Control Panel in the Search tab and select the app from the results.
Open Control Panel and choose Power Options.
Find your currently selected plan and click Change plan settings.
Click Change advanced power settings.
Find USB Settings, then click on USB selective suspend setting, change it to Disabled for all entries, and then click OK to save the changes.
Some users have reported that Windows 10 has successfully recognized their USB keyboard after installing this tool, so make sure that you try that out.
We don’t know if this solution will work with other brands of keyboards, but it won’t hurt if you try it out.
8. Disable USB3 support from BIOS
While your computer boots, press F2, F8, or Del to enter BIOS. The key might be different on your computer, so you might need to repeat this step a few times.
When BIOS opens, go to Advanced Settings and select USB Configuration.
Disable USB3 support and save the changes.
If your laptop is new, chances are that it came with USB 3.0 ports. Most of the peripherals do not support this new standard for USB. So, you can try to disable it and see if the issue disappears.
The solutions here should fix things for you if a USB device is not recognized in Windows 10, as it did for others.
In case the problem lies with the USB port, there’s always the option to use a reliable USB hub, and connect as many devices.
What should I know about builds 22621.875 and 22623.875?
Please remember that Windows 11 Insiders who were previously on Build 22622 will automatically get moved to Build 22623 via an enablement package.
The above-mentioned enablement package artificially increments the build number for the update with new features getting rolled out and turned on to make it easier to differentiate from devices with the update with features off by default.
Microsoft is using this approach for the Beta Channel only and is not indicative of any changes or plans for final feature rollouts.
Changes and Improvements in Build 22623.875
[Tablet-optimized taskbar]
Tablet-optimized taskbar which began rolling out with Build 22623.730 is now available to all Windows Insiders in the Beta Channel. The System Tray improvements that began rolling out with Build 22623.746 that include drag and drop is still rolling out so not all Insiders in the Beta Channel will see this right away.
[Taskbar]
The change that adds Task Manager to the context menu when right-clicking on the taskbar is now available to all Windows Insiders in the Beta Channel.
Fixes in Build 22623.875
[Taskbar]
You can now swipe up from within the taskbar with a pen to expand the tablet-optimized taskbar.
[System Tray Updates]
The show hidden icons panel in the system tray should no longer block context menus opened after it.
NOTE
These fixes for System Tray are still rolling out to Windows Insiders and not yet available for everyone.
Fixes for BOTH Build 22621.875 & Build 22623.875
Enhanced the backup experience when using your Microsoft Account (MSA). Some devices might notice visual treatments for this enhancement. This is available to a small audience initially and deploys more broadly in the months that follow.
Fixed an issue that might affect some types of Secure Sockets Layer (SSL) and Transport Layer Security (TLS) connections. These connections might have handshake failures. For developers, the affected connections are likely to send multiple frames followed by a partial frame with a size of less than 5 bytes within a single input buffer. If the connection fails, your app will receive the error, SEC_E_ILLEGAL_MESSAGE.
Stopped the start of daylight saving time in Jordan at the end of October 2022. The Jordan time zone will permanently shift to the UTC + 3 time zone.
Fixed an issue that affects transparency in layered windows. This occurs when you are in High-Definition remote applications integrated locally (RAIL) mode.
Known issues
[General]
Looking into reports that audio stopped working for some Insiders in recent Beta Channel builds.
[Tablet-optimized taskbar]
The taskbar sometimes flashes when transitioning between desktop posture and tablet posture.
The taskbar takes longer than expected to transition to the touch-optimized version when switching between desktop posture and tablet posture.
When using the bottom right edge gesture to see Quick Settings, the taskbar sometimes stays stuck in the expanded state, instead of dismissing to collapsed state.
What can I do if I can’t install KB5018486?
Press Win+ I to access Settings.
Select the System category and click on Troubleshoot.
Press the Other troubleshooters button.
Press the Run button next to Windows Update.
Don’t forget to report any other issues you might come across, in order for Microsoft to address and improve the overall OS experience for us all.
This is everything you can expect if you are a Windows 11 Beta Channel Insider. Leave a comment below if you found any issues since installing this cumulative update.