Chatting apps are great and you can use them to keep in touch with your teammates while playing the best games. However, some users reported that their browser goes online, but not on Steam or Discord.
Whether you are using Steam or Discord, having a good user experience even if you are using them in your Windows device browser is essential.
Why is my browser going online, but not on Steam or Discord?
This seems to be a common problem among PC users. You have to keep in mind that the reasons behind it don’t always have rigorous explanations.
However, we’ve compiled a series of important aspects you should consider:
Poor updates – It is always important to keep your apps, programs, and all the elements you use up to date. Your browser makes no difference, so any outdated feature might get you into trouble.
Viruses and malware – Because online attacks are more and more frequent, cybercriminals can easily access your private data and harm your activity. Thus, you should always check for any threat caught in your system.
Cache files – It is a good idea to clear your browser cache because it: prevents you from using old forms. protects your personal information. helps our applications run better on your computer.
Now, let’s see what you can do to make your browser also work on apps like Steam or Discord.
What can I do if my browser goes online, but not on Steam or Discord?
Before we head to the more time-consuming solutions, here are a few quick ones to apply:
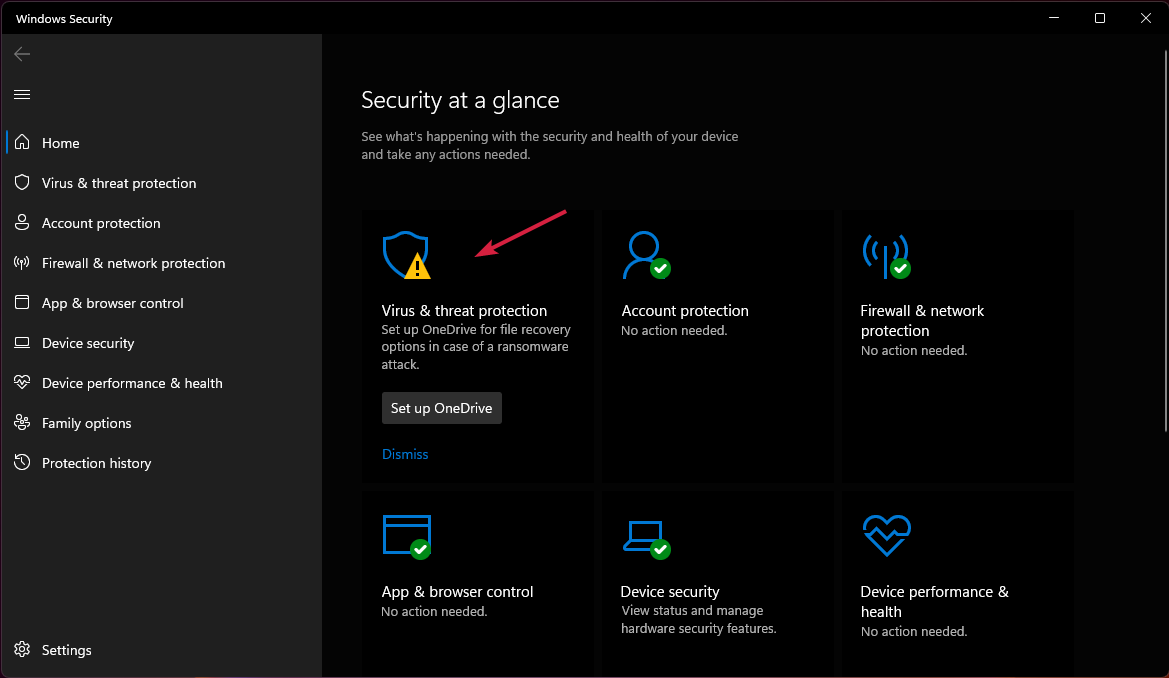
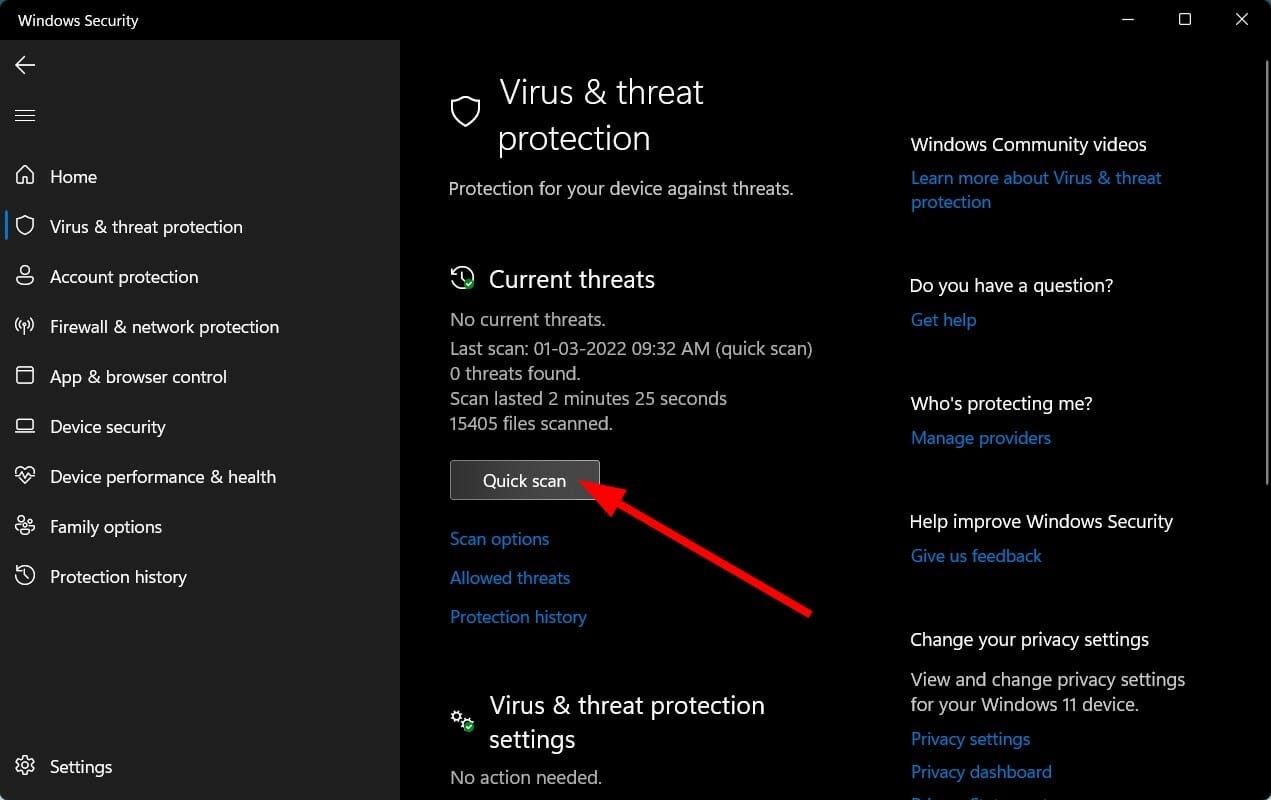
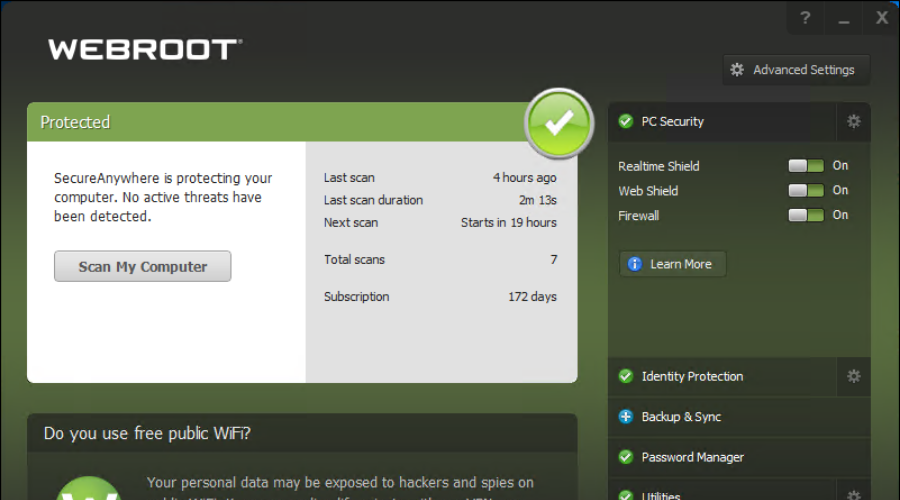
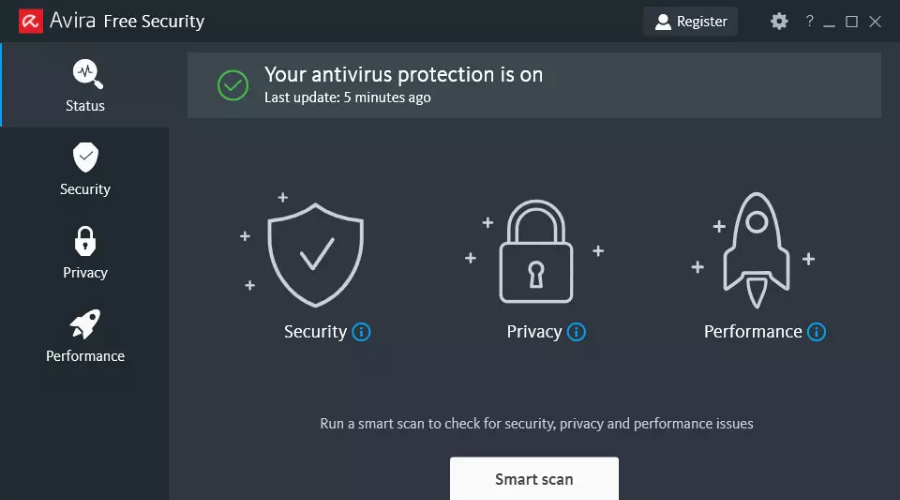
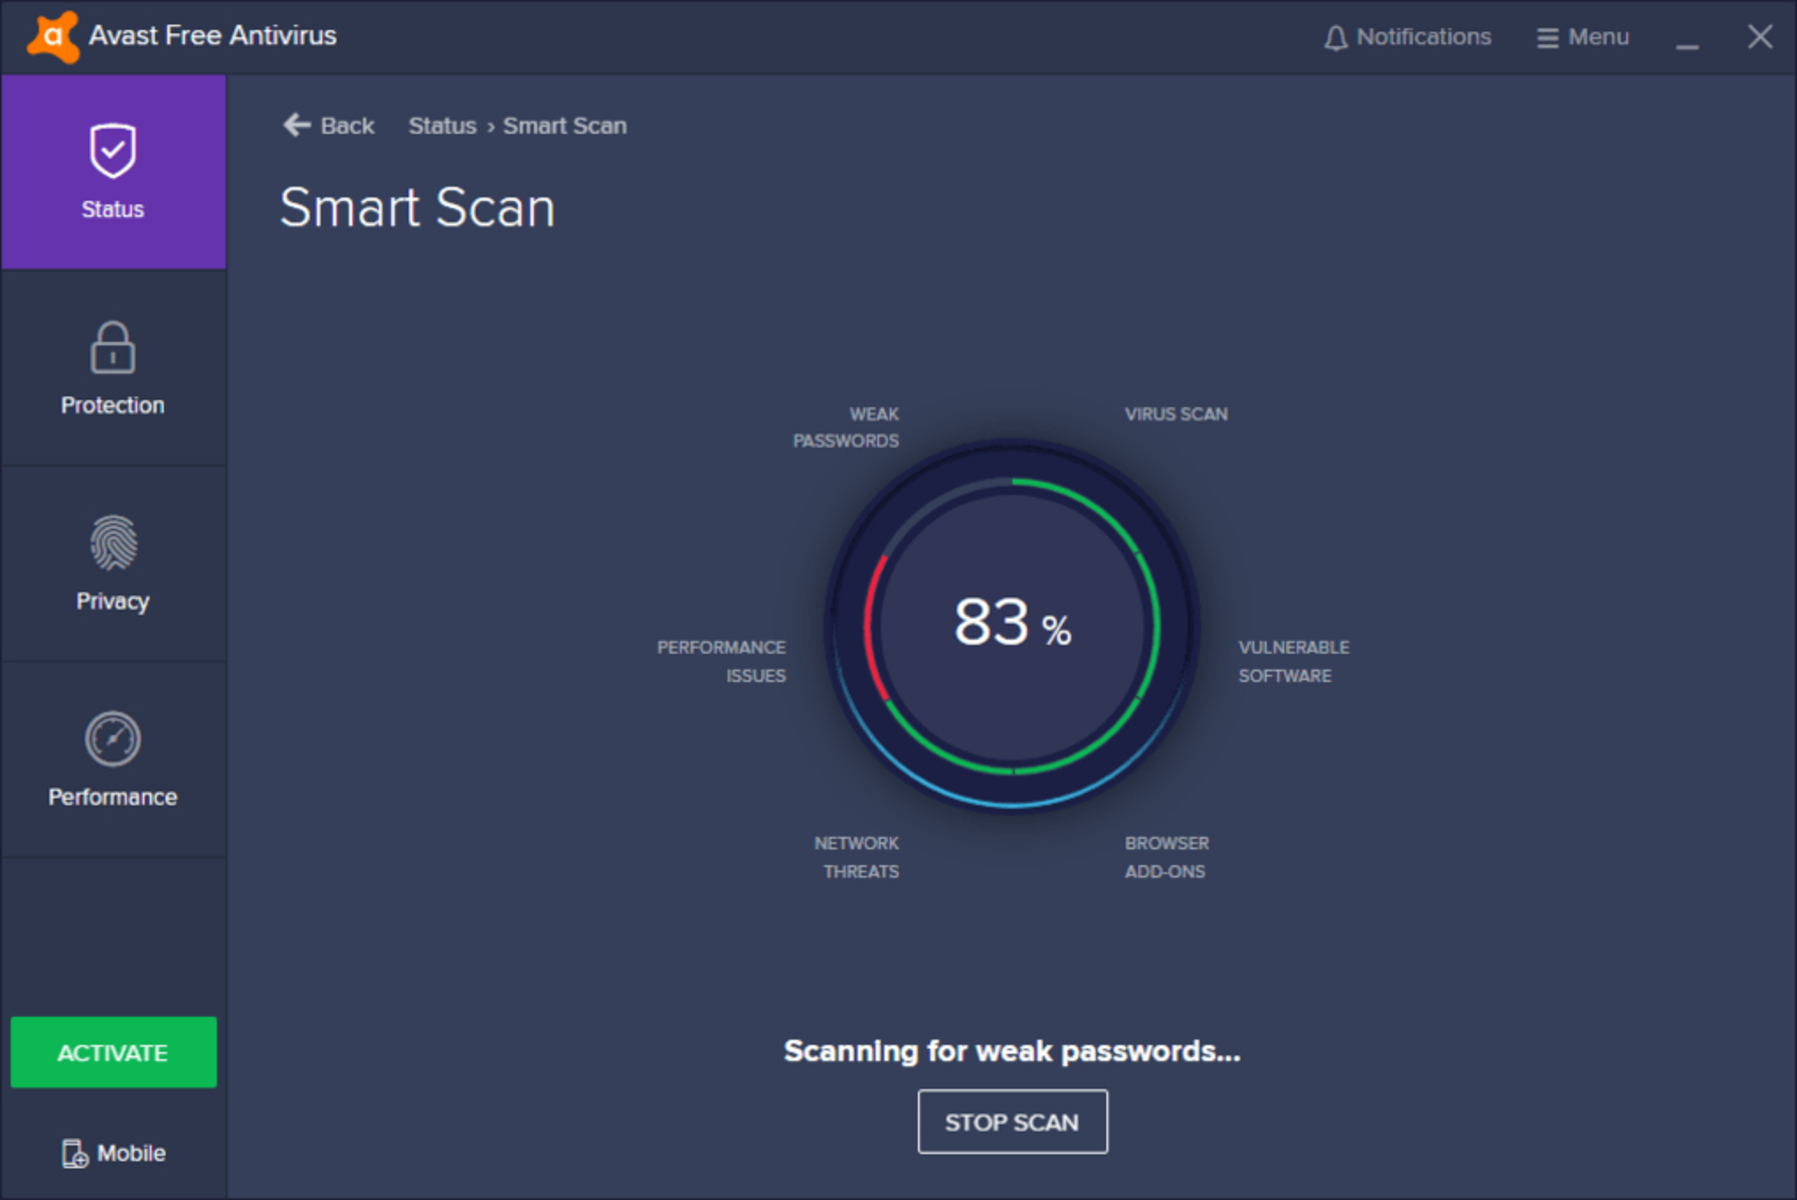
We recommend that you perform a scan to see if there is malware. Once your antivirus scans your device, make sure to quarantine and restart your PC afterward. To benefit the most from this solution, we recommend choosing from the best antiviruses.
Restart the computer.
If the two preliminary checks didn’t work, the following procedures surely will.
1. Update your browser
1.1 Chrome
Hit the Windows key on your keyboard, type Chrome, then open the browser.
Once you open the window, look at the top right corner, and click on the three vertical dots.
Hover the mouse over the Help option, then click on About Google Chrome.
If there are any available updates, your browser will automatically start the update process.
After the process is finished, click on the Relaunch blue button.
1.2 Mozilla Firefox
Hit the Windows key, type Firefox, then open the first result.
In the top right corner of the window, click on the three horizontal lines.
Click on the Help section.
Now, navigate to the About Firefox section.
A pop-up window will now appear on your screen. If Firefox is up to date, you’ll be notified as in the picture below.
In case your browser needs to be updated, the process will start instantly. Once it’s done, restart Firefox.
1.3 Microsoft Edge
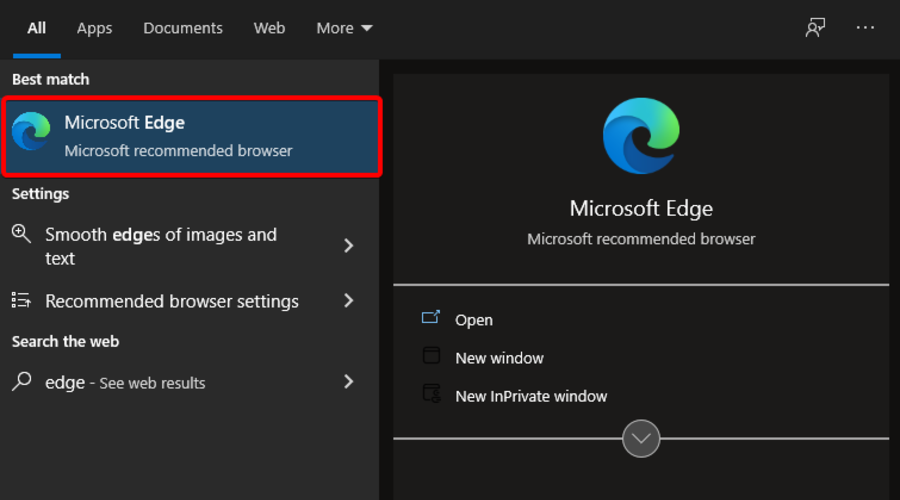
Use the following keyboard shortcut to open the Windows search box: Windows + S.
Type Edge, then click on the first result.
In the top right corner, click on the three horizontal dots.
Hover the mouse over the Help and feedback section, then click on About Microsoft Edge.
Stay on the About Microsoft Edge page, then look at the right window pane.
If your browser is updated, you’ll be notified as in the picture below.
In case your browser needs to be updated, the process will automatically begin. After it is finished, restart Microsoft Edge.
Is not uncommon for this issue to happen especially if your browser is out of date. Make sure to check the settings for any new releases.
If you find a new version available, make sure to press the update button and allow the browser to finish the process.
Afterward is recommended that you restart your device and afterward try using Discord again.
2. Clear the browser cache
2.1 Chrome
Hit Windows key, type Chrome, then open it.
At the top right, click on More, marked as three vertical dots.
Hover the mouse over More Tools, then click on Clear browsing data.
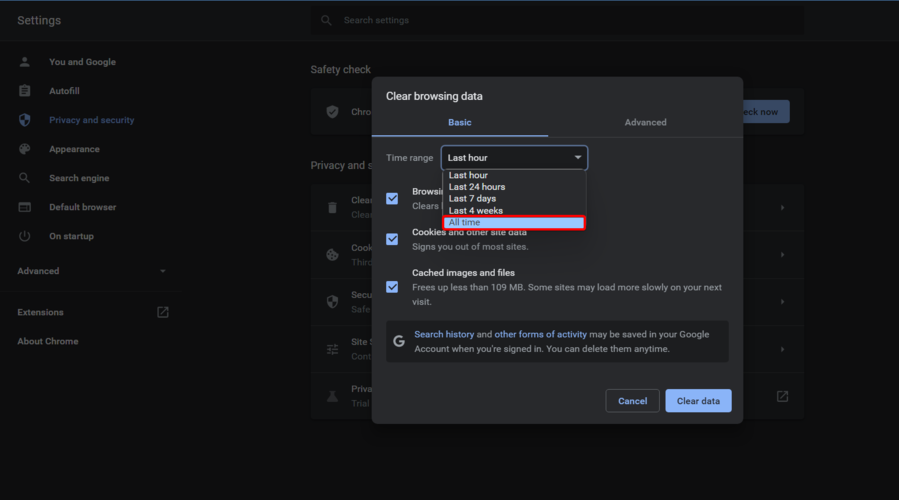
At the top, choose a Time range.
To delete everything, select All time.
Next, checkmark the Browsing history, Cookies and other site data and Cached images and files boxes.
Click Clear data.
2.2 Mozilla Firefox
2.2.1 From Settings
Use the following keyboard shortcut: Windows + S.
Type Firefox, then click on the first result.
In the right top corner, click on the More menu, marked as three horizontal lines.
Select Settings.
Navigate to Privacy & Security from the left window pane.
Now, in the right window pane, scroll down to Cookies and Site Data, then click on Clear Data.
Remove the checkmark in front of Cookies and Site Data and leave it only on Cached Web Content, then click on the Clear button.
Scroll down in the same Privacy & Security page and find the History section. Now, click on the Clear History… button.
2.2.2 From history
Hit the Windows key, type Firefox, then open it.
From the top right corner of the window, click on the More menu (marked as three horizontal lines).
Click on History.
Navigate to Clear recent History...
Select a Time range.
Checkmark what you want to remove, then click on OK.
2.3 Microsoft Edge
Hit the Windows key, type Edge, then open the first result.
Click on the More menu (the 3 dots icon, in the right top corner of the window).
Navigate to Settings.
From the left window pane, select Privacy, search and services.
Next to the Clear browsing data section, click on the Choose what to clear button.
Checkmark Cached images and files and Cookies and other site data. Of course, you can also choose to clear browsing history or others.
Now, click on the Clear now button.
3. Use a different browser
Anytime your current browser shows signs of not working properly or to the extent you need it to, then switching to another one is usually a good idea.
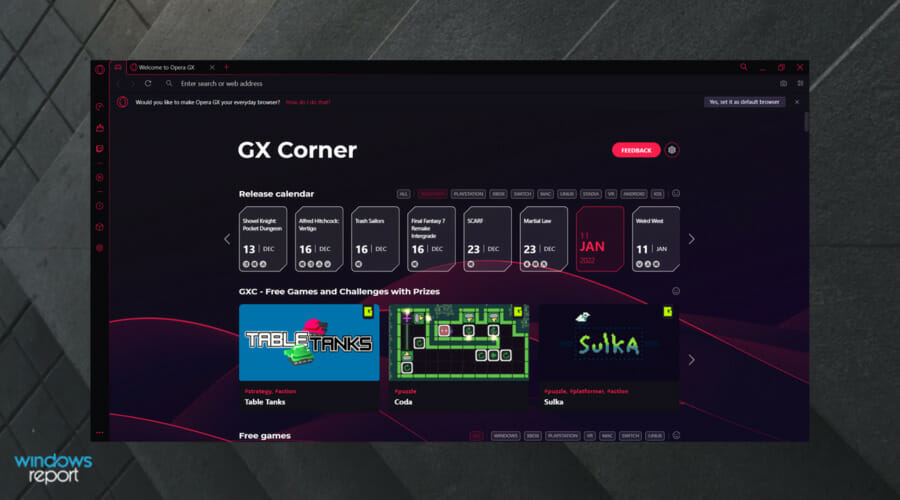
Opera GX is our recommendation since it comes with fantastic features and is error-free when it comes to Steam or Discord.
Since this is one of the best web browsers for gamers the built-in features, such as Razer Chroma and GX Control will ensure that your browser won’t interfere with your gaming session.
Moreover, all the features Opera has are also included in Opera GX, including the ad and tracking blocker as well as the VPN option.
With the Twitch integration, you’ll also be able to watch way faster and better your favorite steam.
Check out Opera GX’s most important features:
Easy to use
Built-in VPN
Integrated ad blocker
Battery saver tool
Dedicated to apps like Steam or Discord
Opera GX
Enjoy a distraction-free gaming experience thanks to Opera GX’s advanced features.
What other Discord in-browser problems should I be aware of?
Apps like Discord or Steam are great to keep in touch with your teammates. If we are referring straight to the Discord browser version, you should keep in mind that you can encounter several other issues while using it.
Discord live viewing not working in browser – In this case, you’ll notice a black screen arising on your desktop. Fortunately, you can easily solve this problem by using our recommended solutions.
Discord can’t unmute browser – It seems like many users are experiencing this error. If it’s happening to be on the same boat, make sure you check our dedicated fixing guide.
Although it can be very frustrating not being able to connect to Steam or Discord with your browser, there are a few easy steps that you can make to solve this issue.
Let us know in the comments section below which solution worked best for you, we would love to hear it.
Volume Mixer is a feature that allows you to control volume levels for individual applications. Compared to the old days when you had to mute or lower the volume of each application individually, Volume Mixer is a much more convenient way to do so.
However, sometimes this feature may not work as intended, which can cause problems such as not showing all programs. You may be using your browser to stream videos and when you go to adjust, you find that Chrome is missing from Volume Mixer in your Windows 10 or 11.
Every Windows user knows just how important the Volume Mixer is. We all have at one time added another program in the Volume Mixer to boost sound or just add a little additional functionality for enhanced audio.
When it comes to audio, the Volume Mixer offers good quality but if you are looking for next-level audio features, you will need to install audio mixer software. But, what can you do when apps are not showing in your Volume Mixer in Windows 11?
Why is the Volume Mixer not showing applications in Windows 11?
So, you just downloaded an application to boost your sound in Windows but it is not showing up in the Volume Mixer. What could be the issue? Below are some possible reasons:
Outdated audio drivers – Sometimes your audio driver can become corrupt or broken, which could cause this problem. If you’re using an old version of Windows you might want to check whether there’s a newer driver available and install it. Alternatively, you could try reinstalling the latest version of Windows and hope that it fixes things.
Software interference – If you have installed any third-party software recently, it may be causing the problem. It could be interfering with Windows ability to work correctly with your audio hardware. Try uninstalling it and see if this changes things.
You have changed your default playback device settings – If you have changed your default playback device settings, the Volume Mixer might not show the applications that you are using.
Incompatible program – The application you are using for your sound may not be supported by your version of Windows. You can uninstall the program or try an alternative.
Now that you are aware of why some programs may not show up in the Volume Mixer, here are some solutions you can attempt to resolve the situation.
How can I fix programs not showing up in the Volume Mixer?
1. Disable and re-enable Volume Mixer
If you’re having problems with your Volume Mixer, this is one of the simplest and most basic solutions to the problem. This is because sometimes a program may not be able to start due to a temporary issue.
If you recently added a new program or updated existing ones and the application failed to launch for whatever reason, this troubleshooting step could help the programs appear.
2. Uninstall third-party apps
If you’ve installed any new software recently, uninstall the program and then restart your computer. Sometimes programs that aren’t compatible with Windows can cause problems with the Volume Mixer.
If so, then uninstall them completely from your system by running an antivirus scan and then reinstall them after scanning. You may also need to restart your PC after uninstalling these apps or software.
3. Update sound drivers
If you are using an outdated sound driver, then it is possible that your Volume Mixer isn’t showing all programs. This is probably because the application doesn’t support older versions.
You can check these by visiting the manufacturer’s website and downloading the updated driver or firmware files. Alternatively, you can opt for a software tool that does the job automatically for you.
Outbyte Driver Updater scans your system and checks if there are any outdated drivers installed on your system that may cause issues while running the programs properly. It will automatically detect them and update them with the latest version available through its servers without any hassle on your part.
Outbyte Driver Updater
Choose to use Outbyte Driver Updater and let this program keep your drivers updated all the time without any effort.
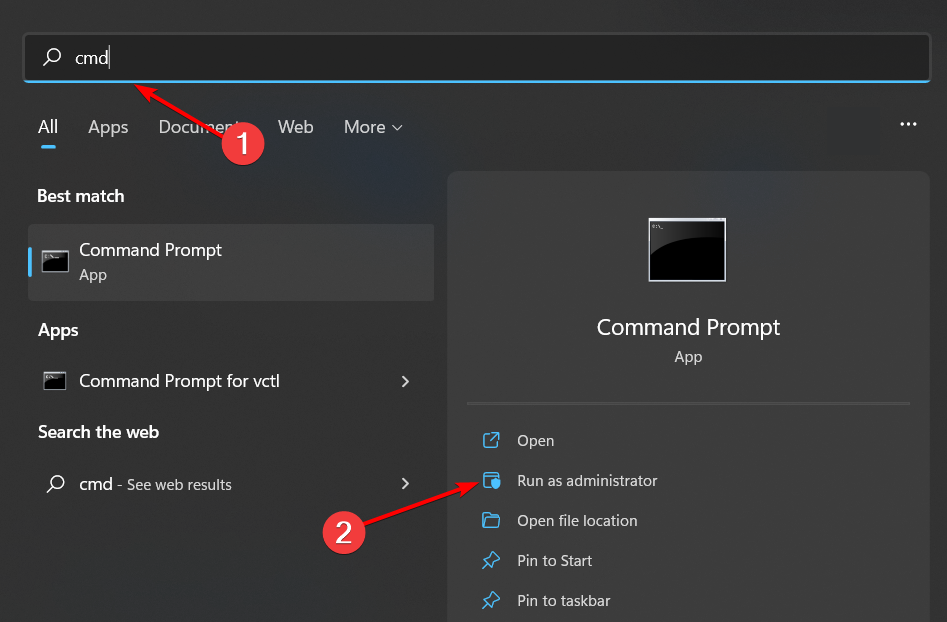
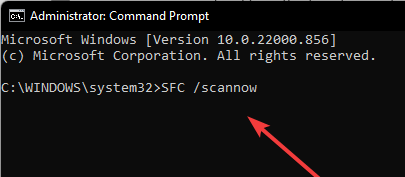
Hit the Windows button, type cmd in the search bar and select Run as administrator.
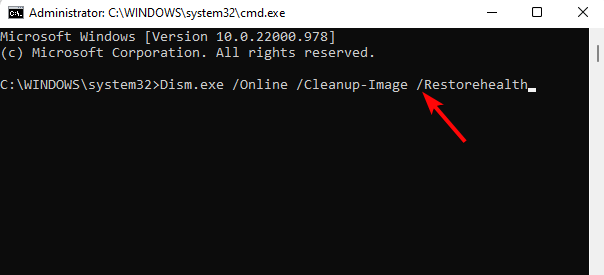
Enter the following command: DISM.exe /Online /Restorehealth
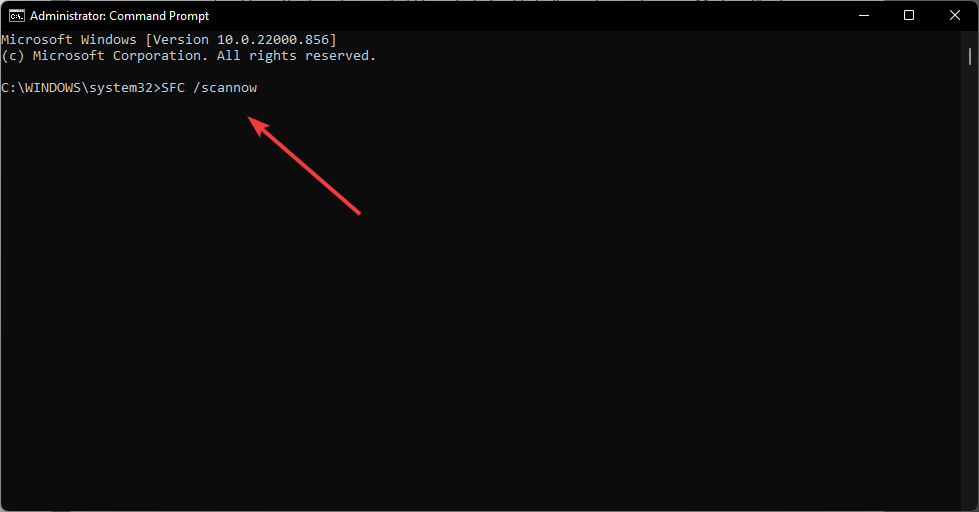
Allow for the command to be executed then type in the next one: sfc /scannow
Sometimes, there could be some corrupt system files in your computer that prevent it from showing all programs in Volume Mixer. Running these commands can help identify the issue and replace the corrupted system files.
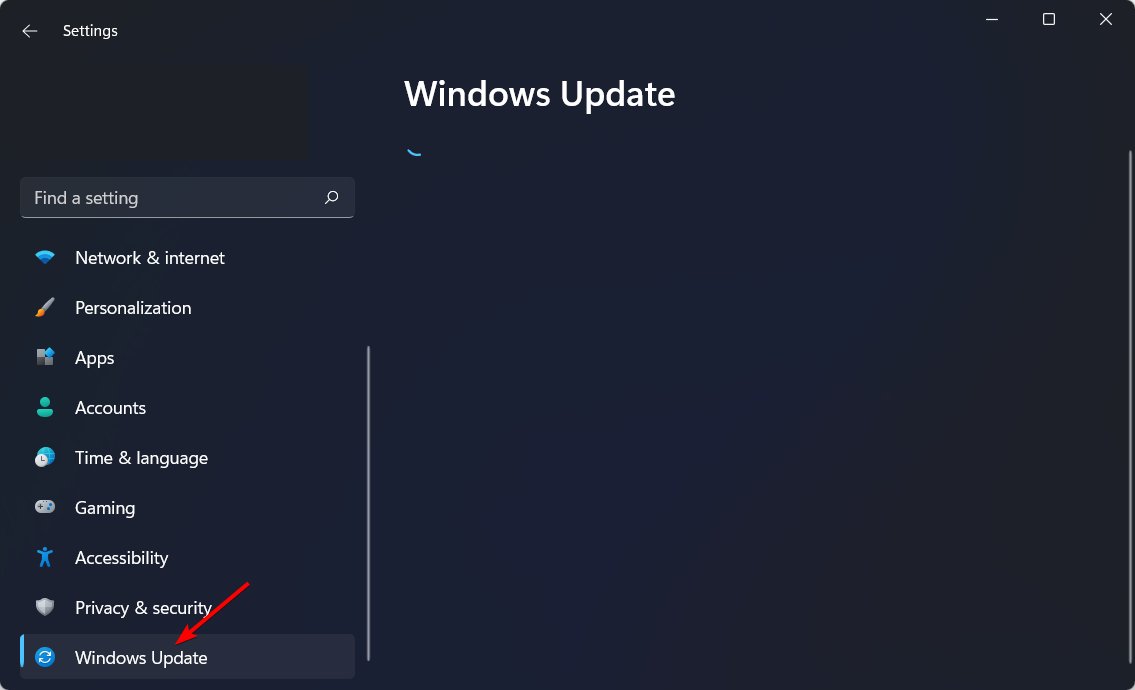
7. Update your operating system
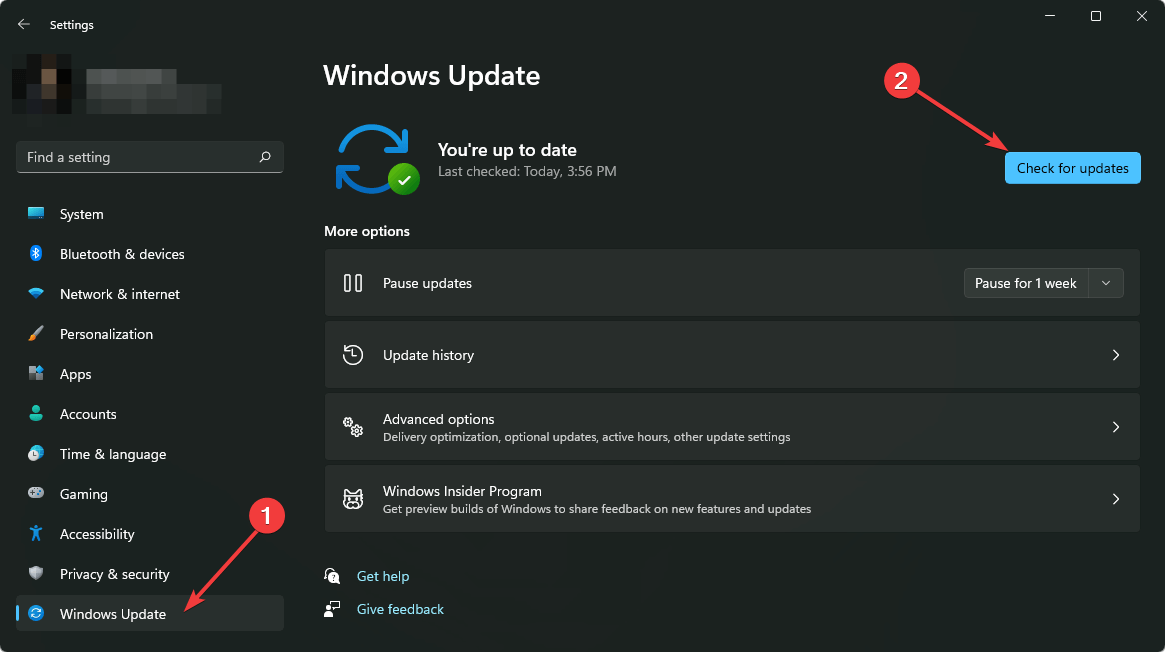
Hit the Windows key and select Windows Update.
Click on Check for updates.
If there are any updates, select Download and install.
How do I get my old Volume Mixer back on Windows 11?
Windows 11 came with lots of changes and an overhaul of the Volume Mixer was part of the package. Now, when you open the Volume Mixer, it opens up a system page that displays different applications.
You can manage each application’s sound from this page. While this may be perfect for some users, others would prefer the old UI back. Luckily, with just a few tweaks you can restore your old Volume Mixer.
Follow the steps below to do so:
Hit the Windows + R keys to open the Run command.
Type in the Sndvol.exe in the dialog box then press Enter.
You can now use your old Volume Mixer right away.
Hopefully, with the help of this guide, you have been able to solve this issue. If you have multiple programs and would like to control the volume for individual apps, we have a dedicated article on the same.
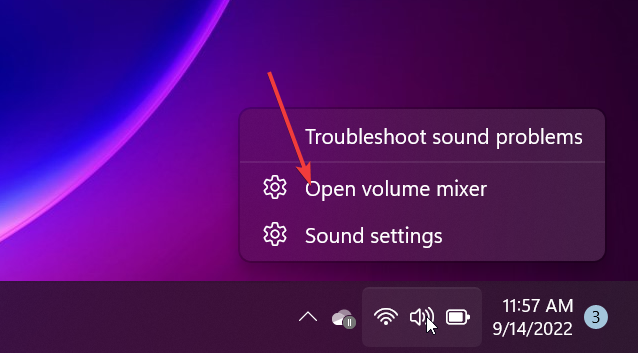
You should first learn how to open the Volume Mixer in Windows 11 and Windows 10 so you can confirm which apps appear and which ones are missing. See the full walkthrough here: how to open the Sound Volume Mixer.
In case you are looking for an audio enhancer to boost your sound in Windows, we have recommended an expert list in our guide.
Let us know what solution worked for you in the comments section below.
Those with extensive Windows game libraries can’t always organize them effectively. Steam, GOG, and Ubisoft Connect are examples of PC game launcher software options with client software you need to access before opening games.
Thus, you’ll usually have to start multiple game clients separately to launch the games. As such, some software developers have now developed game launchers with which you can organize your Windows games within a single library more efficiently.
Game launcher software enables you to organize all your games from separate digital distributors and Windows folders within a single package.
Then you can quickly open all your games straight from the game launcher software without shuffling through countless subfolders.
Game launchers are a gaming equivalent of Google Picasa. Which imports and organizes images on your HDD so that you can quickly find and edit them within a single program.
The programs usually have customizable interfaces and search tools. Plus some also include extra options and settings with which to optimize your gaming system.
Why do I need a Game Launcher?
There was once a time when we had games dispersed throughout all of the home screens of our devices, but then the game launcher software appeared.
These launchers give the user the ability to download and install games, maintain the up-to-date state of the game, and sprinkle a lot of their own features here and there. Such as the potential to repair any games that have been damaged in any way.
Free game launchers are available in a broad range for users of the Windows operating system to pick from. On the other hand, if you are looking for an application that is already incorporated into the device and comes pre-installed, you will not be able to discover one that fits your criteria.
However, we can promise that the programs that are going to be mentioned below are of such a good quality that you won’t miss having a launcher that was pre-installed on your device. It is definitely worth your time to give them a go.
Steam is without a doubt the most popular game launcher for Windows on the market. It offers thousands of different types of games, making it a good fit for all kinds of game enthusiasts.
The UI is modern and easy to navigate. You can access the store and the game library easily by clicking their corresponding tabs at the top.
As previously mentioned, the Game Store comes with a wide variety of games. Finding a game is easy with the organized catalog. You can browse game categories and game genres. And even see the games recommended to you either by your friends or curators.
Similarly, the organized game library makes it possible to easily find the games you’re looking for. You can see your most recent games, order them alphabetically, and more.
Steam also makes it easy to connect with gamers. You can add users as friends and connect with them via instant messaging. Not only does this make you part of a community, but it can also help with finding peers for team-based games. Thus, we regarded it as the best Windows 10 game launcher.
Other key features of Steam include:
Controller and VR support
Support for game developers and publishers
Informative game hubs
Steam Workshop
Integrated live-stream
It may come as no surprise that it makes the top of our list. But keep in mind that the main criteria for this pick are the features and user experience. Market share is just a bonus that validates the quality of the software.
GOG Galaxy 2.0 is a comprehensive, unified game launcher. Its core strength is that it can be used for games across all platforms, including non-GOG titles.
Users of GOG Galaxy can import all their PC and console games into one library with many different sorting features for good accessibility.
Keep in mind that in order to be able to use other gaming platforms’ specific features, you have to keep that platform installed on your PC along with GOG Galaxy.
The user interface is easy to navigate. You can organize your game collection in many flexible ways, according to your preferences. You can also use certain filters that help display only certain types of games.
GOG Galaxy also has a Friendlist where you can chat with your gaming friends. It also comes with an Activity Feed; where you can check what your friends are playing and with Leaderboards for more accessible team play and competitions.
Other key features of GOG Galaxy include:
Sync between devices
Custom views
Cloud Storage
Multiplayer & Matchmaking
Restore games to older versions
The privacy of the users is greatly valued. GOG guarantees no data spying or sharing, all information is entirely private to the user of the app.
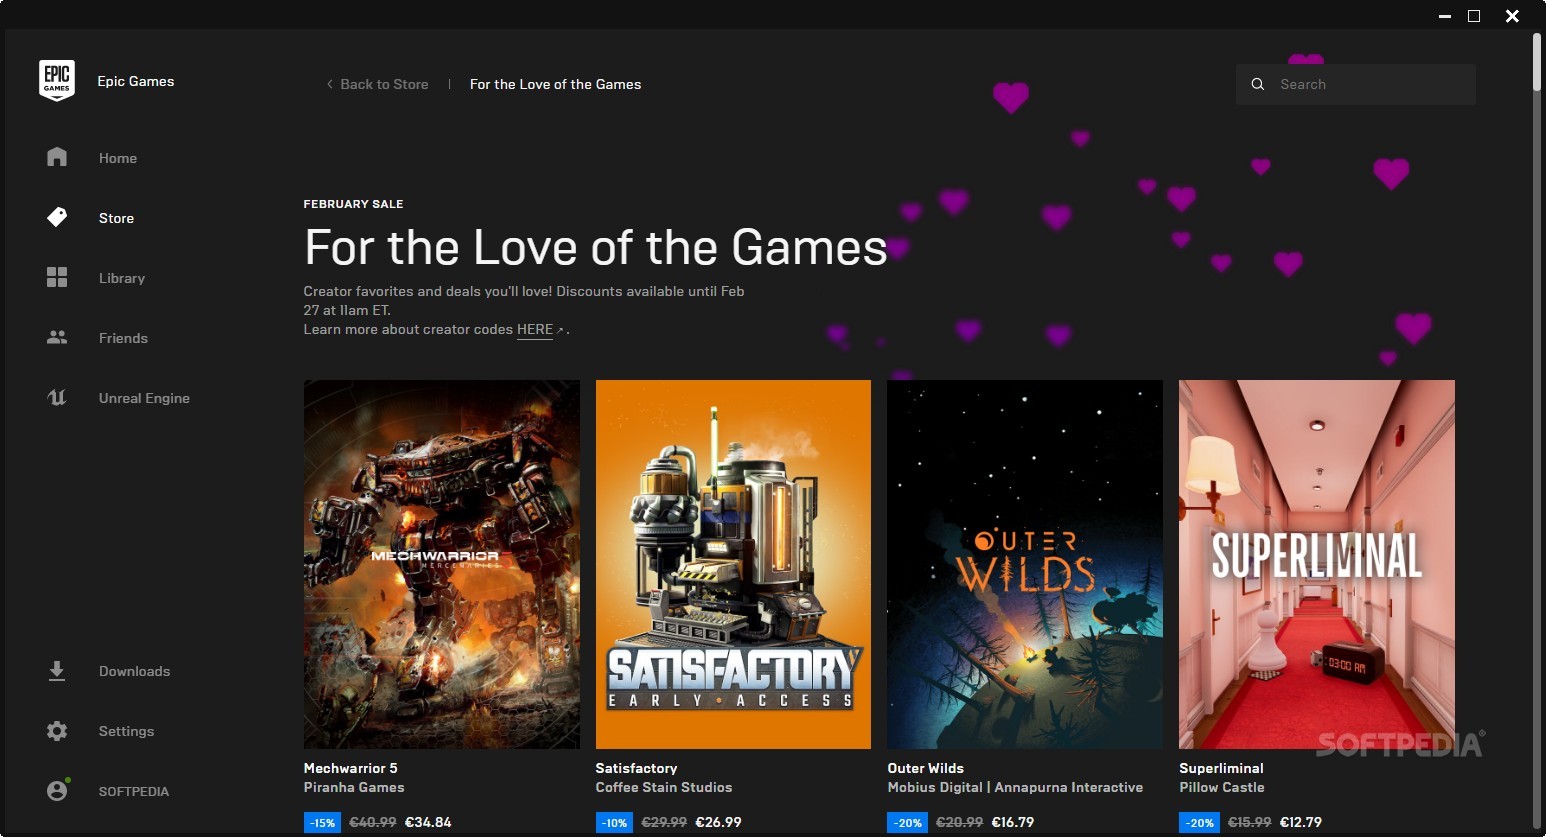
Epic Games Launcher for PC is the free official distribution platform that has been given permission to distribute this developer’s proprietary software and games.
Through this program, keen gamers are granted access to a variety of exclusive in-house games, new Unreal Engine platform launches, and the best offers from other companies as well as licensed third-party developers.
Similarly to these privileges, members are entitled to exclusive discounts and free premium games at regular intervals.
The Launcher is available as a free download for Windows-based personal computers, and it competes with Steam, Origin, and the Microsoft Store in terms of providing a possibly superior option.
Other key features of Epic Games Launcher include:
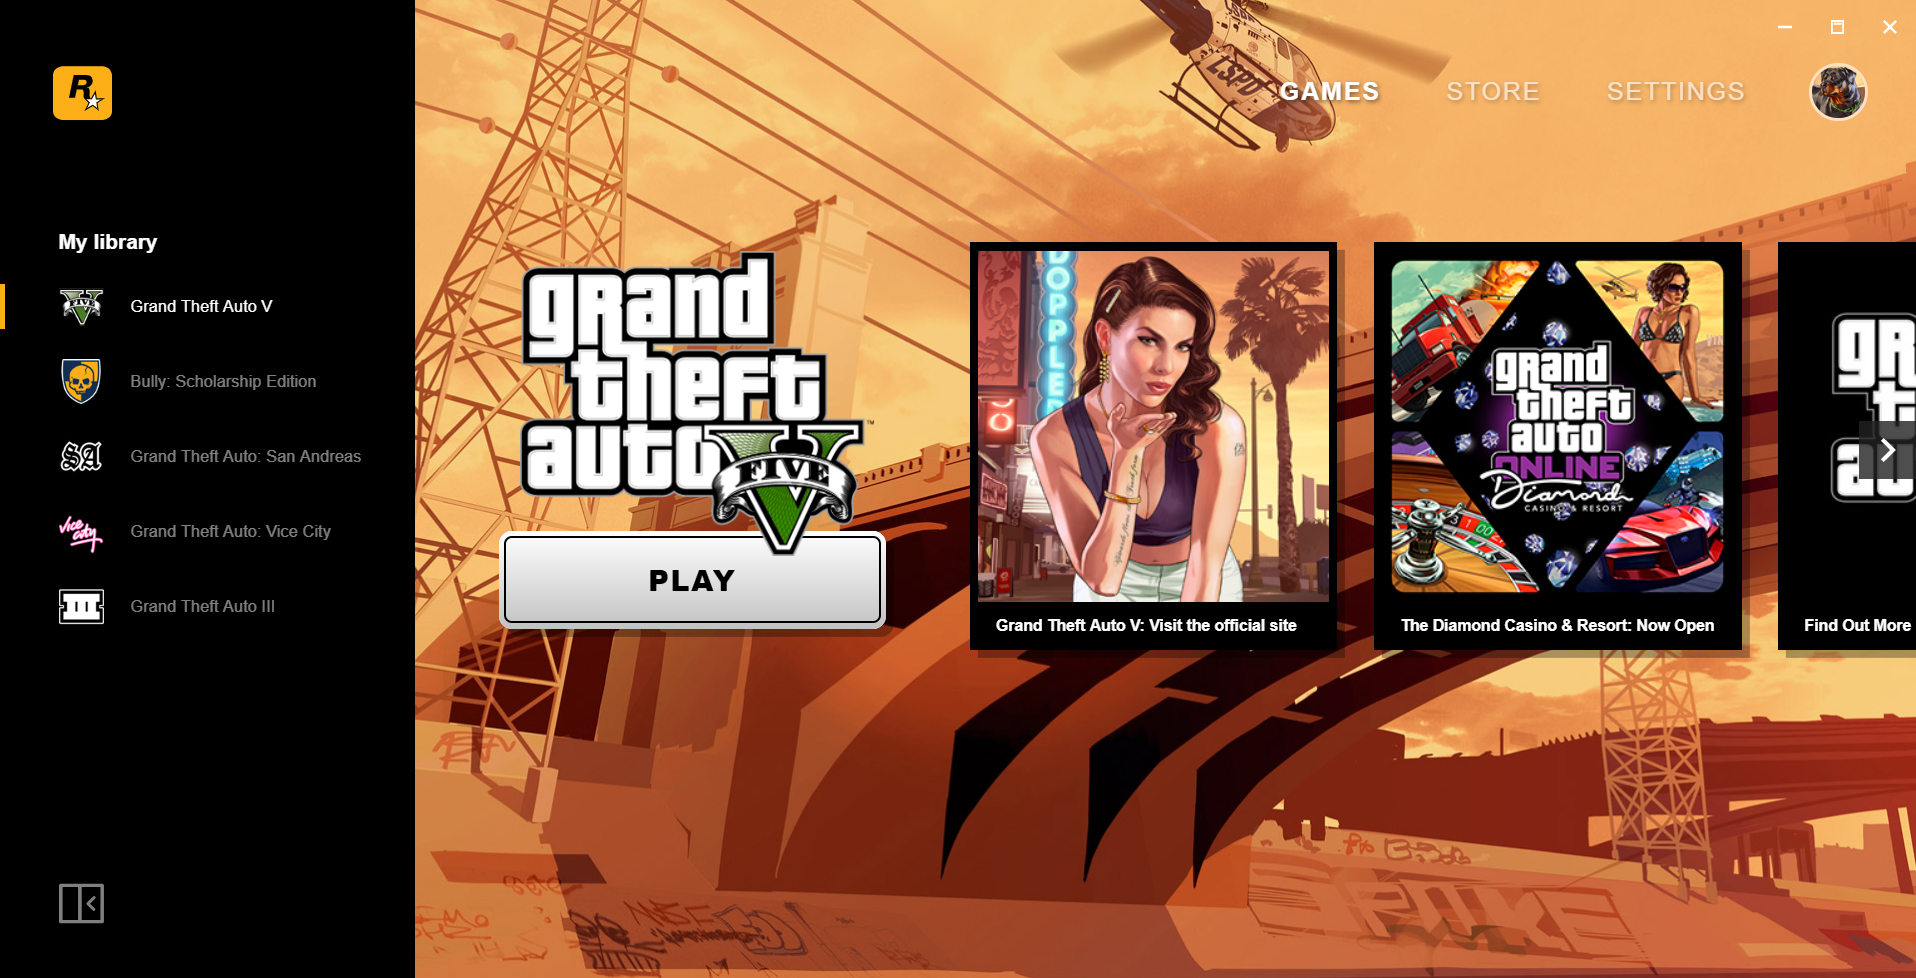
Rockstar Games is the proprietor of the Rockstar Games Launcher, a digital video game shop that is incorporated into an application launcher for Microsoft Windows and is made available by Rockstar Games.
On September 17, 2019, the PC Rockstar Games Launcher was made available to the public. In order for the user to access it, they will need to check in using their Rockstar Games Social Club account.
The desktop program gives the user the ability to quickly access their entire Rockstar Games library on their personal computer in a single location. This includes both their digital and disc-based games, as well as those games that they have acquired from a variety of other digital retailers.
It includes a plethora of features, some of which are the addition of cloud save functionality for all supported titles, the capacity to keep the user library automatically updated, and the ability to follow all of the most recent Rockstar Games news directly from within the Launcher itself.
Other key features of Rockstar Games Launcher include:
Ubisoft Connect is the player services ecosystem for all Ubisoft games, regardless of the platform they are played on. Its goal is to provide the optimal atmosphere for all players so that they can interact with one another and enjoy playing their games.
It is a free service that is accessible on all different kinds of devices. You may access it on your own computer, via an app on your mobile device, or on your gaming console straight from inside the games itself.
You’ll be able to discover your friends’ profiles across all platforms, learn what they’re playing, and investigate their accomplishments.
Moreover, you can manage and start playing your games via the library, as well as find new material and download it with a single click using our desktop software.
Other key features of Ubisoft Connect include:
Endless giveaways and sales
Displays the latest news
Accessible stats
Simply follow the link below to download the Ubisoft game launcher for PC and boost up your gaming experience.
If you are looking for an Xbox game launcher on a PC, there isn’t one as of now, but you will be able to use other launchers that support cross-platform games.
Other users asked whether there is a PC Microsoft game launcher. Unfortunately, with Microsoft Store, you can only download games and apps on your computer, without being able to organize them.
One of Windows 10’s finest features is Windows Hello, But it brings up issues such as Windows Hello not automatically dismissing the lock screen.
Using several techniques, such as face scanning with an infrared camera and fingerprint sensors, this capability allows users to access their computers safely.
With each new version of the operating system, Windows Hello gets better. It was first introduced with the original release of Windows 10.
However, the operating system unlocks the computer as soon as it recognizes the proper biometric input to speed up the login procedure. However, not everyone might get this feature.
Some users have complained that the lock screen does not always disappear when they utilize Windows Hello. Here are several solutions to this problem because it would be a bothersome problem.
What is the cause of Windows Hello not automatically dismissing the lock screen?
Different factors may be at play at the problem’s core. In many circumstances, the registry for this feature is changed, and the user must manually re-enable it in the registries.
However, corrupted system files can also cause problems, which you can sometimes resolve with a quick file repair.
How do I fix the Windows Hello not automatically dismiss the lock screen issue?
1. Make sure the feature is enabled
Simply right-click This PC and choose Manage.
Check whether you have a Device Manager list item labeled Biometric Devices on the center panel.
If you do, Windows Hello is supported by your PC; otherwise, it is not.
Find Settings in the Start menu and click on it.
Go to Accounts, and then select the Sign-in option.
Choose the appropriate Windows Hello authentication option.
Turn on the Automatically dismiss the lock screen if Windows recognizes your face option.
Often this feature is overlooked, and users ignore the fact that it should be enabled to work!
2. Run System File Checker
In the Start menu’s search box, type commandprompt, then right-click the first result and choose Run as administrator.
Type the following command: SFC /scannow
After the operation is completed, restart the computer.
The System File Checker is a part of Windows Resource Protection in Windows 11/10/8/7/Vista, which safeguards important system files, registry entries, and directories.
Any time a user changes a protected system file, a cached duplicate kept in the Windows folder itself is used to restore the changed file.
In Windows 11/10/8/7, there are many ways to run an SFC scan, but the above technique is the easiest.
Click on the Start menu, type Command Prompt, then right-click on the first result and select Run as administrator.
Type the following command and press Enter: wmic useraccount list brief
Make a note of your user account’s SID.
Open the Windows Registry Editor by typing regedit in the search box of the Start menu and pressing Enter.
Navigate to the next destination: Computer\HKEY LOCAL MACHINE\SOFTWARE\Microsoft\Windows\CurrentVersion\Authentication\ LogonUI\FaceLogon\
Look for a key with the SID we stated earlier in the directory.
When you reach the key with the corresponding SID, a DWORD with the name AutoDismissOn appears on the right panel.
If you set its value to 1, Windows will detect your face and automatically dismiss the lock screen.
For the modifications to take effect, reboot your computer.
Using the Windows Registry Editor, administrators and advanced users can perform root-level and administrative-level modifications.
For example, establishing access rights or modifying the hardware- or software-level configurations. Thus, the registry editor is the best tool to fix this issue.
How can I find SFC scan log if it didn’t fix the Windows Hello not automatically dismiss the lock screen issue?
The CBS.log file is where the sfc.exe tool records the specifics of each verification and repair process. The %windir%LogsCBS folder contains the CBS.log file.
You may use the procedures below to run this sort of search and direct the results to a text file:
Click Start, enter cmd or command prompt in theSearch box, right-click Command Prompt in the Programs list, and select Run as administrator.
Press Enter after typing the following command: /c: findstr "[SR]" %windir%logscbscbs.log >sfcdetails.txt
The sfcdetails.txt file contains the entries logged each time the user on the PC executes the SFC.exe application.
Microsoft has designed Windows Hello to make it easier for users to access their computers while maintaining high security. Yet, it sometimes achieves the reverse by not allowing the computer owner to pass the lock screen.
However, with the solutions shown above, you should be able to resolve the issue quickly because they are simple and do not require you to seek expert assistance.
If none of the options seem to work for you, getting help from a professional is recommended. An expert has the knowledge necessary to quickly resolve the problem.
In the comments section below, let us know if you were able to successfully fix the automatically dismissing lock screen issues.
If you’re on a work or school computer joined to a domain, you might have noticed that Windows Hello just doesn’t show up as an option.
Many organizations disable it on domain-joined PCs to keep things secure. It’s annoying, but there’s usually a good reason behind it, and some steps your IT team can take if you really need it.
What can I do if Windows Hello is not available on domain?
1. Disconnect from Work or School Account
You may find the AccessWork or School option by going to Windows Settings and then Accounts.
Disconnect the Work or School Account setting with the bright Windows logo next to it.
You shouldn’t change the Connected to domain setting.
Next, select Sign-in Options. PIN and fingerprint are no longer grayed out. Make sure convenience PIN sign-in is enabled if it’s still grayed out.
Select PIN first, then set fingerprints.
Go back to Settings, Accounts, and select Access Work or School.
Enter the user’s email address and password after clicking Connect.
You must disconnect the Work or School Account service and then reconnect if your company’s PCs are domain-joined. By disconnecting, you may set up your PIN and fingerprint.
2. Set registry key
Open the Windows Registry Editor by typing Regedit in the Start menu search box.
Go to the following location to continue: Computer\HKEY_LOCAL_MACHINE\SOFTWARE\Policies\Microsoft\Windows\System
When you get to the directory, make a DWORD called AllowDomainPINLogon by right-clicking on the page.
Put 1 as the value.
Restart your computer.
Registry Editor is a useful application to alter registries to fix issues with Windows Hello.
Make sure that the Active Directory Schema is 2016 or above.
Active Directory Certificate Services (ADCS) 2012 or above is required.
An HTTP-accessible certificate revocation list (CRL) is required.
You need a resolvable DNS for the CRL on the client.
A new Kerberos Authentication Template will be created, which must be deployed on all Domain Controllers (overwriting the previous one).
Setup, configure and synchronize users from on-premiseAD into AAD with Azure AD Connect.
Licensing for Azure AD Premium P1 or P2 or equivalent.
Installation of the Domain Controller Root Certificate for the clients.
Before attempting to deploy Windows Hello for business, make sure you have the necessary preparations.
5. Run an SFC scan
Type Command Prompt or CMD into the Start Menu search box, right-click the top result and select Run as administrator.
Type the following after starting the tool: sfc /scannow.
The System File Checker will now perform an integrity check on your computer’s protected operating system files.
It might take some time to finish. Once you’ve started the process, you can’t stop it before it’s finished.
Restart your computer.
How do I set up Windows Hello for Business?
Cert-Trust and Key-Trust are two distinct implementations of Hello for Business by Microsoft. The default and simplest to set up is Key-Trust.
Each of these techniques needs certain software and apps. Visit this page on how to Setup Windows Hello for Business because the instructions are too lengthy to fit in one article.
But if you have set up Hello for Business but it still doesn’t work on the domain, here are five quick fixes.
Wrapping up
While Windows Hello might be blocked on domain-joined devices by default, it’s not a dead end. With the right Group Policy changes or Windows Hello for Business setup, your IT team can enable secure biometric sign-in across your organization.
ROG gaming center not showing CPU or GPU is a problem that has been reported by many users. The cause of this problem is still unknown but there are a few possible explanations that are discussed in this article.
The ROG Gaming Center is a gateway to ROG utilities, apps, and tools. It is a one-stop interface for managing numerous gaming profiles, keyboard profiles and macros, Splendid Display and Audio Equalizer profiles, as well as for monitoring and fine-tuning system components, Internet packet priority, and profiles for keyboard shortcuts.
If the ROG gaming center does not show CPU or GPU, it is possible that the computer’s BIOS is not configured to show this piece of information.
To fix this, you will need to enter the BIOS and enable the options to display CPU and GPU information. Other ways to solve the problem are listed in this article.
What causes ROG Gaming Center not to show CPU and GPU?
The ROG Gaming Center’s inability to display CPU and GPU data could be caused by several factors.
The ROG Gaming Center program may not be installed correctly, for example. Another option is that this information is not configured to display in the ROG Gaming Center.
The gaming center might also not be compatible with your particular model of CPU or GPU.
It is also possible that the gaming center is not receiving information from your CPU or GPU due to a hardware or software issue.
How do you fix ROG Gaming Center if it does not show CPU and GPU?
1. Restart the application
Open the ROG Gaming Center on your computer.
Click on the Settings icon and then select the Restart option. Click OK.
2. Update the application to the latest version
Launch the ROG Gaming Center on your computer.
On the main interface, click on System Information to see if there are updates.
If there is a new update available, click on the Download button to download and install it.
3. Uninstall and reinstall the application
In the search bar on the taskbar, type control panel and then click on it.
Select Programs and Features.
Scroll down to ROG Gaming Center, click on it, and then select Uninstall at the top.
Follow the on-screen instructions to uninstall.
Download the latest version of ROG gaming center from the official website and install it.
4. Check for updates to your graphics drivers
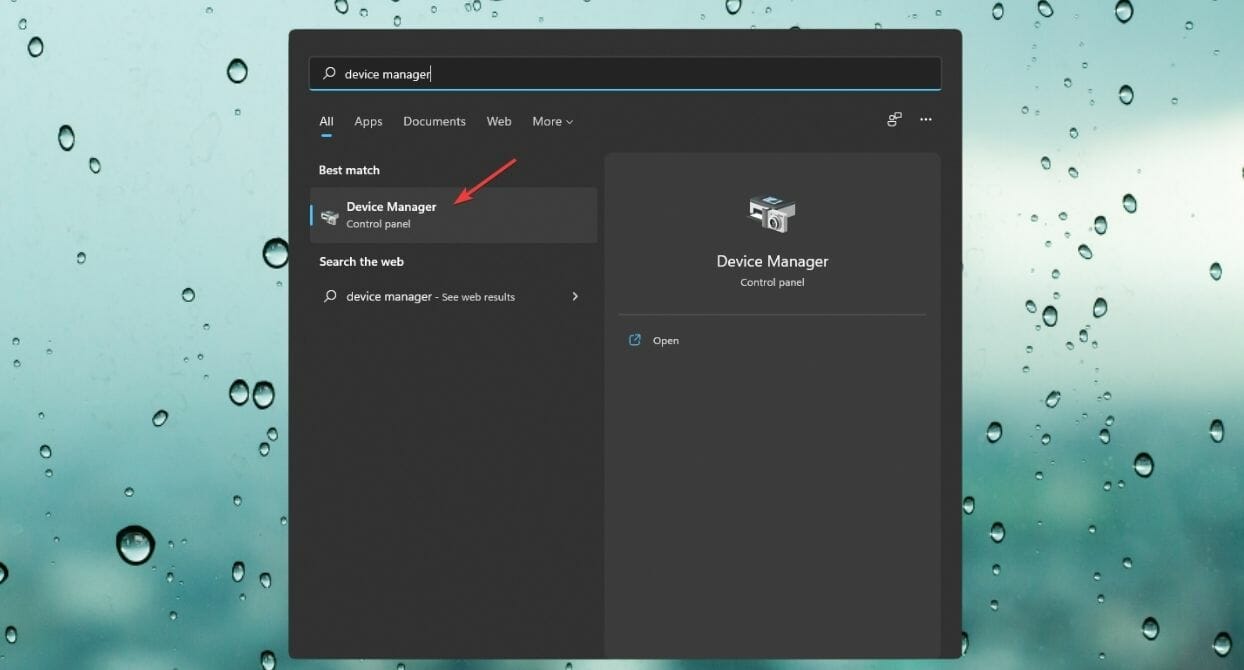
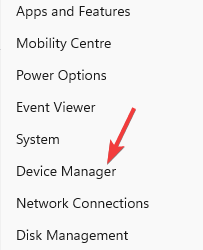
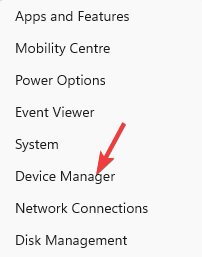
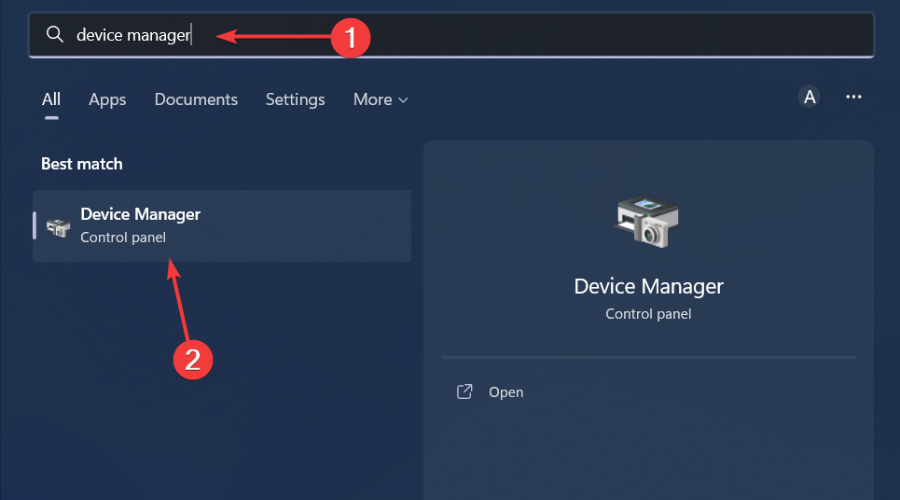
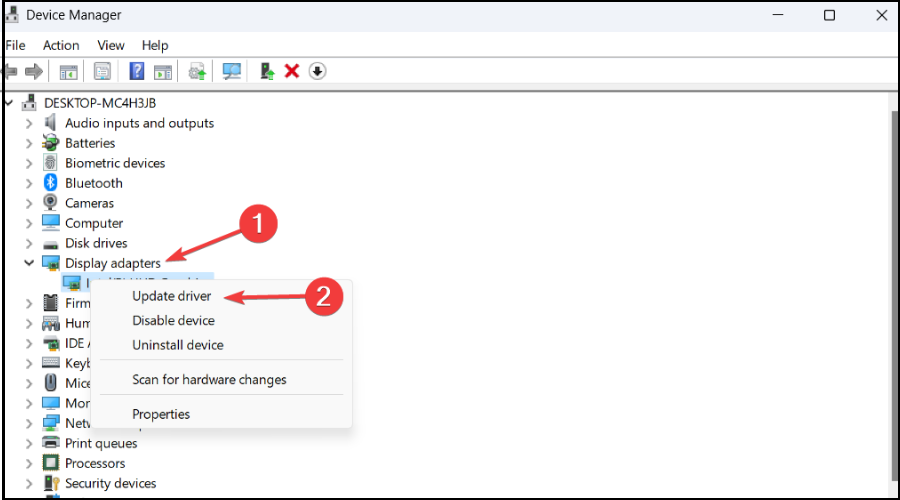
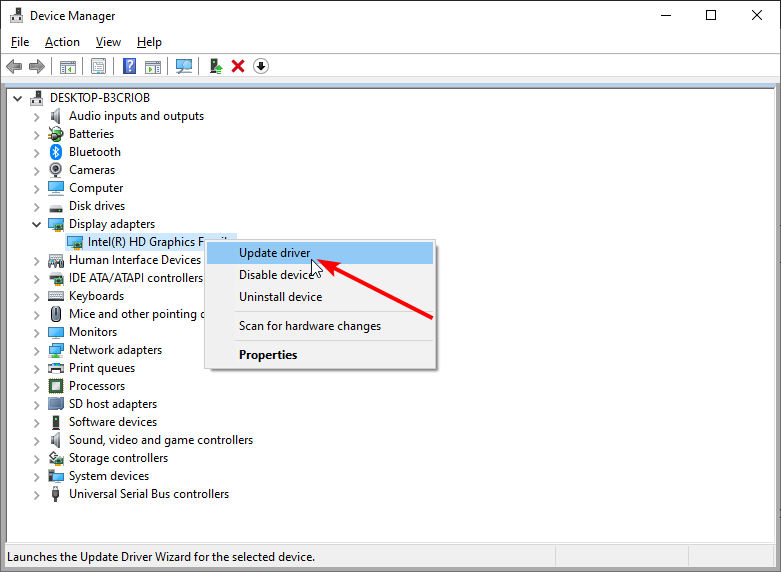
Right-click on the Windows Start button and select Device Manager.
Double-click on Display adapters to expand the section.
Right-click on your video card driver and choose Update driver.
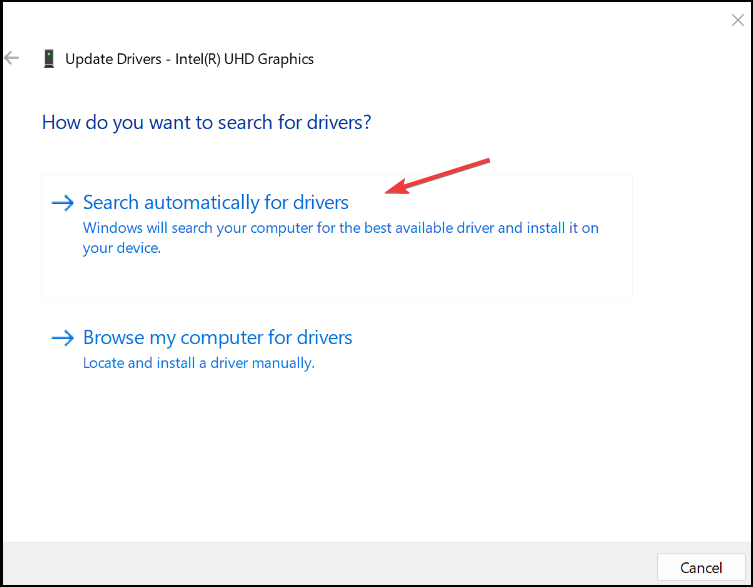
Select Search automatically for drivers.
If the drivers are not updated, they will update to the most recent version.
Click on Close.
Alternatively, a fast way to check for GPU driver updates is to use a specialized tool that will also update it automatically.
Warframe FPS drops and lags may occur frequently, and there are several factors to consider to determine the source of the problem.
Knowing the problem can help you solve it quickly, which is why you should perform some troubleshooting procedures if you’re experiencing stutters while playing Warframe on a PC.
That is what we will help you to do by recommending some steps you take to determine the source of the problem and, hopefully, resolve it.
Now let us move to the common causes and solutions and discuss the ways of fixing Warframe sudden FPS drop.
Why do I suddenly have FPS drops in Warframe?
When one event interrupts another hardware-intensive task, such as playing a game that exceeds the system’s capacity, it usually indicates a system bottleneck.
Common bottlenecks can be detected when your CPU is suddenly overwhelmed by other demanding tasks that appear on the screen.
However, in most cases, Warframe problems start from the fact that the system doesn’t comply with the minimum system requirements of the game.
So, as a prerequisite measure, make sure that your device is compatible with the specs provided below.
Minimum system requirements
OS: Windows 7 64-Bit (32-bit not supported)
Processor: Intel Core 2 Duo e6400 or AMD Athlon x64 4000+
Video: DirectX 11+ capable Graphics Card
Memory: 4 GB RAM
Storage: 35 GB available HD space
Internet: Broadband Internet connection required
Now that we know all that, let’s troubleshoot the game and system to fix any FPS drops, lag, or stuttering in Warframe.
How do I fix my FPS in Warframe?
1. Test your Internet speed
Run a speed test to determine whether your download and upload speeds are enough and whether there is too much delay.
You need to call your ISP to have it checked if it’s a connection issue, or you may wait it out to see if the issue resolves itself.
A sluggish Internet connection may be the cause of stutters and FPS drops. Therefore, you must verify it first, especially if the issue arose without apparent explanation or cause.
2. Update graphics drivers
Not updating your graphics drivers can result in this kind of error. Luckily, you can opt for a specialized tool that can update your device drivers automatically.
3. Check your OS for updates
Click the Start button and choose Settings.
Now, select Update & Security.
Hit the Check for updates button and install any new updates that may be detected.
Some of our readers reported that after installing the new Windows updates, Warframe started to run perfectly, without any stuttering or FPS drops.
If you’ve upgraded to Windows 11, you can still find the Check for updates button under Update & Security from Settings.
4. Lower Warframe’s graphics settings
Start Warframe.
When you get to the lobby, hit Esc to see the menu.
Click Display after selecting Options.
Put everything on Medium or Low in the Graphics Quality panel.
Try gaming after saving the modifications.
The fact that CPU and GPU are having trouble processing the graphics may be a result of it being set too high for your PC’s current specifications; thus, your PC faces Warframe open world FPS drop.
5. Verify the integrity of game files
Open the Steam client.
Right-click on Warframe and choose Properties from the Library menu.
Click Verify integrity of game files after navigating to Local Files.
Wait till the verification is complete.
You might need to delete Warframe from your computer and then reinstall a fresh copy of the game if the verification reveals any files are damaged or if this process cannot resolve the Warframe FPS drop after the update issue.
See whether any of the most often reported issues match up with what you’re now dealing with by looking at them.
If so, the problem is on the server; thus, there is nothing you can do on your computer.
Problems can often appear on any service, so you could occasionally experience some lags and stutters. You must always verify the game’s server status when encountering problems like these.
How can I make Warframe run smoother?
The best option is to lower the graphical settings or the resolution. Either way, the game will look worse, but you’ll get much smoother gameplay.
You can also change your PC power settings to Performance to increase the FPS of Warframe.
Although you may wish to reduce the Warframe FPS limit from 60 to 30 to minimize the load on your CPU, playing the game at 60 FPS feels much better.
To avoid Warframe FPS drops every few seconds, we recommend changing the visuals or lowering the resolution.
You should also check the game servers since online games run into problems as soon as their servers go into maintenance. Try offline games for a few hours, then return to everybody’s favorite Warframe.
In the comment section below, let us know if you were able to fix the Warframe FPS drop issue.
Is your laptop battery not decreasing on Windows? It is a sign of a serious problem. This article will explain this problem in detail and give the perfect solution.
Laptops have been very popular these days because of their portability. However, every laptop users have a concern about the battery life when they are outside or on travel.
But, if the battery percentage doesn’t reflect the actual value, it can be a nightmare for laptop users. Unfortunately, many Windows 10 and 11 users have been encountering this problem in many situations.
Many users have already reported that the laptop battery percentage was not decreasing for them. It happened even though they were doing heavy tasks.
For most of them, the laptop suddenly shuts off even though the battery level seems good enough. This is one of the symptoms Windows is not showing the value correctly.
Fortunately, you can easily fix this problem by taking the appropriate steps. This article will introduce these steps to you. However, before that, let’s dig this problem deeper.
Why is my battery staying at the same percentage on Windows?
The reason may seem very tricky to find out. But, in most common cases, it can result from a software bug or your laptop’s battery fault.
For a very old notebook, whether it is running Windows or other operating systems, the battery health may be very low. If it has other issues as well, an operating system like Windows may predict the percentage in the wrong way.
A similar case may happen when a Windows update or any third-party services break core components on Windows.
You can quickly fix the wrong battery percentage issue if you follow the methods mentioned in the next part of the article.
How do I fix the laptop battery not decreasing on Windows 11?
1. Calibrate the battery
There are several ways to calibrate a laptop battery on Windows. One of the easiest ways is to charge it for longer and ensure it has been charged 100%.
Then, start using it until the battery level is completely zero or the laptop shuts down automatically. After the next charging cycle, Windows should understand the battery life better.
Open the Start Menu, type Device Manager, and hit Enter.
Find and right-click on the battery device and choose Update.
Click on Search automatically for drivers.
Follow onscreen instructions to finish the process.
Do the same steps for other drivers as well.
The above steps may not be the best way to update any drivers. For this, we suggest you use Outbyte Driver Updater. It is because the device manager may not find the latest driver, and also updating all of your drivers one by one will take a lot of time.
On the other hand, Outbyte Driver Updater can update all of the drivers with just a single click. Else, it can periodically check for new updates and install them according to your preferred schedule.
Outbyte Driver Updater
Outbyte is an excellent tool that can automatically update all of your PC drivers, including the battery driver on Windows.
Resetting Windows is the last option to solve the laptop battery not decreasing issue. If any misconfiguration or broken components cause the problem, it will give you the final relief.
How do I fix a wrong battery percentage on Windows 10?
Above, we presented the solutions to fix the battery percentage issues in Windows 11, but the new OS is not much different from Windows 10.
Therefore, all the solutions above will work perfectly for the old OS as well. Some of the solutions will look a bit different.
For instance, in Solution 3, you will have to click on the Additional troubleshooters option from Update & Security in Settings to get to the Power troubleshooter.
How to make your laptop battery last longer?
Any laptop user will want to increase the battery life. For this, there are some easy things to do regularly. It will make your laptop battery healthy for a longer period. Also, you will get better battery backup.
These steps include enabling power saving mode, disabling unused devices and background services, charging before the battery level is below 5%, protecting it from overheating, etc.
This article has explained how to fix laptop battery not decreasing. If you know of any other useful suggestions, you can include them in the comment box.
The Intel Dual Band Wireless AC 3160 adapter is native to many laptop brands like Dell, HP, etc., that powers the Wi-Fi function, however, it comes with its set of problems.
Intel is one of the oldest and most well-known manufacturers of equipment and hardware that allows your PC to complete the function with ease and perfection.
Some of the widely used adapters produced by the brand include Intel Dual Band Wireless AC 3160, 3165, and 8260.
Wireless drivers allow your operating system to communicate with wireless devices such as wireless cards and network interface controllers.
The Intel Dual Band Wireless-AC dual-band adapter offers powerful connectivity (Wi-Fi + Bluetooth) as it moves at the speed of light.
They are known for their faster speeds, higher capacity, wide coverage, and prolonged battery life.
Powered by the Intel Core processors and impressive innovations, the Intel Dual Band Wireless-AC 3160 offers you a notable connected experience, whether at the office, at home, or on the move.
How do I fix the Intel Wi-Fi driver?
1. Update/rollback/reinstall the Wireless AC driver
1.1 Update the Intel Dual Band Wireless AC driver
Right-click on Start and select Device Manager.
Expand the Network adapters section, right-click on Intel(R) Dual Band Wireless-AC 3160 adapter, and select Update driver.
Next, in the Update Drivers window, click on Search automatically for drivers.
Now, wait till Windows detects the latest driver version. Once found, it will install the driver automatically.
Now, exit Device Manager, restart your PC, and check if the network adapter issue is resolved.
This method is also applicable if you are having Intel Dual Band Wireless-AC 3165 problems.
1.2 Rollback the driver version
Go to Start, right-click and click on Device Manager in the menu.
Now, expand Network adapters, right-click on Intel(R) Dual Band Wireless-AC 3160 adapter, and select Properties.
Navigate to the Driver tab in the Properties dialog, and press the Roll Back Driver button.
Once done, check if the network adapter issue is resolved and your Wi-Fi or Bluetooth connection is working.
1.3 Reinstall the device driver
Right-click on the Start menu and select Device Manager.
Expand the Network adapters section, right-click on Intel(R) Dual Band Wireless-AC 3160 adapter, and select Uninstall device.
Again press Uninstall in the confirmation prompt.
Once the device is completely uninstalled, reboot your PC and the network adapter should be reinstalled automatically.
Now, close Device Manager and check if you still encounter any problems with the Intel(R) Dual Band Wireless-AC 3160 adapter.
If you don’t want to follow the manual steps, you can always choose to use a dedicated software like Outbyte Driver Updater. This program scans your device entirely and offers you a list of all your drivers, including outdated ones.
After that, it searches the web for the latest versions through its interface and automatically updates your drivers so that it can improve significantly your PC performance.
Outbyte Driver Updater
Keep your device healthy by letting Outbyte Driver Updater update your drivers with the latest version.
As soon as you see the brand logo screen during startup, press the F2/F12 key 4 to 5 times, and select BIOS Setup or System Setup from the menu.
Next, look for the network settings page and select the wireless connection settings option.
If it’s not enabled already, click on the field next to it, to change it to Enabled. Press Save and Exit, and click Yes to confirm.
Once done, boot up your PC and check if the Wi-Fi or Bluetooth connection is working properly now.
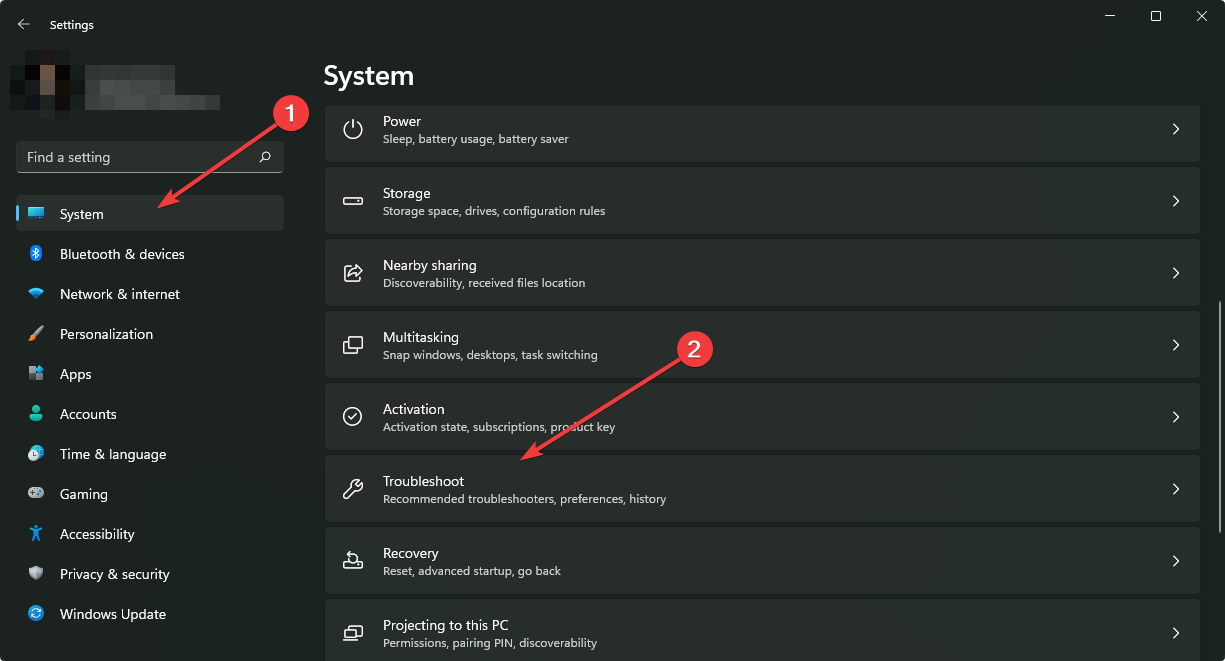
3. Run Network Troubleshooter
Right-click on Start and select Settings.
In the Windows Settings app, click on System on the left.
Now, on the right, click on Troubleshoot.
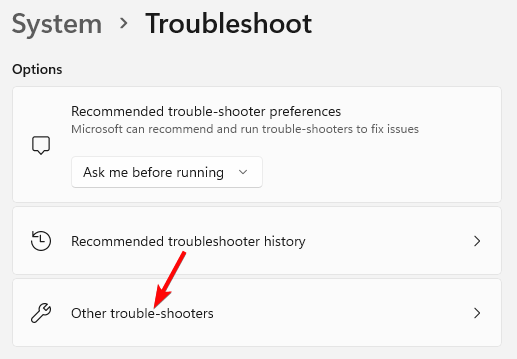
On the next screen, click on Other trouble-shooters on the right.
Next, go to the right, and under Other, navigate to Network Adapter and click on Run.
Now, wait till the troubleshooter finds any issues and if any are found, it will apply the fix automatically.
You can now exit the Settings app and check if the network adapter is working fine.
4. Flush DNS and reset Winsock
Go to Start, right-click and select Windows Terminal (Admin).
This will open the elevated Command Prompt window. Here, run the below commands one after another and hit Enter after each command:ipconfig/flushdns; ipconfig /release; ipconfig /renew; netsh winsock; reset netsh; int ip reset.
Once the commands have been executed successfully, exit Command Prompt, and restart your PC.
Now, try connecting your Wi-Fi or Bluetooth, and the Intel Dual Band Wireless-AC 3160 problems should be fixed.
However, if none of the above methods work, you can reset your PC to get rid of any problems related to the Intel Dual Band Wireless-AC 3160, 3165, or 8260 adapters.
If you are facing any other issues related to network adapters, you can let us know in the comments box below.
You may experience many annoying problems when using the Remote Desktop software on your computer. The Remote Desktop: not enough storage is available to complete this operation is an error message users complain about.
Since companies and organizations are embracing the work-from-home method of working, the use of the Remote Desktop software has significantly increased. However, the problem may prevent you from performing some operations on the RDP network.
Unfortunately, users may encounter the script error – not enough storage is available to complete this operation, even when there is enough space.
Many factors may be responsible for the issue. Some are IRPStackSize (which determines the allocated amount of memory for processing commands in Windows) and problems with the Temp files.
Hence, we’ll take you through ways to fix the storage issues on the Remote Desktop connection.
Is there a limit on RDP sessions?
The straightforward answer is yes. Windows limits the Remote Desktop session that can be initiated in a session to two. So, users may run into errors or issues with establishing more than two Remote Desktop sessions.
However, there are a few ways you can connect multiple Remote Desktop sessions without any difficulty whatsoever.
Furthermore, you can have multiple Remote Desktop sessions concurrently using an external RDP Wrapper software.
What can I do if there is not enough storage available to complete this operation?
1. Change the IRPStackSize Registry Value
Press Windows + Rkeys to open the Run window.
Type Regedit in the text space and press Enter to prompt the Registry Editor.
In the Registry Editor, navigate to the following path: HKEY_LOCAL_MACHINE\SYSTEM\CurrentControlSet\Services\LanmanServer\Parameters
Locate IRPStackSize and double-click on it.
Change the value data into a more significant number, for instance, 30 (range from 11-50).
Close the Registry Editor and restart your computer to allow the change to take effect. Increasing the IRPStackSize allocates more memory for processing commands.
However, it can fix the not enough storage is available to process this command C error in the Remote Desktop.
Note that you need an administrator account in Windows to make changes on the IRPStackSize. Read about how to make yourself an administrator on your PC.
2. Delete the temporary folder files
Press Windows + Rkeys to open the Run window.
Type %temp% in the search space and press Enter.
Press Ctrl + A and right-click, then click on Delete from the drop-down.
Or navigate to: This PC > Local Disk (C): > Windows > Temp
Press Ctrl + A and delete all the temp.
Restart the PC and check if the error persists.
3. Use a Remote Desktop software
Another solution for the Remote Desktop not having enough storage available to complete this operation is using an alternative RDP software.
The Remote Desktop uses TCP port 3389 and UDP port 3389. TCP port 3389 is needed to open RDP. However, there are other ports that users can use for RDP, like ports 80 and 443, that are required for internet access.
GTA 5, just like every other game, has shortcomings such as the FPS drops, lag, and stuttering in GTA 5. These issues are often caused by graphics driver issues, low resources and connection problems. First, try checking your connection and perform a GTA 5 latency test.
How can I fix FPS drops in GTA 5 and make the game smoother?
1. Check your system’s requirements
Closing some programs on your device helps create more space and resources for your game.
Users can experience the FPS drop issue in their game if their devices do not meet the system requirements for GTA 5.
Firstly, press Windows + Rkeys on your keyboard to prompt the Run window.
Type Regedit in the search space and click OK to open the Registry Editor.
Click on the Game DVR option, double-click on the AppCaptureEnabled option, then select Modify.
In the Edit DWORD (32-bit) Value tab, change the Value data to 0, then Click OK.
Restart your computer and launch your game to check whether your FPS is stable. Disabling the Game DVR feature on your PC creates more system resources that can fix GTA5 FPS drops in menu issues.
3. Update graphics drivers
Press Windows + Rkeys to prompt the Run window.
Type devmgmt.msc into the search space and click OK.
Click on the Display adapters option from the search results, and select the driver from the drop-down menu.
Click the Update driver software option, and click on Search automatically for drivers. (Restart your computer and check if the FPS drop in your game persists)
On the Windows update page, select Check for updates. (If there’s an update available, Windows will automatically search for it and install it)
Does RAM improve the FPS rate?
Random Access Memory (RAM) can improve system responsiveness and optimize frame rates. Hence, having more RAM on your device boosts its performance. It makes more difference compared to a device with low RAM.
The Nvidia Control Panel is software that gives users access and control of Nvidia utilities installed on their PC and the Nvidia graphics driver settings. It offers a wide range of features that allows users to customize their settings, such as resolution, color correction, and 3D application settings.
Lately, users have complained about the Nvidia Control Panel application not being compatible, making it difficult to use the app.
Furthermore, encountering the Nvidia Control Panel application not compatible issue may impede your activities on the tool.
You may also encounter the Nvidia installer cannot continue: not compatible with this version of Windows 10 error when installing Nvidia drivers on your PC.
Fortunately, you can solve the problem with the Nvidia Control Panel on your PC by tweaking your PC. So, this article will discuss what to do if you encounter Nvidia not compatible with Windows 10.
Why is the Nvidia Control Panel incompatible with my device?
Windows startup issues: Startup issues are the common cause of many problems with your computer. It entails errors that the PC encounters during power up or power off. It can cause issues with your drivers like the Nvidia driver, prompting the Nvidia Control Panel application not compatible error.
Outdated Windows OS: Users may experience difficulties with their devices if their operating systems are outdated. Likewise, the Nvidia Control Panel application is not compatible error may occur if your version of Windows is not compatible with the Nvidia driver. Also, not keeping your PC up-to-date prevents it from accessing updates and patches for improving its performance and fixing bugs.
Issues with Nvidia updates: Some users complain about problems encountered with Nvidia immediately after they update the driver. So, the Nvidia Control Panel application is not compatible errors can occur due to update issues.
What can I do if I encounter the Nvidia Control Panel incompatibility error?
1. Restart your PC
Click on the Start button and select Power.
Select the Restart option and press OK.
Restarting your PC will fix any startup problems that might have caused the Nvidia Control Panel application not compatible error on your PC.
2. Update Windows OS
Click on the Start button.
Select Settings from the options.
Click on Windows Update and select Check for updates.
Windows will automatically search and download updates if there are any available. You should be able to fix the Nvidia not compatible with Windows 10 error.
3. Update your Nvidia GPU driver
Press Windows + X to open the Quick Link menu.
On the Quick Link menu, select Device Manager.
Click on the drop-down button to expand the Display adapters option.
Right-click your Nvidia GPU and select the Update driver option.
After the update is complete, restart your device and check if the issue persists. If the issue is still there, you can also try updating your drivers automatically using a specialized tool.
4. Uninstall the current driver and reinstall it
Press Windows + R keys to open the Run window.
Type devmgmt.msc in the text space and press Enter to open the Device Manager.
Click the drop-down button against the Display adapters to view the devices under it.
Right-click on the Nvidia adapter and select Uninstall device from the options.
Then, check the box for Attempt to remove the driver for this device and click on Uninstall.
After uninstalling the driver, restart your PC and check if it helps solve the Nvidia Control Panel application not compatible error.
As brilliant as the FFXIV game is, the major plague that affects its gameplay is the sudden FPS drops. This often disrupts the game flow and, in some cases, leads to a game crash.
Experiencing FPS drop, lag, and stuttering in your games is frustrating because it affects your gameplay. It can make your game slow and unstable to play.
The FPS drop is an issue common to virtually every game you can think of. However, players complain that this problem significantly affects the Final Fantasy XIV game.
Hence, we’ll discuss the FPS drops in the FFXIV game, their causes, and how you can fix it.
Why is FFXIV laggy and choppy?
Outdated or corrupt graphics driver: The graphic driver is responsible for whatever displays on your computer screen. However, you may experience FPS drops and a lag in your game if the graphics driver is outdated. Likewise, the driver may be corrupt, causing it to malfunction and affecting your PC. So, you may experience the FFXIV Endwalker FPS drops if your graphics driver is not up-to-date.
Game DVR interference: Players may also experience difficulties with their game if the Game DVR feature on their PC is enabled. This feature consumes system resources and can affect the number of resources left for the Final Fantasy XIV game to run with. So, if your PC isn’t a high-end PC and doesn’t have enough resources, you may encounter the FFXIV FPS drop in 2022.
PC not matching the Final Fantasy XIV game requirements: Numerous issues aside, the FPS drop, lag, and stuttering can erupt if you don’t adhere to the game’s requirements policy. Because the game demands more resources, not all PCs can play it. So, your FPS can drop in Final Fantasy XIV if your computer doesn’t match the requirements.
How can I make FFXIV run smoother without issues?
1. Check your system’s requirements
You may be experiencing the FPS drop issue in your game because your device doesn’t meet up to the requirements for the game.
Type devmgmt.msc into the search space and click OK.
Click on the Display adapters option from the search results, and select the driver from the drop-down menu.
Click the Update driver software option, and click on Search automatically for drivers. (Restart your computer and check if the FPS drop in your game persists)
If Windows didn’t find any update, you might want to use a specialized tool that scans your computer for outdated drivers and safely updates them if possible.
3. Disable Game DVR on your PC
Press Windows + Rkeys on your keyboard to prompt the Run window.
Type Regedit in the search space and click OK to open the Registry Editor.
Click on the Game DVR option, double-click on the AppCaptureEnabled option, then select Modify.
In the Edit DWORD (32-bit) Value tab, change the Value data to 0, then Click OK.
4. End tasks for unimportant programs
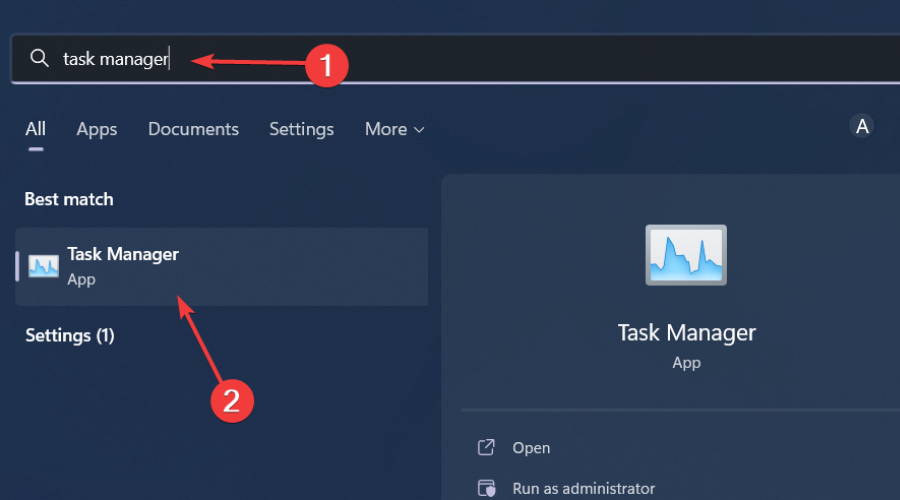
Click on the Taskbar and select Task Manager.
Select the CPU and Memory usage in the Task Manager tab.
Click on the applications consuming lots of CPU and memory space on your PC.
Click on the End Task from the drop-down that pops up.
Creating more system resources and RAM will help Final Fantasy XIV run smoothly without lag or FPS drop.
On the Windows update page, select Check for updates. (If there’s an update available, Windows will automatically search for it and install it)
What is a good FPS for FFXIV?
To achieve a smooth and stable gaming experience with Final Fantasy XIV, you should set your FPS rate between 30 and 60. It’ll help you cut through the game without fail or issue.
Which is better: 40 or 60 FPS?
Players often ask about which is better at 40 or 60 FPS. However, setting your frame rate at 40 is good and helps you run your game smoothly, but it can glitch when you switch to another screen or monitor. So, 60 is most recommended because it is more stable on various devices.
We hope this article has been helpful. You can also read our article about how to fix FFXIV error in the game.
When users try to start the RuneScape client on their Windows PC, they frequently see the message There was an error loading the game configuration from the website.
We will go into the potential reasons for this problem in more detail, but for the time being, note that several contributing elements, such as firewall or antivirus, are causing the issue.
So, let’s first discuss the problems that might be causing There was an error loading the game configuration from the website and how you can fix it.
What causes There was an error loading the game configuration from the website error?
There are three main causes of this issue:
One of the most frequent reasons for this issue is some sort of firewall or antivirus interference, which prevents the end user’s PC from communicating with the game server
This issue may occasionally arise due to temporary files that your network adapter keeps
It turns out that Runescape is designed to assume that the OS and browser languages are the same. The game server will flag it as a mismatch and disconnect the connection if the format differs
How do I fix There was an error loading the game configuration from the website error?
1. Switch the browser
Remember that RuneScape is mostly played through a browser menu and is a Java-based game.
The browser you’re using is the potential culprit if you already investigated the likelihood of a security interference and determined that’s not the case.
The main element that could end up creating this specific problem is corrupted cached data. Internet Explorer and Microsoft Edge are popular native Windows browsers where this issue has been observed to occur most frequently.
When this problem occurred, some affected users reported that they fixed it after they switched to another browser.
Consider switching to a more reliable browser, such as Firefox, Chrome, or Opera, if you’re still using a native browser. Java-built gaming browsers are known to have difficulties with IE and Edge.
Still, Opera GX is a great option because is specially designed to improve your gaming experience and also to browse the internet more safely and securely.
Opera GX
Enhance both your gaming and browsing experience with Opera GX’s improved features.
Type in the command prompt in the Start menu’s search box, right-click the first result and choose Run as administrator.
To clear your DNS cache, enter the following command and press Enter. ipconfig/flushdns
The error message There was an error loading the game configuration from the website is frequently caused by an inconsistent DNS.
In this situation, forcing your router to grant a new address and clearing your existing DNS cache is the other potential method that may help you fix the problem.
4. Performe a complete Winsock reset
Type in the command prompt in the Start menu’s search box, right-click the first result and choose Run as administrator.
Type in the command below in order and press Enter after each. netsh winsock reset netsh winsock reset catalog netsh int ipv4 reset
Try restarting your computer once the commands have been successfully executed, then start the game to check whether the issue has been fixed.
Some RuneScape users who were also seeing the error message There was an error loading the game configuration from the website said that the issue in their particular scenario was brought on by cached data from the network adapter.
By performing a complete Winsock reset from Command Prompt, you should be able to resolve the problem once and for all.
The solutions presented above have all been tried and tested by users who have encountered similar problems.
Although the Steam client is the best video game digital distribution service and storefront available, it does have certain problems and drawbacks, such as the Steam game validation loop.
Most users encounter this problem after installing a game and Steam attempting to validate the game files or while validating the integrity of their game files.
The problem might display itself in several ways, such as a stuck or sluggish validation process. This issue will frustrate people, but there are several simple fixes that, if followed correctly, would resolve the problem.
Why are validating Steam game files stuck?
Based on user reports, there are three main causes for this issue:
It could have originated from a system issue. So, to address the problem, try restarting your PC and app
You are likely to experience this problem if the download cache on your Steam app is corrupted. As a result, you could try emptying Steam’s download cache to fix the issue
A faulty installation of the Steam software itself may be the root of the issue. If so, you should be able to resolve the issue by uninstalling and reinstalling the application
How do I fix the Steam game validation loop?
1. Remove download cache
Launch your Steam app and select the Steam menu from the top toolbar. Then, select the Settings option.
Then, in the Settings box, navigate to the Downloads tab. Now, in the right-side panel, select the Clear Download Cache option.
Close and restart the Steam app to verify if you have solved the problem.
You may encounter a problem if Steam’s download cache and files are corrupted. It may even prohibit you from accessing the store’s main page or downloading games.
2. Repair Steam Library folders
Open your Steam app and choose Steam, followed by Settings.
Go to the Downloads page.
Select Steam Library Folders from the Downloads menu.
Next, click on the three dots icon and select Repair Library Folder from the context menu that appears.
Steam will detect and correct any issues with the chosen folder.
Relaunch the Steam app when the repair procedure is complete to verify whether you have fixed the issue.
If the problem is caused by corruption in the Steam Library folder, you can attempt to repair the Steam Library folder to resolve the issue.
Steam includes a specific option for repairing the Steam library folder that you can find following the steps above.
Launch the Steam app, select Steam, and then Settings from the top of the screen.
Now, from the left side pane, select the Downloads tab.
Then, from the Download Region drop-down option, choose a different region. You can experiment with different locations to find which works best for you.
Finally, click OK to save your modifications and restart your Steam app.
You may also try changing the Download Region in Steam to resolve the issue. It is a type of workaround that may solve the problem. This has shown to be successful for many affected people and may work for you as well.
4. Reinstall Steam Client
Search Apps and features in the Start menu and select the first result.
Find Steam and click on the three dots and select Uninstall.
VisitSteam and download the client again and reinstall it.
5. Temporary issue with Steam
Try closing any running programs, then start Steam once again.
If the problems with the Steam Validating Loop still exist, restart your computer and try again.
Most users agree that there may be a brief issue between the Steam website, the Steam program, or even the Steam servers.
This inconsistency may occasionally be caused by certain system services, third-party application services, or the program itself.
If the technique mentioned above does not resolve the issue, something is wrong with the servers or the client application, and you will need to wait a few hours before trying again.
The validation procedure may take some time, depending on the size of the game, so consider waiting a bit to check whether the process is truly blocked.
In any case, we recommend that you delete the downloaded cache every now and then so Steam can replace the cache with a fresh data set and prevent file corruption.
However, now, let’s see what you can do in case you get the Thunderbold application not in use anymore error.
Why am I getting the Thunderbolt application not in use anymore error?
You should really know that, if your Thunderbolt 3 driver or utility version types are mismatched within a Windows host system, you may receive an error message stating: Application Cannot run – This Thunderbolt application is not in use anymore and can be safely uninstalled.
This mainly happens when you are attempting to run the Intel Thunderbolt Software management utility or the Intel Thunderbolt Control Center utility.
As you would have imagined, this prevents proper management of Thunderbolt devices on the host system.
It’s also important to mention that this problem does not occur on Apple Mac systems, only on Windows-powered devices.
How can I fix the Thunderbolt application not in use anymore error?
1. Remove Thunderbold drivers from Device Manager
Disconnect any Thunderbolt 3 devices from your PC.
Search for Device Manager and open the app.
Expand the System Devices category, right-click on Thunderbolt Controller, then select Uninstall device.
Close the Device Manager.
2. Remove Thunderbolt drivers using CMD
Search for Command Prompt, and open it as an administrator.
Type the following, then press the Enter key: sc delete nhi
3. Remove Thunderbolt devices using the appwiz.cpl tool
Search for appwiz.cpl and open the app as an administrator.
Look for any Applications and Features for any Thunderbolt Software by Intel, right-click on it and select Uninstall.
4. Re-install latest Thunderbolt software
Go to the official Thunderbolt website and download the version for your device.
Run the executable you downloaded and follow the on-screen instructions.
5. Update Windows
PressWindows+Ito access Settings.
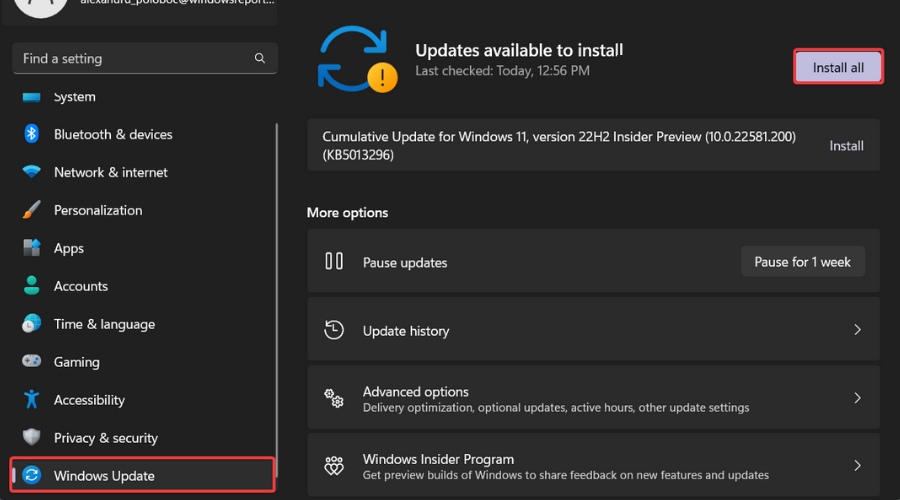
Select the Windows updates tab and click Install all.
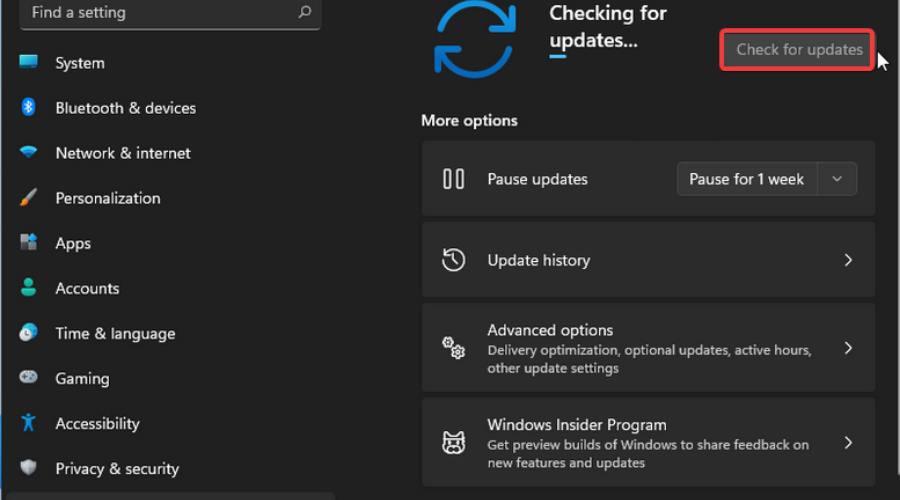
If no updates are queued for installation, press the Check for updates button.
Does Thunderbolt support high-resolution displays?
Actually, Thunderbolt is an input/output technology introduced years ago by Apple, well-known for supporting high-resolution displays and high-performance data devices with a single port.
Its main characteristics are flexibility, speed, and simplicity. This technology gives you two channels on the same connector and each channel has a data transfer speed of 10 Gb/s in both directions.
Thunderbolt is one method of connecting a display to a computer, but not a very popular one. The most appreciated are HDMI, DVI, VGA, and DisplayPort.
Today, most of the VGA and DVI ports were replaced with DisplayPort. HDMI is used for flat-screen TVs and smart TVs because you can connect that port to different extensions like Blu-Ray players, game consoles, computers, and much more.
And while Thunderbolt 3 has adopted a new USB Type-C port, this port is not compatible with any kind of PC.
We hope this guide helped you fix this annoying issue. Leave a comment below and share your thoughts and opinions.
The Republic of Gamers, also known as ROG, aims to provide the gaming community with the best possible gaming experience.
In addition to gaming PCs, phones, and accessories, ROG also offers some special software for gamers. The pinnacle of the Asus ROG software range is ROG Gaming Center though sometimes ASUS ROG Gaming Center not working is a problem most users face.
This isn’t the only software affected, and many reported that ASUS Aura stopped working, but we covered that issue in a separate guide.
ASUS ROG laptops provide a utility called the ROG Gaming Center out of the box. It is a one-stop shop for monitoring and fine-tuning system components.
It helps maintain many gaming accounts on the computer, as the name suggests, and many gamers adore the degree of personalization it offers.
However, even a much-loved application has flaws, and the most obvious one is the malfunctioning ROG gaming center.
What causes Asus ROG Gaming Centre not to work?
There are certain recognized causes for this issue, and many users have talked about them. Unknown reasons carry a greater danger; however certain ways are effective without anybody knowing how. In any event, look at the list of potential causes we’ve provided below;
Administrator permissions
Likely, the software doesn’t have administrator access, which would explain why the ROG Gaming Center won’t start up. Therefore, we strongly suggest you grant it these rights and check to see if that fixes the issue.
Misconfigured installation
Your computer software installation may not have been handled correctly in storage, which would explain why the ROG Gaming Center wouldn’t launch. Therefore, you should attempt reinstalling the software using the alternatives listed below.
Windows Defender Blocklist
In some cases, the Windows Defender application may fail to recognize and add the ROG Gaming Center software to the block list. Therefore, the issue can arise if Windows Defender interferes with the software’s ability to function.
Outdated drivers
You can handle a variety of gaming-related hardware through the ROG Gaming Center, including your graphics card and peripherals like your mouse and keyboard. If you wish to prevent this issue, make sure to install Asus monitor drivers for the best experience.
How do I fix Asus ROG Gaming Centre if it’s not working?
1. Update Windows
Press Windows + Ikey combination to open Settings.
Click the Update & Security option.
Under the Windows Update tab, click on Check for updates button.
Click Install Now and adhere to the update instructions if a new update is available.
If Windows is updated, You’re up to date message will be displayed.
2. Update drivers
Right-click on the Windows Start button and select Device Manager.
Double-click on Display adapters to expand it.
Right-click on your video card driver and choose Update driver.
Select Search automatically for drivers.
If the drivers are not updated, they will update to the most recent version.
Check if this resolves the ROG gaming center not working.
What other issues are common with Asus Gaming Center?
When we utilize or launch ROG Gaming Center on our PCs, we have additional issues. In the following paragraphs, we’ll discuss some potential problems you might encounter with this program.
The ROG Gaming Center does not display the CPU temperature
Use System Restore Points to return your PC to its previous state if this issue still exists after upgrading ROG Gaming Center. Reinstalling ROG Gaming Center is the best course of action if you don’t have any System Restore Points.
The ROG Gaming Center’s fan control isn’t working
Make sure your computer’s Windows and device drivers are up to date if your fan control is not working. You may get the ASUS Keyboard Hotkeys from the Microsoft Store. It has a function key overlay notification that lets us change the Fan Speed.
G14, ROG button not working
Windows Defender or any antivirus program you may have installed on your computer could be to blame for this issue. As a result, allow the ROG Gaming Center program to run on your computer. If the issue continues, uninstall the antivirus program.
Third-party applications
The ROG Gaming Center Fan Control utility may become unresponsive due to third-party apps interfering with it. Deactivate the problematic programs to fix the issue. To prevent issues like this, make sure you have updated your drivers. If the issue continues, get in touch with ASUS technical support.
Turbo Gear at ROG Gaming Center isn’t functioning
Verify whether the software is in a newer or older version. If you’re still using the older versions, install the most recent ones. Increase the memory and core clocks in Turbo Gear to fix this.
We hope that this post will assist you in resolving the ROG gaming center issue. On our website, you can find a lot more tech-related articles.
Several users have been complaining about Remote Desktop not detecting the microphone, but not to worry, this comprehensive guide provides simplified fixes for this issue.
Some users also specify the connection errors they encounter, such as; Remote Desktop microphone with no input devices found, headphones not working on Remote Desktop, and so forth.
These problems are common; however, the solutions can fix both built-in microphones and external headsets’ microphones.
If your Remote Desktop presents this problem, this guide will help you fix your microphone.
Why is my mic not being detected?
Microphone Permission turned off: If your microphone is not detected after updating Windows, then it could be that the app permissions have been turned off, hence the need to toggle it back on.
Microphone not set as default device: If you have connected multiple microphones and headset devices to your computer, it may have selected the wrong device for use. To fix this, you need to choose the microphone device of your choice and set it as default.
Outdated audio drivers: You may experience Remote Desktop not detecting microphone errors when your audio drives are outdated. To fix this, you need to update your audio drivers.
How can I fix the Remote Desktop if it fails to detect the microphone?
1. Enable your disabled microphone
Click the Starts button and select Settings.
Navigate to System settings.
Click on Sound in the left sidebar.
Next, locate and click on Manage sound devices in the Input devices settings.
Locate your microphone device under the Allow or Don’t allow section.
Click on Allow to enable your microphone.
2. Adjust the default audio settings
Press the Starts button and select Settings.
Navigate to System settings from the list of options.
Then, click on Sound in the menu on the left sidebar.
Open the Input devices dropdown menu and select your microphone as the default audio.
3. Confirm that the microphone and computer’s ports are working
Firstly, check if your microphone’s wire is not broken, especially at the ends where it connects to your PC.
If there’s any other available device, plug your microphone into its ports to test if it works. Inspect the connecting jack to see if there are any bending or burns.
In the availability of other devices, you can test it by plugging it into the same port you’ve tested with your microphone to see if it works.
Press the Windows + Rkeys to launch the Run dialog box.
Input devmgmt.msc and press Enter to launch the Device Manager.
Locate the Audio Inputs and Outputs and expand it.
Right-click the audio driver and choose Update driver.
Then select Search automatically for drivers.
Alternatively, you can use third-party tools to download and install the latest drivers for all your devices. Instead of having to manually download each driver, you can automatically download all the drivers your PC needs.
Does the microphone work through RDP?
You cannot access your microphone over a Remote Desktop Protocol unless you enable it manually.
Microsoft created the proprietary Remote Desktop Protocol (RDP) to give users a graphical interface for connecting to other computers via a network connection. This article can help you if you see an error stating that the remote desktop does not belong to the specified network.
The Windows Remote Desktop function has proven useful as a productivity tool as working remotely became more widespread. If you have a functional Internet connection, the function allows you to control your computer from anywhere.
Some users, however, have encountered an error message stating the Remote desktop does not belong to the specified network. We will talk about fixes to this issue in this article.
What does Remote desktop does not belong to the specified network mean?
The message Remote desktop does not belong to the defined network typically denotes a DNS server (or DNS record) issue, which prevents your computer from correctly resolving the specified hostname.
The Domain Name System (DNS) server is an essential part of the Internet. Unfortunately, DNS problems are rather common in Windows 10 and Windows 11.
You are required to initially connect to a DNS server before you are able to visit any website on the Internet. Your request will be sent to the DNS server, and after it is processed, you will be sent to the website you specified.
Press Windows and type Allow an app through Windows firewall then click the top result.
On the upper right corner of the window, locate and click the Change Settingsbutton. You’ll see a list of the applications that your firewall has approved or rejected.
Navigate the menu until you find Remote Desktop.
Check the boxes next to private and public, click OK, and then try reconnecting after closing the window.
It is essential to turn on the Microsoft Defender Firewall, even if you are utilizing another firewall at the same time. It aids in preventing illegal access to your account.
3. Restart the Remote Desktop essential services
Press Windows + R key combination. Type services.msc and click OK.
Search for Remote Desktop Services and Remote Desktop Services UserMode Port Redirector.
Right-click on each one of them and then select restart.
Restart your computer for the changes to take effect.
A Windows service is a piece of software that operates in the background of your computer to carry out specific activities.
4. Switch to a private network
Press Windows + I then navigate to Network & Internet.
From the Wi-Fi settings screen, choose Manage known networks, and then select the Wi-Fi network you wish to change.
Click on the network Properties.
Select Private under Network profile.
5. Check the group policy.
Press Windows + R key combination to open the Run window and then type gpedit.msc.
Under Computer Configuration, go to Administrative Templatesand then Windows Components.
Select Remote Desktop Services, and then Remote Desktop Session Host.
Click Connections and then right-click Allow Users to Connect remotely by using Remote Desktop Services.
Select Edit and then select the radio button next to enabled. Click OK to save your changes.
A network administrator in charge of Microsoft’s Active Directory may implement customized configurations for users and machines by using Group Policy, which is a hierarchical architecture.
Group Policy was developed by Microsoft and is essentially a security tool that can be utilized to apply various security configurations to people as well as devices.
What leads to the Remote desktop does not belong to the specified network issue?
Various things cause the remote desktop does not belong to the specified network issue. The most common causes are:
Antivirus software: RDP can occasionally be totally or partially blocked by antivirus software, which results in the error Remote desktop can’t connect to the specified network. The good news about this mistake is that it is simple to spot.
Windows Update: After a Windows update or upgrade, the Remote Desktop (RDP) functionality may frequently get corrupted as a result of one of the newly installed files interfering with the RDP’s operation.
Public network profile: Your computer can disable the remote desktop feature as a safety step if you have a networking group or public network profile.
Because so many problems might result in the Remote desktop does not belong to the specified network error, it is quite frequent and dreaded by Windows users.
Many encountered a similar issue, but we covered it our No healthy upstream guide.
We hope that at least one of these fixes was effective for you. Going through each option one at a time until you find the one that works is the best course of action. Comment below and let us know which fix worked for you.
One of the most distinctive and popular survival games is Conan Exiles. The game’s debut and ongoing maintenance have been extremely successful for both the game and its developers.
Since the game’s first release, Conan has received several updates and new features. The game’s optimization has improved since its early stages.
However, some players still struggle with their game performance, and certain issues, like the Conan Exiles FPS drops, never get fixed.
We will focus on performance difficulties in this article, such as FPS loss, freezing, low FPS, stuttering, lagging, spikes, and high ping, and finally resolve this problem.
So, without further ado, let’s dive right into the article and learn more about this issue.
What effects FPS the most?
The graphics card and the CPU are the two components that have the most influence on the frame rate or the FPS performance of a game.
When it comes to playing online games, however, internet speed and ping are two additional factors that come into play.
However, before starting any tweaking, make sure that your system is on par with the minimum game requirements below.
Conan Exiles minimum system requirements
Requires a 64-bit processor and operating system
OS: Windows 10 64 Bit
Processor: Intel Quad Core i5-2300 or AMD FX-6300
Memory: 6 GB RAM
Graphics: Nvidia GeForce GTX 560 (1GB) or AMD Radeon HD 7770 (1GB)
DirectX: Version 11
Network: Broadband Internet connection
Storage: 115 GB of available space
Now, let’s go through our solutions to fix any FPS drops, lag, and stuttering in Conan Exiles.
How do I fix Conan Exiles FPS drops?
1. Eliminate the background processes
To open Task Manager, press Ctrl + Shift + Esc.
Select the Processes tab to find processes running in the background and using too many system resources.
Select the task and then close it by clicking End Task. Repeat for other similar tasks with the high processes.
Close any unnecessary programs, such as Chrome, Spotify, and OneDrive. Also, if Discord is idle, you should exit it.
These unnecessary apps tend to consume excessive resources and computational power, leaving little power for your PC to use on the game, resulting in Conan Exiles FPS drops.
2. Adjust the game’s graphic settings
Go to the in-game graphical settings and make sure to lower the graphics performance settings.
For instance, you may disable Vsync, enable the Low-End Laptop Mode, and set the View Distance, Post Processing, General Shadows, and Texture Quality to Low.
Test various settings until you get to acceptable game performance.
If you have screen tearing while playing, you should re-enable Vertical Sync. The above settings will increase the game’s frame rate while decreasing frame drops.
Navigate to the list of titles in your Steam Library.
Right-click Conan Exiles and choose Properties.
Find the General tab, then click the Launch Optionsbox.
In the launch options window, type or paste thefollowing command into the box. -USEALLAVAILABLECORES
This command will force your device to use all of your CPU cores to run the game, resulting in significantly more balanced CPU activity.
4. Update the graphics drivers
Enter device manager into the Start MenuSearch box and choose the first result.
Find the Display Adapters category and expand it by clicking on it.
Select Update driver after right-clicking the dedicated graphics device.
Then choose Search automatically for drivers.
Because outdated drivers are the source of most Windows issues, you should first update your graphics card drivers if your FPS drops.
Fortunately, Windows automatically updates the drivers, but this does not ensure that compatibility issues will not occur.
5. Disable the fullscreen optimization
Navigate to the game’s installation folder: go to Steam, Library, Conan Exiles, Properties, LOCAL FILES, then BROWSE LOCAL FILES.
Right-click ConanSandbox.exe. and select the Properties.
In the Compatibility tab, tick Disable full-screen optimizations.
The Fullscreen Optimizations feature was developed to improve the game experience. However, it can occasionally cause FPS drops.
Can RAM cause stuttering?
Yes, stuttering could be caused by a RAM shortage. Your system will stutter if you don’t have enough RAM since it can’t handle all the information rapidly.
Conan Exiles is undoubtedly one of the greatest games in its genre, but FPS drops, and stuttering may quickly ruin the fun of playing it.
The best thing to do is to reduce the game’s graphic settings or look on the web for the optimal option that will maintain quality while still giving you adequate performance.
In the comment section below, let us know if you were able to fix Conan Exiles FPS drops.
Is there even any shred of doubt that the Call of Duty franchise is amongst the most popular video game franchises this world has seen?
In fact, on a monthly basis, literally, tens of millions of people around the world are playing at least one of the titles in the series.
And, lately, the most popular of all the Call of Duty games has definitely become the Warzone battle royale, which is also free of cost.
Speaking of Warzone, we can show you dev error 6068 or how to treat packet loss situations if you are even in one yourself.
There have also been users reporting dealing with a DirectX unrecoverable error, so today we are going to take a closer look at this.
Why am I getting the DirectX unrecoverable error in Warzone?
This doesn’t just happen for one reason. In fact, this error can be triggered by random game or PC bugs, corrupted game files, or maybe even outdated software or drivers.
Incompatibility issues with other programs that are running on your PC can be another cause, along with a faulty or inexistent internet connection.
There are many causes for the Warzone DirectX unrecoverable error on Windows 10/11, and we are about to show you how to fix it.
How can I fix the Warzone DirectX unrecoverable error?
1. Restart the BattleNet service
Click on the BattleNet icon on the interface.
Select Exit from the dropdown.
Run BattleNet.
2. Update your GPU
Search for Device Manager and open the app.
Expand Display adapters, then right-click on our GPU and select Update driver.
Select Search automatically for drivers.
3. Run the BattleNet Scan and Repair tool
Select the Call of Duty Warzone game.
Click on the Options button, then select Scan and repair.
Under Processes, look at the apps using the most CPU power, select them and click on End Task.
5. Run Warzone in DirectX 11 mode
Select the Call of Duty: Warzone game.
Click on Options, then select Game Settings.
Enable Additional command line arguments.
In the box, enter D3D11 then click on Done.
How can I make Warzone a more stable experience?
You have to keep in mind one simple thing about Warzone: it is an internet-dependant game. That means that the better your internet connection, the better your game will run.
Also, it is a pretty graphics-heavy game so you might also want to have a look at the system requirements before downloading and installing Warzone.
Using the screenshot above, you can see exactly what your rig will need to run this game in various scenarios.
Also, make sure you keep your Windows OS updated, close all background processes and also allow Warzone through the Firewall.
There are plenty of factors that can mess up your Call of Duty Warzone experience, but you will find answers to all your problems here.
Has this guide been helpful to you in fixing this serious Call of Duty Warzone issue? Let us know in the comments section below.
Sometimes Battlefield 1 stutters, lags, and FPS drops. Who wouldn’t find it annoying if this problem cropped up in the middle of the game? FPS drops in Battlefield 1 are a common issue faced by gamers.
Battlefield 1’s developers have tried to update the game from time to time, but it appears that your PC is experiencing some performance issues. Do not fret, as we will show you how to resolve these issues in Battlefield 1.
What causes FPS drops, lag & stuttering in Battlefield 1?
Battlefield 1 FPS drop can be caused by a variety of things, including outdated graphics card drivers, malware and virus attacks, and hard disk problems.
The main cause of Battlefield 1 lag for most users is that their PCs don’t satisfy the minimum specifications. As a result, they experience problems like latency spikes and rubber banding.
How do you fix FPS drops, lag & stuttering in Battlefield 1?
1. Update the graphics drivers
Right-click the Start button and select Device Manager from the list.
Click the Display adapters section to expand, right-click your adapter, and select Update driver.
Select Search automatically for drivers.
If the system finds a new driver, install it.
Sometimes, the system won’t find a new driver and the default one will not work as well. However, you can try a dedicated driver updater software that will help you update the drivers automatically.
2. Disable Steam overlay
Open Steam and then choose Library.
Right-click on Battlefield 1 and then select Properties.
Select In-Game from the left pane, then uncheck the Enable steam overlay option.
3. Set Battlefield 1 to high priority
Launch Battlefield 1.
Press Ctrl + Shift + Esc key combination at the same time to open Task Manager.
Next, go to the Details tab and then right-click Battlefield 1.
Select Set Priority and then choose High.
4. Adjust Battlefield 1 graphics settings
Go to settings in the game.
Experiment with the graphics option to choose a profile that meets your requirements.
5. Use a dedicated software
As you’ve probably noticed, there are a few useful methods to manually increase the FPS or get rid of the lag within games.
However, you may do this a lot quicker with the help of dedicated game booster software that will do all that automatically.
What are the best graphic settings for Battlefield 1?
There are 11 graphics options in Battlefield 1 that affect how the game looks and, consequently, how well it runs on your machine.
Additionally, it features a Resolution Scale setting that lets you render the game at a resolution that is either greater or lower than your native resolution. Some of the best graphics settings are discussed below.
➡ Graphics quality presets – Performance improves by 70–75% when switching from the Ultra preset to Low. Naturally, that also has a big impact on the game’s aesthetic attractiveness
➡ Resolution scale – This down samples or super samples the rendering resolution of the game; so, even if your monitor only supports 1080p resolution, you may still play the game at 4K resolution
➡ Texture quality – The textures of the game, which cover its characters and setting, are impacted by this; lower texture quality to get more performance
➡ Texture filtering – Increased settings reduce texture blocking and blurring on models
FPS drops in Battlefield 1 are a common issue that might leave you frustrated when playing your game.
Fortunately, following the guidelines in this article, you can fix the problem and improve your gaming experience.
Make sure to drop a comment in the dedicated section below if you have any input or questions.
Surely each of us played or at least heard at least once of the Far Cry franchise since it was first launched back in 2004.
If you haven’t gotten around to playing Far Cry 6, the latest title in the series, the fifth one is just as good and entertaining.
However, Far Cry 5 players reported a lot of issues with the game, including low-quality graphics, crashes, or the game not launching at all.
There have even been cases where Far Cry 5 won’t update, but we got you covered for that as well, just in case it ever happens.
That being said, if you also experience low FPS, stuttering, or lag while playing Far Cry 5, the solutions below will help you fix the issues and have a proper experience.
Why is my Far Cry 5 running on low FPS and lagging?
This behavior can be the result of multiple causes, ranging from your device being incompatible with the game, to your graphics card’s drivers being outdated.
Other processes running in the background and in-game overlays can also contribute to noticeable frame drops and stuttering.
When playing a graphics or CPU-demanding game, we recommend closing other processes such as browsers, VPNs, or other programs.
So, if Far Cry 5 is lagging on your Windows 10/11 device, we have prepared a neat guide to help get things back on track.
Can you play Far Cry 5 on Windows 11?
If you have the rig for it, of course. Microsoft actually emphasized that Windows 11 will be their best operating system for gaming so far.
The company recently reminds users about the constant work that goes into improving the gaming experience on the latest OS.
How can I fix stuttering, lagging, and low FPS for Far Cry 5?
1. Check system requirements
There is absolutely no point in going further into this troubleshooting process if the PC you are trying to play Far Cry 5 on doesn’t have the required specs to run it.
In fact, before even buying and installing the game, we recommend you check the list of system requirements associated with the title.
In fact, we are going to provide it for you, so you know exactly what to expect when installing this highly-popular Ubisoft game.
Hardware & Software
Minimum
Recommended
OS
Windows 7 SP1, Windows 8.1, Windows 10 (64-bit versions only)
Windows 7 SP1, Windows 8.1, Windows 10 (64-bit versions only)
CPU
Intel Core i5-2400 @ 3.1 GHz or AMD FX-6300 @ 3.5 GHz or equivalent
Intel Core i7-4770 @ 3.4 GHz or AMD Ryzen 5 1600 @ 3.2 GHz or equivalent
GPU
NVIDIA GeForce GTX 670 or AMD R9 270 (2GB VRAM with Shader Model 5.0 or better)
NVIDIA GeForce GTX 970 or AMD R9 290X (4GB VRAM with Shader Model 5.0 or better)
RAM
8 GB
8 GB
STORAGE
40 GB
40 GB
DirectX
DirectX 11
DirectX 11
This should be the number one step you take when deciding to pick up Far Cry 5 if you want to avoid unpleasant surprises and disappointment.
2. Adjust in-game Graphics Settings
In-game graphic/visual settings will make the difference between a good or bad experience, depending on your PC specs as well.
Make sure you press Esc while in-game and access the Graphics Settings to perform the required tweaks for excellent compatibility.
Not going for options such as motion blur, and turning down the quality for shadows or volumetric fog will result in more FPS.
3. Update GPU driver
Search for Device Manager and open the app.
Expand Display adapters, then right-click on our GPU and select Update driver.
Select Search automatically for drivers.
4. Disable in-game Framerate Lock
You might now know this, but Far Cry 5 comes with a built-in Framerate lock that is set to 30 or 60 FPS by default, depending on your PC specs.
Disabling this feature and setting the FPS to your desired value will improve your experience significantly. However, don’t crank it up too much, or it will just result in low FPS.
You will find the Framerate Lock feature in the Advanced Settings tab of the Video settings for Far Cry 5. We recommend 60 FPS for starters but, again, it all depends on your PC’s power.
5. Close background processes
Search for Task Manager and open the app.
Under Processes, look at the apps using the most CPU power, select them and click on End Task.
Far Cry 5 is not using my GPU
Although peculiar, as the game automatically recognizes the gaming-dedicated GPUs and uses them as default, there have been cases when it happened.
If you are in this situation, press the Esc key when in-game, go to the Monitor tab of the Video settings and, under Video Adapter, select the GPU you want to play on.
These are the solutions proven to have resolved lag, stuttering, and low FPS for Far Cry on both Windows 10 and Windows 11.
Be sure to leave a comment below if this guide has helped you fix any issues you might have had with Ubisoft’s Far Cry 5 title.
The Razer Synapse is a unified configuration software. It allows the user to assign controls to their Razer peripherals. In short, it is a utility tool for configuring Razer peripherals like keyboards, speakers, mice, etc., and automatically saves your settings to the cloud.
Likewise, it is a widely used software, especially in the gaming community. However, users face difficulties using the software, and the Razer Synapse crashing is the most common.
Furthermore, experiencing crashes or freezing in Razer Synapse can happen for many reasons. Some common causes of this problem are outdated OS, broken Razer drivers, and others.
However, you don’t have to worry regarding issues with the Razer Synapse.
Thankfully, there are some fixes for Razer Synapse if it keeps crashing on PC, and we’ll discuss them with you in this article.
Why does Razer Synapse stop working?
Windows Defender Firewall: The Windows Defender Firewall is responsible for protecting the PC from malware attacks and threats whatsoever. So, it blocks programs and software that may harm the computer. However, the Firewall may mistake Razer Synapse for a threat and block its activities across the computer, resulting in the software crashing or freezing.
Issues with Razer device drivers: The Razer Synapse on your computer may crash or freeze if its drivers are faulty or broken. So, problems with the Razer driver may affect its performance.
Outdated Windows OS: Computer malfunctions often occur due to outdated operating systems. It indicates that the computer lacks the necessary updates and patches for fixing bugs affecting it. However, it may affect the programs running on it, for example, the Razer Synapse. It can cause issues with the current version of your software.
Installing Razer Surround with Synapse on your PC: Users complain about various issues with Razer Synapse when there is Razer Surround installed on your computer. So, you can experience Razer Synapse crashing issues if you already have Razer Surround installed.
How can I fix Razer Synapse if it keeps crashing?
1. Turn off Windows Defender
Click on Start in the bottom-left corner of your screen and type Windows Security in the search space.
Select Windows Security from the search results.
Click on Virus & threat protection on the Windows Security tab.
Then select Manage settings under Virus & threat protection settings.
Toggle off Real-time protection.
Click on Start and select Power, then click on Restart.
2. Update Windows
Click on Start.
Select Settings from the options.
Click on Windows Update, then select Check for updates.
Windows will automatically search and download updates if there are any available.
3. Ensure you don’t install Razer Surround with Synapse
Press Windows + Rkeys to prompt the Run window.
Type appwiz.cpl, then click OK to open the Program and featureswindow.
Select Razer Surround and click Uninstall to remove it from your PC.
4. Uninstall and reinstall Razer Synapse and Razer device drivers
Right-click on Start and select Device Manager.
Double-click the Mice and other pointing devices option, right-click on the Razer devices in the category and select the Uninstall device option.
Double-click the Keyboards and Human Interface Devices category, right-click on the Razer devices in the category and select the Uninstall device option.
Click on the Delete the driversoftware for this device option for every Razer device.
Click on Uninstall to confirm (after the process is complete, unplug the Razer peripherals you have connected, then restart your PC).
Plug the Razer device back in. (Windows will automatically reinstall the drivers for the devices)
Download the latest Razer Synapse software. (Reinstall the Razer Synapse software following the prompts from the setup wizard)
You should be able to fix any issues causing the Razer Synapse to crash.
If the problem still occurs, we recommend you use a specialized tool. It will scan your device for drivers that need an update and find the most recent version from its database.
5. Uninstall the recent Windows update
Press Windows + Ikeys to open Settings.
Go to the Windows Update tab and select Update history.
Click Uninstall updates and select the most recent update.
Click on Uninstall.
If the problem persists when trying the fixes above, uninstalling the recent Windows update should help.
Can Razer work without the Synapse?
Users should understand that virtually all devices with at least four onboard memory profiles can store macros on the onboard memory.
However, it’s still done only via Synapse. So, the simple answer is yes, but the user will be disadvantaged because you won’t have total control of some settings like DPI settings, program buttons, lightning timeout, etc.
In conclusion, we hope you’ve been able to solve Razer Synapse crashing issue on your device. We recommend you learn how to fix Razer Synapse if it’s not opening on Windows 10/11.
The Rainbow Six Siege FPS drops on your computer can result in lag and stuttering, affecting your gameplay. This is one of the leading issues, among others, that users have complained about when playing this game.
Tom Clancy’s Rainbow Six Siege is a first-person online tactical shooter video game. It was developed by Ubisoft and released for platforms like Microsoft Windows, PlayStation 4&5, Xbox Series, and others. It is an advanced game that requires a high-end PC to play smoothly.
Nonetheless, FPS issues on your PC affect almost all your games and reduce the performance of your game. If you are dealing with the same issue, don’t panic.
This article will take you through some solutions for Rainbow Six Siege FPS drop in 2022 and permanently fix the problem.
Why is Rainbow Six FPS dropping suddenly?
Outdated graphics driver on your PC: There are a lot of graphic elements in games like Rainbow Six Siege, and they also require a fast refresh rate. However, the graphics driver allows your PC to display screen content. So, if the graphics driver is outdated, it may not function correctly, thus affecting your game’s performance and resulting in Rainbow Six Siege FPS dropping to 0.
Systems requirements: Most people complain about the bad performance of games on their PC without checking if their PC is capable of running the game. Rainbow Six Siege, just like other games, has system requirements that determine the features a PC needs to have to be able to play it. Hence, you may experience difficulties like Rainbow Six Siege’s huge FPS drops if your computer doesn’t meet the system requirements.
Outdated operating system: Players can face some problems if their operating systems, for instance, Windows, are outdated. It impedes the ability of your PC to fix bugs and improve performance by updating.
Many background apps: Games like Rainbow Six Siege need enough system resources like RAM to run smoothly. So, it can result in issues if you have many apps consuming the system resources concurrently.
What can I do when FPS drops or lags while playing Rainbow Six Siege?
1. Check system requirements
Checking the system requirements for the game can help you decipher whether your computer can handle the game.
Users ask why they get FPS drops in Rainbow Six Siege without checking if the computer is durable enough.
We recommend you go to Ubisoft’s official website to read about Rainbow Six: Siege’s minimum and required system requirements.
2. Update the graphics driver
Press Windows + Rkeys to open the Run menu.
Type devmgmt.msc into the search space, then click OK.
Click on the Display adapters option from the search results, then select the driver from the drop-down menu.
Click the Update driver software option, and click on Search automatically for drivers.
Press Windows + Rkeys on your keyboard to open the Run window.
Type Regedit in the search space and press the Ctrl + Shift + Enterkeys to prompt the Registry Editor.
Click on the Game DVR option, double-click on the AppCaptureEnabled option, then select Modify.
In the Edit DWORD (32-bit) Value tab, change the Value data to 0, then Click OK.
5. Update Windows
Click the Start button.
Select Settings and click on Windows update.
On the Windows update page, select Check for updates. (If there’s an update available, Windows will automatically search for it and install it. Restart your computer)
Does scaling reduce the FPS?
Scaling can reduce your FPS rate because it puts more load on the GPU, making it work harder than it usually does. So, it causes your FPS to drop, lag, and stutter.
Connecting to a Remote Desktop session goes through some process that checks if the host or device is certified to connect to the RDS host server.
It ensures that the connection is secure and that no unauthorized system can connect to the Remote host. Hence, users can encounter error messages saying the Remote Desktop Session Host is not configured.
Furthermore, the Remote Desktop session (RDS) Host server vets every connection attempt to decide whether the device requires a Client Access License (CAL) or not. So, for some reason, you may be blocked from accessing the host server.
However, the Remote Desktop Session Host is not configured with any license server error message insinuates that you must configure the Session Host server’s licensing mode.
Likewise, Microsoft offers a grace period of 120 days that allows you to log into the Remote Desktop without a Client Access License (CAL).
After the 120 days grace period, you’ll need to configure a license server for the Remote Desktop session host server.
What is a Remote Desktop session host?
The Remote Desktop Session Host manages the Remote Desktop Services, session maintenance, and configurations.
Likewise, end-users can remotely access active Remote Desktop clients that run on different operating systems such as Windows, macOS, iOS, and Android.
Click on Start and type Windows Security in the search box.
Select Windows Security from the search results.
Click on Virus & threat protection from the Windows Security tab.
Then select Manage settings under Virus & threat protection settings.
Turn off Real-time protection.
Restart your computer for the changes to take effect.
3. Check the RDS CAL license compatibility
You may encounter Remote Desktop licensing issues if the RDS CAL is not compatible with your Windows server.
Is the Remote session safe?
The Remote Desktop sessions connect through an encrypted network that helps prevent security breaches or exposure of the system hosting the Remote Desktop Protocol Services (RDPS).
If your main email client is Microsoft Outlook, then you are most likely the owner of the Microsoft Office Suite, and you probably work in a company environment.
Because of this, the emails that you send and receive are generally of the utmost importance to others, and would generally need saving in one way or another.
One versatile file format that exists is the PDF, and this guide will show you how you can convert Outlook emails to PDF.
Normally, when you would want to save an Outlook email as a file, you’d do the following:
Open the message you want to save
Click on File
Go to Save As
Choose the location where you want to save the email to
Input a file name
Select a file type
The problem is that Outlook doesn’t include PDF as one of the default Save as types.
How do I convert Outlook emails to PDF?
1. Use the Microsoft Print To PDF utility
The Microsoft Print To PDF utility included in Windows 10 allows you to print any email message directly to a PDF.
You can do this by following these steps:
Open the message you want to save
Click on File
Select Print
Choose Microsoft Print to PDF
Select Print
The Save Print Output As box will open
Choose the location where you want to save the email to
Use the Save As feature in Word to save the email as a PDF file
2. Use a third-party Add-in for Microsoft Outlook
There are many Microsoft Outlook Add-ins available that will allow you to save emails directly to PDF. Additionally, there are many professional PDF readers and managers that will also install an Outlook Add-in during their setup process.
As far as strictly saving emails to PDF is concerned, this solution is indeed the fastest. However, having too many Add-ins installed can cause issues with your Microsoft Outlook client.
3. Use a third-party PST to PDF converter
Some of you may not know that Microsoft Outlook stores your emails on your PC as well in a designated location. These emails are saved in a PST file, which can only be opened using Outlook or PST-dedicated programs.
You could use a third-party PST to PDF conversion tool, as they are available as both downloadable clients for the PC, and as web apps online.
If you want a full-feature utility that lets you convert Outlook emails, contacts, calendars, and notes and is able to work with multiple PST file batches, we suggest you try SysTools Outlook PST to PDF Converter.
Have you found a new way to convert Outlook emails into PDF files? Let us know in the comments section below.
Google Drive is cloud storage service where you can save documents, images, videos, archives, and other files too. It provides a minimum of 15 GB of storage, and you can upgrade that to one TB.
However, Google Drive doesn’t include any options to search for duplicate files.
Duplicated files can waste quite a bit of your Google Drive storage space, so this is how you can remove them.
How can I remove duplicate files on Google Drive?
1. Manually remove duplicate files from Google Drive
2. Click on the icon in the upper right corner of the screen to change the view to List View.
3. Write copy in the search bar and press Enter. All the files that contain the word will appear in the list.
Alternatively, you can press the Ctrl + F keys on your keyboard and write copy in the text box that appears.
4. Select a duplicate file and press Delete on your keyboard or right-click on it and select Remove.
5. In order to remove multiple files at once, start by selecting one of them, then hold the Ctrl key and select the others. After, delete them as previously described in step 4.
Although Google Drive does not offer its users a built-in option to remove duplicate files, there is a workaround for this.
Duplicate files are likely to have the word Copy in front of them, given the fact that they are copies of others. Therefore, you can manually search for all the files that contain this word in their title and delete them.
Do note that, if the duplicate files have a different name, they cannot be found using this method and you might need to try out something else.
2. Remove duplicate files from Google Drive using third-party software
Clone Files Checker is freeware software that enables you to quickly find and delete duplicate files from your system disk and cloud storage.
As such, it’s a utility you can erase duplicate files from Google Drive with.
Click theDownload Clone Files Checker button on the software’s home page to save its setup wizard and install it. Then you can remove duplicate files in Google Drive as follows.
First, open Clone Files Checker and click the Cloud Scan tab at the top of its window.
Next, press the Load Drive button and enter your Google account details. Then you can select your Google Drive folders as in the snapshot below.
Select a drive or folder on the left of the window to scan.
On the right, you can select All Files to scan all the files. Alternatively, select Custom to choose more specific file types to scan.
Then press the Start Search button. A brief scan will show you duplicate files in the selected Google Drive folder as in the shot directly below.
Now press the Select Duplicates button to open the menu directly below. That includes a few options for you to select duplicate files such as Retain newest files in each group.
Click an option on that menu to select duplicate files.
Press Select Action to open the window below. Then you can select Permanent Delete to erase the selected duplicate files from Google Drive.
You can also select a Move Items to Trash Folder check box so the duplicates can be restored. Then press Continue to delete the files.
Open Google Drive in your browser. It will no longer include the duplicated files you deleted with Clone Files Checker.
Now you can save hundreds of megabytes of Google Drive storage. You can also scan for and delete duplicated files from your hard disk with Clone Files Checker much the same.
So Clone Files Checker is a handy utility to add to Windows.
Why is my Google Drive storage full?
It seems like the backup, the e-mails, and other files you stored on your drive exceed the space allocated. You can start deleting files from Google Drive or you can back them up on an external hard drive.
We hope you managed to find and remove duplicate files in your Google Drive. Let us know in the comments below what method you prefer.
You’re probably seeing the message There were some problems installing updates but we’ll try again later, or We couldn’t install this update, but you can try again followed by an error code. The Windows Update was not successful and that can have lots of reasons, from an inconsistent internet connection or server issues to software conflicts and corrupted system files.
How can I fix the Windows Update installation error?
1. Run the Windows Update troubleshooter
Press Windows key + I to open Settings.
Choose Update & Security.
Select Troubleshoot from the left pane.
Expand the Windows Update troubleshooter and click Run the troubleshooter.
Does this let you continue with your update installation? If not, try the next solution.
The Windows Update troubleshooter automatically detects and fixes most incorrect settings on your computer that bring the message there were some problems installing updates, but we’ll try again later.
Sometimes you can’t perform an update installation if your computer can’t find the correct IP address when trying to resolve a URL for the Windows Update website or the Microsoft Update website.
This error, usually coded as 0x80072EE7, may occur if the hosts’ file contains a static IP address, so running the Windows Update troubleshooter resolves any issues that prevent you from updating Windows.
2. Run the DISM tool
Click the search box, type command, and select Run as administrator.
In the command line, copy-paste the following lines and press Enter after each:
DISM /online /Cleanup-Image / ScanHealth
DISM /Online /Cleanup-Image /RestoreHealth
After it’s done, reboot your PC.
If you still can’t perform an update installation on Windows 10, run the DISM or Deployment Image Servicing and Management tool.
The DISM tool helps fix Windows corruption errors when Windows Updates and service packs fail to install due to corruption, like if you have a damaged system file.
Once the repair is complete, reboot your computer and perform an update installation again.
3. Manually reset Windows Updates components
NOTE
It’s recommended not to uncheck the update option Give me updates for other Microsoft products when I update Windows. Windows Updates downloads and installs updates required to run Windows efficiently.
Click the search box, type command, and select Run as administrator.
In the command line, type the following commands and press Enter after each:
Close the Command Prompt and navigate again to Task Manager to ensure that the Windows Update service abnormal resource consumption is reduced.
Try rerunning Windows Updates to check if the issue has been resolved.
Back up the registry before you modify it, then restore it if a problem occurs.
4. Run a System File Checker scan
Click the search box, type command, and select Run as administrator.
Type the script below and hit Enter. sfc /scannow
Restart your computer
A System File Checker scan checks or scans all protected system files and then replaces the incorrect versions with the genuine, correct Microsoft versions.
If the update installation issue persists, try the next solution.
5. Temporarily disable your antivirus security software
You can uninstall third-party software, such as a computer cleaner or antivirus, to check whether it can fix the issue.
For antivirus software, temporarily disable it because you need it to prevent your computer from security threats.
Immediately after fixing the update installation issue, re-enable your antivirus.
Suppose none of the previous steps proved to be a definite solution and Windows won’t install updates. In that case, we suggest navigating to Microsoft’s Update Catalog and downloading recent updates manually.
Besides the most recent system updates, some users suggest installing KB5001649 worked for them. So go to the Microsoft Update Catalog to download it and look for other updates specific to your system version.
Install only the updates specific to your Windows version (you can find this information in Settings > System > About).
How do I force a Windows Update to install?
Click the search box, type command, and select Run as administrator.
Paste the scripts below, hitting Enter after each one. net stop wuauserv net stop bits
Launch the File Explorer, and navigate to the following path: C:\Windows\SoftwareDistribution
Delete all the items in the folder.
Click the search box, type command, and select Run as administrator.
Run the following scripts hitting Enter after each one is typed in. net start wuauserv net start bits
Windows will automatically redownload the files necessary to update your computer to the newest OS build. Forcing updates, especially security intelligence updates are crucial for system stability and security.
What can I do if Windows 10 updates won’t install?
If the updates won’t install, it’s possible that Windows Update isn’t working correctly. This can be fixed by resetting the necessary components and trying again.
In some cases, you might get We couldn’t complete the updates message, which appears if an issue with your system prevents the update from completing. Sometimes this can be caused by antivirus software.
You should note that many of these problems are fixed using similar solutions, and many of our solutions will work for there were some problems installing updates error codes 0x8000ffff, 0x800f0922, 0x800f0831, 0x800f0922, 0x80070424, 0x800f020b, 0x80070422, and 0x80080005.
Problem 0x80070057 is another typical error on undesired updates. It is most commonly associated with the Windows 10 upgrade but can sadly extend to other platforms, apps, and actions.
We would like to know what solutions worked for you; please tell us in the comments section.
7. Open SwiftKey and sign in with the account you use on your Windows device.
8. Navigate to SwiftKey Settings.
9. Select Rich input from the list.
10. Go to Clipboard.
11. Enable Sync clipboard history.
12. Ensure the Remember copied items and Show last copied item as quick paste option on prediction bar options are enabled. If not, manually enable them.
The Redmond tech company’s latest update to SwiftKey allows users to sync their clipboard history between Android and Windows 10 or Windows 11.
Know that you could already sync your clipboard between Windows devices, but the functionality now spans across multiple platforms.
In order to use Cloud Clipboard to sync across devices, you need to first enable it on your smartphone and your PC.
You will be pleased to know that Windows 11 also supports clipboard syncing, so the feature should work with Microsoft’s upcoming OS.
It makes total sense to have clipboard content sync, with so many services syncing across devices.
And this will prove to be very useful, seeing how people frequently continue conversations or workflows across devices, thus being able to copy the text on one device and paste it onto another is a major improvement.
Microsoft had another form of clipboard syncing through the Your Phone app before, but having the option directly within a keyboard app may be a more natural option for people.
Are you excited to now use the Windows clipboard on your Android device as well? Share your opinion with us in the comments section below.
Experiencing a high ping in games is annoying because it affects your gameplay. It reduces the game’s performance and disrupts the fun of playing it. However, you can experience high ping in many games.
Games like For Honor need a reasonable response time to allow the game to communicate between your PC and its servers. High ping is a problem many players complain about. So, we’ll guide you through the steps to fix the high ping rate and improve For Honor gameplay.
Furthermore, pings mean the time it takes for your device to communicate with the client’s online server. It can be low, average, or high.
Why am I suddenly getting high ping?
Issues with the network connection: The ping rate in the For Honor game may increase if your network connection is slow or unstable. It affects the communication between the game and its servers.
Outdated network drivers: The network driver on your device enables a network device to communicate with a computer’s OS, likewise, other computers and devices. Hence, if the driver is outdated, you may experience problems connecting to the network device.
Low bandwidth: Playing games on your PC needs enough system resources to ensure good performance. So, if many programs are running on your system, they can consume the most bandwidth, leaving the game with little. So, low bandwidth can affect your game performance, causing For Honor characters to lag.
Before we start making complex changes, here are a few quick checks to perform:
Ensure you are connected to a network and have a high Internet speed. Also, you can switch to a wired connection to reduce ping.
Run For Honor with administrative privileges. To do that, right-click on the game launcher, and choose Run as administrator from the context menu.
If these don’t work, move to the solutions listed next.
1. Use a VPN
Since your internet connection is good, the issue might come from the server you are trying to connect to. If the For Honor server has problems, you will encounter them too.
To gain no lag and no high ping we recommend you use a VPN provider to connect to a server in a different country. The closest the country, the better the connection speed.
To make it facile for you, we have a list of easy-to-follow steps below (using PIA as an example):
Open PIA and click on the On/Off Button to automatically connect to a sever
If you want to connect to a specific country, search and select the one you want
Open For Honor again to see if the problem is still there.
Our Recommendation is Private Internet Access since it’s one of the safest and fastest out there. With a no-log policy, it’s 100% open source, and advanced features for power users, it’s our best choice.
Private Internet Access
Play your favorite games lag-free and gain access to geo-restricted content.
Navigate to the Windows Update tab and click on the Advanced options.
Select Additional options and click on Options updates.
Expand the Drivers updates section, then check the box.
Click the Download & install button.
Updating network drivers resolves issues with the network driver on your PC and makes it connect faster with network devices.
An outdated network driver can limit your bandwidth to incredibly low values. If Windows didn’t find any updates, we recommend you use Outbyte Driver Updater, which is specialized in finding outdated drivers.
3. End process for apps using more bandwidth
Press Windows + R simultaneously to open the Run window.
Type resmon in the text box and press Enter to open the Resource Monitor.
Click the Network option in the Resource Monitor window.
Check the Total volume to know the programs occupying most of your network resources.
Right-click on the program using much bandwidth, then select the End Process option from the function menu.
Click on End Process to confirm the action.
Restart your PC and check if the high ping issue persists.
We hope this article helps you solve the high ping issue in your game. However, you can also check our guide on how to fix For Honor’s common issues you may encounter when playing the game.
Today we’ll walk you through the steps of removing the background/ saving your image with a transparent background in GIMP.
There are actually a few different ways to achieve that – depending on your image, skillset and what exactly you want to do with the resulting image. We included all methods:
How do I make the background transparent in GIMP?
Fuzzy select tool
Launch the GIMP app on your PC.
Open the image you want to edit in GIMP.
Right-click on the image layer from the Layer tab in the right sidebar and select Add Alpha Channel (if the option is greyed-out, it means you already have the Alpha Channel selected)
Navigate to the tools panel and click on the Fuzzy Select Tool (or press U on your keyboard).
Click and drag on your subject to create a selection (keep dragging to increase or decrease it). You can add to your selection by holding Shift and clicking on another area.
Press on Edit in the main menu and hit the Clear button. Alternatively, tap the Delete key on your keyboard to delete the background.
On PC, you can easily make the background transparent in GIMP using the Fuzzy Select tool. For this, you need to open the image as a layer, select the background using the tool, and then delete it.
The remaining result will be your image without a background.
It is advisable to have the Antialiasing, Drawmask and FeatherEdges options enabled in the Tools section.
By using this tool you can slowly make the background transparent in GIMP.
Click anywhere on the image where you want the background gone and start dragging until you reach the desired selection.
Press Delete on your keyboard.
Paths tool
Open the image.
Select the Paths tool.
Zoom the image to get a closer view of the details. Start clicking around the edges of your subject to create an outline.
Curve the lines between the points by dragging them.
If you stop at a certain point, resume the outline by clicking on the most recent point you created then continue.
Close the outline by clicking the first point and hold to unite with the last one.
This is a more time-consuming technique, but perhaps the most accurate one if you want to make the background transparent in GIMP.
Layer masks
Open the image.
Right-click on the layer and select Duplicate Layer from the available options.
Then, in the upper-right menu, go to Colors. Select Saturation, and drag the scale to zero. Click OK.
Go again to Colors. Select Curves and drag the margins of the curve to make the subject as black as possible, and the background as white as possible.
Then go to Colors and choose Invert.
Go to Edit and pick Copy Visible. Turn off the visibility of the layer.
Next, right-click on the original layer and choose Add Layer Mask. Leave everything as default and click Add.
Then go to Edit and choose Paste. Also, in the right lower part of the screen, click on the green anchor icon. At this point, the black areas should remain visible, while the white areas become transparent.
Grab a white brush and fill in whatever imperfect areas you still have.
This is the most advanced technique to make the background transparent in GIMP, as you might have noticed. But it works fine when there are a lot of details on the subject’s outline.
It only works well when there’s a lot of contrast between the subject and the background.
Foreground Select tool
Open the image.
Grab the Foreground Select tool and manually draw a rough outline around your subject. It does not have to be perfect.
Then, brush in the subject without touching the margins. Toggle the preview setting to see how it looks.
Press Enter on the keyboard to convert it into a selection. Then, invert the selection by going to Select > Invert, and then press Delete on your keyboard to remove the background.
Can’t select the subject in GIMP
If you can’t select the subject or are struggling with imprecise selections in GIMP, try to:
Adjust Tool Settings: Modify Threshold and Feather Edges for better accuracy.
Refine Edges: Use Select > Feather or Grow/Shrink to refine selections.
Increase Contrast: Temporarily boost contrast for easier selection.
Combine Tools: Use tools like Fuzzy Select with Paths for precision.
Ultimately, if it’s too difficult to get precise results with GIMP, you can use an AI-powered alternative. InPixio offers a free version with basic background removal features, making the process easier, faster, and more precise with minimal effort.
For advanced tools, a paid subscription is required, but the free version is a great starting point for efficient and hassle-free background removal.
InPixio
Simplify the background removal with InPixio—easy, fast, and free!
And that should do it. You have five ways of removing the background in GIMP, both for the beginner and for the advanced user. We have a new guide on how to blur background in GIMP, so don’t hesitate to check it out.
If you have other suggestions for making a transparent background in GIMP, don’t hesitate to drop us a line in the comments section below.
Running your system without an antivirus is quite risky even if you are not connected to the Internet. You can still get a virus via Steam, Origin, or Uplay exploits.
Also, if you download games from suspicious sources, there is a high risk that they come with injected malware.
They might cause the addition of new toolbars to your browser and sometimes even steal your passwords from your social media accounts.
Nowadays anybody can be the victim of serious cyberattacks, and gamers are not excluded. Actually, they are more exposed to malicious viruses like worms or trojans, thus strong antivirus software is imperative.
Hence, considering powerful antivirus software will offer you protection against critical viruses, plus it may improve your gaming experience with Game Mode functionalities.
To prevent this, consider enhancing your protection with good antivirus. Check out these best antivirus software for gaming PCs and make your pick according to your needs.
– USB guarding tool – Quarantine and ransomware monitor
What is the best virus protection for a gaming PC?
Total AV – Best system maintenance and browsing security
TotalAV is an antivirus program that provides real-time protection against any threats and attacks on your computer. Enhance your privacy, remove all viruses, and optimize your PC with one software.
With a built-in VPN which you can use to browse the web anonymously, it can also be used to connect to a different region via a different server in case your game lags or the server you are playing on is under maintenance.
You are safe every time you change your IP location and your connection will be encrypted to avoid exposure to online risks.
There’s nothing that bypasses your antivirus as they are scanned every time you try to access them. It also protects your PC from any attempts to steal your data. Downloads and executable files are checked before malicious scripts can infect your computer.
TotalAV will get rid of all those pesky ads and pop-ups that show up every time you browse the web or access a site.
Some of the best key features of TotalAV are:
Threat protection in Real-time
Password vault and manager
VPN and ad blocker
Enhance system performance by using built-in tune-up tools
Increased browser security via the WebShield feature
Total AV
Enjoy faster and smoother browsing with a great antivirus with amazing features.
Bitdefender Antivirus Plus is the best full-featured security antivirus, but you should be aware that such a high level of protection doesn’t come cheap.
This is the robust and silent type of protection, and after installation, it goes into Autopilot mode by default, making all security-related decisions for you while you enjoy your favorite games.
The program will never bother you with alerts and pop-ups, and it won’t ask you to go through and configure its behavior.
Thousands of users trust this antivirus program because of the experience they’ve had with it throughout the years.
All tests have proven that it can detect every single threat including 213 zero-day malware samples and more than 20,000 widespread and prevalent malware discovered lately.
In addition, if you choose this performant antivirus solution you secure multi-layered protection from online threats, anti-phishing, or fraud actions. It also provides a Game Mode that will ensure your uninterrupted gaming sessions.
Let’s quickly look at its key features:
Can scan for vulnerabilities such as out-of-date software
Can also check formissing Windows updates and analyzes the strength of your passwords
Provides detailed reports about the vulnerabilities and specific security threats it has detected
Includes a Safepay option for conducting online transactions, which comes in very handy when you buy games
You can call up Bitdefender’s virtual keyboard to protect your system from keyloggers
Bitdefender Antivirus Plus
Enjoy gaming with no interruptions while Bitdefender silently protects you in the background.
ESET HOME Security Essential protects against any type of malware, including viruses, ransomware, worms, and spyware. So it will be your best shot if you want a lightweight and unintrusive antivirus for your gaming PC.
The software’s efficiency has been demonstrated in numerous industry tests and the tool ranks among the top antivirus developers for more than 20 years.
With ESET HOME Security Essential, your gaming experience is safe and the tool’s permanent background activity won’t interfere with any of the ongoing system processes.
Moreover, this antivirus software can provide complex security services and lock your PC against online threats. Hence, your games can run smoothly without being affected by background running apps.
It’s also desirable to benefit from this antivirus program to secure all your devices and thereby enjoy your games from Windows, Mac, or Android OS.
ESET HOME Security Essential’s best key features are:
Gamer mode feature
Password vault and manager
Webcam protection
Sensitive data encryption
Real-time protection against any threats
Thus you can get a professionally verified antivirus to protect your PC from online malware and enjoy your gameplay without trouble.
ESET HOME Security Essential
Protect your gaming PC and stay away from cyber-attacks, plus secure your home network with ESET.
Kaspersky Total Security is packed with some handy utilities, and it’s worth the money.
The software is perfect for protecting gaming PCs. Most users will find that Kaspersky’s default settings are adequate, but if you are after some fine-grain control, you will find plenty of it in its various submenus.
You can also dig deeper by clicking on Advanced Settings to bring up even more options.
Let’s quickly look at its key features:
Integrated file shredder that overwrites deleted files (making them impossible to restore)
Encrypted folders to keep your valuable data secure
Password syncing among more devices
In-built PC clean-up tools
Of course, you can also find free alternatives to all these features, but having them all together in just a single place is more than convenient.
Kaspersky Total Security consistently performs among the best AV programs both in terms of identifying and blocking malware and having a minimal impact on system performance.
The only downside might be the fact that it can take several clicks to dig your way to a particular setting.
Kaspersky Standard
Get complete system security and maintenance package with this amazing antivirus
Webroot Secure Anywhere installs in under one minute and uses very little RAM or storage space. Actually, it uses only 5MB of RAM when idle, and less than 15% CPU when it’s scanning your system.
If you’re looking for a lightweight antivirus for gaming, then Secure Anywhere is the perfect choice for you.
As a matter of fact, there is a special version of Secure Anywhere for gamers. This antivirus version comes with a dedicated system optimizer that detects system issues in real-time and wipes away all traces of online activity making deleted files unrecoverable.
The software is cloud-based, so it will work best when there is an internet connection involved. Secure Anywhere features a series of adjustable settings that you can customize depending on your needs.
Some of Webroot’s best features are:
Lighting fast scans
Threat protection in real-time
Identity theft protection
Password management via a third-party software
Cloud-based with performance guarantee
Moreover, such an antivirus platform will comprehend all your security needs, from ransomware or malware attacks to phishing and identity full protection. It doesn’t promise a Game mode to boost your gameplay, but it will not slow down your system a bit.
Webroot AntiVirus
Lightweight system scans and usage with full security against threats.
Avira is one of the best free antivirus software you will find. Its level of customization is very high, allowing you to customize many options.
You can configure how Avira scans for zero-day threats. However, if you select a high detection level, the risk of getting false positive reports increases.
More than 400 million people already downloaded Avira, and this fact alone confirms that this tool is a powerful and reliable antivirus.
The one thing that you will not get from the free version of Avira is a Game Mode. That’s why we strongly recommend that you go for Avira Pro.
Nonetheless, you can use this safeguard software to get valuable antivirus protection or anti-malware security in order to block viruses to infect your system.
Let’s check some of the key features of Avira:
Scan downloads and files
Blocks infected sites
Verifies USB devices
Detects PUA and offers priority cloud scanning
No ads
Ready to pay a little extra money to secure your gaming experience?
Avira Antivirus
Your gaming device deserves the best anti-hacking protection and this is certainly a sturdy choice!
Avast antivirus tool comes with quite a lot of tools included in its free version, which makes it quite popular.
Regardless, like with all of the other entries, you get what you pay for, and upgrading to the premium version will indeed unlock this tool’s full potential.
Sporting real-time protection, frequent updates, and a pageant for stopping malware before it even has the chance to look at your PC, or the ability to detect Wi-Fi weaknesses, Avast Free Antivirus is truly a tool worth mentioning.
In case you opt for a premium version of the software, you’ll also get webcam protection, which might be useful in case you’re playing games on the network or on dedicated live streaming platforms.
Therefore, with Avast you’re all set regarding rounded online privacy and PC system optimization. If you also want extra safety there is a VPN Line service created for browsing freedom.
Benefits of using Avast:
SecureLine VPN for your safety
Premium cleanup
Anti-track to hide your identity online
Wi-Fi scanning and protection
Avoiding fake and unsafe websites
Avast Free Antivirus
Best free choice of antivirus with great threat protection.
The software provides an easy and quick installation process, and you will get immediate protection against emerging threats.
It is the most efficient protection againstspyware, malware, adware, Key logger, and Rootkits and it offers Fast Scan Technology.
The Advanced Monitoring feature prompts warn you in case any program makes illegal entries in critical registry locations.
It offers a complete USB block for total safety from external devices and uninterrupted external Drive scan and notification, automated removal of Malware.
That being said, this licensed solution mostly covers every area of digital security, including parental control to prevent your children to access bad sites.
Let’s quickly look at its key features:
AutoRun and Short-cut creation protection to minimize virus transmission to other PCs
Yes, any computer can be vulnerable to malware or online threats and gaming PCs make no exception.
Does antivirus slow down gaming?
Most of the time, antivirus software will not interfere with your game so you should be able to play without lag.
Does Norton slow down gaming?
According to different users, Norton can slow down your gaming sessions because it consumes a lot of RAM and other PC resources.
Finding the right level of AV protection for your PC is quite a personal thing. There are of course solutions that are much better than others.
Once you manage to separate the good from the bad, it will all come down to features, price, and other criteria that are important to you.
There is also the question if you really need to use a third-party AV program as long as you havethe benefits of Windows Defender which is free and built into Windows 10.
The advantage of running a security suite is that it provides a more comprehensive solution in a tidy package.
Blue Screen of Death errors is probably one of the most severe errors that you can encounter on your Windows 10 PC. They usually happen due to corrupt system files and hardware problems.
These errors will restart your PC and interrupt your work, and since they can be caused by faulty hardware, you must know how to fix the BUGCODE_NDIS_DRIVER error on Windows 10.
We’ve included some useful solutions to fix these errors for you in this article. Make sure you follow them closely and read everything before trying them out.
BUGCODE_NDIS_DRIVER is a Blue Screen error that can cause many problems on your PC. In addition to this error, many users reported the following issues as well:
BUGCODE_NDIS_DRIVER wireless adapter – This error mostly occurs due to your hardware, and the most common cause is your wireless adapter. If you’re having this issue, be sure to check your wireless adapter and its drivers.
Windows stopcode NDIS_DRIVER – This is just a variation of this error, and you can solve it by using one of our solutions.
Blue screen of death BUGCODE_NDIS_DRIVER – This is a Blue Screen of Death error, and just like all other Blue Screen errors, this one will force your PC to restart as soon as it appears.
BUGCODE_NDIS_DRIVER TP-Link – Many users reported this error while using TP-Link adapters. In most cases, the issue is caused by a faulty wireless adapter or a corrupted driver.
BUGCODE_NDIS_DRIVERCisco VPN Client – Several users reported this issue while using the Cisco VPN client on their PC. To fix the issue, you need to remove your VPN client or update it and see if that solves the issue.
What is an NDIS error?
NDIS is one of the most fatal errors you would encounter on your Windows PC. NDIS stands for Network Driver Interface Specification, a crucial part of your Windows system.
You must be aware that the drivers help facilitate communication between its corresponding hardware and PC, and if they run into an error, you will come across an NDIS error.
NDIS makes sure that all drivers are working perfectly fine. However, if you come across an NDIS error, there is some issue with your installed drivers.
Here are some of the common reasons NDIS errors could trigger.
There is a critical system file missing or corrupt.
The drivers are not updated.
Your PC is infected with viruses or malware.
A third-party program is problematic and causing the problem.
How can I fix the BUGCODE_NDIS_DRIVER BSoD error?
1. Use a third-party BSoD fixer
If you’re having trouble with blue screen crashes, try to use a dedicated repair tool. Professional software will scan your system for damaged files, and with just a few clicks, it will repair or replace them.
2. Update your Windows 10
Press Win + I to open Settings.
Click on Update & security.
Select Windows Update from the left pane.
Hit the Check for updates button.
3. Update your drivers
Right-click on the Start menu.
Select Device Manager.
Expand each section, such as audio, graphics, etc.
Right-click on your driver and select the Update driver option.
3.1 Update drivers automatically
To prevent BSOD errors, updating all drivers on your PC is advised. While you can manually update drivers on your PC, this process can sometimes take a while as you have to perform the same steps for all of your drivers.
Therefore it’s better to use third-party software such as Outbyte Driver Updater to update all drivers on your PC with a single click.
Outbyte Driver Updater
You need to keep your drivers updated at all times, and Outbyte Driver Updater will also make your PC faster!
4. Disable or uninstall your Wi-Fi adapter software
Right-click on the Start menu.
Select Device Manager.
Expand the Network adapters section.
Right-click on your driver and select the Update driver option.
5. Roll back to the previous driver
Right-click on the Start menu and select Device Manager.
Locate your Wi-Fi adapter and double-click it.
Navigate to the Driver tab and click the Roll Back Driver button.
Follow the instructions on the screen to roll back your driver.
After you’re done, restart your computer.
A problematic driver can cause the BUGCODE_NDIS_DRIVER BSOD error, and several users reported that the latest Wi-Fi adapter driver was the cause for this error.
According to users, rolling back to the previous version of the driver fixed the issue for them. To install the older version of the driver, do the following:
A few users reported that they could not roll back the driver, so to fix this problem, we advise you to check out our dedicated guide on Safe Mode.
5.1 How to access Safe Mode
Restart your computer while it boots. Repeat this step until you start the Automatic Repair process. Alternatively, you can just hold the Shift key and click the Restart button.
Choose Troubleshoot, then go toAdvanced options.
Then go to Startup Settings and click the Restart button.
When your computer restarts, select Safe Mode with Networking by pressingF5 or 5.
Once you enter Safe Mode, roll back your Wi-Fi adapter driver. You can also uninstall the problematic driver and download the older version to fix this problem.
Select Selective startup and uncheck Load startup items.
Go to the Services tab. Check Hide all Microsoft services and click on Disable all.
Click Apply and OK.
If you get asked to restart your PC, choose not to.
Start Task Manager by pressing Ctrl + Shift + Esc.
Navigate to the Startup tab.
Right-click each entry on the list and select Disable from the menu.
After you’re done, close Task Manager and restart your computer.
Now you need to repeat the same process and enable each service and application one by one until you find the one that is causing this problem.
Wireless adapters are the common cause of the BUGCODE_NDIS_DRIVER error on Windows 10. So update your drivers and check if your wireless adapter is working correctly.
Several users reported that performing a Clean Boot before upgrading to Windows 10 fixed the BUGCODE_NDIS_DRIVER error.
Even if you performed a clean install of Windows 10, you could try Clean Boot to find problematic software causing this error.
How can I fix the bugcode NDIS Driver on Windows 11?
Update all drivers on your PC.
Check if any Windows update is pending. If yes, then install it.
Reinstall the network driver.
Scan your PC for viruses or malware.
Reset your PC.
Install Windows OS again.
Check for hard driver errors.
Perform a system restore.
Can I disable NDIS?
Right-click on the Start menu.
Select Device Manager.
Expand the Network adapters section.
Right-click on your driver and select the Disable device option.
There you have it from us in this guide. In the comments below, let us know which of the above solutions fixed the problem for you.
If your computer is malware-infected, you should remove the threat as soon as possible, because it can seriously harm your system, and it will put your privacy at risk.
Having an antivirus to protect you from dangerous threats such as spyware and malware is mandatory. Unfortunately, new types of viruses are coming out, and some of them can bypass some antiviruses.
If your antivirus couldn’t detect and block malware from infecting your PC in the first place, you need to use one of the following virus removal tools to clean it.
Good antivirus software can detect and remove all the well-known threats such as trojan, chromium malware, neshta, ransomware, or Segurazo. On top of that, they keep updating their databases to protect you against any emerging, new threats.
If you are trying to determine which is the best virus removal software for Windows 10, we have some great suggestions for you. All the following are good options, it all depends on your specific needs.
What is the best malware removal software?
Total AV – Best browsing security and system maintenance
TotalAV is an antivirus program that provides real-time web browsing protection, enhanced privacy, and virus removal. Enjoy all the security features you need to keep your system safe.
With multi-device compatibility, you can protect up to 3 devices with intuitive and easy-to-use interfaces across Windows, Android, Mac, and iOS.
Malware is one of the most common viruses, so you need protection against it. TotalAV features award-winning anti-malware protection to keep harmful things away from your PC.
It also protects your PC from any attempts to steal your data. Downloads and executable files are checked before malicious scripts can infect your computer. There’s nothing that bypasses your antivirus as they are scanned every time you try to access them.
A built-in VPN protects your privacy when accessing the Internet. Change your IP location and encrypt your connection to avoid exposure to online risks.
A VPN allows you to access even geo-restricted content. If you set your IP location to another country, it will treat you as if you are from that country and you will be able to see all its content.
Prevent snoopers and hackers from monitoring your browsing habits. Never tell anyone what sites you visit, what cards you use, or what you buy.
Annoyed by seeing too many ads online? TotalAV brings a TotalAdblocker so no more pesky ads, notifications, and pop-ups will show up.
Some of the best key features of TotalAV are:
WebShield for browser security
Real-time protection against threats
Tune-up tools for enhancing system performance
Password vault and manager
Zero-day cloud scanning
When no ads are shown, no ads will be loaded, so web pages will launch faster because they require less data to load.
Total AV
Enjoy faster and smoother browsing with a great antivirus with amazing features.
Bitdefender Antivirus removes all malware installed on your computer and prevents future attacks as well. It can detect, block, and remove all types of threats including ransomware, trojan malware, malicious software, and suspicious links.
This solution identifies malware installed on your PC and removes it in the blink of an eye. Bitdefender has had the best malware detection rate in the cybersecurity industry for years.
Artificial Intelligence-backed algorithms and other revolutionary technologies will instantly detect and remove threats, without affecting your PC’s performance.
Many attacks happen while you browse the web. It is established that the antivirus finds and blocks threats, but it also offers a dedicated browser security plugin.
Bitdefender traffic light has an advanced malware filter, phishing attack protection, and a link scanner. Moreover, it can identify trackers for Firefox, Chrome, and Safari.
This antivirus software keeps you protected from attackers at all times while still ensuring you have a good user experience. You can set up game, movie, and work modes to delay certain notifications such as scan reports. It can also pause unwanted background activities to boost the performance of your computer.
Other key features include:
Parental controls
Battery mode
Integrated VPN
Wi-Fi security
Password manager
File shredder
Bitdefender is one of the best virus removal software for Windows 10. It has a free version and several premium packages. You can pick the standard Bitdefender Antivirus Plus, or opt for Bitdefender Total Security or Bitdefender Internet Security.
Bitdefender
The world leader in digital protection is offering its services at a special price. Take advantage of the offer now.
ESET HOME Security Essential is one of the safest and most secure antivirus software on the market, providing privacy and protection for both businesses and home users.
Being constantly updated, the program can detect even the newest viruses that usually bypass other antiviruses. ESET is not only able to detect such threats, but it will also remove them.
For instance, ransomware infections are pretty hard to get rid of if you are not prepared. Eset is a powerful ransomware virus removal software because it uses a dedicated feature called Ransomware Shield that is able to quickly detect any malicious code before it does any damage to your PC.
Actually, the tool features several individual malware removal software that can tackle specific threats. ESET lists around 30 such tools on its website and constantly updates them.
It can detect and remove notorious threats such as all sorts of trojan threats. The software is also a good option for svchost virus removal on Windows 10.
The company also offers detailed information about each particular threat, including information about its origin, behavior, and ways to remove it.
You won’t have to worry about accessing suspicious sites anymore. ESET will make sure no unwanted guests will enter your system and steal your data.
Benefit from these awesome features on a multitude of devices and Operating Systems, thanks to ESET’s compatibility. One license ensures protection across all your gadgets.
Moreover, the program can encrypt your photos, and keep your network secure. remove any existing viruses from your computer, while also allowing you to make safe online payments.
Other key features include:
Webcam security
Scans new files as they download
Gamer mode
Parental control
ESET HOME Security Essential is licensed-based. It has multiple versions with specific protection features integrated. You can try any of them for free for 30 days.
ESET HOME Security Essential
Remove any threats and protect your device from future attacks with the most secure antivirus.
If nasty malware sneaked into your computer, Kaspersky Standard is here to save the day. The company offers a powerful virus and spyware removal tool that can detect and remove all threats.
Kaspersky’s Virus Removal Tool is a free product that detects a malware, adware, riskware, and other similar threats. After disinfecting your PC, don’t forget to restart your computer to remove any traces left.
After downloading the tool, simply open the downloaded file to install and launch the software. If you’re having problems launching the tool, try opening it in Safe Mode.
The user interface is very friendly and intuitive: all you need to do is hit the scan button and resume your work. The scanning process will continue in the background.
Kaspersky ensures safe navigation across the web. It offers protection of personal data, an advanced ad blocker, and online transaction protection.
Kaspersky offers Windows users a powerful password manager. You can use it to store other types of sensitive information like private documents or card information. It works with up-to-date encryption technologies.
Other key features include:
Integrated VPN
Public Wi-Fi data protection
Anti-Phishing
Mobile apps
Kaspersky offers multiple security plans, both for individual users and enterprises.
Kaspersky Standard
Try this complete protection service to protect your PC against malware and other viruses.
VIPRE is a handy solution to clean your PC if you are already infected with a virus. If malware disabled your VIPRE antivirus, you can still download VIPRE Rescue to clean your computer.
This software installs very fast without causing Internet security software conflicts. It is very straightforward and provides all the necessary tools for scanning, updating, and keeping threats away.
Vipre automatically scans any removable devices you connect to your PC. This prevents viruses from spreading from your drives into your PCs and can also help you remove the viruses while keeping your data intact.
Vipre can easily detect and stop web-based threats and keep your data protected in real-time.
Another useful feature this antivirus offers is the Secure file eraser. This allows you to remove any unwanted traces of uninstalled programs. It can help you remove malicious software such as the Chromium virus or Segurazo.
The tool runs a full system scan, analyzing each and every file, including registry entries, system processes, program files, etc.
You may find that VIPRE Rescue takes a bit longer to finish the scanning process, so if the process appears stuck, don’t cancel it. Just wait for a few more minutes.
Even if the process of scanning and cleaning your computer takes longer than expected, VIPRE Rescue Scanner provides you with accurate results.
If the malware infection is preventing your computer from functioning properly, boot it in Safe Mode and then download VIPRE Rescue, launch the app and allow it to clean your device.
Other key features include:
Low CPU usage
Malicious website blocker
Automatic updates for Windows 10 software
Email security
Firewall
Vipre has 3 different types of subscription plans. The basic plan includes all the features presented, and the other two have additional benefits such as an integrated VPN and a dark web scanner.
Vipre
Vipre provides award-winning security and privacy protection to MACs and PCs.
Avast Free Antivirus is, among many other things, a free malware scanner and remover. You can choose to use the free versions forever or upgrade to the premium or ultimate versions, which have more features.
Speaking of features, Avast Free Antivirus is no short of them. The software includes a malware scanner and removal tool, and the premium version includes a PC cleanup tool as well.
You will be able to detect and stop any type of malware, as well as quarantine suspicious files to prevent the spread of the virus before it’s too late.
In addition to the system scanner, Avast Free Antivirus will actively find malware and adware while you’re browsing the internet. It will constantly warn you and block dangerous and unsafe websites.
The program also comes with a VPN and other privacy-related measures that will keep your identity private and your personal information safe.
Avast provides a more secure browser alternative that is created to protect against and prevent all security problems that can happen while browsing. It comes with anti-phishing technology, advanced encryption for tons of websites, digital identity masking, and more.
On the topic of online security, Avast antivirus can detect and remove svchost.exe viruses at a higher rate than other similar software.
Other key features include:
Integrated PC cleanup utility
Mobile apps
Password security
Avast is one of the best options when it comes to free virus removal for Windows 10 because it offers up-to-date protection and tons of features free of charge. If you, however, need additional features, you can pick a premium plan.
Avast Free Antivirus
A great free solution that helps you protect your system against online risks.
Avira is completely free antivirus software that is really popular for its ability to keep away viruses, trojans, internet scams, and other harmful software from your device.
This powerful anti-virus tool protects and scans your computer for any intruders. It thoroughly scans and removes viruses, ransomware, banker trojans, and more. In addition, you will get a comprehensive list of information about each threat.
In addition to removing viruses, Avira can also clean your PC of leftover files, thus increasing its speed and performance.
You will also benefit from a free VPN to secure your online activities and keep your identity and location private.
This free virus removal tool also has a powerful PUA shield. PUAs (potentially unwanted software) usually pose as software solutions, but actually, steal data or use your computer’s resources for crypto jacking or other malicious activities.
For example, Segurazo virus removal for Windows 10 is an intrusive software that is often included in installers of legitimate tools. It poses as an antivirus and tries to convince you to buy a subscription to fully protect your PC. Avira can safely detect and remove it before it does any damage.
Avira has the ability to protect you in real time against suspicious websites. It can detect and block harmful websites before they load. Along with that, it has an integrated ad blocker that prevents intrusive and malicious ads from loading.
Other key features include:
Password manager
Runs on Windows, Mac, Android, and iOS
Cloud-based antivirus scanner
Ensures all apps are up-to-date
Avira is one of the best virus removal software for PC that you can download for free. It provides a powerful set of features that other antivirus tools of a similar range charge for. It does, however, have premium versions that come with additional features and improvements upon the original free features.
Avira Antivirus
Get rid of all types of harmful software easily and keep yourself protected with Avira Antivirus!
SpyHunter is a highly effective malware-removing tool created to help the average computer user in removing malicious threats from their PC.
As malware continues to evolve and become more sophisticated to avoid detection by anti-spyware/anti-virus programs, SpyHunter responds with advanced technology to stay one step ahead of today’s threats.
It offers additional customization capabilities to ensure that every user is able to customize SpyHunter for their specific needs.
SpyHunter has the ability to detect and remove rootkits, which are used to stealth install ransomware. It can also remove rogue anti-spyware programs such as Segurazo virus removal, trojans, and other security threats.
Rootkits use hidden and encrypted files and folders to avoid detection by traditional security software.
SpyHunter’s has an advanced rootkit detection technology that performs an instant rootkit scan.
Other key features include:
Lets you exclude certain apps from being detected
Responsive helpdesk
Constant updates
The tool will then ask the user to reboot the computer and will remove the found rootkits from the PC during the reboot process.
SpyHunter
Viruses will be a thing of the past once you get SpyHunter installed and running on your PC.
Malwarebytes is excellent security software that detects and removes malware and advanced threats, preventing them from degrading PC performance or attacking your system.
The software relies on four layers of malware-crushing technology: anti-malware, anti-ransomware, anti-exploit, and malicious website protection.
The tool can detect and remove all malware types, including adware and Trojans. The scanning process usually takes only a few minutes to complete.
In other words, the malware won’t be sticking around for too long if you scan your PC regularly.
Not only can Malwarebytes detect and prevent viruses, but it can also remove them with ease, even if you don’t have it on your PC at the time of the infection. It has a really good rate of trojan virus removal for Windows 10.
If your computer gets infected with a trojan. delf or other similar viruses that block your internet access, you can easily remediate the problem with Malwarebytes.
You need access to a secondary computer so you can get the Malwarebytes offline installer. Just add it to a removable disk and install it on the infected computer, run a scan, and remove all threats.
This is reportedly one of the best software to detect even the sneakiest viruses that try to take over your PC, like auto-typing malware. While there are manual solutions for auto typing virus removal for Windows 10 users, Malwarebytes can be an extra precaution against these.
Malwarebytes is a good option when it comes to other common threats that infiltrate your PC. It is reportedly one of the best free antivirus software for neshta virus removal as well as cloud net virus removal for Windows 10.
Other key features include:
Minimal impact on PC performance
Easy and customizable settings
Intrusive ads removal
Next-gen VPN
Malwarebytes Anti-Malware is light and doesn’t take up much space on your drive. You can test Malwarebytes 3 for free for 14 days and get full real-time protection.
After the 14 days are up, Malwarebytes 3 reverts to a limited free version that will only disinfect your computer after an attack.
Malwarebytes
Extensive antivirus scans are something few products can do properly, but Malwarebytes is not one of them.
Norton AntiVirus Plus is a very useful tool that removes deeply embedded and difficult-to-detect malware and unwanted software.
If malicious software remained undetected by traditional antivirus solutions, rest assured, Norton Power Erase will trace it and completely remove it from your computer.
Keep in mind that Norton Power Eraser uses an extremely aggressive scanning technology that sometimes may mark a legitimate program for removal, which you can undo easily.
The tool is very lightweight, quickly scanning your computer for threats. You can use it even if you have a Symantec product or any other antivirus solution.
If the malware infection is preventing you from starting your computer, you can run Norton Power Eraser in Safe mode.
Norton Antivirus includes a password management feature. You can use it to safely store all your passwords, credit card information, and other sensitive data.
Norton Power Eraser can identify potentially unwanted applications like adware, browser hijackers, or spyware. These infections can be hard to detect because they present themselves as regular, legitimate software, or pose as other software, using similar or identical names.
Such attacks often happen to Chromium browser users, but Norton can easily conduct a safe and full chromium virus removal on Windows 10 PCs, allowing you to continue using the great features provided by the legitimate Chromium browser.
Other key features include:
Cloud-based backup
Parental controls
Integrated VPN
Dark web monitoring
Norton Antivirus is subscription-based. It is compatible with Windows and macOS computers. They also offer mobile apps for Android and iOS.
McAfee Labs Stinger is a standalone tool that detects and removes specific virus categories. It is a useful additional tool when dealing with infected systems.
The Threat List of the tool includes a list of malware that Stinger is configured to detect. If the specific malware affecting your PC is not on Stinger’s list, it won’t detect it.
Stinger also includes a real-time behavior detection technology that monitors suspicious activity to detect malware in real-time.
You can also add a series of filters and choose what to scan, how to run the scan, and what happens after threats have been detected.
This utility can remove all traces of trojan, ransomware, and exploit viruses, as well as several potentially unwanted software like the previously mentioned chromium virus of the segurazo virus removal.
Stinger can scan your whole computer, or specific folders/drivers. You can the exact locations you want to scan by using the Customize my scanner feature.
Other key features include:
Compatible with Windows OS starting with Windows XP
Custom detections
This tool is great for removing specific threats, however, for maximum protection, we advise you to use a full-featured antivirus along with it. McAfee offers various options that are well-received by users.
⇒ Get McAfee Stinger
Keeping your computer secure is primordial nowadays. If your antivirus couldn’t block malware from infecting your computer in the first place, the virus removal tools listed above will definitely remove it.
Whether you use Overwolf as a developer to create extensions for games or end-user, depending on the situation, you may have to delete the Overwolf account and all the data associated with the account.
Deleting the Overwolf account is a straightforward process and there are no strings attached. In this article, we show you how to delete the Overwolf account and all the data in it.
How can I delete my Overwolf account?
1. On your desktop, launch the Overwolf client and sign in with the username and password of the account you want to delete.
2. From the home screen, click on theOverwolf tray icon.
3. Go toSettingsand click onPrivacy.
4. Scroll down to the Account Privacy Preferences section.
5. Here you will see the Delete Account button. Click on it.
6. Confirm the deletion.
7. That’s it. Close the Overwolf client and you are done.
You can easily delete your account on Overwolf using the app’s client. All you need to do is navigate to the account deletion section and press the Delete account button.
What else should I know about deleting my account on Overwolf?
Clicking on the Delete Account button is the first step in removing your Overwolf account. Here are a few more things to note to successfully delete the account.
Verifying email address
Overwolf requires the users to verify their email addresses to be able to remove the account successfully.
You may receive an email to verify the account, make sure you click on it to complete verification. Ignore if you did not receive any links from Overwolf.
The account is not deleted instantly
After clicking on Delete Account and signing out, your account will be suspended for 2 weeks.
Once the two weeks are over, your Overwolf account and all related data will be permanently removed.
You cannot reactivate the account
Once the Overwolf account is permanently removed after 2 weeks’ time, the user will not be able to reactivate the account.
All the actions related to the deletion of the account are permanent and irreversible.
This action will also cancel your in-progress data package requests.
So that was about how to delete the Overwolf account and all related data. However, do read the second section of the article to understand more about the risk associated with canceling the Overwolf account.
We hope you managed to find out what you were looking for. Let us know in the comments section if you have any questions.