How to Enable or Disable the Adaptive Brightness on Steam Deck

Do you know the steps to use the Steam Deck adaptive brightness feature? This article will help you with this.

Steam Deck is the newest edition in the game console world. With a lot of potential, it is probably going to dominate the market. There are already many Steam Deck verified games available.

As it is a new product, you may not know the usage of many of its features well.

The adaptive brightness feature is one of them. It helps to give you a convenient gaming experience on Steam Deck.

But, in some cases, you may want to keep it disabled for your convenience. So, this article will help to know how you can enable or disable this feature.

What happens when adaptive brightness is enabled?

When you enable the adaptive brightness on Steam Deck, it helps to see contents better by lowering or increasing brightness based on the light intensity in your environment.

If your room or surrounding has too much light, you will need more brightness on the screen to see the content correctly. In a dark room, too much brightness can hurt your eyes.

Even though you can increase or decrease the level manually, it will happen automatically when adaptive brightness is enabled.

    How do I enable or disable adaptive brightness on my Steam Deck?

    You can manage the settings for adaptive brightness via your Steam Deck’s built-in Display Options. From there, you can toggle adaptive brightness on and off with a simple click.

  1. 1. Press the Steam button to open the Menu.

    pressing steam key steam deck
  2. 2. Go to Settings.

  3. 3. Navigate to Display.

    navigate to the display settings section steam deck
  4. 4. Now, toggle the switch on or off next to the Enable Adaptive brightness to enable or disable it.

    enable or disable adaptive brightness steam deck toggle
  5. 5. If you don’t like the setting you just chose, you can simply press again on the toggle button to change it.

In display settings, there are other related options, like Night Mode, Display Scaling, etc.

You can tweak these as well to adjust settings according to your comfort. You can do even more, like changing resolution when Steam Deck is docked or undocked.

Should I turn on adaptive brightness on the Steam Deck?

The answer depends on the situation. If you mostly play in indoors on a steady brightness level, you can disable this feature to avoid unwanted interruption.

However, suppose you often go outside and use Steam Deck. In that case, the adaptive brightness feature comes in handy as the level of brightness is dynamic outside, and you may feel uncomfortable when there is too much light, but the screen brightness is very low or vice versa.

But, for best, we suggest you test this feature and determine if it is useful for you or not. Then, you will understand whether you should turn on adaptive brightness on Steam Deck or not.

There are other interesting features you can use on Steam Deck, such as playing games offline on it. If you want to find out more about this, check out our dedicated guide on using the Offline Mode in Steam Deck.

What can I do if Steam Deck adaptive brightness is not working?

If you notice that the brightness level is not changing depending on the ambient brightness even after the feature is enabled, it means there is something wrong.

This problem may come due to a hardware fault or a software bug. If the sensor is faulty, the problem may appear. In this type of situation, check for software updates, and restart the Steam Deck.

If nothing fixes the Steam Deck adaptive brightness not working issue, you can go and claim your warranty.

This article has explained how you can use the Steam Deck adaptive brightness feature. If you have any opinions, let us know in the comments box.

Omegle Asking For Captcha Every Time: 5 Ways To Stop it

Yes, having to constantly enter a Captcha every time you visit a website can get extremely frustrating really quickly.

But, as you surely know, this doesn’t only happen on Omegle, and it can basically happen on every website out there.

Before we get into solving this issue, since we are talking about Omegle, we can also show you to fix your VPN not working on Omegle.

Furthermore, we can also assist if Omegle has an error connecting to the server, or if you are looking for the best browsers for Omegle.

Now, circling back to why we’re here, when you are visiting Omegle, the website is always going to require you to deal with Captcha, so we’re going to show you what to do in this case.

Why is Omegle always asking for Captcha?

Well, you should know that Omegle, like other websites, primarily uses CAPTCHAs to limit bot access to its site. 

Website creators strongly believe that bot interactions aren’t in the best interest of the user experience, and try to prevent them. 

As you know, bots are software that runs automated tasks such as spamming random text, and sending the same messages over and over again, often used by scammers to send you links to phishing websites.

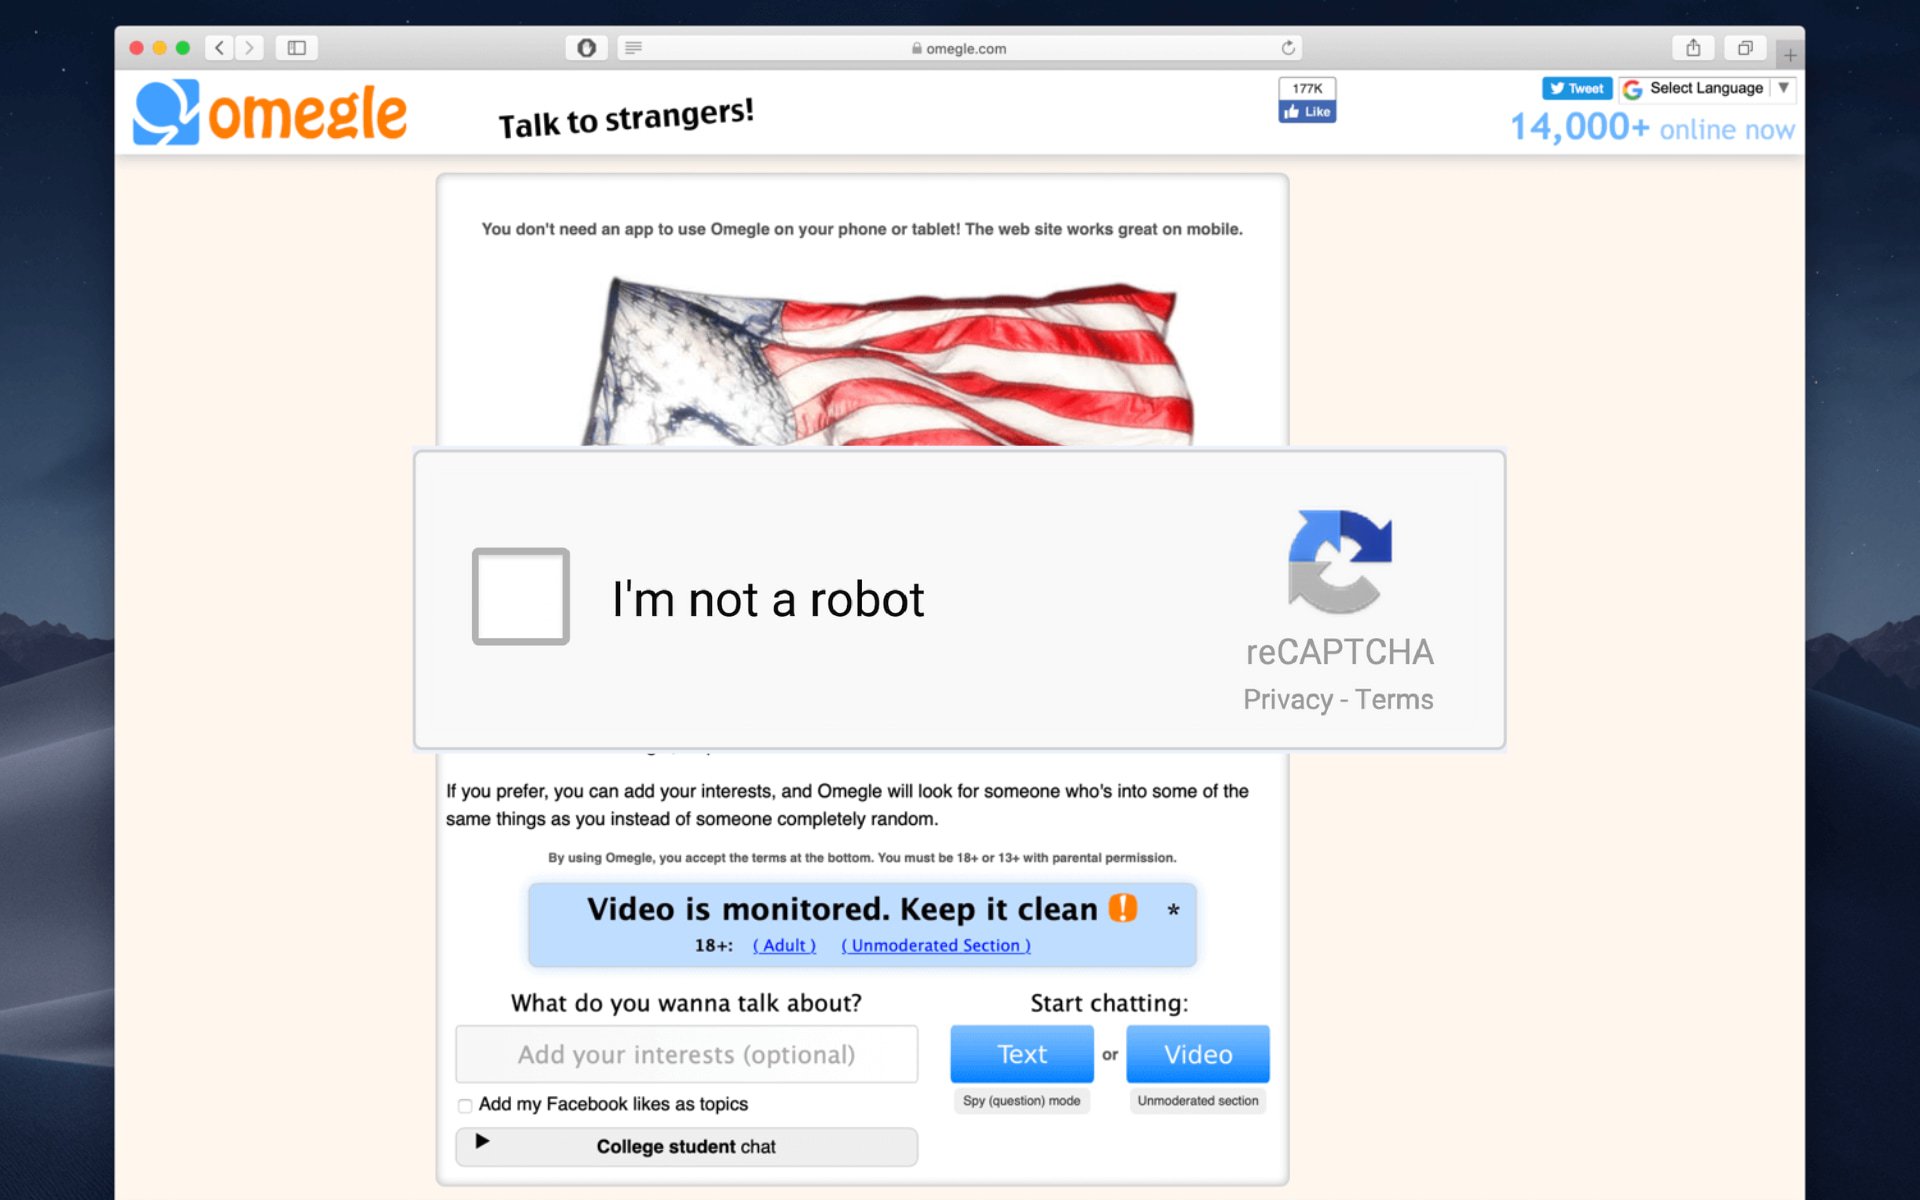
So, each time you see a captcha appear on Omegle, it means that the computer program is confused about whether you’re a real person or a bot.

Thus, if Omegle keeps asking for Captcha every time, we recommend following the guide below for a quick fix.

How do I stop Omegle from always asking for Captcha?

1. Restart your router

One of the most effective, and at the same time simplest solutions that we can offer you for this annoying problem is to actually reset the Internet router.

You might go thinking that such a simple measure couldn’t have the desired effect, but in fact, users have reported it doing the trick.

So, before we get further into it, make sure that this is the first thing you try when Omegle keeps asking for Captcha.

2. Clear the browser’s Cookies and Cache

  1. Open Chrome.
  2. Click on the Customize and Control Google Chrome button, then select History.chrome history
  3. Click the Clear browsing data button.history
  4. Select Cookies and other site data and Cached images and files, then select Always, and press Clear data.clear history

3. Scan your PC

  1. Search for Virus & threat protection and open the app.virus and threat
  2. Select Scan options.scan options
  3. Choose Full Scan, then click the Scan now button.full scan

4. Use a VPN

  1. Download and install Private Internet Access.
  2. Open the VPN app.
  3. Select the desired region.PIA region
  4. Start the VPN service.PIA on
  5. Access Omegle.

PIA is a trusted VPN provider that offers multiple layers of protection from online threats. It has built-in anti-malware, keeps no logs with a no-logs policy, and is one of the fastest VPNs on the market.

Private Internet Access

Your own web companion to aid web surfing and protect you against any threats.
Free Trial Visit Website

5. Contact the Omegle staff

When all else fails, the time has come for you to finally contact the staff over at Omegle and let them know you have this problem.

Users that haven’t managed to solve this issue any other way have reported success after bringing the problem to the staff’s attention.

So, as the last step, we recommend that this be the course of action you take against this Omegle captcha problem.

Is Captcha necessary on Omegle?

Yes, it actually is. It’s a rule that site developers have agreed on enforcing in order to try and limit the number of fictitious accounts.

That being said, there are services out there that let users bypass the Captcha. This service integrates a bot into your browser’s code so you can automatically bypass Captcha easily every time.

And, since Captcha was created to filter out bots from humans, the above process is actually similar to cheating because you’re letting software integrated into your browser code to help you bypass this security feature.

There you have it! There isn’t much to it for those situations when Omegle keeps asking for ReCaptcha, and now you know all you have to do.

Was this article helpful to you? We would appreciate it if you would let us know in the comments section located below.

3 Ways to Fix Lag, Stuttering & FPS Drops on MapleStory

There are so many video games out there that will surely satisfy all needs and demands of everyone that is even remotely into gaming.

From pixelated old-school arcade games to the latest triple-A titles with enhanced graphics, all you have to do is want to play something and you will surely find what you are looking for.

But, as all gamers will tell you, video games can sometimes drive us to the brink of insanity, as they can be full of bugs, laggy, or incompatible with the right we are trying to play on.

That’s why, in order to help you have a more pleasant experience, we can show you the best browsers for gaming.

Also, seeing how not all gaming is done on PCs and laptops, make sure to check out what is happening in the console gaming market.

Now, coming back to why we are here, we’re going to show you how to improve your MapleStory experience, in case it is laggy, or has FPS drops.

If you are playing MapleStory, the 64-bit version, and you have lag, what you need to do can be found in the rows below.

Why am I having FPS drops on MapleStory?

In general, FPS drops can occur if you have problems with your connection or the servers are too busy, or it might also be some system configuration issues.

That’s why, whenever you start experiencing, you will first need to check if everything is running optimally, and then gradually move on to updating drivers.

So, in case your MapleStory is stuttering, or your MapleStory has lag when attacking, this guide will show you what you need to do.

How do I fix lag & FPS drops on MapleStory?

1. Check system requirements

First of all, when we are dealing with video games, we first need to ensure that the specific title can run properly on your PC.

If your rig isn’t powerful enough to run MapleStory, you will start experiencing lag, stuttering, or major FPS drops.

We’re going to have a look at the system requirements for MapleStory, so you can make sure that you can play it properly.

2. Update video driver

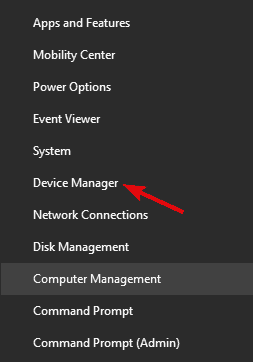
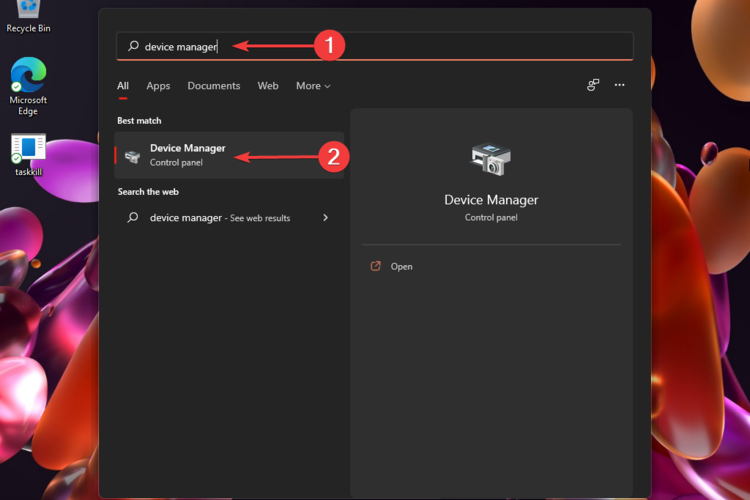
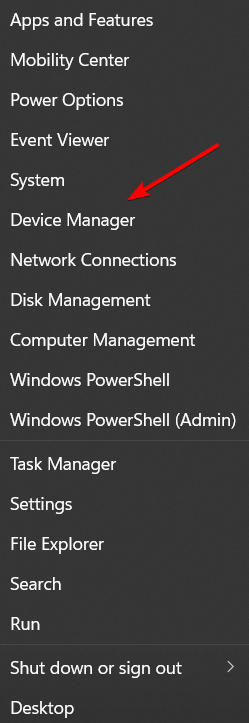
  1. Search for Device Manager and open the app. device manager
  2. Expand Display adapters, right-click on the one you are using and select Update driver.display
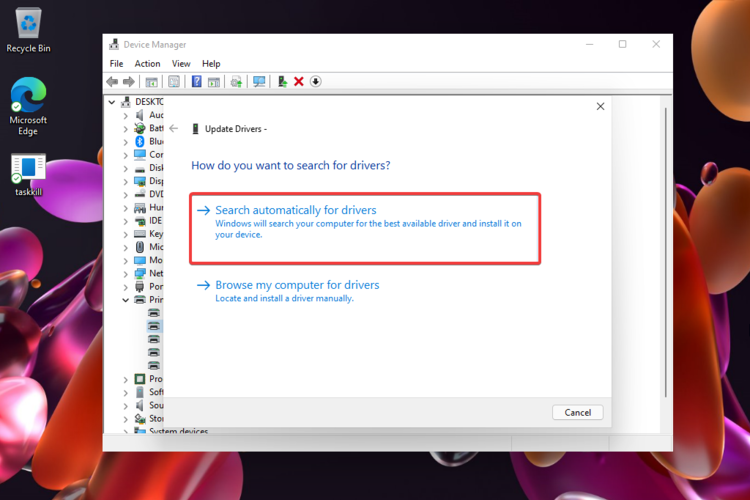
  3. Select Search automatically for drivers.auto

Updating your drivers manually can be a bit challenging, therefore a specialized tool, such as Fortect Driver Updater can perform this process in a much easier and safer way.

⇒ Get Fortect Driver Updater

3. Switch to a wired connection

Taking into consideration that MapleStory is a free-to-play, 2D, side-scrolling massively multiplayer online role-playing game, a steady and reliable Internet connection is a must.

We’re not saying that a wireless connection is not good for playing your favorite game, but we strongly recommend switching to a wired connection for online games.

Having slow internet can cause stuttering, lag, and FPS issues, so keep that in mind the next time you are in such a predicament.

Thus, in case of MapleStory is stuttering, or lags on Windows 10/11, make sure you go through the troubleshooting process above.

Has this guide been useful to you? Make sure to let us know in the comments section located below.

5 Ways to Fix your Webcam When It’s Not Working on Streamlabs

If you are a professional who loves to use Streamlabs for content creation, and your webcam is not working, it can be frustrating.

Previously known as the Streamlabs OBS, the Streamlabs desktop is a free and open-source streaming software that allows you to stream Twitch, YouTube, and Facebook in a jiffy.

However, like any other tool, it’s prone to common issues and one of them is the webcam not showing up on the Streamlabs app.

But, if it’s an issue with the OBS Studio where the virtual camera is not showing up, we have some quick solutions for you in our detailed post here.

Why is my camera not working on Streamlabs?

Webcam not working on Streamlabs OBS is nothing new and it usually shows up due to the below reasons:

  • Outdated Webcam drivers
  • More than one Webcam Source in your editor
  • Inaccurate Settings
  • The app does not have camera access permission
  • An antivirus software blocking the program

However, we have got you covered here with some quick workarounds below that can help you fix the issue in the blink of an eye.

But, before you proceed with the below fixes, make sure that you allow apps to access your camera, or try disabling and enabling the camera as explained in our detailed post here.

At the same time, check if the Webcam is not being used by any other apps apart from Streamlabs. This is one of the major reasons why it may fail to work.

This will not just help the Webcam to work again but will also fix the issue if the Streamlabs Webcam goes black.

How do I get my webcam to work on Streamlabs?

1. Update or re-install the camera driver

1.1 Update the camera driver

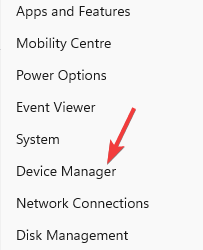
  1. Right-click on Start and select Device Manager. right click on Start and select Device Manager
  2. Expand the Cameras section, right-click on Integrated Webcam and select Update driver. update Integrated Webcam
  3. Next, in the Update Drivers window, click on Search automatically for drivers. Search automatically for drivers
  4. Now, wait till Windows detects the latest driver and applies the update automatically.

Once done, close the device manager and check if the webcam in Streamlabs is working now.

1.2 Re-install the camera driver

  1. Go to Start, right-click on it and click on Device Manager. right click on Start and select Device Manager
  2. In the Device Manager window, go to Cameras, right-click on Integrated Webcam and select Uninstall device. uninstall Integrated Webcam
  3. Click on Uninstall again in the Uninstall Device pop-up to confirm. press uninstall to confirm
  4. Once the device is completely uninstalled, close Device Manager and restart your PC.
  5. You can then head over to the manufacturer’s website and download & install the latest webcam driver.

Now, open Streamlabs OBS and check if the webcam not working issue is resolved.

2. Make sure your device supports custom resolution settings

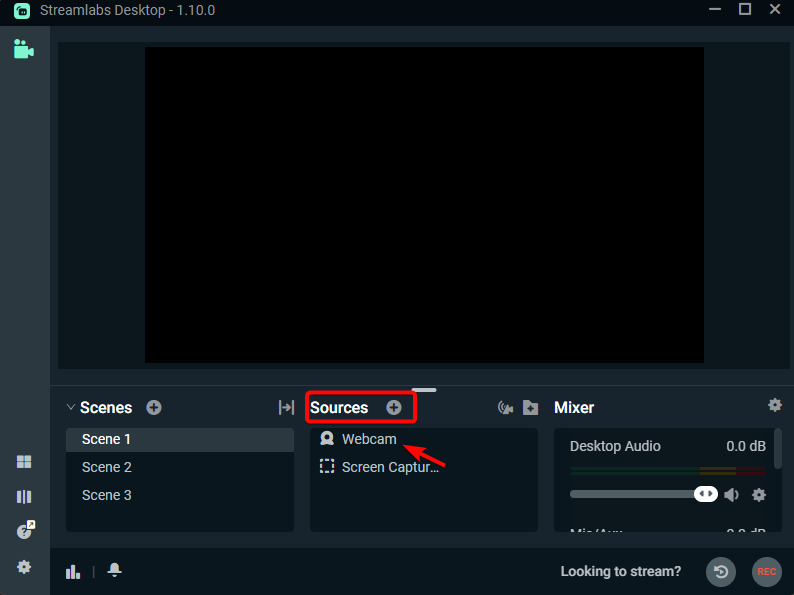
  1. Open Streamlabs and double-click on the Video Capture Device/Webcam under Sources. double click on webcam
  2. Now, in the Settings window, set the configuration to Custom anda make sure to enter the correct settings for your webcam. Here’s an example below for the Logitech c920 webcam:match the settings
  3. Below is another example of correct settings for the Logitech c922 webcam:match the settings

However, if you are using any other brand of webcam, or if you don’t know the correct settings of your webcam, you can refer to its manual, or visit the manufacturer’s webpage to get the details.

Incorrect settings may trigger the webcam issue in the Streamlabs OBS app.

3. Deactivate OBS scenes

  1. Launch Streamlabs, navigate to Scenes, and select the first scene.select 1st scene
  2. Double-click on the webcam under Sources to open its settings. double click on webcam
  3. Under the Settings window, check the Deactivate When Not Showing option. Deactivate When Not Showing
  4. Repeat steps 1 to 3 for all the others scenes in the app, and make sure that you turn on this option on your other sources also.

Now, check if the webcam is back up and running for the Streamlabs OBS.

4. Change the webcam video format

  1. Open the Streamlabs OBS app, go to Sources, and double-click on the webcam to open its Settings window. double click on webcam
  2. Here, scroll down towards the bottom and click on Video Format.
  3. Now, from the drop-down, select MJPEG.video format - mjpeg

You can now check if the web camera is working. Besides, this method is also applicable if the camera is lagging on Streamlabs.

5. Change the FPS settings

  1. Launch Streamlabs and click on Settings (gear icon) on the bottom left. streamlabs settings
  2. Click on Video on the left. streamlabs video settings
  3. Next, on the right, check the Common FPS Values field where it’s set at 60fps. Common FPS Values
  4. Click on Done to exit the Settings window.
  5. Now, double-click on the Webcam to open its Settings page. double click on webcam
  6. Here, go to FPS and set it to 30. change FPS settings to 30

Close the window and the Webcam not working issue on your Streamlabs app should be fixed. This method also works if the Streamlabs camera zoom is not working.

Where are the camera settings on Streamlabs?

If you want to choose the best Streamlabs camera settings for an enhanced experience, here’s what you can do:

  1. Launch Streamlabs Desktop and select the 1st Scene under the Scenes tab. select 1st scene
  2. Now, go to Sources, and double-click on Webcam to open the open Settings for Video Capture Device. double click on webcam
  3. Here, you can select the Device, and set the Resolution Type, FPOS, Video Format, etc. change camera settings

Alternatively, you can also remove any duplicate webcam sources or any other webcam sources from any other scenes.

It may also be possible that antivirus software on your PC may be blocking the webcam and hence, it’s not working on Streamlabs.

In such a case, you can either try and remove the block from the antivirus settings, or turn off the software temporarily.

If none of the above methods work, you can uninstall the Streamlabs OBS and reinstall it to check if it helps fix the issue.

But, if you are using the OBS app and it keeps crashing, you can follow our detailed guide on how to fix the issue on Windows 10 & 11.

If you have more queries on the Streamlabs OBS app, you can leave a message in the comments box below.

How to Add & Set Up Your Printer by IP Address in Windows 11

Printers have unique IP address numbers for connecting to networks. Users can set up wireless printers with those IP addresses for network printing.

Windows 11 has a WSD (Windows Service Demand) port for connecting printers, which can be unreliable. Some users may prefer to set up printers with IP addresses in Windows 11.

Can you add a printer by IP address?

Setting up a printer in Windows 11 with its IP address is relatively straightforward. Here, we’ll look at how to add a printer by IP address on Windows 11 PCs.

You can set up a printer by IP address with Windows 11’s Add Printer wizard as outlined in the instructions below.

That wizard includes an option for adding printers with TCP/IP protocols, so read on to find out more.

What is my IP address?

Many printers have small LCD screens on which you can find their IP address details. Look through the network setup section in your printer’s display screen to find the IP address.

If your printer doesn’t have a display screen, try printing its configuration page, which includes the IP address.

You can often print such pages by holding the printer’s power buttons for a few seconds. Read the instructions in the manual to find out how to print the test page.

How do I add a printer by IP in Windows 11?

  1. 1. Press the Windows + I key combination to open Settings.

  2. 2. Select Bluetooth & devices and choose Printers & scanners.

  3. 3. Click the Add device button.

    add device printers and scanners
  4. 4. Then click the Add manually link to bring up the wizard.

    add option printers and scanners
  5. 5. Select the Add a printer using an IP address or hostname option and click Next to view IP settings.

    add printer using ip address windows 11
  6. 6. Click the TCP/IP Device option on the Device type drop-down menu.

    ip device options
  7. 7. Input your printer’s IP address within the Hostname or IP address box.

  8. 8. Enter the same IP address in the Port name field.

  9. 9. Make sure the Query the printer checkbox is selected.

    query printing options
  10. 10. Click Next for Windows to locate the printer.

  11. 11. Then you’ll see a message informing you that you’ve added the printer. You can change the printer’s name in the text box or leave it as it is.

  12. 12. Press Next to view printer sharing options.

  13. 13. If you want the printer shared with other devices on your network, select the Share this printer option. If not, click the Do not share radio button.

    share this printer option
  14. 14. Select Next again to reach a Print test page button, which you can click if you wish.

    print test page windows 11
  15. 15. Press the Add Printer wizard’s Finish button to complete the setup.

  16. You can add a printer by IP address via Printers & scanners settings, with the Add Printer wizard. This option is recommended if your printer is not automatically detected.

    After you add your printer, you can customize its name and other settings. Moreover, you can press the Windows Update button in the wizard to select your printer’s brand and model for driver installation.

How can I set up a printer on a network?

To share a printer on a home network, Windows 11’s network discovery and printer sharing features need to be enabled. This is how you can set up a network printer for sharing:

1. Enable network discovery

  1. Press Run’s Windows + R key combo and input this text in the Open box: control.exe /name Microsoft.NetworkAndSharingCenter
  2. Click OK to open the Network and Sharing Center.
  3. Select the Change advanced sharing settings navigation option.
    Change advanced sharing settings option windows 11 add printer by ip
  4. Then select the Turn on network discovery radio button if that option is disabled.
    The Turn on network discovery option windows 11 add printer by ip
  5. Click the Turn on file and printer sharing option.
  6. Press the Save changes button.

2. Select a printer to share

  1. When you’ve enabled network discovery and printer sharing, type printers and scanners in the Start menu’s search box. Select Printers and scanners to open the Settings page.
  2. Select a printer to share.
  3. Click the Printer properties option.
    Printer properties option windows 11 add printer by ip
  4. Select the Share this printer checkbox on the Sharing tab.
    Share this printer checkbox windows 11 add printer by ip
  5. Press Apply to share the printer.

After adding a printer with an IP address, you can start printing from any device on your network. Further, to improve your workflow, you can go ahead and rename your printer for easier identification.

Note that the guidelines here apply to Windows 10 since that has the same Add Printer wizard. So, you can add printers by IP addresses and share them in Windows 10 much the same.

Fix: Epson Event Manager Button Settings Are Not Available

Epson as a brand name for printers needs no introduction. It’s one of the world’s biggest manufacturers of computer printers and shows no sign of slowing down.

But like with a lot of tech out there, Epson printers are often victims of some kind of error or malfunction. Be it paper getting stuck, the ink not coming out correctly, or in the case of this guide, scanning problems.

There have been reports of the Event Manager button setting not working properly. This guide will help you troubleshoot and fix those problems.

Why can’t I get my Epson printer to scan to my computer?

Well, there is a multitude of reasons why your Epson printer won’t scan your computer. According to Epson itself, there may be a problem with one of the cables not being properly connected to either the computer or printer.

In other cases, it could be that Epson Scan isn’t selected in the scanning problem. It’s also entirely possible that the printer is in some kind of power-saving mode like Sleep or Standby. In that case, wake up the printer and restart it.

All that said, follow these instructions if you’d like to know how to fix your Epson printer not scanning.

What can I do if Epson Event Manager button settings are not available?

1. Update drivers

  1. The first thing you should immediately do is update your drivers.
  2. Open the search bar on your Windows computer and search for the Device Manager. Click the first entry you see.
  3. In the Device Manager, click Printers.
  4. Right-click the Epson printer that appears and selects Update drivers in the window that appears.
  5. In the new window, select Search automatically for drivers.
  6. Your computer will automatically install Epson printer drivers. If the drivers are already installed, the window will let you know.

Updating drivers manually is a good option, but sometimes, doing this by yourself can be challenging. In this case, we feel like an automatic driver monitoring tool is much easier.

2. Check Windows Image Acquisition

  1. Click on the search bar and type in Services.
  2. Click the Services entry that appears.
  3. In Services, scroll down to Windows Image Acquisition (WIA).
  4. Right-click it and select Properties.
  5. Ensure that the Startup type is set to Automatic.
  6. Make sure that the Service status reads Running. You can activate it by clicking the Start button.
  7. Click Apply on the bottom, then select OK.

3. Add permissions to Windows Defender Firewall

  1. In the Windows Search bar, bring up the Windows Defender Firewall.
  2. Click on the entry as shown in the image.
  3. Click Allow an app or feature through Windows Defender Firewall in the new window.
  4. Click Change settings in this new window.
  5. Click Allow another app.
  6. Click Browse.
  7. Search for the Epson Event Manager app. Click Add.
  8. The Event Manager app now has Firewall permissions.

How can I configure event buttons?

Epson has a set of instructions on its Support website that we highly recommend that you check out if you’d like to learn how to configure buttons on Epson printers.

But the short end of it is that you’ll have to assign the program that you want to configure in the Epson Event Manager. You select the action that you’d want to assign to the button. Click Close and you’re done.

Feel free to leave a comment below if you have any questions. Also, leave comments about guides you’d like to see in the near future.

Microsoft news recap: new Home UI coming to Xbox next year, redesigned Smart Campaigns experience for Microsoft Advertising, and more

Microsoft news recap is a weekly feature highlighting the top Microsoft news stories of the past week. Sit back, grab some coffee, and enjoy the read!

Xbox to launch brand new Home UI in 2023

A new Home UI is being worked on, due for launch in 2023, on Xbox consoles. A random set of Xbox Insiders who are part of the Alpha Skip-Ahead Ring have started testing the new UI this week, so that feedback can be collected on the experience.

US Army to take delivery of first batch of HoloLens 2 based “combat goggles”

The US Army is to accept delivery of its first batch of HoloLens 2-based combat goggles, from Microsoft, following a mostly successful test, after the programme was originally placed on hold.

US Army to take delivery of first batch of HoloLens 2 based "combat goggles" - OnMSFT.com - September 7, 2022

PlayStation CEO Jim Ryan says Xbox Call of Duty offer is “inadequate on many levels”

CEO of PlayStation, Jim Ryan, has weighed in on Microsoft’s acquisition of Activision Blizzard, claiming that Microsoft’s offer to keep Call of Duty on PlayStation is “inadequate on many levels.”

Microsoft Advertising launches a newly redesigned Smart Campaigns experience to help SBMs optimize their operations

A new Smart Campaigns experienced has been released to Microsoft Advertising in the US, making it efficient and reliable for small and medium businesses to get up and running with online advertising, and now also assists in setting up ads across multiple platforms.

Microsoft Advertising launches a newly redesigned Smart Campaigns experience to help SBMs optimize their operations - OnMSFT.com - September 8, 2022

That’s it for this week. We will be back next week with more Microsoft news.

How to Force Windows 11 Widgets to Open in Default Browser

Usually, Windows 11 Widgets will open links in the default browser, which is Microsoft Edge. However, not everyone enjoys Edge as their default browser. This is especially annoying if you prefer another browser, like Firefox, Opera One, or Chrome. 

Windows 11 widgets are cool. They help you do things like research flights, check your calendar, and send emails right from a panel on your Windows desktop.

If you don’t have a use for them, you can disable widgets, but if they make your life easier, this article is for you to help open them in your browser of choice.

Why aren’t Windows 11 widgets opening in my browser? 

If you click on your widgets but are always directed to a blank page, below are some possible causes:

  • Firewall/Antivirus – If you use a firewall or anti-virus program, it might have blocked access to the web pages where your widgets are hosted. Check that any antivirus software on your PC isn’t blocking access by temporarily disabling it.
  • Outdated browser – You may have an outdated version of your browser installed on your computer that needs to be updated.
  • Incompatibility issues – Windows 11 widgets are compatible with only certain browsers. If you use any other browser, the widget might not open properly or get stuck on a blank page. 
  • You have pop-up blockers enabled – If you want to open widgets in your browser, you’ll need to allow pop-ups.

If you encounter any of the above issues, there is a way to open widgets in your favorite browser, as detailed below.

Quick Tip:

Since we use more and more add-ons and extensions in our browsers, using additional widgets might create issues and make them open in Windows’s default browser, Edge.

Switching to a different browser that has most features you use already installed can be just the right solution. Opera One has already built-in things like VPN, Ad Blocker, AI, social media and messaging apps.

Opera One

With all the built-in apps, Opera One is ideal for your day-to-day browsing!
Free Download Visit website

How do I change the default browser for widgets in Windows 11? 

1. Set your preferred browser as the default

When you download and install a new browser, you will always get a prompt asking you to set it as your default browser.

This is useful if you’re trying out a new browser and want to use it for all your browsing without changing anything manually. 

2. Disable Microsoft Edge

Disabling an app is a way of preventing the app from running on your PC. It is different from uninstalling or deleting it. This is useful if you want to remove an app causing problems on your device.

When you disable an app, it won’t be able to access your location or other information and features. It can temporarily remove it from your device without deleting it. This will not affect any of your data or information stored within the app, and you can enable it again at any time.

3. Use MSEdgeRedirect

  1. 1. Navigate to your browser and download MSEdgeRedirect.

  2. 2. Double-click on the downloaded file to start the installation wizard, then click on Install.

    how to install msedge redirect on pc
  3. 3. Click on I accept this license then hit Next to continue with the installation.

    accept terms for msedge redirect
  4. 4. Select Service Mode then click on Next.

    select mode msedge
  5. 5. Launch the app, then click on Start Service Mode With Windows and Windows Store Apps, then hit Install.

    select start service mode msedge redirect
  6. If your Windows 11 widgets keep getting redirected from your default browser to Microsoft Edge, it might be time to use a third-party app to stop this from happening.

    We recommend MSEdge Redirect, which is an open-source tool available for free on Github. The tool will ensure your widgets use the browser you set as default, instead of Edge, via Settings.

4. Change the browser manually

  1. Hit the three horizontal ellipses next to your selected widget.
  2. At the bottom, you will see Powered by Weather (In this case the weather widget).
  3. Now proceed to Settings, select Apps then click on Default Apps.going default apps windows 11 settings
  4. Select a browser of your choice as the default.

Since each widget is related to an app or service, you first need to find the app and then manually set the default browser to your preferred one.

What is the default browser in Windows 11 widget?

The default browser in Windows 11 widgets is Microsoft Edge, and though it can be switched for some, the changes don’t really reflect in all widgets and some links in the Settings app.

A few of these will always open in Edge, no matter what you do, which is Microsoft’s way of pushing the browser.

Will uninstalling Microsoft Edge cause problems? 

Microsoft Edge is a web browser built into Windows 11, but it’s not the only browser available. The most common reason people want to uninstall Microsoft Edge is that they don’t like it. 

If you’re unhappy with how Microsoft Edge works or looks, then there’s no point in keeping it on your computer, and you can switch to Opera One or Chrome. You may find that there are better browsers available that do everything that you want them to do in a more efficient manner. 

Uninstalling applications from your system can cause problems because they use parts of your operating system and other applications installed on your computer. 

When you remove an application, these components may remain on your system and cause issues with other programs or even prevent them from working properly.

While all browsers have their advantages, there are some built-in OS functions and features that are exclusive to Microsoft Edge on Windows 11. If you uninstall this browser, you may lose access to these functions.

This is just one of the facts that prove Windows 11 is not user-friendly. Instead of uninstalling, you can also opt to disable Microsoft Edge.

Hopefully, you have found at least one or more ways to open your widgets in your favorite browser. 

In case you want to also open apps in a browser of your choice, you can do so by changing your default browser in Windows 11.

What’s your default browser, and what are your reasons for choosing it? Just let us know in the comments section below.

5 Ways to Fix YouTube TV when It Shows Error Code 3

YouTube TV is an excellent option for watching TV series on compatible platforms such as Android, smart TVs, Xbox gaming consoles, etc.

The best part is that users do not require a cable set-up box to watch TV episodes or channels.

Many people are now experiencing this issue while attempting to watch YouTube TV on their devices. When they tried to start YouTube TV, it displayed the error code 3 on the device’s screen.

They were unable to stream any of the videos nor open the app. Some users who could launch YouTube TV got playback errors on their devices.

Why does my YouTube TV keep saying error 3?

When our readers attempted to start YouTube TV on a compatible device, it failed to launch correctly, and they could not watch any content.

Instead, error code 3 appears on the screen. Some reasons why YouTube TV keeps displaying error 3 are listed below.

  • An issue with the YouTube TV app – Restarting the YouTube TV app many times may help
  • Poor Internet connection – An inconsistent Internet connection may be the cause of this error.
  • The YouTube TV app server is down – The YouTube TV app server may be temporarily unavailable during maintenance; waiting a couple of minutes may solve the issue.
  • A problem with the device – If the device is damaged due to some obvious reasons, this could lead to errors discussed above
  • Your device is unsupported – The YouTube TV app and its content are available on compatible devices such as Smart TVs and PC web browsers; such issues emerge when a user attempts to launch the YouTube TV app on an unsupported device.

Don’t worry if you’re experiencing a similar problem! Here are some ideas to get you started.

How do I fix YouTube TV error code 3?

1. Check the Internet connection

When users have an unreliable internet connection, it frequently causes the issues mentioned above and problems.

After removing the internet connection from the system, we recommend that users restart the router. Wait a few minutes before reconnecting the connection to the system.

If you use an Ethernet connection, please detach it by removing its cable wire from the system and reconnecting it after some time.

Even after this, if your internet connection is inconsistent, contact your internet service provider to acquire a steady connection!

2. YouTube TV app technical glitch

Because of a technical problem related to the YouTube TV app, this error can occur on any system.

It is simple to fix, just relaunching the application after shutting it. Restarting the device on which the user is attempting to stream the YouTube TV app is also recommended.

3. Close the background apps

  1. Press the Ctrl + Shift + Esc keys simultaneously to open the Task Manager window.
  2. Click the Processes tab, right-click on the unnecessary application that is currently running, which might be causing this error, and choose End task from the context menu.
  3. Now repeat the same procedure to end all the unwanted apps listed under Background Processes.
  4. Once done, you may close the Task Manager window and try to open the YouTube TV app to see if you have any errors.

4. Clear the browsing history and other data

  1. Open the Chrome browser on the system.
  2. In a new tab, type the following line in the address bar and press Enter key:chrome://settings/privacy
  3. Under the Privacy and security page, click Clear browsing data.
  4. Now, select Browsing history, Cookies and other site data, and Cached images and files checkboxes and hit the Clear data button.
  5. This starts clearing all the browsing history and other data selected for the Chrome browser.
  6. You can do the same with other major web browsers to clear browsing data and cache.

5. Check if the YouTube TV server is down

These issues are unavoidable when the YouTube TV app server is turned off. YouTube TV has regular maintenance tasks, during which the server will be unavailable.

In addition, the server is shut down due to many requests from millions of users. This may be determined by checking the status of YouTube TV.

Why won’t my YouTube connect to my TV anymore?

The reason why YouTube cannot connect to the TV is that the YouTube TV app might be outdated, or the TV needs a software upgrade. It could also be possible that the TV is not connected to the Internet.

If you are annoyed by the ads coming up on your TV, here is the guide on how to block the ads on a smart TV.

We also have a new guide on Playback error: This video requires payment to watch in YouTube TV, so don’t miss it.

Did you find this article helpful? Please share your thoughts in the comments box below.

How to Download & Install Google Play Games on Your Windows PC

Google Play Games is an online multiplayer gaming service that allows you to compete against other players on your device or computer. 

The service allows you to save your progress from one device and continue it on another, and it offers achievements, leaderboards, and cloud saves for all games.

Although Windows 11 has a decent collection of games, Android games are far more popular. If you’re going to play games on Windows, you’ll have to use the Microsoft Store.

Android is the most popular mobile operating system in the world. And it’s also the most versatile one. It, therefore, doesn’t come as a surprise that gaming fanatics would want to play Android games on Windows PCs.

Can you download Google Play Games on Windows 10? 

Unfortunately, there is no official version of Google Play Games for Windows 10 because the developers made it for Android and iOS devices. So if you want to use it on a PC, you’ll need to find alternative ways to install it.

Using an Android emulator is one of the most efficient ways to download Android apps on your PC.  This is because you can run Android apps directly without needing to root your device or install anything else on your phone or tablet.

How do I download and install Google Play Games on my PC? 

Use an Android emulator

  1. Download or launch your favorite emulator (in this case Bluestacks).
  2. Navigate to your browser and download Google Play Games.
  3. Go to the download folder, locate the file and select Open with Bluestacks.
  4. Open the app.

How can I download Android games on a PC? 

There are many methods available through which you can download any kind of app or game on your PC but not all are safe or secure. You can use Google Play Store, but it’s not always possible because there are some countries where Google Play Store is not available.

In such cases, you can install a VPN that will mask your IP address and allow you to select another region where the application is allowed.

Another safe method to download Android games on your PC by using an Android emulator. An Android emulator is software that allows you to run Android apps on your computer. 

What are Google Play Games PC system requirements?

The system requirements for Google Play Games are not strict, but there are some things that you need to take into account before installing the app on your computer. Here is what you need:

  • A Windows 10 (v2004) or later operating system
  • At least 8GB of RAM
  • An SSD with at least 10GB of available storage space
  • Intel UHD Graphics 630 processor or comparable

You can check for the detailed minimum system requirements from the official page to ensure your PC is compatible.

As always, remember to install an antivirus program when downloading applications from third-party sites. They could come bundled up with malware and put your system at risk.

If you want to play old games on your Windows PC, check out our expert article on how to navigate around the issue.

We also have a huge selection of games that you can play without downloading or installing anything if you are running low on storage space.

Let us know of any additional thoughts you may have on this topic down below.

Windows 11 Multiple Users Simultaneously: Easy Setup

Windows 11 has several features that make it easier to share your PC with family members or co-workers. One of the most useful ones is that you can set up multiple users on a single PC. 

If you’ve got a lot of family members who need to get on your computer, setting up Windows for each person can be a pain, especially with the high cost of new PCs that meet the stringent Windows 11 system requirements.

As such, creating different accounts for every user comes in handy. This can keep them from accessing your files and settings, which will protect your privacy and prevent them from accidentally deleting or modifying important information. 

Does Windows 11 allow multiple users? 

Yes, Windows 11 allows multiple users. One of the biggest changes in Windows 11 is that you can now have several profiles on the same computer. The new features allow you to have different accounts for different people and even create separate accounts for kids.

You can set up different accounts for each family member, friend, or employee who uses it. Each account will have its own unique login details and settings, so you can customize the experience for each person.

The default user is called Administrator. As the administrator, you can change the name of your main user to anything you want. You’ll also be able to create additional users with different privileges so that you can share your computer with other people without worrying about them messing things up.

Can two users use the same computer at the same time?

Yes, two users can use the same computer at the same time. A virtual desktop is a tool that allows you to use a Windows 11 multi user environment. These virtual desktops can be accessed from any device that has internet access, including phones, tablets, and laptops.

You can also use this program if you want to share your computer with someone else or if you have multiple monitors and want to share them with other users as well.

If your activities are not extensive, the built-in TaskView will do but if you are looking for more features such as syncing and overall security, you are better off installing Virtual Desktop software.

Some companies allow employees to work from home while they are logged in to an office computer. This means that they would have access to the same files and programs that other employees would use if they were in the office.

Each desktop can have its own wallpaper, background music, and even different programs running on it. In addition, you will also need the Remote Desktop feature such that each user will have a separate monitor to access their desktop.

    How do I set up multiple users at the same time on Windows 11? 

    In order to add multiple users to a single Windows 11 device, all you need to do is manually create them from the User Accounts menu.

    You may add as many local users as you want to a device, each with their own separate account.

  1. 1. Hit the Windows + R keys to open the Run command.

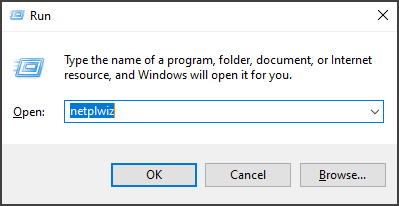
  2. 2. Type netplwiz and press Enter.

    netplwiz run command
  3. 3. Click Add in the User Accounts window.

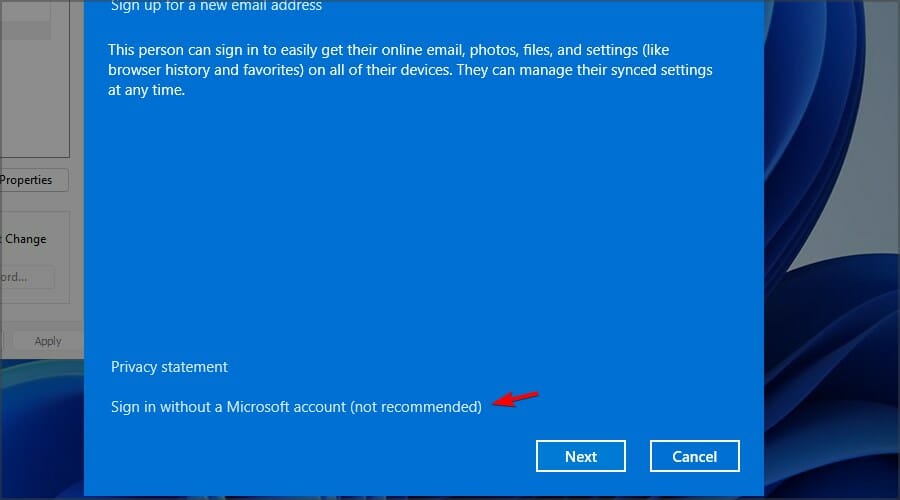
  4. 4. Select Sign in without a Microsoft account (not recommended).

    sign in without microsoft account
  5. 5. Click on the Local account button.

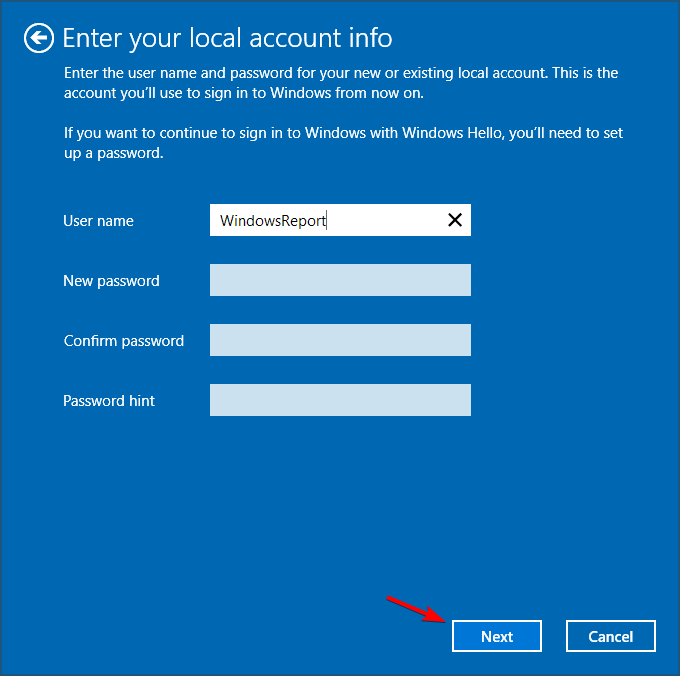
  6. 6. Enter a username and password (optional) for the new user account, and a hint, in case you set a password. Once done, click on Next.

    add local account windows 11
  7. 7. Click on Finish to create the Local account.

    click Finish to create local user account windows 11
  8. 8. You can repeat these steps until you have created as many users as you wish on your PC.

  9. 9. Now select a virtual desktop to use and get started.

How many simultaneous users can access a Windows computer at a single time? 

The number of simultaneous users who can connect to the main computer depends on the remote desktop software you are using and the server configuration. Most of them have a limit on the number of simultaneous users that can connect to a single computer.

Some require that you purchase a Pro or Premium account to increase the limit. In case you are using the built-in Remote Desktop feature, you can connect only one user at a time.

We have a rich collection of free Remote Desktop software if you are in the market for one. As a precaution, always switch off your Remote Desktop when not in use to prevent cyber criminals from accessing your data.

It is also recommended to keep your OS updated, limit the number of users who can access Remote Desktop, and use a reliable VPN service.

Have you set up multiple accounts on your Windows PC? What is your experience? Let us know in the comment section below.

3 Ways to Fix Your Webcam if It’s Not Working with a USB Hub

When using a USB hub to connect your USB devices like a webcam with your computer, you realize that it’s not working.

This is a common situation and apparently, it may occur due to corrupt or outdated USB drivers. You may also encounter this issue if you are not using a powered hub.

Also, because certain external hard drives like webcams or flash drives are high-powered devices, they would need a powered hub. Otherwise, they may fail to work.

But if there’s a power surge in the USB port that’s preventing the webcam to work, you can follow our detailed guide for more details.

Why is my webcam not being detected through a USB hub?

If you are using a USB webcam and you realize that it’s not being recognized by the USB hub, then it could be because:

  • the USB webcam/USB hub is not connected properly
  • the camera/USB drivers are corrupt/outdated
  • you are not using a powered USB hub
  • There’s a glitch in the OS or with the USB port itself

So, if your webcam is not working with the USB hub, we have some effective tips on how to fix the issue.

What can I do if my webcam is not working with a USB hub?

1. Disconnect & reconnect USB devices

  1. Disconnect the webcam from the computer. disconnect webcam
  2. Now restart your PC without the USB devices.
  3. Once the PC has restarted, attach the webcam back.

Now, check if the webcam is working with the USB hub and if you are facing any other issues.

2. Update and reinstall the webcam software & USB drivers

  1. Press the Win + R keys simultaneously to launch the Run console.
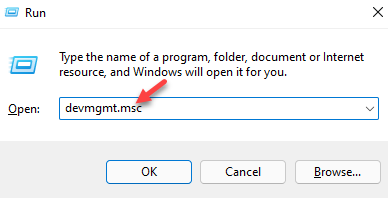
  2. In the search bar, type devmgmt.msc and hit Enter. write devmgmt.msc in the run command and press enter
  3. Expand the Universal Serial Bus controllers section, right-click on the USB device, and select Update driver. update usb device
  4. Next, in the new window, click on Search automatically for drivers. Now, wait till Windows detects and installs the latest drivers automatically. Search automatically for drivers
  5. Now, expand the Cameras section and repeat steps 3 and 4 for the Integrated Webcam as well. update integrated webcam

Once done, exit Device Manager and restart your PC for the changes to be effective. Now, the webcam is not working with the USB hub issue should be fixed.

This method is also effective if your USB camera is not detected on your computer.

Note icon NOTE
You can also uninstall the device, and then visit the manufacturer’s website to reinstall the latest software and check if it resolves the issue.

Another option you should try is using specialized software because it scans your entire PC and searches for any error that could be an impediment to its performance. After it founds the issue, it can automatically repairs or replaces the damage.

3. Run the built-in camera troubleshooter

  1. Press the Win + I keys together to launch the Windows Settings app.
  2. Click on System on the left of the Settings window. system settings
  3. Now, on the right, click on Troubleshoot. windows troubleshooter
  4. Next, under Options, click on Other trouble-shooters. Other trouble-shooters
  5. On the right, under the Other section, go to Camera and click on Run. run the camera troubleshooter
  6. Now, wait for the troubleshooter to detect and fix the issue automatically.

You can now restart your machine and check if the webcam not working issue with the USB Hub is resolved.

How do I know if my USB hub is powered?

To check if your USB hub is powered, you can confirm the power output of USB ports as shown below:

  1. Press the Win + R hotkeys to open the Run console.
  2. Type devmgmt.msc in the search field and hit Enter. Type devmgmt.msc in Run console and press Enter
  3. Next, expand Universal Serial Bus controller, right-click on USB Root Hub, and click on Properties.usb hub root properties
  4. Select the Details tab and in the Property field, select Power data. 
  5. Under Value, you will see something like D0.
  6. The higher the number, the lower the power output of your USB Device. For example, here we see D2, which is somewhere in the middle. power data value D2

Do I need a powered USB hub for a webcam?

While the powered USB hubs draw their power from an electrical outlet, the non-powered USB hubs draw their power from the computer connection.

USB hubs are perfect for low-powered devices like mice and keyboards. But for high-powered devices like webcams and flash drives, it may not work properly.

You can also use multiple webcams with powered USB hubs, and divide the available bandwidth across three cameras.

However, if none of the above methods work, you can create a system restore point on Windows 11 and perform a system restore to go revert your PC to a previous working state.

If this does not help, you can also reset your Windows 11 PC and check if this helps fix the webcam not working with the USB hub issue.

For any other queries related to the webcam or the USB hub, you can leave a message in the comments box below.

5 Ways to Fix The Unable to Connect Error on The Kindle App for PC

The Kindle app for PC unable to connect is one of the recurring errors most users have encountered when trying to use it for reading.

Reading is an activity we all engage in daily, and it can be annoying not to gain access to ebooks to read. However, reading ebooks online sometimes requires downloading or purchasing some from online bookstores. Hence, you may need an app like Kindle to access your purchases.

The kindle app is free software that allows you to download ebooks from Amazon and then read them.

It is available on different operating systems like macOS, Windows, and Android. However, it is the best app to download and read digital books from Amazon.

These issues can come in different ways, like the inability to sign into the Kindle app and the Kindle book not opening on a PC.

However, this article will discuss the Kindle app for PC unable to connect and how users can quickly fix the problem.

Why does my Kindle say Unable to connect?

  • Network connection issues: The Kindle app can encounter several issues while connecting to the PC network. The Kindle app requires a stable and fast network to work correctly. However, it will be impossible for Kindle to establish a connection or sign if there’s a network error, likewise if you are connected to the internet through a cable network connection. It slows down the Internet connection and can make it unstable.
  • Outdated Kindle app: When the Kindle app is obsolete, it can cause it to malfunction. It indicates that the version of the app running on your PC doesn’t have the necessary patches and updates it needs.
  • Outdated Windows: Running an outdated Windows version on your computer can be detrimental. It can prompt the Kindle book not opening on PC error. Likewise, it means your computer doesn’t have the needed updates to help it run some apps. The above causes are the most common among all. However, we’ll discuss how to fix them later in this article.

Why is the Kindle app not opening on my PC?

Outdated system drivers are a culprit for the Kindle app not opening on PC. Every app on the computer requires one or more drivers to run it. However, if the drivers are outdated, it can cause difficulties in the case of the Kindle app.

How do I fix my Kindle app for PC if it’s unable to connect to my device?

1. Check if Airplane Mode is On

  1. Go to the Taskbar.
  2. Select the Network icon.
  3. Click on Airplane Mode and toggle Off the switch if it’s On.

Turning Off the Airplane Mode on your computer allows it to connect to the internet.

2. Check your network connection

The easiest way to fix your network issues is to perform a power cycle on your router. Also, switch to a wireless network connection if your connection is through a cable.

3. Restart your computer

  1. Click Start on your screen.
  2. Select Power from the drop-down.
  3. Click on Restart, then OK.

Restarting your computer will automatically relaunch Kindle and fix any issues with it.

4. Update Windows

  1. Click on Start.
  2. Select Settings from the options.
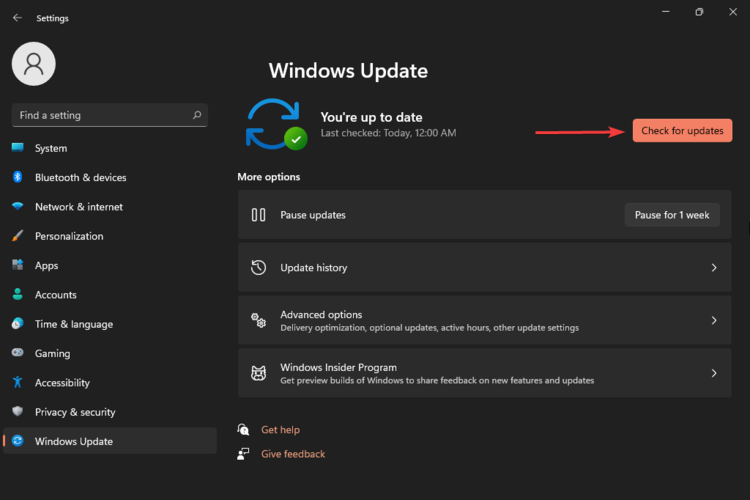
  3. Click on Windows Update, then select Check for updates.

Windows will automatically search and download updates if there are any available.

5. End unnecessary programs

  1. Click on Taskbar and select Task manager.
  2. Select the CPU and Memory usage.
  3. Click on apps you aren’t using, then click on End task.

Repeat the steps for all the programs to end and restart your computer. After this, the Kindle app for PC unable to connect problem should be fixed.

How do I check my Kindle software version?

  1. Launch the Kindle software.
  2. Click on Menu.
  3. Click on Settings.
  4. Scroll to the bottom of the screen, and you’ll see the current version of your software.

How do I update my Kindle software?

  1. Launch the Kindle software.
  2. Click the Menu button.
  3. Select Settings.
  4. Click the Menu button and tap Update Your Kindle.
  5. Click OK to update.

These are the best fixes for the Kindle app for PC unable to connect problem. Any of the solutions should fix the problem for you if they are followed accordingly.

Nevertheless, we recommend you read through our guide about how to fix your computer cannot find Kindle errors.

Leave your feedback and suggestions in the comments section. We’d love to hear from you.

Microsoft Teams is Stuck on Loading: 6 Tested Ways to Fix

When you launch Microsoft Teams, it may get stuck when the Teams logo or the loading text appears.

It might get stuck on loading with a white screen, or on loading your accounts, etc. Corrupt passwords cache, temporary data, incorrect date and time, or a server problem.

What can I do if Microsoft Teams is stuck on loading?

1. Restart MS Teams

  1. Close Microsoft Teams if possible.
  2. Press CTRL + ALT + Del on the keyboard and open Task Manager.
  3. Find the Microsoft Teams process and end it.ending microsoft teams process windows task manager
  4. Relaunch the Teams.

It should fix Microsoft Teams’ not loading problem on Windows 11 or 10.

2. Run in compatibility mode

  1. Right-click on MS Teams and go to Properties.
  2. Go to the Compatibility tab.
  3. Check Run this program in compatibility mode for: and select Windows 7 from the list.enabling compatibility mode microsoft teams
  4. Click on Apply and OK.

3. Delete the credential files

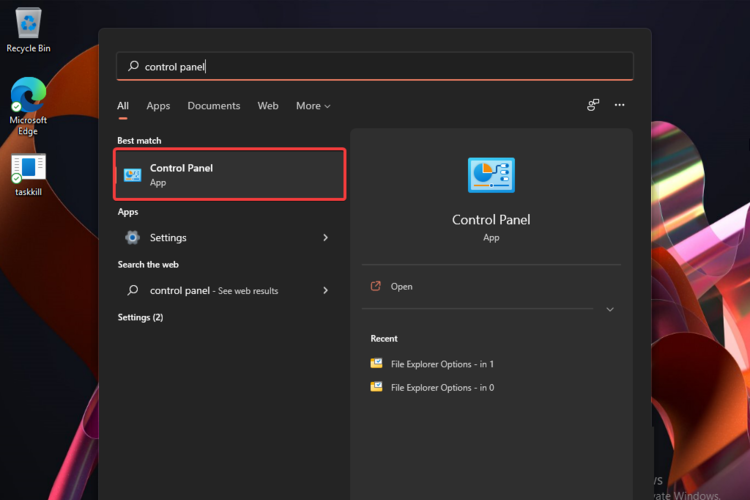
  1. Open the Start Menu, type Control Panel, and hit Enter.opening control panel win11
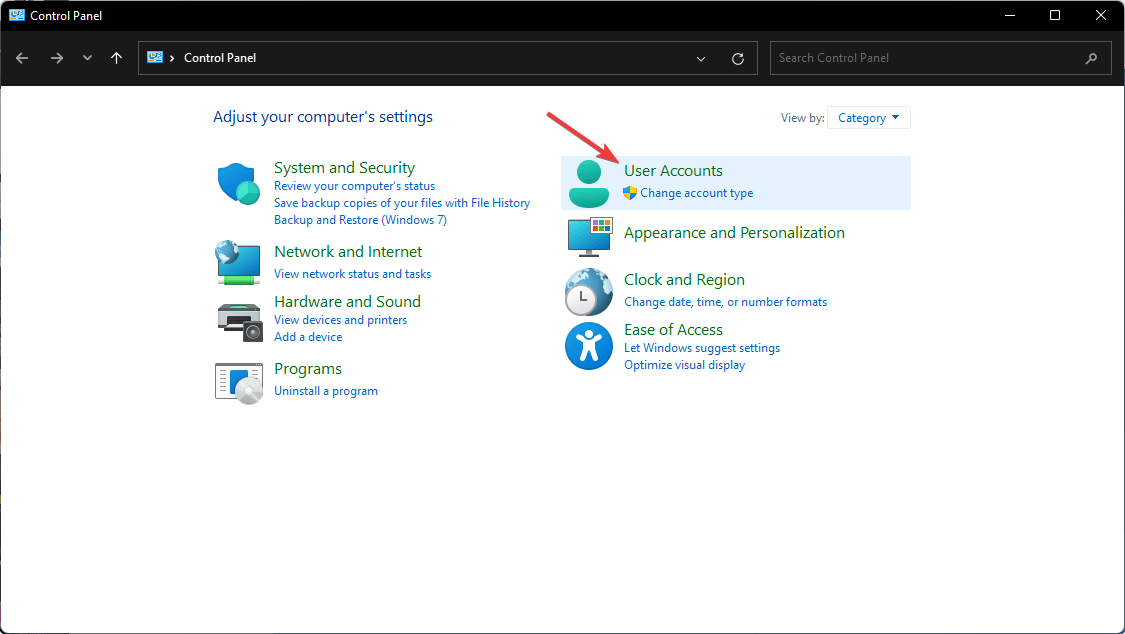
  2. Go to User Accounts.going user accounts control panel
  3. Go to Credential Manager.going credential manager
  4. Select Windows Credentials.
  5. Find and delete Microsoft Teams credentials.removing microsoft teams credentials
  6. Now, launch the Teams.

Deleting credentials works when Microsoft Teams is stuck on the Continue option.

4. Delete the app cache

  1. Press Win + R on the keyboard to open Run.
  2. Type the following command and hit Enter: %appdata%\Microsoft\teams
  3. Delete the content from the following folders: Blob_storage, Cache, Databases, GPUCache, IndexedDB, Local Storage, and tmp.Microsoft Teams local data folder
  4. Relaunch the Teams.

If Microsoft Teams is taking forever to load, clearing the app cache should do the trick. Besides, deleting the cache also works on Android devices and iPhones.

5. Re-install Microsoft Teams

5.1 Uninstall Microsoft Teams

  1. Press Win + I on the keyboard to open the Windows Settings.
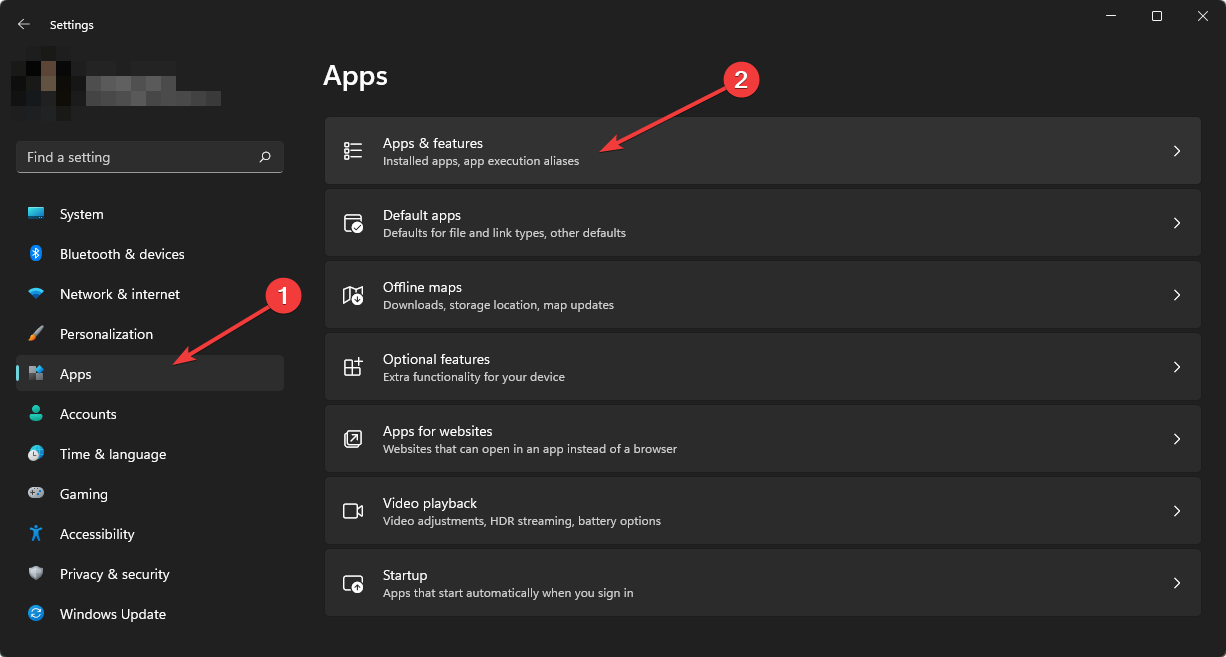
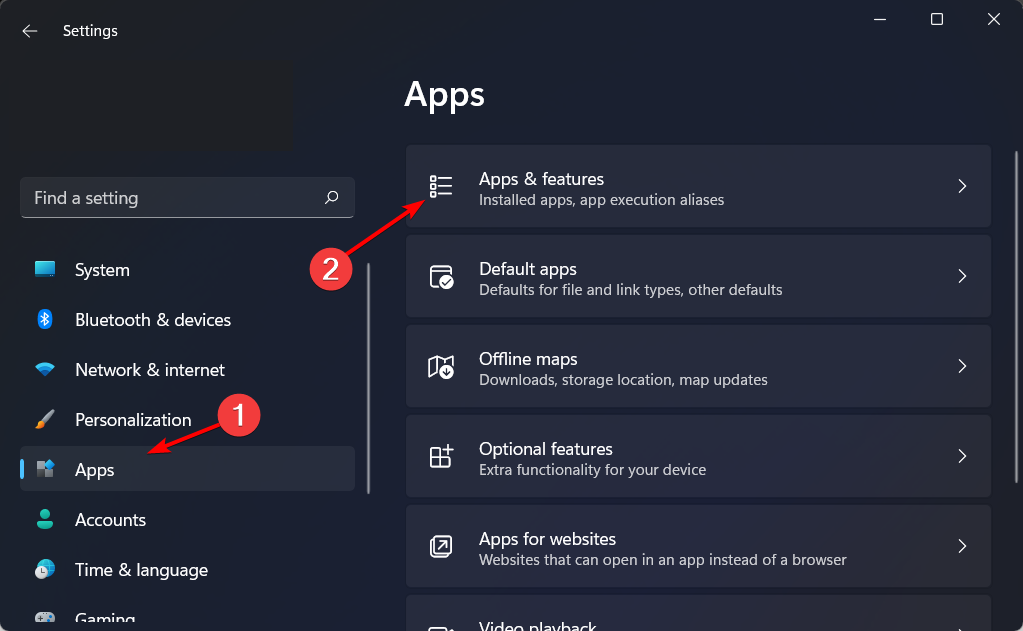
  2. Go to Apps and click on Apps & features.going apps & features Microsoft windows 11
  3. Search for Microsoft Teams.
  4. Click on the three vertical dots and choose Uninstall.uninstalling microsoft teams

To make sure that Microsoft Teams leaves no roots or broken files behind, you can use software to ensure that there are no junk files left on your PC. CCleaner is a tool that scans and cleans your computer of any unnecessary files left.

5.2 Install again

  1. Go to the download page and download the app.downloading microsoft teams
  2. Install on your computer.

You also can find this app on Microsoft Store.

6. Disable hardware acceleration

  1. Open Microsoft Teams.
  2. Click on your profile picture and select Manage Account.manage microsoft teams account
  3. Select the General tab.ms teams settings general tab
  4. Under the Application section, check the box next to Disable GPU Hardware Acceleration.ms teams disable gpu acceleration
  5. Restart Teams and see if the issue persists.

How do you run the troubleshooter for Teams?

Microsoft Teams is available on both Microsoft Store as well as on Microsoft’s website as a standalone installer. Even though both are very similar, there are differences.

If you use the non-store version, you can do the suggested things given above to troubleshoot.

However, if you have the store version, you can do the following things to troubleshoot Microsoft Teams.

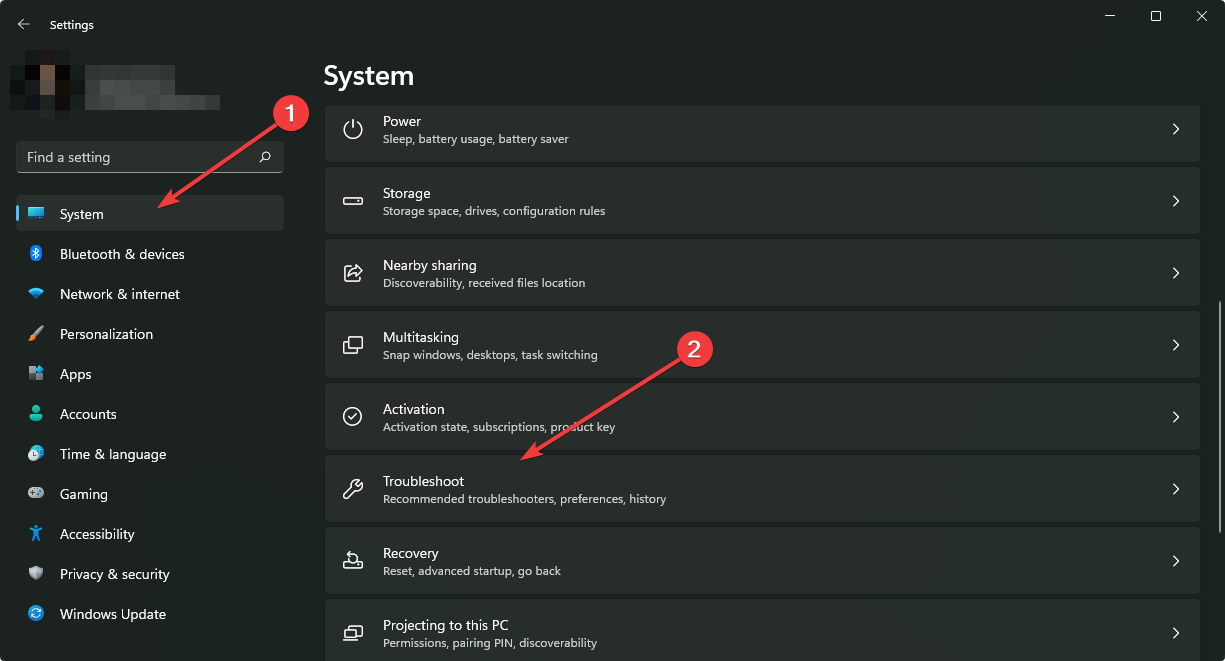
  1. Go to Windows Settings.
  2. Go to Troubleshoot under the System tab.going system and troubleshoot windows 11 settings
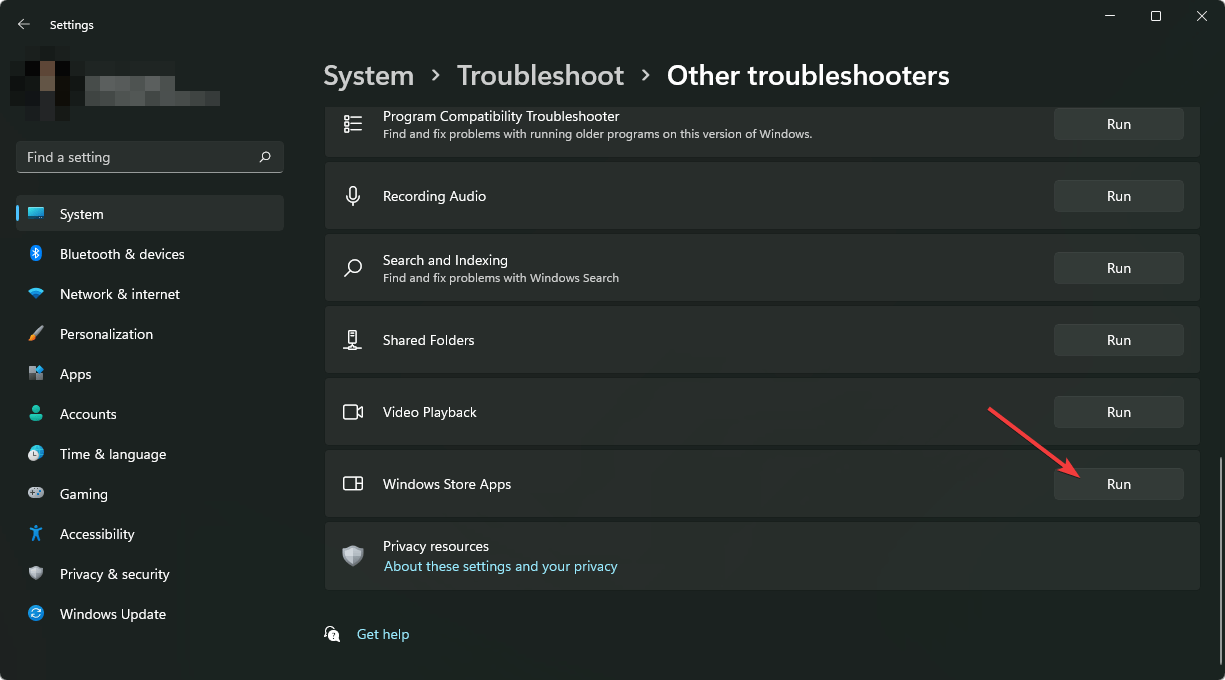
  3. Click on Other troubleshooters.clicking other troubleshooter windows 11 settings
  4. Scroll down until you find Windows Store apps, and click on Run next to it.clicking run windows store apps troubleshooter
  5. Follow the on-screen instructions.

Alternatively, you can right-click on the Teams app icon and go to Apps settings. Then, you can reset/repair the app.

These are the ways to fix the Microsoft Teams stuck on loading issue. In addition, you can verify if the time and date are correct on your PC or not. Also, make sure you have a stable Internet connection. However, if you keep getting the problem, you can consider using Microsoft Teams Web.

If you have any other methods that may help others, let us know in the comments box.

Microsoft Edge Built-In VPN: How to Install, Use, and Alternatives [2026]

Known as Microsoft Edge Secure Network, Edge’s built-in VPN transforms your browser into a more secure one. However, it’s not pre-installed, you have to configure it yourself.

It allows users to browse freely across restricted sites. Today we’ll show you how to install and use it, talk more about its features and safety, and touch on alternatives that might suit better some of you.

Let’s get to it.

How do I enable VPN on Edge?

    Microsoft Edge’s VPN settings allow you to enable the built-in VPN. To accomplish this, you need to toggle the Secure Network service on.rnrnYou can navigate to these settings through the Edge browser in a few clicks. Moreover, if you are not satisfied with the built-in VPN, you can easily turn it back off from the same menu.

  1. 1. Launch the Microsoft Edge browser.

  2. 2. Click on the Menu button, and then select the Settings and more option.

  3. 3. Choose Secure Network from the drop-down.

    click on secure network
  4. 4. On the new tab, sign in to your Microsoft account (Create a new Microsoft Account if you don’t have one).

  5. 5. Click on the shield icon in the browser frame and  toggle Microsoft Edge’s Secure Network ON.

    toggle network protection on

How Safe Is Microsoft Edge’s VPN?

Microsoft Edge is a highly secure browser with an advanced security and protection system. It provides a reliable and safe online browsing experience.

However, Microsoft Edge’s VPN is safe and reliable. It operates on the integrated VPN service known as Microsoft Edge Secure Network.

Moreover, many benefits come with this VPN. Some benefits are an encrypted connection that protects user data from online threats and private location access to several servers. Likewise, it is free to use and does not require any subscriptions.

Likewise, it offers all the usual benefits associated with a VPN service.

By the way, it can be beneficial for users to read more about Edge’s VPN launch. So, we recommend that you check our article about Edge having its own integrated VPN service.

Third-party VPN alternatives for Edge

One of the best VPNs on the market that’s very easy to add on Edge is ExpressVPN.

Not only does it have a compatible extension, but it also offers a full-fledged app that can encrypt and protect all the traffic on your device.

Main features include:

  • servers in 105 countries
  • unlimited bandwidth
  • cross-platform support
  • AES-256-bit encryption (the most secure in the world)

The tool is premium-tier, so you’ll have to get a subscription, but you can get a refund in the first 30 days if you’re not happy with the purchase.

ExpressVPN

Add ExpressVPN to Edge for fast connections, safe browsing and uncensored access to pages from the whole world!
Check price Visit website

For more in-depth protection of an entire system, we suggest to manually set up a VPN on Windows 11.

We hope you find our article helpful. If you encounter any difficulties or have any questions, let us know in the comments section below.

Fix: Windows 11 Mouse Gets Stuck When Using Multiple Monitors

Many users are tempted to use multiple monitors with their PC. Most of the time people are clearly thinking about multitasking, while others just like the design.

Whatever your motivation is, we are here to help you when situations such as these happen. Just know that Windows 11 is still a young operating system, and there is still a lot to fix.

If you need to know how to turn off Auto Enhance on Windows 11, or information on how to move the taskbar to the top or side on Windows 11, you came to the right place.

Today, however, we are going to help you fix your mouse getting stuck when using multiple monitors on your Windows 11 device.

Why does my mouse get stuck between monitors?

You should know that, depending on the arrangement of the two monitors in you’re monitor settings and how exactly they align with each other, you might have to move your pointer up or down in order to get to the other monitor.

This is even more true if the two monitors you are using don’t have the same resolution, but it can be the case with the same resolution as well.

So, in the guide below, we’re going to look at how to solve these problems with Windows 11 mouse problems on multiple monitors.

How do I fix my windows 11 mouse if it gets stuck with multiple monitors?

  1. Press Win + I to access Settings.
  2. Select the System tab, then click on Display.displays
  3. Under Multiple displays, switch the monitors around.windows 11 displays

You might have thought that this problem had a more complicated solution, but it really doesn’t. As simple as this seems, it is just as effective.

There have also been cases where the monitors, as you see them in the picture above, will be one above the other.

All you need to do is switch the monitors around, but make sure to keep your main monitor as the blue one.

Keep this in mind next time you or one of your friends is in a situation where the Windows mouse keeps getting stuck between monitors

Is there a limit to how many monitors I can have on Windows 11?

You might have expected us to say 5, or 8, but in truth, Windows 11 lets you use as many monitors as you want as long as your graphic processor can handle it.

Also, keep in mind that there are next to zero risks in using more than one monitor, so it really comes down to what you have to work with.

But, if your mouse gets stuck on the secondary monitor on windows 10/11, look for guidance above and you will soon be done with this.

A lot of users have actually reported that their Windows 10/11 mouse cursor gets stuck in the screen’s corner, so we decided to make this article, especially for you.

Has this guide helped you fix this annoying problem? Share your experience with us in the comments section below.

10 Best Monitor Brightness Control Software

If you are looking to adjust the screen brightness on your Windows PC, there are several ways that you can do it. The first method is by using the Windows Settings app and the second is through screen brightness software.

Windows 10 & 11 have a built-in brightness setting that can be used to change the brightness of your computer screen. It adjusts the amount of light emitted by the computer’s display, to make it easier on the eyes. When you’re using your computer, it can be difficult to find the right brightness setting especially if the brightness slider is missing.

You may have to adjust it frequently if you’re working with different types of content or if there are different people in the room. Screen brightness software can help you get the most out of your screen by allowing you to set a brightness level that works for you.

What is the best screen brightness software for Windows 11?

DimScreen – Lightweight app

DimScreen is a free and lightweight utility that allows you to adjust the brightness of your monitor in Windows. The software provides a simple slider that enables you to adjust the brightness from 0% to 100%.

Non-techies will enjoy this software as it does not need installation. You can easily adjust your computer’s brightness at the click of a button. The program is very easy to use and can be customized to suit your needs.

Additional features:

  • No need for installation
  • Has keyboard shortcuts
  • Night-mode feature
  • Supports multiple monitors

⇒ Get DimScreen

 RedshiftGUI – Feature-packed app

RedShiftGUI is a feature-rich program for managing your screen brightness. The GUI lets you set a schedule for the screen brightness to automatically change during the day and manually adjust it at any time. 

You can also select from various predefined color temperature presets designed to match different lighting conditions. 

This helps you sleep better by reducing the impact of artificial light at night. It’s also helpful if you have a laptop that needs to run on battery power because it doesn’t use much energy. One downside is that it has been over a decade since it was last updated but luckily, it still functions.

Additional features:

  • Lightweight on your PC
  • Detects your location automatically
  • Supports multiple operating systems

⇒ Get RedShiftGUI

CareUEyes – Health-focused app

CareUEyes has a simple yet feature-rich user interface which makes it easy to use even for new users. It comes with some predefined presets that you can use as per your need.

For example, you can set the brightness level to low when you are working in the office, but then increase it when you go home or at night.

CareUEyes also includes a timer that turns off your monitor after a certain period of time so that you don’t have to worry about leaving it on all day. 

Additional features:

  • Has a break reminder to help you remain productive
  • Focus feature for reading area
  • Has color temperature presets
  • Supports multiple operating systems

⇒ Get CareUEyes

F.lux – Intuitive app

F.lux is a popular software that adjusts the color of your display based on the time of day and your location, in order to help you sleep better.

It uses your device’s location and current room settings to determine when sunrise and sunset occur and also takes into account the amount of daylight that is expected for that time of year. 

In this program, you can select how long after sunset you want f.lux to turn on, as well as how long it should stay on before turning it off again. 

You can also make the app automatically adjust your screen brightness based on how much light is in your room — great for when you’re working late at night or early in the morning when it’s dark outside but still pretty bright inside.

Additional features:

  • Auto-adjust feature to the app you are using
  • Easy to use
  • Color temperature control

⇒ Get F.lux

Desktop Lighter – Visually impaired approved app

Desktop Lighter is a free screen brightness software for Windows. The application’s interface is simple and doesn’t take up much space on your desktop.

Users can easily adjust the brightness level by clicking on their desired value or by using the slider bar located below the main window in order to make it easier for them to make changes without having to struggle with too many options at once.

Additional features:

  • Can work with hotkeys
  • Free to download
  • Can enlarge parts of the screen

⇒ Get Desktop Lighter

Gamma Panel – Most advanced app

Gamma Panel is a tool that lets you change the gamma setting of your display. It also has some other features, such as inverting colors, but most people will likely be interested in the gamma control. 

Gamma control allows you to adjust your screen brightness so that it’s more comfortable for your eyes, especially if you’re working at night or in a dark room.

Additional features:

  • You can create your own color profiles
  • Can assign hotkeys
  • Has lots of advanced features

⇒ Get Gamma Panel

PangoBright – Non-intrusive app

PangoBright is a simple and effective program that allows you to change the brightness of your monitor with the press of a button. The program has a simple interface with a single button that changes the brightness level.

This program works by creating a shortcut on your desktop. When you click on this shortcut, it will open up PangoBright and change the brightness level of your monitor immediately.

Additional features:

  • Lightweight on your PC
  • Runs from the system tray
  • Has a simple interface

⇒ Get PangoBright

ClickMonitorDDC – Unobtrusive app

ClickMonitorDDC is a really good tool for those who want to make sure that their screens are always at maximum brightness or at least medium brightness.

The tool monitors the brightness level of your monitor, and when it detects that the brightness is low, it will prompt you to change it. 

Additional features:

  • Supports Hotkeys
  • Stays in the system tray
  • Allows multiple profiles

⇒ Get ClickMonitorDDC

iBrightness – Portable app

iBrightness is a tiny and lightweight tool that allows you to adjust the screen brightness of your Windows PC. You can use it to change the screen brightness value in real-time without having to open any settings page.

The best thing about iBrightness is that it’s completely free and portable, so you can download it without worrying about anything else.

Additional features:

  • Touch-sensitive and suitable for tablets and phones
  • Stays in the system tray
  • Portable

⇒ Get iBrightness

Twinkle Tray – Best screen dimmer app

Twinkle tray is one of the best tools available out there in the market that helps you in changing the screen brightness level of your computer quickly and easily. 

This tool gives you access to multiple options such as increasing or decreasing the brightness level, saving battery life, and more. An advantageous feature is that it automatically adjusts to your chosen Windows theme.

Additional features:

  • Adjusts brightness according to time of day
  • Supports multiple languages
  • Can enable Hotkeys

⇒ Get Twinkle Tray

Is there a way to make my screen brighter?

Windows has a built-in option that you can use to adjust the brightness of your screen. To make your screen brighter, you can use the Settings app to adjust the brightness level. You can also use third-party apps to make your screen brighter or dimmer than it usually is.

The problem with depending on Windows 11 in-built brightness settings is that it’s not always easy to find the right setting.

Some users prefer to have their displays set at maximum brightness because it makes their screens easier to see in bright environments. However, this can also drain your battery faster than you’d expect – especially if you’re using an older laptop with a smaller battery.

Can I control monitor brightness from a PC?

Yes, you can control monitor brightness from your PC. You can change the brightness of your monitor via a keyboard shortcut. This will only be effective if your keyboard has a dedicated key for this purpose. Otherwise, you will have to go to display settings and choose an option that is fit for you.

Windows has a very useful feature called Night Light. The Night Light is a blue light filter that decreases the amount of blue light your screen emits. This helps reduce eye strain and makes it easier to fall asleep after using your PC or laptop at night.

If you find this to be cumbersome or the Night Light is not turning off, you can opt for automatic screen brightness adjusters as detailed above so that if you forget to switch certain features on, they can do it for you.

These tools can also be used if the brightness button is not working on your PC, so don’t hesitate to give them a try. Before you go, you should check our guide on the best brightness and contrast settings for a monitor.

Let us know if you use screen brightness software and your favorite so far in the comments section below.

How to Change the User Account in Windows 11 Widgets

Windows 11 widgets is a system tool that allows you to add some functionality to the Windows desktop and taskbar. The main feature of this tool is that it provides an easy way to access your most used applications and tools, such as a calculator and notepad.

The user account in Windows 11 widgets is the account that you use to sign into Windows. This can be your personal account, or it can be a work account. In Windows, you can create multiple user accounts for different purposes. 

For example, having one account for personal use and another for work is possible. This is useful if you have different needs for each profile, such as having a separate email address and login password for work.

You can also use widgets without signing in. If you use a guest account, the computer has no personalization information. But, sometimes, you need to sync some activities, such as your meetings to get reminders.

What user account does Windows 11 widgets use? 

Installing Windows 11 widgets creates a shortcut on your desktop and adds an icon to the system tray. For these icons to work properly, Windows 11 widgets must run under a user account.

Usually, Windows 11 widgets will use the same user account you signed in with. If you have more than one user account on your computer, then Windows 11 widgets will use the default account created during installation. 

If you’re signed in with your Microsoft account, any changes you make to Windows 11 widgets will automatically sync across all of your devices. 

The widget will ask to create an account for you if there’s no existing profile associated with your device. You can ignore this option if you don’t want to sign in. 

Once the user account has been created, it will remain active until closed or shut down by Windows 11 or when you decide to delete it.

How do I change the account for widgets in Windows 11? 

1. Change the sign-in options

  1. 1. Hit the Windows key on your keyboard.

  2. 2. Click on Settings from the menu that opened.

    settings windows 11
  3. 3. Select Accounts from the left pane, then click on Your info.

    accounts your info windows 11 settings
  4. 4. Click on Stop signing in to all Microsoft apps automatically.

    stop signing in to microsoft apps setting
  5. 5. Now go back to widgets and sign in with your desired user account.

  6. The first and easiest method to change your user account is via Windows 11’s built-in Settings. What you need to do is change the sign-in options so that your PC no longer signs in to Microsoft accounts automatically.

    This change will allow you to sign-in using a different user account of your choice the next time you access widgets.

2. Reset the Mail app 

  1. Hit the Windows key and click on Settings.settings windows 11
  2. Go to Apps.apps-features where is the chrome menu button
  3. Find the Mail and Calendar app and click on Advanced options. advanced options mail windows 11
  4. Hit the Reset button.reset mail and calendar settings
  5. Now go back to widgets and sign in with your desired user account.

3. Delete user account online

  1. Navigate to your web browser to log in to your Microsoft account. 
  2. Go to Devices to find all connected PCs associated with your account.Microsoft devices windows 11
  3. Click on Remove device to unlink the account.remove device confirm
  4. Now go back to widgets and sign in with your desired user account.

Since most of these solutions involve removing your account, remember to back up all your files using backup software to avoid losing any important information.

Can I use multiple accounts with Windows 11 widgets? 

Yes, you can use multiple accounts with Windows 11 widgets. However, you cannot use two or more accounts simultaneously. This can be useful if you share a computer with others and want to keep your personal data separate from theirs.

For example, if you want to use two different accounts but still want to use the same laptop, you need to log off from one account before logging in to another. You can switch between accounts quickly by selecting the profile picture from the Start menu or taskbar.

And you can also sign out all other users in Windows 11 without logging into the individual profiles.

It is also important to note that setting up multiple accounts on a single computer will require more space on your hard drive or SSD drive because each account has its own folder that stores its user files and programs.

In this case, you need to install a RAM cleaner to get rid of temporary and unnecessary files to avoid running out of space.

Should you face any other related problems, such as Windows 11 widgets not working, feel free to check out our detailed guide on how to fix the issue.

We also have the top clock widgets to help you keep track of your time and stay on top of things.

Let us know of any additional thoughts you may have on this topic in the comment section below.

How to Watch French TV in the US & Anywhere [Live Streaming]

Watching French TV in the USA or any other country is possible if you’re equipped with the appropriate tools.

It depends on which TV channel you’re attempting to watch, if it can be accessed online from anywhere in the world without geo-restrictions, or if you need to bypass geoblocks.

If you’re a French citizen who is living or traveling in the USA or an American who wants to learn the French language, you can easily watch French TV on your desktop, laptop, smartphone, or tablet. You just need to know where to look.

Where to watch French TV?

You can find numerous French television channels with diverse content. Thus, simply discover comedy, arts, or politics on French live TV using a reliable VPN for unavailable content.

This is what you can watch by using a VPN that offers access to French streaming services in the USA:

✅ TV5Monde channel

✅ France24

✅ TF1

✅ Eurosport

✅ France2

That being said, these French TV channels in the USA can be available for public use with the help of streaming-optimized tools.

How to watch TV5Monde in the USA?

How can I get TV5Monde in the USA?

  1. Download ExpressVPN
  2. Install the software on your PC.
  3. In the main window, click on the three dots.
  4. Find and select France*.
  5. Click on the power button to connect to the French VPN server.
  6. Using your web browser, visit TV5Monde Direct TV (see our selection of the best web browsers for streaming).
  7. Press the play button and start watching TV5Monde.

*If the France VPN server is unavailable, you can also try Belgium or Switzerland.

the TV5Monde error code 232403

Note: TV5Monde live streaming is available online for free for France, Belgium, and Switzerland.

If you’re trying to access it from anywhere else, then you will receive the 232403 error code unless you connect to a VPN server from one of the three countries.

5 best French TV channels in the USA (with live french streaming service in USA)

  • TV5Monde for all-around content (watch online with VPN).watch TV5Monde live streaming
  • France 24 for multilingual news (watch online without VPN).watch France 24 live streaming
  • Eurosport 1 and 2 for sports (watch online with Mobdro, no VPN).watch Eurosport FR live streaming
  • TF1 for French and American TV shows (watch online with Mobdro, no VPN).watch TF1 live streaming
  • France2 for news, culture, TV shows, and movies (watch online with VPN).watch France2 live streaming

How to get French TV in the US (For children)

  1. Log in to your ExpressVPN account.
  2. Launch the software on your PC.
  3. In the main window, click on the three dots.
  4. Look up France and select this entry.
  5. Press the power button to connect to the French VPN server.
  6. Using your web browser, visit Gulli Direct (check out the best web browsers for streaming).
  7. Press the play button and start watching Gulli*.watch Gullli live streaming

*Besides live streaming, your kids can also watch reruns of cartoons, shows, movies, and TV series on Gulli (for some content, you don’t need a VPN).

NOTE: If your children are interested in watching French TV in USA, you can also explore other TV channels for kids apart from Gulli. Check out BoingTV, Canal J, TiJi, TiVi5 Monde, and Télétoon+. If you’re a Netflix subscriber, you can watch French TV on Netflix, including content for children.

Everything you need to know about watching French TV outside France

In case you’re wondering if you can watch French TV online, yes. You can definitely watch French TV online. There are numerous websites that support French TV channels and live streaming content.

Many users may ask themselves if they can watch French TV on Netflix. Yes, you can watch French TV on Netflix with a VPN.

More so, if somebody wants to know how to watch Quebec TV in the USA, you can watch Quebec TV live in the USA in your web browser. It doesn’t have geo-restrictions, so you don’t need special tools.

? Does Amazon Prime have French TV?

Yes, there is French TV content on this streaming platform, and it brings a high range of French shows you can watch when you please.

? Does Hulu have French TV?

Sadly, no. You don’t have French content on Hulu streaming because it’s not available in France at the moment.

? Can I get TV5MONDE on Roku?

You can watch this French channel on Roku indeed. You only need a subscription to this platform and you’re good to go.

? Does Chromecast have any French channels?

Unfortunately, you don’t have French channels on the Chromecast list for the moment so it’s not possible to access them.

There are tons of quality French TV channels you can watch online in the USA or any other country.

Whether you’re interested in news, culture, politics, sports, TV shows, movies, series, or children’s programs. Some of them are available for free while others require paid subscriptions.

Discover what else you can do with Mobdro by joining our Mobdro section. Plus, you can visit our Streaming hub for more cool guides and quick-fix articles.

War Thunder Packet Loss: What is It and How to Fix It?

War Thunder is a free-to-play, cross-platform military MMO game. It gained a lot of traction and is one of the most-played games on Steam. You can fly warplanes, drive tanks, and wreak havoc on your enemies.

You can play this game entirely for free, making it even more appealing for players worldwide.

Therefore, it’s easy to see why it’s so popular and why sometimes the game servers get overcrowded.

As a result, some unwanted phenomena might occur in the form of high ping/latency, jitter, and packet loss.

Usually, you can’t tell the difference, but take our word on this: packet loss is one of the worst things you could encounter in live-action games.

What is packet loss?

To put it briefly, whenever you send or receive data online, some packets might never reach their destination. We refer to this as packet loss. Now, packet loss can take two forms:

  • Outbound packet loss – affects data flow that goes from your PC toward the destination servers
  • Inbound packet loss – traffic that comes from the destination server toward your PC

Whenever this happens, you might notice some quite familiar yet annoying behavior. Namely, Rubberbanding, high latency/ping, connection timeouts, or game crash.

If you still have no idea what we’re talking about, picture this: you’re shooting at an enemy vehicle, but it seems it’s not taking damage. Suddenly, the vehicle is out of sight, and you’ve missed your chance to pulverize it.

Hence, there are more players who experience game issues on War Thunder and these are as follows:

  • War Thunder high packet loss
  • War Thunder high ping and packet loss
  • War Thunder low ping high packet loss
  • War Thunder operation timed out
  • War Thunder is not loading
  • War Thunder connection to server lost

That’s what packet loss implies regarding your game and what you should first know about this connection issue.

So, does using a VPN improve packet loss? Sometimes, when your ISP throttles your bandwidth and/or leaks packets, you can use a VPN to reduce packet loss and improve ping.

You may also wonder if using a VPN improves your ping. You can improve your War Thunder in-game ping by using a VPN. Here are our best VPNs to improve ping and gameplay.

Why is my packet loss so high in War Thunder?

There are many reasons you might experience packet loss in War Thunder. For instance, you might leak packets if you have an old, chewed-up, flaky Ethernet cable between you and your router.

More so, if there are many users on your network, you might experience network congestion. This, in turn, leads to packet loss.

The good news is that packet loss rarely occurs because of you. If you have never had this issue, chances are slim that you’re what’s causing it to begin with. Therefore, network congestion is still our usual suspect in this case.

However, sometimes, your ISP might throttle your bandwidth to minimize costs. Or the War Thunder server might take a massive blow from all the simultaneous connections.

All of these can be the cause of your packet loss situation.

How can I fix packet loss on War Thunder?

1. Use a VPN

  1. Download ExpressVPN to your PC.
  2. Install it on your system.
  3. Launch it and log into your account.
  4. Connect to the server of your choice.
  5. Launch War Thunder and check if you’re still leaking packets.

A VPN often helps with packet loss, and ExpressVPN is an excellent all-around VPN tool from Kape Technologies. It can help you protect your privacy and secure your connection.

Plus, it can unblock geo-restricted content, and reduce packet loss with its high-speed servers. It also has 24/7 live chat support.

ExpressVPN

Leaking packets in War Thunder? This software can lend you a helping hand.
Check price Visit website

However, it’s worth mentioning that using a VPN won’t work 100% in all cases. In order for this fix to work, the packet leak must occur on your ISP’s side of the connection.

Thus, if you or the game server leak packets, using a VPN connection won’t work.

2. Troubleshoot your connection manually

  1. Use our guide on packet loss to run a complete ping/packet loss testPacket loss analysis Windows with tracert and pathping
  2. Locate the hops where the ping spikes
  3. Depending on your findings, take appropriate actions

You might notice high ping/packet leaks in the following locations:

  • Your home network
  • ISP’s network
  • The servers of the network distribution company
  • War Thunder game servers

Therefore, you can try one of our suggestions below to fix packet loss in War Thunder:

  • Check if the devices on your network function properly (cables, PCs, routers)
  • Talk to your ISP about the issue
  • Ask your ISP to talk to the network distribution company
  • Contact the War Thunder support team if the issue is on their side

War Thunder server ping & packet loss test

Testing your packet loss or high ping levels on your game is quite intuitive. The step-by-step process goes like this:

  1. Connect to your VPN using another server location.
  2. Go online and see if your Internet connection is improved.
  3. If it works, it means that your ISP may throttle your network.
  4. In case it doesn’t work, the cause can be your cables or router distance.

Many players are wondering how to fix War Thunder packet loss. So you can utilize ExpressVPN, but only if you’re sure that your ISP leaks the packets or troubleshoots your connection.

It’s not exactly challenging to fix packet loss in War Thunder if you know where to start and understand what packet loss is.

There are a lot of causes for leaking packets, and as a result, there are also a lot of potential fixes.

You can check out the best VPNs for gamers that can improve your ping. Visit the Gaming hub to discover more reviews and guides.

However, remember that packet loss usually comes and goes, and the best way to tackle it is to wait it out. If you notice a pattern or the issue doesn’t fix itself after a while, you can step in and try some of our suggested fixes.

Remember always to keep your game updated; otherwise, you’ll run into the incompatible server version error.

Disable Laptop Keyboard When Using an External One

For some, this might seem like a dumb question to ask, but it has a serious basis – if your laptop already comes with a built-in keyboard, should you use a separate one?

We provide our sincere opinion below, right after we show you how to disable the built-in laptop keyboard and use the external one only.

Can I disable my internal laptop keyboard but not the external one?

The answer is yes, you can disable only one of the two. Basically, you do not disable the keyboard feature altogether from your laptop.

You can remove the usage of every separate device on your laptop via Settings, as you will see from the guide below.

    How to disable the laptop keyboard when an external is plugged in?

    If you want to use an external keyboard on your laptop, instead of its internal one, you can configure your Settings so that the latter is disabled.

    To do so, you need to access Device Manager and manually uninstall the internal keyboard, which will be removed along with its associated driver.

  1. 1. Press the Windows on your keyboard or the Start button on your taskbar to open the Windows search box.

  2. 2. Type device manager in the search box and press Enter to open the tool.

  3. 3. Navigate to the Keyboard section and click on it to expand it. A list with the installed keyboards on your laptop will appear.

    uninstall keyboard driver
  4. 4. Right-click on the internal keyboard to open a menu with multiple options.

  5. 5. Select Uninstall, then click on Yes to confirm the decision.

This is, however, a temporary fix, because your PC will automatically try to search for a driver for the internal keyboard as soon as you reboot.

How can I prevent my laptop from re-enabling the internal keyboard?

disable automatic driver installation
  1. Open Start Menu and type gpedit.msc.
  2. Hit Enter to open Local Group Policy Editor.
  3. Go to Computer Configuration > Administrative Templates > System > Device Installation > Device Installation Restrictions. A window on the right will open with more details.
  4. Search for Prevent installation of Devices not described by other policy settings. Right-click on it.
  5. Click on the Enable option, apply and save the changes.

Reboot your computer and the device driver will not install automatically and the internal keyboard will remain disabled. You can continue using your external keyboard.

Please note that in case your external keyboard uses the same generic device drivers, then this will not solve your issue. Uninstalling that driver will disable both of them.

Can I manually re-enable the internal keyboard?

Looking to re-enable the keyboard of your laptop? Open gpedit.msc via Run and follow the same steps, only this time make sure you disable the option.


What are the advantages of using an external laptop keyboard?

incorrect posture laptop

Recently, I finally bought a wireless keyboard and mouse for my Windows 10 laptops and have been using them for a few days now.

The reason why I have bought a separate keyboard for my laptop is because of concerns related to my health.

Working for so many hours almost every day in front of my computer is affecting my health because I don’t maintain a healthy posture. And yes, relying on a laptop’s keyboard to write and work is a big cause of that. Let me explain.

Have a look at the picture above. As you can see, your spinal cord is bent mainly because the display is somewhat lower situated than the eyesight, despite the fact that the desktop PC comes with a separate keyboard.

Now, in the below image, you can see that when you’re relying on your laptop‘s built-in keyboard to write, your incline your back and keep it like that for hours.use correct laptop posture

A separate laptop keyboard improves your health

Now, if you would get a separate keyboard, a wireless one, especially, so that you wouldn’t be tied to a cord, first of all, the distance between the screen and your eyes will be reduced.

Secondly, you will now be able to try and adopt a correct spinal cord posture, as your hands won’t be as close to the laptop as they were before. It’s just as simple as that.

Of course, when you are traveling and taking the laptop with you, it might not seem like such a great idea to take an extra keyboard with you.

Do use the keyboard if you don’t have a desktop PC and your laptop is your main working tool. You will be surprised at how big the effect will be on your health.

Interested in keeping yourself healthy? Check out our 6 best Windows 10 fitness apps.

You can customize your external keyboard

And there’s also another major advantage to buying a separate keyboard — you can pick one that really suits your needs. Your built-in laptop keyboard is pretty standard.

On the other hand, you can often customize your separate keyboard: you can choose its color (you may purchase a themed keyboard), select a particular key orientation design, and much more.

So, as you can see, a separate keyboard brings at least two important advantages in terms of keeping a healthy posture and choosing your own keyboard design.

We hope you found this guide useful and managed to disable your laptop’s keyboard when an external one is plugged in. Let us know your thoughts about this article in the comments section below.

Windows 10/11 VPN not Working after Update [Full Guide]

The presence of VPN solutions in the current state of computing technologies reached its peak. And since Windows 10 is one of the most used operative systems, a large chunk of the Virtual Private Networks run on Microsoft’s Windows.

Although they mostly work well, reports say that VPN is not working after Windows 10 updates, especially after the major Windows Updates.

These issues are quite common after every new major release and we decided to provide you with a list of possible solutions that should help you address them.

If you’re suddenly stroke with a plethora of VPN issues after a Windows update, make sure to check them out below.

Can’t connect to any VPN after today’s Windows Updates Windows 10?

This occurring error on Windows 10 affects all users that install a specific Patch Tuesday update. This can interfere with the built-in VPN and prevent connecting to the network.

You may encounter this issue and it’s better to have the knowledge. This is how other similar users describe this VPN problem:

  • Forticlient VPN not connecting Windows 10 (a network error prevented updates from being downloaded)
  • Cisco VPN not working after the Windows 10 update
  • Windows 10 update breaks L2TP VPN- the L2TP connection attempt failed because the security layer encountered a processing error
  • The service profile is damaged. reinstall the service profile
  • The remote access service IP configuration is unusable
  • Windows 10 built-in VPN not connecting
  • VPN connection not showing in Network Connections Windows 10
  • Windows 10 VPN not working after sleep
  • Windows 11 update breaks VPN

These are the most reported issues by users regarding this update error. Therefore, let’s tackle the subject and see how to resolve it.

How can I fix VPN issues on Windows 10 after updates?

1. Use a proper VPN client

In order to avoid issues and errors, we strongly recommend choosing a reliable and compatible VPN.

Our VPN of choice is ExpressVPN, a world-class VPN that brings all those professional privacy and security-oriented features to the table but without you having to break the bank to acquire a subscription. It’s actually very affordable.

Crafted for the Windows 10 architecture, it will seamlessly blend with your system and grant you the security you seek.

Kape Technologies-owned ExpressVPN has OpenVPN, PPTP, IPSEC/L2TP, and SOCKS5 (Proxy) technologies.

In fact, the industry-standard OpenVPN offers you the highest level of encryption via secure VPN tunnels.

Speaking about tunneling technology, the VPN uses a global VPN Tunnel Network powered by multiple gateways with worldwide access and unlimited bandwidth.

ExpressVPN

Install the latest Windows 10 updates without fearing privacy breaches. Team up with this authorized VPN!
Check price Visit website

2. Update Windows 10

  1. Press Windows key + I to summon the Settings app.windows 10 vpn not working after update
  2. Select Updates & Security.
  3. Select Windows Update from the left pane.
  4. Click on the Check for updates button.windows 10 vpn not working after update

It seems that the Windows 10 Updates function, more or less, in the same sequence. Microsoft provides a major update in order to bring improvements, a large variety of bugs appear, and they then, overwhelmed by the large community backlash, end up pushing appropriate fixes as soon as possible.

That’s how it basically works. Since this is a widespread problem and it mostly occurred after some updates, they provided the resolution soon.

A lot of users who experienced issues with VPN after an update, get things sorted out after some time by updating Windows 10.

So, make sure that you have all available updates installed and try running the VPN again. In case you’re unable to make it work regardless, make sure to move to alternative steps.

Here’s how to check for available updates in Windows 10:

If you want to avoid VPN issues triggered by Windows Update, the obvious solution is to simply block the updates.

Keep in mind that not installing the latest security patches may pose a threat to your PC. Therefore, use this method only in extreme cases where you really need your VPN.

3. Reinstall drivers

  1. Right-click on Start and select Device Manager from the PowerUser menu.windows 10 vpn not working after update
  2. Expand the Network adapters section.
  3. Right-click on every individual WAN Miniport driver and uninstall it.windows 10 vpn not working after update
  4. Restart your PC and open Device Manager again.
  5. Navigate to Network Adapters, right-click every individual Miniport, and install it.
  6. Try running the VPN again.

Certain users resolved the issue by completely uninstalling all Network adapters, but you can settle for reinstalling WAN Miniport drivers.

Either way, we all know how notoriously Windows 10 manages drivers and how the generic and mandatory drivers can have an illicit effect on system performance and stability.

In order to avoid this, you can reinstall drivers changed by the last update and let them reinstall on their own. Also, secondary drivers provided by a third-party VPN are better than the ones Windows Update provides.

So, you can also uninstall them and the VPN, and then just obtain them by reinstalling your VPN from scratch.

Here’s how to reinstall WAN Miniport network drivers in Windows 10:

Update drivers automatically (suggested)

After you have uninstalled your drivers, we recommend reinstalling/updating them automatically.

Downloading and installing drivers manually is a process that carries the risk of getting the wrong driver installed, which may lead to serious malfunctions in your system.

The safer and easier way to update drivers on a Windows computer is by using a professional tool.

It will automatically identify each device on your computer and matches it with the latest driver versions from an extensive online database.

⇒ Get Outbyte Driver Updater

4. Edit registry

  1. In the Windows Search bar, type regedit and open regedit from the list of the results.windows 10 vpn not working after update
  2. Backup your registry.
  3. Navigate to this location:
    • ComputerHKEY_LOCAL_MACHINESYSTEMCurrentControlSetServicesPolicyAgent
  4. Right-click on the blank area in the right window and select New > DWORD.
  5. Name the new DWORD input
    AssumeUDPEncapsulationContextOnSendRulewindows 10 vpn not working after update
  6. Change its value to 2 and save it.
  7. Close Registry Editor and restart your PC.

As some tech-savvy users noted, this error can have roots in the Policy Editor. This is the main part of the Windows platform and it regulates the security and access policy for all individual users on one machine.

In order to address this possible instigator of the problem with VPN, we’ll need to change the policy settings by inserting an exception for UDP. Now, the best way to do so is to use Registry Editor.

Of course, with this tool we’re roaming in the dangerous area, so make sure to act with caution and don’t delete anything while there.

Follow these instructions to access Registry Editor and create a new input which should re-enable VPN in Windows 10:

5. Reinstall VPN

  1. In the Windows Search bar, type Control and open Control Panel from the list of results.windows 10 vpn not working after update
  2. From the Category view, click Uninstall a program under Programs.windows 10 vpn not working after update
  3. Right-click on your VPN solution and Uninstall it.
  4. Use CCleaner or any other third-party uninstaller to clean all remaining files and registry entries the VPN has made.
  5. Restart your PC.
  6. Download the latest version of the VPN of your choice and install it.

Since the update-inflicted issues can affect both third-party VPNs and built-in Windows VPN, respectively, we decided to cover both.

Regarding the former, if you’re sure that everything was running smoothly before the update and then things suddenly went south, we advise you to reinstall the client you use.

Reinstallation is also the re-integration of the VPN into changed system surroundings, so this just might help. Also, while we’re at it, don’t forget to acquire the latest version of your VPN of choice.

We make sure to showcase the whole procedure, and decided to use TunnelBearVPN as the example, but this applies to all VPN solutions in general. Make sure to follow the instructions we provided below:

6. Disable antivirus

  1. In the Windows Search bar, type Allow and select Allow an app through Windows Firewall.
  2. Click on the Change settings button.
  3. Find your VPN on the list and check the box beside it. Also, make sure that both Public and Private networks are enabled.
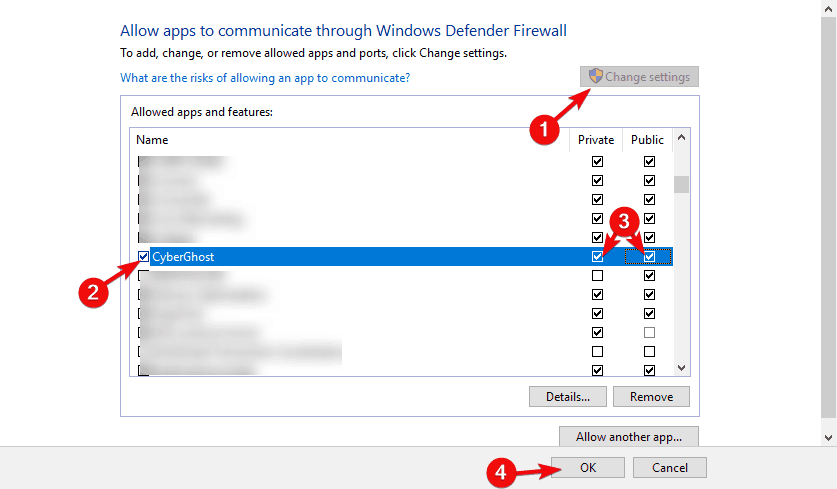
  4. Confirm changes and try connecting through a VPN again.

Another possible reason for this error can lie in the third-party antivirus or some of its subsidiaries. Contemporary antivirus solutions often come in suits that include third-party Firewall security measures.

They do come in handy, especially if you’re knowledgeable enough to customize them, but are, on the other hand, known for conflicting with Windows services.

If you run a VPN through a Windows 10 antivirus provided by Microsoft, make sure to disable the third-party firewall before doing so.

Or even better, for the sake of troubleshooting, disable the antivirus completely and move from there.

Also, make sure that your native Windows Firewall isn’t preventing VPN from accessing the remote servers. Here’s how to add an exception to Windows Firewall in a few simple steps:

7. Disable IPv6

  1. Type Control in the Windows Search bar and open Control Panel from the list of results.windows 10 vpn not working after update
  2. Open Network and Internet and then Network and Sharing Center.
  3. Select Change adapter settings from the left pane.windows 10 vpn not working after update
  4. Right-click on VPN network adapter and open Properties.
  5. Uncheck the box beside IPv6 and confirm changes.windows 10 vpn not working after update
  6. Try running a VPN afterward.

Connection issues, with or without VPN, are rather common after every new major update. Major updates tend to make certain changes to your adapter settings, making it unusable in the process.

Now, in step 7 we’ll try to address all-around connection settings, but this step concerns only IPv6. Namely, for users with the older configuration, the problem might occur due to conflict with the Internet Protocol.

Most users who found this step helpful disabled IPv6, but you can try disabling IPv4 and stick with IPv6, too.

If you’re not sure how to disable IPv6 (or IPv4, its older variation), follow the steps below:

If this method didn’t work, you should enable IPv6 back on. Check out this complete step-by-step guide to do that.

8. Troubleshoot your connection

We don’t want to point fingers at the VPN until we eliminate all possible connection issues.

In other words, make sure that you can connect without a VPN in the first place. If that’s not the case, we advise you to perform standard troubleshooting steps and move from there.

If you’re caught in the middle and unsure what to do, here are some actions that you should consider:

  • Reset your router and/or modem.
  • Flush DNS.
  • Restart related services.
  • Run dedicated Connection troubleshooter.
  • Disable the router’s firewall.
  • Update the router’s firmware.
  • Reset router/modem to factory settings.

9. Reset your PC to factory settings

  1. In the Windows Search bar, type Recovery and open Recovery options.
  2. Under the Reset this PC section, click on the Get started button.windows 10 vpn not working after update
  3. Select whether you’ll preserve or delete your files from the system partition and click Next.
  4. Follow the instructions until the system is fully restored to factory values.windows 10 vpn not working after update
  5. Install VPN again and the update-inflicted problem should be gone.

Finally, if none of the solutions proved helpful, we recommend resetting your PC to its factory values.

If you’re not sure how to reset your Windows 10 machine to default values and refresh it in the process, follow the instructions we provided below:

Which Windows Update is causing VPN issues?

There are multiple Windows 10 updates that can affect your VPN, so you should be aware. More exactly, the specific updates that can break your VPN are KB5009543 and KB5009566.

Besides that, you can encounter other Windows update versions such as 1903, 20h2, 2004, 1909, 2022

How do I uninstall a Windows update?

  1. In the Start Menu, click on Settings.
  2. Now, click on the Windows Update section.
  3. Press the Update history button.
  4. Scroll down and click on Uninstall updates.
  5. Find the broken updates and uninstall them.

This should conclude it. In case you’re still unable to use your VPN on Windows 10 after an update, make sure to send a ticket to both Microsoft and your VPN provider.

Also, if you’re having issues with the business network, contact your network administrator. At least one should give you the helping hand, and chances are that the paid VPN service provider will be the one.

Either way, make sure to tell us if you have an alternative solution or a question regarding the ones we provided above.

9 Best PDF to Word Converters in 2026

Have you ever wanted to apply for a job and the required format for your CV was .doc, or .docx but your CV is in the Adobe PDF format?

Because of the fact that PDFs are not created to be edited or provide you with a way to extract text or images, the best way is to convert them to a Word file format.

Why should I convert my PDF into Word?

Converting the document assures you that the entire range of information is kept intact in the resulting .doc/.docx file.

These are just some examples, but there are many other circumstances in which the use of file-converting tools can be very useful.

Situations like these are frustrating, and instead of having to manually retype your entire CV or another document into a PDF, you can use specialized software to transform your file into a Word document.

The conversion process is usually fast, and the quality of the results is satisfying.

Depending on the software tool you choose to use, you’ll have access to other useful features besides the conversion tools, like batch processing options, merge and splitting features, etc.

Let’s explore some of the best converters on the market that allow you to easily transform your PDF files into Microsoft Word (.doc, .docx) files.

  1. Wondershare PDFelement – Best converter and editor
  2. Soda PDF – Advanced Converter feature
  3. Adobe Acrobat DC – Best interaction feature
  4. Swifdoo – Amazing interface
  5. Icecream PDF Converter – Wide-range formats supporter
  6. Nitro PDF – Effortless software
  7. WPS PDF – Great conversion quality
  8. UniPDF – Easy to use
  9. Solid Converter PDF to Word – Multitude conversion features

What is the best PDF-to-Word converter?

Wondershare PDFelement – Best converter and editor

If you’re looking for the best PDF to Word converter software, Wondershare PDFelement is exactly what you need and more.

Yes, you can easily export your PDF documents in Word format but this tool is also powered by AI, so it brings document editing to a whole new level.

For instance, PDFelement helps you translate or rewrite entire PDF documents and export modified versions instantly.

Another huge help is that the app allows you to quickly summarize PDFs into text summaries and export them as Markdown files.

Of course, being a full-blown PDF editor, Wondershare PDFelement has many other features.

You can eSign PDFs legally, annotate your documents, move, copy, delete, and split the pages, combine more documents together, and more.

After signing into your own account, you also get 20 GB of cloud storage space to keep your work safe and access your documents from anywhere in the world.

Speaking of which, the tool has multiple platform support so you may literally switch from your laptop or PC to an Android or iOS device to continue your work.

Let’s review some of its best features:

  • Built-in AI features to summarize, translate, and export your documents
  • Sign your documents securely
  • 20 GB of cloud storage space
  • Annotate your documents easily for collaboration
  • Move, copy, delete, and split the pages, or combine PDF documents

Soda PDF – Advanced Converter feature

Soda PDF includes an advanced PDF Converter feature. You can convert any PDF to Word, Excel, PowerPoint, text, image, and many more as you need. With this feature, you can convert multiple PDF files at once, in order to save time and boost your productivity.

This popular feature of Soda PDF is one of the best converter software tools among Adobe Acrobat.

Converting files is easier than you thought due to this tool. Just upload a PDF file that you need to convert, select the type you want to convert to, and leave the rest to Soda PDF Converter.

You can send the file to your email, download the PDF file to your computer, or you can simply save it to your cloud storage service like Google Drive.

If you need, a PDF file can be converted back to its original format.

Besides the converter tool, Soda PDF has many more features easy-to-use:

  • Edit
  • Merge
  • Compress
  • Sign & Secure
  • OCR

Soda PDF is one of the best PDF software applications today that helps your work get done with just a few clicks!

Soda PDF

Convert PDFs to Word, Excel, PPT, TXT, JPG, and many more.
Free Trial Visit Website

Adobe Acrobat DC – Best interaction feature

You can’t talk about PDFs, without mentioning Adobe. This list would not have been complete without listing the Adobe PDF converter.

This software is one of the best PDF-to-Word converters available on the market.

With this software, you can easily convert all your PDFs to Word documents, while keeping the layouts and fonts of the original file intact. This includes all bullets and tables found in the PDF.

One of the best features of Adobe PDF Converter is the fact that it allows you to extract specific paragraphs of text from PDF, and move to a Word File.

This feature helps you streamline the process of selecting information, without the need to first convert the entire file, and then extract it into another new document.

The Adobe PDF Converter can also convert PDF to other popular formats like – Excel, and PowerPoint, and also convert Word, Excel, or PowerPoint to PDF.

This software is part of the Adobe Document Cloud, which can be used as a trial, and also has 2 different versions:

Acrobat Standard DC has awesome features such as:

  • The tool allows you to view, interact and edit PDFs
  • Store files and share content online – Dropbox, Google Drive, etc.
  • Converts PDF to any Microsoft Office document and the other way around

Acrobat Pro DC contains all the features found in the Standard version, and you can also use it to:

  • Permanently remove any visible information inside the PDF
  • Add audio, video, and interactive objects to PDFs
  • Get real-time status and activity notifications for documents sent for viewing, or to be signed

SwifDoo – Amazing interface

SwifDoo is a software with lots of great features that help you edit, convert, compress, and sign PDF files in a convenient and efficient way.

It has one of the fastest PDF converter features. You can convert PDF files to Word, Excel, PowerPoint documents, and vice versa instantly. You are also able to switch PDF to text or image files with just a few clicks.

It allows you to export a PDF into JPG, PNG, BMP, and TIF files. Besides, this software is also useful to convert PDF to CAD and contrariwise.

Furthermore, with the Batch convert feature, you can add numerous files simultaneously and perform batch conversion assignments to substantially enhance efficiency.

Here are some other key features of SwifDoo:

  • Select and crop pages
  • Powerful OCR
  • Insert images and links
  • Lossless compression
  • Annotate and markup PDFs
  • Split PDF pages

Icecream PDF Converter – Wide-range formats supporter

Icecream PDF Converter is a powerful application that lets you convert from PDF formats to Word, with unmatched speed and precision.

In fact, it supports a wide range of popular text and image formats like EPUB, JPG, FB2, HTML, MOBI, PNG, XLS, and XLSX.

What sets Icecream PDF Converter apart from other similar apps is that you may add multiple files to the queue of PDF Converter, so all it takes is a single click to convert them.

And since you’re about to get the very best, let us tell you one last tip: Feel free to check the number of pages and set the page range to be converted.

This will certainly speed up the process beyond your imagination. Here are some major benefits of using Icecream PDF Converter:

  • Built-in PDF reader
  • OCR (Text Recognition)
  • Multiple layout settings
  • Supports password-protected files
  • Conversion is guaranteed, regardless of size

Nitro PDF – Effortless software

Nitro PDF is another great software option that can easily transform any PDF file into Word documents. This software also allows batch processing of your PDF files, allowing you to save valuable time in the process.

Besides this capability, Nitro PDF can also transform PDF files into Excel, PowerPoint, and any other Microsoft Office format, allowing you to revert to PDF from any format.

Nitro helps you save time and effort relating to layout issues after conversion without the loss of any information whatsoever.

This program uses computer algorithms to ensure that any problems regarding the way different elements are laid out are eliminated.

Another great thing about Nitro PDF is its Review feature. You can highlight your text and add sticky notes and comments to share feedback.

You can easily see if the document contains digital signatures, comments, or bookmarks for faster reviewing. You can also view and collaborate on PDFs with its intuitive interface that works just like MS Office apps.

WPS PDF – Great conversion quality

This PDF to Word converter from WPS is a great software solution that allows you to easily edit your PDF files.

This tool was designed so it allows you to maintain the quality of your document even after conversion, by keeping and transforming all the bullet points, tables, etc., in order to be presented as a Word document.

The Adobe PDF file can be converted into either .DOC or .DOCX formatted files. You can also use this software to split or even merge the pages contained in your PDF file, before starting the conversion process.

This allows you to avoid any complications down the road and also to have everything set up and ready for the transformation of the file.

WPS PDF to Word, also allows you to process batch files. This option not only saves you time but reduces the strain put on your system by optimizing the way the batch processing is done.

This software can be licensed either for individual use, education, or business. Each version offers particular features:

  • WPS Office Free supports a 5-page limit of PDF to Word converting and offers a good range of free templates
  • WPS Office License is designed for businesses and offers an unlimited number of PDF to Word conversions as well as an ad-free user experience
  • WPS Premium allows you to export PDFs in batches and offers OCR support
  • WPS Premium for education contains all the features of WPS Premium but comes in a free package designed specifically for use in education

UniPDF – Easy to use

UniPDF is another great software option that is designed specifically to transform PDF files into Word documents, allowing you to extract information with ease.

This easy-to-use software is compatible with the entire Microsoft Office Suite, and besides converting PDFs to Word, it is able to convert files to images, HTML, or text files (.txt).

It also allows you to keep the layouts, document texts, images, and formatting style intact after the conversion is completed.

It has a fast conversion that enables you to spend less time converting which improves your work instantly. You can also choose to convert your files individually or batch convert documents in one session.

Moreover, you have the option to convert your entire documents or just simply select particular pages within a file for conversion.

⇒ Get UniPDF

Solid Converter PDF to Word – Multitude conversion features

This converter from Solid Documents is another great option that can transform your PDF files into Word documents.

It has batch conversion features, can convert only selected parts of your text, and also allows you to print PDF documents directly from the user interface.

When you convert your PDF to Word, you can opt for Flowing Mode which keeps everything intact, Continuous Mode which only keeps formatting, text, and graphics flawless, or Exact Mode which uses text boxes to recover precisely how the source doc looks like.

Other features can help you with table detection, managing header, and footers, and handling text annotations.

Furthermore, this software has a built-in OCR feature that rids you of the need to retype content from images or scans, efficiently saving both time and effort. Additionally, you can leave the OCR in automatic mode or choose your preferred language from the provided list.

⇒ Get Solid Converter PDF to Word

In this article, we explored some of the best software options on the market to simply convert any PDF files into Word documents.

Some of the software presented in this list also has other useful features such as Word or Excel file to PDF conversion support, options to export only the images out of PDFs, export only selected text, etc.

At times some issues can appear when trying to convert your PDF into word, if that is the case be sure to check our guide on how to fix PDF to Word conversion. We also have a great guide on how to save a Microsoft Word document as a PDF, so don’t miss it.

We would love to know what software option you chose from this list. Let us know in the comment section below.

FIX: LastPass won’t launch [Firefox, Chrome]

LastPass is supposed to remember all your passwords, yet this makes no difference when the tool will not launch. Users went on forums to report this issue:

Cannot launch sites from my vault. I push the launch button, LP takes me to the site, but does not enter account name or password. Entering account name or original password does not work. Tried several times, which has disabled some sites.

Others created a new entry with a proper URL, username, and password. Despite that, launching LastPass is unsuccessful. The launch button simply doesn’t pop up when scrolling over it.

Such problems are not uncommon on LastPass, so users have tried different solutions until some stood out as working. So we’ve decided to compile a brief list of all those fixes that you could try as well.

Quick tip:

With so many password managers out there, the easy and quick solution is to switch to a new and even better one. We recommend RoboForm since it’s intuitive and has unlimited password storage.

RoboForm will import your old passwords in minutes and will help you generate unique and powerful passwords instead of weak, old, or too-used ones.

RoboForm

Say goodbye to errors and enjoy a new and safe web password companion.
Free trial Visit Website

How can I fix LastPass not launching?

1. Refresh sites on your vault

  1. Click on the browser extension icon.
  2. Go to More options > Advanced.
  3. Hit Refresh Sites.

Note: Browsers such as Avant have an Auto-Refresh option in the Tools menu.

If you want one of the fastest and most reliable browsers available right now, take your pick from these top 5 browsers.

2. Edit the entry

Your browser’s settings might affect how some websites are accessed. Whether it’s for security or for faster loading, this can provoke an issue.

If you get this type of error, check LastPass or another website for complete or broken links. A different entry other than https:// might be the problem.

Some LastPass users tried to plugin https:// in front of all addresses and it worked. Don’t forget to save the entry and refresh the vault.

3. Reset the LastPass account

Reset LastPass account
  1. Backup of all your LastPass data.
  2. Go to LastPass Delete Your Account page.
  3. Click Reset.
  4. Click No to indicate that you don’t remember your Master Password.
  5. A warning message will appear next. It normally states that resetting your account will permanently destroy all of your data.
  6. Fill in your LastPass email address.
  7. Click Send Email to get further instructions and a Master password reset link.
  8. Open the email and click on the sent link.
  9. You may now create a new Master Password. Remember to use a minimum of 12 characters, upper case, lower case, numeric, as well as special character values.
  10. Up next, log back into your account.
  11. Set up your Vault identities, Multifactor Authentication options, and Trusted devices.
  12. Finally, reimport your backup to complete the procedure.

Resetting your LastPass account isn’t always about not remembering your Master Password. Some users got the launch button back after performing the above procedure. You could try it at your earliest convenience, but keep in mind the importance of a proper backup.

By following these steps, you should get rid of any errors related to LastPass not being able to launch sites or completely missing the launch button.

If you have a question, a suggestion, or anything else you might want to share with us, feel free to use the comments area below.

6 Best VPNs for Smite to Enjoy Smooth, Lag-free Gaming

Smite is a popular online battle arena game that has a huge fan base, the game is free to play and developed by Hi-Rez.

The title was released in 2014 to critical acclaim and is one of the few games to have multiple tournaments with the premier tournament, being the annual smite world championship.

Players are placed into a team of five players with each team on opposite sides of their fountains. Meanwhile, players are also given 1500 gold to get starter items.

Players choose from gods and immortals classified into different categories, Assassin, Guardian, Hunter, Mage, and Warrior, and players can’t choose the same god in a team.

However, Smite players may experience connection problems or lags when connecting to game servers.

This can be resolved by the use of a VPN. A Virtual Private Network software helps to resolve these issues by giving a secured connections and helping players bypass geo-blocks.

Looking for the right VPN, read further as we review five of the best VPN for your Smite gaming.

Can I game with a VPN?

In terms of gaming, the utility of a VPN varies depending on the situation. It will not improve your internet connection beyond what you already pay for, only redirect the traffic better. A VPN can be especially useful if you play online video games that rely on a peer-to-peer connection, such as Smite.

The main problem with Verizon throttling and AT&T throttling is that it stops your incoming traffic when things get serious in-game. A VPN will resolve this as soon as you connect to it.

With a VPN, you can protect yourself from DDoS attacks, which are only important in online games that use a peer-to-peer connection. Furthermore, a VPN will redirect network traffic through their servers, allowing you to play in the dungeons for hours without experiencing network congestion.

Powerful VPNs with high speeds can potentially help reduce ping and smooth everything out in Smite.

Does VPN work with Smite?

You can change your Smite server from the main menu in-game, with an option to select a different region in the bottom right corner of the screen. Another way is to host game servers with a VPN and make your own path in the Smite gameplay.

Because there is no server list, you will have to keep tapping left or right until you find the server you want. Keep in mind that these servers are location-dependent, so if you try to connect to a region on the other side of the world, you may experience ping issues. Below are the available servers VPN to play Smite on:

  • North America 
  • Europe
  • Australia
  • Brazil
  • Latin America North (Mexico, Columbia, Northern Brazil, Venezuela, etc)
  • Latin America South (Chile, Argentina, Southern Brazil, etc) 
  • Southeast Asia (Thailand, Philippines, Indonesia, etc) 
  • Japan

The easiest way to play Smite with no lag and without server overload or network congestion is to use a VPN optimized for gaming. We made a list of the VPNs our VPN advocates tested on Smite servers to fix low FPS and high pings. Let’s see what benefits they bring to the table to play Smite with VPN.

What are the best VPN tools to use with Smite?

Private Internet Access – Offers P2P support

Since Smite is a competitive MOBA that is solely multiplayer-based, if you’ll be playing with a VPN, you will need one that will definitely not cause any lag for you.

That being said, topping off our list is a VPN service developed by Kape Technologies called Private Internet Access, and it is one of the best VPNs for gaming currently available, not just for Smite.

This is thanks to the almost 3300 servers located in 46 countries all around the world, offering complete coverage and the best private connectivity features that the market has to offer.

Moreover, this VPN is completely secure thanks to the integrated encryption, and a single subscription you get support for up to 10 devices so that you and your friends can enjoy Smite anywhere.

Here are some of the advantages of choosing Private Internet Access:

  • 3300 servers in 46 countries offer global coverage
  • Unlimited bandwidth
  • Support for 10 devices
  • P2P support
  • Multiple VPN gateways
  • Instant setup
  • No traffic logs

Private Internet Access

Want to play Smite without high lag pestering you? Try Private Internet Access.
Check price Visit website

NordVPN – Best for stable connections

NordVPN is one of the few VPNs which have servers scattered all over the world, and it is developed by Tefincom & Co., S.A.

This best VPN for Smite has optimized servers; this enables your connections to be stable and increases performance.

Your security is kept private with the 256-bit military encryption which encrypts your incoming and outgoing data connections.

Smite gamers can also take advantage of its cross-platform compatibility as it is available on Windows and other devices. This means you can play Smite on any device with maximum security and performance.

Furthermore, NordVPN has many subscription plans with each one coming with a 30-day money-back guarantee which you can use to check the features before deciding to purchase the full product.

NordVPN

NordVPN can protect your privacy, but you can also use it to lower ping in Smite.
Check price Visit website

ExpressVPN – Best gaming protocols

ExpressVPN is one of the pioneers in the VPN business as they have been around for a while and garnered rave reviews on the quality of their services.

Developed by Express VPN International Ltd., this VPN offers over 1500 servers which give gamers a multitude of choices to pick from depending on their geolocation.

Your system is also secured from DDoS attacks as the VPN has a DNS leak protection system to prevent these attacks.

In addition, ExpressVPN offers subscribers a 30 days of money back which enables you to sufficiently check other features before purchasing the product.

ExpressVPN

Can’t enjoy Smite because of high ping? ExpressVPN can sort it out for you.
Check price Visit website

Surfshark – Offers gaming-optimized servers

When you’re a gaming enthusiast who enjoys playing Smite and needs a fast internet connection, it’s important to find a VPN service that provides this capability.

Surfshark VPN, developed by Surfshark LTD, has made it a priority to ensure that its servers supply you with fast speeds when you’re in a game and trying to dominate in the battle arena.

When using any of Surfshark’s 800+ servers, you’ll have a high level of security. This allows you to have peace of mind when gaming as you’ll know that no one will be able to track your activity.

You’ll also have access to a number of different apps as this VPN has multi-platform capability. If you’re a fan of both Windows and macOS, Surfshark provides you with this option.

It’s good to know that Surfshark utilizes strong 256-AES encryption. When this is utilized with top protocol technology, it makes it virtually impossible to view your outgoing or incoming activity as it’s all being hidden via this VPN provider.

If you’d like to take a break when you are traveling and play a game, you should have access to one of Surfshark’s as they are available in over 50 countries.

With the availability of fast speeds, this is one VPN that you may want to check out. It has a risk-free 30-day money-back guarantee, which makes it almost free to try.

Surfshark

High ping giving you a hard time in Smite? Check out Surfshark and lower it effortlessly.
Check price Visit website

CyberGhost – Best to mask IPs

CyberGhost is popular among gamers as it gives many servers and excellent features that ensure seamless gameplay.

This VPN which is also developed by Kape Technologies enables unlimited bandwidth and comes with security measures such as a kill switch and DNS leak protection which gives secure gaming.

CyberGhost has fast servers in over 58 countries that give you options to connect to game servers.

Your anonymity is always protected by the triggering of the CyberGhost VPN killswitch by even the slightest internet connection problem.

Also, with the multiple protocols support, you can always rely on the strong 256-AES encryption technology.

You can take advantage of CyberGhost’s money-back guarantee to test run their services, with the full package price set at $5 a month billed yearly.

CyberGhost VPN

Smite lagging like crazy? Use CyberGhost VPN to lower your ping.
Check price Visit website

VyprVPN – Best to fix connection drop-outs

VyprVPN, which is a service developed by Golden Frog GmbH, has many servers that contribute to its reliability and quality. The VPN is easy to set with an excellent interface that enables connection with a single click.

Since they own their servers Smite gamers are rest assured of their server’s reliability and gameplay is not interrupted with lags.

VyprVPN has a strong privacy policy with its servers secured with 256-bit encryption and they follow a strict no-logs policy.

The VPN has decent speeds on its servers and enables a 3-day free trial which you can maximize before paying for the full service.

VyprVPN

Do you want to experience Smite with minimum lag? Try VyprVPN and thank us later.
Check price Visit website

As a general rule, regardless of how fast your VPN provider is, it will affect your browsing speed and ping because it takes longer for the data to reach you. It has to go through the VPN server first, which can be in a geographically-distant location.

Does a VPN cause lag?

VPN causes lag, but only for the player that uses VPN in a match and others don’t. If you also connect to a Smite game server that is too far from you, this also can result in a lag.

To avoid this, simply look for your VPN provider’s dedicated gaming servers, or look for a server near your location, or the Smite game servers as mentioned before. If you play with your friends, find out how to lower ping when playing other regions, or share your subscription for the VPN since most offer more than 5 devices to connect at the same time.

To learn more about how to use a VPN while gaming without lag, read about slow VPN on Windows 11 and get the most out of your gaming and security.

What is the best no-lag VPN?

The best no-lag VPN for gaming are Private Internet Access, ExpressVPN, Surfshark, and Cyberghost. When you’re playing a competitive online game, a higher ping can cause lag, which is very annoying.

Some games like Smite will even disconnect a player if their ping is too high for the game to function properly. As a result, these VPNs for gaming were chosen as the winners based primarily on their fast speeds and low ping.

Conclusively, the best VPN tools for Smite that we listed above will help you have smooth gameplay of Smite and will give your good value for your money.

If you have any experience with any of the VPN software please leave a comment below.

How to Change the Sound Scheme in Windows 10

Windows 10 is a great operating system to use on your desktop, laptop, or tablet. When using a Windows system, you can choose to personalize your device, as there are various in-built features that can be used in that matter

A great way in which you can customize your Windows 10 system is by changing the sound scheme.

So, during the present step-by-step guide, I will show you how to easily change Windows 10‘s sound scheme.

How can I change the Windows 10 sound scheme on my PC?

    1. Change Windows 10’s sound scheme via Settings

    The sound scheme can  be easily changed by accessing the sound settings section on your device. From there, you will be able to choose from various sound schemes.

    If you really want to spice things up, you can even create your own sound scheme because, in Windows 10, that’s possible.

    Doing all that is easy because you don’t have to use custom apps or programs. You simply use the in-built features on your device.

  1. 1. Navigate to the Desktop and right-click on any blank space.

  2. 2. Choose Personalize from the menu that opened.

    personalize settings windows 10
  3. 3. In the Personalization menu, navigate to the Themes section, and then click on Sounds.

    windows 10 navigate to sounds
  4. 4. The Sound menu will now open. Ensure that you are at the Sounds section from the top menu. If not, navigate to it.

    sound menu windows 10
  5. 5. Navigate to Sound Scheme and click on Windows Default to open a drop-down menu.

    change windows default sound system windows 10
  6. 6. You have to pick another scheme from the dropdown menu that is being offered by default. If you want to disable sound effects from your device, choose the No Sounds option.

    choose the no sounds scheme w10
  7. 7. You can create your own Windows sound scheme by using the Program Events list, which is displayed on the same window.

    To do that, you need to select any program of your choice whose sounds you want to change and choose a sound to apply to it. Once more, you can select from a set of default options or click the Browse button to use custom sounds.

    The changes you make will be saved as a new sound scheme that you can apply to your Windows 10.

    custom sounds options for programs
  8. 8. Before you save the changes, you can check if the sound you chose is to your liking. To do that, simply press on the Test button in the bottom right corner of the window.

    click to test the new sound scheme
  9. 9. Click OK after you made your selection to apply the new sound scheme to your device.

2. Edit the Windows 10 Sound Scheme via Control Panel

  1. Go to your Start Screen.
  2. Press Win +R to open the Run dialog.
  3. Type control and press Enter to run the command and open Control Panel.
  4. Go to Hardware and Sound > Sound and select Change system sounds.
  5. A new window will appear on the screen allowing you to customize sounds on your computer, as you can see in the screenshot below.change sound scheme windows 10
  6. Select a new sound scheme for your Windows 10 device, as shown in the previous solution.
  7. Good job, you have successfully customized and personalized your Windows 10 device.

Stay close for further tips, tricks, and step-by-step guides as we are developing new tutorials on a daily basis.

Let us know if you managed to successfully change the sound scheme on your Windows 10 device and write down any questions you have in the comments section below.

The Webcam Is Not Working when Plugged into the Monitor

It can be frustrating if the webcam is not working when plugged into the monitor. This is usually when you use an external webcam and want to attach it to the monitor.

It’s important to note that if the monitor has a powered USB port, you can plug in your USB camera (webcam). However, you should not expect a video output unless you connect the webcam to the monitor via USB. Plus, ensure you are routing that connection back to the host PC.

You can follow our detailed post for more info if you are looking for the best monitors with speakers and webcams.

Can a webcam be plugged into a monitor?

Yes, a webcam can be connected to a monitor; for this, the monitor should have either a USB type B plug or a USB type C plug.

Next, connect the monitor to a USB hub and the laptop simultaneously. You can then plug an external device like a webcam into the monitor.

Why is my computer not detecting my webcam?

If your computer is not detecting your webcam, it might be due to any of the following reasons:

  • Driver issues – may mean outdated, corrupted, or missing camera drivers, especially after a recent update.
  • Antivirus conflicts – While using some form of antivirus is essential, they may block the camera in some cases.
  • Privilege and access rights – Sometimes, camera access is disabled in privacy settings for some apps.
  • Random glitches – A glitch with the app you want to use may trigger this problem, but these are hardly permanent and easily correctable.
  • Connection issues – Chances are that the webcam is not connected or placed correctly. Connection is often the first thing you need to rule out before troubleshooting.

So, if the webcam on the monitor is not working, you can follow the below troubleshooting methods to fix the issue.

How do I fix my webcam if it’s not working when plugged into my monitor?

Before trying the solutions recommended in this guide, you may try the following quick checks and tests:

  • Confirm the webcam is correctly connected – You must turn off the computer and refit the cable. Also, ensure it faces you and is not enclosed in a dark space.
  • Restart your computer and retest – A reboot can end stubborn processes. So, if it is a minor glitch this may fix it.

1. Enable apps access to webcam

  1. Press the Win + I keys simultaneously to launch Windows Settings.
  2. Click on Privacy & security on the left. select Privacy & security in Settings
  3. Next, on the right, scroll down and under App permissions, select Camera. click on camera
  4. Now, on the right, turn on Camera access.
  5. Also, turn on the Let apps access your camera option, and enable the camera access for the specific app in the list. enable camera access & Let apps access your camera
  6. You can also turn on the Let desktop apps access your camera option. Let desktop apps access your camera

Now, go back to your webcam and check if it works with the monitor.

2. Update the webcam drivers

  1. Right-click on Start and select Device Manager.Right click on Start and select Device Manager
  2. Expand the Cameras section, right-click on the Integrated Webcam, and select Scan for hardware changes.Scan for hardware changes
  3. Now, wait for Windows to scan and reinstall the updated drivers.

Once done, restart your PC, and now check if the webcam not working when plugged into the monitor issue is fixed.

You can also disable the webcam and enable it back to check if this helps fix the webcam not working when plugged into the monitor issue.

Alternatively, you can also roll back your current drivers to the previous version, which helps fix the webcam issue if the current drivers are corrupted.

But if you see a black screen while using the webcam on your PC, we have some quick tips for you in this detailed post.

For any other queries on the webcam or related errors, let us know in the comments box below.

Steam Deck Can’t Reach Steam Servers: 3 Ways to Fix It

If your Steam Deck can’t reach Steam servers, you won’t be able to play any games or download new content. Luckily, there’s a way to fix that issue.

Why can’t I connect to Steam servers?

Issues with your device or Internet connection will cause this problem. Sometimes there might be an issue with the servers that is preventing the connection.

How do I fix my Steam Deck if it can’t reach Steam servers?

1. Restart the Steam Deck

  1. Press and hold the Steam Deck’s power button.power steam deck
  2. Select Restart.restart steam deck
  3. Try connecting again.

2. Enable Developer Mode

  1. Go to Settings.settings
  2. Select the System tab and then activate the Enable Developer Mode option.steam deck enable developer mode

3. Disable Wi-Fi Power Management

  1. Go to Settings.settings steam deck
  2. Select the Developer tab, then deactivate the Enable WiFi Power Management option.developer
  3. Select Restart now.restart now steam deck

Can I use the Steam Deck without Wi-Fi?

If the game you have in mind always requires an Internet connection as you play it on Steam on your PC, it will require the same thing on SteamDeck either.

Of course, you can the device without the Wi-Fi, but what you can do on the Steam Deck will be limited. To learn more, we have a guide on how to use Offline Mode on Steam Deck, so don’t miss it.

Even the PC version of Steam has such problems, so the fact that the Steam Deck also has the Can’t sign in issue shouldn’t come as a surprise.

If the problems still appear, you might want to update Stem Deck software or update Steam Deck BIOS to fix them.

Has this guide been helpful to you in fixing this issue? Share your experience with us in the comments section below.

Quick Fix: Windows 10/11 Forgets Network Credentials

Because you are a Windows user, the Network Credentials screen shows as a security box that requests a login and password. The network location’s settings influence whether or not functions like file and printer sharing, network discovery, and public folder sharing are enabled or disabled.

Windows 10 and Wi-Fi seem to have a dispute of their own. Firstly, users reported a bag of issues concerning Wi-Fi after a major update, and now, once the issue is dealt with, some of them can’t force Windows 10 to preserve the network credentials. It seems that Windows keeps forgetting network credentials every time users reboot the system.

Typically, Windows will remember these credentials and will not ask for them again after the first time.
As a result, in this case, the Remember my credentials option in the Windows Security prompt appears to be faulty. Typing the credentials for the same connections again and over may be tedious for anybody.

The default storage place for the credentials is Windows Vault, as indicated by the icon towards the top of the window. This is merely a general name for your hard drive’s hidden Credentials folder.

This sounds like a minor annoyance but it’s actually quite hard to address and it requires an in-depth troubleshooting approach. Luckily, we found some viable solutions and presented them below.

In case you’re having a hard time with Windows 10 remembering network credentials, make sure to check them out.

Quick Tip:

A simple and fast solution it’s to start using a smart password manager that will autosave and autofill your credentials whenever needed. A great tool we use is NordPass for its amazing security.

With NordPass you no longer have to remember passwords. Store an unlimited number of passwords, and securely keep card information and other sensitive data.

NordPass

Great security to keep all your passwords safe in one place.
Free Download Visit Website

How to fix Windows 10/11 keeps forgetting my network credentials?

  1. Forget and re-establish the network
  2. Install proper Network adapter drivers
  3. Check your router
  4. Inspect Credentials manager
  5. Restart wireless service
  6. Disable Secure Boot and third-party antivirus tools

1: Forget and re-establish the network

Let’s start with the simplest solution for the issue at hand. Reset your router in order to clear the possible halt. If you’re frequently switching networks, your system is freshly installed, or you changed your SSID name and security measures lately, there’s a good chance that the system isn’t able to preserve your credentials.

This can be resolved in a simple manner, by simply forgetting the established network and re-establish it later.

This, of course, applies to the Wireless network and the dedicated password appointed to it. Here’s how to reset the troubling Wi-Fi network and resolve the issue at hand:

  1. Click on the Wireless icon in the Taskbar’s Notification area.
  2. Right-click on your Wi-Fi network and click Forget.windows 10 forgets network credentials
  3. Restart your PC.
  4. Open the list of available Wi-Fi networks and click on your network.
  5. Check the ”Connect automatically” box and click Connect.windows 10 forgets network credentials
  6. Restart your PC again and look for improvements.

On the other hand, if Windows 10 won’t preserve your Wi-Fi password after some time, we advise you to continue with the below-enlisted alternatives.

2: Install proper Network adapter drivers

We all know how many issues Windows 10 users experienced due to faulty drivers. Windows 10 will provide you with the latest generic drivers suiting your Network adapter.

However, they might not suffice, taking into consideration that the older Wi-Fi protocols won’t work as intended with the latest routers and their protection protocols. So, you’ll need to obtain drivers which are, preferably, provided by the OEM.

If you’re not sure how to download, install and configure proper network drivers on Windows 10, follow these instructions closely:

  1. Right-click on the Start menu and open Device Manager.
  2. Navigate to Network adapters and expand this section.
  3. Right-click on your WLAN (Wireless) adapter and Uninstall it.windows 10 forgets network credentials
  4. Restart your PC and open Device Manager again.
  5. The drivers should install automatically or, if they won’t, click on the ”Scan for hardware changes” at the Toolbar.windows 10 forgets network credentials

Instead of that, you can also navigate to the official support site and download the proper WLAN drivers.

Make sure you have the most up-to-date versions of your drivers. There are third-party solutions that can do this automatically for you.

A professional tool like Outbyte Driver Updater is an efficient solution for automatically updating any type of Windows driver. Otherwise, it takes time and requires significant knowledge of the drivers you’re looking for.

You may rely on Outbyte Driver Updater to make such enhancements to ensure a proper update with the most recent Network adapter drivers because it can also back them up and even repair corrupted driver locations.

3: Check your router

Now, let’s move from the system settings and inspect the router settings. There are various things that can inflict constant prompts, asking for your credentials. But, the main suspects are security protocols and SSID’s name.

Namely, certain media access wireless sets support only certain security protocols. This implies that you won’t be able to use, say, 802.1 set with the WPA2 encryption.

A mere accessing your router settings opens the opportunity for a few troubleshooting steps:

  • Switch between the security protocols: from WPA/WPA2 to WEP and vice versa.
  • Change your SSID name. Don’t use scarce Unicode letters.
  • Update your firmware.
  • Eventually, reset your router to factory settings.

If you’re not sure how to access your router, make sure to google it. There are various IP access and passwords which allow you to enter the advanced router settings. And they’re always distinguished one from the other.

4: Inspect Credential Manager

All your Windows credentials, including the Wi-Fi ones, are stored in a secure place called a Credential manager. In there, you can manage them and delete them. And that’s just what we’ll need to do while troubleshooting the ”Windows 10 forgets network credentials” error.  Also, make sure that, in case you’re using a server, your domain name is properly inserted.

Now, in order to access the Credential Manager, you’ll need administrative permission. Once you’re there, you can delete your credentials and re-establish them again.

Follow these instructions to delete Windows 10 Wi-Fi credentials in the Credential Manager:

  1. In the Windows search bar, type Credential and open Credential Manager from the list of results.windows 10 forgets network credentials
  2. Select Windows Credentials.
  3. Select Wi-Fi-related credential input and expand it.windows 10 forgets network credentials
  4. Click Remove underneath it and restart your PC.windows 10 forgets network credentials
  5. Configure the Wi-Fi connection again and look for changes.

5: Restart wireless service

Besides the password itself and related credentials, there might be a problem with the dedicated service, too. the WLAN configuration service is the one we rely on to auto-configure and preserve Wi-Fi-related options.

Like every other major service, this service is also prone to malfunctions, meaning that it can bump into a halt. Also, due to some kind of misuse or virus infection, it can stop working as intended.

Besides that, you can delete all preserved settings stored in the system partition. By doing so, you should be able to overcome the halt usually imposed by the configuration failure or a faulty update.

Here’s what you’ll need to do:

  1. Press Windows key + R to summon the Run elevated command line.
  2. In the dialog box, type services.msc and press Enter.windows 10 forgets network credentials
  3. Navigate to WLAN AutoConfig and Wi-Fi Direct Services Connection Management services and stop both of them.windows 10 forgets network credentials
  4. Now, don’t close the Services window and navigate to the system partition. Most of the time is C: so this is the exact path
    • C:\ProgramData\Microsoft\Wlansvc
  5. If you can’t see ProgramData, make sure to enable Hidden items by selecting View from the Toolbar and checking the ”Hidden items” box.
  6. Once you’re there, delete all content from the Wlansvc folder with the Profiles as the only exception.
  7. Navigate to Service again and start both WLAN AutoConfig and Wi-Fi Direct Services Connection Management services.
  8. Restart your PC and look for improvements.

6: Disable Secure Boot and third-party antivirus tools

Finally, if none of the previous steps worked for you, we see only 3 options remaining (a clean reinstallation is not one of them for obvious reasons):

  • Disable Secure Boot in the BIOS/UEFI settings.
  • If your antivirus has a security tool that oversees Wi-Fi connection, disable it.
  • Update your Windows 10 and hope the resolution is provided.

The Secure Boot is a safety measure that prevents a computer from loading untrusted files. At the first look, this doesn’t have anything to do with the system’s inability to preserve the Wi-Fi network credentials.

However, certain users managed to resolve the issue by disabling it. It should be found in the BIOS settings menu, somewhere within the Security section. It’s worth a try, even though we can’t confirm whether Secure Boot affect the error or if something else is at hand.

If you’re not sure how to disable it, follow the steps we provided below:

  1. In the Windows Search bar, type Recovery and open Recovery options.windows 10 forgets network credentials
  2. Under the Advanced Startup, click Restart now.windows 10 forgets network credentials
  3. Select Troubleshoot and then Advanced Options.
  4. Choose UEFI Firmware settings and click Restart.
  5. Now, you should roam around until you find Secure Boot and disable it.
  6. Start your PC and the error should be gone.

Wrap-up

That should be it. In case you’re still unable to fix your issue, we advise you to send a ticket to Microsoft and present your problem to them. It’s a long shot, but a step forward towards the resolution, nonetheless.

In case you have questions or suggestions regarding the ”Windows 10 forgets network credentials” error, make sure to post them in the comments section below.

25 Best Steam Deck Games To Play In 2026 [Free, Multiplayer]

Are you looking for the best Steam Deck games to play in 2022? Valve has verified several thousand games officially for this device. But, in this article, we will feature the best ones.

Steam Deck is a newcomer in the console world for gamers who wants portability. Like Nintendo Switch, it has a small size. But, in terms of functionalities, it is ahead.

Unlike Nintendo Switch, Steam Deck allows you to play PC games on a small portable device, and if necessary, these can be played on a bigger screen as well.

Can you play any games on Steam Deck?

You can access all of the games available on your Steam library from a Steam Deck device. Technically, yes. You can play any game on this console thanks to its fantastic hardware capacity.

However, not all games will work well because of many limitations. Some games will indeed work well. But, there are games that don’t run smoothly on a mid-level gaming PC. These may not work perfectly on Steam Deck, either.

So, for your convenience, we have prepared a list of the best Steam Deck games that will work great on this device and can give you great enjoyment.

Can Steam Deck run AAA games?

Yes. In fact, Steam Deck can run some AAA games really well and better than expected. Though some titles struggle to deliver a smooth experience, most modern AAA ones still run perfectly.

What are the best games for Steam Deck?

Steam Deck: Best indie games

1. Stray – Best cat game

BlueTwelve Studio developed this amazing indie adventure game called Stray. After getting released in 2022, it has gained a lot of popularity among a class of gamers.

Currently, Stray is one of the best Steam Deck games to try out. In this game, you will play as a Cat who will have to escape a walled cyber-city by unlocking the mystery and avoiding danger.

⇒ Get Stray

2. Stardew Valley – Best Pixel Art indie game

The Stardew Valley is one of the best indie simulation role-playing games for Steam Deck. Eric Barone is the developer, and ConcernedApe is the publisher of this fantastic game.

Here, you will have to grow your inherited farm from your grandfather. While playing, you will have to face a lot of puzzles and challenges. Overall, it is a very enjoyable and playable game on a device like Steam Deck.

⇒ Get Stardew Valley

3. Project Zomboid – Excellent indie survival game

If you like zombie survival games, you will like Project Zomboid. The British Canadian independent developer Indie Stone has developed this open-world indie isometric horror survival game.

In this game, you will play as a survivor. You will have to build defenses and survive. There is a lot of fun in this game which is very much playable on Steam Deck.

⇒ Get Project Zomboid

Best multiplayer games

4. Apex Legends – Most exciting multiplayer game

Who doesn’t know about Apex Legends? This free multiplayer battle royale-hero shooter game has been developed by Respawn Entertainment and published by the famous Electronic Arts.

As it is a battle royal game, you know what to do. You will have to fight with competitors to earn reputation, fame, and glory. Recently, it has been verified by Valve as Steam Deck optimized.

⇒ Get Apex Legends

5. F1 22 – Race with others

If you want to enjoy a modern high-end racing multiplayer game on Steam Deck, F1 22 is indeed one of the best choices. This is a fantastic game published by EA Sports and developed by Codemasters.

You will have to race with other players in this game. There are a lot of elements like creating a team, career mode, race head-to-head, etc. All of these indeed will give an excellent experience on Steam Deck.
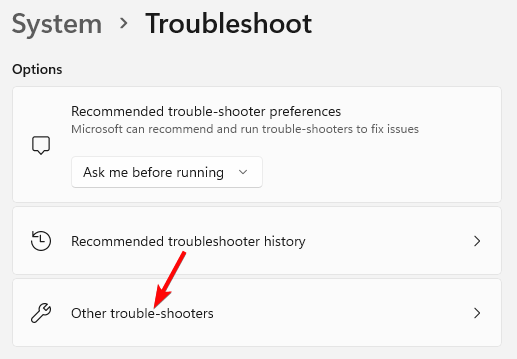
⇒ Get F1 22

6. Terraria – Multiplayer Pixel Art game

Terraria is a multiplayer action-adventure game developed by Re-Logic. After its initial release in 2011, it got the attention of gamers. Even in 2022, it is doing great.

Right now, Terraria is one of the best games for Steam Deck. Valve has also verified its compatibility on this platform which is excellent news for the fanboys.

⇒ Get Terraria

7. Valheim – Best multiplayer experience with Viking culture

Being inspired by the Viking culture, the developer Iron Gate AB developed the Valheim, and Coffee Stain Publishing published this masterpiece.

If you want to explore a mystical world with other players and have a lot of different feelings, it is probably the best option for your Steam Deck console.

⇒ Get Valheim

8. Left 4 Dead 2 – Fight together against zombies

The Left 4 Dead 2 is one of the best multiplayer games for Steam Deck. If you prefer zombie apocalypse games, this title is one of the perfect choices right now.

In addition, the Left 4 Dead 2 is fully compatible with Steam Deck. Whether you play on the console itself or on the large display, you will get amusement by playing this exciting game.

⇒ Get Left 4 Dead 2

Steam Deck: Good old games

9. The Witcher 3: Wild Hunt – Best if you love killing the monsters

If you want to play some decent old games on Steam Deck, The Witcher 3: Wild Hunt is one of the best choices. The CD Projekt developed this game and published it in 2015.

The Witcher 3 features a world where a lot of magical things exist. You will play as a professional monster hunter and kill monsters and solve a lot of puzzles. This open-world game runs really well on this small console.

⇒ Get The Witcher 3

10. Euro Truck Simulator 2 – Drive the trucks throughout Europe

The Euro Truck Simulator 2 is probably the best option if you prefer open world Truck Simulator game. Even though it has been out there for a decade, it still appeals the gamers.

This old game is a Steam Deck verified title that runs well without any issues on this console. In this game, you will start as a truck driver and explore various roads, even can create your own company. Overall, it is a very enjoyable game.

⇒ Get Euro Truck Simulator 2

11. War Thunder – Modern military war game

War Thunder is another old game that is still entertaining gamers. It was first released in November 2012 by Gaijin Entertainment. Even though 2016 was its official release year, it was out there as a beta version for a very long time.

This is a free-to-play game that features modern military combats. Recently, Valve has verified it as a compatible title for Steam Deck.

⇒ Get War Thunder

12. PAYDAY 2 – Complete missions with exciting gun fights

The PayDay 2 is another old game that is a verified title for Steam Deck. This game was released in 2013 by Starbreeze Publishing AB. Overkill – a Starbreeze Studio was behind the development of this item.

This action game has a lot of exciting elements like missions, gun fights, etc. It is not a free game. But, the price is very affordable. So, if you like, you can get the game easily.

⇒ Get PAYDAY 2

13. Brothers – A Tale of Two Sons – Dive into the fairytale

The Brothers – A Tale of Two Sons is another game from 2013 that has the quality to entertain gamers even these days. Starbreeze Studios AB is the developer company behind this game.

Here, the gamer will have to guide two brothers on their journey in the fairy tale kingdom. In this journey, they will face a lot of challenges.

⇒ Get Brothers – A Tale of Two Sons

Best Steam Deck verified games

14. ARK: Survival Evolved – Fight the predators and survive

The ARK: Survival Evolved is one of the best Steam Deck verified games out there for adventure lovers. The title states the genre of the game. It’s a survival open-world game that Studio Wildcard published in 2017.

In this game, you will have to survive on an island and do whatever it takes. The game has various enemy characters, predators like Dinosaurs, and primeval creatures. Overall, it’s a very thrilling game you can play on your Steam Deck device.

⇒ Get ARK: Survival Evolved

15. Marvel’s Spider-Man Remastered – Best game for Marvel fans

For the spider-man fans, this is an amazing title. Currently, Marvel’s Spider-Man Remastered is the best Steam Deck verified game for these specific fanboys.

The gamer will have to play as Spider-Man here and save the people and city from enemies as we saw in other similar games.

⇒ Get Marvel’s Spider-Man Remastered

16. No Man’s Sky – An exciting Sci-Fi game

No Man’s Sky is one of the best games verified by Valve for their newly launched console. It is an action-adventure survival title developed by Hello Games. Since its initial release in 2016, this game has gained tremendous popularity.

This game features a galaxy to explore where gamers will find a lot of elements like lifeforms, planets, dangerous challenges, etc.

⇒ Get No Man’s Sky

17. Dying Light – Best zombie survival horror game

Dying light

If you prefer survival horror games, there are no better options than Dying Light for Steam Deck. Since Valve has confirmed its compatibility, you can be sure of a smooth experience.

The game has been developed by Techland and published by Warner Bros. Interactive Entertainment. Since its release in 2015, it has won many gamers’ hearts. Dying Light is an FPS game that features a post-apocalyptic open world filled with flesh-hungry zombies.

⇒ Get Dying Light

Steam Deck strategy games

18. RimWorld – The best top-down strategy game

The RimWorld is an excellent indie top-down strategy game where a gamer will need to build, manage and develop a sci-fi colony. Ludeon Studios is the company behind this title.

Right now, RimWorld is one of the best strategy games you can play on Steam Deck.

⇒ Get RimWorld

19. Orcs Must Die! 3 – Create defense and fight against orcs

Orcs Must Die 3

The Orcs Must Die! 3 is an action tower defense strategy game that was developed by Robot Entertainment and published by the same company in 2020.

In this game, you will need to fight and make a defense against massive hordes of orcs. Overall, this title can give you a smooth experience and amusement on a device like Steam Deck.

⇒ Get Orcs Must Die! 3

20. Into the Breach – Defeat the aliens

The Into the Breach is a turn-based strategy game where a gamer will have to control powerful mechs from the future and defeat aliens.

Subset Games was the company behind this game. Currently, it is one of the best Steam Deck strategy games to play.

⇒ Get Into the Breach

Best free Steam Deck games

21. Dota 2 – The most played game

Dota 2 is a game by Valve, the company behind the platform Steam and Steam Deck. It’s a free multiplayer game that features online battles.

Another thing is that this is the most played Steam game that millions of gamers play daily. You can enjoy this excellent item on your Steam Deck device at no cost.

⇒ Get Dota 2

22. Splitgate – Free FPS multiplayer game

The Splitgate is another free Steam Deck multiplayer game. Unlike Dota, it’s an FPS game that features a sci-fi world.

1047 Games is the company behind the development and publishing of this game. As it doesn’t cost you to play, you can easily try it out on this console.

⇒ Get Splitgate

23. Team Fortress 2 – The most highly-rated free game

Team Fortress 2 is another popular free multiplayer game available on Steam Deck. Like Dota 2, Valve is also behind this title.

It is considered the most highly-rated free game of all time! Why are you waiting? You can try it out right now.

⇒ Get Team Fortress 2

Steam Deck: Best games to emulate

24. Star Fox Adventures – Exciting old non-Steam game

The Star Fix Adventures is a 2002 action-adventure game published by Nintendo. It was a top-rated game years ago and is still a very desirable choice for old game lovers.

As Steam Deck is like a PC, you can emulate this on this device to get the classic gaming experience.

⇒ Learn about Star Fox Adventures

25. Zelda – A non-Steam fairytale game

Zelda is another non-Steam game. But, it has a fanbase all around the world. You may want to emulate this game on your Steam Deck device.

Various forums and YouTube videos suggest that Zelda is also can be emulated on this console.

⇒ Learn about Zelda

How many Steam Deck games are verified?

Valve is adding new games regularly to the verified list. According to the latest report, there are over 5000 Steam Deck verified games. This number may not be the same when you read this article.

This article has featured the best Steam Deck games to play right now. If you have any recommendations, you can write them down in the comments box.

Is your LastPass Chrome extension not working? Try these steps

A Many users have attempted several times to install LastPass on Chrome and the plugin is failing to show up or activate.

They have a LastPass vault and login, but the plug-in is needed to make the vault interact with both username and password boxes.

Others think they created a LastPass account and installed the web browser extension. In spite of that, the LastPass icon doesn’t show in their web browser toolbar.

So it seems that the number of problems with LastPass installation on Chrome has increased lately.

But don’t worry, we’ve got you covered. In this article, we’re getting the hang of this behavior and helping you address the issue.

Quick Tip:

Sometimes, the fastest way to fix is to change to another password manager. RoboForm is our recommendation for security and smart features.

RoboForm only takes moments to import all your passwords, offers unlimited saved passwords, and easily backs up and syncs passwords across platforms.

RoboForm

This efficient password manager makes it easy to store passwords and sensitive data.
Free trial Visit website

What can I do if LastPass won’t install on Chrome?

1. Reinstall or update the web Chrome extension

Are you running an old version of the LastPass plugin? Waste no more time and get the latest version of the LastPass web browser extension for Chrome.

2. Check that LastPass isn’t disabled from view in the extension bar

LastPass disabled in extension bar
  1. On your computer, open Chrome.
  2. Select the three vertical dots next to the profile icon.
  3. Click More tools, then click Extensions.
  4. Copy and paste chrome://extensions into the navigation bar in Chrome.
  5. Simply turn the setting on to enable LastPass.

Remember that extensions are small software programs that tailor Chrome functionality to your preferences. Let’s assume that LastPass is only listed but not enabled in your browser’s extensions.

So you have to change that right away if you want the LastPass icon to display in your web browser toolbar.

If you happen to find that LastPass is not listed at all, try reinstalling it. Go to the LastPass extension and simply click Add to Chrome. You’ll then see the new extension in your browser as a button on the toolbar.

3. Confirm that other Chrome extensions aren’t interfering

Chrome extension
  1. Open Chrome, and in the top right, select More.
  2. Click More tools, then choose Extensions.
  3. Uncheck the Enabled box to temporarily disable your other Chrome extensions.
  4. Do not click the trash button to remove them.
  5. You are now presented with a confirmation box. Confirm your action.
  6. You may re-enable LastPass.

Note: Re-enabling extensions in Chrome is as easy as returning to the Extensions screen and ticking the box next to Enable.

4. Check if another plug-in is interfering

Chrome plug-in
  1. Go to chrome://extensions in your Chrome address bar.
  2. Use the menu button in the top right corner of Chrome to access More tools.
  3. Go to Extensions, and scroll to the plug-ins list.
  4. Click on them one by one.
  5. Then, just click the slider to toggle the plug-ins off.
  6. Re-enable LastPass now and check if the issue persists.

So these are the exact steps to complete in order to fix LastPass installation problems on Chrome. For further help with this, use the comments section found below.

Steam Deck vs Odin Pro: Which One Should You Buy?

The Steam Deck and the AYN Odin Pro have taken the gaming community by storm, but which is better? Keep reading for an in-depth comparison of the two handheld gaming consoles to find out which one is best for you.

The Odin Pro was developed by AYN Technologies and surprised many skeptical users with its performance and retro emulation.

It can be hard to come by Steam Decks and is considered quite expensive for a handheld gaming device. Let’s examine how the alternative Odin Pro holds up against the Steam Deck.

Can AYN Odin run Steam?

The Odin can run Steam using Steam Link which allows users to connect to a computer that’s running Steam. However, users will need a PC that is on the same Wi-Fi network as their Odin device.

Another method is to install Windows OS on the Odin device. With Windows on Odin, users can download and install Steam and should be able to have access to their games without issue.

Is the Steam Deck worth it?

If you have an established gaming library on Steam, then the Steam Deck is definitely worth it. The popular handheld gaming device allows users to take their favorite games with them on the go. Users can also connect with the Steam community and chat with their friends.

Steam Deck worth it.

For a more in-depth look at the common problems with the Steam Deck and how to fix them, we have a guide for that as well.

Steam Deck VS Odin Pro: Features comparison

Design

In terms of size, the Steam Deck is significantly larger than the Odin Pro. However, the small size and weight of the Odin Pro make it more portable and convenient to carry around. Its small size also makes it easier to hold and more comfortable to game for long periods of time.

steam deck vs odin pro design.

The Odin Pro and Lite have more color variations whereas the Steam Deck only comes in black. Both gaming devices are similar in that they both have built-in controllers with analog sticks, shoulder buttons, and face buttons. However, the Steam Deck hosts extra buttons and two trackpads.

Power

There’s no question that the Steam Deck is more powerful than the Odin Pro if the price difference didn’t already give it away. The Odin Pro is equipped with Snapdragon 845 whereas the Steam Deck has a custom AMD APU and 8 RDNA 2 CPU.

The Steam Deck also offers more RAM and storage with the options for 64GB, 256GB, and 512GB and a micro SD card slot. The Odin Pro offers 64GB, 128GB, 256GB, and also a micro SD card slot.

Odin power and performance.

Because the Odin Pro is less powerful, its battery last longer. The Odin Pro is equipped with a 6600mAh battery and the Steam Deck has a 5200mAh (40Wh) battery. Many users report that the battery on the Steam Deck drains quickly, especially when playing demanding games.

Steam Deck battery life.

Performance

When it comes to the performance of the latest and most popular games, the Steam Deck takes the cake. With a Steam OS, the device can run most AAA games seamlessly as well as the majority of the games on Steam.

Steam deck games and performance.

For a more comprehensive list of the best Steam Deck verified games, we offer a guide for that as well.

The Odin Pro on the other hand is perfect for retro gamers that want to play nostalgic GameCube and Wii games. The Odin Pro also runs on Android OS so users can play most Android games.

Price

Many users point out that you get what you pay for with the Steam Deck and the Odin Pro. The Steam Deck is quite a bit more expensive with prices starting at $399, but it is more powerful than the Odin Pro.

Steam Deck prices vs odin pro.

However, the Odin Pro is perfect for those who are looking for something cheaper but still offers high-performance retro gaming. The Odin Pro starts at $289, however, there is also the Odin Lite starting at $199.

What other Steam Deck alternatives are there?

One of the most popular alternatives is the Nintendo Switch, which also has a Lite version.

Nintendo switch steam deck alternative.

Another powerful handheld alternative to the Steam Deck is the AYANEO Air, which has received rave reviews over its power and performance.

Our conclusion

There are many factors to consider when comparing the Steam Deck vs. the Odin Pro. Ultimately, it’s up to you to decide what you want out of a handheld gaming console after reviewing our guide.

If you want a console with the power and performance to handle AAA games, then the Steam Deck is for you. However, if you’re a retro gamer, then perhaps the Odin Pro is best.

We hope this article shed some light on Steam Deck vs. Odin Pro and their differences. Let us know in the comments which handheld gaming console you prefer and why.

Windows Fingerprint Isn’t Working: 9 Easy Ways to Fix it

A fingerprint scan sounds fantastic if you have confidential data on your computer and don’t want anybody to access it. Unfortunately, the Windows Hello fingerprint is not working for some users.

The message states that We couldn’t find a fingerprint scanner compatible with Windows Hello fingerprint so let’s see how we can resolve this issue.

Why did my fingerprint scanner stop working on Windows?

If the associated drivers are faulty, outdated, or incompatible, your fingerprint reader will not function properly. In addition, some system files may get corrupted, which prevents you from using the fingerprint reader.

Moreover, your fingerprint reader software or other software might be causing the Windows fingerprint not working issue. If you have recently reinstalled Windows from Microsoft, be sure to update the chipset firmware for your computer.

Not being able to use your fingerprint can be a security risk, and in this article, we’re going to cover the following issues:

  • Windows 10 fingerprint blocked – The fingerprint reader is completely unresponsive, no matter what actions you may take.
  • Windows Hello fingerprint setup not working – It can be a problem since you won’t be able to use fingerprint login at all.
  • Fingerprint scanner, the reader doesn’t work with (Windows 10) – This issue affects both built-in and USB fingerprint readers.
  • Windows 10 fingerprint greyed out – The fingerprint option can become grayed out and be fixed by reinstalling your fingerprint reader drivers.
  • Windows Hello isn’t available on this device – This message usually occurs if you don’t have a fingerprint reader or if it doesn’t work correctly.
  • Hello Windows 10 fingerprint without a PIN – It’s impossible to use fingerprint scanning without setting up a PIN or using Windows Hello.
  • Windows 10 fingerprint login not working, not available, missing – If the fingerprint feature isn’t working or missing, be sure to try some of our solutions.
  • Windows 10 fingerprint stopped working – Fingerprint scanning stopped working suddenly, can be fixed by resetting fingerprints.
  • HP, Dell, Lenovo Windows 10 fingerprint reader not working – According to users, a fingerprint reader isn’t working on isn’t related only to these brands, and it may appear on almost any PC.
  • Windows 10 fingerprint and PIN not working; Can’t use fingerprint or PIN login – These may be fixed by recreating your PIN and fingerprint.
  • Windows fingerprint not working after password change – A faulty driver is the primary cause of the fingerprint scanning feature in Windows not functioning correctly.
  • This option is currently unavailable: Windows Hello fingerprint – Disabling the fingerprint driver has been the solution to this problem for several people.
  • Windows fingerprint not working after update – Remove the Synaptics device from the installed devices in Device Manager.
  • Could not find a fingerprint scanner compatible with Windows Hello – Updating your drivers is one possible solution to the problem in which your fingerprint is not available while using Windows Hello.

What can I do if the fingerprint reader is not working in Windows 11?

After updating to Windows 11, many users started complaining on the Microsoft Answers website that their fingerprint reader stopped working and they could no longer use it to log in:

I upgraded to Windows 11 from my Windows 10 laptop meeting all the requirements. Since then I’m unable to use my fingerprint scanner on my laptop. After a day, the sign-in settings on the settings app are also not opening. I re-installed my biometric drivers but it didn’t work out. Please help me fix this issue. Is this a bug and will it be fixed in the next updates?

As several users with ASUS laptops reported this issue, one might assume that there are some compatibility issues with the drivers for the respective readers.

However, one user responded in the same thread that the fingerprint reader from his ASUS laptop works well.

Anyway, this doesn’t seem to be an isolated incident since other users complained on the Acer community website about the same problem:

My Acer 5 fingerprint reader was working great with Windows 10. When I changed to Windows 11 it stopped working. There are no options available for the Windows 11 sign-in window (Settings, Accounts, Sign-in Options). Is there a fix available or will one be available in the future? Will the fix be automatically installed by Windows Update?

In this case, the user updated the fingerprint reader’s driver from the Device Manager Biometrics section and solved the problem immediately.

We don’t have an official solution, but this is likely a case of driver compatibility issues that will be gradually updated as Windows 11 matures.

Windows Fingerprint not working after the update

Speaking about upgrades, you might have noticed that Windows Fingerprint stopped working after installing a particular update.

Many users reported the same issue, so it’s safe to declare this does not happen strictly when switching to a new OS. Regular feature updates can trigger incompatibility issues as well.

To rule out this possibility quickly, we suggest you revert to recent updates and check Windows Hello’s functionality.

Here’s how to do that:

  1. Open the Settings app from the Taskbar, press Windows + I, then select Update & Security.update-security nmi hardware failure windows 10
  2. Navigate to the Windows Update section and select View update history.view-update-history windows fingerprint not working
  3. Click on Uninstall updates to unfold the list.
  4. Now, locate the update or updates you want to remove and click on Uninstall.

If the issue is solved, you might want to run the Windows Update Troubleshooter before trying to reinstall the problematic update to avoid triggering the same behavior.

How do I fix my fingerprint on Windows 10?

1. Rollback drivers/use default drivers

1.1 Rollback the fingerprint scanner driver

  1. Right-click the Start button and choose Device Manager from the list.device-manager-w10 amd driver install problems
  2. Locate your fingerprint driver and double-click it to open its properties. If the Biometric driver is missing, check out our guide to fix it.
  3. Click the Roll Back Driver button.
    Windows 10 fingerprint and PIN not working roll back driver

1.2 Use the default driver from Windows

  1. Open Device Manager like before.
  2. Find your fingerprint scanner driver. Right-click it and choose Uninstall device.
    Windows 10 fingerprint reader not working HP uninstall driver
  3. Check Delete the driver software for this device and click Uninstall.
    Windows Hello fingerprint setup not working uninstall driver

1.3 Update your drivers

Often, it’s better to use the latest driver optimized for Windows 10, so make sure you visit your fingerprint scanner manufacturer and check for the latest Windows 10 drivers.

It’s also worth mentioning that in some instances, older drivers can work better than the latest ones, so you might also try some older drivers.

Updating drivers manually is risky, so we recommend you download and install dedicated software to do it automatically.

2. Switch to a local account/ create a new account

  1. Press Windows + I to open Settings and click on the Accounts icon.accounts settings app User profile won't load
  2. In your account, click Sign in with a local account instead.
    Fingerprint scanner doesn't work with Windows 10 sign in with a local account
  3. Fill out your password and click on Next.
    Windows 10 fingerprint without PIN add password local account
  4. Set your username and the password for your local account, and click Next.
    Windows 10 fingerprint greyed out switch to a local account
  5. Click on Sign out and finish.

You can try creating a new account and setting up the fingerprint scanner. After that, just delete the latest version and switch back to the old one.

If Windows won’t let you add a new account, our expert guide will help you fix the problem and get things back to normal.

3. Prevent your PC from turning off USB devices

  1. Right-click the Start icon then select Device Manager.device-manager-w10 amd driver install problems
  2. Go to the Universal Serial Bus controllers section and double-click on USB Root Hub.
    Windows Hello fingerprint setup not working usb root hub device manager
  3. Navigate to the Power Management tab and uncheck Allow the computer to turn off this device to save power. Click on OK to save the changes.
    Fingerprint scanner, reader doesn't work with Windows 10 usb root hub
  4. Repeat these steps for all USB Root Hub devices that you have on your PC.

Your system may be turning off your USB device to save power. By deactivating this feature, your fingerprint reader will still be active.

4. Update HP Support Assistant

If the fingerprint reader doesn’t work in Windows 10, the problem might be the HP Support Assistant application. If you have this application on your PC, update it to the latest version.

You can do that by running the application and choosing the update option or downloading the latest version from HP’s website.

After the application is updated, restart your PC, and the fingerprint reader will start working again.

Remember that this solution works only if you’re using an HP device. If you have a PC from another brand and you don’t have an HP Support Assistant on your PC, then this solution doesn’t apply to you.

5. Use a different fingerprint reader

  • 360° readability with anti-spoofing protection
  • FIDO and U2F certifications
  • Compatible with Dashlane, LastPass (Premium), Keeper (Premium), and RoboForm, for websites
  • It's very small, easy to lose

If the issue persists, you can use a different fingerprint reader. Sometimes, your fingerprint reader might not be compatible with your computer’s hardware configuration or operating system.

Therefore, before buying a new fingerprint reader, ensure the device is compatible with your machine.

We recommend getting the Kensington VeriMark USB Fingerprint Key, a tiny fingerprint reader fully compatible with Windows.

6. Uninstall the fingerprint software

  1. Open the Settings app using the Windows + I shortcut. Then click the Apps section.
    Windows Hello isn't available on this device apps settings
  2. Locate the fingerprint reader software on the list, select it, and click the Uninstall button.
    Windows 10 fingerprint login not available apps and features uninstall an app
  3. Follow the instructions on the screen to complete the uninstallation process.

After removing the fingerprint software, you will need to remove the fingerprint driver from your PC.

Next, restart your PC. Windows 10 will install the default driver, and the issue should be resolved. If you have trouble opening the Setting app, look at our comprehensive article to solve the problem in no time.

7. Remove fingerprint scanning and update the fingerprint driver

7.1 Remove the fingerprint scanning option

  1. Open the Settings app and click on the Accounts section.
    Windows 10 fingerprint without Hello Accounts
  2. Select the Sign-in options from the menu on the left.Windows 10 fingerprint greyed out sign-in options
  3. In the right pane, go to the Windows Hello section and click on the Remove button under Fingerprint.
  4. Remove the fingerprint driver as explained in Solution 2.
  5. Download and install the latest driver for your fingerprint reader, as shown in Solution 1.

7.2 Register new fingerprints

  1. Open the Settings app, click Accounts, then the Sign-in options.
  2. Make sure that you have a PIN set up. If not, set up your PIN by clicking the Windows Hello PIN option and creating one.windows-hello-pin windows fingerprint not working
  3. Go to the Windows Hello section and click on Add another button.
  4. Follow the instructions on the screen to add another fingerprint.

Still not working? Here’s another comprehensive guide that could help you fix the Windows Hello problem once and for all.

8. Remove and recreate your PIN

8.1 Remove the PIN

  1. Open the Settings app, go to Accounts, and then click on the Sign-in options.
  2. In the PIN section, click the Remove button.
    Windows 10 fingerprint and PIN not working remove password
  3. Click the Remove button again to confirm.
  4. Enter your Microsoft Account password and click on OK.
    Windows 10 fingerprint reader not working Dell verify password removal

8.2 Add your PIN again

  1. Go to the Sign-in options and click on the Add button in the PIN section.
    Windows Hello isn't available on this device add PIN
  2. Enter your password and click on the Sign in button.
    Windows 10 fingerprint login not working re-enter your password
  3. Enter the desired PIN in two input fields and click on OK.
    Windows 10 fingerprint stopped working set up a PIN

9. Update your BIOS

The problem might be your BIOS if the fingerprint doesn’t work in Windows 10. However, if your device has a built-in fingerprint reader, you might be able to fix this problem by updating your BIOS.

The BIOS update is an advanced procedure; if you’re not careful, you can cause irreversible damage to your PC.

In addition, many users are recommending updating your chipset drivers, so make sure you try that too. You can update your drivers using our first two solutions from this guide.

How do I reset my fingerprint reader?

  1. Press Windows, enter control and open the Control Panel result.control-panel-serarch-w10 opera not responding
  2. Type Biometrics in the Control Panel Search box and click the Biometric Devices option.biometrics windows fingerprint not working
  3. Select Change Biometric Device Settings, and then click the Biometrics Off button. Save the changes made.
  4. Repeat steps 1 through 3, then, select the radio button labeled Biometrics On to reset your fingerprint reader. You may change the fingerprint you use to log in and any other parameters on the same Biometric Devices screen.

We hope you managed to fix the fingerprint scanning for your Windows 10 device using our solutions.

If the PIN isn’t working on Windows 10, here’s an excellent guide to help you fix the PIN problem in Windows 10 immediately.

If you updated your operating system and need help, check our guide on how to fix the fingerprint sensor error in Windows 11.

For more suggestions or questions, reach out to the comments section below. Other users might appreciate your input.

Windows 11 Power Plans Missing: 5 Ways to Get Them Back

The latest OS has some new great features, and users are getting more excited about it. Unfortunately, some claimed that they have no power options available on Windows 11. It seems like an annoying error, but we’re here to deliver the best solutions to fix it quickly.

If you encounter this problem, you’ll be unable to check the battery usage & health in Windows 11.

From what users describe, there are times when the power slider is missing in the desktop taskbar and the Settings.

Let us now tell you all you must know.

Why there are currently no power options available?

There are some essential reasons why Windows 11 power settings are missing, and you should take into consideration each of them:

  • Glitched Power Options menu – This one of the most popular causes why this issue occurs. It doesn’t have anything to do with system file corruption. In this case, the problem is likely caused by a Windows Update.
  • System corruption – It can be caused by several situations, like random and temporary software bugs. 
  • Poor OS or drivers updates – It is mandatory to keep your operating system and drivers updated. Any update incompatibility can harm the general usage, even fundamental aspects like power settings.

How do I fix missing power plans in Windows 11?

1. Check for OS updates

  1. Hit the Windows key, then open Settings.
  2. Go to Windows Update.Windows update
  3. Choose to Check for updates.

For the times when a basic feature is missing from your OS, you should scan for Windows updates. It will automatically look for available options and start downloading and installing them.

To make sure your operating system goes through the correct process, you should restart your PC at the end of this process.

2. Switch to the Balanced Performance Plan

  1. Press the Windows key, type Control Panel, then click on it.
  2. Click on Hardware and Sound.
  3. Look at the Power Options section, then select Choose a power plan.
  4. Make sure the Balanced option is marked. If not, do so.
  5. Reboot your PC for a total refresh.

If there are still no power options available on Windows 11, try the next solution.

3. Update the battery driver

  1. Hit the Windows key, type device manager, then open it.
  2. Expand the Batteries section, right-click on the needed driver, and select Update driver.
  3. In the opened window, choose to Search automatically for drivers.
  4. Windows will automatically search for available options and install them on your device.

Your OS Device Manager will automatically install the battery driver, which can help you get the missing battery symbol back to Windows 11.

You may also make an educated decision to stick with OEM or go for third-party drivers.

As for automatic scans of missing or outdated drivers, we can only recommend using a dedicated tool such as Outbyte Driver Updater.

Outbyte Driver Updater

Fast and easy-to-use software that helps you monitor and keep your drivers updated all the time.
Free Trial Download now

4. Run the Power troubleshooter

  1. Open Windows Settings.
  2. Go to System, then select Troubleshoot.
  3. Navigate to Other troubleshooters.Other troubleshooters
  4. Scroll down to the Power section, then click on the Run button.
  5. You’ll be notified if any issues are discovered, then Windows will automatically fix them.

Because our presented issue is strongly related to power usage, running the Power troubleshooter might help you. With this option, your OS will automatically scan for problems, diagnose them, then fix them.

5. Reset your operating system

  1. Open the Windows 11 Settings menu.
  2. Go to System, then click on Recovery.
  3. Click on Reset PC button.
  4. In the next window, you should choose to Keep my files so that you won’t lose any important data. However, note that this option will remove apps and settings.
  5. Choose how you would like to reinstall Windows. We recommend the Local reinstall, but if you feel like having some corrupted system files, go for the Cloud download option.
  6. Click on Next.
  7. Choose the needed additional settings, then click on Confirm.
  8. Click on the Reset button.
  9. Wait a bit until the reset is prepared.
  10. Your PC will restart and you should wait a few minutes until the process is completed.

If none of the above methods worked, we recommend resetting your operating system. Remember that this option will refresh and resolve any problematic Windows version, replacing it with a brand-new model.

How do I get to Power Options in Advanced Settings?

  1. Right-click on the battery icon on the Taskbar.
  2. Select Power and sleep settings.
    no power options available windows 11
  3. Now you should have a couple advanced power settings in the Settings app.

Can I hide Windows 11 power settings?

From what we know, at the moment, there aren’t available options that would allow you to hide Windows 11 power settings. These are some design-related aspects, so they come by default with your new OS.

However, if you’re interested in personalizing your digital environment, you can do that with some File Explorer and folder options.

We ensured the research through the most popular forums and selected only the most valuable solutions for Windows 11 power settings missing issue.

Lastly, the error message There are currently no power options available is common among lockdown browser users, so you may consider uninstalling the browser.

Once you have things up and running, consider changing the power button actions in Windows 11 to personalize the button’s behaviour.

Please notify us of any other questions or additional information by leaving a comment in the section below.

How to Get Rid of the Microsoft PowerPoint Security Notice

PowerPoint is the world’s most popular software tool for creating presentations, but it too can be plagued by several issues.

Some of these issues include Microsoft PowerPoint security notices popping up during presentations which can be rather bothersome for users.

How can I turn off the PowerPoint security notice?

1. Make your security notices invisible to the audiences

powerpoint slide show options

Ensure the computer that is running the presentation is connected to another monitor that only the audience can see in order to get rid of PowerPoint’s security notice message. This is how to do it:

  1. Select the Slide Show tab.
  2. Click on the Monitors group.
  3. Click on the Use Presenter View check box.
  4. Back in the Monitors list, choose the monitor you want the audience to watch.
  5. Run the presentation.

Note: There’s a possibility you may need to modify some monitor display settings beforehand:

  1. Press Home.
  2. Type in Control Panel and open it.
  3. Check the Display Settings dialog box.
  4. Select the monitor icon which corresponds to the monitor your audience will watch.
  5. Check the box labeled Extend my Windows Desktop onto this monitor and confirm your action.
  6. Open your PowerPoint presentation.
  7. Select the Slide Show tab.
  8. Click on the Start Slide Show group.
  9. Select either From Beginning or From Current Slide.

    2. Prevent the Microsoft Powerpoint security notice via Settings

    You can prevent the Microsoft PowerPoint Trust Center from sending security notices on your screen during presentations by moving your file into a trusted location on your PC. This can be done via PowerPoint’s built-in Settings.

    Moreover, you could retain the location of this trusted folder, and simply place all future presentations there. This way, you won’t have to repeat the below-mentioned steps again and again for each future presentation.

  1. 1. Launch the PowerPoint app on your device.

  2. 2. Navigate to the File tab.

  3. 3. Click on Options.

  4. 4. A dialogue box called PowerPoint Options will open. Click on Trust Center.

    trust-center-menu-powerpoint
  5. 5. Select Trust Center Settings.

  6. 6. Click on Trusted Locations.

  7. 7. Choose the Add new location option and choose the folder where your presentation is being kept, if its not already there in the first place.

We hope that you found our solutions helpful and managed to remove Powerpoint’s security notice message that prevented you from making presentations in peace.

Speaking of PowerPoint, we also have a great guide that will tell you what to do if PowerPoint couldn’t write to Microsoft Word, so you should check it out.

Let us know in the comments section below if you have any questions or have encountered any difficulties following our guides.

We Limit How Often Instagram Error: 5 Ways to Quickly Fix It

Some Instagram users have received an error while commenting, liking, or following the page or profile. The error message read Try again later: We limit how often you can do certain things on Instagram…. and forbids the user from doing a few things.

This usually happens to the newly created user profile, who tries to follow most of their favorite people daily. Instagram detects this behavior as similar to the bot behavior and restricts the profile.

Instagram sets a few limits to all the user’s profiles and pages on how many posts they can like, how many comments they can post, or how many people or pages they can follow in a day. You may also get the we limit certain activity to protect our community if you’re in violation of some policies.

Technically, when Instagram puts a restriction, it will last for around 24- 48 hours. After which, you can use the Instagram profile as usual and till it does not cross the limit. Otherwise, you may have to face this error again.

How do you remove limits on Instagram?

1. Change the Instagram password

  1. Firstly, open the Instagram app on your system or simply visit the Instagram website on a web browser app like Chrome, etc.
  2. After you have opened the app or reached the homepage, log in using your credentials.
  3. Once you are successfully logged in, click the Profile Icon on the top-right corner of the Instagram homepage.
  4. Now select the Settings option from the list.


  5. Click Change password on the left menu.


  6. Enter the values in the Old Password, New Password, and Confirm New Password text boxes.
  7. Finally, click the Change Password button at the bottom.


  8. This will change your Instagram password.

2. Reinstall the Instragram app

  1. Press the Windows and I keys simultaneously which opens the Settings app.
  2. Select Apps on the left side panel.


  3. Click the Installed apps option on the Apps page.


  4. Type Instagram on the search bar at the top of the Installed apps page.
  5. Now click the horizontal ellipsis icon of Instagram from the results populated.
  6. Select Uninstall from the list.


  7. Click Uninstall again on the confirm small pop-up window below it.


  8. This will start uninstalling the Instagram app from the system.
  9. Now open the Microsoft Store app.
  10. Search for the Instagram app by typing Instagram in the search bar.


  11. Click the Install button on the Instagram page.


  12. This starts downloading and then installing the Instagram app on the system.

3. Create a backup profile

Such things happen usually with many profiles which are newly created because users tend to start following many of their friends and favorite celebrity profiles.

This causes to occur the error on their Instagram and restricts them from doing certain things. The small workaround is to create a backup profile by visiting the Instagram website and clicking the Sign up button at the bottom, and providing all the necessary details to create a new profile.

Another small tip is the most active account does not get many errors like restrictions on doing certain things, whereas a new or hardly used account will face such problems. So try to engage in Instagram using your primary account most of the time.

4. Report a problem

If this error is caused due to any technical glitch in the Instagram app, you can always report this to Instagram. Go to the Profile icon on the top right corner and select the Settings option. Then, click Help and tap on Report a problem.

Now, describe the technical issue briefly, and you can also attach any screenshots of the issue taken from the Instagram app and send the report to the Instagram support team. They will analyze and rectify it as soon as possible.

5. Use Instagram automation tools

There have been a number of Instagram automation tools like SocialPilot, Later, Kicksta, etc. which can be used for the user’s benefit. These are used to keep control over how many likes, comments are being done by the user. It also keeps track of how many pages and profiles are being followed.

They also help the user for scheduling the best possible time for their posts, stories, and reels on their Instagram profile. They help in managing hashtags and other Instagram features, too.

We hope you found this article informative. Please leave us a comment below.