If you own an HP printer you may notice that the printer is printing documents in Red even though the color of the source file is Yellow. This is a common issue and can happen with other printers as well. This issue is usually caused if you have a cartridge running low on ink or if the cartridge heads are not clean.
In this article, we take a look at a couple of fixes to resolve “my printer prints yellow instead of red” issue.
Why is my printer printing in yellow only?
1. Clean the Printheads
Performing multiple cleaning of the printheads can resolve any printer related issues.
Load plain white papers in the input tray.
On the printer control panel, press the Right Arrow key to display more option.
From the list of options, select Setup.
Select Tools to view the Tools Menu.
Select “Clean Printhead“.
Wait for the printer to complete the printhead cleaning process. Press OK once the process is complete.
The printer will now print a test page for you to review the results.
If you are not satisfied, perform another printhead cleaning repeating the earlier steps. Do this 3-4 times if needed.
2. Align the Printhead
Load plain paper in the input tray.
Press the Right Arrow key to display the second navigation screen.
Select “Tools” from the options and then press Align Printhead.
Wait for the printer to align the printhead and then print an alignment page.
Make sure you print another Print Quality Diagnostic Page to see if the issue is resolved.
3. Check Low ink Level
The printer uses a variety of colors for mixing and printing the document in the required color. If any of the ink cartridges is low on ink, then you may need to replace it.
For example, if the red color is not printing then you need to also check for cyan apart from Red cartridge ink level.
Press the Setup button on the printer control panel.
Press the down arrow key and select Tools and press OK.
Select “Display Ink Gauge” and press OK. This will display the ink level of the cartridges on the printer’s control panel.
Replace the cartridge if needed.
4. Recalibrate the Color
Load a couple of clean and white paper in the input tray.
Open the HP Solution Center app.
Click on Settings and select Print Settings.
Now click on Printer Toolbox.
From the Device Services tab, click on Calibrate Color option.
Follow the on-screen instructions. The process may take a few minutes to complete. Wait for the printer to print the test report, verify the report and repeat the process again if needed.
Sticky Notes is one of the best note-taking apps; its function is very similar to physical ones. With these, you can quickly add a note and stick it to your desktop for easy access. But, several users report that Sticky Notes is not working in Windows 11.
It first became a standalone app in Windows 7 and has been one of our favorites since then. Apart from that, you can sync Sticky Notes across devices, even the ones that run on iOS or Android, given they have OneNote and Outlook for Windows.
If you are facing problems with it, go through the following sections to find out what’s causing the issue and the best ways to get Sticky Notes working in Windows 11.
Why is Sticky Notes not working in Windows 11?
This is one of the few errors where the underlying issues are limited, unlike other cases where the list goes on. We have listed some of the common causes that prevent Sticky Notes from working in Windows 11:
OS or program bugs – A bug in the current version of your operating system or the Sticky Notes app may trigger this issue. at times, it may be certain new features that affect efficient functioning.
Corrupt app files – When application or system files become corrupted, you may expect them to throw a few errors. Sticky Notes is not an exception.
Problems with installation – For some users, the problem is a bad installation.
But, one of the rather tricky aspects here is identifying what’s causing the problem. And that wouldn’t be easy!
We recommend you execute the fixes below in the listed sequence for quick and effective troubleshooting.
What can I do Sticky Notes are not working on Windows 11?
1. Update Windows 11
Press Windows + I to launch the Settings app, and select Windows Update from the tabs listed in the navigation pane on the left.
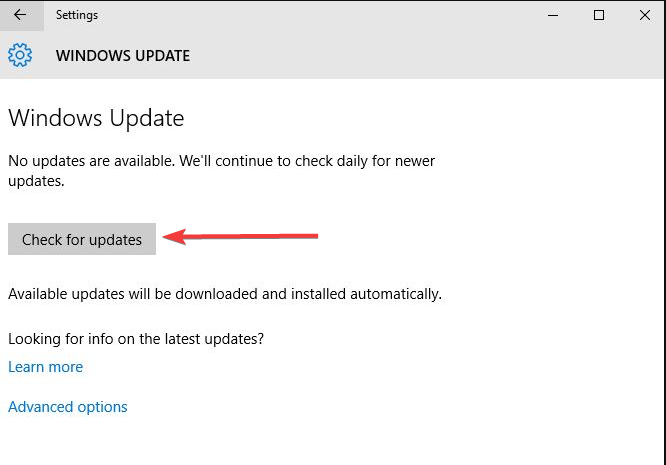
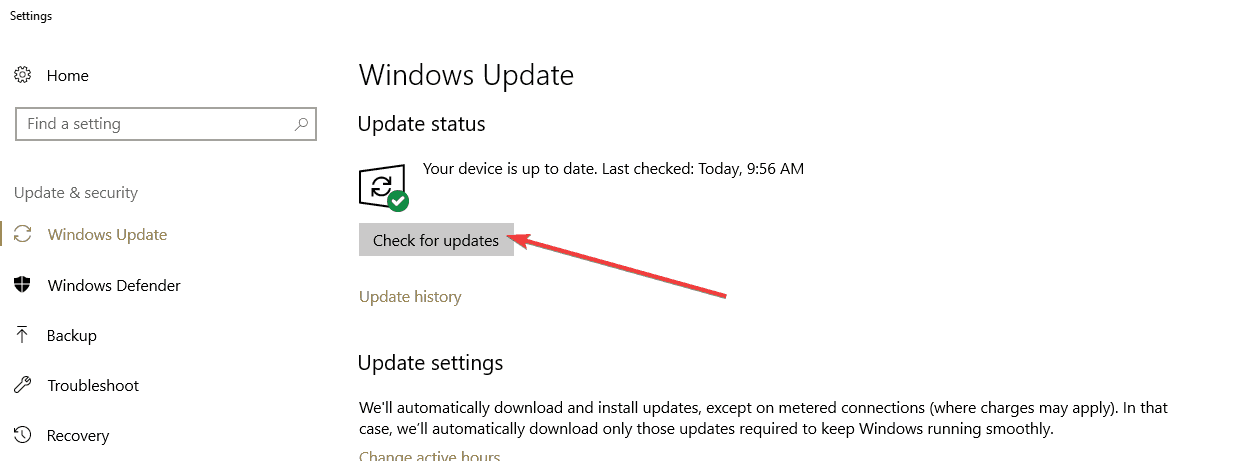
Now, click on Check for updates to scan for any available newer versions of the OS.
If any are listed after the scan, click on Download & install.
Your primary approach when dealing with issues regarding the apps bundled with Windows is to look for updates. If it’s a known bug, Microsoft will likely release a patch for it in the subsequent updates.
2. Update Sticky Notes
Press Windows + S to launch the Search menu, enter Microsoft Store in the text field at the top, and click on the relevant search result.
Click on the Library icon near the bottom-left corner.
Next, click on the Get updates button.
Wait for the scan to complete and if an update for Sticky Notes is listed, download it.
3. Run the troubleshooter
Press Windows + I to launch the Settings app, and click on Troubleshoot on the right in the System tab.
Click on Other troubleshooters to view all the available ones.
Locate the Windows Store Apps troubleshooter and click on the Run button next to it.
Follow the on-screen instructions, and choose the necessary response, if prompted, to complete the troubleshooting process.
It’s always recommended that you look for a built-in troubleshooter when facing a problem in Windows. Microsoft offers several of these to help diagnose and eliminate issues with the system and errors connecting with peripherals.
And, luckily you have one, Windows Store Apps troubleshooter, which should fix issues that lead to Sticky Notes not working in Windows 11.
4. Disable insights in Sticky Notes
Press Windows + S to launch the Search menu, enter Sticky Notes in the text field at the top, and click on the relevant search result that appears.
Now, click on the Settings icon near the top.
Finally, turn off the toggle for Enable insights under the General section.
5. Reset the Microsoft Store cache
Right-click on the Start menu and select Terminal (Admin).
Click on the downward-facing arrow at the top, and select Command Prompt from the list of options. Alternatively, you can press Ctrl + Shift + 2 to launch Command Prompt in a new tab.
Next, type the following command and hit Enter to reset the Microsoft Store cache and fix any issues with it: wsreset
Wait for the reset process to complete. Once it’s done, Microsoft Store will automatically launch.
If the Sticky Notes is not working in Windows 11 due to problems with the Microsoft Store cache, resetting it could help. Apart from resetting the cache, the process eliminates trivial bugs that may affect the functioning of the Windows Store and associated apps.
6. Repair/reset Sticky Notes
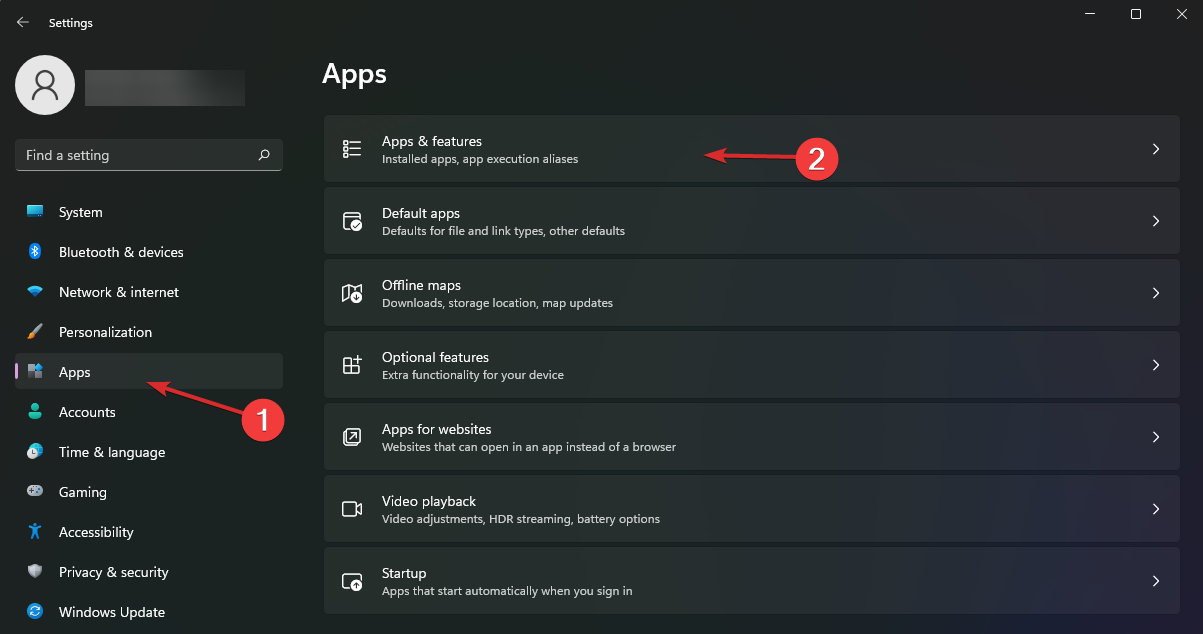
Press Windows + I to launch Settings, and select the Apps tab from the ones listed in the navigation pane on the left.
Next, click on Installed apps.
Locate the Sticky Notes app, click on the ellipsis next to it, and select Advanced options from the menu.
Now, click the Repair button and wait for the process to complete.
If repairing didn’t help, click on the Reset button.
Again click on Reset to confirm and start the process.
Repairing or resetting an app are two of the best ways to eliminate issues that prevent Sticky Notes from working in Windows 11. But, the two processes are entirely different.
When you repair an app, all its files are checked, and any corrupt or missing ones are replaced. Apart from that, the Registry entries are also verified, but all this doesn’t affect the stored data or configured settings.
On the other hand, when you reset an app, it’s taken back to its initial state when it was installed the first time. All your data and configured settings will be lost during the process; hence we recommend you go with reset only if repairing doesn’t work.
If none of the fixes above have helped eliminate issues that lead to Sticky Notes not working, it’s most likely an issue with the current user account.
When it comes to a user account, you can create a local account or one linked with Microsoft. While in the case of the former, you will be missing out on certain features, it works for those using their system as a standalone device.
Creating a user account is simple and shouldn’t take more than a few minutes, whether a local or one linked with Microsoft.
After you finish it, sign in through the new profile, and Sticky Notes will now work in Windows 11.
These were all the ways you could fix issues that led to Sticky Notes not working. Once the error is eliminated, you can add these to your desktop and quickly access the required information frequently.
The Microsoft Store is a one-stop hub for Windows users to download and install a bunch of apps on their PCs. However, things are not always rosy as users are bombarded with Microsoft Store errors from time to time.
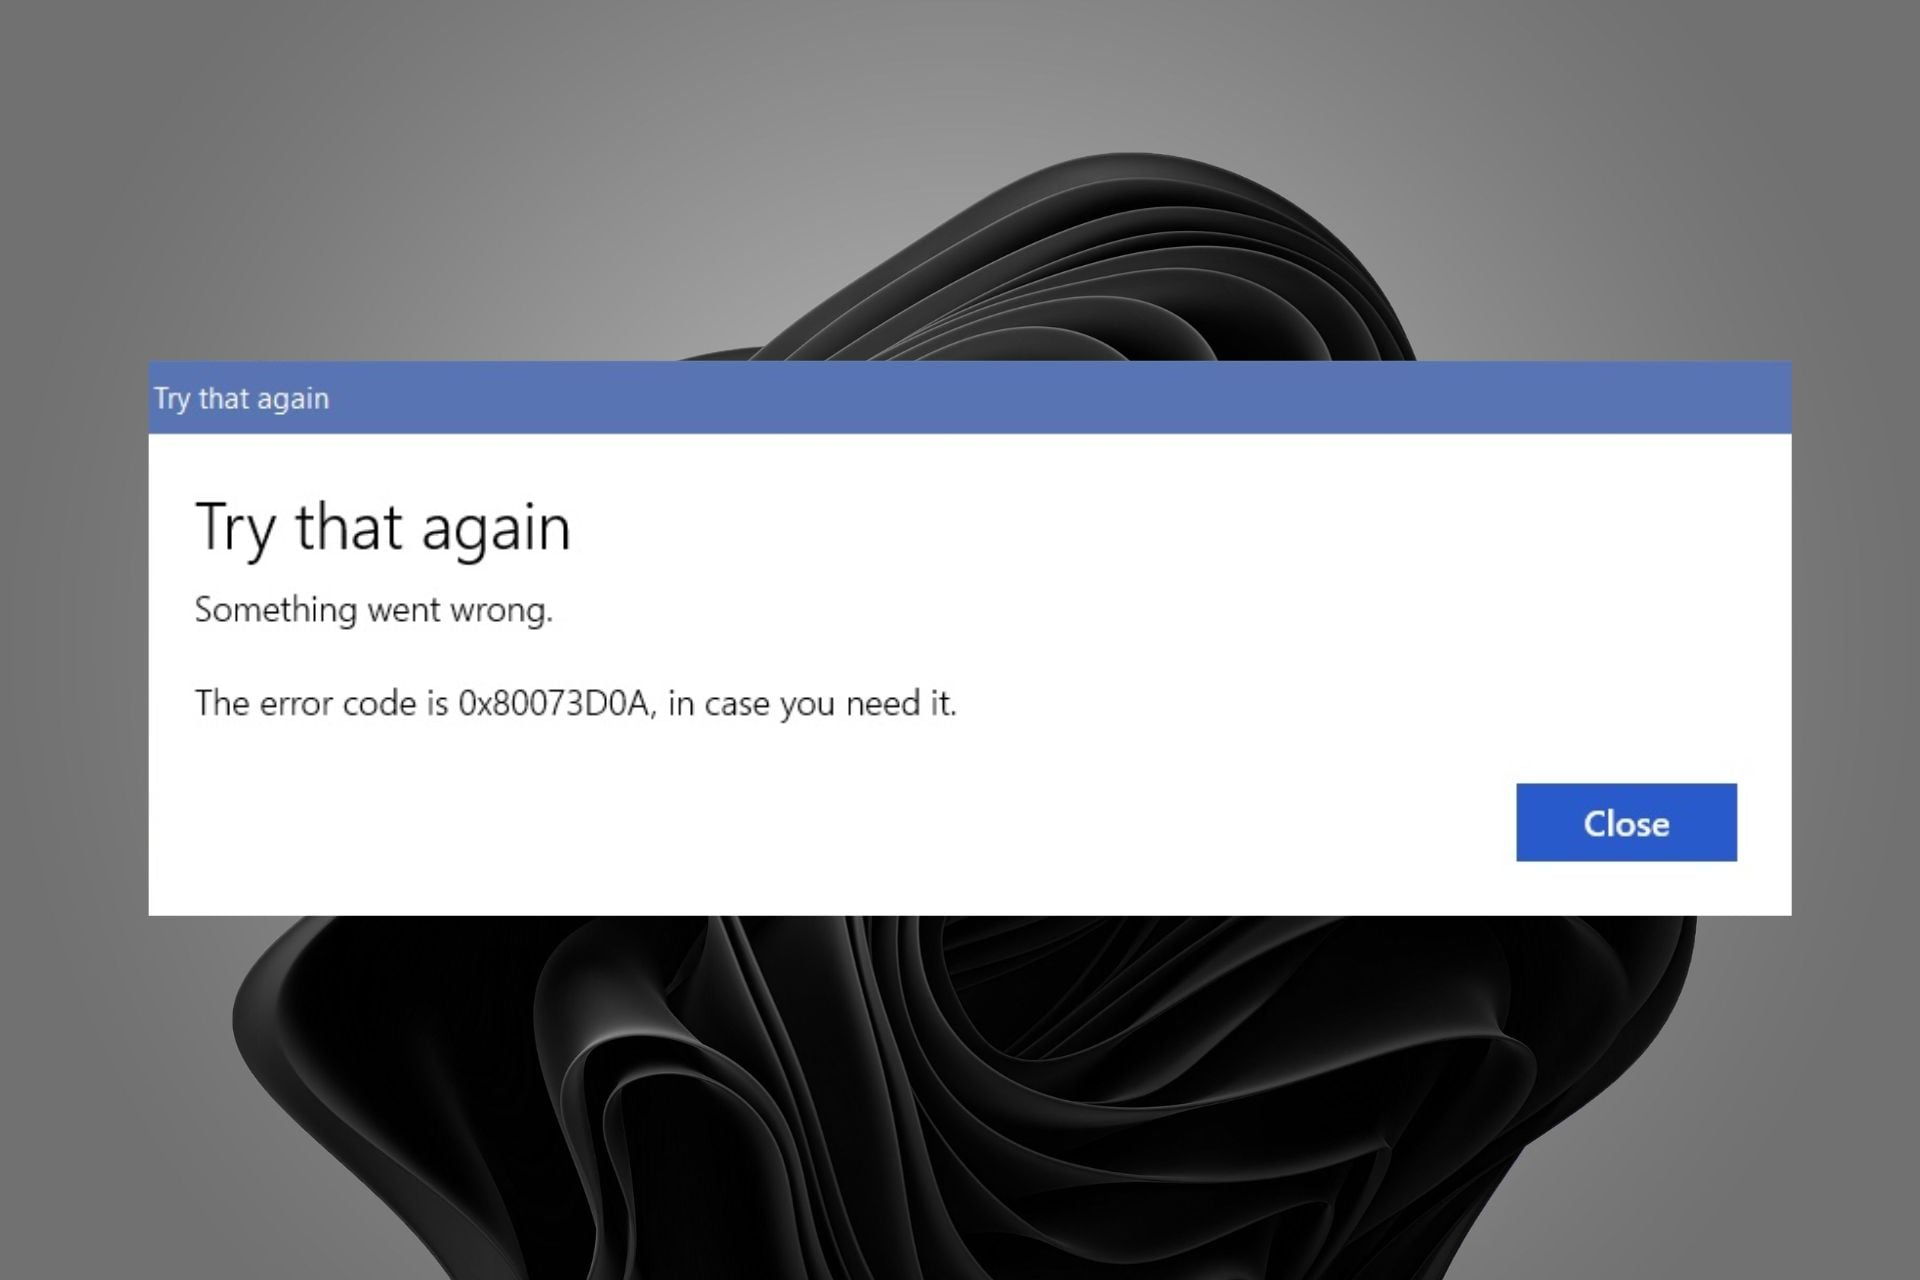
It now appears there’s another problem as users reported encountering The error code is 0x80073d0A, in case you need it message whenever they try to download or update apps from the store. If you have encountered such an error, read on to find out how to easily bypass it.
What is error code 0x80073d0a?
The error code 0x80073d0A occurs when you try to download or update an app from the Microsoft Store on your Windows PC. So what could be the trigger? Below are some potential causes:
Bug/glitch – Sometimes, the Microsoft Store is not working because of an error with Microsoft servers, and there’s nothing you can do but wait.
Cached data – Over time, apps accumulate cache which can become corrupted and present such problems.
You don’t have enough disk space – If there’s not enough space on your PC, you’ll get this error message when trying to download an app or update it.
Incompatible version – If your version of the Microsoft Store is not the official version of Windows, you may experience problems.
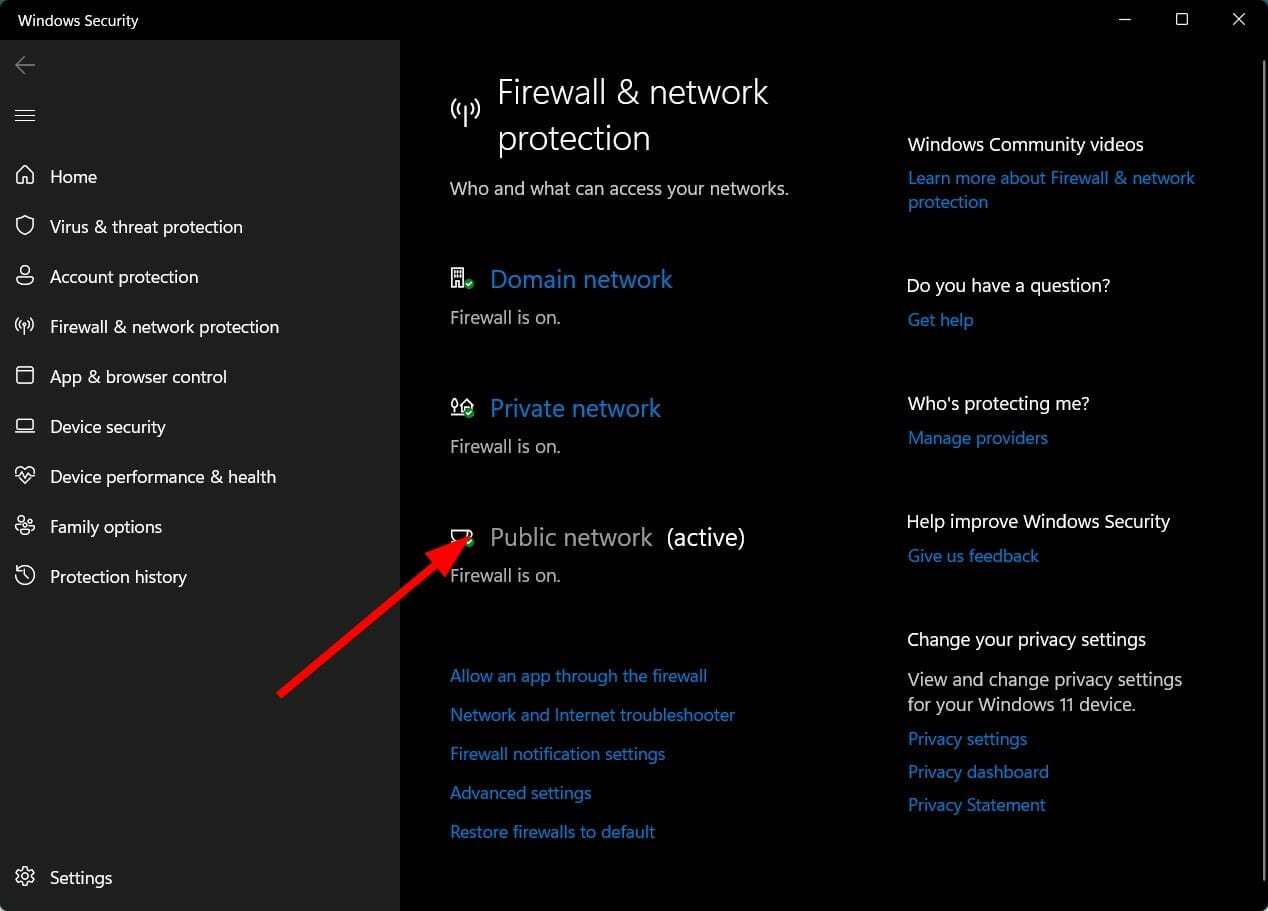
Firewall blocking – Sometimes, your firewall program may block some operations if it deems it a risk to your system.
Virus infection – If malware has found its way to your PC, it may alter how some programs work on your PC.
How do I fix error 0x80073d0a?
Before embarking on any troubleshooting, try the following:
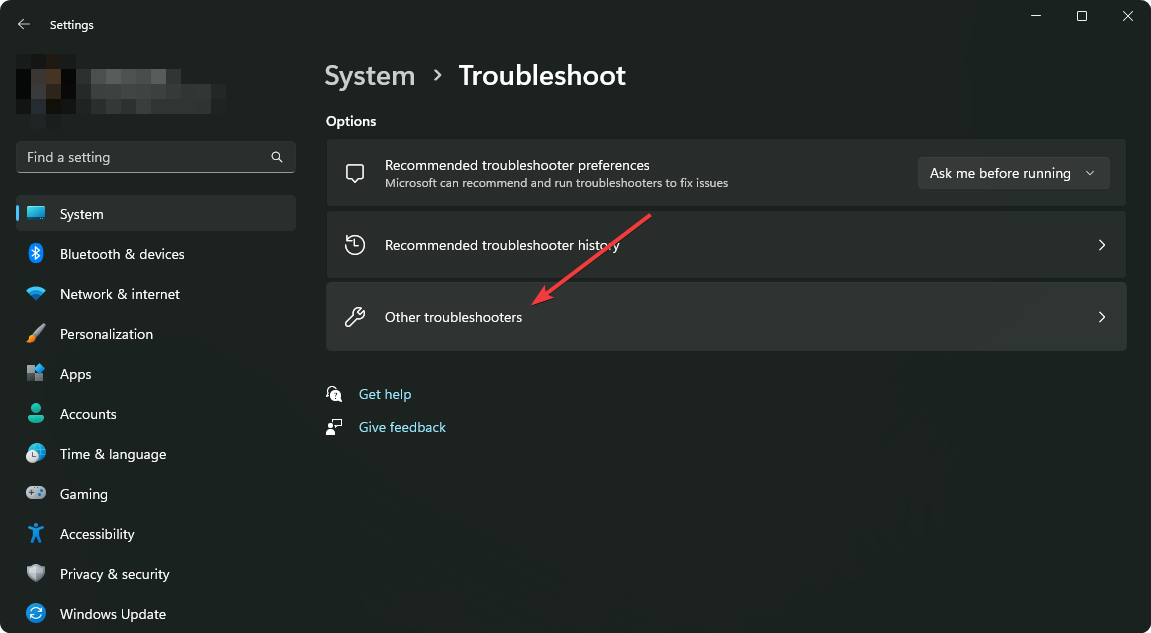
Click on System on the left pane then Troubleshoot on the right pane.
Select Other troubleshooters.
Scroll down, locate Windows Store Apps and click the Run button.
4. Repair/reset Microsoft Store
Hit the Windows key and click on Settings.
Click on Apps on the left pane then Apps & features on the right pane.
Locate the Microsoft Store app, click on the three vertical ellipses and select Advanced options.
Click on Repair.
Go back and click on Reset.
5. Reset the Microsoft Store cache
Hit the Windows search icon.
Type WSReset.exe in the search bar and hit Run as administrator.
The process will take a little while so ensure you have saved all your work and that you remember your passwords as you’ll be signed out of your accounts.
Here we are, in December, and instead of receiving Christmas carols or gifts in our stockings, Microsoft is giving us another batch of security updates for the Windows operating system.
It’s the second Tuesday of the month, which means that Windows users are looking towards Microsoft in hopes that some of the flaws they’ve been struggling with will finally get fixed.
We’ve already provided the direct download links for the cumulative updates released today for Windows 7, 8.1, 10, and 11, but now it’s time to talk about Critical Vulnerabilities and Exposures again.
For December, Microsoft released 52 new patches, which is a lot more than some people were expecting right before we switch to 2023.
These software updates address CVEs in:
Microsoft Windows and Windows Components
Azure
Office and Office Components
SysInternals
Microsoft Edge (Chromium-based)
SharePoint Server
.NET framework
We got 52 new fixes in December 2022’s Patch Tuesday rollout
It’s safe to say that this wasn’t either the busiest or the lightest month for Redmond-based security experts, so we should be sort of glad.
You might like to know that, out of the 52 new CVEs released, 43 are rated Important, and three are rated Moderate in severity.
And, if you are looking for an overall for the year 2022, know that it actually was Microsoft’s second busiest ever with Microsoft fixing over 900 CVEs in total.
Out of all these vulnerabilities addressed this month, one of the new CVEs is listed as publicly known, and one is listed as being in the wild at the time of release
You might want to remember that these types of bugs are often wrapped into some form of social engineering attack, such as convincing someone to open a file or click a link.
Let’s take a closer look at the full list of CVEs released by Microsoft for December 2022:
Windows Graphics Component Elevation of Privilege Vulnerability
Moderate
7.8
No
No
EoP
The PowerShell Remote Code Execution Vulnerability is nothing to take lightly. This Critical-rated bug could actually allow an authenticated user to escape the PowerShell Remoting Session Configuration and run unapproved commands on an affected system.
Malicious third parties often try to live off the land after an initial breach, which means that they use tools already on a system to maintain access and move throughout a network.
Know that PowerShell is one such tool, so any bug that will therefore bypass active restrictions is likely to be abused by unwanted guests.
As for the remaining Critical-rated fixes, there are two patches for the older Secure Socket Tunneling Protocol (SSTP).
According to Microsoft, both could allow a remote, unauthenticated threat actor to get code execution on an affected system by sending a specially crafted connection request to a server with the RAS Server role enabled.
There are 16 other remote code execution bugs getting fixes this December, packed along with 18 other patches addressing Elevation of Privilege (EoP) bugs.
Let’s also mention the one new advisory (ADV220005) this month, which provides additional guidance on third-party drivers that appear to be certified by the Microsoft Windows Hardware Developer Program.
The tech company stated that the drivers that appear to have been certified by this program have been seen in the wild in post-exploitation activity.
Have you found any other issues after installing this month’s security updates? Share your experience with us in the comments section below.
System Volume Information is a mysterious Windows folder that users aren’t permitted to open. The System Volume Information folder stores System Restore, Volume Shadow Copy, and content-indexing files.
So, that folder can hog quite a bit of hard drive storage space for some users. However, users can still clean up that folder to free up HDD space.
How can I delete System Volume Information folder?
1. Reveal the System Volume Information folder in File Explorer
File Explorer doesn’t display the System Volume Information folder unless users configure a few folder settings. First, click the View tab in File Explorer.
Then press the Options button and select Change folder and search options.
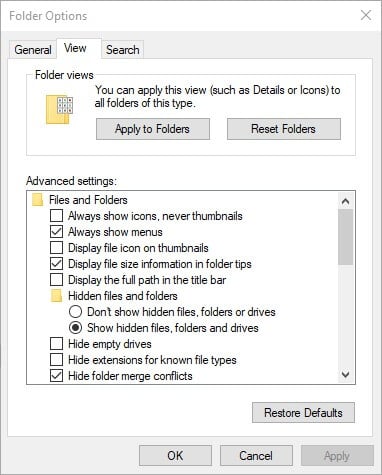
Select the View tab shown directly below.
Select the Show hidden files, folders and drives option.
Then uncheck the Hide protected operating system files (Recommended) check box.
Press the Apply button, and click OK to close the window.
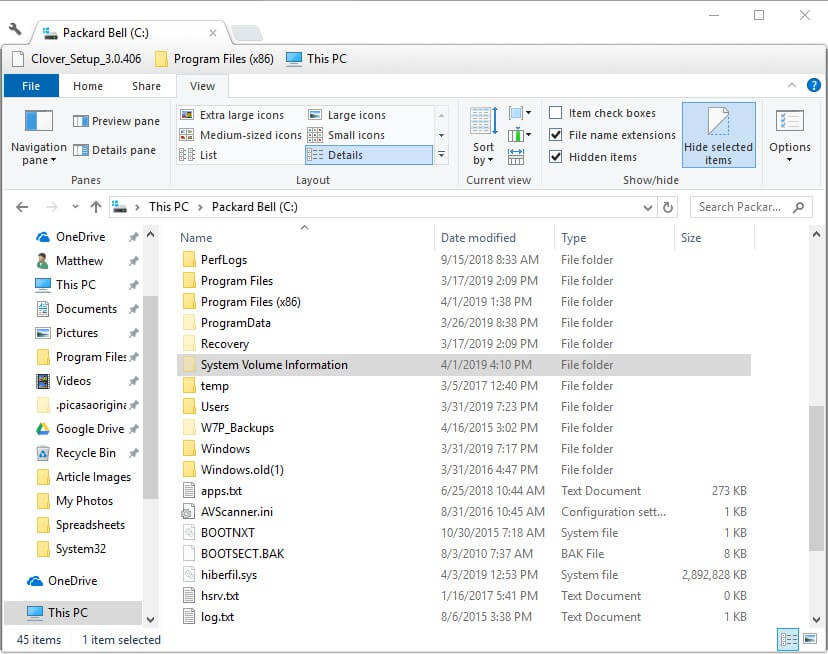
Next, open the C: root directory in File Explorer. Now a System Volume Information window will be visible as shown in the snapshot below.
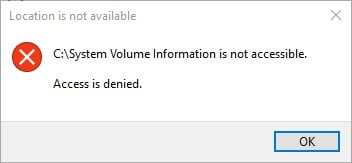
An Access is denied error message will pop up when users try to open the System Volume Information folder. However, users can still right-click the folder and select Properties to open a window that provides further details pertaining to folder size.
2. Reduce HDD Space Allocated to System Restore
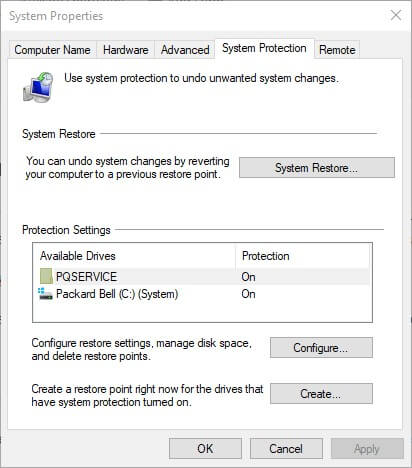
Users can cut a System Volume Information folder down to size by reducing the amount of hard drive space allocated to System Restore. To do that in Windows 10, press the Windows key + Q hotkey.
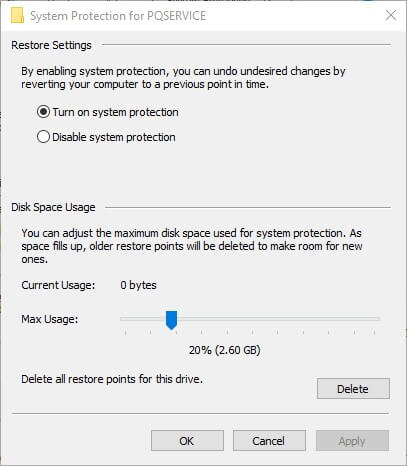
Drag the Max usage bar left to reduce the hard drive storage allocated to System Restore.
Alternatively, users can select the Disable system protection option to turn off System Restore.
Select the Apply option.
Click OK to close the window.
3. Clear System Volume Information Folder With Disk Cleanup
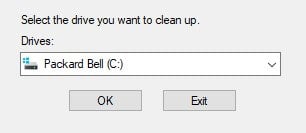
Users can also clean up the Volume Information Folder with the Disk Clean-up utility in Windows. To do that, enter Disk Cleanup in Cortana’s search box.
Click Disk Clean-up to open the window shown below.
Select the C: drive on the drop-down menu, and click the OK button.
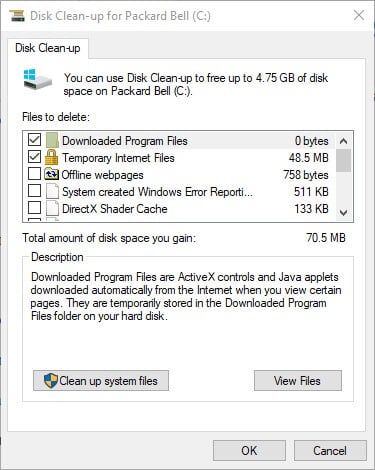
Press the Clean-up system files button.
Then select the C: drive again on the Drive Selection window.
Click the OK button.
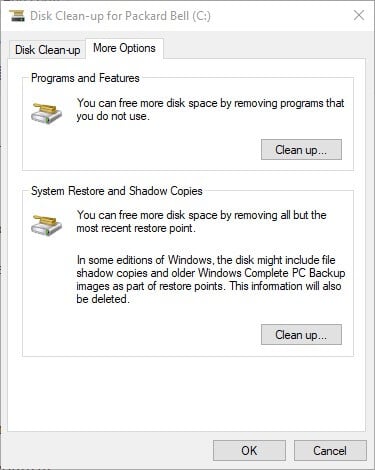
Next, select the More Options tab shown below.
Press the Clean up button under the System Restore and Shadow Copies subheading.
Press the Delete button to further confirm.
So, that’s how users can cut a bloated System Volume Information folder down to size. Doing so can potentially free up gigabytes of storage space hogged by System Restore.
The OneDrive app on Windows 11 is getting a fresh look and feel to better match the design and visual effects of Windows 11. It’s just a new look though, no new features are being introduced.
The new OneDrive app is available for download on Microsoft’s website, if you are running Windows 11, it’s not clear whether those still running Windows 10 will get the update. The most noticeable change is the OneDrive settings which now follow the look and feel of the Windows 11 settings app including light and dark modes.
You’ll see all four areas you can click on in the left column including a glance at the storage limits on your account in the lower left. The OneDrive app lines up nicely with other apps such as Paint, the Clock app, and the Snipping tool to fit the Windows 11 design.
Microsoft launched the Airband Initiative in 2017 with the intent of bringing broadband internet to millions of rural residents who don’t currently have access. And today, Microsoft announced its new partnership with Viasat, a global communications company that is in place to further this cause and provide “internet access to 10 million people around the globe, including 5 million across Africa.”
The new partnership will help the Airband Initiative get a step closer to its main objective, “delivering internet access to a quarter of a billion people across the world, including 100 million people on the continent of Africa, by the end of 2025.”
Viasat will be the first satellite organization to work with Microsoft in the Airband Initiative. They’ll work closely together to ensure that the residents in the Democratic Republic of the Congo, Nigeria, Guatemala, Mexico, and the United States can access an affordable and stable internet connection, which is also part of the United Nations’ Sustainable Development Goals (SDGs). There are plans underway to expand the initiative to Egypt, Senegal, and Angola.
At the moment, an estimated 2.7 billion people have never accessed the internet, which constitutes one-third of the world’s population per the findings from the International Telecommunication Union at the UN. Accessibility plays a major role as to why some people are still yet to access internet, but with satellite, this will no longer pause as an impediment.
According to Microsoft:
Working together, the companies will combine expertise and assets to help enable telehealth, distance learning and education, precision agriculture, clean power, and other services to reach new areas through the transformational provision of power and connectivity. The companies will collaborate to provide and pilot technologies including, but not limited to, satellites (both geostationary orbit and low earth orbit) and fixed wireless.
Microsoft’s vice president of Technology and Corporate Responsibility, Teresa Hutson stated, “We believe access to the internet is a fundamental right and that digital skills create and enable economic prosperity for people, businesses, and governments. Through our Airband Initiative, we will extend high-speed internet access to 100 million people on the continent of Africa and to a quarter of a billion people living in unserved and underserved areas across the world by 2025.”
Viasat’s Global Fixed Broadband President, Evan Dixon further added that:
We’re proud to partner with Microsoft as it represents another important step in bringing affordable internet service across Africa, Latin America and the U.S., as both companies continue to break down barriers to bridge the digital divide and make significant progress toward digital equity and inclusion. Providing internet access to the world is a challenging and bold goal, and doing so in a sustainable and responsible manner will unlock enduring opportunities for those who need it most.
Microsoft’s Airband Initiative works closely with multiple partners providing both internet and energy access at a local and regional level. Telecom, nonprofits as well as governmental and nongovernmental organizations also play a crucial role and assist the initiative to achieve its main goal. This is why the program is currently able to provide high-speed internet access to over 51 million people on a global scale.
Sometimes you might need to change the priority of a certain process in Task Manager. However, users reported that they can’t set the priority in Task Manager on Windows 10.
This can be a problem, and in this article, we’re going to show you a quick fix once and for all if you are unable to change priority.
Why can’t I change priority in Task Manager?
Usually, you might want to change priority in Task Manager so Windows will allocate a big part of its capacity to your preferred process for better performance.
This error may appear for all processes on your system or with a specific process on all systems, but you don’t have to worry as we have a few solutions prepared.
What do I do if I can’t set priority in Task Manager on Windows 10?
1. Go to Safe Mode
Open the Start Menu, click the Power button, press and hold the Shift key, and select Restart.
Now go to Troubleshoot > Advanced options > Startup Settings and click on Restart.
Once the PC restarts, press F4 or F5 to enter Safe Mode.
After entering the Safe Mode, check if the problem is still there.
If there’s no problem in Safe Mode, it’s rather likely that your settings or installed applications are causing this issue, so you might want to try disabling certain applications and check if that helps.
2. Show processes from all users
Make sure that you’re using an administrator account.
Open Task Manager.
Now click on Show processes from all users.
After doing that, try to change the priority and check if the problem is resolved.
3. Make sure that Administrators have full control
Start Task Manager.
Locate the process whose priority you want to change.
Right-click the process and choose Properties.
Go to the Security tab and click on Edit.
Select Administrators and check the Full control option in the Allow Now click Apply and OK to save changes.
You can also give Full control to the Users group, but that comes with some minor security risks.
4. Disable User Account Control
Press Windows Key + S and enter user control. Select Change User Account Control settings.
Now move the slider all the way down to Never notify. Click OK to save changes.
After doing that, User Account Control will be disabled, and you should be able to change the priority of your processes.
If Task Manager can’t change priority, it’s rather likely that your settings are causing the problem, but you should be able to fix the problem after using our solutions.
It’s December, the month of giving, and the time has come again for us to open our virtual arms and extend a warm welcome to the latest batch of security updates from Microsoft.
Please keep in mind that these updates actually bring an entire array of changes for both Windows 10 and Windows 11, regardless of whether it is a newer or an older version.
This December 2022 Patch Tuesday batch of updates is expected to fix some of the issues that were still pending, and in the article below we will be looking to see exactly what we get.
We have included a detailed changelog for each cumulative update, and we will also be providing you with direct download links from Microsoft’s Windows Update Catalog, so you know that they are secure.
That being said, remember that, alternatively, you can always use other methods to get the latest updates, including:
The Windows Update menu on your OS
The WSUS (Windows Server Update Service)
Group Policies set up by your admins if you’re part of a larger network.
Now that we got this out of the way, let’s have a closer look at the December 2022 Patch Tuesday updates rollout from Microsoft.
What should I look for in the December Patch Tuesday updates?
Windows 11
There really isn’t further need for introductions, since most of you are already running Windows 11 on your devices.
You might also like to know that the 22H2 version of Windows 11, the operating system’s first major update, is now ready for downloading and installing.
Addresses security issues for your Windows operating system.
This update contains miscellaneous security improvements to internal OS functionality. No additional issues were documented for this release.
Known issues
After you install this or later updates, you might be unable to reconnect to Direct Access after temporarily losing network connectivity or transitioning between Wi-Fi networks or access points.
After installing this update, apps that use ODBC connections through Microsoft ODBC SQL Server Driver (sqlsrv32.dll) to access databases might not connect. Additionally, you might receive an error in the app, or you might receive an error from the SQL Server.
Windows 10 version 22H2 is the latest major version of Windows 10, and as such has the most experimental features on it.
Fortunately, most bugs that were first present when it was first made available have been weeded out, and this version of Windows 10 is far more stable.
This update contains miscellaneous security improvements to internal OS functionality. No additional issues were documented for this release.
Known issues
Devices with Windows installations created from custom offline media or custom ISO image might have Microsoft Edge Legacy removed by this update, but not automatically replaced by the new Microsoft Edge. This issue is only encountered when custom offline media or ISO images are created by slipstreaming this update into the image without having first installed the standalone servicing stack update (SSU) released March 29, 2021 or later.
After installing this update, apps that use ODBC connections through Microsoft ODBC SQL Server Driver (sqlsrv32.dll) to access databases might not connect. Additionally, you might receive an error in the app, or you might receive an error from the SQL Server.
This version of the Windows operating system is outdated and will no longer receive any updates from the Redmond tech company.
Therefore, users that are still running this old version on their devices are strongly advised to choose a more recent one to update to.
If you still want to use Windows 10 and are not willing to upgrade to 11, you don’t have to do so right away. After all, Microsoft announced that the support for Windows 10 will go on until 2025.
This update addresses an issue that might affect applications that run on the Windows Lock Down Policy (WLDP). They might stop working.
This update addresses an issue that affects remote networks. This issue stops you from reconnecting to them using DirectAccess.
This update addresses a known issue that might affect the Local Security Authority Subsystem Service (LSASS.exe). It might leak memory on Windows domain controllers. This issue might occur when you install Windows updates dated November 8, 2022, or later.
Known issues
After installing KB5001342 or later, the Cluster Service might fail to start because a Cluster Network Driver is not found.
After you install this or later updates, you might be unable to reconnect to Direct Access after temporarily losing network connectivity or transitioning between Wi-Fi networks or access points.
After installing this update, apps that use ODBC connections through Microsoft ODBC SQL Server Driver (sqlsrv32.dll) to access databases might not connect. Additionally, you might receive an error in the app, or you might receive an error from the SQL Server.
After installing this update on Hyper-V hosts managed by SDN configured System Center Virtual Machine Manager (VMM), you might receive an error on workflows involving creating a new Network Adapter (also called a Network Interface Card or NIC) joined to a VM network or a new Virtual Machine (VM) with a Network Adapter joined to a VM network. Existing VMs with existing Network Adapters should not have issues connecting after installing this update, only new Network Adapters created after installation of this update are affected.
Windows 10, version 1607 has reached the end of service for all of its available editions. Update to the latest version of Windows 10 in order to keep your system protected.
This update addresses a known issue that might affect the Local Security Authority Subsystem Service (LSASS.exe). It might leak memory on Windows domain controllers. This issue might occur when you install Windows updates dated November 8, 2022, or later.
Known issues
After installing this update, apps that use ODBC connections through Microsoft ODBC SQL Server Driver (sqlsrv32.dll) to access databases might not connect. Additionally, you might receive an error in the app, or you might receive an error from the SQL Server.
Well, folks, this is pretty much what we are dealing with in terms of security updates for the month of December 2022, as a part of the Patch Tuesday rollout.
Have you noticed any issues after downloading and installing these security updates for your version of the Windows operating system? Let us know in the comments section below.
In case you have tried all the above solutions, and none of them helped you fix the issue then it is recommended to use dedicated repair software.
We hope at least one of these solutions helped you fix the problem with the missing Media Pack. To learn more about other features, visit our best optional features to enable guide.
As always, don’t hesitate to leave us a comment in the dedicated section below, we would love to read them.
Several Dell users have taken to different forums to inquire about the Usbupdate.exe error. This is listed as Usbupdate.exe in the event viewer and is shown to be located in: C:\WINDOWS\TEMP\invF53C_tmp\Executables\UsbUpdate.exe
It is developed by Dell Inc. and isn’t a virus or malware. While some users were able to fix the problem, there isn’t a complete guide on what Usbupdate.exe is and how you can fix the problem when it stops working.
What is Usbupdate.exe and why am I getting the Usbupdate.exe error?
Usbupdate.exe is a part of the Dell tool called the Dell Support Assistant. The error associated with Usbupdate.exe pops up as soon as the PC boots up.
Reportedly, there is some issue with the Dell Support Assistant that runs at the startup and causes the problem. Dell themselves have confirmed this Usbupdate.exe is related to the Dell Support Assistant and they have released a solution for it.
However, do note that a virus or malware could also be conflicting with the program and could be responsible for throwing up errors associated with Usbupdate.exe. Let us take a look at the solutions that you can apply to fix the problem.
How can I fix the errors associated with Usbupdate.exe?
Well, there are just a few things that you can do and possibly try to fix the problem at your end:
Restart your PC and check if this gets rid of the Usbupdate.exe error message or not.
Check if you have the latest version of Windows installed on your PC. If Windows Update isn’t working, then you can refer to our guide that lists some solutions to fix it.
Let us now check out the advanced solutions to resolve the error associated with this executable file.
1. Disable Dell Support Assistant
Press the Win + R keys to open the Run dialogue.
Type msconfig and press Enter.
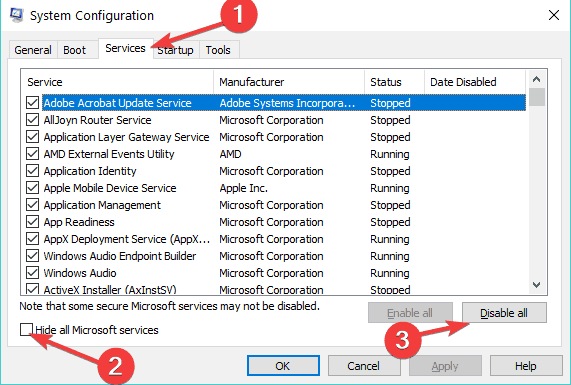
Switch to the Services tab.
Locate Dell Support Assistant.
Uncheck the box before Dell Support Assistant.
Click Apply and OK.
Restart your PC and check if this resolves the issue or not.
This will stop Dell Support Assistant from running when your PC boots up, which is when most users are experiencing errors associated with the Usbupdate.exe.
2. Uninstall Dell Support Assistant
Open the Start menu.
Open Control Panel.
Click on Programs & Features.
Locate Dell Support Assistant.
Click on Dell Support Assistant and select Uninstall from the top.
Now go to the below locations and delete these folders:
C:/ Program Data/ PCDR
C:/ Program Data/Supportassist
C:/ Program Data/Dell/Dell data volt
C:/ Program Files/ Dell/Supportassist
C:/ Program Files/ Dell/ Dell data Volt
Restart your PC and check if this fixes the issue or not.
Uninstalling Dell Support Assistant is another great option to eliminate the issue associated with it. Although you get features such as software upgrades, driver updates, etc. using this tool, the errors because of it are more annoying. So, uninstalling it is a better option.
If you do not wish to delete Dell Support Assistant and want to take advantage of its features, then the best solution, as advised by Dell is to update the Dell Support Assistant.
The best part about this solution is that no input is required from the user’s end. As soon as the Dell Support Assistant opens up, it will update itself.
Basically, there were several users facing this issue. So, Dell responded that they will release an update to fix the problem. But they clearly mentioned:
There will be no notification of any sort. The OTA (over the air) update is going to happen for all Dell remediation services (SupportAssist, Alienware Update, Dell Update).
So, install the latest update and check if this resolves the Usbupdate.exe issue on your Dell laptop or PC or not.
4. Perform a system restore
Open the Start menu.
Search for Create a restore point and open it.
Select the drive where you have installed Windows OS and hit the System Restore button.
Click the Next button.
Select the restore point and click Next.
When the restore finishes, click Finish.
If nothing works, then we would suggest you perform a system restore and go to a point when everything was working smoothly.
Getting the A2 motherboard error code? It usually shows up because the system cannot identify the bootable device, such as your HDD, SSD, or USB.
Luckily, like any other system malfunction, we can easily fix the A2 boot issue and here are the troubleshooting methods that should be applied in this situation.
How to fix the A2 motherboard error code
1. Disconnect the drivers one by one
The first thing you should do is disconnect and then properly reconnect your drivers.
In this way, you can get past the motherboard A2 issue and access BIOS. First, disconnect all peripherals f and afterward disconnect all your drivers.
Finally, plug in only one driver (the SSD for example) and power on your computer. This should take you to BIOS where you can pick how to boot.
2. Reset or update CMOS / BIOS
Another way in which the A2 motherboard code problem can be fixed is by updating BIOS. Of course, initiating a rest might also address this problem.
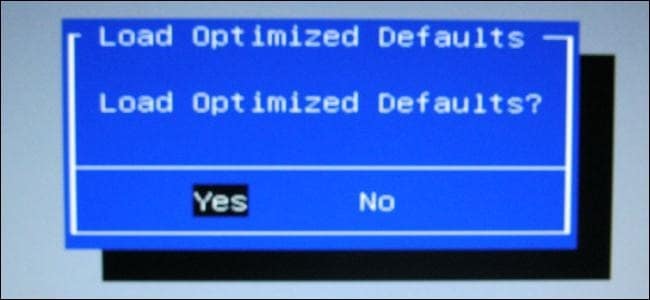
→ To reset your BIOS setting. you’ll have to long press F2 (or DEL/ ESC depending on the model). Once open, select the Reset to Default option. If resetting won’t work, you may have to update your BIOS.
→ From the main menu check if there’s an update feature and select it. If there’s no such option, you’ll have to go to your computer’s manufacturer’s website and download and install it manually.
3. Update your drivers
If the A2 motherboard error code is experienced only rarely, you should also check the drivers installed on your Windows PC. For example, a USB 3.0 driver might cause boot issues.
The easiest way is to go to Device Manager. Check peripheral drivers and make sure they’re properly installed and up to date.
4. Particular case: SATA devices
The A2 boot error can sometimes be related to SATA devices. If that is the case, then try testing it out:
Load BIOS default settings.
Change the SATA ports.
Install your SATA devices one by one to verify which device this issue is related to.
Verify your SATA cables.
If you have access to another system, please check if the device is running properly.
Hopefully, after following the troubleshooting solutions from above your Windows 10 system is now running without problems. However, if you still experience the same A2 boot error, let us know in the comment section below.
Make sure you describe your problem in detail along with your hardware configuration. Based on these details, we can bring further solutions that may work in your particular case.
BTServer.exe error is an error that is mostly encountered by Windows 10 users. However, Windows 11 users have also come across this error a bunch of times.
The BTServer.exe error appears when booting the system or application and is a problem associated with Bluetooth software on your PC. Here is the complete error message:
BTServer.exe – BAD IMAGE C: \ Program Files (x86) \ Realtek \ Realtek Bluetooth \ obexpf.dll is not designed to run on windows or contains an error. Try to install the program again using the original installation media, or contact your system administrator or software vendor for support. Error status 0xc0000020
What is BTServer.exe and why am I getting this error on my Windows PC?
BTServer.exe is a file associated with Realtek Bluetooth by Realtek. It is a configuration utility for Bluetooth devices, that allows the user to manage the connection and security settings of the attached Realtek Bluetooth adapter.
Well, there can be several reasons you are facing the BTServer.exe error on your Windows PC. After some research, we have deduced a list of some of the most common reasons that could trigger this error:
Bluetooth driver has accidentally deleted: Chances are that a third-party program or you have accidentally removed the Bluetooth driver from your PC.
The Bluetooth driver is corrupt: Chances are that the Bluetooth driver is outdated or has gone corrupt because of which you are getting the BTServer.exe error.
Bluetooth service might not be running: Often third-party programs overtake system settings and disable essential services.
How can I fix the BTServer.exe error on my Windows PC?
Here are a few things we would advise you to do before you apply the advanced solutions to resolve the BTServer.exe error:
Common software glitches or bugs can be easily resolved by simply restarting your PC. Here’s what to do if the computer won’t restart.
Check if you have installed the latest Windows updates or not. This ensures that the bugs present in the previous version are fixed.
Now let us take a look at the advanced solutions and try to resolve the problem at hand.
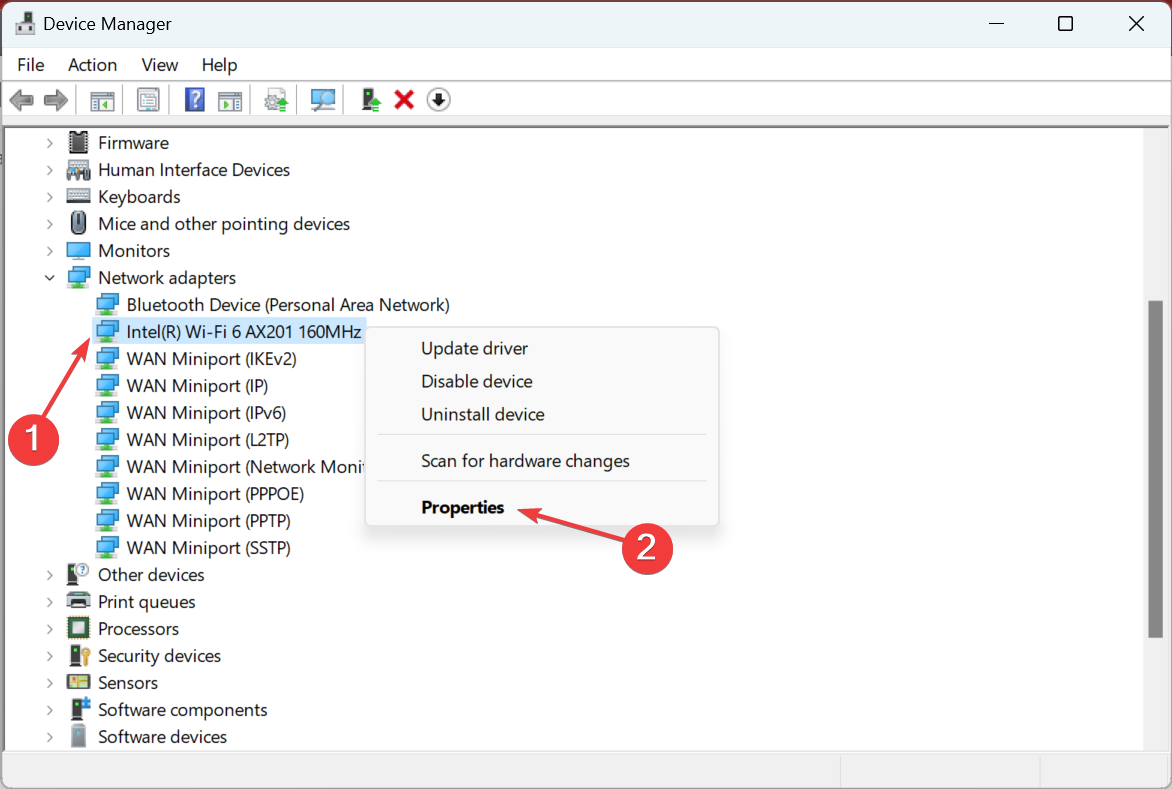
1. Reinstall the Realtek Bluetooth driver
Press the Win + X keys on your keyboard to open the Context menu.
Select Device Manager from the list.
Expand the Bluetooth menu.
Right-click on the Realtek Bluetooth driver and select Uninstall device option.
Follow the on-screen prompts to completely uninstall the device from your PC.
Restart your PC.
As soon as the PC boots up, your system will automatically install the Bluetooth driver.
This solution was suggested by one user. In case your PC does not automatically reinstall the Bluetooth driver, then you should make use of a dedicated tool known as Outbyte Driver Updater.
Outbyte Driver Updater scans your PC for missing or corrupt drivers and prompts you to install them. This way you are getting the compatible driver for your PC. Also, other features of this tool include the ability to schedule scans, and even create driver backups in case things go south.
Outbyte Driver Updater
Get the right driver versions for your computer in no time and try using Outbyte Driver Updater.
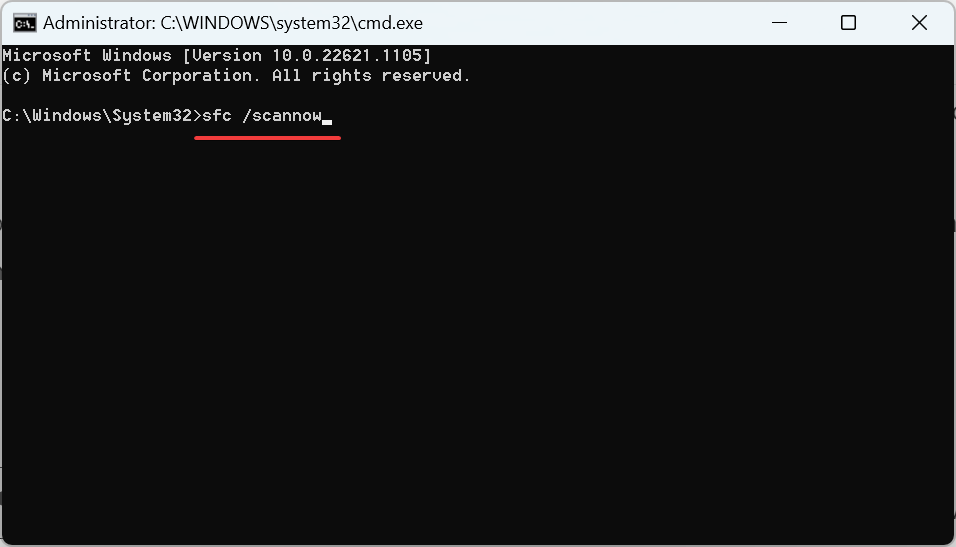
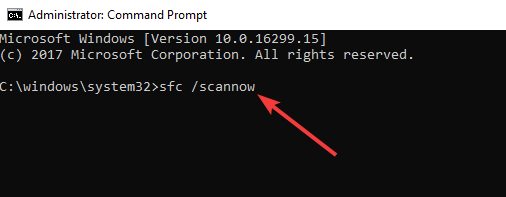
Type the below command and press Enter. sfc /scannow
Once the process completes, type the below command and press Enter. DISM /Online /Cleanup-Image /RestoreHealth
Windows comes with built-in SFC Scan and DISM tools that will help you to scan corrupt system files or replace the missing ones.
They can be operated by a simple command, and you can follow the steps above to safely execute the commands.
4. Scan your PC for virus
Open the Start menu.
Type Windows Defender and open it.
Click on the Virus & threat protection option from the left pane.
Hit the Quick Scan button. This will start scanning your PC for viruses or malware and if detected will prompt you to take action to remove them.
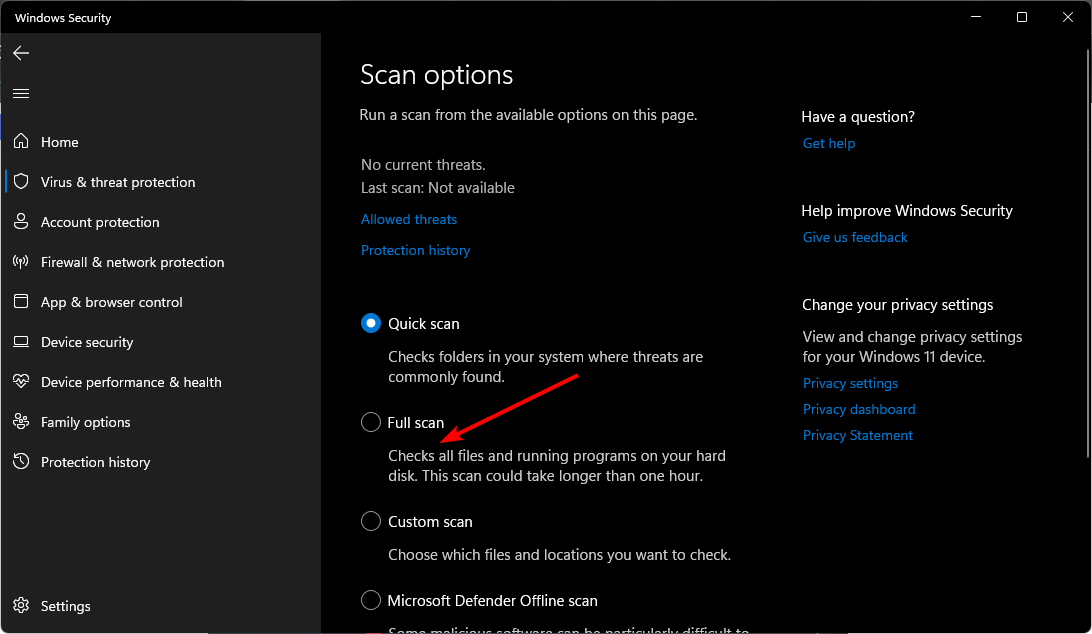
If you press the Advanced scan option, you will be presented with three more options. From here, you can go ahead with Full Scan which will initiate a deep scan of your PC.
While the above makes use of the built-in Windows Defender antivirus tool, it is often found not to be that effective in detecting modern viruses or malware.
In such a case, we would recommend you make use of a third-party antivirus tool. If you are confused about which one to choose, then you can check out our guide which lists some of the best antivirus software for Windows 10 and 11.
That is it from us in this guide. If nothing works, we recommend you reset your Windows 10 PC. If you are unsure how to do that then you can refer to our guide.
Surface Pro 4 is an amazing laptop, but despite the series’ quality, users reported some unusual problems. Near the top of the list is the complaint that the Surface Pro mouse keeps jumping around on the screen.
This problem can make your device incredibly hard to use. Fortunately, it is not the most difficult issue to fix, requiring a tweak here and there, as we will show in this guide.
Why is my mouse cursor jumping around?
There are a few reasons that might cause your Surface Pro mouse to be jumping around. Below are some of the notable ones:
Outdated PC: One of the major reasons the Surface Pro cursor keeps moving is an outdated operating system. You need to update your PC to the latest version to curb the issue.
Wrong touchscreen calibration: If you have recently changed your touchscreen calibration, it might be why your Surface Pro 4 mouse cursor is flickering. The solution here is to reset the touchscreen calibration to default.
Faulty driver: Sometimes, issues with your touchscreen drivers might be the cause of this problem. You might need to re-enable or update your driver to the latest version to arrest the situation.
How can I fix the mouse jumping around on Surface Pro 4?
Before exploring the detailed fixes in this section, below are some general troubleshooting steps you should try:
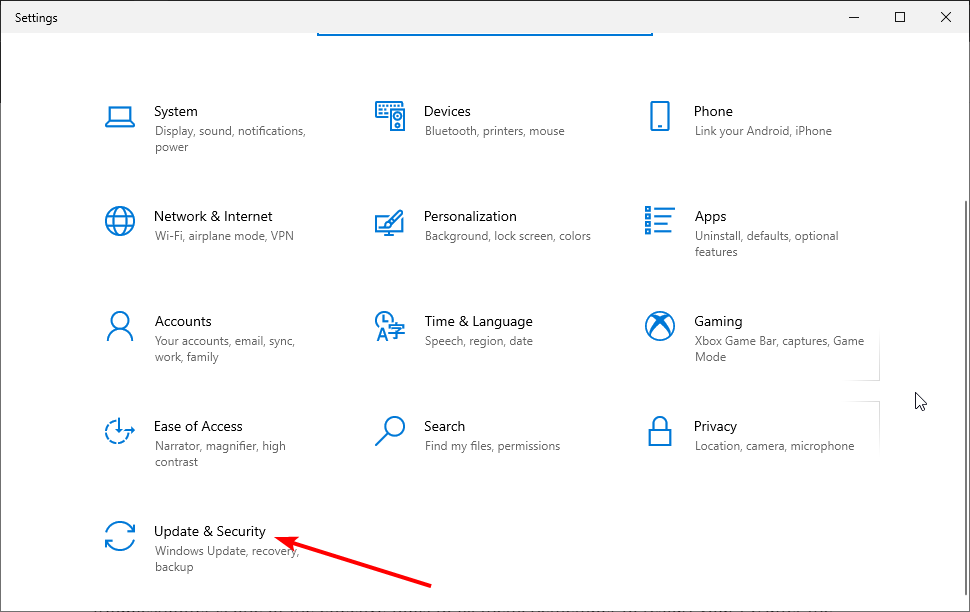
Press the Windows key + I to open the Settings app and select the Update & Security option.
Click the Check for updates button.
Finally, install any available updates.
The first thing to do if your Surface Pro mouse keeps jumping around is to update your PC. By default, Windows 10 automatically downloads the latest updates, but sometimes you might miss an update or two due to certain bugs.
So you can always check for updates manually.
2. Disable your touchscreen driver
Press the Windows key + X to open the Power User Menu and select Device Manager from the list.
Double-click the Human Interface Devices option to expand it, and right-click the HID-compliant touch screen option.
Now, select the Disable option.
Finally, wait a few seconds, right-click the device and select the Enable option.
Sometimes, your Surface Pro mouse keeps jumping around because of minor issues with your drivers. Disabling and enabling the touchscreen drivers should fix this.
Alternatively, you can use a special tool in Outbyte Driver Updater to check if there are updates available for the drivers. This is because outdated drivers can cause all manners of issues, too, and you can’t put this beyond it too.
Press the Windows key, type calibrate, and press Enter to select Calibrate the screen for pen or touch input.
Now, press the Tab key on your keyboard till you select the Reset option and press Enter. If the Reset button is greyed, the calibration is still at the default. So you can move to the next solution.
Finally, press the Tab key again until Yes is selected and press Enter.
One of the quick ways to fix the Surface Pro mouse jumping around issue is to reset your screen calibration. This has worked for many users, so you should try it too.
Press the Windows key + I and select the Devices option.
Click the Touchpad option in the left pane.
Now, click the dropdown under Touchpad sensitivity and change it from Medium to Low.
Some users found that the sensitivity of their touchpad was causing the Surface Pro mouse to jump around. Reducing it to the bearest minimum should restore normalcy quickly.
That’s all there is to fixing the Surface Pro mouse if it keeps jumping around. All you need to do now is to follow the steps carefully, and you should be able to solve the problem for good.
To make video calls, you need a quality webcam, and speaking of which, many users reported that Microsoft LifeCam HD-3000 is not working on their PC. This can be a problem, and in today’s guide, we’ll show you how to fix this issue.
Why is Microsoft LifeCam HD-3000 not working?
There are several reasons why your webcam isn’t working, with the following ones being the most common:
App permissions – If your webcam isn’t working, you need to adjust its settings and enable the webcam.
Driver issues – Sometimes, reinstalling and updating drivers can help with webcam problems.
What can I do if the Microsoft LifeCam HD-3000 is not working?
Before we start fixing this issue, there’s one thing you can try:
Change USB ports – Issues such as these can occur due to your USB port. If the webcam isn’t showing in Device Manager, try connecting it to a different port.
1. Change the settings
Press the Windows key + I to open Settings.
Next, select Privacy.
In the left pane, click on Camera. Here, turn on the Allow apps to access your camera option.
2. Uninstall the USB Root Hub
Press the Windows key + X and select Device Manager from the list.
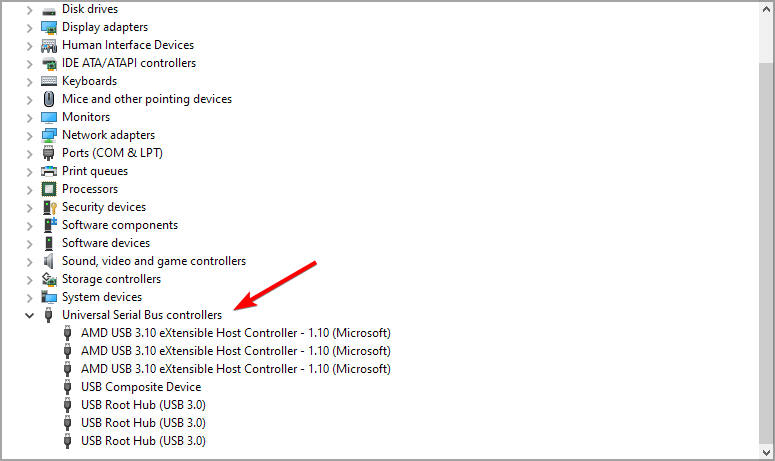
Locate the Universal Serial Bus Controller section and expand it.
Next, locate the USB Root Hub and right-click on it. After that, choose Uninstall device. Do this for all Root Hubs.
Restart your device and allow Windows to automatically reinstall it.
Locate your motherboard and go to the Support section.
Now expand the Driver section and look for a USB or chipset driver.
Download the drivers and install them.
If this process seems a bit complicated, you can speed it up using specialized driver updater software, such as Outbyte Driver Updater. With it, you can easily update all your drivers with a single click.
We hope that one of the presented solutions in this article helped you solve the Microsoft LifeCam HD-3000 not working with Skype.
In case you’re having additional problems, visit our Skype camera not working guide for more information.
Which one of the solutions presented in this article worked best for you? Don’t hesitate to leave us a comment in the dedicated section below.
There’s a chance that you might encounter specific problems when installing a new hard drive on your computer.
Perhaps the most common issue with a new HDD in Windows 10 is that the system doesn’t show them for some reason. But before we solve this problem, let us discuss some possible triggers.
Why is my new HDD not being detected?
From what we gathered from multiple users, any of the following elements may make Windows 10 not to discover your HDD:
Driver problem – Drivers are essential in connecting software and hardware. If they are corrupted or outdated, you may expect some issues.
Network connection problem – Some users with network connection issues may also have this error.
Incorrect BIOS settings – The BIOS may play a key role and, if not correctly configured, may stop the OS from noticing a new HDD.
Wire connections – Another cause could be a connection problem due to a malfunctioning USB port or a frayed or damaged USB cable.
Note that these causes can result in other common problems, such as:
Internal hard drive not showing up in Windows 10, in Disk Management – If your hard drive isn’t showing in Windows at all, it’s possible that it’s not connected correctly. To fix that, enter BIOS and make sure that the drive appears.
Can’t see the hard drive in Windows 10 – If you can’t see your hard drive in Windows 10, it’s possible that your hard drive isn’t properly initialized and formatted. However, you can fix that with ease using Disk Management.
External hard drive not showing up – This issue can also appear with external hard drives, and we already covered how to fix problems with an external hard drive on your PC in one of our previous articles.
Hard drive won’t appear in BIOS, on PC, or in File Explorer – In some cases, the hard drive won’t appear in BIOS. Your configuration usually causes this in BIOS or by connection issues with your hard drive.
Internal hard drive not showing up on Windows 11 – If you are using Windows 11 and you get this error, you can still apply the solutions below but tweak them a bit.
Let’s jump into the solutions to the hard drive errors mentioned above without further ado. Follow along!
How do I detect hard drive on Windows 10?
First, before you go into any of these solutions, you must:
Ensure your hard drive is correctly connected to your motherboard and power supply.
Also, it would be best if you tried connecting the hard drive to a different port or using a different cable.
1. Update your drivers
Press the Windows Key + S, type device manager, and click the Device Manager option.
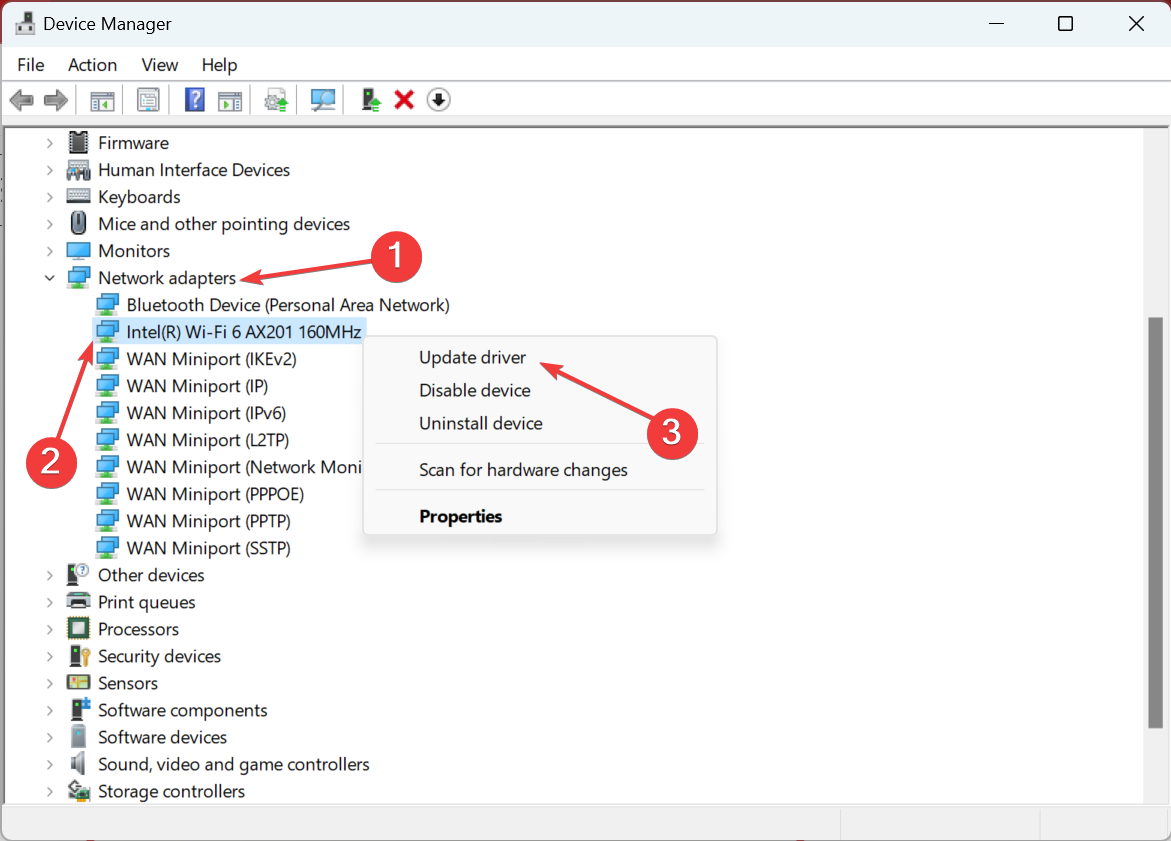
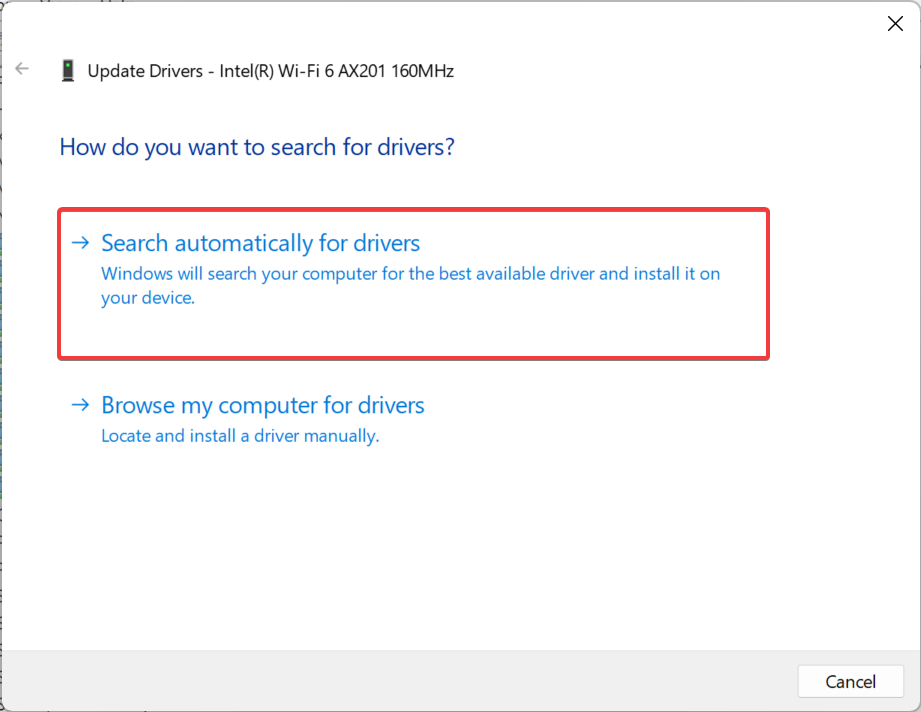
In the Device Manager, select the device you wish to update, right-click on it, then select Update driver.
Repeat for all the devices you want to update.
You may have a driver issue if your hard drive won’t show up in Windows. To fix the problem, ensure your drivers are up to date.
This goes for your motherboard and chipset drivers, so visit the manufacturer’s websites and download the latest ones for your motherboard.
2. Initialize the disk
Press Windows Key + X and choose Disk Management from the list.
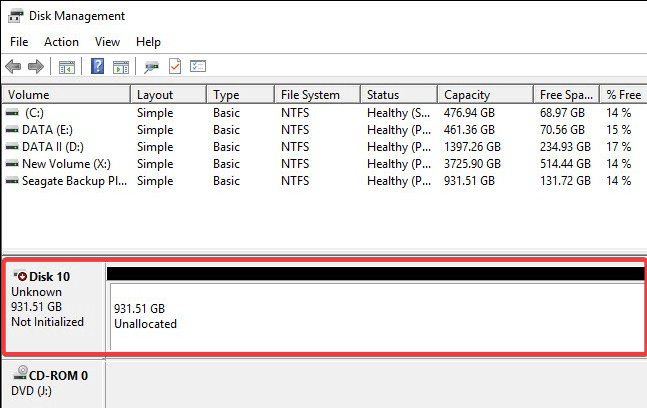
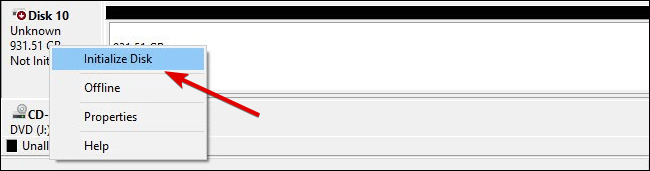
You’ll see all connected hard drives listed when the Disk Management window opens. Look at the list, and find a drive listed as Disk 1, or Disk 10 (other names are possible, as well).
You’ll recognize this drive because it is not initialized and is listed as Unknown, and unallocated.
Right-click on that partition, and select Initialize Disk from the right-click context menu.
Once you initiate the process, it will ask you to choose between a Master Boot Record (MBR) or a GUID Partition Table (GPT). We advise you to choose a GPT. Click OK.
Once you do this, you’ll get back to the main window, where your new drive will be listed as Basic and Online, but it will still have unallocated space.
To fix that, right-click on the stripped box, and select New simple volume…
Click Next, and assign a drive letter.
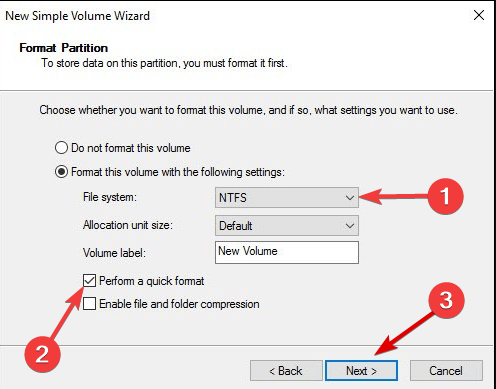
Now you need to format your new drive. For the best results, choose the NTFS file system, and Perform a quick format, then hit Next.
Finish the process.
There you go; This is a simple way to detect a new hard drive on Windows 10. If you’re not too fond of Disk Management, you can use any third-party disk management software.
In most cases, you need to initialize your new hard drive, after which the HDD will show up on your PC normally.
3. Use diskpart command to clean your drive
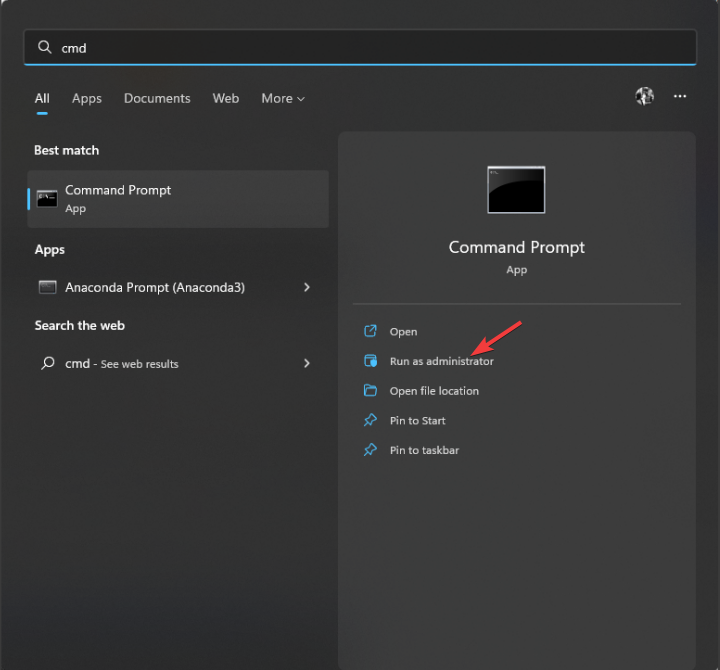
Press Windows Key + X and choose Command Prompt (Admin) or Powershell (Admin) from the menu.
When Command Prompt opens, enter the following command and press Enter: diskpart
After diskpart starts, input the script below and hit Enter: list disk
You should now see a list of all hard drives on your PC.
You must select the correct hard drive. If you select the wrong hard disk, you’ll wipe all your files and lose them, so be extra cautious.
Check the size of each drive to find the hard drive that is giving you trouble. Select the problematic drive by entering select disk X.
In our example, we used select disk 0, but you’ll likely need to use a different number on your PC.
After you select the hard drive, double-check everything and make sure that the problematic drive is selected.
Now enter the script below and hit Enter: clean
If your internal hard drive doesn’t show up, it might not be properly configured. Sometimes, you need to use a single command to completely wipe your hard drive and initialize it again.
Before we start, we have to mention that this solution will delete all files and partitions from the selected drive, so it’s best to use it with a new hard drive that doesn’t have any files.
If your hard drive has some files, it would be best to back them up to removable storage or a different drive.
After a few moments, your hard drive will be wiped, and all your files will be removed. Now go back to the Disk Management tool and initialize your hard drive.
Then, create a new partition, and assign a letter to it, as we showed you in one of our previous solutions.
Alternatively, you can initialize and format your hard drive right from disk part. Just start Command Prompt as an admin and run the following commands:
diskpart
select disk 1 (make sure to and select the disk that you just cleaned)
attributes disk clear readonly
online disk
select disk 1 (make sure to and select the disk that you just cleaned)
convert gpt
create partition primary
format quick fs=ntfs label="data" unit=64k
assign letter=“E"
4. Check if your hard drive appears in BIOS
Keep pressing F2 or Del while your system boots to enter BIOS. Sometimes it might be a different keyboard key, so if you’re unsure, check your motherboard’s manual.
Once you enter BIOS, look for your hard drive.
Many users reported that their internal hard drive won’t appear in Windows, and various issues can cause this. However, you can always check if your hard drive shows in BIOS.
If your hard drive appears in BIOS, it’s connected and working correctly, so Windows cause the issue.
On the other hand, if the hard drive doesn’t show in BIOS, it’s likely not properly connected.
If you’re finding it hard to access your BIOS, take a closer look at our dedicated guide that will teach you how to do it quickly.
That’s about it. If you did not know how to detect a new hard drive in Windows 10, this should have helped. In most cases, you need to initialize it, and we sincerely hope this action will be the only one required.
If you have any comments, questions, or suggestions, let us know in the comments section below.
There are so many Windows 10 updates that it’s hard to track them. Today we are talking about some significantly impacting the Outlook Mail functionality.
So, if you run Outlook Mail and it crashes due to a memory error and does not synchronize e-mail when the app runs in the background, you need to be aware that it isn’t only happening to you.
Microsoft has fixed this problem through its Windows Update feature. As no hotfixes were available, you just needed to ensure that you’re running the latest version of your Windows 10 OS for this fix.
Why does my Outlook app keep crashing?
Users have reported this problem, and we gather it may occur for varying reasons. Some include:
Problems with add-ins – Sometimes, add-ins may cause your Outlook service to behave unexpectedly. Disabling add-ins may help you to fix this problem quickly.
Conflicting programs – These could be any of the third-party tools you have installed, but the antivirus is a common culprit in most cases.
It is so common to experience Outlook issues. However, the above solutions have been confirmed to work in the flowing scenarios too:
Outlook crashes when maximized – Users describe how maximizing their Outlook application to full screen leads to the same result: it crashes and closes down. If that’s your issue, disabling add-ins may help you out.
Outlook crashes after Windows 10 update – If you’re running Windows 10, you want the latest updates. You’re no stranger to the fact that they don’t always bring the stability you’re after, but the above fixes will help you get things on track.
Outlook 2013 crashes on startup – If the application crashes on startup and you cannot enjoy it, think of a more reliable email client alternative.
If you installed the latest OS version but are still experiencing Outlook crashes, here are some additional solutions.
How can I fix Outlook crashing issues on Windows 10?
Before you go into these solutions, you may consider the following:
Switch to another email service to avoid Outlook crashing issues. We are sure you’ll find some exciting alternatives even though it’s not always easy to make such changes.
1. Disable add-ins
Click the File tab in Outlook.
Select Options to open an Outlook Options window.
Click Add-Ins on the left of the window, selectCom Add-on on the Manage drop-down menu, and press the Go button.
Deselect all the add-ins listed on the COM Add-ins window, then press the OK button.
Finally, restart Outlook.
2. Repair Office
Press Windows + R, enter control panel, and hit Enter.
Click on Uninstall a program.
Right-click on Office installation and select Change.
Click on Download on the official website to get the Office 365 Support andRecovery Assistant.
Run the program after it is finished installing.
Select the appropriate issues to run the troubleshooting tool, and follow the on-screen solutions.
4. Run Scanpst
Close the Outlook app.
Open File Explorer by pressing the Windows key + E hotkey.
Navigate to any of the paths below depending on your Outlook version: C:\Program Files (x86)\Microsoft Office\root\Office16 C:\Program Files (x86)\Microsoft Office\Office15 C:\Program Files (x86)\Microsoft Office\Office14 C:\Program Files (x86)\Microsoft Office\Office12
Double-click on SCANPST.EXE to start the repair tool.
Click the Browse button to select the PST file. The PST files are usually in the DocumentsOutlook files folder for an Outlook profile.
Press the Start button to initiate the scan, and select the Repair option to fix a corrupted PST.
Thankfully, if you have an Office 365 account, you can use their specialized tool to diagnose, troubleshoot and solve all Office-related problems and errors.
NOTE
If nothing worked, creating a new Outlook profile may help eliminate all those annoying Outlook crashes.
If you have any corrupted emails in outlook, you should also check out Repair Toolbox for Outlook. It’s an excellent tool that will restore them and their contents in no time.
That concludes our article. Which of these methods worked for you? Do let us know in the comments below. We also strongly advise you to leave us feedback regarding the subject.
For so many reasons, mostly good, you can decide to call it quits on your friendship with someone.
Every social network has its version of the blockfeature, and Facebook Messenger isn’t an exception.
If you wish to block a user while on Messenger, the program asks if you want to do so on Messenger or on the larger Facebook as well.
After blocking a user whom you wish to cut off, a worry is that they may still be able to see when they are active.
There’s not much information on this topic, but it’s vital to know for the sake of your privacy and security. This post tells you precisely what happens when to expect when you block someone on Messenger.
Can I see if someone is online if they blocked me on Messenger?
Blocking a user on Facebook removes everything about the person from your interface.
This means that neither of you will see each other’s updates nor be able to chat with each other.
However, it gets tricky because Facebook allows you to block users in two different ways – blocking on Facebook or blocking on Messenger.
In this section, I’ll briefly explain what happens when someone blocks your Facebook as well as Messenger.
When you’re blocked on Facebook
As mentioned earlier, I pointed out that if someone blocks you on Facebook (not Messenger), your profile ceases to exist to the user.
They no longer find your profile even if they search. The Facebook block extends to Messenger.
The person who blocked you won’t see you on their contact list because you’re blocked on Facebook.
You won’t even see each other’s profiles. Regarding seeing when you’re online, you won’t even find them on your contact list, talk more about seeing when they’re active.
When you’re blocked on Messenger
If the person only blocks you on Facebook Messenger, you can see when they’re online.
While you’re blocked on Messenger alone, you can still view the person’s Facebook profile and interact with their content.
However, you can’t send them messages or reach old messages send before they blocked you.
In the area where you would normally type your message, you’ll see a notice saying you can’t reply to this conversation.
When someone blocks you on Messenger only, you will still see them on your list but can’t send them messages or view their last seen or online status.
However, you must note that this doesn’t only happen when a user blocks you. You will also not be able to interact with them if they deactivate their Facebook account.
Many Xbox One users have complained about facing error 0x8027025A when signing in on the Xbox app. Fortunately, there are solutions available to fix the problem.
This guide will discuss some of the available fixes and probable causes for the issue. Let’s get started!
What causes the Xbox error code 0x8027025a?
There could be various reasons for this Xbox sign-in error. Some of the popular ones are listed below:
Xbox service – If there is a problem with the Xbox Live service, you might get this error. It is advised to wait for some time before signing in.
Sign-in issue – If there is a sign-in issue with your profile due to connectivity, the error might appear. Check your internet connection.
The app didn’t load in the expected time – If an app takes too long to start, you get this Xbox One error. Try restarting the app.
What can I do to fix Xbox error code 0x8027025a?
Before moving to the troubleshooting steps, try these quick fixes to resolve the problem:
First, unplug and replug the network cable if you are using a wired connection.
Check all the connections to ensure there is no loose end.
Check all the services listed on the page. Expand them if you see any alerts.
Scroll down to notifications.
Sign in to get notified once the service is up and running.
2. Restart the affected app
Press the Xbox button on the controller to open the guide.
Select Home.
Go to the app and click the Menu button.
Choose Quit.
Wait for 10-15 seconds and restart the app.
3. Reinstall the affected app on the external HDD
If nothing else worked for you, then it is suggested to uninstall the app in question from the internal HDD of the console and install it on an external hard drive instead. This is clear some space on the console and could resolve the error.
Press and hold the Xbox button on the console for 10 seconds or more until the console shuts down.
Remove the power cord from the console. Wait for three minutes, then plug it in.
Press the Xbox button on the controller to restart your console and controller.
5. Contact Xbox Support
If even after installing the game on external hardware doesn’t work for you, it is suggested to contact Xbox support and explain your issue. Also, tell them all the fixes you have tried so far for them to understand the situation.
So, these are the methods you need to follow to eliminate error 0x8027025a on Xbox One. Try them and let us know what worked for you in the comments below.
When launching a game or an app, if you get AUEPEC.exe -system error saying, The program can’t start because VCRUNTIME140.dll is missing from your computer. Try reinstalling it to fix this problem. Then, you are not alone.
Here we will discuss what AUEPUC.exe is and how to fix this system error with expert-recommended fixes. Let’s begin!
What is AUEPUC.exe?
AUEPUC.exe, developed by AMD, is also known as TODO. It is an entirely safe executable file used by a background process of AMD.
What causes the AUEPUC.exe system error?
There could be various reasons for the error message. However, we have listed some of the most popular ones:
Program installed incorrectly – This error could occur if the program in question is not installed correctly. Try to uninstall and reinstall the program.
Missing Microsoft Visual C++ Redistributable– If your computer doesn’t have Microsoft Visual C++ Redistributable file, this error message could come up. You can install the latest version of the tool to fix the issue.
How can I fix the AUEPUC.exe system error?
Before diving into detailed troubleshooting, here are some things you should do:
Locate the program, and right-click on it to select Uninstall.
Go to the executable file location of the program and double-click to run and install.
Follow the on-screen instructions to complete.
2. Re-register the VCRUNTIME140.DLL file
Press the Windows key, type CMD, and click Run as administrator.
Type the following commands one by one to re-register the DLL file, and press Enter after every command: regsvr32 /u VCRUNTIME140.dllregsvr32 VCRUNTIME140.dll
Under Visual Studio 2015, 2017, 2019, and 2022, in a table, you will get the link for the Microsoft Visual C++ Redistributable. Click on the link as per your PC’s architecture.
Once downloaded, double-click to Run the file.
Follow the on-screen prompt to complete the installation.
5. Run the SFC & DISM command
Press the Windows key, type CMD, and click Run as administrator.
Type the following command one by one and hit Enter after every command: sfc/scannowDISM /Online /Cleanup-Image /RestoreHealth
6. Restart the Windows Update service
Press Windows + R to open the Run window.
Type services.msc and hit Enter to open Services.
Locate Windows Update and double-click it.
Change the Startup type to Automatic.
Click the Start button under Service status.
Click Apply and OK.
So, these are methods to fix the AUEPUC.exe system error. Try them and let us know which worked for you in the comments section below.
Even with advanced algorithms and substantial virus databases, antivirus programs might sometime fall short. Updane.exe is one such potentially dangerous executable file, which often goes undetected.
Here we will explain what Updane.exe is, how it affects your PC, and how to remove it safely from your PC. Also, we have mentioned the harmful effects that it could have if not removed.
What is Updane.exe?
Updane.exe is a Windows executable file but is not essential for Windows OS. It is programmed to spy on all your moves on your PC and invade your privacy.
It keeps an eye on your keyboard and mouse inputs and records personal and financial data. Once its work is done, it exposes all the data to cybercriminals who planted it in the first place.
How does Updane.exe work?
Updane.exe can be a part of a program you installed or can enter your computer via a spam email. It can delete important files, crash programs, and make your computer run slowly.
Updane.exe can infect more files and record more data from your computer if not dealt with immediately.
How can I remove Updane.exe for good?
Before moving to the troubleshooting steps, ensure you perform these preliminary checks:
Once you are done with these, please follow all these steps to remove Updane altogether.
1. Remove program related from the computer
1.1 Identify the file location
Press Ctrl + Shift + Esc to open Task Manager.
On the Details tab, look for the File, right-click on it and select Open file location.
You will get the name of the app and the folder in which it is stored.
1.2 Uninstall the program
Press Windows + R to open the Run window.
Type appwiz.cpl and press Enter.
Select and right-click the program. Then, from the context menu, click Uninstall.
1.3 Verify Hosts files content
Press Windows + R to open the Run window.
Copy and paste the following path and press Enter: C:\WINDOWS\System32\drivers\etc
Locate the hosts file, and open it using Notepad.
Compare your hosts File to the image below and if there is any other information displayed apart from this, remove it. Press Ctrl + S to save the File and close it.
1.4 Remove leftovers from Registry Editor
Tip
Making changes to the Registry Editor affects your computer. Any wrong move can leave your computer inoperable. Therefore before making any changes, it is advised to create a backup. Go to File, and click Export. Save the .reg File in any of the drives apart from C (the drive with Windows installed).
Open the Run window, type regedit, and hit Enter.
Follow this path and right-click the program that you uninstalled, and select Delete: HKEY_LOCAL_MACHINE\SOFTWARE
Finally, select Yes on the following prompt to complete the process.
2. Run Disk Cleanup
Press Windows + R to open the Run window.
Type cleanmgr and press Enter.
On Disk Cleanup: Drive Selection window, click OK.
Click Clean up system files on the Disk Cleanup window.
Click OK on the next window.
Under Files to delete, select all the items and click OK.
Press the Windows key, type CMD and click Run as administrator.
Type the following commands one by one and press Enter: sfc/scannowresmon
Copy and paste the following command and press Enter: DISM.exe /Online /Cleanup-image /Restorehealth
Restart your PC once the scan is complete.
4. Change the internet settings
Press Windows + R to open the Run window.
Type ncpa.cpl and press Enter.
Right-click on the active connection and select Properties.
From This connection uses the following items option, locate and double-click Internet Protocol Version 4(TCP/IPv4) to open Properties.
Ensure that Obtain an IP address automatically and Obtain DNS server address are selected automatically. If not, select them.
Click OK and OK again.
So, these are the steps to remove Updane.exe from your PC altogether. Alternatively, you can use reliable antivirus software to eliminate this threat from your computer.
Stuck somewhere while removing Updane? Feel free to let us know in the comments section below.
If you need to set up Windows 10 Home Single Language, you can do so easily with the right tools and files.
This edition is designed for users who require a specific display language and don’t need the extra customization options of Pro or Enterprise. Below, you’ll find a step-by-step guide to download, install, and activate Windows 10 Home Single Language.
How can I download Windows 10 Home Single Language Edition?
When you get to this page, make the following selection:
Select type:Windows (final).
Select version: Windows 10, Version 1703.
Select edition, and go for Windows 10 Single Language.
Select language: Your favorite Language, for example, English.
Select file:Windows 10 1703 SingleLang_English_64.iso (or 32bit.iso for 32-bit machines).
Finally, click Download.
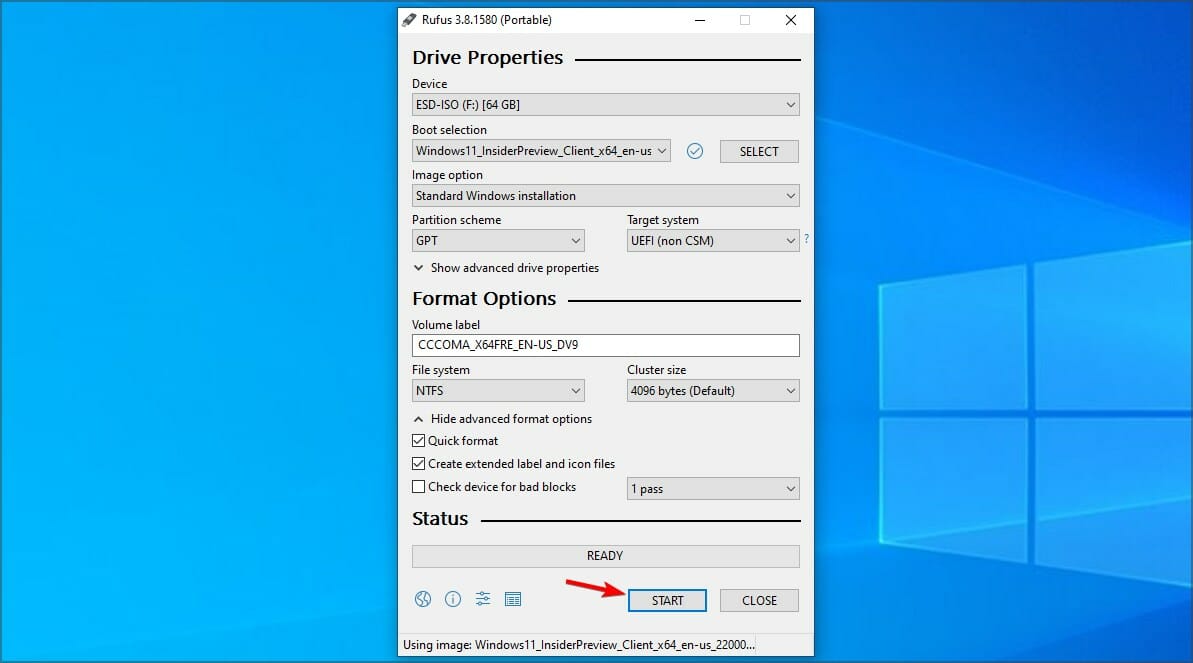
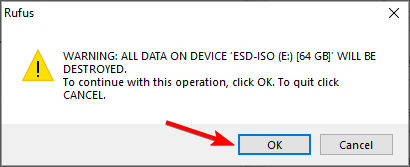
Then wait as the file downloads. It may take a while, depending on your Internet connection. Once the ISO file is downloaded, you need to burn it by following these steps:
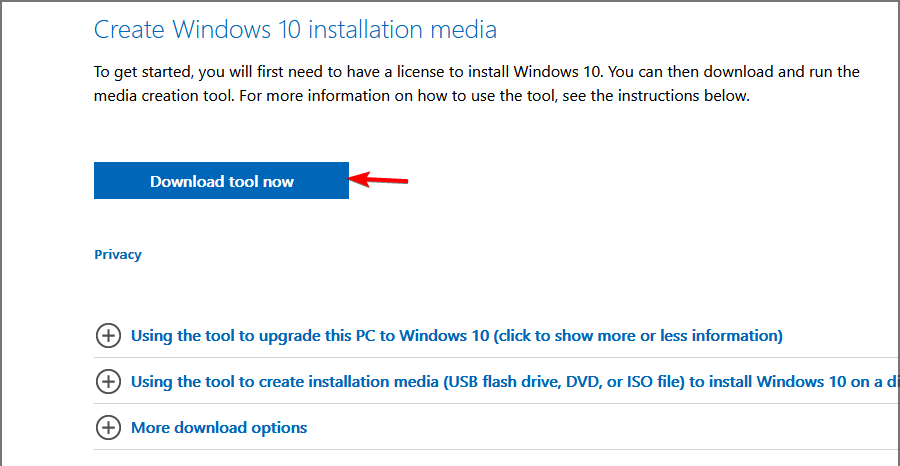
2. Click on Download tool now in the Create Windows 10 installation media section.
3. Connect a USB flash drive to your PC.
4. Once the file is downloaded, run it.
5. Accept the terms of service.
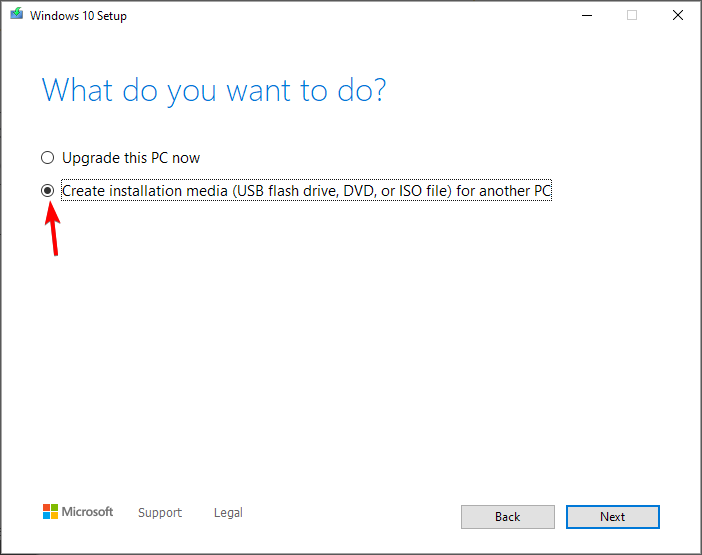
6. Select Create installation media.
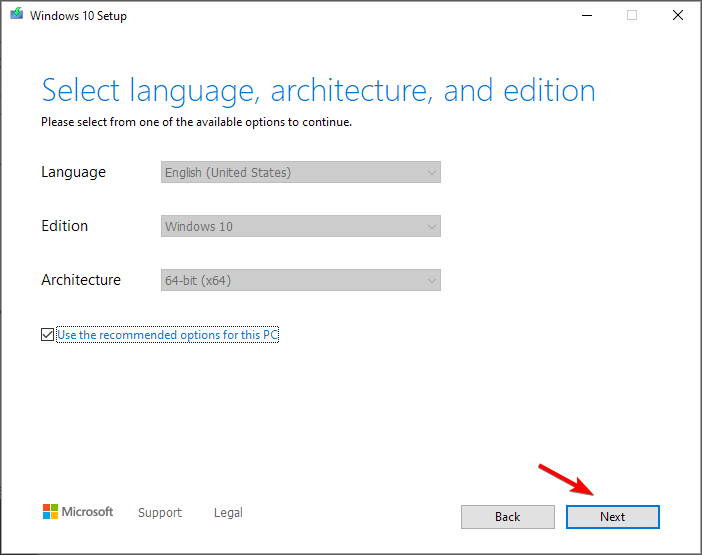
7. Check if your settings are correct and click Next.
8. Select USB flash drive and click Next.
9. Select your drive and wait for the process to finish.
How can I install Windows 10 Home Single Language?
Connect your USB flash drive to the PC.
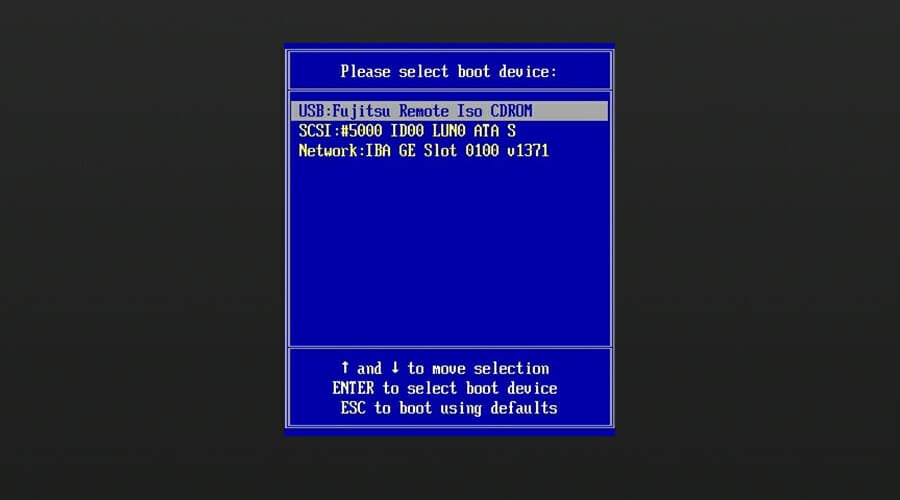
While it boots, press F2, F10, or F12 to open the boot menu.
Select your flash drive.
Now press any key to boot.
The Windows logo pops up on the screen.
Select Time, Keyboard method, and your Language (as you had chosen when downloading), then click Next.
Click Install now.
Run through the remaining steps (Remember to select Custom Install -Windows only advanced) at the type of installation step.
Select the correct partition.
Follow the instructions on the screen to complete the process.
Is it possible to update Windows 10 Home Single Language to Windows 11?
You should be able to upgrade to Windows 11 using the Single Language edition. The process is simple and can be completed from the Windows Update section.
How to add more languages into Windows 10 Home Single Language?
You cannot add additional display languages in Windows 10 Home Single Language, as it supports only one language. To install more languages, you must upgrade to Windows 10 Pro through the Microsoft Store. However, language packs for typing and input can still be added.
Summary
As you can see, it’s pretty simple to clean install Windows 10 Home Single Language edition if you can download the original ISO file.
Nevertheless, Windows 10 is on its way out so you should seriously thinking about Windows 11 instead.
Activating Windows is critical to an optimal experience, but the error code 0XC004B100 often stands in the way.
How do I fix the error code 0XC004B100?
1. Make sure you are entering the correct key
As per Microsoft, the error code 0XC004B100 results from an incorrect MAK (Multiple Activation Key), so you must verify that first. Often, we enter a faulty activation key in a hurry, so take your time and check it once before submitting.
Also, if this is the first time you got the error, try again in a few hours since it could be a server-related problem. In case that doesn’t work, head to the next solution.
Once downloaded, run the tool and wait for it to verify if the requirements are met.
Now, click Install in the confirmation prompt and let the application get ready.
Click on I agree to accept the license terms and conditions.
Let the tool run, and follow the on-screen instructions to fix the error.
Whenever you encounter the error code 0XC004B100, the most viable solution is running an official tool from Microsoft, the Support and Recovery Assitant tool, or the Activation troubleshooter.
This should get things running for most users, and even if the tool cannot eliminate the error, it will list the possible solutions.
3. Check for any hardware changes
A few users reported the error code 0XC004B100 after changing the hardware, usually the motherboard and CPU. Here, re-activating Windows becomes imperative and is often tricky.
In this case, you may be able to activate Windows using the previous key or have to get a new one, depending on how Windows was installed initially. In addition, windows licenses bought from a store or the Microsoft website are transferable, while those from the OEM are not.
If yours is, transfer the Windows license and get the device up and running. In case this, too, doesn’t work, head to the last solution.
Press Windows + R to open Run, type slui 4 in the text field, and hit Enter.
Choose your country from the dropdown menu, and click Next to proceed.
Call on the provided number, follow the instructions to activate Windows to secure the confirmation ID, and then click on Enter confirmation ID.
Finally, enter the confirmation ID here, and click on Activate Windows.
This is another way to fix error code 0XC004B100 when the servers seem to be giving you a hard time. Also, find out what to do when the Windows activate key is not working. Drop a comment below for queries or to share solutions that are not listed here.
Microsoft allows hardware vendors to push driver updates through Windows updates, including AMD. However, some users may prefer installing the driver update manually. So, is there a way to stop Windows from updating AMD drivers?
For those who do a lot of testing with new PC hardware, automatic driver updates can change the testing results on different hardware.
Even for those who are not tech-savvy, automatic GPU driver updates can still be annoying. Is Windows keep installing old AMD drivers? Don’t stress, you can resolve it with the right tools.
If you are one of those who prefer to install GPU drivers for your AMD graphics card manually, this is the article you need.
We’ll show you how to stop AMD drivers from updating automatically or disable AMD driver updates in Windows 10.
How can I stop AMD drivers from updating automatically?
1. Change device installation settings
Press Windows Key + S and type advanced. Select View advanced system settings.
Open the Hardware tab and click on the Device Installations Settings button.
Choose No (your device might not work as expected) option.
Click the Save Changes button. Click Yes when prompted by the UAC.
Next, click Apply and OK to save the changes on other open System Properties windows.
This is a simple solution, but it might help you stop windows 10 AMD driver update.
2. Uninstall and reinstall the older driver
Press Windows Key + X and select Device Manager.
Locate the AMD driver, right-click it and choose Uninstall driver.
If available, check Delete the driver software for this device option and click on Uninstall.
Once the driver is uninstalled, you need to restart your PC.
Visit AMD’s website and download an older version of the driver software.
You can also remove AMD software and driver by using specialized uninstaller software, that removes icons, folders, and registries. By using this software, you’ll remove any application along with all of the files associated with it and the clutter that may have been left behind after the normal uninstall.
We recommend browsing the article about the removal tools since every PC is unique and varies in specs. Therefore, you need to choose one that is most compatible with your operating system to avoid any conflicts.
Doing this may be a time-consuming and tricky process since Windows will reinstall the designated and unwanted driver. We recommend using a different solution, such as a driver updater and installer, to avoid a never-ending loop.
The driver updater program is handy for updating and installing required specific Windows drivers. Otherwise, doing it manually takes time and requires a thorough understanding of the drivers you’re looking for.
Not to mention that it might cause problems on the PC, which we don’t want.
In just a few seconds, Outbyte Driver Updater will scan your system for any faults or missing drivers and generate a report. It would figure out outdated or missing drivers and then seeks your permission to update them.
Outbyte Driver Updater
Control what AMD drivers are updated and which are not with this automated driver manager.
3. Use Microsoft Show or Hide Updates Troubleshooter
Download Microsoft Show or Hide Updates Troubleshooter and run it.
Click on Hide updates.
Now select the update that you want to block using this tool.
Follow the instructions on the screen to complete the process.
For this process to work, you need to know the exact name of the update that is causing this problem, so keep a close eye on any recently installed updates.
That’s because Windows Update may have automatically replaced your AMD graphics driver and you have to identify it.
Keep in mind that Wushowhide.diagcab isn’t working for many users since Microsoft removed this tool from their servers, but you can still get it from third-party sources and use it to block the updates.
To stop the Windows 10 AMD driver update, you can try changing the device installation settings or try using an older version of the driver.
Many users reported that they stopped the drivers from updating by following the solutions from that guide and by modifying their Group Policy settings, so be sure to try that.
Did these solutions work for you? Let us know in the comments section below.
Looking for the best photo viewer for Windows 7? Although Windows 7 reached end of support, many users still rely on it and want a smooth way to open and organize images. Whether you want the classic Microsoft Photo Viewer experience or a modern free app, there are several excellent options.
You would usually have to install multiple applications to manage all your photos, documents, and archives. It’s convenient to choose one that can handle at least most of the formats you are going to work with.
File Viewer Plus 3 is a universal file viewer for Windows that can open and display over 300 different file types. Meaning that you can use it as a JPEG viewer or JPG viewer platform.
The new version brings extra features and focuses on support for viewing and converting over 50 new file formats, including over 25 additional image, audio, and video formats.
The new batch conversion feature works at great speed and you can save settings to use it again for different jobs.
Raw files are well supported with this program and you can open photos from 600 different camera models. You can also view EXIF data for digital photos and camera raw files.
Other key features include:
Simple and smart layout
Affordable price
User-friendly interface
File Viewer Plus
Easily view images and multiple file types with just one tool.
Adobe Lightroom is a complete solution for any photo editing needs, including image viewing down to pixel levels as well as advanced image manipulation.
This app lets you work on countless file formats and is one of the best when it comes to photo organization.
The automatic photo arrangement based on the timeline along with the option to group images based on tags and filters makes it easy to manage any amount of photos depending on your desired criteria.
Photos from your collection panel can be assembled into a photo book or slideshow format. You can also assign stars, flags, color labels, and keywords to your photos, you can use those depending on your needs, be it for quality assessment or thematic grouping.
Therefore, if you need undisputable services in photo management, this software will take good care of your shots using cutting-edge functions to smoothen your viewing processes.
Other key features include:
Tone adjustments
Easy editing
Instant objects removal
Adobe Lightroom
Enjoy Adobe’s next-gen photo editing and viewing capabilities on your Windows 7 OS.
The next entry in the list is CyberLink presenting PowerDirector video and photo editing solutions.
Firstly, you should know that it’s possible to use this full-featured app on Windows 7 devices or other recent versions.
Regarding functionalities, you have professional tools for motion editing, AI object replacing, millions of royalty-free stock, or animated stickers.
At the same time, it allows photo organizing in a structured and convenient manner. You can make albums, add photos in categories, or a library browser.
It’s also possible to create photo slideshows instantly. Simply do it by selecting photos in bulk and organizing them with transitions or customizable elements.
In terms of photo editing, you have different edits such as brightness or contrast, that can improve the aspect of your shots.
Other key features include:
Sharing and collaboration tools
Zoom pan for seeing details
Digital photos organizer
Storyboard editing
CyberLink PowerDirector
Manage every photo you have using this modern video & photo editing software.
This one comes in different types for different users such as the home user or professional as it is like a full photo studio suite for use in viewing, editing, and creating unique images.
It supports more than 60 image formats including GIFs, plus you not only get to view crisp quality images on a super platform, but you also can edit, organize, manage and even share your digital photos with your loved ones or friends, or workmates from your desktop.
Sometimes photo viewers can be slowed down but this one, even with all its features, is fast in terms of opening and scrolling through directories of your images.
Moreover, you can benefit from lightning-fast media mode to manage your photos database or scan through the folders quickly to choose between.
Thus this unrivaled software is capable of managing your shots using machine learning or other automated features, plus stunning viewing options that streamline your workflow.
Install it on your computer and give it a try.
Other key features include:
Superior file management
AI-driven facial recognition
Complex photo editing
ACDSee Photo Studio
View, edit & organize your photos, all in one place with ACDSee!
Irfanview is one of the most popularly used and best Windows 7 photo viewer software you can get. It is small, super-fast, and compact, plus if you’re a beginner, it is so simple to use.
Professionals can also take advantage of this powerful tool, which, unlike other photo viewers, is built to create new, unique, and interesting features for your graphics.
It is actually the first Windows 7 photo viewer globally that delivers multiple GIF, ICO, and multipage TIF support.
It is this variety of features that comes with Irfanview that makes people love it and also use it as their photo editor, besides viewing photos, because it also supports filters from Adobe Photoshop.
Plus it comes completely free of charge if not used for commercial purposes, otherwise, you’d have to register for $12 for commercial use.
Other key features include:
Batch conversions for advanced image processing
Photoshop filter support
Paint options
Capture screenshots, change cut/crop, and add watermarks
This is also one of the best Windows 7 photo viewer software used in the world. Besides offering viewer capabilities, you can also convert images as it supports over 500 image formats.
This tool offers different viewing features such as Thumbnail, Fullscreen, Filmstrip, and Slideshow so you can always view based on your preferences, or when making a presentation.
You can also edit images using various editing features such as resizing, rotating, cropping, adjusting brightness and contrast, modifying colors, or even applying filters among other effects.
You can also export over 70 image formats, but also create slideshows, web pages, contact sheets, image strips, and so much more.
It has unrivaled compatibility in terms of format support, which includes animated still formats, GIFs, and ICO support.
this Windows 7 photo viewer comes in two types for your viewing pleasure:
FastStone Image Viewer
FastStone MaxView
FastStone Image Viewer
This tool is fast and user-friendly, plus comes with a variety of features including image editing, viewing, and management.
You get great features such as slideshow and other transitional effects, plus it supports major graphic formats such as JPEG, BMP, PNG, TIFF, ICO, GIF, TGA, and most RAW formats.
With this tool, you can also compare up to 4 images side by side at a go, so you can modify your photos for better viewing.
It also comes with the usual features such as color effects, paint options, editing tools, an image magnifier, zoom support, different screen view styles, print and scan options, create montages, batch processing and so much more.
It is also free to download and use, plus you don’t get the silly ad popups, adware, or spyware that come with using free apps. Speaking of adware and spyware, here are the best tools to erase them completely!
FastStone MaxView
Similar to the classic version, MaxView is faster, more compact, and supports major graphic formats.
You get an intuitive, user-friendly layout so you can view your photos in different ways, plus you can even password protect your files in a jiffy in case you have those private photos you don’t want all and sundry to access.
It has regular photo editing and paint options, but you can view compressed or archived files securely and directly. It also supports touch interfaces if you like to touch or swipe.
This Windows 7 photo viewer is fast and supports different formats and viewing of images in compressed and archived files without the need to extract them.
One cool thing about this photo viewer is that if your images have GPS information, their location can easily be seen on Google Maps, and you can store the photos you want.
It doesn’t come with any adware and/or spyware, plus you can view your photos in different displays such as Fill or Parallel view modes.
You also get a photo folder feature where you can store any of your favorite photos.
Some of the formats supported by this photo viewer include BMP, JPG, GIF, PNG, PSD, TGA, TIFF, and RAW formats from digital cameras.
GIMP is great free software that will allow you to view and edit photos. It has a simple user interface where you can quickly find the necessary tools for the editing process.
You will find their special effects filters, color controls, exposure controls, selection tools, and many more.
Gimp is more a tool for beginners and for amateurs that would like to create some basic images by using some of the most used tools.
We strongly recommend it, especially because of its price – free. Plus, the tool works with every Windows version from 7 and higher.
If you’re looking for a Windows 7 photo viewer, you should consider Nomacs. This is a free and open-source image viewer, and it’s available on all major desktop platforms, including Mac, Windows, and Linux.
Nomacs supports over 25 different image formats, including RAW format and it has the ability to view EXIF information.
It can also change the transparency of windows and is capable of seeing histogram or file pieces of information.
With the Nomacs app, you can hide the toolbar and menu bar for extra immersion and synchronize images and zoom, pan, or switch images in sync.
Other key features include:
Fast thumbnail preview
Frameless view
Slideshow support
Basic image editing options: cropping, resizing, color adjustment, rotation
Have you found your favorite pick among these Windows 7 photo viewer tools? Let us know in the comments section below.
If you’re using Windows 7 and want a smooth, reliable photo viewing experience, these options cover everything from simple image viewing to advanced editing.
However, we encourage you to upgrade to Windows 10. Make sure you check out our tutorials on how to make the transition as smooth as possible.
Choosing the right photo viewer can really enhance how you manage your pictures. While you’re updating your system tools, you might also want to check out the best browsers for Windows 7 to keep your web experience fast and secure.
Many reported A network cable is not properly plugged in or may be broken when running the troubleshooter, and this error will prevent you from accessing the Web. Luckily, we have a few fixes that might help you.
Why does it say my Ethernet cable is not plugged in?
This can happen due to network glitches, or outdated drivers. In some instances, your Ethernet cable might be damaged.
How can I fix the a network cable is not properly plugged in or may be broken error?
Before we start, if you’re not actively using an Ethernet connection, try to connect to Wi-Fi network and the error should be gone.
1. Disable the network and hard-reboot the PC
Right-click the network icon on the Taskbar and select the Open Network and Sharing Center.
Choose Change adapter options.
Now, right-click your network connection and select the Disable option.
If you are using a wired connection, you need to remove it and restart your PC.
Now, remove your PC battery or disconnect the power cable for the desktop and wait for close to 10 minutes.
Switch on your computer again and repeat Steps 1 to 3 to enable your network adapter again.
Finally, connect the internet cable again or your wireless network.
2. Update the network driver
Right-click the Start icon and select Device Manager.
Expand the Network adapter option and right-click the device there.
Now, select Update driver.
Choose Search automatically for drivers and install the latest drivers.
Alternatively, download the drivers manually from your Wi-Fi adapter manufacturer’s website.
However, the simplest and quickest solution is to use a dedicated third-party driver updater and fixer like Outbyte Driver Updater. It will scan your PC for all drivers, saving you the time you would use to visit each manufacturer by hand.
More so, it can repair the drivers you already have but are broken and filling in the ones that are missing. Most importantly, you don’t need to be an IT expert to use it since the interface is very simplistic and to the point.
Press the Windows key + X and select the Device Manager option.
Click the arrow next to the Network adapters option and right-click your network device.
Now, select the Properties option.
Click the Advanced tab at the top.
Select the Speed & Duplex option from here and set its value to 100Mbps Half Duplex.
Finally, click the OK button and restart your PC.
If you are getting the network cable is not correctly plugged in or may be broken error, it might be because your duplex setting is too high. The steps above should help fix this effortlessly.
Launch the Device Manager and expand the Network adapter option.
Right-click the network device and choose Uninstall device.
Now, click the Uninstall button.
Finally, click the Scan for hardware changes icon.
If all the solutions above fail to fix the network cable is not properly plugged in or may be broken error, you need to switch to the default network driver.
Different software and hardware problems can result in your HP laptop not connecting to Wi-Fi in Windows 10. Unfortunately, this has been a problem for many users of the Microsoft OS.
It means you may be blocked from using the Internet and some of your favorite online services, which can be frustrating. The problem usually arises out of the blue or after making changes to the computer, and in both cases, it’s easily fixable.
Why my HP laptop is not connecting to Wi-Fi?
We have gathered that a few things may trigger this problem on HP computers. Here are some that you should be aware of:
Driver issues – If you run on outdated drivers, you will likely encounter this error. In most cases, you should pay attention to the wireless drivers.
HP laptop Wi-Fi disabled – Some HP laptops have dedicated keys that enable or disable the Wi-Fi settings. You should make sure this has not been turned off.
Hardware issues – You may also witness this problem due to a bad network card. In this case, replacing it may be the best alternative.
How can I fix an HP laptop that’s not connecting to Wi-Fi?
Before you go into any of the solutions below, we recommend trying the following quick fixes:
Ensure the laptop is placed well within the range of the Wi-Fi router and that there are obstructions in between. Try moving it right next to the router if possible.
Restart both the computer and the router. For the latter, keep it powered off for at least a few minutes.
Check if there is a Wi-Fi switch on the laptop or if a keyboard shortcut that acts as one, and make sure it’s not disabled. For some devices, it’s a Function key, so check that.
Update Windows if there’s a bug in the current version preventing the HP laptop from establishing a Wi-Fi connection.
Verify whether the HP laptop is not connecting to any Wi-Fi network or a particular network. Because if it’s the latter, the problem may lie with the router itself, in which case resetting (or replacing) the router would be a viable solution.
If none of these work, head to the solutions listed next.
1. Scan for hardware changes
Press Windows + R to open Run, type devmgmt.msc in the text field, and hit Enter.
Now, click on the Action menu, and choose Scan for hardware changes from the list of options.
If the Wi-Fi adapter is not listed in the Device Manager and, subsequently, your HP laptop is not connecting to the Internet, scanning for hardware changes might do the trick.
2. Reinstall the Wi-Fi driver
Press Windows + X to open the Power User menu, and choose Device Manager from the list.
Expand Network adapters, right-click on the Wi-Fi adapter, and then choose Uninstall device from the context menu.
Tick the checkbox for Attempt to remove the driver for this device, and then click on Uninstall.
Once done, restart the device, and Windows will automatically install the best drivers for the Wi-Fi adapter.
Corrupt drivers are just as likely to cause issues and lead to the HP laptop not connecting to Wi-Fi. A simple fix here would be to reinstall the drivers.
3. Run the SFC scan
Press Windows + R to open Run, type cmd, and hit Ctrl + Shift + Enter.
Click Yes in the UAC prompt.
Paste the following command and hit Enter to run the SFC scan:sfc /scannow
An SFC (System File Checker) scan identifies the corrupt system files and replaces them with their cached copy stored on the PC. So, if corrupt system files are why your HP laptop is not connecting to Wi-Fi, running the scan would do.
4. Modify the Power Management settings
Press Windows + R to open Run, type devmgmt.msc, and click OK.
Now, locate the Wi-Fi adapter under the Network adapters entry, right-click on it, and choose Properties.
Head to the Power Management tab, untick the checkbox for Allow the computer to turn off this device to save power, and click on OK to save the changes.
Once done, restart the computer, and Wi-Fi should be working.
If nothing so far has worked, you will need to update the drivers. Since Internet connectivity is required for it, we recommend you connect to Ethernet to complete the process.
5.1 Windows Update
Select the search box, type updates, and select Windows Update settings.
Select Check for Updates.
New updates will be installed, after which you can try connecting to the Internet again.
Windows updates often come with essential driver updates.
5.2 HP Support Assistant
Press Windows + S to open the Search box, type HP support assistant, and click on the app.
If there are available updates, click Updates to view the available ones.
Give it about 60 seconds to check for updates.
Click Install now icon next to the update, and then try connecting to the Internet again.
5.3 Driver updates from Device Manager
Right-click Start and select Device Manager.
Go to Network adapters and click to expand the list, right-click on your adapter, and select Update driver.
Select Search automatically for drivers, and Windows will install the best available driver.
5.4 Update drivers automatically
6. Use automatic troubleshooting
6.1 Using HP support assistant
Go to the search box, type HP support assistant, and click on the app.
Click on Fix your network.
This will detect, diagnose, and repair any network errors, including errors of your HP laptop not connecting to the Wi-Fi.
HP Support Assistant is a software support diagnosis and troubleshooting tool that resolves many networks and Internet connection issues, specifically for HP machines.
If you don’t have it, use the automated troubleshooter that comes with Windows 10.
6.2 Using built-in troubleshooter
Enable the wireless signal by turning your computer’s wireless key or button.
Right-click the wireless connection icon on the taskbar and select Troubleshoot problems.
The Windows Network Diagnostic window will open and begin the troubleshooting process.
After troubleshooting, see the list of problems and what was fixed, plus remedial actions to resolve the issues, and then perform the suggested activities.
Try and reconnect to the Internet again.
7. Reset the network settings
Press Windows + I to open Settings, and click on Network & Internet.
In the Status tab, click on Network reset at the bottom.
Click the Reset now button to confirm.
There you go! One of these fixes should help resolve issues behind the HP laptop not connecting to Wi-Fi.
Did any of these solutions work for you? Please share with us in the comments section below. Also, leave any other questions, and we’ll check them out.
Trying to delete a file or folder without any success? Unfortunately, it happens to all of us all the time. Unfortunately, some files in your computer are too stubborn and won’t let you clean up the disk and free some space by deleting them.
You can also delete ghost files using the command prompt with a command or by changing the file type.
In this article, we walk you through a few software to delete files that seem undeletable on Windows PC.
How do I delete stubborn files?
Windows have built-in options to help you delete stubborn files. The most common and widely-used method is the DEL command in CMD.
This deletes even ghost files, provided you know their location. However, there are some secured and system files that the built-in option cannot delete. And this is where the use of third-party software comes in.
BitRaser from Stellar is an incredibly versatile and thorough software that enables you to easily remove any unwanted files from your PC without leaving any trace.
Not only can you remove files and folders entirely and permanently, but you can also perform the same actions regarding browsing history, saved passwords, etc.
The easy-to-use interface ensures you don’t need to be a computer pro to use it, but it offers pro-level results in a blink.
BitRaser File Eraser
This easy-to-use and thorough software will always ensure that all traces of unwanted files and folders are gone with a few clicks.
Obliterate files that are tricky to remove without compromising the security of the PC and operating system with Secure Eraser.
Even if data is deleted from a computer, it is not impossible to recover. Confidential information is similar to a memory pattern; it is tough to remove from a system storing it for various purposes.
Secure Eraser uses the most well-known data deletion process, overwriting sensitive data that can never be restored, even with specialized software.
Secure Eraser operates to the tiniest detail and leaves no residues. You can also remove previously deleted files, and this time will be forever gone.
Whenever an action is performed, a clean-up of the hard drive should follow to ensure that it performs smoothly after that.
Since Windows XP, the software has supported all operating system versions, and the Department of Defence of the US and the German industrial standard approves it.
Secure Eraser
Secure Eraser eradicates files, folders, drives, recycle bins or traces of surfing to the tiniest detail.
Easy File Shredder does precisely what its title suggests, cleaning any trace of unwanted files and folders from your PC.
This fantastic app removes the files and ensures no trace remains, making the extracted data unrecoverable.
The features included in this powerful software protect your entire hard drive, and it can be used to extend its capabilities even to USB drivers and SD cards.
Easy File Shredder
Ensure that none of the files and folders you want to be removed from your hard drive or external device leaves any traces behind.
Wise Force Deleter is free software that lets you delete any file on your Windows system (64 and 32-bit). It is designed and tested to run smoothly on Windows operating systems ranging from Windows XP to Windows 11.
Wise Force Deleter has a simple and highly intuitive UI with drag-and-drop functions, making it a breeze for you.
Once you install it, a new Force Delete option will appear in the dialogue box. Right-click a protected file and pick Force Remove, which will open the Wise Force Deleter to unlock and delete it. The file can then be unlocked and removed from your Windows PC in seconds.
You also get a 60-day money-back guarantee and live technical support 24/7.
Wise Force Deleter
Wise Force Deleter allows you to unlock and delete any file in Windows OS without any difficulties.
Malwarebytes is known for its popular Malwarebytes Antivirus solution, which is effective and one of the lightest antiviruses you can install on your PC. But, above all, it works.
This powerful software removes any traces available of the apps and files you’re trying to get rid of, thus making it a viable option.
Besides performing these tasks without problems, it also keeps your computer safe from any malware intrusions while also removing any threats found at this time on your PC.
Malwarebytes
Use this great software to remove traces of malicious files from your computer without any remaining pieces.
IObit Unlocker is a free utility from the developers at IObit. The company makes system utility tools for Windows, Mac, and Android devices.
IObit Unlocker is a free software for Windows devices that can help you to solve error messages while trying to delete files.
The software supports all the versions of Windows since XP. In addition, IObit Unlocker offers multiple ways to manage files, including Delete, Rename, Move, Unlock, and Copy.
You can use multiple files and unlock them simultaneously. Simply click the small + Add button and select any other file you want to unlock or delete.
Once you select the file, you can check the status of the file. Click the small drop-down button beside the Unlock button and select the appropriate action.
IObit Unlocker
IObit Unlocker is a handy tool that gives you full control over the contents of your hard drive.
LockHunter is another free file unlocker software available for Windows computers.
It can help you delete malware-infected or system-protected files with a single click. In addition, all the deleted files are moved to the Recycle Bin, just in case you need to restore an important file after deleting it accidentally.
It shows the process that keeps the file locked, can unload DDLS from the process, supports Explorer menu integration for easier access, and supports both 32-bit and 64-bit edition Windows.
LockHunter also allows you to unlock, delete, copy or rename a locked file, schedule file deletion on the following OS restart and remove the locked process from the hard drive.
Whether you want to deal with a malicious virus-infected file that hides delete and right-click options to a file with permission issues, you can download any of these file unlocker software to get the job done.
Ensure you always create a restore point before making significant changes to your computer, including deleting undeletable/locked files.
Are you looking for a list of the best file recovery software instead? Then, check our detailed guide for the top options available.
Please let us know the software you enjoy using from our list in the comments below.
Many users noticed an unusual file on their PC named MPSigStub. While many are concerned about the purpose of this file, in today’s article we’re going to explain to you what is MPSigStub and how to remove it.
What it MPSigStub?
MPSigStub.exe is an executable file whose role is to extract downloaded Windows Updates. This file is also associated with Windows Defender, so it’s safe to say that this file is perfectly safe and not malicious.
Bear in mind that sometimes you might have several copies of this file on your PC in several random folders and that is in most cases perfectly normal.
How to fix MPSigStub high CPU usage?
1. Wait for Windows update to finish
If Windows is installing or downloading updates, make sure to finish the process.
Once the update process is finished, the CPU usage for MPSigStub.exe should drop.
2. Run a malware scan
Scan your PC with reliable antivirus software.
If you find any malware, be sure to remove it.
If you strongly need a fast and reliable antivirus that offers 100% protection from malware attacks, then you should consider the best antivirus programs on the market right now.
Using a highly effective antivirus you actually invest in the comprehensive protection of your PC. It’s known that you can experience malware issues while browsing online, or even spyware or phishing attacks.
Depending on the type of malware, it can attack your PC and determine high CPU usage all of a sudden. Therefore, with high detection shielding, you will prevent that scenario instantly.
How do I remove MPSigStub from my PC?
1. Run File Explorer as administrator
Press Windows Key + S and enter file explorer.
Right-click File Explorer from the list of results and choose Run as administrator.
After doing that, locate the MPSigStub.exe or its folder and delete it.
2. Use Command Prompt
Press Windows Key + X and choose Command Prompt (Admin) or PowerShell (Admin) from the menu.
When Command Prompt starts, navigate to the directory where MPSigStub.exe is located. You need to do that by using the cd command.
Once enter the directory that holds the MPSigStub.exe, type del MPSigStub.exe and press Enter to remove it.
Alternatively, you can delete the entire folder by running rmdir Folder_Name command. Do not use this command if the file is stored in the System32 directory.
There you go, we hope that you found this article helpful and that you understand better what MPSigStub actually is and how to remove it on your PC.
The solutions and information presented are also useful in these cases:
mpsigstub in random folder – Since the process is related to Windows Updates, it is normal for temporary random folders to be created and find the file in there.
mpsigstub virus – Like we said, some existing malware borrows this name. Perform a quick scan to verify if there is a threat or not.
mpsigstub avast – Avast, as well as many other antivirus programs, can detect the malware that takes this name.
Facing a PC Doctor module with high CPU usage can be quite frustrating. Since it is an essential service for Dell PCs, many users are unsure of how best to approach this problem.
PC Doctor comes with Dell computers and it is a big part of Dell SupportAssist. Its core function is to scan and detect issues affecting your PC and then report to Dell’s technical support for solutions.
The background activities of the PC Doctor module can make your PC very slow. As a result, it can take longer than normal to perform tasks or access programs.
To help you solve this issue, we’ve outlined effective troubleshooting solutions to make PC Doctor use fewer resources on your PC. Before we dive in, let’s take a close look at what the PC Doctor module is and how it functions.
Is the PC Doctor module a virus?
Oftentimes, people get confused about what the exact PC Doctor is and some even call it a kind of virus. PC Doctor is not a virus, nor is it malware that can post destructive threats to your PC. It is a component of what is known as Dell SupportAssist.
Can I end the task PC Doctor module?
Yes, you can. If you have decided to end the PC Doctor Module for causing 100% CPU usage on your computer, you have just two options to choose from:
Disable automatic scan and optimization for the PC Doctor module
Uninstall PC Doctor from Dell PC.
Although it is an automatic assistant created by Dell, there are no consequences for disabling it on your device.
Can I uninstall PC Doctor?
Absolutely yes, you can uninstall PC Doctor. To do this, follow the guidelines provided above and that will be the end of the issue.
How can I fix PC Doctor’s high CPU usage?
1. Disable automatic scan for Dell SupportAssist
Press the Windows key, input SupportAssist in the startup search menu, and launch it.
In SupportAssist, go to schedule Scheduled scan and optimization, and click to open Settings.
Untick Turn on automatic scans and optimizations at.
By disabling automatic scans, your PC will not constantly engage in background searches. Thus, the CPU usage will be minimal.
2. Adjust Dell SupportAssist startup type to manual
Press the Windows Key, input Services, and launch it.
Locate Dell SupportAssist, right-click the service, then Properties.
Adjust the startup type to the manual, then click OK to save the changes.
After this process, the service will stop unless you are manually using it.
3. Uninstall Dell SupportAssist
Press Windows Key + I to open Settings.
Expand Apps and locate Dell SupportAssist.
Select the app and click Uninstall and restart the PC to take effect.
The last option to turn to if none of the above works for you, is to get rid of this Dell SupportAssist.
Why does the PC Doctor use my webcam?
PC Doctor uses a webcam toolbox to run diagnostics. This is to make sure that the webcam functions properly whenever you want to test it. It is relatively safe to allow a PC Doctor to execute this procedure.
If you are wondering what it is, CcmExec.exe is an agent for SCCM, which allows organizations to deploy updates, patches, and install applications to the end user’s computer.
How do if fix CcmExec.exe high CPU usage?
1. Terminate CcmExec.exe from the Task Manager
Press Ctrl + Shift + Esc to open the Task Manager, and navigate to the Details tab.
Locate the CcmExec.exe process, right-click on it, and choose End task.
This will immediately bring the CPU usage under check and should provide some reprieve, even if temporary.
2. Update Windows
Press Windows + I to open Settings, choose Windows Update from the tabs on the left, and then click on Check for updates.
If an update is listed after the scan, click on Download & install to get it.
After installing all the available Windows updates, restart the computer for the changes to come into effect.
3. Run the Windows Update troubleshooter
Press Windows + I to open Settings, and click on Troubleshoot on the right in the System tab.
Click on Other troubleshooters.
Now, click on Run next to the Windows Update troubleshooter.
Follow the on-screen instructions to complete the troubleshooting process.
A few users reported that running the troubleshooter helped fix things in the case of high CPU usage by CcmExec.exe. Remember, give it a few more attempts if the troubleshooter doesn’t resolve things in the first go.
Press Windows + R to open Run, type appwiz.cpl, and click OK.
Now, locate the installed third-party antivirus, select it, and click Uninstall.
Follow the instructions to complete the uninstall process.
Once done, restart the computer and verify whether the CcmExec.exe problem is resolved.
In many cases, a third-party antivirus interfered with the process and led to high CPU consumption by CcmExec.exe. While you can disable it, uninstalling it provides a better idea and helps effectively identify whether the antivirus is the underlying cause.
Press Windows + R to open Run, type taskschd.msc in the text field, and hit Enter.
Now, choose Task Scheduler Library, expand Microsoft, and choose Windows.
Next, choose Application Experience from the navigation pane, right-click on Microsoft Compatibility Appraiser, and select Disable.
If nothing previously worked, this should fix things when CcmExec.exe uses a high CPU. Also, if other background processes contribute to the error, find out how to fix 100% CPU consumption in Windows. For any other queries, drop a comment below.
Microsoft offers a Windows Media Creation tool that anyone can use to install or upgrade to different Windows operating systems.
The tool can be used to create a bootable USB drive as well. However, the Media Creation toolnot having enough space on C display not enough space error appear for the users that are trying to install the file on C disk partition.
The error occurs irrespective of whether the user has enough space on their hard drive or not.
Plus, this error can occur due to several reasons, and in this article, we have put together multiple solutions to troubleshoot this error on Windows 10 system.
Why does it say I don’t have enough disk space when I do?
When this memory error message appears, it’s usually because your disk space is used by the current Windows OS or any large files and applications on the specific drive partition.
If it seems that it’s not enough disk space but there is plenty, you should double-check your hard drive and get rid of unwanted large files from your storage.
How to fix Windows Media Creation Tool not having enough space on C?
1. Free up storage in C: Drive
An effective and fast workaround to get rid of Windows Media Creation tool not enough space issue is to free the storage on the C: drive.
1. Press the Windows key and type Disk Cleanup. Open the Disk Cleanup utility from the search.
2. Select the C:drive under Drive and click OK.
3. Disk Cleanup will calculate how much space can be freed and a pop-up window will display all the data you can clean up.
4. Select the files you want to delete. Make sure you select the Recycle Bin and the download folder (after taking the backup).
5. Click on the OK button. Click Delete Files if asked to confirm the delete process.
6. The Disk Clean-up tool will delete all the selected files from the system.
To clean install Windows OS, you need to create a bootable USB drive with Windows 10 ISO. We have covered the best tools to create a bootable drive for Windows 10.
Reinsert the USB drive into the system and reboot your PC.
Follow the on-screen instructions to format and Clean Install Windows 10 on your main drive.
3. Choose another drive partition
Download the Media Creation tool ISO from Microsoft website.
Open the ISO file on your PC.
In the open window, check and accept the Terms and Conditions.
Pick the Create installation media for another PC option and click Next.
Choose Use the recommended option for this PC.
Pick the ISO file option.
Select a different disk partition to install the file.
Wait for the installation to complete.
In addition, you should know that an error like this might be encountered in different versions on Windows systems.
For instance, it may appear like we can’t tell if your PC has enough space to continue installation for Windows 10 and stop the process.
It’s worth knowing how much space is recommended for Windows 10 installation media storage. Namely, you need minimum 10GB free space to complete the media creation tool installation.
If some application is using your CPU it will cause it to use more power, produce more heat as well as decrease your performance. Users have reported that Photo Background Task Host is using more and more CPU power over time, so let’s see if we can resolve this issue.
How to fix Photo Background Task Host high CPU?
Solution 1 – Disable Runtime Broker process
Users report that main cause for high CPU usage is the process called Runtime Broker. To reduce the CPU usage, you can always close this process from the Task Manager.
Open Task Manager. You can open it by pressing Ctrl + Shift + Esc on your keyboard.
Locate Runtime Broker process.
Right click it and choose End process.
We have to warn you that turning off Runtime Broker process will prevent Universal apps from working, so if you are using Universal apps regularly you might want to try something else.
Solution 2 – Kill the Photos Background Task Host process
This is also a simple workaround although it’s not a permanent solution.
Open the Task Manager.
Find the Photo Background Task Host process.
Right click it and choose End process.
Solution 3 – Disable your Windows Camera app
You can as well try to disable your Windows Camera app:
Go to Settings and then to Privacy.
Choose Location and scroll down until you find settings for individual apps.
Locate Windows Camera app.
Scroll the slider to No to disable it.
Solution 4 – Turn off Photos in Background Apps
Go to Settings > Privacy.
Next go to Background Apps > Photos.
Turn off Photos, and you problem should be fixed.
Solution 5 – Change Sources for your Photos app
Photos scans your computer for new pictures, but in addition it also scans your OneDrive for pictures from time to time, and this can increase the CPU usage, so the best way is to disable that.
Open Start menu and find Universal title called Photos.
Click it and choose Settings.
Go to Sources and from there turn off Show my photos and videos from OneDrive.
Solution 6 – Reinstall and re-register all Windows apps
And if nothing else helps, you can try with reinstalling Windows app, in case if some of the apps is causing the high usage problem. Here’s how to quickly reinstall your Windows apps:
Open PowerShell as administrator. You can do so by typing PowerShell into the Search bar and right clicking the
PowerShell icon and choosing Run as administrator option.
Enter this in PowerShell and press Enter to run it:
Windows 10 is a highly versatile all-purpose operating system. You can use it to run apps related to education, work, gaming, and pretty much anything that can be used as a program.
Things are no different for Mac users. So, it doesn’t come as a surprise that musicians also utilize Microsoft’s powerful OS and Mac to run virtual piano software.
Why use a virtual piano? Well, it has numerous advantages over a traditional piano.
For one, you don’t have to empty your wallet for a piano or keyboard since piano software for Windows 10 and Mac are usually free.
Furthermore, a virtual keyboard allows you to record your creative pieces easier.
So, if you are an aspiring musician looking for the best piano app for PC, then you’ve come to the right place.
With the help of our list below, finding the right piano program for PC and Mac should be as easy as a walk in the park:
The Grand Piano Keys 5K is an excellent Windows virtual piano program. This application’s instrumentality allows you to enter the realm of the musical piano. Your goal is to start playing beautiful pieces of music.
You may use this program as a regular piano keyboard to perform music – this mode adds one extra option: the ability to record and save whatever you play. Using the MIC button, you may sing and play at the same time.
To view the chords on the keyboard, enable chords mode. Simply tap the lighted keys at the appropriate moment to perform a tune from a training list.
The Grand Piano Keys 5K is a fantastic musical application for piano that includes chords and pre-programmed tunes, as well as a training mode and recording possibilities.
Professional piano keyboard, high-quality sounds, fun popular tunes in learning mode, and special training mode for novices are some of the other wonderful features.
However, you may find it bothersome since when you download it and open it, it immediately goes to full screen and you are unable to modify this setting.
Grand Piano Keys 5K
Play various songs, record your voice, change the piano sound, and save your project with this fun musical tool!
The Virtual Piano platform allows you to quickly play the piano on your computer keyboard, mobile device, or tablet.
This keyboard piano software teaches you how to play a variety of virtual music instruments, allowing you to become an online pianist and produce your own exceptional music.
VirtualPiano.net is the original online piano platform that anybody, anywhere, at any time, may use for free. The best thing is that you don’t even need to know how to read music notation to perform.
The music sheets on VirtualPiano.net employ the plain English alphabet and simple semantics, allowing you to enjoy the sensation of playing a real piano in less than a minute.
One more thing, the music sheets are also free! There are many of them. So go choose a song that moves you, learn, and share it.
Additionally, Virtual Piano provides a selection of other instruments for you to learn to play, all with the same permission terms to use as the piano.
The Sweet Little Piano software is somewhat deceiving because it looks simple but it’s actually feature-rich.
The application is primarily a virtual piano, yet it also can be used as a virtual flute, guitar, accordion, and draw organ.
You can change the user interface and keyboard layout to fit your needs. It’s also possible to change the notes to sharps or flats.
A unique thing about this software is that it has pre-mapped keyboard keys that generate MIDI notes. MIDI audio files are great for musicians, as they can be easily recorded and edited.
All in all, if you are looking for something that is easy to use but still offers a number of features, then you will want to try Sweet Little Piano.
My Piano Phone has a lot of things going for it. For instance, it has a wide variety of integrated songs, which you can use to play and learn.
There is another feature in this app that allows you to use one or two keyboards simultaneously. There is also a drum kit, that you can use to help keep your playing on the beat or to improve the sound of your music.
This application also has other virtual instruments, such as electric guitar, acoustic guitar, trumpet, violin, electric piano, and more.
The only disadvantage of this application is that there isn’t an option for recording. Most users will use this app purely for recreational uses.
Everyone Piano is capable of producing sounds that accurately simulate a real piano. In fact, the sound from Everyone Piano sounds so authentic, that it even simulates the piano‘s pedal.
In addition to being lifelike, the application allows you to record, and customize your keyboard, playback, music score, play halftone, and more. There are also numerous music scores that you can use to improve your piano skills.
From the official website of Everyone Piano, you have the option to download various plugins that can increase the entertainment and educational value of the application.
There are also downloadable skins that you can use to improve the aesthetics of the user interface. Other features include support for external MIDI keyboards and VSTI.
There are also different modes: Children mode, Adult mode, and Elder Mode. From recording capabilities to teaching materials, Everyone Piano is truly a versatile application.
A73 Piano Station doesn’t lack great features, but it does have one that makes the application stand out from the crowd. It has a user interface that is both aesthetically very pleasing and professional.
In fact, it looks exactly like a real-life professional keyboard, complete with information displays and slider controls.
Of course, virtual piano software doesn’t only look good, but it is also packed with amazing features.
For starters, there is a full-sized six-octave keyboard that not only allows you to pump out your creative piano pieces, but also lets you play more than 100 musical virtual instruments, including drums, guitar, and bass.
One of the most useful features of this piano application is that it allows you to play three different instruments simultaneously.
There is also an option to save your projects. This means that you will not have to download third-party programs in order to combine and record your compositions.
There are also detailed documents included in the program that can assist you if you do not know how to operate certain functions of the application.
Overall, the professional interface combined with its numerous features, makes the A73 Piano Station one of the best there is when it comes to virtual pianos compatible with the Windows 10 OS.
Virtual MIDI Piano Keyboard is ideal for professional piano players or musicians who want a program that is void of any unnecessary functions.
The user interface is certainly not something you will be impressed with, but it is clear and plain. The design obviously favors practicality over aesthetics, which again is ideal for professionals.
It is important to note that the program itself does not produce any sound, rather you will need a MIDI synthesizer to produce music.
Also, can display notes from other instruments that are connected to your computer’s MIDI ports. You can then tweak the sound by adjusting the Transpose and Base Octave options.
Other controls available on this app include phaser depth, expression, and modulation. You will be able to produce a wide variety of sounds, as the application features a number of preset programs such as tango accordion, and grand piano.
All in all, while the Virtual MIDI Piano Keyboard is powerful and versatile, it works best for professionals.
As great as Windows 10 has proven to be, it has flaws. For example, users have recently complained about the Windows Shell Experience Host high CPU usage. It is scary because problems with CPU usage often lead to system crashes.
We have investigated this problem and have come up with some effective resolutions and possible causes so that you may avoid future occurrences.
Why is Windows Shell Experience Host using so much CPU?
From interacting with users who faced this problem, we have gathered the primary trigger, which includes:
Problems with system files – For most users, this will refer to corrupted or bad system files on the computer.
Issues with the graphics driver – This is often because the driver is corrupted or outdated. Whichever it is is dangerous for your computer, and we will explain the best steps in this guide.
OS updates – While these are mainly beneficial, there are a few times when an update may introduce a system bug leading to the Windows Shell Experience Host’s high CPU usage.
Conflicting software – These are often third-party tools that may not best suit your computer.
Desktop Backgrounds – Many users report slideshow background as the main reason for Windows Shell Experience Host causing high CPU usage.
You need not worry because regardless of the cause, we have solutions to help resolve it and make your computer more usable.
What is Windows Shell Experience Host used for?
Its primary function is connected to changing desktop backgrounds in Windows 10 computers. We could say that it provides users with a visual interface on their computers.
This most often includes OS elements like the Search, Start menu, and notification, as well as other aspects that enable you to interact with Windows 10.
If a process uses your CPU more than it should, it can be a problem since your computer will use more power and produce more heat, which is especially bad for laptops. For example, users report that Windows Shell Experience Host uses 30-35% of CPU, which is a lot, so let’s see how to fix that.
How do I fix Windows Shell Experience Host high CPU usage?
Before going into these solutions, we advise that you restart your computer. A reboot helps end troublesome processes and could correct the high CPU usage.
1. Change your desktop to a static background
Press Windows + I to open the Settings app.
Click on Personalization and select Background from the menu on the left.
From the drop-down menu, select Picture.
Save your settings, and Windows Shell Experience Host issues should be resolved.
Users report that this process uses your hardware power if you set your desktop background to a slideshow, so the best solution is to put your desktop to a static picture.
2. Turn off the automatic color changing
Press Windows + I to open the Settings app.
Click on Personalization and select Colors from the menu on the left.
Find the Automatically pick an accent color from my background option and turn it off.
Save your changes.
If changing the background behavior didn’t get the job done, you can try disabling automatic color changing.
3. Update your computer
Press Windows + I, and select Security & Update.
Click on Windows update and click the Check for updates button on the right pane.
Ensure you’re running the latest Windows OS updates on your machine. As you know, Microsoft regularly rolls out system updates to fix various issues and improve Windows 10‘s stability.
It’s possible that the pending updates are actually aimed at focusing on high CPU usage and may quickly fix your problem.
4. Run SFC
Press Windows + R, type cmd, then hit Ctrl + Shift + Enter.
When the elevated Command Prompt opens up, type the script below and hit Enter. sfc /scannow
Wait for the scanning process, and then restart your computer. All corrupted files will be replaced on reboot.
If specific Registry keys have been incorrectly changed or even deleted, you may encounter various issues on Windows 10, including high CPU usage.
Try repairing your Registry to cross this hypothesis off your list. However, remember to back up your registry first in case anything goes wrong.
The safest way to check for system file corruption is to use Microsoft’s System File Checker. With the help of a simple Command Prompt instruction, you can check the integrity of all system files and repair the problematic ones.
You can also repair your registry using a registry cleaner like CCleaner.
Press Ctrl + Shift + Esc to open the Task Manager.
Click on the Details tab and locate Windows Shell Experience Host.
Right-click on it, select Set Affinity, then choose the CPU limit threshold.
You can also manually limit Windows Shell Experience Host’s CPU usage. However, remember that this action may severely impact graphics quality and trigger other graphics-related issues, so proceed at your own risk.
6. Run a virus scan
Type Windows Security in the Search bar, and click on the relevant search result.
Now, click on Virus & threat protection here.
Click on Scan options.
Select Full scan and click the Scan now button at the bottom.
That is all; we hope this article helped you to reduce CPU usage on your Windows 10 computer to normal. If you have any questions, comments, or suggestions, see the comment section below.
Windows users often experience high CPU usage. This issue causes PC performance to slow down, consuming huge chunks of memory.
It is critical to take measures in fixing this issue, as it can bring fatal damage to your PC. In this guide, we will provide you with a series of fixes that should help you out.
What is Sppsvc.exe?
This process enables the download, install,ation and enforcement of digital licenses for all Windows applications and Windows. It is a part of Windows OS, if disabled, it can lead to Activation issues.