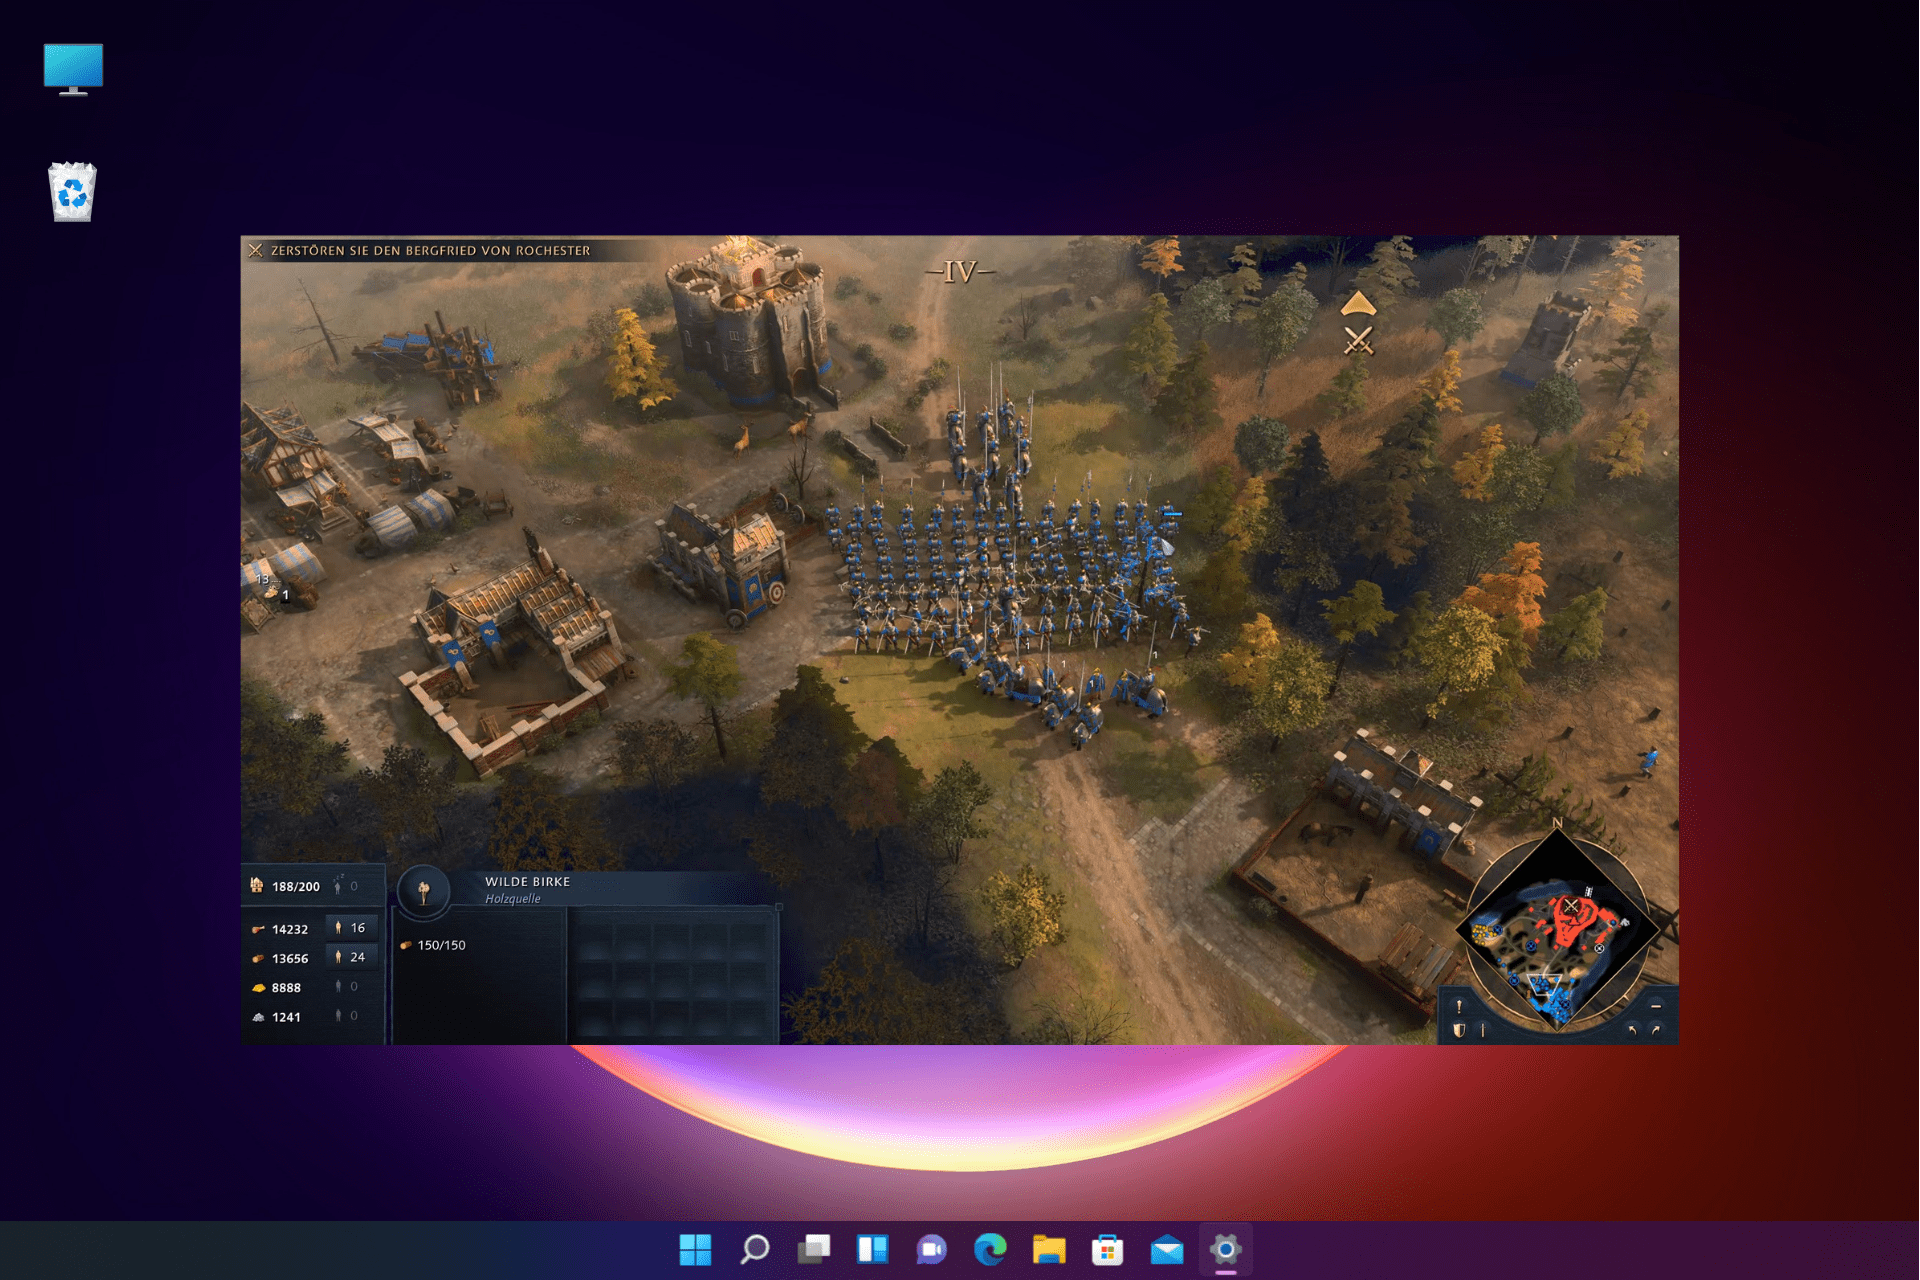
Path of Exile is a popular action-packed role-playing game, but users have recently reported that it’s lagging or stuttering. Path of Exile FPS drops can come from various causes.
The settings configuration, old drivers, or VSync might all be the culprits. Each of these causes has a workaround that will increase the frame rate and eliminate any stuttering.
Since the developers have optimized the game on consoles, you should not expect it to freeze or lag on these gaming devices. So, our main focus will be to offer fixes for Path of Exile FPS drops on PC.
Why is my Path of Exile so laggy?
Various factors can cause FPS drops, including your PC not meeting the system requirements, errors in the game files, and a slow internet connection.
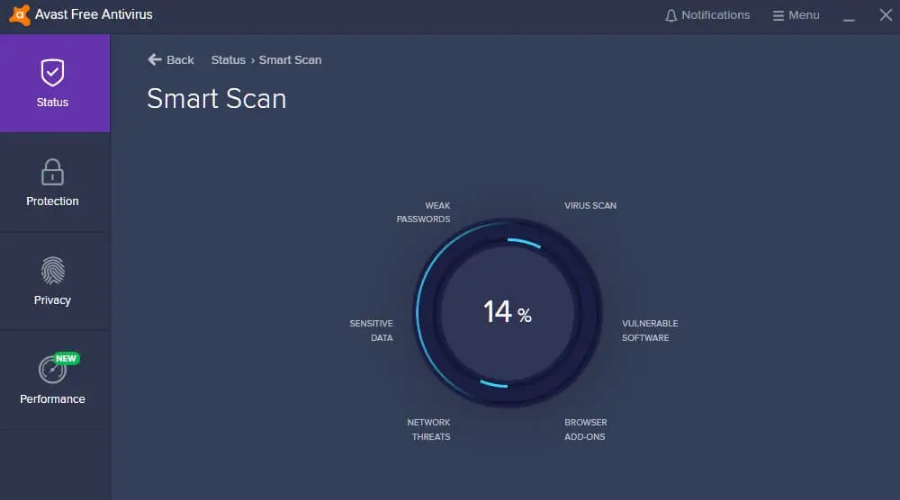
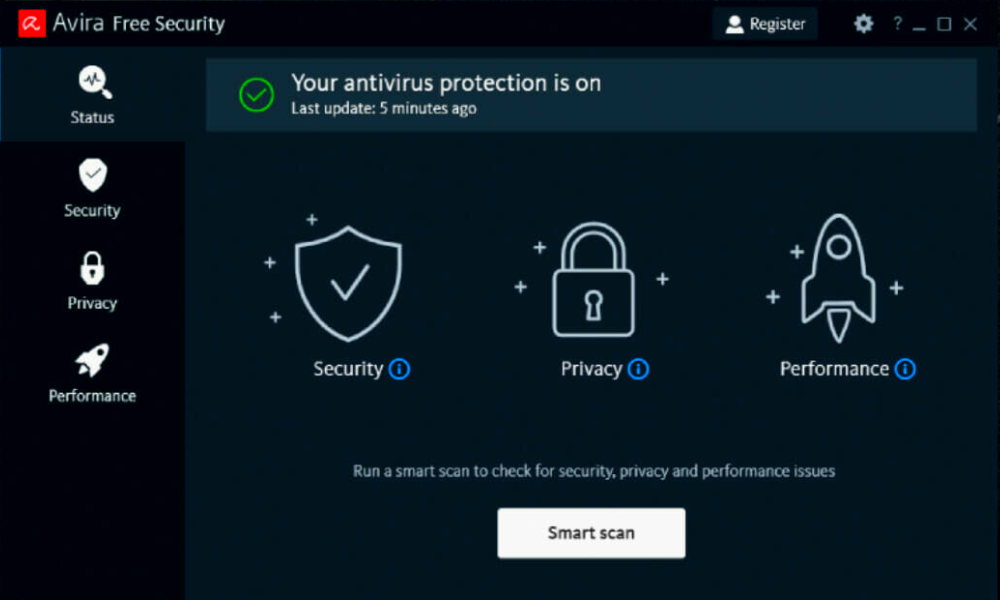
Antivirus software, the Windows firewall, and old graphics cards can also cause lags.
How do I fix FPS drops, lag & stuttering in Path of Exile?
1. Check system requirements
Minimum requirements:
OS: Windows 7 SP1/Windows 8
Processor: Quad-core 2.6GHz x86-compatible
Memory: 8 GB of RAM
Graphics: GeForce GTX 650 Ti or ATI Radeon HD 7850
DirectX: Version 11
Network: Broadband Internet connection
Storage: 40 GB available space
Recommended requirements:
OS: Windows 10
Processor: Quad-core 3.2GHz x64-compatible
Memory: 16 GB of RAM
Graphics: GeForce GTX 1050 Ti or ATI Radeon RX560
DirectX: Version 11
Network: Broadband Internet connection
Storage: 40 GB available space
Most of the time, compatibility problems with your PC specifications might create such problems. So, before leaping to any assumptions, we recommend you thoroughly review the game’s system requirements and PC characteristics.
Above, we have presented the minimum and recommended system requirements for this game.
2. Update drivers
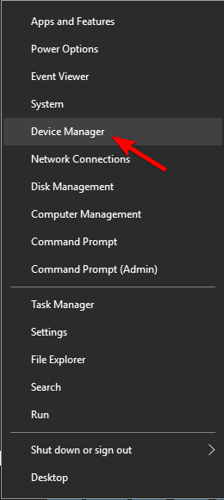
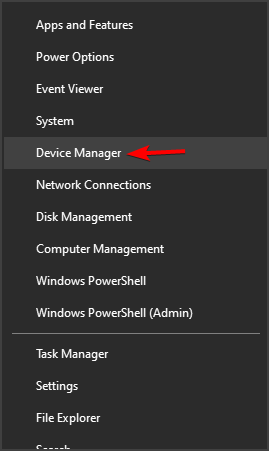
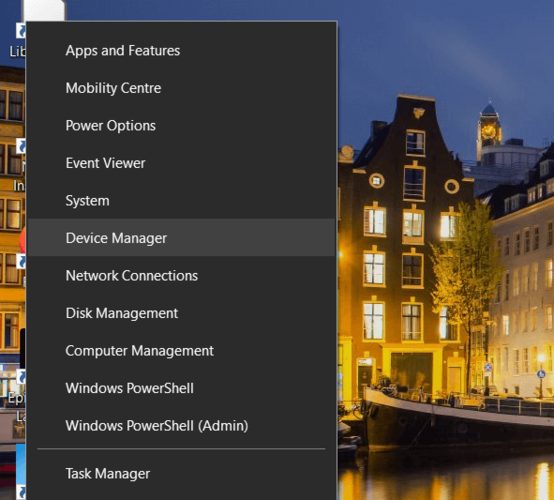
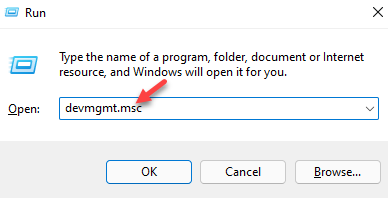
To get the Quick Access Menu, right-click on the Start Menu.
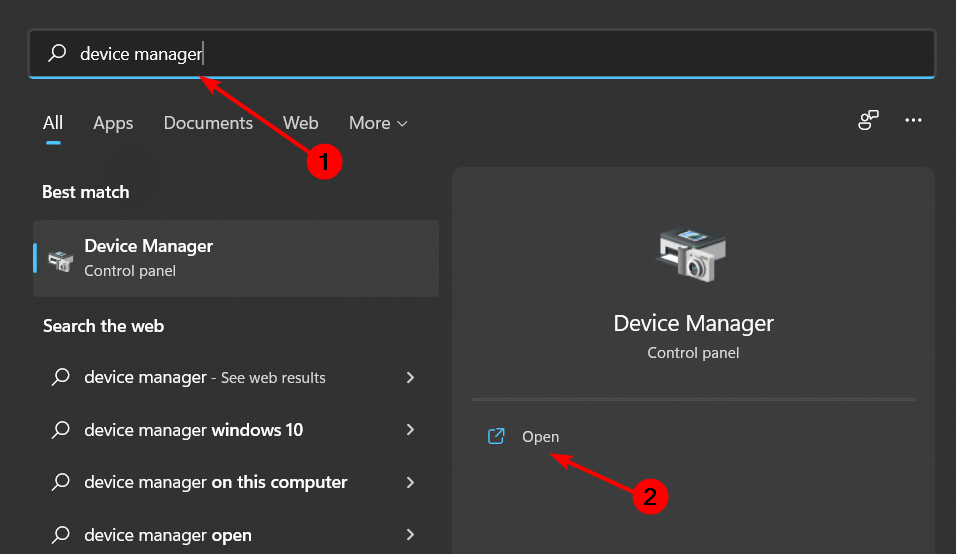
From the list, select Device Manager.
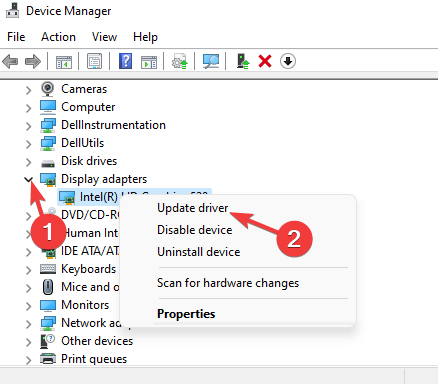
To expand the list, double-click on the Display adapters category.
Then, right-click on the name of the dedicated graphics card.
Choose Update driver, then select Search automatically for drivers.
It will download and install the most recent version of the driver.
After that, restart your computer to apply the changes.
Graphics card manufacturers offer graphics card driver updates to increase frame rates and optimize performance.
An outdated driver can create problems with your PC’s components, including sound cards, Wireless controllers, and imaging devices.
You should check your PC for graphics driver upgrades so that games and other graphics-intensive apps can operate correctly, whether you’re experiencing Path of Exile FPS drops or other similar issues like failed to connect to instance.
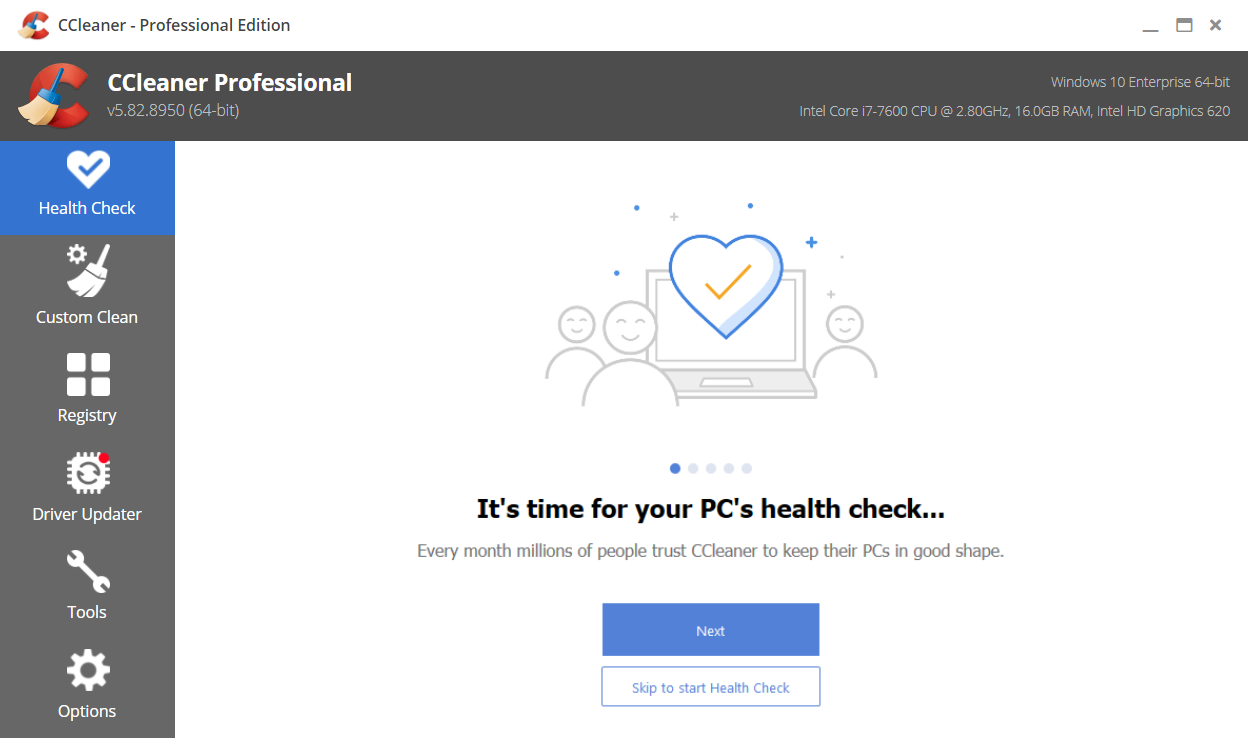
You can choose to use a specialized program that will help you update your drivers automatically. It can scan your PC to detect old drivers and download the latest version for them from its consistently revised database.
3. Turn Auto Settings on
During gameplay, press the Esc key on your keyboard.
Now, navigate to the Settings menu and select Video.
Choose Auto Settings.
Restart the game to see whether the frame drops or lags remain.
If you haven’t been able to resolve the frame drop problem, be sure you switch to auto settings in video settings by following the instructions above.
4. Eliminate background running tasks
Use Ctrl + Shift + Esc to launch Task Manager.
Now, pick the Processes tab to identify processes running in the background and consuming too many system resources.
Select and then close the task by clicking End Task and then repeat for any unwanted tasks.
Unnecessary background running applications or programs can also take resources on the system, causing crashes, lags, stutters, FPS decreases, and other problems.
5. Stop Background Downloads
Background downloads can utilize a lot of your PC’s computational power, resulting in game lags, just as they might restrict the network bandwidth your game receives, creating connection troubles.
Background downloads should be paused or stopped while launching and playing Path of Exile on the client. After playing, you may continue downloading games or applying patch updates.
Why can’t I get more than 30 FPS?
If your FPS is limited to 30, VSync is likely to be set to double buffered. Please try turning it off or switching to triple buffered mode.
On the other hand, if the FPS is limited to 60, VSync is likely to be set to double or triple buffering. You should turn off VSync to restore your FPS.
The game is enjoyable, but frame dips can ruin the experience and leave you wondering what caused the problem.
The solutions listed above will help you in minimizing the use of system resources by other apps, allowing your PC to devote its full power to improve your gaming experience.
To avoid future difficulties, keep your system up to date and upgrade your PC components.
In the comment section below, let us know if you were able to fix Path of Exile FPS drops with the methods described in this article.
Want a more polished or solid look for your desktop? Windows 10 lets you easily enable or disable taskbar transparency with just a few clicks. Whether you’re aiming for a cleaner appearance or prefer an opaque taskbar, the setting is built right into the system—no third-party tools required.
In this guide, we’ll show you how to turn taskbar transparency on or off in Windows 10 and help you quickly customize the look of your taskbar to match your style.
How do I make the taskbar not transparent?
1. Turn off taskbar transparency in Windows 10 via Settings
1. Press the Windows key + I to open the Settings app.
2. Navigate to the Personalization section.
3. In the menu on the left, select Colors.
4. From the right pane, under the More options section, toggle Transparency effects off.
5. If you want to enable transparency once more, simply follow these steps and turn on the transparency setting.
If you’re using Windows 10, you’ll be happy to know that you don’t need to use third-party applications or themes in order to make the taskbar not transparent.
Windows 10 has a built-in setting that allows you to enable or disable transparency of your taskbar. As a result, you can disable transparency with a single click.
2. Use Classic Shell
Download Classic Shell on your device.
Install the software by following the on-screen prompts.
The right click on the Start button and select Settings.
Select the Start button tab and just check Disable taskbar transparency.
Click OK and that’s it; uncheck the same option if you want to enable taskbar transparency on or Windows 10.
Then save this file to path C:\Windows\Resources\Themes.
Now just change the current Windows 10 theme to Aero Lite.
Customize the new theme for setting a new background, for enabling / disabling taskbar transparency, and so on.
Test the theme and if you don’t like it, just uninstall the same from Control Panel.
Several users claim that you don’t even have to download this theme in order to use it. According to users, the theme is still available on your PC, and you can activate it manually by doing the following:
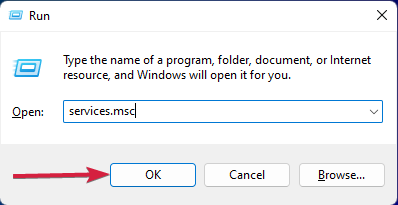
Press Windows Key + R to open the Run dialog. In the input field enter resources and press Enter or click OK.
Navigate to the Themes directory and copy the aero.theme to your Desktop. Keep in mind that you might see this file only as aero if you don’t have file extensions revealed.
Rename the file that you just copied to your Desktop from aero.theme to aerolite.theme.
Now right click aerolite.theme file on your desktop and choose Open with.
Select Notepad from the list and click on OK.
Locate DisplayName line in the [Theme] section and change it to DisplayName=Aero Lite. Basically, you just need to change the value after the = sign to the desired name.
Now locate [VisualStyles] section. Locate Path and change Aero.msstyles to Aerolite.msstyles. After doing that, save changes.
Now move the aerolite.theme from your Desktop back to C:\Windows\Resources\Themes directory. If you get a security warning just click on Continue.
After doing that you should be able to access the Aero Light theme from the personalization section and change your theme to Aero Lite.
After switching to this theme, your Taskbar won’t be transparent anymore.
Perfect; so there you have it. These are the best ways to use when trying to disable taskbar transparency.
However, in Windows 10, you can make the taskbar not transparent by tweaking your PC’s built-in settings.
Anyway, use the comments field below if you had problems performing the steps explained in this tutorial and we will help you resolve the issues.
Microsoft Surface is a great device, but many users reported that their Surface Pen tip isn’t working. Surprisingly, the eraser works fine, but the pen won’t write or work. This can be a big problem, but there’s a way to fix this issue.
Surface Pen issues can cause many problems, and speaking of Surface Pen, here are some common issues that users reported:
Surface Pen driver error – This issue can occur if your driver is outdated or corrupted. Reinstall or update your drivers, and the case should be resolved.
Surface Pen no light – If the LED won’t light up on your Surface Pen, it’s somewhat likely that your battery is empty, so you’ll need to replace it.
Surface Pro 4 pen not writing, but buttons work – This problem can occur due to your battery, so be sure it’s working correctly.
Surface Pen tip doesn’t work, won’t write – If you encounter any of these issues, try some of our solutions and check if that helps.
Why is my Surface Pen tip not working?
The battery of the Surface Pen is dead or faulty.
You haven’t paired the Surface Pen to your Surface Pro.
There is a pending Windows update available that you haven’t installed.
You are using an incompatible app to use the Surface Pen.
The Surface Pen itself is faulty.
Another stylus or pen is connected to your PC and conflicts with the Surface Pen.
How do I fix the Surface Pen tip if it’s not working?
Several users reported that the Surface pen tip is not working for them at all. The pen pairs with the Surface, but it’s unable to write.
A drained battery usually causes this, and to fix the problem, replace the AAAA battery with a new one, and the issue should be resolved.
Another method you can use is to unscrew the pen, just enough to cut power to it. Now wait a few seconds and screw the pen to power it up.
This method might work for some users, so you might want to try it out. In addition to replacing the battery, be sure to check if your battery isn’t inserted upside down.
Several users reported that their battery wasn’t properly inserted and that caused the issue to appear. After flipping the battery, the problem was fixed.
Sometimes, you must take out the battery and put it back in. For example, there might be some dust on the contacts of your battery, and that can cause this issue to appear, but by removing and reinserting the battery, the problem should be fixed.
In some cases, you might even have to clean your contacts manually in order to fix the issue.
2. Install the latest updates, drivers, and firmware
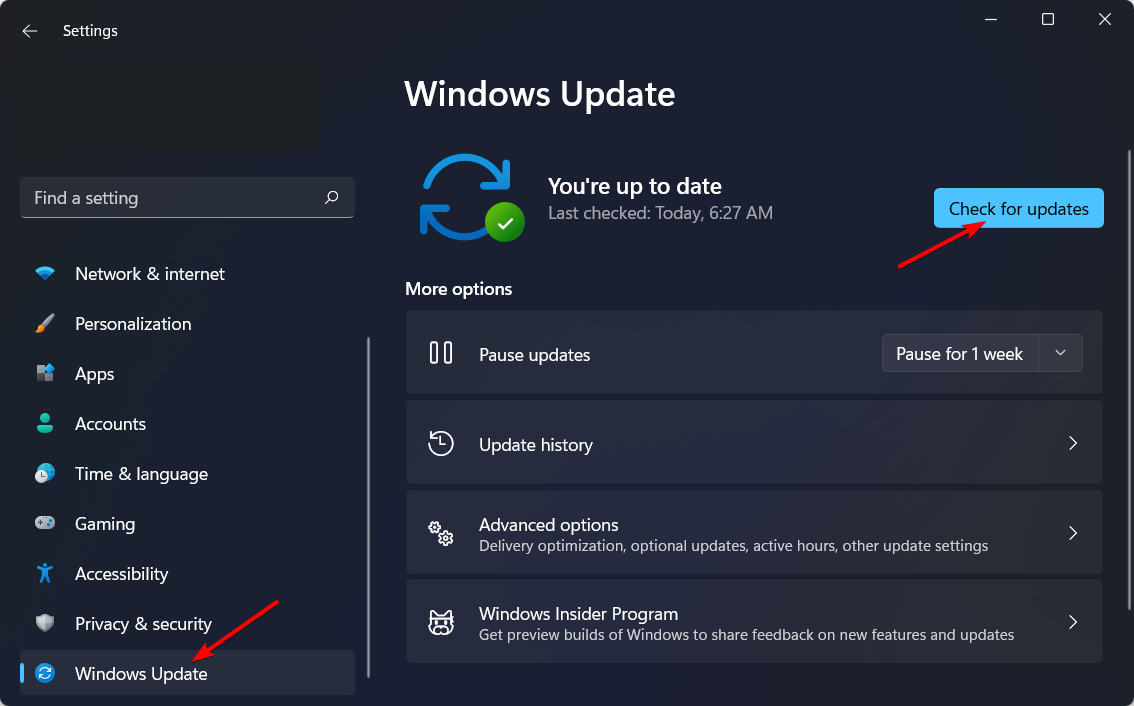
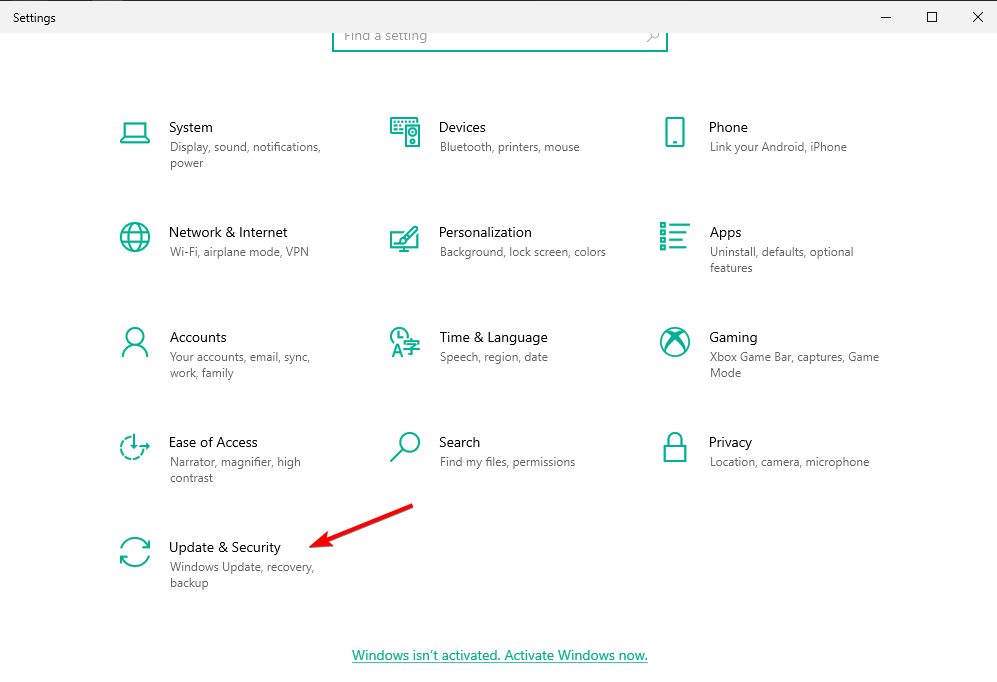
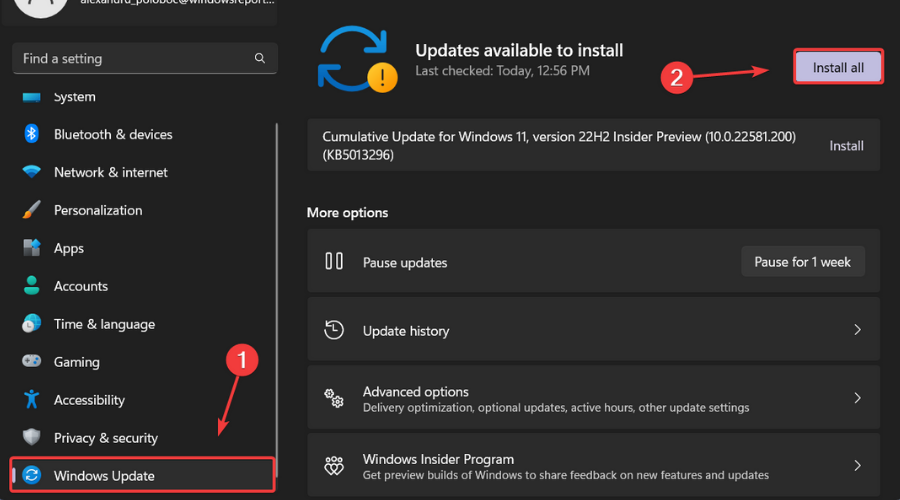
Open the Settings app.
Navigate to the Update & Security section.
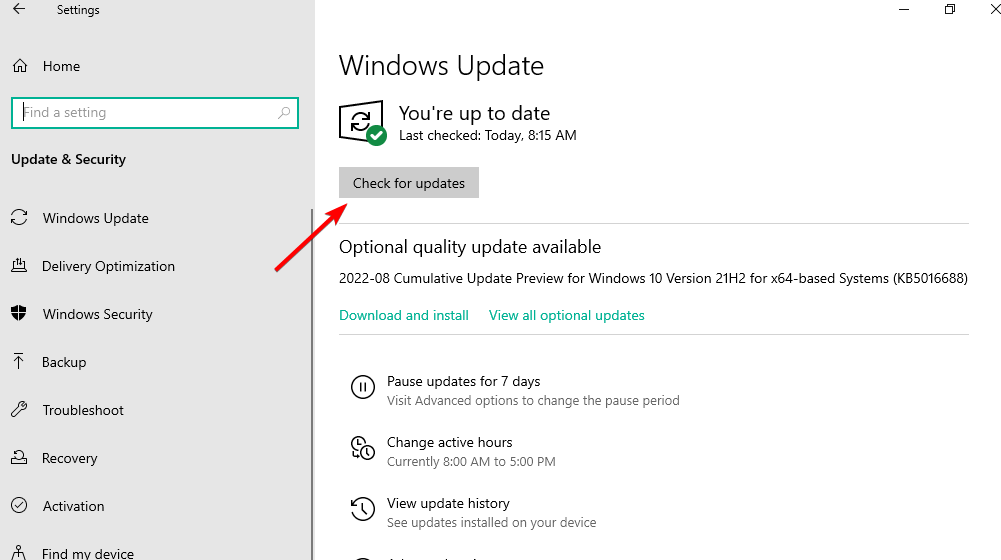
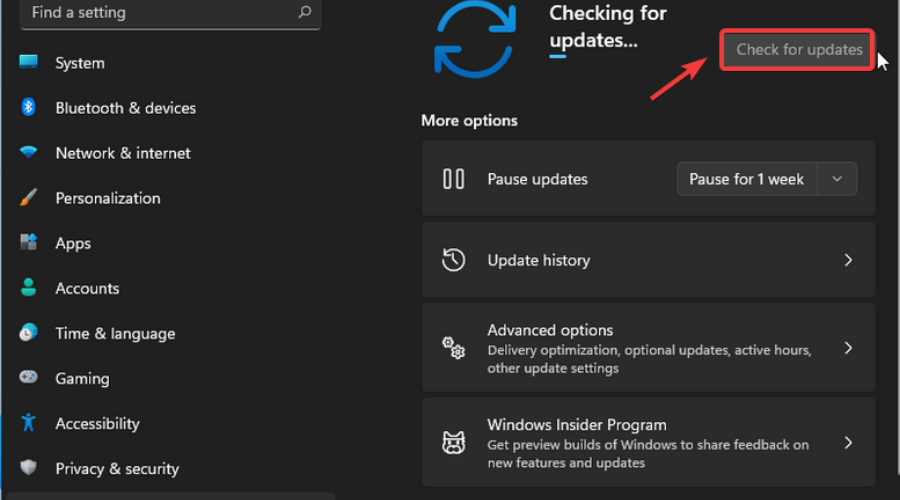
Now click the Check for updates button.
If the Surface Pen tip is not working properly, the issue might be the lack of system updates. Windows 10 is a solid operating system, but sometimes issues can occur if you don’t have the latest updates installed.
The updating process is quite streamlined in Windows 10, and it will automatically download the missing updates, for the most part.
If any updates are available, they will be downloaded automatically and installed as soon as you restart your PC. After updates are installed, check if the problem is still there.
If the problem is still there, even after installing the latest system updates, be sure to install the latest firmware and driver updates for your Surface device. You can download the necessary files right from Microsoft’s website.
However, if you don’t want to download the drivers manually, you can always use third-party solutions to automatically update all your drivers.
Not only is this tool much easier to use, you always know that it will get the driver versions right and that they are always the latest available.
More so, Outbyte Driver Updater is called that way because it can also detect faulty or missing drivers and replaces them with the latest versions as well.
Lastly, the update and repair process is done mainly by the program, and as long as you have an Internet connection, the process can be fully automated as well.
Locate your pen in the right pane and click the Remove button.
Click Yes to confirm.
In some cases, there might be a glitch with your pen that is causing the Surface Pen tip not to work. This can occur for a number of reasons, but you can fix the problem simply by removing the pen and pairing it up again with your Surface device.
After doing that, you just need to pair your pen with Surface once again. Simply press and hold the button for 6 seconds until the light glows. Now pair the pen with your PC.
After doing that, check if the problem is still there. As you can see, minor glitches with Bluetooth can occur, but in most cases, you should be able to fix them simply by unpairing and pairing your pen with your system.
4. Disable the pen in Device Manager
Right-click on the Start button and choose Device Manager from the list.
Locate your pen in the list of devices under the Bluetooth section.
Right-click the pen and choose Disable device from the menu.
When the confirmation dialog appears, click Yes.
After doing that, wait for a few seconds and right-click the pen again, and choose Enable from the menu.
If the Surface Pen tip is not working, the problem might be a temporary glitch with your system. This usually isn’t an issue, and in most cases, you can fix the problem simply by disabling the pen from Device Manager.
Once you enable your pen, check if it works with your Surface device. If that doesn’t work, perhaps you should try disabling the Intel(R) Precise Touch Device.
A number of users reported that disabling and enabling Intel(R) Precise Touch Device in Device Manager fixed the problem for them, so be sure to try that.
Keep in mind that this is just a workaround, so you might have to repeat it if you shut down your Surface.
5. Reinstall the pen driver
Right-click on the Start menu and select Device Manager.
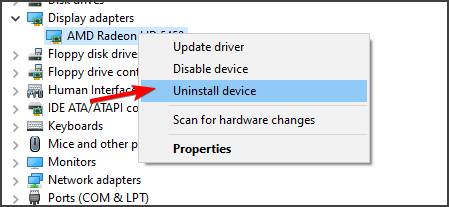
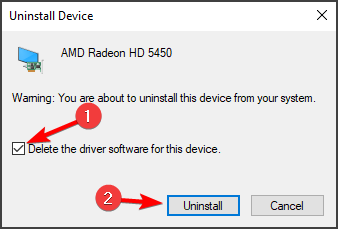
Locate your Surface Pen in the list of devices, right-click it and choose Uninstall device from the menu.
When the confirmation dialog appears, click Uninstall.
After the driver is removed, click the Scan for hardware changes icon and wait while the driver is installed.
Sometimes your Surface Pen tip won’t work because of your driver. There might be an issue with your drivers, and that could lead to this and many other problems.
However, you can fix this problem simply by reinstalling the pen driver. Once the driver is reinstalled, check if the problem is still there.
6. Perform a hard reset
Press and hold the Power button for about 25-30 seconds.
Be sure to completely shut down your device.
Now press and hold the Power button and Volume Up button until you see the Surface logo on the screen.
You should now see the UEFI menu.
Exit the UEFI menu and your PC will restart.
If the Surface Pro tip is not working properly, you might be able to fix this issue simply by performing a hard reset.
Once your device boots, check if the problem with the pen is still there.
7. Make sure that other devices aren’t interfering with your touchscreen
In some cases, your Surface Pen tip won’t work if other electrical devices are interfering with your touchscreen.
This is unlikely, but a handful of users claim that certain devices, such as lamps can interfere with their touchscreen.
To fix the problem, simply move away from these devices and your touchscreen and Surface Pen will start working again. This is an unlikely solution, but you can still try it out if you want.
8. Run the troubleshooter
Open the Settings app by pressing Win + I.
Navigate to the Update & Security section.
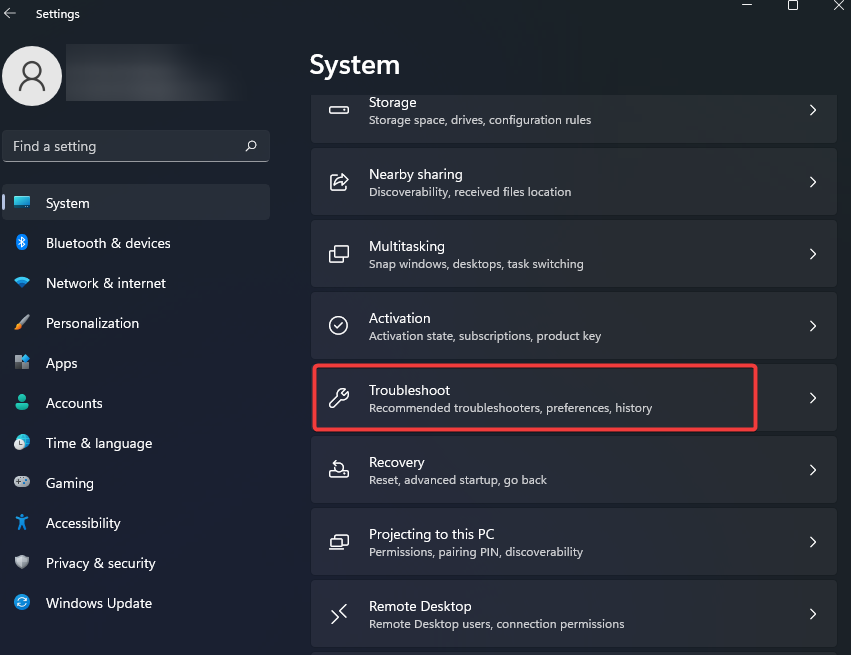
Choose Troubleshoot from the menu on the left.
Now pick Hardware and Devices from the list and click the Run the troubleshooter button.
According to users, sometimes the Surface Pen tip won’t work due to certain glitches on your system. However, you might be able to fix those glitches automatically by running the built-in troubleshooter.
After the troubleshooter is finished, check if the problem is still there. In addition, you might want to try running the Bluetooth troubleshooter and check if that solves the problem.
Just be careful to get the right tip for your exact model of Surface Pen because there are a few different kinds on the market.
How do I fix Surface Pen tip not if it’s not working on Windows 11?
Check for Windows updates.
Check if the Surface Pen is compatible with your Surface device.
The battery level of the phone is crucial. Check if that is okay or not.
Unpair and then connect it back to your Surface Pro.
Reset the Surface Pen.
Does Surface Pen work without a battery?
No. The Surface Pen does not work without a battery. You need to make sure that it is charged to 100% in order to use it.
It will stop working once the battery is dead, and you will have to replace it. According to Microsoft, the Surface Pen with a rechargeable battery will give you a battery life of about 15 hours.
Surface Pen issues can be problematic, but we hope that you managed to solve this issue by using one of our solutions.
Of course, if the pen doesn’t work even with a replacement tip, you may consider replacing the Surface Pen with a new one altogether.
For any other suggestions or questions, feel free to use our comments section below and we will get back to you as soon as possible.
What surprised most users was that Microsoft revealed, after 26 long years, its intention to disable Internet Explorer in Windows 11. First, we will show you how to download and install it on this operating system.
While the browser wasn’t the most successful, if you don’t count the popular memes making the rounds over the Internet, plenty of users still expected Internet Explorer to appear in Windows 11.
Some say that they were hoping for at least an Internet Explorer 32-bit. But as the OS only runs 64-bit software, it seems this app has no place in the roster.
Now let’s see how you can download Internet Explorer on Windows 11 and start using it as soon as possible.
NOTE
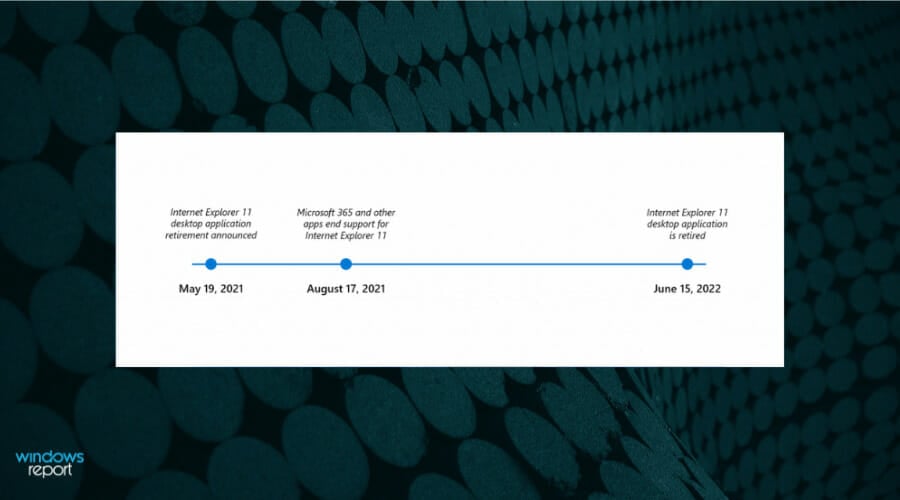
Starting on June 15, 2022, u003ca href=u0022https://windowsreport.com/internet-explorer-end-of-service/u0022 target=u0022_blanku0022 rel=u0022noreferrer noopeneru0022u003ethe Internet Explorer browser has officially gone out of serviceu003c/au003e. Thus, IE 11 will be retired for Windows 10 client SKUs, version 20H2 and later, and Windows 10 IoT, version 20H2 and later.u003cbru003eu003cbru003ePlease note that the products not affected by this retirement are:u003cbru003eu003cbru003e- IE Mode in Edgeu003cbru003e- IE 11 desktop on Windows 8.1u003cbru003e- Windows 7 (with Extended Security Updates)u003cbru003e- Windows Server LTSC (all versions)u003cbru003e- Windows Server 2022u003cbru003e- Windows 10 client LTSC (all versions)u003cbru003e- Windows 10 IoT LTSC (all versions)
Quick Tip:
An Internet Explorer update for Windows 11 will never come. Yet there are ways in which you can work around this issue.
As an alternative to this browser, you can use Opera One, a browser with a modern and friendly interface that can offer many features from pinboards, multiple workspaces, and an embedded ad-blocker to a free VPN.
Opera One
Check out Opera One, a browser that works great with Windows 11 and supports legacy devices.
The download process will now start automatically, and all you will have to do is wait for it to complete.
Remember that this download method might not work after officially discontinuing the software.
How do I enable Internet Explorer in Windows 11?
1. Enable IE Mode from Edge
1. u003cspanu003eOpen u003c/spanu003eu003cemu003eMicrosoft Edgeu003c/emu003eu003cspanu003e and click the u003c/spanu003eu003cstrongu003eellipsis buttonu003c/strongu003eu003cspanu003e on the top-right corner.u003c/spanu003e
2. u003cspanu003eFrom the drop-down menu, select the u003c/spanu003eu003cstrongu003eSettingsu003c/strongu003eu003cspanu003e option.u003c/spanu003e
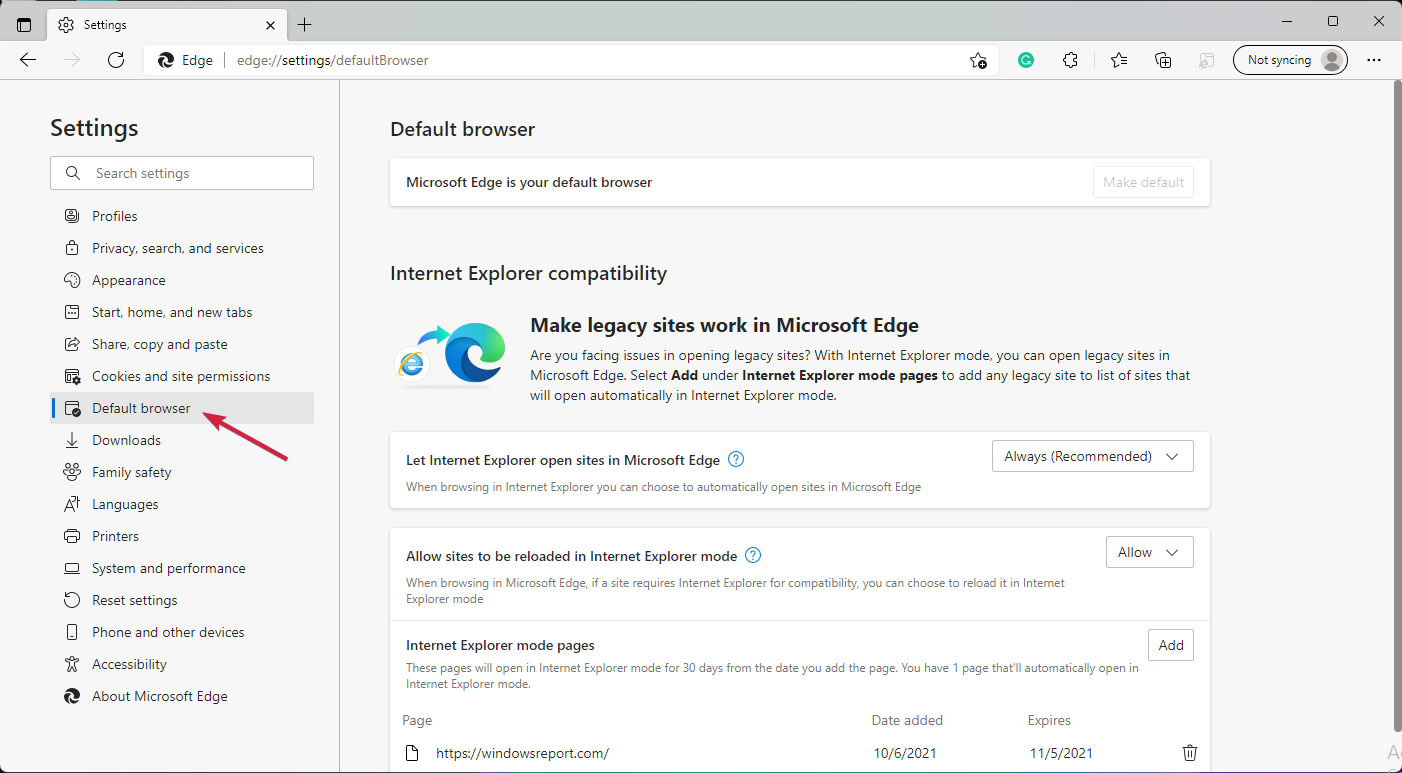
3. u003cspanu003eNext, click on the u003c/spanu003eu003cstrongu003eDefault browseru003c/strongu003eu003cspanu003e option.u003c/spanu003e
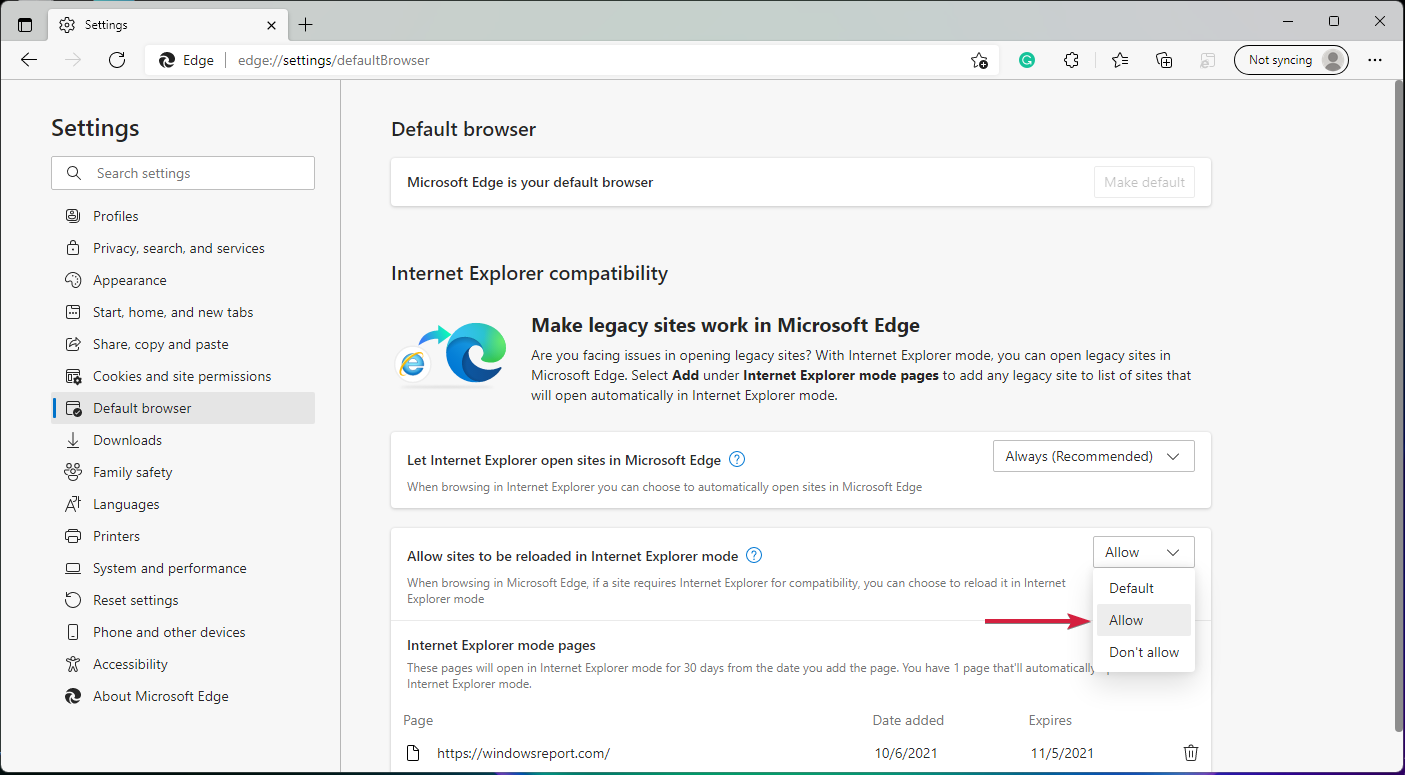
4. u003cspanu003eUnder u003c/spanu003eu003cemu003eInternet Explorer compatibilityu003c/emu003eu003cspanu003e, click on the drop-down menu next to u003c/spanu003eu003cstrongu003eAllow sites to be reloaded in Internet Explorer modeu003c/strongu003eu003cspanu003e and select u003c/spanu003eu003cemu003eAllowu003c/emu003eu003cspanu003e.u003c/spanu003e
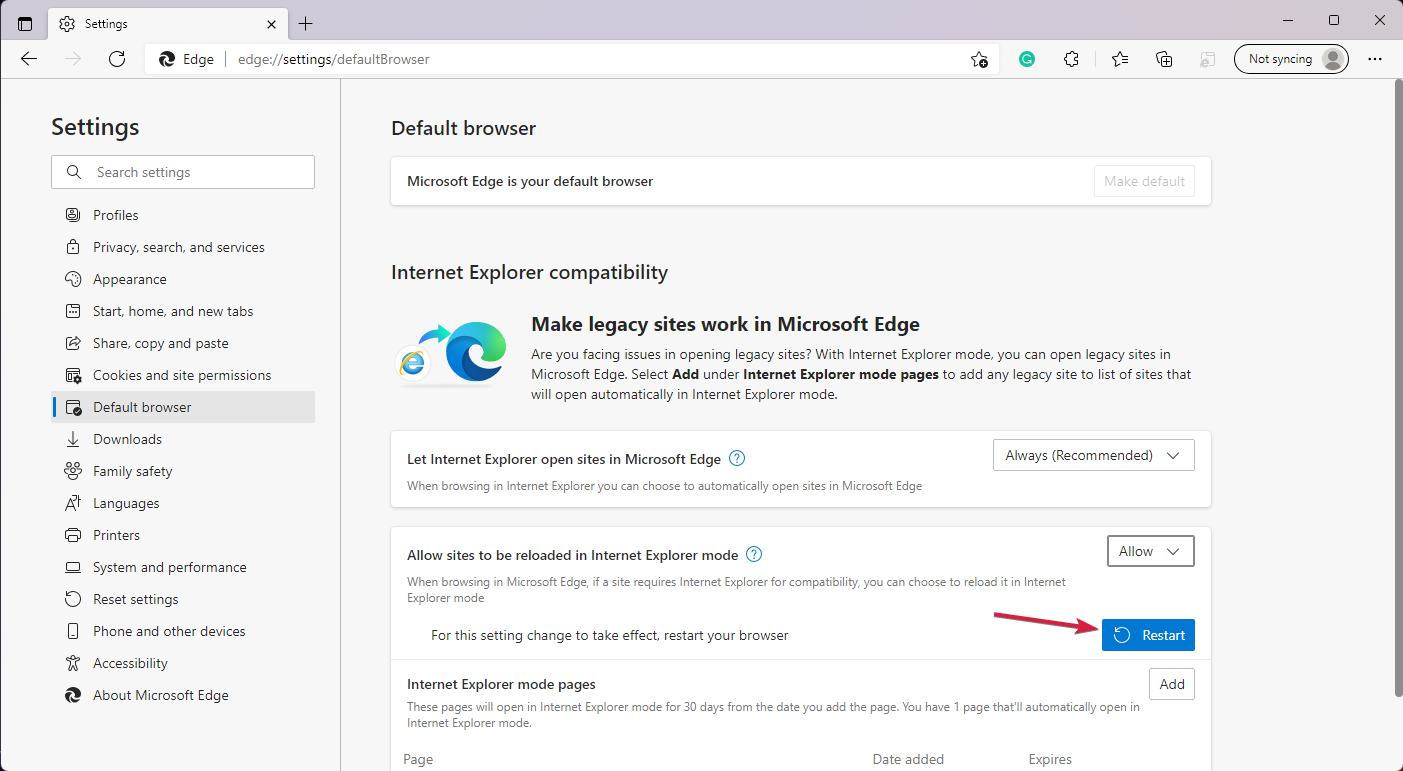
5. u003cspanu003eNext, click on the u003c/spanu003eu003cstrongu003eRestart u003c/strongu003eu003cspanu003ebutton.u003c/spanu003e
If you’re looking to install and use Internet Explorer on your Windows 11 device as a default browser, that cannot be done anymore. However, you can enable Internet Explorer Mode via Microsoft Edge’s built-in settings.rnrnWhen sites require Internet Explorer, you will be able to useu003cspanu003e u003c/spanu003eu003cspan class=u0022vm-hook-outeru0022u003eu003cspan class=u0022vm-hooku0022u003eMicrosoft Edgeu003c/spanu003eu003c/spanu003e to reload the page using IE mode.
2. Open the site with Internet Explorer Mode on Edge
Open Microsoft Edge, then click on the ellipsis button in the top-right corner to select the Settings option.
Tap on the Add button from the Internet Explorer mode pages section.
Type or paste the website address you want to see in Internet Explorer mode and click on the Add button.
When you access the website, you will have the option to Reload in Internet Explorer mode. Note that if you don’t add the website URL first, you won’t see this option in the menu.
If you want to load the website without the IE mode, delete the website by clicking the bin icon in the Settings menu.
3. Let Internet Explorer open sites in Microsoft Edge
Follow the steps from the first solution until you reach the Default button option in Microsoft’s Edge settings.
Under the Internet Explore compatibility section, click on the Let Internet Explorer open sites in the Microsoft Edge drop-down menu and select the preferred option between:
Never – Internet Explorer will never switch to Edge to load the website.
Incompatible sites only – Internet Explorer will still load the websites, but those designated for a modern browser will load in Microsoft Edge.
Always – Internet Explorer will always switch to Edge to load sites.
Websites will now open in Microsoft Edge according to your configuration settings in the second step. You will know you are in IE Mode as a little Internet Explorer icon will appear in the address bar.
What does the Internet Explorer Mode in Edge have to offer?
According to Microsoft, IE Mode aims to provide its users with a method to use the legacy infrastructure of IE inside the chromium-based Microsoft Edge:
IE mode on Microsoft Edge makes it easy to use all of the sites your organization needs in a single browser. It uses the integrated Chromium engine for modern sites, and it uses the Trident MSHTML engine from Internet Explorer 11 (IE11) for legacy sites.
Microsoft Edge will replace the Internet Explorer 11 desktop app with its IE mode.
With this change, users can restrict their use of the Internet Explorer browser. Thus, it can only access those legacy sites that need it.
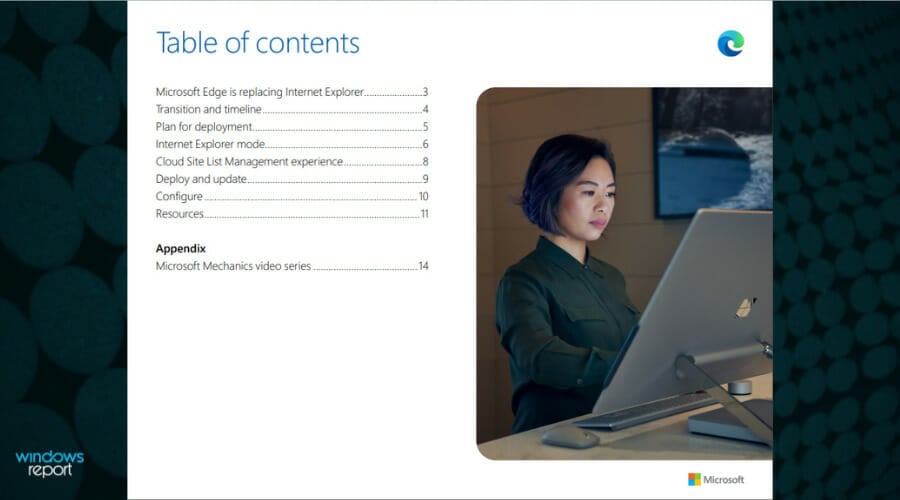
To make the transition easier, Microsoft even put out a PDF guide. It is intended for people and companies using IE as their default browser to prepare them for the app’s retirement.
Is IE Mode better than Internet Explorer?
The primary purpose of IE Mode is to make it easier for people and organizations to use one browser. Currently, Edge is the only browser with built-in compatibility for legacy sites and apps.
IE Mode will still be able to support a lot of Internet Explorer’s functionalities. Such as all document and enterprise modes, ActiveX controls, Browser Helper Objects, Internet Explorer settings, and the F12 developer tools.
Taking this into consideration, plus the fact that Edge also provides more features on its own, the browser and its IE Mode can be considered better than Internet Explorer.
Moreover, one of the most exciting things about Edge and its IE Mode is its economic impact on organizations.
According to a study by Forrester on The Total Economic Impact™ Of Microsoft Edge, the avoided cost of legacy application modernization from using IE Mode leads to almost $1.2M in total savings.
So, maybe this change isn’t so bad after all. However, I am weighing the fact that IE Mode can still support many of Internet Explorer’s functionalities and generate savings, productivity gains, and security for organizations.
And judging from the small number of users who would still need, for some reason, to use Internet Explorer, this won’t be recorded as such a significant loss for the operating system.
Does Windows 11 not support Internet Explorer?
It’s the other way round. Internet Explorer is not compatible with Windows 11, and you can’t run it. Even searching for Internet Explorer will display Microsoft Edge as a result.
And this is because Microsoft intends to replace Internet Explorer with a new and redefined version of Edge.
Can I install Internet Explorer on Windows 11?
Firstly, we have established that installing it is pretty impossible. You can even download and install Internet Explorer 11 on Windows 11, and you will still be prompted with Microsoft Edge instead.
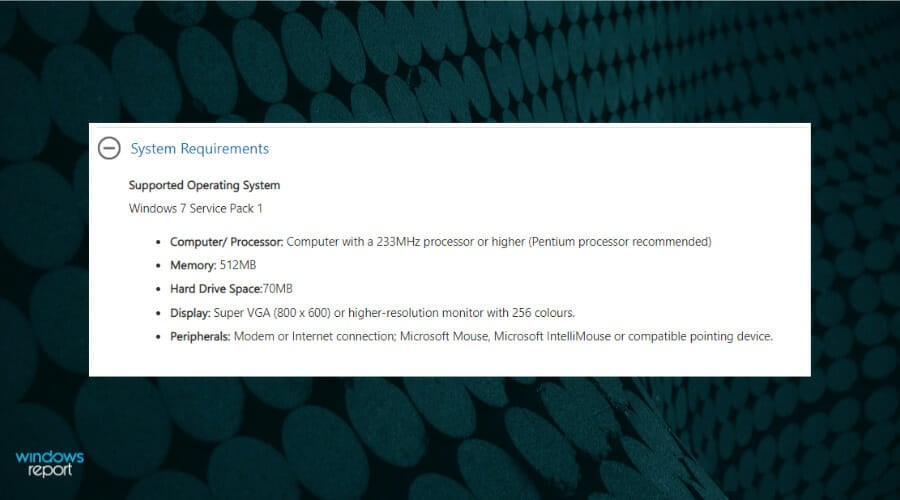
If you take a closer look at the system requirements for Internet Explorer 11, you will find that it’s only for Windows 7 PCs with Service Pack 1.
Many users are wondering if they can install Internet Explorer on Windows 11. While the answer is yes, the application won’t run at all, so technically, you can install it without using it.
However, there are three ways in which you can use Internet Explorer. Follow along as we will explore them after seeing why Microsoft removed it from Windows 11.
Why did Microsoft remove the ability to use Internet Explorer on Windows 11?
Microsoft warned that the Long-Term Servicing Channel (LTSC) of Windows 10 would include Internet Explorer, even though a consumer removal took place.
In the same blog post, Microsoft said that Internet Explorer is less secure than modern browsers. Moreover, they said that it doesn’t deliver an up-to-date browsing experience.
For these reasons, they are encouraging users to use Edge, a modern web browser based on Google’s open-source Chromium code:
Not only is Microsoft Edge a faster, more secure and more modern browsing experience than Internet Explorer, but it is also able to address a key concern: compatibility for older, legacy websites and applications.
Sean Lyndersay, Microsoft’s program manager for Edge.
On the official Windows 11 specs, Microsoft states that Internet Explorer is indeed disabled in Windows 11. As Microsoft Edge now includes the IE Mode feature.
So, Windows 11 has entirely removed this browser. And users that still use shortcuts such as iexplore are redirected to Microsoft Edge instead.
No surprise here, considering Microsoft is known for being constantly headed towards the future. Although it sometimes holds on to some of its past features and apps.
Can I run Internet Explorer on Windows 11?
Yes, you can use Internet Explorer in Windows, but you will have to install one of the older versions of the OS that the browser is compatible with. And honestly, that’s too much trouble for a browser far less secure than its replacement, Microsoft Edge.
If you still want to use Internet Explorer in Windows 10 or 11, IE Mode in Edge is the only option. And Microsoft has confirmed that it will continue to support the IE Mode functionality until 2029, and a year’s notice will be provided before discontinuing it.
That’s all for now! Internet Explorer may have been discontinued, but it’s not outright impossible to use it, as illustrated in the sections earlier.
With all this talk about Internet Explorer, don’t forget that there are a lot of other browsers out there. Check out the best browsers for Windows 11 and select one according to your needs.
Please share your thoughts on Microsoft discontinuing support for Internet Explorer and what you liked the most about it in the comments section below.
Users have recently reported that their laptop battery is not charging after performing a Windows 10 or 11 update. This can be a frustrating issue, follow the solutions offered below to quickly solve this problem before resorting to replacing the battery entirely.
Windows updates are meant to provide improvements and fixes to your PC, however, there is a rare case where it may introduce an issue instead.
Try the following troubleshooting steps listed below to try to solve this problem and get your laptop up and running again. If you find your battery draining rapidly in Windows 11, we have a guide for that as well.
Why is my laptop not charging when plugged in after an update?
There are a number of reasons that can cause your laptop battery to act up and not charge even when plugged in. It could be due to an outdated battery driver or a faulty power adapter. If the issue occurs after a Windows update, then it’s likely due to problems with the update and your PC.
Running a battery report and troubleshooting will help you identify if there is something specifically wrong with your battery and the next steps you should take. Rolling back after the update may help fix this issue.
It’s rare for a Windows update to introduce bugs or issues with your PC but there is always a possibility. If you’re having issues with your battery charging after a Windows update then you can always restore it to the previous version. Keep reading to find out how below.
How do I fix my laptop battery if not charging after Windows update?
1. Run battery troubleshooter
Click on Start and open Settings (or press Windows + I).
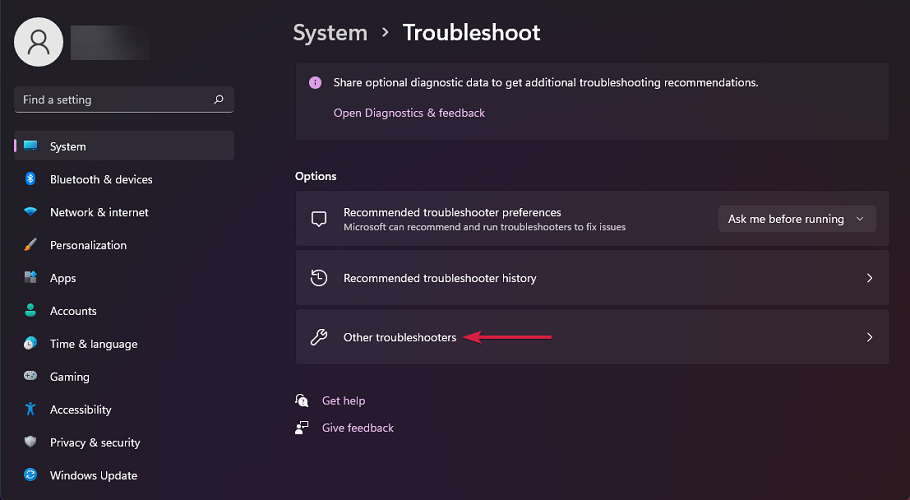
Under System, select Troubleshoot.
Click Other troubleshooters.
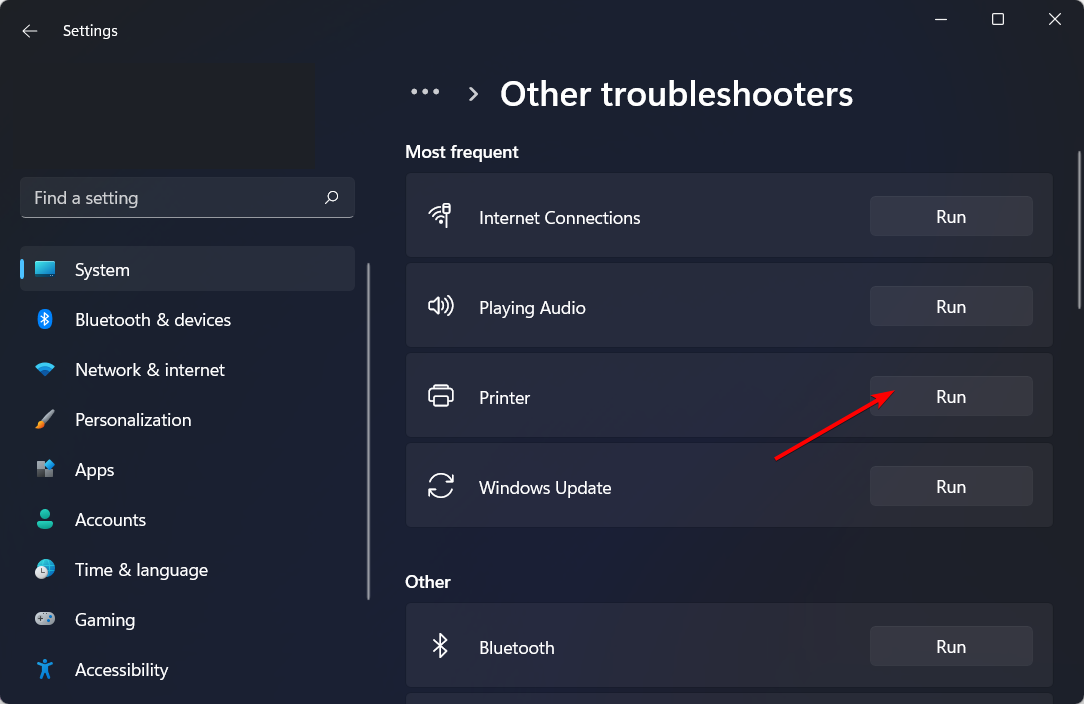
Under Other, Select Run next to Power.
Allow the troubleshooter to run and fix any issues.
The built-in troubleshooter can help locate any issues related to your laptop’s power and battery. If any issues are detected, the troubleshooter will attempt to fix them.
2. Perform a system rollback
Click on Start and open Settings (or press Windows + I).
Under System, scroll down and select Recovery.
If eligible for a system rollback, click on Go Back.
Follow the prompts to revert to the previous update.
Windows gives users a 10-day grace period to roll back to the previous update. If your laptop battery is not charging after a Windows update, then you can use the Go Back function and revert the change.
3. Hard reset the battery
Power your laptop down and remove any cords and cables.
Flip your laptop over and remove the back panel then take out the battery if possible.
Return your laptop right-side up and press and hold the power button for 15 seconds.
Replace the battery and back panel and reattach the power cable then power on your laptop.
Some laptops have detachable batteries which make this solution a lot easier. However, most laptops have the battery located within the back panel which you will need to remove to gain access to it. Be sure to look up a guide for your specific laptop model to properly locate and remove the battery.
Keep in mind that if your laptop is still under warranty, then removing the battery and back panel may void it.
Click on Start and search Control Panel then press Enter.
Select Hardware and Sound then open Device Manager.
Expand the Batteries drop-down menu then right-click on Microsoft ACPI-Compliant Control Method Battery.
Select Update driver.
Click Search automatically for drivers.
Restart your PC.
If your battery driver is out of date, then issues may occur with your laptop battery including not charging even when plugged in. You can also perform a driver update on the Microsoft AC Adapter driver.
If you don’t necessarily want to do this process manually, you can opt for a program that will do this automatically.
This way, you can finish these steps more securely and also save time because you don’t have to look for the latest update for your drivers anymore.
If you’ve tried everything and your laptop still won’t charge after a Windows 10 update, you may have to replace the battery. Usually, the laptop manufacturer’s website sells replacement batteries for your laptop model.
Laptops with detachable batteries are much easier to replace because they are easily accessible. However, built-in batteries can also be replaced. Be sure to run a battery report to double-check the health status of your battery.
How do I run a Windows battery report?
Click on Start and search Command Prompt then hit Enter.
Type in the following command then hit Enter. powercfg /batteryreport
Copy the file path provided and then open File Explorer.
Paste the file path in the search bar and press Enter.
Choose how you want to open the .html file.
The Windows battery report provides details about your battery, including the cycle count. Here, you can check if there is something wrong with the battery and if it needs to be replaced. Generating a battery report won’t fix the issue, but it will provide more information as to the status of your battery.
If your laptop is still under warranty, you can use this when filing a warranty claim to prove an issue with the battery.
We hope one of the above solutions helped you fix your laptop battery if it’s not charging after Windows 10 or 11 updates. Let us know in the comments below which step worked for you or if you have a suggestion for a different solution.
Some Surface Pro 3 users have complained that they’re unable to connect their Surface to a smart TV via the Microsoft wireless display adapter after the upgrade to Windows 10.
So, we did a little research on this and found a couple of solutions for the problem with the Microsoft wireless display adapter in Windows 10.
How do I fix the Microsoft wireless display adapter if it’s not connecting?
1. Uninstall the driver, and let Windows install it
Right-click the Start button and select Device Manager.
Find the Wireless display adapter, right-click on it and go to Uninstall.
Reboot your computer.
Press Win + I to open Settings.
SelectUpdate & Security, and Check for updates.
Microsoft will likely install the Wireless Display Adapter driver again, and everything should work.
In some cases, just uninstalling the Microsoft Wireless Display Adapter driver and letting Windows 10 install it again automatically can help if the Wireless Display Adapter is not working.
Now you can turn on your TV and check if everything is OK. If the issue is still present, you can try using a dedicated driver update tool to do it automatically.
2. Reset the adapter
On the adapter, press and hold the reset button for 10 seconds.
When the message Ready to connect appears, open Action Center from the Taskbar.
Select Connect, and select Microsoft Wireless Display Adapter in the list of displays.
If reinstalling drivers didn’t get the job done, you can try resetting the adapter. This will bring your Microsoft Wireless Display Adapter to its default settings, so it would now be changed if something was wrong.
3. Change the wireless frequency band
Right-click the Start button and select Device Manager.
Under Network Adapters, right-click on your wireless adapter.
Select Properties, and go to the Advanced tab
Under Property, select PreferredBand.
Under Value, select the arrow, either 2.4GHz or 5GHz,and then OK.
If you’re using Surface 3, Surface Pro 3, Surface Pro 4, or Surface Book, you can communicate with the Microsoft Wireless Display Adapter on the 2.4GHz or 5GHz wireless frequency band.
However, you must have the 2.4GHz frequency band enabled if you want to pair your Surface device with the adapter.
So, if this frequency band is disabled, you won’t be able to use the Microsoft Wireless Display Adapter to project the screen from your Surface on your TV.
Right-click on the Start menu and select Device Manager.
Expand Display adapters.
Right-click on your GPU, then select Uninstall driver.
Restart your PC, and your Windows will automatically install the default GPU driver.
And finally, maybe some issues with your graphics card (Intel HD Graphics, if you’re using Surface) usually prevent your Microsoft Wireless Display Adapter from working.
So, we’re going to do the same thing as we did in the first step, only with a different device.
Windows Update will install your graphics card driver again, and you’ll know if it was causing the Wireless Display Adapter not working issue.
5. Connect the adapter properly
Connect the adapter to the USB port.
Now connect it to the HDMI port.
After doing that, switch to the HDMI input. This step is crucial, and your device won’t work until you switch to the correct input.
Now you have to choose the device and add a wireless display.
If the Connect to a wireless display option is not showing, you might be able to fix the problem by connecting it properly.
This is a basic solution, but several users reported it worked for them, so be sure to try it out.
6. Change your refresh rate
Your refresh rate can cause this issue. However, several users reported fixing the problem simply by opening their graphics adapter software and changing the refresh rate from 30Hz to 25Hz.
Sometimes third-party applications can interfere with your Internet connection and cause various problems. For example, if you can’t connect to a wireless display in Windows 10, the cause might be your VPN client.
Many users reported that Cyber Ghost VPN caused this issue, and after removing the application, the problem was resolved.
If you continue using Cyber Ghost, we advise you to download and install the latest version and check if that solves your issue.
VPN applications aren’t the only apps that can cause this problem, so you might have to research before you find the problematic application.
The problem might be your antivirus software if the Microsoft Wireless Display Adapter is not working.
According to users, antivirus software such as AVG can sometimes interfere with your Internet connection and prevent Microsoft Wireless Display Adapter from working.
To fix the issue, users recommend temporarily disabling your antivirus and checking if that solves the problem.
Even if you disable your antivirus, your PC will remain protected by Windows Defender, so there’s no reason to worry. However, if disabling the antivirus doesn’t help, you might have to remove your antivirus.
It’s worth mentioning that antivirus tools can leave specific files and registry entries behind, so it’s recommended to use a dedicated removal tool.
Once you remove all files associated with your antivirus, the issue should be resolved.
Problems with Microsoft Wireless Display Adapter can prevent you from enjoying multimedia on an external display. Speaking of issues, users reported the following problems as well:
Microsoft wireless display adapter bad quality, blurry, stutter
One common problem with this adapter is terrible picture quality.
In addition, many users reported blurry pictures.
Microsoft wireless display adapter disconnects, won’t stay connected
Common disconnects are also a problem with Microsoft wireless display adapters.
According to users, sometimes their adapter can’t stay connected.
Pairing failed Microsoft wireless display adapter
In some cases, you might not be able to pair your adapter.
Many users reported various paring issues while using this adapter.
Unable to connect to Microsoft wireless display adapter
This is just a variation of this problem, but many users said their PC couldn’t connect to their adapter.
No sound Microsoft wireless display adapter
Another common problem with your adapter might be the lack of sound.
This is an annoying problem, but you should be able to fix it with one of our solutions.
Microsoft wireless display adapter lag, latency, losing connection
Many users also reported latency issues with this adapter.
According to them, they are experiencing lag frequently.
Microsoft wireless display adapter black screen, blue screen
This is another connection problem, but you should be able to fix it with one of our solutions.
Why does Windows 10 not connect to a wireless display?
Here are some common reasons your Windows 10 PC couldn’t connect to a wireless display.
Your graphics driver is not updated – Keeping your device’s drivers updated at all times will ensure a smooth operation across the board.
The wireless adapter is facing some issues – Checking if your network settings are compatible with your setup is of paramount importance.
The wireless adapter isn’t connected correctly – In cases where the wireless adapter is not plugged in perfectly into the motherboard, the error mentioned above will appear.
Your antivirus is interfering with the connection process. Even though they protect us from any unwanted virtual visits, sometimes the security measures can get into the way of your PC working correctly.
Your PC settings and the wireless display settings do not match. Whether your wireless display settings match, or if they are not compatible for other reasons, the error mentioned above will be a result.
A third-party tool might be conflicting with the process – Checking and then double-checking that all the apps installed on your device are running without affecting your system badly.
How do I fix Microsoft wireless display adapter not connecting on Windows 11?
Here are some quick solutions that you can apply to fix the wireless display adapter not connecting to your Windows 11 PC.
Install the latest Windows updates.
Check whether your HDMI and USB connection is proper or not.
Ensure that the ports are working fine.
Update the adapter’s firmware.
Reset the adapter.
Disable Windows Firewall and check if this fixes the issue.
Reinstall the graphics card drivers.
Reinstall the Wi-Fi drivers.
To update firmware and tweak settings more easily, install the official Microsoft Wireless Display Adapter app, then use it to apply updates and reset or calibrate the adapter.
FAQs
Why is my Microsoft Wireless Display Adapter not connecting?
Common causes include outdated firmware, unsupported Miracast hardware, interference on the 2.4 GHz Wi-Fi band, or a poor HDMI/USB connection on your TV. Restarting both your PC and TV often resolves temporary glitches.
How do I fix connection problems with the Microsoft Wireless Display Adapter?
Make sure your PC supports Miracast, update the adapter’s firmware using the Microsoft Wireless Display Adapter app, change your TV’s input source, and reconnect the adapter to a different HDMI port. Also reboot your laptop and toggle the Connect (Win + K) panel again.
Does my PC need Wi-Fi to use the Microsoft Wireless Display Adapter?
No. The adapter creates a direct wireless connection using Miracast, so an internet connection is not required. However, Wi-Fi and Bluetooth must be enabled on your PC for discovery and pairing.
Why does the screen keep freezing or disconnecting?
This can happen due to wireless interference, outdated display or network drivers, or the adapter using the crowded 2.4 GHz band. Try updating drivers, moving devices closer, switching your router to 5 GHz, or resetting the adapter from the companion app.
Microsoft Wireless Display Adapter is a solid device, but sometimes issues can occur. Try some of our solutions if you have any problems with your Microsoft Wireless Display adapter.
Something big and new is coming for Xbox gamers. Certain Affinity is an industry-leading game support studio founded by ex-Bungie employee Max Hoberman. They’ve been working on Halo since Halo 2, providing support for the campaign and multiplayer modes alongside Bungie and 343 Industries. Certain Affinity also built the area deathmatch gameplay in DOOM 2016 and provided support for Call of Duty Modern Warfare Remastered.
Earlier in the year, it was revealed that Certain Affinity is working with Xbox in a big way. The studio is working on a brand new original title codenamed Project Suerte, but few details have emerged yet. But Halo fans will be happy to hear that a brand new multiplayer mode codenamed Tatanka seems to be well into development. The list of public APIs available do offer a few hints. The mode could be something in between the Warzone in Halo 5 and the traditional smaller battle royale style, with shrinking circles forcing players together.
In a recent interview with VentureBeat, incoming COO Paul Sams discussed a number of topics including teasing a large Halo project:
“The biggest thing we’re doing that’s public right now, for more than two years now we’ve been working on Halo Infinite doing something that–they’re very prescriptive about what we can say. But we’re doing something unannounced, and we’re doing lead development on that unannounced thing, from conception and design. It’s something big and new for the franchise. But I can’t say any more about it. That’s our single largest project of our three projects currently. We have close to 100 developers working on that.”
CEO Max Hoberman joined Sams to discuss the company’s plans on possibly introducing its own IP in the future and developing games in the studio.
It’s certainly aspirational for us to be able to do that. We see the benefits of building our own IP and owning our own IP. It’s something we’re committed to. Max can talk to it more. […] He’s done [building IP] more outside of the game space with his novel work, but he’s also been doing it at the company. Every single thing I’ve seen that’s come out from him has been really solid.
You can check out Halo Infinite’s multiplayer free on Game Pass
Some players have posted on Steam’s forum about a procedure entry point createdxgifactory2 could not be locatederror. The entire error message states:
The procedure entry point CreateDXGIFactory 2 could not be located in the dynamic link library C: WINDOWS SYSTEM32 d3d11.dll.
That error message pops up when users launch the games. Although it doesn’t always crash games at launch, games will often crash a bit later after that error message pops up.
This guide will show you a bunch of solutions that have helped users fix the createdxgifactory2 cannot be located error. But, first, let us check out the answers.
Why does the createdxgifactory2 could not be located error appear?
Here are some of the most common reasons createdxgifactory2 could not be located on your PC.
There are some issues with your graphics driver.
The graphics driver isn’t up to date.
Some critical system files are missing or corrupt.
Important DLL files are missing from your PC.
Your PC is infected with a virus or malware.
How do I fix the entry point createdxgifactory2 error?
1. Use a specialized tool
When encountering the entry point createdxgifactory2 error, rest assured that scanning your system is the easiest thing to do.
Delete all SweetFX files by holding the Ctrl key: dxgi.dllSweetFX_settingsd3d9.fxd3d9.dlldxfi.fxSweetfx_d3d9.dllSweetFX_preset
Click the Delete button on the Home tab to erase selected files.
Another confirmed fix for the procedure entry point error is to delete SweetFX files in the game’s folder.
5. Rollback an updated graphics card driver
Right-click the Start menu and select Device Manager.
Expand the Display adapters category.
Right-click the NVIDIA or AMD graphics card to select Properties.
Select the Driver tab on the properties window.
Next, click the Roll Back Driver option.
A Driver Package rollback window will open.
Select the For another reason option.
Click the Yes button.
If the procedure entry point error arises soon after updating a graphics card driver, try rolling back the driver.
6. Uninstall GeForce Experience
Open Control Panel.
Select Programs and features.
Select GeForce Experience.
Click the Uninstall /Change button and Uninstall to remove GeForce.
Restart Windows after you’ve uninstalled GeForce.
Uninstalling GeForce Experience is another resolution a few users have said fixed the procedure entry point error for them.
What is the DXGI factory?
DXGI stands for Microsoft DirectX Graphics Infrastructure. The DXGI factory generates objects that enumerate adapters, help create swap chains, and associate a window with the Alt + Enter key sequence for toggling to and from the fullscreen display mode.
So, the primary goal of DXGI is to handle low-level tasks that can be managed without the need for DirectX graphics runtime.
The above resolutions have fixed the procedure entry point error for many users. So, there’s a good chance they’ll fix the same issue for you.
Make sure to give us any feedback regarding the subject in the comment section below.
There are computer problems that can resurface depending on the way that hardware components evolve. Finding and removing duplicate files stored on your Windows 10 computer is one of them.
More than a decade ago hard drives were pretty expensive, especially the larger capacity ones, so people opted for the smaller ones that were in a decent price range.
This meant that you had to keep an eye on the free space available and do regular cleanups to remove unneeded files stored on your hard drive.
Why do I need duplicate file finder software?
The first thing people used to look for was duplicate files as this was the most obvious way of freeing up space.
But as time went by and bigger hard drives became more accessible to the masses free space became a problem of the past. Most of us couldn’t be bothered to organize our files library.
Duplicate files can also be a problem when creating backups as the process will take longer to finish and you will need more space on the backup destination. This can also slow down the process of restoring a backup.
In this article, we are going to list a few Windows 10 compatible applications that you can use to find, compare, and remove duplicate files, freeing up precious storage space in the process.
What are the best tools to find and remove duplicate files?
If you are looking for a tool that will help you search files through multiple internal or external drives, all at the same time, then we recommend you use Copernic Desktop Search.
The software completes the search in no time so you will not have to wait long to see the results.
Copernic Desktop Search comes with the Preview function that allows you to first see the found file, before initiating any action. If needed, you can keep the software in the background.
If there are specific files you are searching for, the custom feature allows you to filter the results so that you can only see the desired files.
Here are some of its best features:
Keyword search for the most important types and categories of files
Searches within your PC and on the Internet
Quick file identifications
Available previews of the files
Copernic Desktop Search
Find all your hidden folders and open them in no time with Copernic Desktop Search. Get the best deal now!
Duplicate Cleaner’s simple interface makes it easy to start searching for duplicate files on your PC. You can customize your search by the type of file, size, dates, and more.
You can specify which drives and folders to look in, and you even get an option to search inside Zip archives.
This software will assist you in selecting which duplicate files you want to delete. Its Selection Assistant allows you to select files by dates, drives, folders, and more.
You can select a favorite folder, and remove files that duplicate it in another place, or maybe select the smallest images, or the lowest quality mp3. In case you have made a copy of a directory – this is not a problem.
Duplicate Cleaner can scan popular music formats to find duplicates by Artist, Name, or Title. It supports formats such as MP3, OGG, WMA, M4A, AAC, FLAC, and WAV.
It is capable of listing details of the audio files found, including bit rate, sample rate, and length.
Duplicate Cleaner will show you that in the Duplicate Folder browser. Quickly see duplicated directories, and easily get rid of the ones you don’t want to keep.
You can also save Scan Profiles (just like presets in Winamp) and reuse different settings for different jobs.
Moreover, you don’t have to worry about the important System Files: several safeguards are offered to make sure that these files won’t be touched.
Here are a few of its most important features:
Multiple file type support
Create and save scanning profiles
Advanced filtering for audio files
Dedicated presets for images, audio and video
Quick scanning
Duplicate Cleaner
Safely delete duplicate files of all types and formats, with an assisted selection process and detailed reports.
If you have a ton of photos on your drives, most likely, a lot of them will be duplicates, and Duplicate Photos Fixer Pro will help you get rid of them swiftly.
And best of all, it’s extremely easy to use. You just add the folders and photo albums from your PC and click on the Scan for Duplicates button.
In just a couple of seconds, the software is able to scan through thousands of photos and identify duplicates with great precision.
Duplicate Photos Fixer Pro is also great for photographers because it can spot also similar images and you can set the matching level for them.
This will work great if you performed burst from your camera and you only want to keep the best shots.
In the duplicates report, you will get the results in groups of images, so you can mark for deletion the ones you don’t need.
This tool has versions for Windows, macOS, and iOS, and it also has free limited versions for them to test before buying.
Let’s review some of its best features:
Advanced settings for similar image detection
Quick scanning and removal of duplicates
Available versions for Windows, macOS, and iOS
Simple and friendly interface
It can detect images from the GPS metadata
Duplicate Photos Fixer Pro
With this smart tool, you will get rid of those duplicate photos on any drive quickly and effortlessly!
We are sure most of you have already heard of CCleaner, perhaps the number 1 Windows application when it comes to cleaning junk from your computer.
But what most of you don’t know is the fact that it has a built-in duplicate file scanner that does its’ job really well.
It has the option to scan the files for duplicate filenames, matching sizes, content, or by their modified dates.
If you are already a CCleaner user, then this news can be good for you as you don’t need to look for and install other applications that will use more space on your drive. The Duplicate Finder in CCleaner can be easily found under the Tools tab.
The problem we have with CCleaner is that it has a lot of other extra features, features that you don’t need, features that you may never use, and that only take up space.
A new feature of CCleaner is the automatic software updater. Outdated software will make your computer more exposed to cyber threats.
CCleaner is commercial software but it does offer a free version with limited functionality.
Let’s see some of its key features:
Optimizes your PC performance
App and driver updater in the Pro version
Finds and removes duplicate files
Cleans your drives from unwanted files and apps
CC Cleaner
Find and get rid of duplicate files and use the other optimization features to keep your system running perfectly.
dupeGuru has become the industry standard when it comes to searching for duplicate files under Microsoft Windows. It offers 3 versions of the app – the Standard edition, a Music edition, and one for Pictures.
TheStandard Editionis the default one that can search through all your files, either by filename or the contents of the files.
It features a fuzzy algorithm that can detect files even if the name has been changed or if part of the content matches other files.
The Music Edition (ME) is dedicated to finding duplicate music files using the following file formats: MP3, WMA, AAC, OGG, and FLAC. It can scan the filenames, tags, and even the contents of music files.
The main advantage of this edition is the fact that it can detect duplicate music files even if they use a different encoder or are saved at a different bitrate, giving you the chance to locate and keep only the high-quality files.
The third version is called the Picture Edition (PE) and as the name suggests it can be used to find duplicate image files that use the JPG, PNG, TIFF, GIF, and BMP file formats.
The search engine in the Pictures Edition can match image files even if they use different file formats or have been resized or rotated.
It can even match files that have been slightly edited, helping you find the source of an edited image.
All editions of dupeGuru are free of charge and open-sourced and can be downloaded from their official website.
This is another lightweight tool aimed at finding and removing duplicate files stored on your computer.
This application has been around for some years now and even has a version compatible with older, pre NT versions of Microsoft Windows.
It hasn’t been updated in a very long time because well, it doesn’t need to be. It does its job really well, really simple, and really fast and you can use it even on legacy Windows versions.
Getting the “Word can’t do this because a dialog box is open” error? You hit OK, but it won’t go away. It usually means there’s another Word window open, a background process running, or a pop-up waiting for input. Add-ins, Protected View, or even missing files can trigger it too.
Here’s how to fix it and stop the loop for good.
1. Use the keyboard
Click OK when you see the error message.
Press the Alt + Tabkeys and cycle through the open windows.
Repeat this action until you find the window which is causing issues.
2. Disable the Add-ins
Launch Microsoft Word on your computer.
ClickFile at the top left corner.
Choose Options.
Click on Add-Ins.
Select the Manage tab below the Word Options window.
Choose COM Add-Ins from the list.
Click the Go button.
Uncheck, and stop all the Add-Ins you feel might be causing the error.
Click OK when you’re done.
Restart Microsoft Word.
If you still get the error, follow the next step to disable all Add-Ins with Trust Center.
Launch Word, and click on File.
Click Options.
Select Trust Center.
ClickTrust Center Settings.
When the Trust Center window pops up, choose Add-ins.
Check the box next to the Disable all Application Add-ins option.
Next, click OK.
The Word Options window will redisplay, and select OK to finalize.
Close and restart word to confirm if this approach worked for you.
Before you begin to disable Protected View, know that this method might open your computer to viruses. So you will use this method at your own risk if you still wish to continue.
Launch Microsoft Word.
Select the File menu at the top-left corner of your PC screen.
Click on Options.
Select Trust Center from the menu to the left side.
Click the Trust Center Settings at the bottom left corner.
Click the Protected View option.
Uncheck the boxes.
Click OK.
Why is my Word document not closing?
Add-ins conflict with the app.
Your antivirus might be blocking the app.
The latest Office update might be buggy.
A corrupt or missing system file on your PC can also cause this problem
The normal.dot template file is causing the issue, which you can locate with the following path: %USERPROFILE%\Application Data\Microsoft\Templates\
How to close a Dialog Box in Microsoft Word?
Try pressing the X from the upper right corner or Cancel.
If the pop-up keeps appearing, close Word and rename the Normal.dot file.
Press the Ctrl+Alt+Del keys to open Task Manager and end the Word process.
Click on the Powerbutton and select Restart.
Hopefully, methods one to four discussed in this article will get rid of the word can’t do this because a dialog box is open error.
Getting a new graphics card is always exciting since you’ll now be able to experience smoother gameplay and play more recent games.
However, some users reported that games crash after installing a new GPU. This can be a big problem, and in this guide, we’ll show you the best ways to fix this issue.
Why is my GPU crashing games?
Well, all games depend on your GPU for the best performance you can experience. Here are some of the most common reasons your GPU might be crashing games on your PC.
It could be because of the increased GPU temperature.
You have overclocked your GPU.
The GPU drivers aren’t updated.
A faulty power supply could also result in the crashing of games.
Some critical system files are missing from your PC.
DirectX isn’t updated.
Your GPU itself is problematic.
How do I test my new GPU?
There are a few things that you can do to test if your new GPU is working fine or not.
Check if the cooling fans are moving freely or not.
Clean the dust off the GPU.
Download benchmark tools on your PC and run tests to see all the working features.
Use the DirectX Diagnostic Tool to check if all the graphics features your card supports are working or not.
You can also use the Windows Display settings to check if your graphics card is supported by your PC or not.
Play some games and check whether you are getting the optimal performance.
How can I fix games crashing after installing a new GPU?
1. Make sure that your drivers are updated
If you’re experiencing crashes with a new GPU, your drivers may be outdated. There are several ways to update them, but the fastest would be using specialized driver updater software.
These powerful tools allow you to scan your computer and update any broken drivers you encounter in just a few minutes.
2. Reinstall the drivers
Press Win + X and choose Device Manager from the list.
Locate your graphics card driver, right-click it and choose Uninstall device.
Check Remove driver software for this device if available and click on Uninstall.
After doing that, install the latest drivers for your new graphics card.
A few users reported that switching to an older driver version fixed the problem for them, so you might want to try that as well.
3. Underclock your graphics card/RAM
If the games crash after installing a new GPU, your PC may not handle the current graphics card. One way to fix this problem is by underclocking your graphics card.
To do that, you need to use overclocking software that is compatible with your graphics card and reduces overclock values.
Some users suggest lowering the frequency by 100MHz since that might be able to fix the issue, so be sure to try that.
Others also suggested that you might be able to fix this problem by underclocking your RAM. To do that, follow these steps:
You might have to check your power supply if the games crash after installing a new GPU. But, first, make sure that everything is connected correctly.
Next, you might want to test your power supply. Again, you can do that easily with specialized power supply testing software.
Lastly, be sure to check the power output. Your new graphics card might need more power; if that’s the case, you might have to upgrade your power supply.
Problems with a graphics card can be hard to fix, but we hope you managed to fix this issue with our solutions. Moreover, we encourage you to check out these great graphics cards for gaming.
How do I know if my GPU is failing?
Here are some quick checks you can go through that will help you determine if your GPU is failing or if it is time for you to get a new one.
You are coming across graphics glitches quite often.
Strange fan noise comes from the GPU.
Your PC is crashing multiple times.
You are experiencing significant frame drops while playing games.
Blue Screen of Death (BSoD) is another indication of your GPU dying.
Did you find a different solution to this problem? Feel free to share it with us in the comments section below.
Sticky Keys might be useful for some, but most Windows 10 users instantly turn this feature off because it interferes with their work.
A few users reported that Sticky Keys won’t turn off on their computers, and that can cause a lot of inconvenience. It’s not just on newer Windows OSs. The same happened on older versions, as well.
Not to mention that sometimes, Sticky Keys randomly turn on, which can indicate keyboard issues.
So in this article, we’ll try several solutions. We hope that before you reach the end, Sticky Keys won’t be an issue anymore.
What can I do if Sticky Keys won’t turn off in Windows 10?
1. Check your PC for malware
If you can’t turn Sticky Keys off, it’s possible that your PC is infected with malware. Not all malware is harmful, and some malware is designed just to annoy the infected users.
If that is the case, run a full system scan and check if that solves the problem.
A good antivirus can save you from a lot of trouble by blocking threats before they get the chance to infect your PC, but they can also remove already existing malware with the least possible damage to your system files and apps.
Using an antivirus software such as TotalAV can be a great option here because it has a powerful anti-malware scanner. It has various scanning options, such as the system scan where it scans every single file on your PC, including program files, system files, cached files, and others.
Furthermore, it provides you with an overview of your entire system and allows you to generate security reports so you can see an in-depth list of your computer’s running processes.
TotalAV
A secure antivirus suite with outstanding malware detection rates that protects your device successfully.
Open Device Manager by pressing Windows + X and choosing it from the list.
Locate your keyboard driver, right-click it and choose Uninstall device.
Now click the Uninstall button to confirm.
After the driver is removed, restart your PC and the default driver will be installed. Once that is finished, check if the problem still persists.
If the previous method doesn’t fix the issue, we recommend you use a dedicated tool. It is a faster and safer option for your device and you don’t have to worry about choosing the right driver.
Tools like Outbyte Driver Updater can update your drivers automatically by identifying each component on your computer and matching it with the latest driver versions from an extensive online database.
3. Reinstall the Synaptic pointing device
If you’re having problems with Sticky Keys on your laptop, the issue might be Synaptics pointing device. So it’s advised to reinstall this software.
The most effective way is to use an uninstaller application since it will safely and completely remove programs from your PC.
Unlike regular uninstall processes, uninstaller software will remove all files and registry entries associated with the application you no longer need.
Oftentimes, regular uninstalls leave behind residual files that only take up space and have the potential to cause errors. An improperly removed file may prevent you from reinstalling it.
There are many great options available, and the best uninstaller software can scan your whole computer and remove any lingering files. On top of that, they can also force remove stubborn (often malicious) programs from your PC.
Once you are sure your program is completely removed, you can reinstall it and see if the problem persists.
4. Change registry values
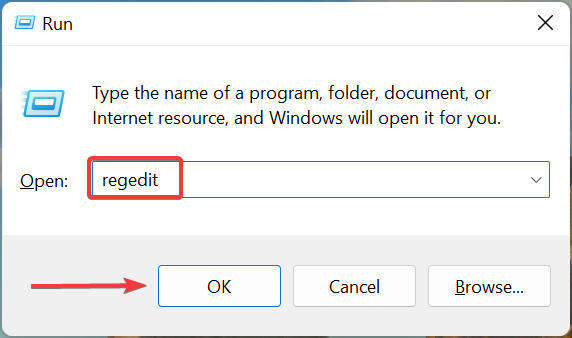
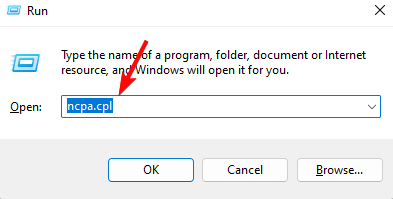
1. Press Windows Key + R on your keyboard to open the Run dialog.
2. Type regedit and then click OKor press Enter to run the command.
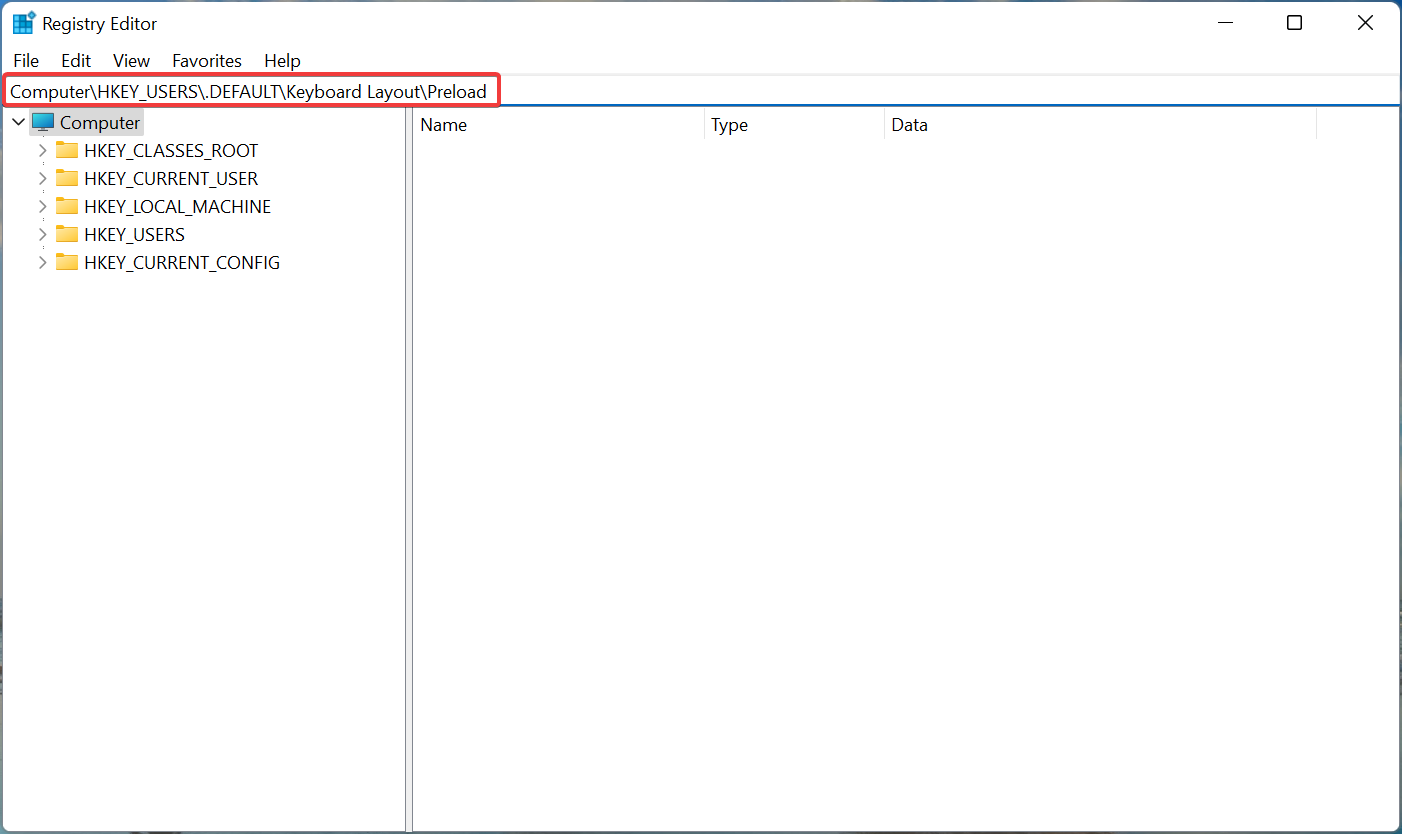
3. Navigate to the following location: HKEY_CURRENT_USERControl PanelAccessibilityStickyKeys
4. In the right pane locate the Flags string. Double-click it and change its value to 506.
5. In the left panel, navigate to: HKEY_CURRENT_USERControl PanelAccessibilityKeyboard Response
6. Locate Flags in the right pane, double-click it, and set its value to 122.
7. To the left, go to: HKEY_CURRENT_USERControl PanelAccessibilityToggleKeys
8. Finally, locate Flags in the right pane and set its value to 58.
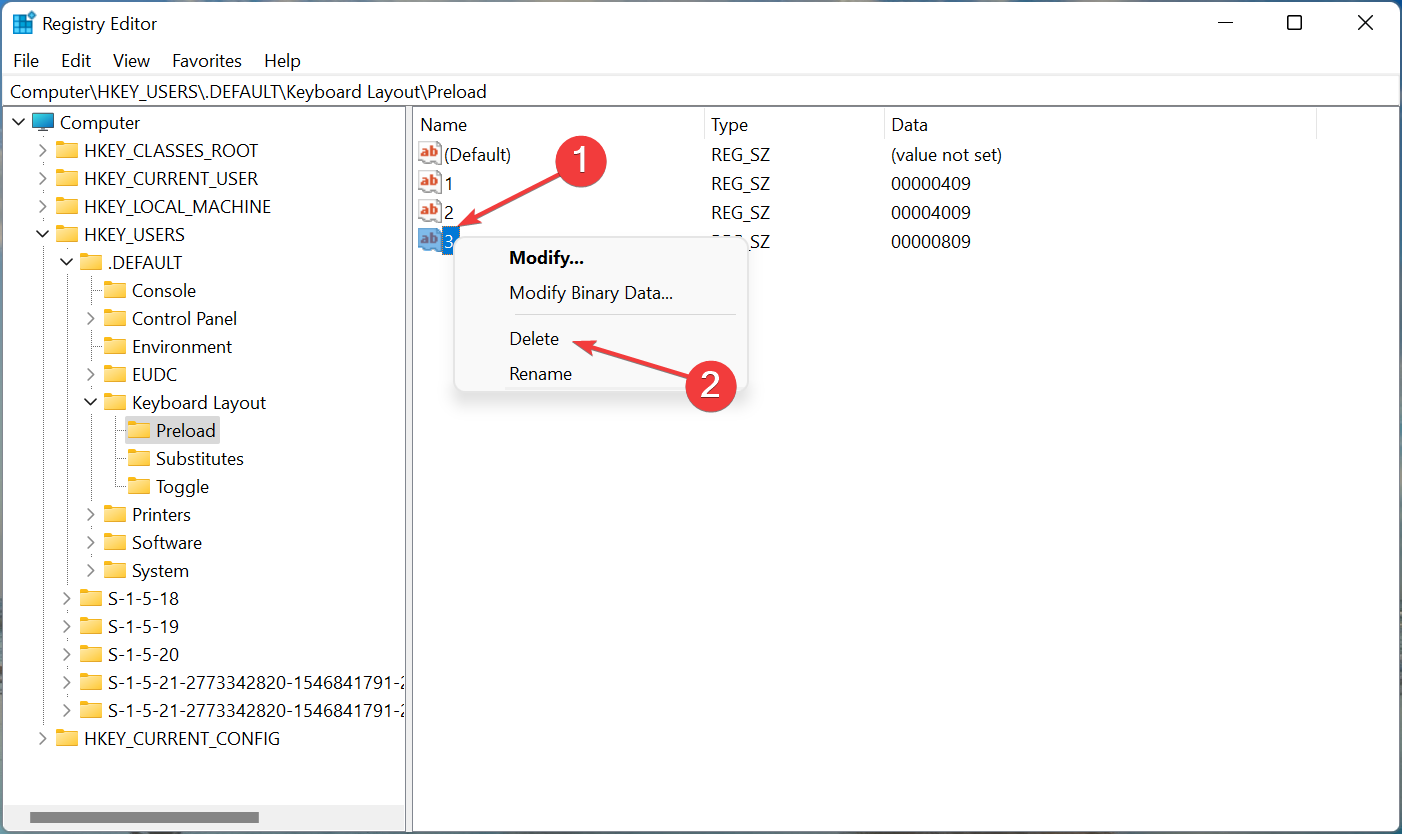
If other solutions did not work, you can try a more advanced one. The Registry Editor allows you to modify any settings you want on your PC. You can turn off Sticky Keys from it by editing some String Values, as shown in the steps above.
We have to mention that changing your registry can cause certain issues with Windows 10 if you don’t do it properly, so before you start, make sure to create a backup of your registry.
Right-click the Start icon from your taskbar then select Device Manager.
Locate your keyboard and right-click it. Choose Properties from the menu.
Navigate to the Power Management tab and make sure to uncheck Allow the computer to turn off this device to save power.
Click OK to save the changes made.
Bear in mind that your keyboard might be listed in both Keyboards and Human Interface Devices sections, so you’ll have to repeat this process for both entries.
6. Replace your keyboard
If Sticky Keys won’t turn off on your computer, it might be due to a faulty keyboard. Users reported that this issue was fixed simply by replacing their keyboard.
Before you replace your keyboard, it’s advised to inspect it for hardware malfunctions. Sometimes certain keys such as Shift, Alt, or Ctrl can get stuck and that can cause this problem to appear.
Alternatively, you can also try the keyboard on a different PC. If the problem appears on another PC, it’s rather likely that the keyboard is faulty.
7. Disable Sticky Keys from Control Panel / Settings app
Press Windows + I to open the Settings app then go to Ease of Access.
Select Keyboard from the left pane and disable Sticky Keys from the right side. You can also disable all other options.
8. Press the Num Lock key
Many users reported that the FN key is always pressed on their laptops. As you know, the FN key is designed to perform certain functionalities, and if it stays active, you might activate certain shortcuts by accident.
This behavior can interfere with your work, and in order to fix this problem, you just need to turn off the Num Lock button. Simply press the button and the problem should be resolved.
Keep in mind that this is just a workaround, but many users reported that it fixed the problem on their laptop, so be sure to try it out.
9. Press the right and left Shift keys at the same time
According to users, you might be able to fix this problem simply by using a quick keyboard shortcut: pressing both Shift keys simultaneously.
This sounds like a workaround, but few users claim that it works, so feel free to try it out.
10. Install the latest updates
Press the Windows key + I to open the Settings app then navigate to the Update & Security section.
Now click the Check for updates button.
Windows will now check for available updates. The available ones will be downloaded in the background. Once the update process is finished, restart your PC to install the updates.
After updating Windows 10 to the latest version, check if the problem still persists.
As mentioned, not being able to turn off Sticky Keys on Windows 10 can be troublesome, but most users report that the issue was resolved using one of the solutions suggested in this article.
If you have any other suggestions or questions, don’t hesitate to leave them in the comments section below and we’ll be sure to check them out.
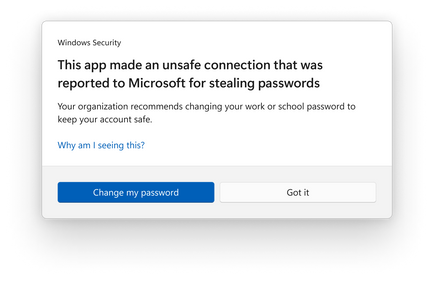
Last week, Microsoft announced that it’s beginning to roll out the Windows 11 2022 Update which features a ton of improvements. Among them is Enhanced Phishing Protection, a tool that is designed to identify malicious sites or applications that attackers use to access login credentials. Whenever the tool detects such an instance, it automatically notifies the admin through Microsoft Defender for Endpoint.
“Enhanced phishing protection is baked into the Windows 11 operating system and automatically detects when users type their password into any app or site. Windows understands in real-time whether that app or website has a secure connection to a trusted website; if not, Windows will let users know if they’re in danger. That means admins can know exactly when a password has been stolen and be equipped to better protect your organization. When Windows 11 protects against one phishing attack, that threat intelligence cascades to protect other Windows users interacting with other apps and sites that are experiencing the same attack as well.”
How does Enhanced Phishing Protection work? Windows will first analyze where you enter your password, then use SmartScreen to decipher the authenticity of the application or site. It then responds immediately and alerts the users that they are required to change their password immediately, this is regardless of whether they are using a Microsoft Account, Active Directory, Azure Active Directory, or local passwordSmartScreen. The tool will also notify the IT admin of the incident through the MDE portal for further investigation and mitigation of the issue.
SmartScreen identifies and protects against corporate password entry on reported phishing sites or apps connecting to phishing sites, password reuse on any app or site, and passwords typed into Notepad, Wordpad, or Microsoft 365 apps.
IT admins can control which instances end users will receive warnings for these security breaches via CSP/MDM or Group Policy. The feature is however in audit mode by default, which allows admins to assess password usage through the Defender for Endpoint portal without notifying users.
The feature is currently accessible to users who have upgraded to Windows 11 22H2. However, for commercial customers looking to receive the Enhanced Phishing Protection alerts in the M365 Defender security portal, their license must have Microsoft 365 Defender security portal access.
Have you accessed this feature yet? Share your thoughts with us in the comment section below.
Brother printers are typically a great, budget-friendly investment. They can print and copy many documents quickly, they’re very easy to hook up to a home network, they’re compatible with many operating systems, and they usually come with a fairly large amount of memory.
But like any printer, you may have to look into it from time to time to ensure it’s working and not having any problems. Even the most diligent printer owners must deal with their machine’s occasional refusal to print.
Sometimes, Windows cannot connect to the printer, and all that needs to happen is a quick clean-out of any paper jams that may be present inside the machine.
Why is the Brother printer not printing?
When your printer starts acting up, it can be a real pain to start working again – but if you know what’s causing the problem, you can usually fix it easily.
Here are some possible causes for your Brother printer not printing:
Paper tray is empty – Make sure you have paper in your printer. Also, check your paper and ensure you have loaded it correctly into the tray. If you have paper in the printer and you still have a blank page, exit the print job and then try to print again.
Toner cartridge is not installed properly – If the toner cartridge isn’t installed correctly or if its seal has been broken, it may not be able to print properly anymore. Go ahead and install a new one if necessary.
The tray has jammed – Open up the tray compartment and check for paper jams. Remove any jammed paper by hand or with tweezers before attempting to print again.
Faulty USB – Check to see if you have a problem with your USB cable or power cord. Test the USB cable by plugging it into another USB port on the computer.
Why is my Brother printer not printing in colour?
The most common reason for this happening is that your Brother printer doesn’t have enough ink to fill the cartridges. Most printers have either three or four separate cartridges, each containing a different colored ink.
Check to make sure that the ink cartridges are installed correctly and that they are not empty. If the ink cartridges are out of ink or improperly installed, the printer will not be able to print in colour.
Also, try shaking up the ink cartridge to get rid of any bubbles that may be inside. Your Brother printer may be printing blank pages because of air bubbles.
Other times, you probably just need to change your printer settings. For some reason, the default settings on many printers are set to print everything in monochrome.
What can I do if my Brother printer is not printing?
1. Check cable connections
If you find that your Brother printer isn’t printing, make sure that the cable connections are secure. If a cable is loose or damaged, it might not be transferring data to the printer. Next, check if the power cord is securely plugged into the wall or surge protector.
Try turning off and then on again the printer and computer to see if they revert to normal operations. If printing with a wireless or Bluetooth connection, make sure that both devices are on the same network, and that they’re connected preferably by an Ethernet cable.
2. Clear print queue
The print queue is a list of documents that are waiting to be printed. Every time you send a document to your Brother printer, it gets added to the top of this list. The documents at the top of this list will be printed first.
Clearing the print queue will remove any jobs that haven’t printed yet and free up the space in the queue to allow new jobs to print.
3. Disable other printers
If your Brother printer is not printing or responding to the computer, it is possible that there are other printers on your network currently receiving print jobs. Disabling other printers will clear out any clutter or confusion that might be causing this error.
Once you have turned off all of your printers, go ahead and restart your computer. Your printer should then work just fine. Alternatively, you can set Brother printer as the default printer.
Hit the Windows key, type Device Manager in the search bar and click Open.
Locate and Expand the Print queues section, then right-click on the Brother printer, and select Update Driver Software.
Click on Search automatically for drivers.
If you specifically use the Brother MFC-L2710DW model, you can follow this Brother MFC-L2710DW driver download guide to get the correct package and ensure smooth installation.
You can either follow the steps above manually, or you can use a third-party tool. Fortect Driver Updater can do this process automatically, saving you time and effort.
It scans your device and offers you a list of devices that need to be updated. It replaces outdated drivers with the latest ones from its constantly revised database.
Hit the Windows + R keys simultaneously to open the Run command.
Type in services.msc then hit Enter.
Locate Print Spooler, right-click and select Restart.
6. Run the Printer troubleshooter
Press the Windows key and select Settings.
Click on System, then select Troubleshoot.
Select Other troubleshooters.
Navigate to the Printer section, then click on the Run button.
7. Reset the printer
If your Brother printer is not responding to the solutions listed above, it is possible that the printer has been locked up. In this case, you can attempt to reset it by unplugging the device and waiting for a minute or two.
For a full reset, you will need to check the official website for your printer’s model number and follow the reset instructions. A full reset will cancel any print jobs and return all settings to their factory defaults. This means that all your personal files will be deleted, so make sure to backup your files before performing this step.
Why is my printer working but not printing?
Bad drivers – Your computer may use the wrong printer driver. If this is the case, use the correct Brother printer drivers to print instead of your computer’s default driver. We encourage you to check out our article on how to download Brother printer drivers for Windows 11.
Outdated OS – Make sure your operating system is up-to-date and your computer meets all its requirements. You can do this by running a diagnostic test on your computer or by calling customer service for help with checking compatibility issues.
Weak connection – Wireless connections tend to be weaker than wired connections. This is because of obstructions that cause disruptions.
Most of the time, the problem with a printer is simply a matter of troubleshooting and plugging in some cables.
However, if you’re trying to troubleshoot this issue on your own and you can’t get your printer to cooperate, there’s no shame in calling Brother printer support for help.
In case you have outgrown your Brother printer and are in the market for printers compatible with Windows 11, we have an awesome collection that is just the right fit.
Let us know if you have been able to solve the issue in the comments section below.
Keyboard layouts are a great way to input multiple languages into the computer without requiring specialized hardware. However, several users have reported that they can’t remove a keyboard layout in Windows 11.
Though this does not pose a significant problem, there is always a chance of mistakenly choosing the wrong keyboard layout.
Also, many users prefer an uncluttered PC with no unnecessary settings or applications that can hamper progress and, thus, the need to remove additional keyboard layouts.
So, if you have been trying but can’t remove the keyboard layout in Windows 11, here are the most effective solutions to the problem.
How can I remove a keyboard layout in Windows 11?
1. Use the Settings app
Press Windows + I to launch the Settings app, and select Time & language from the tabs in the navigation pane on the left.
Click Language & region on the right.
Now, click the ellipsis next to the language under which the layout you want to remove appears, and select Language options.
Click the Add a keyboard button next to Installed keyboards.
Select the very same layout from the list that you have trouble removing.
Once done, close the Settings app and restart the computer.
Now, again, head to Language options.
Click the ellipsis next to the layout you had been trying to delete, and select Remove from the flyout menu.
Again, restart the computer for the changes to come into effect.
Once the computer turns on, the layout will be removed. This method is very effective if you can’t remove the keyboard layout in Windows 11 on Dell, Lenovo, or HP.
The idea is to add the layout that keeps appearing and then manually remove it. Similar issues were encountered in the previous iteration, i.e., Windows 10. In case this method doesn’t work, head to the next one.
2. Use the Windows PowerShell
Press Windows + S to launch the Search menu, enter Terminal in the text field at the top, right-click on the relevant search result, and select Run as administrator from the context menu.
Click Yes in the UAC (User Account Control) prompt that pops up.
Now, paste the following command and hit Enter to list all the keyboard layouts added to the system:Get-WinUserLanguageList
Note the value listed next to LanguageTag for the layout you want to remove.
Next, execute the following four commands one at a time while replacing <LanguageTag> in the second command with the one you noted earlier:$LangList = Get-WinUserLanguageList$MarkedLang = $LangList | where LanguageTag -eq <LanguageTag>$LangList.Remove($MarkedLang)Set-WinUserLanguageList $LangList -Force
For instance, if you want to remove the layout with LanguageTag as en-IN, the four commands become as follows:$LangList = Get-WinUserLanguageList$MarkedLang = $LangList | where LanguageTag -eq en-IN$LangList.Remove($MarkedLang)Set-WinUserLanguageList $LangList -Force
Once done, restart the computer for the changes to come into effect.
For those who prefer command-line applications to execute, this method should do the trick if you can’t remove the keyboard layout in Windows 11.
3. Modify the Registry
Press Windows + R to launch the Run command dialog box, enter regedit in the text field, and either click OK or hit Enter to launch the Registry Editor.
Click Yes in the UAC prompt that pops up.
Paste the following path into the address bar at the top, and hit Enter. Alternatively, you can navigate it using the left pane: Computer\HKEY_USERS\.DEFAULT\Keyboard Layout\Preload
You will now find a list of entries on the right, each denoting a particular keyboard layout added to the PC. Check Microsoft’s official website for the Keyboard Identifier to find the one you want to remove.
Once you can identify the layout to be removed, right-click on it and select Delete from the context menu.
Click Yes in the confirmation prompt that appears.
Restart the computer for the changes to come into effect.
That’s it! You have now successfully removed the keyboard layout using Registry in Windows 11. The process is pretty simple, but make sure to identify the keyboard layout correctly and do not make any other changes to the Registry except the ones listed here.
How do I change the keyboard layout in Windows 11?
Changing the keyboard layout is pretty simple in Windows 11 and even the previous iterations of the OS. To change the keyboard layout for the same language, press the Ctrl + Shift and then hit the Shift key to select another.
If you want to select another language, press Windows + Space Bar and then hit Space Bar to navigate the listed entries and choose one.
That’s all there is to the concept and the most effective solutions if you can’t remove a keyboard layout in Windows 11. Also, these methods would help remove a keyboard layout in Windows 10.
The No audio output device is installederror occurs when Windows can’t find the audio device. You can see this notification above the system tray when hovering the cursor over the sound icon.
Consequently, no sound plays when Windows can’t find audio device hardware. Unfortunately, the issue often arises after system upgrades.
There are, however, a few potential resolutions for the Windows can’t find audio device problem, and we’ll discuss them here.
Why is my audio device not detected in Windows 10?
One of the most common reasons behind the We can’t find an audio device error in Windows 10 is improper connections, be it wired or wireless.
For wired audio devices, check that it is plugged in properly to the PC and that the cable or the port is not damaged. For wireless ones, check for issues with Bluetooth, run the dedicated troubleshooter, and other relevant ones.
Also, drivers have often been found to lead situations where your computer doesn’t recognize the audio device. In addition to that, the third-party apps installed on the computer may create conflicts.
Why am I getting We can’t find an audio device 0xc00d36 error message?
These types of errors are somewhat common, and many reported Music/Video error 0xc00d36c4. If this issue occurs, check your audio drivers, and update them if needed.
These tools will recommend compatible updates not just for your audio driver but for any outdated software it will find so that you can choose the preferred ones.
If you are using an external audio interface like the Focusrite Scarlett Solo, you can follow this Scarlett Solo driver download guide to install the correct package and fix missing audio device errors.
2. Run the Playing Audio troubleshooter
Press Windows + I to open Settings, and select Update & Security from the left.
Next, select Troubleshoot from the navigation pane, and click on Additional troubleshooters on the right.
Select Playing Audio and click theRun the troubleshooter button under it.
Now, follow the on-screen instructions, and choose the appropriate response when prompted to complete the process.
The built-in troubleshooter is an effective way of dealing with things when Windows can’t find the audio device and should eliminate the issue. Though it only works for problems reported to Microsoft and a patch introduced for it.
3. Re-enable the sound adapter
Press the Windows + X and choose Device Manager.
Double-click Sound, video and game controllers to expand that category.
Then right-click the audio adapter listed there and select Disable device.
Click Yes in the confirmation prompt.
To re-enable it, right-click the audio adapter and select Enabledevice.
If it’s a minor bug or trivial issues with the audio device, simply reinstalling it should fix things if you come across I couldn’t find your audio device. Then, make sure it’s connected and try again.
4. Check the Windows Audio Services are Enabled
Press Windows + R, type services.msc in the text field, and click OK or hit Enter.
Locate and double-click on Windows Audio to open its Properties.
Select Automatic from the Startup type drop-down menu, and click on Start if the service is not running.
Click OK to save the changes and close the window.
Then double-click Windows Endpoint Audio Builder.
Again, select Automatic from the Startup type drop-down menu, and click the Start button.
Finally, click on OK to save the changes.
Keep in mind that Windows Audio and Windows Audio Endpoint Builder are two services that need to be enabled for audio devices. And if the two are not running, you may encounter a bunch of issues, including We can’t find an audio device: 0x8889000f.
Press Windows + R to open Run, type rstrui.exe in the text field, and click OK.
Press the Next button to open the list of restore points.
Select a restore point from the list, and click on Next.
Finally, click Finish to start the restore process.
System Restore is an effective tool to fix many issues with Windows. It simply reverts the system to a state where the error didn’t exist by modifying the configured settings and installed apps, though it doesn’t affect the files stored on the PC.
Choosing a restore point created before you first encountered the Windows can’t find audio device error is critical. And that’s why it’s recommended that you manually create restore points every once in a while to be able to revert things to normal in case of issues.
6. Factory reset Windows
If nothing else worked, you are left with no option but to factory reset Windows. And we recommend you clear everything from the PC when given the option since there’s a higher possibility of the error being eliminated in this case.
You may create a backup for the files using reliable cloud storage services to recover things after the reset, but that’s a personal preference.
Once the reset process is complete, things should be up and running, with Windows can’t find audio device error fixed.
How do I reinstall an audio device in Windows 10?
Type Device Manager in the Search menu and click on the relevant search result.
Locate the audio device you want to reinstall, right-click on it, and then select Uninstall device.
Now, click Uninstall in the confirmation prompt.
Once done, click on the Scan for hardware changes icon to reinstall the device and the relevant driver.
That’s it! These are some resolutions that should fix the No audio outputerror when Windows can’t find audio device hardware.
Back in March, Microsoft released a new SMB preview feature, the Server Message Block (SMB) authentication rate limiter, through the Windows Server Insider build 25075, and coming to Windows Server Azure Edition Insider & Windows 11 Insider Dev Channel builds.
The Server Message Block (SMB) authentication rate limiter is in place to help shield users from brute force password attacks. Its server runs by default in all versions of Windows, though you will need to open the firewall to access it.
Most times, you will find that IT staff enable access to the SMB server service even on devices that are not file servers designated to meet important needs such as opening remote files. The problem with this is that it provides a platform for hackers to attempt authentication.
With just a username, the hacker can send local or Active Directory NTLM logons to a machine using common open-source tools, thus allowing them to guess the login credentials. Therefore, if your organization does not have intrusion detection software or a password lockout policy, you are more susceptible to compromise. The same also applies to users that disable their firewall and connect their devices to unsafe networks.
Starting in Windows Server Insider build 25075 and later, the SMB server service now implements a 2-second delay between each failed NTLM or PKU2U-based authentication. This means if an attacker previously sent 300 brute force attempts per second from a client for 5 minutes (90,000 passwords), the same number of attempts would now take 50 hours at a minimum. The goal here is to make a machine a very unattractive target, a key aspect of defense-in-depth techniques.
And now, with the recent release of Windows 11 Insider build 25206 for the Dev Channel, the feature is on by default and set to 2 seconds. With this in place, any incorrect password or username sent to SMB will automatically lead to a 2 second delay by default in all Windows 11 Insiders editions. Previously, the feature was off by default, however, this does not affect Windows Server Insiders because it still defaults to 0.
It is also worth noting that this behavior change will not affect Kerberos, it will still be able to function as usual and make the authentication then later allow SMB to connect. It provides an extra layer of protection, moreso, for devices that are not linked to domains.
What are your thoughts on this tool and the purpose it serves? Let us know in the comment section below.
Many gamers reported that Elden Ring is not using the GPU. Misconfigured game settings, outdated GPU drivers, or being on a low-performance power plan may be behind Elden Ring not using a dedicated GPU.
If you find Elden Ring not using GPU in the Windows Task Manager, verify the same through the utility offered by your graphics card manufacturer. Task Manager has often been found to display incorrect information in this regard.
How can I fix Elden Ring if it’s not using GPU?
1. Update Elden Ring
Launch Steam, and navigate to the Library.
Right-click on Elden Ring, and then select Update from the context menu.
As discussed earlier, the recent update, Path 1.02.2, to be precise, fixed Elden Ring’s low GPU utilization for most users. In case an update option is not available yet, here’s how you can manually do it:
Right-click on Elden Ring and select Properties.
Navigate to the Updates tab.
Select High Priority – Always auto-update this game before others from the Automatic Updates dropdown menu.
Now, restart Steam, and you should see an update that would fix things if Elden Ring is not using GPU.
2. Switch to a High Performance plan
Press Windows + I to open Settings, and click on Display in the System tab.
Click on Graphics under Related settings.
Select Elden Ring from the list, and click on Options.
Now, choose High Performance and click Save.
Restart the computer and verify if Elden Ring’s GPU usage remains under 50. Suppose that’s the case, head to the other solutions here.
3. Update the graphics driver
If your computer already relies on the dedicated GPU, but you are still facing the problem, it could be the outdated drivers to blame. In this case, the best option would be to update the drivers.
Though the manual approach wouldn’t be as feasible since there are a lot of sources for the update, you might not be able to access them all. It would take considerably more time and effort if you somehow do.
In this case, using a professional software that updates your drivers automatically had proven to work for many users when the issue was related to faulty drivers. So, do give it a try!
Select Manage 3D settings from the navigation pane on the left.
Next, choose a High-performance NVIDIA processor from the Preferred graphics processor dropdown menu.
If the last method didn’t work out for some reason, you could always configure Windows to use Nvidia (or other processors) by default through the dedicated control panel.
Press Windows + S to open the Search menu, enter Device Manager in the text field, and click on the relevant search result.
Double-click on the Display adapters entry.
Now, right-click on the internal GPU, and select Disable device.
Once done, Windows will automatically rely on the dedicated graphics processor, which should fix things if Elden Ring is not using GPU.
How do I force a game to play on my GPU?
Right-click on the desktop and select Display settings.
Now, select Graphics from the options here.
Click on Add an app dropdown menu.
Choose whether you want to add a Desktop app or a Microsoft Store app.
Next, click on Browse.
Now, navigate to the folder where the game launcher is stored, select it, and click on Add. (This is the case for Desktop apps. In case you choose Microsoft Store app, Windows would present a list of the installed ones)
Locate the game you added to the list below, and click on Options.
Choose the graphics processor you want the particular app to use, and click Save.
That’s it! The particular game has now been configured to use the GPU, and you should notice a considerable boost in performance.
Also, by now, Elden Ring will be using the GPU, which should reflect in the Task Manager if it didn’t earlier.
Can you play Elden Ring without GPU?
Many users tried running Elden Ring on the integrated graphics card, and the result wasn’t as bad as expected. In such cases, you can’t expect it to deliver the same performance as it does on a dedicated GPU.
The game will lag and stutter, but it will remain playable, as reported by players. So, if you are facing issues with the game, verify the underlying cause before blaming the integrated graphics.
If a certain video won’t play on your PC, it’s possible that you have a missing codec. To ensure that all videos are working properly, you’ll need a Windows 11 codec pack.
How do I download and install the Windows 11 codec pack?
Windows 11 usually doesn’t need codecs, and it should be able to play most video files. However, if you ever encounter a file that you can’t play, you might have to download a specific codec for it, but as you can see downloading and installing codecs on Windows 11 is pretty simple.
How to install HEVC codec on Windows 11 for free?
HEVC is one of the codecs that isn’t natively available in Windows 11. While the codec isn’t free, there are media players that come with HEVC preinstalled, and to learn more visit our guide on how to install the HEVC codecs in Windows 11 manually.
If you run into any problems with codecs, we’ve put together an article to help you repair the problem quickly and easily so don’t miss our To play this video you need a new codec guide.
Alternatively, if you want to find out more about the topic, you can look into our post on installing codecs in Windows 10. Of course, the procedure may be applied in Windows 11 as well.
As you can see these are free codecs for Windows 11, and they can be installed with ease by following our solutions.
If you have other suggestions, don’t hesitate to comment in the section below.
Libraries were introduced in Windows 7, and since then, they become a handy way to organize your files. And many users have been looking for ways to show the Libraries in Windows 10.
But, for some reason, the Libraries item is missing from the Navigation panel in Windows 10 by default.
If you use the Libraries to sort files, you might want it back, and here are a couple of ways to do it.
How can I use Libraries in Windows 10 Explorer?
1. Show Libraries in Windows 10
1. Press Windows + E to open File Explorer.
3. Click on the View tab from the top menu.
4. Click on the Navigation pane option on the left.
5. Choose Show libraries from the drop-down menu.
6. The Libraries item will now show in the Navigation panel on the left.
The Libraries feature in File Explorer needs to be manually enabled before you can use it. And this is how you can show Libraries in Windows 10. The process is simple and wouldn’t take more than a minute.
2. Open Libraries with the context menu
Press Windows + E to open File Explorer, right-click on the left portion, and select Show libraries from the context menu.
The Libraries will now show in the navigation pane in Windows 10.
3. Show Libraries using the Folder Options
Press Windows + E to open the File Explorer, go to the View menu, and click on Options.
Navigate to the View tab, scroll down to the bottom, select Show libraries under Navigation pane, and click OK.
4. Open Libraries in Windows 10
Press Windows + R to open the Run command, type the following command in the text field, and click OK:shell:Libraries
The Libraries folder will now open and show in File Explorer on Windows 10.
This command is a special shell command which will open the Libraries folder directly in your File Explorer.
An issue with your libraries can be a significant problem, especially if you stock your data in those folders.
For those of you having library problems, we suggest you check our guide on fixing the Music Library.
It is a quick fix that will reset your Libraries, and you can apply this fix not only for the Music folder but also for Videos, Pictures, and Documents.
That should be all. We don’t know why Microsoft decided to exclude Libraries from the default Navigation bar, but as you can see, you can easily bring it back. And you can always create new libraries in Windows.
We have all heard of, and many may have also encountered, the BSoD error on Windows 11, but there is another similar one that most of us are unaware of. It’s the Windows 11 green screen error.
A regular user would most likely never come across this, but if you do, troubleshooting it is not very different from the BSoD errors.
But the real question is, why are you encountering the Windows 11 green screen error instead of BSoD? Go through the following sections to find the answer and learn how to fix the error.
Why is my computer showing a green screen?
You might get a green screen on Windows 11 because of faulty or corrupt system files. Running a dedicated PC repair tool or using the built-in file fixer should fix the issue.
Another known cause of the issue is an outdated operating system. While Windows installs updates automatically, you can sometimes miss out for some reason.
So, you need to update your PC manually to fix this. Irrespective of the cause, take the time to read this guide for suitable solutions.
What is the difference between blue screen and green screen errors?
The main difference is that the Windows 11 Insider build uses a green screen instead of the blue one for system crashes.
However, the information listed on the error screen is more or less the same, except that it says you are on a Windows Insider Build. Other than that, it will have every piece of information listed on the BSoD screen but with a green background.
Also, the underlying causes are similar to the blue screen error. But since you are running an unstable Insider Build, a bug with the OS, too, can lead to the green screen error.
Now that you have a basic understanding, let’s walk you through the most effective fixes for the Windows 11 green screen error.
What are some common green screen errors on Windows 11?
Green screen errors share the same error codes as their blue counterparts, and you can fix both with the same methods. Regarding the most common ones, they include the following:
Green screen Inaccessible Boot Device on Windows 11: This issue usually appears if there’s a problem with your boot device. This issue will prevent your system from booting and lead you to a reboot loop.
DPC watchdog violation Windows 11 green screen: This variation of this issue makes your computer freeze. You should be able to fit it by repairing your system files.
Green screen Memory Management on Windows 11: In most cases, you’ll encounter this error code if there’s a problem with your memory modules.
How can I fix the Windows 11 green screen error?
1. Use a dedicated third-party tool
The easiest way to eliminate green and blue screen errors in Windows 11 is to use a reliable third-party app that automatically identifies and eliminates issues with the PC.
Apart from fixing errors, these tools also run regular scans to identify malware and ensure that your system remains in good health.
Once done, your system should work like before. However, if you want to go ahead and manually resolve the problem, try the methods listed next.
2. Disconnect the malfunctioning device
One of the primary reasons behind the GSOD Windows 11 error is having incompatible or malfunctioning hardware connected to the system. To fix it, all you have to do is identify and disconnect that particular device.
First, shut down the system and disconnect every peripheral leaving just the mouse and keyboard. Now start adding the ones you removed once a day, turn on the computer after each, and check if the green screen error is encountered.
Repeat the process until you identify the malfunctioning or incompatible device, and either get it repaired or replaced. You can also get in touch with the device manufacturer for a resolution.
3. Update Windows 11
Press Windows + I to launch the Settings app, and select Windows Update from the tabs listed in the navigation pane on the left.
Now, click the Check for updates button on the right and verify if any newer versions of the OS are available.
If any are listed after the scan, click on the Download & install button.
4. Update the drivers
Press Windows + S to launch the Search menu, enter Device Manager in the text field at the top, and click on the relevant search result.
Double-click on the Display adapters entry to expand and view the graphics adapter.
Now, right-click on the graphics card, and select Update driver from the context menu.
Select Search automatically for drivers from the options in the Update Drivers window.
Wait for Windows to find the best available driver and install it.
An outdated driver is likely to cause the Windows 11 green screen error. This is because drivers play a critical role in the effective functioning of the hardware by relaying commands between the OS and the device.
The Device Manager method is the simplest way to update the installed drivers. But it will only look for versions that are present on the system. So if you haven’t downloaded the latest version, try manually installing drivers on Windows 11.
Similarly, update all the drivers that are listed in the Device Manager. If not all, at least make sure to update the ones for the critical devices, such as the graphics card, hard drive, keyboard, and mouse, amongst others.
The whole process is bound to take time, but there’s a simpler alternative in the form of a third-party app. For example, you can use Outbyte Driver Updater, a reliable tool that will automatically check for updates and install these for the drivers on your system.
5. Remove conflicting applications
Press Windows + I to launch Settings, and select the Apps tab from the navigation pane on the left.
Next, click on Apps & features on the right.
Locate the conflicting app, click on the ellipsis next to it, and select Uninstall from the menu.
Now, click on Uninstall in the prompt that pops up.
Once done, restart the computer for the changes to full effect.
If you started encountering the Windows 11 green screen error after installing an app, you should remove it. In addition, many third-party antiviruses are known to cause the error, so uninstall them.
Press Windows + S to launch the Search menu, enter Windows Terminal in the text field, right-click on the relevant search result, and select Run as administrator from the context menu.
Click Yes on the UAC (User Account Control) prompt.
Click on the downward-facing arrow at the top, and select Command Prompt from the menu.
Now, enter the following commands one a time and hit Enter after each to run the DISM(Deployment Image Servicing and Management) tool:Dism /Online /Cleanup-Image /ScanHealthDism /Online /Cleanup-Image /CheckHealthDism /Online /Cleanup-Image /RestoreHealth
Once the DISM tool is run, execute the following command to perform an SFC (System File Checker) scan:sfc /scannow
7. Uninstall Windows 11 updates
Press Windows + I to launch Settings, and select Windows Update from the left.
Next, click on Update history on the right.
Click on Uninstall updates under Related settings.
Now, select the problematic update and click on Uninstall.
Click Yes in the confirmation prompt that appears.
If you started encountering the Windows 11 green screen crash after updating the OS, it’s recommended that you uninstall that particular update and wait for a newer version to be released.
8. Install the standard version of Windows 11
If nothing else works, we recommend that you install the standard version of Windows 11. The features in the Insider Build are not yet polished, and you may encounter issues from time to time. And that’s the idea behind it, to let users point out the flaws and bugs.
So, you can either install Windows 11 using the Windows 11 upgrade assistant or wait for it to release via Windows Updates for your PC and then make the upgrade.
So if you’re getting Windows 11 green screen during installation, perhaps it’s best to switch to a regular version.
Is the green screen of death fixable?
Like the blue screen, the green screen of death error is fixable. While the mistake might be frustrating, there are ways to fix it because the causes are well-known.
So, if you are facing an error on Windows 11, feel free to apply any of the solutions in this guide.
That’s all there is to fix the Windows 11 green screen of death error. And by the time you reach this part, the error should be long gone, and you can start using your system like before.
Also, the solutions for the green screen of death in Windows 10 remain pretty much the same, so you should now be able to fix the error on the previous iteration.
Tell us which fix worked and your experience of Windows Insider Build in the comments section below.
Windows 11 is now upon us. Millions of users that meet the requirements have embraced Microsoft’s latest desktop OS since October 2021. So now we’re better acquainted with Windows 11, it’s time to discover all the latest features this new platform offers.
Whether Windows 11 is a genuinely new desktop operating system under the hood is debatable. It is more of a subtle upgrade to its predecessor than the great leap forward Windows 10 was to 8.
Some users might say it’s a rebranded Windows 10, but that’s not a bad thing even so.
Windows 10 was, after all, a most welcome addition to its OS series after the flop of its predecessor. If Microsoft’s previous desktop platform wasn’t broken, why fix it?
The latest platform delivers the same performance as its predecessor, albeit with a revamped UI design and some cool new features.
What should I do first in Windows 11?
Now that your new Windows 11 OS is installed and ready to be used, there are a few actions to take that will provide you with system stability and customization.
Here are the most important steps to follow once you have installed a new OS on your PC:
Update the PC drivers – Press the Windows + Ikeys to access the Settings app and click to Check for updates.
Uninstall any apps you don’t use – Inside the Windows menu, simply right-click any app and choose Uninstall to remove it from your system.
Download any valuable apps – To access all the tools you need, your Windows 11 PC will need to have some apps installed.
Check your PC’s power settings – This element will dictate the amount of power your PC will use, so changing the power settings to fit your needs will ensure longer battery life and more stability.
Back up your personal files – To ensure that all your files will be kept unchanged, saving them onto an external HDD or SSD is the best option.
As you can see, our team of experts has created a handy step-by-step guide above dealing with how to set up your new Windows 11 OS for the best performance and stability.
Here are some handy Windows 11 tips and tricks you can try out on the new platform.
What are the best features of Windows 11?
While Windows 11 is built on the solid foundation of its predecessor, it still boasts some pretty excellent features that set it apart. Below are some of its best features:
Redefined Start Menu and Action Center
Support for Android apps
Addition of widgets
Redefined context menu with rounded corners
Integration of Microsoft Teams chat
What are the best tips and tricks for Windows 11?
1. Resize the taskbar
First, press the Windows + S hotkey for the search box.
Type Registry Editor in the search text box.
Next, click Registry Editor in the search utility to open it.
Browse to this registry key location: HKEY_CURRENT_USER\Software\Microsoft\Windows\CurrentVersion\Explorer\Advanced\
Right-click the Advanced key and select New.
Then select the DWORD (32-bit) Value option.
Enter TaskbarSi for the new DWORD’s name.
Double-click TaskbarSi to open the window in the screenshot directly below.
Then enter 0 or 2 within the Value data box. For example, enter 2 to expand the taskbar or 0 to reduce size.
Click OK on the Edit DWORD window to exit.
After that, close the Registry Editor.
Press the Start button, and select its Power option.
Then click Restart. After that, Windows 11 will have a larger or smaller taskbar depending on the value you entered.
NOTE
You can restore the original medium taskbar by entering 1 in TaskbarSi’s Edit DWORD window. Alternatively, right-click TaskbarSi and selectDelete.
2. Try out the new keyboard shortcuts
Windows 11 has new keyboard shortcuts for some of its features. You can press those hotkeys to bring up the widgets panel, Notification Center, Quick Settings, Teams Chats, and Snap Layouts. Press these hotkeys to open their features:
Windows key + W: Widgets panel
Windows key + N: Notifications Center
Windows key + A: Quick Settings
Windows key + C: Teams Chat
Windows key + Z: Snap Layouts
Shift + F10: Legacy context menus (items need to be selected)
3. Change your default browser
First, you must install a capable browser that is fully compatible with your new OS. Opera One makes an attractive choice.
Then, use the in-browser settings to declare Opera One as the default browser, as shown here.
Once you declare it, you will need to strengthen this setup in the Windows configuration.
To do that, open Settings and click on the Apps section.
Next, choose Default apps. Then, from the list, select the specific file types that you would like to associate with your preferred browser, and change them accordingly.
As you know, Edge is the default browser in Windows 11, and Microsoft has spared no effort to promote it. Unfortunately, that’s one of the reasons it’s a bit trickier to get it out of your way.
Windows 11 will still use Edge to open numerous file formats even though you tweaked the in-browser settings. And that is precisely why you need to adjust the settings in Windows as well.
While we cannot help acknowledging Edge’s worth, it’s safe to say that there are great alternatives that you might not want to miss.
With a sleek design and impressive integrations, performance-driven Opera One makes the perfect match for your brand-new OS.
Opera One
Make the most of your overall virtual sessions and test the latest integrations and features.
Open the Registry Editor as outlined in steps one to three of the first tip.
Then open the following registry key: HKEY_LOCAL_MACHINE\SOFTWARE\Microsoft\Windows\CurrentVersion\Shell Extensions
Right-click the Shell Extensions key on the left of the Registry Editor to select New.
Select the Key option.
Input Blocked for the new registry key’s name.
Right-click the Blocked key you just added and select the New > String Value options for it.
Enter {e2bf9676-5f8f-435c-97eb-11607a5bedf7} for the string value’s name.
Then exit the Registry Editor.
Reboot your PC by selecting the Power > Restart Start menu options.
NOTE
This registry editing restores the tabbed File Explorer from Windows 10 in the new platform. In addition, you can temporarily remove the command bar from File Explorer by pressing its F11 hotkey.
5. Organize the open app windows
Windows 11 has a new Snap Layouts feature that helps users organize windows better. To activate Snap Layouts, hover your cursor over the Maximize button at the top right of a window.
Then you’ll see the Snap Layout options shown directly below.
Then you can choose one of the four window layout options. With those options, you can neatly arrange multiple software windows on the desktop side-by-side without them overlapping.
Snap Layouts also groups the windows on the taskbar. So when you’ve arranged a few windows with that feature, you’ll see a Group thumbnail preview for the layout in the toolbar.
Selecting that thumbnail preview will open all the grouped windows as you’ve arranged them.
6. Check out the Command Terminal
The Command Terminal is a new command-line app you can utilize in Windows 11. The quick way to open it is to right-click the desktop and select Open in Windows Terminal.
When you’ve opened Command Terminal, you can open multiple tabs. To do so, click the +Open a newtab button shown directly below.
To select a different command-line shell for a tab, press the small arrow button and choose one on the menu.
You can further configure the Command Terminal by selecting the Settings menu option.
In the Settings tab that opens, you can click the Default profile drop-down menu to choose an alternative default command shell.
You can customize the app’s colors by clicking Color schemes on the left of the Settings tab. Next, choose a different color scheme on the drop-down menu, and select the Save option.
7. Add different backgrounds to virtual desktops
You can select a new Choose background option to change wallpapers for alternative virtual desktops in Windows 11. To add different wallpapers to them, hover your cursor over the taskbar button shown directly below.
Click + New desktop option to add one.
Right-click the new desktop and select its Choose background option.
Select a new background for the desktop in the Personalization tab that opens.
Then you’ll have two virtual desktops with different wallpapers, as shown in the snapshot below.
8. Move the taskbar’s icons to the left
Click Start on the taskbar and select Settings on its menu.
Select the Taskbar navigation option on the Personalization tab.
Double-click Taskbar behaviors to expand its settings.
Select Left on the Taskbar alignment drop-down menu. Your taskbar’s icons will now be left-aligned.
9. Select a touch keyboard theme with new customization settings
Press the Windows key + I hotkey to launch Settings.
Select the Personalization tab.
Double-click the Touch keyboard on the Personalization tab.
Select a new touch keyboard color theme.
Alternatively, click the Customized theme radio button and Edit. Then you can set up a touch keyboard theme with your own color choices.
Press the Save button when you’ve set up your custom touch keyboard theme.
NOTE
To enable the touch keyboard, right-click the taskbar and select Taskbar settings. Next, click the Touch keyboard option there to turn it on. Then you can click the Touch keyboard system tray icon. Of course, you’ll also need a touchscreen PC to utilize the touch keyboard.
10. Remove distractions and unnecessary notifications
To eliminate potential intrusion factors, open the Settings app.
Next, click on Privacy & Security and make sure you disable the following option: Show me suggested content in the Settings app.
You can go even more granular and disable advertising-focused notifications.
To do that, return to the Settings window and head to the System section.
Here, click on Notifications and disable these two options: Offer suggestions on how to set up my device and Get tips and guidance when I use Windows.
Ads are usually seen as disruptive. Windows 11 has a reputation for showing unrequested information under numerous forms, from tips to software suggestions and other types of notifications.
We recommend you customize how you interact with notifications to avoid being flooded with suggestions, tips, and other unnecessary messages likely to break your focus.
Thus, you can choose only to eliminate ads, disable notifications for individual apps or set specific rules for their display, or even disable notifications altogether.
11. Try the Dark mode for enhanced comfort
Open the Settings and click on Personalization (Or right-click anywhere on the desktop to open the contextual menu, and select the last option available, Personalize).
Now, click on the Colors tab.
Next to the Choose your mode section, you will see a drop-down menu containing the three available themes: Light, Dark, and Custom.
Select Darkmode and apply the changes.
The Windows environment (including all the apps that support this mode) will turn dark.
As you know, this lighting is also beneficial for your eyes, especially if you spend a lot of time in front of the PC, so it’s not just a matter of looks.
You can find more valuable tips about the Dark mode on Windows 11 and enjoy your PC on your terms.
What are the hidden features of Windows 11?
While some Windows 11 features are well advertised, some are pretty hidden. Only the most interested users can detect most of these features.
Below are some of them to explore:
XPS file viewer
Return of the Hardware and devices troubleshooter
File History
The voice typing feature
Hotkeys for Taskbar pinned apps
Can I find more tips within Windows 11?
Windows 11 includes a Tips app, which you can access via the widgets panel. First, press the Widgets taskbar button. Next, click the Add widgets button on the board and select Tips.
Then you can read more Windows 11 hints within the Tips widget. Or you can click the Tips link at the top of the device to open its app. That app includes 18 Windows 11 tip topics for you to look through.
Windows 11 might not be radically different from its predecessor, but there are many new things to discover in the latest desktop OS. So, it’s worth upgrading to Windows 11; and all the more so given that it’s currently a freely available upgrade.
Microsoft is rolling out the new platform to Windows 10 PCs that meet its system requirements. Users who haven’t installed Windows 11 can do so via the Settings’ Windows Update tab.
That tab will include a Windows 11 Download and Install option for users who can upgrade to it.
You can explore the platform’s new features and customize them with the Windows 11 tips and tricks above. Our Windows 11 vs. Windows 10 guide also details the new features in Microsoft’s latest desktop OS and how you can upgrade.
Feel free to let us know the Windows 11 tips you enjoy most and, if there are some you think you should make it to the list in the comments below.
Are you a student with the need for a security tool? Today, we have compiled the best antivirus for students.
It has become important for antivirus to not only protect your computer offline but also when users surf the web.
Since the advent of so many malicious websites and ransomware most of which are spread through the web.
Nowadays it’s essential for antivirus to have web browser blockers and filtering capabilities. Some of the dangers of not having an antivirus that offers these features are concerning data protection.
The dangers of personal information being exposed when transacting on unsecured websites. Your personal data can be used to commit fraud and ransomware.
When systems are locked, users can only have access to it after paying a ransom fee. Follow our post to find the best antivirus programs for students and great student discounts.
What are the best antivirus tools for students?
TotalAV – Best browsing security and system maintenance
TotalAV is all-inclusive antivirus software. Not only will your system be protected, but it will be optimized for smooth operation.
As an award-winning antivirus, it protects every aspect of your PC. You don’t have to worry about attempts to steal your data while browsing the internet.
One of TotalAV’s main features that many antivirus programs don’t have is a VPN and a built-in ad blocker. You will never see ads or popups again and your data will be anonymous every time you visit the internet.
WebShield is another great feature that makes web browsing safer for you and everyone who uses your computer. Search results are checked in real time so you know which sites you can trust. It also blocks malicious websites before you visit them.
The main key features of TotalAV are:
24/7 monitoring of all aspects related to your identity, credit cards and other sensitive data
Password vault with additional layers of protection and random password generator
VPN for access to restricted sites or streaming content as well as privacy protection
PUA protection, zero-day cloud scanning
System tune-up tools and disk cleaner included
TotalAV is a complete first line of defense against all threats trying to access your personal data, banking details, and other sensitive information.
Total AV
Employ the help of this powerful software to keep your data safe when online.
Regardless of whether you are talking about home or enterprise use, free or subscription-based, few antivirus tools are as good as Bitdefender next-gen antivirus.
Students always carry around important data, such as assignments, or even documents that contain personal data, so they need an antivirus that can promise high levels of security.
More so, they need an antivirus that will definitely not slow their laptop or PC down.
Finally, they will most likely be looking for an antivirus tool that is either free, or that won’t break the bank with its yearly subscription.
Bitdefender offers 24h support, it is constantly updated, prevents threats from affecting your PC, cleans it of any that were already there, and runs smoothly in the background.
In short, it is an antivirus tool that fulfills all of a student’s needs in terms of cybersecurity.
Here are some of the perks of using Bitdefender Antivirus:
24h support
In-depth scanning options
Doesn’t slow your PC down
Efficient anti-malware prevention system
Now available at a discount price for a limited time
Bitdefender Antivirus Plus
Great in terms of pricing and features, this choice is especially useful for students like you.
ESET NOD32 – Most complex and advanced security features
ESET’s NOD32 is a popular antivirus for students especially those with low specifications.
This software uses a cloud-based file detection service which allows easy and quick detection of new malware and virus.
In addition to its anti-phishing feature which detects and blocks infected websites; this software also gives protection against a wide range of malware including worms, viruses, Trojans, spyware, and ransomware.
ESET NOD32 offers reliable customer service support with 24/7 email support. Telephone and live chat support are available only on weekdays for 12 hours.
The antivirus official website also has tons of instructional videos and an encyclopedia of solutions for various threats.
Here are some of its notable features:
Free 30-day trial period
Doesn’t interrupt your gaming sessions or movie time
Battery-saving mode for prolonged online sessions when you are far from an outlet
Frequent product updates to benefit from the latest technologies
Easy to use and maintain
ESET NOD32
The ESET Antivirus offers the best balance between budget and protection but you can also try it for free.
Guard.io – Best for blocking browser adware and phishing attempts
Guard.io is not your regular antivirus but a browser extension that uses antivirus-like technologies to stop online threats.
It can prevent malicious software from infecting your system by blocking it as soon as it tries to access any of your data. It blocks invasive browser notifications, whether they come from websites you visit or questionable third-party extensions.
The most common place where cyber attacks happen is on the web. Guard.io was created to protect and prevent exactly this from happening to you.
Guard.io excels in anti-phishing technologies, being able to detect and alert fraudulent attempts to get your private data.
Here are some of Guard.io’s key features:
Takes seconds to add and see its features
Remove threats and protects just like a normal antivirus
Blocks harmful sites and pages that are meant to scam you
Monitors any information leak and notifies you to take action immediately
Guardio is available for Edge, Google Chrome, and Mozilla Firefox browsers.
Guard.io
Disable annoying ads and protect your browser against phishing attacks, malware, and more!
Kaspersky Standard is an ideal antivirus for students because of its excellent detection of malware, and ransomware.
In addition, it is compatible with multiple versions of Windows.
The antivirus also automatically scans emails and web pages to detect possible threats to Windows PCs.
Another intriguing feature of this antivirus is the rescue CD which can reset the PC after serious virus damage.
Also, the Gamer mode works by suspending all notifications and virus scans when users are playing games that give uninterrupted gameplay while allowing the computer to dedicate more of its resources to running the game.
Kaspersky Anti-Virus software comes with three licenses, unlike other antivirus software that comes with a single license.
This means that a single Kaspersky antivirus can be used on different computers giving users more protection at a single price.
In addition, this software enables cross-platform compatibility where users can purchase the mobile version and access it from the PC software platform.
Kaspersky has excellent customer service which includes forums with tutorials, FAQs, and live chat for technical support.
Kaspersky Standard
Automatically scan any emails and make sure your data is safe with this powerful tool.
Free antivirus software obviously can’t rival any of the paid counterparts but Avira Free Security still offers pretty good features and that’s why it’s so high on our list.
For instance, you will get a free VPN and even though it has a limited transfer quota per month it’s still something. You can also count on a firewall and great ransomware protection.
And whether you’re preparing for the next exam or you’re relaxing with a game, Avira comes with a Do Not Disturb Mode that will ensure zero disturbance.
And on top of all, this antivirus won’t even display ads to compensate for its free status.
Check out its best features below:
PC cleaning tool included in the package
Built-in free VPN (limited bandwidth)
Advanced ransomware protection
Speed booster to accelerate the staring time of your OS
Friendly and simple user interface
Avira
Enjoy a free VPN, firewall, ransomware protection, and a Do Not Disturb Mode – all without annoying ads.
If you imagine that getting award-winning security on a tight budget isn’t possible, then you need to take a closer look at VIPRE.
This is a top product, offering rock-solid protection against all emerging threats, including viruses, ransomware, Trojans, spyware, rootkits, and not only.
It’s also incredibly easy to use, not to mention that the Anti-threat Protection is part of the package too. All these make the antivirus under discussion a solid choice even for students with a limited income.
Some of the VIPRE key features that you are about to enjoy are:
This reliable antivirus software comes with a 50% discount for students and can play a critical role in protecting you against the myriad of online malware threats.
Emsisoft Anti-malware is an extremely powerful security software tool designed to run smoothly even on low-spec PCs and laptops.
It is highly compatible with Windows 10 running on both x32 and x64 platforms. Offers real-time protection and blocks malware before it can be executed.
The Anti-Ransomware protection layer can prevent ransomware attacks by detecting their behavioral patterns. Meaning your files are safe from any attacks that may encrypt them.
In addition, surf protection was recently improved and this comes really useful for browsing securely. It warns you about many phishing sites when you try to access them.
The company offers a 50% educational rebate for Emsisoft Anti-Malware and you can apply on their website. Just ask for your student discount.
Finally, saving the best for the last, Avast Free Antivirus is a popular software used worldwide.
It is extremely popular due to its myriad of features and its ability to give good detection and elimination of malware and viral attacks.
Avast Free Antivirus provides web browser protection by using the detection of viruses, malware, spyware, phishing, ransomware, and other real-time threats.
The antivirus also picks out dangerous links in search engines and blocks web trackers and malicious traffic.
Avast Free Antivirus automatically detects weaknesses in your Wi-Fi and unwanted connections on your network.
The antivirus has tons of excellent features that would provide maximum security for students. In addition, their customer support service is excellent.
Let’s see what are its top features:
Do Not Disturb mode for blocking the annoying popups that may interrupt your flow
Passive mode for running multiple security products at the same time
Network security scanner for constant connection monitoring
Software updater to keep all your apps in the best shape
Easy to install and operate
Avast Free Antivirus
Protect your devices with confidence against cyber threats.
To keep your external HDD safe and sound, you will need to use high-quality portable standalone antivirus software. This needs to be regularly updated as well.
Some antivirus tools will allow you to download the database and other devices will require you to download the whole software.
Other standalone antivirus tools on the market are not updated as frequently as they should, and this means that such tools won’t be able to detect the latest malware.
We want to help you stay protected, and that’s why we chose five of the best antivirus for external HDD to show you their features.
What are the best antivirus tools for external HDDs?
TotalAV scans an external hard drive as soon as it is connected and quarantines anything suspicious, so a drive that has been plugged into other machines cannot bring malware across. Real-time protection covers the files you copy from it.
The tune-up tools include a duplicate file finder, which is handy on a large drive full of old backups. TotalAV does not encrypt drives, so the original ‘data encryption’ angle has been dropped.
Automatic scan of external drives on connection
Real-time protection for copied files
Duplicate file finder for large drives
Windows, Mac, Android and iOS
TotalAV
TotalAV offers maximum protection for your internal and external storage.
Bitdefender provides enhanced protection for your external HDD, and this is one of the best antivirus tools that you can possibly find these days.
The software uses a file-scanning engine that looks for matches to all known exploits and malware. It scans your PC and can find effectively both known and unknown malware threats.
After successfully scanning your device, Bitdefender will either quarantine or delete all the threats. It will constantly scan and protect to keep your PC healthy.
It also has an Anti-Spam feature that is designed to work with any mailbox, providing you active protection for the whole email channel.
Check out more impressive features that are packed in this tool:
Heuristic monitoring
Constant updates on malware definitions
Possibility to opt out of the data collection while you install the software
Autopilot feature to adjust defensive posture.
Immunize important files from ransomware attacks
Password Manager
Bitdefender Total Security
Protect your HDD with Bitdefender to benefit from 24/7 security and the best next-gen technologies.
Avira is the free choice for thousands of users around the world, offering great antivirus protection and other important features that will keep your system safe from Trojans, malware, adware, etc.
Avira takes free protection to another level, offering things such as a VPN, ad-blockers, and even password management and system backup.
The software also has an in-built PC cleaner option that will remove all unnecessary and leftover files that encumber your PC.
In addition, it has a comprehensive interface, which was designed for non-tech enthusiasts that have no background knowledge, having a pretty simple and integrated interface.
Let’s have a look at Avira’s main features:
Password manager
Ad-blocker and free VPN
Antivirus scan and removal
System optimizer and app locker
Network scanner
Avira
A free antivirus with excellent protection suited for all kinds of users!
Emsisoft Anti-Malware is a well-known security tool that uses great technologies in order to keep your devices safe.
You can easily scan and check all your available hardware and you can also connect your external device to your computer and run a malware scan as well.
You must know that Emsisoft Anti-Malware cannot be installed on an external HDD and run whenever it connects, as you need a full-working system in order to have active protection.
Thankfully, you won’t have to bother as Emsisoft Anti-Malware does allow you to encrypt your important files.
The tool also uses a Behavior Blocker technology, which protects you from not yet-known threats, real-time 4-layer protection and runs even on low specs PCs and laptops.
Here are some other useful features:
Suspicious behavior tracking
File guard
Web protection
Anti-phishing
Automatic updates
Emsisoft Anti-Malware
Get the ultimate layered protecion for your HDD with Emsisoft.
Panda Dome Security which was previously called Panda Free Antivirus is an excellent free antivirus program that is able to automatically collect threat detection techniques.
These techniques come from other users who already have this tool installed. This will help protect against both current and upcoming attacks.
It also comes with the option to require you to confirm the removal of a virus. Furthermore, it has a web filter that blocks malicious URLs retrieved from its blacklist or specified by you.
You can allow addresses to bypass this block by adding personalized rules. It even separates the addresses into two principal categories which are malware and phishing.
Check out more impressive features that are included in Panda antivirus:
Automatic and transparent upgrades
URL and web monitoring and filtering
Automatic USB protection
Lightweight and easy on the system’s resources
Antispyware and antivirus engines
Parental control
Panda Dome Security
A tool specially created to protect your device against both current and new damages.
VIPRE Rescue is a handy and easy-to-use tool that is designed to clean your computer if you are already infected with malware or viruses and your OS is not working correctly as a result of that infection.
If you are already running VIPRE software and a virus managed to disable the software, you will still be able to run this program in order to clean your computer.
With VIPRE Rescue Essential Installation, you will get up to 2 hours of dedicated remote support for new installations of the program. You will also be able to purchase more time for larger installations.
With VIPRE Prime Installation and Optimization Services, you will get up to three hours of dedicated endpoint security installation and optimization support.
You can trust the experts from VIPRE for the most comprehensive installation support services. If VIPRE Rescue is not able to catch a threat, you can subscribe online to the lab for further analysis.
Check out the best features that are included in the program:
Real-time protection
Webcam and microphone blocker
Dark web scanner
Sensitive document auditing
Unlimited VPN
VIPRE Rescue
Get rid of any type of malware or viruses with this excellent tool.
Another great antivirus that can scan your external HDD is Avast Free Antivirus. The free version of this antivirus offers antivirus and anti-ransomware protection.
In addition to malware protection, the free version also has its own password manager that will store all your passwords in one place and protect them from hackers.
If you want to scan your PC and external HDD, Avast Free Antivirus might be the perfect choice for you.
Some of Avast’s key features include:
Antivirus and anti-ransomware protection
Password manager
Secure online banking and shopping
Anti-phishing and Anti-spam protection
Firewall
Avast Antivirus
Perfect choice for keeping your devices protected at all times.
ClamWin Portable is the well-known ClamWin antivirus that is packaged as a portable app. This means that you will be able to take your antivirus with you to scan your files on the go on your external HDD.
Take a look at some great functionalities that are included in this software:
You can put ClamWin Portable on your external HDD and use it on any computer without leaving any personal data behind.
The tool comes with high detection rates for spyware and antivirus.
ClamWin Portable comes with regular virus database updates.
ClamAV regularly updates the virus databases to include a new variant/virus immediately after it appears.
This tool does not include an on-access real-time scanner, and you will need to manually scan a specific file in order to detect a virus or spyware.
ClamWin Portable comes with scheduled scans and updates disabled because they are not used in a portable scenario.
If you want the best protection possible but your PC isn’t quite up to scratch, then these antivirus solutions for low-spec PCs will keep you safe whilst not hogging all its resources.
Antivirus has become very important since the early 2000s with the expansion of the Internet with lots of hackers releasing new viruses and malware.
And recently, ransomware can put computer users at risk of losing information and files or being held for ransom before accessing their system.
It has become increasingly important to have quality antivirus software to protect against such threats.
If your computer is a low-budget PC then the best type of antivirus is light in size and does not use too much of your computer’s resources as this would slow down the PC.
Since low-budget PCs come with lower-end processors, it is vital that the antivirus to be installed should use as few resources as possible while providing adequate security against malicious threats.
Today we review the best antivirus software for low-spec PCs. Any of the following solutions will work on a low-end system because of their minimum resource requirements.
TotalAV is a reliable antivirus software that protects your device from viruses, malware, and any type of online threats.
It helps you quickly scan your PC for temporary files where viruses are usually found. You can also set a preferred time and schedule an automatic scan for malware, junk files, or tracking cookies.
After TotalAV finishes scanning your device, you can select an action for each of the malicious elements, such as quarantine, whitelist, delete, or many others.
It also has a Real-Time Protection feature that continuously checks your downloads and installs and keeps harmful threats away.
Furthermore, you can browse safely and securely thanks to its WebShield feature that defenses against phishing and “spoofing” websites from compromising your security.
Take a look at other impressive features of TotalAV:
Blocks unlimited ads and in-play video ads
Data breach monitoring
Disable notifications
Generate and store secure passwords
Ransomware and phishing scams protection
TotalAV
Defend your device from viruses and online threats with this professional tool.
Panda Dome is a great security software that uses cloud processing to clean the PC. In addition, it has a nice user interface making it ideal for novice computer users as well.
Furthermore, Panda has a handy vaccination tool that automatically checks USB drives for malicious software.
Also, an emergency rescue USB drive which users can use to reboot to scan the affected system. This antivirus is compatible with Windows 10, 8, 7, Vista, and XP.
Panda Dome antivirus is a useful antivirus software for low-spec PCs with its cloud-based protection which does not impact too much on users’ PC while still offering other stellar protection features.
The most important features include:
Excellent malware detection
Users can create an emergency USB rescue disk
Lightweight software
Panda Dome
Pick this very light antivirus that uses the cloud instead of your PC resources to protect you.
ESET HOME Security Essential is one of the best antiviruses that you can use. It is a modern antivirus powered by AI, meaning that it adapts and improves itself continuously.
Furthermore, it is a perfect and performant tool for gamers or anyone who wants to have uninterrupted sessions of work or gaming on their computers.
Additionally, the software doesn’t need a lot of your computer resources. So, you can watch movies, play, work, and more, but with this antivirus, you won’t experience any slowdowns.
Some of the best features:
Compatible with Mac, and Linux operating systems
Keeps your PC clean of viruses, worms, ransomware, spyware, and all types of malware
Multi-layered technologies
Game Mode, to prevent pop-us while playing
Regular updates
ESET HOME Security Essential
Get one of the best modern cybersecurity solutions, that work great even on old PCs.
Bitdefender has had the best detection rate for the past 5 years and its solutions are installed on millions of systems across the world.
That’s certainly a very good reason to consider installing Bitdefender Antivirus Plus.
Artificial Intelligence and machine learning technologies anticipate, detect, and block all threats, even the newest ones before they infect your system.
Although it’s a very rich security solution, coming with lots of built-in functions, Bitdefender uses minimal resources from your PC.
Moreover, this antivirus solution features optimization tools that can speed up your PC’s boot-up time and increase its performance.
Bitdefender Antivirus Plus also has a very sensitive nose for phishing websites. It detects and blocks them even before you get to see their false promises.
Some great features include:
AI and machine learning technologies
Enhancing system performance
Safe online banking
VPN integrated
Bitdefender Antivirus Plus
This new-age antivirus is an award-winning solution that has a very low impact on your PC.
Intego ONE is a free-trial antivirus that is suitable for both Windows and Mac devices with low-end performance.
Using this enhanced antivirus, you have overall security against all types of malware or web attacks that targets your device safety.
Plus, you’re covered with 24/7 threat-monitoring technologies that can detect emerging threats and block infected apps before getting into your PC.
Given that Intego ONE is trusted and used by millions, you can install it without a doubt on low-end devices and use it without affecting the OS performance.
In terms of scanning, this antivirus tool helps you with different scan modules that can diagnose multiple areas of your system including folders, files, or RAM memory.
Avira Free Security is one of the popular antivirus software offering free antivirus and is used by millions. This antivirus gives top-notch protection to users’ computers.
The installation of the antivirus is slow and contains lots of advertisements that remind users that they are using free software.
After installation, things get interesting with the user interface opening a homepage consisting of a main window with a slatted menu and panels where users can view the system status.
When clicking on PC protection users can start a scan of the system. Users can also toggle on the real-time protection features and configure the default settings.
However, Avira is slow in running a full scan with each full scan taking about two and a half hours which is far longer than other competitive rivals.
Unlike other antivirus solutions that skip already validated files for subsequent scanning, Avira still validates these same files for every scan meaning that subsequent scans still take more than 2 hours.
Some of the best features that are worthy of your attention::
The antivirus gives good independent results when used
Very good at blocking malware
Includes a free VPN
Improves PC performance
Quality protection for users with low-end computers
Avira Free Security
Over 100 million people worldwide use Avira thanks to its great protection but also for its lightness.
As threats become more sophisticated and attacks exceed in ingenuity, you need strong protection for your PC even if you don’t have the ultimate configuration.
This is where VIPRE comes in with a promise to have a very low impact on your resources but to pack an impressive punch against any threats.
This awesome security solution defends your PC against ransomware and other emerging threats, viruses, Trojans, rootkits, exploits, spyware, and more.
If you’re in the U.S., VIPRE is your best choice because they offer an award-winning customer service team ready to help you for free.
This clever antivirus software is always on the look for malicious activity, blocking any snooping or any attempts of data theft.
The most important features include:
Free premium-level customer support and service for the U.S. residents
Malwarebytes is unique software, best used in conjunction with another antivirus as it helps to detect unwanted bugs that accompany software downloads, especially if you like to download free software.
Also, it gives layers of protection that specializes in the detection of malware and malicious files.
Web protection blocks traffic to known dangerous addresses, whether by the browser or by a malicious application.
Ransomware protection watches for the behaviors that occur when an unknown program is getting ready to encrypt your files.
Malwarebytes is an ideal software to have in conjunction with a regular antivirus as it helps to boost it by detecting security threats.
It also takes little resources from users’ PCs which makes it one of the lowest impact antivirus solutions for low-spec PCs.
More important features that are worth mentioning:
Emsisoft Anti-malware is an extremely powerful security software designed to run smoothly on low specs PCs and laptops. It is highly compatible with Windows 10 running on both x32 and x64 platforms.
This tool is offering real-time protection and blocks malware before it can be executed, using the high-performance dual-engine scanner or the behavior analysis.
In addition, the surf protection feature was recently improved and warns you about many phishing sites when you try to access them.
Emsisoft Anti-Malware stands out as the top security software with a redesigned interface, significant improvements, and recent awards from AV comparatives and Virus Bulletin.
This is a reliable tool that protects the most important parts of your system against malware, ransomware, adware, you name it – and it is the lightest antivirus to use on your low-spec PC.
Avast is a worldwide giant in the antivirus industry with hundreds of millions of users worldwide.
Avast incorporates features such as excellent detection of malware and malicious software with real-time protection which makes the antivirus consistently rank among the best in the world.
Avast Free Antivirus features browser protection using specific plugins with just little delays when installing this plugin.
This software competes comparatively well in browser protection, especially against malware threats, and highlights dangerous links in search engine results while blocking trackers.
In addition, the gaming feature prevents displays of updates or pop-ups that can disrupt users’ gaming experience.
Microsoft Security Essentials may not be one of the top-rated antiviruses but it is still among the best when it comes to its functions and compatibility with low-spec PC.
This malware protection software which was launched by Microsoft in 2009 has gotten a reputation as decent antivirus software.
Microsoft Security Essentials is free to download for Windows, which is a plus, and comes with well-programmed protection tools geared towards antivirus and anti-malware protection.
It is also compatible with multiple Windows versions from Windows XP to Windows 10 and comes in both 32-bit and 64-bit which is a crucial aspect for low-end PCs.
Furthermore, one of its unique advantages is that it can be installed and run on more than 8 systems simultaneously because it is small to download and utilizes low resources.
Users can also determine how much of the CPU resources would be allocated to the software for a scan with the default at 50%.
Microsoft Windows essential is the ideal antivirus for a low specs PC with its small size and easy installation appealing to users.
Some of the best features include:
Easy to install and use
Compatible with numerous versions of windows O.S
Gives protection with access to a large database of virus definitions
If you’re still using an old computer with low specification, no worry about using an antivirus. Any of the above solutions will not make it run slower.
Please tell us which one you prefer and how is your experience with the software you have chosen in the comments section below.
You have to use proper router antivirus protection to secure all Wi-Fi-connected devices. Wireless networks have obvious benefits, but they are also subject to serious vulnerabilities.
Threats today not only attack your devices but are increasingly targeting routers as well.
There are numerous reports worldwide about people not being able to connect to their Internet. Cybercriminals attacked their routers due to identified vulnerabilities in the same.
The router security situation hasn’t improved in the last two years. More and more instances of routers used to carry out attacks are being witnessed and felt across the globe.
This just shows how big an issue it is when a router is not secured. Attackers hack into other devices once they gain access to the router. They use your bandwidth and access your data.
To fight this menace, you need the best antivirus for router protection. We have some of the top picks you can choose from right here.
Do routers have antivirus?
For the time being, routers do not come with any type of pre-installed independent antivirus. All network security hardware and tools are connected to a central device like a PC or phone.
Some manufacturers implement firewall options and offer applications that give you the possibility to check the status of your network.
These can help block suspicious devices from connecting to your network and detect vulnerabilities. They may not be enough when it comes to serious malware attacks, though.
That being said, there are some essential things to take into consideration. There are ways to configure your Wi-Fi network for increased security.
One of the most important things is to set up a strong password. We recommend you follow current password guidelines to make sure it is not easy to guess. You can also use a password generator to help you.
It is also important to select an up-to-date security protocol. Most modern-day routers will automatically configure WPA2-AES or WPA3-AES encryption. They are the best according to cyber-experts.
Another thing you can do for more privacy is to install a VPN if you have a VPN-supporting router. The VPN reroutes traffic and hides your IP which makes you less likely to be tracked down by hackers.
Enabling firewall protection is also essential. You can use the in-built Windows Firewall or pick a third party.
Can routers get viruses?
Yes, your router can get infected with a virus. While not as common as other types of viruses, those that target your router can cause serious damage.
Given the fact that your router is responsible for directing your traffic data, all the devices you connect to it are at risk if you get a virus.
There are multiple types of malicious attacks targeted toward routers. Cyberattackers may compromise your devices so you will lose important data and damage your PC.
Routers can also fall victim to phishing attacks so hackers may get a hold of all the private information such as name, address, or bank information.
One of the most notorious routers malware is the VPNFilter which reportedly hacked over 500 000 devices worldwide. It steals data, changes DNS, and manages your network.
These types of advanced attackers cannot be removed with a simple reboot which is why we can’t stress enough the importance of adequate prevention.
Can you install an antivirus on a router?
Routers for personal computers have come a long way since their launch in the late 90s, but they are still pieces of hardware built to serve the primary function of directing your traffic and do not support antivirus.
There are some routers that include a firewall and are sold alongside a dedicated antivirus app, but that still require a central management device like a phone or PC.
Thankfully, you can certainly secure your router with reliable antivirus software. Not only do they include powerful Wi-Fi protection and strong firewalls, but many of the tools presented below have router scanning options.
Do I need antivirus protection for my router?
Yes. You need to make sure that you establish a secure connection so there’s no risk of getting private data leaked.
As already mentioned, cyber attackers are able to create router viruses that can cause serious damage. They can steal and sell your data and also compromise your devices forever.
Good antivirus software that has strong network protection features is able to:
✔️ Test for outdated or vulnerable firmware
✔️ Manage all devices connected to your router
✔️ Detect weak network passwords
✔️ Block known network traffic threats
✔️ Identify changes in network patterns with machine learning
✔️ Remove viruses and malware and reconfigure your router
Having an antivirus installed on your network is still a smart idea. The built-in capabilities of the router will protect you against certain fundamental assaults, but not against all threats. Even if you don’t want your neighbors to use your Wi-Fi, you’ll be protecting yourself from more harmful snoops.
What’s the best antivirus for router protection?
It’s an important step to preserve all of the information those devices carry, especially now that so many homes are linked and numerous devices use Wi-Fi.
A few minutes spent selecting the proper home antivirus router protection can make a huge impact on how safe you are connected to the digital world.
Antiviruses are software built for computers and mobile devices that can give an extra layer of protection for routers. That is because they require constant updates and run powerful machine learning algorithms to detect day-one threats, which could not be done from a router.
TotalAV is a premium antivirus program with a lot of great features and successful detection rates.
It provides multiple scanning options, such as System Scan which scans the whole system for malware, or Smart Scan which scans not only for malware but junk files and tracking cookies too.
It has a WebShield feature that is the first line of defense against scam, fake, and phishing sites that are created to harm your devices, compromise security or even steal personal data.
This feature continuously looks for potential cyber threats, blocking and intercepting them long before they can damage your PC.
Furthermore, it helps you stop intrusive trackers and take back control of your privacy and security, denying unwanted trackers from snooping on your data.
TotalAV eliminates irritating ads, pop-ups, and notifications that clog your screen on the pages you’re browsing. It also blocks in-play video ads.
TotalAV
Protect your personal information and block any online threats with this amazing antivirus program.
This antivirus for router protection secures your network using the Panda GateDefender Integra eSeries, a unified perimeter security device, for protection against any type of threats and is accessible from the cloud.
It provides complete protection at the Internet gateway, flexible connectivity, and management through a single and easy-to-use interface, plus it increases your business productivity.
Features include a firewall, antimalware, antispam, web and content filters, VPN, Hotspot, multiple connection technologies to access the Internet and corporate network, plus an Intrusion Prevention System to prevent intrusion attacks.
Not only that, but this antivirus also provides web filtering and has a built-in VPN to ensure you have a private connection.
Dome Panda Security Essential
Panda offers reliable router protection without slowing down your system. Ready to try it out?
ESET HOME Security Essential is an advanced solution with multi-layered security options for up to a single Windows, Andoird, Mac, or Linux device.
In all instances, it will keep your network secure for the connected device and ensure a safe environment against malware, ransomware, and phishing attacks.
Banking operations are likewise secured and you’ll definitely love the silent updating system, with no annoying pop-ups while you play games or run a program in full-screen mode.
This tool integrates a nifty feature that is able to thoroughly analyze your Internet connection, hence your router.
It is called ESET Network Inspector and you can use it to scan your router.
To do that, just open ESET and then click on Tools ⇒ Network Inspector. Click the Scan your network button and you are good to go.
ESET HOME Security Essential
Get instant network protection and join the +100 million happy users of ESET’s award-winning technology.
There are times when traditional, slow antivirus software solutions aren’t recommended for complete router protection. This is where Vipre steps in.
This is the antivirus that can keep you safe from computer viruses, ransomware, identity theft, and all other threats that you’re exposed to when surfing the Internet or using a router on a daily basis.
And if you happen to fear complicated procedures, rest assured that the preconfigured settings are more than enough, without any actions from your side.
Vipre is one of the most reliable antiviruses on the market with the fewest false positives. It is also very easy to set up and install, with an intuitive configuration.
Users of Vire can benefit from real-time threat intelligence and award-winning customer support.
Vipre Antivirus Plus
If you’re looking for the best antivirus for router protection, rest assured that Vipre is a great choice.
If you want to protect your home network, you might be interested in the F-Secure Sense router.
This device comes from a famous antivirus manufacturer, and it will provide you with fast Wi-Fi while protecting all devices on your network.
This router will block malicious websites and other threats automatically, so you won’t have to worry about the safety of your network.
In order to monitor your network, F-Secure SENSE comes with a dedicated app, so you can keep track of network security on your smartphone.
The dedicated app also works as a guide, and it will guide you through the setup process.
It’s worth mentioning that this router is optimized to protect your smart devices, so it’s perfect if you need to protect your TV, console, or smart home appliances.
In order to provide you with top-notch security, F-Secure SENSE is constantly updated with new features and security definitions, so your network will remain protected from the latest online threats.
F-Secure Sense is a great device, and it will be perfect for any home network, especially if you tend to use smart devices in your home.
This tool is able to protect and monitor all your devices with the help of the dedicated smartphone app. It’s easy to set up and optimized for smart devices and appliances.
Avast’s Premium Network Security scan, included in Avast Free Antivirus, detects if your router’s TCP port is open and accessible from the outside, which makes it vulnerable to attacks.
The Wi-Fi Inspector scans your network for any vulnerabilities while identifying potential security issues that open the door to several threats.
It also checks your network’s status, the devices connected to it, and router settings, helping you secure it from attackers trying to access it or misuse your personal data.
The Wi-Fi inspector exposes weak passwords for Wi-Fi and router administration, router firmware vulnerabilities, non-encrypted and unsecured wireless networks, DNS hijacking, as well as open network ports for remote access or Telnet, among others.
It also shows you the scan results in a single dashboard, where you can see your router, discovered devices, and details like IP or MAC address, vendor, model, and DNS name, plus running services and related network ports.
Avast Free Antivirus provides alerts such as router infection and easy router access from the Internet.
If you need only basic network protection, Avira is an extremely convenient solution. The free software offers just the essential security shield against advanced threats and malicious websites.
As you can expect from free software, Avira Fee Security is easy to set up and extremely lightweight when it comes to resources.
Besides that, Avira Free Security offers VPN protection (with a certain limit), tune-up tools, and a strong password generator.
You can always update to a more advanced solution in case you’d like a driver update feature or alerts for vulnerable accounts.
McAfee’s Home Network Security is a cloud-integrated antivirus for the router and complete protection for all devices in your home network.
This secure home platform is built-in in into your router to provide protection for every device whether they are tablets, IP cameras, smart door locks, smart lighting systems, or thermostats.
The Internet has brought with it a greater opportunity for cybercrime and attacks as hackers break into smart and connected home devices grabbing personal information hence identity thefts increase, as well as threats to your own personal security.
Features include parental controls, device identification, Internet pausing, real-time alerts on potential vulnerabilities, device fingerprinting, and Global Threat Intelligence.
That’s an always-on and updated service that protects your router and devices from threats in real time.
It is available pre-integrated in Wi-Fi routers and cable modems, such as ARRIS SURFboard, one of the first routers with SHP.
NETGEAR Orbi – Best to secure your entire household
Next, we have a device that is able to keep all your Internet-enabled devices protected.
Netgear Orbi is a mesh network device that can protect all your traffic data. It is a simple and small device that you can connect directly to your cable modem.
It is compatible with any Internet service provider and allows up to 100 simultaneous connections, so all your devices are covered.
Netgear Orbi is easy to set up. You have to install the Orbi app to your phone so you get a central management board where you can manage your WiFi settings, monitor data usage, and test out speed.
You can permanently see all the devices that are connected to your network which makes suspicious activity easier to spot.
For increased security, you can activate the NETGEAR Armor security utility. Powered by Bitdefender, it comes pre-installed on the mesh and you can find it in the Orbi application in the Security section.
It protects against malware, viruses, ransomware, phishing attacks, and other emerging threats. It is easy to activate in just a few minutes, and you can benefit from a 30-day free trial and try it out.
The antivirus software solutions listed above are ideal for all those willing to increase:
✅ Router security – Most home routers have serious security flaws to worry about. Let the antivirus deal with them and continue your work.
✅ Router protection – To increase your router’s safety, you’ll find above some great solutions for the efficient protection of your entire home network.
How Can I tell my router has a virus?
Just like viruses that are hosted by your PC, routed viruses serve different purposes, hence act differently. However, they generally change up your network settings to less secure configurations that can lead to some of the following issues:
➡ Slow Internet connection
➡ Network drops
➡ Your browser redirects to malicious/suspicious websites
➡ Unfamiliar data in browser history
➡ The browser does no longer block access to unsecure websites that are not SSL protected (that don’t have the locked icon before the URL)
➡ Passwords don’t work anymore
➡ Virus message pop-ups
➡ Ransomware locks your data
How to remove a virus from your router
➡ Use the rooter scan feature in your antivirus and immediately remove any threats found
➡ Uninstall any suspicious browser extension or add-on
➡ Change your DNS settings
➡ Update your router or perform a factory reset
➡ Use a router antivirus like NETGEAR Armor to scan your whole network and quarantine/remove any suspicious threat
This wraps up our rundown on the best security options you have for your router. These can save you from serious data breaches and device problems.
Keep in mind that it is also important to use a good and stable router that has good configuration options and secure ports.
Have you tried any one of these antivirus solutions for your router before? Share with us your experience, and your favorite in the comments section below.
Some Windows users are complaining about a strange issue they are experiencing. The issue of Windows File Explorer not showing the top bar prevents them from being able to minimize or maximize any application on their computer.
This is because the title bar is completely absent. Although this is a rare issue, there are many possible causes for it. This is one of many File Explorer problems that can occur.
There is no reason to get worried if you are experiencing a similar circumstance. This post will give you several fixes for this issue; if you use them, your issue should be resolved right away.
Why is Windows File Explorer not showing the top bar?
The Minimize, Maximize, and Close buttons are often located in the upper right corner of an application’s window on Windows. You might assume that they have no potential for failure because you use them every day.
However, there are times when the top bar and its buttons vanish. This problem could be brought on by a third-party customization app, wrong system settings, or corrupt files. These suggestions can assist you in troubleshooting the issue if the Windows file explorer top bar is missing.
How do I fix Windows File Explorer not showing the top bar?
1. Restart your computer
Click the Windows start button and select the Power icon.
Select Restart from the Power icon.
2. Check if your Windows is updated
Press the Windows + I key combination to launch Settings and then click on Update & Security.
Select Windows Update on the left-hand side menu.
Click Check for Updates.
Allow Windows to download and install any available updates. Your computer might restart after the process completes.
Type msconfig in the text field and then select OK.
In the System Configuration window, select the General tab and uncheck the box next to Load startup items.
Enable Load system services under Selective startup.
Open the same window’s Services tab then select Hide all Microsoft services.
Select Disable all then click Apply and OK in order to save the changes on your computer.
Restart your computer and it will start in clean mode.
4. Force Windows to repair display issues
Press Ctrl+ Shift + Win + B key combination to force Windows to take action.
Your screen will go black for a moment.
Your display driver will be restarted and the screen will turn back on.
What are the differences between Windows File Explorer in Windows 10 and 11, and which is better?
Windows 10 and 11 have a lot of design differences. With pastel colors, rounded corners for all windows, and a cleaner interface than its predecessor, Windows 11 delivers an interface that looks more like a Mac.
Microsoft made every effort to streamline the user interface in order to create a clean environment for work and pleasure.
Snap Layouts is another new feature in Windows 11. Similar to how users can group apps on Android and iOS, this allows users to more efficiently manage their windows and apps.
Snap Layouts offer a variety of layout choices to arrange the various windows on the screen. With the help of the productivity tool Snap, users can logically arrange windows and other apps on their screens.
Users of Windows 10’s Snap feature must manually arrange their windows by hovering to the left or right of the screen or by using specific keyboard shortcuts.
This article has covered some of the causes of Windows File Explorer not showing the top bar and how to resolve the issue.
Unfortunately, this isn’t the only problem, and many reported that File Explorer keeps crashing. However, we covered this issue in a separate guide, so feel free to try it out.
We hope that you are now able to sort the problem. Feel free to comment in the comment section below, about your experiences, your questions, or any other things you feel compelled to share.
A magnificent game and an able successor to the AoE 3, the Age of Empires 4 is known for performance issues like FPS drops, lags and stuttering.
While it’s a widely popular game offering the feel of the old-style games and the way it illustrates history, users have been complaining of a host of issues.
From lags, freezes, or stutters to low FPS or sudden crashes, there has been a multitude of issues being reported since its release.
Some of the common causes that are known for sudden FPS drops in AOE 4 are:
High graphics settings
G-sync enabled
Too many applications running in the background
OneDrive syncing enabled
Higher refresh rate
Multiple GPUs
High network usage
Bigger map with a higher population
Higher display resolution
Outdated graphics drivers
If the game is not yet updated
Before you move over to the troubleshooting methods, make sure that you close any unused applications or programs that are running in the background.
Also, ensure that the display resolution is set to 1920×1080 and the gameplay resolution scale to 100.
We have compiled a few workarounds that will not just help you with the FPS drop issue in the Age of Empires 4 but will also fix the lags and stuttering issue.
How do I fix FPS drops in the Age of Empire 4?
1. Set refresh rate to 60Hz
Press the Win + I keys simultaneously to launch Windows Settings.
Now, click on System on the left of the Settings app.
Next, on the right, click on Display.
On the Display settings page, scroll down and click on Advanced display.
Now, on the Advanced display screen, go to the Choose a refresh rate field and set it to 60Hz.
Once done, you can now check if the Age of Empires FPS drop issue is fixed.
2. Update the GPU drivers
Press the Win + R keys together to launch the Run console.
Type sysdm.cpl in the search bar and hit Enter.
As the System Properties dialog opens, go to the Hardware tab, and click on the Device Installation Settings button.
In the next dialog, select No and press Save changes.
Confirm the changes and now, press the Win + R shortcut keys to open the Run console.
In the search field, type devmgmt.msc and hit Enter.
Next, expand Display adapters in the Device Manager. Here, right-click on the GPU and selectProperties.
Now, go to the Driver tab, and click on Update driver.
Once done, close Device Manager and restart your PC for the changes to be effective. The FPS drops issue on Age of Empire 4 should be fixed now.
3. Tweak Windows 11 graphics settings
3.1 Disable Hardware-Accelerated GPU Scheduling
Press the Win + I buttons together to open WindowsSettings.
Next, click on System from the left.
Now, go to the right and select Display.
On the Display settings screen, click on Graphics.
Next, click on Change default graphics settings on the right.
Now, turn off Hardware Accelerated GPU Scheduling.
Rebootyour PC for the changes to be effective and now the Age of Empires 4 FPS drops issue should be resolved.
3.2 Set AOE IV app to High Performance
Press the Win + I hotkeys to launch the Windows Settings menu.
On the left side of the app, click on System.
Now, click on the Display option on the right.
Next, click on Graphics.
On the right, under the list of apps, look for Age of Empires 4 and click on Options.
In the Graphics Preference window, select High performance, and click on Save.
You can now try playing the Age of Empires 4 game and you should not experience FPS drops, lags, or stuttering.
4. Change AOE 4 graphics settings
A lot of users fixed the stuttering by just tweaking a few settings in the graphics settings menu.
Here is what I think are the best graphics settings for Age of Empires 4:
Vertical Sync = On
Framerate Limit = 60 FPS
Game Window = Exclusive Fullscreen
In case you are facing a scroll lag issue in the Age of Empires 4 game, you can set the image quality to medium, and leave everything else on high.
5. Enable the Game Mode
Open the Settings app by pressing the Win + I keys simultaneously.
Next, click on Gaming on the left.
Now, go to the right side and click on Game Mode.
On the right side, move the toggle to the right to turn on the Game Mode.
You can now check the game and there should be no lags in the Age of Empires 4 multiplayer or FPS drops.
To optimize Age of Empires IV, make sure to follow the below instructions:
Make sure that your PC meets the minimum requirements
Lower the in-game graphics settings (Image Quality, Lighting Quality, Texture Detail, Geometry Detail) to low
Play on a smaller map with a lower population
Close any applications running in the background
Keep a check on your network usage
In addition, if the Documents folder is set to sync with OneDrive, disable syncing to fix the Age of Empires 4 stuttering issue as shown below:
Go to your taskbar, and click on the OneDrive icon in the system tray.
Next, click on Help & Settings on the top right.
Now, select Pause Syncing.
Now that the sync is paused, launch AoE4 and check if you are still suffering from FPS drops, lag, and stuttering.
How do I show FPS in Age of Empires 4?
Usually, Age of Empires 4does not have any hotkeys, functions, or a menu option to check FPS while playing.
But, you can enable the Steam in-game overlay (if using Steam) in your global steam settings to check your frames.
However, as an alternative, you can use the Windows game bar to track performance and FPS by pressing the Win + G shortcut keys.
Nvidia users can use its GeForce Experience overlay, MSI Afterburner, or Fraps to find and measure your in-game FPS and track any performance dips.
At the same time, make sure that the game is updated to the latest version to avoid any performance issues.
Also, make sure to select the correct graphics processor (Nvidia/AMD) to avoid any FPS drops, lags, or stuttering.
Besides, Nvidia users can disable G-sync through the Nvidia Control Panel and the VRR option should also be turned off. But. if this does not help you may uninstall and reinstall the game to fix the issue.
If you have any other issues related to the Age of Empires 4, you can let us know in the comments box below.
Microsoft news recap is a weekly feature highlighting the top Microsoft news stories of the past week. Sit back, grab some coffee, and enjoy the read!
Microsoft Docs moves to new home at Microsoft Learn
It has been announced that Microsoft Docs has moved to Microsoft Learn. This change means that the URL has changed from docs.microsoft.com to learn.microsoft.com/docs, but that all bookmarks will continue to work.
Microsoft and BBC Earth join to bring Frozen Planet II to Minecraft
Microsoft has partnered with BBC Earth in order to bring Frozen Plant II to Minecraft Education Edition. There will be five free worlds made available, with the first having already launched on September 21 on Minecraft Education Edition and Minecraft Bedrock.
Satya Nadella is confident that Activision deal will be approved, he tells Bloomberg
Yes, this is true since the 2206 update. We examined data since Series X|S launch & determined the online compatibility check isn't needed in the vast majority of cases for Xbox One discs. Some games may still need to be updated online after install to ensure the best experience.
Several Canon printer users have reported that they encounter the Canon printer Bluetooth not working error. It can be very annoying for some users if the flexibility to print from anywhere without having to connect your device to the printer physically is no longer available.
There can be various reasons for these errors depending on the kind of device and kind of printer you wish to pair.
This article will provide simplified troubleshooting tips to fix your Canon printer Bluetooth not pairing issue.
Why is my Bluetooth not working on the Canon printer?
Bluetooth deactivated: It could be because the device’s Bluetooth or the printer’s Bluetooth is not turned on. You need to ensure that your printer’s Bluetooth.
Multiple devices connected: The printer can only communicate with one device simultaneously. Sometimes, the printer may be communicating with another previously connected device.
Connected to a USB cable: Another common reason that Canon printer Bluetooth is not pairing is that if it is connected to a computer with a USB cable, it cannot communicate using Bluetooth simultaneously. You’ll need to disconnect the USB cable and try pairing the printer again.
Does my Canon printer have Bluetooth?
Some Canon printers can connect to the computer via either the USB or Bluetooth connection system. You can decide to switch to a Bluetooth connection at any time, as long as your Canon printer is Bluetooth-enabled.
However, if your printer is not Bluetooth-enabled, you can’t adjust your printer to function as a Bluetooth device.
How do I fix the Canon printer’s Bluetooth?
1. Disable the USB cable connection
Remove the USB cable connection from your computer. This will enable you to connect via Bluetooth.
Do not bother about adding a new driver because the current printers are already installed from your USB connection.
2. Connect your printer via Bluetooth
Press the Windows + R to launch the Run dialogue box.
Type bthprops.cpl in the box and click OK.
Click Add device in the window, then select My device is set up and ready to be found.
Click Next for the computer to scan for any nearby Bluetooth devices.
Choose your Canon Bluetooth printer from the list that pops up and click Next.
The printer should connect to your computer, and you can begin using it with a wireless connection.
3. Update your drivers
If you still can’t connect to the Bluetooth of the Canon printer, you might want to consider updating your printer drivers.
Once you start the printer, ensure that it is not displaying any error, such as flashing lights or error codes on the screen. But, if the printer senses any error, try using the error code to fix the problem.
Make sure to address the error before proceeding with other steps.
5. Run the printer troubleshooter
Press theWindows key, type troubleshooting in the provided box, and launch the settings.
Click on Other troubleshooters in the new result.
Choose the Printer and click on the Run button.
Follow the on-screen prompts to complete the troubleshooting.
This should hopefully fix any issues with the Canon printer’s Bluetooth that could cause it not to work.
Enter your printer’s model name in the provided box.
Click on the Search icon and select your printer from the result.
Go to the Drivers & Downloads section.
Next, choose your operating system and click Select next to the driver you want to download.
Click Download.
Open the downloaded file, and click Yes. (You will then be moved to a setup wizard)
In the setup wizard, click Next.
Click Yes as you approve the license agreement.
Choose the mode of connection you used for your printer during the installation.
Then, click Next.
You can try any of the troubleshooting steps above to fix your Canon printer Bluetooth not working errors.
Do you need Wi-Fi to use Bluetooth on a printer?
Bluetooth printers are built with Bluetooth Standard technology to communicate with connected devices. Hence, Bluetooth printers do not use Wi-Fi to print content from your computer. You can use Bluetooth without Wi-Fi.
Yes, you can allow remote access to other participants in Microsoft Teams and also allow them to control your screen by clicking on the screen items, editing, and even typing.
Using this feature, you can easily give control, and the other user can take control or request control of the shared content during a meeting on the Teams app.
It’s an important feature considering that the Teams app is used for official meetings, and hence, it helps you share presentations or exchange files with other participants during the meeting.
Before enabling remote access, ensure you have the Microsoft Teams remote control administrator rights.
Next, on the left, under Meetings, go to Meeting Policies.
Now, on the right, under Content sharing, turn on Allow an external participant to give or request control.
You can now give control of your screen during your sessions with external users.
2. Allow remote control during the meeting
1. Launch Microsoft Teams and Join a meeting.
2. Next, click on Join now to start the meeting.
3. Once you join the meeting, in the middle of your video you will see a couple of options. Here, click on the up arrow (Share desktop icon).
4. Next, select to share either the Entire screen, a Window, or a Chrome Tab, and click on Share.
5. You will now notice that the content that you chose to share, will be surrounded by ared/blueborder.
6. As you move the mouse to the top of the screen, you will see a bar with a drop-down arrow that reads, Give control.
7. Click onGive controland pick the user you want to give control to.
8. You will now notice two pointers on the screen, one of which has your initials and the other with the user’s initials.
There is the possibility of enabling Remote Control in Teams during a meeting that has already begun. This is a handy method for when you cannot plan in advance which participants have something to share with the others.
As the meeting’s organizer, you need to first start sharing your screen, and then configure settings to give control to another user.
Next, wait till a participant is ready to share his screen.
Now, click on the Request controlbutton to request the participant to grant control over his screen.
Alternatively, if the participant requests control, you can either Allow or Deny sharing the screen.
You now have access to the screen that the participant wants to share for the presentation, even if you joined the meeting without an account.
Why can’t I give remote control on Teams?
Sometimes, when an external user requests control on Microsoft Teams, you do not see an option to allow or deny the request.
While the Request control option is missing on Microsoft Teams, the Give Control drop-down menu also stops responding as you try to open it.
To resolve this issue, you must enable hardware acceleration on Chrome/Edge. Here, as an example, we will show you how to enable hardware acceleration for Chrome:
Open Chrome, click on the three dots on the top right, and select Settings.
In the Settings window, click on System on the left.
Now, on the right, turn on Use hardware acceleration when available.
Click on Relaunch to restart Chrome and for the changes to be effective.
If you are using Edge, you can follow a similar process to enable hardware acceleration to fix the issue. Now, you should be able to give control to Teams to the participants.
As a participant, you can access files on the host’s PC effortlessly, using the Microsoft Teams remote control function on the desktop.
You can also edit the presentation and help the host deliver a successful interactive meeting.
Microsoft Outlook is a popular email client and one of the most productive tools for managing personal information such as webmail, contacts, calendar entries, and lots more.
Likewise, using a tool as advanced as Outlook has benefits. However, Microsoft Outlook, just like other platforms, has difficulties users complain about. One of these issues is that Outlook zoom is greyed out.
For those asking where is the zoom slider in Outlook, it’s positioned at the bottom-right corner and can be used to increase or decrease the text. So, when Outlook zoom in and out is not working, it presents a major issue and often leads to other problems.
Some say that the Outlook calendar zoom is greyed-out, the Outlook email zoom is greyed-out, the Outlook zoom slider is stuck at 10, and many others.
Fortunately, there are ways to fix Outlook if the zoom button is greyed out or not working. This article will take you through how to permanently fix the issue and get your Outlook zoom working in no time.
Why is the zoom bar greyed out in Outlook?
Zoom is not enabled in Outlook: The zoom button can be greyed-out if the zoom feature is not enabled in Outlook. Users need to download the zoom add-in for Outlook to be able to use the zoom button.
Outdated Outlook software: If you were wondering why can’t I zoom out in Outlook, chances are the app is outdated. It indicates that Outlook lacks the essential updates and patches that help it fix bugs and improvements.
Reading pane view is off: Using the zoom slider in Outlook may not work because it only works if the reading pane view is on. However, this may cause Outlook zooming in and out not to work.
Launch Outlook on your computer and navigate to File.
Click on the Office Account.
Select the Update Options and click on the Enable Updates option or Update Now.
Restart your PC.
Updating Outlook can help fix Outlook zoom in and out if it’s not working. Likewise, it is a good fix for the Outlook zoom slider stuck at 10.
2. Use another zoom method
If the zoom slider is greyed out in MS Outlook 2016, there are other ways users can use the zoom feature in Outlook. For those trying to discover how do I unlock zoom in Outlook, you can use the keyboard and mouse combination for it.
Press and hold Ctrl on your keyboard, then tap + to zoom in as much as you want.
Likewise, press and hold the Ctrl key on your keyboard, then push the scroll wheel forward to enlarge your display in Outlook. It is a good alternative if the Outlook zoom button is greyed out.
If you notice Outlook not updating inbox or failing to show new emails, follow the steps below to fix it fast. This problem can happen in both the classic and new Outlook versions. Sometimes Outlook is stuck updating inbox or doesn’t refresh automatically, which can block important messages.
Luckily, there are several fixes you can try to restore Outlook synchronization and get your inbox working again.
What can I do if my Outlook inbox is not updating?
Input this Network and Sharing Center Run command and click OK: control.exe /name Microsoft.NetworkAndSharingCenter
Then click that Control Panel applet’s Change adapter settings navigation option.
Right-click your internet connection adapter and select Properties.
Uncheck the Internet Protocol Version 6 checkbox.
Select OK to apply the new setting.
5. Repair the MS Office Suite
Bring up Windows 11’s or 10’s search box. Pressing Windows + S will open that search tool.
To find Programs and Features, input appwiz.cpl in the search box.
Click appwiz.cpl to bring up the Control Panel’s uninstaller tool.
Select your MS Office application listed within Programs and Features.
Press its Change button.
Select the Repair radio button if you’re using Office 2016. Office 365 users should select the more thorough Online Repair option.
Click the Repair or Continue button.
6. Manually Update Outlook Folders
If Outlook is not updating inbox automatically, force a manual refresh.
Steps:
Go to the Send/Receive tab.
Click Send/Receive All Folders.
Wait until synchronization completes.
Check if your inbox now shows new emails.
This is a quick way to bypass auto-sync issues when Outlook is stuck.
7. Verify Mail Server Settings
Incorrect account settings may leave Outlook synchronization status stuck updating inbox.
Steps:
Go to File > Account Settings > Account Settings.
Select your email account and click Change.
Verify incoming/outgoing server names and ports.
Save and restart Outlook.
Correct server details ensure Outlook can sync your mailbox properly.
8. Update Outlook Application
Using an outdated version may cause Outlook not syncing problems.
Steps:
Open Outlook and go to File > Office Account.
Click Update Options > Update Now.
Wait for updates to finish installing.
Restart Outlook and check your inbox.
Updating eliminates bugs and improves synchronization.
9. Remove and Re-add Your Account
If none of the above works, re-adding the account can reset syncing.
Steps:
Go to File > Account Settings > Account Settings.
Select your account and click Remove.
Restart Outlook.
Add your account again using correct login details.
This often fixes Outlook not refreshing with new emails.
Is there a better email client than Outlook?
There are certainly quite a few alternatives to Outlook. Thunderbird and Mailbird are two of the most notable alternative email clients. Our email client software guide provides further details about those applications and others.
There aren’t any guaranteed solutions for Outlook’s inbox not updating since potential causes are varied. However, the resolutions outlined here are among the more likely Outlook inbox fixes.
Outlook’s Inbox Repair tool (otherwise SCANPST.EXE) may also help some users fix the inbox not updating. This Microsoft webpage provides guidelines for repairing data files with SCANPST.EXE.
Many Windows users have always wanted to replace their AMD GPU with an Nvidia graphics card on their system.
There has always been a debate over which graphics card is better whether it is AMD or Nvidia since both companies provide the best graphics card possible.
Yes! You can easily swap GPUs on your system these days. The process is incredibly simple and it can be completed in just a couple of steps.
If you haven’t done this before, don’t worry, this guide will show you how to change the AMD graphics card to Nvidia properly.
Do I need to uninstall drivers before installing a new GPU?
You have to uninstall the old GPU drivers completely from the system before going to install the new graphics card drivers.
Otherwise, you might encounter some compatibility issues, so removing the drivers is recommended.
How do I replace my AMD GPU with Nvidia?
1. Uninstall the AMD graphics drivers
Press the Windows and R keys together to open the run console.
Type appwiz.cpl in the textbox and then press Enter.
This opens the Programs and Features wizard.
Search for the AMD software from the list and select it.
Click Uninstall from the top of the wizard.
This starts uninstalling the AMD drivers from the system completely.
For best results, users are recommending using DDU to remove your drivers. If you’re not familiar, visit our how-to-use Display Driver Uninstaller guide for more info.
To completely uninstall AMD drivers, we recommend using automated software. CCleaner is a tool that specializes in uninstalling programs along with all associated files and deep roots within your computer.
Next, click the Power button and choose Shut down.
Once your PC is turned off, disconnect the computer case from the power outlet.
Disconnect all peripherals that are connected to your case.
3. Remove your AMD GPU
NOTE
Replacing a GPU can be a complicated process. If your computer is under warranty or if you don’t know how to do it safely, contact a professional.
Open the computer case and locate your graphics card.
Unscrew any screws that might be holding it to your case. Next, disconnect all the cables that are connected to it.
Carefully remove the old GPU from the slot. Keep in mind that there’s a lock next to the slot that is holding your GPU, so make sure you press and hold it beforehand.
4. Insert a new GPU
Carefully insert your new GPU into the PCI-E slot.
Connect the necessary cables, and secure the new GPU to your case with a screw.
After everything is connected, close the computer case and connect your cables.
Start your PC.
If you don’t hear any beeping noise and the image is displayed on your monitor, it means that the new GPU is successfully installed.
While playing Borderlands 3 if you are experiencing lags or stuttering, the issue is mostly related to network issues or problems with the FPS.
However, there could be other reasons as well that can affect the performance of the game and some of them include:
Outdated graphics drivers
Higher graphics configuration that the game is not designed to handle
DirectX configuration
Windows graphics settings
Pending Windows OS update
Accumulated junk files
Fortunately, there are a few workarounds that can help you fix the Borderlands 3 low FPS issue even on a high-end PC.
Before you proceed with the methods below, make sure that you restart the system once to check if it helps fix the issue.
Besides, you can also check your network connection or close any unused background applications to get rid of game lags or FPS drops.
How do I fix my FPS drop in Borderlands 3?
1. Run the game launcher as an administrator
Right-click on the launcher on the desktop and select Properties.
In the Properties dialog, select the Compatibility tab.
Here, navigate to Settings and check the box next to Run this program as an administrator. Press Apply and OK to save changes and exit.
So now, whenever you open the game it will open with administrator rights, thus, helping you to get rid of the FPS drops issue.
2. Update your drivers
Some of the most common issues are a result of outdated drivers. You can opt for a professional program that can help you scan your PC for incompatible or old drivers.
It will provide a thorough report of your device drivers and update immediately each one of them if that is the case. Plus you can set it up so it will run periodic scans so you can be sure your drivers never go out of date again.
Press the Win + Rkeyssimultaneously and the Run console is launched.
Type cmd in the search box and press the Ctrl + Shift + Enter hotkeys to open Command Prompt as administrator.
Type the below commands one after another in the Command prompt (admin) and hit Enterafter each one: ipconfig /releaseipconfig /renew
Once the IP address is successfully renewed, run the below command and hit Enter to flush the DNS cache: ipconfig /flushdns
Now, exit Command Prompt, restart your PC, and check if the FPS drops issue is resolved.
6. Use Google Public DNS address
Open the Run console by pressing the Win + R shortcut keys.
Now, in the search field, type ncpa.cpl and hit Enter.
Next, in the Network Connections window, right-click on your network connection and select Properties.
Under the Networking tab, select Internet Protocol Version 4 (TCP/IPv4) and click on Properties.
In the next dialog, go to the General tab, and select Obtain an IP address automatically.
Now, select Use the following DNS server addresses options, and input the below Google Public DNSaddress in the respective fields: Preferred DNS server: 8.8.8.8; Alternate DNS server: 8.8.4.4.
Now, launch Borderlands 3 and check if you still experience stutters, slow FPs, or lags during the game.
Bonus tip
Additionally, you can modify in-game settings as below:
➡Set the display mode to full screen
➡Change the game settings(below is an example):
Graphics API – Direct X 11
Overall Quality: Medium (If using an old PC model, set it low/very low)
Anti Aliasing: FXAA
FidelityFX Sharpening: On
Camera Motion Blur: Off
Object Motion Blur: Off
Texture Streaming: Ultra
Anisotropic Filtering: 16x
Material Complexity: Medium
How do I make Borderlands 3 run smoother?
While the above troubleshooting methods can help you to fix issues such as FPS drops, lags, and stuttering, you can also turn off the hardware acceleration for a smoother performance.
So, for example, if you are playing the game on Discord, you can follow the below steps to turn off the feature:
Launch Discord and click on the gear icon in the bottom left to open Settings.
On the left, click on Appearance.
Now, on the right, under Advanced, turn off Hardware Acceleration.
You can now try playing Borderlands 3 on Discord and it should run it smoothly.
At the same time, make sure that you always check for the latest updates for the game to keep off any performance issues.
Now, circling back to what is important now, if you get the An unknown error has occurred, the steps below will save you.
Why does Amazon keep saying an error has occurred?
This is a pretty common error, so don’t even sweat about it. A lot of Amazon users report dealing with this situation, so you aren’t alone in this.
So, if Amazon keeps saying Sorry, something went wrong, just refresh the page or reload the app, as the first line of defense.
This common error usually results from a poor connection, so check and see if your internet is working properly or if you are downloading a large file.
Furthermore, assuming Amazon servers are actually online, you should double-check that your PC or phone network connection is working as intended.
Thus, presuming you are now dealing with An unknown error has occurred, please try again later on Amazon, here’s what you need to do.
Quick Tip
An option that we recommend is switching to a more suitable browser. Opera GX can be very useful because of its various built-in features. It lets you set limits on CPU, RAM, and Network usage to speed up your online activity.
You can also control your privacy and security with its free integrated VPN. Your IP address is replaced with a virtual one, making it harder for websites to track your location and identify your PC.
Opera GX
Try this browser to boost your online activity and to make it more secure.
How do I fix an unknown error has occurred on Amazon?
1. Restart the Amazon app
The simplest solutions bring the best results in solving what appear to be impossibly intricate problems, so we will go this route at first.
Before we commit to doing anything else, let’s simply restart the app. A lot of users facing this problem state that it only took restarting the app for the problem to go away.
It might not seem like much, but that is all that software needs sometimes, a good old-fashioned reboot, and all will be good.
2. Update the Amazon app
More times than not, software starts to malfunction and exhibit strange behavior when it becomes outdated, in case you didn’t know.
That being said, keeping your app up to date with the latest patches and fixes is vital for it to properly function and not display any errors.
Just hit the update button and let the app download its latest build, afterwards simply start Amazon and keep on shopping.
3. Delete the Amazon app cache
1. Start the Settings app and tap Apps.
2. If necessary, tap See all apps and then tap Amazon Shopping.
3. Tap Storage & cache.
4. Tap Clear storage.
4. Update Windows
PressWindows+Ito access Settings.
Select the Windows updates tab and click Install all.
If no updates are queued for installation, press the Check for updates button.
5. Uninstall/Re-install the app
Press Win + I to access Settings.
Select the Apps tab, then click on Installed Apps.
Look for the Amazon app, click on the dots next to it and select Uninstall.
Re-install the app.
How do I empty my Amazon cache?
This is one of the easiest actions you can do and it will only take one minute of your time, so don’t worry about it.
All you need to do is follow the steps shown in solution 3, where we’ve explained exactly what you need to do on your end.
It’s not from the app itself, and you will have to go to your system’s settings and access this information. From there, you can delete the Cache for pretty much everything installed.
So, if you are in a scenario where Firestick displays An unknown error occurred connecting to Amazon Appstore, use the solutions in this article.
In fact, the steps above can be useful in pretty much all Amazon Appstore connection failures, so keep that in mind.
Has this guide been helpful? Share your experience with us in the comments section below.