Are you getting the Word found unreadable content error message? If yes, then you aren’t alone. Several users are looking for solutions to resolve the Word found illegible content error message. Users have even said no option fixes the issue.
Fortunately, this guide has a bunch of solutions that will help you resolve the error. Moreover, we will also explain why you come across the Word found unreadable content error message in the first place. So let us get right into it.
Why do I get the Word found unreadable content error message?
After our careful research, we did some digging and found out the most common reasons why you will come across the Word found unreadable content error message.
The file is corrupt or damaged: If the file you are trying to open in MS Word is corrupt or damaged, you will encounter this error.
The document wasn’t closed properly: Unexpectedly shutting down the PC or closing the document leads the document to get saved without proper formatting.
Your PC is infected with Virus: Virus or malware can corrupt not only all your files but also corrupt the system files and make them unreadable.
The document did not convert properly: If you tried to convert the document into another format, you will receive this error message.
How can I fix Word found unreadable content error message?
1. Repair the Word file
Launch Microsoft Word.
Open a new Word file.
Click on File.
Select Open.
Click the Browse button and select the problematic Word file.
From the Tools drop-down menu, select the Open and Repair option.
The problematic Word file will be repaired, and you can open it.
The Open and Repair option, as shown below, has helped several users fix the Word found unreadable content error. This fixes any issues with the document.
Click the Browse button and select the problematic Word file.
Expand the All Word Documents drop-down and select the Recover Text from the Any File option.
Click on Open.
The damaged file will take some time to open.
3. Unblock the document
Open File Explorer by pressing the Win + E keys.
Locate the Word file.
Right-click on the Word file.
Select Properties.
Uncheck the Read-only box.
Click Apply and OK.
Open the Word file and check if this fixes the issue or not.
4. Reinstall Microsoft Office
Open the Start menu by pressing the Win key.
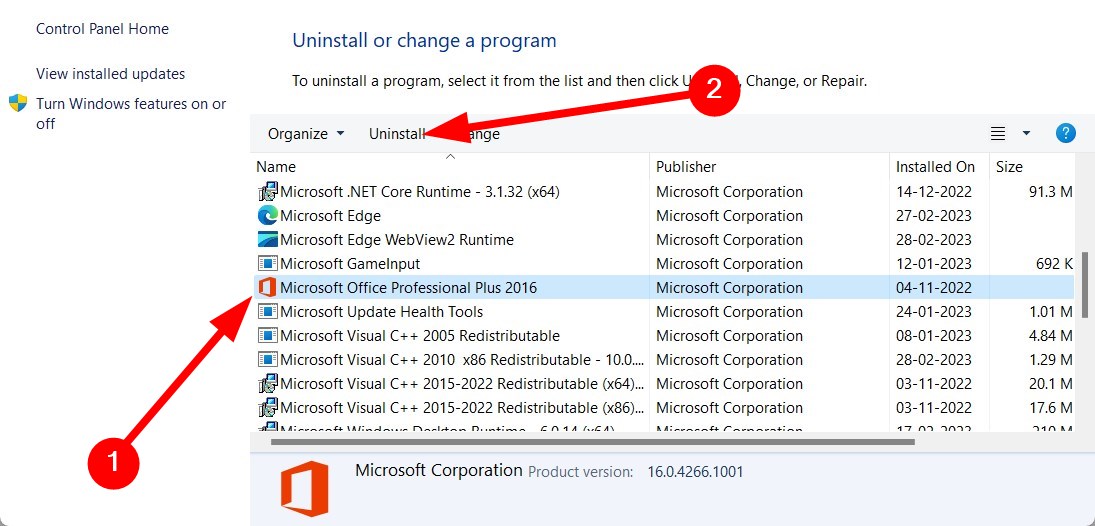
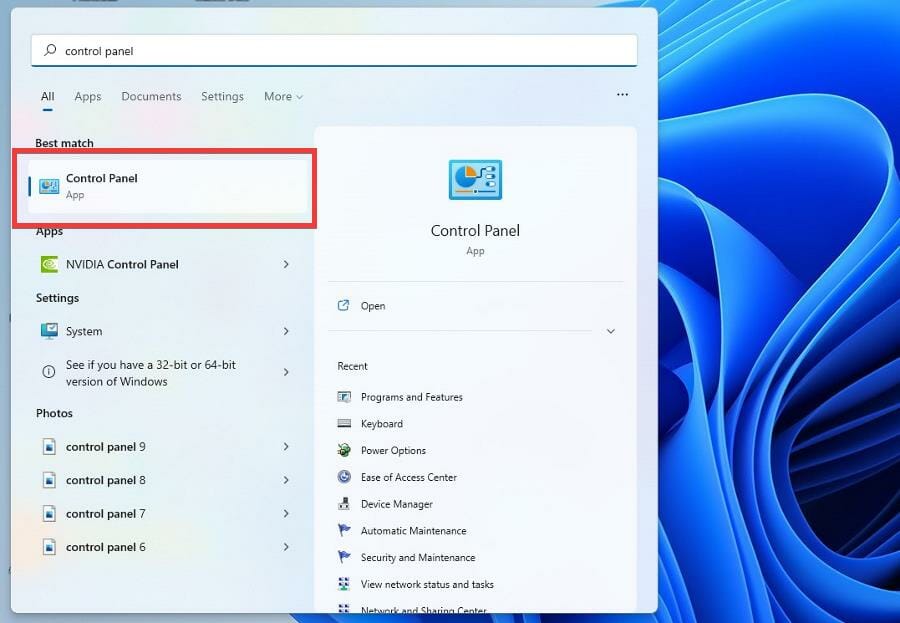
Open Control Panel.
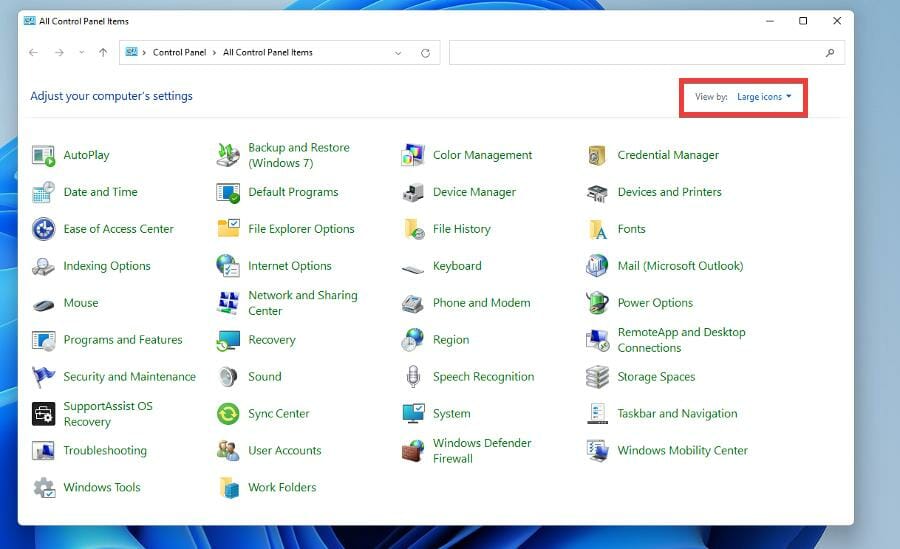
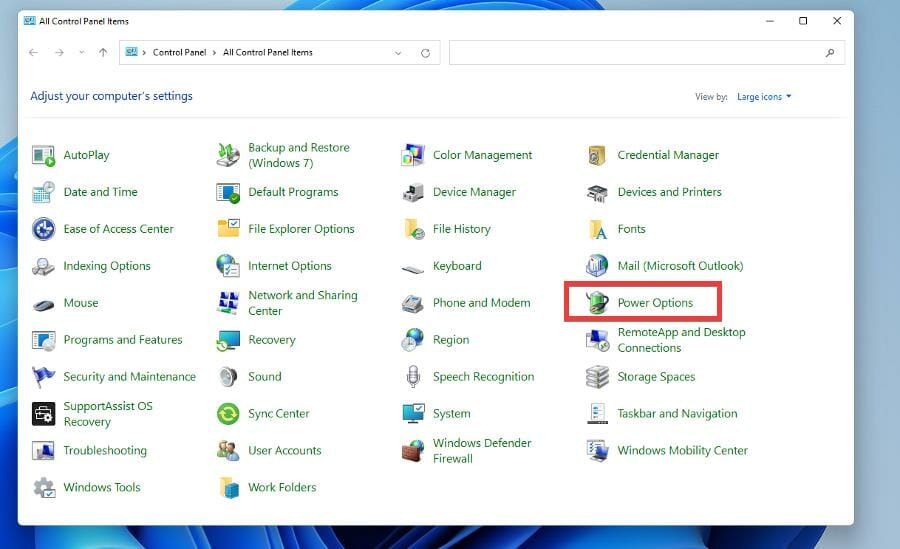
Click on Programs and Features.
Select Microsoft Office and click the Uninstall button at the top.
Follow the on-screen steps to uninstall MS Office from your PC.
Restart your PC.
Run the MS Office EXE and install the application.
Open the Word document and check if this resolves the issue or not.
Chances are that some of the critical MS Office files are missing, because of which you are getting the Word found unreadable content error message.
In such a case, the best bet is to reinstall the entire package and ensure you do not interrupt the installation process after reinstalling. Then, you can open the problematic Word file and check if this fixes the issue.
5. Scan PC for virus
Open the Start menu by pressing the Win key.
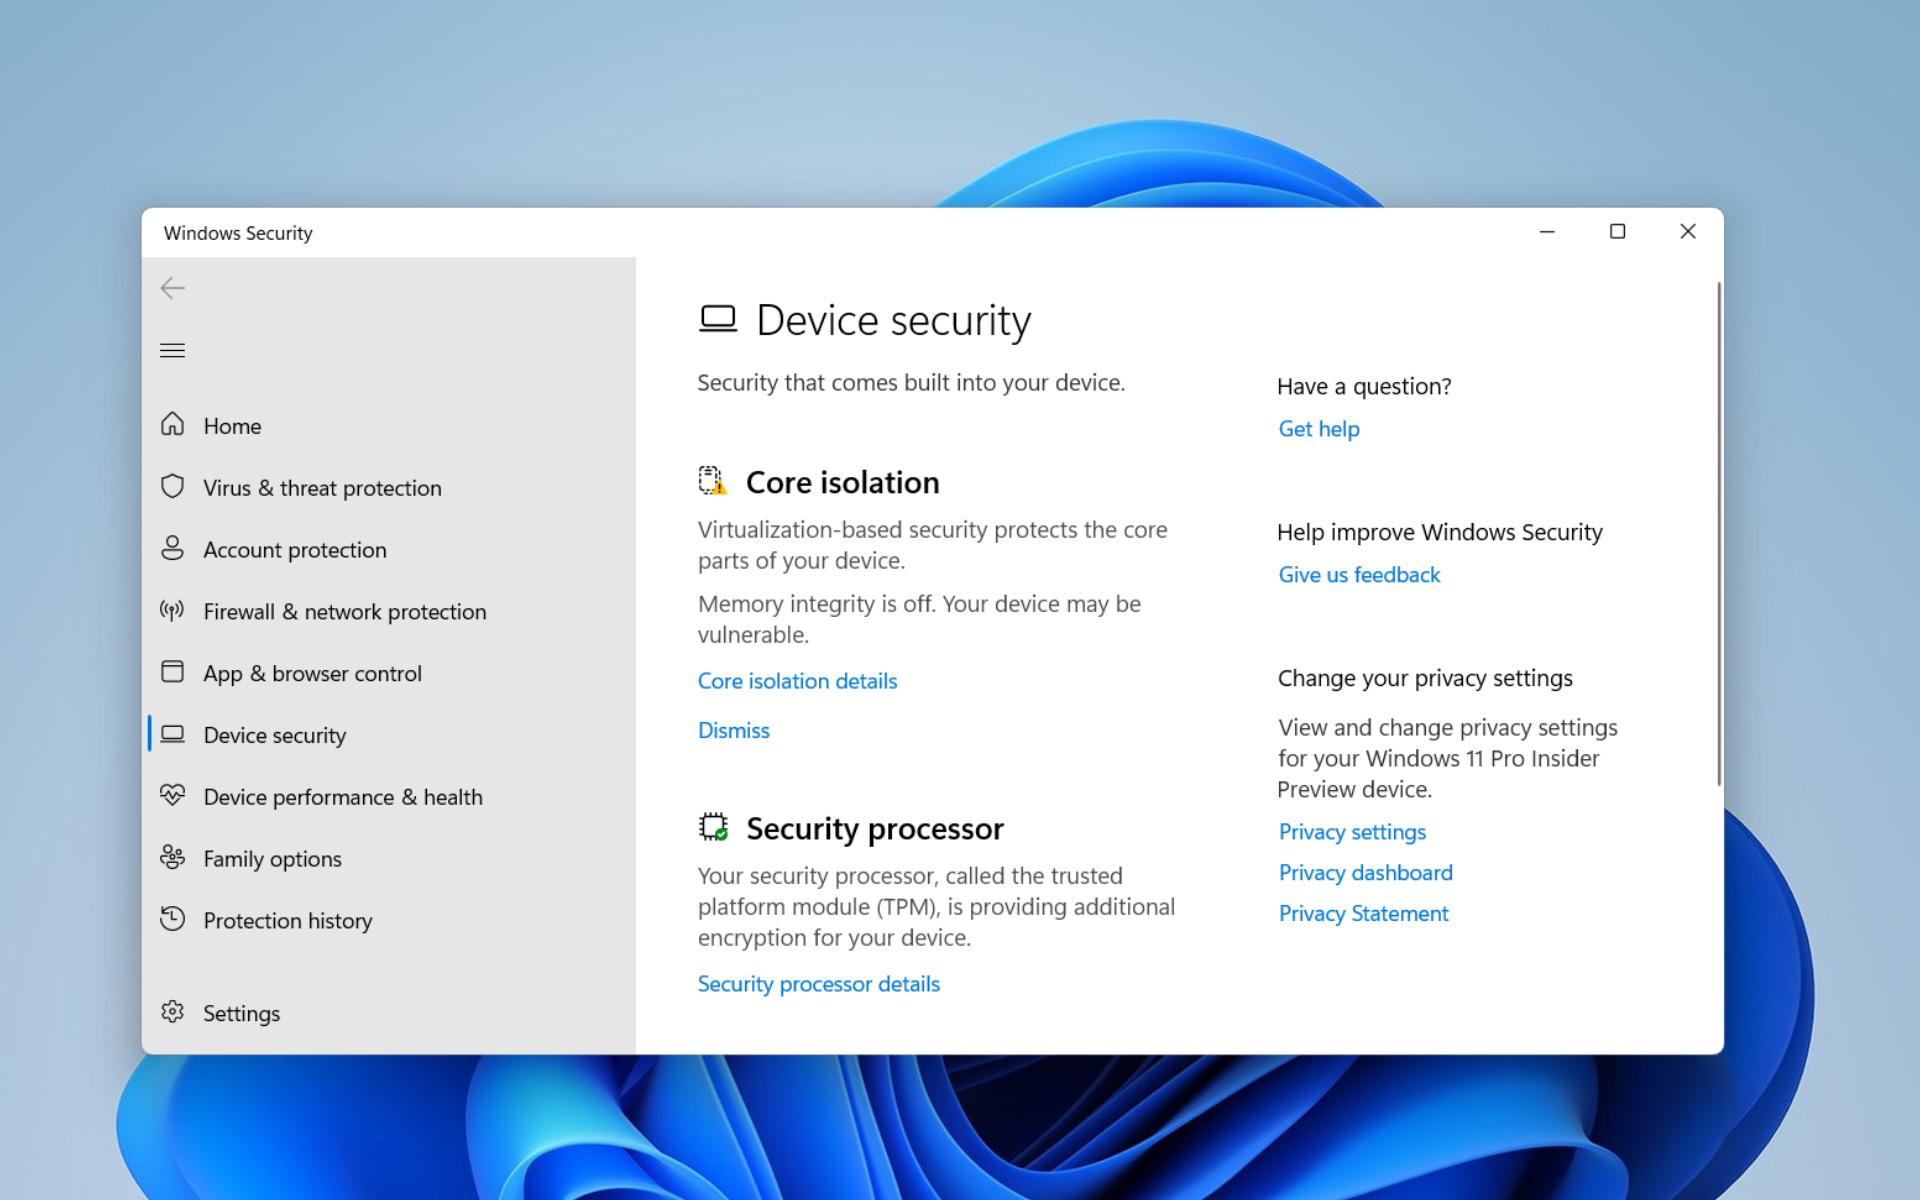
Open Windows Security.
Click on Virus & threat protection.
Click on Quick Scan.
Wait for the process to complete and apply the prompted solution to remove the virus from your PC.
Click Scan options and select Full Scan for a deeper PC scan.
You can use the built-in Windows Security tool to scan your PC for viruses quickly. However, often this isn’t as effective as a dedicated third-party antivirus tool.
If you need more support, we advise you to confidently pick TotalAV to gain the most effective data and file security from the market.
That is it from us in this guide. However, if you are having issues running MS Office on your PC or any of the office products, you should check out our guide, which lists some practical solutions to resolve the problem.
Several users have reported coming across Microsoft Office error code 30204-44. However, you can quickly fix the issue by checking out our guide, which mentions some solutions that help users fix the problem.
If you use Microsoft Office 365 and want to know how to remove the Recommended Documents list from showing on the home screen, you can check out our guide.
Feel free to let us know in the comments below which one of the above solutions helped you fix the Word found unreadable content error message.
The best Windows 11 optional features allow you to take full advantage of your PC’s enormous potential. You get to activate productivity features and get more functionality.
Hence, seeing these settings blank suddenly when you need them can be annoying. Some of the features become blank, from wrong system settings to missing and corrupt files.
Irrespective of the cause, we have gathered seven simple yet effective fixes to help you get the Windows 11 optional features back.
Why is the Windows feature box empty?
The reasons the Windows 11 optional features box is empty are numerous. Below are some of the popular ones:
Wrong settings.
Corruption of the component store containing information about Windows features.
Corrupt system file.
How do I enable optional features in Windows 11?
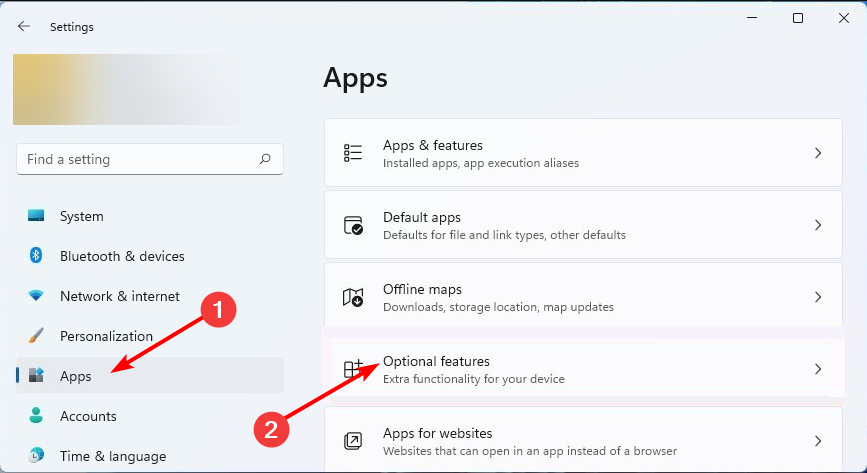
Press the Windows+ Ikeys to open Settings.
Select the Apps option.
Choose Optional features.
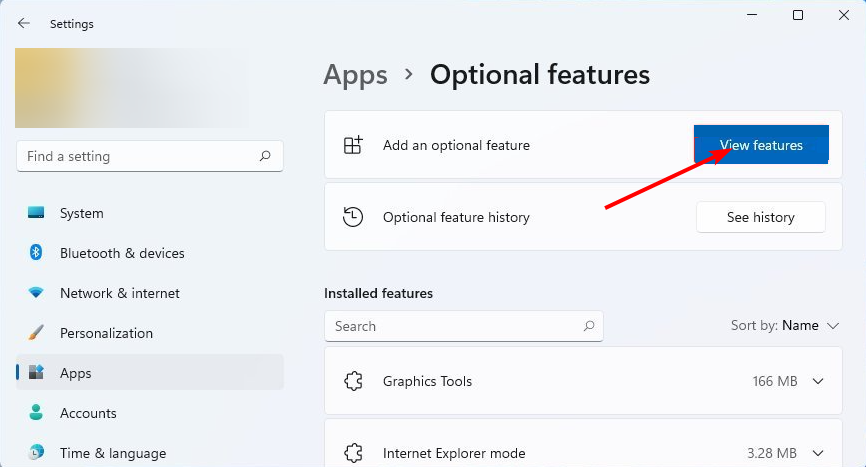
Click the View features button in front of Add an optional feature.
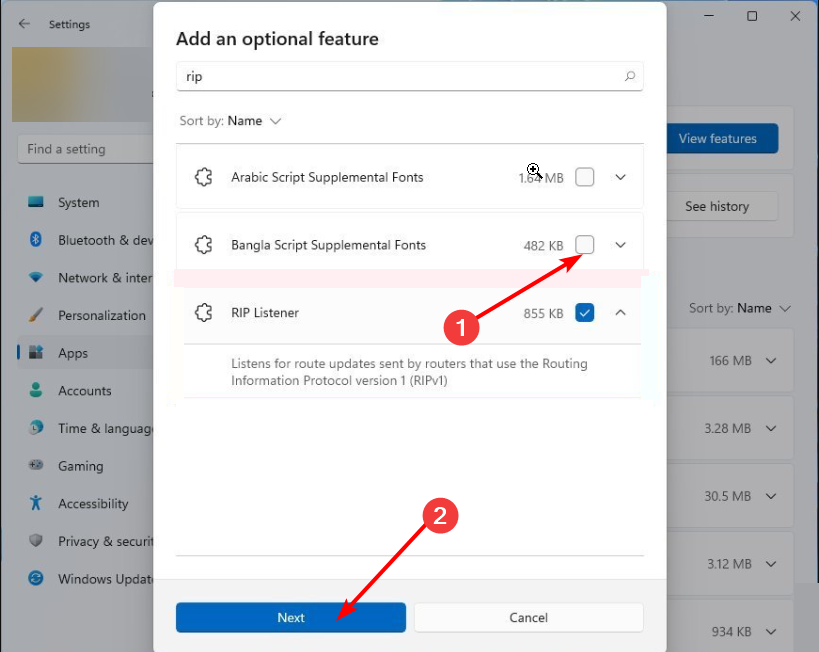
Select any optional feature to install and click the Next button.
Finally, click the Install button to complete the process.
How do I fix Turn Windows features on or off blank?
1. Set Windows Module Installer as automatic
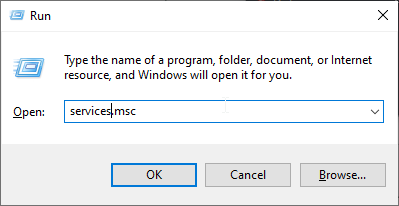
Press the Windows+ Rkeys to open the Run utility.
Type services.msc in the search box and press the Enterkey.
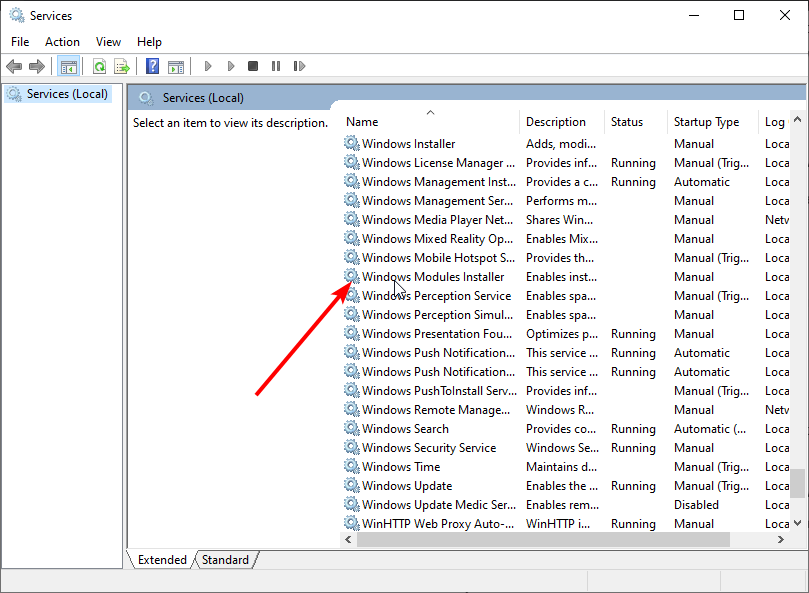
Scroll down in the Services windows and select Windows Modules Installer.
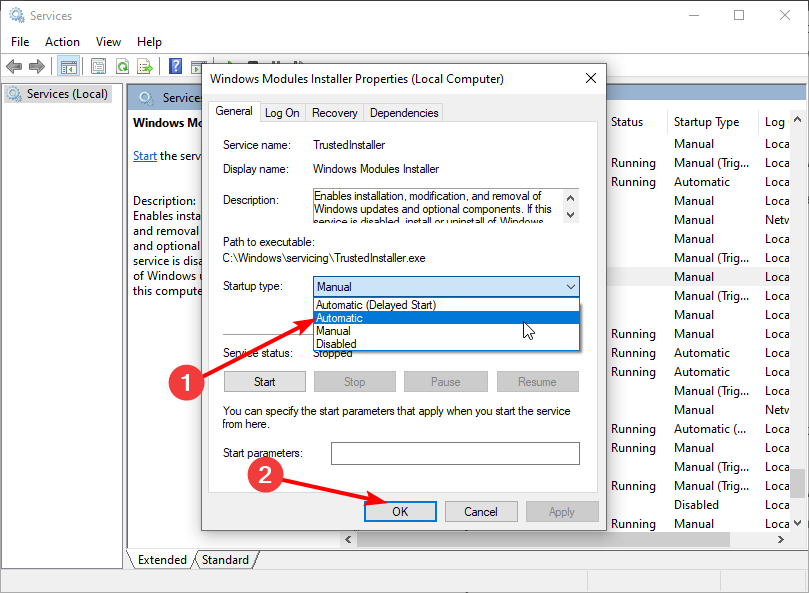
Click the dropdown before Startup type and select Automatic.
Now, click the OK button to save the changes.
The Windows 11 optional features blank can be caused by manually setting the Windows Module Installer. This is because this feature is in charge of installing windows updates and other features.
To explore all available Windows 11 optional features and learn how to manage them, visit Windows Optional Features for detailed guidance.
2. Disable Hide Windows Features
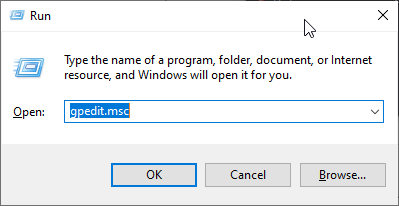
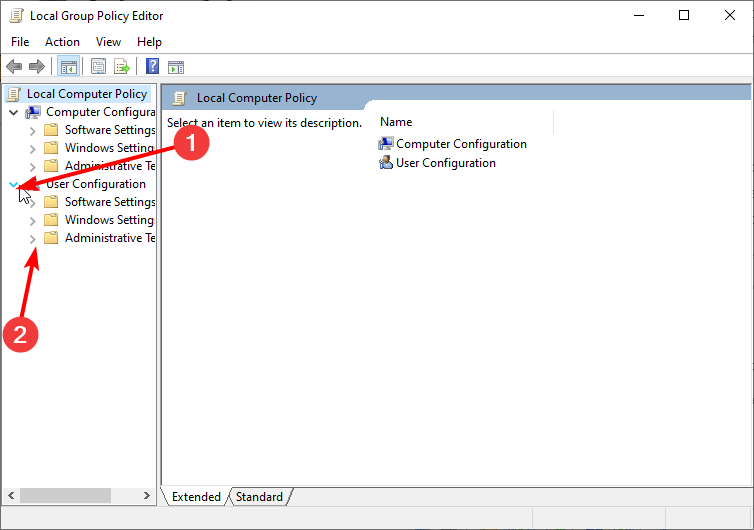
Launch the Run utility, type gpedit.msc in the Run box, and press Enter.
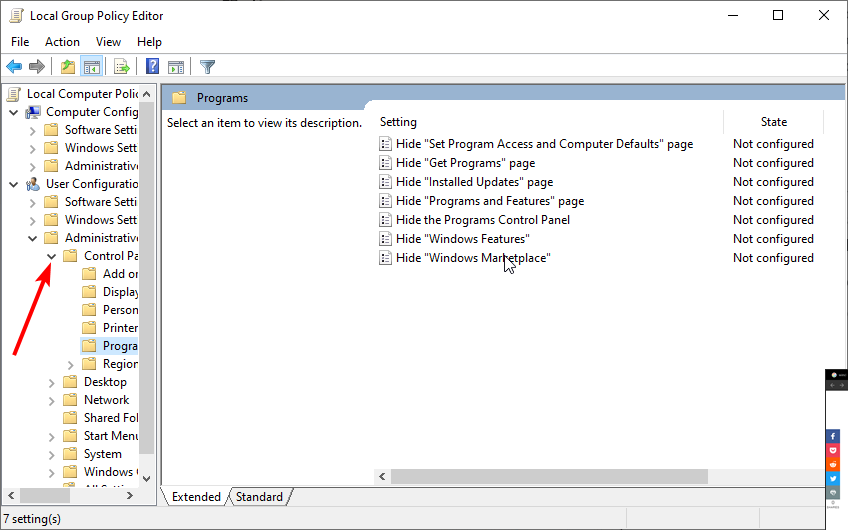
Select User configuration on the left pane, followed by Administrative Template.
Choose the Control Panel option.
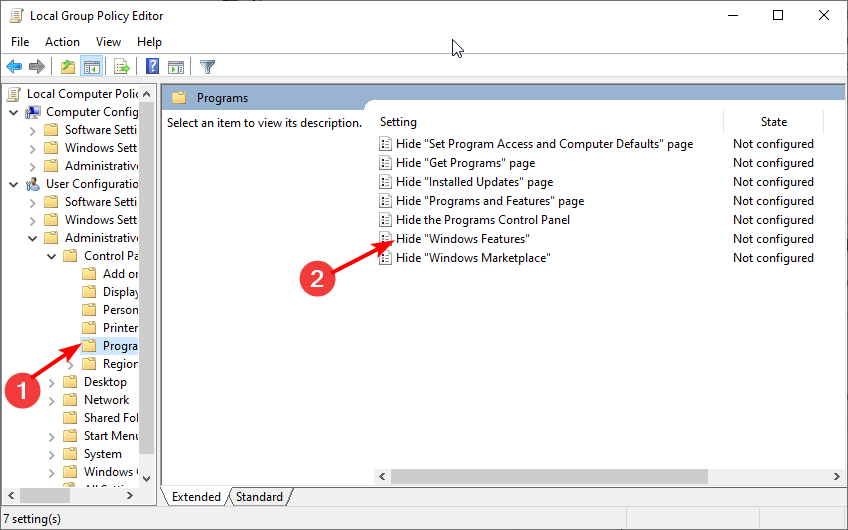
Now, select Programs.
Double-click on the Hide “Windows Features” option.
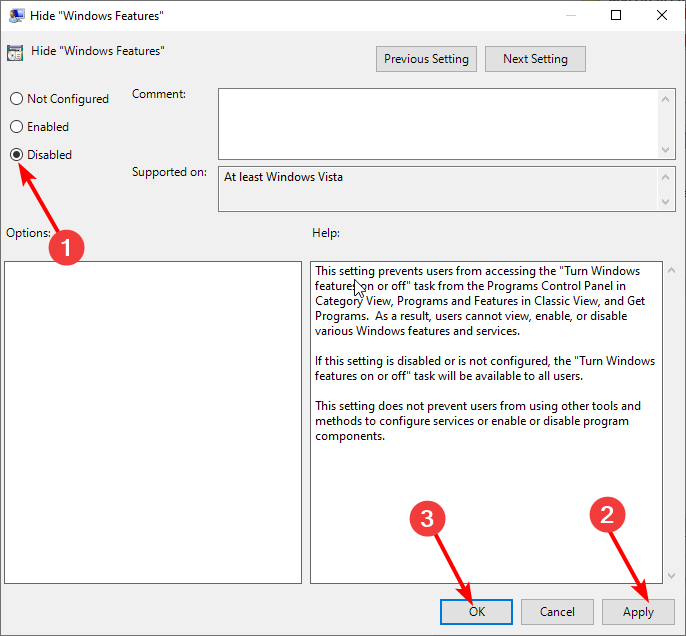
Tick the radio button for Disabled.
Finally, click Apply followed by OK.
If the Windows 11 optional features are empty on a user account and present on another, this fix will help set the local group policy to make it available on all of them.
3. Perform SFC scan
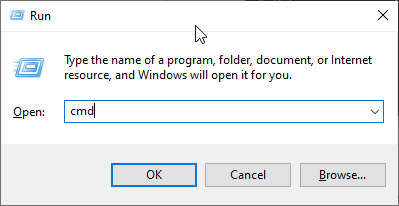
Start the Run utility.
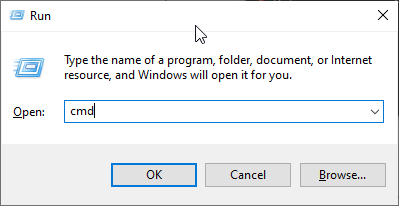
Type cmd and press Enter.
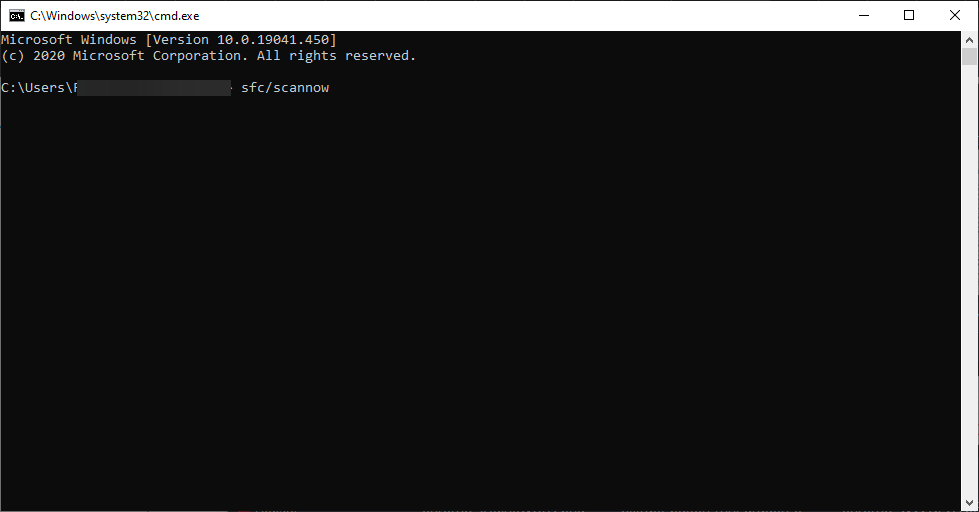
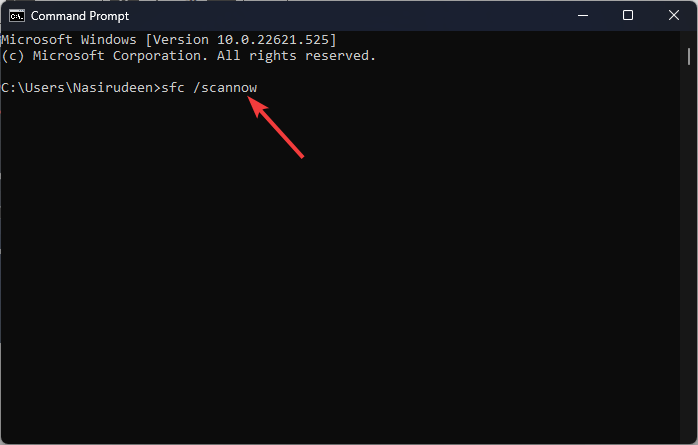
Copy the code below in the Command Prompt window and hit Enter. sfc/scannow
The Windows optional features might not be loaded due to corrupt or missing files. The System File Checker (SFC) should help scan and restore the files.
4. Perform DISM scan
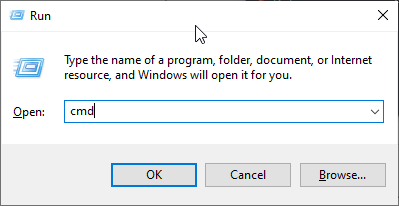
Press the Windows+ Rsimultaneously to open the Run utility.
Type cmd in the run box and hit the Enterkey.
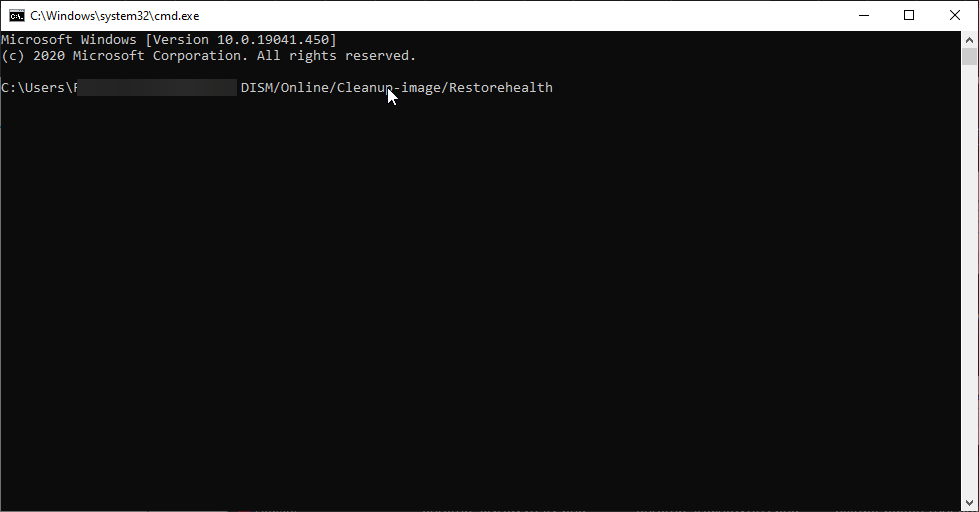
Copy the code below into the Command prompt window and press Enter. DISM/Online/Cleanup-image/Restorehealth
The DISM scan helps scan and repair corrupt files that could cause Windows 11 optional features not to load. Wait for the scan and the repair to complete and restart your PC to effect the changes.
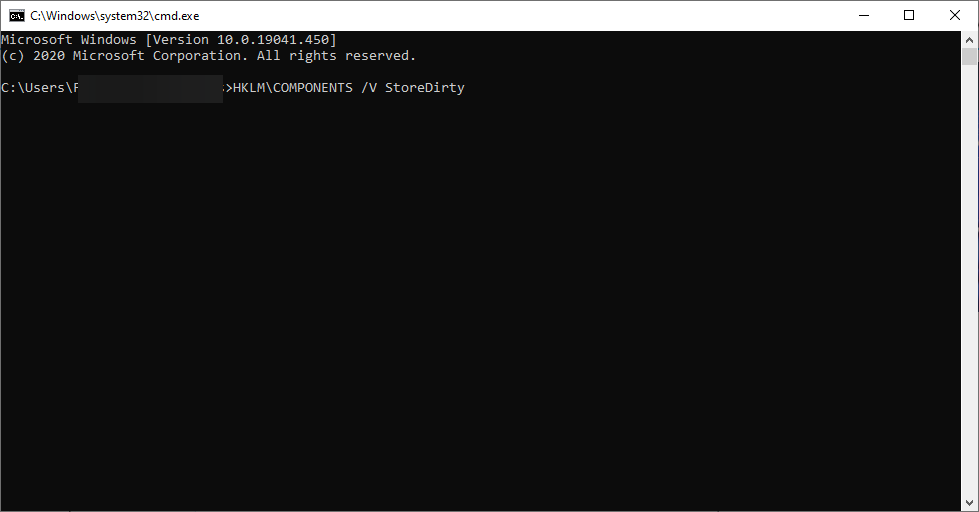
Type the command below and press the Enterkey. reg delete HKLM\COMPONENTS /v StoreDirty
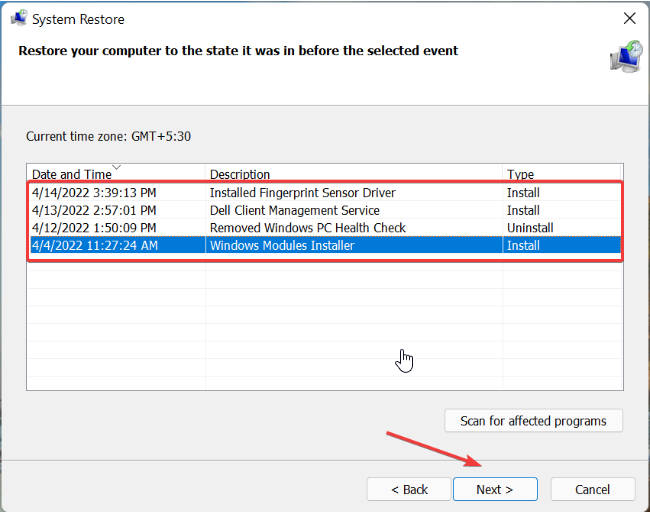
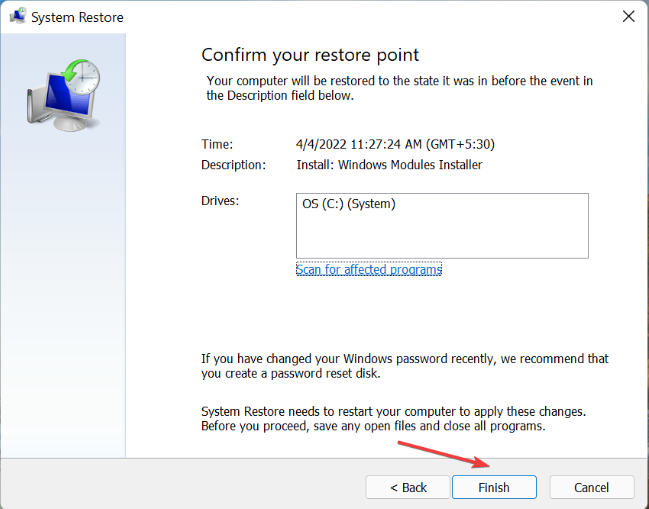
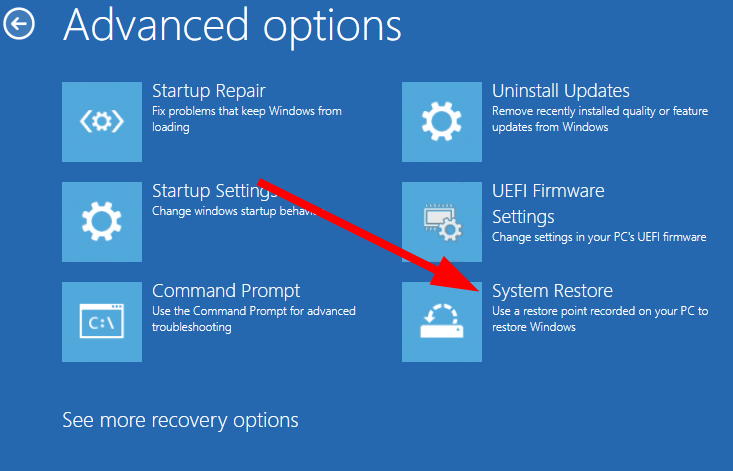
7. Restore system
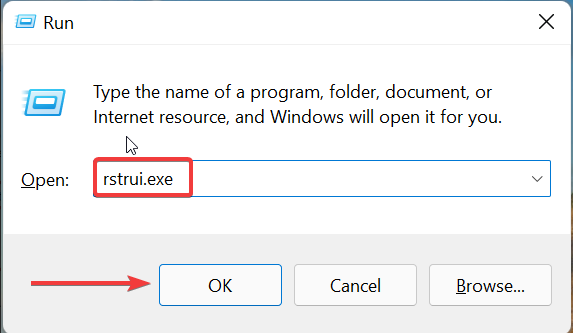
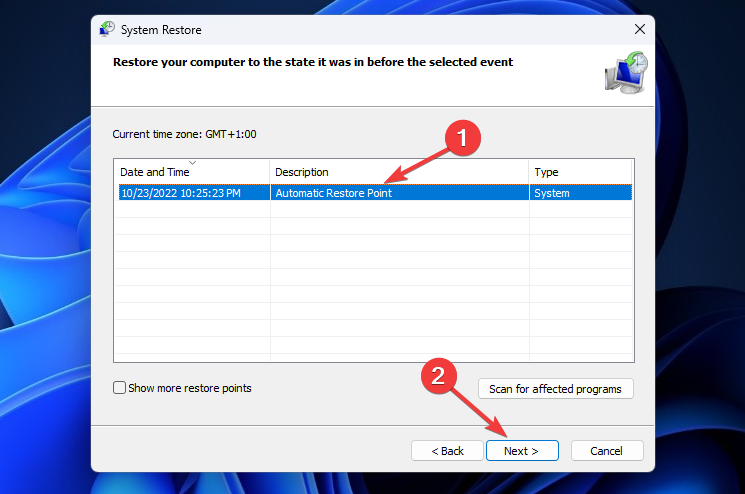
Launch the Run utility, type rstrui.exe, and hit Enter.
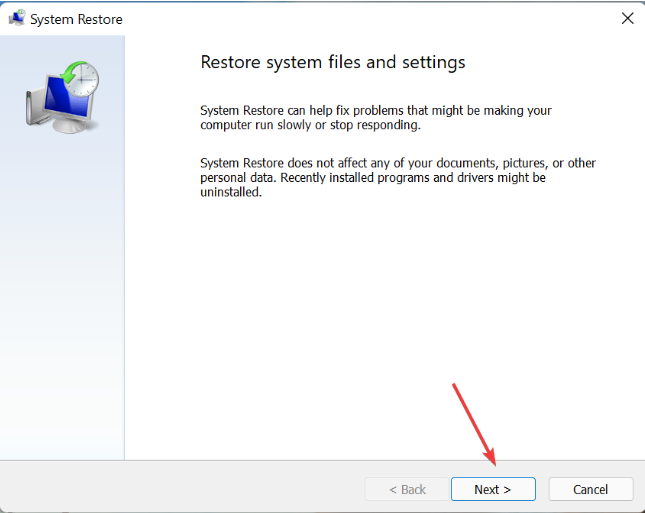
Click the Next button.
Now, select a restore point from the options shown.
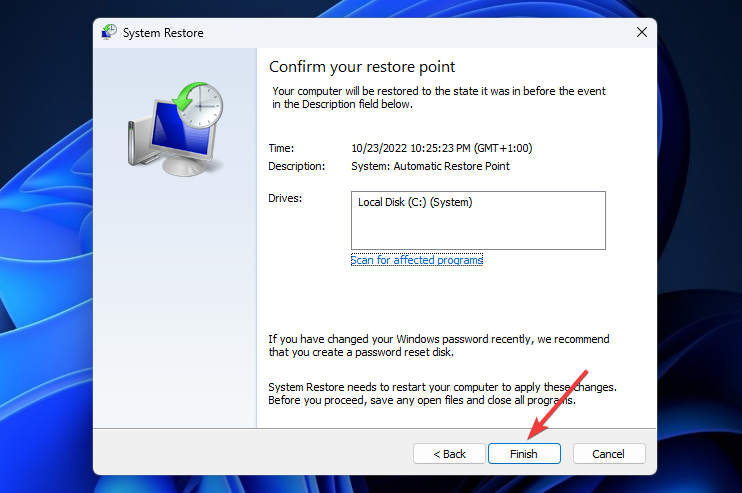
Check if the details are correct and click Finish.
This is the last resort if every other fixes fail. The system restores you to return your system to a time when the Windows 11 optional features last worked.
What are Windows 10 features missing from Windows 11?
A series of features were present on Windows 10 but are now missing on Windows 11. Below are some of the notable ones:
Ability to move the Taskbar.
File dragging and dropping to open in an app on Taskbar.
Quick status on Lockscreen.
Desktop wallpaper roaming when signed in with a Microsoft account.
The Windows 11 optional features empty issue can be pretty annoying, as it stops you from accessing high-level features like Hyper-V. So we have provided seven effective fixes to help you get them back.
Check this guide on the best new features on Windows 11 to enable today to maximize its strengths and increase its functionality.
Feel free to let us know the fixes that helped you solve the issue in the comments below.
If there’s a public enemy number-one for Windows 11 users since October 2022, that would have been BlackLotus. At that time, the UEFI bootkit malware was rumored to be the only thing that could pass any defense in the cyber landscape.
For just $5,000, hackers on black forums could have an access to this tool and bypass Secure Boot on Windows devices.
Now, it seems like what has been feared for months is true, at least according to ESET’s recent study done by analyst Martin Smolár.
The number of UEFI vulnerabilities discovered in recent years and the failures in patching them or revoking vulnerable binaries within a reasonable time window hasn’t gone unnoticed by threat actors. As a result, the first publicly known UEFI bootkit bypassing the essential platform security feature – UEFI Secure Boot – is now a reality.
When you boot up your devices, the system and its security load first before anything else to disarm any malicious attempt at accessing the laptop. BlackLotus, however, targets UEFI so that it loads before anything else.
Matter of fact, it’s able to run on the latest Windows 11 system with the Secure Boot feature enabled.
BlackLotus exposes Windows 11 through its CVE-2022-21894 vulnerability. While it was patched in Microsoft’s January 2022 update, the malware takes advantage of this by signing binaries that have not been added to the UEFI revocation list.
Once installed, the bootkit’s main goal is to deploy a kernel driver (which, among other things, protects the bootkit from removal), and an HTTP downloader responsible for communication with the C&C and capable of loading additional user-mode or kernel-mode payloads.
Smolár also writes that some of the installers do not proceed if the host uses locales from Romanian/Russian (Moldova), Russia, Ukraine, Belarus, Armenia, and Kazakhstan.
Details of this first emerged when Kaspersky’s Sergey Lozhkin saw it being sold on black markets with the aforementioned price tag.
What do you think about this latest development? Let us know in the comments!
Much has been said about VPNs. But have you heard of VPN routers? To achieve increased online privacy, they’re just what the doctor ordered.
Keep reading to discover what VPN routers are all about, how they work, and what their different types and benefits are.
We’ll also show you how to choose the right VPN router for your needs, and how to set it up.
Let’s dive in!
What is a VPN router?
In essence, it’s a WiFi routerthat has the firmware needed to set up a VPN.
Conversely, a regular router doesn’t have the built-in software necessary to support VPN connections. But, you may be able to convert one into a VPN router by flashing it. More on this later.
VPN routers and router VPNs aren’t the same, although some incorrectly use them interchangeably.
Router VPNs are VPN apps you could install on routers. Oftentimes, they’re compatible with a wide variety of router firmware and can mesh with dedicated router apps.
How does a VPN router work?
To understand how VPN routers work, here’s a primer on VPN technology:
A VPN is a tool that reroutes your device’s traffic through an encrypted tunnel to a third-party server, allowing you to interact with the web indirectly.
As a result, you use the VPN server’s IP to spoof your location and hide your activity and DNS queries from snoopers.
Moreover, a VPN app on a device strongly encrypts outgoing traffic and decrypts incoming one. So, whoever tries to monitor or intercept your data in transit would remain clueless about what you’re doing.
Usually, VPN services have server networks that span dozens of jurisdictions across the world. Some providers might use virtual server locations, but they take this route to obtain IPs registered in places that are prone to cyberattacks or not friendly to VPNs.
Leading services offer extraordinary capabilities such as obfuscationand split tunneling, which is for using your VPN selectively.
A VPN router follows the same basic principle, except that it secures all devices on the network using a single VPN connection. So, it encrypts all data leaving it and decrypts the one coming in. However, the traffic between your router and devices is unencrypted.
In terms of setup, you can configure VPN routers in different ways, ranging from simple to complex. Your configuration options would depend on your router model, your VPN, and your technical know-how.
Types of VPN routers
VPN routers do work after the same principle, but they come in different forms. As follows are the most common ones on the market:
Pre-configured VPN routers
These routers are ready to go. You can buy an off-the-shelf model or one that you can tailor to your favorite service.
Now, pre-configured VPN models don’t come cheap. But, they make setup and configuration changes painless.
Pre-flashed VPN routers
These routers are VPN-enabled. This means they have the firmware needed to install a specific VPN but are yet to be pre-configured to a particular server. You can set one up using a VPN router app or manually.
Manually flashed VPN routers
These routers are compatible with VPN firmware. However, they don’t have it pre-installed. If you have one of these, you’ll have to flash it so that it can run a VPN.
Retrofitting VPN functionality to your WiFi router can be taxing, especially if you’re not technically proficient.
However, keep in mind that not every VPN-compatible regular router supports any VPN firmware. Installing something incompatible could mess up the hardware beyond repair.
So, do your homework beforehand.
Dedicated VPN routers
A dedicated VPN router could refer to a secondary routerwith VPN software installed on it and connected to a primary router with no VPN capabilities or to an enterprise-grade VPN setup.
In your home, you could configure a dedicated VPN router to create a new WiFi network with VPN protection while keeping your original network as usual.
In the office, a dedicated VPN router housed in the HQ can create secure connections at the hardware level site-wide while eliminating the need to install a client VPN on individual devices. As a result, the entire remote office can enjoy continuous access to the network.
Setting up a dedicated VPN router at home may intimidate not-so-tech-savvy users.
In business settings, pulling off a proper VPN router setup is a Herculean task for tech greenhorns. So, that’s why you should probably leave this job to IT experts.
Pre-configured
Pre-flashed
Manually flashed
Dedicated (home)
Dedicated (office)
VPN compatibility
Limited
Limited
Wide
Depends on router model
Limited
Setup difficulty
Easy
Moderate
Hard
Moderate or hard
Hard
Setup time
Fast
Moderate
Moderate or lengthy
Moderate or lengthy
Lengthy
Router upgrade cost
High
High
None
High or none
Depends on enterprise-grade VPN router vendor’s pricing
Benefits of using a VPN router
Installing your VPN on a router instead of directly on your device can be a massive inconvenience. So, why bother?
Well, using a VPN router can be advantageous for many reasons.
Let’s discuss the most important ones:
Increased privacy at the network level
Normally, only the devices that individually connect to the VPN can stay protected. The rest expose you geographically and broadcast your activity to your ISP.
A VPN router changes everything. It can keep the IP and DNS data of all devices on its network a secret. That’s why it’s such a useful tool if you’re privacy-minded.
Automatic encryption
If you use a VPN router, you’ll only need to log in once and enjoy the merits of data encryption around the clock.
Its set-and-forget nature can not only make it incredibly convenient to obscure your traffic. But also enhance your network security to the point where you may no longer need additional firewall protection.
Protect devices that don’t natively support VPNs
Generally, VPN apps are designed for Windows, macOS, iOS, and Android. Only some vendors have developed dedicated clients for Linux, ChromeOS, and FireOS.
Say you have a gaming console like PlayStation or an Apple Watch. Or you’re using a streaming media player like Chromecast or Roku. Such devices aren’t usually enabled to route data to a VPN.
So, if you want to hide your online activity on all your electronics, having a VPN router is your best bet.
Unblock geo-restricted content on all devices
Spoofing your location with a VPN is one of the most effective ways to beat regional lockouts, which limit the kind of content you can enjoy on the internet.
But, if you have a VPN router, you can successfully pretend you’re located in another area or country as long as you’re using a device that’s connected to your WiFi network.
Get around simultaneous VPN connection restrictions
And, if you reach the limit, you’ll have to remove a device, buy another subscription, or purchase extra slots (if possible) to make room for more.
Using a VPN router is a neat workaround. No matter how many devices you connect to your home network, your service provider would count it as just one.
So, when you’re outside and want to use your mobile data, you can still secure your traffic with your VPN at no extra cost.
Easily create a double VPN connection
Using another VPN service when connected to a VPN router can take your online privacy to another level.
This setup can mask your IP and encrypt your data twice, creating a second line of defense in case your VPN router becomes leaky.
More importantly, it can secure the traffic between your devices and your WiFi router.
Now, keep in mind that this configuration will noticeably slow down your internet connection. However, this may be a trade-off you’d be willing to accept if, for example, you live in a country with heavy internet usage restrictions.
VPN routers are easier to set up than ever
There’s no denying that setting up a VPN router seems more complicated than downloading a native VPN app for your system.
That said, VPN router apps are now available to simplify the configuration process. At the moment, ExpressVPNand VyprVPN are the only ones that offer them. But, it could inspire or pressure others to follow suit.
How to choose the right VPN router
VPN routers come in many shapes and forms. So, to select the one that suits your needs, you should take note of the following factors:
VPN preference
Obviously, not all VPNs are router VPNs. And not all router VPNs are installable on any router model. So, if you want to subscribe to a particular service, you’ll be limiting the number of products you can use.
However, leading VPN providers usually have lists of supported routers on their websites to make things easier.
VPN compatibility
Installing an incompatible VPN on your router is futile. So, it’s important to determine whether your preferred model can actually function with the particular VPN service you’re eyeing.
Setup difficulty
Again, setup methods come in varying degrees of difficulty. If you’re not technically proficient to handle the complex process of flashing your hardware and configuring your VPN, you may want to take the easiest route to installation and get a pre-configured router.
Cost
The more convenient a VPN router is to set up, themore expensive it usually is. So, if you want to spend as little as possible, you should explore the manually-flashed option.
How to set up a VPN router
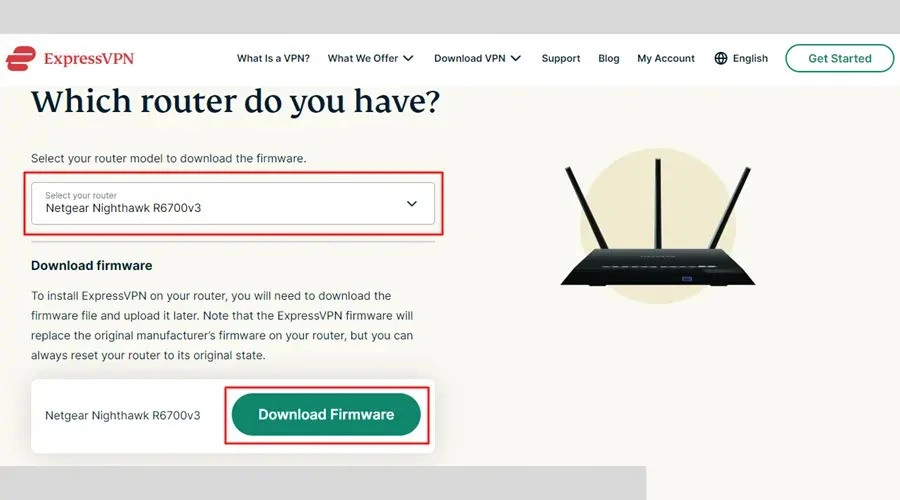
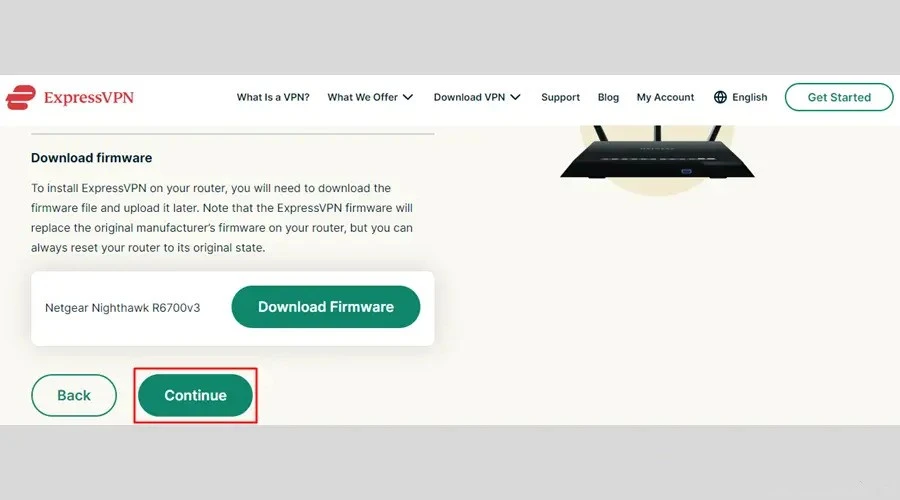
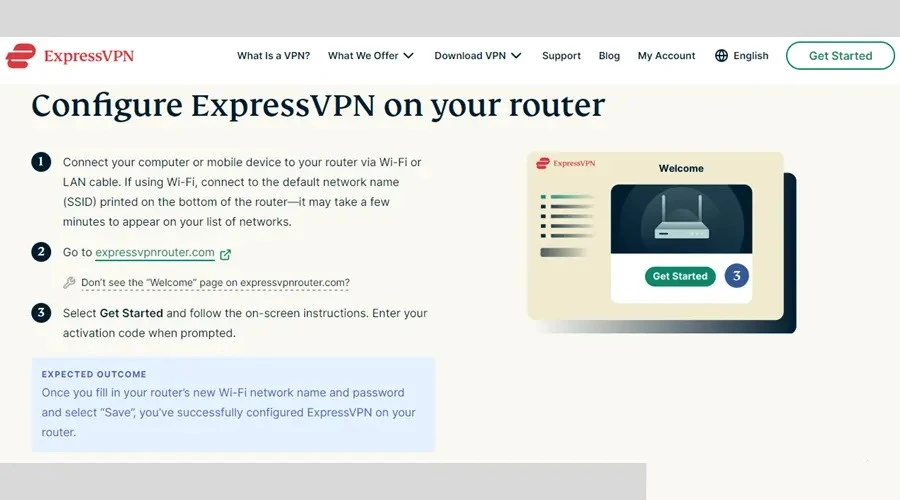
To get an idea of the whole setup process, here’s a walkthrough of ExpressVPN’s installation guide forNetgear Nighthawk R6700, one of the best VPN routers you can buy:
If you already own a supported router, choose Install on the router I’ve been using.
Select the model and download its firmware.
Click Continue.
Follow the on-screen instructions.
Click continue.
Follow the final set of instructions to complete the setup.
If you encounter connection failure or IP and DNS data leakage on all devices, restarting your WiFi router may fix what’s wrong. But, if the issue is isolated, restarting the problematic device should do the trick.
If the above troubleshooting steps don’t work, contact your VPN service provider’shelp desk. Its customer support reps can diagnose the problem better and offer the most effective solution.
Summary
Now you know the answer to the question: How does a VPN router work? However, that’s just the tip of the iceberg.
The real keys to determining the right model for you are understanding the differences between its many types and realizing the most important factors when comparing products.
Hopefully, you found this explainer helpful. If you think we missed something, share your thoughts in the comments!
Screenshots are necessary as it helps to save information without needing to note it down. You can always open the screenshot and refer to it for information. Windows offers the ability to take screenshots inbuilt. However, that is restricted to screenshots for the active window or a selected area.
It cannot take scrolling screenshots. This guide will give you multiple ways to take scrolling screenshots on your Windows 10 PC. This would also involve using several third-party apps to accomplish the task. Let us get right into it.
How to take scrolling screenshots in Windows 10?
1. Capture a scrolling screenshot in the browser
1.1. Microsoft Edge
Launch the Microsoft Edge browser.
Click on the 3-dot menu icon.
Click on Web Capture.
Select Capture full page.
This will capture the scrolling screenshot on Microsoft Edge’s active tab. Do note that you can later edit this screenshot and annotate it.
Click on the webpage or Windows app of which you wish to take a scrolling screenshot.
Click on Start scrolling capture.
ShareX is an excellent piece of software that lets you take different screenshots, such as scrolling screenshots. It also is a great video recording tool.
Using ShareX, you can take scrolling screenshots of a webpage or a browser and any Windows app, for that matter.
Among all the toolbar options, click on the fourth icon to take a scrolling screenshot.
Select the page or window you wish to take a scrolling screenshot.
The app will automatically take the scrolling screenshot.
Once the screenshot has been captured, you can easily edit the photo in the screenshot editor. It will open right after the screenshot has been taken.
Apart from scrolling screenshots, you can take Tweakshot to take regular and full-screen screenshots, capture windows, use the image editor, video record, screen color picker, and more.
Select the Scrolling Window option from the list that appears in the menu.
Left-click on the area in which you wish to take a scrolling screenshot.
PicPick will automatically start taking the scrolling screenshot.
To stop the scrolling screenshot, simply right or left-click on the screen.
The screenshot will immediately appear in the editor, where you can do all sorts of things to the image.
So, to take scrolling screenshots on your Windows PC, you have to rely on third-party tools, as mentioned above, if you want to take screenshots of a Windows app or games specifically.
Otherwise, popular browsers such as Firefox and Opera can take scrolling screenshots. You can use an extension on Google Chrome to take scrolling screenshots on Windows 10.
We have a dedicated guide that lists some of the best screenshot-taking tools you can opt for on your Windows 10 PC.
You can also refer to our guide that explains how you can disable the PrintScr button on your keyboard, which is usually meant to capture screenshots on a Windows PC.
We also have a guide that explains the different methods that will help you to add text in the Snipping Tool. For those who don’t know, Snipping Tool is Microsoft’s default screenshot tool on Windows OS.
Feel free to let us know in the comments below which methods you used to take scrolling screenshots on Windows 10.
Microsoft always gives the latest update for the sake of features and security, especially for a next-gen console like Xbox Series X&S.
However, several users have reported that they’ve been stuck in updating Microsoft Store on their Xbox consoles. The problem varies, but the main takeaway is the Store always tells them to update. Then, once they did, it would tell them to do another update.
For users that have been stuck in this endless cycle of nonsense, it can get quite irritating. As a matter of fact, this particular problem has been around since Xbox One was a hot console in the market, and the size of these updates isn’t small either (over 100 MB).
Some have even reported the issue to Microsoft through the Feedback hub, but the problem still seems to persist to them.
So, how do we fix it? Or, is there any possible workaround we can try?
What can I do if my Microsoft Store on Xbox keeps updating?
Microsoft hasn’t officially announced anything that may cause this bug, but it seems like the problem arrives at the most random time to the most random user.
However, here are some of the workarounds you can try.
1. Restarting the console
1. Press and hold the Xbox button in the center of your Xbox controller to open the Power Center.
2. Select Restart console.
3. Select Restart.
2. Performing hard reset
1. Hold the power button for 10 seconds until it’s off.
2. Wait for another 30 seconds
3. Press the Xbox button to switch it on again
3. Nudging
1. With the update prompt on, press Start, then Pause it.
2. Press and hold the Xbox button in the center of your Xbox controller to open the Power Center.
3. Select Restart console ➜ Restart.
4. Resume the update to nudge it into fully updating.
4. Continue without updating
1. With the update prompt on, press Cancel.
2. It takes you to the store without the update, although there’s a chance that the annoying pop-up may come back.
There are many other errors that plague Xbox consoles, including the unavoidable black screen for some Xbox One users. Make sure to follow our Xbox-dedicated page to find the easiest & clearest fixes of any Xbox problem.
Has this annoying bug affected you? Let us know in the comments!
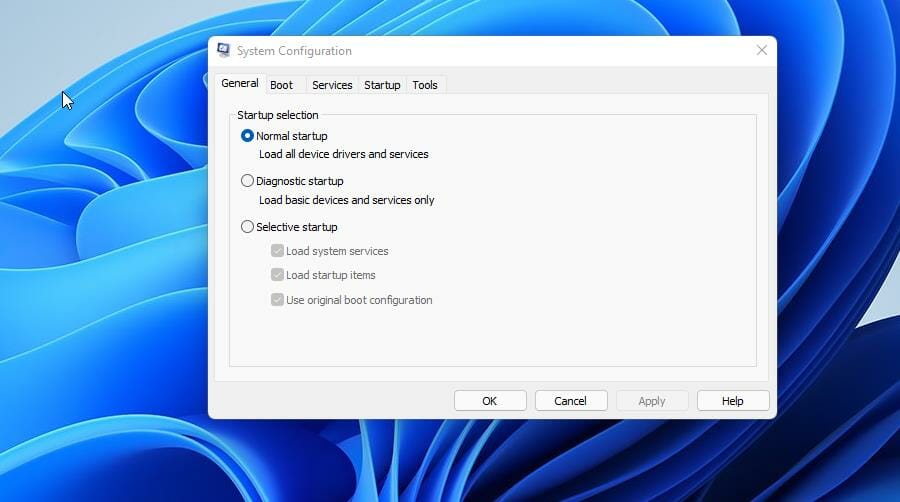
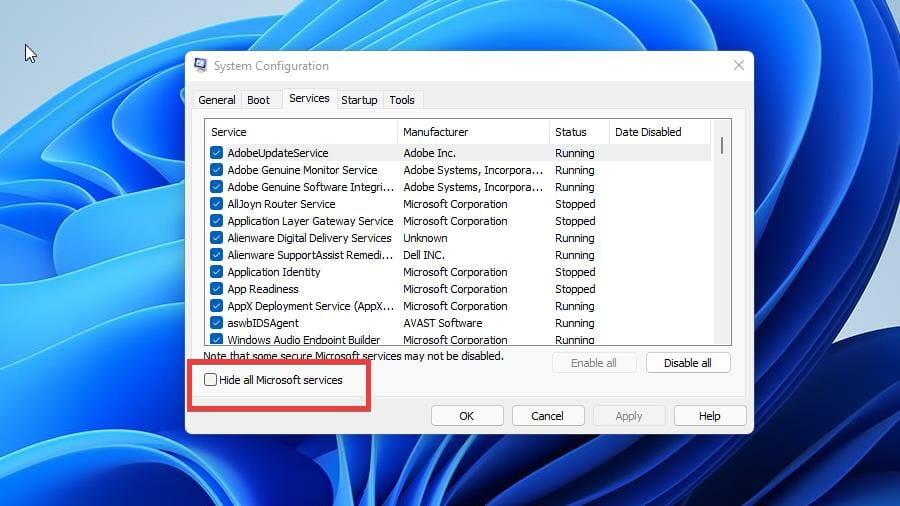
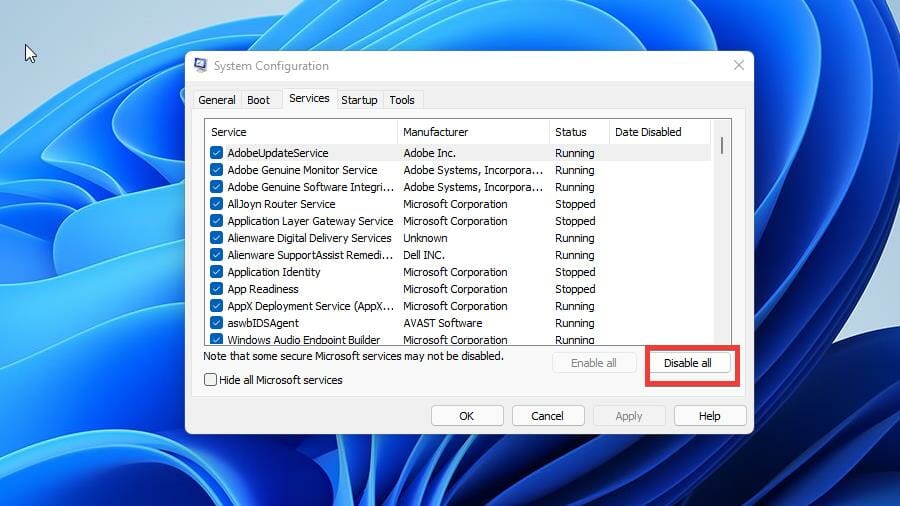
If you have accidentally disabled all services in MSCONFIG, many users on Microsoft’s forums have experienced the same issue. This can prevent you from logging into your PC and may even cause BSoDs or system crashes.
These services are essential for keeping Windows stable and functional. In this guide, we’ll explain how to re-enable all MSCONFIG services and get your system working normally again.
What can I do if I accidentally disabled all services MSCONFIG?
2. Enable MSCONFIG services using a different account
Sign in to your other account that doesn’t require any password.
Press Win + R keys to open the Run dialogue.
Type msconfig and press Enter.
Switch to the Services tab.
Click on Enable all.
Click Apply and OK.
This would work for users who have created one extra account on their PCs. You should ensure that at least one account doesn’t require password access, as this could help if you have disabled all services in the MSCONFIG situation.
3. Replace the on-screen keyboard with CMD
Turn off your PC.
Turn on your PC and press the F10 key when the first screen appears. The key could be different for different brands of PCs.
Select Troubleshoot.
Choose Advanced Options.
Select Command Prompt.
Run the below command to know the partition letter where you have installed Windows OS. BCDEDIT
Execute the below commands to change the directory. C:/cd Windowscd System32
Replace the on-screen keyboard app by running the below command. ren osk.exe osk.exe.bak
Copy the command prompt to osk.exe by running the below command. copy cmd.exe osk.exe
Restart your PC.
In the Windows login screen, click on the on-screen keyboard icon.
Why it works: Repairs corrupted or altered service configurations so Windows can boot normally.
9. Revert MSCONFIG Changes via Command Prompt
Boot from installation media.
Open Command Prompt.
Type bcdedit /deletevalue {current} safeboot.
Then run msconfig and re-enable services.
10. Reset your PC
Turn off your PC.
Turn on your PC and press the F10 key when the first screen appears.
Choose Troubleshoot.
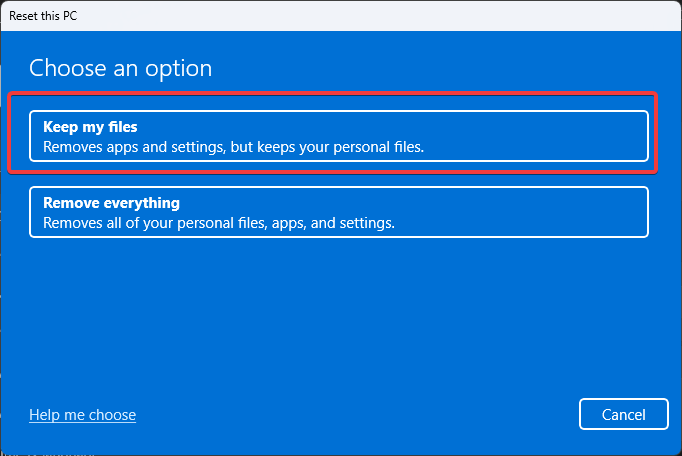
Select the Reset this PC option.
Choose Keep my files.
Follow the on-screen prompts to complete the reset process.
Wait for the process to complete.
As a last resort, if nothing works, you should opt to reset your PC. You can follow the above process and safely reset your PC and get back your PC in normal working condition.
That is it from us in this guide. You can check out our guide that lists different ways to access MSCONFIG on your PC.
We have also correctly explained how to use the System Configuration tool on Windows 10. Feel free to let us know in the comments below which one of the above solutions resolved your problem.
MSinfo32.exe is a system information utility that is used to diagnose system problems or optimize system performance as well as troubleshoot system issues or generate reports.
Unfortunately, several of our readers claim this tool isn’t working on their PC due to the Msinfo32.exe not working error that they encounter. We will provide step-by-step instructions on how to fix this error.
Why is Msinfo32.exe not working?
An additional message comes with the error: Cannot access the Windows Management Instrumentation software. Windows Management files may be moved or missing.
There are several potential causes of the Msinfo32.exe not working problem. The following are some of the main causes, as reported by some users:
Outdated drivers – If you haven’t updated Windows in a while, there might be issues.
Critical services are not running – Msinfo32.exe can’t collect information if the Windows Management Instrumentation (WMI) service has been disabled.
Corrupt system files – If the System files are corrupt, it can prevent the MSinfo32 app from working properly and affect the core functioning of the Operating System.
Incompatibility issues – Only Windows 7 and 10 are compatible with the MSinfo32 app. The tool won’t function if you’re running an older version of Windows.
Conflicting updates – At times, the MSinfo32 app may malfunction as a result of some Windows update files interfering with it.
The potential causes of the system information not showing in Windows, as reported by certain users, are listed above. Not to worry, some of the error’s tested fixes are listed below.
What can I do if Msinfo32.exe is not working?
Before engaging in the lengthy troubleshooting or settings tweaks for this error, below are some quick steps:
Check if there are any available updates for Windows and install them.
Restart the computer and check if it resolves the problem.
Uninstall the latest Windows update.
If, after doing the aforementioned checks, you still need help fixing Msinfo32.exe not working error, you can follow any of the instructions suggested in the following section.
1. Run SFC & DISM scans
Left-click the Start button, type command prompt in the Windows Search bar, and click on Run as administrator.
Next, type the following and press Enter: sfc /scannow
After the scan is complete, type the following command and press Enter: DISM /Online /Cleanup-Image /RestoreHealth
Hold on till the verification reaches 100%. Once completed, restart your PC and check if the error is fixed.
The SFC and DISM scans can detect, repair and replace corrupted system files that might prevent MSinfo32 from running properly.
2. Reset the Windows Management Instrumentation service
Left-click the Start menu, type command prompt, and click on Run as administrator.
Type the following command in the text field and press Enter after each:
net stop  winmgmt
winmgmt /resetrepository
net start   winmgmt
Now, close the Command Prompt window and check if the Msinfo32.
If the Windows Management Instrumentation service is not working properly, resetting the service would help restore it to default, hereby fixing the Msinfo32.exe not working issue.
Click the Start button, type command prompt and select Run as administrator from the results.
Type or paste the following commands one by one and press Enter after each:
cd /d %windir%\system32\wbem
for %i in (*.dll) do regsvr32 -s %i
for %i in (*.exe) do %i /regserver
4. Temporarily disable your security software
Press the Windows key and type control panel in the Windows Search bar and launch it.
Next, click on System and Security. Then, click on Windows Defender Firewall.
Click on Turn Windows Defender Firewall on or off on the left pane.
Check all the boxes with the Turn off Windows Defender Firewall (not recommended) options under all menus.
Then, restart your PC.
Another effective way to fix this MSinfo32 problem is by disabling security software such as an anti-virus or firewall program.
5. Perform a System Restore
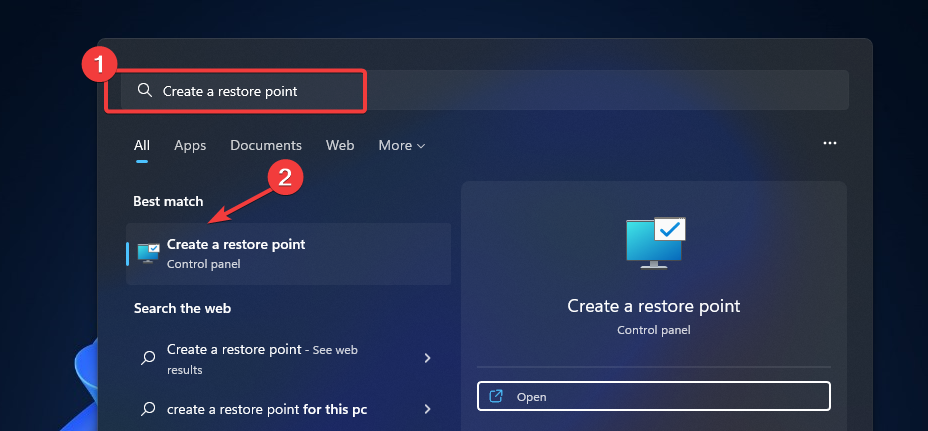
Press the Windows key and type restore in the Windows Search bar, and select Create a restore point.
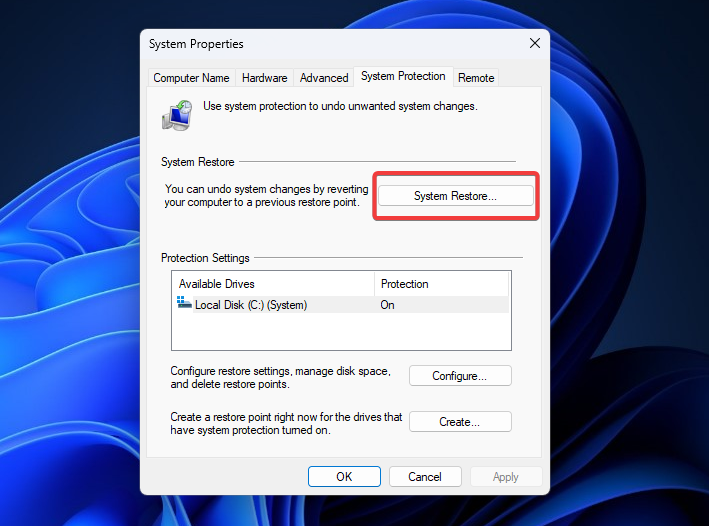
Now, select System Protection and click on the System Restore button.
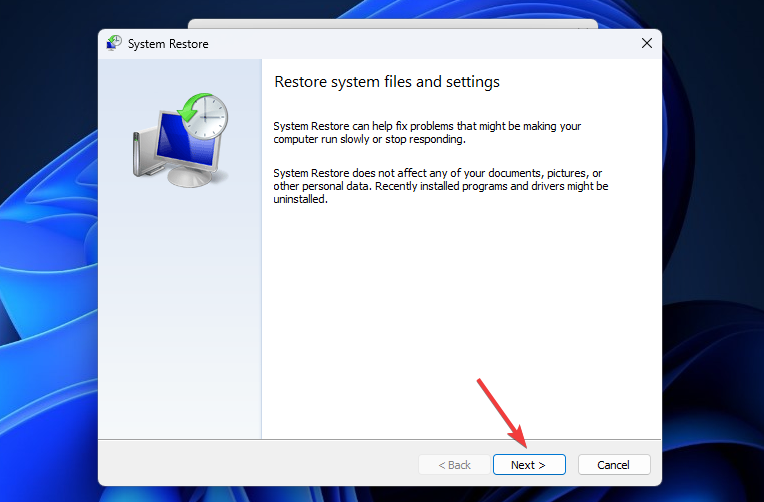
Next, from the list, select a restore point and click Next.
Follow the prompts to complete the system restore process.
Restart your PC.
If all other steps fail to fix the Msinfo32.exe not working problem, restoring your system to the earlier point should do the trick.
Hence, you can apply this process with the steps above but also perform it automatically with a dedicated PC repair tool capable of detecting corrupted system files and replacing them with functional ones.
And that’s it on what to do if Msinfo32.exe is not working on Windows. Your system information tool is very important as it provides you with many details about your computer.
So, using the methods provided in this article should help you to get it working again. Also, while fixing things, find out a few quick tweaks to improve Windows’ performance. Discover a few quick adjustments to enhance Windows’ performance while you are fixing things as well.
In conclusion, you can leave your questions and suggestions in the comments section if you have any.
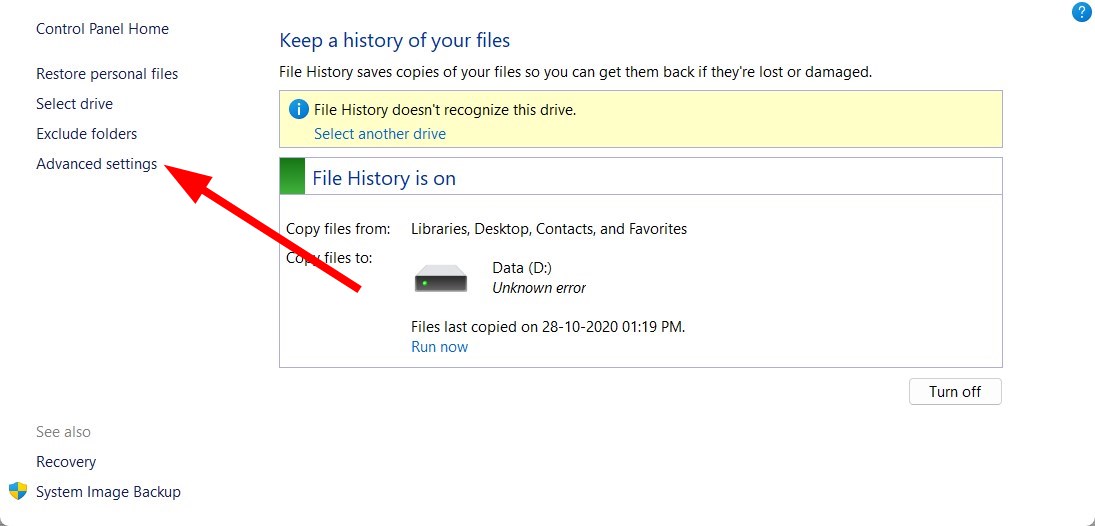
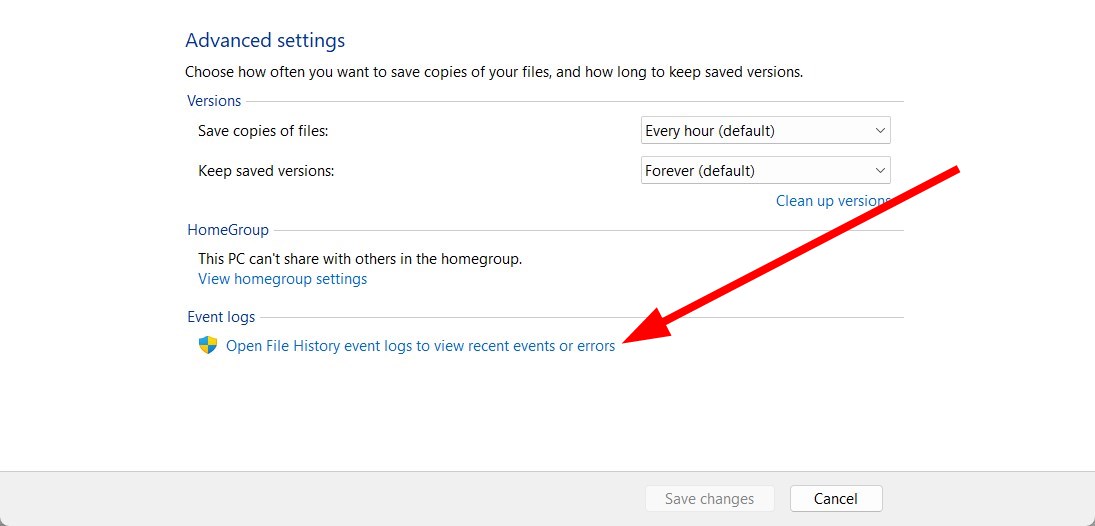
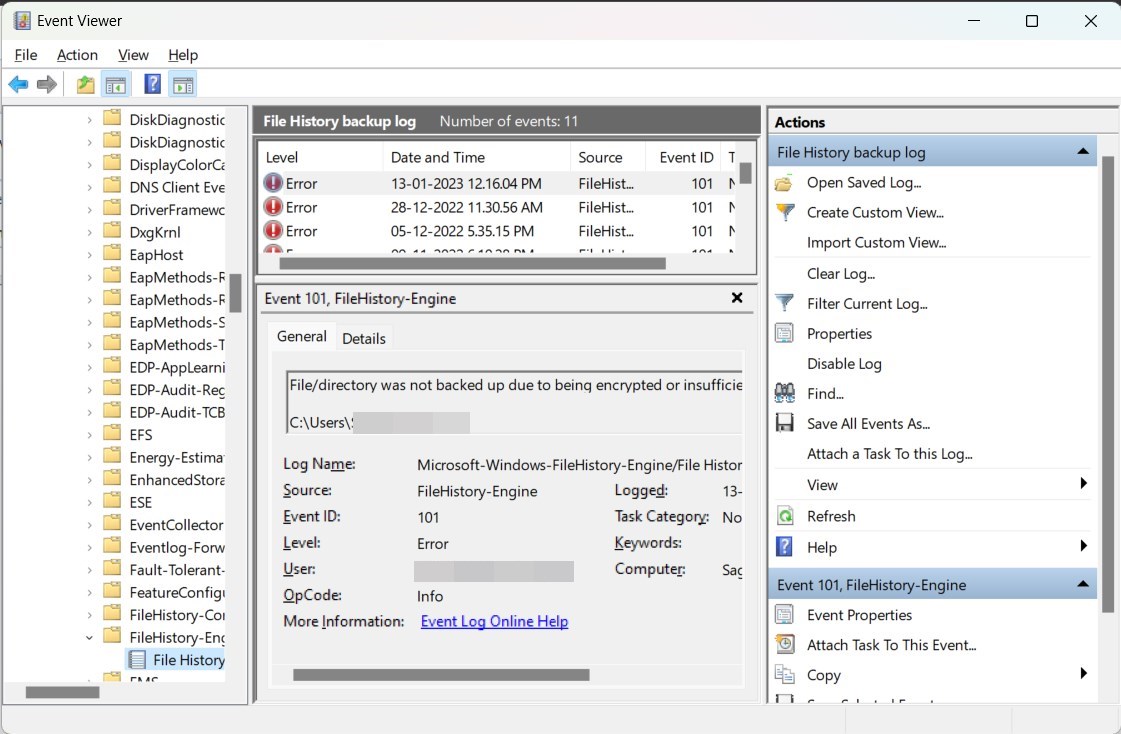
You can back up the files on a drive using the built-in Windows backup tool. However, the File History service is often known to throw up errors. One of the most common errors is the File History no usable drives found.
In this guide, we will give you a bunch of solutions to resolve the File history no usable drives found error. Along with the solutions, we will also give you some reasons that could cause this error to trigger in the first place. So let us get right into it.
Why am I getting the File history no usable drives found error?
After digging the internet, we have discovered some of the most common reasons you are facing this error.
File History has some bugs: Just like every Windows feature, you will encounter this File History error because of bugs.
File History is disabled: Chances are some third-party or even first-party app has disabled the File History service on your PC, which is why you are getting the error.
Storage drive has some issues: Due to corruption in the File History backup drive, you will come across this File History no usable drives found error.
Corrupt system files: The presence of corrupt system files can also trigger multiple system problems.
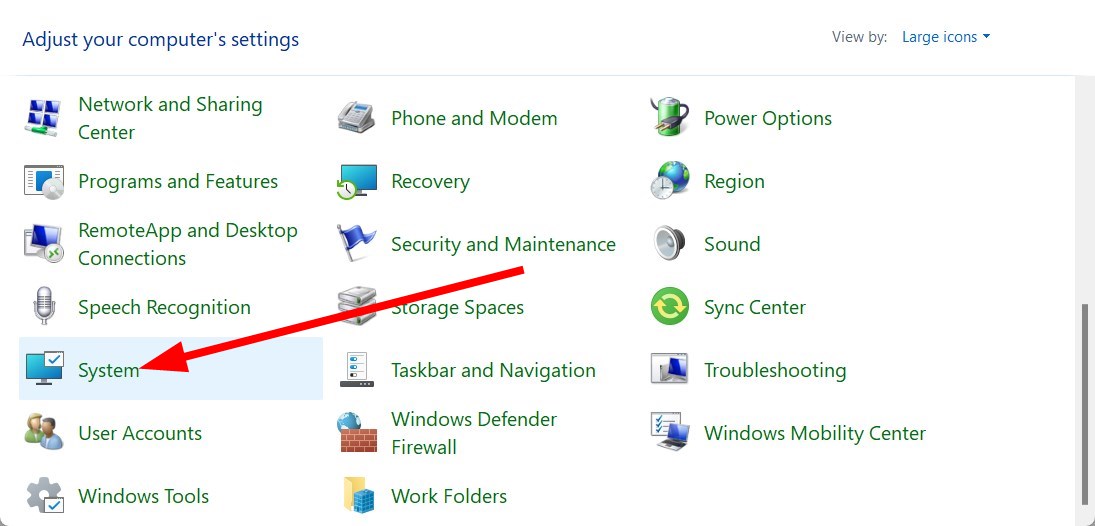
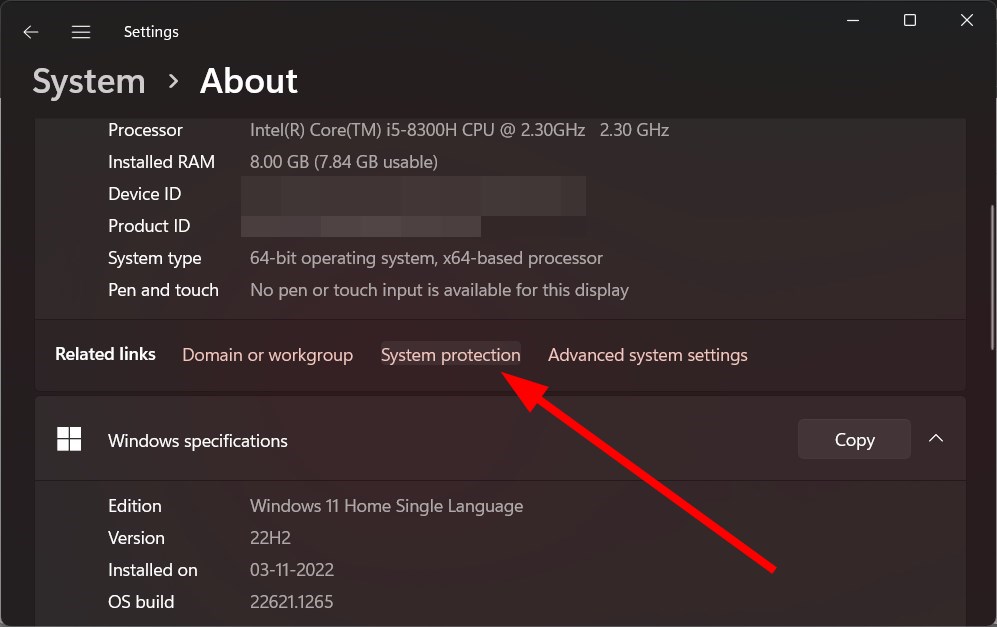
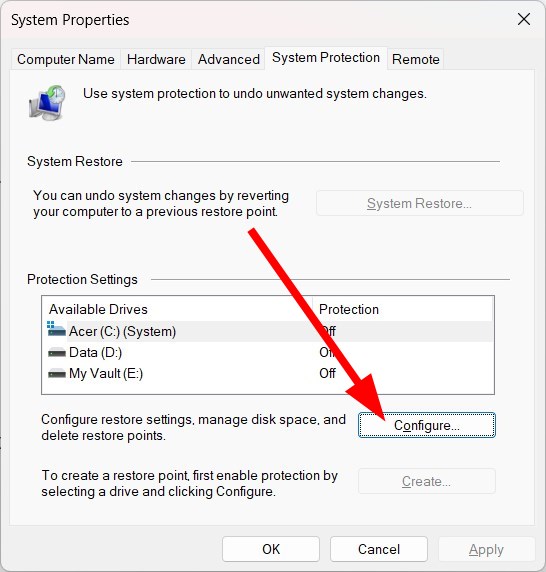
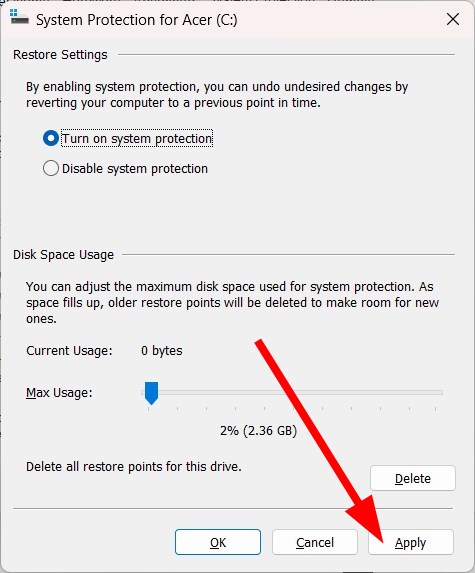
Select the drive where you have created File History backup and hit Configure.
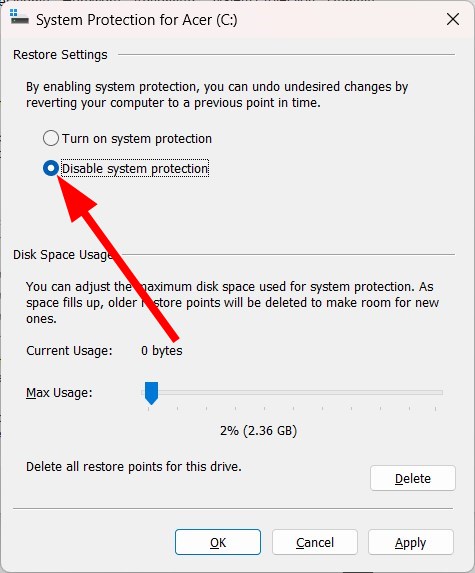
Choose Disable system protection.
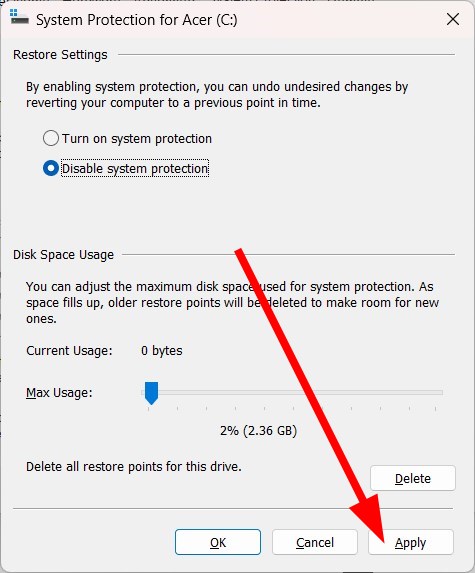
Click Apply to make the changes.
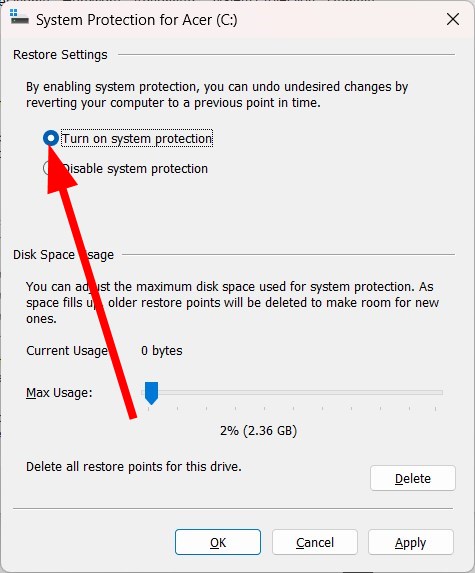
Select Turn on system protection.
Click Apply.
Some users have reported that adjusting the System Protection settings, or in simple terms, re-enabling the feature, helped them resolve the File History no usable drives found error.
Enabling them listed the usable drive on the list, and the error message didn’t reappear.
3. Select another drive
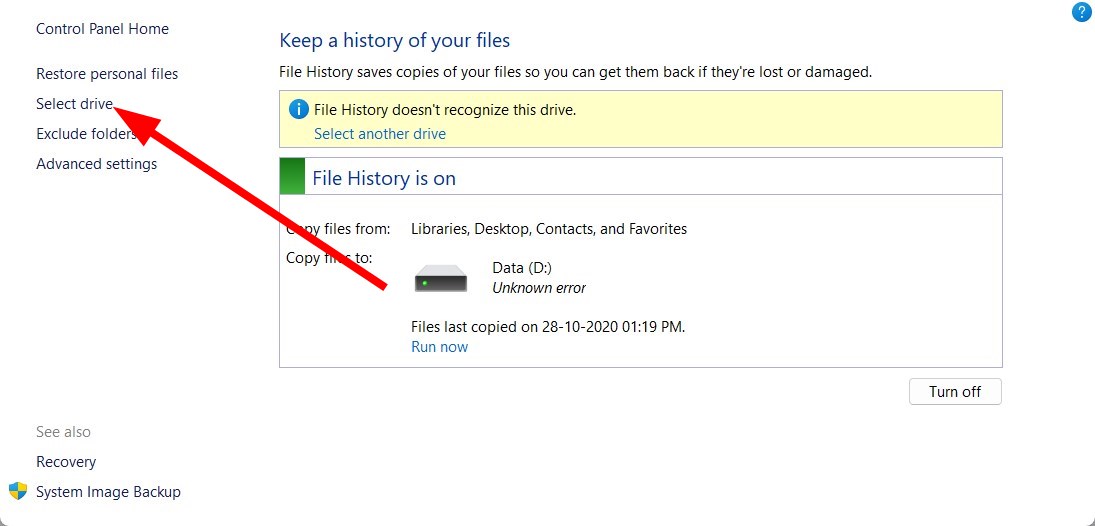
Press the Win key to open the Start menu.
Open Control Panel.
Select File History.
From the left pane, click on Select drive.
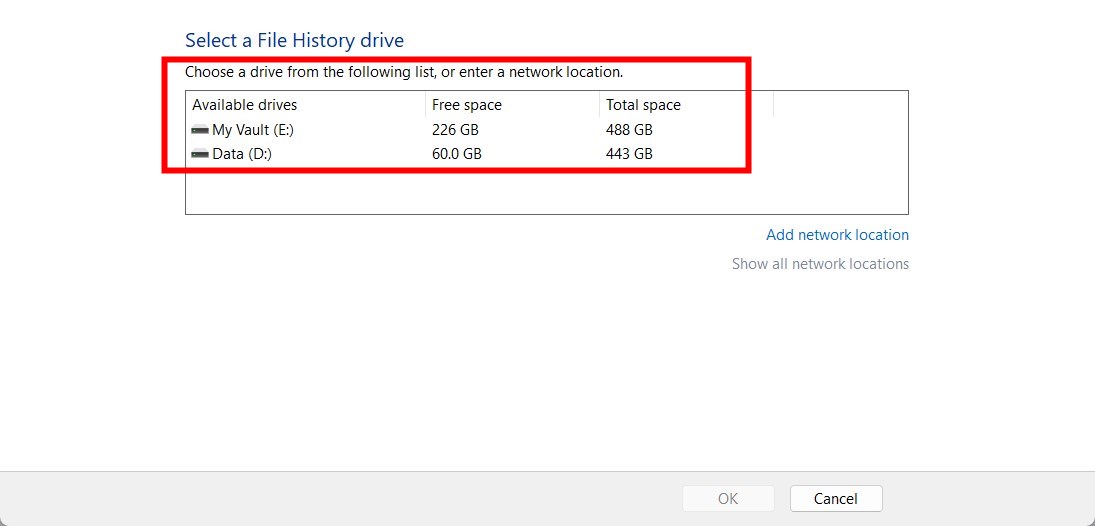
Under the Select a File History drive section, select your original File History backup drive or a new one.
Click Next.
You can try to select a new drive or the original File History drive and fix this issue. This has reportedly helped several users resolve the problem.
4. Fix corrupt system files
Open the Start menu by pressing the Win key.
Run Command Prompt as an admin.
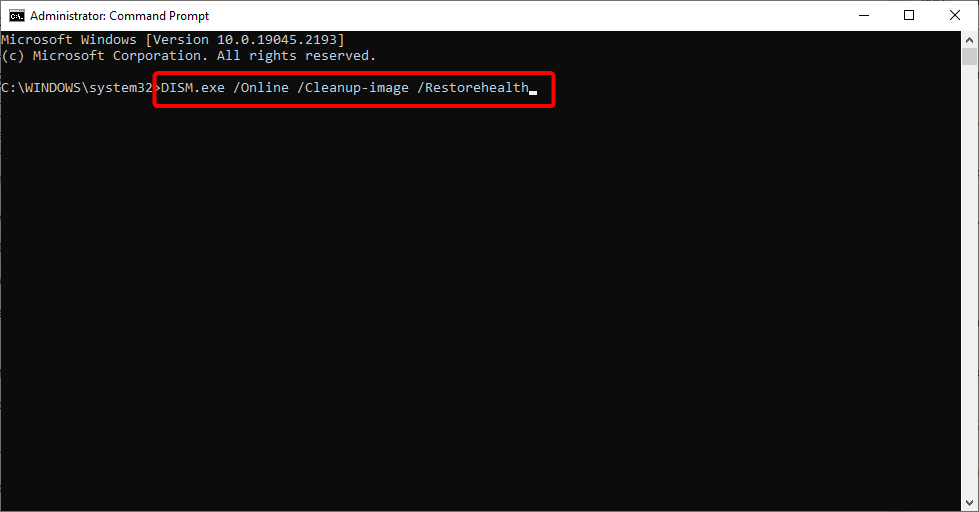
Type the below command and press Enter. sfc /scannnow
Run the below command and press Enter. dism /online /cleanup-image /restorehealth
Restart your PC.
If the system files are missing or corrupt, then this can cause multiple issues on your PC and ultimately lead to system crashes.
The SFC Scan and DISM commands can help fix the corrupt system files. However, often these commands aren’t as effective as using a dedicated third-party tool.
5. Cloud reset Windows
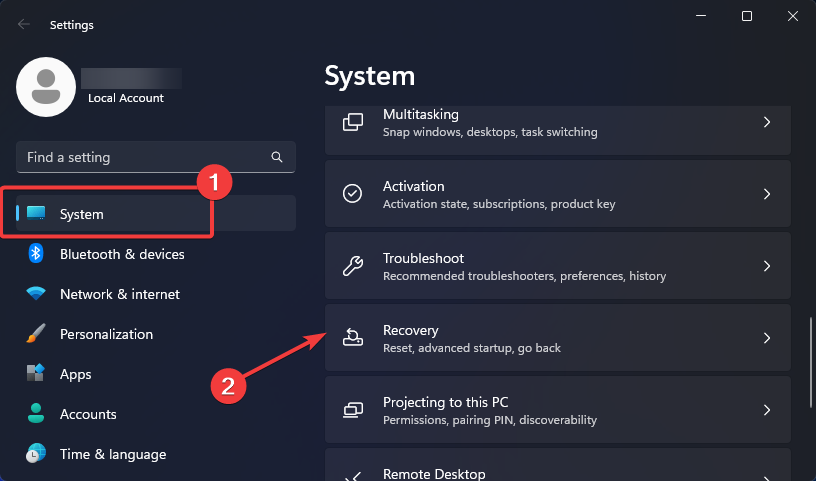
Open the Settings menu by pressing the Win + I keys.
Select Recovery.
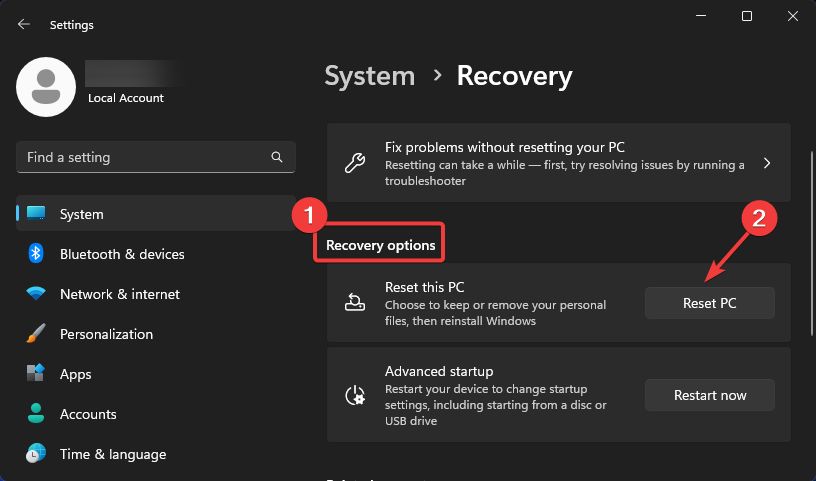
Click on Reset PC.
Select the Keep my files option.
Choose the Cloud download option.
Let the process begin and wait for it to complete.
One wrong move can delete all files from your PC. To avoid it, we would advise you to back up your files. For that, we have a guide that lists some of the best backup tools you can have on your Windows 11 PC.
That is it from us in this guide. Unfortunately, you cannot rely on File History to save your backup. We suggest you check out our guide, which lists some of the best backup tools for your Windows 11 PC.
In the comments below, let us know which one of the above solutions fixed the File History element not found error.
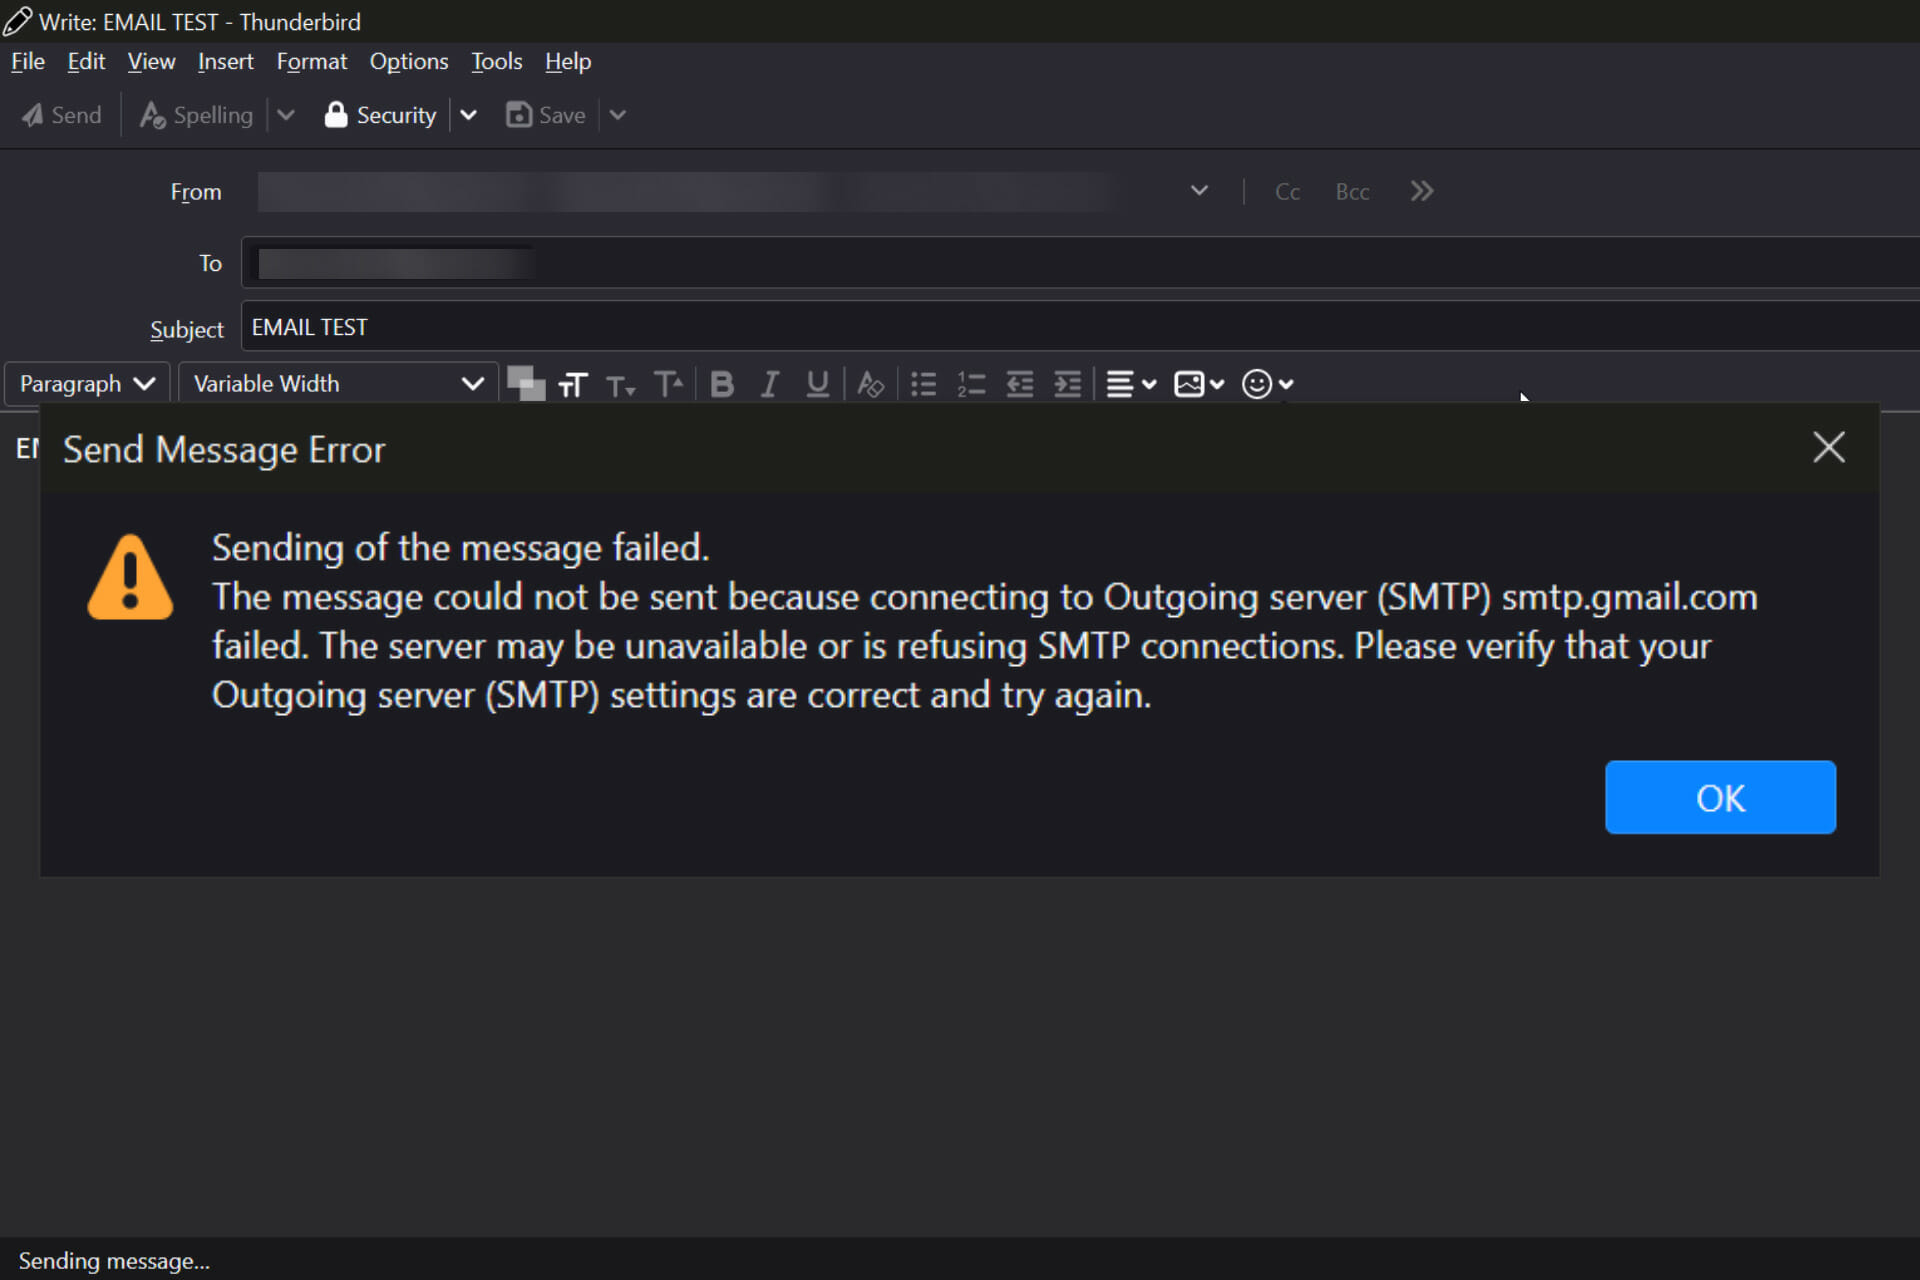
Does VPN affect your email or block SMTP on your Windows PC? Are you having issues sending or receiving emails in your custom webmail while on VPN?
Even though it might seem like a complicated problem, a few methods are worth trying, as some users have confirmed them.
SMTP (Send Mail Transfer Protocol) is used for outgoing mail from a PC. This protocol is generally used during Mail exchange.
SMTP is provided by the ISP and has a particular address through which these mail exchanges are sent, such as TCP 25, used by many older email client programs.
How does a VPN affect email?
SMTP can be blocked for different reasons apart from your VPN. This problem can be especially felt when traveling outside your ISP coverage area.
You may have difficulties sending emails from email clients such as Microsoft Outlook, Mozilla Thunderbird, and others email clients.
This is usually caused due to differences between the information your ISP has and your device.
For instance, some hotels have checks that search if your ISP is from that region; however, your SMTP may be blocked if it’s not.
Another reason SMTP is blocked while you are on VPN is spam. Many reputable VPN providers do not keep logs, so they must also block spam messages. One way they reduce spam messages is by blocking SMTP traffic.
Most VPNs block outgoing SMTP on port 25 (because this port is unsecured). However, MS Outlook and several email client programs use this port as the major port for SMTP mails.
You should know the most frequent scenarios that imply this email issue. These are the following:
Cannot send an email when connected to VPN
NordVPN email not working – NordVPN blocking email
Yahoo is not working with VPN
Outlook not working on VPN – Outlook is not receiving emails on VPN
Apple mail is not working with VPN
Gmail VPN problem
Meanwhile, the WindowsReport team has developed practical solutions to help you work around the VPN SMTP blocked problem.
What can I do if my VPN service blocks SMTP?
1. Use a webmail provider
Most complaints about VPN SMTP blocked issues emanated from custom webmail users. An example of a custom webmail is [email protected].
However, standard webmail is an excellent solution since most webmail provides an SMTP server on an SSL port TCP 465. Moreover, many VPNs do not block this port because it is secure.
This is because several VPN service providers do not block these webmail providers. They also have a vast user base and provide excellent anti-spamming and security features.
Also, they are free to use and easy to access, unlike email clients.
In addition, many webmail providers provide anti-spamming features for users, reducing the number of spam messages entering your inbox. You can pick from many available webmail clients online.
However, we recommend using Gmail, or Yahoo Mail, as these have become some of the most well-rounded and known email providers.
2. Change your VPN
Even though plenty of competent options are on the market regarding VPN software, some stand out from the crowd, especially when dealing with SMTP issues.
One such VPN software that will never stop you from accessing your email due to SMTP issues is the well-rounded and easy-to-use ExpressVPN.
This VPN app not only ensures a smooth browsing experience no matter what tasks you’re focusing on online but also allows you to efficiently transform your IP to almost any country by using many servers across the globe.
The easy-to-use interface ensures you won’t waste time configuring the VPN. You can also access geo-restricted content worldwide while protecting your IP from any third parties collecting online data.
As mentioned, many other viable VPN apps exist, even though we highly recommend this one. It is a VPN that does not affect your email.
ExpressVPN
Forget all STMP email problems by using this powerful and versatile VPN today!
3. Contact your VPN provider and add the email server to the whitelist
Even though you might have another VPN service installed, you can always try contacting them and asking about adding the email server you’re using to the whitelist.
This is a standard procedure used for the security and privacy of their subscribers, and it is merely another sign that the service is very secure.
Like many other VPN providers with no-log policies, ExpressVPN must block outgoing SMTP traffic due to the spam associated with using VPN services. Still, they are highly responsive when it comes to specific requests.
Fortunately, they can be contacted so your specific email server can be whitelisted.
All you need to do is submit screenshots showing all of the following settings that you currently have entered to use in your email program:
The email addresses being blocked
The SMTP/outgoing email server name for the above address
For example smtp.mail.com, mail.example.net, etc.
The Port number used to connect to the mail server
Your SSL setting
Whether it is enabled or disabled
It may appear as TLS or SSL
Alternatively, you can bypass these blocks by simply changing the SMTP server settings on your email client to the TCP port.
4. Switch to a newer email client
Many new email clients do not use TCP port 25 for their SMTP services. Upgrade to a more recent version if your VPN still blocks your SMTP.
This incredible tool has a free version and includes multiple email accounts. It also allows you to classify and organize your emails, thus making your email work easier.
Meanwhile, some VPN providers don’t block SMTP mails on TCP 25. So if you use your email client regularly, switching your VPN service to SMTP-friendly VPN may be beneficial. We’ll list these VPN services below.
The exact process to disable your VPN service will vary depending on the application you use for this task. However, we will cover the same steps to disable the ExpressVPN software.
A quick fix that bypasses the SMTP blocked on the VPN issue is to disable your VPN temporarily, send the email to your email client, and enable your VPN afterward.
This would effectively work; however, many dangers are involved, as you could be exposed to hacks and attacks from trackers.
Does a VPN affect your email? A VPN is perfect for stopping cyber threats like spam emails or phishing attacks that may reach your email inbox.
Using VPN protection can shield your email data with encryption operations and mask your traffic to hide your location or sensitive information on email.
That being said, which of these methods worked for you? Feel free to share your thoughts and experience using the comment section below this guide.
While using ChatGPT, if the system detects suspicious behavior, you can trigger the error We’ve detected suspicious behavior.
If ChatGPT is showing the error, we’ve detected suspicious behavior, this article will provide you with the fixes to resolve the error.
Why do I get we’ve detected suspicious behavior in ChatGPT?
The full message reads: We’ve detected suspicious behavior from phone numbers similar to yours. Please try again later or contact us through our help center at help.openai.com.
The error is basically linked to a security issue; here are some of the common reasons why you’re getting the error:
Unauthorized login attempts – ChatGPT, like most websites with login pages, will restrict access to their service if a user makes multiple failed login attempts. If you’ve tried logging into ChatGPT with the wrong credentials, it might trigger we’ve detected suspicious behavior error.
Spamming – Oftentimes, spammers create multiple accounts on free services using countless phone numbers in an attempt to mess with the website. Webmasters usually put web blocks in place to prevent such spamming attempts; it might be the reason for the ChatGPT error.
Change in Usage Pattern – A sudden change in your usual usage pattern of Open AI’s service might trigger we’ve detected suspicious activity. The website will see the spike in pattern as suspicious behavior and will move to thwart any further actions.
Now that we know what this is all about, let’s see if we have any solutions or workarounds to this issue.
What can I do when I get We’ve detected suspicious behavior error in ChatGPT?
If you’re getting the We’ve detected suspicious behavior error in ChatGPT, here are some quick fixes you can apply:
If those quick fixes couldn’t resolve the error, here are some advanced troubleshooting steps you can attempt.
1. Use another phone number to verify your ChatGPT account
Launch your preferred browser, and visit the Open AI phone number verification tab.
Now, provide another phone number. It can be your secondary number or one you can access to confirm the SMS code.
Alternatively, you may use a temporary phone number. Several services can provide a phone number and a verification code just for this purpose.
There are several services which you can obtain a free temporary phone number from. For example, anonymsms.com gives out limitless free numbers that you can use to verify your ChatGPT account.
On the bottom right corner, click on the little chat bubble.
Click on Messages and select Send us a Message.
In the Login or Sign Up issues tab, select No.
Enter your email address, and type your message.
Contacting the support team of most websites usually takes a few days to get a response. However, using the live chat feature ensures prompt and immediate response.
These are some of the best ways to help resolve we’ve detected suspicious behavior in ChatGPT. Usually, changing your phone number is all that’s required.
If you’ve got other solutions that helped resolved this error, do let us know in the comments below.
While using your PC, you must back up your files to ensure that your files remain secured during fatal windows errors. However, you can run into errors like the 0x8078002a while backing up your PC.
If you’re currently experiencing this error, this article will provide you with the necessary steps to help resolve the 0x8078002a Windows backup error code.
What causes the Windows backup error 0x8078002a?
The full error message reads: One of the backup files could not be created. Details: The request could not be performed because of an I/O device error.
Here are some of the common reasons why you’re experiencing the Windows backup error code 0x8078002a:
Backing up external files using 4K logic disk sector – If you’re attempting to back up your PC files to an external drive using a 4K logical disk sector size drive, you can trigger the 0x8078002a backup error code.
Improper system shutdown – When performing a system shutdown, you must follow the proper procedure. A forced system shutdown due to a system crash can trigger the 0x8078002a.
Corrupt system files – Occasionally, Windows system files can get corrupted by viruses or malware. A PC housing a host of corrupt system files will likely experience errors like the 0x8078002a.
The reasons may seem complicated, but as you will see, the solutions are pretty simple.
How can I fix the Windows backup error 0x8078002a?
Before we proceed with advanced troubleshooting techniques, here are a couple of quick fixes you can attempt:
Restart your PC.
Power cycle your PC.
Disconnect and reconnect the external HDD, if present.
If those quick fixes couldn’t resolve the 0x8078002a backup error code, the following solutions will help you.
1. Check Volume Shadow Copy and Windows Backup
Press the Windows key + R, type in services.msc, and hit Enter to open Services.
Locate the Volume Shadow Copy service, right-click it, and click Start.
Then, right-click and select Properties. Change the Startup type from Manual to Automatic.
Click Apply and OK to save the settings and close the window.
Now, scroll down and locate the Windows Backup service, right-click on it, and select Properties.
In the popup window, make sure the service under the Service status is running.
If the service is not automatically running, click Start under the Service Status tab, and click OK.
Due to advancements in the data storage industry, the format of physical hard drives has moved from 512-byte sectors to 4096.
Windows doesn’t support 4K sectors, and this leads to incompatibility issues with existing software. Checking the Volume Shadow Copy and Windows Backup services can help resolve the error.
This method will wipe out any data on the drive, so make sure you back up any valuable data before this procedure.
Plug in your external drive and press the Windows key + E to open File Explorer.
Locate the drive, right-click on it, and select Format from the drop-down menu.
Select the type of file system you want, and give your drive a name under the Volume Label tab.
Ensure the Quick Format selection box is checked.
Click Start and wait for your computer to format the external hard drive completely.
Formatting the external media is the last resort and is usually one of the quickest ways to resolve the 0x8078002a backup error code. You can format the drive a couple of times repeatedly to ensure you get rid of everything on the drive.
There aren’t a lot of fixes to help resolve the 0x8078002a backup error code. However, if you’re battling the error, you can follow any of the above fixes to help you resolve the error.
A lot of users have suggested several fixes that helped them resolve this error. If you’ve got other solutions that helped you bypass this error, you can let us know in the comments below.
The File History element not found error has been troubling users for quite some time. There are multiple user reports regarding this error on the official Microsoft support forums. Both Windows 10 and Windows 11 users are affected by the File History element not found error.
This issue pops up because of a bug in the File History feature. You are in the right place if you are also experiencing the same problem.
Because in this guide, we will explain to you all the different methods for Windows 10 and 11 users that will help you fix the issue at hand. Let us get right into it.
What causes the File History element not found error in Windows 10 and 11?
Here are some of the most common reasons that could trigger the File History element not found error in Windows 10 and 11.
Presence of a bug: Due to a bug in the File History feature, you will face this error.
Your storage is full: If the storage drive is full where you have created the File History backup, then you will face this issue.
Storage drive has some issues: Due to file corruption or backup corruption, you will also face the File History element not found error.
Corrupt system files: If the system files are corrupt or missing, then you will multiple system problems, one of which is the error at hand.
How can I fix the File History element not found error in Windows 10 and 11?
NOTE
The solutions mentioned below apply to Windows 10 and Windows 11 operating systems.
1. Clean up disk storage space
Press the Win key to open the Start menu.
Type Disk Cleanup and open it.
Select the drive where you store the File History backup.
Click on the Clean up system files button.
Check the boxes for all the unnecessary files.
Click OK to delete the selected files.
Wait for the cleanup to complete.
Restart your PC.
Alternatively, go to the drive and delete the unwanted files from your PC one by one. The above method is helpful when cleaning up the disk space, including unwanted system files.
2. Re-enable File History
Open the Start menu by pressing the Win key.
Open Control Panel.
Click on File History.
Hit the Turn off button.
Press the Win + R keys to open the Run dialogue.
Type the below and press Enter. %UserProfile%\AppData\Local\Microsoft\Windows\FileHistory
Select all files inside the folder and hit the Delete button.
Open Control Panel again.
Click on File History.
Select Turn on.
3. Clean up history files using CMD
Open the Start menu by pressing the Win key.
Open Command Prompt as an admin.
Type the below command and press Enter. FhManagew.exe -cleanup 30
The above command will delete the File History files older than 30 days.
Restart your PC.
4. Fix system corruption
Open the Start menu by pressing the Win key.
Open Command Prompt as an admin.
Type the below command and press Enter. sfc /scannnow
Wait for the scan to complete.
Type the below command and press Enter. dism /online /cleanup-image /restorehealth
Once the process completes, restart your PC.
System file corruption can lead to multiple issues on your PC, including the File History element not found error.
In such a case, you should run the SFC Scan, and DISM commands to fix the files. However, in most cases, these commands do not yield the desired result. So, we suggest you use a dedicated repair tool.
5. Uninstall installed Windows updates
Press the Win + I keys to open the Settings menu.
Click on Windows Update on the left pane.
Click on Update history.
Select Uninstall updates option.
Click on Uninstall next to the recently installed update.
Confirm the action by hitting Uninstall again.
Chances are that the recent Windows update introduced a bug that is causing the File History element not found error. A simple fix for this is to remove the currently installed Windows update and check whether the problem is resolved.
6. Cloud reset Windows
Press the Win + I keys to open the Settings menu.
Click on Recovery.
Click on Reset PC.
Select the Keep my files option.
Choose the Cloud download option.
Let the process begin and wait for it to complete.
If none of the above solutions helped you resolve the File History element not found error, then it is time for you to reset the PC.
Following the above steps, you can reset your PC without losing your personal files and return to a state where everything generally worked on your PC.
However, we strongly advise you to create a backup of all files on your PC, as anything can happen with a single wrong click. You should check out our guide, which lists some of the best backup tools for your Windows 11 PC.
Game stuttering, characterized by random delays in gameplay, is a frequent issue that can make games unplayable. Whether caused by outdated drivers or cluttered hard drives, this problem affects both high-end PCs and systems not meeting game requirements. This guide will explore the causes and provide solutions to fix and prevent game stuttering, enhancing your gaming experience.
What causes game stuttering?
Game stuttering usually occurs if your system is not powerful enough to run the specific game, but there are other possible reasons.
We will discuss each of them, thus allowing you to identify which ones apply to your case and deal with them accordingly. Here are some of the most common and preliminary checks you can try on your own to fix game stuttering on your PC:
Outdated drivers
Not having the latest drivers, especially the GPU driver, can affect how your hardware handles games. Ensuring all drivers are up-to-date is crucial to prevent problems. You can update them manually one by one from the Device Manager.
Lack of system optimization
Slow system performance due to clutter, like browser caches can greatly impact game speed. Utilizing the right optimization software can easily fix this issue without removing useful files.
Not meeting system requirements
If your system doesn’t meet the game’s recommended requirements, it may lead to stuttering or even closure of the game. Checking the developer’s page for hardware requirements is essential to avoid wasting money and time on an unplayable game.
Halo Reach system requirements – Source: Neowin.net
How do I fix lagging games on Windows 10?
Tip
Not all the recommended changes here will make your PC run faster and enhance gaming performance. Some might turn out counterproductive, and it’s due to several localized factors. No matter the case, if you find the computer’s performance affected, revert the change.
1. Reduce the game’s graphics settings
In case you are wondering why my games are stuttering suddenly, remember the graphics settings significantly influence the stuttering of games in Windows 10.
If your system’s capabilities fall short of the requirements for running the game optimally, then the stuttering of your game will be influenced considerably.
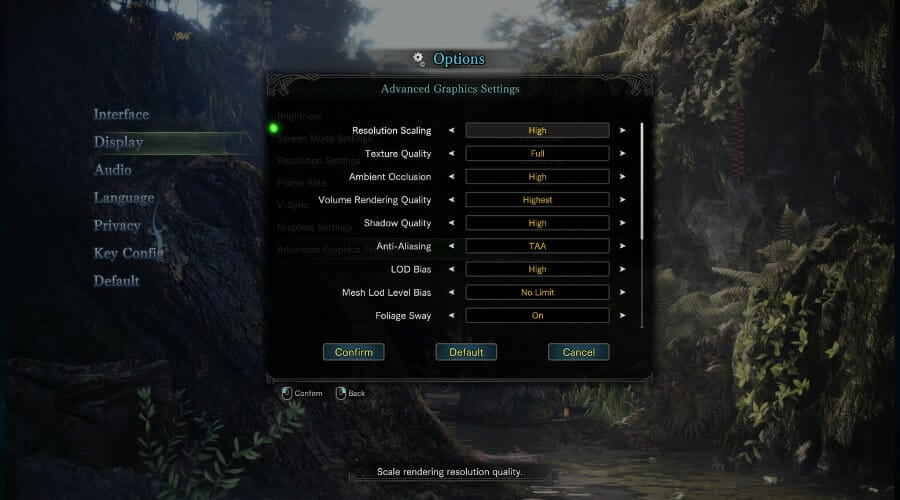
To change this option, simply open the game, navigate to its Settings, choose Graphics, and make sure to set a lower overall value or deactivate some features like Antialiasing, Shadow values, and others. This should also fix game stuttering with high FPS.
2. Update the Graphics card driver
Press Win key + Xand choose Device Manager from the list.
Toggle the Display Adapters option.
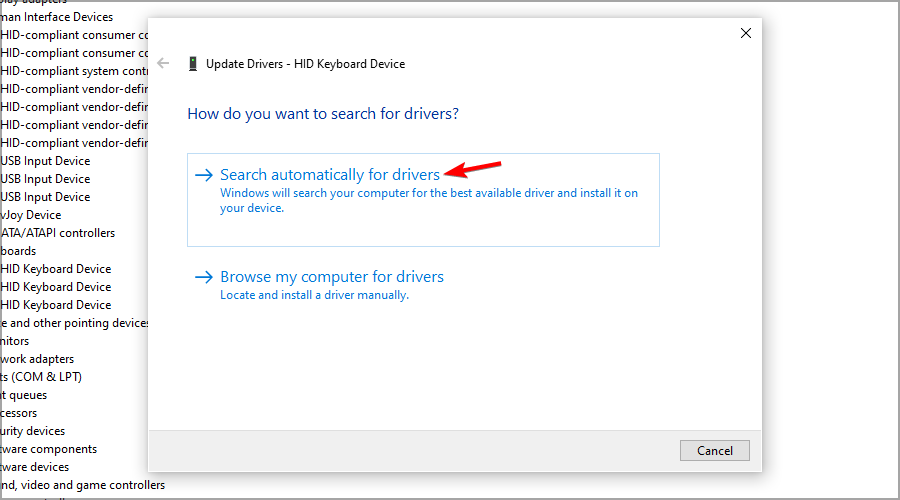
Right-click your GPU, and choose Update Driver.
Choose Search automatically for drivers.
Wait for the process to complete.
If you have the GPU stuttering constantly or even micro stuttering in Windows `10, updating the graphics driver should help. So, if you were wondering why my PC is stuttering in games, it could be the outdated graphics driver to blame.
Tip
Depending on your GPU, it might come with software that includes an update section, so be sure to check that out.
3. Turn off the Windows Game Bar and DVR
Press the Start button and select Settings.
Click on Gaming from the left pane, then select Xbox Game Bar from the right.
Un-toggle the Xbox Game Bar option.
Go back to the previous screen and click Captures.
Turn off the Record what happened option.
4. Enable V-Sync
➡ Nvidia graphics
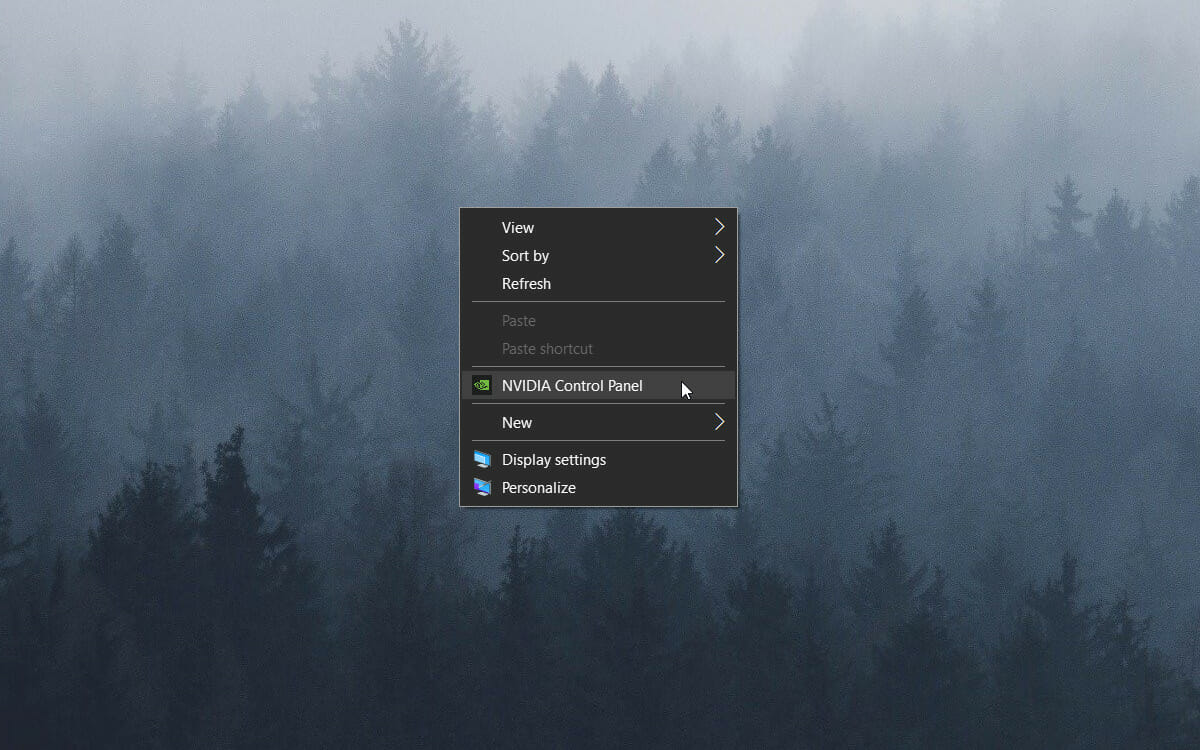
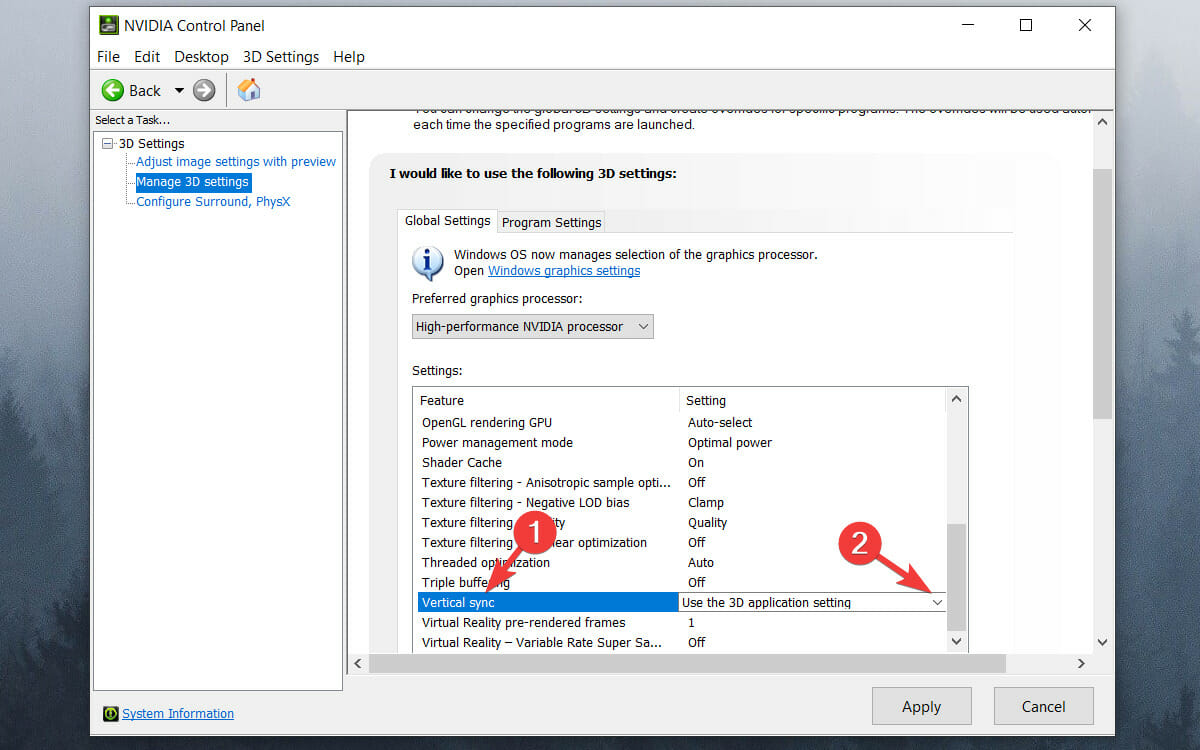
Right-click the desktop and select NVIDIA Control Panel.
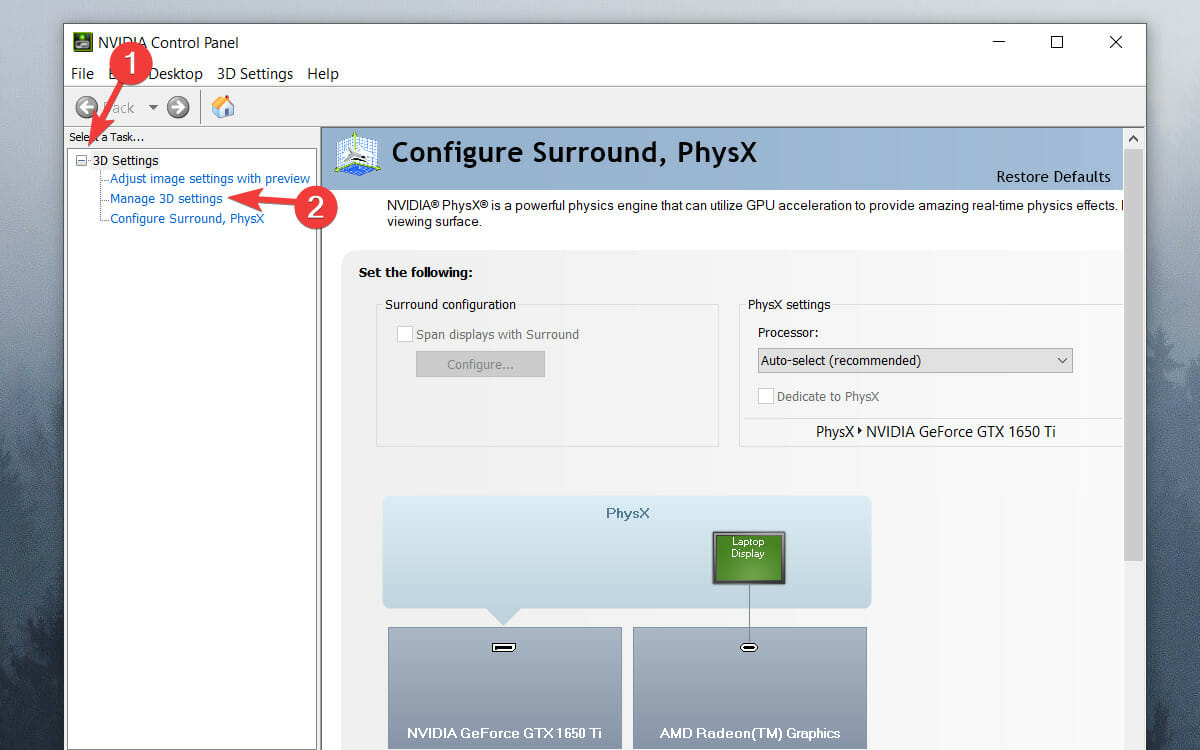
Click3D Settings and select Manage 3D Settings.
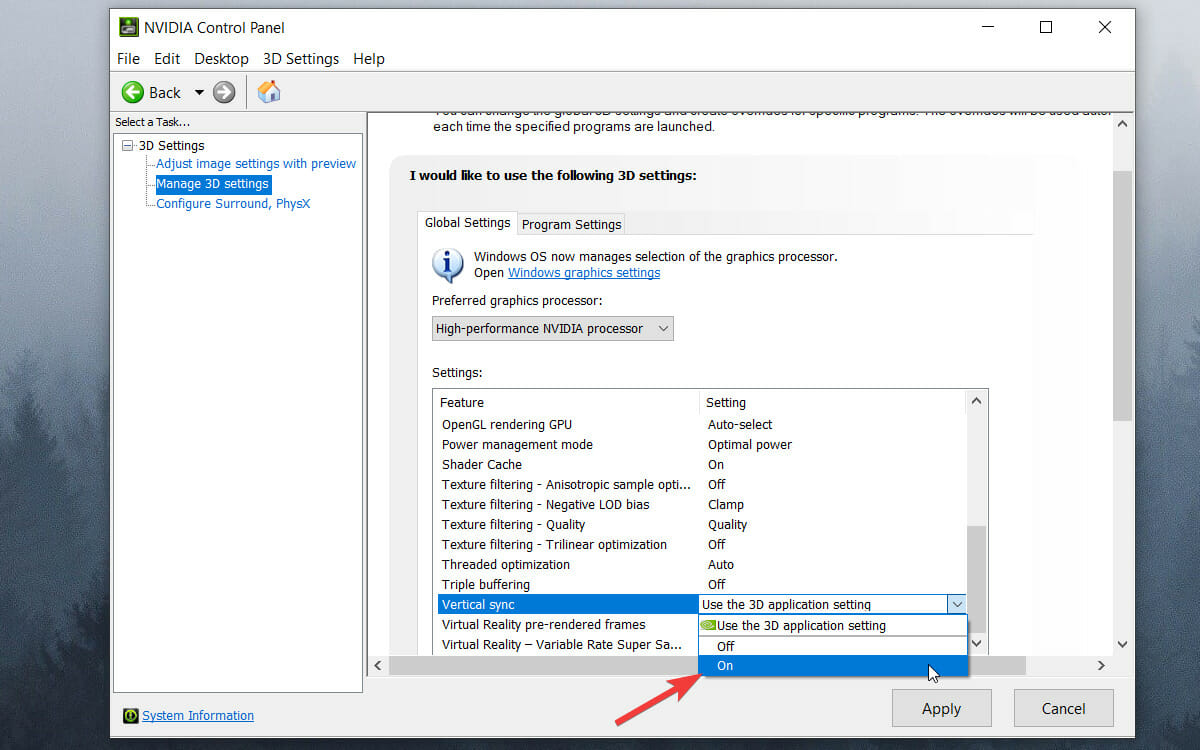
Scroll down through the list, click on Vertical sync, and click the drop-down menu.
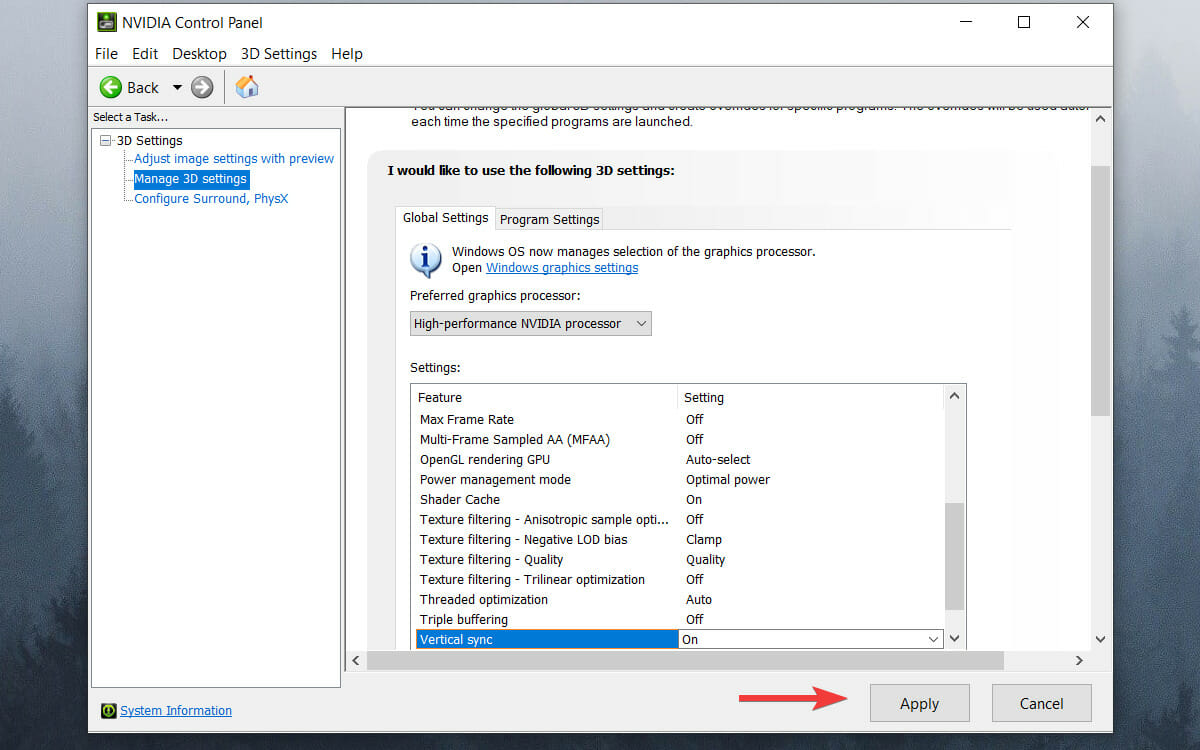
Choose On from the drop-down menu.
Press the Apply button.
➡ AMD graphics
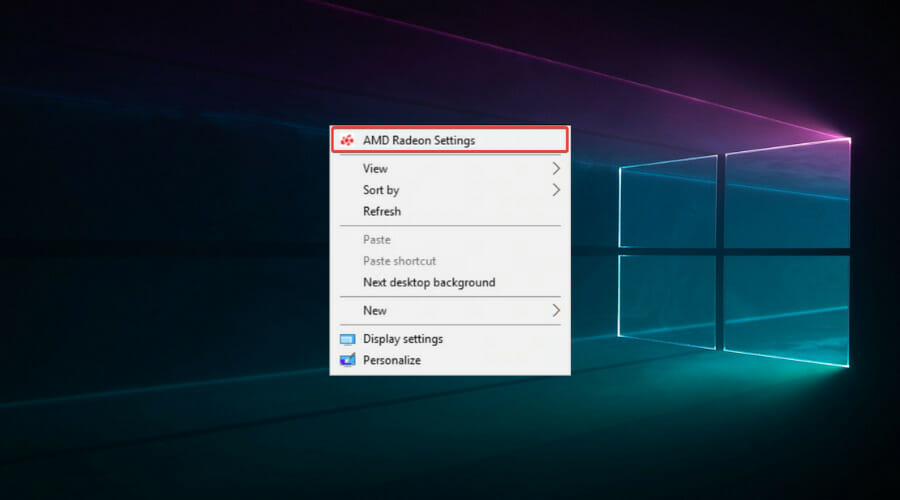
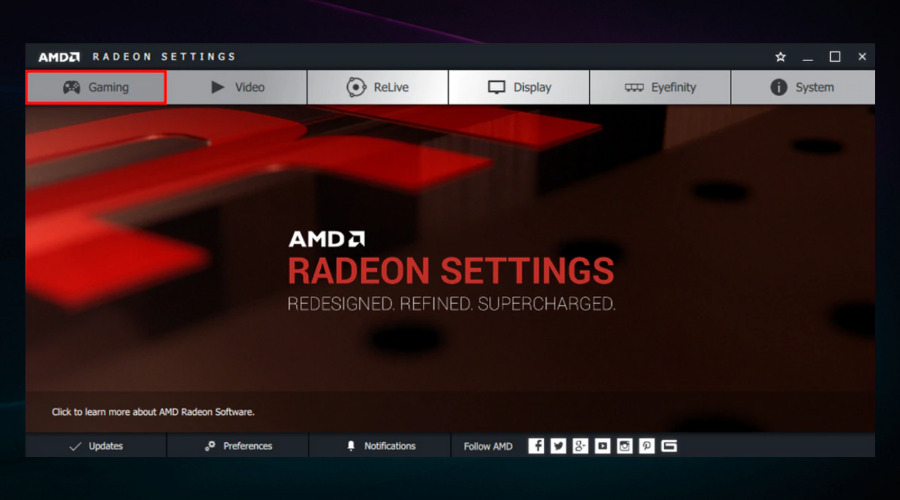
Right-click the desktop and select the AMD Radeon Settings option.
Click the Gaming tab.
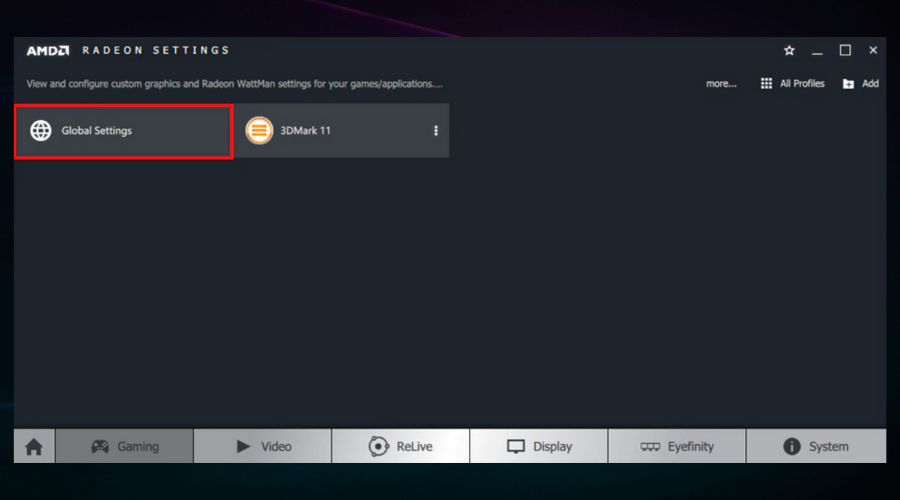
Choose Global Settings.
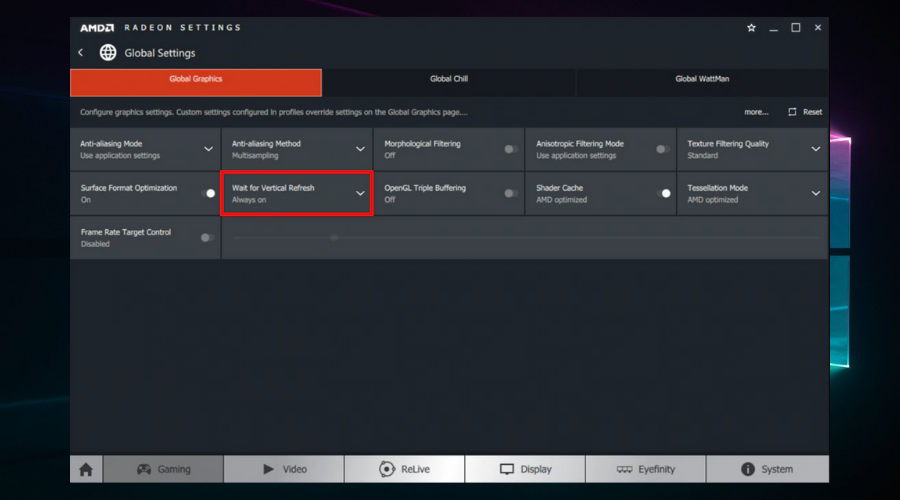
Click Wait for Vertical Refresh and select the Always on option.
Remember turning on V-Sync can ruin FPS so be careful on your game’s specifics before you enable it.
5. Turn off Intel Turbo Boost
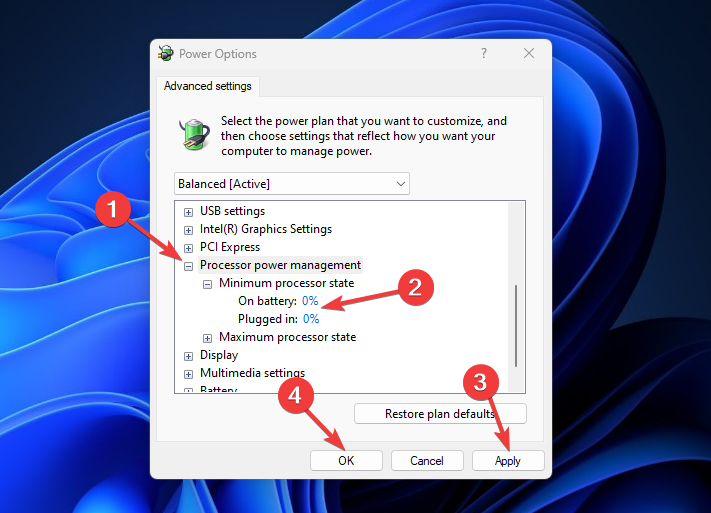
Enter powercfg.cpl in Run, and select the OK option.
Click Change plan settings next to the selected plan.
Then click Change advanced power settings.
Double-click the Processor power management to expand that category.
Then double-click Maximum processor state.
Adjust the On battery and Plugged in values to 99 %.
Click the OK button.
6. Turn off Dynamic Tick
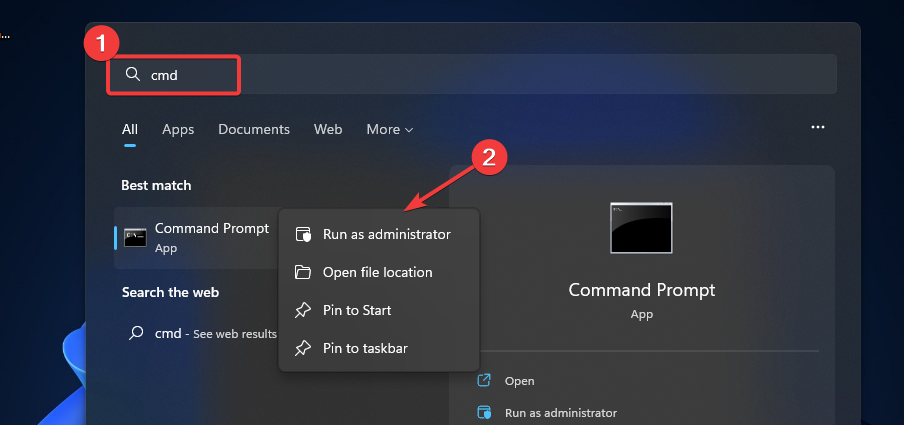
Right-click the Start menu and select Windows Terminal (Admin). On Windows 10, you can use Windows PowerShellor Command Prompt as administrator instead.
Type in the following command and press Enter: bcdedit /set disabledynamictick yes
Input this line, and press Enter: bcdedit /set useplatformclock true
Run the following command: bcdedit /set tscsyncpolicy Enhanced
Close the command window and restart your system.
Note that there are a few game booster programs that optimize system resources for games.
Software such as Game Fire 6, Razer Cortex, and Wise Game Booster include numerous resources for boosting games. This software will also close superfluous third-party programs and services for users.
Game stuttering is more likely when players don’t optimize system resources for games. As such, make sure there aren’t too many background programs consuming system resources before launching the game.
NOTE
If you want to revert all the changes made in Windows PowerShell, Command Prompt, or Windows Terminal, you can simply run the following commands:
bcdedit /set disabledynamictick no bcdedit /set useplatformclock no bcdedit /set tscsyncpolicy Default
7. Turn off the Diagnostic Policy Service
Press Win key + R to open the Run dialog.
Enter services.msc in Run and clickOK.
Double-click Diagnostic Policy Service.
Select Disabled on the Startup type drop-down menu.
Click the OK button and restart your system.
The most efficient ways to prevent in-game stuttering
➡ Buy some new components
To avoid encountering the same issues in the future, the best way is to invest in better computer components for your gaming rig.
The PC components market growth estimates have been steadily increasing across time, but it does show a leveling when it comes to 2022 and 2023, so you might want to invest in some new components as soon as possible.
PC components market value estimates – Source: Statista
As it is the brain of your PC, a good processor (CPU) can make a huge difference in gameplay smoothness and overall experience.
Of course, a capable CPU will not only give you an advantage while gaming but also in everyday usage.
Besides the processing capabilities, a PC that will allow you to play games without encountering stuttering will also be equipped with a good Graphics Process Unit (GPU).
Contributing to a streamlined gaming experience also includes having enough RAM available and also high-speed storage like SSD.
As there might be situations where your PCs components are strong enough to run the game without issues, there might be a problem with the game itself.
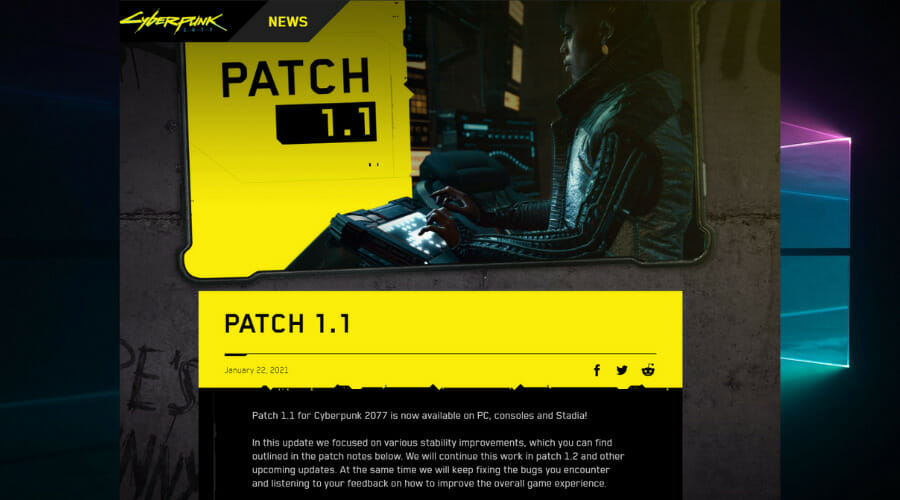
Game developers release patches and fixes for known bugs regularly, so if you find yourself in this category, check out the producer’s websites for any updates.
Bonus: Games stuttering on high-end PCs
This very particular situation caught our attention, and it’s closely linked to the mentions above. In other words, the game or games may be unfit, buggy, or otherwise broken.
However, other potential culprits can cause serious lagging even on computers with superior specs.
For instance, virus and malware infections are generally responsible when you have games stuttering on a high-end PC. Thus, running a full system scan with a trustworthy antivirus program such as TotalAV makes sense.
You can also try these methods and see if they help solve or reduce the stuttering:
Drop any intermediary wires and connect your GPU straight to the Power supply
Check if your GPU’s firmware is up to date and take appropriate measures if it’s not
Clean up some storage and memory space (erase temp files, junk files, optimize partitions, etc.)
Check for signs of corruption at the system level
Can RAM cause stuttering in games?
Yes, the RAM, like any other component, can just as well be responsible for stuttering in games. Its role is to store the files for the programs currently running, and if the memory starts running low, the game’s performance is affected.
The RAM’s timing also plays a critical role here, and it has to be optimal for the best gaming experience, neither too high nor too low. Usually, adding more RAM modules to PC does help, but you can start by increasing the virtual memory.
As you can see, it is not complicated to fix game and PC stuttering in Windows 10 and 11 as long as you know what you’re doing.
Does HDD cause stutter?
If your HDD (Hard Disk Drive), or for that matter, even the SSD, is filled up with apps and files, then the required space to run the game and the OS might not be sufficient. In this case, the games will lag or even sometimes make the game crash on Windows 10.
This is why it is always recommended to keep your PC clean of any unused software and games, as any installed programs that haven’t been used lately are only slowing down your PC. Also, you could run Disk Cleanup or set up Storage Sense to automatically clear storage on the PC.
Our solutions cover all bases, from the least to the more invasive troubleshooting methods, thus allowing you to get the most results with the least effort.
You don’t need to worry about causing any extra issues as long as you’re following the steps exactly.
Preventing stuttering from appearing should be one of your top priorities as a gamer, but in case it happens suddenly, following our guide will ensure a quick resolution.
Don’t hesitate to share your thoughts about this topic with us. You can do so easily by using the comment section below.
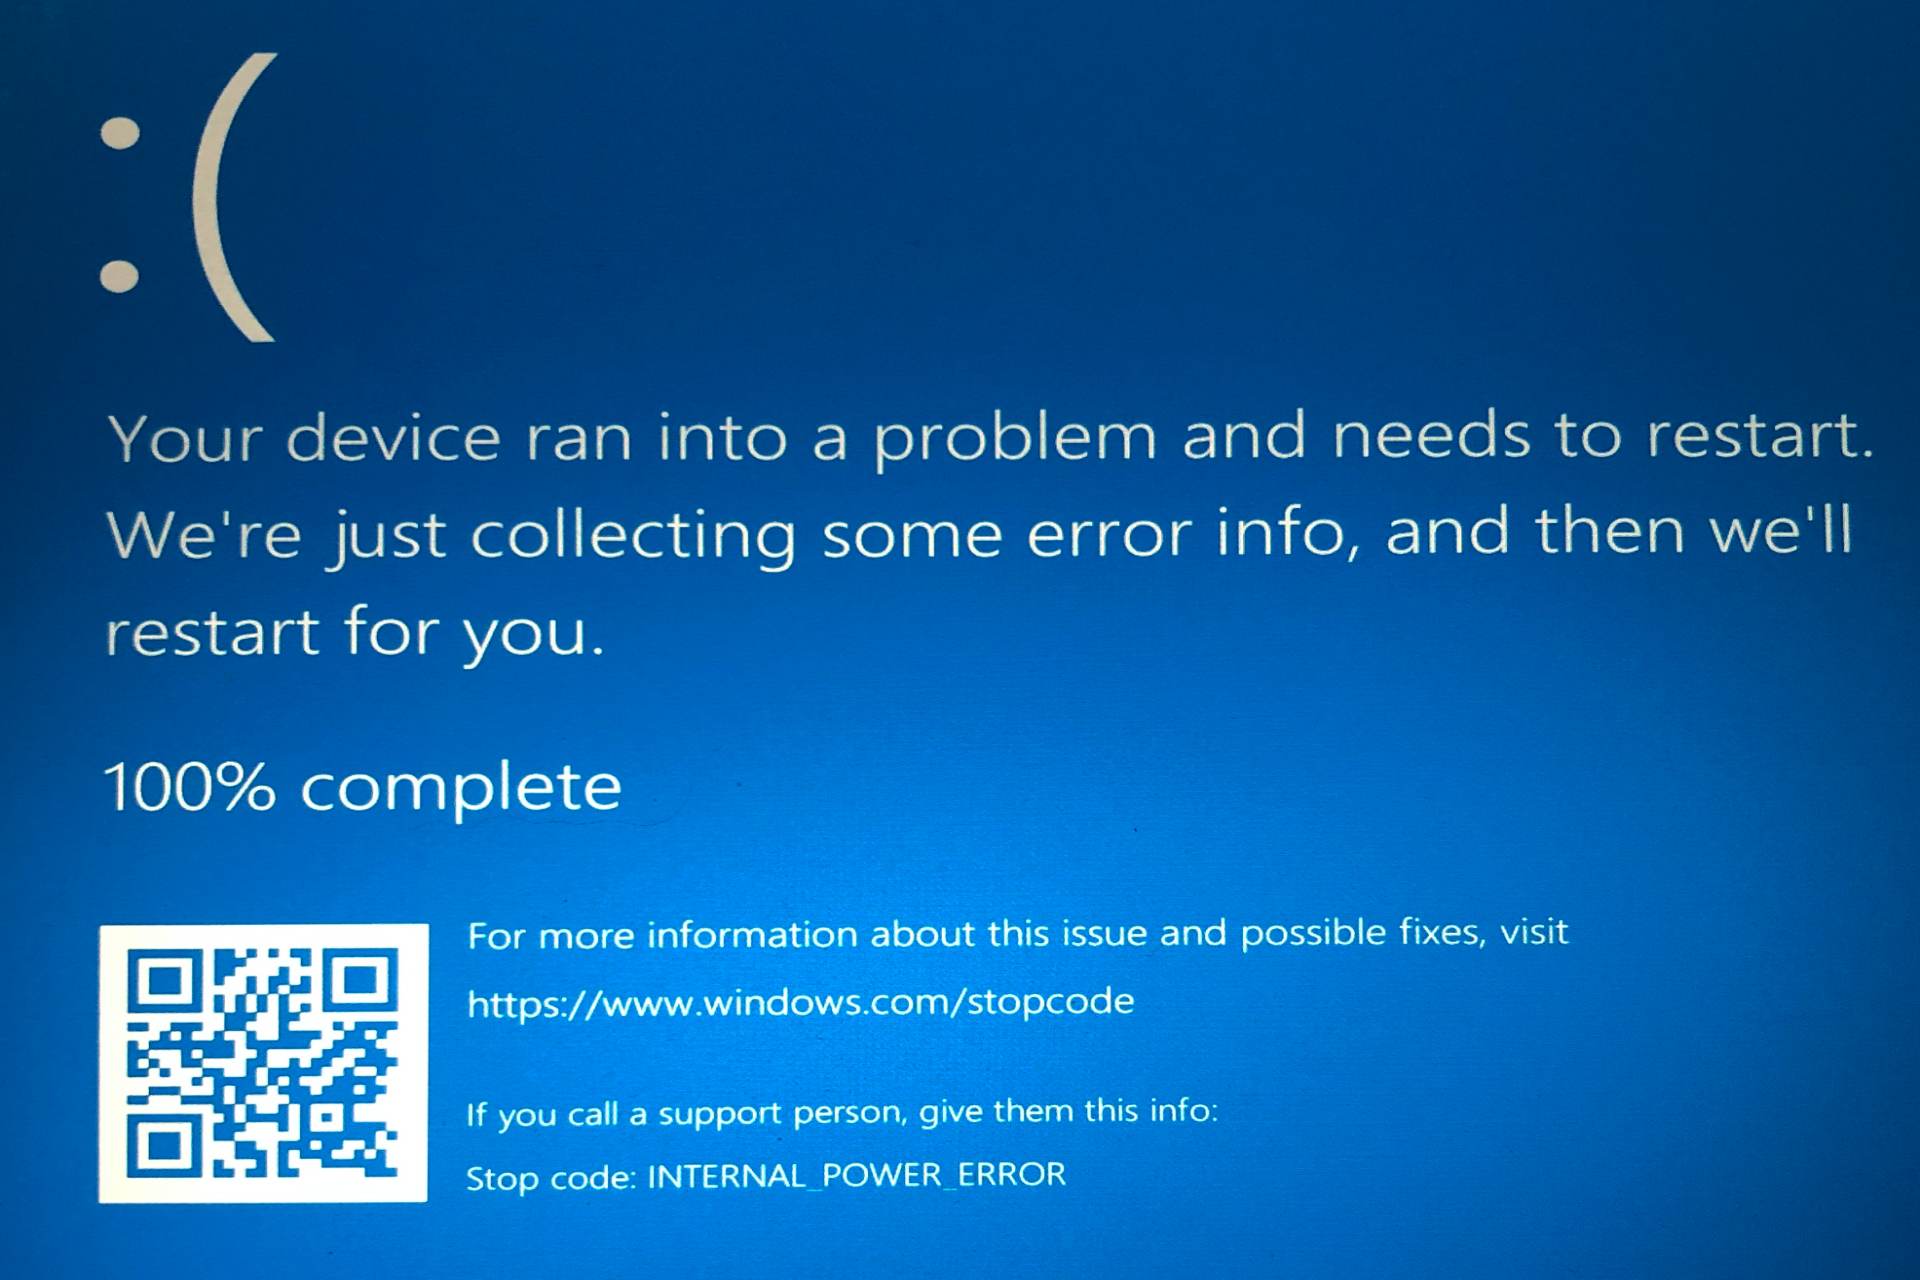
Blue Screen of Death errors can be problematic on Windows 10 since they will always restart your PC to prevent damage.
These errors can disrupt your work and cause data loss. There are many variations of the Blue Screen of Death errors, with the INTERNAL POWER ERROR being one of the common ones.
Thankfully, this error is not the most difficult to fix. And we will show how to fix this issue in this guide, just like we did with the Worker Invalid BSoD error.
What is an Internal Power error?
The INTERNAL POWER ERROR is a BSoD issue that occurs constantly and takes time to leave your PC. There are different variations of the problem with varying causes.
Below are some of the common ones:
INTERNAL POWER ERROR on Windows 10: The INTERNAL POWER ERROR is relatively standard in Windows 10. So, if you’re using Microsoft’s latest operating system, you’re not the only one who’s run into this error.
Your pc ran into a problem INTERNAL POWER ERROR: This is just another error message for the same error code.
Also, according to numerous users, the INTERNAL POWER ERROR is more common on HP, Lenovo, Dell, and Surface Book devices.
Do you need hibernation file?
The Hibernation.sys file is critical for those who utilize the Hibernation feature in Windows, which allows them to turn on the computer quickly.
If you don’t mind a few extra seconds worth of boot time and want to start your computer fresh on each restart, deleting the hibernation file wouldn’t make much of a difference.
What happens if I delete the hibernation file?
When you delete the hibernation file, first, the computer will automatically disable the Hibernate feature.
Secondly, the space occupied by the hibernation file will clear up, and in case you are running low on storage, this would be helpful.
How can I fix the INTERNAL_POWER_ERROR blue screen error?
Tip
If you cannot turn on the PC due to the BSOD error normally, boot Windows into Safe Mode with Networking to execute the fixes listed here.
1. Increase the size of the hibernation file
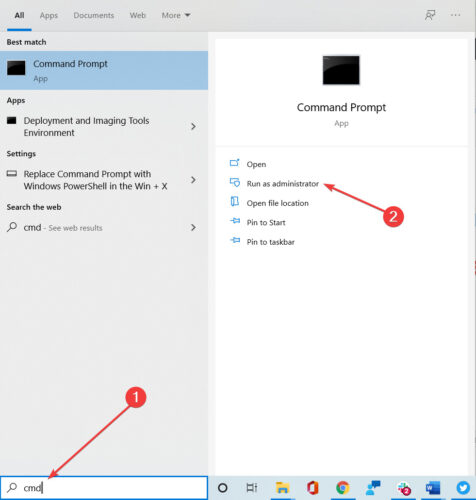
Open the Windows search bar and type cmd.
Select Command Prompt (Admin) from the menu.
When Command Prompt opens, type the command below and press Enter. powercfg /hibernate /size 100
The INTERNAL POWER ERROR blue screen in Windows 10 occurs due to the small size of the hibernation file. The only solution is to increase its size.
By default, the size of the hibernation file is set to 75%. However, sometimes, that might not be enough for current memory requirements, but you can easily change the size to 100% by using the instructions above.
2. Update your drivers
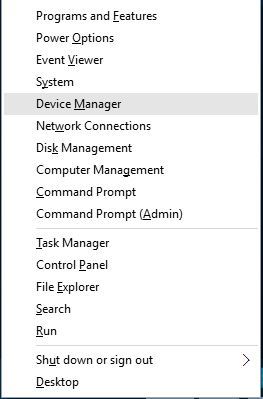
Press the Windows key + X and select Device Manager.
Double-click the option where the driver to update is to expand it.
Right-click on each of the drivers there and select Update driver.
Now, select Search automatically for drivers.
Wait for the search to complete and install any available update.
Blue Screen of Death errors are often caused by outdated or incompatible drivers, and to fix this error, we strongly advise you to update all drivers on your PC.
Aside from using the built-in Windows 11 updater to update the drivers manually, you can go to the manufacturer’s website to download it.
Alternatively, you can use dedicated software in Outbyte Driver Updater to make the process easier. This is because downloading drivers manually can be a long and tiresome process.
Also, there is always the risk of downloading the wrong drivers. But with Outbyte Driver Updater, the tool will scan for outdated drivers and recommend an original update from its extensive database before it can cause problems. All with little to no input from you.
Outbyte Driver Updater
Safely update all your drivers and keep them up to date automatically.
3. Disable your graphics card or roll back your drivers
Click the Start icon followed by the Power button.
Hold the Shift key and click the Restart button.
Follow this path: Troubleshoot > Advanced options > Startup Settings.
Click the Restart button.
After your computer restarts, you’ll see a list of options. Press 5 or F5 to select Safe Mode with Networking.
Press the Windows key + X and select Device Manager from the list.
Double-click the Display adapters option to expand it.
Right-click on your graphics driver and choose Disable device.
If disabling your driver is causing issues, right-click the driver again and select the Properties option.
Click the Driver tab at the top.
Now, click the Roll Back Driver button.
Many users reported issues with AMD graphic cards, and according to them, the only way to fix Windows 10 INTERNAL POWER ERROR after sleep is to disable or roll back the drivers.
4. Disable automatic driver updates
Press the Windows + S keys and type advanced system settings.
Select the View advanced system settings option.
Click the Hardware tab at the top.
Now, click the Device Installation Settings button.
Tick the radio button for No (your device might not work as expected).
Now, open the Device Manager and right-click your driver.
Select the Uninstall device option.
Finally, click the Uninstall button.
To fix the INTERNAL POWER ERROR in Windows 10 on Dell and other devices, you might need to uninstall your graphic card driver, but that might not be as easy since Windows 10 will automatically install the missing drivers.
If you cannot access Windows 10 generally due to BSoD error, you can always perform these steps from Safe Mode. After you disable driver updates, you need to remove your driver.
After the problematic driver is removed, download the new driver from your graphic card manufacturer’s website, but be careful not to install the same problematic driver again.
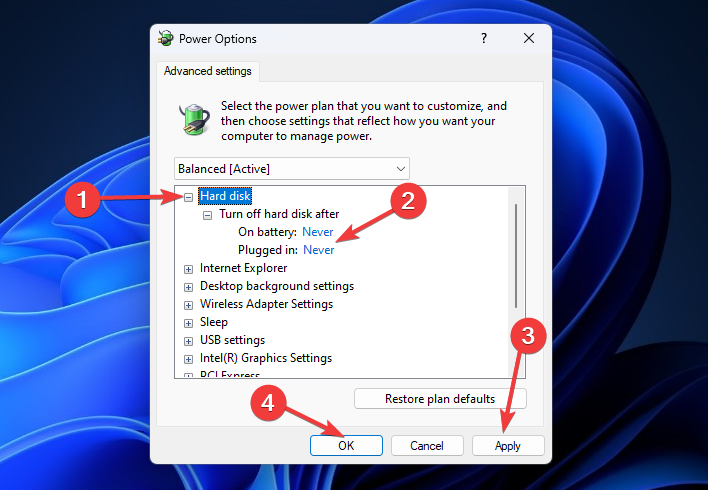
5. Set your hard drive turn off timer to 0
Press Windows key + S and enter power plan.
Select Edit power plan from the list of results.
Click on Change advanced power settings.
Click the Hard disk option to expand it.
Now, set the value for Turn off hard disk after to 0.
Finally, click Apply and OK to save the changes.
If you’re getting INTERNAL POWER ERROR BSoD, you can fix it by setting your hard drive turn-off timer to 0.
6. Make sure you’re using the correct hard drive mode
A few users reported that INTERNAL POWER ERROR in Windows 10 could be caused by incorrect hard drive mode, and to fix this error. You’ll have to change your hard drive mode in BIOS.
For detailed instructions on how to do that, we strongly advise that you check your motherboard manual.
Select the Run as administrator option under Command Prompt.
Enter the following line, and press Enter: sfc/scannow
Wait for the process to finish.
Restart your computer.
SFC is Windows 10’s built-in tool for dealing with various system-related problems. It scans for corrupt and broken system files and repairs them accordingly. It should help you fix the INTERNAL POWER ERROR after startup if it is down to your system files.
8. Clean junk files
Go to Search, type this pc, and open This PC.
Right-click the system drive (most likely C:), and select Properties.
Now, click the Disk Cleanup button.
Check the boxes for the files to delete.
Click the Clean up system files button.
Now, click the OK button.
Wait for the process to finish and restart your computer.
There could be some junk files on your computer that are causing the INTERNAL POWER ERROR in Windows 10, so the obvious solution, in this case, is to clean them.
9. Check for HDD corruption
Go to Search, type this pc, and open This PC.
Right-click the system drive (most likely C:), and select Properties.
Now, click the Tools tab.
Click the Check button under the Error checking option.
Finally, click Scan Drive, and wait for the process to finish.
Since we’re at the hard drive, let’s quickly check for any errors because these errors can also cause the INTERNAL POWER ERROR in Windows 10.
How can I fix the INTERNAL POWER ERROR on Windows 11?
To fix the INTERNAL POWER ERROR on Windows 11, check your hard drive for errors. We have shown how to do that in Solution 9 of this guide.
Also, you can run the SFC scan to fix corrupt and broken system files. You can use any fixes in this guide to resolve the issue.
So, if you were wondering how to fix the Windows error code INTERNAL POWER ERROR in Windows 10, updating or reinstalling the drivers, increasing the hibernation file’s size, disabling automatic updates, and checking for corrupt system files should help.
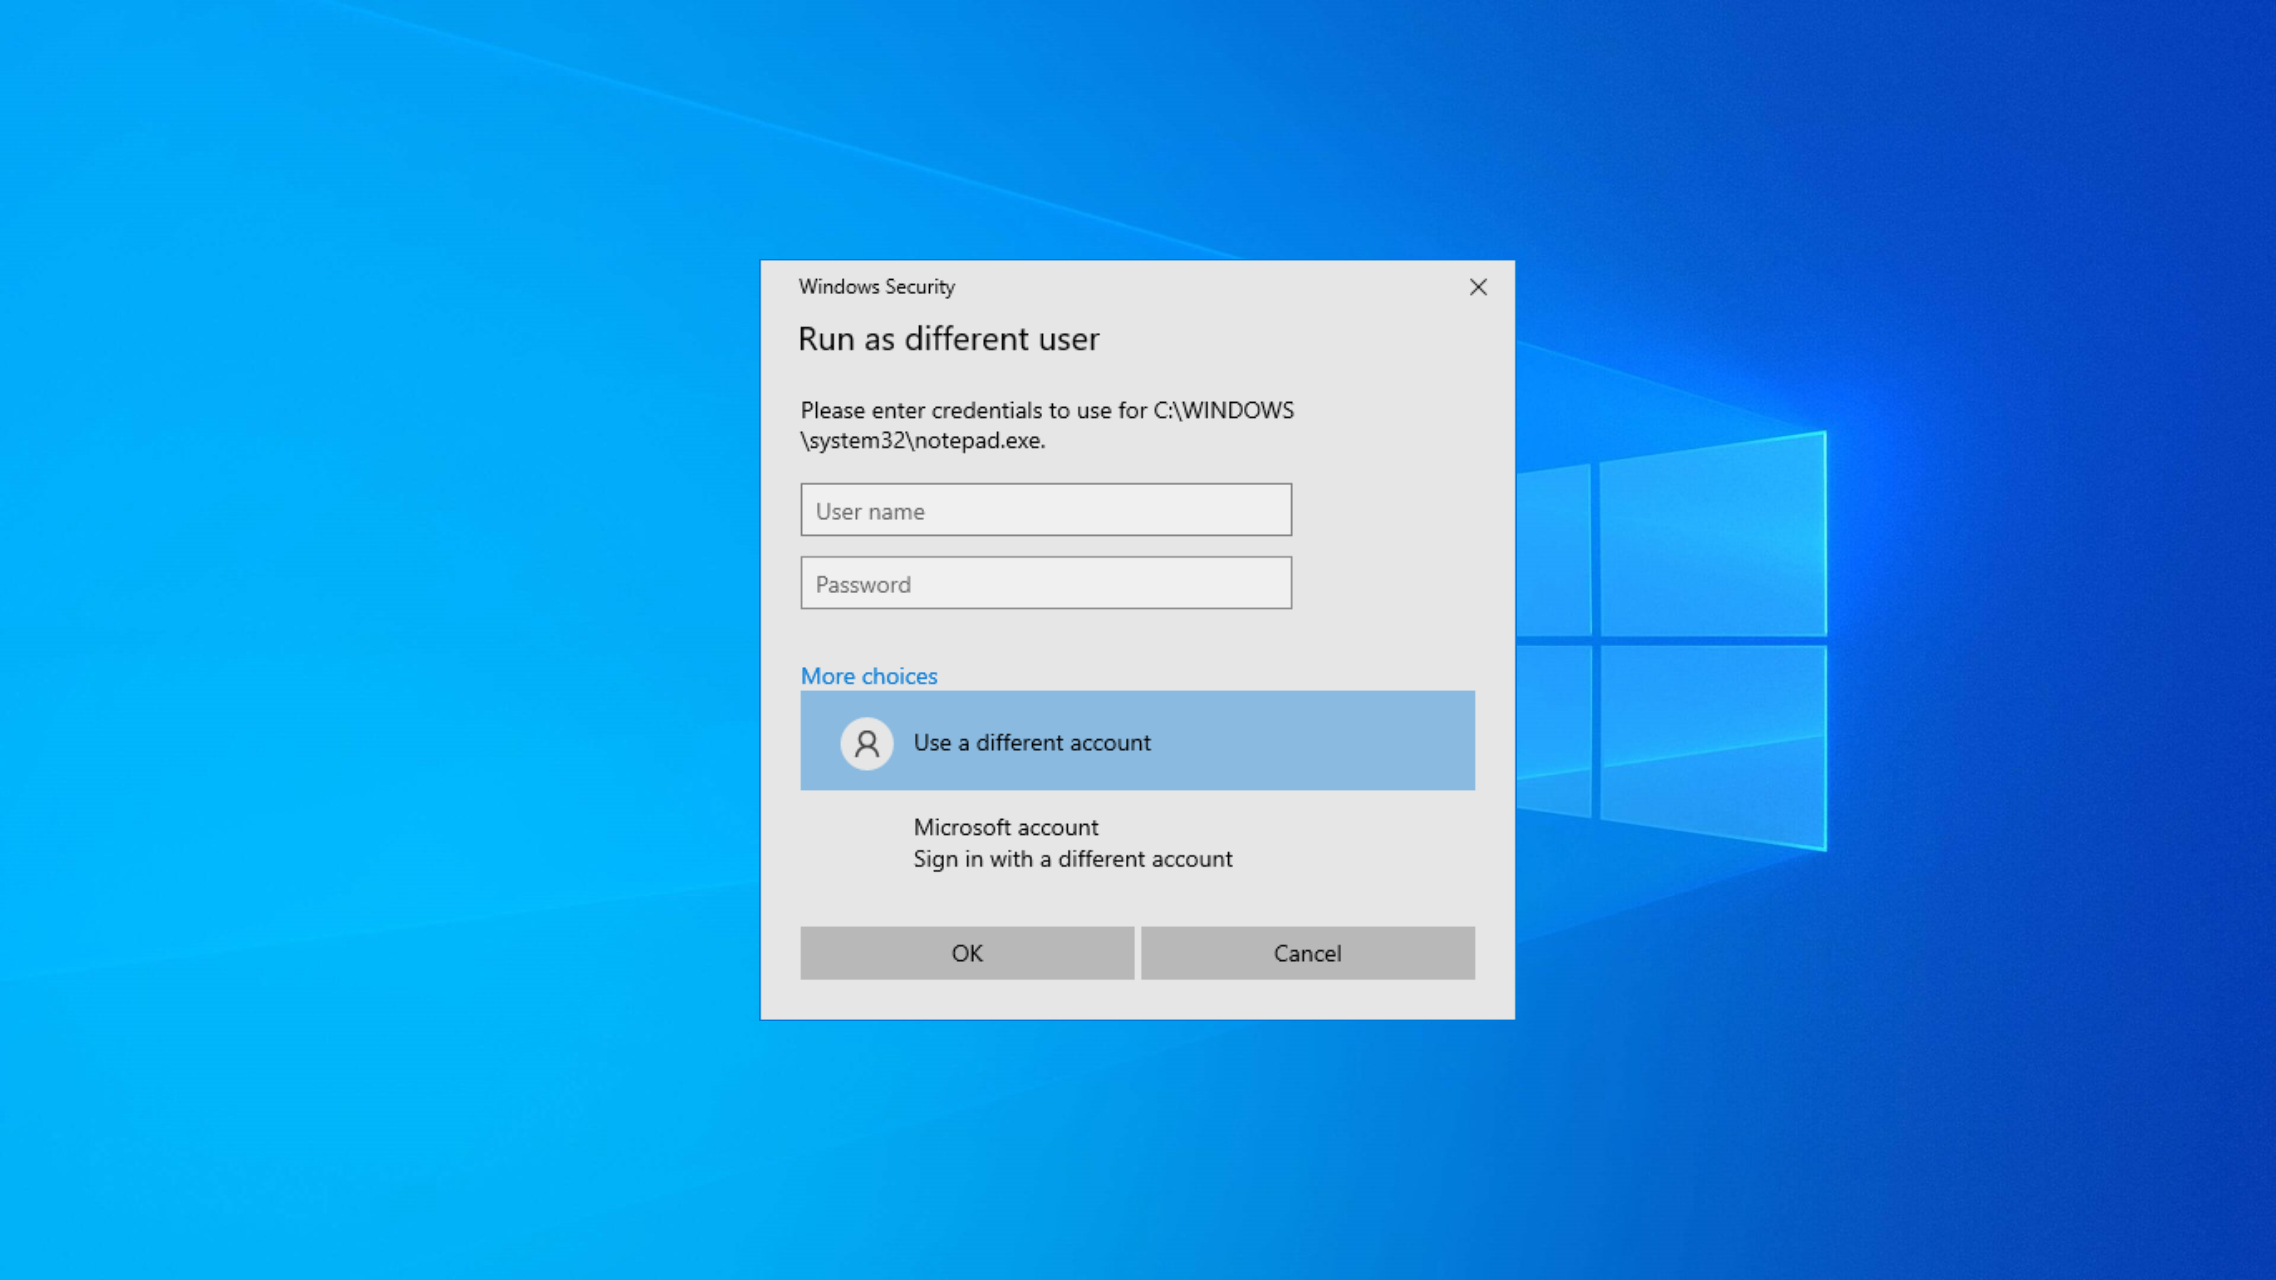
You can create multiple user accounts on your Windows PC. Moreover, you can run apps and processes for a particular account. If you run a program in one account, it won’t appear on another.
However, you can run these processes as a different user on Windows 10 if you have access to the other account. This guide will show you the different ways to run a program as a different user on Windows 10. So, let us get right into it.
Why would I want to run a program as a different user on Windows 10?
There are plenty of good reasons to run a program as a different user on Windows 10. Some of them are listed below.
Check for an issue on the app for the user: If you run a program as a different user, then you can troubleshoot problems on the app that a particular user is facing.
Protect your data: If you are not sure about a program, running it as a different user will restrict it from accessing your sensitive data.
Check for conflicts: For users who have issues running a program, which could be because of a third-party app conflict, you can run it as a different user to fix the problem.
Provide sufficient resources: A new user account provides free memory for the program, which would provide better performance.
How can I run a program as a different user on Windows 10?
1. Using the context menu
Hold the Shift key and right-click on the app on your Taskbar or desktop.
Select Run as a different user from the context menu.
Enter the username and password of the user account.
Click OK.
2. Using Command Prompt
Open the Start menu by pressing the Win key.
Open the command prompt as an admin.
Type the below command and press Enter. runas /user:"Username" "FileLocation" (Replace Username and Filelocation with the actual username and the location of the program)
Type the username and password for the user account in a prompt that appears and press Enter.
Type gpedit.msc and press Enter to open the Group Policy Editor.
Head to the below-mentioned location. User Configuration/Administrative Templates/Start Menu and Taskbar
Double-click on Show “Run as different user” command on Start.
Select Enabled.
Click Apply and OK to save changes.
4. Use the Registry Editor
Press the Win + R keys to open the Run dialogue.
Type regedit and press Enter.
Navigate to the below path. Computer\HKEY_CURRENT_USER\Software\Policies\Microsoft\Windows\Explorer
Right-click on the ShowRunAsDifferentUserInStart key and select Modify.
In the Value Data field, type 1.
Click OK to save the changes.
We suggest you tweak the registry editor only if the previous methods did not work or if you know that tweaking the registry keys wrongly could crash your system.
That is it from us in this guide. However, for users getting an error, this app can’t run on this PC, we advise you to check out our dedicated guide to resolve the problem.
Desktop Windows Manager is an important process, but many reported that Desktop Window Manager causes high GPU usage on their PC.
Some users have encountered issues as a message pops up saying that their GPU memory is full, which can cause a lot of stress and confusion.
How do I stop Desktop Window Manager from using so much GPU?
1. Update drivers
Open the Start menu by pressing the Win key.
the Device Manager in the search bar and open it.
Expand the Display adapters section.
Right-click on your GPU and select Update drivers.
Choose Search automatically for drivers to update.
Desktop Window Manager high GPU usage can occur with AMD graphics, so it’s important to keep drivers up to date.
If you want to avoid following the steps mentioned above, and also keep your PC’s drivers updated constantly, using specialized software like Fortect Driver Updater can do the trick.
It will not only keep all of your drivers up to date with just a few clicks, but it will also help you schedule scans, create driver backups, act as a downloaded manager, and much more.
On your desktop, right-click anywhere and select Personalize. The process is the same for Windows 10 and 11, but the guide will focus on Windows 11 for brevity.
Click on Background.
In the Personalize your background drop-down, select Solid color.
Select a color to serve as your background. (Doesn’t matter which, so long as the background doesn’t have a graphic that will increase GPU consumption.)
You can also create your own custom color.
Back in the Personalization menu, select Colors.
Turn off Transparency effects.
Go back to the Personalization menu, and select Themes.
Select either Windows (Light) or Windows (Dark).
Disabling these features should fix desktop Window Manager high GPU usage in OBS and other software.
4. Disable the Fast Startup feature
Open the Start menu by pressing the Win button.
Type Control Panel and open it.
Ensure that either Large Icons or Small Icons are in the View by.
Click on Category and make the change to either Icon choice.
Select Power Options.
Click Choose what power buttons do on the left pane.
Click Change settings that are currently unavailable.
Under Shutdown settings, click Turn on fast startup (recommended)and Hibernate to turn them off.
Open the Start menu and open System Configuration.
Click the Services tab.
Click Hide all Microsoft services.
Hit the Disable all button.
Restart your computer.
5. Turn off Hardware accelerated GPU scheduling
Press the Win key to open the Start menu.
Type Display Settings and open it.
Click on Graphics.
Click on Change default graphics settings.
Toggle off the Hardware-accelerated GPU scheduling option.
Restart your PC.
Once you disable this feature, check if Desktop Window Manager high GPU usage still occurs when watching YouTube.
Why is Desktop Windows Manager taking up so much GPU?
Here are a few of the most common reasons that trigger the Desktop Windows Manager high GPU issue:
Problem with your hardware: Dwm.exe can usually use a lot of GPU memory if there’s a problem with your hardware.
The GPU driver hasn’t updated: Chances are the your drivers aren’t up to date. To fix this problem update graphics drivers.
Latest Windows update isn’t installed: Latest Windows updates not only bring new features but also fix the bugs that cause multiple issues, such as the one at hand.
Corrupt system files: System files are responsible for the smooth functioning of your PC, and if they are corrupt or missing, then they can cause issues.
Misconfigured graphics settings: You should check if your Nvidia or AMD graphics settings aren’t misconfigured.
One solution that wasn’t touched upon for Desktop Windows Manager is using antivirus software. In certain situations, malware may cause DWM suddenly use more resources.
Other GPU problems may be due to high internal temperatures. Normal temperatures range from 149 to 185 degrees Fahrenheit (65 to 85 degrees Celsius) but go slightly higher during intense gaming sessions.
Prolonged high temperatures can cause permanent damage to your GPU, so it’s recommended that you check GPU temperature.
Conversely, there are solutions for low GPU usage and high CPU usage. It’s a mismatched problem that can be caused by bottlenecking, but not always.
From this strange discrepancy, you may have to deal with frame drops and stuttering or high CPU temperature. This problem may be caused by out-of-date drivers or certain apps getting in the way.
Feel free to comment below if you have questions about other Windows 11 apps. Also, leave comments about guides you’d like to see or information on other Windows 11 features or list guides like this.
Just like when Windows 11 keeps restarting, Windows 11 randomly shuts down is frustrating for anyone who can’t live a day without their PC.
If you’ve been looking for a solution for these auto shutdowns on Windows 11, you’ve just landed on the right page.
Why is my computer shutting down randomly in Windows 11?
Your computer could shut down randomly without you hitting the power button for various reasons that include but are not limited to the following:
Overheating – Your computer is programmed to power off when its temperature rises to a certain level to protect hardware and software components.
Malfunctioning sleep mode – In Windows 11, the Sleep Mode may become problematic and result in unexpected shutdowns rather than the expected sleep.
Overclocking – Your computer’s components might be unable to handle the additional power requirements if it has been overclocked. Hence, randomly shutting down.
Hardware problem – Your computer can shut off due to failing hardware components.
Whatever causes your Windows 11 PC to shut down abruptly, the solution to fix it is here.
How can I fix a random shutdown on Windows 11?
To stop Windows 11 from random shutdowns, start with these basic troubleshooting steps:
Ensure your cables are connected correctly, or switch to a different power source. That should fix it if they are the root of the problem.
Updating Windows to the latest version could be all you need if the problem is due to some bugs
Use your PC in a well-ventilated room. Avoid direct sunlight or anything that could heat your PC. If your computer fans are dirty, cleaning it can be the solution.
Click on the Windows icon on your taskbar, enter Control Panel into the Search box, and select the Best match result.
Select System and Security on the left pane, and click on Power Options.
Next, click on Change plan settings.
Next, click on Change advanced power settings.
On the pop-up window, double-click to expand Hard disk, then set the On battery and Plugged in options under Turn off hard disk after to Never. Click the Apply then OK button to save your changes.
On the same pop-up window, navigate to Processor power management, double-click to expand it, and select Minimum processor state. Change the value of the On battery and Plugged in options to 0%. Click the Apply then OK button to save your changes.
Note that this solution is only for laptop users but is very effective in getting rid of the Windows 11 auto shutdown problem.
4. Turn off sleep mode
Press Windows + I keys on your keyboard to open Settings.
Go to the System tile on the left pane, then scroll down to select Power & battery on the right.
Under Screen and sleep, set On battery power, put my device to sleep after and When plugged in, put my device to sleep after options to Never.
Click on the Windows icon on your taskbar, type Create a restore point into the Search box and select the Best match result.
On the System Properties window, click on the System Restore… button.
Click the Next button.
Select the available restore point and click the Next button.
Click the Finish button to confirm your restore point.
System Restore will automatically restart your computer to effect the changes. Wait for the process to complete then check if the problem has been fixed.
If the problem persists after using all the above solutions, resetting Windows 11, manually or automatically is the next resort.
Another worth-knowing method that can repair your PC and fix shutting-down issues is a PC optimization tool designed for system restore operation.
7. Reset PC to factory settings
Press Windows + I on your keyboard to open Settings, select the System tile, and scroll down to choose Recovery on the right pane.
Under Recovery options, click the Reset PC button next to Reset this PC.
Next, choose Keep my files to reset all system settings default without removing any personal file.
Follow the on-screen instruction to complete the process.
A sudden shutdown can damage the PC’s hardware and software, though the effects on the latter are more profound. The damage is minor for hardware unless the computer is repeatedly shut down the same way over an extended period. The hard drive is usually the worst affected component and you might get the windows failed to load properly message..
But when it comes to software, an unexpected shutdown can wreak havoc. It’s one of the primary reasons behind corrupt system files, which leads to a range of other issues, sometimes even a Blue Screen of Death. Also, you lose unsaved data due to an unexpected shutdown.
Where can I find shutdown logs?
Press Windows + S to open Search, type Event Viewer in the text field, and click on the relevant search result.
Expand Windows Logs from the navigation pane, and then select System under it.
You can now view all the shutdown logs on the right.
You can check the error logs to ascertain the shutdown history of the PC and identify any issues encountered during the process. Here are a few Event IDs you should be aware of for a better understanding of the shutdown logs:
Event ID 6006: Indicates a proper shutdown. So there’s nothing to be concerned about.
Event ID 6008: Indicates an improper shutdown. So, you should verify what caused it and take the necessary steps to prevent future occurrences.
Event ID 1074: Indicates a built-in or third-party application initiated the shutdown. It could just as well be Windows Update, but you may verify that same.
Event ID 41: Indicates that the PC underwent a reboot without shutting down properly.
That’s about it. Hopefully, you can stop random shutdowns on your Windows 11 device with one of these solutions.
We use keyboard shortcuts all the time, but some users have reported the Alt F4 not working on their PC.
This isn’t a major problem unless you use this shortcut frequently. Luckily, there are ways to fix this, and in today’s guide, we’ll show you the best ways to do it.
How do I fix Alt F4 not working?
1. Check FN Lock
If you have a function key on your keyboard, press and hold it. It’s usually labeled Fn.
While holding this key, press Alt + F4.
Check if this works.
2. Update keyboard drivers
Press Win + X and select Device Manager from the menu.
Expand the Keyboards section to see the list of connected keyboards.
Right-click your keyboard and choose Update driver.
Select Search automatically for drivers to let Windows find the latest driver online.
3. Turn off Sticky Keys
Press theWindows key + I to open Settings.
Go to Ease of Access.
Scroll down and open the Keyboard tab from the left pane.
Scroll down and click toggle the switch to turn off Use Sticky Keys.
Close the Settings window and then check if the Alt F4 key combo is working.
4. Run keyboard troubleshooter
Click on Start and choose Settings.
Go to Update & Security.
Open the Troubleshoot tab from the left pane.
Click on the Additional troubleshooters option.
Scroll down and select the Keyboard option.
Click the Run the troubleshooter button. It will scan your system for keyboard-related issues and recommend some fixes.
5. Disable Legacy Fx function in BIOS
Turn off your PC completely.
Press the power button to restart and start pressing the F2 or F12 key on your keyboard right away. Keep pressing the keys until you access BIOS.
Once in BIOS, open the Configuration tab. You can use the arrow keys on your keyboard to navigate.
Use the down arrow key to highlight Hotkey Mode.
Use the left and right arrow key to set Hotkey Mode to Disabled.
Save the changes and exit BIOS.
If the issue persists, modify some registry entries to resolve the issue. Alternatively, change function keys in Windows 10 to bind your F4 key to another key.
6. Modify Windows Registry settings
Press the Windows key + R to open Run.
Type regedit and click OK to open the Registry Editor.
In Registry Editor, navigate to the following location: HKEY_CURRENT_USER\Software\Microsoft\Windows\CurrentVersion\Policies\Explorer
In the Explore folder, check if an entry named NoWinKeys exists. If yes, double-click to open it and then set the Decimal value to 0.
If not, right-click on the Explorer folder, go to New and choose the DWORD (32-bit) value.
Rename it as NoWinKeys.
Double-click on the newly created entry and set the decimal value to 0.
7. Check for hardware issues
Even if the issue persists after following all the troubleshooting steps, it is time to diagnose your keyboard for hardware issues. Laptop and external keyboards over time can wear off and may require replacement.
While you can use an external keyboard, this may not be ideal for those who use their laptop on the go or carry it out. Contact your laptop service center for a better diagnostic of your computer keyboard.
The Alt F4 not working issue in Windows 10 usually occurs due to Fn lock being enabled. Run the keyboard troubleshoot and perform other troubleshooting steps listed in this article to resolve the issue.
Apps acting as they should is essential for the best experience on your PC. So when Cortana keeps popping up, it reduces the value you get from your computer. While Cortana is undoubtedly a great addition to what Windows 10 already offers, no one wants it all over the place all the time.
This guide will walk you through some triggers for this problem and the best possible solutions. You may also read our other guide if Cortana is not working on your device.
Why is Cortana constantly popping up?
Over time, users have highlighted some of the causes for this problem with Cortana, and here are the top triggers we have been able to gather:
Trackpad gestures – You may accidentally give a command without meaning to, especially if you have Trackpad gestures turned on.
Driver issues – You may be using outdated drivers, which no longer work well with your Trackpad.
Malware – As we all know, viruses may trigger many PC problems, which could be one such case. You should always use the best antivirus programs.
Keyboard errors – Some keys may be stuck, triggering constant calls for Cortana. We advise you to use only the best keyboards.
This post will show you how to stop Cortana from popping up when scrollingand get rid of it forever. Let’s get started.
What can I do if Cortana keeps popping up?
Before going into these fixes, we recommend you unplug your keyboard and other peripherals, as they may trigger this Cortana problem.
1. Turn off Hey Cortana hot word detection
Open the Start menu, type in Cortana,and click Cortana & Search settings.
Look for the setting that reads Let Cortana respond to Hey Cortana, then turn the option off.
2. Disable Cortana on the lock screen
Press Windows + I to open the Settings app.
When the Settings app opens, navigate to the Cortana section.
In the right pane, locate Use Cortana even when my device is locked and disable it.
Press Windows Key + R and enter regedit. Now press Enter or click OK.
Navigate to the path below: Computer\HKEY_LOCAL_MACHINE\SOFTWARE\Synaptics\SynTP\Win10
Right-click the Win10 key and choose Export from the menu.
In the Export range, select Selected branch, enter the desired file name and click on Save. If anything goes wrong after modifying the registry, you can always run the exported file and restore the registry.
In the right pane, delete the following DWORDs:
3FingerTapAction
3FingerTapPlugInActionID
3FingerTapPlugInID
3FingerPressButtonAction
After doing that, check if Cortana keeps popping up. If you can’t find any DWORDs or the path from Step 2, this solution doesn’t apply to you so that you can skip it.
4. Disable Cortana
Press Windows + R, then type regedit and hit Enter.
Navigate to the path below (If you do not have the second Windows folder, create a new key and call it Windows): Computer\HKEY_LOCAL_MACHINE\SOFTWARE\Policies\Microsoft\Windows\Windows
Create a DWORD (32-bit) Value key and name it AllowCortana.
Double-click AllowCortana and set the value to 0.
5. Reset Cortana
Click on Windows Search, type Cortana, and select App Settings.
Scroll down, then click on Repair, and also click on Reset.
If Cortana keeps popping up, these methods will fix your problem, as they already have for countless others over the internet.
Let us know how these instructions worked out for you in our comments!
Have you been wondering where to find or change your MAC address on Windows 11, but you do not yet know how to go about it?
Since it is possible to cloak an IP address, this article will provide simplified steps to set a custom MAC address from your device properties on Windows 11.
Can a MAC address be changed?
The default MAC address of your Windows computer can be changed, although device manufacturers strongly advise against it because it may result in unanticipated problems.
On a Network Interface Controller (NIC), the MAC address is hard-coded and cannot be altered, though, with some drivers, it may be possible.
We’d advise you to opt for random hardware addresses instead of changing your MAC address, but if you must, below is how to go about it.
How do I find and change the MAC address on Windows 11?
1. Use Windows 11 CMD
Press the Windows key, type in command prompt, and click on Run as administrator.
Input the following command and click Enter: reg add “HKEY_LOCAL_MACHINE\SYSTEM\CurrentControlSet\Control\Class\{4D36E972-E325-11CE-BFC1-08002BE10318}\0001” /v NetworkAddress /d 4181DBEA0EDF /f
Remember to change the string value to your device’s.
Wait for the command to run successfully and restart your PC.
To confirm if the change has been made, open the Command Prompt as instructed above, type the following command, and press Enter: ipconfig /all
You should now see the new MAC address show up in the line starting with Physical Address.
The Command Prompt offers many tips and tricks. It also saves a lot of stress navigating through several clicks. One of the commands lets you change the MAC address in Windows 11 from Device Manager.
2. Via Device Manager
Press the Windows key + I to open the Settings app.
Select the System category in the left sidebar and click on About.
Next, select Device Manager.
Expand the Network adapters by double-clicking on it, then right-click on the Network device, and select the Properties option.
From the Properties dialog, select the Advanced tab. Under the Property box, scroll down and select Locally Administered Address.
Now, type the 12-digit new alphabetical MAC address in the Value field and then click the OK button.
If you don’t know what value to enter, you may use a search engine to look for MAC address generator. There are plenty of websites that can help you generate one for you.
Restart your PC.
The Windows 11 Settings app has been massively upgraded in usability compared to other lesser Windows versions, making finding a specific setting easier.
You can also explore a full list of reliable utilities that simplify this task by checking the best MAC address changer tools available for Windows.
Press the Windows key + I to open the Settings app.
Go to Network & Internet settings on the left sidebar and select Wi-Fi on the right.
Now, enable the switch called Random hardware addresses at the bottom of the window. This will enable you to spoof your MAC addresses for all the Wi-Fi networks.
To spoof the MAC address for a specific Wi-Fi network, click on Manage known networks.
Next, click on any wireless network of your choice.
On that Wi-Fi network’s page, locate the Random hardware addresses setting.
Then click on the drop-down list on its right side and select the option you prefer (Off/On/Change daily).
Windows 11 also allows you to change your MAC address for each Wi-Fi network you connect to and those you will still connect to. This setting will be practical when connecting to the chosen Wi-Fi network.
That’s it on how to find & change the MAC address on a Windows 11 PC, and we hope the information we offered is useful.
The Steam app is one of the most popular gaming platforms, with millions of players worldwide. However, some of our readers recently complained that Steam won’t open on Windows 11.
If you have been experiencing similar issues on your Windows 11 PC, do not worry, as we have gathered some potential fixes for your Steam application.
Why is my Steam not opening?
Whenever your Steam app is not opening, there can be several reasons behind this error. One of the major reasons reported by some users is that the error occurs when the app runs in the background without showing in the Taskbar or system tray for a long time.
Other factors causing this issue are as follows:
Interruptions from third-party applications – Your Steam startup can be interrupted by third-party applications or antivirus programs. A quick fix can be to disable unnecessary programs or uninstall your antivirus applications.
Using an outdated Steam version or Windows OS – Another possible reason behind this error is when you’re using the older Steam version that contains bugs, or your Windows OS is outdated.
Missing or Corrupted files – There is a possibility that the installation files and other essential documents for the Steam client have been removed or are corrupted.
Critical services not running – Steam may fail to open because certain services are not running or essential permissions are missing.
Issues with the user account – Some of our readers reported that when their user account is corrupted, it affected most of their applications, but having a new user profile, the error is fixed.
We will highlight below the proven fixes for the problem. You can work your way through the article and apply a suitable fix to eliminate the issue.
What can I do if Steam is not opening on Windows 11?
Before using any of the fixes provided in this article, make sure your computer meets the minimum requirements to run the Steam application. You can also perform the following preparatory checks:
Restart your PC.
Update your system’s date & time settings.
Make sure you are running the latest version of Steam and Windows 11.
The GeForce Experience app is a dedicated control panel to manage the NVIDIA GPUs. It helps change graphics settings throughout the system and make app-specific changes. Of late, many users reported that GeForce Experience is stuck on the Preparing to install screen.
When this happens, users can’t update the NVIDIA drivers, which greatly affects the Windows experience and might lead to poor gaming performance. So, let’s find out all about the GeForce Experience Preparing to install error and the solutions for it.
Why does GeForce Experience take so long to install drivers?
Here are a few reasons the GeForce driver is taking forever to install:
Slow Internet connection: Whenever something is to be downloaded off the web, a slow Internet connection will increase the time required for the process to complete.
Missing permissions: Even missing relevant permissions can affect the effective functioning of the app and be the reason NVIDIA is stuck on installing the graphics driver.
The update is stuck: In some cases, users found GeForce Experience stuck on the screen. It usually takes a few minutes at max to complete the installation, but if that’s not the case, the update might be stuck.
What can I do if GeForce Experience is stuck on preparing to install?
Before we start with the complex changes, here are a few quick tricks that might help:
Restart the computer.
Run GeForce Experience as administrator and check whether you can update the drivers. To do that, right-click on the launcher, and select Run as administrator.
Disconnect all non-critical devices from the PC, including printers, audio devices, and USB hubs.
Check if any UAC prompts appear and click Yes on every one of them.
Re-attempt the driver installation and verify whether GeForce Experience is still stuck on the Preparing to install screen.
Disable any third-party antivirus, firewall, or similar security software installed on the PC. If that does the trick, we recommend you switch to reliable all-round antivirus.
Check for Windows Updates and install any that are pending.
If none of these work, move to the solutions listed next.
1. Terminate programs running the driver
Press Ctrl + Shift + Esc to open the Task Manager, locate GeForce Experience, right-click on it, and select End task.
Similarly, terminate the other non-critical apps and processes here.
Now, press Windows + R to open Run, type services.msc, and hit Enter.
Right-click on the Cryptographic Services entry, and select Stop from the context menu.
Once done, again launch GeForce Experience, and then try installing the driver.
Many users managed to fix things when GeForce Driver was stuck on Preparing to install by terminating the processes that were engaging the driver and stopping the Cryptographic Services. Also, if you have Steam or game clients running in the background, terminate them.
2. Modify Windows Security settings
Press Windows + S to open the Search menu, type Windows Security, and click on the relevant search result.
Click on App & browser control.
Now, click Exploit protection settings.
Go to the Program settings tab, click on Add program to customize, and select Choose exact file path from the flyout menu.
Navigate to the following path:C:\Program Files\NVIDIA Corporation\NVIDIA GeForce Experience
Select the NVIDIA GeForce Experience.exe file, and click Open.
Finally, scroll down to Disable extension points, tick the checkbox for Override system settings, then enable the toggle under it, and click on Apply to save the changes.
If GeForce Experience ran all this while, restart the application, and you should be able to install the drivers.
Press Windows + R to open Run, type appwiz.cpl in the text field, and click OK.
Locate applications installed around the same time the problem first appeared, select them individually, and then click Uninstall.
Follow the on-screen instructions to complete the process.
It may take a while to identify the conflicting application, and you may end up removing a few others in the process. Don’t worry! You can always reinstall these once the problematic app is uninstalled.
A few users found out that ZoneAlarm Firewall was the underlying cause when GeForce Experience was stuck at Preparing to install. Look for it and other similar apps.
4. Reconfigure the NVIDIA 3D settings
Open the NVIDIA Control Panel, expand 3D Settings, and then click on Manage 3D settings.
Click on the Restore button.
Choose the appropriate response in case a confirmation prompt appears.
5. Reinstall GeForce Experience
Press Windows + X to open the Power User menu, and select Installed apps (the option reads Apps and Features in Windows 10).
Locate the GeForce Experience app, click on the ellipsis next to it, and select Uninstall from the flyout menu.
Again, click on Uninstall in the confirmation prompt.
Once done, restart the computer.
Now, head to the official website, and download GeForce Experience.
Run the setup and follow the on-screen instructions to complete the installation process.
After you have reinstalled GeForce Experience, the driver update shouldn’t be stuck on the Preparing to install screen anymore.
6. Manually install the driver
Go to NVIDIA’s official website, choose the appropriate options to locate your driver, and then click on Search.
Click on Download.
Again, click Download.
Run the setup, and complete the driver installation.
If the previous solutions didn’t work, you could manually install the drivers from the official website. The process, though a bit intricate initially, shouldn’t be much of a hassle and will allow you to update the drivers seamlessly.
As an alternative, you can use an automatic tool that will successfully install or update any drivers on your PC much faster and completely securely.
7. Create a new user account
Press Windows + R to open Run, type netplwiz in the text field, and hit Enter.
Click on Add.
Select Sign in without a Microsoft account (not recommended).
Click on Local account.
Enter the username and password (not mandatory for Local Accounts), then click on Next.
Click Finish to create the user account.
Select the account you just created and click Properties.
Head to the Group Membership tab, select Administrator, and click OK to save the changes.
Finally, sign in with the new user account, install the GeForce Experience app, and you should be able to install the latest drivers.
As a last resort, you can create a new user account to fix things if GeForce Experience is stuck on the Preparing to install screen due to a corrupt user profile. To transfer data between the previous and new account, you can use a reliable backup tool or USB storage device.
While using Windows mail, your emails could suddenly start showing as HTML code. When this happens, reading your emails becomes a bit problematic. If your Windows mail app displays HTML code on Windows 11, this article will provide steps to help you resolve the error.
Why is the Windows Mail app showing HTML code?
Here are some of the common reasons why the Windows Mail app is showing HTML code:
Third-party antivirus software – Sometimes, third-party antivirus software installed on your PC can cause the mail app to show HTML code.
Changing text format – If the sender of the mail changes the official text format before sending the mail, it can cause the mail app to show HTML code.
Corrupt Mail app – In some cases, a corrupt Mail application might cause received mails to display as HTML code. If that’s the case, you can try accessing Windows mail service from your web browser.
Problematic Windows update – If you noticed this error with the mail app after updating Windows, the update likely caused that problem, and you should uninstall it.
Now that we know what the probable causes are, let’s solve the problem by using the solutions below.
How do I fix the Mail app if it’s showing HTML code on Windows 11?
Before we proceed with more advanced solutions, here are a couple of quick fixes you can apply:
If those steps couldn’t resolve the error, here are a couple of advanced fixes you can try.
1. Repair the Mail application
Press the Windows key + I to open the Settings app.
Click on Apps and select Installed apps.
Locate the Mail and Calendar app from the list of apps, click on the More icon, and click on Advanced Options.
Select Repair. If the repair option isn’t available, select Reset.
Close the Settings app, restart your PC, and relaunch Windows Mail.
2. Disable the antivirus software
Press the Windows key + S, type in Windows Security, and launch it.
Navigate to the Virus & Threat Protection tab. Under the Virus and Threat Protection settings, select Manage Settings.
In the next window, click on the toggle button to switch Real Time Protection to Off.
This will prevent Windows Defender from operating. Check if Windows Mail is displaying the messages correctly. If so, you should think about switching to a better antivirus for Windows 11 that doesn’t interfere with your apps.
In case you’re using a third-party antivirus, disable it from its menu and see if that changes how Windows Mail is displaying the messages.
3. Roll back the Windows update
Press the Windows key + I to open the Settings app.
Click on Windows Update and select Update History.
Select Uninstall Updates.
Locate the most recently installed update from the list and click Uninstall to remove it.
If you noticed the HTML mail error after running a Windows update, rolling back the update is the best way to resolve the error. Here is a detailed guide showing the best ways to remove a Windows Update.
Sign-in with your credentials to read your received mails.
Accessing your email via your web browser isn’t a traditional fix but it’s one of the quickest ways to get around the HTML raw data error in Windows.
Of course, instead of using the Outlook web app, you may go directly to the website of your email provider like Gmail, ProtonMail, etc.
5. Reinstall Windows Mail
Press the Windows key + I to open the Settings app.
Click on Apps and select Installed apps.
Locate Windows Mail & Calendar in the list of applications, click on the tab, and select Uninstall.
Wait for the app to be completely removed and close the Settings app.
Press the Windows key + S, type in Microsoft Store, and hit Enter.
Type in Mail and Calendar, from the search results, click Get in Store app and select Install.
Once the app is installed, sign into Windows Mail using your correct credentials. Reinstalling the Windows Mail app should revert the app to its default configurations.
Troubleshooting the HTML error in Windows Mail is pretty difficult. Usually, most users opt to access their email via their web browsers when they can’t resolve the error.
Our readers also encountered the email error code 0x80040b0b. If you’re one of them, read the highlighted guide for instructions.
An IP block isn’t a prevalent error among Windows users, but getting your IP address blocked from accessing a website is possible. There are several reasons behind this block. Whatever the reason, we’ll provide you with the seven best ways to help you resolve the error.
Why has my IP been temporarily blocked?
The error Your IP has been temporarily blocked is pretty rare, but when triggered, it can prevent you from accessing a particular website or service. Here are some of the common reasons for this problem:
Multiple Logins: Most websites with login pages have a limited number of login attempts you can make. If you’ve exceeded the limit, your IP might be temporarily blocked. This is to prevent hackers from brute-forcing the login page.
Malicious Activity: You might trigger the error Your IP address has been blockeddue to malicious activity if a website detects suspicious activities from your IP address.
Country Ban: Online services like games, payment providers, and streaming websites often have location restrictions to prevent users from certain countries from accessing their websites.
Port Scanning: Port scanning involves scanning through a server or a website to discover open ports. Hackers often utilize this method to carry out attacks, so if you attempted a port scan against a website, your IP might be temporarily blocked.
Now we know the reason behind this error, so let’s move on to the solutions to fix it.
What can I do if my IP has been temporarily blocked?
Before moving to more complicated solutions, let’s go through some simple quick methods that might clear the problem right away:
Reset your router and your PC. Sometimes, this simple tweak solves everything.
Make sure you installed all the latest OS updates.
Try to use another browser and check if the website or service is still blocking you.
Check the full message for the blockage. If you are blocked out from login attempts, that action might have a waiting period after which you can try again, so you need to wait.
Try to connect to a different hotspot if you’re blocked by the website using a Wi-Fi network.
If these quick workarounds didn’t fix the problem, review the solutions below.
1. Check if your IP address has been blacklisted
Start your preferred browser, visit the WhatIsMyIPAddress website, and click the Check my IP address button.
After clicking the button, the website will provide you with a detailed report of data gathered on your IP address. It will show in the report if your IP has been banned.
In addition, most websites employ the services of publicly available IP address blacklists. These lists are compiled based on data from other websites and contain IP addresses of known spammers and hackers.
2. Change your DNS Server
Press the Windows key + R, type in ncpa.cpl, and hit Enter.
Then, right-click on your Internet connection, and select Properties.
In the popup window, double-click on the Internet Protocol Version 4 (TCP/IPv4) tab.
Now, select the option Use the following DNS server addresses, and Enter 1.1.1.1 as your Preferred DNS server, and 1.0.0.1 as your Alternate DNS server.
Click OK and exit the window, you should be able to bypass the IP block after resetting your DNS address.
Sometimes, an error with the DNS server can block your IP. Changing the DNS often is what to do when your IP address is blocked.
Press the Windows key + S, type in Windows Security, and hit Enter.
Now, select Virus & threat protection, then select Scan options.
Then, choose Full scan and click Scan now.
Once the scan is completed, Windows Defender will provide you with a brief overview of your PC’s security. You can run a full system scan using third-party antivirus software to check your system for malware.
As a last resort, you may try contacting the webmaster of the website or service that blocked you and find out why your IP was banned.
Sometimes, webmasters can block a whole class of IPs willingly or by mistake, and just because your IP is in that class, you get blocked as well.
With the steps above, you should be able to resolve a temporarily blocked IP address. If you’ve got other solutions for getting around an IP block, you can let us know in the comments below.
Windows update problems are common in any Windows version, but that doesn’t make them less annoying. One of these errors is the 0x80070070, which informs users that they do not have sufficient space to complete the update.
If you have enough space but are still slapped with this error, we have come up with this article to help you bypass this Windows update error. Keep reading to find out how you can resolve it.
What does 0x80070070 failed to install mean?
The 0x80070070 error code is associated with a problem with your system’s installation. This problem can come from any number of causes, including a corrupt file, an incorrectly installed driver or software package, or even a hardware problem with your computer.
Users who encountered this error reported that their drive did not have sufficient space as they were trying to install Windows. If you have tried installing Windows 11 before, you already know the stringent system requirements.
Space is one of these; you must have or exceed at least 64 GB. That said, even users who had met these requirements were part of the group that encountered the 0x80070070 error. Some of the similar issues that stood out in these scenarios include:
Users were trying to install Windows from a DVD or USB drive
The error was common when trying to upgrade from Windows 10 to Windows 11
Updating Windows would go through but fail in the middle with an error message that something went wrong
The major causes for this issue include:
Insufficient space – Other programs may be taking space in your PC, leaving no room for an update.
Corrupt system partition – The system partition is a part of your hard drive where all your programs are stored. If this partition becomes corrupted, it causes problems for the operating system.
The system partition is unavailable – The Windows installation cannot complete because of an error in the volume boot record. It can also be caused by a corrupted MBR (Master Boot Record).
Check for any system file errors by running the SFC scan.
Try restarting your PC.
1. Run the Windows update troubleshooter
Hit the Windows key and click on Settings.
Click on System and select Troubleshoot.
Navigate to Other troubleshooters.
Click the Run option for the Windows Update troubleshooter.
2. Perform a Disk Cleanup
Press the Windows key, type cleanmgr in the search bar, then click Open.
The Disk Cleanup dialog box will show up. Select the drive that you wish to clean up, and click OK.
Navigate to the Disk Cleanup tab in the Disk Cleanup dialog box, check the boxes for all file types you wish to delete, and click OK.
Click Delete files and click OK in the confirmation box.
3. Remove partition quotas
Right-click on the Start Menu and select Disk Management.
Locate your Windows drive, right-click on it, and select Properties.
Navigate to the Quota tab in the Properties dialog box that pops up, uncheck the Enable quota management box, then click on Apply and OK.
Restart your PC.
If you’re using a quota partition, it’s possible that Windows is not able to update all the partitions on your system. This may occur if you have insufficient hard drive space. When the size of your quota partition reaches the limit, Windows does not have enough space to update the files on that partition.
Click on Upgrade this PC now and wait for your PC’s system requirements to be verified.
Stay put; your PC will restart multiple times until the installation is complete.
Hopefully, one of these methods has helped you bypass the Windows update error 0x80070070, and you can now update with no issues. Other update errors include 0x800f0831 and 0x80240023, so if you come across either, check out our detailed guides for more information.
Share any other method you tried not mentioned here but worked for you in the comment section below.
Xbox Free Play Days is back for another weekend of games for Xbox Live Gold and Xbox Game Pass Ultimate subscribers. These games will be available for those subscribers to play from Thursday, March 2 through Sunday, March 5. Check out this week’s lineup below.
Generations of gamers have battled the demonic hordes of Diablo, and now it’s your turn to take part in the action-RPG legacy. This Eternal Collection features Diablo III, the Reaper of Souls expansion set and the Rise of the Necromancer pack—all together in one definitive volume. Prepare yourself, mortal hero. The hellgates are opening.
For the first time in a videogame, become the driver and the railway company manager with Train Life: A Railway Simulator! Drive your passengers or goods across 10 countries and learn to control your locomotive expertly, while following the railway signs and adapting to the weather conditions. Create your own company; buy and maintain your trains; hire conductors and give them new contracts; explore new routes; and optimize your Passenger and Freight activities!
Human: Fall Flat is a hilarious, light-hearted platformer set in floating dreamscapes that can be played solo or with up to 8 players online. Each dream level provides a new environment to navigate, from mansions, castles and Aztec adventures, to snowy mountains, eerie nightscapes, and industrial locations. Free new levels keep its vibrant community rewarded.
Wrap up
What doyou think of this week’s Xbox Free Play Days games? Is there anything here that’s got you excited for the weekend? Tell us about it down in the comments. To learn more visit the Xbox Free Play Days FAQ page.
Activision stocks have risen 1.8 percent in premarketing trading based on a Reuters report that the EU will not force Microsoft to sell assets to gain its merger approval. Instead, Activision will likely use licensing deals to gain EU approval.
Microsoft recently met with UK antitrust regulators to discuss options for getting a deal approved. The European Commission has added a short two-week extension to review the deal, moving the deadline to April 25th. Lawyers for both sides met with EU regulators last month to discuss if the deal raised too many anti-competitive concerns. It appears that last-minute licensing agreements with Nintendo and Nvidia may help get Microsoft the push it needs. Even with this bit of good news Microsoft still faces FTC hurdles in the US.
Windows XP has been around for a long time. It has been the most widely adopted operating system from Microsoft. Since its release in 2001, it has been updated several times. While it had its share of problems like any other OS, people still use it.
Some of the reasons include its simplicity, power, and flexibility. On the downside, Windows XP is no longer supported by Microsoft. The company stopped providing support because it was no longer able to provide security updates for it. Luckily, you can use optimization software to boost its performance.
What are the advantages of Windows XP?
Some of the reasons why Windows XP is still a fan-favorite include:
Better hardware support – With Windows XP, you can run many hardware devices designed for older versions of Windows, such as Windows 98. This includes devices such as scanners and printers that use parallel and serial ports, and are not supported in newer versions of Windows but are still widely used by older peripherals.
User-friendly interface – Windows XP has been around for two decades, meaning many people have used it during their careers. They’re familiar with its layout and functionality, making it easier for them to use without learning anything new.
Stability – Stable software is software that works consistently and reliably over time. The fact that Windows XP has been around since 2001 means that it has had more time to be tested and debugged than newer versions of Windows.
Efficiency – The system requirements for Windows XP are less than those for previous versions of the OS. This makes using Windows XP easier on older computers, allowing users to keep their old ones longer.
Graphics – One of the biggest advantages of Windows XP is that it can run on computers with less memory than previous versions of Windows. This means that even people with older PCs can use it.
What are the main features of Windows XP?
With all the changes made to Windows in recent years, one would wonder, What is the use of Microsoft XP? Windows XP is still being used by millions of people worldwide. It remains popular due to its wide adoption.
Organizations worldwide are still using it because they do not want to upgrade their systems for security reasons or compatibility issues caused by newer versions of Windows.
1. Support for multiple users
Windows XP includes support for multiple users. Each user has a desktop or personal area to work in. This allows users to have their own settings, programs, and files.
You can also allow guest accounts that do not require passwords so that people can use your computer without authorization.
2. Start menu
This menu opens up when you click on the Windows logo in the bottom left corner of your desktop. When it’s open, you will see all your installed programs listed in alphabetical order so that it’s easy for you to find what you need quickly.
Users can also pin frequently used applications. The Start menu is also customizable, where users have the option to remove or add links.
3. Taskbar
This bar appears at the bottom of your screen and allows you to see which programs are running, what they’re doing, and how much memory they use. You can also open or close programs from here, as well as minimize, maximize, or restore them.
Another exciting feature is the Taskbar grouping which allows users to click one button and reveal an array of options for a particular program.
4. Media features
Windows XP has several media-related features, including Windows Media Player and Windows Movie Maker. The digital media player allows users to play audio files, view video files, and stream online video content.
It also has a built-in library so users can organize their media collection easily. Windows Movie Maker lets users edit videos and create simple movies with ease. It also includes tools for adding music tracks and captions.
Parental controls allow you to restrict access to games, websites, and content based on ratings that you set up yourself. You can set time limits for when your kids can use their computer and what they can do with it while online or playing games.
You can even lock down certain programs so they can’t be opened without your permission or control what sites they visit while surfing the web.
Why was Windows XP so good?
Here are a few reasons users liked Windows XP:
Fast performance: Windows XP was considered one of the fastest operating systems of the time, and it managed to hold the title for years.
Stability: The OS was fairly stable compared to the other iterations released previously by Microsoft, and provided support to a wide range of apps.
User-friendly interface: Windows XP had an extremely user-friendly interface, and most actions could be performed seamlessly and within seconds.
Is Windows XP still good to use?
You can still run Windows XP. But the OS lost support from Microsoft in 2014, so you wouldn’t be getting any security or feature updates, which puts the PC at a greater risk of being attacked by malware or virus.
Also, several applications might not run on Windows XP due to compatibility issues. Though if that doesn’t seem like a hassle and the OS is already installed, you can keep using Windows XP, at least for now.
What are the limitations of Windows XP?
It is not free – Windows XP costs money, so it may not be accessible to everyone. Compared to other iterations, users have been able to upgrade free of charge.
Difficult upgrades – Windows XP is very difficult to upgrade from earlier versions of Windows. If you want to switch from, say Windows 98 to Windows XP, you’ll have to do a clean install that deletes all files on your hard drive.
Complex installation process – It can be difficult to set up a new PC with Windows XP. The installation process can take several hours and requires a CD or DVD drive to install from.
Security risks – Windows XP has known security vulnerabilities that can be exploited by hackers to gain access to your computer system or data files stored on it. Luckily, you can secure your system with Windows XP antivirus software.
Limited RAM – The system memory only supports up to 4GB. You can either upgrade to Windows XP Professional at a cost or a newer Windows version.
Having explored all that Windows XP has to offer, it brings us to the age-old question: Which is better, Windows XP or Windows 10? The two operating systems are very different from each other, but they do share some similarities.
Ultimately, there are a lot of trade-offs when it comes to upgrading to Windows 10. Some people will consider the upgrade, especially if they use a compatible computer, but others may not even bother.
It all boils down to the activities you use your PC for. If you are doing basic stuff, then by all means, continue using Windows XP. This just means that you’ll have to take measures such as hiding your IP in Windows XP to minimize the security risks.
However, if you are looking to explore more modern features and overall enhanced performance, Windows 10 is. We also have a great guide on Windows XP Black Edition, so you might want to check it out before leaving.
We’d love to hear your stance on Windows XP and whether you’d consider using it in the comments section below.
The recommended files tab is one of the excellent features of Office 365. It attempts to suggest documents that you’re involved with. However, the feature takes up a lot of home space, and you’d eventually want to remove the recommended documents.
If you’d like to know how to remove such files, read through our guide; we provide the steps needed to remove recommended documents in Office 365.
What are recommended documents in Office 365?
Recommend documents are files automatically suggested to Office 365 users by Microsoft to give the user quick access to the documents.
Usually, recommended documents in Office 365 are generated through interactions with any of Microsoft’s cloud services like OneDrive and SharePoint. Also, Microsoft itemizes files stored on its cloud services and suggests them to Office 365 users as recommended documents.
Before a file can be suggested as a recommended document, a machine learning model scans documents in the organization’s store to suggest documents that are relevant to you.
Further, each file displayed on the recommended documents tab in Office 365 is a document that Microsoft’s AI assumes you’ll need.
How can I remove Office 365 recommended documents?
1. Disable recent documents
Open Microsoft Word.
Click on the File menu and select Options.
Now, choose the Advanced tab.
Scroll down until you find the Display section and change the Recent Documents to 0.
Now, when you open Word, you will not see any recommended documents.
We have shown you how to do this in Word, but the method works on all Office 365 apps.
In the pop-up window, hover over the file you intend to remove.
Then click on the More Options button and select Remove from the list.
Once done, Windows will automatically replace the file with the next best-recommended document.
Alternatively, instead of removing just a single file from the recommended documents section, you can collapse the entire Recommended section in Office 365.
Then, click on the arrow in the left pane of the Recommended for You section.
After clicking the arrow, you’ll completely minimize the Recommended Documents tab. If you click it again, it’ll expand the tab and display recommended documents.
Removing a file from the recommended documents list doesn’t delete the file from your computer. It simply removes it from the recommended documents tab.
Removing Office 365 documents doesn’t require any technical know-how or complex troubleshooting. With a few easy steps, you can remove any recommended documents in Office 365.
Removing a file from the recommended documents list doesn’t delete the file from your computer. It simply removes it from the recommended documents tab.
The major downside to the Amazon Fire Stick is its sheer number of error messages users have complained about. One of the prominent error messages is the Unknown error has occurred on Fire Stick, which makes it impossible to perform some tasks on the device.
Amazon Fire Stick is a media streaming device that allows users to stream media content such as videos and music and install apps. It runs on the Android operating system, which makes it accessible on TV.
Furthermore, many factors, such as internet connection issues and outdated software, may cause an unexpected error message on the Fire Stick. The error message indicates a problem with Fire Stick completing the task or process.
However, we’ll take you through the causes and how to fix Fire Stick’s unexpected error has occurred.
Why does Firestick keep saying an unknown error has occurred?
Network connection issues: Fire Stick may run into errors if your network connection is poor or unstable. The device requires a stable internet connection to load videos and perform other tasks like downloading. Likewise, users complain about encountering issues with a cable network connection. So, the error may occur if you connect to a LAN network. It can prompt download issues such as an unknown downloader error – check your URL and connection. In seven easy ways, you can check our article about how to fix Fire Stick if it won’t connect to Wi-Fi. And if you’re looking for quick ways to fix Firestick, which may say the network is disconnected when the Internet is working, rest assured that we have a detailed guide in this regard as well.
Startup errors: Fire Stick may encounter difficulties if there’s a startup error. It means the device can’t function due to boot errors.
Outdated Firestick software: An outdated Fire Stick software can cause problems with its work. In this case, the device lacks updates and patches to help fix bug issues in the previous version.
However, there are some other causes, but we’ve highlighted the major ones above. For further understanding of the causes, users can read our guide on fixing common Amazon Fire Stick errors.
How do I fix an unknown error that has occurred on Fire Stick?
1. Check your network connection
Unplug the router from the power source, and leave it for some minutes.
Plug it back in and turn it on.
An easy way to fix your network connection issues is by performing a power cycle on your router. It will help you connect faster and more smoothly.
Also, we recommend you switch to a wireless connection if you’re having issues with a cable connection.
Restarting the Fire Stick can fix any startup issues that may prompt the unknown error message and other errors.
Hence, press the Select and Play button on the remote simultaneously for 10-13 seconds to restart the Fire Stick. After the restart, check and see if the error persists.
While trying to sign into Microsoft 365 apps, you might run into the errors such as the error code 135011. The error indicates that your organization has disabled the device, and you should contact your administrator.
If you’re currently battling error 135011 on your PC, this article will provide the steps you need to resolve the error.
What causes the error code 135011?
If you’re currently experiencing the error, your organization has disabled this device error code 135011 on your PC, the most likely cause is that your organization’s systems administrator has disabled your device in the Azure Active Directory.
Aside from the fact that your administrator might have disabled your device from the admin portal, there are also secondary causes of the error code 135011; they include:
Poor Internet Connection: Accessing Microsoft 365 applications require a stable internet connection. If your system has network congestion, you might trigger the error code 135011.
Logging in from Third-Party Devices: Organizations have standard security measures that prevent their network infrastructure from being breached. One such measure might be to automatically block unregistered devices that attempt to log in to the network.
Firewall Restrictions: In rare cases, the error your organization has disabled this device error code 135011 might be triggered due to firewall restrictions blocking a specific port. You can check if a firewall is blocking a program to see if Office 365 is one of the allowed applications.
Our readers have identified the Microsoft Teams 135011 error and Outlook error code 135011, which clearly manifests o any Microsoft 365 apps linked to an organization.
Now that we know what error 135011 is, let’s apply the solutions below to remedy the situation.
How can I fix the error code 135011?
Before we proceed with advanced troubleshooting techniques, here are a few quick fixes you can apply:
Close and restart the Office 365 app.
Access Office 365 using your browser.
Fix network congestion and make sure you have a reliable internet connection. Checking your PC’s internet speed helps you know if the error is network related.
Contact your Admin. Usually, if the error is from a restriction by the administrator, you should be able to rid your PC of the error in a very short while with his/her help.
If those steps couldn’t resolve the error, here are more advanced troubleshooting solutions:
1. Enable the device in the Azure Portal
Open your preferred browser and navigate to Microsoft Azure.
Click on Azure Active Directory and select Devices.
Take a look at the list of disabled devices in the Devices tab by searching for the username or device name.
Select the device and click on Enable.
Enabling the Device in the Azure portal is one of the quickest and most efficient ways to resolve the error code 135011.
However, you’d require enough administrative access to make such changes on the Azure portal. Ensure that the device you’re accessing the Azure portal has sufficient privileges. Here is a guide showing you how to make yourself an Admin in Windows.
2. Remove all your Microsoft Credentials
Press the Windows key + S, type in Control Panel, and hit Enter.
Click on the User Accounts option.
On the right pane, click on Credential Manager, and select Windows Credentials.
Look for all credentials related to Office 365, click on the option, and select Remove.
Close the Control Panel window and restart your PC.
Press the Windows key + I to open the Settings app.
Click on Accounts and click on the Access Work or School tab.
On the left pane, unlink your work or school account.
Close the Settings app and restart your PC.
Follow the same procedure to relink your work or school account.
Because the error 135011 was triggered while attempting to log in to Office 365, unlinking and re-linking your accounts sometimes resolves the error code 135011.
If you’ve got alternative solutions that have helped you resolve your organization has disabled this device error code 135011, you can let us know in the comments section.
Some Call of Duty fanatics has encountered a DirectX unrecoverable error when they launch their games in Windows.
When that occurs, the game doesn’t start and returns this message: DirectX encountered an unrecoverable error, check the readme for possible solutions.
DirectX is a series of APIs (Application Programming Interfaces) essential for multimedia software. The latest DirectX versions ensure better graphics quality for Windows games.
The issue is more frequent for COD titles but might also occur when starting other Windows games. So let’s quickly go through some common scenarios.
Why am I getting DirectX encountered an unrecoverable error message?
You could encounter DirectX encountered an unrecoverable error message for multiple reasons. Some of the common causes are listed below.
Faulty hardware could result in this error.
There are some bugs or glitches present in the game.
The system drivers aren’t up to date.
You aren’t running the latest available or compatible version of DirectX.
Your PC isn’t installed with the latest update.
Your PC doesn’t meet the software requirements for COD Warzone.
There are some problems with your internet connection.
Where can the unrecoverable error be found, and what does it look like?
DEV error 6066 DirectX encountered an unrecoverable error (others various can include DEV error 6068, DEV error 6071, or DEV error 5761)
DirectX encountered an unrecoverable error Dxgi_error_device_removed
DirectX encountered an unrecoverable error Warzone
Call of Duty WW2 DirectX encountered an unrecoverable error
DirectX encountered an unrecoverable error in Modern Warfare
DirectX encountered an unrecoverable error Plutonium
Black Ops 2 DirectX encountered an unrecoverable error
DirectX encountered an unrecoverable error Fivem
DirectX encountered an unrecoverable error Vanguard
Recursive error DirectX encountered an unrecoverable error
DirectX encountered an unrecoverable error in Windows 7
If you have a game returning the DirectX unrecoverable error, this is how you can resolve the issue to get it up and running.
How can I fix DirectX unrecoverable error in Windows 10?
1. Reinstall the graphics card driver
Press Win + R to open Run.
Type dxdiag to open the DirectX Diagnostic Tool.
Note down the graphics card and manufacturer details included in the display tab.
Note down the 32 or 64-bit OS.
Open the video card manufacturer’s website, and click on the drivers or download center hyperlink. Then, enter your graphics card in the search box.
Select to download the most updated video card driver that’s compatible with your Windows platform.
Right-click on the Start menu and select Device Manager.
Expand the Display adapters section and right-click your listed graphics card to open its context menu.
Select the Uninstall device option on the context menu.
Check the Delete the driver settings for this device checkbox, and then press the Uninstall button.
Restart the Windows OS.
Click Cancel if a prompt window opens for detecting the graphics card driver.
Then install the downloaded graphics card driver by selecting its installer in File Explorer. You might also need to extract the zip folder first.
1.1 Update drivers automatically
Downloading drivers manually is a process that carries the risk of getting the wrong driver installed, which may lead to severe malfunctions in your system.
The safer and easier way to update drivers on a Windows computer is by using an automatic tool such as Fortect Driver Updater. This tool automatically identifies each device on your computer and matches it with the latest driver versions from an extensive online database.
Drivers can then be updated in batches or one at a time without requiring the user to make complex decisions. You can also schedule regular scans and automatic updates, so you won’t have to check on your drivers manually.
Aside from that, you might have to upgrade your Windows OS to get the latest DirectX. You can also ensure you have the latest DirectX version for a platform by updating Windows.
The Windows updates will usually automatically update DirectX if there’s a more recent version, so make sure your Windows Update service isn’t switched off.
Right-click on the desktop and select Display Settings.
Click Custom scaling to enter a custom DPI scale value.
Enter 100 in the text box if that isn’t your current DPI scale value, and click the Apply button.
Then click Sign out to apply the custom scale factor.
In Windows 8, drag the DPI scaling bar’s slider to the left.
4. Edit the Registry
Press Win + R to open the Run dialogue.
Type Regedit and press OK.
Navigate to this registry location: ComputerHKEY_CLASSES_ROOTPROTOCOLSFiltertext/xml
Click File.
Select Export, enter a file title and click Save to back up the selected registry branch.
Right-click text/XML, select the Delete option, and press the Yes button to confirm.
Close the Registry Editor.
How do I fix the DirectX encountered an unrecoverable error on Windows 11?
While the above solutions are also applicable for a Windows 11 PC, we have a dedicated guide for Windows 11 users to help them resolve the DirectX errors on their PCs.
You will keep receiving DirectX errors because of the below-mentioned reasons.
Unexpected bugs in the game.
Corrupt game files.
Outdated system drivers.
Outdated DirectX.
Your PC doesn’t meet the minimum requirements for the game.
Third-party apps are conflicting.
Your Firewall is blocking the game.
Those are a few potential fixes that might resolve the DirectX unrecoverable error. We also have an article that will provide different resolutions for DirectX issues.
Battlefield 3 is one of the popular FPS (First Person Shooter) games published by EA and is available for the Windows, Xbox, and PlayStation ecosystems. However, many who downloaded it reported that Battlefield 3 is not launching on Windows 10.
While stuttering in games has long been a problem, Battlefield 3 not launching from Steam or other gaming clients puts users in a pickle. So, let’s find out about the problem and walk you through the effective fixes.
Why Battlefield 3 won’t start on Windows 10?
Here are a few reasons you might be experiencing the problem:
Minimum system requirement not met: The first thing you must check when the game won’t launch or Battlefield 3 menu is not showing is whether the computer matches the system requirements for Battlefields 3. Though very minimal, these can still be a problem for some.
Outdated graphics driver: An outdated driver, especially one for the graphics adapter, can lead to issues while running games.
Corrupt game files: When unable to launch a game, there’s a high likelihood that a part of the game files is corrupt or missing.
What can I do if Battlefield 3 is not launching on Windows 10?
Before we start with the slightly complex changes, here are a few quick tricks that might work:
Change the auto-generated username to something simpler.
Switch to another browser, say Opera GX, Chrome, Edge, or Firefox.
Launch Battlefield 3 from Origin
Reset the password when logging into Battlelog. This is a recent bug, and until a patch is released, try changing the password every time you log in.
Make sure you have installed Origin on the boot drive, usually the C: drive.
In case you are facing issues joining a server, check for slow Internet speed.
If none work, move to the fixes listed next.
1. Set the game and client to run as administrator
Locate the Battlefield 3 launcher, right-click on it, and select Properties.
Head to the Compatibility tab, tick the checkbox for Run this program as an administrator, and then click OK to save the changes.
Make similar changes to the Origin launcher as well.
Once done, verify whether Battlefield 3 is still not launching on Windows 10. If that’s the case, head to the next solution.
2. Delete files
Press Windows + E to open File Explorer, paste the following path in the address bar, and hit Enter:C:\ProgramData\Electronic Arts\EA Services\License
Now, press Ctrl + A to select all the files and then hit the Delete key.
You should now be able to launch Battlefield 3 on Windows 10 without it being stuck.
3. Run in compatibility mode
Right-click on the game launcher and select Properties.
Go to the Compatibility tab, tick the checkbox for Run this program in compatibility mode for, select a previous iteration of Windows from the dropdown menu, and click OK to save the changes.
A quick fix when Battlefield 3 is not launching on Windows 10 is to run the game in compatibility mode. Remember, you might have to try a few iterations before things start working.
Press Windows + R to open Run, type devmgmt.msc in the text field, and hit Enter.
Expand Display adapters, right-click on the graphics adapter, and select Update driver.
Now, select Search automatically for drivers and let Windows find and install the best one.
Drivers play a vital role on the PC, and the graphics driver is all the more important when it comes to gaming. So, make sure you update the graphics driver. In case the OS can’t find one, go ahead and manually install the driver.
Clearing disk space, updating drivers, and repairing corrupted files can help you fix issues like BattleField 1 error code 1; read this guide to learn more.
4.1 Update Drivers Automatically
Downloading drivers manually is a process that carries the risk of getting the wrong driver installed, which may lead to serious malfunctions in your PC. Thus, we recommend an alternative tool that will do it for you.
The safer and easier way to update drivers on a Windows computer is by using an automatic tool such as Outbyte Driver Updater. The took is an internationally recognized software, and it’s safe (tested on Virus Total).
Disclaimer: Some features of this tool are not free.
5. Change Battlelog settings
Sign in to Battlelog, click on the profile icon, and choose Settings.
Under the General tab, disable the Use plugin-free game launching option, and save the changes.
If BF3 is not launching from Battlelog, these changes should help get things running.
Tip
If you’re having FPS issues, lags, and slowdowns while playing, we recommend you download GameFire 6 Pro (free). It will focus your computer resources and processes on the game without overclocking your hardware.
6. Repair game files
6.1 Origin
Launch Origin and go to the My Game Library section.
Right-click on Battlefield 3, and select Repair from the context menu.
Wait for the repair process to complete, and then try playing the game.
6.2 Steam
Launch Steam, go to Library, right-click on Battlefield 3, and select Properties.
Head to the Local Files tab, and click on Verify the integrity of game files.
Wait for the process to complete.
Oftentimes, the game files undergo some corruption, or the critical ones go missing, and, as a result, Battlefield 3 is not launching on Windows 10. Both Steam and Origin offer built-in file repair tools, so you should be able to get rid of the problem in no time.
7. Run Battlefield 3 in Windowed mode
Right-click on the Battlefield 3 shortcut and select Properties.
In the Target text field, paste the following while replacing both xxxx with the display resolution on your PC:-noborder -width xxxx -height xxxx
Click Apply and OK to save the changes.
That’s it! If the previous solutions didn’t work, this should help get things up and running if Battlefield 3 was not launching on Windows 10.
Since the launch of AI-powered tools, people have begun to look for the best ChatGPT browser extension for their needs.
If you’ve been searching for the best ChatGPT browser, you’re in the right place, as we’ve gathered some of the ChatGPT browser extensions that have earned some reputation among users.
What are the best ChatGPT browser extensions to use?
ChatGPT for Google, as its name implies, is a browser extension that displays ChatGPT’s responses alongside Google search results.
Unlike the normal AI ChatGPT, which is restricted to a single browser tab that must be left open at all times, ChatGPT for Google solves this problem by enabling users to use the bot across multiple tabs.
To set up ChatGPT for Google, you only need to log in to OpenAI using the extension, and it’ll be ready for use.
Below are some of the features attributed to this browser extension:
Displays ChatGPT responses with Google search results
Similar to the ChatGPT for Google extension, but better, is Merlin – OpenAI ChatGPT Powered Assistant which works across the entire browser on any webpage instead of just the search engine.
Merlin is also known for its rapid and instant response to any query. Once you enter a query like you would on ChatGPT, Merlin will give a reply within seconds. Hence, Merlin is up to the task if you need a quick reply to a work email or a quick HTML code.
Moreover, the Merlin browser extension can be enabled by pressing the CTRL (CMD on Mac) + M keyboard shortcut in the browser. Below are some of the features attributed to this browser extension:
Works across the entire browser
Quick response to work
Merlin ChatGPT browser extension can be opened through CMD
The WebChatGPT extension allows users to augment their ChatGPT prompts with relevant web results. After entering a prompt, the extension lets ChatGPT search the web for appropriate links.
Since ChatGPT does not have access to the most recent information available on the Internet beyond 2021 data, the answers for anything that occurred after that date are out of date. WebChatGPT helps to overcome this limitation.
Additionally, there are a variety of filters available, including time, region, and the number of results. You can even deactivate the extension using the toggle to get native ChatGPT functionality back.
Features include:
Access to the latest information on the Internet
Adds relevant web results
Availability of a variety of filters, and so forth
ChatGPT for Search Engines lets users view ChatGPT responses on popular search engines like Bing, Google, and DuckDuckGo.
As a Bing user, instead of using either of the two extensions above (ChatGPT for Google or WebChatGPT), you’ll prefer this one. It will enable you to get direct results from ChatGPT using multiple search engines for the query you entered in the search bar in a small window on the right.
Additionally, you may use a context menu item to highlight any text on a website and submit it immediately to ChatGPT as a question. Alternatively, you can access ChatGPT on any website using the extension pop-up menu.
Features include:
Get direct results from popular search engines
Directly search any highlighted text
Launch ChatGPT by ending a query with a question mark (?)
Unlike ChatGPT, which can only be used in a separate browser tab, or you’ll have to navigate to the AI address of anything you want before you can interact with it, ChatGPT Everywhere is unique.
With this extension, you can access the AI bot (almost) everywhere, as its name implies, on all the websites and even during Google Search.
However, unlike ChatGPT’s user interface, previous inquiries and responses are not saved while using it in the extension window; instead, asking a new question will erase the previous one.
Features include:
Access to AI bot on all websites and during Google Search
With the YouTube Summary, you no longer have to sit through incredibly long YouTube films that can bore you. Once the extension is installed you’ll see a transcript box on the right, which contains the video’s transcript summary.
But here’s the catch: Simply clicking the View AI Summary button will launch ChatGPT in a new tab without requiring any further action on your part. Then, the extension will paste the entire video transcript, which will load automatically in the chatbot and provide a quick summary of the entire video.
The AI chatbot’s level of accuracy varies, but this extension generally works well for videos as long as the audio is clear. Due to its ability to save time, YouTube Summary may be one of the top ChatGPT Chrome extensions.
This extension brings ChatGPT’s wordsmithing skills to your browser. The primary goal of ChatGPT Writer is to compose emails and messages for all websites.
Simply log into OpenAI to use the extension, which operates independently. It’ll then request a context-filled input that specifies the subject of the email or message.
The extension responds almost instantly after receiving the prompt. Although the extension is designed for emails and texts, you may also use it to converse with ChatGPT.
Features include:
Composes emails and messages on all websites
The ChatGPT utilizes a context-filled input to compose emails and texts
An AI chatbot called tweetGPT can be used to tweet anything or to respond to other people’s questions intelligibly. But this extension eliminates the need to enter ChatGPT, copy the tweet text, and paste the reply.
Twitter users can use ChatGPT directly with the tweetGPT Chrome extension.
tweetGPT can be used in various moods, including humorous, sarcastic, optimistic, smart, and even hillbilly. You can have ChatGPT create the tweet for you by clicking on any of these.
Features include:
Chrome extension integrates ChatGPT right into Twitter
tweetGPT supports a variety of moods
Autogenerate tweets fit each of the available moods
Besides the YouTube extension for getting the transcript summary of videos, Summarize makes it easy to quickly generate summaries for lengthy content without having to leave the website or deal with tedious copy/paste work.
Moreover, you don’t have to go to the ChatGPT website to use the extension since it is already built into Chrome.
ChatGPT (Chat Generative Pre-trained Transformer) is a sophisticated machine learning model that can accurately perform natural language generation (NLG) tasks.
In simple terms, the website is a simple online artificial intelligence chatbot created by OpenAI in December 2022. It can provide users with fact-based answers to questions or requests.
The following are some of the potential features to look out for in ChatGPT:
Provides answers to questions
Completes a given text or a phrase
Writes fiction and non-fiction content from prompts
Generates computer code
Translates text from one language to another, and so forth
After the advent of ChatGPT alternatives, ChatGPT has widened its tentacles to do much more than respond to your queries on a web browser. Now, several ChatGPT browser extensions have surfaced to benefit users.
And that’s it on the best ChatGPT browser extension for use today. If you want to know what ChatGPT Professional is and why you need it, you can explore our article to learn about it. It comes in handy when ChatGPT has an internal server error.
Also, for users anxiously asking why is my ChatGPT not working, we have provided some fixes for this error in our guide. You can check it out.
If you have any questions or suggestions, please use the comments section below.
If you are reading this article, you are most likely experiencing Raspberry Pi boot issues. Your Raspberry Pi can stop booting or refuse to turn on due to several reasons. The device may be experiencing power issues, SD card issues. the operating system is not properly installed and other hardware issues.
In this article, we explore a few troubleshooting steps to help you fix the Raspberry Pi not booting issues. Follow the steps one by one to get your device up and running.
What to do if Raspberry Pi 3 or 4 is not booting?
1. Check for power issues
The newer version of Raspberry Pi, like the Pi 4, comes with a USB Type C connection, unlike the older version RPis that use smaller capacity power adapters.
Make sure the device is getting adequate power supply through the official 5.1V 3A PSU.
You can check the requirements section of your device’s instruction manual to find a PSU that can supply adequate power.
Avoid using your smartphone or tablet charger with the newer version of Raspberry Pi.
You may also want to check your power cable. Sometimes, the power cable may not work with a Pi.
Check if the OS is installed.
Needless to say, the Raspberry Pi won’t boot unless an operating system is installed on the SD card that is connected to the device.
You can install Ubuntu on the SD card to boot up your device.
You can also install Raspbian to get the Pi up and running and then choose Ubuntu or other distros of your choice to install.
2. Check for SD card issues
Most of the time (If not all), the Raspberry Pi booting issues are associated with a faulty or corrupt SD card. When the expensive cards are not necessarily better than the cheap SD cards as they tend to fail as well but are usually considered more reliable.
Eject the SD card and insert it into your Windows computer to see if the computer detects the card. Windows will prompt to scan and fix the card if it detects any issues with it. Click on Scan and fix the error option to repair the card.
If Windows fails to repair the card, use the dosfsck tool using a Ubuntu running computer to repair the card. If the issue persists, you may have to format the card and reinstall the OS to make it work. In case the formatting fails, you may need to replace the SD card.
Check the Raspberry Pi’s LED indicators.
If you are still not sure of the card being corrupt, your Raspberry Pi can help. The device comes with a built-in Red and Green LEDs. While the Red LED indicates the PWR status, which is the power status, the Green LED indicates ACT that is the activity status of your SD card.
If the SD card is not faulty, the green LED will flash without any issues. However, if the Green LED is not on, it means there is an issue with your SD card. The SD card again may require repair, reformatting, or replacement, depending on the situation.
The Raspberry Pi comes with an HDMI port that is used to connect the computer to a display like a TV or a monitor. If Red and Green indicators are working on the Pi, make sure the HDMI cable is working as well.
If the HDMI cable is working, try forcing the HDMI detection by editing the config file. Here’s how to do it.
Insert the SD card into your computer and navigate to the following location: /boot/ partition
Open the config.txt file.
Add the following line to the end of the file: hdmi_force_hotplug=1
Save the file and eject the SD card.
Reinsert the SD card and try booting your Raspberry Pi again to see if the issue is resolved.
4. Check if your Raspberry Pi is DoA
Disconnect all the cables and other accessories connected to the faulty Pi.
Connect the cable and insert the SD card into a different Raspberry Pi device that you own.
Try to power on the device.
Should the device work without any issues, your Raspberry Pi device can be faulty and may require replacement.
If the issue occurs on the secondary Pi as well, try replacing the HDMI or Power cable or the SD card to see if that resolves the issue.
If you are using a Raspberry Pi A, A+, and Zero device, you can connect it to your Windows computer and open the device to manage to see if Windows detects the connected device. You can connect the Pi to your Windows computer using a USB cable.
Unfortunately, there isn’t much you can do other than ask for a replacement if the Pi has hardware issues. So, follow the steps in the article to diagnose the Raspberry Pi not booting issue and hope it is the usual suspect (SD card) that is causing the issue.