The speculation arises from a recent survey Microsoft put to gamers querying whether they would find Game Pass with ads acceptable if the subscription fee were lower. An unsourced screenshot of the survey, in Spanish, can be seen via Reset Era.
Earlier this year, Microsoft rolled out a “Friends and Family” edition of Game Pass which allows for a single subscription to be shared among 5 people. It only launched in two countries, however (those being Ireland and Colombia), though it is expected to eventually expand to others.
If a lower-priced Game Pass ad tier does become a reality, it will likely be a popular move given the recent announcement that going forward into 2023 Microsoft’s first party games will retail for $70.
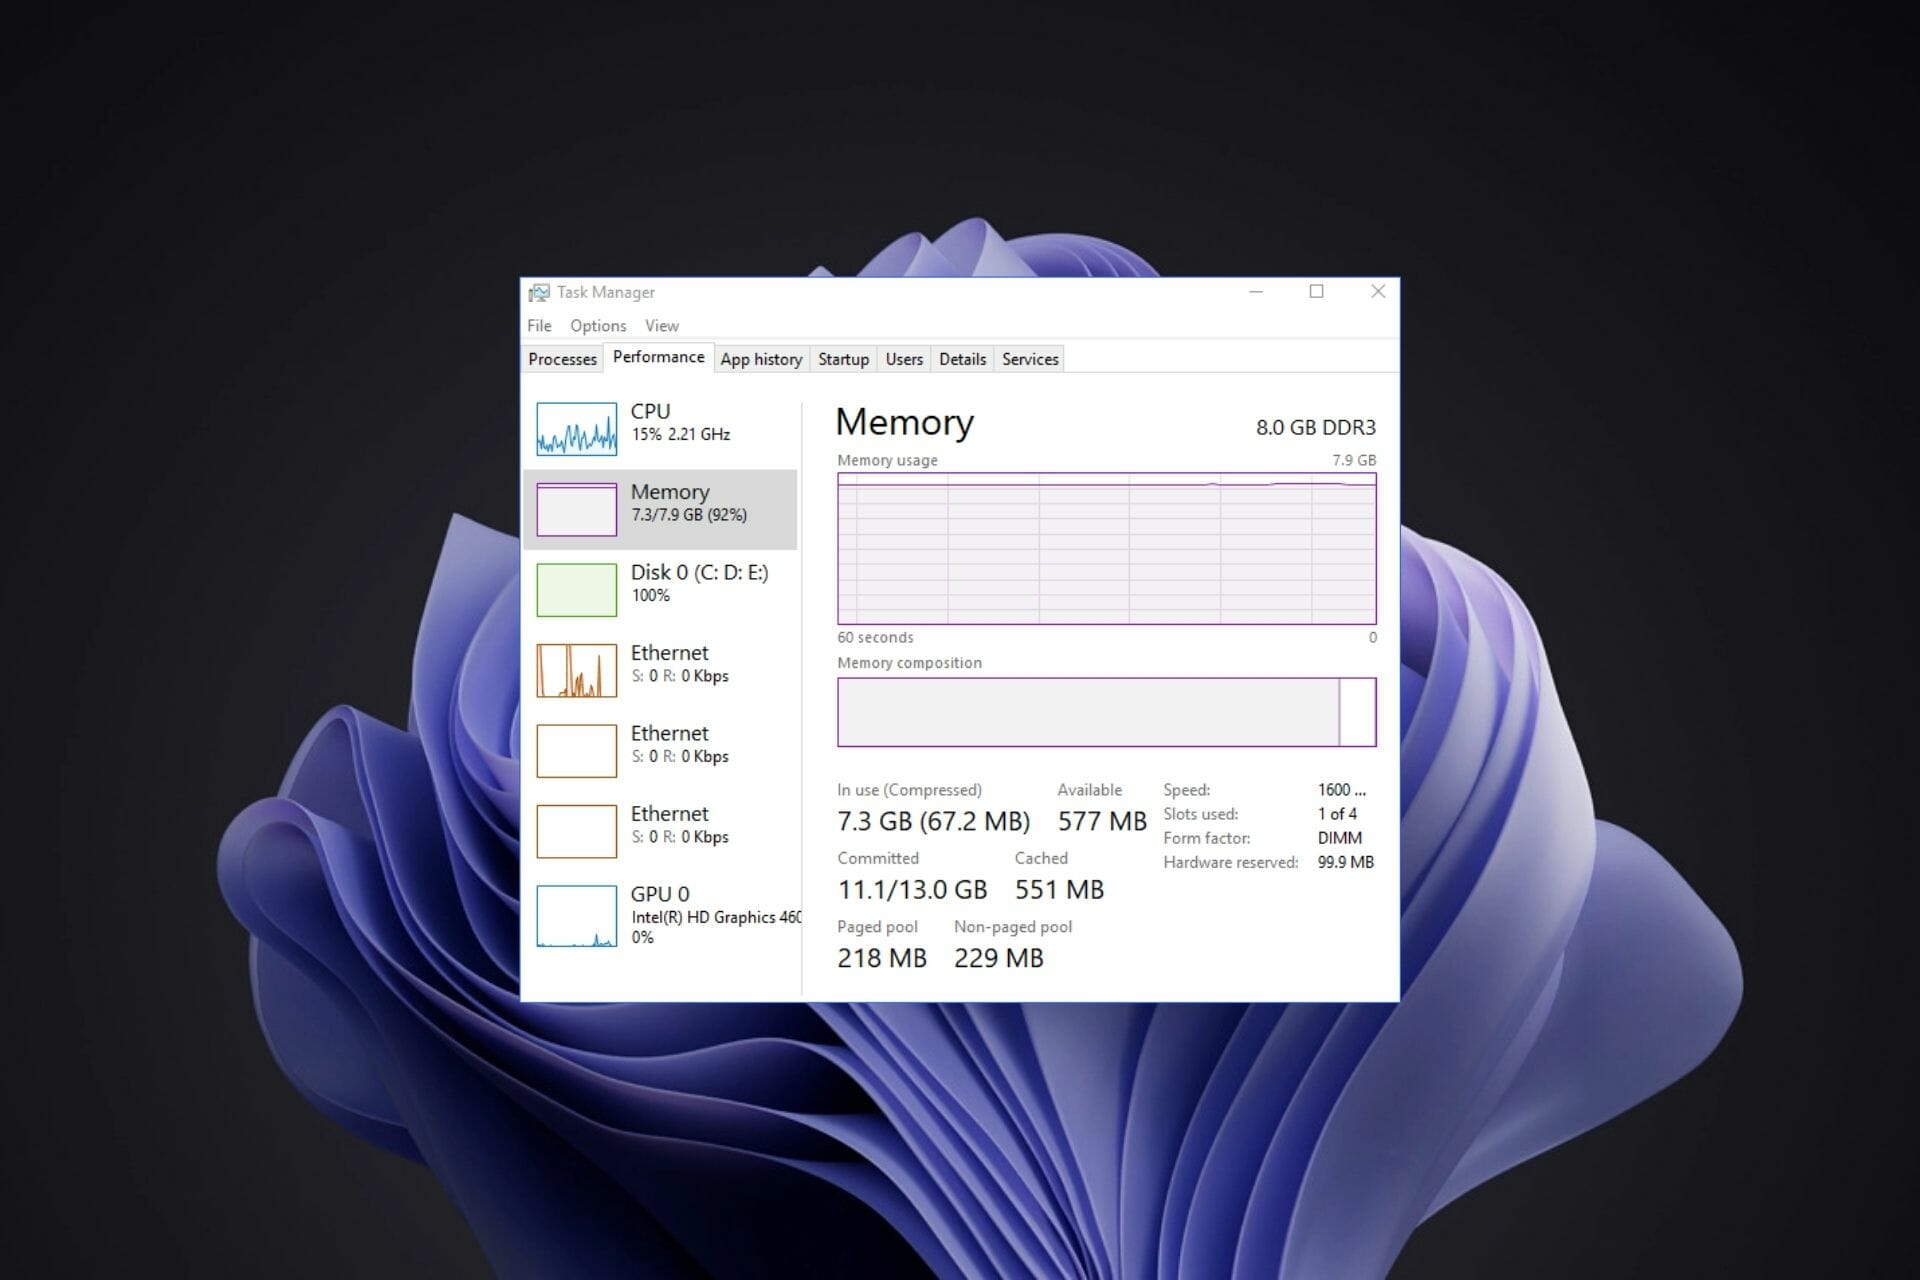
Noticed the MoUSO core worker process causing high disk usage, high RAM consumption, and CPU usage? If you are wondering whether it is a legit process, then you are at the right place.
Here, in this guide, we will discuss what the MoUSO core worker process is and how to reduce disk and CPU usage due to it. Let’s begin!
What is the MoUSO core worker process?
MoUSO is a software component of Microsoft’s Unified Update Platform. It manages the order in which updates are downloaded and installed on Windows.
This process appears in Task Manager whenever Windows check for updates. However, sometimes it might remain active for a long time without any reason, which causes high CPU and RAM consumption, resulting in slow and sluggish PC performance.
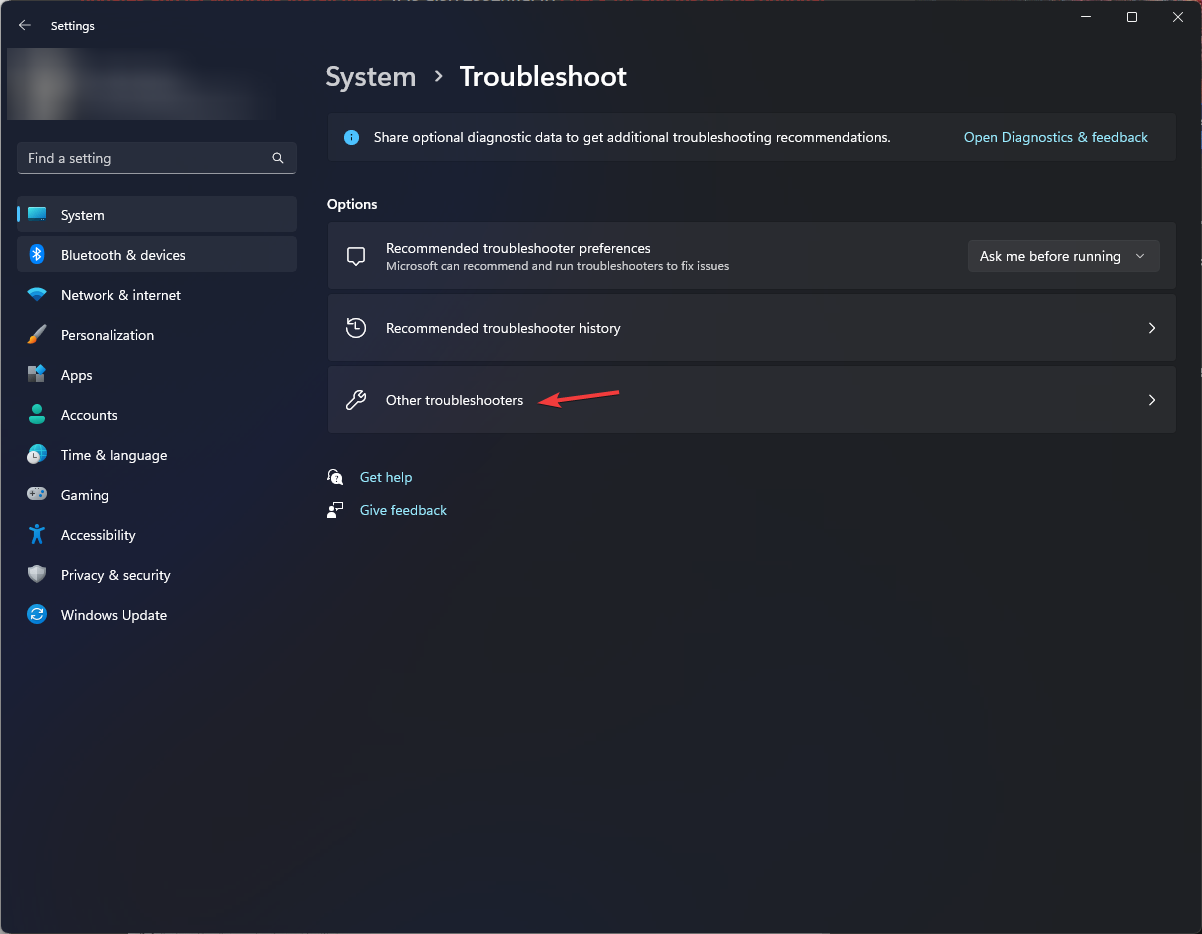
How to fix MoUSO core worker process high Disk/CPU Usage?
Before diving into advanced troubleshooting, you should consider performing the following steps:
Go to Windows Update, then click Advanced options.
Under Additional options, click Delivery Optimization.
Turn off the toggle next to Allow downloads for other PCs.
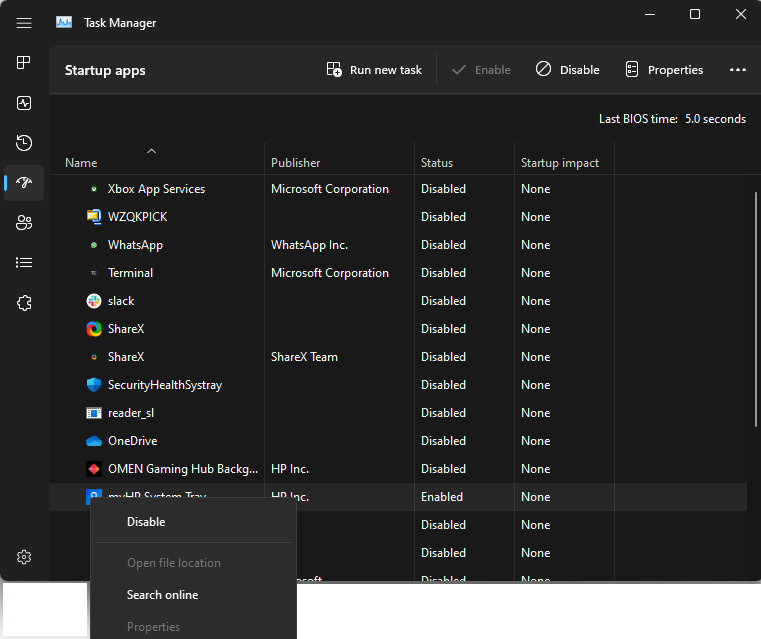
5. Disable & Restart Services
Press Windows + R to open the Run window.
Type services.msc and press Enter to open Services.
Locate and right-click Windows Update. Select Restart.
Now look for Update Orchestrator Service, and double-click it.
In the next window, select Disabled from the drop-down next to the Startup type.
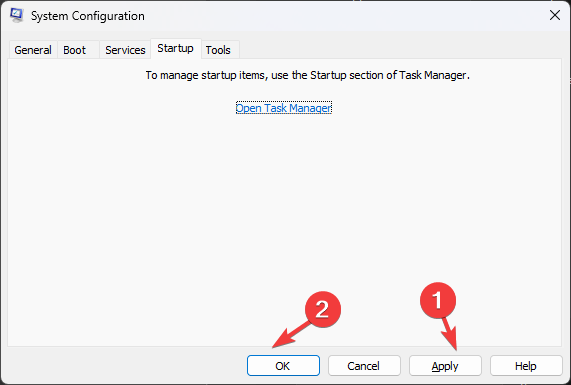
Click Apply and OK.
6. Reset Power settings
Press the Windows key, type PowerShell, and click Run as administrator.
Copy and paste the following command and press Enter: powercfg -restoredefaultschemes
Wait for the process to finish, and then restart your PC.
Is MoUSO core worker process a virus?
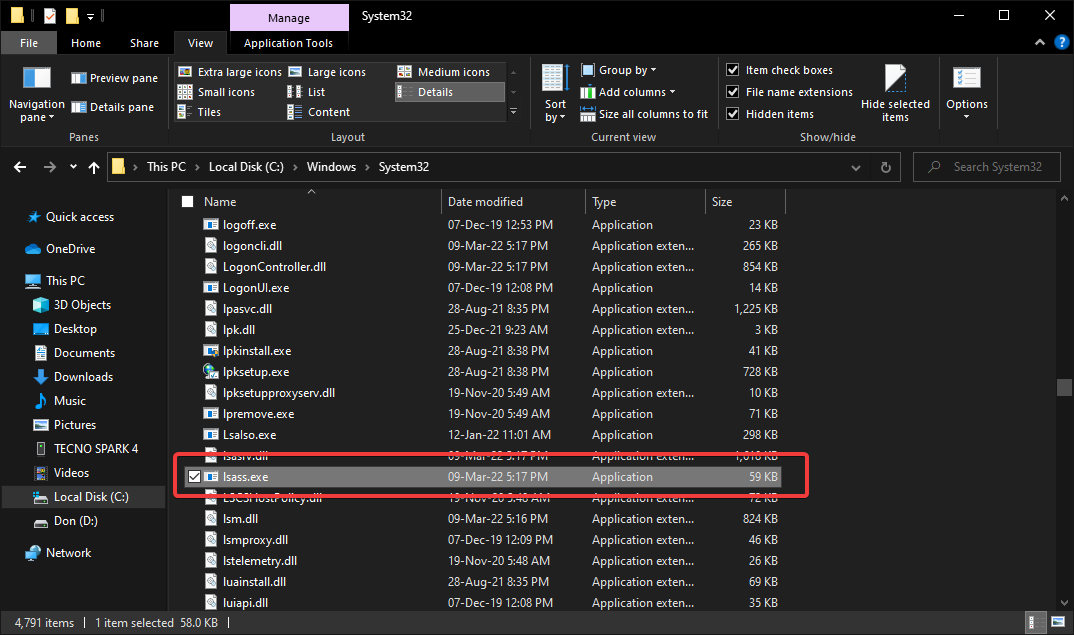
MoUSO is a genuine Windows process. However, if it seems to be CPU-intensive, then you can authenticate it using the first method. Also, you can open this executable file’s location and check if it is in the Windows folder on your C drive. If the file is located somewhere else, it might not be legit, and you need to run a deep scan on the security tool to eliminate the problem.
Can I End task MoUSO core worker process?
Yes, you can end task for the MoUSO core worker process from Task Manager. You can right-click on it and select End Task to close the process.
So, this is it! This is all you need to know about the MoUSO core worker process, along with the fixes to get rid of high CPU and high disk usage caused by the process.
Try these methods to fix the issue, and let us know what worked for you in the comments section below.
The holiday shopping season is entering the home stretch and time is running out to find those perfect Xbox Christmas gifts for that gamer in your life. If at this point you’re still searching for Xbox related gift ideas then look no further, because we’ve got you covered with these gift ideas for Xbox fans.
Xbox Series S holiday discount
We recently saw the Xbox Series S drop to its lowest price yet for this year’s Black Friday event. But don’t worry if you missed out, because that discount has been extended through the Christmas shopping season. As of right now (December 19) you can still get the most accessible next-gen gaming console for an incredible $239.99. In other words, that’s $60 off—a 20% discount on the usual MSRP. You can find this discount at various retailers including Walmart, or you can buy from the Microsoft Store.
That’s for a next-gen console, mind you. The all-digital Xbox Series S can deliver up to 120FPS gameplay, HDR, rich 3D sound and up to 1440p resolution. It also supports ray-tracing, ultra-low latency, variable refresh rate, variable rate shading, and includes a 512GB SSD.
But really it’s all about the games, and with Series S you can access hundreds of them—from the latest next-gen blockbusters to backward-compatible titles from all three previous generations of Xbox. This includes hundreds of titles available with Xbox Game Pass.
Countdown Sale game deals
Of course they’ll want some great games to go along with a great console, right? Lucky for them, the Countdown Sale is going on right now with hundreds of discounted games and DLC. You can visit the link to find the entirety of everything on offer with the Countdown Sale—it’s way too much to go into here, but below are just a few of the highlights from the many, many awesome discounts available through the Countdown Sale.
Elden Ring—$41.99 (30% off)
Forza Horizon 5 plus Hot Wheels Bundle—%51.98 (35% off)
Grand Theft Auto V: Premium Edition—$14.99 (50% off)
Cyberpunk 2077—$29.99 (50% off)
Assassin’s Creed Valhalla—$19.79 (67% off)
Far Cry 6 Game of the Year Edition—$47.99 (60% off)
Tiny Tina’s Wonderlands: Chaotic Great Edition—$44.99 (50% off)
Need for Speed Unbound—$41.99 (40% off)
And there are other, smaller sales going on out there too. Visit Xbox.com to find out more.
Xbox Gift Cards
Of course you can never go wrong with gift cards, and the rule holds true when it comes to holiday shopping for gamers. Here you can buy gift cards directly from Microsoft and they’ll simply email the code to you. These Xbox Gift Cards can be used by them to buy a gift of their own choosing, be it digital game downloads, apps, movies and TV shows, accessories like Xbox controllers, etc. They can be used at the Microsoft Store, on Windows, and on Xbox.
We would be remiss if we neglected to mention Xbox Game Pass here. Give the gift of the best gaming service out there, with hundreds of games in the Game Pass catalog. Buy here on the Xbox Store and simply choose the “Buy as Gift” option when adding it to your cart.
We hope this has been helpful in guiding you toward the right Xbox Christmas gifts for this holiday season. There should be something here to please anyone who plays games on Xbox. And if you haven’t joined that community yourself and would like to, there has never been a more affordable time than now.
Microsoft has discovered a new issue affecting Outlook. Essentially, affected users will notice that when they select multiple calendars in the Calendar pane, the timeslot selected may be incorrect.
The company has further indicated that the issue might have occurred because of low screen DPI or when Outlook isn’t maximized and the window is relatively small in size. Other potential causes include: displaying both non-working hours and working hours simultaneously in the same view or the user might have added or selected a calendar in the Calendar pane.
However, Microsoft released a fix for this bug on December 13. Therefore, if you are running on Current Channel Version 2211, Build 16.0.15831.20208 this issue should be resolved. In other Outlook related news, the Mac client now lets users save files in local folders.
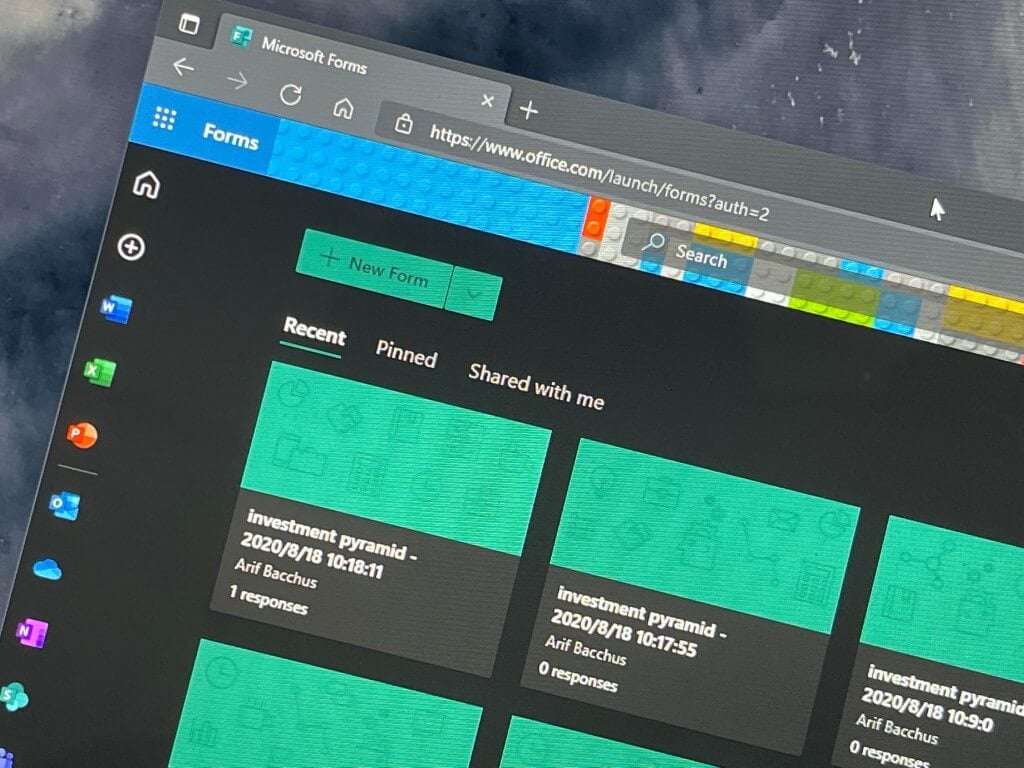
Microsoft announced that it is making improvements to Forms. The enhancements will be centered on both the cover page and distribution options in a bid to increase engagement and ultimately attain a higher response rate.
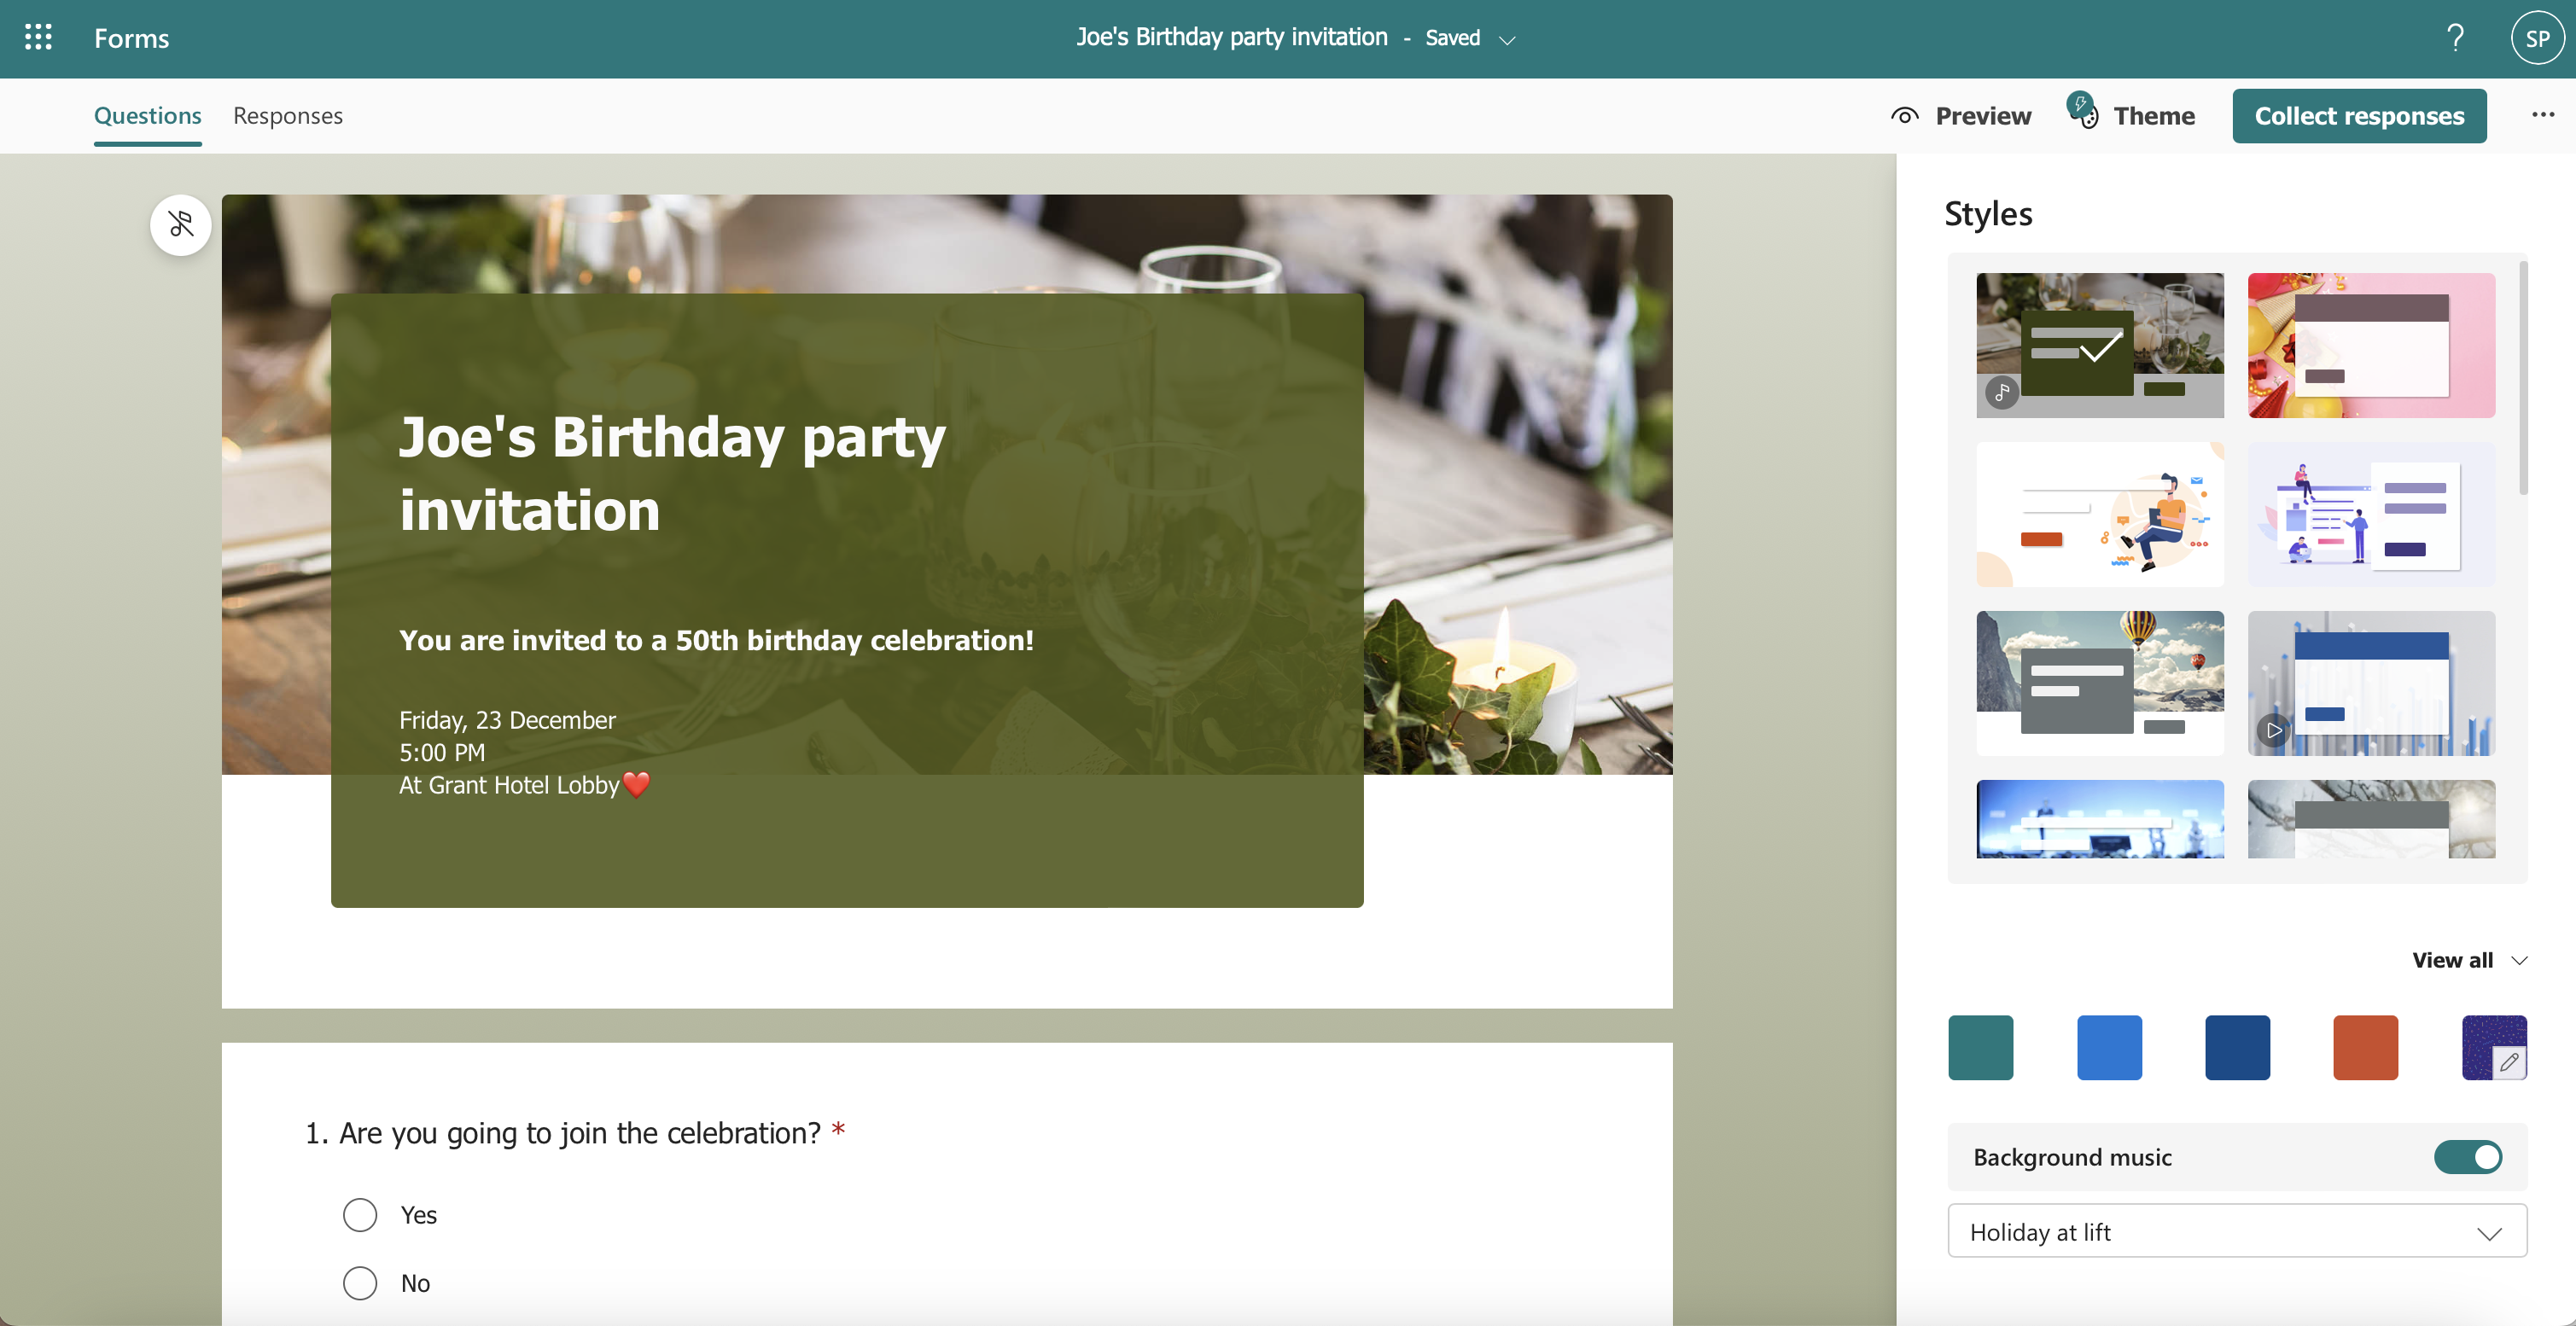
With this new redesign, users are more likely to interact and engage with the surveys or registration forms. What’s more, through the AI-powered search tool in the platform, you can now key in a few words that best describe the theme you want. You’ll then get an array of “predefined cover page templates based on that theme” and get to select the most appealing one.
You can further enhance the cover page design you select by uploading pictures from your device or search results from Bing.com. Furthermore, there’s an option to add music to your forms which goes a long way to prepare the recipients for what’s to come.
Once you have prepared the surveys and they are ready to send, you can use multiple channels, that is, Outlook, Teams, QR code, and even Facebook and Twitter. Alternatively, you can use email or a QR code.
The newly revamped Microsoft Forms is currently available for both Business and Education subscribers. In related news, last month Microsoft added a long request feature to Forms that lets users insert images as choices.
We invite you to check out Microsoft’s blog which features a comprehensive FAQ section that will answer any questions you might have about the platform and how you can use it.
Minecraft using a high CPU is, unfortunately, a pretty common issue with the game. However, if you optimize your system properly, you can reduce its resource usage.
That’s exactly what we’ll show you how to do in the lines below. So just stick with us as we cover some effective tips to get your game running smoothly.
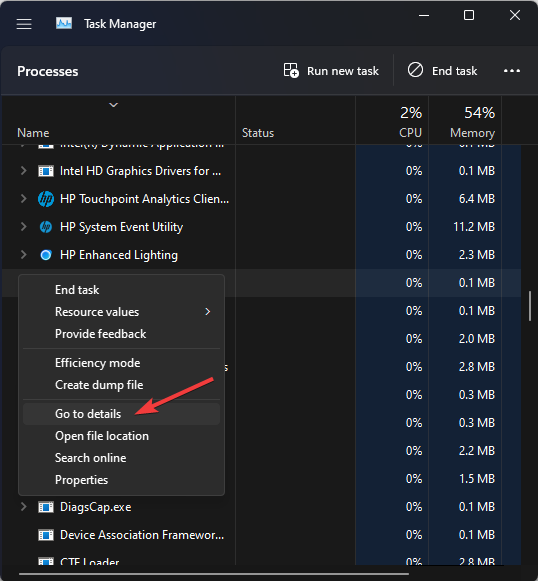
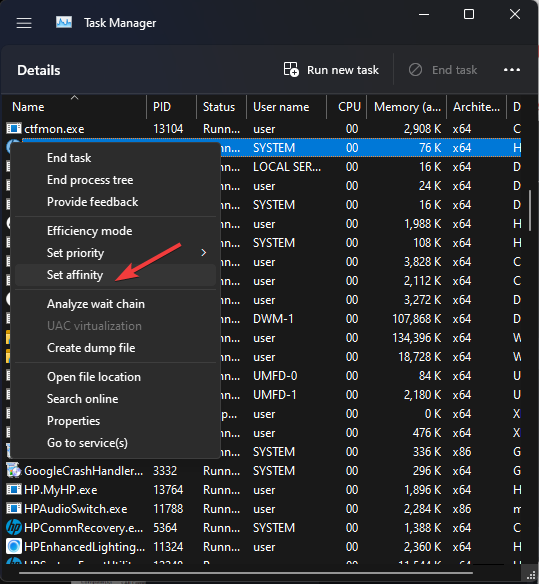
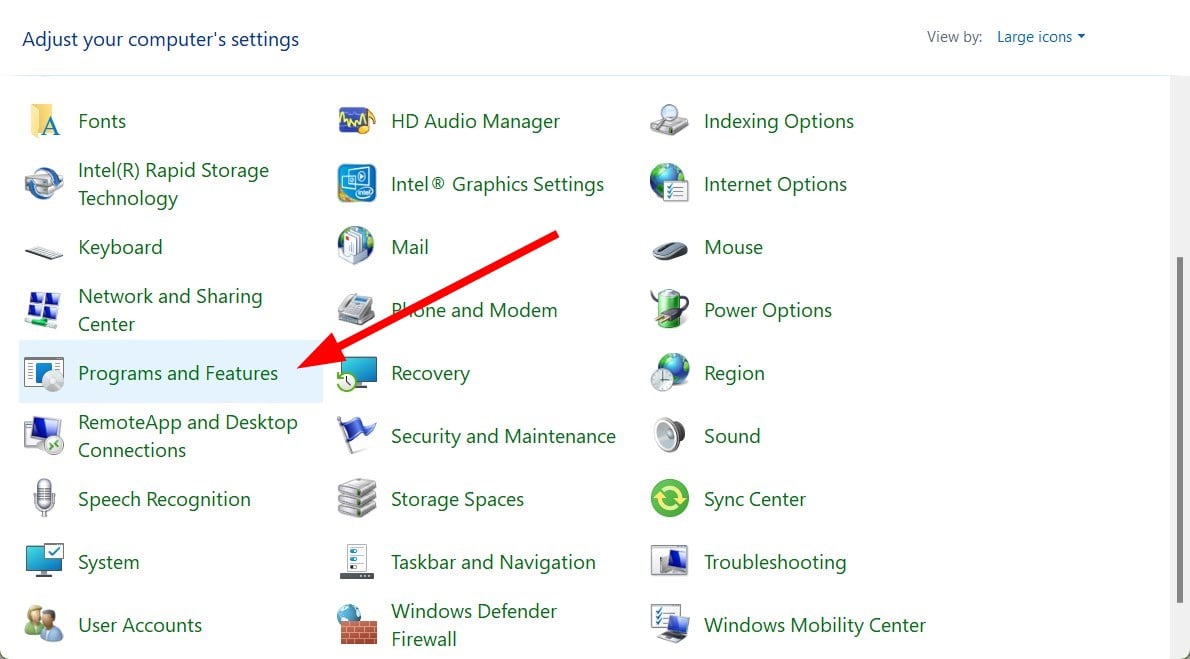
On the Processes tab, right-click on OpenJDK Platform binary and choose Go to details.
Right-click on javaw.exe, and choose Set Affinity.
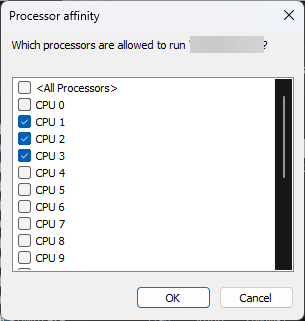
On the next window, remove the checkmark from All Processors and select only CPU 1, 2 & 3. Click OK.
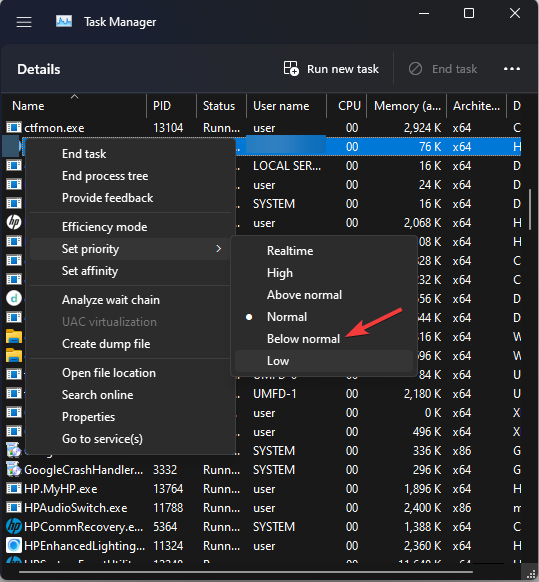
Right-click on javaw.exe again and choose Set Priority.
Change priority from Normal to Below Normal.
If Minecraft still isn’t performing as expected, it may be due to GPU settings. In that case, see our guide on Minecraft not using GPU for steps to force the game to run on your dedicated graphics card.
2. Check scheduled tasks
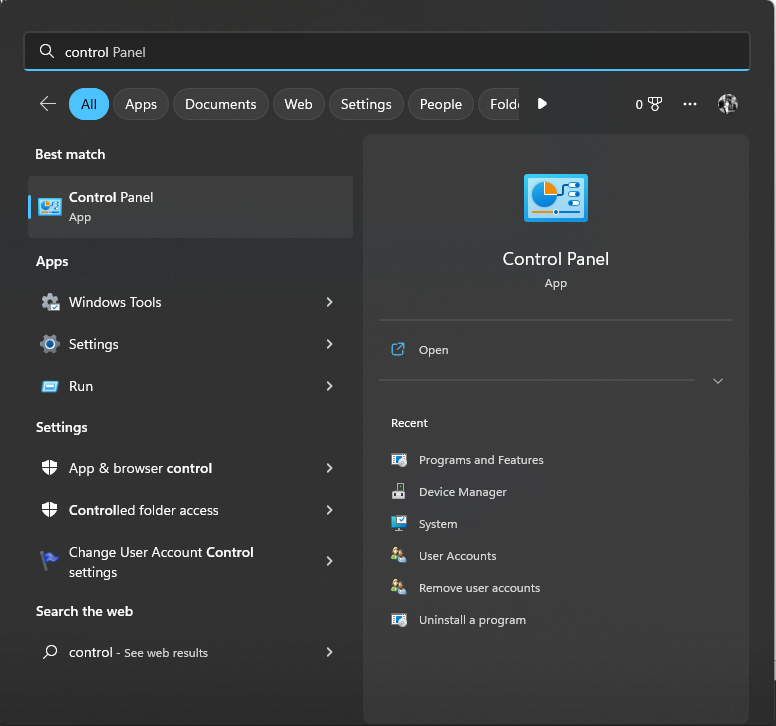
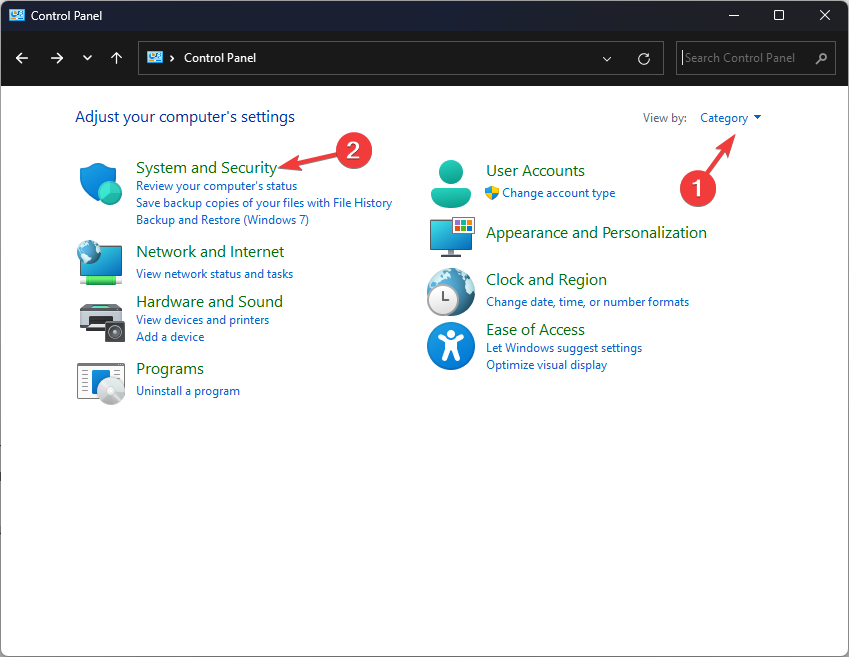
Press the Windows key, type Control Panel and click Open.
Go to View by, and from the drop-down, select Category.
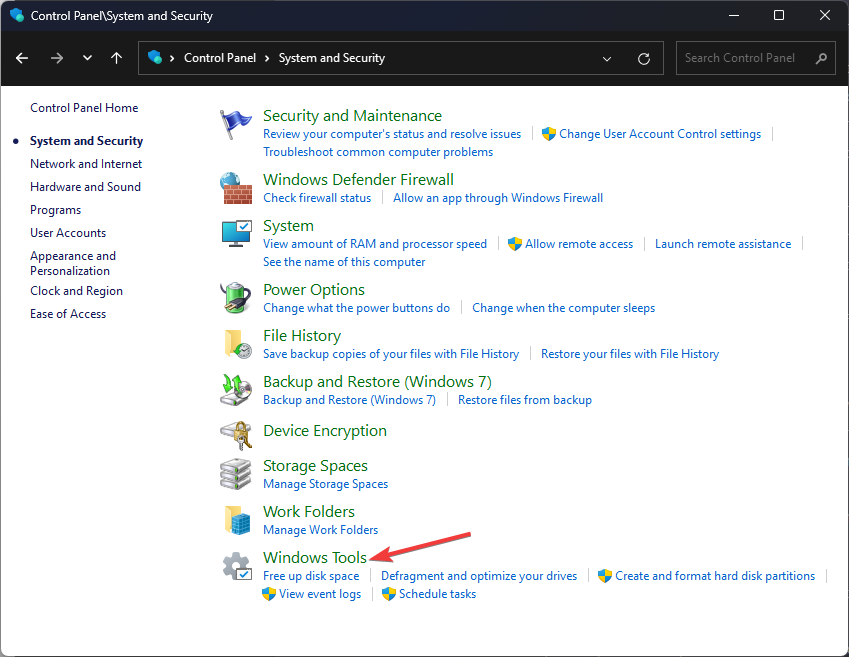
Now click System and Security.
Click Windows Tools.
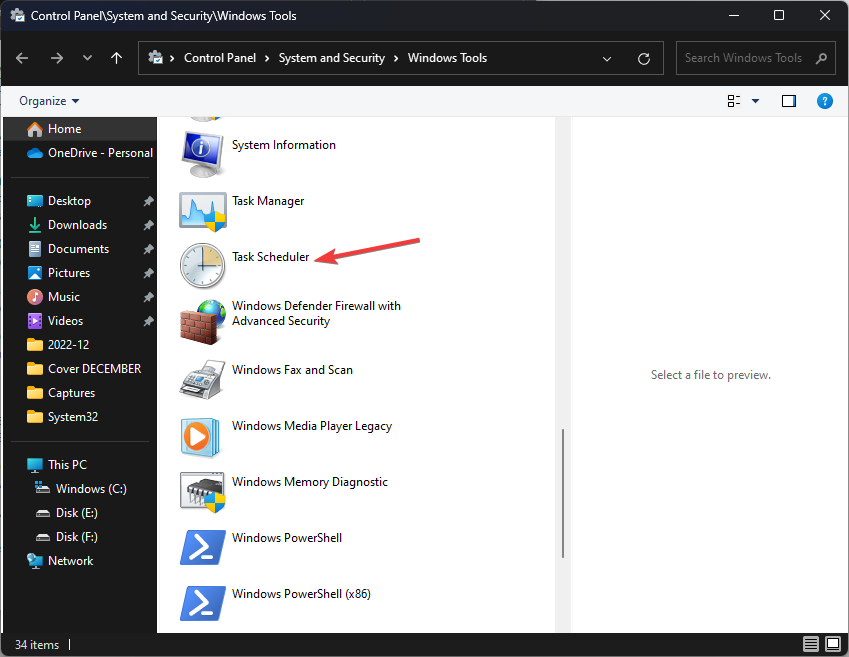
From the list of tools, select Task Scheduler.
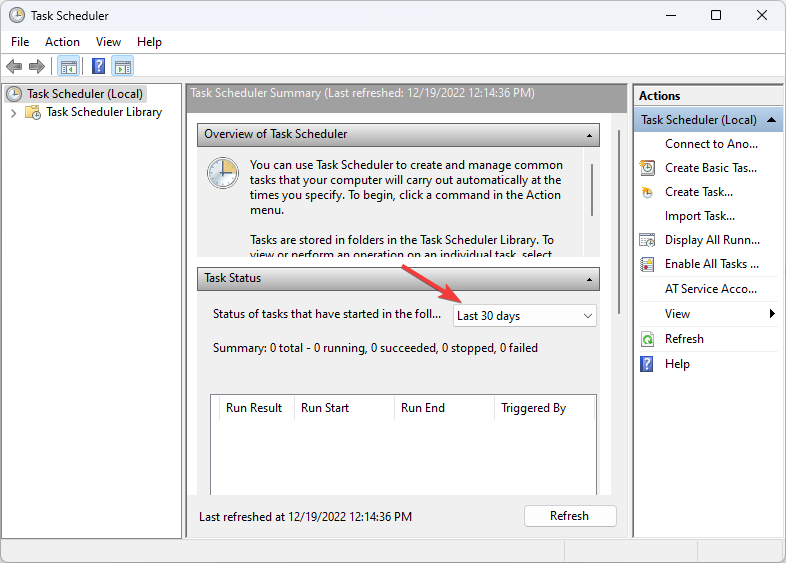
On the Task Scheduler window, under Task Status, you will get the list of scheduled tasks.
From the drop-down menu, select the Last 30 days for the Status of tasks that started in the following period.
Scroll through the list of tasks and identify which could have caused the high CPU usage.
VPNs and virtual networks like Hamachi can also interfere with Minecraft performance. If you’re using Hamachi, check this fix for Hamachi not working with Minecraft.
3. Disable browser plugins
Open your preferred browser. Here we are using Chrome.
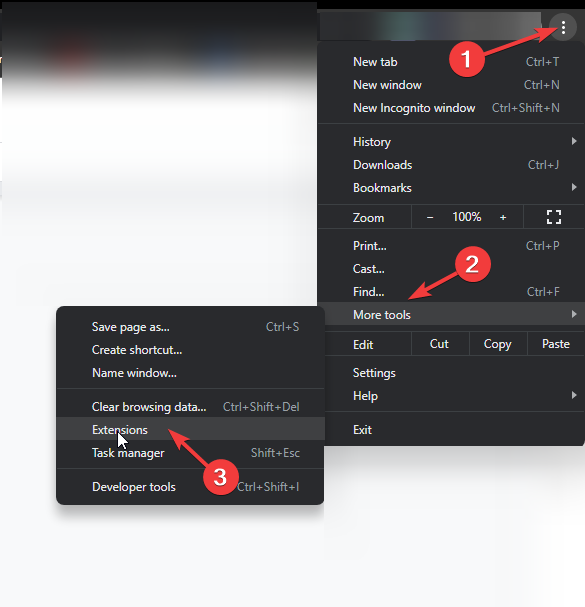
Click on three dots, click More Tools, and then select Extensions.
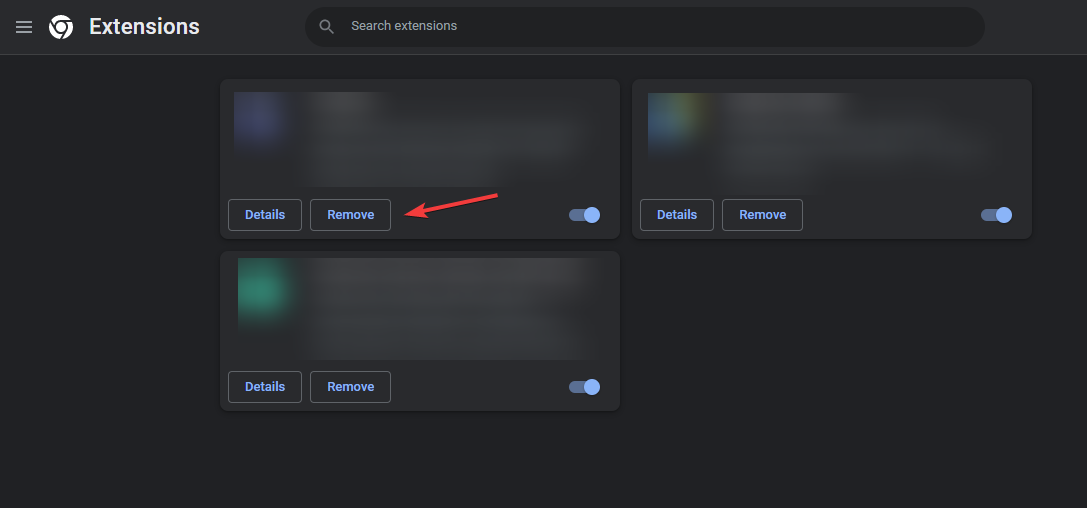
Check the list of extensions installed and click Remove for the unwanted ones.
There are a few reasons why Minecraft might have been using high CPU resources, some of them are listed below:
Background processes – If you have a device with a high-end processor still facing the issue, there might be resource-intensive tasks running in the background. Try closing unnecessary processes and programs.
Game running on the low-end device – If your device has insufficient processing power, you might have to upgrade your device or reduce graphics settings to take off the load of the CPU.
Faulty CPU – The game may be running on a device with a faulty CPU. In this case, you must think of upgrading your device to resolve the problem.
Bug in the game – If it is buggy, it can use more resources than needed. Check for game updates or report the issue to game developers. In some cases, Minecraft’s performance issues may also affect other game functions. For example, if you’re having trouble communicating in-game, here’s how to fix the issue when you can’t chat in Minecraft.
Also, if you’re just getting started or want a fresh experience, check out our guide on how to get a free Minecraft account.
So, these are methods that you can help to reduce CPU usage while running Minecraft on your computer. If you think we have missed something that worked for you to resolve the issue, feel free to let us know in the comments section below.
We gathered a few of the best Cricut 3rd party software that works perfectly with the majority of models, so make sure to check out these tools.
One more thing before we dive into it: You don’t have your own Cricut machine yet? If not, here you will find the bestdeal on Amazon, check it out.
So let’s explore the finest Cricut maker software available today.
Can I use other software with Cricut?
If you’re a craft enthusiast and you love your Cricut die-cutting system, then you must know by now that the primary complaint of such digital die-cutting units is that they are much too restrictive.
They only allow you to cut a limited number of fonts. Then, you have to get separation and it doesn’t come cheap. But, no worries, fortunately, this issue also has a workaround.
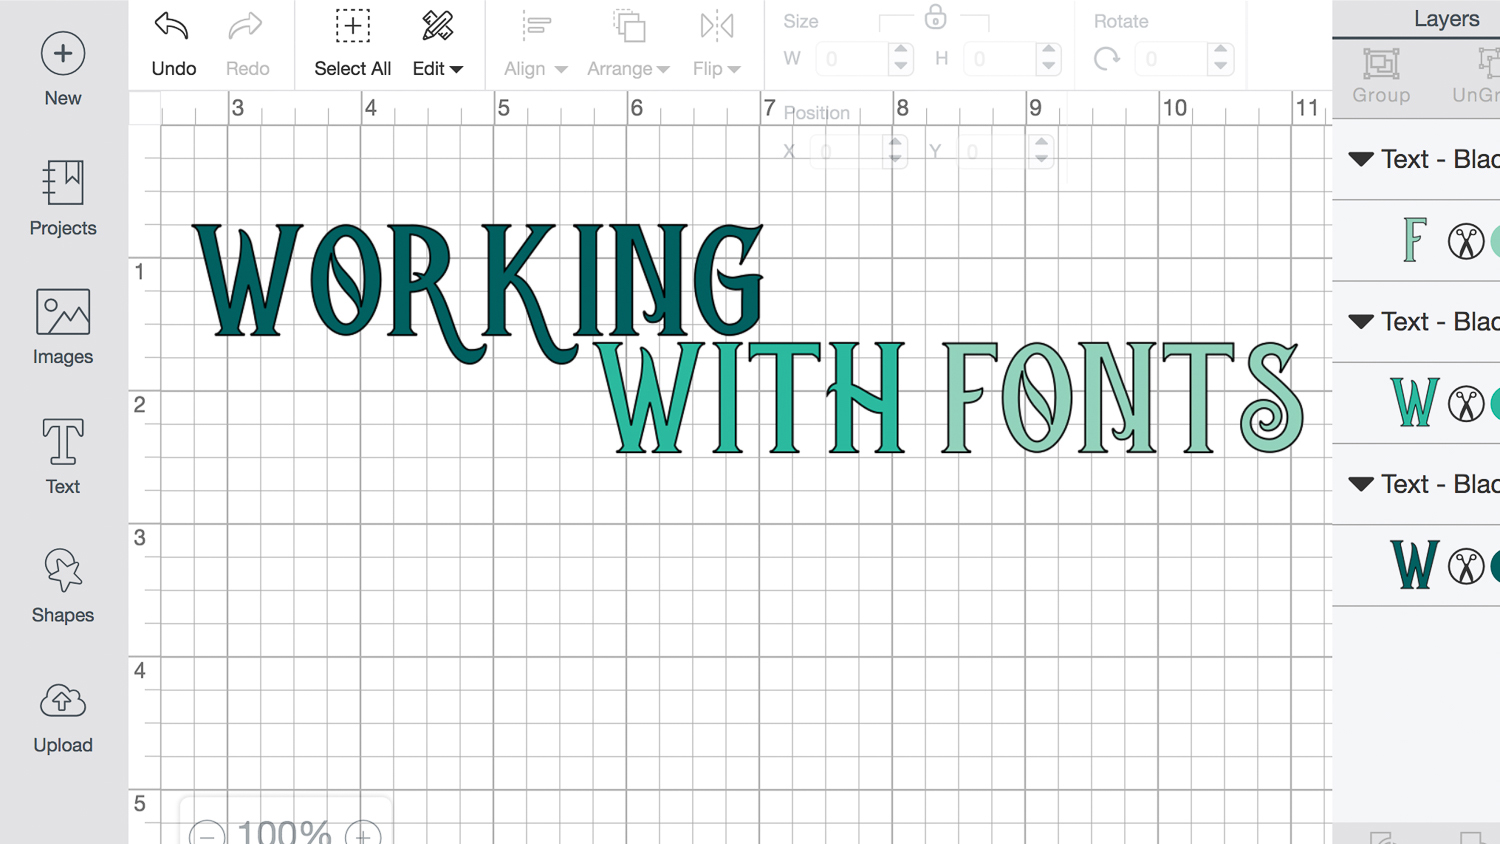
What program does Cricut use? A few do-it-yourselves managed to open or hack Cricut to enable TrueType fonts, customized designs, and more via Cricut alternative software.
We did some research online and polled our readers to find out which SVG software they thought was the best. Illustrator came out on top, followed by Cricut Design Space and CorelDraw. Here’s a quick preview of all our picks:
Adobe Illustrator – Most popular option
Cricut Design Space – Extensive assets library
Adobe Photoshop – Robust editing toolkit
CorelDRAW – Vector-based tool
Silhouette Software – Full creative control
Thus, using these apps, your 2D drawings or images can be scaled up or down without losing their quality because, in the SVG format, your 2D design’s features are described as geometries, not pixels.
Design Space is a cloud-based Cricut editing software that is both easy to learn and lightweight.
Use it whenever inspiration strikes and take advantage of its cross-platform compatibility that stretches from laptops to Mac, iOs, and Android devices. It’s especially suitable for stamp designs. You can even use it offline! So what’s there not to like?
Let’s quickly look at its key features:
Extensive assets library (images, fonts, pre-made templates, and more)
Advanced editing toolkit to personalize your project
Create complex details with unmatched precision
Step-by-step tutorials and instructional videos
Extended chat and phone support
Cricut Design Space
Feel free to create and enjoy Cricut’s extensive great features.
No type of graphics design can be discussed without mentioning one of the best tools in the trade.
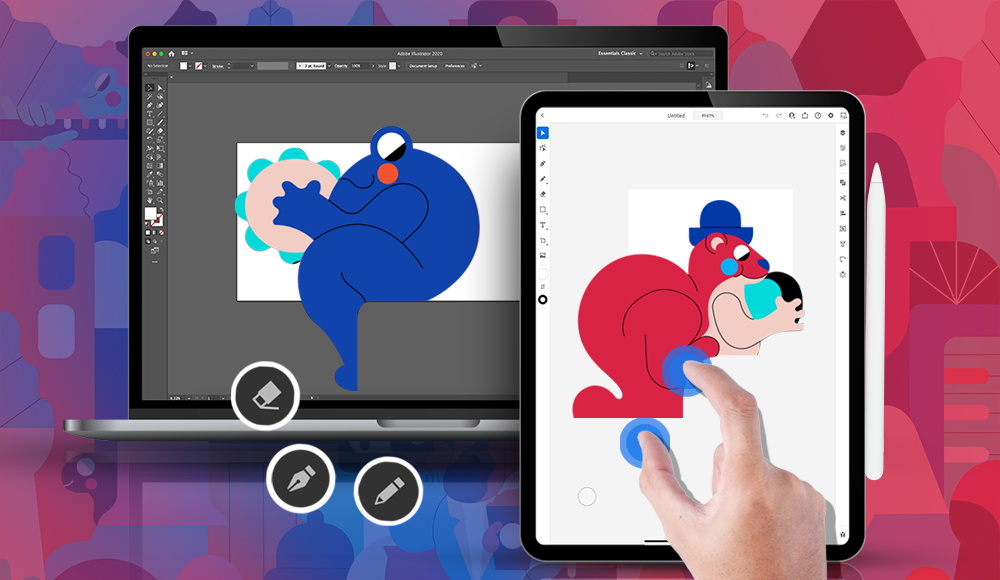
Adobe Illustrator is a vector-based image editor that allows you to create pretty much anything that has shape or color, including Cricut Maker 3 software.
In the case of Cricut designs, this means being able to create complex and beautiful patterns, and that is something that Adobe Illustrator can do without much effort.
The expanded toolset allows you to create models that are both precise and intricate, and the file formats are perfectly compatible with Cricut hardware.
More so, once you are done designing your Cricut patterns, you should know that the software tool can be used for pretty much anything else, as it is not a program with a singular purpose.
Let’s quickly look at its key features to understand why we ranked it as the best drawing app for Cricut:
Great for creating intricate and precise patterns
File formats supported by a wide range of hardware and software
Its popularity makes it so that tutorials and guides are not hard to find
The toolset can be further expanded using plug-ins
Can be tested for free
Adobe Illustrator
Turn on vector power to create stunning patterns that perfectly match your Cricut machine!
The world’s best imaging and graphic design software need little or no introduction at all, so we’re going to jump straight to it.
Just like Illustrator, this amazing tool can be paired with your Cricut machine in order to achieve sophisticated patterns executed with supreme precision.
And just like its vector-based sibling, Photoshop is a hugely versatile software that can be used to explore Cricut Air 2 and pretty much anything your imagination can conceive.
Needless to say that such powerful features cannot be confined to a singular platform or workspace. And that is precisely why you can use Photoshop whenever your Cricut inspiration strikes.
From PC to mobile workstations, your progress will be instantly updated across all platforms.
Since so many artists all around the globe are already used to working in Photoshop, creating Cricut files is rather straightforward and comfortable.
Just open Adobe Photoshop, then click on Place Embed to add all the PNGs (or other file formats) you want.
Then start making use of the powerful editing toolset to resize, rearrange, adjust, add layers, group images, and much more until you are perfectly satisfied with the result.
Eliminate the white background (more tools are available for this task – don’t be afraid to explore them at your own pace).
Once you’re satisfied with the outcome, go to the File menu, name your project and choose to save it as PNG.
Finally, upload your design in the Cricut tool and you’re all set.
Let’s quickly look at its key features:
Robust editing toolkit (crop, combine, retouch, resize images to perfection)
Cross-platform integration (from desktop to mobile station)
Fully compatible with touch and pen technology
Unlimited layers, masks, filters, and brushes
your work is automatically saved to the cloud
Adobe Fonts integration to automatically detect all missing fonts
Object Selection tool to create fast and precise selections
Adobe Photoshop
Unleash your Cricut creativity with the world’s best imaging and graphic design software.
CorelDRAW Graphics Suite is one amazing all-in-one graphic design software to meet every single one of your needs.
From apparel and textiles to blueprints and maps and all to way to sophisticated illustrations, this feature-rich design suite delivers all the tools you need.
It will help you conceptualize your ideas and take them one step closer to materialization.
If you’ve simply outgrown your cartridge collection, it’s time to take your Cricut skills up a notch. Thus, investing in this performant design software perfectly adapted for Cricut Machines is the next step.
This vector-based tool is preferred by many professional cutters who enjoy its complex functionalities, but home-cutter crafters will enjoy it just the same.
With beautiful typography, support for TTF files, and seamless integration with popular plugins for cutting, CorelDRAW is a great solution to use with your Cricut.
CorelDRAW Graphics Suite
Excellent graphic design program that offers extensive features to help you create freely.
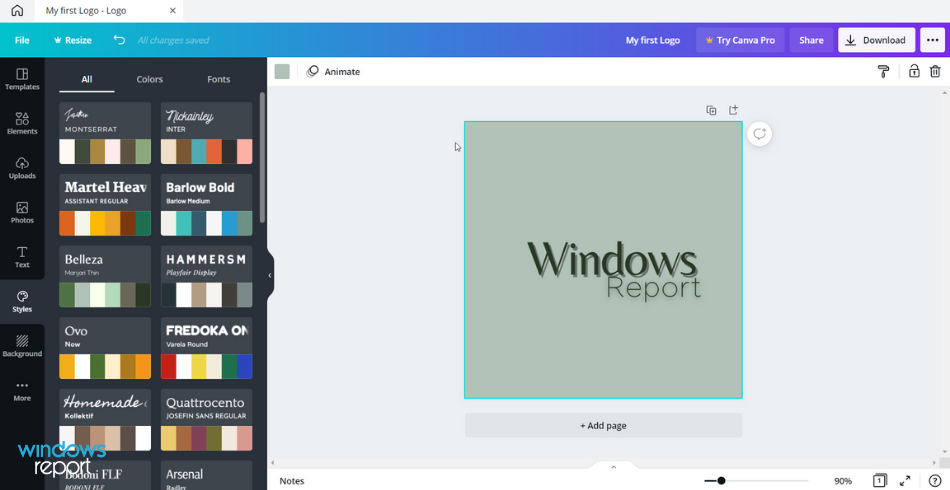
Canva is a free online design platform that hosts thousands of materials that can be used with Circuit devices.
Firstly, you can use this design creation solution for crafting various products such as business cards, t-shirts, or hoodie materials.
The tool includes plenty of features that will support any creativity needs, no matter the subject. So you can create official documents, social media posts, infographics, or marketing creatives.
In addition, there are no limits regarding sharing or printing the products, so you get the material version and use it however you need
It’s also worth mentioning that you can design and print in one place, so your designs are finished in due time.
Canva
Bring your ideas alive with the most used graphic design hub.
The next product on our list is actually not a standalone software, but an already built-in solution meant to facilitate the design process for you.
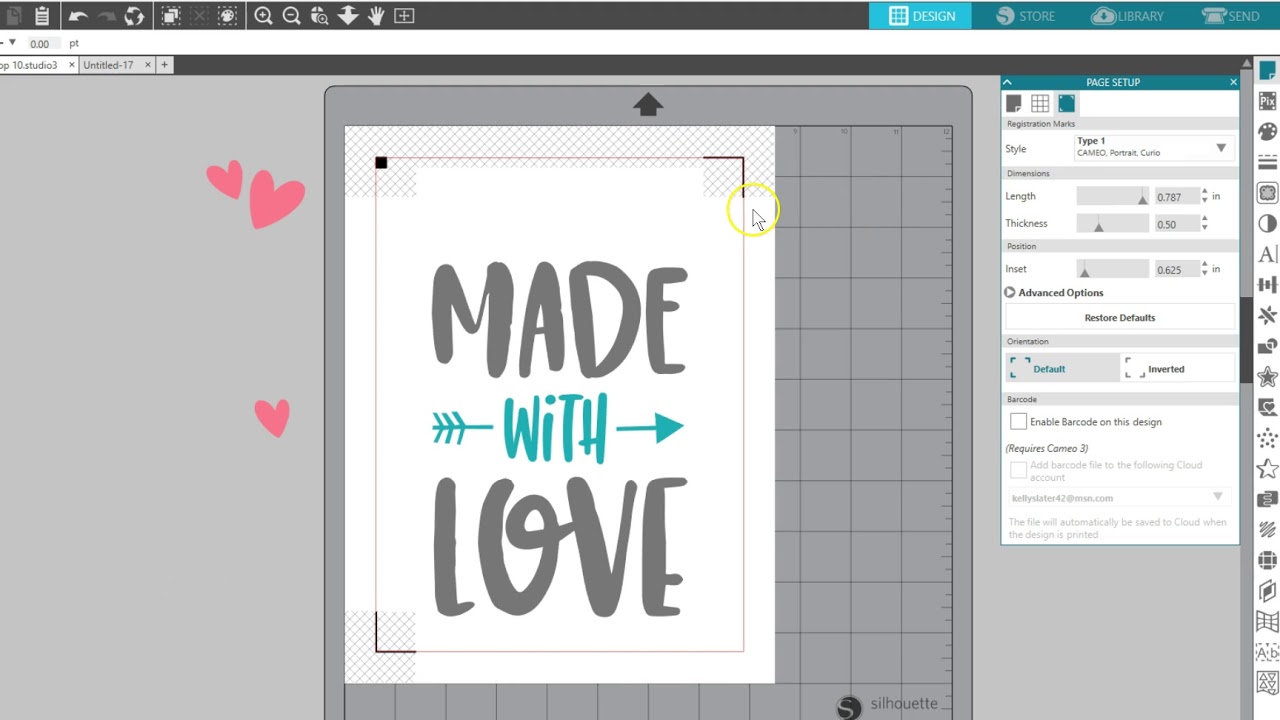
Indeed, there are cutters that come with full-featured design software. Silhouette Studio is such a tool that allows you to create designs and send them to a Silhouette machine.
As far as we are concerned, the tool does a pretty good job of meeting your basic needs by allowing you to import, customize, and create cutting files.
However, if you want to export your work in formats that can be used with other cutters, you will need to adhere to a subscription plan.
The premium versions of this software are Designer Edition, Designer Edition +, and Business Edition.
Affinity is recognized for its top-notch designing benefits and photo editing or publishing tools.
This design solution is the right place to be as it offers vector image editing and numerous object creation with various edits.
In terms of features, you have professional support to design your products such as groups and color tags, brush textures for illustrations, keyboard shortcuts, pixel preview mode, etc.
Plus, you have plenty of layouts to use for your page sizes, topics, and artboards. Not only that, you can use creative typography to customize your text on any design.
It’s crucial to know that Affinity offers print and sharing options for you to turn digital products into physical materials for any purpose.
We are glad to inform you that you can use this design app on multiple platforms like Windows, Mac, or iPads.
Quite known in the industry, this design solution can be used for photo editing, art creation, or graphic elements.
With this editing tool, you can design and craft any products you may imagine and then print them for Circuit devices.
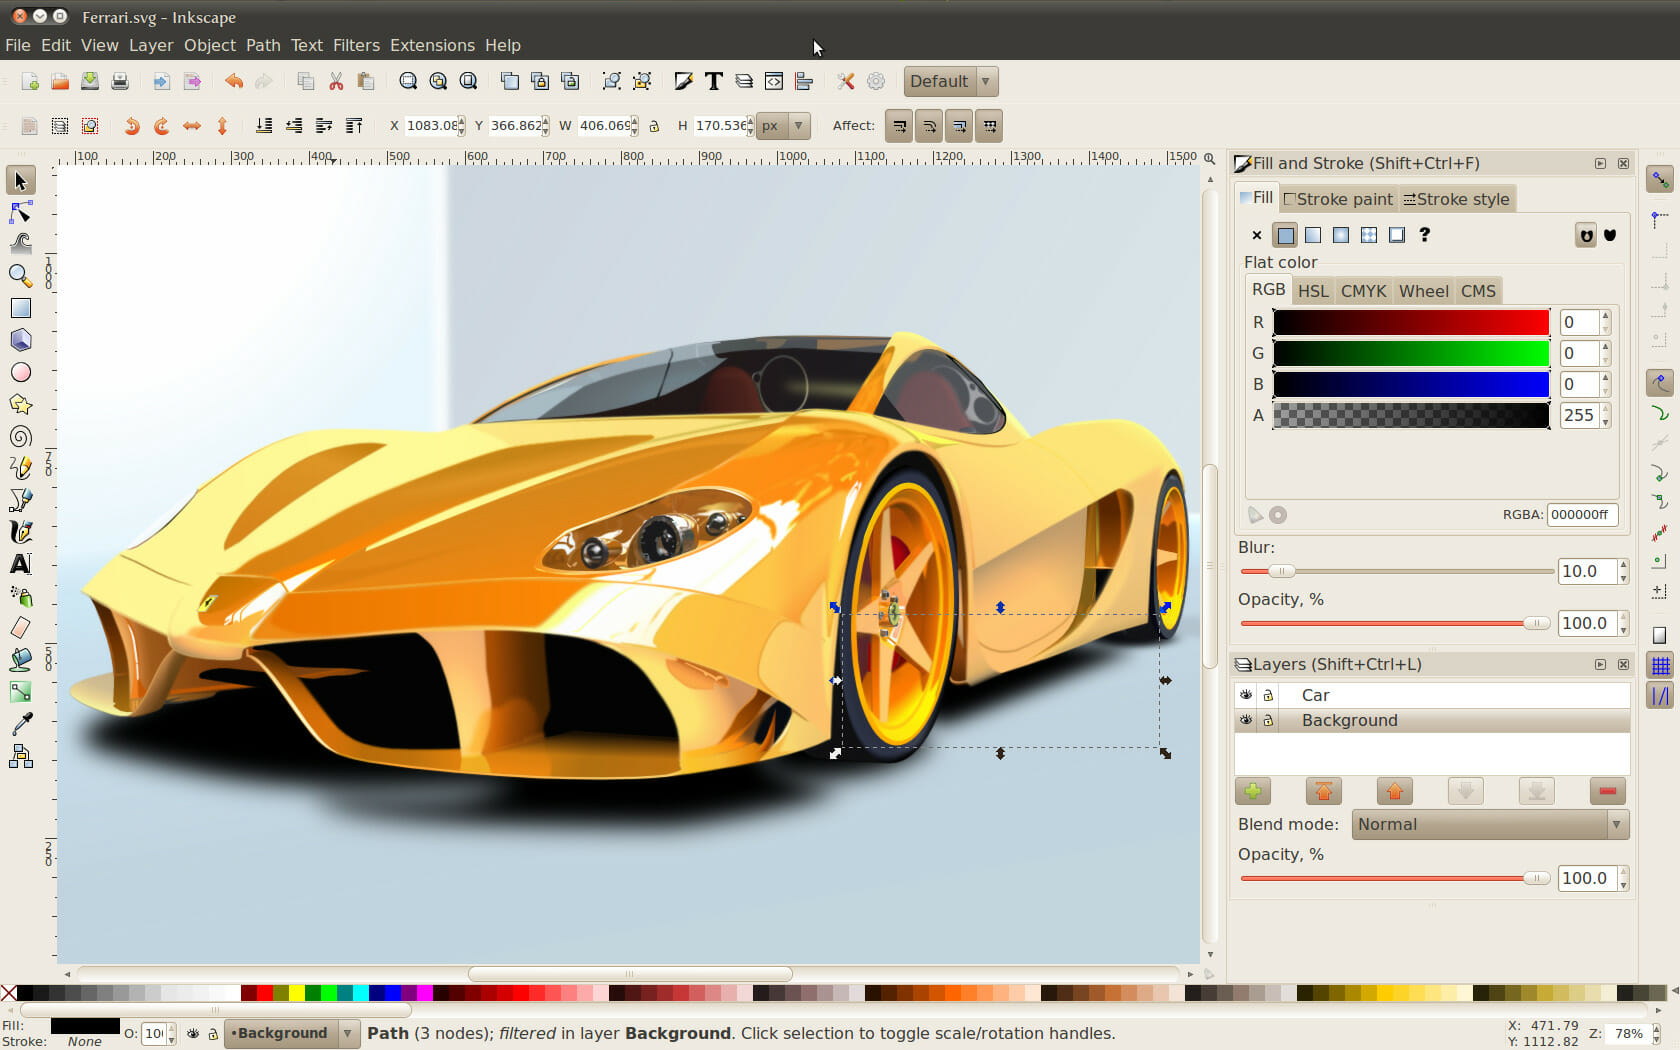
More exactly, GIMP is quite popular due to its high-quality picture manipulation and graphic design tools. You can either restore or edit designs in order to make composites.
Besides this, you have diverse color management for giving life to any digital or print media project.
As a last note, you should be aware of the programming language benefit that lets you utilize script images using multiple language support.
No matter which one you decide to use, you will be able to take control of your creativity. Plus, you’ll finally manage to use the Cricut die-cutting system the way that you always wanted to.
If you have any other questions, drop them in the comments section below.
If you want high-quality image resizing without losing any detail, you’re in the right place. Let’s get one thing straight: resizing only adjusts dimensions without changing pixel count, but resampling keeps your image sharp and clear.
That’s what you’re actually looking for. Check the tools below to cut your search short. They’ve been tested by our experts.
What’s the best image resizer software to try out?
The InPixio online editor is a professional solution for image editing and improvement. However, it is so simple to use that anyone can resize an image with just a few clicks and no prior training.
Using this program you can resize or maximize photos in high resolution, create close-up shots from small details with no blur, or enlarge images without deteriorating the quality.
Photography often means catching details. So using this tool you can enlarge the smallest details and see every piece of pixels of your art.
Even more, the inPixio online editor comes with ready-made presets so that you can prepare your images for any purpose, including Ecommerce, social media or marketplaces such as Amazon or AliExpress.
You simply upload your image, select one of the presets and download the image. But that is not all because the tool also comes with a ton of other features such as background remover and backdrop AI generator, and a full photo editor with lots of options and filters that ensure you will never need anything else.
And remember, you don’t need to download anything on your PC because everything will be in your cloud account.
Take a look at its most important characteristics:
1000% powerful zoom function
Improve image quality and sharpness
Batch processing of thousand images
Numerous \filters
Very intuitive interface to use
inPixio Photo Studio
Take advantage of the clearest photos with maximizing service provided by this practical tool.
Adobe Creative Cloud Express offers a free image resizer feature designed to help you modify pictures according to your needs. You can adjust the size or of your photos right away, make the pictures smaller, and so on.
You’re actually getting a complete package that can help you create stunning graphics for all occasions. If your wish is to personalize your designs with custom elements, there’s no better choice than Adobe Creative Cloud Express.
You may add your own logo, colors, and fonts within a few taps, and rest assured that you can easily remove the Creative Cloud Express watermark from all your projects.
Take a look at its most important characteristics:
Thousands of free images are waiting for you
Incredible free icons are part of the package
Branded templates and themes at your disposal
Unique CC Libraries for easy management
Adobe Creative Cloud Express watermark removal, if needed
Adobe Creative Cloud Express
Access pro-level resizing tools using this light yet powerful editor!
Adobe Photoshop is the most used premium image-editing app and a geat option for crisp resized images.
With Photoshop opened, drag and drop the image you want to resize on the working surface.
Click Image in the main menu and select Image size from the contextual menu. Then, just select Pixels in the right tab and choose the size that pleases you.
Check the Resample box and select Preserve Details (enlargement) from the drop-down menu. You may now choose the noise reduction percentage and click OK to finally resize the image.
After that, you simply need to click File > Save as, and save your image, preferably, in the PNG format.
Take a look at its most important characteristics:
Unlimited number of layers to achieve impressive results
Depth Blur to realistically blur backgrounds in seconds
Bring life to gray images with Colorize Filter
Watermark customization with both text and graphics
Digimarc Barcode for image copyright protection
Adobe Photoshop
Resize images perfectly with Photoshop’s Preserve Details feature!
If you’re looking for a simple and intuitive image resizer, you might want to try CorelDraw. Make no mistake, though, CorelDraw is as powerful as such a tool can get.
This comprehensive suite of professional graphic design software gives you everything you need to craft design projects from vector illustration and photo editing to typography tools.
Compatible with over 100 graphics file formats, you can easily import and export a variety of assets and resize or tweak them to perfection according to your imagination.
And don’t leave aside the fact that you can collaborate with colleagues using CorelDRAW.app to gather real-time feedback on every single project.
Take a look at its most important characteristics:
AI-powered image solutions
Workspace customization options to accelerate workflows
Impressive editing toolset
AfterShot 3 HDR to create stunning High Dynamic Range photos from your RAW images
To resize an image without losing quality, use resampling methods like “Preserve Details” or “Bicubic” to adjust dimensions. Ensure the image is saved in a high-quality format such as PNG or TIFF for the best results.
You can easily change the width, height, and resolution while maintaining the quality with advanced features from apps like Creative Cloud Express, Photoshop, inPixio, GIMP, and many others.
Reasons to reduce the size of your images
➡️You clearly don’t want a blog or website that takes ages to upload your photos. After all, your audience is often short on patience and time.
➡️Buffering is also related to huge pic files that are saturated with pixels. Potential buyers or readers may see it as a go-signal to find a faster site.
➡️There are quite a few social media platforms that require you to load images of a specific size. Feel free to customize your photos for Twitter, Facebook, Instagram, LinkedIn, Snapchat, YouTube, Pinterest, and more.
➡️If you happen to love taking photos with a digital camera, chances are it produces huge image files. Posting them on the web or sending them via email could turn into a daunting task unless you take action.
➡️Uniform-sized images on blogs could lead to the unpleasant impression that you are not professional.
Here are some of the best photo resizers for Windows that can help you make images smaller without losing quality or change them into a new format that’s size efficient.
Even more, whenever you find an interesting image while browsing the Internet, note that you can easily resize it to fit the desktop background. Stretching it makes it lose a part of its charm, don’t you think?
If you have any alternative programs to recommend or questions regarding the ones we presented above, do tell. Feel free to use the comments section below in that regard.
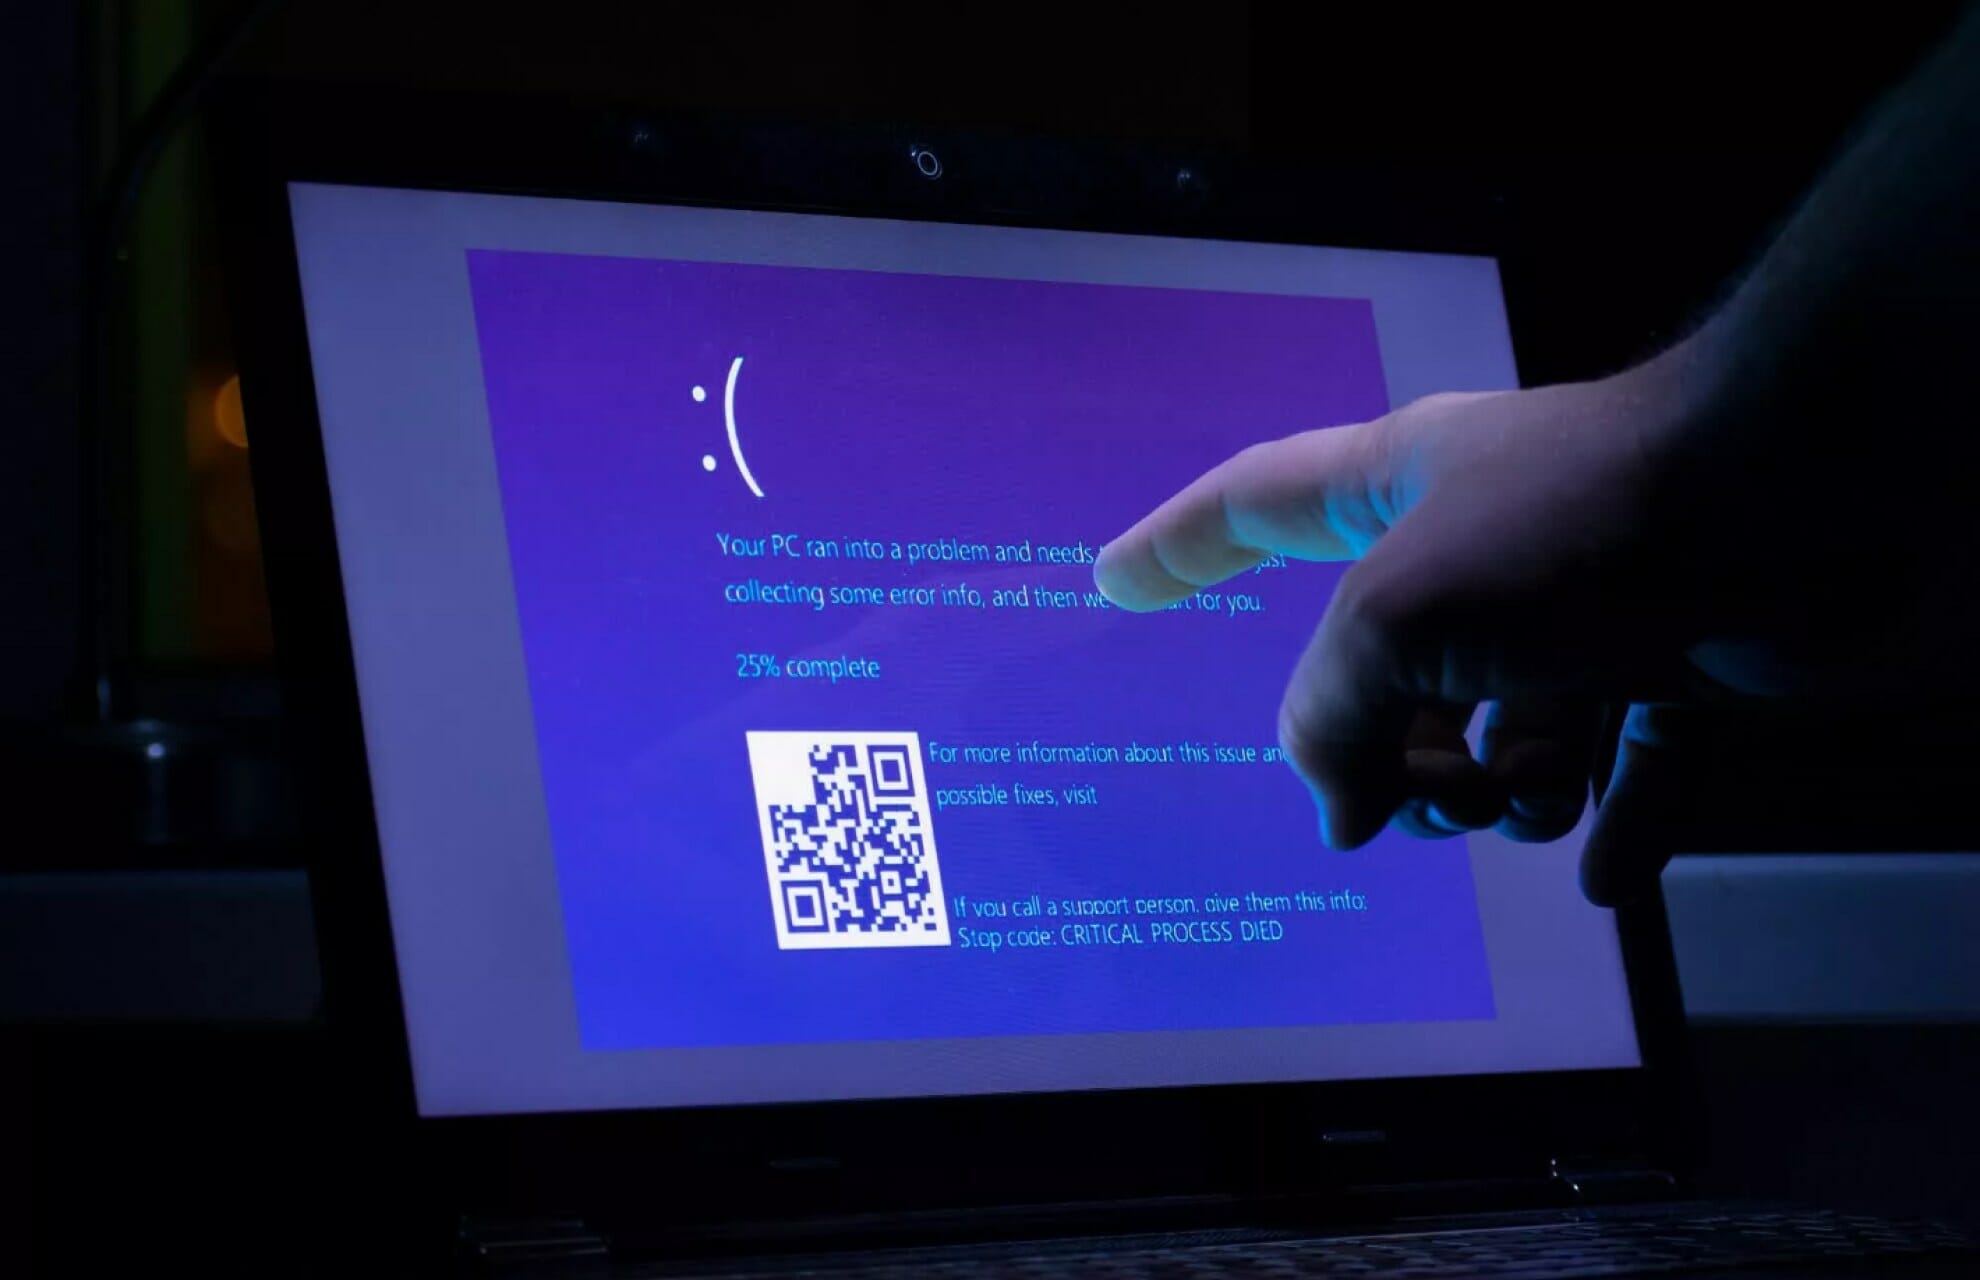
Autorun.dll errors are widespread among Windows 10 users, and the most frequently encountered errors are the following: Autorun.dll not found, and The file Autorun.dll is missing.
These errors can occur when users try to install an update or launch a particular program. The AutoRun.dll file contains essential information on how a particular software should execute, do here’s how to fix it.
Missing or corrupt autorun.dll during setup or recovery
Damaged Windows installation media
System file corruption from malware or improper shutdowns
Incompatible drivers or hardware issues
You may also notice this on bootable USB devices with incomplete media setups.
How do I fix Autorun.dll error code 0X7E?
1. Repair Autorun.dll registry entries
Sometimes, the autorun.dll file is corrupted or invalid because the file location may have changed. The best solution to fix this issue is to use a Registry repair tool.
Press Ctrl + F to open the search bar, type Autorun.dll, and hit Enter.
If the file is found, right-click on it, and select Restore.
You may have unintentionally deleted the Autorun.dll file, which may explain why you’re getting the Autorun.dll not found and The file Autorun.dll is missing errors.
3. Run a full system scan
The Autorun.dll errors may be linked to a malware infection. The best solution is to run a full system scan to detect and remove the malicious programs that may have triggered the Autorun.dll errors.
If you didn’t find any malware, or if you don’t have an antivirus, you might want to consider using a third-party antivirus solution.
Many great third-party antivirus tools offer excellent protection and features, and if you’re looking for a new antivirus, we would have to recommend Bitdefender.
This tool offers excellent security and will keep your PC protected and safe from all malware. Once you scan your PC for malware with one of these tools, check if the problem persists.
4. Use the System File Checker tool
4.1 SFC scan
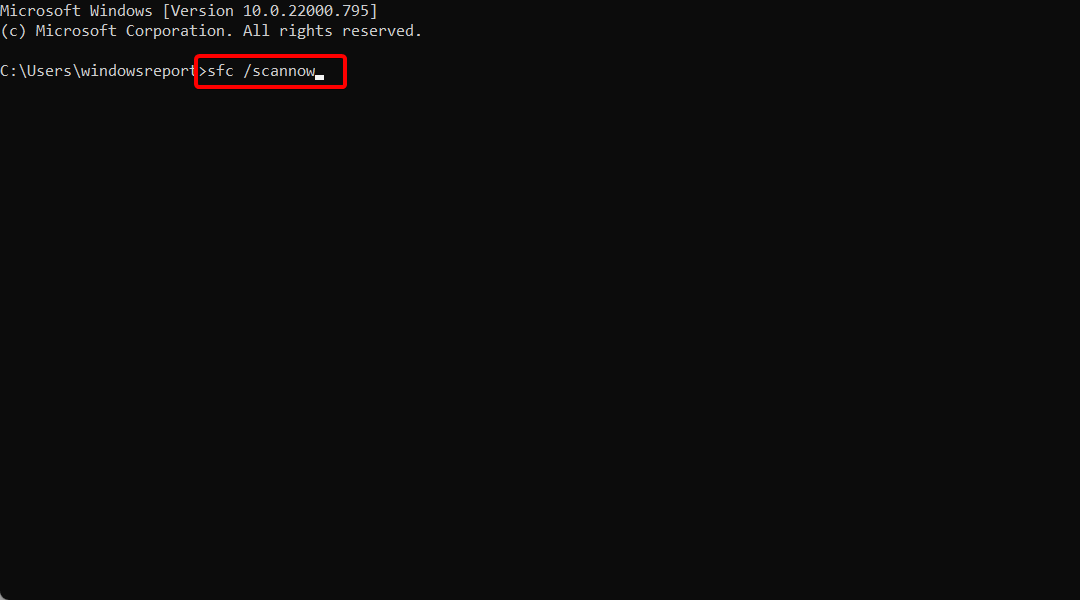
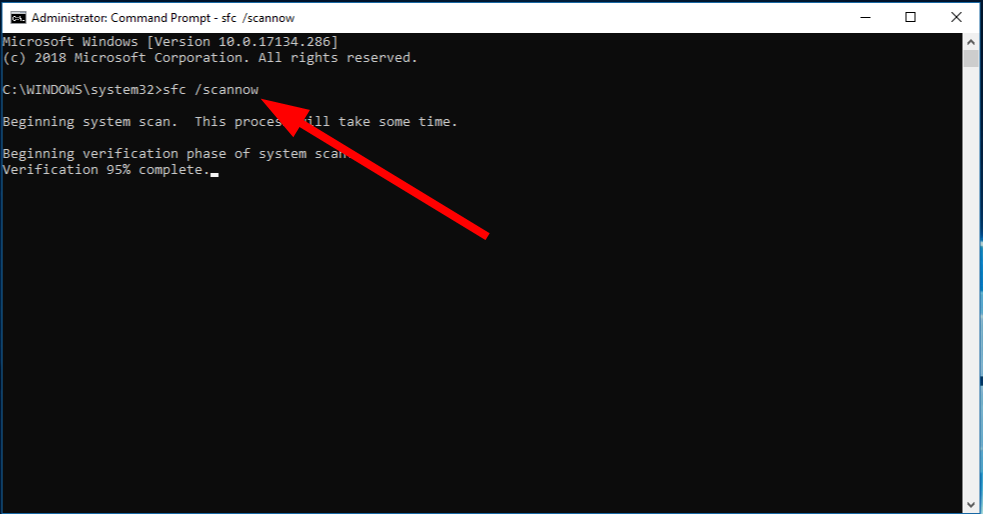
Press Windows then type cmd. Choose the Run as administrator option from the right side.
Type the following command and press Enter: sfc /scannow
When the scan is complete, restart your PC.
Once the SFC scan is finished, check if the problem is resolved. Several users reported that they couldn’t run the SFC scan on their PC.
The issue might be file corruption if you have any Autorun.dll errors on your Windows 10 PC.
According to users, sometimes your system files can get corrupted, and that can cause autrorun.dll to become missing or corrupted.
However, as explained above, you can permanently repair your files simply by performing an SFC scan.
If that’s the case, or if the SFC scan didn’t fix your problem, you might also have to use a DISM scan.
4.2 DISM command
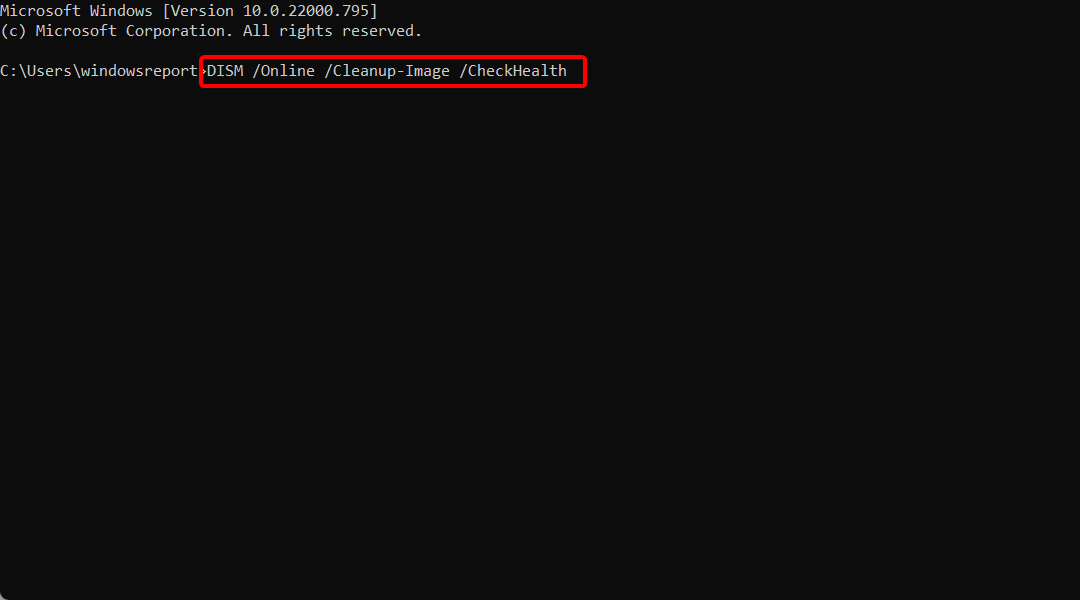
Start Command Prompt as administrator.
Run the following command: DISM /Online /Cleanup-Image /RestoreHealth
DISM scan will now start. It’s worth mentioning that DISM scan can take about 20 minutes or more, so don’t interrupt it.
Once the DISM scan is finished, check if the problem persists. If you could not run an SFC scan before, you might want to rerun it and check if that solves your problem.
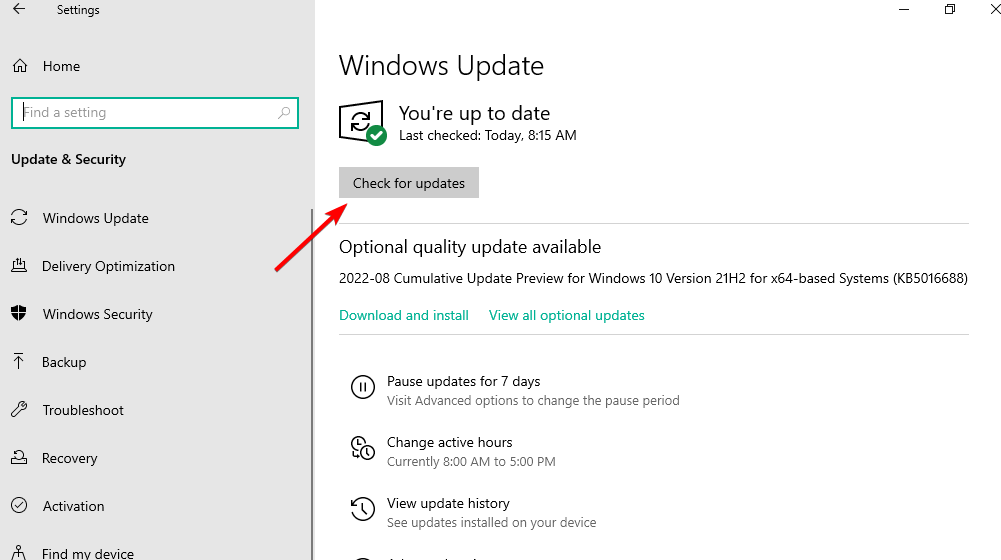
5. Install all the available updates
Press Windows + I to open the Settings app.
When the Settings app opens, navigate to the Update & Security section.
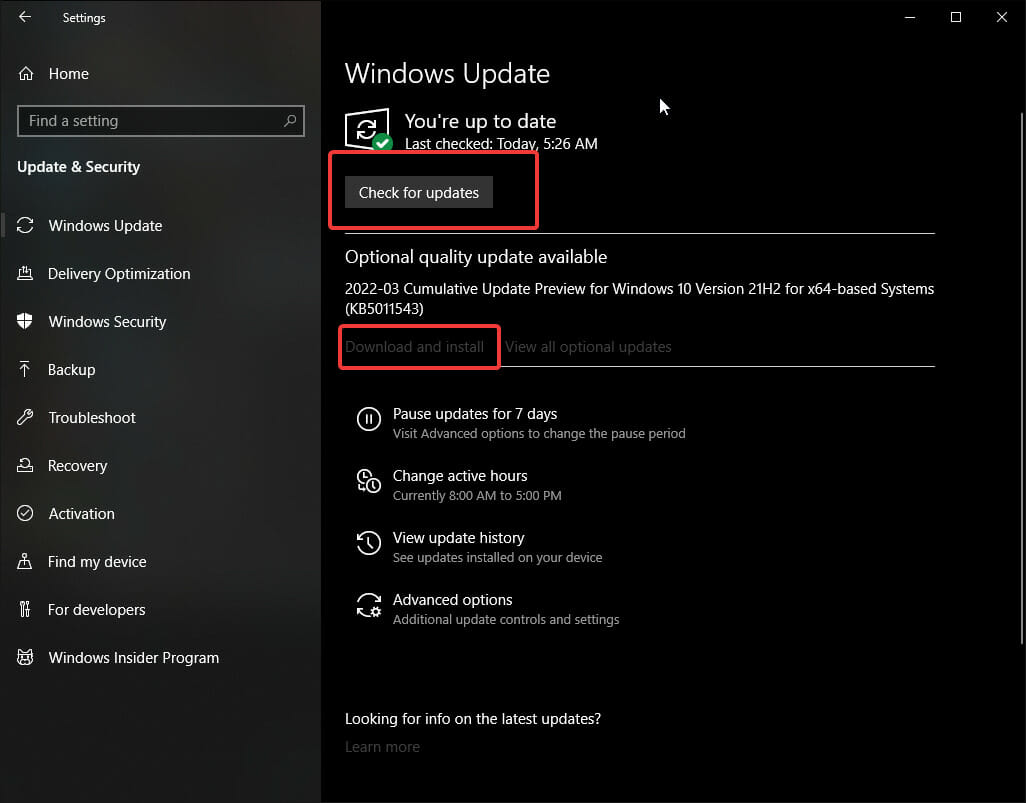
Now click the Check for updates button.
Windows will now check for available updates and download them automatically in the background.
Once the updates are downloaded, restart your PC, and the updates will be installed. Once your PC is up to date, check if the problem persists.
Outdated system drivers may also cause Autorun.dll errors. Go to Windows Update and install all the available updates.
If you’re getting the error when you try to run a particular program, such as a video game, your video drivers are likely outdated.
Windows 10 usually downloads the necessary updates automatically, but sometimes you might miss an update or two due to specific bugs.
You can download the necessary drivers from your manufacturer’s website if an outdated driver is a problem.
However, downloading drivers manually can be tedious, so it might be better to use a driver updating tool that can update all your drivers automatically.
6. Perform a system restore
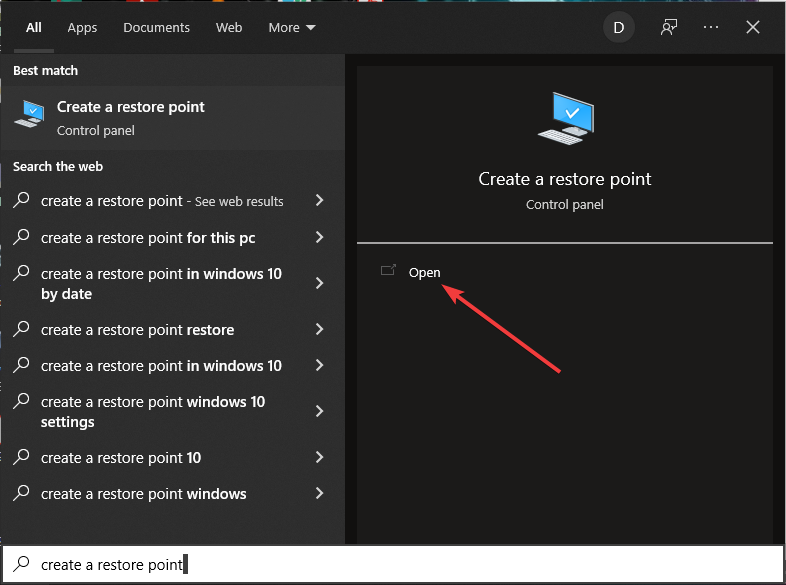
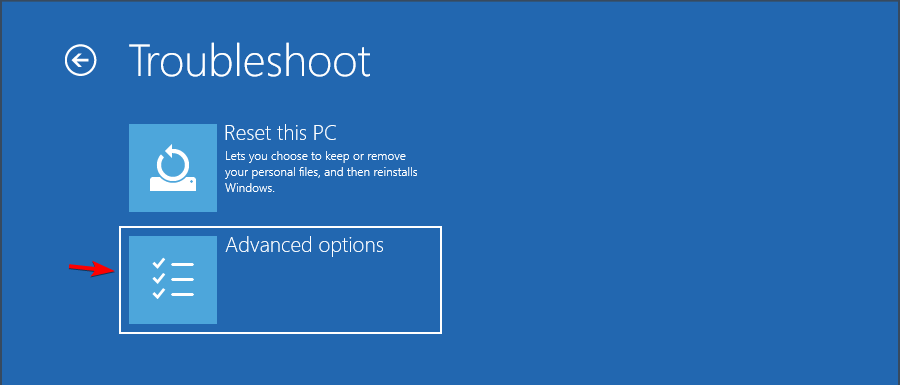
Type Recovery in the search box that you open by pressing the Windows key, then open the first result.
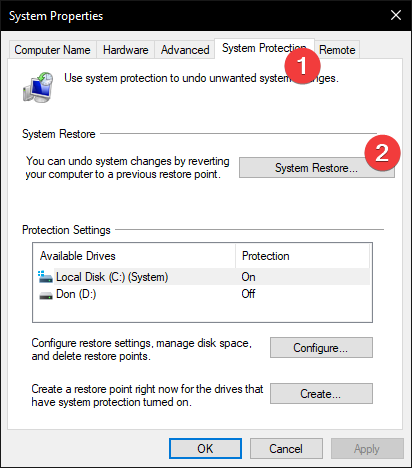
Next, select Open System Restore.
Follow the on-screen instructions to choose a restore point. The Autorun dll could not be a loaded issue and will be gone.
The System Restore feature allows you to return to a previous Windows state when everything is working correctly.
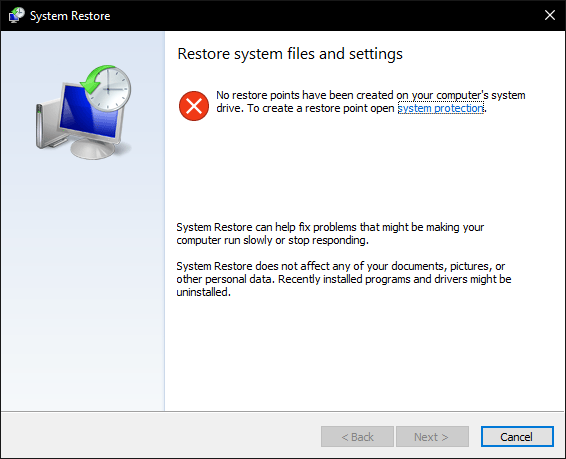
Unfortunately, if you don’t have any created points, you won’t be able to do this. So instead, check out how to make a System Restore Point in Windows 10 and Windows 11 so you can have one created for future errors.
7. Check your DVD drive
Many users reported this problem while installing Windows from a DVD. According to users, a faulty DVD drive caused the problem.
To fix the problem, checking if your DVD drive is working correctly is recommended. You can do that by trying to read other DVDs.
If your DVD isn’t working correctly, you must replace it to solve the problem. If you don’t feel like replacing your DVD, you can always try to install Windows from a USB flash drive.
You must create installation media using the Media Creation Tool and boot your PC from the installation media.
8. Check your DVD drive options
According to users, if you’re having problems with Autorun.dll, the issue might be your DVD drive options.
Several users reported that they fixed the problem simply by turning on Enable CD recording option in their DVD drive options.
After enabling this option, the issue with Autorun.dll was resolved entirely.
9. Reinstall your DVD drive
Right-click the Start icon then select Device Manager.
Locate your DVD drive on the list, right-click it, and choose Uninstall device from the menu.
A confirmation dialog will now appear. Click Uninstall to confirm. The Autorun dll could not be loaded issue will be solved.
Once the driver is removed, restart your PC and check if that solves the problem.
As we previously mentioned, issues with Autorun.dll can appear due to problems with your drivers. However, several users fixed this problem simply by reinstalling their DVD drives.
How can I fix autorun.dll could not be loaded on Windows 11?
Several distinct potential causes for errors are associated with the autorun.dll file. For example, a malfunctioning program, the autorun.dll file may have been deleted or lost, or it may have been corrupted by malicious software installed on your computer.
The problem may almost always be fixed by thoroughly reinstalling the autorun.dll file on your personal computer under the Windows system folder.
Alternately, specific applications, most notably PC games, call for the DLL file to be stored within the folder designated for the game or application’s installation.
Use the DLL-files website to download the Autorun.dll file you need. But remember that you can’t download DLL files from any website as this action risks affecting your system.
What is Autorun dll?
An example of an Autorun Wizard Pages file is the file called Autorun.dll. The Windows operating system is where you will most frequently find it. It is a Win64 DLL file, a crucial component of the OS and one of its core files.
Autorun.dll typically consists of a collection of driver functions and operations that Windows can use. If you’re dealing with other DLL errors, such as UnityPlayer.dll issues, you can find solutions in our guide on UnityPlayer.dll errors.
When you get an error about DLL files, it is possible that the autorun.dll file on your computer was removed by a user unintentionally, that it was removed because it was a shared file with another software, or that it was removed as a consequence of a malware infestation.
Various Autorun.dll issues can appear on your PC and prevent you from installing specific applications.
This can be an annoying problem, and speaking of Autorun.dll issues, here are some of the most common problems that users reported:
Install Windows the file Autorun.dll could not be loaded 0x7e, 0xc1 or is corrupted. So setup cannot continue error code is 0x7e Autorun.dll download – You can quickly fix this error by running a full system scan as shown below.
Autorun.dll file error code 0x7e Windows 7, 8, 0xc1 Windows 10, Windows 11 – There are various errors related to Autorun.dll, which can appear on all versions of Windows. Even if you’re not using Windows 10, you should know that our solutions will also work for older versions of Windows.
The file Autorun.dll 0x7e Windows 10 – This error can appear on Windows 10, and if you encounter it, be sure to clean your registry and check if that solves the issue.
Autorun.dll could not be loaded or corrupted 0xc1 – This error can appear while trying to install specific applications. However, you might be able to fix it by performing a full system scan.
Autorun.dll missing Windows 10 – Sometimes, you might get a message saying that Autorun.dll is missing from your system. If that happens, you might have to perform both SFC and DISM scans to fix it.
Autorun.dll is missing or corrupt – If you’re getting an error message saying that Autorun.dll is missing or corrupt, you might be able to solve the problem simply by performing System Restore.
Why do DLL errors occur?
DLL errors occur due to a bunch of reasons, including renaming or deleting a DLL file. Also, certain applications modify the DLL file, and if it’s used by multiple apps, this may lead to the Autorun.dll error in Windows 10, amongst other similar issues.
Besides, corrupt system files or the presence of malware on the system can also lead to DLL errors. Another reason for it is improper installation of OS updates or issues while upgrading the OS.
How do I know if a DLL is corrupted?
Take advantage of the System File Checker to check Windows and recover your data if some Windows features aren’t working, or Windows crashes.
The System File Checker (SFC) is a handy program that can check and restore protected system files. It is run from the command line.
Assessing the reliability of your computer using this method is the simplest and quickest way to do it. It identifies issues with software installs and updates and searches for suitable replacements for corrupted or missing files, if feasible.
Follow our fourth solution to see how to run this scan on your computer. Now let’s see what we can do about the Autorun.dll error in Windows 10.
How do I install a DLL file in Windows 10?
There is an extensive range of third-party software available, and the vast majority of it lives up to its claims of being able to repair or replace DLLs that have been damaged or misplaced. These claims may be found in the program’s product descriptions.
Check out our post on the seven best DLL repair software that you can use that will not only repair but also download and replace Autorun.dll and other DLL files. This is the easiest method out there.
Are you often getting unresponsive web pages in your default browser? For example, some Firefox users usually get a Warning: Unresponsive script error message when a page is not responding.
This is not unique to Firefox; a Page(s) Unresponsive window usually opens for unresponsive pages in Google Chrome. Edge, Internet Explorer, and all other browsers can also have unresponsive page errors, which can be narrowed down to a few factors.
This article explores the problems and shows you the best fixes.
Why do I keep getting Page not responding?
When a web page becomes unresponsive, it’s probably a scripting error caused by extensions, an outdated browser or plug-ins, page bugs, etc.
It might also be due to overextended system resources preventing browsers from responding in time.
Also, this problem often indicates a problem with graphics rendering, and opening a new tab and visiting a different website will sometimes speed up the loading of the problematic tab.
Page not responding message can appear in any browser and prevent you from accessing your favorite websites. Speaking of this issue, here are some similar problems reported by users:
Page not responding Chrome, Internet ExplorerEdge
Page not opening in Internet Explorer, Chrome, Firefox
Page unresponsive you can wait for it to become responsive or exit the page
Web page not responding Windows 10 Edge
Page unresponsive keeps popping up
Page unresponsive error in Chrome – Why does Chrome keep saying page unresponsive
Website not loading properly in all browsers
Page unresponsive JavaScript
Page unresponsive Windows 10, Windows 11
Internet page not responding, page will not load
Page cannot be reached all browsers
Some websites not opening in Windows 10
So, if you’re often getting unresponsive pages in your browser, here are a few potential ways you can fix the problem in Chrome, Firefox, Edge, and Internet Explorer.
Before going through the hassle of trying to fix your current browser, you need to consider that maybe changing the browser would be far less of an effort.
A good and up-to-date internet browser is essential for a seamless online experience.
It would help if you had a tool with a firm privacy policy, some basic security features, and good performance without using p too many system resources.
The best browsers for Windows 10 are generally free and include VPNs, ad-blockers, and many plug-ins. On top of that, most of them are highly customizable, allowing users to sort their bookmarks, add/create themes, and more.
Check to see if the problem persists after switching your browser. If it is remediated, think about keeping the new browser permanently, as it may be better optimized for other situations.
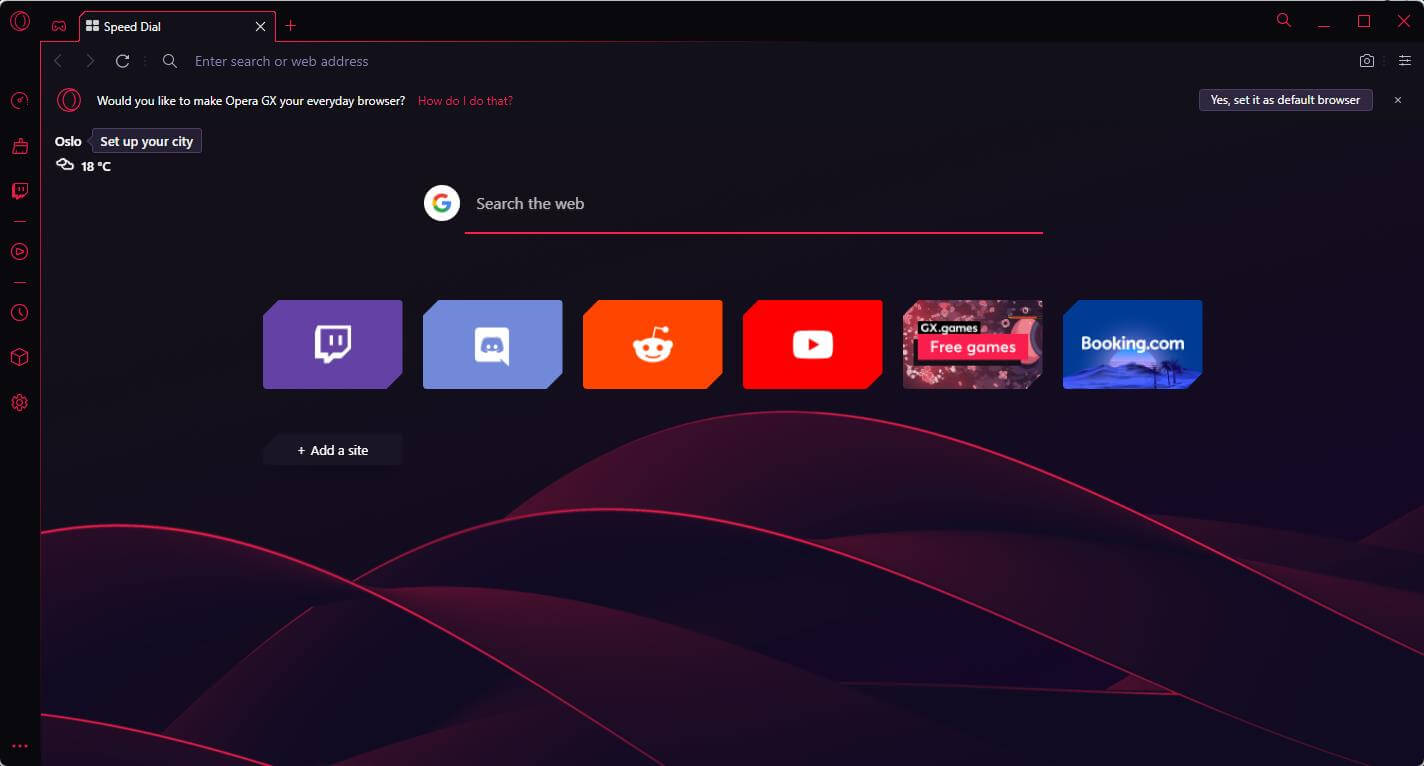
Therefore, a great option is Opera GX. It has unique features such as CPU, RAM, and Network limiters which help you speed up your browsing experience. It lets you choose how much of your network’s bandwidth you prefer to devote to your browser. You can also control your privacy and security thanks to its integrated VPN.
2. Check your antivirus
Open the third-party antivirus and access the Protection or Security menu. We offer Bitdefender as an example, but all antiviruses can be disabled from their menus.
Click the Open button under antivirus.
Lastly, select the Advanced tab and click the switch to turn off Bitdefender Shield.
Page not responding message can sometimes appear due to your antivirus, and if you encounter it, it’s advised that you temporarily disable certain antivirus features or your antivirus altogether.
If disabling the antivirus doesn’t help, your next step would be to uninstall your antivirus. Once you remove your antivirus, check if the issue is still there. Several users reported that removing their antivirus solved the problem for them, so if that’s the case, you should consider switching to a different antivirus solution.
Many great antivirus tools on the market won’t interfere with your system.
3. Remove superfluous browser extensions and apps
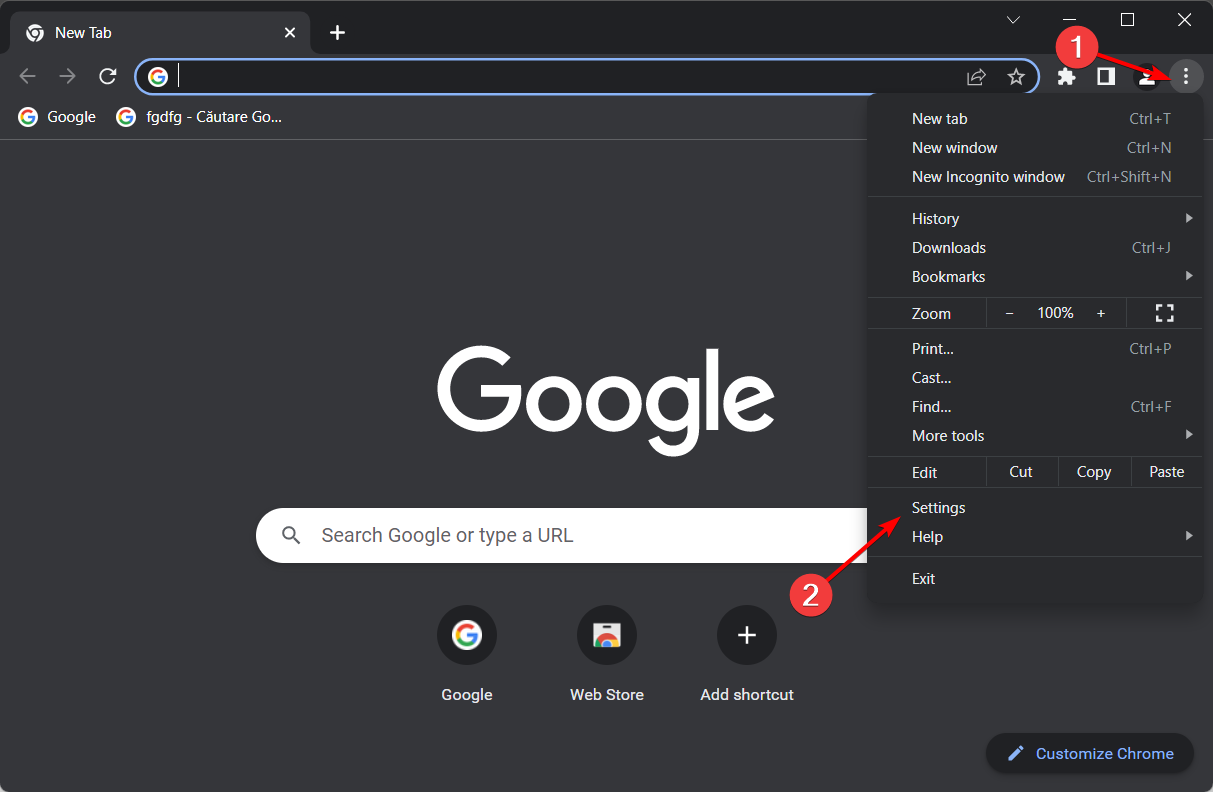
Click the Menu icon in the top-right corner and navigate to More tools > Extensions.
Click the little switch next to the extension you want to disable. You’ll need to repeat this step for all available extensions.
After the extensions are disabled, restart Chrome and check if the issue is still there.
If disabling the extensions fixes the problem, we advise you to go back to your browser and enable extensions one by one until you find the extension causing the problem. Once you find it, remove it, and the issue should be permanently resolved.
4. Reset or reinstall browser
Open Chrome and select Menu followed by Settings.
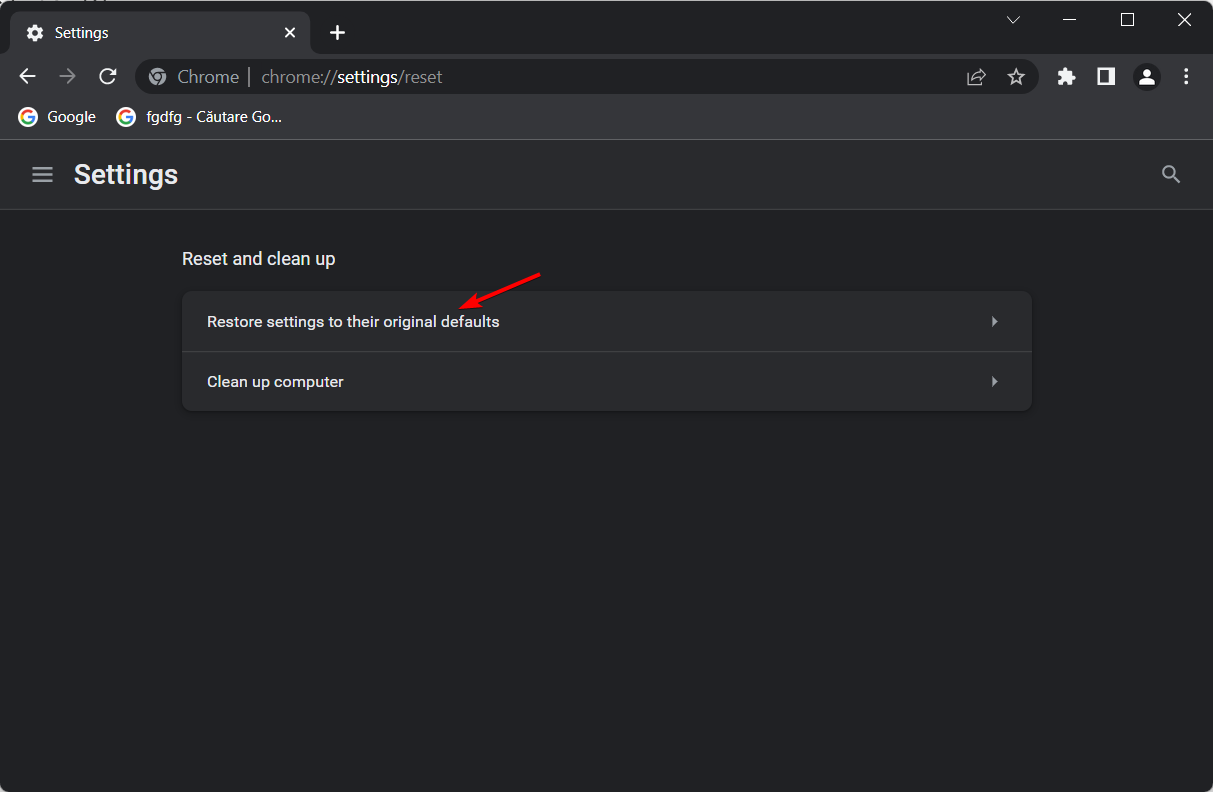
Click Reset and clean up from the left side.
Select the Restore settings to their original defaults option.
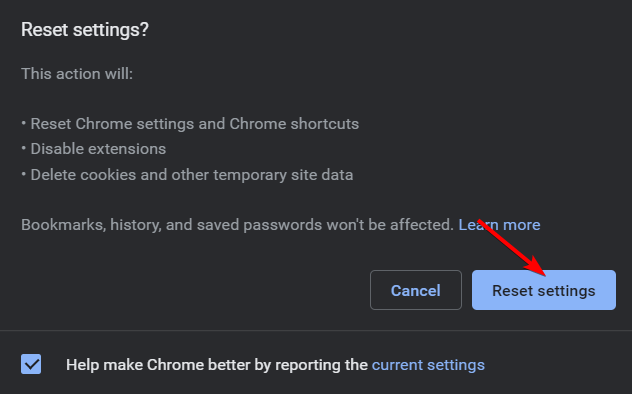
Lastly, click Reset settings.
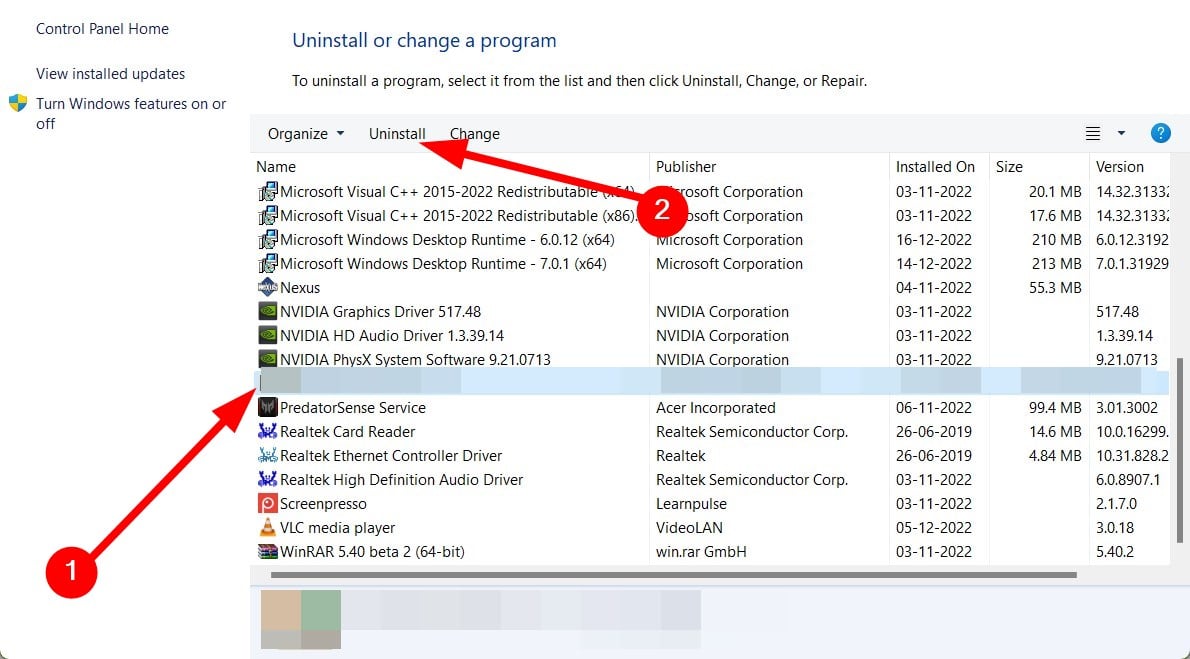
Click on the Start menu, type control panel, and click on the Uninstall a program option.
Search for your browser in the browser list, click on it and click Uninstall.
Follow the wizard to uninstall the browser.
Now visit the official website for your browser; in this case, we use Chrome.
Click the Download Chrome button.
Once downloaded, click the file and follow the wizard to complete the installation.
If the Page not responding message keeps appearing, the only way to fix this problem might be to reinstall your browser. There are several ways to do that, but the most efficient method is to use uninstaller software.
In case you’re unfamiliar, uninstaller software can remove any application from your PC, and it will also remove all files and registry entries associated with that application.
As a result, the application will be removed entirely from your PC, and there won’t be any leftover files to interfere with your system.
5. Update the Browser
Click the Menu icon in the top right corner. Now go to Help > About Google Chrome.
A new tab will now appear and check for available updates. They will be installed automatically in the background if any updates are available.
After installing the latest updates, check if the problem is still there. Remember that this method works for Google Chrome, but the procedure should be similar if you use a different browser.
If you keep getting a Page not responding message in your browser, the issue might be the browser itself. Sometimes your browser might be outdated, which can cause this and many other problems.
To avoid this and other errors in the future, it’s advised that you update your browser.
6. Clear the browser cache and cookies
Click the Menu icon and select Settings from the menu.
Scroll down and click Advanced.
Click Clear browsing data.
Set the Time range to All time; click the Clear data button.
Sometimes your cache and browsing data can cause this problem to appear, and to fix the Page not responding message; you need to remove your cache.
After a couple of moments, the cache will be cleared, restart the browser, and check if the problem is still there.
7. Switch off hardware acceleration
Click the Menu icon and select Settings from the menu.
Click on System on the left pane.
Toggle off Use hardware acceleration when available
Hardware acceleration can be a helpful feature that will utilize your hardware for better performance. However, sometimes this feature might not work correctly, and it can even give you a Page not responding message.
Therefore, we advise you to disable this feature to fix this problem completely. Even though this method works on Chrome, disabling hardware acceleration is similar for all major browsers.
8. Switch off Chrome’s Sandbox Mode
First, you should right-click a Chrome shortcut on the desktop and select Properties to open the window and tab below.
Click on the Shortcut tab, and add -no-sandbox to the end of the Target field. The Target field would look like the link below "C:Program Files (x86)GoogleChromeApplicationchrome.exe" – no-sandbox
Press the Apply > OK buttons to close the Shortcut Properties window.
This is a potential fix for unresponsive pages, specifically in Google Chrome. Chrome has a Sandbox Mode that’s supposed to be an antivirus measure but also requires extra system resources.
9. Adjust the dom.max_script_run_time Setting in Firefox
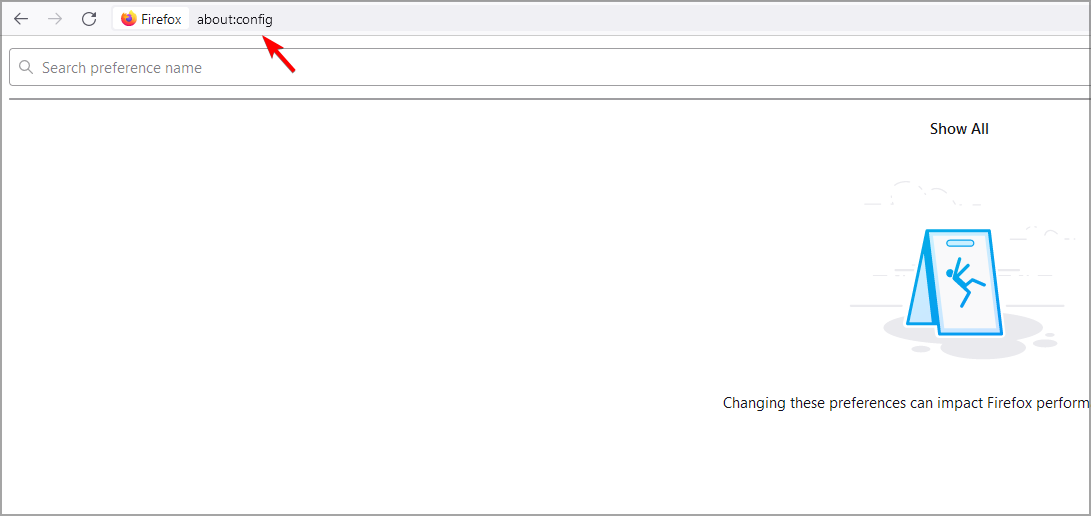
Input about:config in Firefox’s URL bar and press the Enter key.
Type the element below into the search box. dom.max_script_run_time
Next, you should double-click dom.max_script_run_time and input a higher value.
For example, enter 30 in the text box and press the OK button.
Firefox users can also configure page scripts to run longer, giving them more time to complete. Like this, you might not get so many unresponsive scripts and pages.
You can configure the scripts to run longer by adjusting an about:config setting in the browser.
10. Remove Chrome’s local files
Press Windows + R, and enter the path below, and press Enter or click OK. %localappdata%
Navigate to Google > Chrome > User Data directory.
Locate the Default folder and rename it. For example, you can rename it to Default.old.
Sometimes Chrome’s local files can get corrupted or damaged, leading to the Page not responding to the message. To fix this problem, you must find and remove these files manually. After doing that, start Chrome again, and the issue should be resolved.
What can I do if the page is not responding on Windows 11?
Typically, the solutions discussed above should work on Windows 11. It would be best if you tried the following:
Using a different browser
Disabling or uninstalling antivirusirus
Uninstalling problematic browser extensions
Reinstalling the browser
Regardless of the solution you pick, the steps will be similar to the solutions explained in the section above.
How do you unfreeze Chrome?
Use the keyboard hotkey Ctrl + Alt + Del.
Select Task Manager from the options list.
Click on the browser process, and click the End Task button.
Now restart the browser.
The above fixes won’t necessarily guarantee your browser will never have any other unresponsive pages. However, they will undoubtedly reduce page not responding errors in Chrome, Firefox, Internet Explorer, and Edge.
For more helpful guides, head to our Browser Errors Hub, and if you want to know more about browsers in general, head to our website’s Browser page.
How do I fix my games on Facebook if they’re not working?
1. Try a gaming-focused browser
Facebook games might work fine in alternative web browsers. So, try playing the game with a different browser, such as Opera GX.
Opera GX is especially recommended because it’s an innovative Chromium browser with novel features and a huge repository of extensions.
Plus, it’s optimized for gaming, incorporating a GX Control sidebar with which you can manage tabs, optimize RAM, and limit network bandwidth usage. Discord and Twitch are also integrated into Opera GX’s sidebar.
Opera GX
Explore the ever-expanding universe of Facebook games by using the gaming-specific Opera GX browser today.
Click the Customize and Control Google Chrome button at the far right of that browser’s URL toolbar.
Select Settings to open that tab in Chrome.
Next, click Site settings to open the options shown directly below.
Then click JavaScript.
Toggle the Allowed option on if it’s off.
Then restart Google Chrome.
Why can’t I play games on Facebook anymore 2022? If Facebook games are not working on Chrome, make sure that all the necessary components are working properly.
Firefox
Type about:config in Firefox’s URL bar, and press the Enter key.
Click the Accept the Risk button to continue.
Next, input javascript in the search box.
Double-click the javascript.enabled flag if it’s currently false.
Restart Firefox after enabling JavaScript.
3. Clear your browser’s cache and cookies
Google Chrome
Press the Ctrl + Shift + Delete keys at the same time within Google Chrome.
Click the Time range drop-down menu, and select the All time option.
Press the Clear data button.
Firefox
Press Firefox’s Ctrl + Shift + Del keyboard shortcut to open the Clear Recent History window.
Select the Cookies and Cache checkboxes.
Next, click Everything on the Time range to clear the drop-down menu.
Press the OK button to erase Firefox’s cookie and cache data.
If King games are not loading on Facebook, removing your cache is a great way to fix the problem.
4. Reset your browser
Google Chrome
Click Customize and control Google Chrome and then Settings in Chrome.
Click on Reset and cleanup.
Then click Reset to factory defaults.
Firefox
Click the Open menu button on the right side of Firefox’s URL toolbar.
Head to Help to open the submenu in the screenshot directly below.
Click Troubleshooting Information to open that tab.
Press the Refresh Firefox button.
5. Open Chrome or Firefox in incognito mode
You can utilize Google Chrome in incognito mode by pressing the Ctrl + Shift + N hotkey. To open Firefox’s incognito mode, press the Ctrl + Shift + P hotkey for that browser.
6. Update your browser
Google Chrome
Click the Customize Google Chrome browser button.
Select Help and then About Google Chrome to open the tab in the screenshot directly below.
Click Relaunch if Google Chrome installs a new update.
Firefox
Click the Open menu button to open Firefox’s menu.
Select the Help and then go to About Firefox options.
Press the Restart to update Firefox button.
Alter clearing the cache, check if the problem is gone.
Facebook games are updated solely by Facebook, so you don’t need to do anything in that regard. In most cases, Facebook will do that automatically.
If a particular game is out of date, you might have to wait for a bit longer when you start it in order to install the updates, but no other actions are required.
So, that’s how you can fix Facebook games when they don’t load. This isn’t the only issue that users reported, and we already covered what to do if Facebook videos are not playing in your browser.
Although not necessarily guaranteed, the above resolutions will usually fix Facebook games not loading. If further potential resolutions are needed, you can send an FB support email to [email protected].
If you face similar problems on other platforms, check out our full Wplace not working guide for additional fixes.
Did you find a different solution for this problem? If so, let us know in the comments section below.
In the next window, you will see the currently used DNS servers.
Click Start Benchmark. Wait for 20 mins approx for the results.
Once the test is complete, your browser will show you the results.
You can see the fastest DNS server for your connection from the top left corner.
Which is the fastest DNS server?
Tip
Determining the fastest DNS server can be difficult as the speed depends on various factors, such as the server’s geographical location, hardware, software infrastructure of the server, and overall network conditions. The DNS server, which is physically closer to you, will work faster for you.
With a global network of servers, Google Public DNS offers a fast and reliable DNS resolution for users. To use Google Public DNS, you can change your current DNS server address to Google DNS, i.e., 8.8.8.8 and 8.8.4.4.
This DNS resolution comes with advanced security features, including DNSSEC support and filtering of malicious websites.
Quad9 is one of the fastest DNS servers, which maintains a list of threats that keeps updating to ensure it blocks all malicious threats when you browse. In addition, it claims that it doesn’t store any personal data of users. To use Quad9, you can DNS to 9.9.9.9 as the preferred DNS and 149.112.112.112 as an alternate DNS.
It supports the DNSCrypt protocol, which encrypts the connection between the DNS server and the client to prevent MITM attacks.
More about Quad9
Blocks malicious hosts
20+ threat intelligence providers.
GDPR compliant.
Allows you to configure your router or Wi-Fi access point.
Cloudflare 1.1.1.1 DNS resolution comes with WARP that encrypts the outgoing traffic to keep you safe from snooping eyes. In addition, its global servers worldwide reduce latency between your device and Cloudflare, thus improving browsing speed.
To use the Cloudflare DNS server, you need to use 1.1.1.1 and 1.0.0.1 as the preferred and alternate DNS for IPv4, respectively.
Cisco’s Open DNS Home provides protection with a faster and more reliable internet connection. Moreover, it protects your connection from malicious URLs, IPs, and domains.
To use Open DNS, you need to use 08.67.222.222 and 208.67.220.220 as the preferred and alternate DNS for IPv4, respectively.
You can improve both speed and security by switching to a trusted resolver, and OpenDNS is one of the most reliable choices. Learn more in this guide on OpenDNS free DNS.
More about Open DNS Home
Keeps your connection safe from cloned websites, malware, and phishing attacks.
One of the best DNS servers for gaming is Google Public DNS. It is reliable, faster, and has a global network of servers. Alternatively, you can also use OpenDNS and Cloudflare for gaming.
So, these are some of the fastest DNS server options for you. You can either use the benchmarking tool or choose any of the reliable options mentioned above to enhance your browsing speed without jeopardizing your privacy.
Elder Scrolls V: Skyrim doesn’t always save game settings for players. Some players have said in support forums that Skyrim doesn’t save newly selected videos or control settings.
Consequently, changed settings will reset for those players when they restart the game. This can be frustrating, as you must repeat the same settings repeatedly. This guide will show you how to fix this issue effortlessly.
Why isn’t Skyrim not saving my selected settings?
Several factors can cause the Skyrim settings not saving issue. Below are some of the prevalent ones:
Lack of privileges: Sometimes, your games require you to have administrative rights to make changes to their files. If you are not running the game as admin, it might be why your Skyrim is not saving your settings. It would be best if you corrected this by launching it as administrator and in compatibility mode.
Antivirus interference: Your security software might also prevent your game from saving some in-game changes on your PC. The solution is to disable the software and probably switch to one of the best antiviruses for Windows PC.
Lack of ownership: In some cases, you might not the permission the write to your game files. The fix is to take ownership and total control of the file and restart Skyrim.
How can I fix Skyrim if it is not saving settings?
1. Disable read-only for Skyrim’s INI files
Click File Explorer’s folder icon on the Taskbar and navigate to the path (replace %USERPROFILE% with your user folder name) below: %USERPROFILE%\Documents\My Games\Skyrim
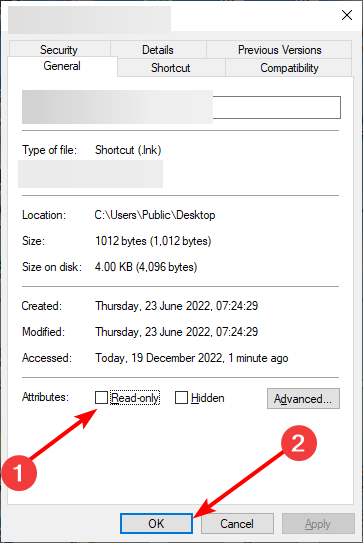
Then right-click the SkyrimPrefs.ini file and select its Properties option.
Uncheck the selected Read-only checkbox there.
Click the Apply button followed by OK to save settings.
Repeat steps three to seven for the Skyrim.ini file.
If your INI folder is set to read-only, you might not be able to make changes to it. This can cause Skyrim not to save your settings. Following the steps above should correct it.
Note: You’ll need to.
2. Take ownership of Skyrim’s installation folder
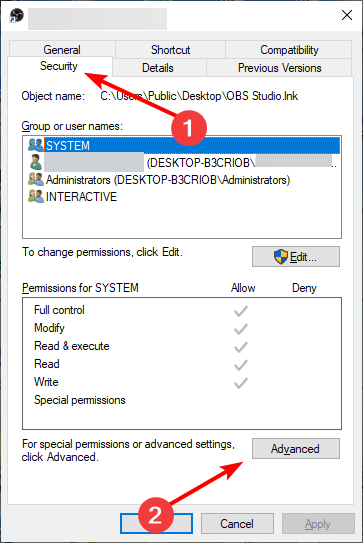
Right-click the Skyrim installation folder and select the Properties option.
Click the Security tab at the top.
Now, click the Advanced button.
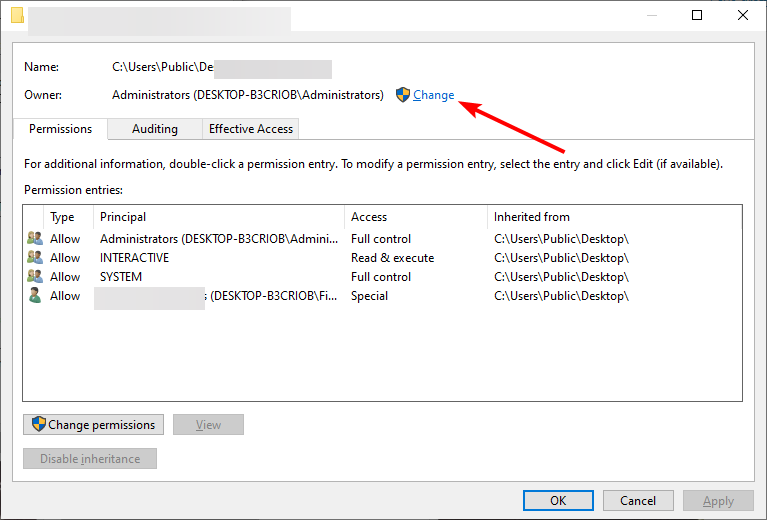
Next, click the Change option before the Owner section.
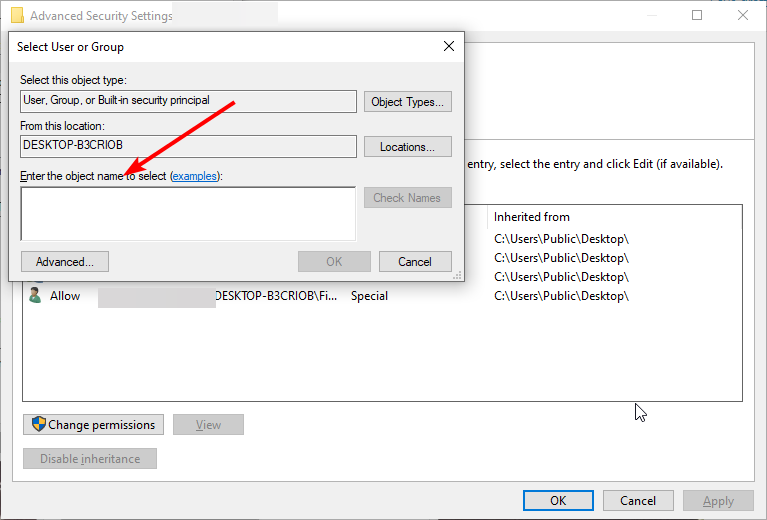
Type your User profile name in the Enter the object name box.
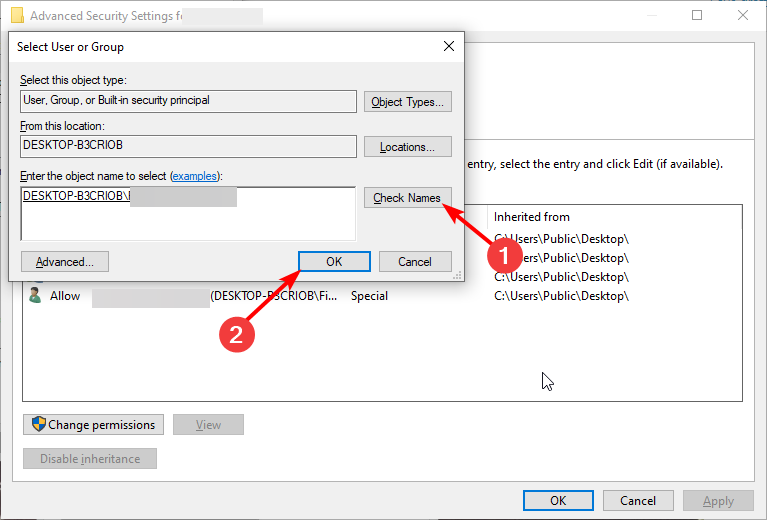
Now, click Check names, followed by OK.
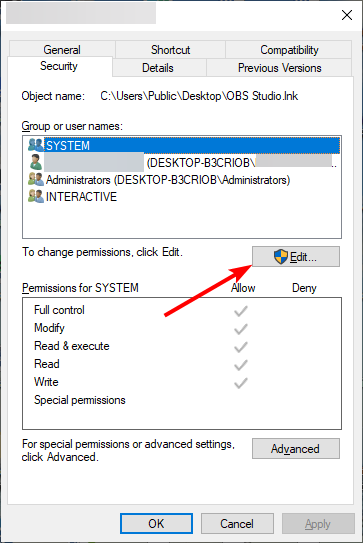
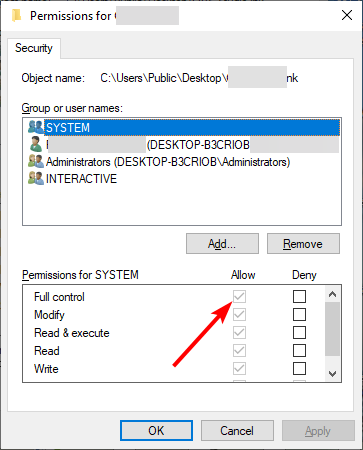
Go back to the Properties window and click the Edit button.
Next, check the box for Full control and click OK.
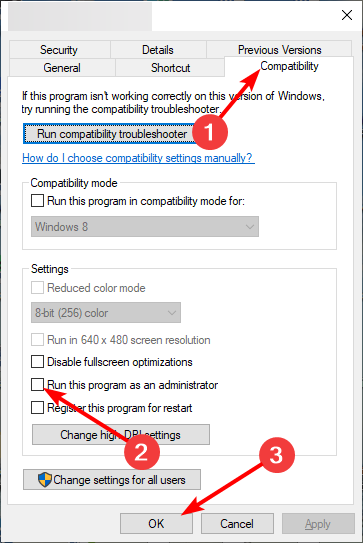
Right-click the TESV file in the Elder Scrolls V Skyrim folder and select Properties.
Click the Compatibility tab at the top and check the box for Run this program as administrator.
Finally, click the Apply button, followed by OK.
To make unrestricted changes to Skyrim, you need free access to its files. Else, the game will not save your changes.
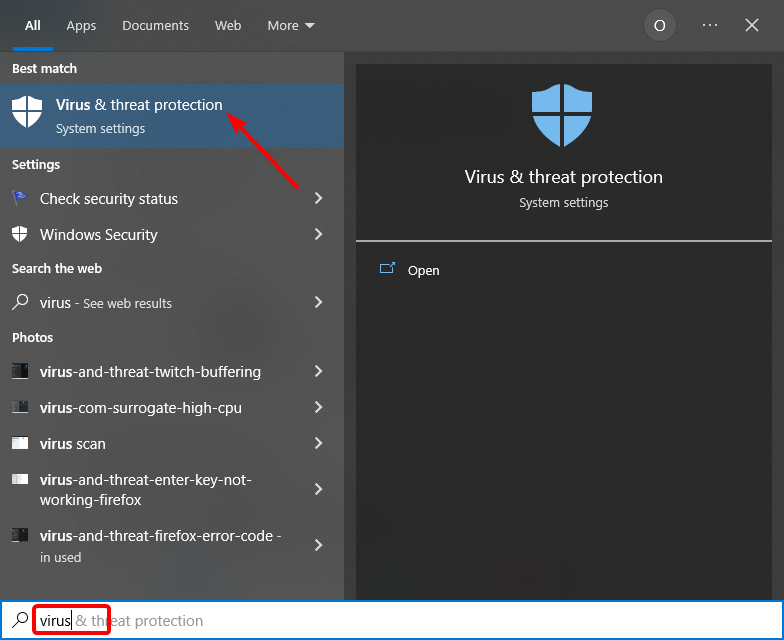
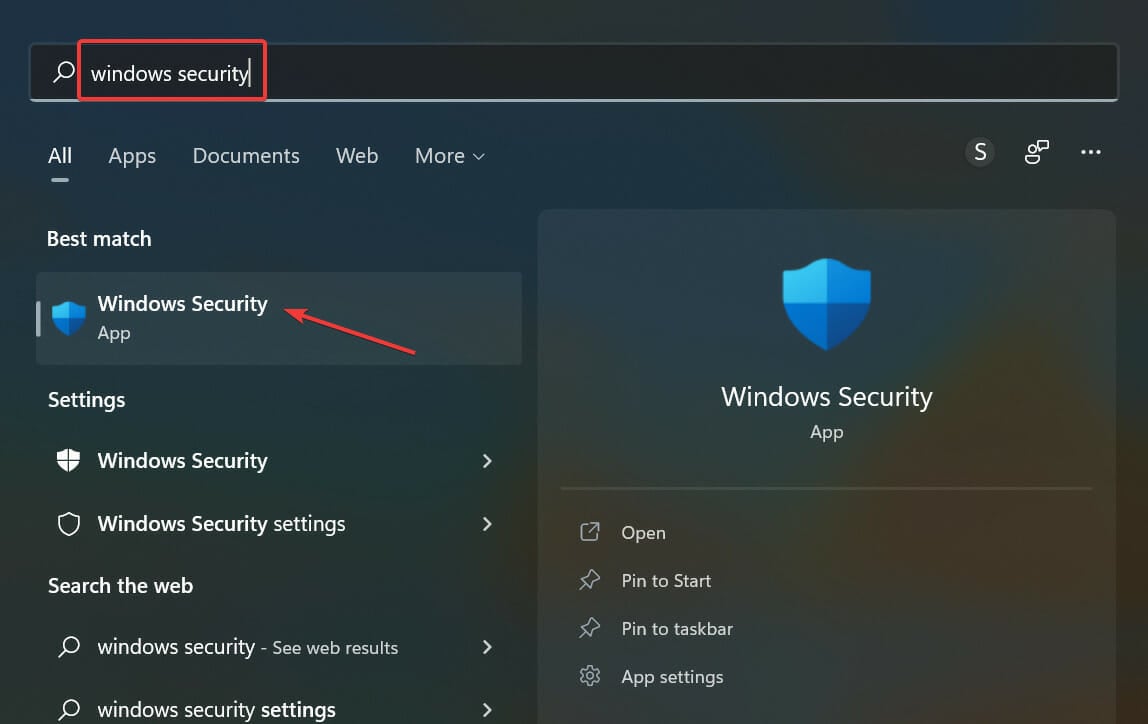
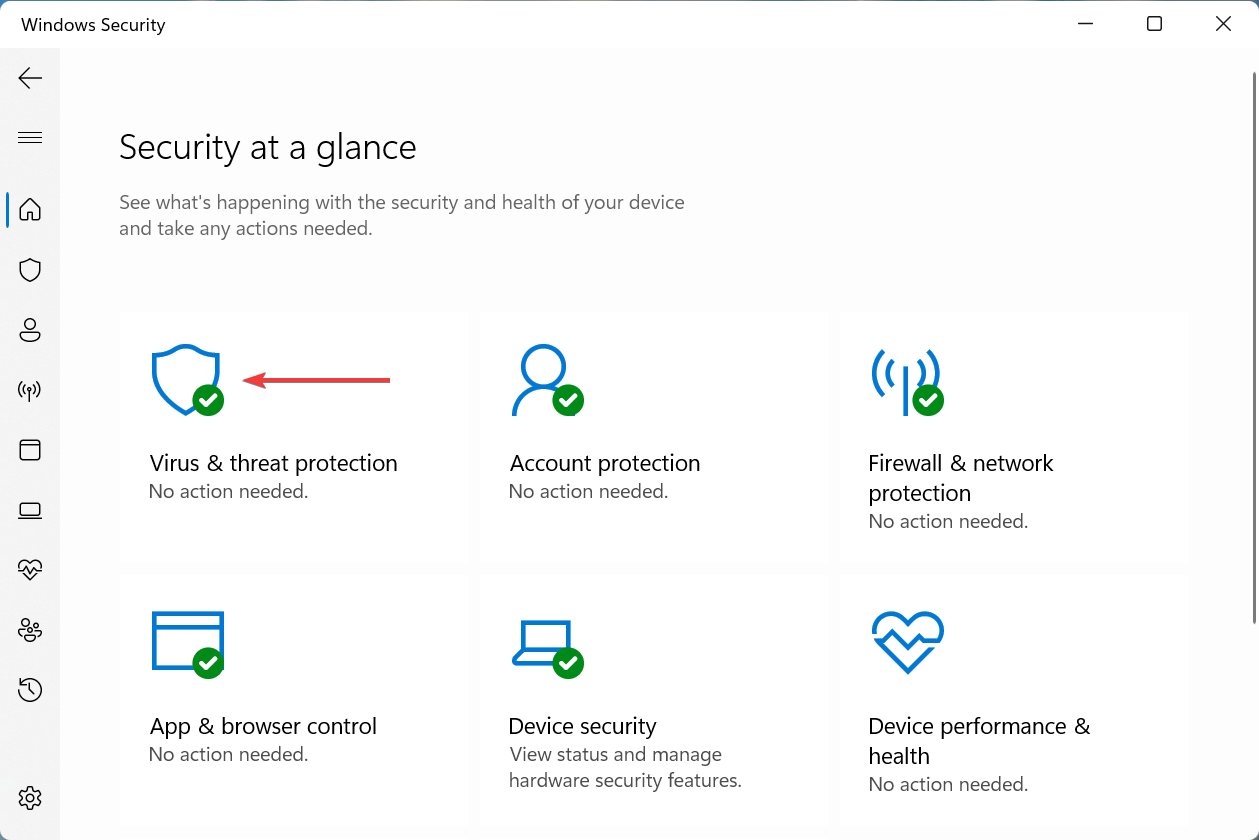
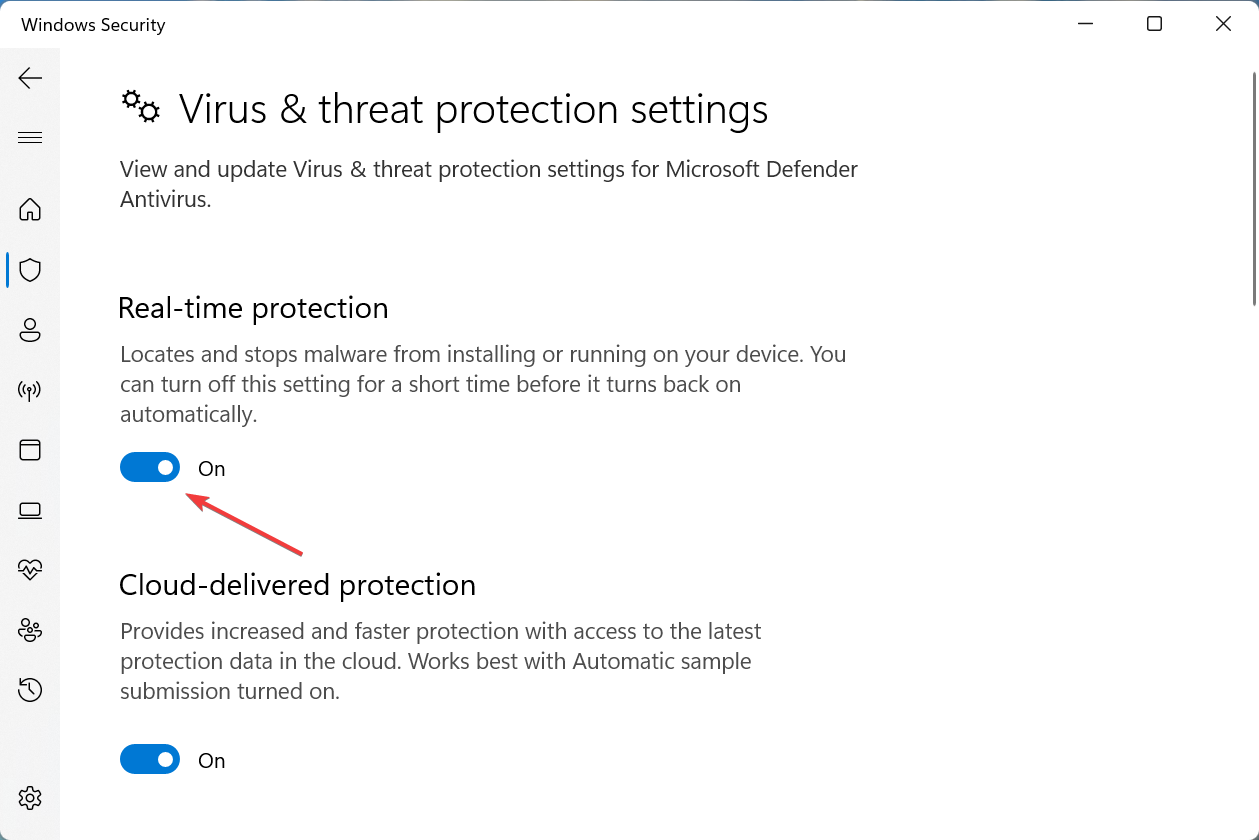
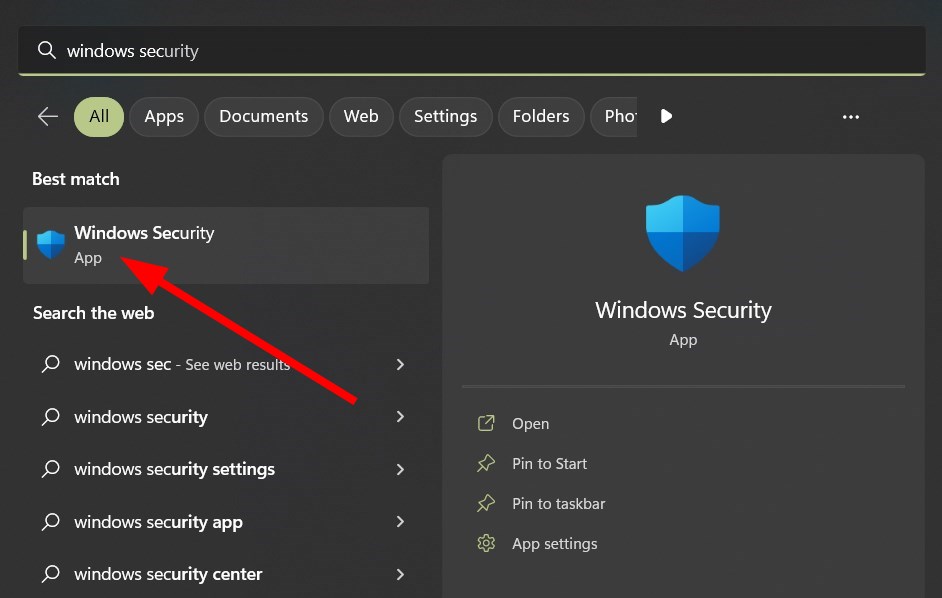
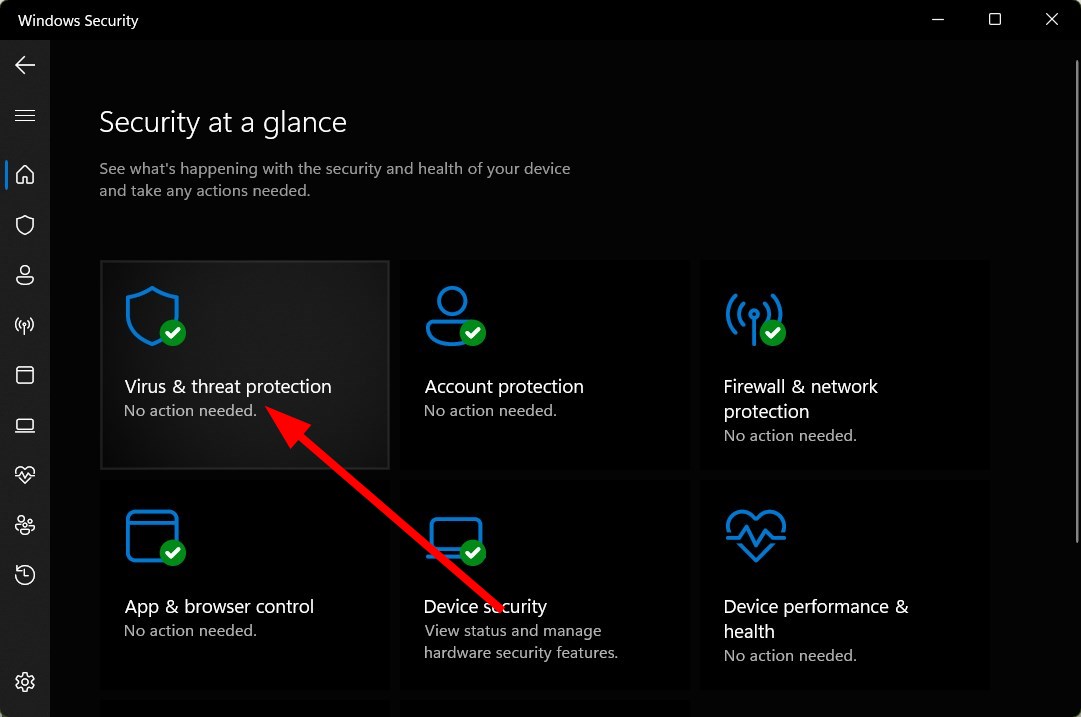
Press the Windows key, type virus, and select Virus & threat protection.
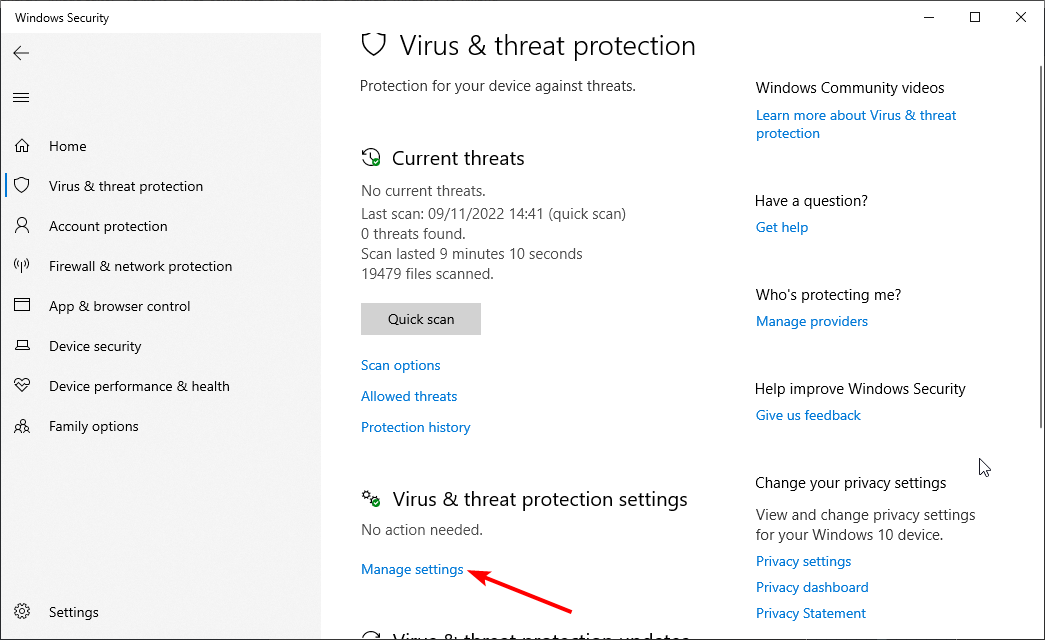
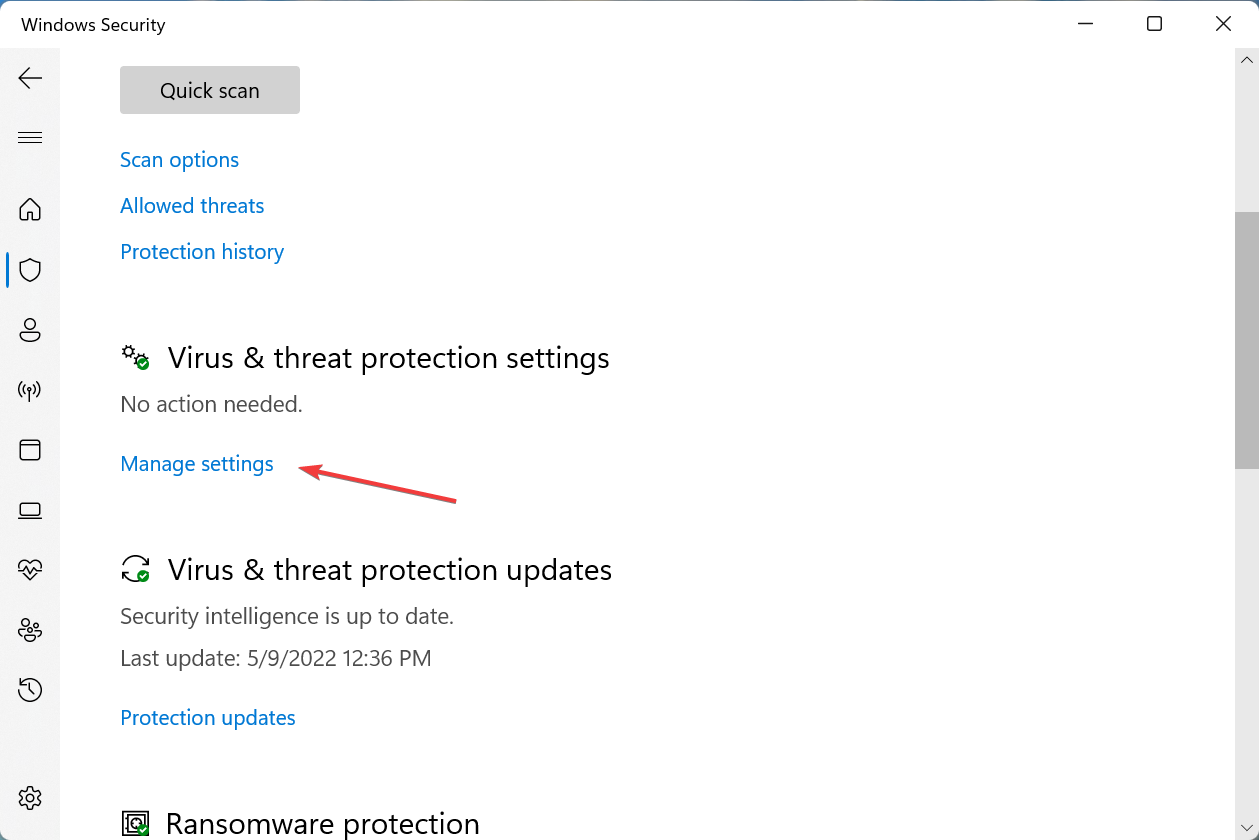
Click Manage settings.
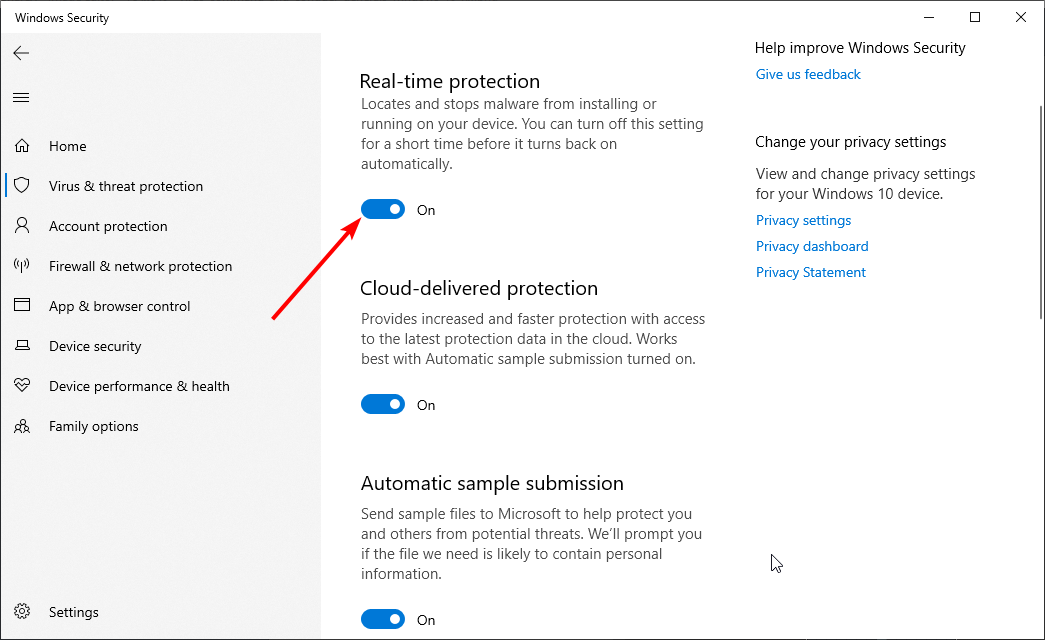
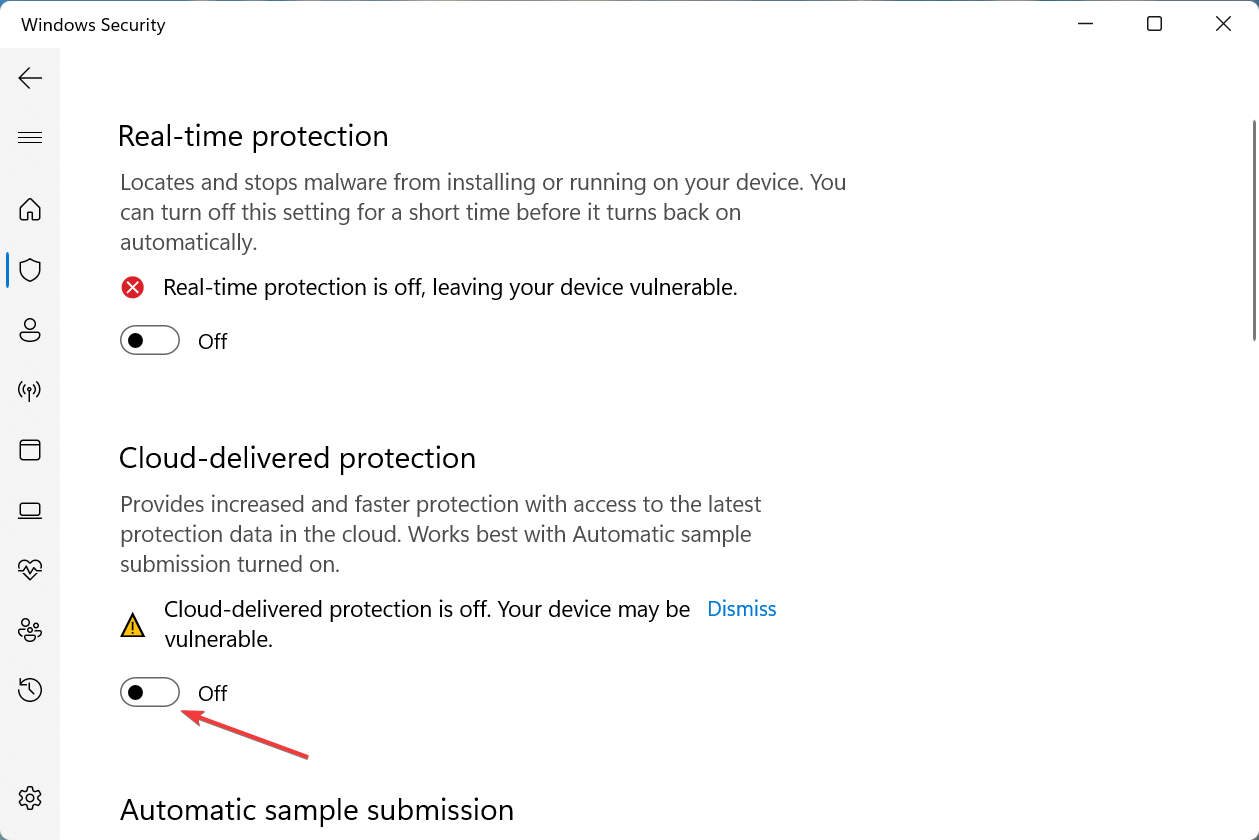
Next, toggle off the Real-time protection option.
If you’re utilizing a third-party antivirus software, disable that utility’s shield. Right-click its system tray icon and look for and select a disable (turn off) setting of some kind.
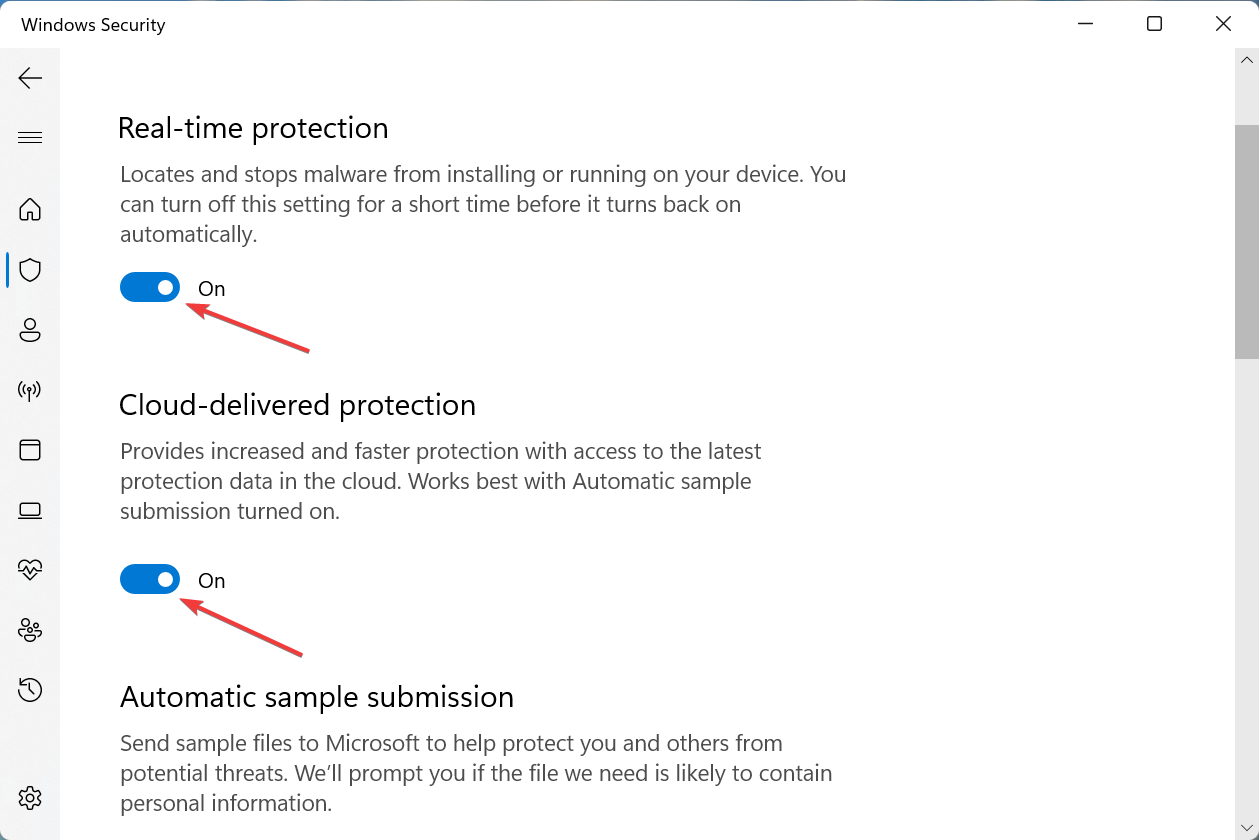
If this fixes the problem, you should remember to enable your antivirus after saving the changes.
That is all there is to fix the Skyrim not saving settings issue. In most cases, taking ownership and complete control of the installation folder should solve the problem.
So, if you are not sure how to redeem V-Bucks on Xbox, here’s a quick guide to help you through.
How do I redeem Fortnite V-Bucks on Xbox?
Visit the official page for Epic Games on your Xbox device to redeem your V-Bucks card. Then either log in with your Epic Games account or with the Xbox Live account.
Next, click on the Get Started button.
On the next page, you would need to scratch off the security covering to unveil a unique VBucks PINcode. Press Next.
Now, on the next screen, you will be asked to Choose the device you play Fortnite on. Here, select Xbox and press Next.
On the next page, review the details related to the Epic account to ensure that the device and the balance info are correct. Press Confirm.
For Xbox or PlayStation, a second code is generated (also sent to your email) which is usually a 12 or 25-character code. Enter the code in your Microsoft or Sony account.
From the V-Bucks redemption website, you will be now redirected to sign in to your third-party account. You mustsign in to the account associated with your Epic account.
Enter the 12 or 25-character code, and the V-Bucks will be added to your account.
Now that you know how to redeem the V-Bucks gift card on Xbox, you can have fun with the game.
Next, click on the Transactions button on the left. On the right, select VBucks card redemption history from the drop-down.
On the next screen, you will see your VBucks Xbox code under the VBucks Card Code section.
At the same time, please note that V-Bucks are not transferable between accounts. Also, refunds are not offered on V-Bucks. You can spend them on gifts for friends if you no longer want them.
If you purchased V-Bucks from the Microsoft Store but not receive them yet, follow our post for more details.
For other issues like if your balance is incorrect, you may contact Fortnite support for assistance.
If you have any other queries about Fortnite V-Bucks, leave a message in the comments box below.
Call of Duty: Black Cops is one of the most played video games. However, some users report that the Start button is not working in Cold War.
This can be frustrating, as you cannot leave the start page. Fortunately, this article is here to help you with the solutions to fix the issue for good.
Why can’t I press A to start Cold War?
There are a few known reasons the start button might not work in Cold War. Below are some of them:
Incomplete content pack: Sometimes, the game installer might not download all the required content packs for the game to run smoothly. This might be the reason Cold War is stuck on the start screen. You need to check the Microsoft Store for any missing content pack to run the game.
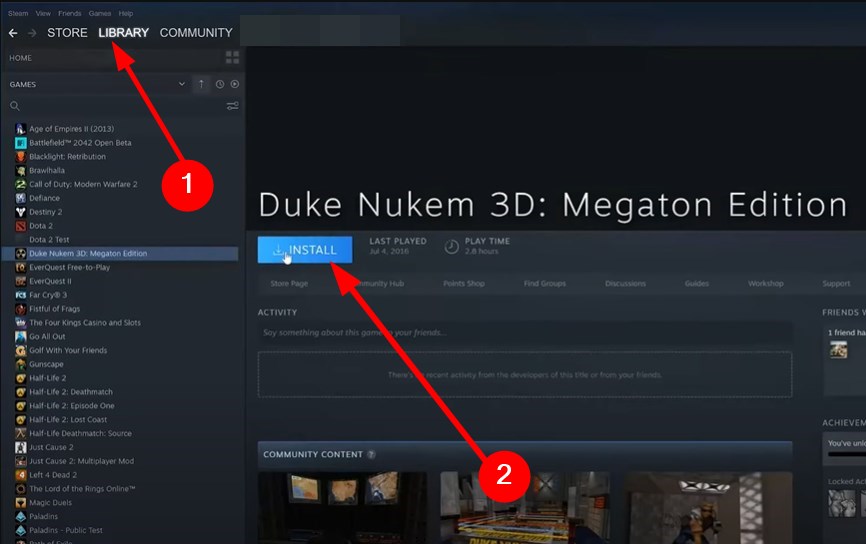
Issues with the game: In some cases, the game files might run into problems that can cause this issue. The solution here is to uninstall the game with one of the best uninstaller software and reinstall it.
What can I do if the Start button is not working in Cold War?
Before making any changes to the game, perform the following troubleshooting steps:
Restart your controller
Relaunch the game
If these steps do not fix the issue, you can now proceed to the solutions below:
1. Make sure that all the content pack is downloaded
Most users have noticed that their Start button is not working in the Cold War game because of incomplete files. This happens if you cannot download all the content packs during the installation.
Press the Windows key + I to open Settings and choose the Apps option.
Now, select the Cold War game and click the Uninstall button.
Finally, follow the onscreen instruction to complete the removal.
To make sure you remove all the game files, you should use uninstaller software in CCleaner. This tool will remove all the components of the game and ensures there is no residual file that can cause problems in the future.
If the fixes above do not fix the Start button that is not working on Cold War, you need to get in touch with the support team. This is because the issue might be due to a bug with the game.
We have selected the best methods you should try if Call of Duty: Black Ops Cold War will not leave the start page on your PC.
Sager is a premium gaming laptop brand for gaming enthusiasts looking for a performant notebook. It is a newer brand among names like Alienware and MSI, but they build high-quality devices.
The Sager NP8957 is one of the best thin gaming laptops with excellent specifications at an acceptable price, and in this guide, we’re going to take a closer look at it.
Here’s everything you need to know Sager NP8957 review
Design
The Sager NP8957 has a sleek look with a nice-looking wing, and the Sager branding glows when the screen is lit up.
The laptop is extremely thin, with only 0.78 inches in thickness, making it a very portable device. As per the other dimensions, it has 9.92 inches in length and 14.96 inches in width.
However, the bezel around the edges of the screen is quite large, especially for a new laptop.
Display
The display is 15.6 inches large, Full HD, with a resolution of 1920x 1080. It also features a 144HZ refresh rate with a wide-angle view. Even if it does not have the best high refresh rate, it looks great, especially for laptops in this price range.
The matte display has a sharp and detailed picture quality with minimal blurs. A huge plus is that the screen is visible from all angles and in most lighting conditions.
CPU, GPU, and performance
The Sager NP8957 is built with the 9th Generation Intel Core i7-9750H-6 Core processor. Honestly, this thing is a beast. A processor that is highly powerful and reliable enough not to cause you any glitches while you’re gaming.
As you might think, this processor needs to have a performance cooling system to avoid overheating. It has strong enough fans that will cool down the laptop.
The Sager NP8957 has a great GPU, NVIDIA GeForce RTX 2070, with 8GB GDDR6 (Max-Q design).
Real-Time Ray-Tracing (RTX) creates exciting experiences and makes any game look super realistic. It brings out shadows, reflections, and lighting.
The Max-Q design is created for power efficiency in thinner laptops, mainly to extend battery life. Although, gaming laptops are known to have pretty bad battery life as a whole.
Battery
This model is not one of the best laptops with great battery life. Although, gaming and video editing tasks will consume fast the battery of any laptop.
Used for basics like browsing, reading, and editing word documents, the battery will last for around 3-4 hours. However, if you are using it for intensive tasks like video editing or gaming, you can use it for about 1.5 hours without needing to plug it in.
The laptop has a lot of ports, anything you might need. For monitor connectivity, you can use HDMI, Mini DisplayPort, and even a DisplayPort over the USB port. This is definitively nice when you need to connect up to 3 external monitors.
You will not have an issue with any USB. The laptop includes both USB types, A and C. Furthermore, you have an audio jack if you want to connect an external headset.
Besides these ports, the laptop has an RJ 45 port for network connectivity, a port that is missing on most thin laptops.
Main strong points and other features:
Best CPU for gaming, 9th Gen Intel Core i7-9750H 6-Core Processor
Full-color RGB illuminated full-size keyboard with numeric pad
Great and new GPU model, RTX 2070 8GB DDR6
RAM of 32 GB, enough for any video rendering software
Enough storage of 1 TB SSD
Plenty of connectivity ports, including RJ 45
Possibility to connect up to 3 external monitors
Sager NP8957 review: Verdict
The Sager NP8957 model is a perfect option for anyone that needs a device for intensive tasks. It brilliantly handles any new game with high graphic settings and video editing software.
It is a portable device due to its thin and light design, but the battery life is one of the main disadvantages of this laptop. You should have the charger to use for more than 3 hours.
15.6” Full HD 144Hz display
9th Gen Intel Core i7-9750H 6-Core processor
GeForce RTX 2070 8GB GDDR6
16GB DDR4 2666MHz
1TB M.2 SSD
Requires a power source for resource-intensive games
I download the tool to the desktop. I’m on an Admin account. I insert a 16GB thumb drive. I format it. I start the tool. I point it to the thumb drive. During the phase where the files are copied to the USB, I get some [..] error like this:
This is a pretty common error and many Windows 10 users are getting frustrated by it.
Can I solve the 0x80042405 – 0xA001B error easily?
Another efficient and time-saving resolution for Media Creation Tool not working is to run your file with administrator rights and remove any usage restrictions.
Hence, try our solutions and see if any of them work. If the issue is still present, there are a couple of other things we covered in this foolproof guide.
How do I fix error code 0x80070005 0xa001b?
1. Configure the USB drive as NTFS
Connect the USB device to your computer.
Go to the Start search bar and type This PC.
Now, right-click on the USB Drive partition and select Format.
In this tab, go to the File system tab and change to NTFS format.
Click the Start button to proceed. (Be aware that formatting will erase all the USB data)
This helpful guide can prevent you get Media Creation Tool bugs that involve errors like 0x80070005 0xa001b.
2. Use Diskpart
In the Windows search box, type cmd and right-click the first result Run as administrator.
Run the Diskpart command then type list disk. Write down or remember the number of your USB drive (for example, we’ll use Disk 1).
Now type these commands one by one:
select disk 1 <enter>
clean<enter>
convert MBR <enter>
create partition primary <enter>
format fs=fat32 quick <enter>
active<enter>
assign<enter>
After doing this, your USB drive with the Windows 10 v1903 should work just fine and the 0x80042405 – 0xA001B error in Media Creation tool should be gone.
Go to the Start menu search bar and type Downloads.
Find the MediaCreationTool file and right-click.
Select Properties at the bottom of the list.
Then, select the Compatibility tab.
Uncheck the Compatibility mode if it’s selected.
Click on the Save button to finish.
4. Run the Media Creation tool in Elevated mode
You can do this by simply right-clicking on the executable file and selecting Run as administrator. When the UAC prompt appears, click OK and let the tool do its job.
If you have any other questions or maybe an alternative solution, don’t hesitate to leave them in the comments section below.
Even though Windows 11 comes with a fresh new, more fluent, look, most users are disappointed to see that the File Explorer still lacks the highly requested tab support.
Everyone has stressed how much they want tabs in File Explorer for years, but Microsoft hasn’t transformed this into reality yet.
Now, be rest assured that while the File Explorer on Windows 11 doesn’t support tabs, there is an app called Files that does.
What is Files?
This is not an app from Microsoft, but a third-party app from an independent developer, and it first launched to the public in July 2019.
Also, the app isn’t a full replacement for the default File Explorer, but it offers users what they craved the most, which is tabs.
Since it was first released, Files received several updates and also a refreshed look, which makes it look quite natural on Windows 11, thanks to its updated icons and layout.
Another cool thing about this app is the fact that you can also use it on Windows 10 if you are not yet sure about switching to the new OS when the final version comes out.
In that regard, you should know that the latest Windows 11 preview build brings certain visual improvements regarding the menus and app previews.
The Files app is also touch-friendly and scales really well whether you use it on a tablet or your desktop. It lacks some of the features of Microsoft’s File Explorer, but, in return, it can fulfill some roles that make it unique.
The major advantage that Files has over the first-party File Explorer is that it supports tabs. Thus, you can navigate to different files and folders without constantly having to open a second window.
Also, remember that this app supports dragging and dropping files between tabs and the ability to open folders and tabs by hovering over them.
Specific system requierments to install the app
As with any app, there are some minimum specific requirements your device needs to meet to use the app, as seen below:
The site will try to open the Microsoft Store. Allow it by clicking on Open.
On the newly opened Microsoft Store, click on Free to proceed with the installation.
Once the app is installed on your Windows 11 device, it will open a separate File Explorer for you, in which you can benefit from the feature you so much desire.
2. Download and install it from the App Store
Click on the Microsoft Storeicon from the taskbar to launch the app.
Now go to the search tab, type Files and hitEnter.
Select the app from the list of results.
Proceed with the installation like in the previous solution.
What are some of Files best features?
Besides the much-desired tabs option, Yair Aichenbaum, the developer behind Files, did his best in complementing the overall design of Windows to give users a natural feel when using the app.
Using Microsoft’s Fluent Design, Files offers light and dark modes, icons that match the OS, and the option to drag and hold an item over a tab or folder to open that location. One of the best features in Files is the ability to manage OneDrive files as the native File Explorer.
You have the option to decide which OneDrive files you want to be stored locally and free up space by having them only on cloud.
Another thing worth mentioning is the fact that Aichenbaum takes into account all feedback regarding the app, as seen on their GitHub – CONTRIBUTING.md page:
Files thrives off of the contributions and input from users. We always look at your feedback when we decide what to work on next and we look forward to hearing your ideas. We welcome your contributions to the Files project, especially to fix bugs and to make improvements which address the top issues reported by Files users.
Because your input will help shape the future of Files, any notes or improvements you submit may actually make a difference and in our book, that’s pretty cool.
So, until Microsoft decides to include this option into the upcoming OS, you can simply use this third-party app that will surely make your job of navigating through your computer a lot easier.
Even more, if you are interested to know what types of apps are supported in the new OS, get a closer look at the new Microsoft Store in Windows 11.
Have you installed this app yet? Tell us about your experience with it so far, in the comments section below.
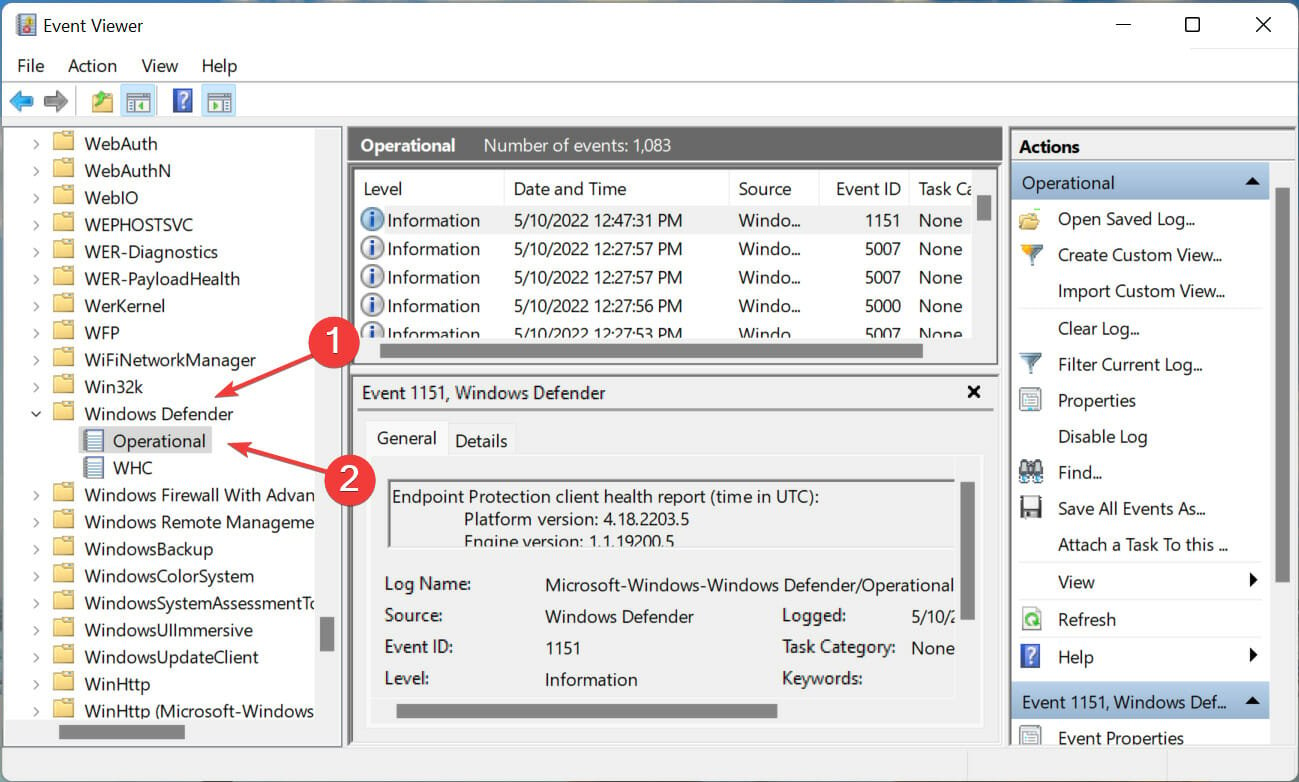
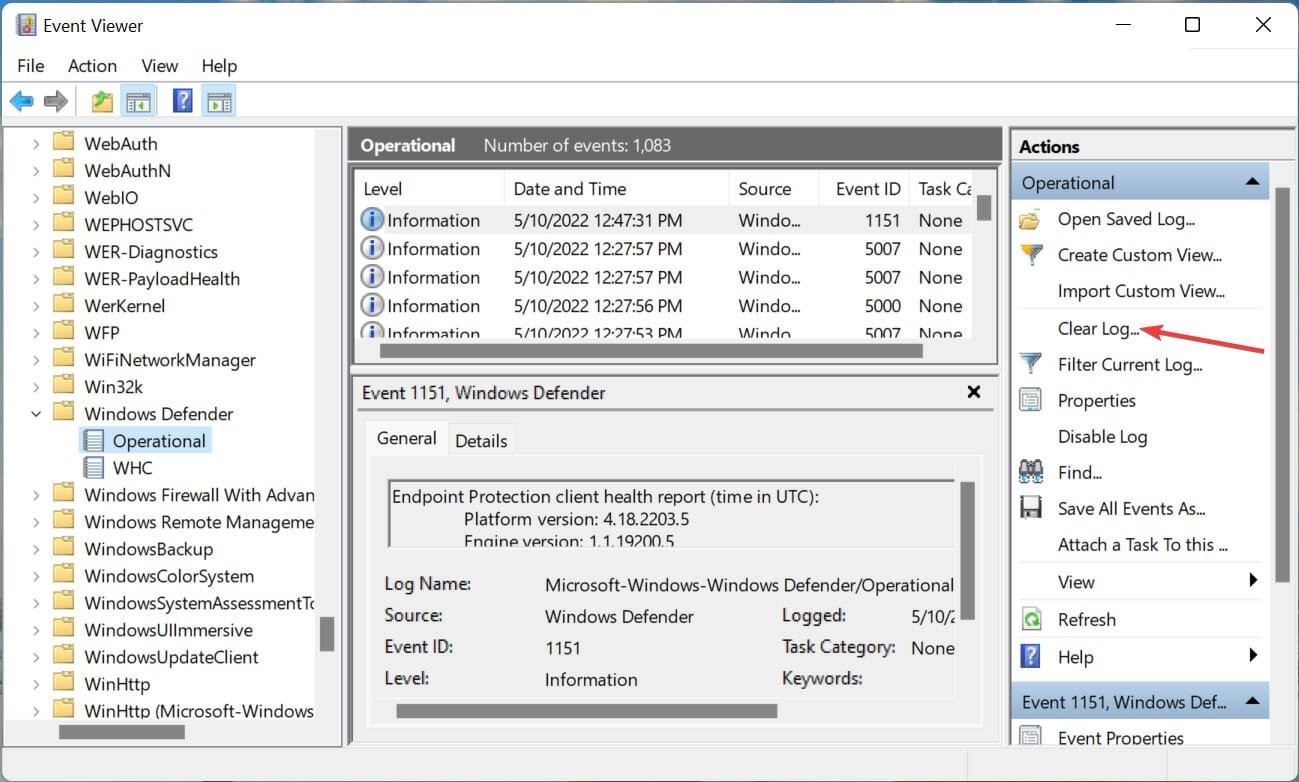
When your PC is running low on storage, there are a lot of folders you immediately look into to free up space. One of these that consumes a large portion is the Windows Defender protection history.
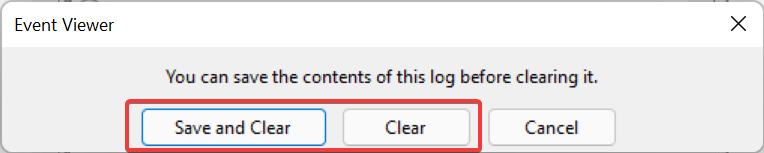
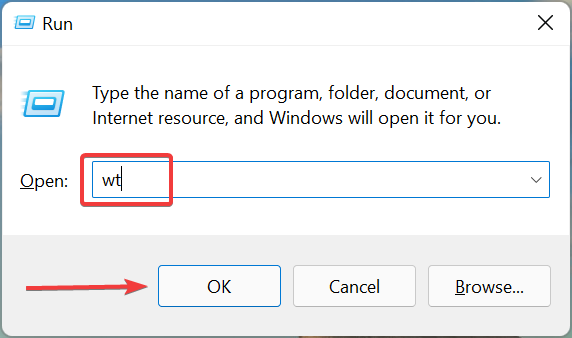
So, let’s find out what is protection history, all the ways you can clear Protection History in Windows 11, and how to configure it to clear automatically after a set period of time.
What is Protection History?
Microsoft offers a built-in antivirus, Windows Defender, to keep your system secure and free from any threats and viruses.
In order to achieve that, Windows Defender will run regular scans in the background, given it is enabled, and keep a log of problems that it identifies, along with the actions taken. It will list out the potentially unwanted apps that were blocked or removed, or if any critical services are turned off.
These logs or the information are referred to as the Windows Defender Protection History or simply Protection History. It categories the problems based on their severity level. Remember, you need to have administrator privileges to view the details of these actions.
Now that you have a fair understanding of the process, let’s walk you through the ways you can clear the protection history in Windows 11.
How do I manually clear protection history in Windows 11?
1. Use the File Explorer
Press Windows + E to launch the File Explorer, paste the following path in the address bar at the top, and hit Enter. Alternatively, you can navigate this path as well, just make sure to make the hidden files visible:C:\ProgramData\Microsoft\Windows Defender\Scans\History\Service
Once there, press Ctrl + A to select all the files, and hit Delete to clear them.
Choose the appropriate response in case a confirmation prompt pops up.
Now, go to this path:C:\ProgramData\Microsoft\Windows Defender\Scans
Locate the mpenginedb.db file, right-click on it and select the Delete icon from the context menu.
Again, choose the appropriate response if a confirmation prompt appears.
Once done, press Windows + S to launch the Search menu, enter Windows Security in the text field, and click on the relevant search result.
Click on Virus & threat protection from the options here.
Next, click on Manage settings under Virus & threat protection settings.
Click on the toggle for Real-time protection to disable it.
Click Yes in the UAC (User Account Control) prompt that pops up.
Similarly, disable Cloud-delivered protection under it.
Wait for a few moments, and then re-enable both the features.
The protection history in Windows 11 has been successfully cleared. Also, you now know the Windows Defender History location on the PC, and can easily delete it the next time onwards.
Press Windows + S to launch the Search menu, enter Event Viewer in the text field, and click on the relevant search result.
Double-click on Applications and Services Logs in the navigation pane on the left.
Now, expand Microsoft to view the options under it.
Next, double-click on Windows.
Expand Windows Defender and click on the Operational entry under it.
Click on Clear Log on the right.
Now, select the appropriate response from the confirmation prompt depending on whether you want to save its contents or delete it completely. We recommend the latter.
This is how you clear protection history in Windows 11 using the Event Viewer. The method is relatively simple and far more efficient for those who regularly check the error logs in Windows 11.
Both these methods help manually clear protection history, but what if you want it to be cleared automatically? There are a couple of ways to do that. Read the next section to find out.
How do I set the protection history to clear automatically?
1. Use Windows PowerShell
Press Windows + R to launch the Run command, enter wt in the text field, press and hold the Ctrl + Shift key, and either click on OK or hit Enter to launch an elevated Windows Terminal.
Click Yes in the UAC prompt that pops up.
Now, paste the following command in the PowerShell tab and hit Enter to execute it. Just make sure to replace N here with the number of days after which you want the protection history to be automatically cleared.Set-MpPreference -ScanPurgeItemsAfterDelay N
For instance, if you want the protection history to be cleared automatically after 7 days, the command becomes as follows:Set-MpPreference -ScanPurgeItemsAfterDelay 7
This is probably the easiest method to automatically clear protection history in Windows 11 using PowerShell. But in case you are not a big fan of the command line, try the next method.
2. Use Local Group Policy Editor (Gpedit)
Press Windows + R to launch the Run command, enter gpedit.msc in the text field, and either click OK or hit Enter to launch the Local Group Policy Editor.
Expand Administrative templates and then double-click on Windows Components.
Next, double-click on Microsoft Defender Antivirus and then on Scan under it.
Double-click on the Turn of removal of items from scan history folder policy here.
Select Enabled from the top, enter the number of days before the history is deleted, and then click OK at the bottom to save the changes.
That’s it! The protection history will now automatically be cleared after the set number of days. In case you want to keep the protection history forever, enter 0 in the field for the number of days.
Though not entirely necessary, deleting the protection history actually helps clear some storage space on the system.
For some users, these files took 20-25 GB of space, and that can be intimidating if your computer is running low on storage.
Is it safe to clear the protection history in Windows 11?
There’s no harm in clearing the protection history in Windows 11 and it certainly wouldn’t affect the functioning of the PC in any way. More so, these files appear in Disk Cleanup if you run a scan.
And it doesn’t matter whether Windows Defender is now disabled and you are using a third-party antivirus, you can still clear the old log files.
Also, if the files have accumulated over time and their size has increased considerably, it could cause a crash each time you open Windows Defender protection history. All the more reasons to clear protection history
That’s all there is to the concept. Also, the methods listed here would help manually clear the Windows Defender protection history in Windows 10 as well.
In case the Virus & threat protection is not working, learn how to fix it since the issue is common, and without it, you wouldn’t be able to access the protection history through Windows Defender.
Besides, if your PC is running low on resources, you may consider disabling Antimalware Service Executable (Windows Defender process), since it’s known to hog the system resources.
If you have any queries, drop a comment in the section below.
Have you got a Windows 11 touchscreen laptop that won’t calibrate or not working? You may encounter issues like the touch-enabled display not working or, sometimes, the Windows 11 touch screen won’t calibrate.
How do I calibrate the touch screen in Windows 11?
Follow the steps below to fix all of those issues in no time:
1. Download the touchscreen driver on Windows 11
1.1 Update the touch screen driver
Press the Win+ R shortcut key combination to open the Run console.
In the search field, type devmgmt.msc and hit Enter to open the Device Manager window.
Navigate to Human Interface Devices, expand the section, right-click on the device, and select Update driver.
Next, in the new window, click on Search automatically for drivers.
Windows will start looking up for the latest drivers on your computer and if the latest version is available, will install them automatically.
Once done, close the Device Manager, restart your PC, and check if you can now calibrate the Windows 11 touchscreen after the driver download.
Specialized driver updaters can help you solve this issue and install your drivers in just a few minutes with just a few clicks.
Make sure the touch input service is active before updating or reinstalling any drivers. Learn how to enable Tablet PC touch input on Windows 11 to restore full touch functionality.
1.2 Install the default drivers
Press the hotkeys Win + R together to launch the Run console.
Now, type devmgmt.msc in the search bar and hit Enter.
In the Device Manager window, expand Human Interfaces Devices, right-click on the touch screen device and select Uninstall.
You will now see a small confirmation prompt – Uninstall Device. Press Uninstall to confirm the action.
2. Surface Pro Windows 11 touch screen is not working
Press the Win + I shortcut key to launch Windows Settings.
Navigate to the left and click on Windows Update.
Now, go to the right and click on Check for updates.
Once Windows pulls up any recent updates, click to download them on your PC.
Now, restart your PC, and the update will be installed automatically.
You can refer to the Microsoft support page for more such Surface touch screen issues and possible solutions for other issues related to the touch screen.
3. Lenovo Yoga touch screen not working on Windows 11
3.1 Check if the device is compatible with Windows 11
Even though you manage to upgrade your PC to the Windows 11 OS, the touch screen will fail to work because the device is actually not compatible with Windows 11.
Therefore, make sure that your device meets all the Windows 11 system requirements, to ensure that the touch screen works.
3.2 Edit the Registry settings
NOTE
Make sure to create a backup of the registry editor settings, before you make any changes. This will ensure that any data lost during the process can be recovered easily.
Press the keys – Win + R on your keyboard. This will open the Run console.
In the search bar, type regedit and hit Enter.
Navigate to the below path in the Registry Editor window: HKEY_LOCAL_MACHINE\SYSTEM\CurrentControlSet\Enum\ACPI\ATML1000\3&233a31a5&0\Device Parameters
Now, go to the right side and double-click on EnhancedPowerManagementEnabled.
Set the Value data field to 00000000 and press OK to save the changes.
Now, exit Registry Editor, restart your PC, and the Windows touch screen not working issue should be resolved.
Press the Win + R keys together to launch the Run console.
In the search bar, type in, control panel and press OK.
Now, change the View by field to Category and select Hardware and Sound from the list.
Next, on the right side, select Calibrate the screen for pen or touch input.
You will now see the Tablet PC Settings dialogue box.
Under the Display tab, go to Display options, and click on Calibrate.
In the new dialogue box, select the Pen option and now follow the on-screen instructions to finish the calibration.
Once you finish the process, the surface pen in Windows 11 will be calibrated.
However, sometimes, you can’t calibrate the touchscreen on Windows 11. Below are a few methods that may help you fix the issue.
How do I adjust touch sensitivity in Windows 11?
Press the shortcut key combination – Win + R keys to open the Run console.
Type in, control panel in the search field and hit Enter.
Now, select Category from the View by drop-down and select Hardware and Sound from the list.
Next, on the right side, select Calibrate the screen for pen or touch input.
In the Tablet PC Settings dialogue box, check if the monitor in the Display field is the one that you want to calibrate.
Select the Calibrate button, and follow the on-screen instructions.
Once you have adjusted the touch sensitivity, the Windows 11 touchscreen won’t calibrate issue should be resolved now.
How do I disable the touch screen in Windows 11?
There could be situations when you do not want to use the touchscreen on your Windows 11 PC. In such a case, you can disable all the touch features easily through the built-in option as below:
Press the Win +R key combination to launch the Run console.
Write devmgmt.msc in the search field and hit Enter.
In the Device Manager window, expand Human Interface Devices.
Next, right-click on the first HID-compliant touch screen option and select Disable device.
The touchscreen is now disabled temporarily, and you can enable it again if you want or leave it as it is. Remember, for many, touch screen is not working in tablet mode, which often arises due to similar misconfigurations.
If the above methods fail and the touchscreen is still unresponsive, you can follow our detailed guide on Windows 11 touchscreen not working.
Moreover, if you find any other solutions that worked for you to calibrate the touch screen in Windows 11, do leave a comment in the comments box below.
Discord is a popular platform not just amongst gamers, but also people looking to interact with like-minded people. But, many have reported that the Discord mic is not working in Windows 11.
Discord allows you to connect via text, audio, and video with other users individually or in groups. While the former works fine, issues with the mic can affect your audio and video interactions.
But the fixes here remain rather simple and you can easily fix the Discord mic not working issue in Windows 11. Go through the following sections to find out all there is about the problem.
Why is my Windows 11 discord mic not working?
Whenever you encounter issues with the microphone in Windows 11, be it with specific apps like Discord or system-wide, it’s generally misconfigured settings or issues with the microphone driver to be blamed.
If the relevant driver is either corrupt or outdated, it could cause problems with the effective functioning of the mic and lead to it not working on Discord in Windows 11.
Microphone driver in Device Manager
Apart from that, if Discord does not have access to the microphone, you wouldn’t be able to use it while interacting on the platform. Besides, it could be a bug in the current version of the app or the OS installed on your device.
Be it any of the above causes, the fixes listed below would help eliminate the Discord mic not working Windows 11 issue. Follow the methods here in the listed sequence for quick and effective troubleshooting.
What do I do if the Discord mic is not working in Windows 11?
Before trying out more complicated solutions to fix your Windows 11 Discord mic not working issue, make sure that you try restarting the app. Such a reset is likely to get you rid of the problem within a few moments.
Moreover, try reconnecting your microphone cable, in case you’re using a wired mic, or reconnecting your Bluetooth connection to your mic, in case it is wireless.
1. Restart the PC
Navigate to the desktop, press Alt + F4 to launch the Shut Down Windows box, and select Restart from the dropdown menu.
Now, click on OK to restart the computer.
After the system restarts, check if the Discord mic not working in Windows 11 issue is resolved. If it’s a trivial bug behind the problem, the microphone should now be working fine.
In case the issue persists, head to the next method.
2. Set desired microphone as default input device
Launch the Discord app, and click on the User Settings icon near the bottom-left corner.
Select the Voice & Video option under App Settings.
Next, click on the Input Device dropdown menu, and select the desired microphone from the list of options that appear.
After making the selection, restart the computer for the changes to fully come into effect.
3. Make sure Discord can access the mic
Press Windows + I to launch the Settings app, and select Privacy & security from the tabs listed in the navigation pane on the left.
Now, scroll down and select Microphone under App permissions.
Verify if Discord has access to the microphone, and in case it doesn’t, turn on the toggle for it.
In many instances, users realized that Discord didn’t have access to the microphone. If that’s the case, it would appear as if the Discord mic is not working in Windows 11. Just providing the access here should help fix the issue.
Press Windows + S to launch the Search menu, enter Device Manager in the text field at the top, and click on the relevant search result that appears.
Now, double-click on the Audio inputs & outputs entry to expand and view the devices under it.
Right-click on the Microphone option, and select Update driver from the context menu.
Next, select Search automatically for drivers from the two options that appear in the Update Drivers window.
Wait for the OS to find the best available driver on the system and install it for the microphone.
An outdated driver is likely to cause a bunch of performance-related issues and could lead to various errors. Therefore, it’s always recommended that you update the installed drivers, whenever a newer version is available.
But, the Device Manager method here only scans for newer versions available on the system. In case you haven’t installed one previously, check out the other ways to update the driver.
In case that sounds like too much trouble, you can always use a reliable third-party app. We recommend using Outbyte Driver Updater, a dedicated tool that automatically checks for driver updates and installs them on your computer, thus always keeping the drivers up-to-date.
Press Windows + S to launch the Search menu, enter Discord in the text field at the top, right-click on the relevant search result, and select Run as administrator from the context menu.
Click Yes on the UAC (User Account Control) prompt that pops up.
If certain other critical permissions were missing earlier, running Discord with administrative privileges should fix the mic not working issue in Windows 11.
6. Reset Voice Settings in Discord
Open the Discord app, and click on the User Settings icon near the bottom-left corner.
Now, select the Voice & Video entry on the left under Apps Settings.
Scroll down to the bottom and click on the Reset Voice Settings button.
Click Okay in the confirmation prompt that pops up.
If you had certain audio settings misconfigured, instead of reconfiguring them individually, you can simply reset the voice settings. Once done with it, check if the Discord mic not working issue in Windows 11 is eliminated.
7. Update Windows 11
Press Windows + I to launch the Settings app, and select Windows Update from the tabs in the navigation pane on the left.
Next, click on the Check for updates button on the right to scan for any new available versions of the OS.
If an update is listed after the scan, click on Download & install to get it.
8. Disable Exclusive mode
Press Windows + S to launch the Search menu, enter Change system sounds in the text field at the top, and click on the relevant search result.
Navigate to the Recording tab from the top.
Now, right-click on the Microphone and select Properties from the context menu. Alternatively, you can double-click on the entry here to launch its properties.
In the Microphone Properties window, go to the Advanced tab.
Next, untick the checkbox for Allow applications to take exclusive control of this device and click on OK at the bottom to save the changes.
The exclusive mode lets an individual device take control of the sound driver and this could lead to issues with the microphone. After making the changes, check if the Discord mic not working in Windows 11 issue is fixed.
9. Reinstall Discord
Press Windows + I to launch Settings, and select Apps from the list of tabs in the navigation pane on the left.
Next, click on Apps & features on the right.
Locate Discord from the apps listed here, click on the ellipsis next to it, and select Uninstall from the flyout menu.
Again, click on Uninstall in the confirmation prompt that pops up.
If none of the methods listed above have worked, it’s most likely a problem with the app installation that’s leading to the Discord mic not working in Windows 11. And in this case, you have no option but to reinstall the Discord.
What can I do to reduce Discord’s resource consumption?
Apart from the mic not working issue in Discord, several users have also reported that the app consumes way too many resources and affects their system’s performance. This could be due to various reasons, but as is the case with most of the problems, it’s easily fixable.
You can try disabling hardware acceleration in Discord, changing the number of cores, along with the other methods to reduce Discord’s resource consumption. No matter what the issue is with Discord, there’s always a solution for it out there so that you can enjoy using your favorite VoIP program.
That is all there’s to the issue! By the time you reach this part of the article, the Discord mic not working in Windows 11 problem should be fixed.
Some Elder Scrolls IV: Oblivion players have needed to fix an issue in which the game doesn’t save settings. When that issue arises, the in-game graphical settings players select aren’t saved. Consequently, the game keeps resetting selected settings when restarted.
Why doesn’t Elder Scrolls IV: Oblivion save new settings?
Here are a few reasons you are facing the issue:
Controlled Folder Access at play: When enabled, Controlled Folder Access blocks unauthorized software from changing files in protected folders. Thus, that feature can block Oblivion from changing required files to save the settings.
Improper shutdown: If you abruptly turn off the computer, it will result in loss of unsaved data, and the same applies to the Elder Scrolls IV: Oblivion when the settings do not save.
Missing permissions: Sometimes, the critical files are inadvertently moved to folders the game can’t access, and as a result, it can’t save the settings.
How can I fix Elder Scrolls IV: Oblivion’s settings not saving?
Before getting into more complicated tweaking, let’s apply some quick methods:
Ensure that Elder Scrolls IV: Oblivion is updated and deactivate any add-ons that might interfere.
Disable third-party antiviruses from their main menu. Sometimes these programs may block certain features within other software or games.
Now that we checked these from our list, we can go to the actual solutions.
1. Set up a Controlled folder access Oblivion exception
Click Windows Security’s system tray icon to open that utility.
Select the Virus and threat protection tab along the left side of Windows Security’s window.
Next, click Manage ransomware protection to open more options.
Click Allow an app through Controlled folder access to open the exclusion list for that feature.
Press the Add an allowed app button to open a menu with two additional options.
Select the Browse all apps option. You can also click Recently blocked apps to see if Oblivion is among CFA’s recently blocked apps.
Now select the OblivionLauncher.exe file, and press the Open button.
If you prefer, you can turn off Controlled folder access. To turn off that feature, click the Controlled folder access toggle switch in Windows Security.
2. Save game settings with Elder Scrolls IV: Oblivion’s console
Launch Oblivion, and start playing the game.
Press your keyboard’s Tilde key just below Esc and directly left of the 1 key. On most keyboards, the tilde key will be the key with the ~ symbol on it.
Then type saveini within the Oblivion console, and press the Enter key.
Close the console by pressing the ~ (also the ` key) keyboard key again.
First, open File Explorer, which you can bring up with the Windows key + E hotkey for it.
Next, go to this folder path in File Explorer: C:\Users\<Your Username>\Documents\My Games\
Right-click the Oblivion folder there and select the Properties context menu option.
Select the Security tab.
Click the Edit button.
Select System and make sure all the Allow checkboxes are selected.
Then click your listed user account, and select all the Allowpermission checkboxes for it.
Click the Apply and OK buttons.
If the Allow options are grayed out, you’ll need to remove the inherited permissions for the Oblivion folder by taking ownership of it. Our how to take ownership guide provides full details on how to take file and folder ownership.
If the above potential fixes aren’t enough for you, submit a support ticket for the game to Bethesda. You can submit a support ticket via the Elder Scrolls IV: Oblivion Support page. Click the Submit a Ticket button there, select the Technical Support category, and then sign in to compose a message.
The Steam support forum is also a good place for Steam players to discuss technical gaming issues. Add a post about the Oblivion game settings not saving to the Elder Scrolls Oblivion Discussions tab on Steam’s forum. The community there might be able to provide more potential fixes.
Hopefully, however, you won’t need to send a support ticket. Users have confirmed the above potential resolutions can fix Elder Scrolls IV: Oblivion settings not saving. So, there’s a good chance those resolutions will fix Oblivion’s settings not saving for most players.
If you have any other viable solutions for this problem, let us know in the comments section below.
Windows 11 has its antivirus, but if it encounters issues, you might need to reinstall Windows Security on Windows 11, and this guide will show you a few ways to do it
How do I reinstall Windows Defender in Windows 11?
1. Use Windows PowerShell
Right-click on the Start button and select Windows Terminal (Admin) from the menu.
Copy and paste the below command in the Terminal and hit Enter: Get-AppxPackage Microsoft.SecHealthUI -AllUsers | Reset-AppxPackage
Once the command is successfully executed and it generates the success message, exit the Terminal.
Alternatively, you can use the following command instead: PowerShell -ExecutionPolicy Unrestricted -Command "& {$manifest = (Get-AppxPackage WindowsDefender).InstallLocation + '\AppxManifest.xml' ; Add-AppxPackage -DisableDevelopmentMode -Register -ForceApplicationShutdown $manifest}
Using these commands, you should be able to repair Windows Security in Windows 11.
After you reinstall or repair the Windows Security app, check out this complete guide on how to use Windows Security effectively to keep your PC protected.
2. Reset Windows Security via Settings
Press the Windows key + X and select Apps and Features.
Locate Windows Security, click the three dots next to it, and choose Advanced options.
Next, click on Reset and click Reset again to confirm.
How do I reset Windows Security in Windows 11?
You can achieve this from the Settings app, by following the guides from Solution 2 of this guide.
Windows 11 system requirements determine whether your PC is ready to upgrade to Microsoft’s latest operating system. In this guide, we break down all the essentials in simple steps, so even beginners can confidently check if their computer is supported.
Whether you’re using a desktop, laptop, or tablet, this checklist walks you through everything from basic hardware to advanced feature requirements.
Touch Support: Requires a screen or monitor with multi-touch capability
Precision Touchpad: Needed if touchpad is present
USB Ports: At least one is mandatory
Video Output: Required for external displays
Hardware Buttons: Power, Volume Up/Down for tablets or hybrid devices
Supported Device Categories
Windows 11 supports many device types, including:
Desktop PCs
All-in-One PCs (Fixed or Portable)
Notebooks and Laptops
Mini PCs (under 1-liter volume, no display)
Convertibles and Detachables
Tablets with touch input
Windows 11-Compatible CPU List
Microsoft maintains an official list of supported CPUs:
Intel (examples)
8th Gen and newer (e.g., i5-8250U, i7-8650U, i9-8950HK)
Xeon and Core X-Series supported (depending on model)
AMD (examples)
Ryzen 2000 series and up (e.g., Ryzen 5 2600, Ryzen 7 2700X)
EPYC and Athlon Gold 3150U also supported
Qualcomm
Snapdragon 7c, 8c, and 8cx Series (Gen 1 and 2)
📌 You can find the full compatibility list for your processor model on Microsoft’s official documentation.
FAQs
How do I know if my PC has TPM 2.0?
Open Windows Security > Device Security > Security processor details. You can also check using tpm.msc.
Can I install Windows 11 on an unsupported device?
Yes, but it requires manual ISO installation and bypassing system checks. This is not officially recommended and may prevent updates.
Does Windows 11 support older apps and drivers?
Yes, most apps from Windows 10 will work, but legacy drivers may need updates or replacements.
Why does Windows 11 require Secure Boot and TPM?
These features enhance security by protecting against firmware-level threats and ensuring system integrity.
Conclusion
Windows 11 system requirements are designed to ensure performance, stability, and security across modern devices. While the base requirements are fairly lenient, advanced features like DirectStorage and Windows Hello demand newer hardware. Use the PC Health Check Tool to assess your device, and explore upgrade options if needed.
There is no reason to deny that Windows 11 has improved upon its predecessor in several ways. However, it still has errors and bugs, such as the Windows 11 HDR not supported issue.
Let’s find out what causes HDR to not work on Windows 11 and how to fix it.
Why is HDR not working on Windows 11?
If your personal computer does not support auto high dynamic range, the function will not operate. You also need to check to see that this function is turned on.
The failure of Windows 11 Auto HDR to function correctly may be caused by an HDMI cable incompatible with the operating system and not supporting HDMI 2.0b.
If you utilize the appropriate HDMI cable, you should not have any problems using this feature. However, if the HDR stream choice is not visible to you, this may be because the monitor does not support the particular technology in question.
What can I do if Windows 11 HDR is not supported?
1. Install a color profile for your monitor
Open Settings by pressing Windows + I, then type color management in the search box and select the top result.
Select your monitor from the drop-down box next to the Device label.
Select Add, then Browse to select the file you downloaded.
Highlight the new color profile by clicking on it and selecting Set as Default Profile before you close the Color Management panel.
Gray-outs, washed-out, inaccurate colors, and many other problems related to auto-HDR are solved with a color profile. Note that a color profile saves you from the endless tweaking of the monitor’s brightness and contrast settings.
Ghosting can be so bad it steals details from the picture, while an auto-simple-HDR image can be distorted to unnatural colors.
Grey-out happens when the HDR algorithm can’t capture the full dynamic range of the scene: some parts are entirely white, some completely black, but there’s nothing in between.
2. Adjust the settings to enable Auto HDR
Open the Settings app by pressing Windows + I. Click Display on the right side.
Then, click HDR.
Ensure Auto HDR is enabled. The Windows HDR won’t turn on issue will be fixed.
3. Check the display and HDMI port
Sometimes, the application you are watching, or the graphics mode in your game can cause text to look jumbled together.
If you are using multiple HDR-enabled displays to view or play the content, try connecting only your TV to your PC and enabling HDR streaming for that display.
Windows 11 users may experience issues when running HDR applications on HDR-supported hardware. The problem is caused by using an incompatible HDMI cable, which doesn’t support HDMI 2.0b. So if YouTube is not displaying HDR videos, this could be the reason why.
With the use of the recommended cable, it will function as expected. However, it is worth noting that if your HDR stream option is missing, it may be due to your monitor or TV not supporting this particular technology.
The use HDR not supported in Windows 11 is a problem that usually occurs due to a glitchy update or incompatible HDMI connection. If HDR stopped working right after an update, see this guide on HDR not working after Windows update for step-by-step fixes.
To play HDR with sharp and bright colors on Windows 11, you must meet some requirements for your monitor, HDMI and DisplayPort, and more. You can’t use HDR if it’s not supported.
The built-in display needs a resolution of 1080p or more and a recommended max brightness of 300 nits.
The HDR display or TV must support HDR10 and DisplayPort 1.4 or HDMI 2.0 or higher for external displays. In addition, we recommend displays that are DisplayHDR certified, such as these gaming monitors.
The Windows 11 device must have an integrated graphics card that supports PlayReady hardware digital rights management (for protected HDR content) and must have the required codecs installed for 10-bit video decoding.
What is HDR?
One of the features of Windows 11 worthy of your attention is Auto HDR, which enables your PC to apply similar brightness boosting, and color emboldening effects as HDR (High Dynamic Range) displays, but without needing to build a new display or having a monitor that supports it natively.
HDR displays show off a richer, more vibrant color palette to better use those extra pixels on higher resolution displays, but only if your game supports it.
Microsoft’s latest operating system, Windows 11, will automatically adjust your videos and photos to give you the best possible picture.
If a game or app cannot take advantage of the increased color range, it will scale the picture down so it can be viewed on any device, thanks to the Auto HDR feature.
Do all games support Auto HDR?
With Auto HDR, you can see colors that previously only looked right in your imagination. Many today’s games look bright and vivid on high-end, big-screen monitors, but that’s not the case with all gaming PCs.
With the feature enabled, you get richer colors and more visual details regardless of the game or display. Unfortunately, there isn’t much you can do to force non-supported games to use the feature at this stage, and there isn’t an official list you can review, either.
It is enabled by default in supported titles, and games without support will list it as an essential feature.
Microsoft recommends that many popular DirectX 11 and 12 games will be Windows 11 Auto HDR-supported games, including Assassin’s Creed IV Black Flag, Call of Duty: Ghosts, Dying Light, Far Cry 4, Final Fantasy XIV: A Realm Reborn, Metal Gear Solid V: The Phantom Pain, and more.
If you want to see which games support Auto HDR, you should know that most Windows Store games are eligible. Therefore, if you don’t have an HDR-ready monitor, use our article on the best PC monitors to browse the products and get something you like.
Alternatively, you can also go through our detailed guide on what to do if Windows 10 HDR won’t turn on to get more insight on what to do. Note that the same measures apply to Windows 11 even though the guide discusses Windows 10.
How do you test an Auto HDR?
You may put the Auto HDR function to the test by turning it off initially, then playing a game or viewing a movie that you enjoy while paying attention to the color, brightness, and other visual characteristics as you do so.
After that, activate the Auto HDR option and examine the adjustment results. The different situations will result in various amounts of alteration to the image quality.
What causes Auto HDR to appear washed out?
SDR (Standard Dynamic Range) will limit the amount of light your device reaches to just that amount, which is recommended for old movie productions and low-budget programs.
On the other hand, High Dynamic Range allows videos from 10 to 1000nit, with a color gamut reaching PC3 at its highest brightness.
However, there are some instances where the HDR content displayed is not brighter than SDR. At times, its colors appear washed out or faded in Windows 11.
The graphic shows that the exposure zones in an HDR image are not simply larger versions of the zones in an SDR rendering. Instead, the additional HDR zones are for information only and do not affect the rendering of the original zones.
Moreover, they can be used to distinguish between dark and light areas. For example, the difference between a white sheet of paper in the sun and an explosion is slight.
Both are around 100 percent white. On the other hand, brightness levels can be significantly different with a high dynamic range.
The leading causes of this issue may vary from using a non-HDR monitor, incompatible DisplayPort, or HDMI to improper Windows 11 settings, among other factors.
Is 4K better than HDR?
The Ultra HD 4K devices are the latest in the market, offering resolutions up to four times that of Full HD. In addition, by producing a more precise picture with millions of pixels on the screen, you’ll enjoy bolder, more detailed images.
Since each pixel on a 4K UHD device is smaller than the ones on 1080p Full HD computers, you’ll be able to sit closer to the screen and still see vivid detail.
While HDR technology has been around for years, it was not until recently that we had many high-quality content sources.
The exponential growth of content providers is quickening every year, with Amazon’s Prime Video, Vudu, and Netflix streaming high-definition videos compatible with HDR.
Technology is not enough on its own. HDR combines 4K and High Dynamic Range (HDR) to make your computer display more luminous, colorful, and true to life.
Whether playing games or watching your favorite film, you’ll enjoy a picture with exceptional brilliance and depth.
In select models, Four-View (4V) technology lets you see your content from four different angles at once, which is an exciting new way to view movies and games with your friends and family.
HDR (High Dynamic Range) technology on Windows 11 provides a broader range of color contrast and allows you to enjoy more vibrant images, videos, and games. And for the best settings, consider calibrating HDR on Windows.
Keeping Windows and your apps up-to-date is critical for your system’s security. An infinite number of threats circulate on the internet, many of which cause irreparable damage to your computer.
Unfortunately, many errors can occur during the update process. In this article, we’ll focus on the Windows Update error 0x80244019 and show you how to fix it.
How can I fix the Windows Update error 0x80244019?
1. Run the Windows Update troubleshooter
Press Windows Key + I to open the Settings app.
When Settings app opens, go to Update & Security section.
Select Troubleshoot from the left pane. In the right pane select Windows Update and click Run the troubleshooter button.
Follow the instructions on the screen to complete the troubleshooter.
According to users, sometimes you might be able to fix this problem simply by running Windows Update troubleshooter.
As you know, Windows 10 has a wide range of troubleshooters available, and they are specially designed to automatically fix common problems.
If you’re having error 0x80244019 on your PC, you just need to run the Windows Update troubleshooter by following the above steps.
Once the troubleshooter is finished, check if the problem is still there.
2. Change Windows update options
Open the Settings app and navigate to Update & Security section.
When Windows Update window opens, click on Advanced options.
Now turn off Give me updates for other Microsoft products when I update Windows.
According to users, sometimes your options can cause error 0x80244019 to appear.
If you can’t update your PC due to this error, you might have to change your settings a bit. You can do that by following these steps from above.
After turning off this option, the issue should be resolved and you’ll be able to update Windows without any issues.
3. Check your antivirus
According to users, sometimes your antivirus can interfere with your system and cause error 0x80244019 to appear.
To fix the problem, it’s recommended to disable certain antivirus features and check if that solves the issue.
If that doesn’t work, your next step would be to completely disable your antivirus. In the worst-case scenario, you might have to uninstall your antivirus and check if that solves the issue.
In order to download the updates, certain Windows Update components need to be running. If these components aren’t running, you might encounter error 0x80244019.
However, you can fix this problem simply by resetting these components. To do that, you just need to follow these steps describe in the lines above.
After running these commands the necessary components will be reset and the issue should be resolved.
If you don’t want to run these commands manually, you can always create a Windows Update reset script that will automatically reset the necessary components for you.
5. Perform a clean boot
Press Windows Key + R and enter msconfig. Now press Enter or click OK.
On the Servicestab select the Hide all Microsoft services check box > click Disable all.
On the Startuptab > click Open Task Manager.
Right-click each startup item and then click Disable.
Close Task Manager > click OK > restart the computer.
Third-party applications can sometimes interfere with your system and cause error 0x80244019 and other update errors to appear. To fix the problem, it’s advised to perform a Clean boot.
If you’re not familiar, in Clean boot state your PC will start without any third-party applications or services.
This is a great feature, especially if you’re concerned that a third-party application is interfering with your system. To perform a clean boot, perform the steps that were described a bit earlier.
After disabling all startup applications and services, try to install the update again and check if the issue is still there.
6. Disconnect all USB devices
In some rare cases, your USB devices can cause error 0x80244019 to appear. If you’re having this problem, it’s advised to disconnect all your USB devices from your PC.
This includes external hard drives, USB flash drives, gamepads, printers, etc.
Basically, you need to disconnect all devices except your keyboard and mouse. After doing that, try to install the update again and check if the problem is still there.
7. Install the update manually
Go to Windows Update Catalog website.
Enter the KB number in the search field.
List of matching updates will now appear. Select the update that matches your system architecture and download it.
If you can’t download the latest updates due to error 0x80244019, you might want to try installing the update manually.
This isn’t that hard, and in order to do it, first you need to find the KB number of the update. To do that, visit the Windows Update section and look for the KB number of the update.
Once you find the KB number, you need to do perform the steps from above.
Once you download the update, install it and check if that solves the issue.
Keep in mind that this method won’t fix the core problem, instead, you’ll just avoid the error message by downloading and installing the update on your own.
8. Install optional updates
Windows 10 installs updates automatically, but sometimes you might encounter a problematic update. In order to prevent the update from installing, you need to block it with a special tool.
If you want to know more about blocking Windows Updates, we wrote a special article about it, so you should check it out.
Although blocking updates can help you with certain problems, several users reported that hiding optional updates can cause this problem to appear.
Therefore, if you have any optional updates hidden, be sure to unblock and install them.
After doing that, this problem should be resolved and you’ll be able to install the updates without any problems.
Update error 0x80244019 can be problematic since it can leave your system vulnerable. Speaking of this error message, here are some related issues that users reported:
0x80244019 Windows Server 2016 – This issue can affect Windows Server 2016, and if you have this problem, you might be able to fix it using one of our solutions.
Windows 7 update error 0x80244019 – Many users reported this issue on older versions of Windows. Even if you don’t use Windows 10, you should know that most of our solutions can b applied to older versions of Windows as well.
We hope the solutions listed above helped you fix Windows 10 update error 0x80244019.
If you’ve come across other workarounds to fix this problem, you can list the troubleshooting steps in the comment section below.
You should keep in mind that other new Registry entries will not perform any noticeable behavior. The main reason for this is that this leaked Windows 11 build is just an early preview of the new OS.
6056 readers responded to our queries covering the possible name of the OS, if and how people are inclined to upgrade, and also other interesting ideas.
The responders were mostly located in the US, but the UK, India, Canada, and Australian readers are close to the same numbers. In total, users that took the survey are located in 152 countries around the world.
Registry hacks for Windows 11 UI elements
Upon the release of this new OS build, many users liked the Windows 11 Start Menu, while others didn’t really appreciate the change and wished they could switch back to the Windows 10 version.
Well, you should know that Microsoft added a Start_ShowClassicMode Registry value which allows users to enable what they call Classic Mode, that uses the Windows 10 Start Menu
In order to modify this registry value, you should create a DWORD 32-bit value named Start_ShowClassicMode under the following path:
Possible DWORD 32-bit settings for the TaskbarSi value are:
0 = Small 1 = Medium 2 = Large
If you didn’t already know, Windows 11 now makes it possible for you to center or left align the Start button and pinned taskbar programs on the taskbar.
In order to control the alignment of the Windows 11 taskbar, Microsoft introduced a new TaskbarAl Registry value. Modifying this registry value, means creating a DWORD 32-bit value named TaskbarAl under the following path:
However, you can perform almost similar changes to the Start menu in Windows 11 even without resorting to the input of these Registry hacks. Check out the information by reading our extensive article.
This is how you enable or disable the Windows 11 Snap Assist flyout
Microsoft’s new operating system introduces a redesigned Snap Assist feature, where if you hover over the maximize button, you can see a flyout containing four predefined Windows snap layouts.
If you just want to disable this feature, or have already disabled it and realized you want it again, the Registry command is:
Is your PC performance slow or are you coming across frequent system crashes? This could very well be because a service is eating up most of your CPU resources. The service that we are talking about is the cryptographic service, which has been troubling Windows 10 users for quite some time.
Users are looking to fix the cryptographic services’ high CPU usage issue but in vain. Fortunately, in this guide, we have some effective solutions lined up for you that will help you resolve the service host cryptographic service’s high CPU usage problem on your Windows PC.
What is Cryptographic Service?
Before we get ahead with the solutions to resolve the cryptographic service high CPU usage problem, let us first understand what is this cryptographic service.
The cryptographic service in your Windows 10 PC is an official service by Microsoft that performs the action of encrypting and decrypting the data as and when it is accessed.
The reason why users are reporting service host cryptographic services high CPU usage problem is that the encryption software runs an algorithm to secure the data file and this process requires a lot of resources.
How can I fix the Crytpograhic Service high CPU usage issue?
Here are a few preliminary solutions that we would suggest you apply right away:
Close all programs and restart your PC. This will make sure that all the system files are reloaded from scratch which might have been missed during the previous session.
Check if you have any pending Windows updates ready to install. Often a new update fixes the bug related to a previous version.
Scan your PC for viruses or malware as very often a virus can camouflage themselves as an essential process and slow down your PC by running the background.
Now, let us check out the advanced solutions and possibly fix the high CPU usage caused by the cryptographic service.
1. Rename the Catroot2 folder
Open the Start menu.
Search for the command prompt and run it as an administrator.
Type the below command to temporarily disable the cryptographic service and press Enter. net stop cryptsvc
Wait till you see a message on cmd the cryptographic service was stopped successfully.
Type the below command to rename the unwanted catroot2 folder to oldcatroot2 and press Enter. ren %systemroot%\System32\Catroot2 oldcatroot2
After a few seconds, type the below command and press Enter. net start cryptsvc
Open Windows Explorer and navigate to the below path. C:\Windows\System32\catroot2
Open the folder F750E6C3-38EE-11D1-85E5-00C04FC295EE and delete any file inside it that starts with tmp.
Restart your PC and check if this fixes the issue or not.
2. Clean boot your PC
Press the Win + R keys to open the Run dialogue.
Type msconfig and press Enter.
Click on the Services tab.
Check the box next to Hide all Microsoft services.
Click on Disable all.
Switch to the Startup tab.
Click Open Task Manager.
Switch to the Startup tab.
Disable each of the enabled startup items one by one.
Close Task Manager.
Reboot your PC and check if this resolves the issue or not.
Clean boot will start your PC with a minimal set of drivers and startup items. Only essential programs will load. You can now check if the cryptographic service was having any issues with another process that was ultimately causing high CPU usage.
Search for the command prompt and run it as an administrator.
Type the below command and press Enter. sfc /scannow
After the SFC Scan process completes, type the below command and press Enter.DISM /Online /Cleanup-Image /RestoreHealth
Restart your PC.
We have a guide to help restore and repair corrupt system files on your Windows PC. It contains a bunch of effective solutions to fix system-file-related issues.
Otherwise, you can also use a dedicated third-party tool that can repair corrupt system files with just a few clicks.
It will help scan your PC, find new files to replace the corrupt ones, fix DLL-related issues, fix BSOD errors, and much more.
4. Reset your PC
Open the Start menu.
Type recovery and open Recovery options.
Click on the Get started button under the Reset this PC option.
Choose the Keep my files option to only remove apps and settings but save all your personal files.
Follow the onscreen prompts till your PC is reset.
This should be performed only as a last resort if none of the above solutions work for you. Chances are the cryptographic service itself is faulty, and a reset would help replace the file and also resolve the issue of high CPU usage.
We also have a bunch of solutions to fix the high CPU usage issue that can trigger without any reason. In such a case a dedicated virus infection or malicious remover software can come in handy, and we would recommend you make use of TotalAV.
There is also a chance that the cryptographic service itself isn’t causing the high CPU usage issue, but the other background processes are conflicting with it and causing the problem. For such situations, you can refer to our guide on how you can fix too many background processes running on your PC.
Tired of searching for the perfect ePub reader? We’ve got you. Whether you’re into free tools or premium features, this list has something for every Windows user.
Let’s skip the small talk and get straight to the best options out there.
FBReader is the minimalist’s dream. It’s a fast, lightweight ePub reader supporting multiple formats like MOBI and RTF.
It works seamlessly on Windows and other platforms like Linux and iOS.
We like its simplicity and stability. While it’s not fancy, it gets the job done perfectly for basic reading needs. If you need a free ePUB reader for Windows, this might be the right choice.
Epubor Ultimate is a powerhouse for managing eBooks. It converts eBooks to formats like ePub or PDF and removes DRM restrictions. This is a lifesaver if you’ve ever been frustrated with device compatibility. We like how straightforward the interface is, though it’s pricier than most readers.
Looking to convert Kindle books to ePub format for easier reading? Check out this guide on how to convert Kindle to ePub: convert Kindle to ePub.
Pros:
Converts eBooks to multiple formats
Removes DRM restrictions
Easy-to-use interface
Cons:
Basic reader compared to competitors
Paid software
Epubor Ultimate
Try this advanced-shape eBook tool and enjoy reading your books more comfortably.
Neat Reader combines simplicity with cross-device syncing. The free version handles most reading needs, while the paid version adds 10GB cloud storage and advanced settings. We think its clean design and ease of use are standout features. However, ads in the free version can be distracting.
If you want to get the most out of your Windows 11 computer, there are particular apps that you should get. This is especially important if you want to keep your computer’s performance at its best and not have it degrade.
FAQs
What is an ePub reader?
An ePub reader is software designed to open and display ePub files, which are a popular format for eBooks. These readers allow you to view, navigate, and sometimes annotate eBooks.
What are the best ePub readers for Windows?
Popular options include Calibre, Adobe Digital Editions, Sumatra PDF, and Microsoft Edge. Each offers unique features like customization, library management, and advanced formatting support.
Can I read ePub files on Windows without installing a reader?
Yes, some browsers, like Microsoft Edge, allow you to open ePub files directly without additional software. However, dedicated ePub readers often provide better navigation and features for eBooks.
Are ePub readers free to use?
Yes, many ePub readers, such as Calibre and Sumatra PDF, are free to use. Some paid versions offer extra features like advanced annotations, cloud syncing, or better formatting options.
You may also be interested to know which virtual machines work the best on Windows 11. Virtual machines are useful if you want to try out the latest features of Windows 11 or the beta version, but don’t want to deal with bugs or glitches. One of the best ones VMware Workstation for its high versatility and how easy it is to set up.
And for fun, you should download a photo viewer. A good photo viewer does more than view pictures, but also comes with great features like editing tools and taking screenshots. In fact, the Photo viewer app that comes with Windows 11 natively has a ton of features. But if you prefer a third-party app with more, an app like Movavi is the way to go.
Feel free to leave a comment below if you have any questions on other Windows 11 apps. Also, leave comments about guides that you’d like to see or information on other Windows 11 features or list guides like this.
Sunset Overdrive is a highly-rated third-person shooter game for Windows 10. However, some players have said they can’t launch the Overdrive Windows game. The game doesn’t start for those players when they click play. Consequently, those players can’t play Sunset Overdrive.
If you are looking for a guide to help resolve the Sunset Overdrive PC won’t launch issue, then we will give you a bunch of solutions to fix the problem. Let us get right into it.
Why won’t Sunset Overdrive launch on my PC?
We did some research and found some common reasons that prevent Sunset Overdrive to launch on your PC:
Your PC doesn’t meet the game’s PC requirements: Before purchasing Sunset Overdrive, double-check that your PC meets the game’s system requirements.
Antivirus is blocking the game: The antivirus on your PC might be stopping the game from launching. Some players have confirmed that Avast, Bitdefender, and AVG antivirus utilities blocked Sunset Overdrive from starting on their PCs.
Third-party programs can also conflict: Apps such as VPN, firewall, P2P, FTP, and IP filtering software can also cause launch issues for games.
There is a file integrity issue for the game: If certain files are missing or you have a Sunset Overdrive PC corrupted save, the game probably won’t start.
So, there are a few ways you might be able to fix a Sunset Overdrive game that’s not launching. This is how you can fix Sunset Overdrive when it won’t launch on your PC.
What can I do if Sunset Overdrive doesn’t launch on my PC?
Here are a few fixes that we would suggest you apply before advancing with the troubleshooting methods:
Whether you use Windows Security or any other antivirus software, you should disable it. After you’ve done that, try playing Sunset Overdrive again. If that fix works, try adding Steam and Sunset Overdrive to your antivirus utility’s exceptions list.
Alternatively, you could uninstall the third-party antivirus utility and rely on Windows Security instead.
Close your launcher, relaunch it back again, and check if this fixes the error.
Restart your PC and check if this resolves the issue.
Now, let us check out the advanced troubleshooting solutions and possibly fix the Sunset Overdrive PC won’t launch error.
1. Verify the integrity of game files
Launch the Steam client on your Windows PC.
Click Library.
Right-click the Sunset Overdrive game in your Steam library and select a Properties option.
Select the Local Files tab.
Click Verify Integrity of Game Files.
Wait for the file validation process to finish, and then click the Close button.
Here we have shown the process for a different game, but the steps for verifying the integrity of the game files remain the same on Steam for all games. This will also work when Sunset Overdrive PC multiplayer is not working.
2. Update your PC’s graphics card driver
Open the Start menu.
Open Device Manager.
Expand Display adapters.
Right-click on your display adapter and select an Update driver option.
Select the Search automatically for drivers option.
Your system will search the internet for updated drivers and will prompt you to install them once detected.
While the above requires manually expanding each driver and scanning for updated drivers, you can automate the process using third-party driver updater software.
We would like you to use Outbyte Driver Updater. You can easily update all of your drivers in just a few clicks, create driver backups, schedule a driver scan, and do much more.
Outbyte Driver Updater
Choose to update your drivers automatically with the best options and try using Outbyte Driver Updater.
Click the Install button for the game on the Library tab.
Alternatively, you can reinstall the Sunset Overdrive UWP game app by downloading it from its Microsoft Store page.
You can also uninstall Sunset Overdrive with third-party uninstaller software. A third-party uninstaller like IObit Uninstaller 11 Free will erase all leftover residual files from uninstalled software.
Insomniac Games has a support service you can contact about Sunset Overdrive issues. Click the Contact Us button on the Insomniac Games website to open a request submission form. Then fill out that form, and press the Submit button.
Steam users can also try contacting the Steam support services for potential fixes. You can contact that service from the Steam Support page when signed into your account. Alternatively, you can post on Steam’s Sunset Overdrive forum about the game not starting.
The resolutions above will likely kick-start Sunset Overdrive for most players. So, those potential fixes are worth a try when Sunset Overdrive won’t launch. Some of the resolutions in our Steam game not launching guide might also help fix that game when it doesn’t start.
The right free Windows 11 screensavers can turn your screen into a functional clock, a work of art, or even a trippy animation. Screensavers started to prevent burn-in, but today they’re more about aesthetics and customization, and Windows still supports them, even if they’re tucked away in settings.
Let’s check out the best screensavers you can use on your Windows 11 PC.
What are the best free screen savers for Windows 11?
Fliqlo is a modern take on a retro flip clock. It displays the time in large, animated numbers — perfect for a clean desktop or secondary monitor. You can customize the size, choose between 12- or 24-hour formats, and adjust brightness. As a screensaver app for Windows 11, it’s one of the simplest yet most elegant options out there.
This unique animated screen saver is part art project, part dreamscape. Electric Sheep blends fractal animations created by users worldwide into ever-changing visuals. It downloads new animations when online, making your Windows 11 screensaver fresh every time.
❌ Cons: Uses bandwidth and CPU; limited offline use
3. Lattice
Lattice recreates the iconic green Matrix code rain, with customizable speed, density, colors, and fonts. It’s an open-source, lightweight option perfect for fans of sci-fi aesthetics and desktop screensaver themes that feel alive.
Polar Clock displays the current time using colorful, rotating arcs. It’s minimalist but informative — a great fit for productivity setups or anyone who wants a unique time-telling desktop screensaver.
This one fills your screen with randomized, colorful fireworks. It’s simple, festive, and doesn’t strain your system. A great pick if you’re looking for cool screensavers with a celebration vibe and instant impact.
This classic bundle includes multiple 3D and high performance screensavers, such as flowing ribbons, space tunnels, and bouncing particles. While some effects are dated, they still look impressive — especially on 4K displays.
Compatibility: Windows 11 (some may need compatibility mode)
Plane9 is a music visualizer and screensaver app for Windows 11. It offers 250+ scenes that react in real time to music or audio input. Although development has stopped, it still runs well and supports deep screensaver customization.
Get Apple’s famous aerial footage of cities, oceans, and landscapes on your PC. The visuals are shot in 4K and cycle smoothly , ideal if you want 4K screensavers with cinematic flair. Setup requires a bit more effort, but the results are worth it.
This themed screensaver is based on Star Trek’s LCARS system. It replicates futuristic ship dashboards and adds subtle animation and sounds. It’s a niche pick, but one of the most immersive Microsoft screensavers available for fans.
Briblo is a LEGO-inspired puzzle where blocks fall and stack in colorful patterns. It’s slightly interactivee, moving the mouse lets you shift pieces. This free and creative Microsoft screensaver is great for casual setups or shared family PCs.
Download the screensaver file (usually .SCR or EXE).
Run or move it to C:\Windows\System32.
Go to Settings > Personalization > Lock Screen > Screen Saver.
Choose it from the list and hit Apply.
Wrapping up
Looking to go even further with desktop personalization? Check out our Windows 10 S wallpapers download guide, many backgrounds pair beautifully with your screensavers.
You will get more functionality using premium screensavers, but the screensavers discussed in this article are the best free options you will have for a Windows 11 PC.
Does Windows 11 consume more RAM? It’s a question that requires an in-depth understanding of the idea, the computer’s use, and several other critical factors. In general, Windows 11 does use more memory, though it might not be the case for everyone.
If you had a PC running Windows 10 and recently upgraded to Windows 11, the RAM consumption might be higher. But why is that, and can you reduce the memory used in the latest iteration? Let’s find out the answer to these.
Why does Windows 11 consume so much RAM?
Here are a few reasons Windows 11 consumes so much RAM on your PC:
More features – Windows 11 is a feature-loaded OS, and these are bound to use more RAM than the previous iteration. But it also ensures a better and safer user experience.
A higher number of built-in programs – The RAM consumption increases with the number of programs running. And since the latest OS has more built-in programs, referred to as the bloatware in Windows 11, it uses higher memory.
Graphics – When all the visual effects are enabled, the OS will consume higher resources. Though, you may disable animations in Windows 11 to reduce this.
How much RAM do I need for Windows 11?
If we were to look at the system requirements for Windows 11, the latest iteration requires a minimum of 4 GB Random Access Memory to install on a device. Remember, it’s the minimum requirement for just running the OS.
Launch a few programs on a PC running Windows 11 with 4 GB of memory, and the device will slow down, apps may start crashing, and in the worst case, you won’t be able to use it at all. So, when upgrading to the latest iteration, ensure the PC has at least 8 GB RAM.
How much RAM does Windows 11 use when idle?
Based on feedback from users, our reader, and through in-depth research, it seems like Windows 11 uses around 2.5-3 GB of memory in an idle state. But remember, what you consider an idle state is not the same for the PC.
It still has several background processes and services running. More so, the startup programs are launched as soon as Windows boots and will consume some resources.
8GB of memory should be good when running Windows 11 and a few simple programs and browsers. But, for resource-intensive tasks like gaming or running editing apps, you will need more RAM.
Task Manager on a PC running Windows 11 with 16 GB RAM
Google Chrome, for instance, uses a lot of memory, so you might consider switching to a lightweight browser. Other similar changes, too, will help bring the RAM consumption in check.
Windows 11 RAM usage vs. Windows 10
Windows 11 does use more RAM than Windows 10, and it’s due to more built-in programs and features. It can be reduced, but we don’t recommend terminating the critical processes or disabling services vital for the effective functioning of the OS.
So, if you were earlier wondering whether Windows 11 does use more resources, the answer is Yes. And you now know the reasons behind it as well as ways to reduce RAM usage.
Bitcoin is a digital currency (cryptocurrency) that you can exchange for products, services, and even other currencies. More and more users are utilizing crypto-mining software to generate bitcoins for themselves. However, some antivirus utilities flag legitimate crypto-mining software as malware.
Legitimate crypto-mining apps are those users knowingly download and install on their PCs. Those mining apps enable users to generate bitcoins by completing verified transaction blocks with their PCs. You can check out our guide that lists some of the best Bitcoin-mining software available for free.
What is Cryptojacking malware?
Cryptojackers are miners who hijack other users’ PC system resources for the purpose of crypto-mining. These cryptojackers do that with cryptojacking malware. Crypotojacking malware secretly installs malware or virus in your PC (sometimes via email attachments) and use your system resources for crypto mining.
Thus, cryptojacking malware basically exploits other PCs’ system resources to generate bitcoins. CPU utilization can get very high as a consequence.
Your PC might become very slow when there’s cryptojacking malware on it, and you won’t be able to understand the reason behind this since the malware is installed without your consent.
Why does my antivirus flag my crypto-mining software?
Antivirus utilities sometimes flag legitimate crypto-mining software as malware because of the increasingly prevalent cryptojacking. Cryptojacking malware has similar executables to legit crypto-mining software.
Therefore, even the best antivirus software finds it hard to distinguish between them. Some antivirus warning flags do not report the crypto-mining software as a threat, but simply inform that the program is related to mining.
You may get terms such as CoinMiner, Cryptocoin miner, or Bitcoin miner in the warning message.
How can I stop antivirus software from flagging my crypto-mining app?
Open the Start menu.
Search for Windows Security and open it.
Click on Virus & threat protection.
Under Virus & threat protection settings, click on Manage settings.
Under Exclusions, clickAdd or remove exclusions.
Press the Add an exclusion button.
Select the Process option.
Enter the full path of your crypto-mining software (including its EXE file) in the process name box.
Click the Add button.
Most antivirus utilities include exception (exclusion) lists. The exclusion list features in antivirus software enable users to select certain programs, files, or folders to exclude from antivirus scanning. The antivirus utility will not flag anything on its exclusion list.
We have used the Windows Security antivirus tool that comes built-in with Windows OS to show how you can add your crypto-mining program to its exclusions list. You can do the same with any of the third-party antivirus tools that you have on your PC.
How can I scan and remove genuine cryptojacking malware?
Once the scan completes, it will display if it has detected any malware, virus, etc.
Hit the Quarantine button to remove all malware from your PC.
If your antivirus utility flags something you don’t recognize, that something could be cryptojacking malware. Malwarebytes is a highly-rated third-party utility for purging malware. Malwarebytes Pro includes a real-time scanner, but you can manually scan with the freeware alternative.
Scanning and purging malware with Malwarebytes is so simple. All you need to do is click its Scan button. Malwarebytes will then scan your PC and list anything detected and quarantined. You can click Total items in quarantine, select quarantined items, and press the Delete button.
Select the type of scan you would like to perform.
Click Next.
The program will begin scanning for malicious programs on your PC.
The result will indicate if the program detected any issues with your PC or not and will prompt you to take necessary action.
You can also make use of Microsoft’s Windows Malicious Software Removal Tool. This utility will scan for and automatically remove detected malware. It’s simple to utilize and also includes three different scanning options.
So, don’t be overly surprised if your PC’s antivirus utility flags your crypto-mining software, as it’s not unusual for false-positive flagging to arise for mining apps. You can simply set up an antivirus exception for your crypto miner. If you don’t recognize a flagged app, however, run a malware scan.
For users who trade in cryptos, keeping up with the live prices is an essential task for which they can check out our guide which lists some of the best apps for cryptocurrency live prices.
An aunblocked browser that requires no download is essential when you’re not able to access online content and websites because of restrictions imposed on such websites and content.
There are also browsers to open blocked sites that require you to download apps. But this guide will cover unblocked browsers that do not need to be downloaded.
What are the best unblocked browsers with no download?
Proxyboost is our best pick of unlocked browsers you can use online without downloading any apps or software. It is an American proxy site for surfing the internet anonymously.
However, users can access the web proxy browser by launching the Proxyboost URL on any browser. Then, input the URL of the restricted or blocked website you want to access and click on the surf now button to unblock the site.
Also, Proxyboost is free and doesn’t require you to subscribe to its services.
DontFilter is an anonymous web browser that is accessible with no download. It is the most secure unlocked browser that allows users to browse through websites that aren’t available for every user.
Furthermore, it allows you to surf the internet anonymously without being noticed or saving any record that you visited the site. It is easy to navigate and is accessible by inputting its URL in a native browser.
Also, it is one of the best unblocked browsers for school and extracurricular activities. Users can access restricted online content without needing to install a third-party app. Its service is free and requires no subscription.
3. Zend2.com – Great for streaming and social media
Zend2.com is the best-unblocked browser that uses a proxy server to browse the internet and doesn’t require any download. It is best for streaming and watching restricted movies and video content.
Moreover, it uses a secure server to access blocked websites and can also work for other blocked online content. Likewise, you can access it by launching the proxy server on your browser and accessing the blocked site.
These are the best unblocked browsers with no downloads that have been tested and trusted by us based on the categories outlined above.
What is an unblocked browser?
An unblocked browser is a proxy server that allows users to access restricted websites and banned online content.
Furthermore, these browsers can come in different types depending on your preference. There are some unblocked browsers you need to download on your system, while some don’t require any software download.
An unblocked browser with no download works because you don’t have to install a separate app, but you can access proxy server browsers through other browsers. Some of the benefits of using them are:
They guarantee safe browsing while hiding your private information and maintaining anonymity.
Unblocked browsers allow you to access restricted or blocked content in your location.
The unblocked browsers with no downloads also preserve space on your device.
Also known as the LSASS.exe, the local security authority process is an executable file that handles the security operations for your Windows computer.
This includes functions such as password authentication, password changes, and creating access tokens across multiple applications.
If you are having issues with your Local security authority process using too much CPU power, it is possible that your system could be compromised. This leads to the program taking up too much CPU power and hogging the memory.
How can I fix Local Security Authority Process high CPU?
1. Check for Windows Update
Go to your search button on the bottom left part of your screen.
Type Settings and click on the App.
The settings up will open with different options.
Scroll down and select Update and Security.
Click the Check for Updatesbutton and let your computer check for available Windows updates. This might take some time.
If you are up to date, move on to the next solution. If not, consider downloading and installing the updates.
Sometimes, Windows updates come with bugs and glitches that affect the local security authority. Microsoft routinely sends out fixes with subsequent updates which are sometimes not immediately downloaded to your system.
2. Scan for viruses
2.1. Check for fake LSASS.exe programs on your computer.
Open your file explorer. On the This PC window, click on your local disk (C:).
Scroll down to Windows and hit Enter.
Scroll down to system32 and hit Enter
Check whether the lsass.exe file is correctly spelt and is to an unusually large file.
Delete any program that is wrongly misspelt.
2.2. Use an Antivirus
The best and safest way of getting rid of any malicious files and programs from your computer is through an antivirus program.
If you are looking for reliable antivirus protection, consider using TotalAV. It is designed to protect your system against corruption from such malicious programs.
Consider setting up the protection and if you encounter issues, this detailed guide will help you out.
We also have a guide on what to do if Local Security Authority is off, so don’t miss it. Learn more about how the Local Security Authority process works in Windows and what the lsass.exe file does in our lsass.exe explained guide.
Remember to always keep your system well updated at all times to keep your computer system healthy and robust.
If you have additional fixes, feel free to leave them in the comment section below.
The Inaccessible Boot Device Windows 11 error is another BSOD (stop code) issue that can arise from various causes. This particular error has a 0x0000007b stop code, often arising during the system startup.
Inaccessible Boot Device is a BSOD error, and it appears because Windows can’t find your boot drive. A bad update or improper BIOS configuration on Windows causes the issue.
How do I fix inaccessible boot device on Windows 11?
Before we start, there are a few preliminary checks you can try:
Connect the device with an Ethernet connection when installing Windows or new updates so it can download the necessary drivers.
Ensure you have the right drive set as a boot device in BIOS.
1. Change RST to AHCI in BIOS
Restart PC several times to and choose Troubleshoot.
Next, choose Advanced options and select Command Prompt.
Run the following command: bcdedit /set {current} safeboot minimal
Restart your PC and keep pressing F2 or Del to enter BIOS.
Go to storage settings.
Make sure to switch from RST to AHCI.
Repeat steps 1 and 2 but this time run: bcdedit /deletevalue {current} safeboot
2. Disable VMD in BIOS
Restart your PC and enter BIOS.
Next, navigate to Advanced and choose Storage Configuration.
Select VMD Configuration and set Enable VMD Controller to Disabled.
3. Disable Virtualisation Direct I/O
Enter BIOS.
Next, navigate to Advanced and choose System Agent Configuration.
Locate Virtualisation Direct I/O or VT-d and disable it.
A few users reported that you need to disable Kernel DMA protection before you can complete the previous step.
Save changes.
Keep in mind that disabling this method only works before you install an update that caused this error.
If you have any questions regarding the Inaccessible Boot Device Windows 11 error, don’t hesitate to leave them in the comments section below; we’ll be sure to look.