What is Regsvcs.exe & Should You Uninstall it?

NET Framework is a software development framework, which is developed by Microsoft for building and running applications on Windows. Regsvcs.exe is a file that runs on your PC and performs some vital operations.

In this guide, we will share with you all the details that would make you understand what is Regsvcs.exe and whether you should uninstall it or keep it on your computer. Let us check out the guide.

What is Regsvcs.exe?

Regarding important files, the Regsvcs.exe is a legitimate Windows file published by Microsoft. The main work of Regsvcs.exe is registering Microsoft NET Framework components in the Windows Registry.

According to an official Microsoft explanation, the Regsvcs.exe (.NET Services Installation Tool) performs the following actions:

  • Loads and registers an assembly.
  • Generates, registers, and installs a type library into a specified COM+ application.
  • Configures services that you have added programmatically to your class.

The Regsvcs.exe file is a part of the NET Framework and helps register and configure NET-based components, including libraries and services.

It ensures that the components can be easily accessed and used by applications that require them to run smoothly.

Since it is an important file, malware or adware can infect this file and can mask it to operate in the background. This could be a serious issue because of the importance of the Regsvcs.exe file.

Is the Regsvcs.exe file malicious?

The Regsvcs.exe file is legitimate and is found inside the C:\Windows\System32 folder. It is barely an MB in size. However, in case the file you spot sizes in GBs, and isn’t in the location of the folder above, then it could be a virus.

Some common errors that you could come across related to Regsvcs.exe are:

  • Cannot find file: Regsvc.exe
  • File not found: Regsvc.exe

How can I resolve the Regsvcs.exe errors?

1. Reinstall NET Framework

  1. Press the Win key to open the Start menu.
  2. Open Control Panel.
  3. Click on Programs and Features.
  4. Select NET Framework and hit the Uninstall button at the top.
  5. Restart your computer.
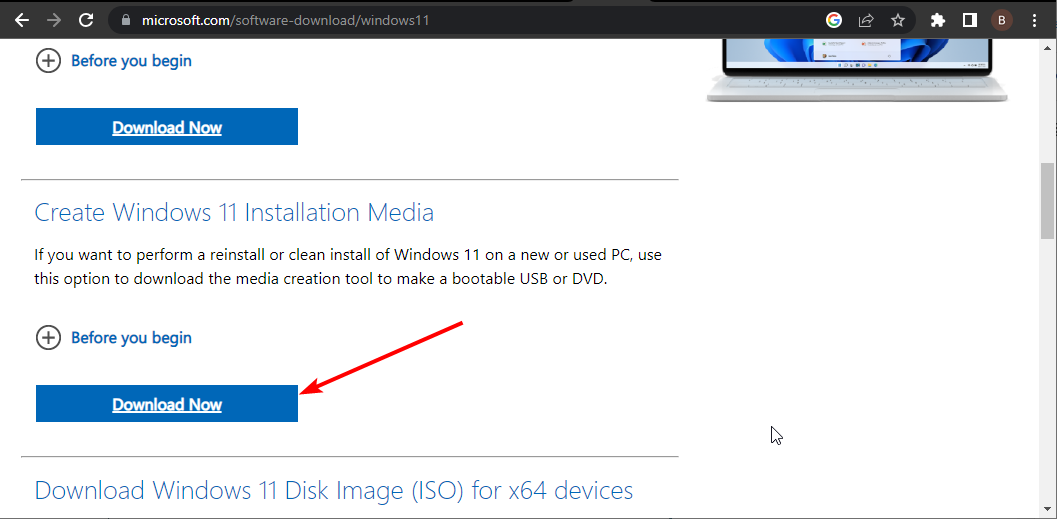
  6. Visit the official website and download the latest version.
  7. Install it and check if this fixes the issue or not.

Most Regsvcs.exe errors can be easily resolved by reinstalling the NET Framework on your computer. Chances are some important files related to it are missing on your PC.

Simply follow the above steps and reinstall the latest version of the NET Framework and check whether this fixes the issue.

2. Run the Microsoft .NET Framework Repair tool

  1. Visit the official Microsoft website.
  2. Download the Microsoft .NET Framework Repair tool.
  3. Launch the program by double-clicking the EXE file.
  4. Accept the terms and conditions and click Next.
  5. The program will begin diagnosing the issues associated with the NET Framework on your computer and present you with a list of Recommended changes that are required to resolve the problem.
  6. Click on the Next button to apply the solutions.
  7. Finally, click Finish to complete the process.

The NET Framework Repair tool will help you diagnose and fix the issues related to Regsvcs.exe. All you need to do is run the program and follow the onscreen steps.

3. Run the SFC and DISM scans

  1. Press the Win key to open the Start menu.
  2. Type command prompt and run it as an administrator.

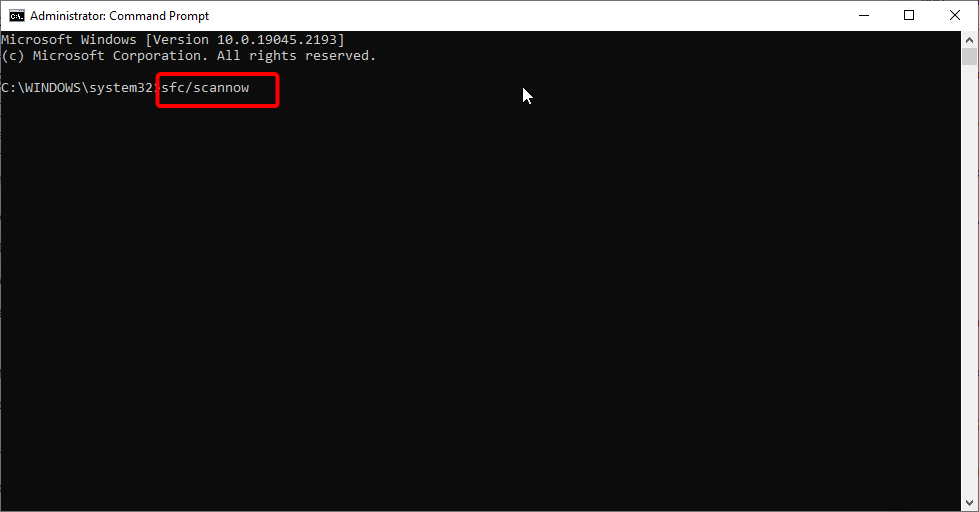
  3. Type the below command and press Enter:sfc /scannow
  4. The SFC command will resolve the problem.
  5. Type the below commands and press Enter after each one:Dism /Online /Cleanup-Image /CheckHealth Dism /Online /Cleanup-Image /ScanHealth Dism /Online /Cleanup-Image /RestoreHealth
  6. Restart your computer.

Since the Regsvcs.exe file is a system file, you should run the SFC and DISM scans to resolve the corrupt or missing system files.

Chances are some important system files associated with the Regsvcs.exe are missing and causing it to crash. In case the SFC scan is not working, you can apply the changes in our guide to fix the problem.

4. Perform a system restore

  1. Open the Start menu by pressing the Win key.
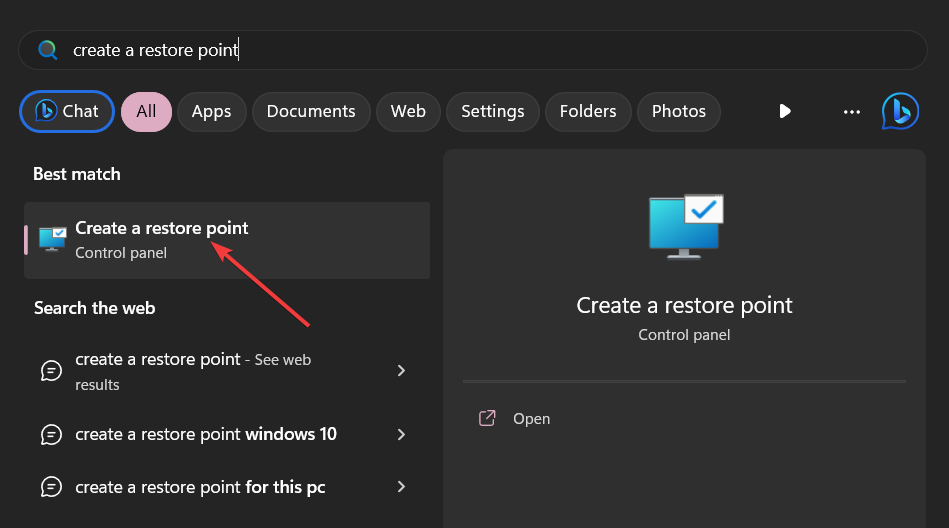
  2. Type Create a restore point and open the top result.
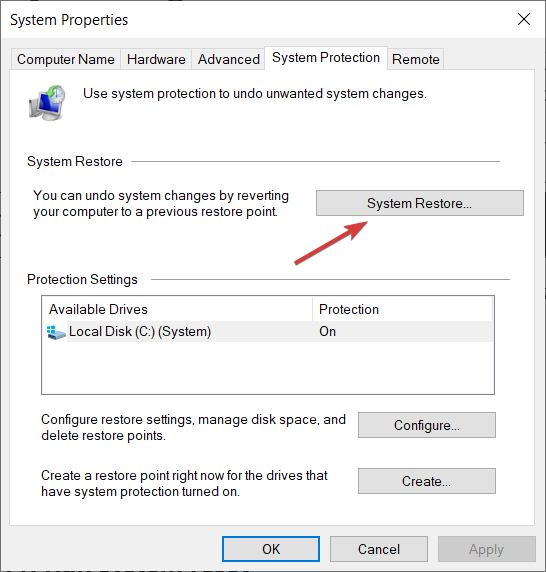
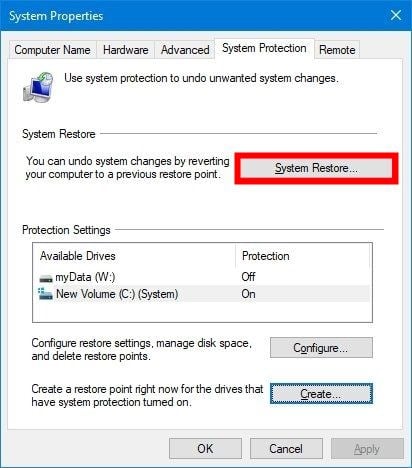
  3. Select the drive where you have the OS installed and click on System Restore.System Restore System config
  4. Select the restore point and hit Next.restore to fix missing sdl2.dll
  5. Click Finish to begin the restore process.

If you are getting the Regsvcs.exe file-related errors, you can restore your PC to a state where everything was working normally.

However, note that for the system restore to work, you should have a restore point created on your PC. For that, you can read out guide, which gives you a detailed explanation of how to create a restore point.

That is it from us in this guide. Let us know in the comments below which one of the above solutions resolved the Regsvcs.exe file errors.

What is Osppsvc.exe & How to Fix its Errors?

Of the wide array of background processes running in Windows, most perform a critical function, either directly linked to Windows or for a third-party app. But a few are known to trigger more errors than others. One that fits the category is osppsvc.exe.

While high CPU usage is one, most users reported that the osppsvc.exe process could not be located when trying to launch Microsoft Office, and as a result, Office wouldn’t open. Keep reading to find out what osppsvc does and effective ways to fix its errors!

What is Office Software Protection Platform?

The osppsvc.exe process stands for Office Software Protection Platform and is a vital component of Microsoft Office. First introduced in Office 13, the component has been a part of all future versions.

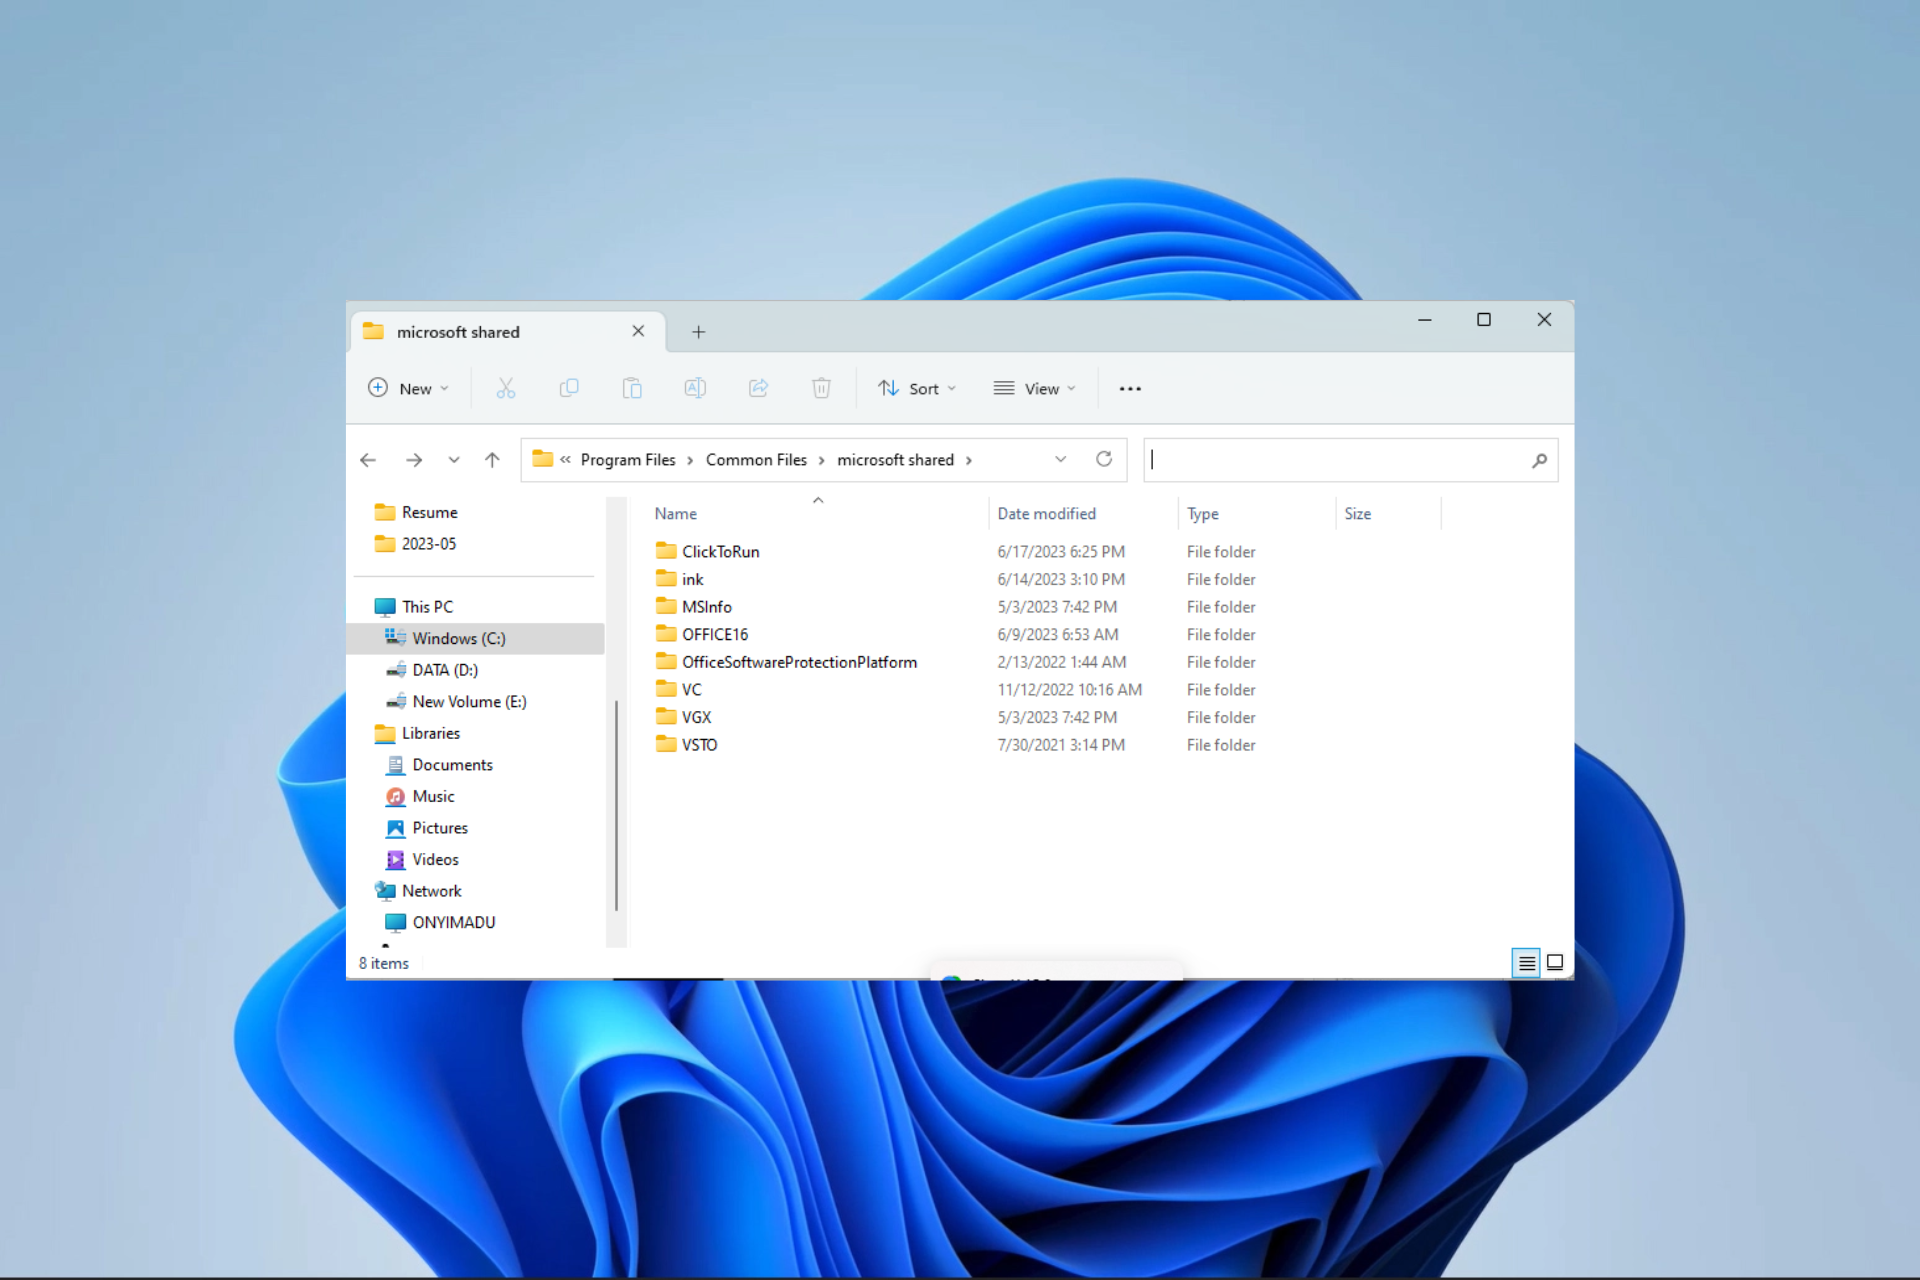
The process plays a critical role, i.e., to acquire and enforce the digital licenses of Microsoft Office applications. For those wondering where is the osppsvc file, it can be found in the following location:C:\Program Files\Common Files\microsoft shared\OfficeSoftwareProtectionPlatform

As per our research, you shouldn’t disable or terminate the osppsvc.exe, given the role it plays, but it, too, ideally shouldn’t throw errors or consume 100% CPU. So, if you are facing problems with the process, a few quick solutions will help!

How do I fix osppsvc.exe errors?

Before we move to the slightly complex solutions, try these quick ones first:

  • Check for any pending Windows or Microsoft Office updates and install them.
  • Make sure you are running an activated version of Office.

If none work, move to the fixes listed next.

1. Terminate the process

  1. Press Ctrl + Shift + Esc to open Task Manager, and head to the Details tab.details
  2. Select the osppsvc.exe process, and click on End task.end task
  3. Once done, relaunch Microsoft Office.

If find come across osppsvc.exe Error 1920 and can’t open Microsoft Office, a quick fix is to terminate the process.

2. Scan for malware

  1. Press Windows + S to open Search, type Windows Security in the text field, and click on the relevant search result.
  2. Click on Virus & threat protection.virus & threat protection
  3. Click on Scan options.scan options
  4. Choose Full scan, then click on Scan now, and wait for the process to complete.full scan to fix osppsvc.exe

Before you take any troubleshooting measures, it’s imperative to identify whether osppsvc.exe is a virus or poses any threat. And an easy way for it is to run a malware scan using the built-in Windows Security. Besides, you could go with a reliable third-party antivirus solution.

3. Repair corrupt system files

  1. Press Windows + R to open Run, type cmd, and hit Ctrl + Shift + Enter.cmd
  2. Click Yes in the UAC prompt.
  3. Paste the following commands one at a time and hit Enter after each:DISM /Online /Cleanup-Image /CheckHealth DISM /Online /Cleanup-Image /ScanHealth DISM /Online /Cleanup-Image /RestoreHealth
  4. Now, execute the following command to run the SFC scan: sfc /scannowsfc scan to fix osppsvc.exe
  5. Once done, restart the computer.

Corrupt system files can often lead to trouble loading files critical to third-party apps, and running the DISM tool and SFC scan will help fix things.

Even better, you can try reliable repair software to help you find system stability issues, such as corrupt or malfunctioning files, and replace them with new Windows elements.

4. Modify the registry

  1. Press Windows + R to open Run, type regedit in the text field, and click OK.registry
  2. Paste the following path in the address bar and hit Enter: HKEY_LOCAL_MACHINE\SOFTWARE\Microsoft\OfficeSoftwareProtectionPlatformpath
  3. Locate the InactivityShutdownDelay DWORD. If you can’t find it, right-click on the empty portion, hover the cursor over New, then select DWORD (32-bit) Value, and name it InactivityShutdownDelay.InactivityShutdownDelay
  4. Right-click on the DWORD and select Modify.
  5. In case it already existed, you will find 300 listed under Value data. Change it to a smaller number, and save the changes.change value data to fix osppsvc.exe

The number listed under Value data is the amount of time in seconds the Office Software Protection Platform continues to run after an action is performed. Reducing this time period will help fix high CPU consumption due to osppsvc.exe.

5. Repair Microsoft Office

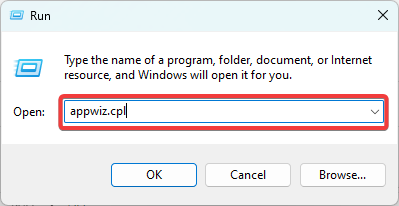
  1. Press Windows + R to open Run, type appwiz.cpl, and hit Enter.
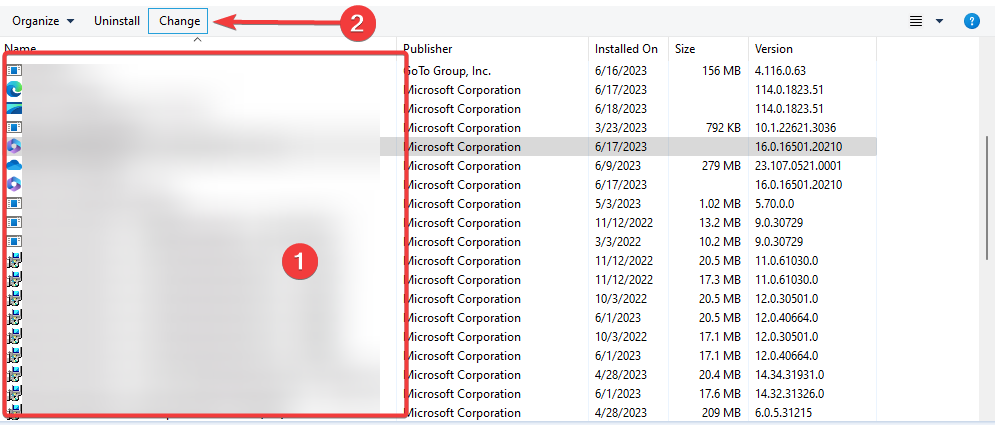
  2. Select Microsoft 365 from the list of programs, and click Change.change
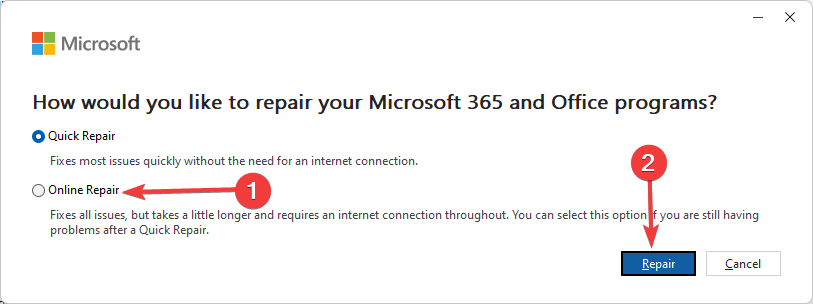
  3. Choose Online Repair and click on Repair to proceed.online repair to fix osppsvc.exe
  4. Again, click Repair in the confirmation prompt and wait for the process to complete.

If the process is corrupt or triggering major errors, you can download and repair osppsvc.exe issues by running an Online Repair of the Microsoft Office 365 suite. This will re-download any problematic files and get things running.

6. Create a new user profile

  1. Press Windows + R to open Run, type netplwiz in the text field, and click OK.
  2. Click on the Add button.add
  3. Click on Sign in without a Microsoft account.sign in without a microsoft account
  4. Now, click on Local account.local account
  5. Enter the User name, and password if required, and click Next to proceed.enter details
  6. Once done with the account creation, select the new profile and click Properties.properties
  7. Go to the Group Membership tab, select Administrator, and click OK to save the changes.administrator account to fix osppsvc.exe
  8. Now, log into the new account, install Microsoft Office, and the problem should be resolved.

A few users reported that the problem lay with the corrupt user profile, and creating a new local account, then setting the account as administrator, got things up and running. So, do try it and check whether the osppsvc.exe errors are fixed in Windows.

7. Upgrade to the latest version of Microsoft Office

In case nothing else works, the last option is to upgrade the version of Microsoft Office. Every few years, Microsoft comes with an upgrade that introduces new features and enhances security and usability.

But other than the two, upgrades increase compatibility with the OS. So, check for the latest version and download the Office Suite. You can find more information on the official website.

That’s all! One of these solutions should have helped fix osppsvc.exe errors in Windows, and you should now be able to run Microsoft Office seamlessly.

If you want to switch to another suite, check the most preferred Microsoft Office alternatives.

For any queries or to share what worked for you, drop a comment below.

0x87dd0005 Xbox Error: How to Fix it in 3 Steps

The error code 0x87dd0005 on Xbox typically indicates a sign-in issue. It commonly occurs when there is a problem with your Xbox Live account or network connectivity. Hence, this article will discuss why the error occurs and some steps for fixing it.

Also, you may be interested in our article about the error 0x80190190 on Xbox and some ways to fix it.

What causes the 0x87dd0005 Xbox error?

The error means there’s a problem with the Xbox service, or your console or PC has encountered an unexpected error. Here are some potential causes of this error:

  • Xbox Live service issues are a common cause.
  • Incorrect account credentials, expired Xbox Live subscriptions, or other account issues.
  • Network connectivity problems will prevent you from connecting to the Internet.
  • Temporary data or cache issues can sometimes lead to issues.
  • Xbox Live profile conflicts, such as multiple signed in profiles can cause the issue.

How do I fix error 0x87dd0005?

We recommend you go through the following preliminary checks before trying any advanced troubleshooting steps:

  • Check the Xbox Live service status on Xbox Live status page and make sure the service is working.
  • Clear persistent storage and temporary files.
  • Check your internet connection and restart your network connection.
  • Check account credentials and subscriptions.

If the preliminary check above can’t resolve the problem, proceed with the solutions outlined below:

1. Restart your device

1.1 Xbox console

  1. Press and hold the Xbox button in the center of your controller to open the Power Center.
  2. Select Restart console from the menu.
  3. Click on Restart.
  4. After restarting the console, try to sign in and check if the error persists.

1.2 PC

  1. Press the Windows button.
  2. Select the Power button from the drop-down menu, then click on Restart.

Restarting the Xbox console or PC will refresh its process and close background activities impeding the sign-in.

2. Use the Switch account option

  1. On the sign-in error page, click on the Switch account button.
  2. Select your account and continue.

The above steps will allow you to select and switch to your account if you have multiple accounts.

3. Uninstall and reinstall the problematic game

3.1 Xbox console

  1. On the Home screen, select My games & apps.
  2. Highlight the game or app, then press the Menu button on your controller.
  3. Click Manage game & add-ons.
  4. Then, select Uninstall all.
  5. Repeat the restart Xbox console steps in solution 1.
  6. After restarting, download the game or app and try launching it to see if the error persists.

3.2 PC

  1. Press the Windows + R keys, type appwiz.cpl, and click OK to open the Programs and Features.
  2. Locate and click the Xbox game, then click on Uninstall.
  3. Restart your PC afterward.
  4. If the game is a Play Anywhere game, reinstall it. However, you may need to re-buy it if it’s not.

Reinstalling the game will resolve issues causing it not to sign in to your Microsoft account.

Alternatively, you can check what to do if Xbox One is not loading games. Also, you can read about fixing issues with downloading games from the Xbox game pass on your PC.

Do you have any questions or suggestions regarding this guide? Kindly drop them in the comments section.

What Is Armsvc.exe & Should You Disable It?

Armsvc.exe is an essential executable file that is part of the Adobe Acrobat Update Service process or Adobe Refresh Manager.

The .exe file is a part of the Adobe Acrobat Software developed by Adobe Systems and is responsible for detecting the available updates for the application if you’ve enabled the automatic application updates feature. 

Problems caused by armsvc.exe 

This file is generally safe for use but, in some scenarios, has been reported to trigger complexities on a Windows PC. 

Several users have mentioned that the armsvc.exe often consumes an abnormally high amount of CPU or GPU, restricting the other processes from running smoothly. Moreover, the executable file is known to have several security shortcomings, which make armsvc.exe vulnerable to malware and virus attacks. 

Lastly, there have been reports that malicious codes often masquerade with the same name as the original Adobe.exe file and silently hare your Windows PC. 

Hence if you are witnessing frequent armsvc.exe-induced errors and your antivirus software flags the file as suspicious, you should perform the following methods to disable its execution. 

How do I fix the errors caused by armsvc.exe? 

Before we move on to the dedicated solutions, perform the following simple workarounds- 

  • Run a virus scan
  • Ensure that your operating system is up to date.
  • Search for the armsvc.exe in File Explorer and delete the instances not within the Adobe folder in the C drive. 

If the armsvc.exe is still creating issues, the following methods should be implemented. 

1. Temporarily disable the background task

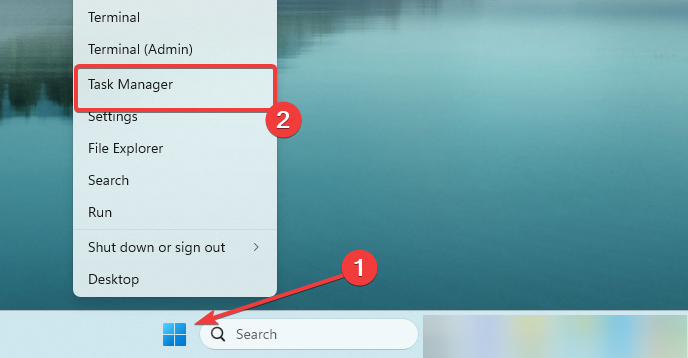
  1. Right-click the Windows icon on the taskbar and choose Task Manager from the context menu. 
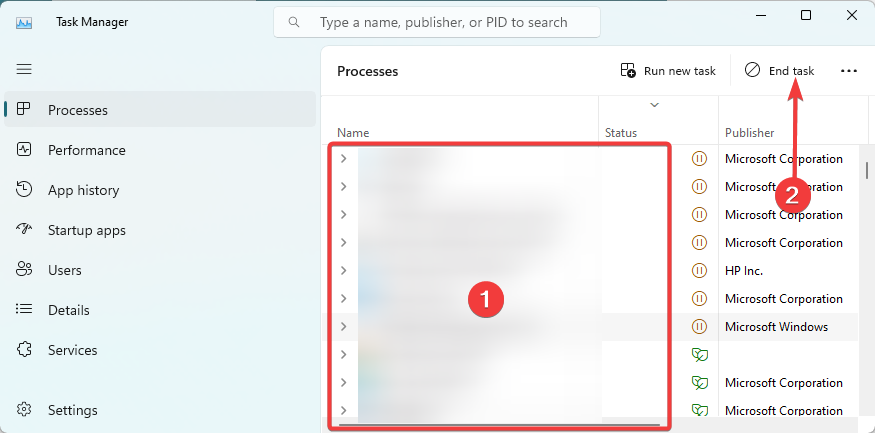
  2. Look for the Acrobat Update Service in the Processes tab, right-click it, and choose End Task from the context menu. Armsvc.exe

Forcefully disabling the Acrobat Update Service from the context menu is a temporary yet effective solution to fix annoying issues like sudden system crashes or high CPU usage. 

2. Verify the authenticity of armsvc.exe

  1. Use the Windows + I shortcut key to launch the File Explorer window. 
  2. Navigate to the following location in the file explorer by pasting this path in the address bar. C:\Program Files (x86)\Common Files\Adobe\ARM\1.0
  3. Look for and right-click the armsvc.exe file and select Properties from the context menu. 
  4. Access the Digital Signatures tab of the armsvc Properties window and verify that Adobe Inc. is mentioned under the name of the signer. Armsvc.exe

The digital signature of the executable file helps determine its authenticity. If the file is legitimate move on to the next solutions. Otherwise, you should right-click the application and press the Trash icon to delete it immediately. 

3. Disable Adobe Acrobat Update service 

  1. Use the Windows + R shortcut key to launch the Run dialog box, type services.msc in the text box, and press the Enter key. Armsvc.exe
  2. Locate and right-click the Adobe Acrobat Update Service in the list and choose Properties from the context menu. 
  3. Expand the Startup type drop-down and set it to Disabled and press the Stop button located under the Service Status section. Armsvc.exe
  4. Finally, press the Apply button to save the changes and OK to exit the properties window. 

The Adobe Acrobat Update Service is configured to run in the background, often interrupting several other processes running concurrently. Luckily, you can restrict the background service from running such that it can no longer disrupt other programs.  

4. Repair Adobe Reader

  1. Exit the Acrobat Reader and all the related web browser windows. 
  2. Press the Windows key, type the control panel in the search bar, and choose the relevant search result. armsvc.exe
  3. Choose Category in the View by drop-down and select Uninstall a program option. 
  4. Select Adobe Acrobat or Adobe Reader in the list of installed programs and select the Change option from the top. 
  5. Press the Next button on the repair wizard that pops up. 
  6. Next, select the Repair option and press the Next button to initate the repair process. armsvc.exe

If the above methods did not fix the armsvc.exe-related errors, you should repair the Adobe installation to resolve the underlying problems. 

5. Remove Adobe Reader and related files

1. Uninstall Adobe software 

  1. Access the Control Panel once again on your Windows PC. 
  2. Set View by drop-down to Category and select Uninstall a program option located under the Programs section. 
  3. Look for Adobe Acrobat or Adobe Reader in the list of installed programs right-click it and choose the Uninstall option from the context menu. armsvc.exe
  4. Press the Yes button on the confirmation popup to begin the uninstallation of the program from your Windows PC. 
  5. Follow the step-by-step process to uninstall the Adobe Reader software successfully. Once done, reboot your Windows PC and perform the steps described below. 

2. Delete AdobeARMservice

  1. Press the Windows icon on the taskbar, type cmd in the search bar on top, and choose Run as administrator.
  2. Press Yes on the User Action Control prompt that opens up on the screen. 
  3. Type or paste the following command and press the OK button to execute it. sc.exe delete AdobeARMservice
  4. Now the command is executed successfully, restart your PC to apply the changes. 

Uninstalling Adobe Reader is the last measure to end the problems caused by armsvc.exe.  

You can check out the best PDF Reader alternatives available for Windows, which are free from any security loopholes and other problems.

Which of these methods worked helped you come out of the situation? Do let us know in the comments section. 

What is Verclsid.exe & Should You Remove it?

Many factors complain about seeing a verclsid.exe process running in their Task Manager. It is because it sprouts some concerns, and they want to know if it is safe. However, this article will discuss vercisid.exe, how to verify the file, and how to remove it.

Alternatively, you may be interested in our guide about exe files deleting themselves on Windows 11 and some steps for fixing it.

What is verclsid.exe?

In Windows, verclsid.exe is an executable for the Shell Extension CLSID Verification Host.

It is a component that helps validate and verify the integrity of shell extensions using CLSID (Class Identifier) registration.

What is verclsid.exe used for?

  • It’s sued to validate and verify the integrity of shell extensions.
  • It ensures that registered CLSIDs for shell extensions are valid.
  • The verification process occurs during the initialization of the Windows Shell.
  • It helps prevent potential issues like crashes, performance problems, and conflicts caused by faulty or incompatible shell extensions.
  • Contributes to the overall stability and reliability of the Windows user interface.

Should I remove verclsid.exe?

No, you should not remove the Shell Extension CLSID Verification Host process for the following reasons:

  • It will negatively affect the stability and functionality of Windows Shell.
  • You might experience the malfunctioning of shell extensions.
  • Comparability problems and system errors.

However, system files can become compromised or corrupted by malware and viruses. So, it is possible that verclsid.exe isn’t safe and should be removed. Proceed to the next section to verify.

How to verify if verclsid.exe is safe or a virus?

Observe the following verification steps to check if the verclsid.exe process is safe or a virus:

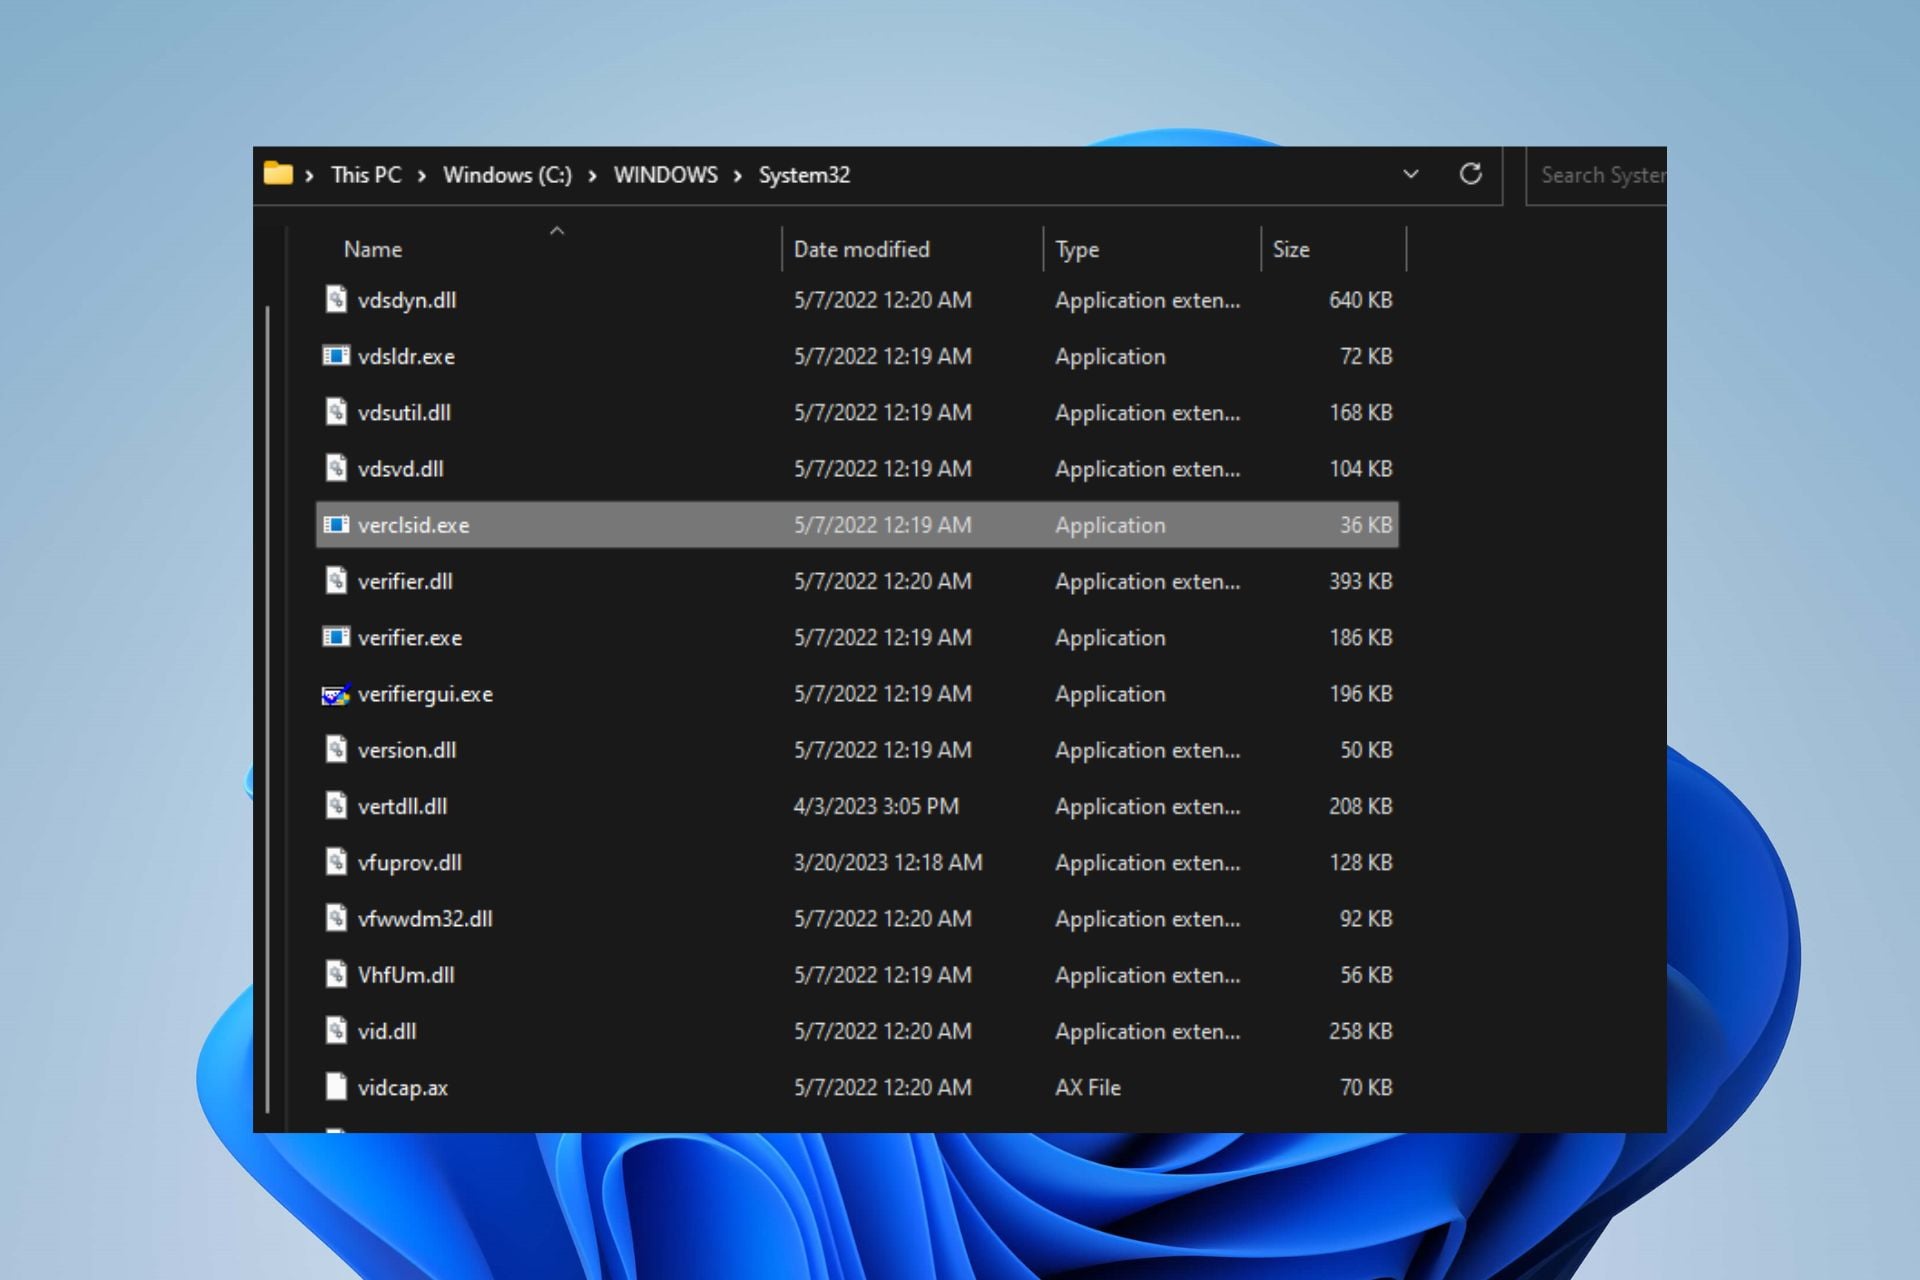
  • Check if the verclsid.exe file on your PC resides in the legitimate directory: C:\Windows\System32
  • Run a virus scan on your computer with trustworthy antivirus software and scan the file
  • Verify if the verclsid.exe file is digitally signed and Copyright by Microsoft Windows Corporation.

After going through the steps above and if you notice any irregularities in the file properties, you should be able to decide whether it is safe.

How can I remove verclsid.exe?

1. End task for verclsid.exe

  1. Right-click the Start button and select Task Manager from the menu.
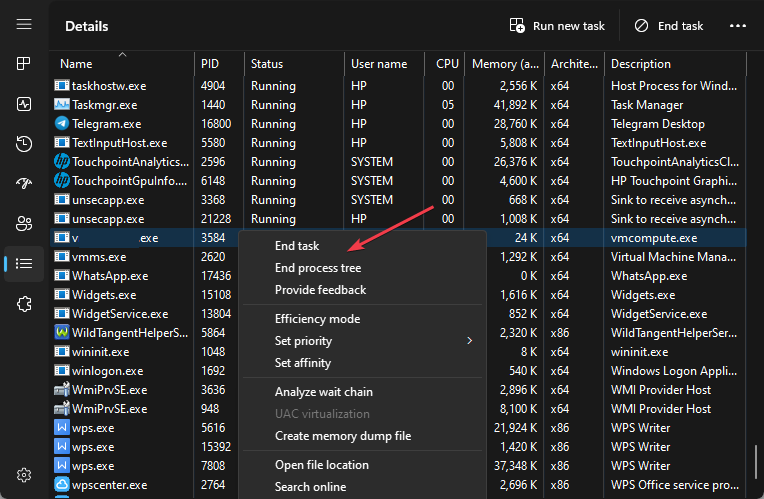
  2. Go to the Processes or Details tab. Click the verclsid.exe from the list, right-click on it, then select End Task from the context menu.
  3. Click OK to confirm that you want to end the task for the program.
  4. Restart your PC and check if it is still running.

The end tasks steps will stop the verclsid.exe process on your PC. Check our article on what to do if the Task Manager is slow to open or respond on your PC.

2. Remove the verclsid.exe file via File Explorer

  1. Repeat steps 1 and 2 from the solution above.
  2. Locate the verclsid.exe in the Task Manager.
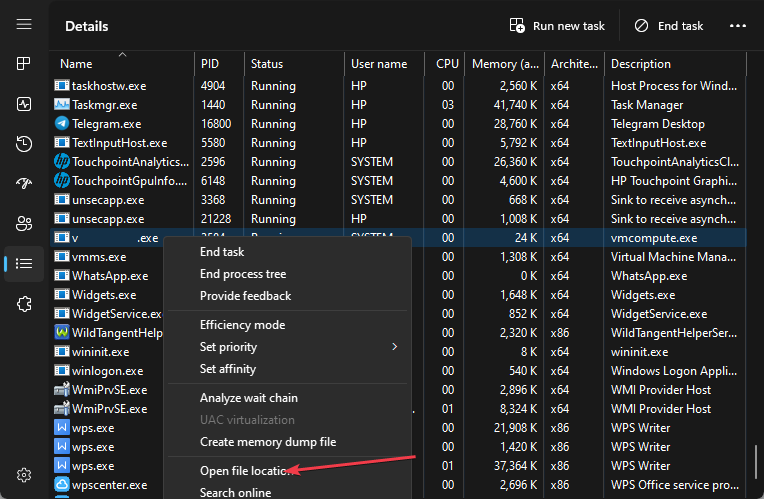
  3. Then, right-click on it and click on Open File Location from the drop-down menu.
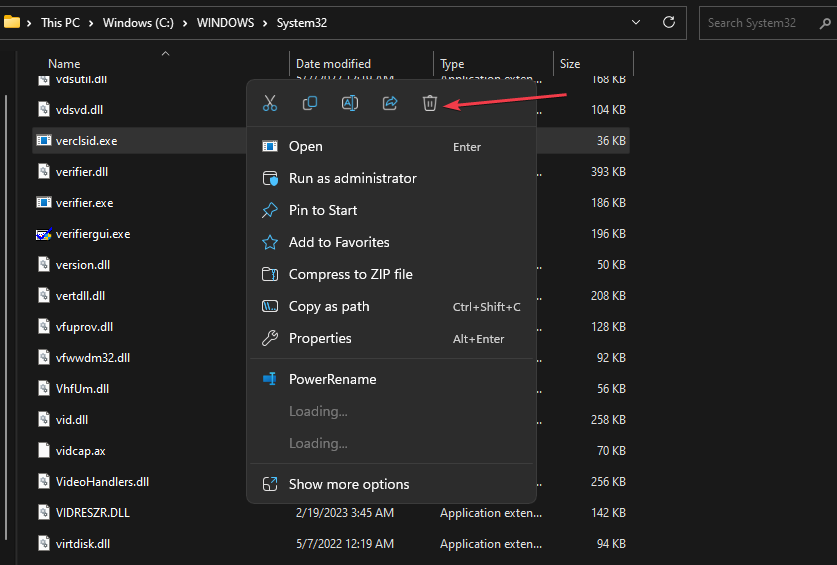
  4. Now, right-click on the verclsid.exe file and delete it.
  5. Restart your PC.

Deleting the executable file in File Explorer will disable and remove the malicious program using the executable.

In conclusion, you can check what to do if antivirus software is blocking .exe files on the PC. Likewise, you can read our detailed guide on why exe files are not opening and how to fix it on Windows 11.

Should you have further questions or suggestions regarding this guide, kindly drop them in the comments section.

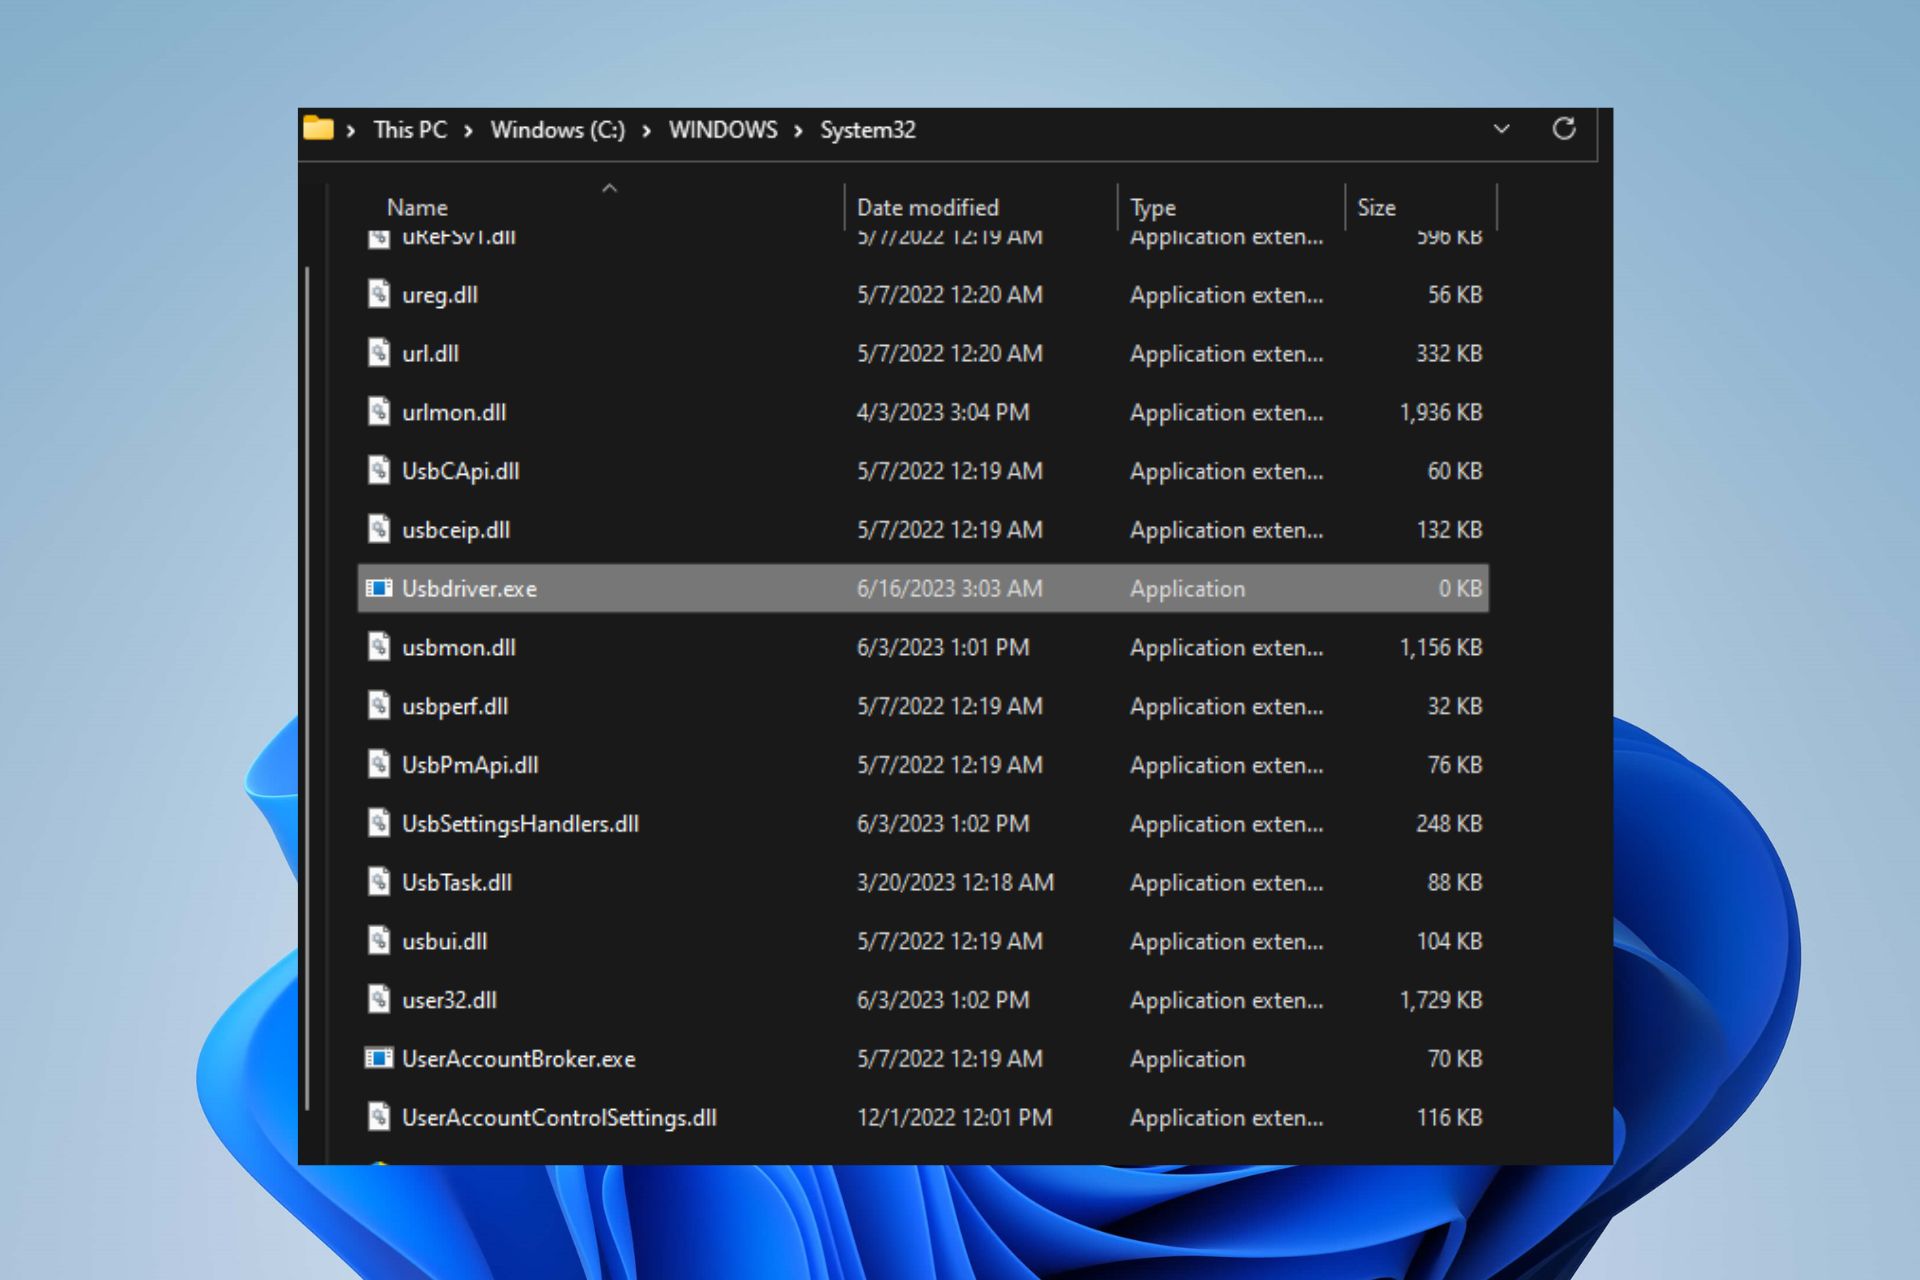
What is Usbdriver.exe & Should You Remove it?

Running into usbdriver.exe in the Task Manager is one of the recent complaints Windows users reported. It is because executable processes like these are liable to be malicious, and they must be sure it’s safe. Hence, we’ll discuss whether you should remove it.

Likewise, you may be interested in our detailed guide on why exe files are not opening on your PC and some fixes to resolve the problem.

What is usbdriver.exe?

Usbdriver.exe, also known as USB Remote NDIS (Network Device Interface Specification), is a network driver model developed by Microsoft.

Below are some of the notable things that the usbdriver.exe does:

  • Allows USB devices to appear as network adapters to host computers.
  • It facilitates data transfer between USB devices and computers.
  • Simplifies network connection setup without requiring additional drivers.
  • Commonly used for tethering smartphones to computers for internet access sharing.
  • Provides a standardized method for USB device communication with host computers.
  • Eliminates the need for specific drivers for each USB device.
  • Enables the USB device to share network resources with the host computer.

Should I remove usbdriver.exe?

Disabling or removing usbdriver.exe can lead to the following:

  • Stability and functionality issues for programs using it.
  • It can hinder USB devices from functioning as network adapters for host computers and impact the network connection.

However, malware and viruses can compromise or corrupt system files, using them as a disguise to stay undetected. Hence, it is possible that usbdriver.exe is unsafe and should be removed. Proceed to the next section to check.

Is a USB drive exe a virus?

Go through the checks below to see if the usbdriver.exe process on your computer belongs to a safe program:

  • Check the file location and make sure its in C:\Windows\System32
  • Verify the digital signature and ensure the file is signed by Microsoft.
  • Check the file size and make sure that it matches.
  • Scan the file using reliable antivirus software.

After following the steps mentioned above and observing any anomalies in the file properties, you can determine its safety.

How can I remove usbdriver.exe?

1. Use CCleaner

  1. Download CCleaner from a trusted source and install it on your computer.
  2. Launch the newly installed Cleaner and go to Tools.
  3. Then, select the Startup tab, then click the Disable and Delete suspicious Startups option.
  4. Further, close the Cleaner and relaunch it.
  5. Click the Scan PC button to run an anti-malware and antivirus scan.
  6. After the scanner is complete, restart the computer.

The Disable and delete suspicious startups option in CCleaner helps to detect and remove any malicious files, including usbdriver.exe, automatically.

2. End task and delete usbdriver.exe

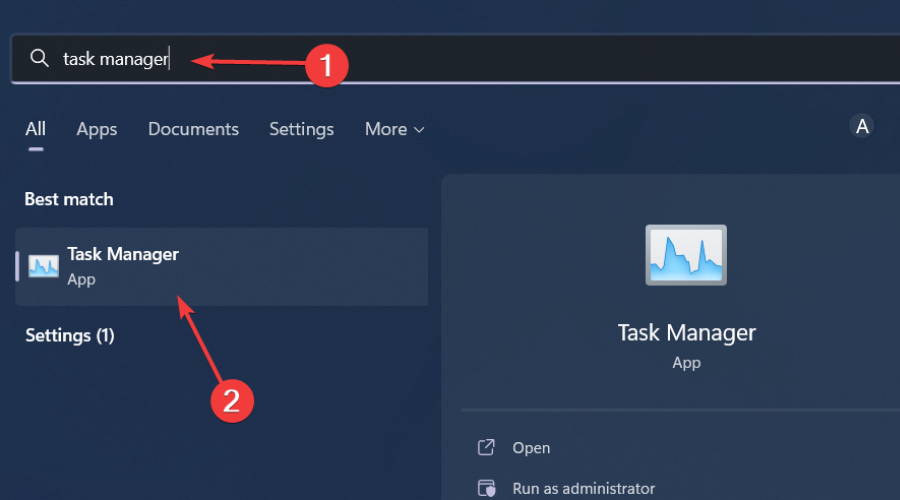
  1. Right-click the Windows button and click on Task Manager from the list menu.
  2. Navigate to the Processes or Details tab. Click the usbdriver.exe from the list, right-click on it, then select End Task from the context menu.
  3. Then, right-click on usbdriver.exe and click on Open File Location from the drop-down menu.
  4. In the folder, right-click on the usbdriver.exe file and delete it.
  5. Restart your PC and check if the executable still exists in the Task Manager.

The above steps allow you to stop the usbdriver.exe process on your PC and delete the executable file from File Explorer.

In some cases, USB issues are not caused by malicious files but by missing or outdated drivers. For instance, if your device relies on serial communication, installing the correct FT232R USB UART driver can help restore proper functionality.

You can check our article on what to do if the Task Manager not responding or opening on your computer.

Alternatively, we have a detailed guide on what SecurityHealthSystray.exe does and how to fix its errors on Windows 11.

Also, you can read about exe files deleting themselves on Windows 11 and some steps for resolving it.

What is Osu.exe & Should You Uninstall It?

The osu.exe process is another one of the many processes installed by third-party apps that need them. This process is important to the smooth running of its parent software.

If you want to know exactly what the process does, you will find detailed information in this guide.

What is the osu.exe file?

Osu.exe is a legit file that a reliable company digitally signs. It is associated with the osu software that is developed by ppy.

It runs in the background when its parent software is active. The original version of this file is found in the location below: c:\ program files\ osu!osu!.exe

When any application needs this file, it will be summoned into the memory. And it will run in the background as long as the associated software is active.

Should I uninstall osu.exe?

Like many third-party processes, deleting this process or not depends on the usefulness of its parent software. If you are still using this software, you need to keep the osu.exe process.

However, if you have no use for the parent software, you can remove the file by uninstalling the app that uses it.

But, if you want to uninstall the process because it is causing issues on your PC, we will show you how to fix it in the next section of this guide.

How can I fix issues related to osu.exe?

1. Scan for malware

  1. Press the Windows key + S, type virus, and click Virus & threat protection.
    virus osu.exe
  2. Choose Scan options on the page that opens.
    scan options
  3. Finally, select your preferred scan option and click Scan now.
    scan now

The presence of malware on your PC can be the reason for the problem you are encountering with the osu.exe process. This is because malware can disguise itself as a process and consume your PC resources.

The solution to this is to perform a deep scan using Microsoft Defender.

If the built-in antivirus software can not eliminate the malware, we recommend using a dedicated tool in TotalAV to get the job done.

This excellent software will remove even the most stubborn malware on your PC before it can cause issues.

⇒ Get TotalAV

2. Uninstall third-party software

  1. Press the Windows key, type control, and select Control Panel.
    control panel
  2. Select the Uninstall a program option under Programs.
    uninstall a osu.exe
  3. Now, right-click the Osu software and select Uninstall.
    uninstall
  4. Finally, follow the onscreen instructions to complete the process.

If you are sure this issue with osu.exe is not due to malware activities, you need to uninstall its parent software.

3. Perform a system restore

  1. Press the Windows key + R, type rstrui.exe, and press Enter.
    rstrui
  2. Click Next on the new page.
    next osu.exe
  3. Now, choose your ideal restore point and click the Next button.
    restore point
  4. Finally, click Finish and follow the onscreen instructions to complete the process.
    finish

If push comes to worst and the osu.exe keeps messing with your PC, you need to restore your PC to a point when everything was working well. With this, you can reverse the changes made to your PC that might be causing this issue.

We can now conclude this comprehensive guide on the osu.exe process. You should now be able to decide if the process is worth keeping.

If you want to know about the msseces.exe process, check our dedicated guide for the verified information you need.

Feel free to share your experience with this process with us in the comments below.

3 Ways to Remove All Packages Installed by Pip

Over time, as you work on various Python projects, your environment may become cluttered with multiple packages. So, using pip to uninstall all packages can help resolve it.

Therefore, we will explore ways to remove all packages installed by pip to have a clean Python environment. Also, we have a detailed guide about how to install pip on macOS in simple steps.

What is pip?

Pip is a package management system for installing and managing software packages written in Python. It stands for Pip Installs Packages or Pip Installs Python. Pip is the standard package installer for Python and is widely used in the Python community.

Here are some of the main functions of pip:

  • Pip lets you easily install Python packages from the Python Package Index (PyPI) or other sources.
  • It automatically resolves and installs the dependencies required by a package.
  • Pip enables you to manage installed packages, including upgrading, downgrading, or uninstalling them.
  • You can search PyPI to discover available Python packages and their versions.
  • It helps you manage package versions, allowing you to specify the desired version or range of versions for installation.
  • Pip provides tools for packaging and distributing Python packages, making it easier to share your own code with others.
  • It integrates well with virtual environments, allowing you to isolate and manage dependencies for different projects.
  • Pip can be used to upgrade its own version to the latest release.

What does pip uninstall do?

As its name says, pip uninstall is in charge of uninstalling Python packages. However, it can’t remove the following:

  • Pure distutils packages that leave no metadata
  • Script wrappers

How can I pip uninstall all packages in Windows?

1. Uninstall the individual package

  1. Press the Windows button, type Command Prompt, and select Run as Administrator to open it.
  2. Type the following and press Enter to know the list of packages installed: pip list
  3. Then, type this and press Enter: pip uninstall package_name

Using the command above will uninstall the particular package name entered. Note: substitute the package name with the individual package you want to remove.

You can read our guide about how to fix Command Prompt not working on your PC.

2. Remove all packages

  1. Press the Windows button, type Command Prompt, and select Run as Administrator to open it.
  2. Type the following and press Enter: pip uninstall -y -r <(pip freeze)
  3. Reply with the following and press Enter to confirm your selection: Y

Adding the pip freeze command will remove all packages installed on your system by pip.

3. Remove all packages using use xargs

  1. Press the Windows button, type Command Prompt, and select Run as Administrator to open it.
  2. Type the following in the command prompt and press Enter: pip freeze | xargs pip uninstall -y
  3. THen, input this code and press Enter to exclude the VCS package: pip freeze | grep -v "^-e" | xargs pip uninstall -y
  4. Type the following and press Enter: pip freeze --user | xargs pip uninstall -y

You can only individually remove packages installed from VCS (version control systems). Thus, you will have to exclude them before the command can run.

In conclusion, check our detailed guide about resolving PIP not recognized in PyCharm terminus on Windows OS. Also, we have a complete guide on Visual Studio vs PyCharm to help you decide which IDE is best for your next project.

Should you have further questions or suggestions regarding this guide, kindly drop them in the comments section.

What is Ouc.exe & Should You Uninstall It?

The ouc.exe process is a third-party process that is digitally signed by Huwai. This process is important to the smooth running of its parent software and should be allowed to run in the background.

If you are wondering what this process does and whether it is worth keeping, this guide will provide you with the information you need and help you make a decision.

What is ouc.exe?

The ouc.exe process is an important part of the Enhanced Mobile Switching Center (EMSC). The parent software (EMSC) is manufactured by the renowned Huawei Technologies, which makes the process trustworthy.

Ouc.exe, which means Online Update Client, is known to install RUN keys in the registry. This allows it to start automatically when your PC boots up.

Also, it helps to start its parent internet dongle and connect your PC to the internet with system privileges.

Another important point to note regarding is process is that it is completely safe. Well, unless malicious software is disguised as ouc.exe to use your PC resources.

Should I uninstall ouc.exe?

Whether to uninstall ouc.exe or not depends on what you use the process for. If you use EMSC, then this process needs to run in the background to make your internet dongle work well.

However, if you have no use for its parent, you can always uninstall it. In a case where you are thinking of the process because you are facing issues with it, we will show you how to solve the problems in the next section of this guide.

How can I fix issues related to ouc.exe?

1. Scan for malware

  1. Press the Windows key, type virus, and click Virus & threat protection.
    virus
  2. Click the Scan options link on the new page.
    scan options ouc.exe
  3. Finally, choose your preferred scan option and click the Scan now button.
    scan now

Viruses can cause so many issues, and it has been reported to be one of the main causes of issues with ouc.exe. This is because malware can hijack the process and use your PC resources.

The way out here is to perform a malware scan using the built-in antivirus. If Microsoft Defender can not get rid of the virus, we advise you to try a dedicated antivirus in TotalAV.

This superb software will scan the hidden parts of your PC to remove even the most hidden malware.

2. Uninstall third-party software

  1. Press the Windows key + R, type control, and click OK.
    control ouc.exe
  2. Select the Uninstall a program option under Programs.
    uninstall a
  3. Now, right-click the Cricket Broadband or EMSC and select Uninstall.
    uninstall
  4. Finally, follow the onscreen instructions to complete the process.

If viruses are not disguised as the ouc.exe process, and it keeps causing problems, you need to remove its parent software. You can do this by following the method above or using the uninst.exe file in the installation folder.

3. Perform a system restore

  1. Press the Windows key + R, type rstrui.exe, and press Enter.
    rstrui ouc.exe
  2. Click Next on the new page.
    next
  3. Now, choose your ideal restore point and click the Next button.
    restore point
  4. Finally, click Finish and follow the onscreen instructions to complete the process.
    finish ouc.exe

If you still can’t get rid of the issue with ouc.exe, you need to perform a system restore to the point when you didn’t have the parent software. This will undo the changes made to your PC that might be causing the issue.

With this, we can conclude this detailed guide on the ouc.exe process. With the information therein, you should now be able to decide whether to remove or keep the software.

If you are looking for detailed information about the ntkrnlpa.exe process, you will find it in our comprehensive guide.

Feel free to share your experience with this process with us in the comments below.

What is Un.exe & Should You Uninstall It?

In this article, we explore the un.exe; it is one of the many programs you may have encountered on your Windows devices. Is it malware, and should you uninstall it? We get to answer all these questions.

Also, you may want to read about some other exe files often found on Windows, so check out our mpcmdrun.exe explainer.

What is un.exe?

We do not know much about this file, but it is not a fundamental component of Windows and is not required for your computer to function. It is identified in the few cases encountered as follows:

  • On Microsoft Defender, it is known as Trojan:Win32/Dynamer!ac.
  • On TrendMicro Antivirus, it is ADW_AppHelper.

You may check out our other guide if your Windows defender application is not working.

Should I remove or uninstall un.exe?

The simple answer is yes. You may remove it for any of the following reasons:

  • It is associated with malware and may download and install other malware on your computer.
  • The program may steal personal information like passwords and credit card numbers.
  • It is not a core Windows file; its removal will not hinder any processes.

How do I remove un.exe?

1. Perform a virus scan

  1. Click the Start menu, type security, and select the Windows Security app.
    un.exe
  2. Click on Virus & threat protection.
  3. Select Scan options.
  4. Finally, select Full scan and click the Scan now button.
  5. When the scan is complete, it should remove un.exe.

As good as Windows Defender can be, sometimes you need a specialized antivirus to detect hidden cyber threats, eliminate them for good, and prevent them from affecting your device again.

⇒ Get TotalAV

2. Remove associated programs

  1. Press Windows + R to open the Run dialog.
  2. Type appwiz.cpl and hit Enter.
    un.exe
  3. Click on any program that the un.exe is bundled with from the app list and select Uninstall.
    un.exe
  4. Finally, you may consider running a virus scan after the uninstallation.

3. Manually delete the file

In some cases, a simple delete may suffice. But we recommend also deleting it from the recycle bin or permanently deleting it using Shift + Del.

We, however, still recommend a virus scan after deleting the file.

Where is the un.exe file located?

Usually, the file may be found in the Windows temporary files folder shown below, and this may be your first scan location if you are looking to get rid of it.

C:\Users\user name\AppData\Local\Temp

It has no file description and a file size of about 3,714,048 bytes. The application is invisible, so you may have to enable hidden files to see it.

By getting rid of un.exe you will protect your computer and your personal information. While we discussed using the inbuilt Windows Security tool, you may also try some other robust antivirus software for Windows 11.

We also have a guide on ZBrain Desktop and how to remove it, so you might want to check it out.

Finally, reach out to us if you have encountered this file, and let us know what you did to get rid of it.

What is Uns.exe & Should You Uninstall It?

If you use the Active Management Technology (AMT) from Intel, you may have encountered UNS.exe. In this guide, we walk you through all the important elements regarding the executable and answer some essential questions that readers have asked.

You may also want to learn about other AMT-related processes like LMS.exe in our other guide.

What is UNS.exe?

UNS.exe is a valid file component of Intel Corporation’s Active Management Technology (AMT). It is useful for a few purposes, including:

  • Monitoring of your applications.
  • Routing app messages to AMT using special port numbers.
  • Recording AMT alerts in your OS system log.
  • Displaying the popup screen and system tray icon at startup to show whether AMT is active and present.

You should have a stable Microsoft .NET Framework installed since UNS.exe may need it to display the system tray and popups.

Where is UNS.exe located?

The executable is located in a subdirectory of the Programs Files (x86), as shown below, and should be about 2,314,240 bytes in size.

C:\Program Files (x86)\Intel\Intel(R) Management Engine Components

However, you should pay attention because viruses are known to mimic genuine executables. So, if you find a file with the same name but in a different folder, we recommend running a virus scan with a robust antivirus software, just in case it is malware.

How do I uninstall UNS.exe?

1. Using the Control Panel

  1. Press Windows + R to open the Run dialog.
  2. Type appwiz.cpl and hit Enter.
    uns.exe
  3. Click on the Intel Active Management Technology and click the Uninstall button, then follow the wizard to complete the process.

2. Using the Command Prompt

  1. Press Windows + R to open the Run dialog.
  2. Type cmd and hit Ctrl + Shift + Enter to open the Command Prompt.
    uns.exe
  3. Type in the script below and hit Enter to stop the LMS service responsible for running UNS.exe.
    sc delete LMS
  4. Finally, delete UNS by running the script below.
    del /f /q C:\Program Files (x86)\Intel\Intel(R) Management Engine Components\UNS*
  5. You may restart your computer after the process.

Should I uninstall UNS.exe?

The decision is entirely up to you, but here are some reasons you may uninstall it:

  • Even though the file is very small, you may still free up space by uninstalling it.
  • You may be experiencing some problems using UNS.exe.
  • If you use Intel Active Management Technology (AMT) and need remote management features.

However, uninstalling it may cause you to lose some Active Management Technology (AMT) functionality if you uninstall it.

If you have learned something from this guide, you may want to read a few other explainers, like un.exe and mmsshost.exe where we cover other executables.

Lastly, if you believe we have left out some valuable information, please let us know in the comments below.

What is Winvnc.exe & How to Quickly Close it?

The winvnc.exe process is otherwise known as Windows VNC Server. This process is particularly important for users that use remote servers.

However, many users don’t know what the process does when it pops up on Task Manager. In this guide, we will detail everything you need to know about the process and how to stop it.

What is the use of WinVNC EXE?

The winvnc.exe process is a Windows default process that allows you to control your desktop remotely. This can be done over a network or across the internet.

This process will be active when you are using any VNC-related software. One thing to note is that this process is completely safe since it is a system file.

However, we cannot rule out the fact that viruses can disguise as this process. So, you might encounter some issues with it at times.

How can I quickly close winvnc.exe?

  1. Press the Windows key + X and select Task Manager.
    task manager winvnc.exe
  2. Right-click any winvnc.exe and select End task.
    end task
  3. Finally, restart your PC.

If you are not running any VNC-related software and or the winvnc.exe process is registering high CPU usage, you can end the process in Task Manager. Also, if you have multiple instances of the process running, ensure to close them.

2. Uninstall the VNC-related software

  1. Press the Windows key + R, type control, and click OK.
    control
  2. Click the Uninstall a program option under Programs.
    uninstall a  winvnc.exe
  3. Now, right-click the VNC-related software and select Uninstall.
    uninstall
  4. Next, follow the onscreen instructions to complete the process.

If you don’t want to see the winvnc.exe process for a while, you can uninstall any VNC-related software like UltraVNC on your PC. In as much as you are not running this software, the process should not run.

3. Scan for malware

  1. Press the Windows key + S, type virus, and choose Virus & threat protection.
    virus
  2. Click the Scan options link on the next page.
    scan options winvnc.exe
  3. Finally, select your preferred scan option and click the Scan now button.
    scan now

Malware activities on your PC can be the cause of issues related to winvnc.exe, especially if it is using too much of your PC resources. Performing a full malware scan should help you get rid of the virus disguising as the process.

4. Perform a system restore

  1. Press the Windows key + R, type rstrui.exe, and click the OK button.
    rstrui
  2. Click Next on the new page.
    next
  3. Now, choose your ideal restore point and click the Next button.
    restore point winvnc.exe
  4. Finally, click Finish and follow the onscreen instructions to complete the process.
    finish

If everything else fails to stop the winvnc.exe process from running on your PC, you need to perform a system restore. This will help reverse the changes made to your PC that are causing the process to misbehave.

With this, we can now conclude this detailed guide on the winvnc.exe process. This process is integral to your PC. So, you shouldn’t remove it.

But if you want to close the process or it is causing problems on your PC, the solutions in this guide should help you resolve it.

If you want to know about the makecab.exe process, check our detailed guide for all verified information.

Feel free to let us know the solution that helped you solve this problem in the comments below.

What is VAPM.exe & How to Fix Its High CPU Usage?

If you have ever used Kaspersky, you may have encountered one of its associated processes VAPM.exe. A few readers have asked what this executable is, so we did extensive research and will completely discuss it and show how to fix some associated errors.

Also, in previous guides, we have discussed other Kaspersky executables like avp.exe, so you may as well take a look.

What is VAPM.exe?

VAPM.exe stands for Vulnerability Assessment and Patch Management and is a part of KES, the Kaspersky Endpoint Security software. It is important for:

  • Maintaining security by applying patches against vulnerabilities.
  • Scanning for vulnerabilities.
  • Tracking the status of patches.
  • Integrating other Kaspersky products.

You may read our review of the Kaspersky security software if you do not already use it.

Why is VAPM.exe using so much CPU?

The most common reasons include:

  • Your computer may have malware that is spiking resource use.
  • VAPM.exe may be scanning and applying security patches.
  • The file may be corrupt and not functioning properly.

How do I fix VAPM high CPU use?

Before going to solutions, we recommend trying this workaround:

  • Scan your computer for malware.

If, after the scan, the high resource use continues, try more specific fixes.

1. End the VAPM process

  1. Press Ctrl + Shift + Esc to open the Task Manager.
  2. Click the VAPM process and click the End task button.
    vapm.exe
  3. Verify if the resource use is reduced.

2. Reinstall Kaspersky

  1. Press Windows + R to open the Run dialog.
  2. Type appwiz.cpl and hit Enter.
    vapm.exe
  3. Click on the Kaspersky software and click the Uninstall button, then follow the wizard to complete the process.
  4. Finally, download a fresh copy of the software and install it.

3. Disable vulnerability monitor

  1. Open the application.
  2. Click on the Settings tab.
    vapm.exe
  3. Select Endpoint control in the left pane, then uncheck Enable Vulnerability Monitor on the right.
  4. Lastly, save the settings and verify it fixes vapm.exe.

Optionally, you may decide to switch to a different antivirus. This may save you the stress of troubleshooting. We suggest any antivirus compatible with Windows 11.

That will be all for this guide. If you have other questions about the executable, we love to hear them in the comments section. You may as well drop any other solutions you know of.

What is Wup.exe & How to Stop Its High CPU Usage?

It’s easy to find yourself at the mercy of a virus such as wup.exe in your system, especially if you do not practice safe browsing habits. If left to linger around in your PC for an extended period, such malicious files can render your device inoperable.

Most of the reports indicate that it is consuming too much CPU, but this is just one of the side effects. So how do you stop this file from hogging your system resources? Find out below.

What is the wup.exe file?

The wup.exe file is a malicious program typically used by cybercriminals to steal information. It can be installed on your PC without your knowledge through the use of a trojan horse or spyware. The program will then run in the background and perform various tasks.

If the wup.exe file isn’t removed from your computer, it can cause a variety of problems, including:

How can I stop wup.exe high CPU usage on my PC?

1. End the process

  1. Hit the Windows key, type Task Manager in the search bar, and click Open.task manager search
  2. Navigate to the Processes tab, find wup.exe, right-click on it, and select End task.

2. Limit CPU usage

  1. Click on the Start Menu icon, type Task Manager in the search bar, and click Open.task manager search
  2. Navigate to the Details tab.
  3. Right-click wup.exe, and select Set affinity.
  4. Now uncheck all CPUs if you don’t want the wup.exe using any processor.

Manually limiting the process via the Task Manager works well most of the time but some viruses are known to be self-replicating so once you limit its usage, it can create another similar process and you’ll be back to square one.

If you want to make sure that your CPU doesn’t get bogged down by something like this, then you can opt for advanced resource monitor software that can also limit CPU usage for you.

3. Update your OS

  1. Hit the Windows key and click on Settings.settings windows 11
  2. Click on Windows Update then select Check for updates.check-updates-w11 windows 11 blue screen
  3. If available, Download and install.

4. Run DISM and SFC scans

  1. Hit the Start Menu icon, type cmd in the search bar, and click Run as administrator.cmd-run-admin-w11 unexpected kernel mode trap windows 11
  2. Type the following commands and press Enter after each one:DISM.exe /Online /Cleanup-Image /Restorehealth sfc /scannow

5. Remove viruses and malware

  1. Press the Windows key, search Windows Security, and click Open.
  2. Select Virus & threat protection.
  3. Next, press Quick scan under Current threats.
  4. If you don’t find any threats, proceed to perform a full scan by clicking on Scan options just below Quick scan.Scan options
  5. Click on Full scan, then Scan now to perform a deep scan of your PC.Full Scan Scan Now
  6. Wait for the process to finish and restart your system.

Windows Defender is your best bet for protecting yourself from malware and viruses. But if you’re looking for more, then you might want to look into another third-party antivirus solution.

It does a good job at detecting viruses and malware, but it doesn’t always catch everything, especially those known for being difficult to detect. That’s why we recommend using TotalAV, which has top-notch detection rates and advanced protection features.

⇒ Get TotalAV

6. Restore your system to an earlier point

  1. Press the Windows + R keys, type rstui, and hit Enter.
  2. The System Restore window will open. Click on Next.
  3. Select the restore point you wish to revert to and click on Next.
  4. Now click on Finish.

By using the methods mentioned above, you can stop the high CPU usage of the wup.exe file and protect your computer from further damage.

However, this will not be the last of the malicious programs on your PC. You might even run into more advanced malware that does more than consume your CPU.

At the very least, securing your system should be a non-negotiable. A good antivirus should always be part of your security system. For an extra layer of protection, you can install antiviruses for browsers or use a browser like Opera that already has its built-in antivirus.

Leave any additional thoughts in the comment section below.

What is Vidnotifier.exe & Should You Uninstall It?

You must have just encountered vidnotifier.exe and are wondering what it is. Well, executable files are a major part of the Windows OS. Some are native, while others, like vpnui.exe, come with third-party applications.

We have done extensive research on Vidnotifier.exe, and in this guide, we explain all the important elements of the process.

What is VidNotifier?

This file is a genuine executable file that comes bundled with the Free Studio software suite. It performs the following functions:

  • Alerts users if new videos have been converted or downloaded by Free Studio.
  • Uses the notification icon to display new video availability.
  • Manages opening of video in the default player when it is clicked.
  • Allows notification configuration, including pop-up notifications.

If you use Free Studio, you may be interested in some of the best media player software for your devices.

Where is vidnotifier.exe located?

You should find the vidnotifier.exe file in a sub-directory of Common Files, as shown below, and it should be about 1,814,848 bytes in size.

C:\Program Files\Common Files\DVDVideoSoft\lib\vidnotifier

You may, however, proceed with caution if the file is found in a different location since malware is known to mimic genuine executables. In such a case, we recommend a virus scan with an effective antivirus software.

How do I uninstall vidnotifier.exe?

1. Using Programs and Features

  1. Press Windows + R to open the Run dialog.
  2. Type appwiz.cpl and hit Enter.
    vidnotifier.exe
  3. From the program list, click on Free Studio and select the Uninstall button.
    vidnotifier.exe
  4. Follow the wizard to complete the process.

2. Delete the vidnotifier.exe

  1. Press Windows + E to open File Explorer.
  2. Navigate to the path below:
    C:\Program Files\Common Files\DVDVideoSoft\lib\vidnotifier
    vidnotifier.exe
  3. Right-click on vidnotifier, and select the delete icon.
  4. Optionally you may delete it from the Recycle Bin to ensure it is permanently deleted.

Optionally, you could stop the program from running by ending the task in the Task Manager, but this will not delete it.

Should you uninstall vidnotifier.exe?

The choice to remove or keep the file to you, but here are some situations that warrant uninstalling it.

  • You do not have Free Studio installed on your computer.
  • It triggers certain errors, such as high CPU usage.
  • Your computer is running low on space and storage.

However, after uninstalling vidnotifier.exe, you will cease receiving alerts from Free Studio for newly downloaded or converted videos. But you may can still manually check by opening your Free Studio program.

If you have read this far, you now know as much as there is to know about the vidnotifier.exe file. We have covered some other interesting processes you may find on your computer, including msascui.exe.

Lastly, if you believe we might have omitted an important detail, please let us know in the comments section. Our readers will love to hear from you.

0x80040c01 Installation Error: 5 Ways to Fix It

Installing software on your PC comes easy for most users, but some are plagued by the egads installation failed error code 0x80040c01. The error can occur on any program, most notably the Microsoft Edge and Chrome browsers.

You cannot run the app, so let’s explore how to resolve this issue below.

Why am I getting the error 0x80040c01?

If you are receiving this error message, it means that your computer is missing a required system component and cannot run the program installer properly at this time.

Some of the common causes behind this issue include:

  • Problem with the setup file – The setup file for the program you’re trying to install may be corrupt or damaged hence why you cannot install the program.
  • Versions conflict – You may have downloaded the software and tried to install it before deleting the previous outdated or damaged copy. 
  • Corrupt registry – If you had a virus infection and it was able to penetrate into your registry, some entries may have been added or deleted that are causing the error 0x80040c01.
  • Firewall interference – Your firewall or antivirus may be blocking the installation because it has flagged the setup file as a risk. This can happen if you downloaded the program from an unverifiable source.
  • Insufficient permissions – Although you can install apps without administrative privileges, some require you to use an admin account.
  • Software conflict – If you are trying to install software on a computer that doesn’t meet the minimum system requirements then this error will occur.

How do I fix the error 0x80040c01?

A few prerequisites to check off before attempting the complex solutions include:

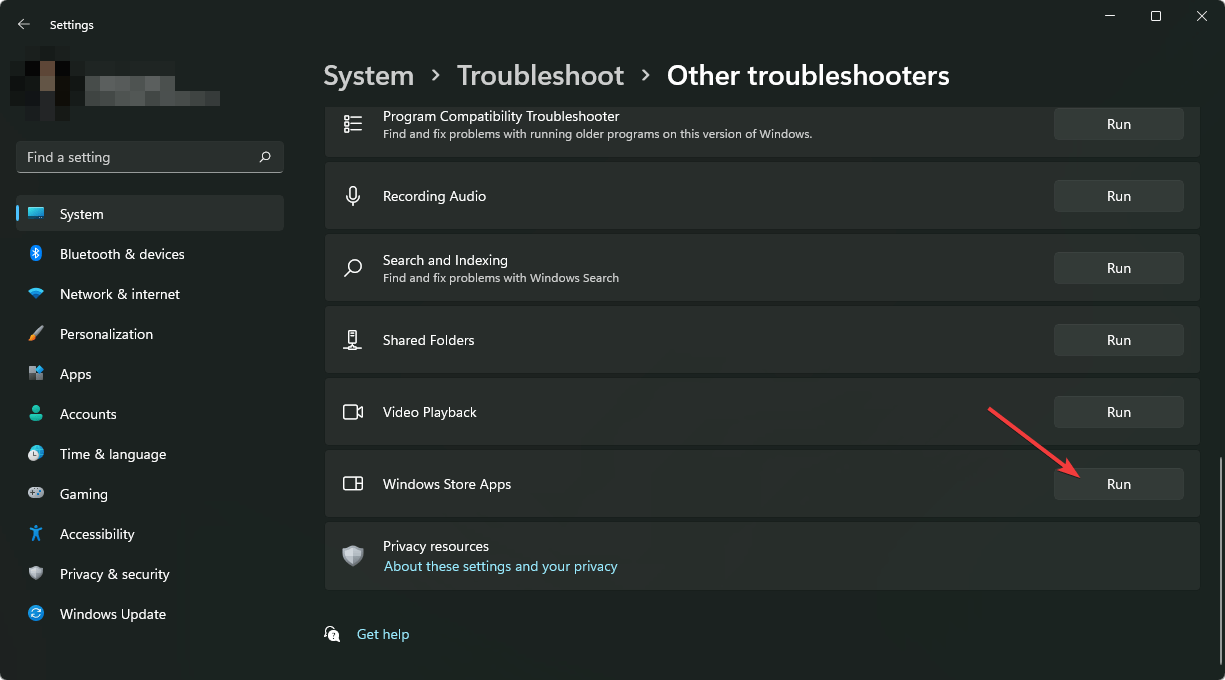
1. Run the Windows Store Apps troubleshooter

  1. Hit the Windows key and click on Settings.settings windows 11
  2. Click on System and select Troubleshoot.Open system troubleshooter
  3. Navigate to Other troubleshooters.other troubleshooters
  4. Click the Run option for the Windows Store Apps troubleshooter.clicking run windows store apps troubleshooter

2. Delete the Google folder

  1. Hit the Windows + R keys to open the Run command.
  2. Type %localappdata% and hit Enter.
  3. Locate the Google folder, right-click on it, and select the Delete icon.

You’ll need to have administrator privileges on your computer to delete the Google folder. Alternatively, remove any software remnants that may be causing the 0x80040c01 installation error.

The files in this folder may be corrupt, so they are blocking the installation.

3. Disable your antivirus temporarily 

  1. Hit the Start menu icon, type Windows Security in the search bar, and click Open.
  2. Click on Firewall & network protection, then select Public network.league of legends black screen after champion select
  3. Locate Microsoft Defender Firewall and toggle the off button.turning off Microsoft Defender Firewall Windows

If you have a third-party antivirus present, ensure you disable it too, and try again.

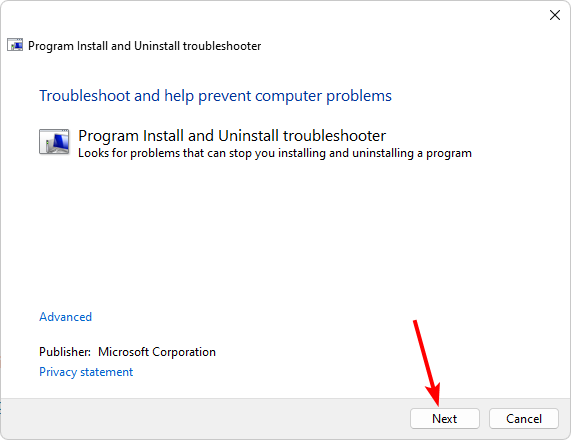
4. Run the Program Install and Uninstall troubleshooter

  1. Download the Program Install and Uninstall troubleshooter and install it.
  2. Open it and click on Next.
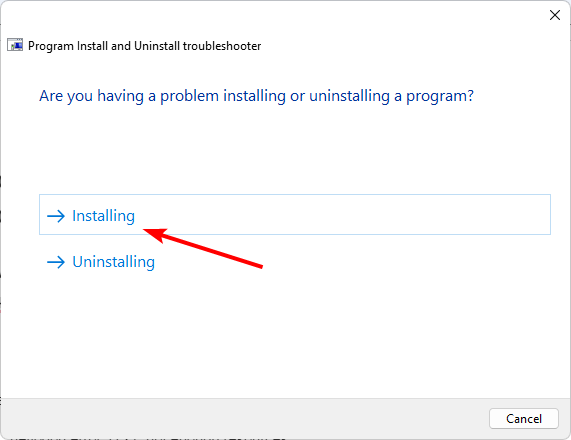
  3. You’ll be asked whether you have a problem installing or uninstalling a program. Select one option.
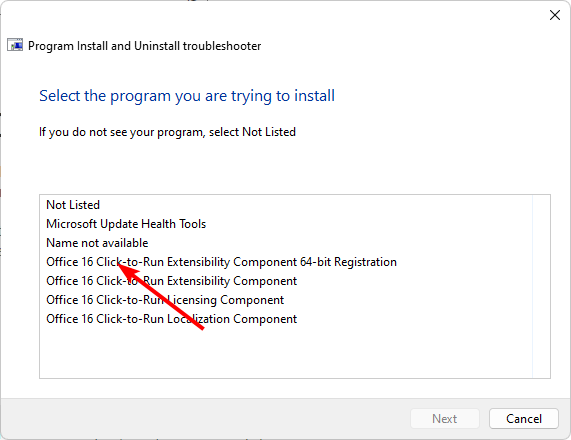
  4. Next, you’ll be asked to select the program that is not installing. Pick the problematic program from the list.
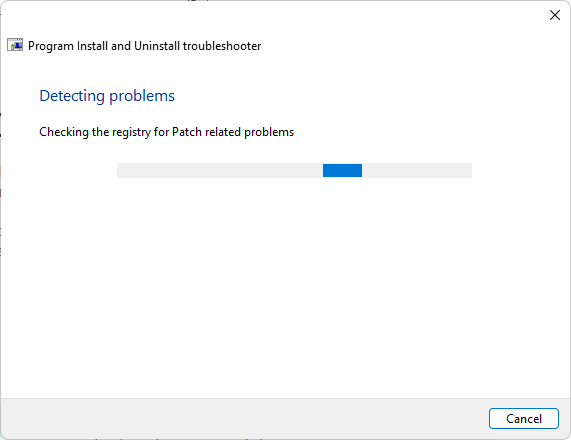
  5. The troubleshooter will start scanning for problems.
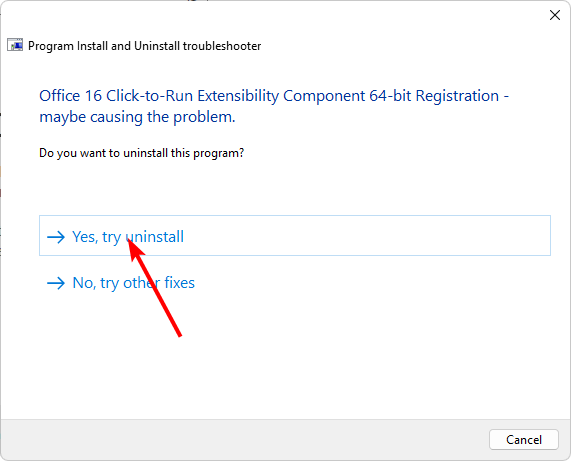
  6. Once it completes, you’ll be presented with two options. Pick either and wait for the troubleshooter to recommend fixes.

5. Edit the Registry

  1. Hit the Windows + R keys to open the Run command.
  2. Type regedit and hit Enter to open the Registry Editor.
  3. Navigate to the following location: HKEY_CURRENT_USER\Software\Google\Update\ClientState
  4. Find the following entry 4DC8B4CA-1BDA-483e-B5FA-D3C12E15B62D and Delete.

Remember to exercise extra caution when editing the registry. If you change the wrong thing in the registry, you could end up with a non-working computer or one that runs slower than usual.

There are some situations where editing the registry is necessary, but even in these cases, it’s always best to back up your registry before making any changes.

Hopefully, the steps above have provided you with a means of determining exactly what is causing the 0x80040c01 installation error and how to fix it.

In addition, to prevent such errors, performing some maintenance on your computer regularly can go a long way. If you haven’t performed some type of maintenance in a while like an antivirus scan or cleaning your hard drive, then it’s high time you did so.

That’s it from us but feel free to continue this conversation in the comment section below with any additional thoughts or suggestions.

What is Mkchelper.exe & Should You Uninstall It?

If you’ve come across mkchelper.exe as one of the many background processes in your Task Manager and have questions about its role and purpose, keep reading.

In this article, we tackle this executable file and learn all there is to know about it.

What is mkchelper.exe?

The mkchelper.exe process is part of the Mouse and Keyboard Center – Microsoft’s software that allows you to configure your mouse and keyboard. According to our research, this executable is a legitimate file related to your peripherals’ setup process.

To ensure your peripherals are working correctly, you must have the latest version of the software, the appropriate mouse drivers, and the ones for the keyboard installed on your device.

However, if you encounter any issues or witness suspicious behavior, you should run a thorough check. Executable files are frequently highjacked by malware because of their immense potential to infect and harm your system.

Is it safe to delete mkchelper.exe?

If mkchelper.exe is legitimate and isn’t causing any problems, you have no reason to remove it. You can check its legitimacy by confirming its location and verifying its digital signature.

In most cases, the executable is located in the following directory: C:\Program Files\Microsoft Mouse and Keyboard Center

Once you’ve located it, you can confirm its source by hovering over the name. It should list Microsoft Corporation as its signer. If it passes both tests, it’s most probably safe to stay.

However, if it comes from an unknown source (or there isn’t one listed) or is acting suspiciously, you should consider removing the file.

How do I uninstall mkchelper.exe?

1. Terminate the process using Task Manager

  1. Press Windows + S key to open the Start menu.mkchelper-exe-legit
  2. Type in Task Manager in the search bar and click Open.mkchelper-legit
  3. Go to Processes and locate mkchelper.exe.mkchelper-task-manager
  4. Right-click on it and select End process.

This doesn’t uninstall the file from your system but safely disables it. If you consider it a threat and wish it to be removed entirely, head to the next solution.

2. Scan your computer for malware

  1. Hold Windows + S key to open the Start menu.
  2. Type in Windows Security in the search bar.mkchelper-windows-security
  3. Open Virus & threat protection.mkchelper-virus-protection
  4. Click on Scan options.mkchelper-exe-virus
  5. Choose Full scan and press Scan now.mkchelper-exe-antivirus
  6. Wait for the process to finish and restart your PC.

That’s the best way to ensure you’ve removed a detected or a potential threat. Keep your device protected at all times by employing anti-malware software and regularly performing deep scans.

Ultimately, you can use a powerful antivirus tool like TotalAV that will safeguard your PC at all times and instantly remove any digital threat.

⇒ Get TotalAV

3. Perform a System Restore

  1. Hold Windows + R key, type rstrui.exe, and hit Enter.mkchelper-exe-system-restore
  2. When the System Restore window opens, click on Choose a different restore point, and press Next.mkchelper-system-restore
  3. Select the restore point you wish to go back to and choose Next.mkchelper-exe-system-restore
  4. Click Finish to start the process.mkchelper-error-system-restore

So that’s how you check mkchelper.exe’s legitimacy and delete it (if you need to). You should also know that if the file proves faulty or you’ve chosen to remove it, you might end up having issues with your peripherals, or Windows might no longer recognize your mouse or keyboard.

If that’s the case, we suggest you reinstall the Mouse and Keyboard center entirely.

Also, install a comprehensive antivirus to prevent any malicious programs from infecting your computer and taking control of your files.

If you have any further questions, kindly drop us a line in the comment section below.

0xd820a069 Error: How to Fix it on Windows 10 & 11

The truth is you can’t avoid downloading games. There are hundreds of releases every year on various platforms, so it’s inevitable that you’ll find yourself reaching out for one. This is where you may run into the error 0xd820a069 error.

It is an error on the little know hshop website when you try to install a game. Most download errors involve your connection, so let’s look at this one to see the similarities.

What is the error 0xd820a069?

This is an error that occurs on the hshop website whenever you try to download and install a game. It’s not uncommon for sites to crash, so this might be a case of hshop not working.

Still, this is not the only cause of the error, and below, we highlight some of the most common ones:

  • Bandwidth limits – If you’ve set bandwidth limits, your downloads may keep getting canceled because you’ve reached a set cap.
  • Unstable connection – If your internet is slow, it can take hours to download a game.
  • Server errors – Sometimes, the hshop servers may be down because of heavy traffic or regular maintenance.
  • Firewall restrictions – Your firewall may be blocking access to the game server by mistake or because it thinks it’s being attacked by malware.
  • Network interference – If too many people are connected to the network, your downloads may fail.
  • Insufficient disk space – You might not be able to download games because your computer doesn’t have enough memory space left on it. This can happen if it’s been a while since you last cleaned up your hard drive or if too many programs are running at once.
  • ISP restrictions – If your ISP is blocking your access to certain game servers, then you won’t be able to download games from these servers. 

How do I fix error 0xd820a069?

Before you attempt any of the solutions listed below, we recommend you try the following preliminary checks first:

  • Check that your Internet connection is active.
  • Close any running background processes and apps that are hogging the RAM.
  • If you’re using a Wi-Fi connection, try connecting directly to the router with an Ethernet cable.
  • Try another internet connection, such as a mobile hotspot, and see if that works.
  • Check the hshop server status to see whether it is active.
  • Move closer to your router and disconnect other devices.
  • Restart your router and try again.

1. Renew IP address

  1. Press the Windows key, type cmd in the search bar, and click Open.cmd-run-admin-w11 unexpected kernel mode trap windows 11
  2. Enter the following command: ipconfig/release
  3. Wait for the command to be executed and enter the next one: ip/renew
  4. Close the Command Prompt and verify if the error is still there.

2. Disable your antivirus temporarily 

  1. Hit the Start menu icon, type Windows Security in the search bar and click Open.
  2. Click on Firewall & network protection, then select Public network.league of legends black screen after champion select
  3. Locate Microsoft Defender Firewall and toggle the off button.turning off Microsoft Defender Firewall Windows

3. Update your network driver

  1. Press the Windows key, search for Device Manager, and click on Open under the top result.device manager w11
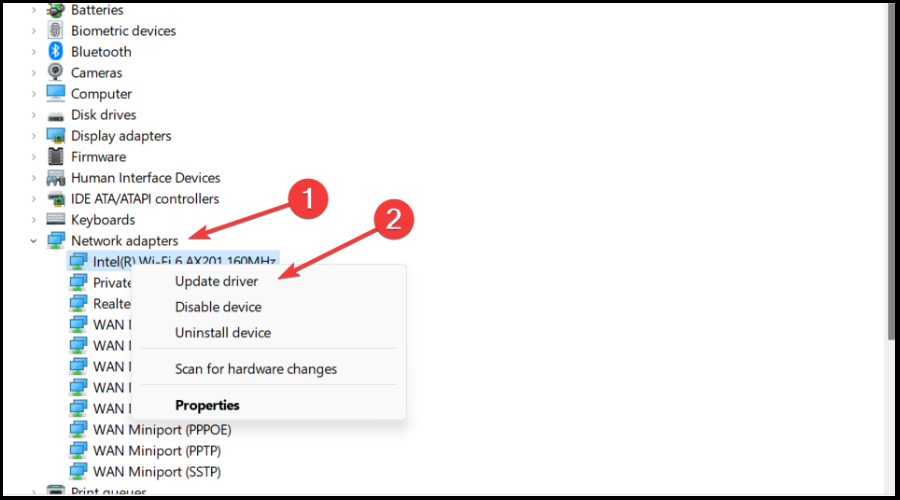
  2. Expand Network Adapters, right-click the first driver, and select Update driver.netio.sys blue screen windows 11
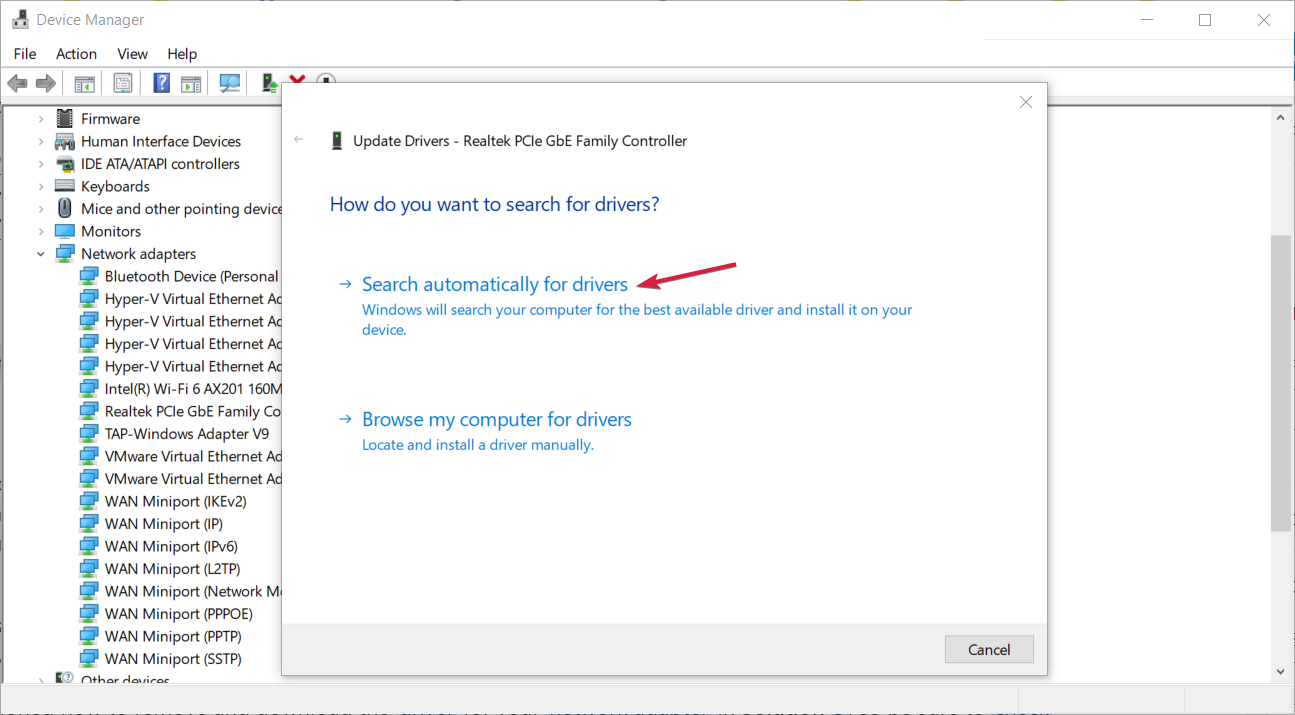
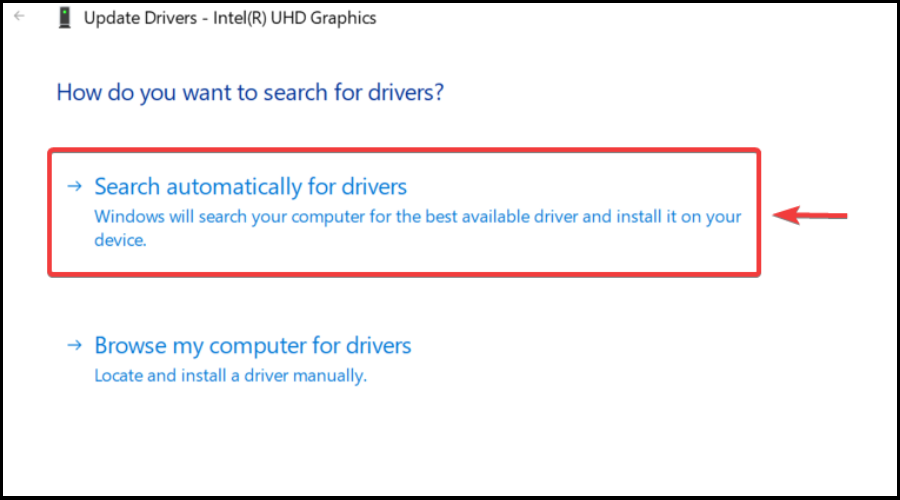
  3. Select Search automatically for drivers. 

You can also opt for an advanced driver updater utility that can automatically scan, detect and download any outdated drivers. It will then replace it with the correct ones from its wide database. Outbyte Driver Updater is our tool of choice for this job.

⇒ Get Outbyte Driver Updater

4. Free up some hard drive space

  1. Press the Windows + E keys combination to start File Explorer.
  2. Click on This PC.
  3. Now right-click the C: drive and select Properties from the drop-down menu.
  4. In the General tab, click on Disk Cleanup to start the app.
  5. Select the data you want to delete by clicking the corresponding boxes, then on OK.

5. Remove bandwidth limits

  1. Hit the Windows key and select Settings.settings windows 11
  2. Click on Network & internet on the left pane.
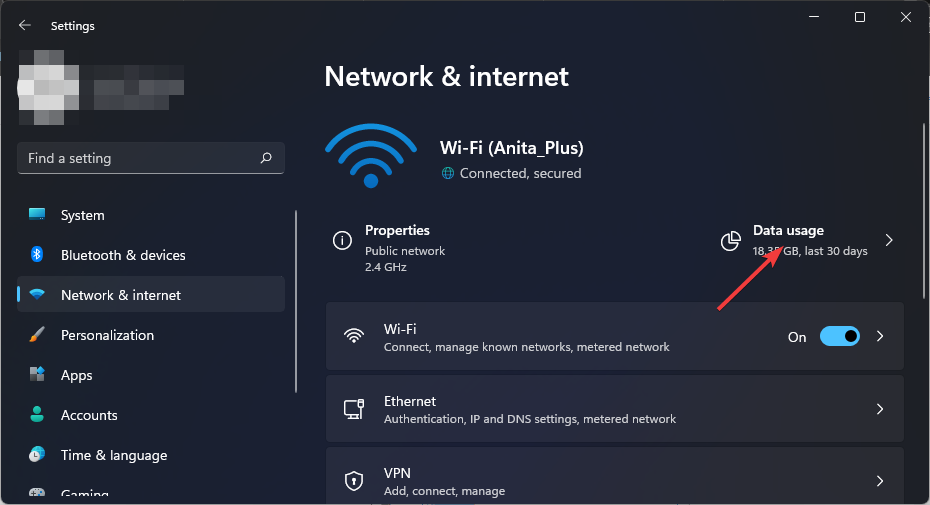
  3. On your current Wi-Fi connection, click on Data usage.
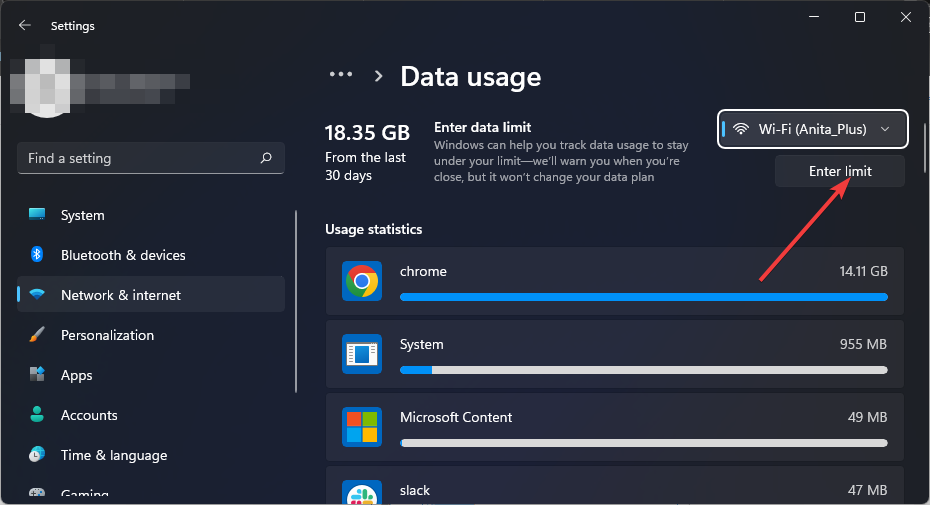
  4. Select Enter limit.
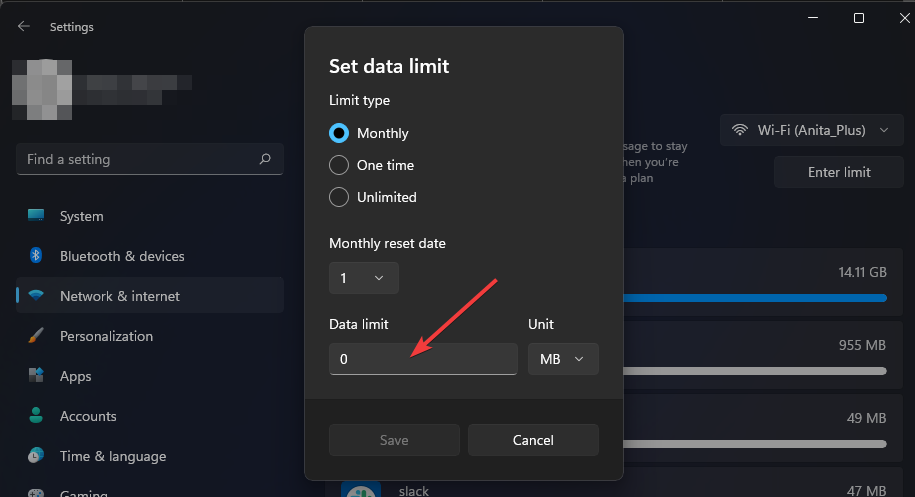
  5. Under the Limit type, check the Unlimited box and click Save.

If you have third-party bandwidth limiters, proceed to disable them too, and try downloading the game again.

6. Reset your network

  1. Hit the Windows key and click on Settings.settings windows 11
  2. Navigate to Network & internet.
  3. Select Advanced network settings.going advanced network settings win11
  4. Click on Network reset.Network Reset 1
  5. Next, hit the Reset now button.Network Reset now

The solutions listed above apply to both Windows 10 and 11 users. If none of them work for you, you may have to wait it out and occasionally check the hshop website to see if the 0xd820a069 error has been fixed.

While you wait, you don’t have to stay bored. We have an awesome collection of offline games you can try to keep you entertained.

We’d love to hear your feedback on this topic, so let us know if you have tried any unmentioned solutions in the comment section below.

Input Not Supported Error: Why It Happens & How to Fix It

Since you’re here, you’ve probably encountered the Monitor input not supported error. Don’t worry. We know the feeling: the screen turning black, displaying only the dreaded message.

The error occurs when there’s a mismatch between the device specs and the output signal it receives. Whether that’s caused by incorrect resolution settings, corrupted drivers, or some other sneaky reason, today, you’ll learn how to fix the issue.

Why does my HDMI say input not supported?

The Input not supported error commonly appears when your monitor’s and PC settings have compatibility issues. This leads to an inability of the latter to process the signal, which shows the message on the screen.

Here are the most frequent causes that could be at play:

  • Outdated or faulty drivers: Drivers link your operating system and hardware. Corrupted ones can result in numerous issues, such as this one or other black screen issues.
  • Hardware issues: Damaged cables or ports can hinder the connection.
  • Display settings: If the resolution/refresh rate doesn’t match or is not supported by the device’s specs, the result will most likely be the said error.

Now that you know what are the most common scenarios behind it, let’s learn how to fix them:

How do I fix input not supported on my monitor?

Before resorting to our tested solutions, you should:

  • Determine the source of your issue: Switching on another display might help identify the problem’s origin.
  • Ensure all cables work and are properly plugged in: Try unplugging and plugging back in your wires or even switching to a different cable. Keep in mind that older cables might not support higher resolutions.
  • Restart your PC: Sometimes, a simple fix like a reboot solves the entire issue. Try it; it might help.

1. Change your display resolution

  1. Run your device in Safe mode.
  2. Right-click on an empty area on your desktop and choose Display settings.monitor-display-settings
  3. Navigate to Display resolution and choose a low one.display-resolution-error
  4. Work your way up until you find one that best suits your needs and specs.
  5. Restart your computer.

Due to your screen being black with the error, you can access your display settings the standard way. This necessitates starting up Windows in Safe mode.

Once in safe mode, your OS will employ a basic display driver and allow customization without showing the error. Then, you can adjust the resolution to match the recommended specs and solve your problem.

2. Modify your monitor’s settings

  1. Right-click on an empty area on your desktop and open Display settings.
  2. Choose the Advanced display option.display-settings-error
  3. Navigate to Display adapter properties.
  4. Go to the Monitor tab.monitor-not-supported-fix
  5. Lower the Screen refresh rate and click Apply.monitor-refresh-rate-error

Refresh rate relates to the number of image refreshes on the screen per second. High RTs are sometimes more than your monitor can handle, which could lead to encountering the Input not supported error. Try reducing the refresh rate to resolve your issue.

If you want to keep track of your PC, we advise installing performance monitoring software to stay ahead of any issues that may arise.

3. Update your display and monitor drivers

  1. This time, run Windows in Safe mode with networking.
  2. Hold Windows + S to open your Start menu.fix-monitor-issue
  3. Type Device Manager into the search menu.device-manager-input-issue
  4. Click on Display adapters.display-fix-monitor-issue
  5. Find your graphics driver, right-click on it, and choose Update driver.monitor-not-supported-fix
  6. Choose Search automatically for drivers to enable your device to find the new versions.update-drivers-monitor-error
  7. If an updated version is not found, go to Search for updated drivers on Windows Update.update-drivers-windows-update
  8. Go to Advanced options.windows-update-drivers
  9. Click on Optional updates and find the best drivers for your device.update-drivers-windows-update-monitor
  10. Tick the checkbox for the graphics driver, if one is listed here, and install it.
  11. Once done, restart your PC.

Follow the same steps to update your monitor drivers. You can also do this manually by visiting the website of your graphics card manufacturer and downloading the latest releases available. However, this procedure is a bit advanced, so we advise you to let your computer take care of it.

If Windows cannot download drivers, this can cause many problems for your system. You should act immediately!

Faulty drivers are often the reason behind display-related errors. It’s important to ensure your drivers are up-to-date with a dependable updater tool like Outbyte Driver Updater to avoid facing issues like the one that brought you here.

⇒ Get Outbyte Driver Updater

4. Allow Windowed mode

  1. Hold Alt + Enter to enable Windowed mode.
  2. Adjust the screen resolution by manually dragging the ends. Alternatively, you can change it by going to your game’s Display settings option.

Some users report the error occurring during gameplay. This means that their monitor can’t support the game’s resolution. Start your game in Windowed mode to fix this issue.

Encountering display screen issues is certainly frustrating. Thankfully, this one is usually solvable. Follow the steps above, and you should forget about the Monitor input not supported error instantly.

However, if nothing worked for you, it might be an issue with the monitor itself. Is it time for a new monitor?

Did you solve your issue? Let us know in the comments below:

4 Ways to Safely Exit Safe Mode on Windows 11

If you have used the Windows OS for a while, you probably, on occasion, would need to enter the Windows Safe Mode. For most people, this is a vital troubleshooting step. To return your Windows 11 device to normal functioning, exit Safe Mode.

So, in this guide, we walk you through all the options to exit Safe Mode. Most of them would require just a few steps.

What is Windows Safe Mode?

Safe Mode is an integral part of the OS that performs the following functions:

  • It offers diagnosis and troubleshooting for problems causing your computer to malfunction.
  • It allows you to start the OS with limited drivers and services.
  • At startup, it performs a check on critical system files and drivers.
  • It provides access to the system restore utility.

We recommend creating a restore point so that if you cannot fix the problem in Safe Mode, you may restore your computer to an earlier point.

Why do I need to exit Safe Mode?

We have said you may need Safe Mode to troubleshoot a problem, but here is why you should exit it:

  • You won’t be able to use any Windows third-party applications until you quit Safe Mode.
  • Several processes, like printing, might not function properly in Safe Mode.
  • For native app troubleshooting, you may need to exit Safe Mode.
  • While in Safe Mode, it is difficult to update your computer.

We have written a guide to help you if you must install Windows updates from Safe Mode.

How do I exit Safe Mode on Windows 11?

1. Restart your computer

  1. Press the Start button.
  2. Click on the Power icon and select the Restart option.
  3. Once the Windows 11 computer starts, it should exit Safe Mode.

2. Using System Configuration

  1. Press Ctrl + Shift + Esc to open the Task Manager.
  2. Click on File, then Run new task.
    exit safe mode windows 11
  3. Type msconfig and hit Enter.
    exit safe mode windows 11
  4. Select the Boot tab, uncheck Safe boot, then click Apply and OK.
    exit safe mode windows 11
  5. Finally, press Restart.

Once your PC restarts, you’ll be out of Safe Mode on your PC.

3. Using Advanced Startup

  1. Click the Start icon, type settings, and select the Settings app.
  2. Click on Recovery on the right pane.
  3. Select Restart now under Advanced Startup.
    exit safe mode windows 11
  4. Click Troubleshoot, Advanced options, then Startup Settings.
    exit safe mode windows 11
  5. Select Restart, then finally, on the next window, Press Enter to return to the operating system, and you should exit Safe Mode on Windows 11 successfully.

4. Using the Command Prompt

  1. Click the Start menu, type command, and choose Run as administrator.
    exit safe mode windows 11
  2. Type the script below and hit Enter to remove safe boot from startup.
    bcedit /deletevalue (current) safeboot
    exit safe mode windows 11
  3. Finally, restart the computer by running the script below on your Command Prompt to exit Safe Mode Windows 11.
    shutdown /r
    exit safe mode windows 11
  4. Once the device boots, you can use the device normally.

As you can see, it’s pretty simple to exit Safe Mode in Windows 11 using cmd.

What button is Safe Mode on Windows 11?

Unlike we had with Windows 7, Windows Safe Mode has no dedicated button. However, from the Advanced Startup Windows, you have the following options to access Safe Mode:

  • F4 or 4 for Safe Mode.
  • F5 or 5 for Safe Mode with networking.
  • F5 or 5 for Safe Mode with Command Prompt.

That should be all for this article. While a simple restart is often the most effective way to exit Safe Mode in Windows 11, any other solutions we recommend may be more efficient if you get stuck.

We have covered all the steps if Windows Safe Mode is not working, so you may check out that guide.

Lastly, if you have any questions regarding exiting Safe Mode, contact us using the comments section.

What is Wuapihost.exe & What is it Used For?

Is wuapihost.exe just another mysterious file running in the background vital for your PC’s operations? Or could it be an error or, worse, malware that has to be removed?

Below, we answer all your questions about this executable’s functions and purpose. Let’s delve into what wuapihost.exe is and how to determine its legitimacy.

Before that, if you, too, feel overwhelmed when exploring your computer’s system files, find out how many processes should be running on your PC.

What is wuapihost.exe?

As you might have guessed, wuapihost.exe is an abbreviation. It stands for:

  • WU – Windows Update
  • API – Application Program Interface
  • Host – A program that replies to external requests with local content.

The wuapihost.exe process is a software component by Microsoft Windows that creates an API to interact with the update servers. In short, the executable is part of the processes taking place to update your operating system.

What is wuapihost.exe used for?

The wuapihost.exe process facilitates communication (e.g., by providing communication protocols) between your computer and the Windows Update service. In other words, it acts as an interface between the two sides by providing an API the software uses to connect with the servers.

Keeping your system up-to-date is an integral part of its proper operation. You should always ensure that by installing the latest updates and patches Microsoft releases.

Is wuapihost.exe a virus?

Based on our research, wuapihost.exe does not generally causes issues. It’s a harmless executable that helps with the update processes.

However, some users report the file has been flagged as an error or a threat by their Windows Security. Thus, they believe it’s a system bug or malware posing as a legitimate file. Both are possible, especially the latter, due to the immense malicious potential of .exe files.

If you have any doubts, you can always try deleting or disabling it. There’s no general consensus whether what’s the right call, but you should know that:

  • Windows will never allow you to delete anything important for your OS without informing you that such action will cause a critical error.
  • You can always perform a System restore and go back to a time before the error.

Also, learn more about the services and processes to disable on Windows 11. For now, let’s see how to check wuapihost.exe’s legitimacy.

How do I determine if wuapihost.exe is legit?

1. Check the file location

  1. Hold Ctrl + Shift + Esc to open the Task Manager window.wuapihost-exe-location
  2. Go to Details, right-click on wuapihost.exe, and choose Open file location from the menu.
  3. The legitimate file should be in C:\Windows\System32

2. Verify the digital signature

  1. Go to the folder where wuapihost.exe is stored.wuapihost-exe-system-32
  2. Right-click on the file, and choose Properties.wuapihost-exe-microsoft
  3. Go to the Digital Signature tab and check if it lists Microsoft Corporation as its creator.

If wuapihost.exe is located in the correct folder and holds a valid digital signature, it’s likely a legitimate Windows component. However, malware can camouflage itself under legitimate files, so it’s essential to regularly perform deep scans using Virus & Threat Protection or your antivirus software.

Congrats! Now you know what wuapihost.exe is and what it does. Continue your education by learning why exe files are not opening on Windows PC or what to do if antivirus software is blocking .exe files.

If you have any additional questions, reach out to us in the comment section below, and we’ll get back to you.

2 Ways to Block a Program in Firewall

Sometimes you want to keep a program on your PC but prevent it from accessing the internet. To do this, you need to block the program in your Firewall.

While this sounds simple and straightforward, you still need to know how to proceed. In this guide, we will detail the steps you need to follow to achieve this feat quickly.

Why do I need to block a program?

The major reason users block a program in Firewall is to monitor the use of their PC resources. This is especially true for programs that use your network.

Also, you can block an app or process from accessing your PC. This protects your PC from harmful software and ensures your safety.

How do I block a program in Firewall?

1. Block a program with advanced settings

  1. Press the Windows key + S, type control, and select the Control Panel option.
    control block program firewall
  2. Select the System and Security option.
    system and
  3. Now, choose the Windows Defender Firewall option.
    windows defender
  4. Select Advanced settings in the left pane to launch Windows Defender Firewall with Advanced Security app.
    advanced settings block program firewall
  5. Next, click the Outbound Rules option in the left pane. This will show all the outbound firewall rule you have in the middle of the window.
    outbound rules
  6. Choose the New Rule option under the Outbound Rules Actions column.
    new rule block program firewall
  7. From here, select the Program option.
  8. Tick the This program path radio button.
  9. Click Browse button to locate the path of the program you want to add.
    browse
  10. Choose the program and click the Open button.
    open
  11. After selecting the program, you might notice that the path is restructured. You can prevent this by simply copying the file path into the box instead of using the Browse button.
  12. When everything is set, click the Next button in the next three pages.
  13. Finally, enter the name of the rule and click the Finish button.

With this, you can block a program using the Windows Defender Firewall advanced settings. The program added in the new rule will not be able to access the internet going forward.

2. Block the program temporarily

  1. Press the Windows key, type firewall, and select Windows Defender Firewall.
    firewall block program firewall
  2. Choose the Allow an app or feature through Windows Firewall option in the left pane.
    allow an app
  3. Now, click the Change settings button.
    change settings block program firewall
  4. Next, check the program you want to block on the list.
  5. If you can’t find it, click the Allow another app option.
    allow another
  6. From here, click the Browse button.
    browse
  7. Navigate to the program locate and select it.
  8. Click the Add button to add it to the list.
    add block program firewall
  9. Now, ensure the box for the program is not check on the left pane. This means that the program is blocked.
  10. Finally, click the OK button to complete the process.

To temporarily block a program on Windows Defender Firewall, you need to follow the steps above. This method is easier, as the settings are easy to change.

Whenever you need to allow the app through your firewall, you only need to check the box to the left of the program.

There you have it: everything you need to block a program in your Firewall. The solutions above are for Windows Defender Firewall only.

If you use any third-party firewall, you need to check its settings to know the steps to follow.

If you want to know if your firewall is blocking a port or program, check our detailed guide for the steps to follow.

Feel free to let us know in the comments below if you encounter any problems while applying the steps above.

Eclipse for Windows 11: How to Download and Install

Eclipse is among the leading IDEs (integrated development environments) for computer programming, especially for Java developers. The SDK is free and open-source, so it’s no wonder many users are looking for ways to download Eclipse for their Windows 11 devices.

So, how to download and install Eclipse on Windows? Read this step-by-step tutorial to find out. Let’s start!

Does Eclipse work on Windows 11?

Eclipse is compatible with Windows 11, but as it’s Java-based software, it requires a Java Development Kit (JDK) to run. Though, if you do not plan to use it for software development, you can install Java virtual machine (JVM) or a Java Runtime Environment (JRE).

Eclipse IDE offers several package choices, all depending on your needs. The good news is that features from different packages can be combined into one. In other words, Eclipse can also be used to develop apps in other programming languages, but it requires plug-ins.

Here’s an example, say you want to use Eclipse for Java and some PHP development. Then you should choose the Eclipse IDE for Java Developers (the most popular option) and then add the PHP package by visiting the software’s Help menu.

If you don’t have JDK installed yet, we’d advise you to take care of that first and install Java JDK on Windows 11 here. Also, make sure your system is up-to-date by automatically installing Windows updates.

How do I download Eclipse on Windows 11?

  1. Go to the official Eclipse Downloads page.
  2. Choose Eclipse’s latest version (at the time of writing, that is Eclipse IDE 2023-06 for Windows 64-bit).download-eclipse-windows
  3. Click on Download and wait for the process to finish.
  4. Run the installer.eclipse-installer
  5. Choose the right package to install.download-eclipse-java
  6. Select the installation folder and finish the installation process.install-eclipse-windows
  7. Launch Eclipse.

Those who haven’t previously downloaded and installed a JDK on their device are also covered. The Eclipse Installer now includes a JRE. So, if you haven’t taken care of that step, you’ll see the option to install all essential tools and add-ons.

Additionally, it’s strongly recommended to configure Eclipse with the specific JVM you’re using. To do so, follow the instructions on Eclipse’s official tutorial page.

There you have it! That’s how to download and install Eclipse IDE on your Windows 11 PC. Follow the steps above, and you shouldn’t encounter any issues.

If you still haven’t upgraded to the latest version of Windows, we’d advise you to do so. Here’s how to seamlessly upgrade to Windows 11 and enjoy your OS and programs running smoothly.

Do you have any questions or suggestions regarding your Eclipse download? Feel free to share them in the comments below.

What is Msoidsvc.exe & How to Fix Its Errors?

Many applications you install on a computer will come with files and processes. Sometimes it gets confusing and hard to tell what is genuine and what may be malware. Some of our readers are in this conundrum with the Msoidsvc.exe file.

In this guide, we explain all there is to this file. You could read our other guides to learn about some of these lesser-known processes, like the WUSA executable.

What is Msoidsvc.exe?

The Microsoft Online Services Sign-In Assistant is a process that runs under the name msoidsvc.exe. It is a service that aids in logging into Microsoft’s online offerings, including Outlook.com, OneDrive, and Office 365. It comes pre-loaded on computers with Microsoft Office 2013 or later installed.

You may look at our article if you can’t connect to Microsoft online services.

What is msoidsvc.exe location?

Since this is a Windows file, you can usually find it in the following location:

C:\Program Files\Common Files\Microsoft Shared\Microsoft Online Services\

How do I fix Msoidsvc.exe error?

1. Repair your Microsoft Office installation

  1. Press Windows + R to open the Run dialog.
  2. Type appwiz.cpl and hit Enter.
    msoidsvc.exe
  3. Click on Microsoft Office from the app list and select the Change button.
    msoidsvc.exe
  4. Select Online repair, and click the Repair button.
  5. Follow any prompts and verify if it fixes the Msoidsvc.exe error.

After you complete these steps, check if msoidsvc.exe cannot be found is still there.

2. Disable the msoidsvc.exe service

  1. Right-click the Start menu and select Task Manager.
    msoidsvc.exe
  2. Search through the list of processes for msoidsvc.
  3. Click the process and select the End task button.
    msoidsvc.exe
  4. Finally, verify if the error is fixed.

As you can see, it’s pretty simple to fix this issue by disabling the service.

Is Msoidsvc.exe a virus?

No, msoidsvc.exe is not a virus, and once you have certain programs on your computer you may need it. That said, some malware is known to mimic genuine programs, so if in doubt, we recommend a thorough scan using a robust antivirus program.

In conclusion, if you use versions of Office later than 2013, you may not have msoidsvc.exe on your computer. So you may consider downloading Microsoft Office 365 on your device.

The elements we cover in this guide are as much as you will need to know about this file. However, if you think we left out an important detail, let us know in the comment section below.

Microsoft news recap: Bing Chat gains image input, Google alleges unfair practices against Microsoft’s Azure, and more

Microsoft news recap is a weekly feature highlighting the top Microsoft news stories of the past week. Sit back, grab some coffee, and enjoy the read!

Bing Chat is now equipped to receive images as input

This week has seen reports of users beginning to be able to see a new feature in Bing Chat that allows users to upload images as input. Once an image is uploaded to Bing Chat, it is deciphered and Bing Chat can provide context or further information on the image. For example, you could upload a meme and Bing Chat will provide context and explanation behind it.

Bing Chat

Google levies allegations of unfair practices against Microsoft’s Azure cloud unit

Google has filed an official grievance against Microsoft with the FTC, claiming that Microsoft uses deceptive tactics in order to secure deals for its Azure cloud business. It forms part of an enquiry by the FTC to seek opinions on activities that could be anti-competitive.

Azure-cloud image

Microsoft to raise Xbox Series X, Game Pass prices

As inflation takes hold in several countries post-pandemic, Microsoft is increasing the price for its Xbox Series X console and its Xbox Game Pass subscriptions. Prices will rise in August in most countries with the exception of US, Japan, Chile, Brazil, and Colombia. The price rise will bring the cost of the Xbox Series X closer to that of Sony’s PlayStation 5.

Microsoft beefs up its list of Windows 11 supported CPUs

The list of supported CPUs for Windows 11 has been updated with a number of new entries. Windows 11 is now listed to support Intel’s 6GHz Core i9-13900KS alongside Intel Raptor Lake mobile CPUs, which include the i5-1334U, 1335U, 1335UE, and 13500HS., as well as AMD’s AM4-based 5800X3D and the AM5-based 7950X3D, 7900X3D, and 7800X3D, among others, and Snapdragon 8cx Gen 3 and the Microsoft SQ3.

Windows 11 Moment 2

That’s it for this week. We will be back next week with more Microsoft news.

0x8031004a Windows Update Error Code: How to Fix it

Windows updates are important for fixing nagging issues on your PC. However, users encounter different issues while trying to update their PCs, with the error code 0x8031004a being a prominent one.

While different factors can cause this issue, it is not the most difficult to fix. And we will show you the quick ways to eliminate the error in this detailed guide.

Why am I getting the error code 0x8031004a

Below are some of the potential causes of this error:

  • Faulty system files: One of the major causes of this issue is a corrupt or missing system file. You can get past the error message by repairing and restoring these files.
  • Insufficient memory: If you have too many junk files on your PC, you might get this error while trying to update your PC. To solve this problem, you need to run the Disk Cleanup tool.
  • Malfunction components: At times, you might get the 0x8031004a error due to problems with some of the update components. The solution to this is to restart these components.

How can I fix the error code 0x8031004a

1. Perform a clean boot

  1. Press the Windows key + R, type msconfig, and hit Enter.
    msconfig 0x8031004a
  2. Choose Services at the top, check the Hide all Microsoft services box, and click the Disable all button.
    hide all
  3. Next, click the Startup tab at the top.
  4. Click the Open Task Manager link.
    startup
  5. Right-click each of the apps there and select Disable.
    disable 0x8031004a
  6. Finally, go back to the System Configuration window and click the Apply button, followed by OK.
    apply ok

The 0x8031004a error can sometimes be due to a conflict between some third-party apps. Performing a clean boot should do the trick here.

2. Reset Windows update components

  1. Press the Windows key, type cmd, and select Run as administrator under Command Prompt.
    cmd 0x8031004a
  2. Type the commands below and press Enter after each: Net stop bits Net stop wuauserv Net stop appidsvc Net stop cryptsvc Del %ALLUSERSPROFILE%\Microsoft\Network\Downloader\qmgr*.dat /Q Del "%HOMEDRIVE%\Users\All Users\Microsoft\Network\Downloader\qmgr*.dat" /Q Del %WINDIR%\SoftwareDistribution\*.* /s /Q Net start bits Net start wuauserv Net start appidsvc Net start cryptsvc
  3. Finally, wait for the commands to finish running and restart your PC.

In some cases, the error 0x8031004a can be caused by problems with one or more crucial update components. You need to restart these components to get rid of the error.

3. Run the Windows Update troubleshooter

  1. Press the Windows key + I and choose Troubleshoot in the right pane.
    troubleshoot
  2. Click the Other troubleshooters option on the next page.
    other troubleshooters
  3. Finally, click the Run button before the Windows Update option.
    run update 0x8031004a

The 0x8031004a error can sometimes be down to issues with some services and components. The solution to this is to run the Windows Update troubleshooter.

4. Repair system files

  1. Press the Windows key, type cmd, and select Run as administrator under Command Prompt.
  2. Type the command below and hit Enter to run it: DISM /online /cleanup-image /restorehealthdism restore
  3. Wait for the command to finish running.
  4. Now, run the command below: sfc /scannowsfc
  5. Finally, wait for the command to finish running and restart your PC.

In some cases, corrupt or missing system files cause different problems, and this 0x8031004a update error is not different. To fix this, you need to run a few scans.

5. Perform an in-place upgrade

  1. Go to the official Windows 11 download website and click Download Now under the Create Windows 11 Installation Media section.
    download now 0x8031004a
  2. Double-click the downloaded file to run it.
    click
  3. Now, wait for Windows to prepare the setup and click Yes when prompted.
  4. Next, accept the Licence Agreement and wait while Windows download the required updates.
  5. Select between keeping your files and apps and removing them. Since you want to perform an in-place upgrade, leave the recommended settings, i.e., keep your files and apps.
  6. Now, click the Install button to start the in-place upgrade.
    install
  7. Finally, wait for Windows to copy the necessary files to upgrade your device and restart your PC.

If the update fails with error code 0x8031004a, you must perform a repair upgrade. This will help you force the update through.

The 0x8031004a update error can be pretty annoying, but it is not the most difficult to fix. Fortunately, your job has been made easier with the solutions in this guide.

Similarly, if you are experiencing other issues like the 0x8007371c update error, you should be able to fix it with the solutions in this guide.

Were you able to fix the issue? Feel free to let us know in the comments below.

What Is DOCP & When Should You Turn It On or Off?

If you use AMD motherboards, then you may be curious about DOCP. This is especially important for overclocking your RAM to its rated speed.

Overclocking, for many users, may be a performance upgrade, but does it come with any risks? We discuss DOCP in this comprehensive guide and explore some pros and cons.

Also, if you are interested, we have written about the best AMD CPU overclocking software.

What Is DOCP?

DOCP stands for Direct Overclock Profile and is comparable to Intel’s XMP (Extreme Memory Profile) technology. It is known for the following:

  • Helping memory modules operate at higher frequencies and with better timings.
  • Adjusting the voltage to the manufacturer’s suggested levels.

RAM has a specified speed and timing. A 3200MHz DDR4 kit, for instance, would have timings of 16-18-18-36.

Your motherboard will automatically set the RAM speed and timing to the recommended levels when you enable DOCP.

To learn more about RAM speed, check our guide on what happens if RAM is faster than CPU to learn more.

Should I turn on DOCP?

Most people will favor enabling DOCP for the following reasons:

  • You get optimal RAM performance by enabling them to operate at the claimed speeds and timings.
  • DOCP automatically applies the RAM-specific XMP profile, so, no manual fiddling with settings.
  • Running your RAM at higher frequencies can result in quicker data transfer rates and responsiveness.
  • Higher RAM speeds can improve your system’s capacity to manage numerous activities concurrently.

However, there are some drawbacks, some of which we state below:

  • Using DOCP to overclock your RAM may cause instability, leading to system crashes or blue screens.
  • DOCP Incompatibility problems may prohibit the XMP profile from being applied successfully.
  • It may increase the heat the RAM modules produce, necessitating additional cooling methods.
  • Overclocking the RAM modules might void their warranties.

Understanding overclocking ideas and associated hazards is necessary to enable DOCP. You run a bigger risk of selecting the wrong settings or encountering problems if you don’t have the required expertise or experience.

How to overclock RAM using DOCP?

Use Ai Tweaker in BIOS

  1. Log into your BIOS by clicking F2 (This will be different for certain computers) before the computer begins to boot.
  2. In the BIOS, click on Advanced Mode.
    docp
  3. Click on Ai Tweaker, and select D.O.C.P from the AI Overclock Tuner dropdown list.
  4. Lastly, click Exit, these Save & Reset.
  5. When your system boots DOCP should be enabled.

Is DOCP good or bad?

DOCP is good for the following reasons:

  • It prevents user mistakes when selecting voltage and speed.
  • Configuration is automatic according to the hardware requirements.
  • Offers improved stability.
  • Impacts CPU’s memory controller.

We have covered a lot on overclocking in previous guides, and you may learn about the best overclocking tools in our comprehensive article.

This is as much as you may need to know regarding DOCP technology. We love to hear from you, so reach out to us with questions or let us know if we may have left out something in this guide.

What is ntkrnlpa.exe & how to Fix its BSOD Errors?

The ntkrnlpa.exe process is one of the integral processes that run in the background on a Windows PC. It ensures the smooth running of many apps and the operating system itself.

However, as important as this process is, some users complain that it sometimes causes the dreaded BSOD. If you also face problems with it, this guide will show you quick and effective ways to fix it.

What is ntkrnlpa.exe?

The ntkrnlpa.exe is a kernel image designed for systems using the Microsoft Windows NT OS. These PCs run on systems that have Physical Address Extension support.

It is in charge of the Kernel and Executive layers of the Windows NT kernel space. Also, it provides a series of services like process and memory management and hardware virtualization.

So, this process is pretty important to the operation of your PC. If you are now encountering issues with this process, it is not the end of the world, as it can be easily fixed with the solutions in the next section.

How can I fix ntkrnlpa.exe if it is causing BSOD?

1. Perform startup repair

  1. Power on your PC and press and hold the power button to force it to shut down. Repeat this thrice to launch the Advanced startup options. From here, proceed to Step 4.
  2. If you can’t boot into the Advanced startup options, insert a bootable media creation tool into your PC, enter your language and other info, and click Next.
    language ntkkrnlpa.exe
  3. Now, click the Repair your computer option in the bottom left corner.
    repair computer
  4. Select the Troubleshoot option.
    troubleshoot ntkrnlpa.exe
  5. Now, choose Advanced options.
  6. Finally, select the Startup Repair option.
    startup repair

If the ntkrnlpa.exe Blue Screen of Death issue prevents you from booting into your PC, you need to repair your startup files. You can do this using the Startup Repair tool.

2. Update the driver

  1. Boot into safe mode on your PC.
  2. Press the Windows key, type cmd, and select Run as administrator under Command Prompt.
    cmd admin
  3. Now, type the command below and hit Enter: verifier /query
  4. Note the driver that is being loaded when your PC crashes.
  5. Next, press the Windows key + X and select the Device Manager option.
    device manager ntkrnlpa.exe
  6. Double-click the section you want to update the driver for and right-click the device under it.
  7. Now, select the Update driver option.
    update driver
  8. Finally, choose Search automatically for drivers and install any available updates.
    SEARCH AUTO

One of the prominent causes of BSOD errors is an outdated driver, and the ntkrnlpa.exe is no different. So, you need to update your driver to solve the problem.

If the Windows driver updater can not find the latest driver, you can go to the manufacturer’s website to download the latest driver.

3. Run CHKDSK

  1. Repeat steps 1 to 5 in solution 1.
  2. Select Command Prompt.
    command prompt ntkrnlpa.exe
  3. Type the command below and press Enter to run it: chkdsk c: /f /rchkdsk
  4. Finally, wait for the command to finish running and restart your PC.

In some cases, the ntkrnlpa.exe BSOD can be caused by bad disk sectors. Running the CHKDSK command should fix this.

4. Repair system files

  1. Repeat steps 1 to 5 in solution 1 and select Command Prompt.
    command prompt ntkrnlpa.exe
  2. Type the command below and hit Enter to run it: DISM /online /cleanup-image /restorehealthdism restore
  3. Wait for the command to finish running. Now, run the command below: sfc /scannowsfc
  4. Finally, wait for the command to finish running and restart your PC

Most BSODs like ntkrnlpa.exe errors are due to issues with your system files. You can fix this by running the DISM and SFC scans.

5. Scan for malware

  1. Boot your PC into safe mode.
  2. Press the Windows key + S, type virus, and choose Virus & threat protection.
    virus ntkrnlpa.exe
  3. Click the Scan options link on the next page.
    scan options
  4. Finally, select your preferred scan option and click the Scan now button.
    scan now

Viruses can sometimes cause the ntkrnlpa.exe blue screen. The solution to this is to perform a full system scan.

6. Perform a system restore

  1. Repeat steps 1 to 5 in solution 1 and select System Restore.
    system restore ntkrnlpa.exe
  2. Now, choose your ideal restore point and click the Next button.
    restore point
  3. Finally, click Finish and follow the onscreen instructions to complete the process.
    finish

If you can’t still fix this ntkrnlpa.exe blue screen issue, you might need to perform a system restore. This will help you restore your PC to a point where everything works well.

There you have everything you need to fix the ntkrnlpa.exe Blue Screen of Death error. With the information in this guide, you should now be able to fix the issue for good.

In the same vein, if you are experiencing a similar issue in navagio.sys BSOD error, check our detailed guide to fix it.

Feel free to let us know the solution that helped you solve this problem in the comments below.

What is updatechecker.exe & How to Fix its Errors?

Any functional Windows PC has many background processes running, which usually isn’t an issue. The problem arises when one of these starts to affect the performance or cause apps to crash. A process that many reported trouble with is updatechecker.exe.

In some cases, users reported that updatechecker crashed randomly or even triggered 100% CPU usage for many. Remember, this is not a problem encountered by all but only on specific devices. So what is the process, and how do you fix these errors? Keep reading to find out!

What is updatechecker.exe?

The process, updatechecker.exe, is a part of the Asus software installed on the computer, and its primary role is to check for newer versions of the programs. It’s certainly not a critical Windows process and is only found on Asus devices.

So, you can disable updatechecker.exe if required, and it shouldn’t affect the core functioning of the PC. However, for those that rely on Asus programs that came pre-installed, it’s best to leave things as it is and have the process running.

Also, the updatechecker process was found to be a part of the MiniTool Partition Wizard tool. So if you have it installed on the PC, simply uninstall the software. Here are the primary paths the .exe file can be found in depending on the program that added it: C:\Program Files (x86)\ASUS\ASUS Live Update C:\Program Files\MiniTool Partition Wizard

How do I fix updatechecker.exe errors?

Before we move to the slightly complex solutions, here are a few quick tricks to try:

  • Your primary approach should be to restart the computer. Even if this doesn’t fix things, it will bring the high CPU usage to normal levels and allow users to at least work on the problem.
  • Verify whether the process is in the correct directory, i.e., under the program’s folder. If that’s not the case, it’s probably malware and needs to be eliminated.

If none of the fixes work, head to the ones listed next.

1. Scan for malware

  1. Press Windows + S to open Search, type Windows Security in the text field, and click on the relevant search result.
  2. Click on Virus & threat protection.virus & threat protection
  3. Click on Scan options.scan options
  4. Select Full scan, then click on Scan now, and wait for the scan to complete.full scan to fix updatechecker.exe

If updatechecker.exe is indeed malware, running a scan with the built-in Windows Security should make it evidently clear. Besides, you could use a reliable antivirus solution for more accurate results.

More exactly, we suggest you utilize a professional antivirus tool for advanced scanning and removal tools for the latest malware threats.

⇒Get TotalAV

2. Disable the process from startup

  1. Press Ctrl + Shift + Esc to open Task Manager, and head to the Startup tab.
  2. Now, select UpdateChecker from the list and click Disable.disable to fix updatechecker.exe
  3. Once done, restart the computer.

Though not for all, the UpdateChecker may appear in the list of startup apps for many. And disabling it should do the trick! While you are at it, make sure to remove it from the startup folder in Windows as well.

3. Uninstall the program behind the process

  1. Press Windows + R to open Run, type appwiz.cpl in the text field, and hit Enter.appwiz.cpl
  2. Select the program responsible for the process, and click Uninstall.uninstall to fix updatechecker.exe
  3. Follow the on-screen instructions to complete the process.

When disabling updatechecker.exe from the startup apps doesn’t help, you could remove the program behind it altogether, be it the Asus software, MiniTool Partition Wizard, or even a few codecs, as reported in this forum.

4. Use a dedicated uninstaller software

If Task Manager has the Disable option greyed out for UpdateChecker and there are no programs on the PC responsible for the process, it’s likely that a previously installed app used updatechecker.exe.

There are often leftover files from programs that trigger such issues, and in this case, it’s best that you use a dedicated uninstaller software to get rid of all such files and registry entries.

5. Perform a system restore

  1. Press Windows + S to open Search, type Create a restore point, and click on the relevant search result.
  2. Click the System Restore button.system restore to fix updatechecker.exe
  3. Select Choose a different restore point, and then click Next.different restore point
  4. Pick another restore point from the list, one created before the error first appeared, and click Next.restore point
  5. Finally, verify the details, and click Finish to start the restore process.

When nothing else works, the last option is to restore the PC to a state before the error first appeared. You may lose some apps and settings in the process, but it won’t affect the personal files.

Once you have fixed updatechecker.exe errors, find some quick ways to speed up the Windows PC. We also have a guide on App_updater.exe, so don’t hesitate to check it out for more information.

For any queries or to share what worked for you, drop a comment below.

What is mbbservice.exe & Should You Uninstall it?

A typical Windows PC has several background processes running, most of which are vital for its effective functioning. Very few users bother looking through the list of processes and only check this when a problem appears. This is particularly true for mbbservice.exe.

A process that silently runs in the background, mbbservice, can sometimes trigger high CPU usage or crash out of the blue. Even if it runs seamlessly, one must know which program mbbservice.exe belongs to. Keep reading to find out!

What is Mbbservice?

Mbbservice is linked to Mobile HiLink Broadband Background Controller Service and is developed by Huawei Technologies. The process is used by Huawei 3G/LTE USB broadband modems to connect to the Internet.

Remember, mbbservice.exe is not a critical Windows process but linked to a third-party program. Though given it’s related to Internet connectivity, one has to be careful while dealing with it.

Is mbbservice.exe safe?

Yes, if you have the verified process by Huawei Technologies running on the PC, it poses no harm. But you must check the storage path and the file’s digital signature.

It’s usually stored in either of the two paths:C:\ProgramData\MobileBrServ C:\Program Files (x86)\MobileBrServ

Simply open its properties, head to the Digital Signature tab, and verify whether Huawei Technologies is listed under the Name of signer column.

Should I uninstall mbbservice.exe?

If things run ideally, you shouldn’t uninstall mbbservice.exe in Windows since it could lead to network connectivity issues. But, if you are facing 100% CPU usage or the PC is running slow, removing mbbservice could fix things.

Though, we recommend you create a restore point beforehand to revert things to the previous configuration in case things go wrong.

How do I uninstall mbbservice.exe?

1. Disable the service

  1. Press Windows + R to open Run, type services.msc in the text field, and click OK.services
  2. Right-click on the Mobile Broadband HL Service, and select Properties.properties
  3. Choose Disabled from the Startup type dropdown menu, click on the Stop button, and then OK to save the changes.disable mbbservice.exe

Disabling the service will not remove or delete the mbbservice.exe file but simply prevent it from running. This should be the ideal approach and work fine for most users.

2. Delete the process

  1. Press Windows + E to open File Explorer, and look for the file in these two paths:C:\ProgramData\MobileBrServ C:\Program Files (x86)\MobileBrServfile explorer
  2. Once found, select the file and hit Delete to remove it.
  3. Choose the appropriate response in case a confirmation prompt appears.

That’s it! Once you have deleted mbbservice.exe from the dedicated directory, things should work out. But there’s a possibility that the Mobile Broadband HL Service will reinstall it in the next update, and you will need to uninstall the program.

3. Uninstall the program

  1. Press Windows + R to open Run, type appwiz.cpl in the text field, and hit Enter.appwiz.cpl
  2. Select Mobile Broadband HL Service from the list of programs, and click Uninstall.remove mbbservice.exe
  3. Follow the on-screen instructions to complete the process.

If deleting the process file didn’t work, you could uninstall the Mobile Broadband HL Service program and get rid of the mbbservice.exe process once and for all. In case you start facing issues, perform a system restore to reacquire the removed files.

Before you leave, do check the other processes that you can disable in Windows to boost the PC’s performance.

For any queries or to share which method worked for you, drop a comment below.

Fix: Windows 11 Security Shows a Blank Screen

Sometimes, Windows 11 Security can encounter issues, as some users only see a blank screen when they open the app. This issue was caused by a Windows 11 update of 23H2. If you update your OS to the latest version, this issue should not appear anymore. However, if the issue persists, here’s what you can do.

How do I fix a blank security screen on Windows 11?

1. Apply the security fix from Microsoft

  1. Download the SecurityHealth app issued by Microsoft to fix this issue on Windows 11.
  2. Right-click on the file SecurityHealthSetup.exe and choose Run as administrator.
  3. The setup file automatically creates the missing SecurityHealth platform folder named 1.0.2402.27001-0.

This is the official fix issued by Microsoft and most of the users who applied it managed to restore the Windows Security app to normal.

2. Repair Windows Security

  1. Press the Windows key + I to open the Settings app and select the Apps option in the left pane.
  2. Select Apps & features in the right pane.
    app and windows 11 security black screen
  3. Now, locate the Windows Security option and click the three vertical dots before it.
  4. Select Advanced options.
    advanced option
  5. Finally, click the Repair button and wait for the process to complete.
    repair

If Windows 11 Security keeps showing a blank screen, it might be due to small issues. What you need to here is to repair the app from the Settings app.

3. Repair system files

  1. Press the Windows key, type cmd, and select Run as administrator under Command Prompt.
    cmd admin windows 11 security black screen
  2. Type the command below and hit Enter to run it: DISM /online /cleanup-image /restorehealthdism restore
  3. Wait for the command to finish running. Now, run the command below: sfc /scannowsfc scannow
  4. Finally, wait for the command to finish running and restart your PC.

Often, if Windows 11 Security is showing a blank screen, it is down to corrupt system files. You can fix this by running DISM and SFC scans.

Alternatively, you can fix this issue for good by using a dedicated tool to save you from the stress of running a series of commands and repairing the files manually.

4. Uninstall third-party antivirus

  1. Press the Windows key + R, type control, and click OK.
    control  windows 11 security black screen
  2. Click the Uninstall a program option under Programs.
    uninstall a
  3. Now, right-click the antivirus software and select Uninstall.
    uninstall
  4. Finally, follow the onscreen instructions to complete the process.

Sometimes, Windows 11 Security shows blank screen because of issues with your third-party antivirus. This might be because the software is interfering with Windows Defender.

So, you need to uninstall the security software and restart your PC.

5. Restart the Windows Security service

  1. From here, press the Windows key + R, type services.msc, and press Enter.
    services windows 11 security black screen
  2. Double-click the Windows Security Service option service to open its Properties.
    windows service
  3. Now, check if the service is running. If it is not click the Start button.
  4. Click the Apply button followed by OK to save the changes.
    start services

If the Windows 11 Security is showing a blank screen, it might because the associated service is not running. You need to restart the service and let it start automatically with your PC.

6. Edit the registry

  1. Press the Windows key + R, type regedit, and click the OK button.
    regedit windows 11 security black screen
  2. Navigate to the path below in the left pane: Computer\HKEY_LOCAL_MACHINE\SYSTEM\CurrentControlSet\Services\SecurityHealthServicepath
  3. Next, double-click the Start DWORD in the right pane.
    start
  4. Set the Value data to 1 and click the OK button.
    value data windows 11 security black screen
  5. Finally, close your Registry Editor and restart your PC.

In some cases, Windows 11 Security might show a blank screen due to a disabled registry value. The solution is to change the registry value and restart your PC.

7. Reinstall the Windows Security app

  1. Press the Windows key, type powershell, and select Run as administrator under Windows PowerShell.
    powershell
  2. Now, type the command below and hit Enter to run it: Get-AppxPackage Microsoft.SecHealthUI -AllUsers | Reset-AppxPackageget
  3. Finally, restart your PC.

Windows 11 Security might be showing a blank screen because the app ran into an issue. You can reset and reinstall the app by running the command above.

8. Redeploy all apps

  1. Launch Windows PowerShell as an admin as shown above.
  2. Now, run the command below: Set-ExecutionPolicy Unrestricted Get-AppXPackage -AllUsers | Foreach {Add-AppxPackage -DisableDevelopmentMode -Register "$($_.InstallLocation)\AppXManifest.xml"}set all windows 11 security black screen
  3. Finally, wait for the command to finish running and restart your PC.

Sometimes, you might need to redeploy all your Windows apps to fix the Windows 11 Security showing a blank screen issue. This will clear the glitches that might be causing the problem.

9. Reset the PC

  1. Press the Windows key + I to open the Settings app and select Recovery in the right pane.
  2. Now, click the Reset PC button before the Reset this PC option.
  3. Finally, choose whether to keep your files or remove everything and follow the onscreen instructions to complete the process.

If you still can’t get Windows 11 Security to stop showing a black screen on your PC, you might need to reset it. If you have a backup of your files, you should consider deleting everything to get rid of the potential cause of the issue.

But if you don’t have a backup file, you can choose to keep your files.

Why is Windows 11 Security showing a blank white screen?

As we’ve mentioned in the beginning of this guide, this issue is known and addressed by Microsoft. However, there are also other various factors can be responsible for Windows 11 Security showing a blank screen issue. Below are some of the prevalent causes:

  • Outdated PC: An outdated operating system is an island of different issues. And it is one of the major causes of this Windows Security problem. You can fix this by updating your PC.
  • Faulty system files: Oftentimes, this problem can be caused by corrupt or missing system files. Repairing these files should do the trick here.
  • Issues with third-party antivirus: If you have a third-party antivirus on your PC, it might cause this problem. You need to uninstall the app and stick to only Windows Defender.
  • Glitches with Windows Security: At times, this problem might be due to glitches with Windows Security. In extreme cases, you need to reinstall Windows Security completely.

With this, we can now conclude this guide on fixing the Windows 11 Security showing a blank screen issue. if the fixes in this guide can’t help you eliminate the problem, you might need to reinstall Windows 11.

This is because the problem might be with your operating system, not the app. While this might look extreme, it has worked for many users. So, you should try it too if you are left with no option.

Feel free to let us know the solution that helped you fix this issue in the comments below.

What is Raserver.exe & How to Fix its Application Errors

Some of our readers have reported that they come across a raserver.exe process running on their Windows PC, but they don’t know what it means. Some others have noticed some errors with the executable.

In this article, we will take you through what raserver.exe is and what to do to fix its errors. Also, you may be interested in our article on ways to improve exe files if it’s not opening.

What is raserver.exe?

Raserver.exe is a legitimate executable file extension specifically known as a Windows Remote Assistance Common Object Model Server file. It is part of the Microsoft Windows Operating System program developed by Microsoft.

The raserver.exe executable file is needed by some applications or games to run correctly, wherein, if the file is missing, you may encounter issues when trying to launch the applications or games.

Is raserver.exe a virus?

As mentioned earlier, the raserver.exe is a legitimate file developed by Microsoft for Windows OS. However, merely seeing that the executable file is named raserver.exe does not guarantee its legitimacy.

This is because it can sometimes be targeted by malware creators who try to disguise their malicious code by using the same filename.

How to verify if raserver.exe is safe

Below are a few means to verify if the raserver.exe file is secure or not:

  • Check its Digital Signature – The legitimate raserver.exe file should have a digital signature from Microsoft Corporation Corporation.
  • Check the file location – The legitimate raserver.exe file should be in a subdirectory of C:\Program Files (x86)\AVG\CloudCare\AvgRemote\
  • Spelling discrepancies – The original file name is spelled raserver.exe. Any other name variations may be viruses.

What can I do if I get raserver.exe application error?

Perform the following checks first before anything else:

  • Ensure to update your Windows OS.
  • End the task for the file in the Processes or Details tab in Task Manager.
  • Locate the file and delete it in File Explorer.

If the problem still persists, perform the following solutions below.

1. Perform a full antivirus scan

  1. Click on the Start button, type virus in the search box, and click on Virus & threat protection from the results.
  2. Then, select Scan options.
  3. Choose the Full scan option and click the Scan now button.

If there is any malware or virus, the scanner should detect them and help you to get rid of them. Alternatively, you can do a deeper scan using one of the best antiviruses for Windows 10 and 11.

2. Run the System File Checker scan

  1. Press the Windows key, type cmd in the Search box, and click on Run as administrator.
  2. In the CMD window, type the following command in the text field and press Enter: sfc /scannow
  3. The scanning process may take up to 15 minutes, so wait till the verification reaches 100%.

The System File Checker will help scan and restore corrupted raserver.exe and other system files. If CMD is not working in Windows 11, you can explore our detailed guide for steps to fix it.

Further, if your Windows OS is outdated, you may encounter raserver.exe application errors. If you have trouble opening your Settings app, you can read this article to learn how to fix it.

3. Perform a system restore

  1. Press the Windows + R keys to open the Run command dialog. Type rstrui in the text field and press Enter.
  2. Choose System Restore under System protection tab.
  3. Then, click Next to proceed.
  4. Select the desired restore point and click Next.
  5. Click on the Finish button to confirm your selection and restart your PC.

Remember to create a system restore point before performing a system restore or use one created by your system.

And that’s it on what to do in case you encounter the raserver.exe application errors. You can also reinstall the application if none of the above steps work.

For further information about raserver.exe errors, you can read our article on tips for fixing the Windows Remote Access Service error.

Do not hesitate to use the comments section below if you have any questions or suggestions.

What is MSASCui.exe & Is It Safe to Remove It?

You must have found this guide because you need to know about the MSASCui.exe file. Most of our readers have wondered about it. Is it a harmful virus or a legitimate Windows program? Does it put your system at risk, and is it crucial to optimal functioning?

In previous guides, we have broken down some other programs like pacjsworker.exe. So, in this guide, we give you answers to these questions.

What is the MSASCui?

MSASCui.exe is the Windows Defender User Interface executable file. This legitimate file is part of Windows Defender, Microsoft’s anti-malware software. It performs the following functions:

  • It is responsible for launching the Windows Defender GUI, allowing users to scan their computers.
  • MSASCui.exe scans the device for malware and removes any threats.
  • It manages settings, including the scan schedule, options, and real-time protection settings.
  • It reports malware activity, such as the number of scans and threats.

This executable was introduced in Windows 7 and continued to Windows 10. We have a practical guide to help you if Windows Defender is missing on Windows 11.

Where is the MSASCui.exe file?

The file is in the Windows Defender directory, shown below, and should be about 1,008,184 bytes.

C:\Program Files\Windows Defender

If you find it in a different directory, it is likely malware, and you will have to perform a deep scan using any robust antivirus software.

Can I remove MSASCui.exe?

This choice is completely up to you. However, if you disable or remove the program, you may expect the following.

  • Windows Defender GUI will cease to open.
  • Your device becomes more vulnerable, especially if you are not using third-party solutions.
  • You may experience problems with components like the Start menu and Windows Taskbar.

How can I remove Msascui.exe?

1. Using the Control Panel

  1. Press Windows + R to open the Run dialog.
  2. Type control and hit Enter.
  3. Click Uninstall a program.
    msascui.exe
  4. From the list of apps, click Windows Defender and hit the Uninstall option.
  5. Finally, follow the wizard to complete the process.

2. Using the Task Manager

  1. Hold Ctrl + Shift + Esc together to open the Task Manager.
  2. Now find the Windows Defender or msascui.exe,
  3. Right-click on either one and select End task.

This is all we share in this guide. If you have problems opening the Task Manager, we have an article to help you fix it.

For other related files like the MSASCuiL.exe, check out our expert article.

Also, if you have additional questions, contact us using the comments section below; we would love to hear from you.

Mighost.exe Errors: What They Are & Easy Fixes [Updated 2026]

Many users are cautious about the legitimacy of computer executables since some Windows antivirus applications may flag them as malware. The Mighost.exe file may fall under this category, especially since it may trigger some system errors.

We explore the file and give practical solutions to some related errors that some readers may encounter.

How do I fix Mighost.exe errors?

1. End the mighost.exe process

  1. Hold the Ctrl+Shift+Esc keys together to launch the Task Manager.
  2. Locate the mighost.exe process among the running processes.
  3. Right-click on it and choose End Task to end the process.
    mighost.exe

2. Run a file scan and repair

  1. Press Windows + R to open the Run dialog.
  2. Type cmd and press Ctrl + Shift + Enter to open an elevated Command Prompt.
    mighost.exe
  3. Input the script below and hit Enter to begin the scan.
    sfc /scannow
    mighost.exe
  4. Lastly, follow any instructions indicated and restart your computer at the end of the process.

3. Repair the installation

  1. Press Windows + R to open the Run dialog.
  2. Type cmd and press Ctrl + Shift + Enter to open an elevated Command Prompt.mighost.exe
  3. Input the script below and hit Enter to begin the scan.
    DISM.exe /Online /Cleanup-image /Restorehealth
  4. When the repair is complete, restart the computer.

Keep in mind that the Mighost.exe file is associated with the Migration Plugins host program process and carries out the following functions:

  • Supports migcore.dll, migcore, and migres, migres.dll.
  • Useful in migrating user profiles to new devices.
  • It runs in the background without requiring user interaction.

Remember that it is possible to disable background applications, so you can always stop this file from running.

4. Scan for malware

Mighost.exe is a legitimate Windows process, but errors related to it may be symptoms of malware infections. Just fire up your antivirus and run a full system scan.

➡️ Remove any found threats, restart your PC, and see if the issue persists.

To scan your system with the built-in Windows Defender: Settings> Update & Security> Windows Security> Scan options> Full scan> Scan now.

malware full scan windows 11

Or you can use a reliable third-party antivirus/anti-malware. Just make sure it’s a legit, up to date software.

5. Check for disk errors

  1. Open Command Prompt as administrator.run command prompt as administrator
  2. Type chkdsk /f /r and press Enter.chdsk
  3. Follow the prompts to schedule a disk check on the next restart, then restart your computer.

Disk errors can lead to corrupted files, including system files used by MigHost.exe. Running a disk check helps identify and fix these errors, ensuring the integrity of the data stored on your hard drive.

Where is Mighost.exe located?

You should find the legitimate executable in the directory below; the file size should be around 257,552 bytes.

C:\$WINDOWS.~BT\Sources\

mighost.exe

You should, however, note that malware often mimics some genuine applications, so we recommend a thorough virus scan with an efficient Windows antivirus software if you are in doubt.

What common errors are associated with Mighost.exe?

These errors may be triggered if the executable is corrupted or damaged, uses too many system resources, or if some apps are incompatible. Regardless of the cause, the solutions we explore in this guide should help.

We have compiled a list of the best file repair tools, so you may try using any of them to fix mighost.exe, as this may solve the system error.

If you’re concerned that other files might be malicious, we have a guide on performing a rsmui.exe malware scan, so be sure to read it.

That will be all for this guide. You may contact us in the comments section to let us know if you had success fixing the errors.

What is Winver.exe & Should You Delete it?

In Task Manager, many executable processes are running, and a common one users complain about is winver.exe. This article will discuss what winver.exe does and how to verify if it’s safe. Also, we’ll discuss how to delete it if it’s malicious.

Alternatively, you may be interested in our article about exe files deleting themselves on Windows 11 and ways to fix it.

What is the use of winver.exe?

Winver.exe is a built-in utility in Microsoft Windows operating systems that provides information about the version and build number of Windows installed on a computer. Winver stands for Windows Version, and the .exe file extension indicates it’s an executable file.

Here are some of the functions of the winver.exe on Windows PCs:

  • When executed, it displays a small window with details such as the edition of Windows (e.g., Home, Professional), version number (e.g., Windows 10, Windows 11), and build number.
  • Helps users check Windows details for troubleshooting or compatibility purposes.
  • Used to verify if the latest updates are installed on the system.

Should I delete winver.exe?

No shouldn’t be deleted due to the following reasons:

  • Winver.exe is a legitimate system utility provided.
  • It’s an integral part of Windows OS.
  • Deleting the file can cause issues.

However, removing the winver.exe file from your computer may be advisable if it poses any threats. It is because viruses and malware disguise using legitimate file names to remain undetected. As we go further, we’ll take you through the steps to determine whether to remove or keep the file.

Where is the winver exe file located?

This is a system file used by Windows; as such, it is located inside the Windows directory.

The exact location is C:\Windows\System32

Is winver.exe a virus?

To verify if the winver.exe file is safe or potentially a virus, you can follow these steps:

  • The legitimate winver.exe file is located in the following path: C:\Windows\System32
  • Microsoft digitally signs the legitimate winver.exe and must be verified for authenticity.
  • Check for significant differences in file size to indicate a potential issue.
  • Run a thorough PC scan to detect if the winver.exe virus exists.

Thus, performing these verification steps can help ensure that the file on your system is safe and legitimate.

How can I delete winver.exe?

1. End task for winver.exe

  1. Right-click the Start button and select Task Manager from the menu.
  2. Go to the Processes or Details tab. Select the winver.exe from the list, right-click on it, then click End Task from the context menu.
  3. Click OK to confirm that you want to end the task for the program.
  4. Restart your PC and check if the winver.exe process is still running.

The above steps will stop the winver.exe process on your PC, preventing it from affecting your computer. Check our article on what to do if the Task Manager is slow to open or respond on your PC.

2. Delete the winver.exe file via File Explorer

  1. Repeat steps 1 & 2 from the solution above.
  2. Find winver.exe in the Task Manager. Right-click on it and select Open File Location from the drop-down menu.
  3. In the file location, right-click on the winver.exe file and delete it.
  4. Restart your computer.

Deleting the winver.exe from the file location will remove it from your computer and mitigate any potential threats.

Conclusively, read our detailed guide on why exe files are not opening and how to fix it on Windows 11. Also, you can check our article about wermgr.exe and how to disable it on Windows PCs.

Do you have further questions or suggestions regarding this guide? Kindly drop them in the comments section.

Make a Calendar in Google Sheets in Just 3 Easy Steps

Google Sheets is a popular electronic spreadsheet consisting of grids of rows and columns. However, users have encountered difficulties creating calendars to organize and keep track of activities on Sheets. Hence, we will examine some easy steps to make a calendar in Google Sheets.

Likewise, check our detailed guide about ways to fix the Unable to load file error in Google Sheets.

Is there a calendar template in Google Sheets?

Yes, Google Sheets offers a range of calendar templates for your use. These templates come with pre-designed formats and styles, making creating calendars for different purposes convenient for users.

Also, there are varieties of third-party calendar templates available for download online for your immediate use.

However, you might not see a template that fits your style, timesheets, invoices, and schedules. Therefore we will walk you through how to make a calendar in Google Sheets.

How do I make a calendar in Google Sheets?

1. Use the Google Sheets calendar template

  1. Navigate to Google Sheets and select the Template Gallery button.
  2. Scroll through the templates and select the Annual Calendar.
  3. Click on the Year sheet and select the large year text on the right.
  4. Then, type the year you want, and press Enter.
  5. Select the Format tab on the ribbon and click Theme to choose your desired theme.
  6. Click the Customize button to change the style, font, accent color, and add an image.
  7. Click the Done key to save changes.
  8. Select the from the sheet below to navigate between months.

Google Sheets has a built-in calendar template that allows us to pick and customize it.

2. Create your calendar

  1. Launch Google Sheets on your PC and click the plus sign to open a new workbook.
  2. Select the columns H to Z, right-click on them, and select Delete selected columns.
  3. Click on Cell A1, type the month and the year you want, and press Enter.
  4. Highlight rows A1 to G1, click the Format tab, select Merge Cells, and choose Merge All.
  5. Type the days of the week from Sunday to Saturday in rows A2 to G2 correspondingly.
  6. Highlight the Month and days of the week row, and center align them.
  7. Input the number 1 into the cell with the correct first day of the month and fill the weeks with the required numbers.
  8. Move to the next row, input numbers into the first two days of the week, highlight the two days, and drag the autofill handle to the right to fill the rest of the week.
  9. Repeat step 8 to complete the remaining weeks of the month.
  10. Click the drop-down arrow on the Sheet1 tab and duplicate to create a duplicate of the first sheet.
  11. Goto the duplicated sheet and update it to the next month by changing the month name and inserting the date where it should be.

Creating your calendar gives you the flexibility and creativity to have it to your needs.

3. Download a third-party calendar template

There are different third-party templates available online that you can use to speed up this process.

You can search for the one suitable for your needs and download it. Be sure to download from a trustworthy site.

In conclusion, read our complete guide on how to swap two cells in Google Sheets. Also, you can read about the best browsers for Google Drive, Google Docs, and Google Sheets on Windows.

If you have further questions or suggestions regarding this guide, kindly drop them in the comments section.