4 Quick Ways to Uninstall HP Support Assistant in Windows 10

HP Support Assistant is a troubleshooting utility that includes HP desktops and notebooks. As it comes preinstalled within Windows 10 on HP PCs, some users might want to uninstall it.

That’s especially true for users who get tired of HP Support Assistant starting automatically.

There are a few ways you can uninstall HP Support Assistant. However, sometimes, more standard uninstall methods might fail when issues like HP Support Assistant error 1316 arise.

When uninstall errors arise, less standard methods for removing software are worth trying.

Why should I uninstall HP Support Assistant?

The HP Support Assistant can be helpful for some users, but you might need to remove it for some reason. Below are some of the reasons users remove the software:

  • Consumes about 138megabytes of hard drive space
  • Can sometimes have compatibility issues with some apps
  • Crashes frequently
  • It does not live up to the billing for some users

How can I uninstall HP Support Assistant in Windows 10?

1. Uninstall HP Support Assistant with third-party uninstallers

When uninstalling any software, HP Support Assistant included, there will sometimes be leftover files and registry entries, which can cause some problems. This is why we recommend using a specialized app, which can thoroughly clean any traces of the apps you want removed.

Third-party software often comes with features and toolkits more advanced than those you’ll find in an operating system or in the app that you are trying to remove.

We recommend for this job IObit Uninstaller, a professional and very powerful software that can help you remove the HP Support Assistant and any other software that seems stuck to your system. With just a quick scan you can identify and remove any unwanted programs, registry entries, malicious toolbars, and plug-ins.

IObit Uninstaller

Protect your computer by removing unwanted or stuck programs with this powerful tool.

2. Uninstall via Programs and Features

  1. Press the Windows key + R, type appwiz.cpl, and click OK.
    appwiz hp support assistant command line
  2. Right-click the HP Support Assistant and select the Uninstall option.
    uninstall
  3. Finally, follow the onscreen instructions to complete the removal.

This is the standard uninstall method for HP Support Assistant. Try alternative methods here if you can’t uninstall HP Support Assistant via Programs and Features.

3. Uninstall HP Support Assistant with the Run command line

  1. Press the Windows key + R, type regedit, and click OK.
    regedit
  2. Navigate to the path below in the left pane: HKLM\Software\WOW6432Node\Hewlett-Packard\HPActiveSupport
  3. Now, right-click the HPActiveSupport file and select Delete.
    delete
  4. Next, press the Windows key, type cmd, and select Run as administrator under Command Prompt.
    cmd uninstall hp support assistant command line
  5. Copy and paste the command below and hit Enter: C:\Program Files (x86)\Hewlett-Packard\HP Support Framework\UninstallHPSA.exe" /s /v/qn UninstallKeepPreferences=FALSEcommand
  6. Finally, wait for the command to finish running.

4. Use the Start Menu

  1. Press the Windows key and right-click the HP Support Assistant app.
  2. Select the Uninstall option.
    option
  3. Finally, click the Uninstall button to confirm the action and follow the onscreen instructions.
    uninstall button hp support assistant command line

This is the easiest method to uninstall HP Support Assistant. However, after completing the removal, you need to restart your PC.

Turn off HP Support Assistant (stop it from starting automatically)

  1. Press the Windows key + R, type taskschd.msc, and click OK.
    taskschd
  2. Navigate to Task Scheduler library > Hewlett-Packard > HP Support Assistant in the left pane.
  3. Next, select HP Support Assistant Quick Start task in the middle panel, which is configured to trigger at user log-on.
  4. Click Disable within Selected Item on the Actions sidebar.
    disable

If you want to uninstall HP Support Assistant because it starts automatically, it’s recommended that you remove HP Support Assistant from startup instead, as outlined above. Then, you can still manually run HP Support Assistant whenever you need it.

Who to contact for fixing HP Support Assistant uninstall issues?

If you encounter any uninstall issues with the methods above, contact HP technical support from the HP Customer Support page. You can also post on the HP support forum for troubleshooting guidance. 

So, those are the various ways you can uninstall HP Support Assistant, including using a command line. Of those methods, it’s probably best to utilize CCleaner Uninstaller for a thorough removal.

Also, if you want to replace the tool with alternative optimization software, check our detailed guide for the top options.

Feel free to let us know in the comments below if you encounter any problems while following any of the solutions in this guide.

Image Tracing Software for PC: 7 Best to Use in 2026

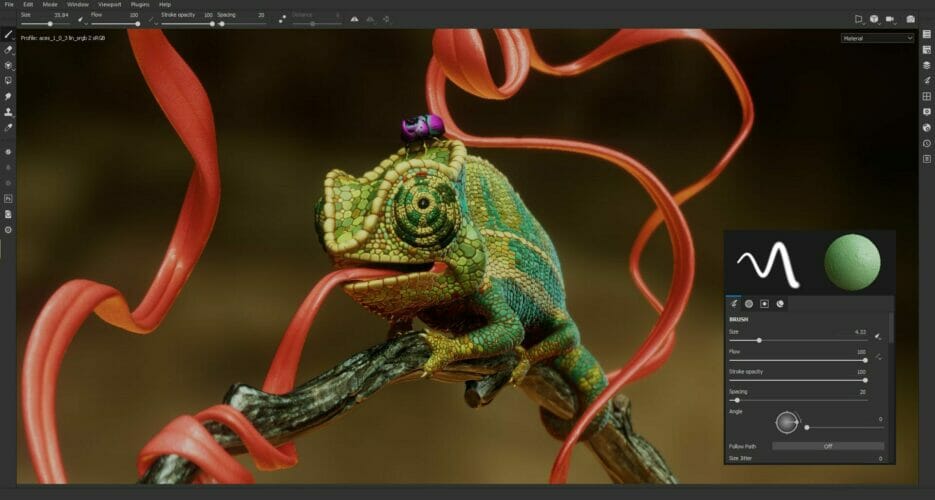
Vector images are made of cursor-based draw operations which consist of shapes like circles, rectangles, lines, and curves (or freeform).

Basically, you need to move the cursor or draw a line and curve to a point with some control, then stroke or fill to create artwork.

To utilize them or to adapt images to vectors, you’ll need to use image vectorizer software.

A bitmap image already has a grid of pixels and color values, but you can draw the same image using different shapes and sequences of stroking and filling.

Depending on what you want to achieve and your skills, using software that vectorizes images is better than starting from scratch because it delivers cleaner results.

We’ve compiled a list of the best software to vectorize images currently available on the market, so keep reading.

What are the best tools to vectorize images?

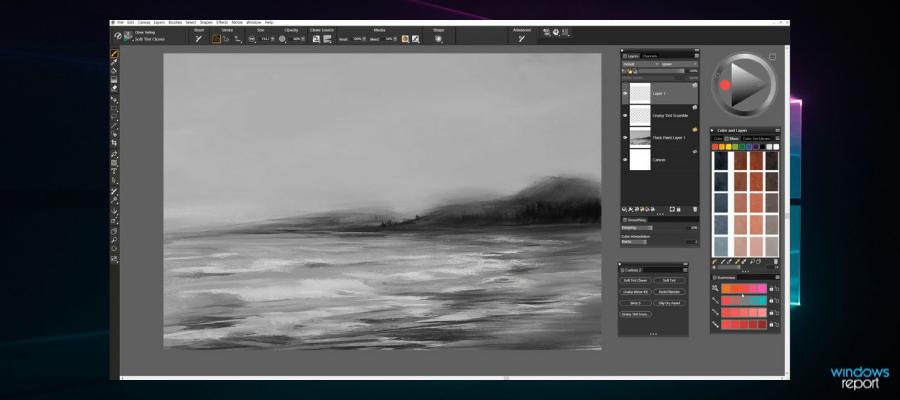
Adobe Illustrator – Leading photos designs

Adobe Illustrator is one of many premium solutions offered by Adobe. To say that Adobe Illustrator is the best vector design solution would be an understatement.

If you are a professional designer, you’ll have all the tools needed in just there.

It covers all necessary solutions to design covers and make artistry, including vectorizing images, advanced typography, freeform gradients, and many more.

The software allows you to create customized fonts by redesigning already existing fonts or implementing them from other designs and sketches. 

Adobe Illustrator has advanced pen options that emulate the feeling of drawing with a real, physical pencil. You get to draw freeform designs and then smooth and perfect them.

The brush settings are highly adjustable, so you don’t have to compromise. You can create your

This abundance of features might even be slightly overwhelming at first, especially if you are a novice user, but it’s easy to get a hold of it.

If you want to explore more options beyond Illustrator, you can check this detailed Adobe Illustrator alternative guide that lists other great tools for designers.

Let’s quickly look at its key features:

  • Industry-standard set of digital design tools
  • Great support with detailed tutorials
  • Seamless integration with Creative Cloud Suite apps
  • Gorgeous typography (effects, styles, and more)
  • Real-time rendering for unparalleled control

Adobe Illustrator is a subscription-based software. You can try it for free for 7 days.

Adobe Illustrator

Explore the best vector-based design software to scale down or go big and create crisp artwork.
Check price Get it now

CorelDRAW – Professional vector illustrations

This comprehensive suite of professional graphic design tools gives you everything you need to craft design projects from vector illustration and photo editing to typography tools.

Compatible with over 100 graphics file formats, you can easily import and export a variety of assets and tweak them to perfection according to your imagination.

CorelDRAW’s state-of-the-art vector-illustration technology will help you create sophisticated artwork from scratch or vectorize any image to perfectly mirror your artistic vision.

Corel lets you create clear and complex vector illustrations. It provides all tools necessary at a very high standard. You can create curves and lines with shaping and drawing tools. You can fine-tune your drawings with blend modes, contour, fill, and more.

You can edit every detail of your object. You get advanced coloring tools that can help you generate patterns, and gradients, change the transparency, and more.

The software offers you an extensive library of clipart images, high-resolution photos, multiple font faces, and templates, as well as a fountain, vector, and bitmap fill. You can integrate them into your designs for free and generate original artwork easily.

Other key features include:

  • AI-powered image solutions (machine-learned effects, Smart Selection tool, and more)
  • Workspace customization options to accelerate workflows
  • Impressive editing toolset (filters, effects, masks, lenses, Replace Color, and more)
  • Adjust color and tone, remove imperfections, correct perspective, and more
  • AfterShot 3 HDR to create stunning High Dynamic Range photos from your RAW images
  • Unparalleled object control

You can either get Corel Draw as a one-time purchase or get an annual subscription plan. You can try the software for free for 15 days.

Corel Draw

Experience AI-powered bitmap-to-vector trace technology with impressive results!
Free trial Visit Website

Adobe Photoshop – First pick photo editing

This industry-leading imaging and design software is widely known and most cherished for its raster image-manipulating capacities.

However, the mighty Photoshop does offer support for vector-based images as well, and you can use it to convert, for instance, PSD files to vector formats.

The general recommendation is to use smart objects, especially when dealing with mixed Raster-Vector-Font objects.

Photoshop provides multiple vector graphics tools. You get shape tools like rectangles, ellipses, or polygons, multiple pen tools, and freeform pen support. 

You can easily retouch any freeform design with anti-aliasing/aliasing tools, resample tools, selection options, and more. 

Let’s quickly look at its key features:

  • Crop, remove objects, retouch, and combine photos into collages
  • Unlimited colors, effects, layers, and masks
  • A generous collection of preset brushes and countless customization options
  • Compatible with touch technology (you control it with a stylus or touch on your iPad)
  • Rotatable patterns (to change the orientation of any pattern)
  • Object Selection tool (for fast and precise selections)

Adobe Photoshop is a subscription-based software. It is integrated within the Creative Cloud along with the other Adobe products. You can try it for free for 7 days.

Adobe Photoshop

Edit your images to vector perfection with the world’s best imaging and graphic design software!
Free trial Visit Website

Adobe Capture – Multiple themes and colors

Adobe Capture is a very good choice if you are new to the vector creation world, but it doesn’t disappoint if you are more advanced.

You can use it on the go as it is a mobile app,  available for free both in Android’s Google Play and in the Apple App Store. 

Even though it is beginner-friendly, it doesn’t lack features. There are a lot of easy and fast options that allow the creation of simpler designs in a relatively short amount of time, but they also have more advanced options. 

For example, if you are not satisfied with their standard brushes or patterns, you can create your own by photographing or uploading a picture of your desired tool and Capture will help you generate it and then use it as you please.

You can easily create vectors instantly with shapes. You can photograph your drawing directly from the app or upload it as a picture and it will transform into a high-quality vector image, with clean and crisp lines. 

If you want a specific font the software can generate a list of Adobe fonts based on your pictures of different logos, magazine headlines, labels, or any form of text in general so that you can use them or similar ones in your own design

Other key features of Adobe Capture include:

  • Allows users to create their own brushes
  • Generates 3D textures straight from the camera or from your uploads
  • Integrated into Adobe Creative Cloud 

The software is compatible with other Adobe Apps (Photoshop, Fresco, Premiere Pro, Illustrator, After Effects, and more) which is great for projects that require more than one tool.

Adobe Capture

Easily transform phone-taken pictures into high-quality vector images, create your own designs with shape tools, and more!
Check price Visit Website

Inkscape – Color spectrum

This is a free and open-source vector graphics editor tool whose features include photo or image and text editing tools, and support for most graphic formats such as SVG, PNG, WMF, and PDF, among so many others.

Whether you are an illustrator, designer, or web designer, or just need to use vector images, this is the best software to vectorize images.

Inkscape supports different types of vector creation. You can use the pencil tool to draw freehand with simple paths, use the pen tool for curves and straight lines, and create calligraphy strokes with the calligraphy tool.

You get to manipulate the objects in your picture with moving, scaling, and rotating features. You can also work with multiple layers, group objects, and align your images.

The software offers advanced node path options. You can move nodes and Bezier handles, and convert shapes and text to paths for advanced editing, path simplification, bitmap tracing, and more.

Let’s quickly look at its key features:

  • Canvas Rotation, Mirroring, and Alignment
  • Pinch-to-zoom feature, Center, and Split View Mode
  • Extensive toolset (Bézier Tool, Calligraphy, Circle, Measurement and Pencil Tools, etc.)
  • Compact Tool Controls Bar
  • Improved Text selection and variable font support
  • Basic Support for SVG in OpenType

Inkscape runs on Windows PCs that run the Windows 7 version or later. If you want to use the software on older versions of the OS, you can find previous versions that support Windows Vista and Windows XP PCs.

⇒ Get Inkscape

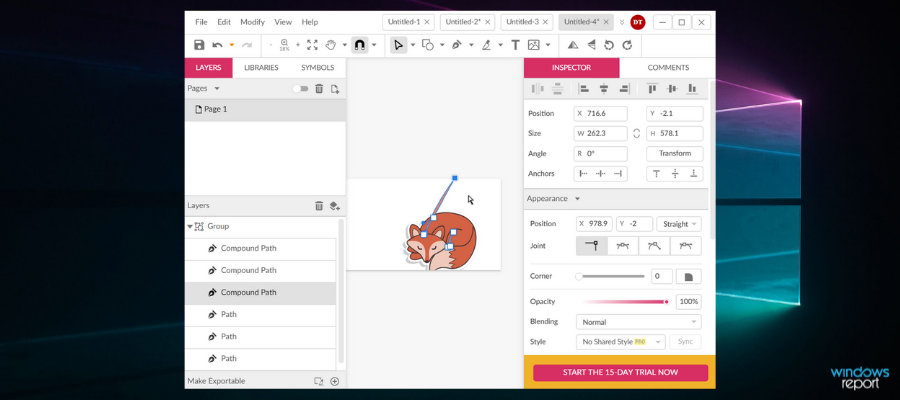
Gravit Designer – Web vector image editing

Gravit Designer is a powerful app designed to meet the needs of visual creators of all kinds. It can be easily accessed on a browser from any desktop platform. It also works without an Internet connection if you decide to download the store version.

The software offers high precision in Vector creation. You get various shape tools, straight line, and curve line tools, convert text to editable vector paths, and more. You can also create freeform vector paths.

This app is easily accessible to beginners. It is easy to learn, with a minimal user interface without overwhelming menus. The Gravit Designer team offers extensive support online. You can access various guides and tutorials and learn everything you need to get started with your designs.

It’s very likely that it fits any artist’s personal preferences in terms of hardware. You can also use Gravit Designer with pen devices or touchscreen devices like tablets and laptops with touch displays.


Gravit Designer also provides preset canvas sizes for different design outcomes such as social media platforms, website dimensions, printable amazon shirts, and more.

You also get multiple premade design assets such as shapes, illustrations, icons, stickers, and frames which you can easily implement and customize into your designs.

You can easily access your projects on multiple devices via the Gravit cloud. You can save and sync your designs and start working wherever you are. You can sort your artwork into different categories, create folders, and more.

Other key features include:

  • Automatic freeform vector smoothing
  • Drag and drop object appearance settings
  • Advanced border controls
  • Predefined line ends
  • Advanced photo-editing features

Gravit Designer has a free version that has some limitations, but it can be a good starting point. It also has a PRO version that charges annually and comes with a 30-day money-back guarantee. 

⇒ Get Gravit Designer

Vectorizer – Ideal for beginners

Vectorizer is an in-browser vector creator that allows you to create vector graphics and also convert other formats to vectors.

This image vectorizer converts raster images like PNG, BMP, and JPEG to scalable vector graphics or SVG. In order to vectorize raster images, you convert pixel color information to simple geometric objects.

To vectorize your image, just upload your image. You will get a side-by-side preview of your vectorized and original images. You can select different image modes like clipart, photo, sketch, or drawing. 

You get to pick your color scheme for the vector file, remove background colors, and more. You can also work with layouts and see the layering of your image in the isometric view.

Vector graphics are not based on pixels but on points, lines, and curves, which are also known as primitives, represented by mathematical expressions.

Let’s quickly look at its key features:

  • Converts these raster images without loss in quality graphics
  • Easily scalable and rotatable images
  • Create logos, tattoos, clip art, stickers, and more

Vectorizer offers some guides and video tutorials on its website. These can help you understand which features and modes are best suited for your image type and desired outcome.

⇒ Get Vectorizer

Have you tried any of these best software to vectorize images? If so, let us know which one and how it turned out for you, by leaving a comment in the section below.

Windows Event Log Viewer: 5 Best Tools & How to Use

Event log viewers are programs that track important events on your computer. Every app or program that runs on your computer leaves a trace in the event log, and before apps stop or crash, they post a notification. 

Every single event or change made on your computer is registered in the event log.

In other words, an event viewer is a program that scans long text log files, groups them and adds a simpler interface on huge amounts of technical data.

In case your computer doesn’t work properly, event viewers are essential because they offer you important information on the source of the problem.

Windows 10 comes with its own built-in event log viewer that offers users an in-depth image of the processes taking place on their computers. 

If you want to analyze particular event information, you can also use third-party event viewers.

How to use Windows Event Viewer

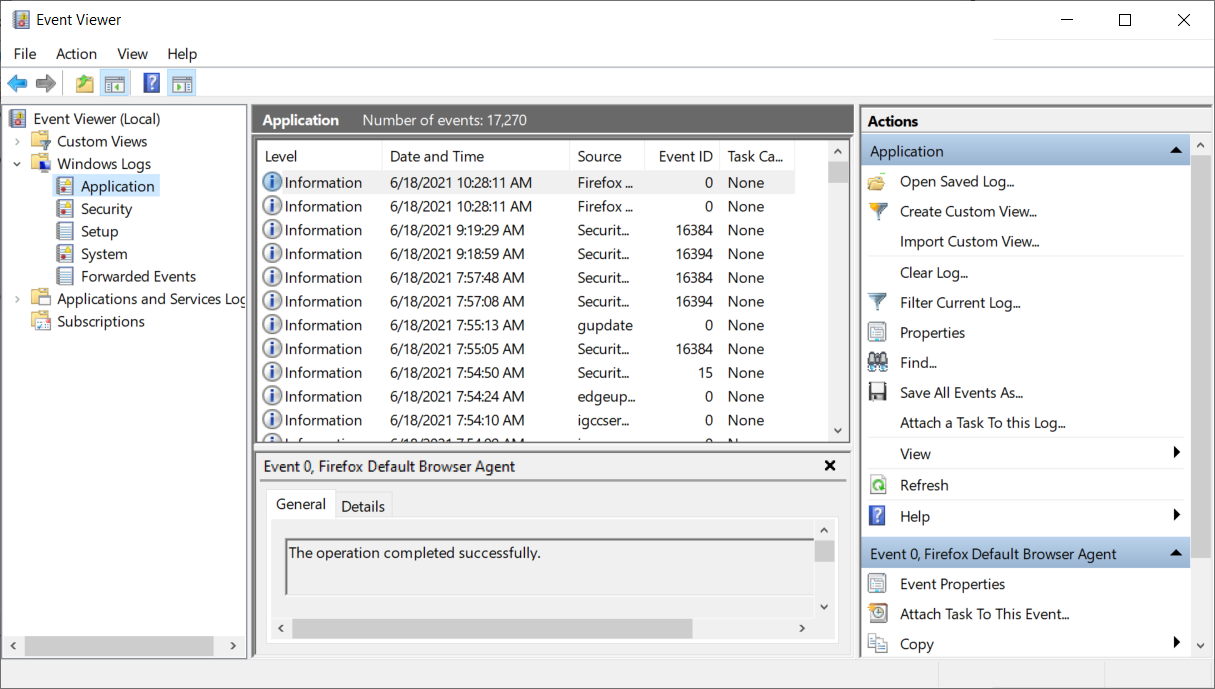
  1. Type event in the Windows search tab and select Run as administrator to start Event Viewer with full privileges.
  2. Next, click on the category of the event from the left pane, and the list of events will appear on the upper-middle pane.
  3. When you click on an event, you will get the details on the bottom-middle pane; double-clicking it will open the details in a separate window.
  4. In our example, we are checking out a kernel warning that a core of the processor was limited by system firmware. Hitting the Copy button with copy all the information in the clipboard to paste it in a document or an Excel file.
  5. You can also use all the options from the right pane to gain more information. For instance, you can save the event as a .evtx file by clicking on Save Selected Events.

Windows Event Viewer is great to get basic information on events on your system and it can be used easily for saving important information.

What are the best Windows 10 event log viewers?

Windows Event Log Viewer

Many Windows users rely on this built-in tool to check the events that take place on their computers.

This tool has two major advantages: it’s already installed on your computer and has a very intuitive interface. You can launch the Windows Event Log Viewer by typing event viewer in the search bar.

The tool’s screen is divided into three parts: the event categories are located in the left-hand sidebar, details about log events can be found in the middle section of the window, while the available actions are listed in the right-hand sidebar.

In the left pane, you can choose from all the event types. The top one is aimed for the administrative event.

Clicking on each one on the center pane, will provide you with general or detailed information about the event.

The next two categories from the left are the Windows logs and the Applications and services logs. The first refers, of course, exclusively to the OS and its built-in apps.

The action pane from the right offers you all the possible options to interact with the logs but the most important are the save and export options that are paramount to sharing the reports to specialized help.

The Windows Event Log Viewer offers reports about five log events:

  • Application events: reports about app/ program issues
  • Security events: reports about the results of security actions
  • Setup events: mainly refers to domain controllers
  • System events: these are reports sent by Windows system files about the issues encountered and are usually self-healing issues
  • Forwarded events: these are reports sent by other computers

Event Log Explorer

This event log viewer allows users to view, analyze and monitor events recorded in Windows’ event logs.

Event Log Explorer is better than Microsoft’s own Event Log Viewer, bringing more features to the table.

Thanks to this tool, users can analyze various event logs: security, application, system, setup, directory service, DNS, and more.

The tool can even access Windows event logs and event log files from remote servers and you can view more of them at one time in separate windows or in one big, merged window.

If it’s relevant, you can choose between legacy Windows NT API and modern Windows Event Log API to access the logs.

Event Log Explorer reads events into its own temporary storage for faster log analysis. Of course, you can choose between memory and disk storage.

The software also allows you to consolidate events in one single view to review it as a solid log. You can even save it as an EVT file.

Other features include:

  • Instant access to event logs – Event Log Explorer works with both local and remote event logs, as well as with event log files in EVT and EVTX format
  • Efficient filtering – filter by event descriptions using regular expressions, filter by security event parameters, or you can build complex filters and organize them into a filter library
  • Export events and report generator – export and print events

⇒ Get Event Log Explorer

MyEventViewer

MyEventViewer is another interesting, simpler alternative to Microsoft’s Event Log Viewer. This tool lets you watch multiple event logs in one list, together with event description and data.

Also, the event description and data are displayed in the main window, instead of opening a new one.

No installation process or additional DLL files are required to run this software, all you need to do is to launch the executable file.

With MyEventViewer, you can select multiple event items and save them to HTML/Text/XML files. Of course, there’s also the option to copy them to the clipboard and paste them afterward into and Excel document.

MyEventViewer’s mai window is composed by 2 panes. The top one shows you the list of all events and when you select one you will see the description in the lower pane window.

You can remove/add the logs that you want to view from the main window by using the Logs menu.

The software also has command-line commands for advanced users. The admins will be happy to use them for a more efficient process that implicates more computers.

Other features include:

  • It packs only the main features and options you need to monitor your system
  • The simplistic interface is very user-friendly
  • You can view the events from a remote computer
  • Certain events can be hidden from specific users
  • Events can be filtered using a series of criteria

⇒ Get MyEventViewer

FullEventLogView

This is NirSoft’s most recent event viewer, it was released on September 9, 2016. FullEventLogView is a simple tool for Windows 10 that displays the details of all Windows events in a table.

FullEventLogView is the upgraded version of MyEventViewer:

MyEventViewer is a very old tool […]. The old programming interface still works even on Windows 10, but it cannot access the new event logs added on Windows Vista and newer systems. […]

FullEventLogView uses the new programming interface, so it displays all events.

The tool allows you not only to view the events of your local computer but also the events of a remote computer on your network, and events stored in .evtx files.

It also allows you to export the events list to text/csv/tab-delimited/html/xml file from the GUI and from the command-line.

This program works on any version of Windows, including Windows Vista and up to Windows 10. Both 32-bit and 64-bit systems are supported.

⇒ Get FullEventLogView

SentinelAgent

SentinelAgent is a cloud-based Windows monitoring software. This tool registers, stores and analyzes event logs, performance metrics, and system inventory from any Windows PCs, tablets, and servers on your network.

SentinelAgent is available for home users, small and medium businesses and enterprise clients.

The service for home users notifies you when your devices are having problems, and help you identify the source of the problem as well. 

No configuration is necessary, as the tool is already pre-configured to monitor specific computer performance elements and alert you by email as soon as issues are detected.

If you opt for a professional version, you will need to install the agent on system you want to monitor.

Then, if those devices start having problems, you will get notified. You will also be able to access a log with 7 days of system data that is stored outside the PC that is acting up to get to the root of the issue.

Other features include:

  • 7 Days Data Retention (Rotating)
  • Monitor All Your Machines From 1 Account
  • Pre-Configured Notifications for CPU/Disk Errors
  • Pre-Configured Notifications for Event ID Errors
  • No Ads. No Bloat
  • Network Installation Ready
  • 2.7 Mb Disk Space Required

⇒ Get SentinelAgent

We hope this top Windows 10 event log viewers help you to choose the tool that best suits your monitoring needs.

If you’re interested in other options, you can also check our log monitoring software list for experienced admins.

Have you already tried out some of the event viewers listed in this article? Tell us more about your experience in the comment section below.

Download Kyocera Printer Drivers for Windows 10 + Install Steps

Windows Update usually automatically updates printer drivers. However, that won’t be the case if you’ve switched off Windows Update.

If that’s so, then your Kyocera printer driver might need updating. If your Kyocera printer isn’t printing correctly, updating an outdated driver could fix it.

This is how to install your Kyocera printer on Windows 10 and how to get the drivers for the device.

How can I update Kyocera printer drivers?

1. Update drivers from Device Manager

  1. You can update Kyocera printer drivers with Device Manager by pressing the Win key + X hotkey and selecting Device Manager from the menu.device manager
  2. Now click Printers, right-click the Kyocera printer. Select Update driver.
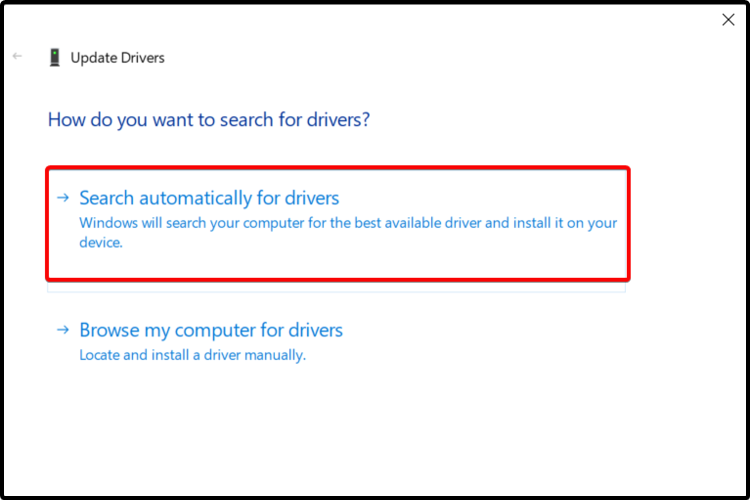
  3. Select the Search automatically for updated driver software option on the Update Driver Software window.
  4. Windows might then find a more updated Kyocera printer driver to download.

The Windows Device Manager lists devices and provides driver details for them so follow the steps above to update it.

You should also be able to get the latest available driver by using Windows Update. It’s not exactly an automatic approach, but it’s the simplest way to obtain missing drivers.

2. Update Kyocera Printer Drivers automatically

You can also update Kyocera printer drivers with the help of a professional driver updater tool.

Using a dedicated tool, you can automatically scan for out-of-date or missing Kyocera printer drivers in order to avoid serious malfunctions.

3. Manually updating Kyocera printer drivers

  1. You can save Kyocera drivers to Windows from the manufacturer’s support website.
  2. Click Download under your country or region.
  3. Then select Print from the Product Category drop-down menu.
  4. Next, click the Product drop-down menu and select your Kyocera printer model number from there.
  5. Press the Go button to open a list of drivers for the Kyocera printer.
  6. Then you can click a Windows 10 driver listed there to download it.
  7. Note that the U.S. drop-down menus on the site aren’t entirely the same as the other countries. In the U.S. Download Center, you select slightly more specific printer categories, Technical Resources from a Resource Category drop-down menu, and Print Drivers from a Sub-Category menu.
  8. Alternatively, you can also download drivers from driver database sites. For example, open the DriverGuide site that includes Kyocera printer drivers.
  9. Then you can click the Free Download button beside the required Kyocera printer driver to save it to Windows.

Or you can search for and download a Kyocera printer driver yourself. First, note down your exact Kyocera printer model number, which will be in its manual.

In addition, you’ll also need details for whether your Windows platform is 64 or 32-bit, which you can check by entering system into the Cortana search box and selecting to open the System tab.

We hope that our step-by-step guide helped you install the correct drivers for your Kyocera printer and now it’s functioning perfectly.

If this appeared a little too difficult, we have a more detailed article on how to update drivers in Windows 10.

For any other suggestions or comments, don’t forget to drop us a line in the comments section below and tell us all about it.

JPG File Not Supported on Windows 10: Why and How to Fix It?

Have you ever taken some really great photos and stored them on your computer, only for them not to open when you try to view them?

This can be very frustrating especially if you want to make some edits or want to check them out before sharing them with friends or colleagues on social networks.

Why is my computer saying it doesn’t support JPG?

When Windows 10 won’t open JPG files, it could be either due to corrupted files or missing updates on the computer.

One of the fastest things to try if your computer’s Windows 10 won’t open JPG files is installing any pending and latest Windows Updates, and also running the apps troubleshooter and check if it helps with the issue.

Or using a third-party app. Should these not yield the desired results, try other solutions listed below.

How do I open a JPG that is not supported on Windows 10?

1. Set a default program to open JPG files

  1. Right click Start and select Control Panel.
    Windows 10 won't open jpg files
  2. Click Programs.
  3. Select Default Programs.
  4. Choose Associate a file type or protocol with a program. You can have all .jpg image files open using a specific program, and .bmp open using another.
  5. In the list of file extensions, locate Jpeg files. Ensure that you have programs associated with it like Windows photo gallery.
  6. If you want to change the program associated with JPG files, click Change Program, and then OK.
Windows 10 won't open jpg files

You can’t open Control Panel on Windows 10? Take a look at this step-by-step guide to find a solution.

2. Download third-party viewers

You can try installing a third-party photo viewer if your default one doesn’t work, and then associate this with your image formats like JPG, PNG, etc. Adobe Photoshop is one of the best options for that.

Photoshop supports all major compression formats like Large Document Format (PSB), Cineon, DICOM, IFF, JPEG, Photoshop PDF, Photoshop Raw, PNG, Portable Bit Map, and TIFF.

Use Adobe Photoshop to easily view, edit, and convert multiple files with the built-in Image Processor. You can even convert files to JPEG, PSD, and TIFF formats simultaneously.

To optimize and save JPEG images for use on the web, simply use the Save As menu option from Choose File, then select JPEG as the file format type for the image.

Let’s quickly look at its key features:

  • Lens Blur and Improved Content-Aware Fill
  • Object Selection Tool (for fast and precise selections)
  • More control in the Warp tool to add control points anywhere
  • More controls in a central location plus convenient Quick Actions
  • Fresh gradients, patterns, swatches, layers, styles, and shapes

Adobe Photoshop

Adobe Photoshop lets you easily view, edit, and convert multiple files such as JPEG, PSD, and TIFF formats simultaneously.
Free trial Visit website

3. Run a DISM ScanHealth

  1. Click Start, and type cmd in the search field box.
  2. Click Command Prompt in the search results list.
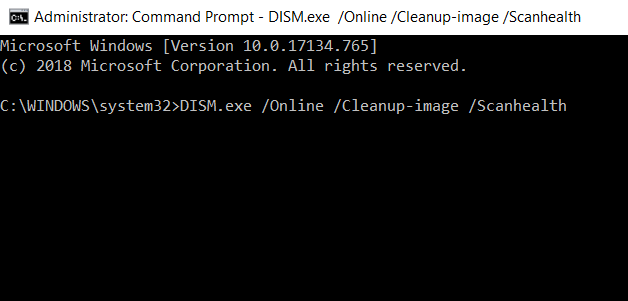
  3. Type the following command to scan for missing components: Dism /Online /Cleanup-Image /ScanHealth
  4. Type the following command to scan and correct any causes of the Windows 10 won’t open JPG files issue: Dism /Online /Cleanup-Image /RestoreHealth
  5. Press Enter.

Once the repair is complete, reboot your computer and check if the problem persists, after which you can run an SFC scan as described in the next solution.

The DISM ScanHealth scans the image for any component store corruption while RestoreHealth performs repair operation automatically, then records those to the log file. Perform both scans to resolve the issue.

Note: The DISM tool usually takes 15 minutes or longer to complete, so do not cancel when it is running.

If you’re having trouble accessing Command Prompt as an admin, then you better take a closer look on this guide.

4. Run an SFC scan

  1. Click Start, and type cmd in the search field box.
  2. Right-click Command Prompt in the search results list, and select Run as Administrator.
  3. Type sfc/scannow, and press Enter.
  4. Restart your PC, and check if the JPG files open.

This scan checks whether there are broken Windows components in your computer when Windows 10 won’t open JPG files.

If it still does not work, then try the next solution.

5. Install and update drivers in Windows 10

Most programs created for earlier versions of Windows may run poorly, or not at all, so you can install and update drivers in Windows 10 and see if it helps.

Additionally, running the program compatibility troubleshooter will detect and fix some of these issues. If the Troubleshooter stops before completing the process, fix it with the help of this complete guide.

6. Delete outdated registry keys

  1. Log in as administrator.
  2. Right-click Start, and select Run.
  3. Type regedit, and press Enter.
  4. Go to the left pane and find the following directory: HKEY_CURRENT_USERSoftwareClassesLocalSettingsSoftwareMicrosoftWindowsCurrentVersionAppModelRepositoryFamiliesMicrosoft.Windows.Photos_8wekyb3d8bbwe
  5. You’ll see several entries, each has a version number. If it has 8 Windows Photos app entries, then the outdated registry keys were left after the update, so you have to remove them (some have two or four).
  6. Select the old entry, right-click it, then select Permissions.
  7. In the Security window click Advanced.
  8. Pick your username, then click OK.
  9. Right-click on the old entry and select Delete.
  10. Repeat these steps with each outdated entry and then exit and restart your PC.

Sometimes Windows 10 won’t open JPG files because registry entries are outdated, but you can restore it by modifying the registry and following the above steps carefully.

Can’t access the Registry Editor? Things aren’t as scary as they seem. Check out this guide and solve the issue quickly.

Also, if this is too much work, and you’re looking for some software to clean your registry, here are the best registry cleaners available right now.

Have any of these solutions helped you fix the Windows 10 won’t open JPG files problem? Let us know by sharing your comments in the section below.

Leave there any other suggestions or questions, as well.

How to Unmap a Network Drive in Windows 10

If you’re wondering how to delete mapped network drives, or you have tried and they’re not going away, read on for solutions. Mapped drives are mounted drives on your computer, usually represented by a name, letter (such as A, B, and so on), or number.

Drive mapping is the process used by operating systems so as to associate or connect a local drive letter, with an allocated shared storage area (shared directory) or folder, to a File/network server over a network.

Once a drive is mapped (or mounted), you’ll be able to read or write files from the shared storage or shared resource, accessing it in the same way you would any other drive located on your computer. Several computers can map their drives to the shared storage area (shared resource) and benefit from the networked space.

If you regularly or frequently need to access folders or files held on a server, without having to check your computer, cloud drive, or browsing the network, mapping a drive will save you more time and hassles.

Mapped drives are ideal particularly for organizations or institutions that hold documents on servers.

How can I delete mapped network drives on Windows 10?

  1. Use File Explorer to delete mapped network drives
  2. Use Command Prompt to delete mapped network drives
  3. Use dedicated uninstaller software

1. Use File Explorer to delete mapped network drives

  1. Right-click Start then select File Explorer or press the Windows button + E.
  2. Choose Computer (or This PC) on the left panel.
  3. Look at the Network locations for mapped drives.
  4. Right-click on the mapped network drive you want to remove/delete
  5. If your mapped drive is on a network location, right-click and select Disconnect. If it is on a network folder or FTP site, right-click and select Delete.

Once you do the above, the mapped network drives should disappear, or stop showing on your computer. Most users don’t know what to do when the Windows key stops working. Check out this guide and be a step ahead. If you’re having any file explorer issues, check the link below.

Note: to restore mapped network drives, you have to create them all over again.

2. Use Command Prompt to delete mapped network drives

  1. Right-click Start button.
  2. Select Command Prompt.

3. Type: net use drive letter/delete (for example, if you have a drive mapping using letter G, type net use G:/delete).

4. Press Enter.

Once you do the above, you will receive a confirmation that the mapped network drive has been deleted successfully. The mapped network drive will also disappear from your Windows/File Explorer immediately.

To learn more about all available options for creating and removing network drives, check our detailed guide on net use commands for Windows, including advanced syntax and automation examples.

Note: this will only work for mapped drives with an assigned letter. If you have a network location mapping, like FTP or web servers, this solution will not work.

What to do if mapped network drives won’t disappear

In case you find that there are mapped network drives and locations that persist, or remain even after trying the solutions above, here two possible solutions:

  1.  Press F5 or right open File Explorer, then right-click anywhere and choose Refresh.
  2. Reboot your computer.

3. Use dedicated uninstaller software

Revo Uninstaller Pro is a software that does what the default Windows uninstaller does, but better. It will permanently delete files, uninstall any program, and empty the recycle bin as well.

The software comes with neat new features such as command-line uninstall support, scanning your device for random leftover files, and an incorporated database containing all the programs available to you.

In addition, the program has a Quick Uninstall feature, which allows you to queue multiple uninstallations in a row for the program to manage, removing the tedious manual process that you usually have to do. Lastly, the software will alert you if there are any files left after you uninstall something, and it will clean them for you if you want to.

Note: If you’re unsure whether your organization has mapped drives, check with your network administrator whether these are already set up on your computer. Alternatively, you can do the following:

  1. Press the Windows button + E
  2. Choose Computer (or This PC) on the left pane
  3. Look at the Network locations for mapped drives

⇒ Get Revo Uninstaller Pro

We hope the solutions from this article will resolve your issues regarding problematic mapping network drivers.

In case you need further assistance, share with us in the comments section below. Leave any other questions you may have there, as well.

Guitar Tab Software: 5 Best to Use in 2026

Software solutions to create guitar tablature should be present on every music enthusiast’s computer. Such tools usually come with the ability to create guitar music sheets and the most commonly used symbols in tablature.

There are lots of programs that allow you to create guitar tabs and we gathered five of the best ones in order to make your choice easier. Check them all out and make an informed decision.

Top 5 software to create guitar tabs

Power Tab Editor

Power Tab Editor is a tablature authoring program for any system running Windows.

Using it, you will be able to create guitar sheet music aka guitar tablature or bass tablature.

Here are the key features of Power Tab Editor:

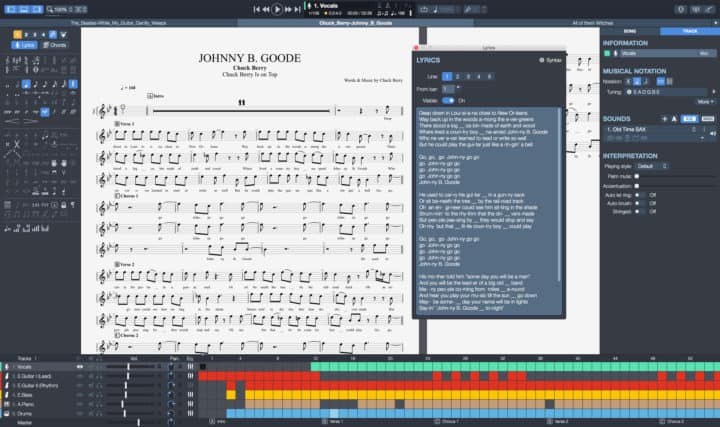
  • Provides chord names, chord diagrams, bends, rhythm slashes, harmonics and more
  • Useful for beginners and aspiring musicians who want to learn how to play guitar
  • Can be used with both electric and acoustic guitar players
  • Creates reads and plays guitar and bass tablature in the .ptb format
  • Excellent for beginners and experienced guitarists to transcribe their music and guitar lessons

→ Download Power Tab Editor

LilyPond

LilyPond is another useful software that provides music notation for everyone. This music engraving tool is devoted to creating the highest-quality sheet music.

Here are the key features of LilyPond:

  • Brings the aesthetics of traditionally engraved music to computer printouts
  • Perfect for users who want to learn how to play the guitar
  • Free software, part of the GNU Project
  • Great for classical music, modern music, complex notation, vocal music, lead sheets, orchestral projects, educational materials, and customized outputs

→ Download LilyPond

TablEdit

TablEdit is a tool for creating, editing, printing, and listening to tablature and sheet music for guitar and other stringent, fretted instruments.

Here are the key features of TablEdit:

  • Designed by guitarists for guitarists
  • Supports both tablature and standard notation, featuring instant conversion from one format to another
  • A tabbed interface allows the opening of multiple TablEdit files at the same time
  • Supports English, German, French, Japanese, and Spanish as interface languages
  • Provides virtually unlimited language support, with 17 available language patches
  • Edit and print songs in multitrack mode
  • Save an image of the printed output in a variety of graphics formats
  • More features like effects, alternate tuning, note duration control, custom chord diagrams, and lyrics management

TablEdit is distinguished by its minimal-sized and optimized code for loading and running.

→ Download TablEdit

Guitar Pro

Guitar Pro is ideal for creating, playing, and sharing your tabs. The latest version comes with a wide range of features and enhancements.

Here are the key features of Guitar Pro:

  • Edit your music scores and tablature for bass, guitar, and ukulele
  • Create backing tracks for drums and piano
  • User-friendly for musicians who want to compose music, improve their skills, or just play along
  • Redesigned interface and better rendering of your scores
  • New tools and audio improvements

→ Download Guitar Pro

Aria Maestosa

Aria Maestosa is an open-source midi sequencer/editor. This tool comes with a few interesting and useful features for musicians and beginners.

Here are the key features of Aria Maestosa:

  • Compose, edit and play MIDI files with just a few clicks
  • Easy interface, even for PC users with no previous experience in software tools for writing guitar tabs
  • The UI comes with a score, guitar, keyboard, controller, and drum views
  • Supports multiple languages, including Spanish, French, Japanese, Chinese, and Russian

→ Download Aria Maestosa

Here’s where our list of the best five tools for creating guitar tablature comes to an end. Make sure to check out all these tools’ functionalities and features before you make your final pick. Have fun!

How to Play Animal Crossing on PC Without Switch: Easy Guide

Unfortunately, the problem with Animal Crossing is that for the moment, it’s a Nintendo Switch exclusive. The big question remains, though: is Animal Crossing playable on PC?

In other words, can you play Animal Crossing on a PC without a switch? While it does not have an official PC-dedicated edition, nor can you play Animal Crossing on a browser, you can still find a way to bring it to Windows.

? If you want to play Animal Crossing for PC without Switch, you need to install the Ryujinx emulator on Windows.

How to play Animal Crossing on PC without a Switch

Note icon NOTE
Before proceeding with the guide below, you will need to already have a copy of Animal Crossing: New Horizons installed on a Nintendo Switch console.
  1. Download the OpenAL client here.
    • Once the client is downloaded, extract and install it on your PC.
  2. Download the Ryujinx from here and extract it on your PC.
  3. Open the newly extracted folder and double-click Ryujinx.exe
    • This will get the emulator running

Now that the Emulator is running, it is time to add Animal crossing to its library:

  1. Press File and select the Open Ryujinx folder.
  2. Open the System Folder.
  3. Drag and drop the Prod.keys file inside
    • The Prod.keys are copyright files that you need to dump in your PC from within a Nintendo Switch
  4. Close and re-open the emulator.
  5. Go to Tools and select Install Firmware.
  6. Choose Install a firmware from an XCI or ZIP.
  7. Select any XCI that you had in your Nintendo Switch and click Open.
    • You should receive a prompt telling you that you need to install a firmware update
    • Any version is good as long as it is above 5.1.0
  8. Go to Options > Settings.
  9. Select your Timezone, System Region and Language.

Now you will need to add your Game directory to the emulator:

  1. Select Browse.
  2. Navigate to where your Nintendo Switch games have been dumped (backed up).
  3. Click Save, and now all your games should be displayed correctly within your emulator.
  4. Close the emulator.
  5. Make sure your game controller is connected to your PC.
  6. Double-click the Animal Crossing: New Horizons icon to launch the game.

Due to its popularity, the game has also managed to find its way to Android emulators. Bluestacks is
another option you can use to play Animal Crossing New Horizons on PC.

Nevertheless, we advise you to only use this option as a plan B since Bluestacks & Animal Crossing incompatibilities often hinder the experience.

If you wish the explore more emulators for PC – including Nintendo ones, don’t be shy
to take a look at RetroArch as well.

Finally, the game itself is not exempt from errors even when played on a Nintendo Switch, and you
can occasionally stumble across Internet connection issues in Animal Crossing.

By following these steps, you should now be able to play Animal Crossing New Horizons on your PC without any restrictions.

If you liked our guide, leave us a message in the comments section below.

What are Vulkan Runtime Libraries? How Can I Remove it?

Many Windows 10 users panic when they detect the presence of Vulkan Run Time Libraries on their computers. The program appears under Programs and Features and is published by LunarG, Inc.

You need to know that the runtime library is a collection of software programs and the goal is to provide functions or services. Usually, you’ll find there are many programs and functions that are commonly used by all kinds of programs.

In a nutshell, the runtime library provides add-on resources to a primary program, thus helping it. 

When Vulkan installs on the user’s computer, there is no pop-up window to inform them about its presence. As a result, when they see Vulkan Runtime Libraries on their list of programs, they fear it’s malicious software.

I noticed an entry in my Programs & Features that I did not intentionally invite. The install date is the same day as the latest Microsoft Visual C+, and the same day as the last NVidia driver updates, March 12th – 2016. The program is titled “Vulcan Run Time Libraries 1.0.3.0” and is published by “LunarG, Inc.”  Does anyone know what is its’ purpose, how it would have managed to get on my PC, and is it a security issue?

Just to get this out of the way from the beginning, Vulkan Run Time Libraries is not a virus and does not affect your computer negatively in any way.

What are Vulkan Runtime Libraries?

Rest assured, Vulkan is not malware. There’s no need to delete it. Actually, Vulkan is a relatively new graphics standard, just like OpenGL and DirectX.

It provides high-efficiency, cross-platform access to modern GPUs used in a wide variety of devices from PCs and consoles, to mobile phones. Vulkan helps with lowering CPU usage is also better able to distribute work amongst multiple CPU cores.

If you are using Nvidia drivers it’s very likely that you already have Vulkan Run Time Libraries on your computer. Because more often than not it’ll be installed with your graphics card driver, you won’t notice any pop-up or dedicated install window.

If you’re a gamer, you most certainly have Vulkan on your PC, but if you’re not, it’s possible that you won’t find it. Keep in mind that if you uninstall Vulkan, it’s very hard to reinstall it again because it comes with the graphics drivers and you will need those first.  

How to remove Vulkan Runtime Libraries?

As stated above, we strongly recommend that you keep this tool on your computer. However, if you still want to delete Vulkan Runtime Libraries, here are the steps to follow:

  1. Go to Control Panel > select Uninstall a programuninstall a program
  2. Scroll down to Vulkan Runtime Libraries > select it > click Uninstall

Also, you can do it this way:

  1. Press Windows Key + R to open a Run window. run blank
  2. In the run box type appwiz.cpl and then hit OK.
  3. In the list that appears, find Vulkan Run Time Libraries. Right-click on it and select Uninstall/Change.
  4. Follow the steps and finish the uninstall process.

As we explained, Vulkan Runtime Libraries is not a virus and doesn’t affect you in any way. It’s best to leave it there, but if you really want to uninstall it, follow the steps above.

Don’t forget to tell us in the comments section below if you have Vulkan on your computer and if it bothers you or not. And if you had any issues regarding it, share how you solved them.

6 Easy Ways to Combine MP3 Files into One

Do you have lots of separate music files saved in a Windows 10 folder? If so, it would be better to combine audio files together so that you can play through multiple music tracks included within a single file.

Then you won’t need to manually select to play each song file separately within your media player. If you ever wondered how to combine audio files, then this article will show you all the best options out there.

How do I combine audio MP3 files into one?

1. Use Adobe Audition

The most obvious and simplest way to combine multiple audio files is through the use of dedicated software that can do just that.

These usually have a very straightforward interface, and will get the job done faster than you ever could manually.

That being said, one great tool that you should take into consideration is Adobe Audition, a digital audio workstation that is a world standard in audio editing.

Just download the free version of Adobe Audition, follow the installation guide and launch the software. Feel free to load all the songs that you want and combine the mp3 files to create a wonderful instrumental piece.

You can place your files one after another on a single track and mix that down, or you can use the Waveform function. By doing this, each track will be put at the end of the previous one, and all you have to do then is save the resultant file.

Adobe Audition

Get your hands on this advanced audio editing tool and create instrumentals like a true pro!
Free Trial Visit Website

2. Combine audio files with the Command Prompt

  1. Right-click the Start button to open the Win + X menu.
  2. Select Command Prompt (Admin) to open the window shown below.
  3. Open the folder that includes the MP3 files you need to merge in the Command Prompt.
  4. You can do that by entering cd in the Prompt followed by the folder path.
  5. Enter this command in the Prompt: /copy /b audio file1.mp3 + audio file2.mp3 audio file3.mp3.

Of course, you’ll need to change the file names there to match your actual audio files and after this all that’s left to do is press the Enter key. That will combine the two MP3s in the copy /b command into one new output file.

3. Use Audio Mix

Combine audio file with Audio Mix software

Audio Mix is a Windows tool designed for all digital music lovers who are looking for a quick and easy way to combine multiple songs.

Thanks to Audio Mix you can combine, split and/or overlay audio tracks with just one click. The combination of the songs is precise and professional thanks to the crossfade effect.

The crossfade is a feature that enables you to join songs so that they flow one into another seamlessly.

With this versatile tool, you can convert mp3 files to ogg, wav, mp4, m4a, and aac format or split songs and cut unwanted parts of the audio files with the Audio Splitter feature.

Feel free to overlay two or more audio tracks (eg. voice and music) with the Overlapping function and improve the quality of your songs by modifying the audio equalizer (bass and treble).

One very interesting and useful characteristic is the MP3 Vocal Remover which allows you to remove the singer’s voice on the music and create your own lyrics around the instrumental.

You also have a video-to-audio converter function that makes it possible to extract audio files from video (avi, mp4, WMV, MOV,).

⇒ Get Audio Mix

4. Use Magix Music Maker

Magic Music Maker is a popular audio editor that allows you to combine over 4000 sounds and loops with other digital instruments. You can create up-tempo beats or add a modern edge to a classical melodic piece.

The recording function allows you to add your own vocals all you need to do is plug in your microphone and start recording your own song. With Magix Music Maker you can also record your own live electric guitar solo.

This software incorporates tools from every musical genre Rock Drums, Bass Machine, Concert Guitar, Drum Engine, Orchestral Ensemble, and Cinematic Synth.

You have a variety of sound effects in order to make your music professional and at the same time innovative so it can stand out and put you on the map as an urban beat maker or musical producer.

Let your creativity flow, combining vocal or sound loops, and add effects such as chorus, wah-wah or flange. You can also recreate an authentic acoustic experience thanks to 5.1 surround sound.

Magix Music Maker

Mix over 4000 sounds and loops and record vocals to create your favorite style of music with this advanced tool!
Free trial Visit website

5. Use Audio Joiner

  1. Open the Audio Joiner web app in your browser.
  2. Click the Add tracks button to select the music files to merge.
  3. The web app then displays the selected tracks as in the snapshot directly below.
  4. You can adjust the playback order of the tracks by clicking the up or down arrows.
  5. The blue sliders on the tracks configure the playback interval when one tracks stops and the other starts playing.
  6. That enables you to cut out some of a song if you drag the blue slider away from the far right of a track.
  7. Audio Joiner also includes Crossfade and Fade-out transition effect buttons on the right of tracks.
  8. You can click those buttons to toggle their effects off or on.
  9. Click the Join button to merge the selected tracks together. Note that it does take a while for the app to merge the files together.
  10. Click Download to save the output audio file to a folder.

⇒ Get Audio Joiner

6. Use Audacity

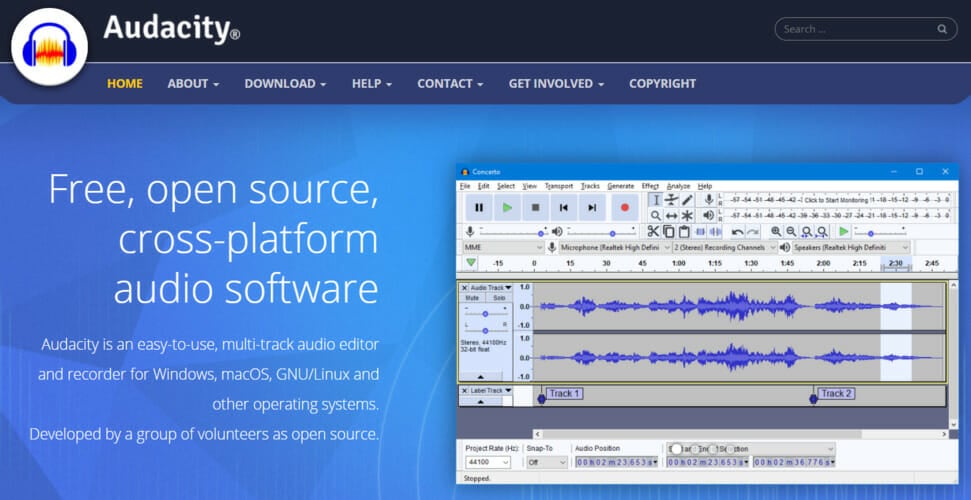
  1. Open the Audacity software window.
  2. Open the first audio file by clicking File, and then Open.
  3. Click Import Audio on the Project menu to open the second audio file in Audacity.
  4. Now you should see two waveforms for the selected audio files in Audacity.
  5. Press the Time Shift Tool button (with double arrows on it) to open the Time Shift Tool.
  6. Place the Time Shift Tool cursor at the beginning of the second audio track you want the file to play.
  7. Click and drag the Time Shift Tool cursor to the right until it gets to the end of the first track’s waveform.
  8. The second track’s waveform should start where the first track’s waveform finishes.
  9. Click File and select Export as WAV to export the merged music file.

Audacity is among the best sound editor software for Windows 10. You can also merge separate audio files with Audacity by overlapping two alternative music tracks. Follow the steps below to combine music tracks with that software.

⇒ Get Audacity

So you can combine mp3 files with the Command Prompt, Audacity, MP3 Merger software, and Audio Joiner web app.

Merge MP3, MP3 Toolkit and Free MP3 Cutter Joiner are three other software tools you can join sound files with. By merging audio files, you can bring your music collection together.

We’d like to hear more from you on this subject so feel free to drop us a comment in the comment section below.

How to Make BlueStacks Faster with Settings for Low End PCs

BlueStacks is an emulator that enables its users to play Android games within Windows.

The software’s publisher boasts on its website that the emulator is the fastest mobile gaming platform on Earth. BlueStacks 4 is eight times faster than the previous version and runs games six times faster than a Samsung Galaxy S9.

Yet, some users have still stated on forums that BlueStacks is laggy and runs slow on their desktops or laptops.

One user stated:

When I tried to run a game such as Candy Crush Saga (in BlueStacks) it’s almost unplayable due to the lags (after pressing Start reaction is after 2-3 sec).

 This is how users can speed up the BlueStacks emulator in Windows 10.

How can I fix BlueStacks slowdown issues on PC?

1. Adjust BlueStacks’ display settings

  1. Click the Settings button in BlueStacks to open a menu.
  2. Select Settings on the menu to open a Settings window.
  3. Then click the Display tab if it’s not already selected.
  4. Select a lower resolution setting. For example, users could select to reduce the software’s resolution from 1,920 x 1,080 to 1,600 x 900.
  5. In addition, select the Low (1600DPI) option on the Display tab.

Display settings usually have a big impact on gameplay speed for Windows games.

Adjusting the graphical settings to lower the resolution and DPI often speeds up games as that frees up system resources.

As such, adjusting the resolution and DPI, in the same way, might also speed up Android games played with the BlueStacks emulator. 

2. Update BlueStacks

BlueStacks 4 is the fastest version of the emulator. As such, games will probably be somewhat faster and more responsive in the latest BlueStacks than previous versions.

So updating to the latest BS 4 is the first thing users utilizing older versions of the software should do.

Those users with BlueStacks version 3.52.66.1905 or higher can update the emulator without losing game data and in-app purchases by clicking the Download BlueStacks button on the software’s webpage.

However, those users utilizing an older BS version less than 3.7.44.1625 cannot directly update the software.

Thus, some users might need to uninstall BlueStacks and then download and install the latest BS 4 from the emulator’s website.

3. Update the graphics card driver

The latest graphics card drivers can notably enhance Windows gaming. Of course, that is primarily in respect of visual quality; but new graphics card drivers can also optimize gaming in other ways.

Windows Update will automatically update graphics card drivers if configured to do so. However, Windows Update doesn’t always keep up with the very latest graphics card driver updates.

So it might be worth checking if there’s a more updated driver for your video card.

Driver updater software provides the best way to quickly check for and update graphics card drivers.

After installation, this kind of tool will immediately scan to check if any drivers need updating. Then you can update the drivers directly with the software.

4. Allocate more RAM to BlueStacks

  1. Open the BlueStacks emulator.
  2. Click the Settings button at the top right of BlueStacks to open a menu.
  3. Select Settings to open a window that includes further options for the software.
  4. Click the Engine tab on the left of the Settings window.
  5. Then, drag the Memory bar to the right to increase the amount of RAM allocated to BlueStacks. 
  6. You can also select more CPU cores for BlueStacks. (Select the highest number from the CPU Cores drop-down menu.)

Note that BlueStacks needs at least two gigabytes of RAM. 

More recent BS versions include game engine settings with which users can maximize the amount of RAM, and other system resources, for the Android emulator.

5. Close Third-Party Software

  1. Right-click the taskbar to open its context menu, and select the Task Manager option.
  2. Then click the Processes tab.
  3. Select software (except BlueStacks) listed under apps, and press the End task button.
  4. Background processes also include some background software. So have a look for and close any non-essential third-party software listed there.

Note that third-party software services can also hog system resources. You can disable third-party services with the System Configuration utility. This is how users can stop software services.

  1. Press the Windows key + R keyboard shortcut.
  2. Enter msconfig in Run, and click the OK button.
  3. Select the Services tab on the System Configuration window.
  4. Select the Hide all Microsoft services option.
  5. Then deselect some of the third-party services listed.
  6. Click the Apply and OK buttons.
  7. Select the Restart option to restart Windows.

Closing programs will have a similar effect to increasing RAM allocation as that will also make more system resources available for BlueStacks.

Remember that there might be some background software running in Windows even when there aren’t any program windows open on the taskbar.

6. Turn off antivirus utilities

Third-party antivirus software features can also have a notable impact on the performance, or speed, of BlueStacks’ Android games.

So temporarily turning those features off, by disabling the antivirus packages, might speed up BlueStacks.

You can temporarily turn off some antivirus software by right-clicking their system tray icons and selecting a disable or turn-off option. Alternatively, select a disable option on the settings tab in the antivirus utility’s primary window.

Some antivirus software incorporates hardware-assisted virtualization, which can have a notable impact on the BlueStacks emulator.

Proceed to deselect the Enable hardware-assisted virtualization option if there is one within your antivirus software.

These are a few resolutions that might reduce gameplay lag for games played in BlueStacks. Hopefully, Android games will feel somewhat faster in Windows 10 after applying them.

If you have further suggestions on this topic, share them with us using the comments section below.

Note that some of the above resolutions might also fix missing DLL error messages for other files.

[wl_navigator]

FIX: There was a problem sending command to the program

The error There was a problem sending the command to the program is one of the most common errors encountered by Windows users.

Usually, this error message is associated with the Office Package and occurs when users try to open Excel, Word, PowerPoint, or Access documents created in older Office versions.

This annoying error affects all Windows versions and has been reported by several Windows 10 users.

Windows sends Dynamic Data Exchange commands (DDE) to Microsoft Office apps, but the OS fails to connect with the application, which triggers this error code.

OS Windows 10 [Current], Office 2013 Standard 15.0.4569.1506
When my user opens a spreadsheet from within Excel, they open normally. When my user opens a spreadsheet from the Desktop or from One Drive, an error stating that “There was a problem sending the command to the program.” appears. […] The only posts we could find address this issue for OSes leading up to but not including Windows 10.

There was a problem sending the command to the program error usually affects Office applications, but sometimes it can appear while using other applications.

How can I fix the commands problem in Office?

1. Disable Dynamic Data Exchange

  1. Open the Microsoft Office app which triggers this error > go to Options.
  2. Click on the File menu > select Options.
  3. Go to the Advanced tab > scroll down to the General section > uncheck Ignore other applications that use Dynamic Data Exchange (DDE). If this option is already unchecked, you should first enable it, restart the Office program, and then disable the option.
    There was a problem sending the command to the program Word 2016
  4. Save the changes and restart the Office program.

According to users, There was a problem sending the command to the program error message can appear due to Dynamic Data Exchange feature in Microsoft Office.

According to users, you can completely fix this problem simply by disabling this option in Microsoft Office. To do that, just follow these steps:

2. Disable the option Run as administrator

  1. Go to the Start Menu > type the name of the Office program causing this error.
  2. Right-click on it > select Properties. If the Properties option is not available > select Open the file location > in the new window, click right-click on the Office program > select Properties.
    There was a problem sending the command to the program AutoCad
  3. Go to the Shortcut tab > Advanced > uncheck the option Run this program as administrator.
  4. Apply the changes.

Sometimes certain applications won’t work unless you start them with administrative privileges.

However, administrative privileges can sometimes interfere with the application and cause There was a problem sending the command to the program error message to appear.

Many users managed to fix this problem simply by disabling Run as administrator option for the problematic app. To do that, you just need to follow the above steps.

3. Repair Office

  1. Type Programs and Features in the search box > hit Enter.
  2. Click on the Office program causing the error or on the entire Office Pack > select Change.
    There was a problem sending the command to the program Excel 2016
  3. Click on Repair > click on the Continue button.

According to users, sometimes you might get There was a problem sending the command to the program message because your Office installation is damaged or corrupted.

To fix this problem, it’s advised to repair your Office installation and check if that helps. Repairing the installation is rather simple, and you can do it by following the above procedure.

If the repair doesn’t solve the problem, you might want to consider reinstalling Office. There are several ways to do that, but the best way is to use uninstaller software.

If you’re not familiar with uninstaller software, these tools are designed to completely remove any application from your PC along with all of its files and registry entries.

As a result, the uninstaller software will completely remove any application from your PC and ensure that any leftover files don’t interfere with your system.

Once you remove Office using one of these tools, reinstall it and the problem should be permanently fixed.

4. Disable your antivirus software

If you’re having problems with There was a problem sending the command to the program error message, the cause might be your antivirus software.

To fix the problem, it’s advised to check your antivirus settings and disable certain features. Users reported issues with Symantec Endpoint Security, but after disabling certain features, the problem was resolved.

If that doesn’t work, you might have to completely disable your antivirus to solve this issue. As a last resort, you might even have to remove your antivirus entirely to fix this problem.

If you’re a Norton user, we’ve got a dedicated guide on how to completely remove it from your PC. There’s a similar guide for McAfee users, as well.

If removing the antivirus solves the issue, you should consider switching to different antivirus software.

There are several qualitative Windows 10 compatible antivirus software on the market that cater to all budgets and needs.

5. Turn off add-ins

  1. Launch the Office program causing the error > go to the File menu > click on Options > click on Add-Ins.In the
  2. Manage list at the bottom of the screen > click on COM Add-Ins > click on Go.
    There was a problem sending the command to the window
  3. Clear one of the add-ins > click OK.
  4. Restart the Office program. If the issue persists, repeat the steps and select a different add-in in step 3. Clear the add-ins one at a time.

According to users, sometimes Office add-ins can cause this issue to appear. Add-ins can bring new features to Office, but sometimes they can cause issues such as this one to appear.

6. Disable hardware acceleration

  1. Go to the File tab > click on Options.
  2. In the new dialog box, click on Advanced > select Disable hardware graphics acceleration > click OK.
    There was a problem sending the command to the program Word 2013

Now, have in mind that, once you disable hardware acceleration, your performance might drop a bit, but you won’t see the error anymore.

Many applications support hardware acceleration features that bring better performance. However, sometimes this feature can lead to There was a problem sending the command to the program error.

To fix this problem, you need to open the problematic application and disable the hardware acceleration feature. To do that, just follow the previous steps.

7. Make similar registry keys agree

  1. Launch the Registry Editor > go to HKEY_CLASSES_ROOT<ap>.12shellOpen<app_specific_key&gt
    There was a problem sending the command to the program Qlikview
  2. Rename the ddeexec key to ddeexec.old, if the key is available.
  3. Go back to the command key and change it to use the “%1” /ou “%u” after the fully-qualified application pathname.

Example: HKEY_CLASSES_ROOTExcel.Sheet.12shellOpen

HKEY_CLASSES_ROOTExcel.Sheet.12shellOpencommand] set to [HKEY_CLASSES_ROOTExcel.Sheet.12shellOpencommand]
@="C:Program FilesMicrosoft OfficeRootOffice16EXCEL.EXE "%1" /ou "%u""

The default key is indicated by the “@”.

According to users, sometimes There was a problem sending the command to the program error can appear due to your registry. Sometimes certain values can interfere with applications and lead to this error.

To fix the problem, you need to modify your registry by doing the following:

If you’re having problems editing your registry on Windows 10, take a look at this simple guide that will help you deal with them.

8. Remove Windows Compatibility Package

In some cases, There was a problem sending the command to the program error can appear if you have any leftover components from the previous versions of Office.

According to users, the Windows Compatibility Package was the reason for the problem.

This tool is associated with previous versions of Office, and if you have it, be sure to remove it in order to permanently solve this issue.

9. Remove the problematic software

According to users, applications such as Tuneup Utilities can sometimes cause this problem to appear. Several users reported that Tuneup Utilities and similar types of software caused this problem on their PC.

If you have any of these applications installed, be sure to remove it and check if that solves the problem.

We hope one of these solutions helped you to fix the error There was a problem sending the command to the program.

As always, in case you’ve come across another workaround that we didn’t list in this article, you can share your experience in the comments section below.

Speaking of similar error messages, users reported the following problems as well:

  • There was a problem sending the command to the program Excel 2007 – You may also successfully apply our above tips whenever facing this Excel error.
  • There was a problem sending the command to the program Word 2016, 2013, 2010 – This issue can appear in Word, and if you encounter it, be sure to disable the Dynamic Data Exchange feature.
  • There was a problem sending the command to the program AutoCAD, Qlikview, OneDrive – This error can also affect other applications. If that happens, make sure that you’re not running the applications as an administrator.
  • Office Error: There was a problem sending the command to the program Excel 2016, 2013, 2010 – Many users reported this error message in Excel. If you encounter this problem in Excel, be sure to disable the hardware acceleration feature and check if that solves the issue.
  • There was a problem sending the command to the window, Internet Explorer – Sometimes this error can appear with other applications. If that happens, be sure to remove any applications that might interfere with your system. In addition, you might want to try disabling your antivirus software.

5 Solutions to Fix Mds_stores High CPU Usage on Mac

Apple is popular for offering great products because both the hardware and software are exceptionally integrated to complement one another, unlike other computers. The mds_stores high CPU usage is due to a malfunction.

After all, they are machines that use silicon and software, and any software can experience bugs. And most users have recently started reporting that mds_stores is consuming a lot of CPU power. If you don’t know what MDS is, its full form is MetaData Server, and it is a part of Spotlight.

Keep reading to find out how to disable mds_stores and stop it from consuming more CPU power in the activity monitor.

What causes mds_stores high CPU usage?

MDS stands for Metadata Server, and it kicks in high CPU usage only when there are significant changes in the system such as a complete macOS reinstall.

However, there are multiple other reasons why you will come across mds_stores high CPU usage issue, which are listed below:

  • Your Mac is infected with a virus: Viruses can trigger multiple programs on your PC causing high CPU usage, out of the blue.
  • App modifying the contents: If you have recently installed an app, it might be infected and modifying the contents of important system folders.
  • You have connected multiple HDDs: If you have connected multiple external HDDs then it could also trigger a massive round of data indexing, which in turn could result in high CPU usage.
  • Browser-specific add-ons: Many users have spotted that the Pininterest add-on in Firefox also triggered the mds_stores high CPU usage issue.

How can I fix mds_stores consuming high CPU usage in my Macbook?

1. Restart your Mac

  1. Click on the Apple logo in the menu bar.Clicking on the Apple logo to restart the Mac
  2. Select Restart.Restarting the Mac for the changes to take effect

Wait for your computer to restart. Once it has booted up, open the activity monitor and see if the issue persists.

A simple restart should fix most of the issues, but if it is still not fixed, you can try the below method to stop the mds_stores from consuming high CPU usage and heating your computer, and causing performance issues.

2. Disable Spotlight

  1. Open Finder.
  2. Click on Applications.Clicking on Applications inside Finder
  3. Find the Utilities folder and open Terminal.Opening the Terminal by opening the Utilities folder
  4. Execute the below command. sudo mdutil -a -i offTurning off the Spotlight using the Terminal
  5. Enter your password and press the Return button to finish running the command.

Although the Spotlight function will stop working after disabling it, you can avoid the mds_stores consuming high CPU power by following this method. If you want, you can enable Spotlight again.

2.1 Enable the Spotlight

  1. Open Finder.
  2. Click on Applications.Clicking on Applications inside Finder
  3. Find the Utilities folder and open Terminal.Opening the Terminal by opening the Utilities folder
  4. Execute the below command. sudo mdutil -a -i onTurning on the Spotlight using the Terminal
  5. Enter your password and press the Return key.Entering the password to confirm the changes
  6. This will enable the Spotlight again.

3. Clean the Spotlight’s database

  1. Open Finder.
  2. Search for Terminal by clicking on the search icon.Opening the Terminal by searching for it inside the Finder
  3. Execute the below command. sudo rm -rf /.Spotlight-V100/* Completely deleting the Spotlight's database
  4. Enter your password and press the Return key.
  5. Restart your computer and allow Spotlight to re-index the data. Re-indexing may take some time, so allow some time for it to successfully re-index 

4. Stop and restart the Spotlight

4.1 Stop the Spotlight

  1. Open Spotlight and search for Terminal.Searching for Terminal using the Spotlight
  2. Execute the below command. sudo launchctl unload -w /System/Library/LaunchDaemons/com.apple.metadata.mds.plist Stopping the Spotlight using Terminal
  3. Press the Return key.
  4. Enter your password and press the Return key to stop the Spotlight.
  5. Restart your Mac.Restarting the Mac to fix issues

4.2 Restart the Spotlight

  1. Open Finder and search for Terminal.Opening the Terminal by searching for it inside the Finder
  2. Execute the below command. sudo launchctl load -w /System/Library/LaunchDaemons/com.apple.metadata.mds.plistRestarting the Spotlight using Terminal
  3. Press the Return key.
  4. Type in your password and press the Return key.
  5. Restart your Mac for the changes to take effect.

Follow this step after fixing the mds_stores consuming high CPU to make the Spotlight work smoothly without any issues.

5. Remove the mds_stores virus in Google Chrome

  1. Launch Google Chrome.
  2. Click the 3-dot menu icon from the top.
  3. Select Settings from the drop-down menu.
  4. Click on Advanced on the left pane.
  5. Select the Reset settings option.
  6. Confirm the reset process by pressing the Reset Settings button.
  7. Wait for the process to complete.
  8. Restart the browser and check if this fixes the mds_stores consuming high CPU usage issue or not.

The mds_stores is a component of Spotlight that can malfunction due to a bug or any underlying error. By restarting your Mac, your issue should be resolved. In case it hasn’t been resolved, you can try the above-mentioned steps to fix the mds_stores consuming high CPU power.

Let us know in the comments below, which one of the above solutions helped you resolve the mds_store high CPU usage issue.

Furniture Design Software: 10 Best We Tested in 2026

Furniture design software programs allow you to create plans and sketches of amazing household furniture and various items on your PC.

Whether you work as a furniture designer or you simply want to draw your own pieces of furniture, the tools in this article will help you, get the job done.

When walking into a store or browsing the Internet, you might spot a gorgeous table or stunning desk that would look just perfect in your home.

Unfortunately, great products come with a hefty price tag, and this especially applies to furniture.

Instead of spending a lot of money on expensive furniture, can draw it with one of the furniture design software solutions below. You can even use these tools to test your creativity and come up with new, custom designs.

What are the best furniture design software tools?

Fusion 360 – Cloud 3D modeling

Autodesk is a world leader in CAD (computer-assisted design) and has a large variety of products. And Fusion 360 is perfect for designing objects made out of different materials, especially furniture.

This tool will not only help you design different pieces of furniture on your PC, but you also will be able to print 3D different pieces and assemble them together.

It has the most powerful modeling tools and will let you start from the most basic sketching down to a fully customizable 3D model. Easily change the colors and the material of your furniture in order to get the perfect combination for your house.

Fusion 360

Design and 3D printing in one program, to push your boundaries and continuously develop your skills.
Check price Visit Website

Adobe Substance 3D – Solution for desktop and VR

Choosing Adobe Substance may be the smartest move in order to have a realistic representation of houses. With state-of-the-art technology, this tool offers leading services for 3D art creation.

Firstly, you have included prolific designing features that can deliver anything you need about your house project. Whether you need 3D materials, objects, lights, or other graphic elements it’s all covered.

More exactly, it’s your own virtual studio with lots of assets and tools, meant to create realistic art. If you create a project of your future home, including furniture and other objects, you can add it and personalize it as you like.

Moreover, with Substance 3D suite designing the furniture is just one thing from many. You can create dynamic geometry patterns, add textures or materials, and project any sketches of your home in 3D.

The software works well for both beginners and advanced, offering support for different formats like CAD or glTF.

Adobe Substance 3D

Design the furniture and entire house in your own way using professional help from Adobe Substance 3D.
Check price Visit Website

Autodesk Autocad – Automated 3D furniture toolset

Autodesk Autocad

Autodesk Autocad is the ultimate solution for CAD automated design and to create house planning or beautiful furniture designs.

This furniture solution comes with machine-learning tools that offer unparalleled support for 2D and 3D designs or blueprints.

Using this software, you can get reliable assistance with furniture construction designs or architecture and mechanical toolsets.

In addition, you have various integrations with add-ons that help you accelerate your workflow and craft elegant furniture for your home.

⇒ Get Autodesk Autocad

Palette CAD – 3D interior design

This 3D interior designing software called Palette CAD can make a difference in your projects. With performant technology, it can support your home projects regarding furniture and much more.

As the name implies, you can design the desired rooms using this 3D tool and create them according to your needs and imagination. CAD software can offer assistance for bathroom and tiling, carpenters or joiners, interior design, or furnishing.

More so, with its great features, it is very easy to provide support for designers or manufacturers in order to fully understand your plans.

Hence you should benefit from qualitative services for such an important project like your house. It’s significant to use professional software to design your furniture and rooms to construct your house exactly as aspired.

In addition, Palette CAD assures digital services for reimagined designing, best-class customer services, and easy product ordering for guaranteed satisfaction.

⇒ Get Palette CAD

SmartDraw – Intuitive diagrams and charts

SmartDraw is a diagramming and visual representation tool designed to create raw designs for all your home furniture.

This software provides standard templates for various industries such as flowcharts, floor plans, network diagrams, object structures, and more.

Using this can easily add shapes, text, images, and other elements to their blueprint project.

Also, you should know there is a machine-learning formatting tool capable to modify your projects automatically to keep you in the game.

In addition, it allows a wide range of diagrams and templates that can be used to design any furniture type.

⇒ Get SmartDraw

SolidWorks – Product engineering designs

SolidWorks is versatile furniture design software that you can use for living rooms, dining rooms, bedrooms, and offices. The CAD models support a wide variety of materials, including stainless steel furniture, wooden furniture, as well as custom-design furniture.

You can use this tool to design virtually any type of furniture component, including desks, chairs, tables, and office panels, and customize them according to your needs.

If you want to see the whole picture, you can also add metal doors, wooden doors, windows, and shutters to get a detailed view of how the room will look once you add the finishing touches.

SolidWorks supports 3D modeling and simulation for cabinets, countertops, cabinet hardware, stairs and rails, knobs, hinges, stops, etc. This powerful furniture design software will help you unleash your imagination and design the perfect house.

⇒ Get SolidWorks

CAD Pro Furniture Design Software – Furniture visualization tools

CAD Pro is a drafting software that lets you design, visualize, and share your furniture design ideas. You can use this tool to design any piece of furniture that you want, from classic tables to extravagant chairs.

When you’re satisfied with the end result, you can then send your design as an image in your emails by selecting the “Send as Mail” option. You can also save your CAD Pro blueprint as a PDF file.

If you like to quickly sketch your furniture design ideas on paper, you can scan the drawing and then resume work in CAD Pro. Your initial scanned design becomes a traceable template that you can then modify and save.

The software supports a series of additional features that allows you to better communicate with the persons with that you want to share the design sketches.

For example, you can record your ideas and add voice instructions to your design blueprints or add pop-up text memos for more information.

⇒ Get CAD Pro

SketchList 3D – Woodworking designs

If you’re a fan of wooden furniture or work wood professionally, then this is the perfect furniture design software for you.

SketchList 3D simplifies the time-consuming and repetitive woodworking design tasks, allowing you to work everywhere, in the shop or at your client’s home.

The solid 3D sketches allow you to mark even the tiniest details and quickly modify them if something looks out of proportion. The virtual boards also let you see how the elements of your design go together.

Once you’re satisfied with the end result, you can use Adobe 3D PDF to send your sketch to your clients so that they can see the ‘before’ version of your work.

SketchList allows you to add joints and contours with just one click. You can use the default colors and grains when designing the furniture or create your own.

⇒ Get SketchList 3D

PRO100 – Architects friendly tool

PRO100 is professional software for furniture and interior design. This tool will allow you to design the interior of kitchens, bathrooms, and living rooms faster and more efficiently.

One of the main strong points of this tool is the quality of visualization. The crystal-clear detailed images that PRO100 renders are very useful, allowing you to spot even the tiniest design details.

The latest version of the tool brings even more impressive features to the table:

  • Design export to 3D panoramas (including VR glasses, mobile devices, web sites)
  • Swap any part, e.g. handles, fittings, drawers
  • Distribution tool (e.d. for shelves or lights arrangement at equal distances from each other)
  • Export to *.jpg files

⇒ Get PRO100

SketchUp – Sustainable furniture builds

SketchUp is a very powerful tool that you can use for a variety of purposes, including furniture design. This software can deliver impressive interior design sketches, as well as specific furniture design images.

If you haven’t used furniture design software before, SketchUp is the perfect place to start. This 3D drawing tool is intuitive, easy to learn, and efficient.

Of course, the tool also supports 2D drawing. Once you finished your sketch, you can use the walkthrough function to go through every detail of your design and see how various pieces of furniture go together.

This software can also generate presentation documents, allowing you to store and share your design ideas.

⇒ Get SketchUp

Conclusion

This brings us to the end of our list. We hope that the description of the furniture design software listed helped you decide which tool to use. In case you need more resources, check out other free interior design apps to take wisely.

The most important aspect is that, with the right software tools, you can begin to design your dream furniture, play with different models and materials, and ultimately bring your designs to life.

If you have any other suggestions, feel free to leave them in the comments section below.

7 Fixes to GeForce Experience not Recording [ShadowPlay, Nvidia]

Gaming much? Then we can skip the introductions as we are pretty confident you’re already well acquainted with NVIDIA and its pros and cons.

GeForce experience not recording issues are not uncommon and chances are, you already battle with this anomaly. Something might have gone wrong with NVidia Geforce or other culprits may be to blame. So, why won’t GeForce Experience record? We’re about to find out.

Acknowledging gamers’ needs, NVIDIA – an important player (if not THE player) in the graphical processing unit manufacturers’ market – raised the bar by adding GeForce Experience into the game.

This app provides an easy and easily customizable interface packed with useful features that are meant to enhance your gaming experience.

Why is my GeForce Experience not recording?

As cool a feature as it may seem (and it really is), there are instances when ShadowPlay can behave quite erratically and users reported issues like:

GeForce Experience not recording sound, instant replay not working, GeForce Experience not recording mic or GeForce Experience not recording game audio among others.

Even more problems are about to be uncovered, as follows:

  • GeForce or ShadowPlay not recording
  • GeForce experience recording not starting
  • Nvidia screen recorder not working
  • GeForce experience not recording audio
  • GeForce experience not recording game chat
  • Also, GeForce experience not recording instant replay
  • GeForce experience not recording mic
  • A particular case – GeForce experience only recording 10 seconds
  • GeForce experience not recording desktop
  • GeForce experience not recording Discord

From incompatible specs to faulty drivers and conflictual software settings that cannot help but interfere with each other, there can be many culprits responsible for the GeForce Experience recording not working problem.

This is where we come into play. Without further ado, let’s dive into some serious, but really easy GeForce troubleshooting steps.

How do I get GeForce Experience to record if it won’t?

1. Check system requirements

The GeForce Experience app requires a minim-up setup, thus you need to check your system’s specifications in order to make sure that the two are compatible.

Fortunately, the app is intuitive enough to allow you to check your specs without leaving the software. Simply access the General section within.

check system requirements Nvidia Geforce Experience

According to the manufacturer, the general system requirements that you will have to comply with are:

  • OS (Windows 7, 8, 8.1, 10)
  • RAM (2GB system memory minimum)
  • Disk Space (20MB minimum)
  • CPU (Intel Pentium G Series, Quad-Core i3, i5, i7, or higher, AMD FX, or higher)

Note: When it comes to GPU, there are a few series that are not entirely compatible with the ShadowPlay technology, such as GeForce 700, 600, and 600M. The same goes for GeForce 300 and 300M, GeForce 200 and 200M, GeForce 9/9M, and 8/8M.

Since the technology is based on a dedicated NVENC video encoding accelerator you will need a GeForce GTX 650 or higher GPU.

2. Check supported games

NVidia Geforce experience_supported games

GeForce Experience in-game overlay supports all DirectX 9, 10, and 11-based games. In desktop mode, OpenGL games running in a window are also supported.

You can check out a full list of games that are compatible with the video-recording feature integrated into the GeForce Experience here.


3. Get the latest graphic and display drivers

  1. 1. Open the app and go to the Preferences screen.

  2. 2. Next, select the Check for Updates button to install the drivers.

    Check for updates Geforce Experience Nvidia
  3. 3. You can also use this option to verify that you are running the latest version of GeForce Experience.

  4. 4. Alternatively, you can through the Device Manager on your PC or even use a dedicated program such as Outbyte Driver Updater to make sure your drivers are always up to date and in pristine condition.

  5. If you are encountering recording issues, you might face a case of corrupted or obsolete drivers.

    One important feature incorporated into the GeForce Experience is the Game Ready driver update. In fact, the app automatically notifies you when new drivers are available.

    Even though it is a useful feature, it’s not exempt from errors. If for some reason the GeForce Game Ready driver installation can’t continue, we got your back.

4. Uninstall or quit third-party audio software

If you are using additional audio enhancement software, it is possible that this is actually interfering with your GeForce Experience recording capacities.

Make sure you uninstall this software from the Control Panel -> Programs -> Programs and Features -> Uninstall a program.

programs and features uninstaller

If you happen to encounter issues while launching the Control Panel, here’s a step-by-step guide to help you have it fixed and get on with your uninstalling.

You can also choose to use a dedicated removal tool. One performant program for this job is the IObit Uninstaller which also removes leftover files, folders, and registry entries.

Furthermore, if there are any other streaming or recording apps and/or games running in the background, make sure you close all of them.

Finally, reboot the PC and try again.

5. Adjust the default directory

Nvidia GeForce_Path prefferences

This issue can be triggered by insufficient disk space in the default directory or by a corrupted recording path.

One simple way to fix this is by changing the recording path to a different HDD than the one you used for installing the game(s).

You can also, create a new directory – just make sure you are logged in with your admin account in order to avoid permissions issues.

6. Switch on Windows Aero

If you are running on Windows 7, switching the Aero effect on is another potential fix for recording issues.

To enable any of the Aero themes, simply access the Control Panel -> Appearance and Personalization -> Personalization or right-click the desktop and select Personalize. Then click Window Color, and select the Enable transparency option.

Windows 7 enable aero theme_transparency

7. Uninstall and reinstall the display drivers

If all other methods fail, you can simply install the display driver altogether and reinstall the latest version from the official website.

Make sure you use a specialized tool to completely uninstall the graphic driver and go for a fresh install by downloading the latest Nvidia and GeForce Experience driver from the official website.

There you go, these tested solutions should have your ShadowPlay option flawlessly recording again in no time so that you can share your gameplay highlights with your friends.

If you are aware of additional methods for fixing NVIDIA recording issues, feel free to share them in the comments section below.

Of course, this depends on several other factors such as CPU consumption and screen resolution.

Best Packet Sniffing Tools for Windows 10 & 11 [2026]

A packet sniffer, also known as a network analyzer or a protocol analyzer, is a program that can intercept and log traffic that passes over a digital network.

Packet sniffers are diagnostic tools that allow network technicians to analyze the network and diagnose network problems.

In order to work, the packet sniffer must have access to the wireless or wired network interface on its host computer. The tool can analyze traffic from the entire network or only a small part.

Then the sniffer converts the analysis into a readable format, helping the network technicians to pinpoint network faults.

What is a network packet sniffer?

If you’re wondering what a packet sniffer is, it can be explained in a few words: A network traffic analysis tool.

The utility of this software relies on the support for analyzing great amounts of network data, such as passwords and log-in credentials or users’ online activity.

Most of the network packet sniffers gather data from your network using two systems, Unix-like systems or Windows systems. In case you require a network sniffer for Windows, you can easily find them on the market.

You should also know that it’s possible to use software or hardware network sniffers. The hardware sniffers will best help you troubleshoot network issues.

Nevertheless, software network sniffing tools are more reliable and don’t need plugging support to detect network insights.

To discover the best packet or free network sniffers for Windows 10 and 11, dive deep into this article and find the one you need.

What are the best network sniffer tools for Windows 10 and 11?

  1. NetFlow Analyzer – Effective Bandwidth monitoring
  2. PRTG Network Monitor – Professional network analyzer
  3. Wireshark – Live capturing and offline analysis
  4. Free Network Analyzer – Real-time protocol analyzer
  5. Solarwinds Network Packet Sniffer – Easy to use
  6. Capsa Free Network Analyzer – Customizable reports

NetFlow Analyzer

Packet sniffers need to be a complete package that allows network management and control and provides in-depth statistics regarding the traffic analytics of a given network.

NetFlow Analyzer is one such tool, and it is one of the best packet sniffers on the market today, providing hundreds of companies with much-needed intel regarding their network status, and how they could improve it.

The software is built around the idea that things need to be easy to understand and as transparent as possible, and that’s exactly how the data is displayed for any Network administrator using it.

Here are some of the features of this program:

  • Network forensics and troubleshooting
  • Efficient bandwidth monitoring
  • App-centric monitoring
  • In-depth traffic analysis
  • Security analysis

NetFlow Analyzer

If you’re looking for an efficient packet sniffer, both in terms of costs and performance, then you need to try out NetFlow Analyzer.
Free trial Visit website

PRTG Network Monitor

PRTG Network Monitor is an advanced, professional tool for analyzing and monitoring local networks. The tool captures the data passing through your network, analyzes it, and then presents it in a readable format.

It has a special Packet Sniffing Sensor that will let you know if any network packets are suspicious.

Be careful, as such a sensor could use many of your PC’s resources, and you will need to manage your processes carefully when you want to scan for dangerous data packets.

PRTG Network Monitor detects all network data activity and application usage of the system’s ports.

The tool offers a flexible system of configurable filters and reports that users can use to capture specific traffic patterns and network data.

Also, it supports many selections of events, methods, and properties.

PRTG Network Monitor comes in two variants: a completely free, basic edition and a paid version with full features. You can test the tool for free for 30 days and continue on a free basis with limited features or buy the full version with user support.

PRTG Network Monitor

PRTG Network Monitor

Manage the way your PC uses your bandwidth with one of the best network monitoring tools on the market today!
Free trial Visit website

Wireshark

Wireshark is one of the most popular packet sniffers in the world, allowing you to see what’s happening on your network at a microscopic level. This free tool is used by industries and educational institutions.

Wireshark has powerful display filters that can read and write a huge number of capture file formats, such as:

tcpdump (libpcap), Pcap NG, Catapult DCT2000, Cisco Secure IDS iplog, Microsoft Network Monitor, Network General Sniffer, Sniffer Pro, and NetXray, Network Instruments Observer, NetScreen snoop, Novell LANalyzer, RADCOM WAN/LAN Analyzer, Shomiti/Finisar Surveyor, Tektronix K12xx, and more.

Other features include:

  • Deep inspection of hundreds of protocols, with more being added all the time
  • Live capture and offline analysis
  • Standard three-pane packet browser
  • Captured network data can be browsed via a GUI, or via the TTY-mode TShark utility
  • Rich VoIP analysis
  • Live data can be read from Ethernet, IEEE 802.11, PPP/HDLC, ATM, Bluetooth, USB, Token Ring, Frame Relay, FDDI, and others
  • Decryption support for many protocols, including IPsec, ISAKMP, Kerberos, SNMPv3, SSL/TLS, WEP, and WPA/WPA2
  • Coloring rules can be applied to the packet list for quick, intuitive analysis
  • Output can be exported to XML, PostScript®, CSV, or plain text/

⇒ Get Wireshark 

Free Network Analyzer

Free Network Analyzer is another excellent free network monitoring software that can analyze the wired or wireless connections of your computer.  The tool can capture, filter, and display all traffic data and decode the network packet raw data.

Packets are then parsed, extracted, and presented in a readable form, offering you a throughout analysis of the data transferred via your PC network interfaces.

Key features include:

  • Real-time protocol analysis and effective dataflow processing even under high traffic load on high data rate communications
  • Data filtered by specific protocol
  • Search for data patterns with RegEx (Regular Expressions) support
  • Importing log files from third party protocol analyzers
  • More than 70 different data encodings supported.

⇒ Get Free Network Analyzer

Solarwinds Network Packet Sniffer

This network traffic platform offers an exhaustive solution for valuable insights regarding your network connection.

In the first place, the tool will measure your network performance from every side and isolate the cause of potential connection issues on your network.

There are so numerous traffic analysis tools that can capture packets but are not actually able to present information clearly and accurately.

For this reason, SolarWinds offers detailed reports from over 1.200 applications or networks that impact the end-user experience.

Ultimately, you have included a Wi-fi packet capture that gives valuable information for your wireless networks, such as connection performance, traffic, or configuration details.

⇒ Get Solarwinds Network Packet Sniffer

Capsa Free Network Analyzer

This tool is the right choice for regular users, such as students, teachers, or computer geeks. Capsa Free allows you to monitor network traffic, troubleshoot network issues and analyze packets.

It supports over 300 network protocols, MSN and Yahoo Messenger filters, email monitor and auto-save, as well as customizable reports and dashboards.

The main advantage of this tool is that it allows you to learn how to monitor network activities, pinpoint network problems, and improve network security.

⇒ Get Capsa Free

How do packet sniffers work?

The packet network sniffing tools will efficiently work by intercepting network traffic using the software or hardware interface on the user’s PC.

With the network sniffing process you have the necessary method to capture the packets that pass through your network and analyze detailed network data or connectivity issues.

A network sniffer for Windows will monitor and offer connection insights for the whole network or only a certain section, depending on the network configuration, not matter if you are looking for home network monitoring software or enterprise grade one.

On the other hand, using the packet sniffer for a wireless network, you will be able to monitor and analyze only one channel at a time. However, if your PC supports multiple wireless interfaces, you can do it for multiple channels.

FAQs

What is a packet sniffer used for?

A packet sniffer captures and analyzes network traffic, helping technicians diagnose issues, monitor bandwidth usage, and detect suspicious activity on Windows 10 or 11.

Is Wireshark the best free packet sniffer?

Yes. Wireshark is the most popular free packet sniffer, offering deep protocol inspection, live traffic capture, and offline analysis with support for hundreds of protocols.

Can packet sniffers detect security threats?

Absolutely. Tools like NetFlow Analyzer and SolarWinds Packet Sniffer can reveal unusual traffic patterns, unauthorized access, or potential malware communication.

Do packet sniffers work on wireless networks?

Yes, but with limitations. A packet sniffer can only analyze one Wi-Fi channel at a time unless your PC supports multiple wireless interfaces.

There are valuable free network sniffers for Windows 10 and 11 on the market, so employ the ones we covered for you in this article and easily catch traffic data.

FIXED: Winload.exe Missing Error in Windows 10

Are you having problems with your Windows 10 OS? If you can’t properly boot your device or if you are noticing issues with the winload.exe protocol (winload.exe is missing or winload.exe is corrupt) then we recommend you use the troubleshooting steps below in order to address these problems with ease.

Winload.exe is in fact what we know as Windows Boot Loader, a small program built on the Windows 10 system. Winload.exe is initiated by another protocol, BOOTMGR which is the boot manager featured in Windows 10, Windows 8, Windows 7, and Windows Vista.

Now, winload.exe will load some files from Windows, files that are quite important for your device. Because of that, if winload.exe is corrupt or missing you will not be able to properly use your Windows 10-based tablet, laptop, or desktop.

So, due for the same reasons, you should use the troubleshooting solution below in order to safely fix this problem.

How can I fix Winload.exe in Windows 10:

1. Use Startup Repair

  1. Make sure you can use your Windows 10 installer DVD.
  2. So, insert the bootable DVD on your device and restart the PC.
  3. When prompted press any key in order to boot from DVD.
  4. Wait while the Windows installation files are being uploaded.
  5. Then from the main menu of your installer disk choose Troubleshoot.
    repair computer
  6. Up next from the System Recovery Options select Command Prompt.
    cmd from wind 8 installer
  7. A cmd window will be displayed on your screen; there type bootrec /rebuildbcd and press enter from your keyboard.
  8. Wait while the command is being executed.
  9. Then on cmd type exit and press enter.
  10. Reject the DVD and reboot your Windows 10 device as you are done.

The Boot Configuration Data file is missing? Don’t panic, we’ve got a dedicated guide about that. Check it out and solve the issue in no time.

For being able to fix winload.exe you need to rebuild the Boot Configuration Data protocol, dubbed as BCD. This protocol is telling to your Windows device how to start the boot sequence and contains essential boot configuration options.

2. Remove the Windows.old folder

1. Type Disk Cleanup > select your C drive > select Clean up system files

2. Wait for the utility to calculate how much space it can free up > on the new windows, click on the “More options” tab

3. Go to System Restores and Shadow copies > hit Clean up

Problems deleting all your junk files? Follow this guide to solve Disk Cleanup issues and save your drive.

The Windows.old folder may also cause various .exe file errors. As a quick reminder, the Windows.old folder appears when you upgrade your Windows version or perform a clean install of Windows 10.

The role of this folder is to keep your previous Windows installation files, allowing you to restore it. Here’s how to remove the Windows.old folder:

3. Reinstall Windows 10

If the two solutions listed above didn’t help you fix Winload.exe bugs on Windows 10, try reinstalling the OS.

That’s it: you have resolved the winload.exe problem from your Windows 10 device.

If you need further Windows 10 tips or troubleshooting solutions, don’t hesitate and use our tutorials, or use the comments field below for sharing your questions with our team.

Users who experience additional executable file problems can also check this detailed guide on fixing the wfs.exe missing error for more repair options.

If you’ve got additional tips and suggestions on how to fix Winload.exe issues in Windows 10, you can list them in the comments below.

Fix: Wi-Fi Stopped Working After Windows 10 Update

If you encounter issues with your WiFi no longer working after a Windows update, you’re in the right place. You should know that some updates change network settings, and that’s what could be at fault.

More exactly the option for IPv6 is now checked and this is one of the reasons why the Internet connection has stopped working.

Here’s how to fix it:

How do I fix the Wi-Fi connection after Windows 10 update?

1. Disable IPv6

  1. Left-click on the WiFi icon on the lower right side of the screen.
  2. Select Open Network and Sharing Center feature.
  3. Now you should have a Network and Sharing Center window in front of you.
  4. Click on the Change adapter settings link situated in the left side panel of the Network and Sharing Center window.change adapter settings
  5. Look for the connection you have to the Internet and right-click on it or just hold tap if you are using a touchscreen device.
  6. From the menu that appears, you will need to left-click on the Properties feature.
  7. On the upper side of the Properties window, select the Networking tab.
  8. Search for the IPv6 option.
  9. Remove the check-mark from the IPv6 option.
    disable IPv6
  10. Left-click or tap on the OK button to close the window.

2. Allow the PC to turn off the Wireless adapter

  1. Press the Windows Key + S and type Device manger.
  2. Press Enter to open the Device Manager.
  3. Expand the Network Adapters icon.
  4. Look for your wireless adapter in the list, right-click on it, and go to Properties.disable IPv6
  5. Select the Power Management tab situated on the upper side of this window.
  6. Uncheck Allow the computer to turn off this device, then press Ok.
    allow computer to turn off wifi to save power
  7. Close every window you opened so far.

3. Update your drivers

3.1 Update drivers manually

  1. Press the Windows Key + S.
  2. Type Device Manager and press Enter.
  3. Go to the device you’d like to update and right-click on it.
  4. Then, select Update driver and follow the instructions.
    0x00000002 DEVICE_QUEUE_NOT_BUSY
  5. Repeat the step for all the devices you want to be updated.

3.2 Update drivers automatically

An easier way to update your system drivers is by installing third-party software that will do it for you, thus you won’t waste so much time searching.

The program will automatically scan all of your computer’s hardware and software for the latest compatible driver versions and install them for you.

4. Change the power settings

  1. Press the Windows Key + X.
  2. Search for Control Panel and press Enter.
  3. Select the Small Icons feature in Control Panel.
  4. Search for Power Options and expand it.
  5. Click on Change plan settings (for the selected Power Plan).
  6. Then, click on Change advanced power settings.
  7. Expand Wireless Adapter Settings.
  8. Go to the Power Savings Mode.
  9. In the Power Savings Mode select Maximum Performance.
  10. Click Ok to save your changes.
  11. Close the windows you opened so far.
  12. Reboot your Windows 10 operating system.
  13. After the device starts check if your Wi-Fi internet connection is working properly.

5. Run the Internet Troubleshooter

  1. Press the Windows Key and select Settings.
  2. Then, go to Update & Security.
  3. Next, go to Troubleshoot.
  4. Click on Run the troubleshooter.

6. Clear DNS Cache

  1. Press Windows + X.
  2. Select Windows Terminal (Admin) or Command Prompt (Admin).terminal admin windows 11
  3. Type the following command: ipconfig /flushdns. ipconfig flush dns terminal
  4. Press Enter and wait for the process to complete.

7. Reset Network settings

  1. Open Windows Settings.
  2. Click on Network & Internet.network and internet windows 11
  3. Go to Advanced network settings.
  4. Under the More settings section, find Network reset.
  5. Select Reset now.reset now button network reset
  6. Confirm by clicking Yes.
  7. Restart your PC.

Another quick way to fix Wi-Fi connectivity issues after Windows 10 updates is to run the Internet Troubleshooter built into your Windows 10.

That’s about it for this article. We hope that our solutions helped you get your internet connection back on. Note that a Windows update may also cause the WLAN Extensibility module has stopped error, so don’t forget to uninstall it if you spot this error.

If you have additional questions related to this subject, you can write us in the comments section below and I will help you further as soon as possible.

Xbox Error 0x87e11838 [Complete Fix]

Are you getting Xbox error 0x87e11838 while launching a game on this console? This article explains how to solve this problem.

Usually, you should not encounter any error while launching or playing your favorite titles on Xbox consoles. But, things may not go smoothly for some internal or external issues. You may encounter errors that may prevent you from playing Xbox games. The error code 0x87e11838 is one of them.

Why do I encounter the Xbox error 0x87e11838?

If you encounter the error 0x87e11838 while launching Xbox games, it can be due to the following reasons:

  • Account problem: If the account you are using on your Xbox has some issues, the error may appear.
  • Poor network speed: If Xbox is not connected to Wi-Fi or ethernet or the network is unstable, it can sometimes trigger the error 0x87e11838.
  • Corrupted cache & local data: If somehow the cache on your Xbox is corrupted, it may prevent your game from loading correctly by showing various error codes.
  • Xbox service is down: It is also possible that everything is OK on your end, but the Xbox service is down temporarily. That’s why you are encountering the error code.

How do I fix Xbox error 0x87e11838?

We have featured the most effective methods. But, before trying them, we suggest you do the following things:

  • Restart your Xbox console.
  • Check the Xbox service status from this official page. If it is down, keep patience until the service is up.
  • Update the Xbox console. If necessary, see how to solve Xbox won’t update issues.
  • If the problematic game is not from your current account, you may face the error 0x87e11838. In this case, you will need to sign in with the account that was used to purchase that game. This will solve your problem.

After doing the above things, if necessary, follow these methods to solve Xbox error 0x87e11838.

1. Test network speed

  1. Press the Xbox button on the controller.
  2. Go to Profile & System.
  3. Go to General Settings and tap on Networking settings.
  4. Tap on Test network speed & statistics.
  5. Wait for the result.network statistics xbox

If you have a good internet speed, but the Xbox seems to show a different thing, restart your router and Xbox console. If necessary, reset the router and change DNS.

2. Clear Xbox cache

2.1 Clear using physical buttons

  1. Press and hold the Xbox button for 10 seconds. It will turn off the console.xbox button
  2. Unplug the power cable.
  3. Press and hold the Xbox button again. Do it several times.
  4. Wait one minute and plug in the power cable again.
  5. Wait another minute.
  6. Now, press the Xbox button again to turn on the console.

If it doesn’t turn on, learn how to solve Xbox won’t turn on problem.

2.2 Clear persistent storage

  1. Press the Xbox button and select Settings.
  2. Go to Devices & streaming and tap on Blu-ray.going blue-ray xbox
  3. Go to Persistent Storage.
  4. Tap on Clear Persistent Storage.clearing persistent storage xbox

After clearing, if necessary, you can restart the console. Then, try to launch the problematic game. It should solve the Xbox error code 0x87e11838.

3. Delete local data

  1. Press the Xbox button.
  2. Then, go to Profile & System.
  3. Go to Settings and then System.
  4. Tap on Storage devices.going storage devices xbox
  5. Now, choose Local saved games.
  6. Delete unnecessary data there.

You may see a bit different options on your Xbox console. It depends on which firmware version or model you are using. But, one thing is certain that it will help to get rid of the error 0x87e11838.

Usually, the above methods are enough to troubleshoot this error. If necessary, reset the console and see if it helps.

If you have any questions or suggestions, feel free to let us know in the comment box.

FIX: Microsoft Teams Microphone not Working on Remote Desktop

Microsoft Teams is a versatile collaboration tool that seamlessly integrates a plethora of business tools that most users need when it comes to their business.

A high-quality microphone allows you to engage in video and audio calls without fearing you’ll encounter any technical issues.

Thus, some users have reported that Microsoft Teams does not recognize the microphone in the desktop client.

Why doesn’t the microphone work?

This issue can occur due to several reasons, one of them being software glitches. It can also occur if there are permission issues that prevent access to your microphone.

Another possible cause is that the Windows operating system or the application itself is not updated to the latest version on the market.

It is also highly advisable before you start looking for the cause of this unpleasant situation to check if your microphone is in use.

To do this, just close all other apps that might be using your microphone and restart your PC. This way you make sure that you can use your microphone in Teams.

In this article, we walk through the steps required to fix the Microsoft Teams microphone issues, so be sure to discover all of them.

How can I fix the Microsoft Teams microphone issues?

1. Make sure your app is updated

First, to make sure you don’t make yourself directly responsible for any bugs or glitches in the app, install the latest Windows update and the latest version of the Teams app.

All you need to do is open Microsoft Teams, log into it, and on the top right, click on your profile picture and select Check for updates.

The app will accordingly install updates in the background if necessary, and then you can check that the microphone is working properly by making a test call.

2. Check microphone privacy settings

  1. Click on Start, and select the Settings app.
  2. Select the Privacy option.
  3. From the left pane, scroll down to App Permission, and click on Microphone.
  4. Scroll down to the Allow desktop apps to access your microphone section.
  5. From the list, enable microphone access for Microsoft Teams.
  6. Launch Microsoft Teams, and check if the client recognizes the microphone.

In case the microphone is already enabled for Microsoft Teams, revoke the access. Reboot the computer and enable microphone for Microsoft Teams again.

Access to the microphone can get disabled when new updates are installed or Microsoft Teams. Make sure the required permission is given to resolve the issue.

If you’re having trouble opening the Settings app, take a closer look at our comprehensive guide, and fix it for good.

3. Troubleshoot the sound problem

  1. Right-click on the speaker icon in the Taskbar.
  2. Select the Troubleshoot sound problem option.
  3. The troubleshooter will perform an initial scan.
  4. When prompted, select your microphone, and click Next.
  5. Follow the on-screen instructions to troubleshoot the microphone.
  6. Apply any recommended fixes and check for any improvements.

Also, if the troubleshooter fails to load with an error, be sure to follow our useful guide and fix it in just a couple of simple steps.

4.  Reinstall Microsoft Teams

  1. Type control in the search bar, and open Control Panel.
  2. In the Control Panel, go to Program, and select Programs and Features.
  3. Select Microsoft Teams from the list, and click Uninstall. Microsoft Teams does not recognize Microphone
  4. Once uninstalled, reboot the computer.
  5. Download and install the latest version of Microsoft Teams.

Reinstalling Microsoft Team can resolve many issues that can occur due to corrupted files and bugs. Install the new version of Microsoft Teams and check for any improvements.

Also, if you can’t open Control Panel, you should take a closer look at our step-by-step guide to find the best solution.

Conclusion

The Microsoft Teams not recognizing the microphone issue can occur due to several reasons. By following the steps in this article, you can fix the problem with your desktop client in no time.

The most important thing, however, is to make sure you are running the latest version of Windows and the latest Teams app update to get rid of various bugs.

Another point worth mentioning is that before you start troubleshooting the problem, you should check if your microphone is in use, and if it is somehow used by other apps in the meantime.

Don’t forget also that you can always use the speaker troubleshooter provided by Windows, which you can rely on without any problems, without having to perform several actions.

And if absolutely necessary, you can always uninstall and reinstall the Microsoft Teams app to make sure everything will work smoothly, and you’ll be able to call without any problems.

Let us know which step helped you fix the issue in the comments. Also, leave there any other questions or suggestions that you may have, and we’ll surely check them out.

Best Flight Simulator for Windows 11, 10: Top 5 Picks

PC flight simulators are PC games that, obviously, simulate flying. These are games that include a wide range of civilian or military planes for players to fly over glorious 3D landscapes with.

The simulators should not be confused with general aerial shoot em ups that have more basic arcade controls.

Flight simulators are much more realistic than your average flying games for consoles that tend to place greater emphasis on frantic blasting action instead of emulating real-world aircraft flight with aerodynamic models or empirical data.

How to choose the best flight simulator game for your PC?

There are many specific features that you might look for when choosing a flight simulator, and we have managed to gather the main of them in our article.

Here you will find answers to such questions as :

  • Does a flight simulator allow plane creation?
  • Can you simulate an open space flight from your PC with a flight simulator game?
  • Can you play it in multiplayer mode (online)?
  • How realistic a flight simulator game can be (detail level)?
  • Can you fly on other aircraft?
 Rating (1 to 5)Paid/FreePlane creation/customizationCombat/CivilMultiplayer
Microsoft Flight Simulator Standard4.5PaidNoCivilNo
Il-2 Sturmovik : 19464PaidNoCombatYes
Rise of Flight United4PaidNoCombatYes
X-Plane 103.5PaidYesCivilNo
Flight Gear3.8FreeYesCivilNo

What is the best flight simulator for PC?

Microsoft Flight Simulator: Standard

Microsoft Flight Simulator is the best-established flight simulator game series that dates back to the ’80s.

The 2020 version of Flight Simulator is the most recent, and best addition to the franchise with an amazing breadth of content and excellent graphical quality.

The game received impressive reviews from the launch day, being praised for the highly detailed and stunning aircraft, as well as for the incredibly realistic world that it creates.

The game comes in three editions, with a different number of aircraft that you can choose from, starting with light planes, and ending with massive jets.

The Standard edition features 20 aircraft available to all players, while premium editions reach 30 aircraft models, including Cessna Citation Longitude or Pipistrel Virus SW 121, for instance.

You’ll be allowed to land at any of the 36,000 airports included in any of the game’s editions.

As a matter of fact, the premium versions only bring a few extras, such as the number of available planes. But you can start with the basic version and upgrade at any time, if necessary.

Should you encounter any trouble with the installation or launch of the new game, a lot of the issues have been fixed by Microsoft in various patches since the launch, but we also have a few recommendations.

Microsoft Flight Simulator: Standard

Microsoft Flight Simulator: Standard

Take it to the skies and land anywhere across the globe with the new Flight Simmulator.
$59.99 Visit website

IL-2 Sturmovik: 1946

The original IL-2 Sturmovik is a classic combat flight sim based on World War 2’s Eastern Front.

With its terrific visuals and immense playability, the game was (and still is) a stormer and had a number of expansion packs and add-ons that expanded its content with new theaters, maps, and planes.

IL-2 Sturmovik: 1946, launched in 2006, is a compilation pack that brings together all the content from the original IL-2 series, including the Forgotten Battles, Pacific Fighters, and Ace Expansion Pack.

As this is more of a compilation pack, IL-2 Sturmovik: 1946 has extensive content.

Players can fly up to 229 aircraft from the Soviet, German, Italian, Japanese, U.K., and U.S. air forces in Eastern Europe, Mediterranean, Pacific, and Western Front maps.

IL-2 Sturmovik: 1946 also has nine exclusive campaigns of its own with 200 detailed missions.

Those missions aren’t just aerial dogfights as someplace more emphasis on bombing or strafing a variety of ground targets, such as airfields, tank columns, and bridges.

This game also includes a few alternative history campaigns with air battles that never happened in 1946 and a full mission builder.

Il-2 Sturmovik had groundbreaking graphics when it first launched, but its graphical quality has inevitably diminished over the years.

However, the game still retains its super realistic flight mechanics and fantastic damage model that made it a classic.

Best flight simulator
  • Great flight locations
  • Detailed flight board
  • Exciting missions

Rise of Flight United

If you’re looking for some blasting action in a flight simulator, look no further than Rise of Flight United. This is a historical simulator based on World War One, which was the first war to widely include aircraft.

Rise of Flight now has a free-to-play model, but that’s limited to three planes only.

Additional planes, modifications, and a Channel Map expansion are retailing on the game’s website.

In Rise of Flight United, players get to fly some legendary biplanes. They are accessible in quick missions, missions, campaigns, and multiplayer modes.

There are 40 planes for players to fly in aerial dogfights over the Western and Eastern Front, which include the Nieuport 17.C1, Felixstowe F.2A, Sopwith Camel, and Albatros D.Va.

The planes are rendered in amazing detail with fully dynamic components and terrific damage modeling, and they also feel very real as the game amplifies aerodynamic effects such as torque, g-force, stalls, and wind buffet.

Rise of Flight has fantastic graphics with High Dynamic Range lighting and detailed World War One landscapes. The experience is additionally enriched with rendered skylines and realistic weather effects.

The game’s scaling is spot on and gives players a real sense of altitude.

The simulator also includes a variety of customization options to adjust the realism. You can configure landing modes, fuel supply, gun convergence, radiator airflow, etc.

So Rise of Flight is undoubtedly one of the most realistic air combat simulators for Windows.

⇒ Get Rise of Flight United

X-Plane 11

X-Plane 11 is perhaps the most realistic flight simulator for Windows that’s a research tool in the aviation industry.

This is largely due to its blade-element theory aerodynamic model that determines the actions of real planes in flight based on their actual design parameters.

X-Plane 11 has more than 40 aircraft for players to choose from. The list includes Concorde, the F22 Raptor, and Boeing 747.

In fact, they’re not all exactly planes as one is the Space Shuttle, which is a great novelty.

Players can fly outside the Earth’s orbit and over Mars with the Space Shuttle, and the publisher has recreated the atmosphere of the Red planet and shuttle controls with NASA data.

Air Traffic Control further enhances X-Plane’s realism as it provides actual voice audio and guides all planes to the runways.

X-Plane 10 is one of the most flexible flight simulators as it has tons of user-created aircraft and scenery add-ons, editable maps, and also includes in-game options to fully customize the weather.

⇒ Get X-Plane 11

FlightGear

best flight simulator games

As both Microsoft Flight Simulator and X-Plane 11 are proprietary software, FlightGear is a good open-source alternative.

The best thing is that the game is freely available, and you can add it to Windows, Mac OS X, or Linux. Besides, developers can expand it with third-party extensions.

The core software includes only a few aircraft, but there are more than 400 planes you can add to it. The list consists of helicopters, airliners, warbirds, modern and historical military models, and light civilian passenger planes.

The software includes 20,000 airports, diverse scenery, and accurate global landscapes; and users can also download more terrain from FlightGear’s database.

One novelty the game has is its accurate sky models that adjust the sky to reflect your actual time.

Variable runway elevation, approach lighting, and scenery that lights up at night further enhance the simulator’s realism.

FlightGear’s graphical quality is also pretty decent as the game has some great weather, atmosphere shading, and water reflection effects.

⇒ Get FlightGear

So these are a few of the best flight simulators that bring the thrill of flying to your Windows PC.

Have you tried any of them so far? Use the comments box to share your experience with us.

6 Best TV Tuner Software for Windows 10 [2026 Updated]

When it comes to TV, most people enjoy watching TV on their couch in the living room, but some folks prefer to watch it on their PC, especially if they are using a large display.

In the past, Windows Media Center was in charge of TV tuning, but since Windows Media Center isn’t included with Windows 10, we’re going to see other TV tuner software for Windows 10.

Even Microsoft has announced that in order to watch live TV on Windows 10, you’ll need a third-party solution, and today we’re giving you several applications to watch live TV on Windows 10 using a TV tuner.

So, check out our list of best TV tuner software for the Windows 10 operating system.

Which TV tuner software should I use for my Windows 10 PC?

Hulu

TV stream on Windows PC

Hulu is a popular streaming service known for its exclusive series and on-demand movies. With a simple subscription home network and a device connected to the Internet, it allows you to watch thousands of TV shows and more.

You can even stream live games from major and pro leagues like the NBA, NFL, or NCAA.

There are several packages available, including a Disney+, ESPN, and HULU deal that lets you switch between the services and access your favorite content.

Sports are right on their court with ESPN and ESPN+ for live coverage and exclusive access to over 3,000 premium articles a year.

For Start Wars fans and families, we recommend Disney+ with a huge content of movies and shows that will keep you always entertained.

You will also get access to the award-winning 30 for 30 libraries of innovative sports documentaries with amazing storytelling.

Hulu

Watch exclusive TV shows and on-demand movies with this industry-leading streaming service!
Check price Visit Website

Plex

TV stream on Windows PC

Plex is a global streaming media service that allows you to enjoy movies, podcasts, music, and other media files from any internet-connected device.

It puts at your disposal over 20,000 free movies and lets you stream more than 130 live channels.

With Plex, you can record your favorite TV shows or movies and organize them as you please in your Plex library.

The software supports almost all audio and video formats, and its library UI showcases your media with artwork, bios, plot summaries, and more information.

Once you install it, you can get content from a lot of important sources like NPR, Spike, and Comedy Central. The music player can also show you timed lyrics of songs, which is a novelty.

You can use multiple accounts and you also have the option for DVR recording at your discretion.

But the best part is that you can sync media between all your devices, including smartphones, tablets, digital media players, and game consoles.

⇒ Get Plex

Kodi

TV stream on Windows PC

Kodi is one of the best alternatives to Windows Media Center, and it was originally created for Xbox, but now it runs on a wide range of platforms, from Windows, over Linux to Android and iOS.

It can play files from your computer, from online streaming services, and with third-party plugins, you can even watch live TV with it. This software is free to download and comes with no restrictions.

Kodi media center supports all-important media file formats for playback, and you can stream content from various online media streaming services.

One of the most interesting parts is that you can customize the skins or the theme of the app, to change the screensaver, wallpaper, and more.

The Kodi feature si that you can use add-ons for audio, videos, pictures, screensavers, games, weather, programs, and skins with which you can further enhance the software.

The best add-on is, however, Exodus, which you can use for streaming and watching a lot of blockbuster movies and TV shows.

⇒ Get Kodi

Media Portal

TV stream on Windows PC

Media Portal was inspired by Kodi, but unlike Kodi, it’s a bit simpler, with not so many added features.

It also plays a variety of files from your computer, and it can also play live TV, if you have a TV tuner, without the need to install additional plugins. Media Portal is also free.

However, even if it doesn’t have a lot of features, it has host hundreds of plugins and skins that you can use to add a lot of benefits.

For instance, you can monitor your HTPC, view sports scores, stream or download web TV, YouTube videos, and Internet radio.

You can even start up MediaPortal playing music from a predefined playlist or show local movie times.

Although it looks very simple, MediaPortal allows great media control for watching, listening, reading, and playing your media as you want to.

⇒ Get Media Portal

Emby

TV stream on Windows PC

Emby is another media player, and it’s also free and open-source software, so it’s available on Linux and Windows, Samsung Smart TVs, Amazon Fire TV, Android TV, Chromecast, and Xbox 360.

Just like other software on the list Emby can work with your TV tuner on Windows 10.

Emby Server is like a media server that automatically converts and streams your personal media to play on any device.

Once you add new content from one of your devices, it will sync to be accessible offline for every other device.

This tool will detect DLNA devices on your network automatically so you can send content, remote control, and more.

And while you may have a lot of personal content that you produced yourself, Emby organizes it into easy and elegant presentations to make it look awesome.

⇒ Get Emby

NextPVR

TV stream on Windows PC

NextPVR allows you to watch live TV on your computer and it’s available to Windows users for free. It might not look visually appealing as the other TV tuner software, but it gets the job done.

The app supports most devices, including DVB, ATSC, QAM, DMB-T, Analog, SAT>IP, HDPVR, and Copy-Freely CableCard.

This tool is not too fancy, but it features an easy-to-use and friendly user interface that can be used by the whole family.

The app includes all the TV functions you’d expect like Live TV, TV Guide, Recordings, Search, Web Scheduler, and more.

NextPVR is free for personal use but if you want to include the TV set up in a hotel, you will need to pay for a commercial license.

⇒ Get NextPVR

That would be all for our list of the best TV tuner programs for Windows 10, so if you’re considering connecting your Windows 10 computer, one of these programs is the right thing for you.

All of the TV tuner software on this list should be compatible with Windows 10, and best of all, it’s available free of charge.

And if you are at the viewing chapter, you can also consider looking at our list including the best media player software for your PC.

If you have any other questions or suggestions, you can leave them in the comments section below.

Ark Won’t Launch: How to Fix If it’s Crashing on Startup

ARK: Survival Evolved is a popular action game that gained massive popularity during the last few years. Of course, the game has its fair share of issues, and in this article, we’ll see how to fix those issues in Windows 10.

ARK: Survival Evolved players have experienced low frame rates, graphical glitches, crashes, freezing loading screens, and many other problems, so let’s see how to fix these problems.

How can I solve ARK crashes, low FPS, and glitches?

1. Update your drivers

There are reports saying that ARK: Survival Evolved suffers from crashes. According to this information, the game crashes on startup while loading, or it displays a black screen before it crashes.

This makes the game almost unplayable, and so far, the only solution is to update your drivers and try to run the game again.

Updating drivers manually is very annoying so we strongly recommend you download and install Outbyte Driver Updater to do it automatically.

Thus, you will prevent file loss and even permanent damage to your computer by downloading and installing the wrong driver versions.

You don’t even have to click on anything because when you open the program, it automatically starts scanning your drive for any problems with your drivers.

After a few minutes, Outbyte Driver Updater will provide you with a list of recommended drivers to update.

That’s the only part where you have to intervene and decide which drivers to install separately or if you want to update all of them by clicking on the Select All box from the top of the list.

As you might have imagined, for individual installation, you need to check the corresponding box from the left of the drivers’ names and click the install button from their right.

Outbyte Driver Updater

Updating your drivers automatically by using DriveFix will hopefully bring you back to playing your beloved ARK game in no time!
Free trial Visit website

2. Reinstall Visual C++ Redistributables

It has been reported that ARK: Survival Evolved comes with certain graphical glitches such as green water and black sky. This looks quite unnatural in the game, but there’s a way to fix that:

  1. Go to SteamSteamAppscommonARK_CommonRedistvcredist
  2. Run all the installers that you have in that folder to reinstall Visual C++ Redistributables.
  3. Start the game and check if the issue has been resolved.

3. Cancel the download or restart Steam

This is a minor problem, but it has been reported that the game gets stuck downloading at 99%.

To fix this, you can simply cancel the download and the game will automatically finish downloading, or you can simply restart Steam.

4. Run the game in compatibility mode

  1. Right-click the ARK: Survival Evolved shortcut and choose Properties.
  2. Go to the Compatibility tab.Run this program in Compatibility mode
  3. Check Run this program in compatibility mode for and choose Windows 7 Service Pack 1 from the list.
  4. Click Apply and OK to save your changes.
  5. Try running the game again.

5. Make sure that you’re running a 64-bit version of Windows 10

If the game won’t start on your computer, this might be due to the 32-bit version of Windows 10.

ARK: Survival Evolved is designed to work with 64-bit operating systems. If you’re using a 32-bit operating system and you really want to play ARK: Survival Evolved, maybe you should consider switching to a 64-bit version of Windows.

6. Set your View Distance to Epic

If you’re having frame rate issues while playing ARK: Survival Evolved, maybe you should change View Distance to Epic in the game options.

We have to admit that this solution seems a bit unusual, but it seems that developers have optimized Epic settings in the game, and users have reported better performance after changing View Distance to Epic.

This might not work for you, but it’s a still solution worth trying.

7. Change the Launch Options

  1. Open Steam and find ARK: Survival Evolved in your library.
  2. Right-click ARK: Survival Evolved and choose Properties.
  3. In the General tab click the Set the Launch Options button.
  4. Enter -USEALLAVAILABLECORES -sm4 -d3d10 in the input field and save the changes.

Note: ARK: Survival Evolved is quite a demanding game, and when you run it you’ll have a list of options to choose from.

If you have 16GB or more of RAM just select Play ARK: Survival Evolved.

If you have 4 to 8GB of RAM select Launch ARK (Low Memory 4GB).

In case you have less than 4GB RAM select Launch ARK (Extremely Low Memory).

ark-survival-evolved-launch

In addition, you might want to experiment with different values of graphical settings in order to get the best performance.

8. Select a PhysX processor

  1. Open Nvidia Control Panel.
  2. Go to 3D Settings and click on Set PhysX configuration.
  3. Select PhysX processor and choose your graphic card instead of auto-select option.
  4. Save the changes and try running the game again.

9. Change TdrDelay using Registry Editor

  1. Press Windows Key + RB, type regedit, and press Enter to run the Registry Editor.
  2. In the left panel navigate to the following key:HKEY_LOCAL_MACHINESYSTEMControlSet002ControlGraphicsDrivers
  3. In the right pane, create a new DWORD if you own 32-bit version of Windows or QWORD if you use 64-bit version of Windows. Name the new DWORD or QWORD TdrDelay.
  4. Double click the TdrDelay and change its value to 8 or 10.
    registry_tdr
  5. Close the Registry Editor and try running the game again.

Note: TDR stands for Timeout Detection and Recovery, and this feature is in charge of restarting your graphic card if the system doesn’t receive any response from the graphic card for a set amount of time.

The default time is 2 seconds, and if the system doesn’t get a response from your graphic card in 2 seconds, it will restart the graphic card and crash your game.

10. Boost your gaming performance

The ARK Survival crashing issues also might be related to your system performance. You can still give it a boost without changing your hardware configuration.

All you need is to install a dedicated app such as Game Fire. This excellent tool turns off some system features that are not needed during your gaming session.

It also targets your system resources towards the game you’re currently playing so that your PC to run it smoothly, with higher FPS and without any freezes. 

Game Fire also comes with a game management platform that allows you to handle all your titles from one place on your PC, whether they are local or online.

⇒ Get Game Fire

11. Use a different screen resolution

Some users have reported crashes, and it seems that these crashes have been caused by the game resolution. If you run the game in 1920×1080 resolution, you might want to change it.

According to users, changing the resolution from 1920×1080 to 1920×1200 has fixed the crashes. If you cannot use 1920×1200 resolution, feel free to use any lower resolution instead.

12. Use official servers

If you are experiencing long loading screens, it’s advised that you switch to official servers because they are faster and more stable.

If switching to official servers didn’t work for you may be the issue is caused by your RAM.

As we already said, ARK: Survival Evolved is a demanding game, and it requires a minimum of 4GB to run, so if you have less than 4GB of RAM you might experience some performance issues.

13. Change the Nvidia Control Panel settings

configure NVIDIA Control Panel resolution settings
  1. Go to Nvidia Control Panel and click on 3D Settings.
  2. Disable some of the options such as Ambient Occlusion, Anti-aliasing, etc.
  3. Save the changes and restart the game.

14. Change the game mode and update your audio drivers

Running the game in Low Memory or Extremely Low Memory mode can sometimes cause issues with sound, and in the worst-case scenario, you won’t get any sound while playing ARK: Survival Evolved.

To fix this you need to run games in normal mode, but if this problem persists in normal game mode, you need to update your audio drivers.

15. Add -fullscreen to launch options

If you’re getting a blank screen every time you start ARK: Survival Evolved maybe you could fix this by changing the game launch options.

Check Solution 7 to see how to change launch options and make sure that you add -fullscreen as the launch option.

As you can see, users are facing quite a lot of issues in ARK: Survival Evolved. We hope this article was of at least some help, and that you were able to solve your problem.

In case you’re having problems with some other games in Windows 10, check out our Windows 10 games hub, for more solutions.

Don’t forget to tell us in the comments section below what other issues you encountered in ARK: Survival Evolved, and how did you deal with them.

Screen Mirroring App for PC: Top 6 Options in 2026

Screen mirroring software lets you display content from your smartphone, tablet, or computer on your TV, projector, or external monitor wirelessly. The display will mirror your device in real time, accurately reproducing movements without flipping the image.

This feature is ideal for sharing photos, documents, videos, and is useful for professional and educational presentations. Screen mirroring requires compatible software on both the sending and receiving devices.

In this article, we will explore the best screen mirroring software options to help you choose the right one for your needs.

What are the best screen mirroring apps for Windows

ApowerMirror (also known as Apowersoft Phone Mirror) is a desktop program that can mirror the screen of your Chromecast-compatible Android device to a PC in just a few steps.

It even supports utilizing the mouse and keyboard to control your Android phone from the computer for an easier typing and clicking experience.

It can be used to play all kinds of Android games (without needing to root your device), stream videos, photos, and other media files send instant messages, and manage various apps.

The screen mirroring tool has the capability to connect to your phone through both USB cables and WiFi. To use it as a wireless display you want to make sure both your PC and phone are connected to the same wireless network.

Let’s quickly look at its key features:

  • Office – present files to every member
  • Classroom – share content with the entire class at once
  • Live – show yourself to a larger audience easily
  • Home – enjoy media with your entire family
  • Control your Android device with your PC mouse and keyboard
  • Take screenshots, and sync app data

The commercial version has all the capabilities of the free and personal versions but is designed for commercial use (corporate/companies).

The Apowersoft official page gives you the option to freely research elaborate guides meant to help you navigate the software easily and tailor the experience specifically to your needs.

ApowerMirror

Using this tool allows you to stream videos, photos, and any other media from your cell phone to a larger screen.
Free trial Visit Website

MobileGo – Comprehensive Phone Managemer with Screen Mirroring

MobileGo software’s key toolkit makes it simple to maximize and optimize your smartphone’s necessities. 

You can back up and restore all of your important data, enable your Android device to overcome restrictions, restore lost files, and delete your phone data to safeguard your privacy.

This Android and IOS manager allows you to screen-mirror the Android phone or iPhone from your PC. It does not take the screen in horizontal viewing, instead leaves it exactly like the phone screen, with a copy-paste function.

 What makes MobileGo unique in its features:

  • You can use apps on your PC from your phone, with no limitations.
  • Has multi-tasking abilities, like running apps in the background and joining meetings at the same time
  • With the MobileGo app you can optimize your phone’s performance but is available for Android only
  • Convert, import, and export music files and emails
  • Backup, restore, de-duplicate contacts
  • The mirroring function allows you to do your tasks faster

MobileGo

MobileGo allows you to run apps on your PC rather than your Android device, with no limits and minimum effort.
Free trial Visit Website

NCH ScreenStream – User-Friendly Screen Broadcasting

This software from NCH is one of the best options the market has to offer when it comes to screen broadcasting software because of its intuitive and user-friendly interface.

ScreenStream is the modern equivalent of an overhead projector, allowing others to watch your screen from their own computers over the network or the internet, and it’s completely free.

Unfortunately, NCH ScreenStream is not directly compatible with Windows 10 operating systems but we have a quick fix for you that allows you to install it nonetheless.

Steps to use NCH ScreenStream on Windows 10

  1. First, you want to download the software normally then right-click on the installer and choose troubleshoot compatibility.
  2. Windows will open the Program Compatibility Troubleshooter screen and all you have to do is click on Try recommended settings. This will set the compatibility mode to Windows Vista (Service Pack 2) automatically.
  3. You can then click on Test the program button and the installer will start.
  4. In order for NCH ScreenStream to automatically configure your network, your router needs to support UPnP. If that’s not the case, you can manually set up the IP address and TCP/IP port.

When you turn on screen sharing, any user that has the link (and optional access code) can easily view your screen directly from their internet browser without the need to install any additional software.

This makes ScreenStream one of the easiest options to set up and use. To stop sharing your screen, you can easily open ScreenStream and click the turn-off button.

Let’s quickly look at its key features:

  • Very simple user interface that you can install and run in minutes
  • Runs in the background and captures your screen while in any other program
  • Quick access for viewers from any web browser (any type of computer)
  • Secure connection using the optional access code feature
  • Share audio in order for others to hear you present/speak
  • Unlimited number of viewers

⇒ Get NCH ScreenStream

TeamViewer – Secure and Versatile Remote Mirroring

TeamViewer is one of the most popular screen mirroring apps used mainly for diagnostic purposes.

You can also use it to mirror desktops and other mobile devices if needed, and it is safe because you are protected with password access from the other end of the screen.

You only need to download this software on both devices and link them using your login information. This makes it easier to copy one screen to another.

It can share your phone screen with another phone, and it can also share the screen of one PC with another if you have the program installed.

Let’s quickly look at its key features:

  • User-friendly interface
  • Supports HD video and sound transmission
  • Supports 256-bit AES encryption
  • Supports files transfers from both devices
  • Cross-platform connections (PC to PC, mobile to PC, PC to mobile, and mobile to mobile)

The most important aspect is that when you shut down your computer or phone, the connection is terminated, and no one else will be able to access your system until you restart your computer or phone and enter your password again.

⇒ Get TeamViewer

Reflector – Advanced Multi-Device Mirroring

With its newly designed interface made specifically for modern operating systems, Reflector has been upgraded and rewritten for stability and performance.

This app is also a wireless mirroring and streaming receiver compatible with most devices. One of its most important features is the ability to mirror multiple devices at once.

It automatically adjusts the layout in order for the screens to be displayed proportionately. This feature is ideal for side-by-side comparisons in collaborative environments.

Let’s quickly look at its key features:

  • Easily records any connected devices
  • Live streaming – the ability to project your screen activities directly to YouTube
  • Support for connections from Miracast devices
  • Easy access to custom controls
  • Full-resolution screenshots
  • Screen previews – quickly see what’s on a screen before showing it to the audience
  • Powerful screen-mirroring features
  • Built into most Windows 10 devices – no need to install or use additional software
  • Options to change frames, emphasize and hide or show devices from one central location

Reflector also comes in a Teacher version, which is installed on the teacher’s computer.

Other classroom devices can wirelessly connect to that computer, connect the teacher’s computer to a projector or external display and take advantage of its specialized education-focused features.

⇒ Get Reflector

Mobizen – Efficient Android Screen Streaming

Mobizen is a screen mirroring app designed for PC that allows you to stream Android phone screens to PC and easily transfer files between your smartphone and computer.

It offers you the capability to control your mobile devices freely using a mouse and keyboard and can connect via USB, Wi-Fi, 3G, or LTE. It doesn’t allow the resizing of windows.

Let’s quickly look at its key features:

  • Real-time mirroring of your mobile device for gaming, instant messaging, etc.
  • Screen recording without needing to root your device
  • Effective for presentations with tools such as on-screen drawing
  • Ability to receive all smartphone notifications on your PC
  • Music and video streaming capabilities
  • Drag-and-drop file transfer
  • Access to call logs from PC
  • No need for installation – it can be used directly from your web browser

⇒ Get Mobizen

  • READ MORE: Looking for an alternative to mirror iPhone/iPad screens on Windows 10? The guide will walk you through easy steps.

Mirroring technology has simplified many forms of communication. It’s easy to record, share, and stream content via Wi-Fi, Bluetooth, or USB cable. And it becomes even easier with the right tools. You can even use your tablet as a drawing pad on your PC.

If you prefer working on your desktop than on your smartphone or tablet, check out the best free Android emulators and the best iPhone and iPad emulators

This article offers you the 6 best screen mirroring software options for Windows 10, whether you use an Android, iPhone, iPad, or another kind of device.

Let us know what is your experience in using these tools so far by hitting the comments section below.

Fix: Firefox Has Disabled the Ability to Change Some Options

When using the Firefox browser, some users have reported coming across a message Your organization has disabled the ability to change some options. This represents a sign that one or more policies have been applied to the browser.

So, you might question who is managing your browser, who has disabled or restricted you from changing Firefox options, or if your computer or web browser is hacked, but none of these are relevant. In this guide, we will show you a bunch of solutions that will help you to get rid of the Your organization has disabled the ability to change some options.

What triggers Your organization has disabled the ability to change some options error?

After some research, we found out there are a few common reasons which you will come across Your organization has disabled the ability to change some options error.

How can I fix Your organization has disabled the ability to change some options error?

1. Use the Troubleshoot Mode

  1. Click on the three-line icon.
  2. Click the Help button.
  3. Click on the Troubleshoot Mode option.
  4. Select the Restart button.

When you make use of the Troubleshoot mode in the Mozilla Firefox browser, then you can fix multiple issues with the browser.

This in-built tool is there to fix some bugs, and false errors, which could be caused by the themes, extensions, etc., and can refrain you from using the complete features of the browser.

2. Disable Hardware Acceleration

  1. Click on the three-line icon.
  2. Select Settings.
  3. Select General from the left.
  4. Scroll down to the Performance section.
  5. Uncheck the Use recommended performance settings box.
  6. Uncheck the Use hardware acceleration when available box.
  7. Close Firefox completely and restart it.

When you enable the Hardware Acceleration feature in the Firefox browser, it allows the browser to make use of the computer’s graphics processor.

This helps in better viewing the media content, as well as the games that can be played on the browser. However, this could also cause some issues with the browser if it fails to properly utilize the GPU. In such a case, you can turn it off and check if this fixes the Your organization has disabled the ability to change some options error.

3. Use the Registry Editor

  1. Press Windows + R keys to open the Run dialogue.
  2. Type regedit and press Enter.
  3. Navigate to the below path: HKEY_LOCAL_MACHINE\SOFTWARE\Policies\Mozilla\Firefox
  4. Select Firefox key and press the Delete button.
  5. Close the Registry Editor and launch Firefox.

4. Delete the Policies.JSON file from the installation directory

  1. Open the File Explorer.
  2. Navigate to the below-mentioned path. C:\Program Files\Mozilla Firefox
    • This path if for those who have installed Firefox in the C Drive. If you have installed the program somewhere else, open that path.
  3. Locate the Distribution folder inside the Mozilla Firefox installation folder.
  4. Open the folder and delete the Policies.JSON file.
  5. Restart Firefox and check if this resolves the problem or not.

When you delete the Policies.JSON file, you are deleting all the policies that have been applied to your Mozilla Firefox. Some policies applied to your browser could be popping up the Your organization has disabled the ability to change some options error.

5. Disable your antivirus software

  1. Open Avast or AVG antivirus software.
  2. Click on the Protection tab on the left.
  3. Select Core Shields.
  4. Locate the File shield and toggle it off.
  5. Close Avast.
  6. Relaunch Mozilla Firefox and check if this gets rid of the error message.

The Your organization has disabled the ability to change some options error has been known to be triggered because of the Avast or AVG antivirus software. It can also be caused by the Windows Defender Firewall.

You can simply follow the steps above and disable the antivirus software and check if this resolves the error message or not.

As you learned from this article, most of the time, your organization manages your browser and has disabled the ability to change some options Firefox message is caused when Firefox browsers apply a new policy.

We have a guide that will help you resolve the administrator has blocked you from running this app error.

However, we presented some solutions that will help you to easily solve this issue, without any problems. We really hope that hat you managed to fix this problem using one of our presented options.

Also, if you encounter troubles in using this browser, you can always find options for how to fix Firefox not responding in Windows 10. For any other questions, please don’t hesitate to contact us.

CSGO Can’t Connect to Official Servers: How to Reach Them

According to many, CSGO can’t connect to official servers and this makes the game unplayable, so let’s see if there’s a way to fix this major problem.

Why is CS:GO stuck on connecting to server?

Networking issues on your end are a common problem, but sometimes there are server-side issues that can cause this.

How do I fix unable to connect to server on CSGO?

1. Check if Counter Strike servers are down

  1. Open the Downdetector page for Counter-Strike.
  2. Check if there are any issues in the past 30 minutes.
  3. If so, you might have to wait while Valve fixes this.
  4. You can also perform a Counter-Strike ping test to check if servers are back online.

2. Verify the integrity of the game’s cache

    1. First, you need to open the Steam client software.
  1. 2. Click Library at the top of Steam’s window.

  2. 3. Right-click Counter Strike: Global Offensive to select Properties.

  3. 4. Select the Local Files tab shown directly below.

  4. 5. Click the Verify Integrity of Game Files option.

  5. How do you fix a stuck CS:GO load? Steam’s Verify Integrity option can often resolve Counter-Strike server errors.

3. Try another game server

hosthavoc-banner

If Counter-Strike does not connect with the server maybe you want to try another game server alternative that can help you provide the best game experience.

We suggest you try Host Havoc which has a custom control panel very easy to use in order to change maps and install further modifications to your server in just a few minutes.

Their directory for modpacks is by far a higher level than any other game hosting provider.

Host Havoc is a high-performance server with excellent 24/7 technical support that helps you fix issues easily and fast.

With a powerful control suite and unique features, and installers, this server hosting is very easy to use for both novice and advanced users.

⇒  Get Host Havoc

4. Turn off Windows Defender Firewall

  1. To turn off WDF, press the Windows key + S hotkey.
  2. Input firewall to search for the WDF applet.
  3. Click Windows Defender Firewall to open the Control Panel applet shown directly below.
    Windows Defender Firewall applet counter strike not connecting to server
  4. Click the Turn Windows Defender Firewall on or off link.
  5. Select the Turn off Windows Defender Firewall options, and click the OK button.
    Turn off Windows Defender Firewall option counter strike not connecting to server

CS: GO server errors can be due to Windows Defender Firewall blocking the game connecting with the server.

If CSGO can’t connect to official servers, you might want to temporarily turn off Windows Defender and check if the issue gets resolved by doing so.

5. Turn off third-party antivirus utilities

  1. Right-click your antivirus in the system tray.
  2. Select the option to disable realtime protection.
  3. Check if the problem is gone.

Keep in mind that these steps can be different depending on the antivirus that you use.

6. Repair Steam service

  1. To fix VAC server connection errors, try repairing Steam. First, make sure Steam is closed.
  2. Press the Windows key + R keyboard shortcut.
  3. Input this command in the Open box: "C:\Program Files (x86)\Steam\bin\SteamService.exe" /repair
  4. Note that users who haven’t installed Steam in its default Program Files directory will need to change the SteamService.exe file path in that command.
    Steam repair command counter strike not connecting to server
  5. Then press the OK button.

7. Switch to the Google DNS server

  1. Switching to Google DNS server can resolve CS: GO server errors. Right-click the Start button to select Run.
  2. Input ncpa.cpl in the Open box, and click the OK option.
  3. Right-click your net connection there to select Properties.
    Network Connections applet counter strike not connecting to server
  4. Double-click Wi-Fi Properties to open the window shown directly below.
    Wi-Fi Properties window counter strike not connecting to server
  5. Select the Use the following DNS server addresses radio button.
  6. Enter 8.8.8.8 in the Preferred DNS server box.
  7. Input 8.8.4.4 in the Alternative DNS server box.
  8. Select the Validate settings upon exit checkbox option.
  9. Press the OK button.

Those are some of the more likely fixes for Counter-Strike not connecting to server errors. In addition, try removing superfluous third-party programs from Windows startup.

By following these steps you should be able to fix any Counter Strike-related issues and play uninterrupted again.

Let us know which of the methods you used by leaving us a message in the comments section below.

How to get Age of Empires 2 to work on Windows 10/11

Windows 10 is used by millions of people worldwide, but just like with many other operating systems, sometimes there are problems with older software.

Speaking of old software, sometimes older games such as Age of Empires 2 won’t work on Windows 10, but luckily, there’s a fix available.

This article will give you the right solutions to help you solve this problem, and enjoy your favorite game, so be sure to check them out.

How do I get Age of Empires 2 to work on Windows 10/11?

1. Use a system optimizer

For a better gaming experience, we recommend downloading a specialized system optimizer. It will help with various gaming issues, by empowering your PC.

These system optimizers can remove malware and repair any damage to your PC caused by viruses.

You can get Age of Empires 2 to work on Windows 10 with just a couple of clicks.

2. Run the game in compatibility mode

  1. Right-click Age of Empires 2 shortcut, and choose Properties.
  2. Go to the Compatibility tab.
  3. Check Run this program in compatibility mode, and select the operating system from the list.
  4. Click Apply, then OK.

Since Age of Empires 2 is a very old game, maybe running it in compatibility mode could solve the problem.

If you’re running Age of Empires 2 on Steam you might try the following solution.

3. Disable the Age of Empires 2 launcher

  1. Open Steam, and find Age of Empires 2.
  2. Right-click it, and choose Properties.
  3. Go to the Set launch options.
  4. Type NoStartUp, and click OK.
  5. Click Local files, and then Browse local files.
  6. Delete or rename Launcher.
  7. Create a copy of AoK HD.
  8. Rename the copy of AoK HD to Launcher.
  9. Go back to the Steam properties window, and click Close.

If running the game in the compatibility mode didn’t solve the problem, you can try with disabling the game launcher.

4. Make sure your game is up to date

If you want to be sure that you do not encounter other problems on Windows 10 with this game, then you need to run the latest version of the Age of Empires 2.

If you’re not running the original version of the game, we suggest you buy now Age of Empires 2 Gold Edition, or the Definitive Edition, which comes with additional content.

We hope that these solutions helped you solve the problems with Age of Empires on Windows 10. If you have any questions or suggestions, reach for the comment section below.

Internet Slow on PC but Fast on Other Devices: Why It Happens and How to Fix It

Two PCs on the same network can have very different internet speeds. If one’s slower, it’s usually due to outdated network drivers, malware, or apps hogging bandwidth.

Other common issues include a corrupt TCP/IP stack or missing system updates. These can quietly drag down performance.

To confirm the slowdown, use internet speed test tools and compare results with your other devices.

How do I fix slow internet on one computer?

1. Update the Network driver

  1. Press Windows + R keys to prompt the Run window, type devmgmt.msc, and click OK.
  2. Expand the Network adapters, right-click the network driver and click Update driver.
  3. Select the Search automatically for drivers option.
  4. Restart your PC and check if your internet connection speed is faster.

Updating the network driver will fix bugs and resolve issues like slow internet issues while using wired access points, along with installing the latest features to improve your internet experience. Check other steps for updating drivers on Windows 11 if you have any issues.

If this method seems too tedious, you can use a third-party tool to automatically find and update any outdated driver.

⇒ Get Outbyte Driver Updater

2. Restart the Network Adapter

  1. Press Windows + R keys to prompt the Run window, type devmgmt.msc, and click OK.
  2. Expand the Network adapters, right-click the network driver, and choose Properties from the drop-down.
  3. Click on the Advanced tab, go to the Property window, click on the Speed & Duplex option and ensure that the Auto-Negotiation is set.
  4. Navigate to the Network adapters, right-click the network driver and select Disable device from the drop-down.
  5. Repeat step 4 and select Enable device from the drop-down.

Restarting the Network adapter will help refresh its process on your computer and improve its functionality. Read how to fix network drivers not found on Windows 11.

3. Uninstall unnecessary apps

  1. Left-click the Start button, type Control Panel, then press Enter.
  2. Click on Programs and Features.
  3. Find and click on the app to uninstall, and click on the Uninstall button.
  4. Select Remove on the uninstall wizard prompt, then click Next to continue.
  5. Click Yes and wait for the process to complete.
  6. Repeat the same process for other applications you want to uninstall.

Uninstalling unnecessary apps on your computer will remove any impediments they cause to the internet speed.

4. Reset TCP/IP Stack

  1. Left-click the Start button, type cmd, and click to open the Command Prompt.
  2. Type the following in the command bar and press Enter: netsh int ip reset c:\resetlog.txt
  3. Restart your PC.

Resetting the TCP/IP stack will restore its default settings and fix any configuration issues that may slow down your internet speed.

Alternatively, users can read through our guide on how to fix network congestion on Windows 11 for more information on increasing internet speed. And if you’re able to fix congestion issues, your video calls are slow despite having a fast internet connection, you may have to change your Wi-Fi channel.

Also, you can check what Wi-Fi packet loss is and how to fix it on your PC.

If your laptop’s WiFi is slow or noticeably worse than your Ethernet connection, check out our guides on how to fix slow WiFi on a laptop and why WiFi is slower than Ethernet for practical solutions.

If you have further questions or suggestions, kindly drop them in the comments section below.

5 Best Enterprise Cybersecurity Software [Antivirus & Backup]

Enterprise environments are places where data is created, modified, and circulated continuously, which makes securing it both in terms of cybersecurity and backups a mandatory process.

You as a user or as a company no longer have to deal with two separate programs, since there are plenty of enterprise cybersecurity software solutions that deal with both protection and data backup.

How can cybersecurity software help my business?

Any business is dealing with sensitive data. Server failures or ransomware attacks can turn everything into dust with huge losses.

That is why not only do you need to protect your network against intrusions but also back up your data at all times. That’s why you need to invest in enterprise cybersecurity software.

We’ve decided that a list of the best software of this kind would be appropriate, so we created one highlighting the best entries currently on the market.

These products were chosen based on their toolkit, reliability, price, and other important criteria.

Which is the best enterprise cybersecurity software?

Acronis Cyber Protect – Best backup & recovery solution

Acronis Cyber Protect is a fully functioning solid cyber protection solution that includes full antivirus and antimalware protection with AI-based ransomware protection, integrated patch management, and backup, a real-time threat feed, vulnerability assessment, remote desktop capabilities, and many more including monitoring and additional management capabilities.

Whether you are concerned about preventing cyberattacks, ensuring business continuity, or system integrity, Acronis’ real-time cyber protection, and data monitoring features will ensure threats are prevented, detected, and managed so you can keep your business moving forward.

All in all, it doesn’t matter whether you fear cyber threats, or simply hardware or software failure, Acronis Cyber Protect has you covered.

Here are just some of the top features of Acronis Cyber Protect:

  • Flexible reporting and monitoring
  • Full antivirus and antimalware protection with AI-based ransomware protection
  • Blockchain-based notarization
  • Real-time threat feed and notifications from Acronis’ Global Cyber Protection Operations Center
  • Integrated patch management and backup
  • Intuitive web-based interface
  • Multi-tenant administration
  • Remote desktop
  • Thorough systems support
  • Acronis Universal Restore
  • Multi-level encryption
  • Acronis Instant Restore
<img class="rmudcb__image" src="https://windowsreport.com/wp-content/uploads/2024/12/Acronis-Cyber-Protect-Home-Office-CTA-210×160.png" alt="<a href="https://www.jdoqocy.com/click-7235723-14491590?sid=https://windowsreport.com/page/636/?post_type=post&subid2=Native" target="_blank" rel="noreferrer noopener sponsored nofollow">Acronis Cyber Protect

Acronis Cyber Protect

Ensure business continuity and prevent cyberattacks with this powerful tool.
Check Price Visit Website

ManageEngine OS Deployer – Effortless Disk Imaging and Backup

ManageEngine OS Deployer

One of the important features of the ManageEngine OS Deployer is imaging, which allows you to create an image of an entire disk or partitions.

These backups can be then deployed as standardized system configurations across multiple computers.

This image can be of great use when a machine is infected or damaged, as it can restore the data and apps in no time without any data loss.

It enables you to either the entire disk or only specific partitions, depending on your requirements, and you can store it locally or remotely.

You can add or remove drivers, apps, and configurations, thereby creating a custom image tailored to your specific needs.

The software supports image compression, which reduces the size of the image and speeds up the deployment process.

Here are just some of the best features of ManageEngine OS Deployer:

  •  Seamlessly migrates user profiles
  • Acquires image of a machine when it’s live
  • Comes with an image verification feature
  • Creates a bootable USB or CD/DVD with an encrypted image
  • Provides centralized management

Bitdefender GravityZone Business Security – Complete security

This next entry is a software solution bought by a leader in terms of antimalware solutions, and it is a complete software Suite for businesses to keep their data safe.

It ensures complete protection against all types of malware, including ransomware, phishing, zero-day attack, viruses, spyware, and more.

The solution uses machine learning techniques, behavioral analysis, and continuous monitoring of running processes to ensure that no stone is left unturned when it comes to security threats.

Bitdefender GravityZone Business Security comes with all sorts of tools that make it an excellent entry in our article, including device control, full disk encryption, and a lot more.

Here are some of its best features:

  • Completely web-based security
  • Layered protection for endpoints
  • Network Attack defense features
  • AI and machine-learning driven systems
  • Access to the largest security intelligence cloud
  • Protection integrated with endpoint risk management
Bitdefender GravityZone Business Security

Bitdefender GravityZone Business Security

Keep your company data secured with the help of this incredibly useful tool.
Check priceVisit website

Paragon Backup & Recovery – Great for saving your data

Paragon Backup & Recovery has always been a staple of backup programs, having been one of the best on the market for a few years now.

Well, Paragon Back & Recovery can also be indirectly used to fight malware infections as well, although it doesn’t achieve this through conventional antivirus-like means.

It does this by using Paragon to simply reboot to a previous day, effectively kicking the malware from their system without any issues, and without losing any money, data, or time.

Basically, even if malware somehow gets on your system, you can simply reload a clean backup, since these are automatically created to contain the latest data relevant to your system.

Let’s review a few of its most important features:

  • Very easy to implement and use
  • Complete backup and recovery features
  • Scheduled backup
  • Incremental backup
  • Hard drive management
Paragon Backup & Recovery

Paragon Backup & Recovery

Perfect backups mean that you can always reboot from virus infection. Let Paragon create those backups today!
Check priceVisit website

AOMEI Backupper Workstation – Very easy to use

This last entry on our list is by no means inferior to the others, as AOMEi is too another big name in the backup software business.

Similar to Paragon, AOMEI has an extensive record of creating perfect copies of whatever data cluster you’re targeting, and it operates in the same way when it comes to dealing with malware.

This makes it an excellent tool when it comes to system crashes, hard drive failures, power outages, accidentally deleted overwritten files, viruses, and more.

Lastly, the price tag isn’t all that high either, and it even comes with a free trial for you to test out its full effectiveness, allowing you to make a more informed decision before commuting to buy it.

Here are some of its key features:

  • Perfect for data security
  • File syncing capabilities
  • File, partition, or disk backup
  • Very easy to use
  • Extensive recovery features
AOMEI Backupper Workstation

AOMEI Backupper Workstation

AOMEI has been keeping your data safe for years now. continue keeping it safe with AOMEI Backupper Workstation!
Check priceVisit website

This concludes our list of the best software for enterprise cybersecurity and data backup.

We hope we included tools that would have made it to your own top list as well, and that we helped you decide which is the better tool to try out.

All in all, if you run a company, or are responsible for running one, then you will definitely need such tools to ensure data privacy and security.

In that respect, you may also check our list of the best network antiviruses for your business.

Is there any other tool that you consider that should have made it on our list? If so, let us know by leaving your suggestions in the comments section below.

10 Best Free Weather Apps for Windows 10

It is very annoying when you go out in the park, expecting to enjoy a lovely, sunny day but you return home soaking wet because the weather caught you by surprise.

You did not check the weather forecast because the sun was shining in the sky in the morning and you thought it was impossible to rain that day.

If you want to always be prepared and never let the weather take you by surprise, install one of the following apps and check the forecast before you go outside.

Have in mind that some of the listed free apps are actually freemium and some payments might be required in order to unlock certain features.

Check the weather with these useful Windows 10 weather apps

Weather Radar Pro

This weather app covers the United States, Europe, and Eastern Caribbean and offers animated weather radar with watch/warning boxes, global hurricane tracking, and cloud overlays.

This app has recently been updated and you can now select your default location manually and use the Live Tiles.

In-depth data about weather phenomena is offered: storm hail size, probability of hail, cloud top height, or vertically integrated liquid.

Storm characteristics on the radar include arrows showing the direction of motion and icons indicating the position and amount of hail, mesocyclones, and tornadic vortex signatures that indicate the existence of rotation in supercells and potential tornadoes.

Weather Radar Pro

Choose the number of frames in your radar animation, the pace of the animation, the interval between frames, and more precise real-time changes.
Check price Visit website

Forecast

This is one of the richest apps in terms of locations available, offering weather information for millions of places around the world. It includes a live tile with a multi-day forecast, in-app weather graphs, and location-based weather.

You can configure the app appearance with both color and image themes available, including Bing’s image of the day. There’s a free trial available so you can give it a try.

Both Fahrenheit and Celsius are available, as well as a variety of measures for wind speed, precipitation, and pressure, all of which may be changed in the app’s settings.

Forecast

Forecast features a live tile with a multi-day forecast, in-app weather graphs, and location-based weather (GPS).
Free trial Visit website

Perfect Weather Universal


This weather app shows the current weather, the forecast for today, and for 9 days ahead. Details such as wind speed, pressure, day length, and moon phase are available.

Another strong point is the number of languages available:  26 languages. Multiple live tiles automatically update the forecasts on the Start screen so that you don’t have to.

Swipe the screen to watch how the weather changes throughout the day. The sunset, sunrise, moonrise, and moonset all occur at the same time as in real life. Learn about the wind, pressure, day length, and moon phase…

There are several landscape layouts that you may choose from, and several live tiles refresh the predictions on the Start screen automatically.

⇒ Get the Perfect Weather Universal app

MSN Weather

This app brings you the latest information on weather conditions, with accurate 10-day and hourly forecasts. It comes pre-installed on Windows 10, and the only thing you have to do is configure it.

Severe weather alerts are offered so that you may be one step ahead of the weather, as well as previous days’ weather maps so that you can see what the weather is like, month by month.

Interactive pan and zoom maps are available, alongside Live Tile support.

⇒ Get MSN Weather

8-bit Weather

If you’re a pixel fan, you will love this app because it combines nostalgic pixelated graphics with the latest weather information.

Watch as pixelated leaves blow over a dream landscape and drops of blocky rain descend from the sky. Keep an eye on the snow that is building up around a stone cave that is most likely home to a terrifying monster, and watch out for that moat!

You can check the current weather conditions – with hourly updates to a 7-day forecast – on videogame canvas. This is definitely the most fun way to check the weather.

⇒Get 8-bit Weather

Rain Gauge

This app gives you the current weather, and the forecasts for the upcoming days, and has a dedicated rain radar. The best part is that you don’t have to check the app to see if it rains.

You can set up rain alerts to get a message when it’s going to rain and check the live tile for the rain graph. Rain Gauge proudly offers rainfall information per 5 minutes in the upcoming 3 hours.

⇒ Get Rain Gauge

The Weather 14 days

As its name suggests, this weather app shows you the weather forecast for the next 14 days. You can use it to get the latest weather forecasts in over 450,000 locations all around the world.

The app is compatible with Windows 10 PCs, Surface devices, as well as Windows 10 phones. If you install it on your phone, you can customize it with weather widgets, display temperature in your notification bar, and more.

You can also select a specific day to view detailed hourly weather information such as temperature, rainfall, humidity, pressure, wind speed, and much more.

Weather warnings are also available so that you’ll never be caught off guard by unusual weather phenomena.

⇒ Get The Weather 14 days

Simple Weather


The Simple Weather app is one of those apps available in the Store that are seemingly too bareboned to be considered worthy. But that’s hardly the case.

Simple Weather checks all the boxes in regards to what it’s supposed to do: shows you the weekly weather forecast along with pressure, humidity, wind conditions, sunrise and sunset times.

It can also give you severe weather alerts based on the weather forecast provider.

⇒ Get Simple Weather

Weather Notify


Many apps we listed here have notification options but none is as specialized in delivering timely notifications as Weather Notify. Once you’ve set the location of your choice, you have a multitude of options to choose from for the app to notify you about.

However, the notifications are under the paywall so you’ll need the Pro version of the app in order to get them. Also, on the downside, the app isn’t exactly the most stable.

⇒ Get Weather Notify 

Strawberry Weather

Strawberry Weather is a really colorful weather app. You can install it on your Windows 10 laptop, mobile device, or Microsoft Hub. One of its strong points is its low battery usage.

Expect it to use about 3% of your battery in a day. This is a nice feature to have especially if you use the app while you’re on the go and don’t have access to a wall socket to power up your laptop or phone.

There are 12 colorful themes that you can choose from. Simply select your favorite color as the app background and you’re ready to go.

The app allows you to search for all the places you want and get the latest weather information about the respective places. The part is that you can sync the weather info across all your Windows 10 devices.

⇒ Get Strawberry Weather

You can also check out these phenomena specific apps:

  • Moon Calendar with specific sunrise, sunset and twilight times for a price tag of $1.99.
  • Hurricane Tracker –  get the latest information about tropical cyclones in the Atlantic, East Pacific, West Pacific, Indian Ocean, and southern hemisphere for only $3.75.
  • Rain Alarm – this app warns you about rain or snow approaching your location using push notifications.

For more guides like this one, visit our dedicated Weather Apps Hub. If you like having handy apps, visit our Utilities and Tools page for more great suggestions.

Also, leave there any other questions you may have and we’ll be sure to check them out.

If you’re aware of other apps that we didn’t feature in our list and are worth mentioning, share them in the comments section below.

Windows 10 Equalizer: How to Improve Your Sound Quality

If you are a movie lover, music lover, or gamer, chances are you’ve wanted a system-wide sound equalizer for Windows 10. There are many ways to add a sound equalizer for Windows 10.

Yet, adding an equalizer to your PC can seem like a daunting task. Fortunately, the detailed steps below will show you how to add a sound equalizer for Windows 10.

How can I use a sound equalizer for Windows 10?

1. Choose a sound equalizer compatible with Windows 10

Once you have made sure that your sound drivers are updated and working properly you will need to search for a sound equalizer that works well for you.

The internet has numerous equalizer applications, so it can be intimidating to choose one. So the 3 best equalizers below will help make your search for an equalizer an easier one.

Each of the three equalizers in this list will have a short introduction. If you want more information on how to install each equalizer then you can proceed to step 3.

1.1. Boom 3D (recommended)

This is the Windows version of the famous Boom 3D from Global Delight Apps. It lets you choose the presets and you can manipulate with various frequencies from these presets.

If you are more advanced in all that is called sound then you should be able to build your own presets.

A powerful intelligent engine lets your hearing senses adapt to the environment/sound combination. You can also choose the type of headphones you are using for a better audio experience.

Boom 3D equalizer is available for free on the official website and fits perfectly on a Windows 10 machine thus being our recommended choice. Many users have tried out this software, and they were all pleased with the results. The program can also let you bypass normal volume limits on your laptop or PC.

Enhancing audio has never been easier thanks to Boom 3D. More so, the software has frequent sales, so you can grab it at a fairly decent price!

Re-imagine your gaming, refine your favorite music, and redefine movie experiences, because you can use this tool to enhance all of your device’s sounds.

The multi-channel 3D surround feature will make create an immersive experience that will absorb you into the movie or the game you play, making it feel like you’re part of it.

Boom 3D

If you want to know what 3D audio with surround effects truly sounds like, then you have to try Boom 3D!
Check price Visit website

1.2. Realtek HD audio manager

This is the default equalizer found in many Windows 10 computers. Some users will have this automatically installed on their computers if they have the right type of hardware.

If a user does not have this equalizer for some reason,  then he/she can easily download  Realtek HD drivers from the internet and use its equalizer.

Realtek originated from Taiwan’s Silicon Valley and has been providing high-end software since 1987. Fortunately, the Realtek HD audio manager is easy to use, attractive, and powerful.

Users who are looking for a basic equalizer that has been proven and tested by time should try this software from Realtek.

Some users do not even have to download it as they already have it on their computers. To learn how to download and use this equalizer go to their official website.

⇒ Download Realtek HD audio manager

1.3. Windows 10 Default Equalizer

Unknown to many, there is a default equalizer in Windows 10. Albeit, the equalizer is somewhat hidden and it is merely a settings window. In other words, there are no special graphics, features, etc.

However, if you do not feel like downloading anything then the default equalizer is for you. Here is how you can find the Windows 10 default equalizer.

You can even use this feature to disable loudness equalization. Learn how to enable or disable Loudness Equalization on Windows 10 in our special guide.

2. How do I add a sound equalizer for Windows 10?

This section will show detailed instructions on how to download, install, or use each equalizer on your Windows 10 PC.

2.1. How to download and install Boom 3D

  1. Download the setup from the official site.
    • Alternatively, you can download the software from the Microsoft Store.
  2. Run the setup and follow the guidelines.
  3. After the setup is finished, sign up or unlock the software.
  4. That’s it. You can now use the software.

2.2. How do I download and access Realtek HD?

  1. Download the equalizer from their official website.
    • If you already have it on your PC proceed to step two.
    • locate the Realtek HD audio manager also on the bottom right part of the screen on the taskbar.
    • It should have a similar icon to your sound icon.
  2. In order to ensure you have the right icon, hover your mouse over it like the sample below.
  3. After you find the icon, right-click on it and select Sound manager.
  4. Once you are inside the sound manager menu, select the sound effect tab.
    • Here you will have a number of preset equalizers as well as a graphic EQ.
    • The image below shows you where to access the graphic equalizer.

2.3. How to find the default Equalizer on Windows 10

  1. Locate the speaker or sound icon on your PC.
  2. Right-click on it and select the playback device option.
  3. A dialog named sound should appear.
  4. Locate the default speakers or headphones in the playback tab.
  5. Right-click on the default speakers, then select properties.
  6. There will be an enhancements tab in this properties window.
  7. Select it and you will find equalizer options.

3. Update your drivers

  1. locate the sound icon, which is usually located in the bottom right-hand corner of your screen on the taskbar.
  2. Right-click on the icon and several options should pop up.
  3. Click on the playback option.
  4. A window like the one below should appear.
    • Once it appears you will need to select the default speaker or headset device that you use for your PC.
    • In the sample image, the device I use is called sample headphones.
  5. Double click the default icon and a properties window should appear.
  6. If you are not already on the general tab, locate it and click on it.
  7. You should then be able to locate properties in this tab.
  8. Open Properties.
  9. Click on the change settings option in the general tab.
  10. Go to the Driver tab and click on update driver.

Updating your drivers will ensure that they are compatible with Windows 10. It is also crucial to update your PC to work properly.

There you have it, you now know how to add a sound equalizer for Windows 10. It is fairly easy and can be done using multiple methods.

Audio equalizer software can be a good choice if you are particular about your audio settings. On top of that, they can help boost the functionality of low-end audio equipment.

Feel free to give us any feedback regarding the subject, or your experience with it, in the comment section below.

Error 0x800701c4 on Xbox [Solved]

The Error 0x800701c4 on the Xbox or Xbox app on the PC has been a nightmare for many users. It prevents users from downloading and installing games via the Xbox app on their Windows 11. Also, the error appears on the Xbox console, making the console inaccessible.

Likewise, users report error code 80151103 on Xbox.

What causes the error code 0x800701c4 on Xbox?

Most errors you can encounter on the Xbox app or console are likely caused by network connection problems. If the game or console can’t connect properly with its servers, it can result in an error.

Furthermore, other factors that may cause the Error 0x800701c4 on the Xbox or Xbox app on the PC are:

  • Server issues – Server downtime on the Xbox Live server affects every activity on the Xbox console or app. So, you can encounter the error whenever there’s a server maintenance session or other issues with the Xbox Live status.
  • Outdated Xbox or PC – If your Xbox console is outdated or the PC you’re running the Xbox app on is outdated, it can cause issues with your gaming activities. It is because of the bugs infecting them due to inaccessibility to needed updates.
  • Interference from other apps – Third-party programs running on your computer can cause issues with the Xbox app on your PC. Apps like antivirus software can block the Xbox app from interacting with the necessary programs.

However, these factors can be fixed by troubleshooting the Xbox console and your PC.

How do I fix the error code 0x800701c4 on Xbox?

Go through the following preliminary checks:

If you still encounter the error, proceed with the following solutions.

1. Reset Microsoft Store

  1. Press Windows + R keys to open the Run dialogue box, type ms-settings:appsfeatures, then press Enter.
  2. Search for Microsoft Store, then click on the Advanced options on the result.
  3. Go to the Reset tab and click the Reset button.
  4. Restart your PC and check if the error is fixed.

Resetting the Microsoft store will fix any configuration issues affecting its performance.

2. Update Windows Operating System

  1. Press Windows + I key to open the Windows Settings app.
  2. Click on Windows Update and click on Check for updates.

If there are any updates available, Windows will search for and install them. Update Windows OS will fix bugs affecting your PC and update your drivers.

For Xbox console users, you can check our guide about updating the Xbox One console and check if the error persists.

3. Reset the Xbox console

  1. Power on your Xbox console and press the Xbox button on the controller to open the guide overlay.
  2. Select the System menu and click on Settings.
  3. Click on System to expand and choose Console info.
  4. Click on Reset Console.
  5. Then choose between Remove everything or Reset and keep my games & apps.

The Remove everything option will delete all data and games, resetting the console to the way it came.

Check how to fix the Xbox controller detected but not working if you experience it. Also, you may take a closer look at our guide on using the Xbox one controller on Windows PC.

For further questions or suggestions, kindly drop them below.

Posted in Fix

Windows 11 HDR is Washed Out? 5 Ways to Fix it

The concept behind Windows High Dynamic Range (HDR) is to improve visual quality and convert a more detailed color texture, look, and feel. However, many users are experiencing Windows HDR washed out after enabling it, causing the opposite effect.

You can check our guide on how to fix auto-HDR not working in Windows 11 to enjoy the best experience.

Why does HDR seem washed out?

Windows HDR seems like it’s washed out after enabling HDR on your PC, which can be due to several factors. It causes the content and items on your screen to look washed out and unclear to read.

Some prominent causes that may be responsible for the issue are:

  • Wrong configuration in the HDR settings – The visual quality of the contents on your screen can be affected by the configurations in the HDR settings. So, color bit depth and color saturation can determine how visible the HDR content will be.
  • The after-effects of the switching from SDR to HDR – The transitioning from SDR to HDR usually affect HDR performance because SDR is overly saturated.
  • HDR display Requirements – Enabling HDR display on a monitor incompatible with the display mode can affect the display performance. It can cause the Windows HDR color to be washed out after enabling it.

The causes of the problem can vary on different PCs. Regardless, you can fix the HDR washed-out colors by tweaking some settings on your PC.

How can I fix HDR washed-out issues?

Go through the following preliminary checks:

  • Increase your screen brightness.
  • Ensure you have enough power on your PC.

If the HDR washed-out issue persists, try the following solutions:

1. Set the right balance for brightness between HDR and SDR content

  1. Right-click the Desktop and select Display Settings from the drop-down.
  2. Go to Rearrange your displays, and select the HDR-capable display.
  3. Move the Settings window to the HDR display that you’re adjusting.
  4. Select Windows HD Color settings on the Display settings screen.
  5. Go to HDR/SDR brightness balance, and drag the slider to get the right balance for brightness between HDR and SDR content.

Setting the right balance for brightness between HDR and SDR content will fix any differences after switching from SDR to HDR. For more brightness and contrast settings, check out our guide.

2.  Enable HDR on Windows

  1. Press Windows + I to open the Windows Settings app.
  2. Select Display, then toggle on the switch for Use HDR.
  3. Allow the Auto HDR option.

Enabling the HDR display on your Monitor or Windows PC can help turn it on if it was toggled off. Read about what to do if the Settings app is missing on Windows 11.

For a broader look at whether HDR is worth keeping enabled during gameplay, check out our guide on is HDR good for gaming.

3. Change Color Bit Depth

3.1 For Nvidia

  1. Right-click on your desktop and select the NVIDIA Control Panel.
  2. Navigate to Display in the left pane, then click on Change Resolution.
  3. Go to Output color depth, and select 10 BPC (bits per color).
  4. Change the Output Dynamic Range to Full and click on Apply.

If you are using an RTX graphics card, you can also follow this dedicated guide on how to enable HDR on RTX in Windows 11 for optimized results.

3.2 For AMD Radeon

  1. Right-click on your desktop and launch AMD Radeon Settings.
  2. In the display tab, change the color depth to 10 BPC.
  3. Go to Preferences, select the Radeon Additional Settings and change the Pixel Format to RGB 4:4:4 Pixel Format PC Standard (Full RGB).
  4. Close the AMD Radeon Settings window.

The 10 BPC Color Bit Depth will produce a more definitive look and more colors compared to lower values like 8 BPC.

4. Update your graphics driver

  1. Press Windows + R keys to prompt the Run window, type devmgmt.msc, and click OK to open the Device Manager.
  2. Click on Display Adapters, select the driver from the drop-down menu, and click the Update driver option.
  3. Select the Search automatically for drivers option.
  4. Restart your PC and check if the HDR content is still washed.

Updating the graphics driver will fix bugs affecting it and help install the latest features to improve its performance. Read about other steps for updating graphics drivers on Windows 11 if you have any issues.

Another quick and safe alternative is to use a third-party tool that will automatically find any outdated drivers and update them on the spot.

⇒ Get Fortect Driver Updater

5. Update Monitor driver

  1. Press Windows + R keys to prompt the Run window, type devmgmt.msc, and click OK to open the Device Manager.
  2. Click on Monitors, right-click on the monitor device, then select Update driver from the drop-down menu.
  3. Select the Search automatically for drivers option.
  4. Restart your PC.

Check our guide on how to update drivers on Windows 11 for more steps. Alternatively, our readers can check our guide on the best HDR software for Windows 11.

Likewise, you can read about fixing HDR game issues on Windows 11 or what to do when HDR videos are not playing on YouTube.

You can also check this detailed guide on HDR not working after Windows update for additional fixes.

If you have any suggestions or questions on this guide, kindly drop them in the comments section.

Spectrum NETGE-1000 Error: Fix it in 3 Steps

Spectrum is a cable television, telephone, Internet, and wireless service provider in the United States. Many customers reported receiving an unusual error message when logging into Spectrum via the app or website. 

Typically, the following types of error messages are displayed:

  • NETGE-1000 error spectrum login
  • NETGE-1000 error spectrum website
  • Spectrum login error Netgear 1000

In this article, we shall show you how to bypass this error.

What are the Spectrum error codes?

Here are a few error codes you may encounter on Spectrum:

  • WLC-1006 – We see you’re away from home: This makes you incapable of connecting to specific channels.
  • WLI-1010 – Unable to sign in: Prohibits you from getting into your account.
  • WLP-1035 – Service unavailable: Comes up when the selected program is unavailable.
  • WVP-3305 – Video unavailable: Comes up when requested videos are not available.

What does Spectrum NETGE-1000 error mean?

On Spectrum, NETGE 1000 indicates that your device can’t connect correctly with Spectrum servers. This is caused by:

  • Incorrect server-side user info
  • Server outages
  • Disabled pop-ups on Spectrum website

How can I fix the Spectrum NETGE-1000 error?

1. Enable pop-ups for the Spectrum site

  1. Log on to the Spectrum website.
  2. Click My Account at the top right, then Sign in.
    netge-1000 error spectrum
  3. Once signed in, click on the padlock icon of the address bar and select the Site settings option.
  4. Make sure the Pop-ups and redirects dropdown is set to Allow.
    netge-1000 error spectrum
  5. Reload the Spectrum site and see if the NETGE-1000 error is cleared.

2. Create a different Spectrum credential for the user

  1. Once again, navigate the Spectrum website and click on the option to Create a Username.
    NETGE-1000 error spectrum
  2. Choose the Contact Info option, then input the email or phone number.
  3. After which, you follow the prompts till the end.
  4. Finally, check if the Spectrum login error Netgear 1000 is fixed.

3. Reset the Spectrum credentials

  1. Once more, navigate the Spectrum site, and click the Sign-in option.
    netge-1000 error spectrum
  2. Here you should select the Forgot Username or Password option.
  3. Under the Username & ZIP Code section, enter your details, then follow the prompts till the password is reset.

The NETGE-1000 error on the Spectrum website should be fixed once you have taken these steps, and you should be able to enjoy the services again.

Some other users have experienced issues of VPN not working on Spectrum or Spectrum self-install not working; you would also be able to fix that in a few easy clicks.

How to Find the Largest Files on Windows 10? [Quick Guide]

The files on your PC can drag it down with time when you are running out of space. In this case, you might need to delete some files to free up some hard drive space.

One quick way to do this is to find and delete the largest files. While this can be easy to talk about, finding these files is another beast.

To help ease the task, we have prepared this guide to show you the easy ways to find the largest files on your PC.

How to find the largest files and folders on Windows 10?

    1. Find largest files using File Explorer

  1. 1. Press the File Explorer button on the Windows 10 taskbar.

  2. 2. Click the View tab at the top and click Options.

    view options find largest files windows 10
  3. 3. Now, click the View tab at the top and tick the button for Show hidden files, folders, or drivers.

  4. 4. Click the Apply button, followed by OK.

    view hidden
  5. 5. Next, go back to File Explorer and click This PC in the left pane.

    this pc
  6. 6. Now, type * in the search box and hit Enter. This will add the Search tab to the menu at the top

  7. 7. Click the Size dropdown at the top and select the range you want to search for.

The first method to find the largest files on Windows 10 is to use the File Explorer. After following the steps above, you can now choose to delete or modify the files that are displayed.

Note that you should not delete or modify any large file that is a system file. This is because it can have a devasting effect on your PC.

2. Use a third-party tool

A dedicated file finder tool will help you with the utmost accuracy to find documents depending on your needs. These tools come with features that allow you to dig deep into the computer files and get exactly what you’re looking for.

As a result, you can search a file by Date, Size, Type, Name, and Folder.

Plenty of these tools come in a wide variety of subscription versions, including free ones, although some limitations to their functionality may apply.

However, you can rest assured that the most popular file types (such as Office files, Outlook emails, and attachments, text documents, archived, and multimedia files) are covered.

After finding the largest files, in case you need to keep some of them, you can still free up HDD space by moving the files from your hard drive into Google Drive or OneDrive cloud storage.

Copernic Desktop Search

Copernic Desktop Search

Find any type of document not just by their size, but also by type or saved date with this first-rate tool.
Free trialVisit website

There you have everything you need to find the largest files on Windows 10. All you need to do now is to follow the instructions therein and things should work out fine.

If you need a list of the best tools to find and remove duplicate files on your PC, check our detailed guide for the excellent options you can use.

Feel free to let us know in the comments below if you encounter any problem applying the steps in this guide,

6 Easy Ways to Fix UltraSurf if it’s not Working

UltraSurf is a freely available app for securing browsing with proxy connections. That software enables users to bypass geographical browsing restrictions. UltraSurf is similar to VPN software, but it only encrypts HTTPS traffic.

However, sometimes users might not be able to connect with Ultrasurf. When the UltraSurf status is not connected, you might need to check some settings. The potential resolutions below might fix an UltraSurf connection.

What is UltraSurf’s platform compatibility?

UltraSurf is compatible with the Windows, Android, and iOS platforms. Thus, you can utilize it on Windows PCs and Android and iOS mobile devices. However, don’t be surprised when UltraSurf doesn’t work on Apple and Linux desktop platforms.

What are the best browsers for UltraSurf?

UltraSurf has primarily been designed for Internet Explorer and Google Chrome. Therefore, it’s best to utilize UltraSurf with those browsers. However, you can still use it with some alternative browsers.

Quick Tip:

Opera ultrasurf not working

Instead of utilizing UltraSurf for Chrome and Internet Explorer, why not use a browser with a built-in VPN instead? Opera is perhaps the most notable browser that incorporates its VPN. That built-in VPN also conceals locations so its users can bypass geo-content restrictions.

Opera also has many other fine features. Its customizable speed dials on its start page are one of Opera’s standout features.

Opera’s unique sidebar with built-in messengers and a built-in music player is another great addition. My Flow is also a great Opera sidebar feature for sharing web content.

Opera

Pick a valuable browser with an improved security proxy and built-in VPN protection.
Check price Visit website

How can I fix UltraSurf not working (connecting)?

1. Run the Internet Connections troubleshooter

  1. Press the Windows key + I to open the Settings app and select Update & Security.
    update and ultrasurf not working
  2. Choose Troubleshoot in the left pane and click Additional troubleshooters.
    troubleshoot
  3. Now, select Internet Connections and click Run the troubleshooter.
    run the internet

The Network Adapter troubleshooter might also come in handy for resolving UltraSurf connection issues.

2. Select a different server

UltraSurf includes three different server checkbox options for users to select from. The best server is usually determined by default, but alternative options exist. So, choose one of the other server options when UltraSurf doesn’t connect.

3. Turn off Windows Defender Firewall

  1. Press the Windows key + S, type fire, and click Windows Defender Firewall.
    windows ultrasurf not working
  2. Choose to Turn Windows Defender Firewall on or off in the left pane.
    turn windows
  3. Now, select the radio buttons for Turn off Windows Defender Firewall (not recommended) options for both the Private and Public networks.
  4. Finally, click OK to exit the window.
    turn off ultrasurf not working

Another effective solution if Ultrasurf is not working is to disable your firewall. However, It’s recommended to turn your firewall back on whenever you are not browsing the web with UltraSurf connections.

4. Uninstall third-party antivirus software and firewalls

  1. Press the Windows key + R, type appwiz.cpl, and click OK.
    appwiz
  2. Next, select any third-party antivirus software and firewall you have installed.
  3. Finally, click the Uninstall option and follow the onscreen instructions to complete the process.
    uninstall

Sometimes, Ultrasurf might not work because your antivirus software is blocking it. In this case, you can try to disable the software to see if that solves the problem.

You should remove the antivirus from your PC if that does not work. To make sure you remove all the components of the antivirus, it is recommended that you use a dedicated third-party uninstaller software in CCleaner to complete the process.

This top-notch tool will ensure there is no stubborn leftover file that can cause problems later.

5. Manually set up an UltraSurf proxy via browser settings

5.1. Google Chrome

  1. Launch Google Chrome, click the menu button (three vertical dots) in the top right corner, and select the Settings option.
    chrome settings ultrasurf not working
  2. Select the System option in the left pane.
  3. Now, click Open your computer’s proxy settings in Chrome.
    system ultrasurf not working
  4. Next, toggle the switch for Use a proxy server forward under Manual proxy setup.
  5. Input 127.0.0.1, or an alternative proxy server of preference, within the Address box.
  6. Then type 9666 within the Port box.
  7. Finally, click the Save button.
    use a proxy

If Ultrasurf is not connecting on Chrome, you might need to set up the proxy manually, as shown above.

5.2. Firefox

  1. Launch Firefox and click the menu button in the top right corner.
  2. Select the Settings option.
    settings
  3. Now, click the Settings button under the Network Settings section.
    settings
  4. Select the Manual proxy configuration option.
  5. Next, input 127.0.0.1, or a different proxy, with the HTTP Proxy box.
  6. Type 9666 in the Port box.
  7. Finally, click the OK button to save the changes.
    manual firefox ultrasurf not working

While it is not compulsory for Chrome users to manually apply proxy settings for Ultrasurf, it is one of the requirements for Firefox users.

6. Try the UltraSurf Chrome extension

There’s an UltraSurf extension for Chrome you can utilize. So, it might be worth adding that extension to Chrome when the UltraSurf app doesn’t work as anticipated. You can toggle an UltraSurf connection on/off with that add-on’s toggle button.

⇒  Get the UltraSurf extension

So, give those potential resolutions a shot when UltraSurf’s connection is not working. For further possible fixes, you can contact UltraSurf’s support at [email protected].

UltraSurf not working can often be due to security software blockages or temporary network issues. For example, you might need to disable security software when UltraSurf is not connecting with Chrome, among other solutions in this guide.

Feel free to let us know the solution that helped you fix this issue in the comments below.