The on-screen keyboard is a feature conveniently built into the Windows 10 platform. If the virtual keyboard is too small or too big and you cannot properly use it, read the troubleshooting steps below and learn how to resize it.
The solution listed in this tutorial will work regardless of what Windows-based device you are currently using.
How to resize the touch keyboard in Windows 10?
1. Modify the registry
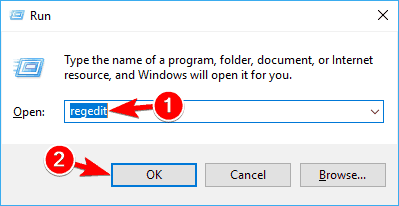
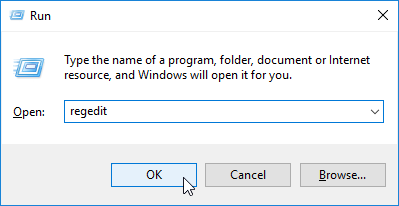
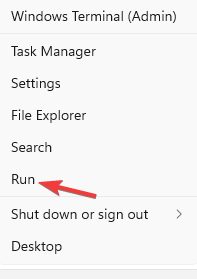
1. Press the Win+Rhotkey. The Run box will be displayed on your device.
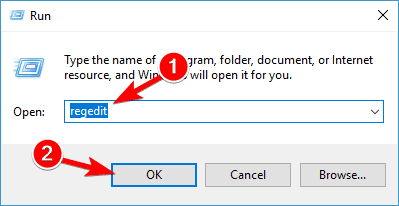
2. In the Run field type regedit and then press Enter. The Registry Editor will open.
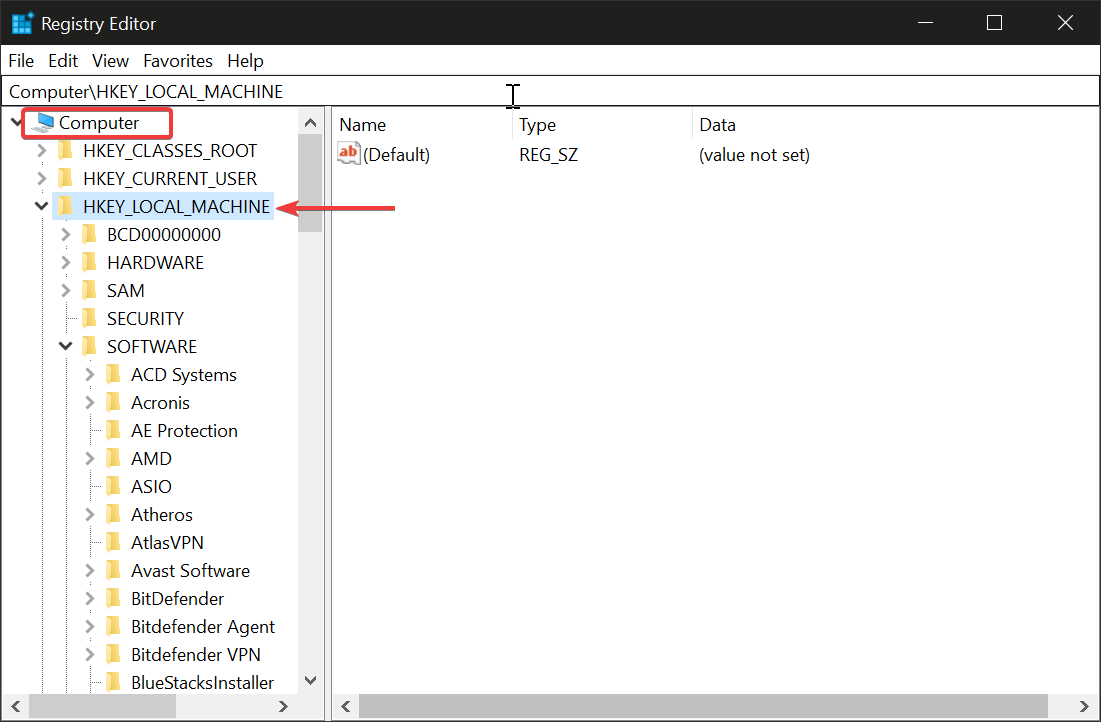
3. From the Registry Editor window, access the following path:HKEY_LOCAL_MACHINESoftwareMicrosoftWindowsCurrentVersionExplorer
4. Right-click on theExplorerfolder and selectNew – > Key.
5. Name this key Scaling.
6. Now, under Explorer, you should see the recently created Scaling entry.
7. Right-click on the Scaling folder and chooseNew – > String Value.
8. Name this ValueMonitorSize.
9. Next, double-click onMonitorSizeand enter the string value 25 (this is the default value for a half-screen-width keyboard). You can also enter a different string value for resizing the virtual keyboard.
10. Close the Registry Editor.
11. Restart your Windows 10 system.
The touch keyboard’s size can be easily modified via the Registry Editor. A quick tweak to the Registry helps you resize the keyboard however you want, depending on the value you input.
You can find high-quality alternatives with advanced features and customization options. Most on-screen keyboards support multiple languages and have auto-complete functions.
Make sure to get an alternative that allows you to set your own shortcuts, and that includes the languages and dictionaries that you frequently use.
This solution should help you adjust the on-screen keyboard size when you think that it’s too big or too small.
Speaking of virtual keyboards, if your on-screen keyboard won’t work at all, check out this troubleshooting guide to fix the problem.
Check out our article on the best virtual key software you can use on your device for more information.
If you have questions or if you cannot successfully complete the steps above, don’t hesitate and share/describe your experience with our team. We will try to find the perfect fit for your problem based on the info that you provide us with.
Newer isn’t always better, especially when it comes to software, and sometimes newer versions of software can cause certain compatibility issues.
In some instances, Office 2016 can be the cause of these issues, and today we’re going to show you how to downgrade to Office 2013 from Office 2016 on Windows 10.
Microsoft has recently added a way to roll back to Office 2013 on your My Account page. From it, you can downgrade from Office 2016 to Office 2013 in a few clicks, without having to use any third-party tools.
Now you will need to replace certain data. Remember to keep all the values between the quotes:
Set SourcePath to the C:Office15
Set OfficeClientEdition to 32 for 32bit version or 64 for 64bit version.
Set Product ID to one of the values from the table below.
Product ID
Product Name
AccessRetail
Microsoft Access 2013
ExcelRetail
Microsoft Excel 2013
GrooveRetail
Microsoft OneDrive for Business 2013
HomeBusinessPipcRetail
Microsoft Office Home and Business Premium
HomeBusinessRetail
Microsoft Office Home and Business 2013
HomeStudentRetail
Microsoft Office Home and Student 2013
InfoPathRetail
Microsoft InfoPath 2013
LyncAcademicRetail
Microsoft Lync Academic 2013
LyncEntryRetail
Microsoft Lync Basic 2013
LyncRetail
Microsoft Lync 2013
MondoRetail
Microsoft Office Mondo 2013
O365BusinessRetail
Microsoft Office 365 Business
O365HomePremRetail
Microsoft Office 365
O365ProPlusRetail
Microsoft Office 365 ProPlus
O365SmallBusPremRetail
Microsoft Office 365 Small Business Premium
OneNoteFreeRetail
Microsoft OneNote 2013
OneNoteRetail
Microsoft OneNote 2013
OutlookRetail
Microsoft Outlook 2013
PersonalPipcRetail
Microsoft Office Personal Premium
PersonalRetail
Microsoft Office Personal 2013
PowerPointRetail
Microsoft PowerPoint 2013
ProfessionalPipcRetail
Microsoft Office Professional Premium
ProfessionalRetail
Microsoft Office Professional 2013
ProjectProRetail
Microsoft Project Professional 2013
ProjectStdRetail
Microsoft Project Standard 2013
ProPlusRetail
Microsoft Office Professional Plus 2013
PublisherRetail
Microsoft Publisher 2013
SPDRetail
Microsoft SharePoint Designer 2013
StandardRetail
Microsoft Office Standard 2013
VisioProRetail
Microsoft Visio Professional 2013
VisioStdRetail
Microsoft Visio Standard 2013
WordRetail
Microsoft Word 2013
Set Language ID to en-us for English version.
As we already mentioned mind the quotes, so please keep all the values between the quotes. If you don’t do that, the installation will fail.
Run Command Prompt. You can run it by entering cmd in Search bar. Type the following to switch to that folder:
cd C:Office15
Now enter the following (This will start the download process. Remember, this might take a while depending on your internet speed, so make sure that you don’t cancel it):
setup.exe /download configuration.xml
Now go to C:Office15OfficeData and locate the folder with numbers in its name (Remember those numbers, you’ll need them for next step).
Go back to C:Office15 and open configuration.xml and paste this into it:
Now you need to change values to the ones you used when downloading Office in Step 4 (Remember to change the Version value to the one from the Step 7).
Open Command Prompt and enter: cd C:Office15.
Now enter this into Command Prompt for the installation to start:
setup.exe /configure configuration.xml
If you get any errors, you might need to check configuration.xml if the values are the same like in Step 4 and Step 7 and if they are placed properly between the quotes.
That’s about it. As you can see, the solutions aren’t very complicated, but you need to be aware of the quotes and the lines you enter. One missed letter can be enough to ruin the installation process.
If you have any other questions, please feel free to ask in the comments section below.
Therefore, it makes sense why you’d want to jump on this train as soon as possible. However, as with many other streaming platforms, Peacock is unavailable for everyone.
In fact, if you’re not on US territory, you may face the dreaded Peacock is unavailable in your region error message.
But don’t fret, we’ve got a few tricks up our sleeve that should help you bypass Peacock geoblocks without breaking a sweat.
Why is Peacock not available in my region?
This streaming service from NBC is available only in the US due to regional limitations imposed by the government.
The users can experience this problem with Peacock because of licensing issues that don’t allow other countries to stream such content.
In order to bypass this issue, you can simply connect to a VPN with worldwide servers with the highest connection speed.
All things considered, there are several things you could try if Peacock is unavailable in your region.
One of the most popular methods to bypass this limitation is using a VPN, as it will not only unblock the service but also protect your online privacy. Also, they might help with the Peacock’s Generic Playback error.
If you’re not concerned about your online privacy, however, you could also stick to a Smart DNS service.
Last but not least, proxy servers can sometimes bypass geo-restrictions, but the drawbacks often outweigh the benefits of this type of service.
Before we start, we need to quickly explain how proxies work. Basically, the proxy works as a middleman between your PC and the Internet.
When using a proxy your actual IP address will be hidden, and you’ll use your proxy’s IP address instead.
Although proxy masks your IP address, it doesn’t encrypt your traffic, which means that malicious users can still intercept it.
What are proxy tools?
Simply said, proxy tools as devices like routers or systems that protect your online privacy with a gateway for the users when navigating on the web.
For instance, you can use proxy servers to access online resources by sending traffic to a proxy that evaluates the web pages before you access them.
Which type of proxy is best?
There are multiple types of proxy servers out there so you can shield your privacy requirements.
If you’re looking for the best proxy types, you should go for residential proxies as they are the most popular option among users because it has real IP addresses for devices.
Which one is better, VPN or proxy?
We have to mention that proxy doesn’t affect your entire network connection, and it will affect only a single application, such as your browser.
Also, by going through a proxy, your original IP can be traced back to your PC. VPNs ensure that your PC is untraceable.
Of course, when you activate a VPN, it will cover all the apps on your PC, not just the browser so you’re covered all the way.
However, this doesn’t mean that proxy tools can’t be useful, and if you’re looking for the best proxy tool, today we’re going to show you a few.
What is the best proxy tool for Windows 10 and 11?
As the world’s leading VPN, PIA does more for your online privacy than a simple proxy tool could ever do.
With this Kape Technologies-owned VPN, you will be able to enjoy a truly liberated web experience, completely free of censorship and geographically imposed restrictions without compromising on security.
If anything, you will benefit from the highest level of encryption for your traffic data, anonymous browsing, IP cloaking, and other privacy-oriented features including a strict no-logs policy.
This means that your online activity will never be tracked or monitored, not by your ISP, not by governmental agencies, and not by hackers.
Speaking of hackers, you will be completely protected against any kind of cyber threats as PIA also includes a malware blocker and a firewall.
Moreover, your IP address is changed when connecting to one of its 3292 servers strategically spread across 46 countries worldwide.
Let’s quickly look at its key features:
Bypass censorship and unblock restricted websites
Secure protection even on public Wi-Fi
Unlimited bandwidth and ultra-fast Download Speeds
Integrated ads, trackers, and malware blocker
Compatible with all popular desktop and mobile operating systems
Strict no-logs policy for total privacy
Easy to set up and easy to use (1 click connection)
Secure VPN protocols (Wireguard, PPTP, OpenVPN, and L2TP/IPSec)
Protect up to 10 devices simultaneously with just 1 subscription
30-day money-back guarantee
Private Internet Access
Extend the benefits of proxies to your entire network and all your devices with PIA!
NordVPN is a reliable VPN service provider trusted by millions of users worldwide.
Unlike a proxy server, this software comes with in-built security features that ensure your traffic data is protected when you browse online.
The VPN program works on the operating system level and encrypts the traffic between your device and the internet network. In this way, your ISP won’t be able to collect data or track what you do online.
With NordVPN’s obfuscated servers you can even hide the fact that you are using a virtual private network.
Since this type of server changes your data packets, connecting to it will enable you to access firewalls blocked by VPNs.
Another great feature of this service is its strict no-logs policy. NordVPN does not track or collect your private data while you navigate online.
Here are other key functions of this software:
5000+ fast servers in 59 countries
Supports Windows, macOS, Linux, Android, and iOS
Connect one account to six devices at once
CyberSec technology
Double VPN security feature
No ISP or bandwidth throttling
Automated kill switch
Browser extensions for Firefox and Google Chrome
Dedicated, static IP address accessible only by you
Mobile apps for Android and iOS
Live chat support 24/7
With NordVPN you can download and share files through secure P2P servers with no bandwidth limits.
NordVPN
Connect to the fastest VPN servers and browse stress-free with NordVPN!
Surfshark is a resourceful VPN service with a strict no-logs policy. They do not keep track of any of your data.
Plus, by hiding your IP and connecting you to a private server, no third party will be able to identify or track you.
It uses the private DNS of each server. This means that all your data is fully encrypted.
Surfshark VPN uses industry-leading AES-256-GCM encryption. No one will be able to access your browsing history, traffic data, or identity without your permission.
Along with that, they use secure protocols like IKEv2/IPsec. They also allow you to use OpenVPN.
In case the connection drops, this VPN is equipped with a killswitch which will automatically turn off any traffic data in case the connection drops.
Surfshark VPN is compatible with all major platforms and you can connect it to an unlimited number of devices. It is subscription-based with a 7-day free trial available for each plan.
Other key features of Surfshark VPN include:
Changes your IP
NoBordersMode
Split tunneling
Ad blocker
Anti tracker
Surfshark
Keep your data private and increase internet connection speed with this reliable and budget-friendly VPN.
Another useful tool if you want to keep your personal details private is ExpressVPN.
To understand how it works compared with a free proxy tool, keep in mind that every single application will need to be configured separately to use the proxy you desire.
Thus, changing the proxy server location might require a complete reconfiguration.
On the other hand, once you install a VPN tool, selecting a location becomes easy and fast. Express VPN routes and encrypts all kinds of traffic through its servers.
When you choose to connect on a free proxy server, check first if it encrypts its traffic and be aware that loads of other users are getting this free congested highway.
Choosing a premium VPN like this Express VPN International Ltd. owed security software instead is like a secured private tunnel just for you, optimized for speed and stability.
ExpressVPN it’s not free, though its speed and the numerous servers it has in 160 locations spread worldwide make the difference.
Plus, you get to enjoy special discount rates and a convenient 30-day money-back guarantee.
ExpressVPN
Enjoy secure and reliable connections on ultra-fast servers in 94 countries!
The best privacy buddy while surfing the web is a virtual private network software (VPN). You can check out this best VPN list to learn more about the virtual private network.
This is one of the leaders on the market when it comes to security. It masks your IP and keeps all your data safe as you are surfing the Web.
Easy to install and easy-to-use, it allows you to run up to 7 devices at a time. This feature is extremely useful if you are using multiple gadgets for the same purposes and you need a safe internet connection.
One of the most important security features that Cyberghost has to offer is that it separates your browsing from your personal data.
It doesn’t log your files in order to prevent them from being damaged or stolen.
CyberGhost VPN has dedicated servers for various activities and you can customize the recommendations based on your preferences and location.
This flexible function makes it the ideal VPN provider for online transactions, streaming, torrenting, and more.
Cyberghost VPN
Surf online with one of the best anonymous web proxy!
Ultrasurf is a small and portable tool that will protect your privacy online. According to its developer,
Ultrasurf has about 3 to 5 million users every month from more than 180 countries. This tool will encrypt your web traffic while hiding your IP address.
At the same time, your IP address will be protected on public networks and you’ll be able to access any website that is blocked on a regional basis.
Ultrasurf is a simple tool, and as soon as it starts it will select the best proxy server and connect you to it.
This is a portable application, so there’s no need to install it. This also means that you can run the tool on any PC and even from a USB flash drive.
We also have to mention that this tool doesn’t require any registration, so you can just download it and use it without limitations.
After you start the application, you’ll automatically connect to the proxy server and your default browser will start.
In our case, Chrome started automatically in Incognito mode, so no traces such as cookies or browsing history are left behind while using Ultrasurf.
From the application, you can choose between different servers and you can even visualize the speed of the server as well.
On the other hand, you won’t be able to see the server’s location, which can be a turn-off for some users.
Ultrasurf is a small, free, and portable proxy tool. The application is rather straightforward, so if you’re looking for a proxy tool, there’s no reason not to try it.
Freegate is another proxy tool that will protect your privacy online. Since this tool is also portable, it can run on any PC without installation. As soon as you launch the app, your default browser will start.
For some reason, the default browser wasn’t correct in our case, but you can change the desired browser from the settings menu.
The application comes with a humble user interface that shows you a simple network graph. As for available settings, you can choose between two tunnels.
The tool supports HTTP and SOCKS5 protocols, and you can even use your own proxy server with this tool if you want to.
Freegate is a simple but useful tool, and if you want to use a proxy, you should definitely give it a try.
SafeIP is another proxy tool that you can use to protect your privacy online. The tool comes with a simple interface so you can easily choose a proxy server with just a few clicks.
All servers are listed in three categories, and you can choose between the US, UK, and other worldwide servers. Simply double-click the desired server and your IP address will change automatically.
The tool offers several available presets such as anonymous web browsing, fast content streaming, and mass or bulk mailing.
Additional options include malware protection, advertisement blocking, cookie tracking protection, referring URL protection, and browser ID protection.
You can also turn on traffic encryption or DNS privacy if you want. To keep your IP address secure, you can automatically change it after a certain number of minutes.
This is a simple application, and it offers most of its features for free. Certain options such as Wi-Fi Protection, Speed and torrents, and Speed Boost modes are unavailable in the free version, but that’s not a big problem.
We also have to mention that not all servers are available in the free version, and the list of available servers will change during the day.
This means that certain servers might not be available at all times, but with an extensive number of servers, this won’t be a problem.
SafeIP is a simple and free proxy tool. With a large number of available servers and a friendly user interface, this app is perfect for all basic users.
Tor is probably one of the best-known applications that can protect your privacy online. This tool is simple to use, and in order to do that, you just need to install Tor Browser.
The browser will have some extensions installed that will prevent websites and malicious users from tracking your online.
Although Tor doesn’t allow you to choose a proxy server, it connects to several different nodes, thus hiding your IP address and encrypting your traffic.
Tor is incredibly simple to use, and if you’re concerned about your privacy online, you might want to consider using it. This application is free, and you’ll be able to enjoy it even if you’re a basic PC user.
KProxy is a useful proxy service that allows you to hide your IP address online. This is a web service, but if you want, you can download Chrome or Firefox plugin.
There’s also a KProxy browser available which is basically a portable version of Firefox with KProxy plugin.
By using this service, you can circumvent any regional restrictions that you might have. This is especially useful if certain services or online content isn’t available in your country.
In addition, this service will also protect you from malicious users and keep your personal information hidden from your Internet service provider.
KProxy is a free service, however, it has certain limitations. By using the free version you can choose between Canadian and German servers.
However, US and UK servers will remain unavailable unless you purchase a Pro version.
We also have to mention that in the free version, servers can get overloaded due to the number of users. You can read a more detailed walkthrough of features, limits, and setup in this KProxy free guide and decide whether the service fits your daily browsing needs.
Another free proxy tool on our list is Psiphon. This tool comes with a simple user interface and it allows you to choose between 7 different servers.
Psiphon allows you to use the Split Tunnel feature, and you can also configure local proxy ports, upstream proxy, or use Transport Mode.
The tool also comes with a useful log that you can use to check your connection status.
In addition, Psiphon is available in several different languages. This is a simple, free, and portable application, so it should work on any PC without problems.
One minor issue is the lack of compatibility with third-party browsers. During our testing, the application worked perfectly with Microsoft Edge and Internet Explorer, but it didn’t work with Chrome or Firefox.
This application is completely free and it doesn’t have any restrictions, so if you’re looking for a free proxy tool, be sure to check Psiphon out.
If you’re looking for a free proxy tool, ChrisPC Free Anonymous Proxy might be just what you need.
This tool allows you to choose between many worldwide proxy servers with just a few clicks. We have to mention that this tool offers several different modes.
The first one is Anonymous Proxy Mode which hides your IP address and allows you to browse the Internet anonymously.
Expat Mode will unblock geo-restricted websites and there’s also Unblock Websites Mode that will unblock certain popular websites.
Another available feature is Ads Blocker Filter, but you can use it only for 30 minutes in the free version.
The free version of the tool offers basic options, but if you want to use Expat Mode or change advanced settings, you’ll have to purchase the premium version.
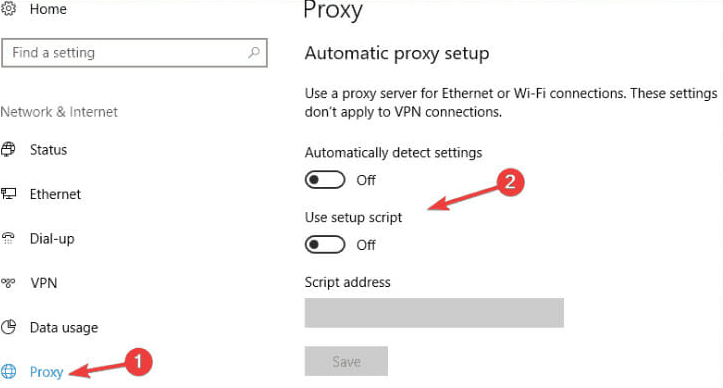
Go to Network and Internet in Windows Settings menu.
Click on Proxy.
In the manual setup window, toggle on Use Proxy Server option.
Slide the option for Automatically detects settings.
Turn on the Use Setup Script option and add the script address.
As you can see, there are many different proxy tools that you can use on Windows 10 and 11.
We have to mention that using a free proxy isn’t the most secure method to protect your privacy online.
So, you might want to refrain from entering sensitive information while using such a tool. Better yet, try a VPN instead to protect your entire network.
When using Windows, you’ll see an option that’s called Add to dictionary in various programs including Microsoft Word, some Note-taking applications, web browsers and more.
Every time you add a word to the spell-checking dictionary, it is saved automatically. Once it is, you’ll be able to ignore it every time the program checks for spelling mistakes.
Add to Dictionary or Ignore
When we write a certain word multiple times and Windows doesn’t recognize it, it will point out that specific word as an error. But if you’re sure the spelling of that word is correct, you can avoid Window’s error prompts and skip its irritating red underline by choosing between “Add to dictionary” or Ignore.
If you choose Ignore, this will happen only once. If you’re sure you’ll use that specific word frequently, it’s better to choose to Add to Dictionary.
In the future, you might also want to remove that word. We’re going to show you the different ways in which you can add, edit or remove words from the default dictionary of Microsoft Office on Windows 10/8/7.
When you use the Add to dictionary feature, the word you used this option on is automatically saved in a file. You can edit that file manually in order to add or remove words from the spell checking dictionary.
1. Press the Windows key on your keyboard and type file explorer in the search box that opens.
2. Click on the first result to open the File Explorer app.
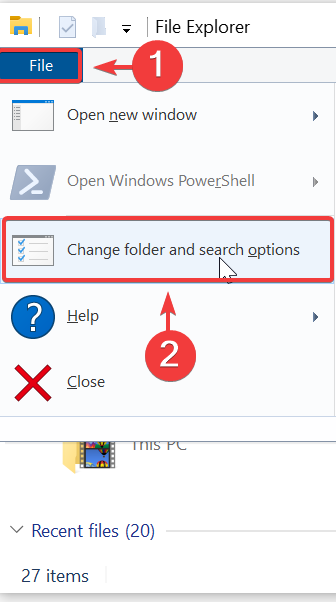
3. Navigate to File > Change folder and search options.
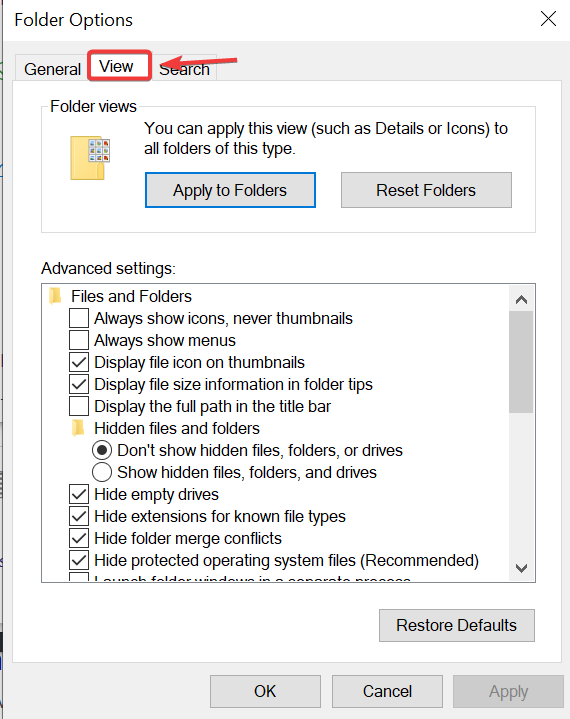
4. The Folder Options window will now open. Navigate to the View tab.
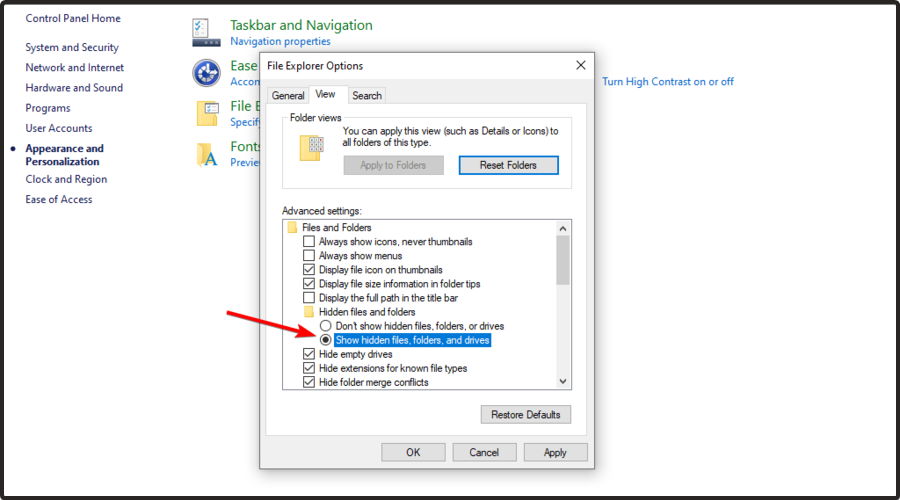
5. Select Show hidden files, folder, and drives, then click on Apply.
6. Use the following path to navigate to the Spelling folder: C:\Users\<username>\AppData\Roaming\Microsoft\Spelling
7. In the Spelling folder you’ll find one or more folders. In case you used more than one language on your system, you’re going to find more than one folder.
8. Choose a folder based on the language that you’ve used. In each folder, you’ll see 3 files: default.acl, default.dic and default.exc.
9. Double-click on default.dic and it will open in Notepad.
10. Here you’ll be able to see all the words that you’ve added to the dictionary. You can now edit the file.
11. Save and exit after you’re done, and you’re all set!
This might be a bothersome task for some, but it’s the simplest way to edit dictionary entries created on your system. The number of words can pile up rather fast, especially if you’re writing about niche things and not your usual vocabulary is at play. However, once you get used to it, it can come quite handy for adding or, in this case, removing words.
Well, aren’t the input methods nowadays changing or what? A decade ago, most users would find mouse and keyboard the peak performance of input devices, but it seems that the next obvious step forward lies in voice recognition.
It’s all about the smart digital assistants and their usability in various devices, like smartphones, cars, and, of course, Windows PCs.
By following the emerging trends, we decided to provide you with a few ways to control your Windows 10 PC with simple voice commands.
No pointing device is needed here, just a microphone and a few tweaks. So, if you’re determined to roam through the user interface and complete various tasks with nothing but a voice, make sure to check the explanation below.
Speech recognition isn’t a Windows 10 exclusive, and it dates back to Windows 7. Nonetheless, this handy feature is more than welcomed on the latest Windows version becauseCortana tends to misbehave. It’s originally introduced as an ease of access feature, to improve overall usability for users with physical issues.
If you’re not sure how to configure Speech Recognition and use it later on, make sure to follow the steps we provided below.
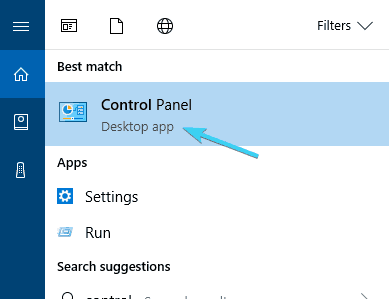
1. In the Windows Search bar, type control and click on the first result to open Control Panel.
2. Select Large iconsfrom theView section.
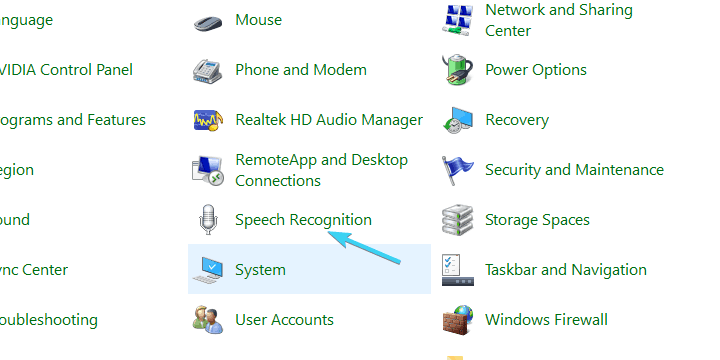
3. Scroll down and open Speech recognition.
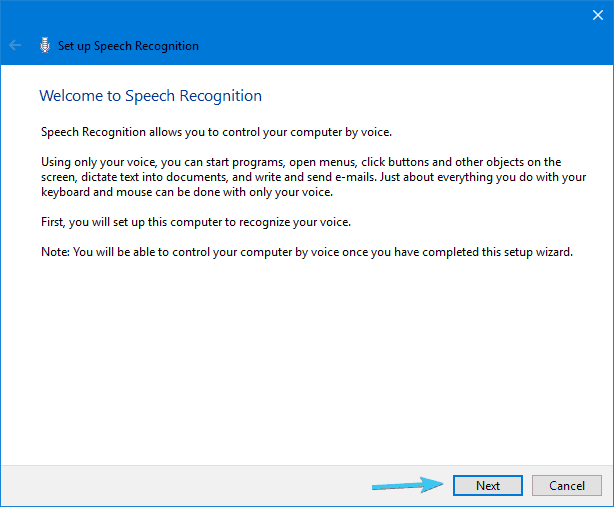
4. Click on the Start speech recognition to start the process.
5. Press theNext button.
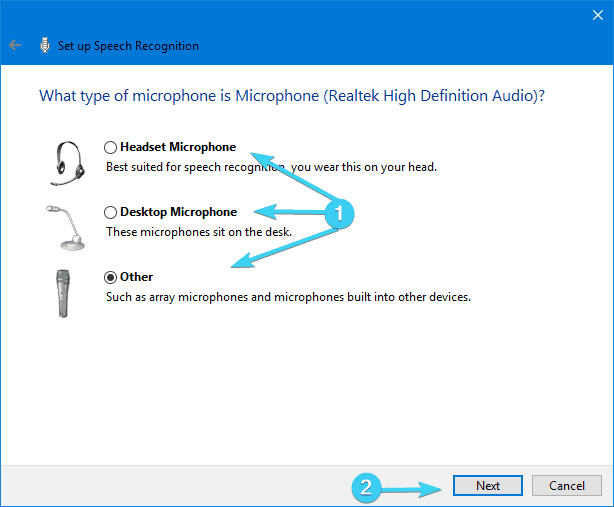
6. Select your Microphone setup and click Next > Next.
7. Read the displayed sentence in order to confirm that your mic is up and running, and then click Next.
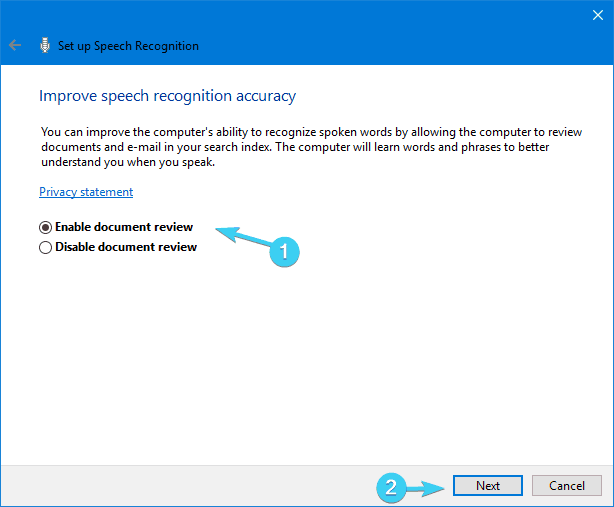
8. The next screen offers you an option to improve the recognition accuracy by enabling Document review. We advise you to enable it.
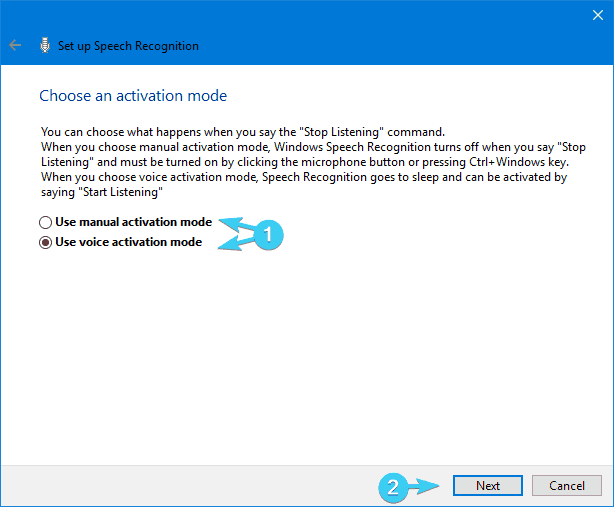
9. On the next screen, you can choose one of the two activation modes:
Manual mode– Speech recognition stops when you say ”Stop listening”.
Voice activation mode– Speech recognition is on hold and it starts the moment you say Start listening.
10. Once you’ve decided which mode suits you better, click Next.
11. Now, you can print or just take a glimpse of all available commands in the Speech reference screen. It basically leads tothis webpage.
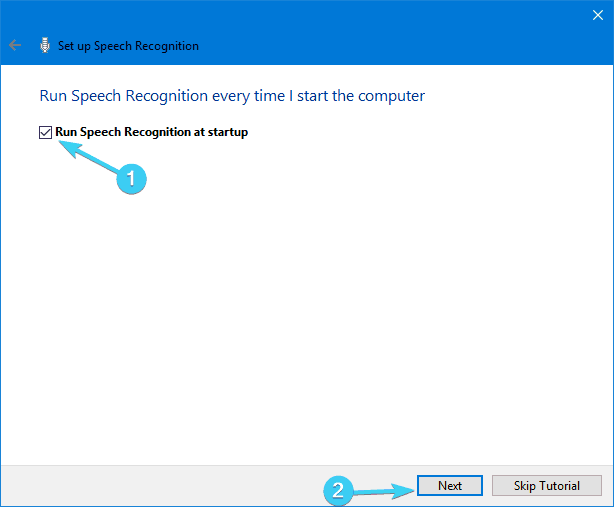
12. Check the Run speech recognition at startup box and click Next.
13. Now start the tutorial and that should do it. After that, you should be able to use speech recognition without issues.
This feature is quite often overlooked and we decided to correct the injustice and enlist Speech recognition in this list.
Over time, it found its place in mass use due to experimental and ted futuristic approaches. You know, like smart assistants do now.
As a side note, due to interference between Cortana and Speech recognition, we advise you to use one or another. Below we explained how to configure Cortana, so you can try out both and choose the one that suits you better.
In order to meet the expectations and prove itself competitive with the likes of Apple, Google, or Amazon, Microsoft introduced its native smart assistant, Cortana.
In the early stages, Cortana was widely regarded as one of the best artificial assistants out there, but that status dropped after Microsoft Mobile lost the final battle with Android and iOS. Nonetheless, with Windows 10, and we’re referring to the PC version here, Cortana kind of got better and it’s a viable option nowadays.
With Windows 10 as a service, we can expect Cortana to improve over time. And if you’re keen to run your Windows 10 PC with nothing but voice commands, it might come in handy.
READ ALSO: Cortana will let you install Windows 10 using only voice commands
Here’s how to enable and configure Cortana for future use on Windows 10:
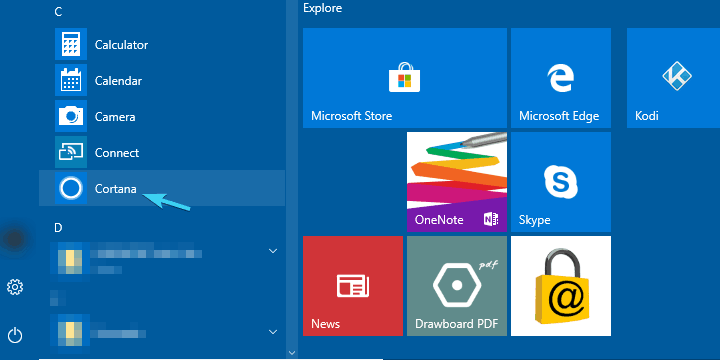
Click on the Start Menu and open All apps.
Look for Cortana and open it.
Toggle the ”Use Cortana” option.
Click ”Yes” or ”No, thanks” depending on whether you want to let Cortana track your data in order to improve (get to know you better) or not. It’s your choice.
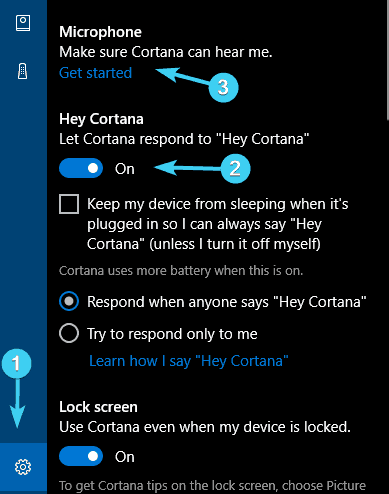
Now that we enabled Cortana, press Windows + S and click on the cog-like settings button positioned on the left side.
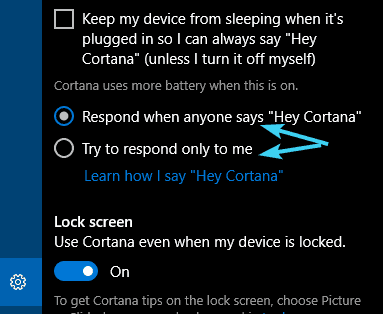
Toggle on ”Hey Cortana” and configure your microphone. You can let Cortana react when anyone says ”Hey, Cortana” or you force it to react only to your voice.
Exit settings and command something to your newly-configured digital assistant.
You can find the list of available commands and tasks Cortana can perform in this article.
3. A collection of third-party programs
Besides the built-in Speak recognition and Cortana, some users might turn to a third-party alternative. Since this is a software category in a state of constant growth, there are various speech recognition solutions in the market compatible with Windows 10. The only question is what are your needs and wants.
Some of them, like Dragon NaturallySpeaking, specialize in fast-paced dictation and voice-to-text in general. Others, like Voice Attack, are there for voice-controlled multitasking and in-game controls (yes, you can reload your weapon in CoD with a voice command). And then there’s VoxCommando that’s mostly used in multimedia programs like Kodi or iTunes, but it can also be used for automated home devices.
So, if Speech recognition or Cortana haven’t met your preferences, you can try them out. Here’s one great article about the top 5 speech recognition third-party programs, so make sure to check it out.
With this, we can wrap it up. Don’t forget to share your experience with speech recognition in general, or talk about individual programs you’ve tried, both built-in and third-party. You can do so in the comments section below.
Handing out brochures is one of the cheapest ways to present and promote your services and business. If you want to impress your audience and potential customers, your brochures need to look professional.
Now, the simplest and safest way to design your brochures is to use dedicated software for brochure design. The good news is that there are many such tools available that you can use both online and offline.
Even in this digital age, paper brochures are still prominently displayed and provide valuable and physical information at the point of sale – an advantage that internet advertising cannot supply. Printed books will not go away, and brochures will not go away either.
Brochure design software assists marketers and designers in creating eye-catching and informative brochures that connect with the target audience and convert prospects into customers.
To make your decision-making process easier, we compiled a list of the best programs for a brochure design that you can use on your Windows computer.
How can I create a brochure?
Creating a brochure for your brand or service is easier than it looks. With so many online tools you will create an amazing brochure in no time. In the following example, we will create a brochure using Adobe Creative Cloud Express.
Before you start, make sure you have all the necessary details that you want to be written in your brochure. This includes products, services, contact info, offers, working hours, locations, etc.
Select the brochure type of project – Adobe offers a wide variety of great layouts and categories, depending on the message you are trying to spread
Choose a template that represents your brand – the color palette should be used to your advantage
Add or edit the text with simple and clear information – feel free to play with the design, photos, and shapes
Lastly, double-check the info then download and you are ready to print – remember to choose an appropriate paper when printing to value your brand
With these 4 steps and a touch of your own creativity, you can make the best brochures to reach out to your clients.
Adobe Creative Cloud Express, formerly known as Adobe Spark, is one of the best tools to use if you want to create eye-catching brochures.
You really don’t have to be a designer to create professional-looking brochures since Adobe Creative Cloud Express makes it very easy to create really impressive materials.
Once you’ve completed your design, all you need to do is save it, and you can then share it with your friends or colleagues or print it.
Here’s how to use Adobe Creative Cloud Express:
Select a shape and size: Go to My Projects, select the template that you like best, and set its initial dimensions. You can resize your brochure at any time according to your needs.
Select a theme: Go to Themes and use the drop-down menu to select the theme that suits your brochure best. Each theme features a full suite of editing tools, that allow you to change colors, design elements, and more.
Add your own background image: The default themes bring their own background images, but you can insert your own background image to better personalize your brochure.
Add text: Go to Text and use the text box to type the message that you want to send to the world. When you’re ready, simply publish and share your creation.
This powerful collection of design tools does not require any technical or programming experience to apply. All you need is a computer, an Internet connection, and your own imagination.
A simple drag-and-drop interface allows you to learn the fundamentals in a matter of minutes. And you can see the results of every adjustment you make right away.
Adobe Creative Cloud Express
Ready to impress with the best brochure design? Use Adobe Creative Cloud Express with confidence!
Canva Brochure Maker is a very easy-to-use and intuitive brochure design tool. Use drag-and-drop to create beautiful brochures that will awaken your audience’s interest.
This software provides you with the right tools to present information clearly, beautifully, and persuasively.
This program is perfect for creating marketing materials or completing an assignment for school.
Here is how to use Canva Brochure Maker:
Choose the right dimensions and layout for your design.
Pick a template or add your own photos.
Add the text and all the other information about your brand.
Don’t be afraid to play with the shapes and colors.
It means that professionals, freelancers, and students alike can successfully use it to convey their message in an appealing manner.
Using this software is very easy: simply drag and drop your favorite images, customize the fonts and colors, and add your text.
Brochure Maker features a library of over 1 million professional graphic design elements (images, banners, icons, frames, etc) that you can choose from.
It is worth mentioning that most of these images are free, with some premium ones which cost per use. Of course, you can also upload your own images.
Once you’re satisfied with the result, you can export your creations as PDF documents and print them in high-quality resolution or share them on social media straight from Canva using the Share button.
Canva
Making a brochure couldn’t be more simple than using this free design tool that offers infinite models.
Adobe InDesign is another smart brochure design software that allows you to build multi-page brochures. If your project is a print project with numerous pages or a master layout, you may use Indesign’s master page tool to do this. InDesign also provides excellent support for three-column layouts, among other things.
Adobe InDesign is an excellent and adaptable tool for producing a wide range of print media, from flyers to brochures. XMPie and Easy Catalog, two very compatible plug-ins, make complex variable data projects a breeze.
When you require a large number of pages and begin to use text more frequently, you’ll appreciate InDesign’s extensive set of standard features.
When working on such publications, the many sorts of guides, the usage of text flow, the automated techniques for placing and formatting text, and the amazing richness of typographical refinements are all required.
Here is how to use Adobe InDesign:
Select predefined orcustom dimensions for your brochure.
Add photos and shapes needed to make your brochure look professional.
Place the text over the other elements and create a nice contrast.
Explore the wide variety of effects and settings Adobe InDesign has to offer.
Unfortunately, it lacks photo editing features such as brightness, contrast, and temperature adjustment. Therefore, you’ll need to use another picture editing tool to do this.
However, because Adobe InDesign integrates with all other Adobe applications, such as the Creative Cloud, you may easily edit your brochures as you want.
Adobe InDesign
Create print-based publications such as brochures, flyers, posters, and books with this page layout software.
We recently tried Visme, and it piqued our interest in the brochure creation space. We found it to be extremely user-friendly and full of flexible graphics that help accelerate the presentation process.
Visme is employed by over ten million organizations, non-profits, and individuals in over a hundred countries.
It’s quite versatile and simple to use. Using Visme’s pre-designed elements saves a significant amount of time over creating things from scratch.
The versatility of the templates and materials, as well as the built-in animation capability, are two advantages of using Visme.
Here is how to use Visme:
Choose the type of project you want to create.
Select from tens of predefined dimensions based on your need.
Make your choice if you wanna start from zero or a template.
Add or edit text, change colors, add or remove photos, the choice is yours.
Visme is also useful for creating infographics and presentations for online courses, as well as making brochures for businesses.
You can modify the canvas dimensions at any time and choose one of the 30+ attractive templates that are customized to your business. With the pro account, you can insert movies or audio files into sections of the infographics.
Visme
A whole workshop for preparing any type of business presentation, brochures, and flyers.
EdrawMax Brochure Maker is an interesting tool that you can use to create flyers, brochures, leaflets, and more in just a few minutes.
If you haven’t used brochure design software before, this is the right program to start with. It’s a perfect match for both personal and business brochure designs.
Here is how to use EdrawMax Brochure Maker:
Click on New, then the select project you want to create.
Choose from all the templates it offers.
Select the best information, color palettes and photos for your project.
Double-check all the settings and text.
The Business Report Brochure Template serves as a formal standard for an organization that requires a straightforward design.
The main benefit of this template is the built-in location map. By simply customizing the template, you may add a business name, business data, a brief description of your business, and contact information. This asset is available for free in the online version of EdrawMax.
EdrawMax Brochure Maker
Surprise your clients and peers with this versatile brochure maker you can use online for free at any time.
Flipsnack, which launched in 2011, is a popular solution for creating brochures. It enables users to turn PDFs into digital flipbooks rich in graphic components and multimedia, which can then be published and shared online.
However, Flipsnack, like any other option, has disadvantages, and for some purposes, other flipbook creators are a better choice.
Flipsnack allows you to create your own brochure. It has a multitude of fully customizable brochure layouts to aid you in your creative process.
Here is how to use Flipsnack:
Create a new project.
Pick the right dimensions for your creation.
Add as many photos, shapes, and texts as you need.
Create the best-looking design to represent your brand.
In addition, you can embed your online brochure to display it on your website. This will prevent customers from leaving your website, and engage them more in your content.
We recommend using Flipsnack to convert PDF to flipbook because it has a few noteworthy characteristics, including no advertisements or linked publications, support for rich media (in-flipbook videos, audio, and more), smooth upload, and speedy conversion.
If you’re looking for online brochure design software, then the Marq Brochure Maker may be the right choice for you.
This tool offers you a bevy of free and premium brochures, leaflets, pamphlets, or handout templates to help you create your brochures in less than 30 minutes.
Of course, you can also start with a white fresh canvas and add your own custom images, fonts and text. Use drag and drop to add text, images, shapes, and videos.
Marq Online Brochure Maker’s modern design allows you to create sleek digital displays, perfect for viewing on a computer. Keyboard shortcuts are also supported.
Here is how to use Marq:
Create a new project
Select a blank or from thousands of templates to work with
Use your creativity for texts, images, and shapes to make your design glow.
Export the design and use it to boost your brand.
You can export your brochures in different formats (JPG, PNG, or PDF) with Google Docs, YouTube, Dropbox, Flickr, Facebook, and other tools.
Real-time collaboration is also supported, allowing you to make changes in a single document at the same time as other users.
SmartDraw is a very useful and interesting brochure design software that will help you create truly amazing brochures and flyers.
Creating brochures to promote your business or events has never been easier. You can design the layout of your brochures and start printing them in minutes.
There are many brochure design templates that you can choose from. Of course, you can then edit them as you like and upload photos, logos, information about your offer or organization, etc.
How to use SmartDraw:
Select a new project, then select the type of project you want to create.
Either chose a template or a blank to start creating.
Mind choosing the best information, color palettes, and photos for your project.
Double-check the design you created, and enjoy.
You can share your brochure design with others and ask them for feedback. Thanks to SmartDraw Cloud, you and your team can work together on the same brochure and edit the material in real-time.
You can also export your creations to Microsoft Word, Excel, PDF, or PowerPoint.
Your brochures and pamphlets will look like they were designed by a professional and will be ready-to-print in just a few minutes.
Sometimes you want to change the resolution of the display to a custom one. In today’s article, we’ll show you how to set custom resolutions on Windows 10.
To do that, just follow the guide below.
How to set a custom resolution on Windows 10?
1. Set custom resolution on Windows 10 with Nvidia Control Panel
It is very easy to create a custom resolution on Windows 10 using Nvidia Control Panel, which is pre-installed on most computers.
All you need to do is enter Nvidia’s settings on your desktop and tweak the display settings.
Navigate to Information > Software > copy the 2D driver file path.
Now, press Windows key + R to open Run, and type regedit. Hit Enter.
In the Registry Editor, navigate to the 2D path from step 2.
Double-click the 0000 folder and inside, find the DALNonStandardModesBCD1 registry key.
Right-click it, select Edit, and then type your desired values in order: The width of the resolution > The height of the resolution > Type four zeros > The refresh rate of your monitor.
If any of the values don’t add up to a 4-digit number, then start the number with 0.
Click OK and Restart your PC.
After the restart, when you launch the AMD Catalyst Control Center, you should find the custom resolution there.
If you’re Windows 10 or 11 PC keeps changing resolution on its own, you needn’t worry. As always, we prepared a series of quick fixes for you to try out and get things sorted.
Want a good browser for Windows 7 that’s safe to use and doesn’t take a toll on your PC’s speed? You’re in luck.
Windows 7 still has a substantial user base even though it has been overtaken by Windows 10/11 and discontinued by Microsoft. If you’re still using it too, check out the browsers below.
What is the best browser to use with Windows 7?
If you’re in a hurry, take a quick look at our top picks and pick the one that works best for your needs:
And if you need more info, check the overviews below:
1. Opera One – Windows 7-friendly with built-in VPN and ad blocker
Opera One is a fast, AI-powered browser that works on Windows 7. It improves web navigation, making it intuitive and quick.
Its modular tab islands let you group tabs efficiently. You can easily open and collapse them. Opera One also includes Aria, an AI assistant for tasks like web searches, booking flights, and learning recipes.
The browser also features multiple workspaces, VPN protection, and integration for AI language tools.
Modular Tab Islands
Group tabs efficiently, open and collapse easily.
Aria AI Assistant
Helps with web searches and simple daily tasks
Customizable UI
Add or remove apps from the sidebar, address bar, and toolbar.
Multiple Workspaces
Organize different tasks in separate workspaces.
VPN Protection
Group tabs efficiently, open, and collapse easily.
AI Language Tools
Includes ChatGPT and other useful AI features for better productivity.
Opera One
Optimize your web surfing on the Windows 7 OS with this supported and futuristic browser.
2. Mozilla Firefox – Secure and regularly updated for Windows 7
Firefox claims it uses 30% less RAM than Chrome, making it ideal for Windows 7 desktops and laptops with lower specs.
It got a major boost with its Quantum update. This made Firefox faster, revamped its UI, and added new tools. You can rearrange the toolbar, add new themes, and configure fonts.
However, one thing to keep in mind is that Firefox will only support Windows 7 until September 2024. This means it will no longer get updates, including security patches after this date.
Quantum Update
Rearrange toolbar, add new themes, and configure fonts.
Customizable Toolbar
Further, customize the browser with various extensions.
Many Extensions
Further customize the browser with various extensions.
Efficient RAM Usage
Uses 30% less RAM than Chrome, ideal for lower-spec systems.
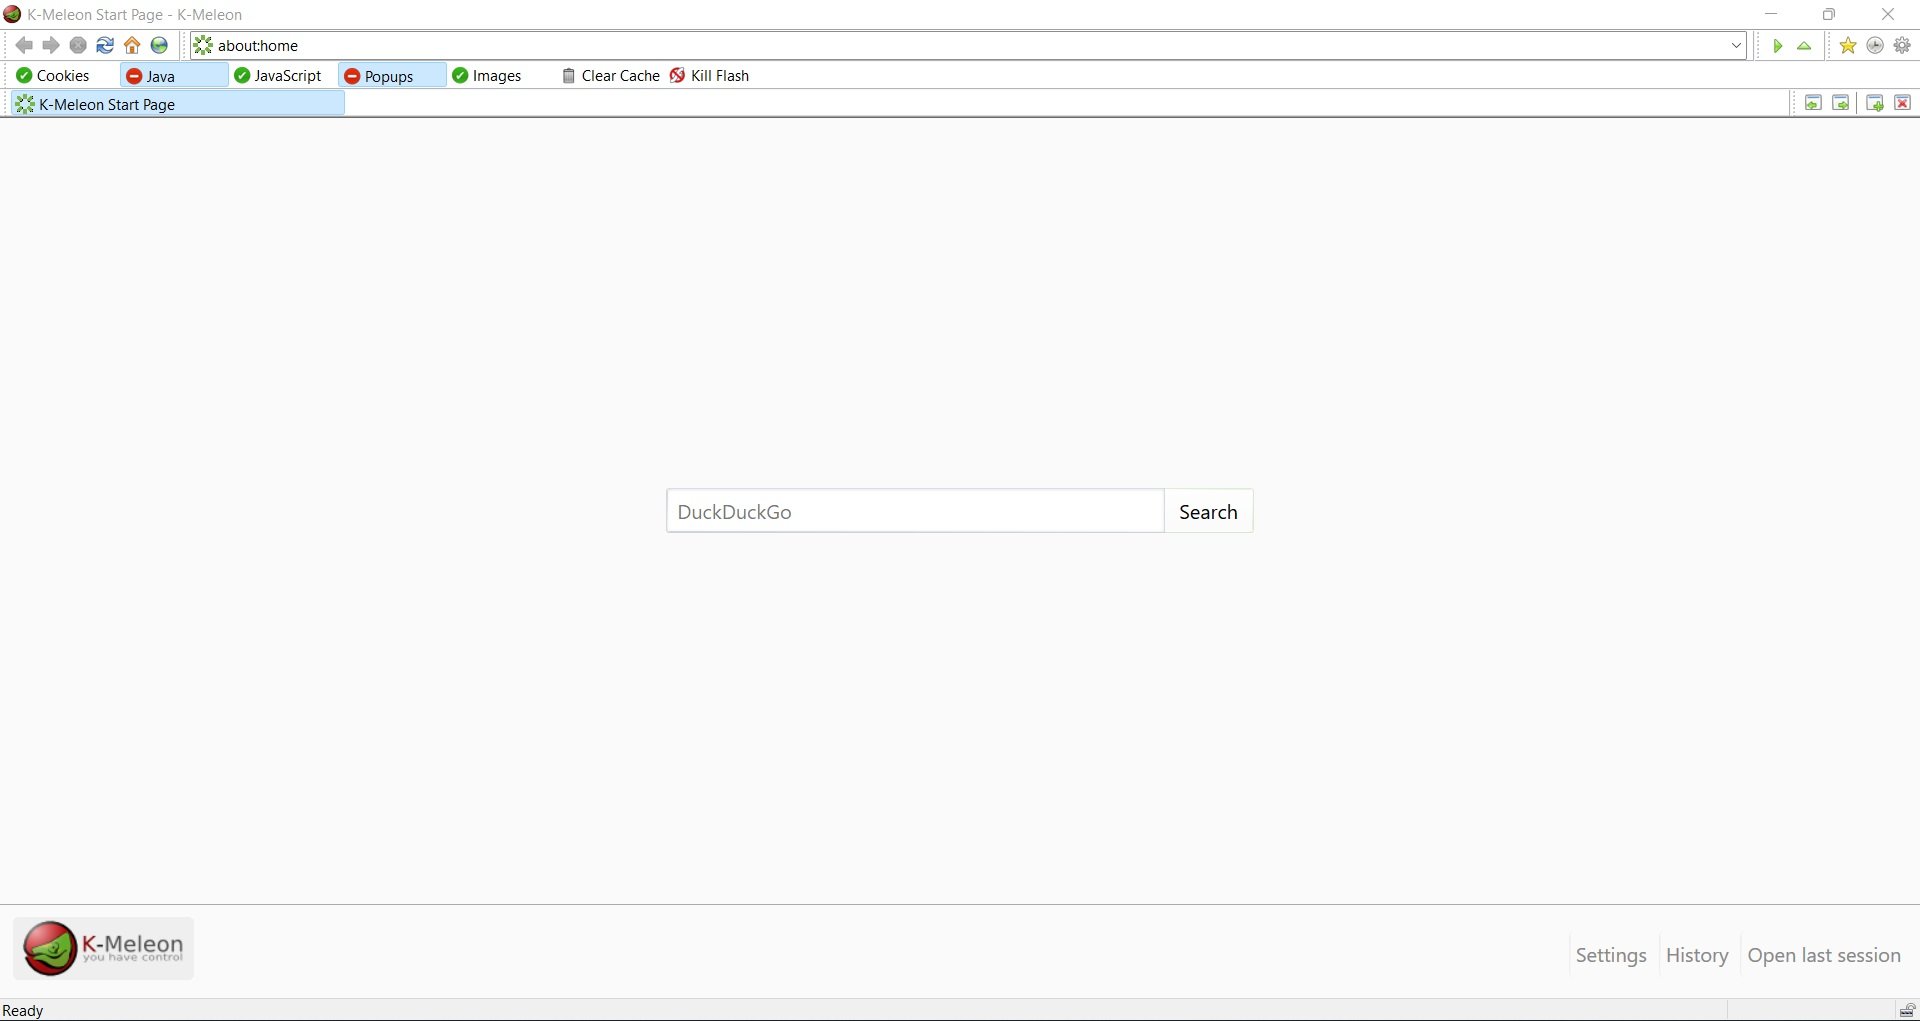
3. K-Meleon Browser – Ultra-lightweight, ideal for older Windows 7 PCs
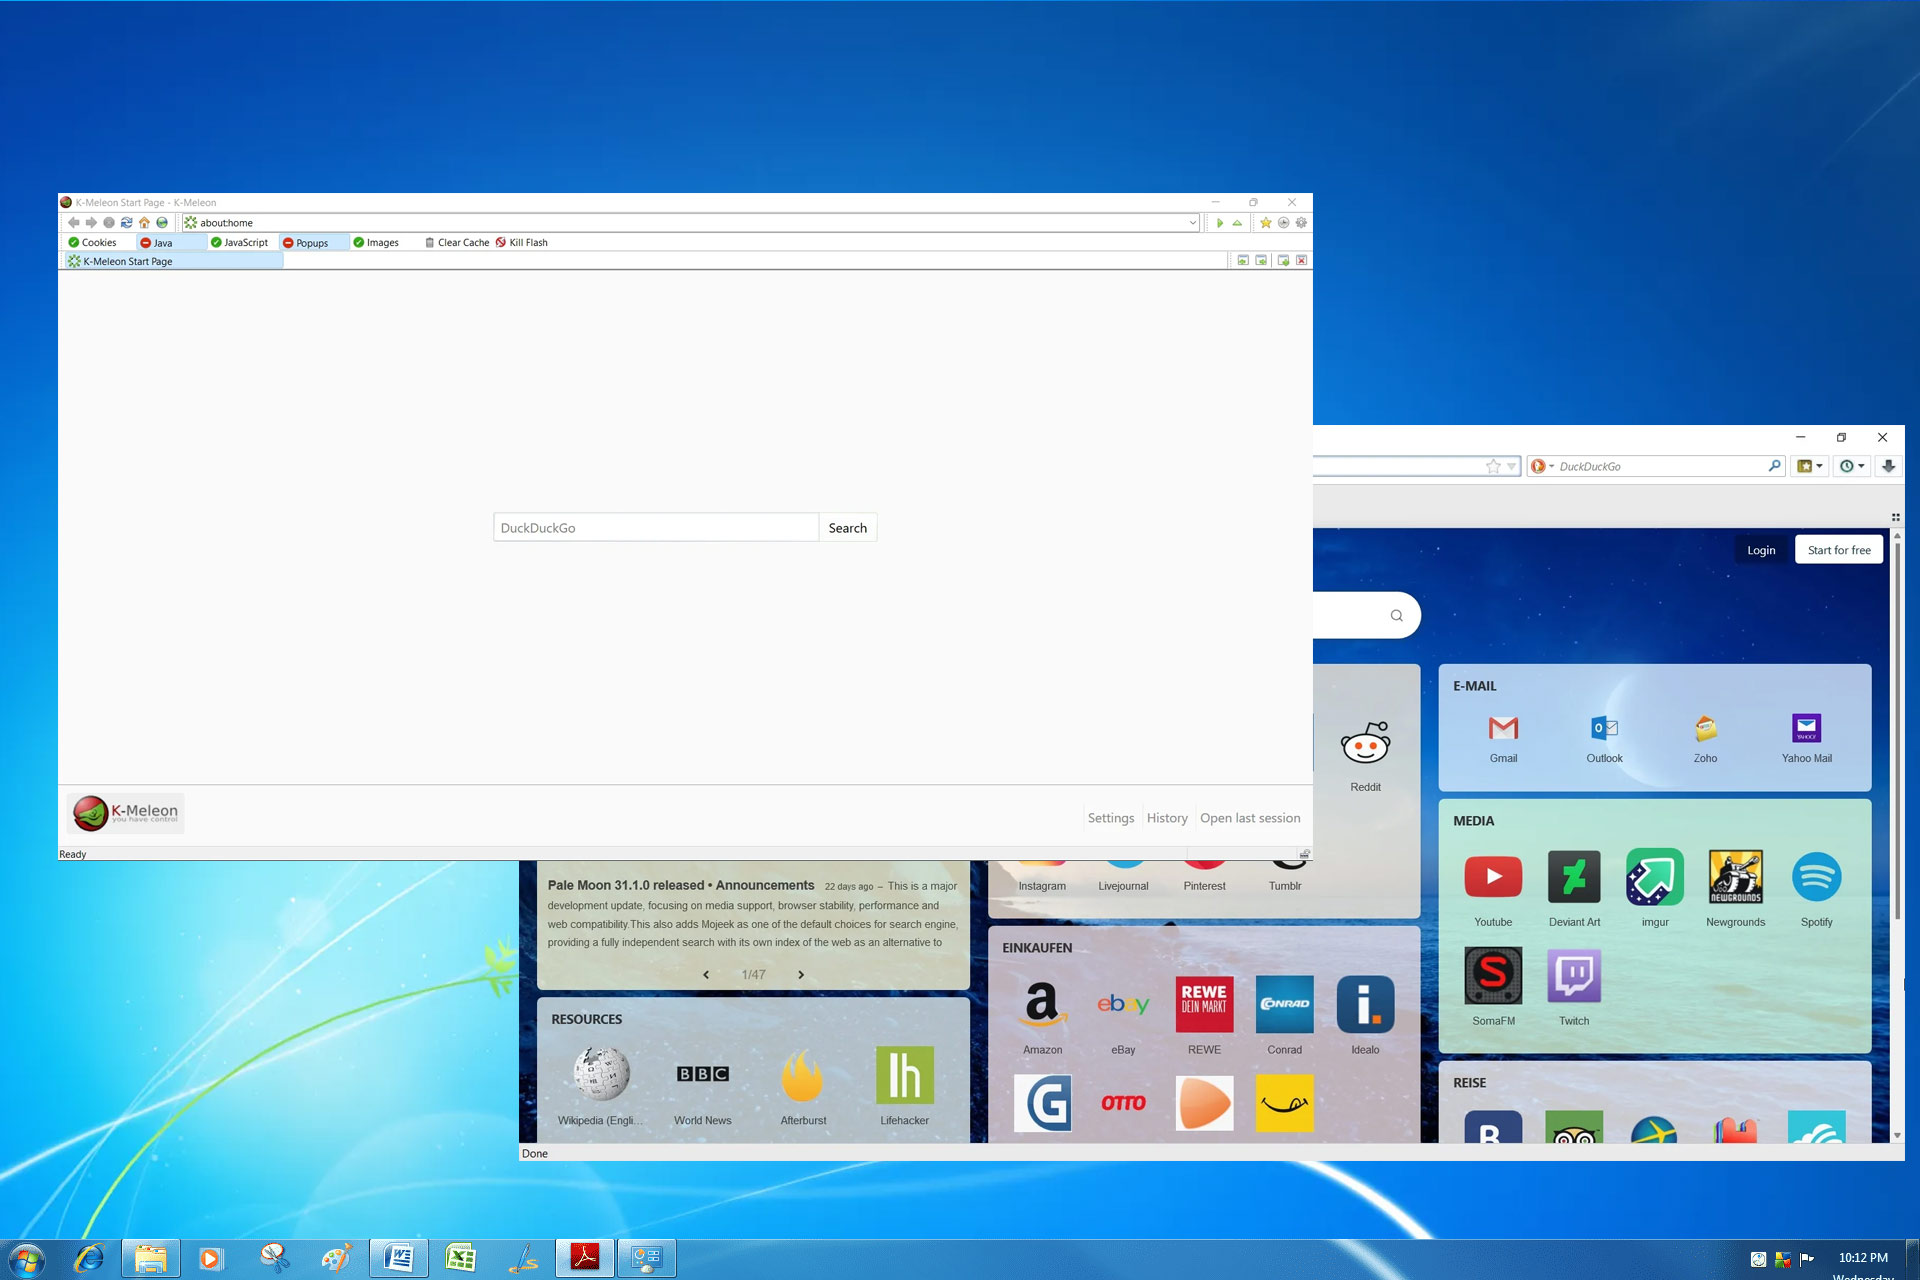
K-Meleon is one of the lightest browsers, resembling Firefox in some aspects. It lacks extensions but offers its own ad-blockers, pop-up blockers, and themes.
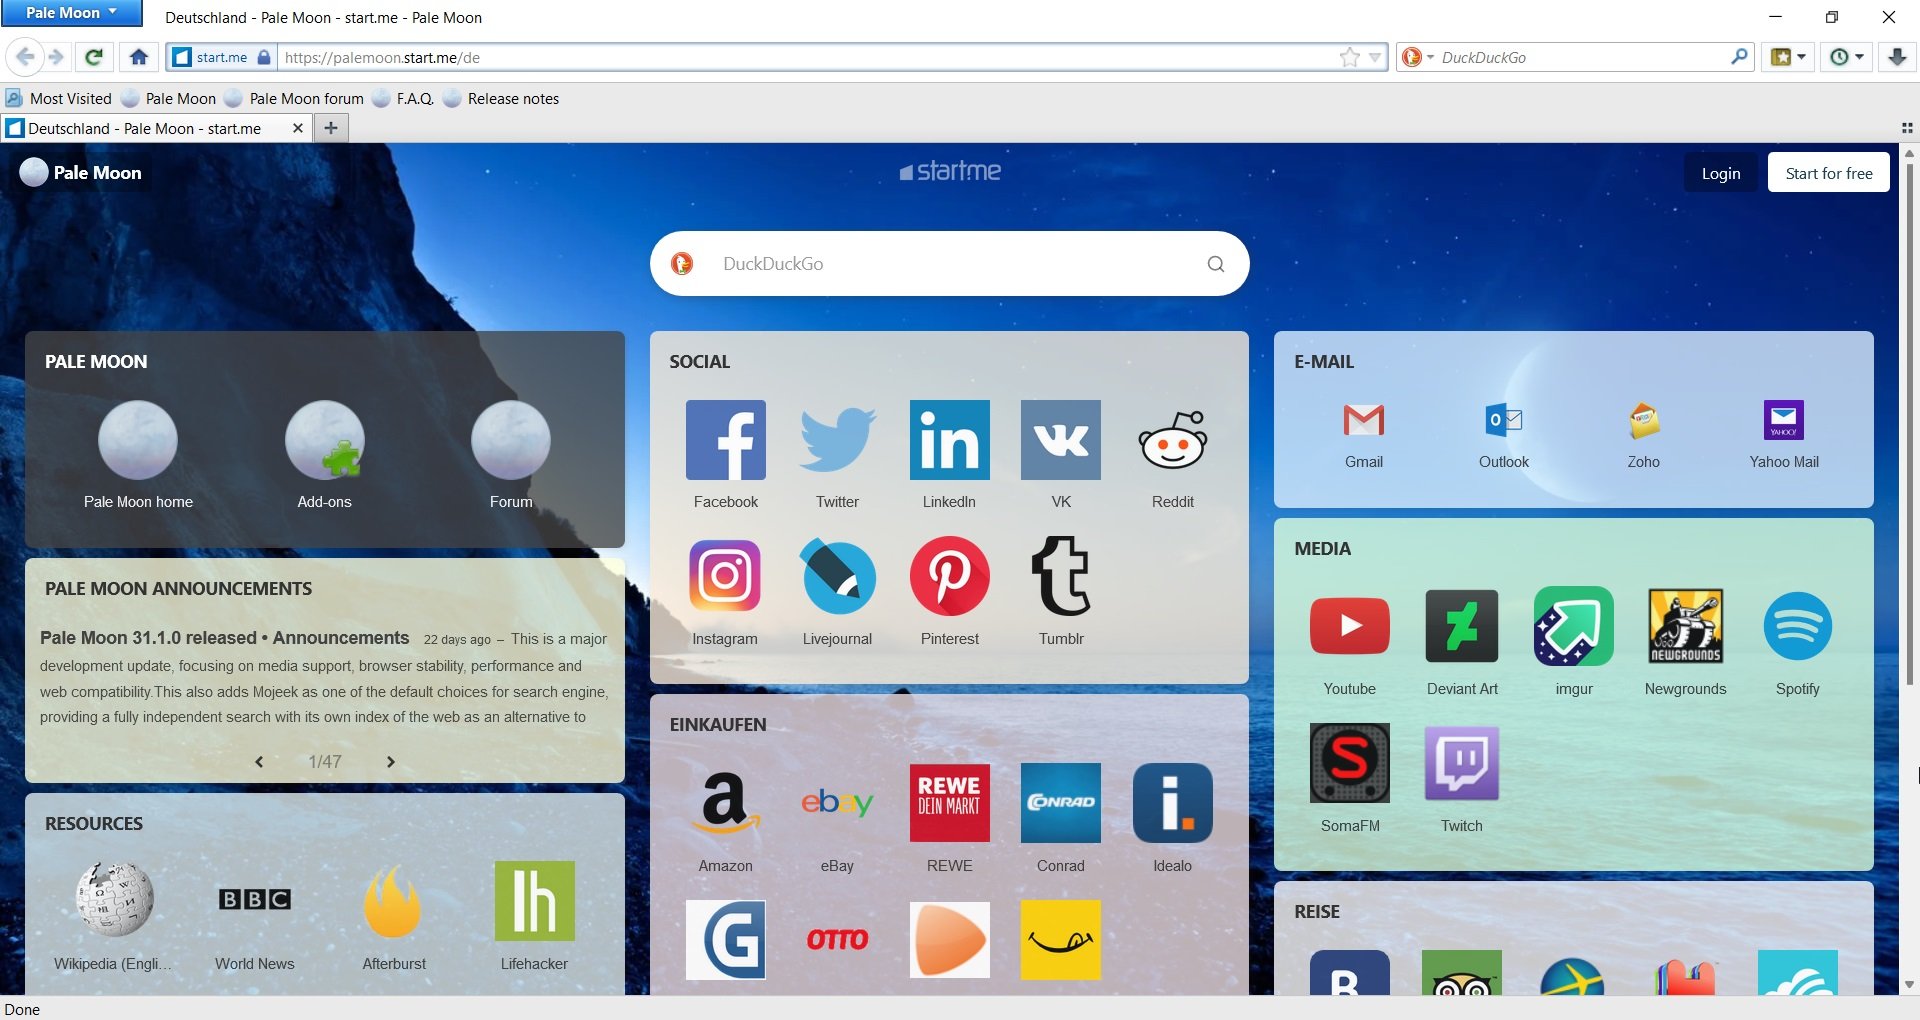
4. Pale Moon – Supports legacy add-ons and privacy on Windows 7
Pale Moon is an open-source browser based on the Goanna engine that only requires 256 MB of RAM to work, so it will run on Windows 7 without any problems.
Design-wise, it’s like a stripped-down version of Firefox, making it pretty fast and reliable for any task.
Its newer versions are optimized for the latest processors but lack the sandboxing that would also make it very safe. However, it’s pretty good for privacy protection since it blocks ads, telemetry, and data gathering.
Extremely Lightweight
Designed to work even on PCs with very few resources
Based on Firefox Fork
Offers compatibility with legacy plugins and features.
Privacy-Oriented
Focuses on user privacy by blocking ads and tracking.
Supports Legacy Plugins
Compatible with older plugins like Silverlight and Java.
7. Thorium – Open-source, fast, and privacy-oriented Chromium browser
Not many Chromium browsers support Windows 7 nowadays and the M109 is the last version that will work with older systems.
Thorium is based on this version, and it can bring the features of Chromium to your legacy PC.
According to the developer, it’s the fastest browser in the world, and it offers 8 to 38% performance improvement over the vanilla Chromium, which is impressive.
Although this is a great browser, it might lack some features that other browsers have, but nevertheless, it’s worth trying out.
Based on Chromium
Brings Chromium features to older systems.
Available on Various Platforms
Ensures accessibility across different operating systems.
Supports Legacy OS
Compatible with older operating systems like Windows 7.
Incredibly Fast
Offers significant performance improvements over standard Chromium.
8. Falkon – Lightweight with ad blocking, suited for Windows 7
If you’re looking for a minimalistic and lightweight browser for your Windows 7, look no further than Falkon.
This is a KDE web browser that uses QtWebEngine, previously known as QupZilla. The browser’s interface is minimalistic, so you won’t have issues adjusting to it.
In terms of functionality, the browser is rather minimalistic, so don’t expect to see any advanced features, such as extension support, etc.
However, Falkon has bookmarks, history, and tab support. There’s even an integrated ad blocker.
Overall, it’s a rather minimalistic browser with limited features, but it works on Windows 7 without issues.
Minimalistic and Lightweight
Designed for simplicity and efficient performance.
Bookmarks, History, Tab Support
Basic browsing essentials for user convenience.
Built on QtWebEngine
Utilizes a robust engine for stable performance.
Available on Legacy Systems
Compatible with older operating systems like Windows 7.
Our top Windows 7 browsers will offer safety and speed for those who still use the legacy operating system. If you want to learn more about our top pick, we have a great guide on how to download Opera for Windows 7 that might interest you.
Still using Windows 7? You’re not alone—and you’re not out of options either. We also recommend exploring our full guide on the best browsers for Windows 7 to see more secure and efficient tools designed for older systems.
Or, if you’re planning to upgrade, don’t miss our breakdown of the best browsers for Windows 11 to stay ahead with speed and performance.
Luckily, there’s still a wide variety of options, so you just have to decide which offers the features that best fit your needs and preferences.
From AI features to privacy controls and lightweight design, the options above won’t disappoint.
To correct this discrepancy and extend the lifespan of your battery, the simple solution is battery calibration. And we’ll be showing you how to calibrate laptop batteries in this article.
However, a weakened laptop battery (that has not been calibrated) could cause serious confusion.
For instance, on a typical laptop, the remaining battery life could read 2 hours, which, in actual sense, is only 30 minutes or thereabout.
Hence, while your laptop battery is showing you 2 hours remaining, you get stunned after only 30 minutes – when your battery suddenly drops to 10%, and eventually powers off.
To avoid such confusion and ensure accurate readings of battery life (on a laptop), the ultimate solution is to calibrate your laptop battery.
Follow this article, as the Windows Report team provides you with tips, tricks, and software solutions, which can be employed to calibrate Windows 10 laptop battery.
How do I calibrate the battery on my Windows 10 laptop?
Some high-performance laptops come with a built-in battery calibration tool, which can easily be used to calibrate a laptop battery.
However, a number (in fact majority) of laptop brands are not equipped with this calibration tool.
Nevertheless, there is no cause for worry, as there is a simple trick you can adopt to manually calibrate your laptop battery, and boost its lifespan.
There are three solutions that you can use to calibrate your laptop battery: manually, using BIOS, or using third-party software.
For convenience, we’ll be showing you how to execute this manual calibration, in the next section of this article.
1. Calibrate the laptop battery manually
1.1. Modify your power settings
Navigate to the taskbar on your screen display, and right-click on Battery.
Select Power Options.
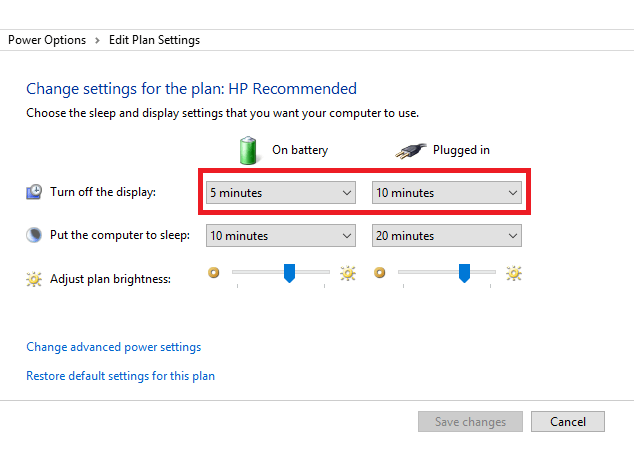
Under Power Options, select Change when the computer sleeps.
Click on the Turn off the display drop-down menu, and select Never.
Select the Put the computer to sleep drop-down menu, and choose Never.
Press the Change Advanced power setting key.
Click on the + (expand) symbol under Battery.
Select the + (expand) icon under Critical battery action, and choose Hibernate.
Click on the + icon (expand) under Critical battery level.
Under On Battery, select Percentage.
Set the percentage to a low value: 1% to 5%.
Click Apply at the lower right-hand corner of your screen.
Select OK, and Save Changes.
To manually calibrate a laptop battery, the first line of action entails changing the laptop‘s power settings.
At this point, you would be required to change the power settings. This will prevent your laptop from automatically going into sleep/hibernation/power saving mode, after a few minutes of inactivity.
Once you’ve changed the power settings as appropriate, move to the next stage.
1.2. Connect/Disconnect/Reconnect your charger
Connect the charger and power the battery until it is fully charged. Leave the charger plugged in (after the battery is fully charged) for a few minutes or hours (to enable it to cool down).
Remove the charger from your laptop and allow the battery to drain down (discharge). Once the battery is completely drained, your laptop will go into hibernation or completely power off.
Reconnect your charger, and charge the battery up to 100% again.
Note: You can use your computer during the recharging process, but it is better to leave it still.
1.3. Calibrate the battery
Once your laptop becomes fully charged, the manual calibration process is complete. Your laptop should now show normal battery life readings.
After the whole process, you can reset your laptop‘s power settings (back to the original settings), or if you like, you can leave it as it is.
2. Calibrate the laptop battery using BIOS
Some Windows laptops come with a pre-installed battery calibration program, which is embedded in their BIOS.rnrnIf your laptop has a built-in Battery Calibration program (in its BIOS), you can use it to calibrate the battery.
1. Power off your laptop, and power it on again.
2. The boot menu will appear on the screen.
3. Enter theu003cspanu003e u003c/spanu003eu003cstrongu003eBIOSu003c/strongu003eu003cspanu003e u003c/spanu003eby pressing theu003cspanu003e u003c/spanu003eu003cemu003eF2u003cspanu003e u003c/spanu003eu003c/emu003ekey at the boot menu.
4. Using the keyboard cursor keys, select theu003cspanu003e u003c/spanu003eu003cstrongu003ePoweru003c/strongu003eu003cspanu003e u003c/spanu003emenu.
5. Navigate to theu003cspanu003e u003c/spanu003eu003cstrongu003eStart Battery Calibrationu003c/strongu003eu003cspanu003e u003c/spanu003esection.
6. Click on theu003cspanu003e u003c/spanu003eu003cemu003eEnteru003c/emu003eu003cspanu003e u003c/spanu003ekey. This action will change your screen background to blue.
7. Follow the on-screen command and plug in your laptop charger.
8. Once your laptop‘s fully charged (100%), disconnect the charger.
9. Allow the battery to discharge from 100% to 0% until it automatically powers off.
10. Reconnect the charger (do not boot your system while it is charging).
11. Once it’s fully charged, the calibration process is complete.
12. You can then unplug the charger and reboot your system.
3. Calibrate the laptop battery with a third-party tool
There are special software solutions, exclusively designed for calibrating laptop batteries.
In this section of the article, we will be looking at two prominent battery calibration software that is compatible with Windows 10 laptops.
Battery management software can analyze and improve your battery. Many of these tools can give you comprehensive reports regarding the battery temperature, autonomy capacity, and more.
On top of that, you can set them up to help you optimize your settings for longer battery life. They can detect what process in your system is draining your battery the most and find quick and safe fixes for it.
AIDA64 is a popular hardware detection tool for Windows laptops that offers diagnostic functions and support for overclocking.
It can be employed to speed up the discharge process of a laptop battery and facilitate its calibration.
This software is compatible with all 32-bit and 64-bit Windows editions, including Windows 10 and Windows Server 2019.
Aside it is monitoring sensors in real time, it can also gather accurate voltage, temperature, and fan speed readings, while its diagnostic functions help detect and prevent battery issues.
No matter how strong your laptop battery is, it will eventually become weakened, with time.
The battery weakening process is gradual, such that you’ll hardly notice. At this point, battery life readings suddenly become inaccurate, throwing you into a state of confusion.
To prevent/avoid such a situation, you have to calibrate your laptop battery, preferably once every 2/3 months. And we have described, comprehensively, how to calibrate laptop battery in this article.
We hope you found these ways to calibrate your Windows 10 laptop battery useful. For more suggestions or other questions, feel free to visit the comments section below.
Many Minecraft players have complained that they can’t connect to the Mojang servers with a VPN. A few years ago, the Mojang Support team has stated that they don’t support the use of a VPN.
Despite fans complaining about this situation, and demanding explanations, the conversation ended there.
All the while more and more players came to realize that when it comes to Minecraft, VPN isn’t a valid alternative to bypass certain geo-restrictions and server-blocking situations.
The certain thing is that users all around the world can’t connect to Minecraft while using a VPN. Users get several types of error messages when facing a VPN problem in Minecraft:
You cannot connect on a VPN or Proxy in Minecraft
Please Disconnect from your Proxy or VPN before joining Minecraft
Your IP has been identified as a VPN or Proxy in Minecraft
Although no official reason has been released by the team behind this game, we have a few guesses.
Does VPN affect Minecraft?
Using a VPN will have an effect on your Minecraft experience. We advise you use a reputable client to get the best experience.
Given that the platform blocks VPN, we advise you use obfuscated servers or double VPN features.
When you use a VPN, your traffic is sent through more tunnels than regular traffic, and if you don’t use a good service, this can lead to slower connections.
On the other hand, a good VPN can actually help increase Internet speed. If you connect to a VPN server that’s close in location to the Minecraft servers, you may be able to reduce ping and lag.
Why can’t I log into Minecraft while using a VPN?
1. Helps schools (and other organizations) block Minecraft effectively
Sometimes schools (and other organizations) enforce restrictions on certain online content, and Minecraft isn’t an exception.
Using a VPN should technically lift these restrictions. The solution? Restrict VPN users from connecting to the game servers.
2. Prevent IP-banned users bypass their penalties
Surely, this could only work if the player didn’t receive an account-wide ban from the server, or if they have multiple accounts.
Still, it’s a good measure to take against abusive/fraudulent users, so this could be another reason.
3. To block players who aren’t supposed to play the game
In some countries such as China, the standard version of Minecraft is not available. However, thanks to technological advancements, users can resort to VPNs to avoid censorship and geo-blocking without too much effort.
Thus, blocking VPN users who might try to bypass these restrictions could’ve been a valid reason.
4. Blocking password brute-forcing attempts
Last, but not least, restricting public VPN users from connecting to the Mojang servers is a great way to eliminate, or at least curb brute-forcing password attempts.
How do I bypass a VPN block in Minecraft?
It appears that Minecraft didn’t ban all VPNs from attempting to connect to their servers. Therefore, it only makes sense to find the right provider, the one that isn’t blacklisted, right?
We’ve tried a bunch of VPNs earlier in our tests and achieved not-so-great results. As you’d expect, we couldn’t connect to the Mojang servers, but we could still play the game offline or in LAN mode.
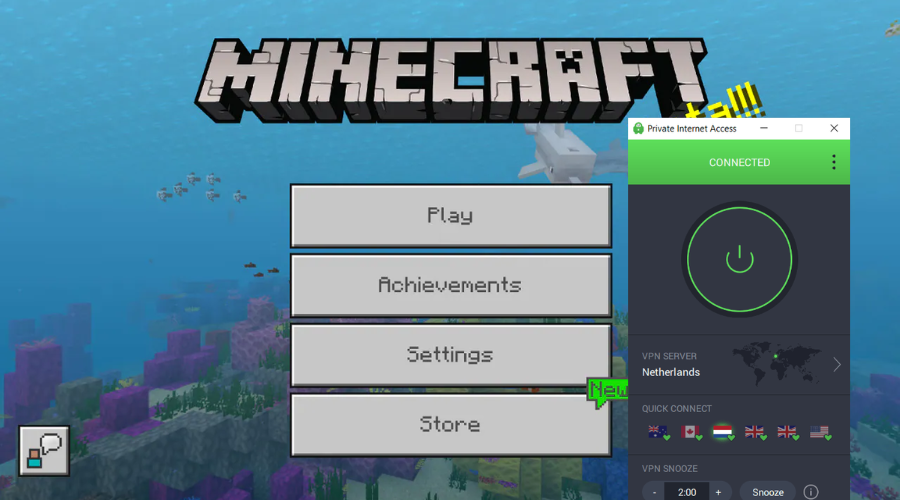
Just as we were about to give up, we found that PIA (Private Internet Access) works like a charm.
At first, we thought we weren’t connected to the VPN server, so we double-checked. Needless to say, we were, in fact, connected
But then we thought it was just a coincidence, so we tried multiple servers from several countries. Even more, we could even host our own public Minecraft servers with no issues. Long story short, we never got locked out while using PIA.
Use PIA to connect to Minecraft
If you want an all-around VPN service that you don’t have to turn off while playing Minecraft we recommend PIA.
It’s been reported that some users of the same VPN have been able to connect to Minecraft whilst others have not.
Turns out that it’s possible that you can remain undetected, but there’s no guarantee. Using a VPN like PIA and activating obfuscation mode and double VPN is the most secure way to access Minecraft.
These features highly encrypt data and hide the fact that you use a VPN in the first place.
Additionally, you don’t even have to switch servers once you’re done playing. You can connect to your favorite server and forget it’s even there. Every service you’ll access through it will work flawlessly.
First, let’s clear out what is an RTF file. RTF, otherwise Rich Text Format, is a text file format that saves document formatting such as bold, italic, and images.
Thus, it’s better to save a text document that includes bold formatting as an RTF instead of TXT.
Microsoft introduced RTF in the 1980s, but the company no longer updates the format. As such, RTF might be a slightly antiquated file type.
Nevertheless, there are plenty of Windows word processors and text editors that support the RTF file type.
MS Word, Corel WordPerfect, OpenOffice, LibreOffice, Notepad++, and AbiWord open rich text documents.
You can click File and select Open to edit an RTF file in most compatible software.
How can I open RTF files on Windows 10?
1. Open RTF documents by converting them to PDF files
The easiest and most secure way to open an RTF file on your PC is by using Adobe Reader DC to convert it to PDF. This way your file will be safe and easy to share.
Taking advantage of the numerous functions of Adobe Acrobat Reader DC means that you will need fewer programs installed on your system, making it faster and more stable.
Additionally, you can even convert files to and from PDF and share them easily.
Here’s a quick overview of all the other features Adobe Acrobat Reader DC has to offer:
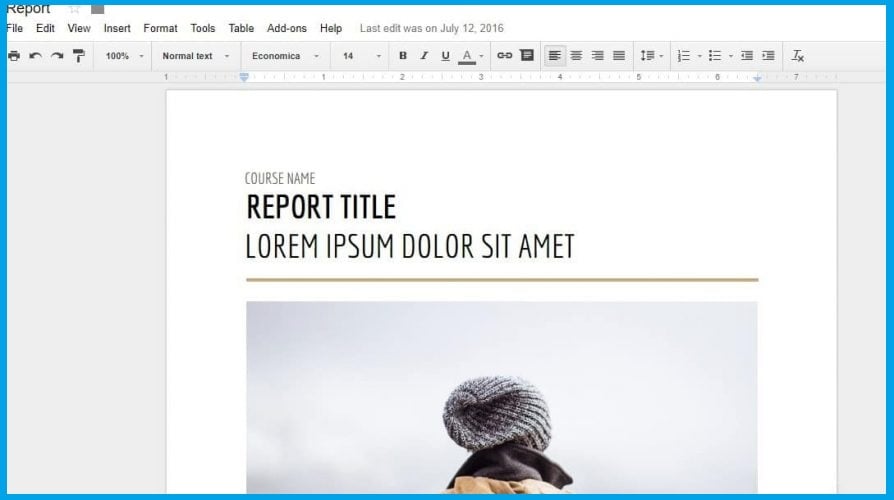
Google Drive (GD) is cloud storage with which you can save documents and then edit them via Docs and Slides.
Google Drive also gives you 15 GB of storage without a subscription fee. You can set up a Google+ account if required, and then you can open an RTF file in Google Drive.
1. First, access the site at drive.google.com to open Google Drive.
2. Click on My Drive and select theUpload files option from the menu.
3. Select the RTF file to save it in Google Drive and click the OK button.
4. When Google Drive includes your selected document, right-click the RTF file’s icon.
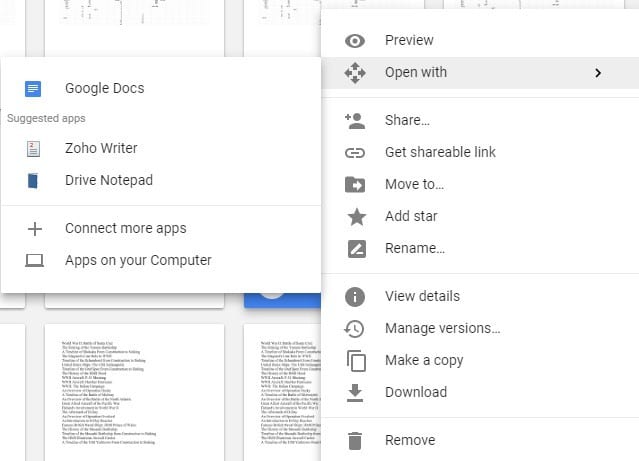
5. Click on Open With and select Google Docs from the list.
6. Note that opening an RTF in Google Docs generates a second copy of the document in Google Drive with a GDOC file format, which is the edited file.
7. Edit the file as you desire in Google Docs.
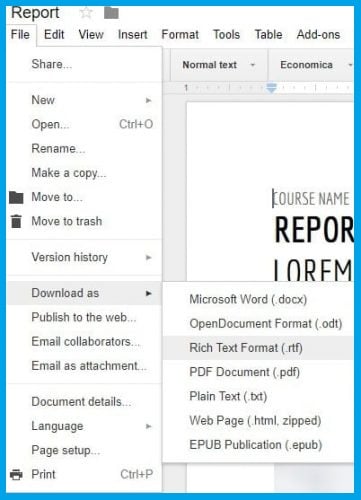
8. Click File, select Download as and choose Rich Text Format to restore the file back to RTF when you’ve finished editing.
However, you can also open a rich text file within Chrome or other browsers that support Google’s web apps.
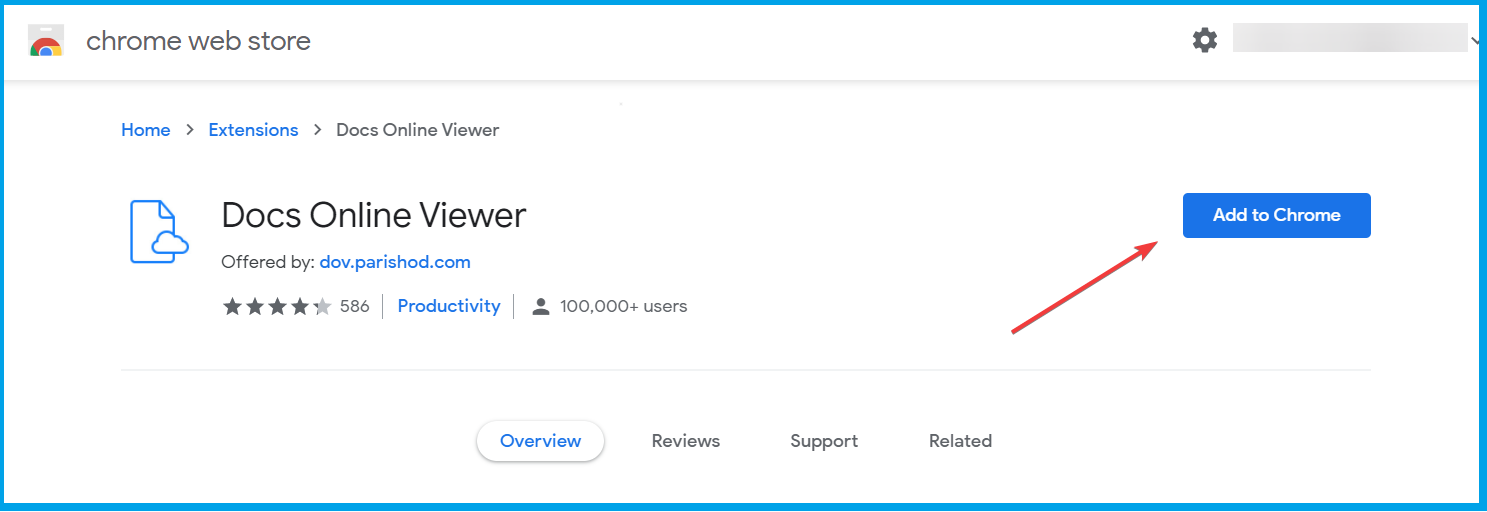
Open the Google webstore to add the Docs Onlive Viewer extension to Google Chrome.
You can open RTF documents in Chrome by typing the keyword RTF document file samples in Google.
Google will then list three RTF documents at the top of its search page.
Click a View this RTF file button beside one of those links to open the document in Chrome as below.
So you can RTF documents without any additional software. Open the RTF documents in Google Drive to edit them. Or open the linked Rich Text Format documents in browser tabs with Docs Online Viewer.
You can also open linked RTF files on website pages or search engines in Chrome with Docs Online Viewer.
This extension supports Rich Text Format so that you can open online RTF documents within Chrome.
Did you ever try doing a project for work or playing your favorite game on your Windows 10 PC, and you accidentally activated a keyboard shortcut?
Well, this can happen to anyone. In this quick tutorial, we will show you how to disable hotkeys in Windows 10 and use your machine without any issues.
Why should I turn off keyboard shortcuts?
Turning off keyboard shortcuts on your computer has both pros and cons. Here we have some reasons why you might consider turning them off:
Preventing accidental inputs – If you frequently make typing mistakes or accidentally hit keyboard shortcuts, turning them off can help prevent unwanted actions from occurring on your computer.
Avoiding interruptions – Keyboard shortcuts can sometimes interrupt your work or cause distractions, especially if they trigger unwanted actions or pop-up windows.
Aiding accessibility – For users with specific disabilities or physical impairments, turning off keyboard shortcuts may make it easier to use their computer by reducing the number of inputs they need to manage.
On the other hand, you may if you disable keyboard shortcuts, you may experience any of the following:
Reduced productivity – Keyboard shortcuts can quickly and efficiently navigate your computer and perform everyday tasks. However, turning them off may slow your workflow or require additional steps to complete specific actions.
Loss of functionality – Some applications or programs rely heavily on keyboard shortcuts, and turning them off may limit your ability to use certain features or tools within those applications.
Inconsistent experience – Turning off keyboard shortcuts may create an unpredictable user experience if you’re used to using them on other computers or devices.
Now let us explore some ways to disable the function if you decide to.
How do I turn off Windows keyboard shortcuts?
1. Using PowerShell
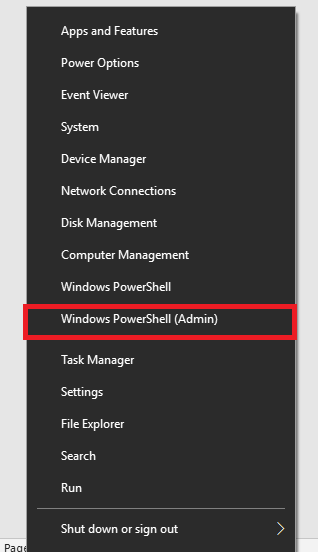
Press Windows + X and select Windows PowerShell (Admin).
Type the below command and press Enter: Set-ItemProperty -Path "HKCU:\Control Panel\Desktop" -Name "UserPreferencesMask" -Value ([byte[]](0x90,0x12,0x03,0x80)
Close PowerShell and restart the computer.
2. Use the Command Prompt
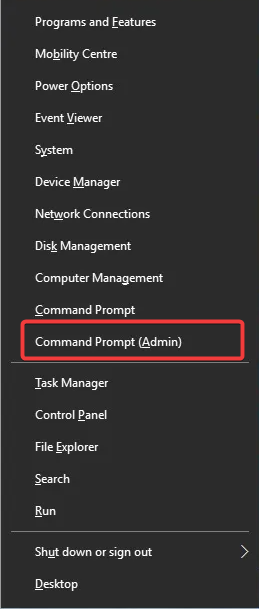
Press Windows + X and select Command Prompt (Admin).
Type the below command and press Enter: reg add "HKCU\Control Panel\Desktop" /v UserPreferencesMask /t REG_BINARY /d 90120380 /f
Then, close the Command Prompt and restart the computer.
3. Use the Group Policy Editor
Press Windows + R, type Gpedit.msc, and hit Enter.
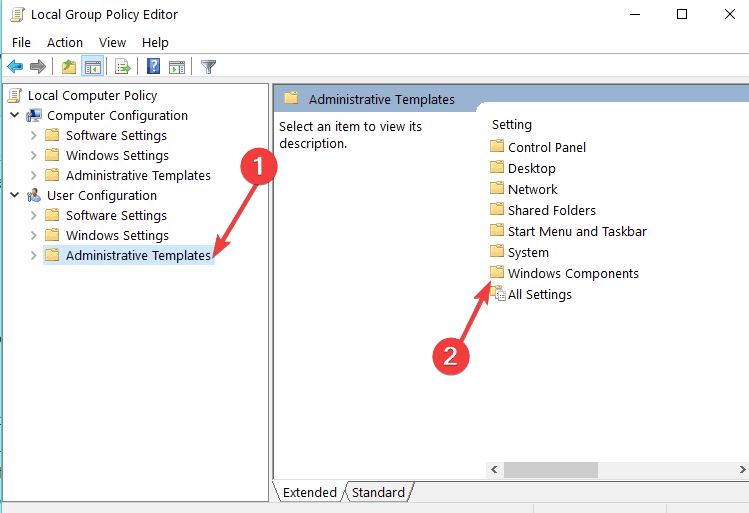
Expand User Configuration in the left panel, click Administrative templates, and choose Windows Components.
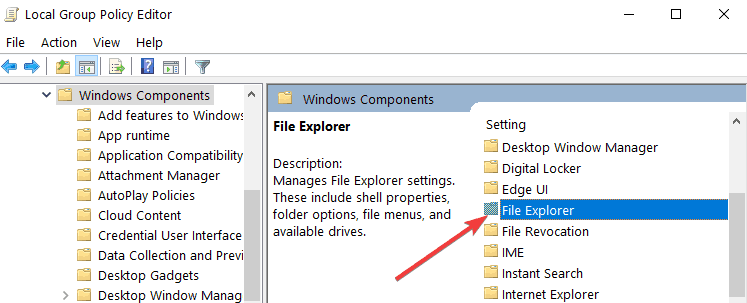
Then, under Windows Components, click on File Explorer.
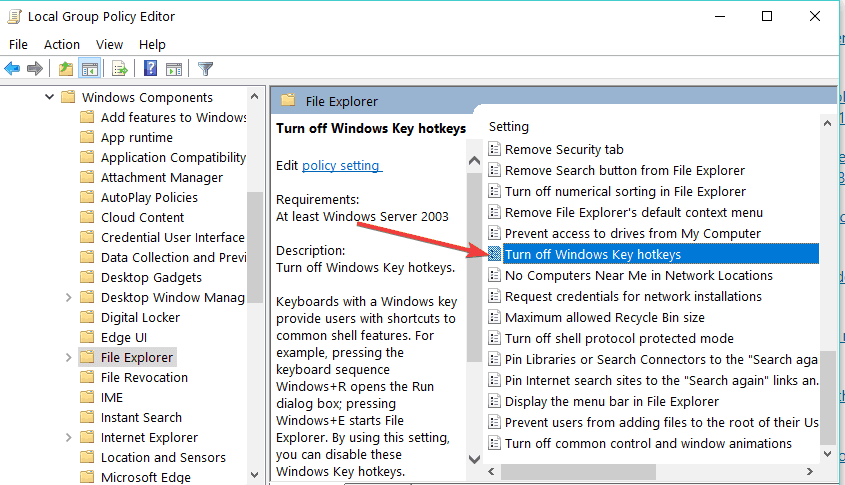
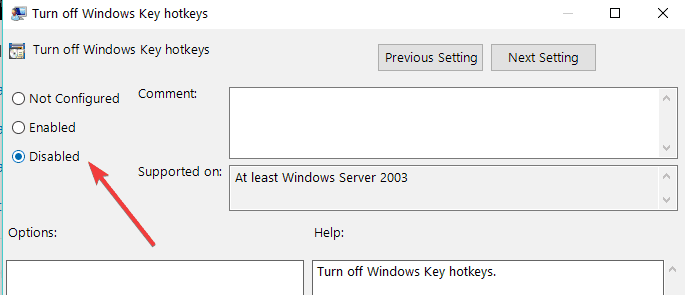
Double-click Turn off Windows hotkeys on the right pane.
A window should pop up after you select the option above and tick Disabled.
Click on the Apply button on the window’s lower side.
Now, click on the OK button on the window’s lower side.
You must close the Group PolicyEditor window and reboot the Windows 10 device.
After the reboot, check if you have the same keyboard shortcuts disabled.
Tip
If you want to get your keyboard shortcuts back up and running, simply choose Enable or Not Configured.
If you’re looking for additional info on how to edit the Group Policy, take a look at this complete guide that will help you better understand what it is and how it works.
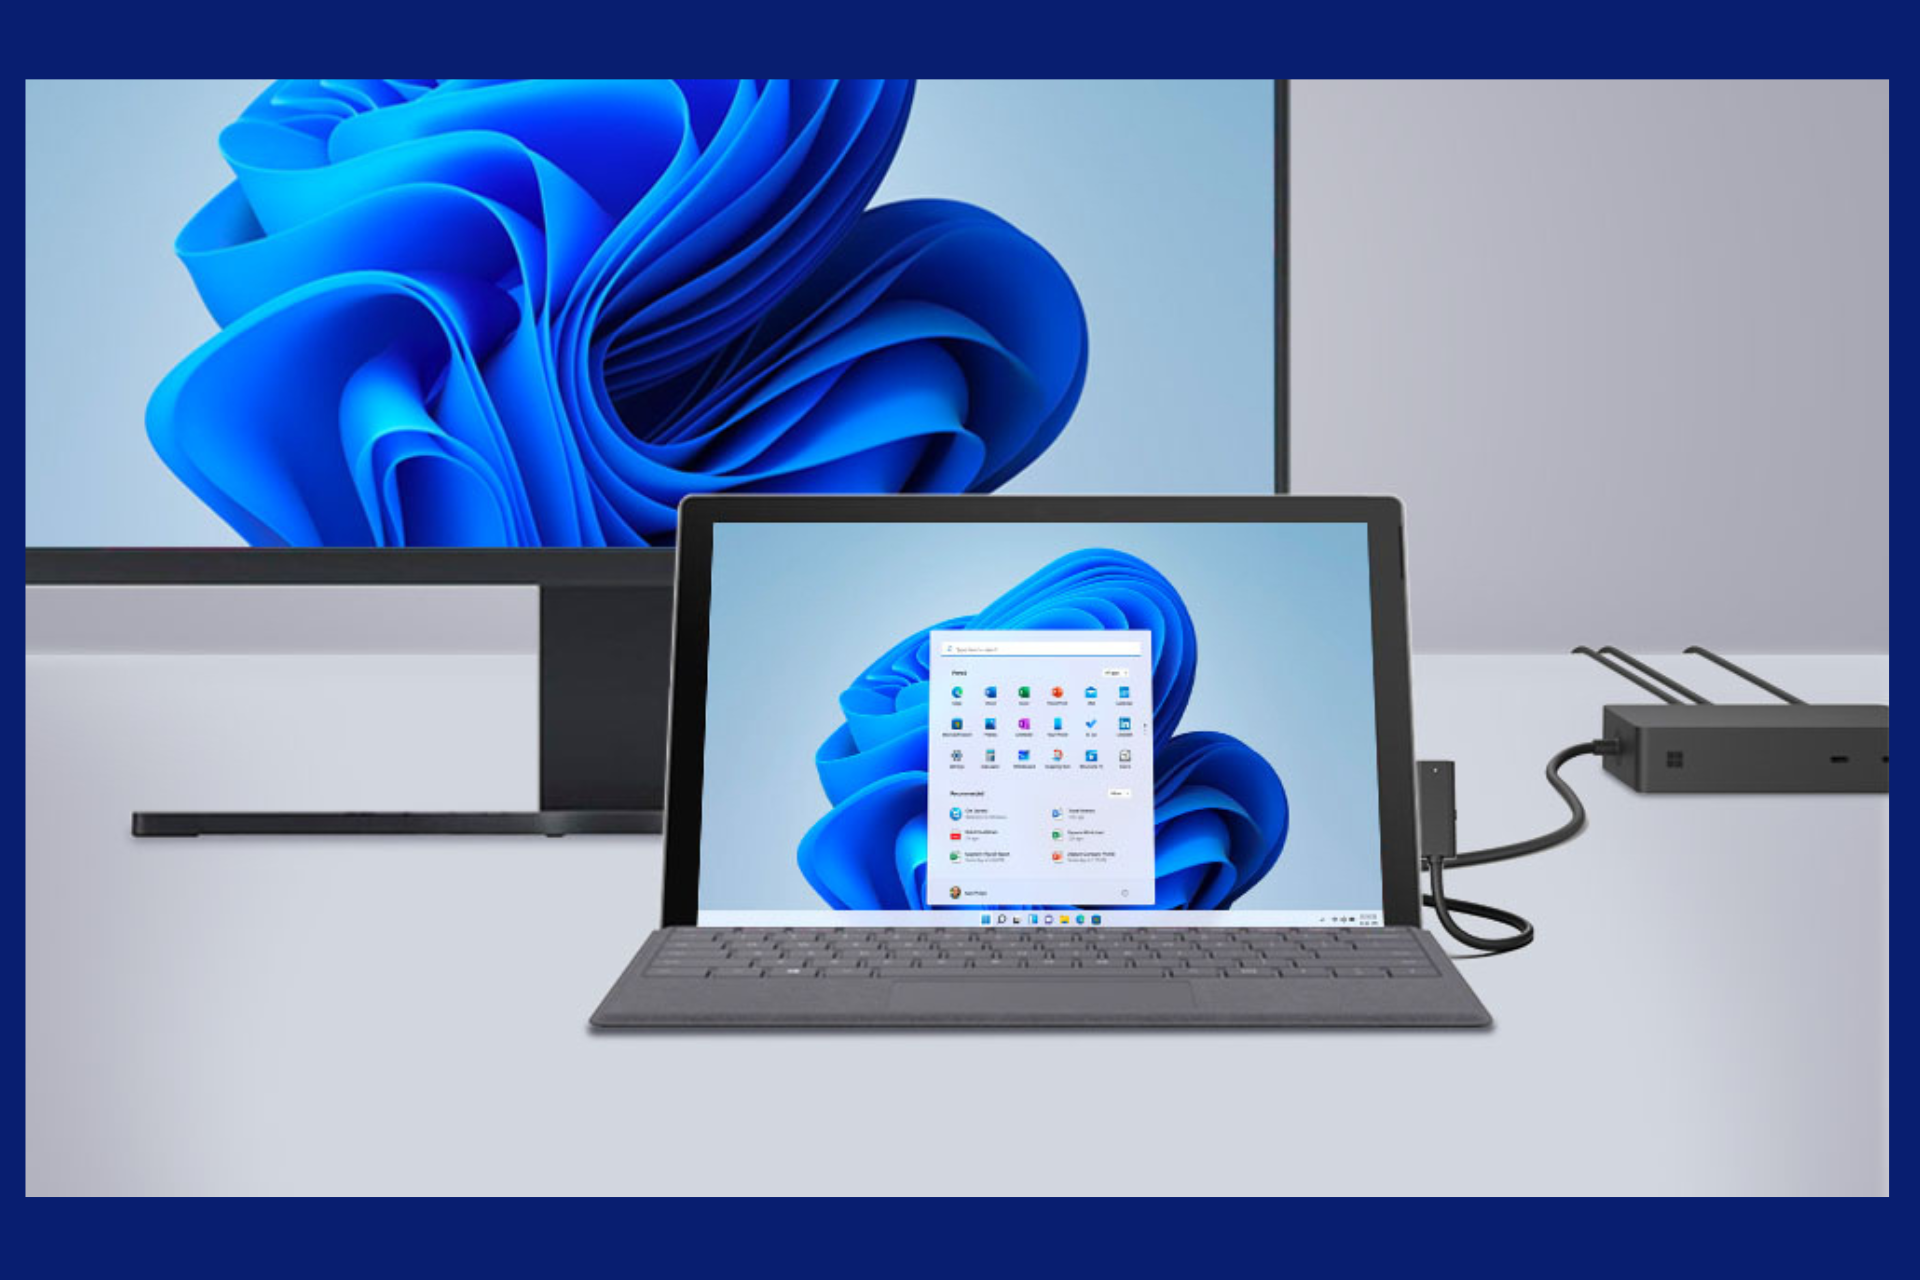
If you’re trying to connect an external monitor to your Surface Pro and nothing’s showing up, you’re not alone. It’s frustrating when your workspace won’t expand like it’s supposed to, especially when you’re counting on that extra screen for productivity or creative work.
But don’t worry, I’ve got you covered with three straightforward ways to get your external monitor working again.
How do I get my Surface Pro to work with an external monitor?
1. Clear your display cache
Disconnect the external monitor from your Surface Pro. You can also choose to undock the Surface Pro from the Surface Dock.
Remove the adapter if you use a USB-C to VGA Adapter, USB-C to DisplayPort Adapter, or USB-C to HDMI adapter.
Reinsert your adapter firmly to ensure it is connected to your Surface Pro.
Check if your external monitor supports DisplayPort and choose an HDMI, VGA, or DVI cable instead.
Why Is My External Monitor Not Working with Surface Pro?
Connection issues: Faulty cables or adapters are the usual suspects.
Display settings: Sometimes Windows just doesn’t detect the second screen automatically.
Driver problems: Outdated or corrupted graphics drivers can block the connection.
Can you connect a monitor via USB-C?
Connecting a monitor via a USB-C cable depends on the monitor that you are using. So, first, you need to ensure that the monitor supports USB-C.
Since USB-C became the default input type in MacBook Pro and MacBook Air laptops, manufacturers are now building USB-C monitors.
Windows 10 machines also started converting to this port, now Windows 11. This means that as long as you have a USB-C monitor, you can connect your device to the monitor via a USB-C port.
It is not uncommon for a laptop fan to run loud whenever the computer is getting hot. It runs faster and louder to keep out the hot temperature and the system in good condition.
However, what to do when your laptop is not hot, but the fan is running loud? To most people, this noise could be very distracting and annoying. While it also, as reported, gives some users a scare as they think their laptop is broken.
This has been the recent concern of users regarding their laptops’ fans. Luckily, this has caught our attention, and we are set to provide three possible fixes to your computer if it’s not hot, but the fan is loud.
Why is my laptop fan loud but not hot?
There are diverse reasons why a laptop fan would run loud but not hot. A typical day when the laptop is hot could make loud noises. But when the laptop fan runs loud when it’s not hot, it could be as a result of the following:
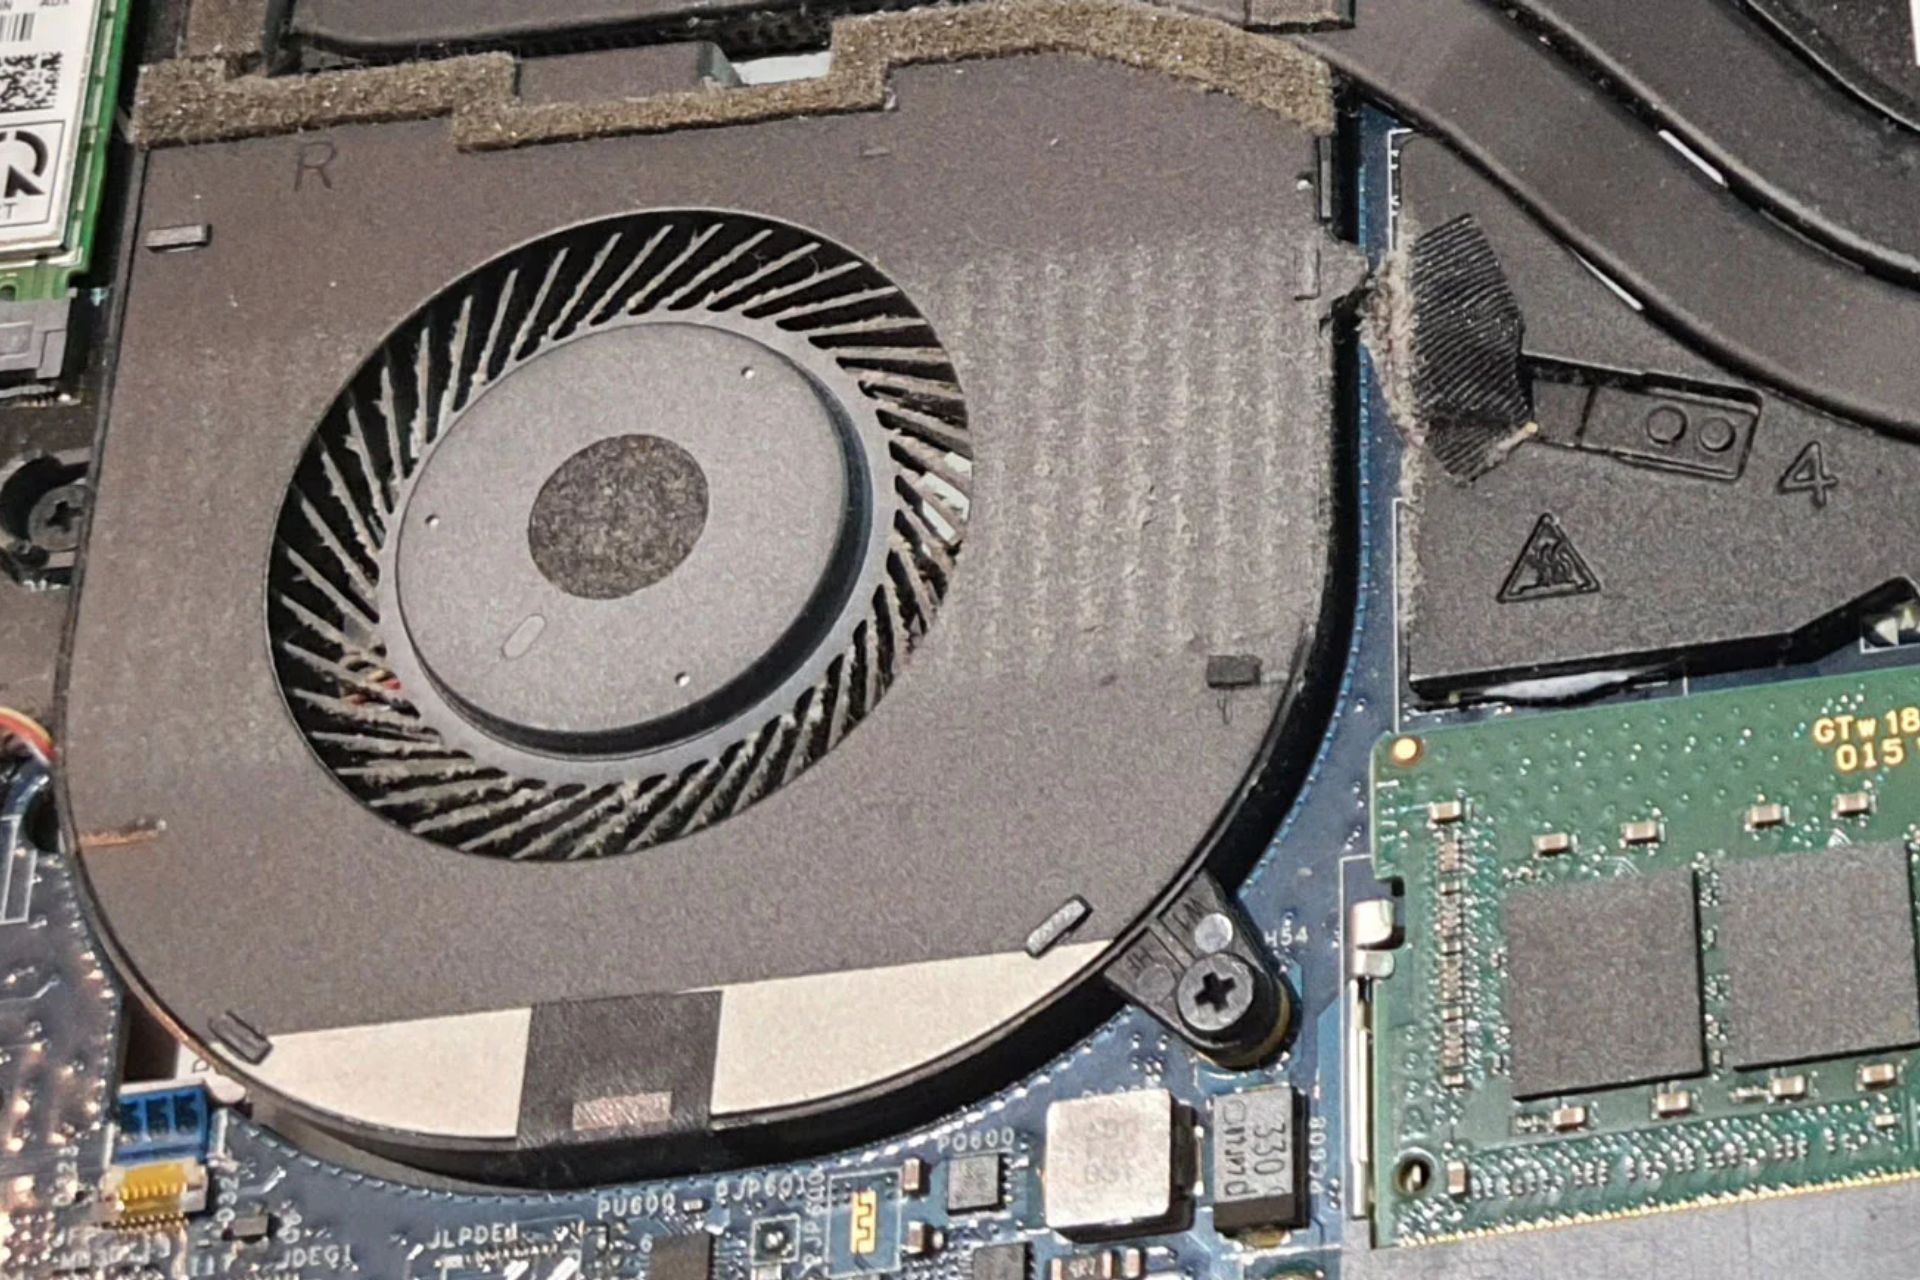
Your fan vent is dirty: When dirt builds up in your fan vent without getting cleaned out for a long time. By this, the fan receives stuffed with dust and other particles, thus causing the fan to roll with force or hindrance. These can then push your laptop to make terrible noises.
Faulty laptop fan: Another thing that could cause your laptop fan to make loud noise is if the fan parts have worn out. This could be possible if the fan has grown loose over time or if the fan develops fault by any mechanical or technical incident.
High CPU usage: Your laptop fan can also, all of a sudden, make a loud noise if you open programs that are capable of wearing down your CPU. If you launch applications incompatible with your system’s memory and storage, you risk having your system crash or make loud noises.
Is it bad if my laptop fan is loud?
The laptop fan is meant to provide the system with a cool temperature, and if it makes a loud noise, it serves you a purpose. It lets you know that you are running a program beyond its capabilities.
It can also indicate problems lurking in the system, especially when the noise persists. Hence, it is not bad if your laptop fan makes a loud noise.
How do I fix my laptop fan if it’s loud but not hot?
1. Disable all Startup running apps
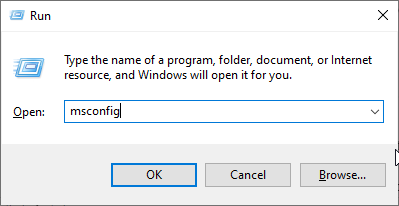
Press the Windows key + R to open the Run box.
Once the Run box opens, type MSConfig and click OK.
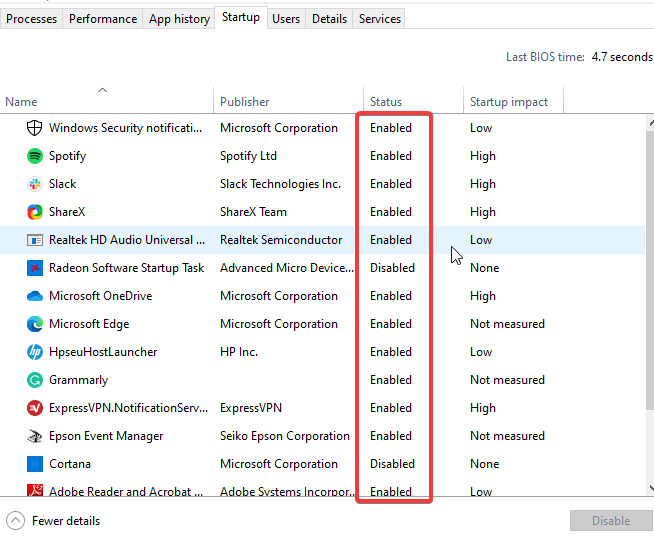
Click the Startup bar and Open Task Manager.
Disable all the apps you don’t want to run when you turn on your system.
Once you’re done, click OK.
Sometimes, some system programs run in the background, which most times might not be necessary at the moment. What’s best is to remove these unnecessary programs at the startup. This should fix your laptop fan running loud but not hot.
2. Clean your laptop fan
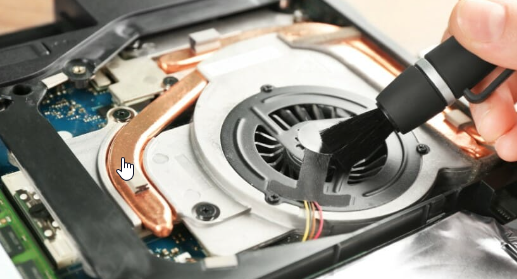
One of the best ways to fix this issue and profit yourself is by cleaning your laptop fan. It is inevitable for your laptop not to accumulate dust since you use it on different surfaces. This may accumulate over time and affect the performance of the fan.
Hence, you may need a technician to clean it for you, or you can learn how to clean a laptop fan with these steps:
Open up your laptop back case.
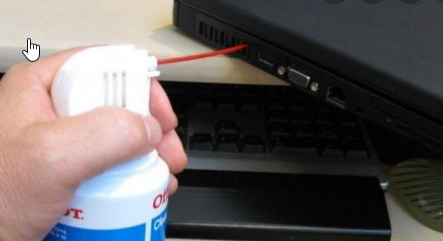
Get an air or electric duster (if things have gone worse) to dust off the dirt.
Dust and blow out the particles till the fan is clean.
Ensure not to use any wet substance for the cleaning
Screw back your laptop afterward.
3. Replace the fan
If you’ve considered trying the above fixes, the noise from your laptop fan does not stop. We advise that you replace the loud fan with a new fan.
Well, this, you might be unable to fix yourself. At this, you should consult an experienced technician.
Like any other operating system, Windows 11 might show some random problems, so you definitely should know how to solve them quickly
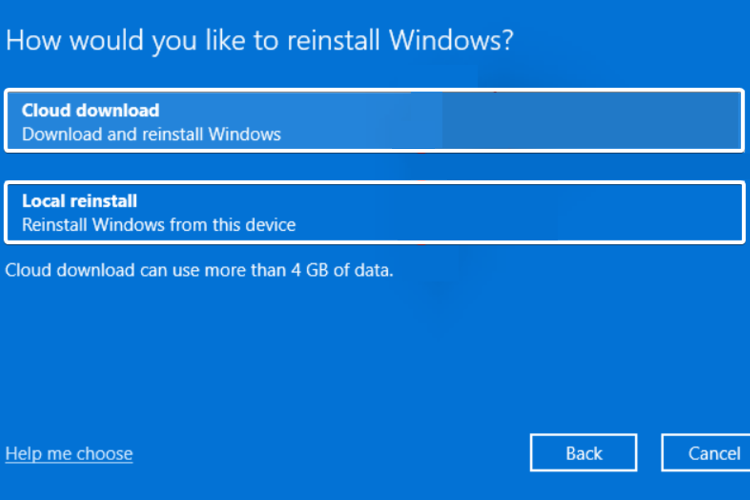
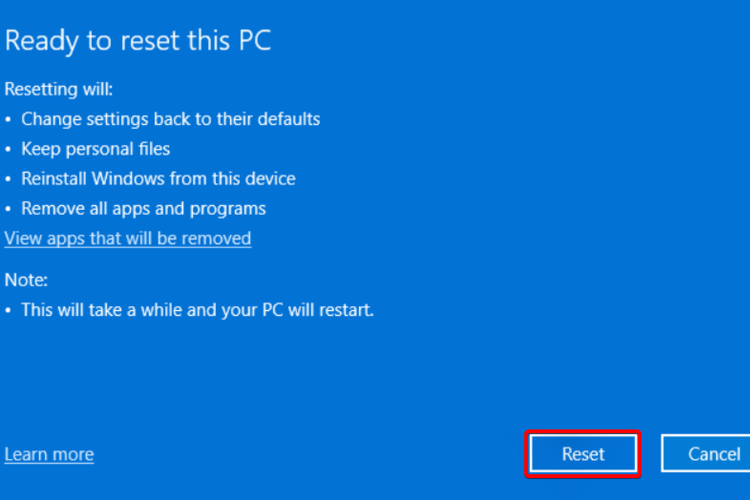
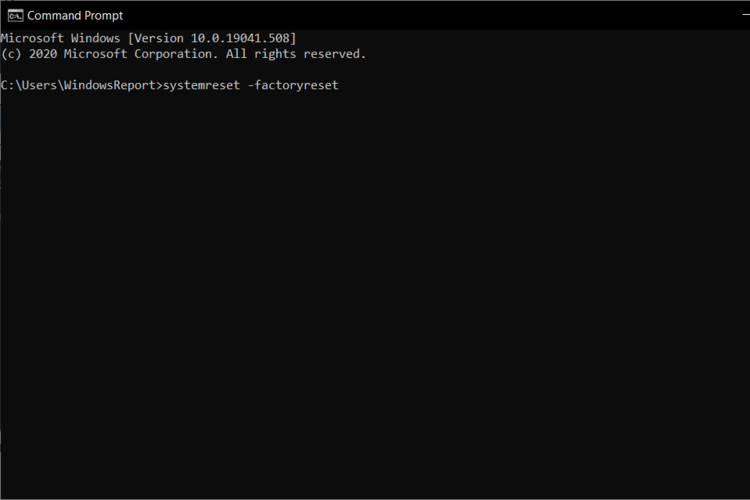
In this guide, we’ll present some of the most valuable options you should consider resetting your Windows 11 PC to its factory settings. This is extremely easy to do, so you’ll not have to worry about it.
How can I reset Windows 11 to its factory settings?
1. Reset your PC using the built-in tool
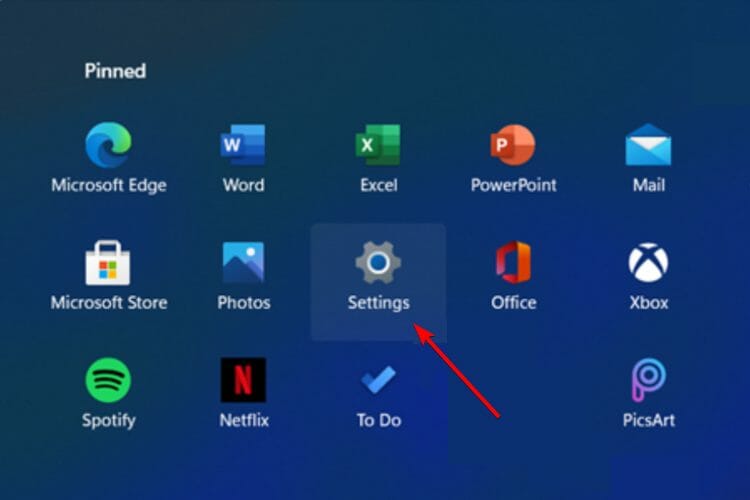
1. Press theWindows + I keys at the same time on your keyboard.
2. From the menu that opens, choose Settings.
3. Go toUpdate & Security.
4. In the left window pane, selectRecovery.
5. Click onReset PC, from the right side.
6. Choose the type of factory reset you need. You can keep your personal files, or perform a complete deletion of all the files, apps and settings on the PC.
7. Select the option you want to reinstall Windows: Cloud download or Local reinstall.
8. Click on Next.
9. Finally, press the Reset button.
10. Now, your operating system will start the reset process. Note that, during this action, your computer might restart on its own a few times. You should leave it alone, take a break and drink something until it is completed.
Windows 11 has a built-in tool that allows you to reset it to factory settings without having to use any other apps or ISO files. You can perform a complete reset or you can choose to keep some personal files for future use.
For broader fixes beyond a factory reset, see our repair Windows 11 guide for step-by-step methods.
During Reset this PC, choose “Only the drive where Windows is installed” if you want to wipe just C:. For a step-by-step walkthrough, see how to reset only the C: drive in Windows 11.
2. Use Command Prompt
2.1 Trigger reset
Press Windows key + S on your keyboard, type cmd, then click on Run as administrator.
In the opened window, type the following command, then hit the Enter button: systemreset -factoryreset
Now you should be able to see the traditional reset window on your screen.
Follow the on-screen instructions to reset your PC.
This option is only about triggering the traditional Windows 11 Reset dialog box from Command Prompt.
Be sore of the fact that it helps if everything works on your operating system and to easily reset your computer factory settings.
Can I reset my Windows 11 factory settings without installation media?
If you don’t have any installation media, resetting your PC from the Settings menu or using an ISO are the perfect options.
On the other hand, considering you encounter BSODs, we strongly recommend you boot your computer on Safe mode.
For those of you who are not able to access the Safe mode, you should use the Troubleshoot Windows section from the Command Prompt.
However, if it still seems to fail, it probably means your installation is corrupted. Unfortunately, there’s no other solution you can use in this case.
Can I reset Windows 11 without a password?
In case you don’t remember your password, you’ll have also to delete your data when resetting your computer.
Your user account passwords encrypt Windows data. Thus, it would be much more simple if you would try recovering your password before getting rid of your data.
If you can’t do it, you should choose the Remove everything option, listed in step 6 of the 2nd option presented above.
Note that the easiest way to reset your password is through a Microsoft account, not a local one. In case you have a local account, recovering your account will be a bit more difficult.
Can I reset Windows 11 to factory settings without losing data?
In order to reset your Windows 11 factory settings without losing data, you’ll need to choose the Keep my files option, during step 6 from the same 2nd listed method.
Note that, once the reset processes are finished, your custom settings will be restored. You’ll also be able to view a list of all the removed programs on your Windows 11.
NOTE
As an alternative future solution, you should know that Boot software producers are now preparing some new updates. Thus, you’ll have an automatic method to restart your Windows 11 factory settings.
FAQ
How do I factory reset Windows 11 without logging in?
If you can’t log in, boot into the Recovery Environment by restarting your PC and pressing Shift + F8 (or holding Shift while selecting Restart). Then go to Troubleshoot > Reset this PC > Remove everything to perform a full reset without logging in.
Can I reset Windows 11 without losing files?
Yes. When you start the reset process, choose Keep my files instead of Remove everything. This option reinstalls Windows 11 while preserving your personal files, though apps and settings will be removed.
What happens after I reset my Windows 11 PC?
After a factory reset, Windows 11 reinstalls itself to a clean state. Your apps, drivers, and settings are removed, but you can reinstall them later. A list of removed programs will also be provided for reference.
Why should I reset Windows 11 to factory settings?
Resetting can fix severe issues like crashes, BSODs, or malware infections. It’s also useful if your PC is running slowly or you want to start fresh without reinstalling Windows manually.
This guide will definitely help you reset your Windows 11 PC to its factory settings especially since there’s no default password. You should also know that Windows 11 runs better & faster on old or low-spec devices, and if you don’t believe us, feel free to check a full explanation of this fact.
Because your opinion is extremely important to us, don’t hesitate to leave a comment in the section below and let us know your thoughts regarding this subject.
If you are looking for a Paradox Launcher review, this is the right place. In this analytical article, you will learn about this launcher in detail.
There are many game launchers available right now. Though Steam, Xbox, and Epic Game launchers have already got their place, many game makers are still trying their luck with similar options.
This review article will learn about another item called Paradox Launcher. We will try to reveal its benefits, features, and downsides.
What is the Paradox Launcher?
Paradox Launcher is a game launcher developed by Paradox Interactive AB. It is also known as the PDX Launcher.
Though the games from this company are available on Steam and other platforms, they have built this launcher for reasons like delivering a gaming experience most conveniently.
Is Paradox Launcher safe?
Yes. This launcher is entirely safe and from the official source. However, if you try to use a pirated copy of the game, in this case, the game along with the launcher may not be safe for you.
The developers behind this app are constantly releasing new versions with various improvements. Currently, PDX Launcher V2 is available that have got other performance and security improvements compared to its previous version.
Why do I need Paradox Launcher?
For some games from Paradox Interactive, you will need to install this launcher like many Ubisoft games purchased from Steam require Uplay or Ubisoft Connect.
The company behind this program is slowly making it a hub for its games. Most of its modern games, like Battletech, Surviving the Aftermath, Cities Skylines, etc., require Paradox Games Launcher.
What are the main features of Paradox Launcher?
1. Managing games
The main feature of this launcher is managing your game library more easily. Paradox allows you to link your account with Steam, Microsoft Account, Twitch, Epic, PlayStation, etc.
If you have games from Paradox Interactive on multiple platforms, the launcher will show all of them in one place.
Even you can install and uninstall games from this launcher without having third-party tools like Steam on your computer.
You do not need to open third-party launchers to run or install most modern games from Paradox interactive. This is a beneficial feature indeed.
2. Browsing mods
You can even browse and manage game mods on Paradox launcher, not just managing games, uninstalling, or installing.
Under all supported games listed on this launcher, you will get the option: Mods. When you go there, you can see all of the available items.
3. Personalized experience
Even though Paradox Launcher is not as feature-rich as some other established ones, you will still get a personalized experience here. For example, if you want to stay on a specific game version and no longer want to update it, this launcher has the option to lock on a performance.
Else, you also can opt out of personalized content anytime you want. So, though the options are minimal, it is still there.
Log in with your credentials or sign up if necessary.
Now, you will be able to use this launcher. If you don’t have any games from Paradox Interactive, you can purchase some from its store. These will be available in the launcher.
If you have games on other platforms like Steam but do not see these in the list, you need to link your account with Steam.
Click on the Link account next to the service you prefer.
Go ahead.
Now, you should be able to find all of your games in the Paradox Launcher.
Conclusion
Whether you like it or not, you must install Paradox Launcherfor some specific games. However, if you have a lot of games from the company behind this app, this launcher can give you a great experience.
Managing games from other sources in one place and locking specific versions of games are two critical benefits of this launcher.
In this Paradox Launcher review, you already have the application details. However, if you have an opinion or question, feel free to let us know in the comment box.
The Steam download demo button not working is a frustrating issue many users report when nothing happens after clicking it. Steam, developed by Valve and launched in 2003, is a digital distribution platform that lets users download, discuss, and play games, along with offering automatic updates for titles.
Steam allows players to try out demos of upcoming and available games, helping them decide what to buy. But sometimes, demos won’t download at all. This can result from network problems, server outages, or restricted bandwidth settings in Steam.
If you’re running into this, don’t worry, we’ll walk you through simple ways to fix the Steam demo not downloading issue.
Search for Free demos in the search space to access them.
How do I fix Steam if the download demo button is not working?
1. Restart your computer
Click on Start at the bottom left corner of the screen.
Select Power from the option.
Click on Restart, then click OK.
Restarting your computer can fix most of the issues you may encounter. It’ll fix any boot issues that may be affecting the Steam Client.
2. Check your network connection
Connection issues can cause lots of problems with the Steam Client, like Steam not downloading demos. However, Steam requires a fast and stable network connection to download game demos.
Hence, a power cycle on your router can help fix this issue. Likewise, if you’re connected to your router network connection with a cable, it can affect its speed and stability. We recommend changing to a wireless network connection and seeing if the issue persists.
If you’re seeing erratic behavior such as the Steam download going on and off, try restarting your router or switching from wired to wireless.
3. Run Steam Client as an administrator
Right-click on the Steam Client icon on your desktop screen.
Select Properties from the options.
On the Steam Properties tab, go to Compatibility and check the box for Run this program as an administrator.
Click OK to save the changes.
Restart your computer and run the Steam Client to see if the issue persists.
4. Check Steam platforms for updates
Users will be notified on Steam’s Twitter page whenever a maintenance session occurs, or there’s an issue with the servers. So, check if there’s any information about it. The solution to this is to wait till the problem is fixed.
5. Update Steam
Launch Steam on your computer.
Click on the Steam Menu.
Select Check for Steam Client Update.
Click on Update if there are any updates. (Steam will automatically install the updates)
Demos are free. They help users check the game story and decide whether it is worth it before purchasing it. Although, not all demos are made available to everyone. Sometimes, game developers send out their demos to specific influencers to check out and give feedback to improve the game.
There are some other difficulties that users complain about while using Steam, like slow download speed. However, users can read through our article about how to fix Steam’s slow download speed permanently.
Steam is one of the most used video game distribution platforms worldwide. It is a gaming community where players and developers can trade video games online.
Steam is free to download and use, but some games come at a cost. You can download it from the official Steam website; different versions are available for both PC and Mac computers.
Downloading and playing games on Steam could be fun, but what if the Steam download button goes missing? There are various reasons why this may occur.
If you are also facing this issue, keep reading this post to learn how you can fix it.
Why is my Steam download button missing?
As discussed, Steam is one of the most prestigious gaming distribution platforms. But even the best can sometimes face bugs and errors.
Below are some of the reasons why the Steam download button missing may occur:
Unstable Internet connection
Misconfigured Steam settings
Steam servers facing a downtime
Steam cache data is full
What can I do if my Steam download button is missing?
1. Restart Steam
Before getting started with complex troubleshooting methods to fix this issue, try restarting Steam. Sometimes, Steam runs into temporary bugs and errors that make it misbehave.
Close Steam and wait for a few minutes. Then restart it and check if the download button appears.
2. Check Internet connection
Steam needs a stable Internet connection to run efficiently. Check your Internet connection by performing a speed test.
Try switching to mobile data if using a Wi-Fi connection and check if the Steam buttons not working issue is fixed. Also, disable VPN if you’re using one.
Users have reported reloading the steam Store has helped fix this error. The reason behind it could be slow steam servers or a minor bug.
4. Delete Steam download cache
Click on Steam in the top left corner and select Settings.
On the Settings page, navigate to Downloads and click on Clear Download Cache.
The download cache data of Steam includes files for the Steam app and not only the games. Therefore, clear the download cache of Steam and check if the problem still exists.
5. Reinstall Steam
Press Windows + I to open Settings.
Navigate to Apps and click on Apps & Features.
Search for Steam and click on three dots beside it.
Click on Uninstall and follow the on-screen instructions.
If none of those mentioned above workarounds were able to help you, Steam’s core files might be corrupted. So first, reinstall Steam and check if the Steam download button is not working and is fixed.
Why is the Install button grayed out on Steam?
Grayed out install button on Steam usually denotes one of the two things. The first is that your device doesn’t meet the minimum requirements to run the particular game, and there are some problems with the Steam app on your device.
If your device has the hardware requirements to run the game, there might be some issues with Steam that you need to fix immediately.
This is how you can solve the Steam download button missing. We hope that the steps mentioned above can help you fix this issue.
If you still have any problems, feel free to comment below. We’ll be eager to hear from you.
Welcome to Xbox Classics Revisited. In this new series we aim to take a look back at the previous three generations—the original Xbox, the Xbox 360, and the Xbox One—of Xbox games. These mini-retrospectives serve as a tribute to some of the best gaming that Xbox has given us over the last 20+ years.
For those who were lucky enough to have been there for all of it, read on and savor the nostalgia. For those Xbox fans too young to remember Maude Flanders or Pepsi Twist: get ready to meet your Xbox gaming backlog.
This 2003 action-adventure platform-puzzle title can be thanked for revitalizing the classic franchise, which dates back to 1989 and the Apple II computer. (A forthcoming remake of Sands of Time hopes to do the same all over again).
The game’s fluid combat along with the protagonist’s wall-running, somersaulting antics—all done with a generous amount of flourish—made the game stand out in its day. As did the Dagger of Time, which had the rather novel function of manipulating in-game time.
Sands of Time spawned several sequels and was one of the main inspirations for the Assassin’s Creed series. Sands of Time was featured on the Canadian documentary television series How it’s Made, and of course there was the film adaptation produced by Jerry Bruckheimer.
The tenth mainline Tomb Raider was a major reboot for the franchise, and the first of the “survivor” trilogy. As such, the game rewrites Lara Croft’s origin story.
The first Tomb Raider game after Square Enix took control of the IP, the game employs a fantastic blend of exploration, survival elements, and combat. It also does a great job of reimagining one of gaming’s most iconic protagonists, giving us a younger, less-hardened Lara that is, while more vulnerable, much more dynamic and interesting as a character.
For this modern classic, Ubisoft decided to go all the way back to ancient Egypt to explore the beginnings of the series’ overarching conflict between the Brotherhood and the Templars. It also decided to reinvent the gameplay by eschewing much of what had defined previous entries in favor of more role-playing elements and open world exploration.
Origins managed to breath fresh life into a franchise that many felt had gone stale and launched a new era for the series. The game won numerous accolades, including Adventure Game of the Year at the 21st D.I.C.E Awards and Ultimate Game of the Year at the 35th Golden Joystick Awards.
Wrap up
We hope we’ve gotten off to a decent start with this series. What are your favorite Xbox classics? Do you have any special memories from the games featured here? Share them in the comments.
Yes, you’ve heard correctly, the Redmond-based tech colossus known as Microsoft has released a fresh cumulative non-security update for users sticking to one of the older Windows 10 versions.
Build number 17763.3346 is now available for download on systems running Windows 10 2019 LTSC and Server 2019.
Keep in mind that Windows 10 Home and Pro users will not receive this update because Microsoft stopped supporting Windows 10 version 1809 in May 2021.
Well, you should know that the main highlight of KB5016690 is a fix for the bug causing an 0x1E error when users try to shut down or restart their systems.
That is definitely the most important thing that comes with this new Windows 10 build, as a fix for the problem was mandatory.
We’re about to take a more in-depth look at the rest of the changelog and discover what Microsoft has dealt with through this cumulative update.
Improvements
Enhances Microsoft Defender for Endpoint’s ability to identify and intercept ransomware and advanced attacks.
Addresses an issue that causes ServerAssignedConfigurations to be null in a few full configuration scenarios.
Addresses an issue that might generate error 0x1E when you shut down or restart a device.
Addresses an issue that prevents virtualized App-V Microsoft Office applications from opening or causes them to stop working.
Addresses an issue that leads to a false negative when you run scripts while Windows Defender Application Control (WDAC) is turned on. This might cause AppLocker events 8029, 8028, or 8037 to appear in the log when they should not.
Addresses an issue that causes the Resultant Set of Policy tool (Rsop.msc) to stop working when it processes 1,000 or more “File System” security settings.
Addresses an issue that causes the Settings app to stop working on server domain controllers (DCs) when accessing the Privacy > Activity history page.
Addresses a race condition that causes the Local Security Authority Subsystem Service (LSASS) to stop working on Active Directory domain controllers. This issue occurs when LSASS processes simultaneous Lightweight Directory Access Protocol (LDAP) over Transport Layer Security (TLS) requests that fail to decrypt. The exception code is 0xc0000409 (STATUS_STACK_BUFFER_OVERRUN).
Addresses an issue that affects a lookup for a nonexistent security ID (SID) from the local domain using read-only domain controller (RODC). The lookup unexpectedly returns the STATUS_TRUSTED_DOMAIN_FAILURE error instead of STATUS_NONE_MAPPED or STATUS_SOME_MAPPED.
Addresses an issue that prevents a private virtual LAN (PVLAN) from providing tenant and virtual machine (VM) isolation.
Addresses an issue that delays a client’s acquisition of the Internet Protocol version 6 (IPv6) address for extended periods in an IPv6 environment.
Addresses an issue that might cause Remote Desktop Session licensing to display a 60-minute disconnection warning after reconnecting.
Addresses an issue that causes a RODC to unexpectedly restart. In the event log, you’ll find the following:
Event 1074 with the message, The system process ‘C:\Windows\system32\lsass.exe’ terminated unexpectedly with status code -1073740286. The system will now shut down and restart.
Event 1015 with the message, A critical system process, C:\Windows\system32\lsass.exe, failed with status code c0000602. The machine must now be restarted.
Event 1000 with the message, Faulting application name: lsass.exe, Faulting module name: ESENT.dll, Exception code: 0xc0000602.
Addresses an issue that might cause cldflt.sys to reference invalid memory in race conditions.
Known issues
After installing KB4493509, devices with some Asian language packs installed may receive the error, 0x800f0982 – PSFX_E_MATCHING_COMPONENT_NOT_FOUND.
After installing KB5001342 or later, the Cluster Service might fail to start because a Cluster Network Driver is not found.
Release Channel
Available
Next Step
Windows Update or Microsoft Update
Yes
Go to Settings > Update & Security > Windows Update. In the Optional updates available area, you’ll find the link to download and install the update.
Windows Update for Business
No
None. These changes will be included in the next security update to this channel.
You can import this update into WSUS manually. See the Microsoft Update Catalog for instructions.
Have you discovered any other issues while dealing with this new Windows 10 cumulative update? Share your experience with us in the comments section below.
Are you still connecting your PC to a modem using an ethernet cable? No matter if you have an old desktop or laptop without Wi-Fi capabilities. You can get rid of these cables that make you sit in a location to browse the Internet.
Some years ago, having a wireless connection was considered cutting-edge technology. And connecting to the Internet using a cable was the only option.
But now you can connect almost all computers using a wireless connection. Keep reading the post to learn how to connect a PC to a modem without an ethernet cable.
Do I plug my PC into the router or modem?
You should connect your PC to the router. The main reason behind doing so is security even if you have a single PC setup.
A modem is not a security device, instead transfers data between you and your ISP (Internet Service Provider). Hence, it offers no protection to your computer from the Internet.
What is the difference between a router and a modem?
A router connects all your devices with each other in hardwired connection setups to the modem. Further, it connects your modem to your devices via an ethernet cable or Wi-Fi if it’s a wireless one.
Routers create a local area network within your house. This allows devices to share files and peripherals like printers. It also manages all information going to end from each device and makes sure it ends up at the right spot.
On the other hand, the modem is a device that connects your home through a cable connection to your ISP. It translates signals from your ISP to your local devices for seamless Internet usage.
The connection between you and the Internet is usually known as a Wide Area Network(WAN). Also, each modem has a pre-assigned public IP address that identifies it on the Internet.
Do I need both a modem and a router?
A modem is your network translator while a router could be understood as a traffic controller that communicates, maintains orders, and makes sure everything is safe.
Routers and modems have always been separate devices. These work together to make a secure home network.
However, with modern technology, you don’t need a separate modem and router. This is because a new combination of modem and router unit is now available that merges the two devices into one powerful gadget.
This multifunctional device offers the power required to connect with your smart devices easily.
Quick Tip:
A simple solution, if you have already a laptop/computer connected via cable, is by creating a virtual hotspot using a great tool, Connectify Hotspot.
Connectify Hotspot allows you to use your computer as a Wi-Fi hotspot and share the internet with all your devices. Furthermore, it comes with a built-in ad blocker for all the devices that join your network. You can use Connectify everywhere, as long as you have an internet connection.
Connectify Hotspot
Create a Wi-Fi hotspot from your computer whenever you need one.
An Ethernet cable is required to connect your PC to a modem. To do so, you’ll have to connect its one end to the Ethernet or LAN port on your modem.
And the other end on your desktop or laptop. Every modem comes with an ethernet cable, however, you can use others.
How can I connect my computer to the modem?
1. Use built-in Wi-Fi
Click on Windows + I to open Settings.
Click on Network and Internet and select Wi-Fi.
Select on Show available networks.
Select your network and enter the password to connect to the Internet.
You can use the Wi-Fi feature that comes pre-installed on almost all modern-day devices. The term built-in Wi-Fi simply means that the router is built into the device itself.
If your device doesn’t come with a built-in adaptor you will need to install a PCI Wi-Fi adaptor. When choosing this adaptor you will have to consider according to the compatible adaptor for both your computer and the type of Wi-Fi signal.
3. Use an external USB Wi-Fi Adapter
A USB Wifi adapter can also be used in case you want to keep it simple. You can also use a plug-and-play Wi-Fi adapter that connects directly to the USB cable of your PC.
Some routers allow connecting to the Internet via USB cable. This method is a bit experimental as not all routers can actually do it.
For the supported routers, you can plug in a cellular 4G modem into the USB port to use it to connect to the Internet.
5. Use USB Tethering
You can also use the Internet on your device by connecting it with your smartphone. Once you connect your smartphone with your computer why a USB cable you can turn on USB touching and share your mobile data with your device to keep using the Internet without an ethernet cable.
6. Set a Dial-up Internet Connection
Click on Windows + I to open Settings.
Click on Network and Internet and select Dial-up.
Select Set up a new connection and follow the instructions on the screen.
A dial-up Internet connection is a method to access the Internet that uses the facilities of the public switched telephone Network to establish the connection. This network is established by dialing a telephone number on a conventional telephone line.
7. Use your smartphone
You can also connect to the Internet wirelessly using your smartphone. This can be done by enabling the hotspot feature and then connecting your PC using Wi-Fi. Doing so is very easy and secure.
Besides, you can also set a data limit to track and minimize your daily data usage.
How can I connect my PC to the Internet without Ethernet?
You can connect your PC to the Internet without an Ethernet cable using a wireless connection. Setting up a wireless connection at your home allows getting online effortlessly.
Here are the things required to set up a wireless network connection:
Broadband Internet connection and modem
Wireless router
Wireless network adaptor
Now we’ll see how to connect a USB modem to a PC without an Ethernet cable. To do so, configure all the equipment and follow the instructions that came in with the modem to connect it to your PC without an ethernet cable.
This was how to connect the PC to the Internet without an Ethernet cable. We hope that the steps mentioned above were able to help you.
If you still have any issues, feel free to drop a comment below. We’ll be eager to hear from you.
This is the follow-up to 2014’s Tales from the Borderlands—an episodic narrative-driven adventure game from the masters of the genre, Telltale Games. This new installment however, will be developed by Gearbox Studios itself and will be another adventure game in more or less the same vein as its predecessor. So it won’t be all about busting caps and lobbing grenades left and right in this one.
New Tales from the Borderlands introduces three playable characters:
Anu—the altruistic scientist
Octavio—Anu’s streetwise brother
Fran—a fierce, frogurt-slinging ally
The story takes place a year after Borderlands 3, though apparently you won’t need any knowledge of any of the previous games to enjoy New Tales from the Borderlands.
The game will be released in five episodes to be delivered all at once when the game launches on October 21. So you won’t have to wait long to jump into the world of Borderlands once again and see what makes the franchise so popular.
Two editions of the game will be available—standard and deluxe—and both can be pre-ordered right now. The deluxe version includes the original Tales from the Borderlands.
And when you pre-order either version on the Xbox Store you will receive a bonus in the form of the Adventure Capital Pack with all sorts of in-game goodies and 10,000 in-game currency.
Microsoft’s Chief Executive Officer of Gaming over at Xbox Phil Spencer recently sat down for an interview with Emily Chang of Bloomberg Studio 1.0. During the interview Spencer expressed optimism about the fate of the company’s acquisition of Activision Blizzard earlier this year, saying,
I feel good about the progress that we’ve been making, but I go into the process supportive of people who maybe aren’t as close to the gaming industry asking good, hard questions about ‘what is our intent? What does this mean? If you play it out over five years, is this constricting a market? Is it growing a market?
Spencer also suggested that Microsoft’s buying spree may not yet be over once the purchase of Activision Blizzard is complete.
I’m always thinking about things that add to our capability. Even though we’ve worked on our geographic expansion, I’d still say we have too many of our creators in places that are our traditional markets.
Could another major acquisition come on the heels of the Activision Blizzard deal? Only time will tell. The full interview will be broadcast on “Bloomberg Studio 1.0” at 9pm Eastern Time.
Are you trying to download and play Steam games at the same time but fail to do so? Well, then, we have the solution for you.
So, when you launch a game using the Steam client, the other game downloading in the background is automatically paused. But if you are facing an issue like Steam won’t go online or it’s stuck in offline mode, you can refer to our detailed post for quick solutions.
In this post, we will address that and more to help you understand how to download and play games on Steam at the same time.
How do I download and play at the same time on Steam?
Open Steam, click on the Steam menu, and select Settings.
In the Settings window, click on Downloads on the left.
Now, on the right, go to the Download Restrictions section and check the box next to Allow downloads during gameplay.
Press OK to save the changes and exit.
It’s a global option where you can change the Steam settings to allow downloads during any gameplay from the settings of the download.
This method is also applicable if you want to play a Steam game without updating it.
NOTE
Simultaneously, you can pause the game that’s downloading, launch the game you want to play, press Alt + Tab to return to Steam and resume all downloads.
Press Alt + Tab again to return to the game and continue playing while the other game downloads in the background.
Can I play Steam games without downloading them?
Yes, you can play Steam games offline through the app with limited or no internet access.
Before proceeding with the steps below, ensure Steam remembers your login credentials. This will allow Steam to sign you in next time without an Internet connection automatically.
Launch Steam. It will now skip the usual login screen and try to connect to your account.
Since there is no active internet connection, you will now see a Connection Error prompt.
Select Start in Offline Mode.
Now, as the Steam window opens, navigate to Library and play the desired game offline.
However, not all games or a Steam client feature will be available while offline, because they require an active connection. Also, neither the store page will work, nor can you download any games.
Besides, if you’re asking if Steam games can download while in sleep mode, the answer is no, they cannot.
Because when your laptop goes into sleep mode, it effectively shuts down all the main processes of the CPU. So, it would ideally run in the background.
Yes, you can install a game while playing if your PC has a good enough CPU and RAM.
However, it’s usually not a good idea to play a graphically intense game while installing another. This may cause huge FPS drops in the game you’re playing; hence, you may experience lags.
If you still want to play a game while installing another, you can close any unnecessary programs running on the system to reduce the load and boost the game’s performance.
How can I improve my Steam download speed?
While you can close any unnecessary processes or disable any 3rd party antivirus on your PC to speed up the download speed on Steam, if it doesn’t work, you can give priority to Steam downloads:
Make sure that Steam is running. Now, right-click on Start and select Task Manager.
Under the Processes tab, go to Background Processes and look for Steam Client.
Right-click on it and select Go to details.
It will take you to the Details tab. Here, right-click on steamservice.exe, select Set priority, and click on High.
This method will prioritize Steam over other processes while increasing the download speed considerably.
As seen above, it is indeed possible to play Steam games and download or install games on the app simultaneously. Some games, however, require some critical install files to launch, so if you encounter a running install script error message, you must first complete the installation.
But, if you are facing an issue like the Steam download is stopping, you can follow the solutions in our detailed post on the issue.
For any queries on Steam or any errors you may encounter while playing a game, you can let us know in the comments box below.
Updated: • “Microsoft’s datacenter development is continuing in Grangecastle. Plans for future datacenters are evaluated based on a number of factors, including our customer needs, our commitments to environmental sustainability, the local community, and relevant laws and regulations.” – a Microsoft Spokesperson
Ireland’s state-owned electrical utility provider is currently struggling with keeping the lights on with its existing data centers and it’s giving Microsoft and Amazon pause in building new ones in the region.
According to a report from The Times, Microsoft and Amazon were considering investing €2 billion in data center infrastructure in the region but are now reconsidering as Ireland utilities regulators warn of on-going rolling black outs continuing until its current electrical issues are resolved.
Microsoft had planned to open two datacenter sites in the region that would also double as a backup power source for Ireland windfarms, Amazon was set to drop a single AWS site as well in the area but neither company have been granted licenses by Ireland’s EirGrid allowing them to eventually latch onto the electrical grid there.
EirGrid isn’t singling out Amazon or Microsoft with its mortarium but is expanding its initial stance taken last November and reserving its authorizations from any new data centers to all data center applications.
“EirGrid is now applying these criteria to all data center applicants, many of which have decided not to progress their developments,” – EirGrid spokesperson
Ireland’s mortarium has seemingly forced Amazon and Microsoft to explore alternative investment sites in London, Frankfurt and Madrid despite communications between Microsoft and the IDA that assured the Redmond business investor that it would not interfere with its plans originally.
Aside from sources familiar with the data center ordeal, neither Microsoft nor Amazon have formally addressed or formerly provided info regarding the pause, and reconsideration publicly.
You have found this guide because your laptop is not booting after a RAM upgrade. So let us show you how to fix this.
The hardware in a computer device called Random Access Memory (RAM) stores the OS, application programs, and data currently in use so that the device’s CPU may access them rapidly. This is the primary memory of a computer.
For different reasons, you may want to upgrade it. For example, some applications may require additional RAM, while sometimes, your RAM may go bad and require replacing.
Whichever is the case, there are times when, after a RAM replacement, your PC will not boot. This is worrying, and we will tell you all you need to know about this error.
Why, after installing RAM, computer will not boot?
A corrupted BIOS – If this is the case, your only chance of booting the laptop will be a power refresh.
You skipped the first RAM module – Some computers have multiple RAM modules. This is a very common computer build. If this is the case and you insert RAMS, skipping the first one, then the PC will not boot.
Compatibility issues with the motherboard – Not all RAMS work on every motherboard, so before purchasing one, you must make sure that it matches your system.
The RAMs are not properly seated – You need to reseat them, and your PC should boot without hassle. Otherwise, your caps lock may start blinking.
How do I fix my laptop if it’s not booting after a RAM upgrade?
1. A power reset
Disconnect the PC power from the source.
Remove the computer’s coin cell battery from the motherboard (the steps depend on the computer).
Press and hold your computer’s Power button for 20 seconds, after which you release it.
Replace the PC’s coin cell battery.
Reconnect your PC’s power cable to a power source and restart the computer.
2. Reseat the RAM
Power off your computer and unplug it from a power source.
Remove the RAMs like you must have done in the past.
Try placing them back and listen for a click sound. In most cases, this shows it is well seated on the RAM mount.
Reboot your computer.
The angle at which you enter the new RAM is crucial information to know after the old RAM has been removed and you are prepared to insert or install the new RAM.
Some individuals tend to push RAM into position horizontally or entirely flat, which is a bad technique since the RAM won’t fit into its spot no matter how hard you push it.
Inserting it correctly involves angling it between 30 and 50 degrees. When correctly positioned, the RAM will fit in quickly and easily if tilted at a 30-degree angle while being inserted.
3. Check RAM maximum capacity
Right-click on the Start menu and open the Windows Terminal (Admin) app.
In the Windows Terminal, paste the code below and hit Enter. wmic memphysical get maxcapacity
The number displayed after this script executes is your maximum RAM capacity noted in kilobytes.
If the RAM you are trying to install is more than the maximum RAM capacity of your computer, try installing a lower capacity.
Reboot your computer.
4. Change the RAM type
Click the Start menu, type system information, and select the System Information app.
In the System Information app, take note of the System Model and the Processor.
Now head to the manufacturer’s site with this information and find what RAM is compatible with your computer. In our case, we go to the HP website and input the system model in the search bar.
Many modern computers will use DDR3 or DDR4 RAMS. Mixing this up, you will have issues booting the laptop since the installed RAM does not match the motherboard.
5. Change the RAM
There is a chance that the new RAM you have mounted will be bad. This could be a result of many different factors. For example, it could be destroyed by the manufacturer or even in transit.
You may also have scratched the RAM against a hard surface during mounting.
Whatever the reason, if your RAM is spoiled or damaged, you may not be able to boot your computer after mounting it. In such situations, your best bet is to replace it.
6. Do not skip the first RAM slot
You are not obligated to fill your PC’s RAM slots entirely. For example, if your PC has 4 RAM slots, you may be able to use 4GB RAM per slot, bringing the total to 16GB.
You may only fill up two slots and have 8 GB or RAM on your computer. However, ensure you do not skip the first slot as long as you are not filling up all the spaces.
In many computers, it becomes impossible to boot once the first slot is skipped.
7. Swap the RAM slots
A solution as simple as this will often be enough. If you have more than one RAM slot, remove the RAM in one slot and put it in a different slot.
This may be a starting point because it is the most basic solution. It is not always effective, but it has been known to work.
As you must have noticed, there is a high chance that your PC will not boot. You may also hear a beeping sound, as this is an auto alarm for some RAM-related malfunctions.
If your RAM module isn’t placed correctly, your computer’s longevity may be impacted, and you may experience program crashes, faults, or non-starting applications.
Do I need to change BIOS when upgrading RAM?
The BIOS does not need to be updated when merely updating or adding RAM; however, you would change it if it also has some issues.
Also, note that some of the solutions in this guide will apply if your laptop is slow to boot after the RAM upgrade.
Try out these solutions if the replaced RAM on the laptop won’t allow it to boot. If you face any other complications, we want to know what they are.
Do not panic when you face issues after installing a new RAM, as most of the time, with slight changes, you should have your PC up and running.
A problem with your wireless adapter or access point usually means your PC can’t connect to Wi-Fi. This error shows up when Windows fails to communicate with the router, often due to corrupted settings, misconfigured access points, or network stack glitches.
Here’s how to fix it without unnecessary guesswork.
The wireless access point not working issue happens when your device and the router fail to authenticate properly. Corrupt TCP/IP stacks, power-saving features, or misconfigured router modes are some of the main culprits. Luckily, you can fix most access point connection errors with built-in Windows tools.
You can also visit your network adapter manufacturer’s website, locate your device, and download the latest drivers.
You can also try installing the drivers using the CD you got with your wireless adapter. Installing drivers from a CD is an excellent solution if you don’t have an Internet connection. Still, bear in mind that those drivers probably aren’t the latest.
Alternatively, if you want to save some time and be sure to have an error-free update, you can use a dedicated driver updater software. This software will fully scan your PC to find outdated and missing drivers and update them individually or all at once.
Using a wired connection on a laptop kills the vibe. But, if you cannot connect to a Wi-Fi network, you have no choice until the problem gets resolved.
So, connect your laptop to your router with the LAN cable. If the Wi-Fi connection is the only problem, you should connect to the internet without any issues.
Also, since some of the upcoming solutions require an Internet connection, we advise you to keep that LAN cable by your side until we find a proper solution.
If you’re still unable to connect to the internet, even though you’re using a wired connection, something is wrong with your router. There are many possible reasons why Windows 10 can’t connect to the router, including faulty hardware equipment.
Type cmd in Windows Search and click on Run as administrator to open Command Prompt.
Enter the following command and press Enter(replace WirelessProfileName with the actual name of your wireless connection): netsh wlan delete profile name="WirelessProfileName"
Reconnect and reconfigure the network to fix wireless adapter problems.
4. Check if your password is correct
It would help if you always protected your Wi-Fi network with a password. You might accidentally enter the wrong password while connecting to the wireless network.
To fix this problem, disconnect from your network and reconnect again, but ensure your password is correct.
Users reported that your keyboard might enter different characters in rare cases, primarily if you use different input languages on your PC. Therefore, be sure to double-check your password.
Enter the following line of command and hit Enter. netsh winsock reset
Repeat step two with the commands below, and press Enter after each command line.
netsh int ip reset
ipconfig /release
ipconfig /renew
ipconfig /flushdns
You may perform a ping to Google to confirm if the error is fixed.
6. Check if your wireless adapter is disabled
Press Windows Key + X and select Device Manager from the list of options.
Locate your wireless adapter and double-click it to open its properties.
Go to the Driver tab and look for the Enable button. If you don’t see the Enable button, it means that your device is enabled and working.
7. Remove your antivirus software
Antivirus software is essential for your online safety. Unfortunately, some antivirus programs can interfere with your wireless connection and cause a problem with the wireless adapter or access point error.
If that was the cause, we strongly recommend you switch to a different antivirus. Windows Defender is a good tool, but additional software is recommended.
Dedicated antivirus software has large, continuously updated threat databases that ensure real-time protection against incoming attackers.
8. Change the name and password for your Wi-Fi connection
According to users, you can fix this issue simply by changing the name and password of your wireless network.
This is a pretty simple procedure. However, it will vary from one device to another, but you should have easy instructions in your specific router user manuals.
9. Reset your router
This error can be caused by improper router configuration. According to users, you can fix this problem by resetting your router.
To do that, just press the reset button on your router or open the router settings and select the reset option.
Before resetting your router, you might want to save and export your configuration so you don’t have to enter it manually.
For more information on resetting or exporting your router’s configuration, check your router’s manual.
10. Check for Windows Updates
Open your Settings app.
Click on Windows Update at the bottom of the left pane.
Click the Check for updates button.
If there are any updates, download and install them.
Microsoft partners with many hardware manufacturers. Therefore, there’s a legitimate chance you’ll get your wireless adapter updated through Windows Update.
So, connect that LAN cable and check for updates. In case there’s a new update for your router, the system will install it automatically
11. Run the Network Troubleshooter
Press Win + I to open Settings.
Go to System > Troubleshoot > Other troubleshooters.
Select Network Adapter and click Run.
12. Reset TCP/IP and Winsock
Search for cmd, right-click Command Prompt, and choose Run as administrator.
Run the following commands (press Enter after each):
netsh int ip reset
netsh winsock reset
ipconfig /flushdns
Restart your PC.
13. Disable Power Saving for the Adapter
Press Win + X and open Device Manager.
Expand Network adapters, right-click your Wi-Fi adapter, and select Properties.
Open the Power Management tab.
Uncheck Allow the computer to turn off this device to save power and click OK.
14. Check Wireless Mode Compatibility
In Device Manager, right-click your Wi-Fi adapter and choose Properties.
Go to the Advanced tab.
Find Wireless Mode or 802.11 mode.
Match it to your router’s mode (e.g., set to 802.11 b/g/n or 802.11 a/n/ac as applicable) and click OK.
15. Reset Network Settings
Open Settings > Network & Internet.
Scroll down and click Network reset.
Select Reset now, then confirm and allow Windows to restart.
16. Adjust Router Security Settings
Ensure WPA2 or WPA3 encryption is enabled.
Verify that SSID broadcast is turned on.
Confirm DHCP is active so devices receive an IP address.
Wrapping up
This isn’t the only problem regarding Internet connectivity in Windows 10 and 11. You might have encountered other similar ones, and we have solutions for quite a few of them, including:
We believe the wireless adapter or access point problem has been resolved if you have read this far.
Please note that we have written any of these solutions in any particular order, and we expect you to apply the fixes that seem most relevant to the situation.
Let us know in the comments section which one worked for you. We will be glad to recommend them in the first place.
The long-anticipated Destiny 2 collaboration is now live in the Fortnite video game on Xbox One and Xbox Series X console families, Windows PC, Xbox Cloud Gaming, and all other supported platforms.
The collab so far includes three outfits based on the Commander Zavala, Ikora Rey, and the Exo Stranger characters from the Destiny 2 video game, three unique Pickaxes for each character, the Sparrow Glider with three optional appearances inspired by each character, and three Ghost Back Blings.
A Destiny 2 Investigate Emote has also been added to Fortnite. This emote, once activated, summons a Ghost which zooms around the environment scanning various objects.
As with all Fortnite cosmetics, the Destiny 2 items don’t offer any competitive advantage though they are still likely to be popular with Destiny 2 fans, especially those who have been wanting a Destiny 2 experience in third-person perspective.
If you wonder what can you do if when you connect to the VPN you lose your Internet connection, you’re in the right place!
We found applicable fixes for all known causes of this bug/error.
Why does my Internet disconnect when I connect to VPN?
The main reasons why you lose Internet when connecting to VPN include:
Faulty DNS settings, incompatible with your VPN client
Outdated or corrupt VPN software
Connecting to a server that has problems or is down
Security software like firewall or antivirus blocking VPN
In the following guide, we will show you what you can do to fix these issues. So if when you connect to VPN you lose Internet in Windows 11 or in Windows 10, make sure to try the upcoming solutions.
What can I do if the Internet disconnects when connected to a VPN?
1. Check your Internet
First, let’s see if there are any issues that are caused by your network, and not your VPN. ❗Disconnect from your VPN and follow the steps below:
1.1. Check Network and Internet status
Go to Start and then select Settings.
Open Network and Internet.
You’ll see the Network status up in the main menu. If it’s says “Connected, secured”, your connection is fine. But if it says “Not connected” or “No internet”, there is an issue and you should troubleshoot it:
1.2. Run the network troubleshooter
Open the Start menu and select Settings.
Click on System in the left sidebar.
Select Troubleshoot from the list of options.
Click on Other troubleshooters.
Find and click the Run button next to Network and Internet to start the troubleshooter.
If you’re still having issues, run a speed test and finally contact your ISP. But if your internet looks like it’s up and running, only ruined by VPN, keep reading:
2. Connect to a different server location
Select a different VPN server location and connect to it. If you can access the Internet now, , there may be a temporary issue with the server location you originally selected.
3. Change your VPN protocol
Open your VPN’s options or settings and select the Protocol from the list and pick a different one.
VPN protocols are the methods by which your device connects to a VPN server. Some protocols are blocked in different countries or by certain Internet Service Providers.
This may be the reason why when you connect to the VPN you lose your Internet connection. For optimal performance, choose the protocols below in the following order:
OpenVPN TCP
L2TP
PPTP
4. Reinstall your VPN
You can uninstall the app, find the latest version install it, and connect again.
Right-click Start and select Apps and Features
Find your VPN from the list of programs and select Uninstall
Type control panel in the taskbar and open Control Panel
Go to Network and Internet
Open the Network and Sharing Center
Under Network Connections, right-click on the WAN Mini port labeled with your VPN’s name
Select Delete.
NOTE
On some machines, after you uninstall your VPN, it will automatically be removed from the Network Connections. So in case you don’t find yours in the Network Connections list, you’re all good.
5. Check for incorrect date and time settings
Double-click the Date and Time display on the taskbar
Click Change date and time settings
In the Date and Time tab, click Change date and time….
In the Date and Time Settings dialog box, update your time to the current date and time, then click OK
If you need to change the time zone, click Change time zone… , select your current time zone in the drop-down list, then click OK
Restart your VPN and connect to a server location
If you cannot connect to a server location after restarting your VPN, re-install the VPN. You do not need to uninstall the app first, just run the installation program again
6. Install the latest version of your VPN
Right-click Start and select Run
Type regedit and press Enter
You will now see the User Account Control dialog box. Click Yes
In the Registry Editor, under Computer, double-click on HKEY_LOCAL_MACHINE.
Under HKEY_LOCAL_MACHINE, double-click on SOFTWARE and then [your]VPN
If you cannot find [your]VPN directly beneath SOFTWARE, go to SOFTWARE > Classes> [your]VPN
Right-click on [your]VPN and then click Delete. After deletion, you should no longer see your VPN under Wow6432Node
If you can’t edit your Windows 10’s registry, read thishandy guide and find the quickest solutions to the issue.
If you see that the VPN is still listed as an available VPN connection after uninstalling:
Type Control Panel in the taskbar to open Control Panel
Go to Network and Internet and click on Network and Sharing Center
On your Network Connections window, right-click on the WAN Miniport labeled [your]VPN
In Network connections window, find your usual connection, either LAN or Wireless network connection.
Right click the connection and select Properties
7.2. Set the DNS server addresses
Double click Internet Protocol Version 4 (IPv4) or just Internet Protocol
Select Use the following DNS server addresses
Type these Google DNS server addresses: Preferred DNS server 8.8.8.8 and Alternate DNS server 8.8.4.4
If Google DNS is blocked, try the following: Neustar DNS Advantage (154.70.1 and 156.154.71.1) enter and press OK; Level3 DNS (4.2.2.1 and 4.2.2.2) enter and press OK. Once you’re done, set your VPN’s DNS settings, and flush old DNS entries as described in the next solution.
DNS server is not responding in Windows 10? Take a look at this guide and fix the issue in no time.
8. Adjust your proxy settings
If you’re having trouble connecting to the Internet, it’s possible that it has been set to use a proxy server. This could interfere with your VPN.
To disable proxy in Internet Explorer:
From the Tools or gear menu, select Internet options.
In the Connections tab, click LAN settings.
Uncheck all of the displayed options except automatically detect settings.
Click OK
Close your browser and then open it again.
9. Change your VPN
If your VPN still kills your internet, even after trying to troubleshoot, switch to a better one.
Opt for a premium option – with VPNs, you get what you pay for. If you don’t invest in a quality service, you risk poor connections, data issues, or no connection at all.
If your touchpad is not working on Windows 11, the problem can be caused by a recent update, driver issues, or disabled settings. This guide covers step-by-step solutions for common touchpad problems on Lenovo, HP, Acer, and ASUS laptops, including how to enable it, update the driver, and use the on-screen alternative if needed.
What can I do if the touchpad is not working in Windows 11?
Using the keyboard arrow keys on your laptop, select the Restart option. Then, click on OK.
Press Enter on your keyboard.
Wait till your laptop restarts, then check whether the issue has been resolved. Windows 11 OS is a bit glitchy sometimes, as a result, the touchpad stops working.
2. Enable your touchpad using Settings
Press the Windows key + I.
Click on Bluetooth and devices in the Settings app.
Click on the touchpad on the right side.
Switch on the toggle under the touchpad.
The Windows 11 touchpad not working often occurs after a user makes a Windows 11 update. The system might at times shut itself off during installation.
Confirm whether the touchpad turned itself off during the installation process. If the issue persists after turning it on, move to the next solution.
3. Update your touchpad driver
A corrupted or outdated touchpad driver can cause issues. Here’s how to reinstall or update:
Press Windows + X and select Device Manager
Expand Mice and other pointing devices
Right-click your touchpad and choose Update driver
If updating fails, choose Uninstall device, then restart your laptop
Windows will auto-reinstall the correct driver. For Lenovo laptops, see the full Lenovo touchpad not working guide for model specific driver fixes.
Alternatively, you can always rely on specialized software. This tool allows you to automatically scan for and replace any broken or outdated drivers in just a few minutes.
You can also review model specific fixes in the Dell laptop touchpad not working guide which provides additional steps for driver issues and recognition problems that often appear on Windows 11.
4. Reset your touchpad
Tip
Resetting your touchpad assists in regaining your original touchpad settings. Therefore, it reduces the chances of any problems occurring.
Press the Windows key + I.
Click on Bluetooth and devices in the Settings app.
Click on the touchpad on the left side.
Scroll to the bottom in the right.
Click on Default to restore your previous settings.
5. Use the On-Screen Touchpad (Temporary Fix)
If your physical touchpad is unresponsive, you can open the on-screen touchpad in Windows 11 as a backup.
Press Windows + Ctrl + O to open On-Screen Keyboard
Click the Touchpad icon (or open Settings > Accessibility > Mouse > On-screen touchpad)
Use this virtual touchpad to navigate until your physical one works
6. Use keyboard shortcuts to enable your touchpad
On most Windows 11 laptops, pressing the Fn key along with one of the F1–F12 function keys controls the touchpad. The exact key varies by model, so check your keyboard symbols or device manual.
Some models also have a dedicated touchpad lock. For example, certain HP laptops feature a small lit square in the corner of the touchpad. If it’s lit, the touchpad is disabled, tap it once to re-enable.
7. Disable the tablet input service
Press the Windows key + R key, the Run dialog will appear.
The Services app will then open, find the Tablet PC Input Service or TabletInputService.
Right-click on the option, then select Stop.
Restart your device.
Check whether your touchpad has regained its normal functions. If the issue persists further, repeat the above steps but this time select Start to enable the service.
8. Perform a System restore
Press the Windows key + R key to open the Run dialog.
Key in the following command: rstrui.
Click on OK.
The System Restore Wizard will open. Select the option Choose a different restore point.
Click on Next.
Check the box set before Show more restore points.
Then, choose the most recently created restore point, click on Next.
Click on Finish to initiate the restoring process.
9. Check for multiple mouse drivers
NOTE
Having an extra mouse along with the built-in touchpad on your laptop creates a conflict with the integral touchpad driver. This cause the Windows 11 touchpad to stop working.
Press the Windows key + S key.
Key in the following command: devmgmt
Click on Device Manager when it appears.
Find the Mouse and pointing devices and click on it to expand the driver list.
Right-click on the external mouse driver.
Select the Uninstall device option.
Click on Uninstall when the popup prompts.
Check whether your touchpad is now active.
Once the issue is fully resolved, Restart your Windows. Your system will automatically reinstall the external mouse driver.
10. Reinstall your touchpad driver
Press Windows + X keyboard shortcut.
Select Device Manager.
Then, find the Mice and pointing devices.
Double-click on the option to expand the driver list.
Find the touchpad driver and right-click on it.
Select the Properties option.
When the window pops up get on to the Driver tab.
Select the Roll Back Driver button. This will allow you to get back to the previous version before the update.
Once you successfully revert to the previous version, Restart Windows 11 and check whether the touchpad is back to normal.
If this does not work for you, then uninstall it. You need to follow these steps:
Once you get to the Driver tab, select the Uninstall Device. This will help you remove drivers’ files and the registry entry of the software.
Then, restart the Windows device. The driver will get back to its default version.
11. Clean your touchpad
Over time, dirt deposits, skin oils, and grime accumulate on your touchpad. As a result, your touchpad stops functioning properly. The touchpad is less responsive and much slower because of the build-up.
Before trying anything else, clean up your touchpad using a soft piece of cloth. Preferably use a moist cloth to ensure that you get to clean it up properly.
After cleaning out all the build-up, try dragging your finger around the surface to check whether the issue has been resolved.
12. Use the laptop’s troubleshooter and run the Windows Hardware
NOTE
The Windows Hardware and Device troubleshooter is in place to help resolve hardware-related issues without necessarily having to use third-party software.
Press the Windows key. Then, type cmd.exe.
Right-click on the Command prompt, then select Run as administrator.
Click on Yes to allow User Account Control.
Key in the following command: msdt.exe -id DeviceDiagnostic
The Hardware and DevicesTroubleshooter will appear. Click on Next.
If the automatic repair pops up, click on Apply this fix.
Follow through the instructions to the end.
13. Adjust Windows Registry
NOTE
The update driver software may vary from one laptop to another, therefore, these instructions might vary as well. But, they should suffice for most of the parts.
Press Windows key + S key.
When the search bar pops up, key in the following command: regedit.
Press Enter key to open the Registry Editor.
Select Yes on the User account control prompt.
Then Navigate through this code: Computer\HKEY_LOCAL_MACHINE\SOFTWARE\Synaptics\SynTP\Install
Double-click on DeleteUserSettingsOnUpgrade (DWORD) that is on the right-hand side panel.
In the event, that the DWORD is not there, you can still create it manually by right-clicking on the empty space. Then select the new DWORD (32-bit) Value.
Then, double-click the DWORD to reset the value data to 0.
Click on OK to save the changes made.
14. Boot into Safe Mode
Safe Mode helps you check if third-party software or drivers are interfering.
Press Windows + R, type msconfig, and open the Boot tab
Check Safe boot > Minimal and restart If the touchpad works in Safe Mode, the issue is likely caused by a background process or driver conflict.
15. Check for Firmware or BIOS Updates
Outdated firmware can cause hardware issues, especially after Windows updates.
Visit your laptop manufacturer’s support page
Download and install the latest BIOS or firmware update
16. Disable USB Selective Suspend
Sometimes, Windows disables unused USB devices (including touchpads internally connected via USB).
Go to Control Panel > Power Options > Change plan settings > Advanced
Expand USB settings > USB selective suspend setting and set to Disabled
17. Use Device-Specific Touchpad Software
Manufacturers like Lenovo and ASUS often include their own touchpad utilities (e.g., ASUS Smart Gesture, Lenovo Vantage).
Check the official support site for your laptop model
Install or update their touchpad utility software
Why Isn’t My Touchpad Working in Windows 11?
Touchpad issues in Windows 11 can stem from:
Disabled settings (accidentally turned off)
Faulty or outdated drivers
Conflicts after a recent system update
BIOS settings disabling internal devices
Physical hardware faults
Using the steps above will help identify and resolve these causes.
FAQs
Why is my laptop touch not working in Windows 11?
It may be disabled in settings, blocked in BIOS, or affected by a faulty driver after an update.
How to enable touchpad on Windows 11 if the setting is grayed out?
Try updating or reinstalling the touchpad driver via Device Manager, or check BIOS settings to re-enable it.
Does my laptop model matter when fixing touchpad issues?
Yes. Lenovo, HP, Acer, and ASUS use different key combinations and drivers. Always check your model’s support page.
Wrapping up
Windows 11 touchpad problems include delayed cursor response, the cursor jumping all over, and settings missing or not functioning completely. You may also be unable to scroll through your screen.
When thousands of Steam users try to use the Store simultaneously, mainly during a sale, it creates a heavy load on the Steam servers.
This is when you bump into the e502 l3 error on Steam and may encounter login issues or fail to access the library.
Therefore, it’s recommended that you wait till the Steam servers are stabilized and are back up and running.
You can also check the Steam community hub or the SteamDB to find the server status and other details to get a clear idea of how the platform’s servers perform.
However, if servers are working fine and you still see the Steam error code e502 L3, you may try the below workarounds to fix the issue.
How do I fix the e502 l3 error on Steam?
1. Add Steam to Windows Defender Firewall Exceptions List
Right-click on Start and select Run to open the Run console.
Type control in the search bar and Enter to open the Control Panel window.
Next, go to View by on the top right of the window, and set it to Category.
Now, click on System and Security in the list.
On the next screen, on the right, click on Allow an app through Windows Firewall.
Next, click on the Change settings button on the top right.
Look for Steam in the Allowed apps and features list and check both Private and Public boxes.
Press OK to save the changes and exit.
Now, open the Steam app and check if you can log in and navigate to the library without seeing the error code E502 L3.
2. Turn off Windows Defender Firewall
Please navigate to the Start button, right-click on it, and click on Run to launch the Run console.
In the search box, type Firewall.cpl and hit Enter.
Now, click on Turn Windows Defender on or off on the left.
Next, select Turn off Windows Defender Firewall under both Private and Public network settings in the Customize Settings window.
Press OK to save the changes and exit.
Now, open Steam and check if you can now access the games or make purchases in the Store.
Go to Start (Windows icon), right-click on it, and select Run to open the Run console.
Type appwiz.cpl in the search box and hit Enter.
In the Control Panel window, under Uninstall or change a program, look for the Steam app, right-click and select Uninstall.
Once completely uninstalled, restart your PC, visit the official Steam website and re-install the app.
Can I reinstall Steam without losing games?
Yes, you can reinstall Steam, and you can still keep your games. There are two ways in which you can recover your Steam games when you uninstall the app and reinstall it later:
1. Redownload them as you reinstall Steam
However, if you uninstall Steam, the files for your games on your PC will also be uninstalled.
But the good thing is, as soon as you log into Steam on another PC or reinstall Steam, you’ll be able to go to your library and download the games again.
That’s because your games will remain associated with your account id, even if you uninstall the app. Download Steam on another computer, and you can redownload them.
2. Copy games from Steam apps common folder
Press the Win + Ekeys simultaneously to launch File Explorer.
Now, navigate to the location where the Steam folder is saved on your PC.
For example, on my PC the Steam folder is located in Program Files (x86), hence the path: C:\Program Files (x86)\Steam
Now, look for steamapps and open the folder.
Here, look for the Common folder and double-click to open it.
Next, copy all the game files here, go to desktop or your preferred location and paste it there.
Uninstall the Steam app like any other Windows 11, as explained in our detailed post.
Next, when you reinstall Steam later on the same PC, you can paste all the games you copied into the Common folder.
Open Steam, go to the Library and start installing the games.
You should see it’s allocating files and installing them instead of redownloading everything.
While the above methods can help you fix the Steam error quickly and effectively, if it still doesn’t, you should check if the internet connection is working correctly.
Additionally, you may also try logging out of the game or exit the game and relaunch it to check if it resolves the error e502 l3, or
At the same time, make sure you disable any 3rd party antivirus software on your PC or do not use a 3rd party anti-cheat software.
Printers are the machines that take inputs from the system, like computers, laptops, etc., and print them on paper.
Millions of people all over the world use printers and scanners at places like educational institutions, offices, stores, houses, etc.
There are different types of printers available on the market currently, such as laser printers, LED printers, 3D printers, and so on. There are better deals when buying laptops and computers that have printers with them these days.
Does HP have drivers for Windows 11?
Recently, HP has released drivers for the compatible HP printers for the Windows 11 system.
They also have a dedicated Smart app to guide users on how to connect and print various documents using the HP printer on their Windows system.
There is also a diagnostic tool called HP Print and Scan Doctor for Windows. This tool is designed such that users just need to run the tool on their system. It starts diagnosing any errors and has got problem-solving features.
Will a Windows 10 printer driver work on Windows 11?
Yes, the HP printer driver, meant for the Windows 10 system, undoubtedly works on the Windows 11 system as well. Earlier, before the driver for Windows 11 was released, users had to download and install the Windows 10 printer driver.
A few users also got an issue where the printer seems offline while trying to print any documents.
This article guides you if you are looking forward to downloading and installing the HP printer driver on the Windows 11 system.
Quick Tip:
As printer drivers might be the most annoying drivers to work with, we recommend a simpler and faster solution to get your printer working.
Outbyte Driver Updater will scan for outdated drivers on your PC and update them if possible. Also, it will make sure that the installation process is done correctly so no errors occur.
Outbyte Driver Upadater
A few clicks away from an optimized system and a working printer.
After the downloads page gets loaded, Enter your product name (printer name) in the textbox as shown below.
Next, click Submit or the dropdown of the search results for your product name.
It displays all the software and drivers for your printer.
This detects your operating system and displays it. If you want to change it, you should click Choose a different OS.
A pop-up window opens and you need to select Windows from the Operating System option and then select Windows 11 from the Version dropdown.
After selecting Windows 11, click Change.
It then lists all the drivers and software for your printer for Windows 11 operating system.
Now click on Installation Software and Full/Basic Driver option for expanding it.
You should now click Download of HP Easy Start Printer Setup Software – Offline Use Only which has a size of 195 MB.
This starts downloading the printer driver’s complete executable package on your system.
If you’re also setting up HP accessories like docking stations, you may need additional drivers. For instance, you can follow this HP USB-C Dock 5G drivers guide to get the correct package for your HP dock.
How do I install the HP printer driver on Windows 11?
Open the Downloads folder on your system where the downloaded HP printer’s driver package is present.
Once you open the folder, right-click on the printer driver package and select WinRAR > Extract to HPEasyStart(you need to have WinRAR installed on your system to apply this step; if not, please install it).
This will extract the entire package to a folder inside the Downloads folder.
Now open the Settings app by pressing together the Windows and I keys.
Select Bluetooth & devices option on the left menu and click Printers & scanners option on the right-hand side.
Then click Add device to add a new printer or scanner.
Select Add a new device manually for adding the printer device which is not listed.
In the Add Printer wizard, select Add a local printer or network printer with manual settings radio button and click Next to proceed.
Click Have Disk option to browse the downloaded driver package.
Select the HP driver inf file from the extracted folder by clicking on Browse.
After selecting the file, click OK.
Choose the printer from the listed ones and click Next.
Give an appropriate name for the printer and proceed by clicking Next.
Now if you do not want to share this printer with others on a network, select the Do not share this printer radio button and click Next. Otherwise, you need to select the second option and provide all the necessary details of the location, etc.
Finally, it will display You’ve successfully added the printer message on the wizard.
You can now directly test the printer by clicking the Print a test page and following the onscreen instructions.
Close the wizard by clicking Finish.
This will add the printer to your system and you can start printing documents or files using this HP printer on your Windows 11 system.
Why does my computer say printer driver unavailable?
When any user finds an error message while trying to print any file or document, which says Printer driver unavailable, this means the printer driver may be corrupted. An outdated printer driver could also be the reason behind this error message.
Does HP have a driver update tool?
Yes, HP has a tool called the HP Support Assistant which works on both Windows 11 and Windows 10. Users have to install the latest version of the HP Support Assistant on their system and run it. This tool has great features, which update the system if it is HP, drivers, software, etc.
To make it feel a lot more welcoming and homier, you can personalize the look and feel of your Windows OS as much as you possibly want.
And, of course, there are dozens of ways of going about and changing certain things that you feel would deserve some further tweaking.
As an example, you can enable or disable Show accent color on title bars and windows, an option that lets you show or hide the window border.
On the off chance that you find this setting less useful, you can turn off the window border color on your Windows 11 powered gadget. If you were asking how you can do that, we got you covered.
How to turn off window borders color in Windows 11?
The operating system’s latest version ships with an accent color feature that renders colors to window borders.
If you have been a Windows user for some time now, you already know that the OS is pretty permissive in terms of customization, so there are a lot of ways you use that to your advantage.
However, today we are going to focus on enabling/disabling accent colors and the window border color.
1. Turn off accent color for Start and taskbar
Right-click on your desktop and select Personalize from the menu.
Click on the Colors button.
Untick the option called Show accent colors on Start and taskbar.
This is just in case you don’t want your selected accent color also to be applied to your taskbar and Start menu but would want to keep them neat and transparent.
You can go back and turn this option back on whenever you want, using the same process, as this is not a permanent modification.
2. Disable accent color on window borders
1. Right-click on your desktop.
2. Select Personalize from the menu that opened.
3. Navigate to the Colors section.
4. Here you can see the Show accent color on title bars and windows borders setting.
5. Toggle it off by clicking on the the button next to it.
6. This action will disable the window border color in Windows 11 completely. However, just as we mentioned above, you can go right back in at any time and enable it.
You can easily turn off the window color on your device by tweaking Personalization settings. From the Personalization menu, you can toggle the color and and off in a simple click.
Should I leave these window border settings on or off?
There is no official guide or any documentation that states the need to have such options turned on at all times. These are simply cosmetic settings that will not impact the overall performance of your device.
So, feel free to make however many visual modifications you want to your operating system. Keep in mind that all such changes can be reversed with a few simple clicks, so go ahead and customize every aspect of the OS to your liking.
Remember that if you ever find yourself in a situation that you haven’t faced before, tech-wise or you simply need some assistance with your laptop PC, or tablet, you are in the right place.
Do you keep accent colors or disable them? Share your preferences with us in the comments section below.
SD cards are mini storage devices used to hold valuable files. They are mostly used in portable devices and can be accessed on PCs.
However, some people are starting to complain that their laptops are not detecting SD cards. This issue is not just limited to old PCs but also some of the best Windows 11 laptops.
Fortunately, it is an issue that is easy to fix, as we will show in this guide.
Why is my laptop not recognizing my SD card?
There are many factors that could cause your laptop not to read or recognize your SD card. It can be due to connectivity issues, problems with the SD card, or the reader.
Below are some of the popular causes:
Outdated drivers
Dirty or dusty SD card or reader
Faulty port
Corrupted SD card
How do I get my laptop to read my SD card?
1. Clean SD card and reader
If your card reader, also known as the adapter or the SD card, is dirty, your laptop might have problems detecting it. So, before moving to complicated fixes, check if they are dirty.
In case you find dirt there, you need to clean the reader and the SD card with a soft material like cotton wool. You only need to dip the material in water and clean it gently.
Ensure you do not scratch the metallic part of either the adapter or SD card while cleaning. This is because any dent on either of them can make it stop working altogether.
2. Use another port
Sometimes you might be trying to access your SD card from another device via a USB port on your laptop, and it might not be detecting it. In this case, you need to try another port.
This is because one of your laptop ports might be weak or faulty. With this, it won’t recognize your SD card.
3. Update drivers
3.1. Update drivers manually
Press the Windowskey + Xand select Device Manager.
Double-click the Disk drives option to expand it.
Right-click on your SD card reader and select the Update driver option.
Choose the Search automatically for drivers option.
Wait for the search to complete and install any available update.
If your HP, Dell, or any other laptop is not detecting or reading your SD card, it might be because of an outdated driver. Updating the driver should restore normalcy in no time.
3.2. Update driver automatically
Instead of going through the stress of updating your drivers manually with the steps above, you can do it automatically with dedicated software. And there is currently no better driver updater than Outbyte Driver Updater.
Outbyte Driver Updater is a top-notch tool that takes care of everything driver on your PC. It automatically scans for outdated, missing, and broken drivers.
It recommends original drivers from trusted manufacturers worldwide to keep your PC in top shape. All you have to do is to allow the installation, and Outbyte Driver Updater will take care of the rest.
This tool might just be everything you need to fix the laptop not recognizing or detecting SD card and other driver-related issues on Windows 10/11.
Outbyte Driver Updater
Get rid of most errors by updating all outdated drivers.
Press the Windowskey + Xand select the Windows PowerShell (Admin) option.
Copy and paste the command below and hit Enter. chkdsk Y: /R
Wait for the process to finish and check if the SD card is now working.
Sometimes your Windows 10/11 laptop might not be detecting your SD card because of some bad sectors. This command above helps to scan the card completely and repairs any bad sector where possible.
Not that the letter Y in the command is the letter assigned to your SD card. So, you should replace it.
To know which of the components is causing the problem, try to use the SD card on another PC. You can try different permutations, like using the SD card with another adapter on the new laptop.
You might have to replace the SD card if it fails to work. This is because the SD card might be broken and cannot be detected by a laptop to fix it.
The SD card not showing up or working on Windows 10/11 laptop issue stops you from accessing and transferring files. It can also lead to losing valuable files if care is not taken.
But with the fixes in this guide, the issue should be a thing of the past.
Feel free to let us know if you were able to make your laptop detect the card in the comments below.
Computer issues will occur sooner or later on your PC. Unfortunately, fixing those problems isn’t always a simple task, but there’s one Windows tool that can help you. If you want to check your reliability history on Windows 10, today we will show you how to use Reliability Monitor.
This utility tracks and logs all system events, including errors, warnings, application crashes, and other issues affecting the system’s stability. It can be accessed by searching for Reliability History in the Start menu or Control Panel.
The report is presented as a graph that shows the stability index of the system over a selected period, along with details of any events that have occurred during that time. The stability index is a score ranging from 1 to 10 that reflects the system’s overall stability.
A score of 10 indicates that the system has been running without any issues, while a score of 1 indicates that the system has experienced frequent crashes and other issues.
Additionally, using this utility, users can quickly identify and troubleshoot issues that may be affecting the performance and stability of their Windows system. It also provides valuable information for system administrators to maintain and monitor the health of their networked computers.
How can I use Reliability History on Windows 10?
1. Opening Reliability History
1.1 Open Reliability History from Windows Search
Press Windows Key + S and enter reliability.
Select View reliability history from the menu.
1.2 Open Reliability History from the Run Dialog
Press Windows Key + R to open the Run dialog.
When the Run dialog opens, enter perfmon /rel, press Enter, or click OK.
1.3 Open Reliability History via Control Panel
Lastly, you can start the Reliability Monitor simply by navigating to the Control Panel. The Security and Maintenance menu allows users to view the reliability history in a few clicks.
1. Press Windows Key + X to open the Win + X menu.
2. Choose Control Panel from the list of options.
3. When Control Panelopens, navigate to the System and Security section.
5. When the Security and Maintenancewindow opens, expand the Maintenance section.
6. Now click on View reliability history.
7. The report will now generate. This can take a while.
8. Reliability Monitor also offers detailed information for each day. Simply select a specific day on the chart and you’ll see a detailed report at the bottom.
9. You can also view technical details about errors on your device. You can see which application caused a warning or a critical event to appear. In addition, you can also see the type of critical event or warning.
Lastly, you’ll see the exact time and date when a specific issue occurred, which makes it easier for you to troubleshoot a problem.
2. Track stability and performance
Open the utility using any of the methods described above.
The utility will show a graph of the system’s stability index over time. The stability index ranges from 1 to 10, with 10 being the most stable.
You can click on any point on the graph to see details about the events that occurred at that time, including warnings, errors, and other issues.
You can also filter the view by date range or by selecting a specific event type to display in the graph.
Lastly, clicking on an individual event will show more detailed information, including a description of the problem, any related files or applications, and suggested actions to resolve the issue.
How do I clear my Reliability History?
Use any of the three approaches discussed above to open Reliability History.
Scroll to the bottom and click View all problem reports.
Click Clear all problem reports at the bottom right.
Finally, click Yes to confirm your choice and wait for the process to complete.
Many advanced users are probably familiar with the Event Viewer. This powerful tool can detect every event, warning, or error. The device uses the information from the Event Viewer but displays it in a user-friendly manner.
Lastly, if you’re having any issues with your PC, we advise you to check your Reliability History using this tool.