Fix: Windows 11 Monitor Detected but Not Displaying

A computer with multiple monitors allows you to see more content, multitask and split your screen. However, many users report that Windows 11 monitors are detected but not displaying content, which can be very frustrating.

Another issue users report is Windows 11 not detecting the second monitor, making it impossible to connect and use it.

Why is the Windows 11 monitor detected but not displaying?

For many reasons, users may experience their Windows 11 monitor not displaying even when connected to their PC. Some factors liable to cause the issue are:

  • Outdated graphics driver – If the graphics driver is not detected or outdated, it can cause problems with the devices connected to your PC due to bugs and compatibility problems.
  • External monitor connection issues – There’s a possibility that the external monitor connection may be faulty, causing issues with it displaying on your PC.
  • Outdated Windows OS – Windows updates often come with bug fixes and drivers, and if you don’t install them, many problems may occur, including the monitor issue.

Now that we know the causes behind this problem, let’s see how to get your monitor to display again.

How do I fix Windows 11 monitor that is detected but not displaying?

Before proceeding with any advanced steps for fixing the issue, try the following:

  • Disconnect other external devices connected to your computer.
  • Unplug the monitor from its power source and from your computer, then reconnect it.
  • Restart Windows in Safe Mode and check if the monitors work properly.
  • Inspect the connecting cables and see if they are properly plugged into the right ports and if they show signs of any deterioration and replace them if needed.

If you can’t fix the problem, proceed with the solutions below.

1. Change your Project mode

  1. Press Windows + P key to open the Project window, then select PC screen only.
  2. Disconnect the external monitor from your PC.
  3. Power off your computer and reconnect the monitor while the PC is still off.
  4. Power on your PC and press the Windows + P keys.
  5. Click the Extend option to check if the monitor is detected and displays as it should.

The above steps will refresh any external projection display device connected to your PC and resolve connection errors from other monitors.

Read what to do if you encounter problems with your monitor screen fading to black on your PC.

2. Change the settings for the external displays

  1. Right-click on a free space on your desktop and select Display settings.
  2. Scroll down on the right pane and select Advanced display.
  3. Select the monitor that you are having a problem with from the top right corner drop-down menu.
  4. Now, first make sure that the refresh rate is on par with your monitor and change it accordingly. If it is OK, click on Display adapter properties for it.
  5. In the new pop-up window, choose List All Modes and select a lower resolution and frequency and frequency that it’s now set.
  6. Play a little bit with these settings and see if the contents start showing up on your screen.

If you don’t have the correct drivers for your display adapter or monitor, they might set up the wrong default resolution and frequency for your displays.

Should this solution fix the problem, you will need to update the display driver. We have the solution below.

3. Enable multiple displays from the dedicated software

  1. Right-click on your desktop and open the NVIDIA Control Panel.
  2. Click Set up multiple displays on the Display tab.
  3. Check all the boxes for the monitor you want to use and save the changes.
  4. Restart your PC and check if the monitor displays.

Our example is for those with an Nvidia graphics card and software, but the solution is similar for AMD owners.

Enabling the multiple display option in the dedicated software lets your device detect external monitors and make them work smoothly. Check how to fix the Nvidia Control Panel crashing or not working on your PC.

4. Update your Graphics driver

  1. Press Windows + R keys to open the Run dialog box, type devmgmt.msc, and click OK.
  2. Click the Display adapters, select the driver from the drop-down, and select the Update driver option.
  3. Click the Search automatically for drivers option.
  4. Restart your PC and check if the issue persists.

The graphics driver update will fix bugs affecting the monitor display and install the latest features to improve its performance. Read our detailed article on updating graphics drivers on Windows 11 if you have any issues.

Suppose you’re searching for a quicker updating alternative. In that case, you can opt for a specialized program like Outbyte Driver Updater to automatically find the latest updates for your outdated drivers, thanks to its large database.

Outbyte Driver Updater

Try this great app to update your drivers with the best versions immediately.
Free Trial Download now

Readers can also check our article about fixing external monitors not detected after sleep or not waking. Also, you can read our detailed guide about the third monitor not detected on Windows 11 and how to fix it.

Conclusively, this guide should help you if Windows 11 monitor is detected but is not displaying. Should you have further questions, then drop them in the comments section.

Fix: Windows Error 2 Occurred While Loading the Java VM

You must have found this guide because Windows error 2 occurred while loading the Java VM. This happens to some users when installing software that relies on the Launch Anywhere Java launcher. Consequently, the users can’t install the software when that error message pops up.

That error message started to pop up for users after the release of Java VM version 1.8.0_60. If the Java VM error message sounds familiar, check out some of the causes and fixes we recommend.

What is a Java VM error?

Java Virtual Machine (JVM) error is when the Java Virtual Machine encounters a problem during the execution of a Java program. The JVM runs Java programs and translates the bytecode into machine code that the computer can execute.

Java Virtual Machine (JVM) errors can be caused by a variety of factors, including:

  • Insufficient memory – Java programs require memory to run, and if the JVM does not have enough memory available, it can result in an Out of Memory error.
  • Incompatible Java version – If the Java program is compiled with a more current Java version than the JVM being used, it can cause errors.
  • Incorrect configurations – Incorrect configurations of the JVM, such as specifying an incorrect heap size or garbage collector settings, can cause errors.
  • Operating system issues – Issues with the operating system, such as low disk space, can cause errors.
  • Hardware issues – Hardware issues, such as faulty memory or a failing hard drive, can cause errors.
  • Bugs in the JVM – In rare cases, bugs in the JVM itself can cause errors.

To determine the cause of a JVM error, it is essential to look at the specific error message and any related error logs. This can provide clues as to what is causing the error and help identify the necessary steps to resolve it.

How can I fix Windows Error 2 occurred while loading the Java VM?

  1. Update Java
  2. Delete the Javapath System Variable
  3. Open the Software Installer via the Command Prompt

1. Update Java

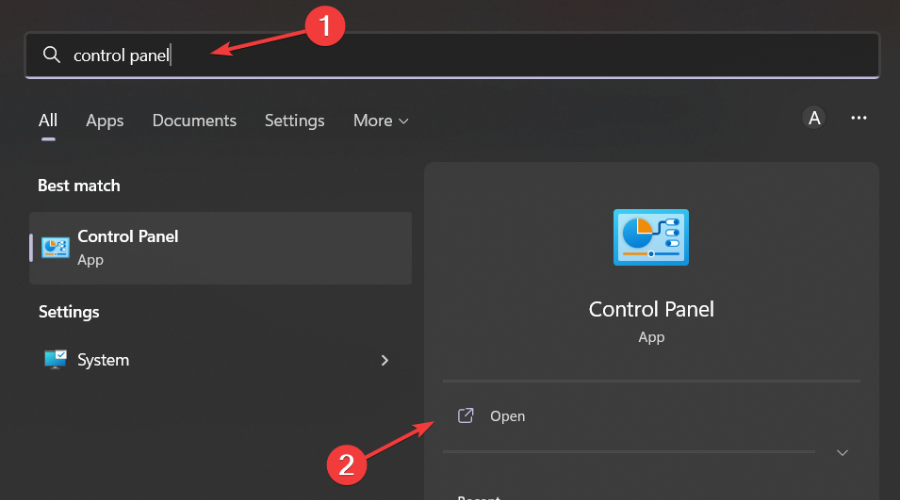
  1. Press the Windows key + R, type Control Panel, and hit Enter to open the Control Panel.
    windows error 2 occurred while loading the java vm
  2. Locate and click Java in the Control Panel.
  3. Click the About button to open version details. If an update is required, uninstall the previous Java version first.
    windows error 2 occurred while loading the java vm
  4. To do that, press Windows + R, type appwiz.cpl in Run’s text box, and hit Enter.
    windows error 2 occurred while loading the java vm
  5. Search for Java, select it, and click Uninstall to remove it.
  6. Restart Windows after uninstalling Java.
  7. Open the Java download page and click Download Java for the latest version.
  8. Open the Java setup file to install the latest version.

2. Delete the Javapath System Variable

  1. Open Run by pressing the Windows key + R.
  2. Input systempropertiesadvanced in the open text box, and hit Enter.
  3. Select the Advanced tab.
  4. Press the Environment Variables button.
    windows error 2 occurred while loading the java vm
  5. Select the javapath variable on that window and click the Delete button to erase the javapath variable.

Some users have stated that they’ve fixed the Windows error 2 error by deleting a Java system variable path. So that’s one of the best resolutions for the Java VM error. Follow the guidelines above to delete the Java system variable path.

For additional troubleshooting steps, see our full Java Virtual Machine Launcher error guide.

3. Open the Software Installer via the Command Prompt

  1. Press the Windows key + X keyboard shortcut, and click Command Prompt (Admin).
  2. Next, enter a LAX_VM command and hit Enter:
    Installer_file.exe LAX_VM C:Program FilesJavajdk1.8.0_60binjava.exe

This is more of a workaround than a fix. Nevertheless, users have confirmed they can open the software’s installer via the Command Prompt. Users can use the steps above to open the Launch Anywhere installer via the Command Prompt.

Note that the LAX_VM command above is an example that users must modify to match their exact installer file names and JDK paths. The syntax for the above Prompt command is:
<installer file name> LAX_VM <full Java (JDK) executable path>

Thus, users will need to edit the installer file name at least. In addition, some users might need to adjust the folder path if they install JDK in a custom directory.

So if you get the Windows error 2 occurred while loading the java VM error, that’s how you may resolve it in Windows.

Let us know if you have found any value in this guide and what solutions have worked for you.

Download and Install Apple TV on Windows 11

Apple TV is a streaming device and platform owned by Apple and designed to work with Apple devices such as the iPhone, iPad, and Mac computers.

However, Apple has launched the first Apple TV preview version for Windows 11. Therefore, this guide will show you how to download and install Apple TV on Windows 11.

Why can’t I get an Apple TV on my computer?

Not being able to download Apple TV on your computer could be ascribed to different reasons, such as:

  • Network issues – When there is a network congestion issue, your PC may not be able to secure a server connection, hindering the download and installation of Apple TV.
  • System requirement issues – The minimum system requirement for the app is Windows 11 version 22621.0, causing the app to be unsupported in the lower Windows version. Therefore, you need to upgrade the PC Windows version if it’s lower than the above-stated version.
  • Location issues – The Apple TV app is still limited to some regions, so users outside these locations encounter complications when downloading the app.

This article will show you how to download and install the Apple TV app on your Windows 11 PC.

How do I download and install Apple Tv in Windows 11?

We recommend following these preliminary checks:

After trying the preliminary checks that can affect Apple TV download, you can proceed to the following steps.

1. Download Apple TV from Microsoft Store

  1. Right-click the Start button and select Microsoft Store from the app list to open it.
  2. Click on the Search bar and type in apple tv preview.
  3. Choose the Apple TV Preview from the search results and click on Get to start downloading and installing.
  4. After downloading is complete, click on the Open button.
  5. Click the Continue button to agree to the app’s preview terms and conditions.

Downloading Apple TV from the Microsoft store gives users access to app reviews and helps them download compatible apps for PC.

You should check out our guide on ways to fix Microsoft Store it it won’t open on Windows if you run into issues with the app.

2. Download Apple TV using Command Prompt

  1. Left-click the Start button, type command prompt, and select Run as Administrator.
  2. Click Yes when the User Account Control window appears.
  3. Input the following command and press Enter: winget install --id 9NM4T8B9JQZ1
  4. Press the following and Enter: Y

Using the command line to download Apple TV offers more control over the download process, such as setting download speed limits or resuming interrupted downloads.

3. Watch Apple TV online via the web browser

  1. Open the web browser app on your Windows PC and visit Apple’s official website.
  2. Click the Sign In button and use your Apple ID to sign in to start streaming.

Using the web browser to stream Apple TV makes it easy for users with lower system requirements.

Check out our guide on fixing web browsers not supported by Apple TV if you have issues using your web browser.

Likewise, you can read about the best IPTV software for Windows 11 to use in 2023 if you prefer such streaming platforms also.

Alternatively, check how to solve errors that occurred loading content on Apple TV if you run into any such issues.

In conclusion, this guide has explored the various ways to access the Apple TV on Windows 11. You should be able to download and use it henceforth.

Edge’s integrated VPN service is now live on the Stable Channel

We know that there are a lot of Edge fans among you and we love to bring you the latest updates concerning the browser you chose as your main one.

Last year’s Dev Channel build has brought a lot of interesting fixes and new features, but nothing like what we’re about to show you right now.

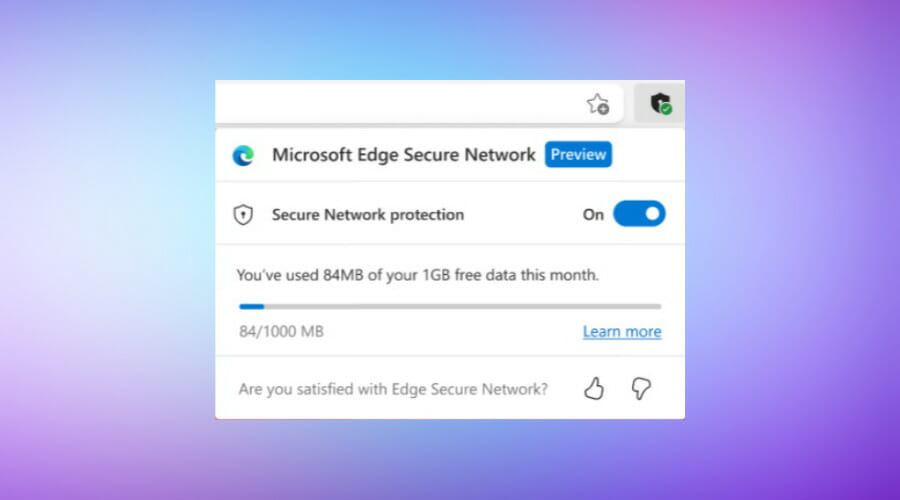
Microsoft’s Edge will soon benefit from an integrated VPN service called the Microsoft Edge Secure Network.

It will work just any other conventional VPN services do, but it could be deeply integrated within the Edge browser itself.

Edge’s integrated VPN service is now widely available

Edge Canary Secure Network settings

Microsoft had announced, back in 2022, that it kicked off experiments for Microsoft Edge Secure Network in the Canary channel of the Edge browser.

Now, however, the company started testing the service that provides 1GB of free data to improve privacy or circumvent regional restrictions on various websites.

Even though we are still waiting for Microsoft to launch Edge’s built-in VPN, some users report seeing the feature in the stable version of the browser and without the Preview tag.

Before this report, Edge Secured Network was available only to Edge Insiders, as we said when we first spoke on the topic.

Unlike other traditional VPN services, Edge Secured Network does not allow picking a server in a specific country or location.

How do you do it then? Well, you should know that you have three modes to customize the experience for your needs:

  • Select Sites – Edge uses the VPN only on websites specified in the “Use VPN” list. For example, if you need a VPN only to access one or two region-restricted websites.
  • Optimized – Rerouts all traffic through the VPN whenever you connect to a public or unsecured network or a website without a valid certificate. This mode also routes videos outside the VPN to conserve the data (1GB/mo is the default free limit).
  • All Sites – Built-in VPN is always on.

So, if you decide to opt for this service, note that Microsoft allows select Edge insiders to test up to 15GB of free monthly traffic, but the limit should return to 1GB once the feature is available to all users.

If you are in need of more data, you will get the option to purchase extra traffic, even though pricing still remains unknown.

However, considering the fact that the VPN is about to be officially launched, we can expect Microsoft to announce pricing and availability soon.

When using the Edge Secure network, your data is routed from Edge through an encrypted tunnel to create a secure connection, even when using a non-secure URL that starts with HTTP.

Thus, this will make it a lot harder for hackers to access your browsing data on a shared public Wi-Fi network.

Edge’s new VPN service will be powered by Cloudflare, and the company assures it permanently deletes the diagnostic and support data collected, every 25 hours.

New Cloudflare-powered VPN service coming to Edge

What other benefits can you get from using this new Edge-integrated VPN service you ask? Well, here’s a small list of exactly that:

  • Encrypts connection: Encrypts internet connection to help protect user data from online threats like hackers. When using Microsoft Edge Secure network, user data is routed from Edge through an encrypted tunnel to create a secure connection, even when using a non-secure URL that starts with HTTP. This makes it harder for hackers to access browsing data on a shared public Wi-Fi network.
  • Helps prevent online tracking: By encrypting web traffic directly from Microsoft Edge, Microsoft helps prevent users’ internet service provider from collecting browsing data like details about the websites users visit.
  • Keeps user location private: Online entities can use user location and IP address for profiling and serving targeted ads. Microsoft Edge Secure Network lets users browse with a virtual IP address that masks users’ IP and replaces their geolocation with a similar regional address to make it more difficult for online trackers to follow users as they browse.
  • Is free to use: Microsoft offers 1 gigabyte of free data every month when users sign into Microsoft Edge with their Microsoft Account.

That being said, you should also know that the Microsoft Edge Secure Network Service isn’t available to all users just yet.

This VPN service should be available in an upcoming version of the Edge browser. Once Microsoft rolls it out, a new menu entry will be available in the Hamburger menu located in the upper right-hand corner of the browser.

Another key factor is that users will need to sign in to their Microsoft account to use said VPN service. The feature will turn off automatically when the user closes the Edge window.

Furthermore, users will also need to turn on Microsoft Edge Secure Network again for their next browsing session if they wish to use it. A shield icon will indicate if the service is active.

The Redmond-based tech giant is going to limit the VPN service to 1GB of data. No mention of any subscription model that could allow users to extend the service beyond the free data cap has been made.

Excited to use this upcoming Edge feature? Share your thoughts with us in the comments section below.

How to Enable or Disable Password After Sleep in Windows 11

Sign-in on wake means the system requires you to sign in with your login password when it wakes from sleep mode. Hence, we’ll take you through how to enable or disable Windows 11 passwords after sleep.

Can I change the sleep settings on Windows 11?

Sleep mode in Windows PC is a power-saving state that stops all actions and program activities on the computer. It allows the system to save power by moving running services and open applications to the system memory (RAM).

However, Windows users can change their PC’s sleep settings to suit their preferences. Settings include how long you want the system to wait before going to sleep when you’re not using it and what shortcuts to put your device to sleep.

How do I turn off login after sleep in Windows 11?

1. Use the Settings app

  1. Press Windows + I to open the Windows Settings app.
  2. Click on Accounts from the left pane and select Sign-in Options from the right-hand side of the screen.
  3. Click the drop-down button for If you’ve been away, when should Windows require you to sign in again? option and select Never.
  4. Apply the changes and put the new settings to the test by putting your system on Sleep mode.

The above steps show how to disable or enable passwords after sleep on Windows 11 without tweaking any advanced directory. Read what to do if the Settings app won’t launch on Windows 11.

2. Use Windows Terminal

  1. Press Windows + R key to open the Run dialog box, type wt in the text bar, and then press Ctrl + Shift + Enter to open an elevated Windows Terminal.
  2. Click Yes when prompted by the User Account Control (UAC).
  3. To enable the password whenever your system wakes from sleep, copy and paste the following commands and press Enter:
    • On Battery: powercfg /SETDCVALUEINDEX SCHEME_CURRENT SUB_NONE CONSOLELOCK 1
    • Plugged in: powercfg /SETACVALUEINDEX SCHEME_CURRENT SUB_NONE CONSOLELOCK 1
  4. To disable the password whenever your system wakes from sleep:
    • On Battery: powercfg /SETDCVALUEINDEX SCHEME_CURRENT SUB_NONE CONSOLELOCK 0
    • Plugged in: powercfg /SETACVALUEINDEX SCHEME_CURRENT SUB_NONE CONSOLELOCK 0
  5. Close the elevated Windows Terminal and put your system in sleep mode to check if the command is effective.

Running those commands in the Windows Terminal will either disable or enable the password after sleep on Windows 11. Check what to do if Windows 11 monitor won’t go to sleep.

3. Use Command Prompt

  1. Press Windows + R key to open the Run dialog box, type cmd, then click on Run as administrator to open Command Prompt with full privileges.
  2. Type the following into the Command Prompt depending on what you want to do, and press Enter:
    • Disable password when you wake your system sleep on battery: powercfg /SETDCVALUEINDEX SCHEME_CURRENT SUB_NONE CONSOLELOCK 0 
    • Disable password when you wake your system sleep when the system is charging: powercfg /SETACVALUEINDEX SCHEME_CURRENT SUB_NONE CONSOLELOCK 0
    • Enable password when you wake your system sleep on battery: powercfg /SETDCVALUEINDEX SCHEME_CURRENT SUB_NONE CONSOLELOCK 1
    • Enable password when you wake your system sleep when the system is charging: powercfg /SETACVALUEINDEX SCHEME_CURRENT SUB_NONE CONSOLELOCK 1
  3. Close the Command Prompt and restart your PC.

This solution will help you disable password on wakeup in Windows 11. Check how to personalize Command Prompt in Windows 11.

4. Use the Registry Editor

  1. Press Windows + R key to open the Run dialog box, type regedit, then press Ctrl + Shift + Enter to open the elevated Registry Editor.
  2. Navigate to the following location: HKEY_CURRENT_USER\Control Panel\Desktop
  3. Right-click on the Desktop registry key and choose New from the drop-down, then Dword (32-bit Value) from the new menu that appears.
  4. On the right pane, type DelayLockInterval as the name of the new DWORD value.
  5. Double-click on the newly created DWORD value DelayLockInterval and set the Value data to 0.
  6. Close the Elevated Registry Editor, then restart your PC to allow the changes to take effect.

Tweaking the Registry Editor will change the wake preference of the system.

Also, you can read our article about Windows PC waking from sleep by itself for steps to fix it.

Further, you may check the steps to fix a computer going to sleep too quickly on Windows 11. Likewise, we have a guide about how to find the Sleep Button on a Windows PC.

In conclusion, you should be able to disable password after sleep on Windows 11 with the steps above. If you have further questions or suggestions, kindly drop them below in the comments section.

Fix: Microsoft Wants to Use Your Confidential Information

Users can use Microsoft apps on Mac, allowing access to Office apps such as Outlook, SharePoint, Excel, etc. MacBook users report Microsoft wants to use your confidential information stored in the Adalcache prompt when working, and it refuses to disappear.

Why do I get the Microsoft wants to use your confidential information pop-up?

Microsoft wants to use your confidential information stored in adalcache prompt that appears when using any Microsoft Office apps like SharePoint, PowerPoint in Excel, Outlook, etc., on Mac.

However, the repeated keychain access prompt can occur due to many factors. Some are:

  • Moving Office app package to another location – The most likely cause of the recurring keychain access prompt when opening Office apps is that the Office app package is not in the default location. It causes Microsoft not to read the Office app package when needed on your Mac.
  • Issues with the Keychains on Mac – A keychain app on Mac is an encrypted container that securely stores account names and password credentials for apps. If there’s any issue with the keychain, it may cause Microsoft apps to request access.
  • Issues with the Office app cache – The app cache can become corrupt and old, causing the app to malfunction or crash sometimes. So, you may experience the recurring keychain access prompt due to a corrupt cache of the Office app you want to access.

Suppose Microsoft SharePoint wants to use your confidential information stored in adalcache, or OneDrive wants to use your confidential information stored in adalcache in your keychain. In that case, we have the solutions below to fix the problem.

How do I fix the pop-up Microsoft wants to use your confidential information message?

Before trying any advanced steps on your Mac, follow the steps below:

  • Fix network issues on your Mac.
  • Close and reopen the Office app showing the prompt.
  • Restart the Mac device and check if the error persists.

If you can’t fix the issue, proceed with the troubleshooting methods below.

1. Lock Keychain Permissions for Office

  1. Close all Office apps (Teams, Outlook, Word, Excel, PowerPoint, and OneNote) on your Mac.
  2. Go to Finder and click on Applications from the right pane.
  3. Find Utilities, click the drop-down button, then double-click to launch the Keychain Access app.
  4. Go to the Default Keychains menu and click the Login keychain entry left pane.
  5. Navigate to the File menu at the top bar and click Lock Keychain login.
  6. Launch any Office app. Your Mac will prompt you for permission to access the keychain.
  7. Enter your password and sign into your Office account.
  8. Exit and launch the Office app to see if the prompt appears.

Locking the keychain access will stop every activity it has on the Office app. Hence, restoring the keychain permissions for Office on your Mac can help you resolve this issue.

Read our guide on fixing there was a problem accessing your keychain error on your MacBook.

2. Clear the app cache

  1. Exit all Office apps (Teams, Outlook, Word, Excel, PowerPoint, and OneNote) on your Mac.
  2. Go to Finder, type Library into the search box, and select the Library folder.
  3. Double-click the Application Support folder.
  4. Open the Microsoft folder, select the Office app causing the prompt, then delete all the files from that folder.
  5. Restart the app and check if the prompt appears.

Deleting the app cache will resolve corrupt files in its folder and fix the recurring keychain prompt.

3. Remove keychains for Microsoft Office and all occurrences of ADAL on Mac

  1. Close all Office apps on your Mac.
  2. Go to Finder and click on Applications from the right pane.
  3. Find Utilities, click the drop-down button, then double-click to launch the Keychain Access app.
  4. Delete the following password entries: Microsoft Office Identities Cache 2 and Microsoft Office Identities Settings 2
  5. Find and delete all entries with occurrences of ADAL in the keychain.
  6. Restart your Mac and open the Office app to check if the prompt appears.

Deleting the keychain entries for Microsoft Office and all occurrences of ADAL on your Mac will fix any compromised keychain causing the problem.

4. Empty the Kind entry box

  1. Exit all Office apps on your Mac.
  2. Navigate to Finder and click on Applications from the right pane.
  3. Select Utilities, click the drop-down button, then double-click to launch the Keychain Access app.
  4. Go to the Default Keychains menu and click the Login keychain entry left pane.
  5. Double all the Microsoft Office items. Remove everything in the Kind entry box.

Removing the Adalcache entry from the Kind box will remove its contents in the Microsoft Keychain.

Another issue Mac users complain about is Mac not connecting to hotspot.

Further, we have a detailed guide about iCloud sign-in repeatedly popping up on PC and Mac.

In conclusion, if Microsoft wants to use your confidential information stored in adalcache, these steps should help you troubleshoot it.

Should you have further questions, kindly drop them in the comments section.

How To Download Any Video in a UC Browser: 3 Ways to do it

Ever wondered how to download a video in the UC Browser? It’s simpler than you think, and this guide will show you the best ways to do it.

How can I download a video in the UC Browser?

1. Use built-in options

  1. In UC Browser, go to a video you want to save (see next solution for YouTube videos).
  2. In the blue menu, click on the small arrow to pick the file size you want to download. Pick size of video to download with UC Browser.
  3. Choose the location on your PC to download, then click Local Download. UC Browser video local download.

2. Via a video converter

  1. In UC Browser, open the  4kdownload page and click on Get 4K Video Downloader to install the app.get the 4k downloader
  2. Select the location where you want to save the installation wizard and click on Local Download.local download
  3. Click on the downloads arrow to open the Downloads folder, and then click on the exe file and run the installer.click on the exe file
  4. In your UC browser, go to the video you want to download. Right-click on its URL and select Copy.copy url
  5. Open the 4K Video Downloader app on your PC and click on the Paste Link button. paste link
  6. Now you get to select the format and resolution you want to save your video. Click on your preferred option and then click on Download.click on download

This is how to download YouTube videos with UC Browser since the built-in download feature no longer works with the platform. Remember that this will not work on professionally protected videos like music videos.

⇒ Get 4K Video Downloader

3. Use UC Turbo

  1. Download UC Turbo from Google Play or App Store.
  2. Tap the middle icon to open Tools. Open UC Browser Tools menu.
  3. Select Video Downloader. Open the UC Turbo Video Downloader.
  4. Paste the URL of a video from websites like Instagram or Facebook. Paste URL and click Download.
  5. Tap Download to save it to your device.

This is how to download videos from UC Browser on iPhone or Android. UC Turbo is only available for mobile devices and lets users quickly download videos and files.

Does UC Browser increase download speed?

Yes, the UC Browser may not be the most popular browser, but it does have some features that set it apart from others, including its fast download speed. UC Browser does this by splitting the download into multiple parts and downloading it simultaneously.

uc browser download speed

Is UC Browser better than Chrome?

UC Browser has privacy issues, therefore it’s not better than Chrome. The only advantage might be its video download capability, but that can be added to other browsers via extensions.

Hopefully, the above tips helped you download videos quickly using UC Browsers. The software has its share of issues such as UC Browser not allowed message. Many also reported that Adblock in UC Browser is not working.

Before you go, you might be interested in our guide on how to stop UC Browser from draining your PC’s battery.

Fix: Nvidia Driver not Compatible with This Windows Version

NVIDIA is one of the most popular manufacturers of graphics cards, with wide usage amongst gamers. But many reported getting the This NVIDIA driver is not compatible with this version of Windows error while installing the driver.

The error may appear on all iterations of the OS, including Windows 7, Windows 10, and Windows 11. Though the chances of encountering it on the latest iteration are far lower. So, let’s find out all about the error.

Why can’t I install NVIDIA drivers on Windows 10?

Here are a few reasons you can’t install NVIDIA drivers and get an error instead:

  • Driver doesn’t match with Windows architecture: The error usually appears when you download a 32-bit version of the driver on a 64-bit Windows or vice-versa.
  • Outdated OS: In many cases, users get the This NVIDIA driver is not compatible with this version of Windows error when OS has not been updated for quite a long time, and a quick trick is to update Windows.
  • Compatibility issues: Sometimes, compatibility issues may arise between NVIDIA drivers and Windows, as was reported by some users when they upgraded the OS.

How can I fix Nvidia driver not compatible with this version of Windows?

Before we head to the slightly complex solutions, here are a few quick things you must try:

  • Check if any updates are available for Windows and install them.
  • Make sure the graphics card is properly seated and check if the GeForce game ready driver is not compatible with this version of Windows error is fixed.
  • Verify that you are downloading the correct drivers for the GPU. If the driver is meant for another GPU, you are just as likely to get the NVIDIA This DCH driver package is not compatible with the currently installed version of Windows error.
  • If you get the error when installing the latest driver version, download the previous one since there may be a bug triggering conflicts.
  • For those with the Armoury Crate program installed, ensure it has not set the GPU to Eco Mode. In this case, switch to Balanced Mode.

If these don’t work, move to the fixes listed next.

1. Uninstall and reinstall the drivers

  1. Press Windows + X to open the Power User menu, and choose Device Manager.device manager
  2. Expand the Display adapters entry, right-click on the NVIDIA GPU, and select Uninstall device.uninstall device to fix nvidia driver not compatible with this version of windows
  3. Tick the checkbox for Attempt to remove the driver for this device, and then click Uninstall.uninstall
  4. Now, go to NVIDIA’s official website, choose your graphics card, iteration of the OS with the correct architecture, download type, and language, and then click on Search.driver
  5. Click on the Download button.download to fix nvidia driver not compatible with this version of windows
  6. Again, click Download to get the driver.confirm
  7. Next, run the setup, and follow the on-screen instructions to complete the process.

One of the ways to fix things when you get the This NVIDIA driver is not compatible with this version of Windows error is to remove the current one and manually install the driver from the manufacturer’s website. Though a simpler solution would be to use specialized software.

2. Use a specialized driver updater program

Since we already know that the issue is due to incompatible drivers, we can now make use of a program that does the driver update automatically.

The software recommended below is an all-in-one Windows tool that helps you update your device drivers easily and safely.

⇒ Get Fortect Driver Updater

3. Use GeForce Experience

  1. Visit GeForce’s official website, and click on the Download Now button.nvidia
  2. Once done, run the setup, and follow the on-screen instructions to complete the installation.
  3. Launch the GeForce Experience app, go to the Drivers tab, and click on Check for updates.check for updates
  4. After an update is listed, click on Download driver.download driver to fix nvidia driver not compatible with this version of windows
  5. Wait for the download to complete.download
  6. Click on Express installation.express installation
  7. The installation will start right away.install
  8. After the installation is complete, restart the computer for the changes to come into effect.install

The GeForce Experience program also allows the option to install the driver. It should come in handy when you get the This NVIDIA driver is not compatible with this version of Windows error.

4. Manually install the driver using Device Manager

  1. Don’t close the setup when you get the error while installing the NVIDIA driver, instead, proceed with the steps below.
  2. Press Windows + R to open Run, type devmgmt.msc in the text field, and hit Enter.device manager
  3. Click on the Action menu, and choose Scan for hardware changes.scan for hardware changes
  4. Double-click on the Display adapters entry, right-click on the NVIDIA adapter, and then select Update driver. (If the NVIDIA GPU is not listed, click on View and choose Show hidden devices)update driver to fix nvidia driver not compatible with this version of windows
  5. Now, choose Browse my computer for drivers.browse
  6. Next, click on Let me pick from a list of available drivers on my computer.browse my computer for drivers
  7. Click on Have disk.have disk
  8. Click on Browse.browse
  9. Now, navigate the following path, open the folder with its name as the driver version, then the one that’s named after the iteration, followed by the International folder, and then the DisplayDriver folder:C\NVIDIA\DisplayDriver
  10. Choose a .inf file and click Open.open to fix nvidia driver not compatible with this version of windows
  11. Click OK.
  12. Now, choose the correct version, click Next, and follow the instructions to complete the process.

A user shared a quick workaround to fix the This NVIDIA driver is not compatible with this version of Windows error by manually installing the driver package, and this seemed to work for others as well. So make sure you try this if the previous solutions didn’t work.

5. Perform an in-place upgrade

  1. Go to Microsoft’s official website, and download the Media Creation Tool for Windows 10.download tool
  2. Once downloaded, run the tool, and wait for it to initialize.getting ready
  3. Now, click on Accept to agree to the license terms and conditions.accept
  4. Choose the Upgrade this PC now option, and click Next.upgrade this PC to fix nvidia driver not compatible with this version of windows
  5. Wait for the download to complete and follow the instructions to perform an in-place upgrade.downloading windows 10

That’s it! If the solutions listed previously did not work, an in-place upgrade should get things up and running. It will update the OS, replace any corrupt system files, and eliminate a range of issues with the OS. And the best part is you don’t lose any data.

Tip icon Tip
If you started facing the problem after upgrading the OS, roll back to the previous version of Windows. If the option to roll back is unavailable, create a bootable USB, and reinstall Windows using it.

Before you leave, do not forget to check some great tips and tricks to speed up Windows 10.

If you have any queries or want to share a solution not listed here, comment below.

How to Integrate and Enable ChatGPT in Microsoft Teams

By now, you already know that ChatGPT AI has taken over the world by storm. Microsoft Teams now integrates AI in its premium edition to show you just how serious it is. ChatGPT AI is designed to be easy for everyone, so this integration is no surprise. 

Now, Teams wants to make meetings easier by integrating the tool. This doesn’t have to interfere with the initial app, as you can install two Teams apps. You can schedule meetings, take notes, and have a whole new experience. We show you how to integrate the two below.

How do I enable ChatGPT in Microsoft Teams?

  1. Launch the Teams app and click on Create a team.
  2. Give your newly created team a name.
  3. You can choose to add members or skip that part for the time being.
  4. Next, log in or signup for ChatGPT.
  5. Click on your profile name/icon at the top right corner and hit View API keys.
  6. Select Create a new secret key and keep it close to be used in a few steps.
  7. Next, navigate to Powerautomate website and sign in.
  8. Click on Create, then select Automated cloud flow and proceed to fill in the required details.
  9. Under Flow trigger, select When keywords are mentioned.
  10. You’ll get a prompt asking you to sign in to Teams for integration.
  11. In the next prompt box, fill in ChatGPT in all entries, and under Team, select the name of the Team you created in 2 above.
  12. Go to HTTP request entry and enter the secret key in 6 above.
  13. You can edit the maximum token to 2000 and above so that you will be able to generate content.

Alternatively, you can wait for the premium version of the Teams app to be made available. You already know that ChatGPT in Microsoft Teams does not come as a standalone app or offer an extension that needs to be downloaded for it to work.

It is important to note that the premium feature is not free, and you will be charged a monthly subscription fee. You can get it for $7 a month, but the price is expected to increase in a few months.

If you’re still under a rock and don’t know why anyone would want to integrate ChatGPT on their Teams app, Microsoft will offer a preview trial to get a taste and feel of what you’re signing up for. 

How can I sign up for the preview?

To sign up for the preview, follow the steps below:

  1. Navigate to your browser and visit the Microsoft Teams premium site.
  2. Click on Try the preview today.
  3. Fill in the required fields and click on Sign up.
  4. You’ll now be on the waitlist, and as soon as the features are live, you’ll be among the first to try them out.
  5. The features will include ChatGPT AI and how it works within Teams.

Although the Teams app still faces a few glitches from time to time, like not working in Chrome, this is a huge step in the development of the program. 

What are the Microsoft Teams premium features?

Microsoft Teams Premium is a subscription service that improves team collaboration by providing access to more features, tools, and integrations. 

Other noteworthy features include:

  • Intelligent AI – Teams is now smarter than ever with the intelligent AI feature. With the AI, users can now have notes taken while in a meeting and translate the content into different languages and time stamps to revisit areas of the meeting they missed.
  • Enhanced security – You can now manage your work with confidence. Teams Premium provides the most advanced security, compliance, and data privacy features.
  • Personalized experience – The new Microsoft Teams meetings feature gives you more control over who sees what and when. You can fine-tune the details of your meetings even further to meet your needs and enhance productivity.
  • Analytics – With the premium version, you can get a breakdown of the performance and usage trends. You can use this as feedback to improve customer satisfaction.

Not long ago, Microsoft also hinted at introducing AI-assisted file sharing within Teams, so you can expect that this integration will put the app at the forefront. We also have an exciting article on how to integrate ChatGPT with Whatsapp.

If Microsoft Teams is not your cup of tea, we have an excellent list of video conferencing software, so be sure to check that out too. We also have a list of AI tools that you can use for your Windows PC to make things easier for you.

Share your thoughts on Microsoft Teams premium and the integration of ChatGPT in the comment section below.

How to Use ChatGPT Without a Phone Number [Quick Tips]

Using ChatGPT without a phone number is easier than many people think. If you want to chat with AI but don’t want to share your personal number, there are ways to access the tool without signing up or using a phone.

Whether you’re looking for quick answers or just want to explore how ChatGPT works, this guide shows the best methods for using ChatGPT no phone number, along with tips on what to expect when you skip the traditional signup process.

How to use ChatGPT without a phone number

Tip icon Tip
Although OpenAI doesn’t allow using VoIP and landline numbers for registration, some sites claim their numbers can be used for verification. In case you want to try this out, follow the steps here.
  1. Go to the official Open AI website or chat.openai.com.
  2. Click on the Get started button to prompt the Sign-Up page.
  3. Sign up with your email and any number you generated earlier, then enter your details as required.
  4. If you receive an OTP, enter it and choose your account type.
  5. Scroll down to Generation under the Text Completion tab, then click Playground.
  6. Click on Try it out when you see a message that says Looking for ChatGPT? to open a new tab with the chatbox.
  7. Start typing searches, texts, or your desired content, then press the Submit button.

That’s it! Now you’re using ChatGPT without revealing your phone number. Further, we have a detailed article about the best ChatGPT alternatives that compete with the original app for users.

Why do you need to use a private number to use ChatGPT?

A private number hides the user’s identity and doesn’t require any personal information to acquire. Using such numbers to register your ChatGPT account lets you keep your personal information from the platform.

Furthermore, most users are unsure of the platform’s safety because it’s still in the research and feedback-collection phase. Hence, using a private number can be a good idea as it assures you of your safety while using the platform.

Also, if you were wondering, can fraudsters use my phone number? The answer is yes, which happens in case of a data leak due to a hacking attempt.

Read about the best automated chat software for business owners and other customers. For a complete walkthrough of creating an account, starting chats, and using key features, read our step by step guide on how to use ChatGPT.

What are the risks associated with using a private number for ChatGPT?

Using a private number when registering for a ChatGPT account can be beneficial, but it can’t be disputed that it also comes with some potential risks. Some are:

  • If the private number you registered with gets exposed or hacked, it can cause your ChatGPT account to be compromised and accessed by the intruder.
  • It can be impossible to recover your ChatGPT account because the private number may be retracted or disabled. Hence, proving your identity and claiming the account will be difficult.
  • Using a private number can make it difficult for ChatGPT to confirm who owns the account.
  • During a security sweep or check, your account can get suspended if the app picks it up as a suspicious account.

You may also be interested in our guide on bypassing the ChatGPT not available in your country error when registering for the service. Also, our readers can check how to fix ChatGPT’s too many redirects on their PCs.

When you decide to stop the paid plan, follow our guide on how to cancel ChatGPT subscription to end billing safely and keep account access until the cycle ends.

In conclusion, we have covered the basics concerning using ChatGPT without giving a phone number. For those trying to discover whether ChatGPT needs a phone number, the answer will be Yes, and there’s no way to bypass it.

Normally, it should not be possible. However, if you have other suggestions concerning our guide, kindly drop them in the comments section.

How to Open Excel in Safe Mode [Windows 11 Guide]

The concept behind launching apps and systems in Safe Mode is to reduce the number of startup apps or services that run during boot or launch. If Excel crashes during launch or is unresponsive, starting in Safe Mode fixes it. Hence, we’ll show you how to open Excel in Safe Mode as we dive into the article.

Also, users complain about Excel dates showing as numbers on Windows 11.

Why won’t Excel open in Safe Mode?

Microsoft Excel not opening in Safe Mode can occur due to many factors affecting its performance on your PC. Some factors that can cause the issue are:

  • Issues with Office installation files – When the Office installation files on your PC are missing or corrupt, it affects the services and programs dependent on it. Also, corrupt Excel files on Windows 11 can cause issues.
  • Problematic Add-ins on Excel – Add-ins can become corrupt and faulty, causing issues with their processes and blocking their response to commands.
  • Outdated Windows OS – Running Excel on an outdated OS can cause version incompatibility with Excel. So, Excel not opening in Safe can be due to an outdated Windows OS.

These causes may vary on different devices. We’ll take you through some basic steps to fix the problem.

How do I force Excel to open in Safe Mode?

Go through the following preliminary checks:

  • Temporarily disable third-party antivirus software.
  • Close other Office applications running on your computer.
  • Install all the latest OS updates.
  • Restart your computer and check if the issue persists.

To effectively implement the steps to force Excel to open in Safe Mode, fix the factors preventing it from opening.

1. Start Excel in Safe Mode

  1. Click the Search button from the taskbar, type excel, then right-click on it and select Open file location.
  2. Press and hold the Ctrl key and double-click the Excel executable file.
  3. Click Yes when you’re prompted if you want to open Excel in safe mode.

This is the most simple method of opening Excel in safe mode, so make sure you try it.

2. Start Excel in Safe Mode while Windows is in Safe Mode

  1. Press Windows + I key to open the Settings app.
  2. Select System and click Recovery.
  3. Tap the Restart now button beside Advanced Startup.
  4. Windows will automatically restart into the Choose an option window, then click on Troubleshoot.
  5. Tap Advanced Options and click on the Startup Settings option.
  6. Press the F4 key to enter Safe Mode.
  7. After starting Windows in Safe Mode, press Windows + R key to open the window, type excel /safe, and click OK to open Excel in Safe Mode.

Restarting Windows in Safe Mode will resolve startup apps that may impede Excel from starting in Safe Mode. Read our guide on how to fix the Safe Mode not working on Windows 11.

3. Create a switch in the file path to always open Excel in Safe Mode

  1. Create a shortcut for the Excel application on your Desktop.
  2. Right-click on the Excel shortcut and select Properties from the drop-down menu.
  3. Go to the Shortcut tab, add /safe to the file path in the Target text bar. Ensure you add the space character before the forward slash otherwise you will get the excel/safe not found error.
  4. Click OK to save the changes.
  5. Then, double-click the Excel shortcut whenever you want to open Excel in Safe Mode.

4. Repair Microsoft Office

  1. Press Windows + R key to prompt the Run window, type appwiz.cpl, and click OK to launch Programs and Features.
  2. Right-click on Microsoft Office and tap on Change from the drop-down.
  3. Choose the Quick Repair option on the new page, then click the Repair button.
  4. If the Quick repair option isn’t working, select the Online Repair option.
  5. Restart your PC and repeat step 8 in the first solution.

If Excel won’t open in safe mode, the Microsoft Office repair procedure fixes any corrupt installation files. Read our guide on adding the Run command to the Start menu in Windows 11.

Conclusively, you can check how to fix Excel not scrolling down on Windows 11. Also, you may be interested in how to troubleshoot SharePoint Export to Excel not working on your computer.

We hope you managed to open Excel in Safe Mode using our guide. Let us know how it went in the comments section below.

Fix: Omegle Error Connecting to Server. Please Try Again

You might be familiar with the Omegle error connecting to the server issue that seems to occur randomly. Omegle is not working because your account has been probably suspended, Omegle has server-side issues or the website is blocked from your settings and/or antivirus.

Therefore, it’s quite important to rule out certain causes and isolate the correct ones to save time. In any case, such errors or the technical error: Server was unreachable for too long, and your connection was lost. Sorry. Omegle understands if you hate it now, but Omegle still loves you. can be easily fixed.

How can I fix the Omegle error connecting to a server?

1. Connect from another network

  1. Disconnect from your current network.
  2. Now, connect to a different network. You can try using the network in a different location.
  3. Once you connect, try to reaccess Omegle.

A few users reported that they managed to circumvent this issue simply by using their phone as a hotspot, so be sure to try that as well.

2. Use a reliable VPN that won’t get blocked by Omegle

Sometimes, a VPN can help if you’re getting an Omegle error connecting to a server message on your PC. In addition to avoiding this problem, a good VPN will protect your privacy.

Anyone on Omegle can see your IP address, so a VPN is a great way to protect your privacy. A high-quality VPN such as ExpressVPN offers next-generation encryption plus a no-logs policy, so your online activities will remain anonymous.

It also offers a double VPN feature for additional security, DNS leak protection, and an automatic Kill Switch. And it’s a great VPN for Omegle and web browsing in general. Some might even be wondering: Why won’t Omegle work on my phone?; well, rest assured that this tip applies in such a case as well.

3. Clear browser cache

  1. Click the Menu button in the top right corner. Navigate to More tools. After that, select Clear browsing data.
  2. Select the data you want to remove and ensure that All time is selected. Next, click on Clear data.
  3. Confirm that you want to clear the data.

This is a simple solution, and some users reported it worked for them, including those facing www.omegle.com sent an invalid response errors. Remember that you might need to repeat the process until it works.

4. Try a different web browser

Sometimes, the simplest solution is the best, and a few users reported that switching to a different web browser solved the issue for them.

Switching to a different browser could fix many issues that you may encounter. Some browsers, especially their newer versions, come with advanced networking and connectivity features.

Access to such features can greatly improve your browsing experience overall, not just when using Omegle. There are browsers with built-in VPNs, adblockers, RAM limiters, advanced video players, and even built-in messaging and AI.

Even though your browser might be up to date, it may not have all the modern features needed for the smoothest online experience.

If you’re an Omegle enthusiast, stumbling upon the error of connecting to a server message can be disappointing and somewhat frustrating.

However, more often than not, the cause of this issue is not exactly unsolvable and can be bypassed with just a bit of patience.

If the Omegle server is unreachable due to issues on its end, that’s the only time you won’t be able to do anything other than wait for a fix.

You might have heard of another issue affecting users when Omegle keeps asking for Captcha.

Why does Omegle say error connecting to server?

You can meet this error for many reasons, including Omegle connecting to server currently unavailable, but the most likely is either because of an unstable Internet network or browsing data like cookies that may stop Omegle from working.

So, if you keep getting the Omegle error connecting to the server, please try again. The practical answer would be to change your DNS servers or even use a robust VPN connection with many servers.

Why is Omegle not working on WiFi?

This issue could be due to various reasons. The main ones include a poor connection, Omegle server outages, sub-optimal browser settings, and more.

Fixing the problem requires addressing these issues separately. You may try improving your connection’s speed or stability, ensuring Omegle’s servers are online, or accessing the platform through a different browser.

Why do I get an error connecting to a server on Omegle via VPN?

Omegle has a rocky relationship with VPNs. Among the main reasons for this is that many people use them to get back on the platform after being banned. That’s why Omegle tries to identify VPN server IPs and block them.

The simplest way to resolve this is to switch to another VPN server. Most providers offer thousands of them, so you’re bound to find one that still works.

However, your VPN’s overall quality may also be an issue. Some services accidentally leak your real IP and location, even while you’re connected. This, in turn, makes it easy for Omegle to block you.

If that’s your case, switching to a superior provider is your best action.

Using a VPN such as NordVPN can circumvent ISP restrictions or geoblocking that might impede you from using Omegle but can also reset your IP in case Omegle has banned or blacklisted it.

If this happens, check our VPN not working on Omegle guide for more alternatives.

Did you manage to fix the Omegle not working issue? Tell us all about it in the comments section below.

ChatGPT Error OAuthCallback: How to Quickly Fix It

ChatGPT has been making a lot of progress and waves, considering the number of user responses it’s getting. It is adding new features from time to time and improving its performance. However, the ChatGPT error OAuthCallback is one of the few problems users still run into on the platform.

What is ChatGPT error OAuthCallback?

Running into the OAuthCallback error occurs during logins, preventing users from accessing the platform. OAuthCallback is an authentication procedure to receive permission to access the service.

Furthermore, the OAuthCallback error in ChatGPT means that there’s a problem in the OAuth flow itself, prompting the error after coming back from the provider. Likewise, it indicates the OAuth (Open Authorization) protocol can’t access user-owned resources.

However, the ChatGPT error OAuthCallback can occur for the following reasons:

  • ChatGPT cache files – These files can become old or sometimes corrupt, causing issues with the activities of ChatGPT and can result in the OAuthCallback error.
  • Interference with browser plug-ins and extensions – Some extensions can conflict with the OpenAI protocol, causing issues with the OAuth (Open Authorization) protocol accessing user credentials.
  • Technical issues with ChatGPT – Many errors due to technical issues like server downtime, IP blockage, and others can interfere with the OAuth process when logging in. Also, it may cause an error occurred message on ChatGPT, preventing you from using it.

Now that we know why this happens, we’ll take you through some basic steps to fix the error.

How do I fix the ChatGPT error OAuthCallback?

Before proceeding with any advanced troubleshooting steps, we recommend you try the following:

If these preliminary methods don’t fix the issue, proceed with the solutions below.

1. Clear ChatGPT cache

  1. Launch Chrome browser on your PC. Tap the three dots in the top right corner and select Settings.
  2. Tap on Privacy and Security and choose Cookies and Other Site Data.
  3. Scroll down and click on See All Site Data and Permissions.
  4. Now search openai in the search bar and click Enter.
  5. Select the Delete icon and choose Clear.

Clearing the site data will delete the caches and cookies in the site’s database and resolve issues causing the ChatGPT OAuthCallback error.

We have shown you the procedure on Google Chrome, but it’s similar to any other popular browser.

2. Clear your browser’s Cache and Cookies

  1. Launch Google Chrome on your PC, then click three dots in the top-right corner to open the Menu. Click on More tools, then Clear browsing data.
  2. Choose a time range as All time option to delete everything. Check the boxes for Cookies and other site data and Cached images and files, then click Clear data.
  3. Restart the Chrome browser and check if the ChatGPT OAuthCallback error appears.

Clearing browser caches and cookies will delete the old and corrupt files interfering with ChatGPT activities. Our example is for Google Chrome users but you will find it similar in any other popular browsers.

3. Disable extensions

  1. Launch Google Chrome on your PC, then click the three dots in the top-right corner to open the Menu. Navigate to More tools and then click on Extensions.
  2. Disable your extensions by toggling off the switch for each.
  3. Refresh your browser and check if the error persists.

Disabling the extensions on your browser will fix any interference causing the ChatGPT error. You can check our guide on how to backup Google Chrome extensions on your PC.

We used Chrome in our example, but disabling the extensions is similar in other browsers.

4. Contact OpenAI Support

  1. Visit the OpenAI contact page on your browser.
  2. Click the Message icon in the bottom-right corner and tap the Send us a message button.
  3. Type in your complaint and send it.

Provide as much information about the error as possible to help them reply with the best solution. Wait until you get a reply from the support service.

Our readers can check our guide about ChatGPT Failed to Refresh Auth Token 403 Forbidden error and how to fix it.

Further, readers can check our article about fixing ChatGPT’s too many redirect errors on their PCs. Also, we have a detailed guide on ChatGPT Error Code 1020 and how to fix it.

Should you have further questions or suggestions on this guide, kindly drop them in the comments below.

5 Best Procreate Alternatives for Windows 11 [2026 List]

Many Windows users complain about not being able to use the Procreate app on their PC due to its unavailability for the Windows operating system. Hence, this article will recommend the best Procreate alternative for Windows 11 that users can use to create art.

What app is equivalent to Procreate for Windows?

SketchBook is the closest app to Procreate that you can install and use on Windows PC. It is a productive tool for digital drawing, and it is available on different operating systems such as Windows, macOS, Android, etc.

Furthermore, it has many advanced features make it the best choice for professional artists and designers. It is one of the few apps that support canvases up to 100 megapixels in size.

Also, SketchBook comes with several brushes and pens that give a physical feel. It allows you to tuck used tools after using them not to cause interruptions when working.

What are the best alternatives to Procreate for Windows 11?

Adobe Illustrator – Best for vector graphics

Adobe Illustrator is an alternative to Procreate primarily for creating Vector graphics. It has the best features for graphics designing and creating artwork. Also, it is best for designing web icons, logos, etc.

More so, Adobe Illustrator supports Raster graphics and allows users to explore advanced options for freehand drawing. It has a large scale for your artwork, making it suitable for numerous purposes.

Pros:

  • Easy to use and comes with a well-managed user interface
  • Advanced tools for vector graphics
  • Usable for professionals and starters

Cons:

  • Too expensive

Adobe Illustrator

Use advanced options and create beautiful artwork with Adobe Illustrator.
Free Trial Visit Website

Corel Painter – Best for advanced users

Corel Painter 22

Corel Painter 2022 is another excellent alternative for Procreate to use on Windows. It has many graphics designing and artwork tools like over 900 brush types, photo art texturing, scaling, etc.

Furthermore, it is suitable for advanced designing and starters because of its built-in tutorials for beginners. Another great feature is that it allows you to import top extensions from online repositories.

Pros:

  • It has an unlimited shelf for brushes
  • Lots of features for professional use
  • Packed in starter tutorial videos
  • Allows users to import extensions

Cons:

  • The user interface is not interactive

Corel Painter

Explore numerous graphics designing and artwork tools and try Corel Painter.
Free Trial Visit Website

Krita – Best for Raster graphics

Krita

Krita is a free and open-source Procreate alternative for Windows. It is a professional-grade app for drawing and creating art. Also, it comes with a significantly advanced user interface making it easy to use.

Likewise, Krita supports active stylus and palm rejection, making it the best choice for users with touchscreen Windows devices.

Pros:

  • It is free to use and open-source
  • It supports Raster graphics
  • Multiple brushes for creating comics and conceptual art

Cons:

  • Not suitable for starters

Krita

Create illustrations, comics, and other artworks, and try this fully-featured digital painting app.
Check Price Visit Website

Concepts – Simple User Interface

Concepts

Concepts is an artistic tool for sketching, graphics designing, and freehand drawing. It works with vector-raster engines, making it one of the best options for Windows. It is simple to use and suitable for users not so vast in mobile arts and graphics designing, leaving a wide space for learning and improving.

Also, it has many features for creating a canvas with sharp strokes at any zoom level. The app offers many tools, including tones/backgrounds, over 40 brushes, and font styles.

Pros:

  • It is easy to use and vast in features
  • Well-structured user interface
  • Has more than 40 brush types and tones/backgrounds
  • It supports vector and raster

Cons:

  • The tutorial is not well-detailed
  • Limited features compared to others

⇒ Get Concepts

ArtRage – Best for beginners

Artrage

ArtRage is the last on our list of the best alternatives for Procreate on Windows. It is a lightweight program with lots of advanced features.

It has many realistic painting tools like well-carved pencils, numerous brush types, curve, and line markers, etc.

Furthermore, ArtRage allows you to unleash your aggressive passion and talent in art by creating a highly customizable user interface. You can tune in and create an interactive space that suits your needs.

Pros:

  • Suitable for beginners and advanced users
  • Attractive and customizable user interface
  • Several brushes and pencils to create different strokes

Cons:

  • Quite pricey
  • Not so good for professional artists

⇒ Get ArtRage

In conclusion, you should be able to choose the best tool as an alternative for Procreate in Windows 11 from our recommended list here.

In addition, we have a detailed guide on the best free 3D design software that users can download. Also, you may be interested in the best Sketchup Rendering Software.

Check our guide on the best software to create 3D characters on PC & Mac if you need more inspiration.

If you have questions or suggestions, kindly drop them in the comments section.

Heads of Xbox and PlayStation to meet with EU regulators today over Activision Blizzard deal

Microsoft Gaming CEO Phil Spencer and PlayStation CEO Jim Ryan will both be part of a closed-door meeting today with EU regulators. The meeting could be a pivotal moment in Microsoft’s bid to acquire gaming giant Activision Blizzard King.

Ahead of the meeting Microsoft president Brad Smith announced today that “a binding 10-year contract to bring Xbox games to Nintendo gamers” had been inked.

The future of the $68 billion deal now seems very much in question. Back in December, the FTC officially filed a lawsuit to halt the merger, while more recently the EU issued an antitrust warning detailing its concerns over how the deal could affect competition.

Possible remedies that might be demanded from regulators could include breaking up ABK or forcing the company to sell of on or more of its divisions. Or, as has been suggested, Activision may be forced to sell off its Call of Duty franchise. The fate of the hugely popular FPS series has largely been the focus of concern from the likes of Sony and others.

Likely these potential remedies will be the topic of today’s meeting. Representatives from Google, Electronic Arts, Valve and Nvidia will also be present.

Microsoft fixes Outlook.com spam problem, for now

If you’re an Outlook.com user with a personal Microsoft email account (hotmail.com, msn.com, outlook.com, etc), you may have noticed an increase in spam emails, which seems to have become noticable roughly two months ago. That came to a head yesterday when the offending emails jumped from 3-5 per day to over 20 for a number of users, including our personal mail here.

It seems to be a common problem, as noted by the many responses to Mary Jo Foley’s tweets on the issues from yesterday.

Later in the day though, the Outlook Twitter account reported that the issue was fixed:

And indeed, this morning, instead of the multiple spam messages in our inbox, there was only one, a great advancement. Have you been inundated with spam in your Outlook.com accounts? Did it get better today? Let us know in the comments below.

Excel Only Opens in Safe Mode: How to Fix It on Windows 11

Excel is a resourceful app that offers many features to help users with their sheet documents and other tools. It has a native app that runs on different operating systems. However, users report problems with Excel only opening in Safe Mode on Windows 11.

Also, users complain about the Excel toolbar not working, preventing them from accessing some Excel features.

Why does Excel only open in Safe Mode?

Running into problems with launching apps on your PC indicates that something obstructs the regular launch. It causes Excel not to respond, then recommends starting in Safe Mode.

Furthermore, some notable factors that can cause Excel to only open in Safe Mode are:

  • Corrupt Office installation files – You can encounter several issues with the Excel client if the Microsoft Office files are corrupt or compromised.
  • Outdated Excel app on your PC – If you don’t install the latest updates of the app, Excel may encounter problems like only starting in Safe Mode.
  • Issues with Excel Add-ins – Add-ins on Excel can become corrupt or malicious, causing problems with Excel and its activities.

Other factors not mentioned here may be responsible for Excel only opening in Safe Mode on your PC. Nonetheless, we’ll take you through some fixes for the issue.

How do I stop Excel from opening in Safe Mode?

Before proceeding with any advanced steps for fixing Excel, try the following:

If the problem persists, proceed with these advanced solutions.

1. Repair Microsoft Office

  1. Press Windows + R key to prompt the Run window, type appwiz.cpl, and click OK to launch Programs and Features.
  2. Right-click on Microsoft Office and tap on Change from the drop-down.
  3. Choose the Quick Repair option on the new page, then click the Repair button.
  4. If the Quick Repair option doesn’t fix the problem, proceed with the steps above and select the Online Repair option.

Repairing Microsoft Office fixes any missing or corrupt app file that may impede Excel from normally starting, causing it to only work in Safe Mode. Read our guide on adding the Run command to the Start menu in Windows 11.

2. Download the latest updates for Excel

  1. Start Excel in Safe Mode and click on Files in the top-right corner.
  2. Click on Account from the menu on the left, select the Update Options, then click on the Update Now option.
  3. Restart your PC and check if Excel starts without Safe.

If any update is available, it will automatically install it. The update fixes bugs and installs the latest features for Excel to improve its functionality.

3. Start Excel in Safe Mode and Disable the Excel Add-Ins

  1. Press Windows + R key to open the Run dialog box, type excel.exe /safe, then click OK to start Microsoft Excel in Safe Mode.
  2. Click on File in the top menu bar, then click on Options from the menu on the left.
  3. Tap on Add-ins on the right, select Excel Add-ins, then tap on the Go button.
  4. Uncheck the boxes next to the active Add-Ins and click OK to save the changes.
  5. Restart Excel and check if the problem persists.

Starting Excel in Safe Mode fixes interference from third-party apps. Also, disabling the Add-ins will fix any issues with corrupt add-ins.

4. Reinstall Excel

  1. Click the Start button and select Settings.
  2. Choose Apps from the left pane and click on Installed apps from the right.
  3. Look for the Office suite in the list of apps, click the three dots icon from its right, and select Uninstall.
  4. Go to the official Office 365 website and sign into your account.
  5. Now, from the main Microsoft 365 account, click on Install Office.

We hope our guide helped you fix Excel if it only opens in Safe Mode. You should also consult our guide on how to fix Microsoft Excel if it can access files.

If you know any other methods of fixing this problem or you have any questions, address them in the comments section below.

GeForce Experience and Elden Ring: Best Ways to Add It

Elden Ring seems to be the talk of the town these days, and everyone is deeply engaged in obtaining the best gear and defeating all the powerful bosses. But for some users, Elden Ring is missing from GeForce Experience.

Other issues, too, seem to plague the title, for instance, users being unable to use controllers on Elden Ring. But for now, let’s focus on the issue dealing with Elden Ring and GeForce Experience and how to add the latter to the former.

Why is GeForce Experience not finding Elden Ring?

Here are a few reasons GeForce Experience is not finding Elden Ring:

  • Compatibility issues: If you’re wondering why you can’t find Elden Ring in the list of games displayed by your GeForce app, it’s not a glitch. It’s simply because Elden Ring is not yet on Nvidia’s supported list.
  • Missing permissions: In many cases, missing administrative privileges can lead to this problem.
  • Path not accessible: If the specified path for Elden Ring is not accessible due to limited permissions, GeForce Experience will have trouble recognizing or finding it.
  • Misconfigured firewall settings: Another reason many users encountered the error was when the firewall blocked either GeForce Experience or Elden Ring.

How can I add Elden Ring to GeForce Experience?

1. Manually add Elden Ring

  1. Open GeForce Experience.start geforce experience
  2. Click the ellipsis near the top-right and choose Optimize all games and apps.elden ring geforce 2
  3. Click the cogwheel button at the top.elden ring geforce 3
  4. Select the Games & Apps tab from the navigation pane.elden ring geforce 4
  5. Under the Scan Location box, click Add.elden ring geforce 5
  6. Select the Elder Ring folder and open it in the program.elden ring geforce 6
  7. Click Scan Now.
  8. Allow the scan to finish and go to the Home tab. Your game will show up there.

2. Whitelist in firewall

  1. Press Windows + S to open Search, type Allow an app through Windows Firewall, and click on the relevant search result.allow an app to fix geforce experience elden ring
  2. Click on Change settings.change settings
  3. Next, click on Allow another app.allow another app
  4. Click Browse.browse
  5. Locate the GeForce Experience launcher, select it, and then click Open.select launcher to fix geforce experience elden ring
  6. Click Add.add
  7. Now, make sure the checkboxes for Private and Public are ticked for GeForce Experience, and then click OK to save the changes.private and public
  8. Similarly, whitelist Elden Ring in the firewall and restart the computer.

For both apps to function effectively and get data from their servers, they must be whitelisted in the Firewall. Once done, check if Elden Ring now appears in GeForce Experience.

If the previous two solutions didn’t work, you could raise a ticket with Elden Ring support, apprising them of the problem and requesting a deadline in case Elden Ring remains incompatible with GeForce Experience for long.

Besides, if the game has been added, but you still face the problem, contact NVIDIA support via Live Chat and get things up and running quickly.

A popular game like Elden Ring missing from GeForce Experience sounds odd and can significantly affect user experience. And with GeForce Game Ready NVIDIA drivers supporting Elden Ring, it is just a matter of time before the game gets listed under the list of compatible ones.

If you get poor performance while playing Elden Ring game, it could be due to it not recognizing your main GPU. Check out our guide on how to fix this, usually, updating your drivers will specialized software like Outbyte Driver Updater is enough to fix the issue.

Also, if you are an avid gamer, find out some quick tips and tricks to improve the gaming performance in Windows. We also have a guide on how to play Elden Ring with DX11, so don’t miss it.

For any other queries or thoughts on the compatibility issue, comment below.

Posted in PC

Fix: This Device Cannot Start. (Code 10) Error on Windows 11

There are several errors users can run into on their Windows computers. Some of these errors can render the system inaccessible or prevent you from using its installed programs. This device cannot start. (code 10) error on Windows 11 pops up on the screen when Windows can’t run hardware.

What causes the error code 10, this device cannot start?

This device cannot start Code 10 appearing on your computer indicates that Windows can’t run a piece of hardware on your PC. So, if your PC can’t run the needed components, it can run into an error.

Some factors that can cause the error are:

  • Outdated or faulty driver – If the drivers are outdated or inaccessible, Windows may not be able to start the devices, depending on their services.
  • Hardware issues – Error code 10 may appear on your computer if there is an issue with any hardware connected to your PC.
  • Outdated Windows OS – It is undisputed that Windows can run into several problems when it is not up-to-date.
  • Incompatible hardware – If your hardware device is too old or freshly launched, you may encounter compatibility issues with Windows 11.

Some of our readers also identified the error stating that This device cannot start code 10 Wi-Fi on Windows 11. Don’t worry because our solutions will help you deal with all such issues.

How do I fix this device cannot start (Code 10) error on Windows 11?

Before proceeding with any advanced fixes, try the following:

  • Turn off background apps on your PC.
  • Unplug and reconnect external devices to your computer.
  • Restart your PC and check if the error persists.
  • Install all the latest Windows updates.

If you can’t fix the error, proceed with the following solutions:

1. Update the drivers

  1. Press Windows + R key to prompt the Run dialog box, type devmgmt.msc, and open the Device Manager.
  2. Look in the list of devices and see if any of them has an exclamation mark on its right. Right-click on the device you want to update and click the Update driver option from the drop-down.
  3. Then select Search automatically for drivers.
  4. Restart your PC and check if the error persists.

Updating the drivers on your computer will help their devices run properly and fix bugs affecting them. Check our guide on how to update drivers on Windows 11 for other methods to use.

1.1 Update the drivers automatically

Updating your device drivers can spare you from various system errors or even prevent them from happening in the first place.

That’s why we usually recommend third-party software because it saves time and effort and it makes sure your drivers have the correct versions.

2. Modify your Registry

  1. Press Windows + R key to open the Run dialog box, type regedit, then press OK to open the Registry Editor.
  2. Navigate to the following Registry key: HKEY_LOCAL_MACHINE\SYSTEM\CurrentControlSet\Control\Class
  3. Press Windows + R key to prompt the Run dialog box, type devmgmt.msc, and open the Device Manager.
  4. Find the device causing the error and double-click on it.
  5. Click on the Details tab, change the Property dropdown box to Class Guid, then go to Value to note the strings of characters it contains.
  6. Go back to the Registry Editor window and click the characters’ string that matches the device on the left pane.
  7. Find the UpperFilters and LowerFilters, right-click on them, and select Delete from the drop-down.
  8. Restart your PC and check if the error appears.

Clearing the filter driver values can fix the issue with the device and Windows.

3. Run System Restore

  1. Left-click the Start button, type Restore, and choose Create a Restore Point.
  2. Click the System Protection tab and select System Restore.
  3. Choose a different system restore and click Next to select a specific Restore Point.
  4. Select a recovery point before this problem started to manifest and click Next.
  5. Click the Finish button.

System Restore reverts your system to the selected restore point when it works properly. Check how to fix Restore Point if it’s not working and if you have any issues running it.

Also, our readers reported that Windows failed to start after a hardware or software change error on Windows 11.

Further, you may check our article on fixing the inability to activate Windows after a hardware change on your PC.

Conclusively, this guide should help you troubleshoot This device cannot start. (code 10) error on Windows 11. If you have further questions or suggestions, kindly drop them in the comments section.

5 Best Sticky Notes Alternative for Windows 11 [2026 List]

Sticky Notes is one of the built-in features that came with Windows PCs. However, if Sticky Notes is not working, sometimes you have no choice but to find alternatives for Windows 11 that can serve the same purpose.

Readers can check our guide on the best screen annotation software for Mac and Windows.

Is there a Sticky Notes app for Windows 11?

The Sticky Notes app has been a great app on Windows PC for a long time. It helps you create notes on your Windows 11 PC and access them on other devices.

However, many of our readers complain about the Sticky Notes app not responding, not signing in, not sticking notes, etc. Fortunately, there are apps you can install on Windows 11 to use the Sticky Notes feature.

What are the best Sticky Notes alternatives for Windows 11?

Notezilla – Picture insertion feature

NoteZilla

Notezilla is one of the best alternatives for the Sticky Notes app for Windows 11. It is available on other platforms, making it easier to access your notes across different devices. The app has many features that help you keep yourself well-equipped and well-organized.

Furthermore, you can create sticky notes to attach to your desktops, making them easy to access. Its always-on-top feature provides access to your existing notes and allows you to type into notes without changing the tasks.

However, Notezilla provides an advanced feature to automatically sync sticky notes between your computers and access them on all desktops. Also, you can insert pictures in your sticky notes for more details.

Key features:

  • Easy-to-use user interface
  • Allows sharing to webpages, documents, programs, apps, folders, etc.
  • Picture insertion feature
  • Advanced & secure sync feature that can be partial or full
  • Cloud storage and restoration

⇒ Get Notezilla

Stickies – Wide range of shortcut options

Stickies

Stickies is another reliable alternative for the Sticky Notes app on Windows 11. Unlike others, it comes with many advanced features like Always On top. It is easy to navigate and allows the creation of sticky notes with a simple keyboard shortcut.

Likewise, it offers lots of options to ease its use. You may create and customize hotkeys to perform tasks like creating, deleting, hiding, copying, and pasting notes. Also, it allows setting up alarms for tasks, a list of friends to share notes with, and lots more.

More so, Stickies sticky notes come in various forms. The app has unique checklist sticky notes where you can create a to-do list with checkboxes to tick off at will. Also, you can arrange your notes on the desktop and tidy up your space.

Key features:

  • Easy-to-use and interactive user interface. Also, it is free to use
  • Set reminders for tasks noted in the sticky notes
  • Wide range of shortcut options and hotkeys to ease your experience
  • Change notes’ skin colors to fit your preference

⇒ Get Stickies

7 Sticky Notes – Good organizing features

7 sticky notes

7 Sticky Notes comes with loads of features that help users have the best experience creating and using notes. It allows setting up alarms on notes and a buzzer or shakes on notes to wiggle when it’s time. It has an attractive interface.

Also, you can label each note to differentiate them and change note colors to make them different. You can use many options when you right-click on notes like rearrange, refactors, etc.

Likewise, it comes with a Note manager that allows you to view and organize all your notes in one tab. It makes it easier to clean up your notes and make adjustments where needed.

Key features:

  • Note manager feature for organizing notes
  • Customize note colors, labels, fonts, font sizes, and colors
  • Allows you to create an alarm in your notes
  • Organizes sticky notes in a folder

⇒ Get 7 Sticky Notes

Hott Notes – Highly customizable interface

Hott notts

Hott Notes is a simplified version of Sticky Notes. It has an easy-to-use interface making it appropriate for professional and general use. It is one of the best alternatives to consider.

Furthermore, it uses several hotkey functions to create a simple and easy atmosphere to work. Also, it allows you to customize what double-clicking its app icon does on your desktop.

Likewise, you may edit fonts, font colors, and font sizes to suit your needs. There is a reminder that allows notifications about a note.

Key features:

  • Highly customizable interface
  • Set reminders and attach notes to the buzzer
  • Easy to use and suitable for different purposes

⇒ Get Hott Notes

Sticky Notes 8 – Easy to use

Like every other sticky note recommendation on this list, Sticky Notes 8 is a great alternative. It offers a straightforward and easy-to-use interface that lets users customize their notes.

There are numerous colors you can choose from to create your notes. It allows you to stick your notes on the desktop for as long as possible without falling off.

However, Sticky Notes 8 is regarded as a newbie in the genre as it doesn’t have as many features as others. Nonetheless, it is worth considering as it allows you to customize the shape and size of your notes.

Key features:

  • Easy to use and customizable user interface
  • Sticks notes on the desktop without disappearing
  • Change note colors, fonts, and other features

⇒ Get Sticky Notes 8

This was our selection of the best alternatives for Sticky Notes on Windows 11. Alternatively, check our guide on fixing notes not syncing to iCloud on macOS and Windows.

Also, we have a detailed article on the best-handwritten notes apps on Windows with Pen/Stylus.

One of the biggest complaints regarding Sticky Notes is that you can pin them on top, but we have a guide that shows you how to keep Windows 11 Sticky Notes always on top, so don’t miss it.

In conclusion, you should be able to decide on the Sticky notes alternative you want from the list above. Should you have further questions, kindly drop them in the comments section.

Dllhost.exe COM Surrogate: What is it and Should I Disable it

If you’ve ever looked through your Task Manager, you may have noticed a process called dllhost.exe or COM Surrogate. At first glance, this may seem like a suspicious process that you should disable, but it’s an integral part of the Windows operating system. 

In this article, we’ll dive into what dllhost.exe is, whether or not you can disable it, and other important information related to this process.

What is dllhost.exe?

Dllhost.exe, also known as COM Surrogate, is a process that Windows uses to execute COM objects outside of their own process space. 

COM stands for Component Object Model, which is a system that allows different software components to communicate with each other. In other words, dllhost.exe runs programs that use COM components.

The COM Surrogate process creates a new instance of dllhost.exe for each COM object that must run outside its process space. This allows the COM object to run independently and prevents it from interfering with other unnecessary PC processes on the system.

Can I disable Dllhost exe?

In short, the answer is no; you should not disable dllhost.exe. As mentioned, this process is essential for running programs using COM components. Disabling it could cause specific programs to stop working correctly or not work at all. 

Additionally, malware can sometimes use the name dllhost.exe to disguise itself, so disabling the process could leave your system vulnerable to attacks.

Should I disable COM Surrogate on startup?

You may have noticed that dllhost.exe sometimes runs in the background, even when you’re not actively using programs requiring COM components. 

Windows uses dllhost.exe to generate thumbnail images of specific files, such as photos and videos. However, if you’re experiencing performance issues or other problems related to thumbnail generation, you may be tempted to disable COM Surrogate on startup. 

However, doing so could cause other problems with your system. Instead, try optimizing your system or updating your drivers to resolve performance issues.

What is the dllhost.exe location?

Dllhost.exe is located in the System32 path of your computer as indicated below:

C:\Windows\System32

  1. To find it, right-click the COM Surrogate, then click Open file location.
    com surrogate task manager
  2. Typically, it will go to the authentic dllhost.exe on the System32 folder.
    dllhost system 32

It could be malware if you see dllhost.exe in a different location or with another name. In this case, you should run a virus scan on your system to ensure it’s not infected.

As we said above, the malicious software could be removed manually if you found it in folders other than System32.

But this is not a safe and efficient method, so we recommend a specialized program to remove the infection on your computer.

Keep your online privacy and computer secured with third-party software whenever you use the Internet for online banking, working, shopping, and communicating.

Remove malicious software from your Windows, Mac, Linux, and Android devices.

This powerful software protects your sensitive data, passwords, and online payments from unauthorized access.

Use this advanced tool to verify the status of your home router and intelligent devices and learn if they contain any vulnerabilities. You can also see if there is any unauthorized access to your webcam and block it.

TotalAV

Great antivirus that removes all kinds of cyber threats and protects your online identity.
Check Price Visit Website

Is Dllhost exe a virus?

As we mentioned earlier, malware can sometimes use the name dllhost.exe to disguise itself. Additionally, some viruses and other types of malware can exploit vulnerabilities in the COM system. 

However, the actual dllhost.exe process in your Task Manager is not a virus or malware. However, if you’re concerned that your system may be infected, you should run a virus scan or use a malware removal tool to remove any threats.

To end, dllhost.exe or COM Surrogate is a necessary process that Windows uses to run programs that use COM components. 

It should not be disabled, as doing so could cause problems with your system. Additionally, make sure that you’re running a reputable antivirus program to protect your system from malware that may try to disguise itself as dllhost.exe.

Reset Windows 10 Hosts File: Recreate it With These Steps

The hosts file is an essential component of your computer. If it has changed for some reason, don’t panic, you can quickly reset Windows 10 hosts file.

So, in this article, we’ll explore some common triggers of host file changes and show you how to set the default values for this file on the MS operating system.

What is a Windows hosts file?

The Windows hosts file is a text file in the Windows operating system that maps hostnames to IP addresses. It acts as a local DNS resolver and allows you to map domain names to IP addresses manually. 

This file is usually used to block or redirect network traffic and can be helpful in a variety of scenarios, such as:

  • Blocking ads – You can add entries to the hosts file that point to the IP address of ad servers, effectively blocking all ads from displaying in your browser.
  • Website testing – You can use the hosts file to test a website before it goes live by pointing the domain name to a specific IP address.
  • Redirecting traffic – You can redirect traffic from one domain name to another by pointing the domain name to a different IP address in the hosts file.

However, sometimes the hosts’ file can become corrupted or modified by malware, which can cause issues with network connectivity. 

In such cases, resetting to its default state can be helpful. Here are some common reasons why someone may want to reset this file:

  • Malware infection – Malware can modify the hosts file to redirect your web traffic to malicious sites or block access to legitimate sites. Resetting the hosts file can help to remove these malicious entries and restore normal network connectivity.
  • Incorrect manual edits – If you have manually edited the hosts file and made an error, this can cause issues with network connectivity. Resetting the file can help to remove any incorrect entries and restore proper functionality.
  • Upgrading to a new version of Windows – Upgrading to a new version of Windows can sometimes cause issues with the hosts file. Resetting the file can help resolve compatibility issues and restore normal network connectivity.

How do I reset my hosts file in Windows 10?

  1. Press Windows + E to open File Explorer and enter the following location:
    • C:\Windows\System32\drivers\etc
  2. Find hosts file, and rename it to host.bak (You may be required to take ownership of the file first).
    reset windows 10 hosts file
  3. Press Windows + R, type Notepad, and hit Enter. 
  4. Paste the following text in Notepad:
    • # Copyright (c) 1993-2009 Microsoft Corp.
      #
      # This is a sample HOSTS file used by Microsoft TCP/IP for Windows.
      #
      # This file contains the mappings of IP addresses to host names. Each
      # entry should be kept on an individual line. The IP address should
      # be placed in the first column followed by the corresponding host name.
      # The IP address and the host name should be separated by at least one
      # space.
      #
      # Additionally, comments (such as these) may be inserted on individual
      # lines or following the machine name denoted by a '#' symbol.
      #
      # For example:
      #
      # 102.54.94.97 rhino.acme.com # source server
      # 38.25.63.10 x.acme.com # x client host
      # localhost name resolution is handle within DNS itself.
      # 127.0.0.1 localhost
      # ::1 localhost
  5. Click on File, then Save As.
  6. Save it to the path below as hosts:
    C:\Windows\System32\drivers\etc

How do I edit and replace the host file in Windows 10?

  1. In Windows search, type notepad, right-click on it, and choose the Run as administrator option.
    reset windows 10 hosts file
  2. Now select File, then Open in your Notepad. Then navigate the path below, click on the hosts file, and choose Open.
    C:\Windows\System32\Drivers\etc
    reset windows 10 hosts file
  3. Now, you should be able to make the changes to your hosts you want to, and simply click on save when you are done.

Your hosts file is now back to its default values, but creating a backup copy of the hosts file is recommended, so you can easily replace it again if needed. For example, you can use your old hosts file as a backup and keep it in the Drivers folder next to the original.

Resetting your hosts file is a beneficial solution for fixing connectivity issues on your Windows computer. So, if your Internet connection is not as stable as it should be, use this method to fix it.

It is worth mentioning that your hosts file may sometimes be locked for editing. If this is the case, we’ve got your back. We have already compiled a list of solutions for this particular issue, which you can check in this guide.

Your hosts file can sometimes cause Can’t reach this page error in browser, so it’s important to know how to access it and reset it in order to fix that.

Please use the comments section below if you have any comments or suggestions.

How to Use WiFi and Ethernet at the Same Time on Windows

Want to use WiFi and Ethernet simultaneously to boost performance or split network tasks? Windows allows you to connect both WiFi and Ethernet, you just need to tweak a few settings manually.

Here’s how to run Ethernet and WiFi together without conflicts:

How can I use WiFi and Ethernet at the same time on Windows?

1. Disable Priority and VLAN setting

    Reconfiguring the Ethernet adapter settings should do the trick in most cases, and it’s probably the simplest way to use Wi-Fi and Ethernet at the same time.

  1. 1. Press Windows + R to open Run, type ncpa.cpl, and hit Enter.

    ncpa.cpl
  2. 2. Right-click on the Ethernet adapter, and choose Properties.

    properties for How to use wifi and ethernet at the same time
  3. 3. Click on Configure.

    configure
  4. 4. Navigate to the Advanced tab, and choose Priority and VLAN (or Packet Priority and VLAN) under Properties.

    disable priority and VLAN to use WiFi and Ethernet at the same time
  5. 5. Select Priority and VLAN Disabled from the Value dropdown menu, and click OK to save the changes.

    save changes

2. Use the Bridge Connections setting

  1. Press Win + R on the keyboard to open Run.
  2. Type the following command and press Enter to open the Network connections window: ncpa.cplncpa.cpl run command windows 11
  3. Press and hold CTRL on the keyboard and select both WiFi and Ethernet connections.
  4. Release the button, right-click on either connection and choose Bridge connections.bridging connection windows 11
  5. Restart your PC.

Now, your PC will use both of these connections. You can easily work on two different networks by bridging the connections.

It is more helpful when you have multiple local networks. However, the computer may or may not use the internet from both of these networks simultaneously.

You can learn more about this option in a detailed guide on how to create a network bridge in Windows, which explains the full process and when it offers the best results.

3. Change your TCP/IPv4 settings

  1. Open the Network connections window again.
  2. Right-click on the ethernet adapter and go to its Properties.going ethernet connection properties windows 11
  3. Double-click on the Internet Protocol Version 4 (TCP/IPv4). You can use IPv6 instead if necessary.double clicking ipv4 ethernet properties windows
  4. Click on Advanced.
  5. Uncheck the Automatic metric.
  6. Set the value to 15 and click on OK.
    setting interface metric advanced tcp ip settings
  7. Do the same for the WiFi adapter as well.
  8. Restart your PC.

From now, Windows will equally use the ethernet and WiFi connection together. In some cases, it may create problems for some software and services. But, in other cases, you may get a significant boost in download speed.

Rather than bridging, you may prefer this method if combining internet connections and getting more download speed from some specific sites is your primary target.

Also, keep in mind you should always check whether you are connected to the WiFi and Ethernet at the same time or not. If not, Windows will continue using the single available connection.

4. Use third-party software

There are a few software solutions that also can help you use Ethernet and WiFi at the same time. You can find many options, like Connectify Hotspot. You can use any of them on Windows if necessary.

This type of software can combine multiple networks you are connected to using different adapters and give you a fast and easy internet experience.

There are also many other ways to combine internet connections on Windows. You can follow these ways, too.

Wrapping up

This article has explained how to use WiFi and Ethernet simultaneously and the procedures. You can let us know your opinion on this if you want.

FAQs

What are the differences between WiFi and Ethernet?

WiFi is a wireless medium to transmit data, while Ethernet is a wired medium. In terms of performance, Ethernet is much faster. However, modern WiFi, especially WiFi 6 with 5 GHz, can perform very fast. But it is still slower than the wired ones.
The speed also depends on the adapter’s capacity. Theoretically, you can get more than 1 Gbps speed on both. But, in the practical world, wireless signals may not give you full performance.

Why is Wi-Fi so slow but Ethernet fast?

Even under ideal conditions, Wi-Fi won’t deliver as fast Internet as the Ethernet, but in some cases, the difference is stark. And here are a few reasons the Internet speed is slow over Wi-Fi but fast on Ethernet:
PC is at a distance from the router: The most common reason you are getting slow speed is that the PC is placed far from the router. With wireless connections, the lesser the distance, the better the speed. You can prioritize your Wi-Fi connection for more stability if you have multiple connections.
Misconfigured network settings: Wi-Fi and Ethernet adapters have dedicated network settings, and the Internet speed will be affected if the ones for Wi-Fi are misconfigured.
Many also wonder if using Wi-Fi and Ethernet simultaneously delivers faster Internet. The answer is No. It all depends on the router, and you can only obtain the maximum speed it provides, even when using both a wired and wireless connection.

Why can’t I use WiFi and Ethernet at the same time?

Are WiFi and Ethernet not working at the same time on Windows 11, 10, or 7? It may be because of several reasons. It includes the following:
Outdated network drivers: Properly working stable network drivers are necessary to operate smoothly.
Physical damage on the adapters: If any of your network adapters are damaged physically, it may create problems.
Any internal errors: You may fail to combine Ethernet and WiFi for any internal bugs.
Lack of permissions: If you are not an administrator of your PC, you may not configure connections due lack of sufficient privileges and use them together.

Unable to Start Dolby Audio Driver: How to Fix This Error

Several of our readers recently reported that they could not start the Dolby audio driver on Windows 10, which is becoming frustrating by the day. Even though various factors may hinder Dolby audio driver from functioning well, we have provided some fixes for this problem.

How do I start Dolby audio?

  1. Press Windows + R to open Run, type mmsys.cpl in the text field, and hit Enter.mmsys.cpl
  2. Right-click on your headphones, and select Properties.properties
  3. Now, head to the Spatial sound tab, select Dolby Atmos for Headphones from the dropdown menu, and click OK to save the changes.dolby atmos

This would start Dobly audio, and you can now enjoy its surround sound experience.

Why can’t I start Dolby audio driver?

There can be several reasons for the unable to start Dolby audio driver error message that pops up for some users in Windows 10. However, the following are some obvious reasons for the error message:

  • Outdated or corrupted audio drivers – There are instances when the OS receives driver updates which may be due to several driver issues. Updating them will solve the issue.
  • Misconfigured audio settings – If the audio enhancement is wrongly configured in Windows 10, the Dolby audio driver may fail to start. Check out the best ways to reset all sound settings on Windows 11. Although it’s a Windows 11 guide, you will find that it also applies on Windows 10.
  • Output sound devices not well-connected – If the audio output devices, such as speakers and headphones, are not connected to the right ports, this problem may also arise.
  • Disabled audio devices – Some necessary audio services are not enabled in Windows 10.

Once you can determine the cause of the problem, you should rest assured that you can fix this problem by using our solutions below.

What can I do if I cannot start the Dolby audio driver?

Before proceeding to explore the advanced solutions to fix the problem, you should consider performing the following preliminary checks:

  • Confirm that your audio cables are correctly connected to the audio output ports, not the audio input ports.
  • Set Dolby as the default audio driver.
  • Disable your antivirus software programs or get a better one designed for Windows 10.
  • Restart your PC.

If, after performing the above checks and the problem persists, you can work your way down this article to know what fix works for you to be able to start Dolby audio driver.

1. Update your audio drivers

  1. Right-click on the Start icon in the Taskbar or press the Windows+ X keys to launch the Quick Access menu and select Device Manager.
  2. Double-click the Sound, video, and game controllers options, right-click on the Dolby Audio device, and select Update driver from the menu.
  3. Then, select the Search automatically for drivers option, and Windows will search for the best drivers on your system.

Install any suggested updates after enabling the Windows driver updater to search for drivers and restart your PC. Also, check how to download the audio driver in Windows 10 if you want to update drivers from your computer.

2. Uninstall and reinstall the Dolby audio driver

  1. Left-click the Start button, type control panel, and launch it.
  2. Click Uninstall a program under Programs.
  3. Select Dolby Digital Plus Advanced Audio and click Uninstall.
  4. Further, visit the manufacturer’s website to download the Dolby audio driver.
  5. Launch the app after downloading and follow the on-screen instructions to complete the installation process.

Reinstalling the Dolby audio driver is a perfect solution if the problem lies with the version of the audio driver. You can also check this guide to reinstall audio drivers in Windows.

However, you should run the Audio troubleshooter if the problem persists after reinstalling the audio driver.

3. Run the Audio troubleshooter

  1. Click the Start button and select Settings.
  2. Then, click on Update & security from the menu.
  3. Locate and click on Troubleshoot on the right pane and select Additional troubleshooters from the right.
  4. Next, click on Other troubleshooters.
  5. Now, select the Playing Audio troubleshooter and click on Run the troubleshooter.
  6. Then, select the audio output device you have issues with and click on Next at the bottom of the screen.

Using the Windows troubleshooter enables you to identify any issues with the device or configured settings and fix them.

Also, ensure that you carefully follow the instructions once the errors are identified to completely fix the inability to start Dolby audio driver on Windows 10.

If you’ve tried all the solutions in this article on fixing your Dolby audio driver, and none seem to work, you should check our guide for other sound solutions.

To learn more about Dolby, we have a great guide on how to install Dolby Atmos for Windows 11, so don’t miss it.

If you have any other queries, kindly drop them in the comments below. Also, tell us the solutions that worked best for you.

Fix: Invalid Game Executable in Fortnite [Application Error]

Fortnite is a trendy game that allows you to team up with your friends and go on a multiplayer battle against another team. However, multiple users are facing multiple errors with the game, one of which is the Invalid game executable file application error.

Because of this error, users aren’t able to play the game, as this error message pops up randomly. While some users could fix the error by dismissing the error message after a couple of tries, some couldn’t go through the error.

What causes the Fortnite Invalid game executable file application error?

After some research, we have deduced a list of reasons that could trigger the issue of Fortnite Invalid game executable file application error:

  • You are using a trainer: Some make use of mods or trainers to help them with the game and complete missions, which could conflict with the actual game files.
  • Corrupt game files: If some important game files are missing or corrupted, then multiple issues can occur with the game, such as Fortnite Invalid game executable file application error. This also triggers Error Code 91 in Fortnite.
  • Antivirus is blocking the game: Chances are your antivirus software is blocking the game from accessing certain game or system files.

How can I fix the Fortnite Invalid game executable file application error?

Here are a few things that you can try out before applying advanced troubleshooting methods:

  • Restart your computer and check if this resolves the issue. Often, temporary glitches or bugs can be easily fixed via a simple restart.
  • Check if the internet connection is working and stable. Due to connectivity issues with the official server, the game might throw up multiple errors.
  • Scan your PC for viruses or malware. If a virus or malware infects your PC, then you will face issues with the installed programs.

Let us check out the advanced troubleshooting methods that have helped users to resolve the problem.

1. Update the EasyAntiCheat file

  1. Open the File Explorer.
  2. Navigate to the below path and press Enter: C:\Program Files\Epic Games\Fortnite\FortniteGame\Binaries\Win64\EasyAntiCheat
  3. Run the EasyAntiCheat_Setup.exe as an administrator.
  4. Click Repair Service.
  5. Follow the on-screen prompts and check if this resolves the issue or not.

2. Stop MyColor2, lightingservice.exe, or SelLedV2

  1. Press Ctrl + Shift + Esc to open the Task Manager.
  2. Locate MyColor2 under the Processes tab.
  3. Click on MyColor2 and select End Task.

You can follow the same process for ending the lightingservice.exe, and SelLedV2 processes. Several users have reported MyColor2 to be the culprit behind this problem.

MyColor2 is software that ships with certain laptops to control the LEDs on my keyboard and fan customization. The same applies to lightingservice.exe and SelLed, which ship with particular brand laptops.

These are often reported to be conflicting with the Fortnite game. If ending the MyColor2, lightingservice.exe, or SelLedV2 process resolves the issue, you can go ahead and uninstall them.

3. Delete the FortniteGame Folder

  1. Open the File Explorer.
  2. Navigate to the below path and press Enter: C:\Users\Username\AppData\Local
  3. Locate the folder FortniteGame.
  4. In case you cannot find the folder, click on View at the top. Then check the Hidden items option.
  5. Right-click on the folder and select Delete. Otherwise, you can open the folder and select all files, and delete them.
  6. Start Fortnite and check if this resolves the issue or not.

If the game files are corrupt or some important ones are missing, you can delete the FortniteGame folder and check if this resolves the issue.

Do not worry about the game files, as they will get re-downloaded as you relaunch the Fortnite game. Re-downloaded data will replace the corrupt ones.

4. Verify the game files

  1. Open Epic Games Launcher.
  2. Click on Library.
  3. Click on the 3-dot icon and select Manage.
  4. Hit the Verify button.

This is another way of checking if the game files are missing or corrupt. Verifying the game files will help you check and resolve the issue.

5. Adjust compatibility mode

  1. Open File Explorer.
  2. Navigate to the below path and press Enter: C:\Program Files\Epic Games\Fortnite\FortniteGame\Binaries\Win64\
    (If you have installed the game in a different folder, then open it accordingly. The above is the default path)
  3. Right-click on FortniteClient-Win64-Shipping.exe and then click Properties.
  4. Click the Compatibility tab.
  5. Check the box next to Run this program in compatibility mode for.
  6. Select Windows 8.
  7. Check the box next to Disable fullscreen optimizations.
  8. Click Apply and OK.
  9. Relaunch Fortnite.

You can also try adjusting the compatibility mode for the Fortnite game, as it has helped users fix the Fortnite Invalid game executable file application error.

How do I fix Fortnite error code LS 0016?

The LS 0016 Launch Failed error usually appears when servers are down, generally for maintenance. This can be verified using a reliable tool like Downdetector, and things should, most likely, be up and running in a few hours.

If the error code still appears, terminate the Epic Games process and relaunch it or verify the integrity of game files. In case nothing works, you may remove the game using an uninstaller software and then install Fortnite from scratch.

Reinstalling the game could help fix similar issues like Unable to join party Error code 83; read this guide to know more.

How do I fix the error code LS 0014?

The error code LS 0014 signals an issue with the game files, either a corrupt state or a change in path. So, your primary approach should be to verify that the game files have not been moved from the default folder.

Also, check the integrity of game files using the built-in option. Besides, running the launcher as administrator or using Google’s DNS server instead of the default might also get things up and running.

That is it from us in this guide. If you are experiencing Fortnite packet data loss, then you can take a look at our guide, which lists some solutions to resolve the problem.

Check out our guide to fix lower ping issues when playing Fortnite on PC or Xbox. We also have a guide on how you can install Fortnite on unsupported OS versions.

Let us know in the comments below which one of the above solutions resolved the Fortnite Invalid game executable file application error.

3 Easy Tips to Download and Enable Stereo Mix on Windows 10

You probably want to know how to download Stereo Mix on Windows 10 because your Stereo Mix does not show up in the Sound section of the Control Panel.

In this article, we will explore in detail why this happens and how you can download Stereo Mix on Windows 10 and bring it back to your sound Control Panel.

Why don’t I have Stereo Mix on my PC?

There are many reasons why Stereo Mix is missing from your Sound settings from Control Panel. Fortunately, in most cases, something simple is the cause.

  • No Realtek audio card – Stereo Mix is a specific feature for those devices, so if you don’t have a Realtek audio card, you can’t use the app. In fact, you will see that you don’t have the Realtek HD Audio Manager either.
  • Invalid association of system files – Sometimes, during Windows installation, some files go missing or get corrupted, which may cause a faulty file association in the system files.
  • Incompatible driver – Additionally, it can be because the computer does not recognize the driver. Check your audio chipset’s manufacturer and see if any update is available.

Now that we know the possible reasons why you don’t have Stereo Mix on your PC, let’s try to fix the problem.

How can I download Stereo Mix on Windows 10?

Let’s crosscheck some prerequisite measures:

  • Check if you have a Realtek sound card. You can easily verify that by accessing the Sound, video, and game controllers from Device Manager. If you see Realtek in the list of controllers, you can go on with the solutions below.
  • Unhide Stereo Mix from the Sound Control Panel. If you don’t know how to do that, follow the second solution from our guide.
  • Make sure you have the latest Windows updates.

If you need Stereo Mix on your PC, read the solutions below to get it.

1. Download Stereo Mix

  1. Head over to the Realtek High Definition PC Audio Codecs software download page.Open  Realtek Audio Codecs -stereo mix windows 10
  2. Then, choose the driver version that matches the architecture of your CPU (32-bit or 64-bit).
  3. Read and agree with their terms and conditions, then click the Download button.Agree with terms of installing Stereo mix for windows 10
  4. After downloading, launch the installation wizard to install the audio codec and follow the on-screen instructions.
  5. Reboot your system and check if you have Stereo Mix now.

The Stereo Mix Realtek high-definition audio Windows 10 download will fix the problem, but only if you have a Realtek audio card or chipset.

2. Unhide Stereo Mix

  1. First, click on the Start menu and type control panel, then click on the app from the results.
  2. Next, find the Sound option and click on it.Go to Sound option in Control Panel - Stereo Mix
  3. Then, click on the Recording tab. Right-click inside the area with all the devices in it and choose Show Disabled Devices.stereo mix windows 10 download
  1. Right-click on the Stereo Mix device and click on Enable.

Stereo Mix is hidden by default, and if you do not unhide it, you will not be able to see it.

3. Install a driver updater tool

Another way to get Stereo Mix is to download and install a driver updater tool, as an out-of-date or missing driver could cause the problem.

The tool we recommend is Fortect Driver Updater. This software will thoroughly scan and look for missing or outdated drivers on your computer after installation.

After identifying them, it will update them automatically and resolve issues like missing audio drivers and Stereo Mix.

⇒ Get Fortect Driver Updater

How do I set up Stereo sound on Windows 10?

  1. Press Windows + R to open Run, type mmsys.cpl in the text field, and hit Enter.mmsys.cpl
  2. Under the Playback tab, select your speakers, and click on the Configure button.configure
  3. Click Test to check.test
  4. Now, choose the relevant setting, and click Next.next
  5. Finally, click Finish to save the changes.finish

That’s it! This will set up stereo sound in Windows 10, and you can always reconfigure the setting using the same process.

How do I use stereo mix in Windows 10?

Stereo Mix is a handy feature on your sound card that allows recording whatever is output through the speakers. It’s particularly useful to gamers and can be quickly enabled via the Recording tab in the Sounds window.

In some cases, Stereo Mix may also be listed as What U Hear, depending on the sound card though the former term is more commonly used. And if you cannot find Stereo Mix, the sound card most likely doesn’t support the feature.

How do I fix Stereo Mix not detecting sound?

  1. Click on the Start menu, type the control panel, and click on Control Panel from the results.
  2. Then, go to Sound.Go to Sound option in Control Panel - Stereo Mix
  3. Head over to the Recording tab.Recording tap Windows 10 Stereo Mix
  4. Right-click on Stereo Mix and click on Properties.
  5. Go to the Levels tab and ensure the level is set correctly. Also, make sure Stereo Mix is the default recording device in Windows 10 and the default input device in your recording application.

If you have successfully installed and enabled Stereo Mix, but it does not detect any sound while recording, there is some problem.

Stereo Mix captures the internal audio of your computer. So, the volume of your speaker and headphone do not affect it. However, the internal volume of your system impacts its sound level, and you may want to switch to mono audio instead.

Now that you have learned about Stereo Mix Windows 10 download, you should know that sometimes, these solutions will not fix your problem.

If this is the case, you must check to see if your audio chipset is compatible with Windows 10 and if it is working properly.

Also, the main reason Stereo Mix does not detect sounds is that people often do not remember to check the volume of their recording software.

Check out this article to learn how to play sound on two devices at once in Windows 10/11.

Let us know whether you can download or enable Stereo Mix on your Windows 10 PC in the comments section below.

7 Ways to Fix Error Code 5003 on Zoom [Connection Problems]

Experiencing software errors is as common as it is frustrating, and, unfortunately, no software is immune to glitches or bugs. Zoom users, for example, reported running into error 5003 when trying to connect and use the application.

Today, we will go over what this error code means, the causes that trigger it, and how properly to deal with the situation.

As a side note, we can also show you how to fix Zoom error code 1001 if you also got this one while using the app.

What is error code 503 in Zoom?

Error 5003 appears on your screen when the connection has failed. Thus, this issue will keep you from initiating video calls, rendering the app useless. Here are a few reasons you encounter the error on Zoom:

  • Server issues: In most cases, it’s a server issue responsible for the error code, and things are usually automatically up and running in a while. To verify whether the Zoom servers are facing an outage, check Downdetector or the official status page.
  • Conflicting apps: A third-party antivirus or firewall can often prevent Zoom from communicating through the servers, and as a result, you get Zoom error 5003.
  • Misconfigured network settings: An incorrect DNS or IP address or even issues with the network drivers can trigger the error.

How do I fix error 5003 on Zoom?

1. Restart the Zoom app

  1. Press Ctrl + Alt + Del and then select Task Manager.
  2. Select Zoom from the list and press the End Task button.end task zoom
  3. Restart Zoom.

2. Check Zoom server status

  1. Go to the Zoom server website.
  2. Check the status of the Zoom server to determine if this is causing the problem.zoom server status

3. Reset Network Adapter Settings

  1. Press Win + R to access the Run utility.
  2. Type in cmd and press the Enter key.run cmd
  3. Paste in the following command, then press Enter: ipconfig /flushdnsipconfig
  4. Now, paste the following command and then press Enter again: netsh winsock resetrestart net
  5. Close the cmd window and restart your PC.
  6. Try connecting to Zoom.

4. Change DNS server

  1. Search for Control Panel and open the app.control panel
  2. Go to Network and Internet.network and internet
  3. Now, go to Network and Sharing Center.network sharing center
  4. Next, choose Change adapter settings.change adapter settings
  5. Now, right-click on the connection you are currently using and select Properties.internet proeperties
  6. Select Internet protocol version 4 (TCP/IPv4) and click on Properties.internet protocol 4
  7. Select the Use the following DNS Server addresses option.
  8. In the top row, you will add 1.1.1.1, while in the bottom one we have 1.0.0.1, then press OK.change dns
  9. Restart Zoom.

5. Allow the Zoom app through your Firewall

  1. Search for Firewall and open the Firewall and Network Protection app.firewall
  2. Click on Allow an app through firewall.allow an app through firewall
  3. Press the Change Settings button, then click on Allow another app.allow another app
  4. Press on Browse, locate Zoom and then press Add.add app

6. Disable all Proxy servers

  1. Press Win + I to bring up Settings.
  2. Select Network & Internet, then choose Proxy.proxy
  3. Disable the Use a Proxy server option.use proxy server

7. Reinstall Network drivers

  1. Search for Device Manager and open the app.
  2. Expand Network adapters, right-click the one you are using and select Uninstall device.network adapter uninstall
  3. Reinstall the Network driver.
  4. Restart your PC.

Why is my firewall blocking Zoom?

There have been several instances of the firewall blocking Zoom on both Windows and Mac. Here are a few reasons why it happens:

  • Zoom is flagged as a threat: Whenever a program is flagged by the firewall, it’s automatically disabled from running or sharing data with the servers. And in some cases, Zoom, too, could be flagged as a threat.
  • Misconfigured settings: The firewall has separate settings for programs on Private and Public networks, and it could be that Zoom is enabled on only one.
  • Issues with the firewall: The firewall itself could be outdated or unreliable since programs like Zoom are never blocked. Here, we recommend you uninstall the program and switch to a more effective firewall.

How do I allow Zoom on my firewall?

You can just go ahead and open the Search function in the taskbar and look for your Windows Firewall protection settings.

Next, simply select the Allow an app through firewall option, and if you do not find Zoom on the list presented to you, you will have to add it yourself.

We explained this step with full details on solution number 5 in the guide above, so all the information you need on this topic is right there.

It’s a simple process, and it will only take up a couple of minutes of your time. So, when encountering Zoom error code 5003, the solutions above should help you fix the issue.

Share with us in the comments section below if this guide helped you through this annoying situation involving the Zoom app.

Surface Pro Touch Screen Dead Spots: 4 Fixes to use

Since Microsoft launched the beloved Surface Pro product, many users have reported that some touchscreen devices have dead spots.

This can be a big problem depending on the affected surface area. To help solve this problem, we prepared a list of possible fixes in this guide.

Why is the Surface Pro touchscreen not working?

A series of factors can cause the Surface Pro touchscreen to have dead spots. Below are some of the prevalent ones:

  • Outdated OS: If your Surface Pro 3, 4, or 7 touch screen is not working on the right side or in some other areas, it might be because your operating system is outdated. Hence, you need to update your OS to the latest version.
  • Outdated driver: This problem might be caused by faulty or outdated touchscreen drivers. You must reinstall or update your driver to get past the issue.

How can I fix Surface Pro touchscreen dead spots?

Below are some troubleshooting steps to try before delving into the sophisticated solutions in this section:

  • Perform a two-button shutdown (press and hold the power + volume buttons till the logo appears)
  • Run the Surface Diagnostic toolkit

If you still can’t solve the problem, you can proceed to the fixes below:

1. Update your touchscreen driver

  1. Press the Windows key + X and select Device Manager.
    device manager  surface pro touch screen dead spots
  2. Double-click the Human Interface Devices section to expand it and right-click your touchscreen device.
  3. Now, select the Update driver option.
    update driver
  4. Finally, choose Search automatically for drivers and install any available updates.
    search auto

As an alternative while troubleshooting, you can also disable touch input entirely by following this guide on how to disable the touch screen on Microsoft Surface.

If the Surface Pro touchscreen has some dead spots, you should try to update your drivers by following the steps above. You can also visit the Surface Pro website and check if an updated driver is available.

However, downloading drivers manually is a process that carries the risk of getting the wrong driver installed, which may lead to severe malfunctions.

Hence, we strongly recommend the Outbyte Driver Updater tool to update your drivers to avoid damage to your PC. To keep your PC, including hardware components, safe and efficient, the latest drivers should permanently be installed, like touchscreen drivers.

This great tool was developed, so you do not have to manually download and install your drivers.

Outbyte Driver Updater

Outbyte Driver Updater automatically installs the latest touchscreen drivers for you to keep your PC and hardware components safe.
Free Trial Download now

2. Reinstall your driver

  1. Right-click the Start icon and select Device Manager.
    device manager surface pro touch screen dead spots
  2. Expand the Human Interface Devices category and right-click your touchscreen device.
  3. Now, select the Uninstall option.
    uninstall device Surface Pro touch screen dead spots
  4. Finally, click the Uninstall button to confirm the action and restart the Surface device.
    uninstall button

If updating your driver does not eliminate the Surface Pro touchscreen dead spots, you need to uninstall the drivers completely. Then, after restarting your Surface device, the drivers will be reinstalled automatically.

3. Install system updates

  1. Press the Windows key + I to open the Settings app and choose Update & Security.
    update and
  2. Click the Check for updates button.
    check for surface pro touch screen dead spots
  3. Finally, install the available updates and restart your PC.

Another potential cause of the Surface Pro touch screen dead spots is an outdated operating system. This makes your device misbehave until you install the latest patches.

4. Restore Surface

  1. Press the Windows key + I and select Update & Security.
  2. Select Recovery in the left pane and click the Get Started button under Reset this PC.
    get started
  3. Finally, select the Keep my files option and follow the onscreen instructions to complete the process.
    keep or remove

If the Surface Pro 3, 4, or 7 screen problems continue after applying the fixes above, you must reset your device to default. This will reverse the changes you might have made to your device that are causing the problem.

These four solutions can help you fix the Surface Pro touch screen dead spots problem. If resetting the Surface device fails to solve the issue, contact Microsoft Support or see a technician to check it out.

Similarly, if your mouse keeps jumping around on Surface Pro 4, check our detailed guide to fix it effortlessly.

In the comments below, let us know the solution that helped you fix this issue.

Duplicate Ownership for Directory Error: 4 Ways to Change it

There’s an abundance of possible critical errors one can struggle with on the Windows 10 platform. One of those errors is the Overlap: Duplicate ownership for directory messages.

This error has a series of potential causes, making it sometimes difficult to fix. Thankfully, we have gathered the surefire fixes to eliminate the error message in this detailed guide.

Why does the Error – overlap: Duplicate ownership for directory appear?

Below are some of the reasons for the duplicate ownership for directory error on Windows 10:

  • Issues with the SFC tool: In some cases, this problem might be due to issues with the SFC scan. To get past the error message, you must run the DISM tool instead.
  • Faulty system files: A broken or missing system file is another potential cause of this problem. You need to repair this file to get past this issue.

How can I fix Duplicate ownership for directory error?

1. Run DISM with an ISO drive

  1. Mount your Windows 10 installation media, either USB or ISO DVD.
  2. Press the Windows key + S, type cmd, and select Run as administrator under Command Prompt.
    cmd admin Duplicate ownership for directory
  3. Now, type the commands (replace X in the third command with the drive letter of the ISO drive) below and hit Enter after each: DISM /online /Cleanup-Image /CheckHealth DISM /online /Cleanup-Image /ScanHealthdism scan DISM /Online /Cleanup-Image /RestoreHealth /source:WIM:X:SourcesInstall.wim:1 /LimitAccessdism limit
  4. Remember to wait for one command to finish running before running another.
  5. After the last command finishes, type the command below and hit Enter: sfc /scannowsfc scan Duplicate ownership for directory
  6. Then, finally, wait for the command to finish running and restart your PC.

If you get the Duplicate ownership for directory error message while running the SFC scan, you can fix it by running the DISM tool.

Unlike SFC, the DISM scan runs deeper and repairs the system image.

2. Use PowerShell

  1. Press the Windows key + X and select the Windows PowerShell (Admin) option.
    powershell
  2. Type the command below and hit Enter to run it: Get-AppXPackage -AllUsers | Where-Object {$_.InstallLocation -like "*SystemApps*"} | Foreach {Add-AppxPackage -DisableDevelopmentMode Register"$($_.InstallLocation)\AppXManifest.xml"}get all
  3. Finally, wait for the command to finish running.

3. Reset this PC

  1. Press the Windows key + I to open the Settings app and select Update & Security.
    update and Duplicate ownership for directory
  2. Select the Recovery option in the left pane and click the Get started button under the Reset this PC section.
    get started Duplicate ownership for directory
  3. Finally, select the Keep my files option and follow the onscreen instructions to complete the process.
    keep or remove

If you still can’t fix the Duplicate ownership for the directory error message, you need to reset your PC to default. This will clear up the potential glitches that might be causing the problem.

4. Clean reinstall Windows 10

If everything fails, you might have to reinstall Windows 10. This is because the problem might have gotten deep into your system files.

Performing a clean installation of your OS should give you a new version of Windows 10.

With this, we can conclude this guide on fixing Duplicate ownership for directory errors. You might have to contact the Microsoft Support team for more guidance on this error.

If you are facing the file or directory is corrupted and unreadable error, check our detailed guide to fix it quickly.

In the comments below, let us know the solution that helped you fix this issue.

Something’s not Right Gmail Error: 5 Easy Fixes to use

Some Windows users reported experiencing the Something’s not right Gmail problem. This occurs when accessing the web version of the email client on any browser, preventing many users from getting into their email.

If you also face this issue, this guide contains effective solutions to eliminate errors and restore access to your email.

Why am I getting Something’s not right in Gmail?

A series of factors could cause the Something’s not right error message on Gmail. Below are some of the notable ones:

  • Faulty browser data: Gmail might not work on your PC because of a corrupt browser cache and cookies. You need to clear this data manually or with the help of a PC cleaner to solve this problem for good.
  • Issues with extensions: Many users have had trouble connecting to Google and some of its products because of issues with add-ons. It would be best if you disabled these extensions temporarily to fix the problem.
  • Internet connection issues: In some cases, this problem might be because of an unstable or inactive internet connection. Verifying your network strength and switching to a better one is a quick way around this.

How can I fix Something’s not right Gmail error?

Before proceeding to the sophisticated fixes in this section, below are some troubleshooting steps you need to perform:

1. Disable browser extensions

  1. Launch your browser and click the Menu button (three vertical dots) in the top right corner.
  2. Select More tools > Extensions.
    extensions gmail something's not right
  3. Now, toggle the switch before each extension to disable it.
    disable extension

While extensions help improve your browser’s functionality, they can sometimes cause problems. According to many users, this has proved true for the Something’s not right error on Gmail.

Hence, you need to disable the extensions on your browser and try to load your email client again. If this fixes the issue, you can enable the add-ons in batches to know the one causing the problem.

Lastly, we have used Google Chrome as an example, but the steps are similar in most modern browsers, with a few tweaks here and there.

2. Clear browser data

  1. Launch your browser and click the menu button in the top right corner.
  2. Select More tools > Clear browsing data.
    clear browsing
  3. Now, click the Time range dropdown at the top and select All time.
    time range gmail something's not right
  4. Check the boxes for Cookies and other site data and Cached images and files.
  5. Finally, click the Clear data button.
    clear data

Browser data help to improve the overall browsing experience. But when they can get corrupted when they accumulate and cause different issues like the Something’s not right problem on Gmail.

In this case, the best thing to do is to clear your browser data and restart your PC.

3. Temporarily disable your antivirus

  1. Press the Windows key, type virus, and select the Virus & threat protection option.
    virus and
  2. Click the Manage settings link.
    manage settings gmail something's not right
  3. Now, toggle the switch for Real-time protection backward to disable it.
    real time
  4. Finally, if you have third-party antivirus, right-click its icon on the taskbar and select the Disable option.

Multiple firewalls, antiviruses, and other monitoring programs may prevent you from accessing Gmail. This might lead to the Something’s not right error or other Gmail issues.

After disabling your antivirus, try to reaccess the email client. Should this fix the issue, you should re-enable your security software.

4. Reinstall your web browser

  1. Press the Windows key + R, type appwiz.cpl, and click OK.
    aappwiz
  2. Right-click your browser and select the Uninstall option.
    uninstall gmail something's not right
  3. Now, follow the onscreen instructions to complete the removal process.
  4. Finally, go to the browser’s official developer website to download and install the latest version.

Another way of fixing the Something’s not right Gmail problem is by uninstalling the web browser and installing it again.

However, make sure that the latest version is installed. Alternatively, you can update your web browser and then try accessing Gmail afterward.

5. Use another web browser

In addition, if Something’s not right, the Gmail error persists after trying all the solutions mentioned above.

Then, you might want to consider using alternative web browsers. We suggest opting for a browser like Opera One with a built-in ad blocker and native AI.

Alternatively, it would be best to consider disabling browser add-ons or extensions; this may be responsible for the error.

Meanwhile, you may also try using Google Chrome in an incognito window or Mozilla Firefox in Safe mode and then try to access your Gmail account afterward.

Opera One

Opera One is a modern browser driven by privacy and security, making it ideal for your default option.
Free Download Visit website

With this, we can conclude this detailed guide on fixing the Something’s not a right error on Gmail. Follow the steps above carefully, and the issue should be resolved for good.

If you face issues like the Gmail Something Went Wrong Error & Sign in to Your Account, check our detailed guide to fix it quickly.

In the comments below, let us know the solution that helped you fix this error.

OneDrive Shared Folder, not Syncing: 5 Ways to get it Working

OneDrive is one of the top cloud storage that helps to keep your files and data safe. However, there can be some hiccups along the way, as some users complain that OneDriver shared folder is not syncing.

This leaves some of your files out of the cloud storage. If you also face this issue, this guide will walk you through the surefire solutions to fix it for good.

Why are my OneDrive folders not syncing?

Below are some of the reasons your shared folders might not be syncing on OneDrive:

  • Outdated PC: Sometimes, the OneDrive shared folder is not updating because of an outdated operating system. The solution is to update your PC to the latest version.
  • Issues with OneDrive: In some cases, this problem can be caused by glitches with the OneDrive app. You need to reset and reconnect the app to fix this.

How can I sync a shared OneDrive folder?

1. Disable antivirus

  1. Press the Windows key, type virus, and select the Virus & threat protection option.
    virus onedrive shared folder not syncing
  2. Select Manage settings.
    manage settings
  3. Now, toggle the switch for Real-time protection backward to disable it.
    real time

Sometimes, your security software might prevent your shared folder from syncing on OneDrive. You can fix this by disabling your antivirus software.

2. Change permissions

  1. Press the Windows key + E to open File Explorer and right-click the OneDrive icon in the left pane.
  2. Select the Properties option.
    properties onedrive shared folder not syncing
  3. Now, click the Security tab at the top.
  4. Click the Advanced button.
    security
  5. Now, under SYSTEM, Administrators, and your user name, you should have Full Control permissions.
  6. Finally, check the Replace all child object permission entries with inheritable permissions from this object option and click OK.
    replace all

Sometimes, the OneDrive shared folder not syncing issue can be caused by a lack of appropriate permissions. This prevents some folders from syncing. Following the steps above should permit you to sync any folder.

2. Update the PC

  1. Press the Windows key + I to open the Settings app and select Update & Security.
    update and onedrive shared folder not syncing
  2. Click the Check for updates button.
    check for
  3. Finally, install any available updates and restart your PC.

An outdated operating system can cause the OneDrive sync shared folder not working issue. The solution to this is to update and restart your PC.

3. Reset OneDrive

  1. Press the Windows key + R, type %localappdata%\Microsoft\OneDrive\onedrive.exe/reset, and click OK.
    path
  2. Now, sign in to your account and click the Settings tab at the top.
  3. Finally, check the box for Start OneDrive automatically when I sign in to Windows and click OK.
    settings  onedrive shared folder not syncing

At times, the OneDrive shared folder not syncing issue might be due to minor glitches with the app. You can fix this by simply resetting the app to default.

4. Update OneDrive

  1. Visit the official OneDrive download page to get the latest version of the app.
    download
  2. Go to your downloads folder and double-click the installer to run it.
  3. Finally, follow the onscreen instructions to complete the process.

If the solutions above do not fix the OneDrive shared folder not syncing issue, you must update the app. You can also uninstall OneDrive and reinstall the latest version.

That is about it for the OneDrive shared folder not syncing issue. With the detailed steps in this guide, you should be able to fix the problem for good.

If you still cannot sync some of your folders, you must consider using other effective cloud storage apps capable of syncing the files in real-time across multiple devices.

In the comments below, let us know the solution that helped you fix this issue.

Windows Update Medic Service: Everything you Need to Know

The Windows Update Medic Service is one of the numerous additions to Windows 10 to improve user experience. However, this new feature makes many users curious about what it does and its importance.

If you also need firsthand information about this service, this guide contains everything you need to know.

What is Windows Update Medic Service?

The Windows Update Medic Service is a new background service introduced with Windows 10 and how this OS handles updating.

Its only purpose is to repair the Windows Update service so your PC can continue receiving updates unhindered.

It also handles the remediation and protection of all Windows Update components. As such, even if you disable all Windows Update-related services, WaasMedic will restart them at some point.

Do I need Windows Update Medic Service?

While this is an important Windows service, you can always disable the service. However, making your PC more vulnerable to update issues is not recommended.

Hence, you should disable the service if there is no tangible reason.

How do I stop the Windows Update Medic service?

1. Use the Registry Editor

  1. Press the Windows key + R, type regedit, and click OK.
    regedit Windows Update Medic Service
  2. Follow the path below in the left pane: HKEY_LOCAL_MACHINE\SYSTEM\CurrentControlSet\Services\WaaSMedicSvc
  3. Now, double-click the Start option in the right pane.
    start
  4. Finally, set the Value data to 3 or 4 and click OK.
    value data

With this, you should be able to disable the Windows Update Medic Service without getting an access denied prompt.

2. Use the Service Manager

  1. Press the Windows key + R, type services.msc, and click OK.
    services Windows Update Medic Service
  2. Double-click the Windows Update Medic Service to open its properties.
    option
  3. Now, set the Startup type to Disabled and click the Stop button.
  4. Finally, click the Apply button and OK to confirm the changes.
    disabled

Most users get an access denied prompt while trying to disable the service using the Service Manager. However, this issue has been fixed in the recent updates, and you should be able to use it.

3. Use the Windows Update Blocker

  1. Download Windows Update Blocker and right-click the Wub zip in your Downloads folder.
  2. Select the Extract files option.
    extract files Windows Update Medic Service
  3. Launch the Windows Update Blocker and select Menu > Windows Services from the list.
    menu services
  4. Look for Windows Update Medic Service and double-click it to open its properties.
    option
  5. Next, copy the Service name.
    service name
  6. Return to the folder where you extracted Windows Update Blocker and open the ini file with Notepad.
    ini Windows Update Medic Service
  7. Now, paste the service name right under dosvc=2,4 and =3,4 in front of it.
    notepad
  8. Finally, return to the Windows Update Blocker window and click Apply now.
    apply now

Another option is to block the service through a third-party blocker. One perfect option is Windows Update Blocker.

Thanks to this handy tool, you can disable any Windows service without error messages.

What happens if you disable Windows Update Medic Service?

If your PC does not run into update issues, you wouldn’t feel the impact of disabling the Windows Update Medic Service.

However, if there are update issues, some components might get damaged with this vital service disabled. Finally, disabling the service might make your PC unstable.

This is pretty much everything there is to know about this vital service, from how to disable it to the impact of removing it.

If you want to know the Windows services you can disable, check our detailed guide.

Feel to share your experience with this service in the comments below.

Error 1603: 7 Fixes to use if the Install has Failed

Installation errors are rare, and in most cases, the process goes through relatively smoothly. However, many users reported Error 1603 during installation. And it’s not just limited to a particular program but can be encountered in many.

The error message doesn’t reveal much about the underlying cause, but you could go through the error log to learn more about the situation. However, before you do, we have solutions that work in most cases and have helped several users fix Error 1603.

Why am I receiving error 1603?

Here are a few reasons why you may be getting Error 1603 in Windows:

  • The program already exists on the PC: If the program you are trying to install is already on the PC, you may receive Error 1603, especially on MSI.
  • Missing permissions: Often, the folder where the program is to be saved is missing access permissions, and the files can’t be installed.
  • The target folder is encrypted: In some cases, users later realized that the folder where the program files were to be saved was encrypted, which triggered Error 1603.
  • Security software blocking the installation: Your third-party antivirus or other similar security software may prevent the program’s installation. You need to disable or uninstall the software to fix this.

Where can I find error code 1603, and what does it look like?

The error message may differ depending on the situation and how it appears, depending on the application throwing it. For example, here are a few programs that are likely to throw Error 1603:

  • Error 1603 Adobe: Several users installing Adobe applications reported the error, and it’s usually caused due to incorrect permissions.
  • FortiClient Error 1603: The FortiClient installer, too, throws the error and rolls back any changes made.
  • Error 1603 AMD: A common issue encountered by users trying to install AMD drivers.
  • Error 1603 QuickBooks: The QuickBook Tools Hub usually comes to the rescue of users.
  • Altiris Error 1603: Here, users receive the message, Error 1603: A fatal error occurred during installation, and our solutions would fix things.
  • Error 1603 Revit: It’s a particularly tricky situation, and users had to go through a great deal of effort to get things working.

How do I fix error code 1603?

Before we head to the slightly complex solutions, here are a few quick ones for you to try:

  • Verify if the program is already installed on the computer. Sometimes, the desktop launcher may not be available after an upgrade, so you must check the list of installed programs and confirm the same.
  • Restart the computer.
  • Launch the installer with administrative privileges. To do that, right-click on it, and select Run as administrator.
  • Check for Windows updates and install the latest available version.

In case none of these works, try the solutions listed next.

1. Clear the contents of the temp folder

  1. Press Windows + R to open Run, type %temp% in the text field, and hit Enter.temp folder
  2. Press Ctrl + A to select all the files here and hit Delete.clear contents to fix error 1603
  3. Choose the appropriate response in case a confirmation prompt pops up.

This is the most straightforward fix if you encounter Error 1603 in Windows 10 while installing any application. Sometimes, the Temp folder may run full, and as a result, installers encounter an issue while executing critical processes, leading to the error.

2. Disable antivirus software

  1. Press the Windows key, type virus, and select Virus & threat protection.
    virus and threat error 1603
  2. Click the Manage settings option.
    manage settings
  3. Now, toggle the switch for Real-time protection backward to disable it.
    real time
  4. Finally, if you have a third-party antivirus, right-click the icon on the taskbar and select the Disable option.

If you are facing Error 1603 on AutoCAD or AutoDesk, it might be due to interference from your antivirus. In this case, you must disable your third-party antivirus and Microsoft Defender.

You can also temporarily disable your firewall too. After installing the program, you can now enable your antivirus and firewall.

3. Clear storage space

  1. Press the Windows key, type cleanmgr, and select Disk Cleanup.
    cleanmgr  error 1603
  2. Choose the drive you want to clear files on and click OK.
    select a disk
  3. Now, select the files to clear and click the OK button.
    clean up

One of the significant causes of Error 1603 on Java and other apps is insufficient storage space for the installation process. You can create space by deleting some files in File Explorer.

To make things easier, you can run Disk Cleanup or try other methods to free storage.

4. Uninstall conflicting apps

  1. Press Windows + R to open the Run, type appwiz.cpl in the text field, and click OK.
    appwiz error 1603
  2. Locate any application that controls the aspect related to the program you are trying to install, right-click it, and click on Uninstall.
    uninstall
  3. Follow the on-screen instructions to complete the process.

Conflicts triggered by third-party apps are a common reason behind Error 1603, and the best solution here is to uninstall the problematic app. For instance, Adobe reports that Google Desktop may affect the installation of its application.

Also, you could use a software uninstaller tool to remove any traces of the concerned app altogether.

One of the best tools available is CCleaner. It removes all junk files on your PC and all programs, including all associated files.

5. Run the Program Install and Uninstall troubleshooter

When faced with issues in Windows, the ideal course is to always look for a dedicated troubleshooter. And you have one, in this case, the Program Install and Uninstall troubleshooter, which is easily downloadable.

Once downloaded, run it, choose the appropriate responses, follow the on-screen instructions, and make the recommended changes to fix Error 1603 in Windows 10.

This troubleshooter can fix all the installation-related errors, including error codes 2502 & 2503 on Windows 11.

6. Reconfigure the Windows Installer service

  1. Press Windows + R to open Run, type services.msc, and click OK.
    services
  2. Locate the Windows Installer service, right-click on it, and select Properties.
    properties
  3. Now, click on the Start button and then on OK to save the changes.
    start error 1603
  4. Again, press Windows + R, paste the following command, and hit Enter:msiexec /unregisterunregister
  5. Similarly, execute the following command in Run:msiexec /regserverregserver error 1603

After restarting the Windows Installer service, you can fix the FortiClient Error 1603.

7. Grant Full Control Permission to Installation Drive

  1. Press Windows + E to open File Explorer, right-click on the installation drive for the software (usually C:), and select Properties.properties
  2. Navigate to the Security tab, and click the Edit button.
    edit
  3. Select SYSTEM, tick the checkbox for Full Control, and click OK.full control to fix error 1603
  4. Now, click on Advanced.
    advanced
  5. Click the Change Permissions option.change permissions
  6. Select SYSTEM from the list, and then click the Edit button.edit
  7. Choose This folder, sub-folders, and files from the Applies to the drop-down menu, and click OK to save the changes.
    change permissions to fix error 1603
  8. Click OK on all opened windows as well.

That’s it! If the previous methods didn’t work, modifying the permissions certainty would have an Error 1603 fixed. You can now seamlessly install the application that earlier threw the error.

Also, find out what to do if you can’t install anything in Windows 10.

If you know of other possible solutions, drop them in the comments below.

Fix: Failed to Load DLL from the List – Error 126 on Windows

The “failed to load DLL from the list – error 126” message typically means the system can’t locate a required file, such as custom.dll or xgameruntime.dll. The complete version may say: LoadLibrary failed with error 126: The specified module could not be found.

Here’s how to fix LoadLibrary error 126, explained step by step.

How can I fix failed to load DLL from the list error code 126?

1. Run the app as an admin

  1. Right-click the app’s shortcut or executable file and select Properties.
    properties failed to load dll from the list error code 126
  2. Click the Compatibility tab at the top.
  3. Now, check the Run this program as an administrator box.
  4. Finally, click the Apply button and OK to save the changes.
    run as admin

Some apps need you to have administrative rights to run their executable files. Hence, if you are getting the failed to load DLL from the list error code 126, you need to run the app as admin.

2. Temporarily disable the antivirus protection

  1. Press the Windows key + S, type virus, and select Virus & threat protection.
    virus
  2. Click the Manage settings option.
    manage settings
  3. Finally, toggle the switch under Real-time protection backward to disable it.
    real-time  failed to load dll from the list error code 126

Your antivirus can delete or quarantine specific files, patches, or DLLs associated with programs, games, or even apps. This can lead to the failed to load DLL from the list error code 126 issue on your PC.

That’s why disabling your antivirus can temporarily fix the issue. To prevent the issue from happening again, consider whitelisting the specific app or game that triggers such issues.

3. Update Microsoft NET Framework

You might experience these two DLL errors if Microsoft NET Framework is outdated. So, it would be best to try to update this built-in software as it might help you fix the problem.

To do so, access Microsoft’s dedicated webpage and download the latest version of Net Framework.

4. Verify game files

  1. Launch Steam and click the Library option.
    library
  2. Right-click the faulty game and select Properties.
    properties steam
  3. Now, select the Local files tab in the left pane.
    local files
  4. Next, click on Verify integrity of game files.
    verify failed to load dll from the list error code 126
  5. Finally, restart Steam and try to play the game again.

If you are facing the failed to load DLL from the list error code 126 on Steam, the issue might be with the game you are trying to play. Verifying the integrity of the game file should clear up the potential causes of the issue.

5. Use a system repair tool

At times, corrupt system files might be responsible for defective DLL from the list error code 126 issue. You can fix this easily by running a multi-functional PC repair software.

Additionally, you’re fully covered against DLL errors after using these repair tools, as they automatically detect broken files and replace them with new ones from their extensive repositories.

Not only that, you can get reports of Windows system files to verify and fix any problematic files, such as broken DLLs.

6. Run the DirectX End-User Runtime Web Installer toolkit

Reinstalling DirectX can also address DLL problems. This is also a program developed and offered by Microsoft. To reinstall it on your computer, go to Microsoft’s official webpage.

Use the search engine, enter DirectX, and download the DirectX End-User Runtime Web Installer.

Run the executable file and follow the onscreen prompts to resume the flashing process. Reboot your Windows 10 system at the end.

7. Uninstall or reinstall the program

  1. Press the Windows key + R, type appwiz.cpl, and click OK.
    appwiz
  2. Right-click the app and select the Uninstall option.
    uninstall
  3. Finally, follow the onscreen instructions to complete the process.

If you are still getting the failed to load DLL from the list error code 126 after applying the fixes above, you need to reinstall the app causing the error. This is because the executable files might be corrupt.

Alternatively, you can use specialized software to uninstall stubborn programs. One of the best ones that are easy to use and you may be familiar with is Fortect.

8. Update your drivers

  1. Press the Windows key + X and select Device Manager.
    device manager
  2. Double-click the Display adapters option to expand it and right-click the device there.
  3. Now, select the Update driver option.
    update driver
  4. Choose Search automatically for drivers and follow the onscreen instructions to complete the process.search auto
  5. Finally, repeat steps 2 and 3 for the Firmware field and restart your PC.

9. Run the System File Checker

  1. Type Command Prompt in the search bar and select Open as an administrator.open command prompt as an administrator
  2. Type: sfc /scannow and press Enter. running system file checker
  3. Wait for the scan to complete and follow any on-screen instructions.

10. Perform a Clean Boot

  1. Press Win + R, type msconfig, and press Enter.run msconfig
  2. In the Services tab, check Hide all Microsoft services, then click Disable all.hide all microsoft services
  3. Go to the Startup tab and click Open Task Manager.Open task Manager Clean boot
  4. Disable all startup programs and restart the system.disable startup apps
  5. After rebooting, try running the app again to see if the issue persists.

A clean boot starts Windows with minimal services and drivers to help identify conflicts.

11. Disable Display Scaling and Fullscreen Optimizations

  1. Right-click the executable → Properties
  2. Open the Compatibility tab
  3. Enable:
    • Disable fullscreen optimizations
    • Override high DPI scaling behaviordisable fullcreen optimization override dpi

Helps apps avoid resolution or scaling errors that interfere with DLL calls.

12. Manually Replace the Missing DLL File

  1. Identify the missing DLL from the error (e.g., custom.dll)
  2. Locate the correct version from the app’s installation media or official site
  3. Copy it to the program’s root directory (next to the main .exe)

Avoid downloading DLLs from untrusted sources to prevent malware infections.

13. Register the DLL Manually

  1. Open Command Prompt as administrator
  2. Run: regsvr32 “C:\Path\To\Your\File.dll”

This tells Windows to officially load and track the specified DLL file.

14. Verify System PATH and Environment Variables

  1. Go to System Properties → Advanced tab → Environment Variables
  2. Under System variables, check the Path entry
  3. Remove or fix broken paths that could mislead DLL resolution

Broken or outdated entries here can stop the OS from finding valid DLLs.

Wrapping up

It is likely to encounter updating limits while applying the steps above, as the manual process may not find available drivers for your case.

Regardless of that, you can employ valuable driver update tools to diagnose your Windows and find outdated drivers to fix right away.

The troubleshooting methods above should help you address the failed to load DLL from the list error code 126 issue. If you used other solutions that might work for this problem, share them with our readers.

If you are facing other issues, like downloader.dll missing, check our detailed guide to fix it quickly.

We also have a guide on how to fix the error 1061 that offers all the step-by-step solutions.

In the comments below, let us know the solution that helped you fix this issue.

VM not booting after Windows update? How to force it

Several users have reported that they’re not able to boot up virtual machines (VMs) on Windows 11 Server 2022 after installing the February 2023 Patch Tuesday. Microsoft has confirmed the issue on the Windows Health Dashboard, promising that it is working to investigate the issue and provide more information in the near future.

“After installing KB5022842 on guest virtual machines (VMs) running Windows Server 2022 on some versions of VMware ESXi, Windows Server 2022 might not start up. Only Windows Server 2022 VMs with Secure Boot enabled are affected by this issue. Affected versions of VMware ESXi are versions vSphere ESXi 7.0.x and below.”

While the Secure Boot option itself is designed to prevent malware to take over the device during the boot time and blocking programs without valid signatures to run, it seems to backfire on some users. One Reddit user says that they’re not able to boot the VM until Secure Boot is disabled in the VM options, while others even lost a server to this issue.

Microsoft says there’s currently no fix to this issue, but there are still a few workarounds to be done to prevent it.

How to prevent VM not booting after Windows update?

1. Disable secure boot.

  1. With the vSphere Client inventory open, right click on the virtual machine ➔ Edit Settings.
  2. On VM Options tab, expand Boot Options.
  3. Make sure that the firmware is set to EFI.
  4. Untick Secure Boot to disable secure boot.
  5. Hit OK.

2. Download vSphere ESXi 8.0 & upgrade.

1. Go to VMWare‘s website and click Customers Connect.

2. Enter your email and password, then hit Sign In.

3. Once open, go to VMware vSphere Hypervisor (ESXi) Download Center. Make sure to select 8.0 on the dropdown.

4. Depending on the plan, there are a few options to choose. Here, we chose the Standard edition ➔ Go to Downloads.

5. If you have purchased the software, you should be able to see Download Now enabled. If not, there’s an option to Download Trial.

Has this issue impacted your organization? Let us know in the comments!

FIX: LastPass Autofill not Working [Chrome, Edge, Firefox]

The LastPass autofill feature is one of its endearing attributes for users. This is because manually entering passwords and user IDs into different sites can be inconvenient.

However, some users are complaining that this all-important auto-fill feature is not working for some reason. If you also face this issue, this guide will show quick ways to restore normalcy to your password manager.

Why is my LastPass not auto-filling?

Below are some of the reasons LastPass might not be auto-filling on your browser:

  • Autofill is disabled: As simple as this may look, if LastPass is not auto-filling on Chrome, Firefox, or Edge, it might be because the feature is disabled. You need to log into the extension and enable autofill.
  • Issues with the extension: LastPass can sometimes malfunction, leading to this issue. In this case, you might need to recreate the password entry or switch to another password manager.

What can I do if LastPass autofill is not working?

1. Check that LastPass autofill is enabled

  1. Click the LastPass icon in your web browser toolbar.
  2. Select the Preferences option in the left pane.
  3. Now, select General.
  4. Finally, enable the setting Automatically Fill Login Information and click Save.
    automatically lastpass not autofilling

The first thing to do if the LastPass is not auto-filling is to check if the feature is enabled. If it is and your credentials are not filled in automatically, you can proceed to the next solution.

2. Use another password manager

Since the whole point of a password manager is to remember all passwords for you and autofill them in the right websites, you need a fast fix.

A good solution is to switch to a different password manager. We use RoboForm because of its excellent security features and unlimited password storage.

RoboForm already has smart imports from most password managers, including LastPass. This tool allows you to back up and sync your passwords across all your browser and devices.

The top-notch security is maintained by two-factor authentication, easy password access, and a powerful password generator.

RoboForm will help you generate unique and strong passwords instead of weak or reused password options.

RoboForm

Secure your digital activity and store your passwords and private data with RoboForm.
Check Price Visit Website

3. Recreate the site entry

  1. Access your LastPass vault.
  2. Click the Passwords option in the left pane.
  3. Now, hover over the entry you want to remove and click the Delete icon.
    delete
  4. Click the Yes button when prompted to confirm the action.
    yes
  5. Finally, recreate the entry by logging into the site again.

If the LastPass autofill feature is still not working, you might need to remove the site it is failing for and add it again.

4. Export LastPass autofill data and use the browser’s autofill

  1. Access your LastPass account.
  2. Select Advanced Options > Export in the left pane.
    advanced options lastpass not autofilling
  3. Now, enter your Master Password and click Continue.
    master continues
  4. This will download your data as a CSV file.
  5. Finally, you can open this data with the appropriate sheet (e.g., Excel) and copy the information into your browser to use the autofill option.

If everything above fails to make the LastPass autofill work, you can use your browser’s default instead. This should save you stress and data.

We have reached the end of this detailed guide on the LastPass not auto-filling issue. You should now be able to fix this issue quickly by applying the solutions therein.

Similarly, if you want to use your browser’s default but Chrome autofill is not working, check our detailed guide to fix it effortlessly.

In the comments below, let us know the solution that helped you fix this issue.