Wired Vs Wireless Headphones [Quick Comparison]

The technology behind headphones has evolved over the years and now users get to choose from wired vs wireless. When listening to music, you may encounter an issue where sound is not coming from your headphones. Nonetheless, there are a few factors to consider as such problems can happen to both. 

This brings us to the question: Are wireless headphones really better than wired ones? Are they worth the extra money? In this article, we’ll take a look at the pros and cons of each type of headphone and decide which one is best for you.

Are wired headphones better than Bluetooth ones? 

There are many factors to consider when buying a pair of headphones. But one of the most important one is the type of connection they use.

Bluetooth technology has become increasingly popular, thanks to its convenience and reliability. However, wired headphones still have their place in the market, especially for people who want more than just music.

So what makes one better than the other?

1. Battery life

The biggest advantage that wired headphones have over wireless ones is battery life. Therefore, if you’re traveling or exercising for long periods of time, it’s nice not to have to worry about your headphones dying on you.

With that said, wireless headphones are certainly better than the old wired models and are getting better every year. You may only get a few hours of continuous use from some wireless headsets, but some have quite an impressive battery life. 

2. Sound quality

One of the most important factors when buying a pair of headphones is how they sound. You will want a pair that has clear bass, crisp mids and highs, and very little distortion at high volumes. 

A common misconception is that Bluetooth technology always delivers high-quality sound. But it depends on a few factors: the codec (compression) used, the bitrate (data rate), and the sampling frequency (the number of times per second a digital signal is sampled).

The overall sound quality can vary from brand to brand, so it’s best to listen before making a purchase decision. Better yet, you can always incorporate headphone software to improve sound quality.

3. Durability 

Most wired headphones last longer than wireless versions because there are fewer parts that can break down over time (such as batteries). Wireless headsets are more delicate and require more maintenance than wired ones.

This is because they contain batteries that must be charged regularly. Your pair is therefore at risk and could potentially break down while it’s charging or during use if you’re not careful with it on your desk.

You want to make sure that your product will last for a long time before it needs replacing or repairing because this will save you from having to spend more money in the future on another pair of headphones or earbuds.

4. Cost 

The first thing that you should ask yourself is whether or not you can afford these products. If you cannot afford them, then it does not matter how good they are because you will not be able to buy them. 

The cost of Bluetooth headphones is generally higher than that of wired headphones. This is because they require more functionality and technology than wired models do. However, also keep in mind that your headphones may stop working if you buy poor quality just to save on costs.

5. Comfort

Bluetooth headphones offer greater convenience than wired ones because they don’t require any cables or wires to connect them to your music player or phone — just switch them on, pair them with your device via Bluetooth and you’re good to go

Wired headphones can get tangled up easily and can be uncomfortable when they rub against your neck or face. Also, you risk damaging the cables if you easily get caught up in small accidents like falling or tripping over.

Are USB headphones better than 3.5mm audio jack ones?

The 3.5mm audio jack has been the standard for a long time, but USB-C is now taking over. If you’re looking for the best sound quality possible, then yes, you should definitely go with USB headphones. 

However, keep in mind that there are many different types of headphones out there and some of them are not compatible with a USB connection. As for wireless, sometimes your Bluetooth headphones are undetectable on your device.

In conclusion, it can be difficult to find a pair of headphones that work well in every situation. The right pair will have a sound signature that matches your preferences, and they’ll also need to be comfortable enough to wear while working out or sitting at a desk all day.

Ultimately, the right pair of headphones is going to come down to your lifestyle and needs, as well as which features you value most. Whatever option you choose to go for, we have awesome recommendations for both wireless and wired headphones.

Also, check out our comprehensive comparison of Bluetooth headset vs headphones if you were curious about these too.

Now that you know the difference, why not consider getting one of these cross-platform headsets?

Do let us know your preferred choice of headphones and why in the comment section below.

Fix: Google Drive Not Showing all Files and Folders

Google Drive is one of the leading cloud storage, and it has wide acceptance thanks to being free and easily accessible. However, it is not without issues, with users complaining that Google Drive is not showing all files.

Thankfully, it is an issue that can be easily fixed, as we will show in the subsequent sections of this guide.

Why are not all my files showing up in Google Drive?

Listed below are some of the reasons for the Google Drive Drive not showing all files issue:

  • Faulty browser cache: In some cases, this issue can be due to a corrupt browser cache. You need to clear the cache to solve this.
  • Firewall interference: Often, Google Drive files might not be showing up on your PC because your firewall is blocking it. You need to disable your firewall and antivirus software to eliminate the problem.

What can I do if Google Drive is not showing all files?

Before delving into the sophisticated solutions in this section, below are some preliminary steps to try:

  • Run Google backup as administrator and re-sign in
  • Restart your PC, and Google sync
  • Use incognito mode on your browser
  • Search for missing files

1. Pause and resume Google Drive

  1. Click the Google Drive button on the Taskbar.
  2. Select the menu button (three vertical dots) in the top right corner.
  3. Now, choose Pause syncing.
    pause syncing google drive not showing all files
  4. Finally, wait a few seconds, then go back and press Resume syncing.

If Google Drive not showing all folders and files or just files with link on your PC, you should try to pause and resume sync. This will eliminate the glitches that might be causing it to misbehave.

2. View unsynced files online

  1. Click the Google Drive icon in your Taskbar.
    icon
  2. Choose View unsynced files.
  3. Finally, click the Visit Google Drive on the web option.

In some cases, the Google Drive files that are not showing might not be synced. The solution is to open the files online and try to sync them again.

3. Make sure all folders are checked to sync

  1. Open the Google Drive menu from the Taskbar.
  2. Go to Preferences.
    preferences google drive not showing all files
  3. Finally, tick the radio button for Sync everything in My Drive.sync everything

4. Clear browser cache

  1. Launch your browser and click the menu button.
  2. Select the More tools option.
  3. Now, choose Clear browsing data.
    clear browsing google drive not showing all files
  4. Click the Time range dropdown and select All time.
    time range
  5. Check the boxes for the Cached images and files, and Cookies and other site data options.
  6. Finally, click the Clear data button.
    clear data

Sometimes, this issue can be due to corrupt browser data. This happens when your Google Drive cache and cookies accumulate on your browser.

What you need to do is to clear your data.

5. Disable firewall and antivirus temporarily

  1. Press the Windows key, type windows defender, and select the Windows Defender Firewall option.
    windows defender
  2. Find and click Turn Windows Defender Firewall on or off on the left pane.
    turn windows google drive not showing all files
  3. In the Customize Settings window, select the Turn off Windows Defender Firewall (not recommended) radio buttons for both the Private and Public network settings.
  4. Click OK to disable Windows Firewall.
    turn off
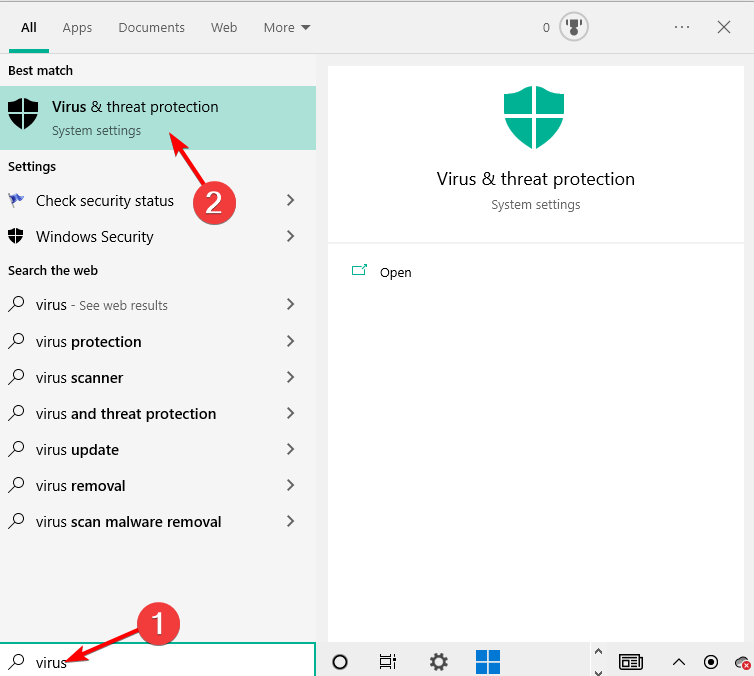
  5. Now, press the Windows key, type virus, and select Virus & threat protection.
    virus google drive not showing all files
  6. Click the Manage settings link.
    manage settings google drive not showing all files
  7. Finally, toggle the switch under Real-time protection backward to disable it.
    real time

If the Google Drive folder is not showing all files, it might be because of your firewall or antivirus. The security tool might flag the files wrongly.

What you need to do here is to disable your antivirus and firewall temporarily.

With this, we can conclude this guide on Google Drive not showing all files issue. You should now be able to solve the problem for good, provided you follow the steps therein.

Similarly, if you do not see shared files on Google Drive, check our comprehensive guide to restore normalcy.

Feel free to let us know the solution that helped you solve this problem in the comments below.

Overwatch 2’s Winter Wonderland Event is now live on Xbox and PC

The Overwatch 2 video game’s Christmas event, Winter Wonderland 2022, is now live on Windows PC, Xbox consoles, and all other supported platforms until January 3rd.

Simply logging into Overwatch 2 will unlock the Festive Wreath weapon charm and 2023 player icon items. A number of additional festive items can also be unlocked for free by completing several in-game challenges. One such item is the Ice Queen Epic Brigitte skin which makes its debut during this event.

Another skin debuting in the game this week is the Legendary Gingerbread Bastion skin (see top image) which can be purchased in-game for just one Overwatch coin.

In addition to new items and skins, four special modes, Mei’s Snowball Offensive, Yeti Hunter, Snowball Deathmatch, and Freeze Thaw Elimination are now live and playable until the end of Winter Wonderland 2022.

Overwatch 2 launched a few months ago in October and, while its launch was plagued by several issues, things mostly seem to be going well nowadays.

Overwatch® 2
Overwatch® 2
Price:
Free

Amazon Prime Video Audio Out of Sync? Fix it in Just 4 Steps

Amazon Prime Video is available on multiple platforms, allowing users to watch their favorite shows on any device. However, sometimes, you may experience audio out-of-sync issues when watching TV shows or movies on your TV.

The Amazon Prime Video audio out-of-sync issue can occur due to incorrect frame-matching settings in Apple TV or issues with your streaming devices.

If you are also experiencing the Amazon Prime Video audio out-of-sync issue, follow the steps below. We have listed some known solutions to help you resolve the problem.

How do I fix the Amazon Prime Video audio out-of-sync problem?

1. Disable Frame Rate Matching in Apple TV

Prime Video audio out of sync
  1. Press the Home button on your Apple TV remote.
  2. Open Settings.
  3. Select Video and Audio option.
  4. Open Match Content.
  5. Turn off the Match Frame Rate option.
  6. Relaunch the Prime Video app and check if the audio out-of-sync issue is resolved.

The Match Frame Rate feature allows Apple TV to match its refresh rate to the original frame rate of content. However, this may create issues with some services resulting audio sync problem.

2. Turn off Volume Mode in Roku TV

Prime Video audio out of sync
  1. Launch the Prime Video App and play the content that you want to watch.
  2. While the content is playing, press the * Star button on your Roku TV remote.
  3. Turn off the Volume Moden option. By default, it is set to Leveling or Night. Simply turn the Volume Mode option off.
  4. Close and relaunch the Prime Video app on your Roku TV and check if the audio sync issue is resolved.

The Volume Mode option allows the users to balance volume while watching the content automatically. However, enabling or setting the option to Levelling or Night can also result in audio sync issues with apps like Prime Video.

3. Check your HDMI cable

Prime Video audio out of sync
  1. Unplug the HDMI cable that is connecting your Roku or other streaming devices to the TV.
  2. Make sure the HDMI cable is not faulty.
  3. Broken or loose HDMI cable connections can cause audio sync issues.
  4. Try playing content from another streaming service, such as Netflix, to see if the audio sync issue exists.
  5. If you suspect the HDMI cable to be faulty, replace the cable even if other streaming apps play the content without any issues.
  6. Replacing the HDMI cable has helped several Roku TV users fix the Prime Video audio sync issue.

Check your audio system

  1. If you are using an external audio system like a soundbar and speakers, the problem can be with the audio system.
  2. Try connecting your audio system to another device and check if you can reproduce the issue.

4. Restart or hard reset

Perform a power cycle

Prime Video audio out of sync
  1. Power off all the devices, including your TV and the streaming device (Roku, Apple TV).
  2. Unplug the device from the TV.
  3. Unplug the power adapter from the power outlet.
  4. Leave the devices idle for a few minutes.
  5. Reconnect all the cables and then reboot the devices.
  6. Launch the Prime Video app and check for any improvement.

Factory reset Roku TV

Prime Video audio out of sync
  1. Press the Home button on your Roku remote.
  2. Scroll down and select Setting.
  3. Go to System > Advanced System Settings.
  4. Open the Factory Reset option.
  5. Factory resetting the device will remove all the settings and apps installed on your Roku TV. You will require to set up the device from scratch.
  6. Select Factory reset everything.
  7. Follow on-screen instructions to factory reset the device successfully.

Once done, install Prime Video and check if the audio out-of-sync issue is resolved. Resetting could also resolve the error 7136. If you have any other device, refer to the user manual for factory reset instructions.

The Amazon Prime Video audio out of sync can occur for different reasons depending on your streaming device.

Follow the steps in this article one by one to fix the issue with your Prime Video app. Let us know which method helped you resolve the issue in the comments.

White Screen of Death: Causes & 8 Fixes

Windows 10 tries to ensure a stable experience regardless of your system configuration or the type of processes and apps you choose to install and run daily.

However, from time to time, you can end up dealing with different issues. Fortunately, they can usually be addressed using built-in troubleshooters or applying easy-to-follow tweaks.

But things are slightly more complicated when you get the White Screen of Death. If you are currently dealing with a White Screen of Death situation on your Windows 10 system, you shouldn’t panic.

In this guide, we will show you different ways to fix the issue, just as we did with the Blue Screen of Death problem.

What causes the Windows 10 White Screen?

There are many reasons for this, but it’s not uncommon for your PC screen to turn white on startup if you’re having issues with drivers.

Another indication that you might have a driver or even a hardware problem is a white screen when playing games, so check your GPU to see if it’s working correctly.

In some instances, your PC screen can become black and white; if this happens, the issue is most likely your settings or even a problem with your monitor.

How can I fix the White Screen of Death on Windows 10?

1. Force restart your Windows 10 system

If you are receiving the White Screen of Death error while trying to boot your machine and the actual Windows login page isn’t displayed, the first thing you should try is a force-restart.

A fresh restart should fix everything if the problems were caused by a specific app or a minor system glitch.

In most situations, a force restart or a force reboot can be initiated by pressing and holding the Power key for a few seconds. Just keep pressing the Power key until the shutdown operation is completed.

Afterward, boot your Windows 10 device once again and see if the Windows 10 white screen problem persists.

2. Remove any peripherals connected through USB

If the White Screen of Death shows up with a cursor on Windows 10 after restarting your PC, you should remove the peripherals connected via USB.

Most likely, a particular external device is a reason for the problem. So, foremost, disconnect everything from your computer.

Unplug even the keyboard and the mouse. Then, force-restart your computer and see what happens.

If the Windows OS starts normally, start connecting your peripherals one at a time. You can now easily identify if a specific external device isn’t running as it should.

3. Go into Safe Mode

  1. Press the Windows key + R to launch the Run utility.
  2. Type msconfig in the run box and press Enter.
    enter msconfig windows 10
  3. The System Configuration window will now be displayed on your computer.
  4. From there, switch to the Boot tab.
  5. Under Boot options, select Safe Boot.
  6. Optional, you can also select Network if you want to use your Internet connection while running in Safe Mode.
  7. That’s it; reboot your device as it will go straight to safe mode.

Sometimes a third-party app can be why you receive the White Screen of Death after login. You should access safe mode to isolate the problem and identify the app that isn’t running correctly.

In safe mode, by default, all third-party apps are disabled.

Thus, shortly, if in safe mode, your device is running without problems, it means that the problems were caused by a third-party process, which can now be easily removed.

4. Update your graphic drivers

4.1. Update drivers manually

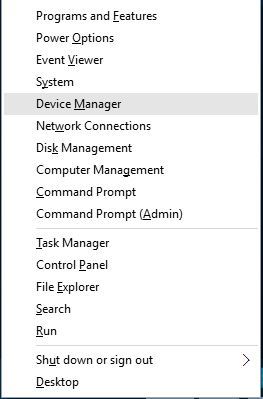
  1. Press the Windows key + X and select Device Manager.
    manager white screen of death windows 10
  2. Double-click the Display adapters option to expand it.
    display adapters white screen of death windows 10
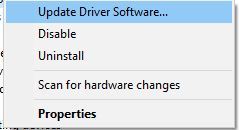
  3. Right-click on each of the drivers there and select Update driver.
    update
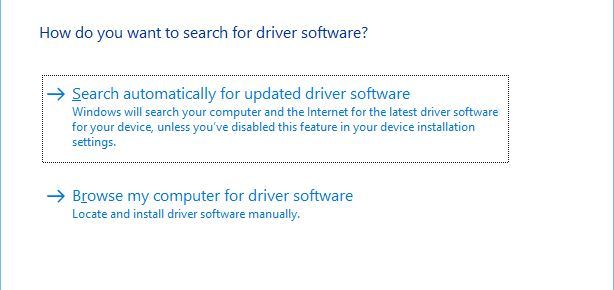
  4. Select the Search automatically for drivers option.
    search automatically white screen of death windows 10
  5. Wait for the search to complete and install any available update.

An outdated graphic driver might bring out the White Screen of Death on Windows 10 and 11 while you try to use or run certain apps.

So, in that case, you should verify if the drivers can receive a new update.

4.2. Update drivers automatically

Updating your graphic drivers manually is tedious, so we recommend using a dedicated driver updating tool to do it automatically.

These tools are fast, updating, and repairing all of your drivers in a single action with minimum implications for you.

5. Apply the newest Windows update

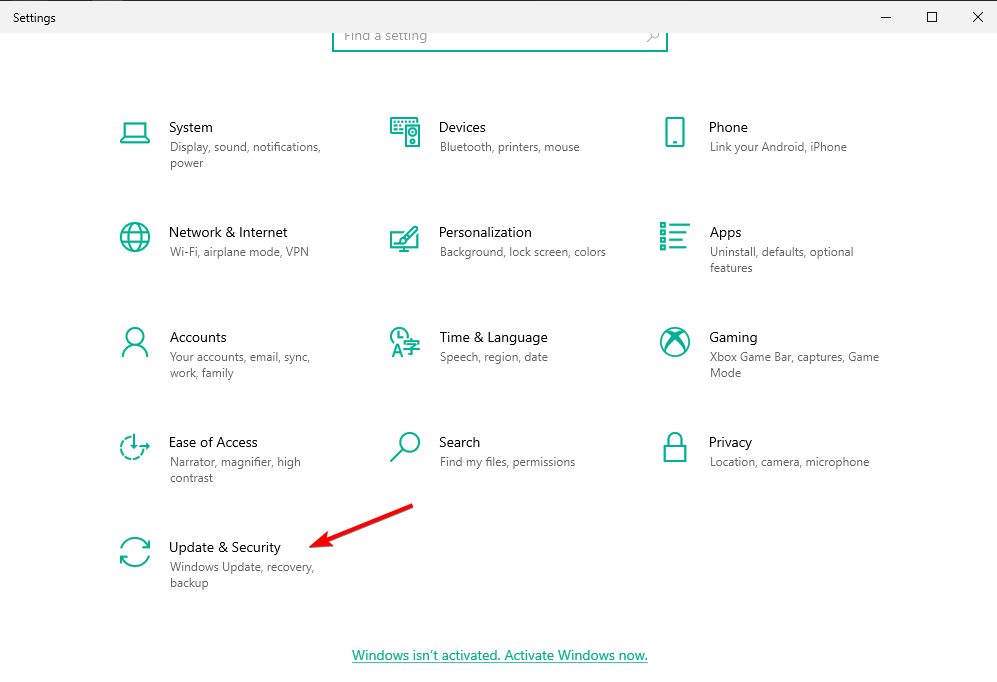
  1. Press the Windows key + I to open Settings.
  2. Select the Update & Security.
    update and security
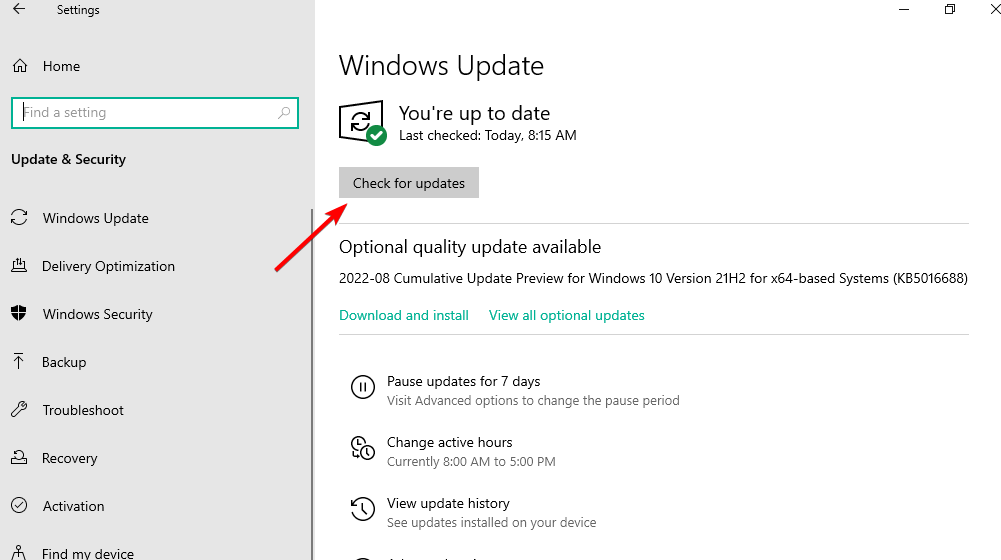
  3. Click the Check for updates button.
    check for updates white screen of death windows 10
  4. Wait for the scan to complete and click the Install now button to install the new updates.
  5. When done, reboot your computer.

Sometimes, your Windows 10 computer turns white and freezes suddenly. An outdated operating system might cause this.

After restarting your Windows 10 or 11 PC, check whether the White Screen of Death persists.

6. Remove a recently installed Windows update

  1. 1. Open the Settings app and select Update & Security.

  2. 2. Scroll down on the Windows Update page and click the View update history option.

    view update
  3. 3. Now, select the Uninstall updates option. This will open the Control Panel.

    uninstall option white screen of death windows 10
  4. 4. Now, click on the updates to remove.

    update
  5. 5. Click the Uninstall button.

    uninstall button
  6. If you started to experience the White Screen of Death after installing a new Windows 10 update, the quickest fix is to remove that certain patch.

    This can be done via the Installed Updates section on your PC.

7. Use System Restore Point

If you get a Windows 10 White Screen of Death after login, you should consider using a restore point. This way, you can restore your Windows system to a fully functional state.

To know how to create a system restore point on Windows 10 or Windows 11, check our detailed guides.

However, it must be noted that this method requires utmost care. This is because everything that was installed after the restore point chosen will be lost. So, you need to be sure.

8. Run some hardware tests

If the problem is still there, you should run some tests as there might be a problem with some hardware components.

Faulty hardware might be causing the white screen of death: it can be the graphics card, the monitor, the GPU, the hard disk, or even the motherboard.

Therefore, ensure everything is running correctly; otherwise, you will apply the troubleshooting methods from above in vain.

If you don’t know how to perform these hardware tests, the best will be to take your computer to an authorized service.

How do I restart my laptop when the screen is white?

Sometimes the white screen does not cause your PC to go blank or hang. In this case, you can use the usual restarting methods.

However, if you can’t see anything on the screen, the only option is to force restart or shut down your laptop. This can be done by pressing and holding the power button for a few seconds.

There you have it: Everything you need to know about fixing the White Screen of Death issue on Windows 10 and 11. All you need to do now is to follow the instructions carefully, and things should be back to normal.

If you have further questions or want to share your observations and experience with us, feel free to use the comments below.

Outlook Error Code CAA2000B: How to Fix It in 4 Steps

There are several errors users encounter when using Outlook on their devices. Recently, Outlook error code CAA2000B is the most common, and it prevents users from signing into Microsoft Outlook.

Likewise, users report issues with Outlook connecting to a server or your Gmail account on their PCs.

What causes the Outlook error code CAA2000B?

Running into Outlook Error code CAA2000B on your PC indicates that something went wrong with the login process. So, it means you can’t log into your Microsoft Outlook account at the moment.

Furthermore, many factors can cause the error to appear in Outlook. Some of these factors include:

  • Network issues – An unstable network or network congestion on your PC can cause problems signing into your Outlook account. It can result in the Error code CAA2000B when you try to log in.
  • Outdated Outlook app – Many errors can occur when the Outlook app is not updated. It prevents the app from accessing the security patches and updates for fixing bugs that may cause errors. Also, it can cause Outlook not to open due to compatibility problems.
  • Corrupted Outlook cache – Keeping cache files for a long time can cause them to become old and corrupt, causing issues with Outlook functionality. It can prompt the Error code CAA2000B to occur.
  • Incorrect time and date – It is common for Microsoft apps to run into errors if the time and date are not correctly set. You can check this guide to change the time and date on your PC.

The cause of the error may vary with different users. So, we’ll take you through some general fixes for the error and get your Outlook account signed in.

How do I fix the Outlook error code CAA2000B?

Go through the following before trying any advanced fixes:

  • Fix network congestion on your PC.
  • Exit Outlook and reopen it.
  • Power cycle your router or modem. Doing so will refresh its network and improve its connection. It will fix Outlook connection issues on your PC.
  • Restart your PC and check if the error persists.

If you can’t get around the error, proceed with the solutions below.

1. Set the correct Windows date and time

  1. Right-click on the Date and time on the taskbar of your screen.
  2. Click on the Adjust date/time option.
  3. Turn on the switch for the Set time automatically option on the Date & time menu.
  4. Restart your PC to initiate the time change across your apps.

You can read our guide on changing time on Windows 11 if you can’t get around the steps above.

2. Update the Outlook app

  1. Press Windows + R keys to open the Run dialog box, type outlook.exe/safe, then click the OK to start Outlook in Safe Mode.
  2. Click Yes on the Microsoft confirm prompt.
  3. Click on File, select Office account, and click the Office updates menu.
  4. Tap the Update Options button, then click Update Now from the drop-down to install pending updates on Outlook.
  5. Restart your PC and launch Outlook to see if you can log into Outlook.

Installing updates will fix Outlook errors affecting its performance and Error code CAA2000B to occur.

3. Rebuild the Outlook Profile

  1. Left-click the Start button, type Control Panel, then click OK to open it.
  2. Select Mail from the menu.
  3. Click on the Show Profiles button.
  4. On the General tab, click on the Add button, then untick the Always use this Profile option.
  5. Input the Profile name and click OK.
  6. Add your Name, Email address, and password credentials, click Next, then Apply to save changes.

Rebuilding a profile will help you sign into Outlook and fix corrupt Outlook profile issues.

4. Clear Outlook cache

  1. Press Windows + R keys to open the Run dialog box, type %LOCALAPPDATA%\Microsoft\Outlook\, then click OK.
  2. Right-click the RoamCache folder, select Copy, then paste it into another folder.
  3. Double-click the actual RoamCache folder, select all the items in the folder, or press Ctrl + A, then press the Delete key.
  4. Restart your PC and launch Outlook to check if the error persists.

Clearing the cache will delete corrupt files causing issues with the Outlook login process.

Alternatively, you can check our guide on what to do if Outlook crashes after Windows updates on your PC. Likewise, it may be beneficial to read about fixing Outlook error 0x80070021 on Windows 11.

If you have further questions or suggestions, kindly drop them in the comments section below.

Windows Update Error 80246007 [Solved]

Keeping your Windows OS up to date is quite important because updates provide you with the latest security fixes and features. Several users have reported receiving the Windows Update error 80246007, so let’s see what you can do in case of being one of them.

What is Windows update error code 80246007? Well, it is usually related to downloading updates, but some people have been getting it while updating apps from Windows 10 store too. It can come up accompanied by this error message: failed [80246007] isusinternal:: iscommitrequired.

There are a few solutions that might help you out and we will walk you through them.

How can I fix the Windows Update error 80246007?

1. Restart Background Intelligent Transfer Service and Windows Event Log

  1. Go to Control Panel and type administrative tools in the search box.
  2. Choose Administrative Tools.
  3. Double click Services. You might be asked to enter your administrator password.
  4. Find Background Intelligent Transfer Service (BITS) service, right-click it and choose Properties.
  5. In the General tab find Startup type and make sure that Automatic (Delayed Start) is selected.select Automatic Delayed Start error 80246007
  6. Find Service status next and check if the service is started. If not, click Start.
  7. Click OK and close the Properties dialog box.
  8. Right-click Windows Event Log service and choose Properties.
  9. In the General tab make sure that the Startup type option is set to Automatic. Startup type option
  10. Find Service status and check to see if the service is started. If not, click Start to turn it on.

2. Disable your antivirus/firewall tools

removal of antivirus to fix error 0246007

If you still face the Windows update error code 80246007, it is an excellent idea to take into consideration disabling your antivirus/firewall. These tools usually are a must in every system to protect against virus threats.

However, they sometimes prevent Windows Updates from working, as a result of which you will get annoying error messages. If this makes no difference, we have another suggestion.

To be more precise, you could also temporarily uninstall these programs. For the Norton users, we’ve got a dedicated guide on how to completely remove it from your PC. There’s a similar guide for McAffe users, as well.


3. Use PowerShell to reinstall the apps

  1. Type PowerShell into the search bar, right-click it and tick Create this box with administrative privileges. administrative privileges
  2.  Enter:
    • Get-appxprovisionedpackage –online | where-object {$_.packagename –like “*windowscommunicationsapps*”} | remove-appxprovisionedpackage –online
  3. Now, try to reinstall the apps from the store.

4. Change the registry

  1. Open Registry Editor by typing regedit in the search bar.enter regedit
  2. On the right side you need to locate the following key:
    • HKEY_LOCAL_MACHINESOFTWAREMicrosoftWindowsCurrentVersionWindowsUpdateOSUpgrade]
  3. If this key doesn’t exist, create it.
  4. Now you need to create a new DWORD (32-bit) Value with Name = AllowOSUpgrade and set the Value = 0x00000001.
  5. Once this key is added you can update your Windows access store and update your apps.

Before modifying the registry, note that any incorrect change you can cause further issues. Thus, be careful about each step you’re taking and create a backup of your registry, just in case.


As you can see, all the above solutions are straightforward and simple, so you’ll be able to fix the Windows Update error 80246007 without any major problems.

If you have any comments, questions or maybe some other solutions for this problem, write your thoughts down in the comments below.

4 Foolproof Ways to Fix IPTV Not Working With WiFi

IPTV is highly monitored and has faced massive blocks in Italy. This all stemmed from a lot of illegal providers broadcasting pretty much all TV content in Italy for a very low price or for free.

Fines go all the way up to 10 000 euros per IPTV service, and over 400 IPTV providers have been shut down. Individual users also risk getting fined and being called to court hearings.

Unfortunately, the restrictions seem to also affect people that use legit IPTV services, as ISPs’ blocks deem any activity as suspicious. Consequently, pretty much any type of IPTV no longer works in Italy.

Users report their IPTV does not load channels or is displaying an endless loop of errors.

Luckily there are ways to fix that and access IPTV without being blocked or detected. Check our instructions below to quickly get around this issue.

Which WiFi internet provider blocks IPTV in Italy?

ISPs do not have much of a say in this. They get court orders that force them to monitor and restrict IPTV usage on all their networks.

You can expect to be blocked out of your IPTV service if you use the following ISPs:

  • Wind
  • Tim
  • Cloudflare 
  • Go Internet 
  • Vodafone
  • Melita

The odds are that other providers will be required to do the same thing in the future. So if you want to keep using IPTV, simply switching your Internet provider may not do the trick.

You need to conceal your online activity, and we got several trustworthy things you can try to achieve that.

Note icon NOTE
This guide is for illustrative and informative purposes only. Windows Report declines any responsibility for incorrect use or use that goes against the laws in force in Italy.

How to fix IPTV not working on home WiFi?

1. Use a VPN

VPNs mask your IP and encrypt your traffic data. This makes you untraceable online, so your ISP won’t be able to monitor or block IPTV.

To use ExpressVPN in solving IPTV not working with WiFi:

  1. Get an ExpressVPN subscription and download the app to your device.
    IPTV not working with WiFi
  2. Install the app and log in with your credentials.
  3. In the VPN app, pick a server located outside Italy. ExpressVPN has servers in 94 different countries, so there are plenty of options.
    iptv not working with wifi
  4. Launch your IPTV service.

ExpressVPN is one of the most reliable VPNs on the market. It’s very stable and has a wide range of privacy-oriented features to ensure that none of your information is vulnerable.

It has 3000+ servers in 94 countries, so there are plenty of options you can use to safely connect to in order to get access to your IPTV channels.

ExpressVPN

Bypass the IPTV block using ExpressVPN and enjoy your favorite online content without any risk!
Check price Visit website

2. Change your router’s DNS

Using a different DNS than the one provided by your ISP makes it more difficult for them to track your activity and block you. The changes will apply to all the devices and IPTV software your use.

Here’s how to change your DNS server from your router’s admin panel:

  1. In a web browser, launch your router settings panel.
  2. Provide username and password to log in. To change DNS, you need to log in with the admin account.
    iptv not working with wifi
  3. Locate DNS settings and change your DNS addresses.
    iptv not working with wi fi
  4. Save your settings and restart your router.

You can find high-quality DNS addresses for free which should do the job just fine. A reliable and stable option is the Google Public DNS service.

After you set up this new DNS server, try to launch your IPTV service again. At this point, it should work without restrictions.

3. Use a proxy

Proxies too hide your location and mask your IP, being another useful fix if your IPTV does not load the channel list. They can get rid of ISP monitoring that stops IPTV from working on your WiFi network.

  1. Launch Windows Settings.
  2. Select Network and Internet on the menu.
    iptv not working with wifi
  3. Select Proxy on the left-hand side menu.
     
  4. Enable the Automatically detect settings toggle. 
    iptv not working with wifi
  5. Under the Manual proxy setup section, turn on Use a Proxy Server. 
  6. Turn on the Use setup switch if Windows finds a PAC file already. You can find the switch under Automatic proxy setup.
  7. Now click Save after inputting the proxy address.

You can get a dedicated proxy address online. There are many providers that offer them for free, or at least include a free trial so you can try them out and see if they really can unlock IPTV.

We advise you use a high-quality proxy if you want to stay anonymous, given these serious regulations happening in Italy.

4. Use Tor

Tor is a web browser that works similarly to a proxy. It reroutes your traffic through multiple nodes, making your online activity untraceable.

It’s easy to set up and a great option for those that use IPTV on a PC:

  1. Get Tor from its official download site and install it.
  2. Launch the Tor app and click on the Connect button.
  3. Wait for the browser to configure.
  4. Type the web address of your IPTV provider and login into your account.
  5. Browse the library and access your content.

Tor is a great free option you can use to bypass these ISP regulations that cause IPTV to not work on your WiFi home network.

Sometimes Tor can get detected, thus blocking your access, but if you enable all its privacy features, you should be fine. Your IP address and true identity won’t be visible even if Tor usage is detected.

Wrap Up

IPTV not working with Wifi is not a new issue. It’s a widespread issue, and major ISPs like Vodafone block IPTV usage in an attempt to comply with the law.

Other IPTV problems you may encounter include the app not working at all, in which case you can follow this IPTV not working guide for general troubleshooting. If you’re missing channel information, you might be dealing with the issue of IPTV not showing the TV guide, which is often tied to outdated EPG data. Additionally, specific errors like IPTV error code 401 or IPTV error code 403 can point to authentication or access problems that require more targeted fixes.

All of the above-mentioned solutions are reliable ways you can fix the IPTV not working with Wi-Fi issues, but that does not mean illegal use is condoned.

We advise you carefully check your IPTV provider’s credibility before you sign up for a subscription, to avoid getting scammed or using illegal services.

How to Fix Windows Update Error 0x80190001

The Windows update error 0x80190001 is hindering Windows users from updating their PCs. This error affects every version of Windows and it’s usually due to connection issues, but it may also be caused by corrupted system files.

How do I fix the error code 0x80190001?

1. Run the Update Troubleshooter

  1. Press the Windows key + I to open the Settings app.
  2. Now go to the Update & Security section.
    security windows update error 0x80190001
  3. Select Troubleshoot from the menu on the left.
    troubleshoot option
  4. Choose the Additional troubleshooters option.
    additional trouble
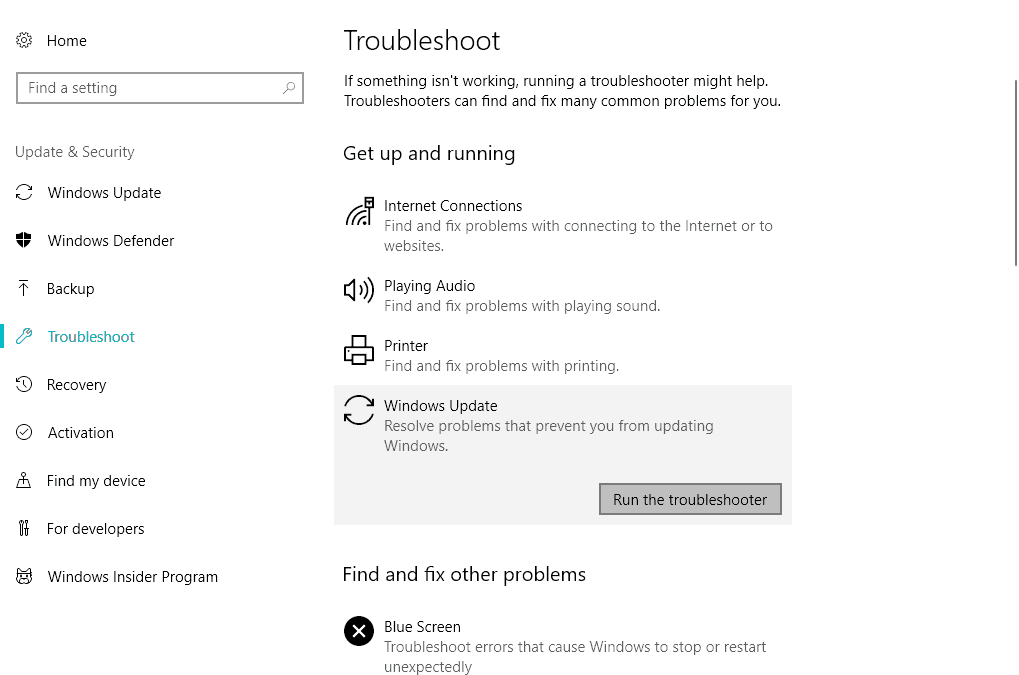
  5. Now, select Windows Update.
    option  update error 0x80190001
  6. Finally, click the Run the troubleshooter button.
    run  update error 0x80190001 windows
  7. Follow the instructions on the screen to complete the process.

The Windows Update troubleshooter is one of the built-in tools to fix update errors like 0x80190001. Once the troubleshooter is finished, try to update Windows again and check if the problem is still there.

2. Repair your system files

  1. Press Windows key + X and choose Command Prompt (Admin) or Powershell (Admin).
    0x80190001 Windows 10
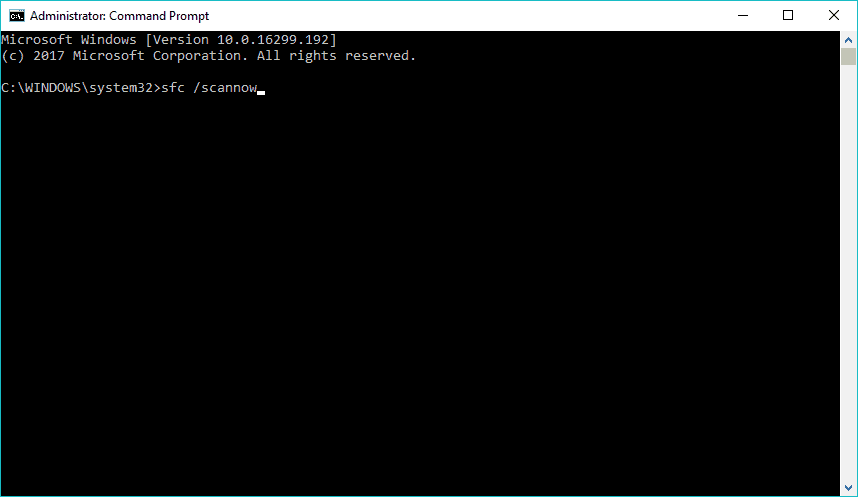
  2. When Command Prompt starts, run the sfc /scannow command.
    0x80190001 Windows 10
  3. SFC scan will now start. Remember that an SFC scan can take up to 10-15 minutes, so don’t interfere with it, and don’t run any other applications in the background.

Another cause for error 0x80190001 can be file corruption, and if your system files are damaged, you need to repair them using an SFC scan.

Once the SFC scan is finished, check if the problem is still there. If the issue persists or you could not run or complete the SFC scan, you need to use the DISM scan instead.

0x80190001 Creators Update

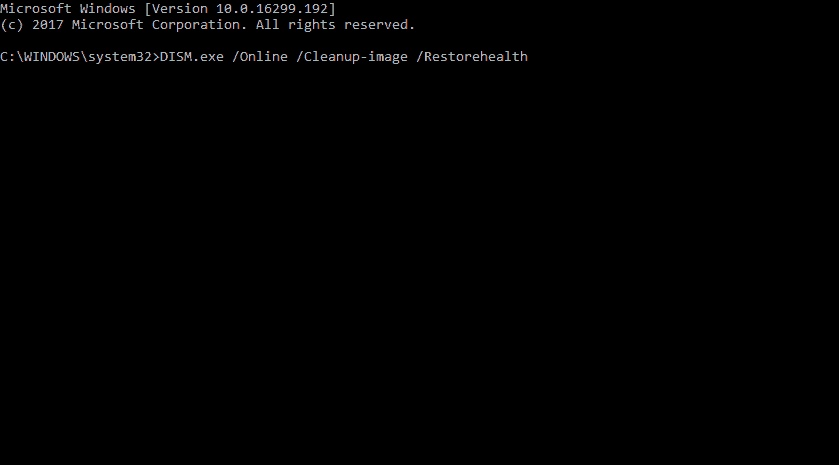
To do that, start Command Prompt as administrator and run the command below: DISM /Online /Cleanup-Image /RestoreHealth

This should fix the damaged files and solve any issue with the SFC scan

However, instead of going through the stress of repairing files manually, we recommend using a third-party repair application.

If your system files are faulty or missing, these tools can replace them, restore your registry, and even do a comprehensive hardware analysis of your Windows PC.

They repair and reverse damage on your Windows OS by replacing damaged and removed files with new Windows files and components from the constantly online databases.

3. Disable your Internet connection

According to users, you might be able to fix error 0x80190001 simply by disabling your Internet connection. Make sure that your update is downloaded and installed.

During the installation process, disable your Internet connection. After doing that, follow the instructions on the screen to complete the installation. Of course, this isn’t the best solution, but few users claim it works, so you might want to try it out.

4. Check your antivirus

The problem might be your antivirus software if you can’t update Windows due to error 0x80190001.

Although antivirus tools offer protection, they can often interfere with your system and cause various errors.

To fix this problem, many users suggest temporarily disabling some features or your antivirus. However, if removing the antivirus solves the issue, you should consider switching to a different antivirus solution.

There are many error-free antivirus options like the ESET NOD32 on the market. This software is your best bet to prevent future issues and keep your system running smoothly, as it is an antivirus with low CPU usage.

5. Disconnect all peripherals

If you have problems with error 0x80190001, the issue might be your USB devices. Sometimes USB devices can interfere with your system, leading to similar problems.

However, you might be able to fix the problem simply by disconnecting all USB devices before trying to install the update.

Disconnect all USB devices except for your mouse and keyboard. Once everything is disconnected, try to install the update again.

This isn’t the most efficient solution, but several users reported it works, so feel free to try it.

6. Download and install the update manually

  1. Find the KB number of the problematic update. You can do that from the Windows Update section or the Update History website.
  2. Once you get the KB number, go to Microsoft’s Update Catalog website and enter the KB number.
  3. A list of results will appear. Download the update that matches your system architecture and install it.
    0x80190001 Windows 10

Several users reported successfully circumventing error 0x80190001 simply by manually downloading the update. However, we must mention that this isn’t a permanent solution, and the issue might reappear when you try to update your system.

7. Make sure your date and time are correct

  1. Right-click the clock in the bottom right corner and select Adjust the date/time.
    Windows 10 upgrade failed
  2. Toggle switch for the Set time automatically option backward to disable it.
  3. Wait for a few moments and then turn it back on again.
    0x80190001 Creators Update

A couple of users reported that error 0x80190001 occurred due to incorrect date and time on their PC. Adjusting your time and date should fix the issue in this case.

After following the steps above, the date and time will be readjusted and synchronized. You can also click the Change button and manually adjust the date and time if you want.

8. Perform a Clean boot

  1. Press Windows key + R, enter msconfig, and click OK.
    Windows 10 upgrade failed
  2. Click the Services tab.
  3. Check the box for Hide all Microsoft services.
  4. Now, click the Disable all button.
    0x80190001 Creators Update
  5. Go to the Startup tab and click Open Task Manager.
    Windows 10 upgrade failed
  6. Right-click on each application there and choose Disable from the menu.
    0x80190001 Creators Update
  7. Go back to the System Configuration window and click Apply, followed by OK, to save the changes.
    Windows 10 upgrade failed

This issue can sometimes occur due to third-party applications and services. However, you can fix that by performing a Clean boot. Then, make sure you restart your PC and check if the issue is resolved.

9. Perform an in-place upgrade

  1. Go to Microsoft’s Windows 10 upgrade website.
  2. Click the Download Now button under the Create Windows 10 Installation Media option.download  update error 0x80190001 windows
  3. Now, click the downloaded tool and Accept the license terms.
  4. Then, select Upgrade this PC now and click Next.
  5. Check the Keep personal files and apps option to keep your apps, files, and settings.
  6. Click Install to launch the upgrade process.

According to users, sometimes you can fix this problem simply by performing an in-place upgrade. However, performing an in-place upgrade will force Windows 10 to update to the latest version.

Once the setup is finished, you’ll have the latest version of Windows installed, and the problem will be resolved.

How can I fix error code 0x80190001 on Windows 11?

The main reason you are experiencing the update error 0x90190001 on Windows 11 is interference from your antivirus. You can solve this by disabling your antivirus or obliterating it.

Another known cause of the issue is incorrect time and date. We have shown how to change this earlier in this guide. Finally, you can use our other solutions to fix this error, as the causes are similar on all Windows PC.

Why does the Windows Update error 0x80190001 appear?

As mentioned earlier, there are various versions of this error, each with varying causes. Below are some of the popular ones:

  • Windows 10 upgrade failed – If your Windows 10 upgrade fails due to this error code, try some of our solutions and check if that solves the problem.
  • 0x80190001 Creators Update, Windows 10 – Many users reported this error while trying to install Creators Update. Bear in mind that this issue can affect any Windows 10 update, but in most cases, you can solve this problem by disabling your antivirus.

How do I do a factory reset with Windows 10?

  1. Press the Windows key + I to open the Settings app.
  2. Choose the Update & Security option.
  3. Click Recovery in the left pane.
  4. Click the Get Started button under the Reset this PC option.
  5. Choose to keep your files or wipe everything and click the Next button.
  6. Now, follow the simple onscreen instructions to complete the process.

If you encounter this issue, the standard solutions listed above will assist you in resolving the Windows 10 update error code 0x80190001.

You should also verify the product key to determine if it is a valid version because this problem might occur even if you use a copy of Windows.

If you are facing other issues like the Windows 10 update error 0x800f0900, check our easy guide to fix it quickly. We also have provided fixes for Windows 10 update error 0x8007042B.

Feel free to let us know in the comments below if any of our fixes helped you solve the issue.

Event ID 4688: What Is It & How to Enable It

Many processes on the Windows PC. Some can’t be trusted, while some are marked as trusted by the Security Identifier. Event ID 4688 is a process creation command written in Windows viewer as Event ID 4688.

Alternatively, you can check on Fix: Event ID 4648 A Logon Was Attempted Using Credentials.

What is event ID 4688?

On a Windows computer, an event process is simply a running program. The Windows Event Viewer Windows event log provides an in-depth record of events concerning the system, security, and application stored on the windows operating system.

Many processes will be started as part of the operation on a standard workstation or server throughout a working day. Consequently, malware frequently starts one or more processes as part of its operation.

However, Event ID 4688 can log these malicious activities with process creation events. If their malware activities appear in log files, they can be detected and tracked using thread haunting.

So, it starts a new process that contains information such as time, process name, parent process, source, level, computer, etc.

How do I enable the event ID 4688?

1. Via the Group policy

  1. Press the Windows + R keys to launch the Run window, type gpedit.msc, and click OK.
  2. Navigate through this path: Windows Settings\ Security Settings\ Advanced Audit Policy Configuration\ Audit Policies\ Detailed Tracking\ Audit Process Creation
  3. Also, double-click on the Include Command Line in Process Creation Events, select Enabled, and click OK.

Event viewer on Windows will record all process creation logs on Windows. Furthermore, you can read more on Event viewer on Windows.

2. Enabling Event ID 4688 with local policy

  1. Left-click the Start button, search the Event viewer, and launch it.
  2. Also, select the Windows Logs and click Security from the top left corner.
  3. Choose the Event and click on the Filter Current log from the right side.
  4. Select the Event ID bar from the pop-up menu, type in 4688, and click OK.
  5. It will display the event process creation records.

Event ID 4688 is an advance window policy. Enabling the event process creation with the windows event viewer makes it more accessible.

Also, users can protect themselves from malware with our guide on how to download Microsoft’s Malicious Software Removal Tool.

Let us know how the procedure went for you in the comments area below.

Windows Doesn’t Have Enough Information To Verify This Certificate

Issues with domain certificates are quite common. If you’re getting the Windows doesn’t have enough information to verify this certificate error message, read on to find out how to get rid of it.

What causes this certificate error message?

In most cases, the problems with the certificate verification occur due to lack of proper certificates installed on your system. Consequently, the same goes for Windows doesn’t have enough information to verify this certificate error.

Basically, this problem occurs when either intermediate or root certificates are not installed as intended.

How can I fix Windows doesn’t have enough information to verify this certificate?

An obvious solution is to reinstall the certificates. This is easily by checking the state of certificates, where all Root and Intermediate certificates should come with the This digital signature is OK verification.


Since this usually appears on Internet Explorer, here’s the procedure how to install required certificates in no time:

  1. Click on these 2 links respectively to download the necessary certificates.
    VeriSign_Class_1_Public_Primary_Certification_Authority _G3.cer
    Symantec Class 1 Individual Subscriber CA – G4.cer
  2. Save the certificates to desktop.
  3. Double-click on the certificate files one by one and run it.
  4. Click Install Certificate.Windows doesn't have enough information to verify this certificate
  5. In the Certificate Import Wizard, click Next, and select Place all certificates in the following store.
  6. Click Browse.
  7. Select Trusted Root Certification Authorities for Symantec_Class_1_Public_Primary_Certification_Authority _G3.cer
  8. For the Symantec Class 1 Individual Subscriber CA – G4.cer, select Intermediate Certification Authorities.
  9. Confirm the selection and click Next.
  10. Click Finish and you are done.

If you want to check whether all certificates are properly installed, follow these steps:

  1. Open Internet Explorer.
  2. In the top right corner, click on the cog-like icon and open Internet Options.
  3. Select the Content tab.
  4. Choose Certificates.
  5. Click on the Personal tab.Windows doesn't have enough information to verify this certificate
  6. You should see all certificates and they should say This digital signature is OK.

We hope that the Windows does not have enough information to verify this certificate error message is now a thing of the past. Let us know your thoughts in the comments section below.

Fix: Symantec Service Framework (ccSvcHst.exe) High CPU Usage

Symantec Service Framework, or ccSvcHst.exe, is a hidden service installed on your PC alongside the Norton security software. However, its process can cause Symantec Service Framework high CPU usage.

Also, users report Symantec Endpoint Protection crashing Google Chrome version 78 on their PC.

What causes the Symantec Service Framework’s high CPU usage?

Symantec Service Framework (ccSvcHst.exe) is an executable file displaying Norton products GUI (Graphical User Interface). It runs in the background alongside Norton security software. However, the ccSvcHst.exe process can cause high CPU usage on the PC.

Furthermore, in the Symantec Service Framework’s high disk usage can occur due to numerous factors. Some are:

  • Corrupt system files – Some users report not having any Symantec products installed on your computers but still experiencing high CPU usage by ccSvcHst.exe. It means it’s a corrupt system file issue and can affect other components on your PC.
  • Outdated Norton software – Since Symantec Service Framework (ccSvcHst.exe) belongs to Norton Security software, it can run into issues if Norton is outdated. It can be problems with bugs the software can’t fix because it can’t access patches and updates.
  • Norton security software activities – Activities like Floppy drive scanning on the computer can cause it to use a lot of system resources, resulting in Symantec Service Framework’s high CPU usage. Also, the security processes can be delayed for some reason, causing issues.
  • Virus or malware infections – The ccSvcHst.exe executable file on your PC may run into problems due to viruses and malware on your computer.

However, you may experience high CPU usage for a different reason. Regardless, we’ll discuss some easy fixes you can use to fix it.

How do I fix the Symantec Service Framework high CPU usage?

Proceed with the following preliminary checks:

If the problem continues, proceed with the troubleshooting steps below.

1. Run the Norton product LiveUpdate

  1. Launch the Norton security software on your PC.
  2. On the My Norton window, next to Device Security, click Open.
  3. Click LiveUpdate. It will download the update if any is available, then click OK.

Updating the Norton product will fix bugs causing it to use too much CPU and improve its performance. Check ways to fix Norton antivirus failing to update on your computer.

2.  Run a System File Checker (SFC) scan

  1. Left-click the Start button, type the command prompt, and select Run as administrator.
  2. Click Yes on the User Account Control prompt.
  3. Type the following and press Enter: sfc /scannow 
  4. Restart your PC and check if there is still a high CPU usage.

If the ccSvcHst.exe file is present without any Symantec products, it is most likely to be malicious. So, a System File Checker scan will check and remove corrupt system files on your computer.

Check our article about what to do if nothing happens when you select run as administrator on Windows 10/11.

3. Disallow Norton antivirus from scanning the floppy drive on your PC

  1. Launch the Norton security software on your PC and go to Settings.
  2. Select Automatic Protection, then click on the Configure button.
  3. Select General settings under the Real-Time Protection tab.
  4. Uncheck the Scan floppy disk in A: for boot viruses when shutting down option.

Disabling the settings will prevent Norton from scanning floppy disks as it can take time and resources. Read about fixing Norton security settings not opening when clicked.

4. End task for ccSvcHst.exe

  1. Right-click the Start button and select Task Manager from the menu.
  2. Navigate to the Processes tab. Select the ccSvcHst.exe from the list, right-click on it, click End Task from the drop-down menu, and click OK to confirm.
  3. Restart your PC and check if the Symantec Service Framework high CPU persists.

Ending the ccSvcHst.exe process on your PC will kill its background activities that may cause high CPU or memory. You can check for shortcuts to open Task Manager on your PC.

Conclusively, you can refer to our article about uninstalling the Norton antivirus software if you have further concerns.

Also, our readers can read how to fix Norton Antivirus that doesn’t work in Windows 11 Insider builds.

Error 0x8024001e in Windows Update [Solved]

When attempting to update Windows, you might encounter the error 0x8024001e, preventing system updates and application updates. This article provides troubleshooting steps to resolve this issue.

What is error 0x8024001e?

I’ve encountered error 0x8024001e, usually due to conflicts and restrictions, such as third-party antivirus interference or missing DLL files. This error can prevent Windows from installing updates successfully

How do I fix error code 0x8024001e?

Before moving on to more complex troubleshooting solutions, check your Internet connection and ensure it’s working. You can also try removing your third-party antivirus software.

1. Fix or replace missing DLL files

Missing .dll files can lead to system and update errors. Using an automated repair tool can scan your computer, identify missing or mismatched .dll files, and restore them to resolve the issue.

2. Restart the Windows Update service & replace SoftwareDistribution

  1. Press the Windows key, type cmd, and select Run as administrator.cmd-run-admin 0x80070002 windows update
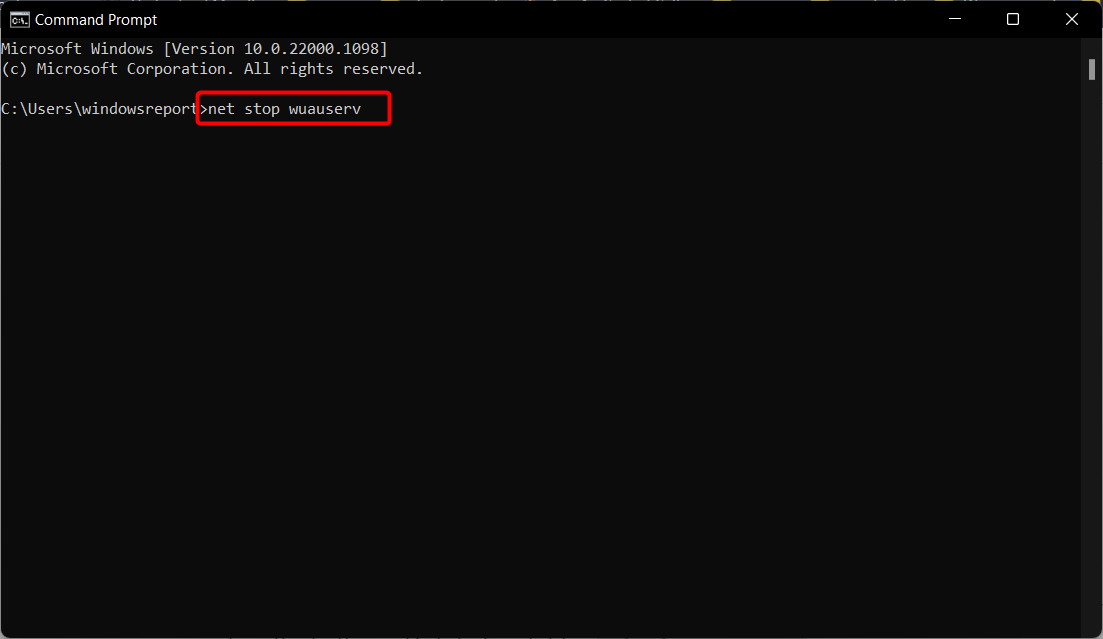
  2. Type the following command, then press Enter to restart the Windows Update service and replace the Software Distribution folder: net stop wuauserv rename c:\windows\SoftwareDistribution softwaredistribution.old net start wuauservnet-stop-wauser 0x8024001e
  3. Restart your computer afterward to see if the error has been resolved.

These steps can also help if the Windows Update service is not running on your PC.

3. Use the Update Assistant

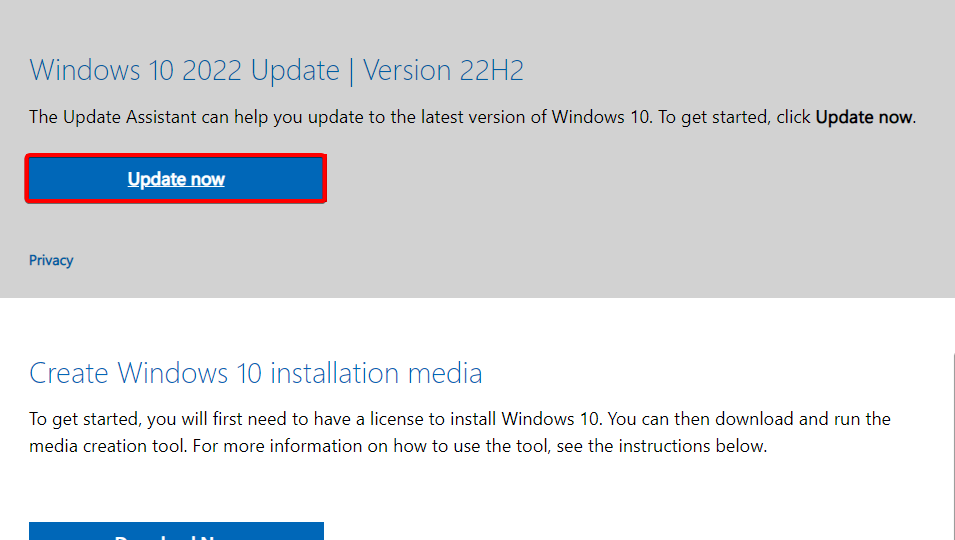
  1. Go to Microsoft’s official page and click Update now under the Windows 10 update.update-now 0x8024001e
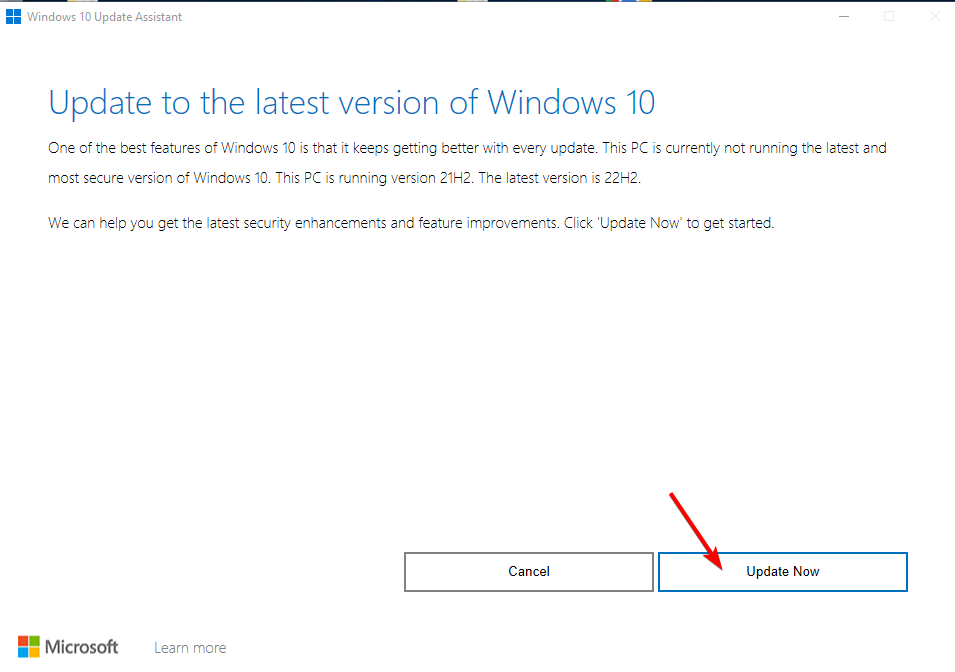
  2. Double-click the file downloaded to run the Update Assistant, then click the Update now button.update-now-w10 0x8024001e
  3. Follow the prompts to update your system.

4. Perform a clean boot then update your OS

  1. 1. Press Windows then enter msconfig in the search box and press Enter.

    msconfig-w10 vertical lines on monitor
  2. 2. Find the Services tab, and tick the Hide all Microsoft services box, then select Disable all.

    hide-disable vertical lines on monitor
  3. 3. Navigate to the Startup tab then click Open Task Manager.

    startup-open vertical lines on monitor
  4. 4. Select any startup program you think might be interfering then choose Disable.

    avast-disable 0x8024001e
  5. 5. Close Task Manager, click OK in the System Configuration window, and reboot your PC.

    ok-sys-conf 0x8024001e
  6. 6. Next, press Windows + I to open the Settings app and select Update & Security.

    update-securty-w10 opera keeps crashing
  7. 7. And lastly, click the Check for updates button in order to install the OS updates that you need.

    check-updates searchui windows 10

5. Perform a virus scan

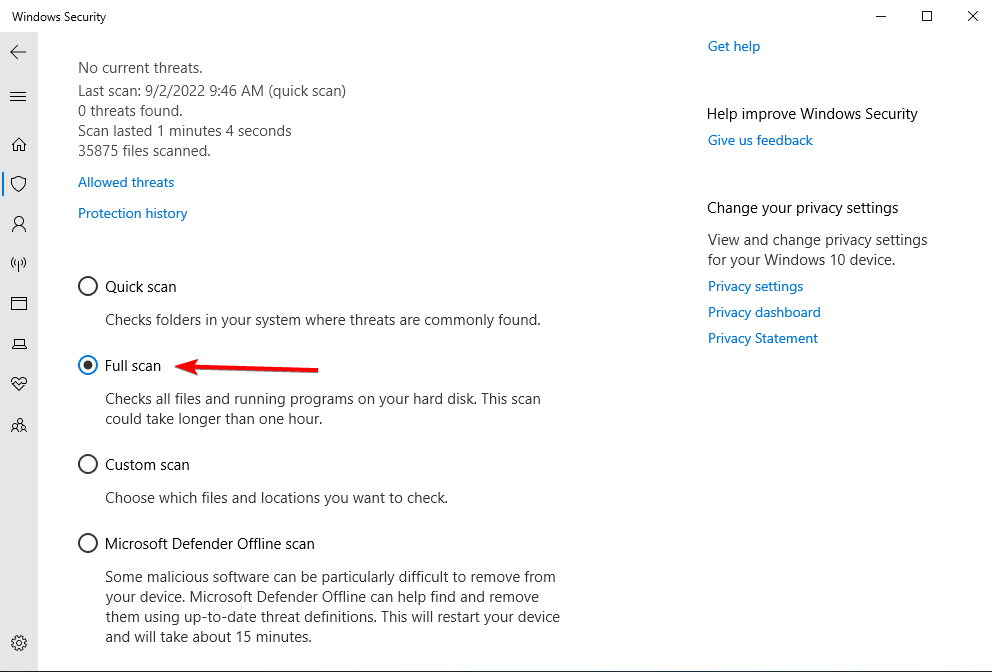
  1. Press the Windows key, type virus & threat protection, and select the top result.virus-threat 0x8024001e
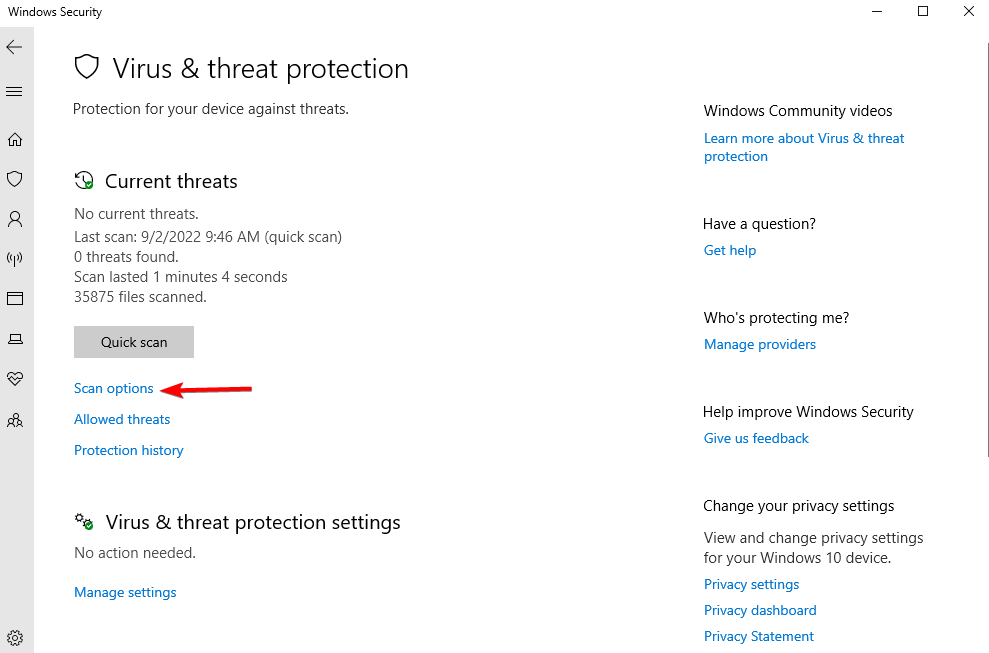
  2. Select Scan options.scan-opt full screen game keeps minimizing
  3. Select the Full scan option.full-scan-w10 full screen game keeps minimizing

Hopefully, one of these solutions worked for you. If not, try contacting Microsoft Support.

This isn’t the only error you can encounter, and many reported Windows Update Service registration is missing message.

Many also encountered Update error 0x8024a21e while others reported that the Windows Update is not working at all.

By following these steps, you should be able to resolve the 0x8024001e error and successfully update Windows.

Error 0x80240034 in Windows Update [SOLVED]

Several Windows 10 users who experience the error 0x80240034 reported that their Windows Update gets stuck at 1% and it fails entirely.

You can see the Windows Update error 0x80240034 when you view the update history which indicates that the update has failed, though downloading might be 100% complete.

You’ll find in this guide a few effective solutions that can be applied to fix the installerror 0x80240034 once and for all.

How can I fix the Windows Update error 0x80240034?

  • Free up some space by deleting unnecessary files or apps
  • Disconnect external hardware that you’re not using (peripherals, USB media)
  • Use the Get help option in Settings

Now let’s get down to the actual solutions. Take them one by one, and don’t forget to restart your device after each to apply the changes.

1. Use Windows Update troubleshooter

    The built-in Windows Update troubleshooter effectively eliminates a lot of issues, and allows users to download updates that are throwing errors. And the best part, it’s all done automatically.

  1. 1. Go to Start, type Settings and then hit the Enter key.

    settings
  2. 2. Head over to Update & Security and choose Troubleshoot.

    troubleshoot to fix 0x80240034
  3. 3. Find Windows Update, and click Run the troubleshooter.

    windows update troubleshooter to fix error 0x80240034
  4. 4. Follow the on-screen instructions to complete the troubleshooting process.

  5. 5. Once done, restart the computer for the changes to come into effect.

2. Run SFC

  1. Press Windows+Q and type cmd.
  2. From the search results, right-click Command Prompt and choose Run as Administrator.command prompt windows 10 error 0x80240034
  3. A new cmd window appears. Type sfc /scannow and then hit the Enter key.sfc scannow windows 10 error 0x80240034
  4. Wait until the scan and repair process is finished.

It can happen that the SFC command will not bring useful results to completely fix this. Yet, there are alternative methods, such as professional repair tools that scan the Windows OS and restore it automatically.

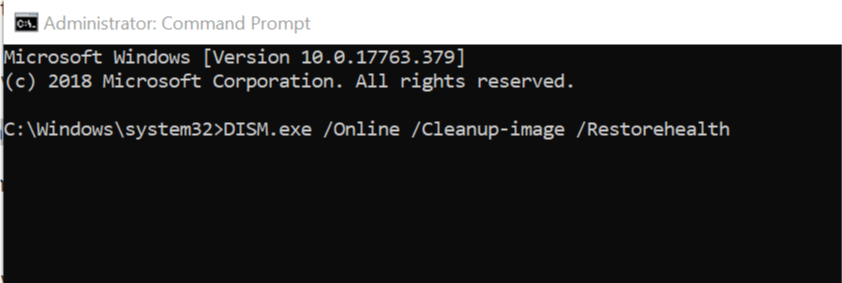
3. Run DISM

  1. Press Windows key + X and run Command Prompt (Admin).
  2. Copy and paste the following command on the command line:
    dism.exe /Online /Cleanup-image /Restorehealth
    dism scan error 0x80240034

  3. In case the DISM can’t obtain files online, try using your installation USB or DVD. Insert media and type the following command:
    dism.exe /Online /Cleanup-Image /RestoreHealth /Source:C:/Repair/Source/Windows /LimitAccess
  4. Be sure to replace C:/Repair/Source/Windows with the path of your DVD or USB.
Note icon NOTE
Note: Please ensure that you replace the repair source path with your own.

4. Download the update manually

  1. Go to the Microsoft Update Catalog website.
    windows update catalog error 0x80240034
  2. In the search box, type the update code in the search box and then hit the Enter key.
  3. From the list of matching updates, locate the update that uses the same architecture as your system.
  4. Click the Download button next to the update to download it.
  5. Once you download the update, run the setup file and follow the instructions.
  6. After the update is complete, restart your Windows PC.

5. Run a full system scan

Sometimes a malware infection can cause a 0x80240034 Windows update error. To fix the problem, we advise you to perform a full system scan with your antivirus.

In case you don’t have a reliable antivirus, we strongly recommend trying out a fast one that won’t interfere with your system in any way.

To find the most suitable choice in terms of antivirus protection, it is highly recommended to choose a professional solution from the best antivirus software for Windows 10.

6. Reset Windows Updates Components

  1. Open Win + X menu and select Command Prompt (Admin) from the list. You can do that by pressing the Windows Key + X shortcut.command prompt (admin) error 0x80240034
  2. Once the Command Prompt opens, type the following commands:
    • net stop wuauserv
    • net stop cryptSvc
    • net stop bits
    • net stop msiserver
    • rmdir %windir%SoftwareDistribution /S /Q
    • net start wuauserv
    • net start cryptSvc
    • net start bits
    • net start msiserver
  3. Hit the Enter key afterward and then check to see if the problem is resolved.

In addition, you can create a reset script using the steps outlined in our WUReset script guide.

Windows Update error 0x80240034 can be problematic, but we hope that you managed to fix it using one of our solutions.

We’d like to know if this article was helpful or if you have tried other solutions. Get in touch with us using the comments section.

This is Not the .exe You Are Looking For: Get Rid of it Now

The This is not the exe you are looking for error is usually encountered with Civilization 5 and Bioshock Infinite, amongst other games and apps. If you see this message, that usually means you have downloaded the game from a third-party website and it’s infected with a virus.

The This is not the .exe you are looking for error falls under the category of a dummy file. A dummy file is an application mimicking a real one but with no real output, and as a result, you can’t launch the app.

This is not the exe you are looking for is actually a pun from the Star Wars Ben Kenobi line These are not the droids you are looking for.

What to do is to immediately uninstall the game and manually delete any traces of the game files. Another important step is to use a reliable antivirus to scan your system and get rid of this dummy file.

How can I fix This is not the exe you are looking for error?

Perform a system restore

  1. Press Windows + R to open the Run command, type rstrui, and click OK.rstrui to fix this is not the exe you are looking for
  2. Select Choose a different restore point, and click on Next to proceed.choose a different restore point
  3. Now, select a restore point created before the error was first encountered, and click Next.next
  4. Click on Finish to start the restore process.start restore to fix this is not the exe you are looking for

That’s it! If nothing so far has worked, a system restore should get things up and running. And you wouldn’t lose any files, though installed apps or configured settings might be lost.

That wraps it up for us! By now, you would have the This is not the .exe file you are looking for error fixed. In case it persists, reinstalling Windows is the only possible fix.

Also, find out how to optimize Windows 11 for gaming and get the best performance.

As always, if you found other methods to solve this issue, or if you think we missed something, feel free to let us know in the comments below!

How to Fix Virgin TV GO Not Available in This Region [2026]

Virgin has been one of the leading traditional television services in the UK for many years. Now, its TV Go service lets you stream content over the internet using your Smart TV or mobile device.

You can watch live and on-demand TV, including free and premium channels, movies, full box sets, and more.

However, if you’re receiving an error message saying: Virgin TV Go not available in this region, you may need a virtual private network (VPN) to gain access.

Why is Virgin TV Go not available in your region?

Virgin TV Go is a UK-based service and is only officially available to customers streaming within the UK. 

Of course, this isn’t ideal if you pay for the service but travel to different countries and still want to watch your favorite shows.

Moreover, there’s no doubt its impressive library draws the attention of users outside the UK as well. 

However, without some extra steps, these users will face Virgin geo-blocking, which prevents streams from loading.

The good news is setting up a VPN is easy when you know how.

How to fix the Virgin TV Go not available in this region error?

A VPN works as a middleman between you, your ISP, and the internet. So, any request you make or data you receive is routed through a separate server and encrypted.

This means your browsing habits can’t be tracked. But, more importantly, your real location stays hidden as well.

In fact, the best VPN providers like Express VPN let you choose the server’s location, which makes it appear like you’re also residing there.

So, if you don’t live in the UK or are simply traveling abroad, you can set your location in the UK to unblock Virgin TV Go. 

Here’s a simple step-by-step guide to getting the streaming service working in your region using ExpressVPN.

Most premium VPNs operate in a similar fashion:

  1. Register for an ExpressVPN account and download the relevant app onto the devices you use to watch Virgin TV Go.
  1. Log in with your details and press the three dots to open its available server locations.
expressvpn not connected uk locations
  1. Scroll down and select the UK to connect to the best server in the country or use the arrow to manually choose a different UK location.
  1. Click the big on/off button and wait to be connected.
  1. With the VPN active, launch the Virgin TV Go app and log in. 
virgin tv go unblocked with expressvpn
  1. You should now be able to stream content as normal.

Now, if you’re still receiving the Virgin TV Go not available in this region error, it means Virgin has saved data suggesting you are still outside of the UK.

This could be in the form of cookies, the app cache, or your GPS location. To fix this, log out of the app and follow these steps:

  1. Go to your browser settings and locate the Cookies section. Depending on the browser, this may be under Security and Privacy or its own tab.
  1. Scroll down and click All Sites or See all site data.
  1. Use the search bar to find Virgin and delete all the corresponding cookies. 
virgin media clear displayed data browser
  1. Next, go to your device settings and locate the list of apps.
  1. Navigate to Virgin TV Go.
virgin tv go clear app data and chache
  1. Depending on your device, choose Force Stop, Clear Data, Clear Cache, or all of the above.
  1. If on mobile, go to Settings > Location (Privacy on iOS), and toggle off location completely. Alternatively, locate Virgin TV Go and revoke the permission.
ios location services
  1. Launch the VPN and connect to a location in the UK.
  1. Finally, relaunch Virgin TV Go.

Note: You may need to use a VPN to sign up for Virgin TV Go if you permanently reside in another region. 

Which VPN works with Virgin TV Go?

Most premium VPN providers make quick work of the Virgin TV go is not available in this region error. We’ve narrowed down the 5 best, based on streaming speed and other features.

ExpressVPN – best overall

ExpressVPN takes the top spot for its super-fast servers and the ability to choose from four UK locations in London, the Docklands, and the Midlands. All currently work with Virgin TV Go.

Additionally, it has superior encryption and leak protection, which means your real location will never be revealed. If you ever become disconnected, the kill switch will halt all traffic until you reconnect.

ExpressVPN is great for streaming services, as it has mobile apps and can be configured on Smart TVs and routers. 

You can connect 5 devices at once, so multiple people in the household can use the internet with a VPN.

ExpressVPN

Enjoy unrestricted access to Virgin TV Go and the highest streaming quality with ExpressVPN.

Private Internet Access – largest server network

PIA VPN is one of the few providers to offer customers a dedicated IP address. This means Virgin TV Go cannot block you based on public server information, because it’s exclusive to you. 

There are three UK locations to choose from: London, Manchester, and Southampton.

Moreover, it has dedicated apps for all your devices, including desktops, browsers, iOS, Android, gaming consoles, and Smart TVs. 

There’s also no risk of accidentally leaking your real location because the multi-hop feature routes your traffic through an additional proxy.

You can connect up to 10 devices at once, so it can cover your entire home network.

Private Internet Access

Unblock Virgin TV Go and stream on all your devices, thanks to PIA’s vast global network.

CyberGhost – easy setup

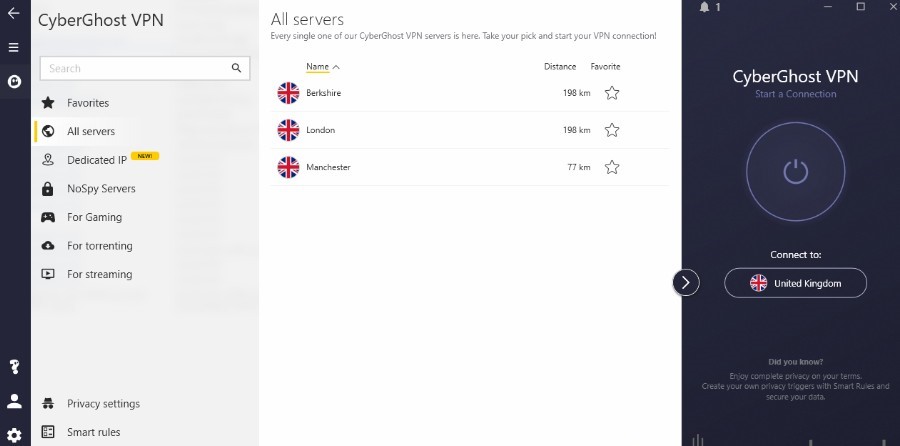
cyberghost vpn all uk servers

CyberGhost has fast UK servers in Manchester, London, and Berkshire. Moreover, it has special options to optimize your connection for streaming services like Virgin TV Go.

It also has excellent leak prevention. For example, you can disable all IPv6 connections from within the app, instead of messing with your operating system.

Apps include desktop, mobile, Smart TV, and game consoles. And, up to 7 devices can use the VPN at the same time.

CyberGhost

Unblock Virgin TV Go and enjoy high-quality playbacks with CyberGhost’s streaming-optimized servers.

Surfshark – unlimited simultaneous connections

If you have a busy network, Surfshark offers unlimited connections and great speeds for streaming. It consistently supports 70 Mbps, so you’ll have no trouble watching Virgin TV Go in HD.

Additionally, you also have your pick of UK locations, including London, Manchester, Glasgow, and Edinburgh.

Surfshark excels at protecting your identity, offering a kill switch and IP rotation. This constantly changes your IP address to hide your location.

Surfshark

Watch Virgin TV Go without restrictions using this powerful and untraceable VPN!

NordVPN – advanced anti-detection features

NordVPN is another provider with quick servers in the UK. You can spoof your location to Manchester, London, Glasgow, and Edinburgh. If you prefer the Irish Virgin TV Anywhere service, there’s also a server in the Republic of Ireland.

Furthermore, NordVPN is perfect for streaming thanks to its Smart Play feature. This automatically performs optimal DNS routing. 

Other useful features include a kill switch and multi-hop for an extra layer of privacy.

With 6 supported devices, households should have no trouble getting multiple users online.

NordVPN

Enjoy a seamless streaming experince and watch Virgin TV Go from anywhere with NordVPN.

Conclusion

When you get the Virgin TV Go not available in this region message, it means you’ve been caught accessing the service outside of the UK. 

However, while you’re not technically allowed to watch from a different region, a good VPN makes geo-blocking easy to bypass.

Our 5 picks guarantee enough speed for streaming, UK locations, and leading privacy.

FAQ

Why can’t I use Virgin TV Go abroad?

You’re not permitted to use Virgin TV abroad because it’s a UK-based service that digitizes traditional UK TV channels and content. Streaming services in other countries have their own rights agreements.

Because of this, Virgin TV Go monitors the IP address and location of its users and blocks anyone trying to log in from a location outside of the UK.

Fortunately, this is only a basic automated process, and a VPN can easily spoof your location to unblock access.

Where is Virgin TV Go available?

Currently, Virgin TV Go is only available in the UK. There’s a similar service for Irish customers called Virgin TV Anywhere.

However, anyone outside these regions is not officially permitted to use the service.

Is Virgin blocking VPN?

Virgin has been known to openly oppose the use of VPNs and has occasionally blocked specific servers. Fortunately, the top providers regularly change and update their systems, so this shouldn’t be a problem.

If you suspect Virgin has blocked a VPN location, all you have to do is disconnect and manually choose a different one. Remember to follow the above steps in case Virgin is temporarily using another method to identify your location.

Windows Update Error 0x80246019 [SOLVED]

Every time Microsoft rolls out a new Windows 10 build, many users can’t install the update due to various error codes.

The latest Windows 10 build is no exception to this rule, as users reported that the 0x80246019 error code prevented them from downloading and installing the build.

I tried to get the update to 14385 and got this Error 0x80246019.
I ran the troubleshooter and it went through hoops stopping and restarting a variety of things, then rebooted.
Now Windows update tells me I am up to date, but the feedback hub shows I still have 14383.
Any help from an engineer would be gratefully received.

What causes the 0x80246019 error?

The Windows Update error 0x80246019 appears when the download failed because the user has no license to download the content.

Many users reported error 0x80246019 while downloading the latest Insider builds. This error is relatively common, and users reported it in the following instances as well:

  • 0x80246019 Windows Update – This problem usually occurs while using Windows Update, and if you encounter it, be sure to try some of our solutions.
  • 0x80246019 Microsoft Store – If you have this error message with Windows Store, you might be able to fix the problem using some of our solutions. For more in-depth solutions, we suggest you check out our Windows Store error 0x80246019 article.

How can I fix the Windows Update error 0x80246019?

1. Check your antivirus software

If you’re getting error 0x80246019 while trying to download the latest builds of Windows 10, the problem might be your antivirus.

To fix the problem, check your antivirus settings and try disabling certain features.

If that doesn’t work, you might have to disable your antivirus altogether.

In some instances, disabling the antivirus might not be enough, so we advise you to temporarily uninstall your antivirus.

Even if you remove your antivirus, you’ll be protected by Windows Defender for the time being until you install another third-party antivirus solution.

If removing the antivirus solves the problem, this might be a good time to consider a compatible antivirus software, that doesn’t interfere with any Windows updates.

2. Remove the $WINDOWS.~BT directory

According to users, sometimes $WINDOWS.~BT directory can cause error 0x80246019 to appear. This file is created by Windows Update and its purpose is to store temporary files.

However, these files can get corrupted and that can cause various issues to appear. To fix that problem, you need to remove $WINDOWS.~BT by doing the following:

  1. Type disk in the Search bar. Select Disk Cleanup from the list of results.
    0x80246019 Microsoft Store
  2. Make sure that your System drive, is selected and click OK.
    0x80246019 Windows Update
  3. Wait while the PC scans the selected drive. This process usually takes a couple of seconds.
  4. Now you just have to select the files you want to remove and click OK. Be sure to go to the Clean system files button and select Temporary Windows installation files.

After removing these files from your PC, check if the problem is still there. Many users reported that removing this directory fixed the issue for them, so be sure to try it out.

3. Unplug the USB devices

According to users, error 0x80246019 can appear due to your USB devices.

Sometimes certain USB peripherals can interfere with your system and prevent you from downloading the latest builds.

To fix that issue, it’s advised that you safely remove all unnecessary USB devices from your PC.

To fix the problem be sure to disconnect your webcam and printer and leave only the essential devices, such as your keyboard and mouse, connected.

After doing that, try to install the latest build again.

4. Change the Insider Program Settings in the Settings app

If you can’t download the latest builds due to error 0x80246019, the problem might be your settings. To fix the problem, you need to make a couple of changes to the Settings app.

To do that, follow these steps:

  1. Press Windows Key + I to open the Settings app. Now go to the Update & Security section.
    0x80246019 Windows Update
  2. Locate and click the Stop receiving Insider Preview builds.
  3. Now click the Cancel button to confirm.

After doing that, try to download the updates again.

5. Disable real-time security in Windows Defender

Sometimes error 0x80246019 can occur due to Windows Defender and its Real-time security feature.

According to users, Windows Defender can block certain files by mistake, and that can lead to this error.

To fix the problem, it’s advised to disable Real-time security in Windows Defender. To do that, just follow these steps:

  1. Open the Settings app and go to Update & Security.
  2. Navigate to Windows Defender in the menu on the left. Click the Open Windows Defender Security Center in the right pane.
    0x80246019 Microsoft Store
  3. Go to the Virus & threat protection.
    0x80246019 Windows Update
  4. Choose Virus & threat protection settings.
    0x80246019 Microsoft Store
  5. Now disable Real-time protection.
    0x80246019 Windows Update

After doing that, Windows Defender protection will be disabled. Now try to install the new build and check if the problem is still there.

Keep in mind that disabling Windows Defender isn’t advised, so be sure to enable it once you install the latest build.

6. Run the SFC /Scannow command

According to users, sometimes the Windows Update error 0x80246019 can occur if your Windows installation is corrupted.

This issue can occur for various reasons, but you can fix it simply by performing an SFC scan.

To do that, just follow these steps:

  1. Press Windows Key + X to open Win + X menu. Select Command Prompt (Admin) or PowerShell (Admin) from the menu.
    0x80246019 Microsoft Store
  2. Once Command Prompt opens, enter sfc /scannow and press Enter to run it.
    0x80246019 Windows Update
  3. The scan will now start. SFC scan can take about 15 minutes, so don’t interfere with it.

After the SFC scan finishes, check if the problem is still there. If the problem is still present or if you were unable to use the SFC scan, you need to run a DISM scan by doing the following:

  1. Start Command Prompt as an administrator and enter DISM /Online /Cleanup-Image /RestoreHealth command. Press Enter to run it.
    0x80246019 Microsoft Store
  2. DISM scan will now start. Bear in mind that this scan can take about 20 minutes or more, so don’t interfere with it.

After the DISM scan is finished, check if the error is still there. If you were unable to run the SFC scan before, try running it now and check if that helps.

7. Run the Windows Update Troubleshooter

In some cases, you might be able to fix error 0x80246019 simply by running a Windows Update troubleshooter.

Windows comes with various troubleshooters that allow you to automatically fix some common problems.

To use Windows Update troubleshooter, do the following:

  1. Open the Settings app and head over to the Update & Security section.
  2. Select Troubleshoot from the menu on the left. Choose Windows Update from the list and click the Run the troubleshooter button.
    0x80246019 Microsoft Store
  3. Follow the instructions on the screen.

After the troubleshooter is finished, check if the problem is still there. This is a simple solution, but few users reported that it worked for them, so you might want to try it out.

We also have a guide on Windows Update error 0x80248014, so don’t miss it for more solutions.

If you encountered error 0x80246019 when trying to update your Windows, and used one of the workarounds listed above or even your own fix, tell us which solution worked for you in the comment section below.

0x80248014 Windows Update/ Microsoft Store Error [SOLVED]

Users have reported that the 0x80248014 download error appears in two cases – when they’re unable to check for updates and when they cannot complete a purchase in the Microsoft Store.

We have solutions for both problems, so just follow the instructions from this article.

How to fix Microsoft Store/Windows Update error code 0x80248014

1. Reset Network components

  1. Right-click on the Start Menu button, and choose Command Prompt (Admin).
  2. Enter the following command and press Enter: net stop WuAuServerror code 0x80248014
  3. Now, past the following into Search and press Enter: %windir%
  4. In Windows folder, find SoftwareDistribution folder, and rename it to SDold.error code 0x80248014 windows10
  5. Open Command Prompt (Admin) again, and enter the following command: net start WuAuServerror code 0x80248014 windows 10
  6. Try to check for updates again

2. Delete the Software Distribution folder

  1. Go to Search, type services.msc, and go to Services.
  2. In the Services list, search for Windows Update.
  3. Right-click and go to Properties, then choose Disable.
  4. Restart your computer.

Now that the Windows Update service is disabled, let’s go and delete (rename) the SoftwareDistribution folder:

  1. Navigate to C:\Windows and find the SoftwareDistribution folder.
  2. Rename folder to SoftwareDistribution.OLD (you can delete it, but it’s safer if we just leave it there).
  3. Restart your computer.

Once you do that, go and re-enable the Windows Update service:

  1. Once again navigate to Services and find Windows Update and, in Properties, change from Disabled to Manual.
  2. Restart your computer once again.
  3. Check for updates.

3. Run the Troubleshooter

  1. Go to Settings.
  2. Head over to Updates & Security > Troubleshoot.
  3. Now, click Windows Update, and choose Run the troubleshooter.
  4. Follow further on-screen instructions.

Alternatively, you can use a third-party troubleshooting tool. Choose one from our great list.

4. Run the SFC scan

  1. Go to Search, type cmd in the Search box, and then right-click on Command Prompt.
  2. Click on Run as administrator. (If you are prompted for an administrator password or for a confirmation, type the password, or click Allow).
  3. At the Command Prompt, type the following command, and then press ENTER: sfc /scannow

5. Run the DISM

  1. Open the Command Prompt as shown above.
  2. Enter the following command and press Enter: DISM.exe /Online /Cleanup-image /Restorehealth
  3. Wait for the process to finish.
  4. Restart your computer.

6. Flush DNS

  1. Start Command Prompt as administrator. To do that press Windows Key + X and choose Command Prompt (Admin) from the menu.
  2. When Command Prompt opens, enter the following lines before closing Command Prompt and restarting your PC:Ipconfig release
  • ipconfig /release
  • ipconfig /flushdns
  • and ipconfig /renew

7. Disable UAC

  1. Go to Search and type user account. Choose User Account Control from the menu.change user account control settings
  2. User Account Control Settings window will appear. Move the slider all the way down to Never notify and click OK to save changes.never notify

8. Reset Windows

  1. Press the Windows key + I to open the Settings app.
  2. Go to Windows Update.windows update
  3. Select Advanced options.advanced options in update settings
  4. Click Recovery.recovery options
  5. Select Reset this PC.reset this pc
  6. Select Keep My Files.keep my files reset

Wrapping up

We hope you managed to fix the Windows Update error 0x80248014, as well as the error with the same name that appears on Microsoft Store.

This isn’t the only error you’ll encounter, and we already wrote about 0x80d02013 in Windows Update and Windows Update error 0x80246019.

Lastly, don’t miss our Windows Update error 0x80244018 guide for more potential solutions.

Let us know how it went in the comments section below.

Xbox 360 Controller not Working on PC: How to Get It Work

Many gamers like to use their Xbox 360 Controller with Windows 10 while playing their favorite games.

This is great if you don’t want to spend money on an additional controller, but there have been reports that Xbox 360 Controller is not working with Windows 10, and today we’ll try to fix that.

There are many things that could go wrong, and we will try to focus on all of them:

How do I fix Xbox 360 controller driver issues on Windows 10?

1. Install the driver manually

If you’re using a wireless Xbox 360 Controller, you need to use a wireless receiver in order to connect it to your computer.

Sometimes, drivers for wireless receivers have to be updated, or your Xbox 360 Controller might not work on Windows 10.

To update the drivers for your receiver, follow these steps:

  1. Open Device Manager. You can access Device Manager by pressing Windows Key + X and choosing Device Manager from the list.
    device-manager
  2. When Device Manager opens, make sure that your receiver is connected to your PC. Navigate to Other Devices section and expand it. Right-click the Unknown device and choose Update Driver Software from the menu.
    update-driver-software
  3. Click Browse my computer for driver software.
    browse-my-for-driver-software
  4. Now click on Let me pick from a list of device drivers on my computer.
    let-me-pick-driver
  5. You should see a list of device drivers. Select Xbox 360 peripherals and click Next.
  6. Choose the latest Receiver driver that’s on the list and click Next. If you get a warning message, just click OK and wait for the driver to install.
  7. Now you just need to hold the pairing button on your Bluetooth receiver and on your Xbox 360 Controller for about 3 seconds. After doing that, your computer should recognize your controller.

After the driver has been installed, your Xbox 360 Controller should start working on Windows 10 without any problems.

It has been reported that this solution works with third-party receivers as well, so even if you don’t use Microsoft receiver, it should work without any problems as long as you install Microsoft’s drivers.

2. Uninstall the driver

Sometimes Xbox 360 Controller might not work on Windows 10 due to bad driver, and if that’s the case, the best solution is to uninstall that driver and allow Windows to install it again.

To uninstall the driver, follow these steps:

  1. Start Device Manager.
  2. In Device Manager locate Xbox 360 Wireless Receiver for Windows and right-click it.
  3. Choose Uninstall from the menu.
    uninstall-driver
  4. After the driver has been uninstalled, restart your computer. When your computer restarts, Windows 10 will automatically install the missing driver.

3. Install the latest drivers

Sometimes your Xbox 360 Controller might not be recognized due to outdated driver, and if that’s the case, make sure that your Windows 10 is up to date with latest patches.

In addition, you can also download the necessary drivers from this link. After you’ve downloaded and installed the appropriate driver, Xbox 360 Controller should start working again.

If this method doesn’t work or you do not have the necessary computer skills to update/fix the drivers manually, we strongly suggest doing it automatically by using an automated driver updater.

3 ways to fix Xbox 360 Controller Steam issues in Windows 10

1. Uncheck Remember this application is a game in Windows Game overlay

  1. Press center button on your Xbox 360 Controller while you’re playing any Steam game.
  2. When Windows Game overlay appears, uncheck Remember this application as a game.

After you’ve done that, Windows Game overlay will be disabled while you’re playing games on Steam, and the Steam overlay should be restored.

It has been reported that Xbox 360 Controller has some issues with Steam, and according to the users, they cannot access Steam functions by pressing the center button on Xbox 360 controller.

By default, pressing the center button on your Xbox 360 Controller should give you Steam overlay, but for some reason, Windows Game overlay appears instead.

2. Disable Game DVR in Xbox app

  1. Press Windows Key + S and type Xbox. Choose Xbox app from the list of results.
    xbox-app
  2. When Xbox app starts, click Settings (gear icon).
    xbox-settings
  3. Now go to Game DVR tab and make sure that Take screenshots using Game DVR option is disabled.
    game-dvr-off

It has been reported that the Game DVR functionality of the Xbox app can sometimes create problems with Xbox 360 Controller and Steam.

Users report that the center button isn’t working properly, and it’s giving them Windows Game overlay while playing Steam games.

This isn’t a big problem, and it can be fixed by disabling the Game DVR functionality in the Xbox app.

After disabling the Game DVR option, Xbox 360 Controller should work with Steam without any problems.

By disabling the Game DVR option you won’t be able to record gameplay or take screenshots using the Xbox app, but you can always use alternative software to fix this problem.

3. Turn off the Game bar

turn off windows 10 game bar
  1. Open the Windows 10 Settings app
  2. Go to Gaming
  3. Turn it off via the toggle switch at the top

How can I fix Xbox 360 controller blinking buttons?

1. Make sure that you have the latest updates installed

  1. Open the Settings app and go to Update & Security section.
    settings-update
  2. Go to Windows Update section and download all available updates. In addition, you might want to download optional updates as well because those updates are often designed to update your gaming devices and hardware.
    windows-update
  3. After the updates have been downloaded, restart your computer.
  4. After your computer restarts, check if the issue is resolved.

Users have reported blinking buttons on Xbox 360Controller, and if you have this issue, it’s advised that you install the latest updates for Windows 10.

2. Reconnect your controller

Users report that their wired Xbox 360 Controller is blinking after Windows 10 wakes up from Sleep Mode.

In order to fix the blinking Xbox 360 Controller, you just need to unplug it and connect it to your computer again.

According to users, this solution works if you’re using a wired Xbox 360 Controller, but if you’re using a wireless Xbox controller, you might want to unplug your Bluetooth receiver and connect it back again.

In addition, you might have to pair your wireless Xbox 360 Controller by pressing the pairing button on the Bluetooth receiver and Xbox 360 Controller.

How to fix Xbox 360 controller Play and Charge issues on Windows 10

If you have Play and Charge problems, the solution is to use a wired controller or purchase a Bluetooth receiver for Xbox 360 Controller.

Xbox 360 Play and Charge cable is designed to recharge your wireless Xbox 360 Controller while you play games on Xbox 360.

Play and Charge cable works with Windows 10, but using Play and Charge cable won’t allow you to play games on Windows 10 with a wireless Xbox 360 Controller.

The Play and Charge cable is designed just to recharge batteries on your wireless Xbox 360 Controller, and even if you have your controller connected to your console or PC, the controller still uses wireless signals to communicate with your PC / Xbox console.

Therefore, if you want to recharge your wireless Xbox 360 Controller while playing games on Windows 10, you’ll have to purchase a special Bluetooth receiver for Xbox 360 controller.

Fix Xbox 360 wired controller not working

The solution is pretty simple: you’ll have to make sure that you’re using a powered USB port.

Sometimes wired Xbox 360 Controller might not work with Windows 10 if you connect it to the USB port on the front of your computer.

In order to fix any potential issues with wired Xbox 360 Controller, it’s always better to connect it to the USB port on the back of your computer since those ports are usually powered USB ports.

If you’re using a USB hub, it’s also advised that you don’t connect the wired Xbox 360 Controller to it since most USB hubs don’t come with powered USB ports.

Using Xbox 360 controller on Windows 10 is a great way to save money since both wireless and wired Xbox 360 Controllers are compatible with Windows 10.

Although Xbox 360 Controller might have some issues on Windows 10, you can easily resolve most of them by following our solutions.

Don’t forget to share your problem and how you solved it in the comments section below.

Cold War Shutting Off Xbox Series X? 3 Easy Ways to Fix It

Some users are reporting that their Cold War game is shutting off Xbox Series X every time they try to play the title, while the other games run just fine.

Though minor problems like issues with the frame rate in Xbox Series X are common, Cold War shutting it off unexpectedly had users all confused. And the worst part, nothing seemed to work. So, let’s find out how you can fix things.

Why is Xbox Series X shutting off when playing Cold War?

Here are a few reasons Cold War keeps crashing or turning off Xbox Series X:

  • Running an incorrect version of the game – Most users don’t know, but there are two versions of the game. And if you are running the wrong version, Xbox Series X might shut down.
  • Misconfigured settings – Misconfigured game or console settings can also trigger the shutdown.
  • Improper ventilation – When talking about hardware issues, improper ventilation leading to an increase in temperature is usually the reason behind Cold War shutting off Xbox Box Series X.
  • Bug in the game – The problem has been reported by many, so many believe it could be a bug in the game.

How can I fix Cold war shutting off Xbox Series X?

Before we head to the slightly complex fixes, here are a few quick ones you should try:

  • Make sure the console is not surrounded by objects and can effectively release the hot air.
  • Update Xbox Series X and verify whether it stops shutting off when playing Cold War.
  • Plug the console directly into a wall socket instead of a surge protector or a hub to ensure that it receives adequate power.
  • Once you identify signs that your game is about to crash, such as the frame rate acting weird or jittering, accompanied by the controller not vibrating, simply press the Power button, wait for Power menu to appear, and then hit the B button to close it. When the game begins, things should now work.

If none of these work, head to the solutions listed next.

1. Install the correct Xbox series

It seems that the problem occurs as a result of players accidentally downloading the Xbox One version of the game. You can easily solve this issue by making sure to download the correct version of Black Ops Cold War to your console.

Keep in mind that the Xbox Series X of the game is 130 GB, and it also features an X/S label on the game’s icon. These two characteristics will help you choose the right version.

Moreover, if you want to have Call of Duty: Black Ops Cold War on both consoles, it is available through the upgraded version of the game.

2. Disable Ray Tracing

Ray Tracing allows games to look more realistic, but it has been found to be the reason Xbox Series X keeps shutting off when playing Cold War.

A simple fix here would be to disable Ray Tracing in the Graphics tab of Cold War settings. Though not a sure-shot fix, this one has helped several users, and we recommend you give it a try.

3. Turn off Party Overlay

Party Overlay is one of the reasons the game is shutting off Xbox Series X. Though there’s no official confirmation for it, users who disabled Party Overlay reported better game performance and far lesser crashes, if not eliminated outright.

cold war shutting off xbox series x

If nothing so far has worked, it’s recommended that you contact Xbox support since the problem might lie with the hardware and, as a result, Cold War is shutting off Xbox Series X.

With these solutions, your gaming console shouldn’t run into issues again. Also, find out the best Xbox games and play at least one of these today!

Tell us which fix worked or drop any other solution that did the trick for you in the comments section below.

Turn your Xbox console into a home PC with this guide

If you’ve ever wondered if you can turn your Xbox into a PC, you came to the right place.

Because the Xbox console has the same hardware specifications as some older computer desktops, you will be able to convert it to a fully functioning PC. Unfortunately, you will not be able to install Windows on your console, but you can use the Linux operating system.

In this article you will find out what items you’re going to need in order to make this happen, and also the steps you need to follow to accomplish this.

Note: Please read through the instructions carefully before starting this process to make sure that you are able to manage all the steps required.

In the case that you’re not secure enough on your skills to achieve this, it is recommended that you don’t try it, as a mistake may result in making your Xbox console unusable.

How can you turn Xbox One into a PC?

1. Required items

xbox controller white - turn Xbox into PC
  • Xbox console
  • Lexar JumpDrive Secure 128 and 256 MB or Kingston Data Traveler 32 and 256 MB
  • USB cable adapter
  • A Linux OS
  • Mechassault Xbox game

2. Get a bootable Linux image on your USB stick

Linux penguin - Turn Xbox into PC
  1. Attach your USB memory device to your console by using the USB cable adapter.
  2. Turn on your Xbox console (This will reformat your USB device in order to be recognized by the Xbox, and will display the device inside your dashboard).
  3. Download MechInstaller.
  4. Flash the FatX image (compatible Xbox format) to your USB stick by connecting it with your PC.
  5. Transfer the Mechassault image to your USB device by dragging and dropping it inside of it.

3. Copy FatX image to your Xbox

Xbox Controller black - Turn Xbox into PC
  1. Remove the USB device from your PC and connect it to your console.
  2. The USB will appear inside your Xbox dashboard.
  3. Open the USB device from your dashboard -> you will notice three options – Emergency Linux, Remove Linux, Install Linux.
  4. Select Memory -> select USB device.
  5. Click on the Install Linux entry and select Copy -> choose Xbox hard disk (repeat this step for all three entries).

4. Run the copied image to start Linux

video-games controller close-up - Turn Xbox into PC
  1. Insert the game copy of Mechassault.
  2. Navigate inside the Xbox dashboard hard-drive and select the Emergency Linux file copied earlier.
  3. If all of the steps above were performed correctly, then your Xbox will restart and the TV will show a black screen with white letters. (that means Linux is booting)
  4. Navigate to the address 192.168.0.3 and log in with root as username and Xbox as a password.
  5. After logging in, type the following command xbox_tool-a to display the hard disk key (make a note of this key as it might be useful in the future).
  6. Download a copy of Linux and burn it onto a DVD-R.
  7. Place the DVD-R in your Xbox to boot from it.
  8. Type su to login as the administrator and use xbox as a password.
  9. type XBOXLinuxInstaller and follow the on-screen instructions to complete the setup.

Please feel free to let us know if this guide helped you understand how to turn your Xbox into a PC. You can do so by using the comment section below.

READ ALSO:

Windows Update Stuck on Pending Install? 4 Ways to Fix it

If a Windows update is stuck on pending install, you won’t be able to install it unless you fix this issue, and in today’s guide, we’re going to show you a few ways to do that.

Why does my Windows Update say pending install?

This can happen if there’s an issue with the update or problem with the Windows Update components.

What can I do if Windows Update is pending install?

1. Run the Windows update troubleshooter

  1. Press the Windows key + I to open the Settings app and select Update & Security.
    update and security settings app
  2. Select Troubleshoot in the left pane and select Additional troubleshooters.
    additional troubleshooters
  3. Choose the Windows Update option and click Run the troubleshooter.
    run the troubleshooter
  4. Finally, apply any recommendations and restart your PC.

2. Reset the required components

  1. Press the Windows key, type cmd, and click Run as administrator under Command Prompt.
    cmd search results
  2. Now, type the commands below and hit Enter after each: net stop wuauserv net stop cryptSvc net stop bits net stop msiserver ren C:\Windows\SoftwareDistribution SoftwareDistribution.old ren C:\Windows\System32\catroot2 catroot2.old net start wuauserv net start cryptSvc net start bits net start msiserver

Alternatively, you can automate this process and make it much faster by using the Windows Update reset script.

3. Enable the update over metered connection

  1. Press the Windows key + I and select the Update & Security option.
    update and security settings app
  2. Click Advanced options.
    advanced options windows update
  3. Now, toggle the switch for Download updates over metered connections (extra charges may apply).
    Download updates over metered connections disable
  4. Finally, wait a few minutes and try to download the updates again.

4. Delete the Windows update cache

  1. Press the Windows key + R, type services.msc in the Run box, and click OK.
    services.msc run window
  2. Right-click Windows Update and select Stop.
    stop windows update service
  3. Now, right-click Background Intelligent Transfer Service and select Stop.
    stop bits service
  4. Close the Services window and press the Windows key + E to launch File Explorer.
  5. Navigate to the path below: C:\Windows\SoftwareDistribution\Downloaddownload folder
  6. Delete the contents of the Download folder. If it shows can’t delete prompt, check the box for Always do the Selected Action and click OK.
  7. Finally, restart your PC.

We have come to the end of this detailed guide. We hope that our solutions can help you with the Windows update pending install issue.

If Windows update is not showing, check this excellent guide to bring them back. We also have a guide on what to do if there were some problems installing updates.

Also don’t miss our guide on how to tell if Windows Update is stuck.

In the comments below, let us know the solution that helped you fix this issue.

How to Record Xbox Party Chat Using 7 Simple Methods

Gaming is diverse, and there are situations where players decide to join together despite playing on different platforms like Xbox One and Xbox Series X.

Since both support multiplayer gaming, it’s easy to embark on a joint journey and enjoy famous titles such as Fortnite, Minecraft, Sea of Thieves, and more.

Microsoft introduced Xbox Party Chat to make this possible. At first, it was only a paid version, but this has changed. The payment got removed due to the price increase of the Xbox Live Gold subscriptions.

What’s more, fans can now use the Looking For Groups (LFG) feature to step up their multiplayer game.

Party chat has made in-game communications with friends easier. You can now find friends who are interested in your game and strike meaningful conversations around common topics.

This empowers you to talk to people, plus it works well with both Series X and Xbox One games. And if you’re missing the chat feature, you can simply use Gamertag to achieve the same result.

Does Xbox record Party Chats? 

Many people ask if it’s possible to record party chat when playing games with their friends. Microsoft made this possible.

Now, the tech giant stated that its main motivation for doing this was to improve its services and help add quality to the game.

Some players think otherwise and view it more as a privacy concern since Microsoft uses voice recognition algorithms and models to train and go through the chats.

The backlash was powerful enough to determine Microsoft to stop listening to the party chats back in 2021.

How can I record my Xbox Party Chat? 

1. Record gameplay using game DVR

  1. On your game controller, press the Xbox button twice.
  2. Select the Snap an app option followed by the Game DVR. (Those who use Kinect can choose the Snap Game DVR option).
  3. Click on the End Clip now option. You will get the option of choosing the length of the recording you want.
  4. Choose the Start recording option and Stop recording option to have a recording file template.
  5. Click on the View all the Captures option and select the Save option to keep the recording.

2. Record Xbox party chat using gameplay

  1. Head over to the Xbox homepage and click on the Home button.
  2. Download the Twitch app and create a Twitch channel if you don’t have one.
  3. Create a broadcast on Twitch and ensure you have enough control over the ways of increasing stream quality.
  4. Mute your microphones and enable the microphones of your friends in the party chat.
  5. You can start streaming.
  6. Once you reach the end of the stream, click on Stop streaming and view the recording.

In order to use this method, you should have a strong internet connection to prevent lagging issues that may occur during recording.

If you are sure your internet is slow, feel free to adjust the configuration and set the streaming quality to a lower value in order to get the best party chat.

3. Record gameplay using Bandicam Game Recorder

  1. Download and install Bandicam Game Recorder. It has both free and paid versions.
  2. Launch the recorder and choose the Game recording option.
  3. Choose your caption area and turn on the speakers, and microphone that will provide voice recording during the gameplay.
  4. You can also add a Webcam overlay if you want to.
  5. Click on the REC button to start recording when you already have the Xbox party chat and game setup. You still use this option to stop the recording.
  6. You can preview the recorded chat and click on the Save button to save it.

If you feel like taking it up a notch, the BandiCam Game Recorder is also available as a paying software with unlimited recording duration. In the free version, you only get a maximum of 10 minutes worth of recording.

You will be able to enjoy high-res and FPS recording with webcam overlay and voice included, and enjoy the Xbox party chats with your friends.

4. Record Xbox party chat using the capture card

  1. Locate your capture card that will help you change the game signals to useful data. Follow the instructions on how to get the card set up well.
  2. Start the party chat by opening the app.
  3. On your game controller, locate the Xbox button and press it. It will make the guide open.
  4. Locate the party option, choose Broadcast & Capture, and click on the Start recording option.

5. Record Xbox party chat using Gameplay with voice (No capture card)

  1. Go to the Xbox game controller and turn it on. Access the Settings menu and locate the Broadcast & capture option as shown above.
  2. Under Broadcast settings, check the box corresponding to the mic option.
  3. Download and install the Twitch application from the website or App Store.
  4. Go back to Xbox, select Broadcast, and start streaming to twitch. You can tweak settings, like sound and microphone level, to meet your specific needs during streaming.
  5. Launch a game and start streaming and recording.
  6. You can pause the recording, download it, and share it with your fellow gamers.

6. Record gameplay using the built-in recording feature

  1. Open your Xbox game and start playing.
  2. When you want to start capturing, locate the Xbox guide menu.
  3. Click on the X button to provide a gameplay clip that you played in the last 30 seconds.
  4. Click on the View button, choose Capture, and the period you want. This gives you the freedom to get a clip depending on your desired timeline.
  5. You can also use your headset and microphone to start the recording by activating Cortana.
  6. When all the recordings get saved, users can use the End Game Clip feature to adjust the video length.

7. Lightstream Studio PC Screenshare Layer

  1. Download the PC Screenshare Layer software from Lightstream Studio. (This helps to provide a Discord chat feature).
  2. Open the browser tab of the software, mainly Chrome browser, and remember to turn the audio on.
  3. Click on the Audio Source Layer to turn your microphone on.
  4. Click on the visual player – you can delete it or choose to hide it.
  5. Create the party chat link, share, and start recording.
  6. You will find the audio under the Audio mixer when you finish your party.

How to record Xbox party chat on PC? 

  1. Go to the Xbox guide menu and navigate to the Settings menu.
  2. Next, choose Preferences, and Xbox app connectivity.
  3. Make sure you check the box next to Allow game streaming to other devices.
  4. Under the volume options, you can change the volume using the chat mixer. Invite your friends to join the party chat.
  5. The OBS software will use the speaker’s sound to capture the audio, and you can start recording.

You can record the party chat on a PC using the OBS software. All you need is to follow the steps listed above.

If computer gaming is more your thing, you can also check out these best game recording programs that work flawlessly with Windows 10 as well as Windows 11.

Can you record the party chats with Elgato?

  1. Create a party chat link by splitting the audio from the game controller and transferring it to the Elgato capture that handles the recording and the headsets.
  2. Take your Elgato Chat link cables and connect them to the Xbox Controller.
  3. Add your headset and insert the Elgato gaming chat links cable jack into the RCA.
  4. Locate the RCA connectors and connect them to the component breakout adapter cables RCA ports.
  5. Take the component adapter and connect it to the A/V input of the game.
  6. Open the Settings, navigate to the Capture tab, choose Audio Input, and change the input from HDMI to Analog.
  7. Choose the microphone for recording and click the OK button.

Elgato uses audiovisual technology that helps in streaming services like capturing and recording party chats on Xbox and PS4.

You can connect it to the gaming console using a USB. There are different types available (Elgato Game Capture HD60+, Elgato Game Capture HD60 S+, etc.) and you can use Elgato to record party chats by following the steps above.

How do you record Xbox party chat on Twitch?

You can record the Xbox party chat on Twitch using virtual microphones.

Virtual microphones like Virtual Audio Cables (VAC) provide you with several audio options to choose from when recording party chats.

Once you have configured everything, you can set the scene you want to record. It enables it to record anything it will hear, and you can later incorporate it into your project as the Audio source layer.

If you also enjoy using Discord, you might want to check out these top soundbars for Discord that not only allow you to play sounds for your fellow gamers but come with a plethora of sound effects for just as many popular games.

Xbox party chats have improved the gaming experience by allowing friends who like gaming to enjoy the whole experience together. Many people were looking for different ways they could record their party chats.

Now, creating your own party is one way to go. You can also join another friend’s party by following an invite link. If you seem to fall short in this department, your Xbox app may not be getting party invites, so do take a closer look.

Sometimes, some of the party chat features get blocked by different network settings, making it hard to do the recording sessions. Whatever comes your way, we got your back, so don’t be shy to reach out!

Asmtxhci.sys BSOD Error: 2 Solutions That can Fix it

The  SYSTEM_SERVICE_EXCEPTION (asmtxhci.sys) Blue Screen of Death error is common on Asus computers or devices using the Asus motherboard. This error can happen after a system update or installing a specific app or program on your computer.

Irrespective of the cause, this guide contains the fixes that will help you solve the problem in no time.

What causes asmtxhci.sys blue screen?

The asmtxhci.sys BSOD on Windows 10 Dell on Asus PCs are usually caused by driver issues. Below are some of the known causes:

  • Outdated drivers: In some cases, this blue screen error is down to obsolete drivers. The simple fix is to update the driver to the latest version.
  • Faulty driver: Sometimes, updating your driver might not fix this issue. This is because the driver is defective and needs to be removed. So, only a complete reinstall will do the trick.

How can I fix asmtxhci.sys error?

1. Update drivers

  1. Press the Windows key + X and click on Device Manager.
    device manager asmtxhci.sys
  2. Click on the arrow next to the Universal Serial Bus controllers option to expand it.
  3. Right-click the ASMedia XHCI controller device and select Update driver.
    update
  4. Now, choose the Search automatically for driver updates option and install any available updates.
    search auto

If you recently performed a Windows update, the asmtxhci.sys failed, an outdated driver might cause an error.

So, you need to update the driver to the latest version to prevent the issue. If the Windows driver updater did not provide an update, you could check the manufacturer’s website for the latest version.

Alternatively, you can update your driver to the latest version using a professional tool in Outbyte Driver Updater that can scan your drivers and download the latest patches.

With this software, you can be sure your PC won’t miss any critical updates. Also, this will prevent blue screen issues, as driver and hardware issues usually cause them.

Outbyte Driver Updater

Prevent blue screen issues and other PC errors by updating your drivers with the latest versions.
Free Trial Download now

2. Reinstall the driver

  1. Right-click the Start icon and select the Device Manager option.
    manager asmtxhci.sys
  2. Expand the Universal Serial Bus controllers option and double-click the ASMedia XHCI controller.
  3. Click the Driver tab at the top and note the Driver version.
    driver version asmtxhci.sys
  4. Proceed to the official page to download the stable version of the driver (this might be an older or newer version).
  5. Next, go back to the Device Manager window and right-click the ASMedia XHCI controller.
  6. Choose the Uninstall device option.
    uninstall device
  7. Check the box for Delete the driver software for this device if it is available on your PC.
  8. Now, click the Uninstall button to confirm the action.
    uninstall
  9. Finally, go to the location where your downloaded driver is and install it.

If updating the driver does fix the asmtxhci.sys issue, you need to uninstall and reinstall the stable version of the driver. However, many users have reported that the older driver versions work better.

So, you can try them too.

There you have it; those are the troubleshooting solutions that can be used to fix this BSOD error on Windows 10.

You can also use professional tools to fix the Blue Screen of Death error, like the ones in this excellent article on the best BSOD repair software.

Feel free to let us know if you encounter any problems while implementing any of the fixes above.

Error 0x80071a91 in Windows Update [SOLVED]

Windows 10 and 11 are one of the most popular operating systems in the world today. However, just like every other OS, it also has many issues. In this guide, we’re going to talk about the install error 0x80071a91 and how to fix it.

The Windows Update 0x80071a91 is an error that occurs on mostly Windows 10 and 11 PC after recent upgrades from lower Windows versions.

Corrupt system drivers, corrupt Windows OS installation, and Windows Updates issues are some factors that trigger Windows 10 error 0x80071a91.

Therefore, we have enlisted working solutions geared towards fixing the error problem once and for all.

What is error 0x80071AB1?

Error 0x80071a91 prevents users from downloading and installing Windows updates. We could say that Windows 10 inherited this error code from Windows 8.1. Unfortunately, it also occurs on the latest Windows OS.

This error is intended to inform you that an effort to make room in the manager’s log for the transactional resource is unsuccessful, and the event log has been updated to reflect the failure.

Here are a few causes:

  • Corrupted system files – It turns out that the 0x80071AB1 issue might also originate from system file corruption. SFC or DISM checks can usually fix superficial corruption issues, but you might need a clean install in more significant situations.
  • Missing Windows update – Utilizing the Media Creation tool for OS upgrade is the only way to get around this message if you have a WU issue.
  • Windows update glitch – Using the Windows Update troubleshooter and implementing the suggested remedy may solve your problem if you’re having difficulties installing a new.NET framework update or another WU update the traditional way.
  • Corrupted WU components – Installing the necessary update from the Microsoft Update Catalog will allow you to avoid the issue in this scenario altogether.
  • Recent software change – You might be able to fix this error using the System Restore tool if you recently installed an application or made another software modification that led to it. Just be careful to select the appropriate restore point.

Now let us look at the most recommended solutions; these would also come in handy if you have the error messages Net Framework 3.5 error code 0x80071A91 or 0x80071a91 System Restore.

How do I fix the 0x80071a91 Windows Update error?

1. Erase the Common Log File System transaction logs

  1. Right-click the Start menu and select Select Command Prompt (Admin).
    0x80071a91
  2. Type the scripts below, hitting Enter after each one.
    cd /d %SystemRoot%\System32\SMI\Store\Machine
    attrib -s -h *
    del *.blf
    del *.regtrans-ms
  3. Restart the computer and see if you can upgrade Windows now.

2. Run the Windows Update troubleshooter

  1. Go to Settings
  2. Head over to Update & Security.
  3. Click Troubleshoot, find Windows Update, and click Run the troubleshooter, then Follow the on-screen instructions and restart your computer.

A newer version of Windows 10 or Windows 10 Creators Update comes with a Windows Update troubleshooting tool. Since Windows 10 error 0x80071a91 is related to a Windows update, you must use the troubleshooter.

3. Run a full system scan

  1. Click the Start menu, type Defender, and open the Virus & threat protection app.
  2. Click on Scan options.
    0x80071a91
  3. Select Full scan, then click the Scan now button.

Malware and viruses can creep up on your Windows PC and corrupt important system drivers; hence, you experience Windows 10 error 0x80071a91.

Consider purchasing a reliable security tool to help eradicate malware and viruses from your computer.

When you find antivirus software that covers compatibility with your computer’s functionality, you know it won’t interfere with your PC.

Windows Security, a natural defender for your Windows PC that runs scans and receives updates to help identify the latest threats, is a quick and efficient solution.

One of the safest antivirus options you can use is TotalAV. It offers excellent protection features against viruses, malware, phishing scams, and other digital threats that might affect your device.

It has a variety of different scanning options with high-quality detection rates. You can scan every file on your computer, including running processes, system files, program files, and even cached files.

TotalAV

Protect your device against all digital types of threats with TotalAV advanced detection rates.
Check Price Visit Website

4. Reset Windows Updates components

Disclaimer: This solution contains steps that are part of modifying the registry. Please note that serious problems may occur if you do this incorrectly. Hence, follow these steps correctly and carefully.

Here’s how to manually reset the Windows Updates Components:

  1. Right-click the Start menu and select Select Command Prompt (Admin).
  2. Stop the BITS, Cryptographic, MSI Installer, and Windows Update services by typing the following commands and hitting Enter after each one:
    • net stop wuauserv
    • net stop cryptSvc
    • net stop bits
    • net stop msiserver
  3. Rename the SoftwareDistribution and Catroot2 folders by typing the commands below in the Command Prompt, hitting Enter after each command:
    • Ren C:WindowssoftwareDistribution SoftwareDistribution.old
    • Ren C:WindowsSystem32catroot2 Catroot2.old
  4. Restart the BITS, Cryptographic, MSI Installer, and Windows Update services by typing the following commands and hitting Enter after each one:
    • net start wuauserv
    • net start cryptSvc
    • net start bits
    • net start msiserver
  5. Type Exit in the Command Prompt to close it

Afterward, rerun Windows Updates, install the latest updates, and verify that the 0x80071a91 error is resolved.

5. Perform a Clean Boot

  1. Open the Run dialog using Windows + R, then type msconfig and hit Enter.fix windows 10 error 0x80071a91
  2. Click the Services tab, select the Hide all Microsoft services box, then click Disable all.
    0x80071a91
  3. Go to the Startup tab and click Open Task Manager.
  4. Right-click each startup item and then click Disable.fix windows 10 error 0x80071a91
  5. Click ok to close the Task Manager and restart the computer.fix windows 10 error 0x80071a91

6. Run System Restore in safe mode

  1. Open the Start menu.
  2. Click on the Power button.
  3. Hold Shift on your keyboard and click on Restart.
  4. When your computer restarts, choose Troubleshoot.
    0x80071a91
  5. Then click on Advanced options.
  6. Select Startup Settings and click Restart.
  7. Press F5 to select Safe Mode with Networking when your computer restarts again.
  8. After you enter Safe Mode, try to perform System Restore.

Alternatively, you can always rely on specialized repair software to help you deal with this error. These automated solutions will help scan for broken system files and will help replace them in no time.

7. Reset your FSRM Service

  1. Right-click the Start menu and select Select Command Prompt (Admin).
  2. Input the code below and hit Enter.
    fsutil resource setautoreset true C:\
  3. Restart the system after executing the command to see whether it resolves the problem.

How do I fix the 0x80071a91 error on Windows 11?

This Windows update error happens across different upgrades of the Microsoft OS. The good news is that while the solutions we have shown are for Windows 10, they are easily adaptable for Windows 11.

This is because both operating systems are similar except for the occasional UI differences. So you should pick whatever solution pleases you, and it should work on a windows 11 device.

What do you do when the transaction log is full?

You must back up the transaction log to enable log records to be freed and the log to be reduced.

To allow the Database Engine to truncate the log to the position of the most recent backup, you must establish two log backups if the log has never been backed up. For new log records, the log can be truncated to create logical space.

Can I download Windows updates manually?

While updates would, in most cases, be automatic, you can manually check for new updates and download and install them.

You have to open your settings app and hit the windows Update tab to reveal if there are any updates to be downloaded.

Conclusively any of the solutions above should be able to fix Windows 10 error 0x80071a91. However, if you still experience this issue, we will recommend that you consider installing Windows 10 OS afresh.

Have you encountered Window error 0x80071a91? Did you try any of our fixes above? We do appreciate it if you share your experience with us. Let us know in the comment section below.

Windows Update Error 0x8024402f [Solved]

Some users complained about how they receive an error message when they try to update their system to the latest build.

More precisely, the error code is 0x8024402f and this issue prevents them from installing the latest version of Windows 10 Technical Preview.

The full message states: There were some problems installing updates, but we’ll try again later. If you keep seeing this and want to search the web or contact support for information, this may help: (0x8024402f).

Read on to find out how to fix this error and resume your failed update installations as soon as possible.

How do I fix the Windows Update error 0x8024402f?

1. Check your antivirus software

If you’re getting error code 0x8024402f, the problem might be related to your antivirus software.

Certain antivirus tools can interfere with your security policies and prevent Windows Update from working properly.

To fix this problem, it’s advised to check your antivirus configuration and disable any security features that might interfere with Windows Update.

If you can’t find those features on your own, you might want to try disabling your antivirus. Many users reported issues with some specific antiviruses, but after disabling them, the issue was fixed.

In some cases, you might even have to remove your antivirus entirely. If your current antivirus is causing this error to appear, you might want to consider switching to a different antivirus solution.

2. Remove temporary files

Windows 10 uses temporary files for various operations, but if your temporary files are corrupted, you might encounter certain issues.

Users reported that the error code 0x8024402f can appear due to corrupted files, and in order to fix the problem, you need to remove them.

We recommend you use a reliable third-party tool that can remove temporary and junk files from your PC with ease. They also offer some advanced features that you might find useful.

3. Run the Windows Update Troubleshooter

You can always try Microsoft’s Update Troubleshooter. This tool is created for solving problems with Windows Updates, and it could solve yours as well.

All you have to do is to download it, open it and let it find, and (maybe) solve your update issues.

If you’re still facing the same issue, after running the Troubleshooter, you should check your Internet connection.

4. Check your Internet connection

  1. Go to Search and enter identify and repair.
  2. Open Identify and repair network problems.
    Windows 10 update stuck 0x8024402f
  3. The troubleshooter will open, and it will tell you what you need to do in order to get your Internet connection back.

0x8024402f is an error code related to connection problems with Windows Update.

That means your computer isn’t able to connect to the Microsoft Update server, therefore you’re unable to receive any new updates.

So you either have a problem with the Internet connection, or the Microsoft Update server is corrupted.

If Microsoft Update Server causes problems, you just need to wait a bit, because Microsoft’s staff will probably solve the problem quickly.

But if your Internet connection is an issue, then you should follow the above steps.

5. Uninstall problematic updates

  1. Press the Windows Key + I to open the Settings app.
  2. Go to the Update & security section.
    Windows Defender error code 0x8024402f
  3. In the left pane, click on View installed update history.
    Windows 10 update error number 0x8024402f
  4. Now choose Uninstall updates.
    Windows 10 update stuck 0x8024402f
  5. List of recent updates will appear. Double-click the problematic update to uninstall it.
    Windows Defender error code 0x8024402f

If this error started occurring recently, the issue might be a problematic update. Several users reported that an update caused error 0x8024402f to appear on their PC.

To fix this issue, you need to find the problematic update and remove it.

After removing the latest update, check if the problem still persists. If not, you might want to block that update from installing.

Windows 10 installs missing updates automatically, but there are a few ways to block Windows 10 from installing automatic updates.

6. Check your router’s firewall

According to users, sometimes your router’s configuration can cause this problem to appear. Users reported that error code 0x8024402f occurs if ActiveX controls are blocked in your router’s firewall.

To fix this problem, simply open your router’s configuration page, locate ActiveX blocking or filtering and disable this feature.

After doing that, the problem should be resolved, and you’ll be able to use Windows Update again.

To see how to disable this feature, we strongly advise you to check your router’s manual for detailed instructions.

7. Reset your gateway/modem/router

As previously mentioned, your router configuration can cause this problem to appear.

If you’re getting error code 0x8024402f on your PC, the issue might be caused because the router is set to work in bridge mode.

To fix the problem, set your router to work in default mode and the issue should be resolved. In addition, you might also want to try resetting your router settings to default and check if that helps.

Users reported this problem with Comcast devices, but the problem might occur with other devices as well.

8. Try using a VPN

If you’re constantly getting error code 0x8024402f, the problem might be related to your ISP.

Sometimes ISPs can block certain servers and prevent you from downloading updates. If this happens, you might want to try contacting your ISP and check if that solves the problem.

If you don’t want to contact your ISP, you might be able to solve these issues by using VPN software, it is fast and efficient.

We covered various VPNs, and if you’re looking for a reliable VPN, we recommend you browser the list and install the one you believe suits best for your PC. After installing and using a VPN tool, the issue should be completely resolved.

9. Change Windows Update settings

  1. Open the Settings app, and go to the Update & security section.
  2. In the left pane, choose Advanced options.
    Windows 10 update error number 0x8024402f
  3. Set Choose how updates are installed to Notify to schedule restart.
  4. Disable Give me updates for other Microsoft products when I update Windows and the Defer upgrades options.
  5. Now select Delivery Optimization.
    Windows 10 update stuck 0x8024402f
  6. Enable Allow downloads from other PCs, and select PCs on my local network and PCs on the Internet.
    Windows Defender error code 0x8024402f

According to users, you might be able to fix error code 0x8024402f simply by changing Windows Update settings.

To do that, just follow the above steps. After making these changes, check if the problem still persists.

10. Change your DNS

  1. In the bottom right corner, click on the Network icon.
  2. Now select the network name from the list.
    Windows 10 update error number 0x8024402f
  3. When the Settings app appears, select Change adapter options.
    Windows 10 update stuck 0x8024402f
  4. Locate your network connection, right-click it and choose Properties from the menu.
    Windows 10 update error number 0x8024402f
  5. Select Internet Protocol Version 4 (TCP/IPv4), and click the Properties button.
    Windows Defender error code 0x8024402f
  6. A new window will now appear. Select Use the following DNS server addresses and set the following:
    • Preferred DNS server: 8.8.8.8
    • Alternate DNS server: 8.8.4.4
  7. Now click on OK to save changes.

Sometimes error code 0x8024402f can appear due to your DNS. In order to fix this problem, you need to change your default DNS to Google’s DNS.

After making these changes, your computer will use Google’s DNS. If you want, you can also use OpenDN.

Keep in mind that your Internet speed might be slightly slower after switching to the Google DNS, but the problem should be resolved.

Establishing your Internet connection again should solve the 0x8024402f error code problem, and you’ll be able to update your Windows 10 Technical Preview to the latest 10049 build.

Error code 0x8024402f can prevent you from downloading Windows updates. Speaking of this error, users reported the following problems:

  • Windows 10 update error number 0x8024402f – This is a relatively common problem with Windows Update. However, you should be able to fix this issue by using one of our solutions.
  • Windows 10 update stuck 0x8024402f – Sometimes Windows Update can become stuck due to this error. To fix it, try disabling your antivirus or check your firewall settings.
  • Windows Defender error code 0x8024402f – This error can also affect Windows Defender, but you should be able to solve it by removing the problematic updates.

Also, if you encounter some Windows 10 Technical Preview key issues, our detailed guide will help you find the best solution.

If you have any other comments or suggestions, please write the down in the comments section below.

FIX: Error Code 80151103 in 4 Step-by-Step Guides

If you get Xbox error code 80151103, you may not immediately know the root cause, so one of the things most users do is restart their consoles.

However, if restarting doesn’t help, what next? Thankfully, we have an explanation for what Xbox error code 80151103 is, and how to fix it so you don’t have to sweat too hard looking for solutions.

Usually, error and status codes on Xbox can be generated by service outages, so in order to save yourself some time, you can check the Xbox Live service status for alerts, prior to doing online searches for the Xbox error code 80151103.

Xbox error code 80151103 occurs when you’re downloading your profile to your Xbox 360, then you get either of these three error codes and messages:

  • Sorry, Xbox Live profiles cannot be loaded right now. Please try again later.
  • Status code: 80151103.
  • Error: Can’t connect to Live. The logon error code is 0x80151103

This could mean that there’s a temporary problem with the service, the security information you gave for your Microsoft account, or the Xbox Live profile stored on your console.

In order to resolve the Xbox error code 80151103 issue, here are some solutions you can try.

How can I fix Xbox error code 80151103?

1. Check for service alerts

If you find any service alerts when you check the Xbox Live service status, give it a few minutes or wait for a while before trying it again, and check if the service is up and running.

Usually, the status will be displayed as up and running in green color with a green tick next to Xbox Live Core Services.

2. Confirm your Microsoft account credentials

Xbox error code 80151103 can come up if your Microsoft account’s security information is not correct. In order to resolve this, do the following:

  • Sign in to your Microsoft account. In case you forgot your password or are unable to sign in using it, you can check with the Lost Account or Lost Password troubleshooting on how to change it.
  • Once you’re signed in, go to Security & Privacy
  • Click Change password & more
  • Under Security info helps keep your account secure, verify your email addresses and phone number
  • You can add or update your security information as and when necessary
  • Sign out and sign in again
  • Try to sign in to Xbox Live

3. Reset your password

You can change your Microsoft account password by going to account.live.com and following the prompts. Once you change it, sign in again and try Xbox Live again.

Password changes are ideal if you think someone else is using your account, or the retailer you use had a security breach and you used the same password on your account, or you just want to change it for safety reasons.

However, if you forgot the password and know your email address, reset the password online by verifying your identity using other information. If you don’t know either information, use the Lost account or a Lost password solution to reset it.

Note: You cannot change your Microsoft account password on your Xbox One console.

4. Download your Xbox Live profile again

If you still get Xbox error code 80151103 after trying the solutions above, redownload your profile again by doing the following:

  • Move your Xbox Live profile by using a USB flash drive, plugging it into your console then going to the dashboard>settings>storage>all devices>gamer profiles (select your gamer profile). Select Move, then select the memory unit you want to move your profile too. Remove the USB flash from your console
  • Clear the system cache by pressing the Guide button, then go to Settings>System Settings>Storage/Memory. Highlight any storage device, then go back to your controller and press Y. Select Clear System Cache, and select Yes to confirm
  • Restart your Xbox console
  • Redownload your Xbox Live profile

Did any of these solutions help fix Xbox error code 80151103? Let us know by leaving a comment in the section below.

Your Gmail Settings are Out of Date: 4 Fixes You can Use

Google’s Gmail is one of the best email clients currently available. However, even the best can suffer a setback, as users complain they are getting a Gmail settings out of date prompt.

If you are troubled by this issue, you have no worries, as we have found several solutions for it and will share them with you in this article.

Why do I keep getting your Gmail account settings are out of date?

The reasons for the Gmail account settings are out of date prompt are within a close circle, as shown in the list below:

  • Issues with account settings: Most times, this issue might be because of your account’s security settings. To be sure this is not the case, you need to turn on the less secure app feature on your account.
  • Outdated browser: If you are getting some info that may be outdated on your Google account prompt on the web client, the problem might be with your browser. The solution is to update your browser or switch to one of the best browsers for all devices.

How can I fix Your Gmail settings are out of date error?

1. Remove and add Email

  1. Press the Windows key, search Mail, and select the corresponding option.
    mail your gmail settings are out of date
  2. Click the Settings option in the bottom left corner.
  3. Now, select the Manage account option and set the account you want to remove.
  4. Select the Change mailbox sync settings option and scroll down to Sync options.
  5. Next, toggle the switch for the Email backward to disable it and click Done, followed by Save.
  6. Close the Mail app and wait for some minutes.
  7. Repeat Steps 1 to 3 above.
  8. Choose the Add account option and select the type of account you want to add.
    add account
  9. Finally, enter your account details and Sign in.
    sign in

If you get a message error that informs you that your Gmail settings are out of date, it might be due to some glitches with the Mail or Calendar app. Removing and adding the app should fix the issue.

2. Update your browser

  1. Launch your browser and click the menu button.
  2. Click the Help button and select About Chrome.
    abouyour gmail settings are out of date
  3. It will show you if there is an update available to install.
    checking

Another cause of the Gmail settings are out of date issue is an outdated browser. Updating the browser to the latest version should do the trick here.

3. Change your password

  1. Press the Windows key + S, type Mail, and launch the app.
    mail option your gmail settings are out of date
  2. Click the Fix account option in the notification bar at the top.
  3. You will get a prompt to change your password if it is incorrect.
  4. Enter your password and click the Done button.

If you entered the wrong password in the Mail or Calendar app, you would likely get the Gmail settings to be out of date prompt. The solution is to Fix your account and change the password.

4. Turn on the Less secure app option

  1. Sign into your Google account and click the Security option in the left pane.
    security
  2. Select the Turn on access option in the Less secure app access section.
  3. Finally, click Save to save your settings.

Sometimes, Google views some apps like Mail and Calendar as vulnerable. This might be the reason for the Gmail settings are out of date prompt.

You need to grant access to less secure apps to be able to use these apps without problems.

After following all these steps, the Gmail settings are out of date notification should stop popping up, and you should be able to use your email app without any further issues.

If you are facing other issues, like Gmail not receiving emails, check our detailed guide to address it for good.

Feel free to let us know the solution that helped you fix this issue in the comments below.

0x8000ffff in Windows Update [SOLVED]

With Windows 10 and 11, updates have become essential to everyday computer use. To achieve maximum safety and smooth work, Microsoft creates new builds based on feedback from Windows Insiders.

However, with many new features, you may have an extra one or two issues. Error 0x8000ffff appears mostly when you try to do a standard update or update some Windows features or apps in the Store.

Furthermore, it may appear after the system restore. So, if you’re facing this update issue, we’ve prepared some workarounds for you to resolve the problem.

What does error 0x8000ffff mean?

There are different causes of this error. Most of the time, it occurs because of a virus infection or faulty drivers. Or maybe just a defective app.

Error 0x8000ffff can be problematic and prevent you from installing updates on your PC.

Speaking of update errors, here are some issues reported by users:

  • Windows failed to install the following update with error 0x8000ffff – This is a variation of the original error, and if you encounter it, be sure to try all of our solutions.
  • 0x8000ffff Windows 7 – This error can appear on older versions of Windows, and even if you don’t use Windows 10, you should be able to apply most of our solutions to your operating system.
  • 0x8000ffff Windows Update / 0x8000ffff Windows 11 Update – This indicates that Windows 10 update problems are present. Usually, after a Windows upgrade, this issue locks the Windows Store.

Regardless of the variation or the cause, we will show you some of the best solutions.

How do I fix error code 0x8000ffff in Windows Update?

1. Repair your PC with specialized software

If you’re having issues with download error 0x8000ffff, the problem might be caused by system corruption, and this is where a reliable repair tool can come in handy.

2. Scan your PC with Windows Security or 3rd party antimalware software

  1. Press the Windows key, type Windows Security, and select the Windows Security app.
    0x8000ffff
  2. Click on Virus & threat protection.
  3. Select Scan options.
  4. Click on Full scan and click the Scan now button.
    0x8000ffff

The first step in this situation is performing a full scan. After that, you can use either Windows Defender or a 3rd party software.

Although Windows Defender is a solid antivirus, third-party antivirus tools might offer certain features that Windows Defender lacks.

If you’re looking for new antivirus software, we would have to recommend TotalAV.

⇒ TotalAV

3. Check files integrity with the SFC tool

  1. Right-click on Start and open Command Prompt (Admin). If Command Prompt isn’t available, you can also use PowerShell (Admin).
    Windows failed to install the following update with error 0x8000ffff 
  2. In the command line, type the script below and hit Enter.
    sfc /scannow
    0x8000ffff Windows 7
  3. The tool will scan and repair all corrupted files.

If an SFC scan doesn’t fix your problem, or if you can’t start an SFC scan, you should try performing a DISM scan instead by running the script below:

DISM /Online /Cleanup-Image /RestoreHealth/

DISM scan can take about 20 minutes, sometimes more, so try not to interfere or interrupt it.

Once the DISM scan is finished, check if the problem is resolved. If not, or if you couldn’t run an SFC scan before, be sure to try rerunning the SFC scan.

Sometimes, the system files may get corrupted due to virus infections or even unapparent reasons, and you may encounter download error 0x8000ffff.

4. Set the correct Date & Time and log in as Admin

  1. Right-click the clock in the bottom right corner and select Adjust date/time.
  2. Now locate the Set time automatically option, disable it, wait for a few seconds, and turn it back again.
    0x8000ffff Windows 7

A wrongly set date or time can cause many issues, especially with the Windows Store and its respective apps. So, set up a valid date and time to update apps and bypass the error.

After doing that, your date and time will be updated. You can manually adjust the date and time from this window if you want.

Once your date is corrected, try to perform the update again and check if error 0x8000ffff is still there.

5. Reset Store cache

  1. Press Windows key + R.
  2. In the text field, type WSReset.exe and run it.
    Windows failed to install the following update with error 0x8000ffff
  3. This should clear the Microsoft Store cache.

After the cache is cleared, you should be able to install/update apps without 0x8000ffff error.

6. Boot in a Safe Mode with Networking

  1. Go to Start and open Settings.
  2. Choose Update & Security.
    Windows failed to install the following update with error 0x8000ffff
  3. Click Recovery, then click Restart Now under Advanced Startup.
    Windows failed to install the following update with error 0x8000ffff
  4. After your PC restarts, select Troubleshoot to open Advanced Options.
  5. Choose Startup Settings.
  6. Click Restart.
  7. After the restart, choose Enable Safe Mode with Networking.
    0x8000ffff
  8. Now you can try and update the system/app.

If some drivers or Windows features are incorrectly installed, they can interfere with an update sequence.

We advise you to try and boot the PC in Safe mode with Networking and try updating. After that, the download error 0x8000ffff should be gone.

7. Remove problematic applications

To uninstall a problematic application, we recommend using uninstaller software. If you’re unfamiliar, uninstaller software is a unique application that can remove any program from your PC.

In addition to removing the selected application, these tools will remove all associated files and registry entries.

As a result, there won’t be any leftover files remaining that can interfere with your system.

There are many great uninstaller applications, but Iobit Uninstaller is the best, so feel free to try it out.

Once you remove the problematic application, check if the problem is resolved.

8. Create a new administrator account

8.1 Create account

  1. Press Windows Key + I to open the Settings app.
  2. Now navigate to the Accounts section.
    0x8000ffff Windows 7
  3. On the menu on the left select Family & other people, and in the right pane, select Add someone else to this PC.
    Windows failed to install the following update with error 0x8000ffff
  4. Select I don’t have this person’s sign-in information.
    0x8000ffff Windows 7
  5. Now you’ll be asked to create a new Microsoft account. Choose the Add a user without a Microsoft account option.
    Windows failed to install the following update with error 0x8000ffff
  6. Enter the desired user name and click Next.
    0x8000ffff Windows 7

Now you need to convert your new account to the administrator account. This is quite simple, and you need to do the following:

8.2 Convert account to admin

  1. In the Settings app, go to Accounts.
    0x8000ffff Windows 7
  2. Click on Family and other people. Next, select the new user account in the Other people section and click Change account type.
    Windows failed to install the following update with error 0x8000ffff
  3. Select Account type to Administrator, and click OK.
    0x8000ffff Windows 7

Now sign out of your current account and switch to the new account. After doing that, try to update again.

Sometimes error 0x8000ffff can appear due to your user account.

If your user account is corrupted or you don’t have administrative privileges, you won’t be able to update your Windows.

9. Perform an in-place upgrade

  1. Download Media Creation Tool from Microsoft’s website and run it.
  2. Select Upgrade this PC now, click Next, and wait while your PC prepares the necessary files.
    0x8000ffff
  3. Now choose Download and install updates (recommended), click Next, and wait for the process to finish.
  4. Follow the instructions until you reach the Ready to install screen. Then, select Change what to keep.
  5. Choose to Keep personal files and apps and click Next.
  6. Follow the instructions on the screen to complete the setup.

Once the installation is finished, you’ll have the latest version of Windows installed with all the necessary updates.

If other solutions don’t work, your only option might be performing an in-place upgrade.

Doing so will force Windows 10 to upgrade to the latest version while keeping all your files and applications.

Why is Windows 10 failing to update?

There are a few causes, but the most common include:

  • Corrupted registry entries
  • Missing or corrupted system files
  • Problematic Windows Store app
  • Faulty or out-of-date drivers
  • Limited access
  • Malware infection

Using the solutions we have suggested, you should be able to solve any issues of failed updates on your computer.

That is it for this article; you should not have successfully resolved error code 0x8000ffff on Windows 10 and 11.

The error 0x8000ffff catastrophic failure can occur in many circumstances and on different Windows versions, but following the steps in this error 0x8000ffff catastrophic failure guide will help you resolve it.

These were our possible workarounds for your issue. We certainly hope you’ll find them helpful. Note that we have not written these solutions in any particular order.

Please tell us in the comments section if you have additional solutions or related questions.

Error 0x800705b4 in Windows Update [SOLVED]

The Windows Update feature is quite advanced; however, occasionally, some errors may crop up. The 0x800705b4 error is one such example.

The full message reads: There were some problems installing updates, but we’ll try again later. If you keep seeing this and want to search the web or contact support for information, this may help: (0x800705b4).

0x800705b4 can be quite problematic since it will prevent your system from updating. Nevertheless, every issue has a solution, and we’ll try and resolve it for you today.

What does error code 0x800705b4 mean?

This 0x800705b4 error appears in Windows systems and affects Window’s ability to perform updates. A few elements trigger it, and on the top of this list, we have the following:

  • Malware – When the device is infected with malware or viruses can trigger this update error.
  • Bad system files – Users have noted that damaged or corrupted Windows system files may trigger the error.
  • Wrongly applied updates – Sometimes, downloading or installing corrupt Windows updates will also trigger the error.

Regardless of the cause, you should be able to resolve the error using one of the solutions we shall cover.

How can I fix the error 0x800705b4?

1. Reset Windows Update components

  1. Right-click on the Start and open Command Prompt (Admin).
  2. In the command line, type the following commands and press Enter after each command:
    • net stop bits
    • net stop wuauserv
    • net stop appidsvc
    • net stop cryptsvc
  3. After you stopped the related services, the next step is erasing a particular file.
  4. In the command line, type the following command and press Enter:
    Del "%ALLUSERSPROFILE%ApplicationDataMicrosoftNetworkDownloaderqmgr*.dat"
  5. After that, we move on to the next command: 
    cd /d %windir%system32
  6. Now you’ll have to restart all of the BITS files. Type the following commands and press Enter after each command:
    • regsvr32.exe oleaut32.dll
    • regsvr32.exe ole32.dll
    • regsvr32.exe shell32.dll
    • regsvr32.exe initpki.dll
    • regsvr32.exe wuapi.dll
    • regsvr32.exe wuaueng.dll
    • regsvr32.exe wuaueng1.dll
    • regsvr32.exe wucltui.dll
    • regsvr32.exe wups.dll
    • regsvr32.exe wups2.dll
    • regsvr32.exe wuweb.dll
    • regsvr32.exe qmgr.dll
    • regsvr32.exe qmgrprxy.dll
    • regsvr32.exe wucltux.dll
    • regsvr32.exe muweb.dll
    • regsvr32.exe wuwebv.dll
    • regsvr32.exe atl.dll
    • regsvr32.exe urlmon.dll
    • regsvr32.exe mshtml.dll
    • regsvr32.exe shdocvw.dll
    • regsvr32.exe browseui.dll
    • regsvr32.exe jscript.dll
    • regsvr32.exe vbscript.dll
    • regsvr32.exe scrrun.dll
    • regsvr32.exe msxml.dll
    • regsvr32.exe msxml3.dll
    • regsvr32.exe msxml6.dll
    • regsvr32.exe actxprxy.dll
    • regsvr32.exe softpub.dll
    • regsvr32.exe wintrust.dll
    • regsvr32.exe dssenh.dll
    • regsvr32.exe rsaenh.dll
    • regsvr32.exe gpkcsp.dll
    • regsvr32.exe sccbase.dll
    • regsvr32.exe slbcsp.dll
    • regsvr32.exe cryptdlg.dll
  7. After those, restart Winshock with this command and press Enter: 
    netsh winsock reset
  8. Now you’ll need to start up stopped services; type these commands and press ENTER after each:
    • net start bits
    • net start wuauserv
    • net start appidsvc
    • net start cryptsvc
  9. Close Command Prompt and restart the PC.

2. Perform SFC and DISM scans

2.2 Running an SFC scan

  1. Right-click on the Start and open Command Prompt (Admin).
    0x800705b4 Windows 7
  2. In the command line, type the following script and hit Enter.
     sfc /scannow
    Windows 10 activation error 0x800705b4
  3. After a few minutes, your issue should be resolved.

If SFC scan didn’t fix the problem, or if you couldn’t run the SFC scan, you might be able to solve the problem by running a DISM scan.

2.2 Running a DISM scan

  1. Right-click on the Start and open Command Prompt (Admin).
    0x800705b4 Windows 7
  2. In the command line, type the following script and hit Enter.
    DISM /Online /Cleanup-Image /RestoreHealth

According to users, sometimes issues with file corruption can cause error 0x800705b4 to appear. File corruption can occur for various reasons, but you might be able to fix the problem simply by performing an SFC scan.

Once the scan is finished, check if the issue is resolved. If you could not run an SFC scan before, or if the problem persists, try running the SFC scan once again and check if that helps.

3. Check and disable your antivirus software

  1. Click on the hidden access arrow in the Taskbar.
    0x800705b4
  2. Click on your antivirus icon, hover over Avast shields Control and select Disable for 10 minutes (This step varies for different antivirus software).

According to users, sometimes update error 0x800705b4 can appear due to your antivirus software. Having a good antivirus is important, but sometimes your antivirus can interfere with your system and cause this error to appear.

You can try disabling certain antivirus features to fix the problem and check if that helps. If the issue is still there, you might want to try disabling your antivirus completely.

In the worst-case scenario, you might have to uninstall your antivirus to solve this problem completely. Many users reported that McAfee Firewall caused this issue, so if you’re using it, be sure to disable it or delete it.

Even if you remove your antivirus, there’s no need to worry about your safety since Windows 10 comes with Windows Defender, which acts as a default antivirus.

If removing the antivirus solves the problem, it might be a good idea to consider switching to a different tool. You can find several Windows 10-compatible antivirus software that won’t interfere with your system.

4. Make sure that the Windows Defender service is running

  1. Press Windows Key + R and type services.msc, hit Enter, or click OK.
    Windows 10 activation error 0x800705b4
  2. When the Services window opens, check if Windows Defender Firewall and Windows Defender Antivirus Service are running.
  3. If needed, you can check their properties simply by double-clicking them.
    0x800705b4 Windows 7
  4. Now check if the services are running. If not, click the Start button. In addition, set Startup type to Automatic. Now click Apply and OK to save changes.
    Windows Server 2016 update error 0x800705b4

To download updates, certain services need to be running on your PC. Regarding services, users reported that update error 0x800705b4 could occur if Windows Defender service isn’t running, so be sure to enable it.

5. Change Windows Update settings

  1. Press Windows Key + I to open the Settings app.
  2. When the Settings app opens, navigate to Update & Security section.
    Windows Server 2016 update error 0x800705b4
  3. Navigate to Advanced options.
    0x800705b4 Windows 7
  4. Disable Give me updates for other Microsoft products when I update Windows option.
    Windows Server 2016 update error 0x800705b4
  5. After doing that, restart your PC.

According to users, sometimes this update error 0x800705b4 can occur due to your settings. Once your PC restarts, try downloading updates again and check if the problem is still there.

6. Perform chkdsk scan

  1. Right-click on the Start and open Command Prompt (Admin).
    0x800705b4 Windows 7
  2. When Command Prompt starts, the script below and hit Enter (be sure to replace X with your system drive, by default, that should be C).
    chkdsk /f X
    Windows 10 activation error 0x800705b4
  3. You’ll get a message asking you to schedule a system scan at the next restart. Enter Y and press Enter to confirm.

According to users, file corruption is a common cause for update error 0x800705b4. If your files are corrupted, that can cause this and other errors to occur.

However, you can try to fix the issue with file corruption simply by performing a chkdsk scan.  Now chkdsk scan will start once you restart your PC. When the scan is finished, check if the problem is still there.

Where else can the error 0x800705b4 be seen?

Speaking of errors, users reported sights of this stop code in various scenarios. Let’s check them out.

  • Windows Server 2016 update error 0x800705b – This issue can appear on Windows Server 2016, and if you encounter it, you should be able to fix it using one of our solutions.
  • Windows 10 activation error 0x800705b4/We can’t activate Windows on this device right now 0x800705b4 – The last product key you entered can t be used on this copy of Windows 0x800705b4 is preventing them from activating their Windows license.
  • 0x800705b4 Windows 7 – This problem can affect older versions of Windows, and even if you don’t use Windows 10, you should be able to apply almost all of our solutions to the older versions of Windows.
  • 0x800705b4 error code Xbox – Frequently encountered on Warzone, Modern Warfare, and more Xbox games.
  • Microsoft Store error 0x800705b4 – Download failed for content under context System, error 0x800705b4.
  • Your device is missing important security and quality fixes 0x800705b4 – Problematic updates can trigger the Your device is missing important security and quality fixes message, so you might want to identify and uninstall them.

That is as far as we will go with this article. The presented solutions will work for 0x800705b4 SCCM, 0x800705b4 Minecraft, and 0x800705b4 Windows 10 and 11 errors.

If you run into errors like 0x800705b4 while updating Windows, you might find helpful tips in this guide on fixing Windows Update error 0xxxxxxxxxx.

These were our workarounds for this issue. If you have any questions or suggestions, feel free to tell us in the comments.

Forza Horizon 4 Controller not Working: 3 Fixes to use

Forza Horizon 4 is the most outstanding automotive festival game out there, and for many enthusiasts, it’s the number one choice.

Unfortunately, many gamers complain that their Forza Horizon 4 PC controller is not working, causing them a lot of frustration and a negative gaming experience.

This guide will show you the easiest way to ensure your controller works again with the game. So, keep reading.

Why is my controller not working in Forza Horizon 4?

Various factors can cause the Forza Horizon 4 controller to stop working on your PC. Below are some of them:

  • Outdated driver: The first thing to check if the Forza Horizon 4 Xbox 360 controller is not working on Steam is the driver. You need to update the driver if it is outdated to get the controller working again.
  • Issues with DS4Windows: In some cases, the problem might be due to your settings on DS4Windows. The way around this is to hide the DS4 controller in the settings.

How can I fix the controller if it’s not working in Forza Horizon 4?

1. Update the driver

  1. Press the Windows key + X and select the Device Manager option.
    device manager
  2. Locate your controller and right-click it.
  3. Select the Update driver option.
    update driver
  4. Now, choose Search automatically for drivers and install any available updates.
    search auto forza horizon 4 controller not working
  5. If this does not work, choose the Browse my computer for drivers option in Step 4 instead.
    browse my
  6. Next, select Let me pick from a list of available drivers on my computer.
    let me pick
  7. Uncheck the box for Show compatible hardware.
  8. Finally, select a driver that is digitally signed and click Next.
    show

An outdated controller driver is the leading cause of the Forza Horizon 4 Xbox one controller not working issue. Using the fix above, you should be able to rectify this quickly, especially on wireless controllers.

Alternatively, you can use specialized software in Outbyte Driver Updater to update your driver.

2. Check the Hide DS4 controller option

  1. Launch DS4Windows and click the Stop button in the bottom right corner if it is still running.
    stop
  2. Now, press the Windows key + X and select the Device Manager option.
    device manager
  3. Click the arrow next to Human Interface Devices to expand it, and right-click the HID-compliant game controller.
  4. Select the Disable device option.
    disable forza horizon 4 controller not working
  5. Now, go back to the DS4Windows app, select the Settings tab and check the Hide DS4 controller option.
  6. Click the Start button in the bottom right corner.
    hide forza horizon 4 controller not working
  7. Finally, go back to the Device Manager window, right-click your controller and select the Enable device option.

This is a quick and simple workaround, so be sure to try it if the Forza Horizon 4 PC controller is not working. Before applying the fix, you must close Steam, Uplay, and NVIDIA Overlay.

3. Enable Steam Overlay

  1. Launch the Steam app and click on the Steam option in the top left corner.
  2. Select the Settings option.
    settings forza horizon 4 controller not working
  3. Now, choose In-Game in the left pane.
  4. Finally, check the Enable the Steam Overlay while in-game box.
    enable forza horizon 4 controller not working

Some users have found joy in fixing the Forza Horizon 4 controller not working simply by enabling Steam Overlay. This might look pretty simple, but it has been effective.

As shown in this guide, fixing the Forza Horizon 4 PC controller is easy. You only need to follow the steps therein.

If the Forza Horizon 4 app can’t open on your PC, check our detailed guide to fix the issue quickly.

If you have any questions or suggestions, please don’t hesitate to let us know in the comments below.

Install Error 0x800f0982 in Windows Update [SOLVED]

Windows users have posted on forums about an update error that occurs when they try to download and install the KB4494441, KB4489899, and KB4482887 updates.

The full error message reads as follows: Updates failed… 2019-05 Cumulative Update for Windows 10 Version 1809 for x64-based Systems (KB4494441) – Error 0x800f0982.

Thus, users can’t install the update referenced within the error message.

If you’re wondering how to fix the Windows Update error 0x800f0982 on Windows 10 and Windows 11, keep reading. We have researched the best solutions for this install error, that will get it solved in a few minutes.

How can I fix the Install Error 0x800f0982?

1. Run the Windows Update Troubleshooter

  1. First, try running the Windows Update troubleshooter. That troubleshooter can fix issues pertaining to the Windows Update service and its downloads. To open the troubleshooter, follow the guidelines below.
  2. Press the Type here to search button to launch Cortana.
  3. Input ‘troubleshoot’ as the keyword in Cortana’s Type here to search box.
  4. Select Troubleshoot settings to open the Settings app’s Troubleshoot tab.windows update troubleshooter
  5. Next, click Windows Update and Run the troubleshooter to open the window in the snapshot directly below. Thereafter, the troubleshooter might apply some fixes to resolve error 0x800f0982.windows update troubleshooter detecting problems

Firstly, run the Windows Update troubleshooter. The built-in troubleshooter usually deals with all kinds of update error codes.

2. Start the Windows Modules Installer Service

  1. 1. Open the Windows Search box.

  2. 2. Type cmd in the search box.

  3. 3. Open an elevated Command Prompt by right-clicking Command Prompt and selecting Run as administrator.

  4. 4. Next, input the following command, and then press the Enter button to run it:SC config trustedinstaller start=auto

    sc config command in cmd
  5. 5. Restart your PC.

  6. Alternatively you can also fix the install error 0x800f0982 by starting the Windows Modules Installer Service via the Command Prompt.

    The Windows Modules Installer service needs to be on to for users to update the platform. Thus, some users might need to turn on the Windows Modules Installer to fix the error.

3. Clear the SoftwareDistribution Folder

This is how users can clear the SoftwareDistribution folder.

  1. First, enter ‘cmd’ in Cortana’s search box.
  2. Right-click Command Prompt to select the Run as administrator context menu option.
  3. Input ‘net stop wuauserv’ and press Enter.
  4. Then enter ‘net stop bits’ in the Prompt’s window, and press the Return key.
  5. Press the Windows key + E keyboard shortcut, which opens File Explorer.
  6. Then open the C:> Windows > SoftwareDistribution folder path in File Explorer.delete software distribution folder
  7. Press the Ctrl + A hotkey, which will select all the SoftwareDistribution folder content.
  8. Then press File Explorer’s Delete button.
  9. Open the Command Prompt again.
  10. Enter ‘net start wuauserv’ in the Prompt, and press the Return key.
  11. Input ‘net start bits’ and press Enter.
  12. Restart Windows.

The SoftwareDistribution folder might include corrupted update components. Clearing that folder will refresh the update components and potentially fix Error 0x800f0982.

4. Download the Required Updates From the Microsoft Update Catalog

This is more of a workaround than a resolution for the install error – 0x800f0982 on Windows 10. Users can also download specific updates from the Microsoft Update Catalog instead and manually install them.

Open the Microsoft Update Catalog page, and then enter the update number that error 0x800f0922 arises for in the search box there.

Then you can download a compatible update that matches the search keyword entered. After downloading, click the update’s MSU file to install it.

There’s a good chance that one of the above resolutions will fix error 0x800f0982 for most users. However, some of the resolutions in our post about Windows Update not working on Windows 10 might also help you in resolving the error 0x800f0982.

Before you go, install error – 0x800705b9 is similar to this one, so you might want to investigate it for more solutions.

We hope you managed to fix your install error – 0x800f0982 using our guide. Let us know in the comments section whether you have any questions about this topic.

Fix: This is Not a Valid File Name Error in Outlook

Microsoft Outlook is used by professionals and businesses, thanks to the ease of use it offers. However, users have been facing the This is not a valid file name error in Outlook when sending emails lately. A similar this is not a valid file name error is experienced when using OneDrive, which you can resolve by checking out our guide.

Notably, this error could also appear when you are trying to save a file or even forward/reply to an email. If you are also experiencing This is not a valid file name error in Outlook and are looking for solutions then you are in the right place.

Why am I getting the This is not a valid file name error in Outlook?

Speaking of This is not a valid file name error in Outlook, the complete error message reads:

This is not a valid file name.
Try one or more of the following:
*Check the path to make sure it was typed correctly.
*Select a file from the list of files and folders.

Here are a few reasons that could trigger the This is not a valid file name error in Outlook:

  • A temporary glitch in Outlook: Certain errors can also be a result of a temporary and small glitch.
  • Presence of special characters in the email: If you have special characters used in the email, then you will face this error.
  • Hidden or broken links: If there are hidden or broken links in the email, then also you will come across This is not a valid file name error in Outlook.
  • Add-ins are conflicting with Outlook: Add-ins apart from expanding the features of a program can also interfere with its smooth performance of it.
  • Issues with the PST file: If there is something wrong with the path of the PST file, then also you will face this error.

Let us take a look at how you can resolve the problem on your end.

How can I fix This is not a valid file name error in MS Outlook?

Here are a few things that we would suggest you apply before moving ahead with the advanced troubleshooting methods:

  • Restart your PC as this error could pop up because of a temporary glitch or maybe the program failed to load all files properly.
  • Remove any special characters in the email and make sure that there are only letters and numbers used in the email.
  • Also, remove any hidden or broken links in the email as this could also trigger the This is not a valid file name error in Outlook.

1. Disable Add-ins in Outlook

  1. Press Win + R to open the Run dialogue.
  2. Type Outlook.exe/Safe and hit OK.
  3. Click on File.
  4. Select Options.
  5. Click on Add-ins.
  6. Click on the Go button.
  7. Uncheck all the add-ins and click OK.
  8. Restart Outlook.

Some add-ins might be interfering with the functionality of Microsoft Outlook thereby causing the This is not a valid file name error in Outlook. Simply load Outlook in Safe Mode and disable all add-ins. Relaunch the program and check if this fixes the issue or not.

This solution might also be helpful in cases where Outlook could not create the work file.

2. Create a new Outlook profile

  1. Open the Start menu.
  2. Open the Control Panel.
  3. Select the View type as Large icons.
  4. Click on the Mail option.
  5. Select Show Profiles.
  6. Click on Outlook and hit the Remove button.
  7. Click Yes in the message that appears.
  8. Hit the Add button.
  9. Enter the Outlook credentials and follow the on-screen prompts.
  10. Restart the Outlook app.

There are chances that your Outlook profile might be corrupted and is showing the error because of it. The easy way to resolve this is to delete the existing profile and add the profile back again and check if this fixes the issue.

3. Modify Outlook with Registry Editor

  1. Open the Start menu.
  2. Type Registry and open the registry editor.
  3. Navigate to the below path and press Enter. HKEY_CURRENT_USER\Software\Microsoft\Windows\CurrentVersion\Explorer\User Shell Folders
  4. Double-click the Personal entry.
  5. In the Value Data field, type %USERPROFILE%\Documents and press OK.
  6. Close Registry Editor.
  7. Relaunch Outlook.

For some users, this issue was resolved when they changed the Value Data to the above-mentioned command. They found out that the Value Field for MS Outlook was empty or changed, which was causing the issue.

4. Use Microsoft Support and Recovery Assistant

  1. Visit this website and download the Microsoft Support and Recovery Assistant.
  2. Run the EXE file and install it on your PC.
  3. Agree on the privacy terms.
  4. Log in with your Microsoft account.
  5. Select Outlook from the list of apps and click Next.
  6. Click on Other problems and select Next.
  7. Click on Yes and then Next.
  8. Follow the on-screen prompts and apply the suggested solution to resolve the problem.

Microsoft has a troubleshooting tool that will help you to resolve errors associated with Microsoft Office programs. All you need to do is install it on your PC, and follow the steps mentioned above to resolve the error.

5. Repair Microsoft Office

  1. Open the Start menu.
  2. Open Control Panel.
  3. Select Programs and Features.
  4. Right-click on Microsoft Office and select Change.
  5. Select the Repair option and click on Continue.
  6. It will start the Microsoft Office repair process.

You can opt for the repair process before reinstalling the Microsoft Office program. This has helped users fix the problem and avoid the hassle of reinstalling the program back again.

We have a guide on how to use Outlook Scheduling Assistant on your PC, which could be helpful in many use-case scenarios.

If you are looking for a guide on how you can use multiple accounts in MS Outlook, then check out our dedicated guide.

Microsoft Outlook also comes with an automated replay feature that would reply on your behalf to emails that come into your inbox. If you are experiencing Outlook keeps asking for a password issue, we suggest you check out the guide and resolve the problem.

Let us know in the comments below, which one of the above solutions helped you resolve the This is not a valid file name error in Outlook.

How to Get the Windows 11 Old Search Button Back

There’s no denying that the Redmond tech giant is having a hard time picking the best search button for Windows 11 22H2 users.

First, the latest operating system featured a standard-looking search icon on the taskbar, and Microsoft swapped it afterward with a pill-shaped button.

As if that wasn’t enough, we then received a proper search box through the Dev Channel, but many users are still struggling with these constant changes.

That being said, if you are not a fan of these back-and-forth changes and would rather have a simple, no-frills search button, we can show you how to restore the first version.

How can I restore the original Search button?

If you have decided to leave Windows 10 behind and move on to Windows 11, check out all the bugs and limitations this new version still has.

For the time being, note that you can use the Win + S shortcut to trigger the Windows Search feature, which Microsoft now promotes the shortcut with ad-like banners.

Know that the Redmond tech company plans to let Windows 11 users switch between three Windows Search designs in the Settings app.

Keep in mind that this feature is currently available to Windows Insiders in the Dev channel, just so there’s no confusion.

However, people using stable Windows 11 can use the ViveTool app to enable the old Windows Search button.

Before we show you how to switch the Search appearance, back up your data and create a system restore point, which will help you effortlessly restore the operating system if something unexpected happens.

Also, consider downloading the ViVetool app from GitHub, a third-party program frequently used to enable or disable various features in Windows 11.

After you’ve finished downloading and installing the ViVetool app, you will need to access the Command Prompt app with Administrator privileges.

Then, access the folder containing the extracted ViveTool files with the command we are about to show you: CD C:\Vive

Next, all you have to do is type in the following command, then press the Enter button on your keyboard:

vivetool /disable /id:42038001

The process is now done, and you can go ahead and restart your PC and enjoy the taskbar exactly how you envisioned it, with the Search button you desire.

Before you leave, find out how to use Windows 11 search effectively and find results much quicker.

Have you managed to perform the switch? Share your experience with us in the comments section below.

Why is My Xbox Controller Going Too Fast? How to Fix It

Regarding controller issues on Xbox, they usually point toward some hardware malfunction. This is to say that software bugs are rather rare. However, we found a lot of user reports stating that the Xbox controller is going too fast, behaves erratically, skips tiles in the Dashboard, or even scrolls too fast during the gameplay.

Here’s what one user had to say about the problem at hand on the official support forum:

hi, I’m not sure if there has been an update overnight or something but today my controller is moving way too fast on the home screen to select anything. If I tap a direction key it jumps 2 or 3 spaces in any direction I press. The same with the thumb stick. If I press a button it tries to press so fast it doesn’t register the click properly […]

If you have exact or similar issues, check the steps we listed below.

How to fix my Xbox controller is moving too fast on the Dashboard and in games?

1. Disable Fast Scroll

Although it proved to be harder than expected, we find out (kind of) the sequence of buttons you need to press on the Home screen in order to disable the Fast Scroll feature. This feature allows for the analog stick to move you faster through the Dashboard tiles. However, some users don’t want this to be the case.

Xbox controller going too fast

On the other hand, disabling it seems to be harder than expected. Some users suggested pressing the combination of RB + face buttons (one of them), which will disable this mode. Give it a try and look for improvements.

2. Unplug the controller and reset the console

The next step is to detach the controller from the console or turn it off and then power cycle the console. You can power cycle Xbox with these steps:

  1. Press and hold the Power button for 10 seconds or so.
  2. Wait until the console shuts down.
    Xbox controller going too fast
  3. After a minute, turn on the console again and look for changes.

3. Update the firmware

Finally, if the controller isn’t faulty, we can only recommend keeping the console firmware up to date. The reports of this issue massively appeared at a certain point in 2018. That made us believe that the problem is in a system bug which was later fixed by Microsoft.

Xbox controller going too fast

Firmware updates are usually automatically distributed, but you can check for available updates manually by following these steps:

  1. Open Settings.
  2. Choose System and then Updates.
  3. Select Update Console to see if there are any available updates.

This also does wonders in case you experience similar issues, so don’t hesitate to take a closer look at another helpful guide on how to reduce input delay on the Xbox Elite controller.