Are you curious about how to dual-boot Windows 11 and Linux Mint? Here is all you need to know.
The Windows 11 and Linux mint operating systems are essential to millions of users worldwide. However, getting two devices to run these OSs is not always economical or ideal.
Hence many users have opted for the option of dual booting. If you want to explore this option, follow this guide.
Can I dual-boot Windows 11 and Linux Mint?
Yes, it is possible to dual-boot Windows 11 and Linux Mint. Dual booting is installing two operating systems on a single computer, allowing you to choose which one to use when you start the computer.
There are a few things you will need to dual-boot Windows 11 and Linux Mint:
Follow the installation Wizard, set up your default language, and tick Install multimedia codecs.
On the Installation, type Windows, choose Something else, and click the Continue button.
Select Free space and tap on the + button.
Allocate a Size, and select the forward slash (/) as the Mount point value to indicate the root.
Repeat step 4, allocate a Size, and select the Swap area as the Use as value.
Click on Install now and accept the changes.
Choose your regions, enter the login details and wait for the installation to complete. After a restart, you can boot into Windows 11 or Linux Mint.
We have broken this installation down into six steps, and in the end, you should successfully have the option to choose either of the operating systems when you start your device.
Hope you have found success using this guide. Let us know how easy this was for you in the comments below.
If you are tired of a static background on your PC, you should know that there is a really simple method to get a more lively background, by using a GIF as your background. Setting a GIF as your background isn’t as hard as you think, and in today’s article, we’ll show you how to do it.
Can I set a GIF as my PC background?
Windows 10 is, without doubt, the best Windows ever, colorful, customizable, in short, nothing to complain. But what if we wanted to push the limits in terms of personalization? Speaking of personalization, wouldn’t it be nice to set up an animated GIF as a background?
By default, Windows 10 doesn’t support GIF images as a desktop wallpaper. In order to circumvent this limitation, we have to rely on third-party programs.
There are several tools that can help you, but the best ones are Stardock DeskScapes and BioniX. While DeskScapes is a paid software, we can use BioniX which is free and works very well.
How do I set a GIF as my desktop background on Windows 10?
Use BioniX Wallpaper
First of all, download BioniX Wallpaper and install it.
Before running the software, make sure you have downloaded or created some good quality GIF images.
Open the BioniX software and click on the Tools menu.
Now select the Wallpaper animator option and a window will open as shown below:
Locate the folder where your GIF images are stored. Select the one you want to apply by adjusting the settings such as Speed Animation, Magnification, etc.
You can now see the effect with the View demo images button.
Note: In order to use GIF backgrounds, it’s necessary that the BioniX program is running. You can also set the application to start with Windows automatically.
Just like Windows 10, Windows 7 doesn’t have support for GIF backgrounds. However, it supports image rotation so you can create an animated background with this workaround.
Create an image folder and move all images that you want to use for your animated background.
Now right-click your desktop and choose Customize option.
At the bottom left you will need to click on Desktop background.
Click on Browse and select the images you want to use.
Click OK to save changes.
If needed, adjust the size of your images.
In order to make your animation smooth, you’ll need to set a low rotation interval.
Save your changes.
In addition, you also have the option of using the Okozo desktop suite, which will allow you to easily obtain a much nicer effect. The 2.7 Mb program is really simple to install and you just need to follow these steps to set it up.
Start the application.
Okozo desktop will offer you a series of categories, including Abstract, Cartoon, Movies, Galleries, Interactive, etc.
Select the desired category and the required plug-in.
The download process will now start.
At the end of the procedure the program will ask you if you want to activate the wallpaper, so be sure to confirm.
To conclude, it must be said that whatever procedure you choose to animate your Windows 7 background, the system will inevitably suffer in terms of performance. This means that it is preferable to implement this tweak only if you have a good CPU, an excellent dedicated GPU, and obviously a rather large RAM.
If you liked the guide, don’t hesitate to comment on it or let us know which methods you use to set a GIF as your background on Windows 10.
Charter Communications is one of the top cable providers in the United States. The company offers cable television, Internet, telephone, and wireless services. So, what happened to Charter email? They were taken over.
Part of their rebranding was also to rename Charter Email to Spectrum Webmail, preserving the domain charter.net.
The email service can be accessed by long-time customers via the old Charter.net email login webmail address.
But what Spectrum email settings to pick? What is the POP3 server for Spectrum email?
How about the IMAP server? These are all legitimate questions that we shall try to answer accordingly.
But first, let’s see what we’re dealing with and what is the difference between IMAP SMTP and POP.
Is Charter email a POP3 or IMAP?
The Charter or Spectrum webmail interface allows new users to utilize email on a desktop or laptop. They provide both POP and IMAP protocols for mobile devices or Mac, enabling you to connect via third-party services such as Outlook or Gmail.
The difference between the two is that IMAP allows you to access your emails from any location or device without downloading content locally. Instead, you can go through a different email provider (see above) in order to view your messages directly.
However, you must first sign up for at least one other service that Spectrum offers, as well as create an email account to use Spectrum email, and set up email server details.
What are the IMAP/POP settings for Charter net?
1. Set up an email account for desktop
Sign upfor Spectrum.net services and create a username and password.
Sign in to your Spectrum account.
Go to theMenuicon in the top left corner of the page and selectManage Account.
ChooseServices >Internet.
ChooseCreate Email Address and create a new username.
Then select Create Mailbox (it should be something like [email protected]).
Enter your Spectrum.net password > Finish.
You’ll receive a confirmation notice that your mailbox has been created. SelectGo to Mailbox to begin using your Spectrum email account.
Whenever you want to access your email address directly from the Spectrum account, you will log in to your Spectrum account and select the Email icon on the homepage.
2. Set up an email account for mobiles or Mac
2.1. Charter email settings For Mac
Download the Mail app.
Open the Mail app > Other Mail Account > Continue.
Enter your information in the fields.
When prompted, enter mobile.charter.net in the Description field.
Connect to the Spectrum email server using the details below.
Incoming Server – IMAP
Server: mobile.charter.net Port: 993 Security: SSL/TLS Username: Your full Spectrum email address Password: Your password
Outgoing Server – SMTP
Server: mobile.charter.net Port: 587 Security: SSL/TLS Username: Your full Spectrum email address Password: Your password
2.2. Charter email settings for Android
In the home screen open the Email app. Alternatively, if you have other email accounts, from the Settings menu > Accounts > Add Account.
Setup email section > Other.
Enter your spectrum.net email address then click Manual Setup.
Select IMAP account and enter the above details.
2.3. Charter email settings for iOS
Open settings > Mail, Contacts, and Calendars.
Choose Add Account available below iCloud tag > Other.
Choose Add Mail Account and enter your name and your Spectrum credentials.
Click Next.
Then Choose IMAP and enter the servers mentioned above > Save.
Open Settings again > your Spectrum account > Advanced and under incoming settings enter the ports mentioned above.
3. Set up an email account via third-party email clients
You can use third-party email services such as Outlook or Gmail to connect your Spectrum email.
To do this, you will have to see the same IMAP/SMPT settings as above, or POP/POP3, depending on the protocol you want to use.
Here are the Charter POP email setting details:
Incoming Server – POP/POP3
Server: pop.charter.net
Port: 110
Security: SSL/TLS
Username: Your full Spectrum email address
Password: Your password
Here are the Charter outgoing mail server details:
Outgoing Server – SMTP
Server: smtp.charter.net
Port: 25
Security: SSL/TLS
Username: Your full Spectrum email address
Password: Your password
To conclude, we hope that this information was useful for you to set up your Charter email account. Any comments are welcomed in the dedicated section below.
Speakers are fascinating output devices that are meant to generate good sound and make you happy by playing your favorite playlist.
Unfortunately, high pitch sounds are produced due to technical glitches as a result of software or hardware upgrade which can be annoying at times.
In order to fix the computer speakers making high pitched noise, we’ve compiled a list of methods that can be used to fix the issue.
How can I fix my computer speakers making a high pitched noise?
1. Disable or mute the microphone
Right-click the speaker icon from the notification area and select Open sound settings.
Scroll down, find the Input section and click on Manage sound devices.
Select the microphone and click the Disable button.
The high-pitch sound can be caused by the acoustic feedback from the microphone being too close to the speaker.
If you have a stand-alone microphone, get it away from the speakers. If the issue persists, perform the steps above to disable the microphone.
2. Install the latest Windows updates
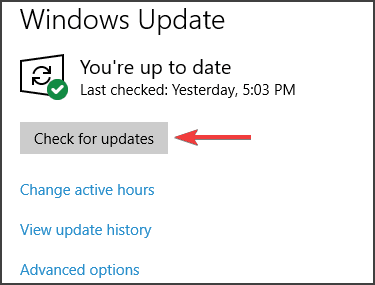
Press the Windows key + Skeyboard shortcut, type update, and select Check for updates from the results.
Now see if you have any pending updates or hit the Check for updates button.
If there are any new releases, the system will install them. Restart your PC for the changes to take effect.
Windows users can update their Windows PC using the latest Windows updates to ensure their Windows Operating System and drivers are all up to date.
3. Update the audio driver
3.1 Manually update the audio driver
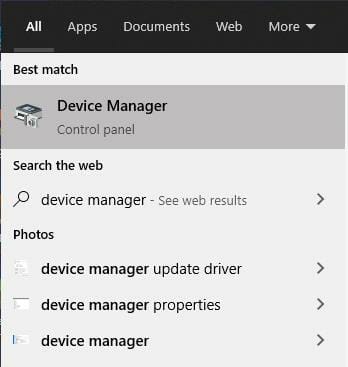
Open Device Manager as shown in the previous solution.
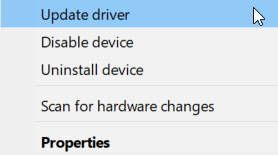
Search for Audio inputs and outputs in the navigation panel and then right-click the driver of the speaker.
Go to your PC manufacturer’s website, identify the Drivers and Downloads section.
Enter your PC’s Model name/number and look for the latest Windows 10 for it.
Download and install the driver to your PC.
Windows 10 users can fix the high pitch sound problem by updating the sound card’s driver. Take the steps above to do this.
3.2 Update the driver automatically
Driver updates can be easily done with the help of specialized tools. This kind of professional driver updating software will allow you to identify and download the correct drivers after just a quick scan of your computer.
4. Uninstall and reinstall the sound card
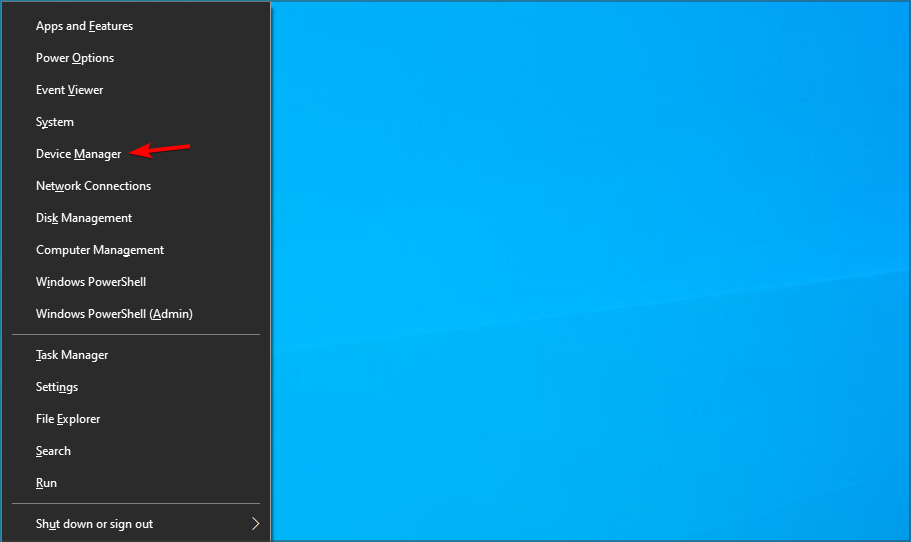
Right-click the Start button and select Device Manager from the list.
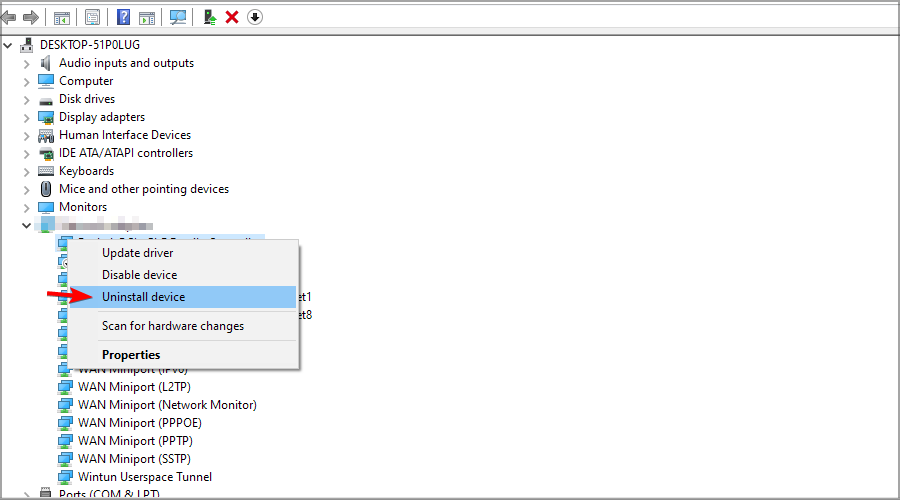
Locate the Sound, video and game controllers in the navigation panel, right-click the driver of the speaker and then click on Uninstall device.
Tick the Delete the driver software for this device box.
Clos Device Manager and reboot your PC.
After the computer reboots, it will automatically find the speaker device on its own and reinstall the drivers.
Test the speaker by playing any audio file or video.
Uninstalling and reinstalling the sound card can also fix the high pitch sound problem. Use the steps aboveto do so.
We hope that you managed to fix the high pitched noise coming from the computer speakers, and now you can listen properly to your soundtrack. You may also encounter an issue where your Windows 11 keeps chiming at intervals, so don’t hesitate to check out our expert article.
If you’ve come across other solutions to fix the high pitch sound problem, you can help other Windows users by listing the troubleshooting steps in the comment section below.
Netflix is one of the biggest video streaming services in the world, and it’s used every day to watch movies and TV shows.
It has a large gallery of video content, with more being added all the time.
But sometimes, streaming issues can occur and the service becomes laggy or stops working altogether.
If you’re in the same boat and lag is ruining your Netflix experience, we’ve got some solutions that will help you get rid of the lagging problem.
What can I do if Netflix is lagging on PC?
Before you try any solutions, you should make sure that your Internet connection is stable and there are no similar problems in other apps.
If there are, it’s most likely a PC issue more and not a Netflix-related one.
1. Restart your modem/wireless router
Sometimes, your router can cause certain problems with the internet connection and that could affect Netflix, as well.
To make sure that there are no underlying router issues, you should restart it by following these steps:
Unplug your router
Wait for a minute or so
Plug your router back in
Wait until it reconnects
After the router re-establishes the connection, check the network connection on your PC.
If your connection is good, you can check if Netflix is still lagging. If it is, move on to the next solution.
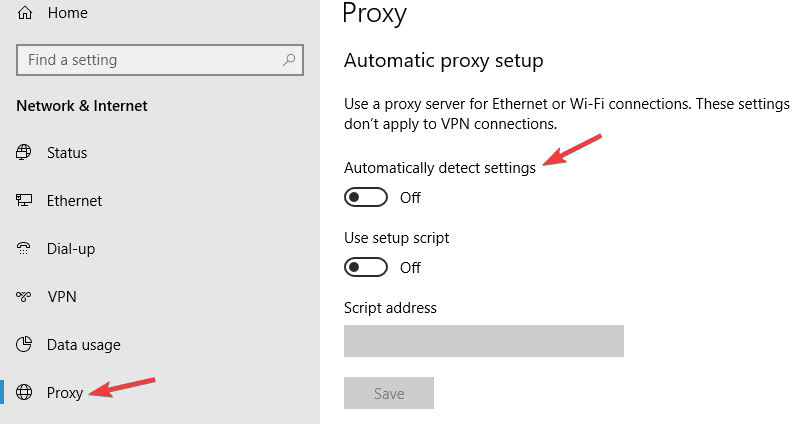
2. Disable VPN/Proxy
If you are using a VPN or a proxy, try disabling them. It’s not uncommon that these tools interfere with online services. For instance, sometimes VPNs can affect your internet connection speed and this could lead to lagging issues in Netflix.
The same goes for proxy servers, especially if they’re overcrowded. Most of them are because they’re free and attract a lot of users. After disabling your VPN or proxy, the lag in Netflix should be gone.
However, if you have a split-tunneling VPN, you can also make use of this useful feature. This lets you add an app (such as your browser) to an exception list, which means that it will be left out of the VPN tunnel.
Split tunneling happens when traffic that is not headed for a destination on the other side of the tunnel is routed out the regular path rather than through the tunnel. To eliminate data loss and Netflix lags, the most secure option would be to route all traffic through the tunnel.
Split tunneling is useful when you are streaming Netflix and you don’t want to overload the channel with data that the tunnel doesn’t need to process.
3. Close apps that are using a lot of bandwidth
In some cases, bandwidth-hungry apps can make your Netflix experience laggy, so it’s best to close them.
Some great examples are cloud services, Windows updates, and other programs that perform background operations.
Here’s how you can get rid of these apps:
Right-click on your Windows taskbar
Select Task Manager
Identify apps that use a lot of bandwidth
Right-click them and select End Task
After closing these apps, you can check and see if Netflix is running as it should. If Netflix lagging on PC is still an issue, try out the next solution.
4. Change the DNS address
In the Windows search box type Control Panel
Click the first result
Under Network and Internet, click on View network status and tasks
In the left side panel, click on Change adapter settings
Right-click your active connection and select Proprieties
Select Internet Protocol Version 4(TCP/IPv4)
Click the Properties button
In the new window, select Obtain an IP address automatically
Toggle the Use the following DNS server addresses option
In the Preferred DNS server, enter the Google Public DNS address: 8.8.8.8
In the Alternative DNS server, enter the Google Public DNS address: 8.8.4.4
Click OK and then restart your PC
5. Update your drivers
Sometimes, outdated drivers can interfere with your network connection or your apps, so it’s best to keep them updated.
Some users confirmed that the lag issue disappeared after they updated their GPU drivers.
If you don’t know how to update your graphics card drivers, we’ve prepared a dedicated guide that will help you with that.
6. Check your antivirus/firewall
If you have antivirus software, make sure you check if it’s not blocking your Netflix app or your browser.
Microsoft Teams is constantly developing, but this doesn’t change the fact that people often complain about the echo they hear during meeting calls with others. This might happen to you as well.
That’s annoying if you’re a remote employee or constantly enjoy the benefits of meeting calls. While trying to do whatever you can to fix the problem, you might have adjusted the mic and speaker settings with no improvement. You also attempted to rejoin the meeting call, but it made no difference.
When you figure it out, you risk losing your attention and productivity. Here are some useful tips for debugging Teams echo during meeting calls so you can get back to being efficient as soon as possible.
How can I fix Microsoft Teams echo during meeting calls?
1. Use headphones for 1 on 1 Teams discussions
Using headphones while using Teams for 1 on 1 discussion is a quick solution to the problem. Remember that finding the best headphones to use in Teams calls can be a pain.
Normally, dedicated hardware is recommended as it delivers better results than any microphone or speakers built into workstations. Make a test call with the desktop client to ensure you’ve made a wise choice.
Click your picture in the top bar and select Settings, followed by Devices. Make sure that the right audio devices are selected for the test. Next, click Make a test call. Teams make the test call to a bot.
The bot answers and allows you to record some words before playing the words back to you to check if the quality is acceptable. At the end of the call, it does nothing to improve your voice, but at least you see realistic test results.
2. Disable Audio Enhancements
Go to Control Panel > Recording > Microphone.
Click Properties.
In the Speakers Properties box which opens, switch to the Enhancements tab.
Select the Disable all enhancements check box.
Confirm your action by hitting OK.
When in a conference room, using headphones is not a feasible solution. To further troubleshoot this, you should access Sound by following the above path and making a quick enhancements adjustment.
Then, return to the meeting call and see if the issue persists.
In the Sound dialog box, on the Recording tab, select your microphone.
Click Properties.
In the Microphone Properties dialog box, on the Levels tab, untick the Microphone Boost check box.
If you are using a laptop with an integrated sound card that supports Microphone Boost, you could also try disabling Microphone Boost.
Also, remember that muting Microsoft Teams sometimes makes the echo disappear, just as you have to be careful about your audio device.
If it is near a wall or other reflective surface that cannot absorb sound, you could change its direction away from the reflective surface to reduce echo during meeting calls. You can test out your mic to ensure the sound is right.
You’ve probably experienced the dreaded sound of echoes more than once, but we hope the above tips helped you fix the issue. The next time this happens to you, you know what you have to do.
Navigate to the Control Panel, click on Hardware and Sound and then go to Sound options.
In the newly opened windows, select the Recording tab
Now, right-click on your microphone and go to Properties.
Go to the Enhancements tab and disable all enhancements.
How do I make a Microsoft Teams echo test?
Here are the steps to follow to make an echo test call on Microsoft Teams:
First, click on your profile photo and then go to Settings > Devices.
Go to Audio devices and select Make a test call.
Teams will display information about your microphone, speakers, and camera during the test.
Record a short audio message to check if there is any echoing.
Microsoft Teams is a communication and collaboration platform that combines persistent workplace chat, video meetings, file storage (including collaboration on files), and application integration.
The service integrates with the company’s Office 365 subscription office productivity suite and features extensions that can integrate with non-Microsoft products.
In Microsoft Teams all meetings can be recorded to be reviewed/shared by other team members. Once a meeting recording is created, it can be viewed in two ways. Keep reading to find out how you can do it yourself.
How do I download Microsoft Teams recordings?
Method 1
Go to the meeting recording and select More options > Open in Microsoft Stream.
On the Microsoft Stream portal, under the video select the options button and click on Download video.
You can add the video to Teams, or you share the recording via existing options.
Method 2
Go to the Microsoft Stream
On the top menu bar select My Content>Meetings
From the displayed list select the recording that you want to share and select the options button and click on Download video
We showed you several methods to play a meeting recording in Microsoft Teams and how to download that recording for additional sharing purposes.
How do I play Microsoft Teams recordings?
1. Play a meeting recording directly in Teams
If you participated in a meeting, go to the chat history in Teams and select Play to play the meeting recording directly in the Teams window.
2. Play a meeting recording in Stream
If you own the meeting recording, you can also find it on Microsoft Stream. Just go to My Content > Videos.
Who can view a meeting recording?
After the recording was uploaded to Microsoft Stream, the recorder is the owner of the video and the people in their organization who were invited to the meeting are the viewers.
We also have an article on how to properly record Teams meeting, so don’t miss it.
The owner will need to allow access or download the video to share the recording with other people.
Note: Guests and external people who attend the meeting won’t be able to view the recording unless the recorder shares it with them.
Meeting type
Owner
Who can view
Who can download
Who can delete
Team meeting recording
Recorder
Team (Office 365 group)
Owner only
Owner only
Private meeting recording
Recorder
Attendees (chat members)
Owner only
Owner only
Group call recording
Recorder
Chat members
Owner only
Owner only
If you have any other suggestions or questions, don’t hesitate to reach for the comments section below.
Are you interested in knowing the best cloud gaming consoles? Then, follow us through this article.
Cloud gaming has become increasingly popular in recent years, allowing users to play high-quality video games on various devices, including consoles.
However, with so many options on the market, it can take time to decide which cloud gaming console is right for you. So here we will be discussing our educated recommendations.
Does cloud gaming work on consoles?
A few users have been curious and brought up the question. The simple answer is Yes; cloud gaming can work on a console.
Several major gaming companies, including Microsoft, Sony, and Google, have released or announced cloud gaming consoles allowing users to stream games directly to their television or other devices.
And for many users, cloud gaming has brought the following benefits:
Always up-to-date – Cloud gaming services automatically update their games, so you’ll always have access to the latest content and features.
Subscription-based pricing – Some cloud gaming services offer a subscription-based pricing model, which can be more affordable than purchasing individual games.
Play on any device – Cloud gaming allows you to play games on various devices, including your console, PC, laptop, or mobile phone. This can be incredibly convenient if you want to play games on the go.
Easy setup and installation – With cloud gaming, there’s no need to worry about installing games or updates. Instead, the cloud gaming service handles everything, so you can start playing immediately.
Access to a more extensive library of games – With cloud gaming, you can access a broader range of games without purchasing each one individually.
Now let us explore some of the best cloud gaming consoles.
What are the best cloud gaming consoles right now and coming soon?
A first look is Xbox through the Game Pass Ultimate subscription.
Microsoft offers users access to over 100 games that can be played on Xbox consoles, PC, and Android devices via the cloud. It also includes access to online multiplayer, free monthly games, and discounts on other games and content.
One of the main benefits of Xbox Game Pass Ultimate is the wide range of available games, including popular titles such as Minecraft, Gears 5, and Forza Horizon 4.
Lastly, Xbox, through this service, allows users to try out new games without committing to a complete purchase. Hence, they can access the games as long as they are subscribed to the service.
The PlayStation needs no introduction. The Sony product has been a leading name in gaming for a couple of decades.
With the introduction of the unique PlayStation Now subscriptions, gamers are ushered into an incredible world of cloud gaming.
Xbox Game Pass Ultimate is a subscription service offered by Microsoft that gives users access to a library of over 100 games that can be played on Xbox consoles, PC, and Android devices via the cloud. It also includes access to online multiplayer, free monthly games, and discounts on other games and content.
One of the main benefits of Xbox Game Pass Ultimate is the wide range of available games, including popular titles such as Minecraft, Gears 5, and Forza Horizon 4. Lastly, the service allows users to try out new games without committing to a full purchase.
The Logitech G Cloud, which has just recently entered the market, demonstrates a general trend toward cloud-based gaming.
Given the popularity of gadgets like the Steam Deck, it’s not all that unexpected to see Logitech dipping its toes in the gaming world.
So, with a lengthy history of producing high-quality technology, Logitech has an edge, and its G Cloud gaming console is no exception. As expected, this is a gorgeous handheld and has excellent ergonomics.
Additionally, the internal processing must be strong enough to transmit video material since this device is nearly completely intended for cloud gaming.
There you go; here are three of the Best cloud gaming consoles we recommend you try.
Of course, we have not made this list in any particular order. The big names like Xbox and PlayStation are often favorites because of general gaming, but with some new services, they are now also adequate equipment for cloud game lovers.
We like to hear from you in the comments below. Please let us know some of your preferred consoles for cloud gaming.
If you’re hitting the “We’re sorry – We’ve run into an issue” wall on Microsoft Teams, especially on Windows 11, you’re far from alone. It’s a common hiccup, but the good news is there are multiple avenues for troubleshooting, from the basic—like a simple restart—to the more involved, like diving into cache folders.
To be honest, we actually use Microsoft Teams for collaboration inside our own company, so I actually vetted all these solutions myself. I’ve went ahead and compiled all the solutions starting with the one that might work the best. These fixes apply even to Mac users.
How can I sign into MS Teams if I get “We’re sorry – we’ve run into an issue”?
1. Update MS Teams to the latest version
If you are using the MS Teams Desktop client, make sure that you update it to the latest version.
The desktop app automatically updates but, if you want, you can still check for available updates by clicking your profile picture at the top of the app, and then select the Check for updates option.
2. Use the web client
Most login issues related to Microsoft Teams usually involve those that access it via the desktop client.
If you are also using the desktop client and encounter the We’re sorry—we’ve run into an issue error, simply consider switching to the web client, which you can access via any of the most popular browsers.
Also, if you are sick of Microsoft Teams’ constant issues, then take a closer look at our dedicated guide to finding the best cloud collaboration software to work on team projects.
3. Enlarge Microsoft Teams and try again
Launch Microsoft Teams.
Close the window with the error message.
Enlarge the Teams window, and click on the Signing out link.
Login to Teams again.
This workaround has proved to be quite a useful one, as many users have said that it has helped them get rid of this error, so it’s worth trying it out.
4. Running Teams in Compatibility Mode
Locate Microsoft Teams Shortcut:
Go to your desktop and find the Microsoft Teams icon. If it’s not there, search for it in the Start menu.
Right-Click for Properties:
a. Right-click on the Microsoft Teams icon b. Select ‘Properties’ from the context menu that appears.
Open Compatibility Tab:
A new window will open. Click on the tab labeled ‘Compatibility’.
Automatic Troubleshooting:
Click the button that says ‘Run compatibility troubleshooter’. Windows will automatically find the best settings for Teams.
Manual Compatibility Mode:
If you prefer, you can manually select a previous version of Windows from the dropdown menu under ‘Run this program in compatibility mode for’.
Save Changes:
Click the ‘Apply’ button, followed by the ‘OK’ button.
Restart Microsoft Teams:
Make sure to close Microsoft Teams completely and then reopen it to apply the changes.
5. Deleting Generic Credentials for Teams
Access Search Bar:
Press the Windows + S keys simultaneously to open the search bar.
Search for Credential Manager:
Type ‘Credential Manager’ into the search bar and click on the app to open it.
Navigate to Windows Credentials:
In the Credential Manager, click on the tab that says ‘Windows Credentials’.
Identify Teams Credentials:
Scroll through the list to find any credentials that are associated with Microsoft Teams.
Select and Remove:
Click on the Teams-related credential, then click the ‘Remove’ button.
Confirm the Action:
A popup will appear asking you to confirm the removal. Click ‘Yes’.
Restart Microsoft Teams:
Close the Teams application and reopen it to see if the issue has been resolved.
6. Enabling TLS Features
Open Search Bar: Press Windows + S to open the search bar.
Type Internet Options: Type ‘Internet Options’ and click to open it.
Navigate to Advanced Tab: In the new window, click on the ‘Advanced’ tab.
Scroll to Security Section: Scroll down until you find the ‘Security’ section.
Check TLS Boxes: Check the boxes next to ‘Use TLS 1.1’ and ‘Use TLS 1.2’.
Apply and Confirm: Click the ‘Apply’ button and then the ‘OK’ button.
Restart Your Computer: To ensure the changes take effect, restart your computer.
7. Resetting Microsoft Edge Settings
Launch Microsoft Edge: Open the Microsoft Edge browser from your desktop or Start menu.
Access Settings: Click on the three horizontal dots in the upper-right corner to open a dropdown menu, then click ‘Settings’.
Scroll to Reset Section: Scroll down until you find the ‘Reset settings’ section.
Initiate Reset: Click on ‘Restore settings to their default values’.
Confirm Reset: A popup will appear asking for confirmation. Click ‘Reset’.
Close and Reopen Edge: Close Microsoft Edge and reopen it to apply the changes.
8. Renaming a Specific Teams File
Open File Explorer: Click on the File Explorer icon on your taskbar or press Windows + E.
Navigate to Teams Folder: Go to C:\Users\[YourUsername]\AppData\Local\Microsoft\Teams.
Locate Update.exe: Find the file named Update.exe.
Right-Click to Rename: Right-click on Update.exe and choose ‘Rename’ from the context menu.
Change Name: Rename the file to Update.old.
Confirm Rename: A popup may appear asking for confirmation. Click ‘Yes’.
Restart Microsoft Teams: Close Microsoft Teams completely and then reopen it to see if the issue has been resolved.
9. Other workarounds to consider
To use Teams as efficiently and effectively as possible, keep these suggestions in mind:
Sign-out and log-in again
Don’t create multiple teams for the same purpose
Each project or complex task should have its own team
Create a library of shared documents to avoid sharing the same files over and over again
Create a two-way connection between Teams and SharePoint to extra efficiency
Enable all the security features supported on Teams for peace of mind
10. Wait for MS Teams to patch things up
Admittedly, this is the most counter-productive method of them all. However, Microsoft frequently runs into bugs and issues that prevent a user from accessing MS Teams.
As such, your best bet is to simply wait until they release another patch and see whether it fixed it or not.
By following these steps, you shouldn’t see the We are sorry we’ve run into an issue error anymore when trying to log in.
Also, we wrote more about Microsoft Teams login errors, so be sure to check out our comprehensive guide and fix them with ease.
If you have faced this issue and are aware of another way to solve this problem, share it in the comments section below so that other users can try it, as well.
A hypervisor is a piece of software that can generate and operate virtual machines. It is often referred to as a virtual machine monitor, or VMM (VMs). The Hypervisor error cand be caused by outdated drivers, missing or failed updates, bad disk sectors or incorrect settings.
Before more complex solutions, reinstall Hyper-V and make sure that your OS and BIOS are updated. You may also consider a third-party solution such as WMware Workstation and forget all about fixing Hypervisor.
How can I fix the Hypervisor error in Windows 11?
1. Check if your CPU supports virtualization and enable it in BIOS
An easy way to fix Hypervisor error in Windows 11 is to check if your CPU supports virtualization and then to enable it in BIOS. Here’s how to do it:
To fix the Windows 11 Hypervisor error blue screen, open theSettingsapp and head over to theSystemsection.
2. Under Device specifications, check the details corresponding to your processor.
3. Next, go to the manufacturer’s site and check that your CPU supports virtualization (use the exact details you obtained during the previous step).
4. If it does, you’ll need to make sure that virtualization is enabled in your BIOS.
6. Click onAdvanced Mode, then go to theAdvancedtab.
7. Select CPU Setup/Configuration and set Intel R Virtualization Technology (for Intel) or SVM Mode (for AMD) to Enabled.
8. Make sure you save the changes before you exit this screen.
2. Update your drivers
Missing or otherwise faulty drivers are notorious suspects when it comes to system errors such as stop code Hypervisor error in Windows 11. Keeping them in good shape is essential regardless of the version of Windows you’re currently running.
Now, there are numerous methods to update your drivers in Windows 11, but we reckon nothing beats an automatic tool that does the job for you. It’s quicker, more accurate and it saves you a lot of headaches.
3. Restart the corresponding service
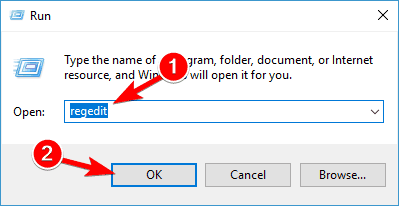
Hold the Windows key and type R to open the Run dialog box.
Type in services.msc and hit Enter.
In the list, locate the Hyper-V Virtual Machine Management.
Right-click on this entry and if it is running, select Stop.
Finally, restart the service and check it it helped solve the Can’t start because Hypervisor is not running in Windows 11.
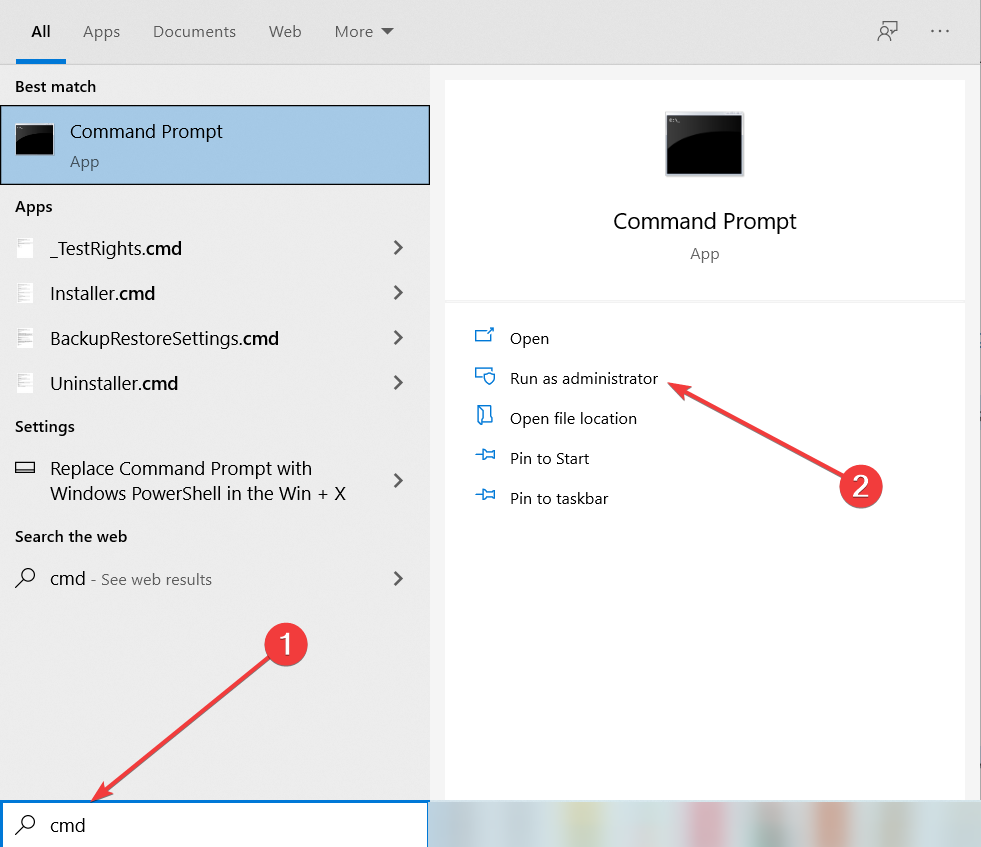
Open the Command prompt with administrative priviledges.
In the new window, type the following command and press Enter: bcdedit /set hypervisorlaunchtype auto
Restart and check to see if it is working correctly.
After that is how you can easily fix the hypervisor_error on Windows 11. While it’s a common error, sometimes it can be challenging to properly solve it. If you encounter any connection errors on the way, be sure to check our article about Hyper-V not connecting on Windows 11.
We’ve also dealt with the hypervisor error on Windows 10 and solved it in just a few steps, but if you’ve found a simpler fix, please leave it in the comments section below and we’ll be sure to check it out.
Creality’s Ender 3 is probably the most popular 3D printer currently on the market. It is incredibly precise, and equally affordable, allowing almost anyone to have it in their household.
Of course, having the machine is just half the story. This is because you need to pair the 3D printer with some good 3D printer software to get the job done.
Even if you don’t know much about 3D printer software, you can imagine that you at least need a program that will let you do the 3D modeling. The big question is what software to use with Ender 3.
Does Ender 3 using Cura? Do you need a particular program or anything will do? These are all legitimate questions and we shall try to address them accordingly.
To simplify things, here’s a quick preview of our top picks for the best software for Ender 3:
Fusion 360 – Top-notch 3D modeling software for Ender 3
Ultimaker Cura – Free 3D printing software for Ender 3
Meshmixer – Ender 3 design software focusing on triangle meshes
MatterControl – Best 3D printer software for Ender 3 with integrated controls
Read on and find out which Ender 3D printer software best suits your needs.
What software should I use for my Ender 3D printer?
Fusion 360 – Top-notch 3D modeling software for Ender 3
The core of a 3D printer is a program that you can use to actually make the 3D model.
That is why you can’t just use any tool, and why you should go for a premium program like Autodesk‘s very own Fusion 360.
This CAD powerhouse has all the features that you may ever need to make detailed models, parts, and more.
Fusion 360 lets you design awesome creations effortlessly thanks to the flexible 3D CAD, CAM, CAE, PCP software, and lots of useful tools.
You have complete freedom to create complex sub-divisional surfaces with T-splines and edit them with easy-to-use and intuitive push and pull gestures.
Besides modeling, you can create realistic photos and image renditions of your work to get a better idea of the final product.
Additionally, you can create and edit 2D sketches as well, having a wide variety of sketching tools, constraints, and dimensions at your disposal.
Let’s check its main features:
Sketching & Rendering
Direct modeling/surface modeling
Mesh modeling/freedom modeling
PCB design integration
Autodesk 360 Fusion
This software lets you design and render 3D models for your business and personal use.
One of the most important programs that you could use when owning a 3D printer is a slicer program. Of course, why should you pay money when there are free alternatives out there, like Ultimaker Cura?
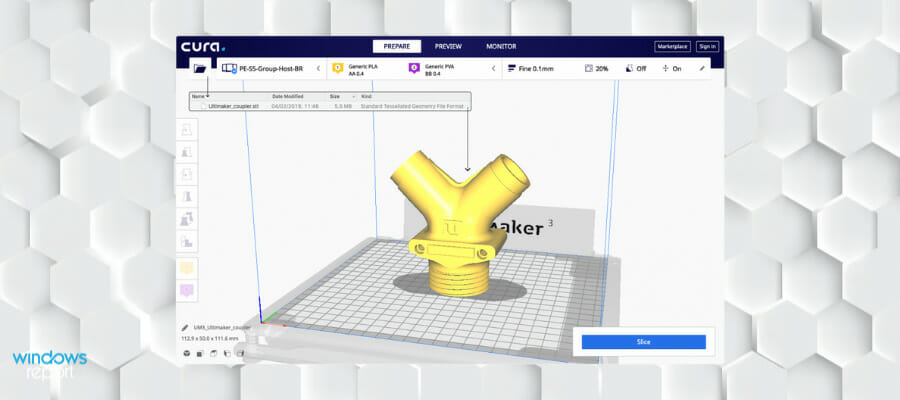
This tool is extremely easy to use, and despite the non-existent price tag, it is regularly updated and has quite a lot of features.
At its core, Ultimaker Cura has a powerful open-source slicing engine that was built throughout the years by professionals and users.
Some of those features include backing up and syncing your own materials and plugins, allowing you to save your progress to the digital cloud and transfer meshes between devices.
Ultimaker Cura has a dedicated community of over 40 thousand active users that constantly contribute to the program’s code by improving it.
More so, the software lets you access 3D printing lessons through online courses in order to learn the ropes of the process.
Meshmixer – Ender 3 design software focusing on triangle meshes
Meshmixer is the de facto universal program for any 3D printer. Yet another one of Autodesk’s creations, Meshmixer allows you to edit and sculpt individual models to make them exactly how you want them.
It comes with a variety of tools, including optimized supports for slicing objects into multiple sections, which makes it helpful for Ender 3 owners since the machine doesn’t have too generous a build volume.
Meshmixer has some light system requirements, only needing 4GB of RAM and Windows 7 or later, without needing a powerful GPU.
The software is specialized in working with triangle meshes, allowing you to design 3D objects for printing, or cleaning up 3D scans.
The company took the time to also create a user manual which they present on their site, for those with no background knowledge that need to learn how to use it.
Meshmixer gets constantly updated and improved. Additionally, all of the changes are recorded and shown to the public so everyone knows about the changes.
MatterControl – Best 3D printer software for Ender 3 (integrated controls)
MatterControl is a great Ender 3F printer software since it comes with some slicing features, design tools that enable users to design parts, and more.
Additionally, this is also open-source software that can be freely edited by users. This will make it easier to fix problems and improve them based on experience.
Once you’ve created parts you can then proceed to attach them to the much larger construct or go right to printing it and attaching it in real life afterward.
MatterControl lets you design anything from scratch using Design Tools, or browse existing ones by going into the Design Apps sections.
Slice your designs using lots of different tools and advanced settings for bed leveling, integrated controls for dual extrusion, and customized support.
Thanks to this software, you no longer need to use multiple programs to create and modify your 3D models. You can do everything with MatterControl.
There are standard options of software that work with most 3D printers pretty much. Since it’s such a popular model, the Ender 3 printer will have its own Cura profile by default, regardless of the version (Pro, V2, and so on).
So, what software does Ender 3 use? Most Ender 3 printers are shipped with the Marlin firmware. Now, it’s important to mention that each control board uses different commands.
Bed dimensions can also vary, which is why not any 3D printer software will make the cut. Compatibility is a key factor.
3D printers come in different sizes and have varied material selections, surface finish, manufacturing speed, cost, and durability of the final product.
However, the machine is nothing but the body, while the software is actually the brain. That is why having a good software program will let you do wonders with your Creality Ender 3 3D printer.
3D printers are the latest rage in terms of home electronics since they can be used to make pretty much anything from toys to spare parts or even prosthetics.
If you want to view Active Directory groups on Windows 10 and 11, this article will help you with all the related steps.
The Active Directory or AD from Microsoft is one of the most popular directory services in the industry. It is like a network address book that helps to search and find users, devices, groups, apps, etc. However, finding things on it may be easier. But how to do it from Windows 10?
Do I need any tools to manage Active Directory?
In general, you don’t need. But, to manage AD with a better experience, you may need to use a third-party tool. Often, these tools come with the ability and automation, which is hard to achieve manually.
Which are the recommended Active Directory tools?
1. ADManager Plus
If you want to manage Active Directory and generate reports, ManageEngine’s ADManager Plus is one of the best options available in the industry right now. Using this tool, you can do many things, including viewing AD groups.
2. ADAudit Plus
The ADAudit Plus is from the same company, ManageEngine. However, this product is a bit different. The main focus of this tool is reporting. You can also view groups based on various filters on this tool.
How can I view Active Directory groups on Windows 10 & 11?
You can easily view any AD users, groups, etc. However, before that, you must ensure the following things:
Make sure a proper domain controller name is configured for your computer or Windows server.
Ensure that there is no configuration error on your computer or server.
After ensuring everything is OK, you can continue using any AD tools to view and manage groups. In this case, you can follow these methods.
These steps are for ADManager Plus. However, if you use ADAudit Plus, you may not find the options exactly like our steps to view Active Directory groups. But, it will be mostly similar.
ADManager Plus
The ADManager Plus is a very powerful tool that can help you to manage your Exchange server in a more user-friendly way.
Click on View features, as shown in the screenshot.
Search for Active directory.
Choose Active Directory Domain Services and Lightweight Directory Services tools and click on Next.
Finish the installation process.
2.2 View AD Groups
Open the Start Menu, search for the active directory users and computers and open it.
Now, you can view all of the AD groups there.
You also can open Run by pressing Win + R on the keyboard.
Then, type the following command and hit Enter: rundll32 dsquery.dll,OpenQueryWindow
There, you can search for any users or AD groups easily.
You also may need to enable additional features based on your needs on Windows 10 or 11. However, the above steps will surely help to view the Active Directory groups.
Because of some complexity, we suggest you use any of the tools mentioned in this article. We have tested and found them very useful, like many other users worldwide.
This article has explained how can you view Active Directory groups on Windows 10 and 11. If you have any opinions or suggestions, feel free to let us know in the comment box.
A CMOS checksum error occurs when the data stored in your motherboard’s CMOS memory does not match the expected checksum value. This issue often happens after a system reset, BIOS update, battery failure, or improper shutdown. Fortunately, you can fix it using a few simple methods.
The error appears because the CMOS stores critical BIOS settings. If these settings are lost or corrupted, the system loads default values, which may not match your hardware configuration. In some cases, you’ll also see messages like CMOS checksum error defaults loaded or CMOS checksum invalid.
To understand how checksums work in general, see our guide on checksums on Windows.
How do I fix CMOS checksum errors on Windows 10?
1. Restart the computer
Sometimes abruptly cutting the power to your machine will cause the CMOS checksum error on HP, Dell, and Lenovo the next time you boot up.
Even switching the computer off using the power button without following the normal shutdown procedure can corrupt the BIOS and cause this error to pop up.
If you suspect this could be the reason the error has been OK, follow the computer’s instructions and restart the computer after it finishes booting. The CMOS checksum error should not appear again. Just remember to shut down the correct way next time.
2. Perform a startup repair
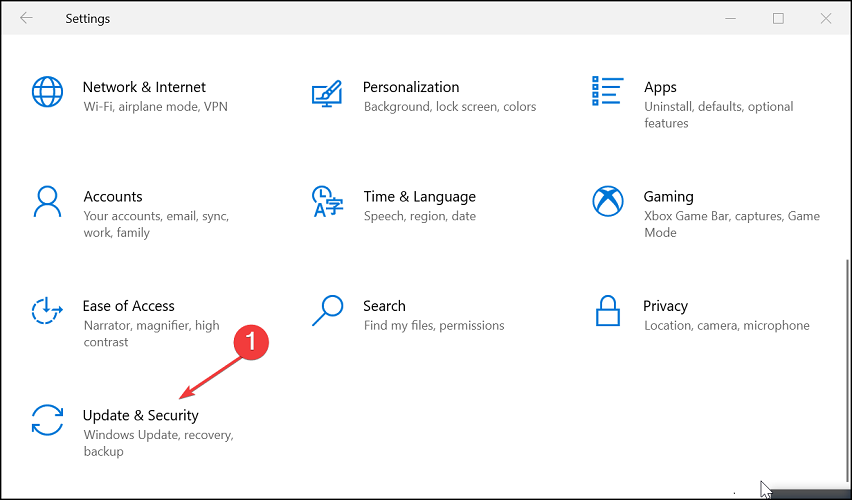
Press the Windows key + I and select Update & Security.
Select Recovery in the left pane and click the Restart now button under Advanced startup.
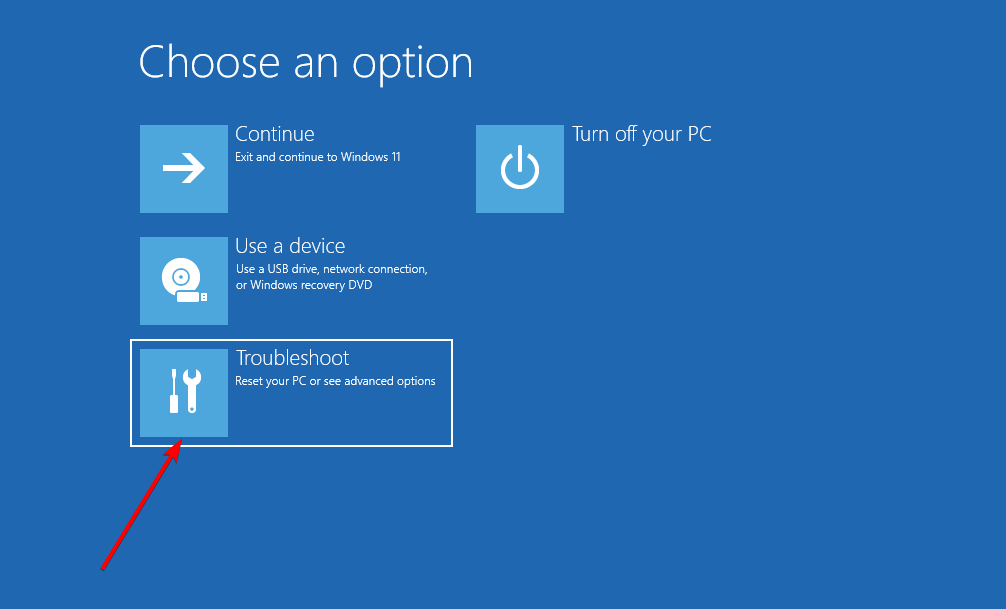
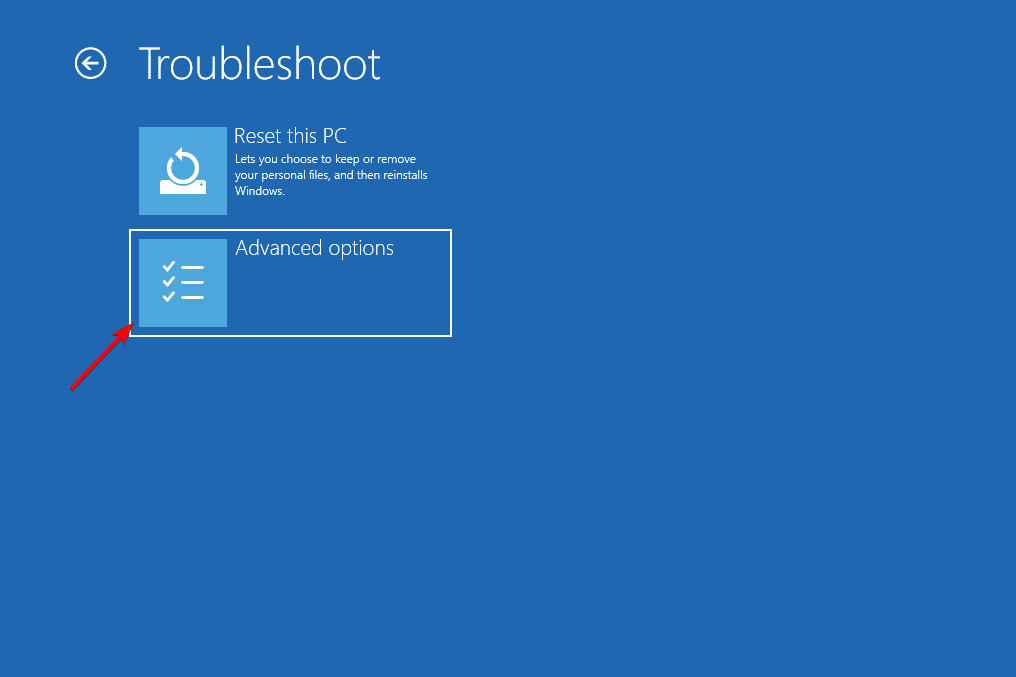
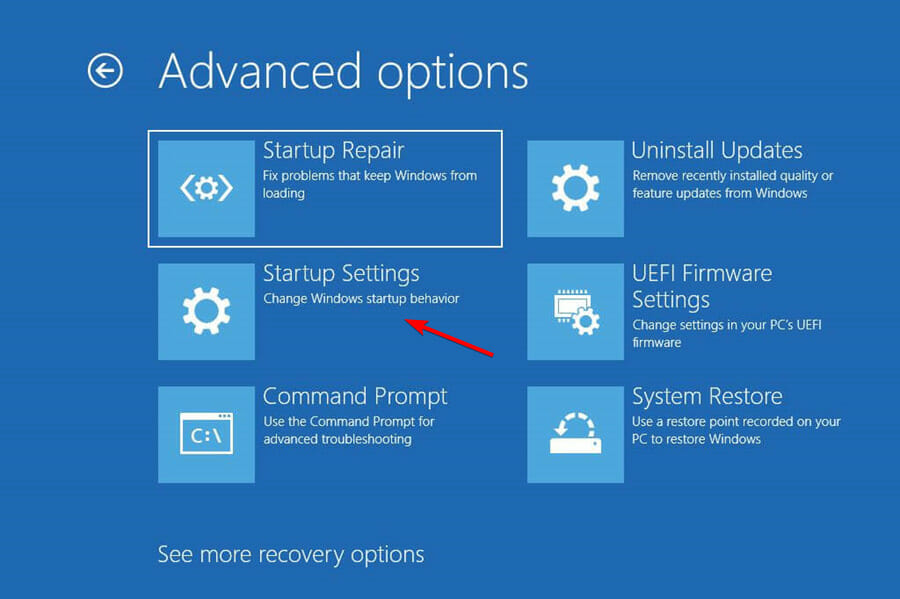
When your PC restarts, select Troubleshoot > Advanced options.
Now, choose Startup Repair.
Finally, enter the password for your account, click the Continue button, and follow the onscreen instructions to complete the process.
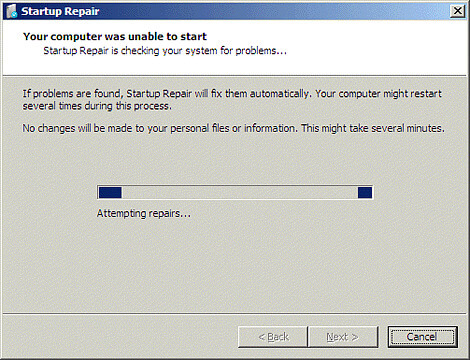
In rare cases, the CMOS checksum error after replacing the battery might be due to other startup issues. The quickest way to fix this is to perform a Startup Repair, as shown above.
3. Update the BIOS
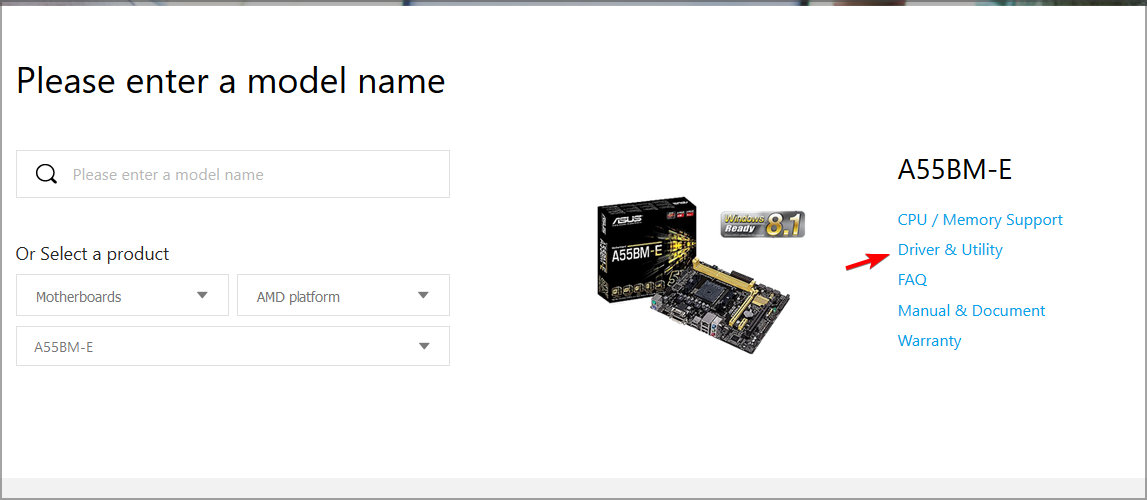
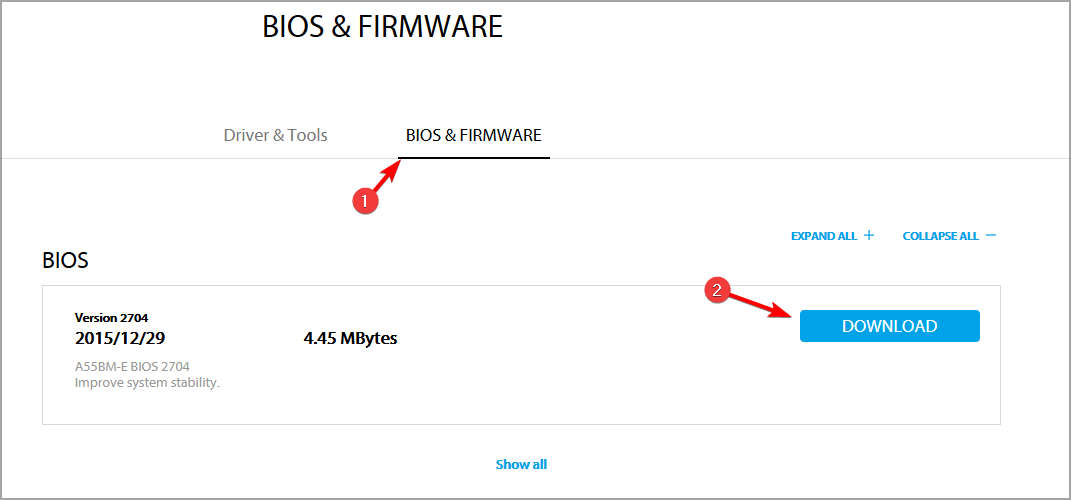
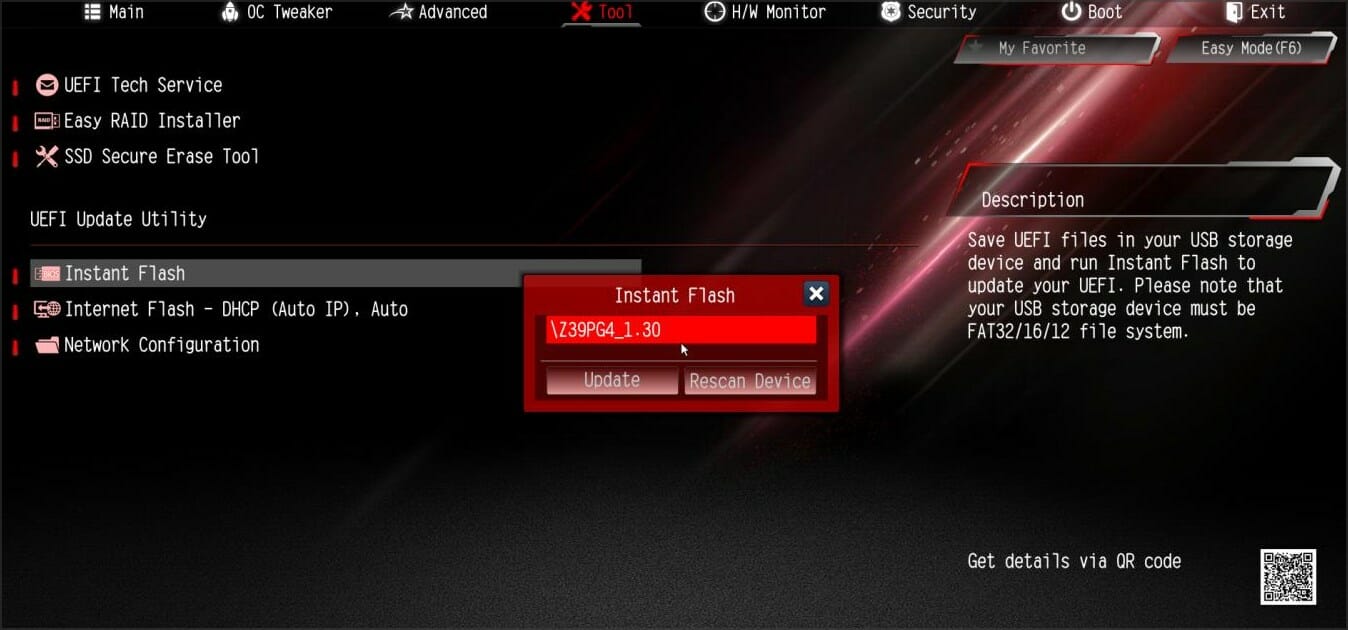
Sometimes, the CMOS checksum error may simply be due to outdated BIOS. Updating or flashing the BIOS by checking the manufacturer’s website for the latest version should do the trick.
However, you should be careful while updating your BIOS, as any mistake might be costly. So, ensure you follow the instructions carefully or seek the help of a technician.
Press and hold F1 or F2 (keyboard input depends on what is shown on the error page) on the error page to enter the BIOS settings.
Click the option to reset your BIOS to default (Load default in some cases).
If you have left the error page, you cannot enter the BIOS using the steps above. So, you need to force shutdown your PC using the Power button.
Now, Turn on your PC again and force it to shut down when the manufacturer’s logo appears. Repeat this twice to enter the Advanced startup page.
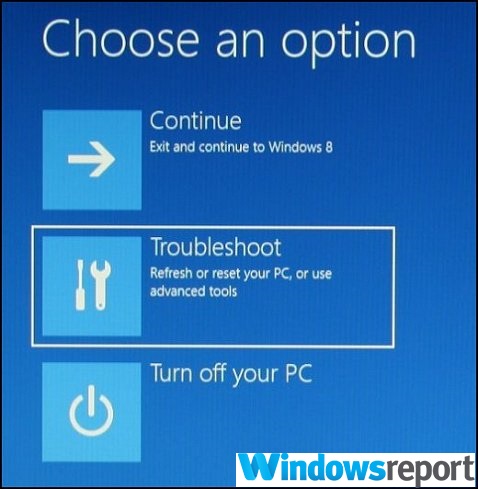
Next, choose the Troubleshoot option.
Select Advanced options.
Choose UEFI Firmware Settings.
Now, click the Restart button to enter BIOS.
Finally, click the Exit tab at the top and choose the option for resetting BIOS, depending on your PC manufacturer.
If you suspect your BIOS has been corrupted by malware or due to a power cut, the best option may be to reset the BIOS to its default or factory settings.
This will also work where the CMOS checksum error occurs after replacing the battery or due to a BIOS update that went wrong. Finally, note that the structure of your BIOS setup page will depend on your PC.
In rare cases, a corrupted Master Boot Record (MBR) can trigger system-level checksum issues during startup. You can follow the steps in our guide on resolving MBR checksum mismatch problems to repair it.
6. Replace the CMOS battery
In some cases, the CMOS battery might be corrupt beyond repair. This small battery on the motherboard provides power to the CMOS, so it remains powered when you switch off the power supply to the computer.
This battery ensures the BIOS loads the correct settings for the computer to start normally. But if it is spoilt, you might keep getting the CMOS checksum error.
Hence, you need to replace the battery to eliminate the error message. However, you need a high level of technical expertise to do this. If you are not sure, it is advised to consult a technician.
The CMOS checksum error can be irritating if you don’t get it fixed. And that irritation will grow into frustration if you fail to find a workable solution to the problem.
Hopefully, the solutions we have discussed here will help you to fix the error and get your PC to behave again. If you still can’t fix the issue after applying the fixes above, you might need to see a technician, as the problem might be caused by hardware damage.
In the same vein, if your CMOS battery is low, check our detailed guide to fix it quickly.
Feel free to let us know the solution that helped you fix this issue in the comments below.
Windows 10 is a near-complete package when it comes to having an operating system at home, as it comes with pretty much every kind of built-in tool imaginable.
For example, it comes with its own lines of defense in the form of a firewall program and antivirus known as Windows Defender.
However, this is too nothing more than a piece of software that can be easily susceptible to bugs and issues.
One good example is Windows Defender Error 0x80073b01 which many users have reported to be giving them plenty of hard times.
Thankfully enough, this antivirus issue is quite common, and there are several fixes that you can try in order to get rid of it. Thus, all you need is to continue reading the step-by-step guide written below.
How do I fix Windows Defender error 0x80073b01?
1. Remove any third-party antivirus and its remains
Since Windows Defender is the default antivirus tool of Windows 10, it goes without saying that interferences may appear between it and any other similar third-party tool.
Unfortunately, this error can occur even if you already uninstalled the old third-party antivirus. So, make sure you did it completely.
As such, simply open the Apps menu from Settings and remove it like any other software, while following the on-screen instructions.
Some antivirus tools can only be removed via dedicated software downloaded from the developer’s website.
Thus, make sure you document yourself regarding the steps of uninstalling your particular antivirus tool.
Even if you got your reasons to eliminate the previous third-party antivirus, if you want a better defense and fewer problems, you might as well think about getting the tool below.
Our recommended security solution is perfect for a modern lifestyle, where you practically work, play, and relax online.
It focuses on defense and privacy with a multi-layered protection system that can counter even the latest threats.
The software not only covers your PC, but all your devices, including your IoT components from the network like the router or the webcam.
TotalAV
Say goodbye to errors and problems and get onboard with the latest and best security solution available now!
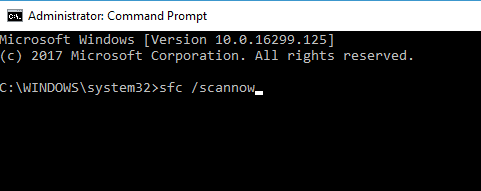
Select Run as administrator to start Command Prompt with full privileges.
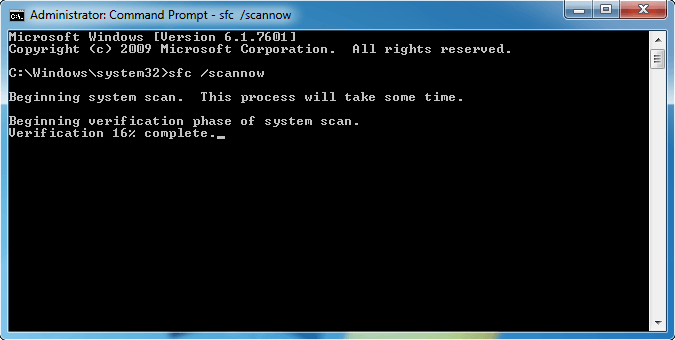
Type in the following command and press Enter: sfc /scannow
Once the scan is complete, reboot the PC.
The System File Checker scan will do just that, verify all the system files and do the necessary repairs to restore the things to normal.
4. Update your PC
Press Start.
Select Settings.
Choose Update & Security.
Select Check for Updates;
If updates are already pending, the button will be renamed to Download Updates.
Wait for the updates to install, andreboot your PC.
Windows Defender is part of your system and it updates monthly, together with your OS. Checking and installing the latest updates can fix the problem.
By following these steps, you should have cleared the Windows Defender error 0x80073b01 and now you can use it like it was intended.
These methods have proven themselves to be very useful, and they are also very efficient in a number of other Windows Defender issues.
However, if you’re tired of patching the old Windows Defender, pick one of the best antiviruses with unlimited license to get a taste of error-free security.
If you know of any other method we may have missed out on that will fix Windows Defender Error 0x80073b01, then leave us a message in the comment section below.
Some users have posted on support forums about a Windows error code 800B0100 issue that arises when they try to install updates.
The error message for that issue looks like this:
Windows Update encountered an unknown error code 800b0100.
Consequently, Windows doesn’t install updates when that issue arises. Read on to find out how to solve this error code on your PC.
How can I fix the error code 800B0100?
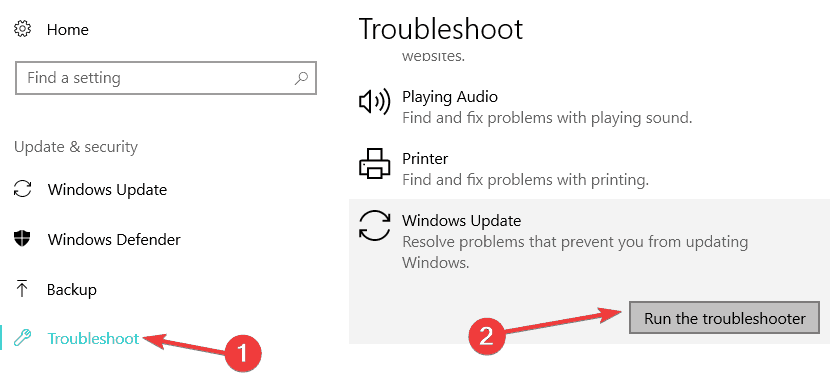
1. Run the Windows Update Troubleshooter
First, click Windows 10’s Type here to search taskbar button.
Enter troubleshoot in the search utility.
Click Troubleshoot Settings to open the window in the shot directly below.
Next, click Additional troubleshooters to open a list of troubleshooters.
Press the Run the troubleshooter button for the Windows Update troubleshooter. Thereafter, the troubleshooter might provide some resolutions for the issue.
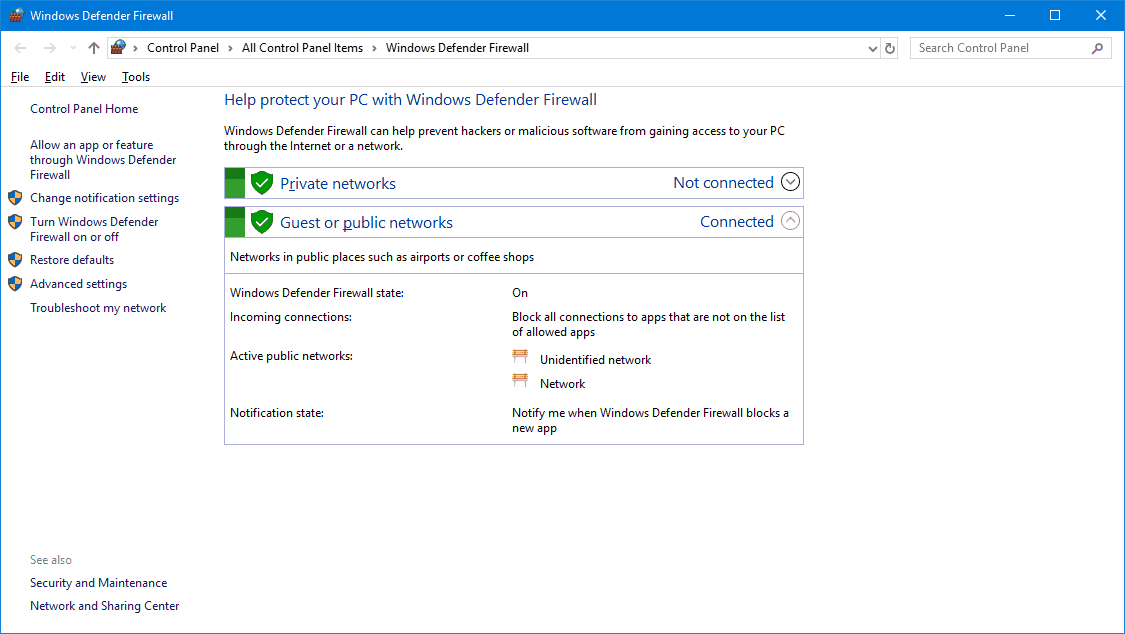
Click Windows Defender Firewall to open that Control Panel applet.
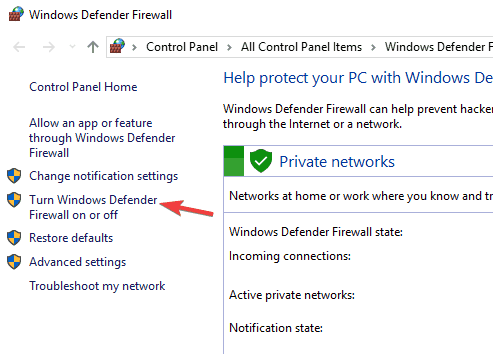
Next, click Turn Windows Defender Firewall on or off on the left side of the Control Panel.
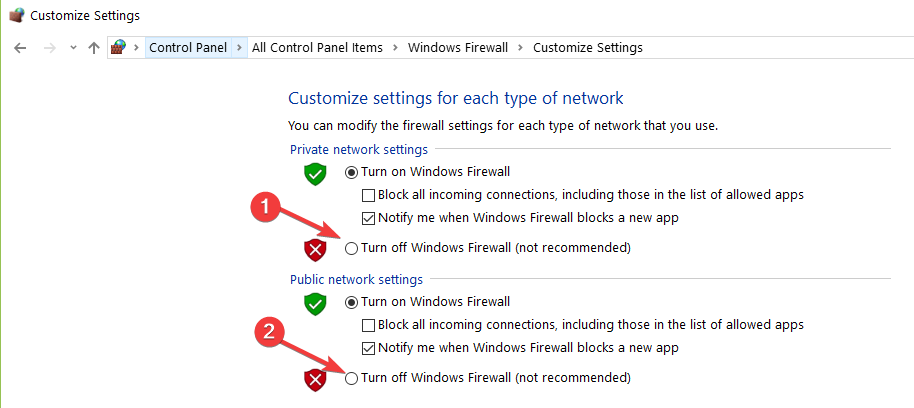
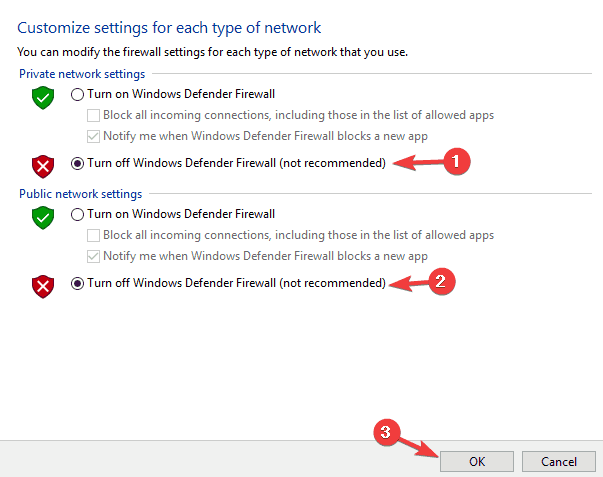
Select both the Turn off Windows Defender Firewall options within Customize Settings.
Click the OK option.
Thereafter, try updating Windows 10 again.
3. Disable third-party antivirus software
If you have installed third-party antivirus software, try disabling that utility to ensure it’s not conflicting with the update service.
Right-click the system tray icon for your antivirus utility to open its context menu. Then look for and select a context menu option that will temporarily disable the antivirus shield.
4. Clear the SoftwareDistribution folder
Launch Run with the Windows + R keyboard shortcut for it.
Type services.msc in your Run accessory and click OK to open the Services window.
Double-click Background Intelligent Transfer Service to open the window in the shot directly below.
Click the Stop button.
Select the Apply option, and click OK to exit the window.
Next, double-click Windows Update to open the properties window for that service.
Select the Stop option.
Click Apply > OK to save the settings.
Launch File Explorer by pressing the Windows and E keys at the same time.
Next, open this path in File Explorer: Windows\SoftwareDistribution\Download
Press the Ctrl + A hotkey to select all the Download folder’s content.
Select the Home tab.
Click the Delete button on the Home tab.
Then return to the Services window.
Restart the Windows Update and BITS services by clicking the Start buttons on their properties windows. Remember to click Apply after selecting to restart them.
5. Run a system file scan
Type the keyword Command Prompt in Windows’ search utility.
Right-click Command Prompt in the search results and select Run as administrator.
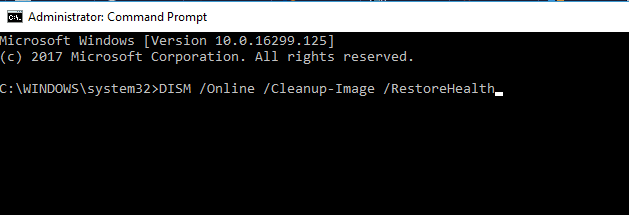
First, input this Deployment Imaging command and press Return: DISM.exe /Online /Cleanup-image /Restorehealth
Thereafter, type in the following System File Checker command: sfc /scannow
Press Enter to start the SFC scanning.
When the scan has finished, restart Windows if it repaired files.
6. Disable proxy server
Open Run’s text box, which you can launch with the Windows key + R hotkey.
Input inetcpl.cpl in Run’s text box and press Enter to open Internet Properties.
Click LAN settings on the Connections tab.
Deselect the Use a proxy server for your LAN option if it’s selected.
Select the OK option to close the window.
Press the Apply button on the Internet Properties window.
Open Run in Windows as outlined for the first step of resolution six.
Input cmd in the Open box.
Press the Ctrl + Shift + Enter hotkey to launch an elevated Command Prompt.
Type in this command and press the Enter key:regsvr32 wintrust.dll
Then type in these separate commands to rename the catroot2 folder: net stop cryptsvc ren %systemroot%\system32\catroot2 oldcatroot2 net start cryptsvc
Those are some of the fixes that can feasibly resolve error code 800B0100.
Error 8007005 occurs during Windows updates with an error message that states, Error 8007005 Windows encountered an unknown error.
As such, this is an update error that stops Windows updating. The system error can happen in all the more recent Windows platforms from Vista to 11. These are a few error 8007005 resolutions for anybody who needs to fix Windows updates.
How do I fix the error code 8007005?
1. Open the Windows Update Troubleshooter
Open Cortana by pressing its Type here to search taskbar button.
Enter ‘troubleshoot’ in the search box to search for the troubleshooter list in Settings.
Click Troubleshoot to open the troubleshooter list below.
Then select Windows Update and press the Run the troubleshooter button to open it.
Go through the troubleshooter‘s suggestions to fix Windows updates.
Win 10 includes the Windows Update troubleshooter to fix update errors. It might be worth opening that troubleshooter to see if it provides any fixes.
2. Run a System File Scan
Press the Windows key + X hotkey, and select Command Prompt (Admin) on the Win + X menu.
Before you run the SFC scan, enter ‘DISM.exe /Online /Cleanup-image /Restorehealth’ in the Prompt and press Return.
Then input ‘sfc /scannow’ and press Enter to run the SFC scan, which might take up to half an hour.
If Windows Resource Protection repairs files, restart your desktop or laptop.
Error 8007005 can be due to corrupted system files. As such, a System File Checker scan is a potential resolution for it.
3. Switch Your User Account to an Admin Account
Open Run with the Windows key + R keyboard shortcut.
Enter ‘Control Panel’ in Run’s Open text box and click OK.
Select User Accounts to open the options shown directly below.
Select Change your account type to open further account options.
Then select the Administrator radio button, and press the Change Account Type button.
Error 8007005 can often be due to users updating Windows in standard user accounts. Those user accounts don’t always have the required file permissions for the update to install. So if your user account is a standard one, switching it to an admin account might fix the issue.
4. Turn Off Anti-Virus Software
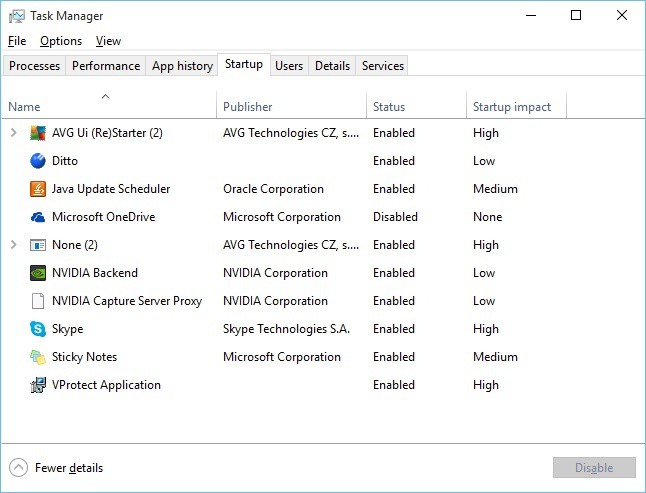
Press the Windows key + X hotkey, and select to open Task Manager from the menu.
Select the Start-up tab shown directly below.
Select your anti-virus utility, and then press the Disable button.
Then restart Windows 10.
Anti-virus software is also another big factor behind error 8007005. Third-party anti-virus software can block Windows Update from making the required changes. Thus, turning anti-virus software off might fix error 8007005.
There are a few ways you can turn off third-party anti-virus software. You could uninstall the software, which will ensure it doesn’t interfere with updates. If you prefer to retain a third-party anti-virus utility, you can probably temporarily disable it by right-clicking the utility’s system tray icon and selecting a disable or turn off option. Select to disable it for a few hours if you can.
When you’ve turned off your third-party anti-virus software, open update settings by entering Windows Update in Cortana’s search box. Then you can select Check for updates to manually check for available updates and install them by pressing the Install now button.
5. Turn Off Windows Defender Firewall
Open the Cortana search box.
Input the keyword Windows Defender Firewall in Cortana’s search box, and select to open the Windows Defender Firewall.
Click Turn Windows Defender Firewall on or off to open the firewall settings shown in the snapshot directly below.
Select both the Turn Windows Defender Firewall options off, and click the OK button.
Remember to turn the firewall back on after updating Windows.
The Windows Defender Firewall is less likely to undermine system updates than third-party software. However, you can also temporarily turn off the WDF just to be sure.
6. Rename the SoftwareDistribution Folder
First, press the Windows key + R hotkey.
Then input ‘services.msc’ in Run, and press the OK button.
Double-click Windows Update to open the window shown below.
Press the Stop button to stop the update service if required.
Press the Apply and OK buttons.
Enter ‘%windir%’ in Run, and press the OK button.
Select the SoftwareDistribution folder and click Rename.
Then enter an alternative title for the folder.
Open the Windows Update Properties window again, and press the Start button there.
Restart your desktop or laptop.
You can also flush out downloaded corrupt files to recreate the Windows Update service. The SoftwareDistribution folder is a temporary repository for update files, and Windows will set up a fresh SoftwareDistribution folder for the update service if you change that folder’s title. As such, this resolution might fix the Windows Update service.
Those are some of the best resolutions for fixing error 8007005 so that Windows updates. Some of the utility packages in this software guide might also come in handy for fixing error 8007005.
The error0x800704c7 is caused due to missing/corrupted files or background processes conflicting with the update due to which you are not able to get the latest update.
Sometimes, this Windows 1o error appears when they try to install certain updates by using the Windows Update function. The hotfixes released by Microsoft are vital and your system relies on them.
However, errors like this one can prevent you from getting your hands on the update.
Luckily in this fix article, we will talk about some of the reasons for 0x800704c7error and offer practical troubleshooting solutions to solve it.
How do I fix the Windows Update error 0x800704c7?
1. Downloading the most recent KB
Press Windows key + I to open Settings.
Go to Update and Security.
In the middle of the window, you will see View update history. Click on it.
Once the download is finished, open the file and install it.
2. Performing a System Restore
Open Start.
Search for Create a restore point, and click the top result to open the System Properties experience.
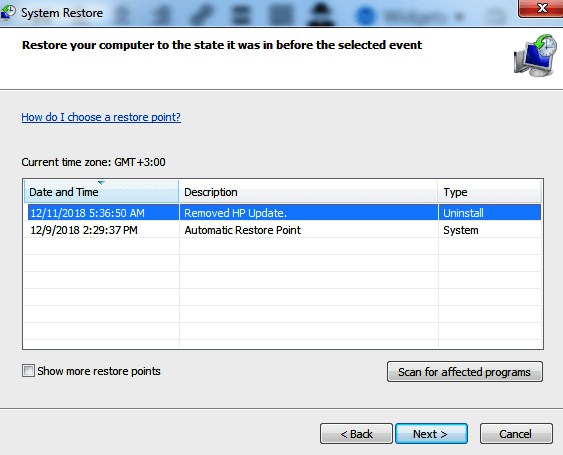
Select the System Restore button and click Next
Select the restore point that you want to use on your computer.
Select the Scan for affected programs button to check the apps that will no longer be available because they will be added after the creation of the restore point.
Select the Close button and the Next button.
Click on Finish to complete.
Once you complete the steps, System Restore will return your computer to the previous working state.
However, to perform a System Restore on Windows 10 you will first need to have System Restore feature enabled and to previously create a System Restore point.
Check this handy guide to find out how to enable System Restore and how to create a System Restore point.
Real-time collaboration might be a game-changer, yet Microsoft Teams is still in the spotlight. The application normally enables users to pull together a team, use chat instead of email, make voice/video calls, securely share or edit documents, and more, but what can you do when Microsoft Teams calls are not ringing?
You want the whole package to make your team more efficient. Calls are definitely a key feature of any successful collaboration in the workplace, especially for remote employees, so you’re entitled to your demand.
Now we have not one, but six approaches that are proven to make incoming calls using a phone ring through to Teams desktop app again. Check them out closely right below and forget all about the “Missed Call” notifications blinking at you.
What can I do if Microsoft Teams calls are not ringing?
1. Configure Calling Plans in Microsoft Teams
Calling Plans is an Office 365 feature powered by Skype for Business that lets you use Teams to make/receive calls to or from landlines and mobile phones via the public switched telephone network (PSTN).
Using a Teams client that supports 1:1 Teams calling and 1:1 calling enabled in Teams are mandatory for enabling the Calls tab in Teams. For more info on 1:1 calling in Teams, read Set-CsTeamsCallingPolicy.
Then, to control incoming calls in Teams or Skype for Business, administrators need to use TeamsUpgradePolicy, via the Microsoft Teams admin center.
Islands mode is the default configuration of TeamsUpgradePolicy. By default, VoIP, PSTN, and all federated calls to users are routed to Skype for Business. To change that, updating the policy to enable inbound calling to Teams is your next step.
Long story short, Islands mode guarantees that incoming VOIP calls from Skype for Business land in the recipient’s Skype for Business client, just as incoming VOIP calls that originated in Teams land in Teams too, if both sender and receiver are in the same tenant.
2. Check Microsoft Teams call settings
Click your profile picture at the top of Teams.
Then, click Settings > Calls.
Make sure the setting for Always ring on this device even when active on desktop is checked.
3. Verify Quiet Hours settings
Enter into your Teams client.
Go to Settings > Notifications > Quiet Hours.
Here’s where you can set start and stop times for any/all days of the week.
Remove any of the previously made changes by clicking on the switch next to Daily quiet hours.
Coworkers often have their PC and mobile with the Teams app. This turns into a problem when both of them ring whenever a call comes.
When out of the office, you don’t want to be interrupted by a Teams call or see the call pop-up on your phone, so there is an option in the Team’s mobile client to set quiet hours for yourself, just to make sure it doesn’t ring your mobile phone.
This seems to interfere with Microsoft Teams calls on the desktop, so you might want to review your decision.
4. Remove Microsoft Teams blocked numbers
Click on your profile picture.
Go to Settings > Calls.
Select Manage blocked numbers under Block calls.
Here you get access to any numbers you’ve blocked and remove them from the list.
Sometimes, there’s a healthy dose of guilt that comes immediately after blocking calls from a number. Then, you just tend to forget all about that.
Viewing and managing the numbers you’ve blocked is possible if you follow the above steps. This will certainly make Microsoft Teams calls work again if the issue was isolated to blocked numbers only.
5. Check if Microsoft Teams is up-to-date
Start by clicking your profile picture at the top of the app.
Select Check for updates.
Note: Linux users aren’t able to update manually within Teams for the moment.
Maintaining the health of the app is as simple as following the above steps whenever you remember the lack of any recent pop-up update notification or when calls stop ringing all of a sudden.
6. Ensure that you are connected to the Internet
Click your profile picture at the top of Teams.
Click Settings.
Hit Update and Security.
Select Troubleshoot from the left-side menu.
Scroll down and click on the Internet Connections option.
Click Run the troubleshooter.
Up next, just follow the on-screen instructions to complete the steps.
Restart Teams and check if the issue disappears.
When calls are failing to ring the desktop, make sure no network issue is interfering. Follow the above procedure instead of waiting for that annoying notification of another missed call.
Conclusion
While some users are uninstalling the Teams app because they cannot stop simultaneous incoming calls on PC and mobile, others just look for ways to enjoy the calling functionality on their desktops.
Microsoft Teams is turning into the primary client for Intelligent Communications in Office 365. There’s no surprise that it’s offering calling options such as call queues, auto-attendant, and consultative transfer.
The ability to forward a call to a group and out of office support, or even to bring your own telephone service to Teams are just some of the reasons why more and more people make the jump to Microsoft’s collaboration platform.
You need many of these and we can only hope the above solutions helped you get Teams calls back to ringing.
Windows 7 is still one of the most popular operating systems in the world, despite Microsoft’s efforts to convince users to upgrade to Windows 10.
Microsoft still takes good care of its good old Windows 7 by regularly pushing updates to patch various security issues and improve system performance. However, this won’t be the case starting January 14, 2020. Microsoft will officially end mainstream support for Windows 7 starting from that day. But we do expect the company to continue to release critical security updates when need be, just like it did with Windows XP.
All Windows OS versions are affected by various update errors, and Windows 7 is no exception.
When updates fail to install, the system displays various error codes, providing more information on the cause triggering the update failure.
To help you quickly interpret these error codes and find a solution to fix them, we’ll list the most common Windows 7 error codes, as well as links to Microsoft’s Support pages describing the proper workarounds to be used.
Editor’s Note: If you’re getting ready to migrate from Windows 7 to Windows 10, there’s a checklist you should take into consideration before hitting the update button.
For more information on how to safely transition from Windows 7 to Windows 10, check out our wide collection of guides.
In case you encountered other Windows 7 Update error codes, list them in the comment section below and add the respective workarounds as well, if possible.
Let’s say you’ve ordered the latest iPhone two days ago at a huge discount and you can’t wait to fiddle with it. But FedEx‘s tracking page keeps saying that the Label has been created.
The status will be updated when the shipment begins totravel. And nothing else.
Or, you ordered some stuff on eBay and the seller gave you a FedEx tracking number. But when you want to track your package down, you see FedEx stuck on label created.
In some cases, the FedEx tracking number is not found at all or simply won’t work. Other scenarios are also possible. Here’s what you can expect:
FedEx label created but not shipped
Shipment information sent to FedEx for days, for a week, for a month
FedEx package stuck on label created
FedEx label created no update – shipment information sent to FedEx not updating
Now, this can happen with all kinds of sellers and the issue is by no means exclusive to a particular service.
However, users reported GameStop, eBay, or Dell shipment information sent to FedEx cases more often than others.
Obviously, one would be interested in the meaning of shipment information sent to FedEx or FedEx label-created meaning. So let’s take a closer.
What does Label Created mean FedEx?
The status means that a package is available for collection andFedEx has been notified of the shipment.
When the seller places the order for shipment, it generates a label in the system. So far, so good. Now, either FedEx collects the package from the seller or the seller delivers the package or parcel to FedEx directly (if there is no collection agreement in place).
Whatever the case, the meaning of the FedEx label created meaning is that FedEx is yet to receive the package and the latter is ready for shipment on the seller’s end.
Why is my FedEx package stuck on label created?
Here are some common reasons:
Sometimes, labels are printed automatically by shippers once an order had been placed, although the shipment has not actually been processed.
The package was shipped, but it hasn’t been scanned in the shipper’s system yet and will be scanned upon arrival at the location.
FedEx is in possession of the package but their system has not updated yet / failed to update.
FedEx may not have scanned the item into its system correctly, to begin with.
How long after label is created for FedEx to update tracking information or receive a package from the shipper?
The tracking information should update as soon as FedEx physically receives the package. This is typically done within a few hours.
If the delay goes anywhere beyond 24 to 48 hours, you can presume there’s been an issue (either FedEx fails to update their system or else, as shown above).
Depending on the shipping instructions, FedEx usually picks up shipments within one or two business days.
However, on periods with heavy traffic, for instance around Black Friday or similar, it is possible that they run off the schedule.
What can I do if my shipping is stuck in Label has been created?
So, the only thing for you to do is wait for a little longer, especially if you trust the seller. If you purchased something on eBay, for instance, it would be a good idea to do a little research on the seller.
It may also be worth reaching out to the seller in case you did not receive any updates for weeks or so. This way, the seller can reach out to FedEx and help shed some light on this situation.
On the other hand, forum users advise against contacting FedEx directly, because their support proved unable to clarify the label shipping status.
We hope that this information was useful. Feel free to share your thoughts on this topic using the comments sections below.
Before the upgrade, most of the Windows users ignored a built-in security solution. Third-party solutions were the go-to software to protect us from annoying malware.
However, with Windows 10, Microsoft offers improved Windows Defender, as a viable alternative for users around the world.
Even though Windows Defender offers solid protection with frequent security updates, there are a few issues and errors, nonetheless.
Additionally, Defender seems to crash before an offline scan is finished. We looked into it and addressed this issue with few possible workarounds.
What causes the 0x80070015 error code?
According to users, Windows Defender error 0x80070015 can sometimes appear on your system, and speaking of this error, here are some similar issues that users reported:
Error code 0x80070015 Windows 10 install
This problem can sometimes occur while trying to install a new version of Windows 10.
This issue can be caused by third-party antivirus, so be sure to disable it.
Error 0x80070015 Windows update
Sometimes this error message can interfere with Windows Update.
If that’s the case, be sure to reset Windows Update components and check if that helps.
0x80070015 Windows Store
This error can sometimes affect Windows Store as well.
If you encounter it, be sure to try all the solutions from this article.
Quick Tip:
Windows Defender is a nice antivirus to have, and it does its job properly. Unfortunately, there are lots of harmful software that can bypass the Firewall.
Therefore, you need to outsmart them by using a third-party security tool that utilizes advanced AI and machine learning to deal with this troublesome software.
TotalAV
TotalAV is a reliable antivirus tool that will defend you from data breaches and keep other harmful software away from your PC.
Open the Settings app. You can do that quickly by pressing Windows Key + I.
When the Settings app opens, go to Update & Security section.
Click the Check for updates button in the right pane.
If any updates are available, they will be downloaded automatically in the background. Once the updates are downloaded, simply restart your PC to install them.
When your system is up to date, the problem should be completely resolved. According to users Windows Defender error 0x80070015 usually occurs because your system is out of date.
An outdated system can have certain bugs and glitches present, and if you want to ensure that your PC is running smoothly, you need to keep your system up to date.
For the most part, Windows 10 automatically installs the missing updates, but sometimes you might miss an update or two.
2. Remove any third-party antivirus software
Windows Defender doesn’t work well with third-party antivirus tools, and if you’re getting Windows Defender error code 0x80070015, the cause might be your antivirus software.
If you’re using another tool alongside Windows Defender, it’s advised that you disable it or uninstall it.
After doing that, the problem should be completely resolved. If you’re not pleased with Windows Defender, you can always switch to different antivirus software.
If you want a reliable antivirus that won’t cause any issues on your system, we strongly suggest that you choose one with advanced AI and machine learning capabilities like the one mentioned above.
3. Uncheck the drives that are not present in the Custom Scan
Some users reported that there is a certain bug with Custom Scan. According to them, if they select an empty drive or USB flash, the Defender crash.
Therefore, what you want to do is ignore or uncheck those drives. After that, the Custom Scan should work without an issue.
4. Reset Windows Update services
Press Windows Key + X to open Win + X menu.
From the list of results choose Command Prompt (Admin) or PowerShell (Admin).
When Command Prompt opens, run the following commands: net stop wuauservnet stop cryptSvcnet stop bitsnet stop msiserverRen C:WindowsSoftwareDistribution SoftwareDistribution.oldRen C:WindowsSystem32catroot2 Catroot2.oldnet start wuauservnet start cryptSvcnet start bitsnet start msiserver
According to users, sometimes Windows Update services can interfere with your system and cause Windows Defender error 0x80070015 to appear.
If you have that problem, it’s advised that you reset Windows Update services. After running these commands, Windows Update services will be reset and the issue should be fixed.
5. Rename CBS.Log file
Open File Explorer and navigate to the following directory: C:\WINDOWS\Logs\CBS
Locate the CBS.Log file and rename it to anything else.
According to users, sometimes Windows update error 0x80070015 message can appear due to problems with the CBS.Log file.
To fix this problem, you need to find and rename the CBS.Log file. After doing that, check if the problem is resolved.
However, some stated that they are unable to rename this file. This is caused by your services, and in order to fix this issue, you just need to do the following:
Press Windows Key + R and enter services.msc.
Press Enter or click OK.
When the Services window opens, locate Windows Modules Installer service and double-click it.
Set the Startup type to Manual and click Apply and OK to save changes.
After doing that, restart your PC.
Once your PC restarts, try to rename the CBS.Log file once again.
Once you successfully rename the file, change the Startup Type of the Windows Modules Installer service to its default value.
6. Create a new user account
Open the Settings app and navigate to the Accounts section.
Select Family & other people from the menu on the left.
Now click the Add someone else to this PC button.
Choose I don’t have this person’s sign-in information.
Go to Add a user without a Microsoft account.
Enter the desired username for the new account and click Next.
If you’re getting Windows Defender error 0x80070015 on your PC, the problem might be your user account, because it can lead to this issue, and in order to fix it, you need to create a new one.
Once you create a new user account, switch to it and check if that solves your problem. If the issue doesn’t appear on the new account, move your personal files to it and start using it instead of your old account.
7. Repair your system files
Open Command Prompt as administrator.
When Command Prompt starts, type the following and press Enter: sfc /scannow
The SFC scan will start. It can take about 15 minutes, so don’t interfere with it.
In some cases, a corrupted Windows installation can cause Windows Defender error 0x80070015 error to appear. However, you can fix this problem simply by performing an SFC scan.
In some cases, an SFC scan might not be able to fix the problem. If that happens, you need to run a DISM scan by doing the following:
Start Command Prompt as administrator.
Now enter the following command: DISM /Online /Cleanup-Image /RestoreHealth
DISM scan will now start. This scan can take about 20 minutes, so be sure not to interrupt it.
Once you complete the DISM scan, check once again if the issue is still there. If the problem is still there, or if you weren’t able to run an SFC scan before, be sure to repeat it now.
8. Perform a System Restore
Press Windows Key + S and enter system restore.
Choose to Create a restore point option from the menu.
When the System Properties window opens, click the System Restore button.
System Restore will now start. Click the Next button.
If available, check Show more restore points option.
Select the desired restore point and click Next.
Follow the instructions on the screen to complete the process.
If this error started appearing recently, it’s possible that a recent update or any other change to your system caused it. To fix the problem, it’s advised to perform a System Restore.
We hope that these workarounds will help you get rid of the error code 0x80070015. In addition, tell us what protective software you use in the comment section below.
Microsoft put a huge emphasis on improving their operating system with regular content patches. On the second Tuesday of each month, the company releases updates that include fixes and sometimes new additions.
Usually, Windows will automatically search and upgrade itself once a patch is officially released. However, the process doesn’t always go as planned, which usually results in failure or other problems.
The 0x800f0986 Windows Update error is just an example. This issue arises when you try to download cumulative patch updates via Settings in Windows 10 1909.
Instead of downloading the updates, you get an Updates failed error message with the 0x800f0986 code. Consequently, you can’t download various patch updates for Windows 10.
How do I fix the Windows Update error 0x800f0986 ?
1. Check if the Windows Update service is enabled
Press the Windows key + R keyboard shortcut.
Type in services.msc and press Enter.
Double-click Windows Update to open its properties window.
Click the Startup type drop-down menu to select Automatic.
Up next, click the Start button on the properties window.
Click Apply, then OK to exit the window.
2. Use the Windows Update troubleshooter
Press the Windows Key + S and type troubleshoot in the search utility.
Click Troubleshoot settings, then select Troubleshoot.
Select Additional troubleshooters, then Windows Update.
Click the Run the troubleshooter button to open the window in the snapshot directly below.
After the troubleshooting process is complete, restart your PC.
The real cause of the error might also be related to some corrupted system files. If that is the case, you need to replace them.
Even if Windows Troubleshooter is great at solving problems, it’s not the best tool out there, so you might need to repair them using other ways.
We recommend using professional automatic registry cleaners since they are designed to fix Windows errors and keep your OS in optimal condition, reducing the risk of getting error codes when you perform an update.
Certain issues can affect your PC’s security as well, so an all-in-one program with protection-oriented features is ideal.
3. Clear out the SoftwareDistribution folder
Stop the Windows Update service by pressing the Stop button on its properties window.
Click the File Explorer button on the taskbar, then open this folder path: C:/Windows/SoftwareDistribution/Download
Press the Ctrl + A hotkey to select all contents in that folder.
Up next, press theDelete button.
Now, restart your device.
4. Reset Windows Update
Open the search box with the Windows key + S hotkey, and type in cmd.
Input these separate commands into the Command Prompt’s window: Net stop wuauservNet stop cryptSvcNet stop bitsNet stop msiserver
Then, enter the following line in the Command Prompt, and press Backspace: Ren C:WindowsSoftwareDistribution SoftwareDistribution.old
Next, type another command and press Enter: Ren C:WindowsSystem32catroot2 Catroot2.old
Thereafter, input these separate commands: Net start wuauservNet start cryptSvcNet start bitsNet start msiserver
Reboot your device afterward.
5. Reset Windows 10
NOTE
This method has the highest success rate of fixing pretty much any Windows 10 issue. However, it comes with the drawback of deleting all of your data. Thus, it is good to create a backup before proceeding.
Press the Windows Key + S and type in reset.
Select Reset this PC to open the Recovery tab in Settings.
Click the Get Started button to open Reset this PC.
Microsoft is constantly working to improve its operating system with new features and tools. You can only get these additions by updating the OS.
Additionally, the company releases frequent security updates that patch breaches or weak spots in the system to prevent cyberattacks from compromising the device or stealing your data.
If you don’t update Windows for a long time, the system will slowly become insecure.
How to check if there is an update available?
Usually, Windows will notify you if there is an update that needs to be installed, but there is a way to manually check that as well.
Press the Windows Key + X and select Settings.
Then, go to Update & Security.
In the Windows Update window, select Check for updates.
If there are updates available, that’s what you’ll see:
Knowing how important it really is to update your PC, it’s time to apply some quick solutions and get rid of the Updates failed error message right away.
The Microsoft Update Catalog
Microsoft created a web-based service called the Windows Update Catalog, containing a list of drivers and updates for Windows or other software related to the OS and Microsoft itself.
They should be distributed over corporate networks, but can also be used by home users. You can search the title of the update and its description. When doing so for hardware updates, type in the model, manufacturer, and other details.
You can find important, recommended, and optional updates on the website:
Important updates – provide significant benefits like improved security and reliability
Optional updates – may include new or update driver software for your devices
Recommended updates – are usually a mix of both
With the Microsoft Update Catalog, you won’t have to rely on the operating system to update automatically.
What are the benefits of resetting the OS?
Resetting the operating system is really useful when you don’t know the exact cause of a problem. Since you have the option to keep the files in storage, there’s no risk of losing precious data or progress.
The only downside is the fact that you will need to configure the general settings. There is also the option to completely delete all the settings, apps, and stored files on the device and install a fresh copy of the system.
Are feature updates worth it?
Microsoft decided to focus on constantly improving Windows 10. Twice a year, they release massive content updates that add new features and overhaul existing ones.
Since there is so much emphasis on them, the Redmond company is pouring all of its resources into developing new tools.
Most of the time, the updates will include quality-of-life changes that were asked by the community, so it’s worth installing them right away.
Don’t worry about possible issues. All builds are going through testing before they are officially released, in order to fix any bugs.
Hopefully, by following these steps, you managed to get rid of the Windows Update error 0x800f0986. If you have problems with the updating process but you are using a newly installed operating system, there are many ways to solve them.
Moreover, if the error 0xc1900204 blocks Windows 10 updates, try running the Windows Update troubleshooter, and keep in mind that we’ve also prepared a detailed guide to help you in this regard.
Which one of the solutions written above worked best for you in solving the 0x800f0986 Windows Update error? Feel free to ask anything or talk about the subject in the comments section below. We’re eager to hear you out.
The Hunter: Call of the Wild brings a variety of features with its immersive nature and vivid graphics. Because of that, it has received critical acclaim.
Some users encounter start-up failures while others who managed to start the game experience in-game crashes.
Luckily, we have a few solutions up our sleeves for both problems. So, in case you’ve had a hard time with your hunting adventure, follow the steps below to troubleshoot the issues.
The Hunter: Call of the Wild is a great game, but many users reported that it won’t start on their PC.
This can be a big problem, and speaking of issues, here are some similar problems that users reported:
The Hunter Call of the Wild has stopped working – This can occur due to missing Visual C++ and DirectX components, so be sure to install them.
The Hunter Call of the Wild crash on launch – This problem can occur if a third-party application is interfering with the game. Usually, the cause is your antivirus, so be sure to disable/remove it.
The Hunter Call of the Wild black screen – This issue can occur due to your drivers, and if you have this problem, update your drivers to the latest version.
How do you fix theHunter: Call of the Wild has stopped working?
1. Update your GPU drivers
If The Hunter: Call of the Wild won’t launch on your PC, the issue might be your drivers. The most common cause for issues is your graphics card drivers.
If you want to run the game without any major problems, we suggest that you download and install the latest drivers for your graphics card.
There are several ways to update your drivers, but the best is to download them directly from the manufacturer.
To do so, first, you need to find out the model of your graphics card and then download the latest driver from the manufacturer’s website.
Depending on your model, you can download the latest driver from the following websites:
Once your driver is up to date, you should be able to run the game without any issues. If you don’t want to download the drivers manually, you can always download them automatically using a third-party tool.
Outbyte Driver Updateris a simple tool that can automatically update all your drivers with just a single click, so if you don’t want to search and download the drivers manually, be sure to try this tool.
It scans your system and lists all existing and possibly missing drivers. The tool also detects if there is already a new version for current records. If necessary, these can be updated directly via Outbyte Driver Updater.
2. Check your antivirus
Sometimes certain applications can’t start on your PC due to your antivirus. If The Hunter: Call of the Wild won’t start on your PC, be sure to check your antivirus software.
You can fix the issue simply by adding the game to the exclusions list or by disabling certain antivirus features.
However, in some cases that might not be enough, so you’ll need to disable your antivirus and check if that solves the problem. If the issue is still there, your next step would be to completely disable your antivirus.
If that doesn’t work, you might have to completely remove your antivirus. If removing the antivirus solves the problem, your next step would be to switch to different antivirus software.
When you use the Gaming Mode function with a suitable antivirus solution, it will not interfere with your games in any way.
It still provides complete protection against viruses, worms, spam, spyware, and other malware. The integrated firewall fends off attacks from the network since you may be exposed to hijackers.
3. Check for additional Windows software
Besides essential GPU drivers, you’ll need a good stack of additional software to play the game. The game installer should cover those after the process of standard installation is done.
However, sometimes they are skipped or unintentionally removed. Because of that, you’ll have to download and install redistributables manually depending on your system.
You can usually download the necessary components online, but sometimes the necessary components might be right in the game’s installation directory.
Be sure to look for vcredist or DirectX directories and run the setup files inside them. Once you install the necessary components, the issue should be completely resolved.
4. Verify the game integrity with Steam
Open your Steam desktop app.
Click Library tab.
Right-click The Hunter: Call of the Wild and open Properties.
Open Local Files tab. Click Verify integrity of game files.
Restart your PC and launch the game.
5. Enable Screen space reflection
Navigate to Documents.
Go to Avalanche Studios and select theHunter Call of the Wild.
Choose Saves and click on Settings.
Enter :Your Steam ID:
Open settings.json with Notepad.
Set GraphicsSSReflection from 0 to 1.
Save changes and start the game.
Screen Space Reflection is an effect that alters the appearance of objects on the surface of Materials within the Unreal engine.
While this effect should be enabled by default, maybe you’ve disabled it unknowingly. Some users reported that game crashes disappear after they enable it again.
Choose the version that matches your system architecture and download it.
Run it to install Media Feature Pack.
According to users, sometimes The Hunter: Call of the Wild won’t launch if you don’t have Windows Media Player installed. If you’re in Europe or in Korea, you most likely have a KN or N version of Windows 10.
This version doesn’t have Windows Media Player and some other media components which can lead to this and many other errors. To fix the problem, you just need to download Media Feature Pack manually.
After installing Media Feature Pack, you’ll install Windows Media Player and the necessary multimedia components and the game should start working again.
Note: In order to boost your game performance and get rid of slowdowns, lags, low FPS and other annoying issues, we strongly recommend downloading Game Fire (free).
7. Make sure that you’re using a dedicated graphics card
Some PCs have both dedicated and integrated graphics, and sometimes that can lead to issues. Users reported that The Hunter: Call of the Wild won’t launch if you’re using your integrated graphics.
To fix this issue, it’s advised to check your graphics card control panel and set your dedicated graphics as the default one.
In some cases, you might have to enter BIOS in order to disable your integrated graphics. To see how to do that, we advise you to check your motherboard manual for detailed instructions.
8. Disable Steam Cloud Synchronization
Open Steam and locate The Hunter: Call of the Wild.
Right-click the game and choose Properties.
Go to Updates tab and uncheck Steam Cloud Synchronization.
Start the game again.
If this solution works, your saved games won’t be synced with Steam servers anymore, so be sure to manually back up your saved games, just in case.
9. Reinstall the game
Open Steam client.
Choose Library.
Right-click The Hunter: Call of the Wild and choose Uninstall.
Delete all remaining files and folders in the game installation directory.
Install the game again from Steam.
We certainly hope you found the proper solution to your problem on this article. Moreover, we can expect future patches that should resolve advanced errors and optimize the game even more.
In case you have any questions or alternative troubleshooting methods, please share them with our readers in the comments section.
Microsoft is well known for providing excellent cloud-based email and office solutions for businesses. Exchange for emails is one of them. Sometimes, you may need to move your existing Exchange email inboxes to another server or vice versa. The thing is not as simple as you are thinking.
In this case, you must go through the proper steps to do the Exchange Mailbox migration. However, manually doing it may need some learning curves that may not be appropriate for everyone.
Do I need a tool to migrate mailboxes?
In General, you can migrate one mailbox to another. However, the steps to do it may depend on several things. So, using a third-party tool is the best idea.
If we think about a complex situation, such tools can save a lot of time. For example, your organization has hundreds of mailboxes that need to be transferred to another server or service. In this type of situation, you will be more likely to use a tool that can do the job more comfortably.
The ADManager Plus is an excellent exchange server management tool. It has a lot of features that can enhance your user experience a lot. However, among them, the Exchange Mailbox Migration is one of the most effective modules.
This feature can help you with mailbox migrations in your organization more easily.
Why is the Exchange Mailbox Migration feature a game changer?
There are similar tools that can migrate email inboxes to a different server. But, if the remote server or service technology is a bit different, these tools often fail to complete the operation. Else, manually doing it is not a very realistic idea.
But the Exchange Mailbox Migration feature of ADManager Plus can do this thing with just a few mouse clicks. It can work with a different version of Exchange servers without any issues.
How can I migrate the Exchange mailboxes?
To migrate safely and with a more effective approach, we recommend you do the following things:
Make sure that your current Exchange server doesn’t have any major issues or configuration errors that can interrupt the process.
Ensure that the remote server is the same or a higher version. It is because you cannot migrate from a higher version to a lower version.
After checking out these things, you can be ready to migrate the mailboxes. For this, follow any of these methods ideal for you.
1. From a dedicated tool
Go to AD Manager and log in with your credentials.
Go to Management.
Then, go to Bulk User Modification.
Click on Exchange Mailbox Tasks.
Click on Migrate Mailbox.
Select Mailbox Store from the Target Mailbox Database.
Select the domain.
Now, select the users whose data are going to be migrated.
Click on Apply and complete the migration.
One thing to keep in mind is that you can select users by using the search box or import a list of users using a CSV file.
ADManager Plus
ADManager Plus is an excellent Exchange server management tool that has an Exchange Mailbox migration feature to transfer your mailboxes to another server.
This method may involve a lot of manual work on both sending and receiving servers. Also, some manual verification may be required.
Go to Exchange Admin Center.
Go to Office 365, click on Recipients, and then on Migration.
Click on Add button and select Migrate to Exchange Online or whatever you prefer.
Select users and follow any suggested on-screen steps.
This method may not be as much easier as you see in the steps. You may require to do some additional things as well.
We always encourage you to use a server management tool like ADManager so that you can do some operations in more robust ways by avoiding any type of scripting or a lot of manual work.
This article has introduced the Exchange Mailbox Migration idea and how to migrate mailboxes from one Exchange server to another one or to a different service. If you have any opinion on this, feel free to let us know in the comments box.
There are some old errors that haven’t been fixed officially by Microsoft, and various Windows 10 users are still reporting them.
In this guide, we’re going to focus on error 8024A000 and how you can fix it. Years ago, somebody has complained that when he tries to take the updates, Windows is throwing the error 8024A000.
Since then, this has become one of the most visited threads on the Windows sub-forum on the Microsoft Community website, with various fixes being suggested along the way.
We tried to find some of the working ones for you to get rid of your problem.
How can I fix the Windows Update error 8024a000?
1. Run the Windows Update Troubleshooter
First of all, you need to perform the general Windows Update troubleshooting, because you just might be that lucky and you could solve it just like that. On Windows 10, you can run the troubleshooter from the Settings page.
On older OS versions, you can launch the tool from Control Panel.
2. Stop the Windows Update Services
If it doesn’t work, then you will need to stop services pertaining to Windows Update. For that, follow the following:
Click Start, click All Programs, click Accessories, right-click Command Prompt, and select Run as Administrator.
At the command prompt, type the following, commands and then press ENTER after each command. net stop wuauserv net stop bits net stop cryptsvc
3. Rename the Windows Update folder
If that didn’t help, try to rename the folders pertaining to Windows Update by following this:
At the command prompt, type the following commands, and then press Enter after each command: ren %systemroot%System32Catroot2 Catroot2.old ren %systemroot%SoftwareDistribution SoftwareDistribution.old
Do not close the Command Prompt window.
4. Register update DLLS again
Also, you might have to register the DLL’s pertaining to Windows Update like this:
Copy and paste the following text into a new Notepad document, and save the file as WindowsUpdate.BAT
If saved correctly, the icon will change from a Notepad file to BAT file which has two blue cogs as its icon.
Also, you might have to restart services pertaining to Windows Update by following these steps:
Click Start, click All Programs, click Accessories, right-click Command Prompt, and select Run as Administrator.
If you receive a notification from User Account Control simply click Continue.
At the command prompt, type the following, commands and then press ENTER after each command. net start wuauserv net start bits net start cryptsvc exit
Check for updates using Windows Update to see if the issue has been resolved.
6. Combine some of the above solutions
Try the following, as well:
Press Windows + X keys and select command prompt(admin).
In the command prompt window, copy and paste the commands (all at once) – net stop wuauserv net stop cryptSvc net stop bits net stop msiserver ren C:WindowsSoftwareDistribution SoftwareDistribution.old ren C:WindowsSystem32catroot2 catroot2.old net start wuauserv net start cryptSvc net start bits net start msiserver pause
Wait for the process to complete.
Close command prompt.
Now, go to Windows update and check.
7. Check your antivirus tools
Also, it’s a good idea to check whether you don’t have two antivirus software tools running in the same time, as it’s often not a good idea and it might result in conflicting software.
8. Clean boot your computer
Go to Start > type msconfig > hit Enter.
Go to System Configuration > click on the Services tab > check the Hide all Microsoft services check box > click Disable all.
Go to the Startup tab > Open Task Manager.
Select each startup item > click Disable.
Close Task Manager > restart the computer.
Let me know by leaving your comment below if this has solved your problems. If not, I’ll try looking into it and add more solutions if there are.
It may seem inconvenient, but you don’t want to look for problems where there are none.
When trying to update your Windows computer you may encounter the Windows Update error 0x8024a223. The full error reads:
There were some problems installing updates, but we’ll try again later. If you keep seeing this and want to search the web or contact support for information, this may help: (0x8024a223)
This error can occur due to a glitch in the Windows Updater or system file corruption. If you are also troubled by this error, here are a couple of troubleshooting tips to help you resolve the Windows Update error 0x8024a223.
Double click on the WindowsUpdateDiagnostic.diagcab file to run the troubleshooter.
Select the Windows Update option and click Next.
Click the Try troubleshooting as an administrator option if available.
Click Next to proceed.
Once done, close the troubleshooter.
Run the Windows Update troubleshooter again.
Select the Windows Network Diagnostic option and click Next.
Wait for the troubleshooter to diagnose and fix any issues with the network.
Close the troubleshooter and restart your computer.
After the restart, try to update Windows 10 again and check for any improvements.
2. Restart Windows update services
Right-click on the Start button.
Select Windows PowerShell (Admin).
In the PowerShell window type the following command one by one and hit enter to execute them: net stop wuauserv net stop cryptSvc net stop bits net stop msiserver Ren C:WindowsSoftwareDistribution SoftwareDistribution.old Ren C:WindowsSystem32catroot2 Catroot2.old net start wuauserv net start cryptSvc net start bits net start msiserver
The above command will stop the necessary services, rename the Windows update folders and then restart the services.
Close the PowerShell window.
2.1. Rename CBS.log
Open File Explorer.
Navigate to the following location: C:WINDOWSLogsCBS
Locate and select the CBS.Log file.
Right-click on the file and select Rename. Enter a name for the file (example, Old_CBS.Log).
Now try to update Windows 10 and check for any improvements.
2.2. What if I am unable to rename CBS.Log file?
Press Windows Key + R to open Run.
Type services.msc and click OK to open Services.
In the Services window, locate Windows Modules Installer.
Right-click on the service and select Properties.
Set the Startup type to Manual and reboot the computer.
Navigate to C:WINDOWSLogsCBS and rename the CSB.Log file.
Open Services and set Startup type for Windows Modules Installer to Automatic.
Reboot the computer and check for any improvements.
Disney Plus acquired Pixar, Marvel, and Lucasfilm, making it a true powerhouse of amazing content. To round this up even more, Fox and Star Wars are included too.
Having access to all these great productions in just one place ensures that everybody visiting Disney Plus can find some great content to watch, no matter their age or interest.
Despite that, many people are struggling with some issues, including Disney Plus not accepting payment when trying to pay for their subscription. This in turn can cause frustration, especially if you were planning on a relaxing night in front of the TV with your family and friends.
Does everybody see the same error codes when payment issues occur?
Even though the exact situation might vary between users, most get the Error Code 4 message on the screen when trying to pay for the service, which is a known transaction error.
Some users get Error Code 9, which can be either a pop-up related to login data being wrongly entered or a payment that hasn’t gone through for some reason.
Before the popcorn gets cold and the fizzy drink goes flat, we have some useful suggestions for you to try out, which we will discuss in this guide.
What can I do if Disney Plus won’t let me update my payment method?
1. Try out some quick troubleshooting steps
Check that the credit card used for payment is valid for use in the country
Make sure that the card you’re using isn’t expired, and that you entered the expiration date correctly in the Disney Plus payment process
An invalid ZIP or postal code could also be related to this issue. Verify that the billing ZIP or postal code for the payment card you are using is correct
Check that the 3-digit security code on the back of your card (or 4-digit code if you have an American Express) matches the one you’re submitting
Make sure you’ve filled all the required fields; these are the ones marked with an *
If you signed up through Google Play or iTunes, note that you will be paying through a third party and not Disney directly
In case your bank has two-factor authentication, make sure to authenticate any transaction through the official application of the bank, or by entering the code sent to you through SMS.
This issue appears all too often so make sure you’ve got the correct payment means. If you can’t use your card online, check out the best virtual credit card software tools for your credit cards.
2. Try a different debit/credit card or use a gift card
Before going further down this list, you should better try using a different credit or debit card and see if the issue persists.
Sometimes it could happen that the funds on the card are not accessible for some reason or another, either not enough funds, or not being able to access them because of the bank having issues with online payments.
Trying another credit or debit card will ensure that both of these possibilities are eliminated from the list of possible reasons.
If it still doesn’t go through, and you’re sure that the other card has enough funds accessible to pay, then we could assume that there might be problems with the payment service on the Disney Plus company’s side.
To eliminate any other possibility, we recommend that you continue down the list and try the following steps as well.
3. Log out and log back in
While on the desktop, from the Home page, click the Character icon in the top left corner.
Click the Log Out button.
Wait a few minutes and then log back into your account.
4. Re-add your account payment details
Log into your account.
Click the character icon from the top right side of the screen.
Choose Account.
Re-enter your payment details.
Try paying for the subscription again.
5. Try out a different payment method
Since you’re determined to enjoy those awesome shows and movies from Disney franchises, consider using a different payment method.
The solution below is our top recommendation this time. It all started with travelers tired of exchanging their money at an inflated rate, yet it became so much more than converting currency at the best rates.
The most significant benefits of using this service include sending and receiving currencies in mere seconds, as well as avoiding payment issues of any kind.
Moreover, opening an account is extremely intuitive. You may even use your iOS/Android phone to register and you’ll receive your physical card in just a few days.
Revolut
Use Revolut as a payment method to easily take advantage of Disney’s Plus collection of movies!
If the problems persist, then you might have issues related to your account, such as problems with your emails or the servers in your region.
If that is the case, the only option remains to create a new account and re-add the entire payment process, hopefully without encountering any issues while paying for your subscription.
The link below will take you to the official page, allowing you to create a new account in minutes.
Hopefully, our guide helped you if the Disney Plus update payment is not working. We’re constantly adding fresh guides for Disney Plus, so check back with us often.
If you are trying to check for updates in your new Windows 10 operating system you might have stumbled upon the Update fail Error 8024402F.
You don’t need to be alarmed because we have found a fix to this issue and you will in just a few minutes of your time find out what you need to do to fix the Windows Update error 8024402F.
Unfortunately, the steps that we need to take are not that obvious if you are trying to fix it yourself because we will need to disable the Automatic Updates feature in Windows 10 first.
Then you can fix the Error 8024402F you get while trying to update the operating system.
How can I fix the error code 8024402F?
1. Change Windows Update settings
Several users reported that they fixed this problem simply by changing your Windows Update settings. To change these settings, do the following:
Open Control Panel.
Find and select the Windows Updates section in this page.
Now left click or tap on the Never check for updates feature. Note: Also uncheck the following: Give me recommended updates the same way I receive important updates and the Give me updates for other Microsoft products when I update Windows features in this page.
Now you can manually check for updates for your Windows operating system and install them without having to worry about the Windows Update Error 8024402F you got in the system.
After you manually make the updates you can go ahead and enable the Windows Updates once again. You also might have to do this every time you get a Windows Update error message.
2. Change your time zone
If you’re getting error 8024402F, you might be able to fix it by changing your time zone. This is quite simple and you can do it by doing the following:
Start Control Panel.
When Control Panel opens, click on Date and time.
Now in the Time Zone section you will need to click Change time zone button.
You need to select the correct time zone from here. Once you select the desired time zone, click OK button to save the file.
Reboot your Windows 8.1 operating system and check again to see if you have the Update Error 8024402F present in your operating system.
Once the file is downloaded, start it and follow the instructions on the screen.
After the process is finished reboot your Windows operating system.
Check again to see if you still get the Update Error 8024402F.
4. Reinstall recent updates
Sometimes you might install a corrupted update that can cause an 8024402F error to appear while using Windows Update.
To fix this problem, you need to remove any recently installed updates and reinstall them. This is rather simple and you can do it by following these steps:
Press Windows Key + I to open the Settings app.
Navigate to Update & Security section.
Now select View installed update history.
List of recent updates will appear. Now click on Uninstall updates.
You should now see the list of installed updates. Double click on an update to remove it.
After removing recent updates, restart your PC. Windows will now automatically download these updates in the background and install them. After the updates are reinstalled, the issue should be completely resolved.
Keep in mind that certain updates can cause this issue to reappear. To prevent this problem in the future, it’s important that you find the problematic update and remove it.
Since Windows 10 will automatically install the missing updates, you need to prevent that update from installing.
According to users, sometimes this issue occurs due to problems with your antivirus. According to users, their antivirus can sometimes interfere with Windows and prevent updates from installing.
If you’re encountering error 8024402F, you might want to try disabling your antivirus. Many users reported that this worked for them, so be sure to try that.
If disabling the antivirus doesn’t help, you might want to try uninstalling your antivirus.
To do that, it’s advised to download a dedicated uninstaller tool from your antivirus developer. After removing your antivirus, check if the problem is resolved.
Since it’s not safe to use your PC without an antivirus, it’s advised to switch to a different antivirus solution.
There are various antivirus tools ready to deliver leading security functionality, so you can benefit from that by taking the best antivirus compatible on Windows 10.
6. Check your firewall
A firewall is great if you want to prevent unauthorized applications from accessing the Internet, however, sometimes your firewall can prevent Windows updates from installing and cause error 8024402F to appear.
To fix that, it’s advised to add Windows Update servers to the exclusion list.
This process is different depending on the type of firewall you’re using, so if you don’t know how to do it, it might be best to contact your network administrator.
As for the list of servers, you need to make sure that the following servers are allowed to go through your firewall:
Download.windowsupdate.com
Windowsupdate.microsoft.com
Update.microsoft.com
After changing your firewall settings, the issue should be completely resolved. Several users reported that this issue was caused after enabling the Filter ActiveX feature on their router.
If you’re having the same issue, check your router configuration and make sure that this feature isn’t enabled.
7. Try using a different network connection
According to users, error 8024402F can sometimes appear due to your network connection. To check if your network connection is the problem, you might want to try using a different network connection.
If the error doesn’t appear on a different network, the problem is your network configuration.
To fix the problem, it’s advised to check all your network settings in Windows. In addition, you might want to try restarting and resetting your router and see if that solves the problem.
8. Add Microsoft servers to the Trusted zone
If you’re constantly experiencing error 8024402F, you might be able to solve the problem simply by adding Microsoft servers to the Trusted zone. To do that, just follow these steps:
Press Windows Key + S and enter internet options. Select Internet Options from the list of results.
Navigate to the Security tab and select Trusted sites. Now click the Sites button.
In the Add this website to the zone field, enter the desired address. Now click the Add button. Add all addresses mentioned in Solution 6. Now click the Close button.
After doing that, restart your PC and the problem should be completely resolved.
9. Disable your proxy
If you’re having any problems with error 8024402F, the cause might be your proxy.
Many users use proxy in order to protect their privacy, but sometimes your proxy will interfere with Windows 10 and prevent you from downloading updates.
However, you can fix this issue simply by disabling your proxy. To do that, follow these steps:
Open the Settings app and go to Network & Internet section.
From the menu on the left choose Proxy. In the right pane, make sure that all options are disabled. If all options are already disabled, try enabling Automatically detect settings option and check if that solves the problem.
Many users reported that disabling proxy fixed this error for them, so be sure to try this solution out.
If you still want to protect your identity online, there are many great third-party applications that can help you with that.
Speaking of problems, users reported the following issues related to this error:
Windows 10 update error 8024402F – This error is usually caused by a problematic update, and in order to fix this problem, it’s advised that you find and remove the problematic update from your PC.
Code 8024402F Windows Update ran into a problem – Sometimes this message can appear due to your security configuration, so be sure to check both your antivirus and firewall.
Windows Update stuck, error, not working, won’t download, keeps failing – Error 8024402F can lead to various problems with Windows Update. However, you should be able to fix most of these problems by using one of our solutions.
This is all you have to do in order to fix in the shortest time possible the Update Error 8024402F but if you encounter any other issues along the way, don’t hesitate to use the comments section below.
You can find a list of extensive materials covering windows update errors so that you can have all the fixes in one place.
If you wish to broaden your area of expertise, feel free to visit our hub dedicated to Windows 10 errors and become your very own PC hero.
Nevertheless, there is an abundance of errors that may occur before or during the update process. In the long list of errors, you’ll also find error code 0x80242ff.
This one mostly occurs after upgrading from Windows 7/8.1 to Windows 10. After the Windows 10 installation process is finished, the system updates just won’t finish downloading.
In case you encounter this problem as well, we offer you a few workarounds that should resolve the issue.
How do I fix the Windows Update Error 0x80242ff?
1. Scan your system for malware
The most common cause for update error 0x80242ff can be your antivirus. Sometimes a third-party antivirus can interfere with your system and cause problems with Windows Update.
However, you can fix this problem simply by disabling certain antivirus features or by disabling the software altogether.
If disabling it doesn’t fix the problem, it’s advised that you remove your antivirus and check if that solves the issue.
Additionally, it might be a good idea to switch to a different antivirus solution.
There are many great antivirus tools on the market, but if you want an antivirus that will provide maximum protection without interfering with your system, you should definitely consider ESET HOME Security Essential.
It guarantees the ultimate protection, without hijacking processes running simultaneously with the real-time online security feature.
ESET HOME Security Essential
Avoid unexpected system errors by using this reliable and powerful antivirus tool.
While malware is the best-known culprit for this and similar errors, the proxy and VPN can slow down or stop an update, as well. Make sure to disable them while updating.
Additionally, you can check your Proxy status via Command Prompt:
Right-click Start and run Command Prompt (Admin).
In the command line type netsh winhttp show proxy
In case you are prompted with Direct Access (no proxy server) message, everything is safe and sound.
To disable your proxy, do the following:
Press Windows Key + I to open the Settings app.
Now navigate to the Network & Internet section.
From the menu on the left, select Proxy. In the right pane disable all options.
After doing that, your proxy should be disabled and the update error 0x80242ff should be resolved.
3. Check the integrity of your system files
Press Windows Key + X and select Command Prompt (Admin) from the list (or PowerShell for older systems).
Enter sfc /scannow and press Enter.
The SFC scan will now start. The scanning process can take about 15 minutes, so don’t interrupt it.
This process finds and fixes corrupt files, if any. Once the SFC scan is finished, check if the problem is still there.
If it is, you need to run a DISM scan. You can do that by following these steps:
Open Command Prompt as administrator.
Now run the following command and press Enter: DISM /Online /Cleanup-Image /RestoreHealth
Once again, the scanning should take about 20 minutes, so don’t interfere with it.
After the DISM scan finishes, check if the problem is resolved. If you want, you can also repeat the SFC scan once again and check if that solves the problem.
4. Start system in Clean Boot
Press Windows Key +R, enter msconfig and press Enter.
Go to the Services tab and check Hide all Microsoft services box.
net stop wuauserv net stop cryptSvc net stop bits net stop msiserver ren C:WindowsSoftwareDistribution SoftwareDistribution.old ren C:WindowsSystem32catroot2 catroot2.old net start wuauserv net start cryptSvc net start bits net start msiserver exit
After running these commands enable your Internet connection once again and restart your PC. Once your PC restarts, check if the problem is resolved.
Select Turn off Windows Defender Firewall (not recommended) for both Private and Public networks.
After doing that, click the OK to save changes.
Once you disable Windows Firewall, check if the problem is still there. If the issue is resolved, update Windows and then turn the firewall back on again.
7. Download the update from the Microsoft Update Catalog
If you can’t download a specific update due to update error 0x80242ff, you might be able to fix that problem by downloading the update directly from Microsoft’s online Update Catalog.
Before you can do that, go to the Windows Update section on your device and look for the update code of the update you’re trying to install.
The update will contain KB plus an array of numbers. Once you find the update code, do the following:
Wait while the setup prepares the necessary files.
Choose Download and install updates (recommended)option.
Now click the Next button.
The setup will now download the updates. This might take a bit, so be patient.
After the updates are downloaded, follow the instructions on the screen.
Once you reach the Ready to install screen, click Change what to keep.
Select Keep personal files and apps and click Next.
Follow the instructions to complete the setup.
Once you complete the in-place upgrade, you’ll have a fresh up-to-date version of Windows. Of course, all your files and applications will be preserved, so you can continue where you left off.
9. Run the Windows Update troubleshooter
Our last fix on the list is more of a basic one, but it should fix most Windows Update related issues within minutes. You can access this built-in troubleshooter via Settings > Update & Security > Troubleshoot.
These were possible workarounds for this update problem. We certainly hope you’ll find it useful and manage to resolve the 0x80242ff error in no time.
Blue Screen of Death errors such as ACPI_BIOS_ERROR on Windows 11 or any other version can be serious since they will restart your computer every time it appear.
This is due to your BIOS settings, and to fix it, you just need to follow the steps from this guide.
Select your motherboard model and choose Driver & Utility section.
Navigate to BIOS & Firmware section. Select the latest version of BIOS and click on Download.
After downloading the file, move it to flash drive.
Restart your PC and keep pressing F2 to access BIOS.
Select the Instant Flash option and select the file you downloaded from the USB drive.
Wait for the process to finish and don’t interrupt it.
For Samsung laptops:
NOTE
Installing BIOS is an advanced procedure, and you can cause permanent damage to your PC if you don’t perform it properly, so be sure to check your motherboard manual for detailed instructions.
Locate your SSD drive and disconnect it.
Start your laptop and you should see a prompt asking you to press F4 to start Recovery Mode.
Press F4 and quickly reconnect your SSD drive.
Choose the option to restore and wait for the process to complete.
Run SW Update software and install the BIOS update.
You can also use specialized software to fix these types of issues without having to update your firmware.
Afterward, it shows you a list of all of them. You can choose to restore these files with a couple of simple clicks. The program does everything for you.
While your PC boots, keep pressing F2 to enter BIOS.
Locate the ACPI mode and set it to S1.
Save the changes.
NOTE
For detailed instructions on how to do that, we strongly advise that you check your motherboard manual since every motherboard’s BIOS has a different UI.
6. Disable the jumper JPME1 and reflash BIOS
Turn off your PC and disconnect it from the power source.
Open the computer case.
Locate the JPME1 jumper and disable it.
After doing that, reflash your BIOS.
Owners of the X9DAI motherboard reported that disabling the JPME1 jumper and reflashing the BIOS fixed this issue for them. Do keep in mind that this solution might not work for other motherboard models.
7. Uninstall the Microsoft ACPI Compliant driver
Press Windows key + X and select Device Manager from the list.
When Device Manager starts, locate the Microsoft ACPI Compliant Control method battery.
Right-click it, and choose Uninstall device.
Click the Scan for hardware changes button and let Windows 10 install any new drivers.
Restart your PC.
A few users reported that uninstalling the Microsoft ACPI Compliant Control method battery driver fixed the ACPI_BIOS_ERROR BSOD error on certain laptops, so you might want to try it.
If you cannot access Windows 10 normally, you might have to perform these steps from Safe Mode. To enter Safe Mode do the following:
Restart your PC during the boot sequence a few times.
This should start Automatic Repair.
Select Troubleshoot.
Navigate to Advanced options.
Then, select Startup Settings and click the Restart button.
Once your computer restarts, you’ll see a list of options. Press 5 or F5 to enter Safe Mode with Networking.
8. Install Windows 10 in UEFI mode
Connect the bootable USB flash drive to your PC and restart your computer.
While your computer boots press F11 to select a boot device. Bear in mind that your motherboard might be using a different key, so be sure to check the motherboard manual for detailed instructions.
You should see a list of options. Select UEFI: Your USB Flash Drive.
Follow the instructions to complete Windows 10 setup.
That’s about it. We’ve listed lots of solutions for you to try. As always, for more questions or suggestions, let us know in the comments section below.
Error 0x8007000e is an update error that affects some users when they try to search for new updates via Settings.
When the error arises, new Windows 10 updates don’t install.
Users seldom manually check for patch updates, but a lot of users are now pressing the Check for updates button to install the Windows 10 May 2019 update.
This morning I tried to update to version 1903 of Windows 10. The update failed with error code 0x8007000e.
Resolve this by following the instructions we provided below.
How can I fix the error code 0x8007000e?
1. Run the Windows Update Troubleshooter
The Windows Update troubleshooter might provide some resolutions for error 0x8007000e. To run that troubleshooter, press the Windows key + Q keyboard shortcut.
Input the keyword troubleshoot in the Type here to search box.
Click Troubleshoot settings to open the Settings window as shown directly below.
Select Windows Update and click Run the troubleshooter.
The Windows Update might then automatically apply some fixes or suggest some resolutions. Go through any resolutions the troubleshooter provides.
2. Run the System File Checker
Right-click Start and open Command Prompt (Admin).
In the command line, type sfc/scannow and press Enter.
Wait for the procedure to end and reboot your PC.
Check for updates again.
3. Rename the SoftwareDistribution Folder
Select Command Prompt (Admin) to open an elevated Prompt window.
Input this command in the Command Prompt: ren %systemroot%SoftwareDistribution softwaredistribution.old. Then press the Enter key.
Close the Command Prompt’s window.
Then restart the desktop or laptop.
4. Check the Windows Update Service is Enabled
Windows Update errors will certainly arise if the Windows Update service isn’t running. To check that, press the Windows key + R keyboard shortcut.
Input services.msc in Run, and click the OK button.
Double-click Windows Update to open the properties window in the snapshot directly below.
Select Automatic on the Startup type drop-down menu if that option isn’t already selected.
Run the application and follow the instructions closely.
Your PC will reboot a couple of times during the process, so make sure to save everything of importance.
The above resolutions might resolve Windows 10 error 0x8007000e for some users.
However, users can also update Windows 10 to version 1903 with the media creation tool and USB drive installation media.
What is error code 8007000e?
If you see the error code 8007000e when searching for updates, probably the Windows update store folder is corrupted and you have to recreate it. Here’s a guide on how to fix Windows Update common errors.
Why can’t I install Windows 10 Update 1903?
When installing Windows 10, version 1903, you may get an error message stating This PC can’t be upgraded to Windows 10. Here’s a guide for a potential fix.
Modern printers with Wireless printing support allow users to print wirelessly from their computer by connecting their printer to the Wi-Fi router. However, at times, the printing function may not work properly and stop connecting to your router.
This error usually occurs if the printer or the router configurations are corrupted. If your printer is also unable to connect to your router, here are a couple of ways to troubleshoot this problem on your Windows computer.
Why is my HP printer not connecting to WiFi?
Wireless printers are great, but many have reported that printers won’t stay connected to Wi-Fi, which can be a problem and negatively affect your workflow.
Keeping your drivers updated is essential if you want your hardware devices to work properly. A faulty driver can cause problems with your printer, so it’s advised to update them.
You can use multiple methods, but they can be tedious and not user-friendly, especially if you don’t know where to download the drivers from.
Luckily, there are specialized driver updating solutions that will scan your PC and automatically update all drivers on your PC with just a single click.
2. Reset the Printer to Network Default
Press the Wireless button and the Cancel button from the printer Control Panel simultaneously and hold them for about 5 seconds.
This should reset the printer to network default.
Now to connect the Printer to WiFi, press and hold the Wireless button on the printer for 3 seconds. This will start WPS push mode and you should see the Wireless status light starts blinking.
Press the WPS button on your Router. This will trigger the timer for two minutes while a wireless connection is established.
Now check if your router is able to recognize your printer.
If our Wireless Channel in your router is set to Auto, try changing it and see if that fixes the issue. Users have reported that changing the Wireless channel from auto to manual has helped them fix the problem.
Every router has a different procedure to access the Wireless channel interface. However, you should be able to access it from the Settings > Wireless > Advanced Settings page of most routers.
Click the Wireless Channel drop-down menu and set it to 1, 6, or 11.
Save the changes and close the Router configuration window.
Try to connect your printer to the router and it should be able to recognize the printer now.
This often solves the problem as too many devices connected to the same channel tend to cause access point channel conflicts.
To be able to connect the printer to Router, the Router should have the 2.4G SSID band enabled with a different SSID name as the Wireless printers only connect to the 2.4G band.
Make sure that the printer and router are at least 5 feet apart.
Use HP Printer and Scan Doctor. It is a diagnostic tool for Windows computers that can scan and fix any issues with the printer.
Check if the IPV6 is disabled in the printer. To disable IPV6 for the printer, open the web browser and navigate to the IP address of your printer. From here, go to the Networking tab and click on Networking Settings. Uncheck the IPV6 box and click Apply.
In conclusion, connection issues with wireless printers can be caused by various factors, such as corrupted configurations, issues with wireless network settings, and problems with printer drivers.
Let us know if the connectivity issue was solved or if we omitted anything.
In the past, in order to print out your photos, you would have to go to a specialized printing shop, and you had to print out all the photos found on the camera film.
This technique did not allow you to choose which of the photos gets printed or apply any effects or templates before printing.
Fortunately for us, by using digital images, we can use specialized software that allows us to choose which photos will be printed, how the pictures will be framed, what effects are applied, and can also edit the photos in a variety of ways.
In this article, we will explore some of the best software options on the market that allow you to create professional-level photo prints from the comfort of your own home and at a fraction of the cost. Read on to find out more.
When it comes to photo manipulation and design, few software giants come close to what Adobe has achieved.
However, when it comes to enhancing photos while still making them believable, the crown goes to Adobe’s very own Lightroom.
This program not only allows you to capture incredible photographs but also lets you retouch them on the go. Apply filters before the photo is taken, or perform more advanced tasks once in your device’s storage.
The license gives you access to the program for all devices, from the common PC to the portable tablet version.
Editing has never been easier since the UI has been completely streamlined over the years. In fact, if you haven’t used Lightroom in over 2 years, you might as well get a hand on it now while you may still recognize what’s left of the interface.
All in all, if you are looking for the perfect blend between professional tools and beginner handling, then Adobe Lightroom is the program for you.
Adobe Lightroom
Use this up-to-date software to benefit from the combined effect of professional touch and novice operations for your digital imaging art.
When you think of photo-enhancing programs, you probably think of overcomplicated software that has overcrowded UI elements and 100 buttons that handle just color balance.
However, that isn’t the case with Fotor, as it values simplicity over all else. In fact, if you’ve ever had one of those simple phone apps for photo enhancement, then you already have a very good idea about what to expect with Fotor.
However, this doesn’t mean that the product doesn’t do a good job. On the contrary, Fotor manages to deliver stunning photos in a simple manner precisely because the algorithms anticipate what you would like the outcome to look like.
Of course, enhancing your own photos is great, but you can even use Fotor to earn an income.
Accent your ideas with many preset templates, ranging from social media designs, including Facebook covers, posters, photo cards, YouTube banner ads, and much more in just a few clicks.
Do whatever you like, from portrait retouching to adding outrageous photo effects, all from a simple touch of a button or an adjustment of a slider, all within the same simplistic yet amazing photo editing tool.
Fotor
It’s all about using photo effects to stretch your imagination and personalize your ideas with simple actions, using a wide range of templates.
Corel PaintShop Pro is definitely one of the most flexible and wonderful software for editing and printing your favorite photos.
With the new technologies included in Corel PaintShop Pro, intricate and time-consuming adjustments have never been easier to do, thanks to the well-organized and simplified UI.
Using composition principles, the Golden Ratio, and the Rule of Thirds, you may easily crop sections of your image to change the emphasis and print a different version of your photographs.
Furthermore, because you wish to print your masterpiece at home so you can save time, you may quickly select from a range of settings to adjust the picture. Printing is possible from the Manage workspace, Edit workspace, and Adjust workspace.
Crop and registration markings can also be printed. You may print crop markings to use as guidelines when trimming the page. Registration markings are used to align film for proofreading or printing plates on a color press. They print on each page of color separation.
You may expand a picture without introducing unwanted distortion with AI Upsampling, remove artifacts and noise from your images with a single click using AI Artifact Removal or AI Denoise, and stylize your photos with unique effects with AI Style Transfer. You now have the greatest photograph ready to be printed and shared with the world!
Corel PaintShop Pro
Look into various unique visual effects to make your photographs more distinctive and unique for sharing and printing!
This software has a wide range of features that can help you with your digital photo projects. The setup of this software can feel a bit confusing when you try it the first time, but we will look at some steps that will ensure you will get through it without any issues.
After you’ve installed Arcsoft Print Creations, you will be able to find a list of different modules in the Start menu called ArcSoft Print Creations.
The options in that folder include items like Quarter-fold greetings cards, Funhouse, Half-fold greeting cards, etc. It can be a bit confusing to choose from one of the options presented in this menu.
In order to make the entire process of choosing the right module easier, we recommend that you first start the Print Creations LaunchPad.
This module allows you to understand what each option has to offer, and it allows you to create a new project or edit an already existing project.
If you choose to start a new project, you will need to choose which project setup works best for your needs. It is now easier to choose the right option as the software offers a graphic icon showing you the preset characteristics.
Even though at first, the modular structure of this software seems like a disadvantage, it can be an extremely efficient way of organizing your projects.
Once you got used to the names of the modules and understand what each one of them does, you can start the appropriate module directly from the Start menu of your Windows 10 PC, avoiding the LaunchPad.
Once you select the right type of project setup, you can simply select the photos you want to be included, edit them in a variety of ways, apply templates, etc.
When you’re happy with how your project looks, you can choose to save the project in order to share it with your friends digitally or print it out as you would do in any printing software.
Pixlr, the Online Photo Editor, allows you to edit images, print photos at home, and create stunning graphics directly in your browser.
Experience next-generation, intuitive picture editing and graphics design with AI-powered tools for rapid yet professional changes.
The image editor supports nearly every image format, including PSD (Photoshop), PXD, JPEG, PNG (transparent), WebP, SVG, and others. Begin with a blank canvas or one of the professionally designed templates provided.
The printing option is available on the File tab of Pixlr E but not in Pixlr X, which is intended for simple and rapid graphic design. To print a high-quality image, choose a BMP file format, which is bigger and captures more data, to get the best out of the printed image with Pixlr.
Do you want to show the real vibe of your photos? To get the required photo effects in your visuals, use the right photo filters to immediately spice things up and print a mood-swinger picture at home.
XnView MP and XnView Classic are both free Image Viewer that allows you to open and modify your photo files quickly and efficiently before printing.
All major picture formats are supported by XnView (JPEG, TIFF, PNG, GIF, WEBP, PSD, JPEG2000, OpenEXR, camera RAW, HEIC, PDF, DNG, CR2), so printing at home is easy and efficient.
Color changing, image resizing, cropping, screen capture, information editing (IPTC, XMP), and much more are all available in XnView.
XnView MP has an easy-to-use explorer-like interface that allows you to not only see but also manage your photographs and photos.
You may generate contact sheets and slideshows, as well as batch rename, batch converter, duplicate image detection, and image comparison.
XnView is compatible with all major operating systems and mobile devices, and if you’re a developer, this is the photo conversion tool you’ve been looking for.
PhotoElf is another great software option that allows you to easily manage, sort, and print your favorite photos at home.
The customization tools found in this software offer you the possibility to combine up to 144 photos on one page and customize the size of every print.
In addition, the software allows you to print multiple images at once and offers you access to a wide range of printing templates.
Because it is very important that before printing, your photos are edited, this software allows you to do so with standard photo editing options and effects.
Even though PhotoElf was designed for older versions of Windows, we managed to install it on Windows 10 without any issues at all.
All you need to do in order to run the setup is to download the files, then right-click on the installer and choose ‘Run as administrator. It only takes a few seconds to install, so you can start creating wonderful photo collages and print them easily.
One of the best features found in PhotoElf is its ability to split a large-sized image into separate A4 pages, allowing you to print photos to any size you desire.
The printer will take every page found in PhotoElf and will print it out in the same way you build a puzzle piece.
Here are some of the best features found in PhotoElf:
Can create amazing templates that can be saved and used as many times as you want to
Ability to batch print more than 1 photo per page
Can add text and captions to the printed page
Quickly find photos on large HDDs
Can edit, rotate, crop, and use a red eye removal tool
Can convert images to different formats
Can print extra-large posters and banners
Batch rename, resize, rotate, image format converting, JPG compression, cropping, etc.
PhotoLightning is another great software option that you need to try. This software allows you to easily customize your favorite digital photographs, add effects, and print photos out.
The user-friendly UI found in this software makes the entire printing process easy, helps you download the pictures from your camera, allows you to easily choose the right photos, set the specific quantities to be printed, and even uses custom frames with preview features.
This allows you not to waste any precious time by printing out different versions of the project.
Besides the editing and printing capabilities of this software, PhotoLightning also gives you the tools needed in order to send your projects via email without leaving this software dashboard.
Here are some of the best features found in PhotoLightning:
Can set custom font size, color, captions, etc.
Can print complete albums with one click
Can print out a different number of copies for each of the images found in your project
Automatically fits your photos in the available print space
Automatically rotates photos to save space, time, and money
Remembers your chosen printer and favorite printing paper
Supports photo paper templates from Canon, Epson, Hewlett-Packard, Kodak, Sony, etc.
In this article, we explored some of the best software options that allow you to easily print out your favorite digital photos from the comfort of your own home.
A digital photo frame can be a nice gift or addition to your house design, and you could also explore our Digital Photo Hub for more top lists in the same regard.
Let us know how these software options worked for you by using the comments below.
If you’re wondering how to fix Windows error recovery, you’re in the right place. Obviously, you are not alone. In fact, many users reported similar issues. The good news is that they also managed to solve these problems.
Let’s quickly review some of the most common issues related to Windows Recovery mode:
Windows error recovery loop Windows 7 – If Windows 7 failed to start it’s likely you encounter the recovery Windows error on a Dell laptop, HP laptop, and so on.
Laptop recovery problem – Speaking about portable PCs, more often than not, you’ll get the recovery screen on laptops.
Windows error recovery on startup
Obviously, the issue can impact all versions of the OS and a particularly common scenario takes the form of Windows error recovery in Windows 10.
Windows error recovery keyboard not working
Don’t worry, we’ll show you exactly what to do when your PC says recovery. But first let’s see what we’re dealing with and what is it that triggers such errors, to begin with.
What is error recovery in computer?
Running apps might seem like a straightforward action, but it’s in fact a complex process involving syntax verification, compiling, and parsing operations that your computer constantly runs in the background.
In fact, some of the situations generating this error have more than one solution meaning there is a huge chance of cracking the matter.
We’ll show how to fix Windows error recovery without CD or with a CD. There are various methods available, so you’ll be able to find the right Windows error recovery Windows 7 solution or Windows 10 fix effortlessly.
How do I fix Windows 10/7 recovery error?
➡️ If possible, make sure that the computer is connected to a reliable internet network as you execute these steps.
➡️ We will be using an HP laptop for demonstrative purposes, but the operations can be applied as such on any other brand (Dell, etc.)
1. Remove recently added hardware
Turn off your laptop and remove the AC adapter and its battery.
Disconnect the newly added device. You may have to reopen the laptop to access whatever hardware you had installed (if it was an internal addition).
Return the battery.
Turn on the laptop the usual way.
The laptop may successfully boot to the desktop and the Windows error recovery message will not be redisplayed.
You can now try to reconnect the device and wait for Windows to recognize it (for external hardware like a USB webcam).
For hardware that is installed on the motherboard, the best approach is to ensure that you are installing a compatible device and to introduce the right drivers immediately.
Adding hardware, for example, a new RAM module can sometimes originate Windows instability problems. This triggers the Windows error recovery loop, making your laptop fail to reboot.
Use these steps to rectify whatever issues arose as a result of installing new hardware.
Tip
If you are adding more than one device, it’s advisable to connect one at a time and keep restarting the computer with each addition until you locate the device causing the error.
2. Run Windows Start Repair
Let the laptop timer countdown run to zero once the error message appears or just press Enter while the launch start repair option is selected.
The startup repair interface opens and starts scanning your laptop for problems.
Implement the suggestions made by the startup repair wizard to rectify the pending faults.
The laptop should soon restart and boot into your normal desktop.
You can now attempt to repair a faulty Windows startup process by mending the relevant files.
3. Boot into LKGC (Last Known Good Configuration)
Restart your laptop.
Press F8 repeatedly until the advanced boot options appear.
Choose LKGC (last known good configuration -advanced) then press Enter.
Booting into the last known good configuration is easy and could solve the problem without much fuss.
Turn off the laptop and then, press its power button to turn it back on.
Now, start pressing the F8key repeatedly until a startup screen appears.
Highlight the safe mode option using the up/down arrow keys and press Enter.
Select an administrator user account when the Windows login screen displays and enter your password (if any).
When the desktop appears, press the windows button on the menu then click inside the search bar.
Type cmd then press Enter.
In the Command prompt window, type rstrui then press Enter again.
The Restore System screen opens.
Click Next, then choose the last restore point that worked (from the displayed options) then click next.
Now click Finish and wait for the checkup and restart process to complete. Again be patient.
Restoring the laptop takes it back to the settings that previously worked. You can execute the system restore directly from the startup repair window if that option pops us.
Here is how to initialize restore if the option wasn’t provided and fix the Windows error recovery via Command prompt.
Besides the Windows error recovery loop, this method should also help if your computer is stuck in a restart loop, so make sure you check it out.
5. Recover the Laptop
Recovering a laptop is equivalent to resetting the computer its factory configuration.
Windows 7
Turn off the laptop.
Turn it on and press the F11key repeatedly until the Recovery Manager (Windows 7) opens.
Click System recovery under theI need help immediately tab.
Select your preferred backup option when the system recovery asks for your backup preferences.
Click OKwhen and if a warning displays.
Click Finishto reboot the laptop as soon as the recovery is complete.
Now go over the typical Windows setup until the laptop finishes the fresh reconfiguration.
Restart your computer to ensure everything sails smoothly again.
You may have to reinstall some or all of your previous software including the antiviruses and business programs (if any) plus any backup files.
Windows 10
Turn off the laptop.
Turn it on and press the F11key repeatedly until the Choose an option window is displayed.
Click Troubleshoot under the Choose an option tab.
Next, click Recovery manager on the Troubleshoot tab.
Finally, click System recovery under Help to finally progress to recovery.
Windows 8
Turn off the laptop.
Turn it on and press the F11key repeatedly until the Choose your keyboard layout window is displayed when the laptop restarts.
In the new windows, click Troubleshoot.
Click Recovery manager on the troubleshooting window.
Select Windows 8 to open the all-important recovery manager.
Now, clickSystem recoveryfor the laptop to be reset to its original factory setup.
Another option would be to click the minimized image recovery in order to restore only your windows 8 operating system, and drivers, and select Software.
Use the HP Recovery disc to run the recovery
Turn on the laptop and then insert your first HP recovery CD/DVD into the drive.
Turn off the computer.
Now turn it on.
Press the escape key continuously until a window’s startup menu or the select boot device window opens.
If you get the select boot device menu, click the correct CD/DVD drive then press enter.
Else press F9to access the boot menu/ device option then choose the right CD/DVD drive and press enter.
If the window requesting you to run recovery from the hard disk appears, choose the Run program from disc option and click next.
Select Recovery discs created from your computer/ Recovery discs received from HP support option appropriately.
Select Factory reset/ Reset the computer by erasing the entire drive and restoring to the factory setup depending on what’s shown on the screen.
Follow the steps and insert the next recovery disc when prompted.
Click Finish/Next as prompted when the recovery ends.
The laptop may turn off or restart automatically. If it is turned off, wait about 5 seconds before turning it back on.
Boot from a USB recovery drive
Turn on the laptop and insert the recovery USB flash disk into the USB port.
Now turn off the laptop and turn it back on.
Press the ESC key continuously until a window’s startup menu or the select boot device window opens.
The selections you need to make vary slightly depending on the type of menu that displays on your screen:
For select boot device menu, select the correct USB storage drive then press Enter.
For the startup menu, pressF9to access the boot menu/ device option. Again select the right USB storage drive and press enter.
The rest of the steps are as I explained above for CD/DVD.
Remember to remove the USB drive before restarting the laptop.
6. Perform Startup Repair with a Windows installation disc
Restart the computer and press F9 (repeatedly) until you see the message Press any key to boot from CD or DVD on the screen.
Select your preferred language, time plus currency, and a favored keyboard/input method, and then click next.
Choose Repair your computer.
In the next system recovery options window, choose the drive where your Windows installation is and click next.
Click Startup repair in the next dialog.
Select System restore and follow the steps until the computer is repaired.
We already showed you how to fix Windows error recovery without CD. However, all methods may fail if there is a critical error with your Windows installation.
In such an instance, you need to repair the original Windows installation using the disk. Finally, should everything else fail, you may need to reinstall a fresh copy of Windows.
If you have connected your laptop through an HDMI cable to the TV and your sound is not working don’t be alarmed because there are a few tips and tricks in Windows 10 that you can do in order to fix the sound.
A few of the reasons why your sound is not working might be because the TV does not support audio output from an HDMI cable or because of the drivers in Windows 10.
Also by following the tutorials posted below you will quickly resolve your laptop HDMI to TV no sound problem in Windows 10 or perhaps find out how to get sound from your laptop to a tv with HDMI.
How do I fix no HDMI sound from a Windows laptop to a TV?
1. Change your Hardware and Sound settings
Press the Windows Key + X.
Select Control Panel.
Go to Hardware and Sound.
Under Sound, click on Manage audio devices.
Next, click on the Playback tab.
Then, right-click on the Digital Output Device (HDMI).
Afterward, check Set as Default Device, then click Ok.
Reboot your device.
If you want your sound to work through an HDMI cable you will first have to adjust some settings in Windows 8 or Windows 10.
2. Update your drivers
Press the Windows Key + S and type in Device Manager.
In the Device Manager, find the sound driver and expand it.
Right-click on your HDMI TV and select Update driver.
Let Windows check and update the driver.
Manually updating your PC drivers with the Device Manager requires time and it doesn’t always end up finding the latest compatible version.
2.1 Update the driver automatically
We recommend updating your sound driver automatically by installing a third-party driver updater that will scan your PC’s peripherals for new software versions.
Not only will this app make your life easier and remove any driver-related problems from your system, but it will also constantly update all of your drivers.
Therefore, get all your drivers up to date and avoid related system problems that can cause sound issues, all with the help of Outbyte Driver Updater.
3. Connect your laptop to a sound system
If your TV or your laptop does not support an HDMI audio output you will not be able to hear any sound, but there will be video output.
Having no HDMI audio support is not uncommon, and while it is unfortunate, there are physical workarounds for such a problem.
Mainly, you will need to connect the laptop to a sound system directly in order to have the sound enabled and good to go on the TV.
Therefore, you will need to connect something else to your laptop, which is not entirely optimal, but it works, and an audio system will provide better sound quality overall.
The connected audio system does not need to be speakers either. You can connect your headphones as well if you prefer.
4. The HDMI might have other problems
This issue may occur not only because of some audio components. It may also be the cause of a greater malfunction, like, the HDMI connection to a laptop or TV.
If you are looking for a new HDMI cable, we recommend choosing one from our top list of the best HDMI cables that you can find on the market.
After following these simple tutorials you should have your sound up and running in no time but if you still have questions about these issues please feel free to write us below in the comments section of the page.
Single Sign On (SSO) is a convenient way to log in to multiple applications and websites with a single user ID and password. In contrast, Multi-Factor Authentication (MFA) requires users to provide additional verification to prove their identity.
Most people are familiar with and have even set up their PCs with multi-factor authentication in Windows 11. In this article, we will compare Single Sign On vs Multi-Factor Authentication. We shall also discuss some of the most prominent solutions used in the market today.
Is there a difference between MFA and 2FA?
Multifactor authentication (MFA) and two-factor authentication (2FA) are two different approaches to the same goal: adding an extra layer of security to your accounts.
It’s common for people to use the terms interchangeably, or even incorrectly. But there is a difference between MFA and 2FA. 2FA is short for two-factor authentication, which is a type of MFA.
MFA makes it more difficult for unauthorized users to access your account by requiring a second authentication factor before logging in. A second factor is usually something you know (like a password), but it can also be something you have (like a phone).
With MFA, the second factor must be provided every time you sign in or perform any actions on your account. This means that if someone tries to log in using just their email address and password, they won’t be able to do so unless they have access to your mobile device.
What is the main advantage of Single Sign On?
1. Ease of use
Users can log in once with their credentials and then access all other applications that are part of the SSO system. This makes it easier for them because they don’t have to remember multiple sets of login credentials and passwords for different applications.
Also, when doing so, they will not have to deal with additional password prompts or any other issues that may occur due to using different passwords for each application or service.
The administrator can also benefit from a unified user interface when managing these accounts because they all share the same login page and interface, making it easier for them.
2. More secure authentication
SSO can greatly reduce security risks by reducing the number of credentials that attackers would need in order to gain unauthorized access.
By eliminating the need for each application to maintain its own authentication system, you can reduce the risk of sharing credentials across multiple systems or having your user database compromised by hackers who steal information from one site and use it on another site as well.
3. Reduces costs
Single sign-on (SSO) is a technology that allows users to authenticate themselves to multiple applications with a single set of credentials. It reduces IT support costs because there is only one password standard that needs to be enforced across all applications.
With SSO, users can access multiple applications without having to log in for each one separately. It can also enforce more robust password policies since they do not have to manage multiple rules for various applications or databases.
4. Centralized management
Because there are fewer components to manage, it’s easier to keep up with updates as they become available. All applications can use a single set of user profile information. This means that IT doesn’t have to create new accounts for users in individual systems.
Additionally, if one component fails, it doesn’t necessarily affect other components. This is because they’re not interconnected as they would be in a multi-component solution.
SSO is essential for some business functions, such as human resources (HR) applications, that require employees to access multiple systems throughout the day.
With single sign-on, users don’t have to enter their username and password before logging into each application separately.
This makes it easier for them to complete their tasks in less time and with greater efficiency. If you’re looking for ways to increase productivity in your organization, SSO is the way to go.
What are the best Active Directory tools with MFA and SSO integration?
While Active Directory is the heart of your organization’s infrastructure, it can be difficult to manage. There are many tools that can help you with management, but many of them don’t integrate with multi-factor authentication (MFA).
There are many ways to manage Active Directory while keeping it secure, including using MFA (multi-factor authentication) to protect your users.
ADManager Plus is a user-friendly and feature-rich administration and reporting tool for Active Directory. It allows you to easily manage your Active Directory environment, including but not limited to user accounts, groups, computers, and distribution groups.
The software comes with built-in support for multi-factor authentication (MFA). It can be used in conjunction with other apps to provide secure access to your network resources by requiring users to authenticate through an additional means after they have entered their credentials.
Other features include:
Simplified AD management activities
Bulk computer management
Audit management
ADManager Plus
Get the best Active Directory management tool to keep track of any network events easily.
ADSelfService Plus allows you to configure different security policies and access levels for different types of users in your company. For example, you can give some users the ability to reset their own passwords while others will not have this right at all.
ADSelfService Plus also supports multi-factor authentication (MFA) and single sign-on (SSO). If you’re looking for an AD solution with the best of both worlds, this here is the perfect fit for you.
Other features include:
Multiple layers of authentication
One-click sign-on to integrated apps
Self-service audit reports for password changes
ADSelfService Plus
Sign on once or enable MFA for multiple applications with a tool that offers the perfect SSO and MFA for Active Directory.
ADAudit Plus is a cloud-based tool that allows you to monitor and manage all of your Active Directory users, groups, and computers. It also has the ability to monitor for changes in policies and configurations.
Although you can enable SSO in ADAudit Plus, you have to do it through a third-party access management service such as OneLogin or Okta.
You can use it to identify users whose accounts are configured in a way that makes them vulnerable to phishing attacks.
Other features include:
Integration with third-party tools
Fulfils most compliance standards
Comprehensive search feature
ADAudit Plus
Ensure security and compliance in your network with the best Active Directory auditing tool.
If you have SSO, then you don’t need MFA. This is because when you log in, you are already authenticated before you enter your password. However, the big question is whether SSO is more secure than MFA. While SSO may be ideal in several situations, it is not perfect.
In some cases, it’s not a good fit as it raises some security concerns with SSO. For example, if someone breaks into a company server, they can get all the user credentials. Once they access all the different servers, they become compromised.
If you want to ensure that no one can get access to your account if they steal your password, then you should enable multi-factor authentication (MFA). Further, some reliable password managers will also come in handy if you don’t want to burden yourself with remembering all your passwords.
If you’ve experienced either SSO or MFA on your AD, we’d love to hear your input and which one you prefer between the two. Share your thoughts in the comments section below.