5 Ways to Fix Kernel Security Check Failure on Windows 11 + Video

Some users have reported seeing the Kernel Security Check Failure error message in the BSoD screen that is caused by some failing processes on their PCs. This issue is not the most difficult to solve, thankfully.

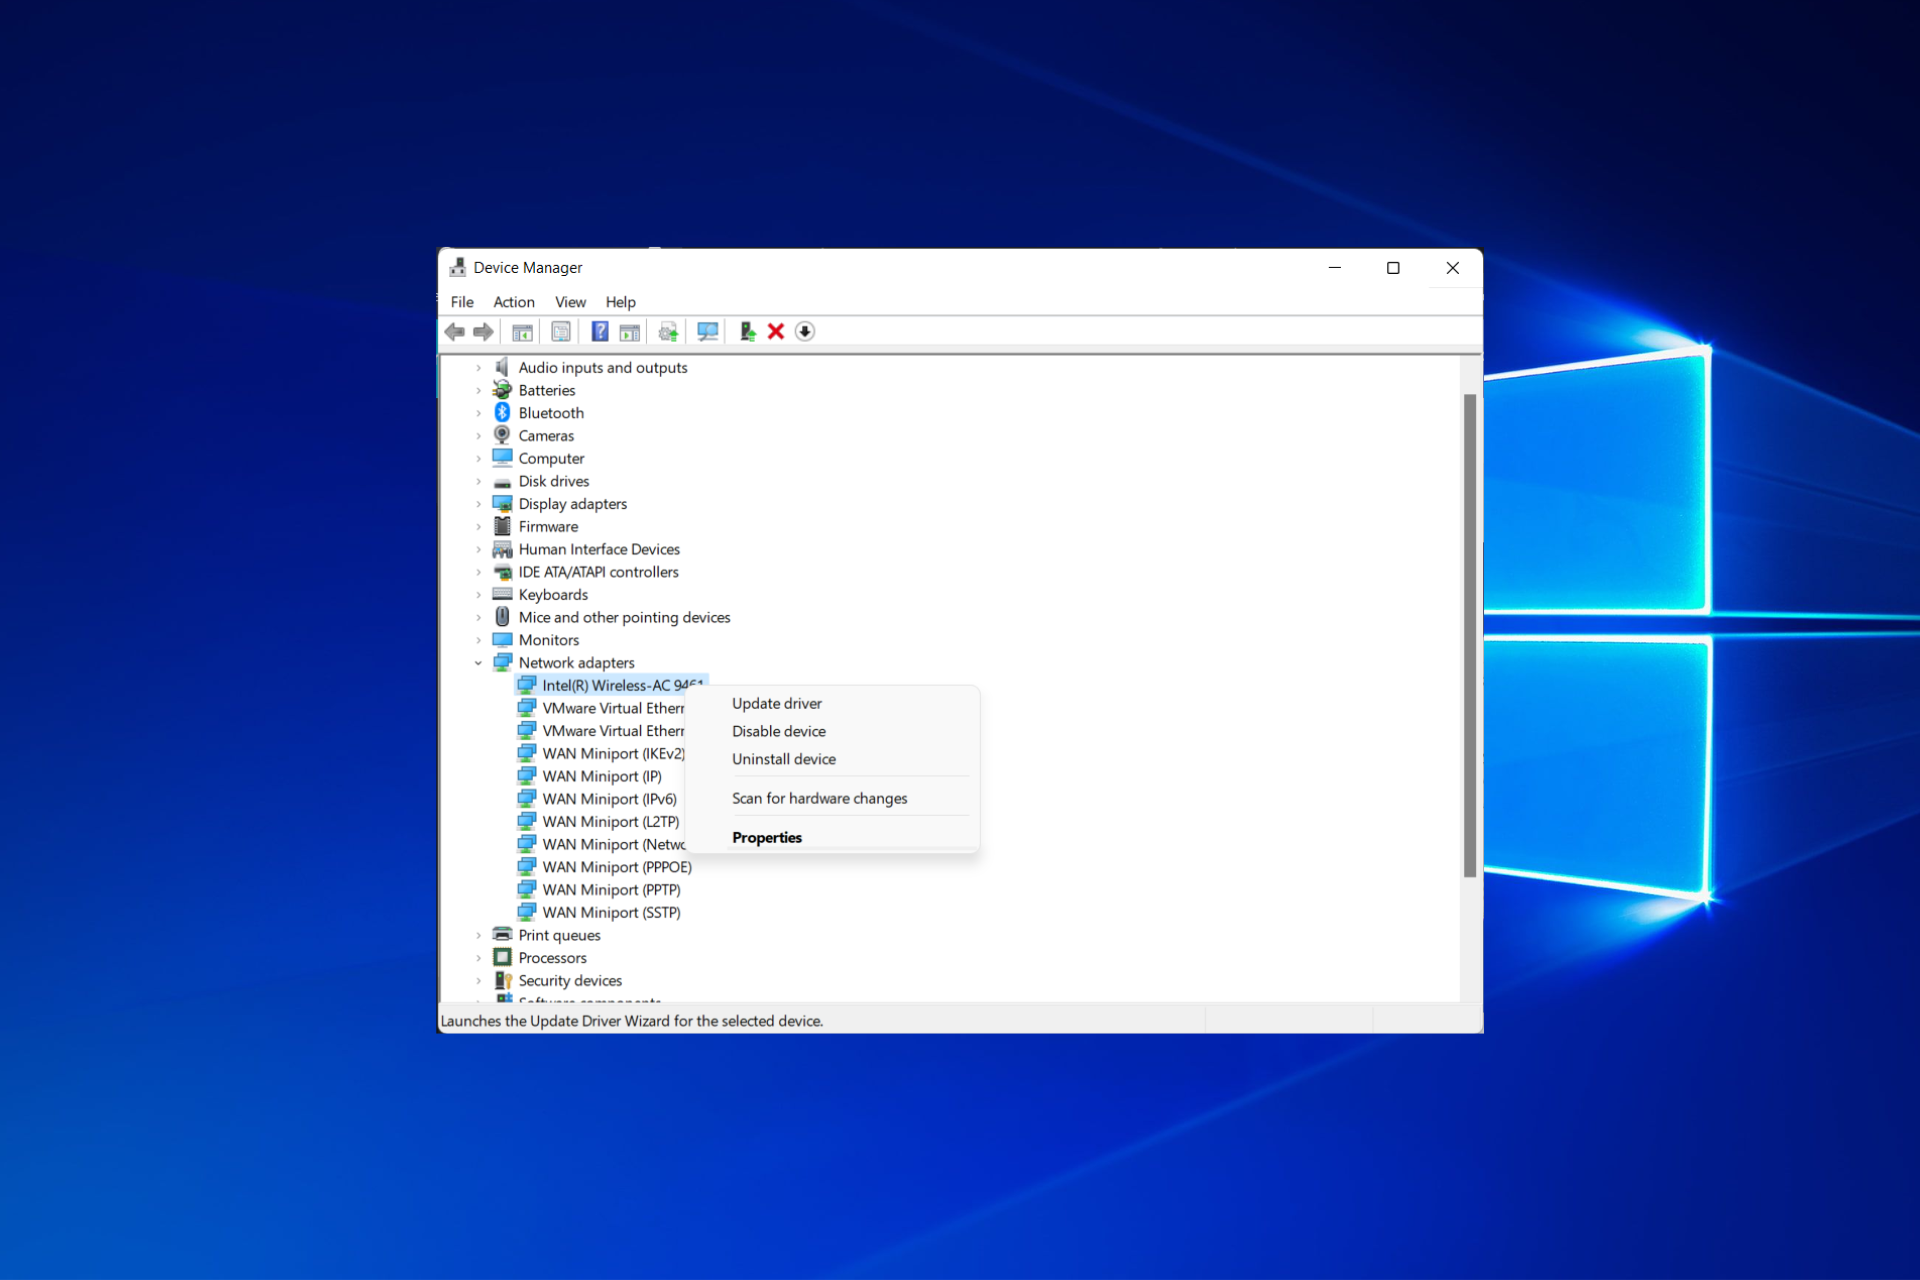
From our experience, this is caused by driver-related issues so updating them will fix the BSoD quickly.

How can I fix Kernel Security Check Failure in Windows 11?

1. Update drivers

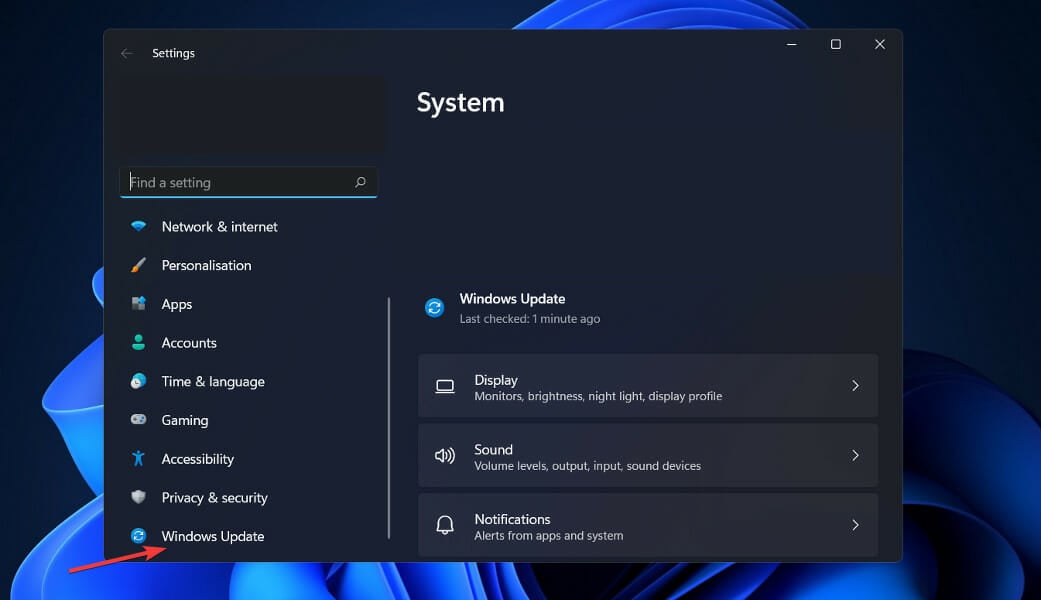
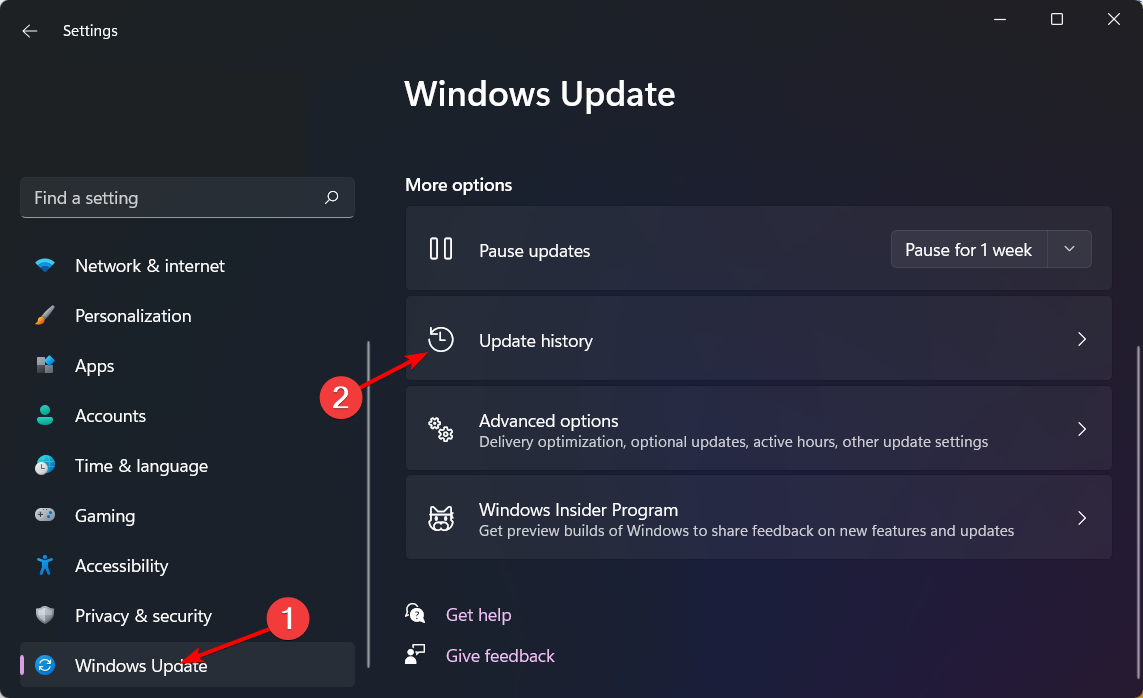
  1. Press the Windows key + I to open the Settings app, and click on Windows Update.
  2. Now, select Advanced options.windows-update-advanced-options kernel security check failure windows 11
  3. In the Additional options section, click on Optional updates.
  4. Tap on the Driver Updates option then select all the available updates and click on the Download & install button.download-install-drivers

Driver updates are often handled by Windows, but if you encounter an issue, you can perform a manual search. Also, you can go to the manufacturer’s website to download the driver update.

This has especially proved effective for those having the AMD Audio Co-processor driver and facing the Kernel Security Check Failure on Windows 11 while trying to use WSL 1. Downloading the AMD auto-detect and running it to update the driver has helped fix the issue.

However, there is always the risk of installing the wrong drivers with the manual method. Hence, we will recommend using the greatest driver update software.

2. Update Windows

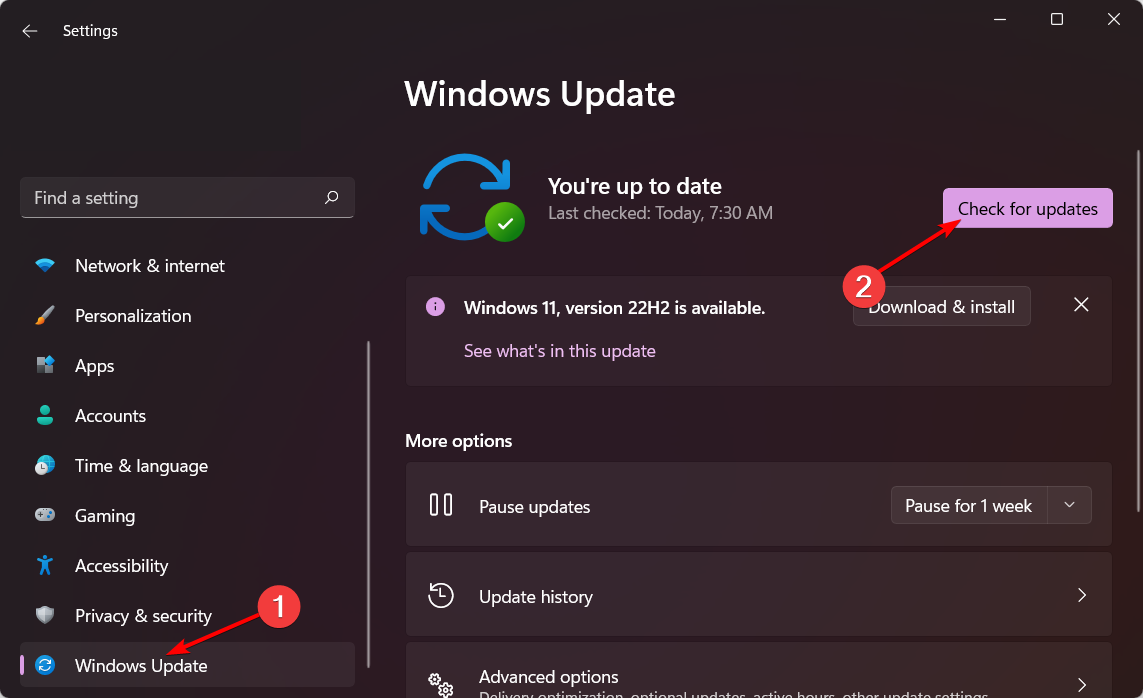
  1. Press the Windows key + I to open the Settings app and click on Windows Update in the left pane.windows-update-settings kernel security check failure windows 11
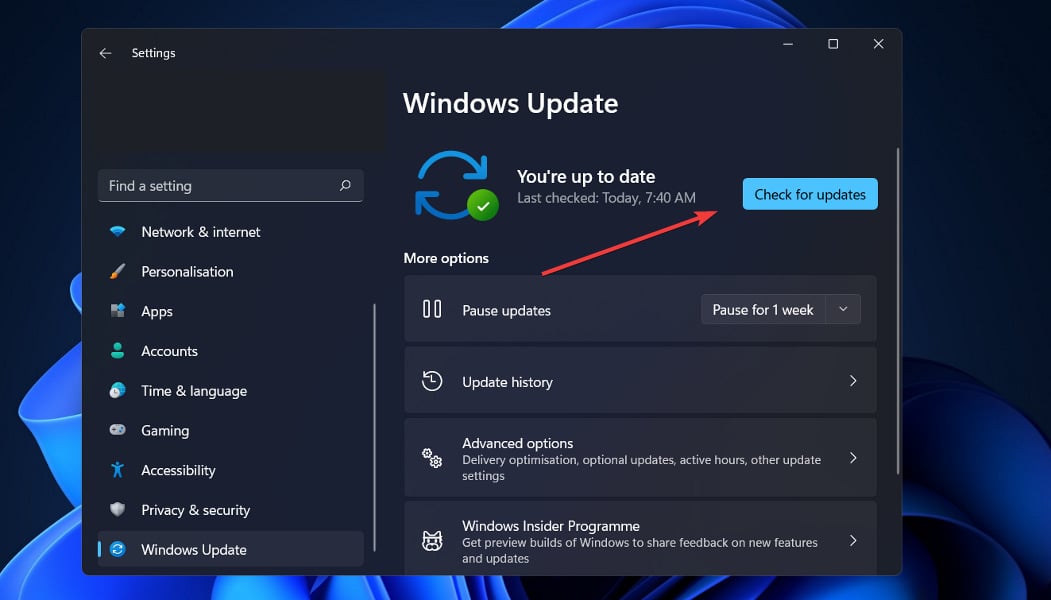
  2. Click on the Check for updates button.checl-for-updates kernel security check failure windows 11

Running an outdated version of Windows can lead to so many problems. In this case, you need to install the latest Windows 11 update to fix the Kernel Security Check Failure issue.

This is because Microsoft might have addressed the causes of the issue in a new update.

3. Use the Windows Memory Diagnostic Tool

  1. Press the Windows key + S, type in Windows Memory, and select Run as administrator under Windows Memory Diagnostic.windows-memory-diagnostic kernel security check failure windows 11
  2. Click on the Restart now and check for problems (recommended) option and let Windows Memory Diagnostic run.memory-diagnostic-option kernel security check failure windows 11

The Kernel Security Check Failure on Windows 11 might also be down to issues with the memory. The scan above should give you a report on the state of the memories. If memory is faulty, you might need to replace it.

4. Run the SFC scan

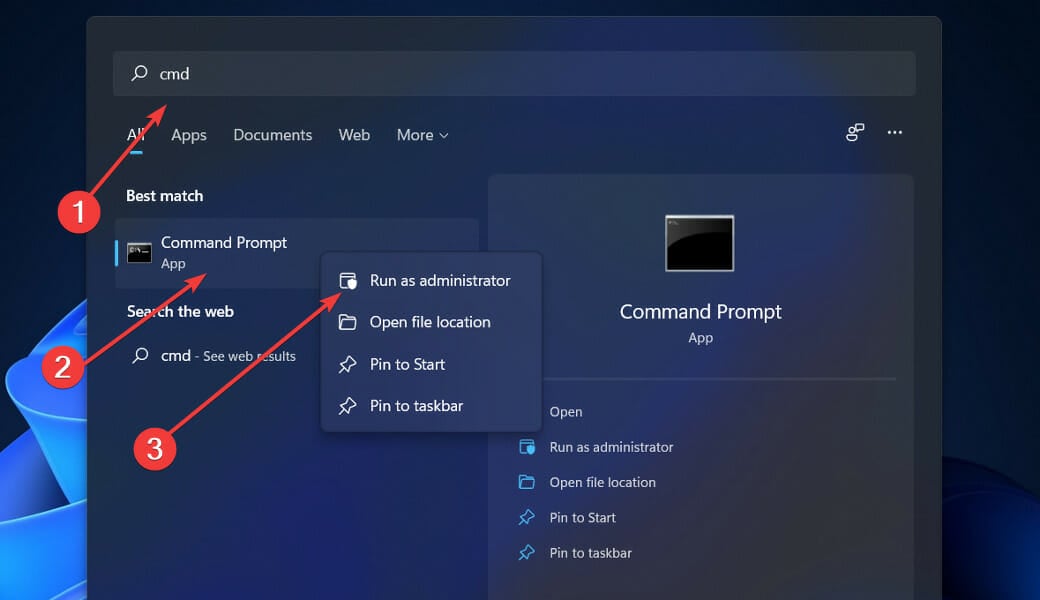
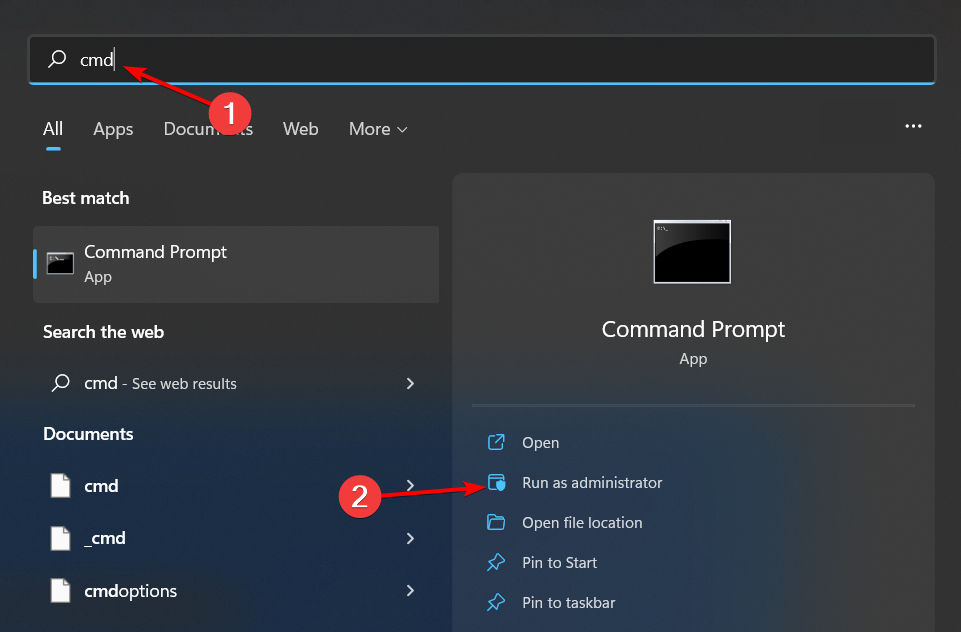
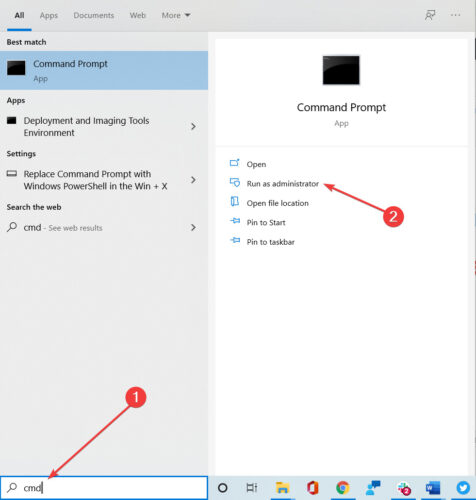
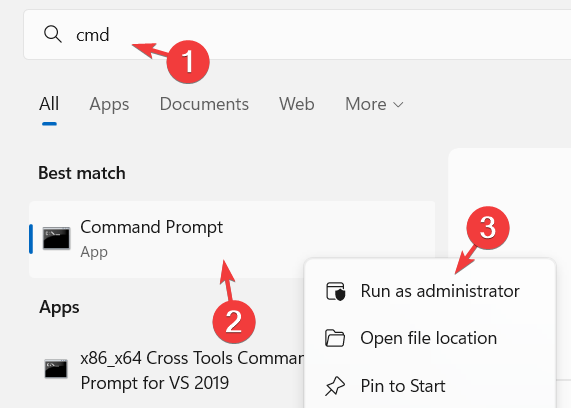
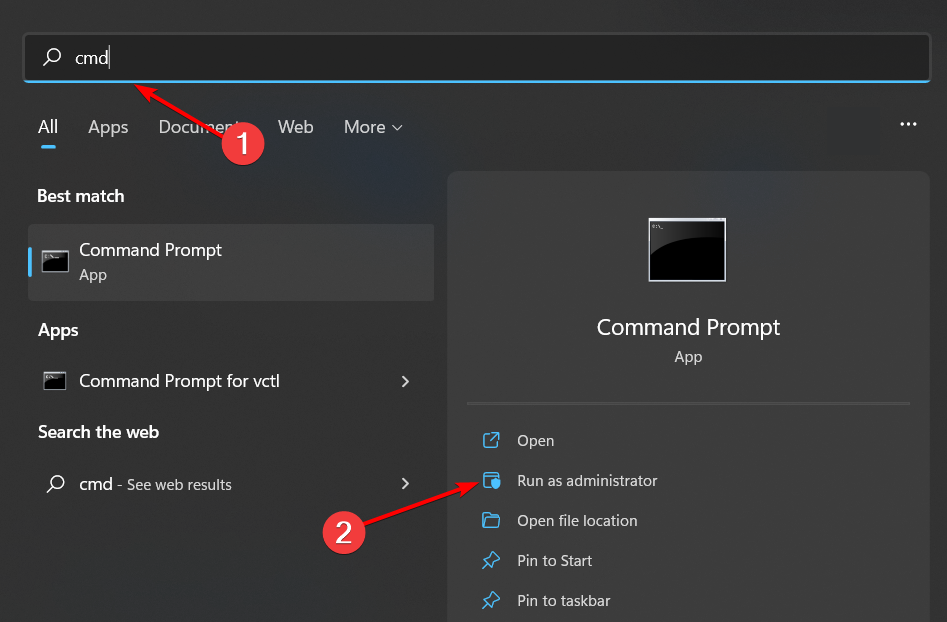
  1. Press the Windows + S key to open the Search bar, then look for cmd, and right-click on the most relevant result to run it as an admin.cmd-search-admin kernel security check failure windows 11
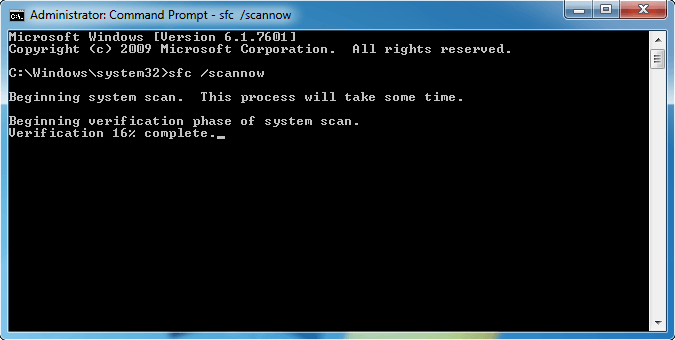
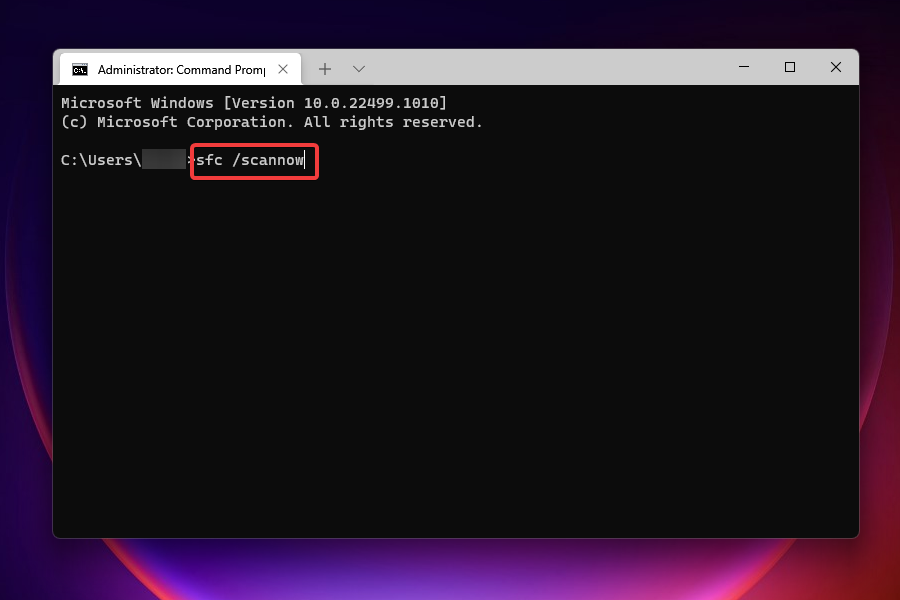
  2. Type or paste in the command below to run the process and press Enter:
    sfc /scannowsfc-scan-windows-11 kernel security check failure windows 11
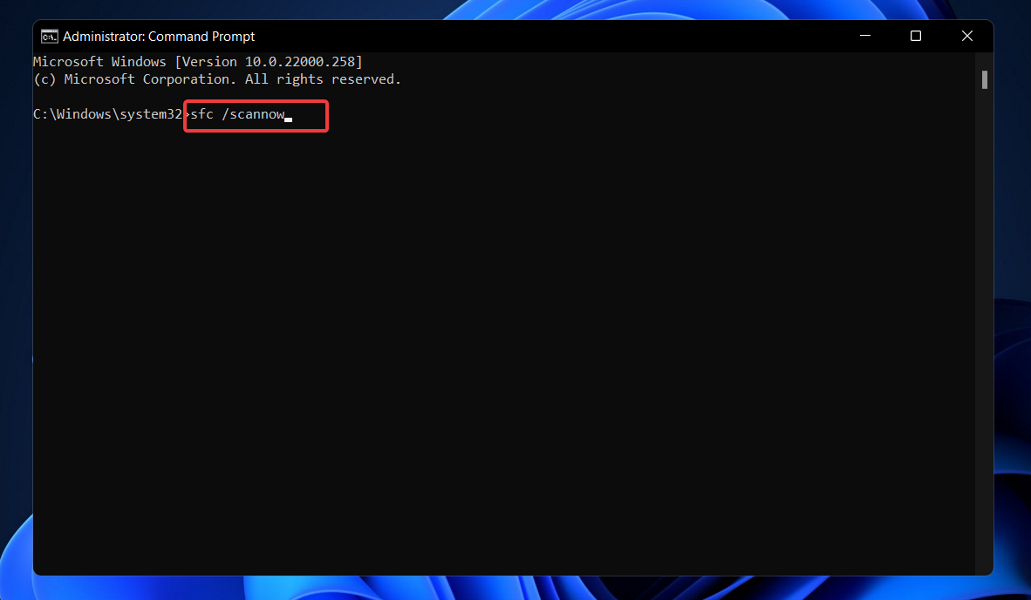
Sometimes, the Kernel Security Check Failure might lead to your PC not restarting. In this case, the issue might be due to faulty system files.

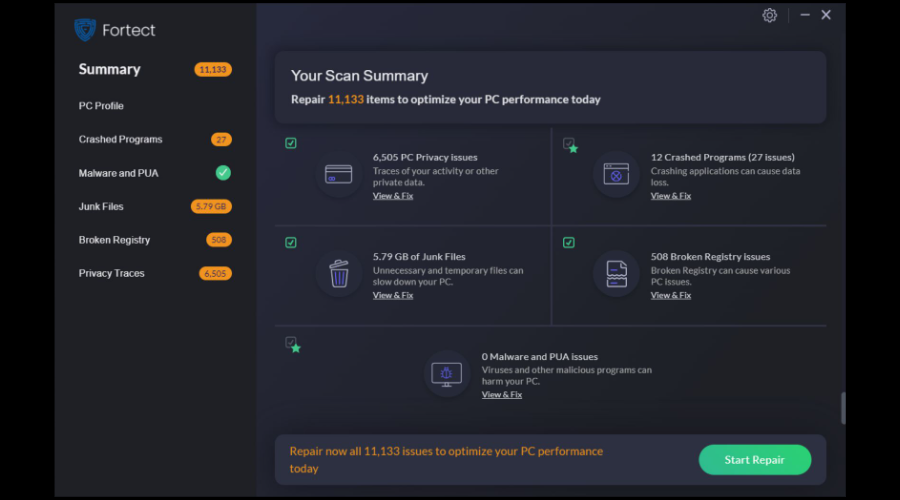
Therefore, we will advise using a dedicated PC repair tool. It will scan for all broken system files and replace them with the original versions. At the same time, it will solve any BSoD errors automatically with just a few clicks of the mouse.

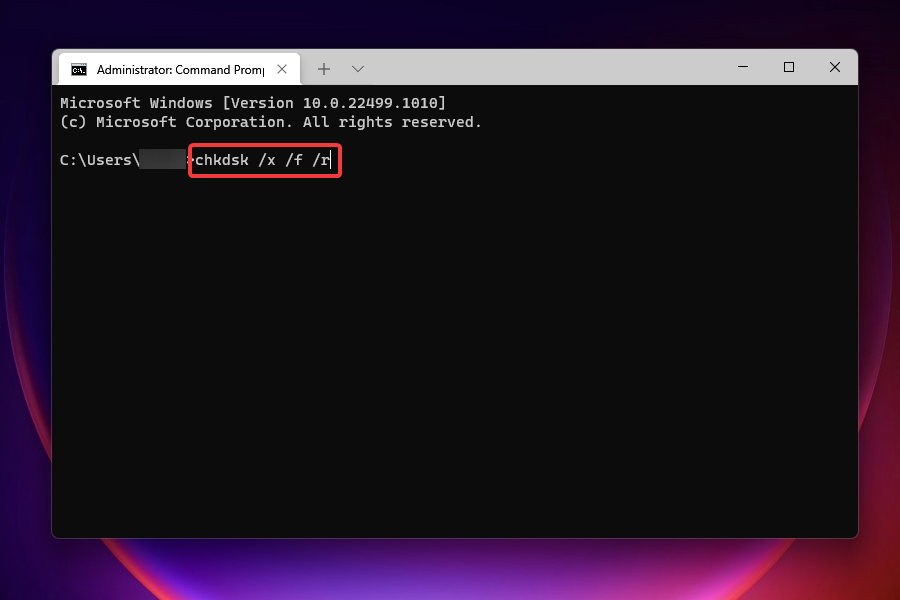
5. Use the CheckDisk tool

  1. Press the Windows key + S, type cmd, and select Run as administrator under Command Prompt.cmd-search-admin kernel security check failure windows 11
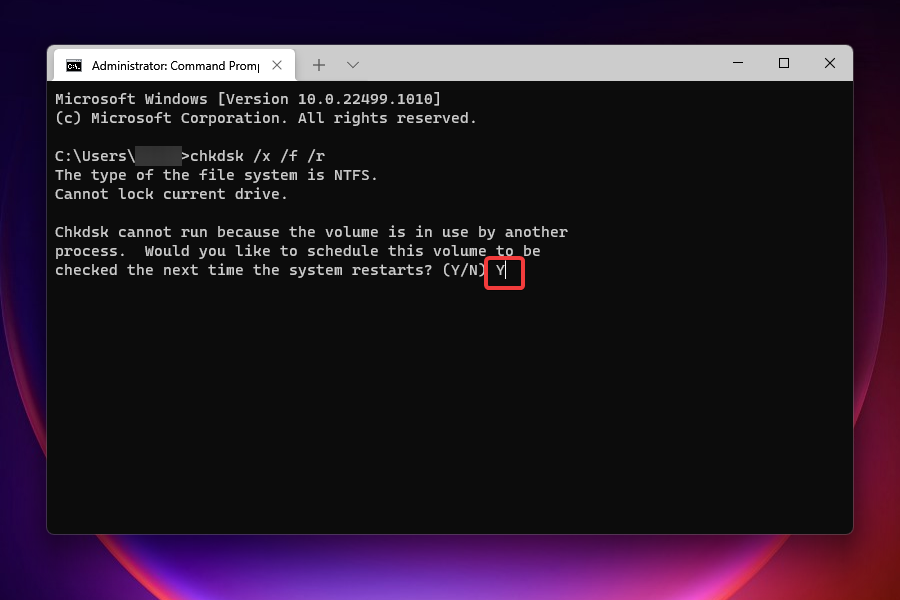
  2. After the Command Prompt launches, type in the following command and press Enter:
    chkdsk C: /f /r /xchkdsk kernel security check failure windows 11
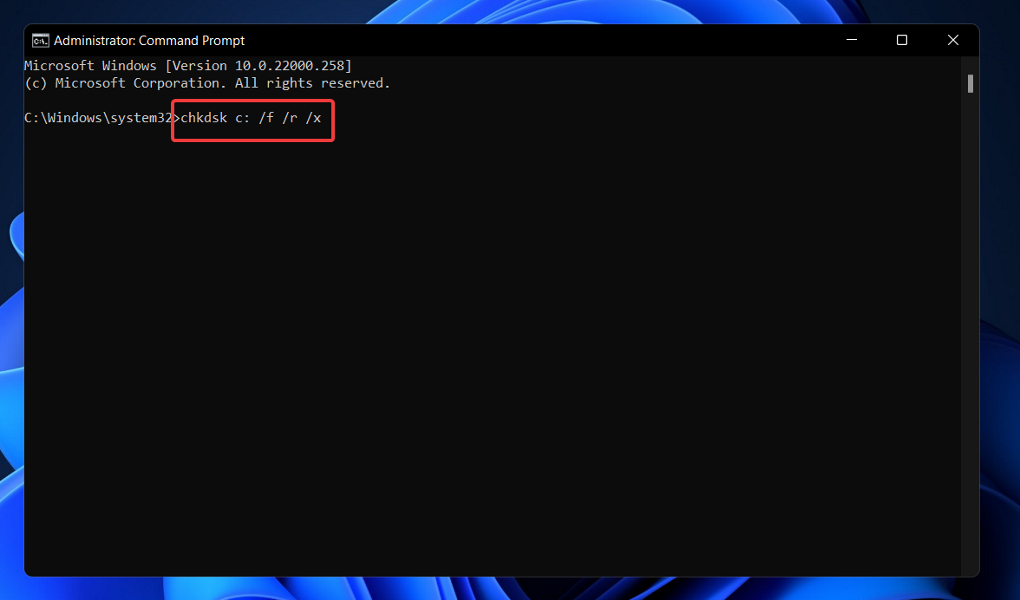
If your drive is faulty, it might cause the Kernel Security Check Failure on startup on Windows 11. The CHKDSK command will help to scan for issues with drive and try to fix them.

The Kernel Security Check Failure on Windows 11 issue can be pretty frustrating. However, it is not the most difficult to fix if you follow the steps in this guide carefully. Read below if you need more information about this issue.

What is Kernel Security Check Failure?

The Kernel Security Check Failure error depicts that some important system files or components failed integrity or compatibility check. The easiest way around it is to replace or update these files or components.

What causes the Kernel Security Check Failure?

When troubleshooting an error, it is critical to have a clear understanding of the factors that caused it. Because of this, we have highlighted some of the most prevalent causes that might trigger a Kernel Security Check Failure error:

  • System files that have been corrupted – Even Microsoft makes mistakes from time to time, releasing flawed upgrades that cause the system to crash without the user’s knowledge or approval.
  • Hardware that is incompatible with or malfunctioning – A stop code can be generated by unseated hard drives, RAM chips, or unsecured connectors. Check that all hardware components are securely fastened, especially if your computer was recently opened. To be on the safe side, unplug and then reseat all of these components.
  • Drivers that are out of date or unsuitable – Oftentimes, old or incompatible program files or device drivers might cause intermittent BSOD STOP errors.
  • Using an older version of Windows – Staying up to date with your OS version is generally recommended as the new updates might fix bugs that you didn’t even know existed in the first place.

To avoid having to deal with kernel issues, you can check how to avoid Kernel Security Check Failure errors.

Kernel debugging is perhaps one of the most useful skills you can have, and we’ve put together a guide on how to debug the Windows kernel to help you out.

Another common error is Kernel Stack Locked At Exit, but we covered it in a separate guide, so don’t miss it. We also have a new article on the Kernel_Thread_Priority_Floor_Violation error, so feel free to visit it.

Please let us know the solution that helped you solve this problem in the comments below.

Fix: GPU Crashes When Playing Games [5 Quick Ways]

If you’ve ever played a graphically intensive game and seen the screen go black or your computer suddenly freezes, keep reading. Today we’ll show you how to fix common GPU crashes.

How can I fix my GPU if it crashes when playing games?

First, make sure your game meets the system requirements. Also, avoid overheating, and close any unnecessary background apps.

Now, proceed to the following solutions.

1. Lower your graphics settings

If you’re experiencing crashes while playing games, try setting the game’s resolution lower than its default setting and lowering the other graphics settings while keeping an eye on the frames per second (FPS) counter. 

Here are recommended settings for better performance:

  • Resolution: Lower the resolution to 1080p (1920×1080) or 720p (1280×720) if you’re experiencing severe crashes.
  • Texture Quality: Set textures to Medium or Low to reduce the strain on your GPU.
  • Shadows: Set shadows to Low or Off for better performance.Anti-Aliasing: Use FXAA or Turn Off anti-aliasing to improve stability.
  • FPS Cap: Cap your FPS to 60 for smoother performance. If your system struggles, try capping at 30 FPS.
  • V-Sync: Try enabling V-Sync if you experience screen tearing, or disable it if it causes input lag.
  • Field of View (FOV): Set FOV between 70-90 degrees to reduce the load on your system.

2. Clear disk space

Over time, the amount of information on your computer gets fragmented and eventually causes performance to lag. This is true for both hard drives and solid state drives (SSDs). The more space a file takes up, the more fragmented it becomes. 

If you’re running out of hard drive space, it may be time to delete some files. Just remember that you should always back up important files like pictures and documents first if there’s any chance that you might need them again.

3. Update your graphics card

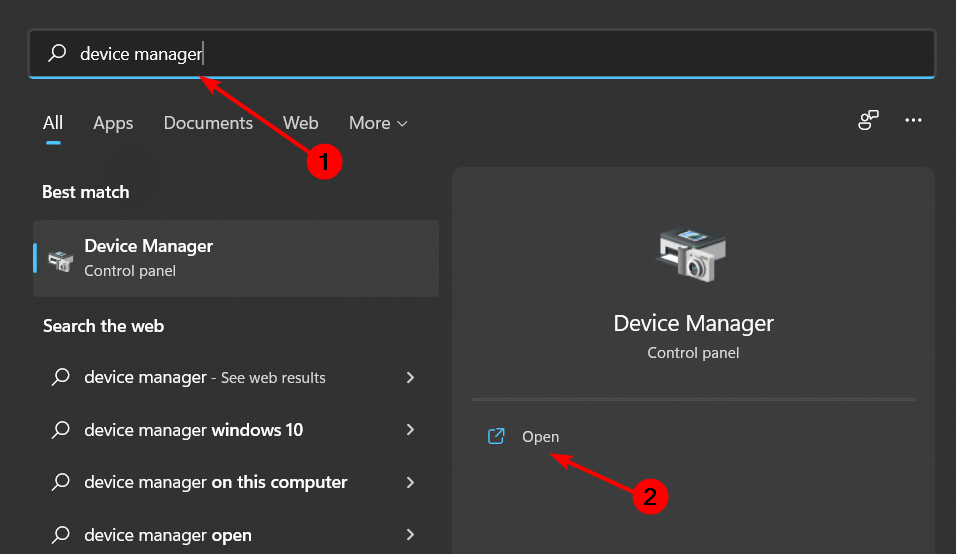
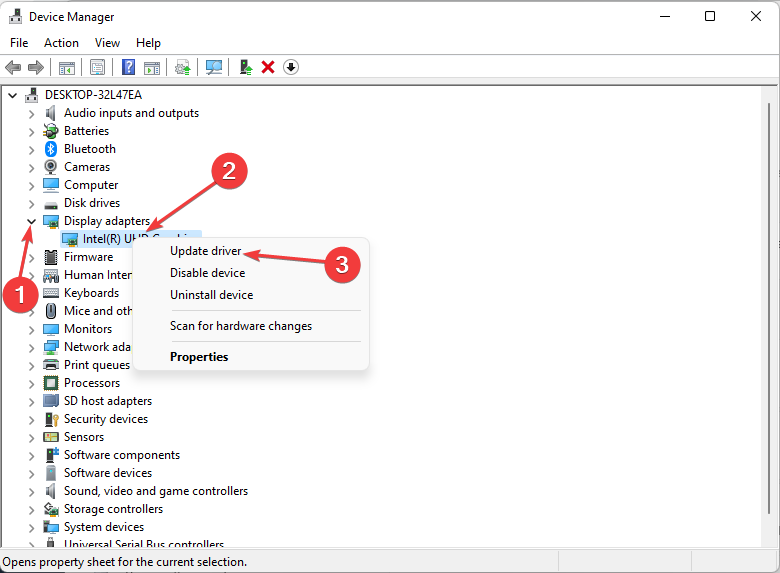
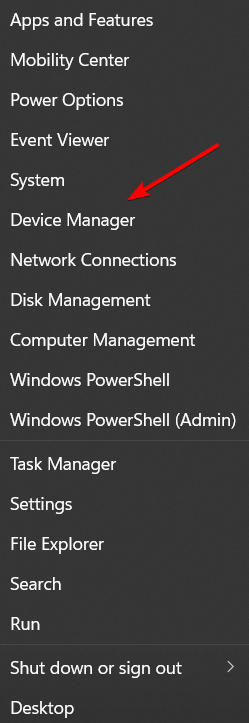
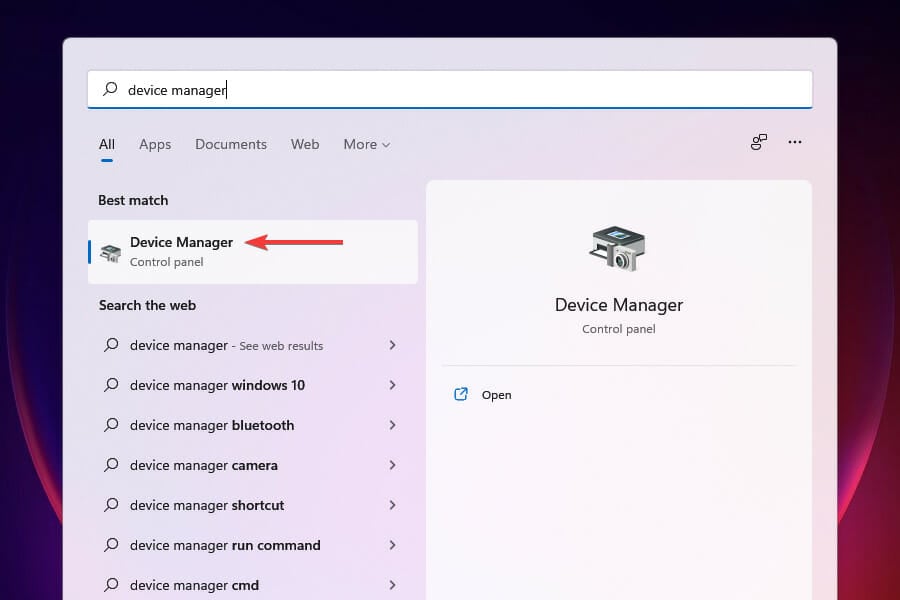
  1. Press the Windows key, type Device Manager in the search box, and click Open.
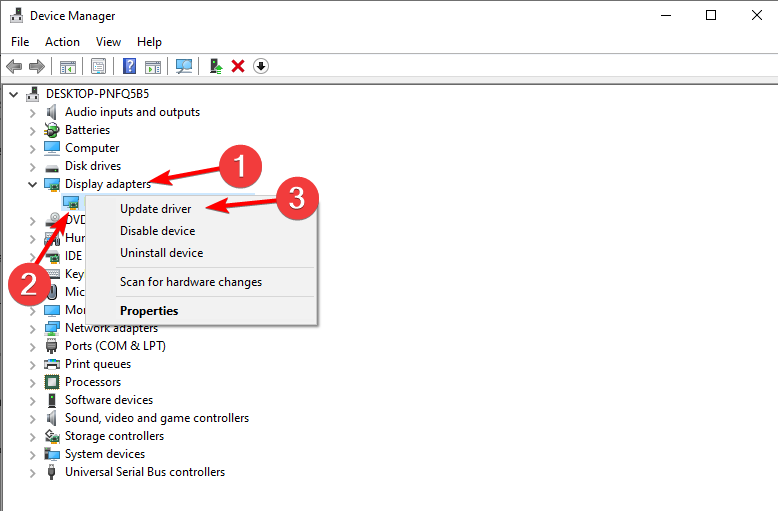
  2. Navigate to Display adapters, right-click on your graphics card, and select Update driver.Graphic Driver Update
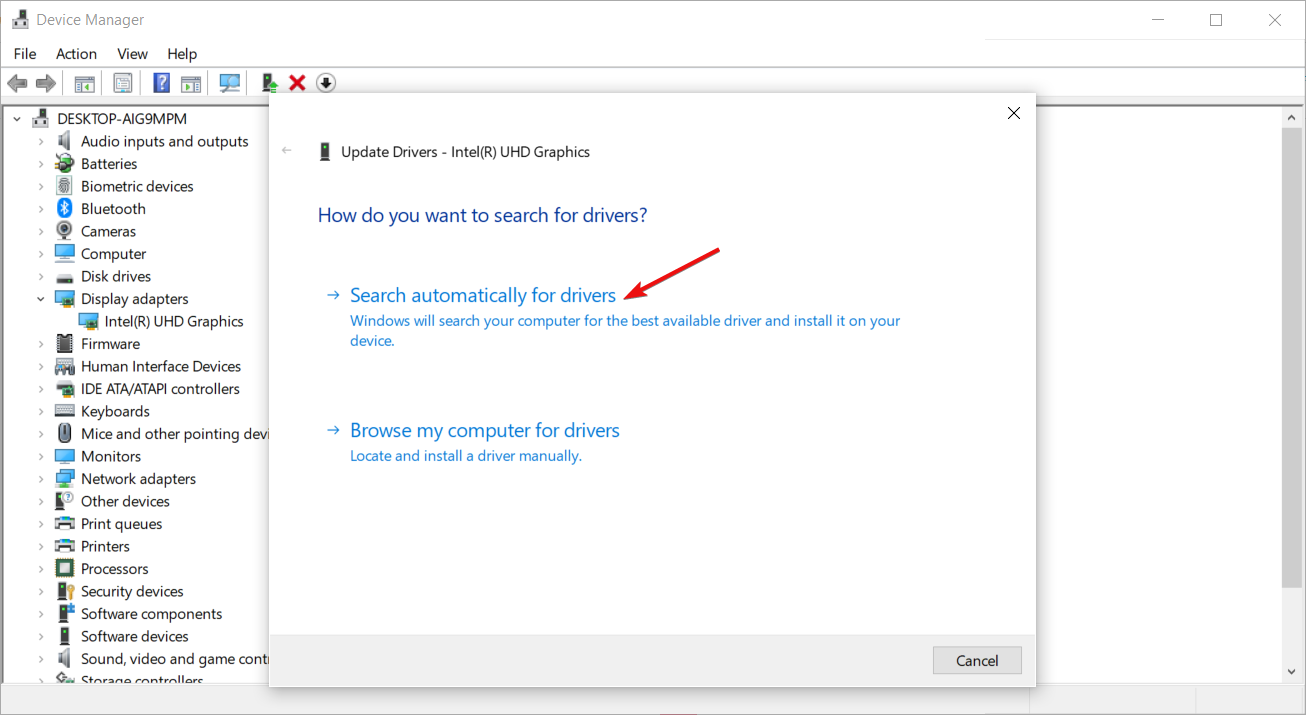
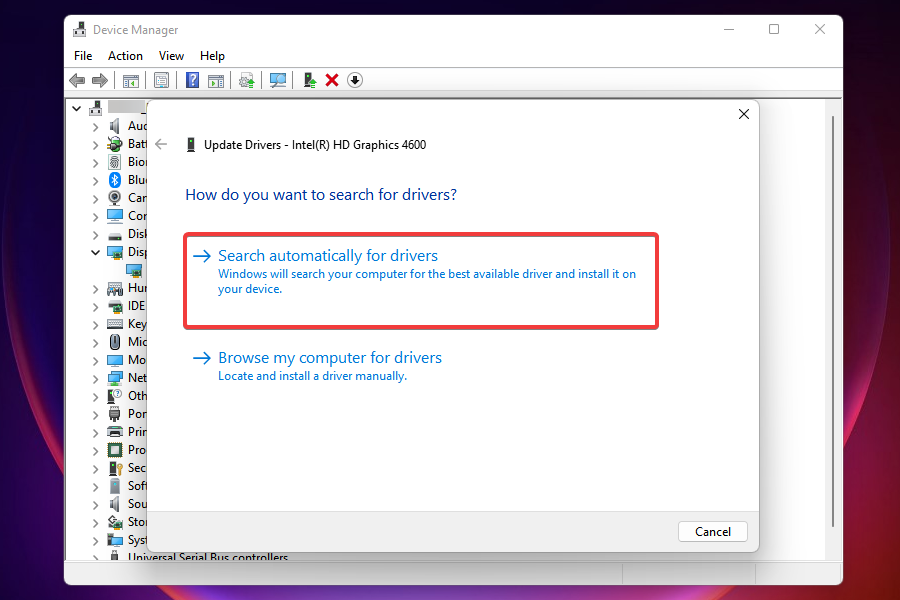
  3. Select Search automatically for drivers.

4. Scan for viruses

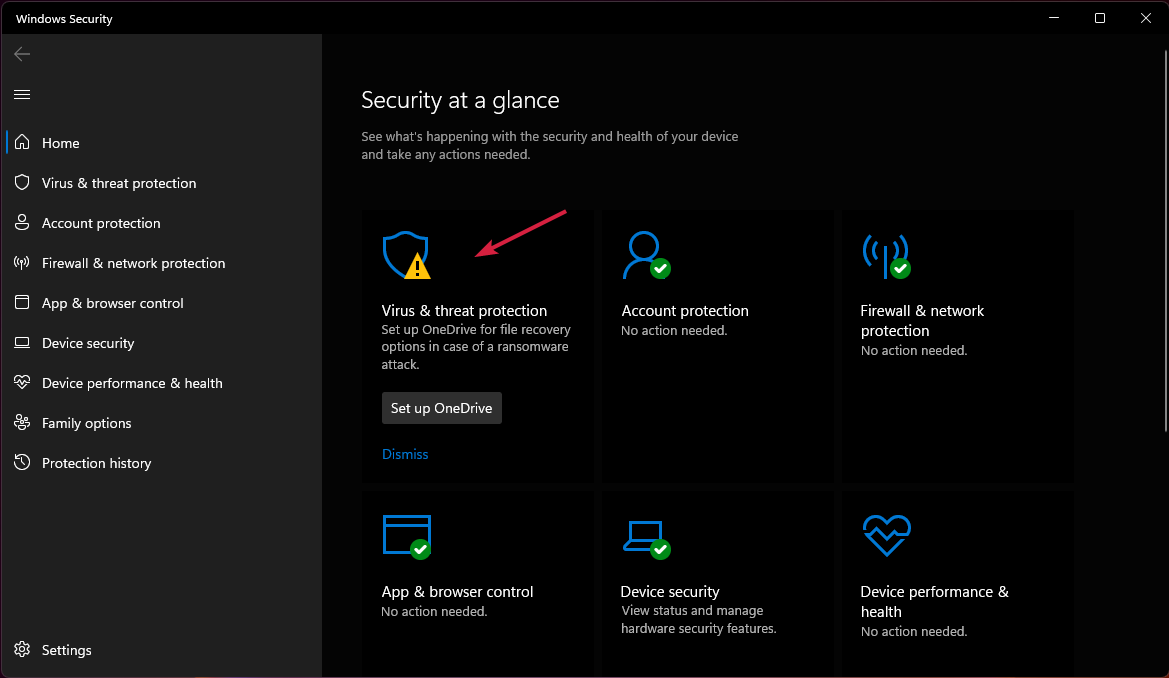
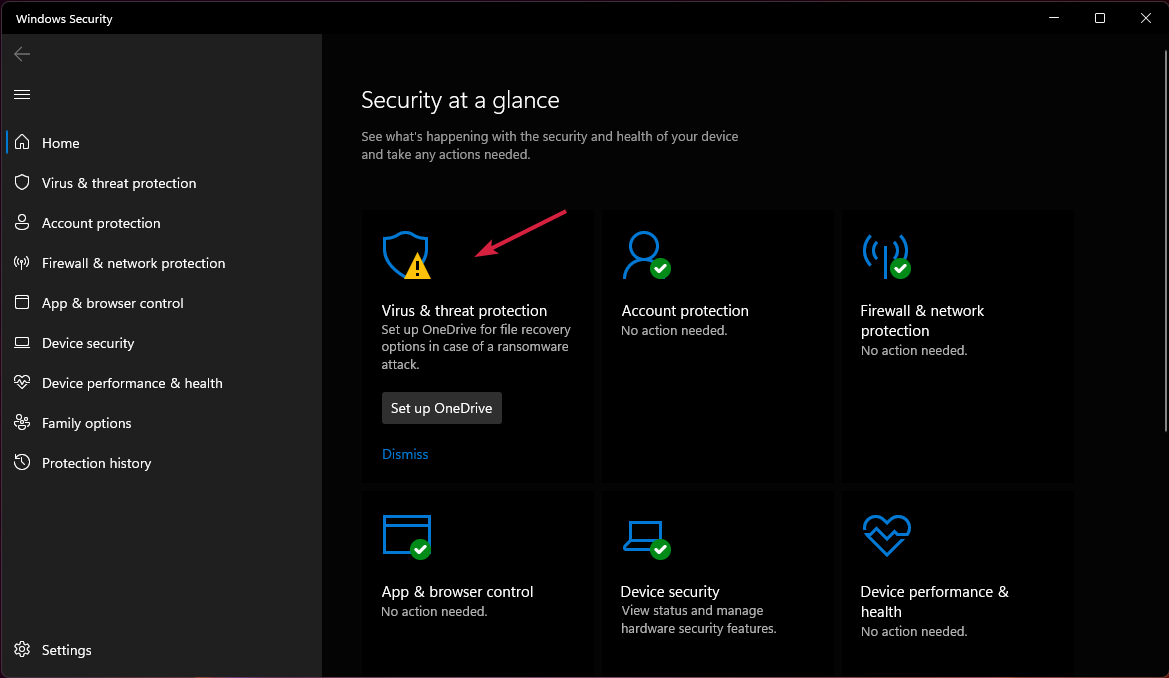
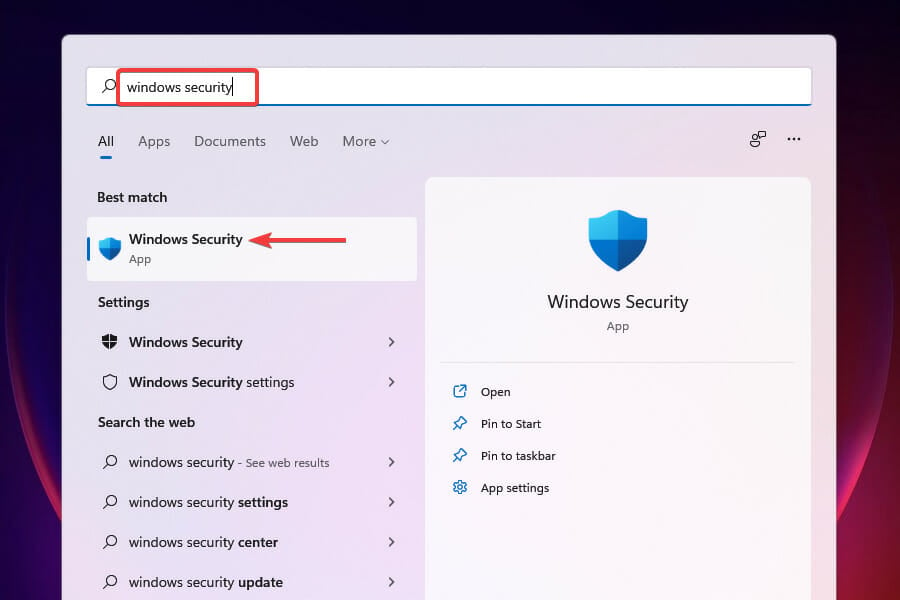
  1. Press the Windows key, search Windows Security and click Open.
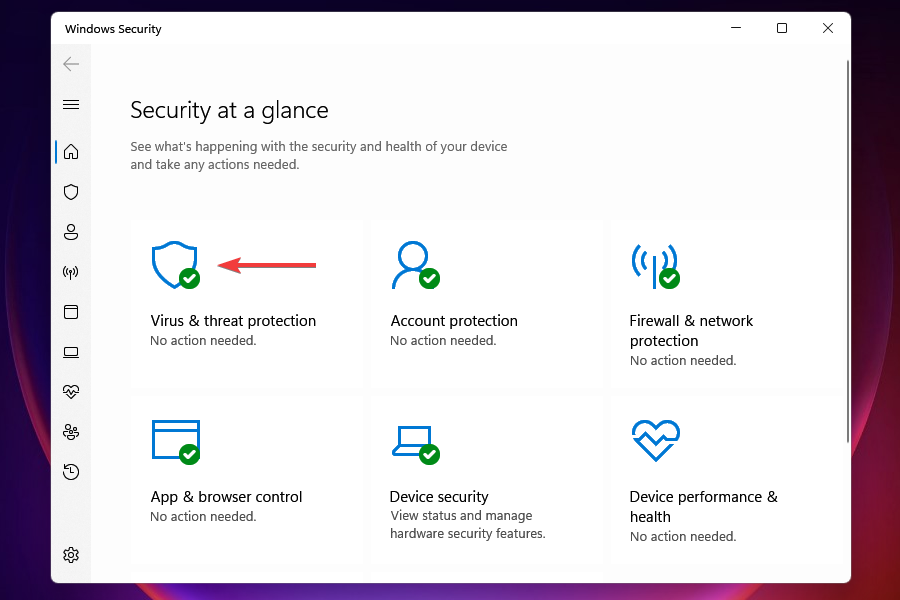
  2. Select Virus & threat protection.
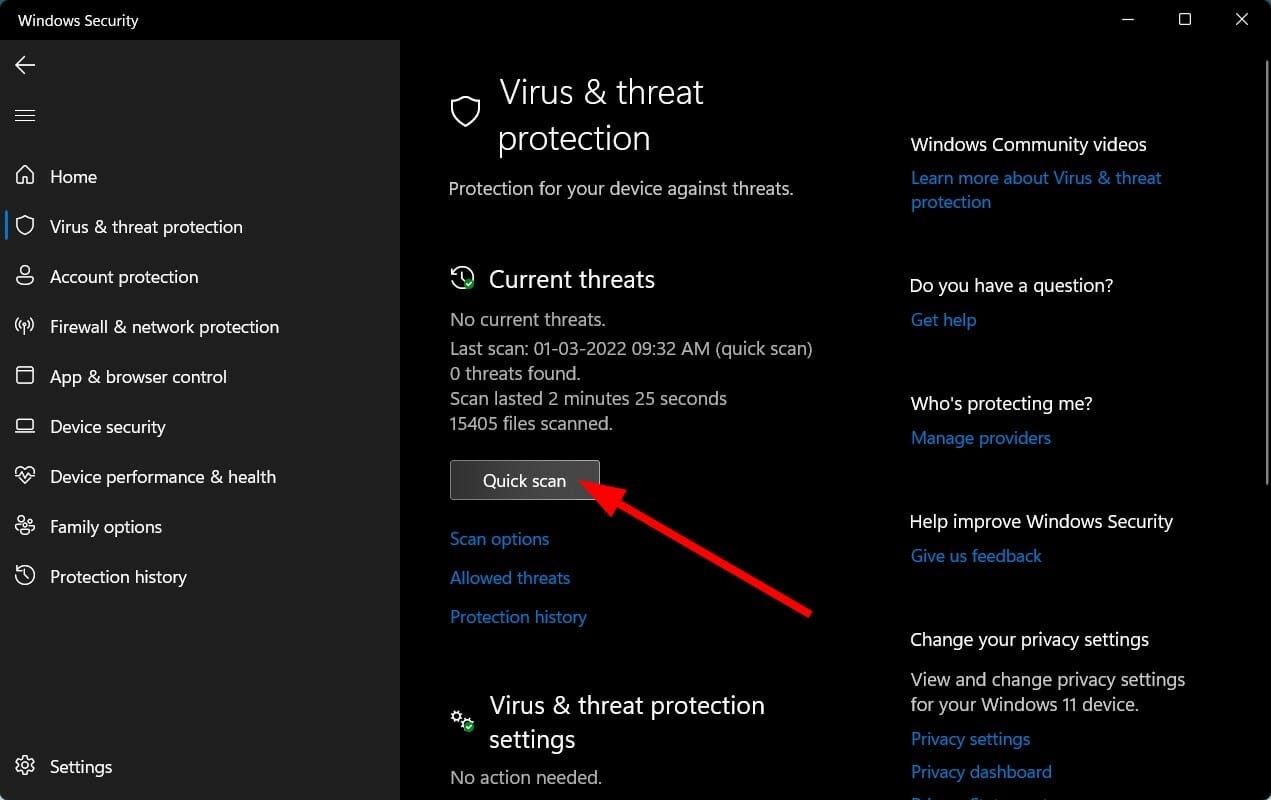
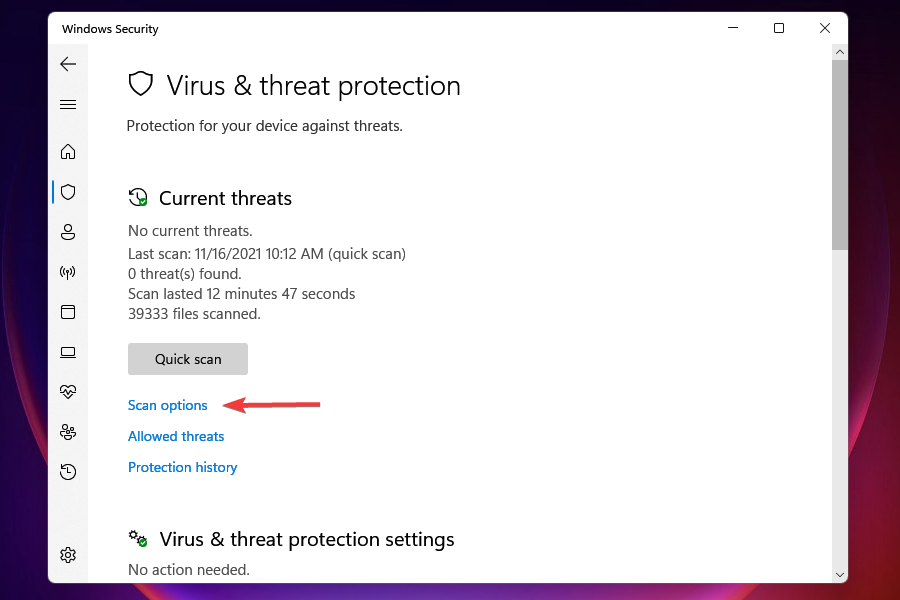
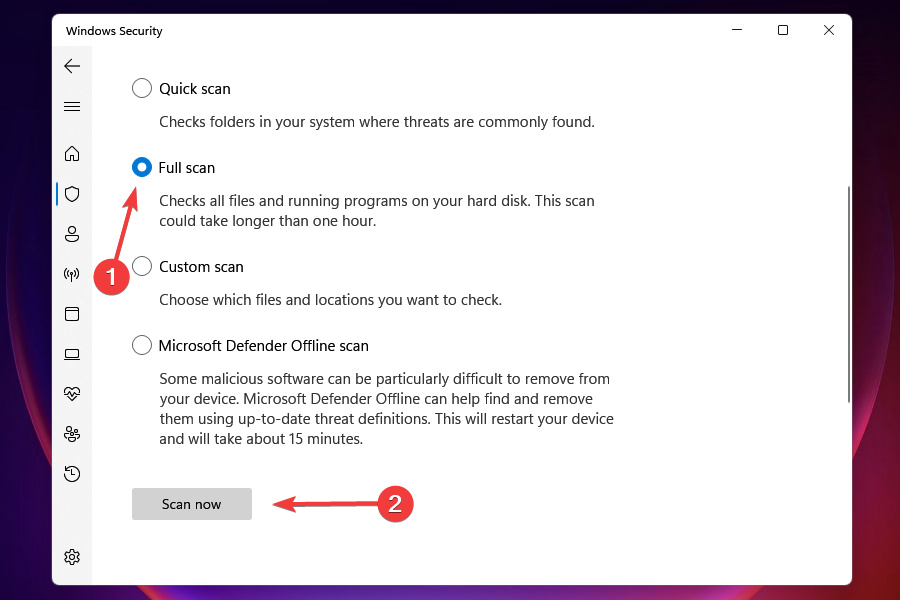
  3. Next, press Quick scan under Current threats.
  4. Wait for the process to finish and restart your system.

5. Update your OS

  1. Hit the Windows key and select Settings.settings windows 11
  2. Click on Windows update, then select Check for updates.check-updates-w11 windows 11 blue screen
  3. Download and install if any are available.

Why does my GPU crash when I play games?

There are a ton of reasons why your graphics card (GPU) could be crashing when you try to play games. Here are some of the reasons:

  • Low memory – It’s possible that you don’t have enough memory to play a game and it’s causing crashes.
  • Overheating – If your computer gets too hot while you’re playing games, then it will crash. You can install resource monitor software to stay on top of things.
  • Old graphics card – If you are playing a graphics-intensive game, it’s likely that the problem stems from age and wear and tear on the computer including the graphics card itself.
  • Virus infection – If you have a virus, your computer’s hardware will be affected, and that can manifest in the way your GPU works. It’s always good to install an antivirus program.
  • Outdated graphic card drivers – Many times, these problems are caused by outdated drivers. You need to update your graphics card to newer versions of Windows.
  • System requirements – If your PC crashes only when playing games, you may be playing a game that requires more graphics processing power than your graphics card can handle.

How do I know if my GPU is dying?

No matter what kind of computer you’re using, it’s likely that one day you’ll see some kind of graphics error or computer crash while in the middle of a game. These errors can be caused by different factors, and can even be attributed to normal wear and tear on your computer.

But there are warning signs that might help you decide whether your GPU is dying before things get worse and you end up stranded without a way to play your favorite games.

If you’re seeing any of the following warning signs, it’s time to get a new GPU: 

  • Frequent Blue Screen of Death when playing
  • Your graphics card doesn’t support the latest games or programs 
  • Games take longer than usual to load 
  • Your computer starts running slower than usual 
  • The screen randomly shakes or vibrates

We also have recommended fixes for when your PC keeps crashing while gaming so be sure to check that out.

In case your GPU has reached its end of life, it may be time to upgrade to a new GPU for gaming. This guarantees you enhanced performance whenever you are playing games and lowers the risk of frequent crashes.

We also have the best gaming settings for Windows 11 to ensure you get the most out of your PC and game.

For any additional thoughts on this topic, let us know in the comments section below.

0x800f0805 Windows Update Error: 5 Ways to Fix it

Keeping your system up to date is important, but sometimes update issues can occur that can prevent you from doing so. Such is the error code 0x800f0805.

These issues can appear on any version of Windows as they are quite resilient, and come in different identification codes. It’s most often present on Windows 10 and Windows 11.

What is error code 0x800f0805?

The update procedure is unable to be carried out at the present time, which is indicated by the occurrence of the error code 0x800f0805. This error may have happened as a result of any misconfigured or corrupted Windows system files.

However, in most cases, update errors appear if there are issues with required services, and starting them usually fixes the problem. Also, some users came across the 0x800f0805 Windows 10 activation error, which, too, is easily fixable.

How do I fix error 0x800f0805?

Before proceeding to more advanced troubleshooting solutions, try the following steps:

1. Create a Wufix.bat file

    This miracle file put together by Microsoft will not only run the SFC and DISM scans but will also stop the Windows Update service which will force the update download to install. The Windows Update error 0x800f0805 will be fixed afterward.

  1. 1. Press Windows, type notepad, and open the first result.

    notepad 0x800f0805
  2. 2. Copy and paste the following commands: SC config trustedinstaller start=auto net stop bits net stop wuauserv net stop msiserver net stop cryptsvc cd %windir% Ren SoftwareDistribution SoftwareDistribution.old cd %windir%\System32 Ren Catroot2 Catroot2.old dism /Online /Cleanup-image /ScanHealth dism /Online /Cleanup-image /CheckHealth dism /Online /Cleanup-image /RestoreHealth dism /Online /Cleanup-image /StartComponentCleanup Sfc /ScanNow

    0x800f0805 notepad-commands
  3. 3. Then select File followed by Save as.

    file-save 0x800f0805
  4. 4. Here, select Desktop from the left side to save the file there, name the file Wufix.bat, select All files next to Save as type, and click Save.

    save-wufix 0x800f0805
  5. 5. Right-click the Wufix file on your Desktop and select Run as administrator. Reboot your PC once the process is done.

    wufix-admin 0x800f0805

2. Reset Update services

There are four services that need to work properly for the update installation to work. In addition, all updates are stored in a single folder so they can be installed later on.

If something goes awry, you can always reset the services and confirm they indeed work and force the system to create a new folder in which updates are stored.

To see how to do that, we suggest reading our guide on how to use the Windows Update Reset script.

3. Make sure that the necessary services are running

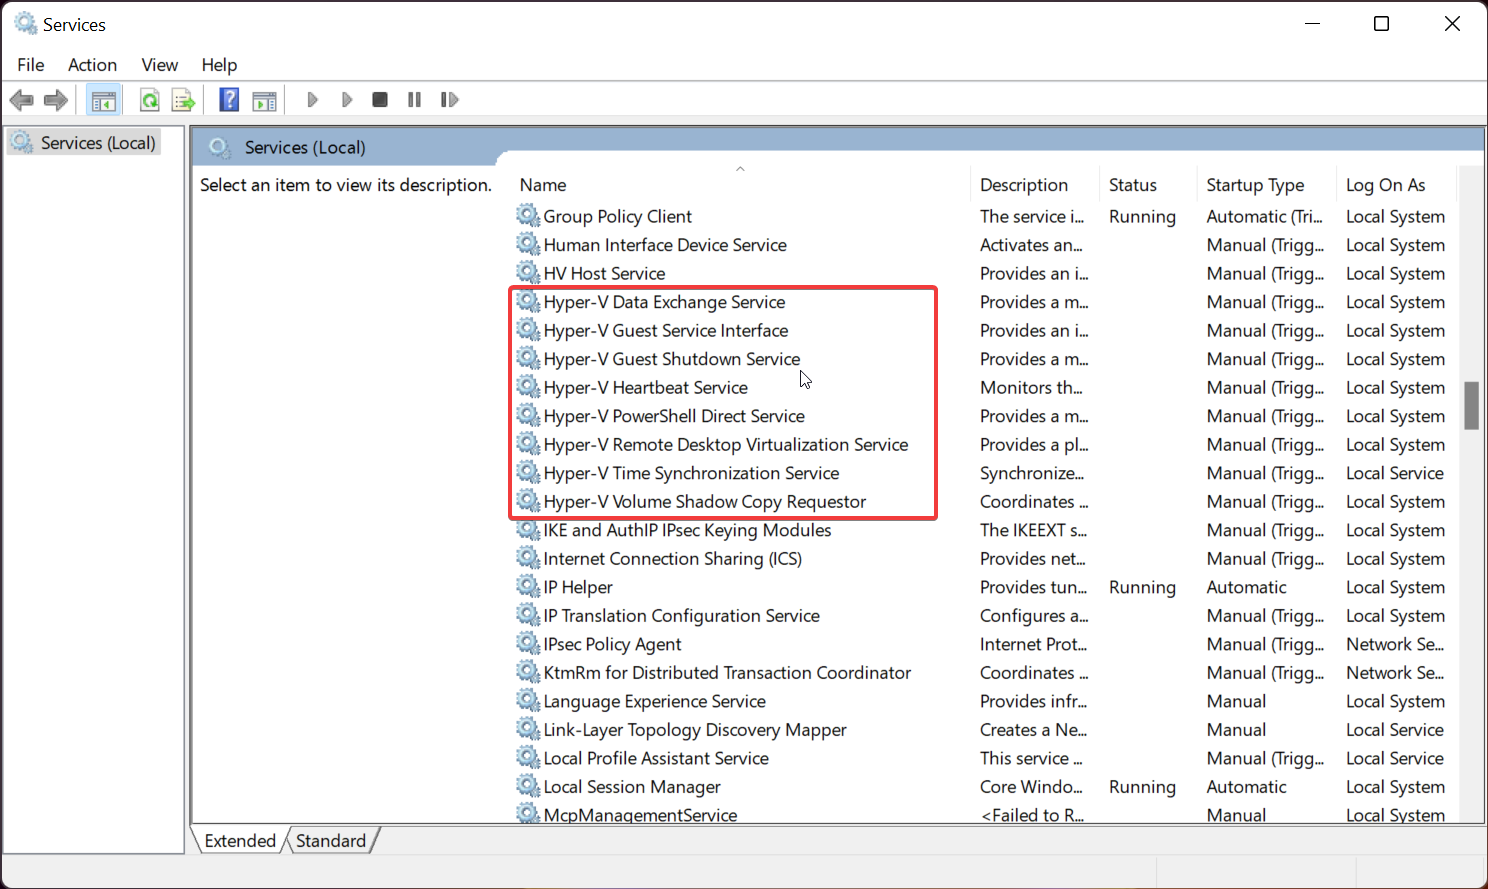
  1. Press Windows key + R and enter services.msc. Press Enter or click OK.services can't remove bluetooth device windows 10
  2. Locate Background Intelligent Transfer Service, right-click it, and choose Start or Restart from the menu.
  3. Now right-click Windows Update and choose Start or Restart. The Windows Update download error 0x800f0805 will be solved.

Many users reported the update error, 0x800f0805, when trying to install the optional Windows 11 KB5008353 update, so if you’re having problems, make sure the Windows Update and BITS services are running.

4. Run the troubleshooter

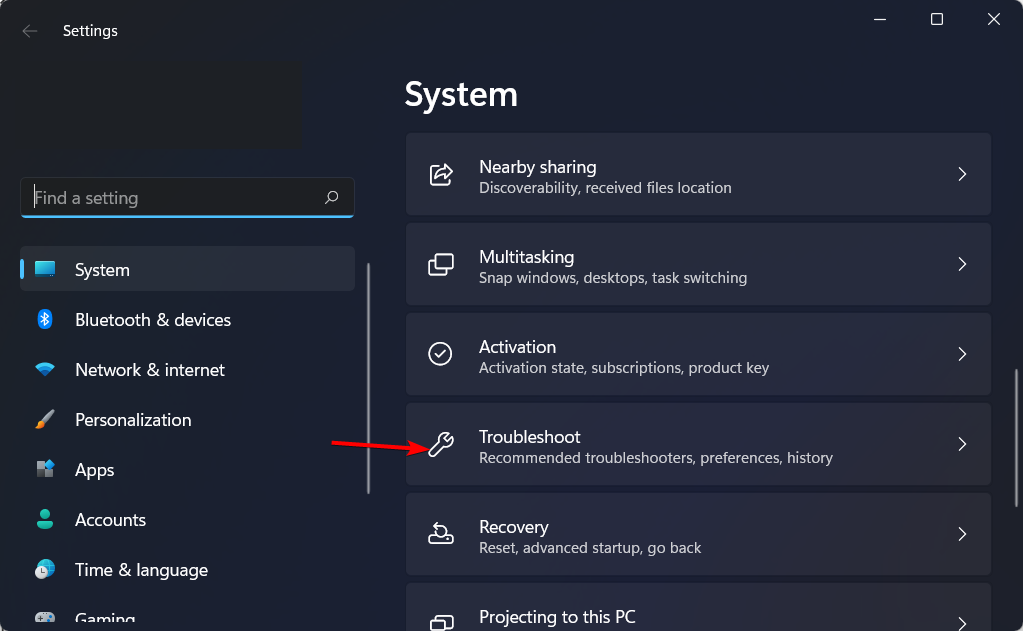
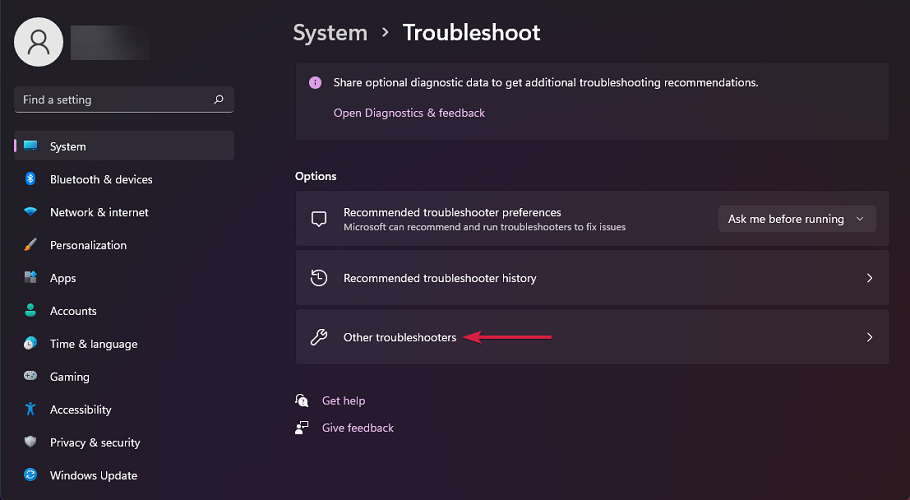
  1. Press Windows + I then click the Troubleshoot section on the right.troubleshoot-opt-w11 0xa00f4244 nocamerasareattached
  2. Click Other troubleshooters.other-trouble file explorer crashes when i right click
  3. Locate the Windows Update troubleshooter and click Run next to it.windows-update 0x800f0805

5. Reset your PC

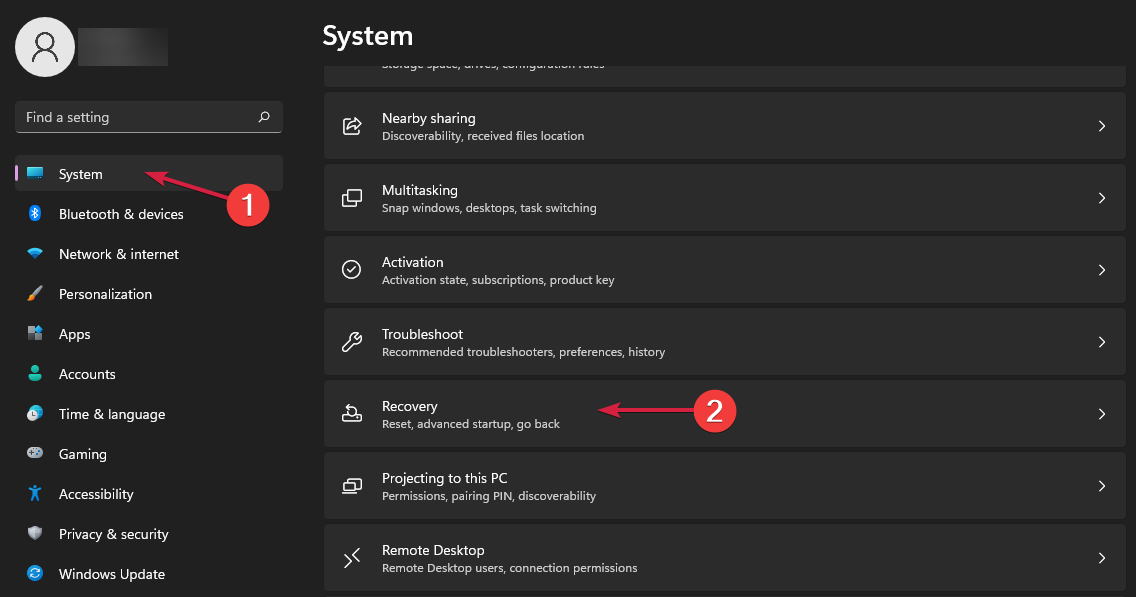
  1. Press Windows + I then go to System followed by Recovery on the right side.
  2. Click the Reset PC button.reset-pc-w11 0x800f0805
  3. Select the Keep my files option.keep-my-files 0x800f0805
  4. Select the Cloud download option, click Next then Reset in order to proceed with the resetting process. cloud-download 0x800f0805

As a final solution, you can opt to reset your OS in order to fix the 0x800f0805 – CBS_E_INVALID_PACKAGE error. For more ways to factory reset Windows 11, follow our dedicated guide.

How does the update error 0x800f0805 affect my PC?

This error will prevent you from downloading updates, which isn’t a big problem, but it might become one if you don’t fix it since you will need to update your OS sometime in the future.

Not being able to download updates will leave your PC vulnerable, and you might miss out on the latest security updates and features.

In case you’re still plagued by update errors, you should read our Windows Update Service isn’t running guide for additional solutions.

Finally, if you’ve run into an alternative solution, feel free to share it with us and other readers in the comments section below.

0xc00000e5: What is This Error Code & How to Fix it

Error 0xc00000e5 is a very common issue that occurs on Windows. It can appear due to various reasons, but the most common is due to low RAM. It may also occur because of a corrupt user profile or an incompatible software application, driver, or hardware component.

When you have a corrupt user profile, you may also encounter the event id 4625 an error occurred during logon. This prevents you from accessing your profile on your PC.

What does 0xc00000e5 mean?

The error code 0xc00000e5 is a common Windows error that can appear on multiple versions of Windows.

It can be related to the blue screen of death which can also appear as an instance of system instability or an application crash. The error code 0xc00000e5 is caused by a hardware problem or incompatibility with the software installed on your computer.

The following are some of the most common causes for error 0xc00000e5:

  • Damaged or incompatible hardware drivers – Incompatible hardware drivers can cause system instability and cause blue screens of deaths to appear. These types of errors are usually caused by outdated or faulty hardware drivers.
  • Corrupt registry files – The registry files are the heart of your computer. They contain all information about installed software and hardware, as well as configuration settings of your system. Sometimes they become corrupted because of malware infection or any other reason.
  • Virus infection –  If your computer is infected with a virus, then there is a chance that the virus has corrupted your computer’s settings. This can sometimes cause issues such as this one.
  • Hard drive error – It could also occur if there is an issue with your hard drive or memory, such as bad sectors on the disk or memory errors like memory leaks and memory fragmentation.

Now let’s look at some possible solutions to solve this error.

How can I fix error 0xc00000e5?

1. Run DISM and SFC commands

  1. Hit the Windows key, type cmd in the search bar and select Run as administrator.cmd-run-admin-w11 unexpected kernel mode trap windows 11
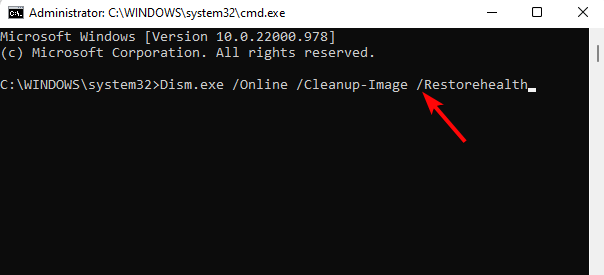
  2. Enter the following command: DISM.exe /Online /Restorehealth 
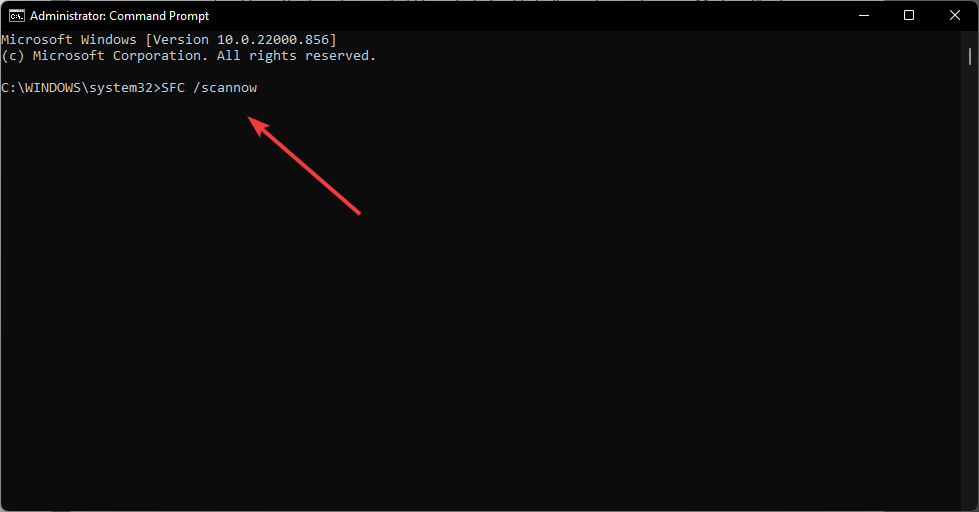
  3. Allow for the command to be executed then type in the next one: sfc /scannowsfc scan command in command prompt.

If you prefer not to do this manually, then you may choose extensive repair tools with various useful features that can repair several PC issues. They can help you repair all your PC stability issues by finding healthy components from its extensive vault.

2. Update your drivers

  1. Hit the Windows + I keys simultaneously to open Settings.settings windows 11
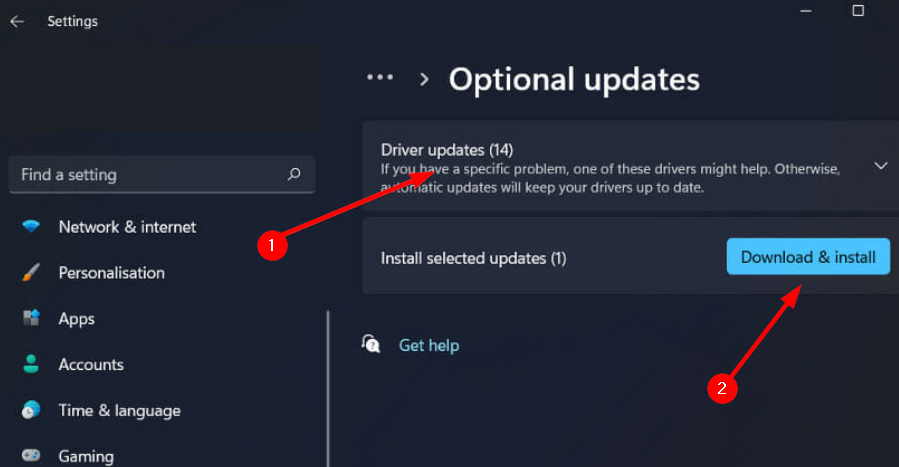
  2. Navigate to Windows Update and select Optional Updates.optional-updates-button How to speed up lenovo ideapad 320
  3. Select Driver updates then click Download & install.

An automated method can be very helpful here if you want to make sure that you have the right updates for your drivers. It can save you more time and assure you that all these steps are done accordingly.

3. Run chkdsk

  1. Press the Windows key, type cmd on the search bar and click Run as administrator.cmd-run-admin-w11 unexpected kernel mode trap windows 11
  2. Type in the following command then press Enter (Replace X with your hard drive): chkdsk:/f chkdsk-f repair corrupted directory

4. Scan for viruses

  1. Press the Windows key, search Windows Security and click Open.
  2. Select Virus & threat protection.
  3. Next, press Quick scan under Current threats.
  4. Wait for the process to finish and restart your system.

5. Run Windows update troubleshooter

  1. Hit the Windows + I keys simultaneously to open Settings.settings windows 11
  2. Select System then click on Troubleshoot.
  3. Click on Other-troubleshooters.other-troubleshooters windows 11 error after update
  4. Hit the Run option for the Windows Update troubleshooter.windows-update-run-troubleshooter runtimebroker.exe error

Hopefully, you have been able to solve the error 0xc00000e5 if you encountered it on your PC. You may also come across a similar error 0xc000000a5 in your Chrome browser but we have outlined various ways to fix it.

Other similar errors include: 0xc00000e, 0xc0000034, and 0xc00007b.

We’d love to know which solution worked for you in the comments section below.

Xbox revenue up from last year, according to newest earnings report

Microsoft has published its earnings report for the first quarter of FY23, and the news on the Xbox front is (mostly) encouraging. The report reveals some pretty interesting market dynamics at play here, which we break down below.

  • Xbox gaming revenue is up 4% from last year.
  • Gaming hardware revenues are up 13%.
  • However, “content and services” revenue dropped 3% over last year.

That last point is somewhat offset by the continued growth of Xbox Game Pass, as the report points out,

Driven by declines in first-party content and in third-party content, with lower engagement hours and higher monetization, partially offset by growth in Xbox Game Pass subscriptions.

PC Game Pass
PC Game Pass

PC Game Pass grew by an impressive 159% over the year. Microsoft CEO Satya Nadella pointed this out in yesterday’s earnings call, stating “We saw usage growth across all platforms driven by the strength off console.”

He also revealed that more than 20 million people have streamed Xbox games with Xbox Cloud Gaming,

With cloud gaming we’re transforming how games are distributed, played, and viewed. More than 20 million people have used the service to stream games to date.

These remarks, however, somewhat contrast with Microsoft’s stated view on cloud gaming in a filing with the CMA last week over the Activision Blizzard buyout. Nevertheless, that number is doubly impressive when you consider that it only reached 10 million back in April this year. Needless to say, cloud gaming is catching on in a big way.

PC Game Pass Subscribers Grew 159% Year-Over-Year, Nearly Half of Series S Buyers Are New to Xbox

The last—and perhaps most intriguing—tidbit to come out of the report comes again from Satya Nadella, who revealed that almost half of all Xbox Series S sales were made to gamers new to the Xbox ecosystem. But when you consider the combination of an affordable, entry-level next-gen console with Game Pass, the popularity of the Series S doesn’t seem quite so surprising.

On the whole, Microsoft surpassed its estimated $49.7 billion revenue for the quarter, taking in $50.1 billion. $9.7 billion was returned to shareholders through share repurchases and dividends, an 11% decrease compared to Q1 FY22.

8 Best Data Loss Prevention Software to Protect your Business

Valuable, and/or sensitive information, especially in this digital age, needs a data loss prevention strategy to be developed and implemented.

The best data loss prevention software will come in handy when planning the DLP strategy so that the risk of data falling into the wrong hands is nipped in the bud.

How can data loss prevention software secure my business?

Whether data is at rest, in use, or in transit, it travels through different channels in your business, and to many endpoints so data loss prevention is necessary.

The software from our list are specialized tools that detect sensitive data and prevent them from being copied or sent outside your organization network.

Here you’ll find the best data loss prevention software you can use in your company or organization.

What is the best data loss prevention software for PC?

Endpoint DLP Plus – Best loss prevention solution

Data loss prevention is a matter of identifying and protecting sensitive data and ManageEngine’s Endpoint DLP Plus does that admirably.

Essentially, this software is a complete solution for sensitive data discovery on all your endpoint.

It scans all the devices on the network and examines the apps installed on them for structured and unstructured data.

Then, it inspects the data contextually to get a forensic evaluation of the information both quantitatively and qualitatively.

Endpoint DLP Plus also assesses the user privileges so that the admins can determine if there are any inside threats.

But all the steps and processes are performed with lightning speed, this tool is prepared for high volumes of data, fit for any network size.

With its help, you can monitor any device connected to an endpoint and limit access. To ensure that no sensitive data gets out, Endpoint DLP Plus also employs Cloud protection and email security features.

Moreover, you may set up trusted apps as enterprise-friendly and contain the data that results from them as sensitive data.

Let’s review some of its best features:

  • Advanced scanning for sensitive data within your network and apps
  • Cloud protection, email security, and external devices monitoring
  • Accurate data discovery and false positive remediation
  • Easy and quick deployment within your network
  • Intuitive and detailed reports

Endpoint DLP Plus

With this smart solution, you can be sure that no sensitive data will leave your organization!
Free trial Visit website

Norton 360 – Great antivirus protection

Another good solution for data loss prevention is Norton 360, considering the necessity of powerful privacy for digital-related businesses. 

Knowing that companies use enormous quantities of data for complex tasks, it is significant to think about the prevention of data loss.

By choosing this protection software you secure the data flow that streams between departments in one’s company. 

With Norton, you obtain your pathway to smooth data secureness, through features like threat protection from emerging malware, no-log VPN, virus protection promise, LifeLock Select, and more.

Whether you need to cover your personal data online or business information, this option can resolve most of the identity issues that may occur. 

Moreover, the LifeLock Select feature comes along and it can protect data like name, address, or social security number from up to 5 devices such as PCs, Macs, or smartphones.

The worth mentioning features of Norton 360: 

  • One-Bureau credit monitoring to see key changes to your credit 
  • Privacy monitoring to know who has your personal information 
  • Anti-spyware and malware protection
  • 100 GB cloud backup 
  • Password manager 
  • Parental control
Norton 360

Norton 360

With Norton 360 you will be able to shield your entire data flow, and safely interact virtually within your business.
Check priceVisit website

CrashPlan – Great for cloud backup

Having the computers and the backup in the same place is a hazard, at least said. As they both can get destroyed by a fire or another disaster. CrashPlan gets all the data protection your business needs and secures it in one seamless cloud solution.

The best practice for data loss prevention is automatic & continuous protection, which this cloud-based program brings up-front.

Data can get lost when hard drives fail, computers get stolen, or any other incidents.
CrashPlan for Small Business comes at a great price, is really easy to use, and quick to set up.

Worth mentioning features:

  • Does not slow down your PC as it runs automatically in the background
  • External Drive Protection included for no additional cost
  • Restore your files to the latest versions in case of a ransomware attack
  • 256-bit AES data encryption
  • No charge to restore your files via the desktop app or browser
  • No file size restrictions or additional charges for storage

Get started for free with a one-month trial and decide later if you want to keep this service.

⇒ Get CrashPlan

Symantec

This data loss prevention software drives total protection of your sensitive data with the most comprehensive detection technologies and unified policies, with privacy regulations that ensure your data is properly managed.

It is configured to identify sensitive data and uses a variety of advanced detection techniques to identify data in a wide range of forms.

With this data loss prevention software, you can identify and track the user and location of data, block the flow of sensitive data (like when an employee is leaving and he wants to move with some files), protect data in the cloud by integrating with encryption and other security technologies.

You can also secure your data outside your managed perimeter by wrapping automatic protection around it such that if data leaves and is shared widely, you don’t lose much.

Symantec’s DLP identifies sensitive data and delivers advanced protection so you can control access to data, define user levels and rights, monitor access to sensitive data, and revoke access while digitally shredding a document.

Here are its key features:

  • You can deploy it on-premise or in your private/hybrid/public cloud
  • Advanced sensitive data detection techniques
  • Identify and track the user and location of data
  • Block the flow of sensitive data transfer
  • Set up and manage safety perimeters

⇒ Get Symantec

Forcepoint – Good sensitive data containment

Forcepoint’s data loss prevention software helps you gain visibility and control over your data to keep it secure against accidental loss, compromised users, and malicious insiders.

Its security focuses on people’s interaction with data, whether it is creation, storage, email, personal devices, and cloud apps.

Features include the Incident Risk Ranking that applies behavioral analytics and machine learning to cluster data loss prevention incidents in order of risk, Office 365 support, flexible deployment on-premise or cloud, integrated incident workflow to resolve DLP incidents faster, pre-defined policy templates, advanced detection with optical character recognition, and automatic detection of high-risk individuals or compromised and malicious users.

With Forcepoint, you can fast-track compliance processes, secure cloud apps, extend data protection to other apps, and use advanced analytics to focus on the biggest threats.

Other tools Forcepoint comes with include the Email Security Cloud to stop spam and phishing emails, as well as the Web Security Cloud to stop advanced web threats in the cloud.

⇒ Get Forcepoint

CA Technologies – Solid access control

With CA’s data protection, you can prevent data loss and control data access whether it is in use, at rest, or in transit, and minimize the misuse of data while complying with standards and regulations.

It helps you reduce data loss and misuse by controlling access at every endpoint in your system, defining regulatory policies, detecting sensitive and unstructured data, and monitoring both known and unknown business processes to control threats to sensitive corporate assets.

This data loss prevention software helps you reduce risk, control information across various locations, and enable critical processes to continue.

You can also transit to cloud services, discover and classify high-risk data and apps, mitigate high-risk modes of communication, and ensure precise policy enforcement through content and identity.

⇒ Get CA Technologies

VikingCloud – Good for data monitoring

As its name implies, this data loss prevention software is trusted to send a wave of protection and security against data loss in your company’s system.

With the explosive growth of data in today’s digital world, it has become more challenging to track, protect and contain sensitive data within corporate borders, so VikingCloud’s DLP helps you discover, monitor, and secure data at rest, in use, or in transit to prevent loss and ensure compliance with regulations.

It focuses on three pillars of data security: monitor, protect and discover, with features such as the Intelligent Content Control Engine that analyzes all web-based communication and attachments for violations of compliance and policies, and its Advanced Content Control works with other detection technologies and risk categories to control and secure critical operations.

This data loss prevention software has a query builder interface for specifying search parameters when looking for DLP events and incidents, a customizable console homepage to show reports and query results, plus it is built on a scalable and extensible architecture for greater efficiency and rapid integration with other third-party apps.

⇒ Get Trustwave

Digital Guardian – Great for endpoint protection

This is your guardian protector against data loss prevention in the digital space.

Digital Guardian is a cloud-based data loss prevention software that comes with advanced analytics and reporting solution which delivers threat aware data protection to safeguard your company’s data.

The endpoint DLP protects sensitive data on all endpoints of your company, against breaches (which are inevitable), giving you the deepest visibility, fine-grained control of all data movement, and data loss protection coverage.

The endpoint agent captures and records all system, user, and data events on or off the network, plus you can configure it to automatically block suspicious insider activity or outsider attacks like malware, before losing sensitive data.

Use this DLP when you need it, as it doesn’t block actions that comply with corporate policy so you and your employees remain productive and data stays safe.

⇒ Get Digital Guardian

This concludes our selection of the best data loss prevention software for your business or personal devices.

You might also be interested to check our list including the best data protection software for your PC.

Do you know which data loss prevention software you want for your company? Let us know your favorite pick in the comments section below.

20 Best Telework Software That You Can Get Today [2022]

At the tap of a button, you can chat with anyone around the world, send an email or a tweet, from practically anywhere, your office, a beach, or a mountain someplace far off.

This is about people who move around working, the type of employees who are location-independent and don’t need to be biased toward one office. Some are always moving, while others are based in one location but have customers across the globe, without necessarily having to travel.

What do I need for teleworking?

Whether you’re a blogger, consultant, freelancer, web developer, creative designer, or IT specialist, it is possible to take your work on the road thanks to teleworking software.

All one needs is a stable Wi-Fi connection, a good place to work from, drink or snacks, and a few apps or tools to make the remote work life a breeze – throw in a headset, and it comes in handy.

Besides having a smartphone, check out some other best remote working software you can use.

What’s the best teleworking software to try out?

Remote Access Plus – Best remote access management

Along with teleworking come remote problems but where those arise, ManageEngine’s Remote Access Plus solution comes to help.

It is a comprehensive enterprise remote access software that helps administrators and IT technicians troubleshoot and manage remote computers just with a snap of the fingers.

Well, in fact, not just with that, but with the over 12 system manager tools, wake on LAN, remote shutdown, secure file transfer, and a lot more.

In fact, you can completely remotely control Windows, Mac, and Linux machines and that includes installing and uninstalling software, managing all the files remotely, etc.

You can also proceed with a hands-off approach with voice, video, and text chat to engage with the remote desktop users and provide them with assistance.

With Remote Access Plus, you may even execute Command Prompt commands, modify the registry and manage the tasks on the endpoints.

So, it literally offers all the tools you need to troubleshoot any problems and the solution has a free trial version for testing.

Let’s review some of its best features below:

  • More than 12 built-in system management tools
  • Wake on LAN and remote shutdown
  • You can control Windows, Mac, and Linux endpoints
  • Voice, video and text communication
  • Simple and quick implementation

Remote Access Plus

Enable optimal teleworking by remotely troubleshooting any endpoint from your network.
Free trial Visit website

Monday.com – Ideal for project management

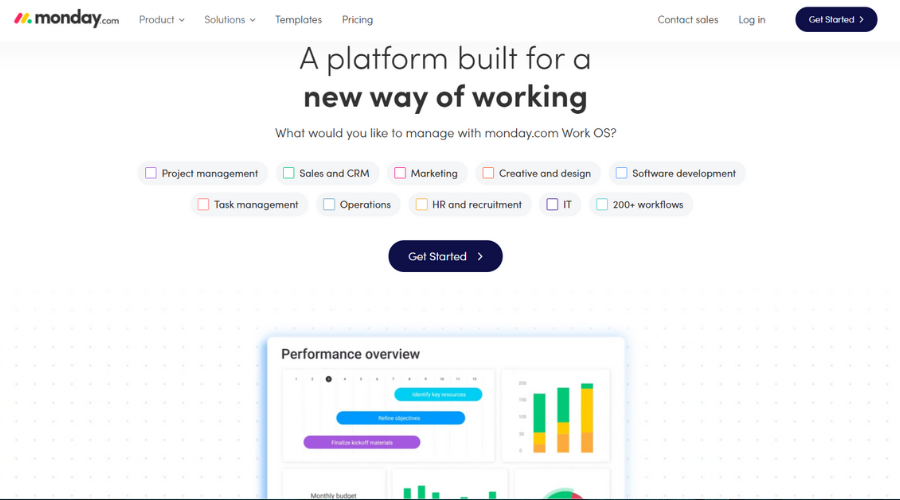
Monday is a more friendly take on the whole work-from-home genre, as it focuses more on personal interactions compared to other similar tools.

Of course, this doesn’t mean that the program is inefficient. The best word to define the Monday service is automation since everything within the program is meant to minimize user input.

Everything is detailed down to the last piece of data, from timetables and schedules to how projects are progressing.

That’s how you know exactly what is going on in real-time, and what areas need some quick adjustments.

Everything is shown in a crystal-clear manner, and the UI is designed to make working from home feel like an enjoyable experience, and not like actual work.

The best part about this service is that the pricing is also extremely user-friendly, as you can experiment with a 14-day trial before you actually decide whether or not to go for the full license.

Either way, if you are forced to work from home, then Monday.com is a surefire way of making things a lot more interesting and fun, while not sacrificing any efficiency.

Let’s see an overview of its most important features:

  • Extensive automation features
  • Very comprehensive UI with clear menus
  • Manage over 200 workflows
  • Sales and CRM integration
  • Cloud-based tool, accessible from anywhere

Monday

Get started now on Monday.com and increase your productivity with great project management tools.
Check price Visit website

Scalefusion – Great mobile management

Scalefusion Mobile Device Management (MDM) Software helps you monitor and control all the corporate devices on your network.

And that makes it a great tool for teleworking and protecting the security of your business assets.

Whether it’s a Windows, macOS, Android, or iOS device, Scalefusion’s MDM comes with a wide range of security policies for data leakage prevention.

For instance, you can even restrict screen captioning work apps for your employees on their personal devices.

You may block the Wi-Fi connection from unauthorized networks, remotely wipe/factory reset the devices, monitor security breaches like forceful SIM card swap, and a lot more.

The administrator will be able to install any applications remotely from the online stores or by uploading the installer and of course, delete any app without the user’s intervention.

And all the actions are possible from a single, easy-to-use, cloud-based dashboard with intuitive and comprehensive menus.

Take a look at Scalefusion’s best features:

  • Complete monitoring and control of all corporate devices
  • Enforce security and usage policies
  • Can control any Windows, macOS, Android, or iOS device
  • Reports and notifications on potential security breaches
  • Single cloud-based dashboard

Scalefusion MDM

Monitor, control, and protect all your teleworkers’ devices against any data breaches.
Free trial Visit website

SupRemo – Great cost-effective tool

SupRemo is a great alternative to TeamViewer, being a cost-effective, reliable, and secure remote desktop access, tech support, and remote work software.

Additionally, the app is cross-platform, being compatible with Windows, macOS, Linux, Android, and iOS. This means that you can connect from a PC, tablet, smartphone, to anywhere in the world.

You don’t have to worry about buying the licenses multiple times, since all of them allow unlimited installation to an unlimited number of devices. The only restriction is the number of simultaneous connections.

What this means is that you can use your license on multiple devices, and there is no limit of endpoint or seats to install the license on.

Besides the affordable plans and the well-thought licensing plans, you can use the app free for non-professional and/or non-continuous usage.

SupRemo gives you the freedom to work from anywhere you wish, giving you total mobility and security. You can work from your home, a cafeteria while traveling.

The plethora of great features gives you endless possibilities will improve your workflow and performance:

  • Installation as a service allows connections to the device without the need of an individual to attend to it
  • Allowed ID and Encrypted connections will secure data during work sessions
  • File transfer between the two connected PCs
  • Remote printing lets you print documents from the connected device after you worked on them
  • Chat through instant messages for easier interaction between coworkers
  • Online Address Book that can be transferred to other SupRemo users
  • Online Reports monitoring all the connections made during the workday by the accounts
  • Automatic update to get the latest features and changes

⇒ Get SupRemo

Desktop.com – Best for increased productivity

remote work software telework software

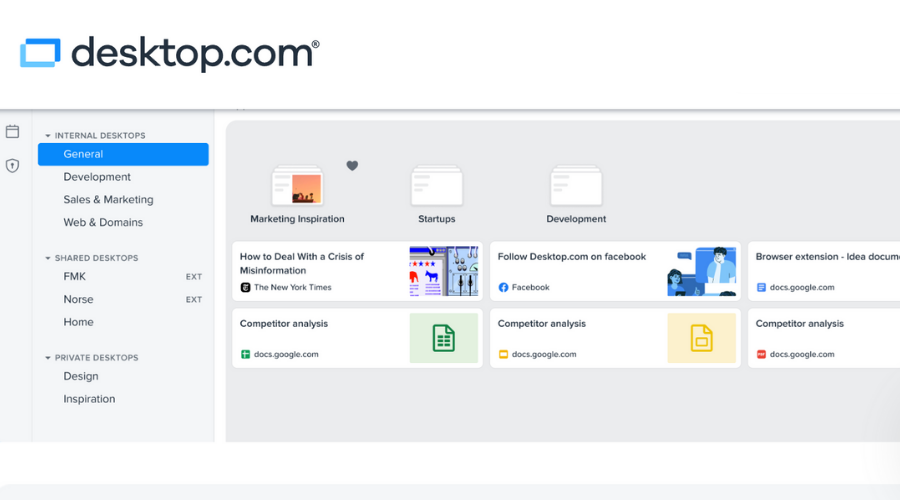
Desktop.com is a digital workspace platform that integrates task management, productivity, and collaboration tools.

It is an all-encompassing instrument that has helped businesses around the world make great use of the webspace.

With this application, you can create shareable workspaces, there are many ways in which you can organize and manage them in order to fit your work style and goals.

The tool lets you easily access everything you need from one central UI, which includes task lists and deadlines, calendars, chats, meetings, and more.

This remote work platform is suitable both for self-employed individuals, as well as full-scale companies with many team members.

Regarding teamwork and collaboration, you will be pleased to know that Desktop.com is very versatile.

It has its own chat that integrates other mass-used collaboration tools such as Slack or MS Teams so all the members of a team can easily communicate, regardless of the primary platform they use.

All messages are comprised in a universal chat, so you won’t have to hop from one app to another.

On the topic of integrations, you should also know that you will be able to access tons of useful tools directly from Desktop.com’s central page.

These include your email apps such as Gmail or MailChimp, productivity apps such as Notion, as well as tons of useful applications like Google Sheets, Trello, Google Drive, or Dropbox.

All in all, if you want a comprehensive tool that offers you the possibility to manage your tasks in an efficient way, collaborate with peers, and integrate all your favorite third-party tools, then Desktop.com is a great choice.

Let’s see some of its best features below:

  • Integrates task management, productivity, and collaboration tools
  • Single, comprehensive dashboard
  • Access all your apps, including Google and MailChimp
  • Great collaboration features
  • Built-in universal chat app

⇒ Get Desktop.com

eResource Scheduler – Great for corporate assessment

Next, we have an enterprise resource management and scheduling software that is proven itself to be very noteworthy because of its amazing features and ease of usage. It is designed to identify and assign resources to projects and jobs.

Thanks to features like custom fields, configurable forms, configurable filters, views, and management reports, this software’s configuration level is off the charts.

eRS Cloud supports multiple working patterns of resources as it offers configurable working calendars.

Beyond this, flexible user access rights also ensure that all the users get access to the information on a need to know basis, without affecting data confidentiality.

 eRS Cloud offers easy resources scheduling by working with the Gantt chart view. Efficient features like drag-and-drop, extend and shorten, cut/copy/paste, and split allow efficient resource scheduling and workload balancing.

This software gives special emphasis to security & privacy and everything has been designed ground up to ensure security at all levels of the application.

It has an informative and accurate financial report which will give you an in-depth view of your company’s finances (cost/revenue/profit) at all levels of the organization i.e. resources, projects, teams, departments, etc.

Another great feature of this app is that you are always updated with the latest information, by the use of the built-in email service.

The best part is that all of these features can be first tested for free before you decide to buy the tool.

  • Custom fields, configurable forms, configurable filters, views, and management reports
  • Efficient features like drag-and-drop, extend and shorten, cut/copy/paste, and split
  • Strong security and privacy features
  • Provides informative and accurate financial reports
  • Always updated with the latest information

eResource Scheduler

Take better control of your office from the comforts of your home with this cross-platform business management suite.
Free trial Visit website

Connecteam – All-in-one task management assistant

Connecteam is an all-in-one team management telework software that you can get today to boost productivity with feature-rich toolkits.

The Connecteam software and app include project and task management, communication, scheduling, time tracking, checklists, digital forms, and staff training.

Connecteam improves team communication and cooperation by making it simple to schedule employee shifts and assign activities to them.

Instead of manually checking attendance and providing timetables, Connecteam digitalizes the work of your job. You may also schedule your duties at various times each day to prevent misunderstandings.

You may also assign it to a team member who will be trained in flow management and monitoring.

You may select the job you are working on and not have to worry about writing things down just to forget where you left them. If you happen to forget what you were doing for a customer and didn’t give the assignment a descriptive enough name, you may go back and check through the logs.

Another fantastic feature is the ability to track how much time you spend on email and other administrative duties compared to actual design work.

Here is a summary of Connecteam’s best features:

  • Efficient communication tools
  • Time clock for tasks
  • Shift scheduler
  • Customizable checklists and reports
  • HR and people manager

Connecteam

Includes scheduling, task management, and communication tools to help you lead an organized and effective team.
Free trial Visit website

Kickidler – Great for personnel monitoring

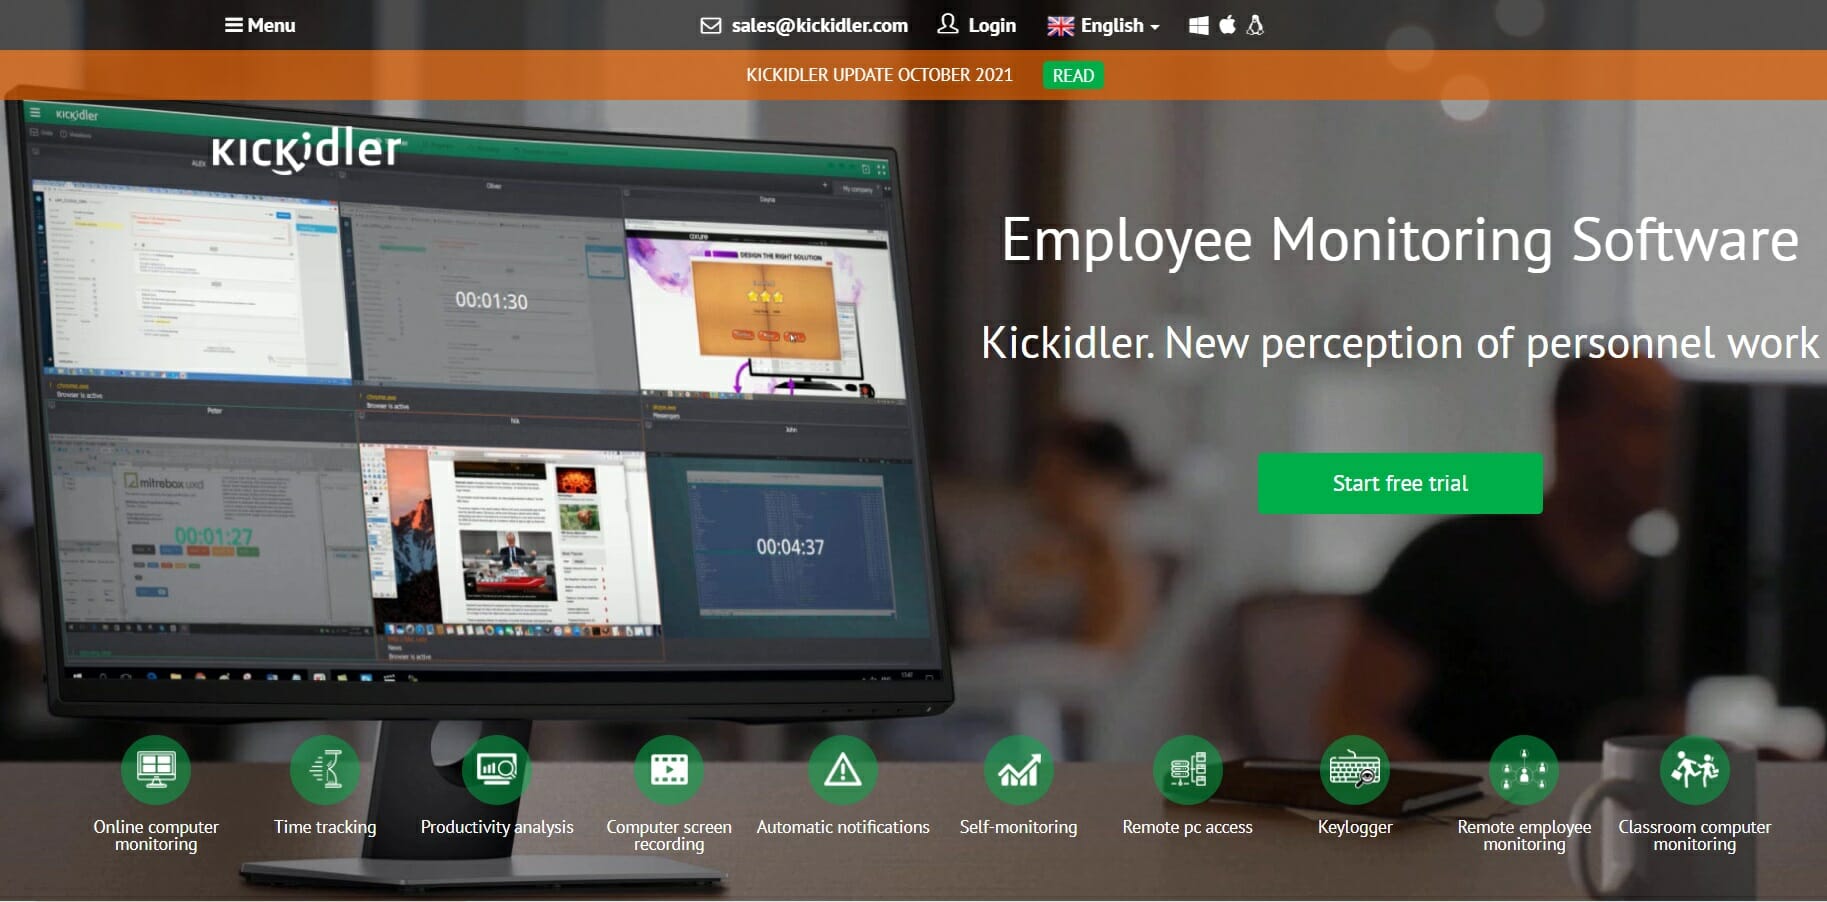
One of the challenges posed by having a business where most of your employees work remotely is making sure that no one is slacking off, so that your productivity level increases, or at least is maintained at a decent pace.

Well, you as an employer will no longer have to worry about things like that once you employ a software tool like Kickidler.

This tool provides you with real-time employee monitoring so that you know at every second what each employee is doing.

More so, even if you’re not always free to monitor them yourself, depending on the settings made, Kickidler computer surveillance software automatically generates alerts if certain employee violations occur.

Here is a summary of Kickidler’s best features:

  • Online broadcast of employee desktop activity
  • Employee negligence and violations detection
  • Employee time-tracking and timekeeping
  • Employee timesheet monitoring and reporting
  • Automatic notifications
  • Remote keyboard, mouse, and clipboard control
  • One-click connection
  • Screen video recording

⇒ Get Kickidler

Wrike – Best for project management

Topping out our list is a product that makes working remotely a high priority.

As an overall goal, Wrike’s purpose seems at first glance to eliminate silos, centralize communication, and go through your to-do list easily, all from the comfort of your home.

As an example of what this product can do, you can use it to view real-time reports and status for all of your company projects.

This then allows you to easily turn strategy into an achievable plan to achieve success.

Working remotely doesn’t mean that you have to forfeit collaboration between you and your peers since you can centralize communication with stakeholders while maintaining full context.

Besides the obvious instant messaging features, you can also enable file transfers and monitoring of what everyone is doing in real-time.

Deadlines will no longer be an issue as long as everyone is doing their job.

The best part about this tool is how easily it integrates with other services. For example, you can connect your essential business tools to Wrike and make it your project management hub.

These compatible services include names like Google, Microsoft, Adobe Creative Cloud, GitHub, JIRA, and more.

As for pricing, it is available in a try-before-you-by deal, as you can request a free demo, and the signup process is completely free, and only requires that you register via an email address.

However, if you want to benefit from the full functionality of Wrike’s service, a full commercial license is the best bet for you.

Here are some of its key features:

  • Great services compatibility, including Google, Microsoft, Adobe Creative Cloud, GitHub, JIRA, and more
  • Centralized communication dashboard
  • Free sign-up process
  • Instant messaging and file transfers
  • Complete monitoring for endpoints

Wrike

Centralize communication and view reports in real-time with Wrike.
Free Trial Visit Website

AnyDesk – Great all-round teleworking tool

A list of reliable teleworking software would be incomplete if we didn’t include AnyDesk, in it, since it is a leader in terms of what it means to deliver quality software that allows users to work remotely.

Connect to a PC from halfway around the world with this tool, enjoying high-quality connectivity and allowing large companies and startups to enjoy exceptional customer service and fast problem-solving solutions from any location.

One highlight of this tool is its cross-compatibility, allowing connectivity between pretty much any two devices, including Windows, MacOS, Android, iOS, Linux, FreeBSD, Raspberry Pi, and Chrome OS.

This allows anyone to be of assistance, regardless of what device they are using, be it a desktop, laptop, or even a mobile phone.

Another strong point of this service is the flexibility of its subscriptions, as it can cater to companies of all sizes, and, speaking of subscriptions, they pride themselves on providing permanently free updates.

Lastly, large companies can also be served easily thanks to AnyDesk’s MSI packages that automatically roll out the AnyDesk client on multiple computers and configure the tool from remote locations.

As for the app itself, it is super lightweight, making it easy to download, install, and use and even those of you looking for a program for personal use can easily work around the user-friendly interface.

Consider some of its key features below:

  • Connect to a PC from anywhere in the world
  • Cross-compatibility with Windows, MacOS, Android, iOS, Linux, FreeBSD, Raspberry Pi, and Chrome OS
  • Subscription flexibility
  • Free updates permanently
  • Super lightweight, easy to download and install

⇒ Get AnyDesk

Nu – Great remote collaboration tools

Nu has a suite of collaboration tools perfect for teleworking so you should definitely try some of the products.

First, there is Backlog, a project management software that will help you with such endeavors.

For instance, each project you develop will have its own wiki and repositories. And for each task, you will benefit from its own file storage, history, and comments section.

You will be able to manage the workflow with timing, color coding, and assignments for all the team members.

Another product is Cacoo, an online diagramming tool for collaborating on wireframes, flowcharts, and more.

You will benefit from multi-user editing, in-app video and chat collaboration, hundreds of flowchart templates, and more.

Next, you can also implement Typetalk, a team chat app, and Nulab Pass, enterprise-grade security for the team.

⇒ Get Nu

Task/Project Management tools

If you want to stay on top of things like tasks, or other updates on projects and foster team collaboration, then these are the best remote working software you need to have for this function:

1. Bitrix24 – Best for office applications

Bitrix remote working software tool

Bitrix24 comes with a powerful set of office tools that help you automate workflow while working remotely.

Firstly, the tool is ideal for an unlimited number of workgroups and user groups for your entire organization.

Moreover, Bitrix24 gives you the chance to enjoy real-time communication tools for all teams through both chat and video.

Even if not working in a real office, you may easily turn your emails into tasks or calendar events in a matter of clicks.  Bitrix24 helps you manage your entire team and let all members know their roles.

With time tracking features and precise task templates/task reports these roles never end up forgotten or buried under hundreds of messages.

This software also has a document management feature, which is extremely useful if file sharing and document management are a priority.

As for the included human resources management system tools, they make sure that no major hiccups could come your way.

As the leader or even a member of a remote team, you’ll most likely see why Bitrix24 is efficient.

You just need to choose this software solution that is designed to provide full support in managing your company’s teams.

Here are some of its best features:

  • Powerful set of office tools
  • File sharing and document management features
  • Built-in human resources management system tools
  • Time management options
  • Tasks and project management tools

⇒ Get Bitrix24

2. Asana – Great for project management

remote working software

This is one of the most popular tasks or project management tools you can use as part of your remote working software collection.

With Asana, you can manage and track tasks, to individuals or groups, check due dates, monitor progress, and even track time and generate timesheets.

It is a lot like your personal assistant who tells you about the happenings in the office at a glance without necessarily having to be there physically.

Take a look at some of its most important features:

  • Add integrations with tools like Slack, Google, and Microsoft Office
  • Organize and assign tasks
  • Manage dependent, overlapping, and unscheduled tasks
  • More than 200+ possible integrations
  • Communicate, collaborate, and coordinate work, from start to finish

⇒ Get Asana

Cloud storage and file organizers

When you want to organize all your stuff, here are the best remote working software to use:

1. Google Drive – Great free cloud storage

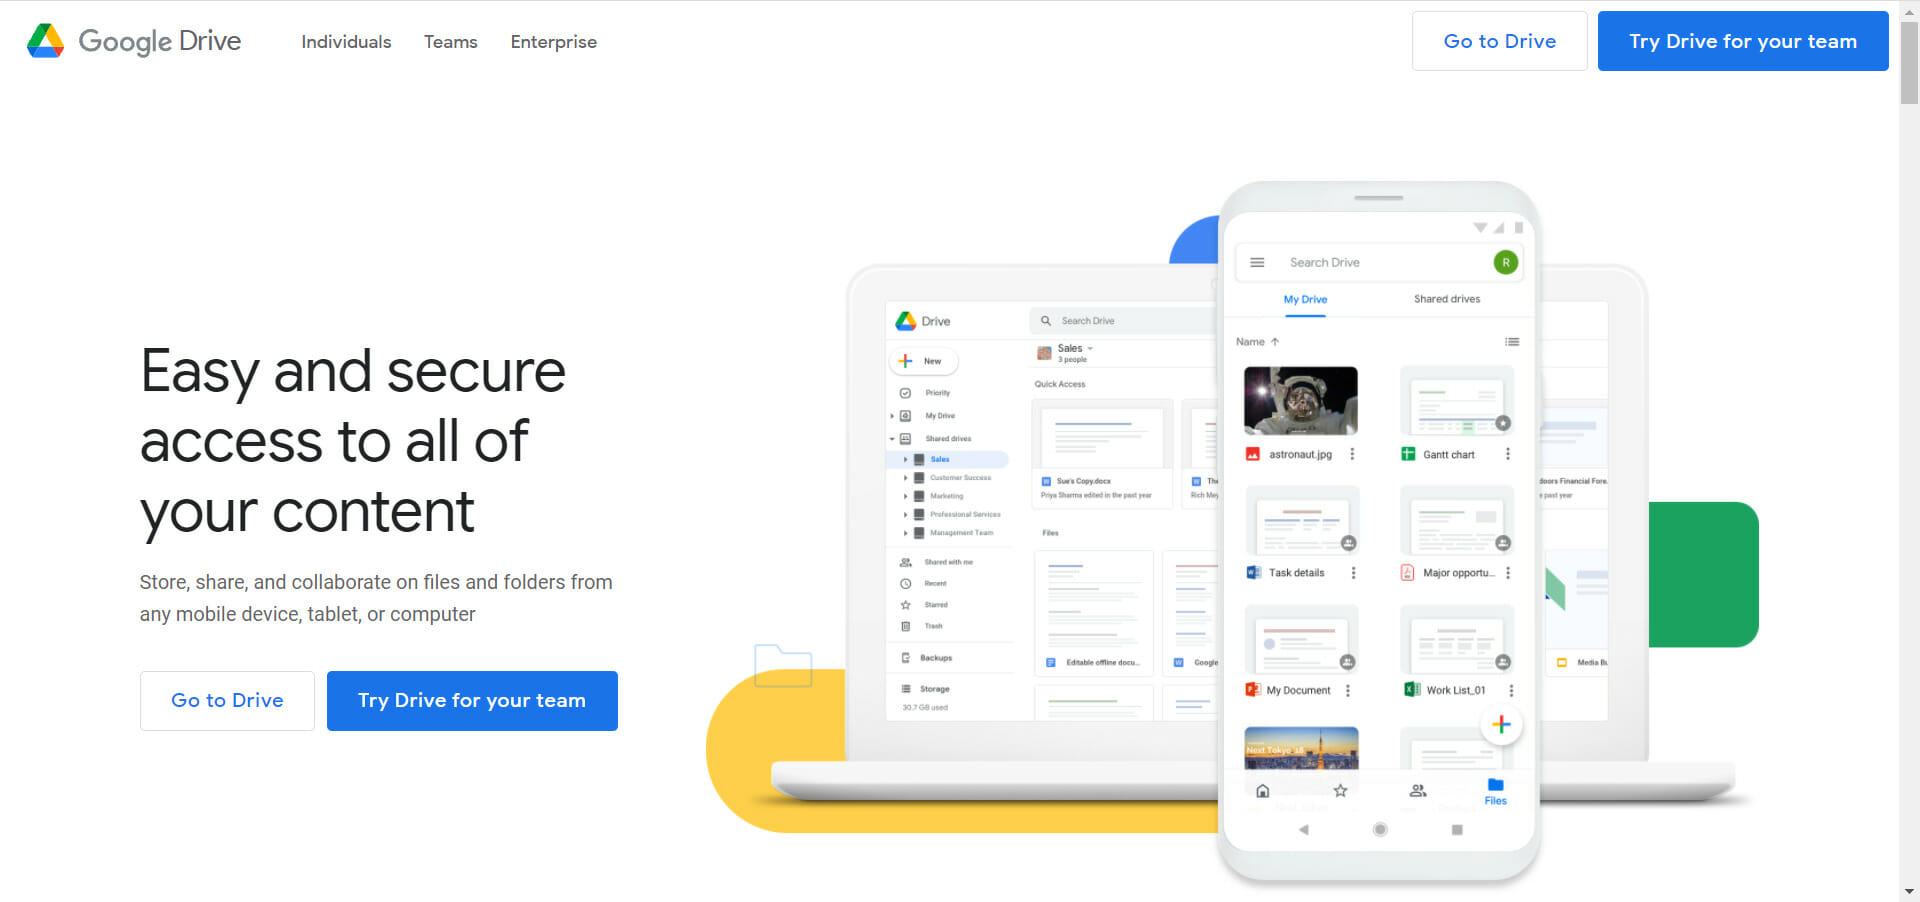
This tool has frequent updates, but it is free to use for storing and organizing all your stuff in one place. You can work on the same document with other people simultaneously.

You can also write and edit Google Docs and Sheets from any location, upload media like pictures or videos and store them, or share them with others. It also integrates well with Gmail and Google calendar.

⇒ Get Google Drive

2. OneDrive – Best for security

OneDrive is a cloud solution for you to store your personal files securely, and access them anytime, anywhere, and from any device or browser.

It works pretty much the same as Google Drive or Dropbox, but the capabilities and storage capacity may vary.

⇒ Get OneDrive

3. Dropbox – Great tool for temporary storage

If you have bulk files, you may not be able to share these over email, as some don’t take attachments larger than 25MB, which you’d then have to upload and share via apps like Google Drive.

This is where Dropbox comes in. Freelancers can use this to organize large files, by simply uploading the documents, and even organizing them in terms of months, and sending you a message once the work is submitted.

It is the cloud storage of choice, especially for software dev teams and designers.

Recently, Dropbox announced the launch of Paper, a separate app like Google Docs to allow people to collaborate in real-time.

⇒ Get Dropbox

4. Box – Great for secure collaboration

This tool is more than just another cloud storage app, as you can store any and everything in there, from sensitive documents to letters from your loved ones, recipes and so much more.

⇒ Get Box

Team management

If you want to manage onboarding, track time and expenses among other issues with your team, theseremote working software tools come in handy:

1. Time Doctor & Harvest – Ideal for automatic time-tracking

The Time Doctor tool helps you track how employees or team members spend their time, plus you can use it for productivity purposes and client billing.

Harvest is also good for time tracking and expense tracking.

⇒ Get Time Doctor
⇒ Get Harvest

2. IDoneThis – Perfect for project checklists

This remote working software is useful when you want to keep your team in sync.

With more than 160,000 users, this tool’s easy daily check-ins and powerful progress reports help run more effective and productive teams.

Get daily status updates as everybody checks in daily via browser or email, and always know what is done or getting done, or what cannot be done on time or completed and why.

Its robust reports give you a high-level view of your team and your organization’s progress over time.

⇒ Get IDoneThis

We hope that our extensive list of solutions covers all your needs and that now you’ve got all the tools to work from home.

The only condition is to set your temporary office in a place with good Internet connection coverage.

And if you’ve forgotten something on the office PC, you might want to look at the best remote access tools with a session recording option list and fix the problem.

What remote working software do you have in your toolbox? Share with us in the comments section below.

PC Inventory Software for Windows PCs: 4 Best to Use

For a network with more devices (at least 50), the network administrator should use some specialized tools to retrieve all the hardware and software characteristics of all the devices connected to the network.

With just a few PCs, it’s easy but for much larger networks, automated PC inventory software is a must and organizations are not able to deal without such programs.

Why do I need PC inventory software?

PC inventory software collects thorough data about the computers connected to your LAN. The software automatically scans the network and then retrieves all the information regarding all the devices that are being inventoried.

After retrieving this information, the software usually records it in a centralized database, allowing the administrator to access it at any time.

After the initial scan of the network is completed, the network admin can re-scan the network anytime. This will not only make the inventory up-to-date, but it will provide more information.

After the new inventory data is received, the software compares it to the previous version of the inventory information that was obtained during the last scan and then records all potential changes. After more re-scans, the network admin will have a detailed configuration of the history of each machine of the company.

The network admin can then access it at any time and also view the configuration information for each computer in a nicely created graphical form.

What are the best PC inventory tools?

Endpoint Central – Best endpoint management tool

If you need an ultimate tool to manage all your endpoints and servers, including smartphones and tablets, ManageEngine’s Endpoint Central is the ultimate solution for that.

It’s a modern take on desktop management where all the management tools can be controlled conveniently from a single dashboard.

Endpoint Central is not only about keeping your assets in check but also helps you install patches, deploy software, imaging, and entire OSes.

In addition, it allows you to manage assets and software licenses, monitor software usage statistics, manage USB device usage, control remote desktops, and more.

With Endpoint Central you may control Windows, Mac, and Linux devices remotely. However, you can also deploy profiles and policies on your mobile devices, and configure them for Wi-Fi connections, VPN, email accounts, etc.

As an added security option, it’s also possible to apply restrictions on application installs, camera and browser usage, as well as protecting your devices by enabling passcodes, remote lock/wipe, etc.

You will avoid any liabilities because you may track license and warranty details effortlessly for any installed software.

Let’s review some of its key features below:

  • Keep track of all your devices in your inventory
  • Control your endpoints remotely and troubleshoot any problem
  • Advanced hardware and software monitoring
  • Deploy profiles and policies on mobile devices
  • Apply restrictions for software installation and app usage

Endpoint Central

Free trial Visit website

N-central RMM – Great for remote monitoring

The software provides powerful automation and customizable IT tools. When you have clients with complex and large networks and systems, you will definitely need the tools that can help you efficiently manage and secure their systems without breaking down your team.

N-central RMM offers you the necessary tools that you need to handle all these complex environments including drag-and-drop automation, device settings and profiles, patch management, and more.

You can enjoy automation for almost everything, and this also includes customer onboarding, self-healing responses to alerts, device setup, and ticket creation.

This software offers support for more types of devices such as servers, endpoints, network devices, virtual machines, mobile, and IoT devices.

It is straightforward to get started with the program because you don’t need any credit card details, your login info is sent straight to you using the email, and you also benefit from tech support available during the trial in order to get you started.

Take a look at its best features:

  • On-premises or hosted environments
  • Manage complex environments easier with the help of filters, groups, and rules
  • Top-tier security, OS and third-party patch management, backup, and antivirus tools
  • Extremely rapid remote access, ticket management, and PSA integrations
  • Create reports that will prove your value to your customers

⇒ Get N-central RMM

Deskcenter Management Suite – Great inventory management

Businesses use Deskcenter Management Suite to bring some order to their IT management. The system has been developed from practical experience in such a way to become seamless and to be implemented modularly.

Its main advantage is the fact that license management, software distribution, and all functional modules work together seamlessly in the most intuitive user interface.

With a starting point of a complete and accurate inventory of all your IT assets such as Computers, Servers, Virtual Environments, Peripherals, Components, Users, and Mobile Devices this module offers you a significant level of capacity on its own.

Your organization will have assured IT compliance, and you will also see high-cost savings.

The foundation for any strategy is a clear inventory of your assets paired with financial, purchase, and contact details.

This tool will help you create all these using its agentless technology and collecting over 3,500 pieces of data about system hardware and software.

Software management means more than software distribution and Diskcenter will allow you to keep your software up to date and distribute it intelligently.

The Deskcenter tool gives you all you need to reasonably identify software applications, manage your software license assets, and create an audit-proof view of your software license position.

Take a look at its key features:

  • Extensive software recognition
  • Application metering
  • Automatic software categorization
  • License and contract repository
  • Product & release recognition
  • All license metrics supported

⇒ Get Deskcenter Management Suite

Network Inventory PRO version 2.0 – Advanced network tool

Network administrators who require detailed information about the PCs that are currently connected to a network might have some difficulties in gathering data manually.

The process is time-consuming, and it comes with various limitations. Network Inventory PRO was created to help admins overcome such issues by providing them with a complete package for network mapping.

This is an advanced network tool that inventory network computers, servers, and non-PC network equipment and builds robust reports. More than this, the tool also allows you to manage remote computers and network devices by using advanced built-in tools.

The tool automatically collects software and hardware configuration of the networked PCs and LAN equipment with Network Inventory PRO.

Anyone who requires an efficient solution for mapping out PCs connected to the LAN and for obtaining information about the devices and their characteristics will be able to use this program successfully.

It will offer admins detailed data regarding the OS, the software, and the hardware of the selected PCs and it will also allow them to carry out remote procedures.

⇒ Get Network Inventory PRO

We guarantee that all the PC inventory tools for Windows will change the way your business functions for the best. Do check them out and choose the one that will best fit your organization’s needs.

While we are on this subject, you should also consult our list of the best remote management software.

If you have experience with any of the tools highlighted above, do share your story in the comments section below.

Flight Simulator X Windows 10: How to Get It Work Perfectly

Microsoft Flight Simulator X is the most popular flight simulation game on Windows 10. This game was released many years ago, so some issues with it are expected.

It has been reported that this game can’t be installed on Windows 10 computers for some users and that there are issues with black screen and other visual problems.

Does Flight Simulator X work on Windows 10?

Yes, fortunately, the Microsoft Flight Simulator X works on Windows 10 as well, and you can download it from Steam.

But if Flight Simulator X is not working on your Windows 10 device or if you encounter some problems using it, below are a few of our top solution recommendations.

Will FSX run on Windows 11?

Yes, FSX is currently running on Windows 11, and thanks to this OS iteration’s extra gaming features, you will get the best out of this game.

Without further ado, let’s see how you can fix FSX issues on Windows 10.

How can I get Flight Simulator X to properly work on Windows 10?

  1. Use Software Licensing System Reset Tool
  2. Use the hidden Administrator account to install the game
  3. Run Microsoft Flight Simulator X in compatibility mode
  4. Verify the integrity of game cache on Steam
  5. Run Flight Simulator X in borderless window mode
  6. Reinstall Flight Simulator X on Steam

1. Use Software Licensing System Reset Tool

    If you need to benefit from Flight Simulator X, you can simply utilize the Use Software Licensing System Reset tool from your Windows PC.

  1. 1. Download the Software Licensing System Reset Tool.

  2. 2. Make sure that you save the file to your Desktop, and after the download is complete, go to your Desktop and run (double-click) MSKB928080.

    flight Simulator X windows 10
  3. 3. Accept the license agreement by clicking Yes.

    flight Simulator X windows 10
  4. 4. Click the Unzip button to extract the files to the below path.
    c:\MicrosoftKB928080

  5. 5. Open the Windows search bar, type cmd, and click Run as administrator.

  6. 6. When Command Prompt starts, type the following lines, and after each line, press Enter to run it:

      • cd C:
      • cd MicrosoftKB928080
      • resetsldl -All
  7. 7. After doing that, close Command Prompt and try installing the game again.

2. Use the hidden Administrator account to install the game

  1. Open the Windows search bar, type cmd, and click Run as administrator.
  2. In Command Prompt, type the following and press Enter to run it:
    net user administrator /active:yes
    flight Simulator X windows 10
  3. Now log out of your current account and switch to the newly enabled Administrator account.
  4. When you log in to the Administrator account, try installing Flight Simulator X, and after the game installs, you can switch back to your regular account.
  5. Start Command Prompt like we explained in Step 1 and enter the following command to disable the administrator account:
    net user administrator /active:no

3. Run Microsoft Flight Simulator X in compatibility mode

  1. Find the Flight Simulator X shortcut and right-click it, then choose Properties and go to the Compatibility tab.
  2. Check Run this program in compatibility mode for and choose Windows 8 from the menu.
  3. Click Apply and OK to save the changes and try rerunning the game.

4. Verify the integrity of the game cache on Steam

  1. Start Steam and log in to your account.
  2. Go to the Library tab and locate Flight Simulator X.
    flight Simulator X windows 10
  3. Right-click it and choose Properties.flight simulator Steam-Libraries-Games-Properties
  4. When the Properties window opens, go to the Local tab, then click the Verify integrity of game cache button.flight simulator X Steam-Game-Properties-Local-Files-Verify-Integrity-of-game-files
  5. Wait for the process to complete, and when Steam finishes verification of your game files, restart Steam and try rerunning Flight Simulator X.

5. Run Flight Simulator X in borderless window mode

To switch to windowed mode, just press Alt + Enter while running the game, and it should switch to borderless window mode.

Some users claim that running Flight Simulator X in window mode fixes certain video issues, so let’s try running the game in windowed mode.

6. Reinstall Flight Simulator X on Steam

  1. Sign out of Steam.
  2. Navigate to the path below and delete the FSX folder.
    C:\Program Files (x86)\Steam\steamapps\Common
  3. Now open Steam and go to your Library.
    flight Simulator X windows 10
  4. Find Flight Simulator X and right-click it, then choose Properties.
    flight simulator Steam-Libraries-Games-Properties
  5. Go to the Local tab, and click Verify Integrity of Games Cache. This will redownload and reinstall Flight Simulator X on your computer.
    flight simulator X Steam-Game-Properties-Local-Files-Verify-Integrity-of-game-files

That would be all. We hope this article helped you solve your problems with Flight Simulator X in Windows 10.

Last but not least, you might want to check out our post on Microsoft Flight Simulator Sale: Best Deals in 2022 in case you want to recommend it to your friends.

Tell us in the comments section below what other issues you encountered and what other solutions worked for you.

NET HELPMSG 2182 Problems with BITS Service: Diagnose & Fix

The NET HELPMSG 2182 error arises for some users when trying to update Windows 10 or install new MS Store apps.

The full error message states Problem with BITS service: The requested service has already been started. System.Management.Automation.RemoteException More help is available by typing NET HELPMSG 2182. System.Management.Automation.RemoteException

Thus, this issue usually pertains to the BITS (Background Intelligent Transfer Service) that assists update downloads from Microsoft servers.

Naturally, one of the first things to do is check the status of the Background Intelligent Transfer Service.

  1. To do this, simply type services.msc in the search area and open the Services app.
  2. Locate the BITS Service and make sure its Startup type is set to Manual.
  3. Also, check the Status column and restart or start it should it be stopped.

Users can’t get Windows apps or updates when the NET HELPMSG 2182. system.management.automation.remoteexception error arises. If you encounter this issue, make sure you use our solutions below.

How do I fix the NET HELPMSG 2182 error in Windows 10?

1. Run the Windows Update troubleshooter

  1. Press the Windows key + S keyboard shortcut to open Settings.
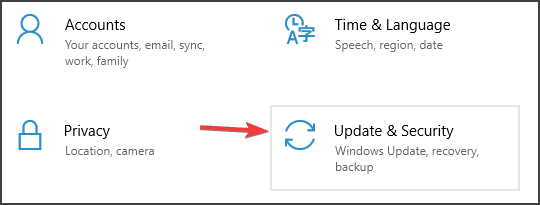
  2. Select Update and Security.
  3. Then you can click Troubleshoot from the left pane.
    The Troubleshoot tab NET HELPMSG 2182

  4. Select Windows Update and click Run the troubleshooter to launch it.
  5. Then you can go through the Windows Update troubleshooter for potential fixes.

First, we will show you how to use the Windows Update troubleshooter, which can fix numerous update issues. This is a Windows built-in troubleshooting tool that can help you solve numerous issues.

2. Run the BITS troubleshooter

  1. To open the BITS troubleshooter, press the Windows + R keyboard shortcut.
  2. Enter Control Panel in the Open box, and select the OK option.
  3. Click Troubleshooting to open the Control Panel applet shown directly below.
    Troubleshooting Control Panel applet NET HELPMSG 2182
  4. Click View all on the left of the window to open the list of troubleshooters.
    Troubleshooter list NET HELPMSG 2182
  5. Then click Background Intelligent Transfer Service to open that troubleshooter.
    The BITS TroubleshooterNET HELPMSG 2182
  6. Click Advanced to select the Apply repairs automatically option, and then press the Next button.

The Background Intelligent Transfer Service troubleshooter can fix BITS issues, which is what some users need to do to resolve the NET HELPMSG 2182 error.

3. Use a system repair software

Even though you can always repair your system manually by following detailed guides on the topic, having good PC repair software at your disposal can simplify the entire process considerably.

Moreover, it can prevent your PC from encountering other similar issues in the future.

4. Run a System File Checker scan

  1. Type cmd in the Windows search bar.
  2. Select the Command Prompt (Admin) option to launch an elevated Prompt window.
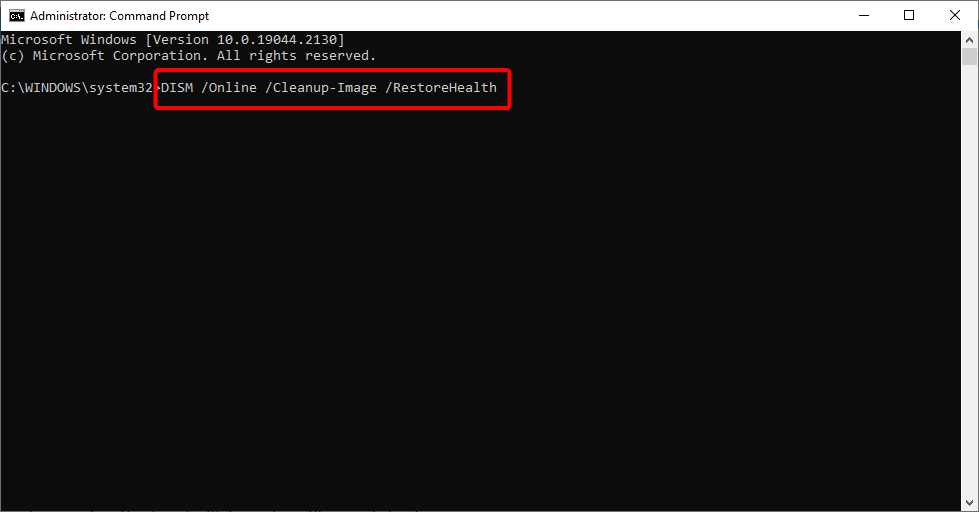
  3. Before initiating the SFC scan, enter the following command in the Command Prompt and press Return to fix Windows 10 image corruptions. DISM /Online /Cleanup-Image /RestoreHealth 
  4. Enter sfc /scannow and press Return to run the System File Checker scan, which might take about half an hour or longer.
    System File Checker command NET HELPMSG 2182
  5. Restart the desktop or laptop if the SFC scan does repair system files.

System File Checker scans can fix BITS errors and corrupted system files. It is another great Windows built-in troubleshooting tool you can use for various issues.

If the SFC scan stops completely on your PC before repairing the files, you can fix the problem by following the right methods.

5. Restart the Windows Update process

  1. 1. Press the Windows key and type cmd in the search box.

  2. 2. Right-click on the result for Command Prompt and select Run as Administrator.

    run cmd as admin
  3. 3. Input the following commands (and press Enter after entering each one) to turn off Windows Update:

    net stop wuauserv
    net stop cryptSvc
    net stop bits
    net stop msiserver

  4. 4. Next, input the below command and press Enter. That command will rename SoftwareDistribution to SoftwareDistribution.old:

    C:\Windows\SoftwareDistribution SoftwareDistribution.old

    input the rename command
  5. 5. Then type the next command and press Enter: ren C:\Windows\System32\catroot2 Catroot2.old 

    rename catroot cmd command
  6. 6. To restart Windows Update, input the commands below separately, and press Enter after each one:

    net start wuauserv
    net stop cryptSvc
    net stop bits
    net stop msiserver

  7. Restarting Windows Update might fix that service and the NET HELPMSG 2182 error. To do this, follow the steps above closely in exact order. You only need to use Command Prompt with administrator rights.

On a side note, these steps will also help if you’re having trouble with the Windows Update service itself.

6. Reset the Microsoft Store cache

  1. Enter Command Prompt in Windows 10’s search box.
  2. Right-click Command Prompt to select its Run as administrator context menu option.
  3. Then enter wsreset.exe in the Command Prompt window, and press the Return button.
    The MS Store reset command NET HELPMSG 2182

  4. Restart Windows after clearing the MS Store cache.

This resolution is more specifically for users who need to fix the NET HELPMSG 2182 error for MS Store. Sign out of the MS Store before clearing its cache.

If you notice that Microsoft Store is not loading, be sure to tackle the issue with confidence (as always, we got your back!).

The resolutions above have fixed the NET HELPMSG 2182 error for some users. So, they are the most probable fixes for the issue.

If you have any other suggestions that we should include here, please write us a comment below.

WD Passport Not Showing Up? Fix it in 4 Easy Steps

WD My Passport Ultra is an external hard drive that users can utilize with Windows 10 desktops and laptops. However, some users have stated that their connected desktops and laptops don’t detect the WD My Passport Ultra drives.

Consequently, the drive is unrecognized and doesn’t appear in Windows 10 File Explorer. This guide contains the solutions to help you fix this issue and start using your hard drive with your PC.

Why is my WD Passport not showing up on my computer?

If the WD Passport is not showing up on your computer, below are some of the causes of the issue:

  • Faulty USB cable or port – Sometimes, the WD MY Passport is not detected due to minor hardware issues like a faulty port or cable. The fix here is to change the port and try another port on your PC.
  • Outdated drivers – Drivers are the connecting media between the hardware and software components. You might encounter this issue if the USB controller and WD Passport drivers are outdated. The fix is to update these drivers.

Moreover, you can encounter the following error variations, that are all solvable with the solutions below:

  • My passport external hard drive not showing up
  • WD Passport not showing up in Windows 10, 11
  • WD Passport not showing up in disk utility, file explorer, disk management
  • WD Passport detected but not showing up
  • WD Passport unlocked but not showing up – WD passport not showing up after unlock
  • WD Passport beeping not showing up
  • My passport ultra not showing up
  • WD Passport light on but not working
  • My passport driver is unavailable

What can I do if WD My Passport is not showing up?

There are some basic troubleshooting steps you should try before exploring the fixes in this section. These steps are listed:

  • Try connecting the driver to another port.
  • Change the USB cable. Try to use the cable that came with the drive or any original short cable.
  • Try the WD Passport on another PC.

1. Run the Hardware and Devices Troubleshooter

  1. Press the Windows key + S, type cmd, and click Run as administrator under Command Prompt.
    run as admin wd my passport not showing up windows 10
  2. Type the command below and press Enter: msdt.exe -id DeviceDiagnosticmsdt command
  3. Wait for the scan to complete and implement any recommended troubleshooting steps.

The Hardware and devices troubleshooter helps to fix issues with hardware on your PC. Running should you detect any issue that might be causing WD My Passport detected but cannot open Windows 10 or if it is not showing at all.

2. Update the drive firmware

    Updating the drive firmware has proved to work for many users in fixing the WD MY Passport not working or unavailable issue. So be sure to try it like in the example below. 

  1. 1. Visit the Western Digital website to download the firmware update file.

    wd-passport-ultra-not-detected
  2. 2. Right-click the downloaded file and select Extract file…

    extract wd my passport not showing up windows 10
  3. 3. Connect the WD Passport to your PC (USB 2.0 port) with the cable that came with it, open the extracted folder, and double-click the WDFirmwareUpdater.exe file.

    wd-passport-ultra-not-detected
  4. 4, Now, follow the simple on screen instruction to complete the installation.


  5. 5. Once the installation is complete, your PC should show that a drive is connected to your PC and what you need to do to make it work.

3. Reinstall USB Controller and update WD My Passport driver

  1. Press the Windows key + X and select Device Manager.
    device manager
  2. Double-click the Disk drives option to expand it, right-click the WD MY Passport driver, and select Update driver.
    update driver
  3. Select Search automatically for drivers and install any available update.
    search automaticcally wd my passport not showing up windows 10
  4. Now, go back to the Device Manager and expand the Universal Serial Bus controllers option.
  5. Right-click the WD My passport USB controller and choose Uninstall device.
    uninstall device
  6. Finally, click the Uninstall button to confirm the action and restart your PC.
    uninstall button

Updating your drivers is another way to fix the WD MY Passport not showing on Windows 10 issue. However, this manual process can be time-consuming and prone to mistakes.

So we will recommend using a dedicated tool in Fortect Driver Updater. This is because it can accurately match your hardware with its corresponding drivers. This guarantees that you will not face any errors that may occur when you install an incompatible driver.

⇒ Get Fortect Driver Updater

4. Adjust the drive letter

  1. Press the Windows key + R, enter diskmgmt.msc, and click the OK button.
    diskkmgt
  2. Right-click the WD My Passport drive and select the Change Drive Letter and Paths option.
    change path
  3. To assign a drive letter, click the Add… button if it does not have a drive letter and the Change… if it already has.
    add wd my passport not showing up windows 10
  4. Finally, choose a driver letter and click the OK button.
    choose letter

If your drive does not have a drive letter, you might encounter the WD My Passport not showing on Windows 10 issue. This is because your device might find it hard to detect the drive. Assigning a drive letter and restarting your PC should help you fix the issue in this case.

The WD MY Passport not showing on Windows 10 issue can be frustrating, as it denies you access to your file. Thankfully, it is a fixable issue, as shown in this guide.

Other models are also affected by this issue, and we have a great guide on what to do if WD My Cloud is not showing on Windows 11.

Are you facing other issues, like Windows 10 external driver keeps disconnecting? Then, check our detailed guide to fix it quickly.

Feel free to let us know the solution that helped you fix the issue in the comments below.

Device PCI Requires Further Installation [Fix]

Many have reported a message in the Event Log saying Device PCI requires further installation, and are concerned that this can cause problems on their PC. Today we’re going to take a closer look and see how to fix this.

How do I fix a PCI device that requires further installation?

Before we try other solutions, make sure that the driver is installed completely and that you’re viewing the latest log entry. If possible, try reconnecting the device and check if that helps.

1. Update the driver

  1. Type Device Manager in the Search bar, and click on the relevant search result.
    device manager search
  2. Locate the problematic device, right-click on it, and select Update driver.
    update driver context menu
  3. Now, select Search automatically for drivers.
    Search automatically for drivers
  4. Wait for Windows to find the best available version on the system and install it.
  5. Restart your PC to apply the changes.

Alternatively, you can try automatic updater software such as Fortect Driver Updater. It will automatically update your drivers and fix any damaged or missing drivers on your PC.

⇒ Get Fortect Driver Updater

2. Manually install the driver

  1. Press Windows + R to open Run, type devmgmt.msc in the text field, and hit Enter.devmgmt.msc run window
  2. Right-click on the problematic device, and select Update driver.update driver context menu
  3. Now, select Browse my computer for drivers.browse my computer for drivers
  4. Select Let me pick from a list of available drivers on my computer.Let me pick from a list of available drivers on my computer
  5. Finally, choose another driver from the list, and click on Next.install an older version to fix device requires further installation
  6. Choose the appropriate response in case a confirmation prompt pops up.
  7. If this doesn’t work, try another driver from the list until you manage to fix the problem.

This method has helped several users fix the Device driver requires further installation error in Windows, and we recommend you give it a try.

3. Check for issues

  1. Type Security and Maintenance in the Search bar, and click on the search result that goes by the same name.security and maintenance
  2. Check for any issues listed here, and take the necessary actions to eliminate the root cause.resolve issues to fix device requires further installation

If wasn’t the driver, you could check for issues in Security and Maintenance and fix them in no time.

Device PCI requires further installation can affect your GPU, Wi-Fi, or any other network adapter, but hopefully, you managed to fix it with these steps.

Moreover, if you’re having trouble with updating the PCI Express Root Port driver specifically, we have a guide just for that. We also wrote about PCI Express root port errorexpress root port error express root port error express root port error so don’t miss it.

This isn’t the only issue with PCI devices and we covered what to do if PCI device driver missing as well as PCI Bus Driver Internal error.

If you have any other queries or know of another method to fix the problem, drop them in the comments section below.

How to Fix USB-C to HDMI Not Working Windows 11

In this guide, we’ll show you how to fix the USB-C to HDMI when it’s not working on Windows 11.

As you probably expect, there are several possible causes for this issue, the most common of which include an outdated or missing driver, a faulty cable or adapter, display settings interfering, or graphics card compatibility.

Here’s how you’ll address them and troubleshoot the USB-C to HDMI not connecting.

How do I fix my USB-C to HDMI adapter if it’s not working?

First, try switching ports, checking the cable for damage, or testing the adapter on another computer; if the issue persists, follow the more advanced steps below.

1. Update the USB C to HDMI driver

  1. 1. Press the Windows+ R to open Run.

  2. 2. Type devmgmt.msc, and then click OK.

    device manager
  3. 3. Double-click on Other devices to expand and view the ones under it.

    other devices
  4. 4. Now, right-click on the USB device and select Update driver.

    update driver to fix usb c to hdmi not working
  5. 5. Select Search automatically for drivers.

    search automatically for drivers
  6. The USB-C to HDMI driver in Windows 10 can often be why it is not working. So make sure to install the latest version of it.

    You can manually install the latest driver using the built-in tool called Device Manager. However, remember that the manual method is not always practical and might not work for all cases.


Update drivers automatically

You can download the latest driver for your USB to HDMI driver from the company’s website. With a bit of research, you should find the correct driver.

However, the best way to update your drivers is by using a specialized third-party tool that automatically scans your hardware for the latest available version and downloads it.

⇒ Get Fortect Driver Updater

2. Scan for hardware changes

  1. Press Windows + X to open the Power User menu, and select Device Manager.device manager
  2. Now, click on the Action menu, and select Scan for hardware changes.scan for hardware changes to fix usb c to hdmi not working
  3. Then try utilizing the USB to HDMI adapter after scanning.

If USB-C to HDMI is not working on the laptop, scan for hardware changes, and it should get the functionality up and running again.

3. Rollback to the previous Windows build

  1. Press Windows + I to open Settings and click on Update & Security.update & security
  2. Now, select Recovery from the navigation pane, and click on the Get started button under Go back to the previous version of Windows 10. Remember, you can only do this within ten days of installing an update.get started to fix usb c to hdmi not working
  3. Follow the on-screen instructions to complete the process.

Some users have found that their USB-C to HDMI adapters stopped working after a Windows update. If that happens, try reverting to the previous version or perform a System Restore if the option is available.

Does USB-C to HDMI always work?

Generally, yes, but issues with the driver or connection can occur. Most of these are fixable with the solutions we’ve provided.

How do I know if my USB-C supports video?

Look for a Lightning symbol or D (DisplayPort) logo next to the USB-C port, indicating support for video output.

If these steps don’t work, your adapter may need replacing. For other USB-related issues, check out our guides on fixing USB-C problems, USB ports not working, or USB devices not working with TVs.

If your adapter is under warranty, consider returning it for repair. Let us know in the comments if you found another solution!

Debug Software for Windows: Best 6 to Use in 2026

This guide brings you a compilation of the best debugging software for Windows. So, if you own a Windows PC and need debugging software, this piece will inform you adequately on the most suitable one.

Debugging is the process of searching for and fixing errors or other problems to avoid improper execution of a piece of software or an entire system.

How do I install debug tools on Windows 10?

  1. If you wonder how to debug a computer, first access the link of the software provided by us below, then hit the Download button.
  2. Then double-click the downloaded file in order to install it. That’s it!

So now, let us introduce you to some great options:

  • WinDbg – Specialized in Windows debugging
  • Visual Studio Debugger – Robust debugging features
  • OllyDbg – Best for 32-bit Windows
  • GNU Debugger – Great portable debugger
  • Fortect– Best debugging software overall
  • Syser Debugger – Top kerdel-mode debugger

What is the best debug software for Windows?

WinDbg – Specialized in Windows debugging

best debugging software for windows

Windows Debugger (WinDbg) is the standard debugging software for Windows. It is the official debugging tool from Windows’ developer – Microsoft. The software requires two interlinked computer systems to function at optimum capacity.

WinDbg can debug Windows OS (in kernel mode) and applications (in user mode). It also can analyze crash dumps and examine processor registers. The software is the ultimate tool for fixing any form of bug attack on a Windows PC.

Furthermore, Windows Debugger (WinDbg) supports operating systems on virtual engines. To do this, you need a durable VirtualCOM port to facilitate debugging of operating systems on virtual machines.

At times, debugging (via WinDbg) could be faster on virtual engines (especially VMWare) than on the original OS.

Important features:

  • Automatic processor detection engine
  • Integrated TTD (Time Travel Debugging)
  • Single-Click app debugging
  • Command windows
  • Powerful GUI

⇒ Get WinDbg

Visual Studio Debugger – Robust debugging features

best debugging software for windows

Visual Studio is another top-rated debugging software from Microsoft. Just like WinDbg, Visual Studio Debugger hosts exclusive support for Windows PC. Additionally, it comes preinstalled on all versions of Visual Studio, an IDE (app development) program from Microsoft.

This debugger is commonly used to debug Windows apps, as it is designed to run in debugger mode i.e. it operates in sync with any app you want to debug. Furthermore, to debug an app, you need to set the breakpoints, and you can start debugging.

Visual Studio is similar to WinDbg in terms of ease of usage and operability. However, unlike WinDbg, it cannot run kernel-mode coding (to debug a Windows OS).

As such, its functionality makes it excellent for debugging system programs and installed applications.

Important features:

  • CodeView
  • Symbol & Source Integration
  • Remote debugging,
  • Edit & Continue (live configuration)

⇒ Get Visual Studio Debugger

OllyDbg – Best for 32-bit Windows

OllyDbg is another top-rated x86 debugging software specially designed for all 32-bit Microsoft Windows NT versions. It is reverse engineering software that is often used to crack systems and install apps on Windows PCs.

OllyDbg is optimized to run binary analysis, in contrast to the conventional coding setup. Furthermore, it hosts an intuitive UI whose functions can easily be extended by plug-ins.

Additionally, it comes with Open architecture, a customizable/extensible platform, unicode support, and a customizable disassembler.

Lastly, OllyDbg is freeware, which means it is available for free download. However, there is an advanced version, which requires a paid license.

Important features:

  • Software cracking
  • Real-time editing (of bitcode)
  • Malware and code analysis
  • DLLs debugging

⇒ Get OllyDbg

GNU Debugger – Great portable debugger

GNU Debugger, GDB, is one of the best debugging software for Windows. It is a portable computer debugger that operates on multiple programming languages.

Additionally, it hosts cross-compatible support for Windows and Unix-like (multipurpose) operating systems.

GDB is program-specific, designed to identify, modify, suspend, terminate, and fix bugs on a specific application hosted on a PC. Essentially, it can examine a target application’s operational behavior, revealing all inherent elements that could cause damage.

This tool offers Python scripting support, Memory leak detectors, Watchpoints, Breakpoints, and Debugging registers.

Lastly, GDB is licensed under the GNU’s General Public License (GPL), which means it is available free of charge.

Important features:

  • 12+ programming language support
  • Remote debugging
  • Reversible debugging
  • Multi-CPU support

⇒ Get GDB Free

Fortect – Best debugging software overall

Debugging and fixing some common issues in Windows 10 involves cleaning and fixing damaged system files, registries, and DLL.

Fortect is an excellent alternative when dealing with such issues. While other third-party tools may do a similar job, Fortect has proven to be the most efficient among them.

It features a lightweight UI, and the debugging process is quite automated. Therefore, you don’t have to click too many buttons or configure too many settings to get your PC to a pristine condition.

Finally, not only will it clean your registries, but it will also clean and fix your DLLs and remove the damage caused by malware, all within a single scan spanning a couple of minutes.

Important features:

  • Repairing virus damage
  • Hardware repair
  • Finding stability issues
  • Junk cleaning

Fortect

Third-party tools may not seem like the go-to solution in this case, but Fortect can get the job done right.
Free Trial Download now

Syser Debugger – Top kerdel-mode debugger

Syser Debugger is a kernel-mode debugger that serves as an operating system analyzer and a driver developer for Windows computer systems. It stands out as one of the best debugging software for Windows.

The software is a 32-bit x86 debugger for Windows NT operating systems. Additionally, it is great for monitoring all Windows commands at any point in time, and it aptly detects bugs at an early stage.

Additionally, it is durable enough to run on virtual engines like VMWare without worrying about system crashes.

Lastly, Syser Debugger’s service license fee is $198.00.

Important features:

  • Source code & assembly debugging
  • Color disassembly
  • Syntax coloring
  • Multi-CPU support

⇒ Get Syser Kernel Debugger

What are debugger tools?

A debugger app is a tool that can aid in software development by spotting code problems at different stages of creating an OS or an application. Some debuggers examine a test run to determine which lines of code were skipped.

You should note that debugging software may come in various forms, including:

  • Resource monitor tools – These tools may diagnose performance issues and monitor PC resource use.
  • Web debugging tools – These may be cross-browser testing tools in some cases.
  • Specific language debugging tools – For example, there are debugging tools for c++, Java, C#, etc.
  • Native OS debuggers – In Windows 10, for example, users may use the built-in WinDbg to debug both kernel-mode and user-mode code, as well as study crash dumps and look into the registers of the CPU while the code is running.

Debugging is an essential computer process that facilitates the swift identification and repair (or removal) of various forms of bugs on computer systems.

Numerous debugging software exists, many of which are either substandard or incompatible with Windows.

Therefore, this article has compiled a list of Windows’s best debugging software to inform better your decision on which one to employ.

How to Listen to Music Together on Spotify on PC

We all love listening to our favorite music. Whether it is used to keep us company while we’re busy, to help us go through sad moments, or to celebrate joyful moments, music has always played an integral part in human life.

Now, as technology has advanced, the quality of the sound and the way we’re experiencing music has changed, but the effect is the same.

Spotify is one of the most comprehensive music platforms that besides other incredible features, allows you to explore the world of music with your friends and family.

Can two people listen to Spotify at the same time?

Spotify allows you to listen to music together with as many friends as you want, using the Remote Group feature.

It is worth mentioning that this feature is going to work only between two or more Premium accounts.

In today’s article, we will talk about the Group session feature in Spotify, and we’ll also discuss how to use it efficiently. Read on for more details.


How can I listen to music together on Spotify?

  1. 1. Launch Spotify.

  2. 2. Tap the Devices available button from the Now Playing toolbar.

    click on the devices button spotify
  3. 3. Click on Start a group session option.

    start a group session spotify
  4. 4. Choose how you want to share the session and copy the code.

  5. 5. Share the code with the friends or family members you want to have access to the Group Session.

  6. If you want to listen to music together with your friends or family on Spotify, all you need to to is create a Remote Group Session.

    You can invite your friends to it via a code. A friend or family member can then use this code to join your session.

Note: If you are the Group Session creator simply click End Session to close it. If you joined the session and want out, you can tap on the Leave Session option.


As you can see, using Spotify‘s Group Session feature is very a simple and direct process. This great Spotify feature allows you, your family, and your friends to enjoy music and podcasts together.

We hope you managed to listen to music together with your friends on Spotify using the Group Session feature. Let us know in the comments section below how it went.

Microsoft’s FY23 Q1 earnings report tripped up by declines in PC shipments and elsewhere

Despite PC shipments riding higher than they had been in pre-pandemic levels, the cliff they dropped off over the past couple of quarters was too steep to overcome for Microsoft’s bottom line.

The start of the fiscal year 2023 is a relatively bumpy one as company investors navigate Microsoft earning $17.6B in net income off of $50.1B in revenue. For the quarter, Microsoft’s revenue is up almost 11% but net income decreased by 14% (down 8% in constant currency).

AMD and Intel sent out warning flares of an imminent jolt to the PC market earlier this month as they lowered their projections for shipments ahead of their own earnings calls this week and Microsoft is also signaling to that softer demand as partial reason for its relatively poor showing this quarter.

“Windows OEM revenue declined 15% with continued deterioration in the PC market, partially offset by 5 points of positive impact from the prior year Windows 11 revenue deferral.”

So, while things could have looked a bit worse this quarter, Microsoft as a whole still has highlights this earnings report that include Xbox hardware being up 13% for the quarter alongside gaming revenue growth of 4%. Unfortunately, Xbox content services lagged behind with a 3% decline as Microsoft cites the lack of engagement hours and monetization from 1st party content, all of which was offset by the growth of Xbox Game Pass.

Search was another positive highlight during the earnings report with Search and News Advertising revenue growing by 16% and device revenue showing a modest 2% gain in the quarter when no new Surface devices were available for purchase.

Per usual, Microsoft’s Server Products and Cloud services revenue grew by 22%. Azure and other cloud services tacked on 35% revenue growth for the quarter that Microsoft is attributing to its “consumption-based services.”

Prior to the rebrand, Office 365 Commerical products and cloud services showed 7% revenue growth while Microsoft’s LinkedIn purchase continues to pay dividends with its own 17 revenue growth driven by “Talent Solutions.” Microsoft 365 is now sitting on 61.4 million Consumer subscribers representing a 13% growth and expected to increase further as the company shifts its naming convention to incorporate Office 365 seats as well.

Business Highlights


Productivity and Business Processes was $16.5 billion

  • Office Commercial products and cloud services revenue increased 7%
  • Office Consumer products and cloud services revenue increased 7% (up 11% in constant currency) and Microsoft 365 Consumer subscribers grew to 61.3 million
  • LinkedIn revenue increased 17%
  • Dynamics products and cloud services revenue increased 15% driven by Dynamics 365 revenue growth of 24%

Revenue in Intelligent Cloud was $20.3 billion and increased 20%

  • Server products and cloud services revenue increased 22% driven by Azure and other cloud services revenue growth of 35% (up 42% in constant currency)

Revenue in More Personal Computing was $13.3 billion

with the following business highlights:

  • Windows OEM revenue decreased 15%
  • Windows Commercial products and cloud services revenue increased 8%
  • Xbox content and services revenue decreased 3%
  • Search and news advertising revenue excluding traffic acquisition costs increased 16%
  • Devices revenue increased 2%

Microsoft returned $9.7 billion to shareholders in the form of share repurchases and dividends in the first quarter of fiscal year 2023, a decrease of 11% compared to the first quarter of fiscal year 2022.

The company warns of the typical industry trade winds, competition, COVID-19 related setbacks to manufacturing, shipping and logistical issues.  As for other risks and uncertainties, we’ll have to wait until the investors call later today to see how the company handles questions about layoffs, an impending recession and its looming $68B Activision acquisition.

Xbox revenues postCheck out our for more on the latest numbers for Xbox and gaming.

How to Backup Windows Server & Restore Data

If you want to back up your Windows Server machine, you found the perfect step-by-step guide to successfully do so.

This guide will be useful to you no matter what Windows Server version you are using, be it 2008, 2012, 2016 or 2019.

Do I need to backup my Windows Server?

Having a backup for your Windows server is extremely important. Doing this allows you to protect the entire set of data stored on your server without worrying about losing it.

Data loss can be extremely difficult to deal with if you don’t have a backup and can occur due to an error, power shortage, or even a third-party attack.

In some other cases, your data can become corrupted, and having a restore point can save you days of work.

In this how-to article, we will discuss the best way to go about backing up your data, and it will be presented to you in a step-by-step fashion. Read on to find out more.

How can I create a Windows Server backup?

1. Windows Server 2019

  • Installation:
  1. Open Server Manager, and select Add roles and features.
  2. In the Before you begin window, click Next.
  3. Choose the Role-based or feature-based installation, and click Next.
  4. Under Select destination server, choose your server, and click Next.
  5. In the Select server roles window, hit Next.
  6. Under Select features, choose Windows Server Backup and press Next.
  7. In the Confirm installation sections window, click on Install, and finally Close.
  • How to use:
  1. 1. Open Server Manager.

  2. 2. Launch the Backup utility.

  3. 3. Go to the Action tab.

  4. 4. Click on Backup Once.

  5. 5. Follow the on-screen instructions to complete the process.

  6. Creating a Windows Server 2019 backup is simple and can be done in a few clicks via the built-in Server Manager tool on your device.

⇒ Get Windows Server 2019

2. Windows Server 2016

  • Installation:
  1. Open Server Manager, and click Add roles and features.
  2. Click the Next button after reading the Before you begin page.
  3. Choose the Role-based or feature-based installation option.
  4. Select the server you want to back up, and click Next.
  5. Choose the server roles from the list by ticking the boxes.
  6. Inside the Features list, select Windows Server Backup by ticking the box.
  7. Click Install to start the installation process.
  • How to use:

Once the Windows Server Backup feature installation is finished, you can already create a backup plan. First, you need to decide on your favorite plan, and just follow the on-screen steps.

3. Windows Server 2012

  • Installation:
  1. Open your Server Manager.
  2. From the menu on the right of your screen, click Manage, and select Add roles and functionalities.
  3. Choose the Install based on a role of functionality option, and click Next.
  4. Select which server you want your backup function to be installed to, and click Next.
  5. Select Windows Server Backup from the list, and select Next.
  6. Check the box next to Automatically restart the destination server if necessary, click Yes, and choose Install.
  • How to use:

After the installation process has been completed, you can open the Server Manager, and launch the backup utility. This tool will allow you to create backups, manage, and restore files as you desire.

4. Windows Server 2008

  • Installation:
  1. Open Server Manager.
  2. Choose the Features option from the left menu.
  3. Click Add features, to open the Select Features page.
  4. Expand the Windows Server Backup Features option.
  5. Click the box next to Windows Server Backup.
  6. Select Install to start the installation process.
  • How to use:
  1. Open Server Manager.
  2. Launch the Backup utility.
  3. Click Create new backup, and follow the on-screen instructions to complete the process.

Also, if your Windows Server is not booting up, you should take a closer look at our comprehensive guide and follow the recommended steps to fix it.

We hope this guide has been useful for your situation, and that you can now successfully create backups for your servers.

Please feel free to let us know if this helped you, or if you have any suggestions. You can do that by using the comment section below.

How to Convert Adobe PDF to Regular PDF [Guide 2026]

Anyone who owns a PC for either school or work surely knows what a PDF file is. It is probably one of the most versatile file formats available today, allowing for the rendering of texts and images in a singular file.

What is PDF/A mode?

Of course, not everyone knows what a PDF/A file is. PDF/A is an ISO-standardized version of the PDF format that is specialized for use in the archiving and long-term preservation of electronic documents.

Opening PDF/A files is pretty easy for any PDF viewer, but editing it, or doing anything else for that matter is a bit more difficult. In simpler terms, a PDF/A document is the read-only version of a PDF file.

That is why we’ve compiled this step-by-step guide to show you how to save Adobe PDF as a normal PDF.

How do I convert PDF/A to PDF?

  1. 1. Open a PDF/A file using Adobe Acrobat DC.

  2. 2. Go to Edit (top-right side of the screen).

  3. 3. Navigate to Preferences.

  4. 4. Right under PDF/A View Mode, select the dropdown menu next to View documents in PDF/A mode.

  5. 5. Select Never.

    Never PDF/A
  6. 6. Save the new file.

  7. If you want to convert PDF/A to PDF, all you need to do is turn off PDF/A mode. This can be done from within the app.

    By doing this, you will convert your PDF/A file to a PDF file, and will thus no longer be read-only. Additionally, you can perform pretty much any action you desire, including editing it.

    If you want to reverse the change and make it read-only again, simply repeat the steps, but select Only for PDF/A documents instead of Never.

You can also use CutePDF to convert printable PDF documents on Windows when you prefer a simple print to PDF method.

What is Adobe Acrobat Reader?

Since Adobe Acrobat is the most popular PDF viewer on the market, the guide is specifically made to comply with it.

Adobe Acrobat Reader is one of the best tools in the tech industry that is able to convert a large variety of files such as Word, PPT, Excel, and JPG to PDF format.

In addition to being able to convert Adobe to PDF, it also provides many other extremely useful characteristics.

With this app, you can edit your PDF file, add comments, reorder, split, rotate pages, or convert your PDFs into JPGs. Depending on the type of documents you are working with you can even merge a PDF with another format file.

There are even more perks to this intelligent tool. With Adobe Acrobat you can choose your own digital signature and even turn existing forms into editable PDFs.

A very important feature is the Protect PDF function which allows you to secure your data by setting your own password and even customize the way you protect your information.

Adobe Acrobat Reader

Manage your PDF documents better and give Adobe Acrobat Reader a try.
Free Trial Visit Website

We hope that our guide gave you all the information you needed so you can successfully convert Adobe PDF to PDF.

Let us know your opinion on this subject by commenting in the section below.


How to Set Up Multiple Windows 11 Display Settings Profiles

One of the best features of Windows 11 is the ability to easily handle multiple displays. Multiple display setups are great for productivity and allow you to have different profiles especially if you want to differentiate them.

Display settings are centrally managed on Windows 11. You can configure multiple profiles, disconnect a display from the display settings and switch between them as needed. This is particularly useful if you have different monitors set up for different tasks or use cases.

Are Windows Display settings per user?

Unfortunately, Windows Display settings are not per user. When you create a new user, they will automatically have the same display settings as your current account. If you change the display settings in your user account, those changes will be reflected in your other users’ accounts.

This means that even when you are the administrator, a standard user account can still change the display settings. This brings us to the next question: How do I stop users from changing Display settings?

Most Windows systems are set up so that anyone who uses the computer can change the screen brightness and turn off external monitors – and if they take those steps, they might not realize that it’s affecting their own computer’s functionality.

If you work in a large environment, you might have users who like to mess around with their monitors. While this can be annoying, it’s not the end of the world – but it is a big enough problem for other people.

If you just want to keep your users from messing with their display settings, you can set a policy that prevents them from changing the display settings. In case the display settings fail to save, we have addressed the issue in our extensive article.

How can I set up multiple Windows 11 display settings profiles?

  1. 1. Right-click on the Start button and select System from the list.

  2. 2. Click on Display.

    go to display
  3. 3. Navigate to Advanced display.

  4. 4. Select a display and adjust its settings accordingly.

  5. 5. You can then switch to another display, adjust the settings and save to create another profile. 

  6. You can easily set up multiple display settings profiles via your Windows 11 PC’s built-in Settings.

    Once you set the settings for one display, it becomes unique to that profile. Remember this only works depending on the number of displays you have connected.

    If you disconnect a display, the settings will be erased as it will no longer be active. You will have to adjust the settings when you connect it again.

2. Use a third-party tool

Another way to get multiple windowed displays is to use a monitor profile switcher. DisplayFusion allows you to switch between different display settings for your monitor.

You can create multiple Windows display profiles and switch between them using a monitor profile switcher. DisplayFusion allows you to create multiple custom monitor settings profiles, which can then be switched between with a simple mouse click.

⇒ Get DisplayFusion

Users have also complained on various community platforms that they are experiencing issues where the Display settings hang or freeze. If you faced similar issues, you’ll be happy to know we have covered the fixes in our guide.

Sometimes, the screen resolution changes by itself but we have also addressed the problem in our comprehensive article. In case your Display settings are greyed out, check out our expert guide on how to resolve it.

Before leaving, don’t miss our guide on how to toggle between screens, since this is a must-have skill when multi-tasking.

Let us know whether you have been able to set up multiple display settings profiles in the comment section below.

Fix Critical Process Died in Windows 10 Stop Code in 5 Steps

The Critical process died issue is basically caused when a critical component of Windows detects that data has been modified when it should not have been.

This element could be a bad driver, a memory error, etc. Most of the time, this error suddenly occurs when users are working on their PCs. Fortunately, there are a couple of ways to fix this issue so stick with us and check all the solutions below to fix the Critical process died BSoD.

What does Critical process died mean on my computer?

If you see the Critical process died error on your computer, it means that an important process that your PC needs to run ended abruptly.

This can be drivers, system files, or other important components.

What causes Critical process died?

This has a wide range of causes. Below are some of the notable ones:

  • Broken or corrupt system files: – Top of the list of the potential causes of this issue are faulty system files. These files are crucial to the smooth running of your PC. To fix this, you need to repair and restore these files.
  • Outdated or broken drivers – Also crucial to the successful running of your PC are drivers. They can cause a lot of problems when outdated or broken and can be the reason you are getting the critical process died BSOD error. Reinstalling or updating these drivers should do the trick here.
  • Activities of third-party apps – If you started noticing this error after installing some apps, you might need to uninstall them. Also, if it just started suddenly, you can try performing a clean boot to pinpoint the faulty app or process.

There are many instances where this error may occur. This troubleshooting guide will show you how to fix this annoying issue in the following instances:

  • Critical process died boot loop – If your PC keeps restarting due to the critical process died error, it might be due to faulty system files.
  • Critical process died on startup – Should the error occur when you start up your PC, it might be down to an issue with one or more startup apps. Performing a clean boot should help here.
  • Critical process died. Windows 10 cannot boot – If you cannot boot into Windows due to this issue, it means there is a problem with your installation. You need to clean install Windows to get back access to your PC.
  • Critical process died in Windows 11 –
  • Windows 10 critical process died no safe mode – Run the CHKDSK or DISM scan in order to fix this.
  • Critical process died keeps restarting – Perform a clean install if the other solutions don’t seem to solve the issue.
  • Asus, Lenovo, Dell, HP critical processes died your device ran into a problem and needs to restart critical process died – No matter what laptop you have, you can experience this issue since it can be driver related.

How do I fix Windows 10 critical process died?

1. Run SFC and DISM scans

1.1. If you can boot into your PC

  1. Type cmd in the Windows search tab and click on Run as administrator under Command Prompt.
    cmd run admin critical process died
  2. Copy and paste the command below and press Enter: sfc/scannowsfc scannow
  3. Wait for the process to finish, type the command below and hit Enter: DISM /Online /Cleanup-Image /RestoreHealthdism
  4. You can run another SFC scan after the DISM scan and restart your PC when it is done.

1.2. If you can’t boot into your PC

  1. Insert a Windows 10 installation media and restart your PC. If your PC does not boot automatically to the USD or DVD, press the required key (could be F2, Del, F12, or Esc) immediately after restarting your PC to get to the boot menu and select the external drive.
  2. Select your language and click the Next button once your PC boots from the installation media.
    language critical process died
  3. Click Repair your computer in the bottom left corner.
    repair
  4. Now, select Troubleshoot option.
    troubleshoot
  5. Choose the Advanced option on the Troubleshoot page.
    advanced critical process died
  6. Select Command Prompt.
    command prompt
  7. From here, type the command below and hit Enter: bcdeditbcdedit critical process died
  8. Note the drive letter before device under the Windows boot loader section, as well as the detail before systemroot.
    bootloader
  9. Now type the command below and hit Enter. Note that you need to replace C in the command with the drive letter in Step 8 and \Windows with the detail before it: SFC /SCANNOW /OFFBOOTDIR=C:\ /OFFWINDIR=C:\Windowssfc root
  10. Wait for the scan to complete and restart your PC.
  11. Run the command below after your PC restarts: DISM /Online /Cleanup-Image /RestoreHealthdism restore critical process died
  12. Finally, you should run the usual SFC scan again to ensure everything is alright.

SFC and DISM are some of the built-in tools for repairing corrupt and broken system files on Windows PC. Alternatively, we will recommend using a dedicated tool to repair these files in case you can boot into your PC.

2. Run CHDKDSK

  1. Press the Windows key + S, type cmd, and choose Run as administrator under Command Prompt.
    cmd run admin critical process died
  2. Type the command below and hit Enter. Note that you need to replace C with the letter of your hard drive partition. chkdsk C: /fchkdsk c critical process died
  3. Wait for the check and fix to complete.
  4. To repair physical issues, type the command below and press Enter: chkdsk D: /rchkdsk r

Faulty memory partitions can also lead to a critical process died error on your PC. The command above helps to check and fix errors on your hard drive. Remember to restart your PC after running the commands.

3. Update drivers

  1. Press the Windows key + X and select Device Manager.
    device manager
  2. Double-click the option you want to download the driver for to expand it.
  3. Right-click each of the drivers there and select Update driver.
    update driver critical process died
  4. Choose Search automatically for drivers and install any available updates when the scan is complete.
    serach automatically

Bad drivers or drivers that wrongly use memory could also cause the Critical process died Windows 10 error.

It should be noted that updating all your drivers manually can be time-consuming. Hence, we suggest doing it automatically with a tailored solution.

Aside from the improved speed, an automated updating tool like Outbyte Driver Updater will help you to avoid permanent damage to your PC caused by downloading and installing the wrong driver versions.

    4. Clean boot to fix Critical process died error

    A clean boot starts Windows by using a minimal set of drivers and startup programs, thus making it perfect for troubleshooting this error.

  1. 1. Type System Configuration in the search box and hit Enter.

  2. 2. On the Services tab select the Hide all Microsoft services check box and click Disable all.

  3. 3. Click on Open Task Manager.

  4. 4. On the Startup tab in Task Manager select all items and click Disable.

  5. 5. Close Task Manager.

  6. 6. On the Startup tab of the System Configuration dialog box, click OK and restart your computer.

5. Perform a clean install

  1. Go to the Windows 10 download page on another PC to download the installation media.
  2. Click the Download Now button and double-click the program downloaded program to run it.
    download now critical process died
  3. Select Accept button on the license page.
    accept
  4. Select the Create installation media for another PC option on the What do you want to do page and click the Next button.
    create media
  5. Choose the appropriate language, system version, and architecture here and click Next.
    next critical process died
  6. Connect a flash drive and select the USB flash drive option. Note that it must be at least 8GB.
    usb flash drive
  7. After the installation media has been created successfully, remove the drive and connect it to your PC.
  8. Restart your system and it should automatically boot to the drive. If it does not, press a key (Esc, F12, F2, or Delete, depending on your PC) immediately after it turns on to open the boot menu.
  9. Select your language and other preferred settings on the Install Windows page and click Next.
    language critical process died
  10. Lastly, click Install Windows.
    install now critical process died

The critical process died error can be pretty annoying and it can sometimes have devastating effects. We hope that you were able to fix the issue with this guide.

You may also use our guide on how to create a restore point and use it to return Windows to a previous state in time.

If you have upgraded your PC and you encounter the Critical process died error on Windows 11, check our detailed guide on how to fix it easily.

Feel free to use the comments below to let us know which solution worked for you.

How to Fix No Audio Devices Found in Windows 11 [Audio]

The No output devices found in Windows 11 error arises when there’s an issue with your sound card. It’s quickly signaled by a red x over your taskbar’s sound icon.

The most common reasons why you get the No output device found error are outdated or unsigned drivers. Missing updates and audio settings may also be at fault.

Hre’s how you fix it:

How do I fix No output devices found in Windows 11?

1. Reinstall the audio driver

  1. Press Windows + S to open the Search menu, enter Device Manager in the text field, and click on the relevant search result.device manager
  2. Double-click Sound, video, and game controllers to view the devices for that category.sound, video and game controllers
  3. Next, right-click your PC’s sound device, and select Uninstall device.uninstall device to fix no output devices found windows 11
  4. Click Uninstall in the confirmation prompt that appears.uninstall device
  5. Also, look for a device with SST in its name under System devices, and reinstall it too.
  6. Once done, restart the computer, and Windows will automatically install the best driver for the device.

If Windows doesn’t identify the device after the restart, go to the Action menu, and select Scan for hardware changes.

2. Reset the audio controller

If simply reinstalling the audio controller doesn’t work, you will have to reset the audio controller. To do that, first, uninstall the High Definition Audio Device from the Device Manager.

Once done, shut down the PC, remove the power cable, and then hold the power button for at least 60 seconds. After that, wait another 10 minutes or so, and restart the computer after plugging in the power cable.

This may seem trivial but it often does the tick when there is a problem with your audio device.

3. Update the sound driver

  1. 1. Press Windows + X to open the Power User menu.

  2. 2. Select Device Manager from the list.

    device manager
  3. 3. Double-click the category for Sound, video, and game controllers.

    sound, video and game controller
  4. 4. Then right-click your PC’s sound device, such as High Definition Audio Device, and select Update driver.

    click on update driver
  5. 5. Click the Search automatically for drivers option.

    click to search automatically for drivers
  6. 6. If selecting that option doesn’t install a new driver, select the Search for updated drivers on Windows Update option.

    search for updated drivers
  7. 7. Next, press the Check for updates button on the Windows Update tab that opens.

    check for updates to fix permissions not synced with category in discord.
  8. 8. Select to download and install available updates.

  9. 9. In addition, click on Advanced options, then Optional updates.

    click on advanced options
  10. 10. Select the checkboxes for optional driver updates, and then on Download & install.

    click on optional driver updates

Some users prefer to update drivers with third-party driver updater software, as it is a much faster solution. This third-party driver updater will scan your PC and display what devices on it need new drivers.

If your sound device is among them, you can select to download and install the latest driver for it within the software.

⇒ Get Fortect Driver Updater

4. Disable Driver Signature Enforcement

  1. Press Windows + R to open Run, type gpedit.msc in the text field, and hit Enter.gpedit.msc
  2. Now, double-click Administrative Templates under User Configuration, and then on System.system
  3. Select Driver Installation from the left, and then double-click on Code signing for driver packages.code signing for driver packages
  4. Check the Enabled option, then from the When Windows detects a driver file without a digital signature dropdown menu, select Ignore, and finally click on OK to save the changes.enable policy to fix no output devices found windows 11

This is the quickest way, though you can also disable Driver Signature Enforcement after booting Windows in Recovery Mode. In case you are running the Home edition of Windows 11, you will have to manually install the Local Group Policy Editor.

5. Change Mono audio settings

  1. Press Windows + I to open Settings, select Accessibility from the navigation pane, and then click on Audio under Hearing.audio settings to fix no output devices found windows 11
  2. Now, check the Mono audio setting. If it’s already Enabled, turn it off, while if it’s Disabled, click on the toggle to turn it on.change mono audio setting

If no output devices are found in Windows 11, change the Mono audio setting and verify if that fixes the problem.

6. Uninstall the last Windows Update

  1. Press Windows + I to open Settings, select Windows Update from the left, and then click on Update history.update history
  2. Now, scroll down to the bottom and click on Uninstall updates.uninstall updates to fix no output devices found windows 11
  3. Click on Uninstall next to the last installed update.uninstall to fix no output devices found windows 11
  4. Again, click Uninstall in the confirmation prompt.confirm

If no output devices were found after Windows 11 update, it could be a bug in the last installed version of the OS. And the simplest solution here would be to uninstall that version. Once done, make sure to disable the automatic installation of Windows updates.

Now, all you have to do is wait for a newer version to be released, install it, and again enable automatic updates.

There might also be more ways to fix the No audio output device installed issue. Some solutions are common here and when Windows can’t find an audio device. So, you may try those as well.

Once you’ve managed to fix this issue, don’t miss our guide on how to change output device on Windows 11. And if you use the older OS, check our guide on how to fix No Output Device in Windows 10.

Many also reported that Windows 11 keeps changing audio output, but we have a guide that addresses that issue.

Users who have fixed this sound error with different methods are welcome to share their alternative resolutions below.

How to Convert MP4 to WMV on Windows 10

MP4 and WMV are two prevalent video file formats established by Moving Pictures and Microsoft. Many users prefer to save videos with those formats, which are widely supported by media players.

MP4 is a more widely supported video format than WMV as it can handle h.264. As WMV is a format more specifically designed for Windows, it’s not so widely supported by Apple-based media players.

The WMV format has a higher compression format than MP4, which means WMV file sizes are typically smaller. WMV’s smaller file sizes make it better for YouTube video streaming and email video attachments.

So, many users might prefer to convert their MP4 videos to the WMV format for YouTube and to save hard drive space. You can convert MP4 videos to the WMV format with web apps and software.

How can I convert MP4 to WMV on Windows 10?

1. Use WinX HD Video Converter Deluxe

WinX HD Video Converter Deluxe is the ideal software for converting MP4 to WMV.

This is a powerful video conversion tool that can convert a multitude of 4K/HD and regular video formats to a wide variety of output alternatives.

Furthermore, WinX is more than just a file converter as it includes some video-editing options. Users can crop, trim, expand, and apply subtitles to the converted video output.

Using this software you can also easily download YouTube videos, compress videos, and also supports level-3 hardware acceleration for faster video transcoding.

  1. Open the WinX HD Video Converter and click the Video button.
  2. Next, select an MP4 video to convert, and click Open.
  3. Click PC General Video on the Output Profile window.
    WinX HD Video Converter Deluxe software How to convert mp4 to wmv
  4. Select the WMV Video option.
  5. Press the Browse button to select a destination folder for the WMV video.
  6. Select Intel or Nvidia to enhance video conversion speed.
  7. To enhance the video picture quality, select the Use High-Quality Engine option.
  8. You can merge multiple MP4 videos together by selecting the Merge checkbox.
  9. Click Run to initiate the conversion.
WinX HD Video Converter Deluxe

WinX HD Video Converter Deluxe

Get started on converting Mini DV files to DVD with the powerful WinX HD Video Converter Deluxe.
Free trial Visit website

2. Use a web mp4 to WMV converter

  1. 1. Open the FreeConvert website.

    open freeconvert
  2. 2. Choose the MP4 video to convert to WMV. You can add a file from your PC, using an URL, or from your cloud storage.

    browse for the mp4 file
  3. 3. Click on Advanced options to open additional settings.

    go to advanced options freeconvert
  4. 4. Select a resolution for the output file.

  5. 5. Click the Video Aspect Ratio and choose the desired setting.

    adjust the volume bar
  6. 6. Press the Convert To WMV button.

  7. 7. Click the Download WMV button to save the file to your hard drive.

  8. If you’re looking for an mp4 to WMV converter to use on your Windows 10 device for free, then you need to look no further than FreeConvert.

    This converter can be used directly on the web, and doesn’t require any installation. All you need to do is add the mp4 file you want to convert into it, tweak the settings to your preferences, and then wait for the video to be converted.

Note: To select an MP4 video saved in cloud storage, hover the cursor over the small arrow on the Choose Files button. Then you can select the options displayed.

If you’re looking for the best software to open WMV files, read our dedicated article.


As you can see, converting MP4 to WMV files is straightforward with WinX HD Video Converter Deluxe and FreeConvert’s MP4 to WMV converter.

Websites like Online-Convert, Cloudconvert, and Convertio also include similar video conversion tools, but FreeConvert’s utility includes good options.

Fix: Halo Infinite Could Not Find Compatible Graphics Error

It’s possible for you to face the Halo Infinite could not find compatible graphics issues during installation and startup.

Although the error seems somewhat complicated, the primary reason behind it for several users is that they do not have enough video GPU RAM in their system.

Why is Halo Infinite not compatible with my GPU?

Apart from the primary reason, insufficient Video GPU RAM, other factors that could be responsible for this error are:

  • Old DirectX version – If your PC doesn’t have DirectX 12, it cannot run the game.
  • Corrupt game files – If the game is not downloaded from the official site, it could have some corrupt files included during compression.
  • Outdated Windows – When Windows is outdated, several compatibility issues will pop up with different apps due to bugs or corrupt files.
  • Outdated Steam Client – If the Steam client on your device is outdated, games directly tied to it will encounter issues such as the one addressed in Halo Infinite not working guide.

What can I do if Halo Infinite couldn’t find compatible graphics?

Before anything, consider conducting these notable checks:

  • Check if your graphics card has enough memory space in the System Information. Press Windows + R to open the Run box, type msinfo32, and then hit Enter to access it.
  • Check to know if the GPU fan, if available, is working correctly
  • Ensure the version of the Halo Infinite game is up to date.
  • Restart your PC to check if the issue still persists.

Proceed to the outlined fixes below after the above checks.

1. Update DirectX

  1. Press the Win + R keys on your keyboard to open the Run dialog box, type dxdiag and launch it.
  2. Verify that the DirectX Version is DirectX 12 under the System tab.
  3. In case it is not the latest version of DirectX, then press Win + I on your keyboard to open Windows Settings.
  4. Select Windows Update from the left pane, click the Check for updates option, and Windows will automatically update DirectX (if a new version is available).
  5. Alternatively, go to the official download site to download the latest DirectX Installer.
  6. Run the Installer and follow the onscreen prompts to install DirectX 12.

You can also follow steps 4 and 5 to update Windows, and if you encounter any issues, you can check out our expert guides on how to fix Windows Update errors. Since Windows update is another solution for this error.

2. Update the graphics driver

  1. Right-click the Start button, search Device Manager, and launch it.
  2. Locate the Display adapter, expand it, and right-click the driver you want to update.
  3. Select Update driver and click Search automatically for drivers.

If the graphics driver could not update using this method, proceed to this article on different methods to update graphics driver on Windows 11.

3. Update your Steam client

  1. Right-click the Start button, search Steam on your PC, and launch it.
  2. Click on the Steam tab located on the top menu bar.
  3. In the drop-down menu, click on the Check for Steam Client Updates option.
  4. Steam will automatically search for a new update and download it if available.

Once Steam is updated, the error should be fixed. However, it isn’t uncommon for Steam updates to revert or fail to apply. Hence, follow the solutions provided in our guide to solve the problem.

That is it from us in this guide. We hope that the above solutions helped you correct the Halo Infinite compatible graphics device issue. You can also explore the solutions provided in the article including tips to fix Halo Infinite crashing on PC.

Do let us know in the comments below which one of the methods helped you fix the problem.

How to Disable Skype Ads on Windows Computers

Are you tired of seeing Skype ads everywhere?

If you want to get rid of or remove the Skype ads that are being displayed in the home menu and also in the chat window, follow the steps below and learn how to use a “clean” Skype app and environment.

Are there ads on Skype?

The latest versions of Skype have brought annoying ads displayed not only in the home menu but also on the chat windows which can be stressful for all of us.

The ads have led to people uninstalling Skype from their Windows 10, 8, and Windows 8.1 devices. However, this is a last-resort measure that doesn’t need to be applied, as we have a fix for the ads.

Anyway, if you are tired of these ads, then you should learn how to disable them as there is an easy method that can be applied to that matter.

This procedure can be performed on any Windows system, so the steps below are also compatible with Windows 11, Windows 10, 8, and Windows 8.1 devices.

How can I disable ads on Skype?

  1. 1. Launch Control Panel on your Windows PC.

    You can access Control Panel by pressing Win + R and by searching for “control”. After, click on “ok” and then run Control Panel.

    Also you can just search for Control Panel by using the Windows Search feature – just type the word “control” on the search box and choose Control Panel from the list that will be displayed.

  2. 2. Navigate to Network and Internet (Network and Sharing Center).

    win 8 control panel
  3. 3. From the window that will be displayed, tap on the Security tab.

  4. 4. Then, from the first box, click on Restricted sites.

  5. 5. Up next, tap on the Sites button. A dialog box dubbed as Restricted sites should be now displayed.

  6. 6. In the same dialog box, type https://apps.skype.com/.

    input the skype web url
  7. 7. Save your changes and close Control Panel.

  8. 8. Now just restart Skype and enjoy the ads-free program. Instead of the annoying ads, you should now see an empty placeholder.

  9. No matter what Windows OS you are using, whether it is Windows 11, Windows 10 or even Windows 8, it is just as easy to disable Skype ads.

    All you need to do is add Skype to the list of restricted sites via Internet Properties. In doing so, you will ensure that the app’s ads will no longer show up, and will display a placeholder in their stead.

Speaking of blocking ads, you can also block them on your browser as well. There are many browser extensions that allow you to disable ads and enjoy a smooth browsing experience. Here are some examples of such extensions:

Perfect; you now know how to remove Skype ads from the home menu and chat window. Remember that this method can be applied on any Window system, so you can anytime try it on your own Windows 11, Windows 10, 8, and Windows 8.1 device.

We hope you successfully removed ads from your Skype app on your computer. Write down in the comments section below whether you encountered any difficulties following our guide.


5 Ways to Fix the Error Starting Game in Overwatch 2

Overwatch 2 errors that involve starting the game are some of the issues plaguing it nowadays. Many users complain about this error popping up, preventing them from being able to play the game. Also, you may experience Overwatch black screen on launch on your PC.

Why does the error starting Overwatch 2 show up?

The main culprit for this error is an outdated game version. It makes the game incompatible with the server you want to connect to. Some other factors are:

  • Outdated graphics driver – When your graphics cards are outdated, they will affect games like Overwatch that use many graphics components. Likewise, running other outdated drivers on your PC can result in crashes when playing games.
  • Windows Defender Firewall interference – It is common for Windows Firewall to interfere with gaming activities. The Firewall can stop the game from running if it senses any threat.
  • Background programs running on your PC – Many apps can cause interference with your game, resulting in the Overwatch error starting a game.
  • Corrupt game files – The game files are responsible for communication between the game client and other components. So, when there is an issue with your game file, it’ll become inaccessible.

Not that we know why this happens, let’s start fixing the game and resume playing.

What can I do if getting an error that starts the game in Overwatch 2?

Before proceeding with any solutions for the error starting the game in Overwatch 2, apply the following preliminary checks:

  • If you have many apps running simultaneously, close the unnecessary ones.
  • Ensure there is enough memory space on your PC. Check this guide for freeing hard disk space on Windows 11.
  • Disable the antivirus software on your PC that can blacklist some game files and prevent them from starting.
  • Restart your PC in Safe Mode to resolve boot errors liable to cause the issue.

In case you’re unable to fix the issue, carry on with the troubleshooting steps below.

1. Repair Overwatch 2

  1. Left-click the Start button, search for Battle.net and launch the app.
  2. Select the Overwatch 2 game from the library, click the cog-wheel icon, and click the Scan & Repair option.
  3. Then select Begin Scan to initiate the diagnostic process.

Follow the prompt that appears after the scan to fix the problem.

2. Uninstall and reinstall Overwatch 2

  1. Left-click the Start button, search for Battle.net and launch the app.
  2. Select the icon for Overwatch 2, select the drop-down arrow next to the play button, then select Uninstall.
  3. To reinstall, select Start Install from the Overwatch 2 tab.

Although this is an extreme step, it is the most effective way to fix this error. You should note that your data and progress will be lost after this process.

3. Update your graphics driver

  1. Press the Windows + R key to prompt the Run window, type the following into the search space and click OK: devmgmt.msc
  2. Click on the Display adapters from the search results and right-click the driver you want to update from the drop-down, then click Update driver.
  3. Choose Search automatically for drivers and wait for Windows to search and install the driver updates.
  4. Restart your computer and check if the error starting a game in Overwatch persists.

Updating the graphics driver on your computer will help it work better. It can also help fix Overwatch 2 lost connection to game server on your computer.

A third-party software can also be useful here because it performs the updating process automatically. Outbyte Driver Updater is a straightforward program that runs a comprehensive scan of your PC and instantly updates any outdated drivers.

Outbyte Driver Updater

Great app with an easy-to-use interface that helps you update your PC drivers.
Free Trial Download now

4. Close the background programs

  1. Press Windows + R to open the Run Window, type the following, and click OK: msconfig
  2. Select the Selective startup and uncheck the Load startup items box.
  3. Now, navigate to the Services tab. Check the Hide all Microsoft services box. Now, click on Disable all and then OK to confirm changes.
  4. Finally, restart your PC and check if the problem is resolved.

Ending activities for background programs consuming lots of system resources can fix the issue with Overwatch. This is a great step if the Task Manager is not working on your PC.

5. Disable Windows Firewall

  1. Left click the Start button, type windows security in the Search bar, and launch it.
  2. Click Virus & threat protection on the Windows Security tab, then select Manage settings.
  3. Toggle Off the Real-time protection option.
  4. Restart your PC to sync the changes.

Disabling the Windows Firewall will help prevent Overwatch 2 files from being flagged as malicious.

Nevertheless, you can check how to fix the Overwatch update stuck on your PC.

If you have suggestions on other proven fixes that have worked for you, kindly drop them in the comments section. Also, we welcome your queries and questions.

5 Best PC Hardware Diagnostic Tools Tested by Experts

To prevent errors like BSoD and system crashes, you need to monitor your PC with a reliable hardware diagnostic tool.

Today, we’ll walk you through the best tools that can detect whether your RAM is failing, your hard drive is about to die, your GPU is overheating, or if there’s a hidden fault in your motherboard.

So let’s check them out.

What are the best hardware tester tools for Windows?

Note icon NOTE
Important! Some of the special data such as the CPU fan speed and temperature of various components, can only be shown if certain hardware comes with a sensor for it.

AIDA64 Extreme – Best hardware monitoring tool

AIDA64 is a hardware monitoring software for Windows 10 and that caters to home users, corporate engineers, and businesses. It offers detailed information for over 185,000 hardware devices.

The System Stability Test uses a 64-bit multi-threaded stress testing module to drive your PC to its limits.

Even more, SSD, hard disk, and OpenCL GPGPU video adapter stress testing are all part of the package. Even more, it can easily provide detailed information on the PC’s internals in no time. This is possible thanks to a generous hardware database holding more than 200,000 entries.

Check out the main features that this tool brings to the table:

  • Over 50 pages of information on software licenses, installed programs, and Windows settings
  • Implements a set of 64-bit benchmarks
  • Supports over 250 various sensor devices to measure temperatures, fan speeds, and not only
  • Custom panel that perfectly fits the design of your rig
  • CPU PhotoWorxx Benchmark for accurate color space conversion

AIDA64 Extreme

This is a great system information tool that allows you to monitor the performance of your computer.
Check price Get it now

CrystalDiskInfo – Good for SSD diagnostics

If you want to know if your SSD or hard drive is in good condition, the tool to use is no other than CrystalDiskInfo. It performs a complete analysis of the state of your data drives, including USB drives, SSDs, and HDDs.

It will give you details about error rates, uptime, spin-up time, and temperature.

What we found extremely useful is that you can configure CrystalDiskInfo to send you alerts if there is any issue identified in one of the systems being monitored. 

Check out the main features that this tool brings to the table:

  • Straightforward interface, with Temperature, Health Status, and Smart information displayed
  • Auto-detection feature that can be easily turned On or Off
  • Ideal for reading and monitoring disk drive status
  • Provides a health rating based on your drive’s Smart status
  • Completely free to use by anyone

⇒ Get CrystalDiskInfo

Intel Processor Diagnostic Tool – Best for Intel CPUs

Intel Processor Diagnostic Tool performs various stress tests on the processor, verifies the processor’s operating efficiency, and checks for brand identification.

Even more, feel free to configure it by accessing Tools > Config > Edit. You will immediately receive a note about the effect of changing Intel PDT parameters from the default configuration. 

We also want to share a useful tip with you. You can get more details on how to use the utility by clicking on About > Help to view the Help Documentation file.

Check out the main features that this tool brings to the table:

  • Verifies the functionality of all the cores of Intel processors
  • Tests specific processor features
  • Brand identification is included
  • Verifies the processor’s operating frequency
  • Lets you save the test results files after the test 

⇒ Get Intel Processor Diagnostic Tool

JScreenFix – Best for identifying LCD issues

If the stuck pixels are not a result of defects in the screen, then JScreenFix can fix the problem. The program uses HTML5 and JavaScript directly in your web browser, so there’s nothing that you are supposed to install.

Quite the opposite, just launch it by using the link below and note that it works by flushing the affected area with hundreds of different colors every minute. This way, it takes only a few minutes to unstick the pixels.

Besides the fact that it has an intuitive interface and it’s very easy to use, this web app is suitable for both LCD and OLED screens.

Check out the main features that this tool brings to the table:

  • Easy to use, clean, and crisp interface
  • Repairs stuck pixels in less than 10 minutes
  • Pixel fixing algorithm that has been applied to over four million screens
  • Provided free of charge
  • Over 60% success rate

⇒ Get JScreenFix

How do I scan for hardware errors in Windows 11?

  1. Click the Start button and select Settings.
  2. Next, click on Privacy & security from the left pane and select Diagnostics & feedback from the right.
  3. Now, turn On the Diagnostic Data Viewer and click on the Open Diagnostic Data Viewer button.
  4. By default, you don’t have the Diagnostic Data Viewer installed so you will be redirected to the Microsoft Store app where you need to click the Get button to download and install the app.
  5. After the app is installed, open the app and if you click the Problem Reports tab, you will see all the recent hardware issue reports with detailed information.

If you didn’t upgrade your machine with the latest OS, below you can see how you can do that on Windows.

How do I scan for hardware errors on PC?

  1. Click the Start button and select Settings.
  2. Choose Privacy.
  3. Now, select Diagnostic & feedback from the left, turn On the View diagnostic data option and click on the Open Diagnostic Data Viewer button.
  4. By default, this app is not installed so you will be redirected to Microsoft Store where you need to click the Get button to download and install it.
  5. After the process is finished, open the app and click on the Program Reports tab from the left to see a detailed situation of all the latest hardware and software issues.

Do Windows 10 and 11 have a hardware diagnostic tool?

Although they offer a Memory Diagnostic Tool, it doesn’t offer too much information.

In comparison with Windows 10, the updated version of troubleshooting software has been improved on Windows 11. But it still doesn’t offer the entire range of features or the amount of information a good third-party software can.

How do I use the Memory Diagnostic Tool?

  1. Press the Win + R keys to open the Run dialogue box.
  2. Type mdsched.exe and press Enter to run it.
  3. Choose either to restart the computer and check for problems or to check for problems the next time you restart the computer.

Also known as mdsched.exe, the Windows Memory Diagnostic Tool runs comprehensive tests on your computer’s memory checking for any error that may stifle proper functioning.

To be more precise, it tests memory for defects and displays the results so that you can take action.

Keep in mind that no intervention is required on your part at this point since the verification is completely automatic. As for the actual memory test sets, they will continue to repeat until the PC is powered off.

The Memory Diagnostic Tool will run tests on your machine and will notify you of any memory module issues.

We also have a guide on how to fix Memory Diagnostic Tool if it doesn’t return any results.

Are hardware diagnostic tools safe?

Yes, legit hardware diagnostic tools are safe. However, hackers and other third parties have used the disguise of such tools to pack malware and bloatware. So always make sure to use reputable tools and only download them from their official sites.

There are many diagnostic tools that you can use to fix hardware problems and since we could not cover all of them in one lot, we hope that you will find the above tools useful.

You can bookmark this page as you might need to visit it again if you come across the same problem or a different one in the future.

For more information, you may also read our guide with 7 ways to run complete hardware diagnostics on Windows 10.

For a comprehensive look at every component, don’t miss our guide on 7 ways to run complete hardware diagnostics on Windows 10 to uncover hidden issues early.

And if you suspect your motherboard might be the culprit, try one of the free options covered in our roundup of motherboard diagnostic software to pinpoint any faults before they lead to bigger problems.

If you have any other questions or suggestions, feel free to drop them in the comments section below.

Can’t Install Anything on Windows 10: 7 Easy Expert fixes

We have all got a bunch of useful programs on the computer, surviving without which seems impossible. And every few days, more are added to the list. However, many users reported that they can’t install anything on a Windows 10 computer.

The problem is rather tricky because it, more or less, eliminates the use of third-party tools, though there are some that manage to bypass it and fix things. We have a recommendation shared later in the article.

Why can’t I install anything on my PC?

Here are the reasons why you can’t install anything on the computer in Windows 10:

  • Misconfigured power settings – Certain features, when enabled in Windows, may affect the core functioning of the OS and prevent the installation of new programs.
  • Background processes conflicting with the installation – The Windows Installer (msiexec.exe) process is usually found to be the culprit here.
  • Incorrect system setting – In many cases, users had set the settings such that only the apps from Microsoft Store could be installed, which turned out the problem.
  • Running an outdated version of the OS – Many were unable to install apps when running an extremely old iteration of the OS, for instance, Windows 96 or XP, due to compatibility issues. Here, it’s recommended that you upgrade the OS.
  • File system error – Some users also reported receiving the File system error when installing apps, which must be fixed first.

Also, here are a few issues shared by users, and we have found the solutions that work in these cases as well:

  • Windows won’t let me install anything – Some users shared the inability to install any app on the computer, and this is usually the case for most who come across the error.
  • I can’t install anything on my computer in Windows 10 – A few users reported that none of the apps, not even those from Microsoft Store, were installed, which may indicate a problem with corrupt files or Windows installation.
  • Windows installer won’t let me install anything – A very similar issue, but in this case, users received a Windows Installer error.

How do I fix Windows 10 if it can’t install anything?

Let’s first try a few quick tricks and workarounds that worked for some users before heading to advanced troubleshooting.

  • Restart the computer if you can’t install anything on your Windows 10 computer.
  • Run the app installer as an administrator.
  • Disable any antivirus or third-party firewall installed on the computer. If that works, we recommend uninstalling the program and switching to a more reliable and effective antivirus.

If these don’t work, try the solutions listed next.

1. Terminate the Windows Installer process

  1. Press Ctrl + Shift + Esc to launch the Task Manager, and locate the Windows Installer (msiexec.exe) process.task manager
  2. Now, select the process and click on End task.End task to fix i can't install anything on my computer windows 10
  3. There could be two processes by the same name. Make sure to terminate the other one as well.

Once done, check if you still can’t install anything on the Windows 10 computer or if the problem is fixed for good.

2. Disable Fast Startup

    If you are logged in as administrator but can’t install software in Windows 10, it’s likely the Fast Startup feature to blame. Though meant to reduce the boot time in Windows, Fast Startup has often been found to affect the functioning of the OS.

    1. Type Control Panel in the Search bar, and click on the relevant search result.
    control panel
  1. 2. Click on System and Security.

    system and security
  2. 3. Now, choose Change what the power buttons do under Power Options.

    change what the power buttons do to fix i can't install anything on my computer windows 10
  3. 4. Click on Change settings that are currently unavailable.

    change settings that are currently unavailable
  4. 5. Uncheck the Turn on fast startup (recommended) option, and click on Save changes at the bottom.

    disable fast startup to fix i can't install anything on my computer windows 10
  5. 6. Once done, restart the computer to fix I can’t install anything on my Windows 10 computer

3. Use Windows troubleshooter

This helps automatically repair issues like corrupted registry keys that may be responsible for the issue.

Simply download the Program Install and Uninstall troubleshooter, run it, and follow the on-screen instructions to fix things. Though it has worked for some users, there’s no certainty that it would work in every case.

A better alternative is to use a comprehensive repair tool that scans and offers a thorough report of your PC. These tools also allow you to fix or replace the broken system file.

4. Run critical services

  1. Press Windows + R to open Run, type services.msc in the text field, and click OK.services.msc
  2. Locate the Windows Audio service, right-click on it, and select Properties.Windows Audio
  3. Select Automatic from the Startup type dropdown menu.automatic
  4. Click on the Start button if the service is not running, and then click on OK to save the changes.start service to fix i can't install anything on my computer windows 10
  5. Similarly, make sure the Windows Update service is running and has been configured to run automatically.Windows Update

Many who can’t install anything on a Windows 10 computer were saved with this method. For some, it was the Windows Audio service, while for many, it was Windows Update that needed to be run. The latter was usually when users couldn’t install apps from Microsoft Store.

5. Change UAC settings

  1. Type Change User Account Control settings in the Search bar, and click on the relevant search result.change user account control settings
  2. Drag the slider to the bottom, and then click on OK to save the changes.Never notify UAC to fix i can't install anything on my computer windows 10
  3. Click Yes in the UAC prompt that pops up. The I can’t install anything on my Windows 10 computer issue will be fixed.

6. Disable/uninstall conflicting apps

  1. Press Windows + R to open Run, enter appwiz.cpl in the text field, and click OK.appwiz.cpl
  2. Now, select the conflicting app, and then click on Uninstall.uninstall app
  3. Follow the on-screen instructions to complete the process.

In some cases, it was third-party apps responsible for the issue. So, if you can’t install anything on a Windows 10 computer, locate the problematic app, and uninstall it. The option to disable it can usually be found inside the app settings.

One user reported Pi-hole to be the culprit here. Look for other similar apps as well.

7. Check security settings

  1. Log into Windows as administrator, press Windows + I to open Settings, and then select Update & Security.update & security
  2. Choose For developers from the left, and then enable the toggle under Developer Mode.disable developer mode to fix i can't install anything on my computer windows 10
  3. Click Yes in the confirmation prompt that appears.confirm change

These solutions have been confirmed by users and should get things up and running if, earlier, you couldn’t install anything on the Windows 10 computer.

While you are at it, also find out how to download Microsoft Store apps without using the Store.

Let us know if you have any further issues or know of a solution not listed here using the comments section below.

How to Fix Video TDR Failure nvlddmkm.sys in 3 Steps

The Video TDR Failure nvlddmkm.sys BSOD error has been an issue for quite a while. From outdated drivers to an overloaded GPU and faulty overclocking, many things could trigger this error.

That said, it’s not unfixable, and below we’ll show you ally ou need to do to get rid of it.

How do I stop the TDR crash?

1. Change the PhysX settings

  1. Launch the NVIDIA Control Panel, and select Configure Surround, PhysX from the left.configure surround, physx settings
  2. Now, click on the Processor dropdown menu under PhysX settings, and select your GPU from the list.select GPU to fix video tdr failure nvlddmkm.sys
  3. Once done, save the changes.

This is one of the quick methods that helped many get things running in case of the Video TDR Failure nvlddmkm.sys blue screen error. So, make sure to try it.

2. Check for updates for the drivers of your graphics card

  1. Press Windows + S for Run, type in dxdiag in the text field, and click OK.dxdiag
  2. Navigate to the Display tab and verify details about your operating system.display tab
  3. Visit the NVIDIA website and download the newest drivers for your graphics card.driver
  4. Select the latest drivers from the list from the NVIDIA website and download them.
  5. Choose the updates necessary for your graphics card, agree, and download them.
  6. Install them and restart your computer.
  7. Verify if the problem has disappeared.

Naturally, you will want to see whether or not your graphics card is up to date also. In fact, most of the time, the error is caused by an outdated driver.

After you entered the NVIDIA website, we advise you to download only certified or recommended updates. You must avoid the ones that are still in the beta development stage. Fortunately, it is very easy to update the graphics drivers, but the manual approach is not always fruitful.

There is also third-party driver updating software that makes it easier for users to keep their drivers updated.

3. Change the TDR value

Note icon NOTE
This method involves making changes to the Registry which is a complex process. We recommend you first create a restore point and then follow the instructions as it is to avoid any issues.

    A quick workaround to fix the stop code Video TDR Failure nvlddmkm.sys is to change the TDR values. Setting it as 60 worked for users, and we recommend you try the same.

  1. 1. Press Windows + R to open Run, type regedit in the text field, and click OK.

    fix-video-tdr-failure
  2. 2. Click Yes in the UAC prompt.

  3. 3. Now, paste the following path in the address bar and hit Enter:Computer\HKEY_LOCAL_MACHINE\SYSTEM\CurrentControlSet\Control\GraphicsDrivers

    fix-video-tdr-failure
  4. 4. Locate the TdrDelay and TdrDdiDelay DWORDs on the right.

  5. 5. If you can’t find both, right-click on the blank portion, hover the cursor over New, select DWORD (32-bit) Value, and name it as TdrDelay.

    DWORD to fix video tdr failure nvlddmkm.sys
  6. 6. Double-click on the newly created DWORD, choose Decimal under Base, enter 60 under Value data, and click on OK.

    fix-video-tdr-failure
  7. 7. Once done, create another DWORD, name it TdrDdiDelay, and similarly, choose Decimal under Base, change the Value data to 60, and then click OK.

    TDR at 60 to fix video tdr failure nvlddmkm.sys
  8. 8. Restart the computer for the changes to come into effect.

In you still receive the VIDEO_TDR_FAILURE nvlddmkm.sys BSOD, delete the two DWORDs created earlier, and contact the GPU manufacturer for more help. At this point, it’s likely that the problem lies with the hardware itself.

There you go! We hope that one of these solutions helped fix the annoying VIDEO_TDR_FAILURE nvlddmkm.sys error on Windows. Also, find out how to make Windows faster than before.

As always, if you come across other workarounds to fix this problem, you can help the Windows community by listing the troubleshooting steps in the comments below.

5 Ways to Fix Netflix When It’s Not Accepting Your Payment

Encountering a payment validation issue on Netflix can be annoying. Some users report that Netflix is not accepting their payments, which is a similar issue on Hulu as well.

Such problems will restrict your access to your favorite premium content. Hence, we will provide plausible fixes.

Why is Netflix not accepting my payment?

Although Netflix offers exceptional service, you can sometimes experience payment rejection issues.

The primary cause of this is due to invalid card details. Since most users opt for the card as a means of payment, a mistake in the details can render the card ineligible for payment. Other likely causes are:

  • Expired card – If your payment card is expired, then your financial institution cannot process it. Hence, your payment will not be successful.
  • Unsupported payment method – Netflix supports multiple payment methods. However, it has a limit, and if you opt for an unsupported one, Netflix cannot accept the payment.
  • Issues with the Netflix payment system – There are times Netflix is unable to process your request. It could be due to the server, or you are encountering an error that freezes or makes the app get stuck.
  • Insufficient funds – If the amount in your account is not up to the subscription plan you opt for, you will likely encounter the Netflix not accepting payment error.

Let’s proceed to the possible ways to fix this error.

What can I do if Netflix is not accepting my payment?

Before anything else, ensure you perform these checks:

  • Ensure you have a stable Internet connection to avoid disruption during payment processing. If there is a problem connecting to Netflix, take a look at this guide.
  • Ensure your card has not been attached to different accounts for recurring subscription charges.
  • Ensure that your bank account is configured for international payments.
  • Restart Netflix and retry the payment.

If all these have been checked and the issue persists, consider trying the fixes below.

1. Update your payment method

  1. Go to the Netflix website or start the app and log in to your account.
  2. Choose your Settings icon and select Account from the drop-down.
  3. Select Account details.
  4. Click Manage payment info under the Membership and Billing section.
  5. Click Add Payment Method, select one of the multiple options available, and provide the information.
  6. Then choose this as your preferred billing method by clicking on Make preferred.

Updating your billing method should fix the Netflix not accepting payment issue. However, accessing Netflix via a browser can lead to Netflix error code  M7111-1331-4027. Hence, check our guide to fix it if you ever encounter it.

2. Contact Netflix support

If you encounter an issue with your payment, it is recommended to contact Netflix support. Sometimes, the problem might be from Netflix when a payment method is temporarily down due to updates or not being supported in your country.

Also, they can further pinpoint why your payment is not accepted. You can reach their support via social media, app, call or live chat.

3. Contact your financial institution

Sometimes, your financial institution might be responsible for this issue if they fail to process the payment. There might be restrictions on your card, insufficient funds, an embargo on international payments, and more.

So, reach out to them to better understand the reason and remove the restrictions causing the Netflix payment not to be processed, if possible.

4. Create a new Netflix account

  1. Go to the Netflix signup page and choose your subscription plan of preference.
  2. Input your details and click Next.
  3. Proceed with the payment method and follow the prompts to activate your subscription.

Try the previously denied payment method on the new account. Sometimes, the payment issues might be tied to just one account. Hence, the need to try it on a different account.

5. Use another browser

Users may encounter payment issues on Netflix due to browser issues. Hence, we recommend you switch to another browser to check if the payment issue persists.

One of the top browsers we had no issue using is Opera browser, coming with a simple interface yet a complete set of features.

Trying Opera is gonna take you only a few moments since you can import all data such as passwords and browser history with just a few clicks.

Opera

Comes with a built-in ad blocker, free VPN and many more integrated features.
Free Download Visit Website

Consider using any of the fixes in this guide should you encounter a browser not supported in Netflix issue.

These are the best fixes to try out when faced with a Netflix payment rejection issue. Whatever the case, any of these fixes should fix the issue for you.

However, Windows users who want to download the Netflix app might encounter the error 0x80240014. So, check out our guide on the causes and fixes for the error.

Also, you might be unable to access Netflix if the error message says something went wrong. Take a look at what to do here if you encounter that.

Should you have further queries or suggestions, you can leave them in the comments section.

The Windows Dev Kit 2023 is now on the Microsoft Store

If you remember, back in May, we told you that Microsoft was gearing up to release a brand-new mini PC designed to improve Windows on Arm called Project Volterra.

And, while everyone was focusing on native Arm support for Visual Studio 2022 and VS Code, the Redmond tech company was creating an Arm-native toolchain.

Support for this includes full Visual Studio 2022 & VS Code, Visual C++, Modern .NET 6 and Java, Classic .NET Framework, Windows Terminal, and WSL and WSA for running Linux and Android apps.

It looks like the time has finally come and Microsoft is launching its own version of the Mac Mini today with a price that many will find a bit spicy.

The new mini Windows PC is great for building ARM apps for Windows 11

The truth is that you will have to dig deep in your pockets and pull out a whopping $599 for this mini PC that’s designed for developers to build native ARM apps for Windows 11.

Previously known as Project Volterra, the Windows Dev Kit 2023 is already available today in Australia, Canada, China, France, Germany, Japan, the United Kingdom, and the US.

So, developers will now be able to purchase this highly-coveted device, but really anyone wanting a miniature Windows on Arm machine can buy one as well.

You surely want to know more about this device so let’s take a closer look at it and see what actually makes this new miniature PC tick.

What are the Windows Dev Kit 2023 specs?

Well, if you are interested in buying one, know that the Windows Dev Kit 2023 is powered by Qualcomm’s Snapdragon 8cx Gen 3 platform with 32GB of RAM and 512GB of NVMe storage.

Furthermore, there are also two USB-C 3.2 Gen 2 ports at the side and three USB-A 3.2 Gen 2 ports at the rear, alongside an Ethernet port and Mini DisplayPort.

We’re also looking at a neural processing unit (NPU) on this device, much like the 5G Surface Pro 9, which will enable developers to run hardware-accelerated AI tasks and machine learning workloads.

The tech giant started to leverage NPUs in Windows 11 to power features like Voice Focus, a state-of-the-art background noise removal algorithm that doesn’t hit your CPU or GPU.

Speaking software-wise, this is where the Windows Dev Kit 2023 will absolutely shine. As we’ve said, Microsoft is working to launch a full toolchain of ARM native apps for developers to use.

Thus, Visual Studio 2022 17.4 now runs natively on Arm with far better performance, and .NET 7 will include improved performance for ARM.

Please keep in mind that previews for Arm versions of Visual C++ and the Windows App SDK are also available now.

With this device, we are getting more apps, tools, frameworks, and packages that are being ported to natively target Windows on ARM and will be arriving over the coming months. 

In the meantime, thanks to Windows 11’s powerful emulation technology, developers will be able to run many unmodified x64 and x86 apps and tools on their Windows Dev Kit.

And if that wasn’t already enough, the Windows Dev Kit will also have access to native ARM versions of Microsoft Teams, Office, Edge, and OneDrive sync.

As a result, Microsoft really hopes this device will encourage Windows on Arm app development, so we can finally see more apps run natively on Arm-powered laptops.

Since we are talking about Windows 11 and Qualcomm processors, be sure to check out the list of Windows 11-supported Intel, Qualcomm & AMD CPUs.

Would you be interested in acquiring one of these mini PCs from Microsoft? Let us know in the designated comments section below.
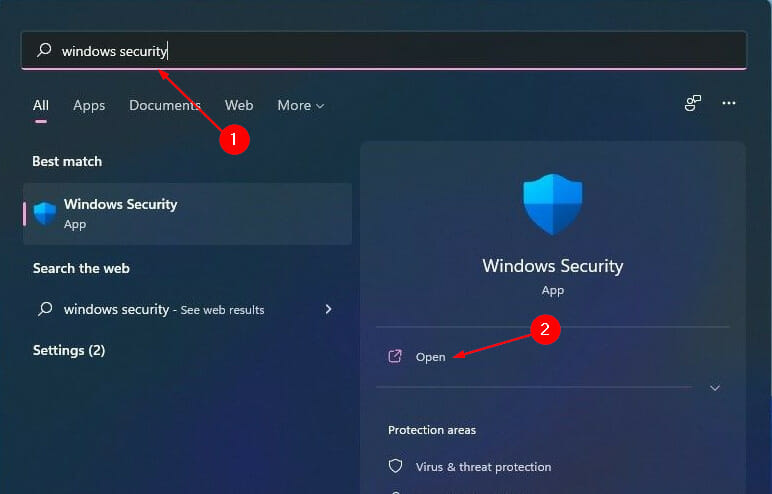
Fix Wdf01000.sys Failed BSOD with 7 Expert Tips

The Windows 10 error wdf01000.sys BSoD is one of those blue screen errors that can have various error messages, including STOP 0×00000050: PAGE_FAULT_IN_NONPAGED_AREA – Wdf01000.sys and SYSTEM_THREAD_EXCEPTION_NOT_HANDLED.

However, all the wdf01000.sys error messages will include wdf01000.sys in them.

What does Wdf01000 sys mean?

If you have wondered what exactly is wdf01000.sys, it is a Windows driver that helps your computer to communicate with hardware and other connected devices. This is an important Windows 10 element.

What failed wdf01000.sys?

A few users have complained of this BSoD error. It is triggered by a few factors, including:

  • Issues with Windows Driver Frameworks – If the WDF fails to work, you may run into this error message.
  • File issues – The wdf01000.sys error and other blue screen errors can often be due to corrupted or missing system files.
  • Hard drive issues – Hard drives, especially bad and defective ones, have triggered this error for many users.
  • Compatibility issues – If some programs have compatibility issues with the OS, it can lead to an error. This, in many cases, could actually be your antivirus software.
  • Defective drivers – Users have encountered this issue when drivers are outdated or defective.

Follow along to find out detailed solutions to this!

How can I fix wdf01000.sys?

1. Use a specialized BSOD repair software

System files are very delicate to handle and any mistake can severely hurt your computer. Using a dedicated system repair software is always a good idea, as they will automatically scan and replace any corrupted file they encounter.

2. Run a System File Checker scan

  1. Open the Windows search bar, type cmd, and click Run as administrator.
  2. First, enter the following command and press Enter:
    DISM.exe/Online/Cleanup-image/Restorehealth
  3. Then input the script below in the Command Prompt, and press the Enter button.
    sfc /scannow
  4. When the SFC scan is complete, the Command Prompt might state Windows Resource Protection found corrupt files and successfully repaired them. If that’s the case, restart Windows.

The System File Checker is a Windows tool that restores corrupted system files.

3. Check for device driver errors

    If this Blue Screen error occurs on your Windows PC, it’s because of corrupted drivers or incompatible driver version that generate such error codes. Hence, make sure you update all the drivers as illustrated below.

  1. 1. Press Windows key + X and select Device Manager from the drop-down list. 

    fix-error-wdf01000-sys
  2. 2. Expand the proper category for the driver you want to update, right-click on the driver you want to update, and select Update driver.

    fix-error-wdf01000-sys
  3. 3. Select Search automatically for drivers.

    fix-error-wdf01000-sys
  4. 4. The system will download and install the compatible drivers for the hardware component.

SYS file errors can be due to corrupted driver files. Thus, updating, or at least reinstalling, corrupted device drivers might resolve the wdf01000.sys error.

You can update the drivers manually, which is time-consuming, or by using software that does this automatically.

⇒ Get Outbyte Driver Updater

4. Run Check Disk

  1. Open the Windows search bar, type cmd, and click Run as administrator.
  2. Enter the script below in the prompt, and press the Enter key.
    chkdsk /f

The wdf01000.sys error can also be the consequence of hard drive corruption. As such, Check Disk is another utility that might potentially fix the BSOD error. 

5. Reinstall problematic software

  1. Open Run with the Windows key + R keyboard shortcut.appwizcpl command
  2. Next, enter appwiz.cpl in Run and click OK to open the window shown directly below.
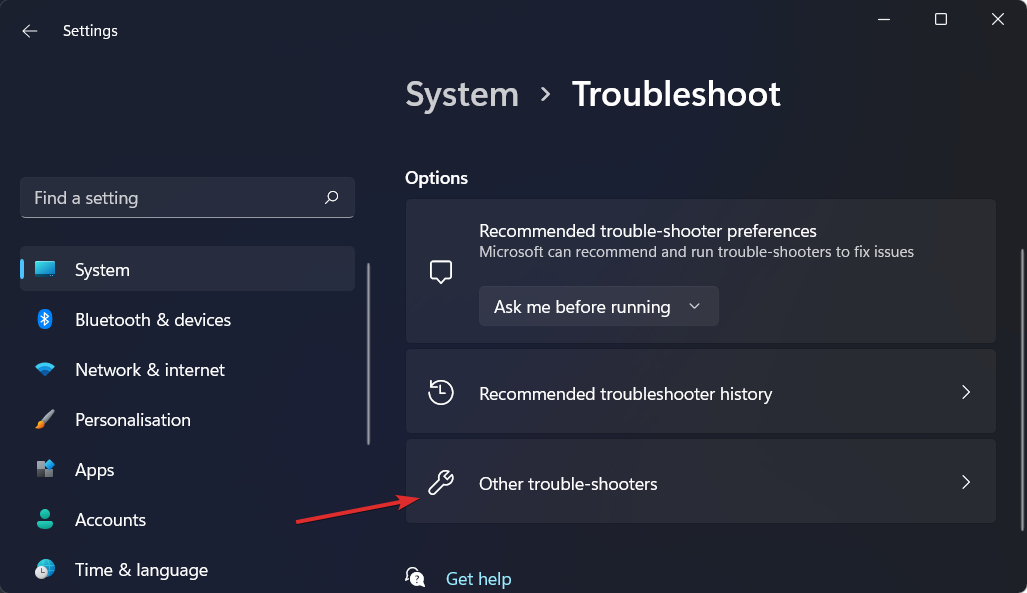
  3. Select the software you need to reinstall, press the Uninstall button, and click Yes to provide further confirmation.
  4. Then restart your desktop or laptop.
  5. Download an updated copy of the uninstalled software from the publisher’s website, then open the program’s setup wizard to reinstall the software.

Reinstalling the conflicting program also does wonders when it comes to fixing the Cldft.sys Blue Screen of Death error and not only.

Don’t hesitate to observe how your PC behaves over the next few days. If there’s no sign of the error, the previous app installation was clearly corrupt.

6. Open the Blue Screen Troubleshooter

  1. To open that troubleshooter, press the Cortana button.
  2. Input the keyword troubleshoot in the search box.Mouse not dragging properly
  3. Click Troubleshoot to open the window in the snapshot directly below, select the Blue Screen troubleshooter, and then click its Run the troubleshooter button.
  4. The troubleshooter window will then open and might detect some issues.

7. Re-register the wdf01000.sys file

  1. Open the Windows search bar, type cmd, and click Run as administrator.
  2. Enter the following command in the Command Prompt, and press the Return button:
    regsvr32 C:Windowssystem32driverswdf01000.sys

Those are a few resolutions that can fix the wdf01000.sys BSoD error in Windows 10. In addition, fixing the registry with system optimization software might also help resolve the issue.

Note that the solutions above will also be relevant if you have the wdf01000.sys error on startup or if the wdf01000.sys experiences a crash or failed.

If you have any other questions, feel free to leave them in the comments section below.
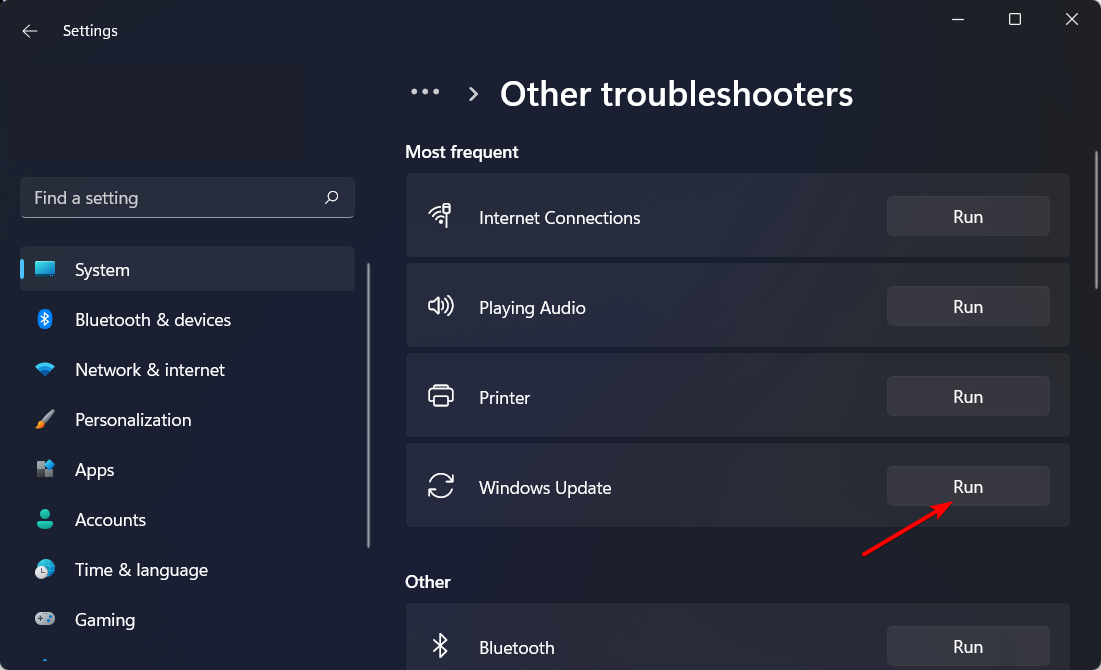
Page Fault in Nonpaged Area on Windows 11: 6 Tested Fixes

You must have encountered the page fault in nonpaged area error on your Windows 11 device. At times, it may cause the system to crash. Page Faults often occur when an application attempts to use memory that is part of its work set but does not find it. They are either soft or hard. 

A hard Page Fault will occur when the page is found in the page file on the hard disk, whereas a soft Page Fault will happen when the page is located somewhere else in the memory. This issue may be triggered by RAM change, a Windows faulty update, outdated or corrupted drivers or a faulty disk drive.

How do I fix Page Fault in Nonpaged Area BSoD in Windows 11?

Note icon NOTE
The Page Fault in the Nonpaged area in Windows 11 causes a BSOD loop on your device. This makes it impossible for you to log into your device. Therefore, you must access Safe Mode to perform the methods and fix the issue.

1. Update drivers

  1. Launch the File Explorer. Then, right-click on This PC.launch
  2. Select Manage to continue. select
  3. Select the Device Manager under System Tools option. select
  4. Then, right-click the disk device under the Disk Drives. Select Update driver or Uninstall device.uninstall

Don’t hesitate to give a try to a dedicated tool such as Fortect Driver Updater. Rest assured that this lightweight software solution will automatically look for outdated drivers and update them periodically.

⇒ Get Fortect Driver Updater

2. Reset your device

  1. Press Windows key + I key.open
  2. Select Recovery on the Settings page.select
  3. Then, select Reset PC on the right side.reset
  4. Select whether to Keep my files or Remove everything when resetting your device. select
  5. Follow the Wizard to continue till you can reset your device completely.

3. Disable Automatic Paging File Size Management

    The useful guide presented here will help you resolve this BSOD error with a few clicks on your Windows 11 settings.

    1. Press Windows key + E key to open File Explorer.
    page-fault-in-nonpaged-area-windows-11
  1. 2. Right-click on This PC and select Properties.

    page-fault-in-nonpaged-area-windows-11
  2. 3. Choose Advanced System Settings under device specification.

    page-fault-in-nonpaged-area-windows-11
  3. 4. Go to the Performance section, then click on Settings.

    page fault in nonpaged area windows 11
  4. 5. Select the Advanced tab, then click on the Change button.

    page fault in nonpaged area windows 11
  5. 6. Uncheck the Automatically manage paging file size for all drives and click OK to save settings.

    page fault in nonpaged area windows 11
  6. 7. Check whether the page fault in nonpaged area error in Windows 11 is still there.

4. Run the troubleshooter

  1. Press the Windows key + I key.open
  2.  Click Troubleshoot on the Settings page.select
  3. Then, select Run automatically, then notify me.scan
  4. Then, wait on your device to detect any problems with the hardware. The error will be identified once the scan is complete. You can then fix the problem. 

However, if the scan does not detect any problem, the hardware on your device does not have any issues. Then you probably need to use another method to fix the error.

5. Check your disk 

Note icon NOTE
At times, the error may occur because of a faulty disk. Don’t hesitate to use the Window Snap-in tool to check and fix the problem on the disk. 
  1. Press the Windows key + S key. open
  2. Type cmd in the search box, then select the Command Prompt Application to Run as Administrator. open
  3. Then, press Enter after you key in the following code (C represents the letter of the drive where you store your operating system): chkdsk/f/renter
  4. Press the Y key on your keyboard.press
  5. Press the Windows key + R key to open the Run dialog box, then key in the following code and click on OK: mdsched.exepage fault in nonpaged area windows 11
  6. Select Restart now and check for problems (recommended).page fault in nonpaged area windows 11
  7. Wait for the scan to end, then check whether the page fault in nonpaged area error in Windows 11 is still there. 

6. Use the Windows Memory Diagnostic Tool

  1. Press Windows key + S key. open
  2. Type memory diagnostic on the search box, then select Windows Memory Diagnostic.open
  3. Click Restart now and check for problems (recommended).
    page fault in nonpaged area windows 11
  4. Wait on your device to identify the problems. Once the search is complete, your device will display the problems detected on the screen. 

It is quite evident that the Page Fault in the Nonpaged Area with Valorant in Windows 11 will affect the gaming experience and even when with other apps.

Therefore, it is important to ensure that your device’s drivers, hardware, and software are safe and will not affect its performance.

These solutions would work even in case of encountering Page Fault in Nonpaged Area errors in Windows 11 devices or while running Apex Legends and VMware.

Feel free to let us know if you have any questions on how to fix this issue for good. Also, leave comments about guides that you would like to see or information on other Windows 11 features.

Hyper-V Guest Cannot Ping the Host: 5 Simple Ways to Fix It

Hyper-V is Microsoft’s virtualization platform and one of the most popular ones in the world. It allows users to create virtual machines and run different Operating Systems on them. 

One of the main advantages of Hyper-V is that it can be used to manage multiple operating systems on the same machine. However, there may be times when you find yourself unable to ping your host from a guest machine. 

Why can I not ping my virtual machine?

If you try to ping your virtual machine from your host computer and it does not work, there are several things that could be causing this issue:

  • Incorrect IP address – If you do not have an IP address set up properly for your network adapter, then it will not be able to communicate with other systems on the network. 
  • The VM is not running or has been stopped – If it’s not running, make sure you’ve configured your VM to start automatically when the server boots.
  • You are using a standard account – If you are running your VM as a non-admin user, then it might not be able to access all needed resources. You may run into a Hyper-V is not authorized to connect error.
  • Lost connectivity – You may not have network connectivity on the host machine. This can be due to a hardware fault or because the host is down. 
  • Unspecified gateway – If this is not set correctly, then you will not be able to access the Internet from within the virtual machine as the destination host is unreachable. 
  • Firewall restriction – It’s possible that the firewall on your computer is blocking the program. 

How can I fix Hyper-V Guest if it cannot ping the host?

Before going into advanced troubleshooting steps, here are some basic things that you should do first:

  • Make sure the virtual machine is running. 
  • Check your network settings. You may find your PC is not connected to the internet.
  • Make sure your system clock is set correctly on both sides of the connection.
  • Check if there are any problems with your network adapter.
  • Reboot your computer and try again to ping.

Now, proceed to the solutions below.
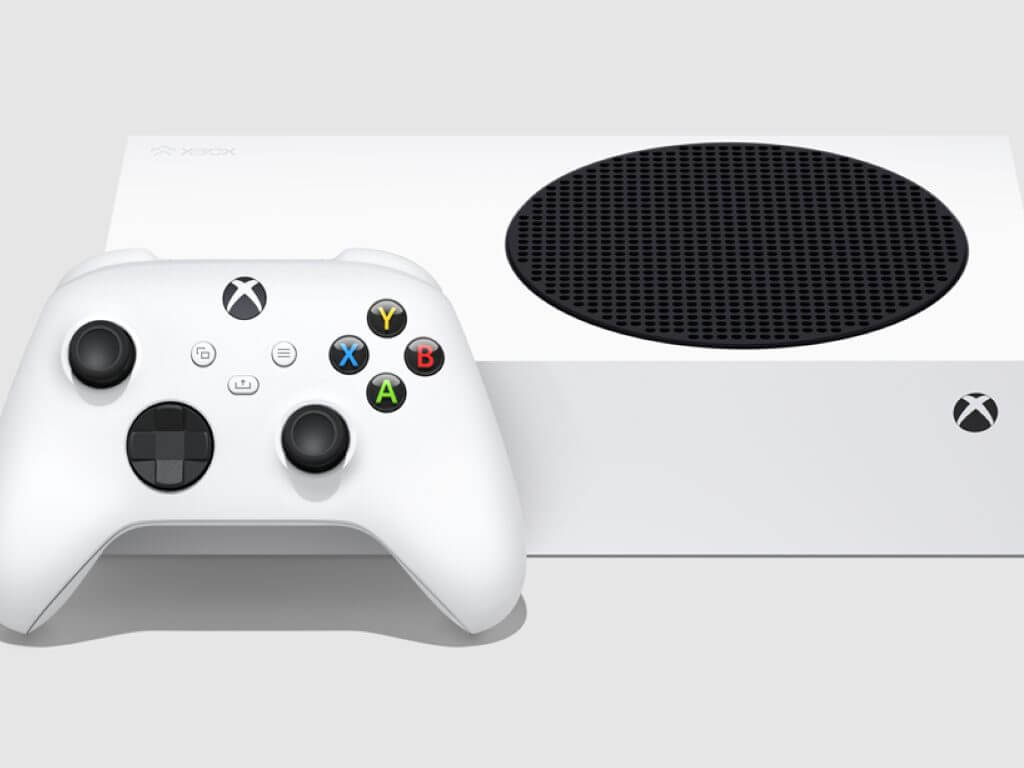
1.  Restart Remote Desktop Services

  1. Hit the Windows + R keys to open the Run command.
  2. Type services.msc and press Enter.
  3. Locate Remote Desktop Services, right-click on it and select Restart.Restart remote desktop services

2. Restart the Hyper-V Service

  1. Hit the Windows + R keys to open the Run dialog box.
  2. Type in services.msc and hit Enter.
  3. Locate the Hyper-V related services, right-click on each, select Stop, then Start again.

3. Run the Network troubleshooter

  1. Press Windows + I to launch the Settings.settings windows 11
  2. Click on Troubleshoot on the right in the System tab.
  3. Select Other troubleshooters.
  4. Locate Internet Connections and click on the Run button next to it.

4. Disable firewall settings

  1. Press the Windows key, search Windows Security and click Open.
  2. Click on Firewall & network protection then select Public network.
  3. Locate Microsoft Defender Firewall and toggle the off button.quick scan

5. Reset TCP/IP 

  1. Hit the Windows key, type cmd, and click Run as administrator.
  2. Type in the following commands and press Enter after each one: netsh winsock reset catalog netsh int ipv4 reset reset.log netsh int ipv6 reset reset.log
  3. Now restart your PC.

Can I run Hyper-V without SLAT?

Yes, you can run Hyper-V without SLAT (Second Level Address Translation), but we don’t recommend it because there are some limitations. If you have server hardware that supports SLAT, then you can run Hyper-V on that hardware.

SLAT makes it very easy to manage virtual machines. It provides you with an interface for creating and deleting virtual machines, adding files to the virtual machines, configuring network settings, etc.

If your computer doesn’t have this feature, it will limit how much memory can be allocated to each virtual machine. Without it, Hyper-V may not be able to run and thus can’t ping the host.

While Hyper-V is a useful tool for VMs, you also need to ensure that your system meets all the minimum system requirements to run it to avoid performance issues.

A minor issue like not enough memory to start the virtual machine can interfere with your ability to ping the host.

Consequently, if you feel the requirements are too stringent, you can always switch to an alternative VM that is equally good and offers similar features.

Should you encounter any other issues such as Hyper-V not being in a state of replication, do not hesitate to check out our comprehensive article on the same.

If you have any comments, suggestions, or perhaps some other solutions for this problem, reach out to us in the comments section below.

Microsoft will likely coast on cloud revenue while PC shipments scare investors

Microsoft is on deck to report its quarterly earnings later today and the street is lowering its estimates in accordance with AMD and Intel’s expected weaker performance.

While it’s expected that Microsoft will continue to post growth in its burgeoning cloud business, analysts are preparing for more modest improvements quarter over quarter while also keeping an eye on predicted ‘lower-than-expected’ Windows licensing revenue due to fewer PC shipments for this earnings report.

Gartner tracked a 12.6% drop in PC sales back in July and with AMD loweing its preliminary estimates, it’s unlike the situation has gotten much better since then.

A consortium of 14 analysts from prominent firms polled by CNBC peg Microsoft’s Azure cloud growth in the 35-36% range for this quarter which is a relative departure from its 40% growth recorded last quarter.

In the midst of an organizational tightening where the company released up to 1,000 employees recently, representing less than 1 percent of its total workforce, Microsoft is also restructuring its reporting and prepped investors with a new FY23 Investors Metrics report earlier this month.

The new report lists the five areas that have been updated and where product categories have shuffled to include “HoloLens revenue, previously in the Intelligent Cloud segment, moved to the More Personal Computing segment” and will be measured in the PC accessories revenue alongside Surface revenue growth.

A bit of an obfuscating move by Microsoft for investors interested in augmented hardware as a standalone business for the company, but with the recent Meta partnership news, it’s clear Microsoft is looking to turn the HoloLens into a tech licensing endeavor while pivoting its Windows augmented reality software into yet another platform akin to its Azure efforts.

Microsoft just announced its Windows 11 2022 Update, a new features pack began rolling out and just a couple of weeks ago it hosted a new hardware event, all items not expected to impact its quarterly earnings report this time around.

While the market was raised by the prospect of tech earnings on Monday, Microsoft shares have seen a 26% deflation over the year and we’ll have to see how the company’s call is received later today before there is potentially more shaved off the stock in afterhours trading.

The Default Gateway Is Not Available: How to Fix This Error

Internet problems can cause a lot of trouble, and one problem that Windows users reported is The default gateway is not available error.

The gateway is the element that connects your computer to the Internet so you won’t be able to access any external links.

What happens if default gateway is not available?

When no next-hop IP address is defined within a routing table for forwarding data packets to a host, a default gateway acts as a forwarding hop to the other networking system.

As a result, when two networks desire to communicate or send data packets to one another, the default gateway serves as the access point to the other networks. This also includes changing the system and network topologies’ IP addressing and subnet masks.

When it is not available, it implies that there can be no communication. Hence in more general terms, you will suffer connection or network issues and will not be able to access other networks as normal.

If the default gateway not available keeps happening, here are some possible causes:

  • Interfering antiviruses – Antivirus software is known to cause issues in areas with no potential dangers. In this case, you will have to remove it altogether, then perhaps head for a better one that won’t interfere in the future.
  • Outdated drivers – Drivers make sure your OS successfully communicates with your PC components. When they are outdated, miscommunications will happen which lead to errors such as The default gateway is not available.
  • Driver settings – The network driver will have by default an option that will turn it off in order to save power. We will show you below how to turn this off in order to fix the error.
  • Faulty router – We recommend that you try to connect to another network connection to figure out if your router is the cause of this error.
  • Incorrect IP settings – Before moving on to serious troubleshooting solutions, you should check the IP address, and that the ISP configuration settings are correct.

Router settings and outdated drivers could also cause this problem. Some users reported that antiviruses may sometimes block your connection.

With this in mind, go through our solutions one by one because one of them will help you fix this issue.

How do I fix default gateway is not available?

Before jumping into the list of advanced troubleshooting solutions, make sure to do the following:

1. Change the Power Management settings for your network adapter

  1. Click the Windows Start button, type device manager and select the app from the results.
  2. Locate your network adapter and double-click it. Once the Properties window opens, go to the Power Management tab and uncheck Allow the computer to turn off this device to save power. Click OK to save the changes.intel-power-ok the default gateway is not available

2. Update your network driver

2.1 Use Device Manager

  1. Right-click the Start icon then select Device Manager.device-manager-w10 amd driver install problems
  2. Expand the Network adapters section, right-click your network driver and select Update driver.network-update the default gateway is not available
  3. Select the Search automatically for drivers option and wait for the process to end then reboot your PC.

2.2 Use the manufacturer’s website

  1. Head to your computer manufacturer’s website and go to the support page and search for the model that you have in order to see all the drivers available. We will use Lenovo as an example.lenovo-search the default gateway is not available
  2. Select the network driver and download it. Double-click the file downloaded to install it then reboot your PC. The default gateway is not available keeps happening will be solved.drivers-network the default gateway is not available

2.3 Automatically update your drivers

It’s important to mention that downloading drivers manually is a risky decision. You can damage permanently your system by manually downloading the wrong driver versions.

Thus, we recommend using a third-party driver updater tool that is 100% safe to automatically download all the outdated drivers on your PC.

3. Run the Network troubleshooter

  1. Press Windows + I then go to Network & Internet.network-internet the default gateway is not available
  2. Click the Network troubleshooter option in order to run it.network-troubleshooter the default gateway is not available

4. Reset the network

  1. Press Windows + I then go to Network & Internet.network-internet the default gateway is not available
  2. Next, click the Network reset option.network-reset the default gateway is not available
  3. Click Reset now and follow the on-screen steps. The default gateway is not available through Ethernet issue will be solved.reset-now the default gateway is not available

5. Reset the network connections via CMD

    Given the fact that connection gateway errors are caused by network malfunctions, it may be useful to reset the network connection on your PC. Use the example down below to do it.

  1. 1. Click on the Windows Start button, type cmd, and choose Run as administrator from the results.

    default-gateway-not-available-windows-10/#5-reset-the-network-connections-via-cmd
  2. 2. When Command Prompt starts, enter the following commands and press Enter after each: netsh winsock reset netsh int ip reset  netsh advfirewall reset ipconfig / flushdns ipconfig / release ipconfig / renew

    netsh-ip the default gateway is not available
  3. 3. After the process is completed, close Command Prompt. 

  4. 4. Restart your PC. (You can fix The default gateway not available error by resetting TCP/IP).

How do I fix the default gateway error in Windows 11?

If you have upgraded to Windows 11, you know by now that it’s not much different from Windows 10, simply because it has the same core.

Apart from some very useful extra features and a more attractive design, the new OS is very similar to the old one.

That is why all the solutions we outlined for Windows 10 will work seamlessly to solve the gateway error on Windows 11 as well.

To fix any network adapter problems, follow the instructions above and also check out our guide on how to fix network adapter issues which will surely help out.

If you have any more questions, or you wish to add anything about the subject, don’t hesitate to do so in the comments section below.

How to Stop Your Windows 11 PC When It Randomly Restarts

Your Windows 11 PC might be restarting randomly due to issues like overheating, fast startup issues, or hardware faults. This leads to loss of progress, unexpected shutdowns during important tasks, and a lot of frustration if left unresolved.

Below, we’ll walk you through tested solutions that address all major causes. Follow along to stop Windows 11 automatic restarts.

Quick Video Summary of the Solutions for Stopping Windows 11 Automatic Restart

1. Disable automatic restart

  1. Press Windows + I to launch the Settings app then scroll down and click on About in the System tab.
    Change startup settings to fix random restart in Windows 11
  2. Next, click on Advanced system settings under Related links.
    Advanced system settings
  3. Click the Settings option under Startup and Recovery.
    Change startup and recovery settings to fix random restart
  4. Untick the checkbox for Automatic restart under System failure, and click on OK to save the changes.
    Disable automatic restart
  5. Now restart the computer and check if the Windows 11 keeps restarting randomly issue persists.

In case you are facing trouble executing this method, learn how to fix issues preventing the Settings from launching,

2. Disable fast startup

    DIFFICULTY

    Easy

    DURATION

    5 minutes

    WHAT YOU NEED

    Windows 11

    Fast startup is a feature that considerably reduces the boot time when you turn on Windows after shut down. With the feature enabled, certain critical files are saved and immediately loaded on startup.

  1. 1. Press Windows + S to launch the Search menu then enter Control Panel in the text field at the top, and click on the top search result that appears.

    control-panel windows 11 keeps restarting
  2. 2. Select System & Security from the list of options that appear.

    windows-11-random-restart
  3. 3. Click on Power options.

    power-opt windows 11 keeps restarting
  4. 4. Now, select Choose what the power buttons do from the list of options on the left.

    power-settings windows 11 keeps restarting
  5. 5. Navigate to the Change settings that are currently unavailable tab.

    change-settings windows 11 keeps restarting
  6. 6. Untick the checkbox for Turn on fast startup (recommended), and then click on Save changes at the bottom.

    fast-startup windows 11 keeps restarting

This option it’s known to cause compatibility issues and may also result in random restart problems in Windows 11. Therefore, disabling it should fix the restart problem on your Windows 11 device.

3. Update group policies

  1. Right-click on the Start button to launch the Power User/Quick Access menu then select Windows Terminal (Admin) from the list of options that appear.
    Launch Windows Terminal to fix random restart in Windows 11
  2. Click Yes on the UAC prompt that appears.
  3. Then, click on the downward-facing arrow at the top and select Command Prompt from the list of options. Alternatively, you can press Ctrl + Shift + 2 to launch the Command Prompt tab.
    Open Command Prompt tab
  4. Now, enter the following command and hit Enter to execute it:gpupdate
    Update Group Policy to fix random restart in Windows 11

Misconfigured group policies are also known to cause trouble from time to time, hence it’s recommended that you keep them updated.

Though they would be updated automatically, manually doing it eliminates the Windows 11 keeps restarting loop issue right away.

4. Change Windows Update settings causing random restarts

Note icon NOTE
The Registry is a critical aspect of Windows and you should not go around making changes without a proper understanding, since it could damage the system and even render it unusable. Follow the steps listed below as it is without changing any other keys or values.
  1. Press Windows + R to launch the Run command. Enter regedit in the text field, and either click on OK at the bottom or hit Enter to launch the Registry Editor.
    Launch Registry Editor
  2. Click Yes on the UAC prompt that appears.
  3. Now, navigate to the following path or type/paste it in the address bar at the top and hit Enter:Computer\HKEY_LOCAL_MACHINE\SOFTWARE\Microsoft\Windows
    navigate to Windows key
  4. Now, right-click on the Windows key in the navigation pane on the left, hover the cursor over New, and select Key from the list of options that appear.
    Create new key
  5. Name this key as Windows Update. Then right-click on the newly created key, hover the cursor over New, and select Key.
    Create AU key
  6. Name this key as AU. Click on the newly created key to open it, right-click on the empty space on the right, hover the cursor over New and select DWORD (32-bit Value) from the context menu.
    Create DWORD (32-bit Value) to fix random restart in Windows 11
  7. Name it as NoAutoRebootWithLoggedOnUser. Now, right-click on it and select Modify from the list of options.
    Modify Dword
  8. Enter 1 in the field under Value Data and click on OK at the bottom to save the changes.
    Enter 1 to fix randon restart in Windows 11

When you download an update, you need to restart your Windows. You can either manually restart the computer or set it to restart automatically after the download is complete. In case the latter settings are in place, you may encounter the random restart issue in Windows 11.

In the above steps, we modified the registry such that Windows will no more reboot automatically, thereby eliminating the error.

5. Update the graphics driver

  1. Right-click the Start icon then select Device Manager.
    device-manager bluetooth won't turn on windows 10
  2. Locate and double-click on the Display adapters to view the graphics driver which you need to right-click and then select Update driver.
    update-driver-w10 amd driver install problems
  3. Select Search automatically for drivers in the Update drivers window to let Windows select and install the best available driver on the system.
    Search automatically for drivers

Running an older version of the graphics driver too is known to cause a bunch of errors. Hence it’s recommended that you keep them up-to-date.

In case the Device Manager method doesn’t work, you can always update the driver via Windows Update or manually download it from the manufacturer’s website.

Another option, if these methods don’t work or simply seem too much trouble, you can use a third-party driver updater. A dedicated tool will automatically scan the web for driver updates and keep all the installed ones up-to-date. Our top choice in this case is Fortect Driver Updater.

6. Reinstall the graphics driver

  1. Press Windows + S to launch the Search menu. Enter Device Manager in the text field at the top, and click on the relevant search result that appears.
    Launch Device Manager to fix random restart in Windows 11
  2. Double-click on Display adapters, then right-click the graphics adapter and select Uninstall device.
    uninstall-device-graphics-card windows 11 keeps restarting
  3. Tick the checkbox for Attempt to remove the driver for this device and click on Uninstall at the bottom.
    Uninstall graphics driver to fix random restart in windows 11
  4. After uninstalling the driver, restart the computer and Windows will automatically install a fresh driver for the graphics adapter.

If the graphics driver installed on the PC is corrupted, you are bound to encounter errors every once in a while, including Windows 11 restarting when playing games. A corrupt driver can be easily identified by a yellow exclamation mark (warning) sign next to the driver icon.

The best part about the process, you don’t have to manually install a fresh set of drivers rather Windows does it automatically.

7. Scan for malware

Note icon NOTE
You can scan for malware and virus using the built-in Windows Security app or any effective third-party antivirus. We choose the former, however, it’s perfectly alright to scan using any reliable antivirus.
  1. Press Windows + S to launch the Search menu. Enter Windows Security in the text field at the top and click on the relevant search result that appears.
    launch Windows Security
  2. Select Virus & threat protection from the options listed here.
    Virus & threat protection
  3. Click on Scan options.
    Scan options
  4. Select Full scan and click on Scan now at the bottom.
    Run Full Scan to fix random restart in Windows 11

In many instances, users realized it was actually malware or a virus that caused the Windows 11 keeps crashing and restarting issue. To remove these, all you have to do is to run a scan.

The full scan will take a lot longer to complete compared to a quick one, but it will scan more files, thereby increasing the chances of detection and removal of malware.

8. Run SFC and CHKDSK scans

  1. Press Windows enter cmd and click Run as administrator under Command Prompt on the right.
    cmd-admin hp printer won't scan
  2. Type or paste the following command to run the SFC scan:sfc /scannow
    scannow 0x80070002 windows update
  3. Wait for the scan to complete. Now, enter the following command to perform a Check Disk:chkdsk /x /f /r
    chkdsk-x-fr windows 11 keeps restarting
  4. You will be asked to schedule the scan to run the next time you restart the computer. Press Y and hit Enter to confirm. Then restart your computer.
    Confirm checkdisk

The scan may take some time to complete depending on the data stored on the computer but it’s known to fix the random restart issue in Windows 11 for a lot of users.

9. Uninstall the latest OS update

  1. Press Windows + I then go to Windows Update followed by Update history.
    windows-update-history logitehc unifying not working
  2. Click Uninstall updates from down the page.
    uninstall-updates-w11 computer-recognize-logitech-unifying-receiver
  3. Click the top Windows update then select Uninstall.
    uninstall-update-latest computer-recognize-logitech-unifying-receiver

Windows updates are generally positive, but sometimes they can cause issues such as random restarts. By uninstalling the last update you have installed, you can stop Windows 11 keeps restarting after update issue.

10. Update your BIOS

It makes no difference whether you buy one of the most recent laptops on the market or have an old one. At some point in time, you may need to do a BIOS update or make some modifications to the software since it can cause Windows 11 to keep restarting after the shutdown.

Carefully follow our dedicated guide to updating your BIOS, as this is no easy task for anyone.

These are all the ways you can solve the random restart problem in Windows 11. If nothing here works, resetting Windows 11 to its factory settings will help.

Also, you could roll back to Windows 10 from Windows 11, since Microsoft will be offering support for the previous version until October 2025.

If your Windows 10 system is not restarting, we have a dedicated article that can help you out as well.

Does my Windows 11 PC keep restarting because of overheating?

Overheating is one of the reasons for the system to restart. Whenever the temperature reaches a certain value, one that can damage the components, the system will automatically restart to cool down.

It’s easy to identify an overheated system, be it a laptop or PC. So if you believe that high temperature is the real culprit here, you can easily fix the overheating problem in Windows 11.

Wrapping up

Fixing a Windows 11 PC that keeps restarting randomly, without any obvious reason might seem intimidating at first, but if you follow the steps outlined above, you’ll put an end to this issue in no time.

This isn’t the only issue of this type. Your PC might also get stuck on restarting, throw a “computer restarted unexpectedly” error, or even restart randomly while gaming. Some users also face random restarts in Windows 10 or find their Dell laptop stuck on the restart screen.

Don’t hesitate to tell us which fix worked for you in the comments section below.