UXDService: What Is It & How to Fix Its Errors

Hundreds of services and processes run on the PC, some built-in while others from third-party programs and drivers. And ideally, they shouldn’t lead to problems, especially shutdown issues. But that’s not always the case, and many reported that uxdservice is preventing shutdown.

Here, when users try to shut down the computer, a popup appears telling them the UXDService running in the background needs to be closed first. And while Windows does that automatically, it takes some time. So, let’s find out how you can get things up and running.

What is UXDService Windows 10?

The UXDService is linked to the NVIDIA graphics drivers, and users with the NVIDIA adapter installed would have it on the PC. As per available information, the process poses no harm and is completely safe to run, but the resulting shutdown issues are a cause of concern.

Here are a few reasons users get the UXDService error in Windows:

  • Corrupt system files: For such issues with the PC, it’s often the corrupt system files to blame. These result in several problems and, in some cases, even lead to a BSOD.
  • Buggy driver update: In case the problem appeared after updating the NVIDIA drivers, it’s likely a bug in the latest version that’s triggering the message.
  • Misconfigured power settings: The power settings on the PC need to be properly configured for the shutdown to go through seamlessly. But third-party apps or even inadvertent changes could lead to misconfigurations here.

How do I fix UXDService errors?

Before we head to the slightly complex solutions, here are a few quick ones to try:

  • Click on the Shut down anyway button to proceed.
  • Check for available Windows updates and install any pending ones.
  • Before turning off the computer, check whether uxdservice appears in the Task Manager, and terminate the process.

If none work, move to the fixes listed next.

1. Repair the corrupt system files

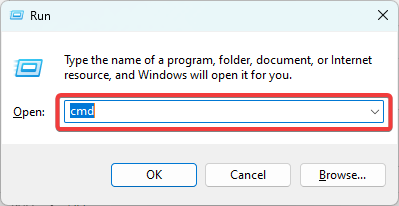
  1. Press Windows + R to open Run, type cmd, and hit Ctrl + Shift + Enter.
    cmd
  2. Click Yes in the UAC prompt.
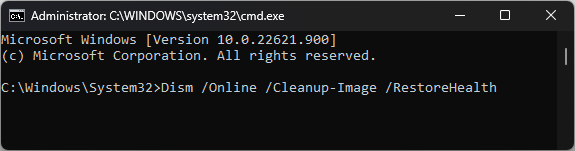
  3. Paste the following three commands individually and hit Enter after each to run the DISM tool:DISM /Online /Cleanup-Image /CheckHealth DISM /Online /Cleanup-Image /ScanHealth DISM /Online /Cleanup-Image /RestoreHealth
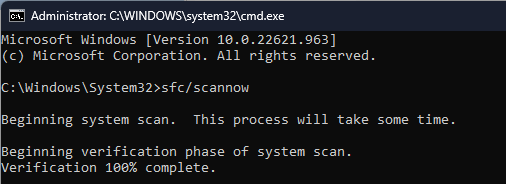
  4. Now, execute this command for the SFC scan: sfc /scannow
    sfc scan to fix UXDService
  5. Finally, restart the computer for the changes to come into effect.

When faced with the UXDService app error, your primary approach should be to repair the corrupt system files. For this, it’s best to run the DISM tool and SFC scan to get things up and running.

2. Update the graphics driver

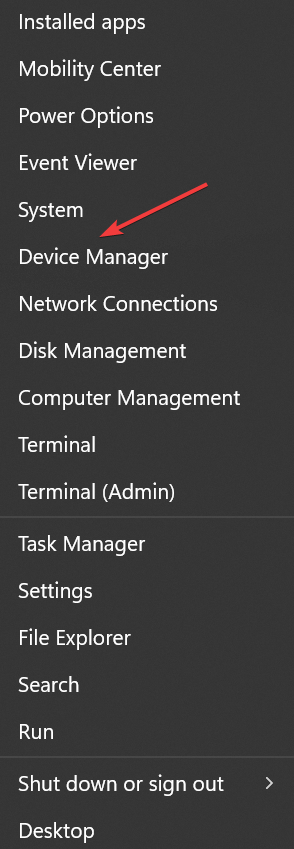
  1. Press Windows + X to open the Power User menu, and select Device Manager from the list.
    device manager
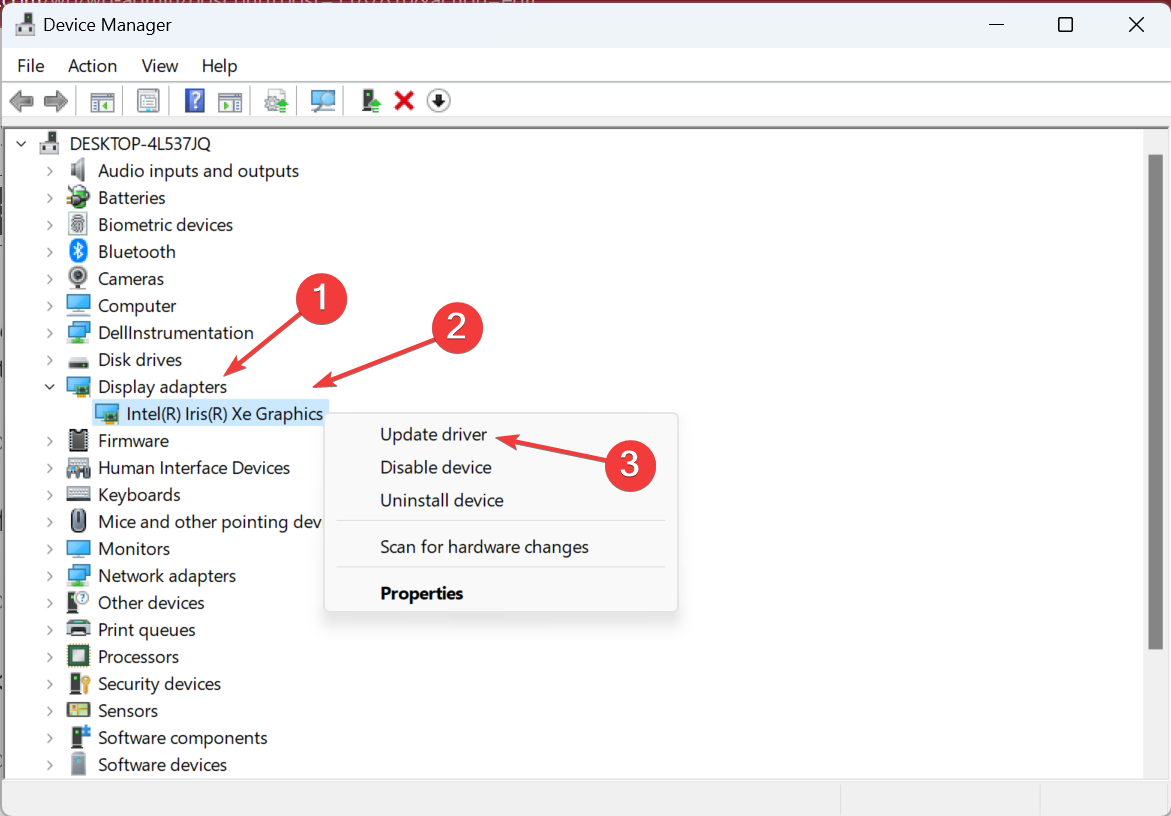
  2. Expand the Display adapters entry, right-click on the NVIDIA graphics adapter, and select Update driver.
    update driver to fix UXDService
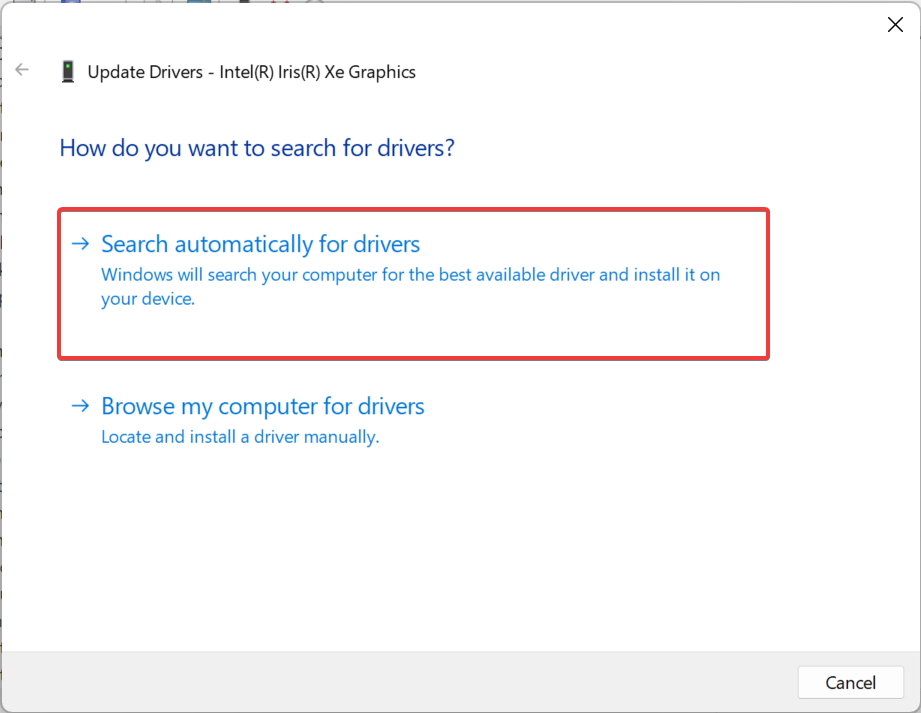
  3. Select Search automatically for drivers and wait for Windows to install the best available driver.
    search automatically

Often, it’s an outdated driver that triggers issues leading to UXDService preventing shutdown. And in this case, an ideal approach should be to update the graphics driver. If a better version can’t be found locally, you can always manually install the latest driver from NVIDIA’s website.

Besides manually installing your driver versions, you can use dedicated software like Outbyte Driver Updater to automatically get the latest updates for your outdated or missing drivers.

⇒ Get Outbyte Driver Updater

3. Roll-back graphics driver update

  1. Press Windows + S to open Search, type Device Manager in the text field, and click on the relevant search result.
    device manager
  2. Double-click the Display adapters entry, right-click on the NVIDIA adapter, and choose Properties.
    properties
  3. Navigate to the Drivers tab, and click on Roll Back Driver.
    roll back driver to fix UXDService
  4. Select a reason for rolling back or enter one in the text field, and click on Yes to continue.
    roll back to fix UXDService
  5. Once done, restart the computer for the changes to apply.

For many users getting the UXDService error shutdown, it was a bug in the latest NVIDIA driver that led to the issue. So, roll back to the previous driver version, then disable automatic updates, and wait for a new version with a patch to be released.

4. Disable fast startup

  1. Press Windows + R to open Run, type control panel in the text field, and hit Enter.
    control panel
  2. Click on System and Security.
    system and security
  3. Click Change what the power buttons do under Power options.
    change what the power buttons do to fix UXDService
  4. Now, click on Change settings that are currently unavailable.
    change settings
  5. Untick the checkbox for Turn on fast startup, and click on Save changes.
    disable fast startup to fix UXDService

Some users also found Fast Startup, a built-in feature to turn on the PC faster a shutdown, being responsible for UXDService preventing shutdown in Windows 10, and disabling it did the trick.

5. Perform a system restore

  1. Press Windows + R to open Run, type rstrui.exe in the text field, and click OK.
    system restore to fix UXDService
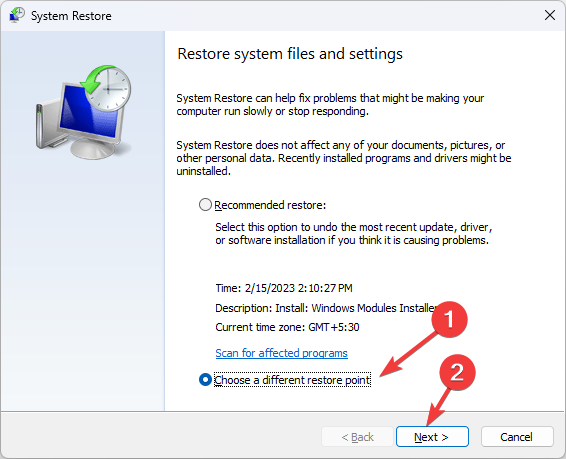
  2. Select Choose a different restore point and click Next to proceed.
    restore point
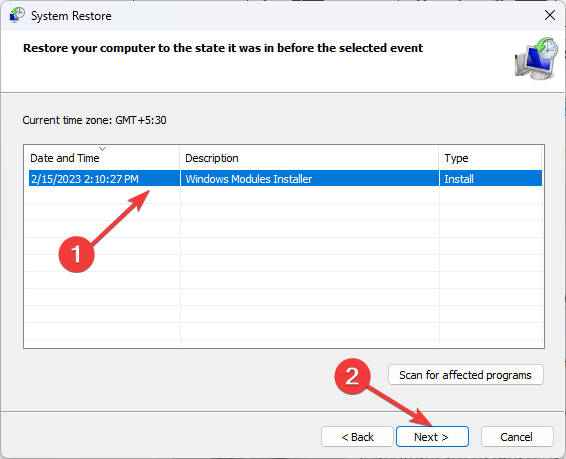
  3. Pick a restore point from the list and click Next.
    restore to fix UXDService
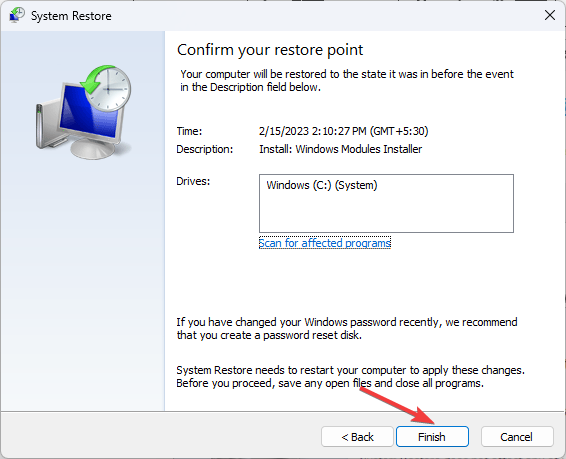
  4. Now, verify the restore details, then click on Finish, and wait for the process to complete.
    restore

That’s it! After the system restore, the UXDService shutdown error should be fixed for good in case a recent system change causes it. And the best part, you don’t lose any files in the process, though some recent apps might be removed.

To learn more about another safe background process that often appears in browsers, read our detailed explanation of gstatic.com and understand its purpose and safety.

Before you leave, check how to set up a shutdown timer and create a shutdown key in Windows.

For any queries or to share which solution worked for you, drop a comment below.

How to Fix the Xbox Update Error Code 0xE0E8000F

Xbox updates are vital for a lot of reasons. These primarily introduce new features, provide patches for known bugs, and improve the overall experience. But the process isn’t always seamless, and many users have reported the 0xE0E8000F error.

When your Xbox won’t update, you miss out on all these aspects. And the error message, in this case, reads, There was a problem with the update. 0xE0E8000F 0x0000000 0x90050005. Trying again doesn’t yield any results for most. So, let’s find out all about the problem!

What is error code 0xE0E8000F on Xbox?

0xE0E8000F is an update error on Xbox and affects Xbox One as well as the Series S/X. It’s one of the issues that is often tricky to troubleshoot and is encountered with several updates. And in most cases, it’s a problem at the user’s end.

Here are a few reasons you are getting the error:

  • Xbox update service is down: When facing the issue, it’s most likely that Xbox services are down, and, as a result, the console is throwing the error.
  • Not enough storage: In some cases, the error appears when the Xbox is running out of storage, And you will need to clear some, at least enough, to download the update.
  • Misconfigured network settings on Xbox: For a few users, it was the misconfigured network settings, basically the DNS and IP address, to blame for the 0xE0E8000F update error.
  • Issues with Internet connectivity: If the Internet is slow or you are facing intermittent loss of connectivity on Xbox, it, too, could trigger an update error.

How do I fix error 0xE0E8000F?

Before we head to the slightly complex solutions, try these quick tricks first:

  • Press the power button on the console to turn it off, then unplug it from the power source (remove the cable as well) for a minute, and finally turn it on. Now, verify whether the update downloads.
  • Instead of the Wi-Fi network, connect your Xbox console to a mobile hotspot and try downloading the update.
  • Keep clicking the Try again button on the error page.
  • Remove any external storage device connected to the console and verify whether 0xE0E8000F is fixed.
  • Re-sign into the Xbox account.
  • Check the Xbox status page and make sure the services are all running. You can also use Downdetector to verify the same.
  • Restart the router.
  • Check if there are any security settings configured over the network, and make sure to whitelist connection requests from Xbox.
  • Access the offline mode from the error page, uninstall a few games on the console to free up storage, and then retry the download.

If none work, move to the fixes listed next.

1. Change the DNS server

  1. Press the Xbox button on the controller, navigate to the gear icon, and select Settings.settings
  2. Go to the Network tab, and then select Network settings.network settings to fix 0xE0E8000F
  3. Choose Advanced settings.advanced settings
  4. Now, select DNS settings.DNS settings to fix 0xE0E8000F
  5. Choose the Manual option.manual to fix 0xE0E8000F
  6. Enter 8.8.8.8 as the Primary IPv4 DNS and proceed.primary DNS
  7. Next, enter 8.8.4.4 as the Secondary IPv4 DNS and save the changes.secondary DNS

Your primary approach when dealing with 0xE0E8000F should be to change the DNS to Google’s. Aside from the ones listed earlier, this is by far the most effective solution that worked for users.

2. Clear MAC address

  1. Open the Xbox settings, go to Network, and then choose Network settings.network settings
  2. Select Advanced settings.advanced settings
  3. Choose Alternate MAC address from the options here.alternate mac address
  4. Now, select Clear.clear to fix 0xE0E8000F
  5. Once done, choose Restart for the changes to come into effect.restart to fix 0xE0E8000F

The MAC address is used to identify devices on a network, and often from issues or due to its corrupt state, you are likely to encounter the 0xE0E8000F Xbox Series S update error.

3. Unenroll from the Insiders program

Tip icon Tip
For this solution, you will need a Windows PC. Get one ready and then proceed.
  1. Go to Microsoft Store, and click on Get to download the Xbox Insider Hub app.Xbox insider hub
  2. Run the app and sign in.
  3. Click on Settings near the bottom-left corner.settings
  4. Go to Manage Devices.Manage devices to fix 0xE0E8000F
  5. Select the Xbox throwing the update error, then click on the cross icon to unenroll it from the insider’s preview.

Many users reported that the problem was limited to those who signed up for the Xbox Insider’s Preview, and unenrolling from it got things up and running in the case of the 0xE0E8000F Xbox update error.

4. Factory reset Xbox

  1. Open the Xbox settings, go to System, and select Console Info from the right.console info
  2. Choose the Reset console option.console
  3. If this is the first time you are performing a reset, select Reset and Keep my Games and Apps.reset to fix 0xE0E8000F
  4. Wait for the process to complete and check whether the error is fixed.
  5. In case that doesn’t work, choose Reset and Remove Everything on the next attempt.factory reset to fix 0xE0E8000F

When nothing else works, your last option is to reset the console to fix 0xE0E8000F in Xbox One. Remember to use reset as the last resort because you might be unable to unenroll from the Insider’s Preview after this.

In case this, too, doesn’t work, we recommend you contact Xbox support for more help. Before you leave, check our curated list of the most played Triple-A games on Xbox.

Tell us which fix worked for you in the comments section below.

amd_ags_x64.dll Missing: 5 Ways to Fix It

DLL or Dynamic Link Library is a file type often shared between applications. Microsoft publishes some of these, while others are by third-party developers. And when a DLL is missing, problems start to appear. One such that affected quite a few is amd_ags_x64.dll.

Developed by AMD (Advanced Micro Devices Inc.), the amd_ags_x64.dll is a part of the AMD GPU Services Library and is vital for several applications to run, usually games. So, let’s find out about the DLL problem and the solutions that worked for others!

What is the problem with AMD_AGS_X64 dll?

The DLL is meant for use in the graphics part, generally to deliver a superior experience. And while issues with it are uncommon, some users do come across the missing amd_ags_x64.dll error.

Here are a few reasons you are facing issues with it:

  • DLL deleted by the user: When the DLL is not found, a common reason is its inadvertent removal. This could both be manual or by an unreliable third-party disk cleaner app.
  • Improper app installation: Since amd_ags_x64.dll is published by a third party and not Microsoft, it should come bundled with the application. And when the DLL is not found, the app installation might not have gone through.
  • The DLL is corrupt and unreadable: In some cases, another application using the DLL might have made changes that corrupted it or rendered the DLL unreadable, and that’s why you get an amd_ags_x64.dll Resident Evil 8 error.

How do I fix the missing amd_ags_x64.dll error?

Before we head to the complex ones, here are a few quick tricks to try:

  • Check the Recycle Bin for the DLL; if it’s there, restore the file.
  • Disable any third-party antivirus installed on the PC.

If none work, move to the solutions listed next.

Tip icon Tip
We recommend against downloading DLL files online because these often contain malicious codes and can harm the PC. Try the solutions here or use a dedicated DLL repair tool for quick troubleshooting.

1. Manually replace the DLL

Often the quickest solution is to replace the missing DLL if you have another PC running the same application. In most cases, the amd_ags_x64.dll file location is:C:\WINDOWS\System32

Or it could be in the program’s dedicated directory, usually under Program Files or Program Files (x86), depending on whether it’s a 64-bit or 32-bit app, respectively.

Verify where the DLL is stored on the other computer, copy it to a USB drive, and then move it to the exact location on the affected PC. Even better, transfer it to both the System32 folder and the program’s directory.

2. Update the graphics driver

  1. Press Windows + X to open the Power User menu, and select Device Manager from the list of options.device manager
  2. Expand the Display adapters entry, right-click on the graphics adapter, and select Update driver.update driver to fix amd_ags_x64.dll
  3. Choose Search automatically for drivers and wait for Windows to install the best one available locally.search automatically

Since the DLL is linked to AMD GPU Services Library, your primary approach should be to update the graphics driver.

And in case a better driver is not available locally, you can always manually install the graphics driver from the AMD website, which should fix error amd_ags_x64.dll in Red Dead Redemption 2.

3. Scan for malware

  1. Press Windows + S to open Search, type Windows Security in the text field, and click on the relevant search result.windows security
  2. Click on Virus & threat protection.virus and threat protection to fix amd_ags_x64.dll
  3. Now, click on Scan options.scan options
  4. Select Full scan and then click on Scan now.full scan to fix amd_ags_x64.dll
  5. Wait for the malware scan to complete.

For many users, it was an antivirus that corrupted amd_ags_x64.dll and many others on the PC, which triggered the missing DLL error. And running a malware scan should do. Besides, you can use an effective antivirus to run a deeper scan.

4. Reinstall the application

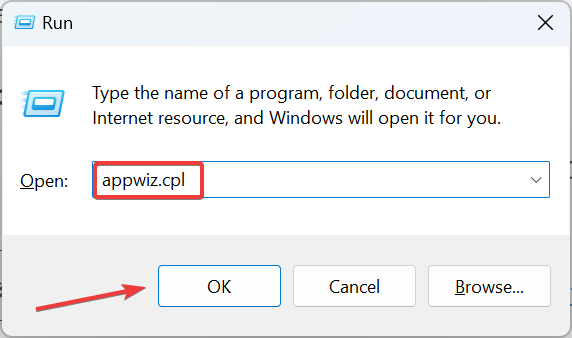
  1. Press Windows + R to open Run, type appwiz.cpl in the text field, and hit Enter.appwiz.cpl
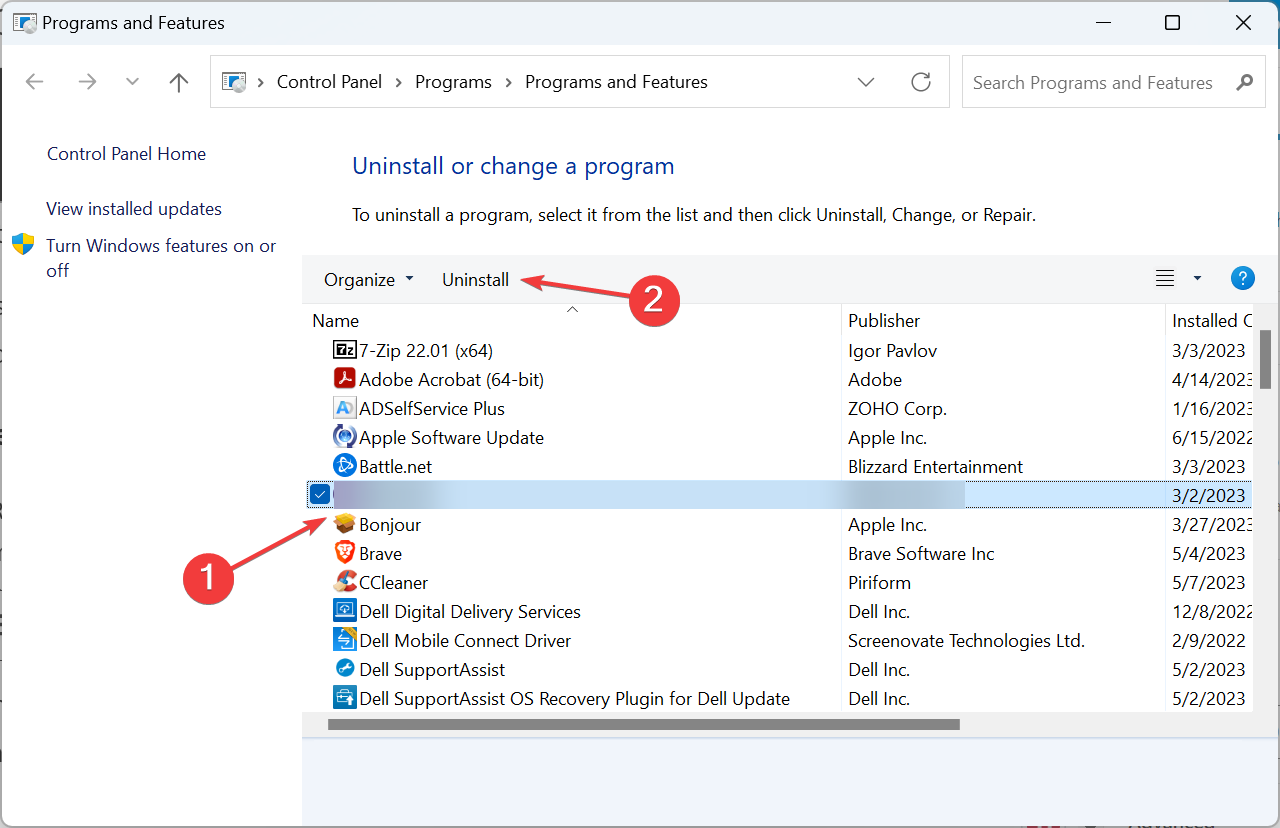
  2. Select the application throwing the error, and click on Uninstall.uninstall to fix amd_ags_x64.dll
  3. Follow the on-screen instructions to complete the process.
  4. Now, delete any app files in the following location where Username is the account name:C:\Users\Username\AppData\Localapp cache
  5. For Steam or any other gaming client, make sure to delete the download cache as well.
  6. Once done, restart the computer, then download the app from an official source.

If the initial installation has not been proper, uninstall the program, and then download it again. For this, you could also use a reliable uninstaller software to clear any leftover files and registry entries.

5. Perform a system restore

  1. Press Windows + R to open Run, type rstrui.exe, and click OK.rstrui.exe
  2. Choose Select a different restore point, and click Next.choose
  3. Now, pick a different restore point from the list, and click Next.restore point to fix amd_ags_x64.dll
  4. Verify the restore details, then click Finish, and wait for the process to complete.verify restore details to fix amd_ags_x64.dll

When nothing else works, there’s always the option to perform a system restore. This will revert any changes on the PC made after the creation of the restore point and get things up and running when amd_ags_x64.dll is not found.

And before you leave, do check some quick tips to make Windows faster than ever.

For any queries or to share what worked for you, drop a comment below.

wtsapi32.dll Missing: How to Fix or Download It Again

Microsoft releases several DLLs and includes them as a part of the Windows installation to run apps effectively. These files are shared between several applications, which often leads to issues. One such DLL several users had issues with is wtsapi32.dll.

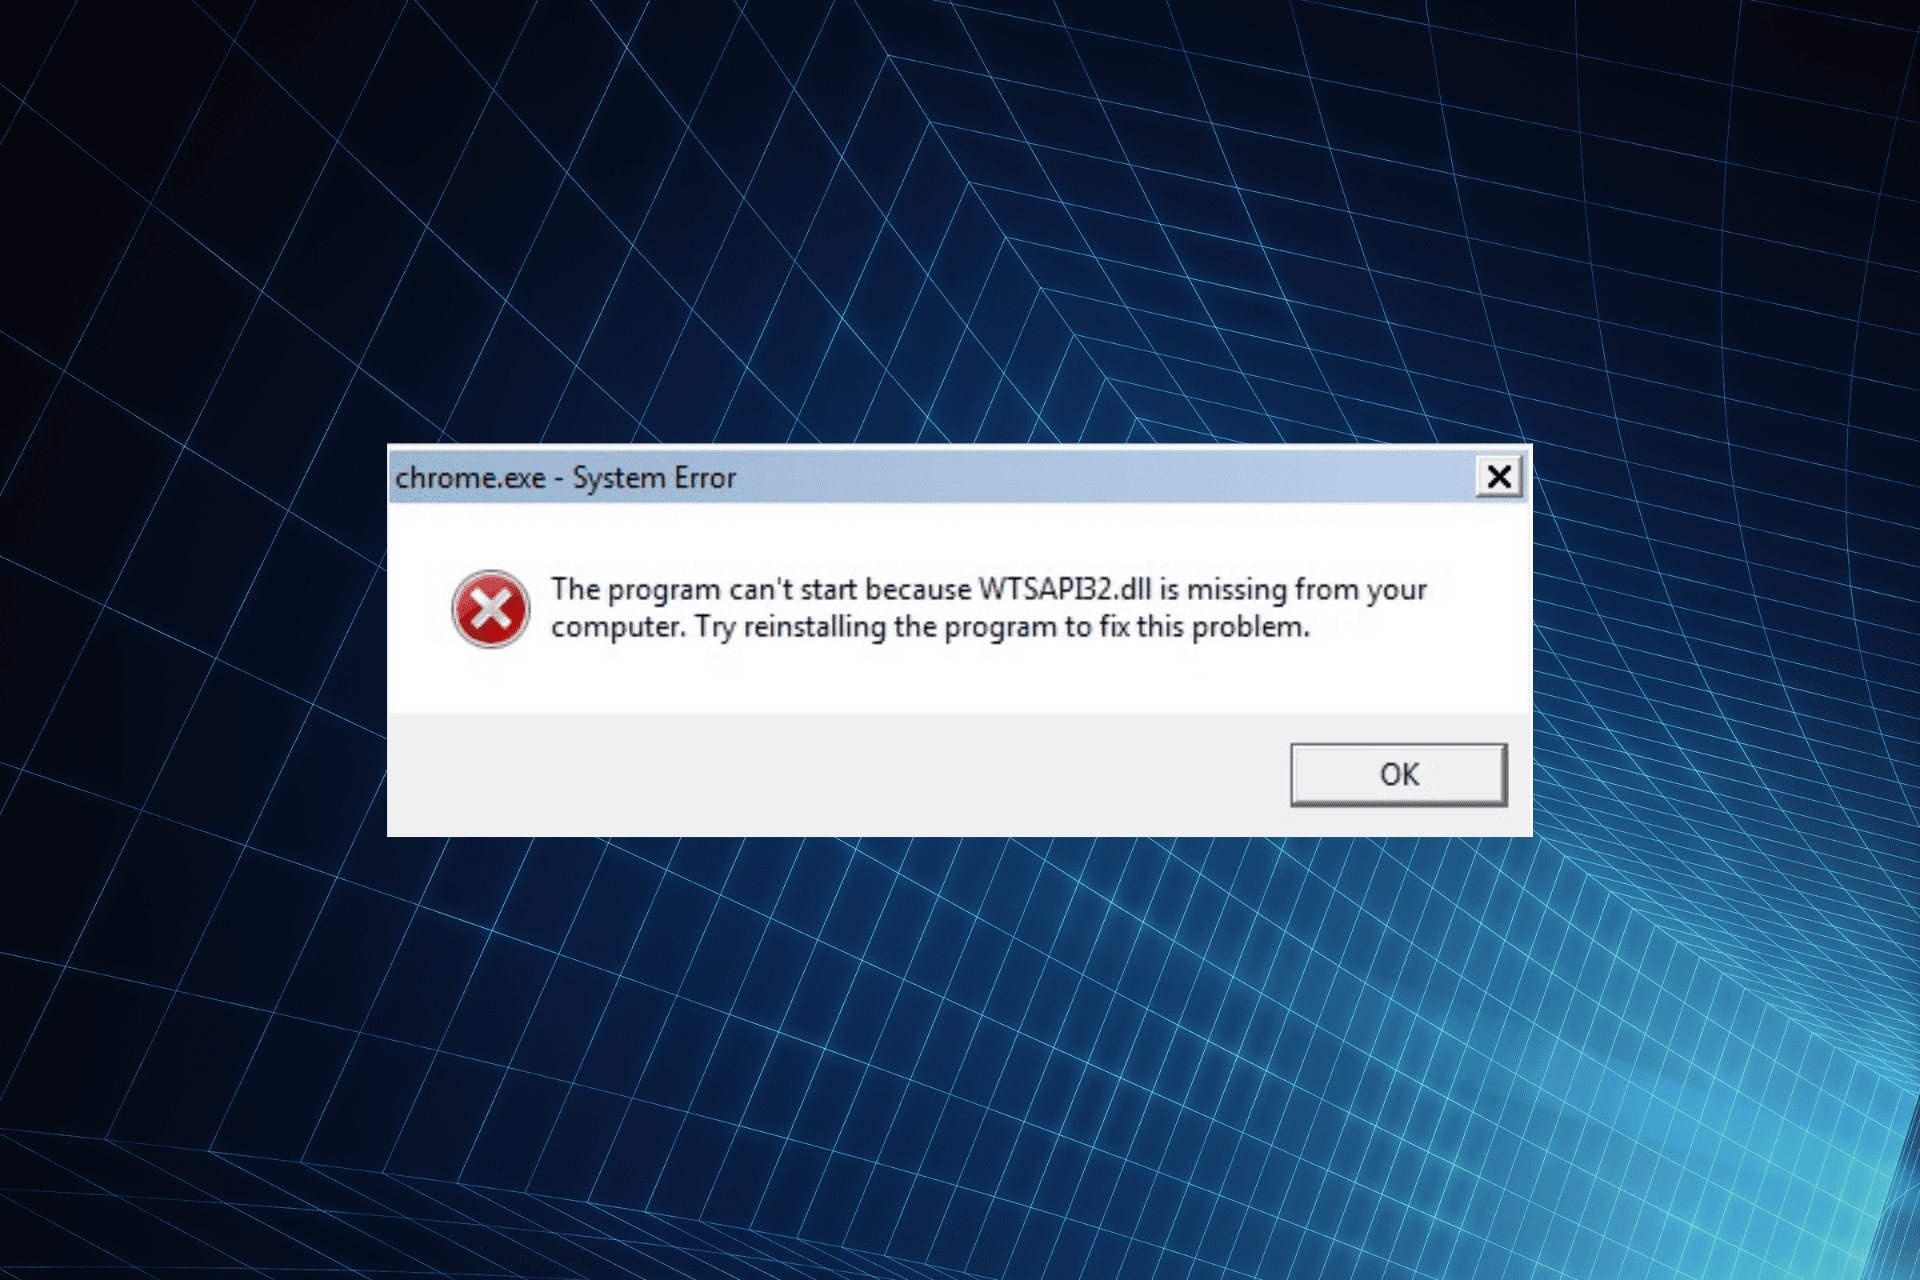
When the DLL file is missing, apps fail to launch. While for some, the problem affected games, others reported issues with Chrome. So, let’s find out how you can get things up and running.

Why is wtsapi32.dll missing?

Here are a few reasons the DLL is not found in Windows:

  • Corrupt system files: When faced with the error, your primary approach should be to look for corrupt system files since these are generally the underlying cause.
  • Missing redistributables: The wtsapi32.dll file is linked to Windows Remote Desktop Session Host Server SDK APIs, and missing Visual C++ Redistributable packages often trigger the error.
  • Issues with the graphics drivers: In some cases, it was an incompatible, corrupt, or outdated driver that led to the error.
  • Improper app installation: For DLLs used by third-party programs, these often come bundled as a part of the package. So when wtsapi32.dll is not found, it’s likely that the app wasn’t installed properly.

How do I fix the wtsapi32.dll missing error?

Try these quick tricky before you proceed:

  • Check for pending Windows updates and install them.
  • Uninstall any program downloaded recently, after which the problem first appears.

If these don’t work, move to the fixes listed next.

1. Manually place the DLL

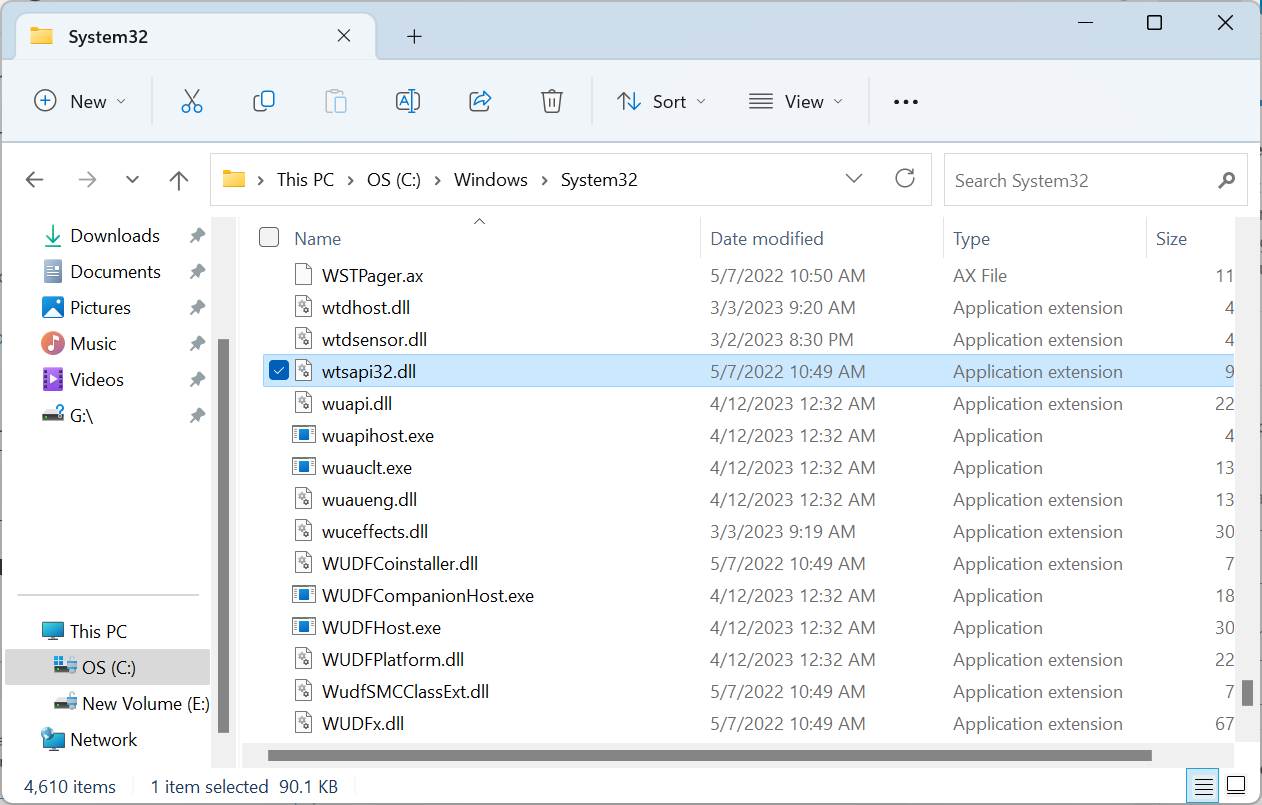
For anyone wondering, wtsapi32.dll is not a malware. It’s a DLL published by Microsoft and available in the System32 folder. So, you can easily move the DLL from another computer to the affected one. The wtsapi32.dll location is:C:\Windows\System32

System32 folder

Besides, you can also paste the DLL into the program’s (one throwing the error) directory. Once done, launch the program, and you shouldn’t get the error anymore.

2. Repair the corrupt system files

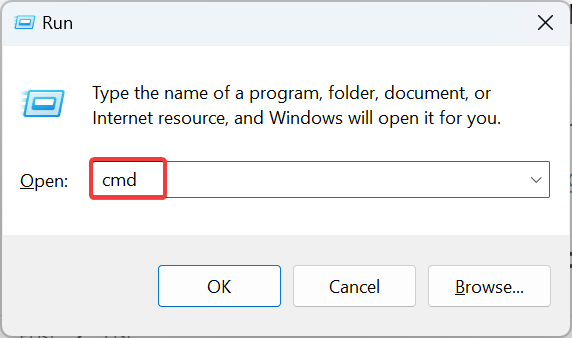
  1. Press Windows + R to open Run, type cmd, and hit Ctrl + Shift + Enter.command prompt
  2. Click Yes in the UAC prompt.
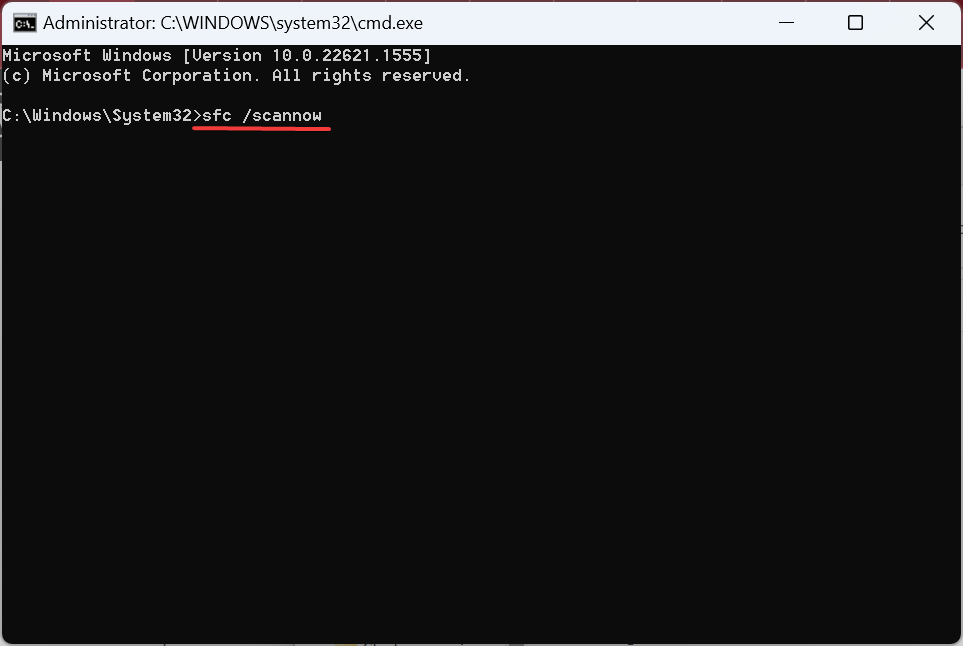
  3. Paste the following commands one at a time and hit Enter after each:DISM /Online /Cleanup-Image /CheckHealth DISM /Online /Cleanup-Image /ScanHealth DISM /Online /Cleanup-Image /RestoreHealth
  4. Now, run this command for the SFC scan: sfc /scannowsfc scan to fix wtsapi32.dll

When it’s the corrupt system files to blame for missing wtsapi32.dll on Chrome, running the DISM tool and SFC scan should do the trick.

To perform this task faster and more effectively, we suggest you use a reliable tool with advanced repair technology.

3. Download Visual C++ Redistributables

  1. Go to Microsoft’s dedicated page, and download the latest Visual C++ Redistributable packages.visual c++ to fix wtsapi32.dll
  2. Once done, run the setup and follow the on-screen instructions to complete the installation.setup
  3. Similarly, install the other available packages as well. Make sure to get both 32-bit and 64-bit versions.

When the missing wtsapi32.dll problem persists, another fix is to get the latest Visual C++ Redistributables. Also, you could repair the ones already installed.

4. Update the graphics driver

  1. Press Windows + X to open the Power User menu, and select Device Manager.device manager
  2. Expand the Display adapters entry, right-click on the graphics adapter, and select Update driver.update driver to fix wtsapi32.dll
  3. Select Search automatically for drivers and wait for the OS to install the best one available locally.search automatically for drivers

A few users reported that the wtsapi32.dll not found error could be triggered due to graphics, and updating the graphics driver should do the trick. Also, if an update is not found, you could manually install the latest driver from the manufacturer’s website.

5. Reinstall the affected application

  1. Press Windows + R to open Run, type appwiz.cpl in the text field, and click OK.appwiz.cpl
  2. Locate the program throwing the error, select it, and click on Uninstall.uninstall to fix wtsapi32.dll
  3. Follow the on-screen instructions to complete the process.
  4. Once done, head back to the official website or Microsoft Store, and download the program again.

If the problem is limited to a specific program, a quick solution is to reinstall it. This will help download the missing wtsapi32.dll.

6. Perform an in-place upgrade

Tip icon Tip
These are the steps to perform an in-place upgrade on Windows 11. In case you are running Windows 10, download the Media Creation Tool and use it for the repair upgrade.
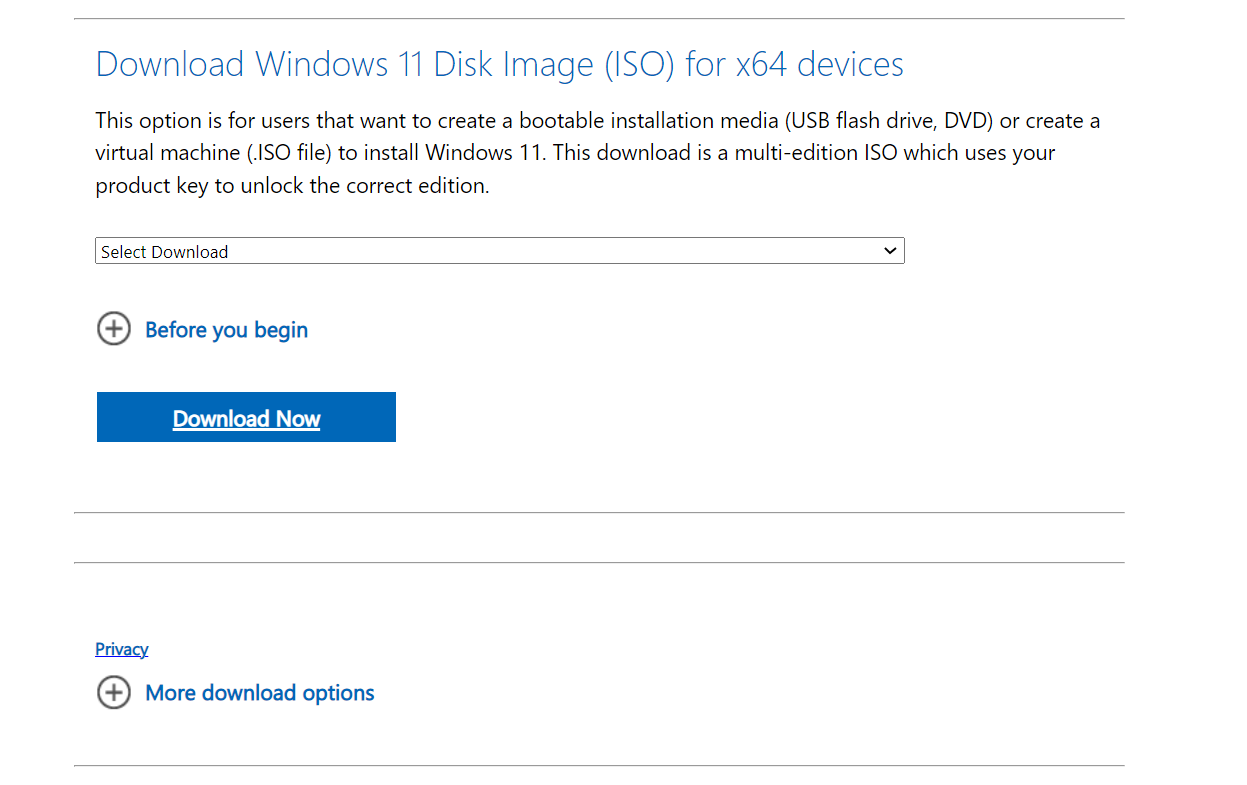
  1. Go to Microsoft’s official website, and download the Windows 11 ISO, after selecting the edition and product language.windows 11 iso
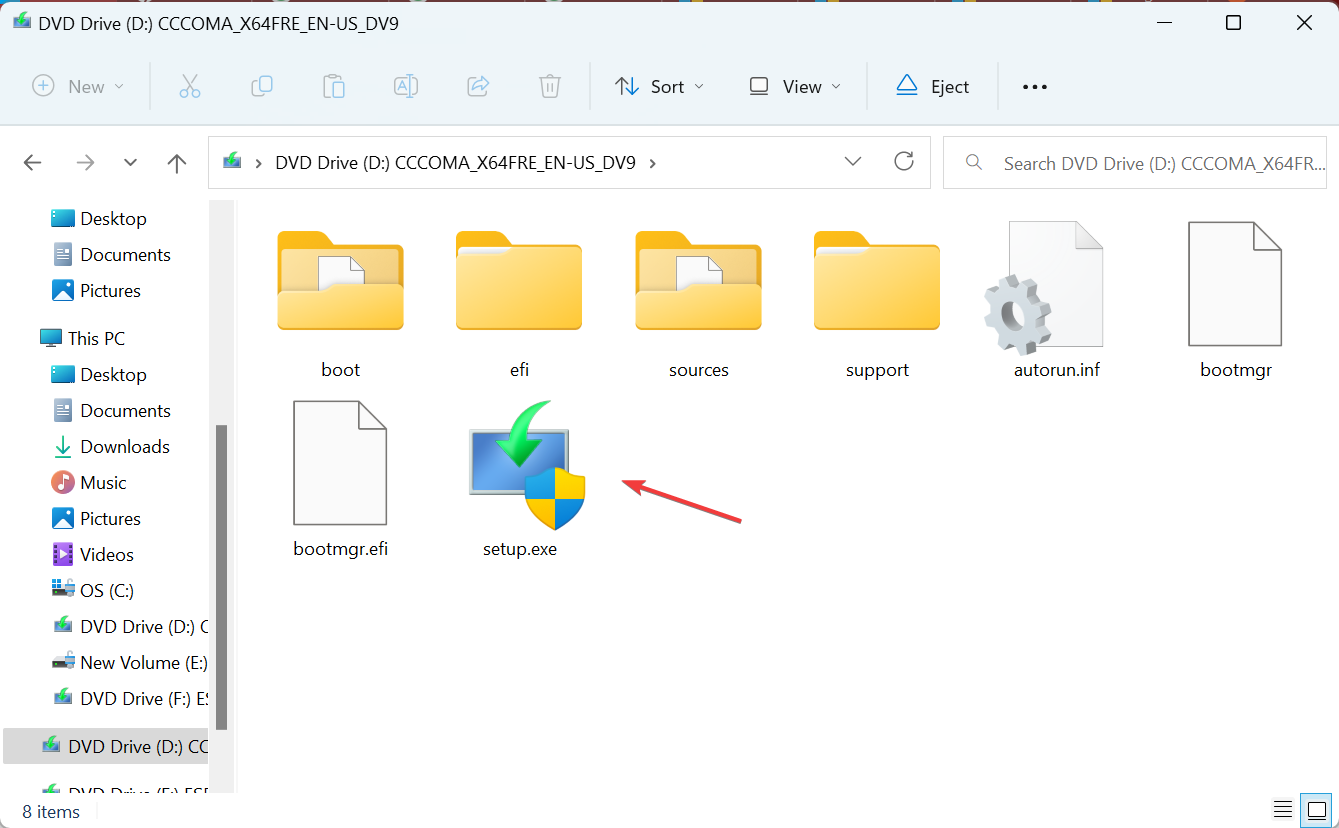
  2. Open the ISO, and run the setup.exe file.setup.exe to fix wtsapi32.dll
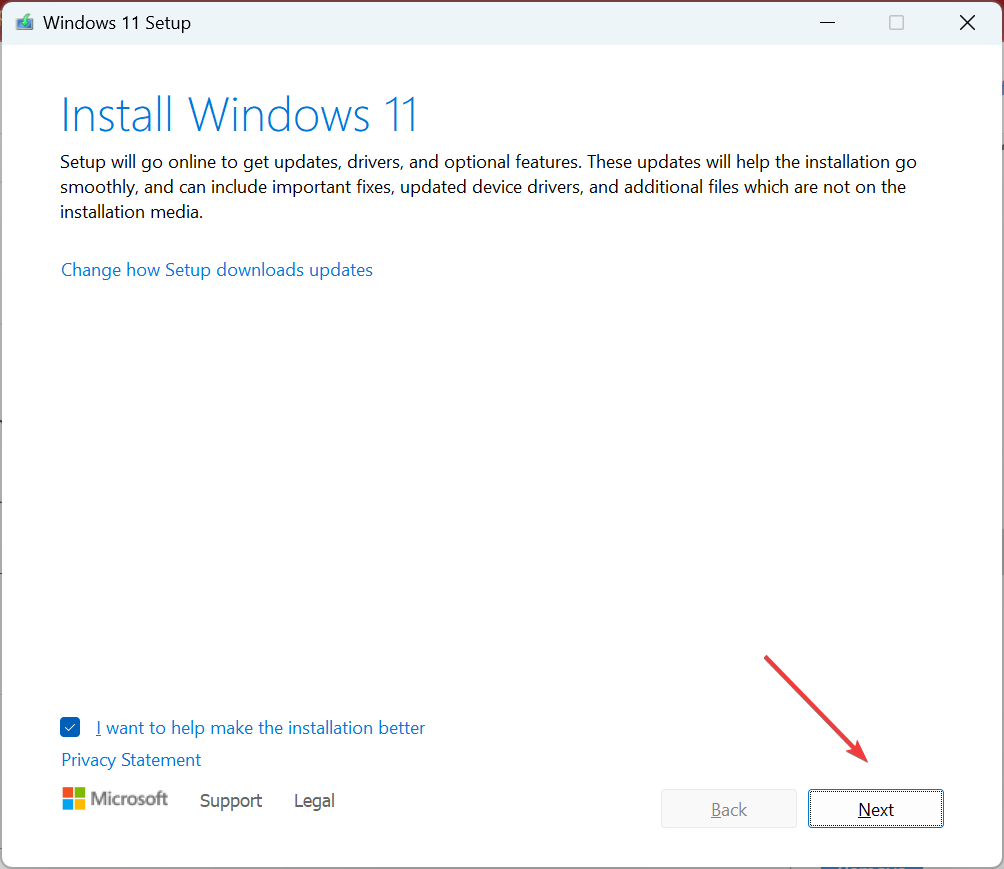
  3. Click Next to proceed.next
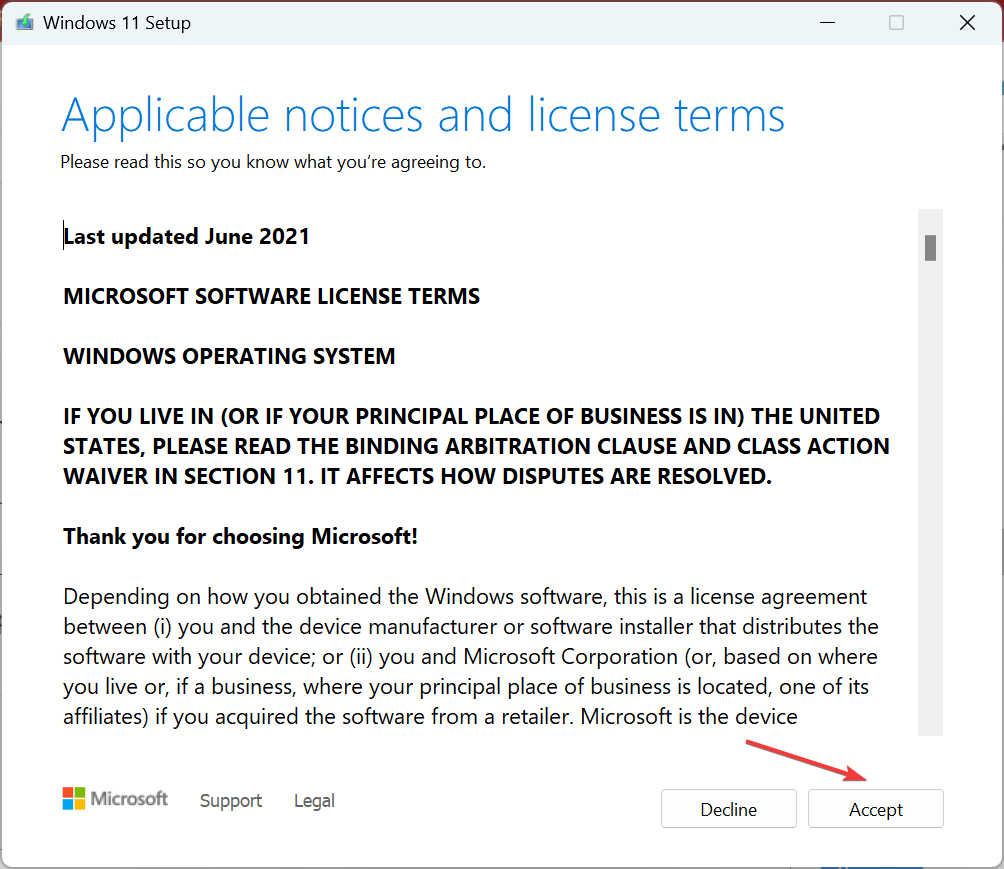
  4. Click Accept to agree to Microsoft’s license terms.accept
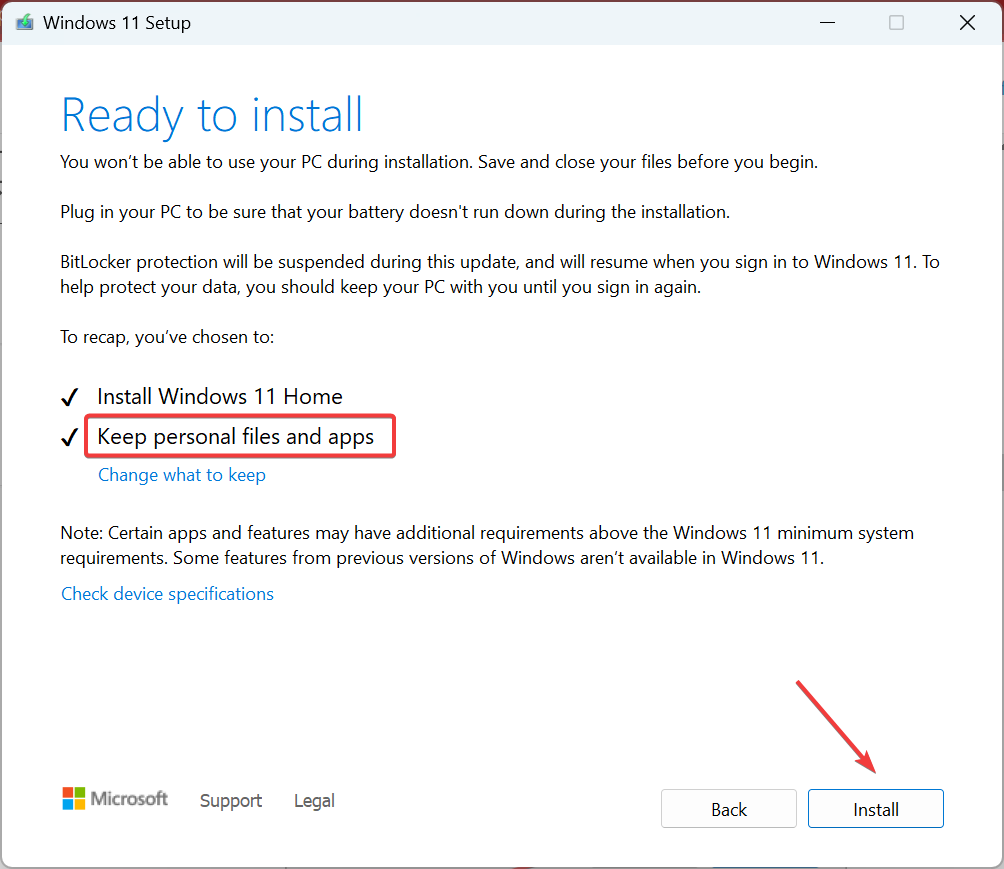
  5. Now, verify that the setup reads, Keep personal files and apps, and click on Install.in-place upgrade to fix wtsapi32.dll
  6. Wait for the repair to complete.

That’s it! If the previous solutions didn’t work and wtsapi32.dll is still not found, an in-place upgrade should get things up and running. This will fix any other issues with Windows as well and boost the PC’s performance.

Besides, we recommend you get a dedicated DLL repair tool to avoid encountering such errors again.

Tell us which fix worked for you in the comments section below.

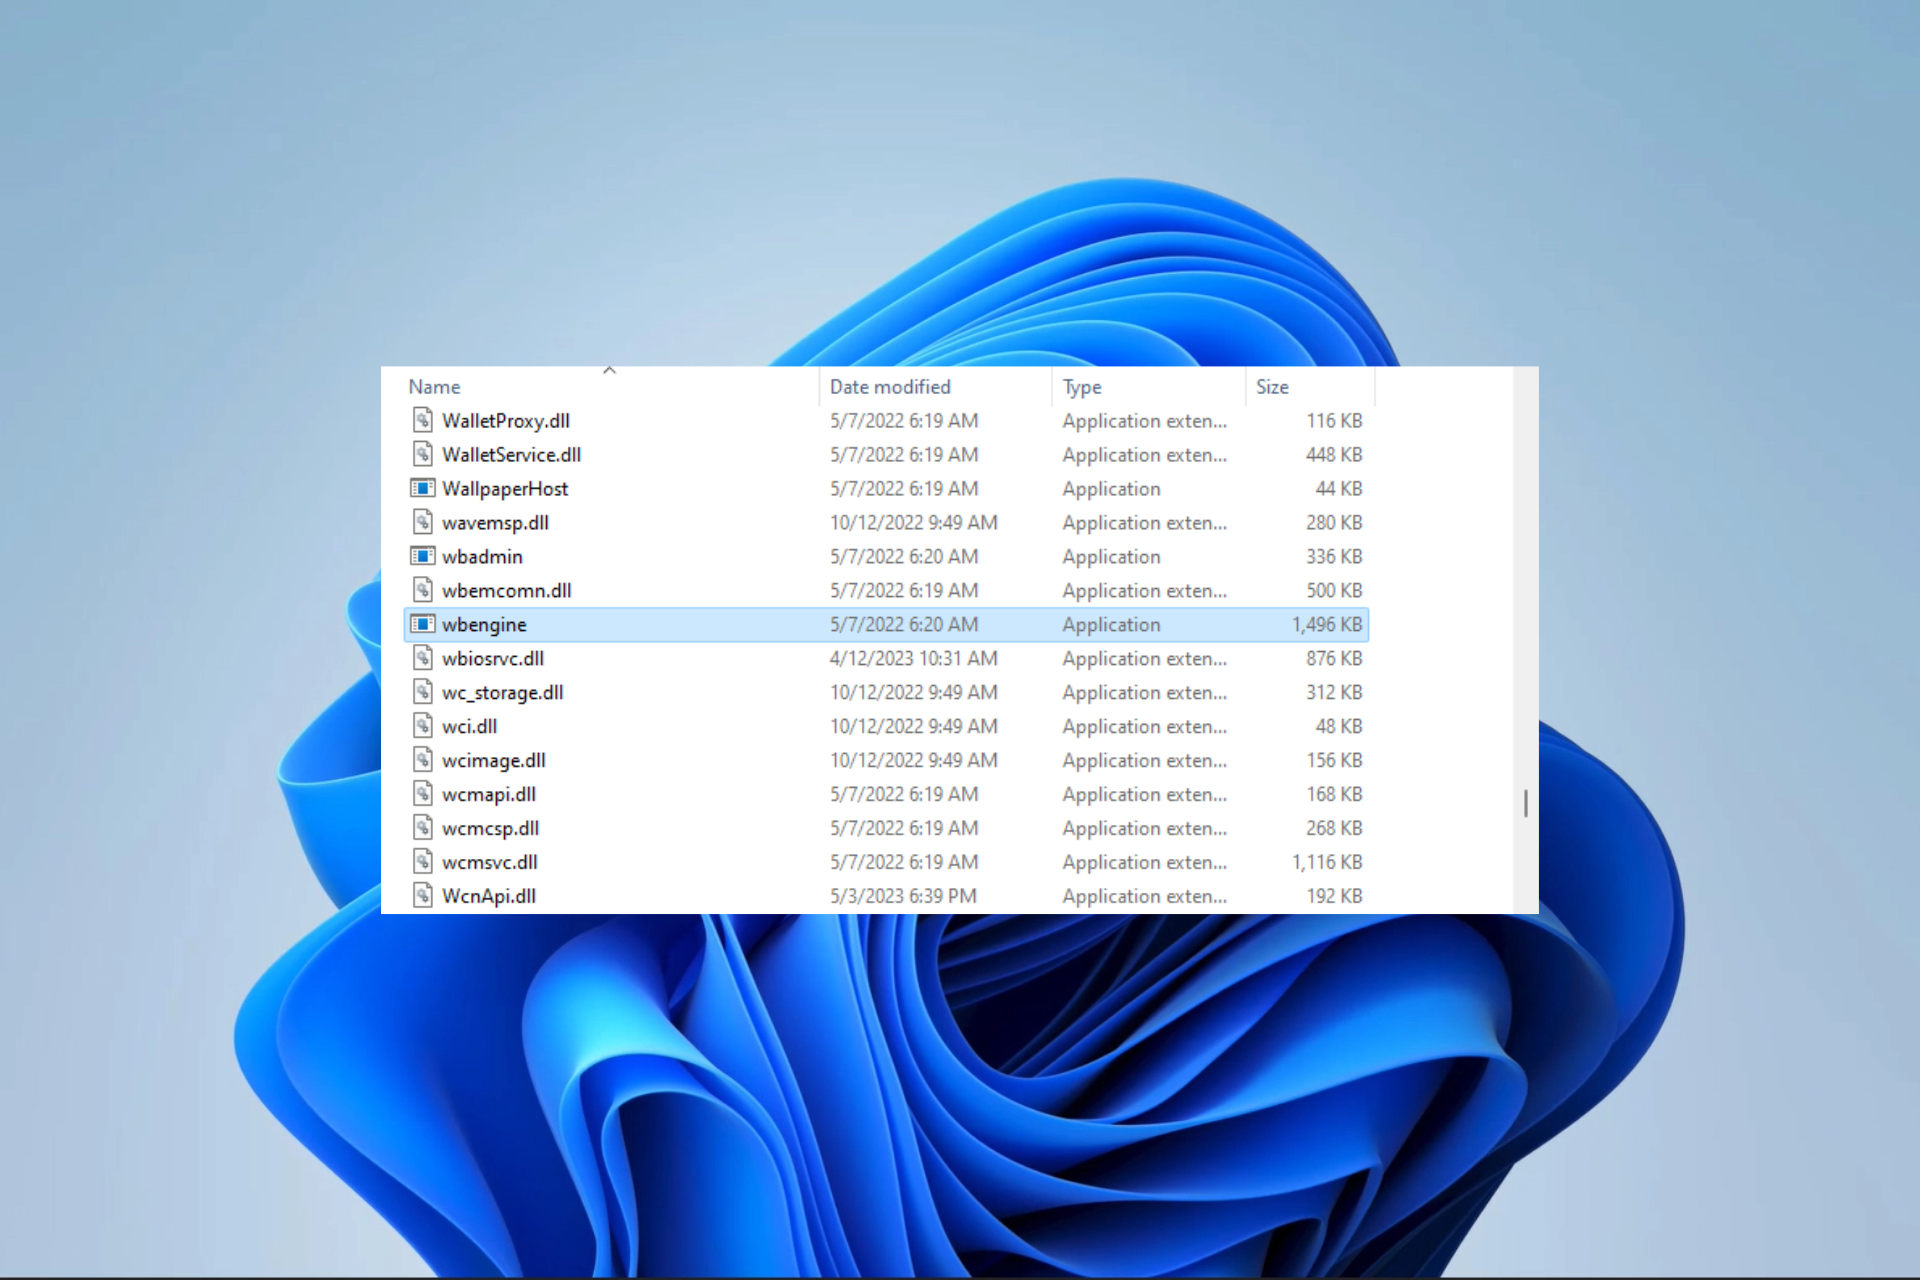
Wbengine.exe: What Is It & How to Fix Its Errors

System errors are not uncommon among computer users. Sometimes, they come from vital processes like wbengine.exe.

In this guide, we explore this Windows system file, tell you all you must know about it, and show you the most practical fixes for errors surrounding the file.

How do I fix wbengine.exe errors?

1. Run an SFC scan

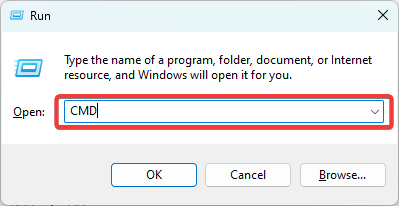
  1. Press Windows + R to open the Run dialog.
  2. Type CMD then hit Ctrl + Shift + Enter.
    wbengine.exe
  3. Input the script below and hit Enter.
    sfc /scannow
    wbengine.exe
  4. Follow the prompts if you get any, then restart your computer at the end and verify if the wbengine.exe error is resolved.

This solution is especially useful if you encounter the bad Image or wbengine.exe failed to initialize properly errors.

If you want an automatic version, you can try reliable repair software to detect all corrupt or malfunctioning files and locate new elements as replacements from its vast repository.

2. Restore the computer

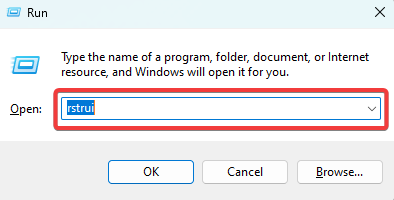
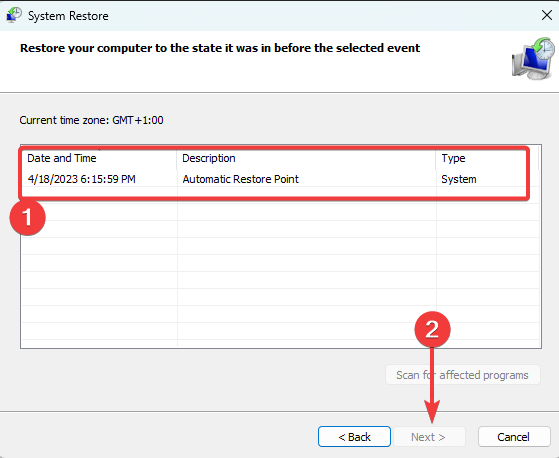
  1. Press Windows + R, type rstrui, and hit Enter.
    wbengine.exe
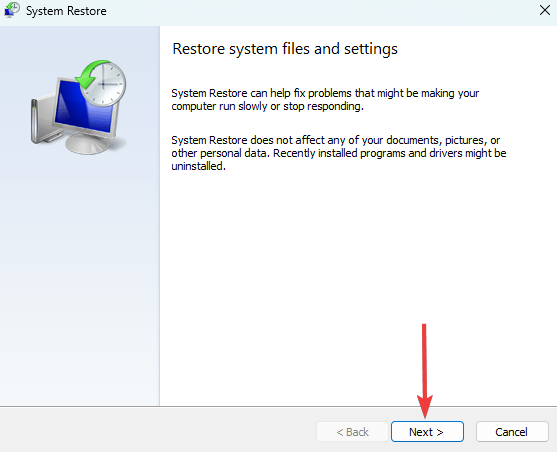
  2. Click the Next button.
    wbengine.exe
  3. Select a restore point and hit the Next button.
    wbengine.exe
  4. Click Finish and wait for the process to complete then verify if it fixes the wbengine.exe error.

3. Update the OS

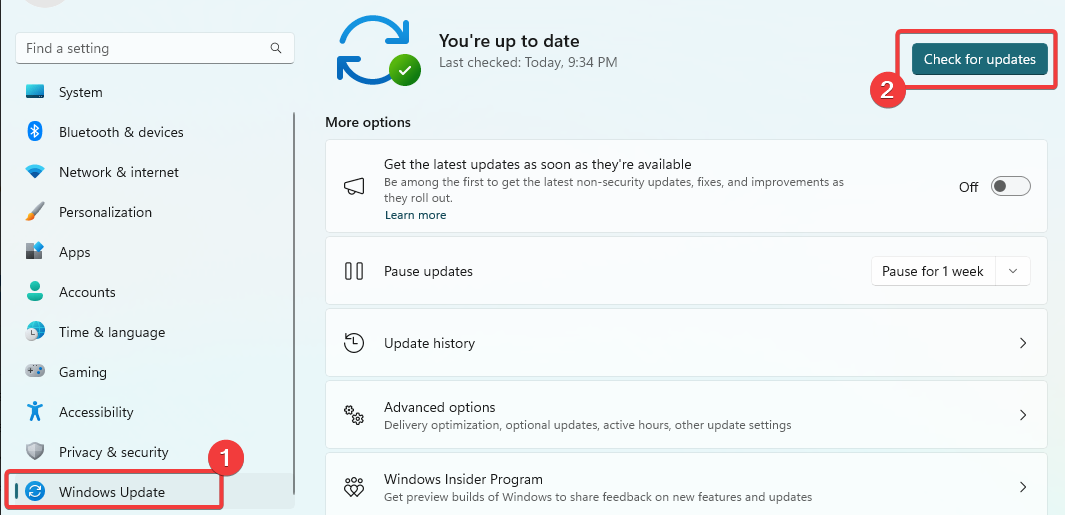
  1. Press Windows + I to open the Settings app.
  2. On the left pane, click Windows update, then on the right, click the Check for updates button.
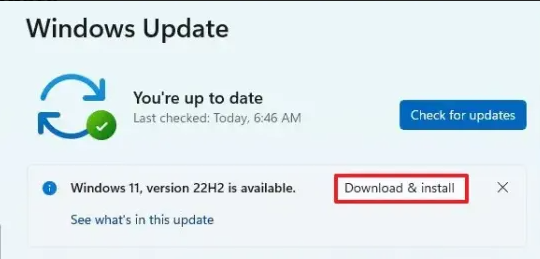
  3. If you find any updates, click on Download & Install.
  4. Finally, restart your computer for all the updates to take effect.

An update works if you encounter wbengine.exe could not be installed or error starting program: wbengine.exe.

What is the wbengine EXE file?

If you come across the file wbengine.exe on your Windows system, there’s no need to worry, as it is a genuine system file connected to the Windows Backup Engine. This file is responsible for the following functions:

  • System Backup – The process is in charge of generating backups of the system’s image. These backups comprise system configurations, the complete OS, installed programs, and user data.
  • Incremental Backups – When performing incremental backups, the Windows Backup Engine utilizes Wbengine.exe to back up the modifications made since the previous backup exclusively.
  • Scheduled Backups – With Wbengine.exe, users can schedule automatic backups at specific times or intervals.
  • Backup Catalog Management – The Backup Engine manages backup metadata, including location, timestamp, and type.
  • Backup Recovery – If there are any system failures or data loss, Wbengine.exe is the responsible tool for recovering data from backups and restoring the system to a previous state.

That is about as much as there is to this backup file. You may also note that a malware scan with robust antivirus software may be a valid fix if you suspect another program mimics the backup file.

To learn more about similar processes, consider exploring WbemCons.exe and troubleshooting its application errors.

Finally, don’t forget to leave us a comment below if you can fix related errors using the solutions in this guide.

This Device Cannot Start (Code 10): 5 Ways to Fix It

Encountering the Windows error message, This device cannot start Code 10? It may appear daunting at first, but it can be resolved quickly.

This error revolves mainly around the Device Manager, and we have investigated and will offer some of the most practical solutions as well as probable causes.

What Is Error Code 10?

This error message indicates that Windows cannot correctly operate a particular hardware, like a USB drive or printer. The following may trigger the error:

  • Driver-related issues – When the device drivers are outdated or corrupted, the device may encounter difficulties in starting up properly.
  • Conflicts between hardware devices – If other hardware devices on your system are conflicting, the device might fail to start.
  • Hardware issues – If there is a problem or damage to the device, it may not start properly and could result in code 10 errors.
  • Registry errors – If there are issues or corruption within the Windows registry about the device, it could potentially result in the device failing to start.

How do I fix error code 10 this device cannot start?

Before going into our main fixes, try these:

  • Restart the computer – A reboot may be able to force problematic processes to end and resolve the error.
  • Remove peripherals – Since attached hardware may trigger the error, you may first remove every peripheral.

After the workarounds, you may proceed to more detailed fixes below.

1. Run the Hardware Troubleshooter

  1. Press Windows + R to open the Run dialog.
  2. Type cmd and hit Ctrl + Shift + Enter to open an elevated Command Prompt.
    windows cannot determine the settings for this device code 34
  3. Type the script below and hit Enter.
    msdt.exe -id DeviceDiagnostic
    windows cannot determine the settings for this device code 34
  4. Tick Apply and repair automatically and hit Next.
    windows cannot determine the settings for this device code 34
  5. Finally, select Apply this fix, and wait for the process to complete.
    windows cannot determine the settings for this device code 34

2. Update drivers

  1. Right-click on the Start menu and select Device Manager.
    windows cannot determine the settings for this device code 34
  2. Expand any category where you have an outdated driver (they usually will have a yellow badge).
  3. Right-click on the driver and select Update driver.
  4. Select the Search automatically for updates option.
  5. Finally, verify this device cannot start code 10 is fixed.

Since this process may be complex and tedious, you may use any robust driver update software to automate the process.

More specifically, we suggest you’re using a specialized driver tool that can entirely scan the PC and detect outdated drivers that need to be updated. Afterward, you’ll fix it with a click.

⇒ Get Outbyte Driver Updater

3. Perform an OS update

  1. Press Windows + I to open the Settings app.
  2. On the left pane, click Windows update; on the right, select Check for updates.
    windows cannot determine the settings for this device code 34
  3. Click on Download & install all.
    windows cannot determine the settings for this device code 34
  4. Restart the computer and verify this device cannot start code 10 is fixed.

4. Make registry modifications

  1. Press Windows + R to open the Run dialog.
  2. Type regedit and hit Enter to open the Registry.
  3. Navigate to the path below:
    Computer\HKEY_LOCAL_MACHINE\SYSTEM\CurrentControlSet\Control\Class{36fc9e60-c465-11cf-8056-444553540000}
  4. On the left pane, delete the UpperFilters and LowerFilters options if they exist (In the image below, they do not exist).
    windows cannot determine the settings for this device code 34
  5. Lastly, verify this device cannot start code 10 error is fixed.

5. Perform a System Restore

  1. Press Windows + R, type rstrui, and hit Enter.
    windows cannot determine the settings for this device code 34
  2. Click the Next button.
  3. Lastly, select a restore point and hit the Next button.
  4. Click on Finish and wait for the process to complete.

And there you go. Any of these five solutions may resolve the code 10 error. We have not written them in any particular order, so once you get through the pre-solutions, you should try any fix that seems the most relevant.

As a last resort, you may try a clean installation of Windows; however, you will lose all your valuable information. For more like issues like code 19, check out our detailed article.

Please let us know what worked in the comments section below.

Fix: Reinstall Drivers for this Device (Code 18)

On a Windows device, a few of our readers have complained of the error message reinstall drivers for this device code 18. As you may guess, this error borders around driver issues.

We have investigated the problem, and in this article, we introduce you to likely causes and some practical solutions.

What causes reinstall drivers for this device code 18?

From interaction with users, the problem may be triggered by any of the following:

  • Incompatible drivers – Sometimes, a code 18 error may appear if the drivers for your device are not compatible with the version of Windows you have installed.
  • Corrupt or outdated drivers – In case the device drivers are outdated or corrupt, reinstalling them could resolve the error.
  • Hardware conflicts – If there are conflicts between the hardware devices in your system, it may cause code 18 errors.
  • Faulty hardware – If the device is faulty or damaged, it may cause code 18 errors.
  • Malware or virus infections – Malware or viruses can damage or corrupt the device drivers, leading to code 18 errors.

How do I fix reinstall drivers for this device code 18?

We suggest trying these simple pre-solutions:

  • Restart the computer – Sometimes, restarting can effectively terminate troublesome processes that could trigger the code 18 error.
  • Test for hardware damage – To ensure the hardware is not faulty, you can test it on another computer.
  • Scan for viruses – Running a thorough virus scan using reliable antivirus software can significantly reduce the risk of encountering error caused by malware.

If the error persists after trying these workarounds, you can move on to the solutions listed below.

1. Reinstall drivers

  1. Right-click on the Start menu, and select Device Manager.
  2. Expand any category where you have an outdated driver (they usually will have a yellow badge).
  3. Right-click on the driver and select Uninstall device.
    reinstall drivers for this device code 18
  4. Confirm your choice.
  5. Restart your computer and relaunch the Device Manager.
  6. Click on the Scan for hardware changes.
    reinstall drivers for this device code 18
  7. Finally, verify that the error is resolved.

2. Update drivers

  1. Right-click on the Start menu, and select Device Manager.
  2. Expand any category where you have an outdated driver (they usually will have a yellow badge).
  3. Right-click on the driver and select Update driver.
    reinstall drivers for this device code 18
  4. Select the Search automatically for updates option.
    reinstall drivers for this device code 18
  5. Finally, verify the reinstall drivers for this device code 18 error is fixed.

In case the steps above didn’t work out for your PC, worry not. You could always get dedicated driver support.

Thus, it’s possible to scan the system for outdated drivers and fix them with their official manufacturer version.

⇒ Get Outbyte Driver Updater

3. Run the specific hardware troubleshooter

  1. Press Windows + I to open the Settings app.
  2. On the right pane, click on Troubleshoot.
    reinstall drivers for this device code 18
  3. Select Other troubleshooters.
  4. Search for the hardware component that triggers the error and click on its Run button.
    reinstall drivers for this device code 18
  5. Finally, verify if reinstall drivers for this device code 18 is fixed.

4. Update the OS

  1. Press Windows + I to open the Settings app.
  2. On the left pane, click on Windows update, then on the right, click Check for updates.
  3. Finally, click Download & Install, then verify if the error is fixed.

Any of the above fixes should come in handy if rectifying the driver error. However, we have not written them in any particular order, so we recommend trying whichever solution feels like a good fit.

Also, as a last resort, you may try to reset your Windows device if nothing else works.

Lastly, we love to hear from you, so contact us via the comments section and let us know what fix corrected the error.

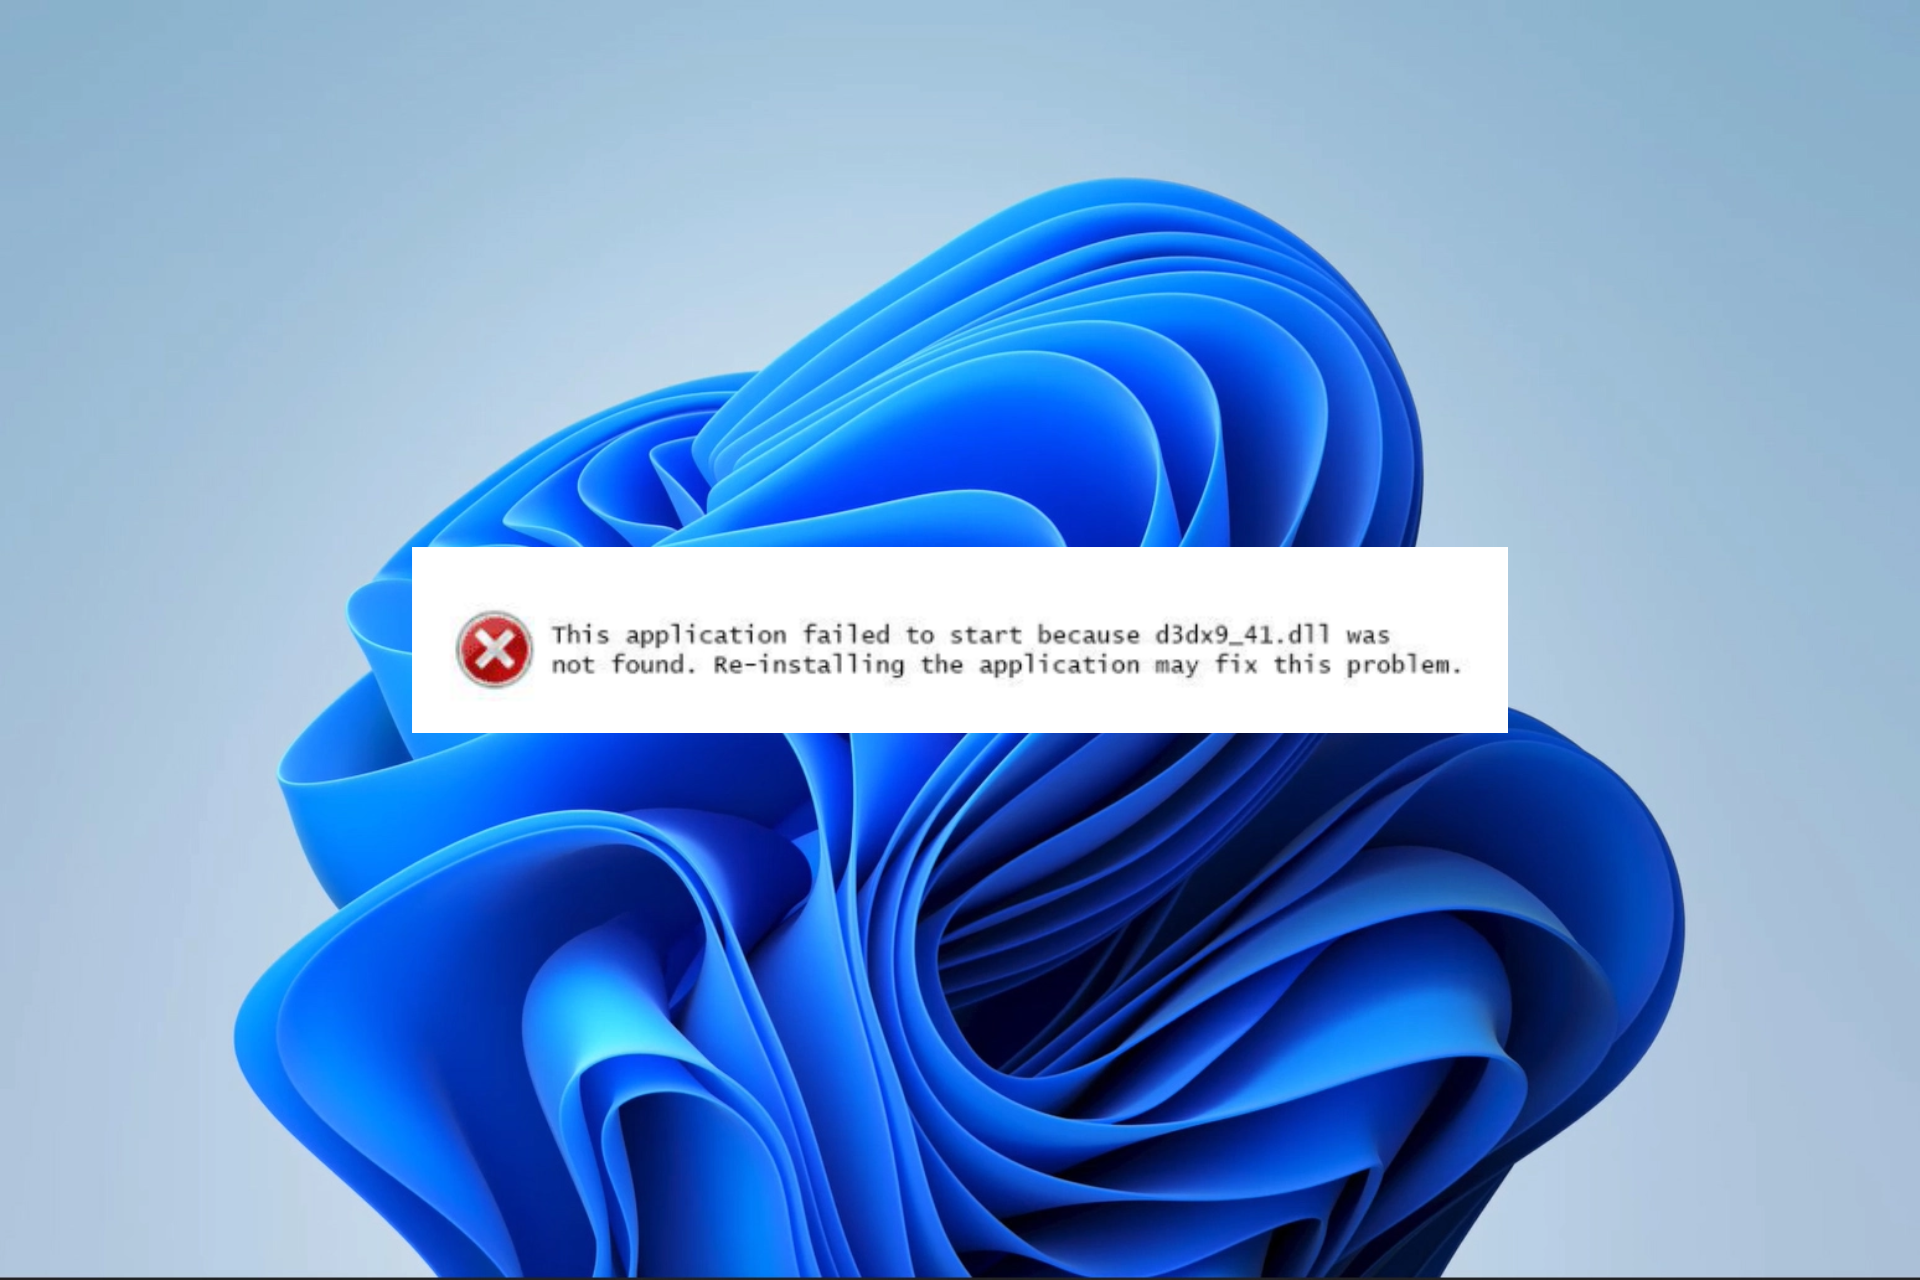
D3dx9_41.dll not Found: 4 Ways to Fix It

The D3dx9_41.dll file is a component of the Microsoft DirectX software package. It encompasses a range of programming interfaces and tools that facilitate the management of multimedia tasks such as graphics, sound, and input devices for applications based on Windows.

So, in this article, we explore ways to fix your PC if this DLL can not be found or is corrupted.

Why is d3dx9_41.dll not found on my computer?

There are a few reasons why this Dynamic Link Library is missing on your device. The major causes are the following:

  • DirectX not installed – One possible explanation for this issue is that the DirectX runtime library is either missing or outdated on your computer.
  • Conflicting software – Your computer’s software or programs may experience conflicts with DirectX due to outdated drivers, conflicting system settings, or other software-related issues.
  • Corrupted or missing file – It could be either missing or corrupted due to a virus or malware infection, an incorrect installation, program removal, or other system errors.

You should try the below fixes if d3dx9_41.dll is not found on your device.

What should I do if d3dx9_41.dll is missing?

Before proceeding to any complex solutions, try the following workarounds:

  • Scan for viruses – If a virus triggers the missing DLL error, a scan will clean the computer and return it to proper functioning. We recommend using a robust antivirus.
  • Uninstall recent applications – Since software conflicts may cause the problem, you may want to uninstall apps triggering the error.
  • Restart your device – There are often little bugs that may trigger the error. A restart may be strong enough to shut them down and save you further troubleshooting.

If the above pre-solutions do not work, proceed to the fixes below.

1. Using a specialized tool

There are several DLL tools that can help fix errors by replacing missing files or repairing corruption.

One of our highly recommended solutions can certainly help you with DLL issues. It provides a 100% guarantee for Microsoft native DLLs such as d3dx9_41.dll.

2. Install the latest DirectX version

  1. Navigate to the download page for the runtime.
  2. Click on the Download button.
    d3dx9_41.dll
  3. Click on the downloaded dxwebsetup.exe to begin the installation, and restart your computer after the installation is complete.
    d3dx9_41.dll

It is common for Microsoft to release DirectX updates without changing the version letter or number. Therefore, we recommend installing the most recent release, even if your current version seems technically the same.

3. Manually download the DLL

If the previous DLL is damaged or absent on your computer, you can get d3dx9_41.dll from reliable sources by downloading it manually.

After downloading, extract the file and place it in the directory of the problematic application. Then, you can launch the app without any issues.

Be cautious when downloading DLLs and only use trusted sources because malicious programs can easily infiltrate your system through a DLL.

4. Perform a System Restore

  1. Press Windows + R, type rstrui, and hit Enter.
    d3dx9_41.dll
  2. Click Next.
    d3dx9_41.dll
  3. Select a restore point and hit Next.

Performing a system restore can be useful in resolving issues with the d3dx9_41.dll file, as it takes the computer to a previous point when all the necessary files were present.

Any of the four solutions should fix a missing DLL problem. Choose the option that best suits your individual circumstances. Before you go, don’t miss our latest dplayx.dll is missing article since it covers a similar subject.

Finally, please share with us in the comments section below which method worked best for you.

Acadres.dll Missing Error: How to Fix It

Third-party software has its own set of DLL files, and one of those files is acadres.dll. However, many reported that this file is missing on their PC.

We already covered missing DLL files on Windows 11 in one of our previous guides, but this time we will specifically focus on this file.

To fix this issue, let’s familiarize ourselves with this file and see what it does.

What is Acadres DLL file?

This file is associated with Autodesk software, specifically AutoCAD. If the file is missing or damaged, the Autodesk software won’t be able to work on your PC.

Why is acadres.dll missing?

There’s usually one major cause for this issue:

  • Corrupted installation – The damaged installation will cause this acadres.dll to go missing.

What can I do if vcruntime140_app.dll is missing?

1. Use a dedicated DLL fixer

Since acadres.dll is an essential DLL for Autodesk applications, it won’t work until you fix this problem. Often this is harder than you think, but some tools can help you with that.

A DLL repair software, and can fix all compatibility issues that you have between your operating system and third-party apps.

These tools are simple to use, after a quick scan of your computer they should fix all of your DLL issues automatically.

2. Reinstall the software

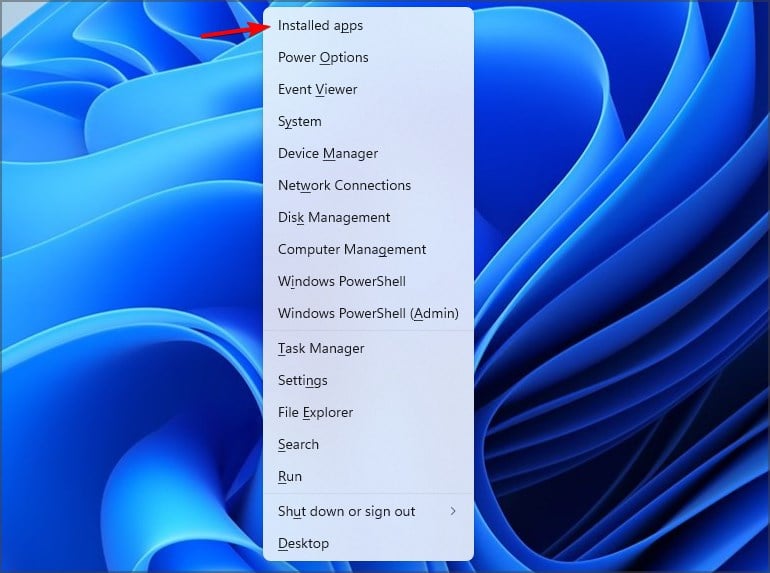
  1. Press Windows key + X and choose Installed apps.
     
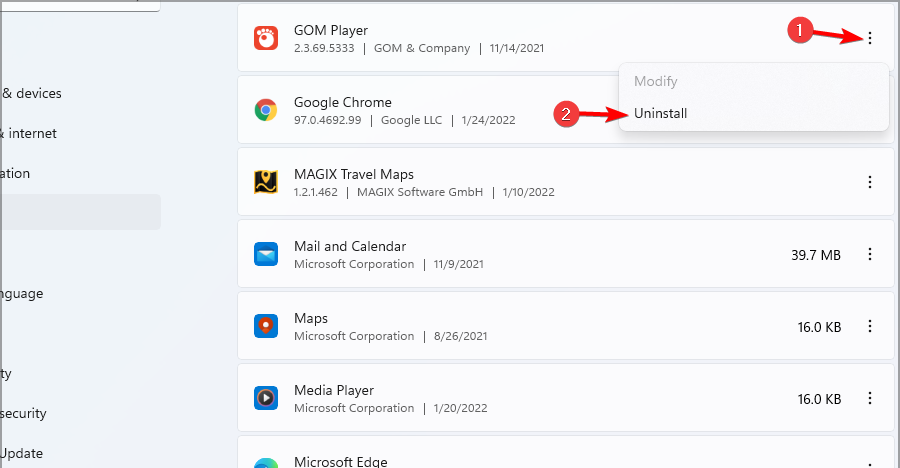
  2. Select the app that is giving you this error and choose Uninstall.
  3. If asked, select all components of the Autodesk software.
  4. Follow the instructions on the screen to complete the process.
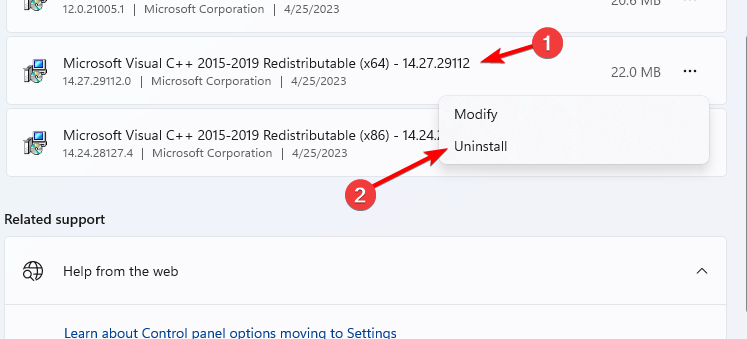
  5. Optional: You might want to remove Visual C++ Redistributables as well.

Some users also recommend removing AutoCad registry entries after uninstalling the software to fix the acadres.dll error.

Note icon NOTE
The paths might be different on your PC depending on the version of AutoCAD you’re using.
  1. Press Windows key + R and enter regedit. Click OK.
  2. Navigate to the following path: HKEY_LOCAL_MACHINE\SOFTWARE\Autodesk\AutoCAD\R21
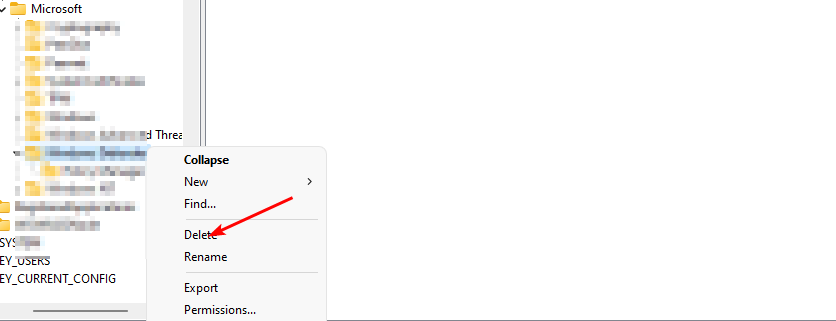
  3. Right-click the R21 key and choose Delete.

  4. Next, navigate to this path: HKEY_CURRENT_USER\SOFTWARE\Autodesk\AutoCAD\R21.0
  5. Right-click the R21.0 key and choose Delete.

Once the software is removed, install it again and check if that solves the problem.

If the acadres.dll is missing, you’re most likely dealing with a damaged installation. Speaking of DLL files, we have a great guide on how to fix missing DLL files on Windows 10, so be sure to check it out.

For more information regarding issues with AutoCAD, visit our AutoCAD not opening guide.

What solution did you use? Share it with us in the comments section below.

Fix: 0x87e00196 Xbox Error When Downloading or Installing Games

The gaming industry is massive, and PC gaming has been a huge part of it. However, the experience is often diminished by little hiccups like the 0x87e00196 Xbox error when downloading or installing games.

After many of our readers complained about it, we investigated, and in this guide, we will explore the best solutions as well as look at possible causes.

What is the 0x87e00196 Xbox error?

If you’re using an Xbox app on Windows and cannot sign in or launch a game or app, you may come across the 0x87e00196 error. This error code is commonly accompanied by a message that reads Try again later. Something happened on our end. It is triggered by the following:

  • Network connectivity issues – If the user’s internet connection is weak or unstable, there could be an error.
  • Server problems – If there’s a problem with Xbox Live service, like maintenance or downtime, an error could occur.
  • Outdated software – If the user’s Windows device has outdated software that is incompatible with the Xbox Live service, users may face the error.

Users have complained of Minecraft install error 0x87e00196, or the error on Forza Horizon 5, or with Game Pass.

How do I fix code 0x87e00196?

These 2 workarounds may be helpful before diving into any complex solutions:

  • Change your internet connection – If you are on a slow network, consider changing your ISP or trying a wired connection.
  • Reinstall the app – You may uninstall the app triggering the issue, and install a fresh copy downloaded from the official website or Microsoft’s store.

If the two initial fixes, do not work, please proceed to the more detailed solutions below.

1. Reinstall the gaming service package

  1. Press Windows + R to launch the Run dialog.
  2. Type cmd and hit Ctrl + Shift + Enter.
    0x87e00196
  3. Type the script below in the Command Prompt and hit Enter.
    Get-AppxPackage gamingservices -allusers | remove-appxpackage -allusers
    0x87e00196
  4. When it has been executed, retry the process that triggered the error and see if it has been fixed.

2. Reset the Microsoft Store

  1. Press Windows + I to open the Settings app.
  2. On the left pane, click Apps, then select Installed apps on the right.
    0x87e00196
  3. Scroll down to Microsoft Store, click the 3 dots, and select Advanced options.
    0x87e00196
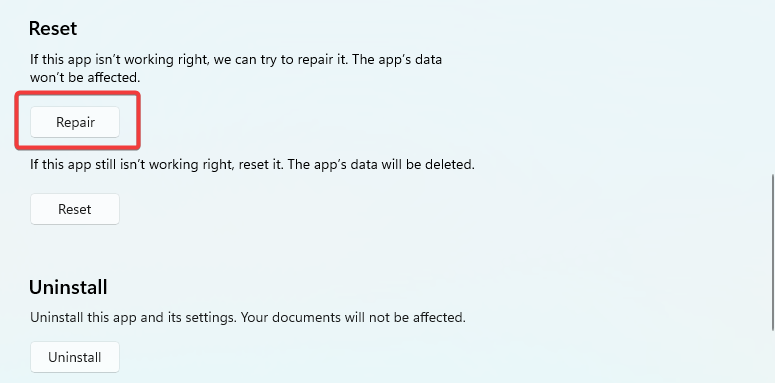
  4. Scroll down, then click on the Repair button.
    0x87e00196
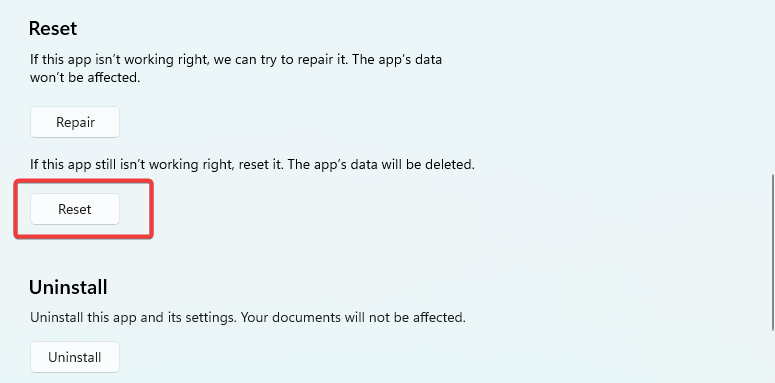
  5. Now click the Reset button.
  6. Finally, when the process is complete, verify that the 0x87e00196 error has been fixed.

3. Start Gaming Services

  1. Press Windows + R to launch the Run dialog.
  2. Type Services.msc and hit Enter.
    0x87e00196
  3. Double-click on Gaming Services. If it is not running, click the Start button.
  4. Repeat the step for the second Gaming Services option then relaunch the app that triggered error 0x87e00196, and see if it is resolved.

4. Update permissions for Gaming Services

  1. Press Windows + I to open the Settings app.
  2. On the left pane, click Apps, then select Installed apps on the right.0x87e00196
  3. Scroll down to Gaming services, click the 3 dots, and select Advanced options.
    0x87e00196
  4. Change the Background apps permissions option to Always.

Any of the above solutions should work well enough to fix the 0x87e00196 Xbox error when downloading or installing games.

We recommend you start with any solution most applicable to your situation. And lastly, let us know in the comments section what you found most effective.

The Server Couldn’t Complete This Action [Error Fix]

Microsoft Office is one of the most used productivity tools, allowing millions to complete simple and complex tasks daily. However, some of our readers recently complained of the error message: The server couldn’t complete this action.

The error is often associated with the error codes 0x88ffc008, 0x88ffc009, 0x803d0005, and 0x803d000a. So, let us introduce the best solutions and probable causes in this guide.

Why am I getting The server couldn’t complete this action on Word?

There are a few known triggers, including:

  • Connectivity problem – If you use an online version of Word or store your documents on the cloud, a weak internet connection or temporary outage may result in an error message.
  • App or file conflicts – Sometimes, Word may have trouble performing certain actions because of conflicts with other software programs or file types on your computer.
  • Corrupted file – If you are working on a corrupted file, it may cause Word difficulties when attempting to save or edit it.

The solutions below will be essential to resolving the error.

How do I fix The server couldn’t complete this action Office error on Windows?

Before continuing to the solutions we suggest, you may attempt these easy workarounds:

  • Change your internet connection – Since a slow connection will trigger the problem, you may change your ISP or consider using a wired connection.
  • Disable conflicting tools – If you have any software that may conflict with the Office tool, you should disable or uninstall it.
  • Reinstall the Microsoft 365 app – Uninstalling the app and reinstalling a freshly downloaded copy may be helpful if file corruption triggers the error.
  • Restart your device – Restarting a Windows computer may be strong enough to remove minor bugs causing the Microsoft Office error.

If the above pre-fixes do not solve the problem, proceed to some of our more detailed options below.

1. Repair Microsoft Office

  1. Open the Settings app by pressing Windows + I.
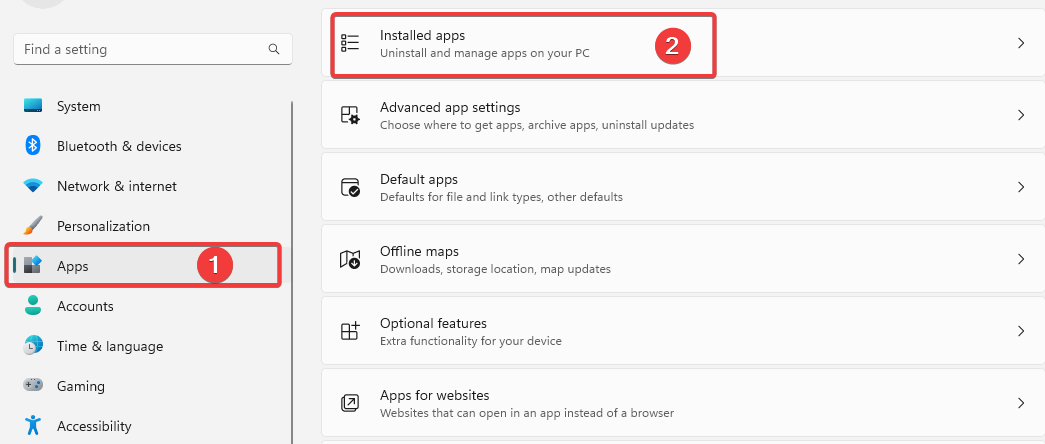
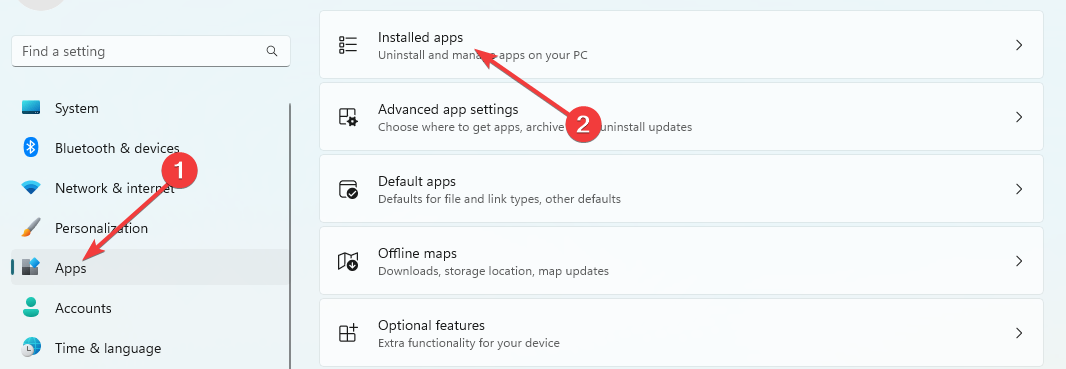
  2. On the left pane, select Apps, then on the right, click on Installed apps.
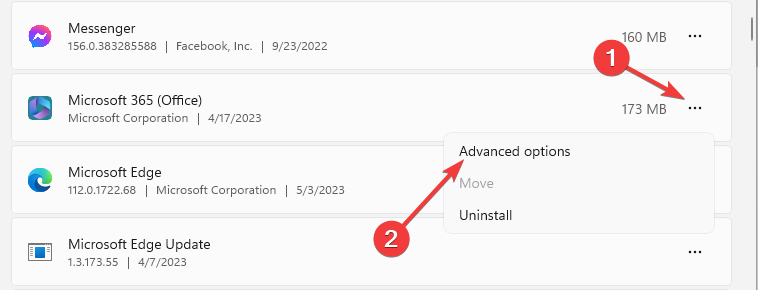
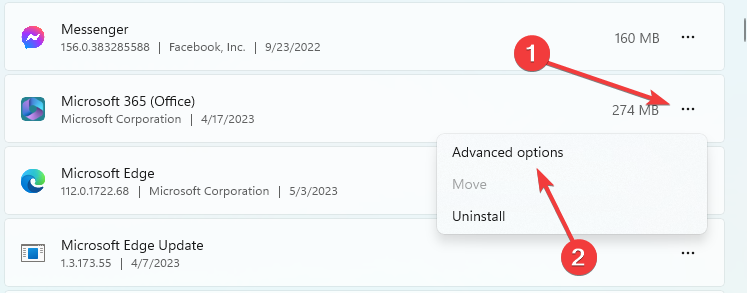
  3. Scroll down to Microsoft 365 (Office), click the 3 dots, and select Advanced options.
    The server couldn't complete this action
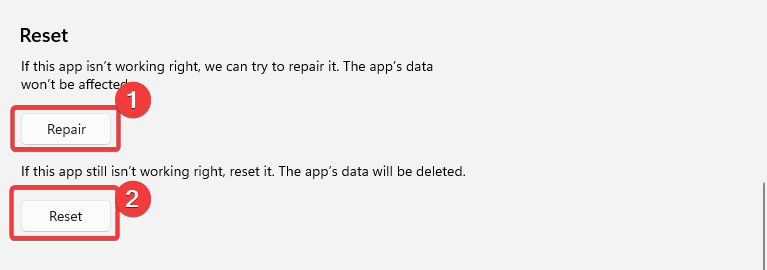
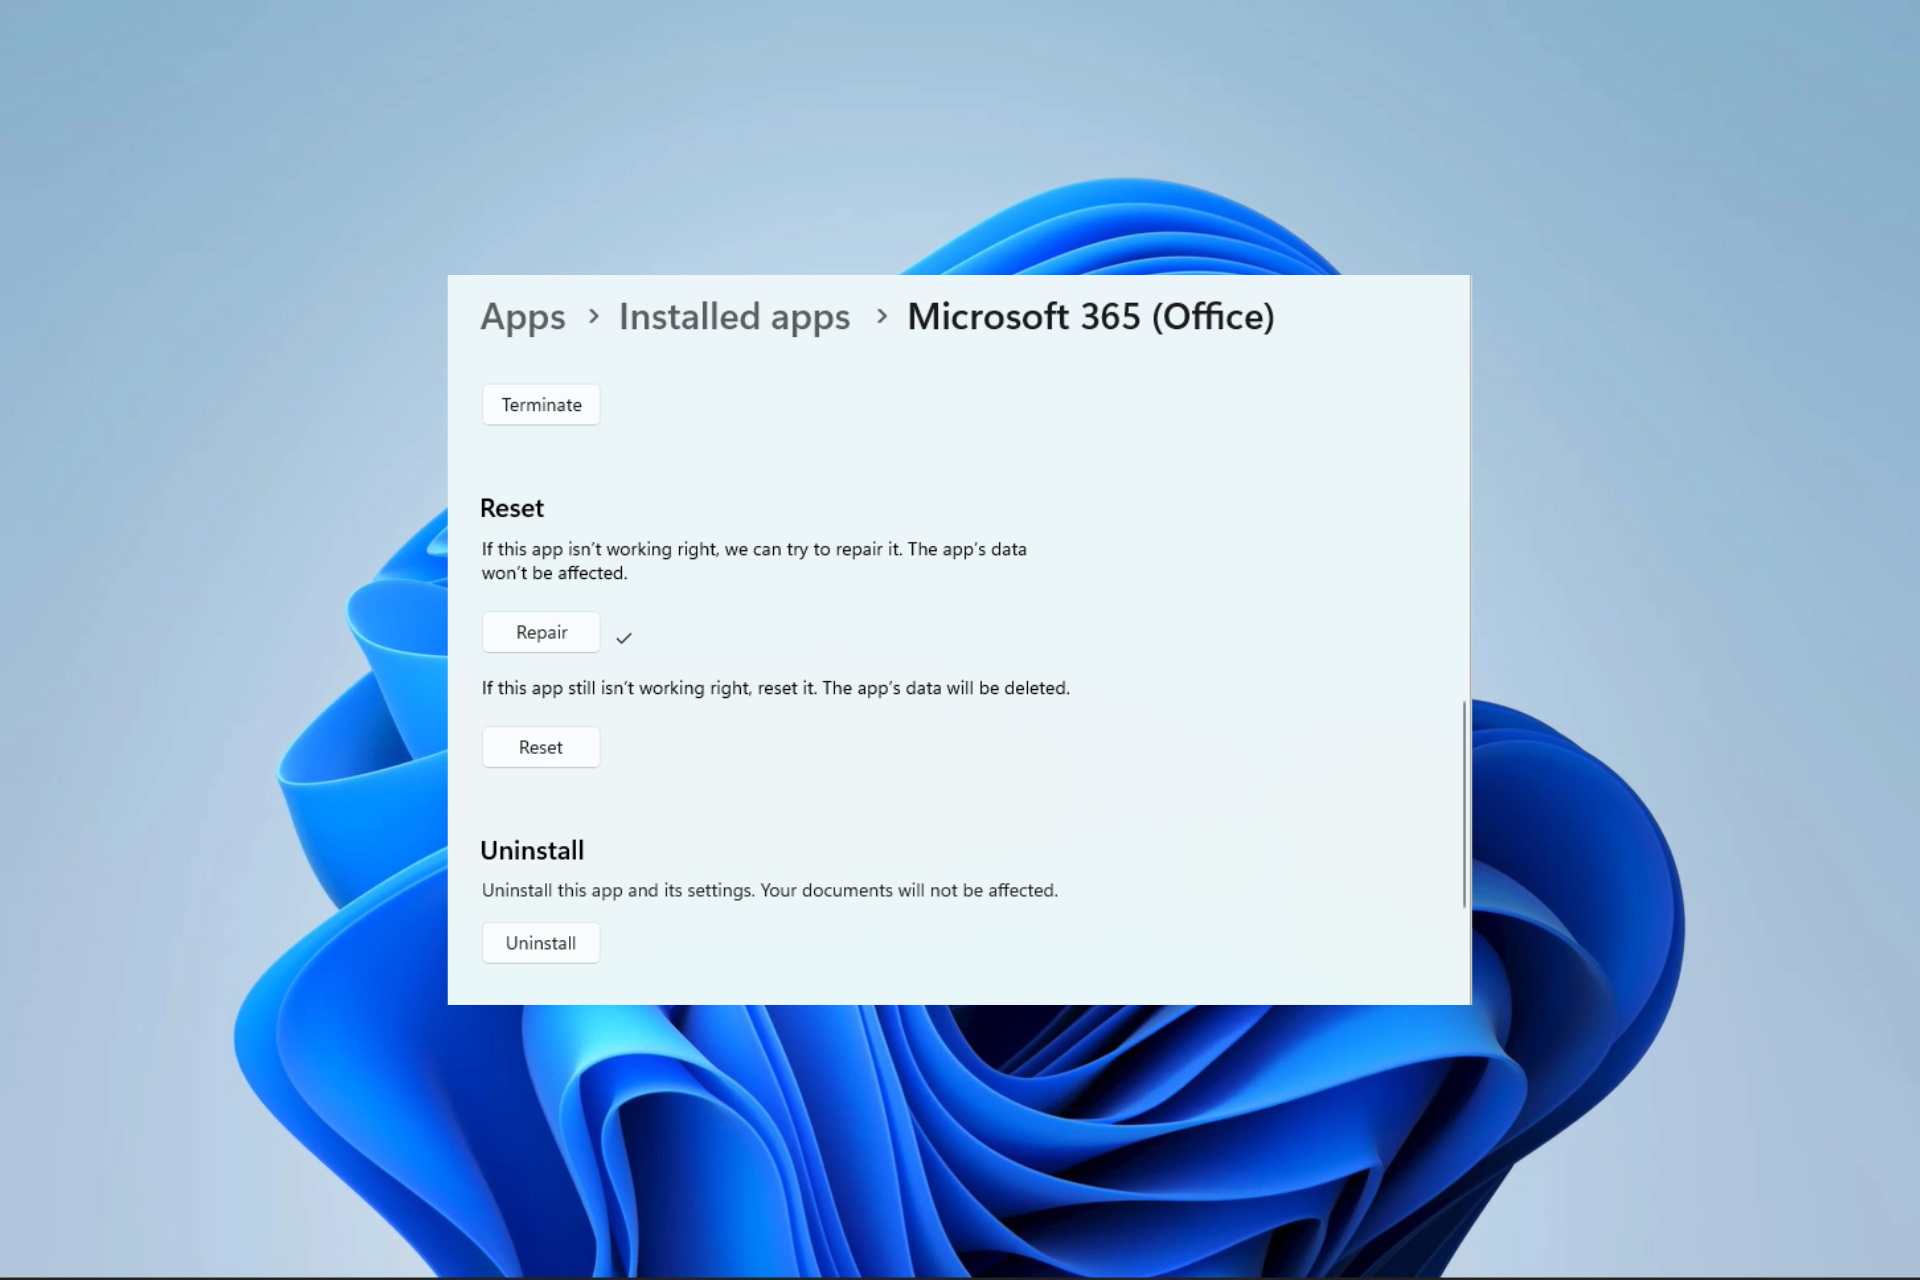
  4. Scroll to the Reset menu, click the Repair button, and after the repair is complete, click the Reset button.
    The server couldn't complete this action

Microsoft Word will address any damaged, missing, or malfunctioning files, settings, or components as part of the repair process.

2. End all processes

  1. Press Ctrl + Shift + Esc to open the Task Manager.
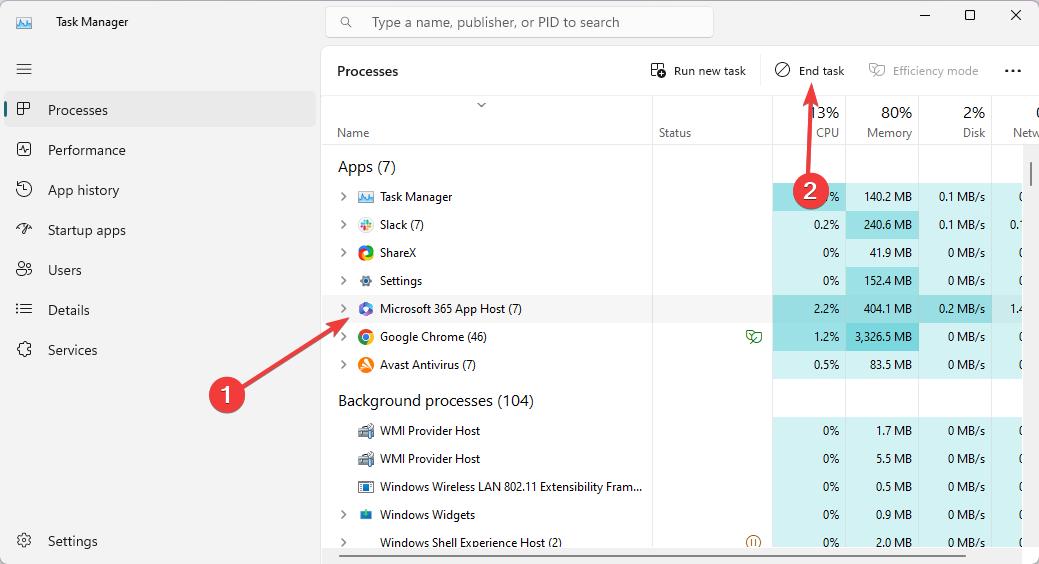
  2. Under the list of apps, click on the Microsoft 365 App, then click the End task button.
  3. End any other app or process associated with the Microsoft 365 app.
  4. Restart Word and verify you have fixed The server couldn’t complete this action.

3. Flush the DNS Cache

  1. Press Windows + R to open the Run dialog.
  2. Type cmd then hit Ctrl + Shift + Enter to open an elevated Command Prompt.
    The server couldn't complete this action
  3. Type the first set of commands hitting Enter after each one to flush your DNS.
    ipconfig /flushdns
    ipconfig /registerdns
    ipconfig /release
  4. Renew your DNS by running the commands below:
    ipconfig /renew
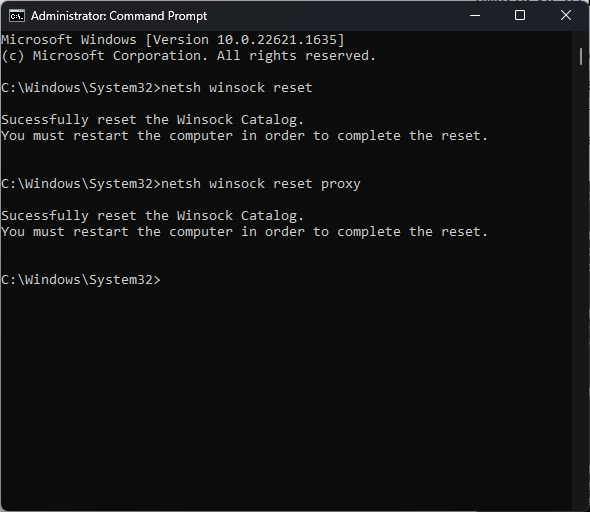
    netsh winsock reset
    The server couldn't complete this action
  5. Finally, restart your computer to complete the process.

You may need to read our comprehensive guide if you can’t type commands in the Command Prompt.

If you have read this far, we are confident that The server couldn’t complete this action error is now successfully resolved.

We encourage you to try the workarounds before any major solutions, as they may save you some troubleshooting time.

Reach out to us in the comments section below if you have any additional questions.

0x80131501 SSIS Error Code: How to Fix It

SQL Server Integration Services (SSIS) is a popular tool for integrating and transforming data. However, sometimes you may encounter DTS_E_PROCESSINPUTFAILED with the error code 0x80131501 when trying to execute an SSIS package.

This error code indicates that the package failed to execute properly. In this article, we will explore the various causes of the 0x80131501 error code and provide you with some methods to help fix it.

What causes the 0x80131501 SSIS error code?

The 0x80131501 error code in SSIS can be caused by a variety of factors. Here are some of the most common causes:

  • Configuration issues – This error code may appear due to problems with configurations of the package, including missing variables, incorrect connection strings, or configurations.
  • SSIS service stopped – If the SQL Server Integration Services service is not running or experiencing issues, it can cause the package to fail to execute correctly.
  • Permissions issues – If the account used to run the SSIS package may not have the necessary permissions to access the resources, such as files or databases required by the package.
  • Data source issues – The error may occur due to issues with the data source, such as a missing or incorrect connection to the data source or problems with the data.
  • The package has errors – If the package has errors, such as missing or incorrectly configured components, they can prevent it from executing properly.

Now you know the causes of the error, let us move to the solutions.

What can I do to fix the 0x80131501 SSIS error code?

Before we go to the advanced fixes, here are a few preliminary checks you should do:

Now that you have completed these checks let us move to the actual solutions.

1. Check package configuration

  1. Press the Windows key, type sql server data tools, and click Open.
  2. Click File, then select Open. Go to the location of the SSIS package, select the package, and click Open.
  3. Go to the Control Flow tab, locate and double-click each Connection Manager used by the package to open its editor.Control Flow chart
  4. Check if the connection information is correct. If not, make the changes and update it.
  5. Go to the Variables tab, and check all the Variables used for the package to ensure the values are correct. If not, edit and update them.
  6. Switch to the Package Configurations tab, and verify that the Package configurations are set up correctly. If not, make changes and update them.

If you are experiencing issues like Setup Failed incorrect function (0X80070001) using SQL Server Data Tools, we recommend you to check out this guide.

2. Verify the permissions of the account

  1. Press the Windows key, type sql server management studio, and click Open.SQL management studio 0x80131501
  2. Connect to the SQL Server instance where the SSIS package is stored.
  3. Expand the Integration Services catalog, right-click the SSIS package you want to run, and select Execute.
  4. On the Set Values tab, locate the Account option. Make sure the account used to run the package is listed and has the necessary permissions.
  5. Also, determine which resources the SSIS package requires to run, such as databases, files, or network resources.

3. Check if the SSIS service is running

  1. Press Windows + R to open the Run console.Services.msc Run command 0x80131501
  2. Type services.msc and click OK to open the Services app.
  3. Locate and double-click the SQL Server Integration Services service.Services SQL 0x80131501
  4. Make sure the service status is Running. If not, click Start.
  5. Click Apply and OK to close the window.

4. Check for Package-Level errors

Note icon NOTE
If the package causing the error is stored on a remote server, you may need to copy it to your local machine first.
  1. Press the Windows key, type sql server data tools, and click Open.
  2. Open the package which is causing the error.
  3. Go to the Connection Managers tab, and check whether all connection managers are configured correctly & the connection strings are valid. If not, make changes and update them. packageexplorer Connection Manager
  4. Switch to the Error List tab, and review any errors displayed in the list. Resolve the errors accordingly.
  5. Now go to the Build menu and choose Build Solution.Build Build Solution
  6. If the build is successful, deploy the package to the appropriate server or location.

5. Reinstall SSIS

  1. Press Windows + R to open the Run console.Programs and Features
  2. Type appwiz.cpl and click OK to open Programs and Features.
  3. Locate & select Microsoft SQL Server Integration Services and click Uninstall.Uninstall SQL 0x80131501
  4. Download the latest version of SSIS from the Microsoft website.
  5. Press the Windows key, type visual studio installer, and click Open.Visual Studio Installer
  6. Choose the edition of Visual Studio and click Modify.
  7. Go to Data storage and processing from the Workloads tab, select SQL Server Data Tools, and click Modify.mODIFY
  8. Follow the onscreen instructions to complete the process.

So, these are methods to fix the 0x80131501 SSIS error code. If you have any questions or suggestions, feel free to mention them in the comments section below.

0x8004deef: How to Quickly Fix this OneDrive Error

OneDrive is an exceptional tool that lets you protect, sync and share your files with other users of the network. However, this experience may be hampered by the error code 0x8004deef, which follows the message, You don’t have access to this service. For help, contact your IT department. 

Why do I encounter the error code 0x8004deef in OneDrive? 

The error code 0x8004deef is generally triggered in OneDrive due to the following reasons: 

  • Credential mismatch – You may run into the above error code if you enter the incorrect password more than the specified number of times. 
  • Missing license – If the users have an invalid license to access OneDrive business, the error code 0x8004deef is unavoidable. 
  • Restricted permissions – The admin may have imposed conditional access to block personal devices from using OneDrive business. 
  • Corrupt local cache – If the OneDrive cached folders get corrupted, the app is likely to malfunction and throw error codes like 0x8004deef. 
  • Bugged Windows Update – Several users have encountered the issue right after installing a new Windows update on your PC. 

In case, you are unable to access OneDrive business due to error code 0x8004deef, execute the fixes listed below. 

How do I fix the OneDrive error code 0x8004deef? 

Try these simple solutions on your computer before moving on to the complex ones. 

If the fixes did not help in this situation, perform the following actions. 

1. Ensure the user has a valid license 

  1. Visit the Microsoft 365 Admin Center on your preferred browser and enter the login credentials of the administrator account of your organization.
  2. Click Users on the left navigation panel and then Active users from the expanded list. 0x8004deef
  3. From the user list, click the name of the user experiencing the problem. 
  4. Switch to the Licenses and Apps tab in the user pane and expand the Licenses section. Here, ensure that the OneDrive license is assigned to the user. 0x8004deef

There is a possibility that the user does not have a OneDrive license assigned or that it may have expired long ago, causing the 0x8004deef error. 

2. Delete the cached account identities

Note icon NOTE
Before implementing these methods, back up the Windows Registry for restoration if you mess up somewhere. 

2.1 In Device based activation 

  1. Hit the Windows key, type regedit in the search bar on top, and select the Run as adminstrator from the result section.  0x8004deef
  2. Enter the following path in the above section to access the subkey: HKEY_CURRENT_USER\SOFTWARE\Microsoft\Office\16.0\Common\Identity
  3. Right-click the Identity sub-key in the left pane and select Delete from the context menu. 0x8004deef

2.2 Shared computer activation 

  1. Press the Windows key, type cmd in the search bar, and choose the Run as administrator option from the right section. 0x8004deef
  2. Choose Yes on the User Action Control window.
  3. Execute the following command in the command prompt window and note down the SID of the user currently signed in: whoami/user 0x8004deef
  4. Launch the Registry editor on your Window and navigate to the following location. Replace <user_SID> with the SID you found previously.  HKEY_USERS\<user_SID>\SOFTWARE\Microsoft\Office\16.0\Common\Identity
  5. Right-click Identity and choose Delete from the context menu. 

Now exit the registry editor and enter your work credentials into OneDrive to complete the login. 

3. Delete the Microsoft 365 cache folders 

  1. Use the Windows + R shortcut to bring up the Run dialog box, type the following path and press the OK button. %localappdata%/Microsoft/OneAuth 0x8004deef
  2. Once you navigate to the above location in the File Explorer window, use the Ctrl + A shortcut to select all the folders. 0x8004deef
  3. Press the Delete key to delete these folders on your PC. 
  4. Similarly, navigate to the following folder path and perform the steps mentioned above. %localappdata%/Microsoft/IdentityCache

After the authentication and identity cache folders of Microsoft 365 are expelled from your computer, log into OneDrive. Hopefully, the error code 0x8004deef will no longer bother you. 

4. Restrict OneDrive Personal Sync in your organization 

  1. Press the Windows icon, type regedit in the search bar on top, and select Run as adminstrator. 0x8004deef
  2. Navigate to the following key in the registry editor. Computer\HKEY_CURRENT_USER\Software\Policies\Microsoft\OneDrive
  3. Right-click anywhere and select New followed by DWORD (32-bit) value. 0x8004deef
  4. Rename it to DisablePersonalSync. 
  5. Double-click the newly created DWORD, assign 1 as the Value Data, and press OK to save the changes. 0x8004deef

Restricting OneDrive Personal from syncing on organizational devices should fix the 0x8004deef error code. 

That’s it! Implement these solutions and let us know which one worked for you in this situation. 

If OneDrive does not show photo thumbnails, you can try the solutions listed in this guide to fix the problem.

For any questions or suggestions, feel free to use the comments section below.

0xcaa70010 in Office 365: How to Fix This Sign-in Error

Launching Office 365 on your device may prompt an error saying We couldn’t connect to one of the services we needed to sign you in. However, it is usually accompanied by error 0xcaa70010. Thus, we will discuss how to fix the sign-in error.

Alternatively, we have a detailed guide on ways to fix Office update error 30015-26 on your PC.

What causes the error 0xcaa70010 in Office 365?

Error code 0xcaa70010 in Office 365 can occur due to several reasons, including:

  • Connectivity issues – Sometimes, issues with the user’s internet connection can cause the activation process to fail. This can happen due to a weak or unstable Internet connection or a firewall blocking activation.
  • Incorrect credentials – Entering wrong or invalid login credentials can also cause the activation to fail, resulting in error code 0xcaa70010.
  • User account issues – If the user’s Office 365 subscription has expired or there are issues with the user’s account permissions, activation may fail, and errors can occur.
  • Server issues – Temporary issues with Microsoft’s servers can also cause error code 0xcaa70010 to occur. In this case, the user can try activating or installing Office 365 again after some time.

The factors listed above vary on different PCs. However, we will discuss how to resolve the error.

How can I fix the error 0xcaa70010 in Office 365?

Observe the following preliminary checks before proceeding with advanced steps:

  • Verify your login credentials – Ensure your login credentials are validated by attempting to log in via the Office 365 web.
  • Ensure that your Office 365 subscription is valid – If the subscription has expired or has issues, you should contact support to fix it.
  • Fix network congestion – Since network issues are the main core of this error, fixing an unstable or congested network should fix it.
  • Install certificate properties – Log in from the browser, access your security message, save and install it on your PC. You can also import the CA Certificate from Internal Certificate Services CA server.

Proceed with the following advanced steps below if the error persists.

1. Remove stored credentials

  1. Left-click the Windows icon, type Control Panel, and press Enter to open it.
  2. Select the View by drop-down button and click on Large icons. Then, select Credential Manager.
  3. Click on Windows Credentials. Go to the Generic Credentials section and click on Microsoft 365 credentials.
  4. Click the Remove link and select the Yes button on the pop-up window to confirm your selection.

Clearing the credentials fix credentials cache errors and allow you to store new credentials.

2. Repair Office 365

  1. Press the Windows + R keys to open the Run command box, type appwiz.cpl, and press Enter to open the Programs and Features.
  2. Scroll to Microsoft 365, right-click on it, and select Change.
  3. Select Online Repair and click on the Repair button.
  4. Select Repair from the Ready to Start an Online Repair dialog box.
  5. Wait to complete the process and restart your PC.

Check our guide about repairing Office apps on Windows.

3. Disable Modern Authentication

  1. Left-click the Windows icon, type regedit, and press Enter to open the Registry Editor.
  2. Go to HKEY_CURRENT_USER\Software\Microsoft\Office\16.0\Common\Identity
  3. Right-click a blank space on the right pane, select New, and click on DWORD (32-bit) Value from the sub-context menu.
  4. Rename the new value to EnableADAL.
  5. Double click the EnableADAL, set Base to Hexadecimal, and input 0 to the Value data bar. Then, click OK.
  6. Restart your PC and try to sign in to your Microsoft 365 account.

Disabling Modern Authentication will troubleshoot issues with authentication security processes. Read about how to fix a corrupt Registry Editor on Windows.

4. Uninstall and reinstall Office 365

  1. Right-click the Windows icon and click on the Installed apps from the list.
  2. Navigate to Microsoft Office, click the options icon, click on Uninstall, and select Uninstall to confirm your selection.
  3. Go to the Office webpage, log in to your Microsoft account if not logged in, and click the Install app button.
  4. Double-click the downloaded file in your browser and follow the on-screen command to install it.

Alternatively, you can go to Office 365 web interface, log in, and download and run the O365 software to overwrite the existing installation on your device.

Reinstalling the office file will fix bugs and corrupt files in the previously installed file. Read our detailed guide about downloading and installing Microsoft 365 on your computer.

In conclusion, you can read about fixing Microsoft Office not opening on Windows devices. Also, you can check our guide about activating Microsoft 365 products key with a few steps.

0x80246013 Windows Update Error: 4 Ways to Fix It

Windows Updates are essential for maintaining a secure and stable operating system. However, sometimes you may encounter errors like the 0x80246013 error code, which can prevent you from downloading or installing your updates.

Therefore, this guide will discuss ways to fix the 0x80246013 Windows Update error. Also, check our detailed guide on ways to fix there were some problems installing update on Windows PC.

What causes the 0x80246013 Windows Update error?

The 0x80246013 error code can be caused by a variety of issues, including:

  • Network connection issues – An unstable or slow Internet connection may prevent the Windows Update service from downloading and installing updates, leading to the error. Also, issues like network congestion can impede the update process.
  • Corrupted system files – If your system files are corrupted or damaged, it may cause issues with the Windows Update service and cause the Windows update error.

The above factors differ on various PCs. However, we will provide solutions to fix the issue.

How can I fix the 0x80246013 Windows Update error?

Observe the following preliminary checks before proceeding with advanced steps:

  • Restart your computer – Restarting your PC is a quick and easy way to fix temporary issues.
  • Perform a clean boot on your PC – It will start your PC with a minimal set of drivers/programs to determine if a third-party program is interfering with your update.
  • Run the Windows Update troubleshooter – This troubleshooter will identify, diagnose, and fix all Windows update issues.
  • Perform an SFC scan – SFC scan will scan all system files and replace corrupted files such as this.
  • Perform a system restore – Restoring your system to a point before the update error starts might help troubleshoot it. You can check what to do if System Restore is not working.

If the error persists, proceed with the advanced fixes discussed below.

1. Manually reset Windows Update components

  1. Left-click the Start button, type Command Prompt, and select the Run as administrator option.
  2. Click Yes on the User Account Control prompt.
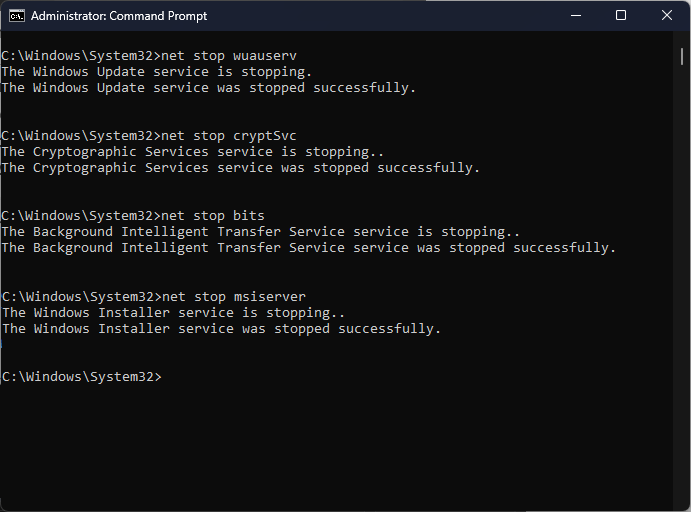
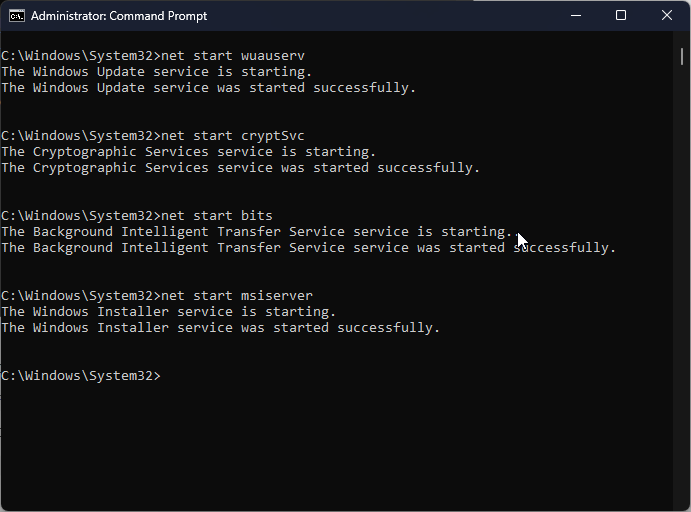
  3. Copy and paste the following commands and press Enter after each one: net stop wuauserv net stop cryptSvc net stop bits net stop msiserver
  4. Then, input the following and press Enter after each one: ren C:\Windows\SoftwareDistribution SoftwareDistribution.old  ren C:\Windows\System32\catroot2 Catroot2.old
  5. Input the following commands and click Enter: net start wuauserv net start cryptSvc net start bits net start msiserver
  6. Exit the Command Prompt and restart your PC.

Resetting the Windows Update components will fix the performance issues and resolve the update error.

Read our article if you encounter issues running the Command Prompt as an administrator on Windows 11.

2. Install the update manually

  1. Go to the Microsoft Update Catalog page, type the update code, and click the Search button.
  2. Select an update version compatible with your operating system, then click the Download link.
  3. Follow the on-screen instructions to download the update.
  4. Restart your PC and check if the update installs.

Manually installing the update will help get past issues with other updates that can prevent it from installing. It may be beneficial to disable automatic updates on your PC to prevent update errors.

3. Reset your PC using the built-in tool

  1. Press the Windows + I keys to open Settings.
  2. Go to System and select Recovery.
  3. Click on Reset PC, from the right side.
  4. Choose the type of factory reset you need. We recommend you select keep your personal files.
  5. Select the option you want to reinstall Windows: Cloud download or Local reinstall. Then, click on Next.
  6. Finally, press the Reset button.
  7. Now, your operating system will start the reset process.

By performing a factory reset, potential issues with your PC updates should be fixed. All updates are removed alongside this process, and your PC is restored to a new working condition.

4. Reinstall Windows OS

  1. Plug the bootable installation media USB flash drive into your PC.
  2. Restart your PC and press Del or F2 during the boot to enter the BIOS menu.
  3. Change the boot priority to set your USB flash drive as the default boot device.
  4. Select your Language and other preferences, then click Next.
  5. Click on Install now to proceed.
  6. If you have a product key, enter it or choose I don’t have a product key.
  7. Select the version that you want to install and click Next.
  8. Click to Accept the terms of service.
  9. Choose the Custom: Install Windows only (advanced) option.
  10. Select your Primary drive and click Next. Then, follow the prompts to complete the process.

Usually, this is the last resort if none of the steps above work. All the issues regarding the Update error will be fixed by reinstalling your OS. Hence, your next updates should be without further issues.

In addition, check our guide about fixing Windows Update Error 0x80242017 on your PC. Also, you can read our complete guide about how to fix the 0x80072eff Windows update error code on Windows.

If you have any questions or suggestions, kindly drop them in the comments section.

0x80070bc9 Update Error: 5 Ways to Quickly Fix It

Updating Windows allows you to install new features and security patches to ensure the stability and reliability of your computer. However, you can encounter a 0x80070bc9 update error in the process. Thus, we will examine ways to fix the 0x80070bc9 update error.

Likewise, you can read about fixing and diagnosing Windows updates not working on Windows PCs.

What causes 0x80070bc9 update error?

The 0x80070bc9 error code can occur due to various reasons. Some of the most common causes of this error include:

  • Corrupted system files – When the system files are corrupted, Windows Update may fail to install updates resulting in error code 0x80070bc9.
  • Windows Update Components Issues – The error may occur due to issues with the Windows Update service not running or other components required to complete the update process.

The causes of this error vary in different circumstances. However, we will discuss solutions to fix the error.

How can I fix the 0x80070bc9 update error?

Try the following preliminary checks to fix the 0x80070bc9 update error code before proceeding with advanced troubleshooting:

  • Install the updates individually – Should you have issues installing pending updates, check our guide here for fixes.
  • Uninstall all third-party antivirus on the PC and turn on Microsoft Firewall – Disabling third-party antivirus can also help with this problem.

You should proceed with the advanced steps below if the issue persists.

1.1 Perform SFC/DISM scans

  1. Press the Windows button, type Command Prompt, and click on Run as administrator to open it.
  2. Click Yes if the Windows User Account Control prompt appears.
  3. Type the following and press Enter:  sfc /scannow
  4. Run the following command: DISM.exe /Online /Cleanup-image /Restorehealth 
  5. Restart your PC and check if the error persists.

Performing SFC/DISM scans alone will not be enough. You need to run the windowsupdate.diagcab tool also. Follow the steps below:

1.2 Run a Windows Update troubleshooter

  1. Press the Windows + I to open the Windows Settings.
  2. Select System, and choose Troubleshoot.
  3. Then click on other troubleshooters.
  4. Select the Windows update and click the Run button.
  5. In the new version of Windows Update troubleshooter, Click Next.
  6. Select Apply this fix.
  7. Wait for the process to complete, close the Settings window and restart your device.

The Windows Update Troubleshooter is an in-built tool to diagnose and fix Windows Update errors. Check our detailed guide on how to run Windows Update troubleshooter on your system.

Also, some users claim that they run the SFC scan again after completing this step before attempting the update.

2. Reset the Windows Update components

  1. Left-click the Start button, type Command Prompt, and select the Run as administrator option.
  2. Click Yes on the User Account Control prompt.
  3. Copy and paste the following commands and press Enter after each one: net stop wuauserv net stop cryptSvc net stop bits net stop msiserver
  4. Then, input the following and press Enter after each one: ren C:\Windows\SoftwareDistribution SoftwareDistribution.old  ren C:\Windows\System32\catroot2 Catroot2.old
  5. Input the following commands and click Enter: net start wuauserv net start cryptSvc net start bits net start msiserver
  6. Exit the Command Prompt and restart your PC.

Resetting the Windows Update components will fix the issues affecting its performance and resolve the update error.

Read our article if you encounter issues running the Command Prompt as an administrator on Windows 11.

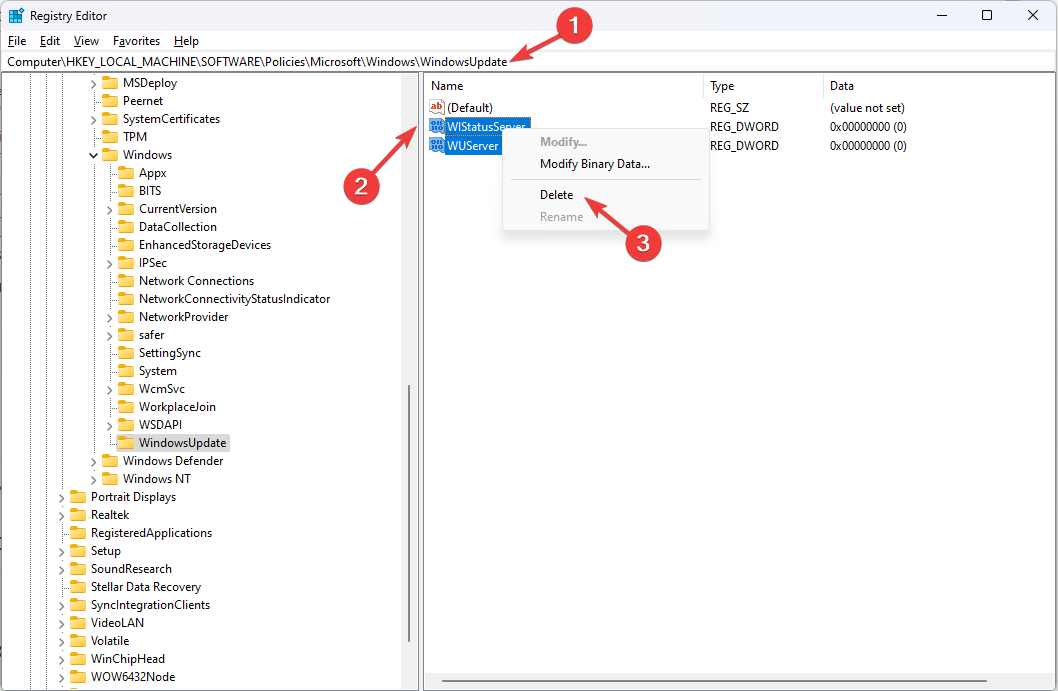
3. Fix Registry Editor issues

  1. Right-click the Windows icon, select Run from the list, type regedit, and press Enter to open the Registry Editor.
  2. Navigate to the following path in the Registry Editor: HKEY_LOCAL_MACHINE\SOFTWARE\Policies\Microsoft\Windows\WindowsUpdate
  3. Select the WUServer and WIStatusServer, right-click and Delete them.
  4.  Restart your PC and check if the error is fixed.

Deleting the WUServer and WIStatusServer folder will clear the Windows update cache. Learn how to master the Windows Registry with Registry Editor on Windows with our detailed guide.

4. Install updates manually

  1. Go to the Microsoft Update Catalog page, type the update code, and click the Search button.
  2. Select an update version compatible with your operating system, then click the Download link.
  3. Follow the on-screen instructions to download the update.
  4. Restart your PC and check if the update installs.

Manually installing the update will help get past issues with other updates that can prevent it from installing.

5. Perform a system restore

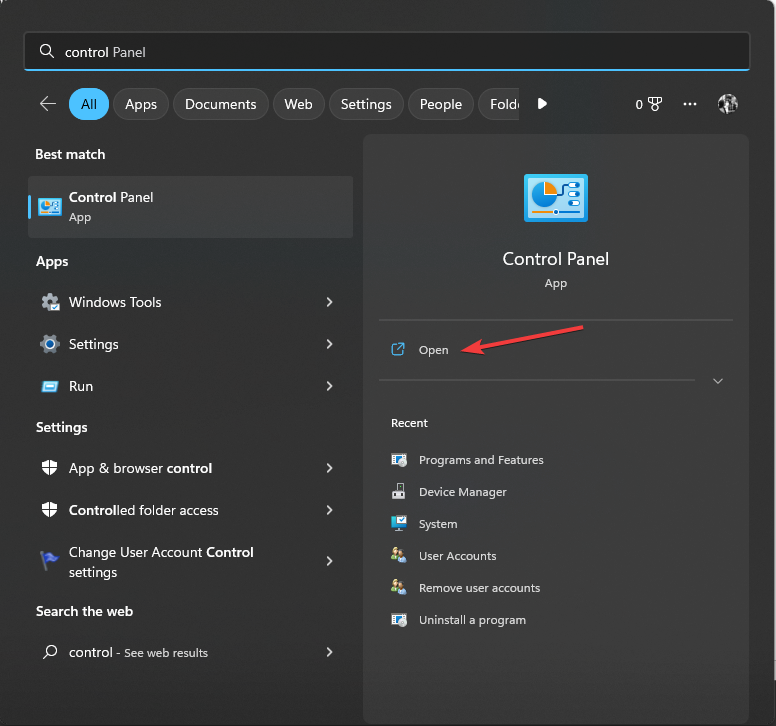
  1. Press the Windows key, type Control panel, and click Open.
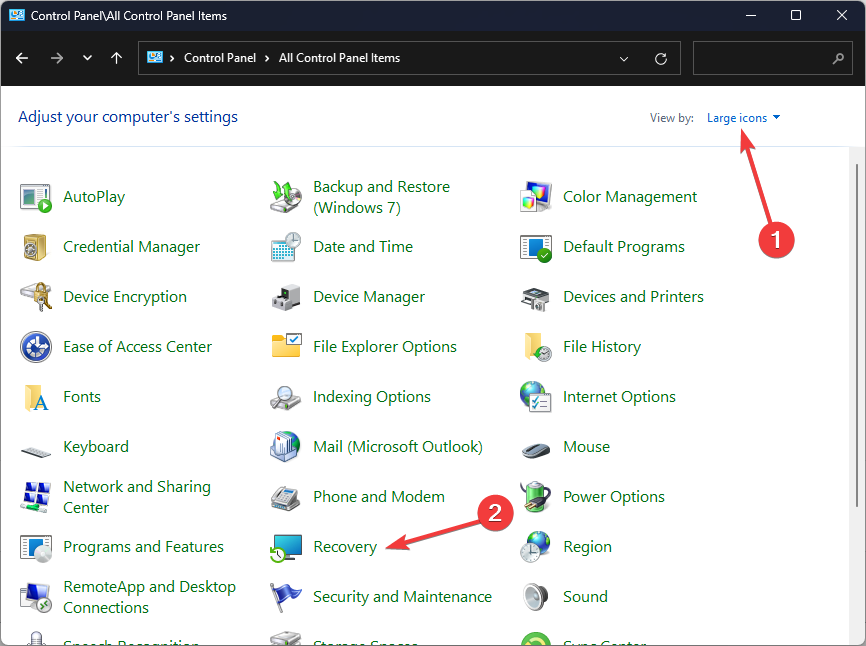
  2. Select View by as Large icons and click Recovery.
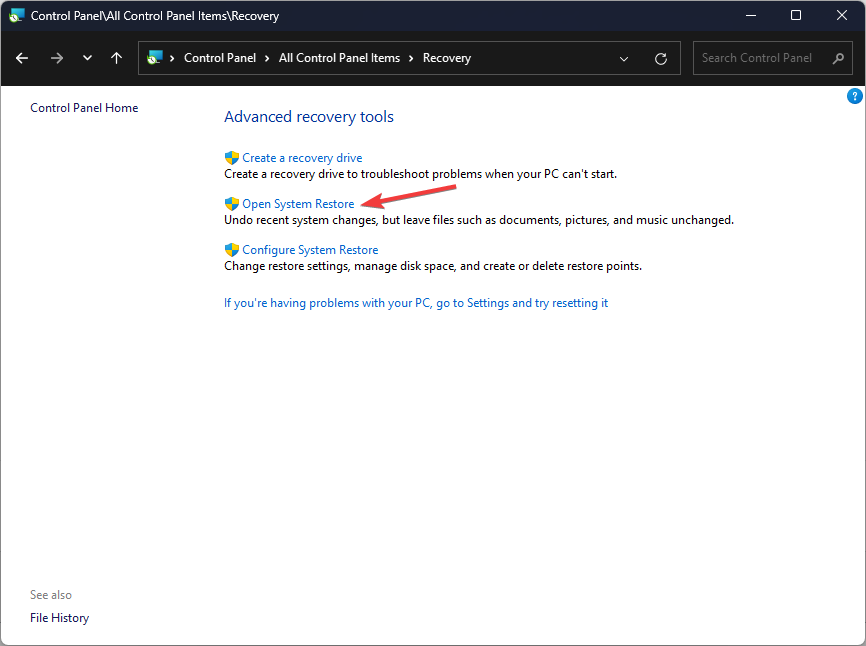
  3. Click Open System Restore.
  4. On the System Restore window, select Choose a different restore point and click Next.
  5. Select the restore point and click Next.
  6. Click Finish to initiate the process.

Windows will restart and restore the previous version.

Conclusively, check our guide on how to fix problems while installing the updates error on Windows PC. Also, we have a detailed guide on fixing Windows Update error 800f0902 on your computer.

If you have any questions or suggestions, kindly drop them in the comments section.

0x80070052: The Directory or File Cannot Be Created [Fix]

Many of our readers have reported issues when they try to copy-paste files into a USB flash drive, resulting in the error 0x80070052. The error is triggered when dealing with photos and videos. However, this article will discuss ways to fix the issue.

Also, you may be interested in our detailed guide about how to fix USB drive detected but not accessible on Windows PCs.

What does the error code 0x80070052 mean?

Error code 0x80070052 is usually accompanied by an error message indicating The directory or file cannot be created. The error pops up when users try to move some files, especially videos, and photos, into an external drive, like an HDD, USB flash drive, or SD card.

Furthermore, many factors can trigger the error, which makes it difficult to say exactly which one is causing it.

However, using an older system file format or having other formatting issues can affect the copy-and-paste process. As we proceed with this guide, we’ll take you through basic steps to resolve the error.

How can I fix the error code 0x80070052?

Try the following preliminary checks before anything else:

  • Check the File System restraints.
  • Try to copy the files into a subfolder rather than pasting them directly.
  • Try reconnecting the USB or using a different USB port.
  • Free up more space on the USB drive.

If these fail, then try the following steps:

1. Create a new folder on the USB drive

  1. While on the portable device, right-click the blank space, select New from the drop-down, then click the Folder option from the context menu.
  2. Copy the files you are trying to transfer and paste them into the newly created folder.

Creating another folder can resolve the file limit restraint that may be causing issues with the File System.

2. Change the drive format to FAT32

  1. Press the Windows + E key to open File Explorer, and then identify the removable media triggering the error.
  2. Right-click on it and select Format from the context menu.
  3. Click the File System tab and set it to FAT32.
  4. Set the Allocation unit size to 4096 bytes, then click the Start button to initiate the changes and wait for the process to complete.
  5. Try to copy the files again and see if the error appears.

Formatting the drive to a modern file system like FAT32 allows it to fix the issue if the file system is of an older format.

Check our comprehensive article about how to format USB drives to FAT32 on Windows PCs for more steps.

If you encounter problems with ejecting the USB drive, check quick ways to resolve it.

In addition, you can read our review of the best USB flash drives for your PC. Also, if you are getting a problem with this drive error when using a USB stick on your laptop, click the link above for fixes.

If you have further questions or suggestions, kindly drop them in the comments section below.

Fix: 0x00001338 Error Code Call of Duty Modern Warfare

Call of Duty: Modern Warfare players have reported encountering the 0x00001338 error code, causing the game to crash during gameplay. If you’re in this situation, you’re in the right place.

From addressing graphics issues, overclocked CPU and GPU problems, and corrupt game files, we’ll show you all you need to do to get your game running smoothly again.

How can I fix the 0x00001338 Call of Duty error?

Start by making sure your operating system is up to date and your connection is good. Try restarting your PC and see if that helps. If you crossed these and are still getting the 0x00001338 error, keep reading:

1.  Run Modern Warfare with administrator privilege

  1. Open the Battle.net Desktop app.
  2. Go to Settings and click the Downloads section.
  3. Click on Scan for Games to show the .exe file location.
  4. Right-click the Modern Warfare.exe file and select Properties from the context menu.
  5. Choose the Compatibility tab and click the Run as Administrator box to checkmark the box. Click the Windows Fullscreen Optimizations box and select the OK button to apply changes.

Granting the game administrator access will give it priority over other apps and resolve permission issues. Check our guide on how to make files and apps run as Admin always in Windows.

2. Repair the game file

  1. Left-click the Start button, type Battle.net, and launch it.
  2. Select Modern Warfare in your library, click the gear button, then select Scan and Repair.
  3. Click Begin Repair to start the scanning process.
  4. Wait till the scan is complete, then check if the error persists.

Repairing the game files will fix corrupt files that may impede the activities of the game.

3. Clear the Battle.net cache

  1. Right-click on the Windows icon and select Task Manager from the list.
  2. Navigate to the agent.exe and Blizzard Update Agent. Right-click on them and select End Task from the context.
  3. Press Windows + R key to open the Run dialog box, type %appdata%, and press Enter.
  4. Go to Blizzard Entertainment and double-click on it to open it.
  5. Select the Battle.net folder, right-click the Cache folder, and click Delete from the context menu.

Clearing the game cache will clear pre-stored data that can cause the error.

4. Reinstall Modern Warfare

  1. Right-click the Windows icon and click on Installed Apps.
  2. Navigate to Modern Warfare, click on the options icon, and click Uninstall. Then, select Uninstall to confirm your selection.
  3. Wait for the process to complete and install the Modern Warfare app on Battle.net.
  4. Alternatively, installing the game on a different drive or partition can troubleshoot the error.

Reinstalling the Modern Warfare app will restore it to default and troubleshoot the 0x00001338 error code in COD Modern Warfare.

Conclusively, check our detailed guide on ways to fix Modern Warfare Remastered crashing on your PC or having packet loss. Also, we have a detailed guide about why Modern Warfare 2 uninstalls itself on Xbox and PCs or what to do when you’re at risk of getting your rank reset.

If you have further questions or suggestions, kindly drop them in the comments section.

Posted in PC

Zlibce.dll not Found: How to Fix or Download It Again

For your applications to work, they need to use DLL files, and one of those files is zlibce.dll.

However, sometimes this file can go missing, and speaking of which, we covered missing DLL files on Windows 11 in an earlier article, so we recommend you check it out for more information.

Fixing this error is fairly simple, and in today’s guide, we will show you how to do that on your PC.

Why is zlibce.dll missing?

There is one usual cause for this issue:

  • Damaged installation – You usually get this error message if the installation of the application you’re trying to run is damaged.

What can I do if zlibce.dll is not found?

1. Use a dedicated DLL fixer

If the zlibce.dll is missing on your PC, there are several ways to the problem. While downloading the file from online sources seems like the easiest solution, we advise against it.

Instead, you can use DLL repair software. These tools are very simple to use, and they can fix various compatibility issues between your operating system and third-party DLL files.

2. Reinstall the affected application

  1. Press the Windows key + I to open the Settings app.
  2. Go to Apps in the left pane. In the right pane, choose Installed apps.
  3. Select the application that is giving you this error message and choose Uninstall.
  4. Next, follow the instructions on the screen to complete the process.
  5. Once the application is removed, install it again.

Fixing the zlibce.dll is simple; in most cases, you just need to reinstall the affected application to restore the missing files.

Issues with DLL files can appear on any operating system, and we already covered how to fix missing DLL files on Windows 10 in a separate guide, so don’t hesitate to check it out.

Did we miss a solution that worked for you? Share it with us in the comments section below.

Ngentask.exe: What Is It & How to Fix its Errors

The ngentask.exe file is a valid executable file linked to the .NET Framework, a software development framework designed by Microsoft.

In this guide, we explore all you should know about it and show you the easiest ways to solve some errors associated with the executable.

What is ngentask.exe?

It is a legitimate Microsoft-signed executable file commonly located in the path below:

C:\Windows\Microsoft.NET\Framework\v4.0.30319

In order to enhance the performance of .NET applications, the file is often utilized by the .NET Framework to compile them into native code. The operating system automatically initiates the ngentask.exe process and operates inconspicuously in the background.

However, a few errors are associated with it, like the ngentask.exe application and access denied error. The solutions below will help you resolve any of these.

How do I fix ngentask.exe errors?

Before going through any of the fixes below, we recommend running a virus scan using a robust antivirus because viruses are known to mimic executables.

1. Repair corrupted system files

  1. Press Windows + R, type cmd, and hit Ctrl + Shift + Enter to open an elevated Command Prompt.
    ngentask.exe
  2. Type the script below and hit Enter.
    sfc /scannow
    ngentask.exe
  3. Wait while the command executes, then restart your device and verify if it resolves the ngentask.exe error.

Besides the process above, you can also utilize a system repair solution that can fix the errors automatically.

More exactly, you could employ the help of a system repair application with enhanced technology for fixing and cleaning your PC.

2. Restore your computer

  1. Press Windows + R, type rstrui, and hit Enter.
    ngentask.exe
  2. Select Choose a different restore point and click Next.
    ngentask.exe
  3. Select a restore point from the available options and click the Next button. Make sure you pick a restore point at a time before you started experiencing the ngentask.exe error.
    ngentask.exe
  4. Finally, click the Finish button, then wait while the restore process begins.

3. Update Windows

  1. Press Windows + I to open the Settings app.
  2. On the left pane, click Windows updates, then on the right, click the Check for updates button.
  3. Finally, if there are any updates, install them, restart the computer, and verify if it fixes the ngentask.exe error.

4. Download and install the .NET Framework

  1. Launch your browser and navigate to the official .Net website.
  2. Click on Download .NET Framework 4.8.1 Runtime.
  3. Run the downloaded file, and verify if the solution fixes the ngentask.exe error.

5. Update device drivers

  1. Right-click on the Start menu and select Device Manager.
  2. Expand any category with a yellow badge, right-click on your driver, and select Update driver.
    ngentask.exe
  3. Select Search automatically for drivers.
  4. Finally, once the driver installation is complete, you should verify if it fixes the error.

In conclusion, the ngentask.exe is not a virus, even though, in some cases, viruses may mimic the executable. However, if you face any errors with this file, using any solutions in this guide will be handy.

Since this file is integral to the .Net framework, you may learn to fix errors with the Microsoft framework in our comprehensive guide.

That is it for this article. Lastly, remember we like to hear from you in the comments section, so if you have any questions, please drop them below.

Findstr.exe: What Is It & How to Properly Use It

You already know how powerful the Windows Command Prompt is. You can even customize it. But did you know about its built-in command utility findstr.exe or Find String? Findstr.exe is a command-line utility that can search for strings in files. 

It is used to find a specific string in one or more files. By default, it searches the current directory and all subdirectories. While it can be helpful, it will do you no good if you don’t know how to use it. Lucky for you, we share how to get the most out of it here.

What is the usage of findstr.exe in Windows?

You may be wondering why anyone would use a command-line utility when Windows already has the find feature in File Explorer or the searchapp.exe process that is associated with Windows search. While it works most of the time, it can be time-consuming and still not generate the expected results.

The main advantage of using findstr.exe over other text search tools is that it allows you to search inside binary files such as Microsoft Office documents or PDFs. 

In addition, findstr.exe provides options to control what kind of output is displayed and which lines are skipped when searching through large files with thousands of lines.

Other benefits of using findstr.exe include:

  • Supports regular expressions (regex) – Regular expressions allow complex searches that would be much more difficult using other methods such as wildcards or string comparisons. If you were wondering whether you can use regex in cmd, here’s your answer.
  • Searches binary files – While other search tools only work on text files. Findstr can search both text and binary files. 
  • Readily available – Findstr is not limited to a select Windows version. You can readily find it in older and newer versions of Windows. It also helps that you do not need to download it as it is built-in.
  • Allows case-insensitive searches – You don’t have to worry about capitalization when searching for words. This is one of the most common reasons some searches fail because they’re case-sensitive.

How to use Findstr in a batch file?

To use Findstr, you must run the Command Prompt with administrative privileges. This way, you can access all the drives on your computer and their folders, and your search won’t be limited. 

This allows you to run commands that search through every folder on your hard drive. Before you embark on your search, you must know how the findstr commands work and when to use them.

Below are some of the common parameters:

  • /B – Matches pattern if at the beginning of a line.
  • /C – Search for strings containing the specified substring.
  • /S – Searches in the current directory and all subdirectories.
  • /I – Ignores uppercase and lowercase distinctions when searching for patterns. Also known as the Case-sensitive search.
  • /L – Lists only file names, not contents.
  • /R – Use regular expressions in strings.
  • /M – Print only matched file names.

To test a few examples:

1. Use case-insensitive parameters

  1. Hit the Windows key, type cmd in the search bar, and click Run as administrator.cmd-run-admin-w11 unexpected kernel mode trap windows 11
  2. We’re going to test out the case-insensitive string. Type the following command and hit Enter: findstr /s /i nba “.”
  3. In context, the term nba in the text is in caps, but with the /I command, it will search irrespective of the case, meaning that upper and lowercase characters are considered equal. The /s command will search in folders and sub folders while the “.” command specifies that the string should search each file and not limit to only text files.

2. Search for specific text

  1. Still in the Command Prompt window, type in the following command and hit Enter: findstr /c:"nba" kwame.txt
  2. In the command above, you have now refined your search only to locate the term nba and in the specific document named kwame.

3. Search files in a specific location

  1. Still in the Command Prompt window, type in the following command and hit Enter: findstr /c:"nba" y.z
  2. Here, you are searching for NBA in a specific location which is y and z in this case.

From the examples above, it is easy to see that Findstr.exe is a great resource when you want to search on your computer that you’ve never done before. It’s extremely useful but requires a specific syntax to know how to use it properly.

Hopefully, this little introduction to findstr.exe brings you a step closer to using it as part of your regular toolkit and taking advantage of all it offers.

Speaking of command-line utilities, we also have an awesome beginner guide on all things try-catch command, so be sure to check that out too.

Let us know how you will use this command-line in the comment section below.

0xc000009a Error Code: 7 Ways to Fix It

Windows is a user-friendly OS, and has, of late, emerged as the primary choice for gaming on PCs, particularly due to a better gaming experience on Windows 11. But it’s not smooth sailing for everyone, and many users came across the 0xc000009a error.

The message reads, Application error – The application was unable to start correctly (0xc000009a). Click OK to close the application. The error can appear for several apps, but Fortnite, Civilization 5, and Tarkov are the most affected. So, let’s find out all about it!

Tip icon Tip
There is a 0xc000009a blue screen error that reads, Your PC/Device needs to be repaired. And in case you are here for that, go through our expert fixes for blue screen errors in Windows.

What is error 0xc00009a?

The error appears when launching a program and indicates Windows’ ability to do so. It can affect any app, given that there’s a problem somewhere down the line that triggers the error. And more often than not, the error can be easily fixed.

Here are a few reasons you are encountering 0xc000009a in Windows 11:

  • Corrupt system files: When the system files are corrupt, you are likely to face issues running applications or even reconfiguring the settings, and Windows may keep crashing.
  • Third-party apps leading to conflicts: For some users, it was a third-party app, usually an antivirus solution installed on the PC, that triggered the 0xc000009a Fortniteerror.
  • Critical app files are missing: When the apps are crashing, you can’t ignore the possibility of an improper installation since that, too, could be an underlying cause.

How do I fix error 0xc00009a?

Before we head to the slightly complex solutions, try these quick tricks first:

If none work, move to the fixes listed next.

1. Repair the corrupt system files

  1. Press Windows + R to open Run, type cmd, and hit Ctrl + Shift + Enter.cmd
  2. Click Yes in the UAC prompt.
  3. Now, paste the following three commands individually and hit Enter after each for the DISM tool:DISM /Online /Cleanup-Image /CheckHealth DISM /Online /Cleanup-Image /ScanHealth DISM /Online /Cleanup-Image /RestoreHealth
  4. Once done, execute this command for the SFC scan:sfc /scannowsfc scan to fix 0xc000009a
  5. Finally, restart the computer for the changes to come into effect.

Corrupt system files are often the primary reason behind the 0xc000009a application error. And running the DISM tool and SFC scan will identify and repair/replace all such files within no time.

To make this process as easy as possible, we recommend you try a dependable repair tool that runs a more in-depth version of the DISM and SFC scan.

These tools can find corrupted, malfunctioning, or missing system files and repair them by locating brand-new components as replacements from its frequently-revised database.

2. Check for disk issues

  1. Press Windows + E to open File Explorer, and go to This PC from the navigation pane.this PC
  2. Right-click on the drive where the app files are stored, and select Properties.properties
  3. Navigate to the Tools tab, and click the Check button under Error checking.check to fix 0xc000009a
  4. Click on Scan drive to confirm and wait for the process to complete.scan drive

In many cases, users found issues with the disk to be responsible for 0xc000009a. And the best solution here is to repair the disk. Besides, if this doesn’t work, you can always use a dedicated disk repair tool to run extensive scans and eliminate the most complex problems.

3. Uninstall third-party apps

  1. Press Windows + R to open Run, type appwiz.cpl in the text field, and hit Enter.appwiz.cpl
  2. Select any recently installed app or one you believe might be triggering the error, and click Uninstall.uninstall to fix 0xc000009a
  3. Follow the on-screen instructions to complete the process.

Often, it’s a third-party app that triggers error code 0xc000009a in Windows 10. Many found McAfee to be the underlying cause, so if you have the antivirus, uninstall the program and check whether the error disappears.

4. Check for RAM issues

When it comes to RAM issues, Microsoft offers the built-in Windows Memory Diagnostics tool to automatically identify and eliminate problems with the memory. Remember, it isn’t that effective, so you may need another memory tool.

When things come down to it, we recommend Memtest86+, an open-source memory testing tool that runs extensive and deep scans on individual memory modules. It’s best to run Memtest86+ overnight, given it takes a few hours to complete the scans.

As a last resort, you can always replace the modules to verify whether these are the underlying cause behind 0xc000009a in BattleEye.

5. Reinstall the game

  1. Press Windows + I to open Settings, go to Apps from the navigation pane, and click on Installed apps.installed apps
  2. Locate the app throwing the error, click on the ellipsis next to it, and select Uninstall.uninstall to fix 0xc000009a
  3. Again, click Uninstall in the confirmation prompt.uninstall
  4. Once done, restart the computer for the changes to come into effect, and download the app from a reliable source, be it the official website or Microsoft Store.

6. Uninstall recent Windows updates

  1. Press Windows + I to open Settings, go to Windows Update, and click on Update history on the right.update history
  2. Scroll to the bottom, and click on Uninstall updates.uninstall updates to fix 0xc000009a
  3. Now, click Uninstall next to the recently installed update.uninstall to fix 0xc000009a
  4. Again, click Uninstall to confirm.uninstall

For some users, it was a recent OS update that changed things, and they got 0xc000009a in Tarkov, and even other applications. In this case, the most viable fix is to uninstall Windows updates. And until a new version is released, we recommend you block Windows updates.

7. Perform a system restore

  1. Press Windows + S to open Search, type Create a restore point in the text field, and click on the relevant search result.system restore to fix 0xc000009a
  2. Now, click on System Restore.system restore
  3. Select Choose a different restore point and click on Next to proceed.choose a different restore point
  4. Pick a restore point from the list, one created before the error first appeared, and click Next.restore to fix 0xc000009a
  5. Finally, verify the restore details and click on Finish to start the process.start restore

If the other solutions for 0xc000009a don’t work, you can always perform a system restore and revert your PC to a previous healthy state. Remember, you might lose some apps and configured settings, but the personal files remain unaffected. This is the reason experts recommend regularly creating restore points.

And once you have fixed the error, do not forget to check our quick tips to optimize the PC for gaming.

Tell us which fix worked for you in the comments section below.

Fix Error Code 80090034 in TPM in 7 Steps

TPM triggers a range of issues, and error code 80090034 with Office applications is a common one.

The message reads Something went wrong. Your computer’s Trusted Platform Module has malfunctioned. If the error persists, contact your system administrator with the error code 80090034, and Encryption failed listed next to the Server message.

Keep reading to find out how all about the problem!

How do I fix the error code 80090034?

Before we start make sure you: ✅ install pending Windows updates; ✅ disconnect VPNs & proxies; ✅enable TPM from the BIOS.

If the options above help with nothing, keep reading:

1. Disable the firewall

Tip icon Tip
Make sure to re-enable the Windows Firewall once done with setting up Microsoft Office.
  1. Press Windows + S to open Search, type Windows Defender Firewall, and click on the relevant search result.windows defender firewall
  2. Click on Turn Windows Defender Firewall on or off in the navigation pane.turn off windows defender firewall to fix error code 80090034
  3. Select Turn off Windows Defender Firewall (not recommended) under both Private network settings and Public network settings, then click OK to save the changes.disable firewall to fix error code 80090034

If you are wondering how to solve error code 80090034, the primary approach should be to disable Windows Firewall or even a third-party one. Because it’s likely that the firewall is blocking the program.

2. Repair the corrupt system files

  1. Press Windows + R to open Run, type cmd, and hit Ctrl + Shift + Enter.cmd
  2. Click Yes in the UAC prompt.
  3. Now, paste the following commands individually and hit Enter after each for DISM:DISM /Online /Cleanup-Image /CheckHealth DISM /Online /Cleanup-Image /ScanHealth DISM /Online /Cleanup-Image /RestoreHealth
  4. Next, run this command for the SFC scan:sfc /scannowsfc scan to fix error code 80090034
  5. Finally, restart the computer for the changes to come into effect.

To eliminate the possibility of corrupt system files triggering error code 80090034, it’s imperative that you run the DISM tool and SFC scan. In case any such files are found, they will be replaced with a cached copy.

You can as well scan your PC in detail using a system repair application that can efficiently scan your OS and take care of damaged files causing this Microsoft error.

3. Clear the credentials

  1. Press Windows + S to open Search, type Credential Manager in the text field, and click on the result.credential manager
  2. Go to Windows Credentials.windows credential
  3. Now, choose the Office credential, and click on Remove.remove credential to fix error code 80090034
  4. Click Yes in the confirmation prompt.remove
  5. Similarly, delete the other Office credentials listed here.
  6. Once done, restart the computer, and then check if you can set up Office apps.

In some cases, the corrupt credentials were responsible for error code 80090034 when setting up Office 365, and clearing them did the trick. Since there’s no way to identify the problematic one, we recommend clearing all and reconfiguring the credentials.

4. Change the account settings

  1. Press Windows + I to open Settings, select Accounts from the navigation pane, and click on Access work or school.account settings to fix error code 80090034
  2. Click on Disconnect if your account is linked to an organization, and confirm the change.
  3. You should now be able to set up Office or Teams.

5. Modify the registry

  1. Press Windows + R to open Run, type regedit in the text field, and click OK.regedit
  2. Click Yes in the prompt.
  3. Paste the following path in the address bar and hit Enter:HKEY_LOCAL_MACHINESoftwareMicrosoftCryptographyProtectProvidersdf9d8cd0-1501-11d1-8c7a-00c04fc297ebpath
  4. Right-click on the empty part, hover the cursor over New, select DWORD (32-bit) Value, and name it ProtectionPolicy.dword to fix error code 80090034
  5. Double-click on the newly created DWORD.dword
  6. Enter 1 under Value data, and click OK to save the changes.value data to fix error code 80090034
  7. Finally, restart the computer for the changes to apply.
  8. If the problem persists, navigate the following path in the Registry:HKEY_CURRENT_USERSoftwareMicrosoftOffice16.0CommonIdentity
  9. Now, as you did earlier, create a DWORD (32-bit) Value titled EnableADAL, and set its Value data to 0.enableADAL to fix error code 80090034

Oftentimes, it’s a misconfiguration with the TPM that can’t be fixed via the GUI route, and that’s where modifying the Registry helps eliminate error code 80090034 in Outlook.

6. Repair Microsoft Office

  1. Press Windows + R to open Run, type appwiz.cpl, and hit Enter.appwiz.cpl
  2. Select Microsoft 365 from the list of installed apps, and click on Change.change
  3. Choose Online Repair and click Repair to proceed.Online repair to fix error code 80090034
  4. Again, click Repair in the confirmation prompt and wait for the process to complete.repair to fix error code 80090034

For some users, it was a problem with Microsoft Office itself that led to error code 80090034, and repairing it got things running. Just make sure you are connected to the Internet before starting the Online Repair.

7. Create a new user profile

  1. Press Windows + R to open Run, type netplwiz in the text field, and click OK.netplwiz
  2. Click on Add.add to fix error code 80090034
  3. Click Sign in without a Microsoft account.sign in
  4. Now, click on Local account.local account to fix error code 80090034
  5. Enter the username, and password (if required), then click on Next.username
  6. Click Finish to create the account.
  7. Once done, select the new user account, and click on Properties.properties
  8. Go to the Group Membership tab, select Administrator, and click on OK.set as administrator to fix error code 80090034

What is error code 80090034 in Microsoft?

The Office 365 account setup TPM error 80090034 appears when users try to activate the suite and sign in. This happens due to a failure on the part of the TPM, but it is not as complex as many would imagine.

Here are a few reasons you get the TPM has malfunctioned error 80090034:

  • Corrupt system files: A common reason behind such issues is corrupt system files, which affect the core functioning of Windows.
  • Issues with the TPM: When you get the TPM has malfunctioned error in Microsoft Office, it could be problems with the configured settings to blame.
  • Problems with Microsoft Office: In some cases, it is an issue with the Office app, and repairing it usually does the trick.
  • Conflicting third-party application: For some users, it was a third-party application, generally an antivirus, that triggered the error code 80090034 – Microsoft Teams.

That’s it! All that’s left is to log in with the new account, download Microsoft Office, and you should be able to set up and sign in if the previous user profile was corrupt.

Now that you have gotten rid of error code 80090034, check the best Office add-ins to enhance your experience and simplify tasks.

Before you go, don’t miss our guide on TPM-WMI 1796 error for more useful information.

For any queries or to share your solution with us, drop a comment below.

Fix: 0xc000012d The Application Was Unable To Start Correctly

The the 0xc000012d error is quite common. The message reads The application was unable to start correctly (0xc000012d). Click OK to close the application.

If you’re dealing with this issue, follow the steps below to get it fixed.

How do I fix error 0xc000012d?

Before trying complex solutions, restart your PC, install updates, use Disk Cleanup, and run the app as an administrator. Next, if needed, scan for malware.

If none work, move to the fixes listed next.

1. Update the graphics driver

  1. Press Windows + X to open the Power User menu, and select Device Manager.device manager
  2. Expand the Display adapters entry, right-click on the graphics adapter, and choose Update driver.update driver to fix 0xc000012d
  3. Now, select Search automatically for drivers and wait for Windows to install one.search automatically

When you get error 0xc000012d in Battlenet, it’s often the underlying driver to blame, and updating the graphics driver should get things up and running. In case an update is not available locally, you can always manually install the driver from the manufacturer’s website. Links are provided below:

Moreover, you can try a specialized tool to avoid potential errors from manually installing the incorrect drivers.

For example, you can use Fortect Driver Updater because it has a massive database from where it locates the latest updates for all your outdated or malfunctioning drivers.

⇒ Get PC Helposft Driver Updater

2. Repair corrupt system files

  1. Press Windows + R to open Run, type cmd, and hit Ctrl + Shift + Enter.cmd
  2. Click Yes in the UAC prompt.
  3. Paste the following commands one at a time and hit Enter after each to run DISM:DISM /Online /Cleanup-Image /CheckHealth DISM /Online /Cleanup-Image /ScanHealth DISM /Online /Cleanup-Image /RestoreHealth
  4. Next, run this command for the SFC scan: sfc /scannowsfc scan to fix 0xc000012d
  5. Finally, restart the computer for the changes to apply.

Often, when you face issues with a built-in app, say, 0xc000012d on Movies & TV, it could be corrupt system files to blame. And running the built-in DISM tool and SFC scan should do the trick.

3. Check for issues with the app files (Steam games)

Tip icon Tip
The steps listed here are for Steam games, but there’s usually a built-in option to repair the game files in every client. Check the web to find out the exact process for the affected app.
  1. Launch Steam, and navigate to Library from the top.library
  2. Right-click on the game you are unable to launch and select Properties.properties
  3. Navigate to the Local Files tab and then click on Verify integrity of game files.verify integrity of game files to fix 0xc000012d
  4. Wait for the process to complete, and then relaunch the game.

For those getting error 0xc000012d in GTA 5 on Steam, verifying the integrity of game files should work.

4. Increase the Virtual Memory

  1. Press Windows + S to open Search, type View advanced system settings in the text field, and click on the relevant result.view advanced system settings
  2. In the Advanced tab, click on Settings under Performance.settings
  3. Again, navigate to the Advanced tab, and click Change under Virtual memory.change to fix 0xc000012d
  4. Untick the checkbox for Automatically manage paging file size for all drives.
  5. Choose the drive currently storing the paging file, select the No paging file option, and click Set.no paging files
  6. Once done, select the system drive (typically C:) from the list, choose the Custom file option, and enter the initial and maximum size, depending on the available RAM, using the following formula:
    • Initial size: 1.5 x Installed RAM (in MBs)
    • Maximum size: 3 x Installed RAM (in MBs)
  7. Once done, click Set and then on OK at the bottom to save the changes.custom size to fix 0xc000012d

A few users reported that the absence of a paging file or virtual memory could trigger the error 0xc000012d with Adobe applications. So, if presently disabled, make sure to enable it and then increase the virtual memory since this comes into play when the PC runs out of memory.

5. Reinstall the affected program

  1. Press Windows + R to open Run, type appwiz.cpl in the text field, and hit Enter.appwiz.cpl
  2. Now, select the program that’s throwing the error, and click Uninstall.uninstall to fix 0xc000012d
  3. Follow the on-screen instructions to complete the process, then restart the computer.
  4. You can now download the program from the official website or the Microsoft Store, and it should run fine.

For 0xc000012d with Chrome or even other applications, it’s often best to uninstall the program and then download it all over again.

6. Perform an in-place upgrade

Tip icon Tip
The steps here are for Windows 11. For users running Windows 10, download the Media Creation Tool, and use it to perform an in-place upgrade.
  1. Go to Microsoft’s official website, and download Windows 11 ISO after selecting the required edition and product language.windows 11 iso to fix 0xc000012d
  2. Now, double-click the ISO and run the setup.exe file.setup
  3. Click Yes in the prompt.
  4. Click on Next to proceed.next
  5. Now, click Accept to agree to Microsoft’s license terms.Microsoft's license terms
  6. Finally, verify that the setup reads, Keep personal files and apps, then click on Install, and wait for the process to complete.in-place upgrade to fix 0xc000012d

If nothing previously worked, the last option is to perform an in-place upgrade to eliminate any Windows-related issues triggering the 0xc000012d application error. Remember, this won’t affect the personal files or installed apps.

The 0xc000012d Application was unable to start error, indicating the inability to launch the application, could arise due to a problem with the system settings, installed drivers, or the application itself.

And there isn’t any way you can identify what’s responsible for it other than following a calculated approach.

Here are a few reasons users encounter the 0xc000012d in Windows 11:

  • Memory issues: Every application running on the PC needs some RAM and CPU to be available, and when that’s not the case, an error message may appear.
  • Problems with the app: Oftentimes, it’s an issue with the app installation or missing files that trigger the error 0xc000012d in Chrome.
  • Corrupt system files: When the system files are corrupt, several built-in and third-party apps fail to launch and throw an error message instead.
  • Incompatible or outdated drivers: In many cases, users found out that it was an incompatible or outdated driver, usually the graphics driver, that led to the error.

And before you leave, do check some quick tips to optimize the PC for gaming and make Windows run faster.

We covered a similar issue in our The application was unable to start correctly 0xc00005 guide, so you might want to check it out.

For any questions or to share your solution, drop a comment below.

avformat-55.dll: What Is It & How to Fix its Errors

Audacity has long been a popular audio editor and is often the first choice of many. And when bundled with the FFmpeg library, you can have a larger set of audio formats to work with. But many users reported getting the missing avformat-55.dll error.

When a DLL is missing in Windows, applications that rely on it either stop functioning properly or don’t launch altogether. And it’s usually the latter! Besides, there ain’t much users can do because the error message only lists reinstalling the software as a solution. So, let’s find out the others!

Why is avformat-55.dll missing?

Here are a few reasons you are getting the error:

  • DLL is corrupt or unreadable: In most cases, when a DLL is not found, it’s there but just can’t be read or accessed due to a corrupt file state. Replacing it usually does the trick.
  • DLL stored in the wrong folder: Simply downloading the DLL won’t help, but it also needs to be in the right directory. And for that, you need to know where to put avformat-55.dll.
  • Improper app installation: Since avformat-55.dll is published by FFmpeg Project and not Microsoft, you need to have the dedicated program installed for it to be available. And in case the DLL is still not there, it’s the improper installation to blame.

What can I do if avformat-55.dll is missing?

Before moving to the slightly complex solutions, here are a few quick ones to try:

  • Make sure you are running the latest version of Audacity.
  • Reset the preferences in Audacity.

If none work, head to the fixes listed next.

1. Manually add the DLL

For users with access to another PC running Audacity with the FFmped plug installed, a quick solution would be to move to DLL file to the affected computer. Simply copy the file to a USB drive, and paste it on the computer throwing the error.

If you are wondering where to find avformat-55.dll, it should be in the following path:C:\Program Files\FFmpeg For Audacity

And you have to move it to the same path on the affected PC.

2. Download FFmpeg

  1. Go to the Audacity support page, and click the download link for FFmpeg.
    FFmpeg to fix avformat-55.dll
  2. In the tab that opens, click on the link for the 64-bit version.
    64-bit version to fix avformat-55.dll
  3. After downloading it, run the setup and follow the on-screen instructions to complete the installation. Make sure to go with the default installation settings.
    setup
  4. Now, when you go to the Preferences, it will list that FFmpeg is available and should be read. To verify the same, simply click on the Locate button.
    ffmpeg to fix avformat-55.dll

When you see the failed to load avformat-55.dll message, installing the FFmpeg plugin for Audacity should do the trick. And while doing so, make sure you get the latest version.

3. Check the version of Audacity

Another aspect to verify is that the installed version of Audacity of FFmpeg matches. A user reported the Audacity FFmpeg avformat-55.dll issue when running a 32-bit version of Audacity and a 64-bit version of the plugin.

If that’s the case, simply download the 64-bit version of Audacity from the official website. Once done, any conflicts between the two should be resolved, and Audacity will locate the missing DLL.

4. Uninstall any version of Audacity

  1. Press Windows + R to open Run, type appwiz.cpl in the text field, and click OK.
    appwiz.cpl
  2. Now, select Audacity from the list of programs, and click on Uninstall.
    uninstall to fix avformat-55.dll
  3. Follow the on-screen instructions to complete the process, and then restart the computer.
  4. Verify whether the other version now runs properly.

For some users, the avformat-55.dll not found issue appeared when they had two versions of Audacity installed on different drives, and uninstalling one did the trick. Make sure you get rid of the older version.

5. Reinstall the program

If nothing else worked and Audacity still can’t find avformat-55.dll, the last option is to uninstall the program, and then download it all over again.

Also, a few users pointed out that installing FFmpeg before Audacity helped them eliminate the error. So, make sure to try that approach as well.

If you are still facing the issue and looking for alternatives, check our curated list of the best audio editing software. This isn’t the only file that can cause issues, and we wrote about avformat-52.dll in our latest guide, so don’t miss it.

For any queries or to share which solution worked for you, drop a comment below.

Qt5Gui.dll Missing: How to Fix or Download It Again

Every DLL (Dynamic Link Library) file on the PC is vital to some program, be it the built-in or third-party ones. Users often overlook this fact, which results in a missing DLL error. One such file that has troubled a lot of users is Qt5Gui.dll.

The DLL is used by plenty of applications, including some popular emulators, such as Dolphin. And when the DLL is not found, the programs that rely on it fail to launch and throw an error instead. So, let’s find out all about the problem!

What is a Qt5Gui DLL file?

The Qt5Gui.dll is developed by The Qt Company Ltd and is linked to the C++ application development framework. Amongst the many that use the file, Autodesk seems to be a prominent name, with many users reporting that Qt5Gui.dll was not found.

Here are a few reasons behind Qt5Gui.dll crash and when the file is not found:

  • Corrupt system files: A common reason behind the problem is corrupt system files which tend to affect the core functioning of the PC and lead to a bunch of errors, including Blue Screen of Death.
  • Improper app installation: Usually, apps that require a DLL bundle it with the installation package, and when the file is missing, it’s the improper installation to blame.
  • Issues with Windows: There is also the possibility that the problem lies with the OS, say running an outdated version of it, which triggers the Qt5Gui.dll not found error.
  • Running an incompatible software version: When faced with the error, another critical underlying cause is running an incompatible software version. Say running a 64-bit version on a 32-bit OS.

How do I fix Qt5Gui.dll missing error?

Before we head to the slightly complex solutions, here are a few quick ones to try:

  • Restart the computer and then relaunch the application.
  • Disable any third-party antivirus installed on the PC.
  • Check for available Windows updates and install them.

If none work, move to the fixes presented next.

1. Manually replace the DLL

The easiest solution for the Origin error Qt5Gui.dll is to replace the missing file in the dedicated folder. You could get it from another PC running the same program. The Qt5Gui.dll location usually is:C:\Windows\System32

System32 folder

Alternatively, you could paste the file into the app’s dedicated directory. Remember, when a DLL is to be loaded, it’s first searched for in the program’s directory, and when not found, the System32 folder is checked next.

Regardless of that, you can actually solve the issue 100% automatically with specialized support from DLL repairing software.

2. Scan for malware

  1. Press Windows + S to open Search, type Windows Security in the text field, and click on the relevant search result.windows security
  2. Click on Virus & threat protection.virus & threat protection to fix Qt5Gui.dll
  3. Click on Scan options.scan options
  4. Select the Full scan option, and then click on Scan now.full scan to fix Qt5Gui.dll
  5. Wait for the scan to complete and check if the program now loads.

Oftentimes, it a malware that affects the application or Windows, and, as a result, Qt5Gui.dll is missing. So, run a full scan using the built-in Windows Security. Besides, you can also use an effective antivirus software to run a more extensive scan.

3. Repair corrupt system files

  1. Press Windows + R to open Run, type cmd, and hit Ctrl + Shift + Enter.command prompt
  2. Click Yes in the UAC prompt.
  3. Paste the following commands individually and hit Enter after each to run DISM:DISM /Online /Cleanup-Image /CheckHealth DISM /Online /Cleanup-Image /ScanHealth DISM /Online /Cleanup-Image /RestoreHealth
  4. Now, execute this command to run the SFC scan:sfc /scannowsfc scan to fix Qt5Gui.dll
  5. Once done, restart the computer for the changes to come into effect.

When Qt5Gui.dll is missing from your computer, another solution is to repair the corrupt system files. And there’s no better way for that than running the DISM tool and SFC scan.

4. Reinstall the affected application

  1. Press Windows + R to open Run, type appwiz.cpl in the text field, and click OK.appwiz.cpl
  2. Select the program throwing the error from the list, and click Uninstall.uninstall to fix Qt5Gui.dll
  3. Follow the on-screen instructions to complete the process, and then restart the computer.
  4. Now, you can reinstall the program from the official website or the Microsoft Store (if available).

For most cases, including the OneDrive Qt5Gui.dll error, reinstalling the application does the trick. Or, if there’s a built-in option for repair or reset, try those first to fix the error.

In case the problem persists, you can always try a dedicated DLL repair tool to get things running in no time.

For any queries or to share which solution worked for you, drop a comment below.

What is DismHost.exe & How to Get Rid of It

There is contradictory information regarding the authenticity of Windows’s DismHost.exe, and many are worried that it might be malware. In today’s guide, we’ll examine this file closely and see what it does.

What is the Dismhost EXE file?

The DismHost.exe file belongs to Microsoft Corporation’s Microsoft Deployment Image Servicing and Management software component. It can be found in the following locations:

How do I get rid of DismHost.exe?

1. Verify the DismHost.exe authenticity

  1. Press Ctrl + Shift + Esc to open the Task Manager.
  2. Click on any DISM process and select Properties.
  3. Navigate to the Digital Signatures tab and verify that the Name of the Signer is Microsoft Windows. It is a virus if it has a different signer, and you must remove it.
    dismhost.exe

2. Uninstall DismHost.exe

  1. Press Windows + R to open the Run dialog.
  2. Type control and hit Enter.
    dismhost.exe
  3. Click on Uninstall a program.
    dismhost.exe
  4. If there is a DismHost application, click on it and select Uninstall.
    dismhost.exe

In most cases, if the app shows up in the Control Panel, it may be malware and should be removed, which means you will have to run a malware scan after uninstalling it.

3. Remove from Task Manager

  1. Press Ctrl + Shift + Esc to open the Task Manager.
  2. Click on any DISM process and select End task. You must do this for all the running DISM processes.
    dismhost.exe
  3. Right-click on a DISM process and select Open file location.
  4. Alternatively, to get the location of DismHost.exe, go to the path below:
    C:\Windows\System32\Dism
  5. Right-click on DismHost and click the Delete icon.
    dismhost.exe

4. Disabling the service from the Command Prompt

  1. Press Windows + R to open the Run dialog.
  2. Type cmd and press Ctrl + Shift + Enter to open an elevated Command Prompt.
    dismhost.exe
  3. Type the script below in the Command Prompt and hit Enter to disable the running DismHost.exe service.
    sc config DismHost start= disabled
    dismhost.exe
  4. Navigate to the path where the DismHost is located and delete the file (This may be bundled in the same directory as a specific program if the process is malware).

What does DISM host do?

This service can fix corrupted system files and update your drivers. It is also used for enabling or disabling Windows features.

Is DismHost a virus?

By default, DismHost is a legitimate Windows system process and not a virus. Some of our readers have found this file in the Temp folder, but this only means that Windows Defender could not complete a scheduled scan.

Lastly, it is crucial to understand that deleting the genuine DismHost.exe process may lead to issues such as DISM failed error message.

You may want to look at this article if you encounter a DISM error 87 on your devices. To learn more about DISM, our guide on DISM commands should be able to answer all your questions.

That is all we will cover in this guide. Let us know if you have any questions using the comments section below.

Fix: 0x80070005-0x000004dc-0x00000524 Email Error

If you encounter an error message that reads 0x80070005-0x0004dc-0x000524 while sending or receiving emails through Microsoft Outlook, know it’s common.

In this guide, we will explain what this email error means and show you the easiest ways to resolve it on your computer.

What is the 0x80070005-0x000004dc-0x00000524 email error?

When this error message pops up, it typically means an issue with the user’s email account permissions or settings. As a result, Outlook is unable to reach the email server. The error message comprises three distinct error codes:

  • 0x80070005 – If you see this error code, it means Outlook faces an access denied issue. This happens when Outlook can’t reach the necessary files or folders crucial for sending or receiving emails.
  • 0x0004dc – This points to an issue with the email account’s settings, primarily with your SMTP server settings.
  • 0x000524 – You are pointed to a connection error, meaning Outlook cannot connect to the email server.

With some common error codes introduced, let us now explore some of the most practical solutions.

How do I fix the 0x80070005-0x000004dc-0x00000524 email error?

Before trying any complex solution, we recommend you do the following:

  • Check your internet connection – You probably need to change your ISP or try a wired connection since a slow Internet may trigger the email error.
  • Disable antivirus software – If you’re experiencing trouble with sending or receiving emails on Outlook, your antivirus software may be causing interference. Temporarily disabling it may work.
  • Reinstall Outlook – If there are problems with the installation, a reinstallation will save you the time of further troubleshooting.

If the problem persists after trying the above, proceed to elaborate solutions below.

1. Repair Microsoft 365

  1. Press Windows + I to open the Settings app.
  2. On the left pane, click Apps, then select Installed apps on the right.
    0x80070005-0x000004dc-0x00000524
  3. Scroll down to Microsoft 365 (Office), click the 3 dots, and select Advanced options.
    0x80070005-0x000004dc-0x00000524
  4. Scroll down, then click on the Repair button.
    0x80070005-0x000004dc-0x00000524
  5. You may also click on the Reset button (Note that this option will delete your password and you will need to reenter them at login).

Once the repair and reset are complete, verify if the 0x80070005-0x000004dc-0x00000524 error is fixed.

2. Update the email account settings

  1. Launch Outlook, click on the Settings icon and select View all Outlook settings.
    0x80070005-0x000004dc-0x00000524
  2. Click Mail, then select the Sync email option.
  3. Enter the values below in the POP setting box:
    Server name: outlook.office365.com
    Port: 995
    Encryption method: TLS

    0x80070005-0x000004dc-0x00000524
  4. Input the values below in the IMAP setting box:
    Server name: outlook.office365.com
    Port: 993
    Encryption method: TLS

  5. Then finally, input the values below in the SMTP setting text area:
    Server name: smtp.office365.com
    Port: 587
    Encryption method: STARTTLS

  6. Once completed, verify if the 0x80070005-0x000004dc-0x00000524 error is rectified.

In rare cases, you may consider uninstalling and reinstalling the Microsoft 365 application, but generally, the two solutions above should suffice.

You should check out this comprehensive guide if you need help downloading Microsoft 365 on your device.

Also, let us know in the comments section which of the solutions was able to resolve your email error.

Social Club Failed to Start: Installation Code 1 [Fix]

Several of our readers have reported The Social Club has failed to load due to an incomplete installation (code 1) error when the Rockstar Games Launcher refuses to open up on their PC.

If you are unable to access the Rockstar Games library due to the following error code, this guide has got you covered. 

Why do I get the failed to start error in Social Club? 

There can be several reasons why the Social Club may fail to start. Some of them are as follows:

  • Incomplete installation – Incomplete installation of the Rockstar Games launcher can lead to installation code 1.
  • Corrupt system files – Missing or corrupt system files or game installation files also prevent Social Club from loading. 
  • Antivirus software – A third-party antivirus tool may wrongly consider the launcher as a threat and may block or delete the related files. 
  • Outdated Games Launcher – An outdated version of Rockstar Games Launcher may be the reason why Social Club has failed to start because of an incomplete installation code 1 error. 
  • Insufficient permissions – If the game launcher has insufficient permissions to access this directory, such errors are likely to occur. 

If you also run into installation code 1 when Social Club has failed to start on your computer, this guide will offer you the required help. 

How do I fix the Social Club failed to start error code 1? 

Before you try the advanced solutions, make sure to implement the following workarounds to bypass installation code 1. 

  • Uninstall the Game launcher and then reinstall it again. 
  • Scan your PC for viruses and malware using Windows Defender.
  • Try disabling the real-time protection in Windows Defender or your third-party antivirus temporarily and see if the error persists.
  • Check your internet connectivity or try an alternate network source. 

If none of these workarounds helped you, start performing the solutions below.

1. Run the Compatibility troubleshooter 

  1. Navigate to the desktop, right-click the Rockstar Games Launcher, and select Properties from the context menu. 
    Social Club has failed to start installation code 1
  2. Switch to the Compatibility tab of the Properties window and press the Run compatibility troubleshooter button. 
    Social Club has failed to start installation code 1
  3. Press the Test the program button to see if the underlying issues causing the Social Club failed to start error are resolved.
    Social Club has failed to start installation code 1
     

If The Social Club failed to start: installation code 1 error is triggered due to compatibility issues, the program compatibility troubleshooter built into Windows will automatically diagnose such problems and present a solution.

2. Update your graphics driver

  1. Use the Windows + R shortcut to launch the Run command window, type the following command in the text box, and press Enter to execute it. devmgmt.msc
    Social Club has failed to start installation code 1
  2. Expand the Display adapters category to view the list of devices. 
  3. Right-click the relevant graphic card and choose the Update driver option from the context menu. 
    Social Club has failed to start installation code 1
  4. Choose the Search automatically for drivers option on the next window. 
    Social Club has failed to start installation code 1

Obsolete or corrupt graphic drivers of your Windows PC are also a possible reason why Social Club fails to start due to installation code 1. If so, updating the graphic drivers of your system should do the trick. 

If the best drivers are already installed on your PC, try the other methods to update the graphic drivers of your system.

Otherwise, you can also employ a dedicated driver update solution that can offer technical support and update any drivers without any issues.

⇒ Get Outbyte Driver Updater

3. Grant security permissions

  1. Use the Windows + E shortcut key to launch the File Explorer window.  
  2. Navigate to the installation folder of the Rockstar Games, right-click it, and choose Properties from the context menu. 
    Social Club has failed to start installation code 1
  3. Switch to the Security tab of the Properties window and press the Edit button. 
    Social Club has failed to start installation code 1
  4. In the Permissions for Rockstar Games window, select each of the users from the Group or user names section and enable the Allow checkbox for Full Control. 
  5. Click Apply to save the changes and OK to exit the window. 

Misconfigured permission settings often restrict the apps from launching on Windows PC and cause them to run into an error. Hence, modifying the security settings of the Rockstar Games launcher should help alleviate the problem.

That’s it! Try these solutions to get past the Social Club failed because of an incomplete installation code 1 error. And for more Rockstar-related errors like 7002.1, see our detailed guide.

If you run into the error code 1002 in Social Club, follow the methods listed in this guide to resolve it quickly. 

Which of the workarounds listed in this guide helped you fix the problem, do let us know in the comments section. 

Binkw64.dll was not Found: How to Fix or Download It Again

Many games use the binkw64.dll file, but if this file is missing, the game that uses it won’t be able to start at all.

Problems with DLL files are fairly common, and we already covered missing DLL files on Windows 11 in a separate guide, so I suggest you check it out for more information.

Before we fix this error, let’s focus on what causes it to appear on your PC.

What is the binkw64 dll?

Binkw64.dll is associated with Bink video codec, and RAD Game Tools develop it. Many popular video games use this codec.

Why is binkw64.dll missing?

There are several causes for this issue:

  • Corrupted installation – If your game installation is corrupted, the file might be missing.
  • Missing files – Sometimes, the file might not be in the right directory, and that can cause this issue to appear.

What can I do if binkw64.dll is not found?

1. Use a dedicated DLL fixer

There are many reasons why binkw64.dll might be missing from your PC, but getting it back doesn’t have to be difficult at all.

With reliable DLL repair software, you can fix any DLL issue caused by incompatibility between your operating system and third-party software.

Simply download the software, install it, and let it scan your PC and repair your DLL files.

2. Verify game files

  1. Navigate to your game library.
  2. Locate the game that is giving you this error. Right-click it and choose Properties.
     
  3. Navigate to Local files. Next, select Verify integrity of game files.
  4. Wait for the process to finish.

If the game is available on a different platform, the steps will be slightly different.

3. Copy the file to the game directory

  1. Navigate to one of the following directories: C:\Windows\SysWOW64 C:\Windows\system32
  2. Locate the binkw64.dll.
  3. Right-click it and choose Copy.
     
  4. Lastly, go to the game’s directory, locate the directory where DLLs are stored, right-click and choose Paste.
Note icon NOTE
Some users also suggest deleting the file from SysWOW64 and system32 directories, but do this at your own risk.

As you can see, fixing issues with missing binkw64.dll is simple, and you need to repair the game installation to fix it.

Missing DLLs can affect any operating system, and we have a great guide on how to fix missing DLL files on Windows 10, so be sure to check it out.

Our latest article covers what to do if bink2w32.dll is missing, so feel free to check it out for more solutions.

Did you find a different solution for this error? If so, share it with us in the comments section below.

Microsoft Loop: Start Guide, Features Review & Handy Tips

Microsoft has a host of collaborative apps and it expanded its portfolio with the Microsoft Loop app. It is a new app in Microsoft 365 that helps take the collaboration game to the next level.

In this guide, we will share with you all the details that you need to know about how to use Microsoft Loop, including its features, and some handy tips. Let us get right into it.

What is Microsoft Loop?

Microsoft built the Microsoft Loop app with collaboration as its main focus. Using Microsoft Loop with different Microsoft 365 apps, users can enhance their communication and collaborative skills.

You can use Microsoft Loop to work together on MS Word or MS Excel documents, share notes in OneNote, and perform collaborative actions across Microsoft 365 apps. Microsoft Loop can also be used to assign or create new tasks for team members as well.

Microsoft Loop offers better collaboration, especially for users working on a small project. Teams can work together in real-time using this tool.

What are the different elements of Microsoft Loop?

Microsoft Loop consists of three elements: Loop components, Loop pages, and Loop workspace. Let us understand each of them, one by one.

1. Loop components

The Loop components in Microsoft Loop remain in sync across all the places they are shared. This means they are elements such as lists, tables, paragraphs, or even tasks that allow users or colleagues to work together within emails, chats, or documents.

Adding a component in an email or a document will store that data in the author’s OneDrive account. Microsoft Loop makes use of the .fluid file extension (which will later change to .loop) to store and share data.

Since Loop components are always synced and updated, you are working with the latest information in your preferred apps, without the need to switch between multiple apps.

To collaborate under your company account, follow this quick guide to connect Microsoft Loop to your organisation so workspaces, pages, and components stay within your tenant.

2. Loop pages

Loop Pages is a whiteboard where you can bring all of your team, collaborate and share ideas. You can even share links, files, and data in real-time giving you a proper brainstorming place.

Anyone within the team can edit or manage the Loop pages and react to someone’s comment or add their comment. Loop pages can be adjusted according to the size of the project.

3. Loop workspaces

Loop workspaces is a place where your team can organize all the files, content, and data in one place for the particular project you are working on.

It can be used to share ideas and work on information. You can also share Loop components from the Loop pages and workspaces across Teams, Outlook, or even OneNote app.

For detailed instructions on updating workspace titles, see this guide to rename a workspace in Microsoft Loop and keep your projects clearly organized.

How do I use Microsoft Loop?

Check out how to use Microsoft Loop below along with some handy tips that will give you an edge when using this collaborative tool.

1. Set Microsoft Loop for the first time

  1. Visit the official Microsoft Loop website.
  2. Click on Get started – It’s free.
  3. Sign in with your Microsoft account.
  4. Once you have logged in, you will see the introduction page.

That way you can use the Microsoft Loop on your desktop using any web browser. However, you can also go ahead and download the Android or iOS mobile app (which is currently in beta) to use Microsoft Loop.

Read the next section to understand how to use Microsoft Loop to create and manage a workspace.

2. Create and manage workspace

  1. On the introduction page, click on Getting Started and select New workspace.
  2. Give a name to your workspace and hit Create.
  3. Click on the Plus(+) icon from the left bar to add a new page.
  4. Right-click on the 3-dot Menu icon and select New subpage to add subpages to your workspace.
  5. Click on the Loop button at the top.
  6. Select a page and hit the 3-dot Menu icon and you can access various options such as set as favorites, edit, rename, add or remove members, and even delete workspaces.

3. Add icon and cover to your pages

  1. To add an icon, hit the Add icon button on the new page.
  2. You can select any icon from the populated list.
  3. Also, you can scroll through the icons category-wise, or even type to find the specific icon.
  4. To add a cover image, you can click on the Add cover button.
  5. Select a cover image of your choice.

Made a change you want to reverse? See this guide on how to undo in Loop to quickly roll back edits and keep your page tidy.

4. Explore and use different templates

  1. On the new page, select any default template by clicking on it.
  2. Click on the Explore other templates button to view more templates.
  3. Select any template of your choice and hit the Use this template button.

5. Insert components in a Loop page

  1. Open any Microsoft Loop workspace page.
  2. Type / to view the list of components.
  3. Select any of the listed components to add them to your page.

6. Sharing Loop pages with others

  1. Click the Share button at the top and select Workspace.
  2. Select the Page Link to share only a particular page.
  3. You can also click the Members button below your workspace name.
  4. Type your team member’s name or email address and click Invite.

7. Switch to the dark theme

  1. Click on the 3-dot Menu icon and select Settings.
  2. Select the Dark theme option.

8. Add comments and reactions

  1. Select any content on your page and click on the chat bubble icon.
  2. Choose the dialogue box icon to add your comments to the page or choose any reaction.

9. Create a Loop component

  1. Open a Microsoft Loop page.
  2. Click on Share and select the Loop component.
  3. Copy the link.
  4. Paste the link in Microsoft Teams or a different Loop page.
  5. Right-click on any content, select Create Loop component, and copy the link.
  6. You can then paste this into supported Microsoft 365 apps.

10. Add tables and use different column type

  1. Type / to add a Loop component.
  2. Select Table from the context menu.
  3. Click on the down arrow icon or column menu icon and select Change column type.

11. Create Microsoft Loop app shortcut

While Loop is available for the web only, you can install an app shortcut on your PC. On any browser, look for the app shortcut or install the app icon in the address bar and click on it. The Microsoft Loop app shortcut will get installed.

Overall, Microsoft Loop is a great collaborating tool, and with the above handy tips, you are all set to handle the tool with ease.

We have a guide that will explain to you how you can download Microsoft Loop. Moreover, if you have doubts about Microsoft Loop vs Notion, then we have a guide that explains all the differences between the two tools.

The guide will help you understand which one among Microsoft Loop and Notion is the best project management tool, and which one should opt for based on your needs.

That is it from us in this guide. Let us know in the comments below, if there are some other tips that you use in Microsoft Loop.

Dinput8.dll: How to Fix or Download It Again if it’s Missing

Dinput8.dll and many other DLL files are used to run many games. If one of these files is missing, your game won’t start, and you’ll get an error message.

This isn’t the only DLL file that can cause problems, and we covered this issue in detail in our missing DLL files on Windows 11 guide, so we suggest you check it out.

Fixing this error is relatively simple, and in today’s guide, we will show you the best solutions you can use to fix it.

What is dinput8 dll?

Dinput8.dll is a Windows file, and it’s used by input devices and gaming controllers. Issues with this file can occur for several reasons:

  • Antivirus software – It’s possible for your antivirus software to quarantine this file. To avoid these issues, we suggest using one of the antivirus applications for Windows 11.
  • Missing file – If this file isn’t in the correct location, you’ll encounter the error message.

What can I do if dinput8.dll is missing?

Before we start fixing this issue, there is a quick check you can perform:

  • Check your antivirus settings – Few users reported that their antivirus quarantined dinput8.dll. If you’re positive that the file is safe, be sure to add it to the whitelist.

1. Use a dedicated DLL fixer

If dinput8.dll is missing on your PC, all the games that require it won’t be able to run anymore. Luckily, there’s a quick way to fix this issue.

A dedicated DLL repair software can automatically repair 100% of issues caused by Windows DLL files.

These tools are incredibly simple to use, and all that is necessary is to download and let it scan your system, and it will do the rest.

2. Copy the file to the game directory

  1. Open File Explorer and go to one of the following folders: C:\Windows\SysWOW64 C:\Windows\system32
  2. Locate the dinput8.dll.
     
  3. Right-click it and choose Copy.
  4. Next, move to the game directory where the DLLs are located, right-click the empty space, and choose Paste.

After copying the file, check if the problem is resolved.

Dinput8.dll errors are easy to fix, and in most cases, you need to move the files to the right location or ensure that your antivirus isn’t blocking them.

Although this guide tackles this issue on Windows 11, missing DLL files on Windows 10 can also be a problem, but we have a special guide that addresses that issue.

If you found a different solution for this error, don’t hesitate to share it with us in the comments section below.

0x8007001 Error Code: How to Fix This Install Issue

If you encountered the 0x8007001 error code while upgrading your computer to Windows 11 22H2 update, this guide could help!

We will cover all the expert-recommended solutions to fix the solutions right after discussing the causes.

What causes the Windows error code 0x8007001?

There could be various reasons for this installation error; some of the common ones are mentioned here:

  • Corrupted system files – If the system files related to the update are corrupted or damaged, it could lead to a 0x8007001 error code. Try repairing the system files using an SFC scan.
  • Volume is listed as Dynamic – Windows doesn’t recommend using Dynamic disks. If one or more volumes on your disk are listed as Dynamic, you could see this install error.
  • Damaged Windows registry – If any software installation or uninstallation has been interrupted or not done correctly on your computer, you might see this error. Try registry cleaner to fix it.
  • Malware or virus infection – Malware infection could damage important files on your PC, leading to this error. Run a malware scan to fix the issue.

So, these are the causes of the installation error; let us move to the solutions.

How can I fix the Windows error code 0x8007001?

Before engaging in advanced troubleshooting steps, you should consider performing the following checks:

  • Restart your computer and router.
  • Use the Disk Cleanup tool to retrieve space.
  • Disconnect all external devices except the mouse or keyboard.
  • Temporarily disable any 3rd party Antivirus you may have installed.
  • Run a deep scan using an antivirus tool.

If these fixes don’t for you, go through the detailed methods mentioned below.

1. Change the disk to Basic

Note icon NOTE
Before you proceed, make sure you back up all your important files and folders.
  1. Press Windows + R to open the Run dialog box.DiskManagement run command
  2. Type diskmgmt.msc and click OK to open the Disk Management tool.
  3. Select and right-click each volume on the dynamic disk you want to convert to basic. Click Delete Volume.Delete Volume
  4. Click Yes to confirm the change.
  5. Once the volumes on the disk are deleted, the disk might automatically turn into a Basic disk. If not, right-click the disk and click Convert to Basic Disk.Convert to Basic Disk 0x8007001

Dynamic disks are no longer recommended and have been deprecated from Windows. It is recommended to use basic disks or newer Storage Spaces. If you have one or more Dynamic disks, Windows updates may not go through.

2. Clean the Windows Update cache

  1. Press the Windows key, type services, and click Run as administrator.Services 0x8007001
  2. Locate & right-click Windows Update and click Stop.Stop Windows Updates
  3. Press Windows + R to open the Run dialog box.
  4. Type the following command to open Windows Update’s download folder and hit Enter: %windir%\SoftwareDistribution\DataStoreWindows + R to open
  5. Press Ctrl + A to select the folder’s content and click the Delete button.DataStore delete all the content
  6. Go to Services again, right-click Windows Update, and click Start.Start Windows Update
  7. Reboot your computer to save the changes.

3. Clean the download path

  1. Press Windows + R to open the Run window.Regedit run command
  2. Type regedit and click OK to open Registry Editor.
  3. Navigate to this path: Computer\HKEY_LOCAL_MACHINE\SOFTWARE\Policies\Microsoft\Windows\WindowsUpdate
  4. Locate WUServer and WIStatusServer, right-click them, and select Delete.WindowsUpdate
  5. Restart your computer to confirm the changes.

4. Run DISM & SFC scans

  1. Press the Windows key, type cmd, and click Run as administrator.CMD elevated
  2. Type the following command to repair system files and press Enter: sfc/scannowSFCSCANNOW CMD 0x8007001
  3. Wait for the scan complete, then copy & paste the following command to restore the Windows OS image and hit Enter: Dism /Online /Cleanup-Image /RestoreHealthRestore health
  4. Once the scan is complete, your PC will automatically connect to the Windows Update service to download and replace the corrupt files.

5. Reset the Windows Update Components

  1. Press the Windows key, type cmd, and click Run as administrator.CMD elevated 0x8007001
  2. Type the following commands to stop Windows Update, BITS & Cryptographic services, and hit Enter after every command:
    • net stop bits
      net stop wuauserv
      net stop appidsvc
      net stop cryptsvc

      Stop the services
  3. To delete the qmgr*.dat files, copy & paste the following command and press Enter: Del "%ALLUSERSPROFILE%\Application Data\Microsoft\Network\Downloader\qmgr*.dat"
  4. To clear the Windows Update cache to allow Windows 10 to re-download the updates, type the following commands one by one and hit Enter after every command:
    • rmdir %systemroot%\SoftwareDistribution /S /Q
      rmdir %systemroot%\system32\catroot2 /S /Q
  5. Copy & paste the following commands to reset the BITS and Windows Update service to the default security descriptor and press Enter:
    • sc.exe sdset bits D:(A;;CCLCSWRPWPDTLOCRRC;;;SY)(A;;CCDCLCSWRPWPDTLOCRSDRCWDWO;;;BA)(A;;CCLCSWLOCRRC;;;AU)(A;;CCLCSWRPWPDTLOCRRC;;;PU)
      sc.exe sdset wuauserv D:(A;;CCLCSWRPWPDTLOCRRC;;;SY)(A;;CCDCLCSWRPWPDTLOCRSDRCWDWO;;;BA)(A;;CCLCSWLOCRRC;;;AU)(A;;CCLCSWRPWPDTLOCRRC;;;PU)
  6. Type the following command and hit Enter: cd /d %windir%\system32
  7. To re-register the BITS files & the Windows Update-related DLL files, copy & paste the following commands one after the other and press Enter after every command:
    • regsvr32.exe /s atl.dll
      regsvr32.exe /s urlmon.dll
      regsvr32.exe /s mshtml.dll
      regsvr32.exe /s shdocvw.dll
      regsvr32.exe /s browseui.dll
      regsvr32.exe /s jscript.dll
      regsvr32.exe /s vbscript.dll
      regsvr32.exe /s scrrun.dll
      regsvr32.exe /s msxml.dll
      regsvr32.exe /s msxml3.dll
      regsvr32.exe /s msxml6.dll
      regsvr32.exe /s actxprxy.dll
      regsvr32.exe /s softpub.dll
      regsvr32.exe /s wintrust.dll
      regsvr32.exe /s dssenh.dll
      regsvr32.exe /s rsaenh.dll
      regsvr32.exe /s gpkcsp.dll
      regsvr32.exe /s sccbase.dll
      regsvr32.exe /s slbcsp.dll
      regsvr32.exe /s cryptdlg.dll
      regsvr32.exe /s oleaut32.dll
      regsvr32.exe /s ole32.dll
      regsvr32.exe /s shell32.dll
      regsvr32.exe /s initpki.dll
      regsvr32.exe /s wuapi.dll
      regsvr32.exe /s wuaueng.dll
      regsvr32.exe /s wuaueng1.dll
      regsvr32.exe /s wucltui.dll
      regsvr32.exe /s wups.dll
      regsvr32.exe /s wups2.dll
      regsvr32.exe /s wuweb.dll
      regsvr32.exe /s qmgr.dll
      regsvr32.exe /s qmgrprxy.dll
      regsvr32.exe /s wucltux.dll
      regsvr32.exe /s muweb.dll
      regsvr32.exe /s wuwebv.dll
  8. Type the following command to reset winsock and hit Enter:
    • netsh winsock reset
      netsh winsock reset proxy

      cmd_netsh reset
  9. Copy & paste the following commands to start Windows Update, BITS & Cryptographic services, and press Enter after every command:
    • net start bits
      net start wuauserv
      net start appidsvc
      net start cryptsvc

      Start the services 0x8007001
  10. Reboot your PC to confirm the changes.

So, these are the methods you can use to fix the Windows error code 0x8007001. If you have questions or suggestions, feel free to mention them in the comments section below.