Adobe Acrobat is one of the best PDF reader applications, and it is available for various operating systems. Lately, users report an error message they encounter when launching Adobe Acrobat Invalid plugin detected. It can sometimes prevent the app from launching.
Many plugins and programs on your PC can cause problems with other apps. It can indicate that the services of two programs conflict with each other, resulting in errors.
However, running into the Invalid plugin detected, Adobe Reader DC will quit error on Windows 11 means the process of another program installed on your computer is impeding Adobe Reader from launching.
Also, it may indicate that Adobe is having issues with some of its components.
Why do I get the Invalid plugin detected error?
The Invalid plugin detected Adobe Acrobat Reader DC error popping up when launching the app can be due to some factors other than issues with other programs on the PC. Some of these factors are:
Corrupt app files – When essential Adobe Reader installation files are missing or corrupt, it can prevent it from launching or cause Adobe Acrobat internal error to occur.
Third-party app interference – Other apps similar to Adobe Reader on your PC can cause the Invalid plugin detected error to appear or other issues.
Outdated Adobe Acrobat software – App updates come with patches to fix bugs and improve the app’s performance, and if you don’t install them, that may lead to such errors.
Other factors not mentioned above can cause the error. Nonetheless, we’ll take you through some easy steps to fix it and get Adobe Acrobat working again.
How can I fix Invalid plugin detected Adobe Reader will quit error?
If Adobe Reader still prompts the Invalid plugin error, apply the solutions below.
1. End task for Adobe Acrobat Reader on your computer
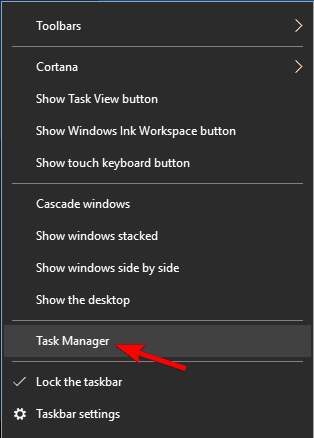
Right-click the Start button and select Task Manager from the menu.
Go to the Processes tab. Click on the Adobe Reader app from the list, right-click on it, and click End task from the drop-down menu.
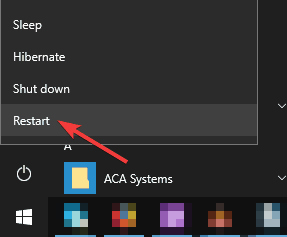
Restart your computer and launch Adobe Reader to check if the error persists.
Ending tasks for the Adobe Reader app on your PC will stop any background process interfering with its functionality. You can check for shortcuts to open Task Manager on your computer.
2. Update the Adobe Reader client
Launch Adobe Reader or Acrobat app on your PC.
Click on Help, then click on the Check for Updates link.
Follow the steps in the Updater window to download and install the latest updates.
After the update is complete, restart Adobe Reader and check if the error persists.
Updating Adobe Reader or Acrobat will fix any bug in the previous version that can cause the error. Also, it will add new features to improve performance.
3. Perform a clean boot
Press Windows + R key to open the Run dialog box, type msconfig, and click OK.
Go to the Services tab and check the box for the Hide all Microsoft services option, and then click the Disable all button.
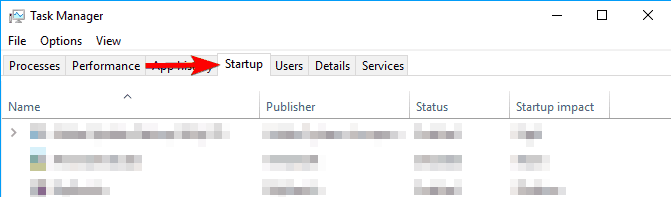
Go to the Startup tab and click Open Task Manager.
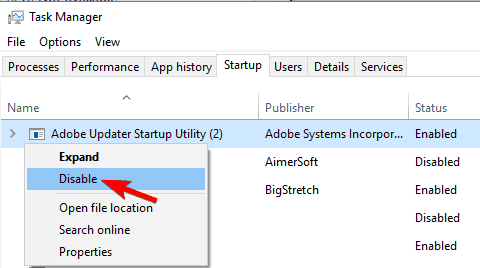
Click on the startup programs and tap the Disable button.
Restart your PC and check if the Adobe Reader error persists.
Performing a clean boot will prevent all startup running programs that can cause the error from running when you start the system.
Go to This PC and navigate to: C:\Program Files (x86)\Adobe\Acrobat Reader DC\Reader\plug_ins
Find and right-click on the ComposerPlayerControl.dll file, then select Delete from the drop-down.
The ComposerPlayerControl.dll file is known to be a culprit causing issues in the installation file. So, uninstalling it can resolve the error. If the File Explorer sidebar is missing on Windows 11, you may not gain access to This PC.
5. Uninstall the Babylon translation tool
Press Windows + R keys to open the Run window, type appwiz.cpl,and click OK.
Find the Babylon translation tool and click Uninstall.
Confirm your action and wait for it to complete. Then restart your PC.
Uninstalling the Babylon translation tool can fix the error. The Babylon translation tool is a common program that causes issues with Adobe. They conflict when they are installed together on the same PC.
In conclusion, these steps will help troubleshoot invalid plugin detected in Adobe Acrobat. Should you have more questions or suggestions, kindly drop them below.
After presenting the latest Dev Channel Insider build for Windows 11, the time has come to also look toward the Beta Channel.
Before we do, we want to remind you that there has recently been a Patch Tuesday update rollout that you might want to check out.
We provided all the information you need about these updates, even for obsolete OS versions such as Windows 7 or Windows 8.
There’s even a section about the Patch Tuesday security updates that Adobe released for its line of products, so be sure to check it out.
Circling back, let’s look at this most recent Beta build that Windows 11 Insiders have just received today from Microsoft.
What should I check out after installing KB5022914?
The Redmond-based tech colossus is running a bit late today, but it has now finally released the latest Windows 11 beta build (KB5022914) for Windows Insider users.
However, this time, the build numbers are 22621.1325 (with new features turned off) and 22623.1325 (with new features turned on by default).
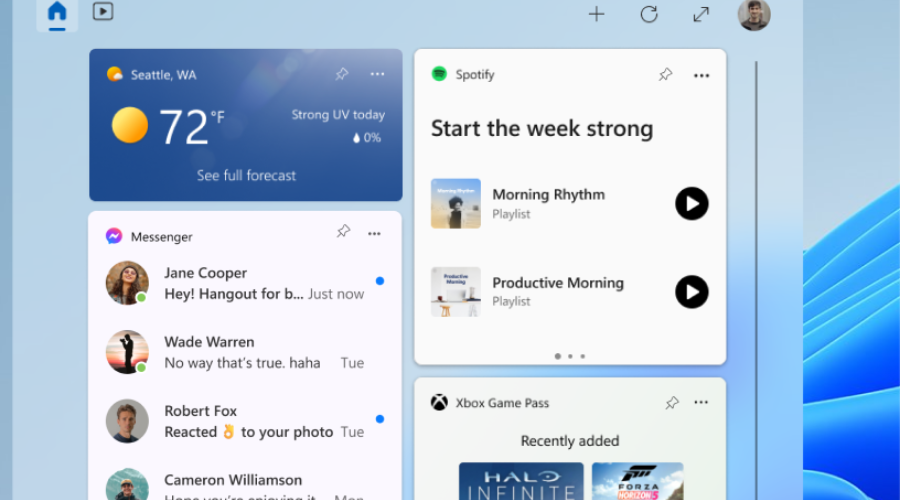
Through this build. Microsoft is beginning to roll out support for new preview widgets for Messenger, Spotify, Phone Link, and Xbox (Game Pass) to Insiders in the Beta Channel.
If you are curious and want to give them a try, go to the widgets collection in the Microsoft Store and update to the latest version of the apps.
There is also a new policy that enables commercial customers to enable features introduced via servicing (outside of the annual feature update) that are off by default for devices that have their Windows updates managed.
Know that Windows update-managed devices are those that have their Windows updates managed via policy; whether via the cloud using Windows Update for Business or on-premises with Windows Server Update Services (WSUS).
Also, for devices that are Azure Active Directory (AAD) joined, the tech giant is personalizing the experience by delivering AI-powered recommended content within your Start menu.
Now, when you open the Start menu, you will find related content to help you prepare for upcoming meetings, quickly access files you’re collaborating on, and more.
This is what we are getting new in this Beta CHannel build. The rest of the changelog talks about fixes and known issues, as you are about to see.
Fixes in Build 22623.1325
[Taskbar & System Tray]
Fixed an issue that was causing taskbar to be cut off after resolution changes.
Fixes for BOTH Build 22621.1325 & Build 22623.1325
Fixed compatibility issues that affected some printers. Those printers used Windows Graphical Device Interface (GDI) printer drivers. Those drivers did not completely adhere to GDI specifications.
Fixed a reliability issue that occurred when you used Task View.
Fixed an issue that affected copying from a network to a local drive. Copying was slower than expected for some users.
Provided support for the United Mexican States’ daylight-saving time change order for 2023.
Fixed a date information issue. It affected the format of dates sent between Windows and some versions of the Heimdal Kerberos library.
Fixed an issue that affected provisioning packages. They failed to apply in certain circumstances when elevation was required.
Fixed an issue that affected which folders appeared in the Browse for Folder picker.
Fixed an issue that affected File Explorer. When you used Shift + Tab or Shift + F6, the input focus did not move.
Fixed an issue that affected the user interface (UI). The volume up and volume down commands from a Bluetooth keyboard did not display.
Improved the reliability of Windows after you installed an update.
Fixed an issue that might have affected lsass.exe. It might have stopped responding when it sent a Lightweight Directory Access Protocol (LDAP) query to a domain controller that had a very large LDAP filter.
Fixed an issue that affected Azure Active Directory (Azure AD). Using a provisioning package for bulk provisioning failed.
Fixed an issue that affected the software keyboard. It did not appear in the Out-of-Box Experience (OOBE) after a Push-button reset (factory reset). This type of reset required an external keyboard to be attached to provide credentials.
Fixed an issue that affected AppV. It stopped file names from having the correct letter case (uppercase or lowercase).
Fixed an issue that affected Universal Print’s Configuration Service Provider (CSP). A command prompt window appeared when you installed a printer.
Fixed an issue that might have affected the touch keyboard and the PIN entry keyboard. You might not have been able to use them to enter text when you signed in to your device.
Fixed an issue that displayed a blue screen during video playback. This occurred after you set high dynamic range (HDR) on your display.
Fixed an issue that affected parity virtual disks. Using Server Manager to create them failed
Fixed an issue that affected IE mode. The text on the status bar was not always visible.
Fixed an issue that affected the Color filters setting. When you selected Inverted, the system set it to Grayscale instead.
Fixed an issue that affected Microsoft Edge. The issue removed conflicting policies for Microsoft Edge. This occurred when you set the MDMWinsOverGPFlag in a Microsoft Intune tenant and Intune detected a policy conflict.
Fixed an issue that affected the Appx State Repository. When you removed a user profile, the cleanup was incomplete. Because of that, its database grew as time passes. This growth might have caused delays when users signed in to multi-user environments like FSLogix.
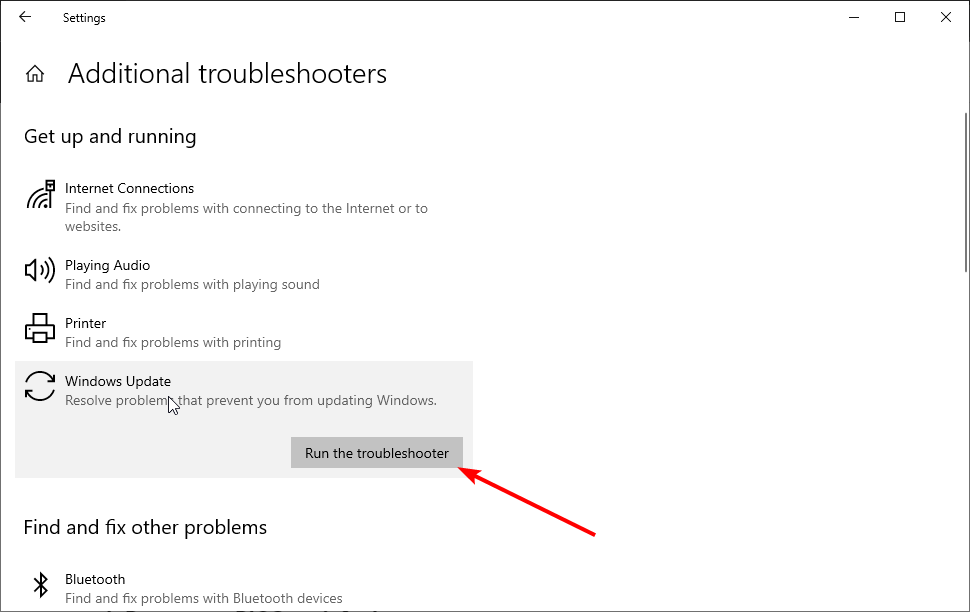
What can I do if I can’t install KB5022914?
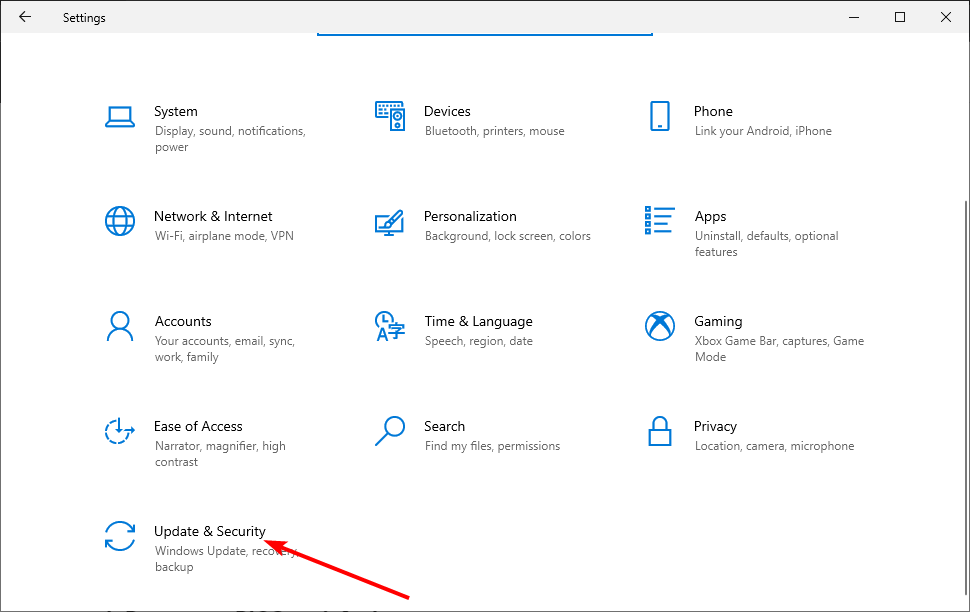
Press Win+ I to access Settings.
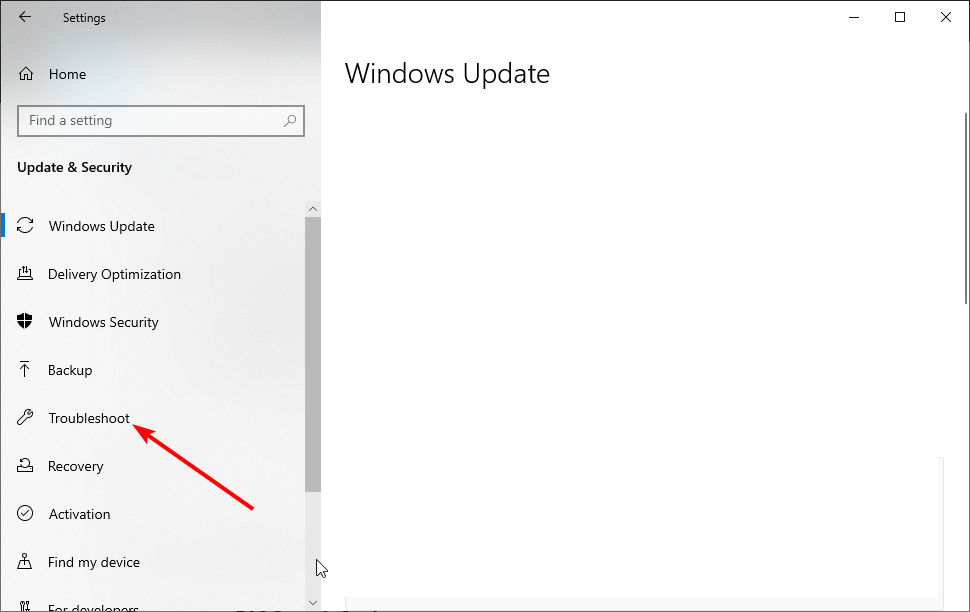
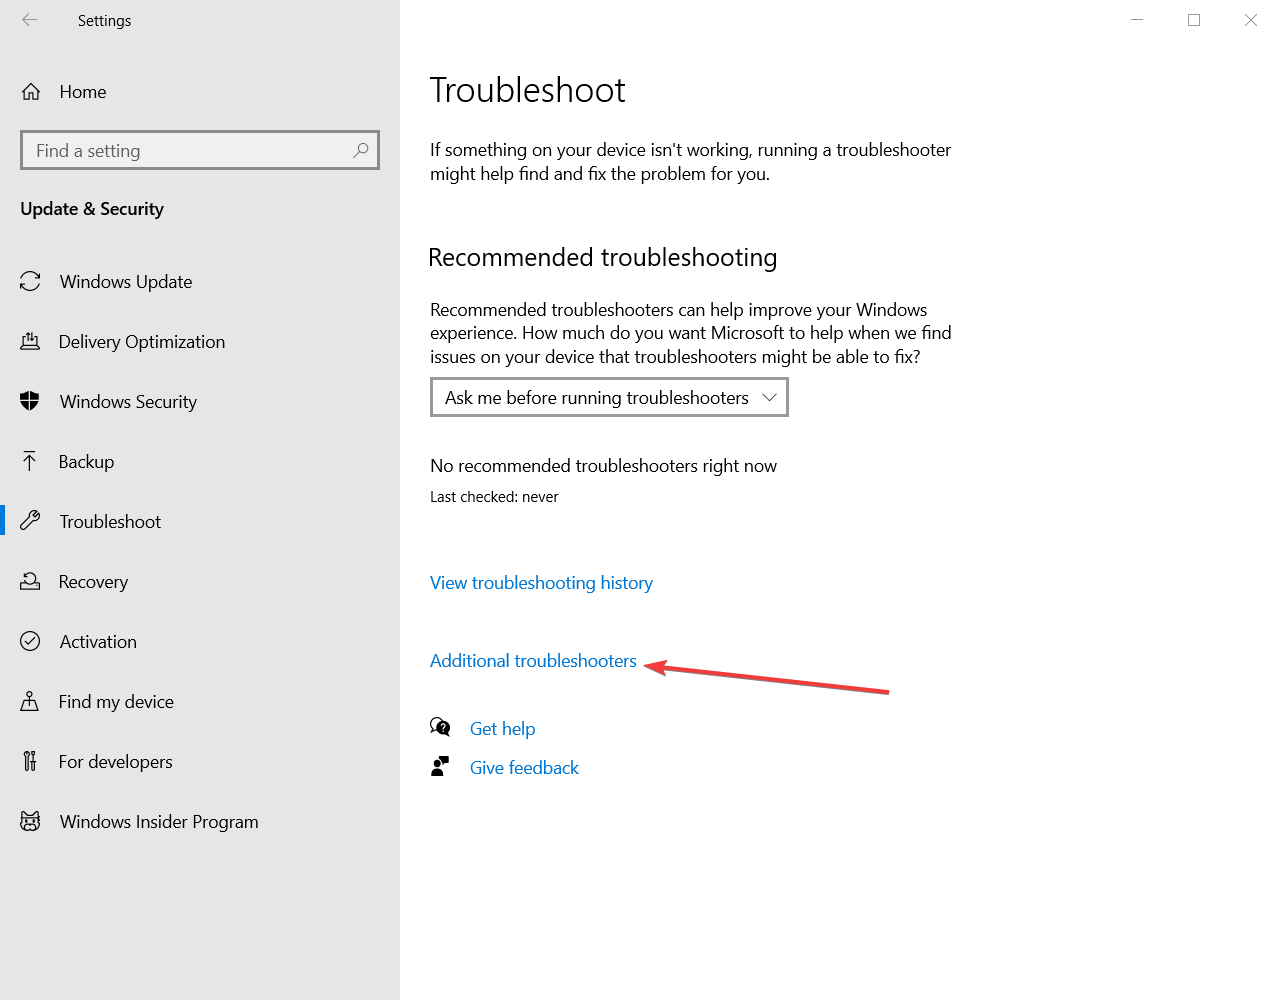
Select the System category and click on Troubleshoot.
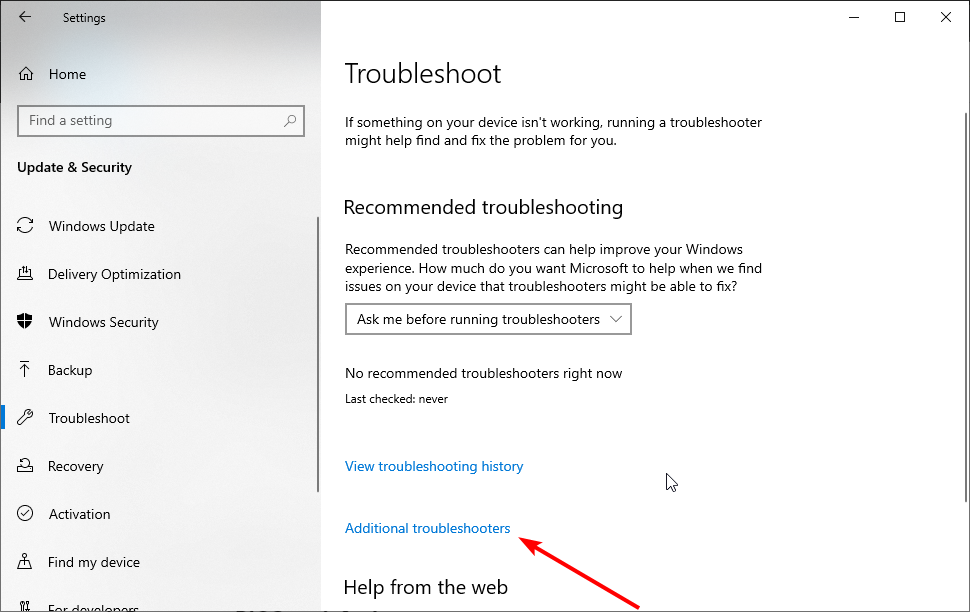
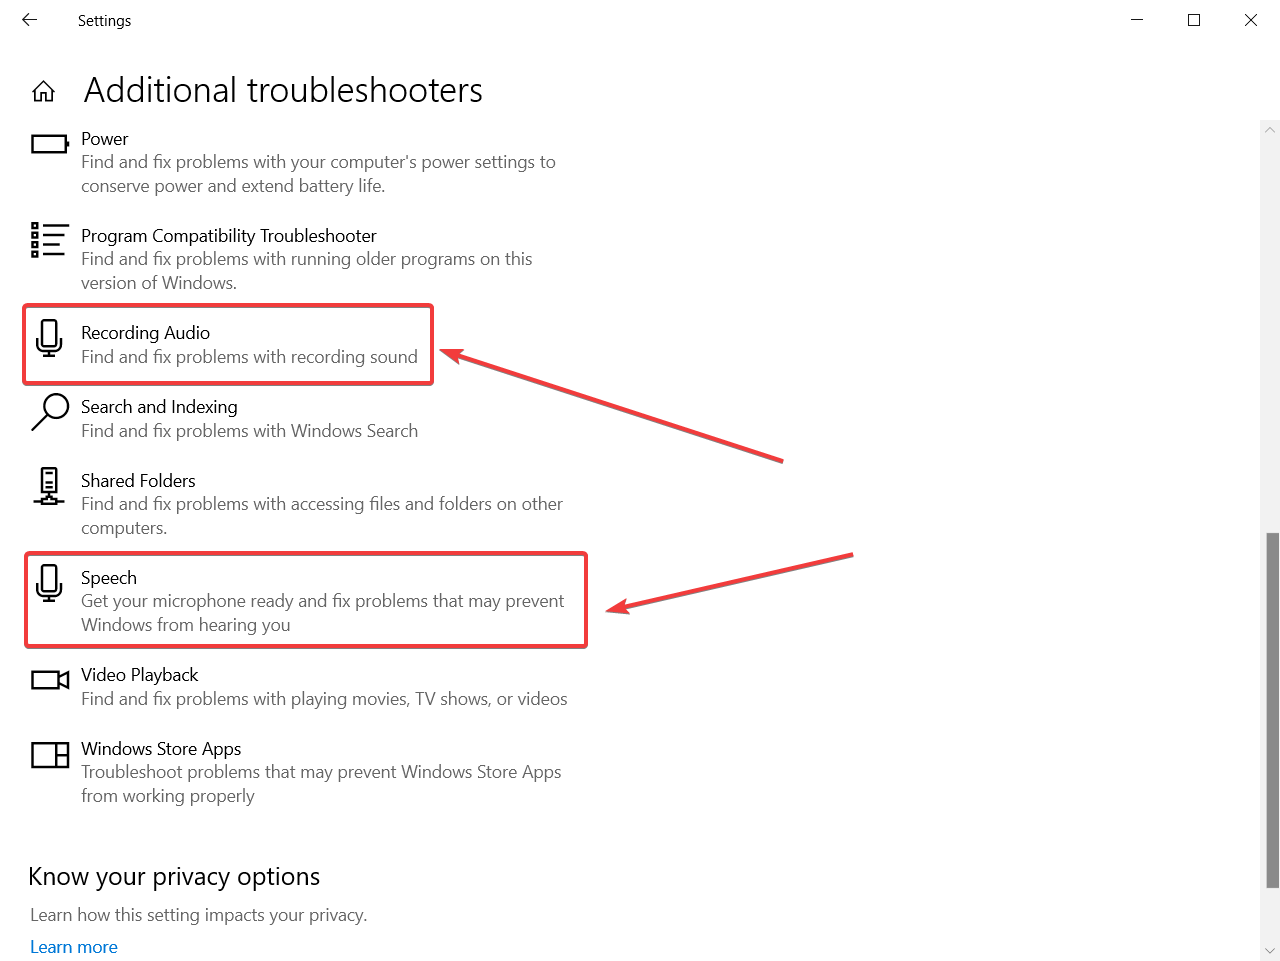
Press the Other troubleshooters button.
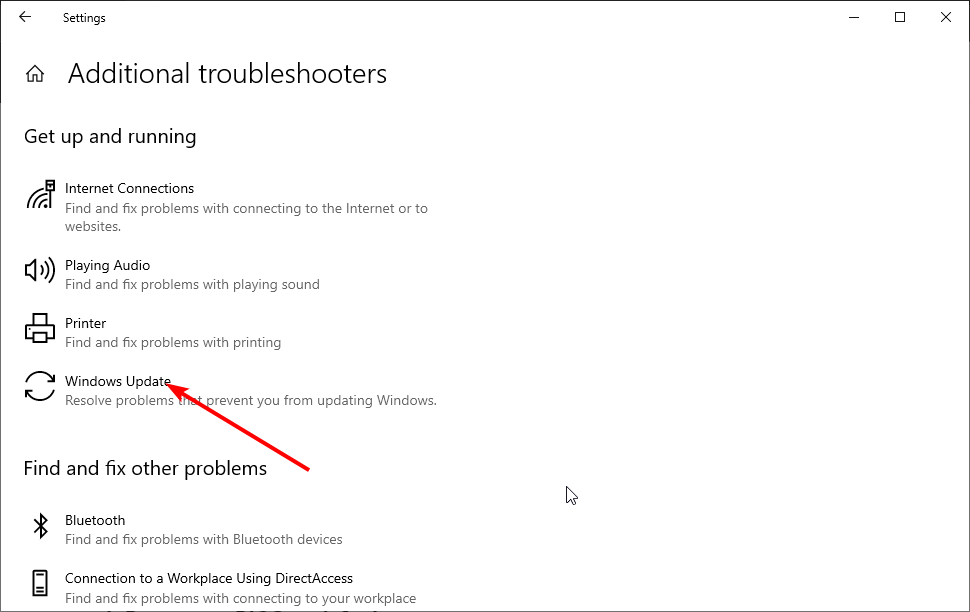
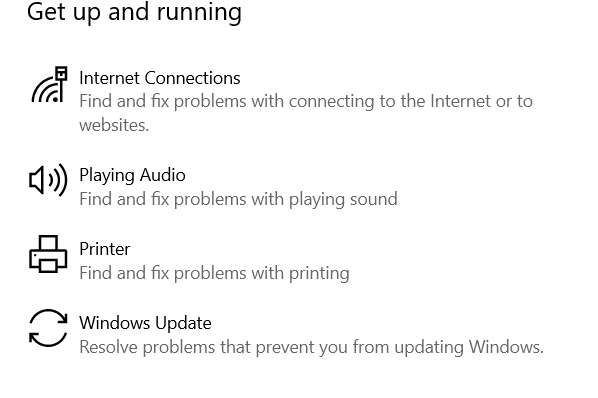
Press the Run button next to Windows Update.
Make sure to report any other issues you might come across, in order for Microsoft to address and improve the overall OS experience for us all.
This is everything you can expect if you are a Windows 11 Insider on the Beta Channel. Leave a comment below if you found any issues since installing this build.
Many users reported An account with the same name exists in Active Directory error, and this can cause various issues login issues.
Luckily, there are several fixes available, so keep on reading to learn how to deal with this issue.
What can I do if an account with the same name exists in the Active Directory?
Before trying any advanced troubleshooting steps try running off all background apps on your computer. You can also try restarting Windows in Safe Mode.
1. Uninstall the KB5020276 Windows Update
Press Windows + I key to open the Settings app.
Navigate to the Windows Update tab and click on Update history.
Click the Uninstall updates button and select the KB5020276 update.
Click on Uninstall and wait while the process completes.
Restart your PC and try reusing the account to see if it creates another user in the Domain.
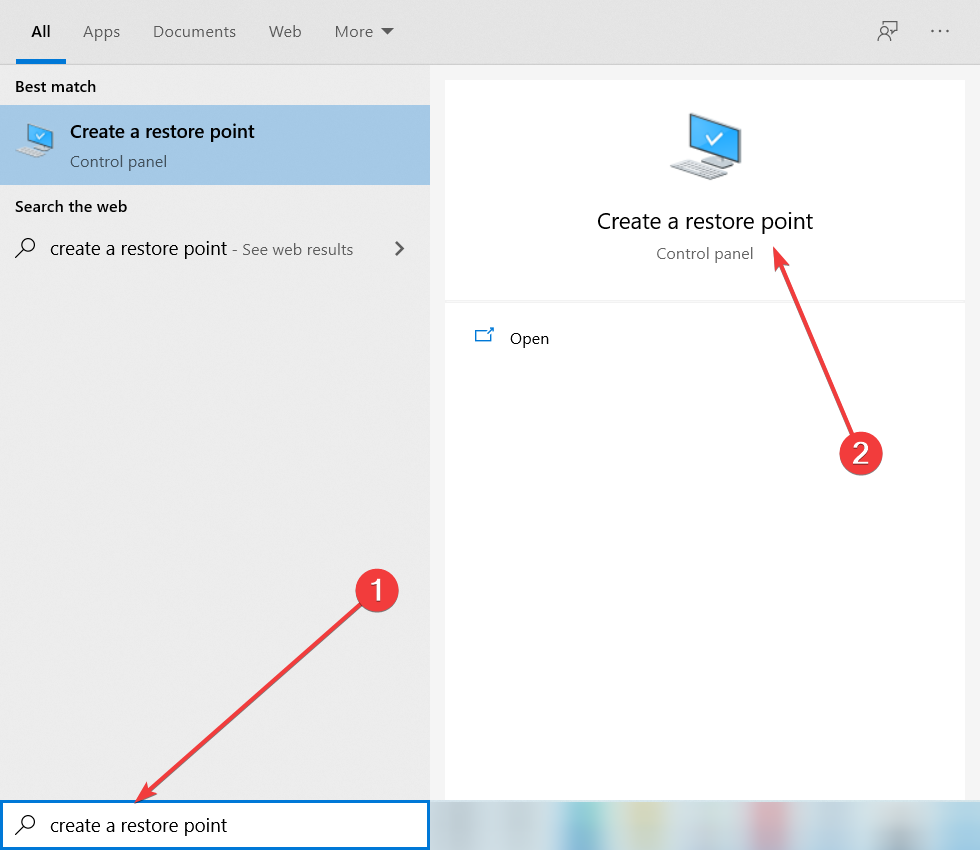
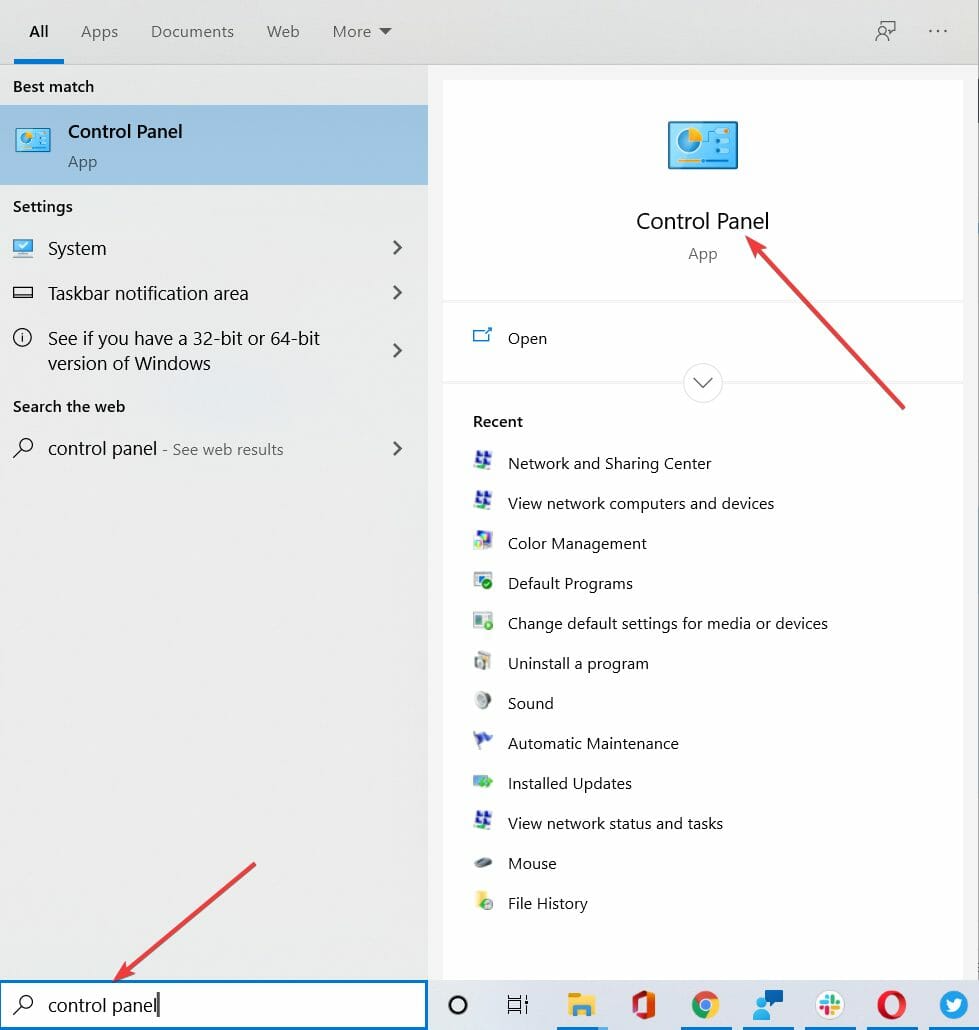
Left-click the Start button, type Restore, and click on Create a Restore Point.
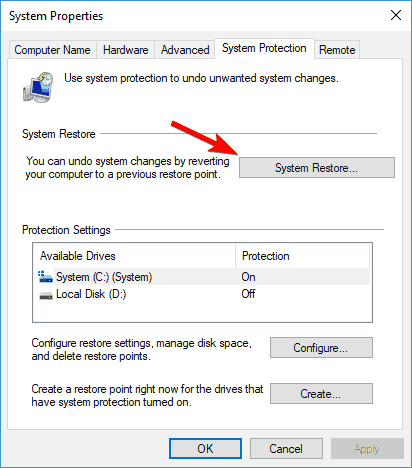
Navigate to the System Protection tab, and then select System Restore.
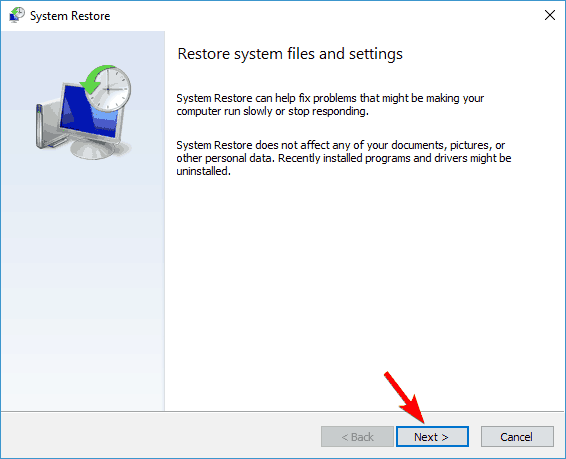
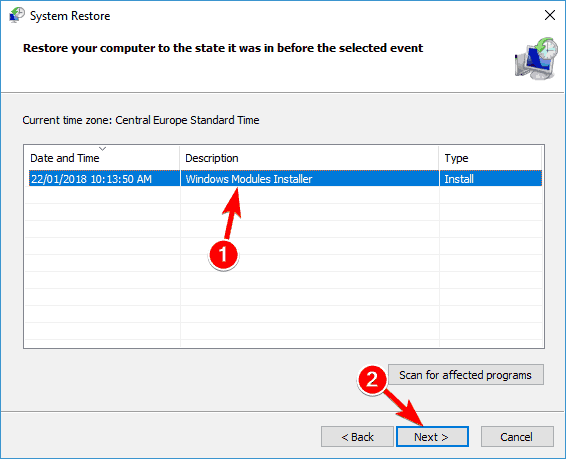
Choose a different system restore and click Next to select a specific Restore Point.
Select the last time you were able to perform the account reuse on your PC and click Next.
Click the Finish button.
System Restore backdates your PC to the last time it functioned when adding an account. Check how to fix Restore Point if it’s not working and if you have any issues running it.
If you want to try another method, you can opt for an automated repair tool to scan your PC for corrupt or missing files and locate healthy replacements automatically from its vault.
Can I create two users with the same name in the Active Directory?
Regular users can’t create two users with the same name, while Administrators can reuse an existing computer account in the Active Directory if it has the active roles proxy account as the computer creator.
It allows you to create another user with an existing computer account on a Domain.
We hope that our solutions helped you deal with An account with the same name that exists in the Active Directory issue, and now everything is back to normal.
Are you a Windows 11 user with high mobility and a knack for multitasking? If so, you’re in for an exciting update.
Microsoft is set to roll out an update that allows users to open their Outlook email app and Edge browser at the same time without having to switch windows for Microsoft 365 Personal and Family plan subscribers.
That means, you can now open links from email on Edge along with the original message in the browser’s sidebar pane, letting you access all the information within the same window.
“Why are we making this change? To improve the user experience between email and browsing, by letting you see them both at the same time, in the same place—no more switching back and forth between apps.”
Are Outlook and Edge the only apps to have this multitasking integration?
The good answer is no. In the future, Microsoft also promises that the update will be applied to Teams. From then onwards, you can open links from your Teams’ conversations on Edge in a single view that helps you engage better in the topic.
It’s not too big of an update—after all, you can still resize the windows however you want and keep all of them displayed at the same time— but still, it’s a thoughtful step forward to let users multitask smarter with less disruption.
“You can choose to open browser links from the Outlook app in Microsoft Edge right alongside the email they’re from in the Edge sidebar pane, so you can easily access, read, and respond to the message using your matching authenticated profile. No disruptive switching—just your email and the web content you need to reference, in a single, side-by-side view.”
Do you multitask a lot with Edge and Outlook? Let us know in the comments!
We’ve just had a Patch Tuesday rollout days ago and everyone thought Microsoft would ease off a bit and not release any other patches.
No such thing actually, as the Redmond-based tech giant is actually gearing up to release more helpful patches and correct past mistakes.
Speaking of Patch Tuesday, make sure to also check out the security patches released for obsolete OS versions such as Windows 7 and 8.
Microsoft also acknowledged that there is a WSUS problem that leads to failing Windows 11 Patch Tuesday updates for some.
Let’s take a look at this cumulative update for Windows 10 and see what Microsoft needed to fix in such an absolute hurry.
Full list of fixes for Windows 10 users through KB5022906
As you know, it has been a little while, but today Microsoft has released a new build to Windows 10 version 22H2 Insiders who are on the Release Preview channel.
You should keep in mind that build 19045.2670 (KB5022906) brings changes to the taskbar search, fixes some important bugs, and more.
We’re about to get into this changelog right now and discover what exactly the problems were, so we no longer have to worry about them.
Fixes
Fixed an issue that stopped hyperlinks from working in Microsoft Excel.
Fixed an issue that affected the Appx State Repository. When you removed a user profile, the cleanup was incomplete. Because of that, its database grew as time passes. This growth might have caused delays when users signed into multi-user environments like FSLogix.
Provided support for the United Mexican States’ daylight-saving time change order for 2023.
Fixed a resource conflict issue between two or more threads (known as a deadlock). This deadlock affected COM+ applications.
Fixed an issue that affected IE mode. The text on the status bar was not always visible.
Fixed an issue that affected cbs.log. This issue logged messages that were not error messages in cbs.log.
Improved how the Remove-Item cmdlet worked for Microsoft OneDrive folders.
Fixed an issue that affected AppV. It stopped file names from having the correct letter case (uppercase or lowercase).
Fixed an issue that affected Microsoft Edge. The issue removed conflicting policies for Microsoft Edge. This occurred when you set the MDMWinsOverGPFlag in a Microsoft Intune tenant and Intune detected a policy conflict.
Fixed an issue that affected Azure Active Directory (Azure AD). Using a provisioning package for bulk provisioning failed.
Fixed an issue that affected a certain streaming app. The issue stopped video playback after an advertisement played in the app.
Fixed an issue that affected MSInfo.exe. It did not correctly report the enforcement status of the Windows Defender Application Control (WDAC) user mode policy.
Fixed accessibility issues. They affected Narrator on the Settings home page.
Fixed an issue that affected the Local Security Authority Subsystem Service (LSASS). LSASS might have stopped responding after you ran Sysprep on a domain-joined machine.
Fixed an issue that affected virtual machines (VM). They stopped responding when you added a new disk to a storage pool in thin provisioning scenarios.
There are absolutely no known issues whatsoever with this recent build, so you don’t have to worry about it at all.
If you aren’t caught up with the latest news from Redmond, know that Microsoft is going to soon retire the MSDT function from the Windows OS.
Also, the Redmond tech company no longer supports Internet Explorer, the popular browser back in the day, so we recommend you use another browser.
Have you found any other issues after installing this brand new cumulative update to your Windows 10 PC? Sjare your experience with us in the comments section below.
Microsoft’s latest Insider Preview Build 22623 for Windows 11 is now live on the Beta Channel. The update comes with dozens of fixes and tryouts for new features, including enriching the widget board with an addition of the Xbox Game Pass.
Not only that, but Messenger, Spotify, and Phone Link are also being introduced for Insiders. Those who are on Build 22622 are getting an automatic migration to 22623 with the enablement package master switch.
“As you give these and other new widgets a try, please let us know what you think through the Widgets feedback link in the widgets picker. You should expect to see additional new widgets as more developers create and release widgets for their apps.”
Additionally, several improvements for the Start menu for AAD-powered devices and more are also in the pipeline. Follow along to find out what fixes are coming with this Build.
What other features are coming with Windows 11 Insider Preview Build 22623?
[Start menu]
For devices that are Azure Active Directory (AAD) joined, we are personalizing your experience by delivering AI-powered recommended content within your Start menu. When you open the Start menu, you will find related content to help you prepare for upcoming meetings, quickly access files you’re collaborating on, and more.
[Fixes in Build 22623]
Fixed an issue that was causing taskbar to be cut off after resolution changes.
We fixed compatibility issues that affected some printers. Those printers used Windows Graphical Device Interface (GDI) printer drivers. Those drivers did not completely adhere to GDI specifications.
We fixed a reliability issue that occurred when you used Task View.
We fixed an issue that affected copying from a network to a local drive. Copying was slower than expected for some users.
We provided support for the United Mexican States’ daylight-saving time change order for 2023.
We fixed a date information issue. It affected the format of dates sent between Windows and some versions of the Heimdal Kerberos library.
We fixed an issue that affected provisioning packages. They failed to apply in certain circumstances when elevation was required.
We fixed an issue that affected which folders appeared in the Browse for Folder picker.
We fixed an issue that affected File Explorer. When you used Shift + Tab or Shift + F6, the input focus did not move.
We fixed an issue that affected the user interface (UI). The volume up and volume down commands from a Bluetooth keyboard did not display.
We improved the reliability of Windows after you installed an update.
We fixed an issue that might have affected lsass.exe. It might have stopped responding when it sent a Lightweight Directory Access Protocol (LDAP) query to a domain controller that had a very large LDAP filter.
We fixed an issue that affected Azure Active Directory (Azure AD). Using a provisioning package for bulk provisioning failed.
We fixed an issue that affected the software keyboard. It did not appear in the Out-of-Box Experience (OOBE) after a Push-button reset (factory reset). This type of reset required an external keyboard to be attached to provide credentials.
We fixed an issue that affected AppV. It stopped file names from having the correct letter case (uppercase or lowercase).
We fixed an issue that affected Universal Print’s Configuration Service Provider (CSP). A command prompt window appeared when you installed a printer.
We fixed an issue that might have affected the touch keyboard and the PIN entry keyboard. You might not have been able to use them to enter text when you signed in to your device.
We fixed an issue that displayed a blue screen during video playback. This occurred after you set high dynamic range (HDR) on your display.
We fixed an issue that affected parity virtual disks. Using Server Manager to create them failed
We fixed an issue that affected IE mode. The text on the status bar was not always visible.
We fixed an issue that affected the Color filters setting. When you selected Inverted, the system set it to Grayscale instead.
We fixed an issue that affected Microsoft Edge. The issue removed conflicting policies for Microsoft Edge. This occurred when you set the MDMWinsOverGPFlag in a Microsoft Intune tenant and Intune detected a policy conflict.
We fixed an issue that affected the Appx State Repository. When you removed a user profile, the cleanup was incomplete. Because of that, its database grew as time passes. This growth might have caused delays when users signed in to multi-user environments like FSLogix.
How to use the new Xbox widget on Windows 11.
1. On your keyboard, press ?+W to open your widgets board.
2. Click on +
3. You should be able to see the new Xbox Game Pass, Spotify, Messenger, and Phone Link widgets to add.
If you’re not on the Insiders Program, however, you will not be able to see this feature, as it’s still being tested on several select users. You can always opt to join the Windows Insiders Program and leave whenever you want.
Tried Game Pass from the new widget and want to stop charges? Follow our guide to cancel Xbox Game Pass quickly and keep your saves.
Are you excited about this update? Let us know in the comments!
Vgk.sys blue screen appears when trying to start the game. It’s associated with the Vanguard security software as well as recent hardware changes, especially CPU.
Before trying anything, ensure that your game client and Vanguard software are updated. Also, disable or turn off any other anti-cheat software before starting the game.
How can I fix vgk.sys blue screen in Valorant?
1. Uninstall Corsair Unity Engine
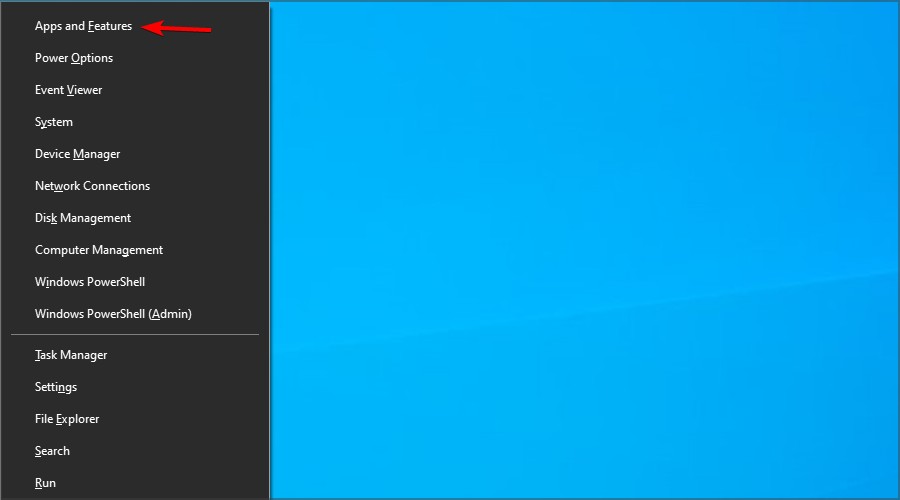
Right-click the Start Menu and choose Apps and Features.
Locate Corsair Unity Engine on the list.
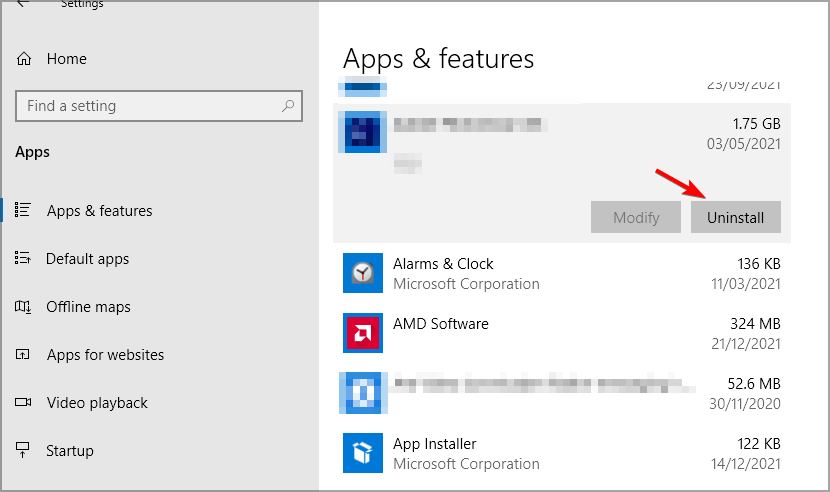
Click on the three dots next to it and choose Uninstall.
Follow the instructions on the screen.
You might have to remove all files and folders associated with this software to fix this error, especially because CorsairVBusDriver.sys seems to be the culprit.
Some users reported that reinstalling Vanguard using the same methods can help; you can try that as well.
2. Disable the Memory Integrity feature
Press the Windows key + S and enter security. Choose Windows Security from the list of results.
Next, select Device security and click on Core isolation details.
Locate Memory integrity feature and turn it off.
After doing that, restart your device.
In addition to this feature, you need to disable virtualization in BIOS. On AMD machines, it’s usually called SVM. Check your manual for detailed instructions.
3. Reinstall Valorant and Vanguard
Go to Settings and select Apps.
Locate Valorant in the list of apps and click on Uninstall.
Run the installer file. It will install both Valorant and Vanguard on your PC.
Reinstalling can help get rid of corrupt game files. It can also help if the underlying issue is caused by corruption of the Vanguard software – which you cannot download separately as a standalone software.
Can Vanguard cause BSoD?
Yes, this software can sometimes cause BSOD. If you don’t use it, it you might want to disable it or remove it.
Some users reported that the vgk.sys error also comes with the SYSTEM THREAD EXCEPTION NOT HANDLED BSoD. Click the highlighted link for a guide to fix it if you have the same issue.
In conclusion, Vgk.sys blue screen in Valorant can be fixed by following all the solutions outlined in this guide. Do not hesitate to leave your questions or suggestions in the comments section.
YouTube is one of the best platforms for streaming and watching random video content. It’s been around for a long time, but Google has yet to release an official Windows YouTube app for the Microsoft Store. However, this guide will discuss the best YouTube apps for Windows 11 that you can download.
YouPlay is the first YouTube app on our list because it is fast and efficient. Its many features set it above other dedicated YouTube apps.
Also, it is suitable for Windows 11 and is available for almost any system specifications. One of the most outstanding features of YouPlay is that it doesn’t have any ads and allows you to watch the content without interruptions.
Pros:
Easy to use and doesn’t require technicalities to navigate
It has an in-built audio and video player
Daily content update with genre categorization
Location-specific YouTube charts and see content from the region
ATube is a free substitute app for YouTube, specifically for Windows 10 and 11. It offers the best video-watching experience through its beautiful and interactive Users Interface (UI).
Also, it allows users to sign into their YouTube accounts, manage their subscriptions, upload videos on their channels, and watch videos.
It supports 2160p (4K) and 1080p with 60 FPS videos. Also, it allows you to switch to HD video quality depending on your needs.
Pros:
Like, dislike, comment, and interact with the videos
VidTuber is a YouTube app with a 4-star+ user rating. It is one of the most interactive apps for watching YouTube videos and has many features users can enjoy. It has an easy-to-use User Interface (UI) to browse popular and trending YouTube videos.
You may sign into your YouTube account, use and manage your YouTube subscriptions, upload videos on your channels, and watch videos.
Also, it allows video conversion from YouTube to MP3 and listening to them offline. In addition, you can also watch and download movies on your PC.
Pros:
Supports offline download
Youtube video conversion to an MP3 feature
Access to your Youtube account to manage activities
Cons:
The user interface is too basic and may be horrible to stare at for long hours
FizzTube is a free-to-use video & music player for Windows 11. Moreover, it is one of the best substitutes for the YouTube app and allows access to millions of free YouTube videos across the globe.
Further, it has features like an interactive User Interface, easy-to-navigate buttons, well-partitioned pages, and ad-free video streaming.
Like in YouTube, you may watch your favorite videos, like, dislike, and comment on trending posts.
Pros:
Offers a quick search feature for easier access to content
Suitable for low-end PCs due to fewer data and resource consumption
Provides an ad-free video streaming
Cons:
Doesn’t support video download for offline viewing
myTube has an impressively advanced but easy-to-use user interface and a user-friendly theme. Also, you can log into your YouTube accounts and upload videos to your channels.
Amongst its multiple features, you can watch any YouTube videos in all possible resolutions for the best user experience. Also, it stores watch history and allows bookmarking videos in the app to watch later.
Pros:
Supports video streaming across all video qualities
For a complete solution that helps you download and manage videos directly on your PC, take a look at this comprehensive iTubeGo YouTube Downloader guide.
In conclusion, these are our top picks for the best YouTube apps for Windows 11. If you have questions about our recommendations, kindly drop them in the comments section.
Microsoft has produced an internal demo of Minecraft which allows players to direct the game using the power of AI rather than manually playing it, according to a report by Semafor.
Scoop: Microsoft has an internal Minecraft demo where, instead of manually mining/building, etc., you can describe your vision to an AI (like a ChatGPT prompt) and watch your creation come to life. More details here. https://t.co/WHLKS9DGNQ
Apparently, in this version of Minecraft players can tell the game what to do via text prompts. However, this doesn’t seem to use the Prometheus model behind Bing’s new AI chat search.
You may recall that the Elon Musk-founded OpenAI—which has been very much in the headlines lately as the company behind ChatGPT—announced last year that its researchers had “taught” an AI model to play Minecraft by feeding it 70,000 hours worth of Minecraft videos.
The Semafor report says that Microsoft currently has no plans to bring AI implementation to the public retail version of Minecraft. However it does beg the question of what AI could mean for gaming in the future. Case in point: at the Game Developer’s Conference in March Sfefano Corazza, Head of Roblox Studio is scheduled to give a talk discussing “Advancing Content Creation with Generative AI.”
SharePoint is a web-based collaboration platform for managing documents and is also used to build an organization’s intranet, etc. However, users report the SharePoint export to Excel is not working, making it difficult to send out documents or items from SharePoint.
Why should you want to export SharePoint data to Excel?
SharePoint has many features that make it convenient to navigate and use. One of the most notable features is that SharePoint allows users to export and share their document libraries.
Furthermore, due to the recent updates on SharePoint, moving list libraries have become accessible and more intriguing. Some data you can export from SharePoint to Microsoft Excel are: a list created from a template, any app created that’s a list and Metadata in document libraries.
However, the main reason for exporting SharePoint list items to Microsoft Excel is to work with the data in a workbook. But when the export SharePoint list to Excel is not working, you have a problem.
Other readers complained that the SharePoint 2016 export to excel is not working in Chrome. That means you’re unable to export to Excel from SharePoint online.
There are even readers who say that SharePoint export to Excel is missing altogether, but we will help you fix all that.
Why am I unable to export to Excel from SharePoint?
Using the Export to Excel button in SharePoint can sometimes run into an error stating that an unexpected error occurred. Changes to your data cannot be saved. It can occur for the following reasons:
Timeout of this client is exceeded – Excel has a 55-second timeout when importing data from SharePoint. So, you may be unable to export from SharePoint to Excel or run into errors if the timeout of this client is exceeded.
Issues with the browser – Since you’re using SharePoint online, you can run into errors exporting to Excel using a non-32-bit browser.
Other factors may be responsible for the error on your PC. Hence, we’ll take you through some troubleshooting tips for fixing the issue.
What can I do if SharePoint cannot export to Excel?
Before proceeding with any advanced troubleshooting steps, go through the following:
Switch the browser for SharePoint. We recommend switching to a 32-bit version of Internet Explorer. It is the best browser to use SharePoint with, and it supports ActiveX controls, which aid the smooth use of SharePoint.
If the SharePoint export error persists, follow the solutions below to fix this issue completely.
1. Increase the default Excel timeout value by using a Registry key
Press Windows + R key to open the Run dialog box, type regedit, and click OK to open Registry Editor.
Click Yes if prompted by UAC.
Copy and paste the following registry path: HKEY_LOCAL_MACHINE\SOFTWARE\Microsoft\Office\ClickToRun\REGISTRY\MACHINE\Software\Microsoft\Office\16.0\Access Connectivity Engine\Engines
Go to the Edit menu, click on New, and select DWORD Value.
Type DataFetchTimeout andpress Enter. Right-click the DataFetchTimeout entry, then select Modify from the drop-down.
Select Decimal for Base, type 90000 in the Value data box, then click OK.
Close the Registry Editor and restart the export process.
Increasing the default Excel timeout value gives the export process more time to execute. This solution will also help you if Sharepoint export to Excel 2013 is not working.
In conclusion, this guide should help you troubleshoot the SharePoint export to Excel not working problem. If you have further questions or suggestions, kindly use the comments section.
Unknown programs and files often find their way into the system, causing issues with how the computer works.
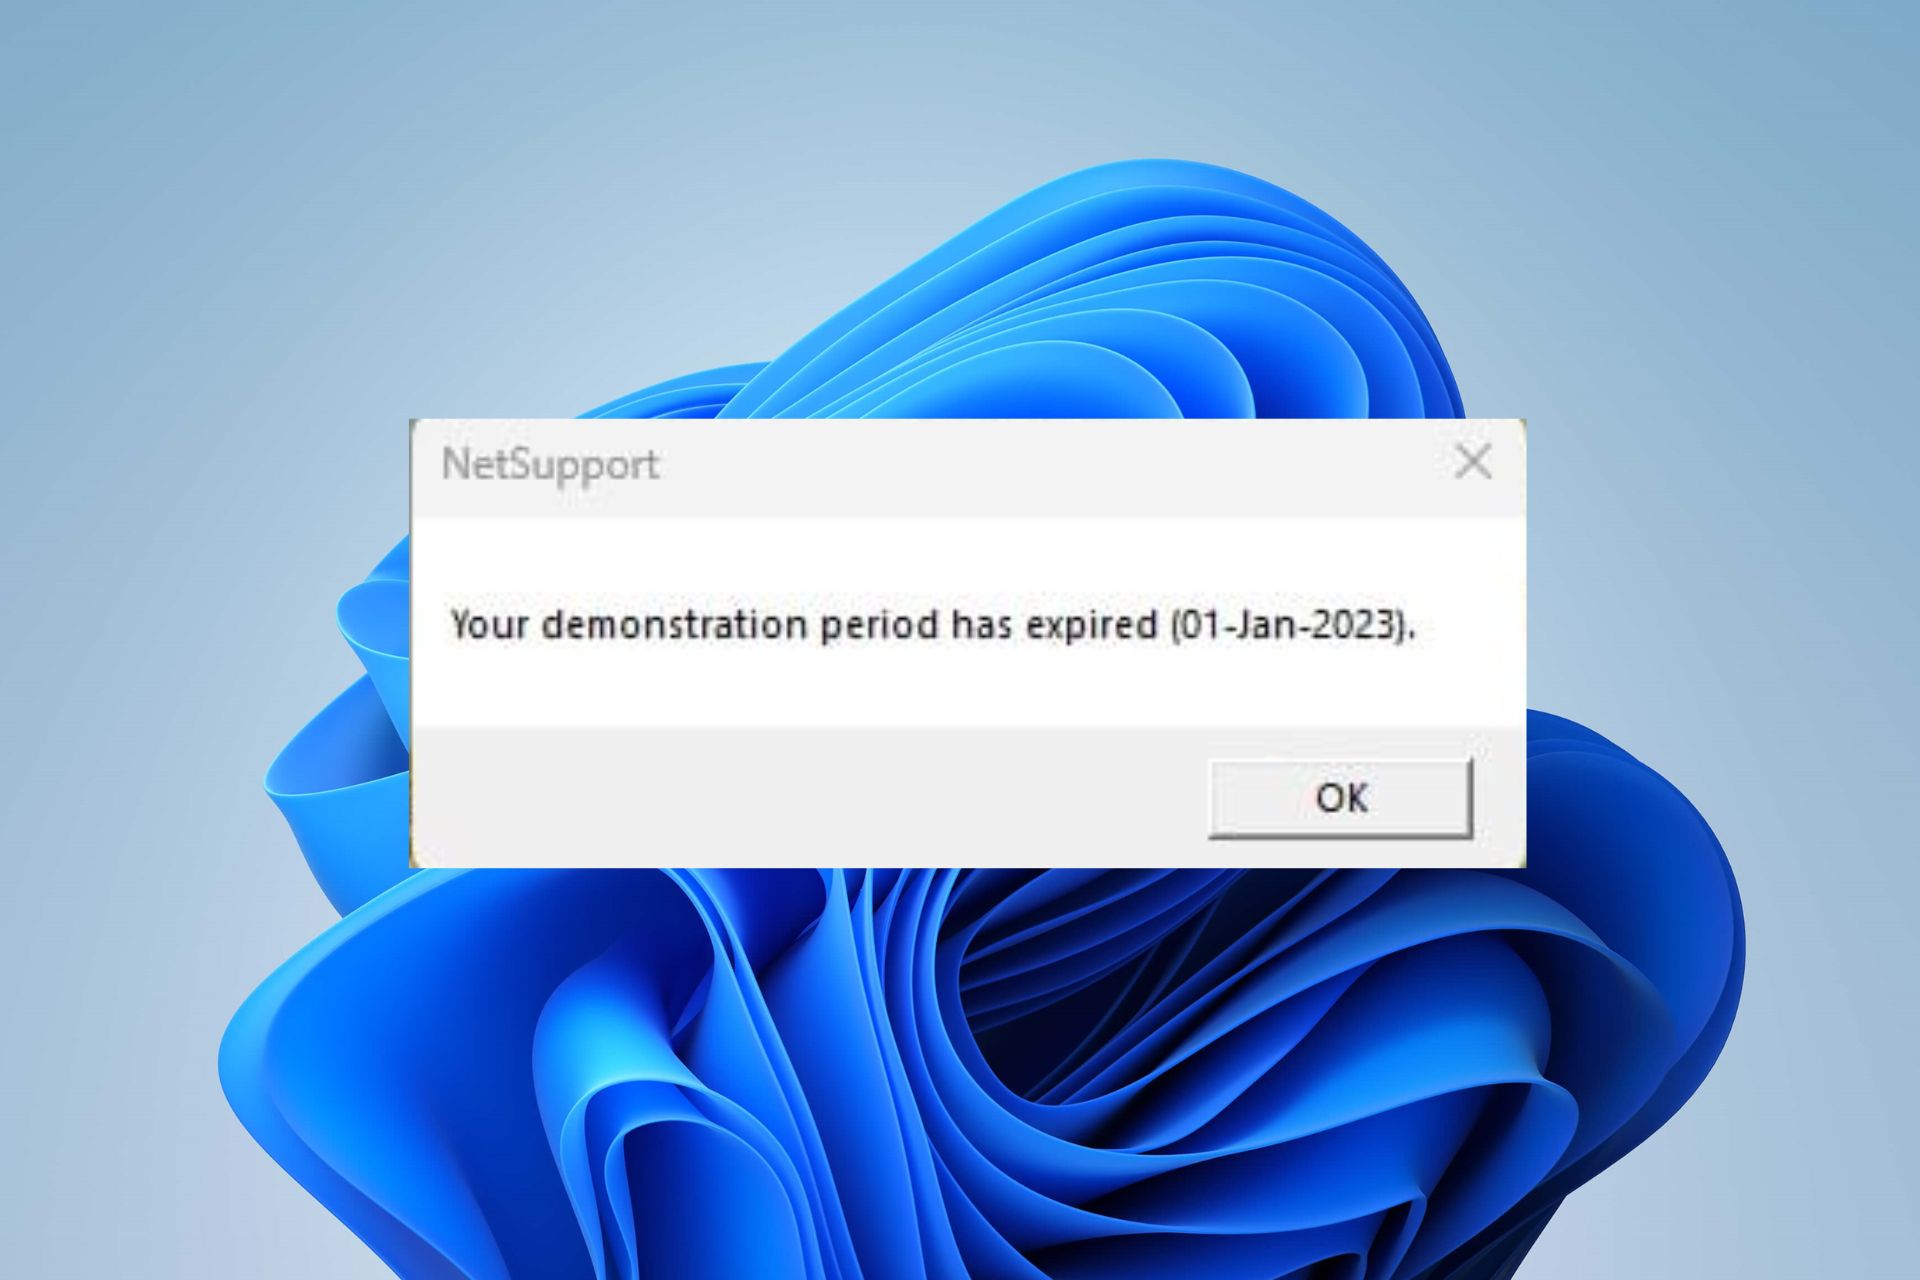
These unwanted programs can start during boot, resulting in the NetSupport Your demonstration period has expired error.
What does NetSupport your demonstration period has expired mean?
Windows users complain about running into the NetSupport: your demonstration period has expired error message when they start their PC. A startup program on your PC prompts the error message.
Furthermore, there is no particular cause for the error message as it is not linked to any app or service. Hence, it may be that the error is due to corrupt system files on the computer. They can impede the computer’s performance, causing it to run into errors.
Also, the error may occur due to a malfunctioning component of an installed app on the PC. However, users can fix the error by troubleshooting their PC.
How do I fix NetSupport Your demonstration period has expired?
We recommend you apply the following preliminary checks:
Disable third-party antivirus software temporarily to see if it changes the situation.
Restart your PC and check if the error message pops up.
If the error persists, proceed with the following solutions to fix this problem quickly.
1. Restart Windows in Safe Mode
Press Windows + I key to launch the Settings app.
Click on System and choose Recovery from the right pane.
Go to Advanced Startup, then click Restart now.
Windows will automatically restart into System Recovery, then click on Troubleshoot.
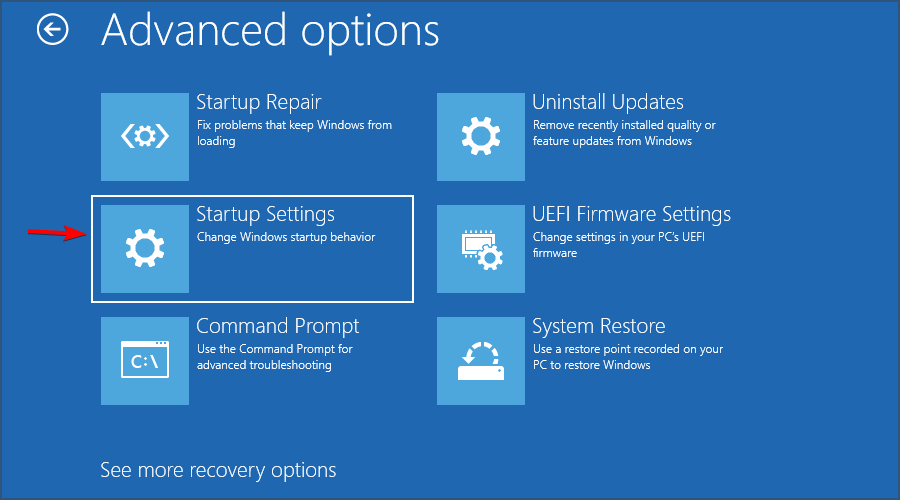
Select Advanced Options and click on the Startup Settings option.
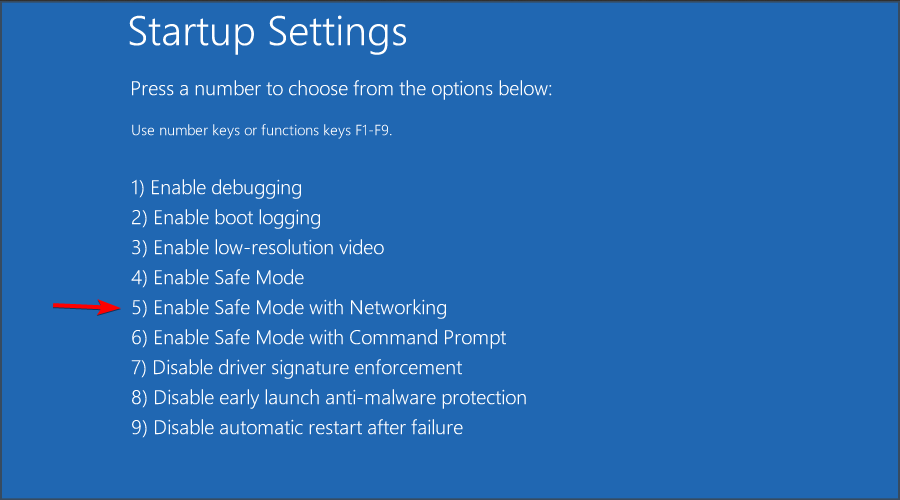
Press the F4 key to enter Safe Mode and click Restart.
Restarting Windows in Safe Mode will minimize the number of programs that start when the system boots. It can stop the error from occurring when logging in.
Navigate to the following path: C:\ProgramData\regid.1993-06.com.microsoft
Right-click on the svrwebui.exe executable file, then select the Rename option from the drop-down.
Type svrwebui.exe~~~ and press OK to save it.
Restart your PC and check if the NetSupport error persists.
Renaming the svrwebui.exe executable file on your PC will prevent the services dependent upon it from running when you boot your system.
4. Enable Real-time protection in Windows Defender
Left-click the Start button, type Windows Security, then click Enter.
Select Virus & Threat Protection from the menu and click on the Scan options.
Select Full scan to initiate an extensive scan, then click the Scan now button.
Wait while the scan completes, then navigate to the Virus & threat protection option.
Click on Manage settings and toggle on the Real-time protection option to enable the Windows Defender Antivirus.
The Full scan will detect and remove any malicious activity on your PC. Also, the Real-Time protection feature will prevent further attacks on your PC.
Unfortunately, sometimes, a Windows Defender scan will not be very effective, so if you still have issues, get a better third-party antivirus and run a full scan.
5. Disable non-Microsoft Startup Programs
Press Windows + I to launch the Windows Settings app.
Click on Apps from the right pane and select the Startup navigation option.
Toggle off the switch next to any programs not associated with Microsoft to disable the startup apps.
Close the Settings app and restart your PC to check if NetSupport persists.
Disabling non-Microsoft startup programs will prevent third-party apps from running when you boot your PC.
How can I get into Safe Mode in Windows 10 with the F8 key not working?
1. Enter Safe Mode from the Start menu
Press Windows + I key to open the Settings app.
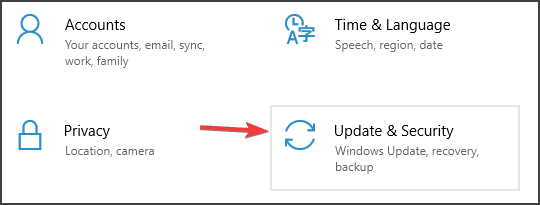
Click on Update & Security.
On the left pane, click Recovery, go to Advanced Startup, then click Restart now.
Windows will automatically restart into the Choose an option window, then click on Troubleshoot.
Click Advanced Options and click on the Startup Settings option.
Press the F4 key to enter Safe Mode and click Restart.
The above steps will help restart windows in Safe Mode when the F8 key is not working. The Recovery menu houses the functions for troubleshooting the system. Read our guide on how to fix the Safe Mode not working on Windows 11.
2. Enter Safe Mode by System configuration
Press Windows + R key to open the Run dialog box, type msconfig, then press Enter to open the System Configuration menu.
Click on the Boot tab, go to Boot options, and check the box for Safe boot, tick the radio button for Minimal.
Click Apply, then OK, and Windows will restart in Safe Mode using the configuration you set.
Tweaking the System Configuration affects the whole process it initiates. So, you can start Windows in Safe Mode by editing the System Configuration to fit your preferences.
3. Enter Safe Mode via the Boot Recovery mechanism
NOTE
This procedure is best suited when Windows is stuck on boot or can’t boot normally. So, you can boot into Safe Mode via the Automatic Repair menu.
Hold down the Power button until the computer goes off.
Repeat step 1 about two or three times to prompt the Boot recovery mechanism. The Preparing Automatic Repair screen should appear.
The Automatic Repair couldn’t repair your PC message should appear, then click on Advanced options.
Windows will automatically restart into the Choose an option page, then click on Troubleshoot.
Select Advanced Options and click on the Startup Settings option.
Press the F4 button to Enable Safe Mode and click Restart.
Why is F8 not working in Windows 10?
Safe Mode is an integral part of the Windows operating system. It is efficient for starting the operating system in a safe environment that allows a minimal number of apps to run on boot. Hence, it prevents disturbing programs from starting on your PC.
However, Microsoft thought the F8 method of running Windows in Safe Mode became useless since the introduction of Windows 10. They said Windows 10 and other recent versions don’t need the F8 Safe Mode because they load incredibly fast.
Nevertheless, there are numerous options that Microsoft has provided that you can follow to help start Windows in Safe Mode. Likewise, there are some fixes you can navigate to fix the F8 not working on Windows 10.
The Boot Recovery mechanism provides Windows with an option to repair the boot issues, prompting the to troubleshoot into Safe Mode.
FAQs
Why is F8 not working on Windows?
Windows 10 and 11 start up too quickly for the F8 key to open the Advanced Boot Options menu, as this feature is disabled by default.
How can I enable F8 for Safe Mode again?
You can turn it back on by opening Command Prompt as an administrator and entering the command to set the boot menu policy to legacy mode.
Can I access Safe Mode without F8?
Yes, open Settings, go to System, then Recovery, and under Advanced startup select Restart now to access recovery options.
Is there a way to fix F8 not responding at startup?
Try using a wired keyboard or check your BIOS settings to make sure USB keyboard support and function keys are enabled.
There are other ways to start Windows in Safe Mode that you can try. Nonetheless, you don’t need to try all the procedures; try one and see if it works.
In an exclusive post on Reuters, the news service is reporting that Microsoft has begun meeting with major advertisers to pitch plans to “allow paid links within responses to search results.”
The (major advertising) company said it is taking traditional search ads, in which brands pay to have their websites or products appear on search results for keywords related to their business, and inserting them into responses generated by the Bing chatbot, the ad executive said.
…
Microsoft is also planning another ad format within the chatbot that will be geared toward advertisers in specific industries. For example, when a user asks the new AI-powered Bing “what are the best hotels in Mexico?”, hotel ads could pop up, according to the ad executive.
Media agency Horizon Media, who also have received a demo of the new Bing, said that the links at the bottom of Bing Chat responses could be another place for ads, according to Horizon CVP Michael Cohen to Reuters:
“They seem intent on starting off immediately with paid ads integrated,” Cohen said, adding that Microsoft said more information about the strategy could come in early March.
During the initial media event, Microsoft CVP told reporters that ads would be there “from the start,” so it’s not surprising that the company is moving forward with monetization plans, but it’s been unclear just how ads in the new Bing would work, but that picture is becoming clearer as Microsoft pitches ad companies.
Some users have reported that Windows 11 Switch User feature is missing from the login screen. If there is no Switch User option in Windows 11, that is usually because of improperly configured user accounts or a corrupt user profile. Before trying the solutions below, ensure you’re using a legitimate version of Windows and check if you’re using a trial version, because that would prevent you from accessing this tool.
How do I enable the Switch user option in Windows 11?
1. Create another user account
Hit the Windows keys and click on Settings.
Click on Accounts on the left pane then select Family & other users.
Select Add account.
Follow the on-screen prompts to create a user account, then try switching users again.
A professional repair software can also help solve the operating system errors and missing files much faster and more safely.
2. Enable the user account
Hit the Windows + R keys to open the Run command.
Type lusrmgr.msc in the dialog box and hit Enter to open the Local users and groups console.
Click on Users on the left pane, then select the user you want to switch to in the right pane.
Right-click on the user and select Properties.
Navigate to the General tab and ensure the Account is disabled option is unchecked.
Click on Apply and OK to save changes.
3. Enable fast user switching
Hit the Windows + R keys to open the Run command.
Type regedit in the dialog box and hit Enter to open the Registry Editor.
Navigate to the following location: HKEY_CURRENT_USER\Software\Microsoft\Windows\CurrentVersion\Policies\System
Click on System but if it’s missing, right-click on Policies and select New Key then rename it as so.
Now go to the right pane, right-click on an empty space and select New DWORD (32-bit) Value then rename it as HideFastUserSwitching.
Double-click on it, set the Value data to 0 and press OK.
We also must remind you that if you’re not familiar with the registry and don’t know what you’re doing, you could permanently damage your computer.
You can easily delete a registry key or value that causes problems for your computer, or you may inadvertently change a setting that prevents the operating system from starting properly.
If you make changes to the registry, it’s a good idea to create a restore point before you start. A restore point is an image of your system at a specific time that you can revert back to if things go wrong.
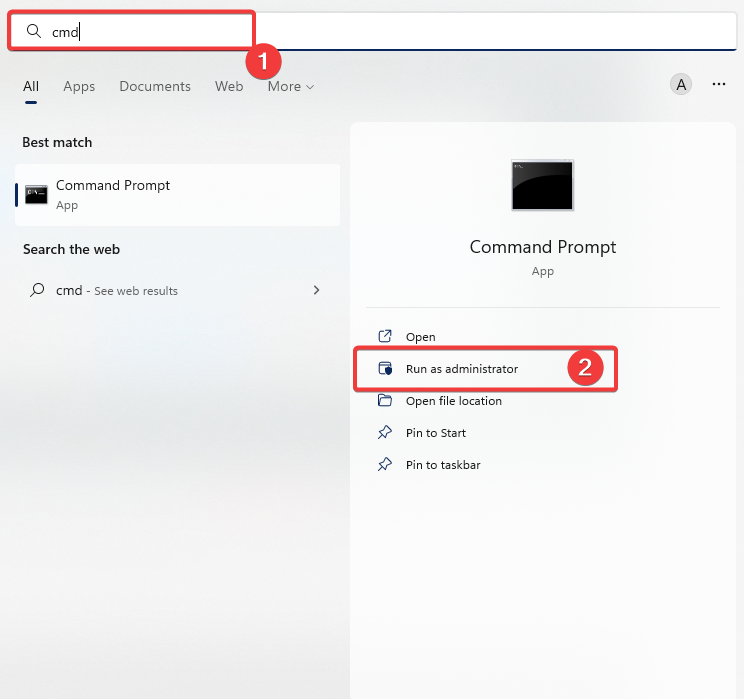
Hit the Windows key, type cmd in the search bar and click Run as administrator.
Type the following command and press Enter: secedit /configure /cfg %windir%\inf\defltbase.inf /db defltbase.sdb /verbose
Before you choose this solution, remember that resetting the Local security policy will erase all standard user accounts, and you’ll be left with only the administrator account. Therefore, if you have any unsaved work or files that could get lost, this is not your option.
Why is there no Switch user on my Windows login screen?
If the Switch user option is missing from your lock screen, it may be because of one of the following reasons:
Incorrect configurations – Some user accounts may be improperly configured and hence won’t appear on the login screen.
A glitch in the system – Sometimes Windows undergoes random glitches, which usually resolve themselves after a few moments. If you can’t switch users in Windows 11, you may have to wait it out.
Outdated OS version – It’s possible that an update or lack of has caused this issue with the Switch User option missing in Windows 11.
Hopefully, one of these methods has helped you bring the switch user option back if it was missing in your Windows 11. You may also be interested in enabling/disabling password expiration, so be sure to check out our detailed article on how to go about it.
If your user account has expired, we show you how to get it back in a few easy steps. To learn more about user accounts, we have a great guide on how to switch users on Windows 10, so be sure not to miss it.
Share with us what method worked for you in the comment section below.
Newer computers use a different sleep feature called Modern Standby, and many users aren’t pleased with it, so they are wondering how to enable S3 to sleep again.
This can be a challenge, depending on your hardware, and in today’s guide, we will show you a couple of methods you can use to do this.
How does S3 sleep work?
S3 sleep turns off most components to save power, but it keeps the data in RAM. This lets users quickly boot the PC and continue where they left off.
How do I enable the S3 sleep state on Windows 11?
1. Use a Registry script
Press Windows + R key to open the Run dialog box, type notepad, and click OK to open a new Notepad file.
Copy and paste the following script into the notepad file: Windows Registry Editor Version 5.00 [HKEY_LOCAL_MACHINE\SYSTEM\CurrentControlSet\Control\Power] "PlatformAoAcOverride"=dword:00000000
Click on File in the top-left corner and select Save As.
Enter the file name as Disable_Modern_Standby.reg, click the Save as type drop-down, select All files, and click Save to save the registry file.
Double-click on the Disable_Modern_Standby.reg file and click Yes when UAC prompts.
Restart your PC to apply the changes.
2. Use Command Prompt
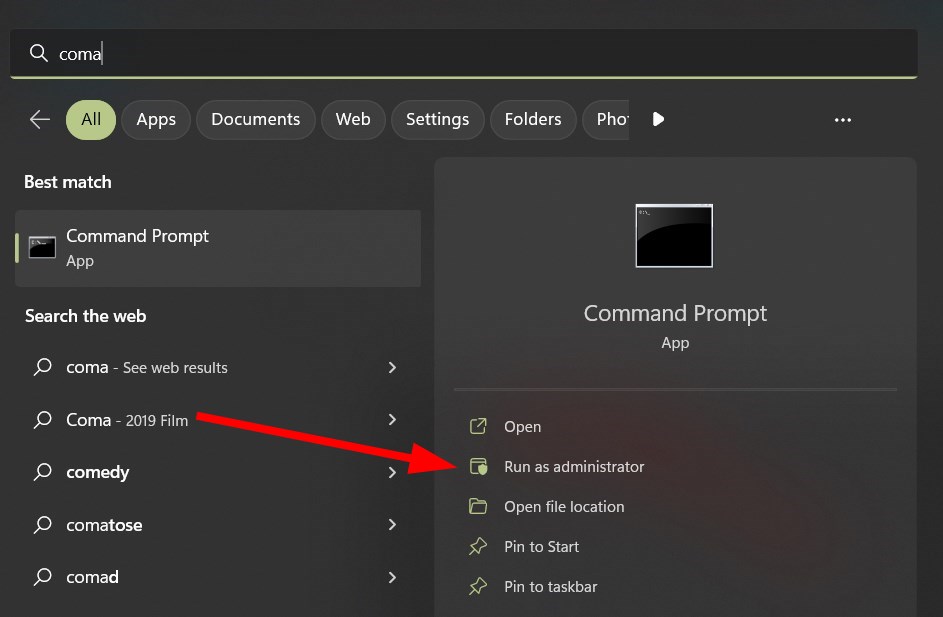
Left-click the Start button, type Command Prompt, and click Run as administrator.
Click Yes on the User Account Control prompt.
Type the following commands and press Enter: reg add HKLM\System\CurrentControlSet\Control\Power /v PlatformAoAcOverride /t REG_DWORD /d 0
Close the Command Prompt and restart your PC to apply the changes.
The Command Prompt uses the reg commands to modify the Windows registry, disabling the Modern Standby.
Press the Windows + R key to open the Run dialog box, type regedit, and click OK to open Registry Editor.
Click Yes if prompted by UAC.
Copy and paste the following registry path: HKEY_LOCAL_MACHINE\SYSTEM\CurrentControlSet\Control\Power
Right-click on the Power entry, select New, and choose DWORD (32-bit) Value from the drop-down, then input PlatformAoAcOverride as the Value name.
Right-click on the PlatformAoAcOverride value and select Modify. Type 0 in the value data field and click OK.
Close the Registry Editor and restart your PC to apply the changes.
By performing these steps, the Modern Standby will be disabled, and S3 sleep should be automatically enabled.
NOTE
Most modern laptops don’t support S3 sleep, so even if you disable Modern Sleep, S3 sleep might not be able to work.
How can I check my PC’s sleep state?
Press the Windows + X key to open the Quick Link menu, then click on Windows Terminal (Admin).
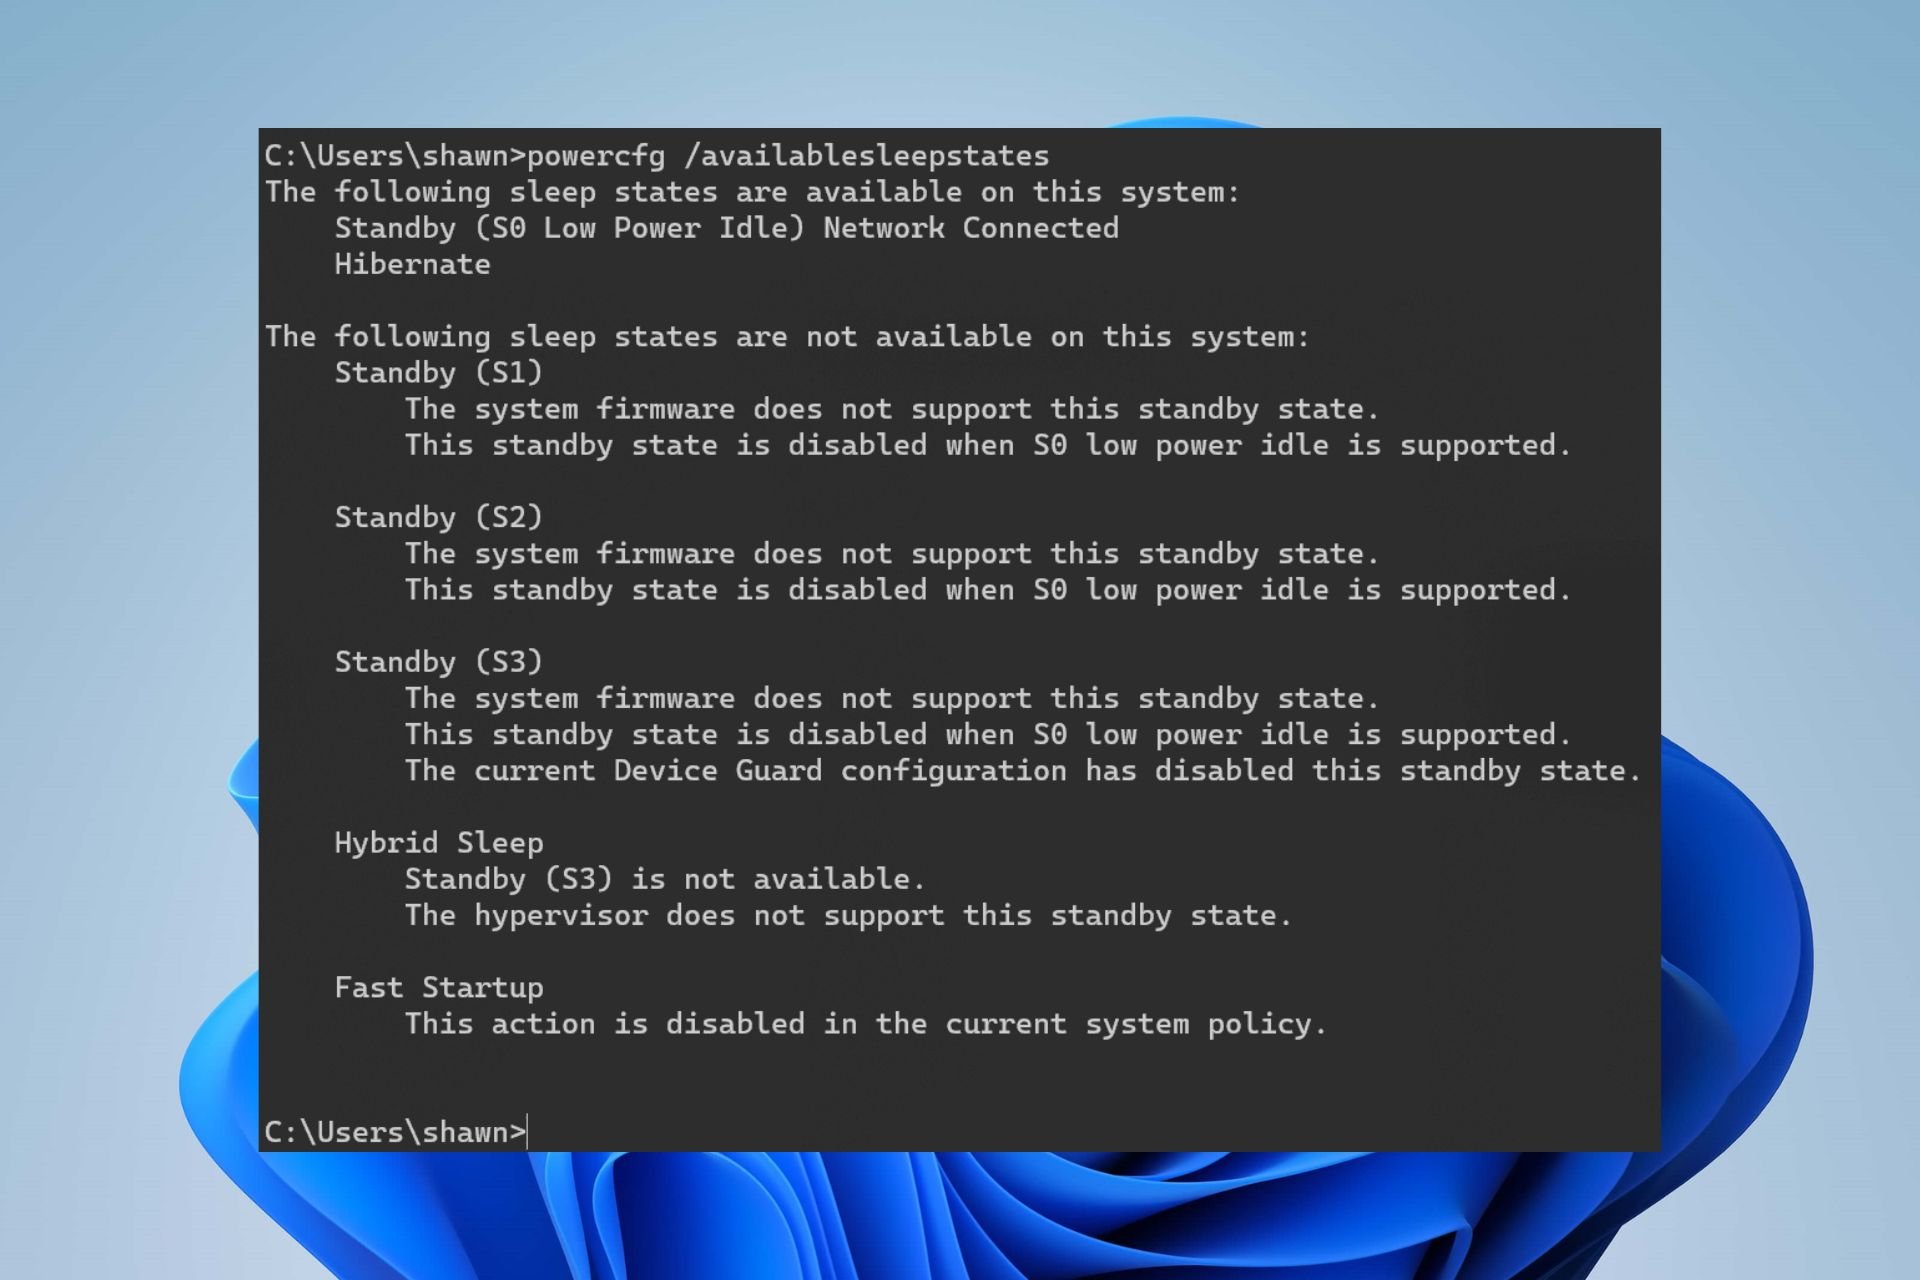
Type the following command and press Enter: powercfg /a
If the system reports Standby (S0 Lower Power Idle) Network Connected/Disconnected, then Modern Standby is enabled.
If the system reports This standby state is disabled when S0 low power idle is supported, it indicates you can disable Modern Standby to enable Legacy Standby (S3).
If you get a message saying that your system firmware doesn’t support S3 sleep, it means that you’ll have to continue using S0.
What is the difference between Modern Standby and S3 sleep?
Modern Standby:
You can instantly wake up your PC for quick access to your applications.
The device is in a low-power state but can perform background tasks.
This allows the device to receive updates and notifications without waking up.
S3 Sleep:
Turns off all components except for your RAM.
PC remains in a low-powered state and has a slightly longer wake-up time than Modern Standby.
Your PC can’t perform background tasks while using S3 sleep.
In conclusion, ensure you strictly follow all the steps outlined for optimal results to disable modern standby and enable the S3 sleep state. Further questions or suggestions are welcomed in the comments section.
Several users have reported that their Origin client is showing them a bad image error, Origin.exe Bad Image. This stops users from being able to launch any of their games.
This can get extremely frustrating, especially if you’ve been waiting to play some of the best Origin games. In addition, the error occurs suddenly and seems to affect users with different system setups. Let’s find out all about it.
What does Bad image mean?
A bad image error indicates some sort of corruption or issue with the files required to launch and run a program. Here are a few reasons you might be getting the error:
Missing DLL files: One of the main reasons you get the Origin Bad Image MSVCR120 dll error is due to missing or corrupt DLL files. MSVCR120.dll comes bundled with the Virtual C++ Redistributable Package.
Outdated graphics driver: Several users also faced the problem due to an outdated graphics driver. The problem tends to affect AMD users more than others.
Corrupt system files: When the system files are corrupt, the DLLs won’t work effectively, and, as a result, you get the Origin Bad Image error.
How do I fix the Origin bad image error?
1. Install the Visual C++ Redistributable Packages for Visual Studio 2013
Go to Microsoft’s official website and click the Download button to get Visual C++ Redistributable Packages for Visual Studio 2013.
Run the setup on your PC and follow the on-screen instructions to complete the installation.
Once done, restart your PC and check if the r5apex.exe Bad Image on Origin error is fixed. If not, head to the following method.
2. Install the Multibyte MFC Library for Visual Studio 2013
Visit Microsoft’s official webpage and click the Download button to get Multibyte MFC Library for Visual Studio 2013.
Run the installer and follow the on-screen instructions to complete it successfully.
Restart your PC, then follow the next method.
3. DownloadVisual C++ 2013 Runtime for Sideloaded Windows 8.1 apps
Press Windows + S to open the Search menu, enter Terminal in the text field, right-click on the relevant search result, and select Run as administrator.
Click Yes in the UAC prompt.
Inside thePowerShell window, paste the following command and then hit Enter:sfc /scannow
Wait for the scan to complete.
SFC or System File Checker scan looks for corruption in the system files, and if any are found, the affected files are replaced with their cached copy. Once done with the scan, check if the EALink.exe Bad Image error in Origin is fixed.
5. Update your GPU drivers
Press Windows + R to open the Run command, enter devmgmt.msc, and click OK.
Double-click on the Display adapters entry.
Right-click the GPU and choose Update Driver.
Select Search automatically for drivers from the options that appear.
You could manually update the graphics driver if an updated version was not found earlier. Once done, the Origin Bad Image msvcr120.DLL error will be fixed.
If your Microsoft Teams status is stuck on “unknown,” it often means there’s a sync issue between your local app and the Microsoft 365 presence service. In some cases, everyone in your contact list may appear with the same unknown status, or it may affect just your own account. This guide walks you through the most effective ways to fix it.
1. Sign out and sign into your Microsoft Teams account
Left-click the Start button, search for Microsoft Teams, and open it from the search results.
Click on the profile picture in the top-right corner. Click on the Sign out option and click OK.
Then, sign back into your account and see if the issue persists.
Signing out of your account from Microsoft Teams will fix any sign-in issues causing your status to be stuck on unknown. Read how to fix Microsoft Teams keep restarting issue on your PC.
2. Clear the Microsoft Teams cache
Press the Windows + R keys to open the Run dialog box, type %appdata%, and press Enter.
Navigate to the Microsoft folder on the left side and click on it.
Find the Teams folder and double-click to open it.
Select all the folders in the Teams folder and press Delete to clear them.
Close and relaunch Microsoft Teams to see if the status issue is resolved.
Clearing the Microsoft Teams app cache will delete the corrupt data files causing the apps to malfunction.
In conclusion, the solutions outlined above are effective if Microsoft Teams status is stuck on unknown. If you have any questions or suggestions, kindly use the comments section.
There are many reasons behind the error Something went wrong. We are working on it. Please try again in a bit while trying to access the premium videos from Hotstar.
If the service is up, the issue is likely on your end. Our troubleshooting guide and VPS recommendations for Hotstar in the US will help. Plus, find the best browsers for streaming Hotstar.
How can I fix Something went wrong Hotstar error?
1. Clear your browser data
Firstly, make sure to log out and log in again and check whether the Hotstar is down temporarily.
From your desktop, simply open Chrome.
At the top right corner, click More.
Click More tools then click Clear browsing data.
Choose a time range, might be Last hour or All time.
Select the types of information you want to remove.
Click on Clear data, and retry using Hotstar.
2. Flush your DNS
Simply type cmd in your Start Menu, in order to open Command Prompt.
Type this command and then press Enter:ipconfig/registerdns
After the operation has been completed, type in exit in Command Prompt, and then restart your machine.
3. Update your network drivers
Click on the Start Menu and select your Device Manager.
Just expand the category with the hardware you want to update.
Right-click on the device, and select Update Driver.
Click the Search automatically for updated driver software.
4. Firewall permission on your PC
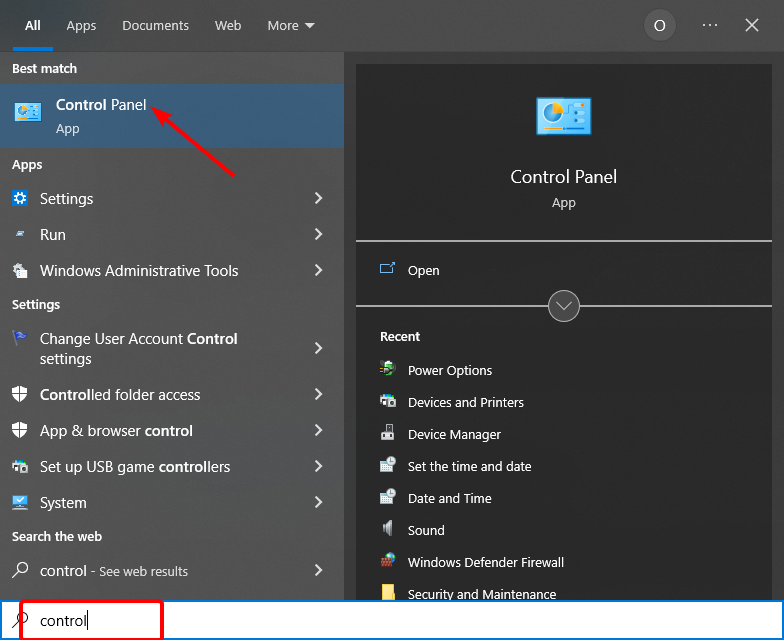
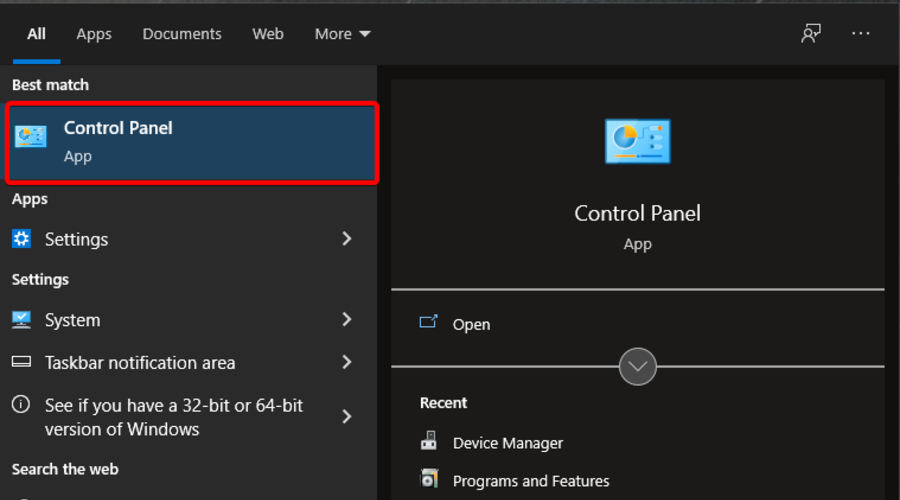
From your PC’s Start Menu select the Control Panel.
Click on Windows Firewall, and proceed to click on Allow an app or feature through Windows Firewall.
Now, the Allowed App windows will open.
Click on the Change Settings.
Now check the boxes next to the apps or programs you want to allow through Windows Firewall or network connections.
Click OK to save your new settings.
5. Try a different browser
The Hotstar Something went wrong error is most likely caused by your current browser. Hence the simplest solution is to switch to an alternative with better performance.
Opera One is one of the leading browsers on the market, with a modern UI and tons of useful features.
Most notable benefits include the turbo mode for enhanced speed, an integrated adblocker, VPN, a snapshot tool, as well as a highly customizable workflow with instant messaging, add-ons, and extensions.
Hotstar not working – If you’re trying to access the app using a VPN, chances are that you’ll run into this error. Another possible reason for this can be an unstable internet connection or an outdated version of the app.
Something went wrong Hotstar error on TV – Some of the reasons why the streaming service app is not working can also be some internal problem or app glitch.
Disney+ Hotstar app Something went wrong – This problem usually surfaces when there is a problem with the Internet connection.
Surfshark Hotstar not working – This can mean that you are not using the right VPN. Hotstar can detect VPNs easily and as a result, it blocks users’ access to content.
Something went wrong (iPhone) – Triggered by old app versions, insufficient storage space, poor Wi-Fi connectivity, or cellular data plan expired.
Something went wrong (Android) – As in the case of iOS devices, this can occur due to outdated app versions, insufficient storage space, poor Wi-Fi connectivity, or no cellular data.
Hotstar error 404 – This error can be caused by conflicts with other third-party apps, not clearing the cache, or using the wrong VPN.
Something went wrong (VPN) – If you’ve been watching Hotstar with a VPN and it’s no longer working, Hotstar has managed to block the IP address your VPN has given you.
Hotstar not working with ExpressVPN – If your current VPN of choice isn’t working, there’s a high chance that Hotstar has blacklisted the VPN server you’re attempting to connect with.
Please let us know which of these solutions helped you get back into the Hotstar platform. If you need additional support, the comments area is waiting for you.
Users can use many audio outputs for their Windows 11 to improve their sound quality and audio performance. One of the options for audio output is 24-bit audio. Hence, we’ll take you through how to get 24-bit audio on Windows 11.
What is 24-bit audio, and how does it help?
24-bit audio is an upgrade from contemporary 16-bit audio. Bits are usually processed in strings of bytes and many groups of eight bits to formulate a digital word.
The digital output created can vary in length by multiples of eight, for instance, 16-bit, 24-bit, 32-bit, etc. Some of its benefits are:
Better for Studio editing – 24-bit audio has about 16,777,216 possible binary combinations. Also, 24-bit is best for studio audio editing as it performs at higher volumes without distorting audio production.
Higher dynamic range – 24-bit audio has a higher dynamic range with noise reduction and can reach louder volumes without noise. Likewise, the 24-bit audio output provides a 144dB dynamic range between the noise floor and 0dBFS.
In short, try the 24-bit audio as it offers more audio quality, a higher volume without sound distortion, and reduced noise.
However, you should know that not all sound cards, especially the onboard one, can use the 24-bit audio depth. So, if you won’t find this setting for your audio device, that is a clear sign that you won’t be able to enhance your audio.
How do I get 24-bit audio on Windows 11?
1. Update Audio drivers
Press Windows + R to open the Run dialog box, type devmgmt.msc, and press Enter to open the Device Manager.
Expand Audio inputs and outputs, select your Audio device, and right-click on it. Select Update driver from the drop-down.
Click Search automatically for drivers.
If there are any updates, the installation wizard will install them automatically. Then, restart your PC.
Updating your audio driver will add new features and fix bugs that may affect the 24-bit audio process on your PC. Check our guide on reinstalling audio drivers on Windows 11 if you can’t update the audio driver.
To prevent choosing the wrong driver and save some time, you can try using an automated driver updating tool to scan your device for outdated drivers and install the latest updates from its vast database.
2. Set sample rate and bit depth in Audio settings
Press Windows + I keys to open the Windows Settings app.
Click on System and select Sound on the right pane.
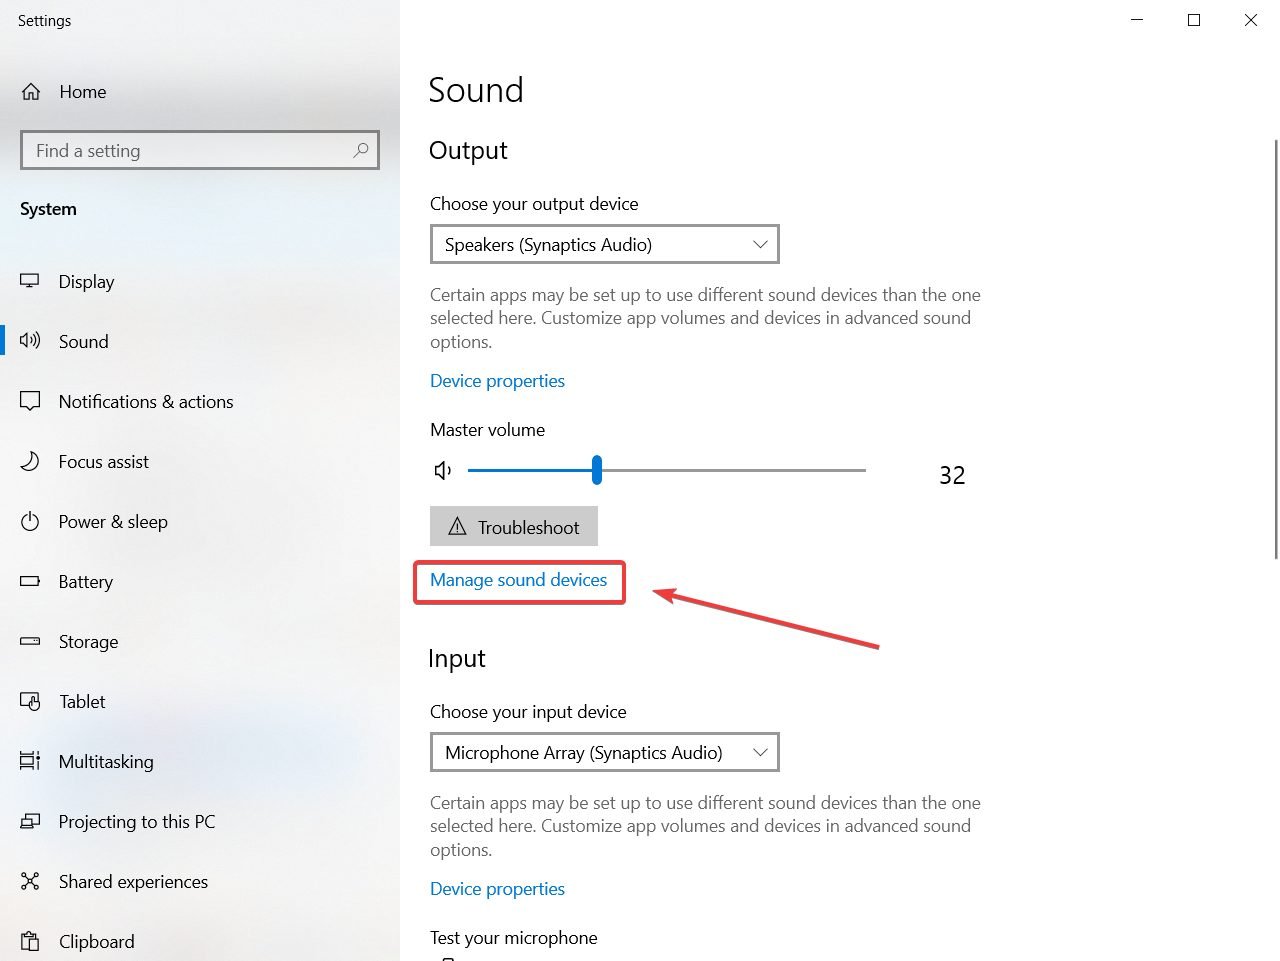
Click on your audio device to open its properties.
Navigate to the Output settings and click the drop-down next to Format to set a sample rate and bit depth. Then select 24-bit 44100 Hz Studio quality or any other 24-bit option depending on your preference.
Click the Test button to hear sample audio and decide if it’s what you want.
The above steps will incorporate your audio device’s 24-bit 44100 Hz studio quality and improve its audio output using the sample rate and bit depth set.
3. Set your Default Format from Realtek Sound Manager
On your Desktop, go to the system tray and right-click on the Realtek HD Audio Manager icon to open the Audio options menu.
Select Sound Manager from the drop-down.
Click the Default Format tab, set the playback default format to 24 Bits 44100 Hz Studio quality, and select the DVD format option below.
Close the Sound Manager and restart your PC.
Setting the Default Format to 24-bit 44100 Hz Studio quality helps reduce sound latency and improve your audio quality.
In this solution, we have shown how to change the format for Realtek software, but if you have another software, you should find these options within its settings.
Also, we have a guide on the best sound cards for music production, best suited for DJs and music enthusiasts.
In conclusion, using the 24-bit audio in Windows 11 will boost the overall output quality of your sounds. Do not hesitate to leave your questions or suggestions in the comments section.
Microsoft Teams is an irreplaceable tool, and many are looking to record a Teams meeting. This is pretty simple to do, and there are great tools that can help you with that.
Can you record a Microsoft Teams meeting?
You can record a meeting using a built-in recording feature. To do so, you’ll need the right permissions for the Teams channel you’re trying to record.
How do I record a meeting in Microsoft Teams?
1. Use the Teams app
Launch the Teams app when a meeting is just about to start.
Click on the horizontal ellipses at the bottom and click on Start recording.
2. Launch the app and click the + icon at the bottom left corner under Scenes and Sources.
3. Click on Display Capture and click OK.
4. Go to Settings.
5. Click on Output in the window that pops up and select a location to save the recording.
6. Now click on Start Recording.
3. Use Adobe Premiere Pro
Adobe Premiere Pro has long been the industry standard for video editing, but it’s also a great tool for capturing video from your computer screen.
You can use this software to record a Microsoft Teams meeting and save it as an MP4 file on your computer. It’s not only powerful but also easy to learn.
Loom is a free screen-recording tool that lets you record any activity on your screen, including Microsoft Teams meetings. The application also has a Chrome extension making it easier to record while using a browser.
It’s easy to use and has many features that make it perfect for recording meetings. The app lets you record audio from your microphone or from the speakers, so you can include the audio from your meeting.
Movavi is a free screen recorder that lets you record desktop activities, including Microsoft Teams meetings.
The best part about this software is that it’s very easy to use: all you need to do is select the area of the screen that you want to record and press Start Recording.
Can I record a Teams meeting if I am not the host?
You can record a Teams meeting if you are not the host. But there are some limitations. The meeting host will need to permit you to record the meeting.
Not having the latest version can cause this problem. Cache issues or low memory can lead to this issue as well. If your organization doesn’t allow recording, you’ll also experience this problem.
Why is the recording option disabled in Teams?
This can occur if the recording is disabled by the administrator. If the path to the folder is changed or app cache is corrupted, you can get this problem. Clearing the cache in Teams should fix things.
Where are Microsoft Teams recordings stored?
The Microsoft Teams’ recordings are usually stored on OneDrive or SharePoint, depending on the meeting type. Channel meetings go to SharePoint while others are saved to OneDrive.
Solid State Disks, or SSD for short, are the perfect storage solutions to improve performance and speed things up with your PC and are often paired with SSD optimization software. You can add them to an old PC to infuse some new life – read speed – into them.
Not only will the boot time be drastically reduced, but the PC as a whole will witness an increase in performance. No wonder most new PCs come with SSD pre-installed.
However, like with almost everything under the sun, SSDs, too, are prone to errors, or there might be conditions that can affect their performance. This is where SSD optimization software comes into the picture, and we have listed the best ones.
Can SSD drives be optimized?
Yes, SSDs can be optimized, and it does help improve performance. But here are a few points you need to remember:
Optimizing of SSDs is not the same as HDDs. With the former, it’s the basic Trim function, while for the latter, it’s Defragmentation.
When you enable the TRIM feature, Windows identifies the free-able space on the drive and makes it available to store data.
Make sure to never defragment an SSD as a part of the optimizing operation since that will reduce its life span.
Does SSD need optimization?
Though you can manually optimize SSDs, it’s recommended that you don’t because Windows automatically takes care of it. And the best part, Windows will identify when an SSD is connected and won’t perform defragmentation.
But if you think the drive is slow, there are several ways to increase the write speed on SSD, and it shouldn’t take more than a few minutes. Besides, disabling startup programs and updating the firmware are also effective solutions.
Though most experts recommend using an SSD optimization tool in Windows 10 and other iterations to get the best performance out of your drive.
This easily is one of the best SSD optimization software though the biggest drawback with the software is that it can weave its magic on only Samsung SSDs and, that too, just a few select models.
Specifically, the SSD Magician supports Samsung SSD 840, 830, 840 EVO, 840 PRO, and 470 series only though that too makes for quite a generous list.
Also, with it being compliant with a highly specific hardware range, the optimization is quite thorough and provides a marked increase in performance, reliability, and capacity.
It’s another third-party SSD optimization software that you can really rely on. One of the biggest pros of the software is its simple user interface, so you don’t have to deal with anything too superfluous.
There aren’t too many tech jargons either to put off tech nerds, while it’s just a few simple steps that will help you get the most out of SSD.
It makes adjustments to the OS settings on its own while you get to see markedly improved performance of your SSD.
As the name implies, the SSD Tweaker will tweak the system to allow for peak SSD performance each time and is easily one of the best things your PC can have.
Also, a major advantage of the software is that it will allow you to make all the necessary changes to your system from a single place. It benefits those not too adept with the intricate settings on their PC.
The software is available in free and paid versions, with the free version providing a spartan set of controls, which can be enough.
Those who need in-depth changes in the PC and hence a far more optimum tweak of the SSD can always opt for the paid version, which offers the more advanced TRIM control feature.
The Crucial SSD optimization software is another handy tool that helps improve performance. The best part, it’s free SSD optimization software.
It allows users to monitor the critical aspects of the drive, including the available storage and temperature. Also, it allows users to download the latest firmware updates to boost performance, in addition to resetting the encryption password.
Crucial Storage Executive has the Momentum Cache feature, which significantly improves the SSDs’ performance and makes it 10x faster. Remember, the tool is only available for the 64-bit version of Windows.
The Kingston SSD optimization software is a one-stop tool that does everything Kingston SSD users could ever ask for. Whether checking the drive identification data, monitoring its health and data usage, or updating the firmware, the tool offers it all.
Also, the tool offers the option to get a detailed report on the drive’s health and helps users identify issues with it and perform the necessary troubleshooting. Besides, with the feature to securely erase data, you can always be sure that it won’t fall into the wrong hands.
So, if you plan to optimize SSD on Windows 10 or even the latest iteration and have one manufactured by Kingston, you now know which tool to use.
Windows users need not worry about their SSDs’ performance, given that the OS already knows how best to derive the most out of the storage media. And when coupled with the right SSD optimization software, you get the best possible performance.
However, should you still see any drop in your SSD performance, the above-mentioned tips and tools should be sufficient to take care of it. For any queries or to share your reviews of the tools listed here, drop a comment below.
The 0x000003e3 printer error often occurs when there’s a communication issue between your PC and a shared or network printer. It’s common on Windows 10 and 11, and typically results from driver problems or recent Windows updates.
The full error message reads Windows cannot connect to printer. Operation failed with error 0x000003e3.
Here’s how to fix it:
What does error 0x000003e3 mean?
The error indicates the PC’s inability to print from a shared local network printer. And it doesn’t go away even after a restart. Common causes include outdated drivers, recent Windows updates, or third-party software conflicts. Similar issues like the 0x00004005 printer error can also disrupt printing operations.
How can I fix printer error 0x000003e3?
First, try disabling your antivirus, make sure your internet is working and check if there’s any Windows update available for install.
If these don’t work, move to the fixes listed next.
1. Restart the Print Spooler
1. Press the Windows + R hotkey, type services.msc, and click the OK option.
2. Then double-click Print Spooler to open its properties window.
3. SelectAutomaticon the Startup type drop-down menu.
4. If the service is not running, click the Start button and apply.
Simply restarting the Print Spooler service fixed this problem for many of our readers so you should definitely try it out.
A simple fix is restarting the Print Spooler, which helps manage printing tasks. This often clears up the 0x000003e3 error, just like it does for other problems, such as error printing issues.
2. Copy the mscms.dll file into the driver installation folder
Launch File Explorer with the Windows + E hotkey.
Then open this path in File Explorer: C:\Windows\System32
Input mscms in the search box to find the mscms.dll file.
Right-click the mscms.dll file to select the Copy option.
Now, open this path for 64-bit Windows: C:\Windows\System32\spool\drivers\x64\3
For 32-bit Windows platforms, you should open this folder: C:\Windows\System32\spool\drivers\w32\x86\3
Then right-click an empty space with the 3 folder and select Paste.
3. Manually install the printer drivers
Press Windows + X to open the Power User menu, and select Device Manager.
Locate the printer, right-click on it, and choose Properties.
Now, head to the Details tab, choose Hardware Ids from the Property dropdown menu, and then copy the ID.
Next, go to Google or any other search engine, search using the Hardware ID you copied earlier, and click OEM entry here. It’s usually the first, though not always.
Download the driver setup, and run it to complete the installation process.
Press Windows + I to open Settings, and click on Troubleshoot on the right in the System tab.
Click on Other troubleshooters.
Locate the Printer entry and click on the Run button next to it.
Follow the on-screen instructions to complete the process.
If you’re encountering similar printer issues, such as a printer error message, the troubleshooter may help fix them too.
5. Uninstall recent Windows Update
Press Windows + I to open Settings, go to Windows Update, and click on Update history.
Scroll down to the bottom and click on Uninstall updates.
Locate the last major update, and click Uninstall next to it.
Again, click Uninstall in the confirmation prompt that appears.
Updates sometimes cause these issues, similar to when you get the printer status unknown error. If true, uninstall them since many have been found to trigger the error.
6. Modify the registry
NOTE
Before you proceed, create a restore point or back up the Registry to restore the previous settings in case things don’t work out as expected.
Press Windows + S to open Search, type Services, and click on the relevant search result.
Locate and right-click on the Print Spooler service, and then select Stop.
Next, press Windows + R to open Run, type regedit in the text field, and hit Enter.
Click Yes in the UAC prompt.
Paste the following path in the address bar and hit Enter:Computer\HKEY_LOCAL_MACHINE\SYSTEM\CurrentControlSet\Control\Print
Now, expand Environments, and choose your architecture of the OS.
Double-click on Drivers, then on Version 3, right-click on the key under it, and select Delete.
Click Yes in the confirmation prompt.
Similarly, delete the other keys here.
Now, delete all the keys under the following four entries as well:
Monitors
PendingUpgrades
Printers
Providers
Once done, go back to Services, right-click on Print Spooler, and select Start.
In all likelihood, you shouldn’t get the 0x000003e3 network printer error anymore in Windows. If the problem persists, head to the next solution.
Press Windows + S to open Search, type Windows Defender Firewall in the text field, and click on the relevant result.
Click on Allow an app or feature through Windows Defender Firewall on the left.
Now, click on Change settings.
Make sure both the Private and Public checkboxes are ticked for File and Printer Sharing, and click OK to save the changes.
If you are getting the 0x000003e3 Cannot connect to printer due to the built-in firewall, make sure File and Printer Sharing is allowed to fix things.
8. Reinstall the printer
If nothing works, the last option is to remove the device and then manually add the printer back. The connection may have run into issues, but it’s easy to fix with a simple reinstall.
While re-adding the printer, use an LPT1: (Printer Port), install the suitable drivers available on the PC, and follow the on-screen instructions. The process is simple and shouldn’t take more than a few minutes.
That’s it! One of the solutions listed here should have helped you get rid of the Operation failed with error 0x000003e3 popup in Windows.
Windows is a great operating system, but many reported that their Windows laptop won’t shut down properly.
Shutdown-related problems, like the shutdown button not working, are among the prominent issues, so let’s see how we can fix them.
Why my laptop won’t shut down?
When it comes to shutdown issues, here are the most common causes:
Power settings – In some instances, power settings such as Hybrid Sleep can affect your PC. Many users also reported that Hybrid Sleep is missing on their PC, so check if it’s available.
Power plan configuration – Improperly configured power plan can cause this issue. In case the power plans are missing, or the laptop won’t shut down with the Power button, you’ll need to restore them to fix this problem.
Missing updates – Keeping your system updated is important if you want to keep your system bug-free. Sometimes, PC bugs can interfere with the process and can lead to the PC not shutting down fully.
Below are some of the variations of the issue as reported by users and the possible causes:
Laptop won’t shut down or restart, hibernate, or lock: According to users, their laptops won’t shut down, restart, hibernate, or lock. This can be a big problem, but you should be able to fix it using our solutions.
The laptop will not shut down when the lid is closed: According to users, their laptops won’t shut down when the lid is closed. This minor problem can be fixed by changing your power settings.
Laptop won’t shut down with the Power button: Few users reported this problem while trying to turn off their laptop with the power button. This issue is caused by your power settings and can be quickly resolved.
My laptop won’t shut down, it just restarts: Several users reported that their laptop wouldn’t shut down, instead of shutting down, their laptop restarts.
Laptop not shutting down black screen: Some users reported a black screen while trying to shut down their laptops. This can be a big problem, but you can fix it using our solutions.
Laptop won’t sleep, turn off: Sometimes your laptop won’t sleep or turn off. This issue can cause many problems, but you should be able to fix it by changing your power settings.
My laptop won’t turn off but the power light is on: If the laptop does not turn off though the power light indicates being pressed, it’s likely misconfigured power settings or corrupt system files to blame.
How do I fix a laptop that won’t shut down?
Before we start fixing, there are a couple of quick checks and solutions that you can perform:
Disconnect USB peripherals – Users reported issues using USB peripherals, such as USB audio cards. If you have those, disconnect them and check if the problem is gone.
Clean your laptop from dust – Dust can sometimes cause issues with shutdown, so use pressurized air to properly clean your laptop.
Remove your laptop battery – A quick way to fix this issue can be to remove your laptop battery. After doing so, wait a minute or two and connect it again.
1. Disable Hybrid Shutdown manually
Press the Windows key + S, type Control, and click on Control Panel.
Choose the System and Security option.
Select Power Options.
Click the Choose what the power buttons do option in the left pane.
Click on Change settings that are currently unavailable.
Uncheck the Turn on fast startup (recommended) checkbox to disable Hybrid Shutdown.
Click the Save changes button to save the modified settings.
Close the Power Options window when done.
2. Perform a Full Shutdown
Right-click on your Desktop.
Go to New and select Shortcut.
Copy the text below in the Type the location of the item space: shutdown -F -T ## -C "Your message here"
Note that ## can be any number from 0 and 315360000, and “Your message here” could be any text you want.
Click Next.
Name the shortcut as you want and click on Finish.
Pin the shortcut to your start menu, and you’re ready.
After doing that, click the newly created shortcut to perform a complete shutdown. Remember that this is just a workaround, but it might help you with the laptop not shutting down issue.
3. Run Windows Update troubleshooter
Press the Windows key + I to open the Settings app.
Choose the Update & Security option.
Click the Troubleshoot option in the left pane.
Select Additional troubleshooters.
Click on the Windows Update option.
Finally, click the Run the troubleshooter button.
According to users, problems after a Windows Update can sometimes prevent your laptop from shutting down.
After the scan is finished, check if the problem is resolved. Several users reported that running the Power Troubleshooter fixed the issue, so be sure to try that as well.
While booting, press Del or another dedicated key to access BIOS.
Navigate to the Exit section and select Load Optimized Defaults.
Confirm that you want to reset your BIOS.
Save changes.
NOTE
Depending on your BIOS, the process might differ, so check your motherboard manual for correct instructions.
5. Change advanced power options
Press the Windows key + S and type power plan. Select Edit power plan.
Click on Change advanced power settings.
Expand Processor power management. Now go to System cooling policy.
Set Battery to On and save changes.
6. Reset your power plan to default
Press the Windows key + S and type power plan.
Choose Edit power plan.
Click the Change plan settings under your Preferred power plan.
Now, click on Change advanced power settings.
Click the Restore plan defaults button.
Finally, click Apply and OK to save changes.
After resetting your power plan to default, the Windows 10 laptop not shutting down issue should be resolved.
7. Uninstall Intel Management Engine Interface
Press the Windows key + X and choose Device Manager from the list.
Double-click the System devices option.
Right-click on Intel(R) Management Engine Interface.
Choose Uninstall device from the menu.
Now, click on the Uninstall button to confirm the action.
According to users, if your HP, Dell, or Lenovo Windows 10 laptop is not shutting down fully, you might have to uninstall the Intel Management Engine Interface.
A lot of audio recording problems could occur in Windows 10, and they are very annoying. Many reported that the headset microphone level was stuck at 0.
Speaking of microphone issues, users reported the following problems:
Microphone level keeps going to 0 Windows 10 – According to users, their microphone level keeps going to 0. This is an annoying problem that might be caused by malware.
Microphone level resets to zero – This is a similar problem that can appear on your PC. To fix it, be sure to check your microphone settings.
Microphone level keeps muting – This is another variation of this problem, but you should be able to fix it by using one of our solutions.
Microphone volume won’t stay up – Several users reported that their microphone volume won’t stay up. This can be an annoying problem, but you can fix it by checking your microphone settings.
Microphone volume reduces automatically – This problem can occur due to your audio control software. To fix the issue, find and remove the audio control software from your PC.
Why is my headphone/mic volume so low?
There are several causes for this problem, with the following ones being the most common:
Audio glitches – Sometimes issues and bugs can occur, and they are usually fixed by using an audio troubleshooter.
Other apps – Other apps can take over your microphone and cause the volume level to change.
Drivers – Audio drivers can have issues, and those issues can prevent you from changing the microphone level.
What can I do if my headset microphone level is stuck at 0?
Here’s what you should do first:
If your headset microphone level is stuck at 0, the problem might be malware on your PC. Sometimes certain malware can interfere with your microphone and reduce the volume levels on your PC. There are many great antivirus applications, but if your antivirus can’t fix this problem, you might consider switching to the best antivirus solution on the market.
The problem might be your port. Many users reported similar problems with their USB microphone, and according to them, the issue was their port. To fix the problem, you need to disconnect your microphone and connect it to a different port. If you’re having issues with USB 3.0 port, visit our USB 3.0 port not recognized guide.
1. Run the Audio troubleshooter
Go to Search, type troubleshoot, and open Troubleshoot settings.
In Troubleshooting window, go to Aditional troubleshooters.
Click on the Recording Audio and then on the Run the troubleshooter button. After running the troubleshooter see if the problem has been resolved. If not, run the Speech troubleshooter from the same window.
You will ask about what device you want to troubleshoot so make sure you select the correct microphone.
2. Perform a System Restore
Press Windows key + S and enter system restore. Choose Create a restore point from the menu.
System Properties window will now appear. Click the System Restore button to proceed.
System Restore window will now appear. Click Next to continue.
If available, check Show more restore points option. Now select the desired restore point and click Next.
Follow the instructions on the screen to complete the restoration process.
All these solutions are great, and they are working for so many users, but some of them may seem complicated for many, and they are time-consuming.
But you can get rid of this issue easily and without technical skills by using a dedicated third-party tool.
3. Forbid apps to control the microphone
Go to Search, type control panel, and open Control Panel from the results.
When Control Panel opens, select Sound.
Go to Recording tab and double-click your microphone.
Under Advanced tab uncheck Allow applications to take exclusive control of this device. Click Apply and OK to save the changes.
Sometimes third-party apps could make your microphone go berserk, so to prevent it, you’ll have to prevent them from controlling the microphone, which is enabled by default.
Now that you know how to lock the microphone volume, be sure to do that on your PC.
Press Windows key + X to open Win + X menu. Now select Device Manager from the list.
When Device Manager opens, locate the problematic device, right-click it and choose Uninstall device.
When the confirmation menu appears, click Uninstall.
Once the driver is removed, click on Scan for hardware changes icon.
Windows will now install the default driver, and the issue should be resolved. If the problem persists with the default driver, you should try updating your driver and check if that helps.
To keep your system working properly, you need to have all drivers updated. We recommend a third-party tool to automatically update your drivers.
A professional driver updater tool will safely update and fix all your drivers in a fraction of the time needed for you to do it manually.
5. Set your microphone as the default recording device
Right click the volume control icon in the bottom right corner and choose Open Sound settings from the menu.
Now click on Manage sound devices.
Look at the Input devices category and find any other devices besides your microphone, click on them and select the Disable button under them.
Many webcams come with a built-in microphone, but sometimes the microphone on your webcam can be the problem.
If you have both your webcam and external microphone connected, you might encounter this issue.
6. Uninstall audio control software
Press Windows key + X and choose Apps and features.
Now select your audio control software and click on Uninstall.
Follow the instructions on the screen to complete the process.
Many applications tend to leave leftover files and registry entries on the PC even after you remove them. These files can cause the same problem to reappear, so it’s always a good idea to use an uninstaller application.
For this, we recommend CCleaner because it has a capable uninstaller feature as well as other very useful PC cleaning and optimization tools.
You can find the Uninstaller in the Tools submenu. It will display a full list of all apps on your PC. Select which ones you want to be removed and wait for the process to complete. CCleaner will leave no trace of your uninstalled apps.
Now press and hold the Shift key and choose Restart from the menu.
Choose Troubleshoot, select Advanced options and click on Startup Settings.
Now click the Restart button.
Once your PC restarts, you’ll be presented with options. Choose any version of Safe Mode by pressing the corresponding key on the key.
Safe Mode is a special segment of Windows that runs with default drivers and software. If you’re having an issue with your microphone volume, try using the microphone in Safe Mode and check if the issue reappears.
Once the Safe Mode starts, check if the problem appears. If not, it might be that your user profile is corrupted. If that’s the case, you must create a new user profile and check if the problem still appears.
Our solutions above should help if your mic volume keeps changing, and things should return to normal.
If you have other problems with the sound volume, we have a great article that will help you fix the problem of the volume being too low in Windows 10.
If you have any comments or suggestions, write them down in the comments section below, and we’ll surely check them out.
GZ files are compressed archives commonly used on Unix-based systems. You can easily extract them on Windows using tools like WinZip, Command Prompt, or PowerShell (with 7-Zip). This guide walks you through all three methods with clear steps and no guesswork.
How to Extract GZ Files on Windows (3 Easy Methods)
If you want a fast, beginner-friendly solution, WinZip is one of the best file archivers that can handle .gz files with ease. It supports RAR, TAR, ZIP, and more, with built-in encryption and cloud sharing.
PowerShell doesn’t natively extract .gz files, but you can use it together with 7-Zip for a simple and efficient solution. Make sure 7-Zip is installed first.
Press Start, type powershell, and open it with Admin rights
Paste the following code into PowerShell:
# Path to 7-Zip executable
$zipExePath = "C:\Program Files\7-Zip\7z.exe"

# Path to your .gz file
$gzFilePath = "C:\Path\To\Your\File.gz"

# Destination folder
$destinationFolder = "C:\Path\To\Extract"

# Build and execute the extraction command
$command = "$zipExePath x $gzFilePath -o$destinationFolder"
Invoke-Expression -Command $command
NOTE
PowerShell itself can’t extract GZ files directly. You’ll need 7-Zip installed to run this method.
Whether you use a visual tool like WinZip, the built-in Command Prompt, or a script-based approach with PowerShell, extracting .gz files in Windows is easier than it seems.
Just like Windows 8, Windows 10 was intended to improve hardware performance and speed up your computer, and most users are satisfied with their performance on Windows 10.
Sadly, not all users have a similar experience, and some of them are claiming that Windows 10 takes forever to boot.
A slow booting of Windows 10 can be a big problem, and in this article, we’re going to cover the following issues:
Slow boot SSD, hard drive
According to users, both SSD and hard drive owners have experienced slow boot issues. However, you should be able to fix this problem by using one of our solutions. Don’t be shy to check out our full guide dedicated to fixing slow booting times on SSD.
Windows 10 slow boot black screen
Users reported that they are stuck on a black screen during the boot. This is an annoying problem and it’s usually caused by your graphics card drivers.
Windows 10 slow boot after update
Many users reported this problem after a Windows update. This is a big problem, and it’s most likely caused by an incompatible driver or software.
Slow boot Windows 10 AMD, Nvidia
Your graphics card can be the cause for slow boot, and both AMD and Nvidia owners reported this issue. To fix the problem, you just have to reinstall or update your drivers.
Slow boot even in Safe Mode
If you’re having issues with slow boot in Safe Mode, the problem might be your hardware or BIOS configuration.
Slow startup time Windows 10
This is a variation of this problem, and if you have problems with slow startup time, you might be able to fix it using one of our solutions.
Long boot times on Windows operating systems are usually caused by third-party apps that you install, and since most of them start automatically with Windows 10, they tend to make your booting routine slow.
If you’re facing the Windows 10 slow boot spinning circle here are our solutions to fix it.
How can I fix a slow boot time in Windows 10?
1. Use the Windows 10 Startup Manager
Open Task Manager by right-clicking the Taskbar and selecting Task Manager from the menu.
In addition, you can use Ctrl + Shift + Escape to open the Task Manager directly or Ctrl + Alt + Delete and select Task Manager from the list.
Click the More details button and then go to the Startup tab.
In the Startup tab, you’ll see the startup impact of each program that starts with Windows 10.
The key is to choose the right apps to disable, for example, you want to keep your Antivirus running, but you might want to disable Skype or driver update software from starting with your Windows 10.
Of course, you can manually start these services at any time if you need them.
If you’re interested in additional info on how to add or remove startup apps on Windows 10, check out this simple guide.
2. Update your BIOS
Several users reported that they fixed the slow boot problems in Windows 10 by updating their BIOS. BIOS update is an advanced and potentially dangerous procedure, so use it at your own risk.
After updating your BIOS, check if the issue is resolved. If you already have the latest version of BIOS, you might want to reflash it and install the same version again.
Few users reported that installing the same version of BIOS fixed the problem for them, so you might want to try that.
Press Windows Key + X to open Win + X menu and choose Device Manager from the list.
When Device Manager opens, locate your graphics card driver, right-click it and choose Uninstall device.
Check Delete this driver software for this device and click on Uninstall.
If you’re having a Windows 10 slow boot black screen, the issue might be related to your drivers. According to users, they fixed this problem simply by updating their Nvidia drivers.
Updating your graphics card drivers is relatively simple, but if you don’t know how to do it, we wrote a short guide on how to update your graphics card drivers.
In some cases, you might have to uninstall your drivers and reinstall them again. You can easily do that right from Device Manager by following the aforementioned steps.
After the driver is uninstalled, simply download the latest driver and check if the issue is resolved. If you want to completely remove your driver along with all of its associated files, be sure to check our guide on how to use Display Driver Uninstaller.
Update your drivers automatically
Updating your drivers manually isn’t that easy, especially for those who have no background knowledge. Having to find out your hardware’s model number and searching for the latest driver can be tedious.
Thankfully, there are specialized driver updating programs that will make your life easier by automatically scanning your hardware for new driver versions, and updating them accordingly.
4. Run the Windows Update Troubleshooter
Press the Windows Key + S and search for Settings.
In the Settings menu, choose Update & Security.
Then, select Troubleshoot, and Additional troubleshooters.
Inside the new window, under Get up and running, select Windows Update.
Next, click on Run the troubleshooter.
Many users reported slow boot problems in Windows 10, and according to users, this issue is caused by a corrupted Windows Update file. To fix this problem, you just need to use the Windows troubleshooter.
Once you start the tool, it should automatically fix any issues and corrupted files. After the troubleshooter is finished, check if the problem is resolved.
If your Windows Troubleshooter stops before completing the process, you can easily fix it with our great guide.
5. Consider getting an SSD and tweak the BIOS settings
Solid State Drives are great for your PC in terms of speed, and if you can afford one, maybe you should consider getting one in the future.
If you can’t afford it, you might want to tweak some BIOS settings to improve your booting routine. For example, you can disable BIOS checking your DVD drive or network locations each time you boot and reduce boot time.
Few users reported that this problem occurs due to the USB Storage Function in BIOS. This feature is used to boot your PC from a flash drive, and if you don’t want to do that, you can just disable it.
To see how to find and disable this feature in BIOS, we advise you to check your motherboard manual.
If you’re in the market for a fast SSD, don’t waste another minute and check this article to get the biggest ones available right now.
6. Install the latest updates
Press Windows Key + I to open the Settings app.
When Settings app opens, go to Update & security section.
Go to the Windows Update section, and click on Check for updates.
Sometimes you can fix the slow boot problems simply by installing the latest updates. Windows 10 usually downloads the necessary updates in the background.
If any updates are available, they will be downloaded automatically and installed once you restart your PC. However, if your PC is already up to date, you might want to try a different solution.
Is the Windows Settings app giving you trouble? Follow the steps from this detailed article to solve the issue. Additionally, here’s another detailed guide dedicated to solving Windows problems.
7. Delete all files from WDI directory
Open File Explorer and navigate to the following directory: C:/Windows/System32/
Now go to the WDI directory.
If you get a security prompt, click on Continue to proceed.
Select all files from the WDI directory, right-click them and choose Delete.
If you’re having slow boot issues, you might be able to fix the problem by deleting the contents of the WDI directory as instructed in the steps above.
After removing the contents of the WDI directory, the Windows 10 slow startup issue will be fixed.
Here’s a comprehensive guide dedicated to fixing File Explorer issues that will make sure it won’t give you any problems in the future.
8. Install the Intel Rapid Store Technology driver
To fix the problems with the slow boot, you just need to install the Intel Rapid Store Technology driver on your PC. Many users reported that this driver isn’t the latest, and that’s causing the issue to appear.
If you’re unable to install drivers on your Windows 10 PC, you’ll find all the causes and solutions for your issues in this great guide.
9. Enable/disable Fast Startup
Press Windows Key + S and enter Control Panel.
Select Control Panel from the list.
When Control Panel opens, select Power Options from the menu.
The Power Options window will now appear.
Click on Choose what the power button does from the menu on the left.
Click on Change settings that are currently unavailable.
If Turn on fast startup is checked, disable it.
If this feature is not enabled, check it.
Now click on the Save changes button.
Sometimes the fast startup feature can cause this problem, but you can disable/enable it by following our method above. After disabling or enabling fast startup, the issue should be resolved.
Why does Windows 10 boot so slowly after reinstalling and how can I fix it?
Open the Control Panel and go to System.
Use the built-in search option to locate Advanced system settings and click on the link.
Once the System Properties window opens, go to the Advanced tab.
Select Settings, right under the first section called Performance.
Finally, check the box corresponding to Adjust for best performance and hit Apply.
If Windows 10 takes 20 minutes to boot, after reinstalling this solution will definitely help you.
How do I make Windows 10 boot faster?
Note that this simple operation, together with disabling other resource-intense services will free up more CPU and help your computer boot faster. You can even throw in a good repair and optimizer tool to speed up startup and booting.
We do have to stress that if Windows 10 slow boot issues continue after the clean install, you might have to repeat the installation.
Make sure you previously purged other versions and reformat or create a new partition on your disk.
Finally, if your computer takes a long time to boot after a clean install, the issue could be related to faulty or failing hardware equipment. Don’t forget to test your hard drives with proper diagnostics tools to make sure they are sained.
If you have any comments or suggestions, tell us in the comment section below. Also, if you have any other Windows 10-related issues you can check for the solution in our dedicated Windows 10 section.
This guide will give you many solutions to help you fix the Virtual Disk Service Error: The Disk Is Not Empty on your PC. We will also give you some reasoning behind this error. So, let us get right into it.
Why am I getting Virtual Disk Service Error: The Disk Is Not Empty error?
The Virtual Disk Service Error: The Disk Is Not Empty error happens when your dynamic disk contains some data or volumes. This error triggers if it contains some data or volumes and you are trying to convert the dynamic disk to a basic disk.
So, before proceeding, you need to delete all the information, data, or volume in the dynamic disk. But deleting the partitions can’t be reverted. So, you have to create a backup and delete all the disk’s partitions.
How to fix Virtual Disk Service Error: The Disk Is Not Empty error?
For our case, we need to choose the Convert a dynamic disk back to a basic disk option.
Click Next.
On the next page, you will see all the dynamic disks listed.
Choose the dynamic disk you wish to convert and click Next.
Click Yes in the prompt that appears.
Hit the checkbox that reads I have decided to execute this operation and click Proceed button to start the conversion process.
With AOMEI Partition Assistant you can safely format drives into different file systems. You can also use this tool to create bootable media or for data recovery.
Type the below commands and press Enter after each one. diskpartlist diskselect disk n (n refers to the dynamic disk number) list volumeselect volume m (m is the number of volume in the dynamic disk) delete volumeselect disk nconvert basicexit
Restart your PC and see if this fixes the Virtual Disk Service Error: The Disk Is Not Empty error or not.
That is it from us in this guide that will help you fix the Virtual Disk Service Error: The Disk Is Not Empty error.
If you are one of those users who are facing the There are no fixed disks to show DiskPart error; then we would recommend you follow our guide and apply the solutions mentioned to resolve the problem.
If you are confused and want to know the differences between the FAT32 and NTFS file systems, then you should read our dedicated and comprehensive guide on it.
Some users have reported getting the Virtual Disk Service error: The volume size is too big error. This appears when they try to format external or internal hard drives on their PCs using the Diskpart utility. Moreover, for some users, the process goes on for several hours with no result.
If you are also experiencing the same Virtual Disk Service error issue: The volume size is too big and is looking to solve the problem, then we suggest you continue reading. Because in this guide, we will show you how you can fix this issue via multiple solutions. Let us get right into it.
Why am I getting Virtual Disk Service error: The volume size is too big error?
We did some digging and found a common reason that would trigger the Virtual Disk Service error: The volume size is too big error on your PC.
You are trying to format a large partition to FAT32: If you are doing this, then you should know that Windows (using the Diskpart utility) does not allow formatting or creating a FAT32 volume greater than 32GB.
While there are better NTFS and exFAT file systems, many USB flash drives with a capacity higher than 32GB can only support FAT32. In such a case, when you try to format it to FAT32, you will come across this error.
How can I fix the Virtual Disk Service error: The volume size is too big error?
1. Format with NTFS file system
Press the Win + R keys to open the Run dialogue.
Type diskpart and press Enter.
To get the list of all disks, type the below command and press Enter. list disk
Usually, Disk 0 is the HDD where the OS is installed.
Execute the below command. select disk X (X is just a placeholder, and you need to enter the drive letter you wish to format)
Type the below command and press Enter. clean
Once the process completes, execute the below command. list disk
If there is the asterisk * sign next to your disk, then it means that the disk is selected.
To create a fresh partition, run the below command. create partition primary
Type the below command to select the fresh partition that you have created. select partition 1
To set the cRun, the below command toated partition as active, execute the below command. active
To create a partition using the NTFS file system and assign the label. format FS=NTFS label=WindowsReport quick
Assign a letter to the drive, by running the below command. assign letter=A
Exit the Diskpart utility.
Restart your PC and check if this gets rid of the Virtual Disk Service error: The volume size is too big error or not.
Locate the disk you wish to format or are getting the Virtual Disk Service error: The volume size is too big error.
Right-click on the drive and select Format Partition.
From the drop-down, select FAT32.
Click OK.
Select Apply and Proceed.
If the Diskpart utility fails to format your drive and you are still getting the Virtual Disk Service error: The volume size is too big error, then we recommend you use a dedicated tool called AOMEI.
AOMEI Partition Assistant helps you to format your drives into different file systems safely. It can also be used to create bootable media or data recovery.
Type Windows PowerShell and open it as an administrator.
Type the below command and press Enter. Format /FS:FAT32 o: (You have to replace the letter o with the letter of the drive in problem)
Once the process completes, exit PowerShell.
You can use Windows PowerShell to format a drive large than 32GB size to FAT32. This would easily do the job and also help you get rid of the Virtual Disk Service error: The volume size is too big error.
That is it from us in this guide. Some users have reported facing There are no fixed disks to show DiskPart error. You can quickly fix it by following the solutions mentioned in our guide.
Feel free to let us know in the comments below which one of the above solutions helped you resolve the Virtual Disk Service error: The volume size is too big error.
Are you also looking for a guide to help you overclock the CPU without BIOS? If so, then you are in the right place. Here we will give you some of the safest ways to overclock the CPU without BIOS.
Overclocking your CPU helps you achieve those extra and consistent FPS when playing games or editing.
However, when you overclock the CPU, it always tends to increase the temperature of the CPU, causing it to overheat. Also, overclocking would fasten your CPU’s process of wear and tear. With these things in mind, let us check out the different ways to overclock the CPU without BIOS safely.
What does overclocking the CPU actually do?
Before we check out the various steps to overclock the CPU without BIOS, the first thing to understand is what overclocking the CPU does.
Notably, when you overclock the CPU, it runs your processor at a higher speed than initially intended. This will help you to perform resource-intensive tasks faster and more smoothly without any issues. You will feel the difference in performance when playing games or editing videos or photos.
The CPU speed is determined by two factors: clock speed and the CPU core ratio. Overclocking changes the CPU’s clock speed, i.e., increases it by increasing the number of cycles your CPU executes per second.
Overclocking is safe, and the high CPU temperature cases are pretty standard but don’t do much damage. It is almost impossible to fry your CPU because of overclocking. However, it does damage the overall CPU in the long run.
XTU: This piece of software is for Intel processors that are unlocked.
Ryzen Master: It is used for AMD processors.
Launch the EXE.
Accept the license terms and conditions.
Hit Install.
Wait for the program to install; in our case, it is the Intel Extreme Tuning Utility (XTU).
Restart your PC.
Close all the background apps before launching the program.
Click on the Basic Tuning tab.
Select the Run Benchmark. This will test the performance of your system and provide a score. Note down this score.
Click on the Advance Tuning tab.
Locate the Turbo Power Boost Max, and slide it all the way to the right.
In the Turbo Boost Short Power Max option, enable it.
Slide the Processor Current Limit option all the way up.
To overclock the system, slide the Processor Core Ratio and Processor Cache Ratio to the maximum.
Click Apply.
Navigate under Witness Performance Improvement and Run Benchmark. Here you will get a new score after a while. Compare it to the benchmark score you got in step 8, and check if there was any increase.
Method 2
Alternatively, go to the Multipliers setting and increase the multiplier by 1x for each score.
Run the benchmark and wait if the system crashes.
If the system does not crash, go to the Profiles tab and save this new profile.
Increase the core by 1x and see if the system crashes.
Keep increasing the core until the system crashes.
If the system crashes, then you can reboot your PC and it will revert back to the profile you saved, which did not crash your system.
The ones that we care about our Profile 1 and Profile 2. It would be best if you avoided the Game Mode as it prevents your CPU from using 8 cores it has more than 8 cores.
Choose either Profile 1 or Profile 2.
Under the Control mode, you will find different overclocking modes:
Eco mode: Lowers the power limit.
Precision Boost Overdrive (PBO): Increase the CPU power limit if it thinks it is safe.
Auto Overclocking: More aggressive than PBO.
Manual: Lets you select clock speeds.
You can choose either the Eco Mode or the PBO mode, which is the best for most users.
Overclocking will often result in game crashes. To fix the problem, we have mentioned some of the best and most effective solutions to help you resolve the issue.
As shown in the above guide on overclocking your Intel CPU with XTU software, there is NVIDIA Inspector for NVIDIA GPU. So we have demonstrated adequately how to overclock the NVIDIA GPU using the NVIDIA Inspector.
Microsoft released a new Dev Channel build to Windows 11 Insiders yesterday, but waited until today to drop the news that there are some new features and new looks added to the latest version of the Microsoft Store.
For Windows 11 Insiders in the Dev Channel, you’ll first have to make sure you’re using the latest version of the Store, 22301.1401.1.0 or higher.
The Store’s home page has been given a “complete overhaul,” with new UI and animations. The home page now supports any type of input, including touch, pen, mouse and trackpad. Note that these features are rolling out in phases to “a limited portion” of Insiders.
Along with the home page, the search results page has been updated too, along with improved product card for apps, and a new Fluent inspired settings page:
The layout of the search result page has been improved with a simplified design, allowing you to find your desired content more quickly and efficiently. More simplified search result page.
Discover the new and improved product cards for apps, featuring a refreshed design that brings your favorite apps to life. The new look highlights the content in a visually stunning way, and accurately reflects the branding of each app. Refreshed design for product cards for apps.
We’ve updated the Microsoft Store’s settings page with better alignment to our Fluent Design system controls and added a touch of new animations.
If you’re on the Windows 11 Insider Dev Channel and updated to 25300, check out the new Microsoft Store!
You must have stumbled on this article because your Steam can’t go online. A few users have reported this issue, while others can’t log in anymore after too many retries.
We have researched the actual causes and solutions. In some extreme cases, users complained about Steam going into offline mode randomly, which can be highly frustrating for avid users.
How can I fix Steam if it can’t go online?
1. Clear your download cache
Hit the Windows key, type Steam, then open the app.
From the top-left corner of the window, click on Steam.
Navigate to Settings.
Select the Downloads tab.
Click on Clear Download Cache.
Next, click OK to confirm your choice. Steam will ask for your login details afterward.
After logging in again, Steam will start as expected.
Clearing the download cache can also resolve issues with the server like Steam error 102.
2. Change your Internet settings
Use the following hotkey: Windows + S.
Type Control Panel, then open the first result.
Navigate to Network and Internet.
Go to Network and Sharing Center.
From the bottom left corner of the window, click on Internet Options.
Select the Advanced tab and scroll down the Security listings.
Uncheck Enable Enhanced Protected Mode.
Restart your machine and launch Steam.
If you’ve changed location recently, ensure that your Steam access isn’t geo-restricted.
On this note, we recommend using a VPN to protect your online privacy while you surf the Internet or play online games and to access gaming content from anywhere in the world.
PIA (Private Internet Access) is an excellent VPN, with hundreds of servers all around the globe, top-notch privacy (no logs), and superior mobility (access on up to 6 devices with one subscription).
Private Internet Access
Choose to use PIA & you’ll always be able to unblock your favorite Steam gaming content!
Click on the Install Steam green button from the window’s top-right corner.
Open the downloaded file, then follow the on-screen instructions to reinstall the app.
Restart your PC and launch the app with administrative privileges. Steam will start updating itself and try to replace the missing files. Hopefully, it will work as expected.
Why can I not go online on Steam?
A few users have said Steam won’t go online but I have internet. Here are the most common triggers for this Steam error:
Winsock errors – For those of you who don’t know, Windows Socket API (Winsock) is a type of app programming interface (API) dedicated to communication between Windows network software and network services. It may sometimes need a restart.
Internet settings – One of the most common causes that explain why you’re unable to go online on Steam is related to your Internet settings.
Random bugs and glitches – Steam might run into unexpected and temporary troubles like any other app or software. As an example, some users have experienced Steam windows going black. In this case, it is best to uninstall it, and then perform a clean reinstallation.
Old system cache – As browsers have their cookies and caches, the Steam app also keeps temporary downloads and other files in a specific location. However, if you’re a daily Steam user, a cache might become oversized, leading to several problems, such as the one presented today.
You can try reinstalling the app if all other solutions fail and Steam still can’t go online. If you’re unsure about cleaning all the related folders, check how to remove software leftovers on Windows 10/11.
There you go. These are just a few solutions that you can try if Steam won’t go online on your PC or if Steam is stuck in offline mode. And if you have a sign-in issue like the travis rilea error, check out our fix guide.
Feel free to try them all and let us know if they worked for you by leaving a comment in the section below.
There are various ways to move files and folders on Windows 11 PC. Moving files and folders makes the storage look organized and makes it easier to find the files we are looking for.
Moving files is different from copying files or folders because it isn’t creating a copy of your file or folder but moving it from one location to another. This guide will show you how to transfer files in Windows 11. We will show all the different ways to accomplish the task. So, let us get right into it.
How can I move files and folders in Windows 11?
1. Use drag-and-drop
Open two instances of File Explorer by pressing the Win + E keys together.
Open the location of the folder from where you wish to move the files in one instance of File Explorer.
Open the location where you wish to copy the files or folder in another instance of File Explorer.
Simply drag and drop the file from one location to another.
Right-click on the file or folder you wish to move.
Select Cut from the context menu.
Open the location where you wish to move the file or folder.
Right-click on an empty area in the final location, and select Paste from the context menu.
Cut and paste is another way of moving files or folders from one location to another. It may sound similar to copying and pasting.
But the only difference is that you move the folder from its previous location to a new one, whereas when you copy and paste, you create a copy of the file or folder in a new location.
Type the below command and press Enter. move<name of the file or folder with full source path><destination path> (For example, if you wish to move file A.doc to C:\Folder 1, then the above command will look like move A.doc C:\Folder 1)
While this may sound like an unnecessary way of making things peculiar for simply moving a file or folder from one place to another, it may come in handy when the File Explorer process is crashing, or File Explorer is freezing. You want to safeguard your files before resetting your PC.
You can type the above command and get done with your job of moving files or folders. Also, if you wish to transfer multiple files or folders, you can separate the file names using commas.
4. Use the Toolbar
Open the File Explorer.
Navigate to the file or folder you wish to move.
Select it and click on the Scissor icon at the top toolbar.
Open the target location and hit the Paste icon on the top toolbar.
You can also make use of the top toolbar and select various options, one of which is the Cut icon and use the same toolbar at the destination and select the Paste icon.
5. Modify Registry to add Move to option
Press the Win + R keys to open the Run dialogue.
Type regedit and press Enter.
Navigate to the below path. HKEY_CLASSES_ROOT\AllFilesystemObjects\shellex\ContextMenuHandlersv
Right-click on the ContextMenuHandlers key, select New, and then Key.
Rename the newly created key as {C2FBB631-2971-11D1-A18C-00C04FD75D13}.
Close the Registry Editor.
Open the target file or folder.
Right-click on it and select the Move To Folder option.
Select the destination in the new pop-up.
Click Move.
When you create a new key and add the Move To Folder option in the context menu, you no longer need to use mouse clicks or go through multiple instances of Windows to move files or folders. This also negates the need to move files using shortcuts.
6. Use Windows PowerShell
Open the Start menu by pressing the Win key.
Type Windows PowerShell and open it as an administrator.
Type the below command and press Enter. move "FileFolderPath" "PathToDestinationFolder" (To move file A.exe from one folder to another, the above command would look like move “C:\Program Files\A.exe” “D:\”)
7. Use Send to option
Locate the file that you want to move.
Right click on it and Show more options.
Select Send to> and pick a location.
That is it from us in this guide that will teach you the different ways to move files in Windows 11. In addition, we have a guide that will help you to change the default folder view in Windows 11.
If, for some reason, the copy and paste feature isn’t working on your Windows 11 PC, then you should check out our guide that will help you quickly resolve the problem.
Some users have reported that the Windows key isn’t working on their keyboards. If that is the case with you as well, then you should refer to our guide, which will help you fix that.
Our guide will discuss the detection error on SSD (m.2). If you have encountered this, spread through as we explore the best fixes.
Modern laptops either come installed with the latest generation M2 SDD or has an empty slot for the user to upgrade. However, you may sometimes encounter SSD m2 errors while turning your computer on.
This standard error can occur for several reasons, and many users have reported similar SSD detection errors in the Reddit Community.
Yesterday for the first time I got a SSD m.2 detection error after powering on the laptop. I have the same error as this screen shotposted on the Lenovo forums. I have shutdown the laptop, waited a couple of minutes and powered on again. My Linux distribution then booted fine but I started to have my journal filled with messages like: And the system was unusable. I powered off (hard shutdown) again and on again and everything is fine now. I do not seem to have loss any data but I can tell you that I was very afraid.
What causes Detection error on SSD (M.2)?
There can be various reasons why an SSD (M.2) may experience detection errors. However, users have attributed it to the following:
Physical damage – Physical damage to the SSD or the M.2 slot can cause detection errors. It is essential to ensure that the M.2 slot and the SSD are not physically damaged.
Loose connection – A loose connection between the M.2 slot and the SSD can cause detection errors.
Outdated firmware or drivers – Outdated firmware or drivers can also cause detection errors. It is recommended to keep the SSD firmware and drivers up-to-date to avoid such errors.
Incompatible hardware – Incompatible hardware can also cause detection errors.
BIOS settings – The BIOS settings can also cause detection errors. Check the BIOS settings to ensure that the M.2 slot is enabled and configured correctly.
Power issues – Power issues, such as an insufficient power supply, can also cause detection errors.
Other software issues – Other software issues such as malware, viruses, or other software conflicts can also cause detection errors.
You should note that the solutions we recommend below will come in handy regardless of the cause of the error.
How can I fix the Detection error on M.2 SSD?
Before going into any solutions, ensure that the power supply to your device is stable and adequate.
Also, ensure that the SSD is compatible with the system’s hardware and specifications. Again, you may find out more about this by reading the manual.
1. Reseat the SSD
First, check your SSD for a loose connection or the drive slipped from the slot.
Shut down your system.
Open the back cover of your laptop.
Unscrew the SSD.
Carefully unplug the SSD from the M2 slot.
Clean it with a cloth and then reseat the drive. Make sure you screw the SSD down. If the screw is loose, the SSD may cause blue screen errors.
Close the back cover and reboot the computer. Check for any improvements.
This solution will only work if a poorly inserted SSD triggers your error.
2. Update BIOS
2.1 Check the BIOS version.
Press Windows + R, type control, and hit Enter.
Search for Windows Tools, and click the option.
Select the System Information option.
Take note of BIOS-related info like the BIOS version.
2.2 Download the BIOS
Head to the manufacturer’s site. In this example, we head to the HP site.
Identify your product type.
Here you should enter your serial number or use the option for Let HP detect your device.
Once you have detected your system, expand the BIOS option and click Download.
Close all open applications, double-click on the downloaded file to start the installation, and follow the prompts.
On completion, restart the computer.
Note that this process will slightly differ for other manufacturers.
If the error occurs on a Lenovo laptop, you can download the latest version of BIOS from the website here. Alternatively, you can also use the Lenovo Vantage software pre-installed on your computer to download the BIOS update.
3. Update your driver
Head to the manufacturer’s site. In this example, we head to the HP site.
Identify your product type.
Here you should enter your serial number or use the option for Let HP detect your device.
Expand the driver, and click Download whenever there is an update.
You should ensure you have the latest drivers for your motherboard and the M.2 SSD. You can usually find them on the manufacturer’s website.
The laptop hardware or the SSD may be defective if the issue persists. In any case, contact your laptop’s manufacturer to claim the warranty. They will probably replace the computer or the SSD drive to fix the problem. If you have installed the SSD yourself, try to claim the warranty for your SSD.
That will be all for this guide. Any of these four solutions should help you resolve the issue. In most cases, the fix will entail simple steps you can perform independently.
In the comments below, let us know what has proved the most effective for you.
You may have encountered operating system errors if you’re a Windows user. One such error is the 0x80070422 Windows Firewall error.
This error can occur when trying to turn on the Windows Firewall or running certain apps that require the firewall to be active, but fortunately, there are ways to fix it.
In this article, we’ll explore the causes of the 0x80070422 Windows Firewall error and provide some solutions to help you get your firewall up and running again.
What is the 0x80070422 firewall error?
The 0x80070422 firewall error is an error code in Windows when attempting to enable or disable the Windows Firewall. This error code can also appear when trying to run certain apps that require the firewall to be active.
It usually indicates that the Windows Firewall service is not running or is disabled, so the firewall cannot be enabled. However, there are several reasons why you might encounter the error on your Windows system.
Disabled Firewall Service – If the Windows Firewall service is not running, you may encounter the 0x80070422 error when you attempt to enable or disable the firewall.
Third-Party Firewall – If you have installed a third-party firewall, it may interfere with the Windows Firewall and cause the error.
Malware or Virus Infection – Malware or virus infections can cause damage to system files and services, including the Windows Firewall service. This can lead to the 0x80070422 error.
Windows Update Issues – In some cases, a failed, or incomplete Windows update can cause issues with the Windows Firewall service, leading to the error.
Corrupted System Files – Corrupted system files can also lead to the 0x80070422 error. This occurs for various reasons, such as a power outage or a sudden system shutdown.
What are other Windows Defender firewall errors?
Specific errors can sometimes appear with Windows Firewall, and speaking of errors, these are some of the common errors that users reported:
Error code 0x80070422 Windows 10 – This error can appear on your Windows 10 PC and prevent the firewall from working correctly. However, you should be able to fix it using one of our solutions.
Windows Firewall can’t change some of your settings error code 0x80070424 – Sometimes, this error can appear while trying to change certain settings in your firewall. This might be caused by malware, so perform a detailed malware scan.
Windows Firewall won’t turn on, start – This is another problem you might encounter. To fix it, make sure that the required services are running correctly.
Windows Firewall turns itself off – Several users reported that their Windows Firewall turns itself off. This strange problem can occur due to a corrupted Windows installation.
Windows Firewall can’t change settings – If you can’t change the settings of Windows Firewall, the issue might be file corruption or any other problem. However, you can fix that problem by performing System Restore.
Windows Firewall not working – In some cases, Windows Firewall won’t work at all. This can be a significant security risk; try some of our solutions to fix that problem.
How do I fix the 0x80070422 firewall error?
1. Scan your PC for malware
Type Windows Security in the Search bar, and click on the relevant search result.
Now, click on Virus & threat protection here.
Click on Scan options.
Now, select Full scan and click on the Scan now button at the bottom.
If you’re constantly getting error 0x80070422 while trying to access Windows Firewall, the problem might be a malware infection. Certain malware can prevent you from opening Windows Firewall, but you can fix that by performing a detailed system scan.
After scanning your PC with one of these tools, the problem should be resolved, and you’ll be able to access Windows Firewall without any problems. Several users suggested using Microsoft’s Malware scanner, so you might want to try that too.
2. Make sure that the Windows Firewall service is running
Press Windows Key + R and enter services.msc. Now press Enter or click OK.
When the Services window opens, locate and double-click on Windows Defender Firewall.
Ensure that the Startup type is set to Automatic and that the service is running. Now click on Apply and OK to save changes.
After enabling this service, you should be able to start and configure Windows Defender without any problems.
In addition to Windows Defender Firewall service, it’s also recommended to configure Windows Update and Background Intelligent Transfer Services. You will repeat the steps above for these two services.
If you’re getting error 0x80070422 while trying to use Windows Firewall, the problem might be your services. Windows Firewall requires certain services to be enabled to work correctly.
3. Use the Startup repair feature
Open the Start menu, click the Power button, hold the Shift key, and select Restart from the menu.
Select Troubleshoot, then Advanced options.
Now select the Startup Repair option.
The repair process will now start.
This process can take a while, so don’t interrupt it. Once the repair process is finished, check if the problem persists.
Sometimes this problem can be related to a corrupted Windows 10 installation, and to fix this problem, you need to run Startup Repair.
4. Perform a System Restore
Press Windows Key + S and enter system restore. Now select Create a restore point from the menu.
The system Properties window will now open. Click the System Restore button to proceed.
When the System Restore window opens, click Next.
If available, check the Show more restore points option. Now select the desired restore point and click Next.
Follow the instructions on the screen to complete the restoration process.
Once your system is restored, check if the problem persists.
If you’re getting error 0x80070422 when trying to use Windows Firewall, you might be able to solve the problem by using System Restore. If you’re unfamiliar, System Restore is a useful feature that can quickly restore your PC to an earlier state and fix various problems.
To ensure a smooth process, you can try specialized applications that help you repair all Windows system issues.
5. Disable your Proxy
Open the Settings app by pressing Windows Key + I.
When the Settings app opens, go to Network & Internet section.
Select Proxy from the menu on the left and disable all options in the right pane.
After doing that, the problem with Windows Firewall should be resolved entirely.
Many users use proxies to protect their privacy online. However, proxies can sometimes interfere with your network configuration so you might encounter error 0x80070422.
After creating a new user account, switch to it and check if the problem persists. If not, you might want to move your files to the new account and start using it as your main one.
If you’re getting error 0x80070422 while trying to run Windows Firewall, the problem might be a corrupted user profile. Your profile can become corrupted for various reasons.
And you are done. If you have reached the end of this article, then it means that you have successfully fixed the error 0x80070422 in Windows.
But if the methods above did not solve your issue, please write us in the comments section of the page situated a little bit below, and we will help you further as soon as we can.
This Event ID 10010 error throws the following message: The server {1F87137D-0E7C-44D5-8C73-4EFFB68962F2} did not register with DCOM within the required timeout.
DCOM errors are present in every computer. For example, the description of Event ID 10010 reads that the server did not register with DCOM within the required time-out period.
DCOM is a Microsoft proprietary that allows Component Object Model (COM) allows the software to communicate across a network. However, the inherent problems associated with the COM model could cause a few issues.
Some components require registering themselves with DCOM; when they fail, you will encounter Event ID 10010 and other errors.
How can I fix the Event ID 10010 error on my Windows PC?
1. Tweak Component Services
Press the Win + R keys to open the Run dialogue.
Type dcomcnfg and press Enter.
Double-click on Computers.
Right-click on My computers and select Properties.
Switch to the COM Security tab.
Under Access Permissions, click on the Edit Default button.
Select the Group or user name and set the correct permissions.
Click OK.
Restart your PC and check if this resolves the issue or not.
2. Enable Function Discovery Resource Publication service
Open the Start menu by pressing the Win key.
Type services and open it.
Locate Function Discovery Resource Publication service.
Right-click on My computers and select Properties.
Switch to the Default Properties tab.
Check the box for Enable Distributed COM on this computer option.
Under the Default Authentication Level drop-down, select Connect.
For the Default Impersonation Level drop-down, select Identify.
Finally, click on Apply and OK.
4. Use SFC Scan
Open the Start menu by pressing the Win key.
Open the command prompt as an admin.
Type the below command and press Enter. sfc /scannow
Once the scan completes, restart your PC.
Windows OS has an in-built SFC Scan tool to help you scan and fix corrupt system files on your PC. However, this isn’t sometimes as impactful as a dedicated system fixer.
5. Install the latest Windows update
Press the Win + I keys to open the Settings menu.
Click on Windows Update on the left pane.
Hit the Check for updates button.
If there is a new update available, hit the Download & Install button.
Once the installation is complete, restart your PC and check whether this resolves the Event ID 10010 error.
You should ensure you are using the latest Windows version on your PC. Apart from bringing essential features, the Windows updates bring bug fixes for issues that could be causing the Event ID 10010 error.
6. Reset your PC
Press the Win + I keys to open the Settings menu.
Click on the Recovery tab on the right side.
Select Reset PC.
Choose the Keep my files option to reset your PC without deleting your personal files.
The process of resetting will begin, and your PC will restart once the process is complete.
You should opt for resetting your PC as a last resort if nothing works in your favor. Resetting your PC will bring it back to where everything is usually working.
That is it from us in this guide. We have a guide about the Event ID 161 Volmgr that explains the issue and how you can quickly resolve it.
You can also refer to our guide if you are coming across the Event ID 7023, which is a standard error in Windows 10 and 11 PCs.
Esent Error Event ID 455 is also one of the common errors that you will face on your Windows operating system computer. You can check out our guide that helps you fix the problem.
Permissions in Discord allow users to set specific access and features within their server. However, some users have reported that their set permissions are not synced with the category in Discord. Keep reading to find a solution to this issue.
Users can use permissions for anything from granting administrative privileges to the ability to edit messages. Permissions are determined based on the roles assigned to users on the server and channel. With category permissions, users have synced or not-synced channels.
Permissions will match the category with a synced channel, however, the permissions will differ for a not-synced channel. Follow the steps below to change a channel to a synced channel.
Why are my permissions not syncing with categories in Discord?
Here are a few reasons you are facing the problem in Discord:
Permissions not synced: Even after changing the category settings, these won’t automatically apply to channels unless manually synced. So, you will have to do that.
Issues with the connection: In case you have a slow Internet connection or there is an intermittent drop in connectivity, syncing issues may appear.
Improper installation of Discord: The problem may also arise due to issues with Discord which might be a result of an improper installation.
How do I fix permissions not syncing with a category?
1. Change to synced channel
Open Discord either in-app or in your browser and right-click on the channel you wish to change, then select Edit Channel.
Click on Permissions.
Select Sync Now to change the channel’s permission to match the category.
Click Sync Permissions.
Keep in mind that adjusting permissions for a category will affect all permission of synced channels and will not impact not-synced channels. If you’re Discord permission roles are not working at all, we also offer a guide for that.
2. Update Windows
Click on Start and open Settings (or press Windows + I)
Select Windows Update and allow it to scan for updates.
Perform any available updates.
If your Windows is out of date, then issues can arise in third-party apps like Discord. Try performing any available updates on your PC and check if the issue is fixed.
Click on Start and search for Discord, then select Open file location.
Right-click on the Discord application and select Show more options.
Click Troubleshoot compatibility.
Select Try recommended settings.
Click Test the program.
If your permissions are not syncing with a category even after changing to synced channel, then try troubleshooting Discord’s compatibility with your PC. Running the troubleshooter will scan and locate any issues with the Discord app and then provide recommended settings to solve the issue.
How do you create categories in Discord?
Open Discord in-app or in your browser and right-click on your server icon.
Select Create category.
Enter a category name, then click Create Category.
Users can create categories and set specific permissions for each category. Any changes made to the category will apply those changes to channels that are synced under it. Users can move categories around, and synced channels automatically update the permissions.
How do I change permissions on all channels in Discord?
At present, Discord does not offer the feature to change permissions for all channels on a server, though you could modify them for the category and then sync these with individual channels.
The feature would be a great addition and help users manage things more effectively. If and when it is released, we will update the article with the detailed steps for it. Bookmark it and keep checking!
We hope one of the above solutions helped you fix your permissions if they’re not synced with a category in Discord.
And once you have fixed the problem, find out what to do if Discord keeps freezing in Windows.
Let us know in the comments below which step worked for you or if you have any other suggestions for a fix.