TurboTax Won’t Load: 4 Easy Ways to Fix It

TurboTax is one of the best tax preparation software that helps users fill in their tax data online. Although the programs generally work great, there have been some issues lately.

Users complain that TurboTax won’t load without giving them an error message that would indicate what the problem is or what they can do next.

We will explore in this article how you can fix TurboTax not loading, so make sure to keep reading.

Why does TurboTax take so long to load?

  • PC does not meet requirements: The primary reason the tax preparation software might not load is if your PC does not meet the criteria. Hence, before making any changes to your system, check if it is qualified to download TurboTax and run the software.
  • Outdated drivers: Sometimes, you might experience issues if some of your drivers are outdated. The quick route out of this is to update your drivers to the latest version.
  • Lack of privileges: Another thing you should look at if TurboTax is not loading is if you have administrative rights. to make the software run optimally, you need to run it as an administrator.

How can I fix TurboTax not loading?

1. Check the requirements

Before moving forward with the troubleshooting steps, ensuring that your device meets the minimum requirements for TurboTax to work correctly is essential.

According to TurboTax, below is what your system needs to have, depending on the software:

Operating System

  • 2020: Windows 8 or higher (Windows 7 not supported)
  • 2019: Windows 10, Windows 8.0/8.1. Make sure to upgrade your operating system before installing it. 
  • 2017 and 2018: Windows 10, Windows 8.0/8.1, or Windows 7 (Service Pack 1 or later)
  • 2016: Windows 10, Windows 8.0/8.1, Windows 7 (Service Pack 1 or later), or Windows Vista (Service Pack 2 or later)

Processor: Pentium 4 or Athlon or later

Hard Drive Space

  • 2020: 1 GB for TurboTax (plus up to 4.5 GB for Microsoft .NET 4.5.2 if not already installed)
  • 2019: 2 GB, plus up to 4.5 GB for Microsoft.NET 4.5.2 client if not already installed
  • 2016, 2017, and 2018: 650 MB, plus up to 4.5 GB for Microsoft.NET 4.5.2 client if not already installed

RAM

  • 2020: 2 GB or more recommended
  • 2019: 2 GB or more recommended
  • 2016, 2017, and 2018: 1 GB or more recommended

CD/DVD drive if installed from the CD.

Internet connection

  • 2020: 1 Mbps modem (Broadband connection highly recommended).
  • 2019: 1 MBps recommended speed. An Internet connection is required for product activation and updates.
  • 2016, 2017, and 2018: 56 Kbps to e-file and download updates (broadband recommended).

Monitor resolution: 1024×768 or higher recommended

2. Run it with administrator rights

  1. Go to your Desktop and locate the TurboTax app.
  2. Right-click on the icon and select Properties.
    properties turbotax wont load
  3. In the Compatibility tab, check the Run as Administrator box.
    run as turbotax wont load
  4. Finally, click Ok for the change to apply and try to rerun the program.

If Turbotax doesn’t load on your PC, it might be because you are not running it with the required privileges. Following the steps above to run it as admin should fix this.

3. Update drivers

  1. Press the Windows key + X and select Device Manager.
    device manager turbotax wont load
  2. Double-click the section you want to update to expand it, and right-click the device there.
  3. Now, select Update driver.
    update driver
  4. Finally, choose Search automatically for drivers and install any available updates.
    search auto

This TurboTax won’t load problem is often related to outdated or faulty drivers that need your attention. You can update your driver manually by following the steps above.

4. Update your security software

With the help of a firewall and virus or spyware protection programs, you can keep your device safe from potential harm by adding a layer of protection.

It can happen, though, that the firewall blocks TurboTax software’s access to the Internet which will, in return, cause difficulty accessing the e-file, downloading state programs, and even getting the latest programs.

This can also be why you may not be able to run TurboTax on your device.

Misinterpreting legitimate actions, such as the ones initiated by TurboTax, results in the security software block of those programs from the Internet.

To ensure this is not the case, we recommend downloading the latest update for your security software from its support site and then adjusting the settings to allow TurboTax to install and function as needed.

This is about all. We hope that with the help of the solutions presented in this article, you can solve the TurboTax problem.

If you need a list of the best tax filing software for small businesses, check our guide for the best options to use today.

We also have a guide on how to fix Internal server error in TurboTax so don’t miss it for more information.

As always, don’t hesitate to let us know in the comments below if you have additional recommendations and suggestions.

Fix: Can’t Change Time Zone in Windows 10 & 11 [5 Ways]

Many users complained about one particular Windows 10 issue: the inability to change the time zone.

Some users received an error message when trying to change the time zone. Other users reported the time zone switching back to the initial form after restarting the PC.

In the following tutorial, we’ll list a series of solutions that can help you to fix both issues.

Why won’t my computer let me change my time zone?

Several factors might prevent you from changing your time zone on Windows 10. Below are some of them:

  • Faulty system files: Sometimes, this issue might be caused by broken or faulty system files. You need to repair and restore these files to get past the problem.
  • Issues with third-party apps: If you have a third-party clock or time manager app, they might interfere with Windows time. What you need to do is to remove these apps using one of the best uninstaller software.

How can I fix Windows 10 time zone change issues?

1. Boot the system in Safe Mode

  1. Press the Windows key + I and select the Update & Security option.
    update and cant change time zone windows 10
  2. Click the Recovery option in the left pane.
  3. Now, click the Restart now button under Advanced startup.
    restart now
  4. When your PC restarts, choose Troubleshoot > Advanced options.
    advanced options
  5. Next, select Startup Settings.
    startup cant change time zone windows 10
  6. Click the Restart button.
    restart
  7. Now, press 5 or F5 to Enable Safe Mode with Networking.
    safe networking
  8. From here, press the Windows key, type timezone, and select Change the time zone.
    option cant change time zone windows 10
  9. Finally, select your desired time zone and restart your PC in normal mode.
    timezone

Booting your system in Safe Mode helps fix both these issues — whether you are getting an error message or the time zone changes back to the initial one.

2. Change Date and Time using the command prompt

  1. Press the Windows key, type cmd, and choose Run as administrator under Command Prompt.
    cmd admin cant change time zone windows 10
  2. Type the command below and hit Enter: datedate
  3. Now, you enter the date manually using the mm-dd-yy format and press Enter.
    enter date
  4. Enter the time manually as well and press Enter.

A simple solution is to change the date and time using a command line. Make sure you are running the system as an administrator. If not, you will receive an error message.

3. Check the system for corrupted files

  1. Press the Windows key + S, type cmd, and select Run as administrator under Command Prompt.
    cmd admin cant change time zone windows 10
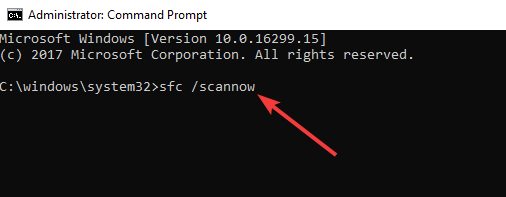
  2. Type the command below and hit Enter: sfc /scannowsfc scan
  3. Finally, wait for the command to finish running.

If you are experiencing unusual permission issues with Windows, try performing a system check. Corrupted files might not allow you to perform certain system changes.

The system file checker finds broken files and replaces or removes them. And this also helps when the set time zone automatically changes.

4. Check Windows Time Properties

  1. Press the Windows key + R, type services.msc, and click OK.
    services
  2. Double-click the Windows Time service to open its proprieties.
    windows cant change time zone windows 10
  3. Now, click the Log On tab at the top and tick the radio button for This Account.
  4. Next, make Local Service is in the box before This Account.
    log on
  5. Under the This Account option, the password fields should be filled automatically, and click OK.
    password
  6. Finally, restart your PC.

Another method we recommend to change the time zone is to make specific changes in Windows Time Properties.

5. Uninstall third-party apps

  1. Press the Windows key + I and choose the Apps option.
    apps
  2. Now, select the app you want to remove and click the Uninstall button.
    uninstall cant change time zone windows 10
  3. Finally, follow the onscreen instructions to complete the process.

Having third-party clock or time manager software could impact the ability to change the time zone.

Conflicts between the installed programs and your system could occur, leaving only one option. Try uninstalling these programs and restarting your computer.

Check if your time zone is set up correctly or if it can be changed manually.

We hope that our solutions helped you to fix this problem. If you want to know how to change the date and time on Windows 10, check our detailed guide.

If you tried other fixes, leave us a comment below. Or let us know which of these five fixes worked for you.

How to Fix Xbox App Closes Immediately on Windows

If your Xbox app closes immediately after launching, the cause is usually corrupted cache, outdated system files, or conflicting services. Try the fixes below in order and you should get the app working again.

Why Does the Xbox App Close Immediately?

  • Corrupted temporary files or cache.
  • Outdated Windows or Xbox app version.
  • Conflicting background services or utilities.
  • Damaged Gaming Services installation.
  • Incorrect system time or region settings.

Fix Xbox App Closes Immediately

Follow these methods in order, starting from the simplest.

1. Restart Your PC

A quick reboot clears temporary glitches that can force the app to close as soon as it opens.

2. Update Windows and the Xbox App

  1. Press Win + I → Windows Update → install all pending updates.
  2. Open the Microsoft Store → select Library → click Get updates.

If the Microsoft Store won’t launch at all, use this guide to fix the Windows Store not opening so you can update the Xbox app properly.

3. Clear the Xbox App Cache

  1. Press Win + R, type wsreset.exe, then press Enter.
  2. Wait for the Store window to appear and close automatically.
  3. Relaunch the Xbox app.

This removes corrupted cache files that often cause startup crashes.

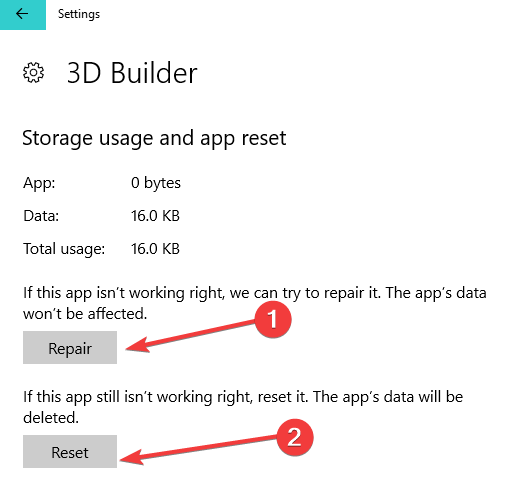
4. Repair or Reset the Xbox App

  1. Press Win + I → Apps → Installed apps.
  2. Find Xbox, select Advanced options.
  3. Click Repair. If that doesn’t work, select Reset.

If the Xbox app won’t open on Windows 10, similar steps can fix stubborn launch issues.

5. Reinstall Gaming Services

  1. Press Win + X → Windows PowerShell (Admin).
  2. Run this command:
    get-appxpackage Microsoft.GamingServices | remove-AppxPackage -allusers
  3. Restart your PC and reinstall Gaming Services from the Microsoft Store.

6. Adjust Date, Time, and Region Settings

  1. Press Win + I → Time & language.
  2. Enable Set time automatically and Set time zone automatically.
  3. Under Region, select your correct country.

7. Run Windows Store Apps Troubleshooter

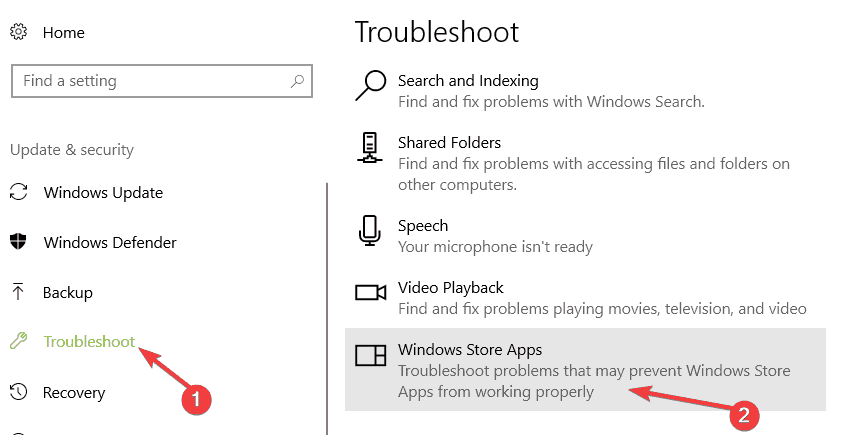
  1. Press Win + I → System → Troubleshoot → Other troubleshooters.
  2. Run the Windows Store Apps troubleshooter.

This tool automatically detects and repairs issues with the Xbox app.

8. Reinstall the Xbox App

  1. Open Settings → Apps.
  2. Uninstall Xbox.
  3. Reinstall it from the Microsoft Store.

Some users who also run GPU utilities such as the Catalyst Control Center or use AMD CPU overclocking software have reported conflicts. Disable them temporarily to see if the crashes stop.

FAQ

Why does the Xbox app keep closing?

The Xbox app usually closes due to corrupted cache, outdated Windows updates, or broken Gaming Services.

Is the Xbox app required for PC gaming?

Yes, the Xbox app is needed for Game Pass titles, multiplayer features, and cross-platform play.

Can I use Game Pass without the Xbox app?

No, PC Game Pass requires the Xbox app to download and manage games.

✅ By following these steps, you should be able to stop the Xbox app from closing immediately and enjoy a smooth gaming experience.

Excel Has Run Into an Error: 5 Fixes to Make it Work Correctly

If, after opening Excel, you see Excel has run into an error preventing it from working correctly, then you are not alone. This error not only occurs while opening Excel; you can get this error in Word or PowerPoint, too. 

Here in this guide, we will talk about the available fixes to resolve the issue right after discussing the causes of the problem.

What causes Excel to run into an error preventing it from working correctly?

There could be several reasons for this error to occur; some of the popular ones are listed below: 

  • Damaged files – If the Excel file you are trying to open is corrupt, it could cause the error to appear.
  • Excel app is not up to date – If you are running an older version of Excel, there could be compatibility issues, which raises the possibility of this error.
  • Conflicting Add-ins – If you add-ins for your Excel app and are conflicting, you will likely see these errors. First, try to remove the add-ins and relaunch the app.
  • Computer has insufficient memory – If your computer doesn’t have enough space to work on the file you want to open, you can get the error. First, try to remove unwanted files from your computer to recover space, then open the file. 
  • Incorrect formulas on the sheet – If the sheet you are trying to open has inaccurate formulas, the program might not work correctly, hence the error.
  • Poor network – If you are accessing an Excel file on the network and don’t have a steady internet connection, you might face an error.

How do you fix Excel has run into an error that is preventing it?

Before engaging in advanced troubleshooting steps, you should consider performing the following checks:

If none of these worked for you, then try the below-mentioned fixes to resolve the error:

1. Use the Program Compatibility Checker

  1. Click on the Search bar, type Program Compatibility Checker, and click on Open under Run programs for previous versions of Windows.Porgram compatibility checker- excel has run into an error that is preventing it from working correctly
  2. On the Program Compatibility Checker window, click Next.Program Compatibility Checker
  3.  From the next window, scroll and select the program; it is Excel. Click Next.Excel NEXT
  4. Click on Troubleshoot program.Select any
  5. Now select the most suitable option presented under What problems do you notice?
  6. Click Next. Select any click Next
  7. You might have to repeat the process with different options to see what resolves the error.

2. Repair Excel

  1. Press Windows + I to open the Settings window.
  2. Go to Apps, then Installed Apps.Apps, installed apps -excel has run into an error that is preventing it from working correctly
  3. Locate Microsoft Office and click on three dots. Then, from the context menu, select Modify.Modify
  4. On the UAC prompt, click Yes.
  5. On the next page, select Quick Repair, then click Repair and follow the on-screen instructions.Repair

3. Disable or remove Add-ins

  1. Press Windows + R keys to open the Run window.EXCEL safe mode -excel has run into an error that is preventing it from working correctly
  2. Type excel /s and press Enter to launch Excel in safe mode.
  3. Click File.File
  4. Go to Options.Options -excel has run into an error that is preventing it from working correctly
  5. On the Options window, select Add-ins from the left pane and click Go.Addins
  6. Now, uncheck all the available Add-ins and click OK.uncheck and click OK
  7. Restart your computer.

While disabling an add-in, you can quickly add the ones you want to use to avoid the #NAME errors in Excel; read this to learn more.

4. Reset Excel to its default settings

Tip icon Tip
You must create a backup of registry files before making changes. To do so, go to File, then select Export. Save the .reg file at the desired location. To import, go to Registry Editor, click File, select Import, and select the file to import.
  1. Press Windows + R to open the Run window.REGEDIT RUN COMMAND
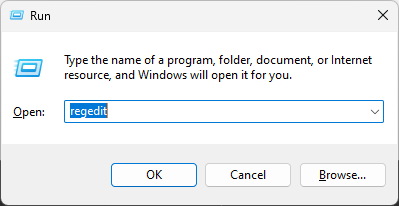
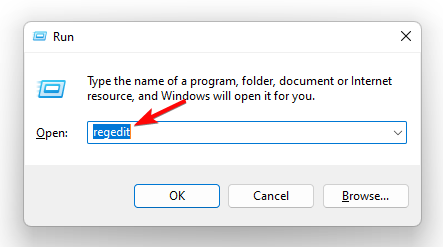
  2. Type regedit and press Enter to open Registry Editor.
  3. Click Yes on the UAC prompt.
  4. Follow this path: Computer\HKEY_CURRENT_USER\Software\Microsoft\Office\Excel
  5. Right-click on the folder and select Delete.EXCEL RESET DEFAULT -excel has run into an error that is preventing it from working correctly
  6. Restart your PC to let the changes take effect.

5. Use the Registry Editor

  1. Press Windows + R to open the Run window.
  2. Type regedit and press Enter to open Registry Editor.
  3. Click Yes on the UAC prompt.
  4. Follow this path: HKEY_CURRENT_USER\Software\Microsoft\Office\16.0\CommonCommon
  5. Expand the Common folder, locate  and delete Experiment, ExperimentEcs, and ExperimentTas
  6. Open the Licensing folder, look for the CurrentSkuldForApp folder, and if it is present, delete it.

So, these are methods that you need to follow to fix Excel has run into an error that is preventing it from working error correctly. If nothing works, try reinstalling the Office app to resolve the issue.

Have queries related to the methods mentioned above? Feel free to mention them in the comments section below.

How to Check & Fix Bad Sectors in Windows 10 [5 Solutions]


Right from the start, you should know that the Windows system can’t always fix bad sectors on a damaged hard drive. The OS can detect these sectors and prevent you from placing new data on them.

As you know, if your hard drive has bad sectors, the data saved there might get lost if you can’t restore it.

So, for the same reason, in the guidelines below, I will first show you how to scan your Windows 10 device to check if the hard drive has bad sectors or not, and then we will explain to you how to recover these sectors and add data on a new hard drive.

Also, note that installing or reinstalling your Windows 10 system from scratch or choosing to repair or refresh your OS will not fix the bad sector issues.

We also have a comprehensive guide on how to recover data from a hard drive with bad sectors.

So, read the steps below and decide whether to apply the same or take your device back to service for technical assistance.

How do I fix bad sectors in Windows 10?

1. Scan for bad sectors

    1. Right-click on your hard drive
  1. 2. Select the Properties option.

    properties check for bad sectors windows 10
  2. 3. Choose the Tools tab at the top and click the Check button.

  3. 4. Now, select Scan drive.

  4. 5. Alternatively, press the Windows key, type cmd, and select Run as administrator under Command Prompt.

    cmd admin check for bad sectors windows 10
  5. 6. Finally, type the command below and hit Enter: chkdsk /F

    chkdsk

The first method to check for bad sectors on Windows 10 is to go through File Explorer or use the CHKDSK command. If bad sectors are detected, remember that Windows can’t fix them. Here’s what you need to do to solve your problem.

If you’re on Windows 11, we also have a guide on how to use chkdsk on Windows 11, so be sure not to miss it.

2. Use third-party software

Bad sectors can be caused by overheating, the age of the HDD, file system errors, malware, and more, and they all result in clusters of memory that cannot be written on anymore.

This also usually means that any data stored in those sectors will be lost, and it becomes increasingly difficult to recover any data from them unless you have dedicated data recovery software at your disposal.

Modern-day tools that deal with such issues don’t only scan your disk for sectors on Windows 10. Some can even handle entirely broken partitions, recovering the data without issues.

Stellar Data Recovery

Bad sectors and their aftereffects will be a thing of the past once you install Stellar Data Recovery.
Free Trial Visit Website

3. Use Drive Manufactures Utility

  1. Take out your damaged hard drive.
  2. Buy a new hard drive and appropriate USB adapters.
  3. Connect your old hard drive to another computer and check for bad sectors, as shown above.
  4. Then, connect your new hard drive to the same computer.
  5. Next, use the drive manufacturer’s utility (follow the on-screen wizard) and clone your old and damaged drive into your new hard drive.
  6. Finally, place the new hard drive on your Windows 10 device as you are done.

Another excellent method to check your HDD for bad sectors on Windows 10 is to use the utility from the manufacturer. This will help clone your disk and prevent loss of info.

4. Fix disk errors via Command Prompt

On Windows 10, you can run a disk check using Command Prompt. There are also two more commands that you can use to detect and repair logical and physical issues.

  1. Press the Windows key + S, type cmd, and select Run as administrator under Command Prompt.
    cmd admin check for bad sectors windows 10
  2. Type the command below and hit Enter: chkdsk C: /f /r
    chkdsk f r
  3. Replace C with the letter of your hard drive partition.

If you do not use the /f parameter, chkdsk displays a message that certain files need to be fixed, but it does not fix any errors.

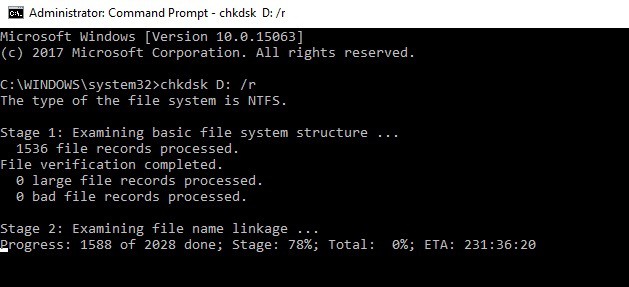
The chkdsk D: /f /r command detects and repairs logical issues affecting your drive. To repair physical issues, run the /r parameter as well, as shown in the screenshot below.

The above method shows how you can repair bad sectors on Windows 10 using CMD.

5. Perform a low-level format

In a case where your drive has a hard bad sector, you need to perform a low-level format on it. Also, you need to reset its blocks, clusters, and the sectors.

This low-level format cannot be performed individually, as it is usually done in the factory. Hence, your only option is to contact the manufacturer or take it to an expert.

Does CHKDSK fix bad sectors?

The CHKDSK command is an excellent built-in tool for fixing memory issues. The CHKDSK command can fix logically bad sectors depending on the parameters used.

It does this by marking the sectors as bad and preventing them from being used. You need to use the chkdsk /r command to scan and fix the issue.

But note that practically bad sectors are hardware issues that software cannot fix. So, if you have a hard, bad sector, you need to take it to an expert.

So, there you have it – this is how you can scan for bad sectors on Windows, and also, this is how you can quickly fix bad sectors by yourself.

If you need a list of the best HDD bad sector repair tools, check our guide for the excellent options you can choose today.

If you’ve got additional tips and suggestions on how to fix bad sectors in Windows 10, you can list them in the comments below.

How to Turn On / Off Fast User Switching on Windows 10?

Fast User Switching is a great feature to seamlessly switch between accounts on your Windows computer without quitting the apps or logging out from the former account. To use this function, a user must click on Switch user instead of Log off from the Start menu options.

This guide will discuss how to turn on/ off the functionality using three simple methods. Let’s get started! 

How can I enable/disable Fast User Switching on Windows 10?

1. Use the Group Policy Editor

  1. Press Windows + R to open the Run window.GPEDIT
  2. Type gpedit.msc and press Enter to open Group Policy Editor.
  3. Follow this path: Local Computer Policy\Computer Configuration\ Administrative Templates\ System
  4. Locate the Logon folder from the left pane, and on the right pane, double-click Hide entry points for Fast User Switching.gpedit 2 Fast user switching Windows 10
  5. On the Hide entry points for the Fast User Switching window, select Disabled to turn it on.
  6. If you want to disable it, then click on the radio button for Enabled.FastUSER SWITCHING
  7. Once you have selected the option, click Apply and then OK.
  8. Restart your computer to let the changes take effect.

2. Use the Registry Editor

  1. Press Windows + R to open the Run window.REGEDIT RUN COMMAND
  2. Type regedit and press Enter to open Registry Editor.
  3. Follow this path: HKEY_LOCAL_MACHINE\SOFTWARE\Microsoft \Windows\CurrentVersion\Policies
  4. Now locate System, right-click it, and select New.Edit DWORD -Fast User Switching Windows 10
  5. Select D-WORD(32-bit) Value and name it HideFastUserSwitching.
  6. Double-click HideFastUserSwitching and change the Value data to 1 to disable it.
  7. If you want to enable Fast User Switching, change the Value data to 0.Hidefastuserswitching windows 10
  8. Click OK.
  9. Restart your PC.

3. Use the PowerShell

  1. Press Windows + X key and select PowerShell Admin.Windows Powershell -Fast User Switching Windows 10
  2. Copy and paste the following command and press Enter to disable Fast User Switching: powershell -windowstyle hidden -command "Start-Process cmd -ArgumentList '/s,/c,REG ADD HKLM\SOFTWARE\Microsoft\Windows\CurrentVersion\Policies\System /V HideFastUserSwitching /T REG_DWORD /D 00000001 /F & REG Delete HKCU\Software\Microsoft\Windows\CurrentVersion\Policies\System /V HideFastUserSwitching /F & taskkill /f /im explorer.exe & start explorer.exe' -Verb runAs"
  3. To enable, copy and paste the following command and press Enter: powershell -windowstyle hidden -command "Start-Process cmd -ArgumentList '/s,/c,REG Delete HKLM\SOFTWARE\Microsoft\Windows\CurrentVersion\Policies\System /V HideFastUserSwitching /F & REG Delete HKCU\Software\Microsoft\Windows\CurrentVersion\Policies\System /V HideFastUserSwitching /F & taskkill /f /im explorer.exe & start explorer.exe' -Verb runAs"
  4. Once done, close the PowerShell window and restart your computer.

So, these three methods you can use to enable/disable the Fast User Switching feature on your Windows 10 computer. Once you enable this feature, you should be able to easily switch users on Windows 10.

Try them and let us know which worked for you in the comments below.

Discord Member List Not Loading: Full Guide to Fix It Now

Is the Discord member list not loading for you and you are looking for solutions to resolve the problem? Fortunately in this guide, we have a list of solutions that will help you fix the problem at your end.

Several users have reported that for them the Discord member list is not loading. Quite often this error is because of server issues and something it could be because of a different issue. Whatever the case may be, we will help you fix the problem.

What causes the Discord member list not loading issue?

After some careful research, we have shortlisted a few reasons that could trigger the Discord member list not loading issue on your PC:

  • Server issue: It could be because there is an official server error that could be causing the loading problem, so apply our below tip.
  • The app’s cache: Chances are that the cache of the Discord app is corrupt and is causing the problem.
  • Outdated app: You should keep the app up to date in order to enjoy the latest features and also fix bugs.
  • Faulty internet connection: If your internet connection is not working properly then you will face multiple issues with the Discord app.
  • Discord files are missing: Some third-party apps might have replaced the Discord program files, or it could have gone corrupted.

How do I fix the Discord member list not loading?

Here are a few things that you should try before jumping ahead with the advanced troubleshooting methods.

  • You can check the status of the Discord server from the official website or by using websites such as Downdetector. If the Discord server is down, then there isn’t much that you can do, as it will start working only after the official servers are up.
  • Simply restart your PC, as this will load all the system and program-related files from scratch.
  • If you are getting this error on a browser, then try launching Discord in another browser and see if this fixes the issue or not. We have a list of some of the best browsers that you can try.
  • Reboot your internet modem and check if this fixes the issue or not.

Now, let us check the advanced troubleshooting solutions and possibly resolve the problem.

1. Clear the Discord app cache

  1. Press Win + R to open the Run dialogue.
  2. Type %appdata% and press Enter.
  3. Open the Discord folder.
  4. Open the Cache folder and delete all the files inside it.

Cache files store all of your personalized settings to ensure all of your in-app settings are loaded correctly and reduce load times.

If these files get corrupted or missing, then you can delete these files. It is perfectly safe to delete app cache files.

2. Update the Discord app

  1. Open the Microsoft Store.
  2. Locate Discord and open its page.
  3. Click on the Update button. This will make sure all the apps are updated along with the Discord app if there is an update available.
  4. Launch Discord and check if this fixes the issue or not.

You will come across the Discord member list not loading error if the app isn’t updated. Chances are because of a bug in the previous version, you are getting the error.

In such a case, developers push new features and bug fixes with new updates. So, you should make sure all apps on your PC are up to date to avoid such issues.

3. Reinstall Discord

  1. Open the Start menu.
  2. Open Control Panel.
  3. Click on Programs and Features.
  4. Select Discord and click the Uninstall button at the top.
  5. Press Win + R to open the Run dialogue.
  6. Type %appdata% and press Enter.
  7. Delete the Discord folder.
  8. Open the Run dialogue.
  9. Type %localappdata% and press Enter.
  10. Delete the Discord folder.
  11. Open Microsoft Store or the official Discord website.
  12. Download Discord on your PC.
  13. Install the program.
  14. Launch it and check if this resolves the problem or not.

The above steps let you uninstall the Discord app completely from your PC leaving no traces behind. While the above process works, you can also make use of a dedicated tool.

You can make use of CCleaner to uninstall apps from your PC. This tool can also help you remove apps that are pretty sticky and do not completely uninstall following the regular process.

⇒ Get CCleaner

4. Clear browser cache

  1. Launch your browser.
  2. Click on the 3-dot menu icon.
  3. Select Settings.
  4. Click on Privacy and security.
  5. Click on Clear browsing data.
  6. Check the boxes for Cookies and other site data and Cached images and files.
  7. Hit the Clear data button.

Just like the app cache, the browser cache can also cause multiple issues with Discord including the Discord members list not loading problem.

Follow the above steps and clear the browser cache for your browser. We have shown the steps for Google Chrome just to give you an idea of how to perform the steps. The steps may be different for a different browser.

You can check out our guide that lists some best solutions to fix Discord microphone issues. We also have a guide on that will help you resolve if you are facing Discord GIFs aren’t loading problem.

If you are unable to unmute Discord in the browser, then you should check out our guide that lists 3 quick ways to fix it. You can also check out the solutions in our guide to fix high CPU usage issues by Discord.

That is it from us in this guide. Let us know in the comments below, which one of the above solutions resolved the problem for you.

Fix: CHKDSK Got Stuck / Taking Forever to Load in Windows

The check disk utility program, also known as CHKDSK is a Windows system tool that verifies the file system integrity, listing and correcting errors on the disk.

These errors can be triggered by various elements, such as not shutting down your computer properly, malware, power failures during writes, removing USB devices without Safely Remove, and other factors.

By running the chkdsk command, users can repair these errors so that their systems can function properly. Unfortunately, this process can sometimes stall, and the scanning gets stuck.

Chkdsk is a useful tool that can fix corrupted files on your hard drive, but sometimes issues with chkdsk can occur.

Since chkdsk is an important tool, in this article, we’re going to cover the following issues:

  • How to stop chkdsk in Windows 10 – There are several ways to top a chkdsk scan. Usually, chkdsk starts automatically while booting Windows, and there’s a short time frame that allows you to press any key and skip the scan.
  • How long does chkdsk take (Windows 10) – Chkdsk scan can take up to a couple of hours depending on the size of your drive and the number of corrupted files.
  • Chkdsk stuck external hard drive, SSD – Problems with chkdsk affect both internal and external hard drives as well as SSDs. If you have any problems with chkdsk, be sure to try one of our solutions.
  • Chkdsk stuck correcting error in index, index entries processed, security descriptors processed, looking for bad clusters – Chkdsk process is divided into several segments, and your PC can get stuck during any of these segments.
  • Chkdsk stuck unreadable – If you’re getting unreadable message while using chkdsk, the problem might be your hard drive. This message appears if your hard drive is faulty or if your files are permanently damaged.
  • Chkdsk stuck stage 1, 2, 3, 4, 5 – Chkdsk has several different stages and can get stuck during any of these stages.
  • Chkdsk stuck loop – In some cases, your PC might get caught in a chkdsk loop. If you encounter this problem, you must perform an SFC and DISM scan to check if that helps.

Here’s what one Windows 10 user is saying:

I got some problems of my pc, 2 days ago i got my pc automatically reboot then im went to event viewer to check it out and found error event id 1001 bugcheck […]. i try chkdsk, chkdsk /f /r c:(ssd) successfully, but on d: (hdd 2tb seagate) is stucking at 10% alr passed 3 hours (never happened before when im chkdsk my drive D: lastime)when im try to click my numlock button there is no light,what should i do?

What can I do if the chkdsk scan is taking forever in Windows 10?

1. Make sure there is an issue to be fixed

Many users have reported that the chkdsk scan process continues despite no change in the scanning advancement.

Oftentimes, when users reboot their computers, the scanning resumes automatically.

Also, take into consideration the size of the drive you’re scanning.

The chkdsk process is usually completed in 5 hours for 1TB drives, and if you’re scanning a 3TB drive, the required time triples.

As we already mentioned, chkdsk scan can take a while, depending on the size of the selected partition.

Sometimes, this process can take a few hours, so be patient. Sometimes, it might be best to leave the scan running overnight.

If you use a larger hard drive, or if you have more bad sectors on your drive, the scanning process will take longer so you’ll have to be patient.

2. Clean boot your system

Few users reported fixing this problem simply by performing a clean boot. To do that on Windows 10, you need to do the following:

  1. Type System Configuration in the search box and select System Configuration from the menu.
    Chkdsk stuck unreadable
  2. On the Services tab >  select the Hide all Microsoft services check box > click Disable all.
    Chkdsk stuck stage 1
  3. On the Startup tab > click on Open Task Manager.
    Chkdsk stuck loop
  4. On the Startup tab in Task Manager right click the first item on the list and choose Disable from the menu. Repeat this for all items on the list.
    How to stop chkdsk Windows 10
  5. On the Startup tab of the System Configuration dialog box >click OK and choose the option to restart your computer.
    How long does chkdsk take Windows 10

After your PC restarts, check if the issue still appears. If not, you can enable all disabled apps and services again.

If you want to know how to add or remove startup apps on Windows 10, check out this simple guide.

3. Use a recovery drive

  1. Create a Windows 10 recovery drive
  2. Enter the CD/USB and reboot your computer.
  3. From the CD main window, run cmd by pressing and holding Shift + F10.
  4. In the cmd window, type regedit to open the Registry Editor.
  5. Go to HKEY_LOCAL_MACHINE >File > Load Hive.
  6. Go to path C:WindowsSystem32Config > select System. If a name is prompted, enter DiskCheck > press Enter to confirm.
  7. Go to DiskCheck ControlSet001ControlSession Manager and select BootExecute.
  8. There, change the autocheck autochk * /rDosDeviceC: line to autocheck autochk *
  9. Go to the DiskCheck folder > select Unload Hive > exit the Registry Editor.
  10.  Type chkdsk c: /r in Command Prompt >wait for the new process to complete.

You can’t create a recovery drive on Windows 10? Take a look at this simple guide to solve the issue. Also, if you can’t edit your Windows 10’s registry, read this handy guide and find the quickest solutions to the issue.

4. Disable error restart

If chkdsk got stuck, you might be able to fix it simply by pressing the Ctrl + Alt + Del shortcut to stop it.

After doing that, you need to disable the error restart. This is rather simple, and you can do it by following these steps:

  1. Turn off your PC and turn it back on.
  2. While the PC boots, press and hold the F8 key.
  3. Now select Disable error restart from the list.

After doing that, the problem should be resolved, and you can use your PC again. Remember that this isn’t a universal solution, so it might not work on newer versions of Windows.

5. Use Disk Cleanup

If you chkdsk gets stuck on your PC, the problem might be your temporary files. Windows stores all sorts of temporary files on your PC, and sometimes chkdsk can get stuck while scanning those files.

To fix the issue, it’s advised to find and remove those files from your PC and see if that fixes the problem. To do this quickly, you need to use Disk Cleanup utility on your PC by following these steps:

  1. Press Windows Key + S and enter disk cleanup. Select Disk Cleanup from the menu.
    Chkdsk stuck stage 2
  2. Select your system drive and click on OK.
    How to stop chkdsk Windows 10
  3. Check the files you want to remove from the list. You can just check Temporary files and Temporary Internet Files, but other files are also saved to check and remove. After selecting the desired options, click on OK to proceed.
    How long does chkdsk take Windows 10
  4. Wait for a few moments while Windows deletes the selected files.

Once the temporary files are removed, check if the problem is resolved. Keep in mind that this isn’t a universal solution, so even if you remove temporary files, your issue might persist.

However, once you remove these files, your PC will have fewer files to scan and repair, reducing the time it takes to perform the scan.

If you have problems deleting all your junk files, follow this guide to solve any Disk Cleanup issues and save your drive.

6. Stop the scanning process before it starts

Many users reported that chkdsk starts automatically with their PC. This is normal, especially if your PC detects file corruption or if you didn’t turn off your PC properly.

However, if chkdsk gets stuck every time, you might want to skip the scan. To do that, you must press any key on your keyboard before chkdsk starts.

Before the chkdsk starts, you’ll see a message on your screen saying Press any key to stop your scanning. To stop the scan, just press any key on your keyboard, and you’ll skip the scanning process.

It’s worth mentioning that this isn’t a universal solution, and it will not stop chkdsk from running on your PC, but it can be useful to skip a chkdsk scan.

7. Use SFC and DISM scan

If chkdsk gets stuck on your PC or it’s not working with Vanguard installed, the problem might be file corruption. Your system files can get corrupted and that can sometimes cause chkdsk to become stuck. This will also help when it’s stuck at CHKDSK is verifying Usn journal.

To fix the problem, you need to have to scan your system using the SFC scan. To do that, just follow these simple steps:

  1. Open Command Prompt as administrator. You can do that quickly by opening Win + X menu and choosing Command Prompt (Admin) from the list. To open this menu, simply right click the Start Button and choose the desired option from the menu.
    Chkdsk stuck SSD
  2. When Command Prompt opens, enter sfc /scannow and press Enter to run it. The scanning process will now start. SFC scan can take more than 10 minutes, so don’t interrupt it.
    Chkdsk stuck index entries processed,

If you can’t run SFC scan, you’ll have to use DISM scan to fix your PC. To do that, follow these steps:

  1. Open Command Prompt as administrator.
  2. Run Dism /Online /Cleanup-Image /RestoreHealth command.
    Chkdsk stuck unreadable
  3. DISM command can take 20 minutes or more to finish, so don’t interrupt it.

Once the DISM scan is finished, run the SFC scan again. After doing that, all your files should be repaired, and chkdsk won’t get stuck anymore.

If you’re having trouble accessing Command Prompt as an admin, you better take a closer look at this guide.

To learn more about ckhdsk, we have a great guide on how to run chkdsk on Windows 11, so be sure not to miss it. Remember that errors can sometimes appear, and we recently covered Unable to determine volume version and state in one of our other guides.

That’s about it. After following some steps above, your chkdsk problem should be gone.

If you have any other questions or suggestions, please leave them in the comments section below, and we will surely check them out.

Windows Deleted All Files After Update [How to Recover Guide]

Some users reported that after performing a Windows Update some of their files have been deleted.

So, Windows 10 updates have deleted files for a small minority of users. It’s worth noting that it’s unlikely users will lose files after an update.

Nevertheless, that doesn’t necessarily mean that we won’t see any further Windows update lost files cases in the future.

Here are a few tips for recovering data in the rare event of a Windows 10 update deleting files.

How can I recover lost files after a Windows 10 update?

1. Recover files from the Windows. old folder

  1. Press the Windows key + E hotkey to open File Explorer.File Explorer window windows 10 deleted all my files
  2. Users can open the Windows.old folder at this path: This PCC:Windows.old
  3. Thereafter, open the User subfolder in the Windows.old folder.
  4. Next, open a user account subfolder.
  5. Then users can recover deleted files from their user account. Select a file, or group of files (press Ctrl + A), and then press the Copy to File Explorer button to open the drop-down menu below.Copy to menu windows 10 deleted all my files
  6. Select another folder to copy the files to.

Windows 10 creates the Windows.old folder that includes backup copies of user files after a build update for 10 days. Users can recover lost files from that folder (for 10 days).

For some users, the Documents folder is not in Windows.old. In this case, make sure the folder is not hidden.

For more information on what to do if certain files and folders are missing on your PC, do check out this helpful guide.

2. Retrieve files with a third party software

  1. Click Free Download on the EaseUS Data Recovery page to save the setup wizard for that software.
  2. Open the EaseUS Data Recovery installer to add that software to Windows 10.
  3. Then launch EaseUS Data Recovery.EaseUS Data Recovery Wizard window windows 10 deleted all my files
  4. Thereafter, select to scan the C: drive. Users with drive partitions can also select to scan those partitions.
  5. Thereafter, EaseUS will display deleted files that it can recover. Users can click files to open previews for them.
  6. Select the files for the software to recover.
  7. Press the Recover button.

Users can also utilize the unregistered EaseUS Data Recovery version to recover lost files after a Windows 10 update.

Setting up a system backup is probably the best way to ensure against data loss before updating Windows 10.

Then users can recover lost files from the system back up after updating Windows 10 to the latest build version.

We hope that our solutions helped you get back the files missing after Windows 10 update and also guided you to create backups more often.

If the damage has been done, you might also want to check our list with the best tools to recover deleted photos from your PC.

If you also know any other ways to protect or recover your date, tell us all about that in the comments section below.

League of Legends No Sound: How to Make it Work

League of Legends is one of the most popular MOBA games in the world, with millions of players.

Although the game is pretty stable, such a massive title, especially an online multiplayer game, can’t go without its fair share of issues.

One of the most common issues LOL players confront is the problem with sound.

The experience isn’t the same without hearing in-game sounds, especially when you need to talk with your teammates on voice chat.

If you’re experiencing sound issues, you’ll need to address them as soon as possible to play the game normally and enjoy the full experience.

We’ve prepared some solutions that might come in handy if you’re experiencing sound issues while playing League of Legends.

So, if this is your problem, we highly recommend reading this article to find the best fixes for this annoying problem.

 Why does my League of Legends have no sound?

Listed below are some of the reasons League of Legends has no sound:

  • Outdated drivers: If your sound driver is outdated, you might experience sound issues on your game. The solution to this is to update your driver to the latest version.
  • Wrong audio channel: Sometimes, you might not get sound on your game because you selected the wrong audio channel. You need to change this and select the right one to restore normalcy.
  • Game file issues: At times, this issue might due to corrupt or faulty game files. Running the in-game file repairer should fix this quickly.

How can I fix sound issues in League of Legends?

1. Make sure you’re using a correct audio channel

  1. Go to the Speaker icon in the bottom left of the screen and select Playback devices.
  2. Right-click on the device you want to use and select Enable.
  3. Now, right-click on other devices in the list, and select Disable.configure playback device
  4. Repeat the above step for all devices you do not want to use.
  5. Restart the game.

A certain audio channel is assigned to each if you have multiple peripherals, like headphones and speakers, connected to your computer.

You must ensure you’re connected to the right audio channel to hear the in-game sound when playing League of Legends and other video games.

If using the wrong channel was a problem, it should be resolved now. But if you’re still experiencing issues, move to the other solutions listed below.

2. Make sure in-game sound is enabled

It may sound silly, but the disabled in-game sound may be why you don’t hear anything while playing the game.

Imagine the situation in which you decided to have one practice match, and since there are no players to interact with, you disabled the in-game sound to focus completely on improving your skills.

If this is the case, enable in-game sound again by ensuring that none of the slider bars in the Sound section are pushed to the left.

Also, check that the checkbox next to Disable all sound is not selected.

3. Update your sound drivers

  1. Go to Search, type devicemngr, and open Device Manager.
  2. Find your audio device on the list of installed hardware.
  3. Right-click it, and select Update driver software.update sound drivers
  4. If the update is available, finish the process.
  5. Restart your PC, and open the game again.

Outdated sound drivers are the most common cause of various sound issues, including not having sound in League of Legends.

So, the obvious solution here is to make sure your sound drivers are up-to-date and update them if not.

Update drivers automatically

Updating the drivers by yourself can be confusing and time-consuming. We strongly suggest you update your drivers automatically by using a dedicated tool.

4. System-related issues

  1. Open the Battle.net client.
  2. Right-click on League of Legends, and choose Scan & repair from the contextual menu.
  3. Wait until your game is repaired and verified, and try again.

Outdated sound drivers are just one of the non-game-related issues that can cause sound issues in League of Legends.

However, some more sound-preventing factors might have nothing to do with the game.

Check out our detailed guide to fix other Windows 10 update sound problems not caused by League of Legends.

For troubleshooting, you can also try fixing the game with the Battle.net client and let us know how it worked for you.

5. Reinstall the game

  1. Press the Windows key + R, type appwiz.cpl, and click OK.
    appwiz league of legends no sound
  2. Right-click the League of Legends app and select Uninstall.
    option
  3. Now, follow the onscreen instructions to complete the removal.
  4. Finally, download the installer and complete the installation.

If everything you have tried failed to fix the League of Legends no sound issue, you might need to go for the jugular and reinstall the game.

That would be all for our article about resolving sound issues in League of Legends.

If you are facing other issues like League of Legends not opening, check our detailed guide to fix it.

If you have more solutions, don’t hesitate to let us know in the comments below.

Should I Turn On Memory Integrity in Windows 11? [We Answer]

Memory Integrity or Hypervisor-protected Code Integrity (HVCI) is a feature under core isolation available in all modern versions of Windows. However, users reported that sometimes, Memory Integrity is off on Windows 11 even though it shouldn’t be.

The core isolation technology isolates the core processes of Windows in memory in a virtualized environment. So, first, enable virtualization on your PC if it is disabled on your motherboard BIOS and update Windows to the latest version.

How do I turn on Memory Integrity on Windows 11?

1. Enable Memory Integrity using Windows Security Defender

  1. Open the Start Menu, type Windows Security and press Enter.
  2. Click on three vertical lines in the top left corner to expand the menu items.expanding windows security menu
  3. Go to Device security.going device security windows security
  4. Click on Core isolation details under Core isolation.going core isolation details windows security
  5. Toggle the switch to turn it on.turning on memory integrity windows security
  6. Restart your PC when it asks to do it.
    restart pc windows security

When you toggle the switch to turn on Memory integrity, it will check for incompatible drivers. If there are any incompatible components, it won’t turn on.

How to fix incompatible driver errors for memory integrity in Windows 11? It’s easy, you will need to update or upgrade them and the simplest method is to use a dedicated tool such as Fortect Driver Updater.

In fact, incompatible drivers are the most common culprits behind this issue. If memory integrity is off on Windows 11 and you can’t turn it on, it’s most likely because of this.

Sometimes, it may involve upgrading physical hardware. Please note that not all computers are compatible with the core isolation feature. Thus, it may prevent you from enabling memory integrity.

2. Turn on Memory Integrity using Registry Editor

Note icon NOTE
Before applying this method, you should make sure your PC is fully compatible with Windows 11. It is because you may face trouble using core isolation on unsupported computers.
  1. 1. In Start Menu, type regedit, and hit Enter to open the Registry Editor.

  2. 2. Now, navigate to the following location: HKEY_LOCAL_MACHINE\SYSTEM\CurrentControlSet\Control\DeviceGuard\Scenarios\HypervisorEnforcedCodeIntegrity

    going hypervisorenforcedcodeintegrity windows registry edtitor
  3. 3. Double-click on Enabled.

    enabled on hypervisorenforcedcodeintegrity windows registry edtitor
  4. 4. Set the value 1 from 0 and click on OK to save the settings.

    setting value 1 and clicking ok dword 32 bit windows registry
  5. 5. Restart your computer.

  6. This method is ideal when you cannot find Windows Security Defender for some reason on your Windows 11 PC.

    However, if you have installed Windows 11 without TPM 2.0, you may not be able to enable memory integrity.

Finally, it’s important to understand just how important is memory integrity in Windows 11. Well, core isolation is a game-changing technology on both Windows 10 and 11.

? Should I turn on Memory Integrity in Windows 11 ❓

If the memory integrity on Windows 11 is turned off, you should enable it to enhance your security. What does memory integrity off mean? Basically, these are the crucial reasons why you should turn it on:

  • Protection against malicious codes – As it isolates the core processes in memory, malicious software cannot hijack these processes.
  • Preventing criminals from taking control of your computer – Enabling memory integrity prevents third-party from getting unauthorized access to your PC, especially by hijacking lower-level drivers.
  • Enhancing overall security – HVCI technology improves overall security and protects your privacy on a Windows 11 PC.

Finally, you should also consider turning on memory integrity in Windows 11 for gaming purposes.

If you want to get next-level security against cyber threats, it is very important to utilize its features. By default, the memory integrity should be active. If not, even your best antivirus software will not be able to protect you these days.

Learn when it should be on by default and what to do when it stays off in this guide on memory integrity enabled by default in Windows 11.

This article has explained how and why you should turn on Memory integrity on Windows 11. If you have an opinion or suggestion regarding this, feel free to write in the comments box.

How to Set up Thunderbolt Display on Windows [Driver Guide]

Nowadays we have faster and faster connections between all our devices, and many of them are wireless. That wasn’t always the case.

In the past years, Thunderbolt was the standard for fastest data transfer and today we’ll find out how you can connect your display through it.

What is Thunderbolt?

Thunderbolt is an input/output technology introduced five years ago by Apple, famous for supporting high-resolution displays and high-performance data devices with a single port.

Its main characteristics are flexibility, speed and simplicity. This technology gives you two channels on the same connector and each channel has a data transfer speed of 10 Gb/s in both directions.

Thunderbolt is one method of connecting a display to a computer, but not a very popular one. The most appreciated are HDMI, DVI, VGA and DisplayPort.

Today, most of the VGA and DVI ports were replaced with DisplayPort. HDMI is used for flat screen TVs and smart TVs because you can connect that port to different extensions like Blu-Ray players, game consoles, computers and much more.

The original project was patented by Intel under the name of Light Peak. The first version of this technology appeared in 2010 but was more like a beta.

The following year, Intel released the product co-developed version with Apple. PC manufacturers rejected the Light Peak version because its fiber optics technology was too expensive and the Thunderbolt version seemed like a more profitable option.

One problem with Thunderbolt monitors is that they have a specific connector for Apple devices. A Thunderbolt screen should work on any PC that has a Thunderbolt port, but many of you wouldn’t buy one without a guarantee it would work.

And while Thunderbolt 3 has adopted a new USB Type-C port, this port is not compatible with any kind of PC.

Can I use an Apple Thunderbolt screen with a Windows 10 PC?

Technically, yes.

As we said, you need a system with a Thunderbolt port and, if you are lucky, you will be able to use this type of monitor on a PC. Wikipedia has a list with almost all the devices compatible with Thunderbolt and on the Thunderbolt official website you can find also a database with all these devices.

How to setup Apple Thunderbolt on Windows 10 PC?

After you made sure that the system and your drivers are up to date and your computer is compatible with Thunderbolt display, after connecting, you should receive a notification called New Thunderbolt devices have been attached.

  1. In the notification window, you have two buttons: OK and Cancel. To start the set-up click on the OK button and it will run the configuration as an administrator.
  2. After this, you may receive a Windows User Account Control (UAC) pop-up which is asking if you want to allow this app to make changes to your PC. Click on Yes button.
  3. It will appear a window where you will approve the Thunderbolt device that was attached. For every device, there is a table. From that table, change the status from Do Not Connect to Always Connect and then click OK.
  4. To view and manage the approved settings, click on the carret (up arrow icon) from the start menu bar. Right click on the Thunderbolt icon and click on the Manage Approved Devices.
  5. Again, you may receive a Windows User Account Control (UAC) pop-up which is asking if you want to allow this app to make changes to your PC. Click on Yes button.
  6. After clicking Yes, it will open a window with all the Thunderbolt devices connected to your PC. Make sure that the devices have a check at Attached category.

How to establish connection via an adapter

To solve this problem, computer manufacturers have introduced different adapters on the market for these types of monitors. We recommend you the DisplayPort adapters.

Of course, there are adapters for any  kind of video format, but there is a very small price difference between an HDMI or VGA adapter and a DisplayPort adapter.

94261

If you still have trouble setting up the thunderbolt display on your PC, you can contact Apple support department for a correct diagnosis and more efficient solutions.

Did you manage to connect your Thunderbolt display to your Windows 10 PC? Tell us in the comments below if the process was seamless or do you still prefer a HDMI connection.

[wl_navigator]

How to Download HDMI Video Drivers in Windows 10

PCs include HDMI ports for connecting HDMI (High-Definition Multimedia Interface) supported devices such as monitors and projectors. PC users who like to have secondary monitors will be familiar with HDMI ports. Such users might sometimes wonder how to update HDMI port drivers.

Do PCs’ HDMI ports have downloadable drivers?

HDMI ports do not have their own separate driver packages. However, they do still have drivers. HDMI video drivers are, in fact, a part of graphics card drivers. HDMI port drivers are integrated with Intel, NVIDIA, and AMD GPU (Graphical Processing Unit) drivers.

Therefore, an HDMI video driver Windows 10 download is a graphics card driver package. You need to download and install the latest driver for your PC’s graphics card to update an HDMI port’s driver. There are a few different ways you can update HDMI video drivers in Windows 10.

Why do I need to download a new HDMI video driver?

Updating HDMI video drivers can often resolve HDMI port issues. A more common HDMI port issue is when HDMI-connected devices don’t display pictures.

You might be able to fix HDMI devices not working by downloading and installing a new HDMI video driver with the methods below.

How can I download and install HDMI driver in Windows 10?

1. Manually download a graphics adapter driver package

1.1 Find the required system details

  1. Click the Start button, type dxdiag, and select dxdiag.
    DirectX Diagnostic Tool hdmi video driver windows 10 download
  2. Note down the operating system detail on the System tab.
  3. Then click the Display tab, and note down your PC’s graphics card model specified there.
  4. Press the Exit button to close the DirectX Diagnostic Tool window.

1.2 Download and install the driver

  1. Open your graphics card manufacturer’s website in a browser. Check out the Nvidia support website and the ATI support website for drivers.
  2. Select your graphics card driver model and PC platform to choose a specific product then hit the Search button.
  3. Then click the Download button for your PC’s latest compatible graphics driver.
  4. Choose a folder to download the driver package, and click the Save button.
  5. Click the driver package’s EXE file to open an installer window and follow the instructions on the screen to finish the procedure.

We have outlined the procedure for Nvidia graphics cards, but for ATI or any other manufacturer, the method is very similar.

2. Use Device Manager

  1. First, right-click the Start button and select Device Manager.
  2. Next, double-click Display adapters, and right-click your PC’s graphics adapter device to select Update driver.
  3. Then select Search automatically for drivers on the Update Drivers window. Thereafter, the Update Drivers utility might detect, download, and install a new graphics adapter driver.

Additionally, ensure you install all the new OS updates because they also contain driver updates.

3. Use a dedicated driver update software

The third option for updating HDMI video drivers is to utilize a driver updater utility. Those utilities are specifically designed to download and install new device drivers. Plus, it’s more straightforward to download and install new drivers with specialized driver software.

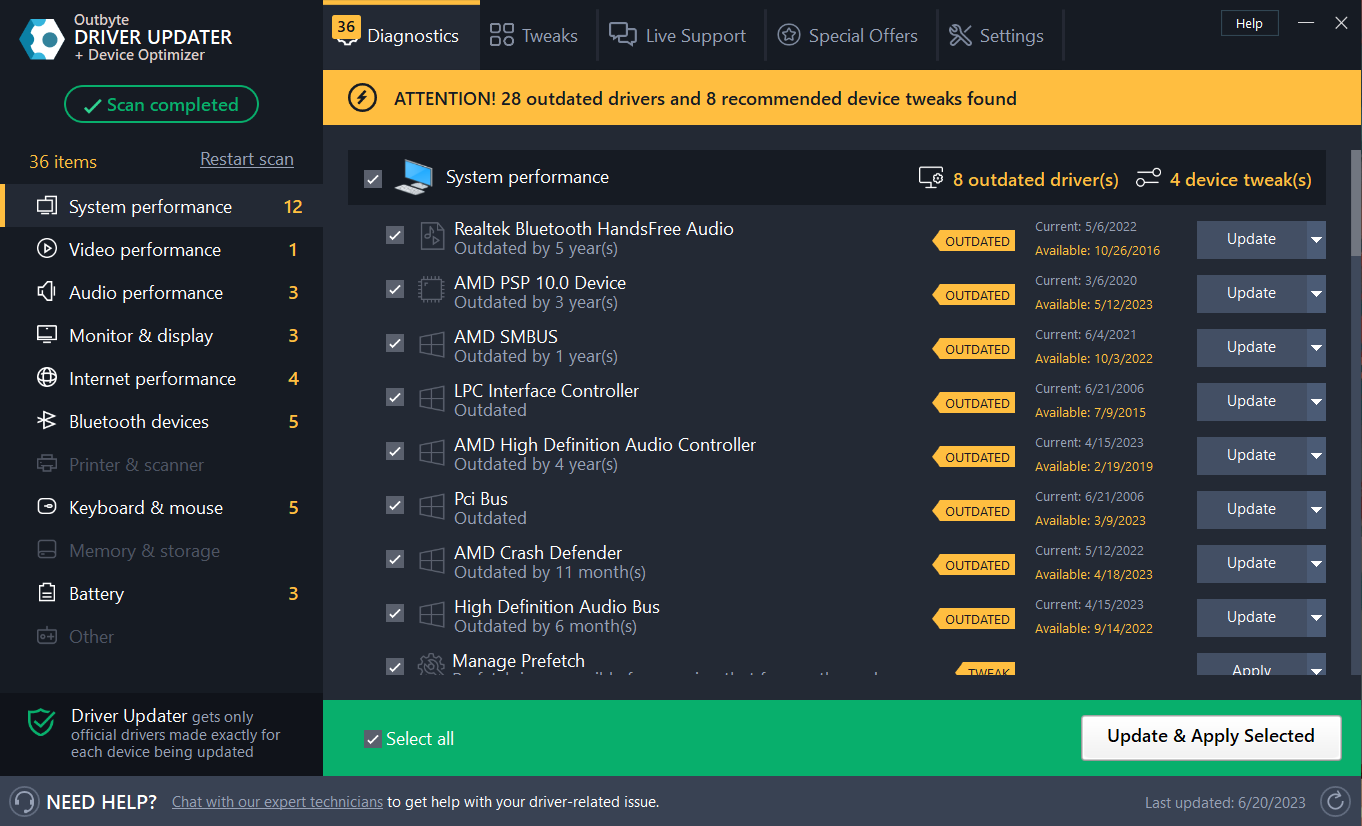
The majority of driver update programs work in a similar way. Clicking their scan buttons will display a list of devices on your PC with outdated or faulty drivers.

You can select to update drivers for all listed devices. Then the driver updater utility will download and install all the latest drivers.

The tool below is recommended due to its fast scanning, portability, regular updates, and minimal system resource usage. See the best driver software updater guide for further details about driver updater utilities.

Outbyte Driver Updater

Go with this trustworthy driver manager to get your HDMI drivers in a few clicks.
Free trial Download now

Downloading and installing the latest graphics driver for your PC’s GPU with any of the above methods will also update the HDMI video drivers. Choose whichever method you prefer for downloading HDMI video drivers in Windows 10.

We also have an excellent guide on how to install graphics card drivers in Windows 10 that will provide additional information.

If you have any other questions or need further instructions let us know in the comments section below.

Microsoft Office Disappeared in Windows 10 or 11? Fix it now

Some Microsoft Windows updates are more of a miss than a hit. The bugs that ensue after some system updates might cost several users their personal data files, for instance, while others – programs deletion.

On a few occasions, users have also reported that Microsoft Office disappeared after an update.

If you’ve been through the same situation, follow these troubleshooting tips to fix the missing Office 365 application.

Why did my Microsoft Office disappear?

Below are some of the reasons Microsoft Office disappeared on Windows 10:

  • Faulty installation: If you didn’t install the Office package correctly, it might disappear from your menu. The solution to this is to repair Microsoft Office.
  • Issues with PC: Another cause of this problem is some issues with your PC. This can be caused by an app you installed recently or a change you made to your PC. You need to perform a system restore or roll back Windows 10.

How can I restore Microsoft Office 365 on Windows 10?

1. Repair the Office app

  1. Press Windows Key + R to open Run.
  2. Type Winword and press OK. (This should open the Word app if it is not deleted or corrupted. If that does not open the Word app, go to the following point.)
  3. Press Windows Key + R.
  4. Type control and press OK to open Control Panel.
  5. In the Control Panel, go to Programs > Programs and Features. 
  6. Look for the Office app and select it.
  7. Click on the Change option at the top.
    Repair Microsoft Office
  8. This will open the Microsoft Office Repair wizard.
  9. Here, you will have two repair options: Quick Repair and Online Repair.
    Quick Repair – This should fix most issues quickly without an internet connection.
    Online Repair – If Quick Repair does not work, this option should work for all the issues, but it takes a little while to complete. It also requires you to have an Internet connection.
  10. Once the repair is complete, reboot your computer.
  11. Press Windows Key + R, type winword, and press OK  to check. If the repair was successful, you should be able to open your Word app now.

If Microsoft Word disappeared in Windows 10 or even the entire Office went missing, you must repair the installation.

2. Perform a System Restore

  1. Type Restore in the search box and click on Create a Restore Point option.
  2. In the System Properties window, click on the System Protection tab.
  3. Next, click on the System Restore button.
  4. Click Next. Click on Show more restore points. 
  5. Select the one that was created just before the update and click on Next.
  6. Read the description and click on the Finish button.
  7. Wait for the Windows 10 to restore your system to the earlier point where it worked without any issues.
  8. After the restart, check if you can access the Microsoft Office app.

Note that a System Restore will undo any recent modifications you’ve brought to your app collection, system features, and programs. It’s advisable to also perform a data backup beforehand.


3. Roll Back Windows 10 Build

  1. Press Windows + I to open Settings.
  2. Go to Update and Security.
  3. Click the Recovery tab.
  4. Under the Go back to an earlier build section, click on the Get Started button.
  5. Follow the on-screen instructions, and you should be able to restore to the old build and get your Office App and other files back.

Note: The Roll Back option will be only available for ten days after the build is installed.

So, these are our proposed methods to retrieve the Office app. As you can see, they’re all accessible to anyone and easy to follow.

If you are facing other issues like Microsoft Office not opening, check our detailed guide to fix it.

In case your device is controlled by your organization, the best way is to use a configuration file created with the help of the Office Customization Tool to install and update Office.

If you’ve used another method, please let us know in the comments, and we’ll look at it to update this material.

How to Bypass MLB.tv Blackout Workaround [VPN Guide]

If you have an MLB.tv subscription, you might be interested in a simple workaround to bypass blackouts and watch all baseball games, no matter where you are.

There are several ways to do this, like using an Internet circumvention tool or a proxy server to change your IP address and geolocation. But the best way is to use a VPN.

What can I do if the MLB.tv app is temporarily unavailable?

The MLB.tv app might not be working because the services are temporarily unavailable. This can be a temporary situation or, less likely, MLB has blocked access to the services in your area.

If the MLB.tv app is temporarily unavailable, you have two options: you may either try to access it later, or use a VPN software and change your region.

The question you’re probably going to ask is: Does MLB.tv works with a VPN? And the answer is yes, MLB.tv works with VPN.

Granted, it’s not free, but you can count on a premium VPN to unblock streaming services like MLB.tv and protect your online privacy and digital security.

You might be tempted to use a free VPN, especially since the market is full of them, particularly on Android and iOS. However, free VPNs are notoriously dangerous for compromising your privacy and exposing you to malware.

On the other hand, premium VPNs are worth the money because they’re built to keep you safe online, no matter what. And here’s how you can use a VPN as a workaround to bypass MLB.tv blackouts. However, remember that you still require an MLB.tv active subscription plan.

How can I bypass MLB.tv blackouts with a VPN?

  1. Sign up for a premium VPN (we used ExpressVPN in our tests, and it’s excellent).
  2. Download and set up the VPN on your device.
  3. Open the application and connect to a VPN server from a region not affected by the MLB.tv blackout.
  4. Using your web browser, sign in to your MLB.tv account.
  5. Enjoy MLB.tv live!

We recommend using it because it’s the best VPN for accessing blocked websites and bypassing firewalls.

You can use ExpressVPN not only to hide your IP address and location but also to redirect all network traffic through VPN servers and encrypt your data. This way, you can defend your device from hacker attacks.

What else you must know about ExpressVPN:

  • Protects up to 10 devices
  • Works with Windows, Mac, Linux, iOS, Android, and routers
  • No logs or leaks
  • 24/7 live chat support
  • 30-day money-back guarantee

⇒ Get ExpressVPN

How can I watch MLB.tv without a VPN?

If you wish to try other workarounds besides a VPN to bypass MLB.tv blackouts, you can look into proxy servers, Smart DNS tools, and Internet circumvention apps like Psiphon or Lantern.

These solutions can spoof your geographical position to get around the MLB.tv restrictions. But you can’t count on them to encrypt your data traffic and keep you safe from cyber-criminals.

You should also give Opera a shot if you want to try its free VPN servers with MLB.tv. It’s an intuitive, fast, secure web browser with a built-in virtual private network solution.

Opera

Try Opera’s free VPN service to overcome MLB.tv blackouts at no cost.

In conclusion, there are several workarounds you can try to bypass MLB.tv blackouts or if the MLB.tv app is temporarily unavailable, like using a Smart DNS service, proxy server, Internet circumvention tool, or free VPN.

However, the best way to do it is by turning to a premium VPN, which ensures online privacy and security for your entire computer.

You might also be interested in our guide on unblocking websites and getting even more information.

If your Ballpark app will not load tickets or keeps crashing, follow our step-by-step MLB Ballpark app not working guide to get it working again.

If you have any other questions or suggestions, you can access our comments section below and message us.

Windows 10 PC Wakes up From Sleep by Itself? How to Stop it

If your PC wakes up from sleep by itself, that can cause certain inconveniences and unnecessary power consumption. While this isn’t a big problem, some users can’t put their PC to sleep at all.

In case you’re dealing with such an issue, in today’s guide, we’re going to take a closer look at causes and solutions that can help you fix it.

Why does my computer wake up from sleep on its own?

  • One or more devices are configured to wake up your PC. It can be your keyboard, mouse, or network adapter.
  • You have scheduled tasks that will wake up the PC automatically.
  • Certain services or applications can also wake your PC without your knowledge.

Windows 10 errors can be solved more easily with the help of specialized tools. In just a few minutes, you can have any errors fixed.

How do I stop Windows 10 from waking up from sleep?

Before we start fixing this issue, try connecting your mouse or keyboard to a USB 2.0 port instead of a 3.0 port, since that can help with this and many other issues.

1. Prevent your devices from waking up the PC

  1. In the Search bar enter device manager. Select Device Manager from the list of results.
    device manager search Windows 10 wakes up from sleep on its own
  2. Locate your mouse on the list and double-click it to open its properties.
    HID compliant mouse device manager PC wakes itself automatically
  3. Left-click or tap on the Power Management tab. You will need to uncheck the box next to Allow this device to wake my computer. Now left click or tap on the OK button.
    mouse power management PC wakes automatically
  4. Close all the windows you opened so far.
  5. Reboot the Windows 10 device.
  6. Place the Windows 10 devices into sleep mode and see if you still have this issue.

Keep in mind that you might have to repeat these steps for other input devices to fix this problem.

2. Prevent the network adapter from waking up your PC

  1. Open Device Manager, expand the Network adapters section, and double-click your network adapter to open its properties. Note: If you find more adapters there you will need to do the same steps for all of them.
    network adapter device manager Windows 10 PC wakes up on its own
  2. In the Properties window, click on the Power Management tab. Uncheck all checkboxes and click on OK to save changes.
    allow the computer to turn off this device to save power network adapter computer wakes up from sleep
  3. Check and see if you still have the same sleep mode issue now.

3. Use lastwake command

  1. In the search box, type cmd and choose Run as administrator.
  2. In the Command Prompt window, run the following command: powercfg –lastwake
    powercfg –lastwake cmd PC won't stay in Sleep Mode
  3. It will show you which device woke up your Windows 10 operating system last time.
  4. Now write in the Command Prompt window the following command: powercfg -devicequery wake_armed
    powercfg -devicequery wake_armed Windows 10 PC won't stay in sleep mode
  5. Now it will display the devices that can wake up your computer from sleep mode and you will only need to go and disable this feature as you did in the options above.

If you want to know more about these commands, be sure to check our guide on shell commands on Windows 10.

4. Check your scheduled tasks

  1. Press the Windows key + S and enter tasks. Select Task Scheduler from the list of results.
    task scheduler PC wakes up automatically
  2. In the left pane, navigate to Task Scheduler Library and then Microsoft. Next, go to Windows and select UpdateOrchestrator. In the right panel, double-click on Reboot.
  3. When the new window opens, go to the Conditions tab. Now uncheck Wake the computer to run this task option and click on OK. If you want, you can uncheck all the other options as well.
    uncheck Wake the computer to run this task under Conditions tab

Some users are also suggesting to disable this task completely. To do that, just do the following:

  1. Locate the Reboot task in Task Scheduler, right-click it and choose Disable from the menu.
    reboot disable in task scheduler update orchestator windows 10 wakes up from sleep
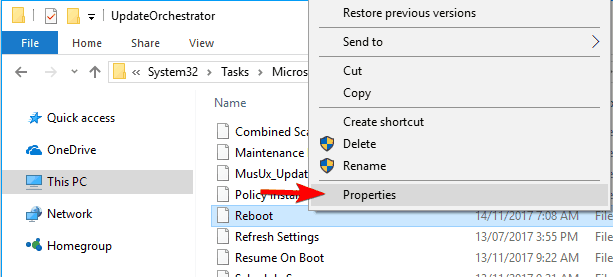
  2. After doing that, go to C:\Windows\System32\Tasks\Microsoft\Windows\UpdateOrchestrator
  3. Now locate the Reboot file, right-click it and choose Properties from the menu.
    Computer wakes from sleep automatically reboot properties
  4. Check the Read-only option and click on Apply and OK to save changes.
    reboot config script PC wakes up from sleep

Other applications can also cause this problem, and users reported that McAfee and Media Center tasks are responsible for this issue, so disable them if you have them on your PC.

5. Use Command Prompt

  1. Start Command Prompt as administrator.
  2. Now enter powercfg /waketimers
    command prompt powercfg /waketimers Windows 10 won't stay in sleep mode
  3. Now you should see the list of apps that can wake up your PC.

To stop your PC from waking up, simply find those apps and change their configuration or remove them from your PC. Users reported that Verizon apps, Go To Meeting app and Teamweaver can cause this problem, so be sure to disable them.

6. Disable UvoSvc service

  1. Open Command Prompt as administrator.
  2. Enter the following commands:
    sc stop UsoSvc
    sc stop "UsoSvc" cmd windows 10 wakes up from sleep mode
    sc config UsoSvc start= disabled
    sc config "UsoSvc" start= disabled Windows 10 PC wakes up automatically

After running these two commands the issue should be resolved.

7. Modify your registry

  1. Press the Windows key + R and enter regedit. Press Enter or click OK.
    regedit run PC won't stay in sleep mode
  2. In the left panel, navigate to HKEY_LOCAL_MACHINE\SOFTWARE\Microsoft\Windows NT\CurrentVersion\Winlogon
    HKEY_LOCAL_MACHINESOFTWAREMicrosoftWindows NTCurrentVersionWinlogon
  3. In the right panel, double-click PowerdownAfterShutdown.
  4. Set Value data to 1 and click on OK to save changes.
    PowerdownAfterShutdown dword value to 1

After doing that, the problem should be completely resolved.

How do you find out what keeps waking my computer?

  1. Press the Windows key + X and select Event Viewer.
  2. Expand Windows Logs and select System.
  3. Select the event that has Power-Troubleshoter source and check the Wake Source.

Alternatively, you can use the Command Prompt and commands that we used in the solutions above.

There you go, a few easy options will help you if your PC wakes up from sleep by itself. For more solutions, be sure to visit our laptop wakes up from sleep on its own guide.

Keep in mind that when your PC wakes up, you might get an ERROR_WAKE_SYSTEM message, but you shouldn’t worry too much about it.

To ensure that no random wake-up occurs, we advise you to disable wake on LAN and disable mouse wake-up as well. We have dedicated guides that explain how to configure these settings; don’t hesitate to check them out.

You can also write us below with any additional questions regarding this subject, and we will help you as soon as possible.

  • How do I change the Wake Up settings in Windows 10?
To create wake times, go to Change advanced power settings. There you can set up and modify events and times to automatically wake up your computer.
  • How do I wake up my computer from hibernation?
To wake your computer from Sleep or Hibernation, all you need to do is to short-press the power button. If that doesn’t work, read our comprehensive guide to solve the problem.

How to Mute One Specific App in Windows: 4 Ways

Besides the basic volume controls, Windows also has built-in options for adjusting and turning off the sound of specific applications.

Below we’ll walk you through a few different ways in which you can mute one app in Windows.

How do I turn off sound for a specific program?

1. Use the Windows 10 Volume Mixer

Note icon NOTE
Windows remembers your settings, so if you muted an app and restarted it, you have to keep in mind that it will still be muted.
  1. On the right side of your taskbar right-click on the Speaker icon.
  2. Click on Open Volume Mixer.
  3. Search for the program you wish to mute.
  4. Click on the Speaker icon to toggle mute/unmute.

2. Use the Xbox Game Bar

  1. Press the Windows key + G to open the Xbox Game Bar.
  2. In the Audio section, all active apps should show up separately.
  3. To turn off the sound, click the speaker icon next to the app’s name. To turn it down, move the slider left.xbox game bar mixer controls

2. Install Microsoft EarTrumpet

microsoft eartrumpet

Microsoft EarTrumpet is an excellent alternative to your default Volume mixer. The app is free on the Microsoft Store, and it comes with many features that will make controlling your volume easier.

You can set shortcut keys or even use your mouse wheel to mute or adjust the volume of all your apps individually. In addition, you can control all your output and input devices separately without trouble. The program also fits perfectly with the Windows interface, having a night/day mode.

⇒ Try EarTrumpet

4. Use SoundVolumeView

  1. Right-click on the device you want to mute.
  2. Select Create Desktop Shortcut.
  3. Navigate to your desktop and right-click on the newly created shortcut.
  4. Double-click the shortcut to mute or unmute it.

SoundVolumeView is a minimalist tool that lets you create specialized shortcuts. The program shows all the available sound devices and programs on your computer, as well as information about their volume, and whether they are muted or not.

⇒ Try SoundVolumeView

Muting a program on Windows 10 is as easy as it gets. Just follow the steps above, and you will be good to go. Plus, it comes in handy when your sound automatically gets muted when you’re in a call.

If you have any other information regarding the subject, do not hesitate to tell us in the comment section below.

Xbox Game Bar Not Working on Windows 11 [Fix]

If you’ve recently upgraded to Microsoft’s latest OS and have discovered that the Xbox game bar is not working on Windows 11, you’re not alone. So, first things first.

Does Windows 11 support Xbox game bar? Definitely, Xbox is one of the default applications in Windows 11.

For those of you wondering how to open the Xbox game bar in Windows 11, it could not be more simple. Simply hit the Windows key plus G.

Now, a large number of new users are booting up their new OS for the first time and discovering that the Xbox GameBar is no longer visible when invoked by the Start button or that the shortcut no longer works.

Here are some commonly reported issues:

  • Xbox game bar can’t record Windows 11
  • Xbox game bar not opening, crashing in Windows 11
  • Windows G not working Windows 11
  • Xbox game bar FPS counter not working Windows 11 – Closely linked to this issue, we have the Xbox game bar performance widget not working / not showing widgets
  • Xbox game bar not showing friends
  • Finally, Xbox game bar isn’t supported for this game’s current settings

Why is Xbox game bar not working on Windows 11?

As it turns out, there is a possibility that the process of upgrading to Windows 11 will result in the deactivation of this feature.

Here are some more possible causes of the Xbox game bar issue to consider:

➡ Game bar is disabled altogether – It makes no difference if you had the app enabled before upgrading to Windows 11. Many reported that this feature may deactivate automatically during the upgrade process.

➡ Gpedit disabled the app – Additionally, if you are using Windows 11 PRO or if your PC is a member of an organization that is structured locally, it is conceivable that the Xbox game bar feature will be restricted by a Local Group Policy.
➡ Xbox game bar component is corrupted – Another reason why the feature won’t start even if you specifically enabled it is because of dependency corruption. Microsoft, fortunately, has a few mitigating measures for this type of problem.
➡ Xbox game bar is disabled from Registry – This behavior can be expected if a hard-coded Registry value has been set to disable this component. When you update to Windows 11, the enforcement (which is represented by a DWORD value) will be carried over as well.
➡ IeFrame Dynamic Link Library is corrupted – This problem might occur as a result of a DLL requirement (ieframe.dll) that the Xbox game bar relies on while running on Windows 11.
➡ Faulty Windows update – Another likely culprit responsible for this strange behavior with the Xbox game bar is a partially incompatible upgrade that ends up interfering with the broadcasting component of the console’s operating system.

How to fix Xbox game bar not recording on Windows 11?

In addition to the steps below, you can also have a go and these handy solutions:

  • Reinstall the Xbox Game Bar from the Microsoft Store
  • Try modifying the captures folder
  • Update or roll back Windows updates, according to your specific case

1. Enable the bar from Settings

  1. Press the Windows key + I to open the Settings app, then click on the Gaming option from the left panel followed by Xbox Game Bar from the right side.
    gaming-xbox-game-bar-settings xbox game bar not working windows 11
  2. Once you’re inside the Xbox Game Bar menu, enable the toggle associated with the Open Xbox Game Bar using this button on a crontroller option.
    enable-xbox-bar  xbox game bar not working windows 11

And that is how to enable the Xbox game bar on Windows 11. Easy, right? Once you’ve completed the steps above, restart your computer and wait for the next startup to complete.

Finally, just press the Windows + G keys to open up the Xbox game bar.

Need a full walkthrough of launch methods and shortcuts? Check this guide on how to open Xbox Game Bar.

2. Reset the Xbox game bar component ✅

  1. 1. Press the Windows key + I to open up the Settings window.

  2. 2. Then, select the Apps option from the left panel followed by Apps & Features from the right side.

    apps-apps-and-feature xbox game bar not working windows 11
  3. 3. Once you’re inside the Apps & Features menu, use the search bar to find the Xbox Search Bar app.

  4. 4. Now, click on the three-dot icon associated with it and choose Advanced Options.

    xbox-three-dot-advanced xbox game bar not working windows 11
  5. 5. Inside the Advanced Menu, scroll down to the Reset tab and click on Repair first.

    repair-xbox-bar xbox game bar not working windows 11
  6. 6. If the Game Bar still won’t work in Windows 11, hit the Reset button instead.

  7. This is how to repair, respectively how to reset the Xbox game bar in Windows 11. Note that resetting the game bar will delete all data associated with this app, so proceed with caution.

3. Enable the feature in Registry Editor

  1. Press the Windows key + R to open up a Run dialog box, then type in regedit and press Ctrl + Shift + Enter to open up Registry Editor with admin access.
    regedit-windows-11  xbox game bar not working windows 11
  2. Navigate to Software under HKEY_CURRENT_USER, then go to Microsoft, followed by Windows, CurrentVersion and lastly GameDVR.
    gamedvr-regedit  xbox game bar not working windows 11
  3. If the AppCaptureEnabled key is missing from the right panel, right click anywhere and choose New, followed by DWORD 32-bit Value or the 64-bit value and name it to AppCaptureEnabled.
    new-key-xbox  xbox game bar not working windows 11
  4. Double click on AppCaptureEnabled and ensure the Base is set to Hexadecimal and the Value data is set to 1. Click OK to save the changes.
    appcaptureenabled  xbox game bar not working windows 11

Close the Registry Editor and reboot your PC to let the changes take effect. Once your computer has started, try to launch the feature by pressing Windows + G.

4. Repair the ieframe.dll file

  1. Press the Windows key + R to open up a Run dialog box, then type in cmd and press Ctrl + Shift + Enter to open up Command Prompt with admin access.
     cmd-run xbox game bar not working windows 11
  2. Once you are inside the elevated Command Prompt, type or paste in the following commands one by one and press Enter after each:
    prompt sfc/scanfile=c:\windows\system32\ieframe.dll sfc/verifyfile=c:\windows\system32\ieframe.dll assoc sfc /scannow
    prompt-cmd  xbox game bar not working windows 11

Once the processes have been successfully run, reboot your PC and see if the Xbox game bar functionality has been restored.

If that does not help, specialized tools can run a full diagnostics scan of your PC for any missing or damaged DLL files, offering you a detailed report of all faulty elements.

After detecting these impediments, it will replace them with updated equivalents from its large database.

5. Enable Xbox game bar in Local Group Policy Editor

  1. Press the Windows key + R to open up a Run dialog box, then type in gpedit.msc and press Ctrl + Shift + Enter to open up Command Prompt with admin access.
    gpedit  xbox game bar not working windows 11
  2. Navigate to Local Computer Policy, followed by Administrative Templates, then Windows Components and lastly Windows Game Recording and Broadcasting.
    windowscomponents  xbox game bar not working windows 11
  3. Double-click on the Enables or disables Windows Game Recording and Broadcasting and switch the toggle to Enabled then click on Apply to save the changes made.
    wnable-windowsbroadcast  xbox game bar not working windows 11

As soon as you have changed the status of the Enables or disables Windows Game Recording and Broadcasting policy, restart your computer and check to see if the Xbox game bar is operational.

Is Windows 11 good for gaming in 2022/2023?


? You may look forward to some gaming-related features that have been borrowed from Xbox Series S/X. By making use of fast SSDs, DirectStorage can significantly shorten lead times and improve texture loading while also significantly reducing the CPU strain on those operations.

? There’s also Auto-HDR, which employs machine learning and artificial intelligence to add an HDR setting to any game, regardless of whether it supports it or not. Of course, you’ll need a compatible monitor to make use of it.

? Windows 11 is also tightly integrated with the Xbox app, allowing users to play game titles on their PC if they have an Ultimate subscription, as well as access to Xbox Cloud Gaming, where they can find and play their favorite Xbox games from anywhere in the world, even those that are not available on a PC.

For more information on what’s new in Windows 11 concerning Xbox, check out our post on Xbox Game Pass best features, games & deals.

If you discover that your Xbox game bar is continually unstable and cannot be disabled, please read the linked article to learn how to resolve the problem.

Alternatively, take a look at our guide on how to fix Xbox game issues on Windows 10 for more potential answers to your questions. They may be applied in Windows 11 too.

This isn’t the only problem, and we already covered what to do if Windows Alt R not working, so don’t miss our guide to see how to fix it.

You can continue by learning how to adjust your recordings with the guide at how to edit Xbox clips on PC, which explains the full process for improving and exporting your gameplay clips.

Do let us know in the comments section below which approach worked best for you, as well as what your current favorite Xbox game is!

FIX: Windows 10 App Icons are Missing / Not Showing Up

Today, while going through the latest updates on my primary Windows 10 laptop and my secondary Windows 8.1 laptop, I realized that there were some issues with the app icons. As you can see for yourself in the screenshot below, the thumbnails for certain apps are missing, which isn’t necessarily a big issue, but if it were to happen to even more apps, or to all of them, then we must agree that it would’ve looked kind of ugly, isn’t it so?

How to fix Windows 10 apps icons missing?

What I must say, however, is that my “old” laptop hasn’t been yet updated to the latest Windows Store look, so this could be a potential problem. Meanwhile, I scoured the forums to find some solutions and here’s what I found.

1. Run the Windows Store Apps troubleshooter

If there is something wrong with your Windows 10 Apps, the first thing you need to do is run the built-in app troubleshooter. With the help of this tool, you can quickly fix various issues affecting your apps, including app freezes, crashes or missing app icons.

In order to launch the app troubleshooter, go to Settings, click on Update & Security and then select troubleshoot. Locate the Windows Store Apps troubleshooter and run it.

windows store apps troubleshooter

2. Repair or reset apps

Another quick solutions consists in repairing or resetting the problematic apps. This solution often works especially if only certain app icons are not showing up. Here are the steps to follow:

  1. Go to Settings > select Apps
  2. Go to Apps & Features and select the problematic app
  3. Select Advanced options and first try to repair the app.
  4. If the app icon is still missing, you can also use the reset option.
repair reset windows 10 app

3. Run SFC scan

If the problem persists, try running a System File Checker scan. Corrupted or missing system files may also cause some app icons not to show up.

To run SFC, simply launch Command Prompt as an administrator and enter the sfc /scannow command. Hit Enter and wait for the scanning process to complete.

sfc scannow

4. Rebuild the icon cache

If your Windows 10 icons are not showing correctly even after following the instructions listed below, try rebuilding your icon cache.

  1. Go to  C:Users%username%AppDataLocalMicrosoftWindowsExplorer
  2. Delete all the icon files listed in the respective folder in order to rebuild and purge the icon cache.Delete icon cache files
  3. Restart your PC and check if the app icons are available.

5. Additional solutions

  • Change your display resolution
  • Uninstall recently installed software and updates, especially if the problem occurred shortly after you installed the latest updates.
  • Uninstall the problematic apps
  • Run an in-depth antivirus scan
  • Create a new user account and check if the app icon problem persists
  • Disable Tablet Mode
  • Disconnect your second monitor if you’re using one.

Have you experienced a similar problem, by any chance? And if so, what have you done to solve it? My advice is to make sure you have deployed the latest update which brings a new and much needed visual revamp to the Windows Store, as that might prove to be quite helpful.

How To Fix Antimalware Service Executable High CPU

If your PC suddenly slows down and Task Manager shows Antimalware Service Executable using high CPU, you’re not alone. This Windows process often causes performance issues, especially during background scans.

In this guide, we’ll explain what it is, why it spikes CPU usage, and how you can reduce its impact without compromising system security.

Note icon NOTE
If you choose to stop the service, check out this guide on how to disable the antimalware service executable in Windows 10 or Windows 11 safely and securely.

How do I stop Antimalware Service Executable from using so much CPU?

1. Reschedule the Windows Defender scan

  1. Press the Windows key + R, type taskschd.msc, and click OK.
    taskscd antimalware service executable
  2. Navigate to the path below in the left pane: Task Scheduler Library > Microsoft > Windows
  3. Now, double-click the Windows Defender option in the left pane.
  4. Next, double-click the Windows Defender Scheduled Scan option.
    defender task
  5. From here, uncheck the Run with highest privileges box.
    run with
  6. Click the Conditions tab at the top, uncheck all the entries under it, and click OK.
    conditions antimalware service executable

If the Antimalware Service Executable registers high CPU usage, it might be because the Windows Defender runs with the highest privileges. You need to disable this and reschedule it to prevent the impact of the process.

2. Add Windows Defender to the execution list

  1. Press the Windows key, type virus, and select Virus & threat protection.
    virus
  2. Click on Manage settings.
    manage
  3. Now, click the Add or remove exclusions option under the Exclusions section.
    add or remove antimalware service executable
  4. Click Add an exclusion button and select the Folder option.
    add an
  5. Next, navigate to the path below: C: Program Files/Windows Defender
  6. Finally, select the Windows Defender folder and click the Select Folder button.
    select folder

If the Antimalware Service Executable service registers high CPU usage, you can fix it by preventing Windows Defender from scanning its folder.

3. Disable real-time protection

  1. Press the Windows key, type virus, and click Virus & threat protection.
    virus
  2. Click the Manage settings option.
    manage antimalware service executable
  3. Now, toggle the switch for Real-time protection backward to disable it.
    real-time  antimalware service executable

Since the Antimalware Service Executable process runs to protect your PC, you can disable the real-time protection. However, this will leave your system vulnerable.

To keep your PC secure, you should install a third-party antivirus to protect against threats while disabling Windows Defender simultaneously.

You should look for antivirus software known for its powerful protection capabilities. Ideally, one that also uses advanced machine learning to detect even the most hidden viruses.

The software also scores excellent regarding false positives, which means it will not detect unharmful programs as potentially threatening or blocking them.

TotalAV

TotalAV Use an antivirus solution that offers reliable cyber threat protection with minimal impact on resources.
Free Trial Visit Website

4. Disable Microsoft Defender

  1. Press the Windows key + R, type regedit, and click OK.
    regedit
  2. Navigate to the path below in the left pane: HKEY_LOCAL_MACHINE\SOFTWARE\Policies\Microsoft\Windows Defenderdefender
  3. Now, right-click the space in the right pane and choose New > DWORD (32-bit) Value.
    new dword antimalware service executable
  4. Type DisableAntiSpyware as the name of the new DWORD and double-click it.
    disableanti
  5. Finally, set its Value data to 1 and click OK.
    value data

If all the solutions above fail to fix this issue, you might need to disable Windows Defender altogether. This will automatically render the process useless.

Hopefully, it will clarify why the Antivirus Service Executable takes up so much CPU and how or if you should stop it.

Why is Antimalware Service Executable using so much CPU?

The service is part of Windows Defender and runs in the background daily. It might even start upon booting, especially if the antivirus solution is marked to also wake up upon startup.

You can notice the service if you open Task Manager since it will remain active while running. You will also be able to see how many resources it takes.

Indeed, the Antimalware Service Executable will use a large amount of the CPU when scanning the device for malware or when a certain running program causes Windows Defender to monitor it in real time.

Is it safe to disable the antimalware service executable? Some working solutions to reduce antimalware service executable memory usage are listed below.

Wrapping up

Take a closer look at our thorough list of unlimited validity antivirus software to see more awesome security products trusted by millions worldwide.

Also, if you are facing other issues like the Microsoft Windows Search Indexer high CPU usage, check our detailed guide to fix it quickly.

We encourage you to share your experience with the service and tell us which of our solutions worked for you in the comment section below.

Fix the Windows Update Error 0xc1900201 [Solved]

By the latest reports, three-quarters of Windows 10 users have obtained Windows 10 Fall Creators Update.

However, some users recently prompted to upgrade to version 1709 bump into an upgrade error based on the code 0xc1900201.

Seemingly, they cannot overcome this error after a few tries and can confirm that the connection or update services are responsible for the error at hand.

We prepared a list of the most common solutions that should fix the issue or provide a viable alternative. So, if you’re stuck with the 0xc1900201 Windows Update error on Windows 10 or Windows 11, make sure to check the list below.

How can I fix the error code 0xc1900201?

1. Expand System Reserved Partition

This shouldn’t be something with what end-users should meet, but that’s Windows 10 for you. When it works – it works fine; when it doesn’t – you’ll need to turn to complex workarounds to make it work.

In this scenario, you’ll need to resize your System Reserved Partition to obtain the latest upgrade, Falls Creator Update.

All chances are that its nominal values vary around 100 MB, while you’ll need 200 to 600 to upgrade to the latest Windows 10 iteration.

This is a rather complex operation, and many tech-savvy users advise using some partition-managing third-party tool. The best one and the most simple to use is EaseUS Partition Manager.

Also, it won’t cost you a thing to back up your system before we move through the steps.

  1. Firstly, create a system repair disk in case something goes awry.
  2. Download EaseUs Partition Master.
  3. Install this nifty tool and run it.
  4. Select your system partition. The one where Windows 10 is installed initially (most of the time, is C:)
  5. Click Resize/Move.
  6. Under the Decide size and position, reduce the available space to approximately 600 MB.
  7. After that, you should be able to see free and unreserved Unallocated space to restart your PC.
  8. Once it boots again, press the Windows key + R to open the Run elevated command line.
  9. In the command line, type diskmgmt.msc and press Enter.windows 10 upgrade error 0xc1900201
  10. Right-click on the System Reserved Partition and click Extend Volume.windows 10 upgrade error 0xc1900201
  11. Add the unallocated space you previously created to System Reserved Partition and confirm changes.
  12. Restart your PC and try upgrading again.

After that, you should be able to install all significant updates without any issues whatsoever.

2. Use Media Creation Tool

If the upgrade procedure suddenly crashes every time you give it a go, you may need to change how the upgrade is distributed and the installation source.

Windows Update is pretty plagued with issues, so your optional way out of this is to use an external source: USB or DVD with the installation files. You can create such media with Media Creation Tool.

If the problem is in connection or upgrades file distribution, this should resolve it accordingly. Make sure to follow the steps below to create an installation media and upgrade to Windows 10 with it:

  1. First, download Media Creation Tool by following this link.
  2. Next, run the tool and accept the Licence Terms.
  3. Choose Upgrade this PC, and the downloading process should commence.
  4. Once it downloads files, Media Creation Tool will start applying upgrades.Windows 10 Setup
  5. This procedure should take up to 2 hours, depending on your Windows 10 version and bandwidth.

3. Perform a clean reinstallation

Finally, if none of the previous steps fell short, you can use the aforementioned Windows 10 installation media and perform a clean reinstallation.

Once your system is completely renewed, it should pack the Fall Creators Update, a.k.a, version 1709.

If you’re unsure how to perform a clean reinstallation of Windows 10, check this article for in-depth insight and a step-by-step explanation of the complete procedure.

With that, we can conclude this article. However, if you’re still unable to make it work and the same error code 0xc1900201 reappears, don’t forget to send your ticket to Microsoft. And if encountering the Failed to collect hardware data error code 0xd0000034, this guide can help you.

On the other hand, if you managed to resolve the issue alternatively, we’d be grateful if you shared it with us in the comments section below.

  • Why does Windows 10 version 1903 take so long to install?
The reason for a slow installation might be the free space on the drive. Another reason might be a slow Internet connection.

Ethernet Controller Not Showing Up in Device Manager (Fix Guide)

If there’s no Ethernet controller in the Device Manager, you won’t be able to access wired internet connections. This often means the Ethernet driver or controller is missing, corrupted, or not installed properly.

This article discusses what to do if you see no Ethernet adapter in Device Manager.

How can I fix the Ethernet adapter if it’s not showing?

1. Show hidden devices

  1. Press Windows + R, type devmgmt.msc, and hit Enter.
  2. Click the View menu and select Show hidden devices.
  3. Once done, restart the computer, expand the Network adapters section and observe if you can see your Ethernet drivers.

2. Reset Winsock

  1. Click the Start menu, type cmd, and select Run as administrator.
    ethernet adapter not showing
  2. Now type the command below and hit Enter.
    netsh winsock reset
  3. Exit the command prompt and restart your computer.

3. Clean up network devices

  1. Click the Start menu, type cmd, and select Run as administrator.ethernet adapter not showing
  2. Now type the command below and hit Enter.
    netcfg -d

Once done, restart your computer and verify whether the Ethernet port is still not showing in the Device Manager if that’s the case, head to the next solution.

4. Change power management settings

  1. Press Windows + R, type devmgmt.msc, and hit Enter.
  2. Right-click on your network adaptor and select Properties.
    ethernet adapter not showing
  3. Click on the Power Management tab and uncheck Allow the computer to turn off this device to save power.
    ethernet adapter not showing

5. Enable the ethernet adapter

  1. Press Windows + R, type control panel, and hit Enter.
  2. Navigate to the path below:
    Control PanelNetwork and InternetNetwork and Sharing Center
  3. Click on Change Adapter Settings from the left pane.
  4. Right-click on your ethernet adapter and select Enable.

6. Reset BIOS

  1. Press and hold Shift while restarting the computer.
  2. Press the Function key before the computer restarts, enabling you to enter BIOS (Varies by manufacturer).
  3. Look out for Load Setup Defaults, Load factory Defaults, Reset to Default, Standard CMOS Features, Load Setup Defaults, Clear BIOS Settings, or something similar.
  4. Navigate to Save and Exit using the Arrow keys and then hit Enter. 

7. Update network adapter driver

  1. Press Windows + R, type devmgmt.msc, and hit Enter to open Device Manager.
  2. Right-click on Network adapters and select Scan for hardware changes.Scanning for network adapters hardware changes
  3. If nothing appears, right-click on Network adapters again, choose Update driver.update network adapter driver
  4. Select Search automatically for drivers.
  5. Restart your computer and check if the Ethernet controller appears.

The LAN card may be defective if your Ethernet is not showing up in Device Manager, even after following all the steps. You can either replace the card or get a USB ethernet adapter.

Please let us know what fix helped you resolve the issue in the comments below. Also, remember to leave there any other questions or suggestions that you may have.

FAQs

Why is the Ethernet controller not showing up in Windows 10?

It’s often due to missing drivers, hidden devices, or disabled hardware. Running a scan for hardware changes or reinstalling the driver usually resolves it.

Is the Ethernet controller missing a sign of hardware failure?

Rarely. It’s more likely a software or BIOS issue, but you can test using a USB-to-Ethernet adapter to confirm.

Can a Windows Update remove my Ethernet controller?

Yes. In some cases, Windows updates can misconfigure or uninstall drivers. Manually reinstalling them should fix the problem.

Fix the Windows Update Error 0x80070643 (Windows Defender)

Users complain that the Windows Defender update fails to install due to the 0x80070643 error code. The error is likely caused by malware, file corruption, driver malfunction, or even improper system settings.

The full error message states: There were problems installing some updates, but we’ll try again later. If you keep seeing this, and want to search the web or contact support for information, this may help. Definition Update for Windows Defender – Error 0x80070643.

If you encountered the 0x80070643 error on Windows 11, check out our dedicated guide for more help.

How do I fix the Windows Defender 0x80070643 error?

1. Use antivirus removal tools

When you uninstall a third-party antivirus using the Uninstall option from Control Panel, some files might remain undetected, preventing you from running and updating Windows Defender.

Even if you uninstalled your previous antivirus and have been using Windows Defender for quite some time without any problems, you’re not safe.

The remnants of your previous antivirus may now be causing the 0x80070643 Windows Defender error, and since they are hard to remove manually, you need to deal with them some other way.

This is where uninstaller software comes in handy to remove your antivirus or any leftover files. It is specially designed to remove the selected application and all its files and registry entries, leaving a clean space.

Completely uninstall your old antivirus programs, restart your computer, and Windows Defender should be able to install the latest updates.

2. Check your system files

  1. Press Windows Key + X and choose Command Prompt (Admin) from the menu.
  2. You can also use PowerShell (Admin).
    Windows Defender not getting updated
  3. Type the following command and hit Enter: sfc /scannow
    Windows Defender update connection failed

The System File Checker tool repairs corruption in system files. Use this tool to verify whether Windows Defender is corrupted, which could explain why you can’t install the updates.

To perform an SFC scan, you need to do the following:

If you can’t run the SFC scan or if SFC didn’t solve the problem, you might have to use a DISM scan instead. To do that, follow these steps:

  1. Start Command Prompt as administrator.
  2. Now run the following command and press Enter: DISM /Online /Cleanup-Image /RestoreHealth
    Windows Defender update failed
  3. DISM scan will now start.
  4. Remember that this scan can take up to 20 minutes or more, so don’t interrupt it.

Once the DISM scan is finished, check if the problem is resolved. If the issue persists, or if you couldn’t run an SFC scan before, try rerunning the SFC scan and check if that solves the problem.

3. Perform a Clean boot

  1. Press the Windows Key + R and enter msconfig.
  2. Press Enter or click OK.
    Windows Defender update won't install
  3. The System Configuration window will now appear.
  4. Go to the Services tab and check to Hide all Microsoft services.
  5. Now click Disable all button.
    Windows Defender update failed
  6. Go to the Startup tab and click Open Task Manager.
    Windows Defender update stuck
    • A list of startup applications will now appear.
  7. Please select the first item on the list, right-click it and choose Disable from the menu.
  8. Now repeat this step for all startup applications.
    Windows Defender update connection failed
  9. Once you disable all startup applications, close Task Manager and return to the System Configuration window.
  10. Click Apply and OK to save changes and restart your PC.
    Windows Defender update won't install
  11. Once your PC restarts, check if the problem still appears.
    • If not, go back and enable disabled apps and services one by one until you find the one causing the issue.
  12. When you find it, delete or disable it, and the problem will be permanently resolved.

Third-party applications can sometimes interfere with Windows and cause Windows Defender update to fail and the Windows Update error 0x80070643 to appear. You might be able to fix it by performing a Clean boot.

4. Use a third-party antivirus software

If you want to avoid all the problems related to Windows Defender, you can switch to a better security tool, such as third-party antivirus software.

Not only will this software do a better job at protecting your data from being stolen or stopping any virus from infecting your device. It should also have no errors or glitches.

You will also benefit from other useful features that protect your PC and allow you to browse the internet carelessly and without worry.

TotalAV

The ultimate security tool uses AI and machine learning to provide excellent protection.
Check Price Visit Website

5. Restart the Security Center Service

  1. Press Windows key + R and launch run.
  2. Type services.msc and hit Enter.
    Windows Defender not getting updated
  3. In the Services tab, search for Security Center.
  4. Right-click on Security Center, then click on Restart.
    Windows Defender update connection failed

6. Perform a final manual update

  1. Go to Microsoft’s Malware Protection Center portal.
  2. Follow the instructions to download and install the Antimalware, antispyware updates, and Network Inspection System updates available for your system.
Note icon NOTE
The manual ADL packageu00a0update installs silently. To ensure the manual update worked correctly, check with the Windows Defender Client UI to see if it reports the latest threat definition version.

7. Disable .NET Framework

  1. Press the Windows Key + S and enter features.
  2. Select Turn Windows features on or off.
    Windows Defender update stuck
  3. When the Windows Features window opens, disable Windows Communication Foundation HTTP Activation and Windows Communication Foundation Non-HTTP Activation.
  4. Now click OK to save the changes.
  5. Restart your PC and check if the problem is solved.

According to people, sometimes .NET Framework can cause problems with Windows Defender updates. However, you might be able to fix this problem simply by disabling it.

Several users suggest repairing your .NET Framework installation as a potential solution, so you might want to try that as well.

8. Check for updates from Windows Defender

  1. Press Windows Key + I to quickly open the Settings app.
  2. Go to the Update & Security section.
    Windows Defender update failed
  3. In the left pane, select Windows Defender and then click the Open Windows Defender Security Center button.
    Windows Defender update connection failed
  4. Then, go to Virus & threat protection section.
    Windows Defender update stuck
  5. Now go to Protection updates.
    Windows Defender update won't install
  6. Click the Check for updates button.
    Windows Defender not getting updated

Windows Defender will now download the available updates. In addition, several users reported that this method fixes the kb2267602 error 0x80070643 for them, so feel free to try it out.

If you’re having problems with downloading updates, you might be able to fix the problem by trying to download updates directly from Windows Defender.

9. Reset Windows Update components

  1. Start Command Prompt as administrator.
  2. Now enter the following commands:
    net stop wuauserv
    net stop cryptSvc
    net stop bits
    net stop msiserver
    ren C:WindowsSoftwareDistribution SoftwareDistribution.old ren C:WindowsSystem32catroot2 Catroot2.old
    net start wuauserv
    net start cryptSvc
    net start bits
    net start msiserver

Sometimes there might be a bug with Windows Update components, which can cause the Windows Update error 0x80070643 error to appear. You might be able to fix the problem by running several CMD commands.

By running these commands, you’ll stop all services associated with the Windows Update, rename the affected directories and then restart the services. This is a simple solution, so feel free to try it out.

What are some common Windows Defender issues?

Windows Defender offers solid protection, but if you want to keep your Windows 10 PC protected, it’s important to update Windows Defender regularly.

Unfortunately, update issues can occur, and speaking of cases, these are some of the common problems that users reported:

  • Windows Defender update failed – If the Windows Defender update fails, the issue might be a third-party antivirus tool. If your previous antivirus isn’t completely removed, sometimes leftover files can interfere with Windows Defender and cause this issue to appear. To fix it, remove any leftover files.
  • Windows Defender update stuck – Sometimes, your Windows Defender can get stuck during the update process. If this happens, be sure to repair your system files using both SFC and DISM scans.
  • Windows Defender update connection failed – If you get this error message while trying to update Windows Defender, your third-party firewall might be an issue, so be sure to disable it or uninstall it.
  • Windows Defender update won’t install – If the Windows Defender update doesn’t install, the issue might be a problematic application. However, you can fix the problem simply by performing a Clean boot.
  • Windows Defender not getting updated / security intelligence update error – Several users claim that Windows Update components can cause this issue, so try resetting them and check if that solves the problem.

We’ve written extensively about Defender update problems before. So bookmark our article on what to do if Windows Defender won’t update in case you need it later.

We hope these fixes work for you in solving the Windows Update error 0x80070643, related to Windows Defender.

If you’ve found other workarounds for the Windows Defender 0x80070643 issue, tell us more about your experience in the comment section below.

Bluestacks: Your Device Isn’t Compatible with This Version [Fixed]

One of the most popular Android emulators on the market is Bluestacks, but many users reported an app incompatibility error stating that your device isn’t compatible with this version in Bluestacks.

This happens when trying to run certain applications or games and obviously, it can be a problem as it will prevent you from doing so.

Don’t worry, in today’s article, we’re going to show you how to fix your device isn’t compatible with this version in Bluestacks error.

Why BlueStacks is not compatible with my device?

Now, this isn’t the only issue that users are dealing with. In fact, there are various problems that can appear in Bluestacks, and here are some similar anomalies that users reported:

  • Your device isn’t compatible with this version Bluestacks PUBG, Fortnite – The Bluestacks game not compatible issue is usually caused by your settings. To fix it, increase the number of cores and amount of RAM in Bluestacks settings.
  • Your device is not supported Mobile Bluestacks, at the moment PUBG Bluestacks – In order to run certain games, you’ll need to have a 64-bit version of Bluestacks installed. A 64-bit version offers better performance by better utilizing your hardware, so be sure to switch to the 64-bit version as soon as you can.
  • Bluestacks device not compatible Pokemon Go – If certain applications aren’t supported, you can maybe avoid this issue simply by downloading the application from a third-party source.
  • Bluestacks this app is incompatible with your tablet – Sometimes you might not have the latest version of Bluestacks installed, and that can cause the Bluestacks app not compatible issue.
  • Your device isn’t compatible with this version emulator (Bluestacks Nikke, Genshin Impact)
  • Bluestacks 5, 4, 10 your device isn’t compatible with this version

How do I fix the Device not compatible error in Bluestacks?

  1. Change the engine settings
  2. Install the 64-bit version of Bluestacks
  3. Try downloading the APK file from a third-party source
  4. Delete the data and cache for Google Play Store
  5. Install the latest version of Bluestacks
  6. Reinstall Bluestacks
  7. Try a different emulator

1. Change the engine settings

  1. Open Bluestacks.
  2. Navigate to Settings, and select Engine.
  3. Change the number of cores to 4, and change the memory to at least 3GB.
  4. Next, check the option Use advanced graphics mode.
  5. Save changes and check if that solves your problem.

Sometimes you might get a Device not compatible message in Bluestacks due to your settings, and this can prevent you from running certain applications and games.

However, you can fix this problem simply by making a couple of adjustments, just follow the above steps to quickly solve this issue.

If you encounter a Bluestacks black screen on your PC, just follow our detailed guide and fix it in no time.

2. Install the 64-bit version of Bluestacks

Many users reported Device not compatible message while trying to run Fortnite in Bluestacks. It turns out that in order to run Fortnite, you need to have a 64-bit version of Bluestacks installed.

In case you don’t know, most software comes in 32-bit and 64-bit versions, and if you have a 64-bit processor, which you most likely do, it’s advised to use a 64-bit version of Bluestacks.

The 64-bit version will make better use of your hardware and CPU and bring you improved performance, so there’s no reason not to use it.

After you switch to the 64-bit version of Bluestacks, try running Fortnite again and check if the problem is still there.

3. Try downloading the APK file from a third-party source

If you’re getting Device not compatible message in Bluestacks, the problem might be related to the application you’re trying to run. Some applications won’t be able to run or download on Bluestacks at all.

However, you can always circumvent this problem simply by downloading the APK file from a different source.

There are many third-party websites that host APK files, so download the application from one of these websites and run the APK file that you’ve downloaded in Bluestacks.

You should then just install the application and the problem should be resolved.

4. Delete the data and cache for Google Play Store

  1. Navigate to the System app in Bluestacks.
  2. Go to the Apps and select All.
  3. Select Google Play Store, and click Clear data.
  4. After doing that, repeat the previous step for Google Play Services.

According to users, one way to fix this problem is to delete data and cache for Google Play Store.

Sometimes your cache can become corrupted and that can interfere with the application download. To fix this problem, you just need to clear the cache by following the above steps.

Once you clear the cache and data for both applications, check if the problem is still there. Alternatively, you can download HD GuestCommandRunner from Bluestacks and use it to clean the cache.

Also, find the quickest solutions to the Latest version already installed error in our comprehensive guide.

5. Install the latest version of Bluestacks

If you’re getting a Device not compatible error in Bluestacks, it’s possible that the issue is caused by an outdated version of Bluestacks.

The older version might have certain bugs, or they might not support the latest features, and that can lead to this and many other errors. To fix this issue, update Bluestacks to the latest version.

After updating your application to the latest version, try running the app that is giving you this error and check if that solves the problem.

6. Reinstall Bluestacks

  1. To manually uninstall Bluestacks, open Control Panel and click on the Programs icon.
  2. Select Uninstall a program. 
  3. Find Bluestacks in the program list and double-click it.
  4. If an Are you sure you want to uninstall? dialog box will show up, select Yes and wait for the process to complete
  5. When the uninstallation is finished, you will receive a The product has been successfully uninstalled prompt.

At this point, there is a possibility that some empty files or the installation wizard are still on your computer.

The Device not compatible error may appear because your Bluestacks installation files are corrupted, in which case we recommend a full reinstallation of the software. 

This can step in the way if you want to reinstall the program, and it is also unnecessarily using resources. To make sure that everything related to the Bluestacks software is removed from your computer:

  1. In your main drive (the one where Windows OS is installed) head to the ProgramData folder. The folder may be hidden, in which case you will have to manually type the location of your main drive and the name of the folder into the location tab, for example, if your main drive is C, then you will type: C:ProgramData.
  2. Find the Bluestacks Setup folder and delete it.
  3. Open the Run command prompt by pressing Windows key+R or by typing Run in the Windows Search Box.
  4. Type %temp%, and click Ok.
  5. Delete everything in the Temp folder.

Now the uninstallation is fully completed, we can proceed to reinstall Bluestacks:

  1. Head to the Bluestacks’ homepage.
  2. Click on the Download Bluestacks button.
  3. Open the installation wizard.
  4. Click the Install now button.
  5. When the installation is complete, the user interface will open automatically.

7. Try a different emulator

If you simply cannot shake off the Bluestacks device not compatible error, consider a different option. Which app can I use instead of BlueStacks? Here’s the big question and obviously, the big answer will follow.

If we had to pick a solid Bluestacks alternative, we would recommend trying out LDPlayer.

It allows you to play mobile games on a PC without facing any issues, at a higher speed compared to a phone or tablet.

This great emulator comes both with Google Play Store and its own LD Store, plus itt has a very straightforward, easy-to-use UI.

⇒ Get LDPlayer

Bluestacks is a great application overall, but Device not compatible message can be a problem for some users.

This issue is usually caused by your settings, but we hope that you managed to solve this problem by using one of our solutions.

For more suggestions or other questions, feel free to access the comments section below.

How to Enable Num Lock on Startup in Windows 10 [Quick Guide]

If your Microsoft Account password contains numbers, you might want to use a numeric part of your keyboard while you’re typing your password on login.

The NumLock is one of the NumPad keys usually found on the right side of normal-sized keyboards. However, some smaller keyboards or laptops have the NumPad integrated into their main keys.

Either way, the NumPad is an optional set of keys that is turned off by default, and needs to be activated to function on Windows 10.

But, since NumLock isn’t enabled by default when you start your computer, you won’t be able to use it to type your password. And in this article, we’re going to show you how to easily change that.

How can I enable NumLock on Windows 10 startup?

1. Enable NumLock and restart the computer

  1. While on Lock Screen, press the NumLock key on your keyboard to enable it.
  2. Reboot the system from the power button on the Lock Screen.
  3. When you turn on your system once again the NumLock should be enabled.

That’s how to enable NumLock on your Lock screen without any Registry hacks.

But if this for some reason doesn’t work for you, or you find it boring to restart your computer every time you need to enter a password, you can try with the registry hack listed below.

If you need additional info, check this article about enabling NumLock on your Logon and Lock screen.

2. Enable NumLock with a Registry tweak

  1. Go to Search, type regedit, and open Registry Editor.
  2. Navigate to the following path: HKEY_USERS\DEFAULT\Control Panel\Keyboard
  3. Find the string value named InitialKeyboardIndicators and set its value to 80000002.enable numlock in windows 10 wind8apps
  4. Click OK and close the Registry Editor.

To permanently enable NumLock on Lock Screen perform the registry edit above.

If you can’t edit your Registry, follow the simple steps in this guide about editing regedit and make your registry tweaks with ease.

3. Disable Fast Startup

  1. Go to Start, then Control Panel and Power Options.
  2. Click on Choose what the power buttons do.choose what power button does
  3. Select the option Change settings that are currently unavailable.
  4. Uncheck the Turn on Fast Startup check box.

If the two methods listed above didn’t help you, this means that you also need to turn off Fast Startup. The reason for this is that the Fast Startup settings may override your recent changes.

Here are the steps to follow in order to disable Fast Startup:

  1. To to the Control Panel.
  2. Next, go to Hardware and Sound.
  3. Select Power Options.
  4. Then Choose what the power buttons do.
  5. Then, toggle Turn of fast startup (recommended) and click Save Changes.

One other solution would be to turn off the fast startup from the power options. It’s quite simple to do if you follow the steps above.

Is your Windows not letting you turn off the Fast Startup for some reason? Learn what to do in this guide dedicated to disabling Windows Fast Startup.

That’s all, after using these simple methods, the NumLock of your keyboard will be enabled by default every time you start your machine.

I have to mention that this tweak also works in previous versions of Windows, like Windows 7. If you’re performing this tweak in Windows 7, set the value of InitialKeyboardIndicators to 2, instead of 80000002 (For Windows 8, it’s 80000002, as well).

If you have any other Windows 10-related issues you can check for the solution in our Windows 10 Fix section.

Additionally, you can check more information about key-related problems on our great guide about enabling Caps lock, Num lock, and Scroll Lock on Windows 10.

For more suggestions or questions, reach for the comments section below and we’ll surely take a look.

0x800707e7 – 0x3000d Error: What is it & How to Fix it

You are not alone if you are trying to upgrade to Windows 11 but getting the 0x800707E7 – 0X3000D error.

As the upgrade reaches a certain percentage, the system restarts again, rolls back to the previous Windows version, and shows the following error code, 0x800707E7 – 0X3000D.

What causes Windows 11 update error 0x800707e7?

Some of the reasons that we have identified that may trigger the Windows 11 upgrade error 0x800707E7 are as below:

  • Services and startup items – Certain services, and startup items like trace sessions or apps may interfere with the update causing the issue.
  • Conflicting external devices – Sometimes, connected peripherals like a USB, pen drive, or keyboard may interrupt the upgrade process, thus, showing the 0x800707E7 error.
  • Problematic software/applications – It could be possible that a certain third-party app or software may be the reason behind the error.
  • Outdated drivers – If the system drivers are not updated, it can trigger the 0x800707E7 error.
  • Corrupted system files – Broken or damaged system files are often the reason behind many errors including the Windows 11 upgrade error.
  • Faulty or too many user profiles – Chances are that you have redundant or corrupt user profiles that may create a conflict with the process.
  • Incorrect path of the index location – Sometimes, even the index location path may trigger the 0x800707e7-0x3000d error.

How do I fix Windows 11 update error 0x800707e7-0x3000d?

You can try some of the preliminary checks to possibly fix the issue:

However, if none of the above methods work, we have some effective solutions to help you fix the 0x800707e7-0x3000d error during the Windows 11 upgrade.

1. Disable Trace Session

  1. Press the Win + R keys simultaneously to launch the Run console, type performance.exe, and hit Enter to open the Performance Monitor. performance monitor command
  2. On the left, expand the Data Collector Sets section, and select Startup Event Trace Sessions. startup event trace sessions
  3. Now, on the right, look for NPETraceSession, right-click on it, and select Properties. NPETraceSession
  4. In the Properties dialog, go to the Trace Session tab, and uncheck the box next to Enabled. Press Apply and then OK to save changes. disable trace session

Now, restart your PC and check if you can now upgrade to Windows 11 without the 0x800707e7 error.

2. Delete unrecognized user profiles

  1. Open the Run dialog by pressing the Win + R keys together. Type sysdm.cpl and hit Enter to launch the System Properties window. sysdm.cpl command
  2. Next, select the Advanced tab, and under User Profiles, click on Settings. user profile settings
  3. Now, in the User Profiles dialog, look for any unknown profiles. If you find any, select the profile and press the Delete button. delete unknown user profile
  4. Press Yes in the prompt to confirm. confirm deletion
  5. Repeat the process for any other unknown user profile.

Once done, press OK to exit, reboot your PC, and you should not encounter the 0x800707E7 – 0X3000D error anymore.

3. Remove the corrupted user profile from the registry editor

Note icon NOTE
Before making any changes to the registry editor, make sure to create a backup of the registry settings. This will help you recover any data that may be lost during the process.
  1. To open the Run console, press the Win + R shortcut keys, type in regedit in the search bar, and hit Enter to launch Registry Editor. run regedit command
  2. In the Registry Editor window, navigate to the below path: HKEY_LOCAL_MACHINE\SOFTWARE\Microsoft\Windows NT\CurrentVersion\ProfileList
  3. Now, under the ProfileList key on the left, select the user profile, and on the right, look for the ProfileImagePath string value. delete user profile key
  4. Under Data you should see the profile name that can help you identify if it’s an unknown account. If it is, delete the associated registry key under ProfileList.
  5. You should also delete any key under ProfileList with a .bak extension.
  6. Now, navigate to the below path and repeat Steps 3 to 5 for this as well: Computer\HKEY_LOCAL_MACHINE\SOFTWARE\WOW6432Node\Microsoft\Windows NT\CurrentVersion\ProfileListdelete user account in 2nd path

Once you have successfully deleted the unknown user profiles, restart your PC and check if the issue is resolved or if it still persists.

4. Uninstall conflicting software

  1. Press the Win + I keys together to launch Windows Settings. Click on Apps on the left and then click on Apps & features on the right. Click on Apps & features in App settings
  2. On the next screen, go to the right, and under the App list, look for the problematic app. It’s usually Microsoft’s Zune Software or the Kaspersky Antivirus. uninstall Microsoft’s Zune Software
  3. Go to the app, click on the three dots next to it, and select Uninstall.
  4. Press Uninstall again to confirm. press uninstall again

Once the software is completely uninstalled, reboot your computer and check if the 0x800707e7 is gone.

5. Set the Indexing Location to the default path

  1. Go to Windows Search, type Indexing Options in the search bar, and click on the result.search for indexing options
  2. In the Indexing Options dialog, click on Advanced. advanced indexing options
  3. Next, in the Advanced Options window, under Index Settings, go to Index Location. Here, check if the path is set to C:\ProgramData\Microsoftset index location to  C:\ProgramData\Microsoft
  4. If not, then click on Select new, and then set the path to C:\ProgramData\Microsoft. Press OK.set new index location

Once done, restart your PC, try upgrading to Windows 11 and check if you still encounter the 0x800707e7 error.

Alternatively, you can also reset the Windows update components following the process mentioned in our detailed post, which is also applicable to the 0x800707e7 error.

However, if all of the above methods fail to work, you may refer to our guide on how to perform a repair upgrade (also applicable to Windows 11) to fix the issue.

For any other queries on Windows 11 upgrade issues, do leave a message in the comments box below.

How to Fix Double NAT and What is it?

If you’ve recently upgraded your Internet connection and have two routers instead of one, it’s highly likely that you’re double NAT-ing. As a novice PC user, that shouldn’t bother you too much.

Some even say that double NAT-ing is even more secure than its singular version. However, if you’re not exactly tech-savvy, you may already have a lot of questions.

You can try to use a powerful VPN service to resolve the NAT issue once and for all, making this option the easiest, but it might not be useful for all users, depending on their network setup and expectations.

In other cases, users have encountered NAT issues while using their PS4 system, which can of course cause a wide range of issues, especially if you have waited for a long time to play a game.

What is double NAT?

To put it simply, double NAT is the situation when you connect to the Internet through two routers. So, you connect to your router, which is behind another router. Thus, you are part of two different private networks, which might seem ideal but it isn’t.

This situation is very frequent whenever your ISP enforces the use of a proprietary router. The ISP-provided router might not be exactly powerful, so you buy an additional one, which is more to your liking.

Due to your ISP’s policy, you are now double NAT-ing, which restricts you in a bunch of ways. For instance, port forwarding becomes a distant memory, since it’s so challenging, if not downright impossible in this situation.

Sure, you could just remove the ISP-provided router, but some companies insist on you using their hardware. A more complicated situation is when you’re using fiber optics and your ISP’s router acts as a signal converter.

For many users, double NAT isn’t a problem. But it can become troublesome if you play online games, want to forward some ports on your router, use UPnP or rely on IP address assignments.

How to fix double NAT

1. Remove ISP router from the network

  1. Unplug and disconnect your ISP router
  2. Plug the network cable into the WAN port of your personal router
  3. Access your personal device’s interface and reconfigure it accordingly

You might need to change the way your modem handles the Internet connection. For instance, if your router only distributed dynamic IPs, you might need to change its settings so it can fill in the ISP modem’s position.

Double NAT can cause major issues for online gaming, port forwarding, or UPnP functions. To improve your connection stability and remove these restrictions, you can also learn how to change NAT type on Windows 11 for a smoother multiplayer experience.

2. Enable Bridge mode on your ISP router

  1. Call your ISP
  2. Ask them to put their router in Bridge mode
  3. Reconfigure your personal router as needed

You will need to configure your router so it can distribute the traffic that previously ran through the first device. For instance, if the ISP router was configured for PPPoE and your personal device was in dynamic IP distribution mode, you will have to move the PPPoE settings on your personal router.

Explanation: When you put the ISP router in bridge mode, it disables the NAT feature on it. Thus, it starts functioning as a DHCP server and stops generating IP conflicts.

More so, if it’s a wireless-enabled router, it will lose its Wi-Fi capabilities and you won’t be able to access it on your network using the default gateway address.

If none of these solutions is good for you, here are a few ways you can circumvent double NAT.

How to port forward through double NAT

1. Use DMZ to forward connections

  1. Log into your second router (the one farthest from the Internet/closer to your PC)
  2. On the status page, locate the WAN/IP address and note it down
  3. Log into the first router (use Wi-Fi or plug your PC directly to its WAN port)
  4. Locate the DMZ page (if supported)
  5. Enable DMZ and type the IP you’ve previously noted from the second router
  6. Save the settings

Note that you should configure the second router in such a manner that its WAN address doesn’t change (static IP). If you use it in DHCP mode, its IP will definitely change at some point, which will render the DMZ IP you used in the first router useless.

2. Use double router port forwarding

  1. Log into your first router (use Wi-Fi or plug your PC straight into the WAN port)
  2. Forward ports to your second router’s external IP address
  3. Log into your second router
  4. Forward ports to the device where you want to run the program/service (game server, mail server, etc)
  5. Configure a static address for every device you want to forward ports to
  6. Make sure that the second router has a static IP address

If you’re not sure about setting static IP addresses for network devices, we’re going to show you how in the following section.

3. Set up a static IP address on Windows 10

  1. Press the Win key on your keyboard
  2. Type cmd and hit Enter
  3. In the Command Prompt type ipconfig /all and hit Enter on your keyboard
  4. Locate your main network adapter
  5. Note down its IPv4 Address, Subnet Mask, and DNS Servers* (check the screenshot)
    Check the ipconfig values
  6. Close the Command Prompt window
  7. Check your router’s status page to view the DNS servers if ipconfig /all shows the same value as Default Gateway
  8. Access the Windows 10 Settings app
  9. Choose Network & Internet
    Settings app network and Internet
  10. Click the Change adapter options button
    Network configuration Change adapter settings
  11. Right-click the main adapter that you’ve used in the CMD steps above and choose Properties
  12. Select Internet Protocol Version 4 (TCP/IPv4) from the list
  13. Click the Properties button
    Properties of main adapter
  14. Take a screenshot of the current configuration displayed in the new window
    Configuration screen IPv4
  15. Click the Use the following IP address radio button
  16. Choose an IP address for your PC (should be similar to the CMD IP above**, only the last set of digits should be different, between 1-254)
  17. Type the Subnet Mask and Default Gateway exactly as they appeared in the CMD window
  18. Click the Use the following DNS server addresses radio button
  19. Type the two DNS servers as they appear in your router’s status page
    Assign static IP address Windows 10
  20. Click OK

* – if you see the same DNS server as the Default Gateway, you will need to check the DNS servers displayed on your router’s status page. Alternatively, you can call your ISP and ask them what DNS servers they use, and they should be able to provide you with this information.
** – if the IP you saw in CMD is, for instance, 192.168.0.108 (our case), you can change it to any other IP like 192.168.0.xxx, where xxx = any number between 1 and 254, except 108.

If your Internet connection doesn’t work after you went through all these steps, it can be one of two things:

  • You chose an invalid IP address (the same as your router’s or not in the same range)
  • The DNS servers are wrong, in which case you’ll have to call your ISP and ask them to tell you what DNS servers to use

Bypass or disable double NAT, ultimately it’s a matter of choice

If you’re unfortunate enough to be trapped behind the double NAT wall, it can be quite difficult to bypass this situation if you’re a novice. However, if you follow our extensive guide, you should have no trouble.

Regardless of whether you want to eliminate Double NAT or just bypass it through various means, our guide should have you covered. Make sure you follow our instructions accordingly and not skip any step.

Fix: My Computer Won’t Let Me Type in My Password [WiFi, Login Screen]

Users of the Windows operating system keep asking what they need to do when they can’t type passwords. Some can’t even type in the Command Prompt.

If your computer won’t let you type in your password, be it a WiFi one or simply a log-in one, you’re pretty much locked out.

Why can’t I type my Wifi password on my laptop? Well, that’s the big question and that’s exactly what we shall try to answer.

Why won’t my computer allow me to type in my password?

Some of the known causes include installation issues, or hardware-related errors, which can either be resolved by a quick hard reset or by troubleshooting the hardware and devices you may be using.

However, sometimes performing a hard reset or using the troubleshooter may not yield the desired results, but we’ve compiled a set of solutions that you can try and see if it helps.

What’s more, the issue can take more than one shape. Let’s have a look at commonly reported problems related to password insertion in the Windows OS:

  • Can’t type Wifi password Windows 10
  • Can’t type Wifi password Windows 11
  • My laptop won’t let me type my password – My Dell, HP, Lenovo will not let me type in my password
  • Can’t type in Windows 10 search bar and Wifi password
  • Unable to type password at login screen Windows 10, Windows 7
  • Windows 10 can’t type PIN
  • Keyboard not working cannot enter password (in Windows 11)
  • User name and password boxes do not appear when signing into Windows
  • Wifi password can’t type letters

How do I fix my WiFi password not typing in Windows 10 and 11?

? One of the ways to quickly help when you can’t type passwords in Windows 10 is to perform a hard reset. To do that, hold down the power button for about thirty seconds to shut down the computer.

? You can also check the hardware and devices troubleshooter and see what it lists as potential causes for the issue.

? Another solution you can try real quick is to replace your keyboard, use a different one, or alternatively boot up, then unplug your keyboard from the port and plug it back in.

If these general troubleshooting fixes don’t resolve the problem, try the other specific solutions below.

1. Use Ease of Access to get the on-screen keyboard

  1. In the login screen, click the Ease of access icon.
  2. Click the On-screen keyboard. Can’t type password in Windows 10
  3. Enter the password using the screen keyboard to sign in.
  4. If you are able to sign in, try uninstalling the keyboard driver by following the steps below and checking if it helps.
  5. On the on-screen keyboard, click the Windows + X shortcut.
  6. Select Device Manager.
  7. In the Device Manager, expand the Keyboard and uninstall the driver.
  8. Finally, restart the computer.

if you need more help fixing a keyboard driver error in Windows 10, don’t worry we got your back. Also, if you’re using a USB keyboard, try connecting it to a different USB port and see if it helps.

2. Disable Toggle and Sticky keys

Sometimes Sticky Keys could hinder you from typing your password, so you may need to disable the function. To do this:

  1. Click Start and choose Settings. Can’t type password in Windows 10
  2. Next, select Ease of Access.
  3. Click Keyboard and find Toggle Keys. Can’t type password in Windows 10
  4. Slide it left to turn it off.
  5. Then, find Sticky Keys and do the same.

3. Create a new user account

You can create a new user profile then change settings to administrator privileges, and check if the problem persists. To do this:

  1. Click Start and select Settings.
  2. Then, go to Accounts.
  3. Under Other people, click Family and other people.
  4. Fill in the form with the username and password. Your new user account will be created.
  5. Click on Change account type.
  6. Click the drop-down arrow and choose Administrator to set the account to administrator level.
  7. Restart your computer.
  8. Login to the new account you just created.

If the keyboard works, then it may mean your other user profile is corrupted.

You can try the following in case of a corrupted user profile:

  • On your new account, use it to downgrade your usual account.
  • Click Apply or Ok.
  • Raise back your old account to its default admin level.
  • Rinse and repeat a few times as this will help to remove any corruption.
  • Leave your account on as Administrator.

4. Boot in Safe Mode

Safe mode starts up your computer with limited files and drivers but Windows will still run. If you still can’t type passwords in Windows 10, check whether it occurs while your computer is in Safe mode.

Follow these steps to start your computer in Safe Mode:

  1. Click on the Start button and select Settings.
  2. When the Settings box opens up, click Update & Security. Can’t type password in Windows 10
  3. Select Recovery from the left pane. Can’t type password in Windows 10
  4. Go to Advanced startup and click Restart now.
  5. Select Troubleshoot from the choose an option screen, then click Advanced options.
  6. Go to Startup Settings and click Restart.
  7. Once your computer restarts, a list of options will come up.
  8. Choose 4 or F4 to start your computer in Safe Mode.

If the issue isn’t there while in Safe mode, then your default settings and basic drivers are not contributing to the issue.

If it persists in Safe Mode, then your drivers have a problem, so you can update the chipset drivers and see if it goes away.

5. Perform Automatic Repair

Can’t type password in Windows 10
  1. Insert a USB or DVD and restart your computer.
  2. Press F12 on your computer to open Windows Setup.
  3. Select the drive you inserted your USB or DVD into.
  4. Click Next and choose to Repair your computer.
  5. A blue screen will come up with different options. Select Troubleshoot.
  6. Select Advanced options.
  7. Finally, choose Startup/Automatic Repair from the Advanced boot option.

The Windows Recovery tool can fix certain system problems by scanning your computer for the problem, then trying to fix it so your computer can start and run correctly.

Once the repair is complete, try typing your password again to see whether the issue persists.

6. Reinstall Windows

  1. Download the media creation tool from the Microsoft website and then run it.
  2. Select Create installation media for another PC.
  3. Choose a language, edition, and architecture (64-bit or 32-bit).
  4. Follow the steps to create installation media, and then select Finish.
  5. Connect the installation media you created to your non-functional PC, and then turn it on.
  6. Enter your language and other preferences, and then select Next. If you’re not seeing the setup screen, your PC might not be set up to boot from a drive. Check your PC manufacturer’s website for info on how to change your PC’s boot order, and then try again.
  7. Click Install now.
  8. On the Enter the product key to activate Windows page, enter a product key if you have one. If you upgraded to Windows 10 for free or bought and activated Windows 10 from the Microsoft Store, select Skip and Windows will automatically activate later.
  9. On the License terms page, select I accept the license terms (if you agree to them), then select Next.
  10. On the Which type of installation do you want? page, select Custom.
  11. On the Where do you want to install Windows? page, select a partition, select a formatting option (if necessary), and then follow the instructions.
  12. Once you finish formatting select Next.

Follow the rest of the setup instructions to finish installing Windows 10.

Did any of these solutions help? Let us know in the comments section below.

FIXED: Slack Notifications not Popping Up on Windows 10

Slack is, in the opinion of many professionals, the best team collaboration service at the moment. The overall usability is followed by the intuitive design and worthy premium features for the ones who need more.

The only major dealbreaker might be the fact it’s a cloud-based service, so it stores all user data on Slack’s servers.

Of course, there are also minor issues and one we’ll try and resolve today are Slack pop-up notifications which are not working for some users.

How do I get Slack pop-up notifications working on Windows?

1. Read all messages and make sure desktop notifications are enabled

  1. Open Slack.
  2. Roam through all channels to check all unread messages.
  3. Now, press Ctrl + Comma to open Preferences.
  4. Choose Notifications from the left pane.
  5. Enable all notifications and disable the Do not disturb mode.notification settings slack pop up notifications not working
  6. Now, under the Deliver notifications via… drop-down menu, select either Windows native notifications or Built-in notifications.deliver notifications via slack pop up notifications not working
  7. Open individual channels, click on the cog icon and open Notification preferences.
  8. Make sure notifications are enabled for Desktop.muting options slack pop up notifications not working
  9. Exit Preferences and restart Slack.

Now check if your Slack notifications are working properly.

2. Clear application cache

Slack client for Desktop

  1. Open Slack.
  2. Click on the hamburger menu in the top left corner and choose Help > Troubleshooting > Clear cache and Restart.clear cache slack pop up notifications not working
  3. You can repeat the action and clear app’s data as well.

Slack UWP from Microsoft Store

  1. Open Start.
  2. Right-click on the Slack app and choose More > App settings from the contextual menu.reset slack slack pop up notifications not working
  3. Try firstly with the Repair and, if it doesn’t work, go for the Reset option.

After that, notifications should come through without any issues. On the other hand, if you’re still having problems with Slack notifications not working, feel free to continue to next troubleshooting step.

3. Check system settings

  1. Press Windows key + I to summon the Settings app.
  2. Open System.
  3. Choose Notifications & actions from the left pane.
  4. Scroll down until you reach Slack and toggle notifications On.notification settings slack pop up notifications not working

After enabling notifications, check if the Slack notifications are working properly.

4. Reinstall Slack

Finally, if none of the previous steps worked for you, consider reinstalling Slack for Desktop (better choice than UWP in our opinion) and stick with it.

With that said, we can conclude this article. In case you have any alternative solutions or additional questions we forgot to answer, feel free to tell us in the comments section.

GTA V Not Saving Graphics Settings: 4 Simple Solutions

GTA V is one of the best games for PC and was one of the most successful releases in the GTA series. Though many users reported that GTA V was not saving graphics settings on the PC.

The problem was usually not in the game but in the game files, and it shouldn’t take you more than a few minutes to get things up and running. So, let’s find out!

Why is GTA V not saving my graphics settings?

Here are a few reasons GTA V is not saving settings:

  • Game files – If the game files are corrupt, it will lead to issues saving the game settings on the relevant file.
  • Third-party apps triggering conflicts – Several third-party applications, usually antivirus and firewalls, create conflicts, and as a result, the graphics settings are not saving.
  • Issues with the game installation – In many cases, users reported that an improper or incomplete game installation could trigger this and other errors in GTA V.
  • Misconfigured file permissions – Another reason why GTA V settings are not saving is when the relevant files are set to Read-only.

What do I do if GTA V is not saving my graphics settings?

Before heading to the slightly complex solutions, we recommend you give these quick ones a try:

  • Restart the computer.
  • Launch the game in single-player mode, modify the desired settings, apply them, and verify whether GTA V is now saving graphics settings. Many users were also able to save the settings in story mode.
  • Disable the installed third-party antivirus, if any, and verify whether the problem is resolved. In case it is, we recommend you switch to a more effective and reliable antivirus.
  • A user also pointed out that switching to Windowed mode, saving the changes, and then reverting to full-screen mode should do the trick. So make sure you try it.

If these don’t work, the ones listed next surely would.

1. Run benchmark before saving settings

This is rather a workaround than an actual solution, but it works fine for most users. All you have to do is reconfigure the desired graphics settings and then hit the Tab key to run benchmark tests before saving the changes.

run benchmark tests to fix gta v not saving graphics settings

Once done, verify whether GTA V is still not saving settings. If that’s the case, head to the next solution.

2. Delete game files

Another quick solution is to delete the relevant game files which might be corrupt. Press Windows + E to open File Explorer, and then navigate the following path and choose your current profile:Documents\Rockstar Games\GTA V\Profiles

file

Once there, delete the pc_settings.bin and cfg.dat files. Now, head to:Documents\Rockstar Games\GTAV\

Select your current profile and delete the settings.xml file. All that’s left to do is restart the computer for the changes to come into effect, and you should now be able to save graphics settings in GTA V.

3. Reconfigure permissions

  1. Press Windows + E to open File Explorer, paste the following path in the address bar, and hit Enter:Documents\Rockstar Games\GTAV\Profilespath
  2. Now, choose the current profile, right-click on the settings.xml file, and select Properties.properties
  3. Uncheck the box for Read-only next to Attributes, and then click OK to save the changes.disable read-only to fix gta v not saving graphics settings

4. Reinstall GTA V

  1. Press Windows + R to open Run, type appwiz.cpl in the text field, and hit Enter.appwiz.cpl
  2. Select GTA V from the apps listed here, and click on Uninstall.uninstall to fix gta v not saving graphics settings
  3. Now, follow the on-screen instructions to complete the process.

That’s it! If nothing so far has worked, the last option is to reinstall GTA V, and the game will now save graphics settings. Also, try using an uninstaller software to effectively delete all the related game files and Registry entries.

And once you have managed to get things running, find out how to improve the gaming performance in Windows.

Tell us which fix worked for you in the comments section below.

EarTrumpet for Windows 11: How to Download, Install & Use

Let us discuss EarTrumpet as relating to Windows 11.

Windows 11 brought some improvements in terms of visual interface, and we can all agree that the new UI looks great.

However, not all changes are for the better; some features have been moved to different locations and are now harder to access.

This applies especially to volume mixers, and while this option was easy to open in the earlier versions, that’s not the case anymore.

However, there are third-party solutions that can help you with that. In today’s guide, we’ll take a closer look at EarTrumpet on Windows 11 and show you what it can do.

Will EarTrumpet work with Windows 11?

EarTrumpet is a third-party application that allows users to manage audio volume on Windows 10 devices. It is also a helpful app that can be downloaded from the Windows Store and will work on Windows 11.

It comes with the following features:

  • Controls for modern and classic app volumes.
  • Support for moving apps between your playback devices.
  • A Feedback Hub integration
  • Two-click default audio device controls

Let us explore how this app works.

What is EarTrumpet and how does it work?

EarTrumpet is a third-party application for Windows that allows users to easily manage the volume levels of individual apps and system sounds.

It provides a convenient way to adjust the volume of specific apps or system sounds, rather than changing the overall system volume or using the built-in volume mixer.

You may use EarTrumpet by downloading and installing the program from the EarTrumpet website or the Microsoft Store. After installation, open EarTrumpet by selecting the speaker icon in the system tray.

EarTrumpet Windows 11

This will open a volume control panel that displays all the active audio sources on your system, including apps and system sounds. You can adjust the volume levels for each audio source individually by clicking and dragging the slider for that source.

EarTrumpet also provides additional features, such as muting specific audio sources, switching between audio devices, and adjusting the default audio device.

You may access these capabilities by choosing EarTrumpet Settings from the context menu after right-clicking on the speaker icon in the system tray.

How to install EarTrumpet?

  1. Click the Microsoft Store icon in the Taskbar.


  2. When the Microsoft Store app opens, search for eartrumpet. Select EarTrumpet from the list of results.
  3. Now click the Free button to start the download.
  4. Wait while the app is being downloaded.
  5. Once the process is finished, click Open to start the software.

To learn more about the new store, we suggest reading our in-depth look at the new Microsoft Store in Windows 11.

Why is my EarTrumpet icon missing?

There are a few possible reasons why the EarTrumpet icon might be missing from your system tray:

  • EarTrumpet may not be installed on your system – To check if EarTrumpet is installed, you can try searching for it in the Start menu or by looking for it in the list of installed programs in the Control Panel.
  • EarTrumpet bad configurations – It may not be configured to show up in the system tray. Also, if the Run this program in compatibility mode for option is not turned on, the icon may be missing.
  • Hidden icon – In some cases, it may simply be hidden from view in the system tray. You will need to force-show hidden icons in the system tray in such a case.
  • Problem with the EarTrumpet program – If none of the above, you can suspect a corrupt file that needs to be uninstalled and reinstalled.

Does EarTrumpet start automatically with Windows?

Yes, it does even though this is a Universal app. Hence, you won’t have to launch it manually whenever you want to use it.

However, there’s no option to prevent automatic startup from the settings, and if you want to disable it, the only way to do it is from the Startup tab in Task Manager.

If you want to mute programs in Windows or control the sound levels of individual apps, EarTrumpet is a must-have.

Although Windows 11 has this feature, it’s not as straightforward to use as the one from the previous versions. So, it’s no wonder many users are going for third-party solutions.

What software do you use to adjust the application volume level on your PC? Let us know in the comments section below.

Why is Firefox So Slow & How to Make It Run Faster

Firefox is one of the most popular browsers on all platforms, but despite its massive popularity, it still has specific issues on Windows 10 and 11. Believe it or not, Firefox can be slow even this year.

Many users complain that Firefox is lagging on their devices, which can be a significant problem if you use it as a default browser.

So, in this article, we’re guiding you through the few solutions available to fix this issue.

Why is Firefox so slow?

There are many possible reasons behind a slow browser, but the most common ones seem to be the following:

  • Outdated version – If Firefox is operating slowly for you, you should first check to see if there are any updates available. If you keep your browser’s version up to date, you’ll be able to remove several potential reasons for the delay.
  • Hardware acceleration – Hardware acceleration can improve speed. But, if you have driver problems or have a specific GPU configuration, it may create latency instead. Firefox may run more quickly by disabling the hardware acceleration feature.
  • The browser theme – You can use a custom theme in Firefox, but doing so may sometimes slow down the browser’s performance. To determine whether or not there is a change, you should revert to the Default theme.
  • Third-party antivirus – There is some evidence to suggest that using an external antivirus application such as Avast might make Firefox perform more slowly. Instead, check out our best antiviruses that are compatible with Windows 10/11.

But remember that your case can be caused by a different reason, such as too much cache and cookies or faulty add-ons. Nonetheless, we will try to address every instance and provide efficient solutions.

How can I fix Firefox if it’s slow?

Before going through these solutions, you may consider using a different browser that is even lighter than Firefox, and we recommend Opera GX.

The browser has built-in CPU, and RAM limiter features to improve response rates even more. They are easy to enable/disable in just one click and contribute a ton to performance.

The browser won’t use resources to load ads if you enable the built-in adblocker. The transition should be seamless because Opera GX has a modern, intuitive UI with familiar controls.

Opera GX

Transfer all your data to Opera GX and enjoy seamless browsing with minimal resource impact.

1. Change your power settings to High Performance

  1. If Firefox’s startup is slow on Windows 10, press the Windows key + S and enter power plan. Select Choose a power plan from the results.choose-powerplan-w10 firefox slow windows 10
  2. Once the Power Options window opens, select the High-Performance profile and save the changes.high-per-w10 firefox slow windows 10

We must mention that switching to a High-Performance mode will drain your battery faster due to increased power consumption, but Firefox should be working without any slowdowns.

Moreover, an even more performance-focused mode that you can enter in Windows 10 will allow you to use your PC in peak conditions.

2. Check if Firefox is up to date

  1. If Firefox is running slow on Windows 10, click on the menu icon from the top right corner and select Settings.firefox-settings firefox slow windows 10
  2. Next, type update inside the Settings’ search bar and click on the Check for updates button.update-firefox firefox slow windows 10

If Firefox is slow on your PC, the problem might be a particular bug. To avoid Firefox bugs, it’s advised to update your Firefox to the latest version.

In most cases, Firefox will perform the update automatically, but you can always check for updates manually from Firefox.

3. Switch to a different theme

  1. Open Firefox, click the Menu button in the top right corner, and choose Add-ons and themes.firefox-addon-w10 firefox slow windows 10
  2. Select Themes and try to find a simple theme that won’t use too much of your resources and install it.themes-firefox firefox slow windows 10

This is a potential workaround, but a few users reported that it works for them, so you might want to try it.

4. Change the accesibility.force feature

  1. In the address bar of Firefox, enter about:config and press Enter.config- firefox slow windows 10
  2. Search for accessibility.force_disabled and set its value to 1 by clicking on the edit icon on the right side. This way, the Firefox is slow on Windows 10 issue will be resolved.accessibility firefox slow windows 10

After enabling this option, check if the problem with Firefox is resolved.

5. Check your antivirus

You can try to disable your antivirus while browsing on Firefox, but that will expose you to online threats.

Alternatively, you might have to uninstall your antivirus to fix the problem. For example, many users reported issues with Norton antivirus.

We encourage you to check out our guide on removing Norton Antivirus to ensure it’s completely removed.

If you are considering switching to a more effective antivirus, visit our best antivirus programs for browsing article for suggestions.

6. Clear your browsing data

  1. Tap on the menu icon from the top right corner and select Settings.firefox-settings firefox slow windows 10
  2. Now type clear inside the search bar and select Clear Data.clear-data-firefox firefox slow windows 10
  3. From the Clear Data window, select all the boxes and click Clear.clear-cookies firefox slow windows 10

If you’re looking for a browser with great functionality that won’t slow down your PC, you might want to try Opera One.

7. Disable add-ons

  1. Open Firefox and click on the menu icon followed by Add ons and themes.firefox-addon-w10 firefox slow windows 10
  2. Click on Extensions and toggle off your extensions to speed up the browser.extensions-addons firefox slow windows 10

Some add-ons can cause specific websites like YouTube to slow down your Firefox browser because of compatibility issues. It can be pretty frustrating when Firefox is running slow on Windows 10 or 11, but hopefully, some of our solutions might be helpful to you.

After all, Firefox is a great web browser, but sometimes you can experience slowdowns while using it. If you’re having more problems, you should check out our Firefox issues guide to see how to fix them.

Did you find a solution to this problem on your own? Then, please share it with us in the comments section below.

FIX: We’re Having Trouble Converting Your PDF to Word

Ever since 2013, Microsoft has offered us the possibility to edit PDFs in Word. With just by a simple press of a button in the File section, you can load any PDF and edit it as if it were a Word file.

But there are a few mishaps that may happen when doing this, like being unable to convert Word to PDF in Windows 10, or one of the most known which is Sorry we’re having trouble converting your PDF to a Word document error.

This can be a big problem, and in this guide, we’ll answer your questions on why your PDF is not converting to Word.

What can I do if PDF is not converting to Word correctly?

1. Download the latest Adobe Acrobat version

Before going along with any of the actual troubleshooting steps, make sure that the problem isn’t actually just you having an old version of your PDF reader.

If PDF to Word is not converting properly, be sure to download the latest version of Adobe Acrobat and check if that solves the problem.

Adobe Acrobat’s best features:

  • Create PDFs
  • Advanced PDF editing tools
  • PDF Conversion
  • Ability to sign PDFs
  • Text recognition

Adobe Acrobat

Create and edit your PDFs and convert them to Word and many other formats with this great tool.
Free Trial Visit Website

2. Retain the format

  1. Open Adobe Acrobat, and click on the Preferences tab.
  2. Go to Converting from PDF and select Word document.
  3. Click on the Retain page layout.
  4. Select the OK button and that’s it.

Your document might look perfect in any desktop PDF reader, given the fact that the reader will automatically use the correct fonts available on your local machine.

However, your PDF reader may still need to substitute the missing fonts with different ones if you do not export the correct layout.

After doing that, check if Sorry we’re having trouble converting your PDF to a Word document error is gone.

3. Proof your PDF

  1. Repair missing formatting.
  2. Fix any line breaks.
  3. Look for incorrect words.
  4. Fix instances of multiple spaces.
  5. Use common fonts.
  6. Don’t use poor-quality images or scans.

If PDF to Word is not converting properly, be sure to follow the guides from above in order to fix the problem and can also check our guide for the best PDF to Word converters.

Additional tips:

When using the Export PDF service by Adobe, make sure you use the supported type of browser.

For Microsoft Windows 10 you should be using Internet Explorer 11, Microsoft Edge, Chrome, or Firefox. Try saving the PDF file under the PDF/X standards, as this might fix your problem.

There you go, these are just a couple of solutions that might help you fix the Sorry we’re having trouble converting your PDF to a Word document error.

Fix: Activation Error Code 0xc004f034 on Windows 10 & 11

After the upgrade from Windows 7 or Windows 8, your copy of Windows 10 should be activated and genuine. But, some users report that they received an activation error 0xc004f034, which is one of the common Windows activation errors.

We prepared a list of possible solutions for this problem and hope at least one will help you activate Windows 10.

Why does error 0xc004f03 occur on Windows?

error-code-windows-10-activation

Error 0xc004f034 is not some critical error that tells you that you won’t be able to install and activate Windows 10.

It’s just Microsoft’s message saying that Microsoft’s servers are not accessible at the moment.

It was especially the case in the first couple of days of system availability because servers were overloaded due to huge downloads, but it could eventually happen even now.

But you don’t have to worry about it because the problem will solve itself, you have to wait until the servers are available again, and you won’t have any problems activating your operating system.

On the other hand, if you don’t want to wait, you can do a couple of things to force the activation of Windows 10 right now.

How can I fix error 0xc004f034?

1. Create .BAT activation file

  1. Log into Windows 10 with your Microsoft Account, which has administrative rights.
  2. Right-click on desktop, create a text file and name it ActivateWindows10.txt.
    text 0xc004f034
  3. Open the file and post the following into Notepad:
    • @echo off
      :loop
      cscript /nologo slmgr.vbs /ato
      if errorlevel 0 goto end
      goto loop
      :end
      echo Activation was successful. Press any key to close this window.
      pause>nul
      exit
  4. Save the file in .BAT format as Windows10Activation.BAT.
    windowsbat 0xc004f034
  5. Now click on the file to run the script.
  6. Check if your Windows 10 is now activated.

So the first solution that could solve the error 0xc004f034 kms is creating a .BAT activation file in Notepad and executing it to get your Windows 10 activated.

2. Click Activate button multiple times

  1. Press the Windows key + I and choose Update & Security.
    update
  2. Select the Activation option in the left pane.
    activation
  3. Now, click the Activate button multiple times.

If the .BAT solution didn’t work, you could try the solution above. Issues with the activation servers can cause this problem.

Many people are reporting that this worked for them and that they could activate Windows 10 after hundreds of clicks on the Activation button.

3. Run the Activation troubleshooter

    1. Press the Windows key + I to open the Settings app and select the Update & Security option.
    update and 0xc004f034
  1. 2. Click the Activation option in the left pane.

  2. 3. Now, choose the Troubleshoot option and follow the onscreen instructions.

    troubleshoot

4. Disable your antivirus, firewall, and VPN

If you’re using one or all of these tools, temporarily disable them while updating your operating system. Keep them turned off during the activation phase as well.

5. Use the Run SLUI 4 command

  1. Open a new Run window and type SLUI 4 > hit Enter.
    Windows 10 activation error 0x803f7001, 0x8007007b
  2. A new Windows 10 activation error should appear on the screen. Simply select your country and hit Next.
    next
  3. Follow the on-screen instructions and call one of the numbers available to contact Microsoft Support.

This solution is particularly useful if incorrect PC settings, hardware issues, and other problems on your end triggered your activation issue.

That’s it. We hope you can activate your Windows 10 after running some of these fixes. As mentioned, you may not need to do anything, as the activation process will be available once Microsoft’s servers are accessible again.

If you are facing other issues like Activation Error 0xc03f6506, check our detailed guide to fix it effortlessly.

But if you still cannot activate your Windows 10, tell us in the comment section below. We’ll try to find another solution for you.

Can’t Decrypt Files on Windows 10: 5 Ways to Unencrypt Them

If you can’t decrypt files on Windows 10, here is all you should know.

Encryption is great if you have the key and can decrypt the file back using the said key. If not, you will find yourself in the same boat as those whom you wanted not to have access to your files or folders.

Fortunately, Windows 10 provides a robust encryption feature to decrypt your files without much fuss.

But then, there are also times when things do go wrong when even the right keys fail to decrypt an encrypted file. Here is what you can do if you face such a situation.

Why can’t I decrypt files in Windows 10?

From user experience, we gather that a few factors may cause this problem on Windows 10. Here are some you should take note of:

  • Malware – A malware attack is a significant reason why decrypting may be impossible. We recommend using the best antivirus software on your devices.
  • Incorrect decryption method – Make sure you are using the correct decryption method. Depending on the encryption type, you may need a specific tool or software to decrypt the files.
  • Incorrect password – If you use a password to decrypt the files, ensure you enter the correct password. If you have forgotten the password, it may not be possible to decrypt the files.
  • Damaged or corrupt files – If the encrypted files are damaged or corrupt, you may be unable to decrypt them. In this case, you may need to try repairing the files or using a data recovery tool to retrieve the data.
  • Outdated encryption method – If the encrypted files were created using an outdated encryption method, you might not have access to the necessary tools or software to decrypt them.
  • Encryption key not available – Some encryption methods use an encryption key that must be kept secret to decrypt the files. If the key is unavailable, decrypting the files may not be possible.

Now let us show you how to scale through decryption problems on windows 10.

What can I do if I can’t decrypt files on Windows 10?

Before you go into any fixes, try the following:

  • Check the encryption settings – Make sure that the file you are trying to decrypt was encrypted using a method that you have the necessary keys or credentials to decrypt.
  • Contact the sender – If the file was sent to you by someone else, you might be able to get help from the sender. For example, they may have the necessary keys or credentials to decrypt the file or be able to provide you with additional information about the encryption method used.

1. Run a full system scan

  1. Type Windows Security in the Search bar, and click on the relevant search result.
    can't decrypt files windows 10
  2. Now, click on Virus & threat protection here.
    can't decrypt files windows 10
  3. Click on Scan options.
  4. Finally, select Full scan and click on the Scan now button at the bottom.

One of the most common reasons when you get stuck trying to decrypt a file is when there is a malware attack. Failing to decrypt files that have been encrypted happens to be the most common sign of a malware or ransomware attack.

If you suspect that the file may have been encrypted by malware, it is essential to scan your system for malware and remove any threats that are found. Once the malware has been removed, you may be able to decrypt the file.

Also, there usually would be a mail or an intimation using any other means asking for a ransom to decrypt the files if it indeed is ransomware that is the culprit.

One way to rule out the chances of a ransomware attack is to have Microsoft Windows Malicious Software Removal Tool check your system. MSRT is already part of the monthly Windows Update, which means it should already be a part of your system if you update regularly.

Else, you can also download it from Microsoft as a standalone tool. It is highly recommended to scan your PC with the MSRT to help eliminate the chances of a malware or virus attack.

2. Use a decryption tool

You may need a specific encryption software or password to decrypt the file. Decryption tools are software programs that are used to decrypt encrypted data. They use algorithms to reverse the encryption process and decode the encrypted data.

The specific algorithm will depend on the encryption used to encrypt the data. You will typically need to enter the correct decryption key or password to use a decryption tool.

Any of our recommended decryption software may help you resolve the issue.

3. Repair damaged or corrupted files

3.1 Run System File Checker

  1. Press the Windows key to open the Windows Search box.
  2. Type cmd in the search box and click on Run as Administrator to open an elevated Command Prompt window.
  3. Lastly, input the following command and hit Enter:
    sfc /scannow
    can't decrypt files windows 10

3.2 Use the DISM tool

  1. Press the Windows key + X and click on Windows PowerShell (Admin) or Command Prompt (Admin) to open the app with administrative privileges.
  2. Type/paste the following command and press Enter:
    DISM /Online /Cleanup-Image /RestoreHealth
  3. The repair process can take 10 minutes or more, so be patient and don’t interrupt it.
  4. Finally, after the DISM tool repairs your files, restart your PC.

4. Try decrypting using a different user account

  1. Press Windows + I and click on Accounts.
    can't decrypt files windows 10
  2. Select Family & other people from the options on the left, then select the Add someone else to this PC option towards the bottom.
    new user check for updates missing
  3. In the window that pops up, select I don’t have this person’s sign-in information.
  4. Lastly, on the next page, select Add a user without a Microsoft account, and follow on-screen instructions, like adding a username and password.

To repair system files, you can also rely on specialized third-party tools, such as Fortect. With just a few clicks, you can have the app scan your system, identify the problematic files, and repair them.

⇒ Fortect

5. Change account type to an administrator account

  1. Press Windows + I and click on Accounts.
    can't decrypt files windows 10
  2. On the left pane, select Family & other people.
  3. Now, on the right, select the account owner name and select Change account type.
    change account type run as administrator doesn't work
  4. Finally, under Account Type, select Administrator and click OK.

In conclusion, if you cannot decrypt files in Windows 10, it may be helpful to seek assistance from a technical support professional or the manufacturer of the encryption software.

However, you should find luck using any solutions discussed in this guide.

Lastly, please, tell us what worked for you in the comments below.

Fix Wacom Error: No Device Connected on Windows 10

If you have a Wacom tablet, and you get the error message Your device is not connected to your computer, don’t be alarmed. This is a pretty common issue that affects a lot of Windows 10 users.

First, we recommend that you check your hardware to see if there’s a problem there.

Make sure that your tablet is properly connected, check the USB ports on your PC, plug your tablet into a different port and if you have the means, connect your Wacom device to a different computer.

If all these preliminary checks don’t have a positive result, then we can try some more in-depth solutions.

Although it’s a pretty annoying problem, the fix is not as hard as it seems. Today we’ll take a look at how to solve it. For more information, follow the steps below.

What can I do if my Wacom tablet is not connecting?

1. Restart Wacom Services

services.msc wacom tablet can't connect to windows 10
  1. Press the Windows key + R to open Run.
  2. Type services.msc, and hit Enter.
  3. Scroll down and find the Wacom service. Usually it’s called TabletServiceWacom, but in your case it may be Wacom Professional Service or Wacom Consumer Service.
  4. Right-click it, and select Restart.

After the process finishes, reconnect your tablet and see if that solved the Wacom tablet not connecting problem.

2. Update/Re-install Wacom drivers

  1. Press the Windows key + R to open Run.
  2. Type devmgmt.msc, and hit Enter.
  3. In Device Manager go to Human Interface Devices, and expand it.
  4. Your Wacom device should be listed there. Right-click it, and choose Update driver.
  5. In the next window select Search automatically for updated driver software.
  6. After the process is finished, Restart your PC.

In many cases, the issue is caused by faulty drivers. Updating or re-installing them could solve the problem.

If after the restart your still having the same problem, we recommend that in step 4 to choose Uninstall device instead of Update driver and follow the steps in the uninstaller.

In case the drivers are outdated or missing,  we recommend you an automatic repair tool to do the job for you. Outbyte Driver Updater is an automated driver updater that can replace corrupted or damaged files, and restore your registry.

⇒ Get Outbyte Driver Updater

3. Install the first driver version that supports your model

  1. Press the Windows key + R to open Run.
  2. Type devmgmt.msc, and hit Enter.
  3. In Device Manager go to Human Interface Devices, and expand it.
  4. Your Wacom device should be listed there. Right-click it, and choose Uninstall Device.
  5. Restart your PC, but don’t connect your tablet.
  6. Download the first driver version that supports your model.
  7. Install it, and connect your Wacom device.

Sometimes, updated drivers can be inconsistent, especially if there are some major changes involved. A solid fix confirmed by users is to install the first driver that works properly for your model.

Now the device should work properly. As a side solution, you can try reinstalling the Visual C++ Redistributable Packages from the official Microsoft site to see if that solves the issue.

4. Disable the Windows Ink option

  1. Go to the Start Menu.
  2. Choose Wacom.
  3. Navigate to Wacom preferences and then to the Pen or Mapping tabs.
  4. Go to the Details Penmode window and uncheck the Use Windows Ink.

Start Wacom and see if the problem was solved. This worked for some of the users so make sure you try it out.

Hope that these solutions helped you get pass the error message. If you have any more questions on how to connect a Wacom tablet to your Windows 10 PC, feel free to share them in the comments section below.