Microsoft Store Has No Install Button [Solved]

Microsoft rebranded its native Store after the Fall Creators Update. Now it’s called Microsoft Store, but the new name and slight design changes still don’t make it flawless.

More than a few users reported a strange bug that concerns Microsoft Store in Windows 10. Namely, it seems that the Microsoft Store has no install button beside the Library apps. They can’t install new apps or even update the old ones manually.

We provided a few common solutions, hoping that at least one will resolve your issue with the install button missing in Mircosoft Store. Make sure to progress through the list we provided below.

How can I fix the Microsoft Store has no install button issue?

1. Run the Windows Troubleshooter

Before we eventually move to some over-the-head solutions, let’s take the first step with simplified Windows Troubleshooting.

Windows 10 came, issues emerged, and Microsoft decided that the unified troubleshooter is a must. Besides all the standard troubleshooting tools, somewhere at the bottom lies the one we’ll need in order to resolve this error.

Here’s how to run it to restore the install button in Microsoft Store:

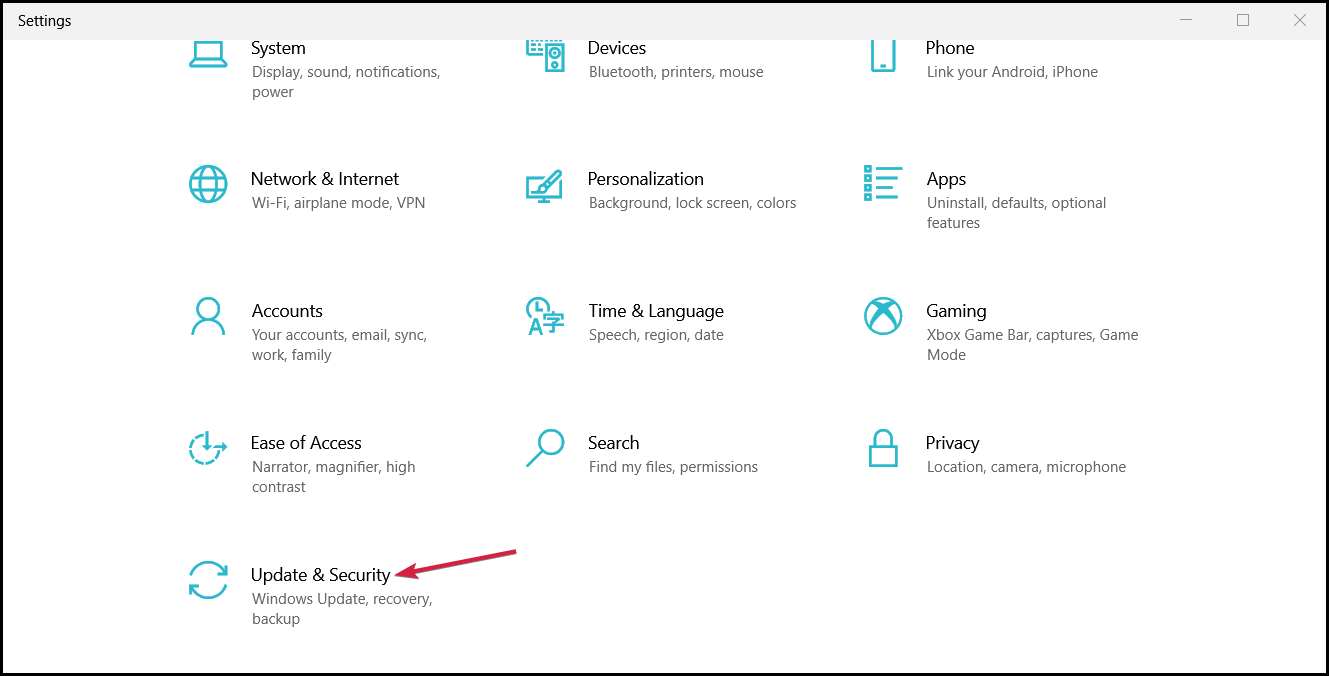
  1. Right-click Start and open Settings from the Power User menu.
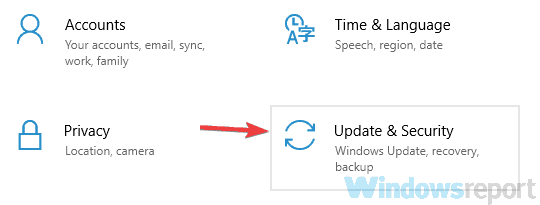
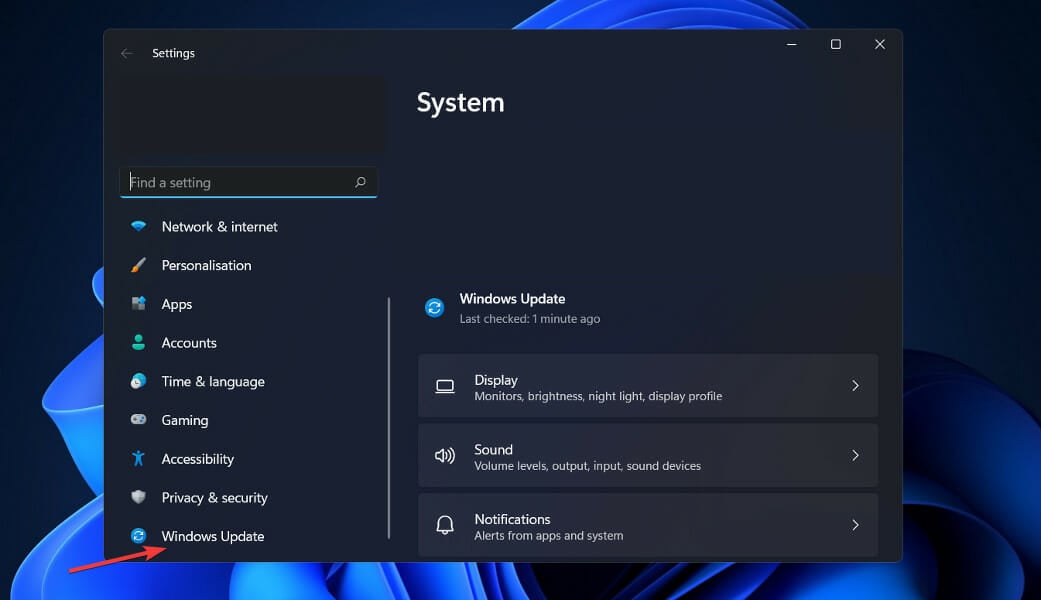
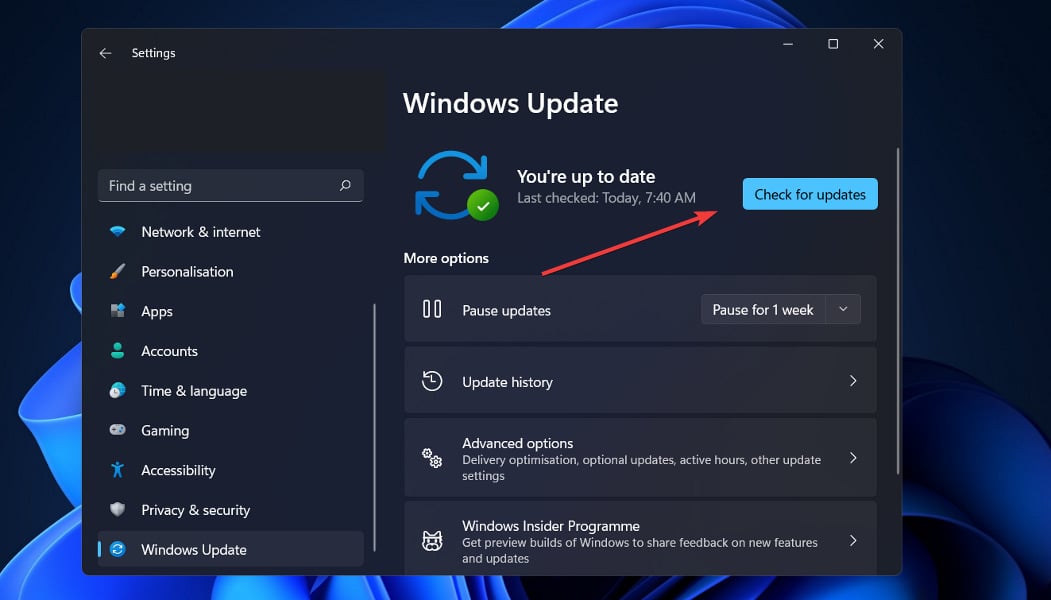
  2. Choose Update & security.windows 10 store install button missing
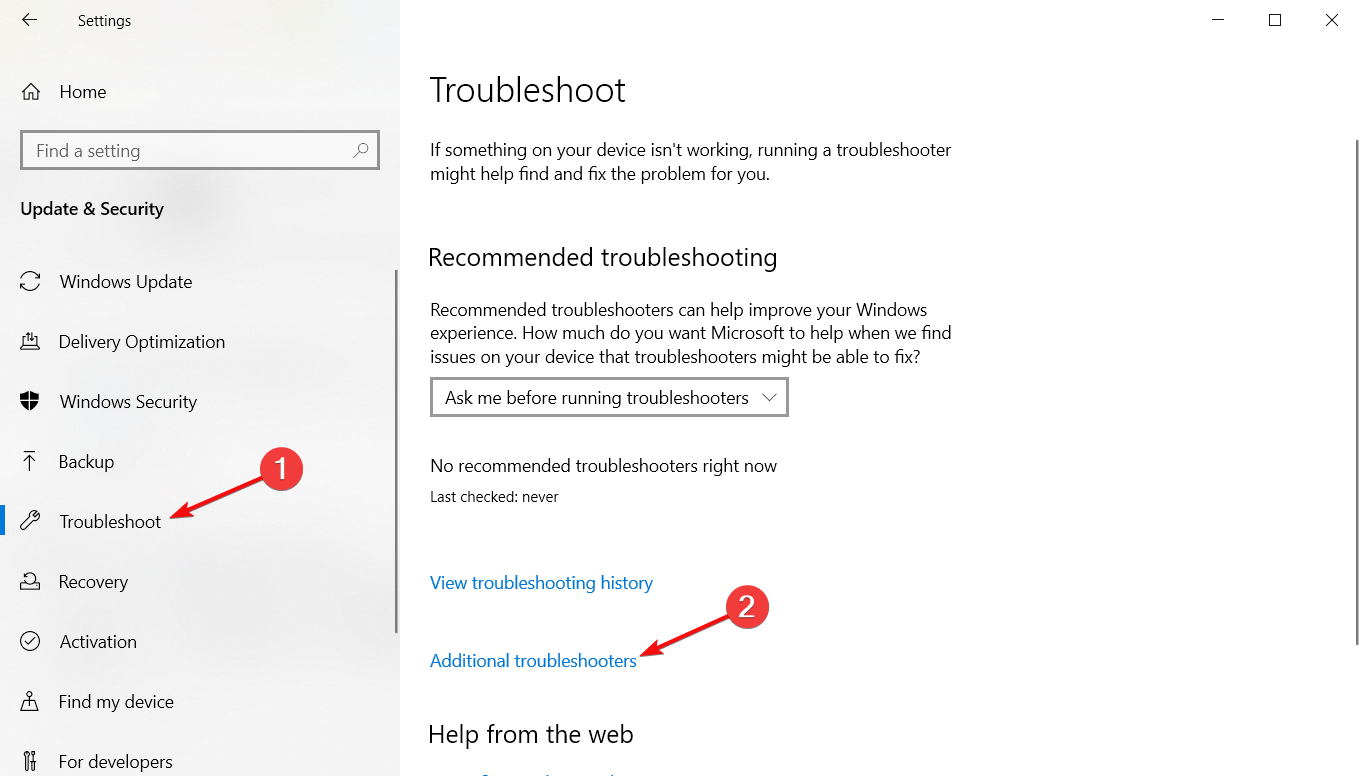
  3. Select Troubleshoot.
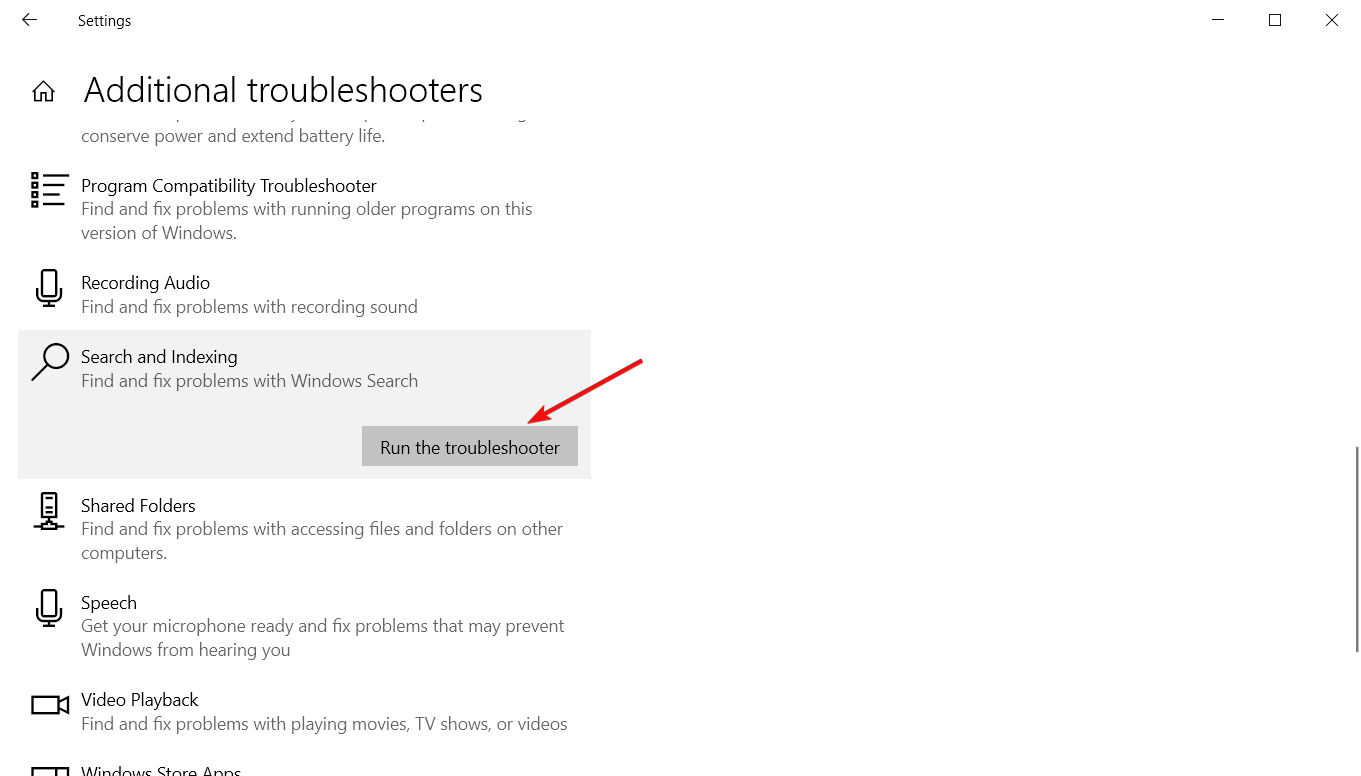
  4. Scroll down until you reach the ‘‘Windows Store Apps” troubleshooter.windows 10 store install button missing
  5. Highlight it and click on the ”Run the troubleshooter”.

If the built-in troubleshooter fell short, maybe the specified will serve you justice in solving the issue of the Microsoft Store download button missing.

2. Run the downloadable troubleshooter

Besides the standard troubleshooter in Settings, you can also try using the downloadable troubleshooter specialized for addressing Microsoft Store issues. Even though you download it, it’s still coming from a trusted source (Microsoft) and it’s not some scammy tool from a third-party site.

The troubleshooting procedure is rather similar to the one above and here’s what you’ll need to do to run it:

  1. Download the troubleshooter.
  2. Navigate to download location and run the Troubleshooter.
  3. Click Next and follow instructions.windows 10 store install button missing
  4. Wait for the procedure to end and restart your PC.
  5. Open Microsoft Store and confirm that the install button is back in Library.

3. Reset the Store’s cache

Since Microsoft Store is, more or less, just like all other pre-installed apps, it stores cache in order to speed up the loading times and save your configuration. And that’s just what we need from the hub of all our Windows 10 apps.

However, if you’ve recently updated the app or the cache pilled up over time, this might come as an issue. Now, there’s a way to manually clear certain folders in which the cache is stored. On the other hand, why to do that when there’s a simple secondary application that reset’s app within seconds?

Here’s how to run the secondary app and reset Store’s cache to try and get the download button back:

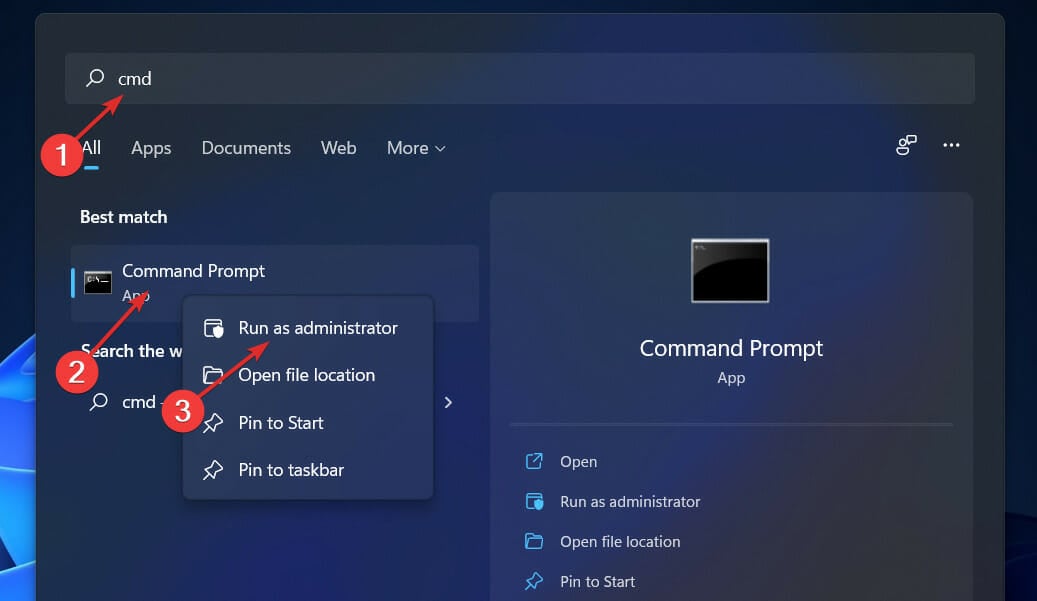
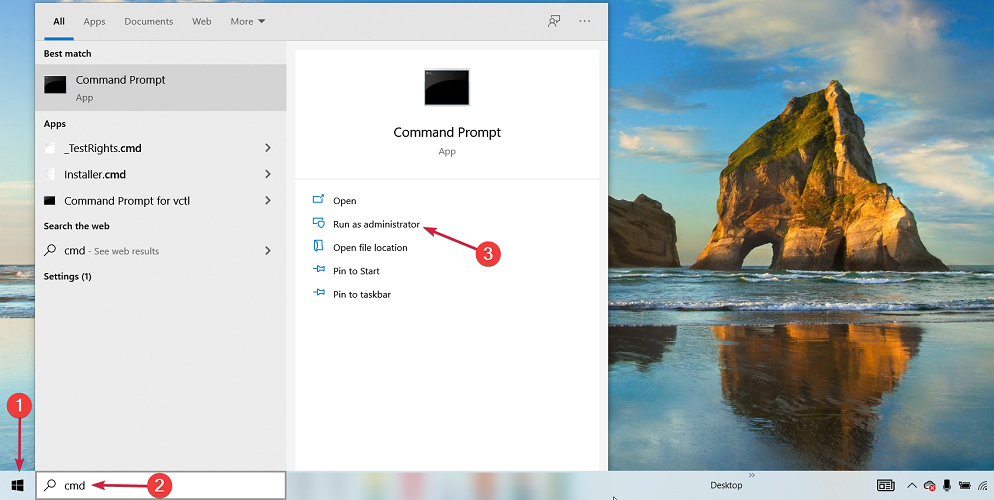
  1. In the Windows Search bar, type WSreset.
  2. Right-click on it and run it as an administrator.windows 10 store install button missing
  3. Open Microsoft Store and look for resolution.

4. Reset applications with PowerShell

While we’re at it, maybe Microsoft Store isn’t the only culpable for the missing install button. If the problem is rather in an individual application and you can confirm which application is provoking the error, you can use PowerShell to reinstall it.

This shouldn’t be a problem and it’s merely a question of copy-pasting one command in the PowerShell elevated command-line.

Follow these steps to do so:

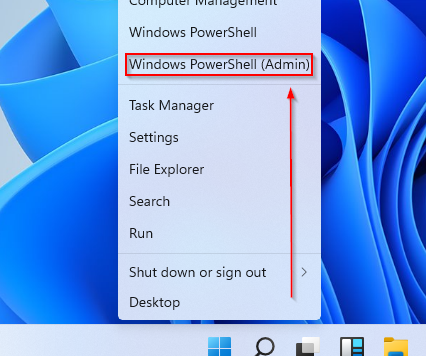
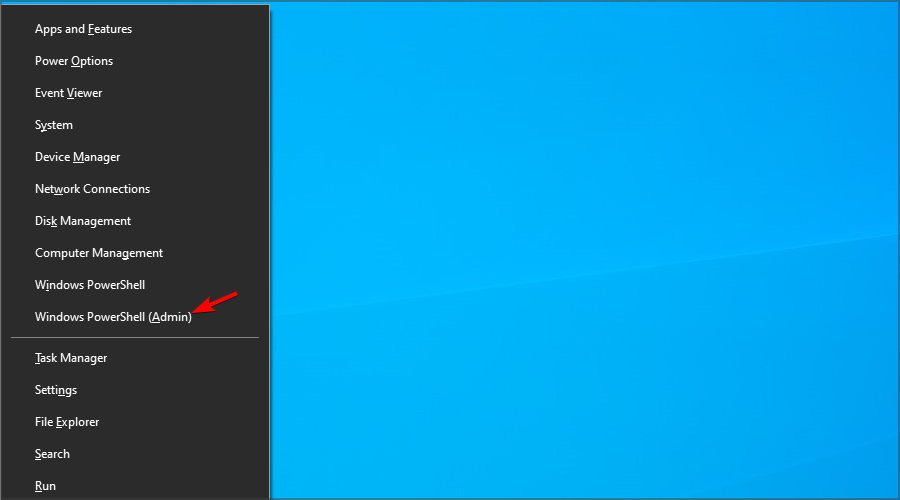
  1. Right-click on the Start and open PowerShell (Admin).
  2. In the command line, copy-paste the following command and press Enter:
    • Get-AppxPackage -allusers | foreach {Add-AppxPackage -register “$($_.InstallLocation)\appxmanifest.xml” -DisableDevelopmentMode}windows 10 store install button missing
  3. Wait for the procedure to end and restart your computer.
  4. Check whether the Microsoft Store Get button missing issue is gone.

5. Re-register Microsoft Store

On the other hand, if the problem occurs with multiple or even all installed applications, reinstalling Microsoft Store completely is the next obvious step.

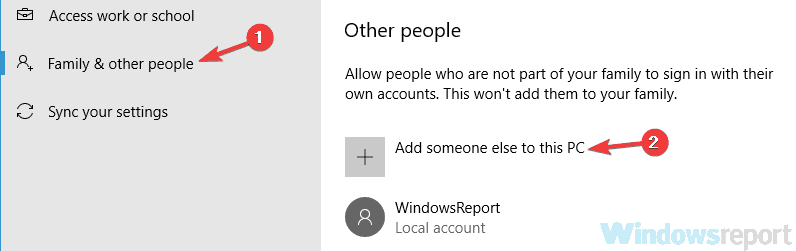
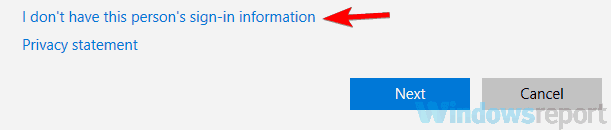
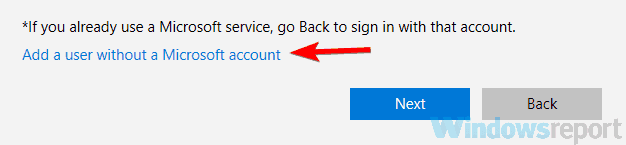
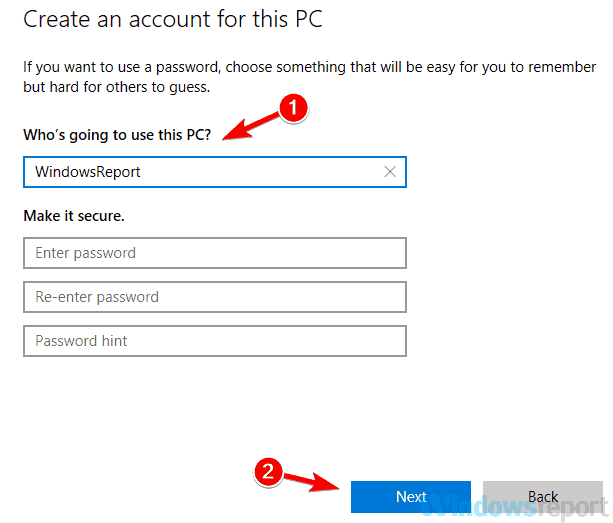
When we say ”reinstall” we mean re-register, since you can’t remove Microsoft Store in Windows 10. This procedure is the closest to reinstallation. Also, you can, alternatively, create a new User profile. That will also allow you to use Microsoft Store from a scratch.

Here’s how to re-register Microsoft Store with PowerShell:

  1. In the Windows Search bar, type PowerShell, right-click on the PowerShell and run it with administrative permissions.
  2. Copy-paste the following command in the elevated window and press Enter:
    • Get-AppxPackage -allusers Microsoft.WindowsStore | Foreach {Add-AppxPackage -DisableDevelopmentMode -Register “$($_.InstallLocation)\AppXManifest.xml”}windows 10 store install button missing
  3. This can take some time so be patient.
  4. Once it’s done, restart your PC.
  5. Open Microsoft Store and check whether the no install button in Microsoft Store problem is gone.

6. Update Microsoft Store

As the last resort, we can only think of update. It might seem strange on the first sight, but most of the users resolved various critical errors by simply updating Microsoft Store. As we all know, Windows 10 is frequently updated, and with the gradual improvements, those updates bring a lot of novelty bugs and peculiar errors. New updates patch it out and that’s a never-ending cycle for us, Windows 10 users.

So, if you’re not sure how to update Microsoft Store in Windows 10, make sure to follow the steps below:

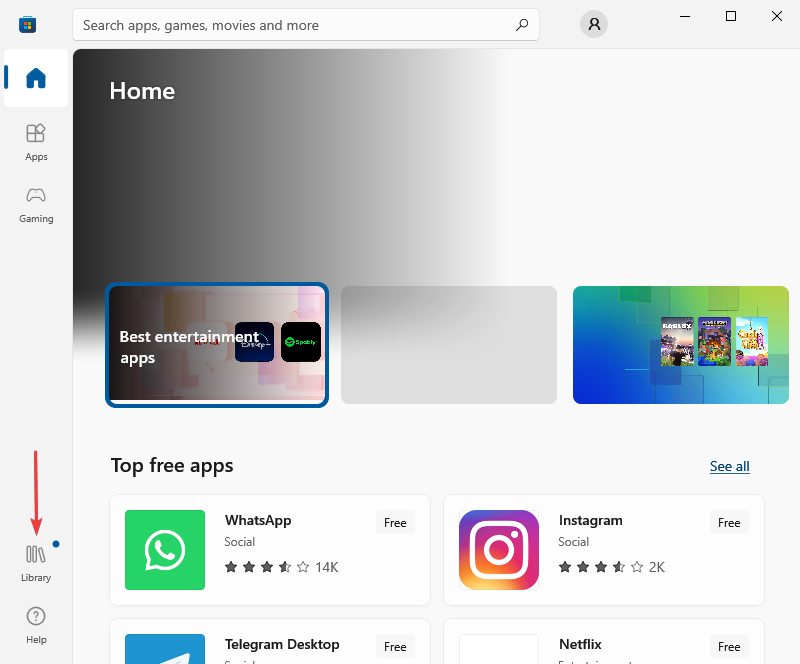
  1. Open Microsoft Store.
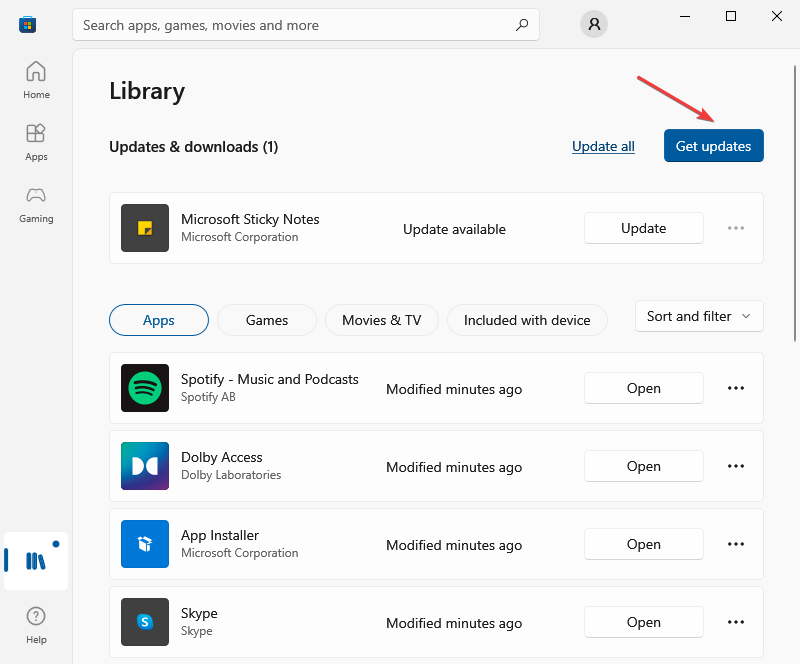
  2. Click on the 3-dot menu and open Downloads and updates.windows 10 store install button missing
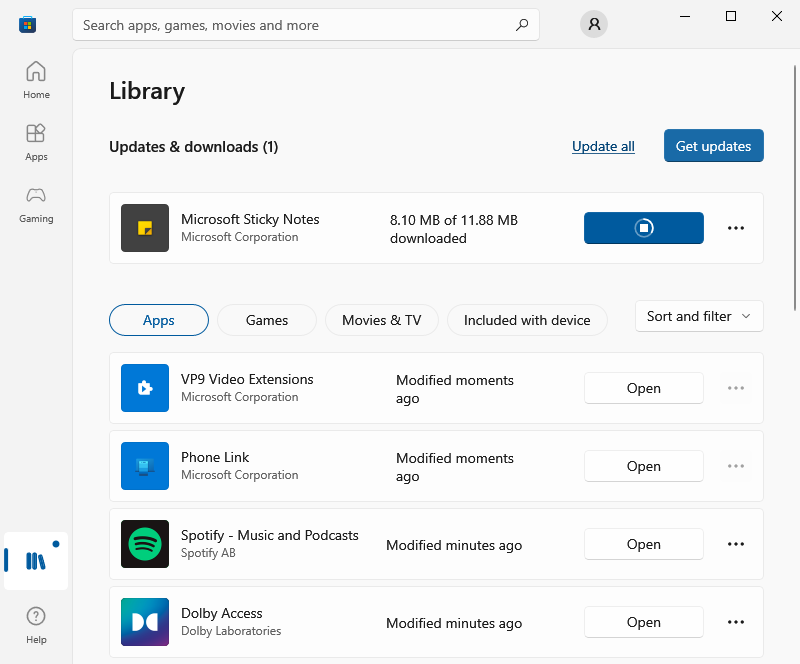
  3. Click on the ”Get updates” button in the upper right corner.windows 10 store install button missing

This is one of the many Microsoft Store error codes that users encountered over the period of 2 years since Windows 10 was introduced. However, in comparison to standard errors (those come in dozens), the missing install button is more of a bug.

Lastly, if your Windows Store Get button is not working, find out how to fix it from our dedicated article.

With that, we can wrap it up. If you have an alternative solution for the Microsoft Store no install button issue, please be kind and share it with us and our readers. You can do so in the comments section below.

MotioninJoy is Not Working: How to Fix It In 5 Steps?

While using the PS3 controllers, if the MotioninJoy app gets stuck on a white page or is not working on Windows 10, you are not alone! Since the app has been discontinued, many users have faced errors. However, it can be fixed.

This guide will discuss the potential fixes after discussing the reason behind the issue.

What causes the MotioninJoy not working error?

The common reasons behind the issue are listed below:

  • Software license expired – The license of the software expired in 2014, that’s why you are stuck with an error.
  • Windows Time error – Another reason for the error could be Windows time sync. This issue can be easily fixed.
  • Corrupted installation files – If the app is not installed correctly or has corrupted files, then it could lead to an issue.

What can I do to fix the MotioninJoy is not working error?

1. Disable driver signature enforcement 

  1. Press Windows + I to open Settings.
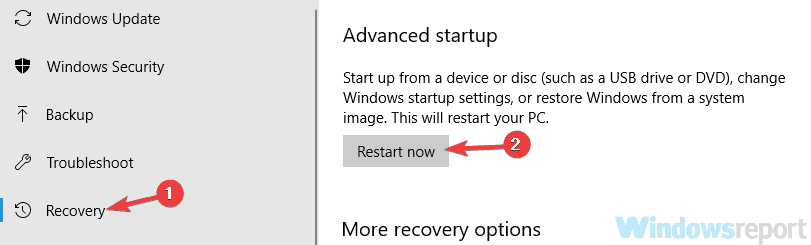
  2. Go to Update & Security, then click Recovery.System - Recovery
  3. Look for Advanced startup and click Restart Now.Recovery Windows 10
  4. On Choose an option screen, click Troubleshoot.Choose an option - Troubleshoot
  5. On the next screen, click Advanced Options.Advanced Options
  6. From the next screen, click Startup Settings and click Restart.Startup Settings
  7. Press the number next to Disable driver signature enforcement to disable it.

2. Update drivers

2.1 Update driver manually

  1. Press Windows + R to open the Run window.Device Manager RUN COMMAND
  2. Type devmgmt.msc and press Enter to open Device Manager.
  3. Click Sound, video and game controllers to expand, select the related driver and click Update driver.Update driver
  4. Follow the on-screen prompts to complete the process.

2.2 Use a third-party driver updater

Using a driver updater utility makes maintaining and updating drivers easy. One such tool Outbyte Driver Updater is a lightweight software to keep drivers up to date without wasting time. This software comes with a huge driver database and a free trial. To update drivers, follow these steps – 

  1. Download and install Outbyte Driver Updater.
  2. Click Scan, and it will scan for outdated drivers on your computer.
  3. Once you get a list of outdated drivers, please select it and click Update.Outbyte Driver Updater 2
  4. The driver will be downloaded, and you will get a prompt to Install once done.
  5. Follow the on-screen instructions to finish and restart your PC.

3. Change the date and time

  1. Press Windows + I to get Settings.
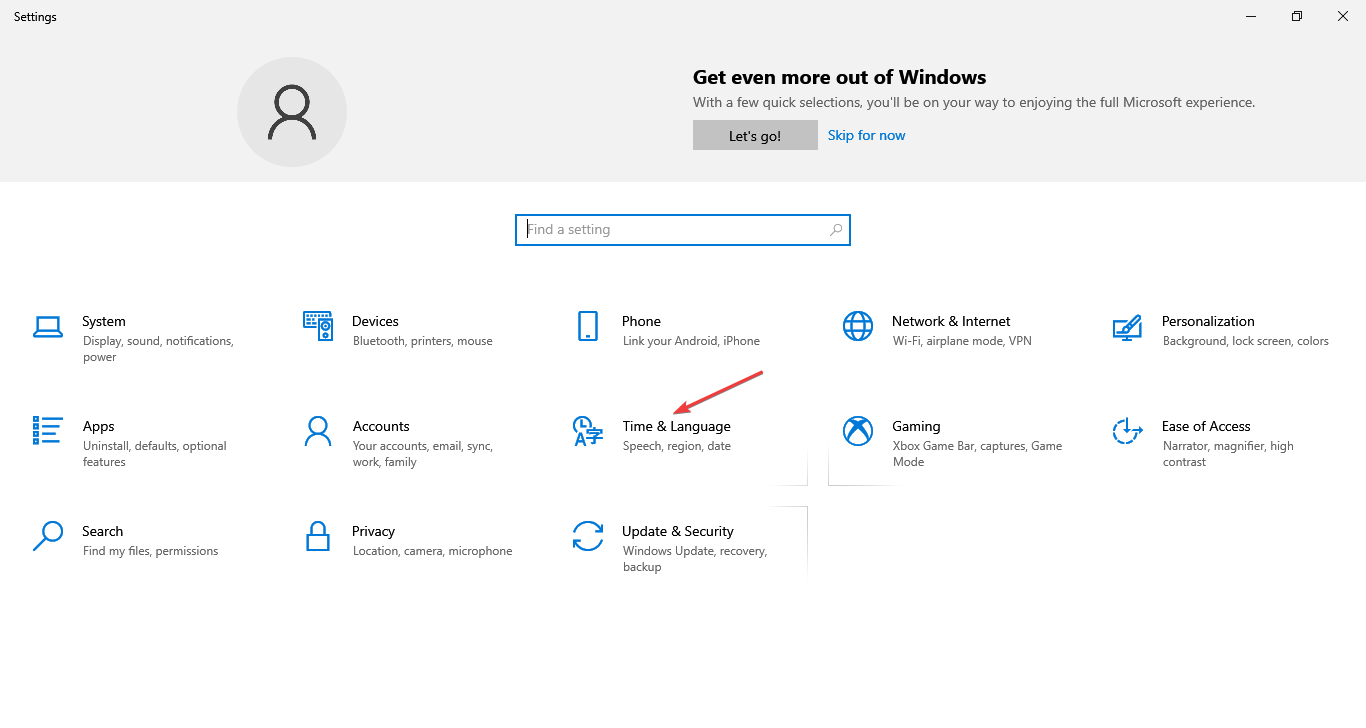
  2. Go to Time & language, and click Date & time.Date time
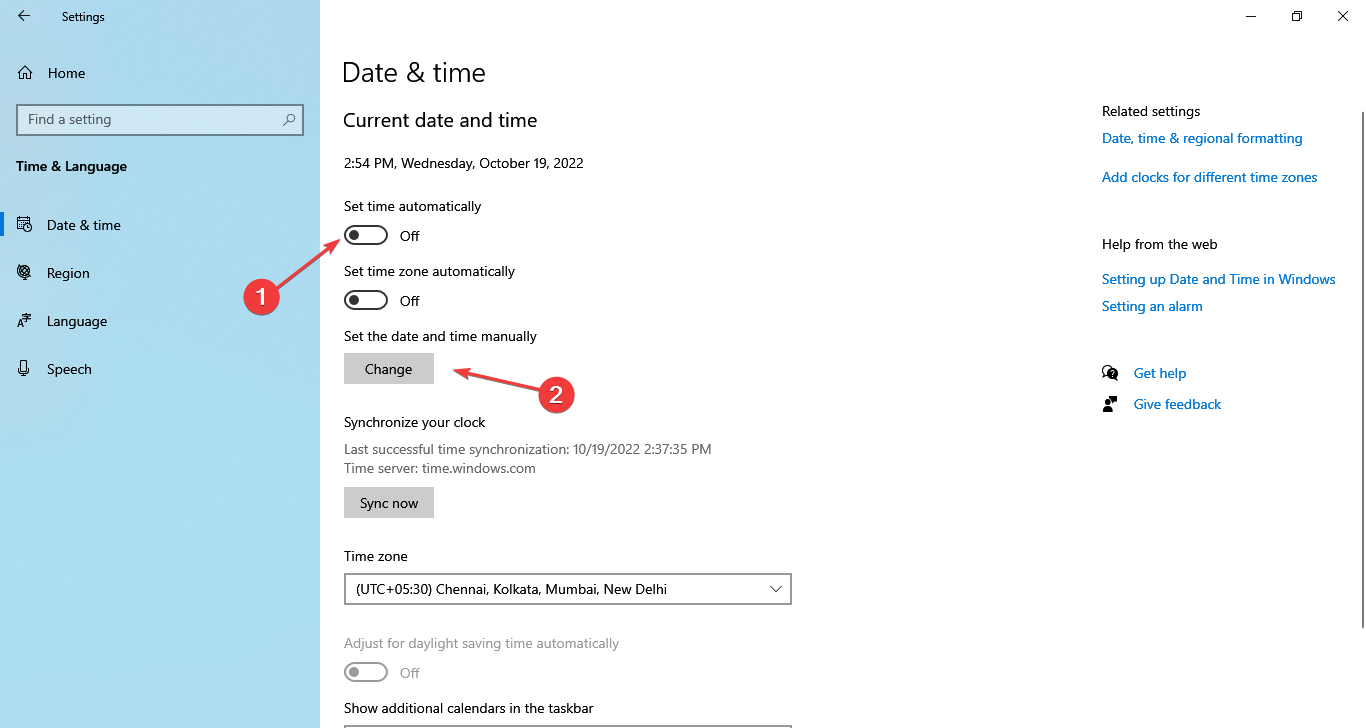
  3. Toggle off the Set time automatically.
  4. Click on Change beside Set the date and time manually. Time change
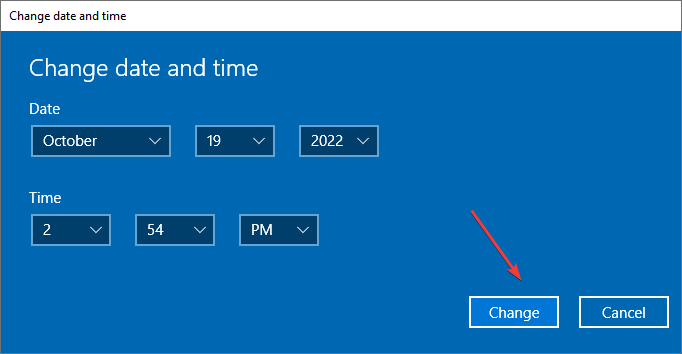
  5. Set it to any date before 2014 or earlier and click Change.Data & time

4. Uninstall & reinstall MotioninJoy

  1. Press Windows + R to get the Run window.
  2. Type appwiz.cpl and press Enter.APPWIZ RUN COMMAND
  3. Locate and right-click the MotioninJoy app and click Uninstall.Uninstall App
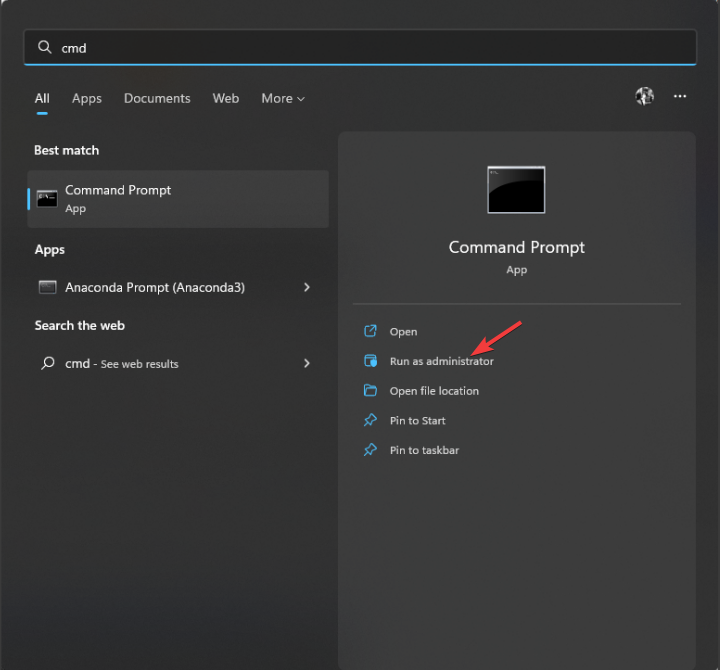
  4. Press the Windows key, type CMD, and click Run as administrator.
  5. Type the following command and press Enter to get a list of installed software and drivers: pnputil.exe –e 
  6. Locate and check the number next to MotioninJoy. Copy and paste the following command after replacing # with the number for MotioninJoy: pnputil.exe –f –d oem#.inf
  7. If step 6 didn’t work for you, open the Run window, type the below-mentioned path, and press Enter. A folder will open; look for oem#.inf and delete it. C:\Windows\INFWindows INF
  8. Restart your PC. Install MotioninJoy again, and connect PS3 controllers for Windows to detect and install drivers.

5. Run the SFC and DISM command

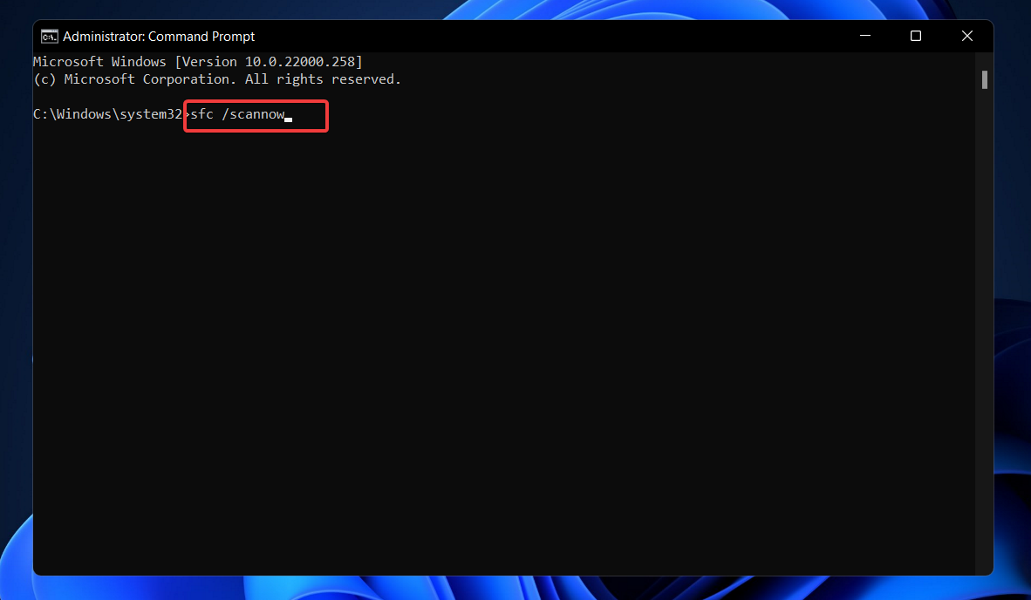
  1. Press the Windows key, type CMD and click Run as administrator.CMD elevated
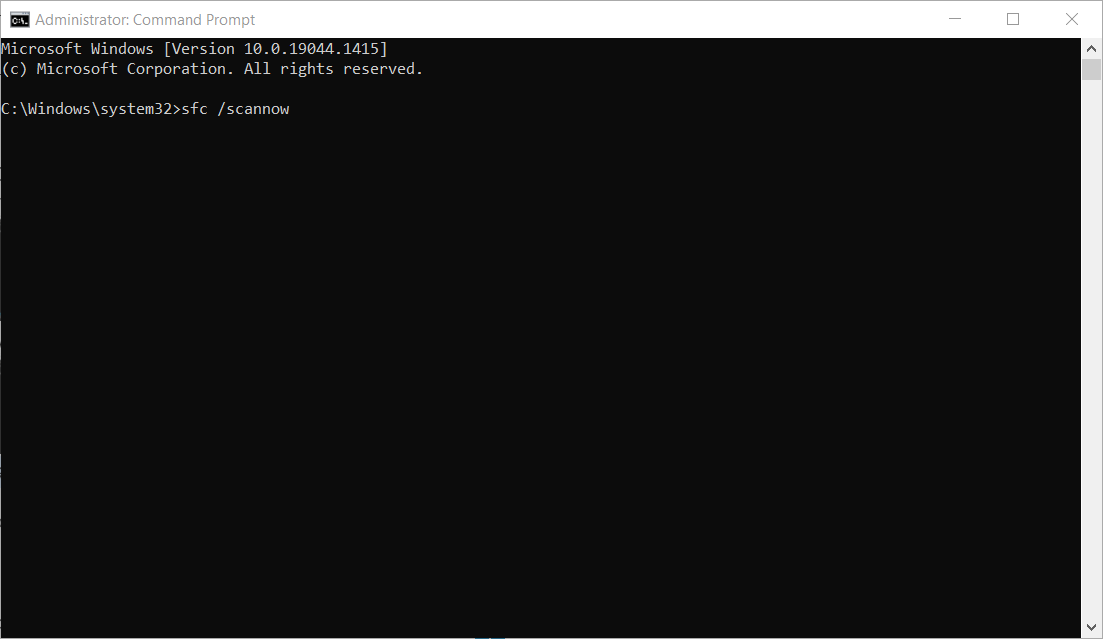
  2. Type the following command and press Enter: sfc/scannowSFC SCAN
  3. Once the process is complete and there is an error, restart your PC.
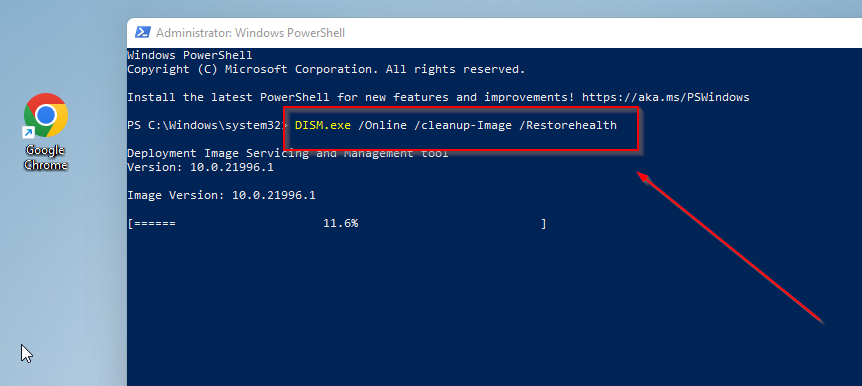
  4. Fire up the Command Prompt again, copy and paste the below-mentioned command, and press Enter: DISM.exe /Online /Cleanup-image /RestorehealthCMD DISM
  5. Restart your PC again once the scanning is complete.

So, you can use these methods to fix MotioninJoy not working on the Windows 10 issue. Try them and let us know which worked for you in the comments below.

Posted in PC

How to Fix Gundam Evolution Lag [3 Simple Solutions]

Gundam Evolution is an engaging adrenaline-pumping online video game. But, poor hardware configuration can cause players on PCs to encounter random stuttering.

Common issues include unreliable internet, incorrect drivers, improper device settings, etc. Thankfully, Gundam Evolution lag problems are easy to fix. 

You can use a VPN, run a driver updater, and tweak your PC settings. Without further ado, let’s break it down into detail. 

How do I fix Gundam Evolution lag issues?

Online video games like Gundam Evolution offer the flexibility of playing anywhere, anytime. And the beauty is you don’t have to choke your device with tons of software.

But there’s a problem:

Online games largely depend on consistent internet connectivity to work properly. So, even a slight mishap to your setup can ruin gameplay. 

That’s the case with Gundam Evolution, where most players encounter annoying lag spikes. This occurs due to high ping arising from unstable network connectivity.

The outcome of it is screen freezes, frame drops, and stuttering. Sometimes, your controllers become unresponsive, or the game even crashes.

Misconfigurations also contribute to lag as they cause your hardware to function sub-optimally. On the bright side, you can update your drivers and optimize PC settings.

That said, the top Gundam Evolution lag fix solutions are as follows:

  • Use a VPN – A VPN can help you fix lag issues by speeding up your internet connection. This lowers your ping resulting in faster response times during online gaming. 
speed test expressvpn reduced ping

We recommend ExpressVPN for this particular job, as it offers the best overall performance. 

Additionally, it has strong encryption and leak-prevention features, so your ISP won’t be able to throttle your connection speed.

ExpressVPN

Eliminate lag and enjoy Gundam Evolution’s fast-paced action to the fullest.
  • Update drivers – This can address glitches arising from using outdated software for your hardware. A utility app like Outbyte Driver Updater can assist you in getting the job done. 

It can perform bulk checks and fix out-of-date drivers on the fly – all with a few clicks.

  • Adjust PC settings – Optimizing your PC for gaming gives a better outcome during gameplay. You can tweak your display settings, graphics card configuration, controller response time, etc. 
intel graphics command center intefrace

Ensure you retest the game while making changes until you get the best results.

⇒ Get Outbyte Driver Updater

Conclusion

Gundam Evolution is a highly engaging online game. But the occasional lag spikes spoil the thrill.

The issue mainly occurs due to poor internet connectivity that increases response time. Besides that, outdated drivers and incorrect hardware settings are also culprits.

Luckily, Gundam Evolution lag issues are simple to fix. All it takes is using a VPN and optimizing your device hardware to favor performance.

Microsoft Store Error Code 0x80131500 [Solved]

The Microsoft Store is integral to Windows 10 and 11 since it allows you to download many applications easily. Unfortunately, many users reported Code: 0x80131500 while trying to use Microsoft Store, so today, we’ll show you how to fix it.

The Microsoft Store error code 0x80131500 is highly complex owing to the vast number of underlying causes, which makes it challenging to identify the one in your case. However, troubleshooting will be more streamlined if you have a thorough understanding.

So, to find out all about the error Code: 0x80131500 and the practical solutions, read the following sections.

What causes the code: 0x80131500 error in Microsoft Store?

Here are some of the common reasons that trigger the error Code: 0x80131500 in the Microsoft store:

  • Misconfigured Microsoft Store setting
  • Incomplete installation of Microsoft Store
  • Running an outdated version of the Microsoft Store
  • Corrupt app cache
  • Issues with the network settings
  • Incorrect date and time or regions set on the computer
  • Third-party apps, usually antivirus, conflicting with Microsoft Store

Below are the solutions for the error Code: 0x80131500 in Microsoft Store that worked for most users.

How do I fix the Microsoft Store error code 0x80131500?

Let’s first try a few quick solutions before heading over to the slightly complex ones.

  1. Restart the computer
  2. Update Windows to the latest available version
  3. Check the Internet connection and make sure you are receiving a decent speed

If these don’t work, here are the ones that worked for most:

1. Reconfigure Internet properties

    This is one of the methods that worked for most users and fixed the Code: 0x80131500 for good. So, do try it. It describes how you can reconfigure the Internet properties correctly with every detail you need, as shown below.

  1. 1. Type Internet Options in the Search bar, then click on the relevant search result.

    Internet options to fix code: 0x80131500
  2. 2. Navigate to the Advanced tab, and then scroll down to the bottom of the Settings list.

    0x80131500-windows-10
  3. 3. Now, reconfigure the following entries:

    • Use SSL 3.0: Uncheck
    • Use TLS 1.0: Uncheck
    • Use TLS 1.1: Uncheck
    • Use TLS 1.2: Check
    reconfigure settings to fix code: 0x80131500
  4. 4. Once done, click on OK to save the changes then reboot the computer for these to apply.

    0x80131500-windows-10

2. Set the date, time, and region correctly

  1. Press Windows + I to open Settings and select Time & Language.time & language
  2. If you see an incorrect time here, turn off the toggle for Set time automatically and then click on the Change button under Set the date and time manually.change time to fix code: 0x80131500
  3. Now, manually choose the correct date and time and click on Change.set time
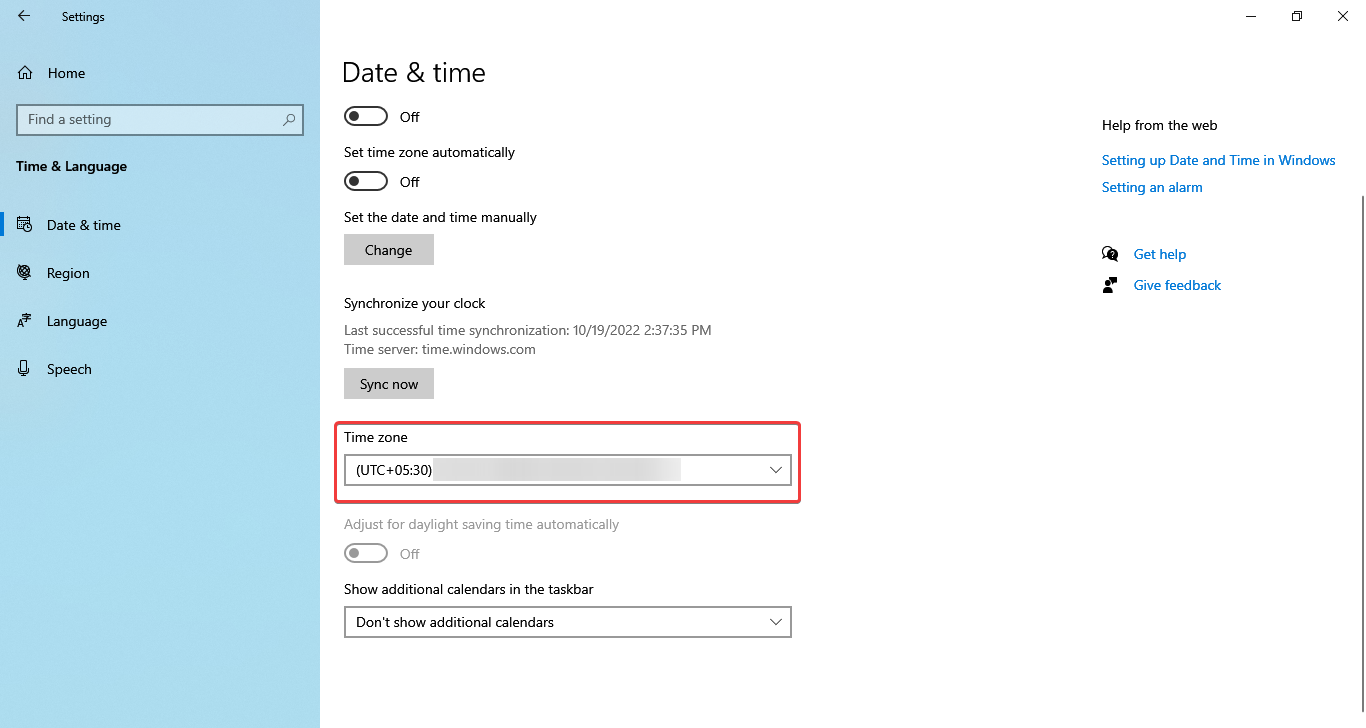
  4. Finally, choose the correct Time zone from the dropdown menu, which corresponds to your region.time zone

Once done, restart the computer, and the error with Microsoft Store should be fixed. Also, some users suggested choosing the United States as the region did the trick. So, you might try that as well, then check whether the Microsoft Store error code 0x80131500 is gone.

3. Change the language to English

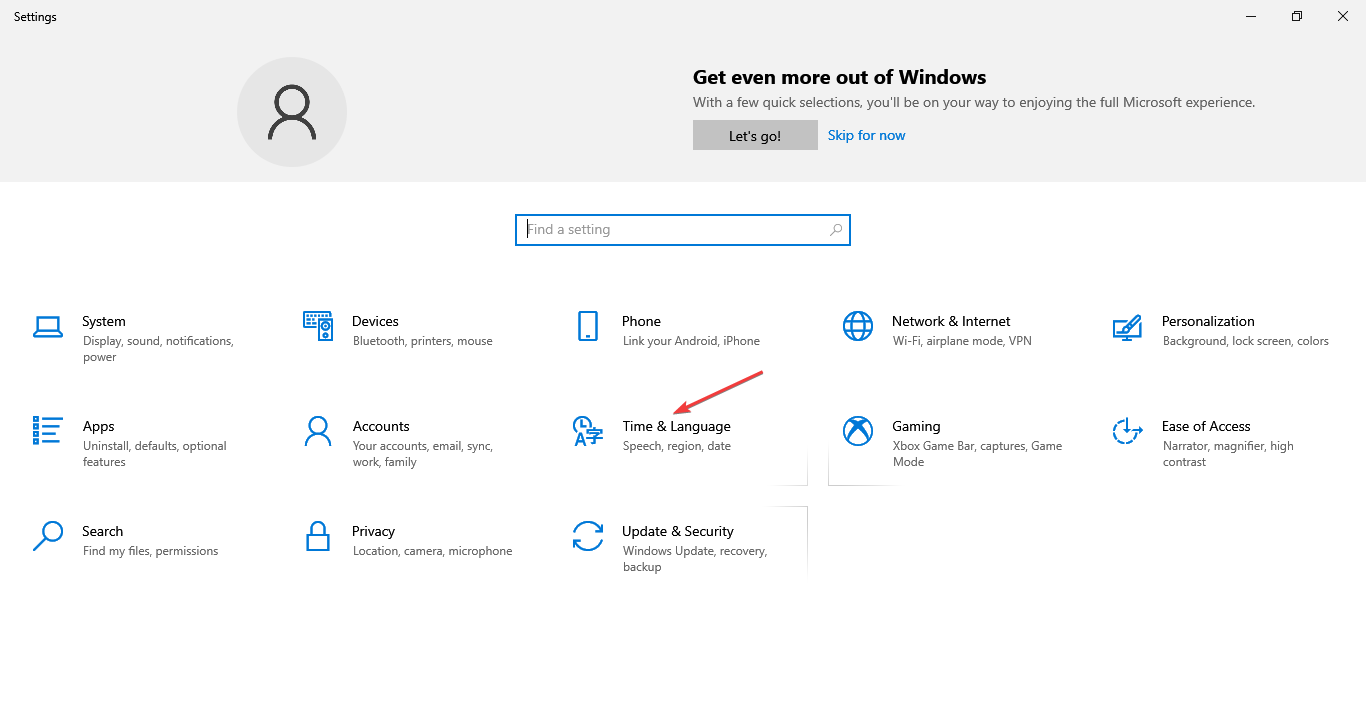
  1. Press Windows + I to open Settings, then click on Time & Langauge.time & language
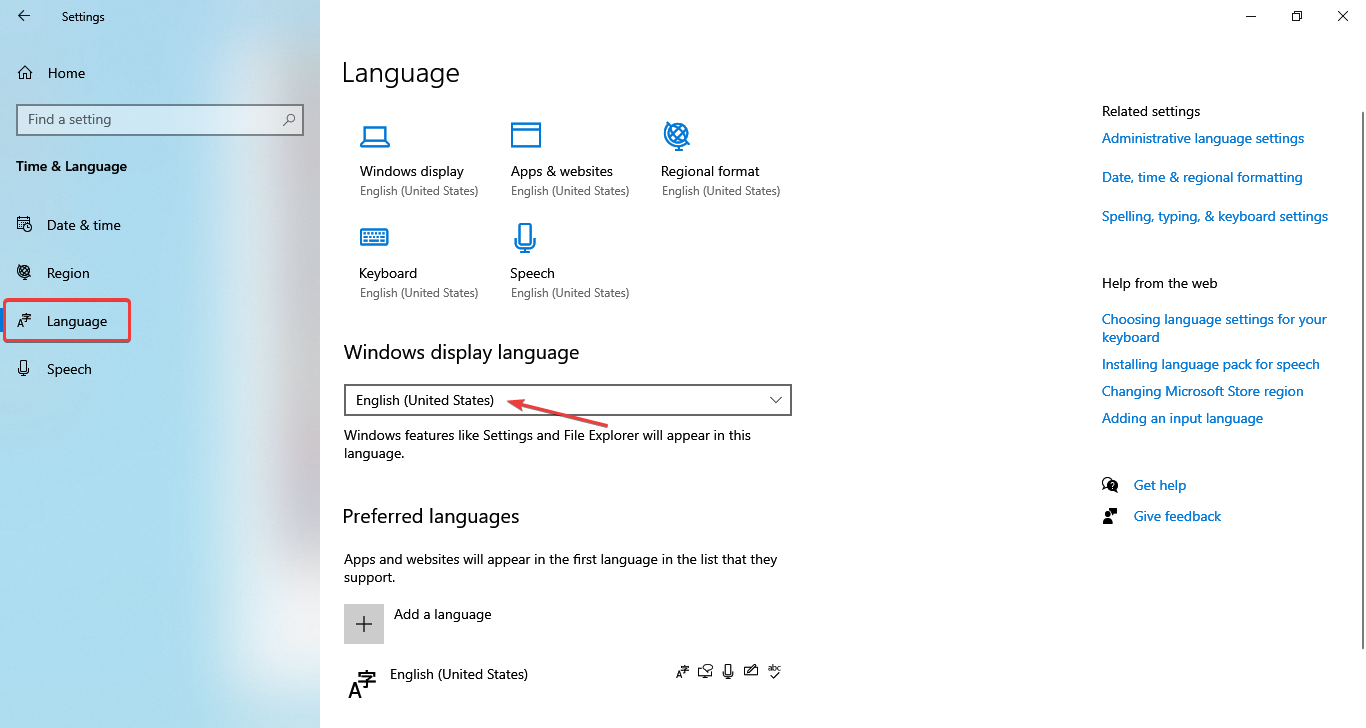
  2. Navigate to the Language tab from the left and select English (United States) from the Windows display language dropdown menu.set english to fix code: 0x80131500

4. Update Microsoft Store

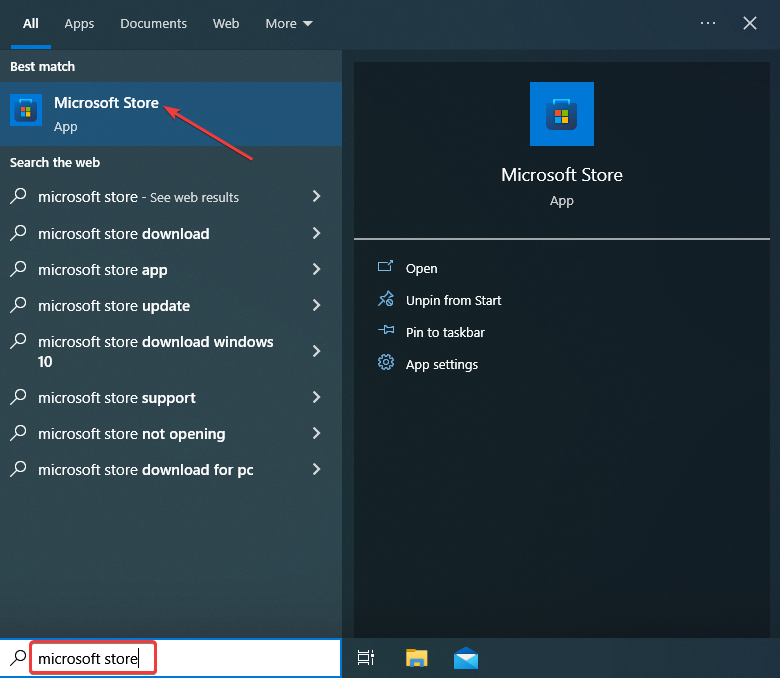
  1. Type Microsoft Store in the Search bar, and then click on the relevant search result.microsoft store
  2. Click on the Library icon near the bottom-left.Library
  3. Now, click on the Get updates button.get updates to fix code: 0x80131500
  4. If there’s an update for Microsoft Store, it should now install automatically.update

Many managed to fix Code: 0x80131500 in Microsoft Store by simply updating the app. However, one user encountered the error after reinstalling a previous iteration of the OS. So, if that’s the case with you, this method may work.

5. Check the services

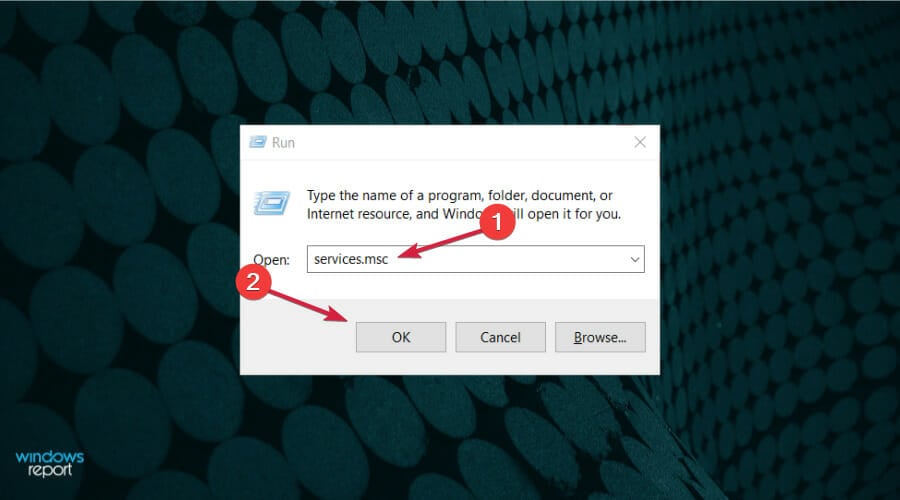
  1. Press the Windows key + R, type services.msc, and then press Enter or click OK.
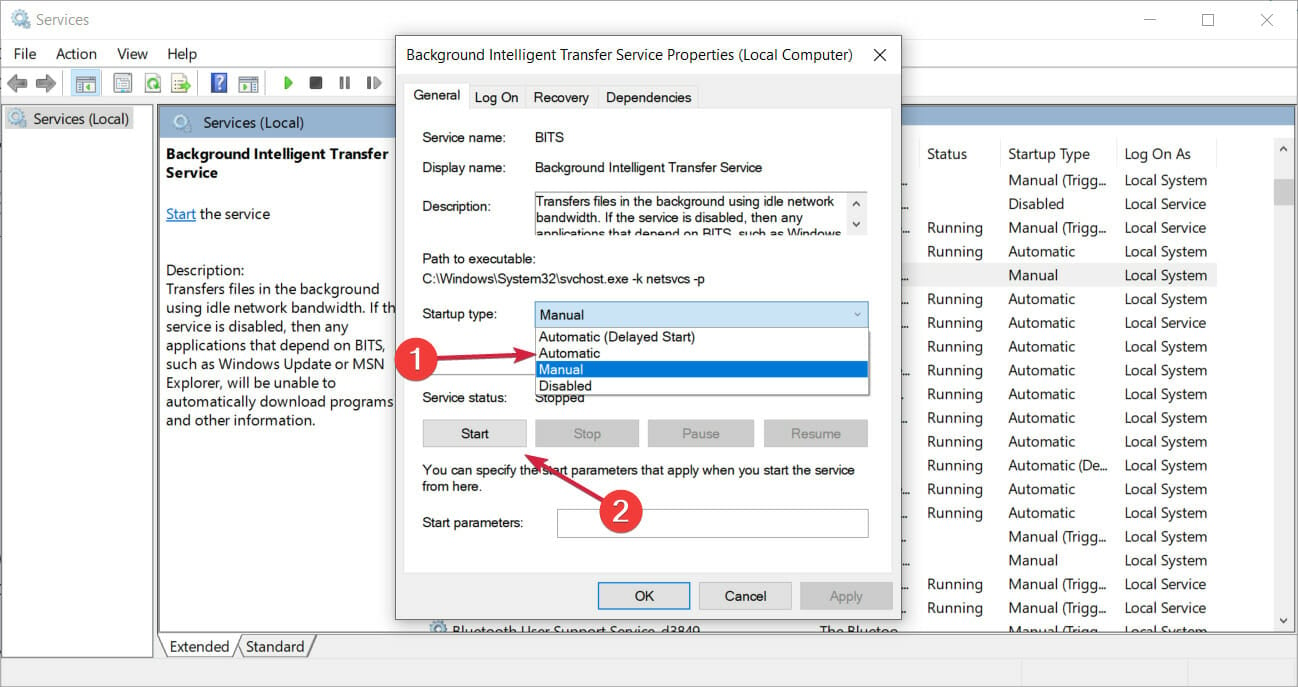
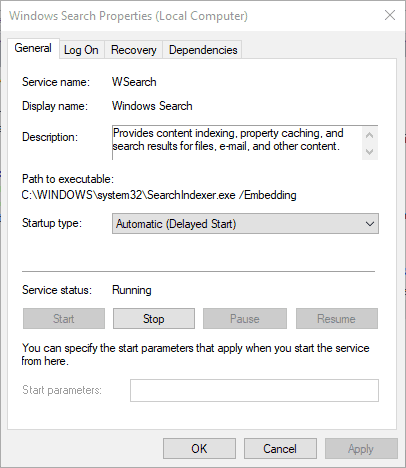
  2. Locate the Background Intelligent Transfer Service and then double-click it.
  3. Set Automatic as the Startup type and then hit the Start button below. Now, click the Apply and OK buttons to acknowledge the change.
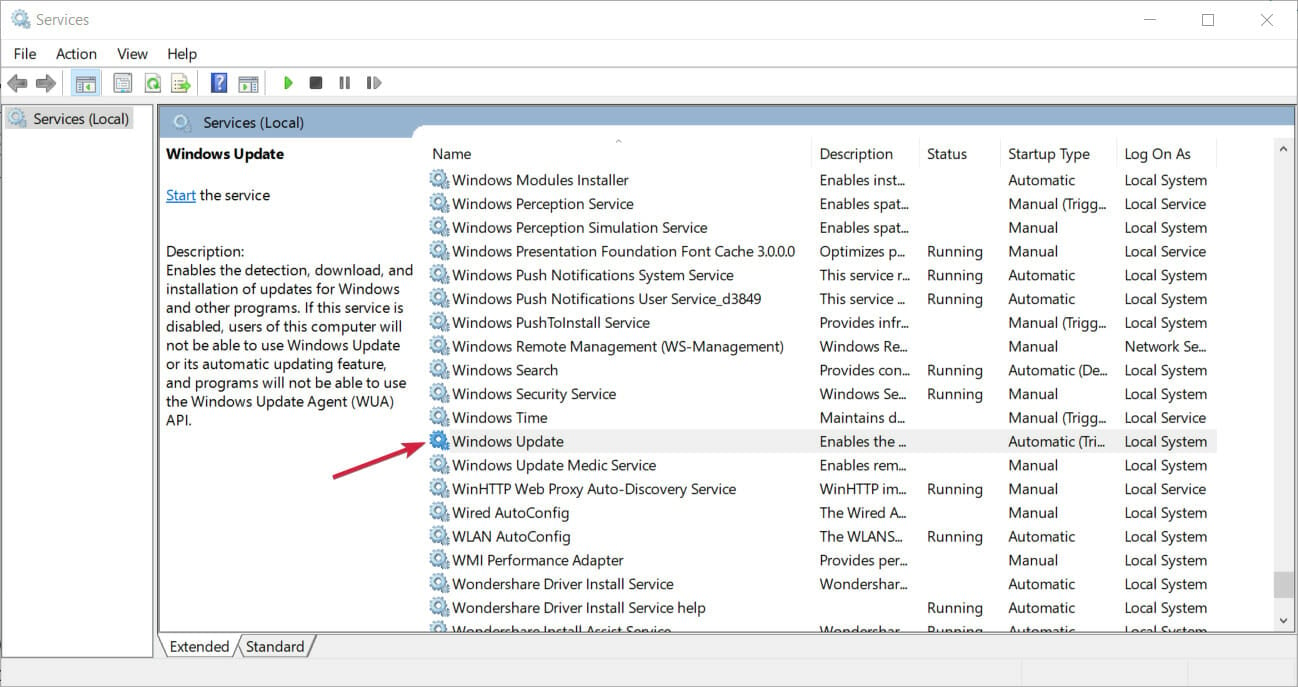
  4. Do the same for the Windows Update service.

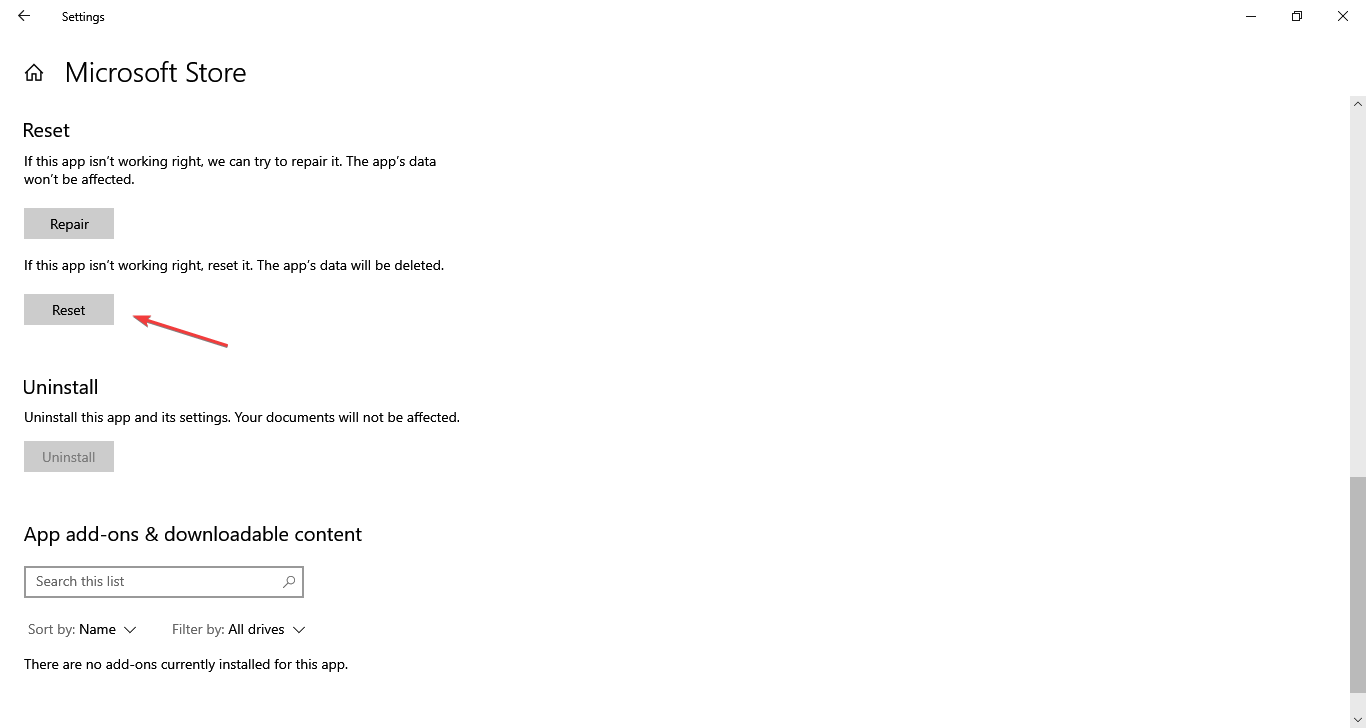
6. Reset the Microsoft Store app

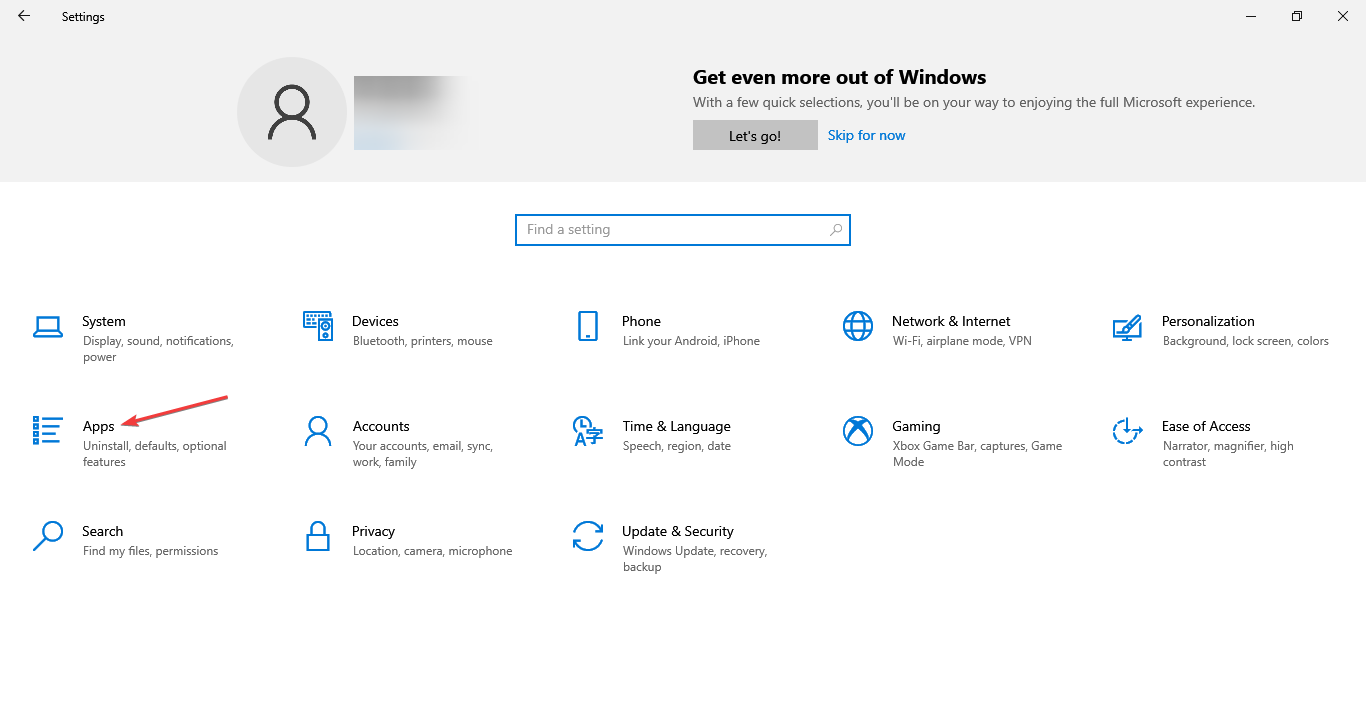
  1. Press Windows + I to open Settings, and then click on Apps.apps
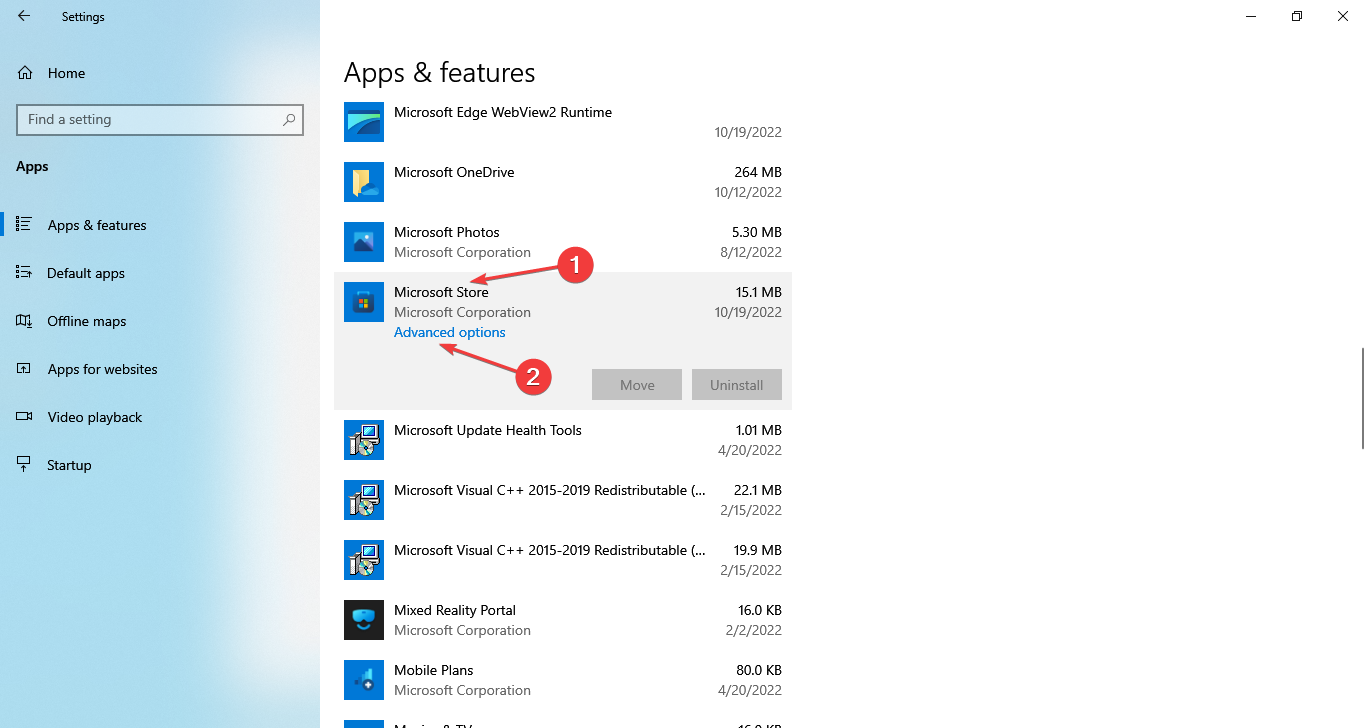
  2. Locate and select Microsoft Store, and then click on Advanced options.advanced options
  3. Click on the Reset button.reset to fix code: 0x80131500
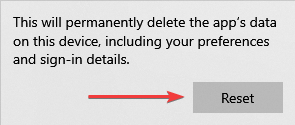
  4. Again, click Reset in the confirmation prompt.reset

After the Microsoft Store reset is complete, you shouldn’t come across Code: 0x80131500.

7. Reinstall Microsoft Store

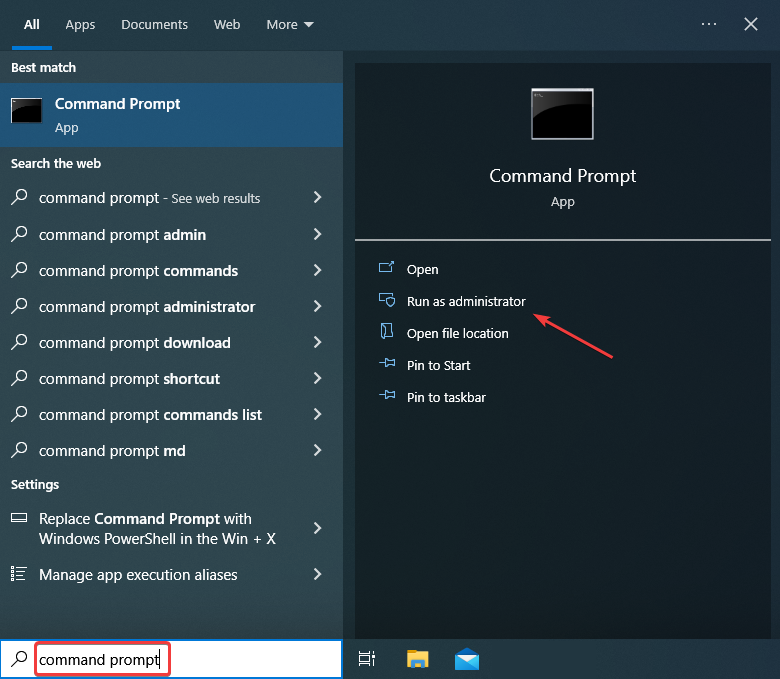
  1. Type cmd in the Search tab, then click on Run as administrator to start Command Prompt with full privileges.Command Prompt
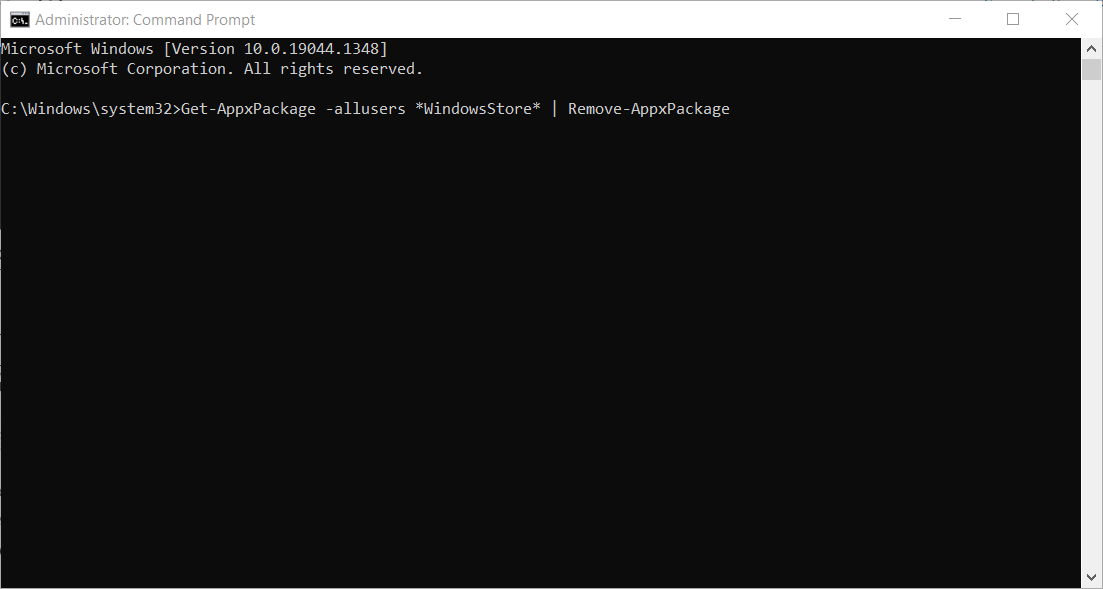
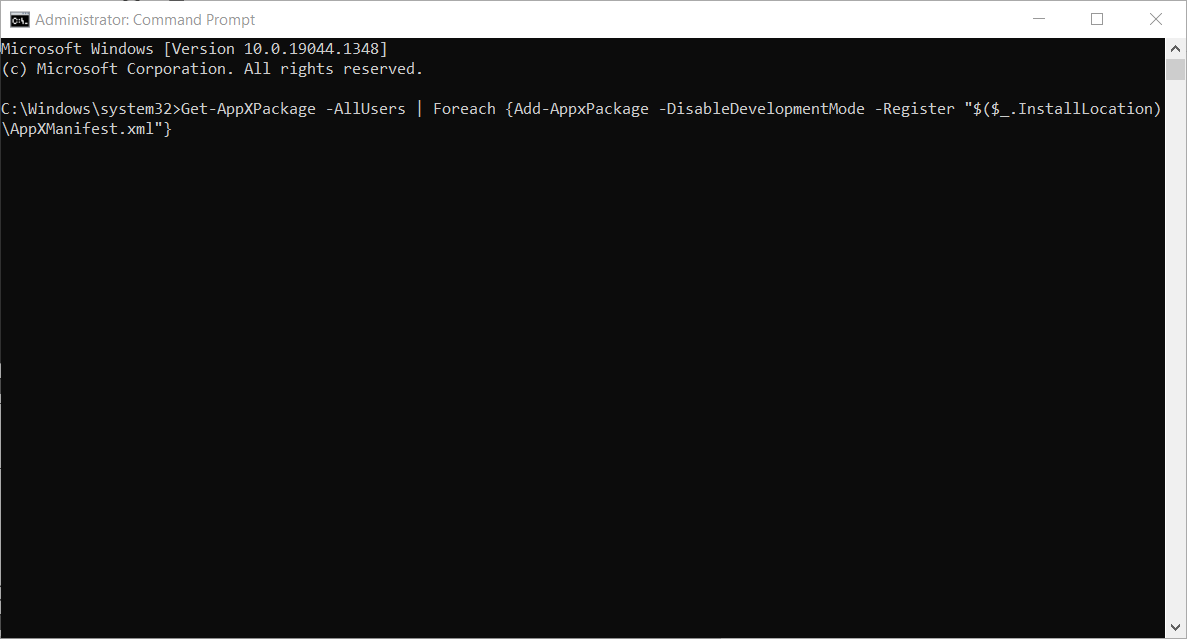
  2. Paste the following command to remove the Microsoft Store apps package and then hit Enter: Get-AppxPackage -allusers *WindowsStore* | Remove-AppxPackage
  3. Now, execute the following command to reinstall it: Get-AppxPackage -allusers *WindowsStore* | Foreach {Add-AppxPackage -DisableDevelopmentMode -Register “$($_.InstallLocation)\AppXManifest.xml”}

This also helps with Microsoft Store error code 0xC002001B.

8. Disable your antivirus and firewall

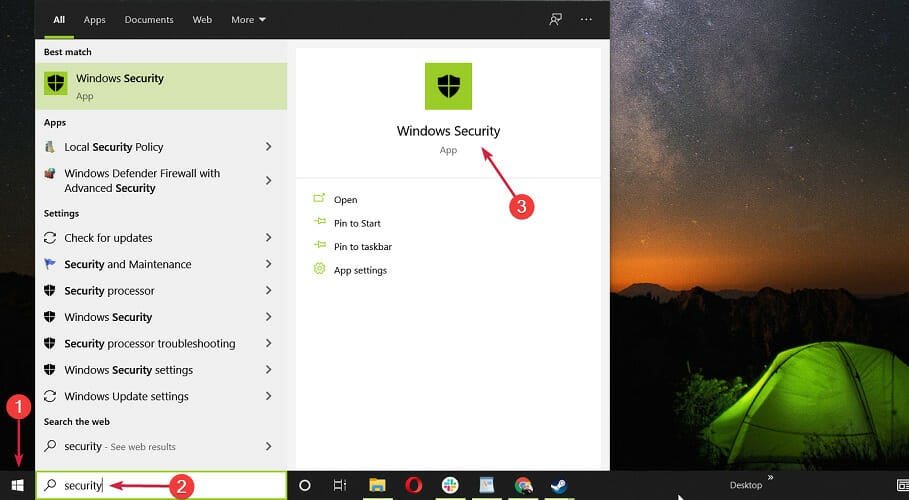
  1. Type Security on the Search tab, and then select Windows Security from the results.
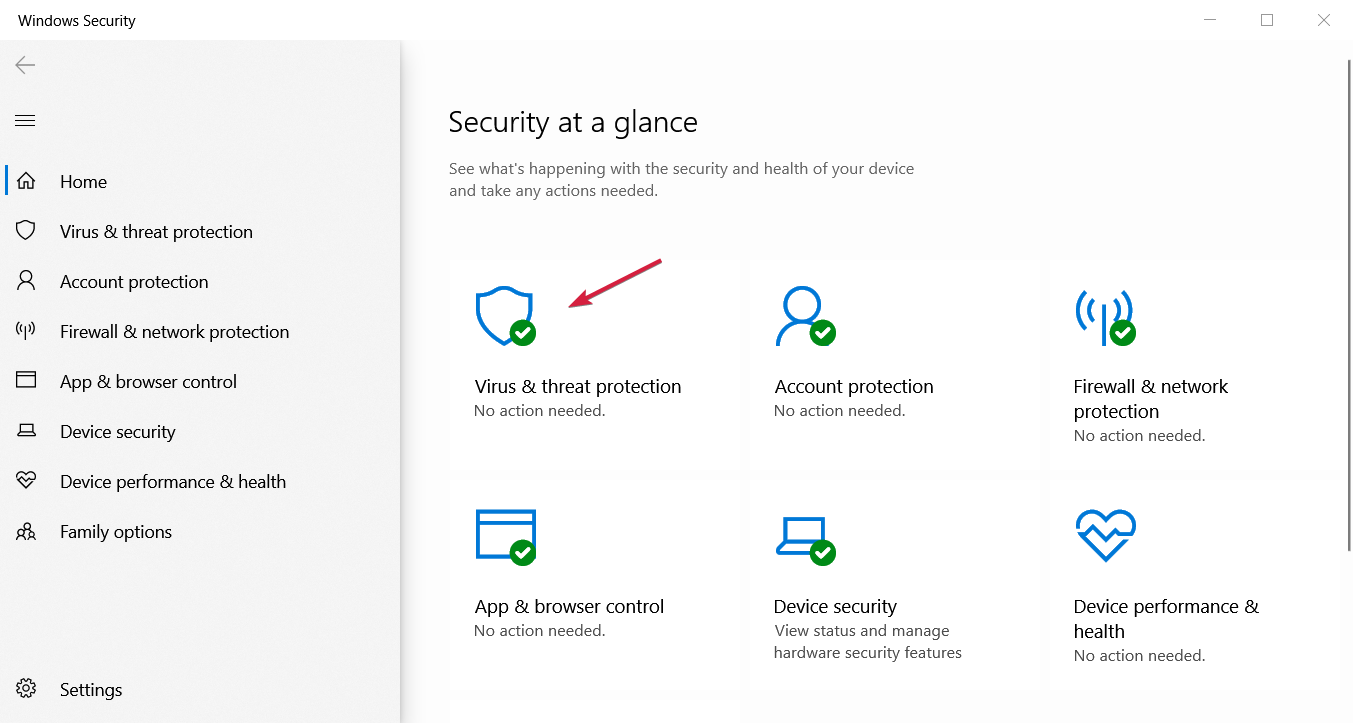
  2. Click on Virus & threat protection.
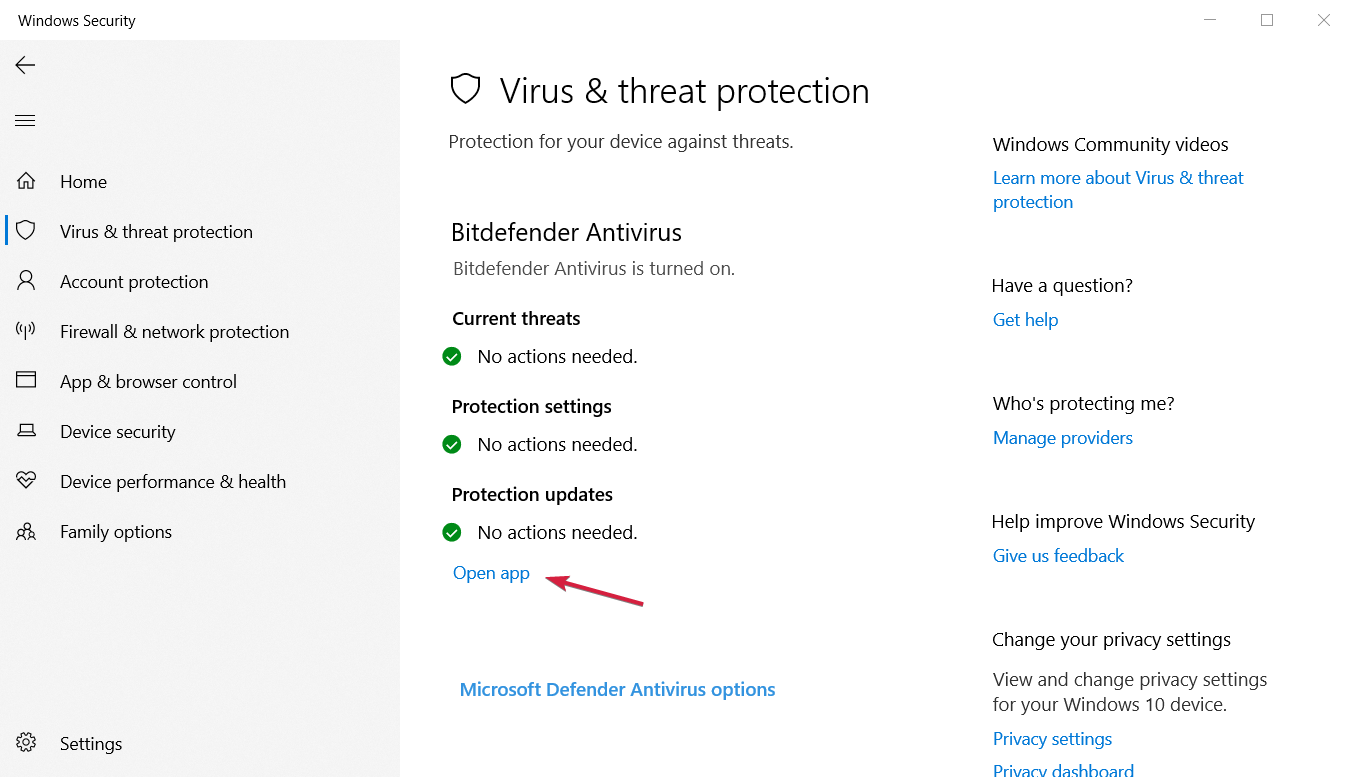
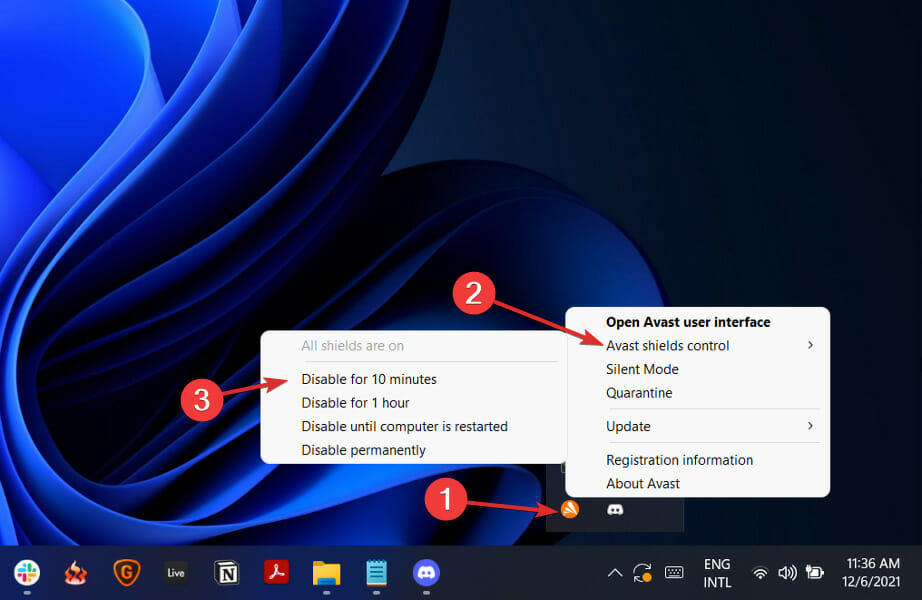
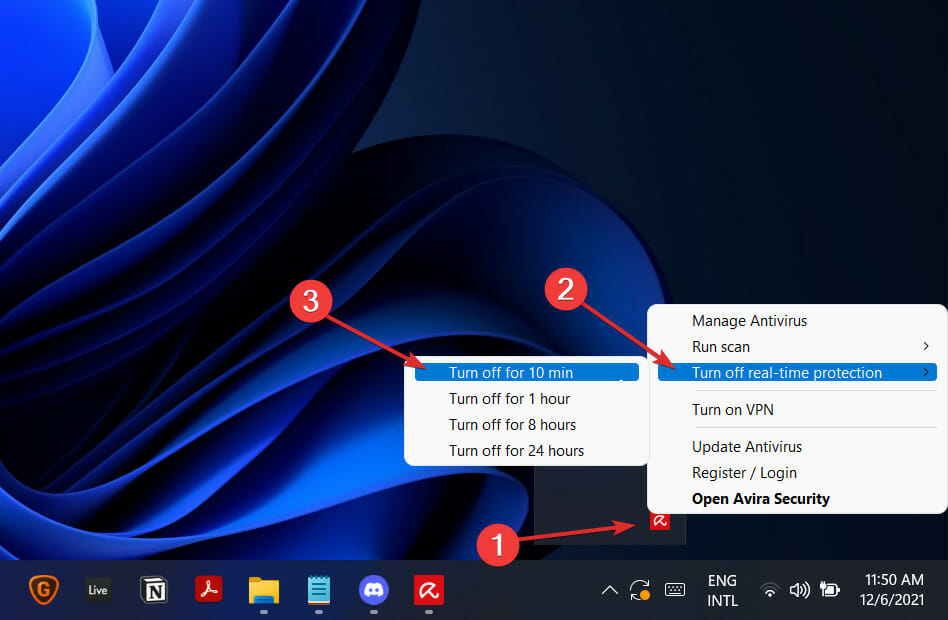
  3. If you don’t have a third-party antivirus, turn off the protection. If you have one, click on Open app or open it individually and disable its protection.

Sometimes the Code: 0x80131500 error can appear due to your antivirus or firewall that may block some apps, and you will need to disable it.

However, the issue can persist even after you disable your antivirus, in which case uninstalling the program is the only viable solution.

If you’re using any antivirus solution to remove it from your PC altogether, be sure to check out the best uninstaller software you can use right now.

Plus, if removing the antivirus solves the problem, you should consider switching to a different antivirus. There are many great antivirus solutions available.

We recommend you try an antivirus that offers comprehensive security and online privacy, multi-platform protection, keeps your banking secure, and protects your IoT and webcam.

TotalAV doesn’t interfere with the Microsoft Store and offers intelligent security protection for your PC. So it’s worth giving it a chance, and you won’t be disappointed.

9. Replace your wireless adapter

A few users reported problematic wireless adapter caused this issue adapter. In addition, even though the Internet connection works without problems, users reported problems with the Microsoft Store.

The issue was fixed after switching to a different wireless adapter, so you might want to try that.

If you don’t have a replacement in mind, you should definitely consider the Wireless USB Wi-Fi Adapter for PC. It has a dual antenna and a top speed of 1200Mbps, working in the 802.11AC standard.

  • Increased signal with the Dual High Gain Wi-Fi Antenna
  • Ultra-fast AC1200 wireless adapter speed
  • Super USB 3.0 Wi-Fi adapter for desktop PCs
  • 7x24 hours technical support
  • Occupies a lot of space

Users also reported the following problems related to the Microsoft Store:

  • 0x80131505 Windows 10 Store – This error usually appears when trying to access Microsoft Store, and some issues with your internet connection most likely cause it.
  • The server stumbled error code 0x80131500 – It’s just a variation in the message received, so the solutions below will surely fix it. However, it is usually caused by issues connecting with the servers, which could be a problem from your ISP.
  • Microsoft Store problems – If you’re having Microsoft Store problems, you might be able to fix this problem by running the Microsoft Store troubleshooter.
  • Visual Studio error code: 0x80131500 – This means that you cannot access the Microsoft server or there are issues with the SQL server.

Running into the error Code: 0x80131500 can be really frustrating, mainly if you constantly use the Microsoft Store for your favorite apps. But the solutions here are all tried and tested and should get things fixed on your computer.

Also, find the best offline games on Microsoft Store you should download today!

As always, for more suggestions or other questions on the Microsoft Store error code 0x80131500, reach out to the comments section below.

How to Open Multiple Excel Files at Once in Windows 10 & 11

Microsoft Excel is undoubtedly one of the best spreadsheet applications for Windows. However, in earlier versions of Excel up to 2010 you can’t automatically open multiple Excel windows.

When you select File > New > Blank workbook in Excel 2010, worksheets open in the same window.

In addition, saved spreadsheets also open in the same window. This is not ideal as you can’t compare spreadsheets in two or more windows.

How to open multiple Excel windows at the same time?

There are a few workarounds that enable you to open multiple Excel windows at the same time and we will present all of them to you, in order.

1. Use Excel’s Jump List

  1. First, you can open multiple windows from the software’s Jump List in Windows 10. To do so, open Excel and right-click its taskbar icon as below.excel  taskbar
  2. The Jump List includes a Microsoft Excel option on it. In the example above, it’s Microsoft Excel 2010 Starter.
  3. Click Microsoft Excel to open a new, separate Excel spreadsheet window.
  4. Now you have opened a second window, click File > Open to open a worksheet in it as shown below.excel taskbar windows
  5. Alternatively, you can also hold the Shift key and left-click the taskbar icon to open multiple spreadsheet windows.

2. With the Middle Mouse Button

If you have a mouse with a middle button or scroll wheel, you can open multiple windows with that. Open Excel and then select its taskbar icon with the middle mouse button.

That will open a new window for you to open a spreadsheet.

3. With Snap Assist

Now you can open Excel spreadsheets in multiple windows at the same time, you can make the most of Windows 10 Snap Assist.

Snap Assist enables you to open two or more windows neatly on the left and right of the desktop.

  1. Select one spreadsheet window and click its Restore Down button.
  2. Then move it to the far right or left side of desktop. That snaps the window to one-half of the desktop as shown below.excel taskbar method
  3. Next, select one of the spreadsheet thumbnails to open another window on the other side of the desktop as in the snapshot below.open multiple excel windows at the same time app
  4. Or you could drag a spreadsheet window to the top left, right or bottom corners of the desktop to arrange up to four spreadsheets as below.spreadsheets how to open multiple excel files at the same time

4. Through the Start menu

    If you are using an older version of Excel and are looking for a way to open multiple files at the same time in different windows, you can do this through the Start menu.

    Each time you open the Excel app from the Start menu, a separate application opens.

  1. 1. Click on the Start button on your taskbar or press the Windows key. This will open the Start Menu.

  2. 2. Type Excel in the search bar or scroll to the folder that includes Excel on your Start menu.

    excel start menu
  3. 3. Click on the app to open Excel from there.

  4. 4. Repeat step 2 to open another Excel window.

  5. 5. Create as many windows as you want. Every time you start Excel from the Start menu, a new window will be created. As such, you can now open multiple spreadsheets in separate windows.

So you can still open spreadsheets in two or more windows with earlier versions of Excel.

The separate windows are better for comparing and analyzing alternative spreadsheets and copying numerical values from one sheet to another.

We hope that you managed to open multiple files at once in Excel using our guide. Let us know your thoughts in the comments section below.

Excel Won’t Open on Windows 11? Here’s What to do

Are Microsoft Excel files not opening on Windows 11? Many users have been facing this issue in recent days.

Usually, You can easily open any Excel files using Microsoft Excel or other supported programs. But there is an issue if that doesn’t happen on your PC. You can try some methods to solve the Excel files, not an opening problem on Windows 11. However, before knowing about that, we should know about the reasons.

Why are Excel files not opening on my Windows 11 PC?

If you cannot open any or some Excel files, these are the possible reasons:

  • Outdated Excel application: If Microsoft Excel is highly outdated, this can be the reason you are facing the problem.
  • Problematic Update: A problematic Windows update or Excel update may cause the problem.
  • Misconfiguration: Any misconfiguration on Windows or Excel may be the reason.
  • Problematic Excel app: If you are not using the official version of Microsoft Excel, you may occasionally encounter various problems, including file opening issues.

How can I fix it if Excel files are not opening on Windows 11?

First, you should do the following things before going through the actual methods:

  • Make sure to open the file with Microsoft Excel.
  • Update Windows to the latest version.
  • Update Microsoft Excel to the latest version.
  • Maximize and Minimize Excel if it shows no content.
  • Ensure your Microsoft Office application is genuine, not a cracked or pirated version. To check if the app is genuine or not, try this tool.
  • Disable Antivirus temporarily and see if it helps.

After ensuring the above things, follow these methods to solve the Excel files not opening an issue on Windows 11:

1. End any Excel and Office processes from Task Manager

  1. Right-click on the Taskbar and choose Task Manager.
  2. Select the Microsoft Excel process and click on End task.ending excel process task manager
  3. End other MS Office-related processes as well.

Sometimes, some background processes remain active for a glitch with either Windows or Office, even though the application was closed. So when next time the user wants to open that app, they may face problem. It may happen with Microsoft Excel too.

2. Ignore other apps that use DDE

  1. Open Microsoft Excel.
  2. Go to Options.going option Microsoft Excel
  3. Go to the Advanced tab and uncheck Ignore other applications that use Dynamic Data Exchange (DDE).unchecking applications that use Dynamic Data Exchange DDE Excel
  4. Click on OK.

According to some users, unchecking the above option fixes the Excel file not opening issue on Windows 11.

3. Reset file associations

  1. Press Win + I on the keyboard to open Windows 11 Settings.
  2. Go to Apps and click on Default apps.going default apps settings windows 11
  3. Scroll down and click on Reset next to Reset all default apps.clicking reset next to Reset all default apps Windows 11
  4. Restart your PC.

After resetting, when you open any Excel file next time, you may get the option to choose which program to use. Select excel. This time, the problem will not appear.

If necessary, learn how to fix file association issues on Windows.

4. Open Excel in Safe Mode

  1. Press Win + R on the keyboard to open RUN.
  2. Type the following command and click on OK: excel /safeopening excel safe mode with run command
  3. Now, open the problematic file using Excel.

If there is something wrong with the Excel configuration, but you cannot figure it out, Safe Mode is an excellent way. For example, those who cannot open a spreadsheet file with Excel on Windows 11 can try the Safe Mode method.

5. Disable add-ins

  1. Open Excel and go to Options like before.
  2. Go to the Add-ins tab.
  3. Select COM Add-ins next to Manage and click on Go.choosing com add-ins and clicking go Microsoft Excel.png
  4. Uncheck all the Add-ins and click on OK.disabling excel add-ins and clicking ok
  5. Relaunch the Excel.

Add-ins can enhance your experience with Microsoft Office. However, sometimes, these can be the root of the problem. Disabling any third-party add-ins can help you to solve the Excel file not opening issue.

6. Repair Microsoft Office

  1. Go to Windows 11 Settings.
  2. Navigate to Apps and click on Installed apps.going installed apps windows 11 settings
  3. Click on the three horizontal dots next to Microsoft Office and choose Modify.clicking modify windows 11 settings microsoft office
  4. Select your preferred option and click on Repair.repairing Microsoft Office quick repair

If possible, you should choose the Online Repair option rather than Quick Repair. However, if the problem is critical, the online method is the best way to sort it out.

Is the above process failing? Learn how to fix couldn’t repair Office problem.

Repairing Excel can also help you fix issues like Exception from HRESULT 0x800a03ec; read this guide to learn more.

7. Re-install MS Office

7.1 Uninstall Microsoft Office

  1. Go to Installed apps on the Settings like before.
  2. Choose Uninstall for Microsoft Office by clicking on the three horizontal dots.uninstalling microsoft office 365 windows 11
  3. Follow the on-screen steps to complete the process.
  4. After that, restart your PC.

For this, you can use Revo or IObit Uninstaller too. These third-party options are better than Windows uninstallers. These can remove any program from your PC without leaving any leftovers.

7.2 Install again

  1. Go to the Microsoft account site and sign in.
  2. Go to View all subscriptions.
  3. Click on Manage next to the Microsoft Office or Microsoft 365 subscription.
  4. Click on Install office, as shown in the screenshot.clicking install office Microsoft website
  5. Now, you will get the option to download.
  6. After downloading it, install it on your PC.

If you don’t have a Microsoft 365 subscription, you may need to follow slightly different steps to download Office apps.

After installing, try to open the Excel files again and see if it has fixed the problem.

8. Use Excel online

  1. Go to the Microsoft Excel Online site.
  2. Sign in with your Microsoft Account if necessary.
  3. Upload the file you want to open.uploading file Microsoft Excel online
  4. Enjoy Excel online.

You won’t have to upload if the Excel file is stored online like in OneDrive. Instead, you can view all of your current file names in Excel. Just click on the preferred one you want to open.

If, after trying the other methods, the problem persists, consider using Excel online. Like Google Sheets, Microsoft also has made its service online, which is, in fact, more powerful.

Sometimes, the file you try to open is not well-optimized for Excel. In this case, you can use other Office alternatives like Google Sheets, Libra Office, etc. Also, consider using any CSV viewers if it is a CSV file.

Hopefully, the above suggestions will help to fix the Excel files, not an opening problem on Windows 11. If you have tips or methods to help others, feel free to let us know in the comment box.

OneDrive Keeps Crashing: Fix it With These 3 Simple Steps

If your OneDrive keeps crashing, you are in the right place. Let us tell you all that you need to know.

If you are using OneDrive to store your data and keep your files secure, you already know that you can sync your data automatically from your Windows 10 device.

Sadly in some cases, this service may crash, which has been reported by a few users. So, let us explore why this may happen.

Why OneDrive keeps crashing?

We gathered from users that a few factors might trigger this crashing problem. At the top of the list are the following:

  • Updates – One thing that may cause you problems is that Microsoft is rolling out essential bug fixes from time to time, which can interfere with how your OneDrive works.
  • Folder syncs – Users complain that some of the updates cause their OneDrive app to freeze when it synchronizes some folders.
  • Third-party apps – On the Windows OS, you may have installed other applications conflicting with OneDrive. In some cases, these may even be your antivirus software.

While this is not an exhaustive list, they make up most of the triggers.

Now let us discuss the most practical solutions. These will work if OneDrive crashes when syncing or if OneDrive crashes on start-up.

How do I fix OneDrive if it keeps crashing?

Before you start with the solutions, you may consider using an alternative to OneDrive. Choosing another efficient file sync software on Windows 10 often will save you the stress of troubleshooting.

Also, ensure you have enough disk space, as sync errors often occur when there is not enough disk space. We recommend reconnecting your OneDrive account and then trying to sync the folder again.

  1. Install the latest Windows updates
  2. Disable conflicting processes
  3. Check the file/folder size

1. Install the latest Windows updates

  1. Press Windows + I to open the settings app.
  2. Click on Updates & Security.
    OneDrive keeps crashing
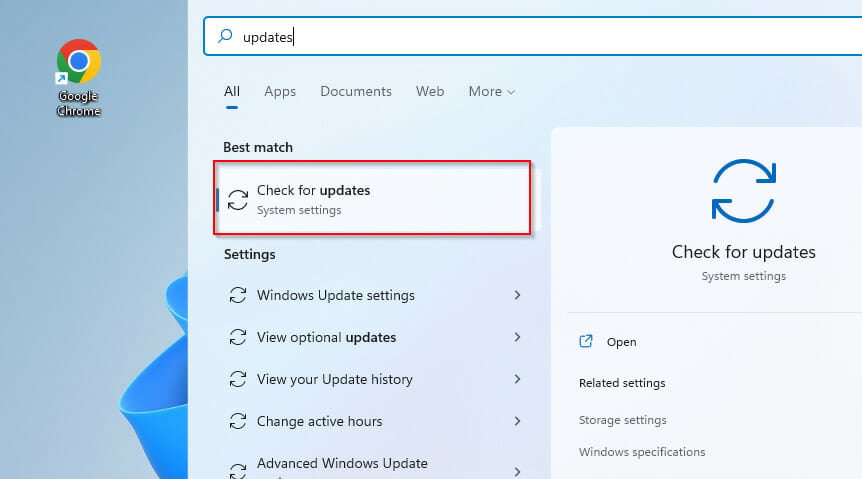
  3. Click on Check for updates.

If there are bugs that have triggered these crashes in a previous update, you will likely get fixes in the next update.

2. Disable conflicting processes

  1. Press Windows + R, type msconfig, and hit Enter.
  2. Click on the Services, check the Hide all Microsoft services check box, and click Disable all.
    OneDrive keeps crashing
  3. Go to the Startup tab and click Open Task Manager.
    OneDrive keeps crashing
  4. Select each startup item, then click Disable.
  5. Close the Task Manager and restart the computer.

Sometimes, various apps and programs may prevent your OneDrive app from syncing your files and folders and even cause it to crash.

Because of this, the safest solution is to clean and boot your computer to use only a minimum set of drivers and programs.

3. Check the file/folder size

OneDrive also has file size limitations. This means you can’t sync a file or folder larger than 10GB. If the problematic folder is more significant than 10GB, you must compress it using some of the file compression tools listed in this guide.

That is as far as we shall be covering. It would be best if you tried any of the solutions above that feel most relevant to you.

We hope that one of these solutions helped you solve the sync issue with OneDrive. Let us know in the comments below which worked best for you.

Apex Directx Error: Fix This Issue With 4 Simple Methods

Apex Legends DirectX error can prevent you from starting the game, and in today’s article, we’ll show you how to fix this problem once and for all.

The game has been out for a while now, and EA’s new battle royale game has become a little phenomenon in its own right, with 50 million players in its first month. That’s something to write home about.

With thousands of players logged into EA’s servers, errors are bound to happen occasionally. With users encountering DirectX errors recently, this issue became the focal point on Reddit threads.

Let’s take about possible triggers and solutions.

What causes Apex Directx error?

From the feedback from multiple users, we have been able to sum up the principal triggers for this error to include the following two elements:

  • Outdated drivers – In most instances, this refers to the graphics driver. If it is bad or outdated you may experience this error.
  • Firewall or antivirus – Some antivirus apps are notorious for blocking out essential components. You may need to disable your antivirus.

While there may be some other minor triggers, you should be concerned about the above listed. So let us explore practical solutions for Apex legends DirectX 11 and 12 errors.

How can I fix Apex Legends DirectX error?

  1. DirectX .cab file removal
  2. Turn off your firewall
  3. Run CCleaner
  4. Update your graphics driver

1. Directx .cab file removal

  1. Go to the path below:
    C:Program Files (x86)Origin GamesApex__Installerdirectxredist
  2. Delete all files except DSETUP.dll, dsetup32.dll, DXSETUP.EXE, and any .cab file with 2010 contained in the name.
    Apex Directx error
  3. Right-click on DXSETUP.exe and run it with Administrator rights; the installation should work.
  4. Re-launch your game, and you’re all set.

2. Turn off your firewall

For some users, this simple solution might work. However, keep in mind that turning off your firewall may not solve Apex Legends DirectX errors for all the gamers out there.

So, here are the steps to follow:

  1. Press Windows + R, type control panel, and hit Enter.
    Apex Directx error
  2. Navigate to System and Security and click Windows Defender Firewall.
    Apex Directx error
  3. On the left-hand pane, click Turn Windows Firewall on or off.
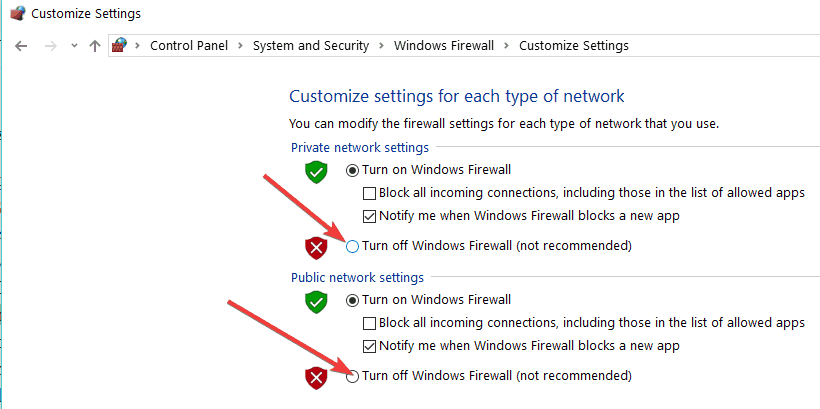
  4. The new window shows two options for private and public networks. First, turn your firewall off on both networks and check if the DirectX error persists.
    disable Windows firewall

3. Run CCleaner

CCleaner is a handy tool that removes any unnecessary files left over from apps and programs that weren’t completely installed. This tool cleans your Windows Registry.

All you need to do is download CCleaner from the official website, install it on your PC and run it.

4. Update your graphics driver

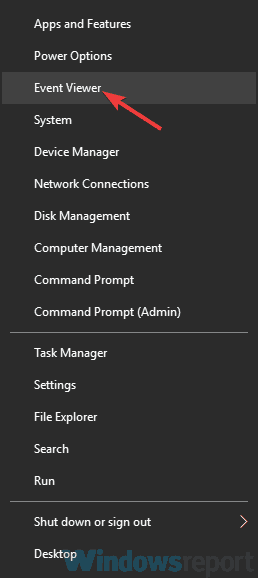
  1. Right-click on the Start menu and select Device Manager.
  2. Expand the Display drivers section, right-click on your graphics card, and select Update driver.
    Apex Directx error
  3. Click Search automatically for drivers.

Another common cause for DirectX errors is outdated graphics drivers. Make sure you installed the latest GPU drivers for Apex Legends.

Alternatively, you may go to your GPU manufacturer’s official website and download the available graphics driver updates.

These solutions should help you when you face this Apex DirectX error. In some extreme cases, you may have to uninstall Origin. Usually, this is a last resort solution, but it may help you to solve this problem.

What issues have you experienced while fighting alongside your teammates? Let us know in the comments below.

0x80240023 on Windows 11: How to Quickly Fix This Error

It is common for users to experience issues during Windows updates or when attempting to update their Windows. One is the Windows Update error code 0x80240023 in Windows 11, indicating there’s a problem somewhere.

Other update concerns like the 0x800f0900 Windows Update error can also disturb the Windows update process.

What causes the Windows update error 0x80240023?

Many factors can be responsible for your PC’s Windows update error 0x80240023. A notable factor that can cause the error is corrupt system files. When there are corrupt system files on your operating system, it can impede the update process on your PC, resulting in an error.

Furthermore, other factors can cause the Window update error 0x80240023 to appear on your PC. Some are:

  • Internet connection issues – Users must connect to a stable and fast network before installing Windows updates. So, network congestion or unstable internet connection can cause issues with the Windows Update process, resulting in the error.
  • Windows Update temporary cache folder – The previous Windows updates installer patch files on your computer are saved as cache files in a folder. These files can become old and corrupt, causing the Windows update error 0x80240023 due to update caches.
  • Virus and Malware – Attacks from viruses and malware can cause problems with Windows updates on Windows 11. They can block the connections between your PC and Windows servers.

Note that the cause can differ on various computers. Nevertheless, we’ll take you through some steps to fix the error.

How do I fix the Windows Update error code 0x80240023 in Windows 11?

Before proceeding with any troubleshooting steps, try the following:

  • Stop background apps running on your computer.
  • Restart your router.
  • Restart Windows in Safe Mode and check if the update can install without errors.

Proceed with the solutions below if you can’t fix the error.

1. Run SFC and DISM scans

  1. Left-click the Start button, type Command Prompt, and click Run as administrator.
  2. Click Yes if the User Account Control prompts
  3. Type the following commands and press Enter after each: sfc/ scannow
  4. Type the following commands and press Enter after each: DISM /Online /Cleanup-Image /RestoreHealth
  5. Restart your PC.

Running the SFC and DISM scan will detect and repair corrupt system files that can cause Windows update error 0x80240023.

You can check how to fix the run as the administrator option not working on their PCs.

2. Run Windows Update Troubleshooter

  1. Press Windows + I key to open the Settings app.
  2. Click System and select Troubleshoot.
  3. Then click on Other troubleshooters.
  4. Click the Run button beside the Windows Update.
  5. Follow the on-screen prompts and restart your PC afterward.

The Windows update troubleshooter will fix issues causing the Windows updates error 0x80240023. Check other ways to run the Windows Update troubleshooter in Windows 10/11. 

3. Clear Windows Update cache via File Explorer

  1. Press Windows + I to open File Explorer.
  2. Go to Local Disk (C), right-click on it, and select Properties from the drop-down.
  3. Click on Disk Clean-up, then click the Cleanup system files button.
  4. Check the boxes for Windows upgrade log files and Temporary Windows Installation files, then click OK.
  5. Close the File Explorer and check if the error persists.

You can read our article on what to do if File Explorer keeps crashing on your PC.

4. Restart the Windows Update services

  1. Left-click the Start button, type cmd, and choose Run as Administrator.
  2. Type the following commands and press Enter after each one to stop Window update services: net stop wuauserv net stop cryptSvc net stop bits net stop msiserver
  3. Type the following command one after the other: ren C:\Windows\SoftwareDistribution SoftwareDistribution.old   ren C:\Windows\System32\catroot2 Catroot2.old
  4. Input the following commands and press Enter after each one to start Windows update services: net start wuauserv net start cryptSvc net start bits net start msiserver
  5. Exit the Command Prompt and restart your PC.

Restarting the Windows update components will fix issues affecting the Windows update services, prompting it to run into errors.

In conclusion, you can check our article on Windows 11 error code 0x800f0830 and how to fix it. Also, we have a guide for fixing the 0x800f0805 Windows Update error that may appear on your PC.

Do not hesitate to drop your suggestions or questions in the comments below.

VCRuntime140.dll Not Found: 5 Ways to Get Missing DLL Back

DLL (Dynamic Link Library) are files used by more than programs and help them perform various critical tasks. But, often, users claim that DLL files are missing, with VCRUNTIME140.dll not found being commonly reported.

The complete error message reads The code execution cannot proceed because VCRUNTIME140.dll was not found. Reinstalling the program may fix this problem. So, let’s find out how you can fix things in this case.

Why am I getting VCRuntime140.dll not found?

Here are a few reasons you might be getting the error:

  • The DLL file was deleted – Since the file is shared amongst several apps, there’s a likelihood that it was deleted by one of these, and, as a result, you are getting the error.
  • Corrupt system files – Even in the case of corrupt system files, you get the VCRUNTIME140.dll not found error.
  • Improper installation of the app – If a program requires a specific DLL file, it is usually installed with the file. So, in case you are getting the error, likely, the program was not installed correctly.
  • System infected with malware or virus – Malware or virus can also affect the DLL files stored on the computer, along with making other unwanted critical changes.

While you are fixing it, we decided to list the programs usually affected:

  • Firefox VCRUNTIME140.dll not found – Many reported that they can’t open Firefox due to this error.
  • Office 2016 VCRUNTIME140.dll not found – Microsoft Office, too, is affected by the missing DLL file.
  • Epic Game VCRUNTIME140.dll not found – Some users had trouble opening Epic Games on their PC.
  • Sims 4 VCRUNTIME140.dll not found – A lot of players had the error message show up as soon as they launched Sims 4.
  • Origin VCRUNTIME140.dll not found – Our solutions should fix things in this case.

How can I fix VCRuntime140.dll not found error?

Before you try the slightly complex solutions, here are a few quick ones:

  • If you accidentally deleted the DLL file, restore it from the Recycle Bin.
  • Make sure Windows is up-to-date. If there’s a pending update, install it and verify whether the problem is resolved.
  • Run a malware scan using a built-in Windows Security or an effective third-party antivirus to remove any virus from the PC.

If these don’t work, try the solutions listed next.

1. Use a DLL finder tool

Some of our favorite repair tools can automatically find disappearing DLLs. Besides finding your lost DLL, these kinds of apps will also significantly improve the performance of your system.

2. Repair Microsoft Visual C++ Redistributable

  1. Press Windows + R to open Run, type appwiz.cpl, and then hit Enter.appwiz.cpl
  2. Locate all Microsoft Visual C++ Redistributable, select each individually, and then click on Change.change
  3. Choose Repair.repair redistributable to fix vcruntime140.dll not found
  4. Click Yes in the UAC prompt.
  5. Wait for the repair process to complete.repair
  6. Once done, repair the other Microsoft Visual C++ Redistributable entries here, and then restart the computer.

Now, check whether the VCRUNTIME140.dll not found error with Microsoft Office is fixed. If not, head to the following method.

3. Download the Microsoft Visual C++ Redistributable

If you couldn’t find any Microsoft Visual C++ Redistributable on the PC, their absence is likely triggering the VCRUNTIME14 not found error. And the ideal solution here would be to download them manually.

Head to Microsoft’s official website and download the x64 and x86 architecture. Once done, run the setup to install them, and the error should be gone.

4. Reinstall the affected program

  1. Press Windows + I to open Settings, choose Apps from the navigation pane, and then click on Installed apps.install apps
  2. Now, locate the app throwing the error, click on the ellipsis next to it, and choose Uninstall.uninstall app to fix vcruntime140.dll not found
  3. Again, click Uninstall in the prompt.uninstall
  4. After removing the app, restart the computer once before reinstalling it. And make sure you get it from a reliable source, preferably the official website or Microsoft Store.

As already stated, an application usually installs the required DLL files. The ideal course, and also the recommended one, when getting the VCRUNTIME14 not found error is to reinstall the app.

5. Run the DISM and SFC scan

  1. Press Windows + R to open Run, type cmd, and press Ctrl + Shift + Enter.cmd
  2. Click Yes in the UAC prompt that appears.
  3. Now, paste the following three commands one at a time, and hit Enter after each to run the DISM tool:DISM/Online /Cleanup-Image /CheckHealth DISM /Online /Cleanup-Image /ScanHealth DISM /Online /Cleanup-Image /RestoreHealth
  4. Next, run the SFC scan with the following command:sfc /scannowsfc scan to fix vcruntime140.dll not found

If nothing else worked, it’s likely the corrupt system files to blame. And in this case, running DISM (Deployment Image Servicing and Management) and SFC scan should fix the VCRUNTIME14 not found error for good.

If you frequently encounter this problem, install the best DLL repair tool and get rid of the error forever.

If you have any questions or other suggestions, please write to us in the comments section below.

EXCEL: There is Not Enough Disk Space [Quick Fix]

Some users have seen the error Microsoft Excel can not open or save any more documents because there is not enough disk space.

This issue has made users, understandably, very confused, as they observed that their hard drives have far less data written on them than at full capacity.

The “there is not enough disk space” issue happens whether the users choose to open the respective file either through the File -> Open method or by double-clicking the Excel file inside Windows Explorer.

In today’s article, we will discuss what are the possible reasons for this error occurring, and also what you can do to avoid it. Please read on to find out more details.

Why does the disk space error occur inside Microsoft Excel?

The error mentioned above seems to have nothing to do with your actual remaining disk space.

Microsoft Excel is trying its best to display a security notification regarding the file you’re trying to open, but because of a glitch, it is not able to do it properly.

These types of security warnings are usually displayed in relation to files that are downloaded from the internet, but this may vary.

The security certificate that the file contains is in some way corrupted, making Excel show you the warning message.

Read along to find out what you can do about this issue.

How do I fix there is not enough memory or disk space to run in Excel?

1. Change settings in the properties of the file

  1. Use the Windows File Explorer and navigate to the location of the Excel file that’s causing issues.
  2. Right-click the file -> choose Properties.
  3. Click the General tab -> click the Unblock button.

Note: In some cases, this option will not be available to you. If that is the case, please try the next method.

2. Use the Trust Center Settings of Excel

    It’s possible to repair the not enough disk space error in Excel with efficient tools such as Trust Center Settings. Check the following steps to do it on your own.

  1. 1. Move the Excel file with issues inside a separate folder on your hard drive.

  2. 2. Open Excel.

  3. 3. Inside MS Excel -> click File -> Options.

    not-enough-disk-space-excel
  4. 4. Select the option Trust Center -> Trust Center Settings -> click the Trusted Locations button.

    not-enough-disk-space-excel
  5. 5. Add the newly created folder to the Trusted Locations list.

  6. 6. Select the option Subfolders of this location are also trusted -> click Ok.

3. Update your software to the latest Microsoft Office

Because this issue has been around for some time, Microsoft has taken notice of it.

In order to tackle it, they released the new version of Microsoft Office.

Using this version of Office will let you have access to all the cool new features and optimizations, and at the same time get rid of the disk space error forever.

Conclusion

In today’s how-to article, we talked about how to best tackle the disk space error that appears in the older versions of Microsoft Excel.

Please make sure to follow the steps we presented here carefully for a speedy fix.

If you found this guide helpful please feel free to let us know by using the comment section below.

Windows Update Stuck at 0% When Downloading [Fix]

Many problems may arise when downloading or installing Windows Updates on your computer. First, they impede the update process, resulting in the Windows Update being stuck at 0 during download & installation.

Another instance of this problem is Windows Update stuck at 100%, meaning it won’t completely download.

Why is my Windows Update stuck?

Windows Updates require some essential services and components to function correctly. When these components are not intact, the Update may get stuck or fail. The most common reason is a conflict with some programs on your PC. For example, programs like Windows Defender can impede the Update process.

Many other factors can cause the Windows Update to be stuck or frozen. Some are:

  • Network issues – When there’s a problem with your network connection, it’ll affect the download process of the Windows Updates. The network congestion on your PC can leave no bandwidth for Windows Update services to use, resulting in the update getting stuck or frozen.
  • Issues with Windows Update services – Windows Updates can get stuck during initialization or finalization if the Windows Update services on your computer are not intact. These services are responsible for processing and initializing the Updates on your device.
  • Windows Update cache – The Update cache on your PC may be old or corrupt, causing issues with the Update files in the folder. Hence, it blocks the process, resulting in the Windows Update being stuck.

These causes can vary in computers, meaning they can demand different fixes. Fortunately, we have some general solutions to help install your Windows Updates.

How do I fix Windows Update if it’s stuck at 0%?

Before proceeding with any troubleshooting steps, go through the following preliminary checks:

  • Turn off background apps running on your PC.
  • Disable third-party antivirus software installed on your computer.
  • Power cycle your network router.

If you can fix the problem, go ahead with the solutions below:

1. Reboot Windows in Safe Mode

  1. On the sign-in screen, press the Shift key while holding the Power button.
  2. Press the shift key to open the Advanced Recovery Options window.
  3. Select Troubleshoot, then select the Advanced options.
  4. Click on Startup Settings and select Restart.
  5. Next, press 4 to Enable Safe Mode.  

Restarting Windows in Safe Mode can fix your PC’s startup issues, causing it not to download Windows updates completely.

2. Run Windows Update troubleshooter

  1. Press Windows + I key to open the Settings app.
  2. Click System and select Troubleshoot.
  3. Then click on the Other troubleshooters.
  4. Select Windows Update and click on the Run button.
  5. Follow the on-screen instructions to complete, then restart your PC.

The Windows Update troubleshooter will find and fix issues affecting the Windows updates process on your PC. Check other ways to run the Windows Update troubleshooter in Windows 10/11.

3. Clear Windows Update cache via File Explorer

  1. Press Windows + I to open File Explorer.
  2. Navigate to Local Disk (C), right-click on it, and click on Properties from the drop-down.
  3. Select Disk Clean-up, then click the Cleanup system files button.
  4. Check the boxes for Windows upgrade log files and Temporary Windows Installation files, then click OK.
  5. Restart Windows and check if the problem persists.

Since a corrupt Windows Update cache can cause it to get stuck at 0, this fix will troubleshoot it. But first, read our article on what to do if File Explorer keeps crashing your PC.

4. Rename the SoftwareDistribution folder

  1. Left-click the Start button, type cmd, and choose Run as Administrator.
  2. Type the following commands and press Enter after each one to stop Window Update services: net stop wuauserv net stop cryptSvc net stop bits net stop msiserver
  3. Type the following command one after the other: ren C:\Windows\SoftwareDistribution SoftwareDistribution.old ren C:\Windows\System32\catroot2 Catroot2.old
  4. Input the following commands and press Enter after each one to start Windows update services: net start wuauserv net start cryptSvc net start bits net start msiserver
  5. Exit the Command Prompt and restart your PC.

Renaming the Windows update components will fix files affecting the Windows update services.

Conclusively, our readers can also check what to do if the update process gets stuck configuring the Windows Updates screen on their computers.

Also, check how to fix Windows Update not working on Windows 10/11.

Kindly drop your comments if you have any suggestions or questions.

Windows 10 Store Not Connected To Internet: Solved

The Windows 10 Your PC isn’t connected to the Internet issue is quite common in some Windows PCs, especially when using the Microsoft Store.

What is most annoying about this fault is that users are connected to a reliable internet connection and they can actually run other tasks needing an online connection such as updating Windows or checking emails on Microsoft Outlook.

Strangely, Windows will persistently warn that the system is disconnected when trying to use Store and a few other internet-based applications.

What causes the Windows 10 Store not connected to internet issue?

The Windows 10 Store not connected to internet issue, like it so happens with many Windows bugs doesn’t have one single trigger. Rather, it’s a result of a wide range of hitches each of which should be checked individually in order to fully eliminate it.

This article discusses what to do if Microsoft Store says you’re not connected to the internet on a Windows 10 PC, so let’s jump right into the solutions.

What can I do if I can’t connect to Windows Store in Windows 10?


1. Clear the Microsoft Store App. Cache

Clearing the AppStore’s cache may help the PC forget the corrupted settings and restore functionality.

  1. Simultaneously Press the Win and R buttons on the keyboard. The Run dialog opens. (Ensure you’re using an account with administrative rights).
  2. Type  WSReset.exe in the dialog area. Click OK.Your PC isn't connected to the Internet
  3. The cache Reset tool runs momentarily and clears the current settings. It will automatically close as soon as it is done.
  4. Your Windows Store app will now hopefully work as expected.

2. Update the Date and Time settings

For Windows 10:

  1. Right-click on the time/date tab on the system tray.my computer wont connect to the internet but others will
  2. Choose adjust date/time.
  3. You can switch the button set time automatically to off (if necessary).
  4. Click change under Change date and time.microsoft store not connecting to internet windows 10
  5. Adjust the date and time appropriately (including the time zone).microsoft store check your connection
  6. Click change again. 
  7. Close the window and check if the system will henceforth work.

For Windows 8/8.1:

  1. Press the Windows key + C. The Charms bar appears.
  2. In the charms search bar, Type Date and Time.
  3. Now click on Change date and time (from the displayed options).
  4. Adjust the date and time appropriately (including the time zone).
  5. Click Apply then Ok.
  6. Exit and retry to see if the error has disappeared.

Please note that for Windows 8.1, the first three steps differ and should be as follows:

  1. Press Win+I. This opens the Settings tab in the Charms bar.
  2. Click on Change PC Settings.
  3. Click Time & Language to access the time/date adjusting Window.

3. Run the Windows Apps built-in Troubleshooter

Microsoft includes an efficient troubleshooter for Windows store apps in the Windows installation package and launching it could help.

Here is how to reset and repair the apps:

  1. Click Start.
  2. Select Settings.
  3. Go to Apps.
  4. Select Apps & features.
  5. Select the Store app.
  6. Select Advanced.
  7. On the next page, select Repair.
  8. Wait for the repair to finish.
  9. Select Reset if the repairing process fails to trigger a full reset. 

4. Use The modern UI App troubleshooting Tool

  1. Download the Modern UI App troubleshooter.
  2. Double-click it from the status bar once it completes downloading (If not , check it from the downloads- its named diagcab) and run it.
  3. Choose Windows Stores apps then next.microsoft store says im not connected to the internet
  4. Leave the tool to work and repair any issues. Attend to any prompts as required.

The Modern UI App troubleshooter resolves a number of common troubles some of which are known to generate the lack of internet connection issues. Downloading and running it could hence help.

The following Fixes works for multiple PC not connected to the Internet issues including general network internet connectivity problems as well as Windows Store Apps opening.


5. Repair the Network Settings

For Windows 10:

  1. Right-click the network icon displayed on the system tray(see screenshot).windows 10 apps wont connect to internet
  2. Click troubleshoot problems.
windows 8 your pc isn t connected to the interne

3. Leave the Windows 10 network troubleshooter to run until its done.

microsoft store says im not connected to the internet

For Windows 8:

  1. Press the Windows key + C. The Charms bar appears.
  2. In the charms search bar, Type Troubleshooting.
  3. Locate the Troubleshooting option under Settings and click it.
  4. In the subsequent search bar, type Network Troubleshooter .
  5. Tap on Network troubleshooter. This initiates the automated network troubleshooting process.
  6. Follow the steps as prompted by the troubleshooter.

For Windows 8.1:

  1. Click the Start button and begin to type Network problems.
  2. A lot of choices come up. Click Identify and repair network problems. The troubleshooter opens.
  3. Let the troubleshooter run until competition while responding to any prompts.

Additional Commands to Help Fix The Network

There are some useful network reconfiguration commands that you can run if, for some reason, the “Your PC isn’t connected to the Internet” problem isn’t solved by the Network troubleshoot.

Steps (Windows 7, 8, 8.1, and 10):

  1. Click start.
  2. Type CMD in the dialog box.
  3. Right click cmd.exe and choose run as administrator. You will not run the following commands in the order given. Press Enter after each entry.
  4. Type netsh winsock reset.
  5. Type netsh int ip reset.
  6. Type ipconfig/release.
  7. Type ipconfig/renew.
  8. Type ipconfig/flushdns.

These commands refresh the system’s IP and DNS settings and may, with luck, heal the issue.


6.  Router/Modem Reset

The error may also be brought about by having a faulty router/modem configuration. The way out here would be to reset your device to their defaults.

Now, the method of resetting your router/modem varies from one model to another so you may have to refer to your devices manual or manufacturers’ website to see the steps.


7. Restart the PC

Another smart quick-fix for a wide range of problems is to restart your PC. Try and see if things will change for the better.


8. Disable the Proxy Server

Using a Proxy to connect to the internet may sometimes precipitate this problem. Disabling it could thus save your day.

Steps (Windows 7, 8, 8.1, and 10):

  1. Press Windows + R.
  2. Type inetcpl.cpl  in the search dialog. Click OK.
  3. Click the Connections tab.
  4. Then click LAN Settings.microsoft store it doesn t look like you re connected to the internet
  5. Check the box against the Automatically detect settings option.
  6. Uncheck the box next to Use a proxy server …. under Proxy server.no internet access but connected
  7. Click OK.

9. Disable The Antivirus & Firewall

Another possible solution for the Windows 10 Store not connected to internet error is to disable your antivirus and/or the firewall even if temporarily.

Steps To Turn Off Firewall:

Windows 7

  1. Click Start.
  2. Click control panel.
  3. Search for Windows Firewall (type in the search box).
  4. Click check firewall status.
windows 10 apps not connecting to internet
  1. Click turn windows firewall on/off.windows 10 store cannot connect to internet
  2. Choose turn off firewall (under both private and public settings).can't connect to windows store windows 10
  3. Click OK

Windows 10

  1. Click the start button.
  2. Type firewall.
  3. Choose check firewall status.
  4. Repeat step 5,6, and 7 above.

Windows 8.1

  1. Click the Start button then tap Control Panel to Open Windows Firewall.
  2. Click
  3. Press Windows Firewall.
  4. Click on Turn Windows Firewall on/off.
  5. Choose turn off firewall (under both private and public settings).
  6. Click OK.

10. Turn off Antivirus

Also try to halt your antivirus for some minutes before attempting to access the resources.

Here is how to turn off Windows defender.

  1. Click the Start
  2. Select Settings.
  3. ChooseUpdate & Security.can't connect to internet windows 10
  4. Click Windows defender.
can t connect to windows store windows 10

5. Set the real-time protection to off by sliding the button to the left.

microsoft store needs to be online

You can also follow the right process to turn off any other antivirus (Bitdefender, Avast, Kaspersky, Norton and more).

Remember to turn on the Firewall & Antiviruses as soon as possible.

After, check whether the can’t connect to Windows Store Windows 10 issue persists or is gone.


11. Reset Internet Explorer

This error can also be arising due to issues with your IE (Internet Explorer) browser. Resetting it sometimes removes the problem.

Steps:

  1. Start Internet Explorer.
  2. Go to the Tools menu/ click the gear icon as shown.windows 8 can t access windows store
  3. Click Internet Options.
  4. Click the Advanced tab.
  5. Click Reset.How do I fix unable to connect to network?
  6. Confirm the reset (you can check delete personal settings) by again clicking reset.
  7. Wait for the process to complete.
Can t connect to the Internet?

8. Exit then restart the browser to effect changes.


12. Reset the Edge Browser

Users with Windows 10 should reset the Edge browser as follows:

  1. Click Start.
  2. Click all apps.
  3. Open Microsoft Edge by clicking it.How do I fix my Internet connection?
  4. Press the ….. tab to access the Settings.Why is my internet not working?
  5. Scroll down and select choose what to clear.
  6. Click on Clear browsing data. You can even press Show more.
  7. Select everything and click Clear.How do I enable my Internet connection?
  8. Restart your system and see if the Windows 10 Store not connected to internet issue persists or not.

13. Run SFC (System File Checker)

The SFC utility could be beneficial if the challenge is caused corruption of some files.

Steps:

  1. Click start.
  2. Type CMD.
  3. Right click cmd.exe and choose run as administrator.your pc isn't connected to the internet
  4. Type sfc /scannow. This will fully scan your system and fix the identified problems automatically. 

14. Tweak Microsoft services

Disabling an essential Microsoft service can also bring the frustrating your PC isn’t connected to the Internet issue.

Ensuring that all the Microsoft services are running could successfully solve this.

Steps:

  1. Click start
  2. Type msconfig (for Windows 8 just start typing msconfig as there is no start button).
  3. Click system configuration (or msconfig.exe in Windows 7).Can't connect to network Windows 10?
  4. Click the services tab.
  5. Click disable all to deselect the various services.your pc isn't connected to the internet
  6. Then click enable all to reactivate all Microsoft services.
  7. Restart the computer.

15. Log In using a different User Account

The corrupt settings could be affecting your user account only. You can switch to a new Microsoft user account or even create one then try to log in using the fresh credentials.

This is also the recommended solution for users experiencing this issue because of logging in using the guest account.

Simply log out of the Guest account and log in using the original logins.


16. Remove any third-party software you have recently installed

Certain third party software interferes with your browser and connection settings so you may have to inspect your system for such programs and uninstall them.

Similarly, any adds on you have enabled on the browser could be the cause of the problem so reverse the action by removing such an Adds-on/extensions.
You will then restart your computer and retest to verify if your PC has reconnected.


You may have to try out each of these suggested fixes before you finally get rid of the error your PC isn’t connected to the Internet.

The key is to be patient and not to miss any of the steps. If possible, back up everything and create a system restore point.

This will give you peace of mind as you can always recover from any subsequent malfunction in case of any of the procedures go wrong.

We hope you managed to get rid of the Windows 10 Store not connected to internet issue on your PC.


How to Fix Zoom High CPU Usage? [7 Quick Ways]

Zoom is a video conferencing platform that is used by millions of people every day. It has an amazing feature set, but there are some limitations to the free version of Zoom. Sometimes you may have trouble detecting your microphone but we have a guide on how you can fix the issue.

Although it is a useful tool for businesses, the Zoom application can be resource-intensive to use and sometimes lead to your browser’s high CPU usage. This can affect both your browser and computer performance. 

When this happens, you may experience slower browsing speed and other issues such as freezing or crashing.

Why is the CPU usage so high in Zoom? 

Zoom uses a lot of CPU because it’s doing a lot of things at once. It’s encoding video and audio, capturing your webcam feed, and running voice recognition software so you can talk with people on the other end of the call.

Other reasons include:

  • Your computer is low on memory – If you have less than 2 GB of RAM on your computer, it will be difficult to run Zoom without causing high CPU usage. 
  • The computer hardware is not powerful enough – Zoom is a highly resource-intensive application. You may need a faster processor, more RAM, or a better graphics card if you want to use other programs while using Zoom at the same time.
  • Background programs – If you have other programs running that are using up your CPU, they could be competing for resources.
  • Poor internet connection or limited bandwidth capacity – If your internet connection is slow, you may see high CPU usage by Zoom. This is because Zoom uses more CPU power when the connection is slow.

So, What does it mean when your CPU usage is affecting the meeting quality? The Zoom meeting experience is highly dependent on your computer’s performance. For example, if you have a slow computer or low-quality internet connection, you’ll notice that the video and audio are unclear or keep stuttering. 

Quick Tip:

As a practical solution, we present an optimized browser like Opera One that offers faster navigation without consuming high CPU resources.

Plus, Opera One comes with many unique features, such as built-in Ad Blocker, VPN, social media and messaging buttons. It even has it’s own built-in AI.

Opera One

Connect with your colleagues on Zoom from this light-resource browser.
Free Download Visit website

How do I reduce Zoom power usage? 

1. Close unused applications

If you’re having trouble with Zoom’s CPU usage, it’s a good idea to close any other applications that may be open on your computer.

You may be running other resource-intensive applications while using Zoom on your Mac, Chromebook, or Windows 11. If possible, close out any applications that might be using a lot of RAM or processing power such as Microsoft Word or Excel.

2. Update Zoom/browser

The first thing to check is whether or not you have the latest version of Zoom. If you’re running an older version, you need to update your software. Zoom browser 100% CPU tends to occur when running outdated programs.

In the event that you are using the web version, you need to update your browser to the latest version to avoid missing out on new features or experiencing limited functionality. This applies to all operating systems from Windows to mac.

3. Use a wired connection

If you have a slow internet connection or are using Wi-Fi, switch over to a wired connection using an Ethernet cable to maximize performance. 

This will eliminate any interference with your network and allow you to connect to Zoom without any problems.

4. Adjust video quality 

If you are using a high-resolution video stream (such as 1080p), this will consume more resources from your computer than if you were using a lower resolution stream (such as 720p).

The lower the quality, the less processing power it uses. If you’re having issues with high CPU usage when using Zoom, try lowering the video quality first. It may also help fix issues with Zoom crashing when screen sharing.

5. Update your graphics card

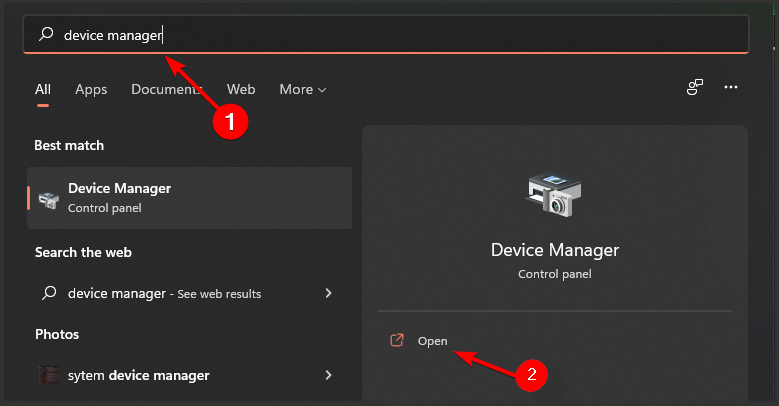
  1. Press the Windows key, type Device Manager, and click Open.
  2. Click on Display adapters, select your graphic card, right-click, and select Update Driver Software.
  3. Select Search automatically for updated driver software.

6. Use the web version

If you have an older device or one that doesn’t have a lot of processing power, this can cause issues with making audio and video calls. To avoid these issues, use the browser version of Zoom instead.

The browser version of Zoom uses significantly less CPU than the desktop application because it doesn’t have to render graphics and audio locally.

7. Upgrade your computer hardware

If all else fails, it may be time to upgrade your computer hardware. Running a very old version of Windows may be the root cause of the problem.

Most applications are usually updated to function well with the latest operating systems. If you are using Windows 10, it may be time to upgrade to Windows 11 and see if the problem persists.

How do I turn off hardware acceleration in Zoom? 

Some computers have a setting that enables hardware acceleration for the video and display functions. This can cause problems with video games and other software, including Zoom. 

To disable hardware acceleration in Zoom, follow the steps below:

  1. Launch Zoom desktop app.
  2. Click on Settings in the top right corner.
  3. Navigate to Video on the left pane and uncheck all Enable hardware acceleration checkboxes.

And that’s how to efficiently manage Zoom’s high CPU usage on your browser. Should you encounter any other related problems such as Zoom video not working, refer to our comprehensive guide for quick fixes.

Let us know of any additional thoughts you may have on this topic in the comments section below.

3 Quick Ways to Fix Chromebook VPN If It’s Not Working

Chromebooks are VPN-friendly devices, but sometimes, things can go wrong and leave your traffic unprotected.

The good news is that these VPN connection issues are fixable. 

First, you have to identify the problem and how to address it accordingly. We’re here to help you with that.

Why is my Chromebook VPN not working?

The likely culprits are as follows:

  • Outdated VPN app or browser extension — If your VPN struggles to establish an encrypted tunnel and prevent traffic data leaks, chances are that your software version isn’t the most recent.
  • Stored browsing data — Cookies and cached files contain information about your IP address. If web servers detect something sketchy about the device’s location, they may block your access in an effort to keep geo-restricted users away.
  • Incorrect configuration — If you have an old Chromebook model, you may have to set up your VPN manually. Generally, it’s not a complicated process, but a single mistake can cause connection problems.
  • Bad VPN service — Maybe your VPN is just ineffective. Free or lower-tier services that don’t invest in adequate infrastructure often fail their privacy and security promises.

How to fix Chromebook VPN when it’s not working?

Here’s what you can do to establish a successful VPN connection on your device: 

1. Delete cookies and cached files

To make sure your browsing data isn’t interfering with your Chrome VPN connection, follow these steps:

  1. Run Chrome.
  2. Press Ctrl + H to go to History.
  3. Select Clear browsing data.
Google Chrome history
  1. Go to the Advanced tab.
  2. Check the Cookies and other site data and Cached images and files boxes.
  3. Choose All Time for the Time range.
Clear browsing data on Chrome
  1. Click Clear data.

2. Manually configure your VPN

Chromebooks natively support various VPN protocols like OpenVPN, L2TP/IPSec, and WireGuard. But not all VPNs share the necessary configuration files.

Here’s how to get started:

  1. Click the bottom-right corner of the screen to open the Action center.
  2. Select the gear icon for Settings.
Action center on a Chromebook
  1. Open the drop-down menu next to Add Connection in the Network section.
Add a connection on a Chromebook
  1. Press the plus icon next to Add built-in VPN.
Add built-in VPN on a Chromebook
  1. Choose your preferred protocol from the Provider type drop-down menu.
Choose a VPN protocol
  1. Fill in the Service name field with what you want.
  2. Copy-paste the IP address or the full server hostname from your VPN vendor’s site in the Server hostname field.
  3. Select your preferred Authentication type.
  4. Copy-paste your VPN credentials.
Manually configure a VPN connection on a Chromebook
  1. Click Connect.

VPN protocols don’t always have the same setup process. So, you may have to deal with slightly different steps than the ones above.

To ensure proper configuration, you should pay attention to the fields you have to fill in and scour your VPN vendor’s site for the correct information. 

3. Change VPN service providers

If your Chromebook VPN is still not working properly, perhaps you need a new service.

As a rule of thumb, you should only use premium providers with a solid privacy track record and a global server fleet of sophisticated hardware.

You may also require advanced features like split tunneling, double VPN, and obfuscation.

The best VPNs for Chromebook

To help simplify your search, here are our favorite options on the market:

ExpressVPN

ExpressVPN has native ChromeOS, Android, and Linux apps and a Chrome extension. Plus, it shares files for manual VPN configuration.

Moreover, you can install it directly to your router, securing your network’s traffic. That will allow you to go around the five simultaneous connections cap.

In terms of location spoofing, ExpressVPN can give you IP addresses from 94 regions. It also has encrypted DNS servers, IPv6 leak protection, a built-in kill switch, and split tunneling. 

It creates secure tunnels using OpenVPN or Lightway, a WireGuard-like proprietary protocol.

This VPN vendor runs mostly 10Gbps servers on RAM, not hard drives. They auto-delete data after every reboot, ensuring no connection and activity logs remain.

Depending on the subscription length, ExpressVPN costs from $8.32 to $12.95 a month and comes with a 30-day money-back guarantee.

ExpressVPN

Secure your Chromebook and other devices with this premium VPN service.
Check Price Visit Website

NordVPN

NordVPN has a dedicated Android app and Linux .rpm package and permits router installation. You can also download its APK version for your device to unlock additional features.

For a simpler setup, you can go with its browser extension instead. That should definitely help if your Chromebook VPN is not working because of configuration issues.

It has over 5,000 RAM-only servers and provides IPs from 59 jurisdictions. What’s more, it supports OpenVPN, IKEv2/IPSec, and NordLynx in all locations.

In select territories, NordVPN has specialty hardware for double VPN, obfuscation, and P2P file sharing. Some of its servers are tied to dedicated IPs too.

In addition, it has private DNS, comes with a kill switch, prevents IPv6 leaks, and keeps online hazards at bay through its Threat Protection feature.

Likewise, NordVPN can monitor the dark web and inform you the moment your sensitive information is compromised.

To subscribe to NordVPN and protect up to six devices simultaneously, you can choose a plan ranging from $5.61 to $14.29 a month. The first 30 days are fully refundable, and you can cancel risk-free.

NordVPN

For optimal online security and connection speeds, trust NordVPN.
Check Price Visit Website

Private Internet Access (PIA)

PIA has dedicated Android and Linux GUI apps, a Chrome extension, a router setup, and a third-party OpenVPN client.

Although mainly a US-first VPN service, its global fleet of RAM-only, 10Gbps servers covers 84 territories.

Aside from the OpenVPN and WireGuard tunneling protocols, PIA lets you transmit the traffic of up to 10 devices concurrently through SOCKS5 proxies, too.

For lag-free streaming and gaming, you can turn this VPN into a SmartDNS service.

To protect your Chromebook from malicious files, ads, and trackers, PIA uses its built-in blocker called MACE.

You can get all of the above for $3.33 to $11.95 a month, with a 30-day money-back guarantee.

Private Internet Access

Don’t compromise the safety of your home or work network; choose PIA for the best results.
Check Price Visit Website

Wrap up

If your Chromebook VPN is not working, you can use any of our handy fixes to resolve the issue and conceal your online activity.

If nothing else proves efficient, getting a different VPN service can be the best course of action. 

You should always trust high-tiered providers with many servers in diverse regions and excellent additional tools and features.

Shell Infrastructure Host: Should I Delete or Disable it?

The Shell Host dictates taskbar transparency, start menu layout, background images, and other graphical elements as a core function of Windows. 

Unlike some processes you find running in the task manager, it doesn’t take up too much power. It shoots up about 1-3 percent at times. But you’ll mostly find it taking up 0% of your CPU. 

So, if you notice a high CPU power usage by the Shell Host Infrastructure process on Windows 11, it means things are not standard on your PC. And this could be a sign of worse to come.

Thankfully, we have provided detailed fixes for the issue in the guide, as we did with the Shell Host Infrastructure has stopped working problem.

Why is Shell Infrastructure Host causing high CPU usage?

If the Shell Infrastructure Host uses high CPU resources, it can be down to an outdated operating system. In this case, you should try first to update your OS.

Also, the feature is responsible for processing the startup of essential UI elements. So, if you use slideshow desktop background photos, the Shell Infrastructure Host might use high CPU power. Here, switching to a static one is advisable.

Lastly, the problem can be down to corrupt system files. You can fix this by repairing the files with the built-in repair tools or dedicated software.

Is Shell Infrastructure Host necessary?

The Shell Infrastructure Host is essential in handling a series of graphics UI elements on Windows PC. Some of these processes include the background, Taskbar, and Start Menu.

So, the process is necessary for various graphic elements and shouldn’t be deactivated.

What can I do if Windows 11 Shell Infrastructure Host uses a high CPU?

1. Update Windows

  1. Go to the Start menu by clicking on Windows + S.
    Windows search
  1. In the search bar, enter updates. 
  2. Click on Check for Updates.
    Check for updates
  1. From the dashboard to the left of the new screen, click on the Windows Update option.
  1. Click the Check for updates button.
  1. Update your OS as required. 

2. Go through your system files

  1. Open the search box by pressing Windows + S.
  2. In the search bar, type in Windows Powershell.
  3. Click on Run as Administrator.
  1. Grant user control and wait for the PowerShell panel to open.
  2. Enter the following into the command line and press Enter to run it: sfc scannow

You’ll have to wait a few seconds after this as the SFC scans and repairs any broken system components. 

If this seems like a tedious task, you can always use third-party repair software. These tools scan your entire computer for corrupted or damaged system files and replace them with fresh Windows originals.

3. Run DSIM

  1. Open up the items list by pressing Windows + X.
  2. Click on the Windows PowerShell (Admin) option.
  1. Grant the user control and wait for the panel to open.
  2. Enter the command below and click on Enter to run it: DISM.Exe /Online /cleanup-Image /Restorehealth

You’ll have to wait a couple of minutes to complete the process. Other than this, you can run a simple antivirus scan to be sure. 

Can I end Shell Infrastructure Host?

You can end the Shell Infrastructure Host process like every other process from the Task Manager. However, it warns that your PC will be unusable or shut down if you deactivate the feature.

And since the process is generally safe, it is advisable not to end it.

With the information in this guide, you should be able to fix the Shell Infrastructure Host high CPU usage on Windows 11. Although this same issue was reported on Windows 10, we have resolved it accordingly.

When the CPU usage for any system component is abnormally high, the resulting overheating can cause your PC to shut down abruptly, So you might want to check out this guide on how to fix CPU temperature on Windows 10/11.

Here’s to hoping that this guide was a great and informative read. If your Shell Host uses a high CPU, don’t hesitate to troubleshoot using any techniques.

The section below is open for your awaited comments and suggestions.

Easily Fix Copy Paste Not Working on Windows 10

If copy and paste suddenly stop working in Windows 10, it’s often due to antivirus interference, a full clipboard, corrupted system files, or issues within specific apps like Excel or Remote Desktop.

To fix it, start by restarting your computer and temporarily disabling your antivirus software. Find other tried and texted fixes for it below, explained step by step.

How can I fix copy-paste issues on Windows 10?

1. Make sure that your Windows 10 is up to date

  1. Press Windows Key + I to open the Settings app.
  2. Go to the Update & Security section.
  3. Click the Check for updates button.

Windows will now check for available updates and download them in the background.

Once the updates are downloaded, they’ll be installed when you restart your PC. If the copy paste not working correctly, and it pastes the previously copied text, try updating the OS and check if that helps resolve things.

If you’re having trouble opening the Setting app, following simple steps will help you fix it.

2. Run Check Disk utility

  1. Right-click on the Start menu and select Command Prompt (Admin) or Powershell (Admin).
    copy paste not working windows 10
  2. When Command Prompt opens, enter the command below and hit Enter.
    chkdsk
    copy paste not working windows 10
  3. Follow the prompts if required to complete the process.

In case you were wondering how to fix copy and paste in Windows 10 without restarting, the Check Disk scan should do the trick. It will start and repair any corrupted files. Once your files are repaired, check if the problem is still there.

3. Disable Send to Bluetooth add-on

This add-on is usually associated with Microsoft Office, which you can find in Office software under the Add-on section.

You might have to check every installed Office tool for Send to Bluetooth add-on and disable it from each device.

After disabling this add-on from every Office tool, copy/paste functions should typically work.

4. Run the rdpclip.exe

    In order to stop this issue of copy-paste not working on Windows 10 you can use the rdclip.exe file as shown in the next steps.

  1. 1. Press Ctrl + Shift + Esc to start Task Manager.

    copy-paste-windows-10-problems
  2. 2. When Task Manager opens, go to the Details tab.

    copy-paste-windows-10-problems
  3. 3. Search for rdpclicp.exe in the Name column, right-click it, and choose End task from the context menu.

    copy paste not working windows 10
  4. 4. Now visit the path below, and run the rdpclip.exe file.
    C:\Windows\System32

    copy-paste-windows-10-problems

This program should start automatically, but if it doesn’t, you’ll have to run it manually every time you start Windows 10. In addition, you can add it to the Startup folder, and it will start every time your Windows 10 starts.

5. Disable Virtualbox’s shared clipboard feature

  1. Launch your Virtualbox manager.
  2. Click on the VirtualBox machine settings icon.
    copy paste not working windows 10
  3. Click on the Advanced tab, and set the Shared Clipboard menu to Disabled.

Virtualbox is an excellent tool if you want to run a virtual machine on your PC, but certain features can cause issues with your system.

According to users, the Shared clipboard feature in Virtualbox can cause issues with copy-paste feature on your PC. To fix the problem, you need to disable this feature in Virtualbox.

Once you disable this feature, the issue should be resolved entirely, and you’ll be able to use copy-paste function once again.

6. Use a third-party application

Comfort Clipboard Pro is a fantastic clipboard manager, allowing you to perform copy-pasting tasks for text editing in no time.

You can edit any text fragment, set whichever color you prefer, or set a hotkey for a quick paste of the piece. And if security is on your mind, you can assign a display name for any fragment that hides its contents with this tool.

This tool also has the History feature, allowing you to reflect on what you have copied. In addition, it lets you edit text fragments, select, and set a hotkey on them, plus the possibility to have color codes.

Another great option is the ability to drag and drop directly from the clipboard dashboard into the text you are currently editing. This excellent tool comes with a price, but it also has a free version that you can find in the link below.

If you’re looking for an advanced clipboard manager, we strongly recommend Comfort Clipboard Pro. It stores 500 items by default, lets you increase or decrease this limit, and remembers your clipboard history for as long as you want.

⇒ Get Comfort Clipboard Pro

7. Remove Skype Click to Call

  1. Navigate to your Skype installation folder.
  2. Search for either unins000.exe or uninstall.exe.
  3. Double-click on either of them and follow the uninstall wizard.

According to users, copy-paste feature might not work on your PC due to Skype Click to Call plugin. This simple browser plugin allows you to make Skype calls by clicking a phone number in your browser.

To fix the problem, removing this add-on from your browser is advised. Once the add-on is terminated, you can copy and paste without any issues.

8. Create a new user account

  1. Press Windows Key +I to open the Settings app.
  2. Now navigate to the Accounts section.
  3. On the menu on the left select Family & other people, and in the right pane, select Add someone else to this PC.
    copy paste not working windows 10
  4. Select I don’t have this person’s sign-in information.
  5. Now you’ll be asked to create a new Microsoft account. Choose the Add a user without a Microsoft account option.
  6. Enter the desired user name and click Next.
    copy paste not working windows 10

Once you create a new account, switch to it and check if the problem appears. If the issue doesn’t appear, you’ll need to move your files to the new account and start using the new account instead of your old one.

9. Check your antivirus

Using good antivirus software is essential, but sometimes your antivirus can cause this problem to appear. This could be the case when OneNote for Windows 10 copy paste is not working.

Therefore, we recommend disabling certain antivirus features to fix the issue and check if that helps. If that doesn’t work, you need to disable your antivirus entirely.

You should note that the method of disabling an antivirus will depend on the tool you use.

Several users reported that they managed to fix the problem with copy-paste by uninstalling their antivirus software. However, if removing the antivirus solves the problem, you should consider switching to a different antivirus solution.

How do I fix copy and paste isn’t working in Windows 11?

Restart the File Explorer

  1. Press the hotkeys Windows + X.
  2. Select Task Manager.
  3. Right-click Windows Explorer in the processes tab and select Restart.
    copy paste not working windows 10

Issues with the clipboard are relatively common, and many have reported that copy and paste in Remote Desktop isn’t working. Unfortunately, this affects all versions of Windows, and your settings usually cause it.

Some users might use alternative solutions, but sadly, it has been reported that drag and drop isn’t working in Windows 11 for a handful of users.

It’s also possible that the clipboard history isn’t working in Windows, thus causing these issues. Luckily, there are ways to fix this problem.

It would help if you adopted any of the solutions discussed in this article. Since Windows 10 and 11 are very similar, similar solutions will work except for rare UI differences. So, you now know what to do if copy and paste are not working in Windows 11.

How to use the clipboard app to copy-paste efficiently

The clipboard app in Windows 10 is one of the most efficient tools for the office environment. When you use the copy command or shortcut Ctrl + C on a file, text, link, etc., you copy it to a clipboard.

From there, you can paste it using the command or the Ctrl + V shortcut.

But what if we told you that you could easily access all the recently copied files?

Just use the Windows key + V shortcut, and you will find a window similar to the one shown below.

Clipboard history

This way, you can access up to 25 of the latest copy actions you performed earlier. And for each, you can click the three horizontal dots and select the Delete, Pin, and Clear commands.

So if you have more paragraphs, links, images, or whatever you need to copy individually from a location, you can do that and then go to the destination and paste them separately from the list.

Why Did Copy and Paste Suddenly Stop Working?

  • Antivirus interference: Some antivirus programs block clipboard functions. Try disabling or uninstalling it temporarily.
  • Corrupted files or malware: Damaged system files or clipboard-targeting viruses can break copy-paste. Run a system scan or repair.
  • Overloaded clipboard: Too much clipboard data—like large images or clutter—can cause copy-paste to fail.
  • App-specific issues: Programs like Excel, Word, AutoCAD, Remote Desktop, or VMware may block copy-paste due to certain plugins or settings.
  • System-wide bugs: These fixes apply to issues on Windows 10/11, after updates, or on specific devices like Lenovo, HP, or Dell.

Why does Ctrl C not work sometimes?

The CTRL + C shortcut may not work for several reasons. First, users have been associating it with issues with the keyboard’s hardware, the keyboard driver, and the corruption of some critical system files.

Once you rule out issues with your hardware, where a replacement may be the option, you may want to try a file repair or a driver update.

If copy and pasting are not working on your Windows 10 device, you should adopt any recommended solutions. However, not all solutions will work for you, so you should skip around until something works.

Not being able to perform a copy-paste function can be a big problem, but we hope you solve this issue with one of our solutions.

If you are still facing issues, try using Command Prompt to copy your files or folder to the destination path; to learn more about it, read our guide.

And if you use the new operating system, Windows 11, copy and paste issues can occur as well — here’s a detailed guide to fix copy and paste problems in Windows 11.

If you have other suggestions or questions, don’t hesitate to leave them in the comments below.

What is Virtualapp/didlogical And is It Safe to Delete It?

Windows PCs come with a Credential Manager app that stores usernames, passwords, and addresses on your system. Lately, users report an unknown virtualapp/didlogical credential stored in the Manager on their Windows.

Sometimes, you can experience the Credential Manager not working on Windows 10.

What is virtualapp/didlogical?

Windows has a couple of Live features that users can use. Whenever you use any Windows Live feature, such as Windows Live Messenger, Windows Live Mail, Windows Live, and other Windows services, it stores a credential. This credential is known as Virtualapp/Didlogical.

Furthermore, Virtualapp/Didlogical saves automatically to your Credential Manager as a network credential or Internet Address. Therefore, though it seems like a threat or malware, it is a legitimate entity not associated with viruses or malware.

Also, Virtualapp/Didlogical credentials usually have a redundant network username, meaning you can’t trace to a particular network address. So, it is why you have the option to remove it.

Is it safe to delete virtualapp/didlogical?

It is tasking to delete the virtualapp/didlogical credential from the Windows Credential Manager. It is because it always finds its way back if you remove it through the Credential Manager.

Nevertheless, deleting the virtualapp/didlogical credential is not a threat and is safe, depending on how you go about it.

How do I remove virtualapp/didlogical?

Before trying any advanced steps for removing the virtualapp/didlogical, observe the following preliminary checks:

If the virtualapp/didlogical is still in your Windows Credential Manager, use the steps below to remove it:

1. Use the Remove from vault option

  1. Press Windows + R key to open the Run dialog box, type control panel, then press Enter.
  2. Click User Accounts, then click Credential Manager.
  3. Next, select Windows Credentials and open Generic Credentials.
  4. Click virtualapp/didlogical, click the Remove from vault button, and follow the on-screen instructions to complete the process.
  5. Restart your PC and see if the credential is still there.

The Remove button in the Credential Manager works for some users. However, it doesn’t remove the credential because it always finds its way back. You can read how to add, remove & edit files in Windows Credential Manager via various tools.

2. Disable Credential Manager in Services

  1. Press the Windows + R keys to open the Run window, type services.msc, and click OK to open Windows Services.
  2. Right-click the CredentialManager and select Properties from the drop-down.
  3. In the Startup type and select Disabled. Click Stop under the Service status, choose OK and click Apply.

By disabling the Windows Credential Manager, the virtualapp/didlogical should be safely removed since there’s no activity to save anymore. You can check other Windows Services that can be safely disabled in this guide.

3. Perform a System Restore

  1. Left-click the Start button, type restore, and click on Create a restore point.
  2. Select the System Protection tab and select the System Restore button.
  3. The System Restore window will now appear. Check the box for Choose a different restore point and click Next to proceed.
  4. Select the restore point you wish to revert to and click on Next.
  5. Then click on Finish.

Your PC will restart and backdate to the selected restore point, then check if the virtualapp/didlogical credential is gone.

Performing a System Restore will backdate your PC, removing any erroneous data liable to cause problems on your computer since the last restore point.

If you have issues with the restore point not responding, read how to fix Restore Point if it’s not working on your PC.

Alternatively, we have a detailed guide on fixing Windows 10 if it forgets network credentials on your device. Also, our readers can check what to do if the Credential Manager doesn’t work or they run into problems.

Do not hesitate to drop your comments if you have questions or suggestions.

High CPU Usage in Windows Event Log? How to Fix it

Windows Event Log high CPU usage will negatively impact your performance, and it might make your PC sluggish. It can even cause freezing in some cases.

Since this issue will drastically impact your performance, it’s essential to fix it, and this guide will show you how to do it properly.

Why is my CPU activity so high?

  • Your antivirus or firewall might be causing high CPU usage.
  • Event log is too large, thus requiring more resources to open.
  • Certain power settings are enabled, and they are causing this issue.
  • Third-party applications might be interfering with your system.

How can I fix high CPU usage in Windows Event Log?

1 Check your antivirus/firewall

  1. Locate your antivirus software in the system tray.
  2. Right-click it and choose the option to disable it.
  3. After disabling it, check if the problem is still there.

Many great alternatives are accessible online, but we recommend ESET NOD32 Antivirus if you want optimum security that won’t interfere with your computer.

It does the job well for a reasonable price and does not rely on scare tactics to promote subscriptions. The most intriguing aspect of this ESET NOD32 is that it receives continual database subscription updates to provide superior security for your system against the most recent threats.

It removes malware without slowing down your computer, and the interface is straightforward and easy to use for any user.

⇒ Get ESET NOD32 Antivirus

2. Use Process Explorer

  1. Visit the Process Explorer download page.
  2. Click on Download Process Explorer.
  3. Once the tool is downloaded, launch it and use it to the cause for high CPU usage.

Do keep in mind that this is an advanced tool, so it might not be as simple to use. To learn more about it, read more about the Windows Sysinternals package.

3. Clear Event Viewer log

  1. Press Windows key + X and choose Event Viewer from the list.
    Windows Event log service high CPU usage
  2. When Event Viewer opens, in the left pane expand the Windows Logs section and select Applications. Now in the right pane, click Clear Log. You can save your logs before removing them if you want.
    High CPU usage event Windows 10
  3. Now go back to the Windows Logs section, select the next category on the list and remove its logs as well. Repeat these steps until you clear all logs from Windows Logs section.

4. Enter Safe Mode

  1. Open the Settings app. The fastest way to do that is to use Windows key + I shortcut.
  2. Now go to the Update & Security section.
    High CPU usage event Google Chrome
  3. Pick Recovery from the menu on the left. In the right pane, click the Restart now button.
    Windows Event log service high CPU usage
  4. List of options should now appear. Pick Troubleshoot and then Advanced options. Lastly, choose Startup Settings and click the Restart button.
  5. Once your PC restarts, you’ll have a list of options. Pick the version of Safe Mode that you want to use by pressing the appropriate keyboard key.

Once you enter Safe Mode, check if the problem is still there. Entering the Safe Mode might not fix the problem, but it’s a great way to troubleshoot your PC, so be sure to try it.

5. Use the command line

  1. Press Windows key + X and choose PowerShell (Admin).
  2. Run the following command: powercfg /QH
  3. Look for IDLEDISABLE value. If it’s enabled, disable it by running these commands:
    PowerCfg /SETACVALUEINDEX SCHEME_CURRENT SUB_PROCESSOR IDLEDISABLE 000
    PowerCfg /SETDCVALUEINDEX SCHEME_CURRENT SUB_PROCESSOR IDLEDISABLE 000
    PowerCfg /SETACTIVE SCHEME_CURRENT
  4. Check if the issue is resolved.

Certain software, such as FlyCapture can enable this feature, so keep an eye out for it.

6. Perform a Clean boot

  1. Press Windows key + R. Now enter msconfig and click OK or press Enter.
    Windows Event log service high CPU usage
  2. When the System Configuration window appears, go to the Services tab. Check Hide all Microsoft services option and click the Disable all button.
    High CPU usage event Windows 8.1
  3. Go to the Startup tab and click Open Task Manager.
    High CPU usage event Excel 2013
  4. Task Manager will now appear and you’ll see the list of startup applications. Right-click the first application on the list and pick Disable. Repeat this for all startup applications.
    Windows Event log service high CPU usage
  5. After you disable all startup applications, head back to the System Configuration window. Click Apply and OK to restart your PC.
    High CPU usage event Windows 7

Once your PC restarts, check if the issue is still there. If the problem doesn’t appear anymore, it’s certain that one of the disabled applications or services was causing it. To pinpoint the cause, you’ll need to enable applications and services in groups until you find the cause of the problem.

Bear in mind that you’ll need to restart your PC every time after enabling a group of applications or services in order to apply the changes.

7. Create a new user account

  1. Open the Settings app and navigate to the Accounts section.
    High CPU usage event Windows 7
  2. Now pick Family & other people from the left pane. Now click Add someone else to this PC button.
    High CPU usage event Excel 2013
  3. Choose I don’t have this person’s sign-in information.
    Windows Event log service high CPU usage
  4. Select Add a user without a Microsoft account.
    High CPU usage event Explorer.exe
  5. Set the username and password if you want for the new account and click Next.
    Windows Event log service high CPU usage

After creating a new account, switch to it and check if the problem remains. If the issue doesn’t appear on the new account, you’ll need to move personal files from your old account to the new one and start using it instead of your old account.

8. Perform a System Restore

  1. Press Windows key + S and enter system restore in the search field. Now select Create a restore point from the list of results.
    High CPU usage event Google Chrome
  2. Click the System Restore button in System Properties window.
    Windows Event log service high CPU usage
  3. System Restore window will now appear. Click Next to proceed.
    High CPU usage event Windows 8.1
  4. Now check Show more restore points option, if available. Select the desired restore point and click Next.
    High CPU usage event Explorer.exe
  5. The instructions on the screen should guide you through the restoration process.

After your PC is restored, the problem should be completely resolved.

What is the event ID for high CPU usage?

If you open Event Log and notice an ID with the number 3207, your PC has encountered increased CPU usage.

This event appears if the usage jumps several percent in the last few seconds.

Fixing Service Host Windows Event Log high CPU usage requires you to modify certain settings, and sometimes, you will need to disable features or applications that might interfere with it.

This isn’t the only component that suffers from this issue, and many reported high CPU usage in Windows Explorer. Some users encountered high CPU usage in Windows Update, but we covered that in a separate guide.

This issue affects all versions of Windows, and to learn more, we have a special guide on how to fix Windows 11 high CPU usage.

Did you find a different method? If so, share it with us in the comments below!

Fix: Adobe CEF Helper.exe High CPU Usage [3 Quick Ways]

Adobe Creative Cloud products have become so ubiquitous that we can’t envision a world without them anymore. The filmmaking, photography, design industry, and other industries rely on each of these applications in one way or another.

As a result, a new pop-up window known as the Adobe CEF Helper has been confusing Adobe Creative Cloud users recently. In addition, it has been reported that consumers experience high CPU usage whenever they run the Helper.exe file.

As soon as you start the software, it will sit in the background doing nothing but routine checks to determine if the programs you have are the most up-to-date versions, so the users ask whether Adobe CEF Helper.exe is a virus or not.

The desktop application has been reported to consume a significant amount of CPU resources even when it is merely lying idle. This, like the Adobe Creative Cloud high CPU usage issue, requires you first to understand what the process does in more detail.

Then, we can jump into the list of solutions. Follow along!

What is Adobe CEF Helper?

In its simplest form, the Adobe CEF Helper is a processing service that is utilized to render various components by a series of Adobe creative cloud applications. For example, when you export a video project from Premiere Pro, this service is invoked for rendering purposes. helper adobe cef helper high cpu

When using the Creative Cloud desktop applications, you will notice that separate and multiple processes with similar and the same names are running in the background.

These apps rely heavily on the Adobe CEF Helper. This is because it is a critical service that is required during runtime and the rendering process.

People have consistently claimed that the Adobe CEF Helper consumes many CPU resources. This causes their device to experience issues like screen freezes, lags, and glitches, among other things. But this only happens when the software is active on their computer.

Because it is causing this type of trouble, consumers may believe it is a virus. However, it is not. The application uses Adobe CEF Helper to render any project before it can be exported. As a result, rendering consumes both the CPU and the GPU of the device.

How do I turn off Adobe CEF Helper?

  1. Press the Windows key + X and select Task Manager.
    task manager adobe cef helper high cpu usage
  2. Locate the Adobe Creative Cloud process under the processes tab and right-click it.
  3. Select the End task option.
    end task
  4. Now, repeat Steps 2 and 3 for the Adobe CEF Helper process.
  5. Click the Startup tab at the top.
    startup
  6. Right-click Adobe Creative Cloud and Adobe CEF Helper one after the other.
  7. Finally, select the Disable option.
    disable adobe cef helper high cpu usage

That is how to stop Adobe CEF Helper from running in the background. This should also turn off the process entirely.

How can I fix Adobe CEF Helper.exe if it’s causing high CPU usage?

1. Run the SFC scan

  1. Press the Windows + S key and type cmd inside the search bar.
  2. Now, right-click Command Prompt and select Run as administrator.cmd-run-as-admin avast high cpu windows 11
  3. Copy-paste or even type inside the window the following command and press Enter:
    sfc /scannowsfc-scan-windows-11 gdi+windows error message on shutdown

Wait for the operation to complete (which may take some time). After that, restart your computer to check that the changes are made correctly. SFC will automatically find and repair corrupted files and folders on your computer.

If that does not work, you can try a professional tool that will scan your PC and automatically repair it.

2. Update Windows

  1. To access the Settings app, press the Windows key + I together and select Windows Update from the left-hand panel.windows-update-settings kernel security check failure windows 11
  2. You may click on the Install now option and wait for the procedure to complete. Or you can click on the Check for updates button if there are any new updates to download.checl-for-updates kernel security check failure windows 11

The fact that you face this problem could be because you are using an older version of Windows. This can be easily rectified by updating your operating system. In the most likely scenario, the bug will be fixed in subsequent software editions.

3. Suspend any antivirus program

  1. Right-click on your antivirus icon in your taskbar and choose Avast shields control. Then select Disable for 10 minutes and click OK.disable-antivirus-icon xbox controller not recognized windows 11
  2. You can temporarily disable the app if you have other antivirus applications installed. Just follow the same procedures described above or comparable ones.avira-disable-icon xbox controller not recognized windows 11

Antivirus interference is the primary cause of the Adobe CEF Helper high CPU problem on Windows 10 and 11. If suspending the software doesn’t work, you might need to uninstall it.

4. Uninstall Adobe CEF Helper

Note icon NOTE
This step is not recommended unless you don’t want to get another Adobe CEF Helper.exe system error and don’t need the program.
  1. You can start by opening up a new File Explorer window and typing or pasting in the following path:C\:Program Files>Adobe Systems>Adobe CEF Helper or Adobe Creative Cloud >Adobe CEF Helper_uninstall.exefile-explorer-path adobe cef helper high cpu
  2. Double-click on the executable file to run it and uninstall Adobe CEF Helper.

If the problem does not occur anymore, your antivirus application is probably the root of the problem. It wldTherefore, you help if you consider picking another compatible antivirus solution for Windows 11 to protect your computer.

How can I fix Adobe CEF Helper’s high CPU usage on Windows 11?

The Adobe CEF Helper’s high CPU usage issue on Windows 11 is primarily down to the interference of your antivirus. To fix it, suspend your antivirus, as shown in this guide.

If this does not work, you might need to uninstall the software and use other safe options like ESET NOD32. Finally, you can remove the Adobe CEF Helper application for good.

We have shown how to do all these in detail in this guide. So, be sure to follow the steps carefully.

Is Adobe Creative Cloud worth it for beginners?

Facing an Adobe CEF Helper.exe application error is quite likely. While it’s rare that a single person will require every service offered by Creative Cloud, it’s beneficial to have as many options as possible. You have the option of installing or uninstalling each Adobe product separately.adobe-creative adobe cef helper high cpu

Sometimes, buying a monthly subscription is more expensive than purchasing a single, permanent software license. However, there are several exceptions to this generalization.

Adobe Creative Cloud, on the other hand, is an excellent bargain. This is because of the regular updates, cloud services, and access to new features. For creative professionals and content creators, the all-apps plan is ideal.

This is because they typically use a combination of the programs included in the plan.

You can cancel your subscription if you ever change jobs or find that you no longer require any applications. There are also several reasonably priced alternatives to the Adobe suite that you might wish to consider.

Why is Adobe always running in the background?

Adobe background processes are essential to the smooth running of your Apps. Some are in charge of syncing your fonts and libraries to the cloud to ensure you do not lose anything.

On the other hand, some processes help to install automatic updates to keep your Adobe apps in top shape. Usually, these processes are safe and not meant to use too many resources.

So, you can always allow them to run till you notice something unusual.

To read more about Adobe Creative Cloud and how to optimize it, check our article Adobe Creative Cloud is draining the battery too fast.

Alternatively, for more information and potential solutions that may apply to the issue, check out our guide on how to fix Creative Cloud’s high CPU usage.

And lastly, users benefited from reading our post on what to do if explorer.exe causes high CPU usage in Windows 10. Make sure to take a peek at it for solutions that may apply to Windows 11 as well.

Before you go, don’t forget to check our AcroCEF.exe application error guide, since it coveres a similar issue.

Let us know which solution worked best for you in the comments section below. Also, you can list the Adobe Creative Cloud products you use the most.

7 Fixes for Bluetooth Speaker not Showing up on Windows 10

Many people use Bluetooth devices such as Bluetooth speakers because they are compact and there’s no need to deal with wires.

However, despite all these benefits, some users report that their Bluetooth speaker is not showing up on Windows 10.

We prepared easy solutions that you might want to try. However, if you’re having difficulty resolving the issue, check them out below.

Why is my Bluetooth speaker not showing up?

The Bluetooth speaker not showing up on Windows 10 can be due to several factors. Listed below are some of its prevalent causes:

  • Outdated drivers: One of the first things to check if you are facing this issue on your PC is your drivers. The solution here is to reinstall or update your driver.
  • Disabled speaker: If your PC can’t find your Bluetooth speaker, it might be because the device is disabled by default. You need to show the disabled devices before you can access them.
  • Connectivity issues: In some cases, the Bluetooth speaker cannot be detected on Windows 10 problem can be caused by minor glitches with your connection. In this case, you need to run the Bluetooth troubleshooter and reconnect the speaker.

How do I fix the Bluetooth speakers if they are not detected?

1. Reset the connection

  1. Press the Windows key + I and select the Devices option.
    devices  bluetooth not showing up windows 10
  2. Toggle the switch under Bluetooth backward to turn it off.
    toggle
  3. Finally, toggle it forwards again to enable it.

The first thing to try if your Bluetooth speaker is not showing up on Windows 10 is to reset the connection. This will clear the glitches that might be causing the issue.

2. Update your Bluetooth drivers

  1. Press the Windows key + X and select Device Manager.
    device manager
  2. Double-click the Bluetooth option to expand it, and right-click the driver there.
  3. Now, select the Update driver option.
    updaet bluetooth not showing up windows 10
  4. Choose the Search automatically for drivers option and install any available updates.
    search auto

If your Bluetooth speaker is not showing up on Windows 10, it might be because of outdated drivers. Aside from using the built-in Windows updater, you can also go to the Bluetooth adapter manufacturer’s website to download the latest drivers.

However, automatic software is the safer and easier way to update drivers on a Windows computer.

We strongly recommend the Outbyte Driver Updater tool to update your drivers to avoid damage to your PC by manually downloading the wrong driver versions.

This great tool was developed, so you do not have to manually download and install your drivers. Already installed drivers can also be stored in an archive and used, for example, when the system is restored.

⇒ Get Outbyte Driver Updater

3. Reinstall your drivers

  1. Right-click the Start icon and select the Device Manager.
    device manager
  2. Expand the Bluetooth option and select the Uninstall device option.
    uninstall device
  3. Check the box for Delete the driver software for this device and click the Uninstall button.
    uninstall bluetooth not showing up windows 10
  4. Finally, go to the Bluetooth adapter’s manufacturer’s website to download the latest version.

If your Bluetooth driver is faulty, your speaker might not show up on Windows 10. To fix this, you need to reinstall the driver from the manufacturer’s website.

4. Restart Bluetooth Support Service

  1. Press the Windows key + R, type services.msc, and click OK.
    services
  2. Right-click the Bluetooth Support Service and select Restart.
    restart bluetooth not showing up windows 10
  3. Now, double-click the service again to open its properties.
  4. Set the Startup type to Automatic and click the Apply button, followed by OK to save your settings.
    automatic

Some services are essential for the smooth running of your Bluetooth devices. If these services are not running smoothly, you might encounter the Bluetooth speaker not showing up issue on Windows 10.

Following the steps above should help restart the required service.

5. Show disabled devices

  1. Right-click the speaker icon in the Taskbar and select the System Sound Events option.
    system sound
  2. Click the Playback tab at the top.
  3. Now, right-click any space there and select the Show Disabled Devices option.
    playback

Sometimes, if your Bluetooth speaker is not showing up on Windows 10, it is not because of any serious problem. Instead, it might just be because the device is disabled.

6. Run the Bluetooth troubleshooter

  1. Press the Windows key + I and select the Update & Security option.
    update and
  2. Select Troubleshoot in the left pane and click Additional troubleshooters.
    troubleshoot
  3. Finally, select Bluetooth and click Run the troubleshooter.
    run

Sometimes, the Bluetooth speaker not showing up on Windows 10 might be caused by a minor glitch. In this case, you should run the built-in troubleshooter. This will diagnose the issue and recommend fixes.

7. Disable and enable Microsoft Bluetooth Emulator

  1. Launch the Device Manager and expand the Bluetooth option.
  2. Right-click the Microsoft Bluetooth LE Emulator and select the Disable device option.
    disable bluetooth not showing up windows 10
  3. Now, click the Yes button if you are prompted to confirm the action.
    yes
  4. Finally, right-click the device again and select Enable device.
    enable bluetooth not showing up windows 10

Glitches with some of your devices can cause the Bluetooth speaker not showing up on Windows 10 issue. However, with the steps above, you should be able to fix the problem quickly.

We can now conclude this article with this solution. If the Bluetooth speaker is not showing up on Windows 10, one of our solutions should fix this issue.

Check our detailed guide to fix the issue if your Bluetooth is not working on Windows 10.

Feel free to let us know the solution that helped you fix this issue in the comments below.

Windows 11 Update Stuck: How to Quickly Fix it

Several users have reported that their Windows 11 update is stuck. For some, this happens on the Updates are underway. So please keep your computer on.

The download could be stuck at 100%, 99%, or even 0%, or maybe a different value. Irrespective of the level it gets stuck, this guide will show you the easy ways to speed up the update process.

Why is my Windows 11 update stuck?

Various factors can cause the Windows 11 update to get stuck at downloading or installing. Below are some of them:

  • Incompatible apps: If the Windows 11 update is taking too long on your PC, it might be because of conflicting or faulty apps. The solution here is to remove these apps using an uninstaller software.
  • Faulty system files: In some cases, this issue can be caused by broken system files. Repairing these corrupt files with the built-in tools or a special system file fixer.
  • Disabled services: Some system services are required for the smooth running of your PC. You need to enable these services to make the process go well.

How can I fix Windows 11 update that’s stuck?

Before proceeding to the fixes in this section, try the preliminary troubleshooting steps below:

  • Check your internet connection
  • Disconnect all unnecessary peripheral devices
  • Download the latest BIOS from the manufacturer’s website

1. Pause the update and then retry

  1. Press the Windows key + I and select Windows Update in the left pane.
    option windows 11 update stuck
  2. Next, click the dropdown before Pause updates and select the Pause for 2 weeks option.
    pause
  3. Finally, restart your computer, repeat Step 1 and click the Resume updates button.

Sometimes, the Windows 11 update might be stuck because of minor glitches. You can fix this by pausing and resuming the update.

2. Run Windows Update troubleshooter

  1. Press the Windows key + I and select the Troubleshoot option.
    troubleshoot
  2. Choose the Other troubleshooters option.
    other windows 11 update stuck
  3. Now, click the Run button before Windows Update.
    run

Microsoft offers several built-in troubleshooters to diagnose and fix system issues automatically. In this case, you should run a Windows Update troubleshooter.

After running the troubleshooter, check if the Windows 11 update stuck problem is fixed.

3. Restart the BITS and Windows Update service

  1. Press the Windows key + R, type services.msc, and click OK.
    services windows 11 update stuck
  2. Right-click the Background Intelligent Transfer Service (BITS) and select Restart.
    restart
  3. Similarly, right-click on the Windows Update service and select Restart.
    restart

The BITS service downloads files using an idle network bandwidth in the background, and Windows Update depends on it for downloads. So if any of the two services run into a bug, the Windows 11 update might get stuck.

Restarting these services should do here.

4. Rename the Software Distribution folder

  1. Press the Windows key, type cmd, and select Run as administrator under Command Prompt.
    cmd windows 11 update stuck
  2. Now, type the commands below and hit Enter after each: net stop wuauserv net stop cryptSvc net stop bits net stop msiserver ren C:\Windows\SoftwareDistribution SoftwareDistribution.old ren C:\Windows\System32\catroot2 catroot2.old net start wuauserv net start cryptSvc net start bits net start msiserver
  3. Finally, restart your PC.

To fix the Windows 11 update stuck issue, you might need to restart some processes and rename some folders. However, the steps above should help you do that quickly.

5. Repair system files

  1. Launch Command Prompt as admin.
  2. Type the command below and hit Enter: sfc/scannowsfc
  3. If the SFC scan fails, type the command below and hit Enter: DISM /online /cleanup-image /restorehealthdism

The Windows 11 update might sometimes get stuck because some system files needed to complete the process are missing. The SFC scan should you fix this issue quickly.

Another option will be to use a dedicated system file solution. This tool will replace any missing file and fix any corrupt one with original copies from your system cache.

6. Remove third-party antivirus

  1. Press the Windows key + I and select the Apps option.
  2. Now, choose Apps & features.
    apps windows 11 update stuck
  3. Finally, click the more button before the antivirus, click Uninstall, and follow the onscreen instruction to complete the removal.
    uninstall windows 11 update stuck

Some third-party antivirus can mess up your PC due to their features. This might be the reason the Windows 11 update gets stuck. You can fix this quickly by removing the app.

Other incompatible apps can also cause this issue. You can remove them by following the steps above.

7. Restart Windows in Safe Mode

  1. Press the Windows key + I and select Recovery.
    recovery
  2. Now, click the Restart now button before Advanced Startup.
    restart windows 11 update stuck
  3. After the computer restarts, choose Troubleshoot > Advanced Options.
    advanced options
  4. Select Startup Settings.
    startup settings windows 11 stuck update
  5. From here, click the Restart button.
    restart
  6. Finally, press 5 or F5 to start the computer in Safe Mode with Networking.
    enable windows 11 stuck update

In some cases, the Windows 11 update stuck issue might be because of incompatible drivers or faulty apps. Restarting in Safe Mode will start your PC with only the required drivers and services.

8. Install Windows 11 using a bootable USB

You can install Windows 11 using a bootable USB if none of the above methods works. The process is relatively simple, though it may seem intricate to first-timers.

But, the dedicated guide we have linked earlier has a step-by-step process that will help those who are not tech-savvy.

The above fixes should have helped get you past the Windows 11 update stuck issue. All you need to do now is to follow the steps carefully.

If you are getting the Windows 11 update error, check our detailed guide to push it through.

Please tell us which fix worked and your first impression of Windows 11 in the comments below.

How to Change the Install Location of Windows 10 Store Apps

Unlike regular downloading from a web browser or installing regular programs, when we download a certain app from Windows Store (also known as Microsoft Store), it just downloads the app, without asking where we want to install it.

So, if you want to change the install location of Windows 10 Store apps, you have come to the right place.

Can I change where Microsoft Store installs apps?

Long story short, you cannot change the download location of Windows Store apps ‘normally,’ because there’s no option for that in Windows Store, but there is a workaround for this, so the answer is “yes”.

Read on to find out how to do this right now.

How can I change the install location of Windows 10 Store apps?

You’ll have to perform a good old registry tweak to change the install location of Windows Store apps. Here’s what you need to do to change the default download location of Windows Store Apps:

  1. Go to Search, type regedit, and open Registry Editor
  2. Navigate to the following path:
    • HKEY_LOCAL_MACHINE\SOFTWARE\Microsoft\Windows\CurrentVersion\Appx
  3. Right-click on Appx folder and choose Permissions
  4. Check Full Control to take the full ownership of this registry folder
  5. Now, right click on PackageRoot and choose Modify change default download location
  6. Now just choose the new path for download location and enter it to Value data:

Users report that this workaround to change where Windows Store installs apps doesn’t work in Windows 8.1, but I tested it in Windows 10, and I didn’t have any problems.

Only thing I noticed is that after changing the default location, downloading takes a lot more time, so if you want to change the default download location, you’ll have to wait longer to download apps.

However, if this registry tweak don’t work for you, you can check this TechNet’s alternative solution, which requires some work in Microsoft PowerShell.

If you decided to follow these steps, and managed to change the default install location of Windows 10 Store apps, tell us your experience, did everything work fine?

Error While Deleting Key: Fix This Issue With 5 Methods

Deleting and editing registry keys isn’t something you should usually do. However, sometimes it is needed to fix a system error.

Yet, some users are met with Cannot delete key: Error while deleting key prompt while trying to delete a locked registry key. This guide will show you how to fix this error on your PC.

Why can I not delete the registry key?

The reasons you are getting an error while deleting a key on Regedit are not far-off. Below are two major ones:

  • Lack of permission: Registry keys are treated like files and folders on your PC. So, if Windows 10 is showing an error while deleting a key, it might be because you don’t have permission to delete them. So, the solution here is to take ownership of the keys and try to delete them again.
  • Presence of null characters: If the key you are trying to delete contains null keys, you might be unable to delete all specified values. You can fix this by adding RegDelNull to your PC.

How do I fix the Error while deleting key issues?

1. Open the Registry Editor as Administrator

  1. Press the Windows key and type regedit.
  2. Select Run as administrator under Registry Editor.
    regedit error while deleting a key
  3. Now, click the Yes button if you get a UAC prompt.
  4. Finally, try to delete the keys again.

The first thing to do if you are getting an error while deleting a registry key is to run Registry Editor as an admin. This is because your PC considers registry key deletion highly privileged.

So, you need to have administrative rights to do it.

2. Edit the Registry Key’s Permissions

  1. Follow the steps in Solution 1 to launch Registry Editor as an admin.
  2. Right-click the registry key you need to delete and select Permissions…
    permissions
  3. Now, click the Advanced button.
    advanced
  4. Click the Change link at the top of the window.
    change
  5. Enter your username in the Enter object name text box.
    enetr error while deleting a key
  6. Now, click the Check Names button, followed by the OK button.check name
  7. From here, click the Apply and OK buttons on the Advanced Security page.
    apply ok
  8. Go back to the Permissions for page, click your username and check the Allow box before the Full Control option.
  9. Finally, click the Apply button, followed by OK to save the changes and try to delete the keys again.
    full error while deleting a key

If you are getting an error while deleting a registry key, it might be because you don’t have ownership of the key. Following the steps above will give you full control of the keys.

3. Add RegDelNull to Windows

  1. Download the RegDelNull zip file.
  2. Open Downloads and right-click the zip file, and select Extract files..
    edit
  3. Now, open the extracted folder and double-click the exe file there.
  4. Finally, enter the command (replace the key path with the path of the registry key you want to delete ) below and hit Enter: regdelnull <key path> -s

Another possible reason you are getting an error while deleting a key is the activities of the null characters in the key. The RegDelNull will help replace these null characters and help you delete the key easily.

4. Use PSExec

  1. Download and install PSExec.
  2. Press the Windows key, type cmd, and click Run as administrator under Command Prompt.
    cmd admin
  3. Now, type the command below and hit Enter: psexec -i -d -s c:\windows\regedit.exepsexec  error while deleting a key
  4. This will now open the Registry Editor. Ensure that you don’t have any prior window of Regedit open.
  5. Finally, try deleting the keys again.

If you still get an error while trying to delete a registry key after changing the permission, you need to use PSExec. This has proved effective for many users. So, you should try it too.

5. Delete the key with Registry DeleteEx

If all the solutions above prove futile in fixing the error while deleting a key prompt, you might need to try an alternative.

One effective program that users have found joy in using is DeleteEx. This tool has a GUI that you can erase locked registry entries.

Furthermore, you can also select to erase all the key’s subkeys. As this software includes more settings, DeleteEx might be a better program for deleting registry entries with than

There you have it: Everything you need to fix the error deleting a key prompt in Windows. Just make sure you follow the instructions carefully, and you should be able to delete your registry keys again.

If you made a mistake and want to know how to undo changes on Registry Editor, check our detailed guide to do it quickly.

Feel free to let us know the solution that worked for you in the comments below.

Your Bank Couldn’t Authorize This Payment Method: Fixed

Whatever app store you’re using, sooner or later, it’ll have some issues that you may not be able to resolve immediately, like users who have raised concerns over Microsoft Store payment problems.

One of the most common ones is the following: Check with your bank. Your bank couldn’t authorize this payment method.

Although you may not know what to do when such an issue arises, there are general fixes listed below that you can use to troubleshoot and resolve the matter and get your payment process back up and running.

How can I fix the Your Bank Couldn’t Authorize This Payment Method issue?

1. Update payment options

You can update and/or add a new payment method whenever you make a purchase, or manage all payment options by logging in to the Microsoft payments site with your Microsoft account.

To add a payment method, do the following:

  • Sign in to Payment options with your Microsoft account.
  • Select Add payment option.
  • Fill in the required fields, then select Next, and you’re done.

If using Xbox One console to add a payment method, do this:

  • Sign in to the Microsoft account associated with the payment option you want to add.
  • Press the Xbox button to open the guide
  • Select Settings.
  • Under Account, select Payment & billing.
  • Under Payment options, select Add a payment option.
  • Choose a payment option and follow the instructions

To update the payment method, do this:

  • Sign in to your Payment options with your Microsoft account.
  • Pick a payment method, then select Edit info.
  • Type your updated info. Payment options used to pay for a subscription can be edited, but can’t be removed until you change how you pay for the subscription. Go to Card info for subscriptions or other services associated with the payment option
  • When you’ve made your changes, select Next.

To update from your Xbox One console, do this:

  • Sign in to the Microsoft account associated with the payment option to update.
  • Press the Xboxbutton on your controller to open the guide
  • Select Settings.
  • Under Account, select Payment & billing.
  • Under Payment options, scroll right to the payment option you want to update
  • Select Edit info.
  • Update payment option details, then select Save.

Note: The country linked to your way to pay must match the country linked to your Microsoft account.

If you cannot update or add a payment option, check for the following:

  1. Follow any instructions you get from the error message
  2. Retype your credit card number without spaces, commas, or other characters that aren’t numerical
  3. Check that your payment option’s billing address, expiration date, and name are correct.
  4. Check that the new payment option is activated
  5. Ensure you have enough money in your account to pay for your purchase.
  6. Ensure the payment option is authorized for online billing or recurring billing.
  7. Check with your bank as to why authorizations are failing.
  8. Try adding or switching to a different payment option (as described in the steps above)

2. Manage your money in your Microsoft account

You can do this in three ways – buy apps with the money, add money to your account, or redeem a gift card or code in your account.

How to add money to your Microsoft account

  • Go to the gift cards page in the Microsoft Store and buy a gift card in the amount you want to add
  • Enter your name and email address as the recipient
  • Complete your purchase
  • Confirm that you’ve received an email with the gift code.
  • Go to the Redeem page on Microsoft
  • Confirm you’re signed in to the right account
  • Enter the code and select Redeem. The entire amount on the code will be added to your Microsoft account.

How to redeem a gift card or code

The easiest way to do this is through the Microsoft redeem page, where you enter the 25-character code, select Next, and follow the on-screen instructions. To do this, you can either use your PC or Xbox console.

To redeem in Windows 10, do this:

  1. Open Microsoft Store.
  2. Select the See more menu(next to search).
  3. Select Redeem a code and sign in if needed.
  4. Enter your code and select Redeem.
  5. If the card or code has money on it, the entire balance will be applied to your Microsoft account. You can use it to buy things from Microsoft Store online, on Windows 10, and on Xbox One. If the card or code is for a specific app or game, it’ll be added to your personal library, where you can download and install it from My Libraryin Microsoft Store. Once redeemed, you’ll be diverted to the product page where you can also download and install. If it is for a subscription, you’ll find it in your Services & subscriptions.

To redeem from your Xbox console, do this:

  1. Ensure the console is connected to the Internet
  2. Sign in to your Microsoft account
  3. Say ‘Xbox use a code’ and follow the instructions to redeem the gift card code
  4. If the card or code is for a specific app or game, it will be added to your personal library, where you can download and install it by pressing the Xbox button on your controller and then select My games and apps > Ready to install. Select the app or game, then select Install.
  5. If the card or code is for a subscription, you can find it in System> Settings > Account > Subscriptions.

For Xbox 360, connect to the internet and sign in, then press the Guide button>Games and apps>Redeem code. Enter the code and select Done.

Note: In case you are not able to redeem a card or code, it could be due to the following reasons:

  1. The code was already redeemed
  2. You have a pending balance on a subscription
  3. The code is for a pre-paid subscription
  4. The code came from another online store like Amazon.com, Best Buy, or EA, so get in touch with them directly to redeem the code
  5. Gift cards can be redeemed to personal Microsoft accounts, not business or corporate accounts

3. Resolve error messages

  1. Write down the Error ID and search the web for info on the ID.
  2. Take a screenshot. Hold down the Windows key and press PrtSc until the screen dims for a second. You’ll find the screenshot in This PC > Pictures > Screenshots.
  3. Contact Microsoft and give the Error ID or exact language of the message to get help for the problem

4. Bank won’t authorize the purchase

Sometimes, Microsoft Store payment issues may be due to bank authorization challenges. If you’re using a new account, ensure it is activated and authorized for online or recurring billing.

Also, ensure that the card details appear precisely as they do on the card and your credit card statement, and if you made several purchases, wait for a day or two before trying again.

Check with your bank if you find the ‘Declined’ message recurring. They can advise if your card is approved or not for online, international, or recurring transactions.

We hope the Check with your bank. Your bank couldn’t authorize this payment method issue is gone from your device.

Before you go, be sure to visit our guide on dealing with payment error OR-RWE-03 in Google Pay for more potential solutions. Sometimes banking services face temporary issues that stop payments from going through. If you use TD, you can also follow our guide on TD EasyWeb not working for extra troubleshooting tips.

Please leave a comment in the section below if you have any other Microsoft Store payment issues or if you could resolve them using any of these solutions.

Xbox One won’t update? How to fix and avoid future issues

The Xbox One that won’t update is basically the biggest vulnerability of anything that’s powered by an OS. And Xboxes are not immune to them either.

In fact, update errors are one of the most common problems with Xbox One a user can encounter.

So, if the Xbox One won’t update, you should act promptly because keeping your console outdated isn’t recommended.

And for that matter, we’ve concluded a list of some potential workarounds that should fix the problem, and allow your Xbox One to install updates seamlessly.

What can I do if Xbox One won’t update?

Solution 1 – Check the internet connection

  1. Press the Xbox button to open the guide.
  2. Select Settings.
  3. Open All Settings.
  4. Choose Network.
  5. Click Network Settings.
  6. On the right side of the Network Settings screen, select Test network connection. The test will run automatically and let you know if there’s a problem with your connection.xbox one wont update
  7. Also, check the Xbox Live server status. You can check the server status at any time by visiting Xbox’s official website.

Solution 2 – Delete and download your profile again

  1. Press the Guide button on your controller.
  2. Go to Settings and select System Settings.
  3. Go to Storage > All Devices > Gamer Profiles.
  4. Select the Gamertag that you want to delete.
  5. Click Delete.
  6. Select Delete Profile Only (this deletes the profile but leaves saved games and achievements).xbox one wont update

Solution 3 – Clear the system cache

  1. 1. Press the Guide button on your controller.

  2. 2. Go to Settings and select System Settings.

  3. 3. Select Storage or Memory.

  4. 4. Highlight any storage device, and then press Y  on your controller (you can select any storage device because the system will clear the cache for all of them).

  5. 5. Select Clear System Cache.

  6. 6. Confirm the action.

  7. 7. Restart your console.

  8. xbox one wont update

Solution 4 – Power cycle your console

  1. Open the guide by scrolling left on the Home screen.
  2. Select Settings and go to All Settings.
  3. Choose System > Console info & updates.
  4. Select Reset console.
  5. You should see two options available: Reset and keep my games & apps and Reset and remove everything. We suggest that you use the first option since this option will only reset your console and delete potentially corrupted data without deleting games and other large files.
  6. If that option doesn’t work and the problem still persists, be sure to use Reset and remove everything option. This option will delete all downloaded games, saved games, accounts, and applications, therefore if you want to preserve some of your files, we suggest that you back them up before using this option.

That’s about it, we certainly hope at least one of these solutions helped you update your Xbox One, and that further issues won’t appear. In case you have any comments, questions, or suggestions, don’t hesitate to write them down below in the comments.

  • Why is my Xbox game not updating?
Check for a system update. If you see, for instance, a Download stopped error, you will need to install the update before the download can complete. If the Xbox update failed, read our complete guide to fix that problem.
  • How do I manually update my Xbox one?

First, make sure your Xbox is connected to the internet, and then check for any updates available from the Updates & downloads option.

How to Fix Minecraft Launcher if It’s Not Currently Available

If you’re attempting to install Minecraft on Windows, you might run into the error Minecraft Launcher is not currently available in your account.

Follow our guide if you’re facing this error in Minecraft. We’ll provide you with the steps needed to resolve the error.

Why is Minecraft Launcher currently not available?

This Minecraft error is usually associated with the new launcher. However, the following are some of the reasons why Minecraft Launcher is not currently available:

  • Improperly installed game: This error might be triggered if you didn’t install Minecraft from the official Microsoft store, e.g., the game was installed from Minecraft or a third-party site.
  • Usage rights: Before games are accepted on the Microsoft store, the usage rights must be sorted out. If Microsoft has trouble checking the usage rights, you might run into this error.
  • Updated Minecraft Launcher: Many users have pointed out that they started experiencing this error after they updated their Minecraft Launchers. It might trigger the launcher error if you’ve recently made an update.
  • Incorrect Activation Key: If you try installing Minecraft with an incorrect Activation Key, you might run into this error.

How do I fix Minecraft Launcher if it’s not currently available?

Before we proceed to advanced troubleshooting techniques, ensure the following checks are completed:

  • Make sure you’re using the correct Activation Key.
  • Log out and re-login to your Microsoft account.
  • Have a stable internet connection.

If those checks couldn’t fix the Minecraft Launcher not currently available error, here are some advanced solutions you can attempt.

1. Uninstall Minecraft and reinstall it from Microsoft Store

  1. Left-click the Start button, search installed apps, and launch it.
  2. Locate the Minecraft Launcher, click the options icon, and select Uninstall.
  3. Then, restart your computer.
  4. Type in Microsoft Store in the Windows search bar and hit Enter.
  5. Sign in to your Microsoft Account, type Minecraft into the search bar, and hit Enter.
  6. Click on the Get button to install the launcher.
  7. Once it’s installed, click on the Play button.

If you run into logging-in errors, follow our detailed guide on how to fix unable to log in to your Microsoft Account. 

2. Reset Microsoft Store

  1. Press the Windows key, search for installed apps, and launch it.
  2. Click the options icon beside Microsoft Store and select Advanced options.
  3. Scroll down and select the Reset button.
  4. Click Reset to delete the app’s data on the device permanently.

The Microsoft Store reset will fix this issue and other common problems, such as the Store not working in Windows 11.

3. Reset the Minecraft app

  1. Press the Windows key, search for installed apps, and launch it.
  2. Click the options icon beside Minecraft Launcher and select Advanced options.
  3. Scroll down and select Reset button.
  4. Click Reset again to delete the app’s data on the device permanently.

Once this is completed, the Minecraft app’s options and settings will be reset. Hence, fixing all the likely causes of the problem.

4. Disable Windows Defender

  1. Press the Windows key, type Windows security, and launch it.
  2. Select the Virus and threat protection tab and click on Manage settings.
  3. Turn off Real-time protection and Cloud-delivered protection. 
  4. If the UAC window opens, click Yes.
  5. Restart your computer.

If this fails, you can check out other ways to permanently disable the Windows Defender in Windows 11.

5. Check for the app updates

  1. Press the Windows key + R to open the Run window, type in ms-windows-store, and hit Enter to open the Microsoft Store Window.
  2. On the top right of the Window, click on your profile, and select App Settings from the drop-down menu.
  3. Turn on App Updates by clicking the toggle bar.

This will ensure that Minecraft remains updated with the latest patches and security fixes.

Minecraft is one of the most played games globally; it wouldn’t be hard to run into occasional errors like 0x87e00009. Once your Minecraft Launcher displays not currently available error, follow our detailed guide to resolve the error quickly. 

Before you leave, don’t miss our guide on Failed to get Minecraft access error transferring server message for more useful information.

Also, do not hesitate to leave your questions and suggestions in the comments area below.

Microsoft Store Themes: How To Download & Install

The Microsoft Store is the main content hub for Windows users. You can download the latest Windows apps, games, Microsoft Edge extensions, music, or movies. You name it, and you can find it in the Store.

Did you know that you can also download Microsoft Store themes for PC? As a quick reminder, a theme is not only a wallpaper. It is a combination of desktop background pictures, window colors, and sounds.

There are lots of impressive desktop themes in the Microsoft Store that you can use to personalize your computer. You can choose from a wide range of themes, such as animals, natural wonders, movies, plants, and flowers, themes with custom sounds, or themes compatible with certain operating systems.

How can I download Microsoft Store themes?

1. First, go to the Microsoft Store’s theme page.

2. select the theme you want to install in the left-hand panel. We’ll select “Animals” > “African wildlife”

download themes Windows Store

3. Click the Download button to download the theme on your computer.

4. Double-click the downloaded theme in the download bar.

windows 10 theme

5. This will automatically install the theme and launch the Appearance and Personalization menu. You can further personalize the appearance of your OS by enabling the desktop background slide show option, or changing the menu color.

set windows 10 theme

It is worth mentioning that the Windows Store also offers panoramic themes for dual monitor systems. This feature is handy because it saves you the trouble of adjusting your favorite themes to your dual monitor system.

And if you have a few additional ones installed, find out how to delete themes in Windows.

Most likely, Microsoft will add more customization options in the future. What are your favorite Microsoft Store themes for desktop PCs?

How to Show Sender Name In Outlook If It’s Not Visible

Sometimes, Outlook may not show the sender’s name in the inbox. This issue can occur while searching for an email or looking through messages. You can fix this by changing the view settings to Compact or Preview.

Find below a few ways in which you can fix Outlook not showing who the email is from.

How to get Outlook email show the sender’s name

1. Check the View settings

  1. To fix sender name not showing in Outlook 365, open Outlook and click View on the menu bar.
  2. Select Change View and select Compact or Preview.

2. Check Service Health Dashboard

Outlook email inbox not showing sender
  1. Open the Microsoft Office portal admin center.
  2. Open the Service Status and check if the issue is posted to the dashboard.
  3. If the issue is posted, Microsoft will release a fix or resolve the Outlook inbox not showing sender name error.

3. Open Outlook in clean view mode

Outlook email inbox not showing sender
  1. Press Windows Key + R to open Run.
  2. Type outlook.exe or cleanview and hit Enter.
    • Outlook will reset the default view.
    • It also deletes any custom views you have created.
  3. Close and relaunch the Outlook client and check for any improvements.

3.1 Open Outlook in Safe Mode

Outlook email inbox not showing sender
  1. Press and hold the Ctrl key.
  2. Click on the Outlook client to launch the app.
  3. Click Yes when a window appears asking if you want to start the application in Safe Mode.
  4. Open the inbox and check if the sender’s name is visible.
  5. If Outlook is showing the sender’s name, it is most likely that a third-party app is causing the problem.
  6. Restart the Outlook client in normal mode.
    Outlook sender name not visible
  7. Disable all the third-party add-ins that you have installed. To do this, go to File > Options > Add-ins.
  8. Relaunch and check if the issue persists.
  9. If the issue is resolved, find the add-on that is causing the problem by enabling them one by one.

4. Run Office repair tool

Outlook sender name not visible
  1. Press Windows Key + R to open Run.
  2. Type control and click OK to open the Control Panel.
  3. Go to Programs > Programs and Features.
  4. Select your Microsoft Office program from the list of the installed programs.
  5. Click on the Change option. Click Yes when prompted by the UAC.
  6. The repair tool offers the following options:
    • Quick Repair – The Quick Repair option will fix most issues quickly without requiring an internet connection.
    • Online Repair – If the issue persists, Online Repair offers advanced repairing options and requires an internet connection throughout.
  7. Click the Repair button to run the troubleshooter.
  8. Follow on-screen instructions and apply any recommended fixes. The emails with no sender in Outlook issue will be fixed.

5. Check for Office updates

Outlook sender name not visible
  1. Start Microsoft Outlook.
  2. Click on File and select Office Account.
  3. Under Product Information, click on Update Options.
  4. If the updates are disabled, click on Enable Updates.
  5. Click again on Update Options and select Update Now.
  6. Outlook will download and install available updates.
  7. Relaunch the Outlook client and check for any improvements.

The Outlook email inbox not showing sender issue can occur for multiple reasons. To fix the problem, check Office Admin Portal for status updates or follow the troubleshooting tips in this article to resolve the problem.

You may also be interested in what to do if the Inbox button is not working in Outlook, Outlook not updating the Inbox, or the Outlook navigation bar has moved to the left.

If you know of any other solution for this common Outlook issue, leave it in the comments section below so that we may update the article accordingly.

How to Keep a Dangerous File in Chrome & Stop Its Blocking

Chrome is the most popular browser in the world, but many reported This file is dangerous message while using it. But what if you want to keep the dangerous file?

Your security is important, so you should use security and privacy extensions for Chrome to maintain it, but what if Chrome falsely targets a file as dangerous? This guide will help you fix that.

Why does Chrome say a file is dangerous?

This message is a part of Chrome’s Safe Browsing feature. The feature is designed to protect you against the following threats:

  • Fraudulent websites – This feature will automatically block access to websites that are deemed untrusted. It can also help you detect scams such as Google critical security alert scam.
  • Unwanted software – You can get this error if Chrome deems the file you’re downloading deceptive, potentially harmful, or if it comes from an untrusted source. This is frequently a false positive, so in most cases, you won’t have to worry as long as you have reliable antivirus software installed.
  • Malware – You can also get this message if you accidentally try to download a malicious file. Do keep in mind that sometimes false detections can sometimes occur.

How can I keep a dangerous file in Chrome?

Before we start fixing this issue, there’s one possible workaround that you might want to try:

  • Download manager – This type of software allows you to download files without using a browser, so you can circumvent this Chrome message by using one.
  1. Locate the download link that you want to use.
  2. Right-click it and choose Save link as.
  3. Now choose the download location and save the file.
  4. You should see a message at the bottom saying that the file can’t be downloaded securely.
  5. Click the arrow next to it and choose Keep.

The file will now download without problems.

2. Disable Chrome security prompts and restore blocked downloads

  1. Open Chrome and click on the three-dot menu from the top right corner to select Settings.
  2. Next, navigate to Privacy and security followed by Security.
  3. Here, make sure to select No protection.

  4. Click on Turn off to confirm.

Once the file is downloaded, scan it with your antivirus and enable this feature again.

3. Try a different browser

If you’re worried about your safety online, you might want to try Opera One. It’s an amazing alternative that offers lots of features. Most of them will make your life easier and help you keep your data safe.

Opera One has numerous privacy-oriented features, such as tracking and phishing protection. Moreover, there’s also the built-in VPN that keeps your online footprint to a minimum while keeping your privacy protected.

Moreover, Opera’s security settings are highly customizable, allowing users that know their online behavior to tweak them for the best performance. You can easily enable protection against untrusted websites and also set HTTP/SSL certification options.

You can also pre-select how much access you give websites to your data. From the Opera One settings, you can disable access to location, camera, and more.

Customization is another perk you will enjoy, as Opera One allows you to craft your own workspace and flow, customize your sidebar, and its appearance, and much more.

Opera One

Enjoy the Internet with the best antiphishing and antimalware system integrated directly into your browser.

In recent years, both mainstream and alternative browsers introduced security checks when opening untrusted links or downloading suspicious files. Chrome is leading the trend with its built-in antimalware and anti-phishing system.

In this article, we explored how to download certain files, although they have been blocked by Chrome’s antimalware system.

Now that you know how to keep potentially dangerous files, you should be able to fix the Couldn’t download virus detected error in no time.

Let us know your questions or thoughts in the comments section below.

How Many Apps Does Microsoft Store Have: Year-By-Year Guide

At the time of this writing, there are over 800,000 apps in the Microsoft Store. The unfortunate part is that among those applications you’ll find a lot of curious omissions.

For example, the most important Google apps, like Gmail are still missing. This tells us that, despite the Store’s relatively high number of apps, Microsoft still struggles with courting big developer names.

We will be counting just how many applications are in the Microsoft Store as much as we will can and will keep you updated on this. We all want the Microsoft Store to thrive, right?

How many apps are in Microsoft Store: Historical Data

windows store number of apps

Microsoft’s problem with the UWP apps is more than noticeable. Even though the company constantly develops new strategies for improving the state of apps in the Microsoft Store, it somehow always fails to hit the jackpot.

We already have innovations like cross-platform compatibility and Windows 10 Desktop Bridge. Some would say these features are quite attractive for developers. However, the situation has remained same.

Truth be told, the Microsoft Store has never been the fastest-growing platform. Both Google Play and the Apple App Store have reached milestones faster than Microsoft’s store.

Back in 2017, Apple’s and Google’s platforms are three times bigger than the Microsoft Store. According to reports, there were 2,800,000 apps in the Google Play Store and 2,300,000 in the Apple App Store.

The Microsoft Store comes in third with just 669,000.

We’ll keep track of how things evolve, so be sure to check our website as we will update you with news and numbers about the current state of Windows 10 applications.

For now, you can check all the updates of this article to see the evolution of Windows apps in the Store.

What is the current number of apps on the Microsoft Store?

Update 1:

Here is the first update to the number of Windows 8 apps currently in the Microsoft Store. According to the latest reports, currently, there are about 13,000 applications in the Microsoft Store (8 November 2012).

In slightly more than a week after its launch, the Microsoft Store’s number of apps increased by 50%, a good sign for Microsoft. But, this growth is sustained by apps that are professional.

My biggest issue with the Microsoft Store is that there might be enough applications, but most of them are applications that are published by amateur developers and ones you’ll delete as soon as you download them.

Let’s hope that the Microsoft Store will not increase only in quantity but also in quality.


Update 2

The Microsoft Store just keeps on growing. One week after its latest update, we now have around 16,000 Windows 8 and Windows RT applications in the Microsoft Store, 3,000 more than on our previous update.

This means that the Microsoft Store is growing by roughly 3,000 applications per week, which means around 12, 000 applications per month. Still, it’s pretty far from Microsoft’s own estimate of 100,000 by February.

Some sources say that eight million copies of Windows 8 have been sold, but we’re still expecting tablets with Windows 8 and RT to start pouncing on iOS and Android.

This is because current growth is no match for these stores, so in one year we’ll see the Microsoft Store will only have grown by around 150,000 apps.

Compare that to 700,000+ apps in the iOS and Android stores and you have four years until Microsoft Store can rival them. So, let’s hope more developers will feel the love for Windows 8 and Windows RT.


Update 3

The Microsoft Store is enlarging and it number of apps is always increasing. It’s now 23 November and rumor has it there are even more than 20,000 apps in the Store for Windows 8 and RT.

The last time we reported there were 16,000 apps and now that number has increased by 4,000 apps, which means slightly over the 3,000 apps/week number we’ve managed to get.

Let’s hope that the interest of developers will pick up and also, once more tablets are sold, more users will be there – the perfect target for developers.


Update 4

Windows 8 developers, it seems you are working hard at your desks! The latest report has it that there are more than 25,000 applications in the Microsoft Store, meaning that the Microsoft Store is growing at the previous rate, which is both good and bad news at the same time.

It’s good because the Store keeps on growing but it’s bad because it’s growing at a slow pace. Let’s hope we’ll hear better news.


Update 5

For those out there wondering how many apps there are in the Windows 8/RT Microsoft Store, we are still updating this article.

Five days before Christmas, new reports suggest there are already more than 30,000 apps in the Store, but the problem still persists with useless and irrelevant apps. Microsoft needs to do something about that, for sure.


Update 6

It’s been a while since the last update, but the Microsoft Store hasn’t stopped growing. According to the MetroStore scanner website, the Store will soon reach 50,000 applications for Windows 8 and Windows RT!

Of course, it still has a long way before it can rival Google Play or the mighty Apple App Store, but don’t forget that Windows 8 is a bet for the future that will slowly but surely gain traction.


Update 7

We’re updating the article to inform you about the number of apps in the Microsoft Store because it appears that we have reached a milestone!

According to data obtained by WinBeta, the number of Windows 8 and Windows RT apps will soon reach 100,000! This is indeed awesome as it’s double the amount we spoke about in the last update! Keep it going, awesome developers!


Update 8

It’s been a while since we updated this article, but as we’re reaching the end of 2015, it seems the release of Windows 10 has boosted the number of apps on the Microsoft Store which are said to be more than 700,000.


Update 9

Microsoft Store has now more than 800,000 apps. There is no official information about the exact number of apps, but we think that Microsoft is simply waiting for the seven-digit figure.

Once that milestone is completed, we will have the exact amount.

Your Network is Behind a Cone NAT: How to Fix This Easily

In order to fully enjoy multiplayer experience on your Xbox One your network needs to be configured properly.

If that’s not the case you might get Your network is behind a port-restricted NAT message on Xbox One. This error will prevent you from accessing certain multiplayer features, so let’s see how to fix it.

How can I fix Your network is behind a port-restricted NAT error on Xbox One?

  1. Forward / trigger your ports
  2. Use DMZ feature
  3. Enable UPnP
  4. Repeat the Internet connection test
  5. Turn off UPnP settings
  6. Enable Access Point feature and turn the UPnP on
  7. Update your router’s firmware
  8. Change NAT filtering settings
  9. Use wireless connection instead
  10. Turn Bridged Mode on your modem

Before we start, let’s quickly explain what NAT is and how does it work. NAT stands for Network Address Translation and it’s performed by your router.

This feature allows all devices on your home network to access your external IP address that is assigned by your ISP.

There are three NAT options on Xbox One, and they are Open, Moderate and Strict.

Moderate NAT will give you Your network is behind a port-restricted NAT message, and this is why it’s important that you switch it to Open NAT in order to avoid these types of problems in the future.

Solution 1 – Forward / trigger your ports

In order to remove this message, it’s advised that your forward or trigger certain ports.

Problems with NAT can occur if specific ports aren’t forwarded, but you can easily change that. To forward your ports, you need to access your router’s configuration settings and assign a static IP address to your Xbox One.

After that, you need to forward the following ports:

  • Port 88 (UDP)
  • Port 3074 (UDP & TCP)
  • Port 53 (UDP & TCP)
  • Port 80 (TCP)
  • Port 500 (UDP)
  • Port 3544 (UDP)
  • Port 4500 (UDP)

Forwarding ports is different for each router, therefore we strongly suggest that you check your router’s manual for detailed instructions. Some users are recommending to trigger the ports in the range 88-88, 3074-3074, etc.

Few users reported that they fixed this problem by forwarding the following ports as well:

  • Port 16000 (UDP and TCP) for party chat and matchmaking
  • Port 1863 (UDP and TCP) for Kinect, Skype and video issues
  • Port 3075 and 3076 for Call of Duty Ghosts and some other games

After forwarding the ports you just need to connect to your network on Xbox One. Be sure that you don’t enter static network information. Instead set your network configuration to Automatic on your Xbox One.

By doing so your router will do all the necessary configuration for your console.

Now you need to test your network connection to ensure that everything is working properly. To do that, follow these steps:

  1. Go to Settings and select Network. You should see the relevant information regarding your network connection.
  2. In the Troubleshooting section select Test network connection. Wait while the scan tests your Internet connection. Once it’s done, select Continue.
  3. Now select Test multiplayer connection option from the Troubleshooting section.
  4. When you see the scan results hold LB + LT + RB + RT on your controller.
  5. You’ll see a new screen with detailed network report.
  6. Look for Detailed NAT status option. Wait for a minute or two and the Detailed NAT status will change. If it changes to OPEN NAT type, it means that the problem is resolved.

Few users reported that you need to restart your router while forwarding ports in order for changes to take effect. To do that, follow these simple steps:

  1. Press the power button on your router to turn it off.
  2. Wait for 30 seconds or more.
  3. Press the power button again and wait until your router turns on completely.
  4. After that, start your Xbox One and check if the problem is resolved.

Solution 2 – Use DMZ feature

Some routers support DMZ feature, also known as Demilitarized Zone, and you should be able to fix various network problems with your Xbox One simply by enabling this feature.

This feature works similarly to port forwarding, but instead of forwarding specific ports, it will forward all ports to your Xbox One.

To use this feature first you need to access your router configuration page and assign a static IP address to your console. If you have any port forwarding or triggering enabled, be sure to disable it.

After that, locate the DMZ feature and enable it. To enable this feature you might have to enter your Xbox’s static IP address or its MAC address.

Remove any network settings that you have on your Xbox One and make sure that your network configuration is set to Automatic. Now you need to test your network connection.

We explained in detail how to do that in our previous solution, so be sure to check it out. Be sure to press LB + LT + RB + RT on your controller after the network scan is completed to see the detailed results.

Wait for couple of minutes and check if Detailed NAT status changes to Open.

We have to mention that using DMZ feature is a lot simpler than forwarding the specific ports, but keep in mind that not all routers support this feature.

Before enabling DMZ feature, be sure to check your router’s manual and see if this feature is supported by your device.

Solution 3 – Enable UPnP

Few users reported that this issue can be solved by using UPnP, also known as Universal Plug and Play. This feature allows your network devices to discover one another and establish the connection seamlessly.

To enable this feature you need to access your router’s configuration page and clear any port forwarding and DMZ settings. Now locate and enable UPnP feature.

By enabling this feature your router should automatically detect the ports that Xbox One uses and enable them without the need for any manual configuration.

After enabling this feature, go to your Xbox One and set network configuration to Automatic.

Test your network connection and press the LB + LT + RB + RT button combination. Wait for a minute or two and check the status of Detailed NAT.

Although UPnP allows you to automatically configure your Xbox One to work with your router, few users reported issues with it.

According to them, this feature doesn’t work if you’re using Instant-On power mode on your Xbox, so you’ll have to switch to Energy-saving mode. To do that, follow these steps:

  1. Press the Menu button on your controller.
  2. Go to Settings > Power & startup.
  3. In Power Options section select Power mode and press the A button on the controller.
  4. Choose Energy-saving option.

After turning Energy-saving mode on UPnP should work without any problems and the Your network is behind a port-restricted NAT message will be removed.

Keep in mind that Energy-saving mode will completely turn off your console, so it will start a bit slower when you press the power button.

We also have to mention that UPnP feature doesn’t require that you assign a static IP address to your Xbox.

Still, few users reported that assigning a static IP address and turning on UPnP fixed the issue for them, so you might want to try that.

Solution 4 – Repeat the Internet connection test

Few users reported that you can fix this problem simply by repeating the Internet connection test a few times. According to them, you need to repeat it until you get Open NAT or Your network is behind a cone NAT message.

For detailed instructions on how to test your Internet connection be sure to check Solution 1.

Solution 5 – Temporarily disable your router’s firewall

Your router comes with its own firewall that is designed to protect your from malicious users and attacks, but sometimes your firewall configuration can affect your multiplayer experience.

To fix this problem you need to open your router configuration page and turn off the firewall. After turning off the firewall check if the Your network is behind a port-restricted NAT message still appears on your Xbox One.

Disabling your router’s firewall is always a security risk, but if disabling the firewall fixes the problem on your Xbox One, you need to enable the firewall and check the firewall configuration to determine why is your firewall blocking Xbox One.

Solution 6 – Turn off UPnP settings

Few users reported that UPnP feature was causing the Your network is behind a port-restricted NAT message to appear on their console.

As we already mentioned, this feature should automatically configure all network devices, including your Xbox One, but sometimes certain problems can occur.

After disabling the UPnP feature the problem should be resolved.

Solution 7 – Enable Access Point feature and turn the UPnP on

Couple of users reported that they fixed this issue on their Xbox One simply by changing their router configuration.

According to them, all that you have to do is to enable Access Point feature on your router and turn on UPnP. After doing that, the issue should be resolved.

Solution 8 – Update your router’s firmware

Your router is in charge for network configuration and all your network traffic, but sometimes in order to get the best performance from your router you need to update its firmware.

New firmware brings new features, and in some cases updating the firmware on your router can fix the problems with your Xbox One.

Users reported that Your network is behind a port-restricted NAT issue was resolved after installing the latest firmware update for their router, so you might want to try doing that.

Keep in mind that updating your firmware is an advanced procedure, and you should check your router’s instruction manual before trying to update the firmware on your router.

Solution 9 – Change NAT filtering settings

As we already mentioned, your modem configuration can cause this and many other network-related issues on Xbox One.

According to some users you can fix Your network is behind a port-restricted NAT issue simply by changing NAT filtering settings on your modem. To do that you need to follow these steps:

  1. Open your modem’s configuration page.
  2. Go to Advanced Settings > WAN setup.
  3. Locate NAT filtering and change it to Open.
  4. Disable SIP ALG and save changes.

This procedure might be a bit different on your modem, therefore we strongly suggest that you check your instruction manual for detailed instructions.

Solution 10 – Use wireless connection instead

Both wireless and wired connections have their advantages, and while using wired connection allows you to access the Internet without any interference or data loss, many users prefer using wireless connection due to its simplicity.

In fact, if you use wired connection you might encounter Your network is behind a port-restricted NAT message on your Xbox One.

Users reported that after switching to the wireless network, their NAT changed to Open and this issue was completely resolved.

Solution 11 – Turn Bridged Mode on your modem

Some modems can work as wireless routers as well, but sometimes that can cause issues with certain devices such as Xbox One. To fix this problem, you need to turn on Bridged Mode option on your modem.

This option will disable router features of your modem and you won’t be able to use Wi-Fi, so keep that in mind.

After turning on Bridged Mode, you just need to connect your console to your modem using an Ethernet cable and check if that fixes the issue.

To see how to enable Bridged Mode on your modem be sure to check its instruction manual.

Your network is behind a port-restricted NAT message is not an error, but this message can prevent certain multiplayer features from running.

In some cases this message can seriously affect your multiplayer experience, but we hope that you managed to solve this issue by using one of our solutions.

If you have any other suggestions or questions, don’t hesitate to leave them in the comments section below.

READ ALSO:

Reinstall Preinstalled Apps on Windows 10 [How to]

Sometimes, you might encounter issues with certain apps; if that happens, you must reinstall preinstalled apps on Windows 10.

If your apps are missing or have any problems, a quick reinstall should help; this guide will show you how to do it properly.

What are preinstalled apps on Windows?

Preinstalled apps are Microsoft Store apps available on your system as you install them. Thanks to those apps, users can perform basic tasks without downloading specialized software.

How do I reinstall preinstalled apps on Windows 10?

1. Use a specialized uninstaller before reinstalling apps from the Store

Sometimes, regular uninstalling procedures are not enough to completely uninstall an application. And if the app leaves some files behind, those can prevent you from adequately reinstalling that app.

That’s why we advise using an effective uninstaller software, an excellent solution that is easy to run and removes any app and leftovers that it may leave behind.

IObit Uninstaller is one of the best uninstalling software options; it has a free version and a pro version at an affordable price, and both come with top-notch performance.

This tool helps you uninstall unnecessary apps, especially when talking about many of them, and it helps you optimize the overall PC system performance.

IObit Uninstaller

Utilize this market-leading uninstaller to optimize your PC and delete unwanted apps.

2. Remove applications manually to reinstall Microsoft Store apps

2.1. Remove apps from Apps & Features

  1. Press the Windows key + I to open the Settings app.
  2. When the Settings app opens, navigate to the Apps section.
    Reinstall Windows 10 apps Powershell
  3. A list of all installed apps will appear. You just need to select the application you want to remove and click on Uninstall. Then, follow the instructions on the screen to uninstall the application.
    Reinstall preinstalled apps Windows 10

One of the simplest ways to reinstall Microsoft Store apps is to uninstall them manually.

However, you will notice that some built-in apps have a grayed-out uninstall button, which means that you can’t uninstall them, at least not by using traditional means.

However, you can also uninstall those too. We have an excellent guide to help you quickly uninstall greyed-out apps on Windows 10.

2.2. Uninstall apps by right-clicking them

  1. Click the Start button and look for the application you want to uninstall.
  2. Right-click it and select Uninstall from the drop-down menu.

2.3. Reinstall the app from the Microsoft Store

  1. Press the Windows Key + S and type store. Select Store from the list of results.
  2. When the Microsoft Store opens, please enter the application’s name in the search bar and select it from the list.
    Reinstall the Windows Store app
  3. Click the Install button and wait for the application to reinstall.
    Reinstall Windows 10 apps Powershell

As you can see, this is a relatively simple method, and by using it, you can easily reinstall any application downloaded from the Microsoft Store.

If you want to remove built-in Microsoft Store apps from your PC, you might want to check out some of our other solutions.

3. Reinstall Microsoft Store apps using PowerShell

    If you want to reinstall any built-in Microsoft Store app such as Calculator or Mail, you’ll have to use PowerShell an advanced command line tool.

    In order to reinstall the apps, you need to uninstall them first. For safety reasons, it’s better to perform a complete backup or to create a restore point in Windows 10 before using this command to uninstall any app.

  1. 1. Press Windows Key + S and enter powershell.

  2. 2. Click on Run as administrator under PowerShell to open the app with elevated privileges.

    reinstall microsoft store app powershell run
  3. 3. When PowerShell opens, enter the following command and press Enter: Get-Appxpackage –Allusers | Select Name, PackageFullName

    reinstall microsoft store apps powershell
  4. 4. Now you should see a list of applications along with their full names.

  5. 5. Find the application you want to remove and copy its full name by pressing Ctrl + C.

  6. 6. Now enter the following command and press Enter to run it: Add-AppxPackage -register “C:\Program Files\WindowsApps\<PackageFullName>” –DisableDevelopmentMode

  7. 7. In our example this command would look like this: Add-AppxPackage -register “C:\Program Files\WindowsApps\Microsoft.WindowsCalculator_11.2307.4.0_x64__8wekyb3d8bbwe” –DisableDevelopmentMode

    • Keep in mind that the command will slightly differ depending on the application you’re trying to reinstall.
  8. 8. After running this command, the application or applications should be reinstalled and you’ll be able to use it once again.

  9. 9. If you want to reinstall all built-in Microsoft Store applications, including the Microsoft Store, you can do it by running the following command in PowerShell: Get-AppxPackage -AllUsers| Foreach {Add-AppxPackage -DisableDevelopmentMode -Register “$($_.InstallLocation)AppXManifest.xml”}

PowerShell is an advanced tool, so be careful when using it. You can cause problems with your PC if you’re not careful.

4. Create a new user account to reinstall Microsoft Store apps

  1. Press the Windows key + I to open the Settings app.
  2. Then, navigate to the Accounts section.
    Reinstall preinstalled apps Windows 10
  3. In the menu on the left, select Family & other people.
  4. Next, click on Add someone else to this PC in the Other people section.
    Install Windows Store app manually
  5. Select I don’t have this person’s sign-in information.
    Reinstall the Windows Store app
  6. Click on Add a user without a Microsoft account.
    Reinstall Windows 10 apps Powershell
  7. Enter the desired username and click on Next.
    Reinstall preinstalled apps Windows 10

If you’re having problems with built-in Microsoft Store apps and can’t reinstall them using the methods above, you might have to create a new user account.

All built-in apps on it will be reinstalled by creating a new user account.

How do I remove preinstalled bloatware?

To do that, you can manually uninstall apps one by one or use debloating scripts to automate the process.

We wrote in detail how to remove bloatware from Windows 10 in a separate guide, so don’t miss it.

Does reset Windows remove preinstalled apps?

Depending on the type of reset you perform, you might remove all preinstalled apps and their data. However, the reset process will reinstall all preinstalled apps as well.

To learn more, we have a guide on how to factory reset Windows 10, so be sure to check it out.

As you can see, it’s easy to reinstall preinstalled apps on Windows 10, and by using these steps, you can reinstall Microsoft Store or restore missing default apps on Windows.

Did you find a different way to restore preinstalled apps on Windows 10? If so, let us know in the comments section.

Fix: Microsoft Windows Search Indexer High CPU Usage

The Windows Search service is one that indexes files for the Windows search tool. That service is the SearchIndexer.exe or Windows Search Indexer process listed on Task Manager’s Processes tab.

However, some users have found that the Search Indexer process can hog a lot of system resources with high CPU and RAM usage.

Why is Microsoft Windows Search indexer running?

The Windows Search indexer can be a bliss just as much as it can be a nuisance and here’s why. Its role is to handle file indexing and thus speed up the search process on your PC.

When it’s running, you find whatever it is that you’re looking for faster. But it can also slow down your drive and affect your overall performance since it’s a relatively resource-intense process, to begin with.

Now, turning the Windows 10 indexing off in order to cut down on the Searchindexer.exe high CPU makes sense if you have a fast drive such as SSD as it can handle the search and retrieval of results on its own.

As always, the right configuration implies balancing different components, but if the Windows desktop search support high CPU becomes unbearable, you can rest assured that disabling the service -at least temporarily – won’t affect your system in any way.

You can always download Indexer Diagnostics to fix Windows Search issues, including high resource consumption instances. If not, feel free to check out our handy solutions to reduce the Windows search’s high CPU utilization.

? Microsoft Windows Search indexer high CPU on Windows 11

Before we move on with the solutions, let’s take a moment to see if and how the Windows desktop search support high CPU issue also applies to Windows 11. In short, yes, it does.

The good news is the solutions listed below will work just as well on the latest version of your OS. In addition, you can also perform these steps:

  • Update your drivers on the Windows 11 OS
  • Run SFC and DISM commands
  • Perform a System Restore to a point previous to the issue

In some cases, the Windows 11 Search Indexing can be turned off completely, so might want to enable it again.

How do I fix Windows Search Indexer high CPU?

1. Use a third-party repair software

If you’re having issues with Search Indexer’s high CPU usage, you should be able to fix it using specialized repair software that can fix a wide array of PC issues automatically.

The software will scan your PC for any problems and give you a list of issues. You can fix all these issues with just a couple of clicks without any additional user input.

These tools can fix a wide array of Windows errors, missing DLL files, BSOD errors, freezes, crashes, and, most importantly high CPU usage, so be sure to check them out.

2. Restart the Windows Search Service

  1. 1. You can start by pressing the Win + R hotkey and entering services.msc in Run‘s text box.

  2. 2. Press Run‘s OK button to open the Services window.

  3. 3. Scroll down to Windows Search.

  4. 4. Double-click Windows Search to open its configuration settings shown directly below.

    windows search properties
  5. 5. Select Disabled from the Startup type menu.

  6. 6. Press the Stop button.

  7. 7. Press the Apply and OK buttons.

  8. 8. Restart your PC.

  9. 9. Thereafter, open the Windows Search service window again.

  10. 10. Select Automatic (Delayed Start) from the Startup type drop-down menu.

  11. 11. Click the Start option, and then press the Apply and OK buttons to restart Windows Search.

  12. Restarting the Windows Search service might reduce the Search Indexer’s CPU usage. You can do this using the built-in Run dialog, which allows you to access Windows Search Properties.

    After restarting the services, the problem with searchindexer.exe high CPU usage should be resolved.

3. Run Search and Indexing Troubleshooter

  1. Click the Start button and select Settings.
  2. Now select Update & Security from the menu.
  3. Click on Troubleshoot from the left pane and Additional troubleshooters from the right.
  4. Select the Search and Indexing troubleshooter and hit the Run the troubleshooter button.
  5. Follow the on-screen instructions to fix the issue.

This can help fix other issues like search results aren’t quite ready yet.

4. Reduce Indexed Locations / Data

  1. To open Indexing Options, press the Cortana taskbar button.
  2. Enter indexing in the search box. Then click Indexing Options to open the window shown directly below.
     
  3. Press the Modify button to open the Indexed Locations window.
  4. Click the arrow beside the C: drive to expand its folders. Now you can deselect some of the check boxes to remove indexed locations.
  5. Press the OK button on the Indexed Locations window.
  6. Click Close on the Indexing Options window.

Reducing the amount of data the Search Indexer is indexing is one of the best ways to fix Windows Desktop Search support high CPU usage.

Users also complained about the delayed write failed error but the highlighted guide will help you fix it.

5. Rebuild the Index

  1. Open Indexing Options as outlined above.
  2. Click the Modify button, and deselect all the selected locations except the C: drive, as shown below.
    indexed location search indexer high CPU 
  3. Click OK to return to the Indexing Options window.
  4. Press the Advanced button to open the tab shown directly below.
  5. Press the Rebuild button on the Index Settings tab.
    advanced options window search indexer high CPU
  6. That will open the dialog box shown directly below. Press the OK button to confirm and rebuild the index.

Users reported that rebuilding the index fixed the searchindexer.exe high CPU usage, so we encourage you to try that.

6. Disable Windows Search Indexer

  1. Enter the keyword windows features in the Control Panel‘s search box.
  2. Click Turn windows features on or off to open the window directly below.
    windows features searchindexer.exe high cpu
  3. Deselect the Windows Search check box.
  4. Press the OK button to confirm the new settings.
  5. Reboot your desktop or laptop.

7. Run System File Checker

  1. Click the Start button, type cmd, and select Run as administrator from the results.
  2. Write or paste the following command and press Enter to execute it: sfc /scannow
  3. The process will start and the system files will be repaired. Wait until it is finished, then restart your device.

Should I disable indexing in Windows 10?

Digital indexation allows you to locate content faster by using specific filters such as keywords or creation dates. Now, if you don’t really search for files that often or if you use an SSD that can quickly retrieve files, it does not make much sense to keep indexing on.

The same goes for Microsoft Windows Search Indexer high CPU cases as you can easily get stuck at 100% disk usage.

This might be a more drastic resolution, but it will help with the Searchindexer.exe high CPU consumption rates. Don’t worry, this does not mean you won’t be able to use Windows Search at all.

Plus, if you need a replacement for Windows Search after switching it off, there are plenty of alternative third-party search utilities.

For example, you can install the freeware Agent Ransack, Copernic Desktop Search Lite, or UltraSearch. Agent Ransack is a highly-rated search software that has Lite and Pro versions.

So that’s how you can cut the Windows Search’s CPU and RAM usage down to size. That will free up system resources for other software and might also speed up the Windows OS a little.

Can’t Type in Command Prompt? 4 Ways to Quickly Fix it

Some of our readers have recently reported that they can’t type in Command Prompt to automate a task or troubleshoot computer problems.

It can seem quite unsettling when you cannot perform certain functions on your PC. Worry less, as we have provided some troubleshooting steps for this problem.

Why can’t I type in Command Prompt?

There can be several reasons why you can’t type in Command Prompt. From errors and complaints gathered from users, we have pointed out some potential causes of why you cannot type in Command Prompt.

Some of the factors responsible for this are:

  • Keyboard cable has been disconnected – It may be that your keyboard cable has been unplugged or the Bluetooth keyboard connector is inactive.
  • Corrupt User Profile – There’s a possibility that you won’t be able to type in Command Prompt if your current user profile or the system files are corrupt.
  • Antivirus and third-party programs – Some users claimed they discovered that their antivirus application was the cause, and after disabling it, they could use their Command Prompt.
  • No administrative privileges – Another possible reason for this error is if you are using a standard user account wherein your account does not have administrative privileges. You should consider granting administrative privileges to your user account.

Now that you know some of the reasons why you can’t type in Command Prompt, let’s proceed to how you can fix this problem.

What can I do if I can’t type in Command Prompt?

The following are a few quick checks you can perform since these have worked for others:

  • Check your keyboard’s connection cable.
  • Restart your PC in Safe Mode.
  • Disable your antivirus software for some time, and if possible, uninstall the program.
  • Remove some unnecessary programs from your Task Manager.
  • Install all pending Windows updates.

If, after applying all the preliminary checks, the error persists, please move to the next section to apply advanced solutions.

1. Run the SFC Scan

  1. Launch the Start menu, type powershell in the search bar, then press Run as an administrator.
  2. Now, type the following command in the PowerShell window and click on Enter: SFC /scannow
  3. Wait for the scanning process to complete and close the PowerShell window.

Once done, ensure you restart your computer. If PowerShell has stopped working in Windows 11, kindly read our recommended fixes here.

Besides following the manual steps, you can also count on specialized software to complete the procedure automatically.

2. Use your On-screen Keyboard

  1. Left-click on the Start button and type control panel, and launch it.
  2. Select the Ease of Access and click Ease of Access center.
  3. Then select Start On-Screen Keyboard.
  4. Left-click the Start button, type cmd, then launch it and use the On-Screen Keyboard.

Once you’ve brought up your Windows On-screen Keyboard, you should be able to type in the Command Prompt.

However, if the On-Screen Keyboard fails to work also, then you need to troubleshoot that with the fixes in our guide.

3. Run CMD as administrator from the Task Manager

  1. Press Ctrl + Shift + Esc keys to open the Task Manager and select Run new task.
  2. Type the following in the text field: cmd.exe
  3. Check the Create this task with administrative privileges box, and click OK.
  4. The Command Prompt will be immediately launched on your PC.

A simple trick is to run CMD as an administrator directly from your Task Manager. By this, you should be able to type in the Command Prompt with the administrative privileges.

If the Task Manager is not working on your PC, check out the possible fixes in this guide.

4. Use the Legacy mode

  1. Launch the Command Prompt, click on the Terminal icon at the upper-left corner, and select Properties.
  2. Select the Options tab, check the box to Use legacy console, and click OK.

This mode should allow you to type in Command Prompt if there are no issues with your PC’s keyboard.

These are the best solutions for this problem. Ensure to follow the steps outlined for each fix for optimal results.

If you have any questions or suggestions, do not hesitate to use the comments section below.

Xbox Error Code 0x8b050033? Update using these solutions

When trying to update your Xbox One console you may encounter the Xbox One update error 0x8b050033. This error occurs when the Xbox servers are down or are undergoing maintenance.
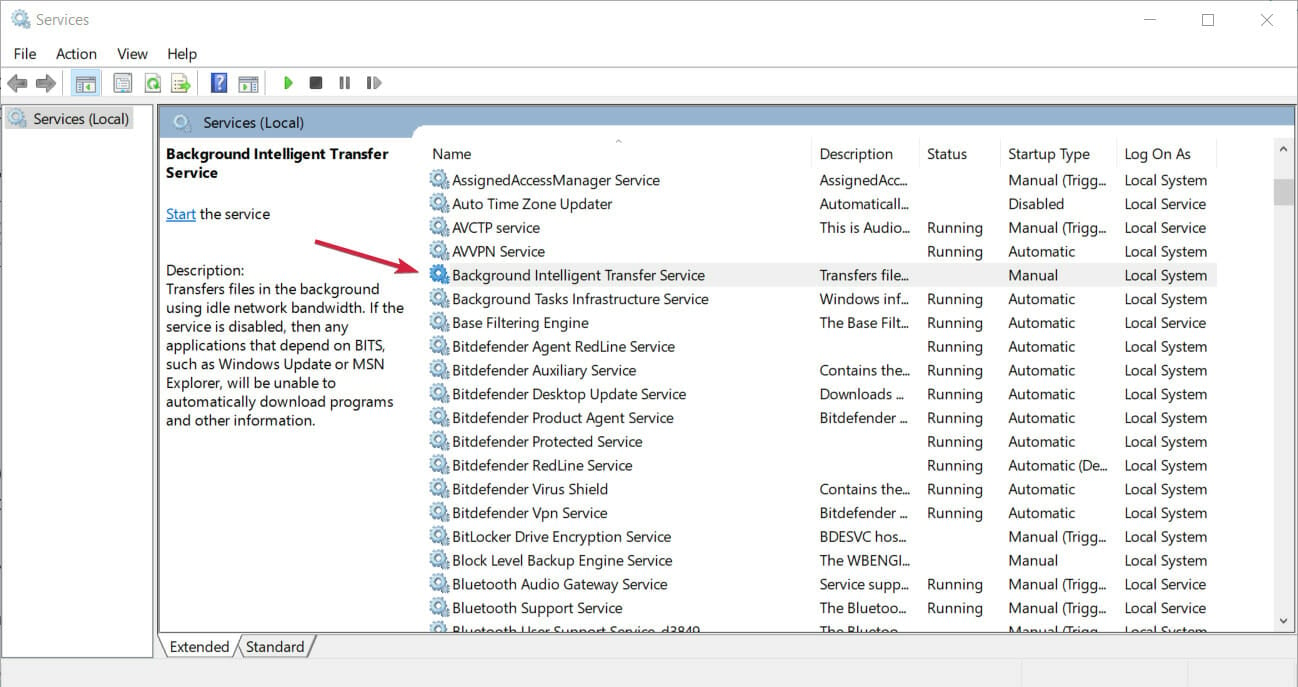
According to Microsoft, this is a common error and usually fixes itself when the services are restored. However, several users have reported that the error occurs if even all the Xbox services are up and running.

If you are also troubled by this error, here are a couple of troubleshooting tips to help you resolve the Xbox One update error 0x8b050033.

How can I fix Xbox One update error 0x8b050033?

1. Check Xbox Live service for outage

Xbox One update error 0x8b050033
  1. According to Microsoft, this error occurs if the Xbox Live servers are down and undergoing maintenance.
  2. Microsoft allows the users to check the Xbox Live service status on the official website.
  3. Visit the Xbox Live Status page.
  4. Xbox Live Status page lists all the services and games that are facing outage.
  5. If one of them appears to be down, wait till Microsoft fixes the issue. You can subscribe to service status updates by logging in with your Xbox account.

2. Perform a quick power start

  1. Make sure the Xbox One console is powered on.
  2. Press the Xbox button on the console for 15 seconds until the console is powered off.
  3. Once powered off, disconnect all the cables connected to the console.
  4. After a few minutes, reconnect all the cables.
  5. Press the Xbox button again on the console to power on the console.
  6. Try updating your Xbox One console and check for any improvements.

If the error is not caused by a server outage, it can be due to temporary issues with the console. A quick power cycle will work as a hard reset that will resolve any firmware related issues.

The Xbox One update error 0x8b050033 is a common error and is caused by an unresponding Xbox Live server. However, if there are no server issues, try performing a power cycle and see if that helps.