Windows Remote Desktop Connection enables users to remotely connect to a PC. But users often complained about a message stating that your computer could not connect to another console session.
Other variations of basically the same error can include, but without being exhaustive, the following instances:
? [window title] remote desktop connection [content] your computer could not connect to another console session on the remote computer because you already have a console session in progress. [^] hide details [ok] [expanded information] error code: 0x708 extended error code: 0x0 press ctrl+c to copy.
? RDP you already have active remote desktop connections on this computer
Obviously, the error does not pertain to a particular platform and you can encounter it on all versions of Windows, from Windows 7 to 10 and 11, Hyper-V, and more.
Traditionally, a console is a terminal where users can both type commands and view the outcome of those specific commands.
While a connection to a remote computer is standard for the terminal, modern consoles are nowadays integrated into the attached monitor.
Now, the console session designates the output that you see on your monitor when you connect the latter to a server via RDP.
If you suddenly see that your computer could not connect to another console session, it is possible that your firewall is blocking that particular connection.
Finally, an IP address overlapping can also make it impossible for your computer to connect to another console.
If a network adapter on your PC shares the same IP address with the host computer, you won’t be able to connect to a console session over RDP.
How do I connect to a console session when the computer could not?
1. Renew your IP address and flush the DNS
Press the Type here to search button (the one with the magnifying glass icon) on your Windows 10 taskbar.
Then enter cmd (or Command Prompt) as the search keyboard.
Next, right-click Command Prompt and select the Run as administrator option for it.
Input the following commands in the order they’re listed and press Enter after each:ipconfig /releaseipconfig /flushdnsipconfig /renew
Then exit the Command Prompt, and restart your PC.
2. Add a Remote Desktop User
Launch Run by pressing the Windows key + R keyboard shortcut for that accessory.
Next, type sysdm.cpl in Run’s window and click OK to open the window shown directly below.
Click the Remote tab.
Make sure both the Allow remote connections and Allow remote connections only from computers running Remote Desktop with Network Local Authentication settings are selected.
Press the Select Users button.
Then click the Add option.
Press the Advanced button.
Click the Find Now option to select to add a user account when the issue arises.
Then click OK to exit.
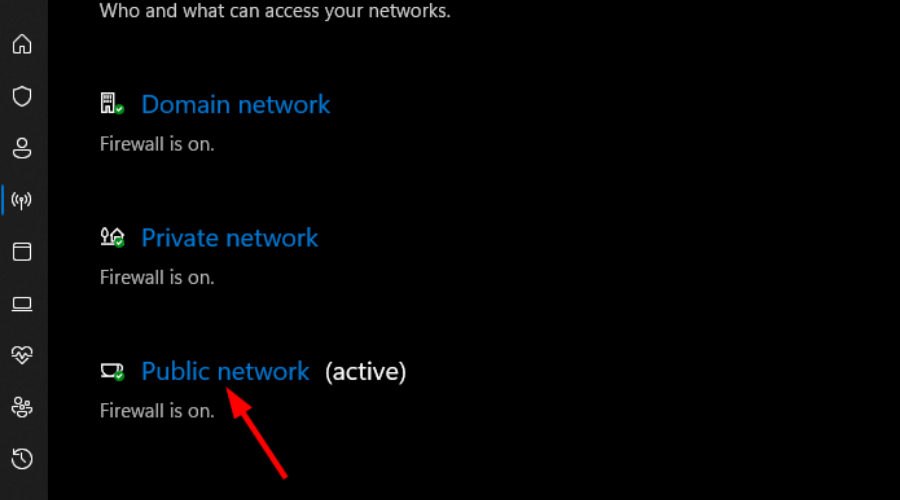
3. Turn off the Windows firewall
Open the search utility by pressing the Windows + S keys at the same time.
Input firewall into the search box.
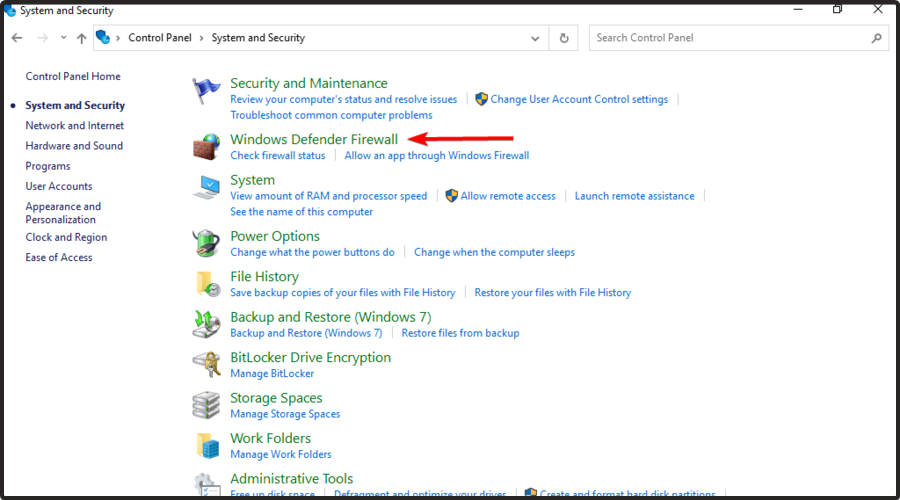
Click Windows Defender Firewall to open the applet in the shot directly below.
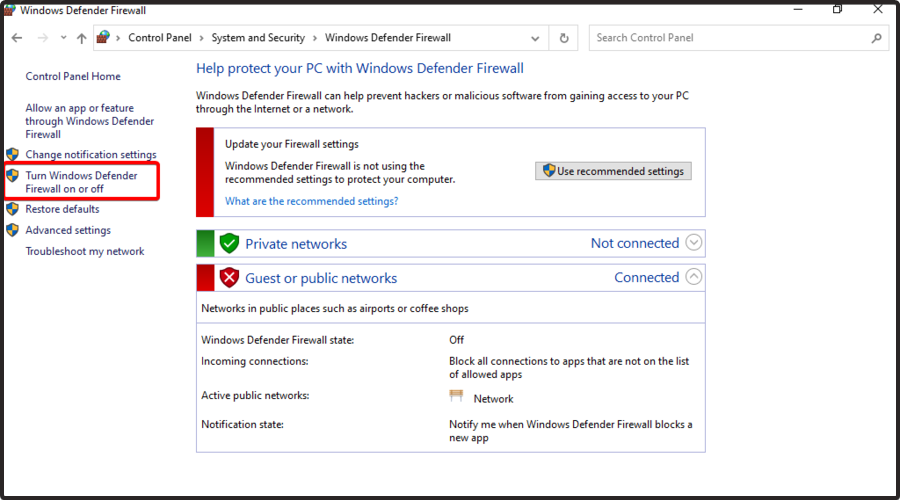
Then click Turn Windows Defender Firewall on or off to open further options.
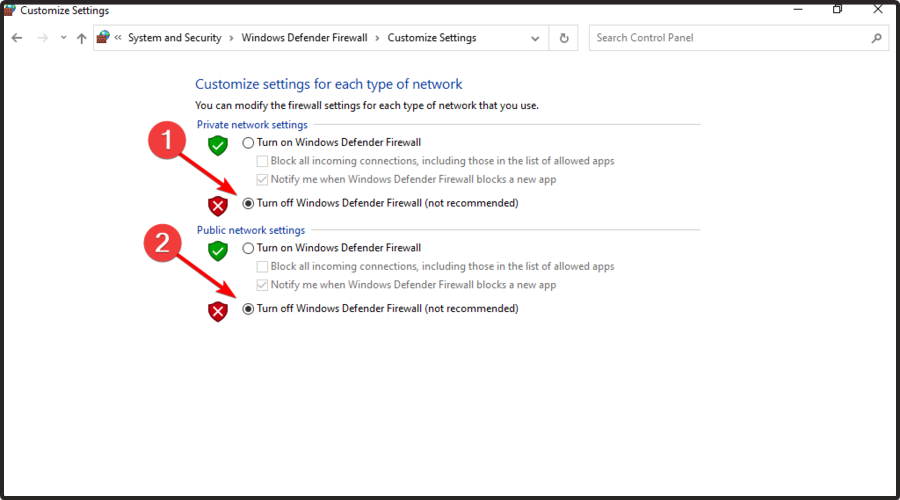
Select both the Turn off Windows Defender Firewall radio buttons.
Click OK to close the window.
If turning off the firewall resolves the issue, click Allow an app or feature through the firewall Windows Defender Firewall on the left of the WDF Control Panel applet.
Press the Change settings button.
Select all the checkboxes for Remote Desktop in the Allowed apps window.
Press the OK button to confirm the new Windows Defender Firewall settings.
Sometimes, not even the Search feature on your PC can’t find the file you’re looking for although you are sure you have it. A tool called TagSpaces can help you organize all your files using a lot of criteria, ensuring you never lose a file again.
What is TagSpaces and how does it help you?
TagSpaces is an offline app for your PC that helps you organize all your files on your PC using tags, annotations, thumbnails, descriptions, and more.
Moreover, the tool may be used for taking notes just like Evernote or Notion. You can do that using markdown, HTML, and plain text with any WYSIWYG text editor.
TagSpaces is like a browser for files where you can open your photos or videos, preview and organize documents, spreadsheets, or scans, listen to music, organize your eBook library, and more.
The app has a free, limited version but if you opt for the Pro version, you will be able to geo-tag your files and folders on a digital map, represent any folder with subfolders as a Kanban board, and more.
More importantly is that you can use TagSpaces on Windows, macOS, Linux and Android, with the same comprehensive interface.
We have tested TagSpaces for you, and in this review article, we will talk about its best features and ways of using the tool.
What are the best features of TagSpaces?
1. Modern and friendly interface
First of all, TagSpaces looks cool. All the menus are just where you would expect them to be and right when you start using the software, you are greeted with a small guide on how to use it.
Adding tags is a matter of just dragging and dropping them to your files. A right-click on any file will show you a quick menu where you may copy, rename, and delete, but also show the parent directory or open it in File Explorer.
Of course, you will also find the tagging menu where you can change or clear all the tags on that file.
And on the right pane, you will be able to preview the file you select from the middle pane. Of course, that applies to images but also Word or PDF documents.
2. Simple and intuitive file organizing
TagSpaces has a lot of tags you can start off with, but you may add your own or edit the existing ones.
All the tags feature a three vertical dots button where you can edit them. You can change the text, the background and text color to match your preferences.
Or course, you may also access the three dots menu for each category to add tags and edit the category itself.
This way, you can create, for instance, a Music tag group with tags like My_playlist, Rock, Blues etc. to organize your music files.
We picked music because you will see that some of the songs already have tags picked up from their meta descriptions.
3. Searching through files like a pro
You don’t even need to tag the files to find them in an instant, but it will certainly help. The Best part is that you can filter your search with multiple tags or queries.
For instance, you can search through all the songs tagged with Rock which contain the word love in the name in the current selection, in a folder or in recently opened files.
In the advanced search option, you mai also include the file type, size and date or time (Pro features).
You may also include or exclude tags from the search and set the level of detection or force the reindexing of the files.
In a few words, there is no way you won’t find exactly what you’re looking for. And when you do, you can preview it by just clicking on the file. For instance, a click on a music fill will automatically play it but you can change that from the settings, of course.
4. Taking notes
TagSpaces comes with a note-taking application that allows you to include lots of content.
For instance, in a Markdown file, you can set up headings, insert text, bullets, number and task lists, photos, tables, quotes and even code.
Even more, the Markdown editor supports even LaTeX math equations so you can use it for school projects if needed.
However, you may also create HTML files with rich text formatting and plain text files.
The app is similar to the ones you have in Evernote or Notion and it’s very easy to use. The content type can be added from a menu or by inserting / as a command.
Next, click the Download for Windows button. Of course, you may also get the Pro version if you are sure it’s the right app for you.
After installing the app, you will be greeted with a Get Started guide.
From the main screen, click the Connect a Location button.
In the next pop-up window, insert the name and the path of the folder you want to index.
Now, click on the newly created location from the Location Manager. The indexing will take a few seconds, depending on the size and number of the files.
It’s time to select the Tag Library icon from the bottom left corner of the window. The pre-made library will show up.
If you want to create your own tags, click the three vertical dots from Tag Library and select Create Tag Group. You will be prompted to select a name and color of the group and text. We have created the Music group as an example.
Go to the newly created Music group, click its three dot menu and select Add Tags.
You may add all the tags, separated by comas. If you want to edit them, just click their individual three dots button and select Edit Tag. This way, you can change its name, background and text color.
Now, start tagging your songs by simply dragging and dropping the tag over the song.
To be more efficient, you can select more tunes with your mouse or by holding Ctrl and selecting additional songs, then right click and select Add/ Remove Tags.
If you want to see your progress, click the three dots button of a tag and select Show Files With This Tag.
Another easy way of tagging is to search for the band name, for instance, click the Select all marking and then right-click the selection and tag all of them in one go.
Now, you only need to search for a tag and all associated files will appear immeadiately.
That’s it! We showed you an example on how to organize the songs from a music folder but you can do the same for any other tipe of file, including documents, photos, videos and more.
What do I get if I upgrade to TagSpaces Pro?
There are plenty of additional options and features in the TagSpaces Pro app but we will only list a few of the most important:
Add description to files and folders – This will help a lot, for instance, when organizing documents, to remind you of important specifications of a file or folder.
Geo tagging for files and folders – The feature will help you get a clear representation of where some photos or videos were taken.
Bookmark files and folders – Bookmarking is just another way of tagging a file or folder, very important on a short term serch.
Save common searches for later use – Searches can be very complex, and it makes sense to be able to save some of them for later usage.
Advanced and full text search – The file type, size and date from advanced search will be unlocked.
Custom color for folders – You will not only be able to change the tag colors and groups, but also the folders themselves.
Kanban perspective for presenting files on a kanban board – The Kanban perspective is a very nice way of seeing the files and folders, a lot more graphic and appealing.
Gallery perspective for browsing photos – You will be able to see the photos in galleries when browsing them.
Mapique perspective for presenting geo tagged files on a map – You will see the geo-tagged files on a world map for a better representation.
So, although the Light free version of TagSpaces is impressive by itself, you should definitely think about switching to Pro.
Compatible with Windows, macOS, Linux and Android devices
Add your own tags and customize them easily
Create notes including all elements of a WYSIWYG text editor
Cons
You can't save the searches in the free version
Final notes
If you want to put an end to the file mess on your computer, TagSpaces can be the great tool you were waiting for.
Tagging and sorting any type of files has never been easier with this software. The fact that you can bulk-tag entire libraries of photos and culling them is as easy as a child’s play with TagSpaces.
We worked with a library of thousands of songs and what seemed to be a several day job has turned into minutes of selecting and tagging.
TagSpaces can do a lot more than we have briefly showed you in this review but we remind you that it comes with a free version you can try and discover yourself.
C is one of the most used programming languages. But sometimes, while developing new software, you might encounter an error: Segmentation fault : 11.
This error will cause your application to crash, and in today’s article, we’re going to show you what this error means and how to fix it once and for all.
Obviously, you’ll need a bit more context in order to fully grasp the meaning of code 11 segmentation fault: 11. Understanding the triggers will prove useful in selecting the right debugging tools.
So, what causes a segmentation fault 11? Let’s take a closer look at the various run-time instances that are likely to display this error and also review its potential causes:
When Segmentation fault: 11 occurs, it means that a program has attempted to access a memory location that it’s not allowed to access.
The error can also occur if the application tries to access memory in a method that isn’t allowed. This usually concerns strings and allocating the right amount of memory for particular string types in C.
Under issue that can trigger a Segmentation fault: 11 error is the lack of values attributed to the global variables in your code. And speaking of variables, using an incorrect format character can have the same effect.
How can I fix Segmentation fault: 11?
Before we dig, make sure you check these prerequisites:
➡️ List the variables and functions in the header and make them accessible via # (You can also use pro software to learn C++ and take advantage of the tips and tricks that come along with it.)
➡️ Separate your code into different files for easier debugging (Just like regular debugging tools for Windows, lldb and gdb will work better on a defined perimeter with defined constants.)
1. Compile the code and use gdb
Run the following command: gcc program.c -g
Now use the gdb like this:
$ gdb ./a.out
(gdb) run
(gdb) backtrace
In addition, users also recommend running these two commands:
Keep in mind that this method might only work if you’re trying to install Cartopy.
2. Use the Terminal
Start the Terminal from the Applications > Utilities directory.
Once the Terminal starts, run the following commands:
cd /Library/Frameworks/Python.framework/Versions/3.3
cd ./lib/python3.3/lib-dynload
sudo mv readline.so readline.so.disabled
Segmentation fault 11 is usually caused by memory allocation issues, and if you’re having this problem, be sure to try some of the solutions mentioned above.
The compact view is a special view of the File Explorer that provides a more close-knit experience, especially for users with smaller screens or who are using multiple monitors.
This makes it easier to see what is open at any given time and to find things more quickly. However, while accessing your files and folders may seem convenient, it is not everyone’s cup of tea. This article shows you how to enable and disable the feature.
Why can’t I enable Compact view in File Explorer?
The File Explorer Compact view is a new feature that allows you to see your files and folders in a compact, streamlined way. This can be useful for those with limited space on their device or working with smaller displays.
Other reasons you may enable it to include:
It’s easy to use – Enabling a compact view makes scrolling easier.
Smooth file/folder movement – You can move the apps and folders you need to do more efficiently and get more out of Windows.
To make the interface look better – A compact view gives your PC a polished and well-managed look.
Better organization – Compact view helps you keep your PC clean and tidy, as it’s easier to spot unwanted files and delete them.
A section of users has, however, reported that the Windows 11 compact view is not working. This can happen due to reasons such as:
Recent Windows update – If you’ve recently updated your Windows, it’s probably why you can’t update to compact view.
Windows trial version – Some Windows features may not be available if you’re using the trial version of Windows.
Click on the View menu at the top to expand and select Compact view from the drop-down menu.
To disable it, follow step 2 and select Compact view again, making sure there is no checkmark before it.
2. Use Folder options
Hit the Windows + R keys to open the Run command.
Type control folders in the dialog box, then hit Enter.
The File Explorer Options dialog box will open. Next, navigate to the View tab.
Under Advanced settings, locate the Decrease space between items (compact view) option and check the box next to it to enable it, then hit Apply and OK to save changes.
If you wish to disable it, uncheck the box next to Decrease space between items (compact view) and click Apply, then OK.
Navigate to the following location: HKEY_CURRENT_USER\Software\Microsoft\Windows\CurrentVersion\Explorer\Advanced
On the right pane, find UseCompactMode, double-click on it, and select Modify.
Type 1 in the Value data entry and click OK.
To disable, follow through steps 1-4, and in the Value data entry, type 0, then click on OK to save the changes.
Hopefully, you’ve enabled Compact view on your Windows 11 and can get on with other matters. But don’t forget that aside from enabling Compact view; there are different ways that you can customize your File Explorer and get more out of it.
If you’re trying to copy text from a website that doesn’t allow it, there are a few simple tricks that can help.
In this guide, you’ll learn how to copy and paste text that won’t let you, how to enable copy-paste on restricted sites, and how to grab content from uncopyable websites without breaking a sweat.
How can I copy from websites that won’t let me?
1. Disable JavaScript
1.1 Chrome
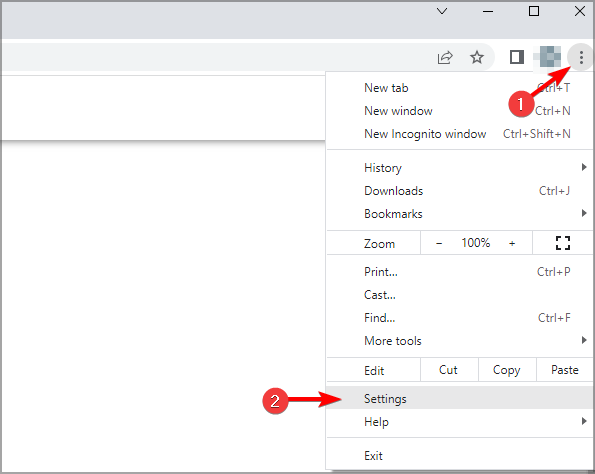
Click the Menu button and then select Settings.
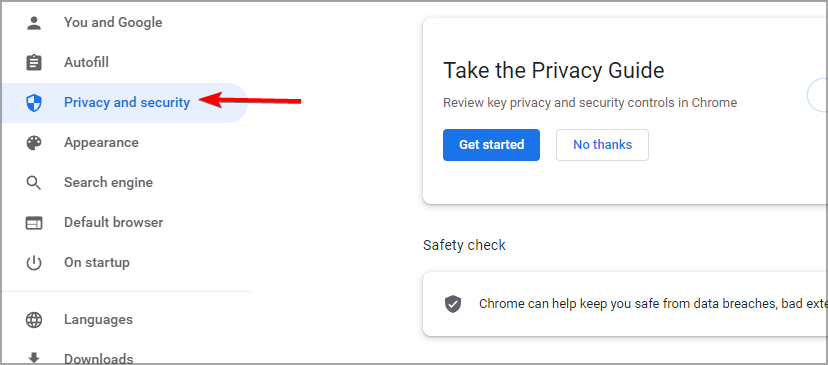
Navigate to Privacy and security.
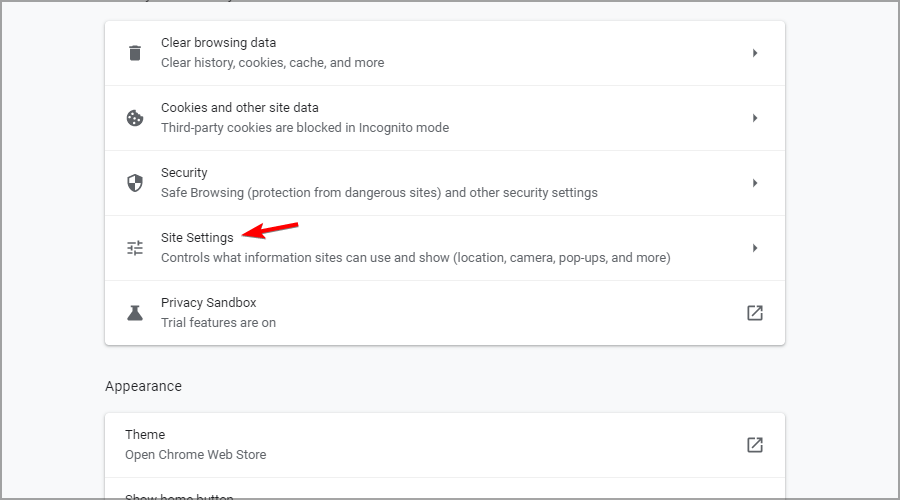
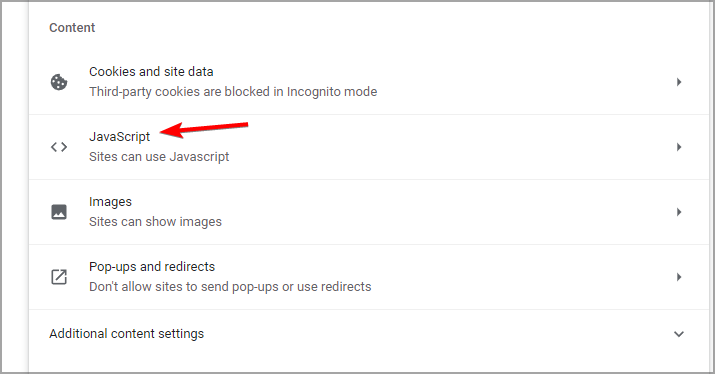
Go to Site settings.
Next, navigate to JavaScript.
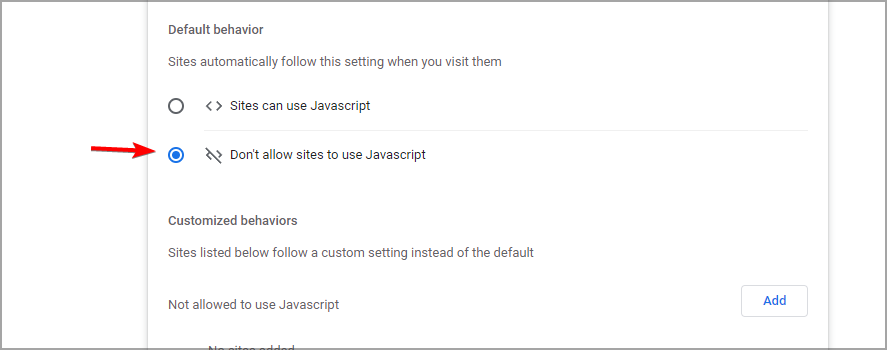
Select Don’t allow sites to turn Javascript.
Go back to your page and refresh it.
If copy and paste is not working in Chrome, Disabling the JavasScript might help and allow you to copy text from sites that prevent copy.
1.2 Firefox
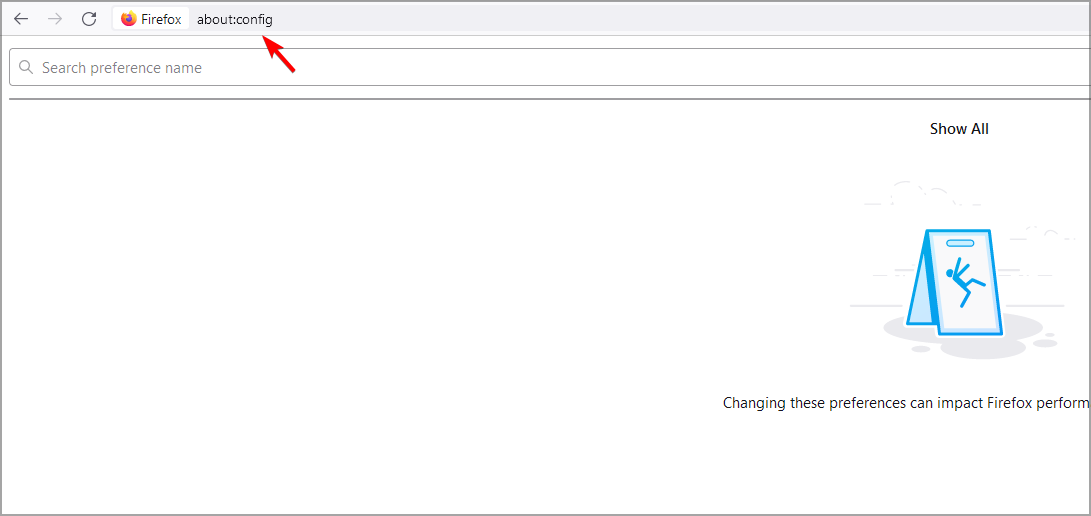
Type the following line in the address bar and confirm if any message appears: about:config
Then you will see a list of Firefox preferences.
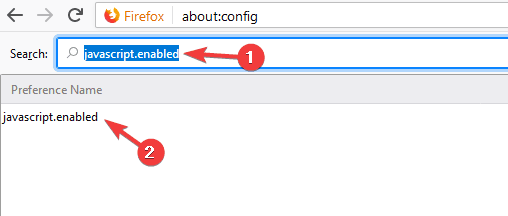
In the search box at the top of the page type: javascript.enabled
Then double-click it to change its value from true to false.
1.3 Opera One
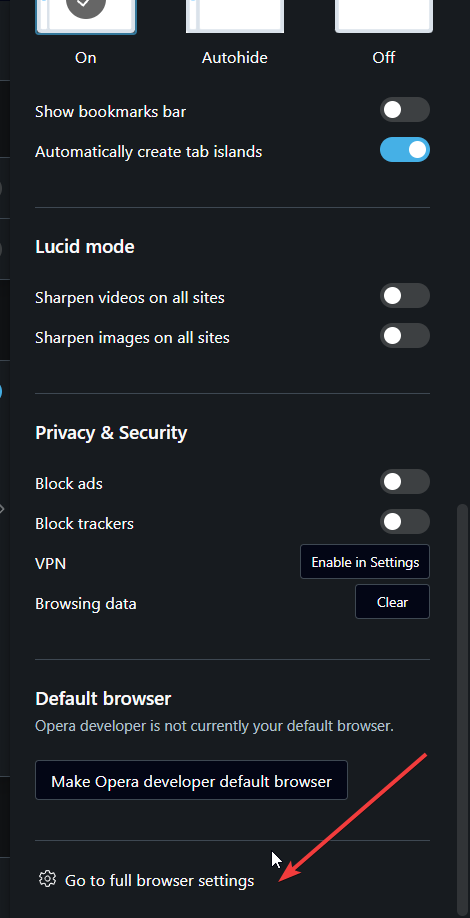
Start Opera One, then open the Easy Menu and then select Go to full browser settings. Search for Javascript.
After that, go to Site settings, then select Javascript.
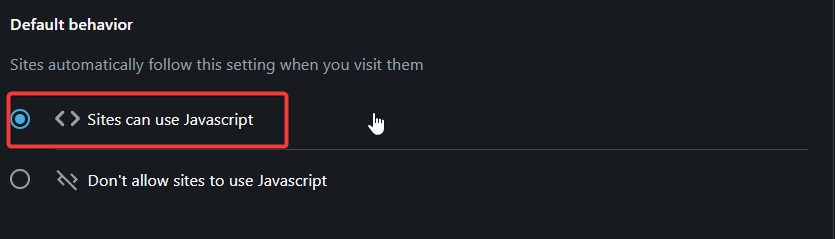
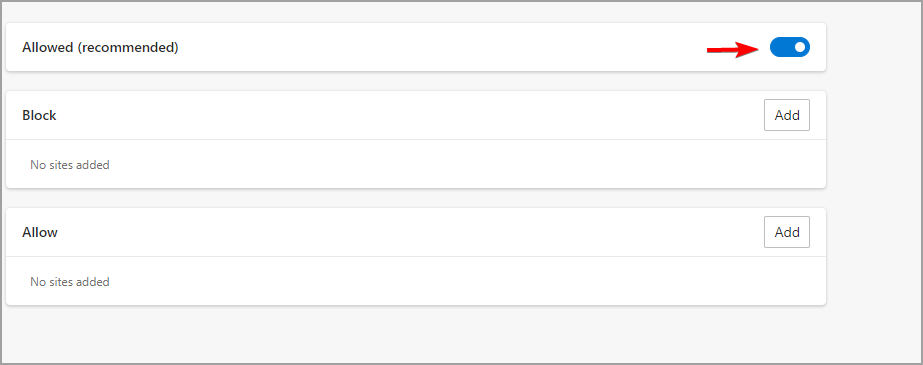
Select Allowed to disable/enable it.
1.4 Edge
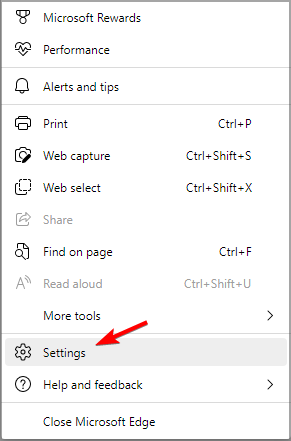
Click the Menu button in the top right and select Settings.
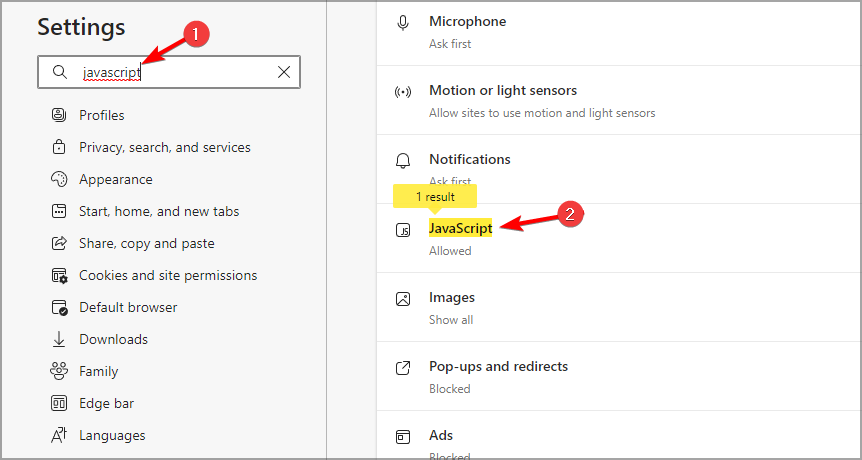
Search for javascript. Then select Javascript from the list of results.
Disable the Allowed option.
Remember to re-enable JavaScript after you copied the content you need. Some sites rely on it, so to avoid future problems, enable it back.
2. Use the Print to PDF feature
Open the page that doesn’t allow you to copy text.
Now press Ctrl + P.
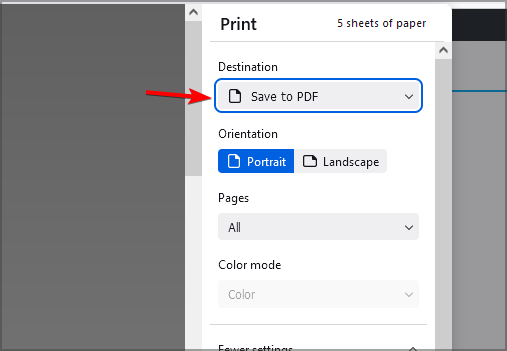
A print dialog will appear. Set Destination to Save as PDF.
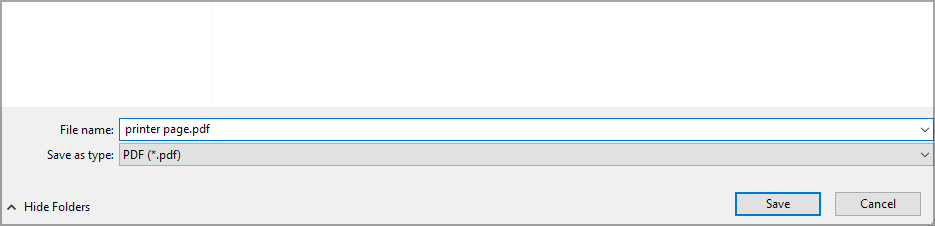
Choose the destination, enter the file name, and then click on Save.
Open the PDF file, and you should be able to copy text without issues.
This is a simple workaround, so you might want to try it out.
3. Create a screenshot and convert to text
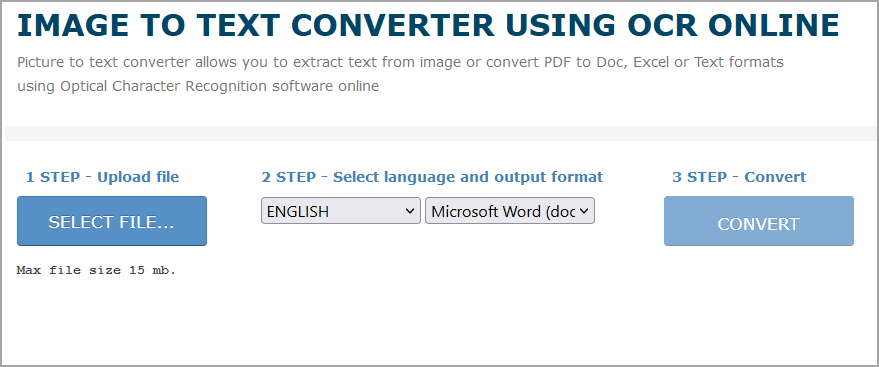
Visit a page that doesn’t allow you to copy text and take a screenshot.
Besides all the text, you’ll see a lot of code, links to images, and other things, but it’s unlikely that you’ll be able to copy them for further use without jumping through a few hoops.
1. Open the website page from which you want to copy text.
2. Select the text that you want to copy.
3. Right-click on it to bring up a menu with multiple options.
4. Select the Inspect option.
5. The Inspect menu will open. Hover your mouse over the code section for the text you want to copy and right-click on it. Another menu will open.
6. Click on Copy, and then select Copy element.
7. Paste the copied text onto a document of your choice. You will notice that you copied the text along with its associated code. You need to manually remove the code parts from it.
Another method you can use involves the usage of the Inspect element feature. This solution is quite similar to that of copying text from the source code. It works in the same way.
However, the window that opens is much smaller and not as easy to navigate on. You need to perform multiple clicks for this to work.
After this, you can copy the content from the source code as following:
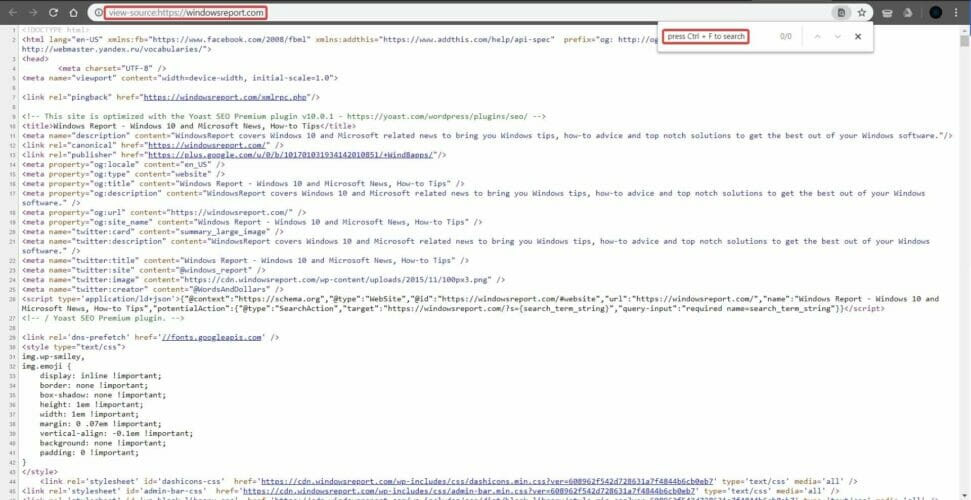
Press Ctrl + U on the desired page, and you should see its code.
Use Ctrl + F to navigate and find exactly what you need.
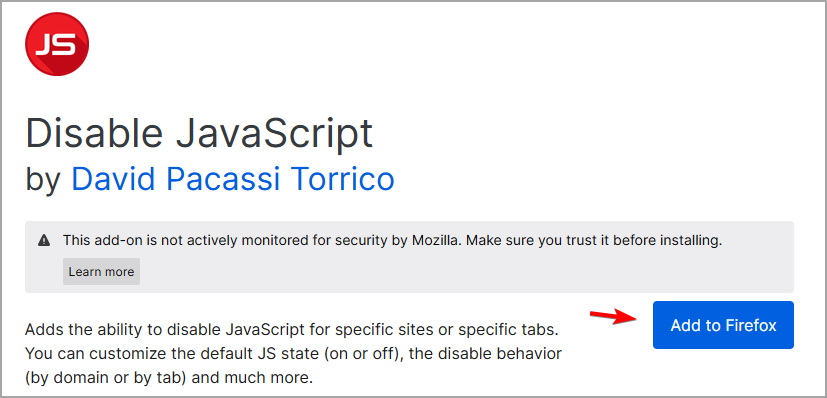
Once the extension is installed, click on it and configure it. The extension is available on other browsers as well, so be sure to try it.
There are extensions available that allow you to copy text even from websites that block it. They will force the website to enable right-clicking and allow you to copy content.
If you’re aware of another method to copy content from websites that don’t allow it, share it in the comments section below and any other questions you may have.
There was a problem with your request Roblox is an error that can sometimes appear and prevent you from playing. Thus, we’ll show you how to fix this issue in today’s article.
Roblox is a game-playing platform and marketplace where users may purchase and download games. It is not a game per se but rather a platform where individuals may play games developed by other Roblox users.
The error message can also come as an HTTP 400 Bad request issue, which signals a connection problem between the client and server side.
What is Roblox error code 400?
If the client receives a 400 Bad Request response status code, the server cannot or unwillingly process the request. Owing to something regarded as a client problem on the client’s end.
For example, malformed request syntax, invalid request message framing, or deceptive request routing. The Roblox 400 bad request error message is a server communication issue between the client and the Roblox game servers.
This connection error usually appears due to several possibilities like invalid cookies or cache data, incorrect URL address, DNS cache, and uploading files too large in size.
You can encounter the error code 400 in Roblox while you’re playing in the browser and on the PC if the server is unavailable or it can not respond to the client’s request.
Additionally, you can check whether the Roblox servers are operational and not temporarily down before proceeding with further actions.
Now, let’s see why this is happening and how to diagnose it so we can turn things back to normal and enjoy your game.
What causes There was a problem with your request error in Roblox?
The 4xx family of status codes is the one we’re looking into in this case since they pertain to requests from the client that are invalid or corrupt.
A 400 Bad Request, also known as an HTTP error 400 or a 400 client error, is a generic client error that the server perceives as not falling into any of the other status code categories, thus being unknown.
There was a problem with your request error message comes up when your PC is trying to communicate with the game server, but the request becomes invalid or incorrect.
It can occur any time in any menu of Roblox, but mostly when you’re trying to access any online resources like browsing a friend’s profile, for instance.
But now let’s see how you can tackle the There was a problem with your request Roblox and get back to creating or playing your favorite games.
How can I fix bad request 400 There was a problem with your request error in Roblox?
Before heading to the slightly complex solutions, try these quick ones:
Ensure you have a stable Internet connection and that the firewall or security software is not interfering with the network properties.
Disable the antivirus on the PC for a few minutes and check if it was the reason you were encountering the error. In case that’s true, we recommend you switch to a reliable and error-free antivirus.
If these don’t work, head to the solutions listed next.
1. Reset Internet Options
Press Windows + S, then type Internet options and select the topmost result in order to open it.
Next, navigate to Advanced and click on the Restore advanced settings button.
Click OK and check whether the Roblox error code 400 bad request issue still appears.
2. Clear your temporary Internet files
NOTE
The steps listed here are for Chrome but should provide a basic understanding of the process to help you do the same on other browsers.
Open your browser and navigate to the Settings page.
Search for the Clear browsing data section and select the Cookies and other site data and Cached images and files, then select Clear data.
Once you’ve done this, check whether the Roblox request error is gone. Also, with this, you can fix the There was a problem with your request issue in Roblox on Mac.
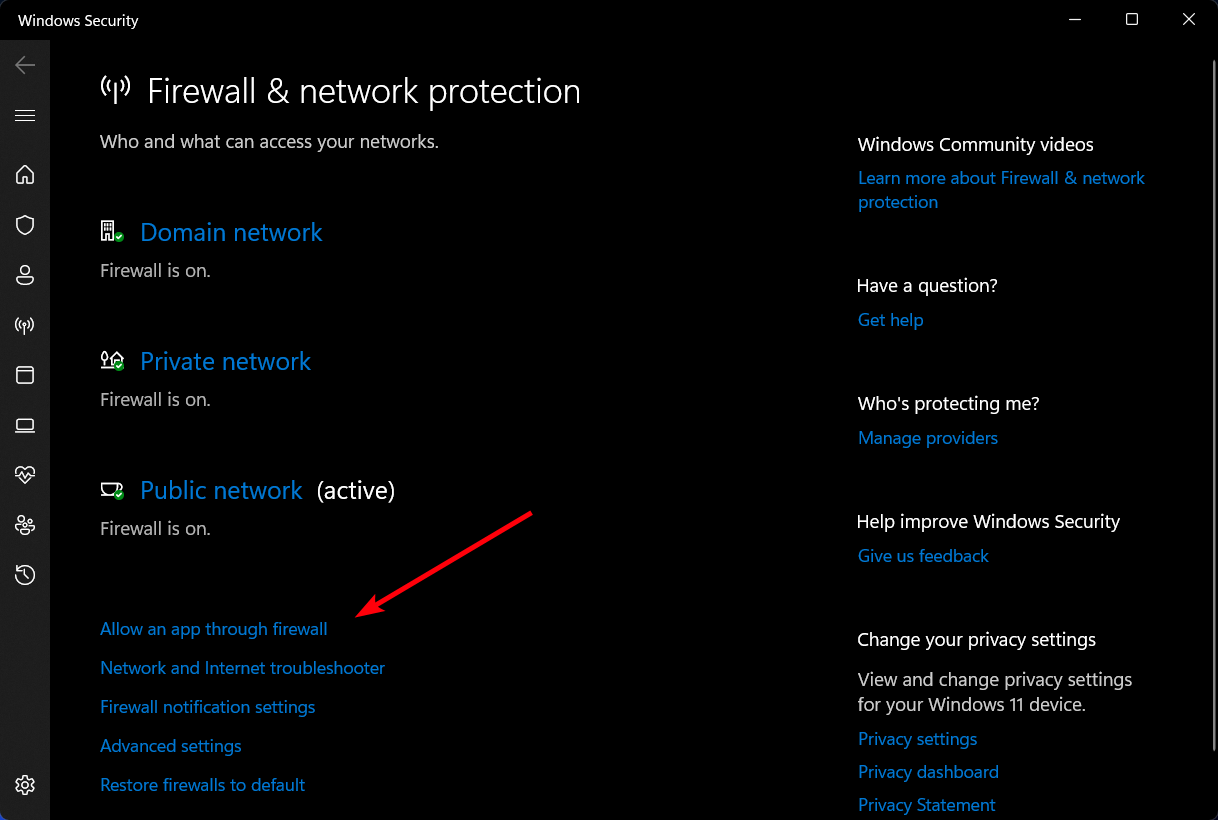
Press Windows + S to open Search, type Firewall & network protection, and choose the topmost result.
Click on the Allow an app through firewall option.
Navigate through theAllowed apps and features list and find Roblox.
After you find it, check the Roblox box and press OK.
Though the process is different, you can also fix the There was a problem with your request issue in Roblox by similarly allowing the app through Firewall.
Open the Windows Search function by clicking on the magnifying glass icon from your Taskbar, type Control Panel, and open it.
Under Network and Internet, click on the View network status and tasks option.
On the top-left side, select Change adapter settings.
Right-click on the Wi-Fi icon and select Diagnose. The troubleshooter will start and try to detect network issues.
Running the troubleshooter works well for Windows and Mac users, though the latter need to run the Wireless Diagnostic.
5. Reinstall Roblox
Press Windows + I to open Settings and go to Apps, followed by Apps & features.
Here, search for the Roblox app, click on the three-dot menu, and choose Uninstall.
Now, open Microsoft Store, search for Roblox, and install it again.
Alternatively, try using uninstaller software, which may delete the needed program and its leftovers. By doing so, you’ll ensure that Roblox and all of its files and registry entries are completely removed from your PC.
Also, reinstalling Roblox on Mac has been found to fix the There was a problem with your request error.
Tip
If you didn’t resolve the Roblox issue, the support team could present you with other alternatives or workarounds to finally fix the error. Add your contact information and provide all the relevant details.
There you go, a few simple solutions that can help you fix There was a problem with your request Roblox error.
Due to the aggressive and territorial nature of Windows 10, problems like this will often emerge. That’s why installing Windows 10 before installing Linux in a dual-boot mode is advised. And you can also fix the Windows bootloader from Linux.
Linux is much less intrusive and won’t damage Windows 10 bootloader. Despite that, things can still go wrong after major updates. If that happens, you can fix it with Linux (Ubuntu).
How to repair Windows 10 bootloader errors from Linux?
Mount it to your USB. You can do it with the Universal USB Installer (preferably) tool. Using this application is essential, or the drive won’t be bootable.
Plug in the drive and boot from it.
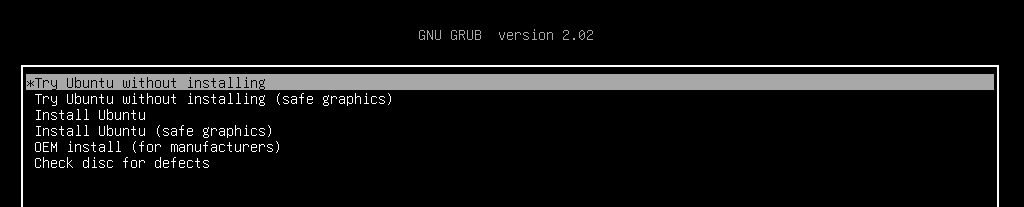
Go for the Try Ubuntu without installing option (If this fails, open BIOS/UEFI settings, disable Secure Boot, and try again).
Once Ubuntu boots, press Ctrl+Alt+T to open the Terminal.
In the command line, run the following string and press Enter after each: sudo add-apt-repository ppa:yannubuntu/boot-repair sudo apt update sudo apt install boot-repair
This should install Boot Repair application, which you can now find in the Application menu.
Open it and choose Recommended repair and wait until it’s done.
Let’s start with the simplest method to fix the Windows bootloader from Linux. Probably knowingly, Ubuntu comes with a small utility called Boot Repair which fixes Windows 10 bootloader corruption upon running.
You’ll need to have the latest version of bootable Ubuntu mounted on your USB drive. After that, you’ll need to install the utility and, without meddling in the Terminal, repair the Windows 10 bootloader.
2. Use Terminal
Boot again with the bootable USB drive.
Open Terminal.
In the command line, type the following strings and press Enter after each: sudo apt-get install extlinux sudo dd if=/usr/lib/extlinux/mbr.bin of=/dev/sda sudo extlinux -i /boot/extlinux
Don’t forget to replace sda with the Windows 10 system drive.
Reboot after that, and Windows 10 should boot without any issues.
The second method relies on the Syslinux run through the Terminal. You’ll need to run a batch of commands to install and utilize Syslinux to fix the Windows 10 bootloader.
3. Use LILO
Boot again with the bootable USB drive and open Terminal.
In the command line, type the following string and press Enter after each: sudo apt-get install lilo sudo lilo - M/dev/sda mbr
Reboot, and you’re good to go. The Windows 10 bootloader is fixed.
The final method utilizes LILO (Linux Loader), a small program responsible for managing dual boot. The procedure is similar to the previous one, at least for the unaccustomed eye.
If the previous two steps weren’t working for you (the first one should resolve bootloader issues), LILO is certainly a handy alternative.
If you’re still having trouble after going through all the solutions above, we recommend using a third-party tool to repair your PC and keep it healthy.
Hopefully, you managed to resolve the issue with the Windows 10 bootloader. We encourage you to tell us which fix worked in the comment below.
If writing emails is an integral part of your job, then the RepIAI ChatGPT Chrome extension can be an excellent addition to your Gmail add-ons. Integrating and using the extension is very easy and makes your task simpler.
This guide will cover the steps to integrate ChatGPT with Gmail and some tips for using it effectively. Let’s start!
Best tips on using ChatGPT with Gmail
Input = Output – To get the relevant reply for your mail, you must give clear and concise instructions. If the instructions are specific, the email generated will be more appropriate.
Create an account on ChatGPT – Before adding the extension, make sure you have signed up on ChatGPT. It makes it easier to use the extension, especially if you are in a hurry.
Same Gmail account – You must use the same Gmail account to sign up for which you are using the extension.
Get Ideas – If you want to send a business proposal or guideline, you can use this extension to get outlines and paragraphs.
Response failures – If ChatGPT comes with an incorrect response, try rephrasing the pointers given or changing the context to make it understandable.
What can I do to integrate ChatGPT with Gmail?
NOTE
Before following these steps to add the ChatGPT extension, create an account on ChatGPT.
1. Install ReplAI – ChatGPT for Gmail
Login to your Gmail account.
Go to Settings, then click See all Settings.
Now switch to Add-ons and click Manage.
In the search bar, typeChatGPT. You will get ReplAI – ChatGPT for the Gmail extension.
Click the Install button.
On the next window, click Continue.
Now choose your Gmail account.
Click on Allow, and you are ready to use the extension.
Locate and click the ChatGPT Writer extension button next to Send; it will ask you to log in.
Once you are logged in, on the ChatGPT writer page, under Briefly enter what you want to reply to type the highlights of what you want to write.
Click Generate reply button.
Once you get the reply, click on the Insert generated reply button to get the response copied to the email body.
So, you need to follow these steps to integrate ChatGPT with Gmail successfully. If you have any questions or concerns, please mention them in the comments section below.
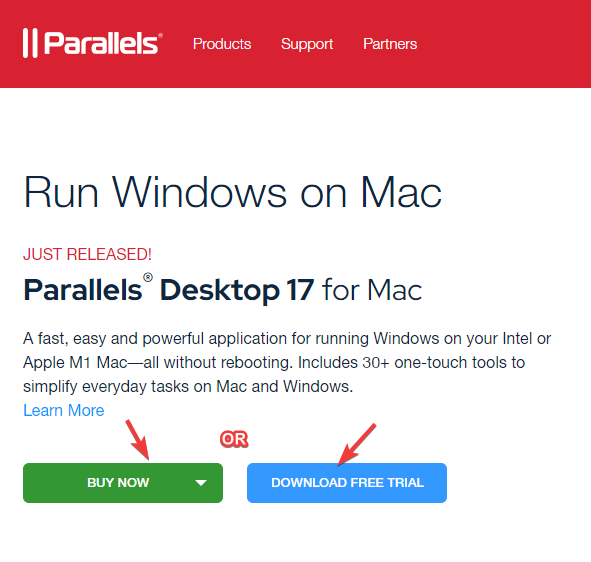
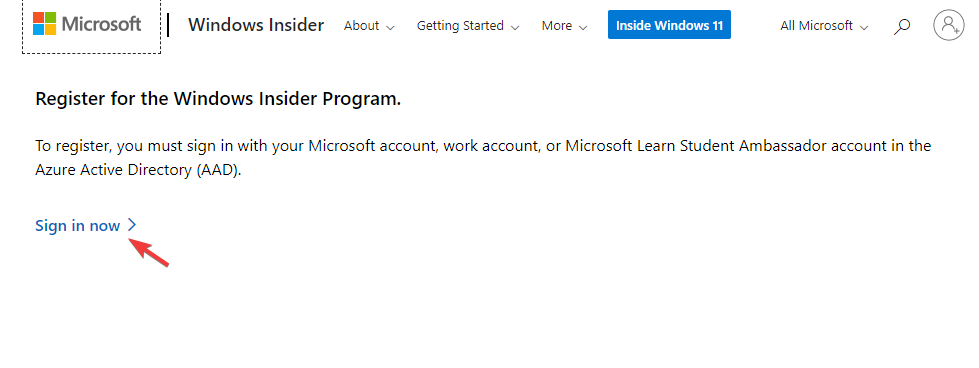
Many users have been long waiting to download & install Windows 11 ARM ISO on M1 Mac. Previously, Windows 10 ARM-based PCs had many limitations, but as the Windows 11 ARM version was released, Microsoft made things a lot easier.
It now offers support for 64-bit apps, but for M1 Mac, there’s still no official support. For now, you can run the Windows apps on Apple laptops using any of these 5 best PC emulation software for Mac.
How can I download and install Windows 11 on my M1 Mac?
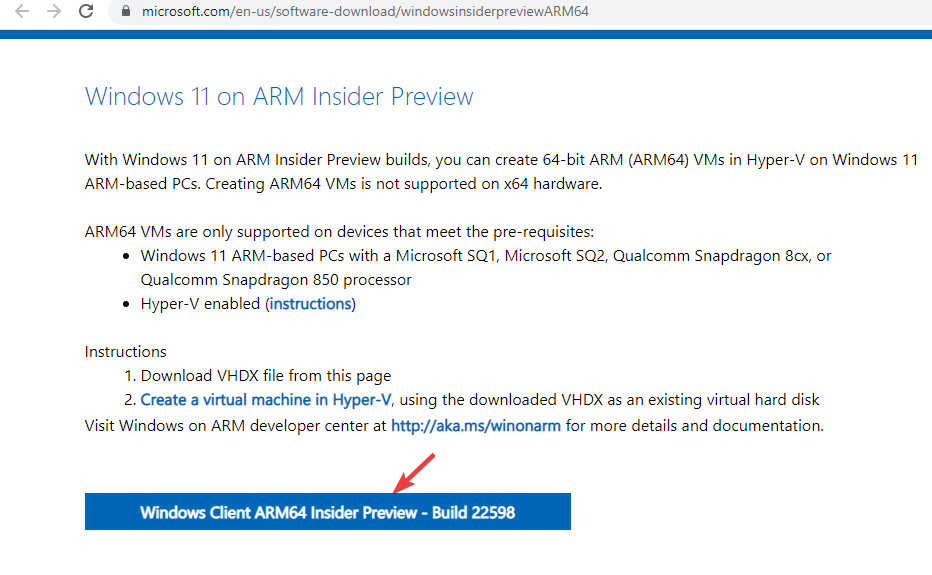
Here, click on the blue button to download the Windows Client ARM64 Insider Preview VHDX image.
After the VHDX image is successfully downloaded, double-click on the file to open on Parallel’s desktop.
Next, follow the instructions on the screen and wait till the installation is complete.
Parallels Desktop is one of the fastest in testing compared to its competitors and is also known for seamless graphics performance for gaming.
Moreover, it also helps you install macOS from the recovery partition on Intel-powered Macs, thus, making it an expert’s choice for virtualization software.
Press the Win + I keys simultaneously to open Windows Settings.
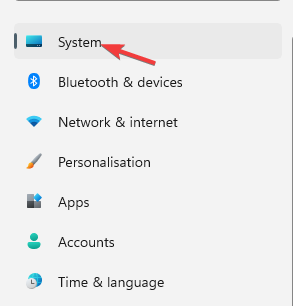
Click on System on the left side of the pane.
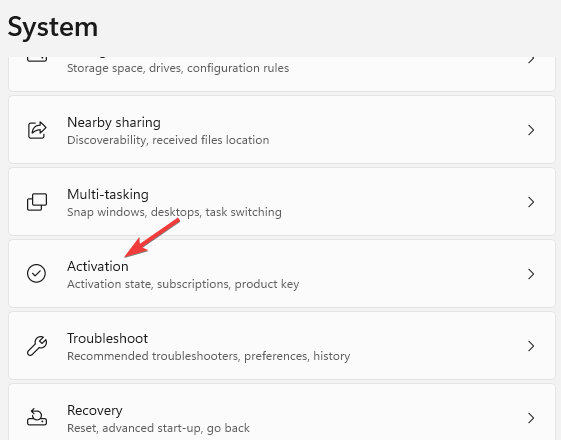
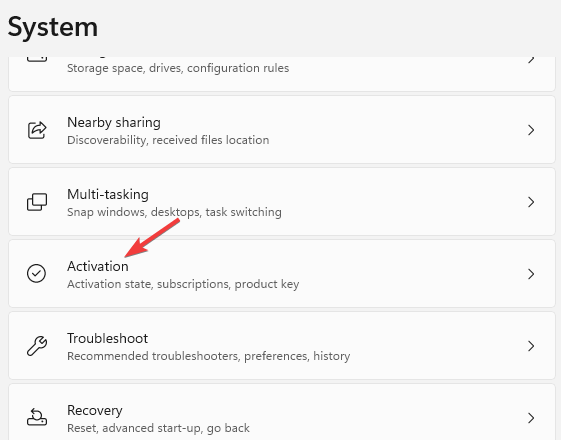
Next, on the right side, scroll down a bit and click on Activation.
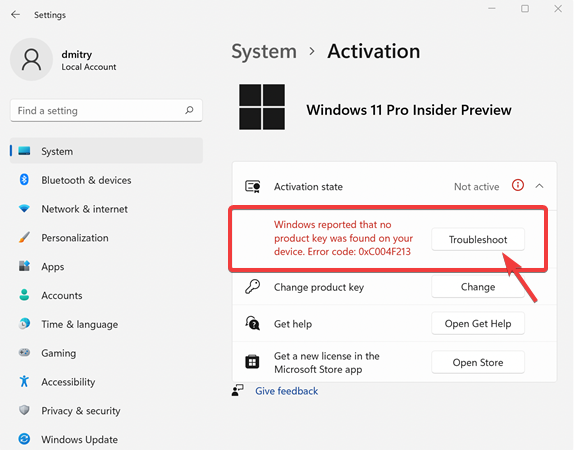
Now, on the right side, under the Activation state, click on Troubleshoot.
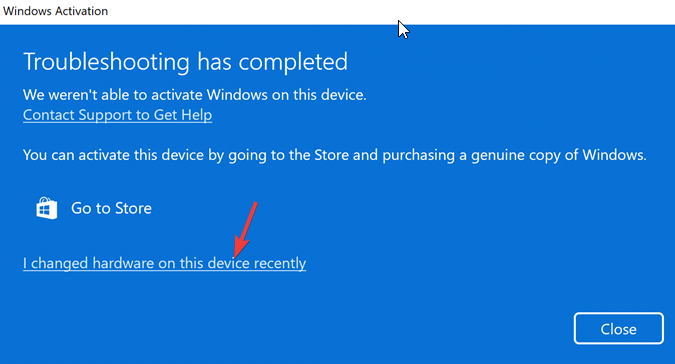
In the Windows activation dialog box, click on the I changed hardware on this device recently link.
On the next screen enter your login details to sign in to your Microsoft account.
Hit Enter when asked for the current Windows password.
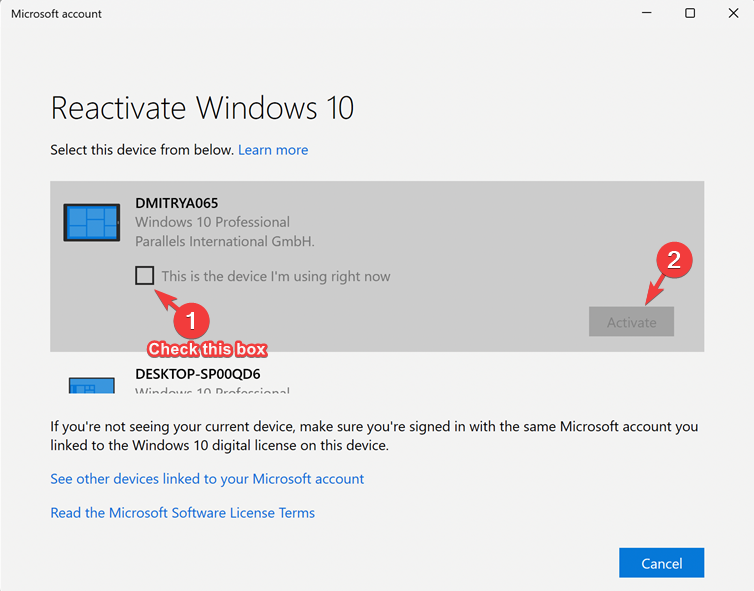
Select the This is the device I’m using right now option and click on Activate.
Windows is now successfully activated on your M1 Mac.
2.2. Activate with a new license
Press the Win + I keys together to launch Windows Settings.
Click on System on the left of the Settings app.
Now, on the right, click on Activation.
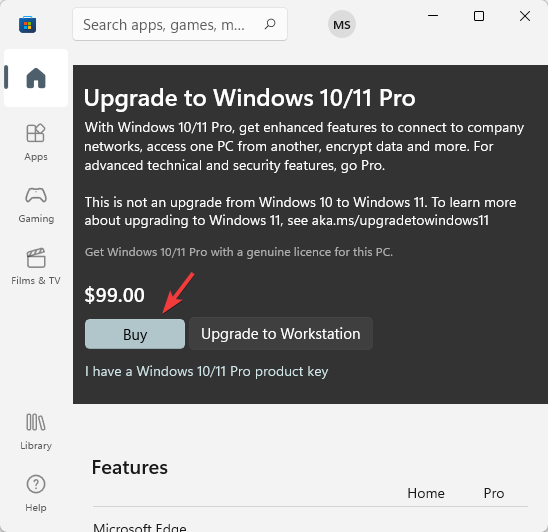
Click on Get a new license in the Microsoft Store app on the right.
You will now see the Upgrade to Windows 10/11 Pro dialog box. Click on Buy to proceed with the purchase process.
Windows will be automatically activated once the purchase is successful.
If you were wondering how to install a Windows 11 virtual machine on an M1 Mac for free, there is no need to wonder anymore. There you have it!
While you can download Windows 11 ISO from the UUP dump for non-supported ARM devices, to download & install Windows 11 ARM64 on M1 Mac, you need the Parallels Desktop.
Before attempting to use the Media Creation Tool on an Arm-based Mac, review this guide on Media Creation Tool not working on Arm64 to understand the limitation and alternatives.
If you are still facing any challenges to install Windows 11 on an ARM64 M1 Mac device, you can let us know in the comments box below.
Guitar amp software basically gives a similar sound to real amps. This software has come a long way to the point where their sound quality and realism are hard to tell apart from the real thing.
The popularity of guitar amp software has been drawn greatly due to the advent of digital signal processing which makes this software match the impedance levels, gain stages, and circuit behaviors of the most iconic guitar amps in the world, with as little latency as possible.
What is the best guitar amp software for Windows 10 PCs?
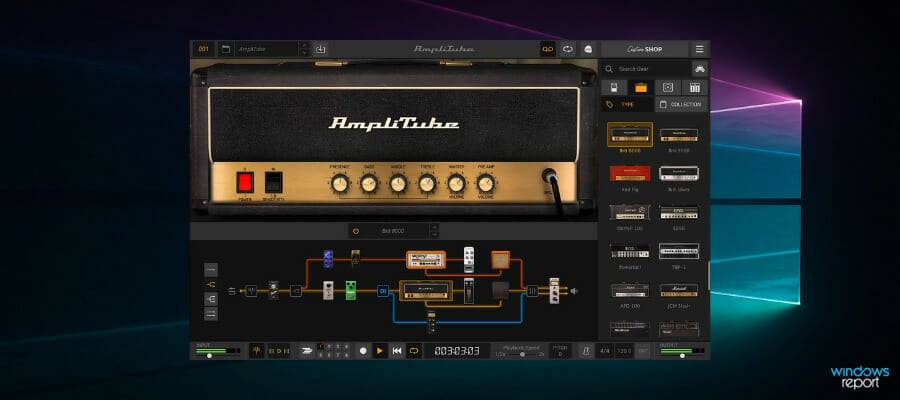
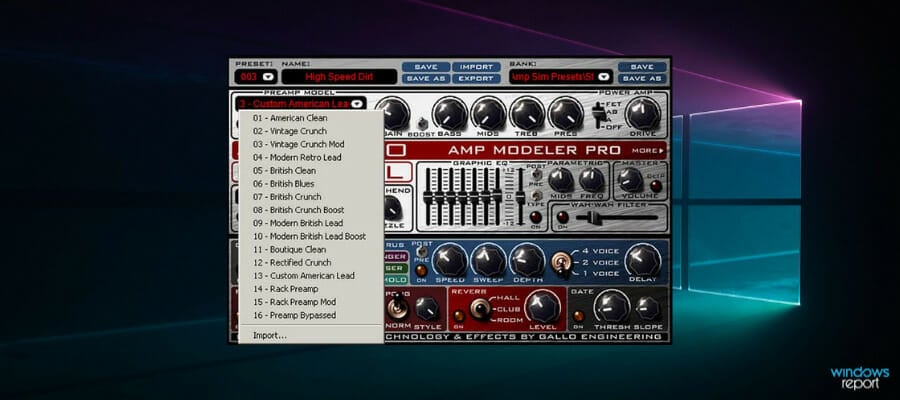
This guitar software amp is one of the most popular and oldest guitar amp simulators.
It is essentially a guitar and bass tone studio for windows PC, which according to the manufacturers recreates the entire guitar/bass signal chain from an instrument to a recording device and does so in a very realistic and intuitive way.
The software also takes guitar amp realism to the next level with its new cable room feature which gives a unique feel of customization and flexibility.
Other added features to Amplitube 5 are new signal chain and routing, new gear brand models, VIR technology, a new mixer with built-in effects, or redesigned custom shop.
Moreover, the new version of Amplitube 5 includes performing guitar or bass sound for PC and Mac. Developed with the help of amazing artists like Brian May or Joe Satriani, this tool raises the stakes with incredible amp performance.
Pros:
Excellent sound and flexibility
Massive cabinet and room options
Excellent collections of models
Cons:
Lots of extra costs for models
The interface is not easy for beginners
IK Multimedia Amplitube 5 comes with a free version that includes amps, pedals, mics, speakers, and more. It is also worth the price as one of the premium guitar amp software.
Ik Multimedia Amplitube
Experience this qualitative guitar studio software that will surely enhance your music tone instantly.
Overloud TH-U is a premier guitar amp software that comes with loads of features that makes it a must-get software.
This software comes with a simplified drag and drop interface, interface with over 203 models with official models such as Randall, DVmark, Brunetti, and THD authorized modeling, which is approved by original manufacturers.
Overloud TH-U also features 69 guitar amplifiers, 3 bass amplifiers, 35 guitar cabinets, and 2 bass cabinets.
Users also get access to 75 pedal and rack effects with 18 microphone models, with up to four mics on each model.
Overloud TH-U uses a proprietary non-linear algorithm which gives an improved sense of realism compared with previous versions.
The graphics user interface has been revamped with a black and orange theme giving nice visual feedback that simulates the studio or stage environment.
The amp software contains over 1000 preset which are properly arranged into well-labeled folders each containing 128 slots.
The software excels in providing officially endorsed models and crucially gives users the option of switching between 35W, 16W, and 4W power-amp stages.
Pros:
Simple interface
Excellent new models
This is a good software for beginners but for more functionality and features you can check out Ik Multimedia Amplitude.
Waves GTR3 is one of the pioneer software companies to produce amp and effects modeling software for guitarists and continues to produce amp software with its unique Guitar tool Rack.
The software also had a unique DI box which was design in collaboration with the legendary Paul Reed Smith to give quality DI electric guitar signal.
Waves GTR3 has over 30 amps, 30 Cabs, and 25 stompboxes and supports models for Fender, Vox, Mesa, Marshall, and others.
The Guitar tool Rack also comes with a full plugin that incorporates ‘stomp’ effects and two amp/cab models, with a dedicated tuner page.
The ground controller is quite good as it integrates well with the tuner software but has some disadvantages as it offers little control beyond the basics which is quite disappointing.
Pros:
Excellent sounds
Sufficient amps options
Cons:
Poor integration of ground controller
Waves GTR3 is good software with good features which makes it great for guitarists. But gives poor integration with ground controllers.
This guitar amp software has been for quite a long time and is one of the premier guitar amp software. It is loved by users due to its simplicity in use while retaining detailed features.
Guitar Rig 5 comes with 15amps while retaining popular models such as Satriani, Van Halen, Rammstein, ZZ Top, Hendrix, and many more.
Guitar Rig 5 has a control room that can balance the 8 sounds to get desired results. The new Stereo Tune effect spreads the stereo image of a mono guitar to great effect, providing a much wider stereo image.
Pros:
Quite flexible and versatile
Excellent control room
Quality amps
Cons:
Needs to be more realistic
Control room could be CPU heavy
Guitar Rig 5 gives users new amps, effects, and Control Room Pro which is ideal for guitarists of all genres.
This software is one of the simplest and straightforward software available. It is different from other modeling packages that offer dozens of amps, interchangeable speakers, effects, and pedals; Vintage Amp Room offers just three classic amps.
Users can adjust the controls by clicking and dragging to move from one amp to the other and the mouse can also be used to move the virtual microphone in front of the cabinet.
The amplifiers really do sound well with users having to work on the controls and mic position to get the best sound out of them.
Pros:
Straightforward and easy to use
Good sound quality
Cons:
Not great value for money
The software gives a specialized focus on a few classic models which is good as users get good quality with its straightforward interface.
Pod Farm 2.5 is premium amp software that offers amp and effect modeling for guitarists. It comes in two versions which is the regular and platinum version. The platinum version has more model amps, cabs, stomp-box effects, and studio effects.
Pod Farm 2.5 comes with a unique user interface that uses a simple carousel-style gear browser, with a graphical representation of the cabs, effects, and amps.
Pod farm is easy to use with buttons properly arranged and named to give users quick accessibility.
However, this software comes with a huge range of amp which gives quality sounds and users can easily choose the few sounds that interest them.
The platinum version gives users access to 78 amps as well as 24 cabinets, 28 bass amps, 22 bass cabs, 97 effects, and six mic preamps which can be tweaked to give users optimal options.
Pros:
Sufficient collection of amp models
Good sounds
Easy user interface
Cons:
Sounds need to be more authentic
Pod Farm 2.5 is a very good alternative to other guitar amp software with its decent collection of amps good user interface and flexibility.
This software is one of the best guitar amp software. It is actually free to download but users have to purchase the producer pack to have access to lots of features.
It allows users to check its fame features through its demo; users can buy and download amps and cabs from the inbuilt app store.
Peavey ReValver 4 gives users a diverse range of tonal options with a huge number of presets, which users can get the versatility provided by this combination of virtual equipment, and for bass and acoustic guitar.
Pros:
Free to download
Quality sounds with lots of tonal choices
Cons:
Amp profiling needs to be revamped
PeavayReValver 4 gives users flexibility and good value for money even though the software may not give that unique users experience like other rival software.
Studio devil comes with a range of features. This software has tools such as valve preamp, power amp modeling while boasting four stompbox-style effects, impulse-based cabinet emulations, a 7-band graphic EQ, 1-band parametric EQ, compressor, gate, echo, and reverb.
Furthermore, users can configure everything even to the point that the basic preamp controls have considerable impact.
Pros:
Simplified user interface
Good sound quality
Cons:
Few plugins available
It is good amp sim software which gives an all-round feel with its experience. It is easy to use and produces quality sound.
Nowadays, this kind of software is very important for every guitar player, because the quality of the sound is paramount for creating good and memorable music.
Do share with us your experience in using any of the guitar amp software we mentioned above. Feel free to comment below.
What are the best guitar learning programs?
If you’re an aspiring musician or you’re just aiming to hone your skills, you can take a look at our best guitar learning software.
How do you plug your guitar into your computer?
If your PC has a supported audio card, you will have to connect your guitar to its Line-In jack. However, since your guitar cable jack has a diameter of 6.3 mm (1/4″) and the Line-In has a 3.5 mm (1/8″) slot, you’ll have to use an adapter. A better alternative would be using a low-latency USB interface.
What are the best guitar tuning software solutions?
If you’re not comfortable enough tuning your guitar by ear, you can give it a try to our best guitar tuning software. Besides, a metronome program might be exactly what you’re missing right now if you’re struggling with rhythm.
Managing your files is crucial to keeping your Chromebook workflow easy and less time-consuming.
Chromebooks can’t work with desktop apps, but with a few tricks, you can run exe files on Chromebook. However, the device works perfectly with a wide array of Android apps.
In today’s guide, we’re going to show you the best file managers that you can use on your Chromebook device.
What are the best file managers for Chromebook I should try?
If you need a file manager for your Chromebook, you can’t go wrong with Solid Explorer File Manager. The application comes with Google’s material design, so it looks great while being simple to use.
The app comes with two panes, allowing you to easily manage files in two different directories, as you would on a desktop PC. Of course, drag and drop is supported, so you can move files quickly.
The app has cloud storage support, allowing you to manage any files stored on the cloud easily. With this app, you can also access root files and change permissions, configuration files, and more.
We also have to mention that the app works with ZIP, 7ZIP, RAR, and TAR file types, so you can work with archives with ease.
Overall, Solid Explorer File Manager offers amazing features, it’s highly customizable, and it’s a perfect choice for any Chromebook user.
The first thing you’ll notice about FX File Explorer is its friendly and colorful user interface. All storage options are easily accessible from the main screen, so you can open them with a single click.
Of course, you can bookmark directories for quick access from the home screen. If you want to transfer files easily, there’s always a split-screen feature that you can use.
Thanks to the side menu, you can easily switch between open directories, or you can check the status of background tasks at a glance.
The app works with cloud storage services, and it supports various file transfer protocols. It even supports Wi-Fi file and clipboard sharing between devices.
These are some of the basic features that FX File Explorer can do, and if you want to learn more, don’t be shy to try it out.
Total Command is a well-known file manager for Windows, but did you know there’s an Android version available as well?
The app comes with its recognizable dual-pane interface that allows you to work with multiple directories easily. In addition to regular file operations, you can create and extract zip archives with ease.
Of course, the bookmarks feature is available, allowing you to save the most-used directories for quick access. Just like its PC counterpart, this version also supports various plugins.
With plugins, you can use FTP and SFTP protocol, access WebDAV, cloud storage services, as well as devices in LAN.
Overall, this is one extremely powerful file manager, and if you’re an advanced user, it might be the perfect choice for your Chromebook.
This app offers all the basic features that you expect from a file manager. This includes copying, pasting, moving files, renaming, compressing, and extracting archives.
Bookmarking is also available, allowing you to easily bookmark the most used locations for quick access in the future. With this software, you can also access files in your network using FTP or SMB.
Of course, cloud storage is also available, so you can seamlessly work with files in the cloud. It’s important to mention that images, audio files, videos, and documents are sorted into separate categories for quick access.
The app also gives you storage analysis allowing you to view how much storage space you have left or to manage installed apps easily.
File Manager Plus offers a colorful user interface and solid features, perfect for less demanding users.
Other great features:
Simple to use interface
Internal image viewer, music player, and text editor
With this app and its simple interface, you can manage files intuitively, similarly to your Windows PC. The app is user-friendly, so even first-time users won’t have any problems using it.
Bookmarks are available, so you never lose any important files. Breadcrumbs must be available as well, so you can use them to navigate the folder tree with ease.
All files are sorted into different categories, such as Music, Movies, Camera, Documents, and Downloads for quick and easy access.
Besides standard file management features, you can easily create or unzip archives on your device. Lastly, there’s a powerful search feature you can use to search files or directories with ease.
Overall, Splend Apps File Manager offers decent features, but some of the more advanced ones are missing, which makes it suitable only for less demanding users.
With this last tool, we will conclude our list. We hope our article has given you all the information needed to decide which is the best file manager for you.
Sometimes users can encounter various Internet-related issues and speak of them, and many users reported Not connected, no connections are available message on their PC. This error is usually caused by an outdated driver or an outdated router firmware. The quick way to get your connectivity back is to update the firmware from the manufacturer’s website.
How can I fix Not connected, no connections are available error?
NOTE
We have tried to include only the solutions that don’t require Internet access. But to download tools, manually install the drivers, or upgrade firmware, you will need another PC with a stable Internet connection.
1. Change the router settings
A quick fix recommended by one of our readers was to set MTU (Maximum Transmission Unit), which decides the maximum packet size, to Auto in the router settings.
Also, if there were any changes to the IP address, revert to the default configuration, and things should be, most likely, up and running.
2. Update your drivers
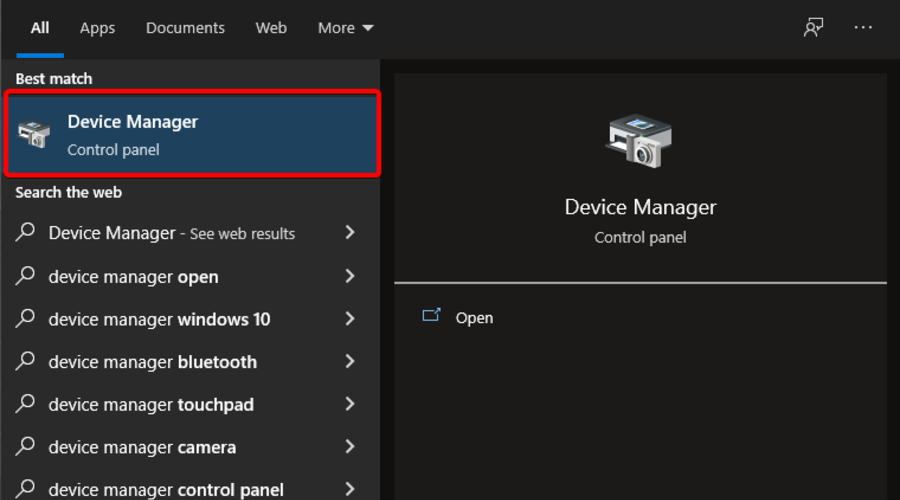
Press the Windows key + X and select the Device Manager option.
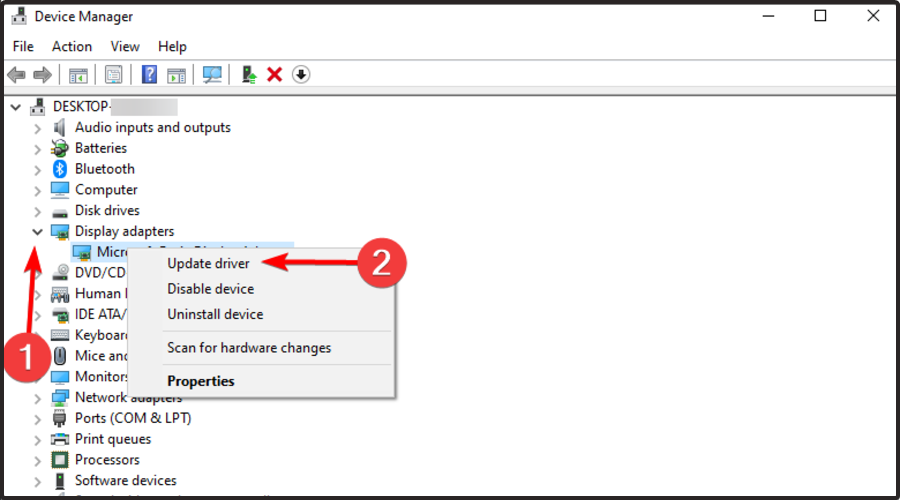
Click the arrow next to the Network adapters option to expand it and right-click the driver there.
Now, select the Update driver option.
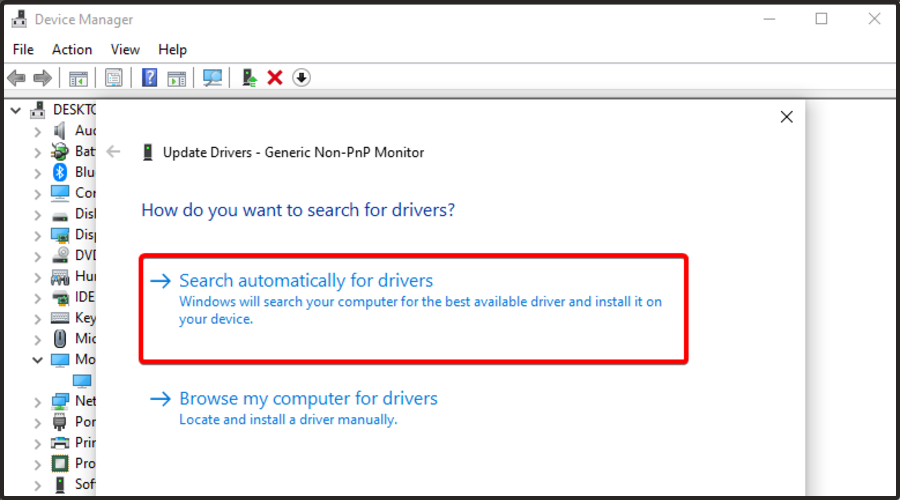
Finally, choose Search automatically for drivers and install any available updates.
If you’re getting Not connected no connections available message on your PC, it might due to outdated drivers. So, it’s recommended that you update the drivers on the computer.
If this fails, you can download the latest driver version from the manufacturer’s website. Remember that you will need another PC to get the driver’s setup. Then, move it to the affected computer and run the setup.
If this process seems a bit complicated, you can always use a third-party solution to update all your drivers automatically.
After the drivers are up to date, check if the problem is still there. Moreover, manually downloading and installing the wrong drivers will protect your system from permanent damage.
Press the Windows key + R, type ncpa.cpl, and click OK.
Right-click your connection and select Enable.
If it is already enabled, select the Disable option and restart your PC.
Now, repeat Steps 1 and 2 to enable it.
Finally, try connecting again.
Sometimes, the Not connected, no connections available message can appear due to a disabled connection. The simple steps above have helped fix this issue for many users.
5. Run the Network Adapter troubleshooter
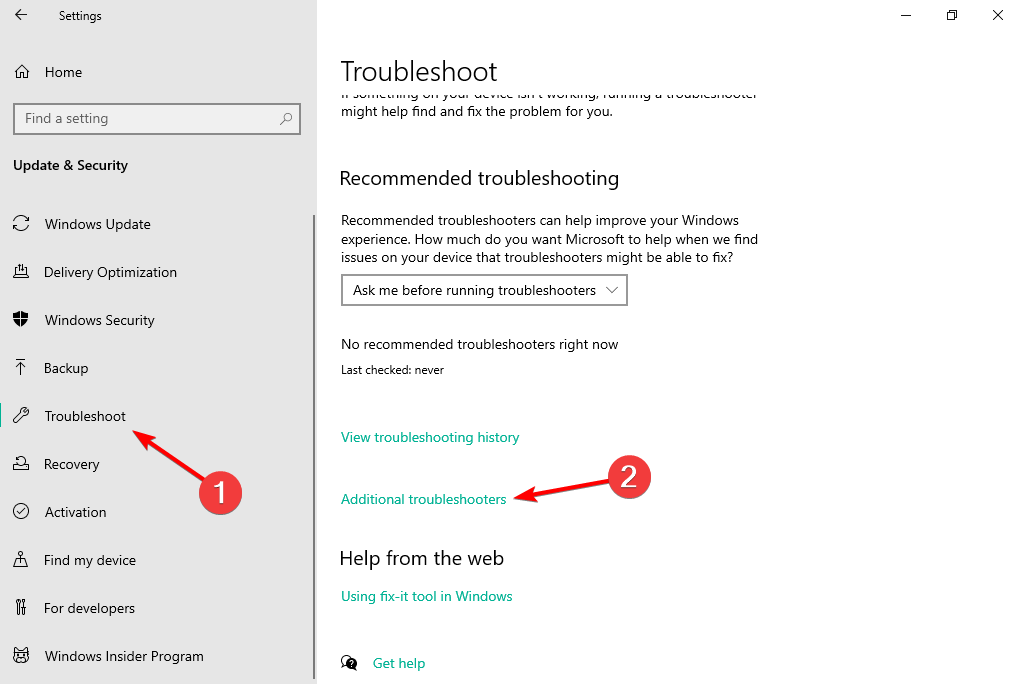
Press the Windows key + I to open the Settings app and select Update & Security.
Choose Troubleshoot in the left pane and click Additional troubleshooters.
Finally, select Network Adapter and click Run the troubleshooter.
In some cases, the Not connected, no connections available error is due to minor glitches. The best solution is to run the built-in network troubleshooter to help diagnose and fix the issue.
We have reached the end of this guide. Hopefully, our solutions will help you fix this problem on your PC.
In case you are still facing issues, get the best software to fix network problems. Again, remember that you will have to download it on another computer and then move it to the one that’s throwing network errors.
Everything we use in the 21st century is computerized when it comes to performing tasks. So, we know how much patience is needed to keep this process going for a long time.
We also tend to make mistakes – after all, to err is human. The need to perform repetitive tasks can arise in a wide range of situations.
For example, you may need to transfer a large amount of data from spreadsheets into a database management system.
Or you need to automate common tasks like sending emails or shutting down your computer at a certain time.
If you own a large company, you need to hire a group of trained people to help you process the data. So, what is the solution? What is the easiest way to create a macro?
How do I create my own macro?
If you’ve made it this far, you probably guessed that PC macros are the way to deal with routine, tedious, and repetitive tasks and operations. But you also need a good macro program to handle the job.
In comes the biggest question of them all. What software to use to make keyboard macros?
Let’s explore some of these options right away so that you can make an informed choice:
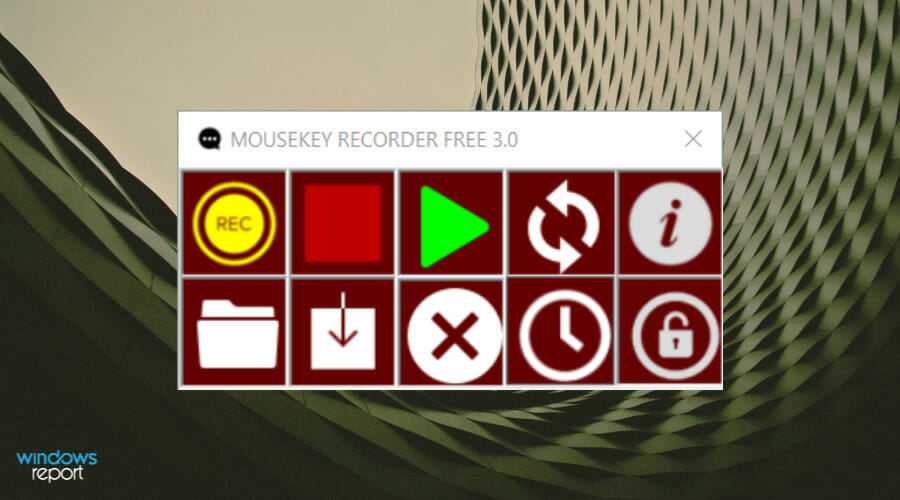
MouseKey Recorder – Easy & intuitive macro program
Macro Recorder – Best macro recorder with step-by-step built-in macro editor
Workflow.com – Business PC macro (no-code rules engine & workflow)
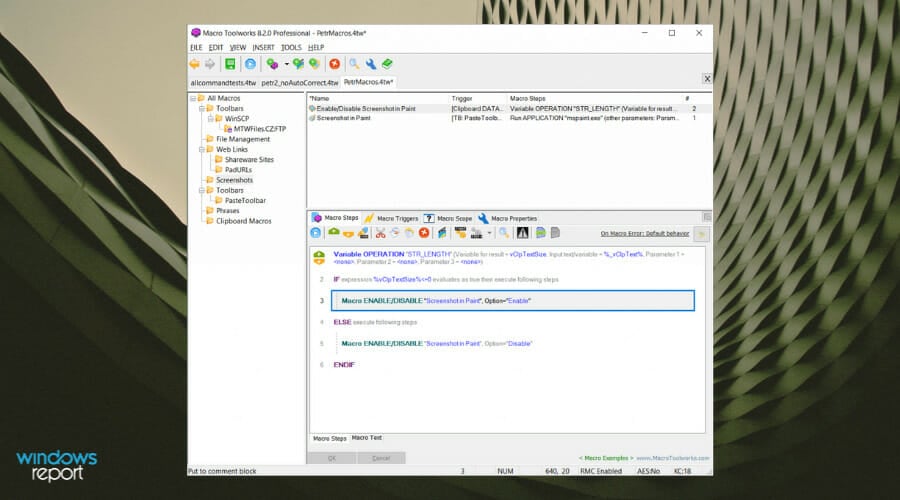
Macro ToolWorks – Nifty macro tools for Windows with file encryption
Pullover’s Macro Creator – Script-based Windows macro creator
AutoIT – Best macro software for gaming (+ can change registry entries)
The process of making your own macros is fairly simple as well. You need to define the rules (triggers included) and decide on the services or apps that you wish to integrate so that your macros can deal with them accordingly.
We compiled a great range of software options that allow you to automate many of the repetitive processes that you or your company need to stay up and running.
Since you aren’t willing to compromise on quality, let us tell you more about what MouseKey Recorder is and how it can help you out.
Well, that’s an efficient solution if your wish is to optimize and automate all sorts of repetitive operations that are performed on a PC.
It doesn’t even matter if you are new to all these. Unlike competitor solutions, there are no complex menus to worry about. You can simply open the app and intuitively record the mouse and keyboard.
Plus, it’s no need for complicated operations to set up your macro settings, or get lost in menus or programs. You only have to record mouse movements and keyboard strokes.
No more wondering what software to use to make keyboard macros. If you need greatly intuitive software to automate processes using macros, this is the winning solution for your efficiency.
Other notable features include:
Intuitive and easy, even for inexperienced users
Real-time recording of both mouse and keyboard actions
Play speed adjustment options
No limit on repetitive operations automation
Free trial in order to give it a go and make a decision
MouseKey Recorder
This tool opens up a new world of possibilities in terms of PC automation. Eager to try it out?
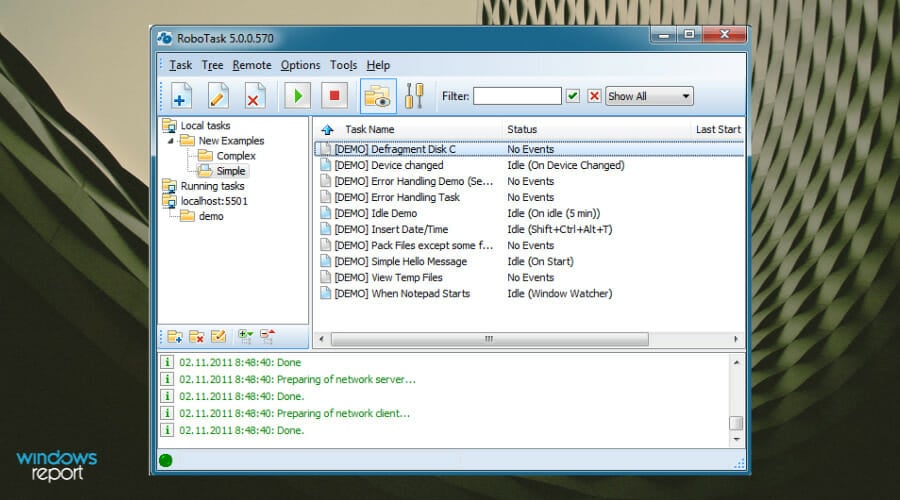
Robotask allows you to automate a great range of tasks on your Windows PC. You can run applications on a schedule, check emails, back up your files either through download or upload, schedule email sending, etc.
You can use Robotask to create simple or complex tasks, depending on your needs. When it comes to the complex automation capabilities of this software, you can create IF/ELSE statements, loops, set custom variables, etc.
Robotask is equipped with a user-friendly custom interface that allows you to simply select the options you need and then allows you to edit them in any way you see fit.
You can choose from a wide range of actions designed for working with files, the internet, FTP, data stats, etc.
Because of Robotask’s wide range of features, you can also create custom scripts that can be activated in certain conditions.
One of the best features of Robotask is the fact that you can run it as a service (SaaS), allowing you to automate different tasks even if you are not logged on.
Other notable features include:
Shut down Windows based on different triggers of your choosing
Process files and folders – copy, move, rename, delete
FTP and Web servers compatibility (can use uploads and downloads, etc.)
Automate the process of sending letters and files by e-mail
You can use the tool as an alarm clock
Robotask
If you want great automated macro software, Robotask is up for the job. Don’t hesitate to give it a try!
Macro Recorder – Best macro recorder with a built-in macro editor
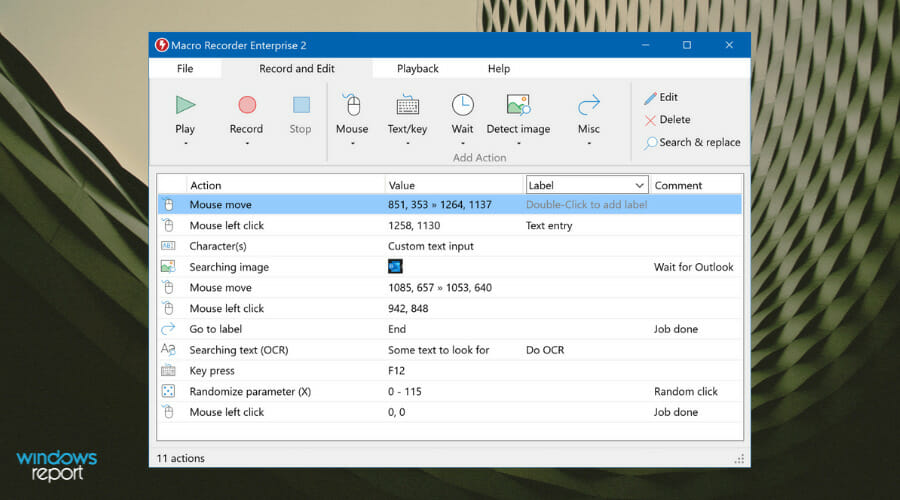
Macro Recorder is a macro automation software tool that allows you to track and record the movement of your computer’s mouse, record keystrokes, and automate repetitive tasks.
You might be wondering – Is Macro Recorder worth it? Well, we believe it does worth paying for. For instance, the Smart macro optimization feature automatically removes unnecessary steps to make things even easier for you.
There is also a step-by-step built-in macro editor, plus you can install this software even on portable USB drives. What’s there not to like?
You can use this lightweight application to edit macros, organize them into folders or groups, restore the previous position of any file if it has been moved, and store all the recordings in an easy-to-access location.
Other notable features include:
Records program window names, positions, and sizes
Can trigger specific macros if a certain action is taken
Macro export compatible with PhraseExpress v14
Can change the playback speed of recordings
Pixel detection with color tolerance options
Compatibility with HiRes (retina) displays
Macro Recorder
Create useful automation tasks using macro recording tools offered by this effective software.
Workflow.com – Business PC macro (no-code rules engine & workflow)
The next software is a Workflow automation service created by Decisions that helps small or mid-size businesses to automate processes and strategies.
This tool is best suited for teams that need full automation for long and repetitive tasks, using visual tools and no code automation to improve time management or marketing results.
Let’s see how you can actually use this program. It is possible to achieve a multitude of professional results with graphic design workflows, dynamic form builders, task management platforms, and integration with other web services.
Moreover, you can create complex workflows without any coding settings and build process automation by simply adding steps to diagrams, configuring, and attaching the tasks in sequence. With over 2000 steps library it’s very intuitive to set up your workflow.
Additionally, the automation of your workflows sure includes communication elements and integrated forms in order to enhance the work processes using automated service.
Hence if you run a business yourself or often work in a team, it’s no reason you should not consider this modern automation software.
Macro ToolWorks – Nifty macro tools for Windows with file encryption
Macro Toolworks is a complete package of powerful automation tools to use on Windows PCs.
You can use it to create and record macros and allows you to play them back either in the Windows application or by the use of an Internet webpage.
This allows you to remotely control your macros from anywhere in the world. Each macro can be set up to react according to a wide range of triggers.
This includes text shortcuts, keyboard hot-keys, mouse clicks, changes to any folder or files, etc.
The macros created in this software can also emulate the use of a normal user by sending virtual Windows keys and mouse clicks, filling web forms, sending and receiving emails, extracting or inserting data into Excel files, etc.
In the Free version, you can set simple hotkeys, use macro toolbar buttons with text, set schedules for timed macros, trigger macros when Windows either starts, is shut down, etc.
You can also set trigger macros when files are created, changed in any way, or deleted. This allows you to keep on track with any changes that happen across time and correct them if needed and many other actions.
Free Edition:
Can open multiple macro files at the same time
Multi-language user interface
Can save macros in a single file for easy access
Macro file encryption – helps protect your content from being easily opened Integrated help into the commands editor
Can search within the macro database by names, triggers, descriptions
Trigger button that turns on or off all macro triggers
This software is a great free and lightweight macro creation software that allows you to write scripts, has a built-in recorder, can record any use of your computer, and automate different tasks.
Macro Creator can be used by both experienced and beginner-level users. It offers you the choice of using the pre-set scripts or writing your own using the AutoHotkey Script.
This app can also record keystrokes, and mouse movement, but also keeps control over files, windows, etc, while adapting to the pre-selected data inputs.
Other notable features include:
Control commands – allows you to control windows in the background
Window commands – can maximize, maximize and set a wide range of window settings
Search for a specific image or pixel on the screen and react according to the macro’s characteristics
Loops – can create simple and advanced loops that allow you to easily browse through folders, text files, etc.
Set If Statements – can react in a specific way if an action happens
Auto-hotkey Expressions – can control applications like Excel, Word, etc.
AutoIT – Best macro software for gaming (+ can change registry entries)
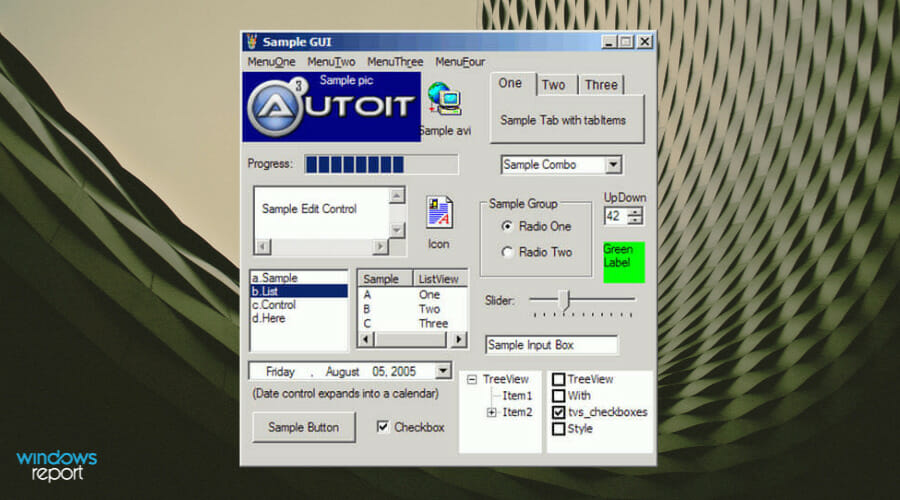
AutoIT is another free and easy-to-use software option that allows you to easily create macros, edit them to your needs, and can also automate a wide range of repetitive processes.
You can execute programs, automate keystrokes and mouse clicks, modify Windows functions, etc.
One of the best features of this program is the fact that it can automate simple text and clipboard functions, and can also be used to change registry entries.
The automation features offered by AutoIT are very easy to understand and use, and it offers a wide range of automated functions.
The AutoIt installation pack includes both x86 and x64 compatible versions and contains program files, documentation, and examples, Aut2Exe – script that allows you to convert macro tasks into standalone .exe files, and also offers a basic version of the SciTE script editor.
The standalone Auto Script Editor is also contained in the installation pack, offering a customized version of SciTE with many additional coding tools.
In this article, we explored some of the best options available on the market that allow you to automate different actions on your computer with ease.
You can record any action performed, store data, and share it easily.
More so, in case you run a business and often need automated processes you can check more business guides for your line of work to find what you need.
The options presented in this list cover the needs of both users who want high-grade professional software with tons of features, and also those who need a quick way to sort out their needs.
Let us know which software option you chose from this list in the comments section below.
SharePoint is a popular collaboration platform that allows users to share files and collaborate on documents in real time. While SharePoint has its web interface, you can access it through File Explorer, providing a more familiar and efficient way to navigate and manage files.
This guide will explain how to open SharePoint in File Explorer, making it easier for you to access and work on your files.
Can SharePoint be used as File Explorer?
SharePoint has its web interface for accessing and managing files, but it differs from File Explorer.
File Explorer is a built-in file management application with the Windows operating system, allowing you to access and manage files on your local drive and network.
On the other hand, SharePoint is a cloud-based platform that allows you to access and share files with other users.
While SharePoint does have some file management features, such as the ability to create folders, upload files, and share files with others, it is not a full-fledged file management tool like File Explorer.
However, you can integrate SharePoint with File Explorer to access your SharePoint files and folders directly from the File Explorer interface.
This integration allows you to navigate your SharePoint and access your files easily.
NOTE
We do not recommend the SharePoint View in File Explorer command since it offers more reliability and is faster.
How do I get SharePoint to show up in File Explorer?
Press Windows + E, right-click on Network in the left pane, then Map network drive from the drop-down menu.
Choose a drive letter from the Drive drop-down menu for the SharePoint site, then click on the Connect using different credentials checkbox. Then enter your SharePoint credentials when prompted.
Click on the Finish button.
Your SharePoint site should now appear in the File Explorer window under the drive letter you selected.
Once your SharePoint site appears in File Explorer, you can manage content more efficiently. For a complete walkthrough on organizing documents, check out our guide on how to move files in SharePoint.
Learn how to create a folder in SharePoint to build a clear library structure and keep files easy to find after connecting your site to File Explorer.
For an overview of SharePoint basics, including sites, libraries, and permissions, visit our SharePoint how to use guide to get started quickly.
Accessing SharePoint through File Explorer can provide a more streamlined experience for managing and collaborating on files.
Following the steps outlined in this article, you can easily connect SharePoint to File Explorer. Also, you will be able to take advantage of its advanced file management features.
Whether you’re working on a project with a team or need to access essential files. Connecting SharePoint to File Explorer quickly can make the process more efficient and convenient.
Computer errors are relatively common, and while some are harmless, others, such as the Windows 10 VIDEO_DXGKRNL_FATAL_ERROR can cause many problems on your PC.
As you probably guessed, the VIDEO_DXGKRNL_FATAL_ERROR in Windows 10 is a Blue Screen of Death error, and it appears during the installation process of a new hardware or software driver.
Since this can be so serious, today we’ll show you how to fix the Dxgkrnl error properly.
What is Video Dxgkrnl Fatal Error in Windows 10?
When installing new software or a new hardware driver, the VIDEO_DXGKRNL_FATAL_ERROR problem may display as a BSOD on your computer.
The signs of this condition are misconfiguration of the device, infection with malware, driver conflicts, or problems with the firmware.
Users reported getting the Windows 10 Video dxgkrnl fatal error on multiple devices. Some of the common ones are the following:
Nvidia Video dxgkrnl fatal error in Windows 8, 10, 11 – A violation has been found and reported by the DirectX graphics kernel subsystem, as shown by the Video DXGKRNL Fatal Error message.
Video dxgkrnl fatal error in Windows 10 on HP, Asus, and Acer – It’s possible that corrupt system files are to blame for the error that Windows 10 is experiencing.
Lenovo Video dxgkrnl fatal error in Windows 10 – Proceed to uninstall the display adapter by navigating to the Device Manager and selecting it.
Video dxgkrnl fatal error in Windows 10 (Asus) – The most typical cause of this problem is a random protection feature in Windows Defender or an antivirus program limiting access to vital files after an update.
Dell Video dxgkrnl fatal error in Windows 10 – Running a system scan will ensure that your files aren’t corrupted.
Video dxgkrnl fatal error in Windows 10 (Nvidia, AutoCAD) – It’s possible that an older version of Windows is to blame for the error you’re seeing.
BSOD video dxgkrnl fatal error (blue screen video dxgkrnl fatal error) – Fix this by running a system repair tool as we have shown below.
Video dxgkrnl fatal error hardware – Check your hardware for any physical damage before moving on to other solutions.
Video dxgkrnl fatal error in Windows 11 – Most of the solutions below can also be applied to fix this error in Windows 11.
Without further ado, let’s jump into the list of easy solutions you can implement to fix the Windows 10 Video dxgkrnl fatal error. Follow along!
How do I fix the Stop Code video Dxgkrnl fatal error?
1. Run a system repair tool
System errors can be quite difficult to identify and properly fix. Dedicated repair software can greatly help you along this process by offering you the ability to perform in-depth scans and replace any broken files with fresh ones.
2. Run the Hardware troubleshooter
Press the Windows key and select Settings.
Go to the Update & Security section.
Select Troubleshoot the menu on the left, followed by Additional troubleshooters from the right pane.
Find the Program Compatibility Troubleshooter and click Run the troubleshooter.
Follow the instructions on the screen to complete the troubleshooting steps.
3. Download the latest Windows 10 updates and drivers
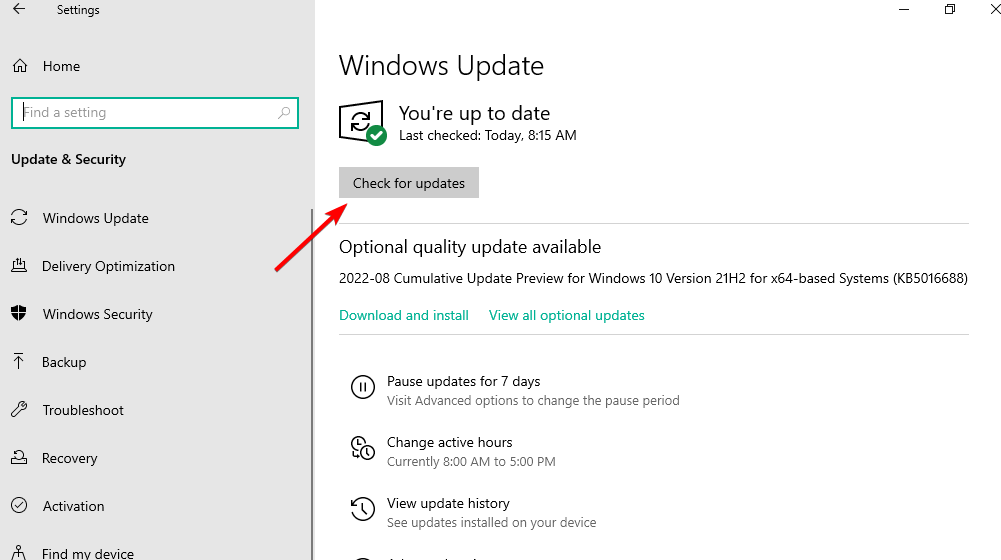
Tap Windows + I then, after the Settings app opens, click Update & security.
Click the Check for updates button.
To keep your PC safe, stable, and free from errors, we advise you to keep Windows 10 up to date by using Windows Update.
In addition to Windows updates, installing the latest drivers is essential.
Without proper drivers, Windows 10 cannot utilize your hardware, and if your drivers are outdated or buggy, you’ll encounter a BSoD error such as VIDEO_DXGKRNL_FATAL_ERROR.
To prevent these types of errors from appearing, it’s essential to download and install the latest drivers. You can do that simply by visiting your hardware manufacturer’s website and downloading the latest drivers for your device.
3.1 Update drivers automatically
Searching for drivers on your own can be time-consuming. So, we advise you to use a tool automatically, such as Outbyte Driver Updater.
Using an automatic driver updater will save you from the hassle of searching for drivers manually, and it will keep your system updated with the latest drivers.
4. Run the SFC scan
Tap Windows, then enter cmd and choose the Run as administrator option.
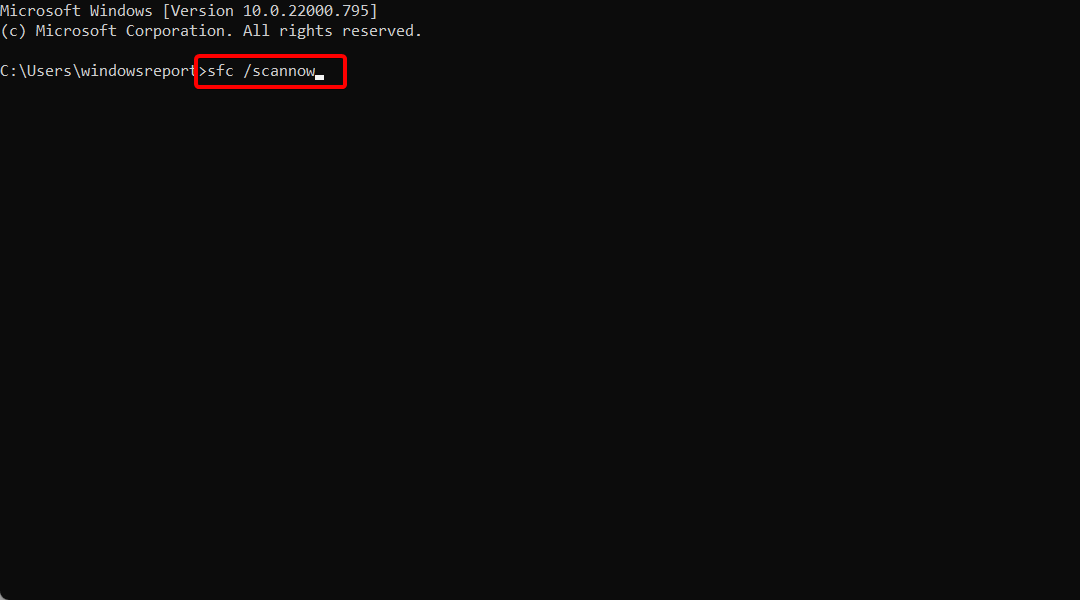
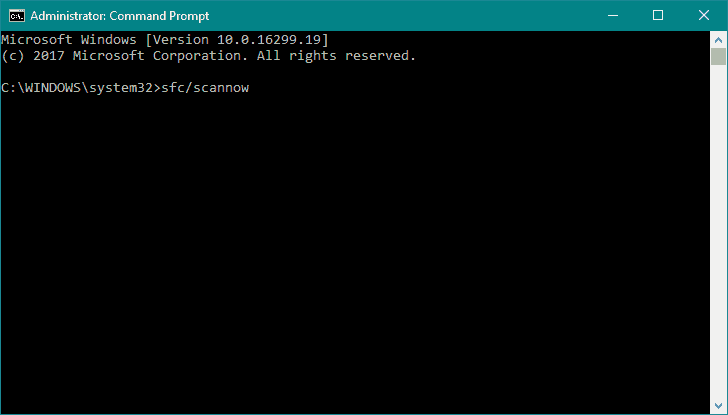
Enter the following line and press Enter: sfc /scannow
Wait until the process is done (it may take a while).
If the solution is found, it will automatically be applied. Now, close the Command Prompt and restart your computer.
The SFC scan is another troubleshooter that functions similarly to Windows 10’s built-in troubleshooting tool. This command-line utility searches the system for potential issues and resolves them if possible.
Now, type the following command and press Enter: DISM /Online /Cleanup-Image /RestoreHealth /source:WIM:X:SourcesInstall.wim:1 /LimitAccess
Make sure to change an X value with the letter of the mounted drive with Windows 10 installation.
After the procedure is finished, restart your computer.
Deployment Image Servicing and Management (DISM) is a tool that, as its name says, deploys the system image repeatedly. And that process could resolve potential BSoD issues.
6. Reinstall the graphics card driver
Press Windows + X on your keyboard to open the Power User menu. Choose Device Manager from the list.
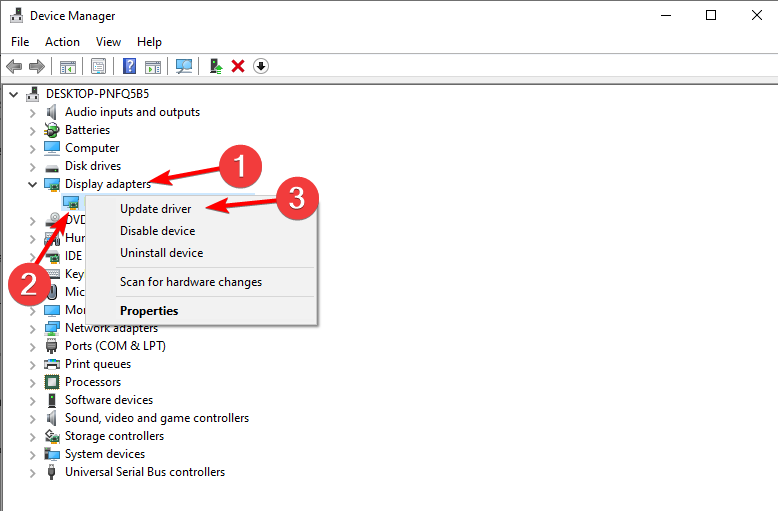
Once Device Manager opens, expand the Display adapters section, right-click the driver there, and choose Uninstall device.
Reboot your PC to reinstall it automatically.
After you remove the Intel graphics driver, be sure to uninstall any Intel graphics software that you have installed. Up next, you can download new Intel drivers for your PC from Intel’s website.
Some users suggest deleting both drivers if you have both integrated and dedicated graphics cards. The simplest way to delete drivers for your dedicated graphic card is to use Display Driver Uninstaller, so be sure to download it.
After uninstalling both drivers, you can now reinstall the necessary drivers again. Unfortunately, a few users had issues with the latest Intel and Nvidia drivers, so you might want to install the older version of the drivers for the time being.
7. Remove your antivirus software
Third-party applications can often cause these types of errors to appear.
Your antivirus program and firewall can be the most common cause for VIDEO_DXGKRNL_FATAL_ERROR and other Blue Screen of Death errors. Therefore you should temporarily remove all third-party programs.
Uninstalling the antivirus isn’t usually enough, and you’ll have to use a dedicated removal tool to remove all files and registry entries associated with your antivirus software.
Users reported that AVG antivirus was causing this error, but remember that almost any antivirus software can cause this error to appear.
If you have both dedicated and integrated graphics adapters, sometimes you need to set the default one in BIOS to fix this error.
According to users, setting the default graphics adapter to automatic in BIOS can cause this error. Therefore, we strongly advise you to enter BIOS and select your dedicated graphics card as a default graphic adapter.
To see how to do that, we suggest you check your motherboard manual for detailed instructions.
9. Reset Windows 10 and check your hardware
Restart your computer a few times to start Automatic Repair.
Choose Troubleshoot followed by Reset this PC and Remove everything. During this step, you might be asked to insert Windows 10 installation media, so be ready to do so.
Choose Only the drive where Windows is installed, remove my files,and click the Reset button.
Follow the instructions on the screen to complete the reset process.
Sometimes Blue Screen of Death errors can be caused by third-party software, but you can fix these errors by performing Windows 10 reset.
Resetting Windows 10 will delete all files from your C drive, so create a backup. It’s also advised that you make a bootable USB flash drive because you might need it for this procedure.
What is Windows Stopcode?
When Windows fails to start, a stop code is generated and shown on the Blue Screen of Death (BSOD). The hexadecimal code for the stop command begins with the character 0x and is then followed by a string of eight additional characters.
Each stop code is associated with a specific Windows fault and points you toward assistance in resolving the issue. Windows stop codes are very similar to Windows error codes.
If the error appears even after you perform Windows 10 reset, your hardware may cause this error, so be sure to check if your hardware is working correctly.
VIDEO_DXGKRNL_FATAL_ERROR Blue Screen of Death error can cause particular problems on your PC, but we hope you managed to fix this error using one of our solutions.
Sometimes, the simplest of tasks on your PC can become tough to get around. For instance, running into Error 0x80043103, No error description is available when deleting files on your Windows PC.
Many factors may cause the Error 0x80043103; No error description is available to appear on your screen when deleting files. These factors prevent you from deleting any files on your PC.
A common factor that can cause the No error description available error 0x80043103 is a misconfiguration in the registry. The registry issue can apply to permissions or configuration settings on your PC, interfering with the deletion process.
Furthermore, the error can occur due to other factors such as:
Windows Defender Firewall interference – The activities of the Windows Firewall can block other processes or services running on your PC. It can detect the file delete process as malicious or a threat, prompting Windows to run into errors.
Windows Startup issues – When Windows is not properly booted, it can cause it to malfunction and run into many issues. So, you may have difficulties deleting files on your PC if there is a problem with booting its components. It can result in the 0x80043103 No error description.
However, these causes may vary in different computers, but you can fix them by troubleshooting your PC.
The solutions below will also fix error 0x800f0831 Windows Server 2012 R2, error 0x800f0831 Windows Server 2019, and error 0x800f0831 Windows Server 2016.
How do I fix the 0x80043103 No error description?
Before trying any fixes for the error, go through the following:
Close and relaunch File Explorer.
Unplug external USB devices from your PC.
Restart your computer and check if you can fix the error. Here’s what to do if the PC fails to restart.
Restarting your PC should fix the error, but if you can’t, proceed with the solutions below.
1. Restart Windows in Safe Mode
On the sign-in screen, press the Shift key while holding the Power button.
Hold the Shift key to open the Advanced Recovery Options page.
Click on Troubleshoot, then select the Advanced options.
Click on Startup Settings and select Restart.
Press 4 to Enable Safe Mode.
Restarting Windows in Safe Mode will fix any startup issues affecting your system and resolve the 0x80043103 No error description.
2. Move the file to another location
Press Windows + E to open File Explorer.
Navigate to the location of the file you want to delete, select the file, right-click on it, then click Cut from the drop-down.
Go to another folder and press the Ctrl + V key to paste the file.
In the new folder, click on the file and press the Delete key to see if it will delete.
Moving the file to another folder can resolve the error if it is due to issues with the folder itself.
Click the Start button and type control panel, then open it.
Click on the Windows Defender Firewall option.
Select the Turn Windows Defender Firewall on or off option from the left pane.
Go to the Private network settings and Public network settings, then click the radio buttons for the Turn off Windows Defender Firewall (not recommended) option.
Restart your PC and try deleting the file prompting the 0x80043103 No error description.
Left-click the Start button, type PowerShell, and click Run as administrator.
Click Yes on the User Account Control prompt.
Type the following line and press Enter: Remove-Item < path of the folder or file> -Recurse -Force
You’re to copy the file path from File Explorer and paste it into the folder or file entry path.
If it doesn’t work the first time, restart your PC and repeat the steps.
Executing the delete command from PowerShell can force delete the file. Check what to do if Windows PowerShell stops working when executing the steps above.
5. Disable Windows Search Service
Press Windows + R keys to open the Run dialog box, type services.msc, and press Enter to open the Services window.
Find the Windows Search service, right-click on it, then select Properties from the drop-down.
Choose Disabled from the Startup option and click on the Stop button to quit its process.
Restart your PC and see if the error persists.
Disabling Windows Search Service has proven to be an effective fix for some users.
Keep in mind that all Steam games run on a PC, so you can’t play them on a console or other smart device.
With just a monitor, all you have is a display, there’s no means for it to run games. In order to be able to play your favorite Steam games, you have to go with a Windows, Linux, or Apple computer.
What can I do if the Steam screen suddenly turns black?
1. Temporarily disable your antivirus software
1.1 Windows Defender Firewall
Hit Windows, type Control Panel, then open the first result.
Navigate to System and security.
Go to Windows Defender Firewall.
Now, from the left window pane, choose to Turn Windows Defender Firewall on or off.
Make sure you checkmark the two boxes shown directly below.
1.2 Other antivirus software
In order to disable a specific antivirus program on Windows 10 or 11, generally, you can right-click the program icon at the right of Windows taskbar, and choose Disable.
If you’re not sure about how to perform the process for your own software, it is best to access the manufacturers’ official page and check the dedicated steps listed there.
Sometimes the cybersecurity measures you install on your PC can interfere with certain programs or applications, such as using Steam.
Even if this is not always recommended, a good solution is to temporarily disable your antivirus. On the other hand, if the problem persists, re-enable your antivirus and continue with the steps below.
2. Stop running Steam as administrator
Right-click on the Steam shortcut from your desktop, and select Properties.
Open the Compatibility tab, then make sure to have the box next toRun this program as an administratorunchecked.
Press OK, and run Steam to see if this fixed the issue.
Some Steam users have reported that if you stop running Steam as administrator, then the screen no longer goes black.
3. Update video card driver
Hit the Windows key, type Device Manager, then open it.
Expand the Display Adapters category, then right-click on your video card, and choose to Update driver.
Click Search automatically drivers.
Wait for the update to install, and restart your PC to see if it fixed the issue.
Sometimes Windows can’t automatically find the latest drivers for your software, so a specialized tool such as Outbyte Driver Updater can help you without the hassle.
4. Reinstall Steam
Press on the Windows key, type Control Panel, then navigate to the first result.
Choose to Uninstall a program.
Search for the Steam app, click on it, then choose to Uninstall it.
From the top-right corner of the opened window, click on the green Install Steam button.
Follow the on-screen instructions to reinstall the app.
Login with your credentials and check if the issue persits.
Although not necessarily desirable, as a last resort you can try reinstalling Steam. This will ensure that the black screen no longer appears when you start it up.
The Steam app is not responding – This can be a pretty annoying issue since you won’t be able to play your favorite games, but fear no more, there’s a way to fix this problem.
We hope that you could find our guide on how to fix the Steam black screen useful. If you know other working solutions, leave us a comment in the section below.
Uninstalling and then reinstalling the battery driver on your PC might be an efficient option if your device has become corrupt.
Fortunately, there are some valuable options you should consider to uninstall drivers on Windows 10 operating system.
What happens if you disable the battery driver?
Before anything else, we do not recommend disabling or uninstalling the battery driver. Remember that drivers are the link between software and hardware, so disabling this driver may mean the battery stops functioning normally.
That said, here is what to expect after disabling the battery driver:
You will have to keep your computer plugged to direct current, as you may no longer get status warnings for the battery.
Some battery issues may be resolved if this driver is disabled and updated.
And remember, if you were wondering What happens if I uninstall battery driver in Windows 10, the results are more or less the same. Just make sure to have the laptop plugged in before you do that, and install the new drivers right away.
Now let us consider the best ways of uninstalling this driver.
How do I uninstall battery drivers?
1. Use Device Manager
Open Device Manager.
Expand Batteries.
Right-click on Microsoft ACPI-Compliant Control Method Battery, then select Uninstall device.
If you see more than one Microsoft ACPI-Compliant Control Method Battery alternative, you should perform the same action for each of them.
2. Roll-back to a previous driver
Open Device Manager.
Expand Batteries.
Right-click on your needed driver, and select Properties.
Select the Driver tab, then click on Roll Back Driver.
A dialog box will ask you to confirm your decision.
Click Yes to begin the roll-back process.
This alternative will automatically remove the current driver for your device and reinstall the previous one. Since the process will uninstall the current battery driver.
Find what you need to remove, right-click on it, and select Uninstall.
4. Try third-party software
Using the help of third-party software can also do an extremely efficient job. Moreover, it can be less time-consuming than the manual methods presented above.
It can quickly scan your system for all installed programs and let you choose several at once for removal.
Thus, it will free up valuable space and ensure you don’t run into troubles when installing a newer version of the same software.
Uninstaller helpers also provide a handy way to manage drivers or browser extensions and remove any app you don’t use.
Considering these aspects, what’s better than knowing you’ll have the support of high-quality software to uninstall drivers or programs quickly?
These were our suggested alternatives that will surely help you to uninstall the battery driver easily. You should consider that we selected some of the best.
Because your opinion is important, you can share your thoughts and tell us which suggestions worked best for you. Thus, don’t hesitate to leave a comment in the section below.
Even though pretty much everybody has upgraded their consoles to either an Xbox Series X|S, or a PlayStation 5, despite the shortage, some people still have outdated gaming rigs.
Xbox One and PlayStation 4 are still going to receive some of the new titles, but the likes of PS3 and Xbox 360 will never do so.
In fact, Microsoft is getting ready to further reduce the available Xbox 360 games, trying to give users a little nudge in the right direction.
Check out the games leaving the Xbox 360 marketplace
If you have an Xbox Series X|S console, remember that Asus collaborated with Microsoft to bring you a brand new OLED display elite controller.
Also, if you get the 0x80a40026 error while using your Xbox console, you will find all the information you need to fix it right here.
In a recent statement to Gematsu, Microsoft confirmed that beginning on February 7, 2023, a limited set of games, add-ons, and in-game content will no longer be purchasable in select markets via the Xbox 360 Store.
That being said, if you still own and use an Xbox 360 console, you might want to stock up on some digital games soon.
These titles will therefore no longer be purchasable on the Xbox 360 Store only, except the titles that are available to be purchased on the Xbox One and Xbox Series X|S Stores, which will remain purchasable.
Don’t worry, you will still be able to play discs or previously downloaded games on your Xbox 360 and modern consoles if they are backward-compatible titles.
Microsoft’s recent actions sort of confirm user speculation that the tech giant’s recent reveal that certain Xbox 360 games being delisted from the aging Xbox 360 platform would not impact those games’ availability on modern Xbox One and Xbox Series X|S consoles.
That still leaves games that are not backward compatible ceasing to be available on their original platform, while even games that are backward compatible on modern Xboxes may no longer be available due to the games not having a listing on the current Xbox Store.
The support page includes links to the games that will be removed in each country and territory. The list of titles that will be taken down in the US market includes:
Aegis Wing
Assassin’s Creed Brotherhood
Assassin’s Creed III
Assassin’s Creed IV
Assassin’s Creed Liberation HD
Blood of the Werewolf
Blue Dragon
Breakdown
Call of Duty: Advanced Warfare
Call of Duty: Ghosts
Castle Crashers
Cloning Clyde
Counter-Strike: GO
Dark Souls
Darksiders II
DAYTONA USA
Defense Grid
Eets: Chowdown
Far Cry 2
Final Fight: DblImpact
Iron Brigade
Jeremy McGrath’s Offroad
Jet Set Radio
Left 4 Dead
Left 4 Dead 2
LIMBO
Lost Odyssey
Mass Effect 2
MONOPOLY DEAL
Mutant Blobs Attack
N+
Outpost Kaloki X
Peggle 2
Phantom Breaker: Battle Grounds
Prince of Persia
R.U.S.E.
Sega Vintage Collection: Alex Kidd & Co.
Skate 2
South Park: The Stick of Truth
Spelunky
Splinter Cell Conviction
Star Wars Battlefront
Star Wars KOTOR 2
The Orange Box
The Raven Episode 1
The Witcher 2
Keep in mind that the page does point out that once you have purchased a game from the Xbox 360 Marketplace, you can still delete it from the hard drive and redownload it from the storefront at any time.
We currently don’t know if any of the games on this list will also not be available on the newer Xbox One and Xbox Series X|S consoles for play via backward compatibility.
In fact, many of these Xbox 360 games are also not available for sale digitally on Microsoft’s newer consoles, so it’s possible that a few Xbox 360 titles could just disappear from sale completely after February 7.
Which of the games that are being removed do you feel the saddest about? Share your thoughts with us in the comments section below.
The Windows key’s default action is to open the Start menu when you press it. Also, when you use the Windows key in combination with other keys, you can do other tasks. Such as, when you press the Windows and E keys together, it will open File Explorer, and so on.
Sometimes you would want the Windows key to be silent, i.e., do not do anything. In such a case, this guide will be helpful for you as here we will show you how to unlock and lock the Windows key on your keyboard. So let us check it out.
Why use a Keyboard lock or unlock on a Windows PC?
Using the Keyboard lock or unlock feature, you can either disable or enable the keyboard. For example, if you are a gamer and have a knack for hitting a particular button on your keyboard often, interrupting your gaming, then disabling the keyboard is a good option.
Some wireless or wired keyboards have a dedicated key to lock the keyboard. However, if your keyboard does not have such a function, you can close or unlock it.
If you are facing issues with your keyboard, then we have a guide that will give you a bunch of solutions to fix the keyboard not working problem in different laptop brands.
As mentioned, some keyboards offer a direct Win Lock key to help you lock or unlock the Windows key.
You can press this button on your keyboard if it is available on your PC. You can move on to the next solution if it is not present.
2. Enable Gaming Mode
Synapse 3
Launch Synapse 3.
Click on Keyboard.
Select CUSTOMIZE.
Under Gaming Mode, click the drop-down menu and hit Always on.
Synapse 2
Launch Synapse 2.
Click on the KEYBOARD option.
Select GAMING MODE.
Toggle on the GAMING MODE.
Select the Windows key to disable it.
Several keyboards come with a Gaming Mode, especially the gaming keyboards such as Razer keyboards. They not only offer you to disable the Windows key or any other keys, but they also come with built-in gaming features.
You can also learn about other system keys by checking our guide on the Pause key.
Since most users have switched to wireless Bluetooth-enabled keyboards, you would encounter issues such as keyboard lag. Thankfully, we have a guide that lists a bunch of solutions to fix Bluetooth keyboard lagging in Windows 11.
Flushing the DNS cache helps you fix the various network issues that might trigger on your PC. While flushing the DNS is a nice process, you should know it to take advantage of it. In fact, there is not just one way, but 6 different ways to completely flush DNS in Windows 11.
Here, we will give you a complete explanation of how to flush DNS in Windows 11. We will list the various ways to flush the DNS cache in Windows 11. Let us get right into it.
What does DNS flush & reset do to your PC?
Before we go ahead with the guide on how to flush the DNS cache in Windows 11, you should first understand what the DNS flushing or resetting would do to your PC.
DNS, or Domain Name System, is the index of all public websites and their IP addresses. Windows stores a local copy of these indexes to speed up the loading of these websites in the form of a DNS cache.
If the DNS cache gets corrupted, you will face a slow network connection and other network-related problems. In such a case, flushing or resetting the DNS cache would help fix the problem.
How can I completely flush the DNS cache in Windows 11?
1. Use CMD
Press the Win key to open the Start menu.
Open the command prompt as an admin.
Type the below command and press Enter. ipconfig /flushdns
You will get a confirmation message that the DNS cache has been flushed.
2. Use PowerShell
Press the Win key to open the Start menu.
Open PowerShell as an admin.
Type the below command and press Enter. Clear-DnsClientCache
Restart your PC.
We have a guide that will help you fix the problems related to Windows PowerShell not working or opening. Our guide lists 5 of the most effective ways to fix the issue.
In the Run dialogue, you must use the same command as in the Command Prompt.
4. Create a Batch file
Press the Win key to open the Start menu.
Open Notepad.
Type ipconfig /flushdns in the notepad.
Click on File.
Select Save as.
In the Save as type drop-down, select All files.
Give the batch file a name and keep the file extension as .bat.
Click on Save.
To clear the DNS cache, simply run the Batch file.
Creating a batch file may look like a bit-long process, but it could come in handy if you do not want to clear the DNS cache that often. If you need to do it, you can simply run the batch file by double-clicking on it, and voila! The DNS cache will be cleared.
5. Reset Winsock settings
Press the Win key to open the Start menu.
Open the command prompt as an admin.
Type the below command and press Enter. netsh winsock reset
You will get a message for its successful completion.
Restart your PC to complete the process.
If the DNS cache methods mentioned above do not work, you should not get frustrated. Because you can easily clear the Winsock settings. Winsock facilitates communication between Windows network software and network services.
When you clear Winsock, it clears or flushes the DNS cache, which is what we wanted.
6. Clear DNS cache automatically
Open the Start menu by pressing the Win key.
Open registry editor.
Navigate to the below-mentioned path. HKEY_LOCAL_MACHINE\SYSTEM\CurrentControlSet\Services\Dnscache\Parameters
Right-click on the empty space on the right and select New, then click DWORD (32-bit) Value.
Name the newly created value as MaxCacheTtl.
In the Value data field, enter 86400.
Click OK.
Right-click on the empty space on the right side.
Select New and then select DWORD (32-bit) Value.
Name the newly created value as MaxNegativeCacheTtl.
In the Value data field, type 5.
Click OK.
Close registry editor.
Restart your PC.
When you create the registry as mentioned above, then you are making sure that the DNS cache will reset automatically after 86400 seconds or 24 hours. This way, you do not need to flush the DNS cache by running any command or anything.
Browser games garner traction by the day because of their dynamism and ease of access. How about a browser flight simulator? You’ll be pleased to know there are some good options on the market.
These games are now far more than the boring ones of the past. One necessary type that is now especially popular is the browser flight simulator or browser plane games.
With the history of airplane games going as far back as possible, it is not surprising that the browser version is thriving. But not any web-based flight simulator is worth your time.
To ensure maximum fun and engagement, we have gathered the best browser plane games to give you the real pilot experience:
GeoFS – The most realistic browser flight simulator
Fractal Combat X – Challenging browser plane game (fighter jet-based)
Air Warfare 3D Fighting Game – Browser flight sim with the best 3D aircraft war
Airplane Fly Simulator – Easiest to control web-based flight simulator
Does Google have a flight simulator?
You were probably wondering if the tech Giant is represented in this department as well. Sure thing, you have none other than Google Earth.
And if you don’t feel like installing it on your machine and controlling it with a joystick, you’ll be pleased to know that there is also a Google Earth web version.
That’s right, you can enjoy the browser flight simulator and easily control it with your mouse or even keyboard. So, what games can you play in a browser? Well, we believe that the sky is the limit (pun intended).
You can play the best tower browser games, airplane games, and many more. Just make sure you are playing from a secure website.
What is the best browser flight simulator?
GeoFS – The most realistic browser flight simulator
GeoFS is a renowned browser airplane and simulator game that offers a realistic physics engine. It is a real flight simulator with dynamics centered around the laws of physics.
It offers players 20 varying aircraft to fly, making it even more enjoyable. Also, it uses real-time atmospheric conditions to make you feel connected to the game.
This stunning browser airplane flight simulation game puts your piloting skills to stern tests. It allows you to pilot a very difficult-to-control 747-passenger airplane.
To survive in this game, you must overcome some tough challenges. Some of these tasks include safe landing and piloting through tricky checkpoints.
If you are ready to experience the life of a pilot, this is the game you must play.
The Fractal Combat X gives you the experience from the cockpit of a fighter jet. It provides different spaceships for you to take care of stern and determined enemy pilots.
With every task, you complete in this game comes a credit reward. This reward will be needed to upgrade your ship, engines, weapons, shields, and other tools.
This is another intense browser airplane game that requires you to pilot a fighter aircraft. Air Warfare is interesting because the battlefield is chaotic with your enemies going all out on you.
You must take out as many enemy planes as possible and dodge their attacks before you eventually crash or run out of ammo. It is just a game you won’t want to miss out on.
Airplane Fly – Easiest to control web-based flight simulator
The Airplane Fly Simulator is one of the new aircraft browser games. Your task is to drop passengers at the correct point on time.
Your job is tricky as you need to fly through some challenging waypoints. Every successful waypoint passage gives you points while missing too many of them signals the end of the journey.
Your browser shouldn’t just be boring, and you can spend your break online with interesting airplane games. While there are many online, the five in this guide will give you that edge-of-your-seat experience.
Are you looking for more adventure like the best browser horror games? Then check our article for some juicy and challenging options.
Feel free to let us know the game that puts your airplane flying skills to the ultimate test in the comments below.
Skype is an incredibly useful tool used by several individuals and organizations for messaging and video conferencing. Though many users reported that Skype installs every time they open it.
The problem is strange, and there’s no sure-shot way to fix things. But users have shared a few solutions that worked for them, and we will present them to you as well, along with other vital information.
Why is Skype installing automatically?
Here are a few reasons Skype installs automatically on the PC every time you open it:
Running an outdated version of Skype: In case you are running an outdated version of Skype, chances are that it is trying to install updates.
Issues with the existing installation: If Skype wasn’t installed properly on the PC, it could be trying to install the missing files.
Corrupt system files: When the system files are corrupt, applications, including Skype, and even some system components may not work properly.
Third-party conflicts: Some third-party apps may also try to install Skype, leading to the issue.
What can I do if Skype keeps installing every time I open it?
Before moving to the complex solutions, here are a few quick ones to try:
Simply uninstall skype in case you don’t need the application. Several users reported that Microsoft pushed the application in one of the updates, and once uninstalled, the app didn’t appear again.
Disable any third-party antivirus or similar security software on the PC, and check whether that fixes the problem. If it does, we recommend you switch to a more friendly and reliable antivirus solution.
Uninstall apps that were added around the same time the problem first appeared in case it’s a third-party conflict.
If these don’t work, head to the solutions listed next.
1. Reset Skype
NOTE
This method only works if you installed Skype from the Microsoft Store. If you got it from the official website, skip to the next solution.
Press Windows + I to open Settings, select the Apps tab from the navigation pane, and click on Installed apps on the right.
Locate Skype, click on the ellipsis next to it, and choose Advanced options.
Now, click on the Reset button.
Again, click Reset to confirm.
A quick way to fix things when Skype installs every time you open it is to Reset the app. Once done, the problem should be resolved.
2. Delete Skype data
Press Windows + R to open Run, type %appdata%, and hit Enter.
Locate the Skype folder here and delete it.
Now launch Skype, and it shouldn’t throw the message again.
3. Uninstall the previous version of Skype
Press Windows + R to open Run, type appwiz.cpl in the text field, and click OK.
Locate and choose the older version of Skype, and then click on Uninstall.
Follow the on-screen instructions to complete the process.
In a few cases, users had two versions of Skype on the PC when an update instead of neutralizing the previous version installed as a separate application. And in this case, uninstalling the older version should do the trick.
4. Modify permissions
Uninstall Skype from the PC.
Press Windows + R to open Run, type %temp%, and hit Enter.
Now, locate any Skype folder/files here, and delete them.
Next, again press Windows + R, enter %appdata%, and click OK.
Find the Skype folder and delete it. Also, make sure to check in the Microsoft folder as well for any related files/folders.
Once done, head to Skype’s official website, choose Get Skype for Windows, and the setup will download automatically.
Run the setup, and choose the appropriate response when prompted to complete the installation process.
After you have installed Skype, again head to the %appdata% folder, and delete the skype.exe (or any related file).
Now, create a file with the same name as the one you deleted earlier, right-click on it, and choose Properties.
Now, tick the checkbox for Read Only, and head to the Security tab.
Next, ensure all the users listed here have minimum permissions, and then save the changes.
That’s it! One of these solutions should help get things running on the PC, and Skype shouldn’t install anymore every time you click on it.
If the problem remains as it is, the last option is to get the application from the official website and remove the one downloaded from the Microsoft Store.
Also, if you are looking for an alternative, there is a wide range of video-conferencing apps that are secure and perform exceptionally well.
If you know of any other solutions that work, do drop them in the comments section below.
Windows 10 has a bucket load of errors that trouble users from time to time, and a recent one is the error code 0xc00007b. This error shows up when users try to open an app, and it fails to start.
This can be exasperating, as the app will be useless until you resolve the issue. Therefore, this guide will show the surefire ways to fix the 0xc00007b error for good on your PC.
What is the reason for the 0xc00007b error?
Below are some of the factors that can cause the Your pc needs to be repaired error code 0xc000007b message to appear on Windows 10:
Faulty app: In most cases, the major cause of the 0xc00007b error on Windows 10 64-bit is a faulty app. This can happen if you download the app from an unauthorized source. The easiest way out of this is to remove the app using an uninstaller software and reinstall it.
Bad memory sector: Sometimes, this problem can be caused by a bad memory sector. The solution to this is to run the CHKDSK command to fix your PC memory,
Missing DLL files: Another known cause of this problem is a missing DLL file. This can be fixed by downloading the required files and copying them to the Syswow64 folder.
How do I fix error 0xc000007b on Windows 10?
Below are some preliminary troubleshooting steps to try before exploring the solutions in this guide:
Right-click the downloaded file and select Extract files.
Now, copy the extract files and paste them into the SysWOW64 folder by following the path below: C:\Windows\SysWOW64
Click the Copy and Replace button if you get any prompts.
Finally, restart your PC and try to relaunch the faulty app.
The first thing to try if you are getting the 0xc00007b error on Windows 10 is to get the needed DLL files. This has fixed the issue for many users. Note that reinstalling the DirectX is a good practice using the link provided earlier in this article.
Also, some users have fixed this error by pasting the DLL files into the immediate directory of the executable with this error. So, you can try that too.
2. Reinstall the latest version of the problematic app
Press the Windows key + R, type appwiz.cpl, and click OK.
Right-click the problematic app and select Uninstall.
Now, follow the onscreen instruction to complete the process.
Finally, visit the official website to download the app again and restart your PC.
In some cases, the 0xc00007b error on Windows 10 is caused by issues with the app. This can be due to some missing files or incomplete downloads.
The easiest way to fix this is to redownload the app.
3. Run the CHKDSK scan
Press the Windows key, type cmd, and select Run as administrator under Command Prompt.
Type the command below and hit Enter: chkdsk c: /r
Finally, press Y if prompted and wait for the command to finish running.
Your hard drive memory sector can get corrupted from time to time and can be the cause of the 0xc00007b error on Windows 10. Running the command above should fix this issue quickly.
Another possible cause of the Windows 10 0xc00007b error is a faulty or outdated Microsoft Visual C++ file. Users have found the Microsoft Visual C 2012 (x64), Microsoft Visual C 2012 (x86), and Microsoft Visual C 2010 x86 Redistributable to be especially culpable.
So make sure you remove them and reinstall them using the links provided. Note that if you use a 64-bit processor, you need to download the x86 and x64 files.
Finally, some users have reported that using an all-in-one installer fixed this issue for them too. So, you can try it.
5. Install or repair .NET framework
Press the Windows key, type turn windows, and select Turn Windows feature on or off.
Tick the box next to .Net Framework 3.5 (includes .NET 2.0 and 3.0) and click the OK button.
Wait for the installation to complete and restart your PC.
The .NET Framework is important for smoothly running apps on your PC. If this feature is disabled, you might experience the 0xc00007b error on Windows 10.
There you have it: everything you need to fix the 0xc00007b error on Windows 10. You only need to follow the steps carefully, and you should be able to open your apps normally again.
If the solutions above fail to fix the issue, you might need to reinstall Windows 10.
For those users who may have lagging mouse issues, lost mouse, damaged mouse, and those who prefer to use shortcuts. It is possible to right-click or left-click without a mouse using the keyboard and specific key combinations.
Whether you are working on a desktop or a laptop. Thus, this guide will show you steps to help you perform the click actions without a mouse. You can also read about ways to fix mouse cursor jumping around in windows.
Can I use my PC without a mouse?
Yes, it is possible to use a PC without a mouse. Most users prefer to use a Mouse to navigate and control their System. However, a keyboard shortcut is another common alternative to a mouse, as they allow users to perform various tasks like opening and closing applications, scrolling, copying, pasting, and other functions.
Furthermore, some laptop users also use a touchpad, similar to a mouse in terms of functionality. More so, the Windows operating systems have Accessibility Options that help users navigate their computer without a mouse. Therefore, without a mouse, users can carry out their work and tasks on their PC with other input devices or keyboard shortcuts.
How can I right-click or left-click without using the mouse?
1. Use the Keyboard shortcut solution
Press the Tab button to highlight the objects on Windows Desktop.
Use the arrow buttons to navigate and press the Enter button to do a left-click.
Press the Context between the Ctrl button as a right-click or press shift + F10.
Without configurations, the shortcut keys on the system have been a way to navigate through the Windows OS fast and with ease. Note that the shortcut keys vary on different versions of Windows.
Need touchpad help on notebooks? See our guide on how to right click on a laptop for quick two finger and corner tap steps.
2. Configure the numerical keypad to perform keyboard functions
Left-click the Start button and select Settings.
Navigate to the Accessibility Options using the arrow key and press Enter.
Select the Mouse tab under the Accessibility properties of Windows using the Tab button, the Keyboard Arrow keys, and Enter.
Press the Alt + M button to Activate Mouse Keys and press Alt + A to make changes.
Turn on NumLock to be able to move around using the Numeric pad.
You can use 6 to move right, 4 to move left, 2 to move up, and 8 to move down on the numeric keypad.
To perform a single left click, press the number 5 key on the numeric keypad.
You can perform a double left-click by pressing the plus sign+ on the numeric keypad.
To right-click, press the minus sign- and press 5.
By default, the number 5 key will remain as a right-click until you press the slash/ on the numeric keypad, which will switch it back to standard clicking.
Configuring your device to use the Numeric pad is one of the solutions available to users in place of a mouse. However, this is only possible for devices with numeric tabs.
If you have any questions or suggestions after going through this guide on how to right-click or left-click without a mouse, then drop them in the comments section.
If you are a Windows user, you know that December 2022’s Patch Tuesday (KB5022083) came with a security update for .NET and .NET Framework.
This actually changed how Windows Presentation Foundation-based (WPF) applications render XPS documents for multiple versions of the Windows OS.
What you probably didn’t know is that it also caused many users to experience issues as XPS documents that leverage structural elements like tables and hyperlinks will not display correctly in WPF-based readers.
However, Microsoft fixed the situation with an update it just released for all the affected versions of Windows.
Microsoft issues permanent fix for .NET problems
Before we get into it, make sure you check out the latest version of Windows 11 (22H2) and all the bugsand issues that you will have to face.
Circling back to the issue at hand, moreover, some inline images may not display correctly in XPS documents or throw Null reference exceptions in WPF-based readers.
Even though Microsoft issued a couple of temporary workarounds involving PowerShell scripts and Windows registry configurations, the tech giant has now rolled out a more permanent fix through an out-of-band (OOB) update.
According to Redmond, this update provides help to mitigate an issue when after installing the December 13, 2022, security updates for .NET Framework and .NET.
If you were wondering what platforms the update is meant for, allow us to shed some light on the matter. Basically, you are covered, regardless of OS version.
If you want the standalone package for these out-of-band updates, search for the KB number in the Microsoft Update Catalog and download it from there.
Furthermore, You can manually import these updates into Windows Server Update Services (WSUS) and Microsoft Endpoint Configuration Manager.
Also, it is extremely important to understand that this OOB update is not being delivered through Windows Update.
As a result, if you want to install it, you should navigate to the Microsoft Update Catalog and search for the various KB numbers mentioned in Microsoft’s support document.
Keep in mind that, now that this permanent fix is available, you can also revert any temporary workarounds you may have applied as they are no longer needed.
Have you encountered any other issues after installing this OOB update for your affected version of the Windows OS?
If Google Pay says this card can’t be verified right now, you’re in for a nasty time. The worst part is you can stumble upon this error on numerous services and platforms besides GPay.
For instance, you can just as well get this card cannot be verified right now error on PayPal, AIB, Chrome, Apple Pay, and so on.
Now, Google Pay offers a safe way to transfer money to friends or family and to pay for purchases conveniently on your phone or desktop.
The app uses encryption and facial recognition to keep your account safe when you use it. However, as many have experienced by now, it is possible to encounter issues on the platform.
At times, Google Pay can stop working abruptly. There’s a chance that you might not be able to send or receive money. The reasons behind this issue can be numerous.
If you experience problems such as This card can’t be verified right now and similar ones, there are ways to solve these issues.
Why can’t my card be verified?
? A common error usually occurs when Google thinks that the device running the app is rooted or compromised in any way that might be harmful to your security. The transaction may fail or you may get an error code U13 indicating the bank servers have an issue.
When you root your phone, Google prevents you from logging in to protect you from hackers who can remotely access your details and later use them to get into your account.
You have to unroot your phone before you try accessing the page again.
? Make sure the mobile number registered with your bank is already inserted in your phone for auto SIM verification.
If you don’t have a SIM card registered with the bank, your card cannot be verified.
? Ensure you receive the SMS on the same mobile number you used when registering with Google Pay and your bank account.
? Check whether Google Pay has access to your contacts. Check if any restrictions are placed by any third-party security apps installed on your phone.
You can try removing any third-party security app to see if it interferes with your accounts.
? Do not use VPN and private browsing mode while downloading an app from the Google Play Store, as it can be interpreted as suspicious activity.
If none of the above works, use another mobile phone. Also, make sure that the other phone isn’t rooted or has any modified version of Android OS installed in it.
How do I fix verify card on Google Pay?
1. Manually save your CVV and billing address
Open a new tab and go to pay.google.com.
Next, click the Payment Methods tab and select the problematic card that G Pay refuses to verify.
Click Edit and manually register the CVV/CVC code and the billing address again, even if they did not change.
Finally, update and refresh the page.
Many users confirmed that this solution worked for them, so you might want to give it a try before anything else. It’s easy!
Some users complained that Google Pay started saying that this card can’t be verified right now after they updated their payment methods.
Others mentioned that the credit card autofill option suddenly stopped after updating the Google Pay app.
Finally, some users claim not to have made any changes at all only to be served with the nasty this card can’t be verified at the moment notification.
2. Temporarily disable your firewall
Hit the Windows key and click on Settings.
Select Privacy & security.
Click on Open Windows Security.
Select Firewall & network protection.
Click on Public network.
Next, toggle Microsoft Defender Firewall off.
Try accessing the page again.
3. Turn off your VPN
Press the Windows key and select Settings.
Next, select Network & Internet.
Select VPN on the right-side menu.
Select the VPN connection you want to disable, click on the drop down and select Remove.
Try accessing the page again.
4. Unroot your phone to fix verify your card on Google Pay
With all the breaches that have been in the news lately, you’re probably worried about your credit card information getting hacked. It’s smart to be concerned. Data breaches have become increasingly common.
It’s important to know whether the hackers got credit card numbers, personal information, or both. When hackers get this data, they could use it to open accounts in your name and ruin your credit.
Although a breach is never good, it’s not the end of the world. If you have a credit card (or two), there are steps you can take to help protect yourself.
Sometimes, you may want to add an extra layer of protection when using your debit and credit card online.
Here’s how to protect your credit/debit card from hackers:
✅ Avoid having too many cards online – Although the Internet is an excellent source of information and convenience, it’s also a dangerous place for your data.
The purpose is to have only one card with a limited amount at any time so that you can keep track of your online activity.
✅ Create unique passwords – Ideally, you should use different passwords for every account, but that can get complicated. You need some way of generating strong passwords that are easy to remember.
✅ Only purchase from trusted sites – If possible, purchase from an established retailer’s website.
Look for security features like secure sockets layer (SSL) technology, which encrypts your information as it is stored and transmitted over the Internet.
You can usually tell whether or not a site is using SSL by looking at the URL.
✅ Avoid using public Wi-Fi – Hotels, restaurants, and coffee shops all offer free Wi-Fi. But, in most cases, the data traveling over these networks is not encrypted.
If you use your credit card on a public Wi-Fi network, someone may be able to steal your credit card information.
In case you are stuck with the Transaction failed due to security reasons message on your PhonePe app on your Android or iPhone, check the bank server status, your account balance, and your internet connection first; read this guide to learn more.
We hope that you were able to bypass the card verification error with at least one of the solutions provided. And if debit cards give you grief, you can turn to mobile payment through DCB association for a more seamless payment approach.
As for other payment issues, we have an informative guide on Google Chrome temp charge, so don’t miss it for more information.
We’d love to hear from you in the comments section below if you have any comments, queries, or suggestions.
Messing with your Windows Registry might end up with a bricked Windows system. But there are ways to perform Windows 10 registry repair with Command Prompt.
Usually, you can get a corrupt registry error after making changes within the Registry Editor. That’s why it is more than recommended to back up your registry before changing anything, as there you have all the internal settings of your Windows 10 system.
How do I know if my registry is corrupted?
There are many ways to know that the Windows Registry is corrupted, but mainly, the PC gets slow, crashes, freezes, and sometimes, you get a BSoD.
More importantly, we need to know what are the leading causes of registry corruption:
Hard drive issues – There may be issues with the hard drive, such as corrupt sectors that result in data loss which is a primary source of registry corruption.
Incorrectly installed software – The most common cause of registry corruption is incorrectly uninstalled software that leaves behind registry entries that interfere with the startup.
Virus and malware infection – Viruses create registry entries that are exceedingly challenging to remove manually, viruses, Trojan horses, and spyware are also known to generate registry issues. Good antivirus software is always a must.
Now, let’s see how we can fix this problem with the below solutions.
Insert the installation media and reboot your device.
When prompted, press any key to boot from DVD/USB. If the prompt doesn’t show up, we have a guide on how to boot from a USB media.
Now from the Windows installer menu, go for Startup Repair and follow the on-screen prompts to fix your Windows 10 system – the data will not be erased as the OS system will be restored to a stable state.
This procedure will also repair the registry.
2. Install a Registry cleaner
If that isn’t working, you can also use registry software. There are many dedicated tools that you can use to fix missing or corrupt registry keys.
3. Run a SFC scan
Go to Start, type cmd, and select Run as administrator.
In the cmd window type the script below and hit Enter. sfc /scannow
Select Reset This PC section, and then choose Keep My Files.
Follow the on-screen instructions.
If these methods didn’t fix your Registry problems, then you probably will have to install Windows from scratch eventually.
5. Run the DISM command
Go to Start and launch Command Prompt as Administrator.
Type the following command and hit Enter:DISM /Online /Cleanup-Image /ScanHealth
Wait until the scan process completes.
This is one of the simplest ways to perform Windows 10 registry repair with Command Prompt, so be sure to try it.
Some of our readers asked: Does resetting Windows 10 fix the registry? The simple answer to this is yes. A reset will completely set your Registry to its original state. In fact, this is a recommended last resort for registry problems.
So, if all attempts have proved abortive, you should try a complete system reset, which should work well enough.
If you’ve got additional tips and suggestions on how to fix corrupt Registry keys on Windows 10, you can list them in the comments below. Also, you can leave there any other questions that you may have.
Are you curious about the user base of the latest Windows iteration? This article features the current state of the market share of Windows 11 in 2023, the iteration set to replace Windows 10, one of the most successful to date.
If one were to read the Windows 11 review, it would be evident that the latest iteration seems like an upgrade. However, the new OS was criticized, particularly for the strict system requirements and design inconsistency.
Despite all that, users are still upgrading to this new OS. Now, the question is, how many people have finally upgraded to the latest iteration, and how is Windows 11 fair in terms of market share?
Windows 11 stats
On June 24, 2021, Microsoft, to everyone’s surprise, revealed Windows 11 and released the first build within a few months on October 5, 2021. In a virtual event, Panos Panay announced the latest OS.
But, a few weeks before the official announcement, the media got a whiff of something big happening and speculated the release of a new iteration. The initial builds of Windows 11 were relatively unstable, but that was expected, and things did improve.
After a week, Microsoft released an update, 22000.258, which included patches to some bugs. Currently, the latest iteration has more than a dozen updates. Also, the first major update for Windows 11, 22H2, was released in September, though it had a few bugs.
Windows 11 certainly isn’t the success many might have imagined, but it’s slowly catching up. Besides, a major reason behind the slow growth is the requirement for TPM and Secure Boot, something missing in most older PCs.
According to Statcounter’s November 2022 report, which shows the latest data about operating systems and browsers, the newest iteration is doing quite fine.
Windows market share by version
Windows is the first choice for most PC users worldwide because of its flexibility, software availability, compatibility, and larger community. Therefore, we have taken two sources to know the market share of this OS. Here is what we have found:
StatCounter data:
According to StatCounter, around 75.11% of computers will run Windows in 2022. The figures for individual iterations may surprise many, given that many users are still running the older ones.
Here is an overview of Windows market share by iterations in 2022:
Windows Market Share by Iteration
Here’s a table depicting the market share of Windows 11 and the previous iterations as of Nov 2022, using the data sourced from Statcounter.
Windows OS
Market Share in %
Windows 11
16.13
Windows 10
69.75
Windows 8.1
2.53
Windows 8
0.79
Windows 7
10.25
Windows XP
0.4
Other versions
0.15
We can see that Windows 10 is still the most used iteration, followed by Windows 11 and Windows 7. The other iterations have a fairly low market share, further decreasing over time.
Based on some versions, a graph compares the Windows version market share over the last ten years (2012-2022).
Windows market share by versions (last ten years). Click to enlarge.
Each release of a new version of Windows has a significant impact on the market share stats. Similarly, with the release of Windows 11, the share of Windows 10 continues to decline, as is evident through the various graphics presented here.
Judging from what Statcounter had to say, in November 2022, Windows 10 dipped below the 70% mark for the first time in history.
But even though Windows 10 remains king of the hill, its market share is slowly decreasing as its successor becomes increasingly popular.
In fact, Statcounter claims Windows 10 now sits at a 69.75% mark, representing a 1.51-point decrease compared to the previous month.
As for the newest operating system (Windows 11), know that it’s not breaking any speed records, but it still gains more and more ground, keeping a relatively slow but steady pace.
This November 2022 report indicates that Windows 11 is now at 16.13%, with a 0.68% change compared to October.
If you are also wondering about the older Windows versions, know that Windows 7 remains the third most popular operating system, with a market share of approximately 10.24% (+0.62).
The Redmond tech giant plans to end the Extended Security Updates program for Windows 7 early next year, so expect the OS’s market share to go down a little faster.
Windows 8.1 and 8 have 2.53% and 0.79% market shares, respectively, at the moment. Remember that these versions are going out of service in January 2023, so you better prepare.
Let’s move on to Windows XP, a now eight-year-old dead and unsupported OS, which still holds strong with a 0.4% market share.
With more than 1.5 billion active devices, Windows is still not the most popular operating system, which in fact, is Android, with a 43.43% (market share.
Windows comes in second with 29.3%, and iOS is in third with 17.22%. These numbers are changing each month, by the way, so we’ll keep an eye out.
AdDuplex data:
AdDuplex is also monitoring the Windows 10 and 11 market share. According to their latest data, Windows 10 has nearly 76.1% market share, and Windows 11 (including Insiders build) has 23.9%.
Windows OS
Version
Market Share in %
Windows 11
21H2
23.1
Windows 11 (Insiders)
0.8
Windows 10
21H2
38.2
Windows 10
21H1
23.9
Windows 10
20H2
3.8
Windows 10
M20U
5.2
Windows 10
N19U
2
Windows 10
M19U
1
Windows 10
O18U
2
AdDuplex data also indicates that the usage percentage of Windows 10 is pretty impressive. However, it doesn’t show any Windows 11 market share by version, unlike Windows 10.
They do not show any Windows 7 market share statistics in 2022. So, as a result, StatCounter data is more acceptable if we talk about this desktop OS usage percentage based on the versions.
How much market share does Windows 11 have?
As of November 2022, Windows 11 has a 16.13-23.9% market share per different available data sources. However, achieving this took over a year, which cannot be ignored. But there are several factors at play here.
According to recent news, 1.4 billion devices are running Windows. But how many people are using Windows 11 right now? Unfortunately, we cannot give you an exact number.
Based on the total Windows users and the latest market share stats, there may be an estimated 0.226 billion or almost 226 million devices running Windows 11. In contrast, Windows 10 is running on over a billion computers.
Remember, this is an estimate based on the data, not the actual number. One individual may have multiple devices. So, it is tricky to estimate the number of users.
We saw that PC users rapidly upgraded to Windows 7 and 10 after their release. So, Windows 11 is not doing well compared to its successful predecessors? Let’s see.
Windows 11 adoption rate in 2022
Since its release, the latest OS has been well-received by users. But, because of the strict system requirements, many thought it might have difficulty achieving a decent user base. But, in reality, it is doing slightly better than the prediction.
Though Windows 11 was released in October 2021, many people started upgrading in January. It might be because they waited to be sure it was not another VISTA or Windows 8.
Since then, it has been slowly gaining a user base. If we compare the month-to-month market share percentage of Windows 11, we get the following:
Windows 11 Market Share Increase by Month
Month
Market Share in %
January 2022
2.6
February 2022
7.89
March 2022
8.45
April 2022
8.91
May 2022
10.08
June 2022
10.96
July 2022
11.77
August 2022
13.08
September 2022
13.61
October 2022
15.45
November 2022
16.13
We can see that in January-February, Windows 11 got the new users at the highest rate. However, the AdDuplex data indicate a different thing. But, one thing is common. According to both data sources, the adoption rate of Windows 11 has slowed a lot in recent months.
In March and April, the Windows 11 market share increased by an almost insignificant amount, contrary to Windows 10 21H2, which got 6.5% new users.
Windows 11 usage rate by the gamers:
If we compare the usage of gamers, the data is a bit different. Windows 11 has been attracting more gamers since its release. To get an idea, we have looked at the Steam survey.
According to the latest data, almost 27.98% of Steam users have upgraded to the latest Windows OS until November 2022, and usage is increasing rapidly. If we look at the data since December, we get the following results:
Month
Usage %
Dec 2021
10.55
Jan 2022
14.10
Feb 2022
16.18
March 2022
17.44
April 2022
19.66
According to the available data, PC gamers are upgrading to the latest iteration more than general users and that could be due to the optimized gaming performance in Windows 11.
What are the factors that affect the market share?
Some significant facts played a substantial role in the market share statistic. After doing some research, we have found the following:
1. Strict hardware requirements
As Windows 11 has a stringent hardware requirement, many users could not upgrade. At least 4 GB RAM, 1 GHz dual-core processor, UEFI, Secure Boot capable firmware, and DirectX 12 compatible graphics are necessary to run the new operating system.
This is not the only story. It would be best to have at least an 8th-generation Intel processor or a 2nd-generation AMD Ryzen processor. Microsoft later added some specific models of Intel’s 7th gen processors to the supported CPU list.
Even if you have better specs, it doesn’t mean you can run this OS because of the security processor requirement.
TPM 2.0:
Windows 11 requires a security processor (TPM 2.0 or Microsoft Pluton) on the computer. Unfortunately, many modern computers have become incapable of running this OS just because these systems don’t have the TPM 2.0.
The performance played a significant role in the market share. We saw that many people upgraded to this latest OS and returned to Windows 10 again due to performance issues on their systems.
3. Compatibility
We are talking about software compatibility. Many users continue using older operating systems like Windows 7 or Windows 10 due to some compatibility issues.
Some discontinued software that does not get any more updates from the developer becomes obsolete in the modern operating system. As a result, users who need these for professional use have not considered upgrading to Windows 11.
Besides, hardware incompatibility is another issue that prevents most users from upgrading.
4. Reliance on other Windows versions
Different people have different viewpoints. Parts of Windows users do not like the changes. They do not consider an upgrade if a version works well for them and serves their purpose.
It happened with every new Windows iteration. Even in 2022, people are relying on Windows 7. Therefore, many have decided to stay on Windows 10 for more years.
5. Waiting
Most Windows 10 users who depend heavily on PCs for their work are waiting and monitoring the news and feedback about Windows 11. However, as this OS was a bit buggy and less performing on some systems after the release, some people decided to wait until it got better stability than Windows 10.
6. Features
Featurewise, this OS has some changes if we compare Windows 11 vs. Windows 10. It played a role in its usage market share.
The new Windows 11 has some additional features, including some for gaming and business, which attract some users to this OS. Particularly, gaming functionalities and benefits attracted more gamers to this OS.
On the other hand, some valuable features were missing in the initial release. Unfortunately, that also prevented many users from accepting Windows 11 as their primary operating system.
7. Design
Windows 11’s design and UI are other things that affect the market share. However, it is one of the best OS in terms of visual quality.
The modern outlook and better consistency in design language compared to Windows 10 have brought some passionate users to this new version of Windows.
Unlike many other Windows operating systems, Microsoft has promised to support Windows 10 for a long time. It will get regular updates and security patches till 2026. So, many users decided to stay with this OS for a few more years.
These factors are directly affecting not only the Windows 11 market share statistics but also that of Windows 10.
Windows 11 future updates
Microsoft has been responding to users’ feedback with the highest priority. Even though the initial Windows 11 release lacked some key features that power users need, Microsoft has promised to bring them in the future update.
Some essential features include drag and drop in the taskbar, app folder in the start menu, tweaking the recommendation section of the start menu, etc., will be available after the next major update.
Besides, using the Windows Insider channel, we can already see a few more features that may come in future updates. Here is the complete list of features that have already been introduced or will be in the Windows 11 future update:
Tabs feature in File Explorer
App folders in the Start menu
Spotlight wallpaper
New Task Manager app
Touch & gesture improvements
Better animation
Better OneDrive integration
Resizable pinned area in the Start menu
Android app support
MS has been working on some other minor but noticeable feature changes in addition to these, and we will keep an eye out for them and inform you of their release.
Microsoft has been bringing fluent design to its existing built-in apps and tools. Recently, MS has updated the design for Notepad, Paint, and Photos. However, some parts of Windows 11 are still inconsistent and use the previous designs.
The Settings app is getting more features, and the traditional Control Panel is going away. For instance, Windows now only allows users to uninstall updates from Settings rather than the Control Panel. More such changes are expected in the future.
This new OS will get one major update each year, unlike Windows 10, which gets multiple updates every year. But, users will regularly get minor updates for security and performance improvements.
We have noticed that each new minor or major update has significantly improved Windows 11. As a result, it is now a very stable and well-performing OS. If it continues to happen, we will see a considerable improvement in Windows 11 market share. Another popular product by Microsoft is Outlook, and if you want to check out its market share and user base, read this post.
What we’re about to tell you right now is really important and should be treated as a priority, especially if you value your online safety.
If you are still interested in buying a licensed Windows 10 copy, you’d better hurry because Microsoft will stop directly selling Windows 10 licenses by the end of the month.
The operating system will still be supported until 2025, but licensed versions of the popular OS will no longer be sold.
No more Windows 10 licenses from Microsoft
January is over, and if you try and navigate to the purchase webpage for Windows 10 Home or Windows 10 Pro, you will be redirected to the Get Windows 11 page.
Once there, you’ll find that there is only a single license purchase link that only allows you to purchase the latest operating system, Windows 11.
To help you out a bit, there is also a list of vendors from where you can buy a Windows 11-compatible PC and there are FAQs for customers who are not tech-savvy too.
However, while Microsoft is no longer selling Windows 10 licenses through its website, you can still buy these at third-party retailers like Newegg and Amazon.
Not to mention the fact that, if you are lucky, you might also find physical copies of Windows 10 in brick-and-mortar stores.
Please keep in mind that, according to notices posted to the Windows 10 Home, Pro, and Workstation pages on Microsoft’s site, the company will stop digital downloads of Windows 10 on Jan. 31, 2023.
As we previously mentioned, Microsoft will still support Windows 10 for a few more years, but we won’t be able to buy a Windows 10 license except through existing stores of licenses at third-party retailers.
Remember that some versions of Windows 10, such as 20H2, have already reached end of support. That’s why we recommend that you upgrade to Windows 10 22H2, the last version of the OS.
In the above-mentioned post, Microsoft says that January 31 (2023), will be the last day this Windows 10 download is offered for sale.
For those of you that didn’t quite catch it, the elimination of the Windows 10 license basically means that Windows 11 will not only be the operating system that Microsoft wants you to buy.
Allow us to rephrase and say that it’s also the only operating system that Microsoft will allow you to buy, therefore the obvious choice.
Don’t worry, we’ll see this again in a few years when the Redmond-based tech colossus will release Windows 12 to the public.
That being said, just because Microsoft won’t sell them anymore, doesn’t mean you can’t still get your hands on a licensed copy of Windows 10.
In fact, the alternative for those wishing to buy a Windows 10 license will be to turn instead to third-party retailers that still have the product in stock.
Keep in mind that OEM copies of Windows 10 are still available at Amazon, although the Windows 10 product listing lacks any indication that Microsoft itself will soon stop selling Windows 10 licenses.
There’s also the option to install Windows 10 on your machine without paying for it, but you will lose the ability to personalize your PC and we don’t recommend it at all.
There will also be a watermark on your desktop asking you to activate Windows, so yet another reason to go official.
On that note, know that this is pretty much the beginning of the end for Windows 10, seven and a half years after it launched, as Microsoft continues to pivot strongly towards Windows 11 as the preferred OS.
A lot of new functionalities are primarily being added to Windows 11 and it’s also being pitched as the most secure version of Windows.
Have you already migrated to the newer Windows 11? Share your experience with us in the comments section below.
Network drive mapping is one of the Windows 10 features that ensure ease of access, consistency, and network setup efficiency.
However, most users reported that, after updating from v1909 to v2004, Windows 10 couldn’t map the network drive. So, this article will show you a series of solutions to help you fix this issue.
Why can’t I see my mapped network drives?
Below are some of the factors that can cause the can’t map network drive error on Windows 10:
Outdated PC: The first thing to check when facing this error is if you are using the latest version of Windows 10. If you are still using the 2004 version, you must update your PC to the 22H2 update.
Missing registry value: Another cause of this issue is a missing ProviderFlags registry value. You need to tweak your registry and add the value accordingly.
Now, let’s see the correct procedure to map a network drive in Windows 10.
How do I manually map a drive in Windows 10?
Press the Windows key + E to start File Explorer.
Select This PC from the left pane, then go to the Computer tab and select Map network drive.
Select the drive letter, then, in the Folder box, type the path of the folder or computer, or select Browseto find the folder or computer.
Select Reconnect at sign-in if you want to map that drive every time you sign in, then click Finish.
If the issue still persists, perform the solutions below to fix the drive mapping problem in Windows 10.
What can I do if Windows 10 can’t map the network drive?
1. Update to the 22H2 version
Press the Windows key + I to open the Settings app and select Update & Security.
On the left side, select Windows Update, then click the Check for updates button.
Look under View optional updates and click on Download and Install.
Click on the Restart now button.
2. Add the ProviderFlags registry value
Press the Windows key + R, type regedit and click OK.
Locate the following in the left pane: HKEY_CURRENT_USER\Network\
Now, right-click the space in the left pane and choose New > DWORD (32-bit).
Type ProviderFlags as the name and double-click it.
Next, set its Value data to 1 and click OK.
Finally, close the Registry Editor and restart your PC.
3. Use Local Group Policy Editor
Press the Windows key + R, type gpedit.msc and press Enter.
Once you’re inside the Local Group Policy Editor, select Local Computer Policy.
Extend Computer Configuration, then click on Administrative Templates.
Look at the right side and double-click on the System section from the shown list.
Scroll down to Logon and double-click on it.
Click on Exclude credential providers, then, on the left side, on policy settings.
Checkmark the Enabled option.
Click on Apply and then on Ok.
Restart your computer, wait for the next startup to complete, and try to access it again.
In addition to gaming, Dell is dropping news about its prosumer peripherals for business and casual use such as a new keyboard, 43-inch monitor with USB-C hub, rechargeable mouse and 34-inch curved monitor.
Dell UltraSharp 34 Curved USB-C Hub Monitor
Starting at $1,259.99
The new UltraSharp 34 Curved is as marketed, with a 34-inch WQHD (3440 x 1440) IPS screen with 2,000:1 contrast ratio and 98% DCI-P3 color space support.
Dell’s new selling point for its latest monitors is a productivity hub built-in and the UltraSharp 34 comes with a streamlined USB-C Hub that helps the display support 2 HDMI ports, RJ45 Ethernet, 2 Type-C upstream ports, display port, Audio line out, 3 downstream USB-A 3.2 10Gbps, 2 Type-C downstream ports, and Kensington Security lock.
Dell UltraSharp 43 4K USB-C Hub monitor
Starting at $1,297.99
Dell UltraSharp 43 4K USB-C Hub monitor offers a similar feature set as its curved 34-inch cousin but flattens its viewing angles and offers 42.5-inches of display surface as well as comes in with 4K resolution and support for up to four FHD partitions.
The standout feature for the UltraSharp 43 4K is the ability to connect and control up to 4 PCs at one time through a KVM connector. The KVM connector enables switching through four separate picture-in-picture displays portioned off in their own corner of the screen.
Port selection on the 43 4K monitor offers 2 Display Port ins, 2 HDMI ports, 2 USB-C upstream ports, USB-A 3.2 Gen2 port, RJ45 ethernet connector and audio line out.
Dell Premier Collaboration Keyboard
Starting at $129.99
The Collaboration moniker comes as the Dell Premier Collaboration Keyboard becomes the world’s first Zoom-certified keyboard on the market.
The low-profile keyboard puts mute, unmute, chat, screen share, and video toggles right on the keyboard for easier controls during Zoom meetings.
Beyond that, the 2-point connecting Bluetooth enabled, USB-C charging, and backlit keyboard presents as many other with a quieter typing experience thanks to its scissor-switch key design. Users can connect a third device to the keyboard via RF dongle if necessary.
Dell Premier Rechargeable Mouse
Starting at $109.99
Dell’s contoured designed mouse adds a horizontal scroll wheel near the thumb placement in addition to the one placed at the middle of the mouse in addition to its adjustable DPI increments to support configurations between 800 and 8000 by increments of 200.
The Rechargeable mouse also supports RF 2.4Ghz and Bluetooth 5.1 connectivity for two devices and a third via RF dongle.
Dell claims the Rechargeable mouse can last up to 3 months on a charge and can be recharged via USB-C.
FlashFXP is one of the most powerful FTP and FTP clients available for download. Wrapped up in a friendly interface with great online tutorials, FlashFXP is a great way to manage your websites professionally.
The interface is intuitive and offers a high degree of customization, allowing you to change almost every element on the interface, from the toolbar to fonts to color.
Apart from the standard FTP, FlashFXP offers support for SFTP and FTPS along with strong password encryption and other high-end security features.
You will find superb features in every section, from connectivity to interface, transfers, and performance. There is also an inbuilt file scheduling system and other webmaster-oriented tools.
However, all this does not come for free. There is a thirty-day trial period after which you buy the program.
Other great features:
High-performance file transfer
MODE Z on the fly compression
Supports popular file transfer protocols
Server to server transfer
FlashFXP
FlashFXP offers unique and complimentary advanced features for client configuration
WS_FTP is software that will simplify your work with its efficiency and friendly-user concept. We will list some of its strong points below.
You can easily find and transfer files directly from your desktop search engine. The search can be customized by file type, date, and size. It allows you to drag and drop these files from your computer to a remote FTP server or between servers if you have more of them.
WS_FTP has rong security, protecting your files during the transfer using multiple crytpographies (256-bit, AES, FIPS 140-2) and also an Open PGP file encryption (well, that’s a security monster!)
It allows you to make your action schedule and keeps safe the files that you scheduled to be transferred. It also can backup, synchronize, schedule, compress, and even notify by mail.
WinSCP is another open-source FTP client that supports the encrypted SFTP, SCP, and WebDAV. It features a dual-panel interface that simplifies transferring files between your computer and the remote server.
Just as the first three letters suggest, WinSCP is only compatible with the Windows platform, and it comes with other premium features such as remote editor capabilities, integrated text editor, and many more.
Talking of the UI, WinSCP has a file manager interface that resembles Windows Explorer or the Norton Commander.
Using the software is simple and straightforward; drag and drop feature makes it easy to upload files, and the program also supports a host of other operations such as changing properties, duplication, moving, and directory synchronization.
WinSCP is a great and versatile program that you get free of charge, and you can choose from one of the 38 languages available.
Easy to use and bursting with premium features, Cyberduck is one of the best free FTP clients for Windows 10. Featuring a minimalistic user interface, Cyberduck offers support for both Windows and Mac OS X.
If you care a lot about the looks of the FTP client you use, then Cyberduck might be of great interest to you. It offers unlimited support for FTP, SFTP, Amazon S3, WebDAV, and OpenStack Swift.
It also offers support for Google Cloud Storage and Rackspace Cloud Files, comprehensively covering all you need to manage your site.
Cyberduck has one of the most impressive Graphical User Interface. There is a handy Quick Look feature that enables you to quickly access the files, while the support for editors feature helps you edit the files instantaneously.
Just like FileZilla, Cyberduck is super easy to use. To transfer a file, all you have to do is click the upload option, and Cyberduck will take it from there.
Cyberduck is convenient as you can even view the file transfer progress through the ‘Transfers’ section.
Other handy features of Cyberduck include synchronization of local and remote directories, desktop notifications, history logs, and bookmarks.
If you’re looking for software that can perform file transfer easily, then WebDrive might be what you need. The software allows you to connect to SFTP and FTP servers easily. You can even map servers as a drive letter for quick access.
Cloud storage services are also supported, and you can access them easily with this tool right from your File Explorer.
The list of supported services includes SharePoint, OneDrive, Box, S3, GoogleDrive, Dropbox, and many more.
The software allows you to preconfigure it before installation. This is perfect if you need to install it quickly on several devices in your network.
Overall, this is a great tool, especially if you plan to use cloud storage services along with FTP servers, so be sure to give it a try.
When the SSD is not recognized or is simply dead, you don’t just lose precious data but will also have to shell out quite a few bucks for a replacement drive.
Most usually go with the latter without much thought. But what if you can get the SSD working? Read ahead to find out.
What are the symptoms of drive failure?
While the SSD (Solid State Drive) and HDD (Hard Disk Drive) are completely different in storing data, a common aspect is that both fail sooner or later. Though the former has a considerably longer life span.
An SSD can last 10 years or more if well -maintained, while an HDD usually wears out after 4-6 years. The reason is that SSDs have no moving parts, as opposed to HDDs.
But you must identify the signs of a failing SSD before it’s completely dead for several reasons. Here are a few things to look out for:
Get errors while reading or writing files: When a drive is about to fail, it will throw errors when accessing or saving files to certain locations.
Computer slows down: A slow computer could be a sign of a falling SSD, though remember, that’s not the only reason.
Issues booting the PC: If you are unable to boot Windows and get an error frequently, chances are the SSD is to blame.
Applications start to crash: In many cases, the applications crash when the SSD is dead, and you must fix things to run them again.
Make sure the connections are in order. Remove the SATA cable from the SSD and then plug it back in just to be sure.
Unplug other non-critical peripherals from the PC, and then connect the SSD.
Plug the SSD into another computer to verify whether it’s dead or the previous PC couldn’t read it. If it’s the latter, replace the cable and check the ports. For the former, the other solutions here will help.
Update the BIOS since it could be an issue there that’s giving the impression that the SSD is dead.
If you can’t figure things out, move to the next fixes.
NOTE
The solutions here are for an SSD that has gone dead over time and is not damaged in any way. If it’s the latter, we recommend you immediately take it to a repair center.
1. Keep the SSD in an idle state
Turn off the PC and unplug the data cable from the SSD, but leave the SATA power cable connected.
Please turn on the PC, enter the BIOS, and let it sit idly for 30 minutes. Do not use the computer during this period.
Now, turn off the computer, disconnect the drive, and wait for 30 seconds.
Again, connect the drive using the SATA power cable, turn on the computer, and wait 30 minutes.
Repeat the process 2-3 times, then connect the drive normally, and it should appear.
Though strange, this is one of the most common techniques to fix a dead SSD. The idea here is to let the SSD be idle for an extended period to get it to work. If that doesn’t help, head to the next solution.
2. Reset the BIOS
NOTE
The steps to reset the BIOS are different for every manufacturer, and the process listed below is only to provide an understanding of the concept. We recommend you look through the manufacturer’s website for the exact steps.
Power off the computer, turn it on, and repeatedly hit the relevant key (depending on the manufacturer) to enter the BIOS. It’s usually F1, F2, F10, F12, or Del.
Once in the BIOS, navigate through the various tabs and look for an option that says Load Optimal Defaults, Load Setup Defaults, Load Default Options, or something similar, and select it.
Confirm the reset, and wait for the process to complete.
Once done, turn on the computer, and it should recognize the SSD.
Oftentimes, an issue with the BIOS makes us think that the SSD is dead, and resetting it helps fix things in no time.
3. Update the SSD’s firmware
Press Windows + X to open the Power User menu, and select Device Manager.
Expand Disk drives, right-click on the SSD, and choose Properties.
Head to the Details tab, choose Hardware Ids from the dropdown menu, and note the one for the SSD.
Now, search for the Hardware ID using Google or another search engine and open the firmware update webpage on the manufacturer’s website.
Download the firmware and run the setup to complete the installation process. Since we are running a Dell computer, we went to its official website. In your case, it might be different depending on the manufacturer.
After downloading and installing the firmware update, check if it can fix the dead SSD. For many users, it did the trick, and we recommend you update the SSD firmware.
Press Windows + R to open Run, type devmgmt.msc in the text field, and hit Enter.
Now, expand Disk drives, right-click on the dead SSD, and choose Update driver.
Next, select Search automatically for drivers and let Windows install the best one.
Updating drivers is critical for the effective functioning of every device, including the SSD. So, make sure you have the latest ones. If Windows doesn’t find an update, you can always manually install the latest drivers, though it’s more time-consuming.
Alternatively, you can use dedicated updater software such as Fortect Driver Updater that automatically scans your PC for outdated drivers and installs the corresponding version for your hardware.
5. Run the Check Disk utility
Press Windows + S to open Search, type Command Prompt, and click on Run as administrator on the right.
Click Yes in the UAC prompt.
Now, paste the following command while replacing C: with the letter for SSD, and hit Enter:chkdsk C: /f
If asked to start the scan after a restart, press Y, then hit Enter and reboot the computer for Check Disk to run.
That’s it! One of the solutions presented here should have helped you fix the dead SSD drive. If the problem persists, we recommend you contact the official manufacturer or a local technician to get the hardware inspected.
Also, if there are critical files on the drive that you would like to salvage, check the best data recovery tools to retrieve them.
If you have any queries or want to share a solution that worked for you, comment below.
If you are one of the people who are tired of seeing tiny text in Windows 11 and want to change the display scaling in Windows, you can easily check DPI and adjust the settings to your preference.
When you have a high-DPI display, you might find that some desktop apps are blurry when you compare them with newer Universal apps.
This makes it difficult to use older applications on Windows 11 because the text is hard to read and images are blurry.
The default display scaling may not always be ideal for what you’re viewing. Some things will appear too small and others are tough to read.
While Windows 11 does its best to adjust DPI scaling automatically, it doesn’t always get it right. Luckily, it’s easy to manually adjust DPI scaling in Windows 11.
Why is DPI important?
If you’re a gamer, the DPI of your mouse can be crucial to your success. A higher-DPI mouse will allow you to move the cursor on the screen further per inch of movement than a lower-DPI mouse. This is why gamers often go for a mouse with a higher DPI.
To know exactly how far your mouse moves on the screen compared to how far you move your hand, you can calculate the DPI of your mouse.
DPI and sensitivity are closely related but not identical. For example, you can have a high-quality gaming mouse set to a low DPI, and it will still be able to track movement with high accuracy.
However, using a low DPI can make it harder to keep your cursor on the screen when moving quickly.
A mouse with a higher DPI setting detects and reacts to smaller movements. A lower DPI setting on a mouse means that you’ll need to physically move it more in order to make the cursor move across the screen.
Choosing the best mouse DPI setting is all about finding that sweet spot between control and speed.
If you play on a high-resolution desktop monitor, consider using a mouse with high DPI so you can take advantage of the extra space. If you have smaller monitors or play on laptops, stick with low to medium DPI.
Click and hold the mouse until you reach the 1 inch mark.
The value you get is your DPI.
Can I change DPI scaling on Windows 11?
Your screen resolution is the number of pixels on your screen. If you have a low resolution, as many users do, and you try to use applications designed for a higher resolution, they won’t be designed properly to fit on your screen.
Instead of showing everything at a size that’s easy to read and use, they’ll either be very small or you’ll have to scroll around too much to see the content.
Windows uses scale factors to compensate for this mismatch between application design and monitor size.
When scaling is 100% (the default setting), the dots in an image are displayed at their native size onscreen – one dot per pixel. In other words, images will appear with the same clarity on all screens (but not necessarily the same size).
To change DPI scaling, follow the steps below:
Press the Windows + I keys simultaneously to open Settings.
Tap on System and select Display on the right pane.
Under Scale & layout, open the drop-down and select your preferred scaling.
What can I do to fix Windows 11’s DPI scaling issues?
If you are using a higher resolution for Windows 11 4L scaling, make sure that you have the recommended display resolution. If you’re not, your DPI scaling may be off, which can cause blurry text, apps, and other items.
While using two or more monitors is a great way to get more work done, it’s not without its problems.
One issue that you may run into involves scaling. Windows will attempt to adjust your programs and apps automatically so that they look good on the monitor that you’re currently using.
For instance, if your main monitor is 4K and the second one is 1080p, set the first to 200% scaling and the second to 100%.
This will improve your experience when working with apps that span across two or more monitors, but it may also cause some apps to stop responding or appear blurry on one of your displays.
Also, if you are using an old monitor, you may run into problems. Older monitors tend to have a limit on their display capacity. You can log out and log back in to resolve the issue.
Can I disable display scaling on high DPI settings in Windows 11?
While using Remote Desktop, you may also face Windows 11 RDP scaling issues because the device cannot be detected. To work around this issue, check and verify that you are connected to the Internet.
You can also disable DPI settings for a program if it appears blurry. To disable, follow the steps below:
Right-click on the program and select Properties.
Click the Compatibility tab and press OK.
Select Change high DPI settings.
Under Program DPI, check Use this setting to fix scaling problems for this program instead of the one in Settings and under High DPI scaling override, check Override high DPI scaling behavior then press OK.
We hope you were able to check your DPI and found some useful information from this article. If you have any suggestions, please leave a comment down below.
If you’re running Windows 11, and your screensaver isn’t working properly, it might be because you have an older version of Windows installed or have recently upgraded to a newer version. Windows screensavers are a great way to add some personalization to your desktop.
They can be used as a cool backdrop for your computer or as a way to get rid of all the clutter on your screen. So, if you are searching for a solution to fix your Windows screensaver not working, then you are at the right place.
Why is my screensaver not working in Windows 11?
If you’re lost on why the screensaver is not working on your Windows 11, below are some possible causes:
Virus infection – It’s possible that there’s a bug in Windows 11 that causes the screensaver to stop working after a few minutes of use.
Corrupt user profile – You might have a corrupted user profile, especially if you didn’t create it correctly or tampered with some settings.
New Windows updates – When a new version of Windows is released, there are usually some changes that can sometimes cause issues with your screensaver.
Outdated/missing drivers – In some cases, if you’re using an older driver or have missing drivers, they may not be compatible with the latest version of Windows.
Configurations – You may have incorrectly configured the screensaver settings.
How do I trigger the screensaver in Windows 11?
As usual, before you apply any of the slightly technical solutions listed below, we recommend you start with the following:
Remove all connected peripherals such as mice, USB drives, or printers.
Clean your mouse and mouse pad to ensure it doesn’t accidentally trigger the screen.
Verify that you have enabled the screensaver settings.
Check if you have recently installed any new software and uninstall it, especially an app that is also a screen saver or program that might interfere with the screen saver.
Try restarting your PC.
1. Update the display drivers
Hit the Windows key, type Device Manager in the search bar, and click Open.
Navigate to Display adapters and find your graphics card.
Right-click on your graphics card and select Update driver.
Select Search automatically for drivers.
If you have a Windows 11 screensaver that is not working and doesn’t want to go through the long method, you can try to update the display drivers using a third-party tool.
Outbyte Driver Updater scans your system for corrupted, missing, or outdated driver versions. Once it finds a faulty driver, it will download and install an updated version.
Outbyte Driver Updater
Quickly update your drivers with the newest versions and give Outbyte Driver Updater a try.
If your screensaver is not working in Windows 11, it is possible that your current user account is corrupted. To get around this, the next time you log in, switch to a different user profile or copy your profile to a new one.
You can also create a new profile if you wish to do so. If this works, you will have confirmed that the previous profile is corrupted and needs to be repaired.
You can also personalize your display by following our guide on using Photos as a screen saver in Windows, which shows how to turn your favorite pictures into a slideshow.
Do let us know of any additional solution not mentioned here that may have worked for you in the comment section below.