One of the most annoying Windows 11 problems must be the IPv4 no internet access issue. From outdated, corrupt or incompatible network drivers to third party app conflicts and misconfigured settings, a lot of underlying issues could cause it.
But don’t worry. We’ll explain all you need to know to get it fixed ASAP. Let’s get started.
How can I fix the IPv4 No Internet Access issue?
1. Install the latest network drivers
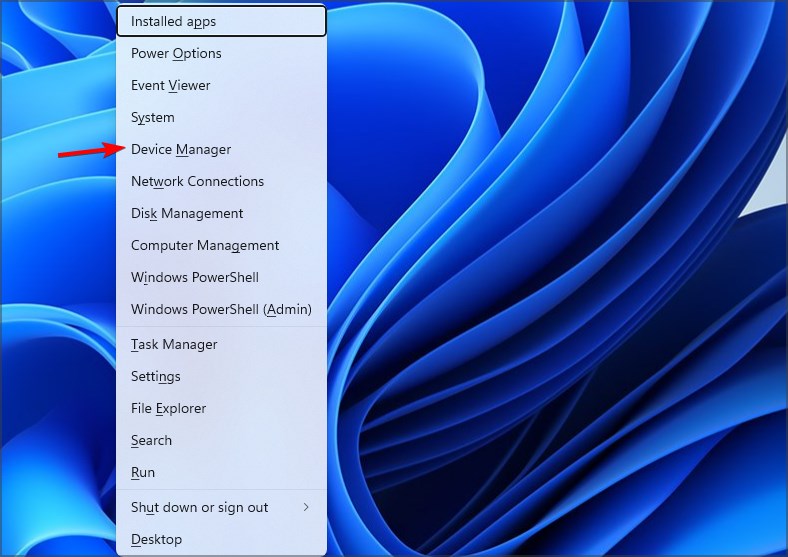
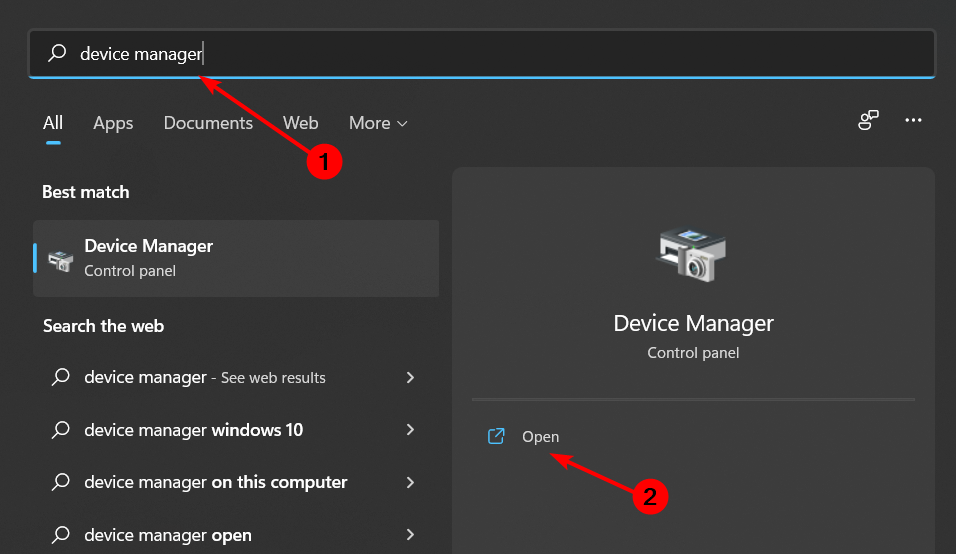
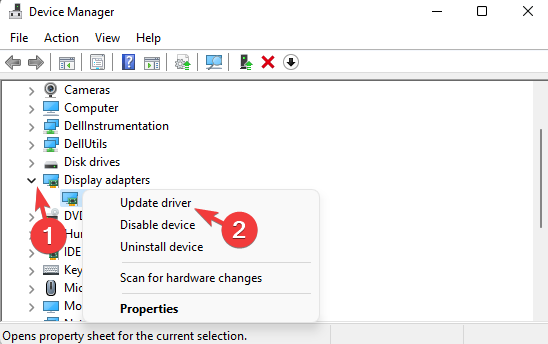
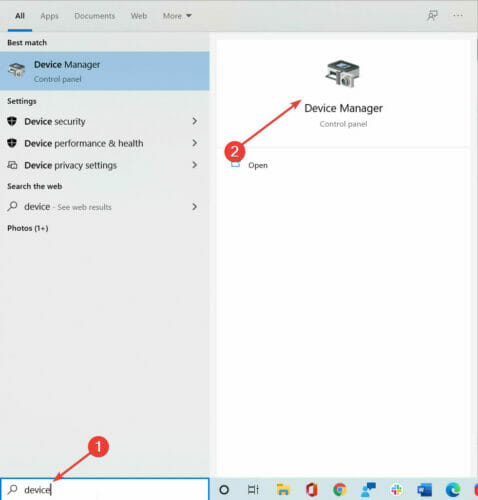
Open Device Manager.
Go to the Network Adapter section.
Locate the network driver you’re currently using, right-click on it, and select Update driver.
Confirm your choice and wait for the process to complete.
Alternatively, you can easily do this with a third-party driver updater. Simply download it, run it, and let it automatically scan for any missing, broken, or outdated drivers. You will then get to choose what to do with each and every one of them.
2. Modify the HT Mode settings
Press Windows + R to open Run, type ncpa.cpl in the text field, and hit Enter.
Right-click on the active network adapter, and choose Properties.
Click on Configure.
Navigate to the Advanced tab, select HT Mode under Property, then choose HT Mode 20|40 under the Value dropdown menu, and click on OK to save the changes.
Once done, restart the computer for the changes to come into effect.
3. Renew the IP address
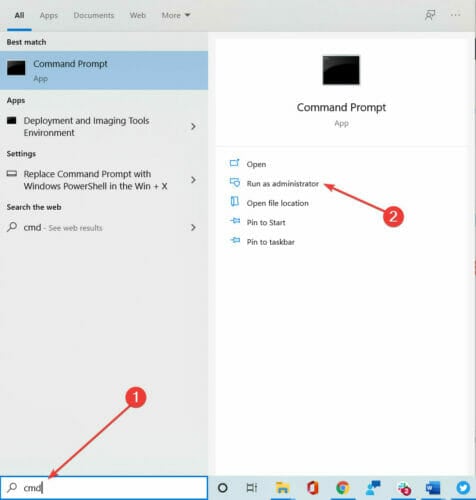
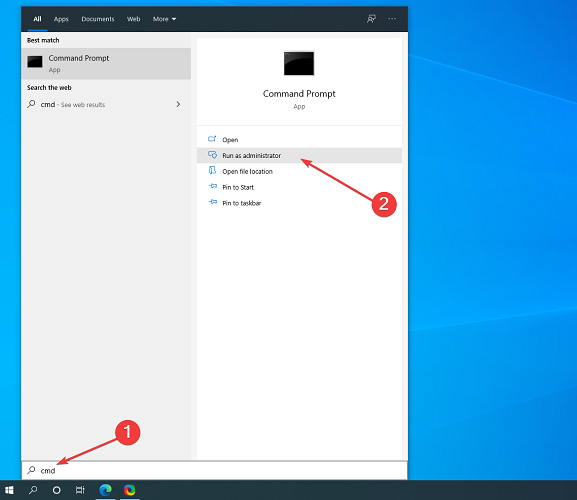
Press Windows + S to open the Search menu, type cmd, right-click on the relevant search result, and select Run as administrator.
Click Yes in the UAC prompt.
Now, paste the following two commands one at a time and hit Enter after each:ipconfig /releaseipconfig /renew
Finally, restart the computer and verify whether the No Internet access error on IPv4 is resolved. If not, head to the next solution.
4. Reset Winsock (Windows Socket API)
Press Windows + R to open Run, type cmd, and hit Ctrl + Shift + Enter.
Click Yes in the UAC prompt that appears.
Now, execute the following two commands one after the other:netsh winsock resetnetsh int ip reset
5. Check your IP settings
Here’s how to enable IPv4 and IPv6 protocols:
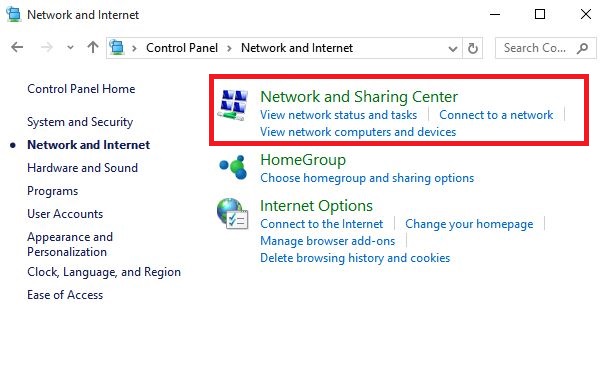
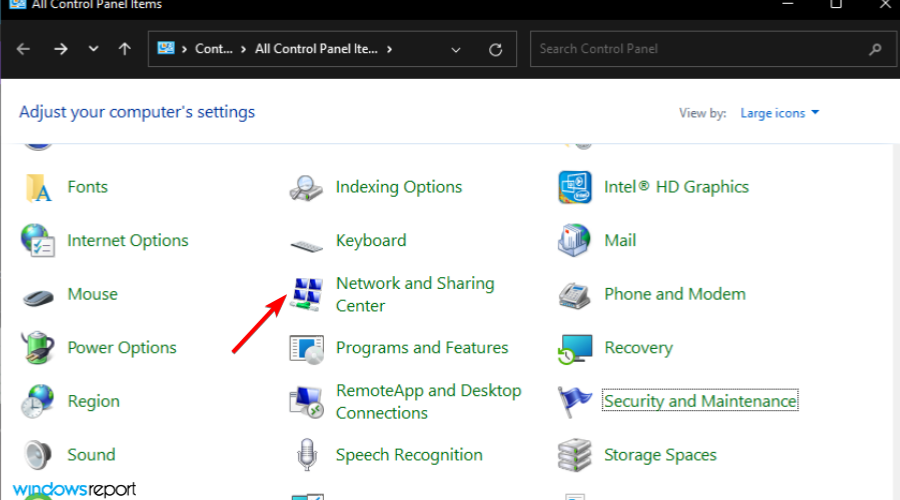
Go to Search, type network and open Network and Sharing Center.
Go to Change adapter settings from the left pan.
Right click on your connection device (in most cases it’s called just Ethernet) and go to Properties.
Under This connection uses the following items: check Internet Protocol Version 4 (TCP/IPv4) andInternet Protocol Version 6 (TCP/IPv6).
Click OK and restart your computer.
When you turn your computer back on, you should be able to connect to internet without any problems.
There’s a chance that Windows 10 turned off your IPv4 and IPv6 protocols after the installation, this doesn’t happen very often, but it could happen. So logically, all you need to do to get your internet connection back is to turn on these protocols again.
Sometimes, your IPV6 may be enabled but not working. Re-enabling it should fix this issue. However if you are still can’t access the internet on IPv6, we suggest you check out this guide.
6. Change the channel width
Navigate to Network and Sharing Center from the list of results
Go to Change adapter settings
Select your wireless adapter by right-clicking it > go to Properties > Go to Configure
Select the Advanced tab > select the 802.11 channel width and change the value. Keep using a different value until you’ve established a stable internet connection.
Save your new settings.
This step applies to wireless networks. By changing the bandwidth settings, you allow your computer to use other wireless frequencies and expand its reach.
7. Disable Internet Protocol Version 6 (IPv6)
Press Windows + S to open the Search menu, type View network connections, and click on the relevant search result.
Right-click on the current adapter, and choose Properties.
Now, uncheck the option for Internet Protocol Version 6 (TCP/IPv6), and click on OK to save the changes.
Finally, restart the computer.
If nothing else worked, the last solution is to disable IPv6 and force the computer to use IPv4 instead. This solution did the trick for many and should help get things up and running
If you encounter this issue related to IPv6, then you can safely use the previously mentioned solutions to fix it. They work for both IPv4 and IPv6 connectivity issues.
If you have any other Windows 10-related issues you can check for the solution in our Windows 10 Fix section.
We hope you managed to fix your IPv4 no internet access issue. Lets us know in the comments section below which solution worked for you.
Generally, programs like Wallpaper Engine use many system resources, especially GPU, as the app is designed to run high-quality animated wallpapers. However, it could be something else if you are experiencing 100% GPU usage while using Wallpaper Engine.
Here, in this guide, we will discuss the potential causes and some tested fixes to resolve the issue.
Why is Wallpaper Engine using too much GPU?
There could be a few reasons why Wallpaper Engine may be using a lot of GPU resources:
Outdated graphics drivers – If your computer drivers are obsolete, your GPU won’t run Wallpaper Engine efficiently. This will lead to performance issues and high GPU usage.
Computer doesn’t meet system requirements – Wallpaper Engine runs high-quality animated wallpaper, which requires a lot of system resources. If your computer configuration doesn’t meet your needs, it may struggle to run the program efficiently. Thus, causing the issue.
Programs running in the background – If you have other resource-intensive apps running on your computer, it can cause GPU usage to increase. Hece performance issues while running Wallpaper Engine.
Your PC is infected – If your computer is infected with viruses or malware, it can spike your CPU or GPU usage, leading to performance issues. Use a reliable security app to scan your PC.
What can I do to fix the Wallpaper Engine using too much GPU error?
Before engaging in advanced troubleshooting steps, you should consider performing the following checks:
If you are using multiple monitors, ensure all monitors are connected to the same GPU. Using the wrong GPU would result in Windows performing poorly while trying to merge them.
1. Clean install of graphics driver
1.1 Use Device Manager
Press Windows + R to open the Run window.
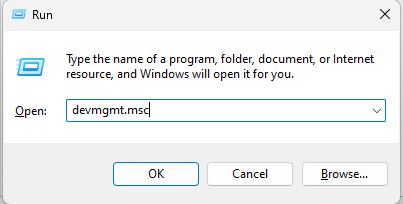
Type devmgmt.msc and hit Enter to open Device Manager.
Click on Display adapters to expand. Next, select, right-click the driver, and click Uninstall driver.
Restart your PC. Upon restarting, your computer will find and download the Windows-certified drivers.
1.2 Use a third-party tool
The Device Manager can only install Windows-certified drivers. However, not all the latest GPU drivers are certified, as manufacturers generally don’t ask for approval for every version. You can download the latest drivers using AMD, NVIDIA, or Intel websites. However, this could be time-consuming and suggested if you know your way around a computer.
Therefore, to save you some time and get the work done quickly, it is suggested to use a driver updater tool such as Outbyte Driver Updater. This driver updating tool can scan and download the latest drivers in a few clicks. Follow these steps to use the tool:
Select the .exe file for Wallpaper Engine from the next window and click Add.
Once added, click on the app, then Options.
Select Let Windows decide and click Save.
4. Tweak Wallpaper Engine settings
Open the Wallpaper Engine app and go to Settings.
Go tothe Performance tab.
For Other application focused, select Keep running.
Now for Other application maximized and Other application full screen, select Pause.
Under Quality, select set Preset to Low, Anti-aliasing to MSAA x2, Resolution to Full, and FPS to 24.
Also, place a checkmark next to Reflections.
Move to the General tab, and remove the checkmark beside Set high priority for Start with Windows option.
Scroll down and put a checkmark beside UI hardware acceleration.
Click OK to save the settings.
5. Scan your computer for malware
Press the Windows key, type Windows Security and click Open.
Go to Virus & threat protection and click Scan options.
Select Full scan and click Scan now.
Now, wait for the tool to complete the scan.
So, these are some methods you can use to resolve Wallpaper Engine causing high GPU usage. Try them and let us know which worked for you in the comments below.
Open the browser you need, then click on Settings and more options, usually marked as three dots.
Look at the Zoom section, then click on the square heads icon.
Now you’ll be able to see your browser on the full screen mode.
You can follow the same process for multiple browsers, like Chrome, Microsoft Edge, or Firefox.
The easiest way to get your browser in or out of the full screen is by using the F11 key. Remember that it also allows you to switch certain networking or chat apps views.
3. How to enable full screen in File explorer (for folders)
You can get your Windows 11 File Explorer into the screen mode by pressing on the already mentioned key (F11). Getting back to the normal preview will require using the same key.
4. How to enable full screen in Microsoft Office in Windows 11 (shortcut+ settings)
You can either use the following keyboard shortcut: Alt + V, followed by the U key, or click on the Toggle Full Screen View command at the top of the window.
If you’re not able to see the required command, make sure you keep on reading to find out how you can easily add it.
Note that these two options work only for Microsoft Word and Excel. If you need to get the PowerPoint full-screen, you’ll have to hit the F5 key.
5. Streaming apps full screen
While many users prefer using the Full-screen icon, keep in mind that you can also apply the following keyboard shortcut: Windows + Shift + Enter. It would be much less time-consuming.
How to exit fullscreen mode in Windows 11?
To exit fullscreen mode in Windows 11, use the same keyboard shortcuts as you do to enter fullscreen mode:
F11 or Fn+ F11 for browsers (Edge, Chromium, Firefox, etc)
Win + Shift + Enter for Windows apps (Settings, Control Panel, Troubleshooters, etc)
Alt+ Enter for media players and games
If Shortcuts Don’t Work:
Use Task Manager: Press Ctrl + Shift + Esc to open Task Manager, find the application or process in fullscreen, and end it if necessary.
Restart Your Computer: A restart may resolve persistent fullscreen issues.
Check Application Settings: Look for specific options within the application’s menus to exit fullscreen mode.
System Restore: Use System Restore to revert your system to a previous state if the issue arose recently.
What are the most common full screen issues?
The full-screen mode is a great feature that will simplify your daily work on Windows 11. However, you might notice random related problems. From what we found, these are the most common ones:
Games won’t go full screen – From our researches, you can get into full screen troubles while playing games, and LoL is just one of them. If League of Legends won’t go full screen, it’s time to take action.
Full screen sudden minimization – This is another annoying problem that might sometimes appear while playing games. Users often claim that full-screen game keeps minimizing but this issue can be fixed too.
Full screen can not work on browsers – We made some researches on browsers issues and we found out that full screen might not work on Chrome. Fortunately, there are always options to solve it.
If you’re still wondering how the full-screen mode can help you, take a look at the section below and find some valuable reasons.
Fullscreen is useful in many ways
A better view perspective – For enhanced clarity and minimal distraction, you might have to set your Windows 11 apps on full screen. This is a great way to keep focus during your daily activity.
More clear screenshots – Some of you may need to take specific screenshots, that will capture any desktop detail. It will definitely require the full screen mode, so this is another reason to learn how to quickly do it. Also, we recommend taking a look at some of the easiest methods to take a screenshot on Windows 11.
It hides specific details – If you choose to go full screen, unnecessary items will be hidden. So again, you’ll be able to focus on your main content.
Feel free to use this guide whenever you want to remember how to go full screen on Windows 11. Also, to get the best out of this feature, you should check our recommended articles.
If you have any questions on this topic, do not hesitate to notify us by leaving a comment in the dedicated section below.
Some Excel users have queried how they can fix an Excel file could not be found error on the Microsoft forum. The error message states:
[filename] could not be found. Check the spelling of the file name and verify that the file location is correct.
That error message pops when those users try to open an Excel file within the software or click an XLS spreadsheet file to start the application. The issue arises for Excel 2007 and 2010 versions.
How to fix ‘[filename] could not be found. Check the spelling of the file name and verify that the file location is correct.’ ?
To fix this error, you will need to determine the cause of the problem and take appropriate action.
Check the file’s location: Make sure that the file is still in the location where you expect it to be. If the file has been moved or deleted, you must find the new location or restore the file.
Check the file name: Make sure that the file name is spelled correctly and that the extension is correct. If the file name or extension is incorrect, you will need to rename the file or change the extension to match the actual format of the file.
Check the file path: If the file is located on a network drive or a remote server, ensure that the file path is correct and that you have the necessary permissions to access the file.
1. Edit the file and folder titles
Open the folder that includes the spreadsheet the Excel file could not be found error arises for.
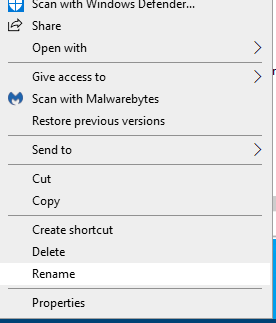
Right-click the spreadsheet file you need to fix the error for and select the Rename option.
Enter a shorter file title for the spreadsheet document.
In addition, edit the spreadsheet file’s folder title by right-clicking it and selecting Rename.
Input a shorter title for the folder, and press the Enter key.
If the folder’s path includes numerous subfolders, try shorting their folder titles by selecting the Rename option as outlined above.
2. Move the file to an alternative folder path
Alternatively, try moving the Excel file the error arises for to a different folder.
To do so, open File Explorer.
Select the Excel spreadsheet to move.
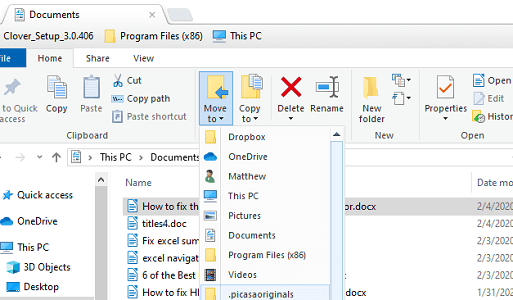
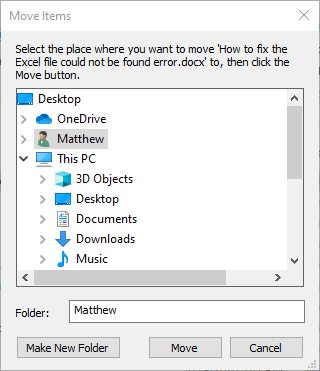
Click the Move to button in the snapshot directly below.
Select a folder to move the file to on the menu.
Alternatively, click Choose Location to open the window below.
You can select an alternative folder path from there.
One of the more common issues you may experience while updating your Windows computer is when it gets stuck while it’s preparing Windows or seeing the Getting ready message. This typically happens when the computer is installing an update.
Normally, the updating process doesn’t take all that long; 20 to 30 minutes at most under normal conditions or shorter if the update size is small.
These normal conditions are contingent on your computer having the requirements like having enough storage, fan speed, and having a solid-state drive or SSD.
If you have a conventional hard drive on your computer, you can expect to wait much longer, up to an hour or more. But sometimes, even with the correct hardware, the updating may get stuck on the “Preparing to configure” screen.
Fortunately, fixing this issue is fairly easy and can be done on your own. This guide will show you multiple methods on how to get past the Preparing Windows stuck screen on Windows 10 & Windows 11 devices.
What do I do if Windows is stuck on preparing Windows?
1. Restart the computer
Press down on the Ctrl + Alt + Del keys at the same time to bring up the Lock screen.
In the bottom right hand corner, click on the Power icon. A small window will appear giving options.
Select Restart to restart the computer. Restarting should solve most problems.
2. Boot Windows 11 into Safe Mode
While stuck on the configuration screen, press the F11 key repeatedly.
Do not stop pressing the key until the Advanced Startup screen appears.
On Advanced Startup, select Troubleshoot, the last option.
In the new window, select Advanced options.
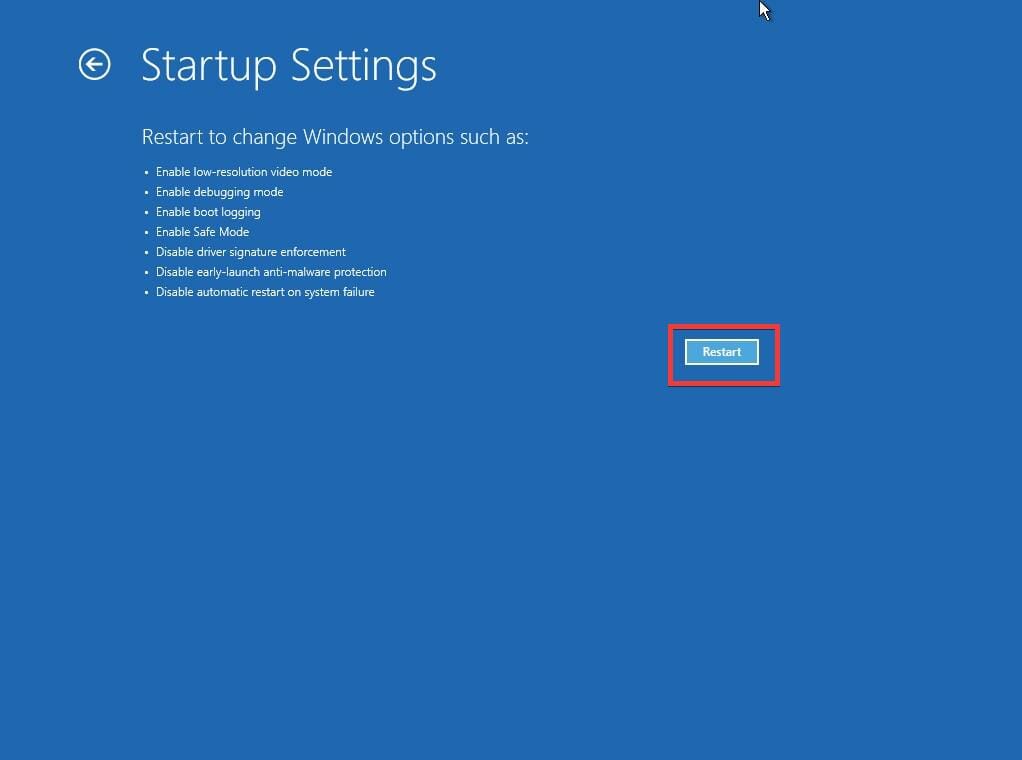
After being taken to another page, select Startup settings.
A list of coming changes will appear on the screen, most importantly booting Windows 11 into Safe Mode.
Click Restart after reading.
Select F5 which is Enable Safe Mode with Networking.
Your Windows 11 computer is now in Safe Mode. Close the Microsoft Edge window that appears.
Hover over the Windows Start icon on the bottom bar and right click it.
Choose Shut down or sign out.
Select Restart from the new drop down menu.
Once it restarts, your computer is free from the locked updating screen.
3. Perform Automatic Startup Repair
Going back to the Advanced Startup screen, select Troubleshoot.
Click on Advanced options.
Select Startup Repair which is the first option.
You can either select to Shut down the computer or click on Advanced options to try something else.
4. Uninstall Updates
On the Advanced Startup page, select Troubleshoot.
Select Advanced options again.
Select Uninstall Updates in the upper right hand corner.
You are given two options, Uninstall latest quality update and Uninstall latest feature update.
Select Uninstall latest quality update to revert back to the previous version of Windows 11.
You will be taken to a new window asking if you want to uninstall the update. Select Uninstall quality update.
After a few minutes, a message will appear stating that the last update has been removed. Click Done on this new window.
From there, Click Continue to exit and go to your Windows 11 home screen.
Tip
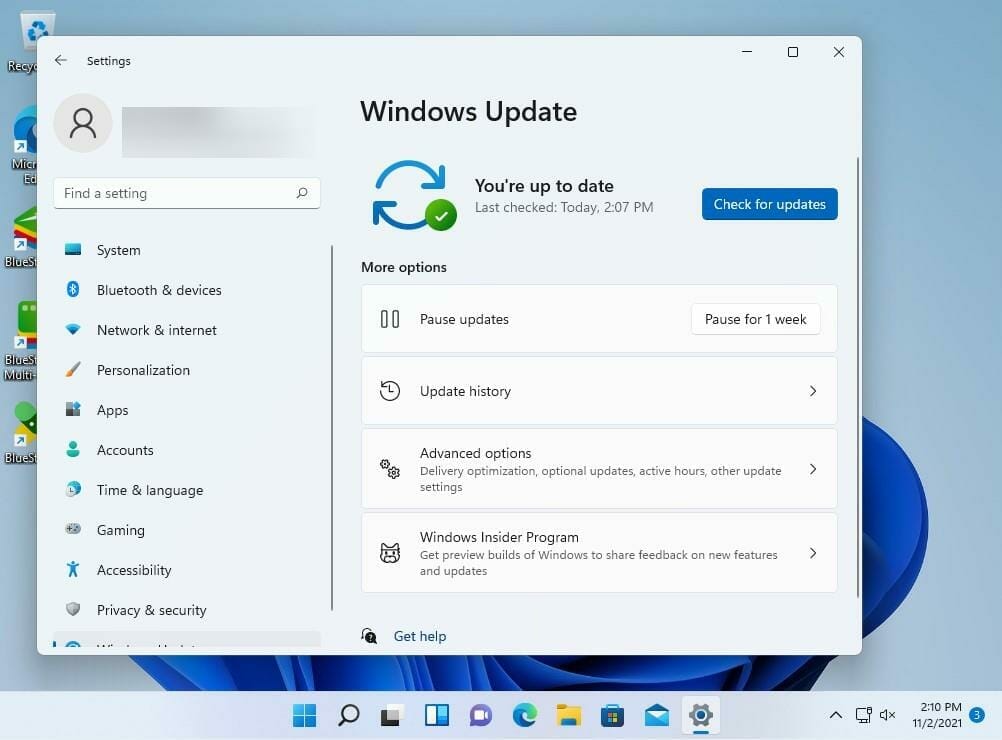
If you want to know which update you should uninstall, look at the Update history panel under the Windows Update tab in the Setting menu. It will tell you how far back you will go when you uninstall an update.
Why is my computer stuck on preparing Windows?
There are a multitude of possible reasons for the update getting stuck on a screen. The file size may be large and your computer may struggle with it.
If your computer is indeed slow, it’s recommended that you wait for an extended period to give your machine the chance to download and install the update.
It’s also possible that during the setup process some important files are missing or become corrupted. If a file is missing or corrupt, the computer won’t know what to do with it and cause the error.
A corrupt file may come from a power outage or overheating machine interrupting the update.
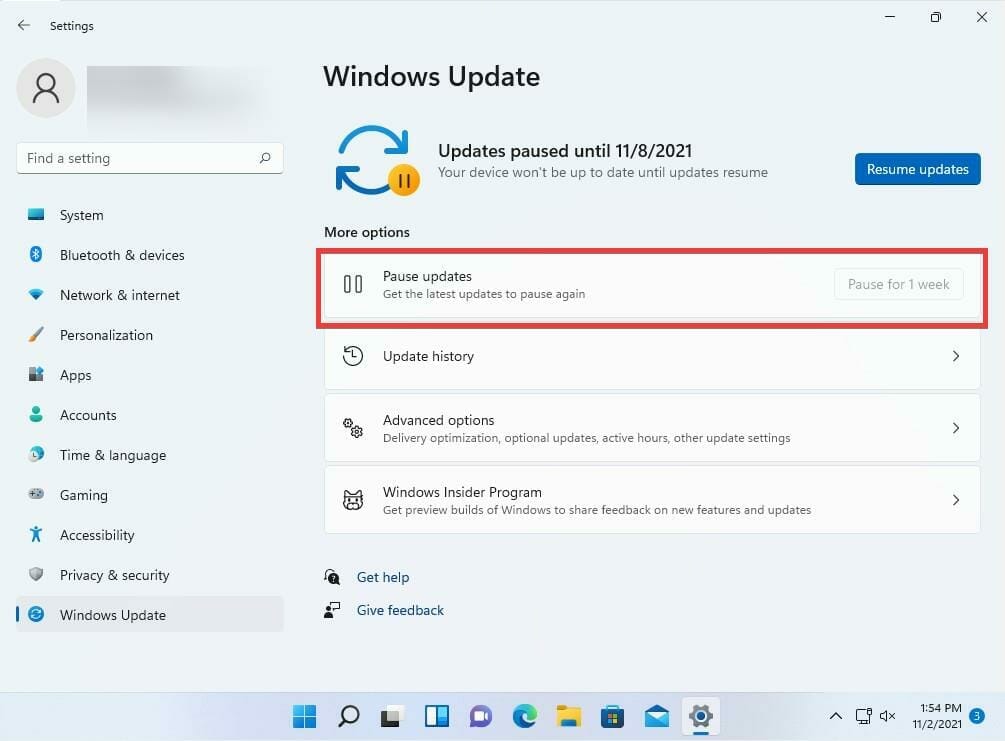
If you go back to the Settings menu on Windows 11, you can pause updates from being automatically installed by going down to Windows Update and going to the Pause updates tab.
You can pause updates from coming through for a week and decide when to resume the updates at any time you want.
Since Windows 11 is still a new operating system, the bugs and glitches will persist for some time. For example, build 22449 was pretty unstable when it came out a few months ago. Some people have even claimed that it disabled their Wi-Fi adapter.
Other people have reported Start menu and taskbar issues on earlier builds as well, but fortunately, there are fixes for these as well. Suffice it to say, sometimes it’s best to wait a little while before putting in that new update.
Feel free to leave a comment below if you have any questions on fixing the preparing Windows stuck window or more. Also, leave comments about guides that you’d like to see or information on other Windows 11 features.
Many users prefer using a trackpad instead of their mouse. However, some users reported that the touchpad click is no longer working.
If your trackpad touch click isn’t working correctly, that can be a big problem, but in most cases, the issue is caused by your settings or drivers.
Why is my laptop touchpad not clicking?
The touchpad might not be adequately enabled from the settings, or it has a delay set.
Issues with touchpad drivers can prevent it from running.
Your registry isn’t correctly configured.
In today’s article, we’ll try to fix this annoying problem. Just keep on reading the solutions detailed below.
How do I fix my touchpad if it’s not clicking?
1. Be sure that this feature is enabled
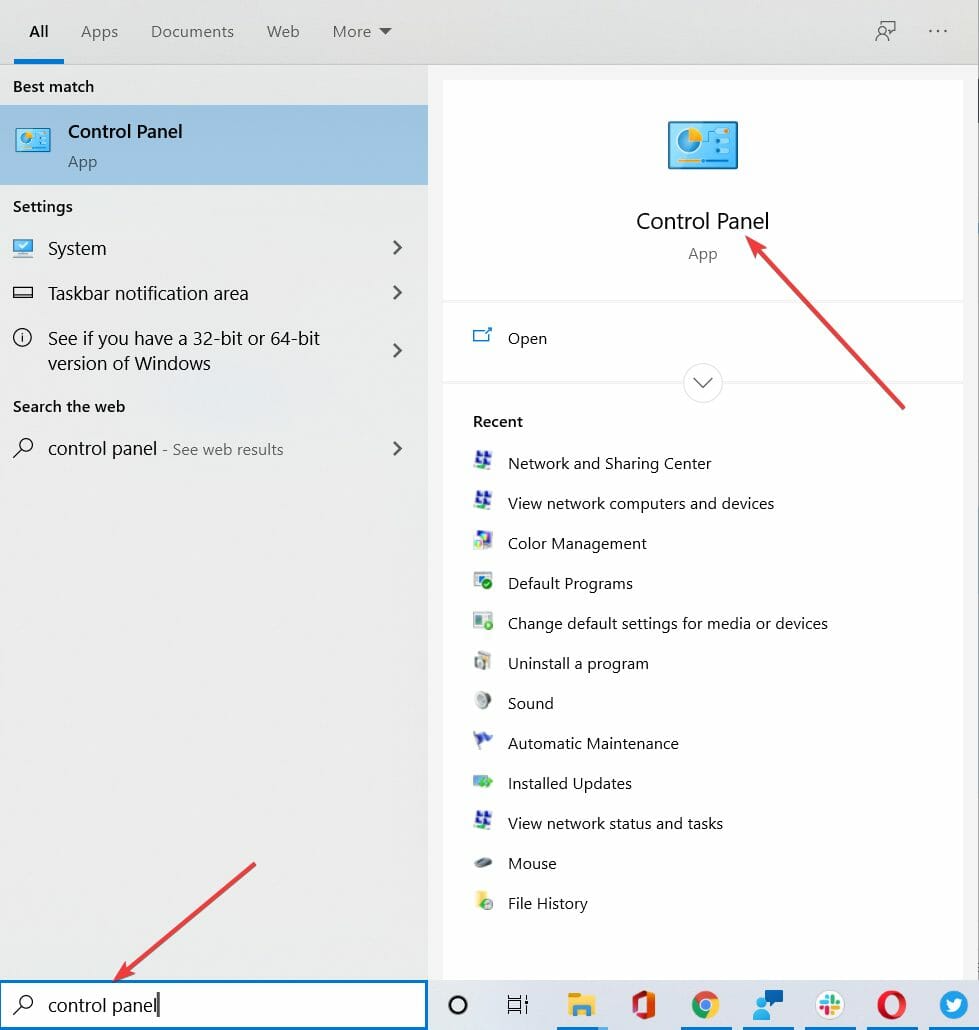
Press the Windows key + S and enter control panel. Select Control Panel from the list.
When the Control Panel opens, select Mouse.
The mouse window will now open. Go to the Device settings tab.
Now click the Settings button and go to Tapping.
Check the Enable tapping checkbox, and click OK.
If the touchpad click is not working on your Lenovo or Acer laptop, it’s possible that it isn’t enabled. Your trackpad supports various configuration.
A couple of users reported that the Tap to click feature was already enabled, but after turning it off and back on again, the problem was resolved.
2. Make sure that delay is turned off
Open the Settings app. To do that quickly, use Windows key + I shortcut.
When the Settings app opens, go to the Bluetooth & devices section. Next, go to Touchpad.
Make sure that the delay is set to No Delay.
3. Reinstall the touchpad driver
Press the Windows key + X and choose Device Manager from the list.
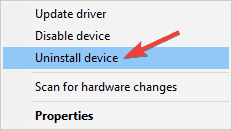
Locate your touchpad driver, right-click it, and choose Uninstall device from the menu.
When the confirmation dialog appears, just click Uninstall. If Remove driver software for this device option is available, don’t check it.
Reinstalling the driver can fix this problem, and other similar problems like Touchpad settings missing. After that, you’ll have to restart your device, and Windows will automatically install the necessary drivers.
You can troubleshoot brand specific issues by reviewing dedicated guides such as the one for Dell models in the Dell laptop touchpad not working article, which covers driver failures, gesture problems, and settings conflicts that can also affect other Windows laptops.
According to users, touchpad issues can occur due to your drivers. If your drivers are out of date, they might have certain bugs that will cause the touchpad click to stop working.
You can make sure your drivers are always up to date with the help of professional driver updating software. These tools allow you to scan for, identify, and update drivers in just a few minutes.
5. Make changes to your registry
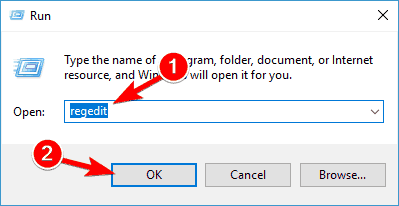
Press the Windows key + R and enter regedit. Press Enter or click OK.
In the left pane, navigate to HKEY_LOCAL_MACHINE\SOFTWARE\Synaptics\SynTP\Install
In the right pane, double-click DeleteUserSettingsOnUpgrade DWORD to change its settings. If this DWORD isn’t available, you might have to create it manually by right-clicking the right pane and selecting DWORD (32-bit) Value from the New menu.
Change the value of the DWORD to 0 and click OK.
Remember that this solution only works if you have this key in your registry. If not, you can just skip it.
6. Perform a System Restore
Press the Windows key + R and enter rstrui.
System Restore will now open. Click Next to proceed.
Look for Show more restore points option and enable it, if available. Select the desired restore point and click Next.
How do I reset my trackpad?
Open the Settings app.
Select Bluetooth & devices and then choose Touchpad.
Click on Reset button next to Reset touchpad settings and gestures to defaults.
You’ll also find more potential causes and quick fixes in our mouse touchpad not working guide, so be sure to check it out. For more suggestions or other questions, please access the comments section below.
It can be a real headache if the Wi-Fi symbol is not showing on your laptop. The wireless icon should appear in adapter settings under network connections. This can be caused by wireless adapter driver issues, corrupted adapter firmware, disabled wireless radio, or improper Windows installation.
First of all, make sure you’re not using a cable connection. If you see the icon above instead of the Wi-Fi icon, that means you’re connected through a cable. You may also see a globe icon. Click on it to set up a Wi-Fi connection. If that’s not your case, apply the solutions below to get back the WiFi icon on your laptop.
What can I do if my WiFi symbol is not showing on laptop?
1. Update the wireless adapter driver
Outdated driver software can lead to several issues with hardware. These include driver corruption, missing software components, and incompatible driver.
Updating to the latest software version for your driver can repair any issue related to legacy software.
The best way to safely update your drivers is to use a specialized tool to help with downloading and installing the right driver versions.
Since installing the wrong driver can damage your laptop irreversibly, we strongly recommend that you use this method.
2. Turn on wireless radio
If the Wi-Fi icon is not showing on your laptop, chances are that the wireless radio is disabled on your device.
You can enable it back again by turning on the hard or soft button for the wireless radio. Refer to your PC manual to locate such a button.
Also, you can turn on the wireless radio through the BIOS setup. Enter the BIOS setting during the reboot process and locate the network settings page. From there, you can enable the wireless radio. Save the changes and exit BIOS.
3. Update the router and adapter firmware
Outdated firmware can sometimes block your router from gaining access to the Internet. The impact extends all the way to the adapter.
As firmware updates vary from one manufacturer to another, you can refer to the user guide that came with your router to update its firmware.
Drivers get outdated regularly, and with Outbyte Driver Updater you simply scan your device and get expert, professional advice on the best components you can get.
We suggest this software because it does the job quickly and efficiently thanks to its advanced updating technology.
If all else fails, the only option left is to buy a USB wireless adapter. You can plug these LAN card dongles into a standard USB port in order to connect to the Internet.
A USB Wi-Fi adapter is a handy little gadget that should be part of your home essentials alongside a good computer or a fast Internet connection.
If your computer has no Wi-Fi connection built into it, you can choose to use a USB Wi-Fi adapter to ensure you get online and continue browsing, streaming Netflix, or even playing games.
USB Wi-Fi adapters eliminate the need for running cables or installing internal hardware, plus you can use them on multiple devices.
If you’re trying to get online but your USB WiFi adapter is not working, here are some solutions you can use.
How can I fix USB WiFi adapter not working?
1. Roll back the network adapter driver
Right-click Start.
Select Device Manager.
Select Network adapters and click to expand the list then choose the network adapter name.
Right-click the network adapter, and then select Properties.
In Properties, select the Driver tab
Select Roll Back Driver, then follow the prompts
If the button is unavailable, that means there’s no driver to roll back to.
If Windows can’t find a new driver for your network adapter, visit your computer manufacturer’s website to download the latest network adapter driver.
1.1 Update drivers automatically
We strongly suggest you do this process automatically by using the Outbyte Driver Updater tool.
Dedicated software like this one ensures that you download just the right driver for your PC; besides, it also makes the very best recommendations in this sense, so you won’t have to waste time searching the Internet.
Hence, if you strongly need to update your network driver correctly and without any difficulties, proceed confidently with specialized driver updating software.
2. Check your Wi-Fi connection
Click Start and select Settings.
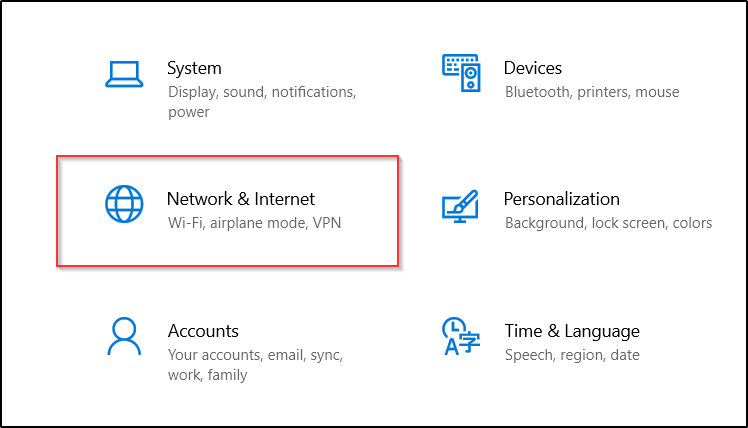
Go to Network & Internet.
Select Wi-Fi to check for available networks.
If a network you expect to see appears in the list, select it.
Click Connect.
3. Turn off Airplane Mode
Make sure the Wi-Fi is on. Then, open Network & Internet settings, as shown above.
Select Airplane mode
Turn it OFF if it is turned on
4. Restart your Wi-Fi router
If the previous solutions didn’t work and your USB WiFi adapter is not working, and you have tried to move closer to your router or access point, you can also restart your Wi-Fi router.
This helps create a new connection to your ISP, but it will disconnect everyone on your network temporarily. It should be one of the last solutions to try though. Here’s what to do:
Unplug the power cable for the router from the power outlet and wait at least 30 seconds
Plug back the router to the power source.
Wait a few minutes for the router to power on fully (you can check this by looking at the status lights on the two devices).
Go to the search box and type Identify and repair network problems.
Select Identify and repair network problems to run it following the instructions carefully
6. Temporarily turn off the firewall
There are times when your firewall or antivirus and anti-malware software may prevent you from connecting to the Internet.
You can temporarily turn it off and try to connect again. Check the software’s documentation for steps on how to do this, although the steps should be quite intuitive.
It’s recommended, though, to turn the firewall back on as soon as you can. Otherwise, your computer remains vulnerable to hackers and malware threats.
7. Uninstall the network adapter driver and restart
Before proceeding, make sure you have a backup of your network drives saved on an external source.
Right-click Start and selectDevice Manager.
Select Network adapters and click to expand the list then choose the network adapter name.
Right-click the network adapter, and then select Uninstall
Select Delete the driver software for this device checkbox
Click Uninstall
Restart your computer
Windows will automatically install the latest driver. If Windows doesn’t automatically install a driver, try to install the backup driver you saved before uninstalling.
Alternatively, you can use the method recommended in the first step to use dedicated software for this.
You can apply this solution if your network connection stopped working after a recent update, as well.
8. Use network reset to reinstall network devices
This should be the last step you try if the other solutions don’t help when your USB Wi-Fi adapter is not connecting to the Internet.
Wait for your PC to restart and see if that fixes the problem.
After using network reset, you may need to reinstall and set up other networking software you might be using, such as VPN client software or virtual switches from Hyper‑V.
Note: Network reset might set each one of your known network connections to a public network profile where your computer is not discoverable to other PCs and devices on the network, which can help make your PC more secure.
If your PC is part of a homegroup or used for file or printer sharing, you need to make it discoverable again by setting it to use a private network profile.
Here’s how to make your computer discoverable again:
Go to Network & Internet as shown before.
Select Wi-Fi .
On the Wi-Fi screen, select Manage known networks
Select the network connection you want to change.
Click Properties.
Under Network profile, select Private.
Did any of these solutions resolve the USB WiFi adapter not working issue? Let us know by leaving a comment in the section below.
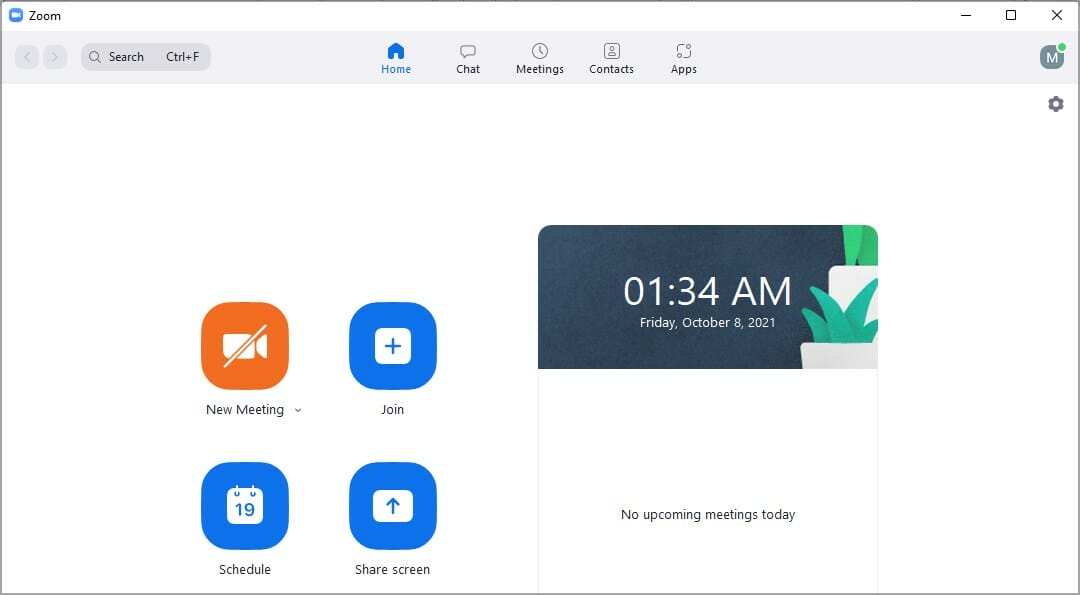
In today’s guide, we’ll talk about everything you need to know about how to download Zoom in Windows 11. We’ll also walk you through its best features. Let’s get right to it.
Look under Zoom Clients for Meetings, then click on the Download 64-bit Client.
Once downloaded, go to your Downloads folder, then double-click on the file to begin the installation.
During the installation, choose Yes when you’re asked if you want Zoom to make changes to your device.
Zoom will be automatically installed and ready for you to sign in or join a meeting.
If you don’t already have an account, just choose to Join a Meeting.
Enter the meeting credentials, then click on Join.
2. Through Microsoft Store
Open Microsoft Store from your Taskbar.
Search for Zoom, then click on Zoom Clouds Meetings.
Click on the red Install button.
Follow the on-screen instructions to complete the installation.
NOTE
You can also choose to install the Zoom Rooms version.
Because it represents one of the most important tools in getting Zoom, you should definitely also take a closer look at the new Microsoft Store in Windows 11.
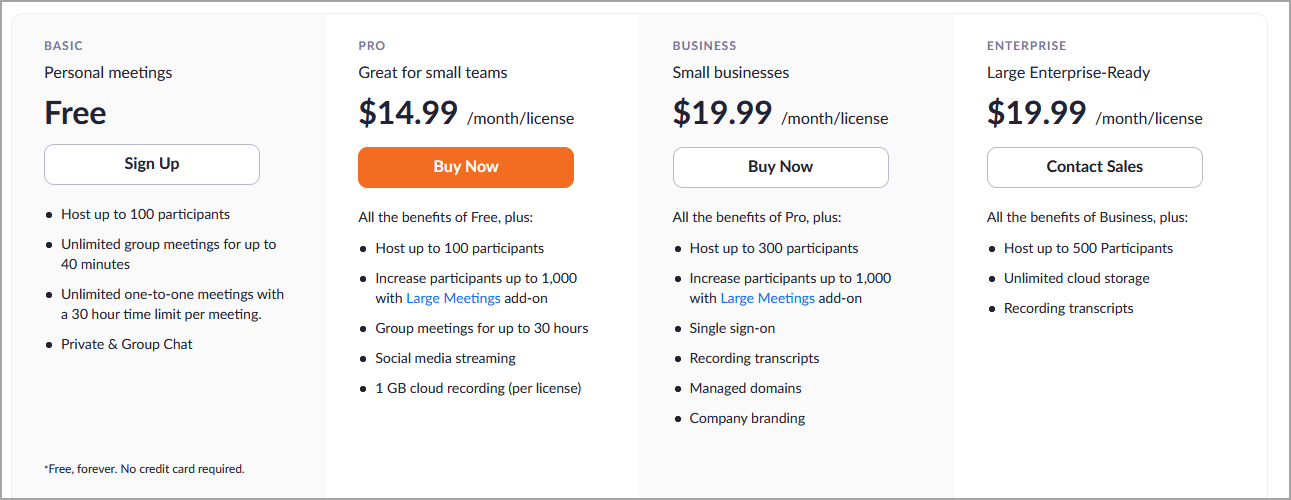
Yes, Xoom has a free tier. It supports unlimited group meetings for up to 40 minutes, one-on-one calls for up to 30 hours, private group chat, and cross-platform availability. There are also paid versions that include additional benefits like larger meetings, cloud storage, and meeting transcripts.
Zoom is a favorite among online meeting apps for a few reasons:
It’s affordable
The app is very simple, easy to use, and quick to install
Integrates built-in features to improve video and picture experience
Allows conferencing with backgrounds and filters
Works on multiple operating systems and devices
It has a focus mode, which is ideal for online classrooms and professional meetings
What’s new about Windows 11 Zoom?
The latest Zoom version, 5.8.1 (1435). This implies a series of resolved issues, such as minor bug fixes or security enhancements.
With its support, you can start meetings with HD quality for video and audio, and in case someone is missing the meeting, you can record the whole thing and share it with your colleague. And you can invite up to 100 people to join.
It is extremely easy to get. You’re able to download and install it through two different methods, as shown above.
We hope our guide offers you a more complex perspective on how Zoom currently works in Windows 11. As you can see, the software is incredibly simple to use, and you can join the meetings in a matter of seconds.
Software bundled with scanners or printers is not unusual these days. However, if you’re looking for better tools than what came with the scanner there are plenty of alternatives.
There are various types of applications for image processing, OCR (Optical Character Recognition), and batch scanning.
These are some of the best scanner software for Windows 11.
Retyping an old document is time-consuming. You can save time by using Soda PDF’s OCR engine to convert scanned documents and images into searchable PDF files.
With this OCR feature, you can also automatically detect the text along with images. You can manually choose which part of your PDF you want to scan.
This PDF editor is among the best in its field, especially if we consider the quality-price ratio. Just like the other programs mentioned so far, Soda PDF also allows you to easily edit PDFs.
The software exists in two different versions: Standard and Pro. The Pro version allows you to transform scanned PDF files into editable and searchable documents.
Both versions only allow you to edit and convert PDF files. The only difference is that you have some plus-minus advanced functions.
Pros
The OCR function is really effective.
It allows you to protect and sign PDFs.
Cons
Protection and signature functions are also included in the Pro version only.
Compatible Systems: Soda PDF is compatible with both Windows and macOS & IOS.
Soda PDF
Turn any PDF, image, or scanned document into a fully editable file with the OCR feature!
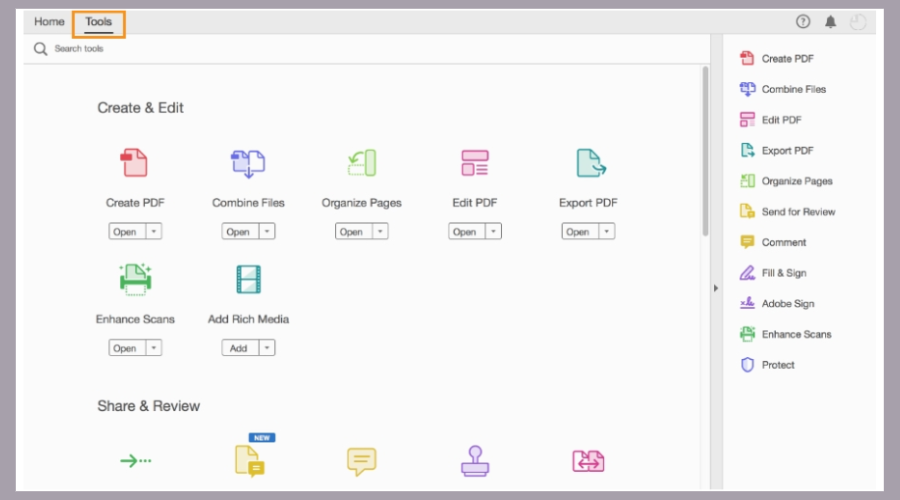
You might recognize Adobe Reader since it is the most used software to open PDF files.
You can use Adobe Acrobat to scan documents, create and annotate PDFs and even recognize text using OCR. Since Adobe created the pdf file format, what better software to use, right?
All you need to do is open Adobe Acrobat, go to Tools -> Create PDF, and from there click on Scanner. You will be presented with a lot of presets and options so that you get the best results.
For scanning documents and creating a PDF with multiple text files in it we recommend using the black-and-white preset from Adobe Acrobat and also setting the scanner to 300dpi. This is the optimum value for OCR.
Once you finished scanning, it’s time to continue with Adobe Acrobat to combine all files into a single PDF, adjust the text, edit images, add password protection, or create an interactive form.
Adobe Acrobat Reader
Check out the best scanner software that perfectly matches your Windows 10 computer.
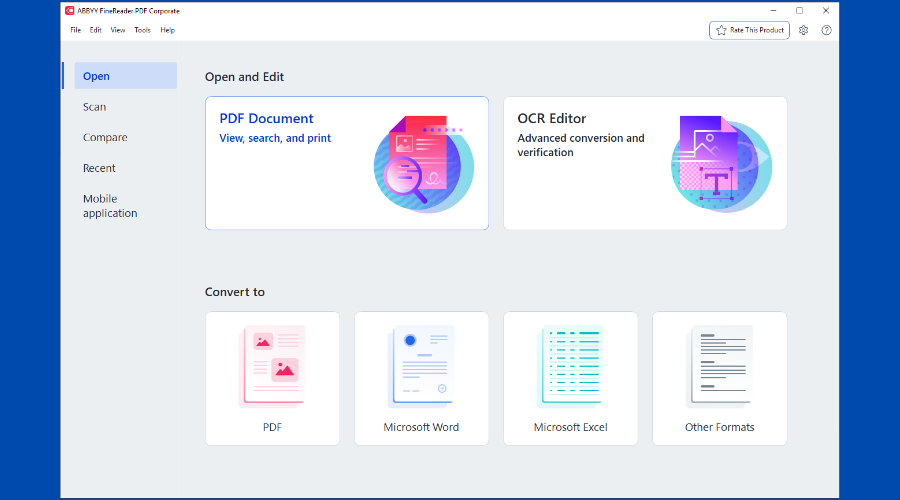
ABBYY is an international software producer specializing in creating programs for OCR reading and working with scanned documents. FineReader has top reviews and awesome ratings from big publications.
We’ll see below what it has and how is it the perfect software for your work with scanned documents. FineReader allows you to edit, review, and convert scans and PDf documents.
The editing feature comes in handy as it allows you not only to edit but also to annotate the documents opened in FineReader and share the work with other users.
The compare feature helps you to track the changes that have been made to a document. Also, it has one of the best OCR engines in the world, and this is probably the most used feature of this software.
You can easily convert scanned documents to Word, Excel, PDF, and other formats with great precision. Forget about copying manually texts, just use ABBYY FineReader.
You can get this software for free from the official website, but it will have only some basic features. However, it is good to try such a tool, especially if you really need it and will like to buy it after.
ABBYY FineReader
Abby FineReader not only helps you scan but also lets you edit digital and scanned PDF documents.
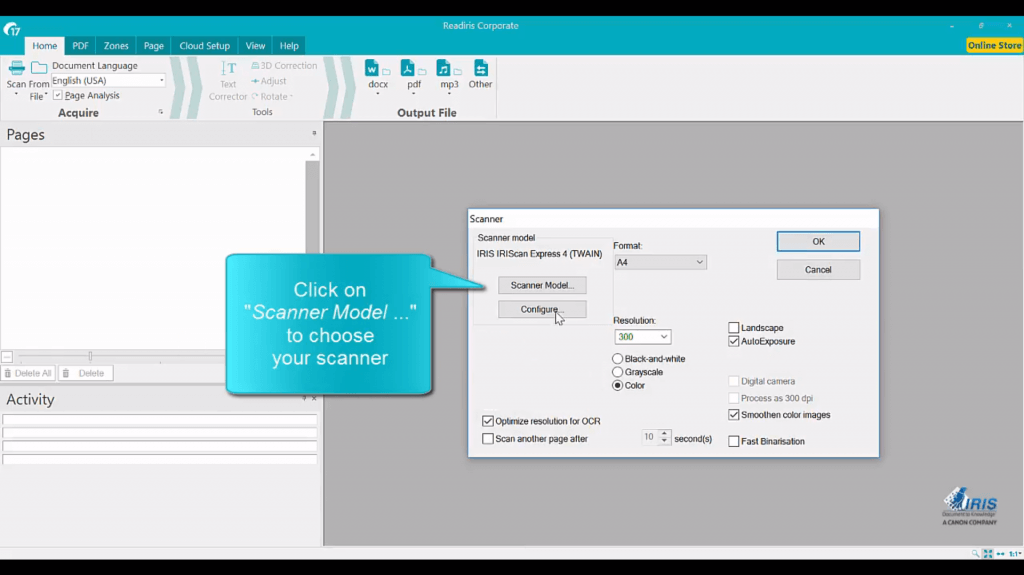
Readiris Pro is more specifically OCR software for scanning documents into an editable format.
This is one of the best software packages for OCR scanning that’s compatible with all Windows versions and all TWAIN scanners and can convert documents and images to a variety of formats.
The software scans documents to PDF, ePub, RTF, TXT, ODT, HTML, GIF, BMP JPEG, PNG, and TIFF file formats, which is more than most.
Note that the OCR scanning isn’t just limited to documents, as the software also extracts text from image formats.
With this program, users can convert their MS Office documents into audio, ePub, or image file formats. Readiris has a variety of PDF options for merging, indexing, compressing, and organizing PDF pages.
Batch OCR is also a handy tool that enables you to convert a batch of documents from a selected folder. Another great thing about Readiris Pro is that it dramatically compresses file sizes for saved documents.
So this scanning application has plenty of more advanced options and tools.
Readiris Pro
Readiris Pro will surprise you with the best OCR engine and will convert PDF documents to Office formats.
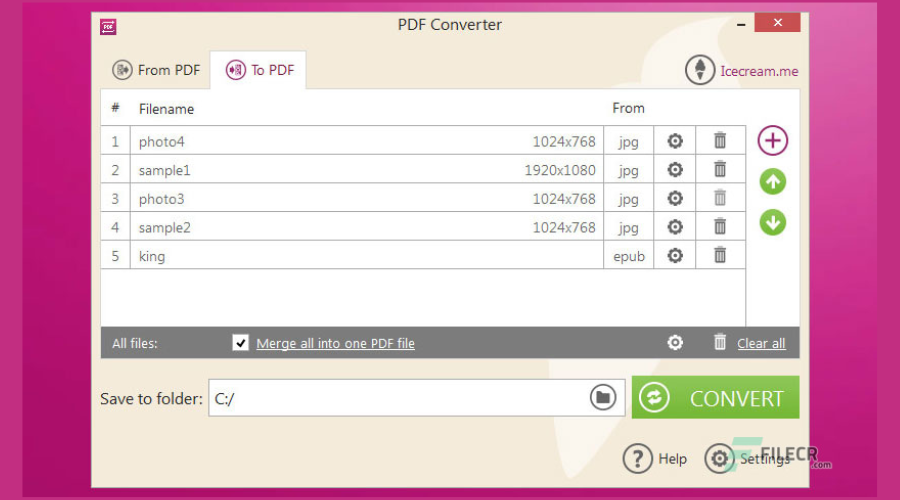
Icecream PDF Converter is obviously focused on PDF conversion to and from practically any format including ODC, JPG, TIFF, XLS, EPS, GIF, WMF, HTML, PNG, and more.
You can even OCR a document into an editable PDF format or even better, convert multiple files with just one click thanks to the batch processing feature.
Privacy-sensitive Icecream Converter is compatible with all versions of Windows including older ones such as Vista and XP, which makes things even simpler for you.
Let’s quickly look at its key features:
Convert any file format to PDF and vice versa
Supports password-protected files
Batch processing to convert multiple files simultaneously
Supports OCR (Text Recognition) technology to turn scanned files into editable documents
PaperScan is another software dedicated to scanning. This app comes with a free version and paid one that is more dedicated to professionals.
The software is pretty straightforward, a tool that is used for scanning documents, and as such it has a lot of features towards that end.
PaperScan supports over 30 languages and 100+ formats, it allows you to scan documents in batch by using separator sheets.
This software also comes with PDF encryption and digital signature, which will help you protect your documents.
Also, you can enhance or correct images right in the app due to its many tools. The software also supports SharePoint, making it much easier to share the documents you want.
Some other key features of PaperScan:
Storage efficiency
Blank page detection and removal
Remove punch holes automatically
Convert to black and white, greyscale, or color
Magnifier mode
Area selection, resize, crop
PaperScan
All your scanning needs can be solved with this very easy to use document scanner.
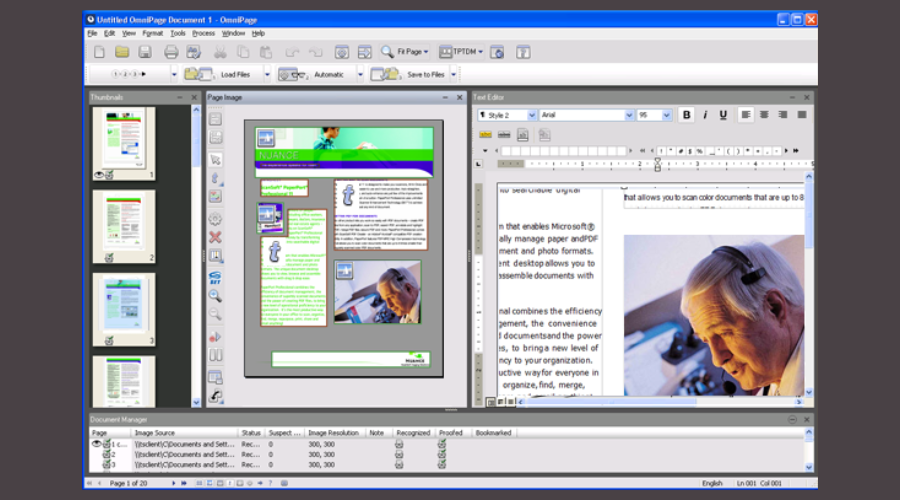
OmniPage Standard is another highly rated OCR software package that provides very accurate text scanning. This software has Standard and Ultimate versions that are both compatible with Windows.
The Standard version should be perfectly sufficient for most as it still incorporates the best OCR technology. The Ultimate version has extra drawings, a digital signature, and scan-to-folder tools.
OmniPage Standard is compatible with any TWAIN, WIA, or ISIS scanners.
The software supports a greater range of output formats than most alternatives including MS Office applications, PDF, HTML, Corel Word Perfect, XML, CSV, and more besides.
OmniPage’s 3-D correct technology gives it an edge when it comes to accuracy, and you can further enhance scan accuracy with some of the software’s enhancement tools.
For processing multiple documents, Omnipage includes a Batch OCR tool with which users can select a folder for automatic processing.
This program can also do OCR conversions in 123 languages. As such, it’s little wonder this is one of the industry-leading scanner software packages.
OmniPage Standard
Business-oriented software has an in-built scanner for translating sensitive data and is ideal for sharing and finding files in real time.
Those are several Windows 10 scanner software packages that can enhance scanning in various ways.
They’ll give you more accurate scans, faster scans, OCR text extraction, batch-scanning tools, PDF options, image-editing options, and more besides.
Does Windows 10 have scanning software?
Windows 10 has, in fact, a built-in scanning tool, which you can easily access from the printer context menu.
What scanner is best for Windows 10?
There are a lot of great scanner software options you can choose from, such as Soda PDF, Adobe Acrobat, ABBYY FineReader, and more.
Do scanners come with software?
Scanners typically connect with a computer system and go together with scanning software, but you can always pick your preferred application to get the best performance.
What scanner works best with Windows 10?
There are many good scanners, but for Windows 10 most professionals recommend and use scanners from Epson, especially model Epson V600. Of course, SodaPDF and Acrobat Reader work flawlessly with that hardware.
You probably just encountered the Zoom error code 3038. In this article, we will explore all you should know about it.
Zoom is one of the most used applications worldwide for taking online webinars, meetings, and online video conferences.
Thanks to the engagement rate and other available features, the app has grown to be highly appreciated by its users.
For some, though, the error code 3038 seems to appear out of the blue, interfering with their app use.
Why is my Zoom showing an error?
We have gathered from users that a few factors may trigger the error code while using the Zoom service. At the top of the list, including the following:
Visiting a concluded meeting – If you are trying to access a meeting that has already ended, you will get this error message.
Using the wrong link – You also may be using the incorrect meeting link. In this case, instead of an ongoing meeting, you may be visiting an elapsed one.
The Zoom error code 3038 means that the Zoom meeting has expired, and the code precisely indicates this.
This article will explore the steps necessary to fix the zoom error code 3038. However, it would be best if you also were careful because some malicious programs may disguise themselves as the Zoom app.
How do I fix error 3038?
Before trying the solutions we have listed, we recommend you wait a few minutes and retry reaccessing the link.
Also, since this error indicates that the webinar has expired, you need to check and ensure that the link you are using is still valid when you try to join and that the token you pass is also valid.
1. Talk to the meeting organizer
Since this error is often because the meeting you are trying to attend has ended or expired, your best bet will be to ask the administrator to set up another meeting.
If you are the organizer, you may navigate to the Zoom service and reschedule the meeting so that others can access it, and this will solve the Zoom error code 3038.
As opposed to a regular meeting where users can join without having to schedule them in advance, the webinar needs to follow a different set of rules.
Take a look at the invitation link on your Address Bar.
Like in the example below, within the address, you must observe that there is a zoom.us domain. If there is none, it could be a wrong or malicious link. https://us04web.zoom.us/j/71668424656?pwd=waQIz7EPyKvB2gGE3sbRARl97GPTGp.1
As you can see, although the Zoom error code 3038 is unpleasant, fixing it does not need to be time-consuming and can be done with just a few easy steps.
Users have also experienced the error code 1142 installation failed; in this case, you willneed to contact the admin.
Please comment in the dedicated section below if you have additional recommendations or suggestions.
The Microsoft Store error 0x80073d12 has dumfounded some users. That’s an error that arises when users try to download and install a specific game app from MS Store, especially an Xbox Game Pass game.
The error message states:
Install the app or game. Before you can install this add-on, you’ll need to install the app or game it works with.
As a consequence, users can’t install specific game apps on their Windows 10 PCs. Find out how get rid of it.
How do I fix the 0x80073d12 error code?
1. Check if there’s enough hard drive space for the game
Press the Windows key + E hotkey to start File Explorer.
Then click This PC.
The hard drive icon there shows how much free storage space is available.
If there’s not enough HDD storage for the game, uninstall some superfluous programs to make space for it.
As this error can be caused by a lack of free space on your hard drive, checking the main drive and freeing some space is the first to do.
2. Check if the game is an expansion
The 0x80073d12 error often arises for games that are expansion packs or a part of a wider game collection package.
For example, users have reported the issue arises for Forza Horizon 3 Hot Wheels and Halo: The Master Chief Collection.
In the case of Forza Horizon 3 Hot Wheels, players need to have installed and played some of the full, regular game to fix the error and download the expansion. The game’s MS Store page states:
To play the Forza Horizon 3 Hot Wheels expansion, some progress is required in the full game. You must complete enough Exhibition Events and PR Stunts to build your second festival site, after which the expansion will become unlocked and accessible on the game map.
In the case of the Master Chief Collection, the error can arise when users try to install a game within the bundle (such as Reach) before the full package.
Some users have needed to select to download and install the full package first. So, check if the game is an expansion (add-on) or part of a bundle pack that needs to be installed first.
3. Select to install the game from My Library
Press Start.
Open the Microsoft Store App.
Click the See more… button at the top right of the MS Store app’s window.
Click Download and updates on the menu.
Click Downloads on the left to open My library.
Then click Ready to install to open a list of apps.
Click the Install button for the game app that you need to install.
4. Reinstall gaming services
Press Start.
Click Type here to search on the taskbar in Windows 10.
Enter PowerShell in the search utility.
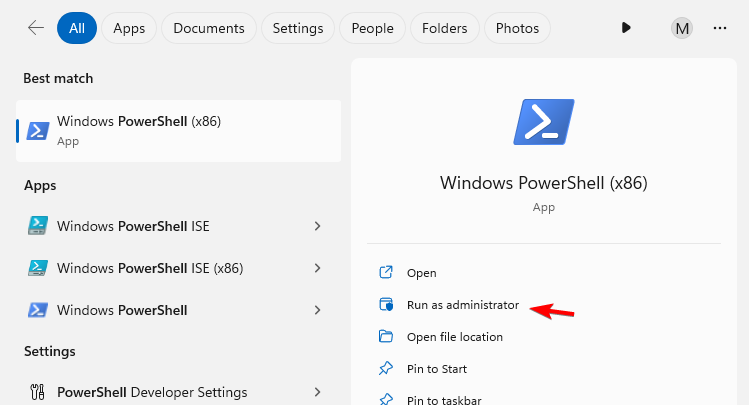
Right-click WindowsPowerShell to select the Run as administrator option on its context menu.
Input this command in PowerShell: get-appxpackage Microsoft.GamingServices | remove-AppxPackage –allusers
Press the Return button after entering the command.
Enter this command into PowerShell: start ms-windows-store://pdp/?productid=9MWPM2CQNLHN
That will open the Gaming Services page in MS Store when you press Enter.
Then click Get to reinstall Game Services.
5. Set up a new hard drive partition
Some users have said they’ve fixed the 0x80073d12 error code by downloading games to alternative hard drive partitions. Some users will need to set up a new hard drive partition.
After you’ve set up the new hard drive partition, select to download the game app to the new D: drive partition.
6. Reinstall the game, then install the add-ons/DLCs
This solution was discovered by Xbox users, as seen on forums. It is quite straightforward and consists of basically ensuring that you first install the game, and then its associated add-ons or DLCs.
The order matters, therefore reinstalling these in the correct one should get you rid of the error code 0x80073d12.
By following these steps, you should be able to get rid of the Microsoft Store error code 0x80073d12 and proceed to install whatever app or game you wish.
Which one of these methods worked best for you? Let us know by leaving your feedback in the comments section below.
CSGO is a first-person shooter game that requires a lot of CPU power to run. It’s not uncommon for the game to use up all of your CPU, which can cause stuttering and other issues.
So, if your computer is running slowly or you are getting lag and FPS drops, it could be because the game uses too much CPU.
Why does CSGO take so much CPU?
There are many reasons why CSGO might be using too much CPU. Some of them are:
Virus/malware – If you’re not equipped with a comprehensive antivirus solution, there may be some malware or adware causing this problem.
Multiple CSGO processes – If you have multiple instances of the game running at once, they could also be consuming a lot of CPU.
Old OS – CSGO undergoes updates from time to time, so if you’re running an older OS with the new version of the game, it is possible that it has not been optimized for your Windows version.
Outdated graphics card – If your graphics card is not powerful enough to handle all of the on-screen action at once, you will experience high CPU usage in CSGO. This is common if you have an older card or laptop that doesn’t support newer technologies. Hence, you need to update the driver to get the best performance,
How do I fix high CPU usage in CSGO?
A few preliminary checks that may be able to help include:
Click on the Windows button, type Device Manager in the search bar, and click Open.
Navigate to Display adapters to expand, right-click on your graphics card, and select Update driver.
Select Search automatically for drivers.
If you are a non-technical user who has no idea how to manually find a suitable driver or install one on your computer, then you’ll be happy to know there’s a tool suitable for you.
This kind of tool will scan your computer for outdated drivers and then fix them. The program can scan for hardware changes, updates to existing driver files, missing drivers, and other errors.
2. Test your hardware for stress
If your CPU is stressed, it will use more power than normal. This means the CPU will run hotter and use more power than normal. You might have a faulty component in your PC causing this problem, so it’s worth testing your PC for stress before investing in new hardware.
It goes without saying that using a high-end gaming PC will make CPU usage much less of an issue than using an older system. So if you haven’t done so recently, upgrade your computer hardware if possible.
Select Windows Update and click on Check for updates.
Download and install if available.
4. Reinstall CSGO
Launch Steam and go to Library.
Locate CSGO, right-click on it, select manage, then click Uninstall.
Confirm Uninstall in the next dialog box.
Restart your PC.
Go back to Steam and reinstall the game.
5. Get an SSD for faster load times
If you’re playing CSGO on a PC with a spinning hard drive, you may notice that the game seems to run slower than it should. This is because your computer spends a lot of time waiting for information to be read from the disk.
To get around this problem and make your games run as smoothly as possible, you need to move your game installation to an SSD. An SSD is much faster than a conventional hard drive and can significantly reduce load times in most games (but not all).
In other instances, you may find that CSGO is not using your CPU. CSGO is a very CPU-intensive game, so if your CPU isn’t powerful enough to handle the game, you will experience freezing and stuttering, ultimately affecting the performance and leading to low FPS.
However, if you have a powerful graphics card, a dedicated GPU might be able to take some of the load off. If this is the case, you’ll notice that CSGO is not using as much CPU or very low CPU usage.
In most cases, CSGO’s high GPU usage is not a problem. It’s simply the game running as it should. However, if your computer has an older graphics card, you may want to ensure that the game isn’t overworking your GPU.
Make sure also to check out some of the best CSGO VPNs that may help in reducing ping or help you bypass geo-restrictions.
Your feedback is important to us, so do let us know if you have been able to resolve this issue using any of the above methods.
Error 2149842967 arises for some users when they try to update Windows 10 (either manually or via the Windows Update tab).
The Event Log message for this error states: Windows update could not be installed because of error 2149842967.
So, Windows 10 updates aren’t installed when that issue arises. It’s important to fix update issues to ensure that Windows 10 gets updated with all patch updates for your build version.
What can I do to fix the error 2149842967?
1. Run a system file scan
First, check for system file corruption by running a System File Checker scan. Our Fix: Corrupted system file guide gives you the full low down on how to run an SFC scan.
2. Check for update issues with the Windows Update troubleshooter
Press Windows + I and select Update & Security.
Click on Troubleshoot on the left pane, then select the Additional troubleshooter option on the right.
Then click the listed Windows Update troubleshooter in Settings, and press the Run the troubleshooter button.
It opens the window shown directly below. Then you can go through the resolutions for Windows Update issues the troubleshooter suggests.
3. Check the BITS service is enabled and running
Right-click Windows 10’s Start button to open the menu in the snapshot directly below.
Click Run to open that accessory.
Type services.msc in Run, and click the OK option.
Double-click Background Intelligent Transfer Service to open the window for it.
Select Automatic on the Startup type drop-down menu if the policy is disabled.
Click the Start button for the service if it isn’t running.
Press the Apply button to save the settings.
Then click OK to close the BITS window.
Also, right-click Windows Update and select Start if that service isn’t running.
4. Reset the update components
Find the Command Prompt by entering cmd in Windows 10’s search utility.
Right-click the Command Prompt so that you can select its Run as administrator option.
Next, type in the following separate commands and press Enter after each: net stop bits
net stop wuauserv
net stop appidsvc
net stop cryptsvc
Type in this command and press Enter: Del “%ALLUSERSPROFILE%\Application Data\Microsoft\Network\Downloader\qmgr*.dat”
Input these separate commands: Ren %systemroot%\SoftwareDistribution SoftwareDistribution.bak
Ren %systemroot%\system32\catroot2 catroot2.bak
Open the System 32 folder by entering:cd /d %windir%\system32
Thereafter, enter this long list of regsvr32 commands to reregister all the BITS service files: regsvr32.exe atl.dll
regsvr32.exe urlmon.dll
regsvr32.exe mshtml.dll
regsvr32.exe shdocvw.dll
regsvr32.exe browseui.dll
regsvr32.exe jscript.dll
regsvr32.exe vbscript.dll
regsvr32.exe scrrun.dll
regsvr32.exe msxml.dll
regsvr32.exe msxml3.dll
regsvr32.exe msxml6.dll
regsvr32.exe actxprxy.dll
regsvr32.exe softpub.dll
regsvr32.exe wintrust.dll
regsvr32.exe dssenh.dll
regsvr32.exe rsaenh.dll
regsvr32.exe gpkcsp.dll
regsvr32.exe sccbase.dll
regsvr32.exe slbcsp.dll
regsvr32.exe cryptdlg.dll
regsvr32.exe oleaut32.dll
regsvr32.exe ole32.dll
regsvr32.exe shell32.dll
regsvr32.exe initpki.dll
regsvr32.exe wuapi.dll
regsvr32.exe wuaueng.dll
regsvr32.exe wuaueng1.dll
regsvr32.exe wucltui.dll
regsvr32.exe wups.dll
regsvr32.exe wups2.dll
regsvr32.exe wuweb.dll
regsvr32.exe qmgr.dll
regsvr32.exe qmgrprxy.dll
regsvr32.exe wucltux.dll
regsvr32.exe muweb.dll
regsvr32.exe wuwebv.dll
Type these separate commands into the Command Prompt: netsh winsock reset
netsh win http reset proxy
Thereafter, restart services by entering these Command Prompt commands: net start appidsvc
net start cryptsvc
net start bits
net start wuauserv
Then restart your desktop or laptop.
Those are some resolutions that can feasibly fix the Windows Update could not be installed because of error 2149842967 issue.
They aren’t necessarily guaranteed fixes for everyone, but resetting or reinstalling Windows 10 should always be the last potential resolutions for resolving Windows 10 update issues like error 2149842967.
When you’re using the Microsoft Store app (formerly known as Windows Store) in Windows to download different applications you might encounter an error code 0x803f7000.
The error code 0x803f7000 means that the Windows Store cannot download the app from the remote server and can be caused by multiple reasons.
Read on to find out how to fix this Microsoft Store error on your device and get back to downloading apps.
How can I fix the error code 0x803f7000?
1. Check your antivirus
The first thing you need to check if you’re getting 0x803f7000 error in Windows Store is your antivirus. Having a good antivirus is important for your safety, but sometimes your antivirus can cause this and many other problems to appear.
To make sure that your antivirus doesn’t interfere with your system, you might want to try disabling certain antivirus features or disable your antivirus altogether. In case the problem is still there, you might even have to uninstall your antivirus.
If removing the antivirus solves the issue, your next step would be to switch to a different antivirus solution. There are many great antivirus tools on the market with maximum protection that won’t interfere with your system.
Using the right antivirus software will keep your PC safe by using some extra protection layers and immediate file encryption.
According to users, the one reason for 0x803f7000 error in Windows Store can be your region. If your region isn’t set properly, you might encounter this and many other problems. However, you can easily change your region by doing the following:
Open the Settings app. The fastest way to do that is to use Windows Key + I shortcut.
Now go to the Time & Language section in the Settings app.
Now go to the Region & language in the left pane. In the right pane pick United States or choose a correct region.
After making these changes, restart your PC and check if the problem is still there.
3. Incorrect date and time
Another cause for 0x803f7000 error in Windows Store can be incorrect date and time. Sometimes if the date or time aren’t correct, you might encounter this or some similar error. However, you can fix the problem simply by adjusting your date and time. You can do that by following these steps:
Right-click the clock icon on your Taskbar. Select Adjust date/time from the menu.
Locate Set time automatically option and disable it. Wait for a few moments and enable this option again.
After doing that, the time should be automatically readjusted. If you want, you can also click the Change button and adjust the time and date manually. After correcting the date and time, check if the problem is still there.
4. Clear the Windows Store cache
Online applications store static information on your machine, called cache, which is used to speed up browsing. When the information on the server changes your cache should update automatically but sometimes you have to manually reset it.
To reset the Windows Store cache press the Windows + R keys or search for Run. This will bring up the Run window. Here you’ll have to type Wsreset.exe and press the Enter key or the OK button.
Running this executable will reset your Windows Store to its default settings and open it once the process finishes.
5. Run the Troubleshooter
Sometimes you might be able to fix this problem simply by running a built-in troubleshooter in Windows. To fix the 0x803f7000 error in Windows Store using the troubleshooter, you just need to do the following:
Open the Settings app and go to the Update & Security section.
Choose Troubleshoot from the menu pm the left. Now pick Windows Store Apps from the list and click the Run the troubleshooter button.
Follow the instructions to complete the troubleshooter.
After the troubleshooter is finished, check if the problem is still there.
6. Disable your proxy
Many users use a proxy in order to protect their privacy online. Using a proxy is a good idea, but sometimes issues as 0x803f7000 error in Windows Store can appear due to your proxy. This can be a big problem, but you can fix it simply by turning off your proxy. To do that, follow these steps:
Open the Settings app and head over to the Network & Internet section.
Pick Proxy from the left pane. In the right pane, disable all options.
Once you disable your proxy, check if the problem is still there. Many users tend to use proxy in order to protect their privacy, but if you want better protection, you should consider using VPN software.
A dedicated VPN software will keep your identity safe while surfing the internet. It will also provide you a wide range of helpful tools in order to access specific internet resources. It will also help you to change your geo-location for shopping, gaming, or professional purposes. We will definitely recommend you use a VPN in order to keep your online identity private.
In some cases, 0x803f7000 error in Windows Store can occur due to problems with the Windows Store application. However, you might be able to solve this problem simply by re-registering Windows Store app. You can do that by following these steps:
Press Windows Key + S and enter powershell. Now right-click Windows PowerShell from the list and choose Run as administrator.
When PowerShell opens, run the -ExecutionPolicy Unrestricted Add-AppxPackage -DisableDevelopmentMode -Register $Env:SystemRootWinStoreAppxManifest.xml command.
After the command is executed, the issue with Windows Store should be completely resolved.
8. Create a new user account
If you’re getting 0x803f7000 error in Microsoft Store, the problem might be related to your user account. Sometimes your account might get corrupted, and that can lead to this and many other errors. To fix this issue, it’s advised to create a new user and switch to it. To do that, just follow these steps:
Open the Settings app and go to the Accounts section.
Head over to the Family & other people in the left pane. In the right pane, click Add someone else to this PC button.
Pick I don’t have this person’s sign-in information.
Select Add a user without a Microsoft account.
Enter the desired username and click Next.
After creating a new user account, switch to it and check if that solves your problem. If the issue doesn’t appear on the new account, you’ll have to move your personal files to it and start using it instead of your old account.
9. Install the missing updates
According to users, a 0x803f7000 error in Windows Store can sometimes appear if you don’t have the necessary updates installed. However, you can fix this problem easily simply by downloading the latest updates for Windows 10.
Windows 10 automatically updates itself for the most part, but you can check for missing updates manually. To do that, just follow these steps:
Open the Settings app and go to the Update & Security section.
Click Check for updates button.
Windows will now check for available updates and download them automatically in the background. Once the updates are downloaded, simply restart your PC to install them. Once your PC restarts, check if the problem is still there.
10. Perform an in-place upgrade
0x803f7000 error in Windows Store can be problematic, and in some cases, the only way to fix it is to perform an in-place upgrade. In case you don’t know, an in-place upgrade will upgrade Windows to the latest version, and will basically reinstall it, while keeping all your files and applications intact. To do that, just do the following:
Download and run Media Creation Tool.
Select Upgrade this PC now option and click Next.
Now pick Download and install updates (recommended) and click Next.
Follow the instructions on the screen. Once you get to the Ready to install screen you need to click Change what to keep.
Be sure to choose Keep personal files and apps and click the Next button.
Follow the instructions to complete the setup.
Once the setup is finished, you’ll have the latest version of Windows installed, and the issues with the Windows Store should be completely resolved.
Speaking of Windows Store issues, here are some common problems that users reported:
Windows 10 app Store not working – According to users, this issue can occur due to your antivirus software, and in order to fix this issue, it’s advised to temporarily disable or even uninstall your antivirus.
Microsoft Store not working Windows 10 – If Microsoft Store isn’t working at all, the most likely cause are the missing updates. Simply update Windows to the latest version and check if that helps.
I hope these tips will fix error code 0x803f7000 for you but if they fail to do so please let us know in the comment section below.
Taking a screenshot on Windows 11 is quick and easy, whether you want to grab the whole screen, a specific window, or just a part of it. In this guide, we’ll show you the fastest and most efficient ways to take screenshots using built-in tools and shortcuts
The PrtSc button is a core Windows function that’s here to stay. It’s a dedicated key on all Windows keyboards that will essentially capture whatever is displayed on your desktop at that particular time.
In this matter, Windows 11 is no different than its predecessor and it responds to the same command.
The Print Screen function can be used in different ways depending on what you want to achieve. Note that this method works for those who wonder how to screenshot on Windows 11 Pro as well.
Print Screen key
You can use the Print Screen button alone. Do keep in mind that this method will copy your screenshot to the clipboard, which means that you’ll lose any other information previously stored there.
One more thing that’s worth mentioning here is that you won’t be able to select a particular area of the screen.
Windows key + Print Screencombination
This key combination will also capture the entire screen, but it has a twist. Instead of copying your screenshot to the clipboard, it will save your image in the Pictures/Screenshots folder.
Press Windows + Shift + S to launch Snipping Tools.
Here you have four options as follows:
Rectangular mode – Allows users to capture the desired rectangular portion as a screenshot.
Freeform mode – With this one, as the name suggests, you can take capture a screenshot of any shape.
Window mode – The current application or program is captured.
Fullscreen mode – A fullscreen screenshot is taken, which includes the taskbar.
To take a screenshot, choose the desired mode, use the cursor to select the desired portion, and click to capture.
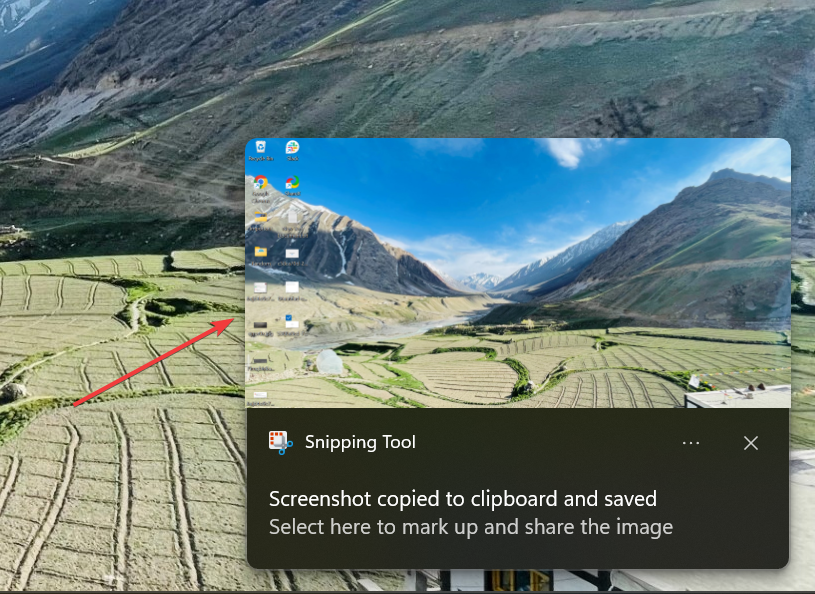
As soon as you take a screenshot using Snipping Tools, it’s saved to the clipboard and a notification appears at the bottom-right corner. Click on it to annotate or edit the screenshot.
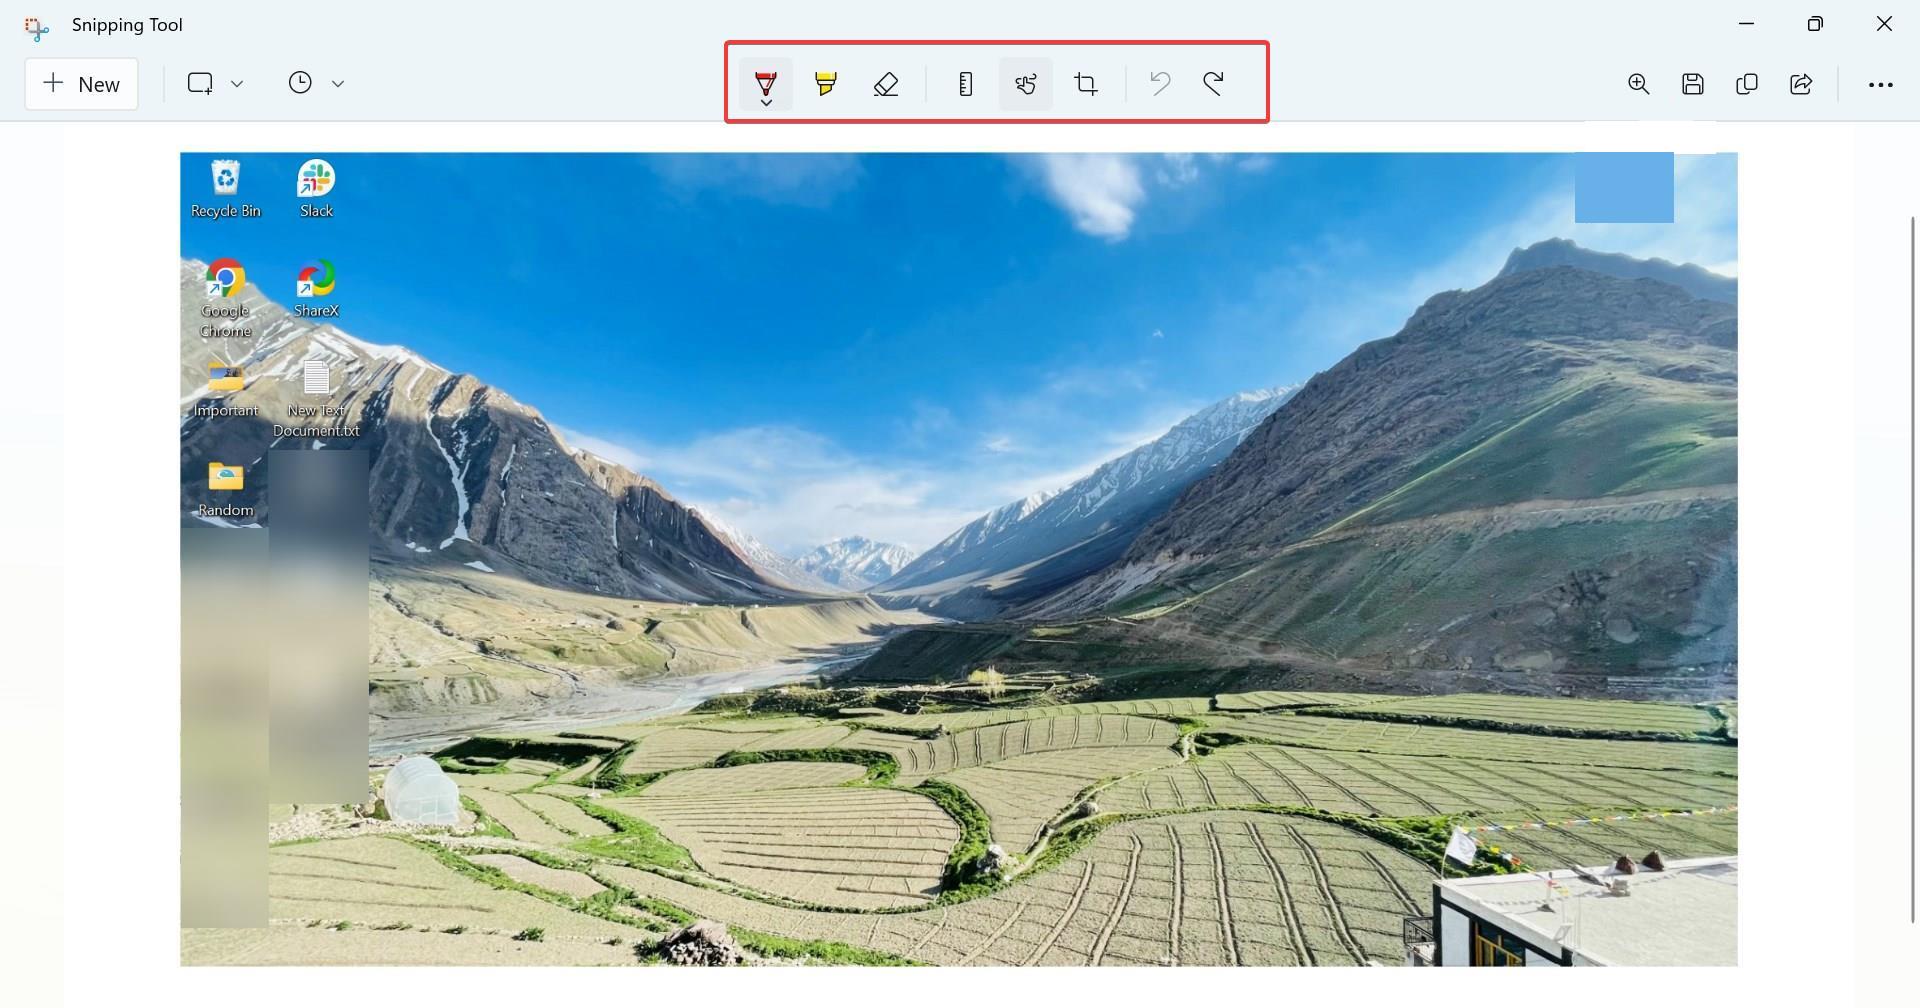
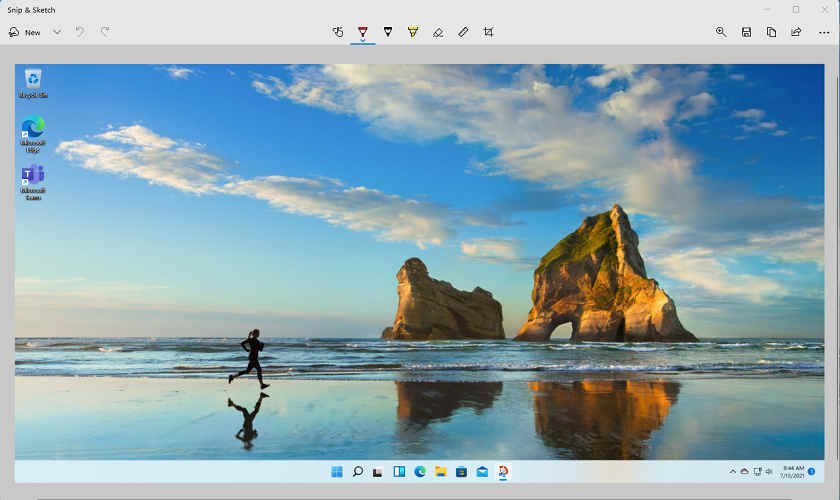
Now, you have the screenshot in the editor. Use the various options here to edit it, for instance, the Ballpoint pen and Highlighter.
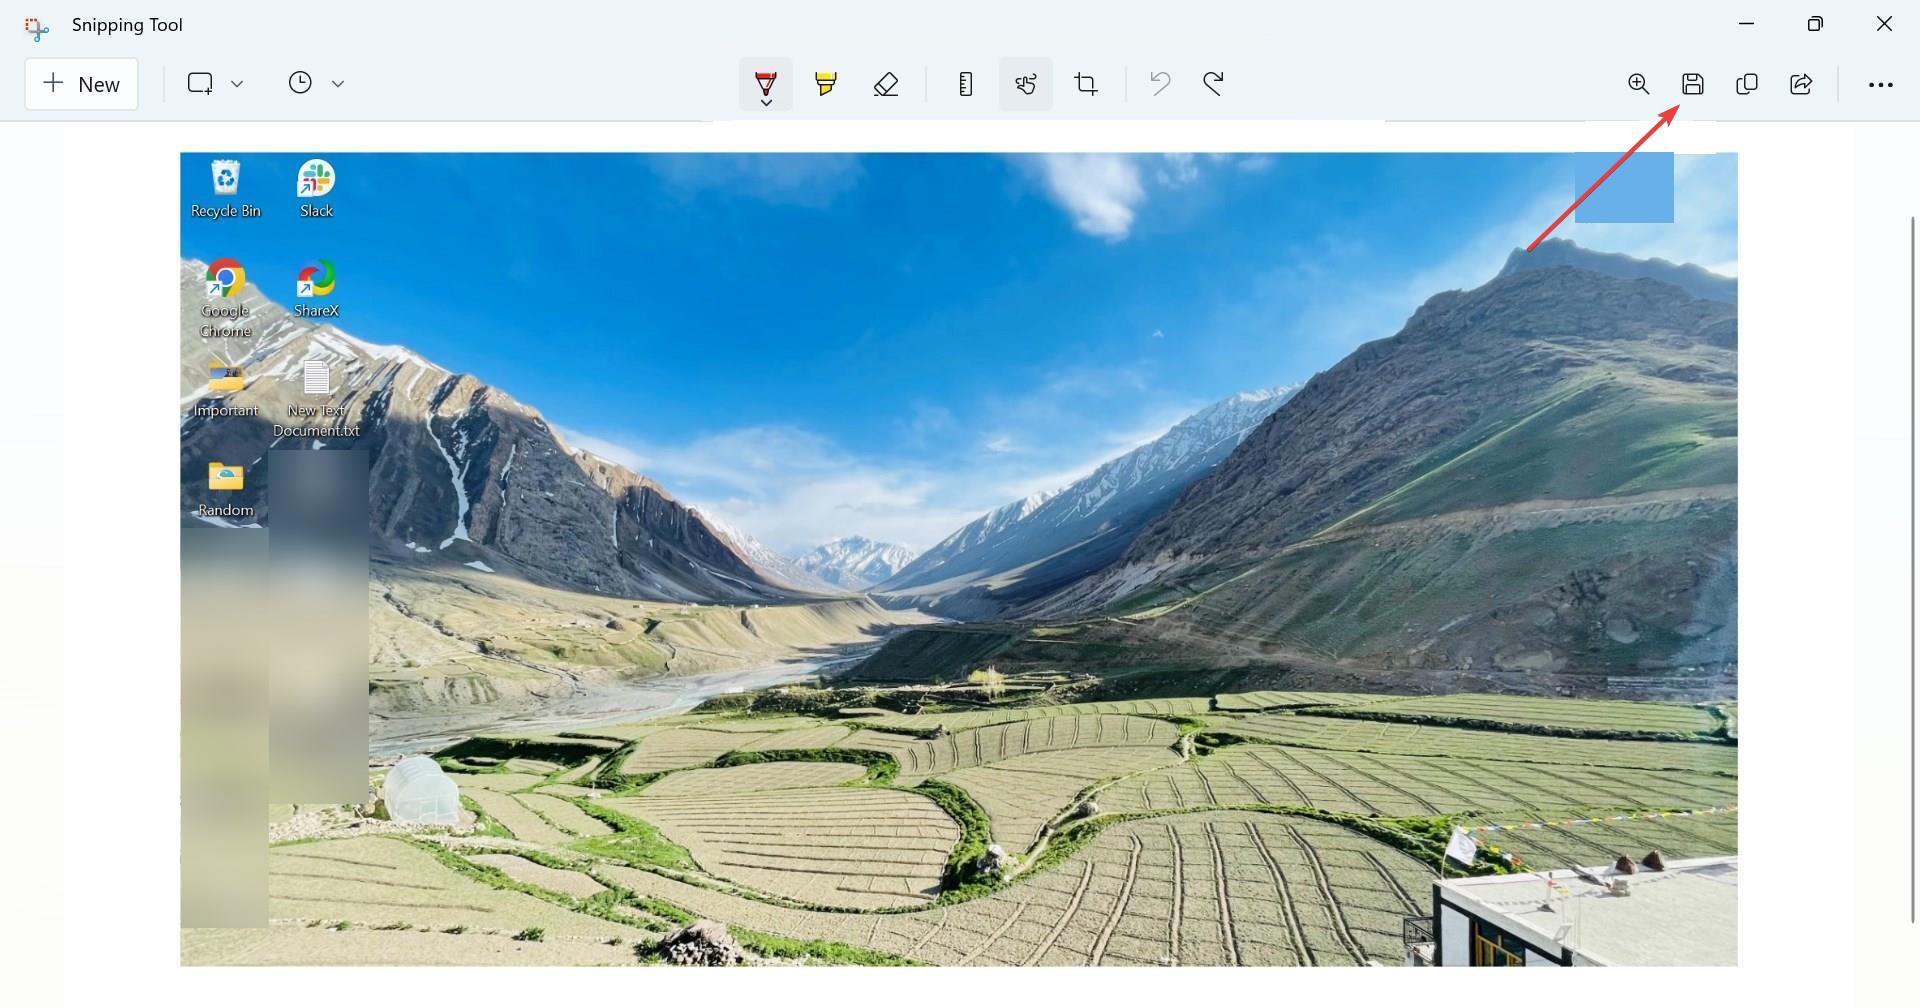
Once done, click on the Save icon.
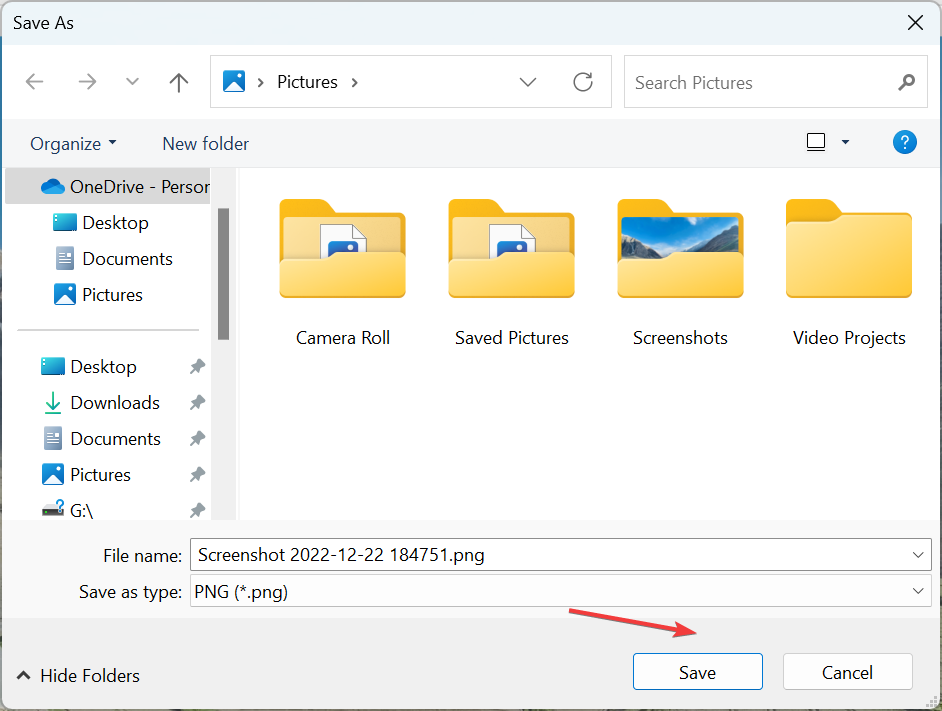
Navigate to the desired location for the file, and again click on Save.
2.2 Set a timer to take the screenshot
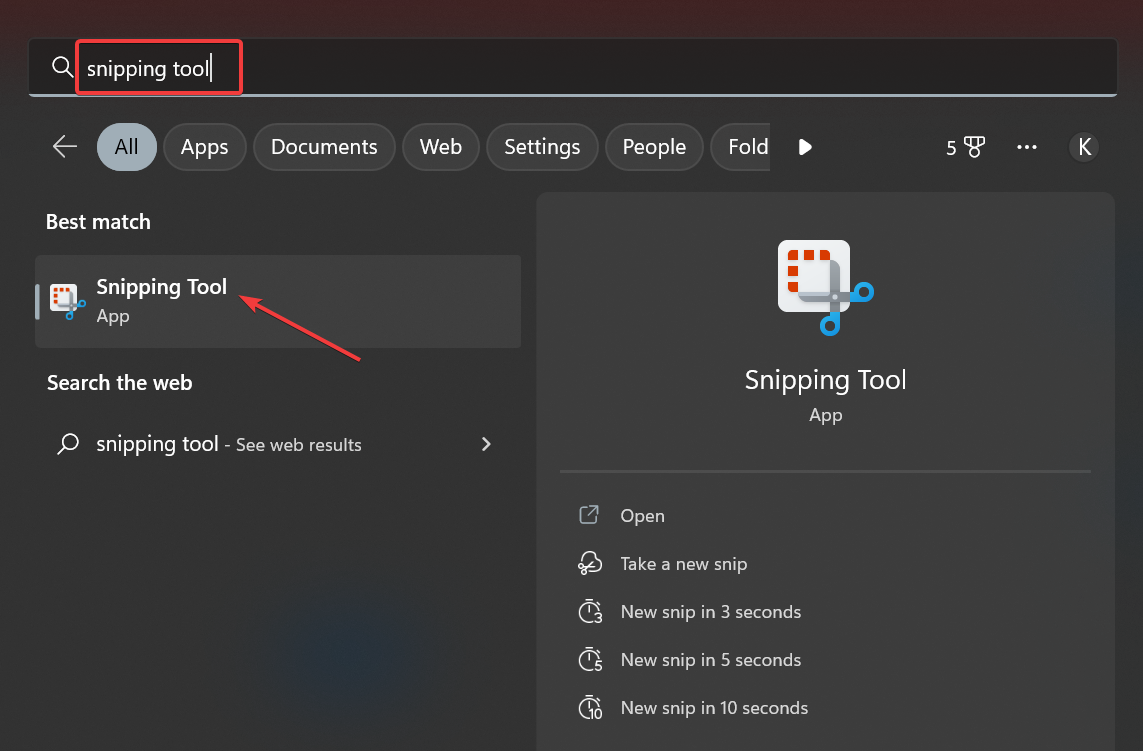
Press Windows + S to open Search, type Snipping Tool, and click on the relevant search result.
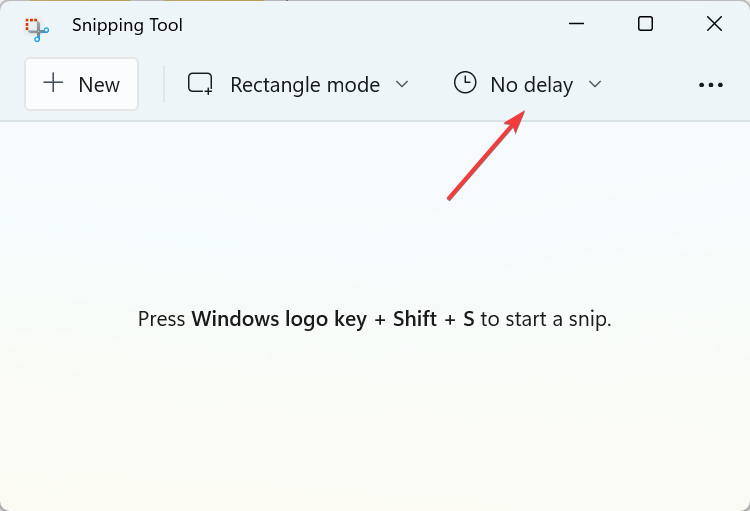
Click on the No delay option.
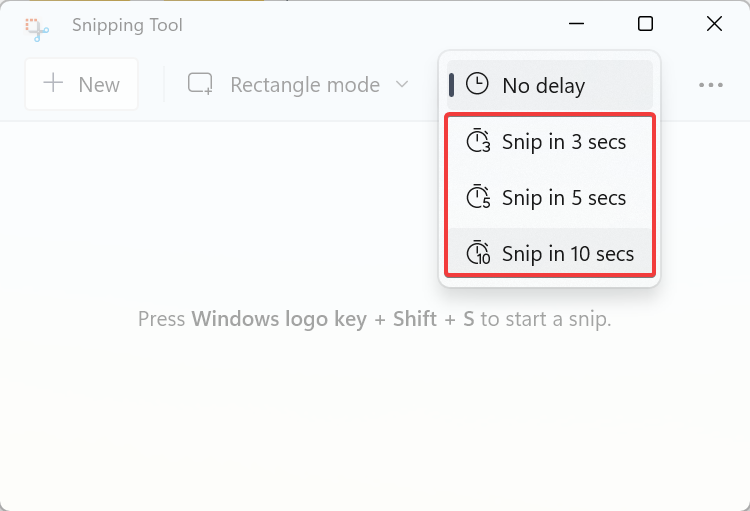
Choose a time here, either 3, 5, or 10 seconds.
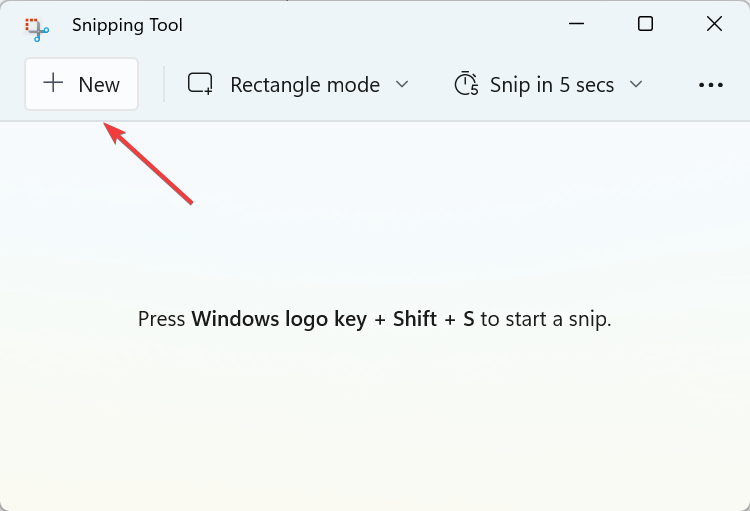
Now, click on New and the Snipping Tools will automatically appear after the chosen period.
That’s it! In Windows 11, Microsoft integrated Snipping Tools and Snip and Sketch into one, and it got the former’s name. The app now offers a lot more features and is handy to use.
Also, you could set a timer to take screenshots of specific actions that can’t be captured instantaneously.
3. Use Snip & Sketch
A great option for taking a screenshot in Windows 11 is using the dedicated tool called Snip & Sketch. It is a handy built-in app. This is the new app that replaces Snipping Tool. Here is how to use it:
1. Open Snip & Sketch
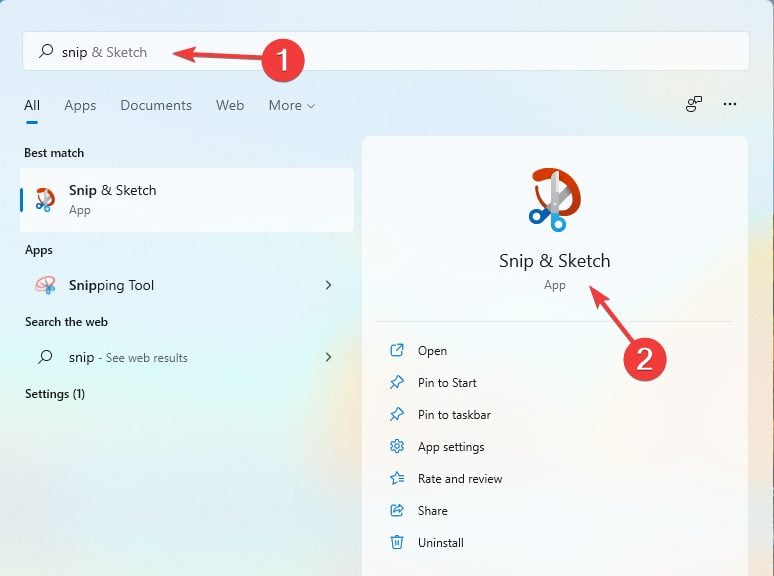
Search for the Snip & Sketch tool in the Start Menu or just type snip in Windows search and select it from the results. Click on it.
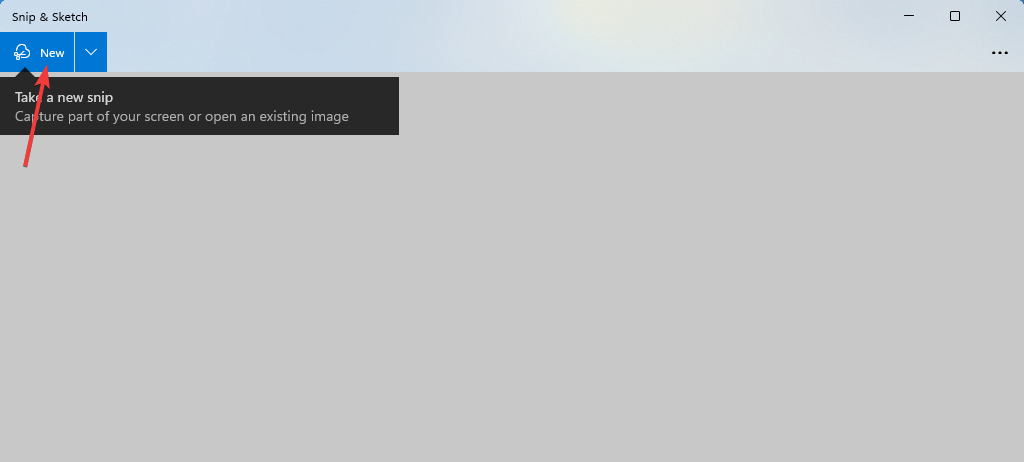
2. Click on New
Now you need to click on the New button in the upper left corner of the application.
3. Select your desired snipping option
You’ll see a couple of different available snipping options: Rectangular Snip, Free-form Snip, Windows Snip, and Full-screen Snip. Choose one of them.
4. Select the screenshot area
Use the mouse cursor to choose what section of the screen you would like to capture in a screenshot.
5. Enter the editor
The tool will automatically transfer your screenshot to the clipboard and then start an editor as soon as you finish selecting your desired area.
6. Edit the screenshot
So now you can edit it as you wish in Snip & Sketch. You can choose to paste the image from the clipboard to another editor or save it on your Windows 11 PC without editing it as a PNG, JPG, or GIF file.
When you’re looking for Snip & Sketch, you will also see that the Snipping Tool app is still available in Windows 11 but we don’t know for how long.
Explore Snip & Sketch
It’s time for the big reveal – introducing the new Snip & Sketch tool which will gradually replace the Snipping Tool. If you were expecting major differences, you’ll be somewhat disappointed.
The new tool basically offers the same features as the original one. In fact, the appearance is the biggest change with the new app offering a more polished look that blends in with the overall flow and feel of the modern Windows 11.
In other words, the Snip & Sketch tool is pretty much a more sophisticated version of the Snipping Tool. For more advanced features, we recommend dedicated software such as Icecream Screen Recorder.
For users who need more powerful capture and editing options, this guide on free Snagit alternatives for Windows 11 can help you choose a dedicated screen capture tool.
When it comes to functionalities, you will have the same modes that allow you to choose a specific area to capture, plus to copy to clipboard flow.
One notable addition is that you can edit the screenshot by adding text, shapes, or highlighting directly in the preview window.
Moreover, accessing the Snip & Sketch tool is as easy as using this keyboard shortcut: Windows + Shift + S.
Basically, the new tool is easier to use, it looks better and it’s a lot more simple to manage by everyone so if you upgraded to Windows 11, you should think about using it.
4. Use the Xbox Game Bar
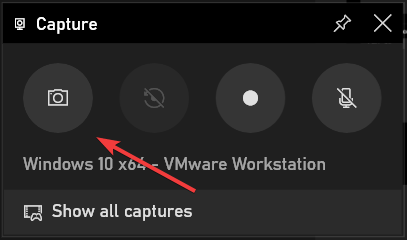
Press the Windows+ G key combination to use the Game Bar or use the Start menu to search for it.
When the app opens, click on the camera icon within its taskbar. This will capture your entire screen.
Even though the Xbox Game Bar is a gaming app, it offers interesting capture functionalities that you can apply to a broader area.
Furthermore, you can use it to record videos of your screen just as you would with a third-party screen recorder. While it’s not a specialized screenshot software, the Game Bar will do the job just fine.
There was a problem connecting to the server is an error that can appear when Windows SharePoint Services and Excel are preventing the Excel spreadsheet from being imported correctly into Windows SharePoint.
The message will prompt showing you a message like this: We’re having trouble connection to the server on Excel, if this keeps happening contact your help desk.
This connection issue can be irritating for any user and it requires practical solutions that can ultimately solve multiple connection issues such as Excel trying to connect to server when saving.
So, as troubling as this may be, we do have reliable solutions for you in this article.
Why is Excel not connecting to a server?
There are multiple causes that will generate Excel error connecting to the server, so be aware of the following ones to check them on your device:
➡️ Browser-related issues – It’s possible that your browser cache is corrupted or interferes with Excel processes.
➡️ SharePoint connection error – When using Excel to connect online, you should make sure it’s connected to SharePoint.
➡️ Connected services – You have multiple services connected to Microsoft Excel that may trigger server problems.
That being said, you can solve Excel cannot connect to server with the right fix methods that we provided down below.
How to fix A problem occurred while connecting to the server Excel error?
1. Create a new list based on the Excel workbook
In the root site, we’re going to create a new list that is based on the Excel workbook.
On the home page of the root site, click Create.
On the Create page, under Custom Lists, click Import Spreadsheet.
Specify the options that you want, and then click Import.
In the Import to Windows SharePoint Services list dialog box, click the range of cells that you want to use for your list, and then click Import.
Specify the columns and the rows that you want to import, and then click Import.
In the root site, save the new list that you created as a list template. To do so, follow these steps:
In the root site, click Documents and Lists.
Click the link to the list that you want to save as a template.
Click Modify settings and columns.
On the Customize ListName page, under General Settings, click Save list as template.
In the File name box, type the file name that you want to use for the template file
In the Template title box, type the title that you want to use for the template.
Select the Include content check box and click OK.
The last thing we’re gonna do is connect to the subsite, and then create a new list that is based on the new list template that you created.
Connect to the subsite, and then click Create.
Click the template that you previously created.
On the New List page, specify a name and a description for the list, and then click Create.
For this, we’re going to disable anonymous access settings on the website in Windows SharePoint Services you’re using.
Go to the home page of the root site, next click Site Settings.
On the Site Settings page, click Go to Site Administration.
Click Manage anonymous access.
In the Change Anonymous Access Settings area click Nothing, then click OK.
Now we’re going to create a new list that is based on the Excel workbook. To see how to do that properly, follow the steps from the previous solution.
Next, we’re going to configure anonymous access settings on the Web site in Windows SharePoint Services.
On the home page of the root site, click Site Settings.
On the Site Settings page, click Go to Site Administration.
On the Top-level Site Administration page, under Users and Permissions, click Manage anonymous access.
On the Change Anonymous Access Settings: SiteName page, in the Anonymous Access area, click Entire Web site or click Lists and libraries, and click OK.
3. Use a ULS Viewer
ULS logs are created by Sharepoint whenever it’s processing a request. And the correlated log creates IDs for any specific request, which are very helpful when debugging a problem.
This program allows you to view logs in real-time, simply by pressing Ctrl+U while running it. You can download ULS Viewer from Microsoft’s official website.
4. Manually connect the SharePoint Online Service
You can fix the Excel connection problem by modifying the connected services and manually connecting the SharePoint service. This can be done through the tool’s built-in settings, in the Account section.
1. Launch Microsoft Excel.
2. Open the file that you have trouble importing.
3. Navigate to the File tab from the menu.
4. Go to Account.
5. Scroll down to Connected Services. Here you can see which services you have associated to your account.
6. Remove the currently connected service.
7. After, click on Add a service.
8. Choose Other sites from the list of options.
9. Add your Sharepoint Service.
We hope these fixes were of use. And in the meantime, let us know in the comment section down below what are your solutions.
On the Microsoft support forum, some Excel users have discussed an error message that states: The file format and extension of ‘file.xls’ don’t match. The file could be corrupted or unsafe. Unless you trust its source, don’t open it. Do you want to open it anyway?
Users can then select to open the Excel file. However, users have said that their spreadsheet files have lost all their data when they click Yes to open. If you need to fix that same error, check out some of the resolutions for it below.
What does it mean when a file format and extension don’t match?
When a file’s format and extension do not match, it means that the file has been saved in a format that is different from the extension that has been given to it.
For example, if a file has been saved as an Excel spreadsheet, but it has been given the “.txt” extension, it means that the file has been saved as a text file instead of an Excel spreadsheet.
This can cause problems when you try to open the file, because Excel may not recognize the file’s true format and may not be able to open it correctly. You may also get the extension is not valid error when you open the Excel file.
It is important to ensure that the file format and extension match, so that you can open and use the file correctly in Excel.
How do I fix the file format and extension don’t match?
1. Change the file’s extension (worked for most users ✅)
Some users have fixed the issue by manually changing the file’s extension to various standard Excel file formats until they get the right one. Click the File Explorer button on Windows 10’s taskbar.
Select the File name extensions option on the View tab.
Open the folder that includes the Excel file the error arises for.
Right-click the file and select the Rename option.
Then edit the extension at the end of the file to. xls, .xlsx, or .xlsm. Try opening the Excel spreadsheet with each of those alternative file formats.
2. Select the Open and Repair option
The Excel file might be corrupted, and you can fix it with the Open and Repair option. First, open Excel’s window.
Select the File tab.
Click Open to open the window shown directly below.
Select the file the issue arises for.
Then click the arrow on the Open button. Select the Open and Repair option.
Select the Repair option.
If the Repair option doesn’t fix the issue, repeat the above steps and click the Extract Data button. Then you can click Convert to Values to extract data from the sheet.
3. Unblock the Excel file
Some users have confirmed they’ve fixed the file format does not match extension error by unblocking the file. To do so, open File Explorer.
Open the folder path that includes the Excel spreadsheet file which needs fixing.
Right-click the Excel file to select the Properties option.
Select the General tab on that window.
Click the Unblock option. Note that option will only be visible for files that came from another source, such as email attachments.
Press the Apply button.
Click exit to close the window.
4. Turn off Protected View
Turning Excel’s Protected View off might also resolve the file format does not match error. Click Excel’s File tab.
Click Options to open a window like the one shown directly below.
Click the Trust Center tab on the left of the window.
Press the Trust Center Settings button.
Then click Protected View on the Trust Center window.
Deselect all three Enable Protected View settings there.
You can also try opening the Excel file the error arises for in LibreOffice Calc. That’s a freeware spreadsheet application you can add to Windows by clicking Download on the Download LibreOffice page. Then install Calc’s office suite with the downloaded setup wizard.
When you try opening the file in LibreOffice Calc, the application might ask you to select an appropriate format. Select alternative formats until you get the file opened. Thereafter, you can copy and paste all the data in the spreadsheet into a blank Excel sheet with the Ctrl + C and Ctrl + V keyboard shortcuts.
Those are some of the confirmed resolutions that users have fixed Excel’s file format does not match extension error with.
If the file the issue arises for is not from a trusted source, however, do not select to open it. Instead, scan the file with an antivirus utility before trying to open it.
Microsoft improved a lot its built-in Mail app in Windows 10. But even in the improved version, some people are reporting that they’re unable to receive emails or even open the app.
So, we prepared a couple of solutions, which, we hope, will be enough for solving the Windows 10 Mail App not working problem that can occur with Yahoo, Gmail, AOL or Office.
Not being able to run the Mail app can be a big problem, and users reported the following issues as well:
Windows 10 Mail app not opening – Many users reported that the Mail app won’t open at all due to this problem. If your Mail app is not launching, you might want to check some of our solutions.
Windows 10 Mail app not syncing – Another similar problem that occurs is the inability to sync your mailbox. This problem will make your Mail app almost unusable.
Windows 10 Mail app crashing – Many users also reported that their Mail application is frequently crashing. According to them, the application usually crashes on startup, so they are unable to use it.
Windows 10 Mail not receiving emails – Another common problem with the Mail app is the inability to receive emails. This can be a serious issue, but you should be able to solve it with our solutions.
Mail app not updating – Many users reported that they aren’t able to update their Mail app at all. With the inability to access the Mail app fixing this problem might be difficult.
Mail app not starting Windows 10 – Common problem that also occurs is the inability to start the Mail app. According to users, it seems that Mail application crashes as soon as users try to launch it.
As you can guess, the solution to this issue is very simple, you just need to go to settings and enable Microsoft’s access to the calendar app.
Restart your computer, and try to run the mail app again, everything should work fine. But if it doesn’t you can try the solution below, as well.
2. Change to secure connection
Open the Mail app.
Click on the Settings icon in the bottom left corner.
Go to Manage Accounts.
Click on your account and go to Change mailbox settings.
Make sure that Server requires encrypted (SSL) connection and Email, under Sync options are checked.
You also might consider switching to a specific mail client which will give you fewer troubles.
If you changed the privacy settings and everything else is correct, but you’re still unable to receive mails into your inbox, try to set the Mail app to use the secure connection.
This solution will also help you fix the email error code 0x80040b0b but the highlighted guide will provide other methods as well.
3. Install another e-mail client
The e-mail client recommended below is quite similar to the Windows native solution in terms of ease of use.
It brings stronger and more complex capacities to smoothen your emailing experience altogether.
This email client features an uncluttered and very intuitive interface that will allow you to easily manage your emails, attachments, and contacts in one unified Inbox.
By adding integrations to the table, you will enjoy a plethora of functionalities to cover all your communication needs.
Let’s quickly look at its key features:
Easy emails and contacts management from a unified Inbox
Customization options (numerous free color themes, different Windows-adapted layouts and more)
Seamless app integrations (Facebook, Twitter, Whatsapp, Dropbox, Google Calendar, Asana and more)
Snooze feature to separate and prioritize your emails
Custom Sounds notifications for incoming and outgoing emails
Intuitive keyboard shortcuts for archiving, composing, replying, and forwarding
Multi-language 24/7 free support
Mailbird
Why settle for the Mail app? Get more options with the same ease of use from Mailbird!
If the Mail app is not working in Windows 10, you might be able to fix the problem simply by updating it.
Many users reported this problem, and according to them, updating the app to the latest version can fix this issue.
After updating the Mail app to the latest version, the problem should be fixed and you’ll be able to run the Mail app without any issues.
5. Install Windows updates
Press Windows Key+ I to open the Settings app.
When the Settings app opens, navigate to the Update & security section.
Now click on Check for updates button.
To keep your PC safe and stable, it’s necessary to install Windows updates. According to users, they managed to fix this problem simply by installing the latest Windows updates.
If the update process gets stuck, check out the quick and easy steps in this amazing guide.
By default, Windows 10 automatically installs the updates in the background, but sometimes it can happen that you skip an important update.
Windows will now check for available updates. If any updates are available, Windows will download them in the background and install them once you restart your PC.
Several users reported that installing the latest updates fixed the problem with the Mail app, so be sure to try that.
6. Turn off Sync settings
Open the Settings app.
Now navigate to the Accounts section.
From the menu on the left select Sync your settings.
In the right pane, locate Sync settings and turn it off.
If the Mail app is not working on your Windows 10 PC, you might be able to solve the problem simply by turning off your Sync settings.
After turning off Sync settings, you just have to restart your PC to apply the changes.
Once your PC restarts, the problem should be fixed. If everything works well, you can turn Sync settings back on again if you want.
7. Change your localization settings
Press Windows Key + S and enter the Control Panel.
Now select Control Panel from the list of results.
When Control Panel opens, select Region.
Navigate to the Location tab and set Home location to your country.
Now go to the Administrative tab and click on the Change system locale button.
Select your country from the Current system locale menu and click on OK to save the changes.
Now click on Apply and OK in theRegion window.
According to users, you might be able to fix the problem with the Mail app simply by changing your localization settings.
Users reported that the Mail app is not working for them on Windows 10, but after changing the localization settings, the problem was resolved entirely.
After changing the system locale, check if the problem with the Mail app still appears. Several users reported that changing the locale fixed the issue for them, so feel free to try it out.
Some users are also suggesting turning on and off Sync settings feature as well, so you might want to try that.
Press Windows Key + S to open the search tab and enter cmd.
Select Run as administrator from the list to open Command Prompt as administrator.
If you don’t have Command Prompt available, feel free to use PowerShell instead.
When Command Prompt opens,type in this line and press Enter to run it.
sfc /scannow
The scanning process will now start. SFC scan can take 10-15 minutes, so be patient and don’t interrupt it.
Once the SFC scan is completed, check if the issue is resolved. If the SFC scan can’t fix the problem, or if you can’t run SFC scan at all, you might want to try using DISM scan instead.
7.2 Run a DISM scan
Start Command Prompt as administrator.
When Command Prompt opens, enter this line, and press Enter to run it
dism /online /cleanup-image /restorehealth
DISM scan will now start. Keep in mind that this scan can take 15-20 minutes, so don’t interrupt it.
According to users, if the Mail app is not working in Windows 10, you might be able to fix the problem by performing SFC and DISM scans.
These scans are designed to repair corrupted system files, and after you perform them, the issue should be resolved.
Once the DISM scan is finished, check if the problem still persists. If you couldn’t run an SFC scan before, be sure to run it after performing a DISM scan. Now check if the problem still appears.
Some users are also recommending to use a PowerShell command to fix this issue. We have to warn you that this command is rather powerful and it can cause problems with other applications if you don’t use it properly.
Since this command is potentially dangerous, keep in mind that you’re using it at your own risk.
7.2 Run a PowerShell command
Right-click the Start button and select Windows PowerShell (Admin) from the list.
This command requires administrative privileges, and if you don’t start PowerShell as an administrator, you won’t be able to perform it.
When PowerShell opens, paste the following command, and press Enter to run it:
If the Mail app is not working in Windows 10, you might be able to fix the issue simply by reinstalling it. To reinstall the Mail app, you’ll need to use PowerShell by running the command from above.
8.2 Uninstall the Mail app using a dedicated uninstaller
If you’re not comfortable using PowerShell, you can remove the Mail app by using third-party uninstaller software for PC.
This list of uninstaller software we compiled will help you choose one compatible with your PC, so you can delete any apps; even the most stubborn ones are eradicated and you can rest assure that it won’t leave any leftovers behind.
After running the remover tool, you will recover the free space on your PC that was clogged with the remains of all useless files that you didn’t even know existed on your hard drive.
8.3 Reinstall the Mail appfrom Microsoft Store
Press Windows Key + S and enter store.
Select Microsoft Store from the list of results.
In the search bar, enter Mailand select Mail and Calendar from the list of results.
Now click the Install button to install Mail application again.
You need to install it again from Microsoft Store. To do that, follow the steps above.
8.4 Reinstall the Mail app using PowerShell
Several users claim that you can also reinstall the Mail app simply by starting PowerShell as administrator and running this command: Get-AppxPackage -AllUsers| Foreach {Add-AppxPackage -DisableDevelopmentMode -Register “$($_.InstallLocation)AppXManifest.xml”}
After reinstalling the Mail application, the issue should be completely resolved.
9. Change the owner of the windows/communications/apps directory
Navigate to this directory:
C:Program Files
Look for WindowsApps directory.
If this directory isn’t available, you need to go to View and check Hidden items. Now locate WindowsApps directory, right-click it and choose Properties from the menu.
When the Properties window opens, go to Security and click on Advanced.
Now click the Change next to the Owner section.
Enter your user account name in the Enter the object name to select field.
Click on the Check Names button.
If everything is in order, click on OK to save the changes.
Click on Apply and OKto save the changes.
Now navigate to the WindowsApps directory.
Locate microsoft.windowscommunicationsapps directory, right-click it, and choose Properties from the menu.
Now change the owner by repeating Steps 3-5.
Be sure to check Replace owner on sub containers and objects and click on Applyand OK to save the changes .
Open the Advanced options again.
Click on the Change permissions button.
Now locate Users on the list and double click it.
Check Full control and click on OK.
Now click on Apply and OKto save the changes.
Now you just have to repeat Steps 7-13 for all other microsoft.windowscommunicationsapps directories.
We had only two microsoft.windowscommunicationsapps directories on our PC, but you might have more.
To fix this problem, it’s important to change the ownership and gain full control over all these directories.
If your Mail app is not working in Windows 10, you might solve the issue by changing the owner of the WindowsApps directory.
This folder holds all the necessary files that the Mail app is using, and after changing the ownership over it, the problems with the Mail app should disappear.
This is an advanced solution, so if you decide to use it, be extra cautious and follow the steps closely. Few users reported that you don’t have to perform all steps to fix this problem.
According to them, simply by changing the owner of WindowsApps directory, the problem should be resolved. If this doesn’t help, you might have to perform all steps from this solution.
10. Disable your Internet connection
If the Mail app is not working in Windows 10, you might be able to solve the problem with this workaround.
According to users, you can fix this issue simply by disabling your Internet connection for a few minutes, reenabling it and try running the Mail app again.
Few users reported that this solution worked for them, so you might want to try it out. This seems like a simple workaround, and you might have to repeat it if the issue reappears.
11. Prevent Mail and Calendar from accessing your location
Open the Settings app.
Navigate to the Privacy section.
Choose Location from the menu on the left.
Now scroll down and turn off location service for Mail and Calendar app.
Alternatively, you can completely disable location service on your PC.
Many users reported that the Mail app isn’t working on their PC. According to them, the issue was caused by a location service.
To fix the issue, you need to prevent Mail and Calendar from accessing your location.
After disabling location service for the Mail app, the problem should be completely resolved.
12. Update your graphics card drivers
Several users reported that the Mail app is constantly crashing on their PC. To fix the issue, users are suggesting to update your graphics card driver.
According to users, there was an issue with Nvidia graphics, but after updating the driver to the latest version the issue was resolved.
When the System Restore window opens, click on Next.
Now you’ll see a list of all available restore points. If available, check the Show more restore points option.
Now select the desired restore point and click on Next.
Follow the instructions on the screen to complete the restoration process.
If the Mail app is not working in Windows 10, you might be able to solve this problem by using System Restore.
Once your PC is restored, check if the problem is resolved. Several users reported that System Restore fixed the problem for them, so be sure to try it out.
14. Create a new user account
Open the Settings app and navigate to the Accounts section.
Navigate to Family & other people in the left pane.
Now click on Add someone else to this PC.
Select I don’t have this person’s sign-in information.
Now click on Add a user without a Microsoft account.
Enter the desired username and click on Next.
According to users, you can sometimes fix this problem by creating a new user account.
It seems that the Mail app isn’t working in Windows 10 if your user account is corrupted. However, you can fix this problem by creating a new user account.
After creating a new account, you need to switch to it and check if the Mail application works. If so, you’ll need to move your personal files and use the new account as your main one.
This is a drastic solution, but several users reported that creating a new user account fixed the problem for them, so be sure to try it.
Few users reported they fixed the issue by creating a new Microsoft user account. To do that, first, you need to change your account from Microsoft to local.
This is relatively simple and you can do it by following these steps:
Open the Settings app and go to the Accounts section.
In Your info section click on Sign in with a local account instead.
Enter your account’s password and click Next.
Now enter the desired user name and click on Next.
Lastly, click on the Sign out and finish button.
Now you just have to log back into your local account and add a new account by following Steps 1-2 from the beginning of this solution.
Be sure to enter your Microsoft account email and follow the instructions on the screen to create a new account.
After doing that, switch to a new account and check if the problem is resolved.
15. Reset Mail app
Open the Settings app and navigate to the Apps section.
A list of all installed apps will appear.
Select Mail and Calendar and click on Advanced options.
Now click the Reset button. A confirmation window will appear.
Click on the Reset button to proceed.
If the Mail app is not working on Windows 10, you might be able to fix it simply by resetting it. This is a rather simple procedure, and you can do it by following these steps:
After resetting the Mail app, its data will be deleted and most problems with it will be resolved.
16. Use the Windows Store Apps troubleshooter
Press the Windows key + S keys, type troubleshoot and select Troubleshoot settings from results.
Click on Additional troubleshooters.
Now select the Windows Store Apps troubleshooter and click on the Run the troubleshooter button.
If the system will detect any issues with the Mail app it will repair it.
In the end, you will also receive the suggestion to reset an app.
Click on the Open Apps & features button.
Select the Mail and Calendar app from the list and select Advanced options.
Scroll down until you see the Reset option and click on it.
You will receive a warning message that this action will delete all the data of the app, including preferences and sign-in data. Click the Reset button if you agree with that.
If you’re having problems with the Mail app and other Microsoft Store apps, you might be able to fix the problem by using this solution.
Several users are suggesting running the Windows Store Apps troubleshooter and using it to scan your PC.
The troubleshooter will check your universal apps and fix any potential problems. After using the troubleshooter, check if your Mail app is working.
Resetting the Mail & Calendar app can also do the trick so make sure you try it but be aware that by resetting the app you will lose all data from the app, including the sign-in data.
17. Reset Microsoft Store cache
Open Command Prompt as administrator.
When Command Prompt opens, enter wsreset.exe and press Enter to run it.
Wait for a couple of moments while Windows clears the cache.
According to users, you might be able to fix this problem simply by resetting the Microsoft Store cache. This isn’t a universal solution, but few users reported that it worked for them, so you might want to try it out.
After doing that, try to start the Mail app and check if the issue still persists.
18. Perform an in-place upgrade
Download Windows 10 ISO file from Microsoft’s website. Double click the ISO file to mount it.
Now navigate to This PC and open the mounted ISO file.
Locate setup.exe and double click it to run it.
Now you’ll be asked to download and install the updates. This isn’t mandatory so you can select Not right now option. Click Next to continue.
Follow the instructions on the screen until you get to the Ready to install screen. Click on Change what to keep option.
Select Keep personal files and apps option and click on Next.
The upgrade process will now start. This can take a while so be sure not to interrupt it.
If the Mail app is not working in Windows 10, you might have to perform an in-place upgrade in order to fix it. This process will upgrade your Windows 10 while keeping all your files intact.
We have to warn you that this process can take a while, so be sure not to interrupt it. To perform an in-place upgrade, perform the steps above.
Once the process is completed, your Windows 10 will be upgraded to the latest version, and problems with the Mail app will be fixed. Keep in mind that you can perform this process by using Media Creation Tool as well.
Then select the Upgrade this PC now option. The tool will download the necessary files and guide you to the upgrade process.
Many users reported that in-place upgrade fixed this problem for them, so you might want to try it out.
Few users claim that you can also fix this problem by resetting Windows 10, but this is a drastic solution that will delete all your files.
Before you try an in-place upgrade or Windows 10 reset, we strongly advise trying all other solutions from this article.
That’s it, we hope that at least one of these solutions helped you to solve your problem with the Mail app not working in Windows 10.
If you have any comments, suggestions, questions, or maybe some other solution for the problem with the Mail app in Windows 10, leave your comments in the section below.
Outlook error 0x800ccc0e shows up on Windows 10 to indicate a problem with either one of these three: Outlook Express, Windows Mail, or Outlook Express.
The reason behind this error showing up is usually a conflict between the SMTP servers and when the user tries to send an email without properly configuring their account.
In this article we look at a few troubleshooting methods that should help resolve error 0x800ccc0e:
Here’s how to fix Outlook error 0x800ccc0e:
1. Repair Outlook
The first thing you should try in order to resolve the Outlook error 0x800ccc0e is to repair it from Program and Features.
Follow these steps:
Open Control Panel.
Go to Programs and Features.
Find “Microsoft Office 365” (or any office application that applies) and select it.
Click on Change at the top of the Programs and Features window. On the window that opens, select “Repair”. Follow the on-screen instructions.
Once the process is complete, restart Outlook and check if error code 0x800ccc0e persists. If it does, try the next solution.
2. Check server requirements from settings
Open Outlook.
Open File > Tools > Account Settings.
On the Account Settings window, click on the E-mail Tab. The following window should open.
Select your email account from the list.
A new window called Email account should open. On it find the “More Setting” button and click it.
The following “Internet E-mail Setting” window should open.
Open the Outgoing Server tab.
On it, check the “My outgoing server (SMTP) required authentication” box.
Click on OK to apply the changes.
Once the process is complete, restart Outlook and check if error code 0x800ccc0e persists. If it does, try the next solution.
3. Delete duplicate accounts
Another possible solution is to look for duplicate accounts, which may be causing conflicts, and delete them. Duplicate accounts have been known to cause the 0x800ccc0e error. Simply follow these steps:
On the Outlook Menu, select Tools.
Go to Accounts and navigate to the Mail tab.
Select any duplicate mail account that you see.
Click on the Remove button to remove those accounts.
Once the process is complete, restart Outlook and check if error code 0x800ccc0e persists. If it does, try the next solution.
4. Change server port number
Open Outlook.
Open File > Tools > Account Settings.
On the Account Settings window, click on the E-mail Tab. The following window should open.
Select your email account from the list.
A new window called Email account should open. On it find the “More Setting” button and click it.
The following “Internet E-mail Setting” window should open.
Open the Advanced tab.
On it, change the Outgoing server (SMTP) port number to 587.
Click on OK to apply the changes.
Once the process is complete, restart Outlook and check if error code 0x800ccc0e persists. If it does, try the next solution.
5. Re-install Outlook
If all else fails, you might have to uninstall & re-install Outlook altogether. Re-installations have been known to resolve a persisting 0x800ccc0e error.
After you’re done reinstalling the services, you will need to create a new account. To uninstall, follow these steps:
Open Control Panel.
Go to Programs and Features.
Find “Microsoft Office 365” (or any office application that applies) and select it.
Click on “Uninstall” at the top of the Programs and Features window. An uninstallation wizard should pop open. Follow the on-screen instructions.
Once the process is complete, re-install Office to add a fresh installation of Outlook.
Once the process is complete, create your account and try sending the email again. Hopefully, the problem will have been resolved.
We hope that our solutions helped you with your issue. If we missed any way of solving the problem please let us know in the comment section below.
Also, if none of the solutions listed above worked for you, and if you did not find the exact reason, you should consider contacting Office Support.
I’ve just opened my outlook 2010 inbox and there is only messages for the last eight days or so. Would like to know where my emails have suddenly disappeared to and how to stop them disappearing again?
Are you facing a similar situation where your emails are disappearing from Outlook? Worry not, there are ways to fix the problem and get all your mail back intact, where it should be.
Usually, when Outlook emails have disappeared, it could be an issue of configuration in your settings, account inactivity, email rules set up on Outlook, and emails moved to a deleted folder.
Of course, in a darker scenario, your account might have been hacked and the emails deleted, or the Conversation Threading feature is turned on.
In this case, we recommend you to check how to recover the Outlook password and take all necessary security actions.
It is important to note, however, that if you upgrade to Outlook.com, the upgrade is only on the user interface to the new interface, so your emails should still remain in your inbox.
If you want to resolve the problem of Outlook emails disappearing, try the steps below.
How can I fix Emails are Disappearing from Outlook?
1. Use specialized software to retrieve your emails
You can recover your Outlook emails by using trusted software that supports all types of hard drives and storage systems.
Stellar Data Recovery is an easy-to-use tool that retrieves lost email files, documents, videos, and more. You will never lose data accidentally anymore.
After a complex scan, it performs recovery from cutting-edge 4K drives formatted with FAT32, NTFS, or ExFAT file systems and provides you with a clean, intuitive view of the results.
Moreover, the Save Scan option enables you to save the scan information and resume the recovery process later, at a convenient time.
Stellar Data Recovery
Recover your Outlook emails within seconds thanks to Stellar Data Recovery!
In case you encounter such problems on Outlook regularly, we strongly recommend switching to another email client. We suggest you try Mailbird.
This app is currently the best email client app and it is great at managing multiple accounts.
You can also create multiple archives and other lists that will help you sort your emails, plus, it has the possibility to secure your email so the emails are not disappearing anymore from Outlook.
This tool can restore your lost emails, but it doesn’t have the option to select the range of dates of the emails to restore, so you’ll get as many emails as the system can restore regardless of dates.
Again, there’s no guarantee that the emails will all be recovered.
If you accidentally delete emails from Outlook, you can recover them if they’re in the Deleted Items or Junk Email folders, or even after the Deleted folder is emptied.
We suggest you try to recover your deleted Outlook emails before you give up on them, especially if there is important information.
How to recover messages when Outlook emails have disappeared:
In the left pane, select the Deleted Items folder or the Junk Email folder.
Select the message you want to recover and select Recover.
Select the message you want to recover and select Not junk.
If you can’t find an item in the Deleted Items folder, check the Recoverable Items folder.
In the left pane of the Outlook.com window, select the Deleted Items folder.
At the top of your message list, select Recover deleted items.
Select the items you want to recover and select Recover.
Select OK.
Messages deleted from Deleted Items folder cannot be restored. Recovered items will be restored to original folders when possible, but if the original folder doesn’t exist, the recovered items are restored differently.
Messages go to inbox, Calendar items to calendar, contacts to contacts folder, and tasks to the tasks folder.
Other things to note on deleted items on Outlook:
You can recover items removed from Deleted Items folder in 30 days
After 14 days, emails are automatically removed from Junk Email folder and cannot be recovered
If you don’t see messages you want to recover, they’re probably permanently removed. Messages deleted from child accounts cannot be recovered either.
Keep your account active by signing in at least once every 365 days otherwise it will be deleted and is not recoverable.
Under Filter tab, check if any filters are applied.
If yes, click on Clear all.
If the Outlook emails have disappeared issue persists, reset the current view, and check if all the email appears by clicking View>View Settings>Reset Current View.
7. Use Advanced Search
Log in to your Outlook account and go to Inbox.
On the upper-left pane, click on Search.
Click Advanced Search. Fill out as many fields as you can.
Tick the Has attachment if emails come with an attachments box.
Click Filter, and then review the following tabs for any selections that could filter out specific messages: Tasks, More Choices, and Advanced.
9. Enable a certain Outlook option
On your mailbox, click on the Gear icon.
Select More mail settings.
Find Managing your account
Select POP and deleting downloaded messages.
Make sure that Don’t let another program delete messages from Outlook option is selected.
Click Save. In addition, you need to make sure that the option Always leave a copy of the message on the server is selected if you don’t want your emails to be deleted from your inbox permanently after downloading to your mail program.
If the data is important, you need to back it up, especially if it resides on the cloud and is not under your control.
External webcams like the Logitech C920 and Mevo Start incorporate built-in microphones. However, sometimes the microphones for such webcams stop working for users. For example, numerous users have posted on support forums about the Logitech C920’s microphone not working for them. One user stated:
Recently I discovered my C920’s microphone stopped working with all video conference services. I found that test microphone under audio settings saw no input, neither did voice recorder.
Why is my mic not being detected?
Users that have complained about this problem have experienced it to be triggered by the following factors:
Permission issues – You may not have the proper permissions for the apps that need to use the microphones.
Problems with settings – For some users, the correct settings have not been enabled for the camera, which may make it undetected.
Glitches with system audio – In some cases, minor glitches require the system troubleshooter to be cleared before the mic can be detected.
Driver issues– These are mainly outdated drivers or corrupted drivers.
Now let us cover how to set up a webcam Microphone and enable a webcam microphone on Windows 10.
How do I fix the microphone on my webcam Windows 10?
1. Check microphone settings in Windows 10
First, press the Windows key + I keyboard shortcut for Settings and select the Privacy category.
Then click the Microphone tab and press the Change button.
Turn on the Microphone access for this device setting if it’s off, and toggle on the Allow apps to access your microphone option.
Then look through the app list on that tab to check that the microphone is enabled for all apps you need. If not, click the toggle switches for the apps you need to utilize your webcam’s microphone.
Finally, ensure the Allow desktop apps to access your microphone option is also turned on.
2. Make sure your webcam’s microphone is the selected input device
Right-click the speaker system tray icon and choose the Open Sound settings option.
Then click the Choose your input device drop-down menu to select your webcam’s microphone.
Next, click Device properties under the Choose your input device drop-down menu and Uncheck the Disabled checkbox there if it’s selected.
If the Volume setting is very low, drag that bar’s slider to the right.
3. Set your webcam’s microphone to be the default one
Right-click the speaker icon on the Windows 10 system tray and select the Sounds context menu option.
Click the Recording tab.
Select your webcam’s microphone listed there, then click the Set Default button.
Press the Apply button, and then click OK.
Note: You can also check your webcam’s microphone’s volume level via the Sound window. Select the device on the Recording tab, and press the Properties button. Then you can drag the volume slider on the Levels tab to raise the volume.
4. Open the Recording Audio troubleshooter
Press the Windows keyboard key, and click Settings on the Start menu.
Next, select Update & Security.
On the left tab, click Troubleshoot, then clickAdditional troubleshooters.
Select the Recording Audio device troubleshooter listed there, and click Run the troubleshooter.
Then select your webcam’s microphone in the troubleshooter’s window, and click the Next option.
Note: The Hardware and devices troubleshooter might also help fix this issue. To quickly open that troubleshooter, click the search box on Windows 10’s taskbar. Then enter the keyword msdt.exe -id DeviceDiagnostic in the search utility’s text box, and press the Return key.
5. Check the audio and microphone settings in the needed software
Using Google Chrome as an example, type the address below in the Address Bar and hit Enter. chrome://settings/content
Select Microphone.
Here you can select options for Sites automatically follow this setting when you visit them, as well as choose the default microphone.
The software you need to utilize your webcam’s microphone probably incorporates audio and microphone options. Check those settings in apps you need the webcam’s microphone. Make sure your webcam’s microphone is the selected input device for your software and that it’s not set to mute.
Also, note that the webcam’s control software might include a mic option. For example, the Logitech Webcam Software has a Mic drop-down menu. Users can select to utilize the webcam’s microphone or other available alternatives with the camera on that menu.
6. Reinstall the webcam’s driver
First, open the search tool with a Windows key + S keyboard shortcut.
Double-click the Audio inputs and outputs category.
Right-click the webcam microphone device and select Uninstall device.
Click Uninstall on the confirmation window that opens. If that confirmation window includes a Delete the driver software for this device checkbox, select that option before uninstalling.
Restart your PC after uninstalling the webcam device.
Plug the webcam into your PC, and make sure you see it listed in Device Manager again.
Open the manufacturer’s website for your webcam in a browser.
Then open the driver download section on that website.
Locate your webcam product with the search tools or drop-down menus on that website.
Then select to download the latest drivers for your webcam that are compatible with your platform.
Open the folder to which you download the webcam’s driver package, then double-click the driver package file to install it.
Alternatively, you can update drivers for webcams with driver update software. Driver updater utilities will scan your PC’s devices and list the ones for which newer drivers are available.
Then you can select to download and automatically install new drivers for devices with the driver updater software.
Outbyte Driver Updater
Find the correct and latest updates for your drivers by using the Outbyte Driver Updater tool.
Suppose you’re wondering why your webcam’s microphone is not working. In that case, it might be because the device has a faulty or outdated driver or specific Windows 10 software microphone settings aren’t correctly configured.
Some users might be able to fix a webcam microphone not working in Windows 10 by changing specific microphone options in Settings.
Reinstalling device drivers can fix USB webcams and microphones that are not working.
Or you might need to change some audio options within the software you’re trying to utilize your webcam’s microphone to fix the issue.
Settings up a shutdown timer in Windows is possible with a relatively simple command, or using the Task Scheduler. We’ll walk you through all the steps necessary below.
So, if you want to be able to shut down once a long download is finished or want to prevent keeping your computer running in case you fall asleep, keep reading.
How can I schedule the shutdown in Windows 11?
1. Auto shutdown Windows 11 with Run
First, press the Windows key + X hotkey, which will open a Win + X menu.
Select Run on the menu to open the window for that accessory.
Type the following shutdown timer command in the Open box: shutdown -s -t XXXX
Then click OK to set the timer. Windows 11 will shut down after the number of seconds set by your timer command.
You will need to replace XXXX in that command with an actual numerical time value. Entering a value of 1 would set Windows to shut down in one second.
Entering 3600 (three thousand, six hundred seconds) will set Windows to shut down in an hour. There are some more time values:
Two hours: shutdown -s -t 7200
Three hours: shutdown -s -t 10800
Four hours: shutdown -s -t 14400
Five hours: shutdown -s -t 18000
Six hours: shutdown -s -t 21600
2. Schedule shutdown via Windows Terminal
First, launch the search tool (you can press the Windows key + S hotkey to do so).
Input the keyword Windows Terminal within the text box to find that command-line app.
Right-click Windows Terminal and select Run as administrator on the context menu.
Then click the Open a new tab button to bring up a menu.
Select Command Prompt on the menu.
Enter this command in the Prompt’s tab: shutdown -s -t XXXX
Then hit the Return key to set the shutdown timer.
NOTE
This method is based on the same command as the Run one. So, you’ll need to specify a time in seconds for the timer much the same.
3. Schedule shutdown with Task Scheduler
First, launch the search utility and type Task Scheduler within the search tool’s text box.
Select Task Scheduler to open that utility’s window.
Click Create Basic Task on the right side of Task Scheduler.
Enter Scheduled Shutdown within the Name box, and click the Next button.
Select the One time option, and click the Next option to continue.
Then choose a date and time for the PC to shut down at, and select the Next option.
Click the Start a program option and Next.
Press the Browse button to select the shutdown.exe at: C:\Windows\System32\shutdown.exe
Then select the Open option.
Enter -s in the Add arguments box.
Select the Next and Finish options to complete the scheduled task setup.
4. Set up a shutdown timer desktop shortcut
Right-click a empty space on your desktop to select the New and Folder options.
Then enter the shutdown timer command in the item location box: shutdown -s -t XXXX
Click Next to go to the final step.
Enter a title for the shortcut in the text box, and select the Finish option.
Thereafter, click the Scheduled Shutdown shortcut you just added to the desktop.
NOTE
Make sure you replace the XXXX in the command with an actual timer value as specified within the first resolution.
If you want to specify Windows 11 to shut down at a specific time every day, the Task Scheduler method is the best. With that tool, you can set up a recurring daily shutdown task for a specific clock time. Then you won’t need to keep on entering a shutdown timer command every day.
Moreover, keep in mind that you can shut down Windows 11 with a keyboard shortcut. You may even create a custom shutdown shortcut to turn off your computer globally even if other apps are opened.
Yes, you can set a sleep timer in Settings > System > Power & battery > Screen and sleep. Choose the idle time after which your PC will automatically go to sleep.
Can I schedule my PC to shut down automatically?
Yes, use Task Scheduler to create a task that runs shutdown.exe -s at a specific time. This method allows for recurring shutdowns, so your PC will turn off automatically based on your schedule.
Does Windows 11 have a night mode?
Windows 11 includes Night Light, which reduces blue light emission. Enable it via Settings > System > Display, and you can schedule it to turn on at a specific time to reduce eye strain during late hours.
Microsoft Teams is the latest addition to the Microsoft Office 365 Suite, and it acts as the de facto collaborative software from Microsoft.
Microsoft Teams is also fully integrated with many other Office 365 services, such as Outlook, Skype, SharePoint, Exchange, and Yammer. It also has a mobile version, available on both Android and iOS (audio only).
In theory, Teams should provide a simple and easy-to-use app that allows you to chat with your team via text, have a voice conversation, or have a video meeting.
However, some users have been complaining on the official forums that they are having problems with the mobile app.
More precisely, they state that anything they send via the mobile app doesn’t get synced with what is sent via the desktop version.
How do I fix Microsoft Teams calendar not syncing with Outlook?
1. Open Teams Admin Center
Open the Microsoft Teams admin center, and select the group whose calendar you want to sync.
Then, go to your Teams channel, add a new tab, and select Website.
Now, copy the calendar name and URL from your Outlook Web App and paste in the website section of the new tab you opened in Teams.
Sign in to your Microsoft account.
Users confirmed that applying this method solved the had of Microsoft Teams not syncing with the Outlook calendar.
Unfortunately, this isn’t the first time Microsoft Teams has had issues when it comes to the compatibility between the desktop and the mobile app versions.
2. Relaunch Microsoft Teams
Navigate to the Taskbar.
Right-click Microsoft Teams.
Select Log Out.
Restart Microsoft Teams.
Check to see if the chats are now synced.
From the issue’s description, this is most likely a cache problem related to the app. As such, the only solution left would be to close the app and restart it.
Press Ctrl + Shift + Esc.
Right-click the Microsoft Teams process in the Task Manager.
Select End Process.
Restart Microsoft Teams.
Additionally, you could open the Task Manager and close Microsoft Teams from there to make sure everything is shut down for good.
This is another efficient solution you can rely on if Teams calendar is not syncing with Outlook.
3. Use Microsoft 365
When you notice that Microsoft Teams doesn’t sync between your devices, one solution that can help is using Microsoft 365.
The Microsoft 365 suite is a complex package of programs that includes a license for Teams, the Office mobile apps along with a spelling and grammar feature, and AI professional templates.
In addition, you also get the One drive folder backup for PCs, which saves your files and allows access across devices.
A very important function is that you can secure your documents with two-step identity verification.
You’ll also enjoy the OneDrive Ransomware Detection and Recovery feature that aims at protecting your personal files against cyber attacks.
Microsoft 365
Rely on Microsoft 365 in if you want your files to be perfectly synced across your devices.
This issue is rather serious considering it basically nullifies the functionality of the mobile app. If you follow the solutions we presented in this article you will fix Microsoft Teams’ not syncing calendar with Outlook error.
Windows 10 brought all sorts of amazing features, but despite all its new features and improvements, there are certain issues that can happen from time to time.
One of the errors that users are getting is The server stumbled, and its error code is sometimes 0x80072F05, so let’s explore and see how to fix this issue.
The server stumbled can be an annoying error that will prevent you from using Microsoft Store. Speaking of this error, users reported the following problems related to it:
80072ee7 Windows 10 Store – The 80072ee7 error can be fixed by using one of our solutions.
The server stumbled 0x80072EFD – A variation of the error.
Microsoft Store cache may be damaged – This can appear if your Microsoft Store cache is damaged. You can fix the problem by simply deleting the cache.
The server stumbled page could not be loaded – This is another variation of this error, and if you encounter it, be sure to try disabling your antivirus.
The server stumbled 0x8000ffff – This error can appear while using the Microsoft Store. If that happens, try disabling your proxy and check if that helps.
Windows 10 Store cannot connect to server – If you’re having this problem, you might want to try re-registering your Microsoft Store apps.
Server stumbled Microsoft Store – This is a relatively common problem and to fix it, be sure to check if the necessary services are running.
This error usually occurs when you try to access Microsoft Store, but there are several solutions available.
The first thing that you need to know about this issue is that sometimes there can be internal issues with Microsoft Store, so the best solution is to wait a while and refresh the page to see if the issue is resolved.
In addition, it’s always good to keep your Windows up to date, because updates offer fixes to such internal issues. Also if you’re having issues with Microsoft Store you might want to temporarily disable your antivirus and try again.
How can I fix The server stumbled?
1. Adjust your time and date
This sounds a bit simple, but sometimes if for some reason your time and date aren’t correct Microsoft Store will give you this error, so the simplest solution is just to check your time and date and see if it’s correct.
Many users reported that this solution worked for them, so we strongly encourage you to try it out.
2. Clear the Microsoft Store cache
Search for WSReset.exe and run it as administrator by right-clicking it and choosing Run as administrator.
Microsoft Store will open and you’ll get a message saying The cache for the Store was cleared. You can now browse the Store for apps.
After clearing the cache, check if the problem is resolved.
3. Check your antivirus
Using an antivirus is important if you want to protect your PC from malware. However, sometimes its settings can interfere with your network connection causing The server stumbled error to appear.
To fix this problem, it’s recommended to check your antivirus settings and disable any settings that might interfere with your network connection.
Avast users reported that they had to enable Internet Sharing Mode in Firewall settings in order to fix this problem, so be sure to do that. If you can’t find this feature, or if the problem still persists, you might want to consider switching to a different antivirus.
There are many excellent solutions on the market, and we highly recommend you to switch to a different antivirus provider that will not interfere with Microsoft Store or any other apps.
4. Re-register Microsoft Store Apps
In the Search bar type powershell and select Run as administrator to start Windows PowerShell.
When PowerShell opens type the following command and press Enter: Get-AppXPackage | Foreach {Add-AppxPackage -DisableDevelopmentMode -Register "$($_.InstallLocation)AppXManifest.xml"}
Your computer will restart when the process is finished.
5. Disable the proxy
Press the Windows Key + I shortcut to open the Settings app.
Go to Network & Internet.
In the menu on the left, select Proxy, and in the right pane disable all options.
Many users use proxy to protect their privacy online, however, your proxy can interfere with your Internet connection and cause The server stumbled error to appear. To fix this problem, you just need to disable proxy on your Windows 10.
6. Check if necessary services are running
Press Windows Key + R, enter services.msc and press Enter or click OK.
Locate the Windows Update service and double click it to open its properties.
Set the Startup type to Automatic or Automatic (Delayed Start) and click Start to start the service. Click on Apply and OK to save changes.
Optional: Repeat the previous step for the Security Center service as well.
If you’re getting The server stumbled error message while trying to use Microsoft Store, the problem might be your services.
The app requires certain services in order to run properly, and if one or more services aren’t running, you might encounter this error.
After enabling both services, the problem should be resolved and you’ll be able to use Microsoft Store without any problems.
Many users reported that this solution solved the problem for them, so we encourage you to try it out.
7. Change your DNS
Right-click the network button in the bottom right corner and choose your network from the menu.
Select Change adapter options.
Right-click your current network and choose Properties from the menu.
Select Internet Protocol Version 4 (TCP/IPv4) and click the Properties button.
Select Use the following DNS server addresses and set Preferred DNS server to 8.8.8.8 and Alternate DNS server to 8.8.4.4. Click on OK to save changes.
Sometimes your DNS can be the problem and cause The server stumbled error to appear. To fix the issue, it’s advised to switch to Google’s DNS.
After doing that, check if the problem is resolved. Keep in mind that your Internet connection might be a bit slower after switching to Google’s DNS, but the problem with Microsoft Store should be resolved completely.
Search for internet options and select the feature from the menu.
Go to Advanced tab and check Use TLS 1.0, Use TLS 1.1, and Use TLS 1.2. Click on Apply and OK to save the changes.
According to users, sometimes your Internet options can interfere with your network and cause The server stumbled error to appear. To fix that problem, you need to change your settings.
These three options should be enabled by default, but they can become disabled for various reasons. After enabling them, the issue should be resolved. Many users reported that this solution worked for them, so be sure to try it out.
9. Delete the Local cache from the Microsoft Store directory
Press Windows Key + R and enter %localappdata%. Now press Enter or click OK.
Navigate to PackagesMicrosoft.WindowsStore_8wekyb3d8bbweLocalCache directory and delete all files from it.
Sometimes you might encounter The server stumbled error is your Microsoft Store cache is damaged. However, you can easily fix this issue simply by deleting the cache manually.
After doing that, you should be able to use Microsoft Store without any problems.
That would be all, I hope at least one of these solutions helped you to solve this error message. Also, if you have any other problems with Windows 10, check out our Windows 10 Fix section, and maybe you’ll find the solution.
Windows 11 printer sharing not working? Stick around.
Troubleshooting printing issues in Windows 11 is easy if you know what to address. Sharing issues are typically caused by firewall interference, faulty sharing settings and outdated drivers.
Here’s how to fix it:
What can I do if Windows 11 cannot connect to shared printer?
1. Check for Windows updates
Press the Windows key and search Check for updates.
Hit Check for updates.
If you have any pending updates, proceed to Download &install and then restart your system.
Try printer sharing again and see if the problem persists.
2. Temporarily disable the firewall
Press the Windows + I keys simultaneously to open the Start Menu.
Type Windows Defender in the search box and selectOpen.
Navigate to Turn Windows Defender Firewall on or off.
SelectTurn off Windows Defender Firewall and turn both off then press OK.
Another likely fix for the Windows 11 printer sharing not working issue is to temporarily disable your Firewall. It could be interfering with your printer and preventing it from working.
3. Whitelist Printer and File sharing over the Firewall
Press Windows + S to open Search, type Allow an app through the firewall, and click on the relevant search result.
Click on Change settings.
Check the File and Printer Sharing entry, make sure checkboxes for both Private and Public are ticked, and click on OK to save the changes.
That’s it! In case the last solution helped fix things when Windows 11 printer sharing was not working, you have now whitelisted the printer and can safely enable the Firewall again.
4. Run the Printer troubleshooter
Press the Windows + I keys simultaneously to open Settings.
Navigate to System.
Select Troubleshoot.
Select Other troubleshooters.
Navigate to Printer and click on Run.
View the message and proceed to solve the issue highlighted.
5. Turn on printer sharing
Hit the Windows + I keys simultaneously to open the Start Menu.
Search for Control Paneland click on it to open.
Navigate to Network and Sharing Center.
Select advanced network settings.
Click Turn on network discovery and Turn on file printer sharing, then click on Save changes.
If you were experiencing printer sharing problems, we hope this guide came in handy to solve your issues and you can confidently proceed with your tasks.
Since an MP4 file is a multimedia digital container, it relies on different codecs in order to work properly.
MP4 files are great, but sometimes issues with them can occur. Speaking of MP4 files and issues, in this article we’re going to cover the following topics:
VLC not playing MP4 Windows 10
It’s most likely a settings issue.
To fix the problem, you just need to go to the configuration page and change a few settings.
How to play MP4 on Windows 10
You should download third-party codecs and install them.
If you don’t feel comfortable downloading codes, you can always install VLC Player and use it to play MP4 files.
Windows Media Player won’t play MP4 video
You might be able to fix the problem simply by disabling video acceleration in Windows Media Player.
Can’t play MP4 in Movie Maker
You can fix it by reinstalling Windows Live Essentials.
Quick tip:
Before starting searching for codecs, players, and problems on your OS, we would recommend you to let third-party software do the job for you.
Adobe Premiere Pro is a great tool that supports pretty much any type of video file format for both import and export.
It is perfect for opening, viewing, editing MP4 and other video-format files, as well as for converting popular video formats into MP4.
How do I get MP4 files to play on Windows?
1. Install the necessary codecs
As we have already mentioned, MP4 files rely on different codes in order to work properly, and if you don’t have these codecs installed, you won’t be able to play MP4 files on your Windows 10 PC.
To fix this issue, it’s advised that you download and install a codec pack on your computer. One of the most used codec packs is K-Lite Codec Pack, and you can download it from Codec Guide.
If you wish to use any other codec pack, feel free to do so. Once you download and install the necessary codecs, MP4 files should work in all media players.
If you cannot play MP4 on Windows 10, the issue is most likely caused by codecs, so be sure to install the required ones.
2. Run the troubleshooter
PressWindows Key + I and open Settings.
Go toUpdate & Security.
Navigate to theTroubleshoot section.
Select Video Playbackand click onRun the troubleshooter.
Follow the on-screen instructions to complete the troubleshooter.
You can also run the Troubleshooter fromControl Panel as follows:
PressWindows Key + S and typecontrol panel.
Select Control Panel.
Click onTroubleshooting.
Choose View all.
Select Windows Media Player Settings.
Follow the on-screen instructions to complete it.
3. Convert your files
If MP4 files are not playing, you might want to consider converting your MP4 files to a different format.
There are many great applications that can convert your MP4 files to other formats, and one of the best ones is WinX HD Video Converter Deluxe.
Keep in mind that file conversion can take a while, usually a couple of minutes depending on the size of your video.
If you can’t play just a couple of MP4 files, you can convert all of them using this tool which conveniently improves conversion time compared to similar software.
WinX HD Video Converter Deluxe you can easily convert MP4 video to AVI, WMV, MOV, M2TS, H.264, and other 420+ video formats and codecs.
By utilizing the GPU acceleration tech, it can convert a video at the fastest speed without any quality loss.
Besides, with the batch conversion feature, you can queue dozens of files and convert them with just one click.
WinX HD Video Converter Deluxe
Now you can have full control over videos in SD, HD and 4K resolution on your PC with WinX HD Video Converter Deluxe!
If you can’t play MP4 files in Windows Movie Maker, the issue might be related to Microsoft Live Essentials. According to users, they had issues with this app, but they fixed the problem by reinstalling it.
To remove a certain application from your PC, along with all of its files, we recommend using dedicated uninstaller software.
These remove all files related to the application you want to uninstall, including temporary files and installer wizards.
After removing Microsoft Live Essentials, download the latest version and install it. After doing that, you should be able to play MP4 files in Windows Movie Maker again.
5. Turn off WMV DirectX video acceleration
OpenWindows Media Player.
Click on Organize and go to Options.
Navigate to the Performance tab and disable Turn on DirectX Video Acceleration for WMV files.
Click on Apply and OK to save changes.
Restart Windows Media Player.
Few users reported that turning off this feature helped with MP4 files not playing
6. Change the file extension
Locate the video that you want to play.
Make sure that file extensions are revealed.
Click on View and select File name extensions.
Optional:Create a backup of the video file before you change its extension.
Locate the file and rename it.
Change the extension of the file from .mp4 to .mp4v.
ClickYesto confirm.
Play the video again.
7. Change VLC settings
Open VLC Player.
Navigate to Tools and select Preferences.
Now select Input and go to Codecs.
In the Codecs section, locate Hardware-accelerated decoding and change it from Disabled to Automatic.
After doing that, the problem with VLC and MP4 files will be resolved, and they should start playing again without any issues.
Windows Media Player doesn’t come with the necessary video codecs, and this is why Windows 10 won’t be able to play mp4 files on your computer.
Windows 10 doesn’t have native support for all MP4 files, therefore, it relies on video codecs. If you don’t wish to install video codecs, you can always install a third-party media player.
Most of these players come with all the necessary codecs, and they’ll be able to play all MP4 files without any issues.
If you’re looking for a good third-party media player, we recommend downloading the CyberLink Power DVD.
This is a wonderfully featured all-around media player, that supports a large variety of media formats.
It offers a unique CyberLink Cloud feature (in the Pro versions) that allows you to upload and stream from a cloud storage space of your own.
CyberLink Power DVD is a great player, and if MP4 won’t play, be sure to try it.
As you can see, problems with MP4 files aren’t related to Windows 10 itself, they are related to video codecs that might not be installed on your computer.
And the only solution is to download and install the codecs, or to use a third-party multimedia player.
If you have any further suggestions on this topic, feel free to drop us a line in the comments section below.
You’re working on your laptop and suddenly, your internet connection drops only to see the No internet, secured message on Windows 10 instead of Connected. The same thing happened to many here, at Windows Report, and we’ve managed to replicate this error in a controlled environment.
Why is it showing No Internet, Secured on Windows 10?
Problems with your ISP services.
Your router needs a fresh restart.
A newly installed Windows update is bugged and changed your internet settings.
How do I fix the No Internet, secured On Windows 10?
Before starting any complicated troubleshooting, perform the following checks:
See if only your laptop or device has problems connecting to Wi-Fi or none of them can. This will tell you if there is a problem with the hotspot or your device.
If none of your devices can connect to Wi-Fi, try to restart your router and use a mobile hotspot to find out if your ISP has any problems delivering services.
In case only your device has problems connecting to Wi-Fi, restart it and make sure that your device is not in Airplane mode and Wi-Fi is on, then try to connect to your hotspot.
Try disabling your third-party antivirus and its firewall if you have one.
1. Run the Internet Connections troubleshooter
Press Windows key + I to open the Settings app.
Go to the Update & Security section.
Select Troubleshoot from the menu on the left and in the right pane select Internet Connections.
Choose Run the troubleshooter.
If the issue is present, try running the Network Adapter troubleshooter and check if that solves your issue.
You might think that the internet and network troubleshooters don’t do much but from the tests performed by the Windows Report software team, they fixed the problem like this in 80% of the cases.
2. Reset your Network Configuration
Type cmd in Windows Search and click on Run as administrator to start the Command Prompt with full privileges.
When Command Prompt starts, run the following commands one by one:
netsh winsock reset
netsh int ip reset
ipconfig /release
ipconfig /renew
ipconfig /flushdns
After running these commands, your network configuration will reset and the issue should be resolved.
According to our software experts at Windows Report, you might be able to fix this problem simply by resetting your network configuration with the Command Prompt command lines listed above.
3. Update the network adapter drivers
If you keep getting No Internet, secured message, the problem might be your drivers. Outdated drivers can cause this issue to appear, and in order to fix the problem, it’s advised to download and install the latest drivers for your network adapter.
To do that, you’ll need a device with stable Internet access. Now you need to visit the manufacturer of your network adapter and download the latest drivers for your device. After doing that, transfer those drivers to your PC and try to install them.
Press Windows key + X to open the Win + X menu and choose Device Manager.
Choose the network device in question.
Right-click on the device whose driver you want to delete and click Uninstall device.
Be sure to check the Delete the driver software for this device box if available. Now click Uninstall.
Then click the Scan for hardware changes icon to reinstall the device.
Complete the installation of the driver before restarting your PC.
Try uninstalling the network adapter and reinstalling it again so that Windows recognizes the adapter anew on the next startup.
6. Make sure that Required Network Features are Enabled
Click the network icon in your system tray.
Select the network name from the list.
Click on the Change adapter options feature.
Right-click your network connection and choose Properties from the menu.
When the Properties window opens, be sure that the following items are checked:
Client for Microsoft Networks
File and Printer Sharing for Microsoft Networks
Link-Layer Topology Discovery Mapper I/O Driver
Internet Protocol Version 4 (TCP/IPv4)
Reliable Multicast Protocol
Internet Protocol Version 6 (TCP/IPv6)
Link-Layer Topology Discovery Responder
According to users, sometimes No Internet, secured message can appear if certain features aren’t enabled. After enabling these features, save changes and check if the issue is resolved.
If the problem still persists, disable your network adapter, wait for a few seconds, and turn it back on again.
Several users reported that Reliable Multicast Protocol is crucial for solving this problem, so be sure that this feature is enabled.
It’s also worth mentioning that several users managed to solve this problem simply by disabling Internet Protocol Version 6 (TCP/IPv6), so you might want to try that as well.
7. Uninstall Problematic Applications
According to users, sometimes No Internet, secured message can appear due to third-party applications. The common cause of this problem can be applications that manage your network connections.
If you installed any software prior to this issue, uninstall it and restart your computer to see if that solved the No internet, Secured issue. Some of our readers reported that the ProSet application caused this problem on their PC, but after removing it, all returned to normal.
8. Enable the Use Random Addresses for This Network feature
Open the Settings app and navigate to Network & Internet section.
Go to Advanced options.
In the Random hardware addresses section be sure to check the Use random addresses for this network.
If you’re having problems with No Internet, secured message on your Windows 11 PC, you might be able to solve the problem simply by changing your network settings. After enabling this feature, you need to check if the problem is resolved.
More issues that you may have encountered
My laptop can’t detect the Wi-Fi but my phone can – If your laptop cannot detect the Wi-Fi hotspot at all, the highlighted guide will provide the right solutions to fix it.
My router is not connecting to the internet – In this case, none of your devices will be able to connect but our guide on how to fix the router in this situation will help you.
No Wi-Fi networks found – And there’s this situation when your device can’t identify any Wi-Fi hotspots. You will find all the solutions for this problem in our highlighted guide.
To summarize our guide, first, identify if this is a problem with your Windows 10 device or the router or services you’re trying to connect to. If it’s your device, run the dedicated troubleshooter, reset the network configuration, and update or reinstall your network drivers. Our software testing team successfully fixed the issue on more than 20 machines by following these steps.
If none of your devices can connect to the Wi-Fi hotspot, restart your router and contact your ISP to verify if is delivering the services or if it has a temporary issue. You can get through this issue by using a mobile hotspot or a cable connection for the moment.
If you think we’ve missed some other helpful procedures, let us know in the comments.
More about the author:
Radu Tyrsina has been a Windows fan ever since he got his first PC, a Pentium III (a monster at that time).For most of the kids of his age, the Internet was an amazing way to play and communicate with others, but he was deeply impressed by the flow of information and how easily you can find anything on the web.
Prior to founding Windows Report, this particular curiosity about digital content enabled him to grow a number of sites that helped hundreds of millions reach faster the answer they’re looking for.
The reminders feature in Outlook is a handy feature and allows users to set appointments and plan meetings accordingly. However, at times, the reminder feature may not work correctly. Several users have reported that Outlook reminders are not popping up.
Follow the troubleshooting tips in this article to fix Outlook reminder error in Windows 10.
Why are Outlook reminders not popping up?
1. Run Outlook Reminder Cleaning Tool
To resolve the issue, try to run the Clean Reminder tool for Outlook.
Close the Outlook client if it is running.
Press Windows Key + R to open Run.
Type Outlook / cleanreminders and press OK to run the tool.
Click OK to run the tool.
This will open the Outlook client. Try to perform the action that was giving the error and check for any improvements.
Reset Outlook Data Folders
If the issue persists, try to reset the Outlook data folders.
Exit Outlook if it is running.
Press Windows Key + R to open run.
Type Outlook /resetfolders.
Click OK to reset the folders.
Relaunch Outlook if it does not open automatically open and check if the error is resolved.
2. Save the Items in Default Folder
Launch Outlook.
Click on File and select Info tab.
Select Account Setting and select Account Settings.
Click on Data Files.
Now make sure that the default location points to the following path: C:\Users\%username%\AppData\Local\Microsoft\Outlook\ C:\Users\%username%\Documents\Outlook Files\
If the default path is not set, click on Add and find the above location.
After adding the location, select the new path and click on Set as Default.
Save the changes, relaunch the Outlook client, and check if the error is resolved.
There are different reasons for deleting a file or folder on a PC. It can be to clear space or to remove unwanted files. However, the deleting process can be simple until you encounter issues with your deleted files that keep coming back.
A common cause of the deleted files returning recurrently is corrupt system files on the PC. Other factors that can cause deleted files to keep coming back on Windows 11 are listed below:
Faulty Recycle Bin – The Recycle Bin is trash storage that keeps temporarily deleted selections waiting to be removed permanently. Hence, if the recycle bin is corrupt, it can cause deleted files or folders to keep coming back.
Malware attacks – You can experience difficulties with the programs on your PC due to malware attacks or viruses. They can cause a deleted file not to delete permanently.
Incorrect system permission –The system permission grants the authorization to control different operations on a PC. So, you may run into this issue with deleting items if you don’t have the necessary permissions.
OneDrive sync error – If you are using the OneDrive cloud storage service, you may experience issues with deleted files that keep coming back. It is because the deleted files may be backed up on the cloud drive.
Since we have outlined the possible causes, let’s check out the solutions below.
What can I do if deleted files keep coming back on Windows 11?
Before trying advanced measures, try the following:
If it persists, here are some advanced methods to try.
1. Change permission settings
Press the Windows + E keys to open the File Manager.
Select the file you want to delete, right-click, and select Properties in the expanded menu.
Switch to the Security tab at the top, then tap the Advanced button at the bottom right.
Click the Change button next to Owner, type Everyone in the box, and tap the OK button.
Return to the Security tab and click the Edit button.
Find the System Permissions section, check the Allow all permissions checkbox, and tap the OK button.
Changing the file permissions will give the system access to delete and perform other functions of the file. Check our guide about how to reset permissions on Windows 11 if you can’t get around the steps above.
2. Fix corrupted Recycle Bin
Press the Windows key + X hotkey and select the Command Prompt Admin.
Enter the following commands and press Enter: rd /s /q C:\$Recycle. bin
Close the Command Prompt window and restart your computer.
Using the in-built Windows option to delete files may cause issues with the deleted files returning to the PC. However, users can download and install third-party file-deleting software to delete files more effectively.
Many users reported that they can’t remove their PIN on Windows 11. This can be a problem, especially if someone knows your PIN or if you want to remove it.
This is usually a minor issue, and it can be easily fixed, so in today’s guide, we’re going to show you the best methods you can use to fix this problem.
Why can’t I remove my PIN from Windows 11?
Issues with specific security settings.
Problems with local files that store your PIN information.
Temporary glitches.
What do I do if I can’t remove the PIN in Windows 11?
1. Disable security settings
Press Windows + I to launch the Settings app.
Select Accounts from the tabs listed in the navigation pane on the left.
Next, click on Sign-in options on the right.
Check if the For improved security, only allow Windows Hello sign-in for Microsoft accounts on this device (Recommended) option under Additional settings is enabled. If it is, click on the toggle to disable it.
Now, close the Settings app for the changes to come into effect, and then relauch it.
Next, navigate to the Pin (Windows Hello) and click on the Remove button.
Again, click on the Remove button.
Verify your Microsoft account password and click on OK to remove the PIN.
Many reported that For improved security, only allow Windows Hello sign-in for Microsoft accounts on this device (Recommended)option isn’t available for them.
If that’s the case, perhaps Windows doesn’t fully support this feature, or your PC isn’t properly configured. In that case, move to the next solution.
2. Use the I forgot my pin option
Navigate to the Sign-in options screen as discussed earlier, and select PIN (Windows Hello).
Next, click on I forgot my PIN.
Click Continue on the confirmation prompt to proceed.
Enter your Microsoft account password for verification and click on Sign in.
Choose the email ID linked to the account to receive a verification code.
Enter the verification code you received and click on Verify.
Now, leave the two text fields blank and click on Cancel to remove the PIN in Windows 11.
Although the I forgot my PIN option is to be avoided, you can use it to remove the PIN when the above method doesn’t work. It’s an effective way but will require some time.
Press the Windows key + R to open Run dialog. Enter %localappdata%/Microsoft
Locate Ngc directory and delete it.
If you don’t have the necessary permission, press Windows key + S and enter powershell. Choose Run as administrator.
Run the following command: powershell -windowstyle hidden -command "Start-Process cmd -ArgumentList '/s,/c,takeown /f C:\Windows\ServiceProfiles\LocalService\AppData\Local\Microsoft\NGC /r /d y & icacls C:\Windows\ServiceProfiles\LocalService\AppData\Local\Microsoft\NGC /grant administrators:F /t & RD /S /Q C:\Windows\ServiceProfiles\LocalService\AppData\Local\Microsoft\Ngc & MD C:\Windows\ServiceProfiles\LocalService\AppData\Local\Microsoft\Ngc & icacls C:\Windows\ServiceProfiles\LocalService\AppData\Local\Microsoft\Ngc /T /Q /C /RESET' -Verb runAs"
These are just a couple of solutions you can use if you can’t remove PIN on Windows 11. If you don’t want to deal with passwords, you can set Windows 11 to auto-login on boot, but we wouldn’t recommend doing that if you are sharing the PC with others.
Some users have reported that they are getting installationerror 0xC1900101 – 0x20017, and today we’re going to see how to resolve this issue.
Users have reported that their Windowsinstallation manages to reach 100% but the computer starts restarting giving you the 0XC190010 – 0x20017 error while saying that installation failed.
This is a quite frustrating issue, but luckily there are few solutions available.
How can I solve the error 0xc1900101 – 0x20017?
1. Uninstall Broadcom Bluetooth and Wireless drivers
According to reports, Broadcom drivers aren’t compatible with Windows 10, so if you’re using these drivers you might need to uninstall them before upgrading to Windows 10. To do so, do the following:
Open Device Manager.
Find your Bluetooth driver on the list.
Right click the driver and choose Uninstall device.
Repeat the process for wireless network driver.
2. Disable wireless from BIOS
If uninstalling the Bluetooth driver didn’t get the job done, you can try with disabling wireless from BIOS. Here’s exactly what you need to do:
If your computer is running, restart it.
During the boot sequence keep pressing F2 or Del to enter BIOS.
While in BIOS to go the Advanced Tab.
In Advanced Tab navigate to Wireless option and press Enter to open it.
You should see two options Internal Bluetooth and Internal WLAN.
Disable them both by pressing Enter and choosing Disabled from the list.
Press Esc to go back to the main screen, and choose to save the changes before exiting.
Depending on the version of BIOS you’re using this process might differ on your computer.
3. Remove additional RAM or your Network card
Sometimes 0XC190010 – 0x20017 error is caused by extra RAM, so you might need to remove one RAM module and try to install Windows 10 again.
Several users reported that they fixed this problem by removing their wireless adapter from your PC.
According to users, some Broadcom wireless adapters aren’t compatible with Windows 10, and in order to install it, you need to remove the adapter from your PC.
This is rather simple and you just need to power down your PC and disconnect all cables, open the computer case and carefully remove the wireless adapter.
Keep in mind that this will void your warranty, so if your PC is still under warranty, you might want to take it to the official repair center.
After removing the wireless adapter, you should be able to install Windows 10 without any issues. Several users reported that they had to replace their Broadcom wireless adapter with a new one once the Windows 10 was installed, so you might have to do that as well.
4. Update your BIOS
Sometimes you might encounter Windows 10 installation errors because of your BIOS. To fix this problem, it’s important to update your BIOS to the latest version.
To do that, be sure to visit your motherboard manufacturer’s website and download the latest BIOS for your motherboard.
Keep in mind that BIOS update can be a potentially dangerous procedure, so be extra cautious while performing it.
To see how to properly update your BIOS, be sure to check your motherboard manual for detailed instructions.
We also wrote a short guide on how to flash your BIOS so be sure to check it out for more information.
5. Change your BIOS settings
Sometimes you might encounter Windows 10 installation errors because of your BIOS settings.
BIOS allows you to configure your hardware, and if your configuration isn’t correct, you might encounter this or any other similar error.
If you can’t install Windows 10 due this error, we advise you to check your BIOS configuration. According to users, they managed to fix the problem after changing the AHCI mode to IDE mode.
After doing that, the issue should be completely resolved and you’ll be able to install Windows 10 without issues.
6. Connect your hard drive to SATA port
If you’re having Windows 10 installation errors, you might be able to solve the problem simply by connecting your hard drive or SSD to a SATA port.
Some PCs have both SATA II and SATA ports, and according to users, sometimes using the SATA II port can cause this issue to appear.
SATA II ports are faster, but your hard drive or SSD might not work properly with a SATA II port.
To fix this issue, you need to disconnect your hard drive or solid state drive and connect it to a SATA port. A
After doing that, you should be able to install Windows 10 without any problems and no longer receive the error 0xc1900101 – 0x20017.
7. Use Media Creation Tool
Several users reported the 0xc1900101 0x20017 error on their PC, and it seems that the problem was caused by two Windows partitions on their hard drive.
If you have two Windows installations on your hard drive, go to Media Creation Tool and try to install Windows 10.
After doing that, your PC will restart and you’ll be asked to choose between two Windows installations.
Select the second installation and follow the instructions on the screen to complete the installation.
This is an unusual solution, and it works only if you have two Windows partitions on your hard drive.
However, you can try using Media Creation Tool if you just have a single Windows partition and check if that solves your problem.
8. Change your registry
If you’re having Windows 10 installation errors 0xC1900101 or 0x20017, the problem might be related to your registry.
To fix the problem, you need to modify your registry by doing the following:
Press Windows Key + R and enter regedit. Press Enter or click OK to proceed.
Optional: Modifying the registry can be potentially dangerous, therefore it’s recommended to export your registry before making any changes. To do that, go to File > Export. Select All as Export range and enter the desired file name. Choose a safe location and click on Save. After exporting your registry, you’ll have a backup of the registry on your PC. Thanks to this backup, you can easily restore your registry to an earlier state in case anything goes wrong after modifying the registry. Simply double click the exported file and you’ll restore your registry to the original state.
In the left pane, navigate to HKEY_LOCAL_MACHINE\SOFTWARE\Microsoft\WindowsSelfHost\Applicability.
Now change the following values:
Ring = WIF
RingBackup = WIS or Enabled
EnablePreviewBuilds = 2
BranchName = TH1
UserPreferredBranchName = TH1
After making these changes, close Registry Editor and restart your PC.
Keep in mind that this solution might work only for Insider builds, so if you don’t have these keys in your registry, you might want to skip this solution.
9. Change the number of active cores to 1
According to users, sometimes you might be able to fix this problem simply by changing the number of active cores. This is an unusual solution, but many users reported that it worked for them.
To do that, simply enter BIOS and change the number of active cores to 1.
To see how to do that properly, we advise you to check your motherboard manual for detailed instructions.
Keep in mind that now all processors and motherboards support this feature, so be sure to check if your BIOS supports this feature.
After setting the number of active cores to 1, try to install Windows 10 again.
Keep in mind that this is just a workaround, and even if you manage to install Windows 10, you’ll have to keep the number of active cores to 1.
This is a peculiar workaround for the 0xc1900101 – 0x20017 installation error, but several users confirmed that it works, so feel free to try it.
Windows 10installation errors are relatively common, and speaking of which, users reported these errors while trying to installWindows 10:
0xc1900101 – 0x20017 Creators Update – Many users reported this error while trying to install Creators Update. We already covered this error in great detail in our 0xC1900101 driver errors in Windows 10 Creators Update article, so be sure to check it out.
0xc1900101 – 0x20017 Windows 10 Anniversary – This error can also appear while trying to install Windows 10 Anniversary Update. We already covered this error in our 0xC1900101 – 0x20017 Anniversary Update error article, so we advise you to check it out for more solutions.
Windows 10installerror 0xc1900101 – 0x30018 – This is a variation of this error, but you should be able to fix it by using one of our solutions.
The installation failed in the safe_os phase Windows 10 – This is another error related to Windows installation. We covered this error in detail in our Installation Failed in Safe_OS Phase With an Error article, so you might want to check it out.
0xc1900101 – 0x20017 1709 – This error message can appear while installing build 1709 of Windows 10. If this error occurs, you should be able to fix it by using one of our solutions.
If you have any other Windows 10-related issues you can check for the solution in our Windows 10 Fix section.
We hope you managed to fix the error 0xc1900101 – 0x20017 during Windows installation. Let us know whether our solutions worked for you in the comments section below.
If the WiFi option suddenly disappears on your Windows 10 PC, it’s most likely a network adapter problem. We’ll show you how to fix it in just a few quick steps.
We’ll also show you a few more tips and tricks so you know for sure the optimal Windows settings to avoid this error.
What can I do if my Wi-Fi icon is missing on Windows 10?
1. Reinstall your wireless adapter drivers
Press Windows Key + X to open Power User Menu and select Device Manager from the list.
Locate your wireless adapter, right-click it and choose Uninstall from the menu.
If available, select Delete driver software for this device and click OK.
After doing that, restart your PC
Sometimes, Windows cannot download drivers automatically. If this happens to you, check our dedicated guide in order to solve the problem.
2. Turn off Wi-Fi Sense
Open theSettings app and go to Network & Internet.
Go to Wi-Fi tab and click Manage Wi-Fi Settings.
Locate Wi-Fi Sense and turn it off.
3. Change System icons settings
Open the Settings app and go to Personalization.
Navigate to the Taskbar tab and click on Turn system icons on or off.
Locate Network icon and be sure that it’s turned on. If it’s not, turn it back on.
Go back and click on Select which icons appear on the taskbar.
Look for the Network icon and be sure that it’s set to On.
If more than one icon is missing from your Windows 10 desktop, take a look at our dedicated guide to get them back.
4. Make sure that your wireless adapter appears in Device Manager
Open the search bar and type device.
Open Device Manager.
When Device Manager opens, click the Scan for hardware changes button.
After doing that your wireless network adapter should appear along with the Wi-Fi icon.
5. Make sure that Airplane mode is turned off
Open the Settings app and go to Network & Internet section.
Select Airplane mode tab.
Be sure to set Turn this on to stop all wireless communication option to Off to disable Airplane mode.
The Wi-Fi option from Wireless devices should be On.
This problem can appear if the Airplane mode is turned on because it will stop all wireless communication, so be sure to check its status.
If you’re having any Airplane mode errors, such as it won’t turn off or it’s turning on by itself, we recommend you to take a look at this detailed article.
6. Restart the Explorer process
Open Task Manager by pressing Ctrl + Shift + Esc.
When Task Manager opens, locate the Windows Explorer process, right-click it and choose Restart.
After Windows Explorer restarts the Wi-Fi icon should appear.
If you can’t open Task Manager on your computer or it stops working after a few seconds, we recommend you to use our comprehensive guide to fix the problem.
7. Edit Group Policy
Press Windows Key + R and type gpedit.msc.
Press Enter or click OK.
Group Policy Editor will now open. In the left pane navigate to the User Configuration > Administrative Templates > Start Menu and Taskbar.
In the right pane locate Remove the networking icon option and double click it.
Select Disabled option and click Apply and OK to save changes.
Close Group Policy Editor and restart your PC.
Group Policy Editor is a great Windows built-in tool that provides centralized management and configuration of operating systems, applications, and users’ settings.
8. Try to disable your network connection
Press Windows Key + X and select Network Connections from the menu.
When the Network Connections window opens, right-click your wireless network and choose Disable from the menu.
Repeat the same step, but this time choose Enable from the menu.
If the Wi-Fi icon is missing, you can fix this problem simply by disabling and enabling your wireless network connection.
9. Perform a full shutdown
Open the search bar and type cmd.
Select Command Prompt (Admin) from the menu.
When Command Prompt opens, enter shutdown /p and press Enter.
Depending on your power settings Windows 10 might not fully shut down when you press the power button, but you can shut down your PC using the Command Prompt.
If you’re having trouble accessing Command Prompt as an admin, then you better take a closer look at our dedicated guide.
If your WiFi settings button is still missing from Windows 10, then go to the next solution.
Press the top arrow at the bottom right corner to show hidden icons.
If the Wi-Fi icon is available, simply drag it to your Taskbar, and it should stay there permanently.
Sometimes the Wi-Fi icon might be just hidden on your Taskbar, and not missing at all. To reveal all icons, follow the quick steps from above.
11. Run the Internet Troubleshooter
Go to Settings and select Update & Security.
From the left pane choose Troubleshooter.
Select and run the Internet Troubleshooter.
Follow the on-screen instructions to complete the scan and then restart your computer.
If the Troubleshooter stops before completing the process, you can resolve the issue with the help of this complete guide.
12. Clean boot your computer
TypeSystem Configuration in the search box hit Enter.
On theServicestab, select the Hide all Microsoft services check box, and click Disable all.
On theStartup tab, click on Open Task Manager.
In Task Managerselect all items and click Disable.
Close theTask Manager.
On theStartup tab of theSystem Configuration dialog box click OK and restart your computer. Check if the Wi-Fi icon is now visible.
13. Create a new user profile
Go to Start and select Settings.
Here choose Accounts then Family & other users.
Select Add someone else to this PC.
Enter a user name, password, password hint then click Next.
Wi-Fi issues are not uncommon on Windows 10. If you want to learn how to solve them easily, check our dedicated guide.
Wi-Fi is a great technology we used daily to connect our devices, such as laptops, desktops, and mobile phones, to the Internet, without the use of any cables.
This gives us the most important feature of Wi-Fi, mobility. We can freely move around within the coverage of the network. Thus, is important that we can connect to it.
If the WiFi option disappeared on Windows 10, it isn’t such a big deal, but some users prefer having the Wi-Fi icon on their Taskbar.
If you’re having this problem, be sure to try some of our solutions from this article and let us know what worked best for you in the comments section below.
A number of users have reported seeing the error code 0x80072f7d when trying to access the Microsoft Store on their Windows PC. The issue appears on OSs such as Windows 7 and Windows 10.
This error message may be caused by system files that were damaged in the process of installing other applications, an incomplete installation or deletion process, or just by an improper shutdown of your PC.
In this article, we will explore the best troubleshooting methods for the 0x80072f7d error.
How can I fix the error code 0x80072f7d?
1. Use the Internet Connection troubleshooter
Right-click on the Internet connection icon on the taskbar, then select Troubleshoot Problems.
Wait for the process of checking your connection to finish, and then choose the appropriate options from the troubleshooter.
Try to see if this has solved your issue.
2. Reset your Microsoft Store
Press Win + R keys on your keyboard to launch the Run window.
Type wsreset.exe and press Enter.
Restart your computer.
Try openingthe Microsoft Store again.
If the issue persists, please follow the next method.
An automated periodical fix of your compromised Windows settings is recommended. Registry and hardware issues, as well as Windows errors, can be detected and resolved with a quick scan performed by a reliable third-party program.
Restoring damaged files that are essential for an optimal OS is an equally important process for your PC.
3. Change your PC’s Internet settings
Press the Win + I keys on your keyboard to launch Windows Settings.
Select the Network & Internet option.
Click on the Network and Sharing Center option at the bottom of the screen.
Click on Internet Options.
Click on the Advanced tab and check the Use TLS 1.2 box, then click OK.
Restart your computer and check to see if the 0x80072f7d unknown issue with installation error persists. If it does, please follow the next method.
4. Clear Cookies and Cache from Microsoft Edge
Open up Microsoft Edge, select the three dots located at the top right side of your screen and choose Settings from the drop-down menu.
Click the Choose what to clear button.
Tick the boxes next to Browsing history, Cookies and saved website data, and also Cached data and files and click on the Clear button.
Close the browser and restart your PC.
Check to see if the issue persists. If it does, follow the next method.
Press Win + X keys on your keyboard and select Apps and Features.
Scroll down and find the Microsoft Storeapplication, select it and click on the Advanced Options.
Inside the Advanced Options menu, scroll down and click on the Reset button.
This will start the process of uninstalling and reinstalling your Microsoft Storeapplication.
Wait for the process to complete, and then check to see if the issue is resolved.
In this article, we explored some of the best troubleshooting methods for the error 0x80072f7d, relating to the Microsoft Store application on Windows 10. Please make sure to follow these steps carefully, in order to avoid creating any other issues.
Please let us know if this guide helped you solve your issue by using the comment section below.
Function keys are available on most laptops and by using them you can make quick changes such as muting the sound, changing the volume, or displaying brightness.
Many users use these keys regularly on their laptops. But for certain laptop manufacturers, these keys aren’t working as they should.
On some occasions, the combination of certain keys or of a number of keys is not possible. On others, the issue is rather a more technical one.
Here’s the list of laptop manufacturers whose laptops are prone to function keys problems:
Dell
HP
Logitech
Toshiba
Lenovo
Asus
How do I get Fn Keys to work on Windows 10?
1. Exit the Fn key priority
As mentioned, with some keyboards, there’s a certain number of keys that can be pressed simultaneously.
So if you got a new laptop or keyboard and you were used to certain combination of hotkeys, it might not work the same as the old one.
For instance, some shortcuts need the pressing of the Fn key + 2 other keys. Other keyboards don’t require the Fn key.
So if your function keys aren’t working, press Fn + Esc to make sure that whatever function keys you are using, don’t also require the Fn key. Check if the function keys work now.
Expand the Hardware and Devices troubleshooter and click on the Run the troubleshooter button.
After that, wait for the procedure to end and check function keys again.
This is a long shot but it won’t cost you a thing. Windows 10 is infamous for various compatibility issues, and if you’re using an older laptop, chances are that the current platform won’t be able to resonate well with the hardware configuration.
Especially since the updates tend to break more things than improve them.
The troubleshooter should restart the affected devices (keyboard, in this case) and their respective services. Here’s how to run Windows 10 Hardware Troubleshooter in a few simple steps:
Many devices might require that you install the latest drivers when you switch to Windows 10. To do that you need to go to your laptop manufacturer’s website and download the latest function key drivers.
We have to mention that they might not be called function drivers on the website, so you might have to download all the drivers.
If there are no Windows 10 drivers available you might want to download the latest drivers or maybe Windows 8 or Windows 7 drivers instead.
3.1 Download drivers automatically
Downloading drivers manually can be a long and tedious process that might affect your PC in case you download the wrong versions. Therefore you might want to use software that automatically downloads and installs the necessary drivers.
We recommend you Outbyte Driver Updater. It is lightweight so it can work with no issue on pretty much any PC. On top of that, it can automatically update multiple drivers at a time and also fix your damaged drivers.
4. Uninstall Synaptics Pointing Device driver
Sometimes your default driver might come into conflict with Windows 10, so it’s advised that you uninstall the Synaptics Pointing Device driver.
To do so, just go to Control Panel and go to the Uninstall program section and uninstall Synaptics Pointing Device driver from there.
5. Uninstall hotkey drivers on your laptop
Open Device Manager and find the Toshiba hotkey driver. If you don’t have a Toshiba laptop, just find a hotkey driver for your device.
Right-click it and choose Uninstall.
Next, find HID-Compliant Keyboard and HID-Compliant Mouse driver and uninstall them as well.
Restart your computer and check if your issue has been resolved.
6. Enable VAIO Event Service
Press Windows key + R and type services.msc.
In the list of services, you’ll need to find VAIO Event Service. If you don’t own a VAIO device, the name of the service might be different.
Double click the service and check the Startup type section. Make sure it’s set to automatic.
Also, check the Service Status option and make sure that the service is started. If not, start it.
Click OK and Apply to save the changes.
7. Disable Filter Keys
Go to Control Panel and open Ease of Access Center.
Scroll down and select Make the keyboard easier to use option.
Scroll down and locate Filter Keys option. Make sure that Turn on Filter Keys option is not checked.
After turning off this option, click Apply and OK to save changes.
Filter Keys is a Windows feature designed to block repeated keystrokes. Although it’s actually quite unlikely this feature will block the function keys on your keyboard, it’s possible.
In the Windows Search bar, type Reset and open Reset this PC from the list of results.
Click on the Get started button.
Choose whether you want to keep or discard your files and start the restoring procedure.
Once your system is refreshed, you should have an easy time locating Microsoft Store.
If none of the previous solutions helped you resolve the issue at hand, we’re afraid that there’s only one thing you should do and that’s resetting your PC to factory settings.
Namely, as most of the keyboard/touchpads come with OEM-provided third-party control apps, and Windows Updates tend to tear those apart.
This recovery option is much better than the clean re-installation since you’ll be able to retain your data. Here’s how to reset your PC to factory values in a few simple steps:
Why are my F keys not working?
One of the main reasons is that your F Key could be locked. Try to unlock it and see if it works. If not, follow our other solutions as the issue might be somewhere else.
After performing these solutions, or at least one of them, your problem with function keys on your Windows 10 laptop should be solved. If you have any comments or questions, just reach to the comment section below.
Considering how many users are relying on Outlook and Mail apps for online communication, not being able to sync emails in Windows 10 can cause a lot of problems and frustration.
If you’re facing syncing problems with your Outlook or Mail app in Windows 10 don’t worry, we have a solution for you.
It’s recommended before we begin that you make sure your operating system is up to date and the latest updates have been installed.
With a couple of easy steps, you’ll be able to regularly receive emails in your inbox again.
How do I fix Outlook app not syncing emails issues in Windows 10?
1. Reset Microsoft Store cache
Maybe there’s a conflict between the Microsoft Store cache and your mailing app, which prevents the Outlook app from syncing emails. To solve this problem you should try resetting the Microsoft Store cache and see if the problem is solved. Here’s how to easily reset the Windows Store cache:
Go to Search and type wsreset.exe
Click on Run as Administrator
Microsoft Store will open and you’ll get a confirmation message saying that: The cache for the Store was cleared. You can now browse the Store for apps
2. Use an alternative email app
Unfortunately, Outlook continues to have a long list of troubleshooting issues, and plenty of their web or downloadable app clients seem to struggle.
We made an in-depth analysis of the best alternatives to use and we think that Mailbird is definitely the best one.
All of them are designed to help their clients organize faster and more efficiently.
The Mailbird design is attractive and you can customize it how you like it most. and let’s not forget about how easy it is to integrate it with other popular services such as Asana, Slack, Dropbox, Google apps, and Degoo.
Mailbird
Forget all about mail errors and check out Mailbird’s features. Organize all your emails in one place within minutes!
If resetting the Microsoft Store cache didn’t work for you, you can try to sync app licenses. To do that, just follow these steps:
On the Start screen, tap or click Store to open the Microsoft Store
Swipe in from the right edge of the screen, and then tap Settings
Tap or click App updates
Tap or click Sync licenses
Your licenses should be synced now
4. Change the mail app settings
Microsoft Outlook has its specific methods of organizing your inbox, and maybe some irregularities in your Organize your email settings prevented your mailing app from receiving emails. To solve the problem with email organization, follow these steps:
Swipe in from the right edge of the screen, and then tap Settings