How to rename web apps on Edge

Microsoft Edge may not be the number-one most popular browser around, but it sure helps a lot of people browse the internet. Not only does it bear the title of the only browser to have an AI-powered search engine, but it also lets you create a simple web app on any website you want, courtesy of Edge.

It may not seem like a big deal for many, but it can help you multitask better. You can convert any website you want into an app, then put it as a shortcut on the desktop. With this, you can always come back to that site with just one simple click.

These websites, however, will be automatically enlisted as what they’re called by the system, but it’s not that hard if you want to rename them.

Read along to find out how you can rename those web apps on Edge.

H2 How to rename web apps on Edge.

1, With your Edge browser open, type edge://apps/all into the search bar then hit Enter.

2. Find the app you would like to ‘rename’. In this case, we’ve saved Bing AI – Search for our demonstration. Click on the 3 dot menu on the top right ➜ Create Desktop shortcut.

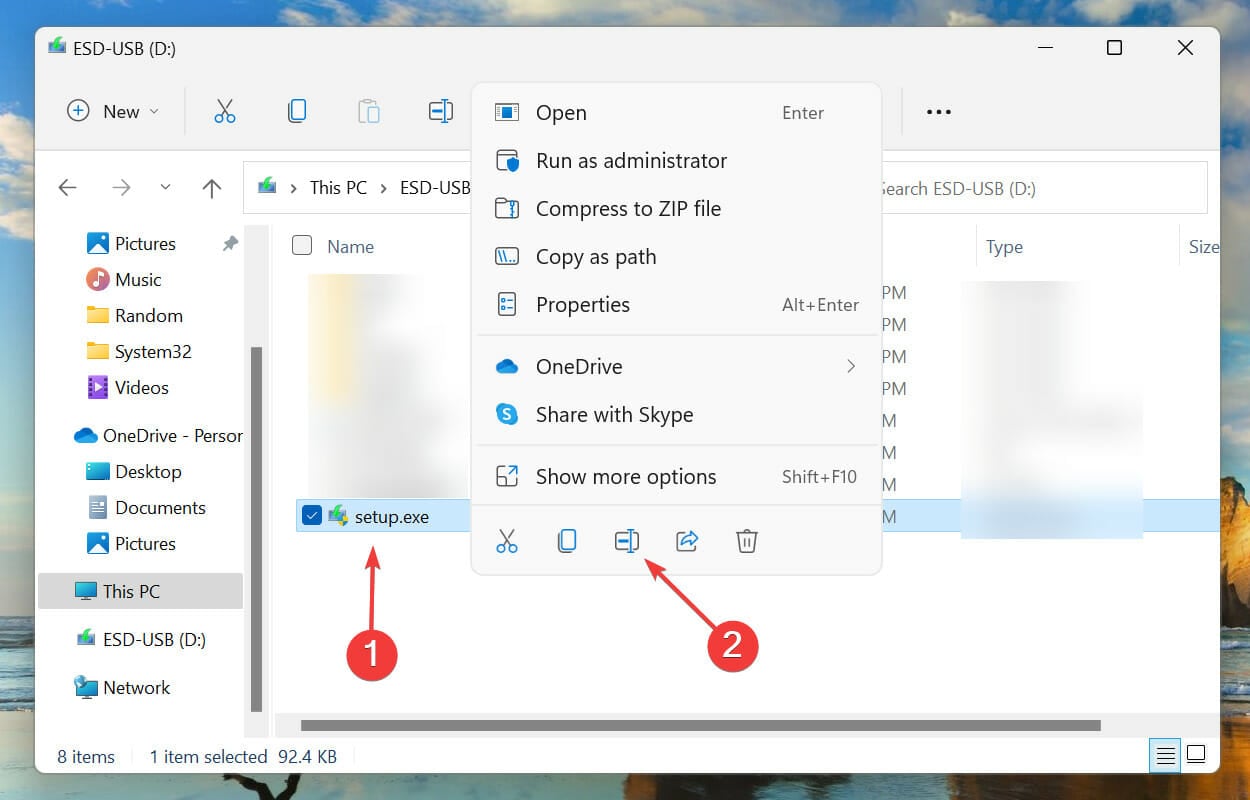
3. Go to your desktop, then rename the app to whatever you want by right-clicking on it. In this case, we’d call this Smart AI Chat.

5. Open your File Explorer, then type this into the taskbar ➜ %appdata%\Microsoft\Windows\Start Menu\Programs.

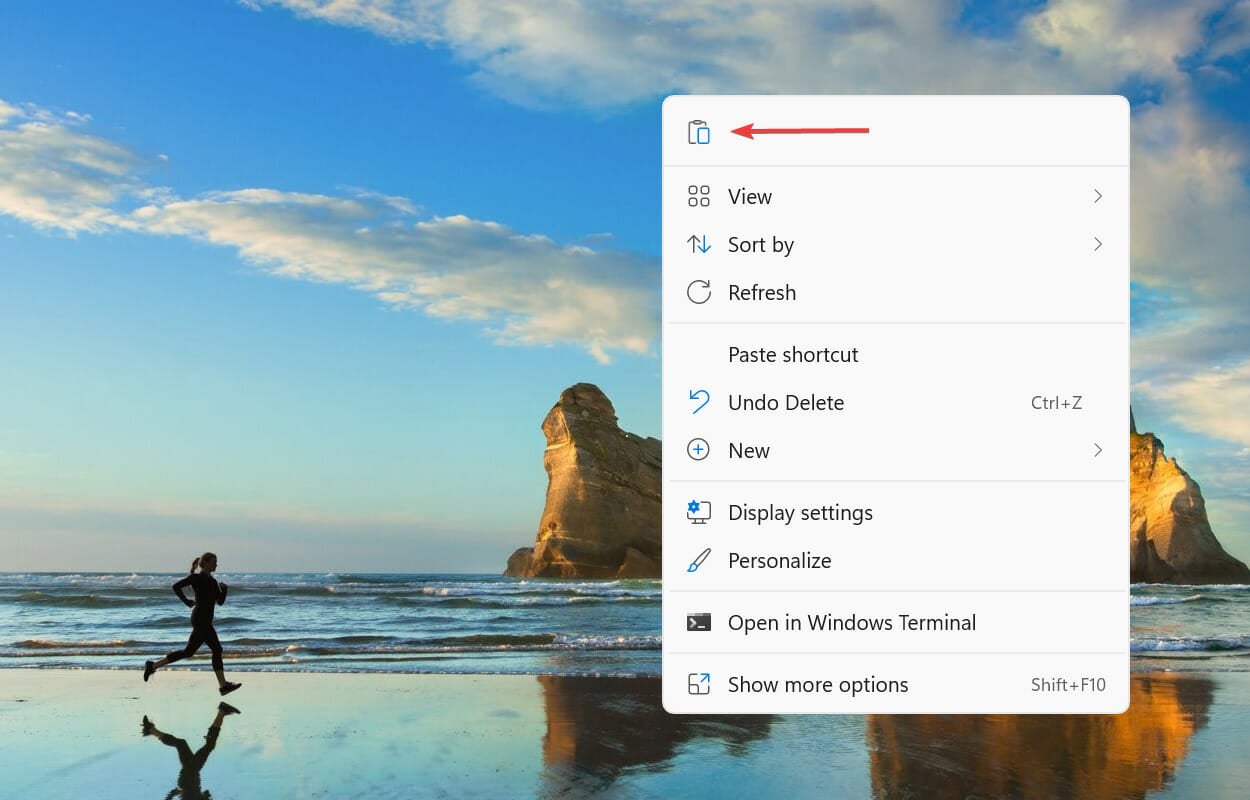
6. Cut the shortcut from the desktop by dragging it to this folder.

7. Open your Task Manager by accessing Ctrl + Alt + Del. On the Processes tab, right-click on File Explorer ➜ Restart.

9. Now, you should be able to see the app in Start ➜ All apps, in its new name (Smart AI Chat, in this case).

From here onwards, you can also pin the app to your taskbar by right-clicking on it.

If you find these tips helpful, let us know in the comments!

Immersive Control Panel: What Is It and How to Fix It

Many Windows users complained about the Immersive Control Panel code that appears instead of the Settings feature.

However, there are some easy fixes for the system error @(windows.immersivecontrolpanel_6.2.c. So, follow the instructions listed below, and you should be able to fix this problem quickly.

The system error you are facing concerns some Windows 10 OS updates that were not completed. The error may also indicate that a simple system error occurred even if you did not do anything special on the operating system.

What is the Immersive Control Panel?

The Windows Immersive Control Panel was introduced in Windows 8 and replaced the traditional Control Panel in Windows 10.

It is a touch-friendly interface optimized for use on tablets and other touch-enabled devices. It is designed to provide a more modern and streamlined way to access and manage system settings and features.

The Immersive Control Panel includes a variety of categories, such as Network & Internet, System, Devices, Personalization, and Privacy. Each category contains a set of related settings that can be easily accessed and adjusted.

While the Immersive Control Panel provides a more touch-friendly and visually appealing interface compared to the traditional Control Panel, many users still prefer the latter for its more comprehensive range of settings and options.

How can I fix Immersive Control Panel issues on Windows 10?

Before starting any of the fixes we recommend in this guide:

  • We suggest a PC reboot. While this may not always work, a restart will force some troublesome processes to end, making your computer return to proper functionality at startup.

1. Run PowerShell Scripts

  1. Press Windows + X and select Command Prompt (Admin).
    immersive control panel
  2. In the command prompt window, write the following script and hit Enter:
    powershell -ExecutionPolicy Unrestricted Add-AppxPackage -DisableDevelopmentMode -Register $Env:SystemRootcameraAppxManifest.xml
  3. Next, type the following execution policy script and hit Enter again:
    powershell -ExecutionPolicy Unrestricted Add-AppxPackage -DisableDevelopmentMode -Register $Env:SystemRootFileManagerAppxManifest.xml
  4. Finally, type the following execution policy script and hit Enter again:
    powershell -ExecutionPolicy Unrestricted Add-AppxPackage -DisableDevelopmentMode -Register $Env:SystemRootImmersiveControlPanelAppxManifest.xml
    https://i.imgur.com/PEwErrp.png
  5. Exit the terminal.
  6. Now that the command prompt window has closed, reboot the Windows 10 device.
  7. Lastly, please recheck the Settings feature to see if it works as intended.

2. Update your OS version

  1. Press Windows + I to open the Settings app.
  2. Click Update & Security.
    immersive control panel
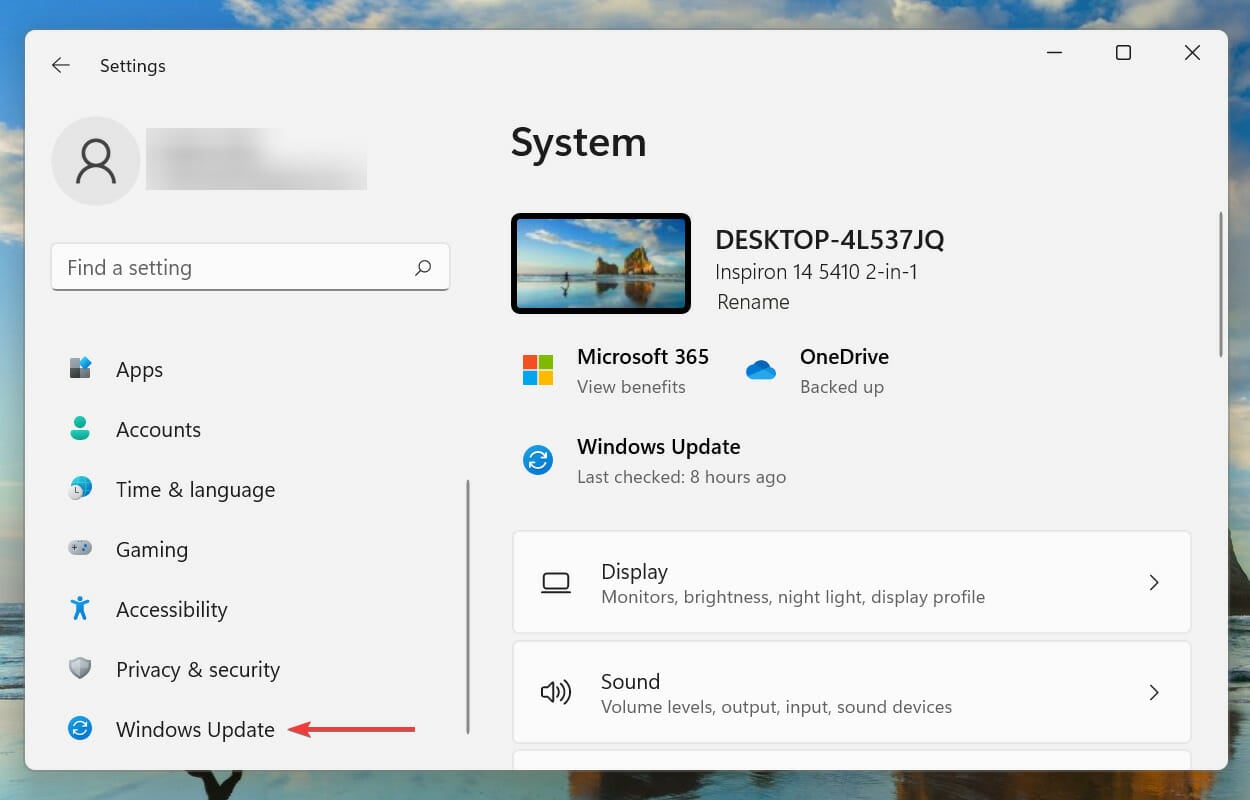
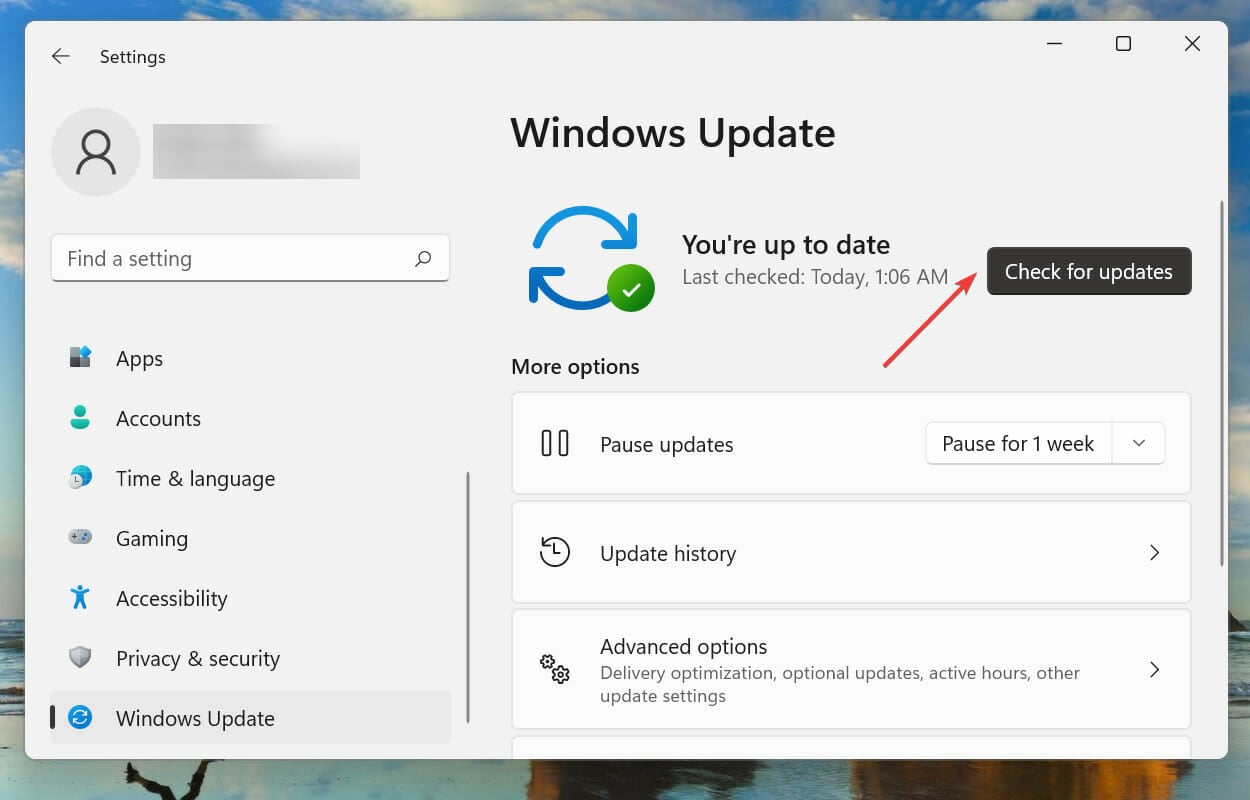
  3. Select Windows Update and click Check for updates.
  4. Let it complete the process and restart your computer if it finds any updates.
  5. Lastly, please recheck the Settings feature to see if it works as intended.

If you’re enrolled in the Windows Insider program, update to the latest Windows 10 Preview build if you haven’t already. Using an old Windows 10 build is one of the leading causes of this error.

The same is valid for non-Insiders. Ensure you’re running the latest OS version and install any pending updates.

3. Run an SFC scan

  1. Press Windows + X and select Command Prompt (Admin).
    immersive control panel
  2. Type the script below and hit Enter.
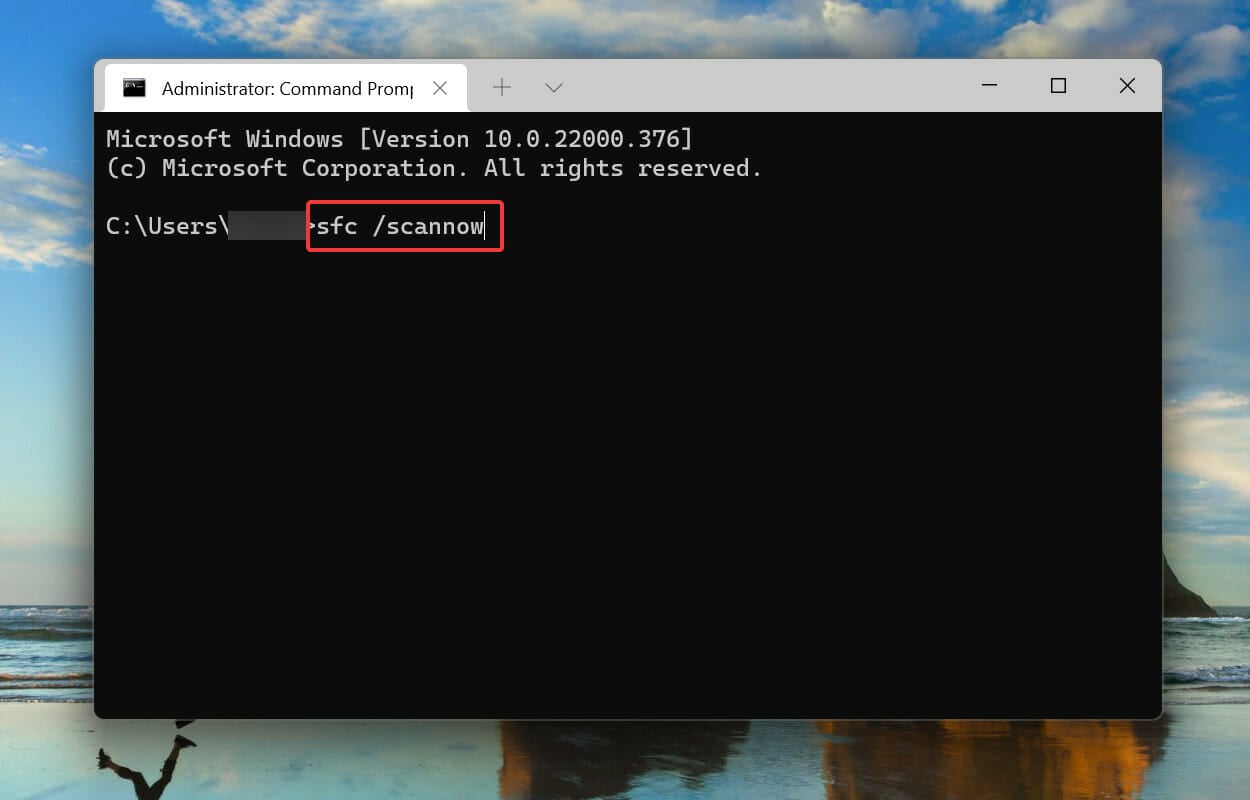
    sfc /scannow
  3. Lastly, run the DISM scan using the script below:
    DISM /Online /Cleanup-Image /RestoreHealth
  4. Finally, exit the command prompt and try reaccessing the utility.

This brings us to the end of this guide. If you carefully followed the steps listed above in the correct order, you should have solved your Immersive Control Panel issues on Windows 10.

However, if you have any questions, please drop us a line in the comments below. We will help you further as soon as possible.

How to Download or Update ELM327 Drivers

ELM327 is a popular OBD-II interface that allows vehicle owners and mechanics to diagnose car issues. However, you need drivers installed on your computer to use this device. Therefore, we will discuss the steps to download and install the ELM327 driver on your PC.

Also, you can check our guide about the best car design software for Windows 11.

What is ELM327?

ELM327 is a small computer chip used as a Car Diagnostic Tool that allows vehicle technicians to read and clear Diagnostic Trouble Codes (DTCs) from a car’s onboard computer (ECU). It is also software that reports vehicle malfunctions.

Furthermore, the ELM327 chip communicates with the vehicle’s ECU through a standard OBD-II port and converts the data into a format that can be read and understood by a computer.

The chip can be in the OBD-II diagnostic tools, including Bluetooth adapters, USB devices, and standalone scan tools.

How can I download or update ELM327 drivers?

1. Download the ELM327 driver

  1. Insert the CD provided with the ELM327 cable into your computer CD-Rom and open your CD folder (don’t connect the ELM327 cable to your computer yet).
  2. Double-click on the driver’s folder to open the list of driver packs on the disk.
  3. Select the Driver Pack1 folder and double-click the CP210x_VCP_Win_xp_52c3_Vista_7.exe.
  4. Click the Yes button if the User Account Control prompts and follow the on-screen instructions to complete the installation.
  5. Navigate to the Drivers pack folder to install Driver Pack2 and Driver Pack5.
  6. Open the Driver Pack3, and right-click on the ser2pl.inf file and click on install from the context menu if you are using Windows 8 operating system.
  7. Plugging the ELM327 cable into your computer might pop up a Window for installing USB-SERIAL CH340 (COM3).
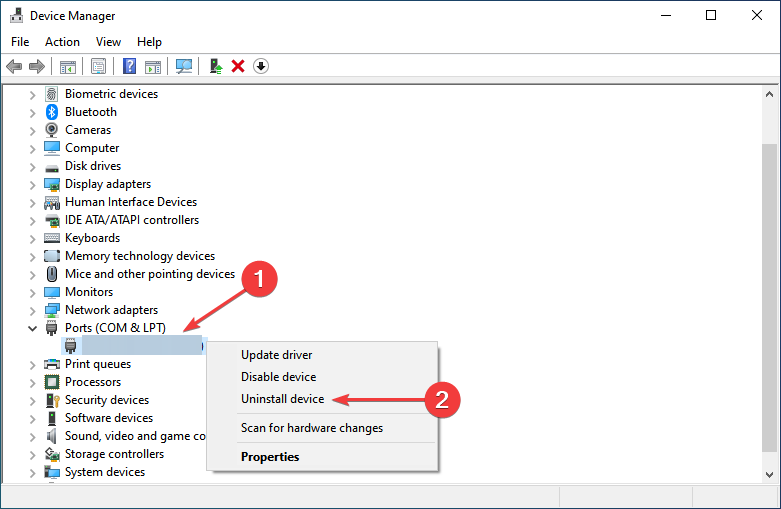
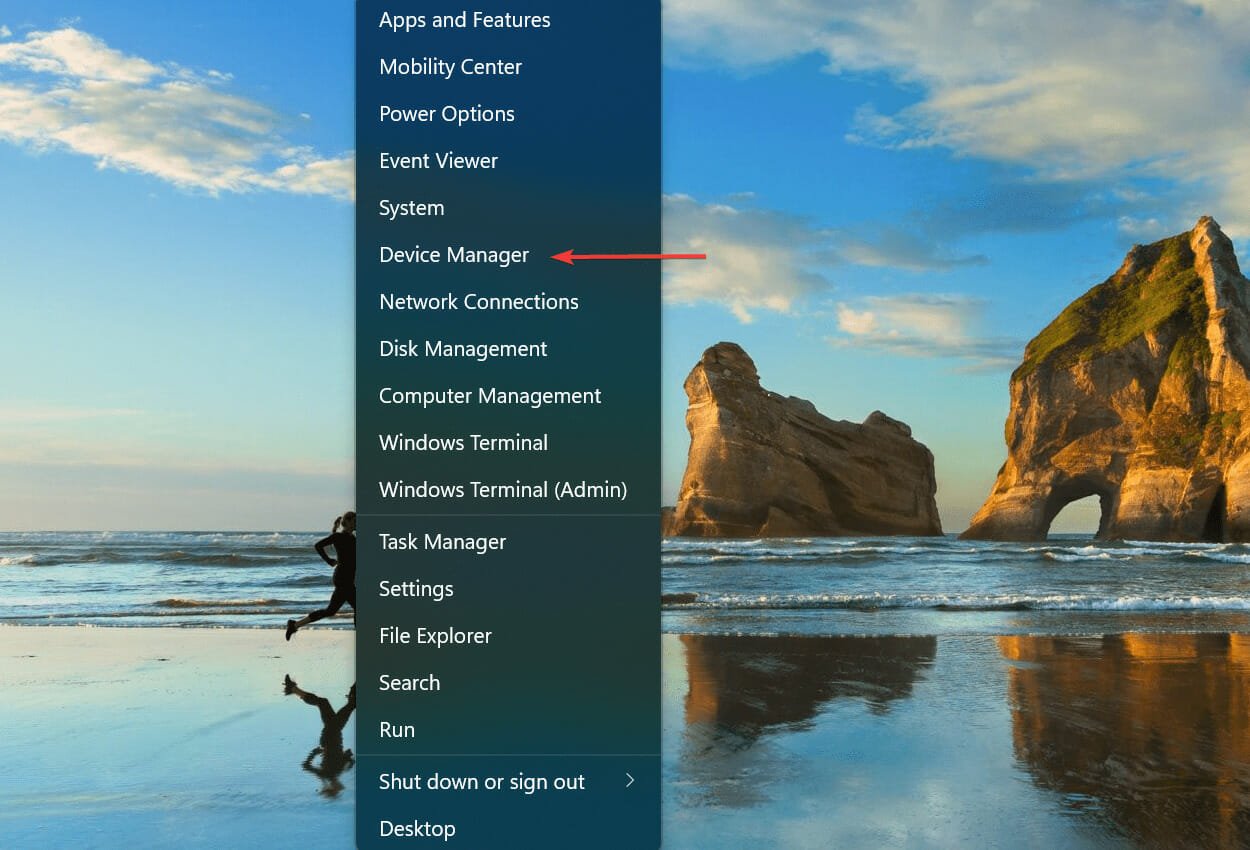
  8.  Right-click on the Windows icon and select Device Manager.
  9. Click the Port (COM & LPT) to see if the USB-SERIAL CH340 (COM3) is without a yellow marking then your device driver installation is successful.

The above step will aid in installing the ELM327 driver for Windows 10 and 11 using the computer CD-ROM.

You can proceed with the step below if you see a yellow marking next to Prolific USB-to-Serial Command Port. Alternatively, follow this guide to learn how to fix CD-ROM not working on Windows.

2. Installing Prolific USB-to-Serial Command Port driver

  1. Plug in the ELM327 cable to your computer USB port, press the Windows + X key, and select Device Manager.
  2. Expand the Port (COM & LPT), right-click on the Prolific USB-to-Serial Command Port, and select the Update Driver option.
  3. Select Browse my computer for driver software and click Let me pick from a list of device drivers on my computer hardware.
  4. Uncheck the Show compatible hardware box and select the Prolific USB-to-Serial Command Port Version 3.3.2. 102.
  5. Wait for the driver to install the yellow marking will be gone.

Manually updating the USB-to-Serial Command Port will help fix the yellow marking error. Thus, check our guide on how to install drivers manually on Windows.

In addition, you can read about the software you can use to check car history on your computer. Also, we have a detailed article on the best driver update software to download for your PC.

If you have further questions or suggestions, do not hesitate to drop them in the comments section.

How to Get Resident Evil 4 Chainsaw Demo on Xbox

Capcom just rolled out a lot of updates during their Capcom Spotlight 2023 press event. One of the most exciting news to arrive is about the hotly-anticipated remake of Resident Evil 4, which, starting from now, you can play its Chainsaw Demo on Xbox One & X/S, PlayStation 4 & 5, and PC via Steam.

Another good news is that the demo has no limit date, meaning you can play it as many times as you like for free before the full game is out on March 24, 2023. You can still pre-order the game on Xbox Store and PlayStation Store, priced at $60. 

Set six years after the fateful night in Racoon City, former rookie cop Leon S. Kennedy is tasked to rescue the US president’s kidnapped daughter in a secluded European village, squirmed by revengeful creatures. In this demo, you will enter the village as Leon and get through the first chapter of the original game. 

In the past few years, Capcom has been remaking some of its classic, best-selling horror games from the Resident Evil franchise. Following a return to its horror roots with Resident Evil 7 in 2017 plus RE Engine’s debut, the game publisher returned two years later with a remake of Resident Evil 2 (originally released in 1998) and Resident Evil 3 (1999). 

Now, it seems like we’re getting closer to seeing Leon’s game getting the same treatment. We all know how gruelingly awesome the graphics on Resident Evil Village were back in 2021, and with the next-gen technology from Xbox Series X/S, fans are in for a treat.

How to get Resident Evil Chainsaw Demo on Xbox?

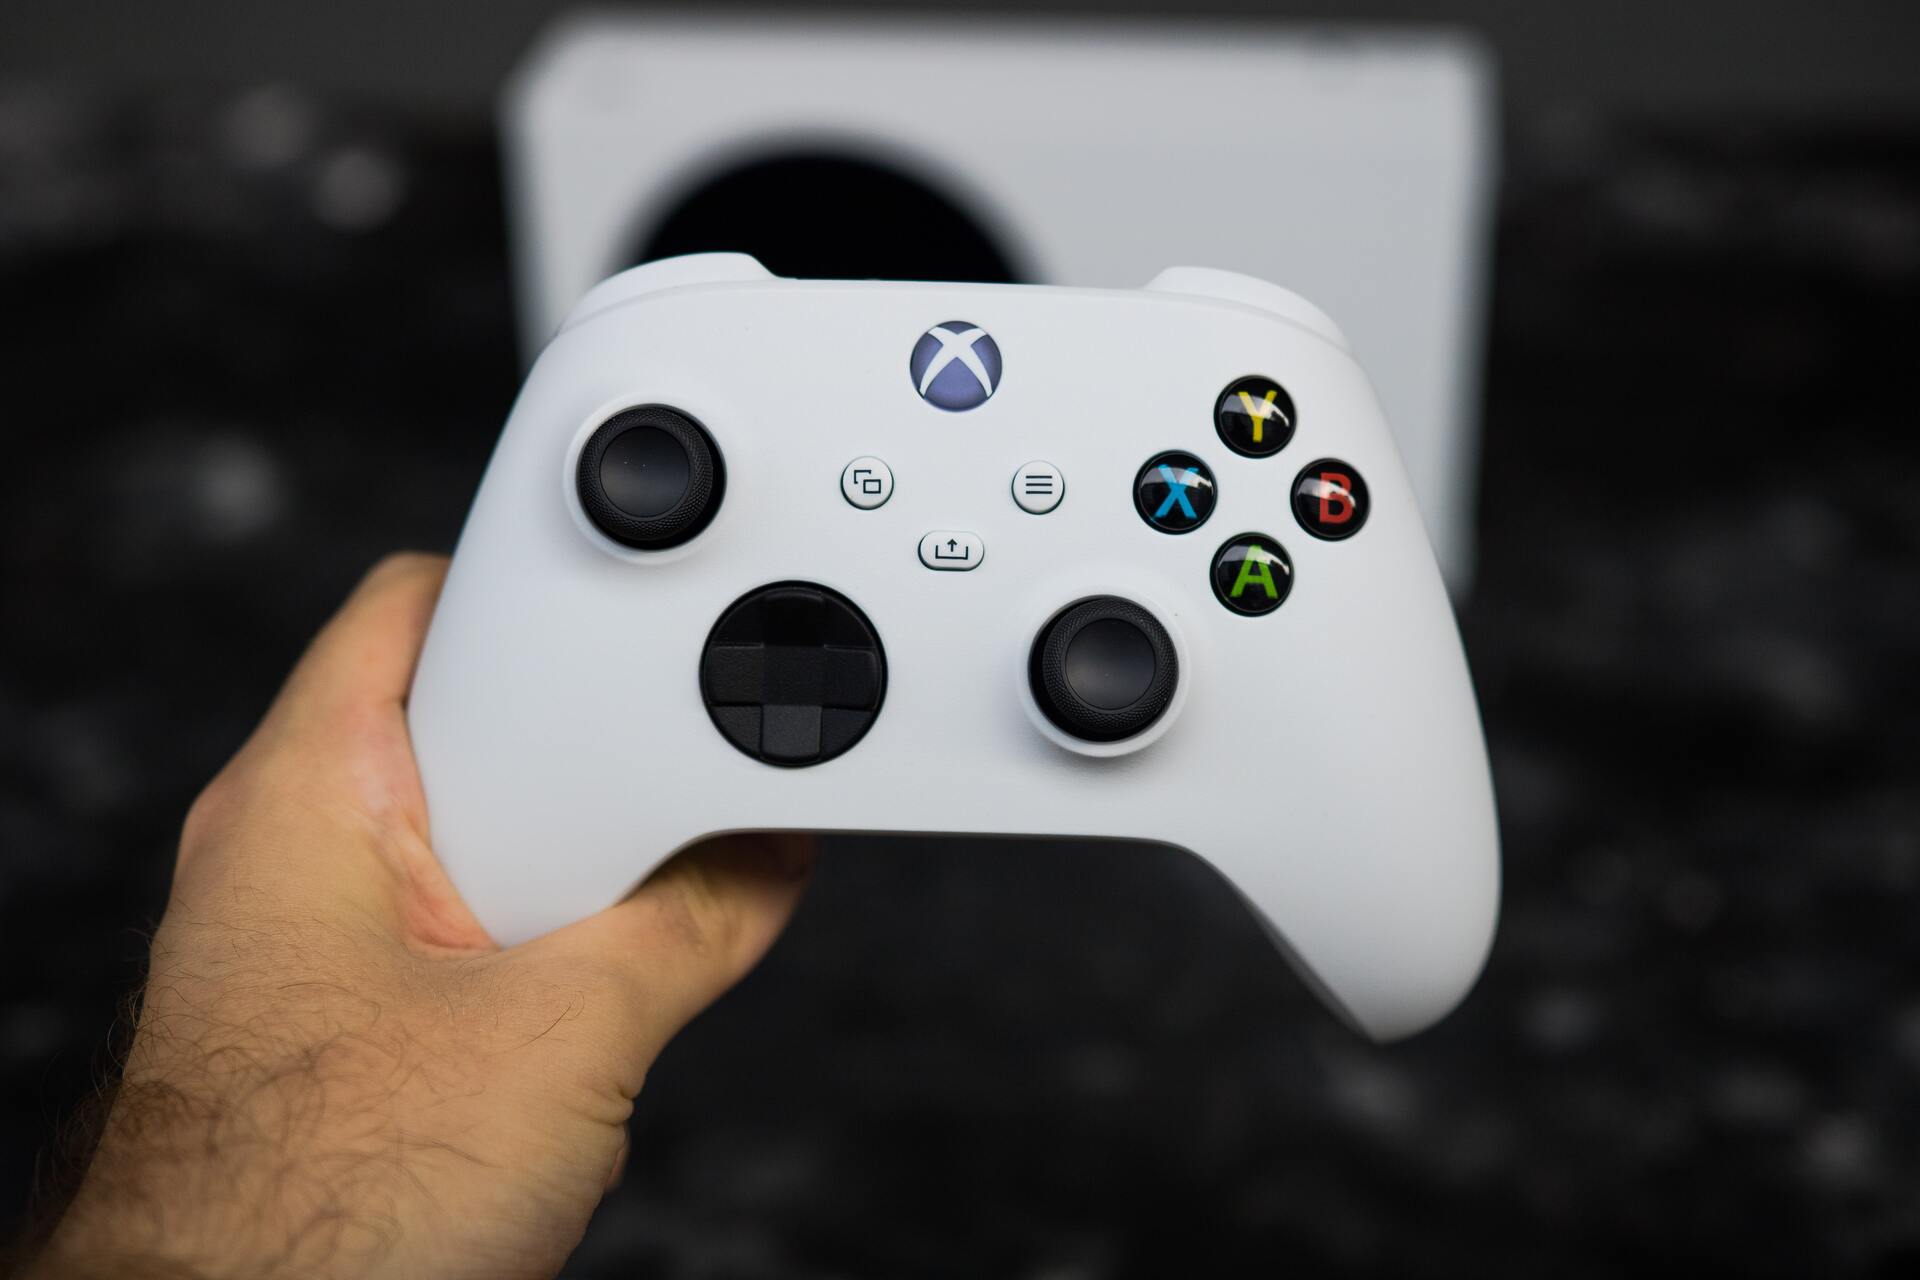
1. Press the Xbox button on your controller ➜ Store.

2. Go to Search, then type Resident Evil 4.

3. Click on Resident Evil 4 Chainsaw Demo ➜ Get (Free).

Speaking of the franchise, an upcoming CG movie called Resident Evil Death Island is also in the works. Coming out this summer, the video game publisher teases Jill Valentine’s return, sporting her Resident Evil 3 Remake look.

Another hotly-anticipated game, Hogwarts Legacy, has also just experienced a release date push back on Xbox One. 

Are you excited about the return of Resident Evil 4 on Xbox? Let us know in the comments!

Remote Desktop App for Windows 11: 11 Best Picks Ranked

Remote desktop software has to be one of, if not the most useful apps to have ever been invented. It allows you to remotely control another computer and specific aspects of it from anywhere at any time, as if you were there in person.

Now, don’t confuse them with screen-sharing software, which is an app that allows users to share their screen for web conferencing or presentations. Naturally, these don’t offer full control.

How does remote access software work?

All remote access apps work pretty much the same. To be used, you must install the control apps on the computer or server you want to control, known as the host. Then you install it on your own computer, which is used to gain access to the other machine.

In the past, remote access software only allowed you to control one other desktop computer via a master/client association. Still, nowadays, that’s changed to allow access through a smartphone or tablet.

This guide will break down the best remote access software you can get for your Windows 11 computer in 2023. Although they have similar functionality, each app has its own set of features that make it stand out above the rest.

What are the best remote access apps for Windows 11?

Remote Access Plus – Best remote access and assistance

ManageEngine’s Remote Access Plus is unquestionably the best software you can get in terms of remote desktop control and assistance.

This HIPPA-compliant software will even help you run an IT remote assistance business because it also comes with workforce management and session recording of the job tasks.

Actually, Remote Access Plus has all the tools needed to carry out any assistance or remote control task on a Windows, Linux, or Mac computer.

The remote-control function is just one of the multiple features available. You can perform file transfers, control power options, and restrict users.

Remote Access Plus implies the usage of HTML5 RDP clients to access the remote machine no matter where it’s located.

If you want to provide assistance instead of remote troubleshooting, there’s always the option of instant voice and video chat to communicate with the receiving end and offer guidance.

When the IT technician finishes the job, a comprehensive report is generated. That and the session recording will help you assess the quality of the work.

Here are some of its key features:

  • Complete remote control and assistance tools
  • HIPPA compliance and HTML5 RDP clients
  • You may offer assistance to any Windows, Linux, and Mac computer
  • Single, cloud-based dashboard, accessible from anywhere in the world
  • Multi-monitor support, voice, and video chat

Remote Access Plus

With this smart software, you get all the tools for remote Windows 11 troubleshooting and assistance!
Free trial Visit Website

Password Manager Pro – Great password management

ManageEngine Password Manager Pro comes with the Secure remote access module allowing access to IT services and maintenance.

This software enables users to launch direct system connections without a plug-in or agent. It directly connects to a desktop and website from native browser extensions.

It allows you to set up connections to remote database servers and secure access to remote systems without showing passwords in plain text.

This password management tool provides granular access controls, strong encryption, and other security features to help organizations protect their critical assets.

With in-built features, you can analyze the strength of passwords and ensure that they meet the organization’s policies.

It enables you to reset your credentials of remote resources from and when required or automatically through scheduled tasks.

This tool has comprehensive audit trials and reporting capabilities, providing visibility into who accessed what credentials and when.

Some key features of this remote desktop app:

  • Allows you to define different roles and permissions for users to access and manage passwords
  • Offers both scheduled and live backups of the entire database to facilitate disaster recovery
  • Automatically log on to the target systems, sites, and apps from the PMP web interface
  • Initiates personalized connections to a system using Auto Logon Helper scripts
  • Detects and resets the passwords for service accounts linked to domain accounts

Password Manager Pro

Protects sensitive passwords and credentials of your organization with a tool that offers remote access.
Free trial Visit Website

Zoho Assist – Great for screen sharing

Zoho Assist is a cloud-based remote access software that provides specialized distant support and unattended access, all in an effort to streamline the workflow process. There are multiple versions available, including support plans.

With Zoho, you can share screens and files, plus talk with another user via chat that uses a unique session ID and password. Other features include multi-monitor navigation and the ability to have up to six different connections.

The company behind the app separates its software into two tiers. The Remote Support plans include features like remote printing and customer branding, which are highly useful for support technicians and IT professionals.

More advanced features are available in high-end plans. The top-tier plans include similar features like remote printing, plus access to the service’s mobile apps and the ability to record sessions. And if you ever need any help, Zoho Assist offers on-demand remote support.

Zoho Assist

Try one of the best remote access software to streamline your workflow process.
Free Trial Visit Website

Radmin Remote – Ideal for low-bandwidth connections

As a remote access app, Radmin Remote gives lightning-fast connections between the host computer and multiple clients. It houses a feature called DirectScreenTransfer which uses a special kernel-mode driver to increase the capture rate of screen updates. This means almost no lag in the connection.

Radmin Remote has also been specially optimized for low-bandwidth connections that allow remote control even on dial-up modems. Security is also pretty high as all the data, even mouse movement and keyboard inputs, are encrypted with 256-bit AES.

The latest version of Radmin supports Intel Active Management Technology to control remote computers even if they’re turned off, or the operating system can’t start. That way, the client can view and change the BIOS settings of the host to boot it.

Other features include compatibility with older versions of Windows operating systems, multiple monitor support, and a multi-language interface. Radmin users are given free technical support to all registered customers.

Here are some of its best features:

  • 256-bit AES encrypted connection
  • DirectScreenTransfer technology for fast connection
  • Intel Active Management Technology support
  • Compatible with older Windows OS versions as well

Radmin Remote

Try this software today and take advantage of the user-friendly interface and plethora of features for Windows 11.
Check price Visit Website

Mikogo – Simple and practical tool

Starting off the list is Mikogo, a very practical remote desktop app that sports a user-friendly interface that easily establishes a remote connection. Mikogo has a specific usage on presentations, team meetings, and web conferencing.

Mikogo can be installed on macOS and Linux computers, plus there are apps on iOS and Android, which is something that much remote access software has. With this particular app, you can organize meetings in advance and send out invitations.

Mikogo is unlike many other remote access apps in that it’s less focused on IT professionals and more focused on casual users. It takes more from conferencing apps like Zoom than anything else. The program isn’t free, unfortunately, but it does have a two-week free trial that you can try.

Setting up is easy as well. All you have to do is download and install the app. The software is immediately launched where you can enter your Mikogo account information so you can get started with scheduling sessions.

Let’s review some of its best features below:

  • Compatible with Windows, macOS, and Linux
  • Dedicated apps for Android and iOS
  • Simple and easy to use with a friendly UI
  • Dedicated tools for presentations, team meetings, and web conferencing

⇒ Get Mikogo

TeamViewer – Most popular tool

TeamViewer is up there as one of the most popular remote access apps for personal and business use. You can use it to remotely control computers and devices on all the major operating systems like Windows, Linux, Mac, and Chrome OS.

There are also app versions that allow you to control the Android, iOS, and Blackberry systems from your smartphone as the client. TeamViewer also supports multiple remote sessions with the host computer being able to accept multiple requests from different clients.

And that client can also send out multiple requests. Users will be able to conduct virtual meetings over TeamViewer to support up to 25 participants. To facilitate this large group of people, Team Viewer has a chat function where you can communicate directly with clients.

The free version is only meant to be used for personal reasons and not in a business setting. In fact, the software has advanced algorithms that can tell how you’re using the app.  Paid versions include new features like the aforementioned multiple requests.

Take a look at some of its key features:

  • Can control Windows, Linux, Mac, and Chrome OS remote computers
  • Seamless compatibility with Windows 11
  • Virtual eating with voice and video communication
  • Simple setup for remote access and control

⇒ Get TeamViewer

AeroAdmin – Simple to use

AeroAdmin is like a stripped-down version of Team Viewer. If all you want is a basic remote desktop app without all of the bells and whistles that Team Viewer has, then AeroAdmin is the way to go. It has a cleaner user interface that isn’t jammed packed full of features.

The interface includes only a field box where you enter the host ID to start a connection. Other features include file transfer and unattended control, where you can access the other computer without intervention on that end. Plus, remote sessions are encrypted to ensure data security during file transfers.

The free version of AeroAdmin has some solid utility for both a personal and commercial setting. Admittedly, however, this app is best suited for personal use or a medium-sized business. AeroAdmin limits the usage of the free version to 17 hours of connection time every month, but the premium version gets rid of this.

⇒ Get AeroAdmin

Splashtop Business Access – Ideal for business professionals

Splashtop Business Access was made with business professionals and teams in mind. It can manage multiple users’ remote access as a central hub of sorts. With Splashtop, professionals and teams can access the host and shared systems with any supported device.

Splashtop can be installed on a Windows 11 computer to control other systems, including Windows, Mac, iOS, Android, and Chromebook. It’s a versatile remote access program with a wide range of features, high security, and a user-friendly interface.

The app has a multi-monitor feature allowing you to view multiple screens from one or many displays. It also allows two separate users to access the same machine remotely and control who has access to which computer and assign tasks to them.

Set up is also easy to do for a problem-free deployment. There are multiple different plans that increase the number of computers that can be accessed, up to 25 separate machines. The paid versions also have on-demand customer service support.

⇒ Get Splashtop Business Access

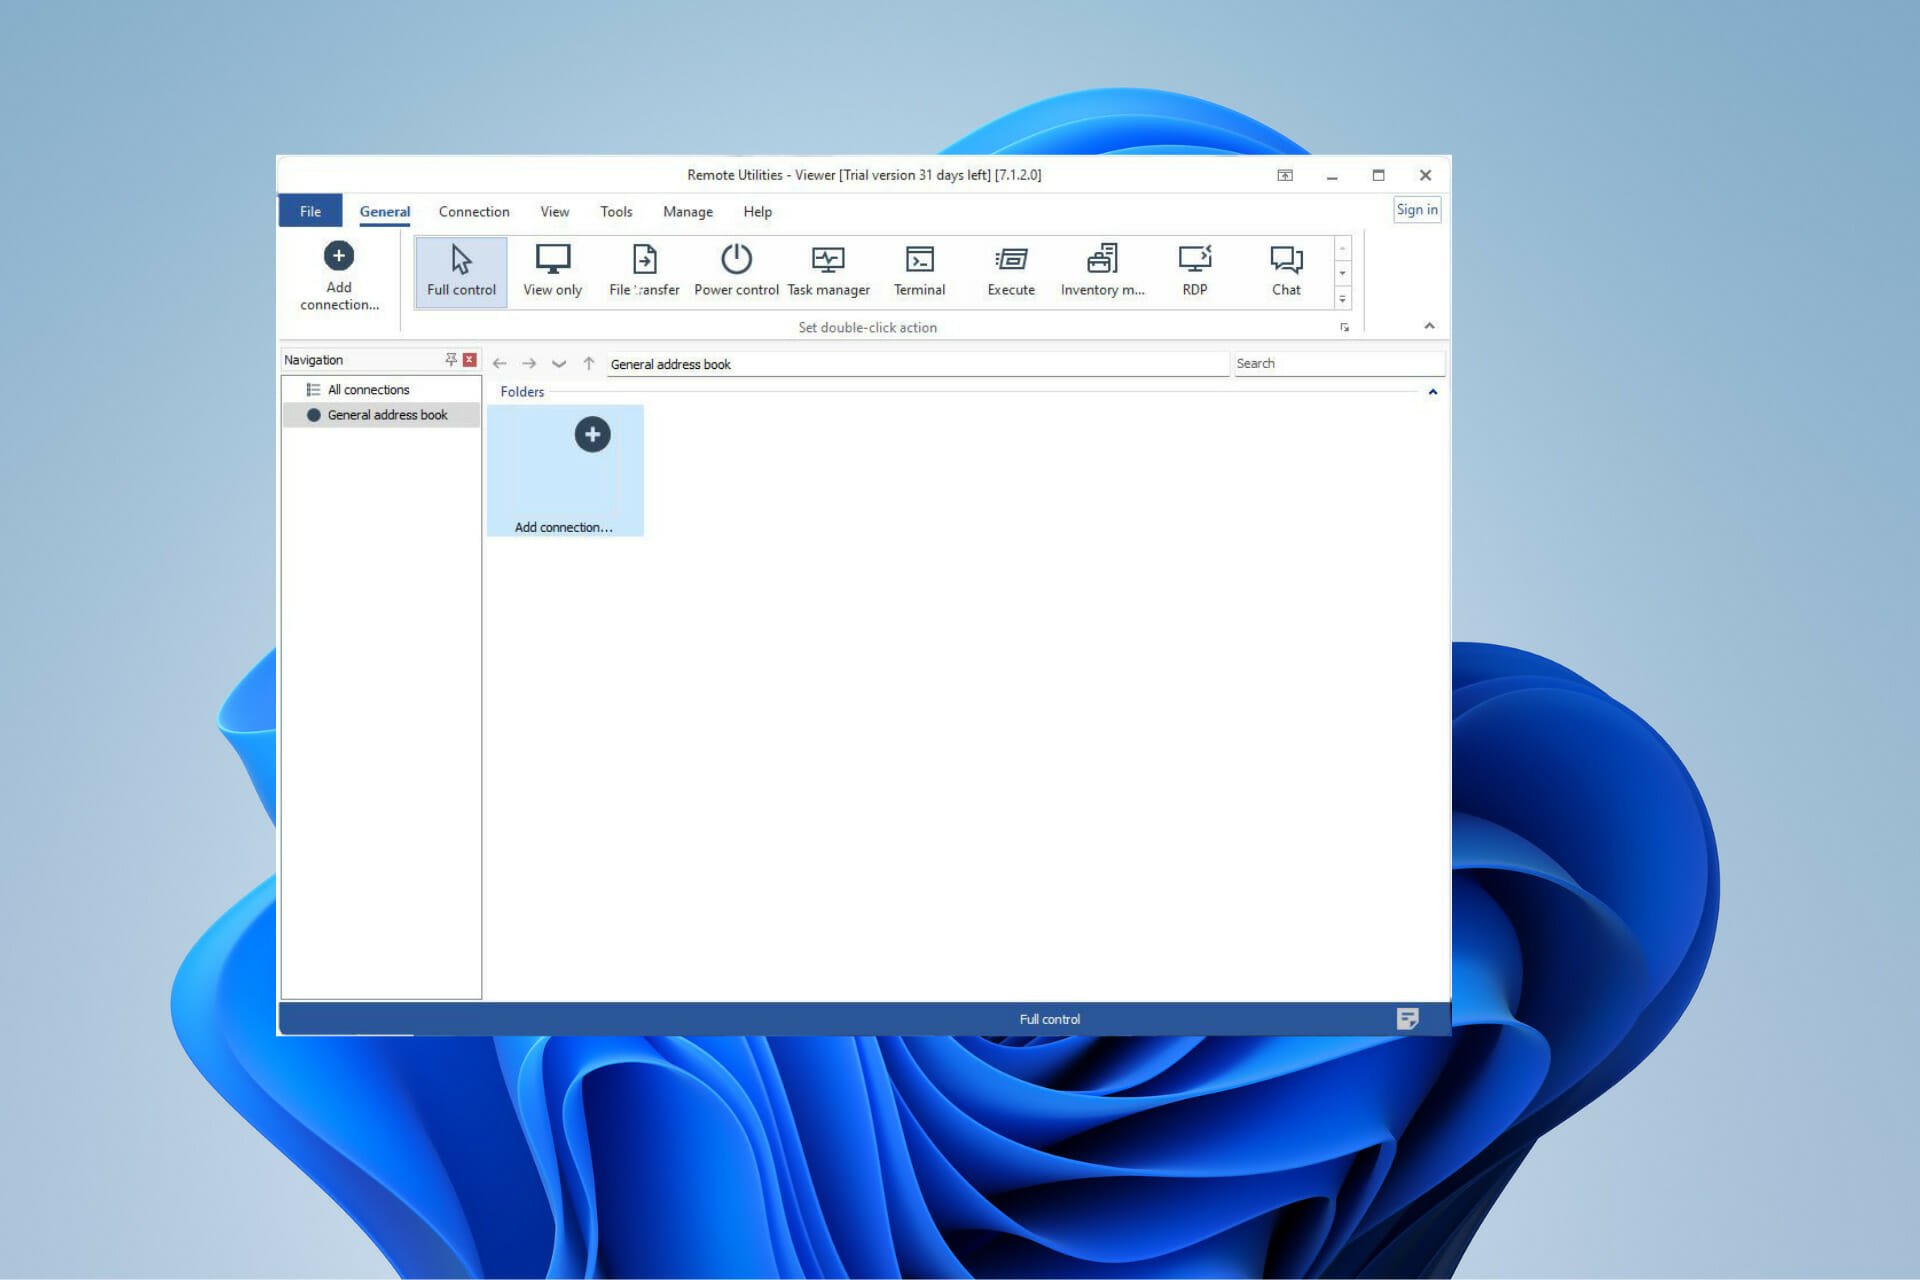
Remote Utilities – Multiple platform support

Remote Utilities is a free remote access app that takes a different approach to its implementation. It’s actually two different tools used as one. There’s the host software that you install on the computer you want to control remotely, and then there’s the viewer which goes on the client.

With the two installed, you can have unattended access to eh remote computer while allowed to execute certain tasks like rebooting the host. Remote Utilities also have a portable version for when you need to access a computer quickly but have no time to install the apps.

Even Android and iOS versions allow you to gain a computer from a mobile device. Other features in Remote Utilities include remote printing, file transfer, webcam viewing, live chat, and multiple monitor viewing.

Remote Utilities can control up to ten separate devices and much older systems, going as far back as Windows XP, plus Windows Server 2019, 2012, and 2003.

⇒ Get Remote Utilities

Chrome Remote Desktop – Great for Google Chrome

Believe it or not, Google has created its own remote access software. It’s called Chrome Remote Desktop and it’s a free tool that allows users to access a computer via the Chrome web browser. It was originally conceived as a browser extension, but over time, it became a standalone tool.

Chrome Remote also allows any user with a Google account to access a computer via iOS or Android device. It does lack a lot of the features that standalone apps have, but its simplicity and cross-platform access make it one of the best free apps out there.

Now, because access happens through the browser, security is limited to HTTPS and includes full support for AES, which is the same protocol businesses use to protect credit card information during online transactions, so it’s not bad, but not amazing either. A PIN is required every time you want to access a remote computer.

Chrome Remote is easy to use and is quite responsive, allowing you to configure key mappings to customize access on a device. It’s a great offset to being light on features and the inability to share files.

⇒ Get Chrome Remote Desktop

LogMeIn – Great for large businesses

LogMeIn can be considered the go-to remote access software for large businesses. The apps come with remote monitoring, remote deployment, endpoint management, and other useful, advanced features.

Like many of the remote access apps on this list, LogMeIn has the standard file transfer capabilities and mobile apps for an immersive experience. The service has unlimited remote access from any and all devices, plus system admin tools so you implement business policies and controls.

The app also gives you access to a whopping 1 TB of cloud storage and LastPass subscribers get the opportunity to save their password in a secure vault of sorts. LogMeIn can also boast lightning-fast access to the host computer, whether it’s a Windows or Mac machine. You can access all the stored files on a computer for easy collaboration.

LogMeIn even has a whiteboard feature, which allows the client user to draw on the host computer if they need to illustrate an action. At first, the whiteboard may be tricky and confusing to use, but fortunately, the service has a helpful guide that teaches how to use the tool.

⇒ Get LogMeIn

Are there other useful Windows 11 apps to make browsing more enjoyable?

As a matter of fact, there are many useful Windows 11 apps that make the overall experience much better. If you ever find yourself needing to transfer vast amounts of data from one computer to another, it’s recommended that you download a useful migration tool.

A data migration tool transfers data by preparing, extracting, and transforming data to make sure it’s compatible with its destination. Some of these apps even have the ability to recover files from a damaged computer.

There’s also QT TabBar which adds tabs to the Windows File Explorer. It’s a relatively small, almost inconsequential addition to the File Explorer, but it’s actually an extremely useful app. It makes exploring your computer’s file less annoying when you can just have one window open.

We also recommend reading our selection of the best VPNs for remote desktop computers.

Feel free to leave a comment below if you have any questions on other Windows 11 apps. Also, leave comments about guides that you’d like to see or information on other Windows 11 features or list guides like this.

Fix: You Don’t Have Privileges for Configuring Connection

Many Windows 10 users reported an issue when trying to bridge network connections. The error message you do not have sufficient privileges for configuring connection properties pops up, leaving users hopeless. So, to help you fix this issue, we came up with a few solutions.

What does You do not have sufficient privileges for configuring connection properties mean?

Typically it indicates that the user attempting to configure a network connection does not have the necessary permissions. This can occur for several reasons:

  • User account – Firstly, the user account may not have sufficient privileges to configure network connections. Also, the user account may not be a member of the appropriate group or have the necessary permissions to modify network settings.
  • Group policy – The network administrator may have implemented group policies, so users are restricted from modifying network settings. This can prevent users from configuring network connections, even if they have administrative privileges on their local machine.
  • Third-party software – Some third-party security software, such as antivirus or firewall programs, may restrict users from modifying network settings to protect the system from unauthorized changes.
  • System corruption – In some cases, system corruption can cause issues with network connections and prevent users from configuring them.

Since we have covered some possible causes, let us explore our top recommended solutions with you.

How can I fix You do not have sufficient privileges for configuring connection properties?

1. Make sure you’re running as an administrator

  1. Press Windows + I to open the Settings app.
  2. Go to Accounts.
    you do not have sufficient privileges for configuring connection properties
  3. Click Family & other users and select Change account type.
    you do not have sufficient privileges for configuring connection properties
  4. Under Account type, choose Administrator and hit OK.
  5. Lastly, check to see if this changed anything.

2. Create a new user with administrator privilege

  1. Press Windows + I to open the Settings app.
  2. Go to Accounts.
    you do not have sufficient privileges for configuring connection properties
  3. Click Family & other users.family and other people you do not have sufficient privileges for configuring connection properties
  4. Select Add someone else on this PC.
    you do not have sufficient privileges for configuring connection properties
  5. Choose I don’t have this person’s sign-in information.
  6. Click Add a user without a Microsoft account.
  7. Enter the required information: user name, password, security questions, and click Next.
  8. Then you need to set it to have administrator privilege, so press Windows + I to open Settings.
  9. Go to Accounts and click Family & other users.
    family and other people you do not have sufficient privileges for configuring connection properties
  10. Select Change account type.
  11. Under Account type, choose Administrator and click OK.
  12. Finally, reboot the PC and log in with the newly created account to see if it fixed the issue.

3. Add the user to the administrator group

  1. Press Windows + R, type compmgmt.msc and hit Enter.
  2. Expand Local Users and Groups in the left pane and click Groups.
  3. Select Administrators in the middle pane, click More Actions in the right pane, and under Administrators, select Add to Group…Computer management groups admin you do not have sufficient privileges for configuring connection properties
  4. In the Administrators Proprieties window, select Add…
  5. Choose a name for the new user and click Check Names.add administrative account you do not have sufficient privileges for configuring connection properties
  6. Lastly, set up a password for the user > restart your PC and log in as the new user.

4. Update Windows

  1. Press Windows + I to open the Settings app.
  2. Click Update & Security.
    you do not have sufficient privileges for configuring connection properties
  3. Select Windows Update and click Check for updates.update windows 10 you do not have sufficient privileges for configuring connection properties
  4. Let it complete the process and restart your computer if it finds any updates.
  5. Finally, after rebooting your PC, check if updating Windows has fixed the issue.

Hopefully, any of the above fixes should help resolve the problem. But note that they have not been written in any particular order, and we hope you choose what feels the most appropriate for your situation.

We hope that our guide on how to fix the Windows privilege issues was able to provide the piece of information you needed. Lastly, if you found this article helpful, comment below.

How to Run the Java Applet Program in 2026 & Compatible Browsers

Running and installing Java on a web browser isn’t a piece of cake nowadays, but it ain’t that hard either. Today, we’ll help you find a shortcut because we found browsers that still support Java and we’ll show you how to use them.

Some support it natively, i.e. you just have to install it, while others will require workarounds like installing certain add-ons. Let’s check out how to run Java applets in 2024.

How can I run Java Applets in a browser?

1. Enable Java content for browsers

    Before you can run the applet program in Java on your favorite browser, you need to enable Java content. This can be done via Settings, after you install Java on your PC.

    The Java applet will then be displayed on the web page by making use of the deprecated applet HTML element, or the recommended object element.

  1. 1. Download and install Java for Windows.

  2. 2. In the Windows Search bar, type Java and open Configure Java from the list of results.

  3. 3. In the Java Control Panel, check the Enable Java content for browser and Web Start applications box.

    your browser is not setup to run java applets enable
  4. 4. Click on Apply and OK to save the changes.

  5. 5. You can now run Java applets on your browser.

2. Run Java Applets in Google Chrome

  1. Launch your browser.
  2. Navigate to the IE Tab extension page. It stimulates the Internet Explorer engine to run Java Applets for Google Chrome.
  3. Click on Add to Chrome.
    how to run java applet program in web browser
  4. After that, install the IE Tab Helper application on your PC. It’s a necessary tool if you want to run Java on Chrome.
  5. Lastly, you should be able to simulate the Internet Explorer engine in Chrome and use Java Applets without any issues.

3. Run Java applet in Microsoft Edge

  1. Launch the Edge browser.
  2. Click on the 3-dot menu and expand More tools.
  3. There, just click on the Open with Internet Explorer option.your browser is not setup to run java applets
  4. If you do not see that option, click the 3-dot menu, and select Settings.
    how to run java applet program in web browser
  5. On the left pane, click Default browser, and on the right pane, select Add under the Internet Explorer Mode pages option.
    how to run java applet program in web browser
  6. Enter the URL of the applet and hit Add.

If you get to a webpage with the Java content or Applets you need to run, the simple workaround is opening the page in Internet Explorer.

4. Enable Java Applet on Internet Explorer

  1. Now, the easiest way is to use Internet Explorer from the get-go. If you cannot run Java on Internet Explorer, then open Internet Explorer.
  2. Click on the cog Tools menu and open Internet Options.your browser is not setup to run java applets
  3. Under the Security tab, click on the Internet icon.
  4. Click on the Custom level.your browser is not setup to run java applets
  5. Make sure that the Scripting for Java applets is enabled.your browser is not setup to run java applets
  6. Restart Internet Explorer and try again.

Can Java applets run from a web browser?

Java applets used to be able to run from a web browser, but support for Java applets in modern web browsers has been largely phased out due to security concerns.

They were a popular way to provide interactive web page content, but they have fallen out of favor recently. Java applets run in a sandboxed environment within the web browser, which can help to prevent them from causing harm to the user’s computer or the web page they are visiting.

However, Java applets also have access to system resources, making them a potential security risk if they need to be correctly designed and implemented.

Most modern web browsers, including Google Chrome, Mozilla Firefox, and Microsoft Edge, no longer support Java applets by default.

Some browsers may still offer the option to enable Java support, but this is generally not recommended due to the security risks involved. Instead, web developers are encouraged to use other technologies like HTML5 and JavaScript to provide interactive content on their web pages.

Wrapping up

If your preferred browser does not support Java, check out our dedicated article to find solutions. You may also use a Java applet viewer.

We hope you enabled and ran Java applets on your web browser. In the comments section below, let us know if you encounter any difficulties or have any questions regarding the process.

Fix: DRIVER_IRQL_NOT_LESS_OR_EQUAL (kbdclass.sys) BSoD

Kbdclass.sys or DRIVER_IRQL_NOT_LESS_OR_EQUAL is a recent error that affects Windows PCs. It is related to Wireless Keyboards and other USB-connected accessories accompanied by BSoD. Though the error can be annoying, we will outline a few fixes.

Also, you can check how to fix USB device not recognized in Windows 11.

What causes DRIVER_IRQL_NOT_LESS_OR_EQUAL kbdclass.sys?

The following are some of the factors that may be responsible for the DRIVER_IRQL_NOT_LESS_OR_EQUAL kbdclass.sys error:

  • Corrupt system files – Windows systems files are responsible for hosting the activities of devices and components on the PC. If the system files are corrupted, they can affect device drivers, resulting in the BSoD error.
  • Conflict with Antivirus programs – Antivirus software running on your PC may interfere with the activities of the keyboard connected. A common one is Webroot antivirus, and recent updates on the software can be faulty, causing the error.
  • Conflicting drivers – Installing an incompatible or invalidated driver with the operating system running on your PC can cause the error.
  • Issues with the USB Controllers – The Universal Serial BUS Controllers ensure the devices connected to the computer function properly and interact with the necessary system components. So, if they are not intact or working correctly, it may result in the kbdclass.sys crash.

Though these factors vary on different computers, you can fix them by following the steps below.

How can I fix the BSoD DRIVER IRQL NOT LESS OR EQUAL kbdclass.sys error?

Before proceeding with any advanced troubleshooting steps, go through the following:

If you can’t resolve the error, try the steps below:

1. Reset the Driver’s changes

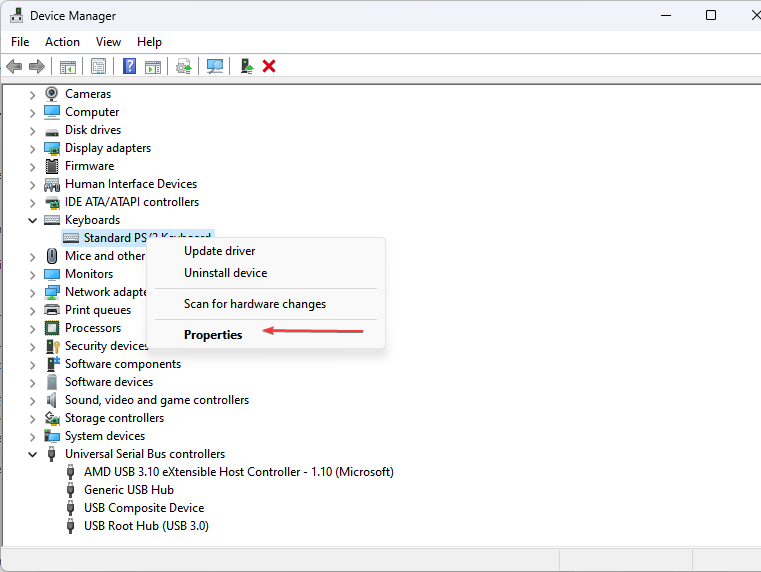
  1. Press Windows + R key to open the Run dialog box, type hdwwiz.cpl, and click OK to open the executable file on your computer’s hard drive.
  2. Right-click the Keyboard Device, then select Properties from the drop-down.
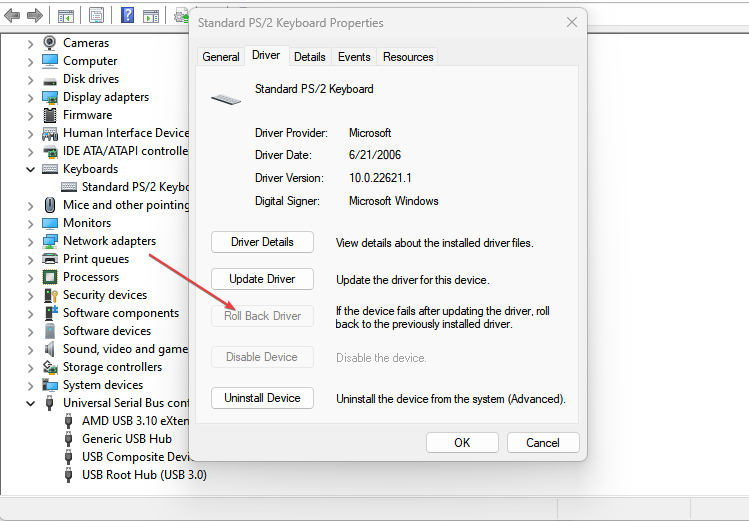
  3. Navigate to the Driver tab, then click the Roll back driver option.
  4. Restart your PC and check if the kbdclass.sys error persists.

Rolling back driver changes will reset it to the version where it works correctly, removing faulty settings or updates.

2. Run an SFC scan

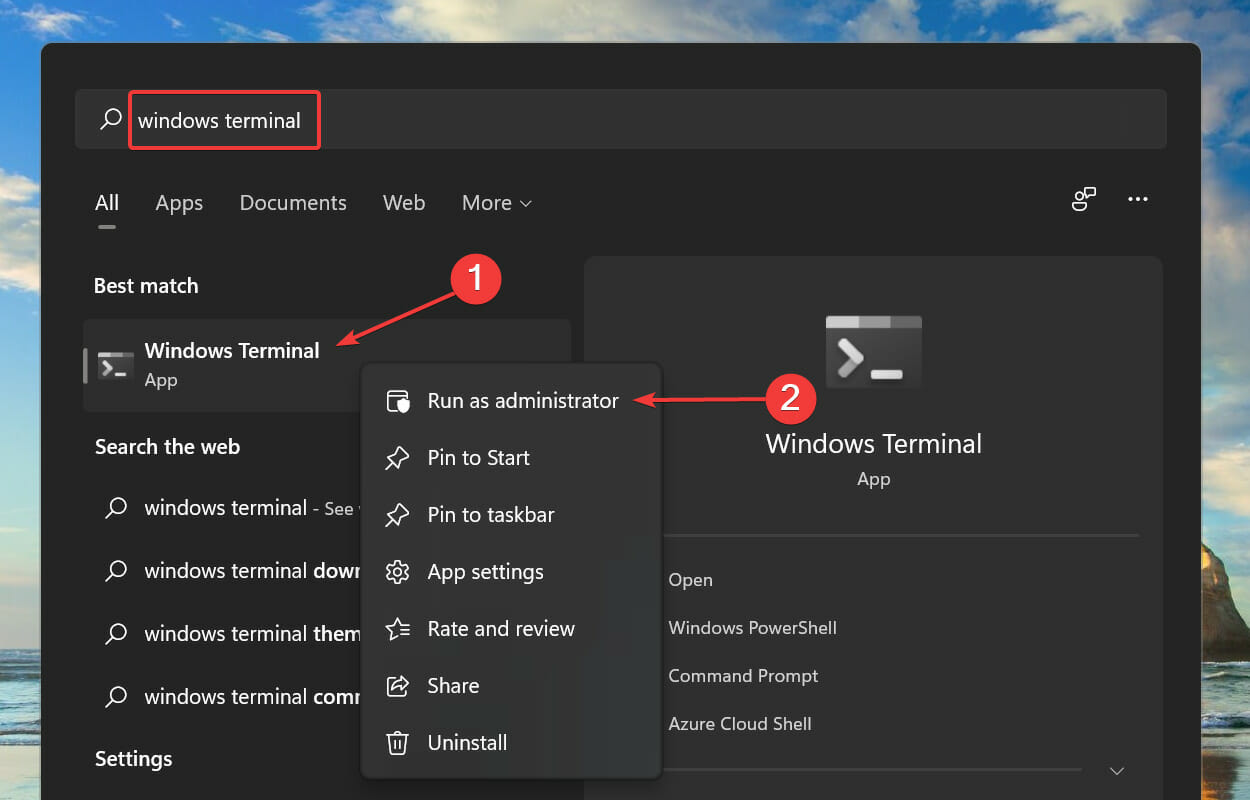
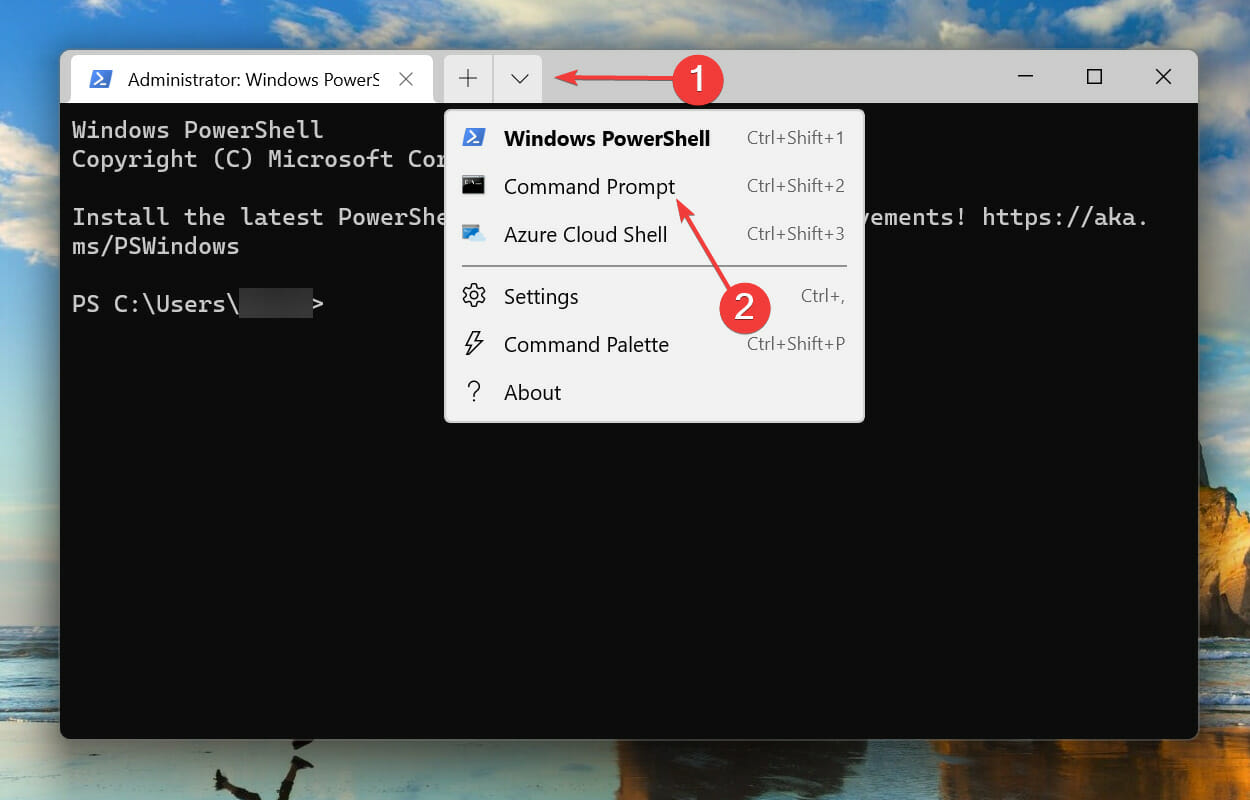
  1. Left-click the Start button, type Command Prompt, and click the Run as administrator option.
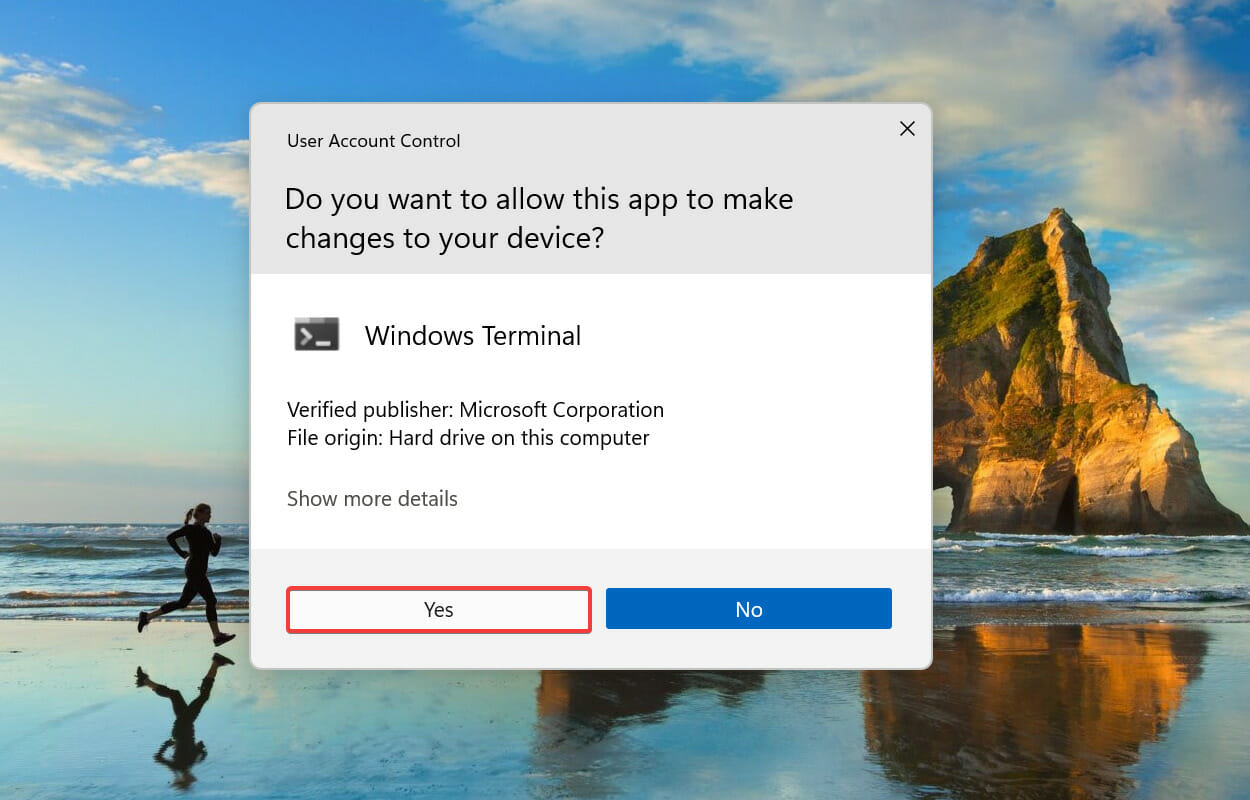
  2. Click Yes on the User Account Control prompt.
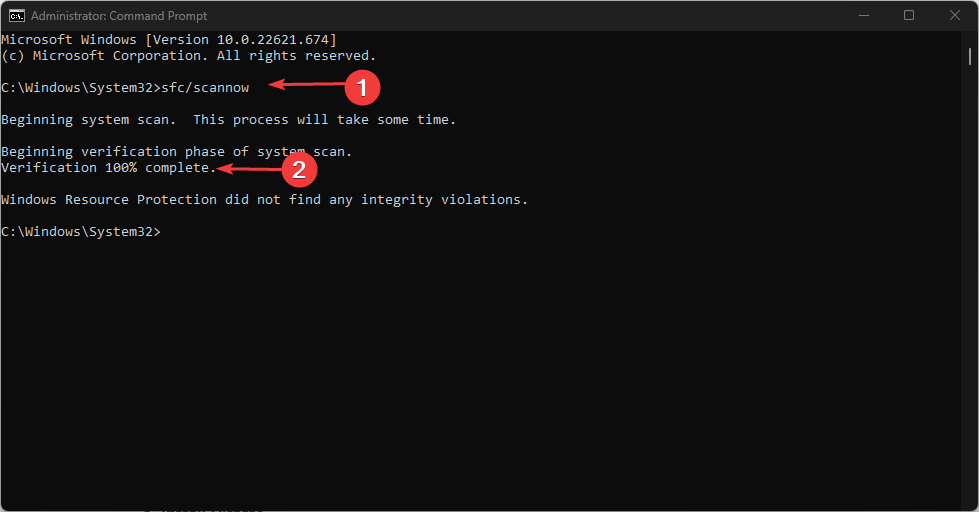
  3. Type the following and press Enter: sfc /scannow
  4. Restart your PC and check if the error persists.

An SFC scan will find and repair corrupt system files causing the kbdclass.sys error. You can check how to fix the run as administrator option if it’s not working on your PC.

Otherwise, you can opt for another effective method to repair OS files, so we advise you to try an automatic repair tool.

The tool will check your Windows system for corrupted files and replace them with clean versions from its extensive repository.

3. Uninstall USB Controllers

  1. Press Windows + R key to open the Run dialog box, type hdwwiz.cpl, and click OK.
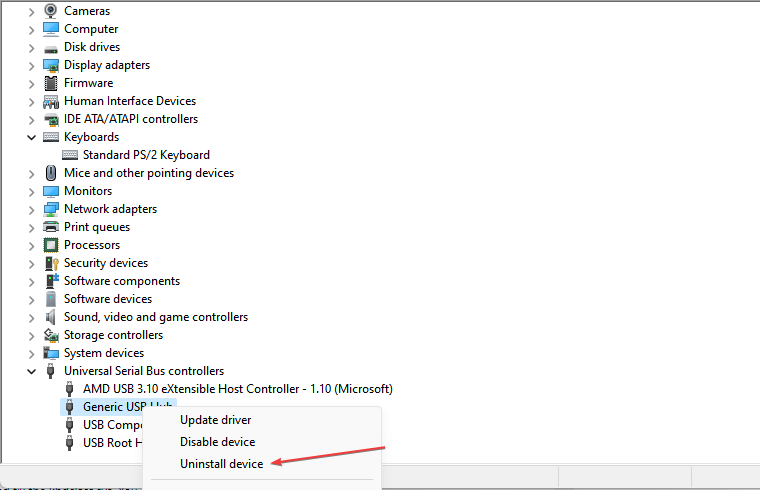
  2. Find the Universal Serial BUS Controllers tab, right-click on the Generic and USB Root Hubs, and select Uninstall device from the drop-down to remove the Controllers.
  3. Restart your PC to reinstall the Controllers, and check if the DRIVER IRQL NOT LESS OR EQUAL (kbdclass.sys) BSoD error persists.

Uninstalling the USB Controllers will allow your system to run and use new ones.

4. Update driver using Windows update

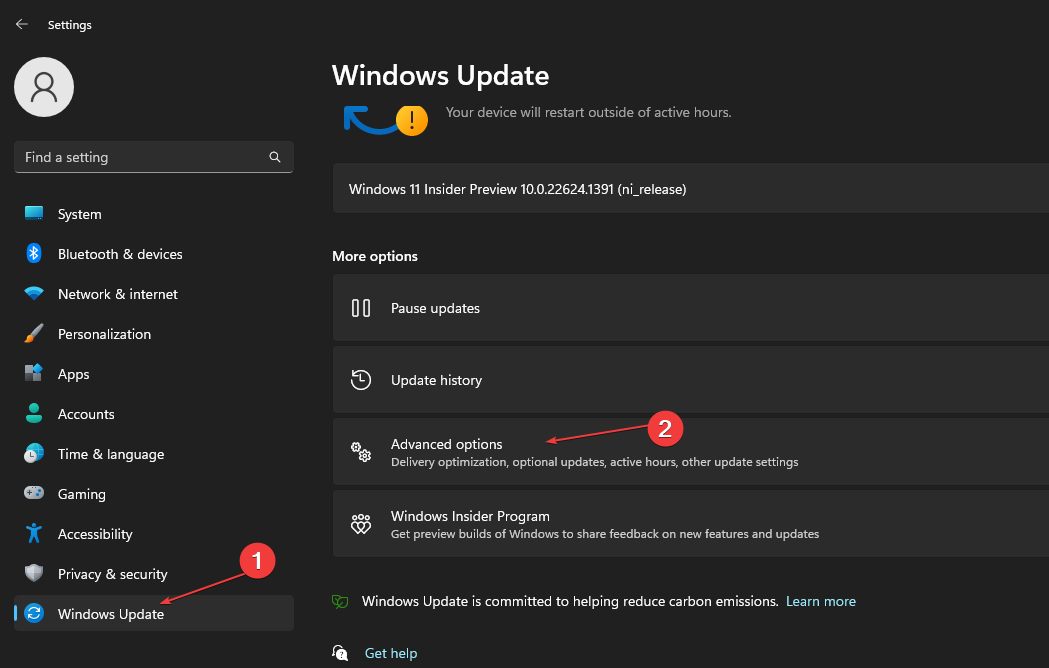
  1. Press the Windows + I key to open Settings.
  2. Select the Windows Update tab and select the Advanced options.
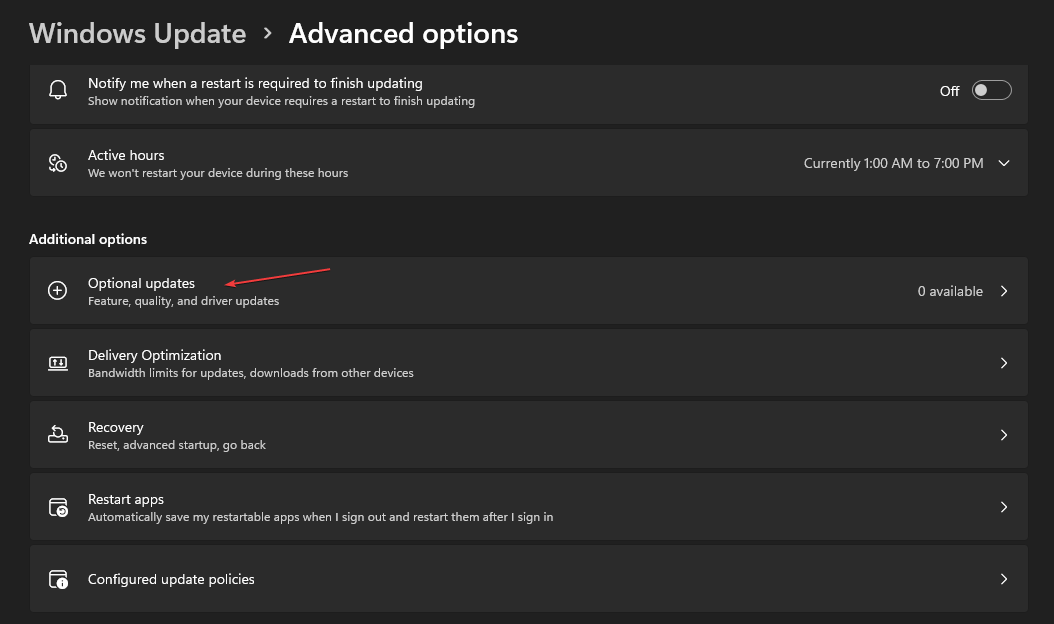
  3. Click on Optional Update.
  4. Click the drop-down button on the Driver Update and checkmark the list of updates available.
  5. Select the Update and Install button and wait for the drivers to install.

Updating drivers will improve the device’s performance and fix the kbdclass.sys. You can read about ways to diagnose and fix Windows Update not loading on your computer.

5. Run System Restore

  1. Press Windows + R key to open the Run dialog box, type control, then press Enter to open the Control Panel.
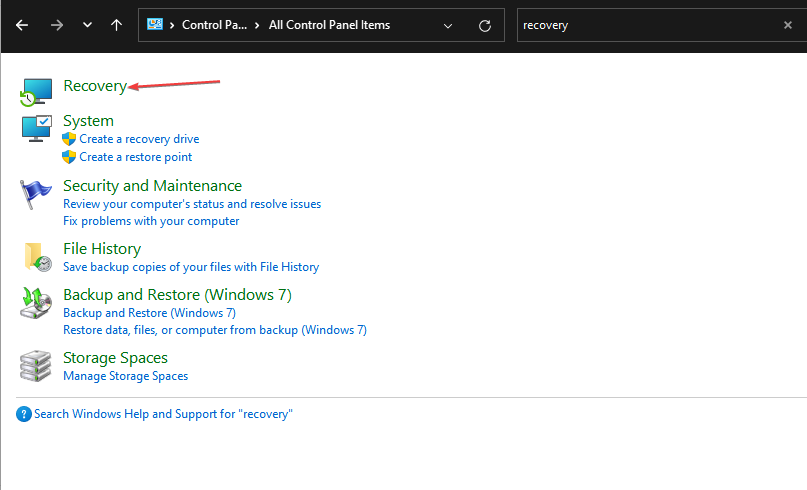
  2. Type recovery in the Control Panel search bar and select Recovery.
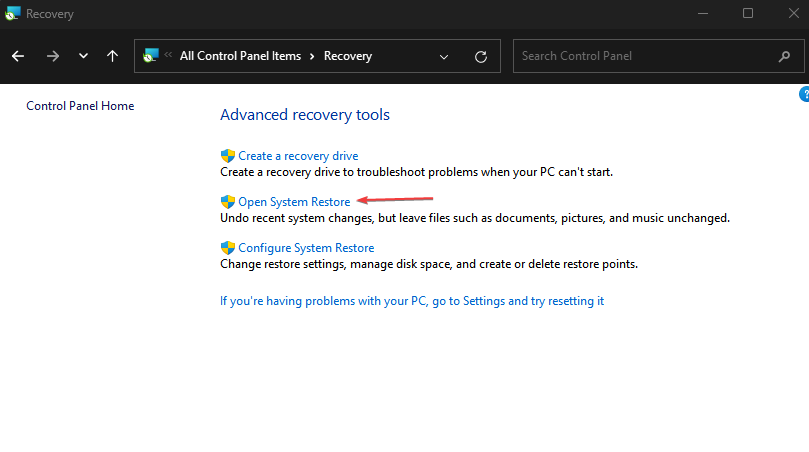
  3. Then click Open System Restore.
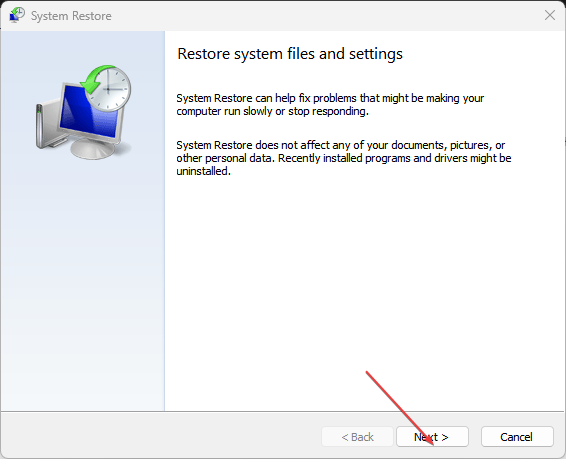
  4. Click Next in the Restore system files and settings window.
  5. Choose the restore point you want to restore from, then click Scan for affected programs.

Running System Restore will backdate the system and undo some recent system modifications on the PC. Read our guide on how to fix Restore Point if it’s not working on your PC.

Alternatively, you can learn about fixing the Keyboard if it’s not working after Windows 10/11 rollback on your PC.

If you have further questions or suggestions on this guide, kindly drop them in the comments section.

11 Best Tools to Run Windows Speed Test for your Internet

Internet speed is among the most important factors when choosing an Internet Service Provider. You however will not be sure of how reliable your ISP is without running a Windows internet speed test. 

There are many ways to check Internet speed, and today we will show you some of the best tools that let you test Internet speed on Windows.

What are the best tools to test my Internet speed?

SpeedConnect Connection Tester – Basic internet speed tester

SpeedConnect Connection Tester is a simple Windows application that will test your Internet speed with a single click.

After you install this tool, you just need to click the Run New Test button, and you’ll see latency and Internet speed in real-time.

This tool seems to try to download a specific file in the background and uses that file to test your Internet speed.

If you want, you can change the Test Server URL field and set a different file that will be used for testing purposes.

In addition to speed and latency, you’ll see other information, such as the duration of the test and file size. SpeedConnect Connection Tester is a simple tool with an outdated design and limited functionality.

This tool will be perfect for basic users who want a quick Internet speed test. However, you must use a different tool if you want more detailed information.

Some important features of SpeedConnect include:

  • Accurate speed measurements
  • Real-time graphs
  • Detailed reports
  • User-friendly interface

⇒ Download SpeedConnect Connection Tester

Network Speed Test – Universal Internet speed testing

Network Speed Test will be great if you prefer Universal apps. We already reviewed Network Speed Test a while ago, so if you want more details, check that article.

Network Speed Test is a simple Universal app that lets you test your Internet speed. Click the Start button to see your network latency and download and upload speed.

There’s also a history table on the right to see the results of your previous tests.

We have to mention that this application has labels next to certain speed values. Labels such as video calls, high-quality video, etc., will show you what kind of content your Internet connection can handle.

Network Speed Test is a simple app; its only flaw is the inability to change the testing server. However, this app will be perfect for basic users with its simple interface.

Some important features of Network Speed Test include the following:

  • Real-time speed testing
  • Accurate result presentation
  • Multiplatform and OS functionality
  • HTML and URL result sharing

⇒ Download Network Speed Test

Network Speed Test Pro – Interactive network readings

Network Speed Test Pro is another Universal app that will test your Internet speed. Before using this app, turn on the location discovery option from the Settings app. After that, you can choose one of the 4000 available servers and test your download speed and ping.

Network Speed Test Pro has an interactive map so that you can select and test one of many available servers. The test process looks rather interesting, and you’ll see a marker moving from your location to the server while testing the speed.

Choose the desired server or country from the menu if you don’t want to use the map. Regarding the available information, you’ll see download speed, upload speed, and ping, which is more than enough for most users.

Network Speed Test Pro has a lot to offer, but it’s not without flaws. One problem we encountered is that location discovery doesn’t always work reliably. Due to this problem, you can sometimes get inaccurate latency results.

Another minor flaw is the user interface. The user interface is simple, but once you start a network test, there’s no way to stop it, and since testing can take a minute, you’ll have to wait until it’s finished to choose a different server.

Some important features of Network Speed Test Pro include the following:

  • Network latency measure
  • Network performance history
  • Interactive map
  • Updated testing server list

⇒ Get Network Speed Test Pro

Fast Internet Speed Test – Easy online tool

This is another Universal app that will let you test your Internet speed. Fast Internet Speed Test is a simple application that will test your Internet connection as soon as you start it. After starting the app, you’ll see your download speed in real-time.

Information such as upload speed or latency isn’t available. In addition, there’s no option to choose the server.

Fast Internet Speed Test is a simple application with limited functionality. If you want the most basic app to test your Internet speed, Fast Internet Speed Test might be just what you need.

Some important features of Fast Internet Speed Test include the following:

  • Simple and easy to use
  • Integration with Netflix’s servers
  • Cross-platform operability

⇒ Get Fast Internet Speed Test

Speedtest – Comprehensive online speed tester

Speedtest is undoubtedly one of the most popular online services that let you test your Internet speed. You can perform a quick speed test simply by clicking Begin test button, and your test server will be selected automatically.

If you want, you can choose the testing server manually. You can choose any server in almost any country regarding the available servers.

All required information is available, including download speed, upload speed, and latency. In addition, you can also rate your ISP right from the Speedtest website.

If you want to share your test results with others, you can do that right from Speedtest. You can also create your Speedtest account and use it to keep track of your testing history and results.

Speedtest online service is amazing and probably the best for testing Internet speed. There’s also a Universal app available from Windows Store. The application is simple to use and has an attractive user interface.

Speedtest app will automatically select the best service once you tap the Go button. One advantage over the web version is the availability of testing history so that you can keep track of your results at all times.

You can also share your results using other apps, but we have to mention that there’s no ability to get a direct link to the results, which can be a flaw for some users.

Another flaw of Speedtest app is the inability to choose any testing server worldwide. You are limited to servers in neighboring countries. Compared to the web version that gives you access to any testing server worldwide, a limited choice of servers feels a bit underwhelming.

Some important features of Speed Test include the following:

  • Free internet speed testing tool
  • Easy-to-read graphs
  • Multiple server locations
  • Saving feature for test results

⇒ Download the Speedtest app

DownTester – Good manual tester

test-internet-speed-downtester-1

DownTester is another simple tool for testing Internet speed. Unlike other tools on our list, this one doesn’t show upload speed or latency. In fact, this tool doesn’t let you choose the server you want to use for testing.

To use this tool, you must add links to certain files you want to download in the background. By doing so, you’ll test the download speed of your connection.

One feature that makes this app special is the ability to test your download speed using multiple files or servers. DownTester is a simple app that requires some preparation before using it.

If you want something more user-friendly, we suggest you try another app from our list.

Some features of DownTester include the following:

  • Portable and lightweight utility
  • Accurate and real-time testing results
  • Easy-to-use interface
  • Test results saving in a CSV file

⇒ Download DownTester

SpeedOf.Me – Live chart speed tester

test-internet-speed-speedofme-1

SpeedOf.Me is a web service that lets you test your Internet speed. This service doesn’t require Flash or Java to be installed on your computer, which is great.

This also makes this service available on any mobile platform. The testing process will give you a live chart representing your download and upload speed.

In addition to download and upload speed, you’ll also see your latency. If you want, you can also export your testing results or your history as an image, PDF, or CSV file.

This simple service should work on any PC, even if you don’t have Java or Flash installed. The only flaw we found is the lack of ability to choose a testing server, so you’ll always use the same server.

Some features of SpeedOf.Me include the following:

  • Free online internet speed testing
  • Accurate and real-time testing results
  • Cross-platform operability
  • Internet speed comparison

⇒ Try SpeedOf.Me

TestMy.Net – Free internet speed testing tool

test-internet-speed-testmynet-1

Another web service that you can use to test Internet speed is TestMy.net. This service doesn’t use Java or Flash, so it will work on any browser and platform, including mobile.

This service lets you check your download or upload speed, or both simultaneously. Unfortunately, there’s no option available to check your ping.

This service offers several different servers to choose from. If you want, you can easily compare your Internet speed with the speed of other users from your ISP. You can also compare your speed to other users in your city or country.

We must mention that TestMy.net will automatically perform the speed test every hour if you keep it open in your browser. This allows you to get the most accurate information regarding your Internet speed.

TestMy.net is a decent service that lets you check your Internet speed, but some users might not like the lack of latency tests.

Some features of TestMy.Net include the following:

  • Download and upload speed testing
  • Multiple server locations
  • User-friendly interface
  • Test result-saving features

⇒ Try TestMy.net

Bandwidth Palace – Efficient HTML internet speed tester

test-internet-speed-bandwidth-palace-1

Bandwidth Palace is another web service that allows you to test your Internet speed. With this tool, you can choose several different servers.

All necessary information, such as download speed, upload speed, and latency, is available during the test. After you’re done with testing, you can easily share a link with your results.

Bandwidth Palace uses HTML5 for testing, so it will work on any platform and browser. Regarding the flaws, the only flaw might be the small number of available testing servers.

Some features of Bandwidth Palace include the following:

  • Results for download and upload speeds
  • Multiple server locations in different regions
  • Operational on all devices and operating systems
  • Insights and speed test comparison

⇒ Try Bandwidth Palace

Speed Test Loggger – Automatic speed testing

Speed Test Loggger is another desktop application that lets you test your Internet speed. To use this application, select Custom URL in the Settings menu. After doing that, you can start testing the download speed.

This tool will test your download speed every minute, which is useful if you want detailed information. The tool doesn’t measure upload speed or latency, which is its only flaw.

Speed Test Loggger is a simple tool for testing your Internet speed, but you’ll need to configure it a bit before you can use it.

Some features of the Speed Test Loggger include the following:

  • Automated speed tests
  • Open-source Windows app
  • CSV logged test results

⇒ Try Speed Test Loggger

SpeedSmart – HTML5 Internet speed tool

speed smart test internet speed

SpeedSmart is a useful HTML5 Internet speed tool that offers you all the information you need about your download and upload speed and ping information.

If you need to optimize your bandwidth for gaming, SpeedSmart supports a series of advanced settings that allow you to get the best of your Internet connection.

You can also keep track of your Internet connection speed values thanks to the detailed history list, chart, and stats this tool supports.

Testing Internet speed on Windows 10 is rather simple, and you can do it by using any of these tools or services. If we had to recommend one, our choice would be Speedtest.

This is the most popular service; it has all the necessary features, and millions of users use it. If you’re not a fan of web services, you can also download Speedtest Windows 10 app.

Some features of SpeedSmart include the following:

  • URL or HTML code result sharing
  • Mobile app version
  • latency and jitter internet information

⇒ Try SpeedSmart

How do I run a speed check on Windows 10?

There are several ways to check your internet connection speed on Windows 10. Here are a few methods:

  • Use the built-in Windows 10 network speed test – You will find this tool in the Settings app under Network troubleshooter.
  • Use a web-based speed test tool – You only need an internet connection and your web browser. A Google search will give you many handy options.
  • Use a specialized tool – Various third-party software tools are available specifically designed for testing internet speed on Windows 10. Examples include NetSpeedMonitor, Ookla Speedtest, and LAN Speed Test.

It’s worth noting that specialized tools tend to provide more detailed information and more accurate results than the built-in Windows 10 network speed test or web-based speed test tools.

So, a specialized tool is recommended if you’re looking for more in-depth information.

FAQs

What is a good internet speed for a Windows PC?

25 Mbps handles HD streaming and video calls. 50 to 100 Mbps is smoother for households with several devices. Gamers and 4K streaming typically need 100 Mbps or higher.

Why do different speed tests show different results?

Results vary due to Wi-Fi quality, server distance, network congestion, and background apps. VPNs, proxies, and antivirus web shields can also affect latency and throughput.

How do I get accurate speed test results on Windows?

Connect with Ethernet, close bandwidth-heavy apps, and pause cloud backups. Pick a nearby test server, run three tests at different times of day, then average the results.

What is the difference between Mbps and MB/s?

Mbps measures megabits per second, while MB/s measures megabytes per second. Convert by dividing Mbps by 8, so 80 Mbps equals about 10 MB/s.

That’s about it for Internet Speed testing tools. All of them are extremely efficient at measuring both your upload and download speeds, so in the end, it is up to your personal preferences which one you choose.

Want real time visibility after testing? You can show your live internet speed in the Windows taskbar with this step by step guide: How to display internet speed on the taskbar.

In case you want to keep track of your network usage in real time, then using a Net Speed Monitor for Windows 11 can be helpful.

[wl_navigator]

Firefox Not Working on Windows 10: 8 Fixes if It Won’t Open

Firefox is known as one of the best browsers for the Windows platform, but unfortunately, it seems that Windows 10 users are having certain issues with it, and now Firefox is not working for them.

Many issues can occur, including slowdowns, crashes, and more, and these problems can affect your daily browsing activities.

However, there are several ways to fix them, and in today’s article, we’ll show you a couple of methods you can apply right away.

Why is Firefox suddenly not working?

There could be various reasons why Firefox suddenly stopped working. Some possible reasons include the following:

  • Outdated or corrupted browser files – If your Firefox browser files are outdated or corrupted, it could cause the browser to stop working.
  • Browser extensions or plugins – Sometimes, incompatible or outdated browser extensions or plugins can cause Firefox to stop working.
  • Operating system or software updates – Recent updates to your operating system or other software could conflict with Firefox, causing it to stop working.
  • Network connectivity issues – If you are experiencing network connectivity issues, Firefox may not be able to connect to the internet, causing it to stop working.
  • Malware or viruses – Viruses or malware on your computer can interfere with the proper functioning of Firefox.

What are some common Firefox issues?

Firefox issues can be problematic and prevent you from using your browser. As for issues, we’ve compiled a list of common problems that users reported with Firefox:

  • Firefox won’t open – This issue can occur if there’s a problem with your Firefox profile. To fix it, recreate the profile.
  • Firefox is too slow, using too much RAM – High RAM usage can occur due to your extensions, so be sure to disable all extensions you don’t need and check if that helps.
  • Firefox high CPU usage – Sometimes, high CPU usage can appear and cause issues with Firefox. This can be due to your antivirus, so disable it temporarily.
  • Firefox keeps crashing, freezing, not responding – Sometimes, your configuration can cause problems with Firefox. However, you can fix that problem simply by starting Firefox in Safe Mode.

Quick Tip:

Problematic add-ons and too many cached internet files might be inconvenient, but they are not hard to resolve. We understand your primary browser is down for maintenance, but it should not stop you.

Switching to a backup browser like Opera One can be beneficial because you can import everything from Firefox with a single click. Opera One’s speed dial and bookmarks are great and also visually appealing.

Opera One

A snappy browser secures your data and comes with several integrations.

What can I do if Firefox is not working on Windows 10?

1. Disable problematic add-ons

  1. Open Firefox and click the Menu button in the top right corner. Choose Add-ons and themes from the list.
  2. Click the Extensions on the left. Now disable all extensions by toggling the switch icon next to individual extensions.
  3. Restart Firefox and check if the issue is resolved.
  4. If the problem is fixed, you can try enabling extensions one by one until you find the one causing you problems.

According to some users, FlashGet was the add-on that caused the crash; remember that almost any add-on can cause Firefox to crash, so you might have to disable or remove specific add-ons to fix this issue.

2. Start Firefox in Safe Mode

  1. Locate the Firefox shortcut on your desktop, hold the Shift key, and double-click it.
  2. When the dialog box appears, click the Open button.

After doing that, Firefox should start in Safe Mode. If the issue doesn’t appear in Safe Mode, one of your extensions or settings may be causing this issue.

This is a valuable technique when Firefox is not working on Windows 10 or when Firefox is not opening on Windows 10.

3. Check your antivirus

  1. Open Avast and choose Settings in the bottom left corner (the steps will vary in other antivirus tools).
  2. Choose Protection and navigate to Core Shields. Now uncheck Enable HTTPs scanning.
  3. Save the changes.

You might want to disable this or other similar features using a different antivirus solution. If that doesn’t work, your next step would be to disable or uninstall it completely.

After that, check our best antivirus software guide to find reliable protection software that won’t cause any issues.

4. Reinstall Firefox

  1. Press Windows key + X and choose Apps and Features.
  2. Select Firefox on the list and click on Uninstall.
  3. Follow the instructions on the screen to complete the process.
  4. Once the software is removed, download the latest version and install it.

You should try this solution if Firefox is still not working after a Windows 10 update or if Firefox keeps crashing on Windows 10.

Also, users have said a reinstallation is effective if Firefox is not loading pages after an update.

5. Clear your cache

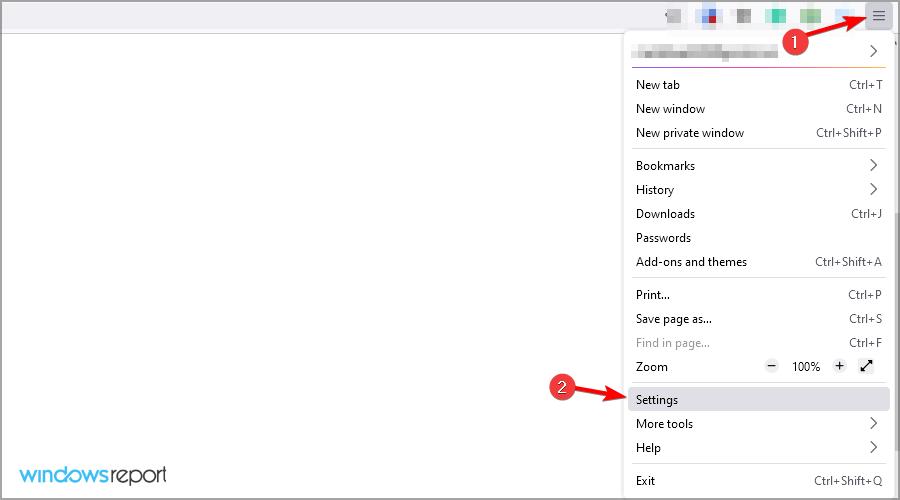
  1. Click the Menu button in the top right corner and choose Settings.
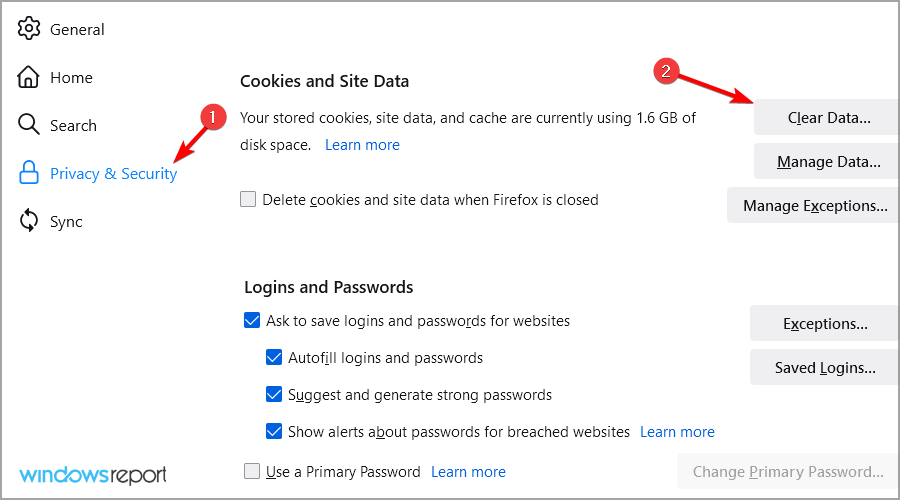
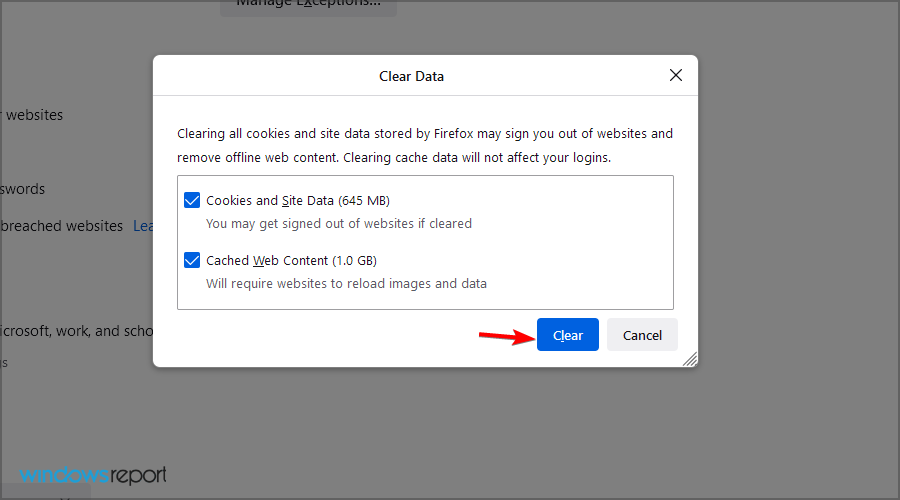
  2. Navigate to Privacy & Security and click the Clear Data button.
  3. Make sure everything is checked, and click on Clear.

6. Refresh Firefox

  1. Open Firefox.
  2. In the address bar, enter the link below and press Enter.
    about:support
  3. Click Refresh Firefox button.
  4. Click on Refresh Firefox and follow the instructions on the screen.

After you’re done, Firefox should be restored to default, and the problem will be permanently resolved.

A simple refresh is sometimes all you need when Firefox is not working properly on Windows 10.

7. Recreate your profile

7.1 Remove your Firefox profile

  1. Close Firefox.
  2. Now press Windows key + R and enter the text below. Press Enter.
    firefox.exe -p
  3. A list of available profiles will appear. Select your user profile; it should probably be labeled as default, and click the Delete Profile button.
  4. Now pick the desired option. If you want to remove your profile completely, click the Delete Files button.

After doing that, your profile should be removed, and a new one will be created once you start Firefox. You can also create a new profile from this dialog box. To do so, follow these steps:

7.2 Create a profile

  1. Click the Create Profile button.
  2. Click Next.
  3. Enter the desired name for your profile and click the Finish button.
  4. Now you have to select the new profile and click the Start Firefox button.

After creating a new user profile, the issue should be resolved entirely. Remember that this method will remove your history, bookmarks, and saved passwords, so be sure to back them up beforehand.

8. Consider using Beta or Nightly version

  1. Visit the Firefox download page.
  2. Now click on Download next to the Beta or Nightly version.
  3. Once the application is downloaded, install it.
Note icon NOTE
Beta and Nightly versions could be unstable, so you might experience certain issues while using them.

Firefox issues on Windows can be troublesome, and in most cases, these problems are caused by a third-party application or a Firefox extension.

In case you’re still having issues, we encourage you to visit our Firefox is not responding in Windows 10 and 11 guide for more solutions.

Also, note that for most issues on the browser, you may start by attempting a diagnosis using the Firefox troubleshooting mode.

Do you know a different tip to solve this problem? If so, share it with us in the comments section below.

Bing AI chatbot reached 100 million daily users milestone

When Microsoft splashed $1 billion into OpenAI, the AI research lab behind ChatGPT in 2019, the Redmond tech giant had hoped to conquer the continuously-improving AI war.

They integrated the viral technology into the often-overlooked search engine, Bing, in February 2023. Despite its polarizing reviews from left and right, Microsoft seems to be doing just fine. After all, they just reached the 100 million daily active users milestone. One-third of them are new to the search engine.

Yusuf Mehdi, Microsoft’s corporate VP, said in a blog post that Microsoft has spurred several improvements for the Bing AI chatbot in the past four weeks. Acknowledging that it hasn’t been the most perfect experience, the tech giant has every right to think that the investment is paying off.

Moreover, each user averages roughly three chats per session, tallying up to 45 million chats since the preview rolled out.

It’s hard to believe it’s been just over a month since we released the new AI-powered Bing and Edge to the world as your copilot for the web. In that time, we have heard your feedback, learned a lot, and shipped a number of improvements. We are delighted by the virtuous cycle of feedback and iteration that is driving strong Bing improvements and usage.

Bing AI chatbot is yet to roll out for general availability, but the waitlist is here. It’s also exclusive to Microsoft’s built-in browser Edge and Redmond officials show no sign of releasing it to other browsers. It would have been commercial suicide, but if you’re still curious, you can follow our tricks on how to access Bing AI on other browsers.

Microsoft: The leading force in the AI battle?

Is Microsoft rushing in releasing Bing AI? Maybe, but it’s safe to say that the tech giant is currently leading the competition in the AI-powered search engine market, but how long can they keep up?

Google, the current leading search engine, is yet to roll out its Bard competitor. Powered by Google’s Language Model for Dialogue Applications (LaMDA), Google is still testing its product on several select users.

Another Chromium-based open-source browser in the market, Brave, has also quietly shipped its AI-powered tool Summarizer, which is trained to process multiple sources on the web. As the name suggests, all it does is display a well-written summary at the top of Search results pages.

Using Web results enables the Summarizer to provide real-time information that is up to date with today’s events. Given the current advancements in AI, it’s crucial to remind users that one should not believe everything an AI system produces, in much the same way one should not believe everything that is published on the Web. At the risk of stating the obvious, we should not suspend critical thinking for anything we consume, no matter how impressive the results of AI models can be.

What do you think about this AI competition among browsers and search engines? Let us know in the comments!

How to Reduce or Resize a PST File [With or Without Outlook]

Outlook uses PST files to store data on your computer, which allows you to access email, contacts, and calendars while not connected to the internet. Over time, the Personal Storage Table (PST) file can become large and cause performance issues. Thus, we will discuss how to reduce the PST file size.

Alternatively, you can read about how to open PST files on Windows 11.

Why do I need to reduce the large PST file?

The issues below are why you should reduce the size of a large PST file on your device.

  • Performance issues – When creating PST files in Outlook, a large file takes longer to process, affecting the Outlook functionality. This can result in issues like slower search, not enough system resources error, longer load times, and frequent crashes.
  • Storage limitations – Outlook has a PST storage capacity limit of 50 GB for the latest versions and less for older versions. Therefore, reducing the file size will prevent it from reaching the threshold and potentially losing important data.
  • File corruption risk – Large PST files are more susceptible to corruption which can result in data loss. Resizing will aid with the stress of fixing corrupt PST files and ensuring that your data remains safe and secure.

Nonetheless, we will discuss steps to reduce the Outlook PST file on your PC.

How can I reduce or resize a PST file?

1. Delete unwanted Outlook data

  1. Open the Outlook app on your device and click on the File tab.
  2. Navigate to the Info section, left-click on Tools, and select the Mailbox clean up.
  3. From the new Window, click on View Deleted Items Size button.
  4. Click on the Empty Deleted Items FOlder button to permanently remove all previously deleted.

Removing the deleted items will shrink the PST file size if the recently deleted files are large. Check our guide about clearing Outlook temp files on Windows.

2. Reduce PST files using the Compact Now Outlook feature

  1. Launch the Outlook app on your device and click on the File tab.
  2. Navigate to the Info section and click on the Account Settings option from the list.
  3. Choose the Data Files tab in Account Settings.
  4. Select a particular email account and click on Settings.
  5. Select Compact Now and click OK to start the shrinking process of the PST file.

Compact Now is an in-built tool that allows you to shrink the PST file. You can read about changing or removing the primary account from Outlook.

You may also learn some quick fixes for Outlook 2010 not opening PST files on your PC. Also, check our guide about how to save your Outlook emails using OST to PST Converter.

For other Outlook formats, we have a guide on how to convert MSG to PST.

Let us know how the procedure went for you in the comments area below.

How to Fix Brave Browser High CPU & Memory Usage in 5 Steps

Despite its resource-saving infrastructure, you can occasionally struggle with Brave high CPU usage or memory leak issues. If you want to know how to make Brave use less RAM and/or CPU, turning off resource-hogging features such as hardware acceleration or running background apps is a good place to start.

Brave browser is designed to run as a lightweight browser that doesn’t bog down your computer’s resources. It has features that make it faster than other browsers such as Chrome, Firefox, or Safari.

One of these features is called Brave Shields. It allows you to block unwanted content like ads and trackers. It’s not flawless, sure, and sometimes you may have a hard time blocking ads with Brave Browser.

But it’s still a great privacy-first option to have at hand without having to install any extra extensions or plugins.

But sometimes Brave can use too much CPU power. This will in turn slow down your computer, especially if you have an older PC. It can also drain your battery, but we have a dedicated article on how to fix that.

If you find that the browser is using too much of your CPU power or RAM, you can install The Great Suspender extension to get rid of unused tabs.

Does Brave Browser use a lot of CPU? 

? Brave is a fast, secure, and safe browser that blocks intrusive ads and trackers by default. While we all appreciate the ad-blocking feature, this, in turn, means that the browser uses more CPU power.

High CPU usage can cause slow performance and even make the computer seem unresponsive. If your computer is already struggling with performance issues, you may want to consider another browser.

?️ Quick Tip:

Opera provides a built-in energy-saver mode that reduces CPU load and performs additional changes such as suspending theme animations, minimizing background tab activity, and pausing unnecessary plugins.

Opera

Opera

Rely on Opera’s triggers to engage the power-saver function automatically & reduce CPU!

? Competing or conflicting extensions can also be responsible for Brave using too much CPU and/or memory. Obviously, you’ll need to take a closer look at each plugin to identify the potentially problematic one and disable it.

? Finally, corrupted browser data can cause more issues than we’d like to admit. These include anything from the cache to cookies, and user profiles and can lead to Brave browser taking too much memory/CPU.

Whatever the cause, the outcome remains invariably the same – a program with high resource consumption rates can affect your entire system (see Twitch’s high CPU usage while streaming, for instance).

How do I fix Brave high CPU usage?

  1. Close tabs/windows & update your browser
  2. Create a new user profile
  3. Disable plugins
  4. Disable hardware acceleration Brave
  5. Clear cache and cookies

1. Close tabs/windows & update your browser

If you are not actively using any additional tabs or windows, it is best to close them. This will reduce the memory footprint of the program, which can help lower CPU usage. 

The more tabs you have open, the more memory Brave uses. Try closing some tabs if you’re having trouble with lagging.

Next, you should do is update your browser because old versions of Brave use more CPU resources than newer ones do.

So if you haven’t updated in a while, go ahead and do that now before continuing with the rest of this guide.

2. Create a new user profile 

  1. Launch Brave browser on your PC and go to Menu.
  2. Then, select Create a new profile.
  3. Finally, give your new user profile a name, customize it at will, and click Done.

3. Disable plugins 

Whereas add-ons and extensions add more functionality to a browser, sometimes they are the culprits that are responsible for high CPU usage.

You can disable plugins such as FlashPlayer if they aren’t needed for viewing content on a website.

These are known to increase resource usage by up to 400% so disabling them will greatly improve your PC’s performance.

4. Disable hardware acceleration Brave

Browsers often use the hardware acceleration feature for pages to load faster. However, if you have a low-end GPU, then you may experience slowdowns in your browser.

If you are experiencing slowdowns while browsing websites, then try disabling this option and see if it helps improve your performance.

5. Clear cache and cookies

If you notice some performance issues with your Brave browser, the first thing you should do is clear your cache and cookies. 

This will remove all cookies and cached data from your device, which will help decrease CPU usage by Brave in the long run.

If you want to remove it automatically, third-party software such as CCleaner will delete your browser history, cookies, and cache files for any browsers you’ve installed, including Brave.

It will also delete the cookie data stored by the Flash Player. CCleaner will remember your preferences for the next time you open it, so you can just launch it and click the Run Cleaner button in the future.

Does Brave use more CPU than Chrome?

When talking about brave vs chrome CPU usage, there is definitely one thing to keep in mind and that is that Brave is built on Chromium. Consequently, it inherits all of its performance characteristics and stability. 

However, your activities will determine how much CPU your browser consumes, so the difference is negligible. So, which browser has the lowest CPU usage?

When you compare top browsers side by side and look at the process graph, which shows CPU usage over time, you’ll find that Microsoft Edge uses less CPU.

For more details, feel free to check our in-depth comparison of Brave vs Chrome vs Edge in terms of RAM/CPU usage and safety.

When performing similar tasks such as opening new tabs or switching between tabs other browsers tend to use more resources. For example, Firefox can end up draining your PC’s battery when executing similar tasks.

Meanwhile, Microsoft Edge has been built with a sleeping tab feature that minimizes resources when you are not using those tabs. All in all, each browser can be made to consume less CPU when you practice resource saving. 

Let us know of any other tips you may have that will fix Brave high CPU usage and/or memory leaks.

System Reset Not Recognized: 7 Fixes for Resetting Your PC

Want to restore your system to default but having trouble? We got you.

If you see error messages like There was a problem resetting your PC, no changes were made, or There was a problem resetting your PC, or System reset is not recognized as internal, check the guide below.

How do I force a factory reset on Windows 10?

Here’s a quick video on the tricks that are most likely to fix systemreset.exe not working. For more details & solutions, keep reading.

1. Use a system restore point

  1. 1. Click the search tool from the taskbar, write control , and press Enter to open the Control Panel app.

    launch control panel from windows search
  2. 2. Choose Recovery from the list.

    recovery section in control panel
  3. 3. Select Open System Restore.

    open system restore
  4. 4. Click Next.

    click next
  5. 5. Choose the restore point that is related to the problem-causing app, driver or update then select Next and Finish.

    choose the restore point
  6. If you can’t factory reset Windows 10, try using a system restore point. This feature lets you revert your computer to an earlier state, undoing recent apps, drivers, and updates while preserving personal files.


2. Check your system for errors

2.1. Run a DISM scan

  1. Press Win + X keys and choose Command Prompt (Admin) or PowerShell (Admin).
  2. Copy-paste the following command and press Enter to run it: DISM.exe /Online /Cleanup-image /Restorehealth
  3. Wait for the process to complete – could take up to 30 mins to complete.

If this does not solve the can’t factory reset windows 10 issue, run the scan below.

2.2. Run an SFC scan

  1. Press Win + X keys and choose Command Prompt (Admin) or PowerShell (Admin).
  2. Run the following command by pressing Enter: sfc /scannow
  3. After the process is completed, type Exit or manually close the console window.

These two commands will check for any damaged system files and repair them as needed. Thus it will fix the can’t factory reset windows 10 problem.

3. Disable the REAgentC.exe

  1. Press Windows then type cmd and open the resut as an administrator by clicking that option under the result on the right side.cmd-run-admin 0x80070002 windows update
  2. Type or paste the following command and press Enter to disable this Windows tool: Reagentc /disablereagent-disable can't reset windows 10

This program also allows you to administer recovery options and customize recovery settings. It is possible to execute the REAgentC command on either an offline Windows image or a Windows operating system that is already running.

This should solve the can’t factory reset windows 10 issue.

4. Use the installation media

Note icon NOTE
The installation will take some time, and your computer will restart a few times, so make sure not to turn it off and plug it in.

4.1 Download and run the tool

  1. Choose the Media Creation Tool for your Windows version.
  2. Click Download tool now.
  3. Navigate to the preffered download location on your HDD.
  4. Click Save.
  5. Run the Media Creation Tool by double-clicking it.

4.2. Set up the tool

  1. Wait for the app to load, and click Accept when the Applicable notices and license terms window appears.
  2. Select Create installation media for another PC.
  3. Tick the box next to the Use the recommended options for this PC option, and click Next.
  4. Choose the ISO file option if you plan on creating a DVD, or choose USB flash drive if using a USB stick, and click Next.
  5. Navigate in Windows Explorer window and choose a location for your Windows ISO file, and click Save.
  6. Wait for the download process to complete.

With this, you can now factory reset Windows. To advance this task further, it will depend on your goal and circumstances. There are two possible options:

➡ Using the ISO file on another PC

If you’re creating the ISO file on a different PC than the one you want to reset, simply click the Finish button and follow the steps required to create a bootable USB drive by using the ISO file you created.

After you have the bootable USB drive created, follow these steps:

  1. Plug your bootable drive into a USB port on the PC you want to reset.
  2. Restart your system, and boot from the USB.
  3. On the Install Windows screen, choose Repair your computer.
  4. Click on Troubleshoot.
  5. Select Advanced options.
  6. Choose Reset this PC.

➡ Reset the same PC you used to create the ISO file

If you want to factory reset the same Windows 10 PC that you used to create the ISO file, follow these steps:

  1. Double-click the ISO file from the location you saved it.
  2. Open the setup.exe file to run the installation.
  3. Click the Next button.
  4. Wait for the Windows installation to check for updates.
  5. Click on Accept in the Applicable notices and license terms window.
  6. Wait for the installer to download any updates.
  7. Click the Change what to keep link.
  8. Choose between the 3 options presented, depending on what your goal is.
    1. The first option will allow you to keep all your files.
    2. The second option will remove all files other than your personal items.
    3. The third will remove everything from your system and perform a clean re-install.
  9. Click Next.

5. Perform a Clean Boot

  1. Press Win + R, type msconfig, and press Enter to Open System configuration.msconfig command
  2. Select the Services Tab:
    • Check the box next to “Hide all Microsoft services” to ensure essential services are not disabled.
    • Click “Disable all” to turn off other services.hide all and disable all services
  3. Select the Startup Tab:
    • Click “Open Task Manager.”
    • In Task Manager, disable all startup items by selecting them and clicking “Disable.”disable startup apps
  4. Restart your PC and attempt the reset process.

A clean boot starts Windows with a minimal set of drivers and startup programs, which can help identify if background software is interfering with the reset process:

6. Check Disk Errors

  1. Press Win + X and select “Command Prompt (Admin)” or “Windows PowerShell (Admin).”
  2. Run Check Disk Command:
    • Type the command: chkdsk /f
    • Press Enter.
    • You may be prompted to schedule the disk check on the next restart. Type Y and press Enter.CHKDSK scan
  3. Restart your PC to allow the disk check to run and fix any errors.
  4. Once the disk check is complete, try the reset process again.

7. Reset through Advanced Startup Options

  1. Press Win + I to open Settings.
  2. Go to “Update & Security” > “Recovery.”
  3. Under “Advanced startup,” click “Restart now.”Recovery Advanced Startup
  4. After your PC restarts, select “Troubleshoot.”troubleshoot
  5. Choose “Reset this PC.”reset pc
  6. Select whether to “Keep my files” or “Remove everything,” and follow the on-screen instructions.

Why is Windows System Reset not Recognized or not Working?

Some of the most common causes include:

  • Malware infection: This is the most common reason users can’t factory reset Windows. An effective antivirus should help in this case.
  • Sudden loss of power for your PC: Continous power supply is vital for the effective functioning of the PC, and sudden fluctuations or loss of power can severely affect it.
  • Corrupted system files: If the system files are corrupt, it’s likely that you won’t be able to reset the OS in addition to performing other critical functions.
  • Mistakenly removing an important file from your system: The OS contains several important files that allow the reset to complete, and if these are missing, the operation won’t go through.
  • A corrupted Windows file was used when creating the recovery image: Another likely reason you can’t reset Windows 10, but it can be easily fixed using specialized software.
  • Not having your Windows activated: Activating Windows is necessary to perform a range of functions, and the process is quick.

Wrapping up

As you can see, you can engage in various modalities if you’re unable to factory reset Windows 10.

We presented them in order from the least intrusive to the final resort, reinstalling the OS entirely. Did any of the above solutions work? Let us know by dropping your comment in the section below.

How to Fix Dead Rising 4 when It Keeps Crashing on PC

After a long day of work, when you return home and want to play some Dead Rising 4, the worst that can happen is that Dead Rising 4 keeps crashing your PC.

Although there are unknown causes for this annoying problem, there are various do-it-yourself solutions you can apply.

You may rest easy knowing that these solutions don’t harm your computer or your personal files. Now, let’s get to these solutions.

Is additional software required to run Dead Rising 4?

You must install DirectX version 11 or later to play Dead Rising 4. Microsoft DirectX is a group of application programming interfaces (APIs) for managing multimedia-related tasks on Microsoft platforms, including video and game development.

The majority of Windows devices come with DirectX preloaded. So, you will only have to update it if required.

Check the requirements

Dead Rising 4 minimum requirements:

  • Requires a 64-bit processor
  • OS: minimum Windows 7
  • Processor: Intel i5-2400 or AMD FX 6300
  • Memory: 6 GB RAM
  • Graphics: GeForce GTX 760 from Nvidia (2 GB) or Radeon HD 7850 from AMD (2 GB)
  • DirectX: Version 11
  • Network: Broadband Internet connection
  • Storage: 50 GB available space

Before installing the game, you should always check the requirements to see if your PC has what it takes to run it. If it doesn’t, then crashes and FPS drops will often happen during the gameplay.

How can I fix Dead Rising 4 if it keeps crashing on my PC?

1. Update drivers

  1. Right-click on the Start Menu to open the Quick Access Menu.
  2. Select Device Manager from the list.accessing Device manager via Quick Menu
  3. Find the Display Adapters category and click on it to expand.
  4. Right-click your graphics card.locating graphics card driver
  5. Select Update driver, followed by Search automatically for drivers.updating driver automatically
  6. It will download and install the most recent driver version.
  7. After that, restart your computer to have the modifications take effect.

You can also visit your graphics card manufacturer’s official website and download the most recent drivers.

If this appears difficult, you can do it through Device Manager by following the steps mentioned above. Alternatively, we recommend you use a third-party tool which is specialized in driver updates.

2. Download the latest DirectX version

  1. Press the Windows logo key that should be located on the bottom of your keyboard, then type dxdiag into the search box and click dxdiag.searching dxdiag in start menu
  2. Check the first page of the report for your DirectX version (if it’s the latest version that your graphics card supports, then you won’t need to update it).checking directx version
  3. Type check for updates after pressing the Windows logo key on your keyboard. Click Check for updates after that.searching for check for updates
  4. On the newly opened page, click Check for Updates.Windows settings check for updates option
  5. To have Windows Update download and install the most recent version of DirectX for you, download and install the latest Windows update (included in the updates).

Although DirectX is already installed on all current versions of Windows, you will still need to update it for the game to run properly.

3. Close background processes

  1. To open Task Manager, press Ctrl + Shift + Esc.
  2. Select the Processes tab to find processes running in the background and using too many system resources.
  3. Select the task and then close it by clicking End Task. Repeat for any other undesirable tasks.processes tab and end task option

You should close web browsers and music streaming programs if they are not needed.

Dead Rising 4 may crash due to these pointless programs’ tendency to consume too many resources and CPU power, leaving no room for the game processes.

4. Verify the game files

  1. Open the Steam client.
  2. Right-click on Dead Rising 4 and select Properties from the Library menu.steam library and game properties
  3. Click Verify integrity of game files after choosing the Local Files tab.verifying integrity of game files
  1. Hold off till the verification is complete.

Steam has a verification option that will check the game files, and if any corruption or missing files are detected, it will then proceed to repair the files or download the missing ones.

The game is not notorious for its bugs, so your PC is to blame if there are any problems.

Since Dead Rising 4 is a multiplayer game, and the multiplayer mode is much more entertaining than the previous versions, you would need to ensure a high Internet speed while playing the game.

Can RAM cause games to crash?

Yes, the RAM can cause games and other resource-intensive applications to crash. Here are a few reasons for it:

  • PC running out of memory: When the RAM usage is high, the PC will run out of it soon, and, as a result, games will start to crash since these generally consume maximum resources.
  • Malfunctioning RAM modules: A malfunctioning RAM module will lead to less available memory to run games and applications, which results in crashes.
  • Memory sticks not connected properly: If the sticks are not connected properly, it presents a similar situation where the available memory is lower than it should be ideally.

If it’s the RAM, you can always increase the virtual memory and prevent games from crashing. Also, find out some quick tips to improve gaming performance in Windows.

Let us know if you could fix the Dead Rising 4 keeps crashing PC issue.

Posted in PC

The first Windows Insider Canary Channel no-blog-post build drops, it’s just a test

Microsoft recently made some changes to the Windows Insider program, adding a Canary channel for servicing builds in the 25000 series, thought to be headed for what could be Windows 12. With the announcement, the company noted that not every Canary Channel build, unlike previous builds in the Dev, Beta, or Release Preview Channels, would get a corresponding Windows Insider blog post.

While Microsoft did blog about the first official Canary Channel build, 25314, today marks the first one of those “Twitter only” announcements:

Since this is the first of its kind, we’ll go ahead and create our own blog post about it, even if Microsoft won’t. We’ll have to see how we’ll handle in the future, we may just Tweet and Toot on Mastodon instead, too, we’ll have to see. Either way, stay tuned to OnMSFT.com for all the latest Windows Insider news, and for now, if you’re in the Canary Channel, you can go ahead and help Microsoft out by testing the update to 25314.1010.

3 Ways to Fix the SCP Driver if It’s Not Working On Your PC

If you are a gamer and use PS3 controllers on your PC, you may have probably encountered this error. The SCP driver is a piece of software that allows you to use your PS3 controller on your PC. However, sometimes it may stop working.

According to the users, their PCs can recognize their controllers, but when they play games, it just doesn’t work. The most common problem is that the driver gets installed, but it’s not working.

The SCP driver for the PlayStation 3 controller works with most games and applications for Windows. If it doesn’t work on your computer, there are a few things you need to do to ensure everything is configured correctly. 

It could be that your gamepad isn’t recognized. This could be either because it isn’t plugged in, or because it doesn’t have drivers installed.

How do I get my PS3 controller to work on my PC?

If you have a PS3 controller and want to use it on your PC, you must install a driver. The SCP driver for PS3 is very useful if you want to play with your console controller on your PC. 

You must download the SCP toolkit and connect your PS3 controller to your PC. It allows your computer to communicate with your PS3. Once you’ve downloaded and installed the program, connect your controller via a USB cable.

If using a wired connection, ensure Bluetooth is turned off on other devices, such as your phone. This will ensure it doesn’t interfere with your computer’s Bluetooth connection to your controller.

This is not the only way; you can check out more ways to use a PS3 controller on your Windows 10 PC in our detailed guide.

Why is my Scptoolkit not working?

Here are a few reasons you are facing the problem:

  • Buggy Windows update: One of the common reasons users encounter the error is due to a bug in the latest OS version. To verify if that’s the case, you must identify whether the problem started after a Windows update.
  • Antivirus or firewall blocking access: In many cases, users reported that a third-party antivirus or firewall was conflicting with the functioning of Scptoolkit, and as a result, the error appeared.
  • Corrupt or outdated driver: A corrupt or outdated driver is just as likely to trigger the issue, and reinstalling or updating the driver should do the trick.

What can I do if the SCP driver is not working on my PC?

1. Uninstall and reinstall the driver

If your controller stopped working after installing the SCP Driver, you should try uninstalling it and reinstalling it again. It is possible that the version you downloaded may be corrupt or did not install properly. Uninstalling will delete all of your previous settings and configurations.

Restart your computer then try installing the driver again. If you are still facing issues with the SCP driver, you can try reinstalling it again. However, if this does not work for you, there might be something wrong with your computer’s hardware or software.

You can also use a dedicated program like Outbyte Driver Updater to perform this action automatically. It will scan your whole device for old or missing drivers and instantly replace them with the latest update from its database.

⇒ Get Outbyte Driver Updater

2. Uninstall conflicting drivers

Some older versions of Windows come with built-in support for game controllers. These can cause problems for third-party drivers like SCP drivers. It might be worth disabling or uninstalling them if they aren’t needed. 

Also, if you have installed any third-party drivers relating to your controller, they could cause conflicts with the original SCP driver. Uninstall them and then try to reinstall the original SCP driver again.

3. Disable antivirus software

If you are using antivirus software, disable it temporarily and check if that resolves your issue. Some antivirus software may interfere with installing new drivers on your computer, which can cause issues installing SCP drivers on your PC.

Turn off firewall if canon printer driver not installing.

Restart your computer after disabling the antivirus software, then try using the SCP driver again and see if that solves the issue. 

If you’ve already tried disabling your third-party antivirus software and it didn’t help, try uninstalling it completely and reinstalling it. This will ensure that any previous conflicts between SCP Driver for PS3 and your antivirus software are resolved. 

It’s also worth checking to see if any updates are available for your antivirus program so that you don’t end up running an older version that could be causing problems.

Is SCP driver malware?

Though it may get flagged as a threat or malware, the SCP driver is completely safe if you download it from official sources.

To be sure, check the file with reliable antivirus software, and analyze the results of the scan.

How do you reset a PS3 controller?

If the controller is acting strange or not responding, you might want to reset it before anything else happens. This way, if something is wrong with the device itself, it will be fixed when you reset it. 

Resetting your PS3 controller is also useful if you have difficulty pairing it with your console. To reset a PS3 controller: Hold the PS button on the top of your controller until the controller turns off.

Should you encounter any other PS3 controller problems, feel free to refer to our guide on troubleshooting the issue.

In the future, you may also benefit from driver updater software to ensure you avoid downloading wrong or corrupt drivers on your device.

Let us know of any other solution not mentioned here that may have worked for you in the comments section below.

0xa00f4288: How to Fix All Cameras Are Reserved Error

Anyone who uses the camera in Windows 11 must know the best camera settings to get optimal results. While you may enjoy these settings for a while, sometimes you may encounter interruptions such as the 0xa00f4288 all cameras are reserved error.

The error prevents you from using your camera with the intended app, implying it’s already being used elsewhere. If this sounds familiar, keep reading to find out what solutions fixed this error for other users.

Why am I getting the 0xa00f4288 error?

Below are some possible causes of the 0xa00f4243 camera reserved by another app error:

  • Permission settings – If you’ve just downloaded an app that requires camera permissions but has yet to grant them, you may encounter this error.
  • Outdated drivers – If your camera drivers are not up-to-date when you try to open an app that uses it, compatibility issues may prevent it from opening.
  • Faulty camera – It is possible that your camera is not working because it has malfunctioned.
  • Outdated OS – If you have not updated your Windows, it may not work well with some apps due to compatibility issues.
  • Corrupt application – There’s also a possibility that the app you’re trying to use with your camera is corrupt. 
  • Firewall settings – Sometimes, your firewall can block certain programs if it flags them as a risk to your system.

How do I fix camera error code 0xa00f4288?

Try the following basic steps before embarking on the slightly technical solutions:

  • Verify that the camera is enabled in your Windows.
  • Perform a camera test to ensure that it is running smoothly.
  • End any running processes that may be using the camera from Task Manager.
  • Turn the camera access option off and then on again.
  • Change the USB ports as some USB ports may not be working, especially if not been used for a long time.
  • Ensure your Windows is up-to-date.
  • Check the application for any viruses or reinstall it again.
  • Run the SFC scan to check for any errors.
  • Try restarting your PC, as it may just be a temporary glitch.

1. Run the camera troubleshooter 

  1. Hit the Windows key and select Settings.settings windows 11
  2. Go to System and click on Troubleshoot.Open system troubleshooter
  3. Select Other troubleshooters.other troubleshooters
  4. Click on Run next to the Camera.
  5. Wait for the process to finish and apply the recommended fixes.

2. Update your camera drivers 

  1. Click on the Windows button, type Device Manager in the search bar, and click Open.device manager w11
  2. Navigate to Cameras to expand, right-click on your camera and select Update driver.update driver
  3. Select Search automatically for updated driver software.

If you feel that this method is a bit lengthy, we have another trick up our sleeves. There is actually another safer and more comprehensive method of downloading the correct drivers for your camera.

Fortect Driver Updater is the driver updater utility you need to scan and detect any outdated drivers and then replace them with the correct ones. The tool does all this automatically, so you don’t have to.

⇒ Get Fortect Driver Updater

3. Reinstall camera drivers 

  1. Click on the Windows button, type Device Manager in the search bar, and click Open.device manager w11
  2. Navigate to Cameras to expand, right-click on your camera and select Uninstall.uninstall device
  3. Confirm uninstallation in the next dialog box.uninstall button
  4. Restart your PC, and the drivers will automatically be reinstalled.

4. Rollback previous camera drivers 

  1. Hit the Windows key, type Device Manager in the search bar, and click Open.device manager w11
  2. Navigate to Cameras to expand, right-click on your camera and select Properties.
  3. Click on the Driver tab, and select Roll Back Driver.
  4. Select a reason for rolling back in the next prompt, then click Yes.
  5. Restart your PC, and the previously installed drivers for your device will be loaded.

5. Disable antivirus temporarily

  1. Hit the Start menu icon, type Windows Security in the search bar, and click Open.
  2. Click on Firewall & network protection, then select Public network.league of legends black screen after champion select
  3. Locate Microsoft Defender Firewall and toggle the off button.turning off Microsoft Defender Firewall Windows

Microsoft Defender is Windows’s default security feature, hence the need to disable it. If you have installed other third-party antivirus programs, disable them and check if the issue persists.

6. Repair/reset the camera app

  1. Hit the Windows key and click on Settings.settings windows 11
  2. Click on Apps on the left pane, then Apps & features on the right pane.
  3. Locate the Camera app, click on the three ellipses, and select  Advanced options.
  4. Click on Repair.
  5. Try again and check if the error persists. If successful, no need to continue with the next step. However, if the error still appears, proceed to reset the app.
  6. Go back and click on Reset.

If at this stage, you’re still experiencing the 0xa00f4288 all cameras are reserved error, we recommend you give your camera a break. Try another camera application, as the built-in one may be experiencing some temporary glitches.

We also have answers to the error code 0xa00f4244 for when an app can’t detect your webcam. Ensure to check out our article for more fixes.

For additional camera problems, you can check our guide to learn how to fix USB storage is running out of space camera error.

That’s it for this article, so be sure to let us know what solution has helped you resolve this issue in the comment section below.

What Are the RS and LS buttons on Your Xbox Controller

The front of the Xbox controller houses the majority of the control buttons. Among these are the RS and LS buttons that pack many functions.

In this guide, we will explain everything about these two important buttons, as we did with the functions of the R1 and L1 buttons on your Xbox controller.

What is RS on my Xbox controller? 

right stick rs what is on xbox controller

RS is the Right Stick on your Xbox controller. Along with the LS, they serve as small joysticks for interacting with games and the Xbox console.

The RS is also known as the rumble button on Xbox controllers. This is because it can create vibration effects in your game when you press and hold it for a few seconds.

What is LS on my Xbox controller?

The LS stands for Left Stick on the Xbox controller. It is used for navigation and interaction with games, apps, and the Xbox console. 

It is known to help initiate a sprint in a game when you hold on to it. Generally, it helps with movement with games and navigation within the console.

How can I fix my Xbox One RS button if it’s not working?

  1. Press the Power button on your Xbox One console for about ten seconds.
  2. Unplug the power cord from the Power port when the console turns off.
  3. Wait for five minutes, plug the console again, and turn on the console.
  4. Re-sync your controller with the console again.

Most times, if the RS button is not working on your controller, it is down to a glitch with your console or a syncing problem.

Need a quick refresher on controller syncing? Follow this guide to pair your Xbox controller step by step to restore a stable connection.

After you make sure to update your controller and it has fresh batteries, the fix should help restore normalcy. 

The RS button is an integral part of the Xbox controller. You need it in some games to have maximum control. With this guide, you have all the information needed on the button.

What does R mean on a controller?

R on the control stands for Right. All the bumpers, triggers, and sticks on the right half of the controller fall under this category.

So, the next time you hold a controller, all this will make much more sense, and it will be easy to identify them.

What is R2 on the Xbox controller?

R2 is the pressable trigger button at the top of the controller, just underneath the right bumper. R2 is longer than most other buttons, which will help you identify it.

The R2 button may also vibrate during the gameplay, though the option could be turned off from the controller settings.

Do you want to know how to update the Xbox One controller driver? Then check our guide on how to do it with ease.

To familiarize yourself with the RT button, don’t hesitate to visit our Discover the purpose of the RT Button on Xbox guide. If you have an L3 button, and you want to learn what it does, our Understanding the Xbox Controller’s L3 Button article should help you.

Feel free to let us know if the fix above helped you get the RS button working again on your controller.

Fix: We Couldn’t Create a New Partition Error in Windows 10

We couldn’t create a new partition or locate an existing one error can appear when trying to install Windows.

This is a serious issue since it will stop the setup process, but there are a couple of solutions you can use to fix this problem.

Why can’t I create a new partition?

Improperly created bootable USB or incorrect drive format can cause this issue. In some instances, other peripherals can block the installation.

How do I fix the new partition error in Windows 10 installation?

Before we head to the slightly complex solutions, ensure the USB drive is formatted in the MBR format and not GPT. Also, disconnect all non-essential peripherals from your PC.

1. Make your partition active

  1. Open Command Prompt from the Recovery Mode, paste the following command, and hit Enter:start diskpart
  2. Execute this command next:list disk
  3. Use the following command to select the disk while replacing X with the corresponding disk number listed on the PC:select disk X
  4. Run the following command:list partition
  5. Select the partition with the following command, while replacing X with the partition number listed on the PC:select partition 4
  6. Finally, execute the following command:active
  7. Exit the Command Prompt, start the installation process again, and the problem is resolved.

2. Use diskpart to clean the drive

Note icon NOTE
This solution will delete all files on your selected hard drive, so use it on a new computer that doesn’t have any files or only if you have a backup available. Before starting this process, ensure you don’t have any SD Cards connected to your PC.
  1. Start Windows 10 setup using a bootable USB or DVD.
  2. If you get the We couldn’t create a new partition error message, close the setup and click the Repair button.
  3. Choose Advanced tools and then select Command Prompt.
  4. When Command Prompt opens, type the following command and hit Enter: start diskpart
  5. Now, execute the following command:list disk
  6. You should see the list of all hard drives connected to your computer. Find the number that represents your hard drive and execute the following command, while replacing X with that number:select disk X
  7. Enter the following lines and hit Enter after each line:clean create partition primary active format fs=ntfs quick assign
  8. Close Command Prompt and start the installation process again.

How do I fix the new partition error for Windows 10 USB?

Before trying anything else, consider using a USB 2.0 flash drive. Also, disconnect all other USB drives from your PC. Lastly, try connecting the USB drive to a different port once you get this error.

1. Use a third-party tool

If you can’t install Windows 10 due to We couldn’t create a new partition error message, you might be able to fix the problem by using a third-party tool.

If you’re not familiar with command-line tools, you might be able to fix this problem by using  Aomei Partition Assistant.

This tool is perfect for recovering lost partitions and copying disks. It also offers a friendly user interface, so you should be able to modify your hard drive and perform the necessary tasks easily.

Not only will it solve your partitioning issue in no time, but it also comes with some advanced features like migrating your OS to SSD/HDD, formatting, wiping and erasing disks, and more.

⇒ Get Aomei Partition Assistant

2. Set your hard drive as the first boot device

  1. In BIOS make sure that your hard drive is set as the first boot device.
  2. Restart your PC with USB drive connected.
  3. Keep pressing F10, F11, or F12 to open the boot menu.
  4. Select your USB flash drive to boot from it.

3. Use Rufus or any other tool to create a bootable USB drive

According to users, problems with We couldn’t create a new partition error message might be caused by Media Creation Tool.

Users reported that the problem was fixed by using a third-party tool, such as Rufus, instead of the Media Creation Tool to create a bootable USB flash drive.

We have instructions on how to use this tool in our guide on how to create a Windows 10 bootable USB drive.

4. Convert the partition to the GPT format

  1. Start Command Prompt and run the following command:diskpart
  2. Execute this command next:list disk
  3. Replace X in the following command with the corresponding disk number as listed on the PC, and hit Enter:select disk X
  4. Now, run the following command to remove all files from your hard drive completely: clean
  5. Finally, execute this command:convert gpt

Fortunately, Microsoft introduced two new ways to convert MBR to GPT drive without file loss, MBR2GPT, and gptgen.

We explained in great detail how to use both these commands in our guide on how to convert MBR to GPT disk, and we strongly advise you to check it out for detailed instructions and more solutions.

How can I fix the new partition error for Windows 10 SSD?

Many users reported We couldn’t create a new partition error message while trying to install Windows 10 on an SSD.

According to users, to fix this issue, you’ll have to disconnect all other hard drives and leave only your SSD drive connected.

Alternatively, you can disable all other hard drives except for your SSD from BIOS.

After you’ve disabled or disconnected all other drives, the SSD should be recognized by the installer.

Now, all that you have to do is to delete all partitions on your SSD, and Windows 10 should install without any problems.

In case you’re still having issues, our Windows can’t be installed on GPT partition and Windows cannot be installed on this disk guides can provide you with more help.

We couldn’t create a new partition error message that can prevent you from installing Windows 10, but as you can see, you can easily fix it by following one of our solutions.

How to Disable Windows Defender SmartScreen: 5 Easy Steps

Windows Defender SmartScreen helps protect you against web-based threats by checking URLs against a list of known malicious websites, which hackers often use to spread viruses and other types of malware.

Some people disable Windows Defender SmartScreen because it slows down their PC or they don’t like the messages it pops up. If this sounds like some of the issues that make you want to disable Windows Defender SmartScreen, below are ways to go about it.

Should I disable Windows Defender SmartScreen? 

Windows Defender SmartScreen is a built-in feature of Windows 11 that provides a layer of protection against malware and phishing attacks. While it can be disabled, it should only be done after careful consideration.

SmartScreen helps protect your PC by warning you before you run unrecognized apps. However, sometimes, it can block unrecognized apps. You may get a Microsoft defender SmartScreen prevented an unrecognized app from starting message. 

This can prevent these apps from launching, which can be frustrating, especially if these are your most used apps.

Other reasons why disabling Windows Defender SmartScreen is a bad idea:

  • Makes your computer vulnerable to malware attacks – SmartScreen filters out malware before it can infect your computer. If you disable this feature, you’ll have no protection against malicious software like ransomware or spyware.
  • Your credentials become less secure – SmartScreen helps prevent unauthorized access to sensitive information such as your email address, credit card number, and password when completing online forms on websites that don’t use HTTPS encryption.
  • You’re more likely to download unsafe apps – SmartScreen also checks apps when they’re installed on your computer and warns you if an app has been reported as unsafe by other users or by Microsoft itself. 

If you find that SmartScreen is making your PC slow or unresponsive, it’s better to find alternative ways to improve your PC’s performance.

How do I disable Windows Defender SmartScreen?

1. Use the Microsoft Edge browser

  1. Launch the Edge browser and click on the three ellipses at the top right corner.
  2. Click on Settings.
  3. Next, select  Privacy, search, and services, scroll down to the Security section, and toggle off Microsoft Defender SmartScreen.

2. Use the Control Panel

  1. Hit the Windows key, type Control Panel, and click Open.control-panel-search fallout new vegas runtime error
  2. Navigate to Network and Internet.Network and Internet 0x80072eff
  3. Next, click on Internet Options.
  4. Navigate to the Advanced tab in the Internet Properties window.
  5. Under the Security section, uncheck the Enable Windows Defender SmartScreen option then click on Apply and OK to save the changes.

3. Use Windows Defender 

  1. Hit the Windows key, type Windows Security in the search bar, and click Open.
  2. Click on App & browser control on the left pane, then select Reputation-based protection settings under Reputation-based protection.
  3. You’ll now open a page that displays four filters. You can choose those that only apply to you or toggle off the disable button for all four.

For some users, the option to disable the Smartscreen will be greyed out. This means that your organization manages those settings, and you can’t make changes. You can contact your administrator to disable them if you don’t need them.

4. Use the Group Policy 

  1. Hit the Windows + R keys to open the Run command.
  2. Type gpedit.msc in the dialog box and hit Enter to open the Group Policy.GPEDiT.msc -Windows Remediation Service Failed to Start?
  3. Navigate to the following location: Computer Configuration/Administrative Templates/Windows Components/File Explorer
  4. Double-click on Configure Windows Defender SmartScreen to edit.
  5. Click on the Disabled checkbox then hit Apply and OK.
  6. Close the Group Policy, then restart your PC.

5. Use the Registry Editor

  1. Hit the Windows + R keys to open the Run command.
  2. Type regedit in the dialog box and hit Enter to open the Registry Editor.
  3. Navigate to the following location: HKEY_LOCAL_MACHINESOFTWAREPoliciesMicrosoftWindowsSystem
  4. On the right pane, double-click on EnableSmartScreen to modify. If unavailable, right-click on an empty space, select New DWORD (32-bit) Value, and rename it as EnableSmartScreen.
  5. Under Value data set it as 0, then click OK to save changes.
  6. Restart your PC to effect the changes.

And that’s how to disable SmartScreen from the registry. We highly recommend you try the four other methods and only use the registry if necessary. Editing the registry can be disastrous, especially for novices.

To cushion yourself from any after-effects that could render your PC unusable, ensure you create a restore point first. This way, you’ll have a point of return if anything goes wrong.

We also have an exciting article on what to do if your Windows Defender SmartScreen is blocked.

Share with us any additional thoughts on this topic in the comment section below.

PL2303 Driver for Windows 11: How to Download & Install

Whether you’re deep into a robotics project, managing your smart home, or trying to revive some legacy medical equipment, downloading and installing the Prolific PL2303 USB driver can be EASY.

No, we’re not joking.

Today, we’ll help you put the pieces together ? because we’ve already figured it out.

Just bear with us.

How do I download PL2303 drivers for Windows 11?

1. Via Windows Update

Note icon NOTE
Before you proceed, connect the Prolific PL2303 adapter to the PC.
  1. Press Windows + I to open Settings, go to Windows Update from the navigation pane, and click on Advanced options.advanced options
  2. Click on Optional updates.optional updates
  3. Expand Driver updates, tick the checkbox for Prolific PL2303 driver, and click on Download & install at the bottom.download
  4. Wait for the process to complete, and restart the computer for the changes to come into effect.

Windows identifies the connected devices and, in most cases, automatically downloads the relevant driver. But if that doesn’t happen, you should be able to find and download the USB to serial driver for Windows 11 under optional updates.

If you’re looking for PL2303TA driver for Windows 11, then this solution might help.

2. Manually from the website

  1. Open any web browser, go to the official Prolific website, and click on the download link for PL23XX_Prolific_DriverInstaller_v408.zip.
  2. Once the download is complete, right-click on the file, and select Extract All from the context menu. This is because the downloaded file is in ZIP format.Extract files
  3. Click on Browse, choose the path for the extracted files, and click on Extract at the bottom.Choose destination for pl2303 driver windows 11
  4. Once the extraction process is complete, click on the setup file.Double-click on setup for pl2303 driver windows 11
  5. Click Yes on the UAC (User Account Control) prompt that pops up.Click Yes
  6. Now, click on Next in the installer window.Click Next to get pl2303 driver windows 11
  7. Once the installation is complete, click on Finish to close the installer.

After installing the Prolific PL2303 driver in Windows 11, restart the computer for the changes to come into effect. Once done, you can use the PL2303 USB to serial cable.

3. Use a dedicated tool

If the manual method sounds too tricky, you can always use a reliable third-party driver updating app that can do the job for you.

These tools perform automatic scan of your system, identify the correct drivers for your components and download them in just a few minutes.

How do I fix issues with Prolific PL2303 drivers?

Issues with the driver generally arise due to three reasons, either the driver is outdated, corrupt, or there is a bug in the current version. While there could be other reasons, they don’t have to do specifically with the driver.

Amongst the three issues listed earlier, you can manually update the driver using the steps listed in the previous section. For the other two, i.e., a corrupt driver or a bug in the current version, the methods listed below should work.

1. Reinstall the driver

  1. Press Windows + S to launch the Search menu, enter Device Manager in the text field at the top, and click on the relevant search result that appears.Launch Device Manager
  2. Locate and double-click on the Ports entry to expand and view the devices under it.Ports to get pl2303 driver windows 11
  3. Now, right-click on the Prolific USB-to-Serial option and select Uninstall device from the context menu.Uninstall device
  4. Click Uninstall in the box that appears.Confirm Uninstall

Once done, restart the computer, and Windows will automatically install a fresh driver for the device. In case that doesn’t happen, you already know how to install Prolific PL2303 driver Windows 11 manually.

Reinstalling the driver is a simple fix employed when the installed one is corrupt. But the focus here is on identifying the corrupt driver, which too is simple. Look for the driver with a warning mark near the bottom-left corner of its icon.

2. Roll back the driver update

  1. Press Windows + X or right-click on the Start icon to launch the Quick Access menu, and select Device Manager from the list of options.Open device manager
  2. Now, double-click on the Ports entry.Ports
  3. Next, locate and right-click on Prolific USB-to-Serial and select Properties from the context menu.Properties to fix pl2303 driver windows 11
  4. Navigate to the Driver tab.Driver tab
  5. Click on the Roll Back Driver buttton.Roll back driver to get pl2303 driver windows 11
  6. Now, choose a reason for rolling back the update, and then click on Yes at the bottom to start the process.Choose reason

When you update a driver, Windows will keep the files for the previously installed version in case things go wrong and you have to revert to the previous version.

And this is what we do when we talk about rolling back a driver update, basically going back to using the previous version.

But if you see the Roll Back Driver option greyed out, it means that either the driver has not been updated or Windows didn’t store the files for it.

Why doesn’t Windows automatically install the drivers?

The driver will only be installed if it has been submitted to Microsoft and is approved by them. Device manufacturers are supposed to submit their drivers and get them approved by Microsoft to get them released along with other Windows updates.

Apart from that, several users unknowingly configure the settings such that Windows doesn’t automatically search for updates.

Wrapping up

So, if you wondering why does Windows 11 not recognize my USB device, it’s likely that the relevant driver has not been installed, and, as a result, the OS can’t identify or connect to the device.

That’s all there’s to know about installing the Prolific PL2303 driver in Windows 11, along with the two most effective troubleshooting techniques. Also, you can similarly download the Prolific USB to the serial driver in Windows 10.

To find out all about updating the installed drivers in Windows 11, check our dedicated guide that explores all the aspects and methods.

Tell us about your experience with the PL2303 USB-to-Serial cable in the comments section below.

Kiosk Software For Windows: 6 Best to Use in 2026

Kiosk software, or visitor management software, are tools that electronically monitor information by identifying and tracking visitors for an office, hotel, or other buildings.

If you want to track incoming, outgoing, and regular visits, you can use kiosk software, which is an intuitive tool that stores such information from a centralized management database for referencing.

Why do I need kiosk software?

It is ideal for security purposes because you need to know who walks in and out of your building, and whether they are approved, or they’re on a security watchlist.

In hotel settings, your tenants can easily be notified that their guests have arrived, making it easier to plan ahead.

In this article, we’ll take a look at the best kiosk software for Windows 10.

Some of the main areas to note in kiosk software tools are deployment, facilitation of check-in and guest verification, as well as regular collection and documentation of visitor information.

Most of these are easily integrated with many major apps and are easy to use and install without the need for programming skills.

What is the best kiosk software for Windows 10 & 11?

Scalefusion – Best zero-touch device enrollment app

With Scalefusion, you can turn any device into kiosk mode in a matter of minutes and with just a few clicks.

And the app has dedicated versions for Windows, Mac, iOS, and Android so it’s basically available on the most important platforms.

With this tool, not only you will be able to restrict the access of the users, but you will also have granular control over your devices.

You won’t need to tweak each device from the store because you can enroll devices over the air and configure application policies for all of them right from your dashboard.

And speaking of the dashboard, Scalefusion comes with a clean, modern UI where you can easily find detailed information about all the managed devices.

You can even control them remotely or cast an announcement or a promotion to incite the customers to buy the products.

Scalefusion is the best kiosk software on our list but you don’t need to take our word for it because it’s available for a free trial.

Let’s see some of its best features:

  • Clean, modern UI
  • Enroll devices over the air
  • Cast announcements or promotions
  • Available for Windows, Mac, iOS, and Android

⇒ Get Scalefusion

Mobile Device Manager Plus – Best kiosk monitoring and management

Mobile Device Manager Plus - Best monitoring and management tool

ManageEngine Mobile Device Manager Plus is a complete management tool that comes with a Kiosk Monitoring feature to monitor and control the kiosks from a central location.

This software has a wide range of security features, including password policies, remote wipe, device encryption, and antivirus protection to secure your devices and corporate data from security threats.

It enables you to guide the users through an app installation or troubleshoot an issue remotely. You can lock down your Android into a single or multi-app mode to perform certain operations.

This tool provides reports and analytics on security events, device usage, and app usage that helps you monitor performance, optimize usage and identify potential security threats.

It allows you to manage and distribute content, like documents, videos, and images, in an enterprise environment.

With its various enrollment options, including QR code, email, and SMS, you can easily add devices to the management console.

For a uniform user experience, it lets you set the app layout, arrange apps, organize them in folders, and change wallpapers.

Here are the important features of this solution:

  • Seamless kiosk profile association and automated installation of apps and updates without interruption
  • Manages kiosk settings, including screen timeout, volume, and screen brightness
  • Sends you alerts and notifications when a kiosk is offline or experiencing issues
  • Can create and deploy in-house apps, manage app licenses, and enforce app usage policies across devices
  • Allows you to track the location of mobile devices to monitor usage and find them if stolen

Mobile Device Manager Plus

Manage your kiosks and control them over the air casting announcements and promotions safely.
Free Trial Visit Website

FrontFace – Great for interactive terminals

This kiosk software is easy to install and use and is highly professional for use in touch-screen kiosk terminals.

It is equally useful in hotels, museums, and other tourist sites, interactive information systems, media control and presentation systems, and digital product catalogs for retail shops, self-service, field services, and trade shows.

It is compatible with Windows 10, 11, and standard PC, or touchscreen hardware.

FrontFace is a fast, affordable, flexible, and easy-to-use on-premise solution, for you to create touch-enabled graphical UI for kiosk systems, and interactive information terminals to present any kind of media or content with no need for programming skills.

Benefits include multi-language support, easy printing of content and email to devices, photo integration, customizable branding, easy use with Office programs, instant content deployment to kiosk system, and cost-effectiveness.

These are some of its key features:

  • Very easy to use
  • Create touch-enabled graphical UI
  • Present any kind of media on the screen
  • Compatible with Windows 10, 11, and standard PC, or touchscreen hardware

⇒ Get FrontFace

Traction Guest – Reat-time visitor experience

With this best kiosk software for Windows 10, you can transform your visitor welcome lobby with an easy and secure guest registration, which is not only memorable but also safe.

Capture real-time visitor information from different locations, all integrated into one cloud-based platform.

Features include admin and customization designed to provide visitors with an efficient and secure sign-in process at events and workplaces, with great customizability, and adaptability to diverse use cases.

User features such as user roles to grant access levels based on business requirements, a central admin console, an experience editor based on the visitor and their reason for visiting, arrival notifications, single sign-on plus select from a growing list of languages for a customized visitor experience.

Security features include watchlists to screen visitors against internal lists or third-party databases, visual identification, digital signature, offline mode, and alerts, all on the Heroku platform backed by leading cloud computing security and privacy policy standards.

It integrates with most major apps including Slack, DocuSign, Active Directory, Google Drive, EventBrite, and Pictatic among others.

⇒ Get Traction Guest

SiteKiosk – Great browser kiosk features

This is one of the best kiosk software for Windows 10 operating system.

It is a lockdown browser and kiosk software for safeguarding public access on internet PCs, displays, and tablets against manipulations.

Features include Chrome Engine support making it adaptable to future changes in browser technology, a start screen generator for easy drag and drop design, a configuration tool (no need for programming skills), and session reset after idle time.

It also includes an Internet content filter to eliminate inappropriate content in real-time, a customizable user interface, on-screen keyboard, digital signage, and payment devices so you can charge for using the computer with support for various cash acceptors.

To use SiteKiosk, you need Windows 10 32/64 bit, Windows 10 IoT Enterprise, Internet Explorer 10 or higher browser, at least 2GB RAM memory (4GB recommended), New Technology File System, Intel or AMD x86 CPU processor, and 1024×768 resolution or higher.

⇒ Get SiteKiosk

Kioware – Ideal for mobile device management

As its name implies, it is a kiosk software whose features include a kiosk mode solution, mobile device management, video conferring, digital signage, and browser lockdown.

This interactive kiosk software lets you secure your Windows computer or device into a self-service kiosk, and you can manage your account or secure your device to permitted websites and browser-based apps, on a rebuilt user interface.

The main features include blocking popups, domain/page lists, file downloads, and dialogs.

Kiosk security provides browser and OS lockdown as well as basic authentication and keyboard filtering.

You can also clear private browser data and create an attractive screen management interface for users with custom toolbar skins, provide a virtual keyboard, and tabbed browsing.

With KioCall, you can add video conferencing to your kiosks so your users can initiate or receive video chats.

⇒ Get Kioware

This concludes our selection of the best kiosk software for Windows 10 and 11 that will help you manage your devices.

Some of them have simple and basic features to limit user access while others offer full remote access and management features.

You might also be interested in our list including the best remote control software for Windows 10/11 and find even more suggestions.

Which of these best kiosk software for Windows 10 & 11 sounds great for your needs? Share with us your favorite in the comments section below.

7 Quick Fixes for 0x8007003b Network Error on Windows 10

Error code 0x8007003b is a network issue that some Windows 10 users have encountered when attempting to transfer large files from a network drive to a desktop or laptop.

This error message window states, 0x8007003B: An unexpected network error occurred. Consequently, you will be unable to transfer all files across your VPNs.

While some users could fix this issue by simply restarting their router, the issue persisted for others. In this guide, we will take you through the surefire fixes to solve this problem convincingly.

What is network error 0x8007003b?

The error appears due to an unstable network connection and affects device sharing. Here are a few reasons you are getting the error:

  • Malware or virus: A common reason users encounter the error is when the PC is infected with malware or virus.
  • Security software conflicting with the process: In many cases, it was the antivirus that triggered the error, be it the built-in Windows Security or a third-party antivirus.
  • Firewall or VPN is active: The firewall or configured VPN can also modify the network properties or block certain elements, which affects the PC’s ability to interact with other devices.

How do I fix the 0x8007003b error on Windows 10?

1. Scan for Malware

  1. Press the Windows key + S, type virus, and select the Virus & threat protection option.
    virus error code 0x8007003b
  2. Select Scan options.
    scan option
  3. Now, choose the Full Scan option and click the Scan now button.
    scan now

If you are trying to figure out how to fix error 0x8007003b, your primary approach should be to scan for malware since this is a common underlying cause. You can utilize Windows Defender to scan for malware since it’s already built-in.

However, for more advanced and accurate results, we recommend trying third-party antimalware software for Windows 10.

2. Temporarily Switch off Anti-Virus Software

  1. Press the Windows key, type virus, and click Virus & threat protection.
    virus error code 0x8007003b
  2. Click the Manage settings option.
    manage error code 0x8007003b
  3. Finally, toggle the switch for the Real-time protection option backward to disable it.
    real time

If a malware scan didn’t fix the network error code 0x8007003b issue, temporarily disable your third-party antivirus software. The antivirus software could be interfering with the file transfer.

If it is a third-party antivirus, you can switch it off by right-clicking its system tray icon and selecting a disable option on its context menu.

3. Switch the Windows Firewall off

  1. Click the Start icon, type firewall, and click Windows Defender Firewall.
    windows defender
  2. Click Turn Windows Firewall on or off in the left pane.
    turn windows  error code 0x8007003b
  3. Now, tick the Turn off Windows Firewall radio buttons for both the Private and Public options.
  4. Finally, click the OK button and restart your PC.
    turn off error code 0x8007003b

Users have also reported error 0x8007003b over VPN and Windows Firewall, which can get in the way of file transfers. It is, after all, a network wall of sorts. So switching that firewall off or disabling the VPN could fix An unexpected network error occurred while copying file.

4. Disable the Windows Search service

  1. Press the Windows key + R, type services.msc, and click the OK button.
    services error code 0x8007003b
  2. Right-click the Windows Search service.
  3. Now, select the Stop option.
    stop

According to some users, the Windows Search service can also cause the error 0x8007003b with a small file. You should temporarily disable the service and try sending your files again.

5. Check the Destination Hard Drive’s Format

  1. Launch File Explorer and right-click your hard drive.
  2. Select the Properties option.
    properties network error code 0x8007003b
  3. Now, check the File system type.
    file system

Another thing to note is if the destination hard drive for the file is FAT32 formatted. You can’t transfer files larger than 4 GB to a FAT32 hard drive.

If your hard drive’s file system is FAT32, you’ll need to split up any file larger than 4 GB to copy it to the PC. You can split files up with third-party tools. This will help prevent the network error code 0x8007003b.

For details on how to split files on Windows 10, check our detailed guide.

6. Scan Files With the System File Checker

  1. Press the Windows key, type cmd, and select Run as administrator under Command Prompt.
    cmd admin
  2. Type the command below and hit Enter: sfc/scannowsfc scan
  3. Finally, wait for the command to finish running.

Windows 10’s System File Checker might also come in handy for fixing network error code 0x8007003b. A wide variety of Windows issues can be due to corrupted system files. So, you need to repair and restore these files to restore normalcy.

7. Perform a system restore

  1. Press the Windows key + R, type rstrui.exe, and click OK.
    rstrui error code 0x8007003b
  2. Click the Next button on the window that pops up.
    next network error code 0x8007003b
  3. Now, choose your desired restore point and click the Next button.
    restore point
  4. Finally, click the Finish button to confirm the action and follow the onscreen instructions.
    finish network error code 0x8007003b

It might be the case that a recently installed program has interfered with Windows settings. If that’s the case, restoring the platform to a previous date might also fix the error code 0x8007003b.

The System Restore tool will remove all third-party software installed after a selected restore point and undo system changes. This is how you can utilize System Restore.

With this, we can conclude this article on how to fix the network error code 0x8007003b. You now have everything you need to get past the issue. Hence, what is left is for you to follow the instructions keenly.

If you are facing a similar issue in error code 0x800704cf, check our detailed guide to fix it quickly.

Feel free to let us know the solution that helped you fix this issue in the comments below.

Microsoft to launch ChatGPT-4 next week

Microsoft has remained at the forefront of Artificial Intelligence technology, and it looks like that trend is continuing with the imminent release of ChatGPT 4, the language module that powers the popular AI tool ChatGPT. The update is expected to be released by the technology giant sometime next week, potentially reigniting interest in the much-talked-about AI tool.

Microsoft Germany CTO Andreas Braun announced at an AI kickoff event that the new ChatGPT 4 language model would introduce “multimodal models,” which will offer new possibilities. As cited by Heise, Braun specified that the model would have the capacity to create AI-generated videos based on textual prompts. “We will introduce GPT-4 next week … we will have multimodal models that will offer completely different possibilities — for example, videos,” he asserted.

The technologist highlighted the potential of Large Language Models such as GPT, deeming it a “game changer” due to its capacity to comprehend “natural language” and deliver conversational responses. GPT-4 could likely be utilized to enhance ChatGPT and Microsoft services powered by Bing AI, as we had already reported last month.

At present, ChatGPT is restricted to responding to user queries in text format. However, an upcoming update is expected to bring a new interactive experience. Also, the report from Heise indicates that “multimodal AI” such as GPT-4 could actually surpass standard text-to-image translation and be utilized to create music and videos with minimal input.

Microsoft has yet to further affirm the unveiling of GPT-4 next week, though the company is planning a virtual gathering concerning the “Future of Work Reinventing Productivity with AI” with CEO Satya Nadella on March 16.

Currently, there is no confirmed information on what ChatGPT-4 can offer, however, we will keep you in the loop should any information become available. In the meantime, please feel free to share your opinions in the comment section below.

Via Digital Trends

How to Invert PDF Colors Using Adobe, Photoshop & Chrome

You may want to invert colors on PDF files for many reasons – from reading them in dim light to just wanting them to look better. When inverting PDF colors, it will replace every color with its exact opposite.

Instead of downloading software for modifying PDF files, we only included tools you probably already use. Also, you can invert colors in PDF with Adobe Reader. It is not merely a PDF opener but a great PDF color inverter that lets you invert colors and carry out other crucial operations, such as merging PDF files.

Regardless of why you want to retouch the PDF, this guide will show you how to do it easily.

How to invert PDF colors guide for Adobe Reader, Photoshop, and Chrome?

1. Invert PDF colors with Adobe Reader

  1. Right-click on the PDF document for which you want to invert its colors, go to Open with, and choose Adobe Acrobat Reader.
  2. Click on the Edit menu.
  3. Select Preferences.
  4. Choose Accessibility from the left-hand pane.
  5. Mark the Replace Document Colors checkbox.
  6. Select the Custom Color radio option.
  7. Click on the checkboxes for Page Background and Document Text, and for each of these options, select your preferred color.pdf viewer
  8. Hit OK to save your new color preferences.
Tip icon Tip
This method of inverting colors on PDF works on all editions of Adobe Acrobat Reader. Also, the color change is only for your viewing. You’ll have the original colors if you open the PDF with a different reader or print the document.

2. Invert PDF colors with Photoshop

  1. Download Photoshop.
  2. Click on the File menu.
  3. Select Open.
  4. Browse and choose the PDF file that you want to edit.
  5. Click on the Pages radio button.
  6. Select the page that you wish to edit.
  7. Hit the OK button.
    invert-colors-pdf-select-page-photoshop
  8. Press the Ctrl + I and then click on the File menu.
  9. Select the Save As… option.
  10. Click the dropdown menu next to Save as type and choose Photoshop PDF.

However, Photoshop handles your PDF as an image. You can invert the PDF colors with Photoshop, but on saving the file as a PDF, it loses PDF characteristics. With Photoshop, you may have to invert the page individually, then save them in PDF format instead of PSD, and combine them.

3. Invert PDF colors using Google Chrome

  1. Right-click on the PDF document.
  2. Go to Open with and select Google Chrome.
  3. Press Shift + Ctrl + I to open the console.
  4. Make sure that you’re on the Console tab.
  5. Copy the following code, paste it into the console, and hit Enter:

var cover = document.createElement("div");
let css = `
position: fixed;
pointer-events: none;
top: 0;
left: 0;
width: 100vw;
height: 100vh;
background-color: white;
mix-blend-mode: difference;
z-index: 1;
`
cover.setAttribute("style", css);
document.body.appendChild(cover);

6. After you hit Enter, you will see the PDF content changing color.

It’s up to you to pick a method that suits your goals to invert PDF colors for printing. If you want to flip the colors on the PDF permanently and don’t mind doing it one page at a time, then Photoshop will suffice. Otherwise, you can invert PDF colors on Chrome or the useful Adobe Reader application.

Also, several websites and tools to invert colors in PDF online for free. So, you can check them out, too. While you are here, check the best PDF viewers for a better experience.

Feel free to share your experience with us using the comment section below.

System 53 Error in Windows: 4 Easy Ways to Fix It In No Time

Accessing a physical resource on your network is no rocket science, yet you sometimes end up getting the System error 53 has occurred. The network path was not found message.

The error generally appears on older iterations of Windows when connecting to another PC. But System error 53 in Windows 10 could also appear when mapping a drive. No matter the case, it’s easy to fix, and we will tell you how.

What does System error 53 mean?

If you were wondering what is system error 53, it points to an issue, usually a trivial one, that prevents the connection between devices on the same network. It’s been there for a long time and can arise due to any of the following reasons:

  • Inputting the wrong command: When getting the error, your primary approach should be to verify whether the command is correct. Because, more often than not, this turns out to be the underlying cause.
  • Misconfigured network settings: Certain network settings are critical to accessing devices on the network, and if these are disabled, you may get an error when mapping the drive or connecting to another PC.
  • Third-party apps triggering conflicts: Many users reported that their antivirus, firewall, or security software were directly conflicting with the network or changed settings critical to the process.

What can I do when getting System 53 error has occurred?

Before we start making major changes, check these quick tips first:

  • Ensure both devices are on the same network. The System 53 error net use may appear when the devices are on different networks.
  • Make sure the command is input correctly. For instance, verify that the shared folder is placed between double quotes in the command. Also, check for spacing. In case of issues with it, you may get the System 53 error Path not found message.
  • Run a ping test using and check for losses. If there are any, it’s likely a network issue, and necessary steps have to be taken to resolve the situation.
  • Disable any third-party antivirus or firewall installed on the PC, and check whether that works. In case it does, we recommend you switch to a more reliable antivirus and a Windows-friendly firewall.

If these don’t work, move to the solutions listed next.

1. Enable File and Printer Sharing for Microsoft Networks

  1. Press Windows + R to open Run, type ncpa.cpl, and hit Enter.network and connections
  2. Right-click on the active network adapter, and then choose Properties.Properties
  3. Now, tick the checkbox for File and Printer Sharing for Microsoft Networks, and click OK to save the changes.enable to fix System 53 error

One of the recommended fixes that seemed to do the trick when you get a System 53 error is to enable File and Printer Sharing for Microsoft Networks in the adapter properties.

2. Turn on network discovery

  1. Press Windows + S to open Search, type Control Panel in the text field, and click on the relevant search result.control panel
  2. Click on Network and Internet.network and internet
  3. Now, click Network and Sharing Center.network and sharing center
  4. Click on Change advanced sharing settings from the navigation pane.change advanced sharing settings to fix System 53 error
  5. Select the Turn on network discovery option under Private network.turn on network discovery to fix System 53 error
  6. Similarly, select Turn on network discovery under Guest network, and click on Save changes.turn on network discovery

3. Turn on the NetBIOS protocol

  1. Press Windows + X to open the Power User menu, and choose Network Connections.network connections
  2. Click on Change adapter options.change adapter options
  3. Right-click on the active adapter and select Properties.properties
  4. Now, select Internet Protocol Version 4 (TCP/IPv4), and click Properties.IPv4 properties to fix System 53 error
  5. Click the Advanced button.advanced
  6. Navigate to the WINS tab, select the Enable NetBIOS over TCP/IP option, and click OK.enable netbios to fix System 53 error
  7. Click OK on all previous windows to save the changes.

Another quick way to fix the System 53 error is to enable NetBIOS for IPv4 in the adapter properties, and things should be up and running. If this, too, doesn’t work, head to the last solution.

4. Change node type to Hybrid

  1. Press Windows + R to open Run, type cmd, and hit Ctrl + Shift + Enter.command prompt
  2. Click Yes in the UAC prompt.
  3. Paste the following command and hit Enter: ipconfig /allipconfig /all to fix System 53 error
  4. Check if the Node Type reads Peer to Peer. If yes, we’ll change it to Hybrid.check node type
  5. Again, press Windows + R, enter regedit, and click OK to open Registry Editor.registry
  6. Paste the following path in the address bar and hit Enter:HKEY_LOCAL_MACHINE/SYSTEM/CurrentControlSet/Services/NetBT/Parameterspath
  7. Right-click on the empty portion, hover the cursor over New, choose DWORD (32-bit) Value, and name it NodeType.DWORD to fix System 53 error
  8. Double-click the NodeType DWORD you just created.DWORD
  9. Enter 8 under Value data, and click OK to save the changes.change to fix System 53 error
  10. Once done, restart the computer, and you should be able to access the network resources.

That’s it! One of these solutions should have helped fix the System 53 error in Windows when accessing the shared resources on the network.

Also, find out the best network performance management software for effective monitoring and eliminating issues.

If you have any other queries or want to share another solution, comment below.

Calendar App not Working in Windows 10: 6 Ways to Fix It Now

The Calendar, a built-in app in Windows, has long been a popular choice amongst users, but many complain that Windows 10 Calendar is not working.

For some users, the Calendar app opens with a white screen and then crashes after a few seconds, or it’s not opening at all. The problem was recently widely reported, but we have a few solutions that will work in the long run.

What can I do if Windows 10 Calendar is not working?

1. Open Calendar from the Mail app

  1. Type Mail in the Search bar, and click on the relevant search result.mail
  2. Now, click on the Calendar icon in the Mail app.calendar

A few users shared this quick workaround to open the Calendar app when it’s not working in Windows 10. So, give it a try. Although remember, that it’s just a temporary measure to access Windows Calendar, and until a concrete fix is available.

2. Update the Calendar app

  1. Press Windows + S to open Search, type Microsoft Store, and click on the relevant result.microsoft store to fix windows 10 calendar not working
  2. Click on the Library icon in the left corner.library
  3. Now, click on the Get updates button.Get updates to fix windows 10 calendar not working
  4. If an update is listed for Mail and Calendar, download it.

When several users recently reported that Windows 10 Calendar app was not working, Microsoft was quick to release a patch for the bug that caused the problem. Downloading the latest version of Mail and Calendar fixed things for most users.

Updating the may also work when Windows Calendar is not showing events.

3. Reset the Mail and Calendar app

  1. Press Windows + I to open Settings, and click on Apps.apps
  2. Now, select Mail and Calendar in the Apps & features tab, and then click on Advanced options.advanced options to fix windows 10 calendar not working
  3. Click on the Reset button.reset to fix windows 10 calendar not working
  4. Again, click Reset in the confirmation prompt.reset

Many keep wondering how do I reset my calendar on my laptop Windows 10. You could easily do it from within the Mail and Calendar app settings, and the reset should take more than a minute.

4. Uninstall recent updates

  1. Press Windows + I to open Settings, and click on Update & Security.update & security
  2. Now, click on View update history.view update history
  3. Click on Uninstall updates.uninstall updates to fix windows 10 calendar not working
  4. Select the update last installed, after which the error appeared, and click Uninstall.uninstall to fix windows 10 calendar not working
  5. Click Yes in the confirmation prompt.uninstall

For many users, the Windows 10 Calendar was not working after an update, and uninstalling it fixed things in no time. Just make sure to restart the computer once done for the changes to come into effect.

5. Do a system restore

  1. Press Windows + R to open Run, type rstrui.exe, and hit Enter.rstrui.exe
  2. Select Choose a different restore point, if available, and click Next.choose
  3. Choose a restore point created before the problem first appeared from the list, and click on Next.system restore to fix windows 10 calendar not working
  4. Verify the details, and click on Finish to start the restore process.restore

Performing a system restore has also helped a few users. But remember, it’s critical to choose a restore point created before the problem first emerged on the PC. Also, this solution would help even when Windows 11 calendar app is not working.

6. Perform an in-place upgrade

  1. Go to Microsoft’s official website, and click Download now to get the Media Creation Tool for Windows 10.media creation tool
  2. Once downloaded, run the setup, and click Yes in the UAC prompt.
  3. Wait for the setup to initialize and get things ready.getting ready
  4. Click on Accept to agree to the license terms.accept
  5. Select Upgrade this PC now, and click Next.upgrade this PC now to fix windows 10 calendar not working
  6. Wait for the download to complete, and then let the setup install a fresh copy of Windows 10.in-place upgrade to fix windows 10 calendar not working

That’s it! If nothing previously worked and you still have Windows 10 calendar not working, an in-place upgrade should be the ideal fix. It will reinstall the OS without affecting the apps or files on the PC.

The methods listed here will also help eliminate issues behind the taskbar calendar not opening in Windows 11.

Besides, if, like many others, you, too, are looking for a reliable alternative, check our curated list of the best Calendar apps for Windows.

Tell us which fix worked for you in the comments section below.

ESO Unexpected Internal Error: Fix It in 2 Simple Ways

The Elder Scroll Online (ESO) is a stunning MMORPG game that combines creativity with competitiveness. It offers superb gameplay, making it one of the most played games since its release.

However, it is not free from issues. It sometimes suffers from latency spikes, but you can solve this by using the best VPNs for ESO to reduce high ping.

Now, it is the unexpected internal error preventing gamers from logging into the game. This guide will show you quick and effective ways to fix this issue and get back to competing with other gamers.

What is the unexpected internal error on ESO? 

The unexpected internal error on ESO prevents users from logging in on the game client. The potential causes are widespread, which sometimes makes it frustrating.

Below are some of the well-known ones:

  • Outdated game client: If you haven’t updated the game client in a while, it’s likely the reason the error keeps appearing.
  • Issues with Steam: If you are facing the ESO Unexpected Internal Error on Steam, it could be that the Steam installation didn’t go through properly or certain critical files were deleted
  • Corrupt game files: The problem could also lie with the game or the game files, usually a corruption of some sort. But there’s a built-in option to verify the game files.
  • Overloaded server: When too many players are active on the server, it might cause overloading, and as a result, you will see the error.

How can I fix the ESO Unexpected Internal Error?

Before we head to the slightly complex solutions, do these quick checks:

  • The first line of action when facing the Unexpected Internal Error on ESO is to check if the game has server downtime. The Service Alerts page or the official Twitter Support is the best place to look.
  • Terminate Steam and related processes from the Task Manager, relaunch it, and check whether the error is gone.

If these don’t work, head to the solutions listed next.

1. Switch Megaservers

  1. Open the ESO Launcher and select the SERVER option at the top left corner of the login page.
    server option eso unexpected internal error
  2. When prompted, select a server to connect to (EU or NA).
    select server
  3. Wait for the process to complete with an announcement indicating the server change before logging in.

Megaserver overload is one of the prominent causes of the unexpected internal error ESO. There are only two Megaservers to choose from – the European (EU) and North American (NA).

When either of them is overwhelmed with requests, it can lead to all sorts of issues. So, changing to the less strained one should resolve the problem.

2. Repair the ESO Launcher

  1. Click the GAME OPTIONS dropdown in the NEWS section.
  2. Select the Repair option.
    repair
  3. Wait for the process to finish.

Corrupt ESO Launcher files can lead to unexpected internal errors in the client. If all the fixes above fail to solve the problem, you should try to repair the launcher. Restart the ESO Launcher after the repair to sync the repair made.

The unexpected internal error on ESO can quickly dent your gaming spirit, as it denies you access to the game. Although server issues are the major reasons behind it, you shouldn’t rule out other possibilities we have shown.

If you are looking for the best Windows 10/11 RPG games to play, check our article on the topic for excellent options.

Feel free to let us know the fix that helped restore normalcy to your game in the comments below.

How to Install the .Net Framework in Windows 10

Depending on the type of application being used in the Windows 10 operating system, you might get an error message regarding the .NET Framework. And this is why you must know how to install the .NET Framework on Windows 10 to get things up and running.

.NET Framework is a proprietary software framework developed by Microsoft and used by developers to build apps for the Windows ecosystem.

If you have been receiving errors regarding it, here’s how you can install the .NET Framework on Windows 10.

Do you need to install .NET Framework on Windows 10?

Yes, you must install .NET Framework to run applications and programs developed on it. If it’s not installed, applications may throw errors when you launch them. The error message usually lists the required .NET Framework version, thus simplifying things a bit.

Also, remember that your Windows 10 PC may already have the .NET Framework since it’s included with the OS. So unless you get a specific error while running an application, there’s no need to manually install the .NET Framework.

How can I install .NET Framework on my Windows 10 device?

    You can easily install .net framework on your Windows 10 PC using the built-in Command Prompt as an admin. All you need to do is input the installation command input in cmd, then the tool will install .net framework for you.

  1. 1. First, you will need to connect the system with the boot CD/DVD or external hard drive with Windows 10 installation media on it.

  2. 2. Now, double click on This PC on the desktop or in the Start menu.

  3. 3. You will need to identify and jot down the drive letter of the CD/DVD Windows 10 installation media.

  4. 4. Type Command Prompt in the Search bar, and click on Run as administrator on the right.

    command prompt to how to install .net framework on Windows 10
  5. 5. Click Yes in the UAC prompt that appears.

  6. 6. Now, paste the following command, replace E with the hard drive letter in your case, and hit Enter :Dism /online /enable-feature /featurename:NetFX3 /All /Source:E:sourcessxs /LimitAccess 

    cmd dism
  7. 7. The installation of the .NET Framework on to your Windows 10 system should start.

  8. 8. When you see the The operation completed successfully message, close the Command Prompt and reboot the system.

  9. 9. After the device boots up again, verify if you have the .NET Framework installed.

Usually, when you have issues with an app, it will ask you to download and install the .NET Framework from the Internet, but you can also do it directly from the Windows 10 CD/DVD, as described above.

You may also try other ways to install the .NET Framework. If you encounter problems after .NET Framework’s installation, especially if missing, fixing things shouldn’t take much time. 

Also, if you have any additional thoughts on this subject, please let us know in the comments section of this page.

Best Bandwidth Monitor Tools for Windows 10 & 11 [2026]

If you’re using a limited connection to access the Internet on your Windows 10/11 PC, you should definitely keep a close eye on your bandwidth.

Exceeding your bandwidth limit can be charged extra by your ISP, and in order to avoid that you should use a bandwidth monitoring tool. But before we dive in, let’s start with the basics.

What can bandwidth monitor software tools do?

Bandwidth monitors are small tools that monitor your Internet connection while providing you with a detailed report on how much bandwidth you use.

These tools are a necessity for all users with limited connections, and today we have several bandwidth monitors for Windows 10 and 11 that we want to recommend to you.

What are the best bandwidth monitors for Windows 10 & 11?

Site24x7 – Best bandwidth monitor

If you’re searching for the best bandwidth monitor, Site24x7 is just what you’re looking for but you will discover that it’s much more than that.

This tool helps you supervise your entire network infrastructure, including up to ten servers, and all other devices that identify themselves with an IP.

In fact, bandwidth is just one of the 60+ performance metrics and comprehensive inventory reports that you will have access to.

The data includes load average, thread and handle count of processes, and a lot more, all displayed in a single cloud-based dashboard whatever systems you’re running.

After you include all devices you want to monitor, you will get detailed and charted syslogs that can be presented or shared with your colleagues.

Site24x7 is a complex and powerful tool that offers an extensive array of tools designed to prevent and warn you of any possible problems with your bandwidth and gives you the chance to fix them before anyone notices.

The solution also comes with a free trial version so you will be able to test it before making any purchase decision.

Site24x7 best features:

  • Monitors all the devices on your network with over 60 performance metrics, including bandwidth
  • Apache, MySQL and Nagios plugin integrations
  • Cloud-based dashboard that can be even accessed on the go
  • Comprehensive graphical reports
  • Manage customer accounts and endpoints securely

Site24x7

Monitor your bandwidth accurately and all the network devices with a professional-level solution.
Free trial Visit website

NetFlow Analyzer – Complete network management

NetFlow Analyzer brandishes itself as a complete traffic analytics tool that uses advanced technology to provide you with real-time monitoring capabilities over the use of your network. It works great on both Windows 10 and 11 operating systems.

Gain better control over your bandwidth use and traffic patterns, as well as detailed information about each user using it, allowing better decision-making when it comes to limiting or providing access.

For example, you can monitor voice, video, and data effectively thanks to key-performance metrics that help boost connectivity with minimal traffic use.

The solution offers customized reports containing specific bandwidth usage details such as applications, IP addresses, hostnames, protocols, and more.

Thanks to the use of its Continuous Stream Mining Engine technology, NetFlow Analyzer can better detect internal and external security threats and stop them before they propagate even further.

This software may also be used as a bandwidth limiter. You can set up thresholds and if they are passed, you will get alerted instantly to apply specific actions.

NetFlow Analyzer best features:

  • Monitors all key performance metrics
  • Continuous Stream Mining Engine technology
  • External threat detection
  • Network traffic analysis and network flow monitoring
  • Accurate trend over extended historic periods

NetFlow Analyzer

Know everything that is happening within a given network and better manage the way your bandwidth is being used with NetFlow Analyzer!
Free trial Visit website

PRTG Network Monitor – Very easy to use

PRTG is an excellent tool for analyzing your network bandwidth when using a Windows 10 and 11 device. It analyses and lists a series of bandwidth parameters that offer you a clear image of your network’s performance.

You’ll be able to quickly detect bandwidth overloads and take the necessary measures in order to bring your network to a normal functioning state.

Supported features include SNMP, WMI, Packet Sniffing, and NetFlow. PRTG is great for both personal and professional usage. It scans your IP address and detects all devices connected to it.

Private users can run speed tests to see if their Internet connection is running at a top-notch performance or not, check DSL bandwidth, and more.

Professional users can use this tool to eliminate bandwidth hogs that reduce employee productivity leading to potential drops in sales or other KPI issues.

PRTG Network Monitor best features:

  • Bandwidth overloads detection
  • SNMP, WMI, Packet Sniffing, and NetFlow features
  • IP scanning and detection
  • Runs speed tests
  • Easy to implement
PRTG Network Monitor

PRTG Network Monitor

Monitoring the ins and outs of your local network and limiting access will be much easier once you use PRTG Network Monitor.
Free trial Visit website

Obkio Network Performance Monitoring – Accurate measurements

best bandwidth monitors for Windows 10/11

Obkio is the easiest network performance monitoring software to deploy and help users monitor end-to-end network performance, measure bandwidth usage, and all other important network metrics that can impact the end-user experience.

The tool continuously measures network performance using synthetic traffic to provide you with a detailed overview of your network’s performance and health.

Synthetic traffic creates a negligible load on your network and requires no packet capture.

You can monitor network devices like firewalls, routers, and switches to quickly detect bandwidth overloads and high bandwidth usage, especially for Windows 10 and 11 PCs.

Obkio will automatically alert you of any existing and past issues and provide you with all the information you need to find and fix network problems before they affect end users.

They run speed tests to see if their Internet connection is as it should be, monitor Internet connection performance, and bandwidth usage, and measure other network metrics such as throughput, jitter, latency, and MOS Score.

Collect historical data to create a performance baseline and troubleshoot past issues.

Users can leverage Obkio to eliminate bandwidth hogs that can reduce employee productivity and lead to serious network performance degradation.

Obkio Network Performance Monitoring best features:

  • Traceroute and speed test
  • Network Device Monitoring (SNMP)
  • Live notifications
  • Measures throughput, jitter, latency, and MOS Score
  • Bandwidth overload detection

Obkio

Are you looking for the very best bandwidth monitor for all your network devices? Just try Obkio Bandwith Monitor for free!
Free trial Visit website

GlassWire – Great filtering

GlassWire’s network monitor allows you to consult your network activity by your geo-location, application, and traffic, using easy-to-read graphs for Windows 10 and 11.

You will be able to see your computer’s traffic back to 30 days, analyze the cause of a casual spike in your network activity and try to avoid them in the future.

The app alerts you about hosts that are known threats, unexpected network system file changes, spikes, ARP spoofs, DNS changes to take immediate action.

If you are not in front of your computer, GlassWire allows you to remotely monitor and block suspect activity on the computers or servers that you need to take care of.

Its firewall is a great tool to anticipate network threats and stop them before they can damage your system.

GlassWire’s firewall helps you detect what current and past servers your PC is communicating with so you can get rid of potential threats.

GlassWire best features:

  • Consult your network activity by your geo-location, application, and traffic
  • Threat allerts on network system file changes, spikes, ARP spoofs, DNS changes
  • Remote monitoring
  • Built-in firewall
  • Monitors all communication between network components

⇒ Get GlassWire

Solarwinds Network Bandwidth Analyzer – Extensive toolset

One of the system tools required for performance, configuration, traffic, bandwidth utilization, and much more is a Network Traffic Analyzer that covers data transmission detectors for both Windows 10 and 11.

SolarWinds offers over 30 products in a variety of categories, including virtualization, storage, databases, systems management, network security, and more.

Note that it has been the unchallenged global leader in network monitoring for the past 16 years. Network Performance Monitor and NetFlow Traffic Analyzer are included in this pack.

The network performance monitor is advanced software that reduces network outages and improves performance.

It provides support for Cisco ACI devices, allowing you to observe members on your Cisco ACis and analyze APIC member health scores in Performance Analysis Dashboards.

You can also use this tool to block or restrict Wi-Fi users from your network. This can help prevent data theft and also improve overall network performance.

The NetFlow Traffic Analyzer captures data from continuous streams of network traffic and converts those raw figures into easy-to-understand charts and tables.

This quantifies exactly how, by whom, and for what purpose the corporate network is being utilized.

It includes a bandwidth monitor that analyzes Cisco NetFlow, Juniper J-Flow, sFlow, Huawei NetStream, and IPFIX flow data to identify the applications and protocols that consume the most bandwidth.

Solarwinds Network Bandwidth Analyzer Pack best features:

  • Block or restrict Wi-Fi users from your network
  • Cisco NetFlow, Juniper J-Flow, sFlow, Huawei NetStream, and IPFIX flow data analisys
  • Retrieves data from continuous streams of network traffic
  • Charted data and table reports
  • Cisco ACI devices support

⇒ Get Solarwinds Network Bandwidth Analyzer Pack

Auvik Bandwidth Monitor – Great performance measurements

best bandwidth monitors for Windows 10/11

Auvik is a software as a service (SaaS), that simplifies maintenance and accelerates the release of new features.

It offers network monitoring tools to assist you in monitoring the health and reliability of your network on Windows 10 and 11.

Note that it also concentrates on LAN and smaller WAN devices, rather than data centers. In comparison to other sophisticated systems such as Solarwinds, Auvik provides a complete, easy, plug-and-play, and moderate approach.

TrafficInsights from Auvik is particularly useful in the data center of your networks and devices because it is where high bandwidth is directed and where it is critical to know exactly what is going on at all times.

It displays network bandwidth usage without the need for costly, in-line traffic decryption, which is a significant benefit to the projects now in the works at Auvik.

Because fiber optics are the backbone of everything in the data center, TrafficInsights can also reveal where the system is having performance challenges.

This tool will also notify you when a certain percentage of a device’s or network’s capacity has been reached. This is critical since it can significantly improve network performance overall.

TrafficInsights’ downside is that it uses Simple Network Management Protocol in its discovery and data collection methods.

However, it does not presently support SNMP collection, thus you cannot have your infrastructure devices send alarms to Auvik. And it is a significant element that we would like to see from Auvik in the near future.

Auvik Bandwidth Monitor best features:

  • SNMP ready
  • Built-in network monitoring tool
  • Notifies about any network performance modifications
  • Easily identify who’s on the network
  • IP address management

⇒ Get Auvik Bandwidth Monitor

BitMeter OS – Simple and friendly interface

BitMeter OS is an open-source Windows bandwidth monitor that runs in the background whenever you start your Windows 10 or Windows 11 PC.

In order to view bandwidth consumption, it’s easy to use your web browser or a command-line interface.

This tool can show you your current bandwidth usage or your bandwidth usage over the past days and weeks.

In addition, you have access to the summary for the current day, month, or year. If you wish, you can also get a summary of specific days and export reports in CSV format.

If you have a bandwidth limit, just set an alert to trigger once you exceed a certain threshold.

BitMeter OS is a simple tool, and although it doesn’t offer any advanced features, it should be perfect for basic users that just want to keep a close eye on their bandwidth usage.

BitMeter OS best features:

  • Simple and friendly interface
  • Export reports in CSV format
  • Open-source software
  • Bandwidth usage monitoring

⇒ Get BitMeter OS

FreeMeter – Minimalistic tool

best bandwidth monitors for Windows 10/11

FreeMeter is a free light bandwidth monitor tool for Windows 10, as well as Windows 11. The first thing you’ll notice about this app is its humble interface that consists of a live graph that shows your current network usage.

If you don’t want the graph to appear at all times, simply minimize it, and the live graph will remain active in your Taskbar.

Regarding the graph, you can customize its update frequency, scale, color, and transparency.

By double-clicking the graph you’ll open a report that shows you your weekly, daily, or monthly bandwidth consumption.

In addition, you may set alerts if you want to be notified once you’ve exceeded certain limits.

FreeMeter best features:

  • Customizable dashboard
  • Live graph display
  • Light on resource usage
  • Simple and intuitive usage

⇒ Get FreeMeter

Rokario Bandwidth Monitor – Live graph usage

Rokario Bandwidth Monitor is a simple tool for Windows 10 and 11 PCs, which comes with a live graph that shows bandwidth usage in real-time.

You can customize the graph with a wide range of themes, and create your own themes with this tool.

We have to admit that Rokario Bandwidth Monitor lacks certain features such as alerts. As for the report log, it doesn’t allow you to see your monthly or weekly bandwidth usage.

Instead, you only have access to your bandwidth usage on a daily basis which is not ideal for professional usage.

Rokario Bandwidth Monitor best features:

  • Customizable graphs
  • Live graph display
  • Simple and easy commands

⇒ Get Rokario Bandwidth Monitor

If you’ve observed a significant decrease in Internet speed, it’s possible that a device on your network is consuming the resources.

A bandwidth limiter for Windows 10 and 11 can level the playing field by ensuring that each computer receives sufficient bandwidth.

This prevents pages from loading slowly when someone else on the network of your home or office is downloading music, films, or other large files.

A bandwidth limiter may also be used on its own to restrict bandwidth consumption for a specific device and therefore increase Internet flow for another that shares the same network.

FAQs

What does bandwidth monitor software do?

Bandwidth monitor tools track your Internet usage in real time, generate detailed reports, and help you avoid exceeding data limits set by your ISP.

What is the best bandwidth monitor for Windows 10 and 11?

Site24x7 and PRTG Network Monitor are top picks for detailed analytics, while BitMeter OS and FreeMeter are lightweight options for everyday users.

Can bandwidth monitors also detect security issues?

Yes. Tools like GlassWire and NetFlow Analyzer can alert you to suspicious traffic patterns, DNS changes, or unknown devices on your network.

Do bandwidth monitors work with limited connections?

Absolutely. Bandwidth monitors are especially useful for limited data plans, since they alert you when usage nears or exceeds your set threshold.

If you have any other questions or suggestions, don’t hesitate to leave them in the comments section below.

How to Fix DirectX Not Installing in Windows 10 [6 Tested Ways]

DirectX is a crucial component required by many multimedia applications, but some users complain that they can’t install DirectX in Windows 10.

This might be due to some DirectX errors on Windows 10. Thankfully, you can solve them. Today we’re going to show all the different ways to do it.

Here’s a quick video summary. Find more in-depth details below if you’re unable to complete DirectX setup.

1. Reinstall your graphics card drivers

  1. Press Windows Key + X and choose Device Manager.
    device-manager
  2. When Device Manager starts, go to Display Adapters section and locate your graphic card driver.
  3. Right-click the driver and choose Uninstall.
    uninstall-driver
  4. Check Remove the driver software for this device and click OK.
    confirm-uninstall-driver
  5. After you’ve uninstalled the driver, restart your computer.
  6. After your computer restarts, go to your graphic card manufacturer’s website and download the latest drivers for your graphic card.
  7. Install the downloaded drivers.

2. Reinstall one of the previous updates

  1. Open the Settings app and go to Update & Security.
  2. Go to Windows Update section and click on Advanced options.
    advanced-options-windows-update
  3. Click View your update history.
    view-your-update-history
  4. Click on Uninstall updates.
    uninstall-updates
  5. Before uninstalling an update you have to do some research and find which of these updates is a DirectX update.
  6. Uninstall that update and restart your computer.

Sometimes previously installed updates can cause issues with DirectX; if that’s the case, you might have to uninstall these updates.

If you’re having trouble opening the Setting app, take a look at this article to solve the issue. Find out if a specific update is installed or not with the help of this guide.

3. Download Visual C++ Redistributables

  1. Download the package.
  2. Run the setup.
  3. Follow the instructions and install the Visual c++ Redistributables.

Few users reported that installing Visual C++ Redistributables has fixed DirectX errors. Make sure you install the whole package or a specific version. Downloading the missing Visual C++ Redistributables will do the trick when you can’t install Directx in Windows 11.

4. Download the missing .dll files

Few users report that you can fix DirectX errors on Windows 10 simply by downloading the missing .dll files and moving them to the WindowsSystem32 or WindowsSysWOW64 folder.

This solution might not be the safest if you download these missing files manually, so keep that in mind. Alternatively, you can copy the missing .dll files from another computer you use.

Note icon NOTE
This solution can lead to potential system instability, so use it at your own risk.

Use a third-party .DLL fixer

You can restore. DLL files if you use a specialized program that can download missing system files and restore corrupted ones.

A tool like this can also keep you safe by performing periodic scans and checks to make sure your computer is healthy and unaffected by malware or spyware.

  1. Open the Windows search bar.
  2. Type in dxdiag and select it.
  3. In the System tab, check to see your RAM and CPU model.
  4. In the Display tab, check to see your GPU model.

I know it’s probably unlikely, but if you’re using an older computer, you might want to check if it meets the minimum system requirements for running DirectX. Here are the minimum system requirements for DirectX 12:

  1. Windows 7 32 bit or 64 bit
  2. DirectX 12 compatible graphics card
  3. .NET Framework 4
  4. 1 GB RAM
  5. 2 GHz Duo Core CPU

6. Install .NET Framework using the Command Prompt

  1. Go to the Search, type cmd, and open Command Prompt as Administrator.
  2. Type the following command and press Enter: DISM /Online /Enable-Feature /FeatureName:NetFx3 /All /LimitAccess /Source:D:sourcessxs
  3. Wait for the process to finish.
  4. Restart your computer.

To install the .NET Framework, you must use the good old DISM (Deployment Image Servicing and Management) service. If DSIM fails, quickly fix it with this step-by-step guide.

However, we’re not going to use the whole tool, but just a part that will allow us to install the .NET Framework.

Is there a way to reinstall DirectX?

While there’s no reliable and dedicated uninstaller software to remove DirectX and then manually install it, you can always reinstall DirectX through several methods.

Since updates for DirectX are released alongside Windows Update in the newer iterations, checking for these should get you the latest version, and the OS will reinstall it over the previous one.

DirectX is an integral part of all Windows operating systems, therefore, any DirectX problems can cause your favorite applications to stop working.

If you have any DirectX problems on Windows 10, feel free to try some of our solutions. For more suggestions or questions, reach out to the comments section below.

Folder Access Denied Windows 11: How to Get Full Permissions

The Windows 11 Access is denied error prevents you from uninstalling applications or accessing particular directories on your computer. The reasons for the error vary from issues with your PC to permission and setting problems.

Fortunately, it is not the most challenging problem to solve, requiring just a few tweaks on your PC.

Why do I keep getting access denied?

You can get the Access is denied error on Windows 11 for various reasons. Below are some of the factors that can cause it:

  • Lack of permission – If a folder or external hard drive shows the Access is denied prompt on Windows 11, it might be because you lack permission to view or open the file. You need to take complete control of the folder to circumvent this.
  • Lack of ownership – This error can also show up if you don’t have ownership rights to the folder. So, you must take ownership of the folder or file and restart your PC to fix this.
  • Encryption – If a folder is encrypted on one user account, you can’t open it from another. So, you need to change your account to admin or provide the admin password to access it.
  • Antivirus interference – Sometimes, your antivirus might deem a safe folder or file as dangerous due to some of its properties. This can lead to this error. You need to disable or remove the security software and switch to one of the best antiviruses for Windows 11.

How do I fix the Access denied error in Windows 11?

Before making changes to your PC, here are a few quick things to do:

  • It is advised to disable your antivirus temporarily. This is because it might be flagging the folder or file, preventing it from opening.
  • Ensure the file you are opening is not corrupt or problematic, say, lesser than the intended size. Check that, and if that turns out to be the case, restore the file from another PC or download it from the web.

If this does not solve the issue, you can now proceed to the fixes below:

1. Use the Registry Editor

  1. Press the Windows key + R, type regedit, and click the OK button.
    regedit
  2. Navigate to the path below in the left pane: HKEY_LOCAL_MACHINE/SYSTEM/CurrentControlSet/Services/LanmanWorkstation/Parameterspath
  3. Now, right-click on any space in the right pane, select New, and then DWORD (32-Bit) Value.
    new
  4. Enter AllowInsecureGuestAuth as the name of the new entry.
    allow
  5. Finally, double-click the new entry, set the Value data to 1, and click OK.
    value data

If you are getting the Windows 11 Access denied as administrator, the steps above will help remove all restrictions that might be causing the issue.

2. Use Computer Management

  1. Right-click on the Start button and choose Computer Management.
    comp management windows 11 lock screen slideshow not working
  2. Expand Local Users and Groups, then open the Users folder.
    local users windows 11 lock screen slideshow not working
  3. Right-click on Administrator, then tap on Properties.
    admin prop windows 11 lock screen slideshow not working
  4. Uncheck the box next to Account is disabled and press the Apply and the OK button on the bottom side.
    disabled acc windows 11 lock screen slideshow not working
  5. Click on the Groups folder on the left side, right-click on Administrator, then tap on Properties.
    group admin windows 11 lock screen slideshow not working
  6. Click on the Add button.
    add windows 11 lock screen slideshow not working
  7. Enter the word test in the opened window, click on Check Names, then press the Apply and the OK button in the current window as well as in the Properties window.
    test windows 11 lock screen slideshow not working

3. Set your account as administrator

  1. Press the Windows key + R then enter control userpasswords2. Lastly, click the OK button.
    control userpassword windows 11 lock screen slideshow not working
  2. The User Accounts window will now appear. Check the box next to Users must enter a user name and password to use this computer, then select your account and click on the Properties button below it.
    user prop windows 11 lock screen slideshow not working
  3. Navigate to the Group Membership tab. Select Administrator and click Apply and OK.
    admin choice windows 11 lock screen slideshow not working

Restart your computer once you’ve completed the procedures outlined above to determine whether or not the external hard drive access denied in Windows 11 problem has been resolved.

4. Check your permissions

  1. Locate the problematic directory, right-click on it, and choose Properties from the menu.
    new properties windows 11 lock screen slideshow not working
  2. Next, navigate to the Security tab and click the Edit button.
    security tab  windows 11 lock screen slideshow not working
  3. Select your user name from the list and make sure that you check the box next to Full control for Allow column in the Permissions sections, then click OK.
    allow permission  windows 11 lock screen slideshow not working

This is a rather simple solution when the destination folder access is denied in Windows 11. But if your user name isn’t on the list, you’ll have to add it manually and then change its permissions.

5. Enable the hidden Administrator account

  1. Press the Windows key + S, type in cmd, and right-click on the most relevant result to Run as administrator.
    run as admin windows 11 lock screen slideshow not working
  2. When Command Prompt starts, run the command below. By doing so you’ll unlock the administrator account:net user administrator /active: yes
    net user addmin windows 11 lock screen slideshow not working
  3. Now log off of your account and switch to the newly enabled Administrator account. From there you should be able to access your files without any problems.
  4. After you’re done using the Administrator account, go back to your main account and start Command Prompt as administrator again as we did in the first step. Now enter this command to disable the Administrator account: net user administrator /active: no 
    net user addmin no windows 11 lock screen slideshow not working

Remember that after switching back to your main account, the Windows 11 Access is denied issue might persist.

If needed, you can use the Administrator account to make the necessary changes to your system and fix things when you have Drive is not accessible Access is denied error in Windows 11.

6. Take ownership of the file

6.1. Take ownership via Properties

  1. Locate the problematic folder, right-click on it, and choose Properties from the menu.
    new properties windows 11 lock screen slideshow not working
  2. Navigate to the Security tab and click the Advanced button.
    advanced secuirty windows 11 lock screen slideshow not working
  3. Locate the Owner section at the top and click on Change.
    change owner windows 11 lock screen slideshow not working
  4. In the Enter the object name to select field, enter Administrators or enter your user name.
  5. Now, click the Check Names button, then tap the OK button to save the changes made.
  6. Check the box next to Replace all child object permission entries with inheritable permission entries from this object and click Apply and OK to save changes.
    replace all child windows 11 lock screen slideshow not working

After applying these steps, the Windows 11 Access is denied error should be solved.

6.2. Take ownership via Command Prompt

  1. Press the Windows key + S in then enter cmd, and click on the most relevant result.
    cmd search   access denied windows 11
  2. Type or paste the following commands and press Enter after each. Note that you need to replace the path_to_folder in the commands with the correct path of the inaccessible folder.
    takeown /f "path_to_folder" /r /d y icacls "path_to_folder" /grant administrators:F /T
    takeown cmd    access denied windows 11

If you were trying to find out how to remove access denied in CMD, reconfiguring the permissions by using the icacls command should do the trick.

After running these two commands, you should have full access to them. Reboot your computer once you’ve completed the procedures outlined above to determine whether or not the problem has been resolved.

If nothing else works, you might consider resetting your Windows 11 to factory defaults. It’s not ideal, but it’s a last-resort solution that will wipe the ownership settings and let you access the folder.

The Windows 11 Access is denied error can be frustrating as it can stop you from opening important files. It can also happen to the Temp folder denying you access to delete junk files. However, with the fixes in this guide, you should be able to fix it for good.

Many reported this error while trying to access the user folder from an old hard drive, but that’s not the only instance.

In the same vein, if you want to know how to fix Error 5 Access is denied on Windows 11, check our detailed guide for the steps to follow. We also recommend checking our guide on how to assign read/write permissions properly and avoid future issues. Additionally, we can help you out if you encounter a pop-up saying “Unable to execute file in the temporary directory.“

Let us know which procedure worked for you in the comments area below.

NSIS Error on Windows 11: How to Get Rid of It

Third-party programs form a critical part of our work or student life. You are required to install various programs, such as editing software, learning apps, data collection, and storage tools. But, while doing so, users encountered the NSIS error in Windows 11.

NSIS (Nullsoft Scriptable Install System) is an open-source tool that facilitates the creation of installers for Windows. When you encounter the error, it indicates a problem with the installer or an unfavorable situation preventing it from running.

If the setup continues to run despite the NSIS error, the installed software may be damaged and wouldn’t work as designed. To prevent this, you should identify the issues causing the problem and eliminate them.

There are many reasons behind the NSIS error in Windows 11, each having a specific fix. We have discussed them in the later sections for you to understand and resolve the problem.

Why do I get NSIS error?

Issues that lead to the NSIS error in Windows, both about the installer setup and the system, are listed below:

  • Some files of the program to be installed are missing – When important program files are missing, any future program activity will be hindered.
  • Downloaded files are modified – Modified data means modified system information which will cause miscommunication across the program.
  • System infected with malware – By performing a system scan, you may eliminate any existing malware.
  • Corrupt system files – Corrupt system files significantly contribute to many Windows errors, including this one.
  • Installation media is damaged – For those trying to figure out what causes NSIS error, damaged installation media is a likely underlying cause.

Now that you have a fair understanding of the error and the underlying causes, let’s walk you through the methods to eliminate it.

How can I fix the NSIS error in Windows 11?

Before we start with the complex changes, here are a few quick things to check:

  • Restart the computer
  • If you have a RAM disk or drive (space on RAM used as a storage drive) set up, ensure the Temp is not full. A user pointed this out and reported that clearing some files there fixed things when there was an NSIS error launching the installer when uninstalling.

If these don’t work, head to the fixes listed next.

1. Rename the installer setup

  1. Locate the downloaded files for the program, right-click on the installer setup, and select the Rename icon from the context menu. Alternatively, you can select the setup file and hit F2.Rename file to fix NSIS error in Windows 11
  2. Change the name to one word and try to keep it simple. Also, avoid using special characters or non-English alphabets since they are known to cause problems running the setup. The NSIS Error launching installer will be solved afterward.

This is, undoubtedly, the simplest and quickest method to fix the NSIS error in Windows 11. However, you may encounter trouble running it if the setup file name is long or has special characters that the OS fails to recognize. Hence, it’s recommended that you use a simple name for it.

2. Move installer setup to another folder

  1. Locate the program installer, right-click, and select the Copy icon from the context menu.Copy the setup
  2. Now, go to the desktop, right-click on the empty portion, and select the Paste icon from the context menu. The NSIS error while uninstalling the program will be fixed.Paste the file

In some instances, the file path caused the NSIS error in Windows 11. Hence, it’s recommended that you change the location of the file and check whether the NSIS error during uninstall or install goes away.

3. Use a third-party repair software

To resolve the TeamViewer NSIS error in Windows 11 and others, you may need to perform a search for corrupted or damaged Windows files.

The best part is that you won’t have to seek a needle in a haystack; all of this and more can be accomplished with an automated repair solution.

4. Run a malware scan

  1. Press Windows + S to launch the Search menu. Enter Windows Security in the text field at the top, and click on the relevant search result.Launch Windows Security to fix NSIS error in Windows 11
  2. Next, click on Virus & threat protection from the listed options.Virus & threat protection
  3. Click on Scan options.Scan options
  4. Now, select the Full scan option and click on the Scan now button under it.Scan for malware to fix NSIS error in Windows 11

Running a malware scan can fix the NSIS error in Windows 10 and the previous iterations as well.

We also recommend you a third-party antivirus like Malwarebytes. Due to its advanced security options, it can detect and remove risky malware immediately. Thus, you ensure your constant protection from different forms of online threats.

5. Update Windows 11

  1. Press Windows + I to launch the Settings app and select Windows Update from the list of tabs in the navigation pane on the left.Windows Update
  2. Click on Check for updates to scan for any available newer versions of Windows.Check for updates to fix NSIS error in Windows 11
  3. If any are available, download and install them.

Updating the OS can also fix things in the event you have an NSIS error launching installer in Windows 7.

If you encounter the 0x80070643, 0x80070422, or 0x800f0831 Windows 11 installation error, click on the relevant linked guide and fix it in no time.

Also, if you are facing trouble launching the Settings app, learn how to eliminate the problem.

6. Change system language

  1. Press Windows + S to launch the Search menu, enter Control Panel in the text field at the top, and click on the relevant search result.Launch Control Panel to fix NSIS error in Windows 11
  2. Click on Clock & Region.Clock & Region
  3. Next, click on Region.Region
  4. Navigate to the Administrative tab from the top, and click on the Change system locale button.Change system locale
  5. Click on the dropdown menu, select an appropriate language that matches the installer’s, and click OK to save the changes.Change system language to fix NSIS error in Windows 11

7. Perform a quick SFC scan

  1. Press Windows + S to launch the Search menu. Enter Windows Terminal in the text field at the top, right-click on the relevant search result, and select Run as administrator from the context menu.Launch Elevated Windows Terminal to fix NSIS error in Windows 11
  2. Click Yes on the UAC (User Account Control) prompt.Click Yes
  3. Click on the downward arrow at the top, and select Command Prompt. Alternatively, you can press Ctrl + Shift + 2 to launch the tab.Launch Command Prompt tab
  4. Type/paste the following command and hit Enter to run the SFC scan. The NSIS writing temporary file error will be solved:sfc /scannowrun SFC scan to fix NSIS error in Windows 11

The SFC (System File Checker) scan identifies corrupt system files and replaces them with their cached copy stored on the system. So, if you are trying to find out how to fix NSIS error in Windows 11 and it’s the corrupt system files to blame, performing the scan should do.

8. Install program via Command Prompt

  1. Press Windows + S to launch the Search menu, enter Windows Terminal in the text field at the top, right-click on the relevant search result, and select Run as administrator from the context menu.Launch Elevated Windows Terminal to fix NSIS error in Windows 11
  2. Click Yes on the UAC (User Account Control) prompt that appears.Click Yes
  3. Click on the downward-facing arrow at the top, and select Command Prompt from the list of options. Alternatively, you can press Ctrl + Shift + 2 to launch the Command Prompt tab.Launch Command Prompt tab
  4. Now, please navigate to the folder where the installation setup is saved, right-click on it and select Copy as path from the context menu. Copy setup path to fix NSIS error in Windows 11
  5. Go to Windows Terminal and press Ctrl + V to paste the path.Paste path
  6. Next, hit the Spacebar key to add space, type the following command, and hit Enter to run the installer:/NCRCRun installer
  7. Once the setup launches, follow the on-screen instructions to complete the installation process.

With this method, the installer will bypass any corruption check and run anyway. But, if there’s a major underlying issue, there could be problems with the installed programs. Therefore, we recommend it as the last fix.

Is NSIS a virus?

No, it isn’t a virus. You have access to the NSIS source code and may verify its accuracy. However, some people use this to spread malware, so make sure not to download any unknown NSIS packages from random websites.

Although most contemporary antivirus vendors are familiar with extracting files from NSIS installers and scanning them, some continue to build signatures on the installer stub itself rather than the files included within it.

How can I prevent the NSIS error in Windows 11?

By now, you already know why the NSIS error is encountered and its most effective fixes. But wouldn’t it be much simpler if you could prevent it in the first place?

To do that, make sure you download the program installer setup from the official website, and in case that’s not possible at least a reliable source. This ensures that all the files are downloaded in a single go with no corruption or missing files.

These are all the ways you can resolve the NSIS error in Windows 11. Some users also reported encountering the NSIS error launching installer for AMD drivers, so learn how to fix it.

The methods listed above should also solve the NSIS error launching the installer when uninstalling a program if that’s the issue you are facing.

Let us know which fix worked for you, along with your experience of Windows 11 thus far, in the comments section below.

Microsoft Word makes editing easier with paste text only shortcut

If you often interact with Microsoft Word in your day-to-day activities, then you’ll be happy to learn that the platform is getting a neat tool that will make editing tasks easier.

Previously, when you copied and pasted text from a website, you’d be required to make extensive edits to get rid of the formats. A daunting task that negatively impacted productivity. Though this will now be a thing of the past.

Microsoft announced that it is debuting the Paste Text Only shortcut in Word for Windows and Mac users. With this new feature, you’ll now be able to just copy and paste text from a website into Word your document and not have to worry about making edits to get rid of the source formatting like font size, type, or background color.

Animation of pasting text only using a shortcut

All you need to do is to source information from the web and select the segment that you want to incorporate into your Word document. Next, head back to your Word document and place the cursor when you want to add the selected content, and hit the Ctrl + Shift + V keyboard shortcut.

The new capability is shipping for M365 Home and M365 Business Standard Beta Channel users running on Windows: Version 16.0.15831.20174 or later or Mac: Version 16.67.1113.0 or later.

The new capability has also prompted some changes since other keyboard shortcuts have been affected. It is possible to restore previous shortcut settings if you’re not pleased with the new changes.

In related news, Microsoft PowerToys v0.68.0 recently shipped with a similar utility dubbed Paste as Plain Text. It is designed to let users paste content from the clipboard without formatting on Windows. Microsoft 365 is also set to get an accessibility assistant that’s designed to promote readability.

Grammarly launches generative AI tool to expand its capabilities beyond proofreading

If you spend your day writing articles and creating content, you might be conversant with Grammarly. It is a writing assistant tool that checks your grammar, spelling, clarity, etc.

In a press release, Grammarly announced its plans to further expand its capabilities with generative AI.  The tool will now feature GrammarlyGO, “an on-demand, contextually aware assistant powered by generative AI”.

The tool is designed to enhance communication by enhancing productivity where writing happens. It will provide users with on-demand communication assistance throughout the writing process and even provide revisions to pieces that have already been completed.

According to Rahul Roy-Chowdhury, Grammarly’s global head of product:

It will uniquely offer relevant, contextually aware suggestions that account for personal voice and brand style while staying true to our augmented intelligence philosophy to keep customers in control of their experience. GrammarlyGO will enable customers to save time, enhance their creativity, and get more done—helping individuals achieve their potential and enterprises transform how they work.

With the generative AI tool, users will be able to rewrite text to be more concise and align with the tone that they want it to. It allows you to personalize your voice to ensure that the flow of communication is seamless. Additionally, it can now compose high-quality content thus helping you communicate effectively and efficiently.

What’s more, you can use it to create ideas and unlock your creativity. Furthermore, you can also leverage its capabilities to send out email replies as the tool understands the context within emails allowing it to come up with drafts.

Grammarly is now transitioning to a platform that provides more than just editing capabilities. The company has also assured users that despite the incorporation of the new tool into the legacy, it will still maintain high standards for enterprise data security, user privacy, and responsible AI.

The new tool is expected to start rolling out in beta in April to all users with Grammarly Premium, Grammarly Business, and Grammarly for Education subscriptions. It will also be rolling out to users with Grammarly’s free plan in the US, Canada, UK, Australia, New Zealand, Germany, Poland, and Ukraine.

We’ve also seen Microsoft take up a similar approach by highlighting its plan to debut an accessibility assistant. A  new feature designed to help content creators make their work more accessible with less effort in Microsoft 365. It will help make content more readable across multiple platforms like Microsoft Editor and more.