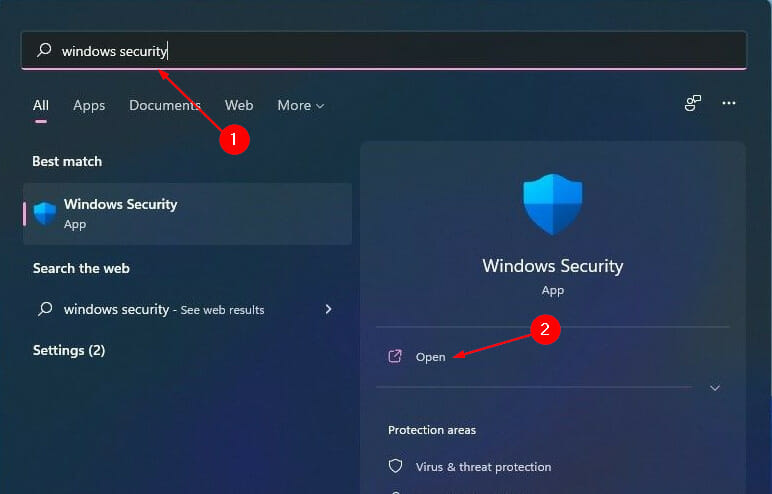
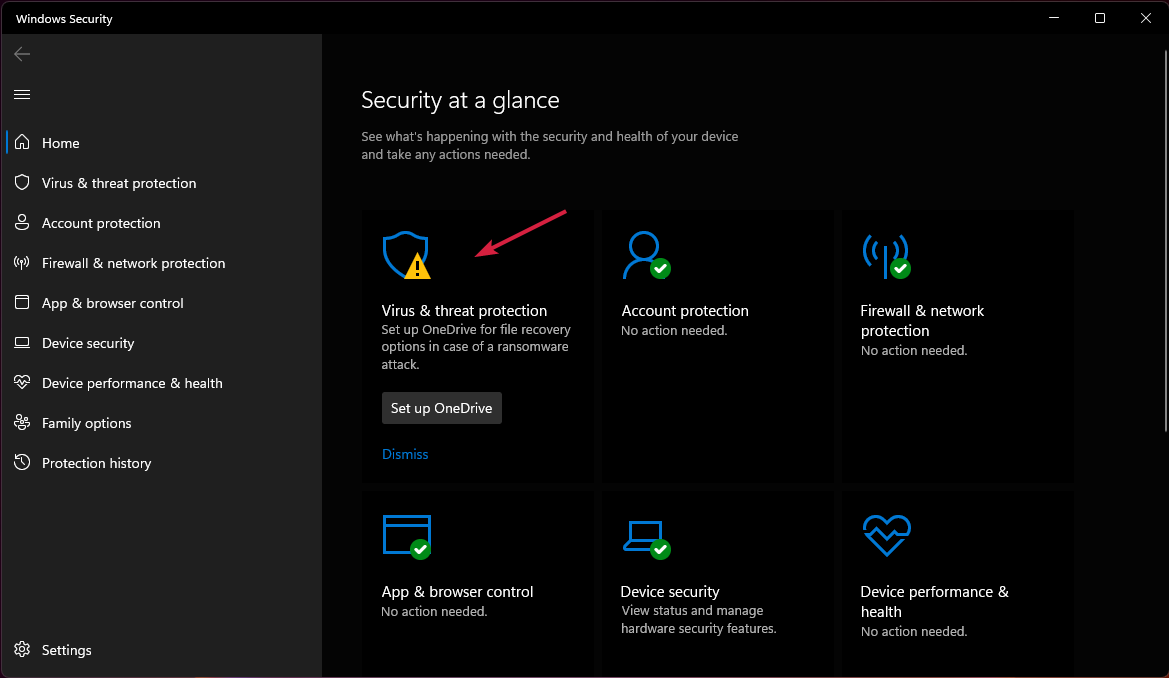
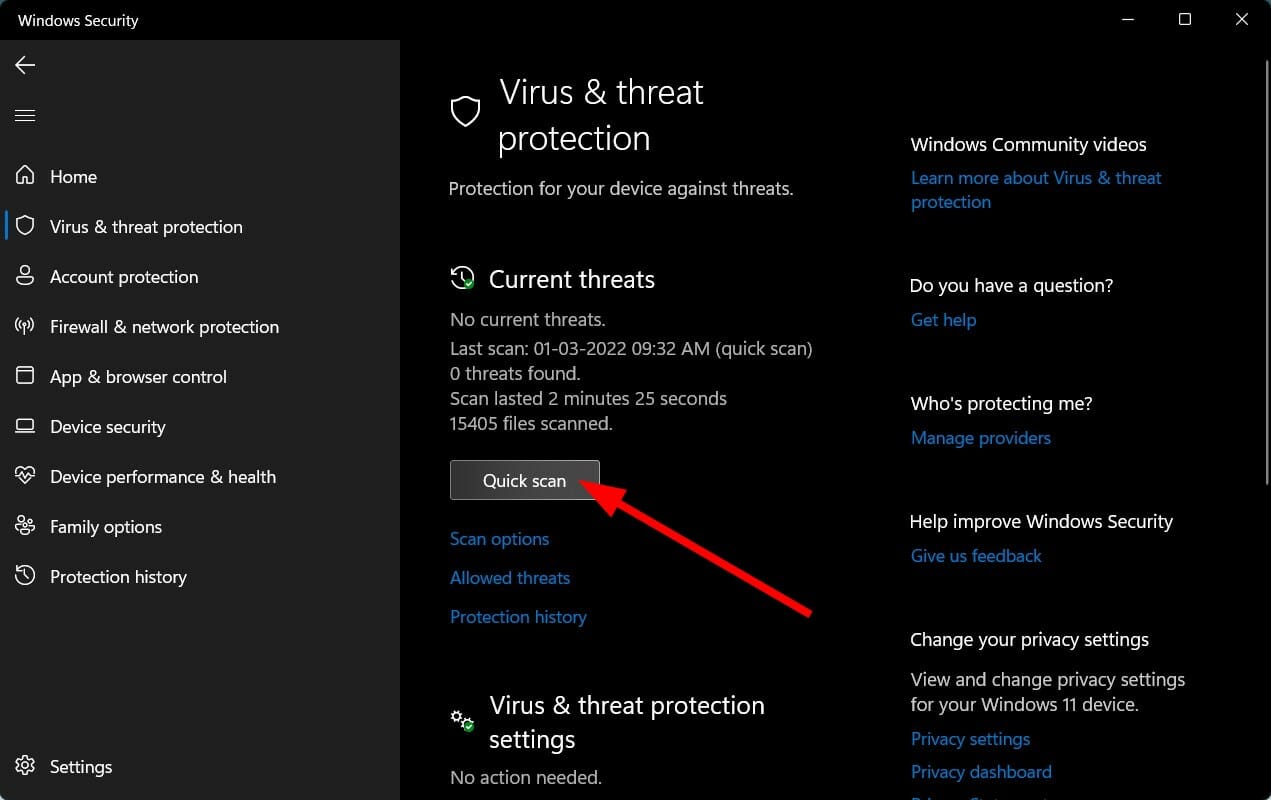
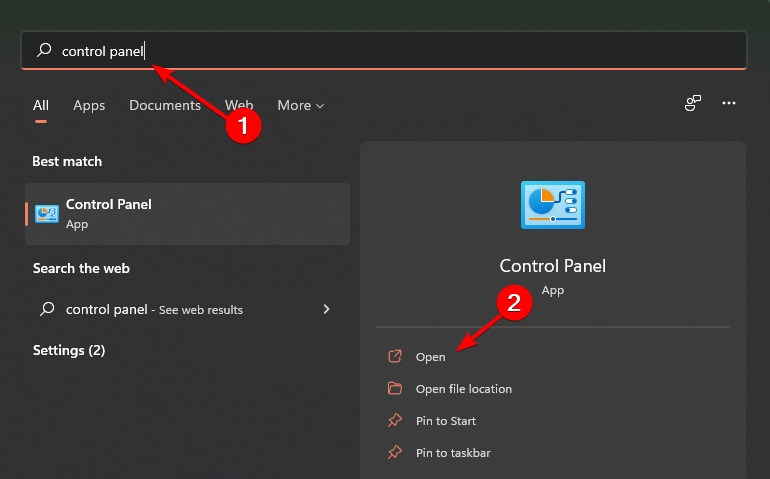
The .djvu extension is a legit file type used to store scanned documents, just like the PDF format. But if you notice more and more files automatically switching to this extension, malware or virus has infected the PC, and it’s imperative that you act swiftly to avoid further damage.
DJVU file extension (.djvu) virus is a recent class of ransomware which attacks your PC and encrypts essential files on your system.
The virus changes the extension of all essential files (DOC, TXT, PDF, XLS, JPG, PPT, MP4, MP3, etc.) into the encrypted .djvu file extension.
In most cases, such an attack is accompanied by a ransom demand, which seeks to blackmail you into paying a certain amount of money to gain back access to your files.
This virus typically enters your system via spam emails, email attachments, insecure downloads, malicious ad campaigns, and phony installers. The virus could infect your system via an insecure connection to a system, site, or device.
Upon successful infection, a ransom message pops up on your computer’s screen, demanding a certain fee (usually in bitcoin) to get your files decrypted. Unfortunately, many computer users fall victim to this and pay the requested ransom.
According to recent findings by security experts and system analysts, there are several variations of this ransomware. These include: .djvu (standard), .djvuq, .djvur, .udjvu, .djvuu and .djvut among others.
How can I remove the .djvu file extension virus?
1. Manual Removal of .djvu virus
1.1 Simply uninstall djvu
NOTE
This procedure is exclusive to Windows 10. Windows 8 and older versions have their own respective procedures.
Click the Start button and select All apps.
Locate djvufile extension (and other related programs).
Right-click on it, and select Uninstall.
1.2 Use the Task Manager
Press Ctrl + Shift + Esc to open the Task Manager.
In the Processes tab, locate the .djvu process, select it, and then click on End task.
1.3 Via the Registry Editor
Press Windows + R to open Run, type regedit in the text field, and click OK.
Locate the .djvu files (and related entries). To speed up the process, press Ctrl + F and input the file name in the search box.
Remove the entries.
1.4 Remove the .djvu virus via Msconfig in Safe Mode
Reboot your system.
On the boot window, press F8 (repeatedly) until you open the Advanced Boot Options.
When the OS boots, press Windows + R to open Run, type msconfig, and click OK.
Navigate to the Services tab, locate all suspicious services, and click OK to disable them.
Restart your system.
1.5 Via System Restore
If the previous methods didn’t work, you would have to perform a system restore to revert the computer to the previous state.
Remember, this will only remove the virus while the affected files may still be present, in which case, you will have to delete them manually.
Manual removal of .djvu file extensionvirus is usually insufficient and, most of the time, unsafe. In fact, in some cases, it is blatantly ineffective, depending on the magnitude of the infection.
Hence, to ensure optimum efficiency, using a durable anti-malware program is recommended.
However, even better than such a program is a performant package with cybersecurity solutions for your computer. This is the best software that protects your Windows, Android, Linux, and Mac devices using powerful antivirus technology.
This third-party software uses powerful antivirus technology to eliminate viruses, trojans, worms, spyware, and all types of malware from your computer. Your operating system will now benefit from multilayered protection.
As a software package, this intelligent tool will keep your private information safe from hackers and unauthorized third parties. It also contains advanced features for those situations when you lose your computer or it gets stolen.
TotalAV
TotalAV is a software that eliminates the .djvu virus and all other types of viruses and malware.
By employing either of the above-listed tools, you can safely remove the .djvu virus from your PC and fully restore all affected files. However, the antivirus option is usually more effective.
On the surface, a missing drive letter may not be a big deal, but it indicates a much bigger problem. It could mean that your computer is not detecting your hard drive.
This can happen if you recently installed a brand new hard drive or something is failing. Either way, you must address this issue so you can continue using your computer without a problem.
What is causing the drive letter to disappear?
It’s important to point out what is causing this problem. If it ever reappears, having that knowledge in your back pocket can go a long way in addressing this issue.
There are many different reasons why your drive’s letter may disappear. The following list is not extensive, but it should give you a pretty good idea of why it happens.
Malware has infected your computer – It is strongly recommended that you download some antivirus software like Bitdefender to clear out the malware.
Parts of your computer are corrupted – To clean up the corruption, you will need to run an SFC scan via the Command Prompt on your computer.
Your motherboard is beginning to fail – This can happen as the motherboard gets old. It will start failing. Before replacing it, you should check the motherboard’s serial number and model.
The CMOS battery is failing – The CMOS battery powers the motherboard so that it can retain its settings. You’ll need to get a battery report to see if it needs to be replaced.
The power supply is faulty – A malfunctioning power supply can cause multiple hardware problems and failure across the board. You’ll have to update the computer’s BIOS to fix this.
How can I restore the drive letter on Windows 11?
There are many different ways to fix the drive letter problem. Most of it is pretty easy to do and can be done quickly, while other solutions will take more time:
Contact your computer’s or laptop’s manufacturer and see if they can repair the device. If this fails, you may be better off buying a new device.
Install a partition assistant app like Acronis Disk Director to allow you to rename the hard drive, among other things.
Replace the CMOS battery on your motherboard so your hard drive can function properly and without issue. A CMOS battery should be replaced every five years or so.
Double-check your laptop’s power supply on your laptop and make sure all the cables are inserted correctly.
1. Check system errors
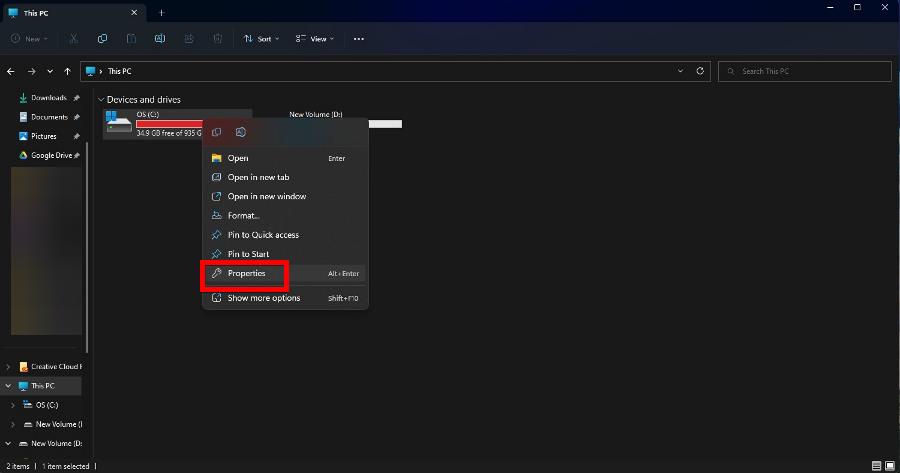
Open File Explorer, then locate your drive. Right-click the problematic drive and select Properties.
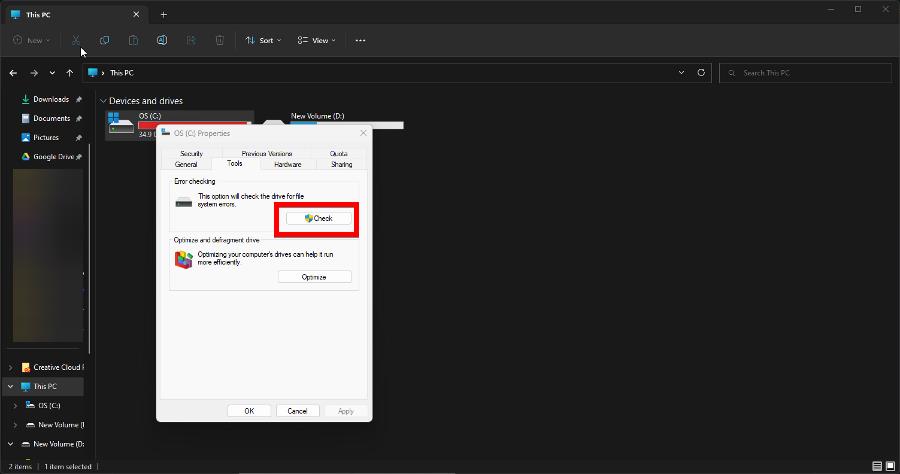
Go to the Tools tab and click the Check button.
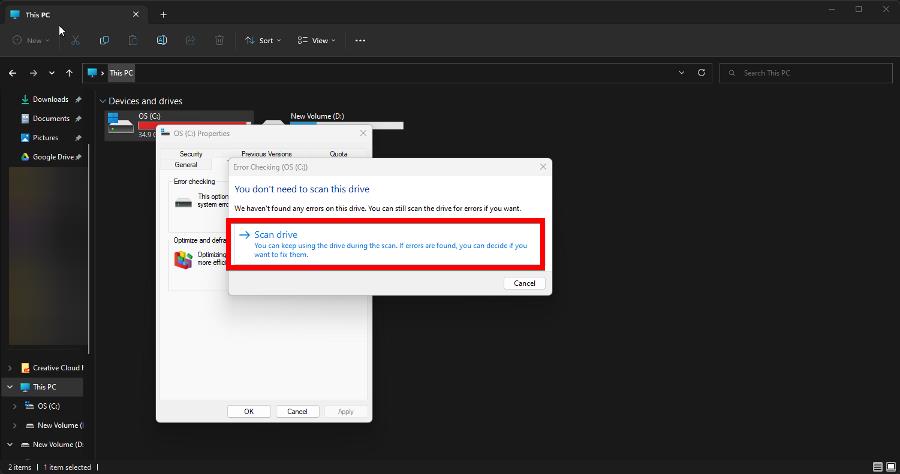
Select Scan drive. The tool will look for any system errors in the drive, and if it discovers anything, the software will offer the opportunity to repair it.
2. Run CHKDSK command
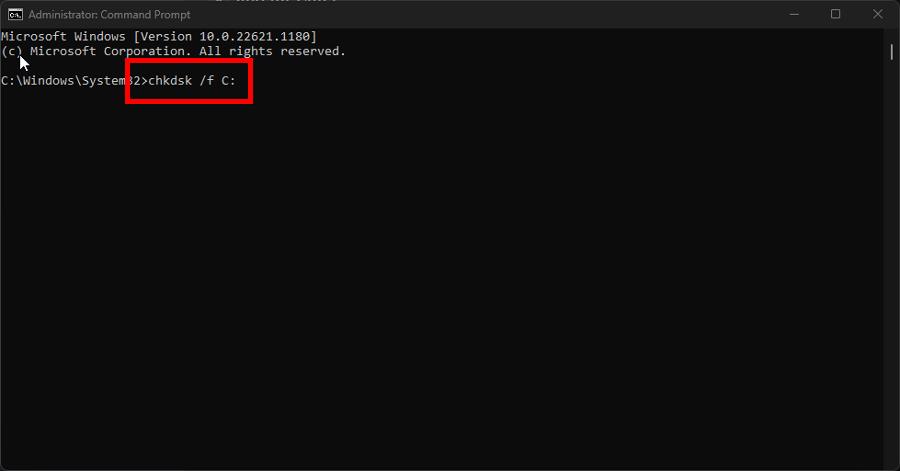
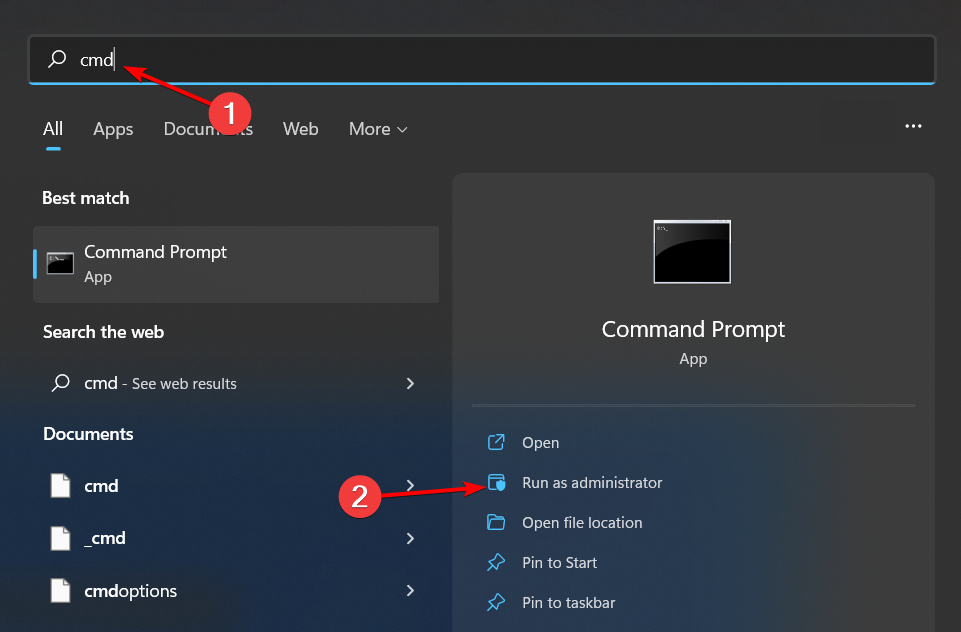
Bring up the Command Prompt in the Windows 11 search bar and select Run as administrator.
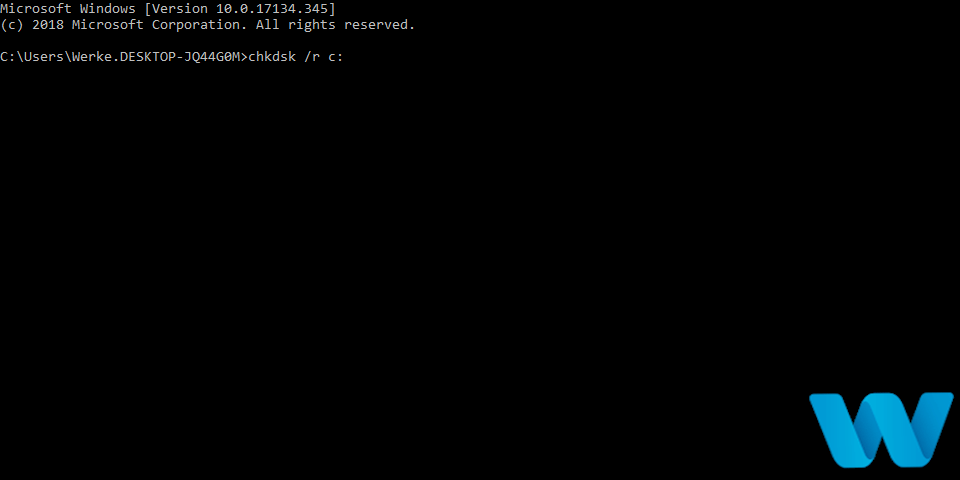
Enter the following command and hit Enter on your keyboard: chkdsk /f C:
If you have other drives on your computer, replace the last letter with the one from the other drive like D:, for example.
Restart your computer after the Command Prompt finishes. Be aware it may take some time before it reboots.
You should perform this solution if checking system errors doesn’t work via the drive’s properties menu.
Also, whenever your computer checks for system errors, it will create a log file telling you what it found. This can be located in the Windows Event Viewer.
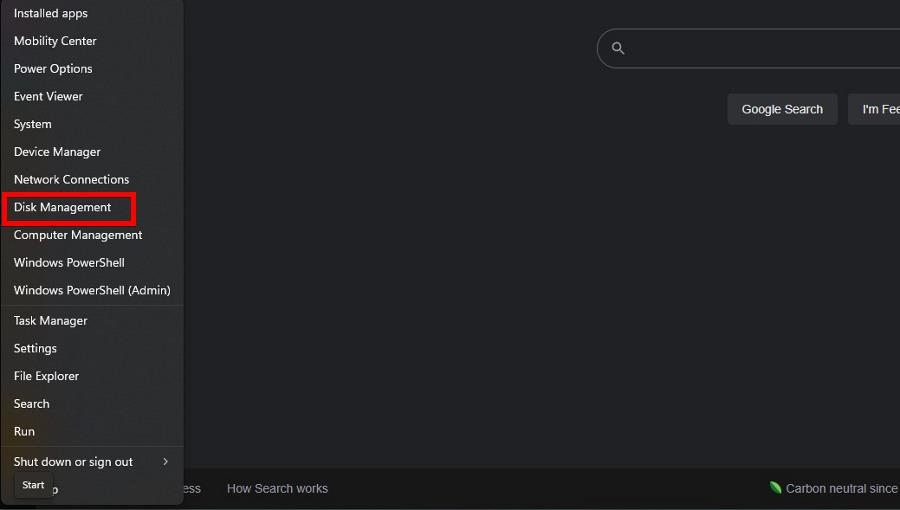
Right-click the Windows logo in the bottom left corner and select Disk Management.
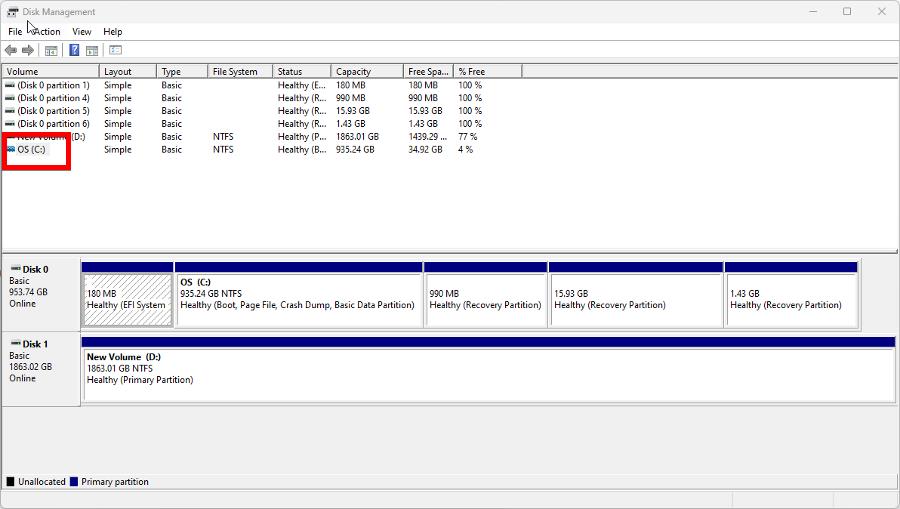
Right-click your drive, then choose Change Drive Letter and Paths.
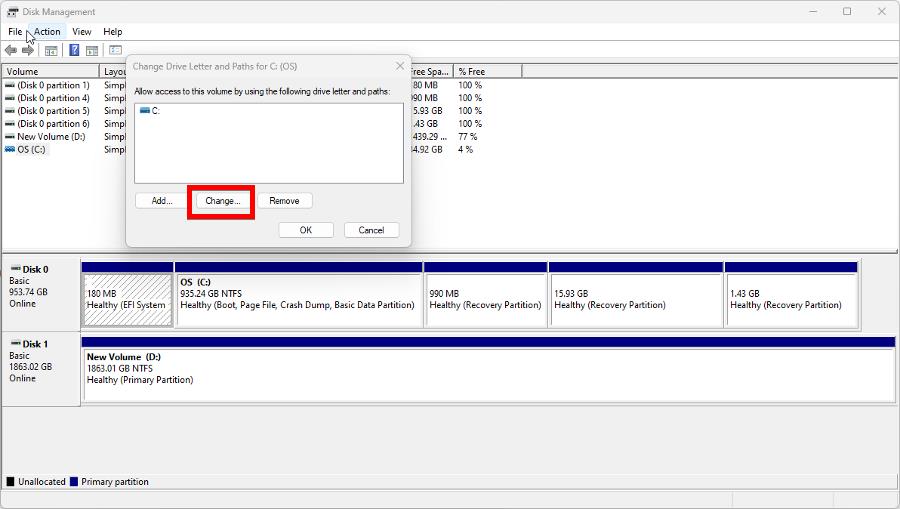
In the new window that appears, click the Change button.
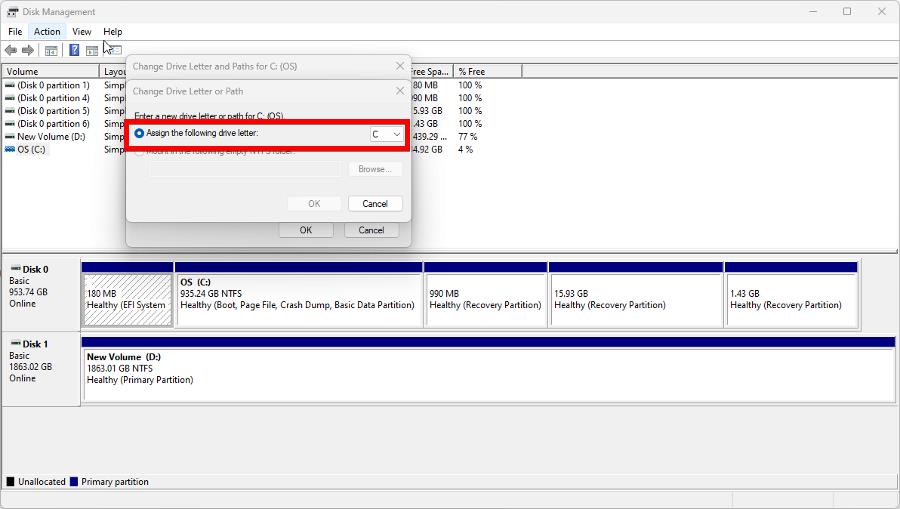
Make sure Assign the following driver letter is selected and choose another letter from the drop-down menu.
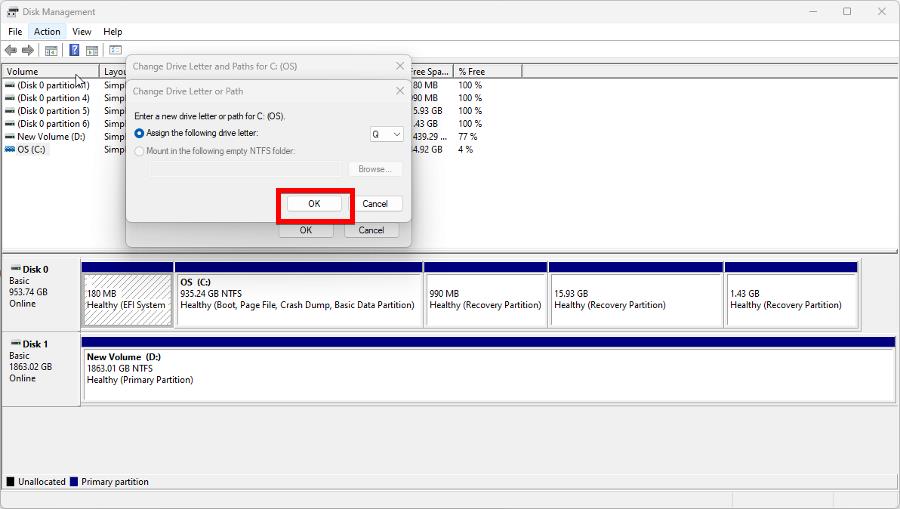
Click OK, then select OK again in the following small window.
7. Rename the drive via the Registry Editor
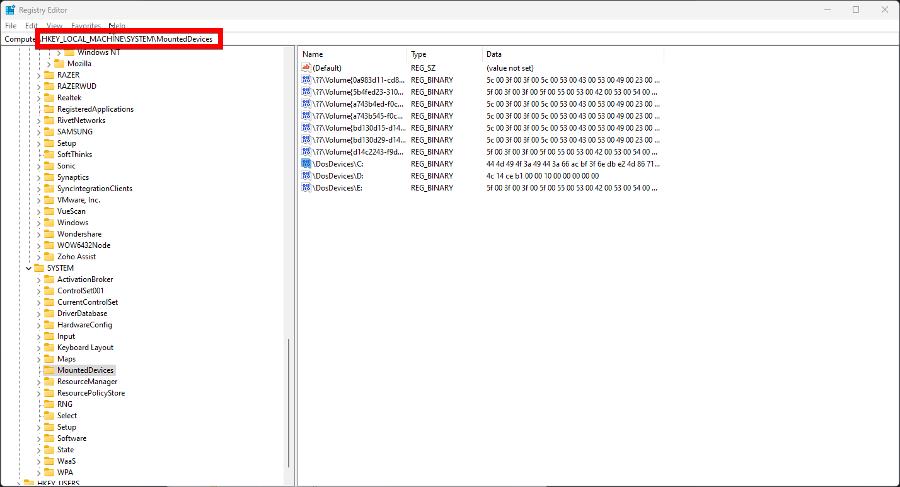
Launch the Registry Editor from the Windows Search bar.
Enter the following key into the address bar at the top: HKEY_LOCAL_MACHINE\SYSTEM\MountedDevices
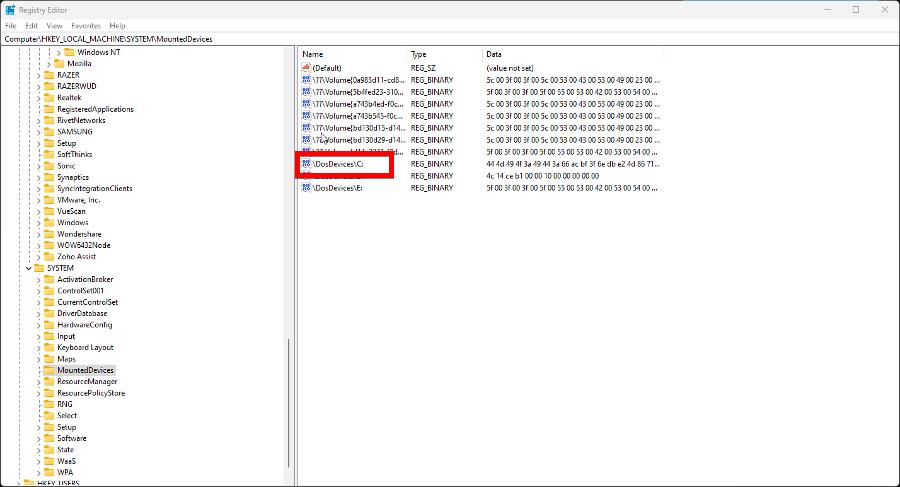
Right-click your hard drive’s letter and select Rename in the menu that appears.
Change the letter to one that is not currently in use. Restart your computer to finish assigning the new letter to the drive.
Why does my hard drive keep crashing?
Since missing drive letters is a symptom of hardware failure, you should learn how to fix other problems that come from system failure.
For example, having a hard drive that constantly crashes is a particularly awful problem. Before you do anything, it’s recommended that you first use a backup tool to save your files.
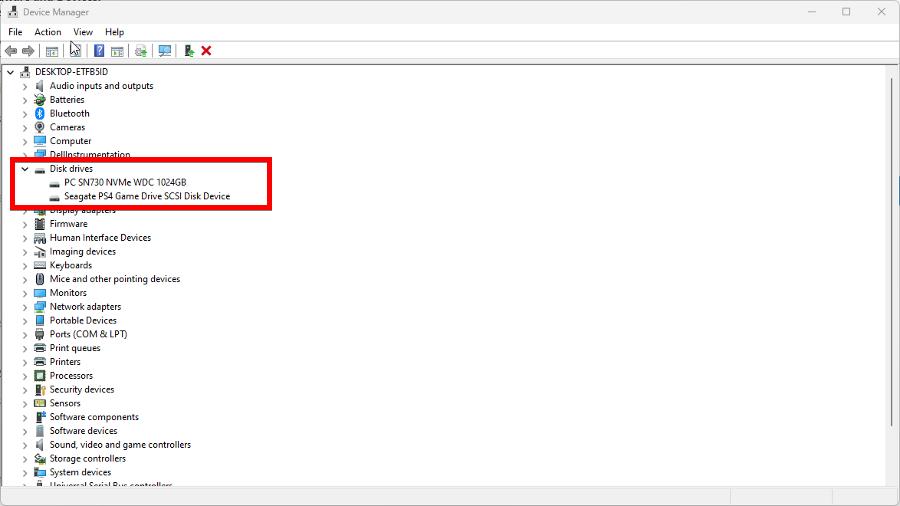
Some users have reported instances of Windows 10 thinking their hard drive is removable when it isn’t. This is a configuration issue and can be solved by modifying the disk drive in the Device Manager.
Feel free to comment below if you have questions about other hardware problems. And please tell us if there’s a specific guide for any Windows 11 error you’d like to see.
Many users have reported that they encountered a Windows reboot from a previous installation is pending error while trying to install or upgrade Microsoft Exchange.
Usually, this issue is fixed by restarting your computer. However, if you still get this error, there is a workaround.
This guide will explain the steps to fix the problem right after discussing the causes. Let’s start!
What causes the reboot from a previous installation is pending error on Exchange 2013?
There are several reasons why you got this error while installing Microsoft Exchange, some of which are mentioned here:
Pending system updates – The pending system updates could cause the error, so to fix this, make sure you install all the pending updates.
Pending restart – You must restart your computer after making significant changes in the system settings or installing an update. If a restart is pending, you may get this error.
Unsuccessful server restart – If your server didn’t restart properly while installing or upgrading Exchange, you could see this error message.
How can I fix the reboot from a previous installation is pending error on Exchange 2013?
Before engaging in advanced troubleshooting steps, you should consider performing the following checks:
First, make sure there are no pending updates.
Reboot your computer.
Restart the server.
Before making any changes to the registries, it is essential to back up entries. To do that, go to File, then click Export. Finally, save the .reg file at a desired location.
1. Delete PendingFileRenameOperations
Press Windows + R to open the Run window.
Type regedit and press Enter to open Registry Editor.
Follow this path: Computer\HKEY_LOCAL_MACHINE\SYSTEM\CurrentControlSet\Control\Session Manager
Follow this path: Computer\HKEY_LOCAL_MACHINE\SOFTWARE\Microsoft\Updates
Locate and double-click UpdateExeVolatile and change the Value data to 0.
Click OK.
Restart your computer to complete the process, and try to install Microsoft Exchange.
So, these steps you need to follow to fix a windows reboot are pending from a previous installation. Please restart the system and rerun the setup to see if the fix has worked.
If you have any questions or concerns, feel free to let us know in the comments below.
Intel unveiled the Unison in 2022, which allows people to transfer their content from their phones to PC effortlessly. Intel Unison is available for Windows 11, Android, and iOS.
In short, you can view incoming notifications and messages, make calls and transfer content from your smartphone to your PC.
This guide will give you many solutions to fix the Intel Unison not working Windows 11 problem. So let’s get right into it.
Why is Intel Unison not working in Windows 11?
After careful research, we have deduced a list of the most common reasons why Inte Unison is not working in Windows 11.
Your PC/Laptop doesn’t have a 12th or 13th-Generation Intel Evo CPU: You should make sure that your PC meets the requirements to run the Intel Unison app and that you have a 12th or 13th-generation Intel EVO CPU.
The Bluetooth driver on your PC is outdated: Outdated Bluetooth driver could very well be why Intel Unison is not working in Windows 11.
There are some issues with the Intel Unison app: Internal problems with the Intel Unison app could also be the reason for several related issues.
The app isn’t up to date: You need to ensure that you have the latest version of the Intel Unison app installed on your PC, as it could have fixed a bug in the previous version.
What can I do if the Intel Unison app is not working?
Here are some quick fixes that we would like you to try to fix the problem at hand:
First, restart your PC, open the program, and check if this fixes the problem.
Check your PC meets the minimum requirements to run the Intel Unison app. For more information, you can check out the official website.
Let us go through the advanced troubleshooting solutions.
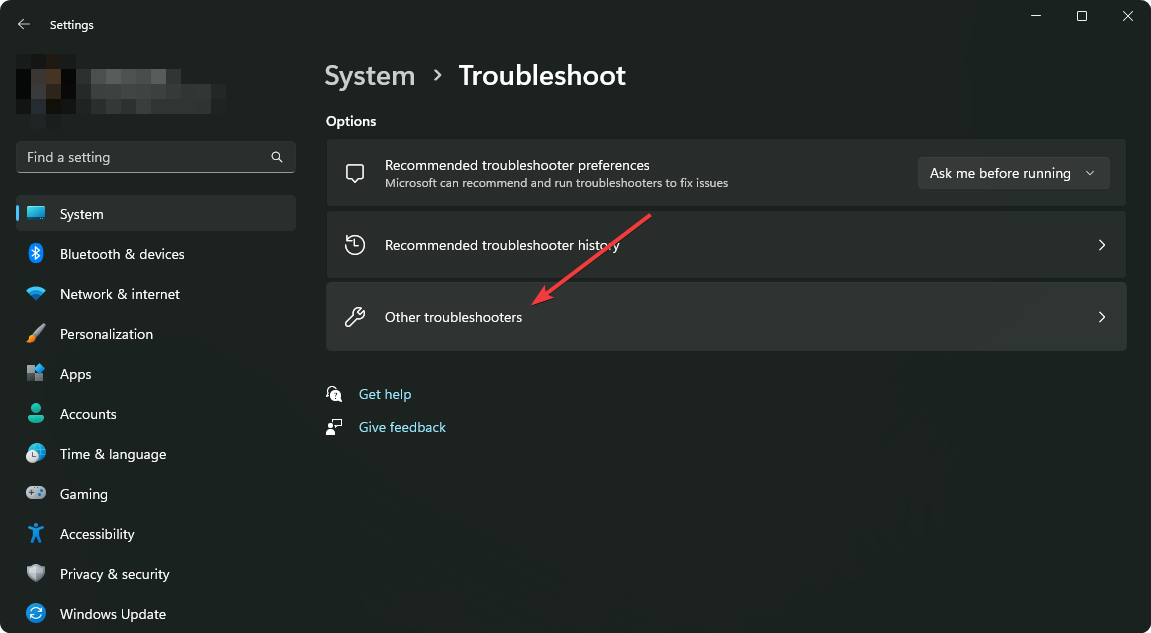
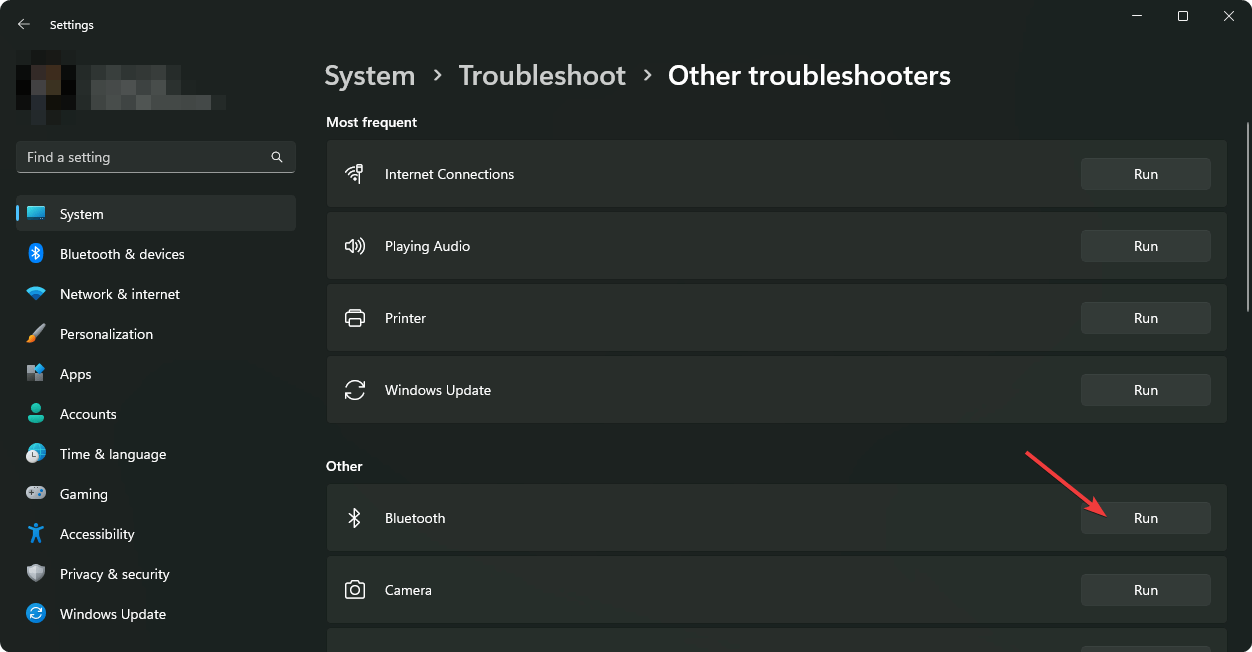
1. Update the Bluetooth driver
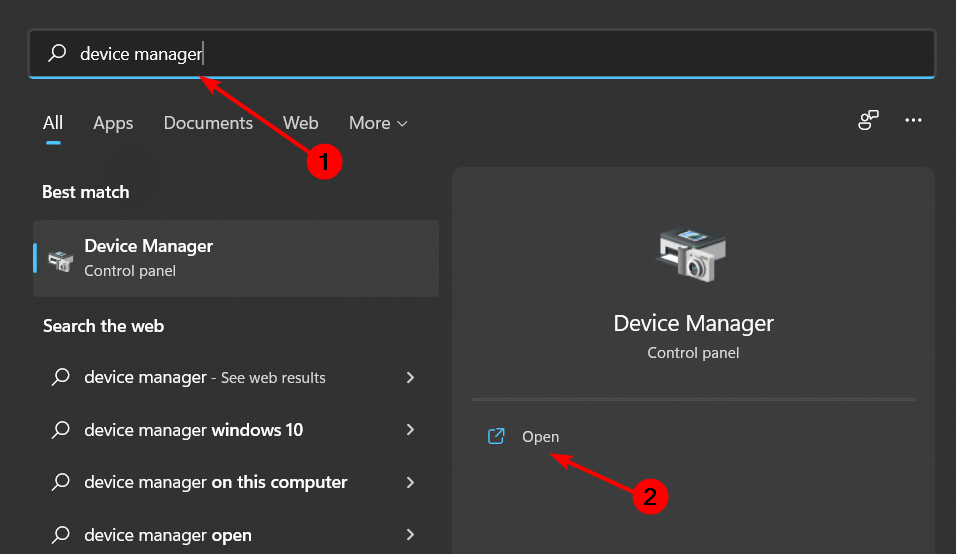
Open the Start menu by pressing the Win key.
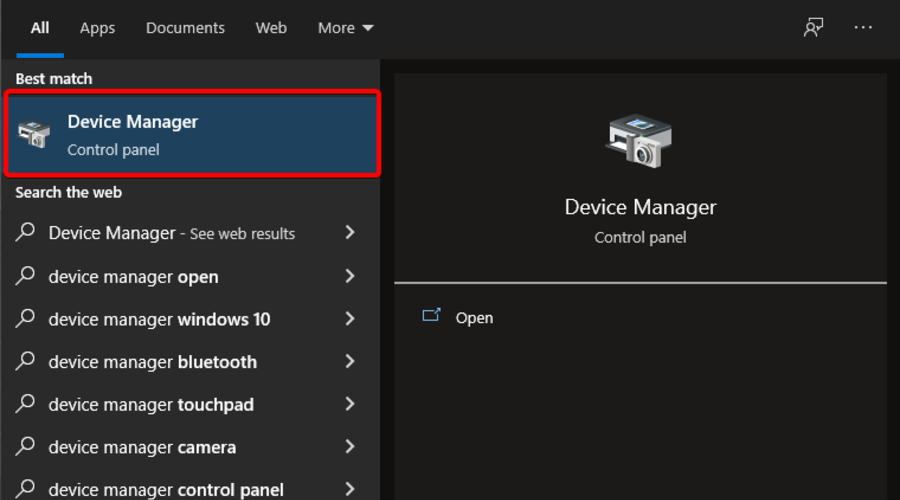
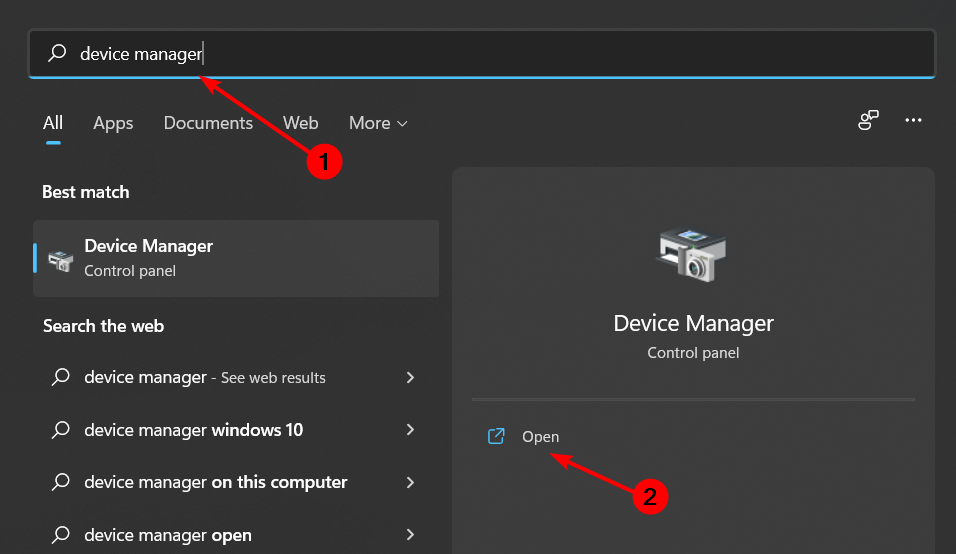
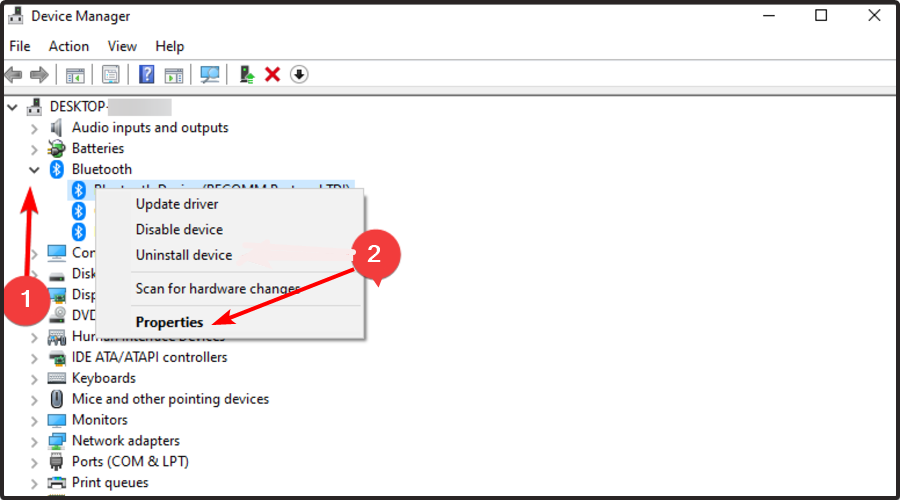
Open Device Manager.
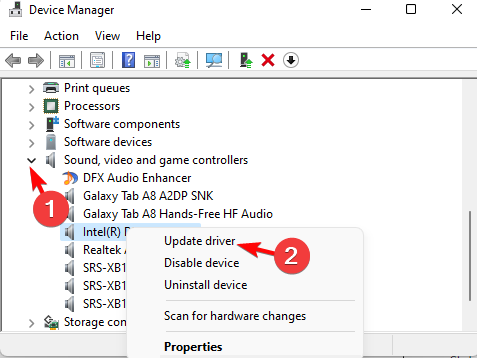
Expand the Bluetooth section.
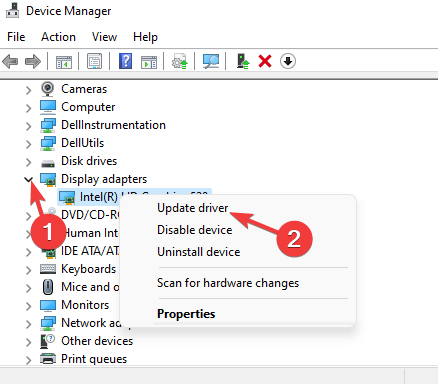
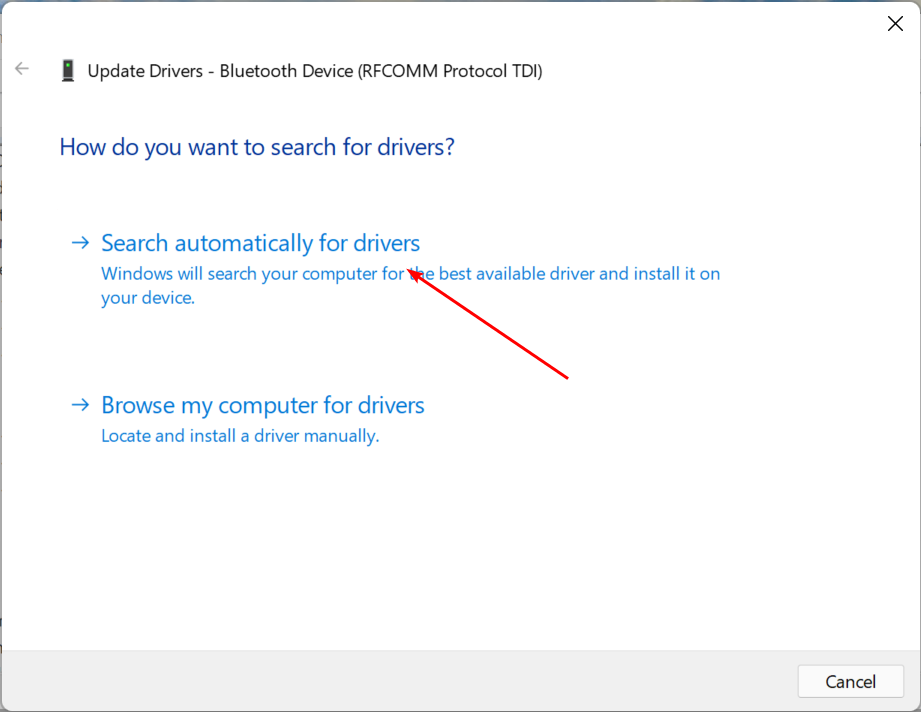
Right-click on your Bluetooth driver and select the Update driver option.
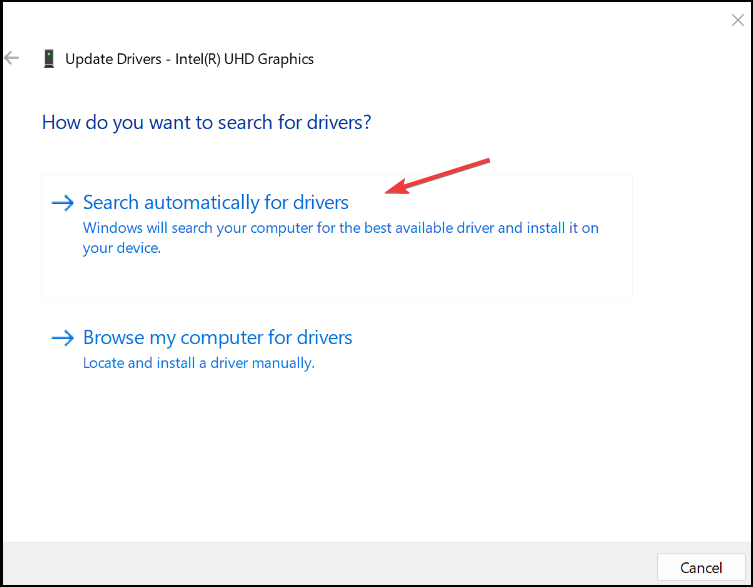
Select Search automatically for drivers option.
Follow the on-screen prompts to install the latest update for the Bluetooth driver.
This is one way to update the driver. But what if this error is because of other outdated drivers? In such a case, we suggest you use the Outbyte Driver Updater tool.
Using Outbyte Driver Updater, you can update all drivers in just a few clicks. Moreover, it can help you schedule driver scans, create driver backups, act as a download manager, and more.
Outbyte Driver Updater
You need to keep your drivers updated at all times, and Outbyte Driver Updater will also make your PC faster!
If there is a new update available, click on Download & install.
You should keep your Windows OS updated not only to fix the Intel Unison app not working in Windows 11 but also to keep the programs running smoothly without any issues.
Discord is a famous Voice over Internet Protocol tool that offers text, video, and voice-based communication. However, recently several users have reported the mic works on Discord but not in-game issues.
This glitch seems to have affected almost all the games, including PUBG, Fortnite, CS Go, Overwatch, Rainbow Six Siege, H1Z1, and more.
We understand how annoying this can be, especially if you’re used to chatting with your teammates while playing your favorite games. Fortunately, we’ve compiled a series of methods to help quickly solve this issue.
Why does my mic work on Discord but not in the game?
There could be several reasons why your microphone works on Discord but not in-game:
Input settings – Ensure that the correct microphone is selected as the input device in the game’s audio settings.
Permissions – Make sure the game has permission to access your microphone. Some games have this option in their settings.
Microphone mute – Double-check if the microphone is not accidentally muted in the game’s audio settings or by a physical mute button on the device.
Driver issues – Outdated or incorrect audio drivers can cause compatibility problems. Try updating your audio drivers to the latest version.
Software conflicts – Other programs or background processes may interfere with the game’s ability to access the microphone. Try closing other programs or disabling background processes temporarily.
If your mic works on Discord but is not in-game, make sure you verify our presented solutions.
What can I do if the mic works in Discord but not in the game?
1. Change the port
If you use a USB microphone, try using a different USB port on your PC. First, unplug your microphone and connect it to any other empty USB port. Then, reboot the computer and check for any improvements.
This also applies if you are using the audio jack. If you are using the front audio jack, remove the plug, connect it to the rear audio jack, and check for any improvements.
2. Update audio device drivers
Hit the Windows key, type Device Manager, then open it.
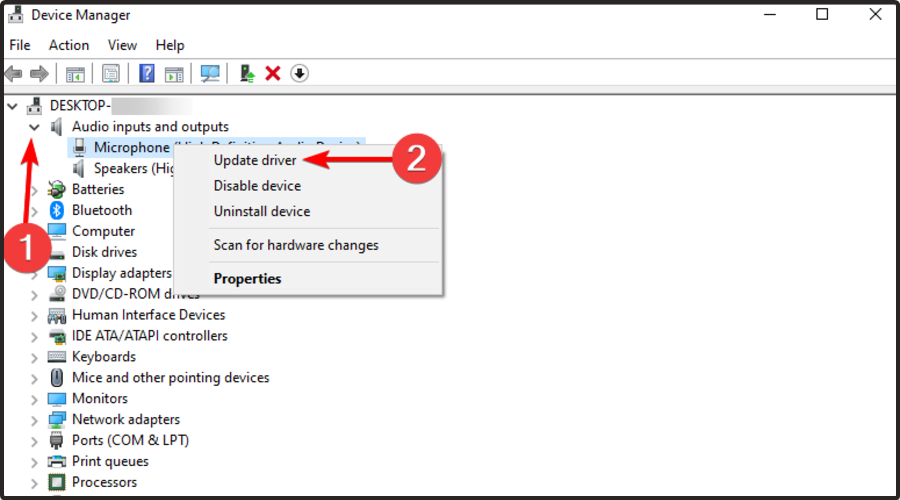
Expand the Audio inputs and outputs section, right-click on your mic, and select Update driver.
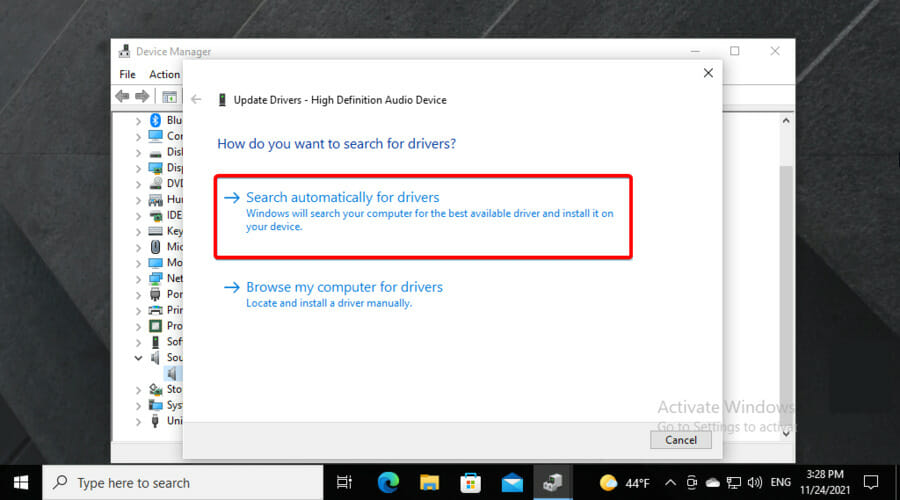
Choose to Search automatically for drivers.
If there are any available drivers to update, you’ll be notified.
Incompatible or outdated audio device drivers can cause the mic works on Discord but not in Fortnite issue. You can fix it quickly by simply updating your audio driver.
While you can update your audio driver manually, automated driver update utilities can make this task easier. A driver update utility is recommended if you are uncomfortable updating system drivers manually.
Therefore, it’s better to utilize software specialized in driver issues, such as updating drivers, finding missing ones, or repairing broken device drivers.
A suitable tool for this purpose is Outbyte Driver Updater due to its automated functionality and deep scanning tools. Thus, you will resolve your drivers’ problems and enjoy your favorite games on Discord.
Use the following keyboard shortcut to open Windows Settings: Windows + I.
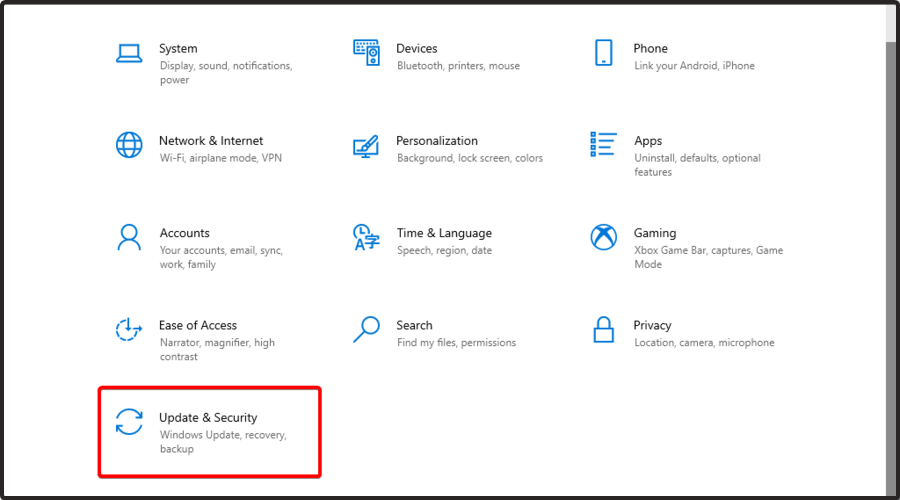
Go to Update & Security.
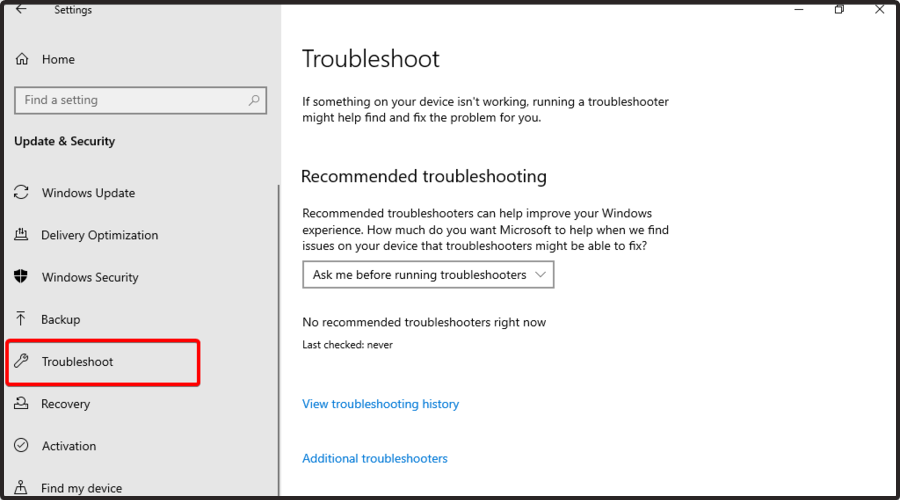
Open the Troubleshoot tab from the left pane.
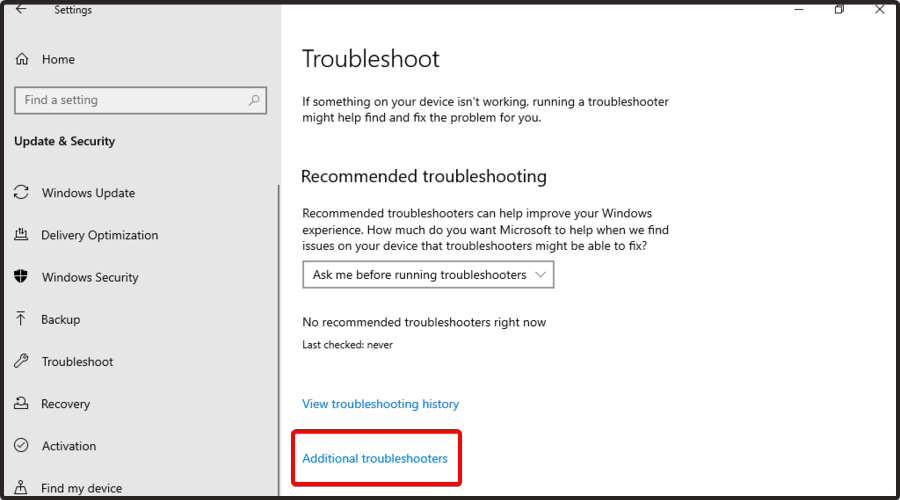
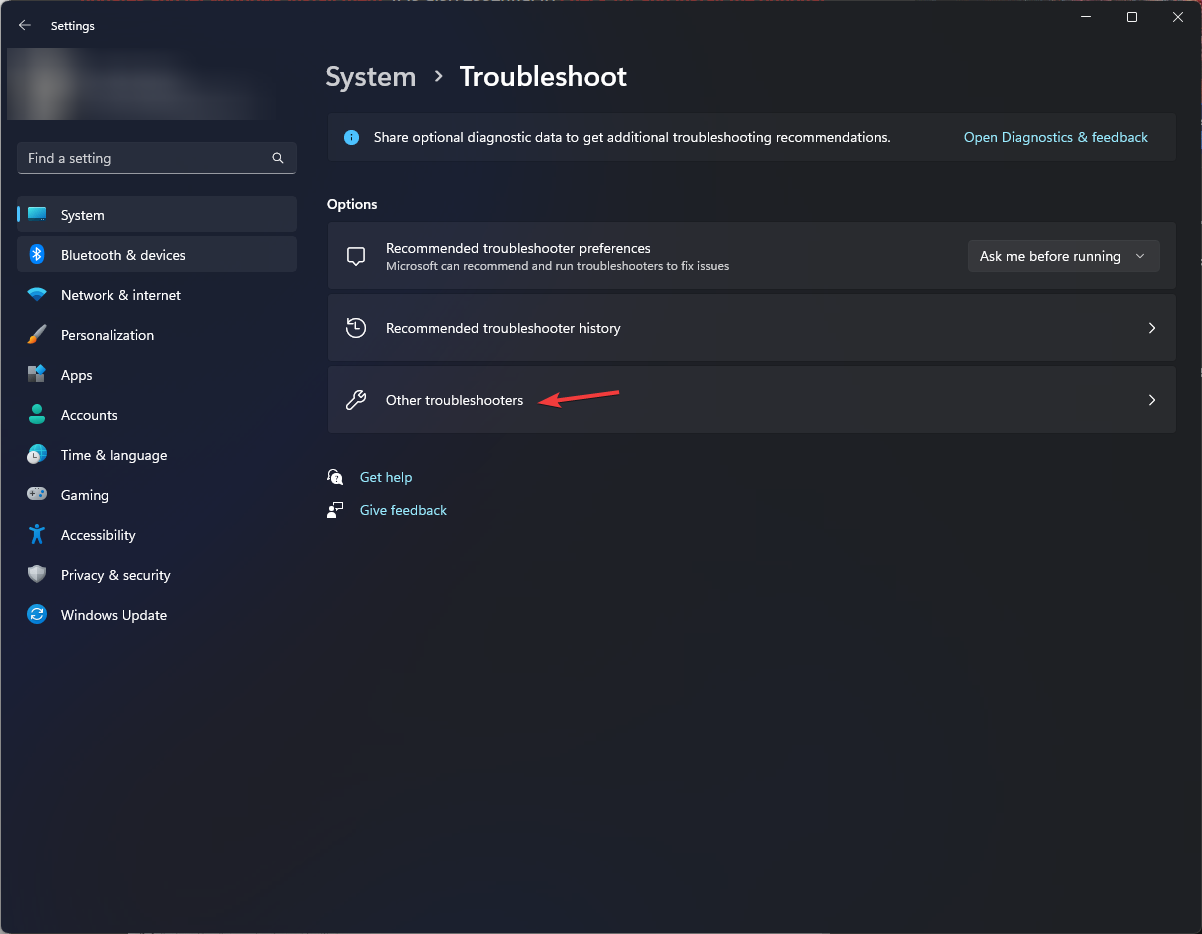
In the right window pane, scroll down, then click on Additional troubleshooters.
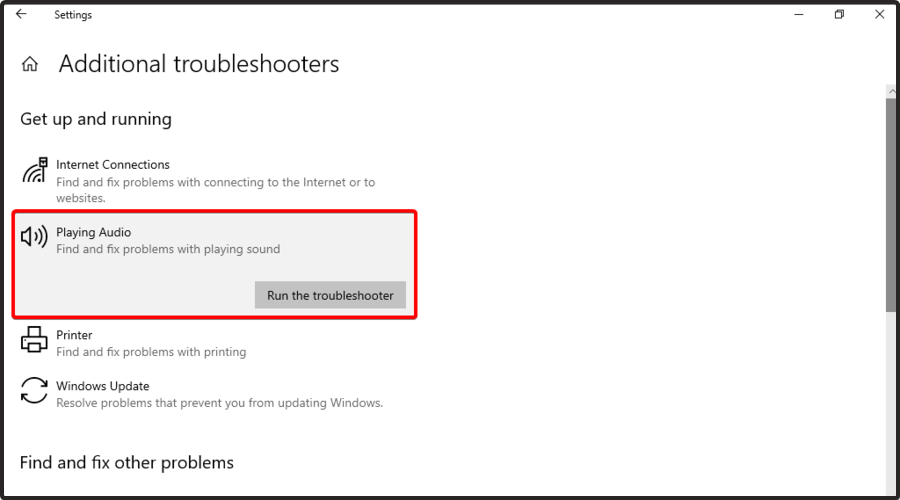
Click on Playing Audio, then choose to Run the Troubleshooter.
After the scan, select the affected audio device and then click Next.
Follow on-screen instructions and apply any recommended fixes.
Once the fixes are applied, close the troubleshooter and restart your PC. After the restart, relaunch the game and check for any improvements.
4. Reset voice settings in Discord
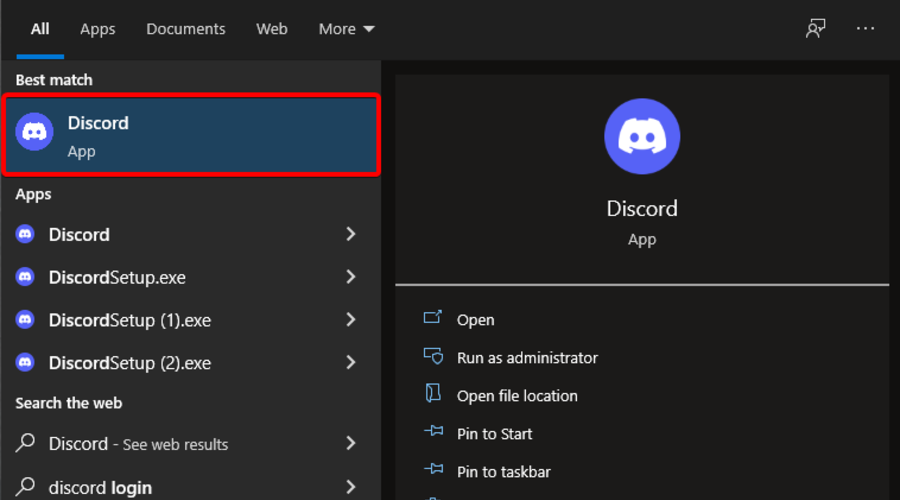
Use the following keyboard shortcut: Windows + S.
Type Discord, then open the first result.
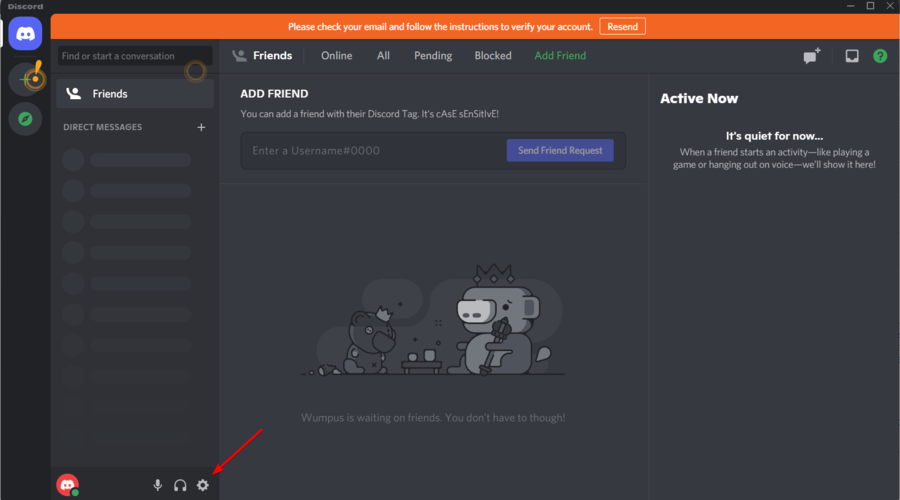
Navigate to Settings (marked as gear at the page’s bottom).
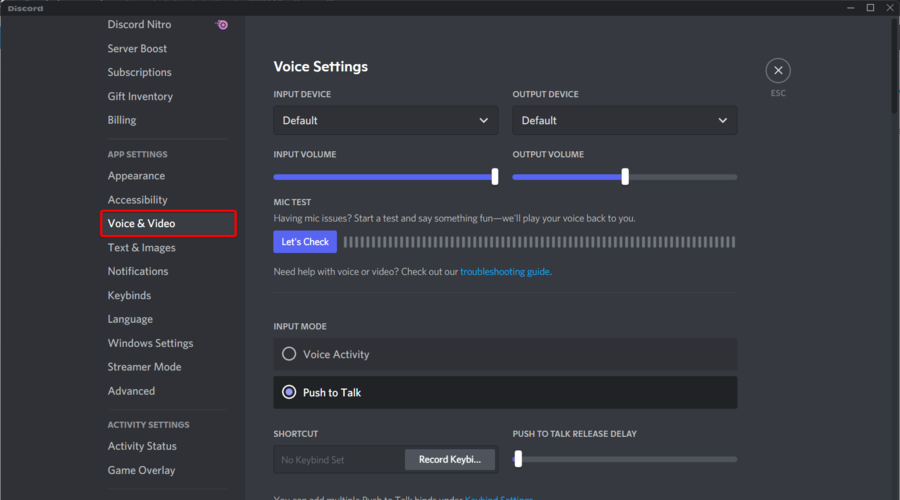
In the User Settings window, open the Voice & Video tab.
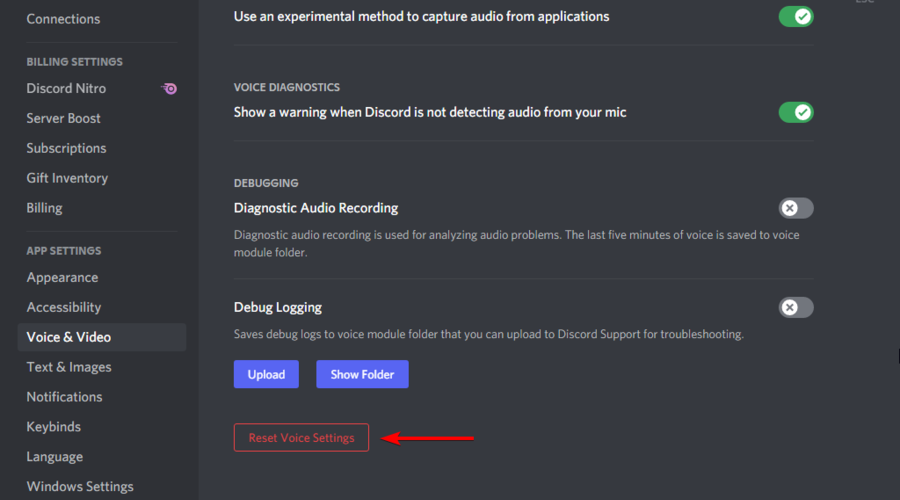
Scroll down to the end of the page and click on Reset Voice Settings.
Confirm the action by clicking on Okay when prompted.
Once reset, you may require to reconfigure Discord voice settings, including Push to Talk feature again.
5. Configure the recording device in Control Panel
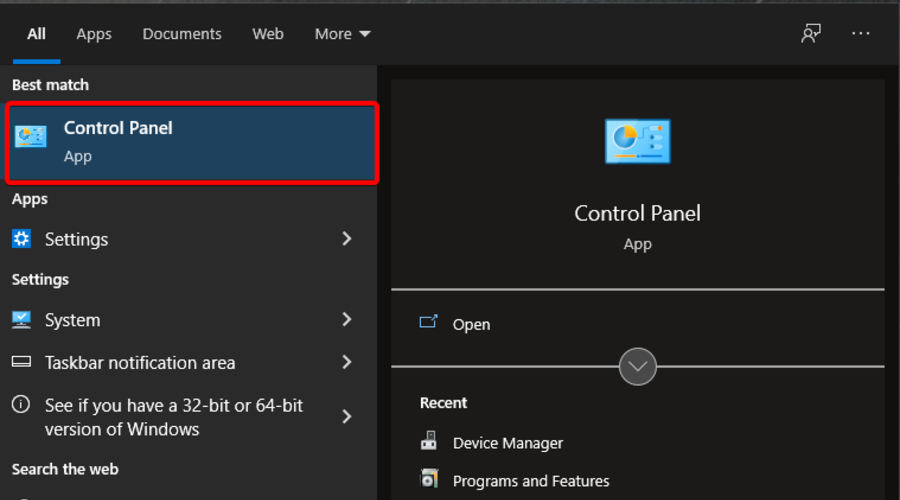
Hit the Windows key, type Control Panel, then open it.
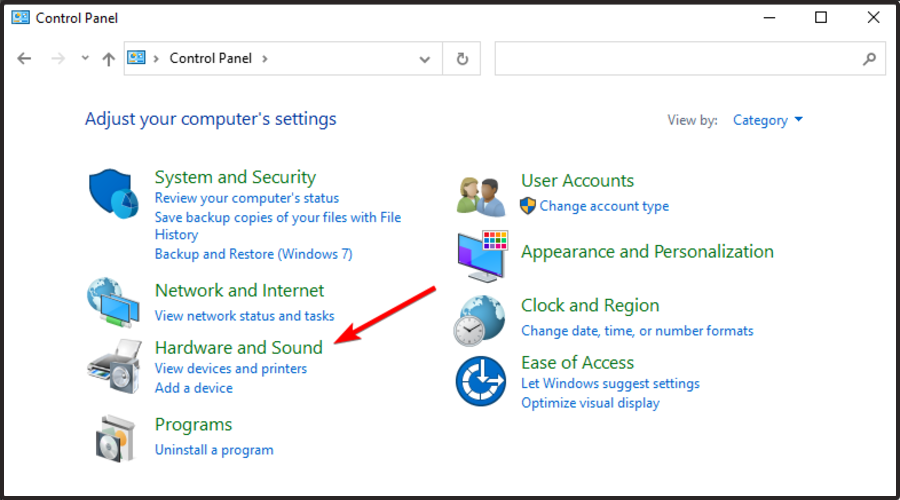
In the Control Panel, click on Hardware and Sound.
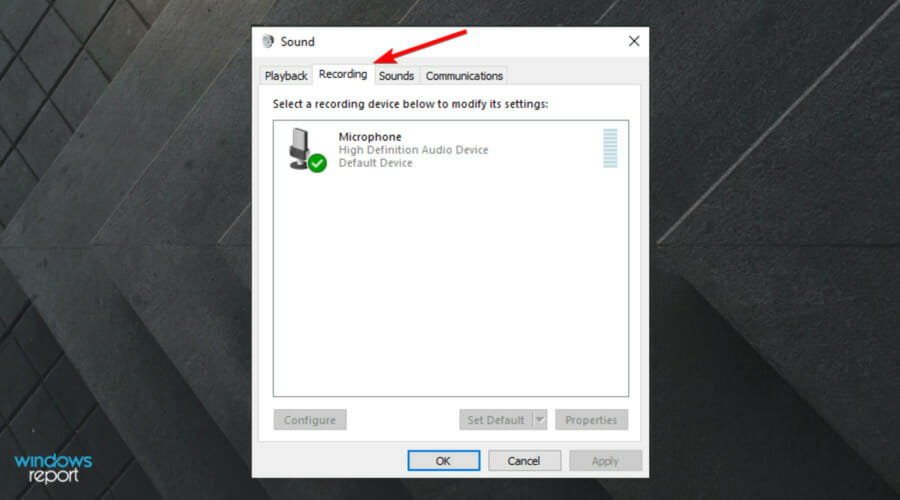
Next, click on the Sound option. This will open the Sound properties window.
Open the Recording tab. Make sure your mic is connected to the PC.
Check the default input device. The default input device will be tagged as Default Communications Device.
To change the default communications device, right-click on your input device (Mic) and choose Set as Default Communications Device.
Click Apply and OK to save the changes.
Once you have configured your input device, launch the affected game and check if the mic works on Discord but not in Overwatch.
Games like PUBG use the default communication device from your PC. If you use a different input device for Discord, your game will not recognize the device.
Ensuring you have the correct input device set as the default communication device in Windows 10 will resolve the issue.
6. Uninstall and reinstall the input device
Hit the Windows key, type Device Manager, then open it.
Expand the Audio inputs and outputs section, right-click on your microphone device, and select Uninstall Device.
Confirm the action by clicking on Uninstall again.
Once uninstalled, close Device Manager.
Ensure your audio input device is connected to the computer and restart your PC.
After restart, Windows automatically detects the input device and reinstalls the input device drivers.
If the audio input device is not reinstalled automatically, scan for hardware changes in Device Manager.
Hit the Windows key, type Device Manager, then open the first result.
Click on Action and then choose Scan for hardware changes.
Windows will scan for missing devices and reinstall the required drivers.
Additionally, you may have to repeat the steps in method two above to reconfigure your input device and set it as default.
Once configured, relaunch Discord. Open the affected game and check if the mic works in Discord but not in CS Go issue is resolved.
With the Windows Event Viewer tool, you can track important system information such as application and event logs. Using these data, you can quickly troubleshoot various system crashes, errors, or malfunctions on both the hardware and software levels.
However, multiple user reports show them an error The security log is now full – Event ID 1104. If you are also facing this issue, and want to resolve the problem, then in this guide, we will give you a bunch of solutions that you can use and possibly fix. So, let us get right into it.
What is Event ID 1104 and what triggers this problem?
The errors in the Event Log are common, and you will come across different errors with different error IDs. For example, Event ID 1104 pops up when the upper limit of the Security Log Event file size is attained, and there is no room to log more events.
Here are a few common reasons because of which you will come across The security log is now full – Event ID 1104.
The log overwriting is not enabled: The Event ID 1104 is triggered when you haven’t enabled the log overwriting option.
Event Viewer service is malfunctioning: If enabling overwriting didn’t help, then the Event Viewer service might have some issues.
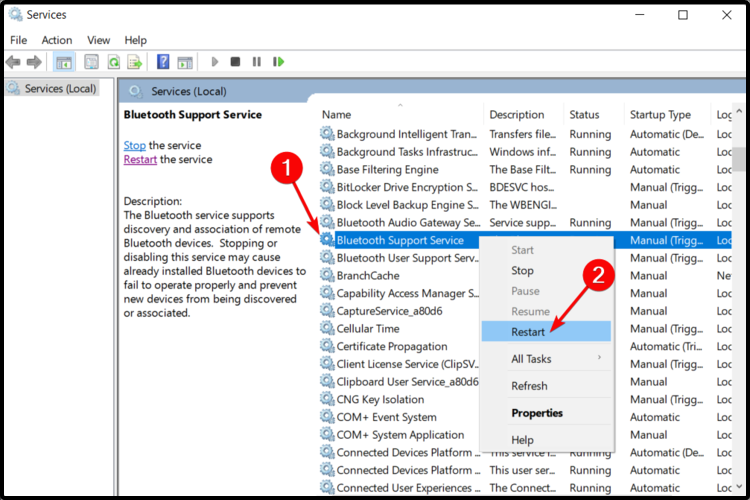
Right-click on Windows Event Log and select Restart.
If the Event Viewer is going through an issue, then this could cause it to malfunction and throw up errors. Restart the service following the above steps and see whether this resolves the problem.
3. Enable Event Viewer
Press the Win + R keys to open the Run dialogue.
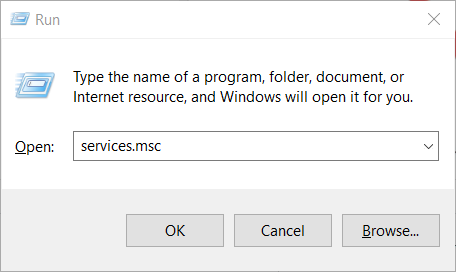
Type services.msc and press Enter.
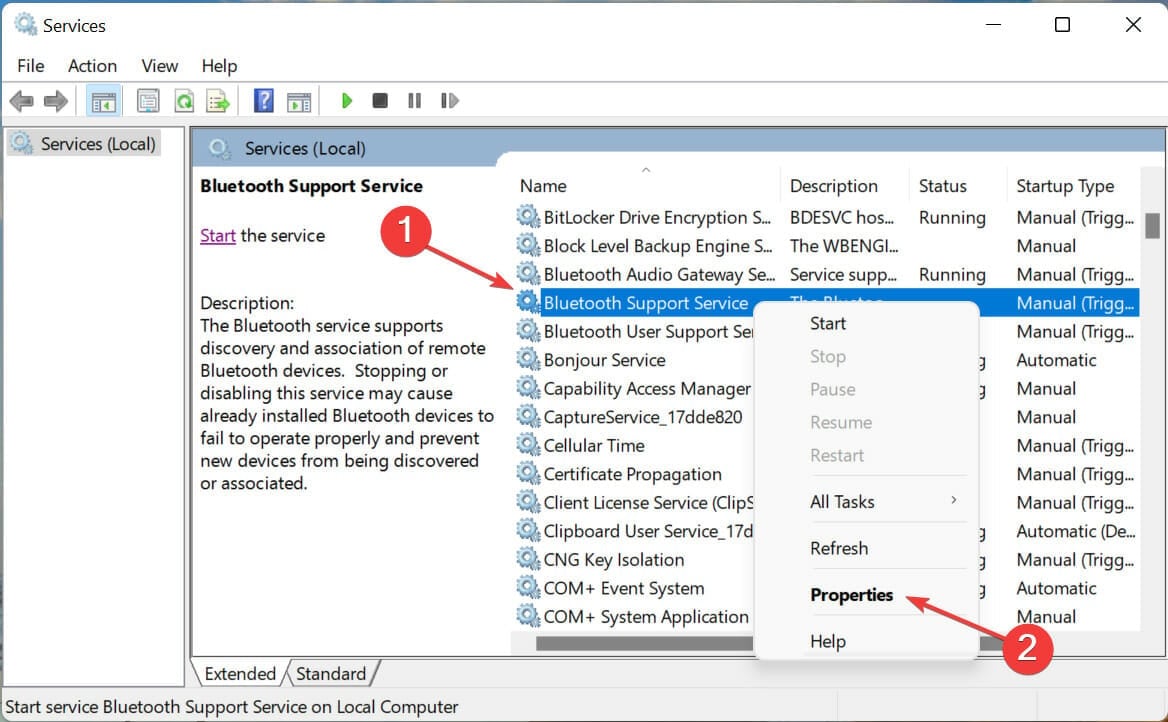
Locate Windows Event Log.
Double-click on the Windows Event Log service.
In the Startup type drop-down, select Automatic.
Hit the Start button under Service status if not already done.
Click Apply and OK.
Often the Event Viewer service can get disabled because of a conflict with another service, which is why you might get The security log is now full – Event ID 1104 error.
In such a scenario, you can go to the Services menu, enable the Event Viewer service and see if this fixes the error.
4. Uninstall the recently installed Windows update
Press the Win + I keys to open the Settings menu.
Select Windows Update from the left.
Click on Update history.
Under Related settings, select Uninstall updates.
Hit the Uninstall button for the recently installed update.
Click on Uninstall.
The update will get uninstalled.
Chances are that the recently installed Windows update is having a bug that is triggering The security log is now full – Event ID 1104 error. Uninstall the recently installed update and check whether this fixes the issue.
5. Repair system files
Open the Start menu by pressing the Win key.
Open Command Prompt as an admin.
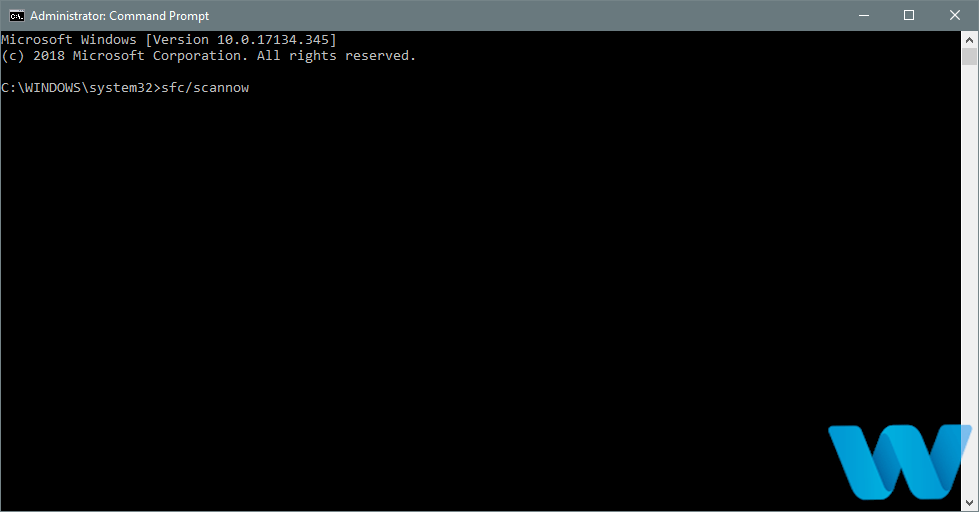
Type the below command and press Enter. sfc /scannow
Once the process completes, restart your PC.
You can use the in-built SFC Scan tool to identify corrupt or missing system files and replace them with new ones.
That is it from us in this guide. Several alternatives to Event Viewer will give you more detailed information about the processes and events on your PC.
If you can’t change the resolution in Elden Ring, you won’t be the first. Many people report dealing with similar issues, particularly having too wide of a screen setup for their hardware.
Elden Ring doesn’t offer a lot of graphics customization. For example, manufacturers didn’t provide DLSS, FSR, 60+ FPS at launch, or even a FOV Slider.
That said, it’s not impossible to adjust your screen resolution. Just follow the steps below:
What can I do to fix the Elden Ring widescreen issues?
1. Change Elden Ring Resolution
Open Elden Ring, then navigate to System.
Now, go to the Monitor icon.
From the Resolution section, change the settings to 1920 x 1080.
Use the following keyboard shortcut to open Windows Settings: Windows + I.
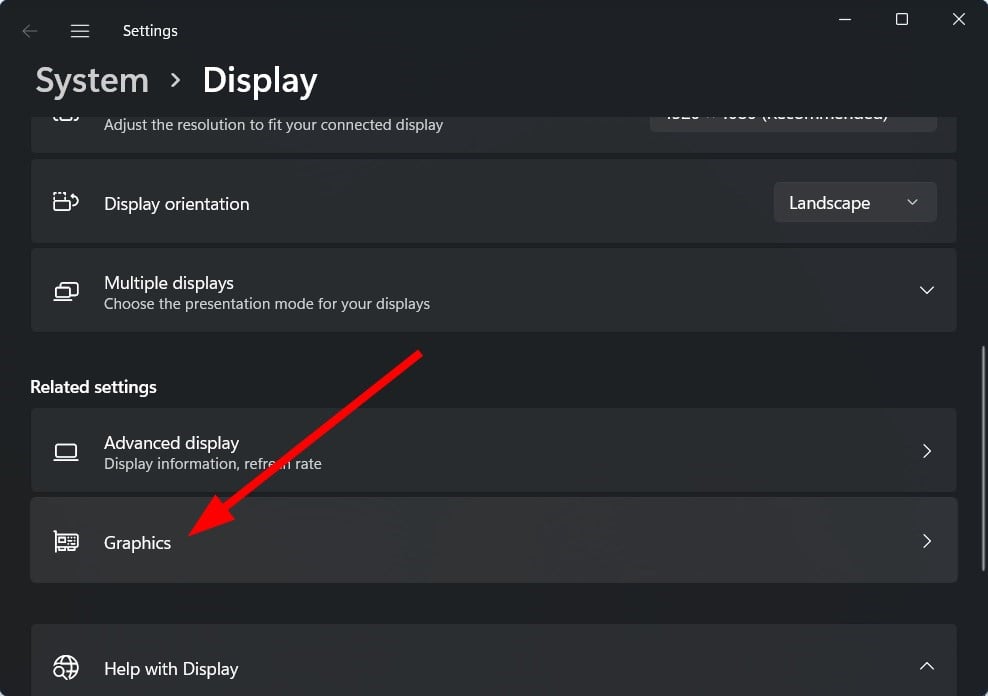
Click the Display navigation option.
Next, click the Display resolution drop-down menu and choose the 1920 x 1080 resolution setting.
Elden Ring ultrawide fix
Download and install Flawless Widescreen (you should get the most current version and one that matches your OS version).
Launch the newly installed app.
On the left pane, navigate Available plugins and FWS plugins and click on Elden Ring.
You can now select your preferred settings from the main interface. However, you should be aware that using Flawless Widescreen can get your account banned.
As you can see, it is straightforward to resolve this issue once and for all. Then, explore fantastic fantasy worlds with minimal effort and build your in-game character.
If you encounter any related questions or curiosities, feel free to comment in the section below.
Many people get the Couldn’t load XPCOM error message while trying to start Firefox.
This message usually signals corrupted files, conflicts with other software, incorrectly set profiles, problems with the registry, and (sometimes) viruses and malware infections.
How do I fix Couldn’t load XPCOM?
No matter the underlying cause, let’s see how we can fix the issue.
1. Completely remove Firefox and reinstall it
Click the Start button and select Settings.
Choose Apps.
Now look for Mozilla Firefox within the list of apps, click on it, and select Uninstall.
Follow the instructions on the screen to complete the process.
Press the Windows key + E to start File Explorer, then removethese folders (for 32-bit and 64-bit versions): C:\ProgramFiles\Mozilla Firefox C:\ProgramFiles(x86)\Mozilla Firefox C:\Users\your_user_name\AppData\Local\MozillaFirefox C:\Users\your_user_name\AppData\Local\Mozillaupdates C:\Users\your_user_name\AppData\Local\VirtualStore\Program Files\Mozilla Firefox
3. Delete everything from the Temp folder and disable your antivirus program
Press Windows Key + R and enter %temp%.
Press Enter or click OK.
The Temp folder will now open.
Select all files from the Temp folder and delete them.
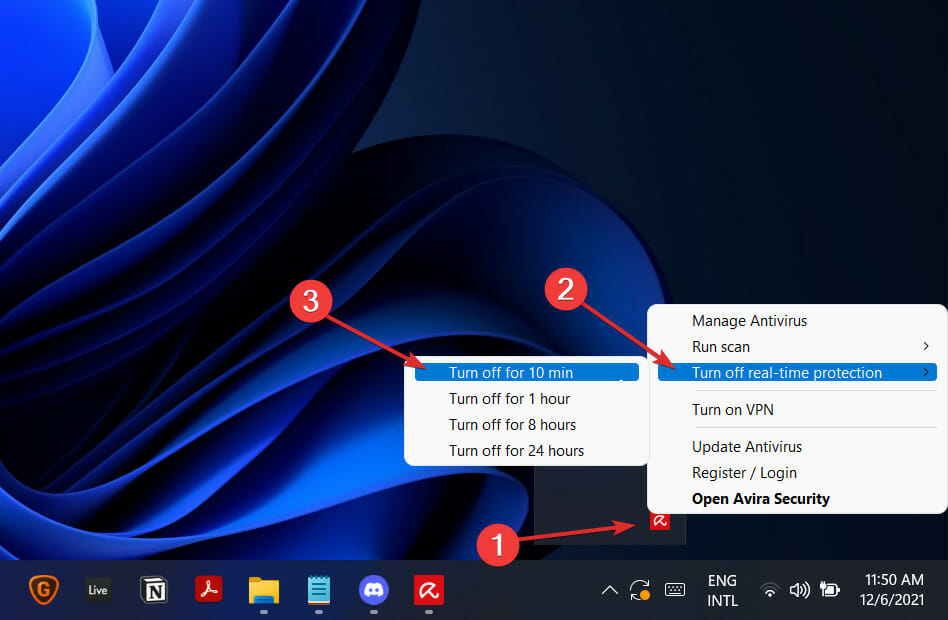
Antivirus can sometimes interfere with specific applications and cause this and many other errors to appear. Try whitelisting Firefox into your antivirus settings or add it as an exception to the firewall.
4. Reinstall Thunderbird
Thunderbird is a browser that Mozilla also makes, and it has the same XPCOM component that may fail after an incomplete update.
As for its most famous brother, to fix this problem, Mozilla recommends a clean reinstallation of Thunderbird. After that, you can follow the same steps as in Solution 1.
That includes uninstalling the program, deleting its folder from the paths below, and reinstalling the app: C:\Program Files\Mozilla Thunderbird\ C:\Program Files (x86)\Mozilla Thunderbird\
5. Disable extensions
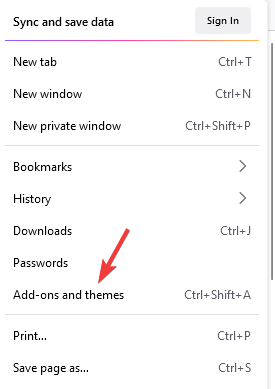
In Firefox, click the menu button (three horizontal lines) and select Add-ons and Themes.
Go to the Extensions tab.
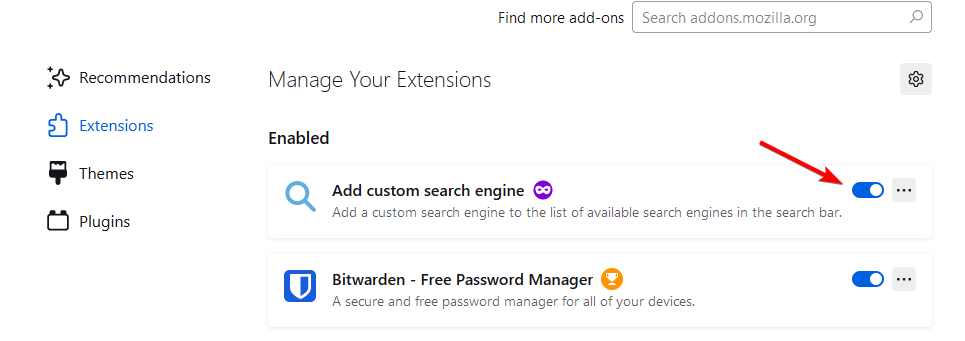
Disable all extensions by toggling the switch next to each one.
Close and reopen Firefox and check if the XPCOM error persists.
6. Reset Firefox
Open Firefox.
Click on the menu button (three horizontal lines) in the upper-right corner and choose Help.
Select Troubleshooting Information.
Click on the Refresh Firefox button on the right side.
Confirm by clicking Refresh Firefox in the pop-up window.
This will restore your settings to default while saving your bookmarks and passwords.
7. Change compatibility settings
Right-click on the Firefox shortcut and select Properties.
Go to the Compatibility tab.
Check the box that says Run this program as an administrator.
Click OK to apply the changes.
Wrapping up
XPCOM errors in Firefox occur when the browser can’t find or access some important files it needs to run. These errors can cause Firefox to crash or not work correctly.
It usually appears right when you try to start the browser. Luckily, it’s pretty easy to fix in most cases. Just follow the guidelines above.
If Firefox is still unresponsive after trying the solutions above, let us know in the comments below and we’ll try to assist you.
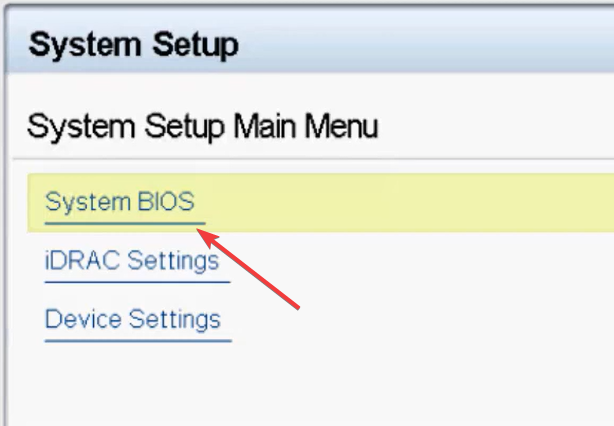
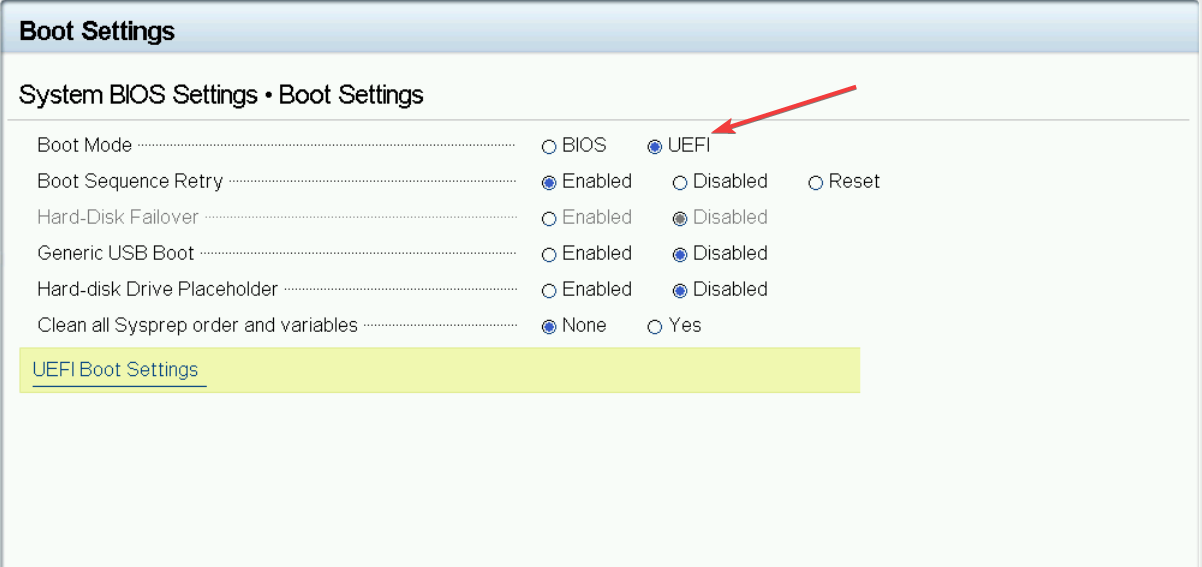
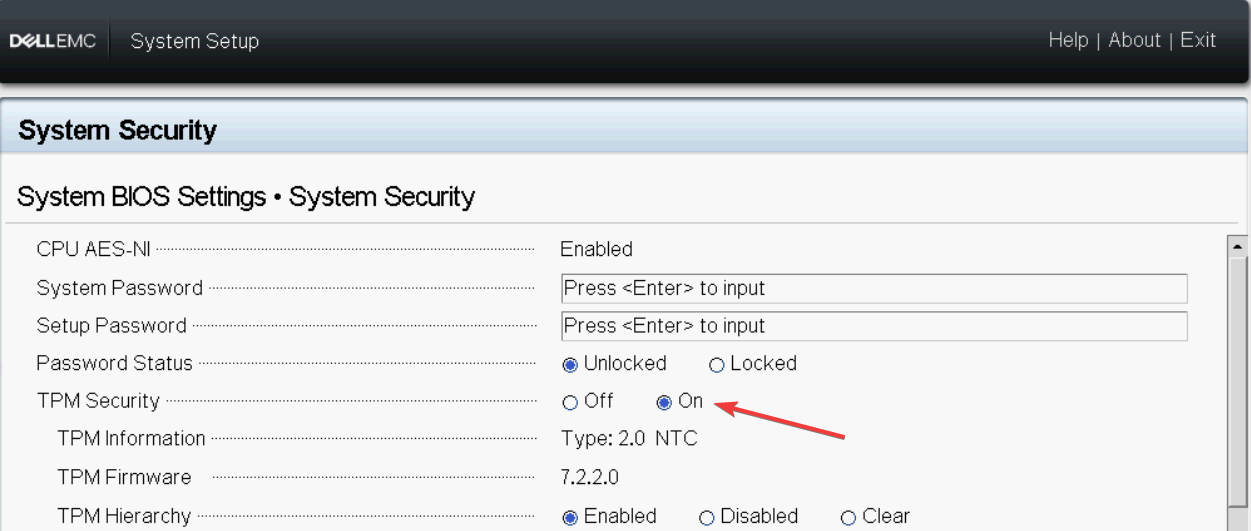
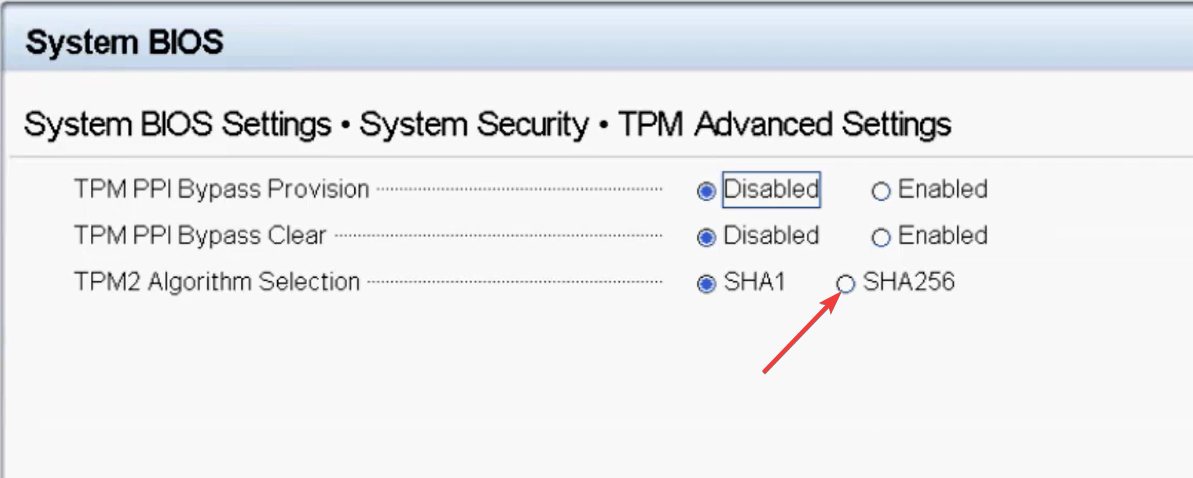
So, these are the steps you need to follow to fix the TPM 2.0 device detected but a connection cannot be established error. If you have other issues, like the TPM device not being detected, you need to check your BIOS settings.
If you have any other questions or concerns about TPM or TPM malfunctioning, feel free to mention them in the comments below.
There’s nothing worse than a computer without an antivirus installed on its system. And if a company owns that computer, the liability goes through the roof.
There is so much valuable content these days, starting with private photos, crucial work data, and more, and if these become compromised, we’re talking about a potential virtual apocalypse.
Do small businesses need antivirus?
Unfortunately, hackers these days, have become so advanced in creating malware that it’s harder to keep up with their sophisticated cyber-attacks.
This is why it’s essential to use the best possible antivirus, especially for your business, to prevent disasters.
We picked the best antivirus software and a VPN for small business to show you their main features so that you can easily decide what is best for your organization’s needs.
TotalAV is a great security software for your business platform because numerous protection features. It has exceptional detection rates, providing real-time advanced web security.
It allows you to take control of your digital enterprise and keep it safeguarded against harmful threats and viruses.
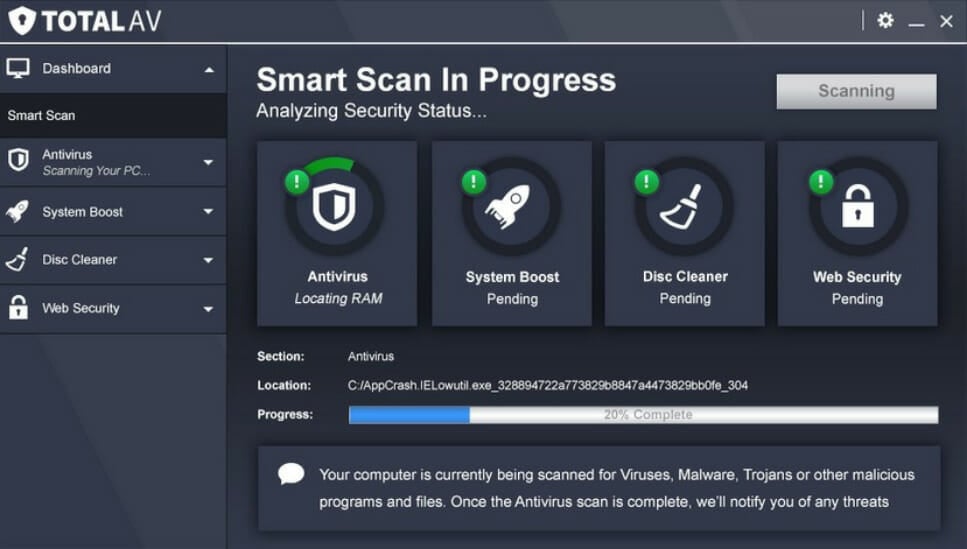
TotalAV offers various scanning options, such as custom scan, quick scan, system scan, and smart scan. You can scan temporary files where viruses are commonly found there, or you can scan your whole system for malware.
You can also scan for junk files and tracking cookies, or even pick a single file, folder, or hard disk to scan.
This solution helps you browse the web safely and securely and shields your business against fake, scam, and phishing sites that are created to harm your devices, compromise your security or even steal your payment information.
TotalAV blocks tracking cookies and eliminate each harmful element, clearing any trace of your online activity.
You can actively and effectively observe your business email address and receive notifications in case your data is at risk.
Other impressive features that you might consider helpful:
Smart scanning
Safe browsing VPN
Remote firewall
Anti-ransomware
Browser manager and cleaner
Password vault
TotalAV
Keep your business platform safe and benefit from all the security features of TotalAV.
NordPass Business is a professional software packed with everything you need to protect your small or medium business. You can control the access of your employees to accounts and makes it easier to share passwords between teams.
This tool is a secure software manager for business, it can be used as encrypted storage for passwords, passkeys, and other sensitive information.
NordPass Business can identify breaches before they can harm your business. With this software, you can learn if any credentials, emails, or company domains have been compromised with its very powerful breach scanner.
You can also simplify the onboarding and offboarding process with this tool as it comes with several features for group and employee management.
NordPass Business pricing is split into several very accessible plans, so you can choose what will best suit your business.
Let us take a look at some more key features of NordPass Business:
Multi-factor authentication (MFA)
Google Workplace SSO
Effective data breach monitoring
Instant password import
Company-wide settings
Secure access sharing between teams
NordPass Business
Keep your company and employee data safe with this powerful software.
Kaspersky is a company that has always excelled at its job, and the company’s antivirus software has managed to pass most tests.
When it comes to protecting your systems from dangers the Endpoint Security for Business will turn out to be the best solution.
This antivirus comes with extensive and efficient management features, and you will get the opportunity to enjoy multi-layered protection from a massive number of aggressive cyber attacks.
After this software finds something suspicious, it will move it to quarantine if this is what you choose, but it can also delete the threat on the spot.
The software is straightforward to use, and it packs big data threat intelligence just to make sure that nothing essential gets stolen from your business’ computers.
Check out the best features that are included in Kaspersky Small Office Security for Business:
Control every computer on your network at the same time
Comes with some of the best anti-ransomware features
It offers one of the most reliable antimalware protection on the market
Using this program will not slow down your computers
Enjoy cloud-based monitoring management and the complete encryption of your files
You will get real-time cloud protection against malware, viruses, and phishing attempts
Comes with a password manager and a strong antispam module
Kaspersky Small Office Security for Business
Kaspersky Small Office Security keeps your company’s computers safe and protected from online threats.
As a small business owner, after you realized that you need the best possible security for your digital life, you have to choose the best antivirus software, and one of the most significant solutions is the one offered by Bitdefender.
Bitdefender for Business has to offer a lot of solutions more or less advanced for your business, according to the organization’s needs.
As a small business, it’s essential to have functional software that does not require dedicated IT resources.
Bitdefender’s solutions for business protect your business from malware without slowing down the systems or affecting your employee’s productivity.
Bitdefender for Business can detect 99% of both known and unknown threats using advanced behavior technologies.
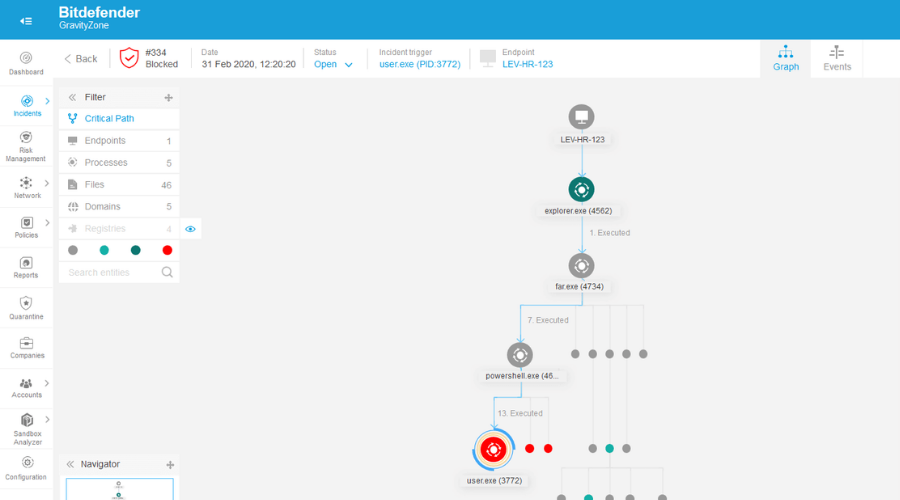
Bitdefender Advanced Threat Control aka ATC is continually monitoring all the running processes for signs of various malicious behaviors.
ATC is a technology that was launched back in 2008 as AVC, and it has been constantly improved to keep users one step ahead of threats.
The Bitdefender Global Protective Network is currently protecting over 500 billion machines
Bitdefender comes with years of experience in perfecting machine learning and artificial intelligence which are essential for increased protection
Bitdefender software for business is able to detect and block all threats such as worms, viruses, spyware, Trojans, and more.
This software will never slow down your computer while it’s working in the background, which is really important for maintaining high performance.
Other noteworthy features include:
Easy to install on your systems, and intuitive enough even for users who are not necessarily experts
Excellent management of the components
Onsite and cloud-based options
Friendly dashboard, easy to navigate
Detects and blocks any threat, including worms, viruses, spyware, and more
Bitdefender GravityZone Business Security
Bitdefender GravityZone uses advanced behavior technologies to protect your business.
Keeping your apps and system updated is imperative to protect your PC from breaches, but Vulnerability Manager Plus actually detects them.
Not only that but this multi-OS vulnerability management and compliance software also offers built-in remediation. And it does that on a network-scale level!
Once you set it up, it scans and discovers the vulnerabilities within all your local or remote endpoints as well as roaming devices.
Then, Vulnerability Manager Plus analyzes and prioritizes vulnerabilities based on the likelihood of being exploited, severity, age, and the number of systems it affects, as well as an available fix.
And then, it helps you download, test, and install patches automatically to Windows, Mac, and Linux endpoints.
Moreover, it covers more than 500 third-party applications with its built-in patching module.
Apart from endpoint devices, this solution also deals with web server security flaws and helps you fix them preemptively.
Another important aspect is that Vulnerability Manager Plus identifies software that is evaluated as unsafe and uninstalls them from your endpoints quickly.
Let’s review some of its best features:
Network-level vulnerability detection
Identifies and patches endpoints
It works seamlessly on Windows, Mac, and Linux endpoints
Built-in patching module with over 500 third-party applications supported
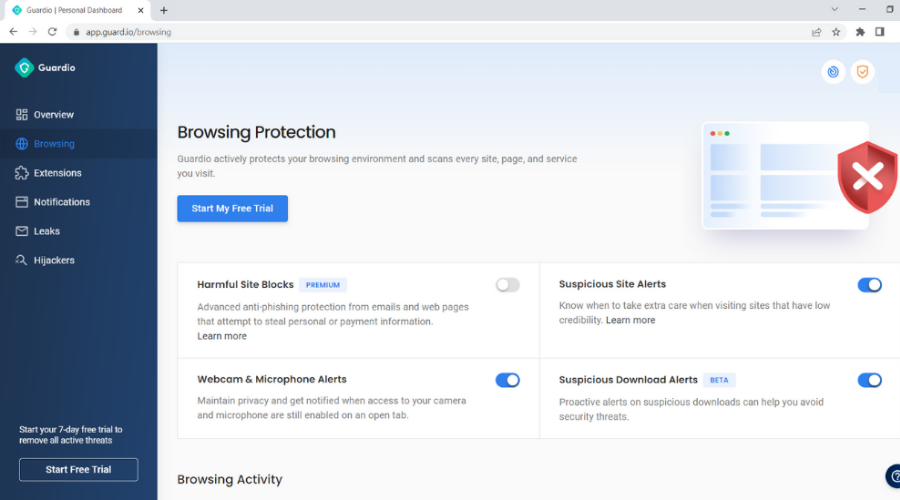
Most cyber-attacks come from the web, so if you want to fully protect your business’s private data, consider protecting your browser with Guardio.
The tool employs cloud-based technologies to protect you against malware, malicious scripts or browser extensions, and data breaches.
It’s not a software tool in the classical sense, but rather a browser extension for Chrome, Firefox, and Edge, but it’s definitely a smart addition to your security toolset.
Online cyber attackers use all sorts of methods to access private information, including via emails, website forms, or even links. They grow smarter and smarter and may be difficult to track down.
Due to the fact that all team members of your business use the same databases and communication channels, one compromised account is enough to jeopardize the privacy of your whole business.
A tool like Guardio is able to block serious data-stealing attempts and protect you and your employee’s personal information, financial and bank information, private documents, workflow, projects, and other private data.
The Business plan of Guardio includes all features mentioned, plus an admin panel where you can monitor user activity, add team members, and set permissions.
Some may argue that this tool is not necessary if you have an antivirus and good online behavior. We suggest you use both because they serve different purposes.
Guardio is vital, particularly when multiple users have access to private information.
It blocks online threats that you can access from the browser, while your antivirus removes current infections and takes care of your system as a whole.
Other key features of Guardio include:
Quick and easy to set up
Remove suspicious extensions
Checks browser for privacy violations
Blocks invasive notifications
Monitors if you are a victim of any current data breach
Detects suspicious emails
Guardio
Use next-gen cloud-based technologies to detect and block cyberattacks before they get a chance to reach your data.
CyberGhost can definitely live up to the awesomeness implied by the product’s name. But although its logo looks playful, it will do its job with great precision.
The software was founded in 2011 by a team located in Romania, and it currently boasts more than 15 million users, which is quite an impressive statistic.
CyberGhost is a VPN software that is able to hide your IP, encrypt and anonymize your Internet activity and secure your system whenever you’re on Wi-Fi.
If your small business is extra concerned about security, you should definitely look into a VPN service and its benefits.
VPNs can hide your online activity from all kinds of snoops and CyberGhost can also limit who can and who cannot access the network content.
Take a look at the most important features and functionalities that CyberGhost can offer for your small business:
CyberGhost is one of the best free VPN solutions on the current market
It offers reliable connection speeds and fantastic network security which is crucial these days
Works on most modern operating systems as well
Offers military-grade protection known as Advanced Encryption Standards aka AES
CyberGhost offers the most secure protocol that currently exists, and it will make your activity hacker-proof
Easy installation and great user experience
CyberGhost VPN
CyberGhost VPN will hide your online activity, secure your system when using Wi-Fi, and more.
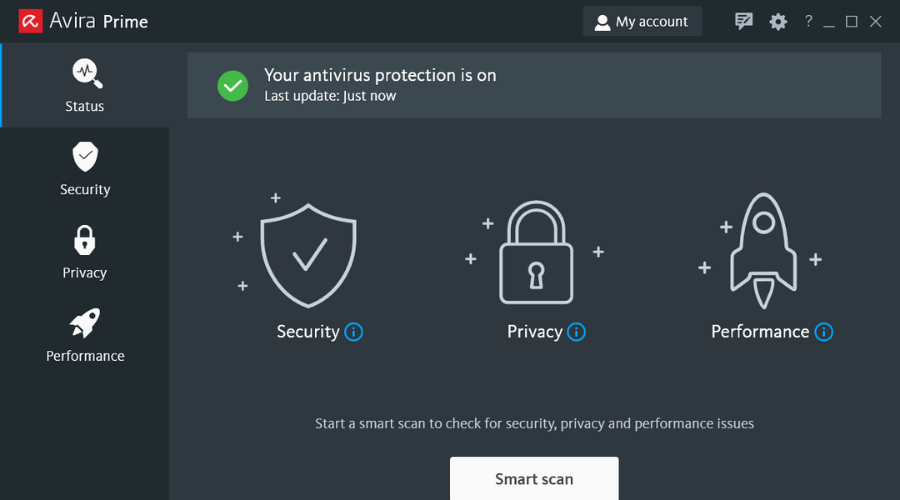
Last but not least, AviraPrime is another excellent solution for your small business’ security.
Everything that your small organization will need is packed here in this great security bundle. This package will protect your PCs, email communications, and servers as well.
This browser secures your devices and network against malware and web attacks.
Avira Prime is lightweight, yet powerful and includes an online management console so you can keep track of all your devices.
This antivirus includes a PC cleaner feature that is able to remove junk files and thus improve speed and reduce lags.
Not only that, but it takes care of overall PC functionality with its built-in software and driver updater. This ensures that you always run up-to-date versions that implement the latest security patches.
Check out the best features and functionalities that you will find using this software:
Manage your customers remotely via the premium on-premises and cloud management consoles
Protect your workstations via real-time scanning, advanced web and network protection, and anti-botnet safeguards
The software’s management is flexible, and you will get fast updates
Password manager to create and store secure passwords
Privacy optimization for over 200 settings
Avira Prime
Avira Antivirus for Small Business offers great protection for your company’s computers and servers.
If you’re looking for a reliable antivirus for your business, perhaps AVG Business Security might be the right choice for you.
This software is designed for small businesses, and it comes in several versions that can be tailored to your business.
All versions have a CyberCapture feature that can send unrecognized files to the AVG’s servers in order to perform a detailed scan on that file.
Remote management is also available, so you can easily monitor and manage all devices in your company.
If you’re using Microsoft File Server or Windows Sharepoint Server, you’ll be pleased to hear that you’ll be able to protect them using the File Server Security feature.
AVG Business security also has a Network Antivirus feature that can detect and remove malware from devices in your network.
If you want more features, there’s AVG AntiVirus Business Edition that comes with advanced threat protection, privacy protection, and its own firewall.
As for additional features, there are Online Protection and Email Protection features. For complete protection, there’s AVG Internet Security Business Edition.
This version has all the aforementioned features as well as Email Server Security and Spam Protection features.
Overall, AVG Business Security offers a plethora of features, so if you’re a small business owner, feel free to try any of these three versions.
Let’s take a look at some of its best features:
CyberCapture sends unrecognized files to the AVG’s servers to get analyzed
Manage all your devices remotely, from one place
File Server Security for business-related file protection
The Network Antivirus detects and removes malware from all devices in your network
Email and online protection, plus a powerful firewall
AVG Business Security
AVG Business Security scans your PCs and network devices for viruses and malware, keeping them safe.
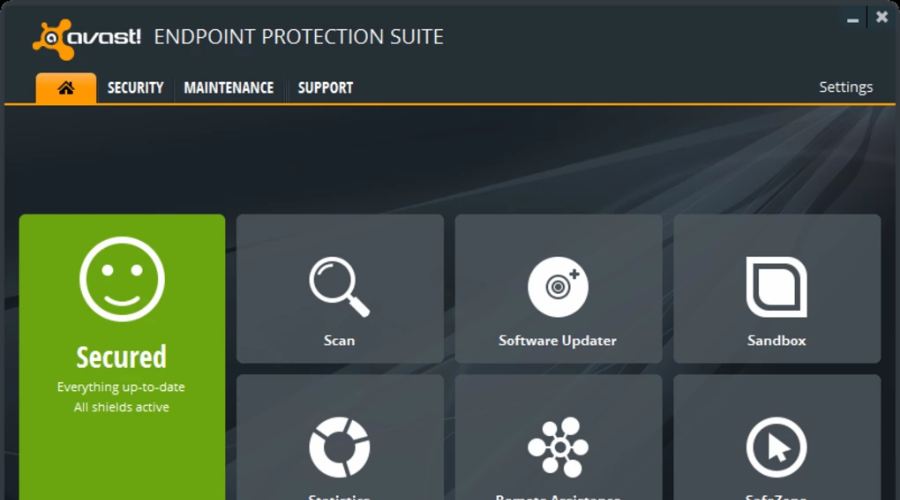
Avast is a Czech company that is much aware of the importance of small businesses with dedicated products.
As a result, it created the Avast Endpoint Protection Suite Plus solution to offer sophisticated protection for your company’s computers and servers as well.
Your essential emails and files will no longer be exposed to the risk of being damaged.
The technologies used by this antivirus are incredibly sophisticated and complex assuring users that their systems are always adequately protected.
The program comes with a lot of amazing features such as the following ones:
Great anti-spyware and anti-malware engine that works flawlessly
Top-notch firewall and a really powerful antispam filter
Full server and workstation support
Email server protection features
Dedicated management options: Enterprise Administration and Small Office Administration
Avast Endpoint Protection Suite Plus
Avast Endpoint Protection Suite Plus offers complex protection for all your company’s servers and computers.
ESET PROTECT Advanced offers an advanced protection system for all your network devices, including your endpoints.
The solution offers improved ransomware protection and secures your endpoints against never-before-seen threat types using adaptive scanning, cloud sandboxing, machine learning, and in-depth behavioral analysis.
It was designed especially for businesses, so it helps comply with all data regulations thanks to full disk encryption capabilities on Windows and macOS.
All computers and mobiles within the organization are protected using advanced multilayered technology that includes file server security, and brute force attack protection.
Managing a fleet of devices is not usually that easy but with ESET PROTECT Advanced, your IT manager can perform remote management can be done from a single cloud dashboard.
This solution not only protects the devices but also offers real-time protection for your company’s data passing through all general servers.
Nevertheless, it comes with a strong encryption solution for system disks, partitions, or entire devices for complete legal compliance.
The best part is that ESET PROTECT Advanced is extremely flexible to any size of business and can grow along with your organization’s needs.
Let’s see some of its best features below:
Multi-layered protection against all impending threats
Adaptive scanning, cloud sandboxing, machine learning, and in-depth behavioral analysis
Strong encryption solution for system disks, partitions, or entire devices
Full disk encryption capabilities on Windows and macOS
Manage all security from a single cloud console
ESET PROTECT Advanced
Secure your business with a top solution that offers advanced multilayered protection against all threats.
SpamTitan Plus offers leading-edge, AI-driven anti-phishing solutions with the newest zero-day threat protection and intelligence.
This top-shelf dedicated solution provides 100% coverage of all current market-leading anti-phishing feeds.
The tool improves protection against phishing by neutralizing malicious links in emails. SpamTitan Plus provides a 1.5X increase in unique phishing URL detections.
It also rewrites all URLs and provides time-of-click analysis within 5 minutes from the initial detection of the malicious, offending URL to your end-user mailbox.
Zero-day Threat intelligence can’t be found in any other phishing product as it contains 1.6X faster phishing detections than the current market leaders.
If you click on a phishing email with SpamTitan it won’t run scripts against your computer to gather data. This layer of protection is critical in responding to phishing attacks.
SpamTitan provides real-time, continuous updates through 10 million new, never-before-seen phishing and malicious URLs a day.
These unique daily URL additions are powered out of several hundred billion queries and 100 million cloud queries a day within SpamTitan Plus.
Let’s see some of its best features below:
Protection against URL-based email threats including malware-based threats and phishing
Predictive analysis to identify suspicious URLs
URLs are rewritten to increase protection
Blocks unsafe links and displays a dedicated block page
SpamTitan Plus
Use this tool’s AI-driven anti-phishing solutions for 100% coverage of all current market-leading feeds.
What is the small business cyber security checklist?
There are a few things that should be considered when it comes to cyber security for a small business and these are Data protection, Threat reduction, Incident response, Backups, 2FA or multi-factor authentication, Remote access, Strong passwords, Regularly updating software and systems, Managing vendor and third-party risks.
These are some of the things you should take into consideration when protecting your business from cyberattacks, of course, the need varies depending on your particular business.
These are our top picks for the best cybersecurity software for small businesses, and we guarantee that no matter what your final choice will be, you’ll get the best possible protection for your small organization.
We also have a list of the best antiviruses for Windows Server that you can draw inspiration from and select a great tool for your office needs.
Have you decided on a product? Do you have any other preferences? Tell us about them in the comments section below.
Google Chrome is a user favorite for a reason, but many reported that Chrome is freezing on Windows 10. This can be a problem, but there are ways to speed up Chrome on your PC. However, sometimes that doesn’t work, so you’ll need different solutions.
The solutions listed below will also help you if you are experiencing the following issues:
Chrome locking up in Windows 10 – This is a common occurrence, and it can be sometimes caused by memory usage.
Google Chrome freezing the computer – If your entire PC freezes, check your drivers. In addition, inspect your hardware.
Google Chrome freezing in Windows 10 – Hidden settings in Chrome can cause issues such as this, so you might want to revert them to default values.
Why does Chrome freeze my computer?
There are several reasons for this, with the following being the most common ones:
High memory usage – This is a common problem since Chrome uses more RAM than it should.
User settings – Sometimes, certain settings can cause this issue. Resetting your browser can sometimes help fix that.
Browser cache – Resetting your cache can sometimes fix issues with Chrome slowdowns.
How do I fix Chrome freezing Windows 10 devices?
1. Use an alternative browser
One great way to easily fix the problem is by trying some alternative browsers. And now more than ever, you have numerous Chrome alternatives.
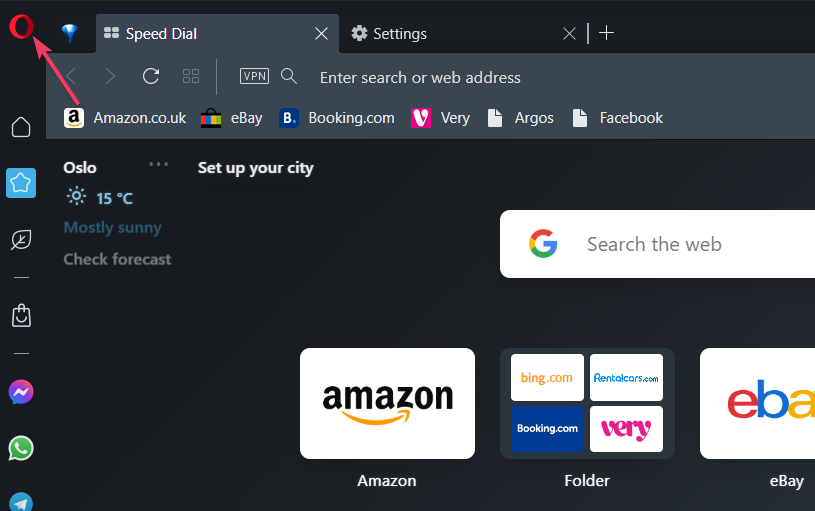
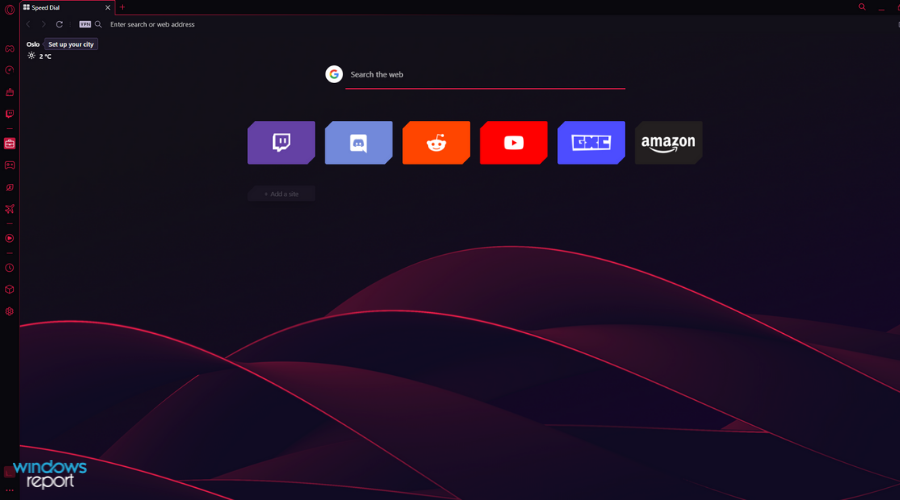
One good example of an alternative browser is Opera GX, which has the same Chromium engine as Google Chrome but at only a fraction of the resource requirements.
This browser is developed to support gaming, so it has several handy performance features, including a RAM and CPU limiter so it’s less likely for it to get unresponsive and freeze.
It also has a vast library of extensions, so enriching the web browser to suit your needs better will not be a problem. Additionally, you get the added benefit of a few extra layers of security that come in the form of a VPN and a built-in ad-blocker.
Opera GX
Surf the Internet and keep tens of tabs opened without worrying about PC freezes by using Opera!
Launch Chrome, paste the following path in the address bar, and hit Enter:chrome://settings/cleanup
Now, click on the Clean up computer option.
Next, click the Find button to let Chrome scan your computer for malware and other harmful software.
Once done, go back to the previous window, and click on Restore settings to their original defaults.
Click Reset settings.
This is one of the most effective methods to fix things when Chrome hangs a lot on Windows 10, but remember that you might lose some data.
Also, you can use an effective third-party antivirus to run the scan, just to be sure that your system is not infected with malware.
3. Disable flag to fix Chrome freezes in Windows 10 after sleep
NOTE
Flags are experimental features and are sometimes removed from Chrome after a while. So, there’s a possibility that it wouldn’t be available when you try the fix. In that case, you can try the other methods here.
Open Chrome, paste the following path in the address bar, and hit Enter:chrome://flags/
Now, search for the Calculate window occlusion on Windows flag, click on the dropdown menu, and select Disabled.
Relaunch Chrome for the changes to come into effect.
Open Chrome, and pressCtrl + Shift + Delete to open the Clear browsing data menu.
Under the Time range dropdown menu, select All time.
Check all three options, and then click on Clear data.
In many cases, it was a corrupt cache that lead to Chrome locking up in Windows 10, and clearing the browsing data did the trick for most users.
5. Update Chrome
Launch Chrome, click on the ellipsis near the top-right corner, hover the cursor over Help, and select About Google Chrome.
If an update is available, it will automatically be installed.
Oftentimes, it’s a bug in the currently installed version of Chrome that’s causing freezing in Windows 10. In this case, you should install the latest version since it’s likely that a patch for the problem would be included in it.
6. Update the OS if Chrome crashes in Windows 10 when printing
Press Windows + I to launch the Settings app, and select Update & Security.
In the Windows Update tab, click on the Check for updates button on the right.
Any available updates will be automatically downloaded and installed.
Once done, restart the computer for the changes to come into effect.
7. Reinstall Chrome
Press Windows key + I and choose Apps and features.
Next, choose Google Chrome on the list.
Click Uninstall and follow the instructions on the screen.
Once the application is removed, download and install it again.
But, besides removing the application itself, we suggest clearing all locally-stored data. For that, you can use a reliable uninstaller software to remove any traces of the browser.
That’s it! Chrome would no longer keep freezing on your computer, and neither would it affect the system performance. Also, find out what to do if Chrome consumes a high CPU in Windows.
Tell us which fix worked for you and your review of Chrome in the comments section below.
Many of us use Wi-Fi networks to connect to the Internet, but many reported that their network security key is not working.
If this happens, you might want to find your Wi-Fi password and make sure it’s correct. That doesn’t always work, and if this happens, you need to go ahead and fix the issue yourself.
This error will prevent you from connecting to your Wi-Fi network, but there’s a way to deal with it.
Why isn’t my security key working?
There are several reasons for this issue, with the following being the most common:
Driver issues – Sometimes, issues with drivers can cause problems with your network adapter. If that happens, go ahead and update your drivers.
Issues with network devices – Glitches are somewhat common; if that happens, you must restart your network adapter.
Connection settings – It’s easy to misconfigure your connection, but you can fix that from router settings.
Here are some similar wireless network issues that users reported:
Network security key not working in Windows 10 – Various problems can affect your wireless network, and if you encounter them, be sure to try one of our solutions.
Netgear security key not working – Be sure to change your network settings and check if that works.
How can I fix network security key not working on Windows 10?
Before we start fixing the issue, there are a few checks you should perform:
Check your password – Make sure that your Wi-Fi password is correct. If you’re using a repeater, it’s suggested to use the same password for the repeat and router.
Use the default password – In some instances, using the default router password can help. However, this only works after resetting your router.
1. Reinstall your driver
Press Windows key + X and choose Device Manager from the list.
Locate your network adapter, right-click it, and choose Uninstall device.
When the confirmation menu appears, check Remove driver software for this device, and click Uninstall.
Once the driver is removed, click Scan for hardware changes icon.
After doing that, Windows will try to install the default driver. If the default driver doesn’t work, you might have to update it and check if that solves The network key isn’t correct error.
If you want to ensure the right drivers are downloaded and to overall streamline this process you can always rely on dedicated tools, such as Fortect Driver Updater.
This software is able to identify and install the correct drivers after just a quick scan of your computer. Plus, it is a great tool to help you with future maintenance of your system.
2. Make sure that your network drivers are up to date
Visit your motherboard manufacturer’s website and go to the drivers section.
Locate your motherboard and select Drivers & Utility.
Locate the latest network or LAN driver and download it.
Run the setup file to install it.
Alternatively, you can use third-party tools such as DriverFix to update all your drivers automatically with just a couple of clicks. This software has an easy-to-use interface and it’s extremely easy to use.
Once the system scan is completed, DriverFix will compare the found drivers with the ones from its built-in database, and any damaged or broken driver will be repaired and fixed.
Log in to your router’s settings. Check the router’s manual to see the correct steps for your model.
Go to the Wireless Security section and set a new password.
Save changes.
You can also try changing the security type from WPA2-PSK[AES] to WPA-Auto. Do keep in mind that WPA-Auto is less secure, so use extra caution.
After doing that, check if The network security key isn’t correct please try again error is gone.
4. Disable your network device
Open Device Manager.
Locate your wireless adapter, right-click it, and choose Disable device.
A confirmation message will now appear. Click Yes to proceed.
Wait for a couple of seconds and then enable your wireless adapter.
After doing that, you should be able to connect to your wireless network. If that doesn’t work, you can try disabling your wireless connection and check if that helps. To do that, follow these steps:
Open the Settings app. You can do that quickly by using Windows key + I shortcut.
Next, navigate to the Network & Internet section.
Scroll down and in the right pane click on Change adapter options.
Locate your Wireless connection, right-click it, and choose Disable from the menu.
Wait for a couple of moments and enable your wireless connection.
Keep in mind that these are just general steps. The process differs depending on your router model, so check your manual.
If you have problems with a network security key, the issue is usually related to your drivers or settings. However, you should be able to fix this problem using one of our solutions.
When you install certain software, it makes a few changes to your registry. Now, it’s no surprise that this can go either way, but fortunately, registry activity can be monitored with the help of specialized tools.
You can monitor registry changes and keep track of all the keys and entries along with their status by using registry monitoring tools. But why would you want to do that?
Tools such as Registry Editor let you edit, but it’s hard to monitor changes with it. This is why many are using specialized software, and speaking of which, we’ll show you the best tools you can use today.
What does registry monitor do?
Registry monitor will keep track of your registry and inform you if any changes are made. You can analyze the changes and see which applications modify your registry.
Doing so can prevent malware or potential issues with your system. Some applications can approve or deny changes, so you can block suspicious applications from affecting your registry.
What is the best tool to monitor registry changes?
Regshot – Windows registry change tracker + snapshot feature
You wanted to know, and we’re here to answer – Can registry activity be monitored with the help of RegShot? Without a shred of a doubt.
Regshot is a very useful tool for monitoring changes in your registry. Besides showing the current state of your Windows registry, it allows you to take a screenshot of it and save it for later comparison.
Regshot is a free and open-source tool that works on both 32-bit and 64-bit versions of Windows.
Besides the Windows registry, Regshot also allows you to take a snapshot of the Windows directories. You can download this open-source registry monitoring tool from SourceForge for free.
This is another small but incredibly useful software that can track registry changes. The software will capture all running processes, files, registry entries, and scheduled tasks.
Thanks to the built-in notifications, you’ll be informed with an item is created, modified, or deleted. In addition, you can use this software to customize the monitored items.
It’s worth mentioning that there’s SHA-256 support, and it’s used to detect file changes. Overall, it’s a simple but useful software, so be sure to try it.
Other great features:
Monitors processes, files, registry entries, and tasks
Process Monitor is another very popular, free registry monitoring utility that offers some advanced options. So how to use Process Monitor? It could not be easier!
Simply download Process Monitor for registry changes, run the .exe file, and install it on your hard drive. It works in real-time and shows all system files, registry changes, and processes/threads of your system.
This tiny tool is also able to fix your registry if there are some errors, as well as to remove malware and other types of malicious software.
You can download this real-time registry change monitor tool for free.
When you first start this software, you’ll notice its simplistic interface, but don’t let that discourage you. The software will scan your registry for changes in determined intervals.
Once a change is detected, you’ll be prompted, or you can configure the software to accept or reject all changes automatically.
The software is simple to use, and it comes with a built-in log so you can keep a close eye on all the registry changes that have occurred on your system.
If you don’t feel like using specialized registry monitoring tools, Reg and FC is Windows’ built-in command line from the Windows registry. And it allows you to monitor and compare the states of your registry.
Before comparing the registry changes, export all the important registry keys you want to monitor (when your system is performing well) to a text file and export these keys again after a few changes or new installations.
Now compare both files with fc.exe:
Go to search and type fc.exe.
Open fc command and enter the following command line: fc 1st.reg 2nd.reg > result.txt
This command will compare both files and save them in the same directory as .text file.
Now, you know what tools you can install on your Windows 10 computer to keep an eye on the Registry changes that various apps and software operate on the OS.
Knowing what’s changed is one thing, but knowing how to revert the changes is another. So, if you want to eliminate all the changes, you can use a Restore Point, provided that you already created one.
Additionally, if you want to reset your Registry, you can install one of these registry cleaners and run it on your machine.
We hope that you’ll find at least one of these tools useful and will help you monitor registry changes easily.
If you have some comments or suggestions or maybe know some other powerful tools for monitoring registry changes, reach us in the comments below, we would love to hear your opinion.
Many users reported McAfee spam emails coming to their inboxes, and many are alarmed by getting such email messages.
Today, we’re going to take a closer look at these messages and let you know if they are legitimate or not and how to deal with them properly.
What is McAfee’s scam email?
This is a phishing email from a hacker disguising himself as a McAfee employee.
Usually, the message will falsely claim that your PC is compromised or at risk.
These emails ask you to click a specific link or send your personal information.
Identifying a phishing email from the lot is not simple, but with a few quick pointers, you can easily spot them quickly and take the necessary action.
Phishing emails are likely to have grammar errors and spelling mistakes.
The sender’s address in a phishing email doesn’t have the corporation’s domain name.
The graphics in phishing emails are of inferior quality and have low resolution. For instance, the logo of the official source would be blurry, or certain parts of it could be missing.
Since scammers do not have your details, phishing emails do not address you with your name and instead use phrases such as Dear customer.
If the message mentions unknown purchases or major security issues asking for your immediate attention, it’s most likely a scam.
Is McAfee a scam?
McAfee Antivirus is one of the best in the market and offers good protection against malware, viruses, and cyber attacks. McAfee is so famous that it has become synonymous with computer security.
McAfee has been around for a long time and has made a name for it. It’s quick and highly effective at accomplishing tasks. So, in all, the antivirus itself is entirely legitimate and safe.
But that doesn’t mean the emails or pop-ups you receive are from McAfee. If you or an acquaintance has ever received a phishing email, read the next section to protect yourself from McAfee antivirus scams.
Some attacks are, unfortunately, very well disguised. We suggest you use an antivirus like TotalAV because it has a solid anti-phishing filter that blocks even hard-to-recognize phishing attempts.
These links will lead to a phishing website that will trick you into entering your personal information.
Even if the message says that it’s urgent or that your credit card has been charged, do not click any of the links in the message.
2. Check the sender’s email address
Locate the McAfee spam email.
Check the email address.
If it’s related to any of the free webmail services, such as Gmail, Hotmail, etc., it’s 100% scam.
McAfee employees will always use the official email address for any business communication.
3. Use data protection software
Various websites collect and trade your data without you knowing. Many McAfee scam emails come from email lists you never subscribe to but acquired your data elsewhere.
One of the smartest choices to protect your data from being stolen is using software like Incogni. With this tool, you erase your data from multiple databases and keep away all cyber threats that try to steal it.
Moreover, it is designed to keep your private details safe, including buying habits, income levels, health conditions, or email, making it impossible for scammers and phishing sites to collect them.
Incogni
Keep your identity safe from digital threats, and give Incogni a try!
Click on the three dots at the top right corner of the email.
Select Report Spam or Report Phishing.
If you identify an email as malicious or illegitimate, report it as spam so your email service provider blocks future attempts of any contact from the sender.
Every email service provider has spam filters to protect users from suspicious emails. But, they are not very effective. This is why getting a reliable third-party email spam filter is essential. This provides an extra layer of security and gives you peace of mind.
As the name suggests, these will filter out emails that carry malware-loaded files or suspicious links and protect you. Several antiviruses also offer spam filters as a part of the package, and you can go with these.
6. Unsubscribe from mailing lists
Open your email client.
Look for any promotional emails from legitimate sources.
Choose the unsubscribe option and click it.
Follow the instructions on the screen and confirm that you want to opt-out.
Not all online services are 100% secure, and sometimes your information, such as email address, can be compromised, so it’s a good practice to be subscribed to only the most essential newsletters.
That’s it! Follow these tips and tricks when dealing with suspicious-looking emails, and you will never become a victim of the McAfee antivirus scam or other phishing scams.
Despite being a major hit, Battlefield 4 has disappointed players because it has high CPU usage. Because of this, players may experience lag, freezing, and dragging.
However, there are a few solutions to this problem, including changing the PC power options, freeing up RAM and CPU, etc.
Before we get into these solutions, let’s first discuss the main reasons why your Battlefield 4 is so laggy.
Why is my Battlefield 4 so laggy?
Battlefield 4 may slow and freeze for several causes, including:
Poor Internet Connection
Server Problems
Game Settings
Device Configuration, and
Low Graphics
However, if you are asking if Battlefield 4 is CPU Intensive? We’d respond Yes. Battlefield 4 is CPU Intensive and requires a powerful CPU. If you’re using Windows 11, try these five tweaks to reduce Battlefield’s CPU use.
Why is a game using 100% of my CPU?
Games are known for using a lot of resources and it’s not unusual to see that a game is using 100% of the CPU.
However, this happens especially when you have integrated graphics. If you have a discrete graphics card, that should take most of the load instead.
How do I lower my Battlefield 4 CPU usage?
1. Resetting Windows Power Options
Click on the Start menu, search power plan in the search bar, and press Enter.
In the Edit Plan Settings window, click on the Change Advanced Power Settings.
In the Power Options window, double-click on the Processor Power Managementtab.
In the expanded two selections, double-click on the Minimum Processor State.
Change the value for On Battery and Plugged In percentages to 20% or less.
Finally, click OK.
Resetting Windows 11’s Power Settings fixes Battlefield 4’s high CPU use. If the power choice is too high, your device might overheat, slow down, and crash owing to the game’s CPU.
2. Deploying a clean boot
Press the Windows + R keys simultaneously to open the Run dialog.
Type msconfig and click OK.
In the opened System Configuration,select the Services tab.
Tick the Hide All Microsoft Services box below the page.
Hit Disable All and press OK.
Hit the Startup tab and Open Task Manager.
In the Task Manager pop-up window and the Startup tab, right-click and Disable all programs with the Enabled status.
Finally, restart the system to reduce Battlefield 4’s CPU usage.
Third-party applications may clash, causing the game to maximize CPU Usage. In this situation, a clean boot could solve the problem.
3. Update your graphics driver
Search Device Manager on the windows search box and press Enter to open the Device Managerpop-up window.
Look for Display Adapters and double-click to maximize its choices.
Right-click your display adapter and select Update Driver in the drop-down menu.
Now, choose Search Automatically for Drivers.
Follow the prompts to update the graphic driver.
Graphics drivers can affect Battlefield 4 CPU usage. We must update our graphics driver to minimize the game’s CPU process.
Another way to successfully update your drivers is to use an automated tool. Outbyte Driver Updater is the best way to make this process safe and fast.
Outbyte Driver Updater scans your PC to find all outdated drivers and updates them with their latest versions.
Outbyte Driver Updater
For a safe and fast installation of all driver updates, Outbyte Driver Updater is the best choice.
Open Task Manager by pressing Ctrl + Shift + Esc keys simultaneously.
Maximize the Task Manager window.
In the Memory percentage description, analyze and pinpoint the App using maximum RAM, click on it, and press End Task.
Also, check the CPU percentage description, analyze, select the program with the most extensive CPU utilization, and click End Task.
If Battlefield 4 still lags and freezes after applying the procedures above, try freeing up memory to lower Battlefield 4 and above’s CPU utilization.
It should free up a significant amount of RAM. Although, ensure your local disk isn’t full by frequently running Disk Cleanup before replaying the game.
5. Prevent overclocking
If you’ve increased your PC’s clock rate beyond what the manufacturer recommended, you’ve made your CPU unstable, causing it to overheat, freeze, or lag.
Therefore, in order to resolve the issue, you need to reset the CPU to its factory settings.
Gaming requires particular hardware, graphics, and configuration, and Battlefield 4 is CPU-intensive. So, make sure to check out each game’s minimal spec requirements before installation.
In the comment section below, let us know if you were able to fix Battlefield 4 high CPU usage.
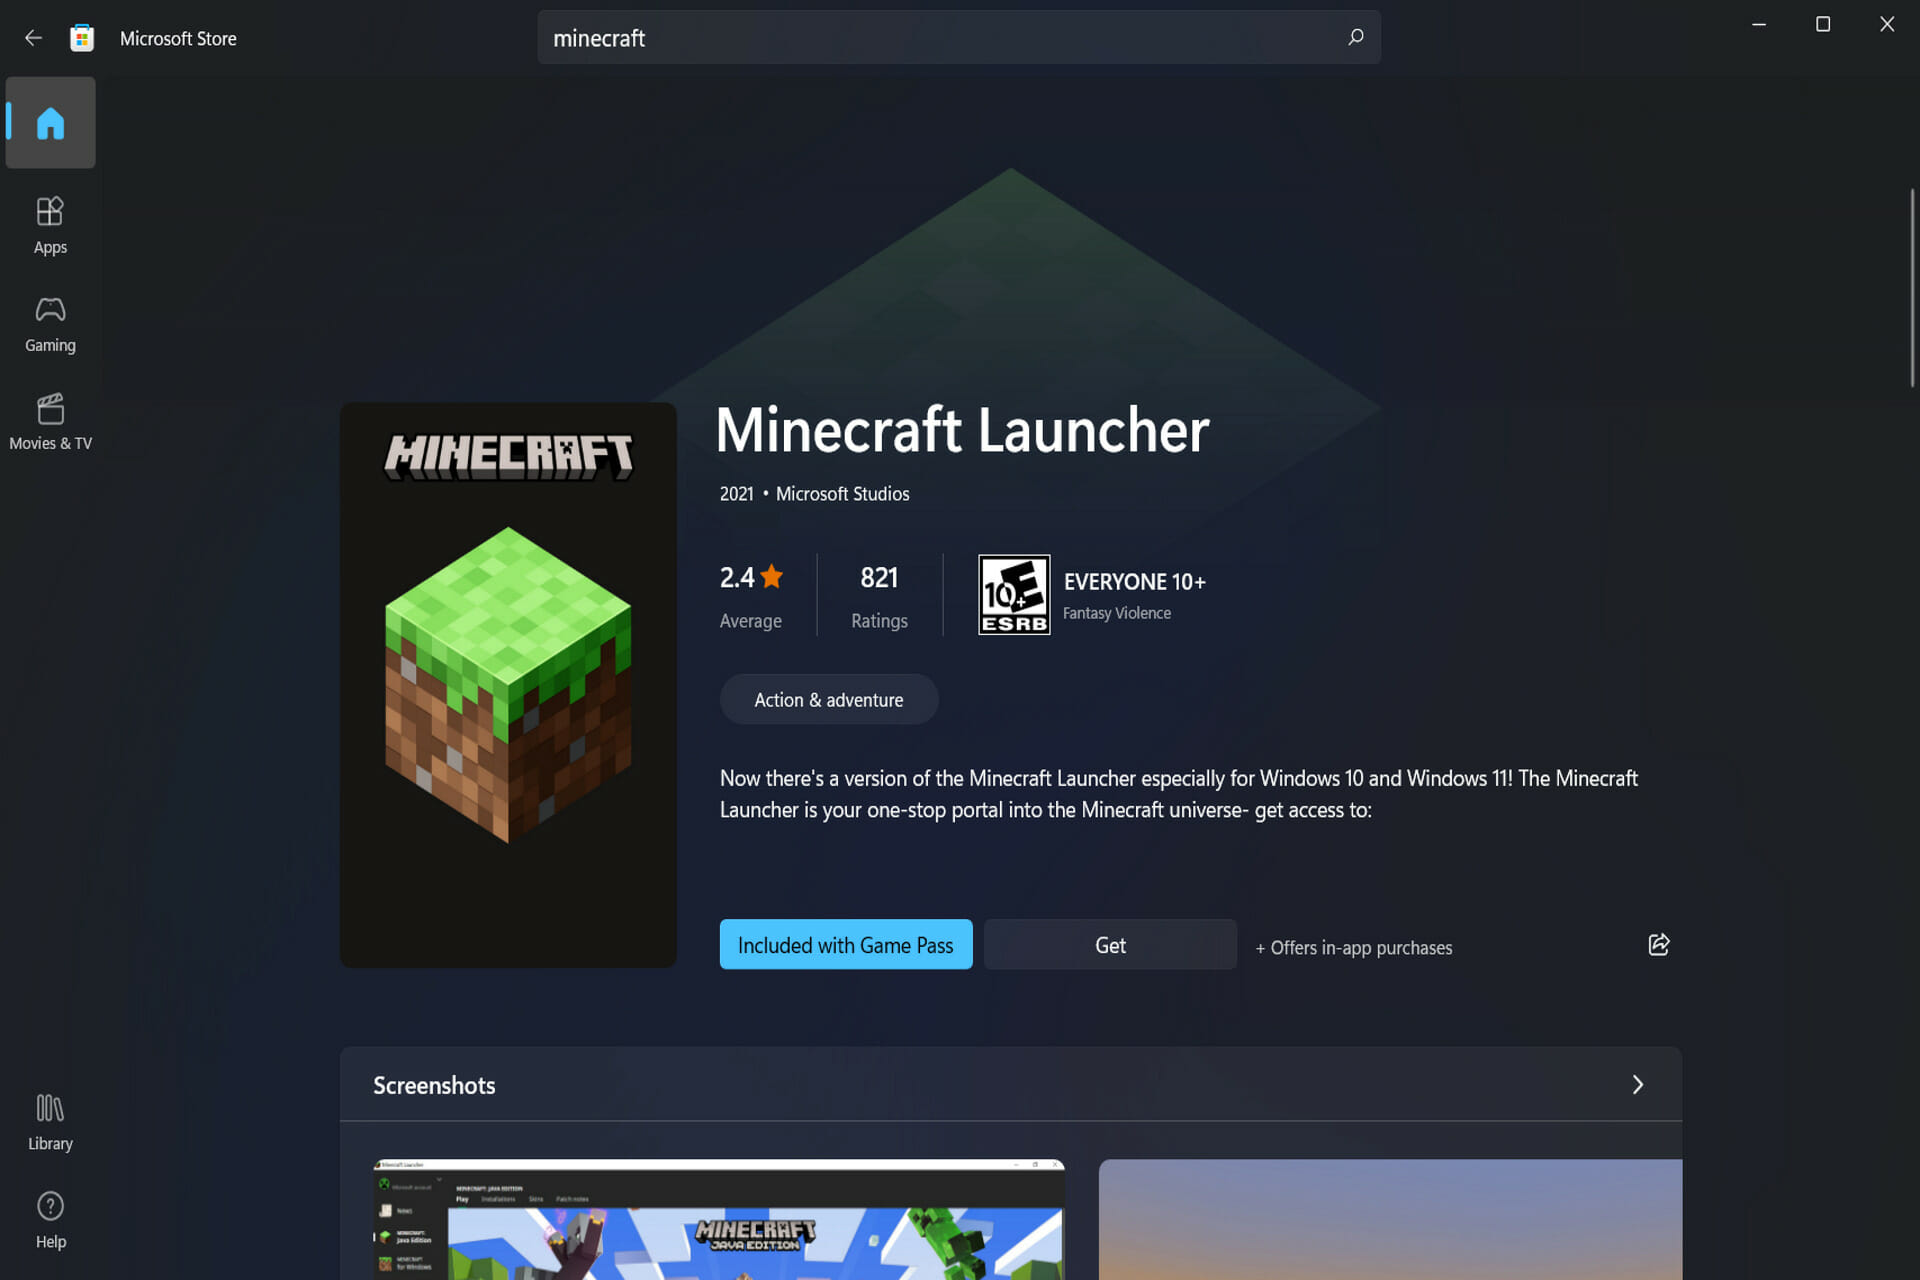
Minecraft is a game we are all familiar with and have all played at some point in our lives. We don’t want to cease the tradition here. Thus we will show you what to do if Minecraft is not installing on Windows 11.
If you are unfamiliar with the term, it is the original survival game that pioneered the survival genre and has been a popular choice among players ever since its release in November 2011.
Exploration, crafting, building structures, fighting monsters, survival, and many other activities are available to you in this game, whether you play with friends or by yourself.
Whether trying to install Minecraft on your Windows 11 computer or re-download the game after updating your PC, you may have run into the Minecraft installer not working error.
That being the case, we will walk you through many strategies you may employ to quickly and effectively eliminate this error and enjoy the game again. But first, let’s see what the Minecraft Launcher’s role is. Follow along!
Why won’t my Minecraft download on Windows 11?
If it is impossible to download the game on Microsoft’s newest OS, it could be because of any of the following reasons:
Insufficient system requirements – Minecraft requires a certain level of hardware and software specifications to run. If your device does not meet these minimum requirements, it may prevent the game from downloading.
Corrupted download file – The installation may fail if the file gets corrupted during the process.
Network connectivity problems – Slow internet speeds or a weak connection can cause Minecraft to stop downloading.
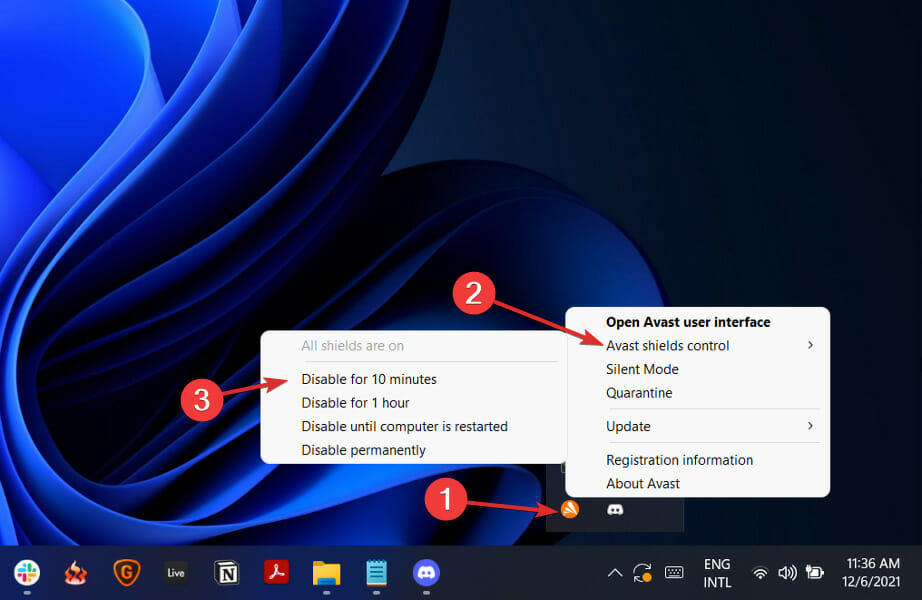
Antivirus software – Sometimes, it can interfere with game downloads and prevent them from completing.
Outdated Java version – Minecraft requires Java to run, and if you have an outdated version, it may prevent the game from downloading.
More storage space – Minecraft requires a certain amount of storage on your hard drive. If your computer has enough space, the download may succeed.
Windows 11 security settings – Windows 11 has strict security settings that can prevent downloads from untrusted sources. If the Minecraft download is not from a trusted source, it may be blocked by the system.
Conflict with other software – If other software installed on your computer conflicts with the Minecraft download, it may prevent the download from completing.
What can I do if Minecraft is not installing on Windows 11?
Before trying any solutions explained below, we recommend you restart your computer. A simple reboot will force some troublesome processes to end and may fix the downloading and installing Minecraft issue.
1. Run in administrator mode
Press Windows + S to then search Minecraft installer.
Next, choose Run as administrator.
That’s it! The installation process should be going smoothly now.
2. Use Task Manager
Press CTRL + SHIFT + ESC to open Task Manager, then navigate to the Details tab.
Now look for the Minecraft.exe process, click on it, and choose End task.
Try rerunning the installer.
3. Allow Minecraft Installer through Firewall
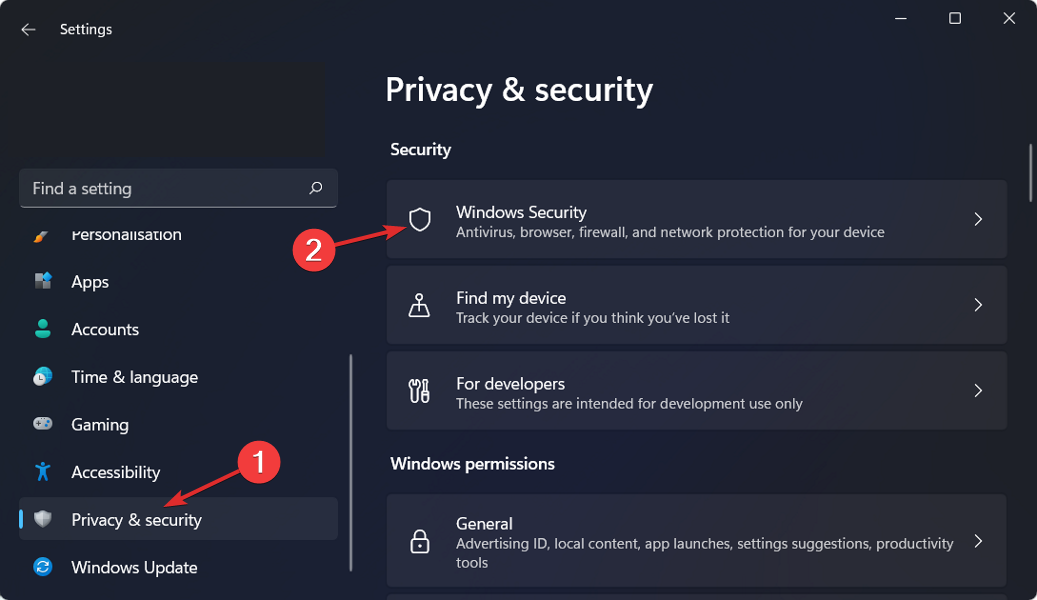
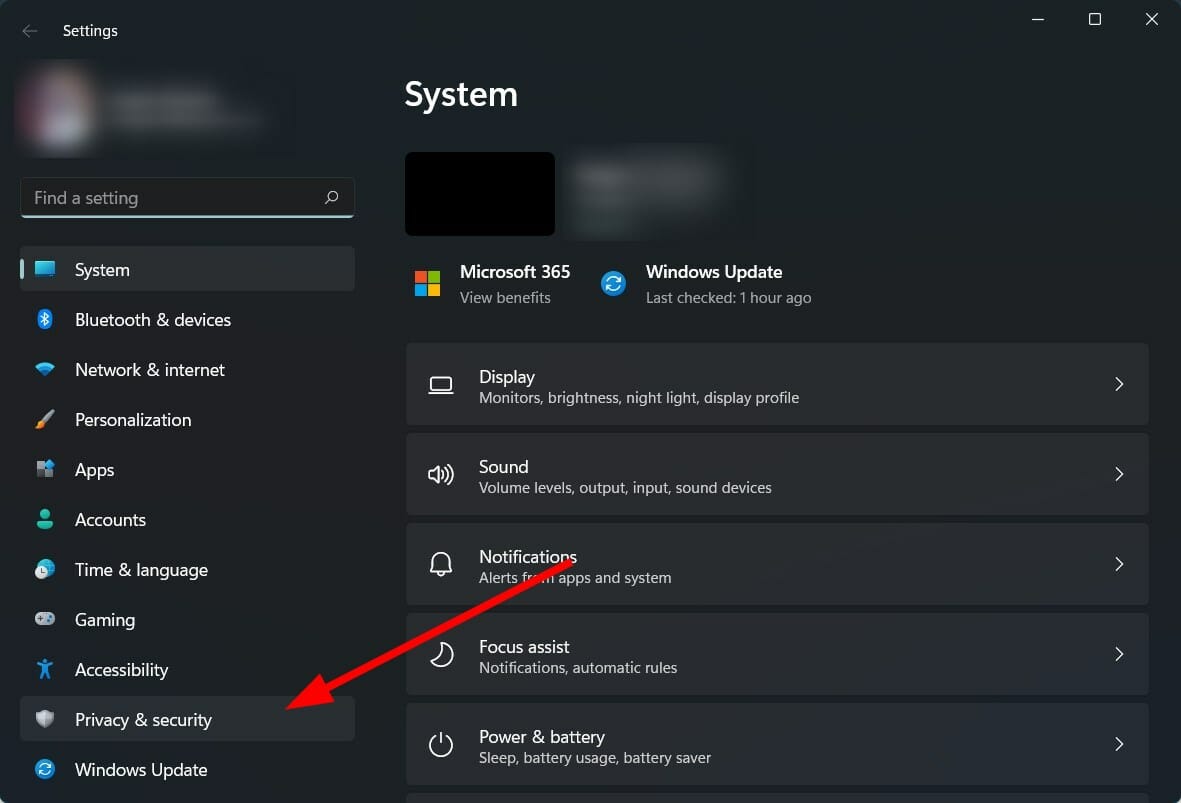
Press the Windows key + I to open the Settings app, and click on Privacy & security from the left menu, followed by Windows Security from the right one.
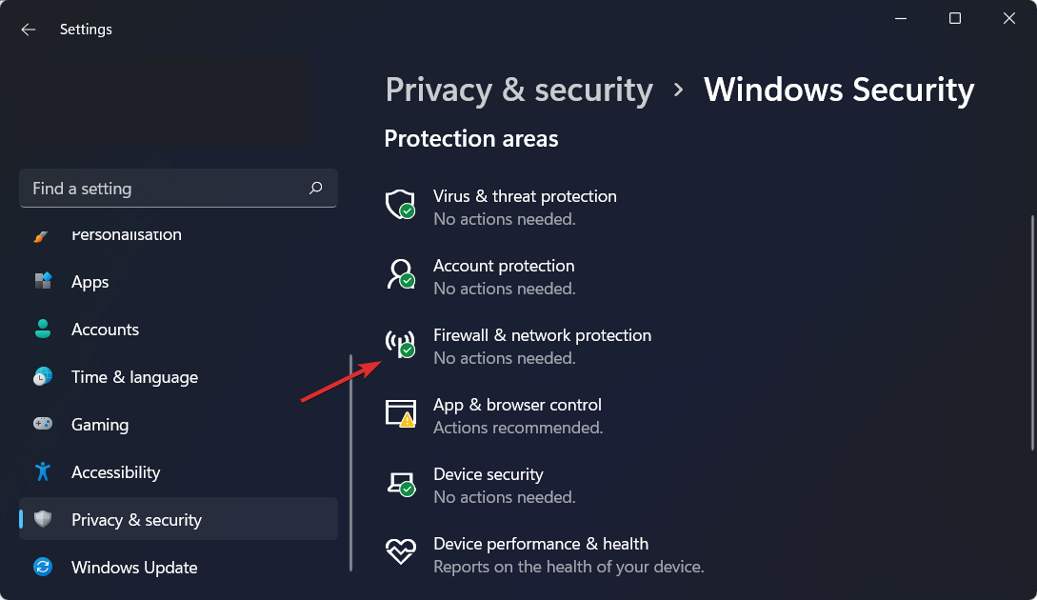
Now click on Firewall & network protection.
Look for the Allow an app through firewall option and click on it.
If you see that Minecraft is not ticked, it means it doesn’t have access. Click on Change settings to give it access.
Now check the box for Public and Private next to Minecraft and click OK.
Your firewall may be why Minecraft Java won’t install on a Windows 11 device.
Click on the expand arrow from your taskbar, then right-click on the antivirus icon. Now choose Avast shields control followed by Disable for 10 minutes.
If you have other antivirus programs installed, you can disable the app temporarily by following the same steps as above or similar steps.
Alternatively, we recommend using professional antivirus software such as TotalAV to protect your computer at all costs.
For more information and potential solutions, look at our post on Minecraft not working in Windows 11 and see how you can fix various issues in no time.
Alternatively, if you feel like you haven’t installed Minecraft as you should have, you can learn how to download and install Minecraft on Windows 11 by following the link attached.
Few things in this world are more annoying than your PC restarting mid-game. A common cause for this is overheating, but many of us face it even with a perfectly cool PC.
So what’s the deal?
Other common reasons why this is happening include problems with the Power Supply Unit (PSU), corrupt or outdated graphics, a CPU working at full power, or misconfigured settings.
Below, we’ll address all of these possible causes that force your PC to restart while gaming.
How to stop your PC from restarting when playing games
First, make sure your PC meets the minimal requirements. Also, if available, try another PSU instead If the problem still persists, let’s perform the solutions below to fix the problem as quickly as possible.
1. Update the graphics driver
Press Windows + S to launch the Search menu, enter Device Manager in the text field; and click on the relevant search result.
Now, double-click on the Display adapters entry.
Right-click on the graphics adapter in use, and select Update driver from the context menu.
Next, select Search automatically for drivers.
Wait for Windows to find and install the best available driver on the system.
Though it’s not recommended that you frequently check for driver updates, the graphics driver here is an exception. When gaming, it plays a critical role, and if it’s outdated or there’s a bug present, updating it could fix the problem.
Constantly updating drivers on your PC is essential, especially when playing games, and a third-party automated solution can improve gaming sessions.
2. Disable automatic restart
Press Windows + S to launch the Search menu, enter View advanced system settings, and click on the relevant search result.
Click on the Settings button under Startup and Recovery.
Now, untick the checkbox for Automatically restart under System failure, and click on OK at the bottom.
3. Remove overclocking
For many users, overclocking resulted in frequent restarts when playing games on the PC. Overclocking is meant to boost the performance; and take it to levels the device is not designed to run at, thus often causing it to malfunction.
So, remove any overclocking on the PC, and uninstall apps that fall under the category of game boosters. If the problem persists after making the changes or the method is not applicable in your case, head to the next one.
If none of the methods listed here have worked, chances are that the underlying problem is not a general one but specific to your computer. In this case, the simplest solution is to perform a System Restore.
A system restore will fix almost any kind of issue, be it problematic drivers that were recently installed, conflicting applications, or changes to the settings. It does that by reverting any modifications made to the computer’s software.
Once done, the PC would no more restart when playing games on Windows 10 or 11.
How do I stop my computer from overheating when playing games?
Choose optimal system settings: If the PC is overheating due to poor performance, configure the settings such that your PC becomes faster and more responsive.
Clear storage space: If your computer runs low on storage, uninstall unnecessary apps and additional files. In case you don’t want to delete them, upload the files to cloud storage.
Control the CPU fan: If you notice the fan speed to be persistently low, manually control the CPU fan and set it to run at the optimal speed.
Use dedicated software, too: You can also use a dedicated third-party tool to reduce overheating. These identify what’s causing the problem and automatically take corrective measures.
That’s it! These were all the ways you can fix things if the PC restarts when playing games and stop it from overheating. The methods will also work if the PC restarts with a black screen while gaming.
Opera RAM usage is a critical aspect of its performance. It directly impacts your browsing experience. Today, we’ll explore what affects Opera’s RAM usage, why it matters, and how to limit it.
How much memory should Opera use?
Opera typically uses 300-700 MB of RAM with a few tabs open. If it goes beyond that, you may want to tweak your settings. High RAM usage might affect performance.
How do I tell how much RAM my Opera uses?
You can check RAM usage for Opera and other software in Windows 11/10 with Task Manager.
Press the Windows key + X.
Select Task Manager.
Go to the Processes tab in Task Manager. It shows all your active software.
You’ll see a RAM usage figure for Opera in the Memory column.
How do I make Opera use less memory?
Before starting with more complicated tweaking methods, let’s go through some basic means to restrict Opera’s memory usage:
Close unneeded background tabs – The easiest way to make Opera use less memory is to close page tabs in that browser you don’t need open.
Clear the browser’s cache – Like any other browser, Opera can get clogged with lots of history items and cache, and refreshing it will make it run smoother and consume less RAM.
Install any updates – Make sure that Opera and your Windows system get updated regularly. Opera and Opera GX get automatic updates, but just in case, we have a guide on how to update Opera GX manually.
If these preliminary steps are insufficient to fix the problem, start performing the solutions below.
You will receive a warning that the extension was not verified by Opera but you can still click the Addextension button.
You will see that all the open tabs have been brought to OneTab so you can manage them.
OneTab is a Google Chrome and Opera extension that can reduce tab memory usage by 95 percent.
Pressing that OneTab button will move all open pages into a single OneTab tab. Moving pages to that tab will reduce Opera’s RAM usage. To send a single page, right-click the OneTab extension and select Send only this tab.
2. Disable background processes with Opera’s Task Manager
Click the red O (Opera) button at the top left of the browser.
Select the Developer menu.
Click Task Manager to view the window directly below.
Select a process, webpage, or extension there to disable.
Press the End process button.
Note that disabling more essential processes may cause some browser issues. However, it’s fine to disable high-memory pages and extensions with Task Manager.
FNV is a popular action role-playing video game available on Windows and other gaming platforms. However, due to an internal bug, you may encounter the Fallout New Vegas out of memory error during gameplay.
If you are also troubled by this error, we prepared a couple of troubleshooting tips to help you resolve it swiftly. But first, let’s take a closer look at the whole picture. How much RAM does New Vegas use?
Is it that resource-intensive? These are all legitimate questions that we shall try to address by answering an even more important question.
What is Out of memory error in FNV?
The error message seems to indicate an issue with the lack of graphics memory. However, it’s rarely the actual case. In fact, the error is caused by a glitch that prevents the game from using more than 2GB of RAM.
In other words, even if you do have enough virtual memory address space, New Vegas won’t be able to access and use it.
Here’s what to expect:
Fallout New Vegas out of memory crash
Fallout New Vegas memory leak – Fallout New Vegas memory could not be read error
Also, Fallout New Vegas out of memory with 4GB, 8GB patch – For some, even the Fallout New Vegas 4GB patch is not working.
Fallout New Vegas out of memory error Windows 10, Windows 11
How can I fix Out of memory error in Fallout New Vegas?
1. Use the Fallout New Vegas 4GB patch/MOD
Open the FNV 4GB Patcher link. You may need to register a free account to download the file.
Scroll down and click the File tab.
Click on Manual Download to download the file and save the file to your computer.
Extract the file downloaded to your computer to the following location: C:/ProgramsFiles(x86)/Steam/SteamApp/common/falloutnewvegas
Once extracted, locate and right-click on the FalloutNVpatch.exe file in the folder.
Select Run as Administrator from the options. This will execute the patcher and create a backup of the game’s original file.
In the Fallout New Vegas folder, search for the *ini file.
Right-click on the first ini file and select Properties.
In the General tab, check the Read-only Attribute.
Click Apply and OK to save the changes.
Repeat the steps with all the ini files in the folder.
Launch Steam and run Fallout New Vegas and check if the error is resolved.
The Fallout New Vegas 4GB patch is a simple MOD that makes the 4GB FNV aware and automatically loads NVSE if it exists. That’s how to use a 4GB patch with NVSE.
It allows the game to use 4GB of Virtual Memory Address Space, thus fixing the Out of Memory error.
Click on the Manual Download button and download the file to your computer.
Extract and open the downloaded file.
Open the Data folder and navigate to Data > NVSE > Plugins.
Select all the files in the Plugins folder and copy them.
Next, navigate the following location: C:/ProgramsFiles(x86)/Steam/SteamApp/common/falloutnewvegas
Open the Data folder in the Fallout New Vegas folder.
Click the New Folder button and name the folder as NVSE.
In the NVSE folder, create another folder called Plugins.
Open the Plugins folder and paste all the files copied previously.
Open Steam and launch Fallout New Vegas.
Check if the error Fallout New Vegas out of memory is resolved.
The second method, combined with the first method for sure, will fix the Fallout New Vegas memory error, especially if you are on a lower-end computer with performance issues.
The Fallout New Vegas out of memory error is caused by a bug in the game that prevents it from utilizing more than 2GB of RAM.
Is your Windows Live Mail not sending emails? A few factors may have triggered this.
Before Outlook appeared, Microsoft’s go-to email client was Windows Live Mail. However, the client has been discontinued, and problems have started to arise.
There have been reported errors, such as the impossibility of sending emails: neither replying nor creating new ones.
Knowing that you’re in a similar position, delete the failed message from the Outbox to clear the blockage. Once you’ve done that, check out some fixes below to finish the job.
Why is Windows Live Mail not sending emails?
There could be several reasons why Windows Live Mail is not sending emails:
Connection issues – One of the reasons Windows Live Mail may not be sending emails could be due to a lack of internet connection or connectivity issues with your email service provider.
Incorrect email settings – Windows Live Mail may only send emails if the email settings are correct. This can include issues with the email server settings, port numbers, or security settings.
Outdated software – Another possible reason for Windows Live Mail not sending emails could be outdated software.
Full Outbox folder – If the Outbox folder is full of unsent messages, Windows Live Mail may not be able to send new messages.
Virus or malware – Windows Live Mail may not send emails if the computer is infected with a virus or malware.
Regardless of the trigger, it would be best if you succeeded using one of the solutions we explore below.
How can I fix Windows Live Mail if it’s not sending?
Before exploring the solutions, you may consider switching to a different service. We recommend Mailbird. You’ll see the latest emails from all your accounts in just one click. This email client makes it possible to connect with all your social media accounts.
Click on your antivirus icon, hover over Avast shields Control and select Disable for 10 minutes (This step varies for different antivirus software).
Try resending the email.
2. Test spam filtering
The content of the message most often contradicts a spam filter from one of the servers.
To rule out this option, compose a simple new text message with a unique subject and a few lines of plain text. Then, send it from the misbehaving account to the same account.
If the message arrives, you should be convinced there’s nothing wrong. If it doesn’t, look at the bounce message you get instead.
3. Send the pictures as attached files
If you attempt to send emails but fail with the error 0x8007007A in Windows Live Mail, the app cannot send any media attachments from OneDrive.
The latest updates in OneDrive caused this, so consider sending the images as attached files instead.
4. Use the same settings as the incoming mail server
In your Windows Live Mail application, right-click on your email account, then select Properties from the menu.
Now choose the Server tab, select My server requires authentication, and click Settings.
Select Use same settings as my incoming mail server and confirm.
5. Delete potentially corrupted emails in the Outbox
Open Windows Live Mail on your computer and click on the Outbox folder on the left-side panel.
Select the email that you think is corrupted.
Right-click on the selected email and choose Delete.
When Windows Live Mail keeps emails you try to send in the Outbox folder, and you know recipients are not receiving them, you most likely have one or more corrupted emails placed there.
This usually happens with the oldest ones, so start deleting them one by one.
The Windows Live Mail error 0x800CCC6A usually rights itself after a short while. This prevents sending messages out, but give it a few days, and things will likely return to normal again.
If fixing the problem seems too much, you can always change your email client to a better one. Check out this excellent list to find our top picks and choose the best fit for your needs.
For other questions and suggestions, reach out to the comments section below.
Not getting a document printed on time is one issue many of us hate to encounter. It is an experience that can cause you a lot of trouble, especially if you’re on a deadline.
Many have reported Driver is unavailable error when installing the printer on Windows 11, and if you encounter this issue, you won’t be able to use the printer at all.
Although this may seem like a big problem, it can be easily fixed, and in today’s guide, we’re going to show you the best ways to fix this issue.
Why am I getting HP printer driver is unavailable on Windows 11?
This error message is displayed when the driver installed for the printer is not compatible. This might be because it is outdated or corrupted.
Luckily, there are ways to fix this issue, and today’s guide will show you how to do that.
How can I get rid of the Driver is unavailable message on Windows 11?
1. Make sure that Windows is up to date
Press Windows key + I to open the Settings app.
Navigate to the Windows Update section.
Check for avilable updates. If any are available, they will be downloaded automatically.
Once the update is downloaded, restart your PC to install it.
2. Update printer drivers
Press Windows key + X and select Device Manager from the list.
Locate your printer, right-click and choose Update driver.
Now select Search automatically for drivers, and wait for Windows to install the driver.
If that doesn’t work, repeat steps 1-2.
Now choose Browse my computer for drivers.
Select Let me pick from a list of available drivers on my computer.
Choose the desired driver and click on Next.
Updating printer drivers manually can be a tedious task, especially if you’re having trouble finding the compatible driver.
Luckily, there are specialized applications such as Outbyte Driver Updater that can make this process both simpler and faster. The software is fully automated, and it will update all your drivers with a single click.
If you’re having driver issues, or if you need to update multiple drivers, this tool will surely help you.
Cricut recommends using an Inkjet printer for your printing jobs before carving the design with the Cricut Explore or the Cricut Maker. However, it can also handle printing, especially on lightly colored materials, but what do you do if you can’t print?
When Cricut doesn’t print, it most likely means the image is not printable. To make the designs printable, you must change the Linetype, and for multiple layers, you can use the Flatten tool.
This step-by-step guide will walk you through how to resolve the issue when your Cricut won’t print.
Why isn’t my printer printing from Cricut?
From our interaction with users, there are a few reasons why your printer is not printing from Cricut:
Printer settings – Ensure that your printer is configured correctly and selected as the default printer in your device’s settings.
Connection issue – Check that the printer is correctly connected to your computer, as this is an easy trigger.
Driver issue – If you are running on an outdated printer driver, you are prone to some of these issues.
Ink or toner – Ensure that your printer has enough ink or toner to print and that it’s not running low.
Software compatibility – Cricut Design Space may not be compatible with some printers. Check the manufacturer’s website for compatibility information.
Firewall or security software – If you have firewall or security software installed on your computer, it may be blocking the printer from printing.
What can I do if Cricut is not printing to the printer?
1. Change the Linetype
Select your Cricut edition. This filters out of the menu all the unavailable options for your device.
Next, insert your designs onto the Design Space Canvas.
Click on the Linetype menu button and select the different Linetype from the dropdown.
If you have multiple layers and wish to change the Linetype for them all, you can first select all the relevant layers before choosing a Linetype from the dropdown.
2. Use a printable image
Click on the filter icon.
Then select the Printables checkbox.
Finally, choose a printable image and insert it onto the Canvas.
Cricut’s library is loaded with tons of beautiful printable images ready to Print and then Cut. These images have the Print Linetype, and you can find them as single layers in the Layer panel.
If your Cricut is not printing, you may have to try it again with printable images.
3. Print, then cut
If Cricut is not printing, you can make your design printable by changing the Linetype or inserting a printable image, as explained in other solutions.
After that, hit the Continue button.
Lastly, select your printer from the dropdown and hit Send to Printer.
This launches the Print Then Cut dialog and applies an image bleed to eliminate the white borders left after the carving.
Retry printing with an Inkjet printer after following the steps here. If Cricut is still not printing, make sure you use a white material for the Cricut Explore or medium to light-colored paper for the Cricut Maker.
Hopefully, this step-by-step guide has put you through all you need to work on Cricut that is not printing. However, ifease let us know in the comments section below if it does not resolve the issue.
Regarding PDF files, no other file is better suited to handling them than PDF files.
The only problem is that not everyone has the chance to take advantage of this fantastic tool since some users have reported that their installation process stops near the end:
Why is my Adobe Reader not installing?
There could be several reasons why Adobe Reader is not installing on your device. Some common reasons are:
Inadequate system requirements – Ensure that your device meets the minimum system requirements for Adobe Reader.
Interrupted download – If the download is interrupted, it may result in a corrupt or incomplete file, preventing the installation from completing.
Antivirus software – Some antivirus software can block the installation of Adobe Reader, so try disabling it temporarily.
Insufficient disk space – Ensure enough free disk space on your device to install Adobe Reader.
Previous installation – If you have a previous version of Adobe Reader installed, it could be causing compatibility issues. Try uninstalling the previous version before installing the new one.
Corrupted installer – The installer file may be corrupt. Try downloading a fresh copy of the installer and attempting the installation again.
How can I fix Adobe Reader install if it’s stuck at 90%?
Before you start any recommended solutions, here’s what you should quickly do:
Check your internet and ensure it runs correctly. Because sometimes, this problem is an indication that you can not access the internet.
In some instances, your antivirus can cause Adobe Acrobat Reader to install stuck at 90 percent, and this is why it’s advised to disable it temporarily.
You could always go for an antivirus that proved itself time and time again to have minimum system interferences. There is excellent protection software that is also reliable antivirus with low CPU usage and capable of malware removal.
Locate the install kit you’ve just downloaded, launch it, and follow the on-screen instructions.
Make sure no other programs are running in the background during the installation.
Issues with installing Adobe apps through the Creative Cloud are not uncommon, and if your Adobe Acrobat DC install is stuck, we suggest using the direct download link below.
Download Adobe Acrobat Reader using the methods listed above.
Right-click on the install kit and select Properties.
In the new context menu, go to the Compatibility tab, check the box Run this program in compatibility mode for, and choose an OS different from the one you are currently running.
By following these steps, you should no longer have any issues getting your AdobeAcrobat Reader installation to go past 90%.
Remember, however, that there are plenty of alternatives to AdobeReader, so instead of troubleshooting, you may try any other Adobe Reader alternative.
If you know of any other method we may have missed in our article, leave a message in the comments section below so that others can use it too.
In a semi-lengthy blog post addressed to the public, Microsoft vice chair and President Brad Smith mulls over what the future holds with AI now becoming more mainstream and in doing so, identifies several things to be cautious of before it gets out of hand.
Quickly following its official $10 billion dollar investment in OpenAI, Microsoft has begun rolling out the ChatGPT platform into several of its own properties that include Viva Sales, Outlook and soon Bing search. With the backdrop of Microsoft accelerating the presence of AI technologies in more mainstream products, the company’s president took to Microsoft On the Issues blog to extol the virtues and highlight the potential pitfalls of a world heavily infused with AI technologies.
This brings huge opportunities to better the world. AI will improve productivity and stimulate economic growth. It will reduce the drudgery in many jobs and, when used effectively, it will help people be more creative in their work and impactful in their lives. The ability to discover new insights in large data sets will drive new advances in medicine, new frontiers in science, new improvements in business, and new and stronger defenses for cyber and national security.
Understandably, Microsoft is bullish on its $10 billion dollar investment, but it has spoken glowingly of other multi-billion-dollar projects that failed spectacularly to pan out the way the company initially envisioned, cough – Windows Phone – cough. However, AI has been on the fringe of modern automation for some time, and it seems like ChatGPT is yet another notable shift in how humans interact with technology.
Smith has identified three key goals he believes the technology sector should take into consideration when utilizing widespread AI platforms for mass consumption that will help with equity, security, and risk management.
First, we must ensure that AI is built and used responsibly and ethically.
In our view, effective AI regulations should center on the highest risk applications and be outcomes-focused and durable in the face of rapidly advancing technologies and changing societal expectations. To spread the benefits of AI as broadly as possible, regulatory approaches around the globe will need to be interoperable and adaptive, just like AI itself.
Smith encourages companies to be proactive and self-regulatory in helping to pave new laws to ensure people have protections under the law for the use of AI while establishing others to deter abuse of the technology.
Second, we must ensure that AI advances international competitiveness and national security.
The United States and democratic societies more broadly will need multiple and strong technology leaders to help advance AI, with broader public policy leadership on topics including data, AI supercomputing infrastructure and talent.
Smith’s second tenant boils down to getting world leaders together to determine a fair and adequate playing field for the use of AI as competitive tool.
Third, we must ensure that AI serves society broadly, not narrowly.
Our most vulnerable groups, including children, will need more support than ever to thrive in an AI-powered world, and we must ensure that this next wave of technological innovation enhances people’s mental health and well-being, instead of gradually eroding it.
Lastly, Smith is calling on individuals and organizations to try and keep pace with AI technology and apply guardrails that help to protect kids, workers, students, and the world at large.
Smith concludes his take on AI and the future by encouraging everyone to “be curious, not judgmental,” as AI evolves into something bigger than it has been in the past.
If you’re using Windows 11, you know you can enable the dark mode feature. Unfortunately, sometimes it can get stuck, and it won’t change back to light mode when you want it to.
This feature gives your screen a cool black look and is particularly helpful for those who don’t like too much brightness. For most people, this isn’t much of a problem. However, some people find it annoying because it makes it harder to see their computer screens.
Why is my computer stuck in dark mode?
Wondering why your Windows 11 might be stuck in dark mode? Here are some possible causes:
You have not activated your Windows version – If you have not activated your copy of Windows, you cannot modify some settings until you enter the product key.
Virus/malware – If you don’t have an antivirus installed, we recommend installing a reliable antivirus program to secure your system.
Incompatible programs – If any third-party apps use their own custom themes, they could prevent Windows from switching to light mode.
Recent Windows updates – Sometimes, Windows updates have issues that can interfere with the performance of your PC and block your OS in dark mode.
Now that we know why this happens, let’s go to the actual solutions to the problem.
How do I get out of dark mode in Windows 11?
Before getting to the more complex solutions, let’s check some preliminary measures from our list of possible fixes:
One of the most basic fixes is restarting your computer. Restarting your PC sometimes solves all your problems related to Windows 11 getting stuck in dark mode.
Ensure you don’t have third-party personalization apps working in the background. They can take over and block your system into dark mode.
If you did all these and still can’t switch to Light mode, apply the solutions below.
1. Disable the High Contrast theme
Hit the Windows key, type control panel, and click on Open.
Go to Ease of Access.
Search for Turn High Contrast on or off in the search bar and click to open.
Scroll to High Contrastand toggle it off.
Once you have disabled high contrast, you can go back and try to change your theme settings to light, then restart your PC.
Press the Windows key, search Windows Security and click Open.
Select Virus & threat protection.
Next, press Quick scan under Current threats.
Wait for the process to finish and restart your system.
Windows Defender provides only basic cybersecurity protection, so it might not detect any new issues. A full scan using a premium antivirus is recommended from time to time.
In that case, we can only recommend TotalAV, since it has some of the best features in terms of security protection, anti-malware, and safety.
3. Uninstall recent apps/programs
Hit the Windows key, search Control Panel and click Open.
Under Programs and Features, select Uninstall a program.
Navigate to the latest installed program/app, right-click, and select Uninstall.
4. Run DISM and SFC commands
Press the Windows key, type cmd in the search bar, and click Run as administrator.
Type in the following command and press Enter: DISM /Online /Cleanup-Image /ScanHealth
Once the command has been executed, type and Enter the next one: sfc /scannow
Wait for the command to be executed and restart your PC.
The DISM command can be used to repair corrupt files or add Windows functionality. It is used to install, uninstall, configure, and update Windows features. On the other hand, SFC scans your system for integrity issues and replaces incorrect versions with correct ones.
How do I change the dark mode back to normal?
Right-click on a free space on your desktop and select Personalize.
Click the Colors menu.
Now, click the Choose your mode drop-down menu and select Light.
Is there Auto Dark Mode in Windows 11?
Auto Dark Mode is a feature that automatically adjusts your display’s brightness depending on the time of day and your location. It can be helpful when you’re using your PC in a dark room at night or if you find yourself staring at your screen for hours on end.
You can find it under Night Light settings. It dims the color of your screen in the evening or when you schedule it.
Night Light uses your computer’s display settings to change your screen’s color temperature at night automatically. This helps reduce eye strain and makes it easier to fall asleep after using your PC.
You can set up Night Light to turn on automatically based on the time of day or manually with a button click.
There is also the option to schedule Dark Mode, and the highlighted guide will help you achieve that.
Should the built-in Windows 11 dark theme not satisfy you, you can opt for other dark themes that offer many more customization options.
Let us know which solution worked for you in the comments section below.
Blue Screen of Death, also known as the WHEA internal error, can be problematic for Windows 10 systems.
Therefore it’s essential to fix them as soon as possible. Unfortunately, this error isn’t that common, but since it can be so severe, today, we’ll show you have to fix it on Windows 10.
Is WHEA’s uncorrectable error serious?
Yes, a WHEA uncorrectable error is considered a severe issue, as it indicates a hardware problem on your computer that is preventing it from functioning correctly.
Different elements, including the following, typically cause this type of error:
Hardware failures – This error is usually caused by hardware failures such as hard drive failures, memory failures, or problems with the processor.
Overheating – Overheating can cause the components of the computer to malfunction and cause this error.
Driver issues – Outdated or corrupted drivers can also cause the WHEA uncorrectable error.
Power supply problems – Power fluctuations or issues with the power supply can also cause this error.
Virus or malware – A virus or malware infection can damage the system files and cause this error.
Software conflicts – Conflicts between software programs can also cause the WHEA uncorrectable error.
Users may experience this BSOD problem in several shades, including WHEA internal error on HP, with the boot loop, or with the stop code. Regardless, the solutions below should help.
How can I fix WHEA Internal Error?
1. Run the BSOD Troubleshooter
Press Windows + I and go to the Update & Security section.
Select Troubleshoot from the menu on the left, then Blue Screen from the right pane, and click Run the troubleshooter.
Wait for the process to finish.
Windows 10 features a handy built-in troubleshooter that can help you with various issues, including BSOD errors.
2. Use a third-party BSoD fixer
An advanced professional tool can keep your PC in top shape by optimizing the Registry, repairing virus damage, recovering damaged files, or offering real-time malware protection.
This software is based on a powerful technology that can fix Windows errors that cause various programs to crash and can also repair and prevent BSoD WHEA internal errors.
3. Run the SFC scan
Right-click the Start Menu, and open Command Prompt (Admin).
Enter the following code and press Enter: sfc/scannow
Wait until the process is done (it may take a while).
If the solution is found, it will automatically be applied.
Now, close the Command Prompt and restart your computer.
The System File Checker scans your computer for potential issues and resolves them automatically (if possible).
So, if a corrupt system file causes the WHEA_INTERNAL_ERROR error, the SFC scan will deal with it.
4. Update drivers
4.1 Manual updates
Press Windows Key + X on your keyboard and select Device Manager from the list.
When the Device Manager opens, locate the device you want to update, right-click it, and choose Update Driver Software.
Select Search automatically for updated driver software and wait for Windows 10 to download the appropriate driver for your device.
Repeat these steps for all drivers that you want to update.
Drivers constitute a significant part of your operating system, mainly because Windows 10 relies on them to communicate with all your hardware.
If specific drivers aren’t compatible with your operating system, or if they are just outdated or buggy, you’ll get a WHEA_INTERNAL_ERROR BSoD error, and your system will crash.
4.2 Automatic updates
When this happens, the issue might be that the device is malfunctioning or that the OS is attempting to install the incorrect driver.
Searching for drivers on your own can be time-consuming. So, we advise you to use a tool that will do this for you automatically.
Using an automatic driver updater will save you from the hassle of manually searching for drivers and keep your system updated with the latest drivers.
After installing the utility, you only need to scan your PC. It will detect outdated drivers and request your permission to update them; this process will be done thoroughly and securely.
Right-click the Start Menu, and open Command Prompt (Admin).
Paste the following command and press Enter: DISM /Online /Cleanup-Image /RestoreHealth
Wait until the scan is finished.
Then, restart your computer and try updating again.
This tool re-deploys the system image and resolves potential issues along the way. So, it’s possible that running DISM will also fix the WHEA_INTERNAL_ERROR error.
5.2 Using the Windows installation media
Insert your Windows installation media.
Right-click the Start menu and, from the menu, choose the Command Prompt (Admin).
In the command line, type the following commands and press Enter after each: dism /online /cleanup-image /scanhealth dism /online /cleanup-image /restorehealth
Now, type the following command and press Enter: DISM /Online /Cleanup-Image /RestoreHealth /source:WIM:X:SourcesInstall.wim:1 /LimitAccess
Make sure to change an X value with the letter of the mounted drive with Windows 10 installation.
After the procedure is finished, restart your computer.
6. Check and repair the hard drive
Restart your computer while holding the Shift key.
Choose Troubleshoot, then click Advanced Options.
Select Command Prompt from the list of options.
When Command Prompt appears, enter the following lines and press Enter after each line to run it: bootrec.exe /rebuildbcd bootrec.exe /fixmbr bootrec.exe /fixboot
Some users are also suggesting that you need to run additional chkdsk commands as well.
To perform these commands, you must know the drive letters for all your hard drive partitions. For example, in Command Prompt, you should enter the following: chkdsk /r c: chkdsk /r d:
Restart your computer and check if the issue is resolved.
This is our example, so keep in mind that you have to perform the chkdsk command for every hard drive partition you have.
Corrupted files on your hard drive can cause BSoD errors, and to fix this issue, it’s advised to run a chkdsk scan.
7. Install the latest Windows 10 updates
Press Windows + I, then click on Update & Security.
Click on Check for updates.
Blue Screen of Death errors are often caused by hardware or software issues, and if your operating system has problems with specific hardware or software.
We strongly advise using Windows Update and downloading the latest Windows 10 updates.
New updates are released frequently, and many of these updates improve your security, but these updates also introduce many bug fixes related to hardware and software.
Therefore you must download the latest updates to keep your PC safe, stable, and free from Windows stop code WHEA internal error.
8. Remove the problematic applications
Press Windows Key + R, insert the code below, then press Enter or click OK: msconfig
When the System Configuration window opens, click on Selective startup and uncheck Load startup items.
Go to the Services tab. Check Hide all Microsoft services and click the Disable all button.
Click Apply and OK to save changes.
Press Ctrl + Shift + Esc to open Task Manager.
Go to the Startup tab, right-click each entry on the list, and choose Disable from the menu.
Once you disable all startup applications, close Task Manager and restart your PC.
When your PC restarts, check if the BSoD, also known as the WHEA internal error boot loop error, appears again.
If the error doesn’t appear, it means that one of the disabled applications or services was causing it.
To find which application caused this error, repeat the same steps, but this time try enabling services and applications one by one until you find the one that caused the problem.
Third-party applications can often cause Blue Screen of Death errors to appear; therefore, you must locate and remove those applications.
Antivirus programs often cause errors such as WHEA_INTERNAL_ERROR; therefore, we advise you to remove all antivirus programs except Windows Defender.
9. Update your BIOS
Few users claim that they managed to fix the WHEA_INTERNAL_ERROR BSoD error by updating their BIOS.
When you update BIOS, you sometimes unlock new features of your motherboard and allow it to work with different hardware.
Updating BIOS is a somewhat advanced feature; therefore, we advise you to check your motherboard manual for detailed instructions.
Bear in mind that you can cause damage to your computer if you don’t update BIOS properly, so be extra cautious.
Outdated BIOS or your hardware usually causes the WHEA internal error in Windows 10, but you can quickly fix it using one of our solutions.
We’d like to hear more from you on this matter, so drop us a comment in the dedicated section below.
FedEx Delivery Manager is a service that allows you to request to customize your delivery preferences, manage delivery times and locations, and keep track of your FedEx deliveries.
The service is free to use to track shipments, receive alerts, provide delivery instructions, and some other features. Also, you can sign up for the service either in the FedEx web app or in the mobile app.
As useful as it may seem, the reviews for the service are not the best ones. And that’s because of the bugs which don’t allow users to get past the sign-up process and a range of scams under the disguise of FedEx. Sometimes it returns an error code (usually 1002).
Why can’t I enroll in FedEx Delivery Manager?
Many complain that the service hasn’t been available for many days. Also, after completing the process, some clients did not get any confirmation message, or the service failed to recognize their credentials or security answers.
And even more often, sign-up attempts fail because the users fail at identity check questions that seem irrelevant, such as their car brand.
Even the multiple-choice answers don’t make sense sometimes (in which case it is possible that one answers incorrectly, compromising the entire process).
The bottom line is that you must get all answers correctly according to the service’s standard to be accepted.
How do I get FedEx Delivery Manager to work?
1. Head to the correct website
In case the website that you received in the letter is incorrect or is not opening, directly head to the sign-up page for FedEx Delivery Manager to create an account.
You will be asked to enter the activation code received earlier, and once done, the account should be set up.
2. Look up your ZIP code
The pickiest part is related to your real location. More exactly, it seems that the sign-up will only work if you’ve lived at the same location (mentioned when signing up) for at least 1 year and, within that time, FedEx has made deliveries.
Since this is already true with most clients, you also have to check if your address is found on USPS.com under Look Up a ZIP Code (under Mail&Ship).
It appears that FedEx uses this reference to recognize your identity. If the details don’t match (your name with the address), sign-up will fail.
3. Enroll under another name
Users reported that they abandoned the unsuccessful attempt and started a new sign-up process using the name of a relative living at the same location (wife/husband, parent, etc.). In most cases, the new attempt was successful.
One thing is for sure, if you encounter any trouble while trying to sign up for FedEx Delivery Manager, don’t contact support. Clients complained of a complete waste of time and of an unprofessional attitude on the part of the FedEx agents.
If you try to access Delivery Manager through the mobile app and it fails to load or shows errors, use this FedEx app not working guide to troubleshoot the app and complete your setup.
We hope that you found this article helpful. If you have any suggestions on this topic that others might benefit from, please use the comments section below.
Windows update process can encounter some issues causing it to run into several errors, preventing it from completing. The Windows update error 80200053 is common to Windows 10 users.
Users encounter Windows update error 80200053 when the Windows upgrade process fails to complete.
It indicates that the update process has encountered an unknown error, asking that you restart the process.
What causes the 80200053 error?
The Windows update error 80200053 can occur due to many factors affecting your computer. A common cause is the corrupt Windows update files.
If there are corrupt files in the Windows update folder, it can cause the update process to result in errors.
Other factors that can cause the Windows update error are:
Windows Defender Firewall interference –The upgrade process can run into issues if Windows Firewall blocks its activities, resulting in errors. The Firewall can mistake the process for a malicious attack to block it.
Issues with Windows update components –Windows update needs some components to help it run smoothly. If these components are not intact, you may encounter the Windows update error 80200053 on your PC.
Many other factors can be responsible for the update issues on your computer. Hence, we’ll guide you through the steps for fixing the problem.
Our solutions will also help you with other variations of this error, such as 80d02002 updateorchestrator failure content download error, Windows Update error 0x80d02002 WSUS, and 0x80d02002 Delivery optimization: Download of a file saw no progress.
How do I fix the Windows update error 80200053?
Before proceeding with any advanced fixes, check these:
Click the Start button, type the control panel, and launch it.
Click on the Windows Defender Firewall option, then click Turn Windows Defender Firewall on or off from the left pane.
Navigate to the Private network settings and Public network settings, then click the radio buttons for the Turn off Windows Defender Firewall (not recommended) option.
In conclusion, our readers can check our fixes for other Windows update errors they are likely to encounter. Read how to fix Windows update error 1935 and error 9c48 on Windows 11.
If you have more questions or suggestions, kindly drop them in the comments section below.
The internet is a vast place. And it’s not just a place for people to find information. It’s also a place where you can find games. Playing browser games is a great way to pass time when you’re bored at work, in class, or just hanging out with friends.
The only downside is that most of them are blocked. However, there are plenty of browser games that don’t require any downloads or installs, and they can be played right in your browser. If you’re looking for a way to play games on your computer, we have a few recommendations.
Games are blocked in schools for a number of reasons. Schools need to protect students from inappropriate material, and sometimes that means blocking certain websites and apps. Other reasons include:
The Internet connection is slow and unstable.
Teachers do not want students using the Internet for non-educational purposes such as playing games.
Teachers may not be able to monitor what students are doing online.
Luckily, there are plenty of unblocked browser games available on the internet, including Google sites games. These games are completely free to play and don’t require any downloads or registrations. Let’s have a look at a few.
Snake for Chrome is a classic game that you can play on your computer. This is one of those old-school computer games where you have to eat food while avoiding obstacles.
The main objective is to avoid running into the walls and your own tail. You control a snake and the more obstacles you avoid, the more points you get. The snake also keeps growing the more you eat.
Additional features include:
It’s free
Does not need to be downloaded or installed
Comes as a browser extension compatible with most browsers
Dino is a unique game that offers a different experience from your ordinary dinosaur games. You have to control a dinosaur, and you will be able to do so by using your keyboard. The objective of this game is to get as many points as possible by avoiding all obstacles on your way.
The controls for this game are simple and easy to use. You need to press the arrow keys to avoid obstacles. Pressing up will make your dinosaur jump, while pressing down will make him fall down to duck.
As you progress and earn more points, you’ll notice the game switches from day to night, and the difficulty level increases.
Browser Quest is a game that you can play in your web browser. It’s like any other online video game except that it’s free and open source. You don’t have to download or install anything on your computer because BrowserQuest runs in your web browser.
The mission is to find rats and kill them before they kill you. Using your sword, you kill it, and once you’re successful, your health level is restored.
Krunker is an old-school arcade-style shooting game where you have to shoot your way through levels by shooting at flags that are on the wall.
There is also a multiplayer version of this game where you can compete against other people online in order to see who can get more points or who can survive longer against each other.
Tankionline is a tank combat game that can be played on the web browser. The game has several modes: single-player battle mode, co-op battle mode, and multiplayer battle mode.
The controls are simple: just click on where you want to go, and your tank will drive there automatically. You can also choose which weapon to use by clicking on it in the top right corner of the screen
Like its name implies, the Slope unblocked game involves going down multiple slopes. You get assigned a ball, and your job is to keep it balanced and avoid falling.
The controls are simple, and it’s fun to see how far you can go before falling off the edge. If you are competitive, you can register for the leaderboard and try to keep up with other players.
The Impossible Quiz is a quirky little puzzle game that has its own unique style and gameplay. It’s an online game that you can play right in your browser, and it doesn’t require any downloads or plugins.
It is designed for people who like studying but in a fun way. You have three lives to answer each question correctly. There are skippable questions, but you have to earn them.
The game is very simple and straightforward, so you don’t need to be a rocket scientist to play it. You have a tunnel and a bunch of obstacles in it. Your goal is to get as far as possible without hitting any of them because if you do that, your game ends immediately.
You can play with other players, or against them. The game has a leaderboard that allows you to compete against other players. The player who has traveled the most miles gets the top spot.
Word Finder is a fun, word-based online game. It offers users a chance to find hidden words and earn points while they play. This game is great for people who love puzzles and word games.
The game’s goal is to find as many words as possible before time runs out. As you progress through Word Finder, new features are unlocked that make gameplay more challenging.
The Maze – Path of Light is a puzzle game in which players must guide a ball from one point to another by creating a path. The ball will follow the path, but it will hit walls and bounce back if there is no path.
It’s fun, easy to play, and challenging simultaneously, making it perfect for players of all ages, no matter what their gaming skills are like.
You can play blocked games on school websites by using a VPN service. A VPN service will mask your IP address and make it appear like you are accessing the internet from a different location.
This means that even though your school might have blocked certain sites, with a VPN service, you can still access the unblocked game world.
The only downside to this is that some schools will block all VPN services, so you would have to find one that isn’t blocked by your school.
How do I unblock games at school without VPN? Another option is using a proxy server. Proxies are similar in that they mask your IP address, but instead of going through a third-party server like VPNs, they use your computer as the middleman between you and the website you’re visiting.
Alternatively, you can use a VPN and Proxy together to get the most out of both worlds.
Let us know what games you are currently enjoying, and share your list down below.
Xbox Free Play Days is back this week, and this time things are just a little different. This week’s event is themed to celebrate Anime Month, with three games available for Xbox Live Gold and Xbox Game Pass Ultimate subscribers to play from Thursday, February 2nd through Sunday, February 5th. Or in the case of For Honor, the game will be available through Thursday, February 9th.
The Naruto franchise is back with a brand new experience in NARUTO TO BORUTO: SHINOBI STRIKER! This new game lets gamers battle as a team of 4 to compete against other teams online! Graphically, SHINOBI STRIKER is also built from the ground up in a completely new graphic style. Lead your team and fight online to see who the best ninjas are!”
Eiyuden Chronicle: Rising combines a thrilling adventure through ancient ruins with the tale of one town’s rise from the ashes.
Drawn by lenses and other treasure in the nearby Runebarrows, our heroes learn that the town is struggling to rebuild after an earthquake and decide to help. Along the way, they’ll resolve disputes between eager adventurers and wary locals who don’t think the Barrows should be disturbed. And they’ll learn more about each other’s reasons for seeking treasure, deepening their bonds in the process.
As you will learn, these Runebarrows hide a great secret that has fateful implications for one of the characters. What begins as a simple treasure hunt turns into a dark conspiracy that will shake the world and plant seeds that carry over into the main story of Eiyuden Chronicle: Hundred Heroes.
The game will introduce a portion of Eiyuden Chronicle’s cast of characters in an original story with thrilling action and engaging town-upgrading elements.
There will be some perks for players that link the game with Eiyuden Chronicle: Hundred Heroes.
The name of one character from the Eiyuden Chronicle franchise has been changed from JB to CJ.
Wrap up
Each of these games are purchasable at discounts throughout the Xbox Free Play Days event. You can learn more about the program over on the Xbox Free Play Days FAQ page.
No Man’s Sky is an action survival game released in 2016 by Hello Games, available across platforms. The game is explained via five pillars, exploration, survival, combat, trading, and base building. You can roam around in the open world, where you need to mine for resources to progress.
While the game has received mixed reviews from critics, some players enjoy playing No Man’s Sky. But just like every other game, No Man’s Sky game isn’t safe from issues. You will encounter multiple problems, one of which is the No Man’s Sky Vulkan driver error. So, what is Vulkan error?
If you are also facing a similar issue, and are looking for solutions, then in this guide, we will give you a bunch of solutions that you can follow and fix the No Man’s Sky Vulkan driver error.
Can I play No Man’s Sky without Vulkan?
There have been enough searches made to know whether players can play the No Man’s Sky game with Vulkan.
Well, without beating around the bush and coming in clear, the answer is NO, if you wish to enjoy all game features. You cannot play No Man’s Sky without Vulkan. Moreover, you won’t be able to play the game offline without Vulkan.
But if you wish to play the game without Vulkan and there is no other option, then you will be able to play No Man’s Sky without Vulkan but miss out on some features.
How do I fix the No Man’s Sky Vulkan driver error?
1. Check if your GPU supports Vulkan
Launch the web browser.
Open the Wikipedia page.
Search for your graphics card series.
On the right, in the detail box, you can see the information if your graphics card supports Vulkan or not.
As in the below image, you can see that the Nvidia GeForce 1650Ti supports Vulkan API.
In case your graphics card does not support the Vulkan API, then the only thing that you can do is get yourself a new laptop or upgrade your graphics card that supports Vulkan API if you wish to play the No Man’s Sky game.
2. Reinstall the graphics driver
Right-click on the Start menu.
Select Device Manager from the list.
Expand the Display adapters section.
Select your graphics card.
Right-click and select Update driver from the list that appears.
Select the option to search the internet for updated drivers.
If there is a new update, then the system will install it automatically.
With an automated tool, not only will you get updated drivers on your PC with a few clicks, but you will also be able to fix the most common Windows errors and bugs that appear as a result of old or incompatible drivers.
2.2 Update drivers manually from the manufacturer’s website
Else you can also update your graphics drivers from the official website of the manufacturers:
Check out the Windows section and click on the Latest Runtime/ZIP.
Click the Download Latest Runtime link.
Open the Runtime installer file.
Follow the on-screen prompts to complete the installation.
Restart your PC for the changes to take effect.
4. Select dedicated graphics
Right-click on your desktop screen.
Click on Display Settings.
Scroll down and select Graphics.
Select Browse.
Locate the EXE file of Minecraft and select it.
Click on Options.
In the new Graphics specifications pop-up, select High-performance.
Hit Save.
If selecting your GPU solves display errors but you still cannot play properly, check out our guide on No Man’s Sky controller not working to ensure your gamepad is detected.
Sometimes the controller can’t get detected, and if that happens, follow this complete guide on No Man’s Sky not detecting controller to restore full input functionality.
A final resort, which surprisingly has helped several users fix the No Man’s Sky Vulkan error, is to reinstall everything.
And by everything, we mean to uninstall the game from your PC, uninstall the graphics card driver, and reinstall them back again. This reportedly fixes the error.
Check out the Windows section and click on the Latest Runtime/ZIP.
Click the Download Latest Runtime link.
Open the Runtime installer file.
Follow the on-screen prompts to complete the installation.
Launch the Vulkan configurator.
If it says Cannot find any Vulkan Physical Devices, click OK.
On the Vulkan Configurator homepage, select the option Fully controlled by the Vulkan applications.
Close it.
How do I change from Vulkan to DirectX 11?
When playing a game that supports both, you usually can switch between Vulkan and DirectX 11, right where the Play button is placed. In some cases, the option can be found in Settings.
Remember that you can only switch between Vulcan and DirectX 11 on a Windows PC since the latter is unavailable on macOS.
There you have it from us in this guide. We hope that you were able to fix the No Man’s Sky Vulkan error with the solutions mentioned in this guide.
Indexing is useful when you want to quickly find something on your computer, such as an email message or a document. With indexing, you can search through your entire hard drive – everything from documents and pictures to music and videos.
While this is an easy way to find what you’re looking for, you may find that the feature is sometimes plagued by glitches. Users have reported getting a message saying Indexing is paused, meaning their search is cut short. Let’s look at possible fixes for this.
Why is indexing paused?
Below are some possible reasons why your indexing is paused in Windows 11:
Corrupt Windows update – It is possible that a Windows update is the culprit. Windows Updates are not without their own share of faults.
Power settings – According to some users, this issue occurs because indexing is paused by the local battery-saving policy. If you’re in power-saving mode, this may be the reason.
Disabled Windows search – It’s possible that you may have disabled Windows search without knowing.
Corrupt system files – If for some reason, you have corrupt system files, indexing may not work normally.
How do I fix the Indexing is paused error?
A few preliminary steps that could solve the issue before you proceed to the slightly technical solutions include:
Navigate to Search and Indexing troubleshooter and click the Run button next to it.
2. Restart the Windows Search service
Hit the Windows + R keys to open the Run command.
Type services.msc in the dialog box and hit Enter.
Locate Windows Search, right-click on it, and select Properties.
Go to Startup type,and in the drop-down menu, select Automatic, then click Start.
Click Apply, then OK to save changes.
Restart your PC and see if the issue persists.
3. Rebuild the search index
Hit the Windows key, type Control Panel in the search bar, and click Open.
Search for Indexing Options in the Control Panel search bar and click to Open.
In the Indexing Options dialog box that opens, select the Advanced option.
Click Rebuild under Troubleshooting in the Advanced Options dialog box that pops up.
Press OK to confirm that you want to rebuild. Note that it may take a while, so ensure you don’t have any pressing matters when performing this step.
Rebuilding the Search index is particularly helpful for users who upgraded to Windows 11 with devices that did not meet the system requirements. We have already looked at some of the consequences of using an incompatible device with the OS, and this happens to be one of them.
4. Run DISM and SFC scans
Hit the Start Menu icon, type cmd in the search bar, and click Run as administrator.
Type the following commands and press Enter after each one: DISM.exe /Online /Cleanup-Image /Restorehealthsfc /scannow
Click on Windows Update and select Update history on the right pane.
Scroll down, and under Related settings, click on Uninstall updates.
This will take you to the most recent installed updates.
Select the topmost update and click on Uninstall.
Restart your PC and check if the problem persists.
Remember to keep checking for new updates because if it was a glitch in the released updates, Microsoft might release new ones to fix the known issue.
6. Disable Indexing of Outlook
Hit the Windows + R keys to open the Run command.
Type regedit in the dialog box and hit Enter.
Navigate to the following location: HKEY_LOCAL_MACHINE\SOFTWARE\Policies\Microsoft\Windows
Right-click on Windows, select New Key, and rename it as Windows Search.
Move on to the right pane, right-click on an empty space, and select New DWORD (32-bit) Value.
Rename it as PreventIndexingOutlook and set its Value data to 1.
Restart your PC.
7. Turn off the battery policy
Hit the Windows + R keys to open the Run command.
Type gpedit.msc in the dialog box and hit Enter.
Navigate to the following location: Computer Configuration/Administrative Templates/Windows Components
Locate Prevent indexing when running on battery power to conserve energy on the right-hand pane and double-click on it.
In the dialog box that opens, check the Disabled option, then click on Apply.
Restart your PC.
If none of these solutions work for you, you might have a damaged hard drive. Indexing may not be able to locate the files if it cannot read from the source. In such a case, you first must attempt to repair your hard drive before proceeding.
If you’re lucky and have been able to bypass this error, you may be interested in ways to speed up indexing for faster results.
Let us know what solution worked for you in the comment section below.
It is one of the most popular browser messaging apps, but many users reported that the Discord overlay is flickering on their mobile/PC. This could be pretty annoying, and if it’s happening to experience it, you better keep on reading.
In this article, we’re presenting you with an easy troubleshooting guide on how you can fix this problem by yourself. Before anything else, let’s start with a series of reasons why this error may appear.
Why is Discord overlay flickering?
Third-party apps – Sometimes third-party applications and Discord are sharing Direct2D graphics stack, and that can cause issues with the overlay. One app that is reported as the main cause is Paint.net, but there are others that can cause it as well.
GPU settings – The the PC isn’t detecting GPU or if Discord has trouble accessing it, you might encounter this problem.
How do I fix Discord screen flickering?
1. Change Paint.NET settings
Access Paint.net, and click on the Settings icon in the upper right corner.
Turn off Hardware accelerated rendering (GPU).
Restart Discord.
As mentioned before, today’s issue may be determined by the injection into the Direct2D graphics stack, which is also used by Paint.NET. However, after changing this setting, the Discord overlay flickering should be gone.
2. Enable GPU on Discord
Now, go to Discord, and choose User Settings in the bottom left of the app.
It the left pane, select Appearance. Now, turn on the Hardware Acceleration.
Restart Discord.
After changing this setting, check if the Discord screen flickering on Android/PC is gone. If not, proceed to the next solution.
A great workaround to resolve the Discord overlay flickering issue is to launch the web app in a dedicated browser.
If you only used the desktop application for Discord, trying the web version may resolve screen flickering while using this popular chat app.
In addition, you can improve your Discord functionality using the right browser, Opera GX.
This gaming browser offers worthwhile functionalities for users, such as gaming apps like Discord or Twitch in the sidebar, GX Corner with the best game deals, limits on RAM and network usage, etc.
Opera GX
Get the most out of your Discord experience and give Opera GX a try.
Press Windows + I to open Settings, search for Graphics, and click on the relevant result.
Pick the app and click on Options.
Select an option here from the three, System default, Power saving, or High performance, and click on Save. Try each until you find the right one.
Repeat the steps for the OSU game to fix the Discord overlay flickering in OSU.
If the flickering appears when you’re using the Screenshare feature from Discord, you need to make sure that the Discord app and the OSU game you are playing are using the same GPU.
NOTE
This applies when your PC or laptop has an integrated and dedicated graphics card.
What other Discord overlay issues should I be aware of?
Like any other app, Discord may get into several troubles. Look at the following information and be prepared for any Discord overlay problem.
Discord overlay not working at all – This is one of the most common and annoying problems. Fortunately, there are always available solutions to fix it.
Discord overlay 404 error – Being a 404 error, it might mean that Discord was looking to make a connection to somewhere outside the user’s connection. It can also indicate that the game is blocked from working.
As you can see, it’s not that difficult to solve the problem regarding the Discord overlay flickering when you play OSU if you follow carefully the steps presented in our article.
However, while some users may like the extra features, others prefer to disable the Discord overlay to keep it clean.
We hope that our guide helped you resume your fun in no time. That’s why we’d like to hear more about your experience, so please feel free to use the comment section below.
Sometimes, WhatsApp might fail to open, or even if it does then, you might not be able to send voice notes or make calls because the WhatsApp microphone not working in Windows 11.
This usually happens because of poor internet, using an outdated version of the app, privacy settings, or too many apps running at the same time. Let’s see how you can fix it.
What can I do if the WhatsApp microphone is not working on Windows 11?
1. Check Microphone Permissions
Press Windows + I keys to open Settings.
Click on Privacy & security tab in the left pane.
Scroll down to the Apps permissions section and click on Microphone.
Make sure both the Microphone access and Let apps access your microphone options are On.
Scroll down and locate the WhatsApp app, then toggle the switch to turn on the notification for the WhatsApp desktop app.
If you want to use the microphone on your device while on WhatsApp, you will have to enable the setting. If you were wondering, how do I activate voice on WhatsApp in Windows, the steps here should do.
You will now be able to make calls and send out voice notes without encountering the WhatsApp microphone not working on Windows 11 issue.
2. Reinstall WhatsApp Desktop
Tap on the Search icon on your Taskbar.
Search for WhatsApp on your device, then click on the Uninstall option when the search results pop up.
Once you have re-downloaded WhatsApp, verify whether the microphone now starts working in Windows 11. If the problem persists, head to the next solution.
Press the Windows key, type in Device Manager, and click Open.
Navigate to Sound, video, and game controllers to expand, right-click on your Sound driver, and select Update driver.
Select Search automatically for drivers.
Generally, you should keep your PC and its components like drivers updated at all times. Regular driver updates also bring security measures and should ultimately help you avoid any problems.
However, updating manually may be time-consuming or you could end up getting the wrong drivers. Luckily, there are automatic driver updating tools that will help you scan your PC for missing or outdated drivers.
4. Run the audio troubleshooter
Press the Windows key and click on Settings.
Select System on the left pane then click on Troubleshoot on the right pane.
Select Other troubleshooters.
Scroll down to the Recording Audio section, then click on the Run button.
If you have tried to apply the listed fixes above and you are still yet to resolve the issue, then the problem might be more complex. You can alternatively try restarting your device in Safe Mode.
By restarting your Windows 11 device in Safe Mode, all third-party applications are disabled by default. You can then try to launch the application to check whether the issue has been resolved.
Bluetooth is a wireless technology that allows you to connect your phone to other devices, such as speakers or headsets. It’s one of the most convenient ways to make and receive calls, but it can also be frustrating when the connection doesn’t work properly.
One such strange instance is when you connect your Bluetooth headset, but it only connects to either voice or music but not both. If this sounds familiar, you’ll want to read the rest of this article.
Why is my Bluetooth only connecting for audio and not calls?
If you’re asking yourself why your Bluetooth can only connect for audio and not calls, below are some possible reasons:
Blocked range – Your headset might be far from your Bluetooth device. If so, consider investing in a Bluetooth adapter.
Low battery – If you’re having trouble connecting to your Bluetooth device, it’s possible that you’re running low on battery.
Incompatible devices – When you connect two Bluetooth-enabled devices, they should be able to pair. Always check for Bluetooth capability when purchasing devices.
How can I fix my Bluetooth headset if it’s only connecting to one type?
We recommend you attempt the following steps before moving on to the slightly advanced solutions:
Make sure you have charged the battery, especially if your Bluetooth audio is stuttering. The battery should be charged for at least 8 hours before using it again.
Ensure that your Bluetooth device is on. Sometimes, Bluetooth won’t turn on, and you have to force it.
If you have another pair of headsets, try connecting with them to establish whether your original pair is faulty.
Restart both your headset and the connecting device.
1. Run the Bluetooth troubleshooter
Click on the Start Menu icon and select Settings.
Click on System on the left pane then Troubleshoot on the right pane.
Select Other troubleshooters.
Locate the Bluetooth troubleshooter, and click on the Run button next to it.
2. Update the Bluetooth driver
Hit the Windows key, type Device Manager in the search bar, and click Open.
Find your Bluetooth device, right-click and select Update.
Select Search automatically for drivers.
Restart your PC and try reconnecting.
Alternatively, you can check from the manufacturer’s site if there’s a driver update or use a third-party tool that will automatically do the job for you.
Outbyte Driver Updater is a driver updater utility that detects outdated, missing, or damaged drivers then, scans for them, and downloads and installs them.
Outbyte Driver Updater
Let Outbyte Driver Updater update your drivers and automatically increase your PC’s performance.
Press the Windows key, type Device Manager, and click Open.
Right-click on your Bluetooth device and select Properties.
Click on the Driver tab, then click the Roll Back Driver button.
Select a reason for rolling back the driver.
Restart your PC.
5. Restart the Bluetooth Service
Press the Windows + R keys simultaneously to open the Run window.
Type services.msc in the Run dialog box.
Find the Bluetooth Support Service, right-click, and select Restart.
Right-click again and select Properties.
Under the General tab, select Automatic as the Startup type then click OK.
Try connecting again.
Hopefully, if you have reached this point, you have successfully resolved the issue of a Bluetooth headset connected to voice or audio only. To prevent such issues in the future we recommend that you make your Bluetooth devices auto connect.


 NOTE