Windows Update Error 0x80242017: 5 Ways to Fix it

Coming across an error while updating Windows is more common than you think. One of the popular ones is 0x80242017. It is imperative to fix such errors as they may affect your computer’s functioning. 

Here, in this guide, we will discuss some potential fixes to resolve the issue right after examining the reasons for its occurrence of it.

What causes Windows Update Error 0x80242017?

There are a few reasons for the issue to occur, below are listed some of the popular ones: 

  • Faulty entries in Registry Editor – If there are registry entries of uninstalled apps or corrupt registry entries in Registry Editor, it may cause the issue.
  • Missing system files – You might get an update error if the system files on your computer have become corrupt or been deleted accidentally.
  • Outdated drivers – If your computer has obsolete drivers, it might cause a lot of issues. And, one of them could be this error.
  • Infected with viruses – If your computer is infected with any malware or virus, then you might find it difficult to update your Windows. Run a malware scan to fix the issue before trying again.

What can I do to fix Windows Update Error 0x80242017?

Before engaging in advanced troubleshooting steps, you should consider performing the following checks:

If these primary checks didn’t work out for you, follow these methods:

1. Reset Windows Update components

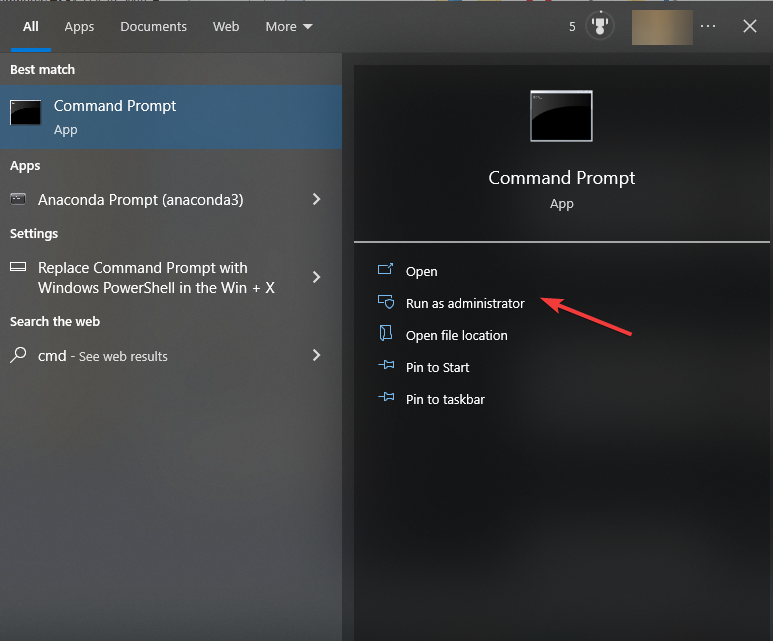
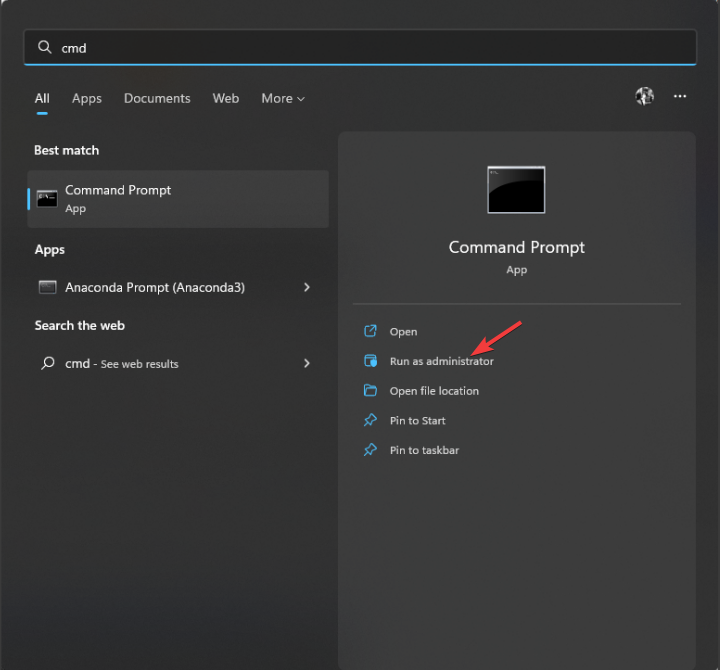
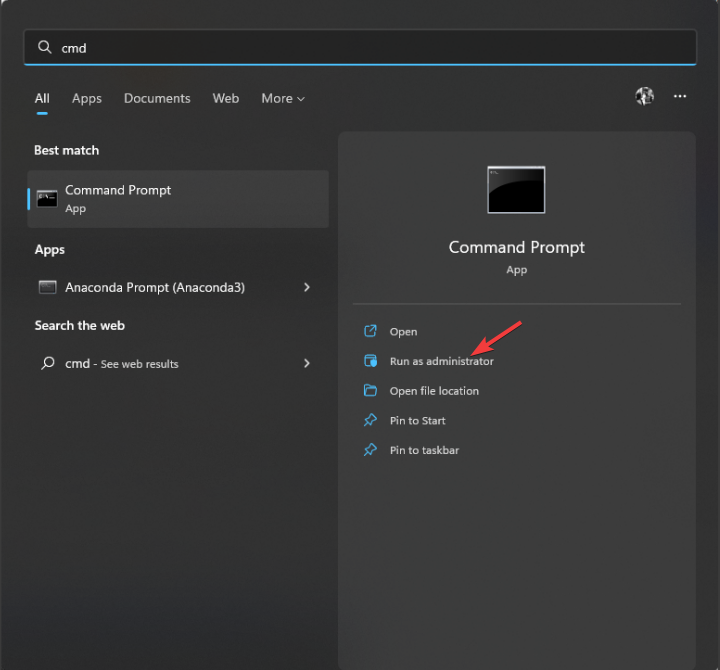
  1. Go to the Search bar, type CMD and click Run as administrator.CMD elevated-0x80242017
  2. Copy and paste the following commands and press Enter after each command: net stop wuauserv net stop cryptSvc net stop bits net stop msiserver ren C:\Windows\SoftwareDistribution SoftwareDistribution.old ren C:\Windows\System32\catroot2 catroot2.old net start wuauserv net start cryptSvc net start bits net start msiserver

2. Run Windows Update troubleshooter

  1. Press Windows + I to open Settings.
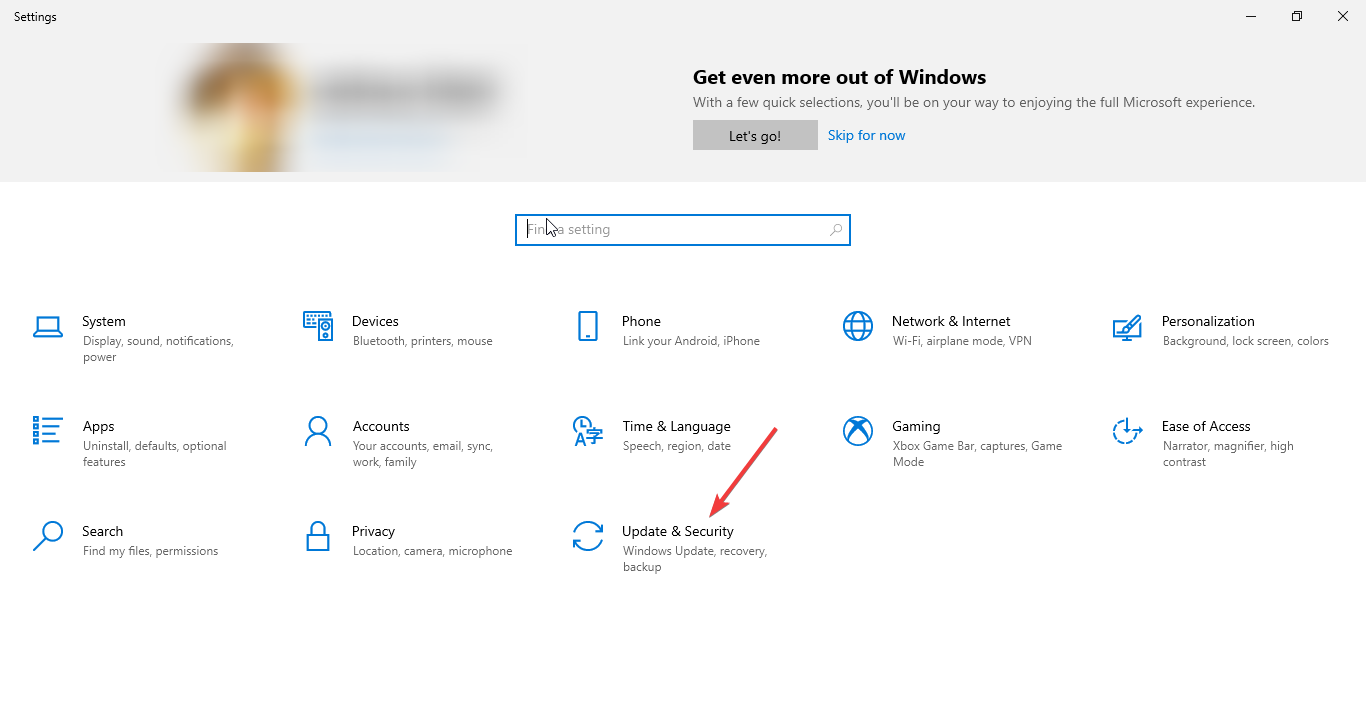
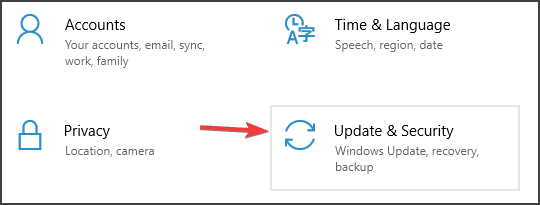
  2. Go to Update & Security. Update & Security -0x80242017
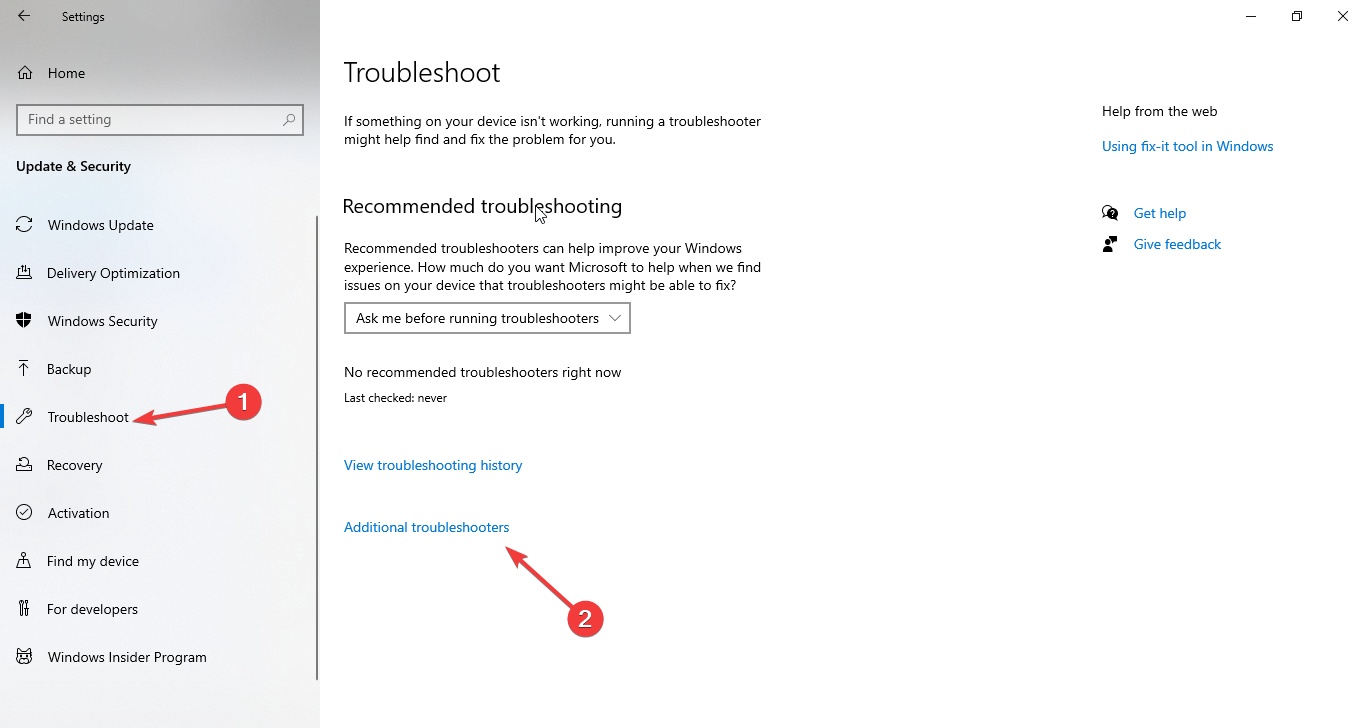
  3. Now, select Troubleshooting from the left pane, and click Additional troubleshooters.Troubleshoot - Additional Troubleshooter
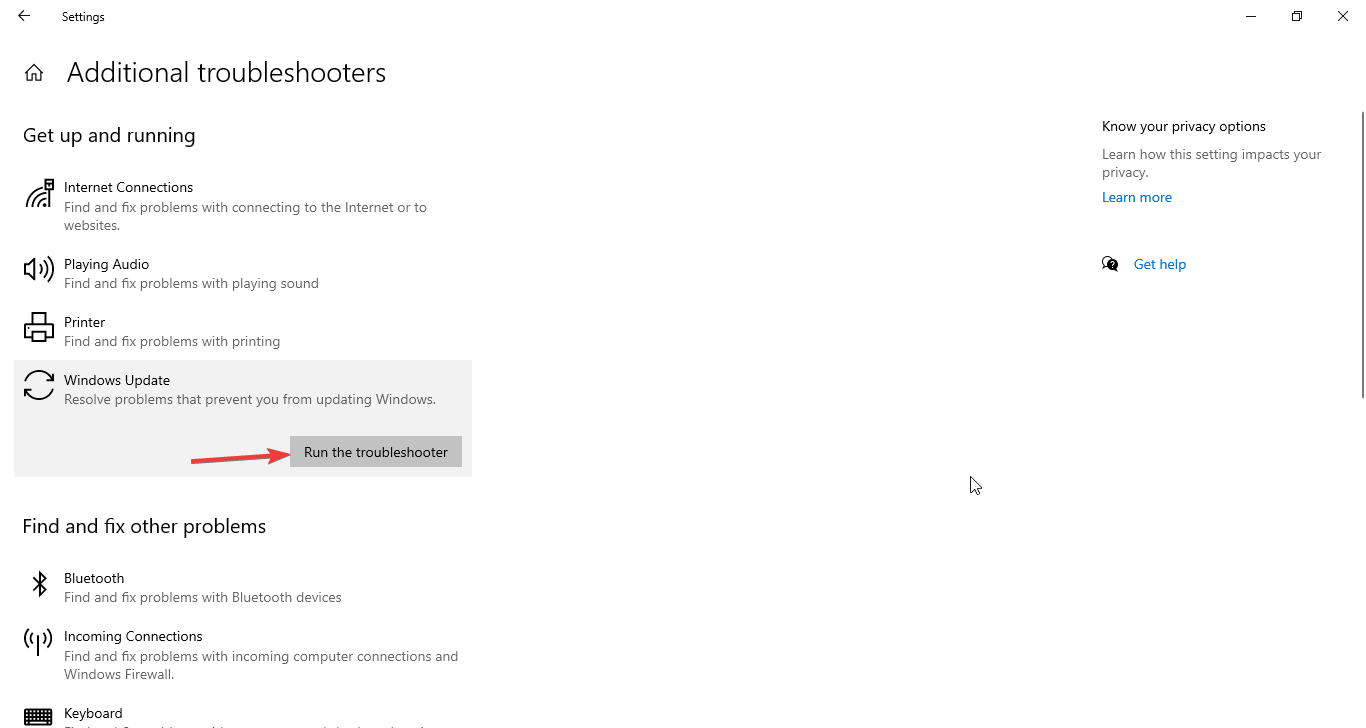
  4. From Get up and running, go to Windows Update and select Run the troubleshooter.Run the troubleshooter
  5. Follow the on-screen instructions to complete the process.

3. Delete the Software Distribution folder

  1. Press Windows + E to open Windows Explorer.
  2. Follow this path: C:\Windows\SoftwareDistribution\DownloadDelete Software Distribution - secure boot enabled but not active windows 11
  3. Press Ctrl + A to select all the files in the folder and click the Delete button from the menu.

4. Allow complete control of the System Volume Information directory

  1. Go to the Search bar, type CMD and click Run as administrator.CMD elevated-0x80242017
  2. Type the following commands and press Enter after every command: net stop sdrsvc takeown /F "C:System Volume Information" /A net start sdrsvc

5. Run SFC and DISM commands

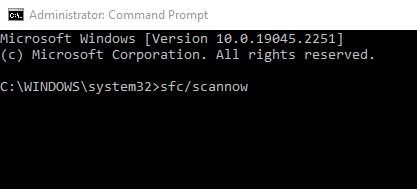
  1. Launch Command Prompt using the steps mentioned in methods 1 or 4.SFC/scannow
  2. Copy and paste the following commands and press Enter after every command: sfc/scannow DISM /Online /Cleanup-Image /RestoreHealth

6. Update outdated drivers 

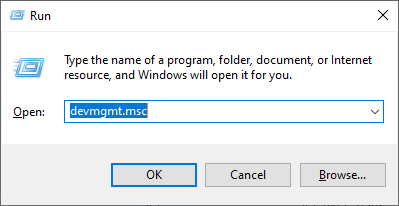
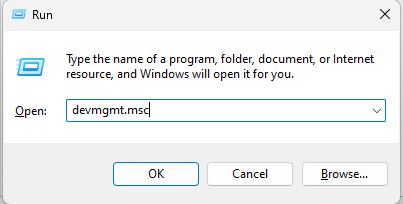
  1. Press Windows + R to open the Run window.Device manager RUN COMMAND WINDOWS 10 0x8024200b
  2. Type devmgmt.msc and press Enter. 
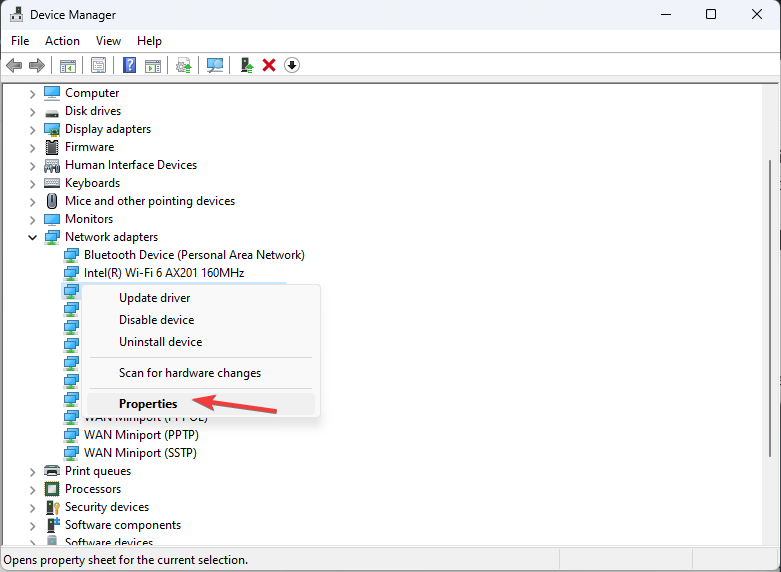
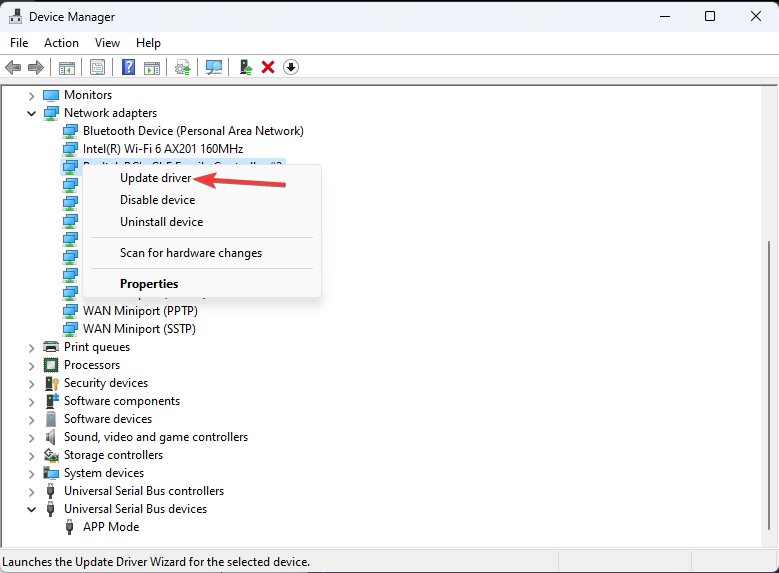
  3. Inspect all the drivers by selecting a driver one by one, right-clicking on them, and choosing Update driver. Update driver 0x80242017
  4. Follow the on-screen instructions to complete.
  5. Restart your computer.

Alternatively, to avoid the hassle of inspecting all drivers installed on your PC, use an automated tool like Outbyte Driver Updater. It will run a quick scan, then update and repair all drivers with just a few clicks.

Outbyte Driver Updater

Keep your drivers in check for peak PC performance and an error-free experience.
Free Trial Download now

So, these are methods you need to take to fix Windows update error 0x80242017. Try them and let us know in the comments section below.

Windows Update Error 0x80242016: 5 Ways to Fix it

If you fail to install 0x80242016, then you are not alone. Users often get such update errors while installing Windows updates on their computers. Luckily the issue can be fixed using simple methods. 

This guide will walk you through the steps to fix the issue right after discussing the causes. Let’s get started! 

What causes the failed to install 0x80242016 error?

There are a few reasons for the installation error to happen. Some of the popular ones are mentioned here: 

  • Wrong Registry values – If the values on your Registry Editor are corrupt, your computer might not work correctly. Hence you get an installation error when updating.
  • Damaged system files – You can get this error if your system files are damaged or corrupt. To fix it, you need to run an SFC scan.
  • Corrupt update component files – If the Windows update component is missing files or becomes corrupt, then it might trigger the error.
  • Corrupted temp files – Whenever you install updates, some temporary files are created on your PC. If these files get damaged, then you might see the error.
  • Computer infected with virus or malware – If your computer is infected with malware or virus, it might interfere with the update process, hence the issue. 
  • Not enough disk space – Before installing the update, you must check for sufficient hard disk space, as insufficient space could result in an error.

What can I do to fix Windows Update error 0x80242016?

Before engaging in advanced troubleshooting steps, you should consider performing the following checks:

  • Remove all the peripherals except the essential ones.
  • Disable Firewall.
  • Ensure you have a stable internet connection.
  • Check the date and time mentioned on the computer because an incorrect date and time can cause this issue.

1. Rename the Software Distribution folder & reset Windows Update components

  1. Go to the Search bar, type CMD and click Run as administrator.CMD elevated-the installation failed in the first boot phase with an error during sysprep operation WINDOWS 10-
  2. Copy and paste the following command to stop the Windows Update service and press Enter. You might have to do it a couple of times to ensure it is not running: taskkill /f /fi "SERVICES eq wuauserv"
  3. Type the following commands one after the other and press Enter after each command: net stop cryptSvc net stop bits net stop appidsvc net stop msiserver net stop wuauserv ren C:\Windows\SoftwareDistribution SoftwareDistribution.old rmdir C:\Windows\SoftwareDistribution\DataStore rmdir C:\Windows\SoftwareDistribution\Download Ren C:\Windows\System32\catroot2 Catroot2.old net start wuauserv net start cryptSvc net start appidsvc net start bits net start msiserver 
  4. Close the Command Prompt window and restart your PC when the process is complete.

2. Run Windows Update troubleshooter

  1. Press Windows + I to open Settings.
  2. Go to Update & Security. Update & Security -0x80242016
  3. Now go to Troubleshoot from the left pane, and click the Additional troubleshooters link.Troubleshoot - Additional Troubleshooter
  4. On the next page, select Windows Update and click Run the troubleshooter button.Run the troubleshooter
  5. Follow the on-screen instructions to complete the process.

3. Run the SFC and DISM commands

  1. Open Command Prompt using the steps mentioned in Method 1.CMD elevated-0x80242016
  2. Type the following commands and press Enter after every command: sfc/scannow dism /online /cleanup-image /scanhealth dism /online /cleanup-image /checkhealth dism /online /cleanup-image /restorehealth
  3. Once complete, reboot your computer.

4. Disable the Windows Search service

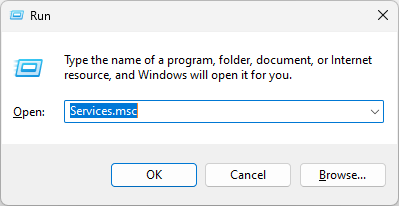
  1. Press Windows + R to open the Run window.Services.msc
  2. Type services.msc and press Enter to open Services.
  3. Locate and double-click the Windows Search service. Windows Search service - 0x80242016
  4. Select Startup type as Automatic. Automatic Startup type
  5. Click Apply and OK to confirm the changes.

5. Run Windows in a Clean boot environment

  1. Press Windows + R to open the Run window.CLEAN BOOT 1
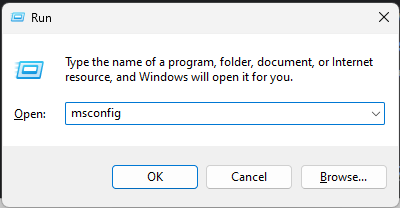
  2. Type msconfig and press Enter.
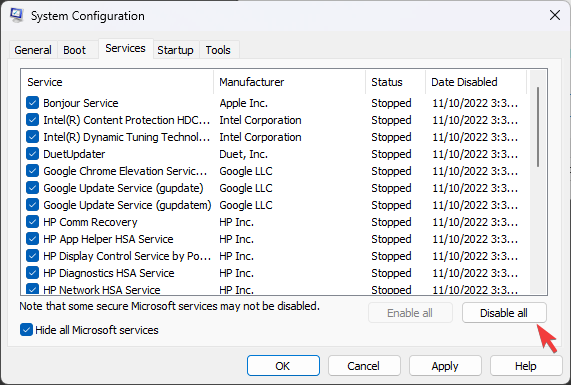
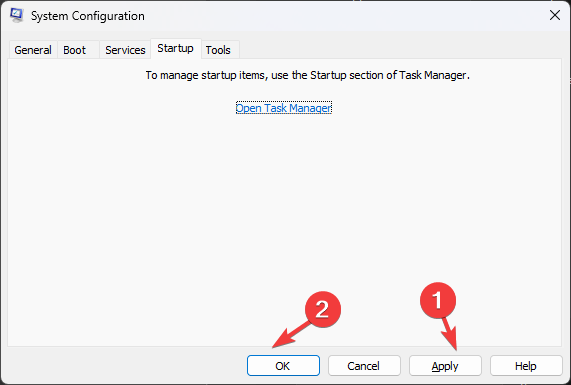
  3. On the System Configuration window, go to the Services tab, place a checkmark next to Hide all Microsoft services, then click Disable all.Clean BOOT 2 -0x80242016
  4. Go to the Startup tab, and click Open in Task Manager.CLEAN BOOT 3 -
  5. Right-click on all Enabled items one by one and select Disable.Clean BOOT 4
  6. Click Apply and OK to confirm. CLEAN BOOT 5
  7. Select Restart. Once restarted, try to install updates again.

So, these are methods that you can use to fix installation error code 0x80242016. If nothing has helped you, you must consider resetting Windows to resolve the issue. 

If you have any questions or concerns about the process, feel free to let us know in the comments section below. 

Windows 10 Update Download Error 0x8024200B: 5 Ways to Fix It

Many users have reported getting the error code 0x8024200b when upgrading to Windows 10/11 from their previous versions. Don’t worry; we can fix this error in no time.

This guide contains all the methods to fix this error and install the Windows updates successfully. Let’s begin! 

What causes Windows 10 Update download error 0x8024200b?

There could be several reasons for the error code to appear when trying to upgrade; some of the popular ones are: 

  • Corrupted Windows Update – If the downloaded update files got damaged, then while installing these updates, you might get this error. You need to reset Windows update components to fix the issue.
  • Outdated printer driver – If your printer driver is obsolete, it might cause an issue. It is suggested to uninstall the driver to get rid of the problem.
  • Damaged temp files –  Your system stores temp files while updating your Windows. If these files get corrupted, then you might get this error code.
  • Windows hotfix missing – Microsoft came up with a hotfix for users switching to Windows 10 from an older version of the OS to fix issues due to incompatible drivers. If the update with the hotfix is missing, then you might get this error.
  • Missing system files – If your computer is missing important system files used for updating or upgrading Windows, then you can face the issue.

What can I do to fix Windows 10 Update download error 0x8024200b?

Before we go to the advanced fixes, here are a few preliminary checks you should do:

1. Reset Windows Update components

  1. Go to the Search bar, type CMD and click Run as administrator.CMD elevated-0x8024200b
  2. To stop BITS, Cryptographic, Windows Update and MSI Installer services, type all these commands one by one and press Enter after each command: net stop wuauserv net stop cryptSvc net stop bits net stop msiserver
  3. Now to rename SoftwareDistribution and Catroot2 folder, copy and paste these commands and press Enter after each command: ren C:\Windows\SoftwareDistribution SoftwareDistribution.old ren C:\Windows\System32\catroot2 Catroot2.old
  4. To restart the BITS, Cryptographic, Windows Update, and MSI Installer services, type all these commands one by one and press Enter after each command: net start wuauserv net start cryptSvc net start bits net start msiserver

2. Run the Windows Update troubleshooter

  1. Press Windows + I to get Settings.
  2. Go to Update & Security.Update & Security -0x8024200b
  3. Now, select Troubleshooting, and click Additional troubleshooters.Troubleshoot - Additional Troubleshooter
  4. Under Get up and running, click Windows Update and select Run the troubleshooter.Run the troubleshooter
  5. Follow the on-screen instructions to complete the process.

3. Use the SFC and DISM commands

  1. Open Command Prompt with admin rights using the steps mentioned in Method 1.
  2. Copy and paste the following commands and press Enter after every command: sfc/scannow DISM /Online /Cleanup-Image /RestoreHealthSFC/scannow
  3. Once the process is complete, restart your computer.

4. Uninstall printer drivers

  1. Press Windows + R to open the Run window.Device manager RUN COMMAND WINDOWS 10 0x8024200b
  2. Type devmgmt.msc and press Enter to open Device Manager.
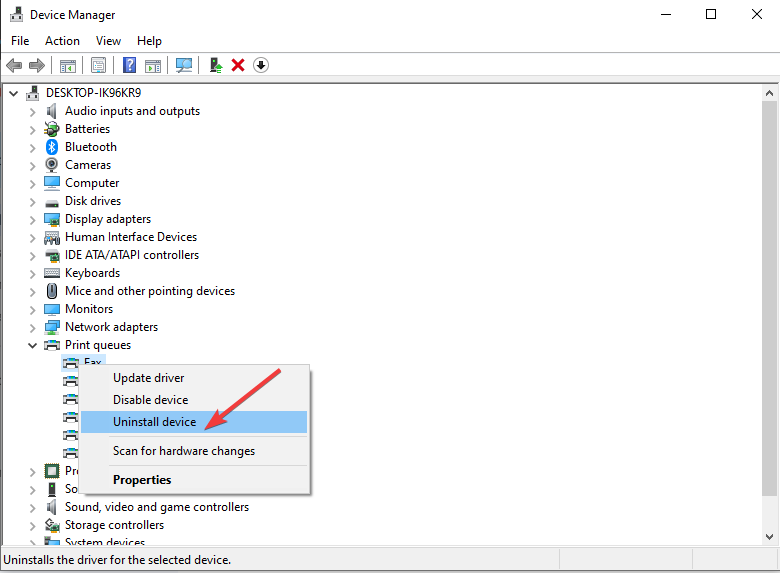
  3. Go to the Print queues and expand it. Then, inspect all the listed drivers and locate the one with the yellow triangle beside it.Printer driver Uninstalled
  4. Right-click on that driver, and select Uninstall device.
  5. Restart your computer to let the changes take effect.

5. Clear the BITS queue 

  1. Launch Command Prompt with administrator privileges using the steps in Method 1.
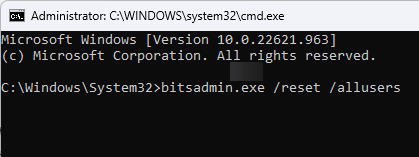
  2. Copy and paste the following command to clear the BITS queue and press Enter: bitsadmin.exe /reset /alluserscmd_bits - 0x8024200b

So, these are methods that you need to follow to get rid of the error code 0x8024200b. Try them and let us know which worked for you in the comments below.

Event ID 86 CertificateServicesClient-CertEnroll [Error Solved]

Windows use requests and responses to enroll for a certificate from a certification authority (CA). The process can get interrupted by a series of problems. Hence, it can result in the Event ID 86: CertificateServicesClient-CertEnroll in Windows.

Likewise, users complain about running into the Event ID 41 error on Windows 11.

What is Event ID 86?

The Event ID 86 is a process in the Windows event log that provides an in-depth record of events concerning the system. It indicates the Active Directory Certificate Services can’t use the provider stated in the registry for encryption keys.

Furthermore, Event ID 86 is logged into the Event Log by the Certificate Services Client and contains the details about the certificate request.

However, the Event ID 86: CertificateServicesClient-CertEnroll in Windows 10 can occur for many reasons. Some are:

  • Issues with the certificate request or the Certificate Authority – If the Active Directory Certificate Services on your PC are faulty or not intact, it can cause its processes to run into issues.
  • Windows Updates or Drivers issues – Windows PCs can malfunction with their processes if a corrupt update is installed or a pending update is not installed. Likewise, outdated drivers on the PC may result in errors.
  • BIOS-related concerns – You can encounter the Event ID 86 on Windows 10 if you don’t have the latest BIOS installed on your PC. Likewise, other issues with the BIOS can affect the certificate processes on your PC.

Other factors can be responsible for the Event ID 86 on your PC. Nonetheless, you can fix it by troubleshooting your computer.

How can I fix Event ID 86 in Windows 10?

Before trying any advanced troubleshooting steps, apply the following:

If you can’t fix the error, proceed with the troubleshooting steps below.

1. Uninstall recent Windows updates

  1. Press Windows + I to open Settings and click Update & Security.
  2. Go to Windows Update and select View update history.
  3. Click the Uninstall updates button and select the most recent update.
  4. Click on Uninstall.

Uninstalling the recent Windows update should help fix any issue with the last build causing the error to occur.

2. Run System Restore

  1. Left-click the Start button, type Restore, and click on Create a Restore Point.
  2. Go to the System Protection tab and select System Restore.
  3. Choose a different system restore and click Next to select a specific Restore point.
  4. Select the last time your PC worked perfectly, and click Next.
  5. Click the Finish button.

System Restore backdates your PC to the last time it functioned properly, removing the corrupt files like updates.exe. Check how to fix Restore Point if it’s not working and if you have any issues running it.

3. Update your device drivers

  1. Press Windows + R keys to prompt the Run window, type devmgmt.msc, and click OK.
  2. Click on the Display adapters you want to update, select the driver, and click the Update driver option.
  3. Select the Search automatically for drivers option.
  4. Repeat the procedure for every driver.

Updating the device driver will fix bugs affecting them and install the latest features to improve system performance. Check other steps for updating drivers on Windows 10 if you have any issues.

And if you are looking for a shortcut and want to update all your drivers in once, Outbyte Driver Updater has your back. With this tool, you’ll be able to search, download and install the latest drivers for your pc specifics and bring them up to date.

⇒ Get Outbyte Driver Updater

4. Update your BIOS

Note icon NOTE
The steps may differ depending on your PC’s manufacturer.
  1. Go to the HP driver and software download website, select your product from the list, then input your serial number or exact computer model.
  2. Select your OS, and OS version, and click Submit.
  3. Click the plus (+) button against All drivers, then click the (+) button against BIOS to expand it and see available updates, then click on Download.
  4. Double-click the downloaded file to install the .exe file, then follow the on-screen instructions to complete the installation.
  5. Restart your PC.
  6. Select the Apply Update Now option during the startup to implement the installed BIOS update.

Updating the BIOS will improve compatibility and enhance system stability.

The updating process varies on different PCs, so we have a guide on how to check and update BIOS on various laptops.

In conclusion, our readers can check how to fix the Event Viewer reboot event ID error. Also, you can read our detailed guide on fixing Application popup event ID 1060 on Windows 10.

If you have further questions or suggestions, kindly drop them below.

How to Fix Windows Media Player Cannot Play the File Error

A lot of people still love to use Windows Media Player as their go-to player, but many users reported Windows Media Player cannot play the file error while trying to play certain files.

The full error message sometimes reads: Windows Media Player cannot play the file. The player might not support the file type or might not support the codec that was used to compress the file.

While the error can be due to a variety of factors, the solutions are not far off, as we will show in the next sections of this article.

Why Windows Media Player Cannot play the file?

The major reason for Windows Media Player cannot play the file error is the lack of the required codec to play the intended file. For instance, OPUS files may not open because they’re not supported.

In some cases, this issue might be because you selected the wrong device to play it. Lastly, if Windows Media Player does not support the file type you want to play, you are likely to get this error.

How can I fix Windows Media Player encountered a problem while playing the file error?

1. Wrong audio device fix

  1. Launch the Windows Media Player, right-click any space there, and choose Tools > Options.
    tools windows media player cannot play this file
  2. Click the Devices tab at the top and select Speakers.
  3. Now, select Properties.
    regedit
  4. Next, click the dropdown under Select the audio device and choose your preferred audio device.
  5. Finally, click the Apply and OK buttons to save your changes.
    select audio

Windows Media Player cannot play the file error can occur if you select the wrong device to play your file. The solution to this is to change the device from the app setting.

If interested, check out this guide to learn how to convert M4A to MP3 on your Windows computer.

2. Download codecs

  1. Right-click any space on the Windows Media Player and choose Tools > Options.
    tools windows media player cannot play this file
  2. Click the Player tab at the top.
  3. Now check the boxes for Connect to the Internet and Download Codecs Automatically.
  4. Finally, click the OK button to confirm your settings.
    player windows media player cannot play this file

Also, you can configure protocol settings.

  1. Repeat Step 1 in the solution above and select the Network tab.
    network
  2. In the Streaming protocols section, select all the protocol check boxes at hand.
  3. When you’re connecting to a server running Windows Media Services, your Windows Media Player attempts to use all the selected protocols.

The Windows Media Player can help you download the codecs automatically. However, this option might not be available on the latest versions of the app.

So, if you can’t find the Download Codecs Automatically option, you will need to download the K-Lite codec pack.

3. Registry fix

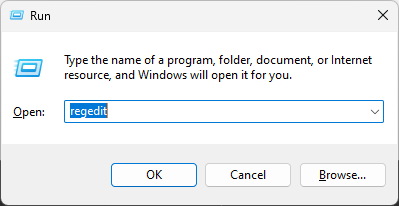
  1. Press the Windows key + R, type regedit, and hit Enter to open the Registry Editor.
    regedit
  2. Locate the following registry key: HKEY_CLASSES_ROOT\CLSID\{DA4E3DA0-D07D-11d0-BD50-00A0C911CE86}\Instance\{083863F1-70DE-11d0-BD40-00A0C911CE86}path windows media player cannot play this file
  3. Ensure the following in the right pane:
    • CLSID has a value of {083863F1-70DE-11d0-BD40-00A0C911CE86}
    • Merit is set to 00600000
    • FriendlyName is set to DirectShow Filters
      values
  4. If any of the above values are wrong, just right-click the key, select Modify, and enter the appropriate value.
    modify
  5. Finally, close the Registry Editor and restart your PC.

In some cases, this problem can occur due to wrong values in the registry. The solution to this is to correct these values and restart your PC.

4. Try using a different player

This error can also occur if the file you are trying to play is encoded. In this case, the Windows Media Player simply cannot play the file, and you need to use another media player for Windows 10.

It should be known that the affected media files include files that have the following extensions: .3gp, .3g2, .mp4, .mov, and .adts. Use the appropriate codec when playing these files.

Thankfully, there are various options available. So, you should not be short of quality ones to use.

With this, we can conclude this detailed guide. We believe you have the right information needed to fix it now, and you only need to follow it carefully.

If the Windows Media Player stopped working on your PC for some reason, check our detailed guide to fix that too.

Feel free to let us know the solution that helped you solve this issue in the comments below.

RogueKiller vs Malwarebytes: The best malware removal tools

Keeping your PC free from malware should be your number one priority, and applications such as RogueKiller and Malwarebytes are great options for malware removal.

Both of these applications can scan your PC and remove any malware that they find. However, the question remains, which one should you use? Here we’re going to answer this question.

What is RogueKiller?

RogueKiller is an anti-malware software that can find and remove all types of malware, from adware and viruses to rootkits.

The software also offers malware and ransomware protection, and it’s available as a portable application so that you can run it from a USB flash drive.

This is perfect if you need to scan an infected PC that doesn’t have Internet access. Regarding availability, RogueKiller is available only for Windows.

What is Malwarebytes?

Malwarebytes is a well-known malware removal software, and the first version of the software was released in 2006.

The software has evolved from a simple malware removal application to almost full-flagged antivirus software with real-time protection.

Currently, Malwarebytes is the most popular choice regarding malware removal software, and rightfully so.

Regarding availability, Malwarebytes is available on Windows, Mac, Android, iOS, and Chrome OS, so you should be able to run it on almost any platform.

RogueKiller vs. Malwarebytes, which is the better option?

Interface

RogueKiller: Simple and easy to use

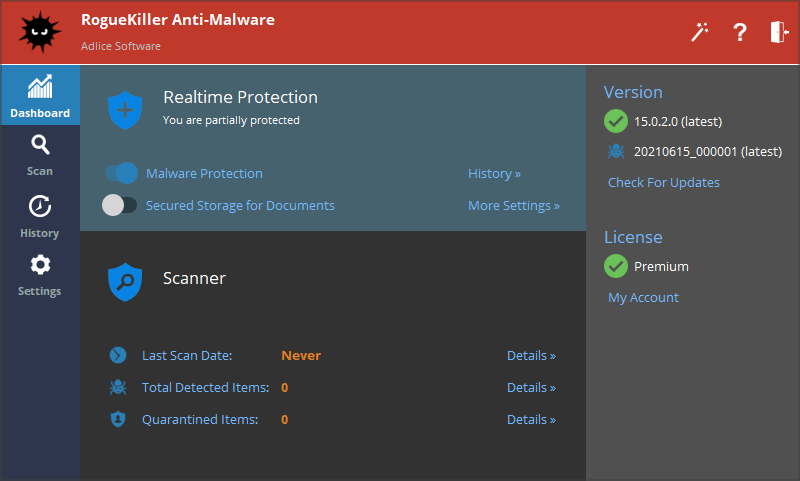
The first time you start RogueKiller, you’ll be asked to configure your software, and you can choose between three different themes and choose which scanning and protection options you want to enable.

Remember that some of these options aren’t available in the free software version. Once you configure the software, you’ll be presented with a Dashboard.

From here, you can enable certain features and see information such as the current version of the software and the version of virus definitions you have.

There’s also an overview of the detected and quarantined files and a scanning option to perform a scan with just a few clicks.

The interface is easy to use, and you won’t have any issues using it. We did get a few notifications asking us to upgrade to the Premium version, but we didn’t mind them much.

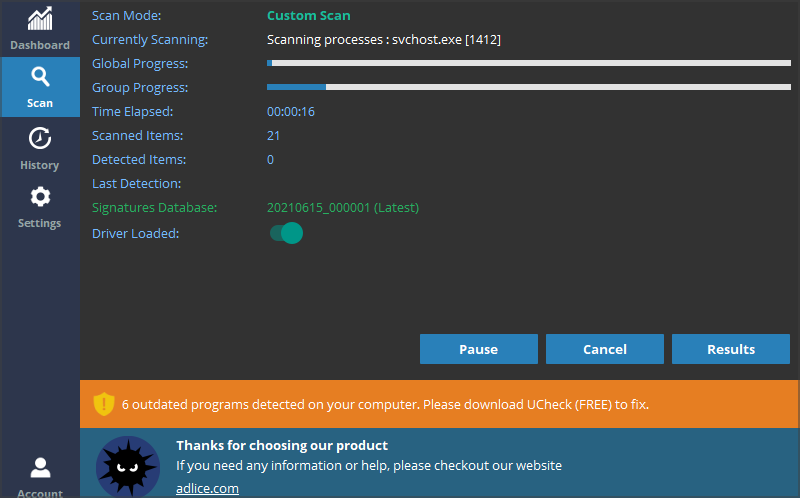
Speaking of notifications, you’ll also get a banner while scanning asking you to download additional software from the same developer. Some users might not like this, but we didn’t find the banner too invasive.

Overall, RogueKiller has a solid user interface, and even first-time users won’t have any issues with it.

Malwarebytes: Incredibly simple to use

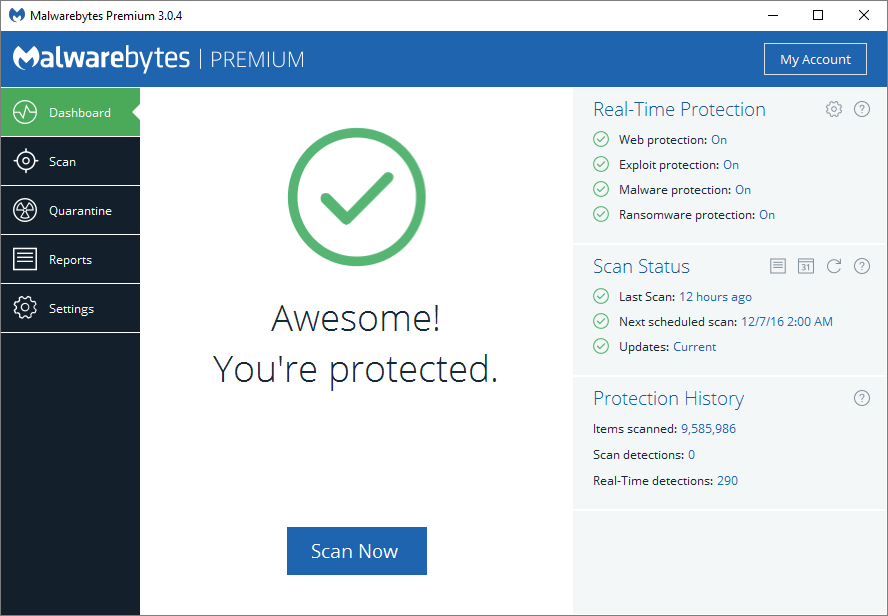
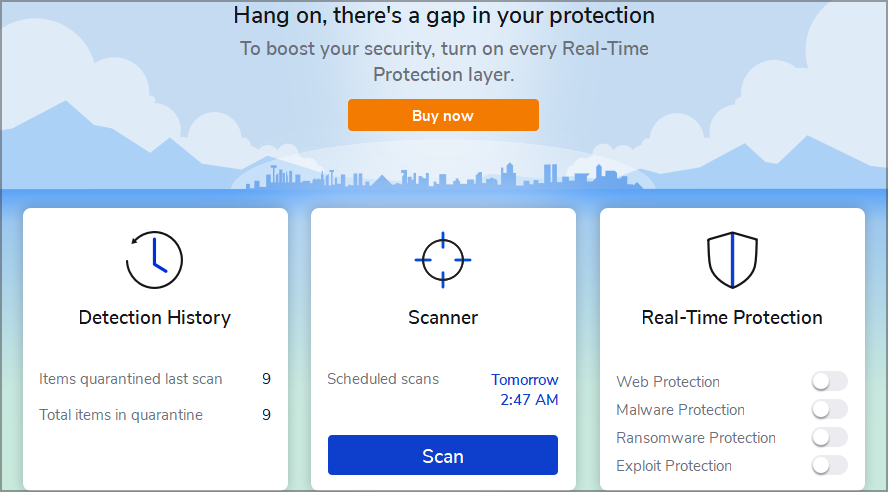
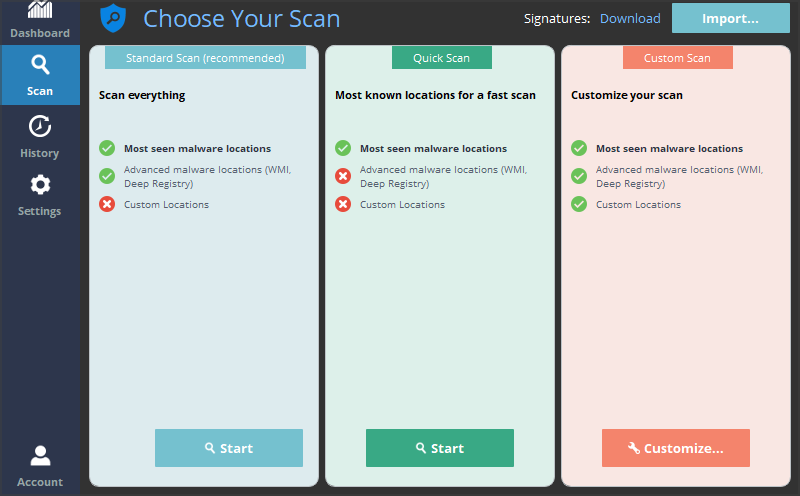
Malwarebytes comes with a straightforward interface, and the main window is divided into three sections so you can quickly perform a scan, modify protection settings or see scan reports.

You can see the notifications in the right pane so that you won’t miss a detected threat. In addition, the interface supports customization, and you can choose between two available themes or use a theme that matches your system theme.

There are also two backgrounds available, so you can spice up the look and feel of the software a bit if you want to.

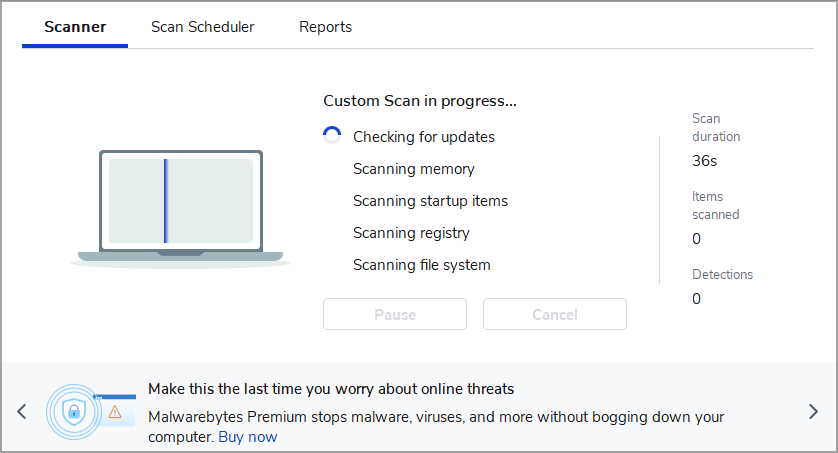
While the interface is pretty simple to use, a few users might not like that a scanner has a banner reminding you to upgrade to the Premium version.

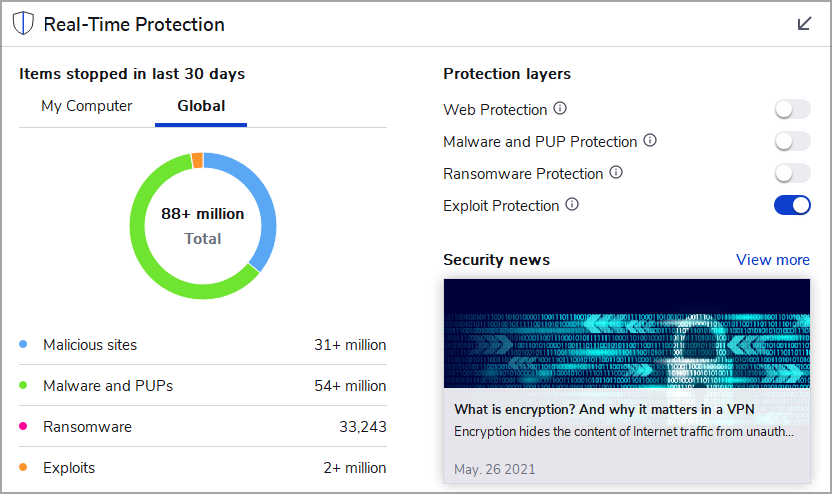
Speaking of other interface components, we also didn’t find the Security news section and the Global malware stats too helpful.

All these features don’t take away from the usability of Malwarebytes, but we doubt anyone would find them too helpful.

⇒ Get Malwarebytes Premium

Feature comparison

RogueKiller: A solid malware removal tool

RogueKiller is a malware removal software that will find and remove all types of malware from your PC.

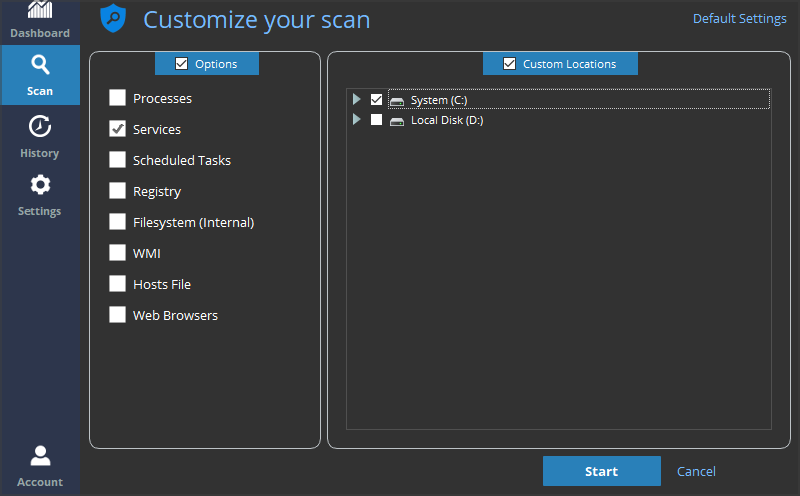
The software uses artificial intelligence and cloud signatures to detect new malware types quickly. There are three scan types available, and you can create custom scans.

With this option, you can choose which file types you want to scan, and you can even pick individual drives and folders that you want to scan.

There’s a scan scheduling feature available, and although it gets the job done, it does seem a bit limited and clunky to set up.

It’s important to mention that RogueKiller also has built-in real-time malware protection, ransomware protection in the form of a Protected storage feature, and Data Leak protection.

Remember that real-time protection and malware protection are available only in the Premium version of the software.

The software comes in three plans, so we’ll give you a quick overview of each plan below.

RogueKiller Free:

  • Malware scanning and removal
  • Rootkit detection
  • Available only for personal use

RogueKiller Premium:

  • All features from the Free version
  • Malware and ransomware protection
  • Permission to be used in business environments
  • Email support

RogueKiller Technician:

  • All features from the premium version
  • Portable license
  • Can be used on an unlimited number of devices
  • Command-line support

Despite the limitations of the Free version, RogueKiller is still a reliable malware removal software that will surely come in handy when removing malware from your PC.

With real-time scanning, RogueKiller works almost like antivirus software, so consider it.

Malwarebytes: One of the best malware removal tools on the market

Malwarebytes is designed to remove malware from your PC quickly, and the scanning process is fast and straightforward.

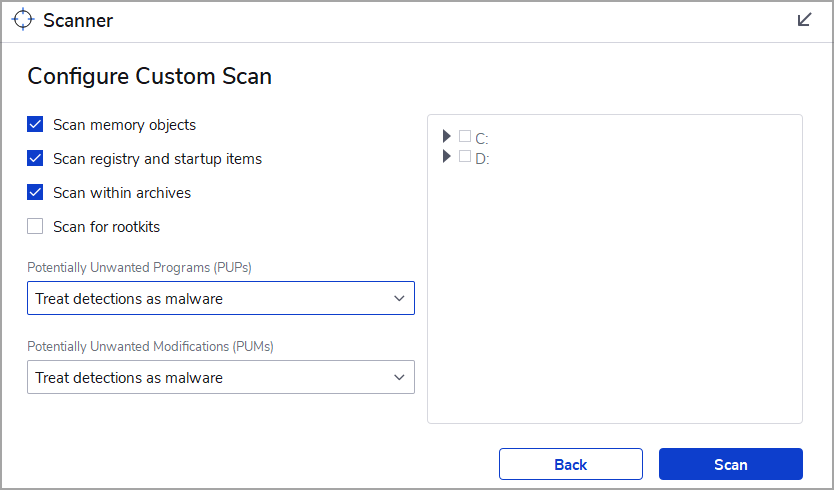
Scan customization allows you to choose which drives or folders to scan. Moreover, you can scan memory objects, registry and startup items, and archives.

It’s important to mention that you can set the default action for all detected threats. You can quarantine them automatically or choose to select the desired action for each threat manually.

The report feature also allows you to read detailed reports about each scan you took. A whitelist feature is also available, so you can skip specific files or directories while scanning.

Malwarebytes also has a scan scheduling feature, but unfortunately, this feature is available only in the Premium version.

Speaking of the Premium version, Real-Time Protection is also available exclusively in the Premium version.

This means that features such as Web Protection, Malware Protection, Ransomware Protection, and Exploit Protection are exclusive to the Premium version.

Despite this limitation, Malwarebytes is still an excellent malware removal tool and is highly efficient even in the Free version.

Here’s a quick feature comparison between the Free and Premium versions of Malwarebytes.

Malwarebytes Free:

  • Ability to clean all types of malware from infected PC
  • Available on multiple platforms

Malwarebytes Premium:

  • All features from the Free version
  • Real-time malware protection
  • Protection against malicious websites
  • Ransomware protection
  • Exploit protection
  • Ability to schedule scans

If you want to learn more about the differences between these versions, we suggest you check our Malwarebytes Free vs. Premium article for an in-depth comparison.

Final thoughts

RogueKiller: Simple but solid malware removal software

RogueKiller is incredibly simple to use and should provide you with decent protection against all types of malware. Even in the Free version, the application is more than capable of dealing with all threats.

The visual interface could use a bit of improvement, especially the scheduling feature, but despite these minor complaints, the application is more capable of dealing with malware.

Specific features such as real-time and ransomware protection remain exclusively available in the Premium version, but even without them, RogueKiller is one pretty good malware removal tool.

Pros
Simple to use
Can remove all types of malware
Ransomware protection
Portable
Command-line support
Cons
Interface could be better

Malwarebytes: One of the best malware removal applications

Malwarebytes has a long history and has built its reputation as one of the most reliable malware removal tools.

The application is simple to use; the interface is friendly, so even first-time users should be able to find and remove malware from their PC with Malwarebytes.

The Free version has some limitations, but if you don’t need scan scheduling and real-time protection, then Malwarebytes is the perfect choice for malware removal on your PC.

Pros
Friendly user interface
Quick scan
Real-time malware protection
Phishing protection
Exploit protection
Cons
Some features are available only in the Premium version

To finish our RogueKiller vs. Malwarebytes comparison, we will answer a few of your frequent questions:

First, is RogueKiller safe to use?

Yes, RogueKiller is perfectly safe and legitimate software. However, the software will occasionally suggest you upgrade to the Premium version or try a similar software from the same developer.

While this isn’t an illegitimate practice, it is frowned upon by many users. However, despite these occasional promotions that may appear, RogueKiller is legitimate and safe to use.

Can I download RogueKiller portable version?

Yes, the portable version of RogueKiller is available from the developer’s website, meaning that you can download the tool and run it on your PC without installation.

You can also run the software from a flash drive, which can be extremely useful if you want to remove malware from a different PC.

When should I use the RougeKiller command-line tool?

The RougeKiller command-line tool is available only in the Technician version, and by using it, you can perform a malware scan from the command line.

This is extremely useful if you can’t boot to Windows due to malware infection and your only option is the command line.

You can also use the command line scan if you don’t want to use the graphical user interface or if you want to start a malware scan instantly.

Do RogueKiller and Malwarebytes have real-time scanning?

Yes, both RogueKiller and Malwarebytes support real-time scanning, but unfortunately, the real-time scanning feature is available only in the Premium version of the software.

However, both applications offer a free trial to test the Premium features, including real-time scanning.

While we’re on the subject, you might also be interested in checking our list of the best website malware removal tools.

Which one did you choose? Let us know your reasons in the comments section below.

Installation Failed in The FIRST BOOT Phase With An Error

Many people have reported that they were stuck with installation failed in the first boot phase with an error during Sysprep operation while updating their Windows computer. The issue could have been caused due several reasons. 

Here, in this guide, we will discuss the available fixes to resolve the Windows 10 first boot error right after examining the reasons for the same.

What causes the installation failed in the first boot phase error?

There could be several reasons for the error to occur; we have mentioned some of the popular ones here: 

  • Hardware issues – You might get this error if your RAM or hard drive is damaged or faulty. 
  • Wrong system configuration – If your computer has incorrect BIOS settings or bad drivers installed, you can get this error while updating your PC.
  • The installation process was interrupted – If there is a power failure or system crash during installation of the update, you might see this error.
  • Installation media is corrupt – The error could have appeared because of the corrupted installation drive or disc used to upgrade your Windows computer.
  • Computer infected with malware or virus – The malware or virus infection on your computer might corrupt the system files or configuration, hence the error.

How to fix the installation failed in the first boot phase error?

Before moving ahead with the troubleshooting steps, make sure you go through these preliminary checks: 

If none of these worked for you, let us check out the detailed troubleshooting methods to fix the issue:

1. Rename the Software distribution folder

  1. Go to the Search bar, type CMD and click Run as administrator.CMD elevated-the installation failed in the first boot phase with an error during sysprep operation WINDOWS 10-
  2. Copy and paste the following commands one by one and press Enter after every command: net stop wuauserv net stop cryptSvc net stop bits net stop msiserver rename c:\windows\SoftwareDistribution SoftwareDistribution.bak net start wuauserv net start cryptSvc net start bits net start msiserver
  3. Close the Command Prompt window.

2. Run the Windows Update troubleshooter

  1. Press Windows + I to get Settings.
  2. Go to Update & Security.Update & Securitythe installation failed in the first boot phase with an error during sysprep operation
  3. Now, select Troubleshooting from the left pane, and click Additional troubleshooters.Troubleshoot - Additional Troubleshooter
  4. Under Get up and running, select Windows Update and click Run the troubleshooter.Run the troubleshooter
  5. Follow the on-screen instructions to complete the process.

3. Make changes in Registry Editor

  1. Press Windows + R to open the Run window.Regedit - the installation failed in the first boot phase with an error during sysprep operation
  2. Type regedit and press Enter to open the Registry Editor.
  3. Go to the following path: Computer\HKEY_LOCAL_MACHINE\SOFTWARE\Microsoft\WindowsUpdate\OSUpgrade
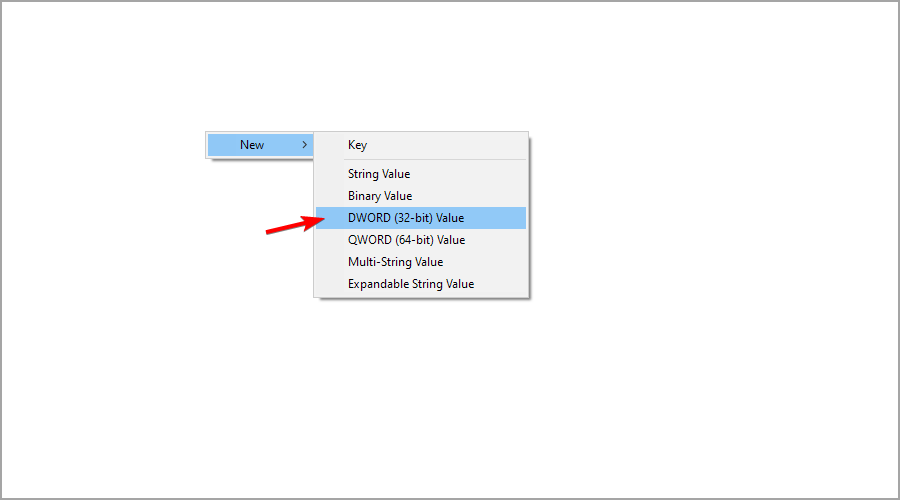
  4. Right-click the OSUpgrade folder, select New, and then click DWORD (32-bit) Value.AllowOS upgrade
  5. Rename it AllowOSUpgrade. Double-click it and set the Value data to 1 and click OK.dword edit
  6. Close Registry Editor and restart your computer. 

4. Disable Secure Boot

  1. Press Windows + I to open Settings. Go to Update & Security.Update & Securitythe installation failed in the first boot phase with an error during sysprep operation
  2. Click on Recovery and go to Advanced startup and click Restart now.Advanced Startup
  3. From the Choose an option page, click Troubleshoot.Choose-an-option-Troubleshoot.=- Virtualbox won't show 64-bit
  4. Now click Advanced Settings.Advanced options -the installation failed in the first boot phase with an error during sysprep operation
  5. On the Advanced Settings page, click UEFI Firmware Settings.UEFI
  6. Click Restart from the next page.
  7. Now select the appropriate option to enter BIOS.
  8. Go to System configuration, then select Secure Boot and disable it.

5. Scan and fix corrupted files

  1. Go to the Search bar, type CMD and click Run as administrator.CMD elevated-the installation failed in the first boot phase with an error during sysprep operation WINDOWS 10-
  2. Type the following command and press Enter: chkdsk volume:/rCMD CHKDSK
  3. Once the process is complete, copy and paste the following command and press Enter: sfc/scannowSFC/scannow
  4. As the process completes, type the following commands and press Enter after every command: DISM /Online /Cleanup-Image /CheckHealth DISM/Online /Cleanup-Image /ScanHealth DISM/Online /Cleanup-Image /RestoreHealth

6. Perform old devices and drivers cleanup

  1. Go to the Search bar, type CMD and click Run as administrator.
  2. Type the following commands and press Enter after every command: rundll32.exe pnpclean.dll,RunDLL_PnpClean /DRIVERS /MAXCLEAN exit CMD - the installation failed in the first boot phase with an error during sysprep operation
  3. Restart your computer and try to update again.

So, you can use these methods to fix the installation that failed in the first boot phase with an error during the Sysprep operation. Try them and let us know what worked for you in the comments below.

Windows Remediation Service Failed to Start? 5 Fixes

Windows Remediation service (WRS) is an essential component of Windows OS and is designed for running Windows features and services. The Remediation services include executable files, Sedlauncher.exe, Rempl.exe, Waasmedic.exe, Remsh.exe, Disktoast.exe, Osrrb.exe, and Sedsvc.exe. 

If you see Windows Remediation Service failed to start to verify the error on your PC, it could mean a few things.

Here, in this guide, we will discuss the common causes of the error and provide you with fixes to resolve it. 

What causes Windows Remediation Service fail to start error?

There can be various reasons for the service failing to start; some of the popular ones are: 

  • Service dependencies are not functioning – The Windows Remediation Service needs other services to work correctly. If any dependencies have stopped, the service might fail to start. 
  • Corrupted system files – If your system files are somehow corrupted, you might face all kinds of issues, including this error.
  • The service has been uninstalled or damaged – If WRS has stopped or damaged, it might work properly, hence the issue.
  • PC is infected with malware – If your computer is infected with a virus or malware, you might face an issue with system services.
  • Configuration files missing – If WRS is not configured correctly or the configuration files related to the service are missing, the WRS service may fail to start.

What can I do to fix the Windows Remediation Service failed to start error?

The error can come up with various other error codes and messages, some of which are:

  • Error code 1053
  • Windows Remediation Service failed to start. Verify that you have sufficient privileges.
  • Error 0xc0000035 in event viewer.
  • Error 1920. Service Windows Remediation Service (sedsvc) failed to start.

Before engaging in advanced troubleshooting steps, you should consider performing the following checks:

  • First, ensure your Windows is up to date.
  • Reboot your computer.

If you are done with these checks, follow the troubleshooting methods to fix the issue:

1. Use the Group Policy Editor

  1. Press Windows + R to open the Run console.
    GPEDiT.msc -Windows Remediation Service Failed to Start?
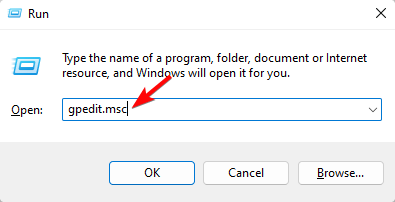
  2. Type gpedit.msc and press Enter to open Group Policy Editor.
  3. Follow this path: Computer Configuration\Windows Settings\ Security Settings\Local Policies\User Rights Assignment
  4. From the Details pane, locate and double-click Log on as a service.Logon as service
  5. Click Add user or group.
    Add user or group
  6. Start typing your user name, then click Check Names.
  7. Select your user name or Authenticated users and click OK.
  8. Click OK, then close the Group Policy Editor. 
  9. Press the Windows + R key, type CMD, and hit Ctrl + Shift + Enter.
  10. Type the following command and press Enter: gpupdate /force

2. Check the service dependencies & restart WRS

  1. Press Windows + R to open the Run window.Services
  2. Type services.msc and press Enter to open Services.
  3. Locate and double-click Windows Remediation Service to open Properties.Windows-remediation-service-in-Windows-Services
  4. On its Properties window, click Dependencies.
  5. Check The service depends on the following system components section, and you will find the list of services. 
  6. Make sure all these services are working fine.
  7. Locate and right-click Windows Remediation Service. Select Restart.

3. Use the Registry Editor

  1. Press Windows + R to open the Run window.REGEDIT RUN COMMAND
  2. Type regedit and press Enter to open Registry Editor.
  3. Follow this path: Computer\HKEY_LOCAL_MACHINE\SYSTEM\CurrentControlSet\Control\WMI\Autologger\EventLog-System\{b675ec37-bdb6-4648-bc92-f3fdc74d3ca2}
  4. Locate Enabled, double-click on it, and change the Value data to 0. Next, change the Base to Hexadecimal. Click OK.Regedit Windows Remediation Service Failed to Start
  5. Now, locate EnabledProperty, double-click it, and change the Value data to 0. Next, change the Base to Hexadecimal. Click OK.ENABLED PROPERTY

4. Scan for infected files

  1. Press the Windows key, type CMD, and click Run as administrator.CMD elevated
  2. Type the following command and press Enter: sfc/scannow
  3. Once the scan is complete and there is an error, then copy and paste the following command and press Enter:DISM /Online /Cleanup-Image /RestoreHealth
  4. Once the process is complete, restart your computer.

5. Run a security scan

Tip icon Tip
If you have a third-party security tool on your computer, launch it and run a deep scan to find viruses or infected files on your PC.
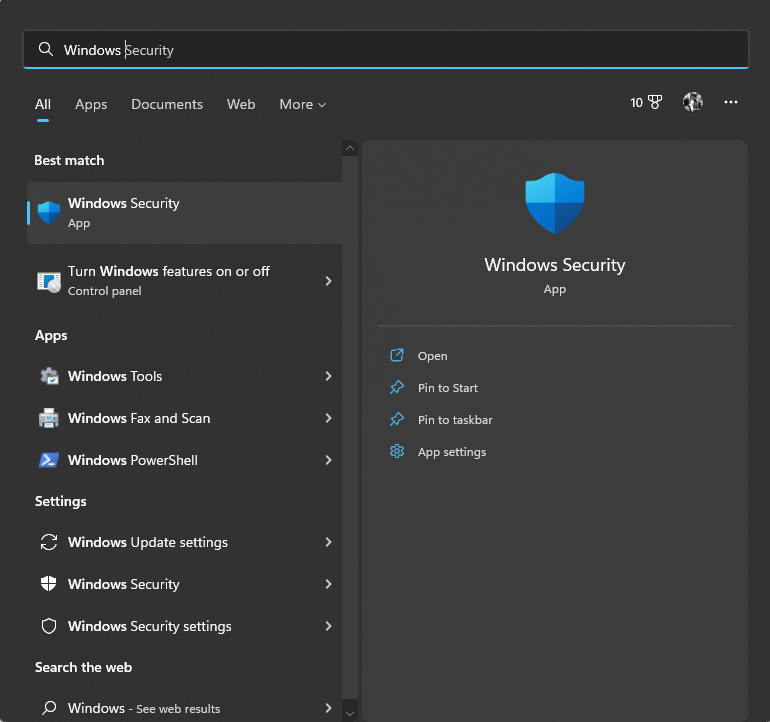
  1. Press the Windows key, type Windows Security and click Open.Windows Security
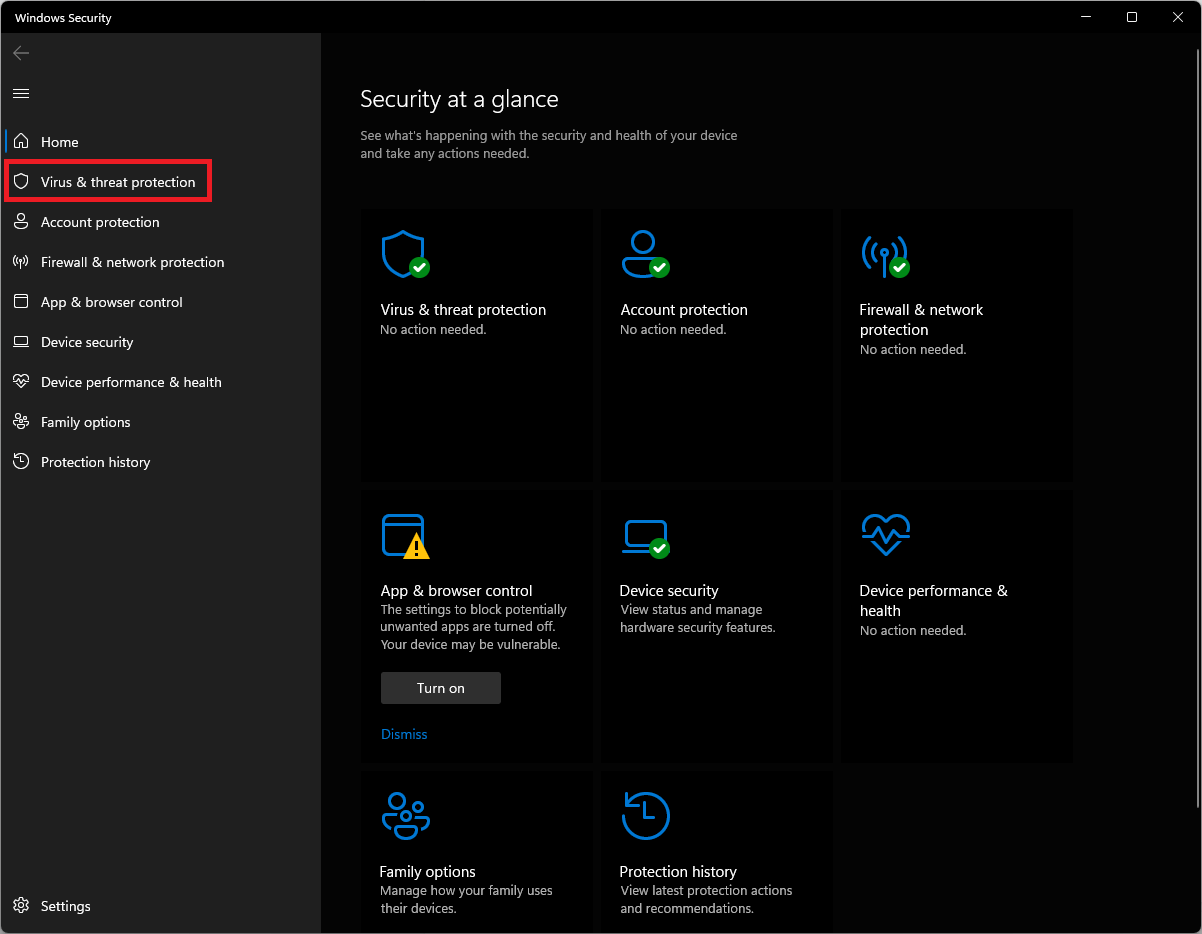
  2. Go to Virus & threat protection. 
  3. Click Scan options.V& T -windows remediation service failed to start
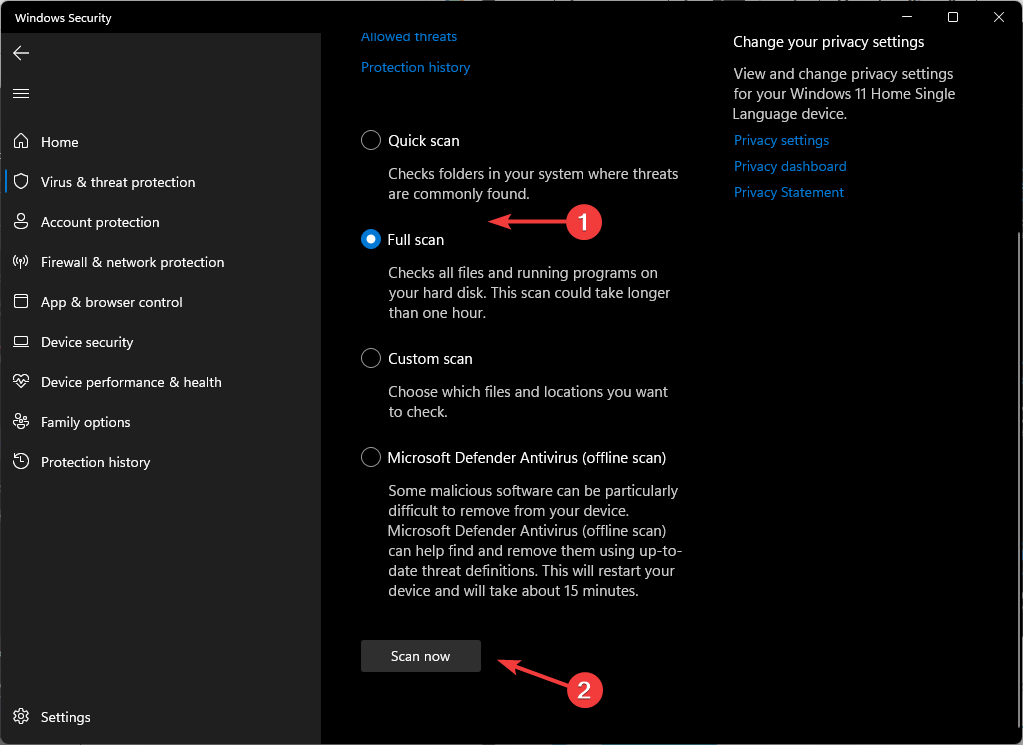
  4. Choose Full scan and click Scan now.Full Scan Scan Now
  5. It will scan your computer for viruses or malware on your computer.

So, these are some of the methods you need to use to resolve the Windows Remediation Service failed to start error. Try them and let us know what worked for you in the comments below.

[Fixed] A Device Attached to The System is Not Functioning

Computer issues will occur sooner or later, and many users reported A device attached to the system is not functioning error message.

This can be a problem, especially if you want to transfer files from a storage device, such as your iPhone or a USB flash drive. Thankfully, there are different ways to fix this problem, and we will show you how to do it in this guide.

How can I fix A device attached to the system is not functioning error?

1. Try using a different USB port

Sometimes, you might not need to make any changes to your PC to fix the device attached to your system is not functioning issue. Instead, you can try changing USB ports and even using a different cable.

This is a simple solution, and several users reported that this issue was resolved after connecting your USB device to a USB 3.0 port, so be sure to try that as well.

2. Check the Keep Originals option on your iOS device

  1. On your iOS device, go to Settings > Photos.
  2. Navigate to the TRANSFER TO MAC OR PC section and choose Keep Originals.
    transfer to mac or PC a device attached to the system is not functioning

After doing that, check if the device attached to your system is not functioning error is resolved.

Keep in mind that your images will be transferred in HEIC format, so you’ll need to download HEIC and HEIF codecs in order to view them.

3. Free up space on your iOS device

  1. On your iOS device, go to Settings > General
  2. Select the iPhone Storage option.
    storage iphone a device attached to the system is not functioning
  3. Check the available storage space. Make sure that you have at least a couple of GBs available.
  4. If needed, delete any files you don’t need and check if that solves the problem.

4. Update iTunes

  1. Open iTunes on your PC and click the Help tab at the top.
  2. Select the Check for Updates option.
    check updates device attached to the system is not functioning error
  3. Once iTunes is updated to the latest version, check if the problem is still there.

In addition to iTunes, make sure that your iOS device is up to date.

5. Update outdated drivers

  1. Press the Windows key + X and select the Device Manager option.
    device manager device attached to the system is not functioning error
  2. Click the arrow next to the option you want to update drivers for and right-click the device there.
  3. Now. select the Update driver option.
    update driver
  4. Finally, choose the Search automatically for drivers option and install any available updates.
    search auto

If you’re getting A device attached to the system that is not functioning in error, the issue might be caused by outdated drivers. So, you need to update them to get past the issue.

To make things easier, we recommend using a dedicated tool in Outbyte Driver Updater to update your drivers automatically. This is because you might need to update more than one driver, and that won’t be easy manually.

⇒ Get Outbyte Driver Updater

6. Check for bad sectors

  1. Launch File Explorer and right-click your storage device.
  2. Select the Properties option.
    properties
  3. Now, click the Tools tab at the top, followed by the Check button.
    check device
  4. Finally, click the Scan drive option and wait for the scan to complete.
    scan drive device attached to the system is not functioning error

Bad sectors and partitions on your storage device can be the reason for a device attached to the system is not functioning error. To fix this, you can use the built-in tool on your PC to check and repair these sectors.

7. Reset Location & Privacy

  1. On your iOS device, navigate to Settings > General.
  2. Select Reset > Reset Location & Privacy.
    Reset location & privacy iphone a device attached to the system is not functioning
  3. Connect your iOS device again, and select the Trust This Computer option.

Sometimes, if your PC does not need permission to transfer and receive files from your device, you might get a device attached to the system is not functioning error. All you need to do now is to change your privacy settings to make it work.

8. Run SFC and DISM scans

  1. Press the Windows key + S, type cmd, and select Run as administrator under Command Prompt.
    cmd admin
  2. Type the command below and hit Enter to run it: sfc/scannowsfc
  3. Now, wait for the command to finish running and run the command below: DISM.exe /Online /Cleanup-image /Restorehealthdism device attached to the system is not functioning error
  4. Finally, wait for the command to finish running.

In some cases, the device attached to the system not functioning prompt might be due to broken or corrupt system files. Running the commands below is one of the quickest ways to fix these files.

9. Enable Safe Mode

  1. Press the Windows key + I and select the Update & Security option.
    update and
  2. Choose Recovery in the left pane and click the Restart now button under Advanced startup.
    restart now
  3. Choose Troubleshoot > Advanced options when your PC restarts.
    advanced options device attached to the system is not functioning error
  4. Now, select Startup settings.
    startup settings
  5. Click the Restart button.
    restart
  6. Finally, press the corresponding on your keyboard to Enable Safe Mode.
    enable safe

If the solutions above fail to fix this issue, you need to enable Safe Mode. Many users have confirmed that they could transfer their files in this mode.

A device attached to the system is not functioning error can prevent you from using your iPhone or other USB devices with your PC, but hopefully, you managed to fix this issue with our solutions.

If you need a list of the best tools to safely transfer files from your PC to your iPhone, check our guide for the top options available.

Fix: I Don’t See Shared Drives in Google Drive [Easy Tips]

Google’s Shared Drive feature allows the Business and Plus, Enterprise, and G Suite Business users to store, search, and access files with a team.

However, some users have reported the Google share Drive not showing up issue on Google forums.

Why is my Google G drive not showing up?

Users are unable to find the shared files or folders, even using the exact file name. To view the file, the user has to use a shareable link to the file.

it can be anything from a Google Drive sync issue to an account-related manifestation. However, occasional glitches are most commonly behind a Google Drive shared folder not showing up on desktop.

The fact that it seems to randomly appear and only affects some files – for instance, the Google Drive shared folder not showing all files – only confirms the bug theory.

If you are also troubled by this error, here are a few troubleshooting steps to help you resolve the Google Drive desktop shared with me not showing in the Google Drive client.

How do I see shared drives on Google Drive?

1. Add the Folder to My Drive

  1. Launch your Chrome browser and visit drive.Google.com.
  2. Log in with your Google Drive credentials.
  3. Click on the Shared With Me option.
  4. Open the folder that you want to share.
  5. Click on Add to My Drive.
  6. Your folder will now show on your Google Drive client.

Following the above steps should help if your work/school account’s shared folder fails to appear when accessed from your personal account.

2. Access it from the web view

Google Shared Drive not showing

If the files are missing from your Google Drive File Stream client, try accessing the Shared Folder through Chrome Google Drive. Launch Google Chrome and open the Google Drive extension. Check if the shared folders are visible.

You can also view the shared folders in the web view. If you see the folders in the web view, it is most likely a bug, and Google should fix it soon.

3. Force immediate sync

Google Shared Drive not showing
  1. Launch Google Drive File Stream on your computer.
  2. Navigate up one folder and use the hidden context menu option.
  3. Press the following key combination to select the Refresh Folder option:
    Windows: Hold Shift and right-click on the folder, then choose Refresh folder
    macOS: Hold the Control key, right-click on the folder, and select Refresh folder
  4. This should force Google Drive File Stream to sync the shared folder with your Google account.

According to a Google Product Expert, users may be able to fix this problem by forcing immediate sync or refresh on the folder that is not showing up.

However, in other instances, the folders seem to have appeared automatically over 48 hours. This requires the users to leave Drive File Stream running with sync enabled.

4. Disconnect and reconnect your Google account

  1. Make sure the Google Drive File Stream is running.
  2. Open File Stream Settings.
  3. Click on Preferences.
  4. Click on Disconnect account and then click OK.
  5. Select Drive File Stream settings and click Quit.
  6. Relaunch Drive File Stream and sign in with your Google account credentials.

After signing in, you may have to wait longer as the Drive File Stream arranges the file system and caches a local copy. You should be able to access the shared drive folder once the process is complete.

Note: For some users, the issue seems to get triggered after every reboot. So, you may have to go through the disconnect and reconnect process all again until a permanent fix is released.

? Wait for the bug to be fixed

In most cases, the Google Shared Drive not showing issue seems to be occurring due to a Google Drive File Stream bug. Google will most likely release an update if it is a widespread issue.

The Google Shared Drive not showing issue in Google Drive File Stream can occur due to a glitch or bug.

Try disconnecting and reconnecting your Google account to fix the issue. If it fails, force an immediate folder refresh to sync the folders.

Fast User Switching on Windows 11: How to Enable or Disable

Sometimes you may want to allow more than one user on your PC, and that’s when you need the Fast User Switching feature on Windows 11.

To allow access to more users, you may need to sign out and back in frequently, and the switch users feature by Windows helps you to change between users effortlessly.

What is Windows fast user switching?

Each user has a unique Windows account, allowing more than one user to share a computer.

As you sign in, the desktop settings, files, favorites, and history are assigned to the specific user id and cannot be accessed by other users.

Once you sign out, your profile is saved for the next time you sign in. In this case, you do not have to sign out for another user to sign in.

Instead, multiple users can sign in and change between open accounts, known as Fast User Switching.

How do I enable or disable fast user switching?

1. Enable/disable fast user switching via Group Policy

  1. Press the Win + R shortcut keys to open the Run console. Type gpedit.msc and hit Enter to open the Local Group Policy Editor.run gpedit command
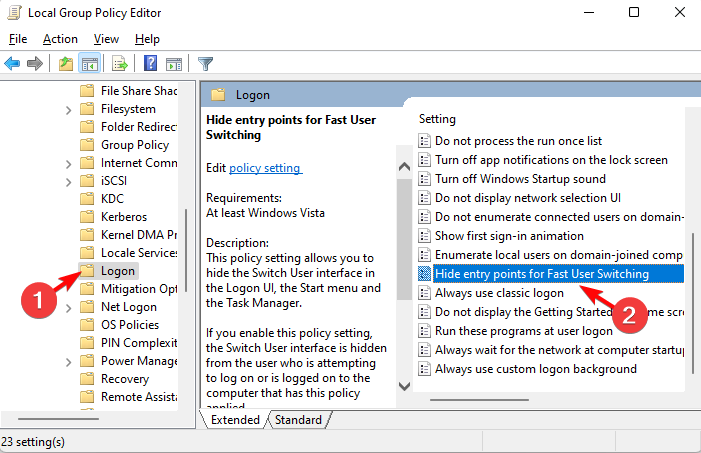
  2. On the left side of the pane, navigate to the below path: Computer Configuration/Administrative Templates/System/Logon
  3. Next, go to the right and double-click on the Hide entry points for the Fast User Switching policy.Hide entry points for the Fast User Switching
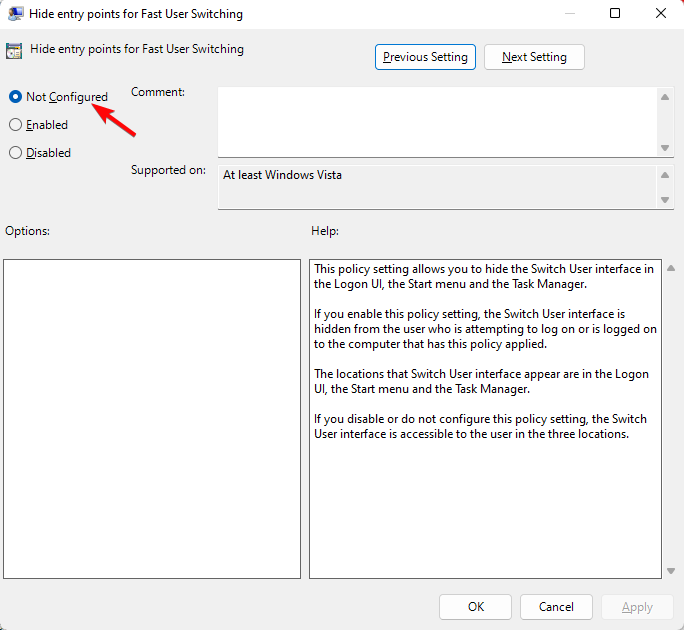
  4. To enable Fast User Switching, select Not Configured, press Apply, and OK. Fast User Switching not configured
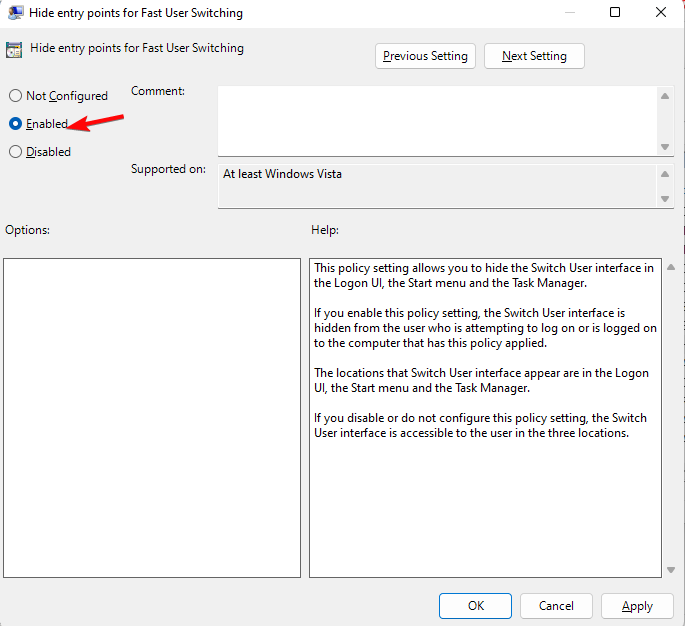
  5. If you want to disable Fast User Switching, select Enabled, press Apply, and then OK.https://windowsreport.com/wp-content/uploads/2022/12/Hide-entry-points-for-the-Fast-User-Switching-not-configured-apply-ok.png

You can successfully enable or disable the Fast User Switching feature through the Local Group Policy Editor.

2. Enable/disable fast user switching via Registry Editor

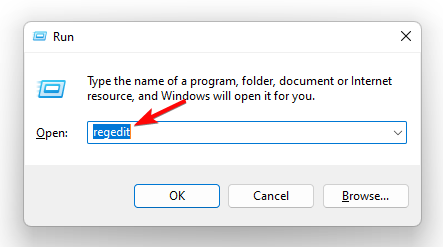
  1. To open the Run console, press the Win + R shortcut keys. Now, type regedit, and hit Enter to open the Registry Editor window. run regedit command
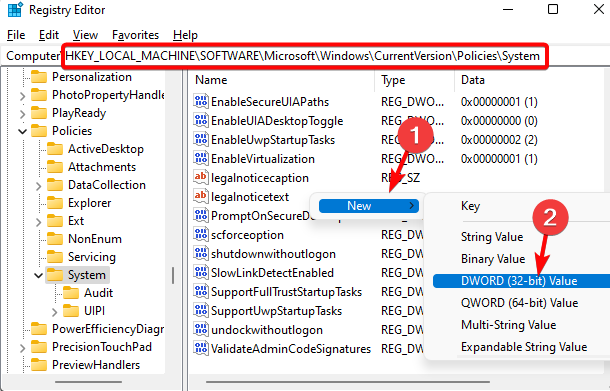
  2. Next, navigate to the below path in the Registry Editor and hit Enter: HKEY_LOCAL_MACHINE\SOFTWARE\Microsoft\Windows\CurrentVersion\Policies\System
  3. Now, on the right, right-click on an empty area, select New, and then select DWORD (32-bit) Value. create new dword value
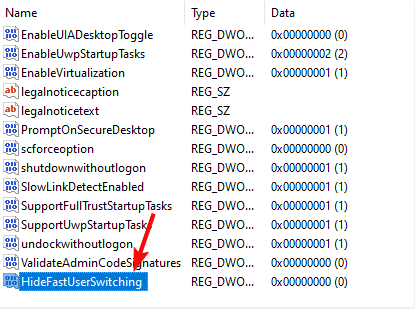
  4. Rename the new DWORD value as HideFastUserSwitching. Double-click to edit. HideFastUserSwitching
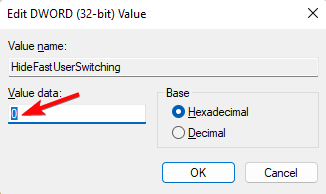
  5. In the Edit DWORD (32-bit) Value dialog, set the Value data to 0 to enable the feature. Press OK.enable fast user switching
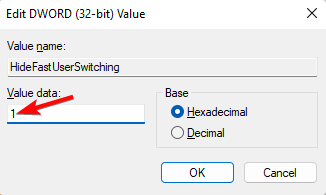
  6. To disable the feature, set the Value Data to 1, and press OK. disable fast user switching

Registry Editor is another great way to modify settings for a Windows feature like Fast User Switching. But, if it’s corrupt, you can follow our guide to resolve the issue (also applicable for Windows 11).

What is the shortcut to switch users in Windows 11?

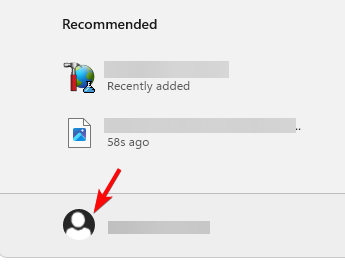
  1. Go to the Windows icon, and click on Start.
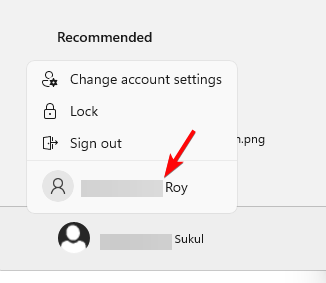
  2. Next, click on the account name icon (or picture). user account or picture
  3. Now, select another user from the menu. switch profile

Thanks to Microsoft’s Fast User Switching feature, switching profiles on your Windows 11 PC is a smooth task.

Enable the feature mentioned above, allowing other users, like friends or family, to quickly sign in to your device.

To remove user accounts in Windows 11, refer to the troubleshooting methods in our detailed guide here.

For any other queries on Windows user accounts, you may leave a message in the comments section below.

How to Disable Adobe Acrobat Update Service [Windows & Mac]

If you want to disable Adobe Updater, you’re in the right place. As the name suggests, this service automatically updates your apps while running in the background.

It could be useful, but it can also hog PC resources. So, if you want to stop it from doing that you can disable it.

How can I disable Adobe Acrobat Update Service?

1. Disable Adobe Updater from Task Scheduler (PC)

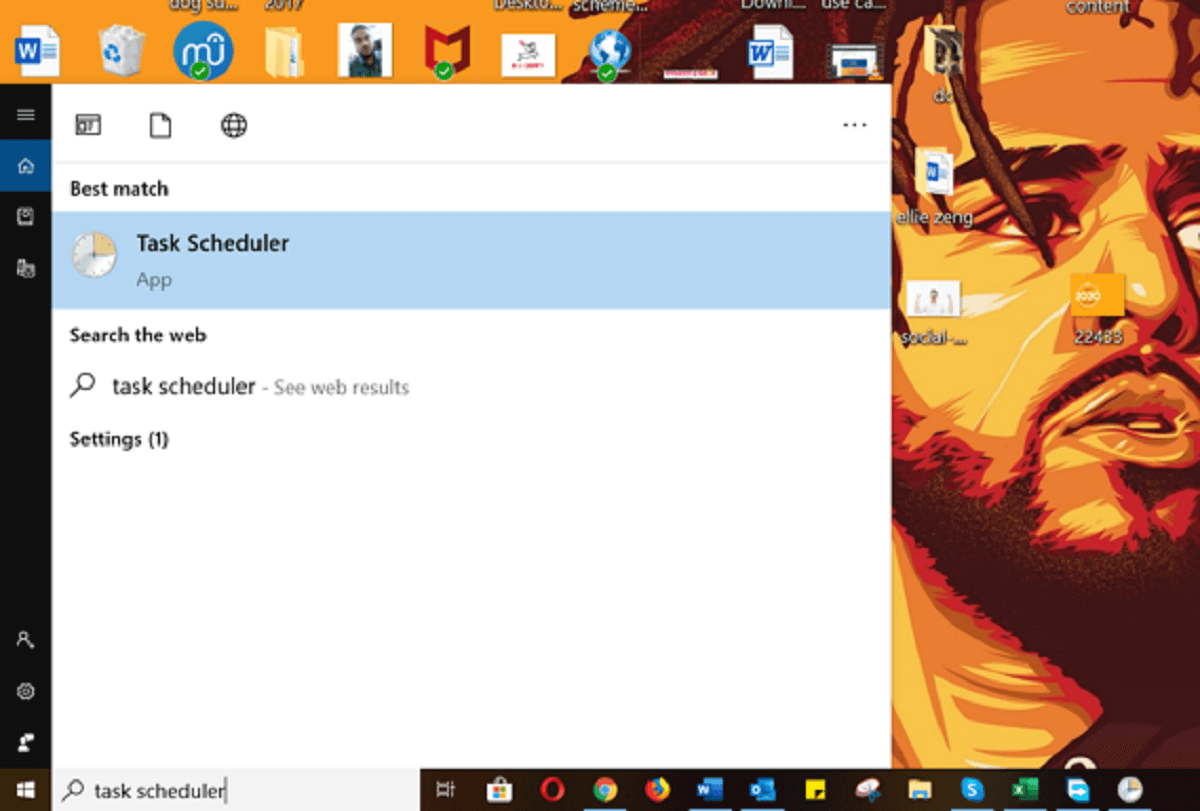
  1. Search for Task Scheduler in Cortana and open it.to permanently stop Adobe Updater in windows 10 launch task scheduler
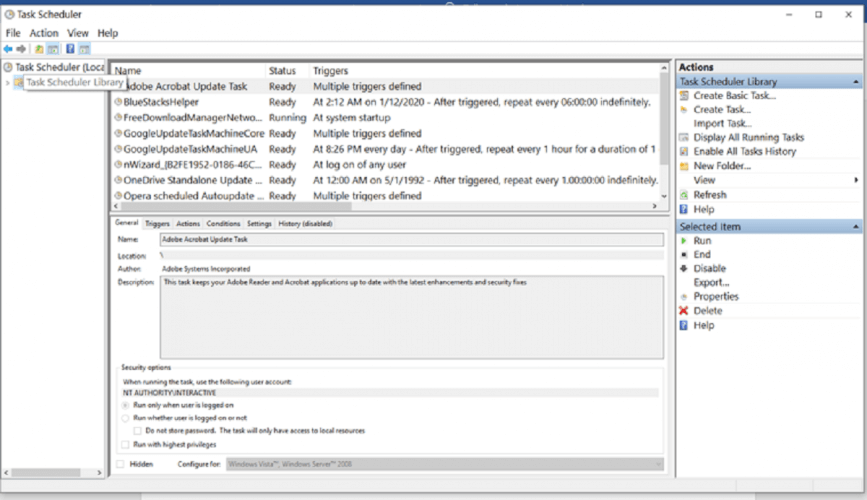
  2. Click the Task Schedule Library on the left.to remove adobe updater windows 10 open Task Schedule Library
  3. Right-click the Adobe Acrobat Update Task.
  4. Hit Disable From the right-side panel.
  5. Close the Task Scheduler.

2. Disable Adobe Acrobat Update Service from Windows services menu (PC)

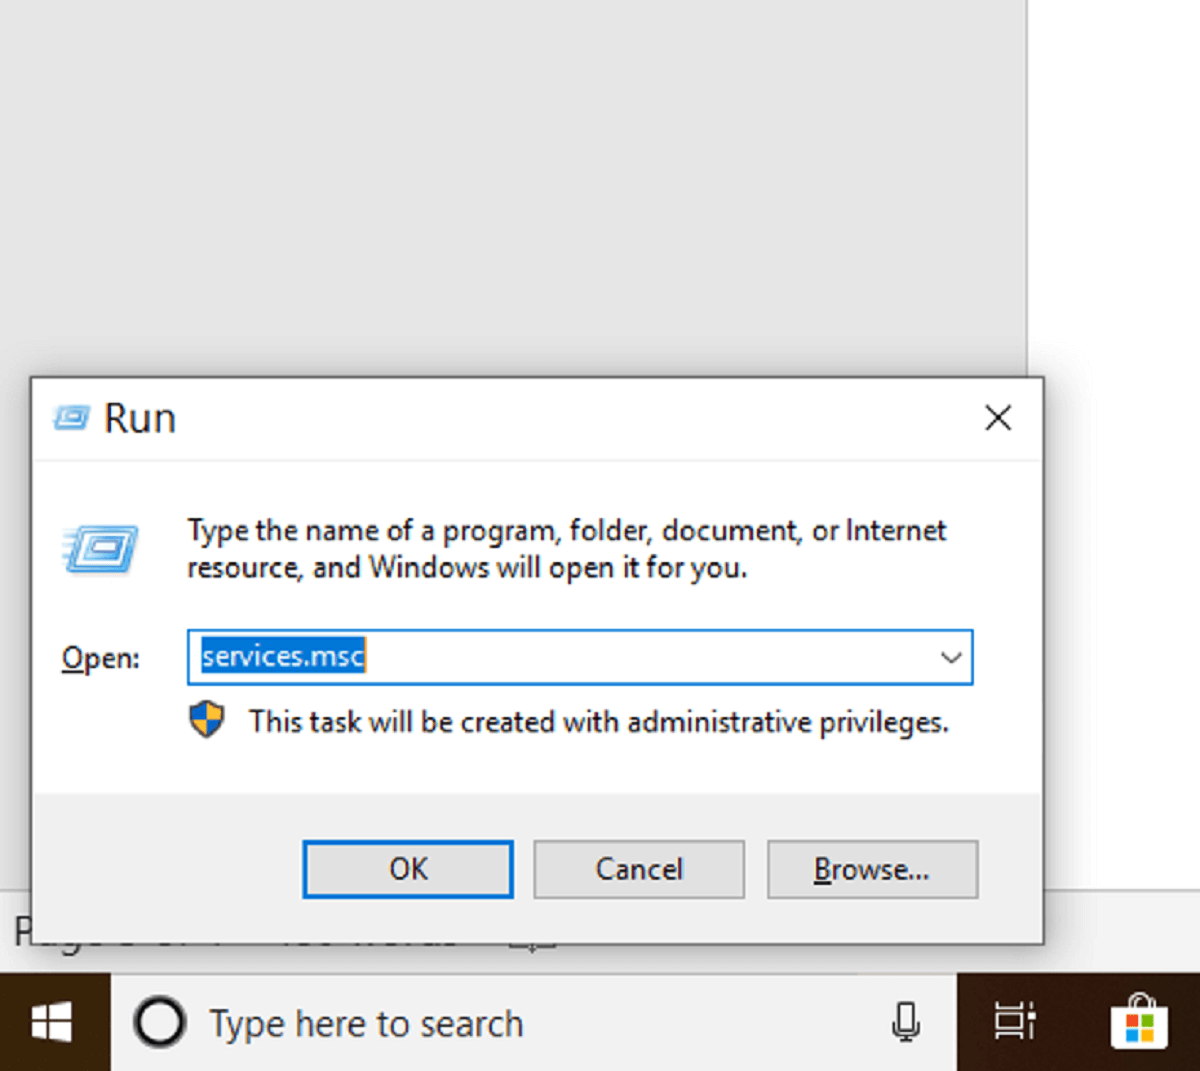
  1. Initialize the run command box by pressing Windows + R and enter Services. Then hit Enter.open services.msc to disable adobe updater service in windows 10
  2. Find the Adobe Acrobat Update Service, right-click on it, and hit Properties.open the service properties to disable adobe updater windows 10
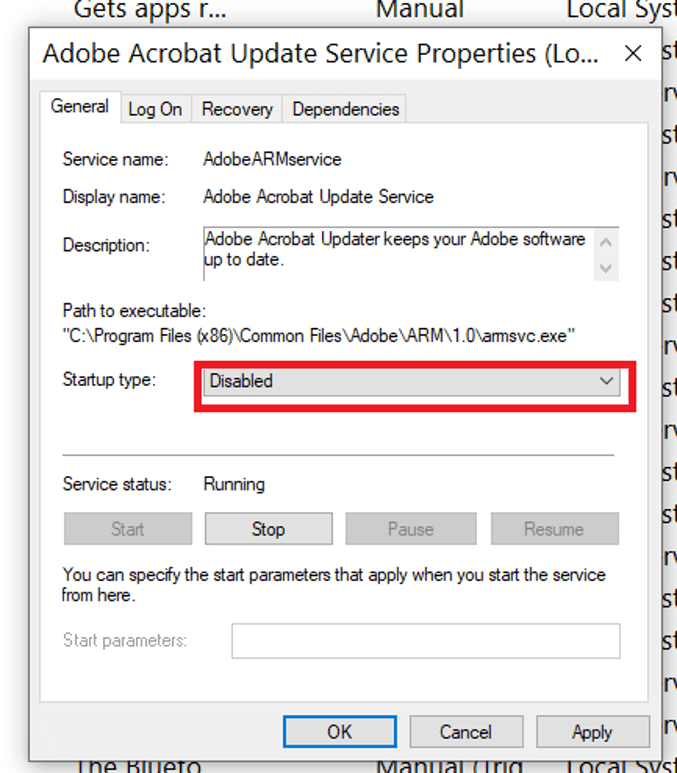
  3. Choose Disabled from the Startup type dropdown. remove adobe updater in windows 10
  4. Click Apply to save the settings and click OK to exit the Window.

3. Disable Adobe Acrobat Update Service from Registry (PC)

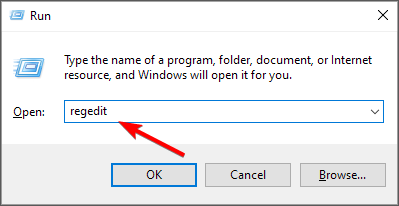
  1. Press the Windows key + R to open the run dialog box, type Regedit, and hit Enter.run regedit to disable adobe updater registry windows 10
  2. Navigate to the following location: HKEY_LOCAL_MACHINE\SOFTWARE\Wow6432Node\Adobe\Adobe ARM\Legacy\Reader(product code)\locate the registry to remove adobe updater in windows 10
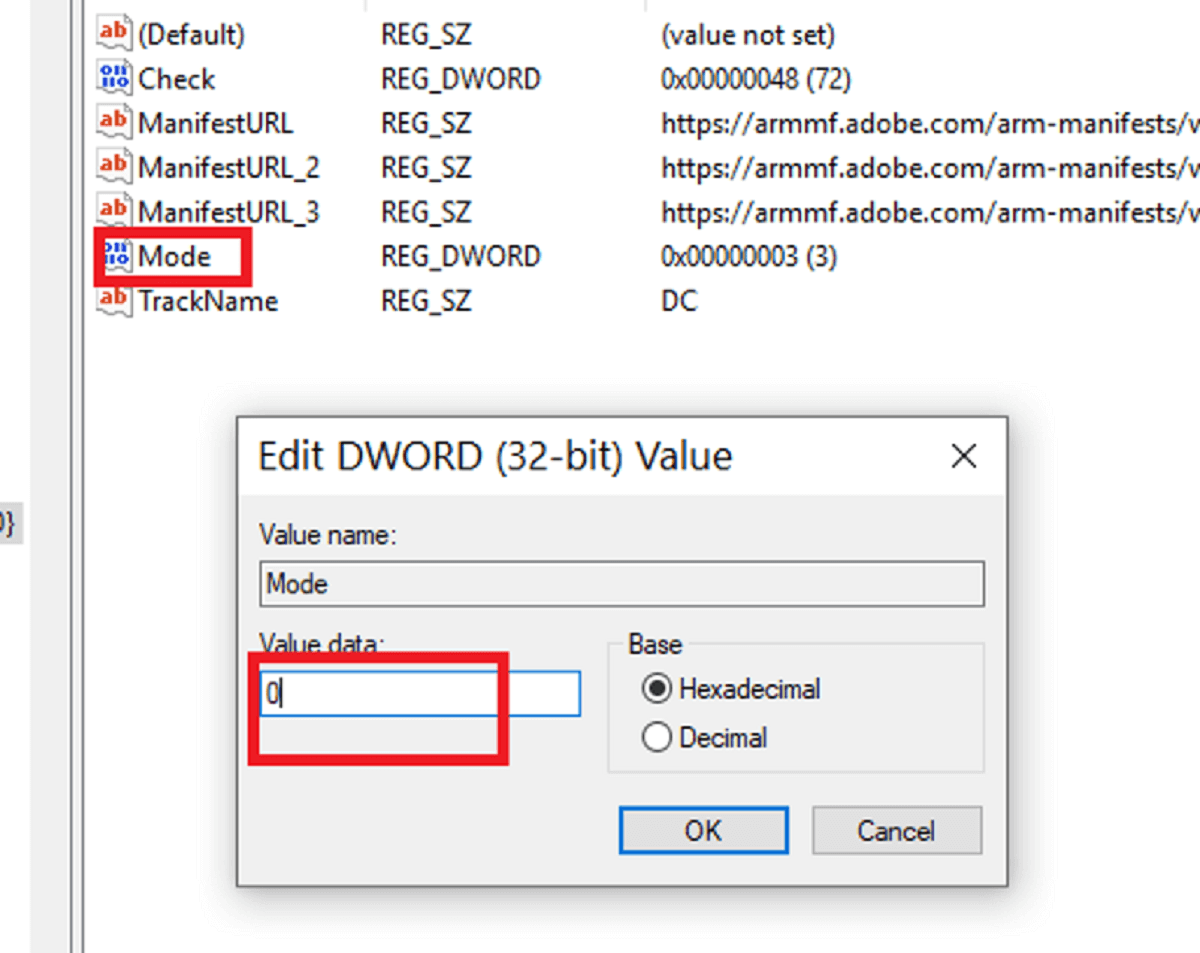
  3. Double-click Mode and then change the Value Data from 3 to 0.

Note: After this process is completed, restart your PC to have the settings take effect.

Note icon NOTE
How do I disable Adobe Updater in Windows 11?

All the methods described above will work on Windows 10 as well as Windows 11. In addition, there is also the possibility to disable adobe acrobat update service via GPO.

4. Create new registry values (PC)

  1. Uninstall Adobe Reader from your PC.
  2. Press Windows key + R and enter regedit.
  3. Navigate to the following path: SOFTWARE\Policies\Adobe\Acrobat Reader\DC\FeatureLockDown
  4. In case the key from above isn’t available, you’ll have to manually create it.
  5. Right-click the right pane and choose New and then DWORD (32-bit) Value.
  6. Set the name to bProtectedMode.
  7. Create additional two DWORDs and name them bUpdater and bUpdateToSingleApp.
  8. Next, go to the following key HKEY_LOCAL_MACHINE\SOFTWARE\WOW6432Node\Policies\Adobe\Acrobat Reader\DC\FeatureLockDown
  9. Create a new DWORD and name it bUpdateToSingleApp
  10. Now install 32-bit version of the software.

5. Reinstall Adobe Reader with special parameters (PC)

  1. Remove Adobe Reader completely from your PC.
  2. Navigate to C:\Program Files (x86)\Common Files\Adobe\ARM\1.0\Cache
  3. Run the uninstall file if available.
  4. Next, download the Adobe Reader setup file.
  5. Press Windows key + S, type cmd and select Run as administrator.
  6. Now navigate to the directory where the Adobe Reader setup file is located using the cd command. On our PC, we used:  cd C:\Users\WindowsReport\Downloads
  7. Be sure to replace the setup.exe with the exact name of the setup file and run this command: "setup.exe" /msi DISABLE_ARM_SERVICE_INSTALL=1
  8. Follow the instructions to complete the setup.

6. Change Adobe app preferences (Mac)

  1. Open the Application Manager.
  2. Click the Preferences button at the bottom of the window.
  3. Uncheck the option Notify me of new updates on the menu bar.

The steps in this post will help you permanently disable Adobe Updater both on Windows 10 and Mac OS.

Note icon NOTE
If you can’t find the options specified above, make sure that you are actually in the Application Manager window, and not in the Creative Cloud Client.

Adobe Acrobat is a great app, but it’s not short of errors and bugs. Besides the automatic update service, people also deal with app unavailable errors or problems reinstalling.

While these are annoying, with a few smart steps like those outlined above, you’ll be able to come out on top.

If you have any other questions or suggestions, don’t hesitate to leave them in the comments section below.

Download & Install ScanSnap iX500 Driver for Windows 10 & 11

Do you need the appropriate driver for the Fujitsu ScanSnap iX500 duplex image scanner? The iX500 is one of the most commonly used scanners out there. However, this product has been discontinued. So, a lot of users cannot take full advantage of it because they don’t have a proper driver.

But you can download and install the driver easily on any version of the Microsoft operating system, including the latest Windows 11 and its predecessor Windows 10.

Is ScanSnap iX500 compatible with the latest Windows 11 and 10?

Fujitsu’s popular scanner model iX500 is fully compatible with Windows 11 and 10. Though some users faced driver-related problems or did not find a stable driver for Windows 11 at the beginning, it has changed now.

If proper drivers are installed, no one should face any compatibility issues with this ScanSnap scanner model and the latest Microsoft Operating systems. Fujitsu has officially discontinued the iX500 model. But, software support will end on January 31, 2024.

After that, users may face compatibility issues with future Windows versions and builds.

How can I download ScanSnap iX500 drivers for Windows 10?

1. Manually from the official website

  1. Go to the Download page.
  2. Select Windows 10 and click on the Display Software list.selecting windows 10 for ScanSnap iX500 driver
  3. Download the ScanSnap Home Download Installer as shown in the instructions for Windows 11.
  4. Install it on your PC.
  5. Follow the same steps to complete the setup and driver installation.setting up ix500 scansnap
  6. Restart Windows 10.

2. Automatically, using a dedicated tool

When updating drivers it is always recommended to use the utmost care, that is why it’s a good idea to employ the help of professional driver updating software.

These tools can update one or multiple drivers with just a single click. If appropriately configured, they can do this job automatically according to your own schedule.

How to download and install the ScanSnap iX500 driver on Windows 11?

Before downloading the driver, we suggest you do the following things:

  • Update Windows 11 to the latest version or at least one of the recent versions.
  • Have a workable internet connection.
  • Connect your iX500 scanner with a proper cable.

Now, follow these methods:

1. Use Device Manager

  1. Open the Start Menu, type device manager, and hit Enter to open it.
  2. Find the iX500 driver, right-click on it and choose Update driver.updating-scansnap ix500-device-manager
  3. Click on Search automatically for drivers.
  4. Follow any additional on-screen steps to complete the process.

As the driver is not installed, you can find it in Device Manager‘s Other devices section.

2. Use ScanSnap Home

  1. Go to the Software download page for Scan Snap iX500.
  2. Click on Download next to the ScanSnap Home Download Installer.downloading ScanSnap Home Download Installer
  3. Open it on your PC.
  4. It should detect the scanner connected to your PC.
  5. You also can select the model manually and click on Start setup.setup iX500 using ScanSnap Home
  6. Follow any on-screen steps to finish the setup and driver installation.
  7. After that, restart your PC.

3. Use a dedicated tool

  1. Download a reliable driver updater such as Fortect‘s.
  2. Install it on your PC.
  3. Open this software.
  4. Scan for the missing drivers.
  5. Download the iX500 driver for Windows 11.
  6. Install the driver.

Fortect Driver Updater is the best way to get the latest compatible iX500 driver on Windows 11. But you can follow other methods without any problem.

This article has shown the ways to download and install the ScanSnap iX500 scanner driver on both Windows 11 and 10. If you have any suggestions, you can write them down in the comment box below.

Outlook AutoFill Email Address not Working: Check & Fix ✅

The Outlook autofill, otherwise Auto-Complete, displays email addresses when you start to enter them in the To field.

However, AutoComplete doesn’t always work for some users. If Outlook doesn’t display email addresses when you enter them in To, you might need to fix AutoComplete. First things first, though.

Why are all my Outlook autocomplete email addresses suddenly missing? Like so many other users, you might also be wondering what causes this abnormal and sudden behavior, to begin with.

Let’s find out together.

Why is my Outlook not auto-populating email addresses?

Improper autocomplete settings, conflicting extensions, or file corruption are just some of the reasons for which you might encounter this issue.

And speaking of issues, let’s quickly go through the most common problems reported by our readers:

  • Outlook email address not auto populating
  • Outlook not autocompleting email addresses
  • Use autocomplete list Outlook greyed out
  • Outlook autocomplete not working for some contacts
  • Outlook 365 not auto populating email address
  • Also, the versions are often impacted – Outlook 2013, 2010, 2003, 2016, 2007 autofill email address not working

How do I restore autofill email addresses in Outlook?

  1. Check the Auto-Complete setting in Outlook
  2. Clear the Auto-Complete List setting
  3. Turn off Outlook add-ins
  4. Open Outlook in Safe Mode
  5. Reset Auto-Complete
  6. Repair the PST File

Before we dig into the solutions listed below, it might be worth considering a different email client.

There are lots of different email clients that offer efficient features in order to help you be more organized and stay on top of a busy day.

In case you wonder what email software you might use, we recommend carefully selecting the best email clients to boost your productivity.

1. Check the Auto-Complete List setting in Outlook

  1. Outlook includes an Auto-Complete setting that needs to be selected.
    • To check the AutoComplete option, click the File tab.
  2. Select Options to open the Outlook Options window.
  3. Select Mail on the left of the window.
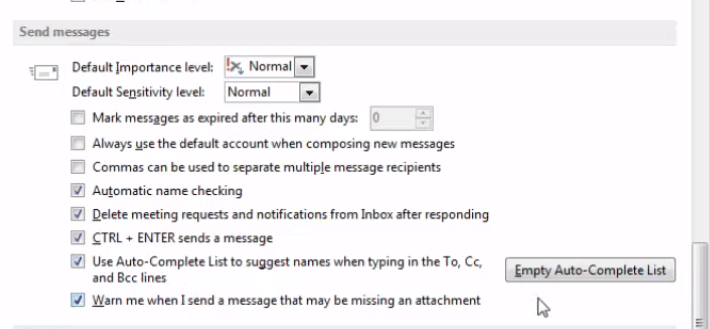
  4. Scroll down to the Send messages options, which include a Use AutoComplete List to suggest names when typing in the To, Cc, and Bcc lines option.
  5. Select the Use AutoComplete List to suggest names when typing in the To, Cc, and Bcc lines option if its checkbox isn’t selected.

2. Clear the Auto-Complete List setting

If you don’t need to select the Use AutoComplete List to suggest names when typing in the To, Cc, and Bcc lines option, note the Empty AutoComplete List button beside it.

Outlook includes a maximum of 1,000 entries in its AutoComplete list, which you can clear by pressing the Empty AutoComplete List button.

Press that button and click Yes to clear the AutoComplete list. Note that you’ll need to fully enter all the email addresses once before Outlook‘s autofill displays them again.

3. Turn Off Outlook Add-ins

  1. Click File > Options to open the Outlook Options window.
  2. Then select Add-ins on the Outlook Options window.
  3. Select COM Add-ins on the Manage drop-down menu.
  4. Click the Go button.
  5. Deselect the add-ins’ checkboxes to disable them.
  6. Press the OK button to close the window.

You might need to turn off some add-ins to fix Outlook autofill email addresses. The iTunes Outlook Change Notifier add-in is one that corrupts the AutoComplete list. You can turn off Outlook add-ins as follows.

4. Open Outlook in Safe Mode

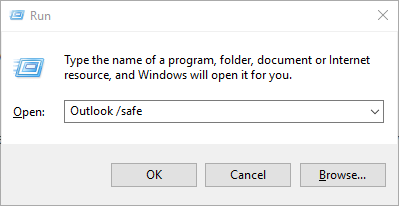
  1. Press the Windows key + X hotkey.
  2. Select Run to open the window in the snapshot below.
  3. Input Outlook.exe /safe in the Open text box.
  4. Click the OK button to launch Outlook.

Alternatively, you can open Outlook in a Safe Mode that deactivates all the application’s add-ins.

Sometimes, Safe Mode won’t accept your password. We’ve prepared a dedicated guide just for such an occasion.

5. Reset Auto-Complete

    1. First, open File Explorer.
  1. 2. Then open this folder in File Explorer: %LOCALAPPDATA%\Microsoft\Outlook

    opening outlook cache folder using run
  2. 3. Right-click the RoamCache folder and select Rename.

  3. 4. Enter old_RoamCache as the folder’s title.

  4. 5. Outlook will set up a new RoamCache folder when you open the application.

  5. How do I fix AutoComplete cache in Outlook? You can reset AutoComplete by clearing its cache. The RoamCache folder includes the AutoComplete cache.

    You can reset that cache by editing the RoamCache folder with the help of File Explorer. If you have any File Explorer issues on Windows 10, check out this dedicated guide to solve them.

6. Repair the PST File

  1. First, open your Outlook folder in File Explorer.
  2. That folder path could be this one on 64-bit Windows: Program Files(x86)/Microsoft/OfficerootOffice
  3. Or this one on 32-bit platforms: Program Files/Microsoft/OfficerootOffice
  4. Then click the scanpst.exe to open the Outlook Inbox Repair Tool window.
  5. Press the Browse button to select your PST file.
  6. Enter Outlook.pst in the Windows search bar if you’re not sure what folder the PST file is in. repair outlook
  7. Click the Start button on the Outlook Inbox Repair Tool window to fix the PST file.

Repairing the PST file might fix AutoComplete. Outlook includes a SCANPST utility (Outlook Inbox Repair Tool) that you can repair the PST file with.

Those are a few resolutions that might fix Outlook‘s AutoComplete so that the To field displays email addresses again.

The Outlook Support and Recovery Assistant might also come in handy for fixing AutoComplete. You can download the Support and Recovery Assistant from this webpage.

If you have any other questions, feel free to leave them in the comments section below.

Fix: Purchased Games & Apps Are Not Showing on Xbox One

Usually, you should be able to find all your purchased items without issues. However, many gamers have noticed that their Xbox One digitally purchased items like games are not showing up in games and apps on different models or in the Microsoft Store on your PC.

If issues like the Microsoft Store payment problems don’t bug you, every purchase you have made should be available on your account. But, If it doesn’t happen, it can bring a lot of frustration. Fortunately, you can overcome this situation easily.

Why can’t I see the game I bought in the Microsoft Store?

If the Microsoft Store is not showing the purchases you have made, it can be due to the following reasons:

  • Wrong account: In most cases, users may have multiple accounts, and they can’t remember which account owns their digital purchases.
  • Corrupted cache: If the local cache has been corrupted, it may fail to show you the purchased games and apps.
  • Problems with the Microsoft Store app: Sometimes, internal problems with the Microsoft Store app can trigger this type of problem.
  • Incorrect region settings: Some purchased items may not be available in your region. That’s why you are not seeing them.
  • It’s taking time: Some purchases may take up to 24 hours to be visible in your account. So, if you purchased any item a few moments ago on Microsoft Store, it may not appear immediately in your library.

Where are my purchases from the Microsoft Store?

No matter what, all of your purchases are available on your MS account. You can find them in the Microsoft Store library. Here is the way to do it:

  1. Open Microsoft Store on your Windows PC or Xbox.
  2. Click on the Library icon.going library microsoft store

Alternatively, you can go to this Microsoft Account Order page and find all the purchases, including Xbox One games, apps, game pass, or any other subscriptions.

What can I do if Xbox One-purchased games are not showing up?

The problem you are encountering has multiple solutions. However, before trying them out, we suggest you do the following things as primary steps:

  • Make sure you are using the correct Microsoft Account. To understand, see the order page on Microsoft’s website, as suggested in the previous section of this article.
  • Make sure that you are using the updated version of Xbox firmware.
  • Check if the purchase was actually successful. It is because, sometimes, Microsoft may have trouble processing your payment.
  • Update the Microsoft Store app.
  • Sign out. Then, restart your Xbox, press the Xbox button and go to Profile & system, tap on Add or switch, and then Add new. Now, follow the on-screen steps and sign in with your Microsoft account again.
  • Wait at least 24 hours if it is a new order that is not showing up.

After doing the above things, if necessary, follow these methods to fix Microsoft Store not showing purchases, including Xbox One games.

1. Change region

  1. Go to Xbox Settings.
  2. Go to System and then Language and region.
  3. From Location, select the correct region or the one where your purchased items are available.changing location xbox
  4. Restart Xbox.

2. Clear cache

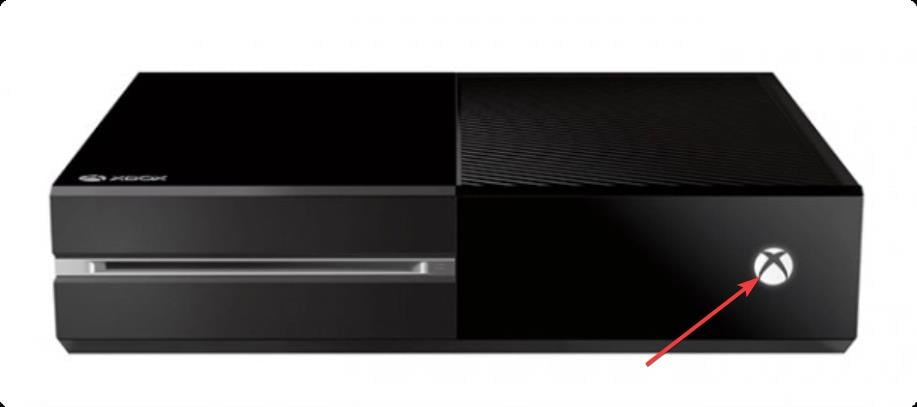
  1. Press and hold the Xbox button for 10 seconds or wait until it turns off the console.xbox button
  2. Unplug the power cable.
  3. Press and hold the Xbox button again and continue doing it several times.
  4. Wait a minute and plug in the power cable again.
  5. Wait another minute.
  6. Now, press the Xbox button to turn on the console.

3. Reset Xbox

  1. Go to Settings and go to System.
  2. Go to Console info.
  3. Tap on Reset console.
  4. Choose between Reset and remove everything and Reset and keep my games & apps.resetting xbox
  5. Follow the onscreen steps to finish the process.

After resetting, configure and sign in again. Now, see if it has solved the problem or not. If necessary, contact Microsoft Support to get a more precise solution.

If you are interested, learn how to solve PUR-Authentication failure errors on Microsoft Store.

This article has explained how to fix Xbox One-purchased games not showing. In case you are facing a similar issue on your PC, read this guide to find solutions.

Before you leave, check our The person who bought this needs to sign in on Xbox since it covers a similar issue.

Let us know in the comment box if you have any questions or opinions.

What Is Error Code 51003 in Death Stranding? How do I Fix It

Is the Death Stranding error code 51003 bugging you while trying to play this game? This article will provide you the helpful information and suggestions on this.

Recently, a lot of games have been experiencing the error 51003 while playing the action game: Death Stranding. When this error appears, it shows the following message:

Connection to Death Stranding game server is unstable.

Switching to Offline Mode…

Error Code: 51003

You also may get a similar error code and get a message like unable to login to the Death Stranding game server. But, the root of the problem is the same.

What is the error code 51003 in Death Stranding?

The error code 51003 usually occurs when there is a network problem, or the game server cannot handle the requests it receives. Right now, in almost every case, the root of the problem is from the developer’s end.

Recently, Epic Games recently gave away this game for free, which brought a lot of new players. Now, when the servers become full and can’t handle new gamers, it throws this error message.

How to fix Death Stranding error code 51003?

At the present time, there is very little thing you can do to solve this problem. However, after doing some research, we have found some tricks that may temporarily help you get rid of this error. Before trying out the actual methods, we suggest you do the following things:

  • Restart your PC or console.
  • Check the status of the current outage from Downdetector’s Death Stranding page.
  • Make sure you have a good internet connection.
  • Power cycle your router.
  • If possible, use ethernet instead of WiFi.

After doing the above things, follow these methods one by one and see which one helps.

1. Change DNS

  1. Press Win + I to open the Windows Settings.
  2. Navigate to the Network & internet.
  3. Click on the Ethernet or WiFi, depending on the connection type you have been using.going ethernet win11 settings
  4. Click on Edit next to the DNS server assignment.clicking edit next to dns server assignment win11 settings
  5. Set it to Manual.
  6. Enable IPv4 or IPv6, depending on the DNS you are trying to use.
  7. Type the following DNS addresses as Preferred and Alternate DNS and click on Save:
    8.8.8.8
    8.8.4.4saving dns settings win11 settings
  8. Restart your PC.

The above-mentioned addresses are for Google DNS. You can use any other quality DNS servers you want. However, we have a very helpful article on this that may help you. Learn how to find the fastest DNS server.

A good DNS can help you to connect to the game server milliseconds faster compared to the other gamers who are using typical DNS. It may reduce the chance of getting Death Stranding server error code 51003.

2. Play in the non-peak hour

If we can see the last 24 hour’s outage reports from the Downdetector, we can easily find out at which time the death stranding error code 51003 occurs most. We suggest you play at a different time and see if it helps.

It may not be the perfect solution. But a significant number of gamers are doing it to avoid this annoying error.

In addition, you can disable your Firewall to find out if it is helpful or not. Another thing we can recommend is that you try one of the gaming VPNs. It is because if your connection uses a complex and problematic routing, you may fail to connect to the Death Stranding server at most times.

But, a proper gaming VPN can give you an optimized experience. However, not all users will get benefits from it, especially who are already using a very stable connection suitable for gaming. To learn more, find out if a VPN can reduce ping in games or not.

If you are interested, check out these best Ping and Lag reducers for online gaming.

This article has featured the most effective methods to solve Death Stranding error code 51003. We will update this post with additional methods when available. If you have any opinions or suggestions, feel free to write them down in the comment box.

Fix: Island Raft Survival Multiplayer Not Working

Island Raft is a fun oceanic survival game with a co-op multiplayer mode. However, some players of Raft can’t join world in games. Consequently, Raft’s multiplayer mode doesn’t work for them.

How come Raft multiplayer doesn’t work?

There are quite a few potential reasons for Raft multiplayer not working. Here are some of the most common:

  • The firewall and antivirus are blocking the app – Certain security software may block the game from connecting with servers.
  • Conflicting background programs – Some software conflicts can also generate multiplayer connection issues for Raft players.
  • Steam service failures – To resolve such issues, some users might need to repair the Steam service.
  • Network issues – Raft game connection issues can arise because of corrupted or obsolete DNS cache data. Such issues can be fixed with some ipconfig networking commands.

Now that we know why this happens, let’s see what we can do about it. But first, a small tip on how to play multiplayer games in Raft.

What do I need to do to play Raft multiplayer games?

To play Raft multiplayer games, you must open Raft from Steam’s launcher. All players need to have online status to join games. Also, note that you can only play online with players on your friend list. So, you’ll need to befriend some players via Discord to find somebody to play with first.

When you’ve found somebody to play with, you’ll need to add them on Steam by right-clicking Steam’s system tray icon and select Friends. Then you’ll need to share your Friend code with the other player. Click the + button to enter your friend’s code in the Enter a Friend Code text box.

Thereafter, you should be able to join a multiplayer game world. If you’re sure you’ve done everything correctly and Raft multiplayer doesn’t work, check out these potential fixes.

How can I fix Raft multiplayer not working?

Before getting into more complicated solutions for this problem, let’s cross a few preliminary checks from our list:

  • Make sure the game host has selected Allow friends to join. Ask the host player if he/she has selected this feature in the game settings.
  • Restart your router. Unplug the router and/or modem for at least 30 seconds, then plug them back in.
  • Disable the third-party antivirus or firewall from its settings and see if you can join a multiplayer game.
  • Restart Steam and your PC. Sometimes this is all it takes to get everything back to normal.

If you still can’t join multiplayer games in Raft, let’s try the detailed solutions below.

1. Flush the DNS

  1. Click the Start button, type cmd, and select Run as administrator from the results.
  2. Next, enter this command and press Enter to run it: ipconfig /flushdns
  3. As a result, the system will flush the DNS cache.

2. Repair the Steam Service

  1. Right-click the Start button and select the Run shortcut.
  2. Input this Run command: "C:\Program Files\Steam\bin\SteamService.exe" /repair
  3. Click the OK button.

If you haven’t installed Steam in its default directory, replace the path in the command above with your PC’s SteamService.exe installation location.

3. Clear caches for Steam and Raft

  1. Press the Windows key + E to start File Explorer.
  2. Next, open this folder path: C:\Users\YOURUSER\AppData\Local
  3. Right-click the Steam folder there and select Delete.
  4. Then right-click the Raft folder to select the Delete option.

Replace YOURUSER in the specified path above with your actual user folder’s title.

4. Turn off the Windows Defender Firewall

  1. Click the Start button, input firewall in the search box, and click on Windows Defender Firewall.
  2. Next, click Turn Windows Defender Firewall on or off to open some firewall settings.
  3. Select both the Turn off Windows Defender Firewall radio buttons, and click the OK option.
  4. Try playing Raft multiplayer with the firewall disabled.

It’s recommended to turn Windows Defender Firewall back on when not playing Raft.

5. Clean-boot Windows 10

  1. Right-click the Start button and select the Run accessory.
  2. Next, enter the following command and press Enter or click OK: msconfig
  3. Select Selective startup on the General tab.
  4. Deselect the checkbox for Load startup items.
  5. Make sure the Load system services and Use original boot configuration settings are selected.
  6. Click the Services tab and select the Hide all Microsoft services checkbox to exclude them from the services list and hit the Disable all button.
  7. Select the Apply and OK buttons to exit.
  8. Finally, select Restart to clean-boot Windows.
  9. Try playing a Raft multiplayer game after rebooting windows.

If this resolution works, a conflicting program starting with Windows was likely generating the issue. Restoring the original boot configuration by reversing the selected System Configuration settings will likely restore Raft’s multiplayer error. Then you’ll need to identify what program is conflicting with Raft.

6. Thoroughly uninstall GameFirst VI and PeerGuardian

  1. Click the Start button and select Settings.
  2. Now click on Apps.
  3. Scroll in the list of apps, click on GameFirst VI and/or PeerGuardian, and select Uninstall.
  4. Press the Windows key + E to launch File Explorer.
  5. Look for the GameFirst VI and PeerGuardian folders and delete them permanently.

GameFirstVI and PeerGuardian are two conflicting programs known to cause Raft and Steam multiplayer errors. Sometimes, a normal uninstallation procedure is insufficient to eliminate all the leftovers.

That’s why it’s better to thoroughly uninstall those software packages using a dedicated uninstaller such as IObit Uninstaller.

Aside from that, this tool has many handy features the default Windows uninstaller doesn’t. You can utilize it to uninstall Windows updates, browser toolbars and plugins, and even unwanted bundleware. IObit Uninstaller’s Software Updater tab also enables you to update installed software.

Other IObit Uninstaller features

  • You can erase files with IObit Uninstaller’s File Shredder
  • It includes an Easy Uninstall icon so you can remove software with
  • The Install Monitor feature logs system changes from newly installed software
  • IObit Uninstaller users can select alternative light and dark skins

IObit Uninstaller

Get rid of unwanted software completely with this tool that wipes all leftovers!
Free trial Visit website

You can report a multiplayer gaming issue to Raft support. To do that, click the Report an issue button on Raft’s Help Center page. Then fill out the contact form’s boxes to provide further details about your Raft multiplayer issue. Click the Submit button to send the support ticket.

Aside from that, Steam support’s service might be able to help you fix Raft multiplayer gaming issues. Click Sign in to Steam on the Steam support page. Thereafter, you can send a support ticket for Raft from that page.

The Steam forum is also a handy place to get troubleshooting advice for Raft and other games. Like other Steam games, Raft has a Discussions forum tab. You can add a post about your Raft multiplayer issue there for more troubleshooting guidance.

The above resolutions could feasibly fix a wide range of Raft multiplayer issues that stop you from playing the game online.

If the servers are inaccessible, you might want to try one of the best VPNs for Raft and circumvent the problem. For a somewhat similar issue with error code 1017 on Battlefront 2, check out our fix guide.

For more multiplayer troubleshooting in similar tactical shooters, see our Ready or Not multiplayer not working guide, which covers common fixes that also apply here.

If you have any other suggestions or questions, don’t hesitate to leave them in the comments section below.

How to Remove Black Bars From Games in Windows 10: 7 Easy Tips

Many Windows 10 users love to relax and enjoy their favorite games, but a few of them reported certain issues while gaming. Black bars randomly popping out seem to hinder the experience quite often.

In order to be fully immersed, the game has to work flawlessly and you should not experience glitches during your playtime.

According to users, it seems that black bars are appearing while they play games on Windows 10. This sounds like an unusual problem, but let’s see what triggers it in the first place.

Why does my game have black bars?

From resolution glitches to improper in-game settings, anything can trigger these pesky black bars or lines to randomly appear and ruin your gameplay.

Unsurprisingly, outdated or otherwise compromised display drivers can also have a huge impact.

Let’s take a look at some of the most common issues reported by our readers:

  • Black bars on side of screen when playing games – Black bars on side of screen Windows 10
  • Black bar in middle of screen Windows 10
  • Windows 11 black border around screen
  • Black borders in games, black lines on screen when playing games
  • Escape simulator, Forza Horizon 5, CSGO Intel, GTA 5 cutscenes black bars
  • Assassin’s Creed Odyssey black bars on full screen
  • Black bars when changing resolution
  • Random black bar on screen Windows 10
  • Steam black bars top and bottom
  • Black bars from games Nvidia

How do I get rid of the black bars in Windows 10 games?

  1. Make sure you use the native resolution
  2. Update your graphics card drivers
  3. Check the in-game settings
  4. Use the Ctrl+Alt+F11 shortcut
  5. Check Override application settings in Intel Graphics Control Panel
  6. Run games in windowed fullscreen mode
  7. Check Override the scaling mode in Nvidia Control Panel

1. Make sure you use the native resolution

  1. Right-click on the Desktop and open the Display settings.
  2. Select the recommended resolution and suiting orientation.
  3. Exit Settings and restart your PC.

Since there are two known formats, standard 4:3 and widescreen 18:6, we advise you to stick to your native resolution and screen format.

By doing so, you’ll avoid possible sidebars which commonly occur if you use a non-native format or resolution. This how-to confirms that your native resolution is set to some random unfitting value.

Once you’re certain that both of those are as they’re supposed to be, the problem should be resolved. However, if the issue is persistent, make sure to continue with the steps below.

2. Update your graphics card drivers

  1. 1. Press the Windows Key + S and type Device Manager.

  2. 2. In the Device Manager, expand Display Adapters.

  3. 3. Right-click on your GPU and select Update driver.

  4. 4. Wait for your OS to finish updating.

  5. This issue can sometimes be related to your graphics card drivers, and in order to resolve this issue, it’s advised that you update your graphics card drivers.

    In order to update your drivers, just go to your graphics card manufacturer’s website, find your graphics card model and download the latest drivers for it.

Update drivers automatically

If you don’t want the hassle of updating drivers manually, we strongly suggest doing it automatically by using third-party software. After several tests, our team concluded that this is the best-automatized solution. 

3. Check the in-game settings

Besides the system screen settings, we advise you to check the in-game graphics settings menu. It seems that this issue appears only with certain games and it doesn’t concern most of them.

Counter-Strike is one of those which have issues with black sidebars. In there you should find the resolution and screen orientation settings.

Make sure that they resemble the ones in system settings. Once you’re over that, and the problem is still present, one of the below-presented solutions should help you address it.

4. Set scaling to fullscreen

  1. Press Windows Key + S and enter Control Panel. Choose Control Panel from the list of results.
  2. Go to Appearance and Personalization and choose Adjust screen resolution.
  3. Change your resolution to a lower one and click Apply and OK.
  4. Next click on Advanced settings.
  5. Go to Intel Graphic and Media Control Panel tab.
  6. Locate the Scaling setting and set it to Scale Fullscreen.
  7. Click Apply and OK to save changes.
  8. Change the resolution back to its original value and click Apply and OK to save changes.

If you’re having black bars in Windows 10, you should try to set scaling to Fullscreen. How do I remove the black bars on my screen? Simply try following the steps described above.

This solution applies to owners of Intel integrated graphics, but if you have any other integrated graphics card, you should have similar options.

5. Use the Ctrl+Alt+F11 shortcut

In order to remove black bars in games, a few users suggested using the Ctrl+Alt+F11 shortcut. According to them, you just need to press Ctrl+Alt+F11 while in-game and the black bars should disappear.

We have to point out that using this shortcut will change your desktop resolution, so you’ll have to change it back after you’re done with your game.

6. Run games in windowed fullscreen mode

  1. Go to Control Panel and change the display resolution to 4:3 resolution.
  2. Start the game that has issues with black bars.
  3. Go to video options and change the mode to windowed fullscreen.

Although this workaround can help you, you’ll have to change the resolution to the original value once you’re done playing.

7. Check Override the scaling mode in Nvidia Control Panel

  1. Open Nvidia Control Panel.
  2. Navigate to Adjust desktop size and position.
  3. Check Override the scaling mode set by games and programs.
  4. Optional: Check Full-screen scaling mode from the list of options.
  5. Click Apply to save changes and check if the problem still persists.

Seeing black bars while playing games on Windows 10? You might have to change a few options in Nvidia Control Panel. To do that, follow the aforementioned steps.

How do I get rid of black bars in Windows 11 games?

Since Windows 11 is really not that different from its predecessor – except for a few design and perhaps, gaming-oriented improvements – you can go ahead and apply all the fixes recommended above.

For instance, many users want to know how to remove black bars from CSGO in Windows 11, but obviously, the issue can be found in other games as well. We’re confident that these tips will also help solve your black bars while gaming issues.

Finally, if your Firewall is ruining your gaming experience, here’s how to fix Windows Defender when it is closing games. This will get rid of the issue once and for all.

Black bars in games on Windows 10 can be quite distracting, but we hope our solutions helped you solve your problems.

The Media Is Write Protected: 5 Methods to Remove It

We use all sorts of drives to store our data, but sometimes you might get The media is write protected message while trying to do so.

This error is somewhat similar to System cannot write to the specified device error, which will cause you problems while saving data.

Luckily, there’s a way to deal with this issue, and in today’s guide, we’re going to show you the best methods that you can use to fix this problem.

Why are my files suddenly write-protected?

This issue can occur due to several reasons:

  • Software glitches – Sometimes, certain software can give you this error. Reinstalling the application usually fixes the issue.
  • Drive errors – In some instances, drive errors can cause this issue. Scan your drive to fix these problems.
  • Your settings – Sometimes, files and drives can have certain settings that prevent writing. Change them to fix the issue.

How can I fix The media is write protected error?

Before we start, there is a simple check that you need to perform:

  • Check for lock switch – The media is write protected on an SD card, and some USB drives can appear due to the lock switch. If your device is locked with it, you won’t be able to write data to it.

1. Reinstall the software that is giving you this error

  1. Press Windows key + X and choose Apps and features.
  2. Select the application that is giving you this error.
  3. Click on Uninstall to remove it.
  4. Once the software is removed, install it again.

Users reported this issue with uTorrent software, but if you’re having this problem with another software, be sure to give this method a try.

2. Check your disk for errors

  1. Press Windows key + X and choose Windows PowerShell (Admin).
  2. Enter the following command and press Enter: chkdsk c: /f
  3. Wait for the scan to finish.

If you’re getting The media is write protected on hard drive your hard drive, be sure to give this solution a try.

Note icon NOTE
If you get this error message on a different drive, enter its letter instead of C in step 2.

3. Use diskpart

Note icon NOTE
Diskpart is an extremely powerful tool, and we’re not responsible for any issues or file loss that might occur while using it.
  1. Connect your USB drive to the PC.
  2. Press Windows key + X and choose Windows PowerShell (Admin).
  3. Once it opens, enter diskpart
     
  4. Now enter list disk
  5. Use the file size value to find the desired disk. Note, this will probably be different on your PC. We used select disk 2
  6. Lastly, run the following command: attributes disk clear readonly

If case you’re getting The media is write protected in diskpart, perhaps is time to format your drive.

4. Change folder properties

  1. Locate the directory that is giving you this error.
  2. Right-click it and choose Properties.
  3. Make sure that Read-only option isn’t checked and click on Apply and OK.

After doing that, check if the problem is still there.

5. Tweak the StorageDevicePolicies key

  1. Press Windows key + R. Enter regedit and click OK.
  2. Navigate to the following key:  Computer\HKEY_LOCAL_MACHINE\SYSTEM\CurrentControlSet\Control
  3. In the left pane, navigate to StorageDevicePolicies key. If you can’t find it, move to the next step.
  4. Right-click the Control key. Now expand the New section and select Key.
  5. Name the new key StorageDevicePolicies and move to it.
  6. Look for WriteProtect DWORD in the right pane.
  7. If it’s not available, right-click the empty space and choose New. Next, select DWORD (32-bit Value).
  8. Name the new DWORD WriteProtect. Double-click it to open its properties.
  9. Check if its Value data is set to 0. If not, change it.

There you go; we hope that the solutions listed above helped you fix this error message. If you’re having additional problems, visit our Error writing to file guide for more information.

Did you find a different solution that worked for you? Let us know in the comment section below.

Best Font Manager for Windows 10 & 11 [Out of 15 Tested]

Font manager software enables you to organize large font collections more efficiently.

The best font manager programs include options and tools for activating and deactivating fonts, organizing them into libraries and groups, previewing and printing sample glyphs, searching font collections, and more besides.

As such, a font manager is a fairly essential bit of kit for anybody who needs to utilize a wide range of fonts for graphics, documents, and website design.

These are a few of the best font management software for Windows 10 and other platforms.

Product nameKey featureDuplicate fonts finder
Adobe FontsFont finder tool❌
TypografFont database sets✅
FontBaseFree usage for everyone❌
NexusFontFree and simple UI✅
Suitcase FusionCloud-based manager for Windows & Mac✅

What are the best font management tools for Windows 10 PCs?

Adobe Fonts – More than 20,000 fonts

adobe fonts

If you use the Adobe Cloud desktop app, the best tool to manage your fonts is Adobe Fonts. Not only that, but you also get unlimited access to over 1,000 fonts that you can use across your projects.

Using Adobe’s library of fonts is very easy. First, you browse through the list of available fonts to find the one that best suits the direction of your current project.

Once you’ve selected the font you want to use, simply use the toggle to activate it.

Keep in mind that Adobe recommends removing the fonts no longer in use.  In this manner, you’ll optimize the performance of your Adobe tools and the font menu will stay nice, clean, and decluttered.

Other interesting features of Adobe Fonts include:

  • Mark your favorite fonts to find them quicker next time you need to use them
  • View your font history
  • Manage your fonts
  • Create custom fonts

Adobe Fonts

This tool not only has great integration with other Adobe software but also offers access to over 1,000 fonts.
Check price Visit Website

Typograf – Compare and print fonts

Typograf font comparison

Typograf is a lightweight and straightforward font manager that provides a comprehensive overview of installed TrueType, OpenType, Type 1, system, bitmap, and printer fonts.

The software is compatible with Windows platforms from XP to 10.

It is available at a pretty low price, with volume discounts, and you can try out an unregistered version of Typograf for a month.

Typograf is a font manager with a clear and straightforward UI design and a variety of handy font tools and options.

You can utilize the software to establish a database archive for fonts, install and uninstall fonts, organize them with Sets, print up to 80 fonts on a single A4 page, preview various font types and compare font tables.

The tool provides comprehensive font properties that include file data, style, designer, version, Unicode character set, typeface classification, and other details.

This software also includes a handy tool that searches for duplicated fonts so you can erase duplicates.

Typograf

If you like fonts, you’ll love the great typography instruction in the Help file, which includes a typeface history.

FontBase – Elegant UI

Best Font Manager for Windows

FontBase is relatively new software for 64-bit Windows 10/8/7, Linux, and Mac platforms. This font manager enables you to edit and customize your fonts as well as organize them.

The software is freeware that you can add to Windows by pressing the Download for Free button below.

FontBase’s live text editing is what really sets this software apart from some of the other alternatives. It enables users to customize font styling and provides real-time previews of adjustments made.

FontBase users can activate their fonts without installing them, compare fonts by pinning them and build favorite font collections.

Furthermore, it also enables you to quickly select and utilize fonts from the Google Fonts collection.

As this is still relatively new software, you can also expect plenty of updates that will further enhance FontBase.

⇒ Get FontBase

NexusFont – Font manager for Windows

NexusFont is a highly-rated freeware font manager that has an appealing and intuitive UI design and an efficient font management system.

The software is compatible with most Windows platforms, and it also has a portable version that you can add to a USB drive.

NexusFont’s multi-panel UI displays your font list alongside the font library and font details.

You can select color, bold, italic, underline, and style font-formatting options from the toolbar at the top of NextFont’s window.

NexusFont users can quickly install and uninstall fonts from the software’s context menu, find duplicate fonts and even export fonts as images.

You can also organize selected fonts into Set groups and quickly filter and sort the fonts by adding tags to them.

So this software pretty much has all the tools and options most will probably need from a font manager.

⇒ Get NexusFont

Suitcase Fusion – Desktop or cloud-based tool

Suitcase Fusion is one of the industry-standard font managers for 64-bit Windows 10, 8, and 7 platforms that support a variety of font formats.

It is an industry-standard software because of its compatibility with the Adobe and QuarkXPress design applications. Suitcase Fusion is retailing at $119.95, which might not seem the best value.

However, this software includes many innovative features that few other alternative font managers can match; and it also comes with a separate Font Doctor package that fixes corrupted fonts.

Suitcase Fusion provides many handy font management tools and options.

The software enables you to organize fonts into various libraries, create Set font lists within libraries, activate and deactivate your fonts, save your searches, select numerous search filters, and more.

Suitcase Fusion connects with the Google Font collection so that you can quickly access those fonts.

A more novel aspect of Fusion is its Adobe Creative Cloud application integration that enables you to browse your full font collection from within Adobe Photoshop with the Extensis Font Panel.

TypeSync is another novel addition to Suitcase Fusion that enables you to cloud-sync fonts between two PCs.

The software also provides automatic font management with Type Core that automatically activates and deactivates fonts when you open applications.

So this is a font manager with many unique tools and features.

⇒ Get Suitcase Fusion

Those are the crème de la crème font managers for Windows 10 that you can organize and browse font collections with.

Of those selected, Adobe Fonts has the best design application support and is probably the most innovative software.

However, FontBase and NexusFont are freeware alternatives that still include all the essential font manager tools.

Nevertheless, these tools will help you become more creative and will give a real artistic sense to your projects.

What font management software do you use? Do let us know in the comments section below.

AutoKMS.exe: Here’s how it works and how to remove it

The virus threat has always been there but nowadays, it’s rising to be a major problem for both individual users and big companies.

There are many malware signatures circulating freely, but one that’s commonly known is AutoKMS.

Today, we brought to you details about this software with ways to remove it from your system for good. So, if you bump into AutoKMS in Windows 10, make sure to check the explanation below.


What is AutoKMS.exe and how can I remove it?

1. Discover what AutoKMS.exe is

AutoKMS virus is not a virus per se, it’s more of a hack tool. Most of the time users download it intentionally.

They want to crack or activate unregistered Microsoft products, and therefore bypass the security measures, and avoid payment.

AutoKMS is graded as a low or medium threat. Most of the time, the unregistered software that comes with it is the real threat, like the Trojan virus.

On the other hand, it’s still an illegal third-party tool, so you can never be sure what you’re looking at. Since it connects to the remote host, there are a dozen unwanted scenarios.

It can grant access to hackers or download malicious software and much more. Some Microsoft technicians claim that AutoKMS is a variation of the Troyan virus, but not all go that far.

Simply because you can uninstall it anytime, and that’s just not the case with Trojan viruses.

Now, you might ask how it works. Basically, once you’ve downloaded a pirated version of, let’s say, Microsoft Office 2016, you’ll need AutoKMS to activate it.

You’ll be advised to disable the antivirus, and that’s not a smart thing to do. The tool can run in the background with the portable version or it can be installed just like any other application.

It connects to remote servers to mimic Microsoft’s KMS Activation process. Then, it activates your license for up to 180 days.

After expiration, you need to run it again and, voila, you’ll get a new license for 180 days.

It sounds great but it’s not. For various reasons. First, pirated versions of Windows or MS Office are not safe to use. Most of them might serve as a testing ground but not much more.

Second, large installation packages are heaven for hackers, where they can tamper with files and add whatever they want.

Additionally, if you use AutoKMS with original Microsoft products, there’s a great chance that things will go south for you.

Due to security measures, the whole structure can crash or substantially drop in performance. Therefore, we advise you to remove it as soon as possible.


2. Uninstall AutoKMS like any other app

  1. In the Search bar, type Control and open Control Panel.
  2. In the Category view, click on Uninstall a program.
  3. Find AutoKMS and uninstall it.
  4. Remove the downloaded installation files.

As we already stated above, you can simply uninstall it. Navigate to Control Panel and remove it just like any other application. If you’re not sure how to do it, follow the instructions above.


You can’t open Control Panel? Take a look at this step-by-step guide to find a solution.


3. Get rid of AutoKMS by using dedicated malware tools

The best way to remove all malware from your computer is to use an antivirus or antimalware dedicated tool.

However, don’t you imagine that we’re talking about a tool for advanced users. This anti-malware software and malware removal is easy to use and can help you forget all about AutoKMS.exe.

Since it is a modern all-in-one solution, it is lightweight and based on artificial intelligence and machine learning to keep your data safe even from the latest online threats.

TotalAV

TotalAV

Remove malware and protect your computer with one of the best modern antivirus solutions.
Free trialVisit website

4. Perform a deep scan with Windows Defender

  1. Open the Settings app by pressing the Windows+ I hotkey combination.
  2. Select Update & Security.
  3. Open Windows Security or Windows Defender from the left pane.
  4. Choose Virus & threat protection.
  5. Click on Scan options and select Microsoft Defender Offline Scan.windows defender offline scan
  6. Save everything before you proceed because the PC will restart.
  7. Wait for the process to finish.

Follow the instructions above to perform a deep scan with Windows Defender. Your PC will restart and perform a thorough search for any malicious software and remove it.

If you need more info on how to perform a full system scan directly from Windows Security Center, don’t hesitate to check our dedicated guide.


After that, you should be in the clear. In addition, it’s your decision whether you’ll uninstall and delete the pirated program or not. But, always have in mind that free software tools aren’t always safe.

AutoKMS is only one suspicious piece of pirated software and there are others, much more dangerous files out there, carefully hidden within the installation.

We also recommend you to keep your computer safe by installing a great malware remover tool. If you aren’t sure which is the best, check our detailed guide for more information.

Before you leave, we have a guide on how to remove SppExtComObjHook.dll, and since this file is associated with AutoKMS, you should check it out for more information.

What’s your experience with AutoKMS? Tell us in the comments section below. We also have guides on Kmsss.exe and KMService.exe so check them out to learn more.

How to Fix the Shutdown Button Not Working on Windows 10

Some users complaining that their Laptop is not shutting down. Now, it is the Windows 10 shutdown button not working issue that is troubling users.

That problem is usually due to the Start Menu not working. However, it can also be caused by power settings issues, or the button itself is not working. Luckily, we have all the situations covered below.

How do I fix the Shutdown button if it’s not working?

1. Replace the Intel Management Interface driver

  1. Press Windows key + X and choose Device Manager from the list.
    Shutdown button not showing
  2. Double-click the System Devices option to expand it.
    system devices shutdown button not working
  3. Right-click Intel(R) Management Engine Interface.
  4. Choose the Properties options.
    properties
  5. Now, click the Driver tab in the top menu.
    driver tab
  6. Check the version of the driver to see if it is 11.
    driver version
  7. If it is version 11, go to Intel’s website and download an older or later version.
  8. When you try to install an older version, you’ll be notified that you already have a newer version.
  9. Click Yes to overwrite it.

According to the reports, the Intel Management Interface driver can cause the shutdown button not working issue on Windows 10 and 11, so to fix it, you need to install the older version.

Currently, version 11 is the leading cause of some laptop shutdown issues, so let’s check first what version of the driver you’re using.

Otherwise, you can use specialized driver updating software and get the correct driver versions for your PC.

2. Put your computer into sleep mode and then shut it down

  1. Press the Windows key and click the Power icon.
    power shutdown button not working
  2. Click the Sleep option.
    sleep option
  3. Wake the computer from sleep and sign in.
  4. Now, shut down your PC.

This is more of a workaround that will temporarily fix the shutdown button not working problem. But it’s not a permanent solution, so keep that in mind.

3. Use a shutdown command to shut down your PC

  1. Press the Windows key + R to open the Run dialog.
  2. When the Run dialog opens, enter the string below and click OK: %SystemRoot%System32Shutdown.exe -s -t 00 -f
    Shutdown button not showing

After running this command, your PC should shut down. This is easy to get past the shutdown button not working issue. If this command works, you might want to create a shortcut to run it faster.

This is relatively simple, and you can do it by following these steps:

  1. First, right-click your Desktop and choose New > Shortcut from the menu.
    When I click shutdown nothing happens Windows 10
  2. In the Type the location of the item field, enter the string below, and click Next to continue: %SystemRoot%System32Shutdown.exe -s -t 00 -f
    Shutdown button not working laptop
  3. Change the shortcut’s name if you want, and click on Finish.
    Shutdown button disappeared

You can permanently shut down your PC using the shutdown command. Remember that this is a workaround and won’t fix the core problem. But it will allow you to shut down your PC with just a few clicks.

4. Install the latest updates

  1. Press the Windows key + I to open the Settings app.
  2. Choose the Update & Security option.
    update nd security
  3. Now in the right pane, click on Check for updates button.
    check for update

Windows 10 is a solid operating system, but inevitable glitches and bugs can sometimes appear. For example, if the shutdown button is not working on your PC, the problem might be a bug in your system.

The best way to permanently fix this problem is to install the latest updates. If you can’t open the Setting app in Windows 10, look at this article to solve the issue.

5. Change power button settings

  1. Press the Windows key + S and enter power settings.
  2. Select Power & sleep settings from the menu.
    Start Menu shutdown not working
  3. Click Additional power settings in the right panel.
    additional shutdown button not working
  4. Now click Choose what the power buttons do from the menu on the left.
    choose what
  5. Set When I press the power button to Shut down.
  6. Now, click on Save changes.
    what does

If the shutdown button is not working on your PC, the problem might be your settings. The power button can be configured to do several things, and sometimes it might not turn off your PC.

After that, your power button will be configured to shut down your PC whenever you press it.

6. Use the Win + X shortcut

  1. Press the Windows + X keys.
  2. Select Shut down or sign out.
  3. Now, choose Shut down from the menu.
    Start Menu shutdown not working

If the shutdown button is not working, you might be able to turn off your PC using this workaround. In addition, Windows 10 comes with a helpful menu called Win + X, which holds several valuable shortcuts.

You can easily access specific applications using this menu, but you can also turn off your PC.

After doing that, your PC should shut down without any problems. Remember that this is just a workaround, so you’ll have to use this method whenever you want to shut down your PC.

7. Turn off Fast Startup

  1. Press the Windows key, type power settings, and select Power & sleep settings.
  2. Click the Additional power settings option.
    additional shutdown button not working
  3. Select Choose what the power buttons do in the left pane.
    choose what
  4. Now, click on Change settings that are currently unavailable.
    change settings shutdown button not working
  5. Uncheck the box for Turn on fast startup (recommended).
  6. Click the Save changes button.
    turn on fast  shutdown button not working

Windows 10 has an exciting Fast Startup feature that allows your PC to start faster. The feature combines shutdown and hibernation into one, allowing your PC to start faster.

However, specific issues like the shutdown button, not working problem can occur due to this feature. And many users are suggesting turning it off.

After doing that, this feature should be disabled completely. Remember that your PC might boot slower than before after turning off this feature, but the shutdown problem should be resolved entirely.

8. Turn off hibernation

  1. Press Windows key + X and choose Command Prompt (Admin) or PowerShell (Admin) if Command Prompt is unavailable.
    When I click shutdown nothing happens Windows 10
  2. When Command Prompt starts, enter the command below and press Enter: powercfg.exe /hibernate off
    Shutdown button not working laptop

Hibernation is a helpful feature that will shut down your PC and save all your open files allowing you to continue where you left off.

However, sometimes this feature can cause the shutdown button not working issue. After that, the hibernation feature will be turned off, and the shutdown problem will be resolved.

9. Reset your BIOS

If the shutdown button is not working, the problem might be your BIOS configuration. BIOS works as a configuration utility for your PC, and sometimes specific BIOS settings can interfere with your PC and prevent it from shutting down properly.

Many versions of BIOS allow you to choose between several different shutdown modes, and sometimes choosing the wrong one can cause this issue to appear. However, you can fix that problem simply by resetting BIOS to default.

To do that, you need to enter BIOS and select the reset option. To see how to enter BIOS and reset it, we advise you to check your motherboard manual for detailed instructions.

If Windows skips BIOS, solve the issue quickly by following this fantastic guide.

In addition, users have reported that removing Intel Rapid Storage and Intel Security Assist helps fix this problem. So you might want to check out similar fixes just in case your Windows 10 laptop won’t shut down.

Why can’t I shut down my PC?

If your computer is not shutting down, it might be because of broken or corrupt system files. You can fix this quickly by running the Windows built-in repair tools or specialized third-party software.

Also, the issue might be down to the Fast Startup feature. We have shown how to disable this feature in this guide.

That would be all. We hope these solutions helped you to fix the shutdown button not working in Windows 10 issue. 

While still on shutdown issues, you can check our detailed guide to schedule automatic shutdown on Windows 10. We also have an article on what to do if Windows shuts down instead of restarting, so you might want to check it out.

For any more questions or suggestions, reach for the comments section below.

Wi-Fi is not Connecting Automatically on Windows 10/11

Many of us use Wi-Fi to connect to the Internet, but sometimes issues with Wi-Fi can occur.

According to users, Windows 10 Wi-Fi isn’t connecting automatically, and today we’re going to show you how to fix that problem.

How can I fix a Wi-Fi that doesn’t connect automatically?

1. Change the properties of your wireless connection

If Windows 10 Wi-Fi isn’t connecting automatically, you might be able to fix the problem by changing the properties of your wireless connection.

This is relatively simple, and you can do it by following these steps:

  1. Click the Internet access icon in your Taskbar.
  2. A list of all wireless connections will appear.
  3. Right-click your connection and choose Properties from the menu.
  4. When Properties window opens, go to Connections tab.
  5. Now check Connect automatically when this network is in range option and save changes.

After enabling this option the problem should be resolved and you’ll be able to use your wireless connection without any issues.

2. Reinstall your Wi-Fi driver

  1. Press Windows Key + X to open Win + X menu and choose Device Manager from the list.
      
  2. After Device Manager starts, you need to locate your Wi-Fi device.
  3. Right-click the Wi-Fi device and choose Uninstall device from the menu.
  4. The confirmation message will now appear.
  5. Click on Uninstall to proceed.
  6. After doing that, click on Scan for hardware changes icon.
  7. Windows will now scan your system and install the missing drivers.

According to users, you might be able to temporarily fix this problem by reinstalling your Wi-Fi driver. Once your driver is installed, the problem with Wi-Fi should be resolved completely.

Few users claim that this is just a workaround, so if the problem appears again you might want to download and install the latest driver for your Wi-Fi adapter.

Update drivers automatically

After uninstalling the drivers, you might want to search for them on the manufacturer’s website. It is very important to choose the right driver versions.

However, if you don’t want to risk installing an older version, or the wrong driver, then you might as well use a third-party drive updater to do the job for you instead.

⇒ Get Fortect Driver Updater

3. Change Group Policy settings

To fix this problem, do the following:

  1. Press Windows Key + R and enter gpedit.msc.
  2. Press Enter or click OK.
  3. In the left panel, navigate to Computer Configuration > Administrative Templates > System > Internet Communication Management > Internet Communicating Settings.
  4. In the right panel, locate Turn off Windows Network Connectivity Status Indicator active tests and double click it to open its properties.
  5. Select Not Configured from the menu and click on Apply and OK to save changes.

Group Policy is a useful feature that allows you to make system-wide changes on your PC. According to users, you might be able to fix this problem simply by making a few changes using the Group Policy Editor.

We have to mention that this feature is available only on Professional and Enterprise versions of Windows, so if you’re using any other version you might not have this feature available.

By default, this policy is set to Not Configured, but for some reason, it might become enabled on your PC, so we advise you to check your Group Policy settings.

Most Windows 10 users have no idea how to edit the Group Policy. Learn how you can do it by reading this simple article.

4. Remove all saved Wi-Fi networks

  1. Open the Settings app. You can do that quickly by pressing Windows Key + I.
  2. Once the Settings app opens, navigate to Network & Internet section.
  3. In the left panel, navigate to Wi-Fi category. Now locate Manage Wi-Fi settings in the right panel and click on it.
  4. Locate Manage known networks and click it.
  5. Now you should see a list of all networks that you’ve connected to in the past. To forget a network, simply select it and click on Forget. Now repeat these steps for all networks on the list.

If Windows can’t connect to a Wi-Fi network automatically, you might be able to fix the problem by removing all saved Wi-Fi networks.

You can also forget all saved networks by using the Command Prompt. This is a bit advanced solution since you have to use a command line, so if you’re a basic user you might want to skip it.

To delete saved Wi-Fi networks with Command Prompt, you need to do the following:

  1. Press Windows Key + X and choose Command Prompt (Admin) from the menu.
  2. If you don’t have Command Prompt available on the list, you can choose PowerShell (Admin) instead.
  3. When Command Prompt opens enter this line and press Enter to run the command:
    • netsh wlan show profiles
  4. After doing that, you’ll see the list of all saved Wi-Fi networks.
  5. To delete a saved Wi-Fi network, simply enter this line and press Enter to run the command:
    • netsh wlan delete profile name="Name of the Wi-Fi network"

This method is a bit advanced, but it might be faster to use if you’re familiar with Command Prompt. Both methods from this solution will have the same results, so feel free to use any of them.

After removing all saved networks, you just have to connect to your network and enter its password and the problem should be resolved.

Some users claim that you just have to delete your own Wi-Fi network from the list of saved networks, so be sure to try that first.

5. Use PROSet software

Several users reported that using the PROSet software fixed the problem for them. For some reason, there was a one-minute delay on their PC before the computer could connect to a Wi-Fi network automatically.

However, after installing PROSet software the problem was completely resolved.

According to users, they used a Cisco wireless router, so that can also be a part of the problem. Even if you don’t use Cisco’s network device, feel free to try this software.

If you have a Wi-Fi exclamation mark on Windows 10, check our dedicated guide that will help you solve the problem.

6. Modify your registry

  1. Press Windows Key + R and enter regedit.
  2. Click on OK or press Enter.
  3. Optional: Modifying the registry can cause some problems with your PC if you’re not careful, therefore it’s always a good idea to create a backup just in case anything goes wrong.
    • To do that, click on File > Export.
  4. Set Export range to All and enter the desired file name.
  5. Choose a safe location and click on Save button.
  6. Now you’ll have a backup of your registry ready. In case any problems occur after modifying your registry, you should be able to fix them simply by running this file.
  7. Navigate to this key in the left panel:
    • HKEY_LOCAL_MACHINESOFTWAREPoliciesMicrosoftWindowsWcmSvc
  8. Expand WcmSvc key and look for GroupPolicy key.
    • If this key isn’t available, you need to create it manually.
    • To do that, right-click WcmSvc and choose New > Key from the menu.
    • Now enter GroupPolicy as the name of the new key.
  9. Navigate to the GroupPolicy key and in the right pane click on empty space and choose New > DWORD (32-bit) value.
  10. Enter fMinimizeConnections as the name of the new DWORD.
  11. After doing that, close Registry Editor and restart your PC.

Your registry holds sensitive information, and by modifying it you can change hidden Windows settings.

Several users claim that they fixed the problem simply by making a couple of small changes to their registry.

Once your PC restarts, the problem should be resolved and your PC will automatically connect to the Wi-Fi network. If any problems occur, you can simply delete the GroupPolicy key you created to fix them.

If you can’t edit your Windows 10’s registry, read this handy guide and find the quickest solutions to the issue.

7. Turn off the Fast Startup feature

  1. Press Windows Key + S and enter control panel. Now choose Control Panel from the menu.
  2. Alternatively, you can just open the Start Menu and search for Control Panel.
  3. When Control Panel opens, navigate to Power Options.
  4. When Power Options window opens, click on Choose what the power button does option from the menu on the left.
  5. Click on Change settings that are currently unavailable.
  6. Uncheck Turn on fast startup (recommended) option and click on Save changes.

Windows 10 has a useful feature called Fast Startup. This feature is enabled by default, and it will save your data when turning off your PC.

As a result, your PC will boot faster the next time you turn it on. This is a useful feature, but it can sometimes cause certain issues to appear.

Users reported that Fast Startup is the cause of this problem.

After turning this option off, your PC might boot a bit slower, but your Wi-Fi problems should be resolved.

You can’t open Control Panel? Take a look at our step-by-step guide to finding a solution.

8. Install the latest drivers manually

  1. Download and install the latest drivers for your wireless adapter.
    • If possible, try to download the drivers without any additional wireless configuration software.
  2. Start Device Manager and locate your wireless device.
  3. Right-click the wireless device and choose Update driver.
  4. Choose Browse my computer for driver software.
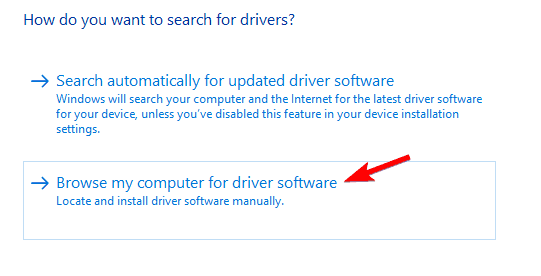
  5. Now click on Let me pick from a list of available drivers on my computer.
  6. You should see several different drivers available. Select the driver from your wireless adapter manufacturer and click on Next.

These types of problems are usually caused by your drivers, but in most cases, you can fix them simply by updating your drivers to the latest version.

After you install the driver manually, the problem should be resolved and you’ll be able to connect to the wireless network without any problems.

9. Replace your wireless adapter

If Windows 10 can’t automatically connect to the Wi-Fi, you might want to try replacing your wireless adapter. Some wireless adapters aren’t fully compatible with Windows 10, and that can be the case with your adapter.

If that’s so, you need to replace your wireless adapter with a different model and check if that solves the problem. This is a drastic solution, and you should use it only if other solutions from this article can’t fix your problem.

Most wireless adapters are fully compatible with Windows 10, but if you’re using an unknown brand, you might experience this problem on your PC.

If you’re having wireless adapter or access point issues on Windows 10, take a look at this awesome guide to solve them.

10. Remove files from Wlansvc directory

  1. Press Windows Key + R and enter services.msc. Press Enter or click OK.
  2. A list of all available services will now appear. Locate WLAN AutoConfig service, right-click it and choose Stop from the menu.
  3. After stopping the service, minimize the Services window.
  4. Open File Explorer and go to this directory:
    1. C:ProgramDataMicrosoftWlansvc
    2. If you can’t find this directory, be sure to reveal hidden files and folders.
    3. To do that, simply click on the View tab and then check Hidden items option.
  5. Once you enter Wlansvc directory, delete all files and directories from it except Profiles directory.
  6. Now navigate to the Profiles directory. Delete all files and directories except Interfaces folder.
  7. Open Interfaces folder and delete all files and folders from it.
  8. Now go back to Services window, locate WLAN AutoConfig service, right-click it and choose Start from the menu.
  9. Connect to your wireless network once again. Be sure to check the option to automatically connect to the selected network.

This problem can sometimes be caused by files inside the Wlansvc directory.

To fix the issue, you need to disable the WLAN AutoConfig service and remove the problematic files.

After doing that, you just have to restart your computer and check if that solves the problem.

A few users are also suggesting going back to this directory and locating the newly created .xml file in one of the folders:

C:ProgramDataMicrosoftWlansvcProfilesInterfaces 

This .xml represents your network connection, and to fix the problem, you need to right-click this file and choose Properties from the menu.

Now go to the General tab and check the Read-only option in the Attributes section. Click on Apply and OK to save changes.

According to users, it seems that Windows was modifying the .xml file causing this problem to appear. By setting the file to Read-only mode, the problem was resolved completely.

11. Change the security permissions

  1. Navigate to C:ProgramDataMicrosoftWlansvc directory.
  2. Locate the Profiles directory and right-click it.
  3. Choose Properties from the menu.
  4. Go to Security tab, and check if Administrators group is available in Group or user names section.
    • If not, click the Advanced button.
    • If Administrators group is available, go to Step 7.
  5. Now click on Add button.
  6. Click on Select a principal.
  7. In the Enter the object names to select the field enter Administrators and click on Check Names.
    • If everything is in order, click on OK.
  8. Check Full control option and click on OK to save changes.
  9. Select Administrators and click on Edit.
  10. Select Administrators and make sure that Full control option is checked in Allow column.
  11. Now click on Apply and OK to save changes.
  12. Go to Network and Sharing Center and try to add your wireless connection.

As we already mentioned, your Profiles folder can sometimes cause problems with Wi-Fi to occur.

After doing that, the problem should be resolved and you’ll be able to connect to your wireless network without any issues.

12. Create a new wireless network connection

  1. Open Control Panel and choose Network and Sharing Center.
  2. When Network and Sharing Center opens, click on Set up a new connection or network.
  3. Choose Manually connect to a wireless network option and click on Next.
  4. Enter the network name and required settings. In addition, be sure to check to Start this connection automatically and Connect even if the network is not broadcasting options.
  5. Now click on Next and follow the instructions to complete the process.

According to users, you might be able to solve this problem simply by creating a new wireless network connection. Before you do that, you might have to remove your wireless connection.

After doing that, you’ll have a new connection ready and Windows will automatically connect to it.

If your Wi-Fi icon is missing on Windows 10, get it back by following this simple guide.

13. Remove any third-party wireless software

  1. Open Device Manager, locate your wireless adapter, right-click it and choose Update driver from the menu.
  2. Select Browse my computer for driver software.
  3. Click the Browse button and locate the wireless drivers on your PC.
    • Usually, they’ll be on a CD that you got with your wireless adapter.
    • If you downloaded the drivers online, be sure to check your download directory.
  4. After you select the driver directory, Check Include subfolders option and click on Next.
  5. Follow the instructions on the screen to complete the process.

Many wireless adapters come with their own software that can help you configure your wireless network. To fix this problem, you need to remove any wireless configuration software that came with your wireless adapter.

Keep in mind that removing this software can also remove drivers for your wireless adapter.

To fix the issue, you need to reinstall your drivers, but be sure not to install any wireless configuration software. The simplest way to do that is to install the drivers manually.

In some cases, Windows will ask you if you want to use Windows or third-party software to control the wireless device. If that happens, be sure to choose Windows.

Users reported that sometimes third-party wireless control software can start automatically with Windows causing this problem to appear.

To fix the issue, you need to manage your startup items and prevent the software from starting automatically with Windows.

Users reported problems with Netgear software, but the problem can also appear with software from other manufacturers.

14. Set WLAN AutoConfig service to Automatic

  1. Open the Services window.
    • We already showed you how to do that in Solution 9, so be sure to check it for detailed instructions.
  2. When Services window opens, locate WLAN AutoConfig service and double-click it to open its properties.
  3. Set Startup type to Automatic.
  4. Go to Dependencies tab and check the list of services that are dependent on WLAN AutoConfig.
  5. Write down those services since you’ll need them for the next step. Click OK and Apply to save changes.
  6. Now locate all dependant services from the previous step and make sure that their Startup type is set to Automatic.

According to users, the problem can occur if the WLAN AutoConfig service isn’t set to Automatic. After making the necessary changes in the Services window the problem should be resolved entirely.

15. Perform DISM and SFC scan

  1. Open Command Prompt as administrator.
  2. When Command Prompt opens, enter sfc /scannow and press Enter to run it.
  3. The SFC scan will now start. The scan can take a while, so don’t interrupt it.

File corruption can occur on any PC, and sometimes if your system files are corrupted you might experience this problem.

According to users, you might be able to fix this issue by using the SFC scan.

If the SFC scan can’t fix the problem or if you can’t run it at all, you might want to use the DISM scan instead. To do that, start Command Prompt as administrator and enter:

Dism /Online /Cleanup-Image /RestoreHealth.

After the DISM scan is completed you should be able to run an SFC scan without any problems.

16. Change your device’s power settings

  1. Start Device Manager.
  2. Locate your wireless adapter on the list, right-click it and choose Properties from the menu.
  3. When Properties window opens, go to Power Management section.
    • Now locate Allow the computer to turn off this device to save power option and check it.
    • Click OK to save changes.

Several users reported that Windows 10 Wi-Fi isn’t connecting automatically after waking up their PC from hibernation. According to users, the issue seems to be caused by your device’s power settings.

After enabling this option, your computer will always turn off your wireless adapter when your PC enters hibernation or Sleep Mode.

Users reported that this solution fixes this problem when waking your PC from hibernation, but feel free to try it even if you don’t use the hibernation feature on your PC.

Several users reported that this option automatically turns back off after you install a new build of Windows, so if you install any major update, be sure to turn on this feature again.

We also have to mention that a few users claim that disabling Allow the computer to turn off this device to save power option fixed the problem for them, so be sure to try it out.

17. Change your router settings

According to users, this problem can occur if you’re using both Ethernet and Wi-Fi connections on your PC. Sometimes your PC might prefer Ethernet over your Wi-Fi connection causing the problem to appear.

It seems that this issue is caused by your router settings, and in order to fix that problem, you need to do the following:

  1. Log in to your router. To see how to do that, we strongly suggest checking your router’s manual.
  2. Now click on Advanced and click Yes to confirm.
  3. Locate IGMP Proxy feature and choose Disable.
  4. Click on Apply to save changes.

After turning this feature off, the problem should be resolved and your PC will automatically connect to a Wi-Fi network without any problems.

Keep in mind that all routers are different, so you might need to take slightly different steps to disable this feature. For detailed instructions on how to disable this feature, we advise you to check your instruction manual.

18. Minimize the number of simultaneous connections

  1. Open Group Policy Editor. We showed you how to do that in Solution 1, so check it for detailed instructions.
  2. When Group Policy Editor opens, in the left pane navigate to Computer Configuration > Administrative Templates > Network > Windows Connection Manager.
  3. In the right pane, locate Minimize the number of simultaneous connections to the Internet or a Windows Domain and double-click it.
  4. Select Disabled and click on Apply and OK to save changes.
  5. After doing that, close Group Policy Editor.

According to users, you might be able to fix this problem simply by making a couple of changes in Group Policy Editor. To fix the issue, you just need to find and disable Minimize the number of simultaneous connections policy.

This setting prevents establishing multiple connections to the Internet, so if you’re already connected to the Internet using an Ethernet connection, your PC won’t connect automatically to the Wi-Fi network.

After disabling this setting, the problem with your Wi-Fi connection should be completely resolved.

19. Change your router’s security

This is just a workaround, so it might not be the best permanent solution. Changing your router’s security isn’t advised since some security standards are less secure than others.

By using this method you’ll reduce the security of your wireless network, so be sure to keep that in mind.

Several users claim that the problem appears while using WPA 2 security to secure the wireless network. According to users, switching the wireless security from WPA or WPA 2 to WEP fixed the problem for them.

We have to warn you that the WEP security standard is outdated, so it’s always better to use WPA 2 standard instead.

Almost all wireless devices are fully compatible with WPA 2 standard, and if your device has a problem with it, you might have to check its settings or update your drivers.

To switch to WEP security, you just have to log in to your router and select WEP security from the Wireless section. For more instructions on how to do that, we advise you to check your router’s instruction manual.

Once again we have to mention that WEP security is outdated, and if you’re going to use it, use it only as a temporary solution.

As you can see, this can be an annoying problem, but we hope that you’ll manage to solve it by using one of our solutions.

If you have any more questions, don’t hesitate to leave them in the comments section below and we’ll be sure to check them out.

How to Change or Reset Orbi Default Admin Password & Log In

The Orbi Home WiFi System from Netgear offers fast and reliable WiFi without dead zones. The system arrives with a default username and password out of the box.

The default Orbi password is typically admin for username and password for the password.

Now, what if you want to change the Orbi default password or if you have forgotten the password? Changing the Orbi default password is easy and takes not more than a few minutes.

This also applies if you want to recover your forgotten password.

Why is Orbi asking for admin password?

As previously mentioned, Orbi routers have a default password and username set up. Since the physical device has a management dashboard or an administrative web interface, admin credentials are required in order to access it.

The Orbi admin password you received by default is not extremely secure, which already provides a good reason to change it. In some cases, the Orbi default password might not work at all.

Orbi admin password not working issues are not so uncommon and they’re usually triggered by virus or malware infection on your computer. That’s an even better reason for you to change your Orbi admin password.

In this article, we take a look at how to change and recover the Orbi default password to keep your home network safe.

How do I change my Orbi admin password?

1. How do I find my Orbi admin password?

Orbi default password
  1. Open the web browser from a computer or mobile device that is connected to the Orbi network.
  2. Navigate to the Orbi login page.
  3. In the user name and password field, enter the default Orbi username and password.
    username – admin
    Password – password
  4. Most router manufacturers use admin and password as the default credential combination.

What is the default Orbi password? Here’s how to find out. While the default Orbi password is easy to remember, it is not secure.

Anyone with a basic understanding of the router can gain access to your router and the network.

To strengthen the security of your home WiFi network, make sure to change the default Orbi password and username.

2. How do I Change the Orbi WiFi default password?

    1. Open the web browser on your computer or mobile device. Make sure it is connected to the Orbi network.
  1. 2. Navigate to the Orbi login page.

  2. 3. It will ask you to enter the password. So, enter the following default Orbi username and password.

    • admin
    • password
  3. 4. Once logged in, open the Advanced option.

    Orbi default password
  4. 5. Go to Administration and select Set Password.

  5. 6. Enter the new password and username that you want to set.

  6. 7. Click Apply to save the changes.

  7. Make sure to enter a long password with a mix of special characters, numbers, and letters to strengthen it.

    If you find it hard to remember a long password or are afraid that you might forget it, try using a password manager to manage all of your passwords.

    Some users reported several Orbi default password not working issues. If this is also your case, or if you had changed your default password and then forgotten it, follow the steps below to recover your Orbi password.

3. How do I reset my Orbi admin password?

Orbi default password
  1. Navigate to the Netgear login webpage.
  2. Select the Forgot your password? option.
  3. In the Reset your password window, enter the email address that is associated with your Orbi account.
  4. Click Reset My Password.
  5. Netgear will send a password reset link to your email address.
  6. Open the link and enter your new Orbi password.
  7. Click on Submit to change the password.

Normally, it’s that easy to reset Orbi admin password. But you can always run into trouble and sometimes even the reset option seems to act out.

? Cannot reset Orbi admin password

If the conventional reset option fails to deliver, you can take it a step further and try either a soft or a hard reset.

The Orbi soft reset procedure implies:

  • Navigate to orbilogin.com and click the Cancel button
  • You will be asked to provide the serial number of your router and answer several security questions
  • Then, click Continue and return to the orbilogin.com password screen to change your password
Tip icon Editor’s tip
We advise you to clear the cache from your browser before trying the steps described above.

The Orbi hard reset or force reset procedure implies a more physical approach:

  • Find the reset button on your Orbi router
  • Press it down for up to 10 seconds or until it starts blinking
  • Resume the password-changing process as described above

Changing the Orbi default router password is easy if you haven’t changed the password earlier.

If not, you have to reset the password using your email account and set a new Orbi password to access the router admin panel.

Sorry an Error Has Occurred in OneDrive: 5 Ways to Fix It

Are you getting Sorry an error has occurred message when accessing OneDrive via your web browser? If yes, then you aren’t alone, because there are multiple users facing a similar issue. As per user reports, they are getting this error message when they try to access the OneDrive tab.

There could be several different reasons why you are getting the OneDrive Sorry an error has occurred message. Fortunately, in this guide, we will give you some quick ways via which you can apply and fix the problem at hand.

Why am I getting OneDrive Sorry an error has occurred message?

After some research, we have prepared a list that will give you most of the common factors because of which you will face the OneDrive Sorry an error has occurred message:

  • Browser cache is corrupt: Cache files if corrupt can cause multiple issues and can also trigger this error message when accessing OneDrive using a web browser.
  • Server issues: Official servers when down can also restrict you from accessing OneDrive.
  • Profile issues: Chances are that your profile is corrupt and is causing the issue.
  • Disable browser add-ons: Third-party add-ons might be conflicting with OneDrive, which is why you are getting the issue.

How can I fix OneDrive Sorry an error has occurred message?

Here are a few things that you can do before you jump ahead with the advanced troubleshooting solutions and try fixing the error:

  • Simply restart your PC and check if this fixes this issue.
  • Close your browser and wait for a few seconds before accessing OneDrive with it.
  • Check if your internet connection is working perfectly fine or not.
  • If there are some issues with the official servers, then you won’t be able to use all the features of the website or use the website at all. You can make use of websites such as Downdetector to check the current status of the OneDrive servers. If there is a server issue, then you can’t do much, and all you can do is wait for the developers to fix the servers.
  • If you are experiencing an issue with a particular browser, say Google Chrome, then we would suggest you check if the same problem exists on a different browser or not. For users looking out for an alternative browser, you can refer to our guide which lists some of the best and tested browsers you can try on your PC.

Now, let us check out the advanced solutions to fix the problem.

1. Clear browser cache

  1. Launch Google Chrome.
  2. Tap on the 3-dot menu icon at the top-right.
  3. Select Settings.
  4. Click on the Privacy and security tab on the left.
  5. Select the Clear browsing data option.
  6. Check the boxes for Cookies and other site data and Cached images and files.
  7. Hit the Clear data button.

Cache data stores all of your personalized settings for the browser as well as the websites that you visit to help facilitate loading all your settings faster.

However, in case these files go corrupt, you will experience issues with certain websites and also come across issues such as OneDrive Sorry an error has occurred.

2. Re-sign to OneDrive

  1. Open OneDrive website.
  2. Click on your profile picture.
  3. Select Sign out.
  4. Enter your Microsoft account details and sign back in.

Some issues with your Microsoft profile can also trigger the error message. In this case, you can sign out and sign back in and check if this resolves the issue or not.

3. Disable browser add-ons/extensions

  1. Launch your browser.
  2. Click on the 3-dot menu icon.
  3. Select More tools.
  4. Click on Extensions.
  5. Toggle off all the extensions, one by one.
  6. Relaunch your browser and check if this fixes the issue or not.

Alternatively, you can press Ctrl + Shift + N to open Google Chrome in Incognito mode, which disables the add-ons and other extensions. You can then check if the problem still exists or not. If the problem is resolved then you have to remove the extensions.

4. Check Internet Options settings

  1. Open the Start menu by pressing the Win button.
  2. Type internet options and open it.
  3. Click on the Advanced tab.
  4. Under the HTTP settings, check the boxes for Use HTTP 1.1, Use HTTP 1.1 through proxy connections, and Use HTTP2.
  5. Uncheck Use SSL 3.0.
  6. Click Apply and OK.
  7. Launch the browser.
  8. Go to the OneDrive website.
  9. Sign in and check if this resolves the issue or not.

For some users, using the above mentioned settings has helped resolve the OneDrive Sorry an error has occurred problem.

That is it from us in this guide. You can check out our guide to learn how to use multiple OneDrive on a single PC.

We also have a comprehensive guide that will give step-by-step instructions to move files from one OneDrive account to another.

For users looking for a guide to changing OneDrive sync settings on Windows 10, then you can refer to our guide. You can also learn about whether or not you can sync OneDrive to an external hard drive or not. Also, check out how you can share files on OneDrive with others.

This isn’t the only error, you can encounter, and we already tackled OneDrive error 1001 and error 0x8007017c in Windows in our previous guides, so don’t miss them.

We also have a complete guide on how to fix OneDrive error 0x8007016a with step-by-step instructions, so don’t miss it if you’re having this problem.

Let us know in the comments below, which one of the above solutions helped you resolve the problem.

11 Tips for Speeding Up File Transfer on Your PC [Updated]

Copying files from external media to your local storage is the most basic task of all. Especially, since the DVD Era is behind us and USB memory drives are used for basically all data transfers. The flash memory speeds up the reading/writing speeds substantially, and thus the emergence of the Solid State Drives was a rather expected next step.

However, lots of users’ reports state that their PCs are copying files slowly or slower than usual. Both from the external media and between different drives/partitions sharing the local storage or network.

This is not so unusual. And there are various factors why something like that would happen. We enlisted some ways to speed up your PC if it’s copying files slowly or slower than usual.

Your PC takes a while to copy files? Here’s why and how to speed it up

1. Check the HDD and external media for corruption

Let’s start by checking the state of your HDD or the external drive. The quickest way to do so is by using the built-in tool which can be found in the partition properties. Once you run it, it should locate the corrupted sectors and fix them if needed so.

Here’s how to run this tool on Windows 10:

  1. Open This PC or File Explorer.
  2. Right-click on the partition or drive and open Properties.
  3. Select the Tool tab.
  4. Under the “Error checking” section, click Check.Why is my computer copying files so slow

2. Disable the Auto-Tuning feature

If you’re having a hard time transferring files swiftly over the network, we suggest disabling the Auto-Tuning feature. This feature should monitor and dynamically adjust the buffer size of the receiving files. Thus, in theory, it should speed up the whole procedure of TCP data transfer. However, it also might cause problems and additionally slow down copying files over a network.

Here’s how to disable it in a few steps:

  1. Right-click on Start and open Command Prompt (Admin).
  2. In the command line, copy-paste the following command and press Enter:
    • netsh int tcp set global autotuninglevel=disabledWhy is my computer copying files so slow
  3. Try transferring files again and, if the problem isn’t resolved, don’t forget to re-enable the Auto-Tuning. Use the same command, just replace “disabled” with “normal” at the end of the line.

3. Turn Off RDC

RDC or Remote Differential Compression has a similar goal but it utilizes alternative ways to help you synchronize large chunks of data. It compresses the data during the network sync, but it can also be a drawback. That’s why we suggest disabling it. If the problem isn’t solved, you can always re-enable it and move onward through the list.

Here’s how to turn off RDC:

  1. In the Windows Search bar, type Turn Windows and open Turn Windows features on or off.
  2. Scroll down and uncheck the “Remote Differential Compression API support” box.Why is my computer copying files so slow
  3. Confirm changes.

4. Use a different USB port

This seems more than obvious but a lot of people ignore it for no apparent reason. Namely, if you have a 3.0 or 3.1 USB port, it should be your primary choice. However, if there are multiple ports, you can switch between them until you get the supposed transfer speeds.

Of course, there’s also file fragmentation at stake. If you have a cluster of 1000 files taking up 5 GB, it’ll take much more time than 1 5 GB- a large file.

5. Check USB drivers

Since its introduction, Windows 10 has had a lot of issues with various drivers for all kinds of devices. The same goes for generic chipset drivers which are automatically administered via Windows Update. What we suggest is replacing those drivers with the official ones obtained from the OEM’s support website.

By simply googling your motherboard, you should find all the latest drivers you need. After you install these drivers, the copying speed should improve substantially.

6. Disable Drive Indexing

In order to speed up access to files stored on the local storage, Windows offers Drive Indexing. When enabled, this feature will index all files and substantially reduce the waiting time when you search for them in File Explorer. This is a great feature if you have dozens of similar files which help you distinguish them and access them quicker than usual.

However, even though it should work when the PC is idle, it sometimes doesn’t. And you can imagine how it can slow the data transfer if starts indexing files while the copying is still at hand.

For that reason, we suggest disabling it. At least temporarily. Here’s how to do it:

  1. Open This PC or File Explorer.
  2. Right-click on the partition you want to relieve of indexing and open Properties.
  3. Uncheck the “Allow files on this drive to have contents indexed in addition to file properties” box and restart your PC.Why is my computer copying files so slow

7. Disable your antivirus

In a similar manner, as Drive Indexing can slow down copying, an antivirus might, as well. Of course, instead of indexing, its real-time engine might scan them for malware presence. Besides slowing down the transfer, it can also affect the whole system and hog the resources. Which adds up to an already heavy burden. That’s the reason why you should disable it until all files are transferred. Obviously, you would want to enable it afterward.

Here’s how to disable Windows Defender:

  1. Open Windows Defender Action Center from the notification area.
  2. Choose Virus & threat protection.Why is my computer copying files so slow
  3. Under the Virus & threat protection settings, click Manage settings.Why is my computer copying files so slow
  4. Toggle off Real-time protection.Why is my computer copying files so slow

8. Use the Disk Cleanup utility

The sole presence of temporary files might slow down the execution of various system services. So, the next viable step is to clean up all temporary files stored in your system partition. This can be done with various third-party tools but, for the sake of simplicity, we suggest using the built-in utility called Disk Cleanup.

Follow these instructions to run Disk Cleanup:

  1. Press Windows key + S to open Search bar.
  2. Type in dsk and open Disk Cleanup.
  3. Choose the system partition and click OK.
  4. Click on Clean system files and choose the system partition again. The calculation can take some time.Why is my computer copying files so slow
  5. Check all boxes and click OK.

9. Format the USB flash drive in the NTFS format

Some users reported visible improvements in the copying speeds as soon as they re-formatted their thumb drives in the NTFS format instead of FAT32. Most USB thumb drives are, by default, formatted in the FAT32 format which shouldn’t be a problem. However, that doesn’t mean that the NTFS format won’t help you resolve horrendously slow copying speeds on your PC.

If you’re unsure how to format a USB flash drive to NTFS, follow these steps:

  1. Back up data from the USB flash drive and plug it in.
  2. Open This PC or File Explorer.
  3. Right-click on the USB flash drive and choose Format from the contextual menu.
  4. Choose NTFS as the format.
  5. Wait until the procedure ends.

10. Change the drive’s Removal policy

Every external USB storage allows you to choose between the Quick removal policy which avoids caching and the Better performance policy which writes caching. The former is usually a better choice for small-sized USB flash drives. However, if we’re talking about copying dozens of gigabytes from an external HDD, the Better performance policy is the way to go.

Here’s how to change the Removal policy for the external drives on your PC:

  1. Connect the external drive to the PC.
  2. Right-click on Start and open Device Manager.
  3. Expand the Disk drives section.Why is my computer copying files so slow
  4. Right-click on the external drive and open Properties.
  5. Choose the Policy tab.
  6. Toggle Better performance instead of Quick removal.

11. Use a third-party application to copy the files

Besides relying on solely system resources, you can try some third-party tools to speed up the copying. There are a whole lot of available tools, and they tend to deal better with large chunks of data. Most of them are free of charge and small in size. Some even doesn’t require installation in order to use them.

Here are some tools we can recommend:

Finally, if none of the previous solutions helped you deal with the slow file copying, we can only suggest a clean reinstallation of Windows 10. If you’ve upgraded to Windows 10 over the Windows 7/8.1 installation, chances are the system will underperform. That’s why we suggest reinstalling Windows 10. Wiping out your HDD and repartitioning it before the installation might help, as well.

With that said, we can conclude this article. Hopefully, at least some of the enlisted steps helped you resolve the problem at hand. If they did, make sure to tell us in the comments section below.

Best GPS Software for Windows 10/11 to Download in 2026

If you own a Windows 10/11 tablet, you’re probably looking to get some good GPS apps for it since it doesn’t make sense to buy a standalone GPS device for that; we have collected some of the best navigation software for you.

We all know that much research must be conducted beforehand when planning a trip to unknown locations.

Routs have to be carefully planned before adventuring into places one has never been before to avoid getting lost and in order to save time and money.

So having a good GPS program to rely on is a very important thing to have for traveling lovers and people who have to travel a lot of the time.

And in Windows 10, you can be sure to encounter a full host of appropriate GPS apps, which will help you plan your routes very easily. We’re going to examine the best navigation tools to use.

Some of the best Windows 10/11 GPS apps you need:

1. Waze

waze windows 10 navigation app

Waze is a navigation tool that doesn’t need any introduction. This community-based tool is one of the most popular navigation apps out there, with millions of active users.

Using Waze is fun, as you can directly interact with other users and drivers. You can also meet up and coordinate with friends on the road.

You can contribute to the app‘s reliability by feeding it with real-time traffic and road information: you can report accidents, hazards, police presence, and other events.

Waze’s key features include:

  • Complete voice-guided navigation
  • Automatic re-routing as conditions on the road change
  • Save frequent destinations, commuting hours, and preferred routes
  • Earn points and move up the ranks in your community as you contribute road info

2. Maps Pro

Maps Pro is one of the most advanced Windows 10 GPS apps you can find in the Store. For one, it allows the users to choose the map style he/she is more comfortable with.

maps pro windows 8 gps app

The range of choice is pretty vast and includes 20 styles ranging from Nokia, MapBox, Stamen, OpenStreetMap, or Bing Maps. The app allows you to find places via its very advanced Direction feature.

You can find out information by entering the place’s address or with geolocation’s help. The app allows you to choose from three different ways of covering the distance: Driving, Cycling, or Walking.

There are over 80+ categories of places of interest to be showcased on your maps, like restaurants, parks, or hotels. The app offers a free trial of 7 days, but after, you will have to pay $2.49 to purchase it.

3. Windows Maps

windows maps navigation map

Windows Maps is Microsoft’s official navigation map. The Redmond giant describes it as your guide to everywhere.

Indeed, this tool software supports voice navigation, as well as turn-by-turn driving, transit, and walking directions.

If you need an offline map, don’t worry, this tool also supports offline navigation.

If you really hate switching navigation apps when using different devices due to incompatibility issues, you’ll really love Windows Maps. You’ll get the same experience across all your Windows 10 devices.

Microsoft’s navigation app adds a very interesting and unique navigation feature to the table: you can explore the world in 3D and virtually visit more than 200 cities worldwide.

4. CoPilot GPS

copilot navigation software

CoPilot is a navigation app used by millions of drivers around the world. Most of them are professional drivers and chose CoPilot due to its high-quality offline maps for fast and accurate guidance.

This app supports voice navigation (available as an in-app purchase), automatic routing and recalculation, safety camera alerts, and information about speed limits and speedometer.

You can test CoPilot for free for seven days. If you prefer not to subscribe to the service, the free version of the tool still offers you free offline 2D street maps, multi-stop trip planning, itinerary and preview directions, and more.

5. GPS Navigation & Maps by Sygic

sygic navigation app

GPS Navigation & Maps by Sygic is one of the most popular offline GPS navigation maps in the world. It is powered by high-quality TomTom Maps that will take you from A to B in a jiffy.

The free version of the app offers offline TomTom maps, POIs, route planning as well as free map updates.

You can also upgrade to premium and enjoy a series of useful features, including 3D maps, turn-by-turn voice-guided navigation, lane guidance, speed limit warnings and junction view with lane indicator arrows at complex intersections to help you better navigate.

6. GPS Satellite [Free]

gps satellite windows 8 gps app

This is an old-school GPS app for Windows 10 and Windows RT, which quickly displays your location. It is also able to calculate the course data from where your GPS receiver is detected via orbiting global positioning satellite signals.

All you need to do is set the right parameters, and the app can direct you to the Colosseum from the place you are staying if you happen to be in Rome. GPS Satellite for Windows 10 will map your location and the path you choose to travel by.

Users can also add geocache and geo-location points, which can appear on the map later.

7. MapSpeedo [$1.99]

map speedo windows 8 gps app

MapSpeedo is another awesome Windows 10 GPS app created to help you better navigate the urban environment and due to its speedometer-based GPS will provide very accurate information.

The maps within the app can come in three types: Road, Aerial, and Bird’s Eye. MapSpeedo will automatically detect your location and then show you how much time it will take to get to a place based on your speed.

8. World Explorer- Travel Guide [Free]

world travel guide windows 8 gps app

For the passionate traveler, here is a continuously updated Windows 10 GPS app that features the best travel guides for major cities worldwide.

No matter where you are off to, Word Explorer uses GPS location features to direct you to the poshest spots in town. Find the best restaurants, gift shops, or the most interesting museums and monuments.

Word Explorer functions as a mini-encyclopedia, providing you with detailed information about the city you are in.

But on top of that, you get the must-see objectives of the area, plus how many meters until you arrive at the destination.

Each objective is rated between 1 and 5 stars to help you decide which is worth visiting and which is not.

9. ViaMichelin [Free]

viamichelin windows 8

ViaMichelin is one of the best GPS apps, and this time I really mean it, because when this post was originally created, there weren’t so many GPS apps in the Windows Store.

You can check out our review for more details, but what you need to know is that it comes with a bunch of useful features, such as interactive map displays, advanced route planning options, car parks, petrol stations, the weather, and traffic in real-time.

10. MapFactor GPS Navigation

MapFactor GPS Navigation

MapFactor Navigator is a very useful turn-by-turn GPS navigation software for Windows phones, tablets, and PCs.

If you need a navigation tool to use offline, this is the perfect choice. The app installs all the maps on your device or SD card, allowing you to find your bearings without an Internet connection.

MapFactor offers a series of interesting and useful features, including:

  • Postcodes
  • Truck restriction information
  • Speed cameras and Overspeed warning
  • Map color themes, many customization options
  • Navigation profiles for each vehicle category: bus, truck, bicycle, and pedestrians

11. GMaps

GMaps navigation software

GMaps is the closest thing that you can get to Google Maps on your Windows 10 phone, tablet or computer. For the time being, there is no Official Google Maps app available in the Microsoft Store.

GMaps supports a series of map layers, including street, satellite, traffic, bike, weather, and more. Local Search lets you search for nearby venues, while the Discover feature offers a series of in-depth search criteria.

The app displays a series of useful navigation information, including different routes depending on your vehicle type, alternative routes and restrictions, driver mode, etc.

GMaps also supports third-party integration, allowing you to view directions through 3rd party apps like Waze, Nokia Drive, and others.

You can also share your current location using SMS, email, and more map information. Night mode is also available.

12. GPS Voice Navigation

GPS Voice Navigation Free app

If you’re looking for the voice navigation version of GMaps, then GPS Voice Navigation Free is the right GPS tool for you.

The map shows all the important driving information, while your virtual copilot will offer you spoken turn-by-turn directions.

Maps are accurate, and the tool provides excellent, clean navigation for your device.

The app interface and navigation instructions are available in English, French, Italian, German, Spanish, Portuguese, Russian, and Bulgarian.

Navigation software for PC

There are many interesting and useful navigation software for PCs as well. So, if you’re planning to use your laptop as your primary navigation device, download and install these tools to help you quickly find your bearings:

And whereas these programs are in plenty and come highly recommended, let’s not forget they’re man-made and may occasionally suffer from GPS hiccups from time to time.

Have you used other navigation software apart from the ones listed above? Tell us more about your experience in the comment section below.

Why Outlook Spell Check is not Working with Signature?

Some of our readers recently claim the Outlook Spell Check not working with Signature. Several users require the use of Grammar or spell-checker tools to correct blunders while writing emails and the absence of this can be pretty troubling.

If you are experiencing this issue or some other problems with the Outlook app, you can read further into this article to know the reason and what best to do to troubleshoot the issue.

Why is Outlook Spell Check not working?

The Outlook Spell Check not working with Signature is a common complaint among users. However, this frequently occurs when someone mistakenly or purposefully types in the signature field.

The following are some other potential reasons reported by some users:

  • Outlook signature does not permit spell check – Outlook’s signature is formatted using the Email Signature style, which is indicated as Do not spell check. Hence, whenever you write in the Outlook signature field it will refuse to spell check except manually tweaked.
  • The Automatic Spelling and Grammar feature is off – On other occasions if the spelling and grammar features are not enabled, then you experience the Outlook auto spell check not working.
  • Incorrect language – In many cases, Outlook’s spell check will not work if the input language is different from the one configured for Spell check.
  • A corrupt patch or installation of Outlook – Many readers reported that the spell check stopped working in Outlook 365 and that is caused by corrupt installation files. Many third-party tools can help you fix corrupt directories or folders, so make sure to check them out.

Now that you know what is responsible for the Outlook Spell Check not working on a reply, the next section will provide you with simplified steps on how to fix the issue:

How do I fix Outlook Spell Check not working?

Before consulting advanced troubleshooting methods, you should consider performing the following preliminary checks:

  • Make sure you are not typing in the Outlook signature field because it is not programmed to use the spell check feature.
  • Restart Outlook and your PC.
  • Change the default language in Outlook.
  • Disable the message-ignoring feature.

Having confirmed the above checks and if you still require further assistance, you can explore the advanced solutions provided below.

1. Change Outlook Message’s Spell Check Setting

  1. Open Outlook and after running an email, select the entire message.
  2. Navigate to the Review ribbon and then choose the Language menu.
  3. Click on the Set Proofing language command to view current language settings.
  4. Now, clear the Do not spell check box.
  5. Next, back out of the dialog box and press F7 to initiate the spell check.

The entire message should be spell checked. Whenever you accidentally type in the Outlook signature field, you can easily change the spell-check setting by following the steps provided above immediately after you discover it.

2. Activate the Outlook Spell Checker

  1. Launch Outlook and navigate to the File tab.
  2. On the left-hand pane, select Options.
  3. In the pop-up window, switch to Mail and click on Spelling and Autocorrect.
  4. Under When correcting spelling in Outlook, check the first two boxes: Check spelling as you type and Mark grammar errors as you type respectively.
  5. Then, click on OK to activate the Outlook Spell Checker.

Ensure that you check the above boxes, or else the spell checker will not work in Outlook.

3. Update your Outlook application

  1. Press the Windows + R keys to open the Run window, type outlook.exe /safe and press Enter to open Outlook in Safe Mode. Make sure that you leave a space after outlook.exe, otherwise the system won’t recognize the command.
  2. Click Yes to allow Microsoft to confirm your decision.
  3. Choose File at the top-left corner of the page, select Office account, and click the Office updates menu.
  4. Click the Update Options button, then select the Update Now option in the drop-down menu to install pending updates on Outlook.

Once the update process is completed, restart your computer and confirm if the problem has been fixed. However, if Outlook keeps crashing after an update, you can check our guide to fix it.

The solutions above will also fix the Outlook spell check not working on reply

Additionally, for some of our readers who requested to know how to fix Outlook signature when it’s not inserting signatures, here is an easy fix for you.

In case you want to know how to make Chrome’s spell check work, you can read our detailed guide here.

And that’s it on how to fix Outlook spell check not working. If you have any questions or suggestions, do not hesitate to use the comments section below.

4 Best PS 4 Emulators to Play Console Games on PC [2026]

The Best PS4 emulators let you revive the PlayStation 4 experience on your PC, whether it’s diving back into Bloodborne, testing Persona 5, or just navigating that familiar UI with a DualShock in hand.

While PS4 emulation is far from perfect, a few tools can already boot simpler titles or fan-made games. If you’ve ever wondered what it’s like to bring your PS4 library to Windows, here’s what works (and what doesn’t) in 2025.

What is the best PS4 emulator for PC?

1. PCSX4 – 4K gaming and smooth performance

PCSX4 offers solid PS4 emulation with support for 4K resolution and 60 FPS on compatible hardware.

We’ve found it works well for less demanding games, but more complex titles can cause slowdowns.

The built-in frame rate control and Vulkan API support help smooth out performance. While it’s still evolving, it’s a great choice if you’re looking to play PS4 games at higher resolutions on a capable PC.

Pros:

  • Supports 4K resolution and 60 FPS
  • Customizable post-processing effects
  • Vulkan API for enhanced performance
  • Plug-and-play controller support

Cons:

  • Still in active development
  • Occasional glitches and crashes

⇒ Get PCSX4

2. fpPS4 Emulator – lightweight, best for smaller games

fpPS4 is an experimental emulator for smaller PS4 games, perfect for testing out basic PS4 compatibility.

We’ve run titles like Sonic Mania with no issues, but larger games can be unstable. It’s early in development, so expect bugs and crashes.

However, it’s an interesting tool for anyone curious about PS4 emulation, and it works well enough for lighter, less demanding games.

Pros:

  • Good for small, less demanding games
  • Open-source and actively updated
  • Simple setup process

Cons:

  • Limited game compatibility
  • Unstable with larger titles
  • Performance issues on complex games

⇒ Get the fpPS4 emulator on GitHub

3. Kyty – Offers limited support

Kyty is an early-stage emulator with plans for PS5 graphics support. We’ve tested it with basic PS4 games, and while it shows potential, performance is rough.

Expect frequent crashes and low FPS. Despite these issues, its modding capabilities and future-proof potential make it an interesting choice for experimental users who want to explore PS4 and upcoming PS5 emulation.

Pros:

  • Modding and shader customization
  • Potential PS5 graphics support
  • Open-source and free

Cons:

  • Frequent crashes and low FPS
  • Lacks audio and network support
  • Still very much in development

⇒ Get Kyty on GitHub

4. PS4Emus – simple and easy Windows PS4 emulation API

ps4emus user interface

PS4Emus is a straightforward emulator designed for casual PS4 gaming. We’ve used it to try out a handful of games, and it works well for testing basic titles.

While the setup is simple and easy, it’s not the most stable option for demanding games.

However, it’s still a good choice for anyone looking for a no-fuss introduction to PS4 emulation.

Pros:

  • Easy to install and use
  • Works across multiple platforms
  • Quick to get started with

Cons:

  • Limited game support
  • Unstable with more complex titles
  • Lacks advanced features

⇒ Get PS4Emus

Is it possible to play PS4 on PC?

The short answer is no, for the most part. Few emulators can start less demanding games, but the quality of emulation and performance might not be satisfying.

Since PS4 emulation is in its infancy, many emulators can’t even run commercial games, which probably won’t change for a few years.

Yes, downloading the emulator software is legal. However, downloading console BIOS and games isn’t legal.

As you can see, the choice of PS4 emulators is rather slim now, so why not try a PS3 emulator for PC or maybe a PS2 emulator instead?

If you’re curious about console gaming on PC beyond just PS4 emulation, you might want to explore PlayStation Now for Windows as an alternative for streaming games directly.

For retro fans, here’s a quick guide to the best PS1 emulators for PC, or if you’re looking ahead, check out the top PS5 emulators for PC and see how far development has come.

Which one will you try? Share our thoughts in the comments section below.

How to Create Custom Power BI Themes: Complete Overview

Power BI User Interface (UI) seems redundant or unappealing to users. So, customization tools like the Power BI themes are essential to help personalize the UI.

However, this article will discuss Power BI themes, why you should employ them, and how to use and create your themes. Check our detailed article on Power BI new page view for Paginated Reports and how to use it.

What are Power BI themes?

A theme is a preset package holding graphical elements, colors, formatting options, sounds, and functionality details. Power BI uses custom themes to enhance user productivity by creating a unique and engaging interface.

Moreover, It improves the experience by allowing users to control the properties of every Power BI element with a custom theme.

Likewise, themes let you use the same display design across your report without changing each element individually.

What are the benefits of using a Power BI theme?

Many advantages come from using a Power BI theme. Some are:

  • Personalize User Interface – Users can create and choose what interface they want. Also, it allows you to have a consistent look and feel by applying the same formatting and design to your report.
  • Time-saving – It saves time when building or designing your report because you don’t have to rebuild the same design for others.
  • Improves output designs – It is easy to make changes to your Power BI theme and takes little or no time to understand. So, you can use corporate colors, change icon sets, or apply new default visual formatting by applying Power BI themes.

What are the types of Power BI themes?

What makes the difference in the types of Power BI themes is the mode of accessibility. There are two main types of report themes:

  1. Built-in themes – The Built-in Power BI themes are preinstalled and designed with the app right from download. They contain a variety of predefined formatting and color schemes which are to be applied to the Power BI report instantly.
  2. Custom themes – A custom theme is the direct opposite of a built-in. It means a report theme that was not preinstalled but created by the user. You can create a custom theme by either adjusting a current one and saving it as a custom theme or importing a custom theme from the Theme Gallery.

How do I use themes in Power BI?

  1. Launch Power BI on your PC.
  2. Navigate to the View ribbon at the top of the page, then click on the drop-down arrow at the right end in the themes section.
  3. Select a theme from the built-in themes available for Power BI. It’ll apply to the report.

Check what to do if Power BI won’t launch on your  PC.

How do I customize Power BI themes?

  1. While on the Power BI workspace, to the View ribbon at the top of the screen.
  2. Click on the drop-down arrow next to the Themes section.
  3. Select the Customize Current Theme option from the menu below Power BI themes.
  4. Then, you’ll be taken to a page where you can adjust the current theme and save your settings as a new theme.

Also, you’ll have access to the theme’s framework, allowing you to edit colors and elements to your preference. Follow the steps above to customize your themes.

Users can enjoy the Customize Current Theme or Browse for Themes features in the view ribbon to create new themes. Check how to fix an error has occurred on Power BI message when using the app.

Under the Customize theme menu, you can find customizable theme settings in the following categories:

  • Name and colors – Theme name and color settings include the name of your theme colors, sentiment colors, divergent colors, and structural colors (Advanced) in the theme.
  • Text – Customizing the text settings includes adjusting the font, size, and color, which sets the primary text class defaults for labels, titles, cards and KPIs, and tab headers.
  • Visuals – Visual settings allow you to customize the background, border, header, and tooltips.
  • Page – Page element settings include the template’s wallpaper and background.
  • Filter pane – By customizing the Filter pane settings, you can tweak the background color, transparency, font and icon color, size, and filter cards.

After customizing the Power BI report theme, click the Apply and save buttons to use it as the default, and add it to your theme repository. Likewise, you can export the customized. Read how to remove Power BI filters in a few steps.

How to import a custom report theme file (JSON)?

  1. Launch Power BI on your PC.
  2. Navigate to the View ribbon at the top of the page, then click on the drop-down arrow beside the Themes section.
  3. Click on Browse for themes from the menu below Power BI themes to open the File Explorer page.
  4. In the Power BI theme folder, find and select the theme file to import, then click Open.
  5. Wait for the theme file to load successfully, then Power BI desktop will display a prompt indicating that the theme import was complete.

Importing a custom report theme file from another database allows you to incorporate the imported custom theme into your report.

It helps achieve a unified theme report across the company or parties involved in the project. You can read our guide on fixing issues with opening Power BI files.

How to export a custom report theme file (JSON)?

Exporting the JSON theme file allows you to save it on your Local disk and share it with other users. Follow the steps below to export and save custom report theme files:

  1. Open Power BI on your PC.
  2. Go to the View ribbon at the top of the screen, then click on the drop-down arrow beside the Themes section.
  3. Click on Save current theme from the menu below Power BI themes.
  4. In the Save As dialog box, go to a directory you want to save the JSON file, and then select Save.

The file will be exported and made available in the directory you selected.

How to switch between Power BI themes?

  1. While on the report view of your Power BI Desktop, click the Switch Theme button on the ribbon.
  2. Find your theme from the drop-down or click the More themes option to view more.
  3. Click on the theme to switch.

It’ll immediately take effect, causing the Power BI report to use the new theme. Using the Switch function allows you to change your current Power BI theme to another saved report theme.

Designing your own custom Power BI theme gives you the liberty to determine the looks and feel of the theme. Go ahead with the following steps to learn how to create a custom theme.

How to create custom Power BI themes?

1. Build a Color Palette

It is essential to determine what colors you want to use for your theme. So building the color palette contains the colors you want to use and where to use them.

More so, a theme color palette consists of 10 colors representing each of the ten elements of the Power BI User Interface. These elements are:

  • Primary 1 and 2
  • Primary 3
  • Secondary 1
  • Secondary 2
  • Header Color
  • Text Color
  • Slicer Color
  • Visual Color
  • Background Color

However, the colors for each element should contrast to make it easy to distinguish. Also, light themes appear more colorful with saturated colors, while dark theme goes well with soft tones.

2. Build your Theme

To build your theme, you’ll transfer the color palette you designed into Power BI. Then, create your theme using the Customize theme feature. Also, assign the color on the color palette to match the right element in the Power BI customized theme framework.

Furthermore, check if the color matches the fields, then click Apply to polish your theme.

3. Amend your Visuals

The amendment part is the final touch to give to the theme. It helps override the default formatting color options based on the Advanced design settings of the theme framework.

How to make proper use of color in your Power BI Reports?

The following tips will help you avoid color confusion and improve your selection of color in the Power BI report:

  • When documenting continuous data, use a single color to represent all the data. It helps indicate that data has different values but belongs to the same category.
  • Use colors that can be easily distinguished from each other when documenting data that contrasts or when dealing with comparisons.
  • When making a definite decision or point, use a color that can easily stand out in the midst of others. The stand-out color indicates the dominance of the element it represents.
  • Maintain a consistent color balance across your report. Hence, we recommend you choose a color from the color palette in order to maintain color consistency.

Top Power BI themes to download

There are many Microsoft Power BI themes you can use in the gallery. Some of our best picks are:

Vintage theme

Vintage theme - Power BI

The Vintage Power BI theme gives an aura of an old visual display consisting of dark colors. It consists of light and dark colors layered with a light-vintage filter.

⇒ Get Vintage theme 

Acterys Planning

Acterys Planning theme - Power BI

The Acterys Planning theme comes in dark backgrounds of blue and green shades. It looks more digitized than other themes.

⇒ Get Acterys Planning

Gartner Bakeoff Opioid Crisis theme

Gartner Bakeoff Opioid Crisis Theme - Power BI

This theme gives your report a clean look. It makes your report easy to navigate because of its easy slider designs and simple interface.

⇒ Get Gartner Bakeoff Opioid Crisis Theme

All Blacks

All Blacks theme - Power BI

All Blacks is a Microsoft Power BI theme with black backgrounds and shades. It comes in a not-so-dark color that utilizes black, ash, and gray. It is the perfect theme to use to reduce light exposure.

⇒ Get All Blacks

Dinosaur!

Dinosaur! theme - Power BI

Users who love dinosaurs can use the Dinosaur! Themes. Its appearance is fun and attractive as it comes in fossil colors like brown, orange, yellow, and gray.

⇒ Get Dinosaur!

Conclusively, our readers can check our guide on how to add an image to Power BI without issues. Also, users having difficulties adding data labels in Power BI can check our guide on fixing it.

If you have further questions or suggestions, kindly drop them in the comments section.

Invalid Media Or Track 0 Bad Disk Usable: 4 Ways to Fix It

If you are trying to format your storage device but are stuck with invalid media or track 0 bad – disk usable, you may lose access to the device and data stored on it. 

Here, in this guide, we will discuss all the available methods to fix the problem right after examining the causes of the issue.

What causes the invalid media or track 0 bad disk unusable error?

There could be several reasons for the issue to occur, but some of the prevalent causes are mentioned below:

  • Damaged Storage media – If your device is physically damaged, it might not work correctly, and hence you can get this error. 
  • Data storage device is corrupted – If your device has software bugs or is infected with malware, the device might get corrupted, and you may lose access to your device.
  • A problem with connection or device – If there is a problem with the connection between your hard drive or USB drive and the computer, you might be able to read or write the data on the drive.
  • Bad sectors on the hard drive – If the drive you are trying to format has bad sectors, you might not be able to access the drive, hence the issue.
  • Write protection enabled – If the device you are trying to format has write protection enabled, then you might get this error.
  • Hard drive has unallocated space – If under disk management, you see the hard drive with unallocated space, you might get this error.

How to solve invalid media or track 0 bad disk unusable?

Before diving into troubleshooting methods, try these quick fixes to resolve this issue:

  • Check the connection
  • If you use a USB drive, try to change the port or device and plug it in.

1. Rebuild MBR

  1. Press the Windows key, type CMD and click Run as administrator.CMD elevated -Invalid media or Track 0 bad
  2. Copy and paste the following commands one by one and press Enter after every command: bootrec /fixmbr bootrec /fixboot bootrec /rebuildbcd
  3. Once done, type the following command and press Enter: exit

2. Format the drive with the DiskPart utility

  1. Press the Windows key, type CMD, and click Run as administrator. 
  2. Type the following command one by one and press Enter after every command: diskpart list diskList Disk -Invalid media or Track 0 bad
  3. Copy and paste the following command, replace the number with the number mentioned for the disk, and press Enter after every command: Select disk 0 clean create partition primary
  4. Type the following command, replace the alphabet with any letter, and press Enter: assign letter = H
  5. Copy and paste the following command one by one and press Enter after each command: format fs=fat32 quick exit

3. Run CHKDSK command

  1. Open the Command Prompt using the method mentioned above.
  2. Copy and paste the following command after replacing X with the drive letter and press Enter: chkdsk /f /r X:CHKDSK -Invalid media or Track 0 bad
  3. Wait for the scan to get completed. Then, close the Command Prompt window and restart your PC.

4. Disable write-protection

  1. Press the Windows key, type CMD, and click Run as administrator.
  2. Copy and paste the following command one by one and press Enter after every command: diskpart List volume
  3. Type the following command and replace 4 with the letter of your drive, and press Enter: Select volume 4
  4. Input this command and press Enter: Attributes disk clear readonlyAttributes disk clear read only-Invalid media or Track 0 bad

So, these methods can fix invalid media or track 0 bad unusable errors. If nothing else worked for you, then you can use a third-party partition tool to fix the issue. 

If you have questions or concerns about the error, feel free to mention them in the comments below.

Ethernet Not Working But WiFi is: 5 Ways to Fix It

The Ethernet is not working, but WiFi has an error is quite common and could be because of hardware flaws, incorrect settings, or missing drivers. Whatever the reason may be, we can fix it in no time.

Here in this guide, we will discuss the methods to fix Ethernet no internet, but WiFi works right after talking about the causes of the same.

Why does my WiFi work but not Ethernet?

There could be various reasons for the ethernet cable not working, but WiFi is; some of the most popular ones are mentioned below: 

  • Network cables – If your network cables are loosely attached or have suffered physical damage, you might not get internet via Ethernet. So check both ends of the cable to inspect the connection and damage.
  • Problem with your router or modem – The issue might occur if your router is not configured correctly. You need to restart your modem and router to see if it fixes the problem.
  • DHCP server – If your device is not getting an IP address from the router, there could be an issue with the DHCP server, which is why you can’t connect via Ethernet.
  • Third-party software interference – Security software can create conflict and block the connection. Check the software settings to ensure the Ethernet connection is not blocked.
  • Incorrect network configuration – If your device is not set up to use the correct subnet mask, IP address, and gateway, you might face the issue.
  • Issue with Network Adapter – If the network adapter on your computer is not enabled or working correctly, then the drivers on the computer might be outdated. You need to update drivers.
  • Too many devices connected to the same network – If you have exceeded your router’s device limit, it may cause congestion and hence the error.

What can I do if the WiFi works but the Ethernet doesn’t?

Before engaging in advanced troubleshooting steps, you should consider performing the following checks:

  • Check the ethernet cable for physical damage and loose connection. Unplug and replug it a couple of times to be sure.
  • Ensure the ethernet port is working. Try the cable on another device to check.
  • Restart your router and modem.
  • Turn off the WiFi feature.
  • Drain the residual power.

If none of the subtle tweaks helped you, then it is time for detailed troubleshooting steps: 

1. Turn off Sleep Mode

  1. Press Windows + R key to open the Run window.Device Manager RUN COMMAND
  2. Type devmgmt.msc and press Enter to open Device Manager.
  3. Locate and expand Network adapters—Right-click on the driver for the Ethernet cable and select Properties.Device Manager Network Adapter Ethernet Properties- ethernet not working but wifi is
  4. Go to the Power Management tab, and remove the checkmark from Allow the computer to turn off this device to save power.Ethernet Powe M
  5. Click OK.

2. Make changes in Network settings

2.1 Give Ethernet the priority

  1. Press the Windows key, type Control Panel and click Open.CP -ethernet not working but wifi is
  2. Select Category for View by and click Network & Internet.Category - ethernet not working but wifi is
  3. Click View network status and tasks.Network and Sharing
  4. From the left pane, click Change adapter settings.Change adapater settings
  5. Right-click on Ethernet and select Properties.Ethernet Properties
  6. Double-click Internet Protocol Version 4(TCP/IP) to open Properties.IPv4
  7. Under the General tab, click Advanced.Advanced
  8. Uncheck the Automatic metric and for the Interface metric, add 1 to set priority.Automatic metric
  9. Click OK and then OK to complete the process.

2.2 Reset Network Adapter

  1. Press Windows + I to open Settings.
  2. Go to Network & Internet, then Advanced network settings.Network Internet -ethernet not working but wifi is
  3. Click Network reset.Network Reset 1
  4. On the next page, click Reset now.Network Reset now

2.3 Run the Troubleshooter

  1. Press Windows + I to open the Settings app.
  2. Go to System, then Troubleshoot.troubleshoot -ethernet not working but wifi is
  3. Now click Other troubleshooters.troubleshooters
  4. Locate Network Adapter and click Run.Network Adapter - ethernet not working but wifi is
  5. Follow the on-screen prompts and wait for the process to complete. It will show if there is any error, along with the potential fix.

3. Change the MAC address

  1. Press the Windows key, type CMD and click Run as administrator.DOS COmmand Prompt
  2. Type the following command and press Enter: ipconfig/all
  3. Note down your MAC address. Now, press Windows + R to open the Run window.Device Manager RUN COMMAND
  4. Type devmgmt.msc and press Enter.
  5. Expand Network Adapters, right-click the Ethernet, and choose Properties.DEvice Network Adapter Properties
  6. Go to the Advanced tab, under Property, and select Locally Administered Address. Then, for Value, type the MAC address you copied.
  7. Click OK and restart your computer.

4. Update drivers using Device Manager

  1. Press Windows + R to open the Run box.
  2. Type devmgmt.msc and press Enter.
  3. Go to Network adapter, expand it, and right-click on Ethernet driver. Choose Update driver.Update driver Network Adapter
  4. Click Search automatically for drivers and follow the on-screen instructions.Search automatically for drivers

Moreover, you can easily update and replace any outdated drivers on you pc by simply use Outbyte Driver Updater. This tool will search, find and replace any drivers available for your device specifics within few minutes.

⇒ Get Outbyte Driver Updater

5. Scan your PC for malware

  1. Press the Windows key, type Windows Security and click Open.Windows Security open -ethernet not working but wifi is
  2. Go to Virus & threat protection. Windows Security
  3. Click Scan options.Scan options
  4. Select Full scan and click Scan now. Wait for the process to complete.Full Scan Scan Now - ethernet not working but wifi is
Tip icon Tip
If you are using a third-party tool to secure your computer, launch the app and run a deep scan to ensure your device is not infected with malware or viruses.

There are other network issues you can experience, and for many only Google works on their Internet, and we have a dedicated guide that addresses this issue.

So, you need to follow these methods to resolve Ethernet not working, but WiFi is an issue. Try them and let us know which worked for you in the comments below.

Why Is My Computer Clock Behind & How to Fix it: 4 Easy Tips

Users complain that the Windows clock is behind occasionally, which is incredibly irritating.

Every time you boot your computer, it seems the time has fallen behind yet again. In fact, it seems the clock has barely moved since the last time you shut down your PC.

Why is my computer clock behind? That’s the big question and that’s what we shall try to answer. But first, let’s have a look at what other users had to say, including the most common clock-related issues:

  • PC clock keeps falling behind
  • The computer clock is slowly falling behind time
  • My laptop clock is behind
  • Computer clock wrong Windows 7 – my computer date and time not updating in Windows 7
  • My computer clock is 2 minutes behind, 3 hours behind
  • Computer clock running slow Windows 10, Windows 11

If you browse many websites as part of your job, it can get quite dicey as some sites will deny you access unless you correct your date and time.

Before long, your PC may start returning a CMOS checksum error on startup.

Why does my computer clock keep losing time?

As with many PC issues, each error rarely has a single possible cause. Therefore, it is important to keep an open mind and investigate all possible angles

→ Dead CMOS battery

The CMOS battery uses a small battery, so the BIOS settings remain active when the PC is switched off. This battery usually runs for between two and 10 years before it needs to be replaced.

So, if your clock can’t seem to keep the correct time and the PC is fairly old, there is a strong chance the CMOS battery may be failing. The clock essentially stops at the point you switch off the PC.

→ Wrong or corrupted BIOS settings

You could be dealing with a loose battery. A quick fix will be removing the battery and lifting the negative power pin upwards.

Also press the positive pin down before replacing the battery, making sure the battery has firm connections.

However, even that may not fix the problem. At this point, the problem could be a result of a corrupted or out-of-date BIOS.

Try resetting the BIOS values, including the date and time settings. Or, if the computer is quite old and does not update automatically, consider installing a more up-to-date BIOS.

→ Wrong time zone

If your clock is set to the wrong time zone, you will find that, even after correcting the time, the clock will fall behind the next time you boot. It may even be ahead by a few hours, depending on the time zone it is set to.

Usually, if the clock is set to the wrong time zone, the minutes are correct, while the hour value will be behind or ahead.

Where the CMOS battery is the issue, the hour and minute values are usually wrong.

→ Malware infection

Now, this one should worry you because a virus or malware is rarely deployed to just throw your time off. The frequently wrong time and date is often a symptom of a more severe problem.

The malware may be targeted at the BIOS or the Windows OS itself. Either way, the effect will be damaging.

Now that we are up to speed with what could be causing your PC‘s clock to fall behind let’s go through the possible solutions you could try to fix the problem.

How do I fix the clock behind on my computer?

1. Synchronize your PC’s clock with the default Microsoft Time Server ✅

    1. Restart your computer in Safe mode.
  1. 2. Click the Time tab in the bottom right corner of your screen.

  2. 3. Click Change and time settings… at the bottom of the pop-up window.

  3. 4. Click on the Internet Time folder. This small screen will come up.

  4. 5. Select the time.windows.com server using the down arrow as shown in the image above. Click Update now.

  5. 6. After you click OK, this confirmation screen will come up.

  6. The best way to set your time on the automatic update is perhaps to synchronize your PC‘s clock with an internet time server. This way, you don’t always have to correct your time every time you boot your computer.

    Being a Windows PC, the first option ought to be Microsoft’s own time server. You can also compare time.windows.com vs time.nist.gov and gauge their accuracy levels. Follow the steps above to synchronize your PC‘s clock and date settings with the Microsoft Time Server.

2. Update your BIOS

Sometimes an outdated or corrupted BIOS may be the reason your PC‘s clock is falling behind.

BIOS corruption may result from improper shutdowns, where you pull the computer from the power source without properly shutting down the PC first.

Getting into the habit of doing a proper shutdown should easily fix this issue. However, in the event your BIOS is now outdated, the only option may be to update.

Get in touch with your PC‘s manufacturer and find out if an updated version is available. You can also find such information on their website.

Remember resetting or flashing your PC’s BIOS so you can correct the time and date settings from there is an option, but it is fraught with risks.

3. Replace your CMOS battery

Let’s face it, if your CMOS battery is now flat, your PC‘s clock is always going to fall behind. You will have to constantly update it and, at the same time, grapple with all manner of errors.

The more permanent fix is just to replace the battery with a new one. The CMOS’s battery slot is usually fitted to the computer’s motherboard.

But removing and replacing the battery on some PCs can be a little tricky. If you have one of those computers it is best you take the computer to a repair technician.

However, the CMOS battery is fairly easy to replace on most modern desktop PCs. It is with laptops that the process may get a bit tricky.

Just remember to properly shut the PC and disconnect it from its power source before you disassemble it. Again seek help from a professional if you are unsure of what to do.

4. Clean your computer of viruses and malware

If, after trying all of the above solutions, your PC‘s clock continues to slow or fall behind, there is a probability a virus may have infected your PC.

In case you haven’t updated your anti-malware software or installed one, now is the time to do it.

If you have up-to-date security software installed, consider upgrading it. To ensure the malware does not evade your anti-malware software or launch on startup, start and install the software in Safe Mode.

This way, all non-essential programs, including malware and viruses, don’t get to launch. You can then properly scan and clean your PC without interference from the malware.

Microsoft has its own free Malware Removal Tool. But, if you want to go premium, there are several good options you can choose from, including Malwarebytes, TotalAV , and others.

Otherwise, be vigilant with how you use your computer to protect against virus and malware infection.

Any one of the solutions we have discussed here should help solve your PC‘s time and date issues, so you don’t have to correct it all the time.

How to Fix Microsoft Teams Crashing Issues During Launch

Microsoft Teams is a collaborative platform for companies that brings everything together in a shared workspace. Recently many users have complained about Microsoft Teams’ crash issues in the community forums.

According to the users in the Microsoft community, Microsoft Teams crashes during launch,  performing updates, or while working leaving a Something went wrong error. At times, it completely feezes having to force start.

If you are also troubled by this issue, here are a couple of troubleshooting tips to help you fix Microsoft Teams crash issues in Windows.

How to fix Microsoft Teams’ random crashes

1. Check Microsoft Teams service status

Microsoft Teams crash issues

The Microsoft Teams app may crash or refuse to open if the Microsoft services are down for maintenance. You can check the status of the service in the admin panel of your Office 365 account.

  1. Launch Office 365 admin center.
  2. Go to Service Health. Here you can see the status of the service and any measures that are being taken to resolve the issue.
  3. Note that you may need to have admin access to be able to check the service status. If you don’t have the clearance, contact the admin.
  4. You can follow Microsoft Office 365 Status handle on Twitter to get all the service statuses.
  5. Any service-related issues will resolve automatically in a few hours to a day and there is little you can do about it.

2. Clear client credentials

  1. If the admin panel shows no issues with Microsoft Teams’ service, try clearing the Microsoft Teams’ account details from the credential manager.
  2. Make sure Microsoft Teams is closed.
  3. Press Windows Key + R to open Run.
  4. Type control and click OK.
  5. In the Control Panel, go to User Accounts.
    Microsoft Teams Freezes
  6. Click on Credential Manager.
    Microsoft Teams crash issues
  7. Select the Windows Credentials tab on the right side.
  8. Expand the Microsoft Office 365/Teams section by clicking the drop-down button.
  9. Click on Remove.
  10. Click on Yes to confirm the action.
  11. Close the Control Panel and relaunch Microsoft Teams.
  12. Enter your Office 365 username and password and sign in. Check if the crashing issue is resolved.

3. Access Teams on other devices

Microsoft Teams Crashes randomly
  1. If the Microsoft Teams desktop client is not working, try accessing the app from your smartphone.
  2. In case you don’t have it installed, you can download the Teams app from the Apps Store and PlayStore.
  3. If your work is not completely dependent on desktop apps, try using mobile apps till the issue is resolved.

4. Delete the local cache

A Corrupt Microsoft apps cache can cause your apps to crash during startup. Try deleting the bad cache to fix the problem.

  1. Open File Explorer.
    Microsoft Teams crash issues
  2. Navigate to the following location:
    C:UsersusernameAppDataRoamingMicrosoft
  3. Delete the Teams folder in the Microsoft folder.
  4. Relaunch Microsoft Teams and check if the issue is resolved.

Microsoft Teams being a productivity tool requires to be up and running all the time for uninterrupted collaboration. By following these fixes you can fix crash issues with the app in no time.

3 Easy Fixes to Unsupported Compression Type in Premiere Pro

Adobe’s Premiere Pro is an industry standard when it comes to consumer-grade video editing software and most of it has to do with its wider file format support and ease of use.

However, some users have reported that they are unable to import audio files like MP3, MP4, AVI, or AVCHD due to a very particular error related to unsupported compression type in Premiere Pro.

What does unsupported compression type mean?

The full error reads the file has an unsupported compression type and occurs when you try to import any media file. However, some specific formats – such as AVI – tend to be more affected than others.

Now, the original file can be easily blamed for being incompatible with the AVI format. However, other culprits can interfere such as cache accumulation or folder-related glitches.

Let’s quickly go through some of the most common scenarios:

  • The file has an unsupported compression type MP4, MP3
  • This file has an unsupported compression type MkV, AVI
  • Premiere Pro file has unsupported compression type
  • Adobe Premiere Rush unsupported compression type

Now that you know what you’re up against, you should also know that this is a common issue and mostly occurs due to the incorrect file format. In this article, we take a look at the best possible solutions to fix it.

Why can’t I import MP3 or MP4 files in Premiere Pro?

Before we begging the actual troubleshooting, we advise you to check if you are using a trial version of Adobe Premiere Pro.

Adobe Premiere Pro may not function properly with some file formats when the trial version is active. If you have the license for the product, make sure it is activated.

1. Make changes to the file and/or folder

  1. Change the file directory: Before attempting to import the file, change the file location and then attempt to import the file.
  2. If your file is in one folder, move it to an alternative folder and try to import it from there.
  3. Should the issue persist, try to move the file to another disk or partition and try again.

2. Clear Media Cache Files and Database ✅

    1. Launch Adobe Premiere Pro. 
  1. 2. Click on the Edit menu and select Preferences.

  2. 3. Select the Media tab from the left pane.

    • Here, note down the location for Media Cache Files and Media Cache Database. Copy the location to a notepad or something for better accessibility.
  3. 4. Close the Adobe Premiere Pro app and any other Adobe program running on your computer.

  4. 5. Open the File Explorer and navigate to the Media Cache Files and Media Cache Database locations, one by one.

  5. 6. Rename the folders, Media Cache File, and Media Cache.

  6. 7. Now launch Adobe Premiere Pro again and go to Edit > Preferences > Media.

  7. 8. Click the Clean button for the Media Cache Database folder.

  8. 9. Close and re-launch Adobe Premiere Pro and attempt to import the file with the error and check for any improvements.

3. Change the File Extension

  1. Before importing the media file, try to change the default file extension to something else.
  2. For instance, if you want to import a .avi file, change the extension to .mpg. 
  3. This makes Premiere Pro use a more tolerant import format that will accept a non-standardized file as a valid import.

You can also use the best audio converter software to convert your media files to a supported format.

And if nothing seems to work, try to reinstall Premiere Pro. After uninstalling it, make sure you remove any leftover junk using registry cleaning software. Finally, you can proceed with the reinstallation.

That’s it! We hope you managed to fix the unsupported compression type Premiere Pro error with one of these solutions.