5 Best Spam Filter Apps for Thunderbird to stop Junk Mail

Thunderbird is Windows’s best free email client, allowing users to manage multiple email accounts easily. It also offers offline email access, a feature missing from the built-in Windows mail app.

Additionally, Thunderbird supports third-party calendar app integration for event and appointment reminders. And for the features that are not available by default, the vast collection of third-party add-ons make up for it.

Does Thunderbird have a spam filter?

Any reliable email client includes an efficient spam filter, and Thunderbird is no exception. This open-source email client also comes with a highly-efficient built-in spam filter. The filter uses Bayesian statistical analysis to determine spam from legit emails.

Although the built-in spam filter takes some time to learn about incoming emails, it starts working efficiently once the learning process is over. 

However, for some, the built-in spam filter might be inefficient mainly because it takes time to learn about incoming emails before putting them in the spam box. If you are thinking of third-party solutions, here are some merits they may offer:

  • Implementing time – There is no need to provide them training or time to adjust to new spam levels. Using a multi-layered approach to threat detection, they can quickly isolate even the most sophisticated threats.
  • Unopened email recognition and filtering – A third-party spam filter will often detect emails you get frequently but never read (for whatever reason) and will begin filtering the undesirable information for you, ensuring that it never reaches your inbox.
  • Unwanted email protection – Before they reach your inbox, incoming emails are checked by a third-party service. Your mail server will only receive messages that pass your filter.
  • Dynamix threat protection – In contrast to the static nature of most out-of-the-box spam coverage, third-party spam solutions often use machine learning or dynamic analysis to identify emerging threats and block them before they reach your mailbox.
  • Denial-of-service attack protection – The attack is prevented by a third party checking your email before it reaches your server.

Let us now explore some of the best email spam filters for Thunderbird.

What’s the best spam filter for Thunderbird?

SPAMFighter – Great integration with Microsoft Services
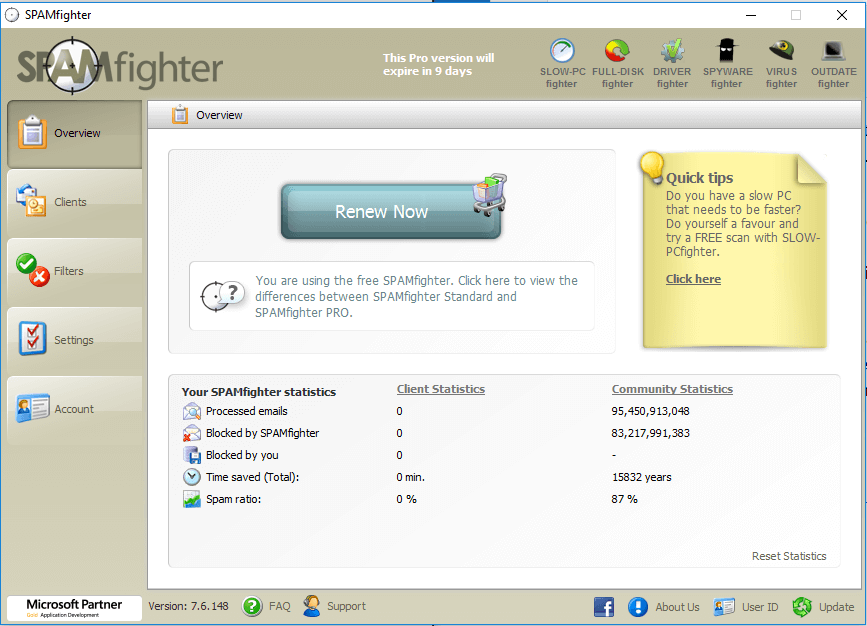
SpamFighter Spam Filter for Thunderbird

SPAMFighter is a third-party spam filter that works with Thunderbird, Microsoft Outlook, Outlook Express, Windows Mail, and Windows Live Mail. It comes in two versions Stand and Pro.

Irrespective of the version, SPAMFighter is a highly-efficient spam filter that can protect users against malware, virus, and phishing attacks by filtering spam from genuine emails.

It works in real-time, scanning every incoming mail and moving the email based on the result to either your Inbox or spam folder. Also, the Spam Blocker feature allows you to tag any undetected email as spam.

Additionally, the developers have offered a multi-language user interface. Furthermore, the Blacklist feature makes blocking emails based on email IDs and domains easier and comes with an automatic whitelist management feature.

Also, the Pro users can protect multiple email IDs, have a license to use in a company, filter emails based on languages, have unlimited Black and Whitelist entries, and have no SPAMFighter footer in their emails.

While the free version may have some limitations, the Pro version is well worth the investment considering the features on offer.

Other important features:

  • Language filtering
  • Account protection
  • Statistics and reporting

    ⇒ Get SPAMFighter

MailWasher – Great mobile options

MailWasher Best Anti Spam Filter for Thunderbird

Firstly, the tool is a free anti-spam filter that works with all major email clients, including Thunderbird, Outlook Express, Windows Live Mail, and Hotmail. It comes in both free and Pro versions with a few differences.

Also, MailWasher is an effective spam filter that works on desktop and mobile computers. It also lets you preview all the incoming emails before forwarding them to your Thunderbird inbox.

Additionally, you can read emails on the server and download them to Thunderbird inbox or delete emails before they reach your inbox. One advantage of this feature is that it allows you to destroy any incoming emails with malware from getting your computer.

Furthermore, MailWasher uses the Bayesian statistical analysis technique to determine the nature of mail based on the email sender. It has comprehensive spam filter tools, including White and Blacklist, customizable filters, and an external blacklist option.

The Pro version of MailWasher costs $40 and allows you to use multiple email addresses. It also offers a recycle bin for deleted emails, a full preview pane for emails, the ability to sync with Mailwasher mobile apps, and technical support from the developers.

Lastly, the lack of country code-based spam filtering or blocking feature is something we missed on an otherwise excellent spam filter.

Other important features:

  • Real-time blocking
  • Content inspection
  • Status tracking and reporting
  • Contact list management

⇒ Get MailWasher for Thunderbird

Thunderbird’s Built-in Spam Filter – Most compatible with Thunderbird

Thunderbird has a built-in Spam filter, as discussed in the article earlier. If you don’t want to use a third-party Spam filter, it is the right time to give the built-in spam filter a fair shot.

The upside to the built-in spam filter in Thunderbird is its ability to accurately filter spam messages from legitimate emails. But, for that to happen, the user must train Thunderbird to identify junk mail by using the Junk tool button to mark a message as junk or not.

After some time, Thunderbird will automatically classify spam mail and put it in the spam box.

Thunderbird uses external classifiers like SpamAssassin, bogofilter, DSPAM, and POPFile to identify spam emails. The user can also exclude emails from the personal address book and collected addresses from being marked as spam.

For the Thunderbird spam filter to work, ensure you enable the adaptive junk mail control from the settings.

Other important features:

  • Customizable junk settings
  • Spam Assasin feature
  • Junk tool for soam training

⇒ Get Thunderbird’s Built-in Spam Filter

CleanMail – Excellent anti-spam and Anti-virus combo

CleanMail is an anti-spam and Anti-virus filter that works with Thunderbird and other email clients.

The programs can protect you from spam, malware, and phishing attacks. It uses the SpamAssassin classifier combined with the Bayes database to determine spam from other emails.

Other notable features of CleanMail include an anti-virus filter, attachment filter, DNS Blacklist, Shared Fingerprint filter, and delay filter.

Lastly, the Cleanmail plan starts at $279 for ten email addresses, but you can try the tool using a 30-days free trial.

Other important features:

  • Unwanted newsletter remover
  • Easy-to-view email organizer
  • Email task automation

⇒ Get CleanMail free trial

POPFile – Great for email classification

POPFile is an automatic email classification program that filters spam emails from your email address.

It uses categories for classification but also allows users to create their classes, like work and personal categories, for better email management.

The software uses the Bayes algorithm and requires the users to train the tool by manually classifying spam and Non-spam mail before it can effectively start organizing spam automatically.

Lastly, you can download the latest version of POPFile from the official website, which sadly was last updated in September 2015.

Other important features:

  • Spam filter
  • Virus-infected emails detection
  • Customization for custom mail headers

⇒ Get  POPFile

In this age where email scrapping tools help promoters bombard anyone with their sales pitch through spamming, it is essential to have one of these best anti-spam filters for Thunderbird to protect your interest.

If you use email accounts from Hotmail or Gmail, you don’t need spam filters as these services offer their spam filters.

However, anyone using a custom email address with Thunderbird must have one of these spam filters to keep their inbox clean.

Reconnect Your Drive: 5 Ways to Remove This Notification

Having a file backup is crucial, and thanks to the File History feature, you can easily create a backup for your files on Windows 10.

Unfortunately, certain issues with File History can occur occasionally, and you might get a notification saying that you need to reconnect your drive on Windows 10. This can be a serious problem due to the importance of your backup files.

What does it mean to reconnect your drive?

Below are some of the potential factors that can cause the File History to show reconnect your drive error:

  • Faulty Windows update: If you are getting an error saying reconnect your drive, your files will be temporarily copied after installing an update, that might be the problem. Uninstalling the update should fix this issue.
  • Outdated driver: In some cases, the problem might be due to outdated disk drivers. You need to update all related drivers to solve the problem quickly.
  • Problems with the File History folder: Some users have found the reconnect your drive notification to be due to issues with the File History folder. The solution to this is to delete the File History configuration folders.

How can I fix Reconnect your drive error?

1. Reconnect your drive and manually start the backup process

  1. Reconnect the drive, press the Windows key + I, and select Update & Security.
    update and reconnect your drive
  2. Select the Backup option.
  3. Now, click on More options.
    more options reconnect your drive
  4. Finally, click the Back up now button.

The File History feature requires an external hard drive to be connected to your PC. If for some reason, your external hard drive has been disconnected for too long, you’ll see a message asking you to reconnect your drive.

To fix this problem, reconnect your external hard drive and manually start the backup process. To manually start the backup, complete the above procedure.

In addition to manually starting the backup process, you can connect your hard drive and wait for the scheduled backup to start automatically.

2. Uninstall recent updates

  1. Press the Windows key + I and select the Update & Security option.
    update and reconnect your drive
  2. Select View update history.
    view update
  3. Now, click Uninstall updates.
    uninstall updates
  4. Finally, right-click the faulty update and select the Uninstall option.
    uninstall reconnect your drive

A lot of users complained that File History stopped working for them after installing recent Windows 10 updates, particularly KB4601319.

They managed to get the program running only after uninstalling the respective update. This is only a workaround, but it works.

3. Make sure your drivers are up to date

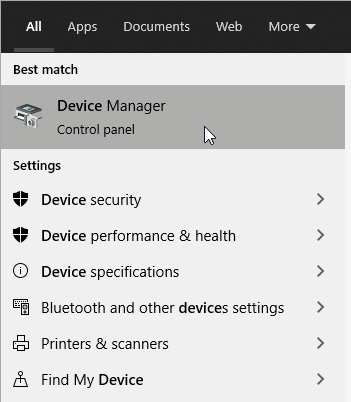
  1. Press the Windows key + X and select the Device Manager option.
    device manager
  2. Click the arrow next to the Disk drives option and right-click your external drive’s driver.
  3. Now, select the Update driver option.
    disk reconnect your drive
  4. Finally, choose the Search automatically for drivers option and install any available update.
    search auto

In some cases, reconnect your drive message appears if your external hard drive isn’t fully compatible with Windows 10. Following the steps above should help you update your drivers manually.

However, if you don’t want the hassle of searching for drivers on your own, you can use a tool that will do this for you automatically.

Of course, this tool won’t be useful if you cannot connect to the internet now. However, once you get online, it will help you to keep all your drivers up to date so that you won’t be in this situation anymore.

4. Delete the File History configuration files

  1. Press the Windows key + R, type %localappdata%, and click OK.
    local
  2. When the Local App Data folder opens, navigate to: Microsoft/Windows/FileHistory/Configuration
  3. After you open the Configuration folder, you should see four files. Delete them.
  4. Finally, start File History, and you should be able to create backups again.

Before trying this solution, create a backup for your files. This process might delete all the files you use for backup on your external hard drive.

So, make sure you save them somewhere safe. After you’ve saved your files to a safe location, complete the above procedure.

5. Format your external hard drive

  1. Open File Explorer, right-click your external hard drive and choose Format.
    format
  2. Click the Start button to format your hard drive.
    start reconnect your drive
  3. After the formatting process is completed, start File History again.
  4. You’ll be asked if you want to save the older version of File History. Choose No and create a new backup.

If you’re getting reconnecting your drive error message, you might want to format the external hard drive you use for backup and recreate your backup again.

Formatting your external hard drive will permanently delete all your files from that external hard drive. So, you might want to back up certain files. To format an external hard drive, follow the above steps.

There you have it: Everything you need to fix the reconnect your drive error. The solutions in this guide are simple and direct and should help you start backing your files up again.

If you want to know how to access and use the File History in the Control Panel, check our detailed guide.

Feel free to let us know the solution that helped you fix this issue in the comments below.

How to Fix Avast This File Cannot be Restored Error [Quick Guide]

Recently, some of our readers have reported that they are receiving error messages on Avast –This file cannot be restored, while trying to recover some quarantined files.

So, we’ve dedicated this article to providing you with simplified steps to restore your files. Also, some of these fixes can troubleshoot Avast if it won’t open.

Why won’t Avast let me restore a file?

The Avast antivirus software has been upgraded to protect users from malware threats and attacks. One of the features of this utility protector is that it quarantines malware-detected files in a Safe Virus Chest.

Now, the reason users are experiencing problems with restoring such files from the Safe Virus Chest is mostly because of false-positive detection.

This means that files that seem clean to a user are detected as malware by Avast, hence the difficulty in restoring such files. You can stop Avast from blocking download files since they usually are targeted by the antivirus.

Now that you know the reason behind the Avast –This file cannot be restored error message, follow the solutions below to fix it.

How do I fix Avast if it doesn’t allow me to restore files?

Before starting the troubleshooting, you should perform the following quick checks that have worked for other users:

  • Confirm that you’re running the latest Avast antivirus software.
  • Simply close and reopen the Avast Virus Chest and check if your file can be recovered.
  • Check if your Windows version is compatible with the Avast version.

After confirming the above checks, if the error persists, you can move to the next section to apply advanced solutions.

1. Reopen the Virus Chest and add file to exception

  1. Left-click the Start button, type avast antivirus, and click Open.
  2. Click on Protection on the left pane and select Quarantine.
  3. Right-click on the file that you want to restore and select Restore and add exception from the dropdown that appears.

By re-opening the Virus Chest/Quarantine, you should be able to access the files and restore them.

Also, due to the constant monitoring for threats, Avast antivirus may cause high CPU usage. So, check this guide to troubleshoot the problem.

2. Repair Avast Antivirus software

  1. Right-click the Start button, type the control panel, and click Open.
  2. Click on Uninstall a program under Programs.
  3. Locate and click the Avast antivirus, then click on Uninstall.
  4. Once the Avast Setup wizard appears, select Repair.
  5. Hit Yes to confirm the action and click Done.
  6. Restart your PC.

3. Clean install Avast antivirus

  1. Open Control Panel, then go to Programs.
  2. Navigate to Uninstall a program under Programs and Features.
  3. Choose Avast Antivirus and click Uninstall.
  4. Select Uninstall in the app uninstaller pop-up and agree to restart in Safe Mode.
  5. Once the uninstallation is complete, restart your computer, and reinstall Avast Antivirus.

Reinstalling Avast antivirus without the prior cache files might help fix the problems preventing you from restoring files from the Virus Chest.

Also, check out this guide for other ways to uninstall the Avast antivirus in Windows 11.

4. Download the latest Windows Update

  1. Press the Windows + I keys to open the Settings app.
  2. Select Windows Update and click on the check for updates button.

Sometimes, if your Windows operating system is outdated, it can also cause the Avast this file cannot be restored error.

However, if the Windows Update fails to work, then try the fixes outlined here to solve the issue.

Having tried any of the above fixes, you should be able to fix the error. In case you need help to stop Avast from blocking your file download, you can explore our article on that.

And if you come across avastui.exe application errors too, this directory is the best solution for you.

If you have any questions or suggestions, do not hesitate to use the comments section below.

AMD and Nvidia GPU in Same PC: Best Tips to use Them

The AMD and NVIDIA GPUs were created to manage graphics. Users are used to having either of them on their PCs.

However, what do you think about using AMD and NVIDIA GPUs on the same PC? This guide will show you how to install and use the two graphics cards and get the best value possible.

What do you need if you want to use AMD and Nvidia GPU on the same PC?

Unfortunately, you can’t simply use any PC with any configuration for this. That’s why we will list some of the needed requirements, so you don’t start tweaking with no results.

  • First, you will need a motherboard that supports Crossfire or SLI technologies or even both because they will boost the success rate of this experiment
  • Of course, you will need at least two PCI x16 slots for the two cards
  • Try to provide a powerful CPU, an i7 of at least 9th generation or an i5 of 10th generation because the load will be pretty high
  • Some users who experimented with this also recommend using outdated drivers for the graphics cards, although in our guide below, we went with the latest drivers
  • Make sure you supply the right amount of power to run both cards at the same time
  • Getting DirectX 12 is a must, so you need to download it before anything else
Tip icon Tip
Important notice:
This is a guide for advanced users. If you’re not tech aware, do not attempt to do this. Also, the guide requires free access to computer components, and opening the PC case might void its warranty.

How can I use AMD and NVIDIA GPUs on the same PC?

  1. Download and install the Display Driver Uninstaller.
    amd and nvidia gpu in same pc ddu download
  2. Go to the AMD website to download the latest driver for your graphics card.
    AMD
  3. Now, go to the NVIDIA support website and get the right driver for your GPU. Double-check and save them in a known location.
    nvidia
  4. Remove the LAN cable to disconnect your PC from the Internet and disconnect it from other wireless connections.
  5. Now, run the DDU software to remove both graphics drivers. If you have not used the software before, you can check the linked guide for the detailed steps to use it.
    ddu
  6. Shut down the PC and install the AMD graphics card in a slot.
  7. Next, install the AMD driver you downloaded in Step 2.
  8. After installing the drivers, restart the PC.
  9. Remove the AMD card and install the NVIDIA GPU card.
  10. Now, install the NVIDIA driver you downloaded in Step 3.
  11. After the restart, shut down the PC and install the other card, so they are together now.
  12. Power up your rig and plug back the LAN cable.

That is how you can have both AMD and NVIDIA GPU in the same PC for mining and gaming.

Note that It’s important to disconnect your PC from the Internet before uninstalling the drivers. Otherwise, the system will install some default drivers instead.

Also, when installing the NVIDIA card, don’t install the GeForce Experience software because it can cause some issues.

If you have any problems after a while, perform the steps again because the drivers might get updated automatically, which can produce some issues.

To conclude, you can have AMD and NVIDIA cards on the same mining rig, and now you know how to install their drivers on Windows 10. Again, note that this guide is for advanced users who can take responsibility for opening up their PCs.

If you’re interested in the latest graphics cards, check out our selection of the top NVIDIA GPUs for gaming that will also do a great job on mining.

Feel free to share your experience with the installation of the two graphic cards in the comments below.

Fix DVD Autorun: 5 Ways to Get DVDs to Play Automatically

The DVD Autorun is the menu that pops up when you insert a CD/DVD into the optical drive of your machine. It asks you how to handle the disk and remembers your selection for future reference.

However, some users are complaining that the DVD Autorun feature is not working. This guide will show you the seamless methods to fix the feature and get back to playing your DVDs automatically.

Why is my DVD Autorun not working?

There are several reasons your DVD Autorun feature is not working. Listed below are some of the popular causes of the problem:

  • Antivirus interference: The major cause of the autoplay DVD player feature not working is interference from your security software. Some third-party antiviruses see the feature as dangerous because it can give a free ride to malicious programs on your PC. In this case, you might need to disable your antivirus to make the feature work.
  • Disabled services: If the Shell hardware detection service is disabled, you might experience issues with the Autorun feature. The solution here is to enable the service.
  • Deactivated autoplay feature: Sometimes, the cause of this issue might not be far-fetched. It might just be that the feature is disabled in your settings. You need to enable it to get it working again.

How can I fix the DVD Autorun?

Before applying the fixes in this guide:

  • Try disabling any third-party antivirus software on your PC. This is because it might be blocking the Autorun feature from working.

If this does not work, you can now proceed to the solutions below.

1. Enable AutoPlay

  1. Press the Windows key + I shortcut to open the Settings app and select the Devices option.
    devices dvd autorun fix
  2. Now, click AutoPlay in the left pane and toggle the switch under Autoplay forward to enable it.
    autoplay
  3. Click the dropdown under Removable drive and select Ask me every time.
    ask

Sometimes, the simplest fix might be the one to fix the DVD Autorun issue. The problem might be that you have not enabled the feature. This you can do by following the steps above.

You can turn on DVD Autorun by enabling AutoPlay in Settings, and you can also follow this complete step by step guide on how to enable AutoPlay in Windows 11 to make Windows react automatically when you insert a disc.

2. Check AutoPlay settings in Control Panel

  1. Press the Windows key + S, type control, and choose Control Panel from the results list.
    control dvd autorun fix
  2. Type auto in the search bar and select the AutoPlay option.
    control
  3. Now, check the box for Use Autoplay for all media and devices.
    use  dvd autorun fix
  4. Locate the DVDs section and choose the default action for each DVD type.
  5. Finally, click the Save button to save changes.
    save

Another option to fix the DVD Autorun issue is to enable it from the Control Panel. This gives you more options and offers more specificity than the Settings app.

3. Update your PC

  1. Press the Windows key + I and select the Update & Security option.
    update and
  2. Click the Check for updates button.
    check for
  3. Finally, install any available updates.

4. Change Group Policy settings

  1. Press the Windows key + R, type gpedit.msc, and click OK.
    DVD AutoPlay not working Windows 10
  2. In the left pane, Navigate to the User Configuration > Administrative Templates > Windows Components > AutoPlay Policies.
  3. In the right pane, double-click Turn off Autoplay.
    AutoPlay not working CD Asus laptop
  4. Select Not Configured and click Apply and OK.
    CD won't autorun Windows 10

If the autoplay feature is disabled in the Group Policy, you might not be able to use it. The easy way to fix the DVD Autorun feature here is to follow the steps above to enable it again.

5. Start Shell Hardware Detection service

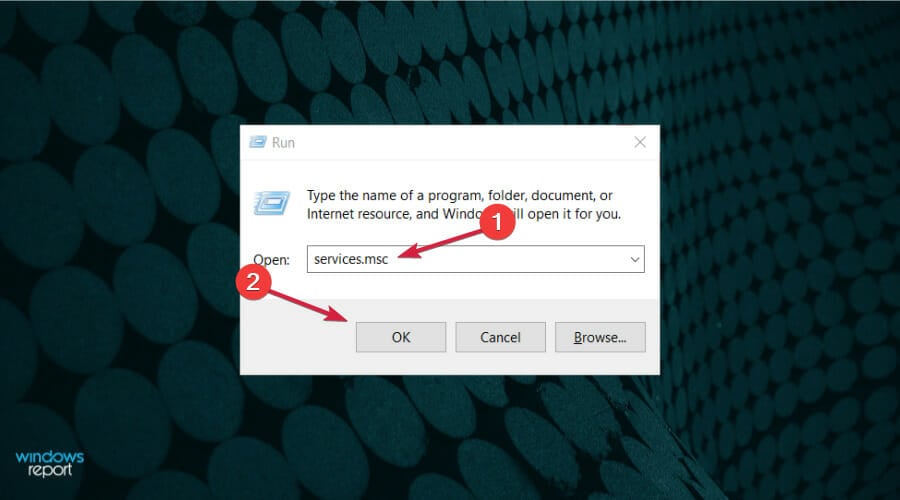
  1. Press the Windows key + R, type services.msc, and click OK.
    AutoPlay not working CD Asus
  2. When the Services window opens, locate and double-click the Shell Hardware Detection service.
    CD won't autorun Windows 10
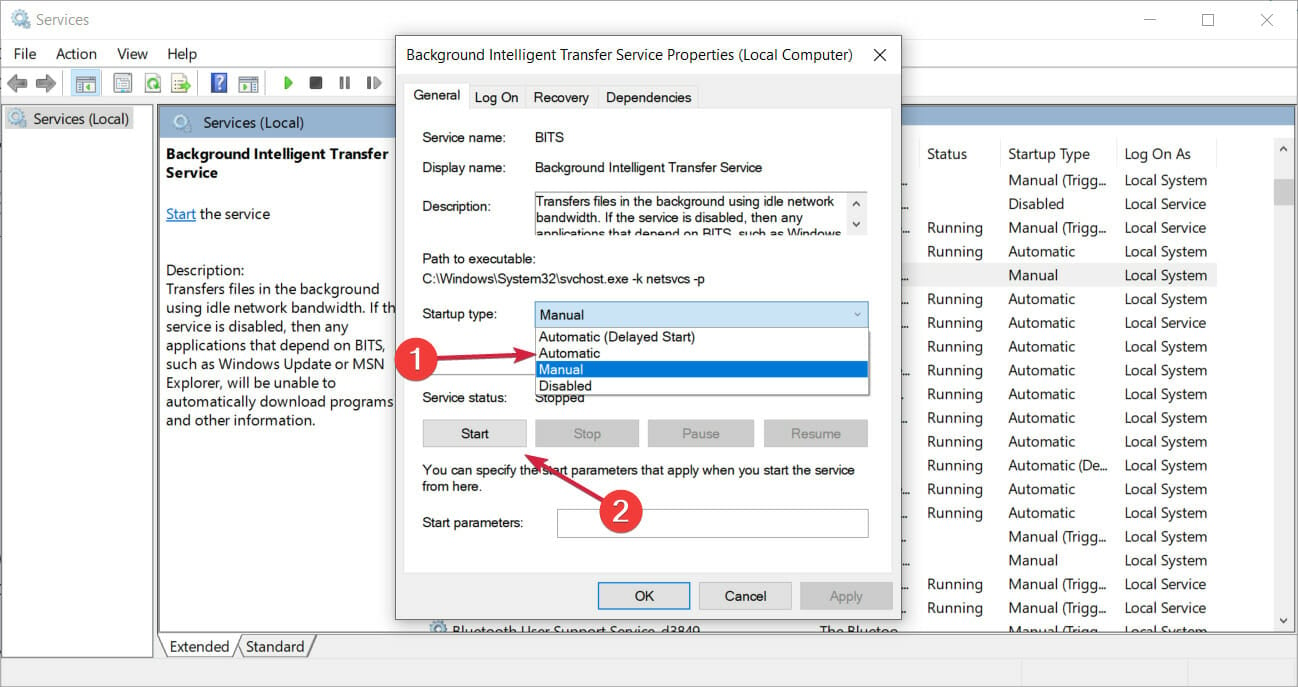
  3. Set the Startup type to Automatic and click the Start button.
  4. Finally, click Apply and OK to save changes.
    AutoPlay not working windows 8

To fix issues with the DVD Autorun feature, you need to ensure the Shell Hardware Detection service is running. This is because the service is one of the components that enable the feature to work properly in the first place.

Issues with the DVD Autorun feature can be somewhat annoying, but we hope you managed to fix them using one of our solutions.

If you want to know the easy ways to manage your autoplay settings on Windows 10, check our detailed guide for the steps you need to follow.

Feel free to let us know the solution that helped you fix this issue in the comments below.

Taskbar Is Not Working: 11 Simple Ways to Unfreeze It

Problems with the user interface are common, not just in Windows 10, and many reported that Taskbar is not working for them.

So if your Taskbar is unresponsive or if it’s not working at all, this guide will help you fix it for good.

Why is my Windows 10 Taskbar not working?

There are many reasons for Taskbar issues, but the most common ones are the following:

  • System glitches – Sometimes, your operating system can encounter a glitch causing this issue to appear. So if you’re having problems with File Explorer or other components, just restart the process.
  • Corrupted components – Sometimes, Windows components can get corrupted. If this happens, you need to reinstall preinstalled apps to fix the problem.
  • System services – Windows requires certain services in order to run properly. If they aren’t working, you need to open services.msc and start them manually.

What are other Taskbar issues that I can encounter?

  • Unclickable Taskbar in Windows 10 – Many users reported that their Taskbar is unclickable. This can be a big problem since you won’t be able to use your Taskbar at all.
  • Windows 10 Taskbar frozen – Sometimes your Taskbar might stop responding. In fact, several users reported that their Taskbar is completely frozen.
  • Right click Taskbar not working – Several users reported that right click on their Taskbar isn’t working. However, you should be able to fix this problem by using one of our solutions.
  • Taskbar thumbnails not working – According to users, it seems that Taskbar thumbnails aren’t working. If you have this problem, the Taskbar preview won’t work for you at all.
  • Pin to Taskbar not working – Users tend to pin their favourite applications to the Taskbar in order to access them faster. However, many users reported that this feature isn’t working for them.
  • Lock the Taskbar, autohide Taskbar not working – Another problem with Taskbar is the inability to lock or automatically hide the Taskbar. This is a minor problem, but you should be able to fix it using our solutions.
  • Taskbar search not working in Windows 10 – Users reported that the search feature isn’t working for them. This can be a big problem, especially if you use the search feature frequently to access applications.
  • Taskbar not working on startup – Several users reported that issues with Taskbar occur right on startup. This means that you won’t be able to use your Taskbar at all on Windows 10.
  • Taskbar jump list not working – Several users reported that Jump lists aren’t working on their PC. This can be a problem if you use Jump lists frequently to open recently used files.
  • Cortana Taskbar not working – According to some users, it seems that Cortana isn’t working on their Taskbar. Cortana is an integral part of Windows 10, and not being able to use it can be a big problem.
  • Taskbar buttons not working – Another relatively common problem with Taskbar. A few users reported that Taskbar buttons aren’t working, but you should be able to fix this problem using one of our solutions.

So, let’s dive right in and see what you can do in order to fix your Windows Taskbar.

What can I do if the Taskbar is not working?

1. Check drivers

Although it seems unlikely, there’s a chance a bad driver is causing the problem. It is known that incompatible drivers can make quite a mess in Windows 10, and a disrupted taskbar is one of the possible issues.

So, make sure all your drivers are up to date and update any outdated drivers. This is a simple procedure, and you can perform it manually or automatically with specialized driver updating tools.

2. Restart Windows Explorer

  1. 1. Press Ctrl + Shift + Esc and choose to open Task Manager.

  2. 2. Navigate to the Processes tab.

  3. 3. Locate Windows Explorer in the list.

  4. 4. Right-click on it and select End task.

    end the windows explorer task
  5. 5. The task will re-launch itself after a couple of moments, so check if everything is okay with your taskbar now, after you restarted Windows Explorer.

  6. Before we get to some ‘system-messing’ solutions that include Command Prompt and PowerShell, let’s try one simpler. A simple restart of the Windows Explorer will restore the functionality of the taskbar, and other user interface features.

    So if your taskbar problem is not that serious, this solution should work just fine.

This solution might solve the problem, but only temporarily, so if the problem returns, try the solution below. Can’t open Task Manager? Don’t worry, we’ve got the right solution for you.

3. Perform a PowerShell fix

  1. Right-click on the Start Menu button and choose Windows PowerShell (Admin)
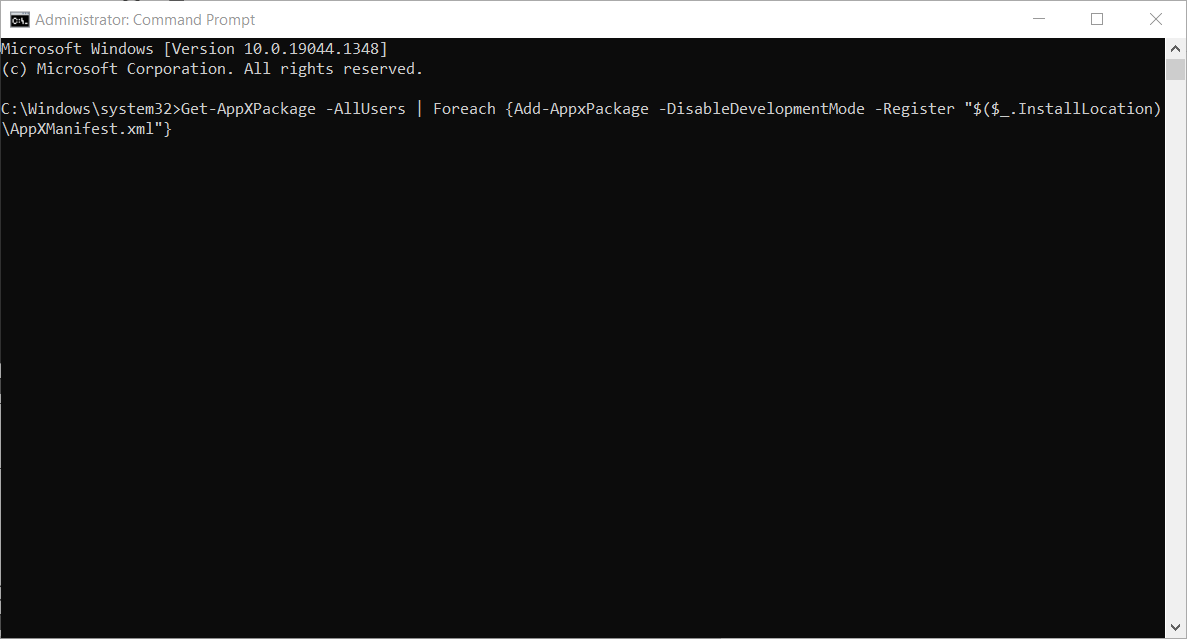
  2. Now paste the following command in press Enter key: Get-AppXPackage -AllUsers | Foreach {Add-AppxPackage -DisableDevelopmentMode -Register "$($_.InstallLocation)AppXManifest.xml"}
    Taskbar thumbnails not working
  3. Now, close PowerShell, and go to the following folder: C:/Users/your_username/AppData/Local/
  4. Locate and delete TileDataLayer folder.
    Pin to Taskbar not working
  5. Now check if your taskbar is working, you don’t even have to restart your computer.

Okay, so if restarting Windows Explorer didn’t get the job done, or it just temporarily solved the issue, you can try some more advanced solutions.

4. Reinstall apps or ShellExperienceHost and Cortana

  1. Right-click the Start Menu, and choose Windows PowerShell (Admin).
  2. Enter the following commands (each command resets one feature) into PowerShell, and press Enter: Get-AppxPackage Microsoft.Windows.ShellExperienceHost | foreach {Add-AppxPackage -register "$($_.InstallLocation)appxmanifest.xml" -DisableDevelopmentMode}
    Lock the Taskbar not working
    Get-AppxPackage Microsoft.Windows.Cortana | foreach {Add-AppxPackage -register "$($_.InstallLocation)appxmanifest.xml" -DisableDevelopmentMode}
    Taskbar search not working in Windows 10
  3. Wait for the process to finish.

If you don’t want to reinstall all of your apps, your best bet is to just re-register Cortana, and ShellExperienceHost.

5. Modify your registry

  1. Press Windows key + R and enter regedit.
  2. Now navigate to the following key: HKEY_LOCAL_MACHINE\SOFTWARE\Policies\Microsoft\Windows\
  3. Look for Windows Feed key and navigate to it. If it’s not available, right-click Windows key and choose the new Key option. Now name it Windows Feed.
  4. Once you enter Windows Feed key, double-click the EnableFeeds DWORD and set it to 0.
  5. If it’s not available, right-click the right pane and choose the option to create a new DWORD (32-bit Value) and name it EnableFeeds. The new DWORD will automatically be set to zero.

6. Perform System Restore

  1. Type Recovery in the Search bar and select Recovery from the list.
  2. Select Open System Restore.
    Cortana Taskbar not working
  3. System Restore window will now open.
  4. Click on Next to proceed.
    Taskbar buttons not working
  5. If available, check to Show more restore points.
  6. Select the desired restore point, and click on Next.
    Unclickable Taskbar Windows 10
  7. Follow the instructions on the screen to complete the restoration process.

7. Use Troubleshooter

  1. Go to the Settings app and go to Update & security section.
  2. Select Troubleshoot and then click on Additional troubleshooters.
  3. Select Windows Store apps and click on Run the troubleshooter.

8. Start Application Identity Service

  1. Go to Search, type services, and open Services.
  2. Find Application Identity service.Taskbar thumbnails not working
  3. Right-click on it, and choose Start.

There are some reports that suggest starting the Application Identity service will fix the taskbar issue.

9. Use DISM

  1. Press Windows key + X and select Windows PowerShell (Admin).
  2. Type the following command: DISM.exe /Online /Cleanup-image /Restorehealth
  3. Wait for the process to finish.

10. Create a new user account

  1. Press Windows key + I to open the Settings app. Next, go to Accounts.
  2. In right pane and select Family & other users in the right pane. Next, click on Add someone else to this PC.
  3. Choose I don’t have this person’s sign-in information.
  4. From here, select Add a user without a Microsoft account.
  5. Enter a username, password, and password hint, and click the Next button.

Once the new account is created, switch to it and check if the problem is resolved.

11. Perform a clean install

  1. Open the Settings app by using Windows key + I shortcut. Next, go to Update & security.

  2. Next, go to Recovery and click the Get started button in the Recovery section.
  3. From the list of options, choose Remove everything or Keep my files. We suggest using the latter, but if that doesn’t work, use the option to remove everything.
  4. Follow the instructions on the screen to complete the process.

What can I do if the Taskbar is not working on Windows 10 after an update?

  1. Press Windows key + I to open the Settings app.
  2. Navigate to the Windows Update section and select View update history.
  3. Now click on Uninstall updates. Uninstall Features Updates to Fix Outlook issue
  4. Locate the update you want to remove and click on Uninstall.

That’s all for this article, I hope at least one of these solutions helped you to restore the functionality of your taskbar.

This isn’t the only issue that you can encounter, and if your Taskbar is flickering, be sure to try the solutions from our dedicated guide.

If you have any comments, questions, or maybe some other solution for this problem that I didn’t manage to find, please write that down in the comments section below.

Libeay32.dll: What is It & How to Fix It if It’s Missing

There are many DLL file missing errors users can encounter when using their PC. These errors prevent you from accessing your apps or even installing Windows. The missing Libeay32.dll is a common one.

Also, users can run into Autorun.dll errors on Windows 11 when there is an issue with the file.

What is libeay32.dll?

The libeay32.dll file is a Windows Dynamic link library file for ensuring apps operate properly. It is an essential system file required by some software on the computer to run or install the software.

Furthermore, it contains a set of instructions and driver functions for programs to use, which Windows may apply.

Why is libeay32.dll missing on my PC?

The most common reason for the file missing error is the libeay32.dll file was deleted from the system. Also, you can encounter errors due to corrupt system files on your PC.

Other factors that can cause the libeay32.dll file to be missing on your PC are:

  • Malicious software – Having malicious software installed on your computer can cause it to malfunction. It can cause the libeay32.dll file not to be available on your computer.
  • Issues with the Windows registry – The libeay32.dll file missing can be due to broken registry items. When the database is not intact, it can affect Windows operations, as well as the app & services running on the Windows PC.

Though the causes may vary, you can fix the problem by troubleshooting your PC.

How do I fix the libeay32.dll if it’s missing in Windows 11?

Before trying any advanced fixes, go through the following:

Peradventure the problem persists, go ahead with the solutions below.

1. Restore Libeay32.dll from the Recycle Bin

  1. Find the Recycle Bin icon on your desktop, right-click, then select Open.
  2. Check if the Libeay32.dll file is in the Recycle Bin or search for it by using the search space at the top left corner.
  3. Right-click on the libeay32.dll file, and select Restore from the drop-down to file to its original directory.
  4. Exit the Recycle Bin.

Try using the app that prompted the libeay32.dll file missing error and check if the error appears.

Likewise, if you cleared your Recycle Bin and the file is permanently deleted, you can use file recovery software for your PC.

2. Run a System File Checker scan

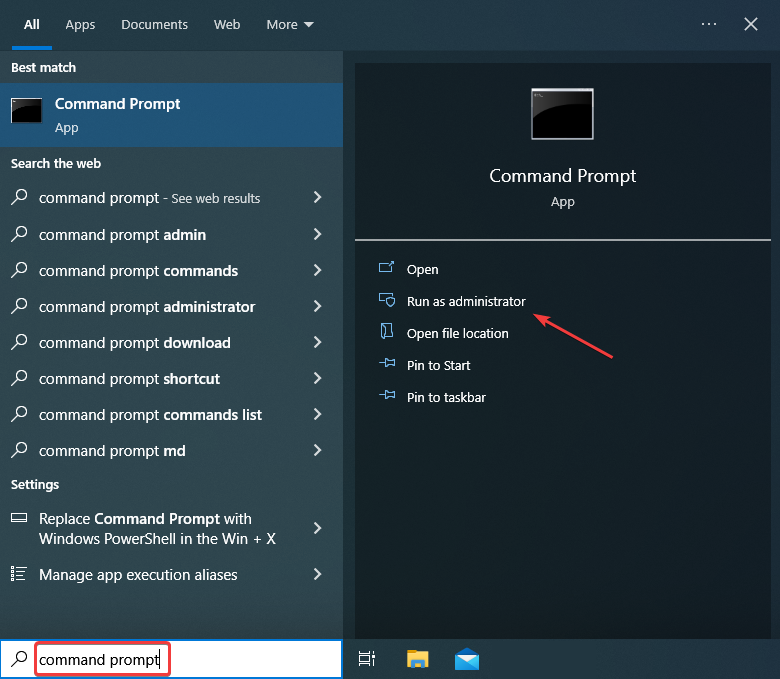
  1. Left-click the Start button, type command prompt, and select Run as administrator.
  2. Choose Yes on the User Account Control prompt.
  3. Type the following command and press Enter: sfc /scannow
  4. Restart your PC and check if the libeay32.dll missing persists.

The System File Checker scan will find and repair corrupt system files that may prevent the libeay32.dll from being accessible.

Check our article about what to do if nothing happens when you select run as administrator on Windows 11.

Aside from the manual steps above, we suggest you use third-party repair software to perform this procedure automatically.

They help you run a scan of your device, then provide you with a comprehensive report of the corrupted files found, and finally locate healthy files as their replacement.

3. Run System Restore

  1. Press Windows + R key to open the Run dialog box, type control, then press Enter to open the Control Panel.
  2. Type recovery in the Control Panel search bar and select Recovery.
  3. Then click Open System Restore.
  4. Click Next after clicking Choose a different restore point.
  5. Choose the restore point you want to restore from, then click Scan for affected programs.

The System Restore will backdate your PC to an earlier point in time. It will remove apps, drivers, and updates installed after the restore point was created without affecting your files. Read how to fix Restore Point if it’s not working on your PC.

4. Reinstall the app prompting the error

  1. Press Windows + R key to open the Run dialog box, type control, then press Enter to open the Control Panel.
  2. Click on Programs, then select Programs and Features.
  3. Find the program from the list, right-click on it, then select Uninstall from the drop-down.
  4. Follow the onscreen instructions to complete the uninstallation.
  5. Download and install the program on your PC and check if it prompts the error again.

Reinstalling the concerned program should fix the problem causing the error.

You can check other steps for uninstalling apps on Windows 11 if you can’t get through the steps above.

Alternatively, our readers can check our list of the best DLL repair tools they can use for their computers.

Kindly leave your comments if you have suggestions or questions below.

Task Scheduler on Windows 11: Best 6 Scheduling Tips

For those unfamiliar with this feature, Task Scheduler is a component tool of Microsoft Windows. It allows you to schedule the PC’s programs/scripts to launch at pre-defined times or after specified intervals.

Task Scheduler is available on Windows 11, too. And because it is required to understand better how this can be used, we’ve prepared a dedicated article. However, keep in mind that you can also consider downloading additional Windows task scheduler software, but today’s subject is less time-consuming.

What does Task Scheduler do?

This is an essential utility that can help in the following:

  • Start time scheduling – As mentioned before, with Task Scheduler, you can organize when to start specific apps and programs.
  • Message delivery – You may also apply a particular time to send specific email messages.
  • Notification schedules – The utility can also be configured to send notifications automatically. This is well-known as job scheduling, which will simplify both individual and business digital work.
  • Increases planning time – By using Windows 11’s Task Scheduler, you’ll save much more planning time and won’t have to execute specific actions manually, such as opening a site at a scheduled time.

There are few limits to what it can do. If the required conditions are met, you can schedule a task to run a backup script every night or send an e-mail whenever a specific system event occurs.

You should check out the full Microsoft guide for more information about the Task Scheduler tool.

How can I use Windows 11’s Task Scheduler?

1. Schedule tasks with basic settings

  1. 1. Open the Start menu by hitting the Windows key.

  2. 2. Type task scheduler in the search box, then click on the result to open the app.

    open task manager windows 11
  3. 3. Look at the left window pane, then right-click on Task Scheduler Library and select the New Folder option.

    create new folder in task scheduler windows 11
  4. 4. Give a name to that folder, then click on OK.

    select folder name task scheduler windows 11
  5. 5. Expand the Task Scheduler Library, then right-click on the folder you’ve just created, and choose to Create Basic Task. 

    create basic task windows 11
  6. 6. Once the Create a Basic Task Wizard window is opened, enter the name and description of the task.

    set task name and description windows 11
  7. 7. After all is set, click on Next.

  8. 8. Choose when do you want the task to start, then click on Next.

    task trigger set
  9. 9. Now you will be asked to set the time for the program to start. After you set it, click on the Next button.

    daily trigger task scheduler in windows 11
  10. 10. Then, you’ll have to set the task you want to perform.

    windows 11 scheduled tasks set
  11. 11. After all is set, click on Finish.

  12. Using Windows 11’s built-in Task Scheduler is very easy and can be done by anyone. You can give your task a name and description, trigger, and many other configurations.

2. Schedule tasks with advanced settings

  1. Open the Start menu by hitting the Windows key. Type task scheduler in the search box, then click on the result to open the app.
  2. Look at the left window pane, then right-click on Task Scheduler Library and select the New Folder option.
    Task Scheduler Windows 11
  3. Give a name to that folder, then click on OK.
  4. Expand the Task Scheduler Library option, then right-click on the folder you created and choose to Create Task.
  5. Set a name and description for the task. Note that you can also change the user or group for which you want to run the task.
  6. On the same window, you’ll have other options to set, like whether to run the program when the user is logged in, whether logged in, or whether you want to run it with the highest privileges.
  7. Once done, click on OK. 

3 Manage Windows 11’s Task Scheduler Triggers

  1. Open the Start menu by hitting the Windows key. Type task scheduler in the search box, then click on the result to open the app.
  2. Look at the left window pane, then right-click on Task Scheduler Library and select the New Folder option.Task Scheduler Windows 11
  3. Give a name to that folder, then click on OK. Then Expand the Task Scheduler Library option, right-click on the folder you created and choose to Create Task.
  4. To specify the triggering condition of the task, click on the Triggers tab, then on the New button.
  5. You can run the task on a schedule, log on, idle, on an event, at task creation/modification, connected or disconnected from the session, etc.
  6. After doing so, click on OK. 

4. Adjust Windows 11’s Task Scheduler Actions

  1. Perform steps one to three of method 3.
  2. To set the task’s action, click on the Actions button, then click on the New button.
  3. You can select whether the action will start a program, send an email, or display a message. Customize the task according to your preferences.
  4. Click on OK to apply the changes.

5. Personalize Windows 11’s Task Scheduler Conditions

  1. Perform steps one to three of method 3.
  2. To adjust the task’s conditions, click on the Conditions tab, then on New.
  3. You can set conditions for idle state, power, and network. Each of them has certain specifications that should be chosen according to your necessities.
  4. Click on OK to apply the changes.

6. Take a look at Windows 11’s Task Scheduler Settings

  1. Perform steps one to three of method 3.
  2. You can personalize settings by selecting the Settings tab, then clicking on New.
  3. In this window, you can adjust additional settings affecting the task’s behavior.
  4. Once done, click on OK, and the task will be created.
Note icon NOTE
If you ever need to edit or delete the task, right-click on it and select Edit or Delete.

Windows 11 problems are usually not so different from the previous OS. So, if you experience issues with this tool, check out what to do if Windows Scheduled Tasks can not properly run on Windows 10.

Even if, like any other app, Windows 11 Task Scheduler can get into specific issues, there are plenty of solutions for each.

If you are looking for ways to enable Task Scheduler History to check information related to tasks, including the date and time of execution or status of the task, check out our guide.

We prepared this article to present its best features. Remember that it will guarantee a digital environment organization and simplify your work.

Are there other curiosities regarding this subject? Do not hesitate to leave a comment in the section below.

8 Best PUP Remover Tools to Clean the Junk Software

Today, we will show you the top Potentially Unwanted Program remover tools for Windows PC. You may be wondering what a PUP is.

What a Potentially Unwanted Program (PUP) is?

So, we will start by defining PUP. A Potentially Unwanted Program is software that gets on your system while installing another program.

The installation prompts request that you install additional bundled components, such as toolbars, programs, adware, etc., on your PC.

However, these unwanted computer programs are bundled on many freeware installers on the WWW. Hence, you need to beware of optional installs as they may be budding PUPs.

To avoid labeling downloadable programs as malware, your antivirus software labeled these unwanted programs as Potentially Unwanted Programs.

How do I get rid of a PUP?

PUPs damage your PC by replicating its process activity; some Windows users reported that PUPs increase on their PCs, especially once connected to the Internet.

These programs can wreck the PC even more than viruses; for instance, a web browser with more than ten PUP toolbars will be slow, impede performance, and even constantly crash.

You can get rid of them manually or by using specialized software. The manual process is laborious, while the software process comes with numerous advantages, including:

  • Auto-detection – You would not have to point the tool towards a direction to work on; it will automatically detect these PUPs.
  • Faster alternatives – Because the tool does all the work for you, it is a fast and convenient alternative. It also will ensure operations are no longer uncompleted because of the PUPs.
  • Multi-threat removal – Other than PUPs, because these apps are often antivirus, they protect your computer all around.

Now we have discussed these benefits, let us look at our top recommendations.

What are the best PUP removal tools?

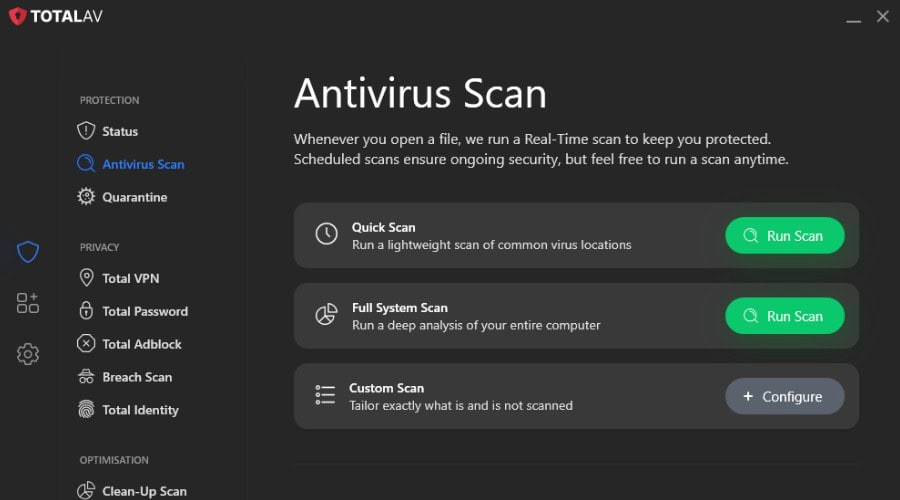
TotalAV – Catches bundled junk before it settles in

TotalAV antivirus scan

TotalAV flags potentially unwanted programs during installation and in its scans, so toolbars, bundled ‘optimisers’ and other junk do not get a foothold.

If some has already crept in, the tune-up tools help you clear it out: an application uninstaller for the leftovers, a startup manager for the things that launch with Windows, and a browser cleanup tool for unwanted extensions and cookies. Real-time protection and WebShield cover the actual malware side.

  • Flags potentially unwanted programs in scans and on install
  • Application uninstaller for leftover junk
  • Startup manager and browser cleanup
  • Real-time protection and WebShield for real malware
TotalAV

TotalAV

Keep your computer safe from PUP with one of the best antiviruses available.
Check Price Visit Website

Bitdefender Antivirus Plus – Excellent choice for blocking PUPs

Bitdefender is the no.1 antivirus solution on the market, so it’s undoubtedly the best solution to protect you from Potentially Unwanted Programs (PUP).

You won’t need to worry about their removal, as Bitdefender will block them even before they reach your PC. However, you could have a PUP already installed on your PC without knowing.

Usually, the first scan with Bitdefender will reveal the culprits in an event, and you can get rid of it with a single click.

Lastly, Bitdefender, as a top security solution, will protect you from every single possible threat, not only PUPs but also malware, ransomware, phishing, and all other modern scamming techniques.

Important features:

  • Network threat prevention
  • Vulnerability assessment
  • Anti-fraud
  • Wi-Fi security advisor

Bitdefender Antivirus Plus

Bitdefender will remove any PUPs and protect your PC from them as a top security solution.
Check Price Visit Website

Avira – Great free option

Avira is another freeware antivirus that can protect your computer from multiple cyber threats, including these annoying PUPs.

This tool detects as PUAs (Potentially Unwanted Applications) all those which attempt to inject malicious content or request an unjustified amount of personal data.

Additionally, Avira considers PUP any payment processing app that may overcharge the user without explicit consent.

Lastly, products that require unnecessary access rights or inject unwanted advertising on the device not to mention spy or remotely controlled software, all get detected by the Avira radar.

Important features:

  • Antivirus scanner
  • Ransomware protection
  • Device optimization
  • Browsing Security

Avira

Use a great free security protection tool with radar for any Potentially Unwanted Programs.

Malwarebytes – Expert PUP and malware detection

Another Potentially Unwanted Program removal tool you can use is Malwarebytes. Unlike HitmanPro, Malwarebytes is a free utility that will scan your computer for Potentially Unwanted Programs.

Some types of malware can be difficult to identify and remove. But, that’s not something to worry about when using Malwarebytes. Its efficiency is proven against viruses, spyware, ransomware, and not only.

Lastly, we love it because it is straightforward and highly efficient.

Important features:

  • Centralized threat reporting
  • Cleans infected devices
  • Prevention tools
  • Centralized management

Malwarebytes

Get Malwarebytes for advanced malware protection and easily remove all PUPs from your device.
Free Trial Visit Website

Avast Free Antivirus – Great free antivirus and PUP remover

pup remover

Avast Free Antivirus is another excellent solution that can detect any Potentially Unwanted Programs that want to install into your system.

From the Protection category, you can modify the settings for the Core Shields. Also, you can find there a Potentially Unwanted Programs tab.

Also, you will see three options and can choose how the antivirus will treat PUP. And finally, you can choose to be fixed, ask, or ignore them.

Important features:

  • Ransomware shield
  • Core firewall functionality
  • Software updater

Avast Free Antivirus

Easily detect any PUP that tries to enter your system by using Avast’s advanced services.

IObit Uninstaller – Ideal for bundled software detection

pup remover

IObit Uninstaller is a Windows PUP removal tool. This utility program is ideal for removing stubborn software applications, such as bundled applications, and cleans up all its traces afterward.

The program is primarily an uninstaller that improves Microsoft’s standard approach to removing applications.

Lastly, programs, toolbars, and any traces in the registry or browser extensions are all deleted.

Important features:

  • Resolves hidden software permissions
  • Removes uninstallation leftovers
  • Silences disturbing notifications
  • Locates malicious extensions and software

IObit Uninstaller

A trustworthy removal tool as it can remove any stubborn software application with ease.

Zemana AntiMalware Portable – Great mobile integration

pup remover

You can also use Zemana AntiMalware Portable to scan your PC for installed PUPs. Zemana AntiMalware is a mainly free utility program that scans and removes malicious programs from your PC.

However, there is a paid option for $25. You might argue that at a price of only $25.00 per year, Zemana Antimalware is a genuinely excellent piece of software. The Zemana antimalware desktop and mobile apps are available at this low cost.

Finally, with this tool, you can remove PUP from Chrome and other standard browsers.

Important features:

  • Real-time Antivirus
  • Registry startup scan
  • Scheduled scan
  • Anti-Rootkit

⇒ Get ZemanaAntiMalware Portable

Hitman Pro – Best for use with an antivirus

pup remover

HitmanPro is a security tool that scans your Windows PC and removes PUPs from your system. It is not a standalone antivirus program; you can use it alongside your antivirus program.

We also love it because it has an excellent user interface and is pretty easy to use.

Finally, it does not offer protection to the same extent as some of the tools in this guide, but it should suffice if you want a PUP remover.

Important features:

  • Scheduled scan
  • Password dumping protection
  • Webcam protection
  • Remote session protection

⇒ Get Hitman Pro

After using any of the tools above, your PC should now be free of all PUPs, including DNS Unlocker. However, we recommend you reset your web browser to its default settings.

This will altogether remove all the PUPs leftovers on your web browser. In addition, we recommend that you run a full system scan on your Windows PC.

These tools can help you remove OneLaunch malware and other unwanted software, so give them a try.

Lastly, if you are facing PUP issues afterward (which is most unlikely), let us know by commenting below.

How to Stop Windows from Installing Apps Without Permission

Sometimes, it seems that Windows 10 has a will of its own. Many users reported that the OS ignores their custom settings and performs automatic update installs. In this article, we’re talking about how to stop Windows 10 from installing apps.

What apps is Windows 10 installing without permission?

Windows 10 automatically installs apps and gets various software from the Microsoft Store without user consent.

One such example is the Candy Crush game series. Speaking of which, check out this guide if you want to permanently remove the game from your computer.

Indeed, many users reported that their computers got Spotify installed automatically after getting the latest Windows 10 updates.

These programs either come pre-installed on Windows, or they are gradually installed with every new update.

How do I stop Windows 10 from automatically installing suggested Apps?

1. Turn off automatic app updates

  1. Start Microsoft Store.
  2. Select the Account menu and then select App settings.
  3. Under App updates, set Update apps automatically to Off.
  4. Restart your PC for the changes to take effect.

This will stop Windows 10 from downloading apps and significantly update the existing ones you don’t need.

2. Disable silent installs from the Registry

  1. Press the Windows key + R to launch the Run console, type regedit, and press Enter or click OK.
  2. Go to the following path in the Registry Editor: HKEY_CURRENT_USER\Software\Microsoft\Windows\CurrentVersion\ContentDeliveryManager
  3. Now, double-click the PreInstalledAppsEnabled and SilentInstalledAppsEnabled keys and change their values from 1 to 0 (where 1 is for enable and 0 is for disable).

If Windows 10 keeps installing games, after this solution, it will stop. If you encounter any errors after this procedure, just restore the values.

3. Disable consumer features from the Registry

  1. Use the Windows + R key combination to start Run, type regedit, then hit Enter.
  2. Navigate to the following Registry key: HKEY_LOCAL_MACHINE\SOFTWARE\Policies\Microsoft\Windows
  3. Right-click in an empty space on the right pane, choose New, then select Key, and name the new key CloudContent.
  4. Within the new key, right-click on an empty space from the right, choose New, and select DWORD (32-bit) Value. Set the new value as DisableWindowsConsumerFeatures.
  5. Double-click the new DisableWindowsConsumerFeatures value and change the value from 0 to 1 in the Value data box and then click OK.
  6. Restart your computer for the changes to take effect.

This is an efficient mode of how to stop Windows 10 from installing apps, so make sure you apply it.

We also have a useful article on how to prevent users from installing apps in Windows if that is a related issue you’re facing.

4. Block potentially unwanted apps

  1. Click the Windows Start button and select Settings.
  2. Next, select Update & Security.
  3. Choose Windows Security from the left pane and click on App & Browser control from the right.
  4. In the Windows Security window, select the Reputation-based protection settings.
  5. The Potentially unwanted apps blocking feature should be set to On by default, but if it isn’t, make sure you make the change.

This is how to stop unwanted software installation when it comes to potentially unwanted programs that try to force-install.

How do I uninstall forced installed Windows 10 apps?

  1. Right-click the Start button and select Windows PowerShell (Admin).
  2. Paste the following command into the applet and press Enter to run it: Get-appxpackage -allusers *xboxapp* | Remove-AppxPackage
  3. Now, input the following command and press Enter: Get-appxprovisionedpackage –online | where-object {$_.packagename –like "*xboxapp*"} | remove-appxprovisionedpackage –online
  4. As you might have noticed, the commands will erase the Xbox app. If you want to remove other preinstalled apps, replace xboxapp from the commands with the name of the app you want to get rid of.

You might also consider stopping Windows 10 automatic updates; however, we don’t recommend doing that for a longer period.

Some of our readers reported rightfully: Programs keep installing themselves on my computer! Well, now you know how to stop Windows 10 from installing apps and get rid of the ones you don’t need.

There are numerous apps that can be installed without permission, and man are worried about OneLaunch malware, but we tackled that issue in another guide.

If security is an issue, it would be helpful to prevent users from installing third-party apps on PC, and this guide will help you do that.

Npcap OEM: What Is It and Should I Uninstall It

Some users have posted on Microsoft’s support forum about Npcap OEM. They have noticed Npcap listed in Apps & features and wonder what exactly it is.

That’s not surprising, as unrecognized apps/programs can sometimes be viruses, and users always have the urge to uninstall them. So, in this guide, we’ll look closely at what Npcap OEM is used for.

What is Npcap OEM?

The Npcap OEM is a tool for packet capture and network analysis. It has so many benefits, and below are some of its features:

  • Helps to facilitate the capture of raw packets
  • Filters captured packets according to specified rules
  • Gathers statistical information on your network traffic
  • Compatible with WinPcap
  • Can be installed automatically with software that needs it
option

Npcap OEM is a third-party packet-sniffing driver (or library) for Windows platforms. This driver enables software to find the network adapter on your PC.

That library is needed for data capturing (intercepting data packets) on networks for packet analysis. Npcap OEM is available for download at the NMAP.org website.

A free/demo version of the Npcap library and Npcap OEM come with commercial support, regular updates, and redistribution rights. The Npcap OEM license packages are primarily for commercial organizations.

You can download the latest version of the Npcap OEM using the link below.

⇒ Get Npcap

Is Npcap OEM safe?

Npcap is not a virus but can still get installed on PCs without users knowing about it.

That’s because the Npcap library gets installed with software that needs it such as Cisco Packet Tracer and Paessler PRTG Network Monitor.

Therefore, some users might not recognize Npcap when they see it listed in apps.

What software needs Npcap?

Network protocol (or packet) analyzers are the software requiring the Npcap packet-sniffing library. Those applications enable users to monitor network data because they come with Npcap.

With a proper network analyzer tool, users can capture traffic and analyze it with reports and charts.

Wireshark is an example of one network protocol analyzer utility. That open-source software comes with the latest Npcap library version, which gets installed.

Wireshark needs Npcap to capture live traffic on a network. Our packet sniffer software guide provides details for the best network analyzer tools, so be sure to check it.

Is it OK to uninstall Npcap?

If you need to utilize network protocol analyzer software on Windows 10, you should not uninstall Npcap. However, users who don’t need to capture and analyze data packets don’t need Npcap.

So, you can uninstall Npcap if you don’t need any network protocol analyzer software manually or using an uninstaller software.

How do I uninstall Npcap?

  1. Press the Windows key + R hotkey, type appwiz.cpl, and select OK.
    appwiz
  2. Then, right-click Npcap and click Uninstall.
    uninstall npcap oem
  3. Now, press the Windows key + X and select Device Manager.
    device manager
  4. Double-click the Network adapters option and right-click the Npcap Loopback Adapter.
  5. Select the Uninstall device.
    uninstall npcap oem
  6. Finally, check the box for Delete the driver software for this device and click the Uninstall button.
    uninstall button

We have reached the end of this guide. Don’t be alarmed if you notice Npcap OEM on your desktop or laptop. You can easily remove the tool if you don’t need a data packet-sniffing library.

However, make sure not to remove it if you still need any network analyzer tools installed on your computer.

If you are looking for another network performance management software, check our detailed guide for the top options available.

Feel free to share your experience with the Npcap tool with us in the comments below.

What is Windows 11 S Mode: 2026 Explainer

Windows S Mode is a streamlined version of Windows 10 and 11 designed for better security, performance, and battery life. It runs only apps from the Microsoft Store and restricts use of non-verified software, making it ideal for students or casual users.

But many wonder: Should I switch out of S Mode? Is it too limited? In this guide, we’ll explain what S Mode is, its pros and cons, and when it makes sense to turn it off.


💡 What Is Windows 11 S Mode?

S Mode is a secure configuration of Windows that:

  • Allows only Microsoft Store apps
  • Uses Microsoft Edge as the default browser
  • Blocks PowerShell, Windows Terminal, and Registry access
  • Offers faster boot time and improved battery life
  • Limits exposure to viruses and unverified apps

✅ S Mode is available on both Windows 10 and Windows 11


🔍 Should I Switch Out of S Mode in Windows 11?

You might want to leave S Mode if:

  • You need apps from outside the Microsoft Store (like Chrome, Zoom, VLC)
  • You need access to system tools (Registry, Command Prompt)
  • You work in IT, creative tools, or advanced workflows

For students, seniors, or light users, S Mode is a great default option.


👍 Pros of S Mode:

  • 🔐 More secure (no unauthorized apps or malware)
  • ⚡ Faster startup & better performance
  • 🧘 Distraction-free environment (fewer background tasks)
  • 🔋 Improved battery life

👎 Cons of S Mode:

  • ❌ Can’t install apps from the web
  • ⚙️ No access to Registry Editor, PowerShell, or Command Prompt
  • 🌐 Limited to Microsoft Edge
  • 🧩 Not suitable for power users or custom setups

📌 S Mode vs Windows 11 Home: Key Differences

FeatureWindows 11 S ModeWindows 11 Home
App installationMicrosoft Store onlyAny source
Default browserEdge only (no change)User’s choice
System tools (Registry, CMD)❌ Not accessible✅ Fully accessible
SecurityHighStandard Windows security

How can I turn off S Mode in Windows 11?

1. Via Windows Settings

  1. 1. Click on Start and open Settings.

    windows 11 settings control panel
  2. 2. Navigate to Activation.

    activation windows 11 setting
  3. 3. Look under Switch to Windows 11 Home or Switch to Windows 11 Pro. Here, the name will vary based on the version of Windows 11 you are running.

  4. 4. Select Open Store. Pay attention not to click on the Go to the Store option under the Upgrade Your Edition Of Windows. That’s a different process which will keep you in S mode.

    open microsoft store
  5. 5. On the Switch out of S mode page that will appear in the Microsoft Store, click on the Get button.

    turn off s mode switch
  6. 6. Click the Install button.

  7. 7. Follow the on-screen instructions until your receive a confirmation.

    s mode is turned off windows 11
  8. 9. You can now install apps from outside the Microsoft Store.

  9. If you want to turn off S mode because it has unwanted restrictions, you can easily do so using Windows Settings. This is a built-in menu on your Windows 11 device, that can be accessed in just a few clicks.

Sometimes you might get a message saying Try again later something went wrong on our end. To see how to fix that, move to the next solution.

2. Reset Microsoft Store

  1. Press Windows + I to open Settings, choose Apps from the left, and click on Installed apps.
    installed apps to leave windows 11 s mode
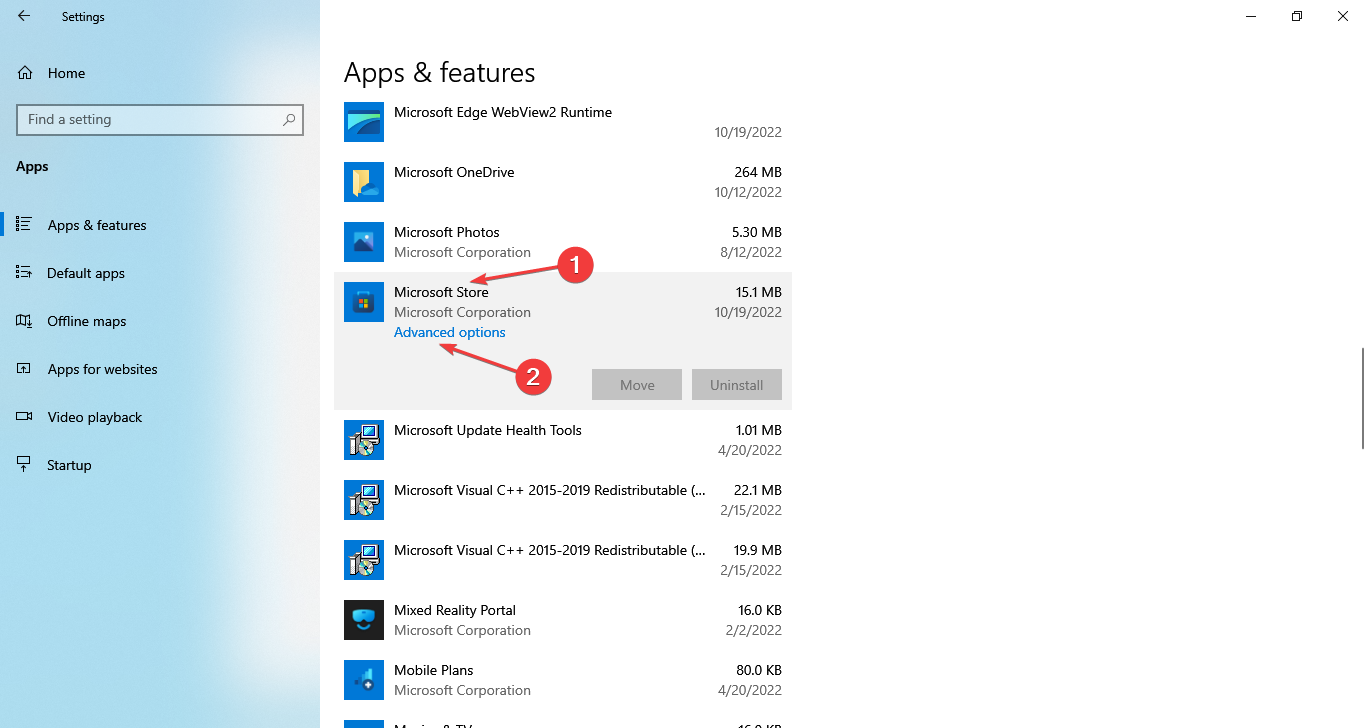
  2. Locate Microsoft Store, click on the three dots next to it and choose Advanced options.
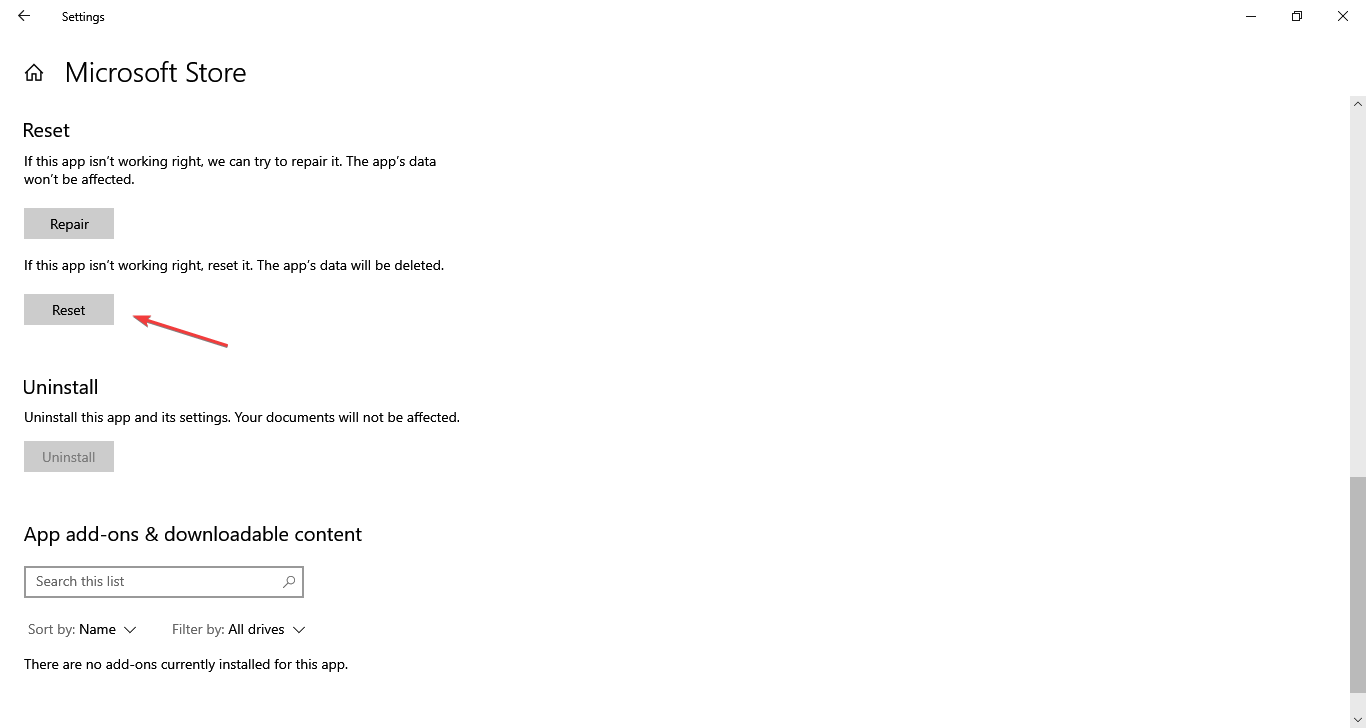
  3. Find the Reset button and click on it.
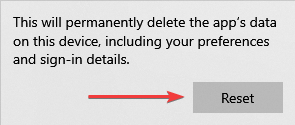
  4. Again, click Reset in the confirmation prompt, and after the process finishes, reboot your device.
  5. Now try to exit S Mode again.

Once you have disabled S Mode on the device, you’ll be able to use any web browser and download any app that isn’t in the Microsoft Store.

But do remember that you can’t re-enable Windows 11 S Mode in Dell or other devices once you have moved out of it. So, weigh the pros and cons and make an informed decision before you proceed.

And if you choose to opt out of S Mode, here are the best applications for Windows 11 that you should install today!

If you have any suggestions or queries regarding the S Mode, let us know in the comments section below.

Jedi: Survivor pre-orders open and they include Luke, Han, and Obi-Wan cosmetics

Pre-orders for the highly-anticipated Star Wars Jedi: Survivor video game are now open ahead of its confirmed March 17th (or 16th depending on your region) release date.

A Standard and Deluxe Edition are available on Microsoft’s Xbox Series X family of consoles. Pre-ordering either will also unlock an exclusive DLC pack of cosmetics inspired by Star Wars icon, Obi-Wan Kenobi, called the Jedi Survival Cosmetic Pack.

The Jedi Survival Cosmetic Pack includes the Hermit outfit, the Hermit Lightsaber Set, and the Combustion Blaster Set. Star Wars Jedi: Survivor will feature both blaster and lightsaber customisation so these aren’t just basic skins for the weapons but likely a collection of numerous aspects that can be selected or deselected to fully change the appearance of the main weapons.

Star Wars Jedi: Survivor Deluxe Edition also includes two DLC packs with content inspired by Luke Skywalker and Han Solo. The Galactic Hero Cosmetic Pack features the Scoundrel outfit and Rugged BD-1 design plus the DL-44 Blaster Set while the New Hero Cosmetic Pack includes the Luke Skywalker New Hero outfit, the BD-Astro BD-1 Cosmetic, and the Rebel Hero Lightsaber Set.

Here’s what each item looks like:

Star Wars Jedi: Survivor pre-order bonuses

In addition to the Standard and Deluxe Editions, a special Collector’s Edition is also available. This collectible is limited to just 1,500 copies for the Xbox Series X version, will set fans back $299.99, and is expected out after the game’s release.

The Star Wars Jedi: Survivor Collector’s Edition will likely prove popular though as it includes a replica of Cal’s lightsaber, a box to hold it in, and a steelbook.

Star Wars Jedi: Survivor Collector’s Edition

A new trailer featuring Star Wars Jedi: Survivor gameplay footage was also released today. Check it out below:

Are you excited for Star Wars Jedi: Survivor? Let us know which version you’re planning to pre-order in the comments below and then follow us on Twitter for more Xbox news.


The Workbook Cannot Be Opened in Excel Online [Quick Fix]

Excel Online not working or not opening files is a common problem among Windows 10  users, but it has general workarounds that can resolve it.

However, for more specific issues, one would have to state the exact error they receive when working with the program.

As an example, multiple users reported a specific issue when they couldn’t open the workbook on Excel online because it exceeds a certain memory limit.

Other times, the issue appears if someone edits a workbook in Excel Online and then leaves the document open without making any additional changes for up to 6 hours. Plus, it might be down to worksheet protection or too many styles.

Irrespective of the cause, this guide contains proven fixes to solve the issue.

Why is Microsoft Excel Online not responding?

The Microsoft Excel Online not working is mostly down to browser issues. Also, it can be caused by the wrong settings on your workbook.

➡️ Below are some of the most prevalent causes:

  • Accumulation of corrupt browser data
  • Corrupted workbook files
  • Wrong browser settings
  • Large file size

For instance, you may encounter different error types like this: Sorry, we can’t open your workbook in Excel Online because it exceeds the 100 MB file size limit.

Another factor that causes the error can be that the workbook cannot be opened or repaired by Microsoft Excel because it’s corrupted.

Thus, you should first check these possibilities of Excel Online issues to identify the specific cause in your case.

How do you fix the Workbook Cannot Be Opened?

1. Use a different browser

If Excel Online is not working on some of the popular browsers like Chrome and Safari, it may be a good option to use a different browser. And there is no better alternative than Opera.

It’s a great error-free browser with amazing features that allow you to customize it based on your needs and help you save a lot of time.

It’s fast, reliable, and emphasizes your online security. The free VPN and built-in adblocker will keep you safe and protected. Your browsing will be much quicker due to the adblocker that will keep unwanted ads away from you.

The Workspace feature, Integrated messenger for social media, Search tab, and bookmarks management are great tools that come in handy, especially when you have a lot of tabs opened.

Opera One

Change to a reliable browser with a fast connection and a flexible easy-to-customize interface.

2. Reset the browser and clear the cache

  1. Start Internet Explorer.
  2. Go to the Tools menu.
  3. Click Internet Options.
  4. Next, click the Advanced tab.
  5. Click Reset or Restore Default.
  6. Under the Reset Internet Explorer Settings dialog box, click Reset.
  7. Select Delete personal settings.
  8. Click Close and exit.
  9. Restart Internet Explorer.

This is a general fix for the Excel Online not working or loading issue and can be applied to other browsers like Chrome, Safari, and Firefox. Thankfully, most of these browsers have in-app options for resetting them.

Lastly, clearing your browser cache and cookies is a recommended fix if Excel Online is not working on Box.

3. Try Two-Step Verification

how to sign in in microsoft 365

Two-step verification protects you by making it hard for anyone else to log in to your Microsoft account using two identification methods, including your password and contact or security information.

Whether someone else gets your password, they won’t be able to access your account without your security information. This is why having different passwords on all your accounts is important.

To set up this two-step verification, you will get a security code sent to your email, SMS via phone, or an authenticator app each time you log in on a device that is not trusted.

When this is off, you only need to verify your identity using the codes at different times, which is risky to your account.

4. Set Default File opening behavior

    This is a worthwhile solution to fix this Excel online workbook issue because it helps you open the file with a different method. See the steps below to apply it on your PC.

  1. 1. Go to the document library page where the Excel files are stored.

  2. 2. Click the Library tab.

  3. 3. Under the Settings group, select Library settings.

  4. 4. Go to the Document Library settings page.

  5. 5. Choose Advanced settings.

  6. 6. Under Advanced settings, find the Opening document in the browser.

  7. 7. Select Open in the browser and click OK.

Note: If you cannot find the Library tab or it is grayed out, ask your admin to check the library permission. To do this:

  1. Log in with an admin account.
  2. Go to the library.
  3. Click library.
  4. Click library permission.
  5. Verify the permission showing for the user who is experiencing the problem with Excel Online

5. Download file and re-save to drive

If Excel Online is not working or not opening files, download the file and try to open it using the Excel desktop application.

If this helps, save the file again, upload it to OneDrive and see if it helps fix the problem.

You can also ensure that you close all documents as you finish using them to avoid such issues and ask anyone you share the documents with to do the same.

6. Check the size of your file

Working with a large file is a potential complication on Excel Online as it may not be supported. Also, it will take too long to open, which may cause Excel Online not to work or to open files.

Usually, five to ten seconds in, your file will fully open or calculate in Excel when you download it, which may be too complex to handle. This is why you see prompts like please wait, we are still loading the workbook or couldn’t open the workbook while trying to use Excel Online.

You’d have to make the file smaller or less complex to make it work. Depending on your calculation needs, you can get the file to open by changing the calculation method to manual.

7. Try a different office suite

If you are still Excel Online is still not working on Sharepoint due to some issues with MS office after trying the fixes above, we’d recommend you give WPS Office a try. It is a great free alternative to Excel Online.

WPS Office allows you to synchronize your documents at any moment, and any change you make on your devices will be applied automatically.

Moreover, WPS Office is suitable for Windows, Mac, Android, Linux, and IOs. You can perform any editing and open all types of Word, Excel, and PDF documents, all in just one place.

It has alternatives for each tool incorporated in Microsoft Office, so you can use it to create and manage text documents, presentations, and spreadsheets.

⇒ Get WPS Office

Why am I seeing the sorry, we can’t open your workbook in Excel Online because it exceeds the 50MB file size prompt?

This error occurs because the workbook you are trying to open exceeds the file size limit in Office 365 subscription. To open the file, you need to reduce the workbook’s file size.

Also, you can open the file on the Excel Desktop client without reducing it. But the best option for ease of access is to reduce the size.

The Excel for the web not working issue can be annoying, as it can reduce your productivity considerably. Fortunately, it is not the most difficult issue to fix, as shown in this article.

Are you facing other issues like Excel cannot add new cells? Check our extensive guide on the topic to solve the problem for good.

Feel free to let us know in the comments below if any of the solutions in this guide helped you solve the issue.

Excel Crashes When Printing: 5 Quick Tips to Fix It

Microsoft Excel is a popular spreadsheet application with powerful data visualization and analysis tools. However, multiple users have reported Excel crashes while printing and Excel freeze when printing issues on their Windows devices.

This issue usually occurs if the printer drivers are outdated or if the Microsoft office files are corrupted. Many users have reported similar issues in the Microsoft community.

This is the latest version of Windows 10 and the latest versions of Word and Excel with an Office 365 Subscription.
Every time the Print screen is opened, either manually or by Ctrl+P, the program freezes and crashes.

Why does Excel crash when I try to print?

First of all, Excel crashes when trying to print may appear for multiple reasons that have to do with the Microsoft Office app itself or even with your Windows 10 operating system.

  • The printer in-use is set on pause.
  • Your printer drivers are out-of-date or corrupted
  • Due to add-ons included in your Excel program
  • The Excel version is not updated to the latest version

If you are also troubled by this issue, here are a couple of troubleshooting to fix Excel crashing when printing problems.

What to do if the Excel freezes or crashes when printing?

1. Update Microsoft Office

  1. Check if your Microsoft Office program has any pending updates. Microsoft releases updates fixing bugs in the program, so make sure it is up to date.
  2. Launch any of the Microsoft Office apps.
  3. Click on File and click on Account.
  4. Click on the Update Option and select Enable updates if it is not already enabled.
    Excel hangs while printing
  5. Again click on Update Options and select Update Now.
  6. Microsoft Office will check for any pending updates and download it. Go through the installation process.
  7. Once the update is installed, launch the Excel app again and check if the print functionality is working.

2. Start Excel in Safe Mode

    It’s very probable that accessing printer Excel freeze can happen due to corrupted files. Thus, open the program in Safe Mode to fix it.

  1. 1. Press and hold the Ctrl key on your keyboard and then click on the Excel icon.

    Excel freezes when printing
  2. 2. Confirm safe mode action when prompted.

  3. 3. Try to print any document and check if it goes through.

  4. 4. If the print job is successful, you may have a third-party app causing issues with the Excel program.

  5. 5. Check your computer for recently installed apps or add-ons for Excel and uninstall any suspicious app.

Starting the Excel app in Safe Mode can help you identify if the problem is with the program or third-party app.

3. Repair the corrupted workbook

  1. Open the Excel app.
  2. Click on File and select Open.
    Excel crashes while printing
  3. Navigate to the location where the workbook is located and select it.
  4. Click the drop-down button beside the Open button and select Open and Repair.
  5. This should resolve any issues with the Workbook and allow for printing.

4. Uninstall and reinstall the printer driver

  1. You can uninstall the printer from the Device Manager or Settings. 
  2. Type Device Manager in Windows Search bar 
  3. In Device Manager navigate to Print queques and select Uninstall device
    Excel freezes when printing 
  4. Restart your PC to reinstall the driver
  5. Reinstall the printer and check if the Excel crashes while printing error is resolved.

If the issue is with your printer, uninstalling and reinstalling the printer can resolve the issue.

In order to find your drivers more easily and install them accordingly, you can use a driver update third-party solution.

⇒ Get Outbyte Driver Updater

5. Repair Microsoft Office

  1. Press Windows Key + R to open Run.
  2. Type control and click OK.
  3. Go to Programs > Programs and Features.
    Excel crashes while printing
  4. Select Microsoft Office and click on Change.
  5. From the Repair screen, first, select Quick Repair and click Next. If that does not work, select Online Repair and try again.

So these are the best tips to help you fix Excel crashing issue while printing the documents. In case you have further issues, our Excel keeps crashing guide should be able to help you.

Do let us know which fix worked for you in the comments.

Webex Microphone is Not Working: 5 Ways to Fix It

If you are in a video conference on Webex, and your microphone is not working; then you are not alone. This issue is more common than you think and can be fixed easily.

In this guide, we will discuss all the available fixes to resolve this sound problem after discussing the causes.

What causes the Webex microphone is not working issue?

There could be various reasons for this audio-related problem. Some of the popular ones are: 

  • Outdated audio driver – If your device’s audio drivers are obsolete, you may face audio problems, such as the microphone not working.
  • Webex doesn’t have the necessary permission – The issue can occur if the Webex app doesn’t have permission to access your device’s microphone.
  • Webex settings are altered – If you have made any changes to the audio settings on the Webex app, check them; these can also cause an issue.
  • Check the physical connection – If your USB port is not working correctly, your headset connected via it will also not work properly. Unplug the headsets and plug them into another port.

What can I do to fix the Webex microphone is not working?

Before diving into detailed troubleshooting, make sure you check these quick fixes to resolve the issue: 

1. Verify Webex has the necessary permissions

1.1 Check permission from Windows Settings

  1. Press Windows + I to get Settings.
  2. Go to Privacy & Security, scroll to App permissions and click Microphone.Microphone not working Webex 1
  3. Check if the Microphone access is enabled for your computer. If not, then enable it.
  4. Ensure all the necessary apps have access to the microphone.

1.2 Check browser settings for permissions

  1. If you are using a browser to attend the meeting, open the browser you use.Microphone not working Webex 2
  2. Go to the Webex meeting page, click on the Padlock icon and check if the toggle for the Microphone is turned on.

2. Enable the automatically adjust the volume feature

  1. Launch the Webex app. Go to on Profile icon, and click Settings.Microphone not working Webex 3
  2. Select Audio from the left side of the window.
  3. Put a checkmark beside Automatically adjust volume.Webex options 3
  4. Click Save.

3. Change Webex audio settings

  1. On the app, go to Profile, then click the Settings icon.
  2. Go to Audio, and under the Microphone option, select the desired audio device from the dropdown.Webex Options 2
  3. Click Save.

4. Update drivers

4.1 Update drivers manually

  1. Press Windows + R to open the Run window.
  2. Type devmgmt.msc and press Enter to open Device Manager.Device Manager RUN COMMAND
  3. Go to Sound, video and game controllers, and expand it.
  4. Locate, right-click the audio driver, and select Update driver.Update driver
  5. Follow the on-screen prompts to complete the process.

4.2 Use a third-party tool

Keeping drivers up to date is essential for the smooth functioning of your computer. However, doing it manually can be risky and time-consuming. Therefore, it is advised to use a third-party tool like Outbyte Driver Updater. This driver updater can swiftly scan and update drivers in a few clicks. Follow these steps to update drivers: 

  1. Download and install Outbyte Driver Updater.
  2. Click Scan and let the tool find the outdated drivers.
  3. Once the scan is done, select the driver, and click Update.Outbyte Driver Updater 2
  4. The tool will download the latest compatible version of the driver.
  5. Click Install and follow the on-screen instructions to complete.

Outbyte Driver Updater

There is no faster and safer way to update your drivers than by using a specialized tool.
Free Trial Download Now

5. Troubleshoot the microphone

  1. Press Windows + I to get Settings.
  2. Go to System, then click Sound.Sound
  3. On the next page, under Input, click Microphone Array.Sound Settings
  4. Under Input settings, go to Test your microphone, and click Start test.Microphone settings

So, these are methods you can use to fix the Webex microphone not working. Try them and let us know which worked for you in the comments below.

Cannot Print From Excel Not Enough Memory: How to Fix It

If you encountered the error Not enough memory when printing from Microsoft Excel, you are not alone.

This error occurs when you’re trying to fill or copy different formulas on a huge worksheet area, or if the worksheet is extremely large.

The error message received in this case will show in different formats: Your file could not be printed due to an error there may not be enough memory available.

Why does Excel say not enough memory when printing?

Firstly, the specific reason for this error occurring is hidden in the way Microsoft Excel has been built or due to the next factors:

  • There are other applications that take too much RAM memory.
  • Your printer’s drivers are not properly installed or are out-of-date.
  • The printer device is not set as default on your computer.
  • An exceeding volume of data or formulas is copied into your Excel spreadsheets.

Every instance of Excel is limited to 2 GB (gigabyte) of memory, and also 32,760 source cells when you’re using a smart fill option.

Depending on the specific action you’re trying to perform, both or one of these limitations will cause the error mentioned above to appear.

How do I fix the Not enough memory for Excel error?

1. Update or reinstall your printer driver

    In case you want to escape from the Excel printing not enough memory error, you should update your printer drivers to make sure it’s not the cause for the issue.

    1. Open Device Manager.
    not-enough-memory-excel
  1. 2. Next, expand the Print queues section.

    not-enough-memory-excel
  2. 3. Right-click on your printer and select Update Driver.

    not-enough-memory-excel
  3. 4. Pick the Search automatically for drivers option.

    not-enough-memory-excel
  4. 5. Wait for the process to complete and restart your PC.

The Excel there is not enough memory to complete this action error should be fixed after updating the driver.

If your driver is already updated and the Excel memory error is still happening, see the next solutions to resolve it fast.

However, it’s more efficient to check for outdated drivers using a professional driver solution. This way, you can scan your PC for problematic drivers, detect them and proceed to update all of them instantly.

⇒ Get Outbyte Driver Updater

2. Close programs running in the background

  1. Open Task Manager from your Windows Search.
    not-enough-memory-excel
  2. Go to Processes to see all your running programs.
  3. Click on the Memory column to filter the most draining apps.
    not-enough-memory-excel
  4. Right-click on the high-consuming apps and hit End Task.
    not-enough-memory-excel
  5. Close the window to Save.

3. Set your printer device as the default

  1. Search for Printers and Scanners.
    not-enough-memory-excel
  2. Scroll down and uncheck the Let Windows manage my default printer.
    not-enough-memory-excel
  3. Select the Manage option to set your printer as the default.

In today’s how-to guide, we discussed the best methods to apply if you’re working with a big MS Excel file and are stopped by memory or cell limitations.

Please tell us if this guide has proven useful in your case. You can do so by using the comment section below.

VPN Works on Your Phone But Not on a Laptop? Here’s 5 Fixes

VPNs usually support all popular desktop and mobile OS, and some can even be installed on routers. 

That’s why it can be frustrating when you can’t get service on your laptop when everything’s fine on your mobile device. 

But don’t worry; we have several quick and easy fixes for that. So, keep reading to learn how to resolve one of the common VPN connectivity issues.

Why is my VPN not working on my laptop?

Let’s explore some of the possible causes:

  • Blocked ports — A port is a virtual location where specific data passes through. VPNs tend to work with 443 and 1194. If your ISP blocks the port needed to transmit data to a secure tunnel, you won’t be able to establish an encrypted connection.
  • Firewall or antivirus interference — These programs exist to disable apps considered harmful to the device. If they see your VPN as a threat, they won’t let you establish a secure connection. You can try to run it with your security programs disabled to test if that solves the issue.
  • Misconfiguration or unsupported OS — Most VPN vendors have dedicated apps for the major desktop OS. However, if your laptop runs a less popular alternative, you’ll have to explore other unconventional setup methods. OS version recency is important too, as your VPN may not support outdated editions.
  • Multiple VPNs in use — If you have other similar apps installed on your laptop, some of them may automatically run at startup and mess with each other’s connection.
  • Outdated software — VPN vendors release new app and browser extension versions to fix known vulnerabilities. If your app works on your phone but not on a laptop, it might be an indication that you haven’t updated your software.
  • Server downtime — VPN servers are specialized computers subject to routine maintenance. That’s why they can be out of service at times.
  • Split tunneling exceptions — Generally, you can select which traffic you don’t want to go throught the encrypted connection. So, if you changed your service’s settings, you may have created exceptions you forgot about.
  • Maxed-out device limit — VPNs usually place a cap on the number of devices you can protect at a time. Typically, it ranges from five to ten connections, including browser add-ons. If you exceed that limit, your most recent connections won’t work.

What to do when a VPN works on your phone but not on a laptop?

If none of the troubleshooting suggestions above helped your issue, it’s time to consider these fixes:

1. Check your base internet connection speed

If you don’t get Internet service only on your laptop, the problem is likely with that particular device.

But when you get no connection or slow download speed on all devices, your ISP may be to blame.

Here’s how to test your Internet connection:

  1. Go to speedtest.net.
  2. Click Go.
Internet speed test
  1. See the results.
Internet speed test results

If you experience a bad connection, it’s best to contact your ISP or consider changing your provider entirely.

2. Connect to a different VPN server location

Using ExpressVPN as an example, try this when you can’t establish a VPN connection or if you get a message that the server is banned.

  1. Click the hamburger icon for Settings.
ExpressVPN app settings
  1. Go to VPN Locations.
  2. Connect to another server location.
ExpressVPN US server locations
  1. Try accessing the webpage you want once the connection is successful.
ExpressVPN connected to a US server

ExpressVPN

Ensure you get the best service on all your devices by choosing ExpressVPN.
Check Price Visit Website

3. Try another tunneling protocol

Not all VPN protocols work well for every use. That’s why it’s recommended to select a different one when struggling to establish a connection.

  1. Click the hamburger icon for Settings.
  2. Choose Options.
  3. Go to Protocol.
ExpressVPN app protocol settings
  1. Choose the one you want from the options.
ExpressVPN protocol options
  1. Click OK.
  2. Connect to your chosen server location.

4. Delete cookies and cached files

To send your Chrome traffic through an encrypted tunnel with a clean slate, follow these steps:

  1. Launch the browser.
  2. Press Ctrl + H to go to History.
  3. Choose Clear browsing data.
Clear Browsing data in Google Chrome
  1. Go to the Advanced tab.
  2. Leave only the Cookies and other site data and Cached images and files boxes checked.
Clear Cookies and other site data and Cached images and files
  1. Click Clear data.

5. Test for IP and DNS leaks

To catch your VPN if it’s failing to hide your real location and online activity, do this:

  1. Click the hamburger icon for Settings.
  2. Go to Help & Support.
  3. Choose IP Address Checker, DNS Leak Test, or WebRTC Leak Test to determine whether there’s leakage.
  4. See the results.
Use IP Address Checker, DNS Leak Test, or WebRTC Leak Test

Conclusion

Desktop VPN connection issues are not uncommon, but there is always a cause for them you can fix.

So when your VPN works on your phone but not on a laptop, check our detailed guide to troubleshoot the problem. Above, you’ll find step-by-step instructions for any situation. 

Let us know how it worked out for you in the comments section.

FAQ

Can I use the same VPN on my phone and laptop?

Yes, you can, as long as you don’t exceed your VPN’s simultaneous connection limit.

Most VPNs have dedicated apps for all major mobile and desktop systems. But if your VPN doesn’t support your laptop’s OS, you may be able to set it up on your router.

How do I get VPN to work on my laptop?

You can fix any VPN troubles on your desktop device by:

  • Having a sufficient base internet speed for transmitting encrypted traffic data.
  • Making sure that the ports it requires are not blocked.
  • Stopping your firewall or antivirus from interfering with it.
  • Choosing the right installation method based on your device’s system.
  • Following your VPN vendor’s setup guide correctly when you manually configure it.
  • Not running multiple VPNs at the same time.
  • Keeping your VPN app or browser extension up-to-date.
  • Choosing a server that isn’t under maintenance or banned by the site you’re visiting.
  • Double-checking your VPN’s split tunneling exceptions.
  • Staying within your VPN’s simultaneous device connection limit.
  • Deleting cached location data on your browser.

How do I transfer a VPN from my phone to my laptop?

You can install and use most VPNs on multiple devices at the same time.

So, you should download the appropriate app for your laptop’s system and leave the one on your mobile device untouched.

However, if the VPN works on your phone but not on a laptop, you should check our recommended fixes above.

How to Reinstall Windows 10 After Hard Drive Replacement?

If your computer has undergone hard drive replacement and you are wondering how to reinstall Windows 10, then you are at the right place. 

This guide will discuss step-by-step processes to reinstall Windows using a USB flash drive. Let’s begin! 

What can I do to reinstall Windows 10 after a hard drive replacement?

Before diving into the detailed steps, make sure you check these things: 

Once you have checked these things, follow all the steps to get Windows 10 installed.

1. Create a bootable drive

  1.  Go to the Windows website. Select Windows 10 from the list.
  2. Under Create Windows 10 installation media, click Download Now.Download now
  3. Double-click on the MediaCreationTool22H2.exe file to run the setup. Then, click Yes on UAC prompt.
  4. On the setup wizard, click Accept to proceed.Windows 10 setup - How to Reinstall Windows 10 After Hard Drive Replacement
  5. Select Create installation media (USB flash drive, DVD, or ISO file) for another PC. Click Next.Setup 3
  6. Select Language, Edition and Architecture on the next page and click Next.Setup 4
  7. Now select USB flash drive, and click Next. USB flash drive
  8. It will list your USB drive; if it is the one you want, click Next. If not, click Refresh drive list, select the drive, and click Next. USB flash drive
  9. The setup will download Windows; it might take a while.
  10. Once completed, you will get Your USB flash drive ready prompt. Click Finish.USB drive ready

2. Install Windows on the new hard drive

Tip icon Tip
If your computer doesn’t boot from the flash drive, you need to enter BIOS and change the settings to allow the computer to boot from USB.
  1. Insert the flash drive into your computer with the new hard drive and turn it on.
  2. Select the language to install and other details on the setup window, then click Next.Install page
  3. Click Install Now to start.
  4. The following window will ask you to enter the product key. Enter the product key, or click the I don’t have a product key option if you have a digital license.I don’t have a product key
  5. On the next page, click Accept. Click Next.
  6. Now choose Custom: Install Windows only(advanced) for a clean install.Custom install
  7. Choose the unallocated space and click Next.unallocated space
  8. The setup tool will install Windows OS. This might take several minutes; you must wait for the process to finish. 

So, these are steps to reinstall Windows 10 after hard drive replacement. Follow these steps closely to install Windows successfully.

Please let us know if these steps worked for you or if you have any other actions that deserve to be on the list in the comments section below.

Windows Store Get Button Not Working [Solved]

The Microsoft Store app is a program that can have issues like any other program. Such would be the case with users that have reported that the Windows Store Get button is not working:

Well, as the title says, the get button doesn’t work, it just reloads the page. I was trying to download a OCR app because i need to copy a lot of text off a image. I really hope there’s a solution that doesn’t require me to edit the registry and restart, can’t do that every time windows 10 goofs, i have lots of programs open and work to do…

Since the Microsoft Store app is an integral part of using Windows 10, any issue that prevents you from using it can be quite troublesome. That is why we’ve created a step-by-step guide that will show you just how to fix this issue.

cmd wsreset

How do I fix the Microsoft Store button issue in Windows 10?

1. Sign in and out of your Microsoft account

  1. Open the Microsoft Apps Store
  2. Click on your profile picture on top right and sign-out
  3. Sign-in again.

2. Run Windows App Troubleshooter

  1. Press Start
  2. Click Settings
  3. Select Update & security
  4. Click Troubleshoot
  5. Scroll down to the bottom and click Windows Store Apps
  6. Click Run the Troubleshooter

3. Reset Windows Store through Command Prompt

  1. Type cmd in Windows Search box
  2. Right-click on Command Prompt
  3. Select Run as Administrator
  4. Type WSreset.exe and click Enter
  5. Reboot your computer

4. Re-register all Store apps

  1. Press Start
  2. Right-click on Windows Powershell
  3. Open it with Administrator rights
  4. Copy the following lines from below and right-click in Powershell to paste:
    • Get-AppXPackage -AllUsers | Foreach {Add-AppxPackage -DisableDevelopmentMode -Register “$($_.InstallLocation)AppXManifest.xml”}
  5. Press Enter
  6. Restart your computer

5. Reinstall the Microsoft Store App

  1. Press Start
  2. Right-click on Windows Powershell
  3. Open it with Administrator rights
  4. Copy the following from below and right-click in Powershell to paste:
    • Get-AppxPackage -allusers *WindowsStore* | Remove-AppxPackage
    • Get-AppxPackage -allusers *WindowsStore* | Foreach {Add-AppxPackage -DisableDevelopmentMode -Register “$($_.InstallLocation)AppXManifest.xml”}
  5. Press Enter
  6. Reboot your PC

By following these steps, you should be able to fix any issue related to the Microsoft Store App’s Get button not working.

Keep in mind that if you follow any of these steps, the data of your already installed app will not be affected, nor will you need to re-download them again.

If you want more information about fixes for common Microsoft Store issues, leave us a message in the comment section below.

RELATED ARTICLES YOU SHOULD CHECK OUT:

What is the Windows Store?

Starting with Windows 8 and onward, users could download specialized and lightweight programs called Apps via the Windows Store. These Apps can vary in functionality, from simple video players so system utility tools.

We hope you managed to fix the Windows Store Get button not working issue on your PC. Let us know how it went in the comments section below.

Microsoft Store Downloading But No Progress [Solved]

The Microsoft Store, just as everything Windows 10, occasionally oscillates between fluent workflow and a sudden problem that reduces system usability and makes you want to cry.

The bug we’re referring to today causes apps to get stuck while downloading from the Microsoft Store. Basically, the Microsoft Store is downloading an app, but no progress is being shown.

Namely, it seems that the issue affects all apps and that it was resolved with updates but it’s still present with isolated users. Nonetheless, if you’re in that group, make sure to check the enlisted solutions and address the issue.

How can I fix the Microsoft Store downloading but no progress issue?

1. Run the Windows Troubleshooter

When Windows internal issues occur, the first advised step is to turn to Windows Troubleshooting tools. Since Microsoft Store is an essential and unremovable part of Windows 10, the specialized troubleshooting tool should help you in resolving this problem.

Once you run the troubleshooter, it should restart related services, resolve the Microsoft Store stuck on starting download issue, and you’ll be able to continue with the process.

If you’re not sure how to do it, make sure to follow the instructions below:

  1. Press the Windows key + I to open Settings.
  2. Open Update & security.
  3. Choose Troubleshoot from the left pane.
  4. Scroll to the bottom and highlight Store Apps Troubleshooter.
  5. Click on Run this troubleshooter and follow the further instructions.windows store app download stuck

Once the pre-installed troubleshooting tool finishes scanning, your pending downloads should proceed with downloading. On the other hand, if you’re still stuck, make sure to continue with the steps below.

If you’re having trouble with the troubleshooter itself, here’s how to have it up and running in no time.

2. Reset the Store’s cache

As you might know, the Microsoft Store is quite similar to other third-party apps in Windows 10 platform. One of the main differences is that you can’t reinstall or repair it as you would do with other apps.

Nonetheless, for the sake of troubleshooting possible issues, Microsoft developers implemented one command that enables you to restart the Store and clean its cache.

By doing so, you’ll, hopefully, resolve the issue at hand. If you’re not sure how to run this tool in the elevated Command Prompt line, follow the steps below:

  1. In the Windows Search bar, type CMD.
  2. Right-click on Command Prompt and choose to Run as administrator.
  3. In the command line, type the following command and press Enter:
    • wsreset.exe
  4. The procedure is swift and you can immediately close Command Prompt and start the Microsoft Store again.windows store app download stuck

Unable to run Command Prompt as administrator on Windows 10? Check out this step-by-step guide.

As a quick reminder, if you don’t clean your Store cache regularly, Microsoft Store won’t open smoothly or some apps like the Realtek Audio Console are missing from the store. Do check this complete troubleshooting guide to fix the problem for good.

3. Sign out/ Sign in with Microsoft account

Some users stated that the problem with forever-pending apps in the Microsoft Store ended after they signed out and then signed in again with their Microsoft account.

Is it a bug or something else, we can’t be sure. However, it’s an obvious workaround, so make sure to give it a try.

Follow the instructions below to log out and sign in again in the Microsoft Store:

  1. Open the Store.
  2. Click on your Profile icon in the upper right corner.
  3. Click again on the active account and choose Sign Out.windows store app download stuck
  4. Close the Microsoft Store and start it again.
  5. Click on the blank icon and select Sign In.windows store app download stuck
  6. Enter your credentials and look for improvements.

4. Check time, date and region settings

Time, date and region are frequently overlooked, even though they play an important role in the Microsoft Store  Your task here is t0 make sure that:

  • Time and Date are properly set.
  • Your country and region are set to the United States.

In order to confirm both, follow the instructions below and we’ll be golden:

  1. Press Windows key + I to summon the Settings app.
  2. Open Time & language section.
  3. Select Date & time from the left pane.
  4. Enable the Set time automatically feature.
  5. Enable the Select time zone automatically feature.windows store app download stuck
  6. Now, choose Region & language from the same pane.
  7. Change Country or region to United States.windows store app download stuck
  8. Close Settings and look for changes in the Store.

5. Re-register the Microsoft Store

The re-registration of the Microsoft Store is analog to the reinstallation of any third-party app. With this procedure, you’ll be able to start from scratch, and this time, hopefully without download issues.

Additionally, re-registering won’t affect installed apps or their individual settings, so you won’t need to worry about that.

Follow the instructions below to re-register the Microsoft Store with PowerShell:

  • Right-click on the Start button and open PowerShell (Admin).
  • In the command line, copy-paste (or type) the following command and press Enter:
windows store error 0x87AFo81

"& {$manifest = (Get-AppxPackage Microsoft.WindowsStore).InstallLocation + 'AppxManifest.xml' ; Add-AppxPackage -DisableDevelopmentMode -Register $manifest}"

  • Restart your computer and look for changes in the Microsoft Store.

We reckon that this is the final solution in regards to the Microsoft Store and your problem with download stuck should be long gone.

However, sometimes the problem is hidden in the bigger picture, or in this case – in a system error. For that reason, make sure to check the final two steps and address the issue with either system file corruption or Windows Update services.

6. Run SFC scan

When it comes to system error troubleshooting, the best-suited tool for the job is System File Checker. There are a dozen different reasons why a particular system file gets corrupted.

And a dozen more negative effects corrupted or incomplete system files can have on the system behavior.

Luckily, SFC is a built-in tool that runs via an elevated Command Prompt and you can employ it by following the steps below:

  1. In the Search bar, type CMD, right-click on Command Prompt, and Run it as administrator.
  2. Type the following command in the command line and press Enter:
    • sfc /scannow
  3. The SFC utility tool will scan for system errors and resolve them accordingly.

If the Microsoft Store downloading but no progress issue is still there, jump to the next solution.

7. Restart Windows update services

Finally, if none of the previously recommended solutions got you going, there’s still one final solution. This is a usual workaround used in Windows Update issues.

Since this problem might as well be closely related to updating features, it should help you address the downloading problem, too.

Follow the instructions below and you should be able to resolve your problem:

  1. Type services.msc in the Search Bar and open Services.
  2. Navigate to the Windows Update service, right-click on it and click Stop.windows store app download stuck
  3. Now, navigate to C:Windows and locate SoftwareDistribution folder.
  4. Right-click on it and rename it to SoftwareDistributionOLD or any other name.
  5. Now, get back to Services and start the Windows Update service again.
  6. Get back to the Store and look for changes.

If you ever encounter the Microsoft We’re Having Trouble Processing Your Payment error, check out our dedicated guide for a quick fix.

That should do it. The Microsoft Store downloading but no progress being shown issue should be gone.

We certainly hope this article was informative and helpful. In addition, if you have questions or suggestions, make sure to tell us in the comments section below.

Microsoft Store Has No Install Button [Solved]

Microsoft rebranded its native Store after the Fall Creators Update. Now it’s called Microsoft Store, but the new name and slight design changes still don’t make it flawless.

More than a few users reported a strange bug that concerns Microsoft Store in Windows 10. Namely, it seems that the Microsoft Store has no install button beside the Library apps. They can’t install new apps or even update the old ones manually.

We provided a few common solutions, hoping that at least one will resolve your issue with the install button missing in Mircosoft Store. Make sure to progress through the list we provided below.

How can I fix the Microsoft Store has no install button issue?

1. Run the Windows Troubleshooter

Before we eventually move to some over-the-head solutions, let’s take the first step with simplified Windows Troubleshooting.

Windows 10 came, issues emerged, and Microsoft decided that the unified troubleshooter is a must. Besides all the standard troubleshooting tools, somewhere at the bottom lies the one we’ll need in order to resolve this error.

Here’s how to run it to restore the install button in Microsoft Store:

  1. Right-click Start and open Settings from the Power User menu.
  2. Choose Update & security.windows 10 store install button missing
  3. Select Troubleshoot.
  4. Scroll down until you reach the ‘‘Windows Store Apps” troubleshooter.windows 10 store install button missing
  5. Highlight it and click on the ”Run the troubleshooter”.

If the built-in troubleshooter fell short, maybe the specified will serve you justice in solving the issue of the Microsoft Store download button missing.

2. Run the downloadable troubleshooter

Besides the standard troubleshooter in Settings, you can also try using the downloadable troubleshooter specialized for addressing Microsoft Store issues. Even though you download it, it’s still coming from a trusted source (Microsoft) and it’s not some scammy tool from a third-party site.

The troubleshooting procedure is rather similar to the one above and here’s what you’ll need to do to run it:

  1. Download the troubleshooter.
  2. Navigate to download location and run the Troubleshooter.
  3. Click Next and follow instructions.windows 10 store install button missing
  4. Wait for the procedure to end and restart your PC.
  5. Open Microsoft Store and confirm that the install button is back in Library.

3. Reset the Store’s cache

Since Microsoft Store is, more or less, just like all other pre-installed apps, it stores cache in order to speed up the loading times and save your configuration. And that’s just what we need from the hub of all our Windows 10 apps.

However, if you’ve recently updated the app or the cache pilled up over time, this might come as an issue. Now, there’s a way to manually clear certain folders in which the cache is stored. On the other hand, why to do that when there’s a simple secondary application that reset’s app within seconds?

Here’s how to run the secondary app and reset Store’s cache to try and get the download button back:

  1. In the Windows Search bar, type WSreset.
  2. Right-click on it and run it as an administrator.windows 10 store install button missing
  3. Open Microsoft Store and look for resolution.

4. Reset applications with PowerShell

While we’re at it, maybe Microsoft Store isn’t the only culpable for the missing install button. If the problem is rather in an individual application and you can confirm which application is provoking the error, you can use PowerShell to reinstall it.

This shouldn’t be a problem and it’s merely a question of copy-pasting one command in the PowerShell elevated command-line.

Follow these steps to do so:

  1. Right-click on the Start and open PowerShell (Admin).
  2. In the command line, copy-paste the following command and press Enter:
    • Get-AppxPackage -allusers | foreach {Add-AppxPackage -register “$($_.InstallLocation)\appxmanifest.xml” -DisableDevelopmentMode}windows 10 store install button missing
  3. Wait for the procedure to end and restart your computer.
  4. Check whether the Microsoft Store Get button missing issue is gone.

5. Re-register Microsoft Store

On the other hand, if the problem occurs with multiple or even all installed applications, reinstalling Microsoft Store completely is the next obvious step.

When we say ”reinstall” we mean re-register, since you can’t remove Microsoft Store in Windows 10. This procedure is the closest to reinstallation. Also, you can, alternatively, create a new User profile. That will also allow you to use Microsoft Store from a scratch.

Here’s how to re-register Microsoft Store with PowerShell:

  1. In the Windows Search bar, type PowerShell, right-click on the PowerShell and run it with administrative permissions.
  2. Copy-paste the following command in the elevated window and press Enter:
    • Get-AppxPackage -allusers Microsoft.WindowsStore | Foreach {Add-AppxPackage -DisableDevelopmentMode -Register “$($_.InstallLocation)\AppXManifest.xml”}windows 10 store install button missing
  3. This can take some time so be patient.
  4. Once it’s done, restart your PC.
  5. Open Microsoft Store and check whether the no install button in Microsoft Store problem is gone.

6. Update Microsoft Store

As the last resort, we can only think of update. It might seem strange on the first sight, but most of the users resolved various critical errors by simply updating Microsoft Store. As we all know, Windows 10 is frequently updated, and with the gradual improvements, those updates bring a lot of novelty bugs and peculiar errors. New updates patch it out and that’s a never-ending cycle for us, Windows 10 users.

So, if you’re not sure how to update Microsoft Store in Windows 10, make sure to follow the steps below:

  1. Open Microsoft Store.
  2. Click on the 3-dot menu and open Downloads and updates.windows 10 store install button missing
  3. Click on the ”Get updates” button in the upper right corner.windows 10 store install button missing

This is one of the many Microsoft Store error codes that users encountered over the period of 2 years since Windows 10 was introduced. However, in comparison to standard errors (those come in dozens), the missing install button is more of a bug.

Lastly, if your Windows Store Get button is not working, find out how to fix it from our dedicated article.

With that, we can wrap it up. If you have an alternative solution for the Microsoft Store no install button issue, please be kind and share it with us and our readers. You can do so in the comments section below.

MotioninJoy is Not Working: How to Fix It In 5 Steps?

While using the PS3 controllers, if the MotioninJoy app gets stuck on a white page or is not working on Windows 10, you are not alone! Since the app has been discontinued, many users have faced errors. However, it can be fixed.

This guide will discuss the potential fixes after discussing the reason behind the issue.

What causes the MotioninJoy not working error?

The common reasons behind the issue are listed below:

  • Software license expired – The license of the software expired in 2014, that’s why you are stuck with an error.
  • Windows Time error – Another reason for the error could be Windows time sync. This issue can be easily fixed.
  • Corrupted installation files – If the app is not installed correctly or has corrupted files, then it could lead to an issue.

What can I do to fix the MotioninJoy is not working error?

1. Disable driver signature enforcement 

  1. Press Windows + I to open Settings.
  2. Go to Update & Security, then click Recovery.System - Recovery
  3. Look for Advanced startup and click Restart Now.Recovery Windows 10
  4. On Choose an option screen, click Troubleshoot.Choose an option - Troubleshoot
  5. On the next screen, click Advanced Options.Advanced Options
  6. From the next screen, click Startup Settings and click Restart.Startup Settings
  7. Press the number next to Disable driver signature enforcement to disable it.

2. Update drivers

2.1 Update driver manually

  1. Press Windows + R to open the Run window.Device Manager RUN COMMAND
  2. Type devmgmt.msc and press Enter to open Device Manager.
  3. Click Sound, video and game controllers to expand, select the related driver and click Update driver.Update driver
  4. Follow the on-screen prompts to complete the process.

2.2 Use a third-party driver updater

Using a driver updater utility makes maintaining and updating drivers easy. One such tool Outbyte Driver Updater is a lightweight software to keep drivers up to date without wasting time. This software comes with a huge driver database and a free trial. To update drivers, follow these steps – 

  1. Download and install Outbyte Driver Updater.
  2. Click Scan, and it will scan for outdated drivers on your computer.
  3. Once you get a list of outdated drivers, please select it and click Update.Outbyte Driver Updater 2
  4. The driver will be downloaded, and you will get a prompt to Install once done.
  5. Follow the on-screen instructions to finish and restart your PC.

3. Change the date and time

  1. Press Windows + I to get Settings.
  2. Go to Time & language, and click Date & time.Date time
  3. Toggle off the Set time automatically.
  4. Click on Change beside Set the date and time manually. Time change
  5. Set it to any date before 2014 or earlier and click Change.Data & time

4. Uninstall & reinstall MotioninJoy

  1. Press Windows + R to get the Run window.
  2. Type appwiz.cpl and press Enter.APPWIZ RUN COMMAND
  3. Locate and right-click the MotioninJoy app and click Uninstall.Uninstall App
  4. Press the Windows key, type CMD, and click Run as administrator.
  5. Type the following command and press Enter to get a list of installed software and drivers: pnputil.exe –e 
  6. Locate and check the number next to MotioninJoy. Copy and paste the following command after replacing # with the number for MotioninJoy: pnputil.exe –f –d oem#.inf
  7. If step 6 didn’t work for you, open the Run window, type the below-mentioned path, and press Enter. A folder will open; look for oem#.inf and delete it. C:\Windows\INFWindows INF
  8. Restart your PC. Install MotioninJoy again, and connect PS3 controllers for Windows to detect and install drivers.

5. Run the SFC and DISM command

  1. Press the Windows key, type CMD and click Run as administrator.CMD elevated
  2. Type the following command and press Enter: sfc/scannowSFC SCAN
  3. Once the process is complete and there is an error, restart your PC.
  4. Fire up the Command Prompt again, copy and paste the below-mentioned command, and press Enter: DISM.exe /Online /Cleanup-image /RestorehealthCMD DISM
  5. Restart your PC again once the scanning is complete.

So, you can use these methods to fix MotioninJoy not working on the Windows 10 issue. Try them and let us know which worked for you in the comments below.

Posted in PC

How to Fix Gundam Evolution Lag [3 Simple Solutions]

Gundam Evolution is an engaging adrenaline-pumping online video game. But, poor hardware configuration can cause players on PCs to encounter random stuttering.

Common issues include unreliable internet, incorrect drivers, improper device settings, etc. Thankfully, Gundam Evolution lag problems are easy to fix. 

You can use a VPN, run a driver updater, and tweak your PC settings. Without further ado, let’s break it down into detail. 

How do I fix Gundam Evolution lag issues?

Online video games like Gundam Evolution offer the flexibility of playing anywhere, anytime. And the beauty is you don’t have to choke your device with tons of software.

But there’s a problem:

Online games largely depend on consistent internet connectivity to work properly. So, even a slight mishap to your setup can ruin gameplay. 

That’s the case with Gundam Evolution, where most players encounter annoying lag spikes. This occurs due to high ping arising from unstable network connectivity.

The outcome of it is screen freezes, frame drops, and stuttering. Sometimes, your controllers become unresponsive, or the game even crashes.

Misconfigurations also contribute to lag as they cause your hardware to function sub-optimally. On the bright side, you can update your drivers and optimize PC settings.

That said, the top Gundam Evolution lag fix solutions are as follows:

  • Use a VPN – A VPN can help you fix lag issues by speeding up your internet connection. This lowers your ping resulting in faster response times during online gaming. 
speed test expressvpn reduced ping

We recommend ExpressVPN for this particular job, as it offers the best overall performance. 

Additionally, it has strong encryption and leak-prevention features, so your ISP won’t be able to throttle your connection speed.

ExpressVPN

Eliminate lag and enjoy Gundam Evolution’s fast-paced action to the fullest.
  • Update drivers – This can address glitches arising from using outdated software for your hardware. A utility app like Outbyte Driver Updater can assist you in getting the job done. 

It can perform bulk checks and fix out-of-date drivers on the fly – all with a few clicks.

  • Adjust PC settings – Optimizing your PC for gaming gives a better outcome during gameplay. You can tweak your display settings, graphics card configuration, controller response time, etc. 
intel graphics command center intefrace

Ensure you retest the game while making changes until you get the best results.

⇒ Get Outbyte Driver Updater

Conclusion

Gundam Evolution is a highly engaging online game. But the occasional lag spikes spoil the thrill.

The issue mainly occurs due to poor internet connectivity that increases response time. Besides that, outdated drivers and incorrect hardware settings are also culprits.

Luckily, Gundam Evolution lag issues are simple to fix. All it takes is using a VPN and optimizing your device hardware to favor performance.

Microsoft Store Error Code 0x80131500 [Solved]

The Microsoft Store is integral to Windows 10 and 11 since it allows you to download many applications easily. Unfortunately, many users reported Code: 0x80131500 while trying to use Microsoft Store, so today, we’ll show you how to fix it.

The Microsoft Store error code 0x80131500 is highly complex owing to the vast number of underlying causes, which makes it challenging to identify the one in your case. However, troubleshooting will be more streamlined if you have a thorough understanding.

So, to find out all about the error Code: 0x80131500 and the practical solutions, read the following sections.

What causes the code: 0x80131500 error in Microsoft Store?

Here are some of the common reasons that trigger the error Code: 0x80131500 in the Microsoft store:

  • Misconfigured Microsoft Store setting
  • Incomplete installation of Microsoft Store
  • Running an outdated version of the Microsoft Store
  • Corrupt app cache
  • Issues with the network settings
  • Incorrect date and time or regions set on the computer
  • Third-party apps, usually antivirus, conflicting with Microsoft Store

Below are the solutions for the error Code: 0x80131500 in Microsoft Store that worked for most users.

How do I fix the Microsoft Store error code 0x80131500?

Let’s first try a few quick solutions before heading over to the slightly complex ones.

  1. Restart the computer
  2. Update Windows to the latest available version
  3. Check the Internet connection and make sure you are receiving a decent speed

If these don’t work, here are the ones that worked for most:

1. Reconfigure Internet properties

    This is one of the methods that worked for most users and fixed the Code: 0x80131500 for good. So, do try it. It describes how you can reconfigure the Internet properties correctly with every detail you need, as shown below.

  1. 1. Type Internet Options in the Search bar, then click on the relevant search result.

    Internet options to fix code: 0x80131500
  2. 2. Navigate to the Advanced tab, and then scroll down to the bottom of the Settings list.

    0x80131500-windows-10
  3. 3. Now, reconfigure the following entries:

    • Use SSL 3.0: Uncheck
    • Use TLS 1.0: Uncheck
    • Use TLS 1.1: Uncheck
    • Use TLS 1.2: Check
    reconfigure settings to fix code: 0x80131500
  4. 4. Once done, click on OK to save the changes then reboot the computer for these to apply.

    0x80131500-windows-10

2. Set the date, time, and region correctly

  1. Press Windows + I to open Settings and select Time & Language.time & language
  2. If you see an incorrect time here, turn off the toggle for Set time automatically and then click on the Change button under Set the date and time manually.change time to fix code: 0x80131500
  3. Now, manually choose the correct date and time and click on Change.set time
  4. Finally, choose the correct Time zone from the dropdown menu, which corresponds to your region.time zone

Once done, restart the computer, and the error with Microsoft Store should be fixed. Also, some users suggested choosing the United States as the region did the trick. So, you might try that as well, then check whether the Microsoft Store error code 0x80131500 is gone.

3. Change the language to English

  1. Press Windows + I to open Settings, then click on Time & Langauge.time & language
  2. Navigate to the Language tab from the left and select English (United States) from the Windows display language dropdown menu.set english to fix code: 0x80131500

4. Update Microsoft Store

  1. Type Microsoft Store in the Search bar, and then click on the relevant search result.microsoft store
  2. Click on the Library icon near the bottom-left.Library
  3. Now, click on the Get updates button.get updates to fix code: 0x80131500
  4. If there’s an update for Microsoft Store, it should now install automatically.update

Many managed to fix Code: 0x80131500 in Microsoft Store by simply updating the app. However, one user encountered the error after reinstalling a previous iteration of the OS. So, if that’s the case with you, this method may work.

5. Check the services

  1. Press the Windows key + R, type services.msc, and then press Enter or click OK.
  2. Locate the Background Intelligent Transfer Service and then double-click it.
  3. Set Automatic as the Startup type and then hit the Start button below. Now, click the Apply and OK buttons to acknowledge the change.
  4. Do the same for the Windows Update service.

6. Reset the Microsoft Store app

  1. Press Windows + I to open Settings, and then click on Apps.apps
  2. Locate and select Microsoft Store, and then click on Advanced options.advanced options
  3. Click on the Reset button.reset to fix code: 0x80131500
  4. Again, click Reset in the confirmation prompt.reset

After the Microsoft Store reset is complete, you shouldn’t come across Code: 0x80131500.

7. Reinstall Microsoft Store

  1. Type cmd in the Search tab, then click on Run as administrator to start Command Prompt with full privileges.Command Prompt
  2. Paste the following command to remove the Microsoft Store apps package and then hit Enter: Get-AppxPackage -allusers *WindowsStore* | Remove-AppxPackage
  3. Now, execute the following command to reinstall it: Get-AppxPackage -allusers *WindowsStore* | Foreach {Add-AppxPackage -DisableDevelopmentMode -Register “$($_.InstallLocation)\AppXManifest.xml”}

This also helps with Microsoft Store error code 0xC002001B.

8. Disable your antivirus and firewall

  1. Type Security on the Search tab, and then select Windows Security from the results.
  2. Click on Virus & threat protection.
  3. If you don’t have a third-party antivirus, turn off the protection. If you have one, click on Open app or open it individually and disable its protection.

Sometimes the Code: 0x80131500 error can appear due to your antivirus or firewall that may block some apps, and you will need to disable it.

However, the issue can persist even after you disable your antivirus, in which case uninstalling the program is the only viable solution.

If you’re using any antivirus solution to remove it from your PC altogether, be sure to check out the best uninstaller software you can use right now.

Plus, if removing the antivirus solves the problem, you should consider switching to a different antivirus. There are many great antivirus solutions available.

We recommend you try an antivirus that offers comprehensive security and online privacy, multi-platform protection, keeps your banking secure, and protects your IoT and webcam.

TotalAV doesn’t interfere with the Microsoft Store and offers intelligent security protection for your PC. So it’s worth giving it a chance, and you won’t be disappointed.

9. Replace your wireless adapter

A few users reported problematic wireless adapter caused this issue adapter. In addition, even though the Internet connection works without problems, users reported problems with the Microsoft Store.

The issue was fixed after switching to a different wireless adapter, so you might want to try that.

If you don’t have a replacement in mind, you should definitely consider the Wireless USB Wi-Fi Adapter for PC. It has a dual antenna and a top speed of 1200Mbps, working in the 802.11AC standard.

  • Increased signal with the Dual High Gain Wi-Fi Antenna
  • Ultra-fast AC1200 wireless adapter speed
  • Super USB 3.0 Wi-Fi adapter for desktop PCs
  • 7x24 hours technical support
  • Occupies a lot of space

Users also reported the following problems related to the Microsoft Store:

  • 0x80131505 Windows 10 Store – This error usually appears when trying to access Microsoft Store, and some issues with your internet connection most likely cause it.
  • The server stumbled error code 0x80131500 – It’s just a variation in the message received, so the solutions below will surely fix it. However, it is usually caused by issues connecting with the servers, which could be a problem from your ISP.
  • Microsoft Store problems – If you’re having Microsoft Store problems, you might be able to fix this problem by running the Microsoft Store troubleshooter.
  • Visual Studio error code: 0x80131500 – This means that you cannot access the Microsoft server or there are issues with the SQL server.

Running into the error Code: 0x80131500 can be really frustrating, mainly if you constantly use the Microsoft Store for your favorite apps. But the solutions here are all tried and tested and should get things fixed on your computer.

Also, find the best offline games on Microsoft Store you should download today!

As always, for more suggestions or other questions on the Microsoft Store error code 0x80131500, reach out to the comments section below.

How to Open Multiple Excel Files at Once in Windows 10 & 11

Microsoft Excel is undoubtedly one of the best spreadsheet applications for Windows. However, in earlier versions of Excel up to 2010 you can’t automatically open multiple Excel windows.

When you select File > New > Blank workbook in Excel 2010, worksheets open in the same window.

In addition, saved spreadsheets also open in the same window. This is not ideal as you can’t compare spreadsheets in two or more windows.

How to open multiple Excel windows at the same time?

There are a few workarounds that enable you to open multiple Excel windows at the same time and we will present all of them to you, in order.

1. Use Excel’s Jump List

  1. First, you can open multiple windows from the software’s Jump List in Windows 10. To do so, open Excel and right-click its taskbar icon as below.excel  taskbar
  2. The Jump List includes a Microsoft Excel option on it. In the example above, it’s Microsoft Excel 2010 Starter.
  3. Click Microsoft Excel to open a new, separate Excel spreadsheet window.
  4. Now you have opened a second window, click File > Open to open a worksheet in it as shown below.excel taskbar windows
  5. Alternatively, you can also hold the Shift key and left-click the taskbar icon to open multiple spreadsheet windows.

2. With the Middle Mouse Button

If you have a mouse with a middle button or scroll wheel, you can open multiple windows with that. Open Excel and then select its taskbar icon with the middle mouse button.

That will open a new window for you to open a spreadsheet.

3. With Snap Assist

Now you can open Excel spreadsheets in multiple windows at the same time, you can make the most of Windows 10 Snap Assist.

Snap Assist enables you to open two or more windows neatly on the left and right of the desktop.

  1. Select one spreadsheet window and click its Restore Down button.
  2. Then move it to the far right or left side of desktop. That snaps the window to one-half of the desktop as shown below.excel taskbar method
  3. Next, select one of the spreadsheet thumbnails to open another window on the other side of the desktop as in the snapshot below.open multiple excel windows at the same time app
  4. Or you could drag a spreadsheet window to the top left, right or bottom corners of the desktop to arrange up to four spreadsheets as below.spreadsheets how to open multiple excel files at the same time

4. Through the Start menu

    If you are using an older version of Excel and are looking for a way to open multiple files at the same time in different windows, you can do this through the Start menu.

    Each time you open the Excel app from the Start menu, a separate application opens.

  1. 1. Click on the Start button on your taskbar or press the Windows key. This will open the Start Menu.

  2. 2. Type Excel in the search bar or scroll to the folder that includes Excel on your Start menu.

    excel start menu
  3. 3. Click on the app to open Excel from there.

  4. 4. Repeat step 2 to open another Excel window.

  5. 5. Create as many windows as you want. Every time you start Excel from the Start menu, a new window will be created. As such, you can now open multiple spreadsheets in separate windows.

So you can still open spreadsheets in two or more windows with earlier versions of Excel.

The separate windows are better for comparing and analyzing alternative spreadsheets and copying numerical values from one sheet to another.

We hope that you managed to open multiple files at once in Excel using our guide. Let us know your thoughts in the comments section below.

Excel Won’t Open on Windows 11? Here’s What to do

Are Microsoft Excel files not opening on Windows 11? Many users have been facing this issue in recent days.

Usually, You can easily open any Excel files using Microsoft Excel or other supported programs. But there is an issue if that doesn’t happen on your PC. You can try some methods to solve the Excel files, not an opening problem on Windows 11. However, before knowing about that, we should know about the reasons.

Why are Excel files not opening on my Windows 11 PC?

If you cannot open any or some Excel files, these are the possible reasons:

  • Outdated Excel application: If Microsoft Excel is highly outdated, this can be the reason you are facing the problem.
  • Problematic Update: A problematic Windows update or Excel update may cause the problem.
  • Misconfiguration: Any misconfiguration on Windows or Excel may be the reason.
  • Problematic Excel app: If you are not using the official version of Microsoft Excel, you may occasionally encounter various problems, including file opening issues.

How can I fix it if Excel files are not opening on Windows 11?

First, you should do the following things before going through the actual methods:

  • Make sure to open the file with Microsoft Excel.
  • Update Windows to the latest version.
  • Update Microsoft Excel to the latest version.
  • Maximize and Minimize Excel if it shows no content.
  • Ensure your Microsoft Office application is genuine, not a cracked or pirated version. To check if the app is genuine or not, try this tool.
  • Disable Antivirus temporarily and see if it helps.

After ensuring the above things, follow these methods to solve the Excel files not opening an issue on Windows 11:

1. End any Excel and Office processes from Task Manager

  1. Right-click on the Taskbar and choose Task Manager.
  2. Select the Microsoft Excel process and click on End task.ending excel process task manager
  3. End other MS Office-related processes as well.

Sometimes, some background processes remain active for a glitch with either Windows or Office, even though the application was closed. So when next time the user wants to open that app, they may face problem. It may happen with Microsoft Excel too.

2. Ignore other apps that use DDE

  1. Open Microsoft Excel.
  2. Go to Options.going option Microsoft Excel
  3. Go to the Advanced tab and uncheck Ignore other applications that use Dynamic Data Exchange (DDE).unchecking applications that use Dynamic Data Exchange DDE Excel
  4. Click on OK.

According to some users, unchecking the above option fixes the Excel file not opening issue on Windows 11.

3. Reset file associations

  1. Press Win + I on the keyboard to open Windows 11 Settings.
  2. Go to Apps and click on Default apps.going default apps settings windows 11
  3. Scroll down and click on Reset next to Reset all default apps.clicking reset next to Reset all default apps Windows 11
  4. Restart your PC.

After resetting, when you open any Excel file next time, you may get the option to choose which program to use. Select excel. This time, the problem will not appear.

If necessary, learn how to fix file association issues on Windows.

4. Open Excel in Safe Mode

  1. Press Win + R on the keyboard to open RUN.
  2. Type the following command and click on OK: excel /safeopening excel safe mode with run command
  3. Now, open the problematic file using Excel.

If there is something wrong with the Excel configuration, but you cannot figure it out, Safe Mode is an excellent way. For example, those who cannot open a spreadsheet file with Excel on Windows 11 can try the Safe Mode method.

5. Disable add-ins

  1. Open Excel and go to Options like before.
  2. Go to the Add-ins tab.
  3. Select COM Add-ins next to Manage and click on Go.choosing com add-ins and clicking go Microsoft Excel.png
  4. Uncheck all the Add-ins and click on OK.disabling excel add-ins and clicking ok
  5. Relaunch the Excel.

Add-ins can enhance your experience with Microsoft Office. However, sometimes, these can be the root of the problem. Disabling any third-party add-ins can help you to solve the Excel file not opening issue.

6. Repair Microsoft Office

  1. Go to Windows 11 Settings.
  2. Navigate to Apps and click on Installed apps.going installed apps windows 11 settings
  3. Click on the three horizontal dots next to Microsoft Office and choose Modify.clicking modify windows 11 settings microsoft office
  4. Select your preferred option and click on Repair.repairing Microsoft Office quick repair

If possible, you should choose the Online Repair option rather than Quick Repair. However, if the problem is critical, the online method is the best way to sort it out.

Is the above process failing? Learn how to fix couldn’t repair Office problem.

Repairing Excel can also help you fix issues like Exception from HRESULT 0x800a03ec; read this guide to learn more.

7. Re-install MS Office

7.1 Uninstall Microsoft Office

  1. Go to Installed apps on the Settings like before.
  2. Choose Uninstall for Microsoft Office by clicking on the three horizontal dots.uninstalling microsoft office 365 windows 11
  3. Follow the on-screen steps to complete the process.
  4. After that, restart your PC.

For this, you can use Revo or IObit Uninstaller too. These third-party options are better than Windows uninstallers. These can remove any program from your PC without leaving any leftovers.

7.2 Install again

  1. Go to the Microsoft account site and sign in.
  2. Go to View all subscriptions.
  3. Click on Manage next to the Microsoft Office or Microsoft 365 subscription.
  4. Click on Install office, as shown in the screenshot.clicking install office Microsoft website
  5. Now, you will get the option to download.
  6. After downloading it, install it on your PC.

If you don’t have a Microsoft 365 subscription, you may need to follow slightly different steps to download Office apps.

After installing, try to open the Excel files again and see if it has fixed the problem.

8. Use Excel online

  1. Go to the Microsoft Excel Online site.
  2. Sign in with your Microsoft Account if necessary.
  3. Upload the file you want to open.uploading file Microsoft Excel online
  4. Enjoy Excel online.

You won’t have to upload if the Excel file is stored online like in OneDrive. Instead, you can view all of your current file names in Excel. Just click on the preferred one you want to open.

If, after trying the other methods, the problem persists, consider using Excel online. Like Google Sheets, Microsoft also has made its service online, which is, in fact, more powerful.

Sometimes, the file you try to open is not well-optimized for Excel. In this case, you can use other Office alternatives like Google Sheets, Libra Office, etc. Also, consider using any CSV viewers if it is a CSV file.

Hopefully, the above suggestions will help to fix the Excel files, not an opening problem on Windows 11. If you have tips or methods to help others, feel free to let us know in the comment box.

OneDrive Keeps Crashing: Fix it With These 3 Simple Steps

If your OneDrive keeps crashing, you are in the right place. Let us tell you all that you need to know.

If you are using OneDrive to store your data and keep your files secure, you already know that you can sync your data automatically from your Windows 10 device.

Sadly in some cases, this service may crash, which has been reported by a few users. So, let us explore why this may happen.

Why OneDrive keeps crashing?

We gathered from users that a few factors might trigger this crashing problem. At the top of the list are the following:

  • Updates – One thing that may cause you problems is that Microsoft is rolling out essential bug fixes from time to time, which can interfere with how your OneDrive works.
  • Folder syncs – Users complain that some of the updates cause their OneDrive app to freeze when it synchronizes some folders.
  • Third-party apps – On the Windows OS, you may have installed other applications conflicting with OneDrive. In some cases, these may even be your antivirus software.

While this is not an exhaustive list, they make up most of the triggers.

Now let us discuss the most practical solutions. These will work if OneDrive crashes when syncing or if OneDrive crashes on start-up.

How do I fix OneDrive if it keeps crashing?

Before you start with the solutions, you may consider using an alternative to OneDrive. Choosing another efficient file sync software on Windows 10 often will save you the stress of troubleshooting.

Also, ensure you have enough disk space, as sync errors often occur when there is not enough disk space. We recommend reconnecting your OneDrive account and then trying to sync the folder again.

  1. Install the latest Windows updates
  2. Disable conflicting processes
  3. Check the file/folder size

1. Install the latest Windows updates

  1. Press Windows + I to open the settings app.
  2. Click on Updates & Security.
    OneDrive keeps crashing
  3. Click on Check for updates.

If there are bugs that have triggered these crashes in a previous update, you will likely get fixes in the next update.

2. Disable conflicting processes

  1. Press Windows + R, type msconfig, and hit Enter.
  2. Click on the Services, check the Hide all Microsoft services check box, and click Disable all.
    OneDrive keeps crashing
  3. Go to the Startup tab and click Open Task Manager.
    OneDrive keeps crashing
  4. Select each startup item, then click Disable.
  5. Close the Task Manager and restart the computer.

Sometimes, various apps and programs may prevent your OneDrive app from syncing your files and folders and even cause it to crash.

Because of this, the safest solution is to clean and boot your computer to use only a minimum set of drivers and programs.

3. Check the file/folder size

OneDrive also has file size limitations. This means you can’t sync a file or folder larger than 10GB. If the problematic folder is more significant than 10GB, you must compress it using some of the file compression tools listed in this guide.

That is as far as we shall be covering. It would be best if you tried any of the solutions above that feel most relevant to you.

We hope that one of these solutions helped you solve the sync issue with OneDrive. Let us know in the comments below which worked best for you.

Apex Directx Error: Fix This Issue With 4 Simple Methods

Apex Legends DirectX error can prevent you from starting the game, and in today’s article, we’ll show you how to fix this problem once and for all.

The game has been out for a while now, and EA’s new battle royale game has become a little phenomenon in its own right, with 50 million players in its first month. That’s something to write home about.

With thousands of players logged into EA’s servers, errors are bound to happen occasionally. With users encountering DirectX errors recently, this issue became the focal point on Reddit threads.

Let’s take about possible triggers and solutions.

What causes Apex Directx error?

From the feedback from multiple users, we have been able to sum up the principal triggers for this error to include the following two elements:

  • Outdated drivers – In most instances, this refers to the graphics driver. If it is bad or outdated you may experience this error.
  • Firewall or antivirus – Some antivirus apps are notorious for blocking out essential components. You may need to disable your antivirus.

While there may be some other minor triggers, you should be concerned about the above listed. So let us explore practical solutions for Apex legends DirectX 11 and 12 errors.

How can I fix Apex Legends DirectX error?

  1. DirectX .cab file removal
  2. Turn off your firewall
  3. Run CCleaner
  4. Update your graphics driver

1. Directx .cab file removal

  1. Go to the path below:
    C:Program Files (x86)Origin GamesApex__Installerdirectxredist
  2. Delete all files except DSETUP.dll, dsetup32.dll, DXSETUP.EXE, and any .cab file with 2010 contained in the name.
    Apex Directx error
  3. Right-click on DXSETUP.exe and run it with Administrator rights; the installation should work.
  4. Re-launch your game, and you’re all set.

2. Turn off your firewall

For some users, this simple solution might work. However, keep in mind that turning off your firewall may not solve Apex Legends DirectX errors for all the gamers out there.

So, here are the steps to follow:

  1. Press Windows + R, type control panel, and hit Enter.
    Apex Directx error
  2. Navigate to System and Security and click Windows Defender Firewall.
    Apex Directx error
  3. On the left-hand pane, click Turn Windows Firewall on or off.
  4. The new window shows two options for private and public networks. First, turn your firewall off on both networks and check if the DirectX error persists.
    disable Windows firewall

3. Run CCleaner

CCleaner is a handy tool that removes any unnecessary files left over from apps and programs that weren’t completely installed. This tool cleans your Windows Registry.

All you need to do is download CCleaner from the official website, install it on your PC and run it.

4. Update your graphics driver

  1. Right-click on the Start menu and select Device Manager.
  2. Expand the Display drivers section, right-click on your graphics card, and select Update driver.
    Apex Directx error
  3. Click Search automatically for drivers.

Another common cause for DirectX errors is outdated graphics drivers. Make sure you installed the latest GPU drivers for Apex Legends.

Alternatively, you may go to your GPU manufacturer’s official website and download the available graphics driver updates.

These solutions should help you when you face this Apex DirectX error. In some extreme cases, you may have to uninstall Origin. Usually, this is a last resort solution, but it may help you to solve this problem.

What issues have you experienced while fighting alongside your teammates? Let us know in the comments below.

0x80240023 on Windows 11: How to Quickly Fix This Error

It is common for users to experience issues during Windows updates or when attempting to update their Windows. One is the Windows Update error code 0x80240023 in Windows 11, indicating there’s a problem somewhere.

Other update concerns like the 0x800f0900 Windows Update error can also disturb the Windows update process.

What causes the Windows update error 0x80240023?

Many factors can be responsible for your PC’s Windows update error 0x80240023. A notable factor that can cause the error is corrupt system files. When there are corrupt system files on your operating system, it can impede the update process on your PC, resulting in an error.

Furthermore, other factors can cause the Window update error 0x80240023 to appear on your PC. Some are:

  • Internet connection issues – Users must connect to a stable and fast network before installing Windows updates. So, network congestion or unstable internet connection can cause issues with the Windows Update process, resulting in the error.
  • Windows Update temporary cache folder – The previous Windows updates installer patch files on your computer are saved as cache files in a folder. These files can become old and corrupt, causing the Windows update error 0x80240023 due to update caches.
  • Virus and Malware – Attacks from viruses and malware can cause problems with Windows updates on Windows 11. They can block the connections between your PC and Windows servers.

Note that the cause can differ on various computers. Nevertheless, we’ll take you through some steps to fix the error.

How do I fix the Windows Update error code 0x80240023 in Windows 11?

Before proceeding with any troubleshooting steps, try the following:

  • Stop background apps running on your computer.
  • Restart your router.
  • Restart Windows in Safe Mode and check if the update can install without errors.

Proceed with the solutions below if you can’t fix the error.

1. Run SFC and DISM scans

  1. Left-click the Start button, type Command Prompt, and click Run as administrator.
  2. Click Yes if the User Account Control prompts
  3. Type the following commands and press Enter after each: sfc/ scannow
  4. Type the following commands and press Enter after each: DISM /Online /Cleanup-Image /RestoreHealth
  5. Restart your PC.

Running the SFC and DISM scan will detect and repair corrupt system files that can cause Windows update error 0x80240023.

You can check how to fix the run as the administrator option not working on their PCs.

2. Run Windows Update Troubleshooter

  1. Press Windows + I key to open the Settings app.
  2. Click System and select Troubleshoot.
  3. Then click on Other troubleshooters.
  4. Click the Run button beside the Windows Update.
  5. Follow the on-screen prompts and restart your PC afterward.

The Windows update troubleshooter will fix issues causing the Windows updates error 0x80240023. Check other ways to run the Windows Update troubleshooter in Windows 10/11. 

3. Clear Windows Update cache via File Explorer

  1. Press Windows + I to open File Explorer.
  2. Go to Local Disk (C), right-click on it, and select Properties from the drop-down.
  3. Click on Disk Clean-up, then click the Cleanup system files button.
  4. Check the boxes for Windows upgrade log files and Temporary Windows Installation files, then click OK.
  5. Close the File Explorer and check if the error persists.

You can read our article on what to do if File Explorer keeps crashing on your PC.

4. Restart the Windows Update services

  1. Left-click the Start button, type cmd, and choose Run as Administrator.
  2. Type the following commands and press Enter after each one to stop Window update services: net stop wuauserv net stop cryptSvc net stop bits net stop msiserver
  3. Type the following command one after the other: ren C:\Windows\SoftwareDistribution SoftwareDistribution.old   ren C:\Windows\System32\catroot2 Catroot2.old
  4. Input the following commands and press Enter after each one to start Windows update services: net start wuauserv net start cryptSvc net start bits net start msiserver
  5. Exit the Command Prompt and restart your PC.

Restarting the Windows update components will fix issues affecting the Windows update services, prompting it to run into errors.

In conclusion, you can check our article on Windows 11 error code 0x800f0830 and how to fix it. Also, we have a guide for fixing the 0x800f0805 Windows Update error that may appear on your PC.

Do not hesitate to drop your suggestions or questions in the comments below.

VCRuntime140.dll Not Found: 5 Ways to Get Missing DLL Back

DLL (Dynamic Link Library) are files used by more than programs and help them perform various critical tasks. But, often, users claim that DLL files are missing, with VCRUNTIME140.dll not found being commonly reported.

The complete error message reads The code execution cannot proceed because VCRUNTIME140.dll was not found. Reinstalling the program may fix this problem. So, let’s find out how you can fix things in this case.

Why am I getting VCRuntime140.dll not found?

Here are a few reasons you might be getting the error:

  • The DLL file was deleted – Since the file is shared amongst several apps, there’s a likelihood that it was deleted by one of these, and, as a result, you are getting the error.
  • Corrupt system files – Even in the case of corrupt system files, you get the VCRUNTIME140.dll not found error.
  • Improper installation of the app – If a program requires a specific DLL file, it is usually installed with the file. So, in case you are getting the error, likely, the program was not installed correctly.
  • System infected with malware or virus – Malware or virus can also affect the DLL files stored on the computer, along with making other unwanted critical changes.

While you are fixing it, we decided to list the programs usually affected:

  • Firefox VCRUNTIME140.dll not found – Many reported that they can’t open Firefox due to this error.
  • Office 2016 VCRUNTIME140.dll not found – Microsoft Office, too, is affected by the missing DLL file.
  • Epic Game VCRUNTIME140.dll not found – Some users had trouble opening Epic Games on their PC.
  • Sims 4 VCRUNTIME140.dll not found – A lot of players had the error message show up as soon as they launched Sims 4.
  • Origin VCRUNTIME140.dll not found – Our solutions should fix things in this case.

How can I fix VCRuntime140.dll not found error?

Before you try the slightly complex solutions, here are a few quick ones:

  • If you accidentally deleted the DLL file, restore it from the Recycle Bin.
  • Make sure Windows is up-to-date. If there’s a pending update, install it and verify whether the problem is resolved.
  • Run a malware scan using a built-in Windows Security or an effective third-party antivirus to remove any virus from the PC.

If these don’t work, try the solutions listed next.

1. Use a DLL finder tool

Some of our favorite repair tools can automatically find disappearing DLLs. Besides finding your lost DLL, these kinds of apps will also significantly improve the performance of your system.

2. Repair Microsoft Visual C++ Redistributable

  1. Press Windows + R to open Run, type appwiz.cpl, and then hit Enter.appwiz.cpl
  2. Locate all Microsoft Visual C++ Redistributable, select each individually, and then click on Change.change
  3. Choose Repair.repair redistributable to fix vcruntime140.dll not found
  4. Click Yes in the UAC prompt.
  5. Wait for the repair process to complete.repair
  6. Once done, repair the other Microsoft Visual C++ Redistributable entries here, and then restart the computer.

Now, check whether the VCRUNTIME140.dll not found error with Microsoft Office is fixed. If not, head to the following method.

3. Download the Microsoft Visual C++ Redistributable

If you couldn’t find any Microsoft Visual C++ Redistributable on the PC, their absence is likely triggering the VCRUNTIME14 not found error. And the ideal solution here would be to download them manually.

Head to Microsoft’s official website and download the x64 and x86 architecture. Once done, run the setup to install them, and the error should be gone.

4. Reinstall the affected program

  1. Press Windows + I to open Settings, choose Apps from the navigation pane, and then click on Installed apps.install apps
  2. Now, locate the app throwing the error, click on the ellipsis next to it, and choose Uninstall.uninstall app to fix vcruntime140.dll not found
  3. Again, click Uninstall in the prompt.uninstall
  4. After removing the app, restart the computer once before reinstalling it. And make sure you get it from a reliable source, preferably the official website or Microsoft Store.

As already stated, an application usually installs the required DLL files. The ideal course, and also the recommended one, when getting the VCRUNTIME14 not found error is to reinstall the app.

5. Run the DISM and SFC scan

  1. Press Windows + R to open Run, type cmd, and press Ctrl + Shift + Enter.cmd
  2. Click Yes in the UAC prompt that appears.
  3. Now, paste the following three commands one at a time, and hit Enter after each to run the DISM tool:DISM/Online /Cleanup-Image /CheckHealth DISM /Online /Cleanup-Image /ScanHealth DISM /Online /Cleanup-Image /RestoreHealth
  4. Next, run the SFC scan with the following command:sfc /scannowsfc scan to fix vcruntime140.dll not found

If nothing else worked, it’s likely the corrupt system files to blame. And in this case, running DISM (Deployment Image Servicing and Management) and SFC scan should fix the VCRUNTIME14 not found error for good.

If you frequently encounter this problem, install the best DLL repair tool and get rid of the error forever.

If you have any questions or other suggestions, please write to us in the comments section below.

EXCEL: There is Not Enough Disk Space [Quick Fix]

Some users have seen the error Microsoft Excel can not open or save any more documents because there is not enough disk space.

This issue has made users, understandably, very confused, as they observed that their hard drives have far less data written on them than at full capacity.

The “there is not enough disk space” issue happens whether the users choose to open the respective file either through the File -> Open method or by double-clicking the Excel file inside Windows Explorer.

In today’s article, we will discuss what are the possible reasons for this error occurring, and also what you can do to avoid it. Please read on to find out more details.

Why does the disk space error occur inside Microsoft Excel?

The error mentioned above seems to have nothing to do with your actual remaining disk space.

Microsoft Excel is trying its best to display a security notification regarding the file you’re trying to open, but because of a glitch, it is not able to do it properly.

These types of security warnings are usually displayed in relation to files that are downloaded from the internet, but this may vary.

The security certificate that the file contains is in some way corrupted, making Excel show you the warning message.

Read along to find out what you can do about this issue.

How do I fix there is not enough memory or disk space to run in Excel?

1. Change settings in the properties of the file

  1. Use the Windows File Explorer and navigate to the location of the Excel file that’s causing issues.
  2. Right-click the file -> choose Properties.
  3. Click the General tab -> click the Unblock button.

Note: In some cases, this option will not be available to you. If that is the case, please try the next method.

2. Use the Trust Center Settings of Excel

    It’s possible to repair the not enough disk space error in Excel with efficient tools such as Trust Center Settings. Check the following steps to do it on your own.

  1. 1. Move the Excel file with issues inside a separate folder on your hard drive.

  2. 2. Open Excel.

  3. 3. Inside MS Excel -> click File -> Options.

    not-enough-disk-space-excel
  4. 4. Select the option Trust Center -> Trust Center Settings -> click the Trusted Locations button.

    not-enough-disk-space-excel
  5. 5. Add the newly created folder to the Trusted Locations list.

  6. 6. Select the option Subfolders of this location are also trusted -> click Ok.

3. Update your software to the latest Microsoft Office

Because this issue has been around for some time, Microsoft has taken notice of it.

In order to tackle it, they released the new version of Microsoft Office.

Using this version of Office will let you have access to all the cool new features and optimizations, and at the same time get rid of the disk space error forever.

Conclusion

In today’s how-to article, we talked about how to best tackle the disk space error that appears in the older versions of Microsoft Excel.

Please make sure to follow the steps we presented here carefully for a speedy fix.

If you found this guide helpful please feel free to let us know by using the comment section below.

Windows Update Stuck at 0% When Downloading [Fix]

Many problems may arise when downloading or installing Windows Updates on your computer. First, they impede the update process, resulting in the Windows Update being stuck at 0 during download & installation.

Another instance of this problem is Windows Update stuck at 100%, meaning it won’t completely download.

Why is my Windows Update stuck?

Windows Updates require some essential services and components to function correctly. When these components are not intact, the Update may get stuck or fail. The most common reason is a conflict with some programs on your PC. For example, programs like Windows Defender can impede the Update process.

Many other factors can cause the Windows Update to be stuck or frozen. Some are:

  • Network issues – When there’s a problem with your network connection, it’ll affect the download process of the Windows Updates. The network congestion on your PC can leave no bandwidth for Windows Update services to use, resulting in the update getting stuck or frozen.
  • Issues with Windows Update services – Windows Updates can get stuck during initialization or finalization if the Windows Update services on your computer are not intact. These services are responsible for processing and initializing the Updates on your device.
  • Windows Update cache – The Update cache on your PC may be old or corrupt, causing issues with the Update files in the folder. Hence, it blocks the process, resulting in the Windows Update being stuck.

These causes can vary in computers, meaning they can demand different fixes. Fortunately, we have some general solutions to help install your Windows Updates.

How do I fix Windows Update if it’s stuck at 0%?

Before proceeding with any troubleshooting steps, go through the following preliminary checks:

  • Turn off background apps running on your PC.
  • Disable third-party antivirus software installed on your computer.
  • Power cycle your network router.

If you can fix the problem, go ahead with the solutions below:

1. Reboot Windows in Safe Mode

  1. On the sign-in screen, press the Shift key while holding the Power button.
  2. Press the shift key to open the Advanced Recovery Options window.
  3. Select Troubleshoot, then select the Advanced options.
  4. Click on Startup Settings and select Restart.
  5. Next, press 4 to Enable Safe Mode.  

Restarting Windows in Safe Mode can fix your PC’s startup issues, causing it not to download Windows updates completely.

2. Run Windows Update troubleshooter

  1. Press Windows + I key to open the Settings app.
  2. Click System and select Troubleshoot.
  3. Then click on the Other troubleshooters.
  4. Select Windows Update and click on the Run button.
  5. Follow the on-screen instructions to complete, then restart your PC.

The Windows Update troubleshooter will find and fix issues affecting the Windows updates process on your PC. Check other ways to run the Windows Update troubleshooter in Windows 10/11.

3. Clear Windows Update cache via File Explorer

  1. Press Windows + I to open File Explorer.
  2. Navigate to Local Disk (C), right-click on it, and click on Properties from the drop-down.
  3. Select Disk Clean-up, then click the Cleanup system files button.
  4. Check the boxes for Windows upgrade log files and Temporary Windows Installation files, then click OK.
  5. Restart Windows and check if the problem persists.

Since a corrupt Windows Update cache can cause it to get stuck at 0, this fix will troubleshoot it. But first, read our article on what to do if File Explorer keeps crashing your PC.

4. Rename the SoftwareDistribution folder

  1. Left-click the Start button, type cmd, and choose Run as Administrator.
  2. Type the following commands and press Enter after each one to stop Window Update services: net stop wuauserv net stop cryptSvc net stop bits net stop msiserver
  3. Type the following command one after the other: ren C:\Windows\SoftwareDistribution SoftwareDistribution.old ren C:\Windows\System32\catroot2 Catroot2.old
  4. Input the following commands and press Enter after each one to start Windows update services: net start wuauserv net start cryptSvc net start bits net start msiserver
  5. Exit the Command Prompt and restart your PC.

Renaming the Windows update components will fix files affecting the Windows update services.

Conclusively, our readers can also check what to do if the update process gets stuck configuring the Windows Updates screen on their computers.

Also, check how to fix Windows Update not working on Windows 10/11.

Kindly drop your comments if you have any suggestions or questions.

Windows 10 Store Not Connected To Internet: Solved

The Windows 10 Your PC isn’t connected to the Internet issue is quite common in some Windows PCs, especially when using the Microsoft Store.

What is most annoying about this fault is that users are connected to a reliable internet connection and they can actually run other tasks needing an online connection such as updating Windows or checking emails on Microsoft Outlook.

Strangely, Windows will persistently warn that the system is disconnected when trying to use Store and a few other internet-based applications.

What causes the Windows 10 Store not connected to internet issue?

The Windows 10 Store not connected to internet issue, like it so happens with many Windows bugs doesn’t have one single trigger. Rather, it’s a result of a wide range of hitches each of which should be checked individually in order to fully eliminate it.

This article discusses what to do if Microsoft Store says you’re not connected to the internet on a Windows 10 PC, so let’s jump right into the solutions.

What can I do if I can’t connect to Windows Store in Windows 10?


1. Clear the Microsoft Store App. Cache

Clearing the AppStore’s cache may help the PC forget the corrupted settings and restore functionality.

  1. Simultaneously Press the Win and R buttons on the keyboard. The Run dialog opens. (Ensure you’re using an account with administrative rights).
  2. Type  WSReset.exe in the dialog area. Click OK.Your PC isn't connected to the Internet
  3. The cache Reset tool runs momentarily and clears the current settings. It will automatically close as soon as it is done.
  4. Your Windows Store app will now hopefully work as expected.

2. Update the Date and Time settings

For Windows 10:

  1. Right-click on the time/date tab on the system tray.my computer wont connect to the internet but others will
  2. Choose adjust date/time.
  3. You can switch the button set time automatically to off (if necessary).
  4. Click change under Change date and time.microsoft store not connecting to internet windows 10
  5. Adjust the date and time appropriately (including the time zone).microsoft store check your connection
  6. Click change again. 
  7. Close the window and check if the system will henceforth work.

For Windows 8/8.1:

  1. Press the Windows key + C. The Charms bar appears.
  2. In the charms search bar, Type Date and Time.
  3. Now click on Change date and time (from the displayed options).
  4. Adjust the date and time appropriately (including the time zone).
  5. Click Apply then Ok.
  6. Exit and retry to see if the error has disappeared.

Please note that for Windows 8.1, the first three steps differ and should be as follows:

  1. Press Win+I. This opens the Settings tab in the Charms bar.
  2. Click on Change PC Settings.
  3. Click Time & Language to access the time/date adjusting Window.

3. Run the Windows Apps built-in Troubleshooter

Microsoft includes an efficient troubleshooter for Windows store apps in the Windows installation package and launching it could help.

Here is how to reset and repair the apps:

  1. Click Start.
  2. Select Settings.
  3. Go to Apps.
  4. Select Apps & features.
  5. Select the Store app.
  6. Select Advanced.
  7. On the next page, select Repair.
  8. Wait for the repair to finish.
  9. Select Reset if the repairing process fails to trigger a full reset. 

4. Use The modern UI App troubleshooting Tool

  1. Download the Modern UI App troubleshooter.
  2. Double-click it from the status bar once it completes downloading (If not , check it from the downloads- its named diagcab) and run it.
  3. Choose Windows Stores apps then next.microsoft store says im not connected to the internet
  4. Leave the tool to work and repair any issues. Attend to any prompts as required.

The Modern UI App troubleshooter resolves a number of common troubles some of which are known to generate the lack of internet connection issues. Downloading and running it could hence help.

The following Fixes works for multiple PC not connected to the Internet issues including general network internet connectivity problems as well as Windows Store Apps opening.


5. Repair the Network Settings

For Windows 10:

  1. Right-click the network icon displayed on the system tray(see screenshot).windows 10 apps wont connect to internet
  2. Click troubleshoot problems.
windows 8 your pc isn t connected to the interne

3. Leave the Windows 10 network troubleshooter to run until its done.

microsoft store says im not connected to the internet

For Windows 8:

  1. Press the Windows key + C. The Charms bar appears.
  2. In the charms search bar, Type Troubleshooting.
  3. Locate the Troubleshooting option under Settings and click it.
  4. In the subsequent search bar, type Network Troubleshooter .
  5. Tap on Network troubleshooter. This initiates the automated network troubleshooting process.
  6. Follow the steps as prompted by the troubleshooter.

For Windows 8.1:

  1. Click the Start button and begin to type Network problems.
  2. A lot of choices come up. Click Identify and repair network problems. The troubleshooter opens.
  3. Let the troubleshooter run until competition while responding to any prompts.

Additional Commands to Help Fix The Network

There are some useful network reconfiguration commands that you can run if, for some reason, the “Your PC isn’t connected to the Internet” problem isn’t solved by the Network troubleshoot.

Steps (Windows 7, 8, 8.1, and 10):

  1. Click start.
  2. Type CMD in the dialog box.
  3. Right click cmd.exe and choose run as administrator. You will not run the following commands in the order given. Press Enter after each entry.
  4. Type netsh winsock reset.
  5. Type netsh int ip reset.
  6. Type ipconfig/release.
  7. Type ipconfig/renew.
  8. Type ipconfig/flushdns.

These commands refresh the system’s IP and DNS settings and may, with luck, heal the issue.


6.  Router/Modem Reset

The error may also be brought about by having a faulty router/modem configuration. The way out here would be to reset your device to their defaults.

Now, the method of resetting your router/modem varies from one model to another so you may have to refer to your devices manual or manufacturers’ website to see the steps.


7. Restart the PC

Another smart quick-fix for a wide range of problems is to restart your PC. Try and see if things will change for the better.


8. Disable the Proxy Server

Using a Proxy to connect to the internet may sometimes precipitate this problem. Disabling it could thus save your day.

Steps (Windows 7, 8, 8.1, and 10):

  1. Press Windows + R.
  2. Type inetcpl.cpl  in the search dialog. Click OK.
  3. Click the Connections tab.
  4. Then click LAN Settings.microsoft store it doesn t look like you re connected to the internet
  5. Check the box against the Automatically detect settings option.
  6. Uncheck the box next to Use a proxy server …. under Proxy server.no internet access but connected
  7. Click OK.

9. Disable The Antivirus & Firewall

Another possible solution for the Windows 10 Store not connected to internet error is to disable your antivirus and/or the firewall even if temporarily.

Steps To Turn Off Firewall:

Windows 7

  1. Click Start.
  2. Click control panel.
  3. Search for Windows Firewall (type in the search box).
  4. Click check firewall status.
windows 10 apps not connecting to internet
  1. Click turn windows firewall on/off.windows 10 store cannot connect to internet
  2. Choose turn off firewall (under both private and public settings).can't connect to windows store windows 10
  3. Click OK

Windows 10

  1. Click the start button.
  2. Type firewall.
  3. Choose check firewall status.
  4. Repeat step 5,6, and 7 above.

Windows 8.1

  1. Click the Start button then tap Control Panel to Open Windows Firewall.
  2. Click
  3. Press Windows Firewall.
  4. Click on Turn Windows Firewall on/off.
  5. Choose turn off firewall (under both private and public settings).
  6. Click OK.

10. Turn off Antivirus

Also try to halt your antivirus for some minutes before attempting to access the resources.

Here is how to turn off Windows defender.

  1. Click the Start
  2. Select Settings.
  3. ChooseUpdate & Security.can't connect to internet windows 10
  4. Click Windows defender.
can t connect to windows store windows 10

5. Set the real-time protection to off by sliding the button to the left.

microsoft store needs to be online

You can also follow the right process to turn off any other antivirus (Bitdefender, Avast, Kaspersky, Norton and more).

Remember to turn on the Firewall & Antiviruses as soon as possible.

After, check whether the can’t connect to Windows Store Windows 10 issue persists or is gone.


11. Reset Internet Explorer

This error can also be arising due to issues with your IE (Internet Explorer) browser. Resetting it sometimes removes the problem.

Steps:

  1. Start Internet Explorer.
  2. Go to the Tools menu/ click the gear icon as shown.windows 8 can t access windows store
  3. Click Internet Options.
  4. Click the Advanced tab.
  5. Click Reset.How do I fix unable to connect to network?
  6. Confirm the reset (you can check delete personal settings) by again clicking reset.
  7. Wait for the process to complete.
Can t connect to the Internet?

8. Exit then restart the browser to effect changes.


12. Reset the Edge Browser

Users with Windows 10 should reset the Edge browser as follows:

  1. Click Start.
  2. Click all apps.
  3. Open Microsoft Edge by clicking it.How do I fix my Internet connection?
  4. Press the ….. tab to access the Settings.Why is my internet not working?
  5. Scroll down and select choose what to clear.
  6. Click on Clear browsing data. You can even press Show more.
  7. Select everything and click Clear.How do I enable my Internet connection?
  8. Restart your system and see if the Windows 10 Store not connected to internet issue persists or not.

13. Run SFC (System File Checker)

The SFC utility could be beneficial if the challenge is caused corruption of some files.

Steps:

  1. Click start.
  2. Type CMD.
  3. Right click cmd.exe and choose run as administrator.your pc isn't connected to the internet
  4. Type sfc /scannow. This will fully scan your system and fix the identified problems automatically. 

14. Tweak Microsoft services

Disabling an essential Microsoft service can also bring the frustrating your PC isn’t connected to the Internet issue.

Ensuring that all the Microsoft services are running could successfully solve this.

Steps:

  1. Click start
  2. Type msconfig (for Windows 8 just start typing msconfig as there is no start button).
  3. Click system configuration (or msconfig.exe in Windows 7).Can't connect to network Windows 10?
  4. Click the services tab.
  5. Click disable all to deselect the various services.your pc isn't connected to the internet
  6. Then click enable all to reactivate all Microsoft services.
  7. Restart the computer.

15. Log In using a different User Account

The corrupt settings could be affecting your user account only. You can switch to a new Microsoft user account or even create one then try to log in using the fresh credentials.

This is also the recommended solution for users experiencing this issue because of logging in using the guest account.

Simply log out of the Guest account and log in using the original logins.


16. Remove any third-party software you have recently installed

Certain third party software interferes with your browser and connection settings so you may have to inspect your system for such programs and uninstall them.

Similarly, any adds on you have enabled on the browser could be the cause of the problem so reverse the action by removing such an Adds-on/extensions.
You will then restart your computer and retest to verify if your PC has reconnected.


You may have to try out each of these suggested fixes before you finally get rid of the error your PC isn’t connected to the Internet.

The key is to be patient and not to miss any of the steps. If possible, back up everything and create a system restore point.

This will give you peace of mind as you can always recover from any subsequent malfunction in case of any of the procedures go wrong.

We hope you managed to get rid of the Windows 10 Store not connected to internet issue on your PC.


How to Fix Zoom High CPU Usage? [7 Quick Ways]

Zoom is a video conferencing platform that is used by millions of people every day. It has an amazing feature set, but there are some limitations to the free version of Zoom. Sometimes you may have trouble detecting your microphone but we have a guide on how you can fix the issue.

Although it is a useful tool for businesses, the Zoom application can be resource-intensive to use and sometimes lead to your browser’s high CPU usage. This can affect both your browser and computer performance. 

When this happens, you may experience slower browsing speed and other issues such as freezing or crashing.

Why is the CPU usage so high in Zoom? 

Zoom uses a lot of CPU because it’s doing a lot of things at once. It’s encoding video and audio, capturing your webcam feed, and running voice recognition software so you can talk with people on the other end of the call.

Other reasons include:

  • Your computer is low on memory – If you have less than 2 GB of RAM on your computer, it will be difficult to run Zoom without causing high CPU usage. 
  • The computer hardware is not powerful enough – Zoom is a highly resource-intensive application. You may need a faster processor, more RAM, or a better graphics card if you want to use other programs while using Zoom at the same time.
  • Background programs – If you have other programs running that are using up your CPU, they could be competing for resources.
  • Poor internet connection or limited bandwidth capacity – If your internet connection is slow, you may see high CPU usage by Zoom. This is because Zoom uses more CPU power when the connection is slow.

So, What does it mean when your CPU usage is affecting the meeting quality? The Zoom meeting experience is highly dependent on your computer’s performance. For example, if you have a slow computer or low-quality internet connection, you’ll notice that the video and audio are unclear or keep stuttering. 

Quick Tip:

As a practical solution, we present an optimized browser like Opera One that offers faster navigation without consuming high CPU resources.

Plus, Opera One comes with many unique features, such as built-in Ad Blocker, VPN, social media and messaging buttons. It even has it’s own built-in AI.

Opera One

Connect with your colleagues on Zoom from this light-resource browser.
Free Download Visit website

How do I reduce Zoom power usage? 

1. Close unused applications

If you’re having trouble with Zoom’s CPU usage, it’s a good idea to close any other applications that may be open on your computer.

You may be running other resource-intensive applications while using Zoom on your Mac, Chromebook, or Windows 11. If possible, close out any applications that might be using a lot of RAM or processing power such as Microsoft Word or Excel.

2. Update Zoom/browser

The first thing to check is whether or not you have the latest version of Zoom. If you’re running an older version, you need to update your software. Zoom browser 100% CPU tends to occur when running outdated programs.

In the event that you are using the web version, you need to update your browser to the latest version to avoid missing out on new features or experiencing limited functionality. This applies to all operating systems from Windows to mac.

3. Use a wired connection

If you have a slow internet connection or are using Wi-Fi, switch over to a wired connection using an Ethernet cable to maximize performance. 

This will eliminate any interference with your network and allow you to connect to Zoom without any problems.

4. Adjust video quality 

If you are using a high-resolution video stream (such as 1080p), this will consume more resources from your computer than if you were using a lower resolution stream (such as 720p).

The lower the quality, the less processing power it uses. If you’re having issues with high CPU usage when using Zoom, try lowering the video quality first. It may also help fix issues with Zoom crashing when screen sharing.

5. Update your graphics card

  1. Press the Windows key, type Device Manager, and click Open.
  2. Click on Display adapters, select your graphic card, right-click, and select Update Driver Software.
  3. Select Search automatically for updated driver software.

6. Use the web version

If you have an older device or one that doesn’t have a lot of processing power, this can cause issues with making audio and video calls. To avoid these issues, use the browser version of Zoom instead.

The browser version of Zoom uses significantly less CPU than the desktop application because it doesn’t have to render graphics and audio locally.

7. Upgrade your computer hardware

If all else fails, it may be time to upgrade your computer hardware. Running a very old version of Windows may be the root cause of the problem.

Most applications are usually updated to function well with the latest operating systems. If you are using Windows 10, it may be time to upgrade to Windows 11 and see if the problem persists.

How do I turn off hardware acceleration in Zoom? 

Some computers have a setting that enables hardware acceleration for the video and display functions. This can cause problems with video games and other software, including Zoom. 

To disable hardware acceleration in Zoom, follow the steps below:

  1. Launch Zoom desktop app.
  2. Click on Settings in the top right corner.
  3. Navigate to Video on the left pane and uncheck all Enable hardware acceleration checkboxes.

And that’s how to efficiently manage Zoom’s high CPU usage on your browser. Should you encounter any other related problems such as Zoom video not working, refer to our comprehensive guide for quick fixes.

Let us know of any additional thoughts you may have on this topic in the comments section below.

3 Quick Ways to Fix Chromebook VPN If It’s Not Working

Chromebooks are VPN-friendly devices, but sometimes, things can go wrong and leave your traffic unprotected.

The good news is that these VPN connection issues are fixable. 

First, you have to identify the problem and how to address it accordingly. We’re here to help you with that.

Why is my Chromebook VPN not working?

The likely culprits are as follows:

  • Outdated VPN app or browser extension — If your VPN struggles to establish an encrypted tunnel and prevent traffic data leaks, chances are that your software version isn’t the most recent.
  • Stored browsing data — Cookies and cached files contain information about your IP address. If web servers detect something sketchy about the device’s location, they may block your access in an effort to keep geo-restricted users away.
  • Incorrect configuration — If you have an old Chromebook model, you may have to set up your VPN manually. Generally, it’s not a complicated process, but a single mistake can cause connection problems.
  • Bad VPN service — Maybe your VPN is just ineffective. Free or lower-tier services that don’t invest in adequate infrastructure often fail their privacy and security promises.

How to fix Chromebook VPN when it’s not working?

Here’s what you can do to establish a successful VPN connection on your device: 

1. Delete cookies and cached files

To make sure your browsing data isn’t interfering with your Chrome VPN connection, follow these steps:

  1. Run Chrome.
  2. Press Ctrl + H to go to History.
  3. Select Clear browsing data.
Google Chrome history
  1. Go to the Advanced tab.
  2. Check the Cookies and other site data and Cached images and files boxes.
  3. Choose All Time for the Time range.
Clear browsing data on Chrome
  1. Click Clear data.

2. Manually configure your VPN

Chromebooks natively support various VPN protocols like OpenVPN, L2TP/IPSec, and WireGuard. But not all VPNs share the necessary configuration files.

Here’s how to get started:

  1. Click the bottom-right corner of the screen to open the Action center.
  2. Select the gear icon for Settings.
Action center on a Chromebook
  1. Open the drop-down menu next to Add Connection in the Network section.
Add a connection on a Chromebook
  1. Press the plus icon next to Add built-in VPN.
Add built-in VPN on a Chromebook
  1. Choose your preferred protocol from the Provider type drop-down menu.
Choose a VPN protocol
  1. Fill in the Service name field with what you want.
  2. Copy-paste the IP address or the full server hostname from your VPN vendor’s site in the Server hostname field.
  3. Select your preferred Authentication type.
  4. Copy-paste your VPN credentials.
Manually configure a VPN connection on a Chromebook
  1. Click Connect.

VPN protocols don’t always have the same setup process. So, you may have to deal with slightly different steps than the ones above.

To ensure proper configuration, you should pay attention to the fields you have to fill in and scour your VPN vendor’s site for the correct information. 

3. Change VPN service providers

If your Chromebook VPN is still not working properly, perhaps you need a new service.

As a rule of thumb, you should only use premium providers with a solid privacy track record and a global server fleet of sophisticated hardware.

You may also require advanced features like split tunneling, double VPN, and obfuscation.

The best VPNs for Chromebook

To help simplify your search, here are our favorite options on the market:

ExpressVPN

ExpressVPN has native ChromeOS, Android, and Linux apps and a Chrome extension. Plus, it shares files for manual VPN configuration.

Moreover, you can install it directly to your router, securing your network’s traffic. That will allow you to go around the five simultaneous connections cap.

In terms of location spoofing, ExpressVPN can give you IP addresses from 94 regions. It also has encrypted DNS servers, IPv6 leak protection, a built-in kill switch, and split tunneling. 

It creates secure tunnels using OpenVPN or Lightway, a WireGuard-like proprietary protocol.

This VPN vendor runs mostly 10Gbps servers on RAM, not hard drives. They auto-delete data after every reboot, ensuring no connection and activity logs remain.

Depending on the subscription length, ExpressVPN costs from $8.32 to $12.95 a month and comes with a 30-day money-back guarantee.

ExpressVPN

Secure your Chromebook and other devices with this premium VPN service.
Check Price Visit Website

NordVPN

NordVPN has a dedicated Android app and Linux .rpm package and permits router installation. You can also download its APK version for your device to unlock additional features.

For a simpler setup, you can go with its browser extension instead. That should definitely help if your Chromebook VPN is not working because of configuration issues.

It has over 5,000 RAM-only servers and provides IPs from 59 jurisdictions. What’s more, it supports OpenVPN, IKEv2/IPSec, and NordLynx in all locations.

In select territories, NordVPN has specialty hardware for double VPN, obfuscation, and P2P file sharing. Some of its servers are tied to dedicated IPs too.

In addition, it has private DNS, comes with a kill switch, prevents IPv6 leaks, and keeps online hazards at bay through its Threat Protection feature.

Likewise, NordVPN can monitor the dark web and inform you the moment your sensitive information is compromised.

To subscribe to NordVPN and protect up to six devices simultaneously, you can choose a plan ranging from $5.61 to $14.29 a month. The first 30 days are fully refundable, and you can cancel risk-free.

NordVPN

For optimal online security and connection speeds, trust NordVPN.
Check Price Visit Website

Private Internet Access (PIA)

PIA has dedicated Android and Linux GUI apps, a Chrome extension, a router setup, and a third-party OpenVPN client.

Although mainly a US-first VPN service, its global fleet of RAM-only, 10Gbps servers covers 84 territories.

Aside from the OpenVPN and WireGuard tunneling protocols, PIA lets you transmit the traffic of up to 10 devices concurrently through SOCKS5 proxies, too.

For lag-free streaming and gaming, you can turn this VPN into a SmartDNS service.

To protect your Chromebook from malicious files, ads, and trackers, PIA uses its built-in blocker called MACE.

You can get all of the above for $3.33 to $11.95 a month, with a 30-day money-back guarantee.

Private Internet Access

Don’t compromise the safety of your home or work network; choose PIA for the best results.
Check Price Visit Website

Wrap up

If your Chromebook VPN is not working, you can use any of our handy fixes to resolve the issue and conceal your online activity.

If nothing else proves efficient, getting a different VPN service can be the best course of action. 

You should always trust high-tiered providers with many servers in diverse regions and excellent additional tools and features.