Reached Daily Limit With Bing AI Chatbot? Here’s How to Trick It!

Microsoft Bing chat display limits errors when you’ve overloaded it with too many questions/ information. There are other possible causes and today we’ll show you how to address them all.

Let’s get kicking:

How to surpass daily limit with Bing Chat AI

Note icon NOTE
This is not exactly a bug. So don’t go to Microsoft for answers. It is a feature that was introduced to restrict the use of Bing’s AI chatbot by some users who were abusing it. 

1. Don’t overload your bot with unnecessary information

Before you start chatting with the chatbot, narrow down your topic and do not ask more than 15 questions on the same topic.

Any attempts to use up more than 15 tries could put your account at risk, and you may end up blocked.

2. Use an incognito tab/window

Some users who wanted to bypass the sorry you’ve reached your daily limit to chat bing message recommended using incognito mode. This feature allows you to browse privately without keeping your search history.

incognito-chrome there was a problem playing this video

This can assist you in asking more than 15 questions, and the bot won’t keep track. Most browsers have this feature, so you have to switch to a new incognito tab or window.

Also, find out more about the differences between Firefox’s private mode and Chrome’s incognito mode.

3. Create multiple accounts

Another workaround is to have different accounts. This way, you can easily switch to another once you hit your daily limit on one.

This also allows you to ask more than 15 questions as you can easily switch to the other account and continue with the superfluous queries you couldn’t complete in one account.

4. Use other apps

Bing chat AI is not only available on the web version. You can also use it on Android apps, giving you more room to expand your search queries. 

If you have exhausted your limits on the Edge browser, you can move on to your phone. Check out our article on how to integrate Bing chat AI with Edge and Skype mobile.

You can also use Bing chat AI with other browsers if you’ve exceeded your limits with the Edge browser. Hopefully, with these tips, you can get more out of the Bing chat AI.

Why Does Bing chat AI say I’ve reached my daily limit?

A section of users has reported that even though they have not used up all 15 tries per session when using the Bing AI, they get the sorry you’ve reached your daily limit to chat bing message. Some of the main causes include:

  • Exhausted quota per session – You may have reached the daily limit per search conversation.
  • Daily limit – It is possible you have already searched for the maximum number of queries within one day.
  • Inappropriate content – If you asked too many questions about topics that are banned from its service or other inappropriate content, your account may be flagged, and you’ll get a similar message.

The technology is still fairly new, and Microsoft is listening to users as they make more improvements. For instance, the 15 daily limit is an upgrade from 5, so it’s likely more will be added in the future. At the moment, you have to make do with the limits or use the tips presented above.

Elsewhere, if your Bing chat has disappeared, we have devised ways to get it back.

We’d love your feedback on Bing chat AI and how you’re coping with the limits in the comment section below.

How to use Microsoft Editor in Microsoft Edge

If your day is spent writing emails, copy, or similar text, you have to be crystal clear with your writing. And although spelling and grammar mistakes are not the end of the world, they can make you look unprofessional, at least from a business perspective.

But if most of your writing is done on Edge, then you’re in luck. Microsoft provides a free editing app, Microsoft Editor, which lets you check your spelling, grammar, and writing assistant. Lucky for you, the app also works on Microsoft Edge through an extension. 

So let’s look how at you can download and make the most out of Microsoft Editor.

How to download the Microsoft Editor in Edge

Microsoft Editor doesn’t come pre-installed in Edge by default. You have to download it instead. So let’s look at how you can install the Microsoft Editor on your Edge browser first.

  1. Launch the Edge browser.
  2. Head to Microsoft Edge Extensions, and look up the Microsoft Editor extension.
  3. Click on Get to download the Editor.
  4. When the download gets finished, click on Add extension.
  5. Now click on the Editor extension button next to the address bar.
  6. Click on Sign in button, and log in with your Microsoft or Microsoft 365 account.

microsoft editor

That’s it—from here on, the Editor will be successfully set up on your PC. You can click on the extension again and toggle on or off the features you would like to use from here on: Spelling, Grammar, and Refinements.

Moreover, you also have the Proofing language option. Click the scroll-down menu below it, then select the preferred language you want to use from here on.

Similarly, under the “Excluded sites” section, click the Add another site button and specify the websites you’d like to use with Microsoft Editor from here.

How to use Microsoft Editor on Edge

After you have set up the Microsoft Editor on your Edge browser, you will receive spelling and grammar suggestions across all your online documents—be it emails, social media, etc.

Let’s look at the features with the Editor extension in your hand in detail.


Using Editor on Edge for your emails

When writing an email, it’s not uncommon to make a barrage of mistakes. For instance, I have written a test email below where I have intentionally made two errors in the first sentence.

test mail

As you can see, the spelling error gets automatically highlighted by an underline. So when I click on the misspelled word, I’ll get an auto-suggestion with the correct wording or spelling. 


But, like most tech things tech, it can also work against you.

For example, if you use an uncommon name, the app will also highlight that. In cases like this, right-click the highlighted word, and select Add to Dictionary to learn the new term.

Some other features

The local feature is limited. It only comes with a feature for AutoCorrect, Spelling, and Grammar.

The paid version of the app, on the other hand, offers many features that make using the Editor a much richer experience. For instance, here are a slew of features on offer:

  • Clarity
  • Conciseness
  • Formality
  • References
  • Vocabulary
  • Resume

The list goes on, but along with handy features, you also get 1TB of OneDrive storage and premium features of all Microsoft 365 apps.

Using Microsoft Editor in Edge Browser

Microsoft Editor definitely brings a lot to the table. Whether you plan on using the Editor just on your browser or you’re thinking of using it to get it to other apps on Windows for daily use, consider trying out the premium version for at least a month. You can then see if you like all the features for more long-term use.

How to Fix Microsoft Teams App Not Working on Android

Microsoft Teams on Android is a powerful collaboration tool that enables teams to communicate, collaborate and stay organized in a virtual workspace. However, like any software, it can encounter errors that may disrupt the productivity and efficiency of its users.

These errors can range from minor glitches to critical issues that require immediate attention. Fortunately, most Microsoft Teams errors can be fixed with some simple troubleshooting techniques. In this article, we will explore some common Microsoft Teams errors and provide step-by-step instructions on how to fix them.

1. Check Your Internet

To keep your email accounts in sync, Microsoft Teams depends on your phone’s internet connection. Therefore, if your phone’s internet connection stops working, the Teams app on Android will also stop functioning, preventing you from sending or receiving emails through the app. Switch off the mobile data and turn it back again if you are using it.

And if you are connected to the WiFi, then try to open Google.com in a web browser. If it is not opening, then first switch off the WiFi on the phone and then turn it back on. When even that is not working, restart the router for any issues.

2. Check App Permissions

Checking app permissions in Microsoft Teams is important to ensure that the app has the necessary access to features and data to function properly. Reviewing and managing app permissions may help to resolve issues with the app not working correctly and improve the security of your Teams account.

  1. Long-press on the Microsoft Team’s icon and then head to the App Info icon.
    fix teams android not working
  2. Head to the Permissions section from the App info.
    fix teams android not working
  3. Give permission to every component by manually turning it on for each one.
    fix teams android not working
  4. Then check if Microsoft Teams is working properly.

3. Clear Temporary Files from the Teams App

When you have been using Microsoft Teams for a long time, it will gather a lot of data, especially temporary files. They can become corrupt and may result in slower performance or prevent you from using certain features.

  1. Tap on the profile picture in the Teams app.
    fix teams android not working
  2. Then go to Settings from the sidebar, which opens up from the left.
    fix teams android not working
  3. Head to Data and Storage from the general section.
  4. Scroll down and tap Clear temporary files.
  5. A prompt will appear confirming that the files have been cleared.

After that restart the app and see if the issues have been fixed.

4. Disable Battery Optimization

Smartphones use a lot of battery power for managing everything. Android has a battery usage feature to enhance battery life by restricting how apps consume power when running in the background.

You can disable battery optimization for Microsoft Teams and see if fixes the underlying problems.

  1. Long-press the Microsoft Teams icon and head to the App info through the shortcut.
  2. Scroll down and go to Battery.
    fix teams android not working
  3. Set the battery to unrestricted. Some phones will have unoptimized instead of unrestricted.
    fix teams android not working
  4. Restart the app and check if the problems are solved.

5. Disable Reduce Data Usage

Microsoft Teams has a data feature that is designed to work on slower as well as capped internet connections. This may reduce the quality of video and audio calls of your meetings. But the good news is that it can be disabled.

  1. Tap on your profile picture in the Microsoft Teams app
    fix teams android not working
  2. Select settings from the sidebar.
    fix teams android not working
  3. Go to Data and storage from the General section.
    fix teams android not working
  4. Then tap on Reduce data usage
    fix teams android not working
  5. Select Never and the check symbol will appear next to it.
    fix teams android not working
  6. After that head back and attend video meetings in a regular fashion. This should fix any issue pertaining to video quality.

However, if this does not fix the issues with video meetings then perhaps you should check the internet speed.

6. Uninstall Microsoft Authenticator App

Microsoft authenticator can throw in errors that will prevent you from logging into the Teams app. That is what a user found in the Microsoft forum so they uninstalled it and that fixed the problem for a number of people. Here is how you can remove the authenticator app.

  1. Long-press the Microsoft Teams icon, and then tap Uninstall.
    fix teams android not working
  2. Then click OK to confirm uninstallation through the prompt.
    fix teams android not working

7. Reset the App Database

Microsoft Teams stores a lot of information in its database on your device for a variety of purposes. It may get corrupted over time and a reset can fix the issue. Here is how it is done.

  1. Head to Data Storage from the Settings.
  2. Scroll down to the storage section and tap Reset database.
    fix teams android not working
  3. It will be completed in a couple of seconds and then you will land on the Team’s home screen. Then check if the issue has been resolved.

8. Reinstall Microsoft Teams

When nothing else works, it might be time to uninstall and then install Teams back again. Install it from the Play Store and then observe if that has solved the problem.

If that is also not solving the issue, then you might want to try installing Microsoft Teams on a different phone. That can help you check if there is an issue with the phone.

Make Teams Great Again

You can fix Microsoft Teams by following the methods we have discussed here. If you cannot solve it after applying all the techniques, then there can be an issue with the phone/tablet.

Total Identified Windows Installations: 0 [Meaning & Fix]

If you have encountered total identified Windows installations:0, this guide can help. We will discuss different ways to fix the issue along with the causes of the problem. Let’s start! 

What does total identified Windows installations:0 mean?

Total Identified Windows Installation:0 appears during the installation process of the Windows operating system. This means that the Windows installer didn’t detect any existing Windows installations on the computer’s hard drive.

This usually occurs if the hard drive is new, formatted, or the existing Windows installation is corrupted or damaged. 

What causes the total identified Windows installations: 0 issue?

There are several reasons why Windows installer may fail to identify existing Windows installations on your hard drive; some of the common ones are: 

  • Hard drive is new or formatted – If your hard drive is new or recently formatted, then you might not have Windows installations or data on it, hence the error.
  • Corrupted Windows installation –  If the existing Windows installation on the hard drive is damaged due to malware infection, hardware failures, etc, the installer might not be able to detect it.
  • Incorrect BIOS settings – If the BIOS settings on your computer are misconfigured, then the installer might show this error.
  • Issues with installation media – If the Windows installation media is corrupted, it might not be able to detect the existing Windows installation. 

What can I do if the total identified Windows installations: 0?

Before engaging in advanced troubleshooting steps, you should consider performing the following checks:

  • Check if the hard drive is properly seated on your motherboard.
  • Restart your computer.

1. Perform System Restore

  1. Press the Windows key, type Control Panel, and click Open.Control Panel Total Identified Windows Installations: 0
  2. Go to View by, select Category, and click Recovery.Recovery Control Panel
  3. On the next screen, click Open System Restore.Open system restore
  4. Select Choose a different restore point and click Next.Next Choose a different restore point
  5. Now select the restore point and click Next.Choose a point
  6. Click Finish to start the restoration process.Finish

2. Use the Boot Recovery feature

2.1 Prepare a recovery drive

  1. Download the Media Creation tool from the Microsoft website.
  2. Double-click the MediaCreationTool.exe file to run the setup.
  3. Click Accept.Accept Setup Windows 11 step1 Total Identified Windows Installations: 0
  4. Select Language and edition and click Next.Next setup Windows 11 step 2
  5. On Choose which media to use, select USB flash drive, and click Next.USB Setup Windows 11 step 3
  6. Select the USB drive and click Next. 
  7. Now Media Creation Tool will download important files to install Windows.

2.2 Recover registry 

  1. Insert your recovery drive and restart your computer.
  2. Click Repair your computer on the installation wizard.Repair your computer Total Identified Windows Installations: 0
  3. Select Troubleshoot.Choose an option - Troubleshoot
  4. On the Troubleshoot window, click Advanced options.advanced- Total Identified Windows Installations: 0
  5. Select Command Prompt from the Advanced options screen.
  6. Go to the following folder in the Command Prompt C:\Windows\System32\config with the following commands and press Enter after every command:  cd windows cd system32 cd config
  7. Type the following commands one by one to replace DEFAULT, SECURITY, SOFTWARE, & SYSTEM, and press Enter after every command: del c:\windows\system32\config\sam del c:\windows\system32\config\security del c:\windows\system32\config\software del c:\windows\system32\config\default del c:\windows\system32\config\system copy c:\windows\tmp\software c:\windows\system32\config\software copy c:\windows\tmp\system c:\windows\system32\config\system copy c:\windows\tmp\sam c:\windows\system32\config\sam copy c:\windows\tmp\security c:\windows\system32\config\security copy c:\windows\tmp\default c:\windows\system32\config\default
  8. Shut down your computer and remove the recovery drive and try to start your computer.

3. Use the Boot Recovery feature

  1. Open the command prompt using the same step mentioned in the 2.2 method.
  2. Copy and paste the following command to search for Windows installations that are not included in Boot Configuration Data and press Enter: bootrec /rebuildbcdCMD Total Identified Windows Installations: 0
  3. If you have Windows installed on your computer, type the below-mentioned commands one by one to remove and rebuilt it again, and press Enter every command: bcdedit /export c:\bcdbackup attrib c:\boot\bcd -h -r -s
  4. Copy and paste the following commands one by one to rename and rebuilt bcd and press Enter after every command: ren c:\boot\bcd bcd.old bootrec /rebuildbcd
  5. When the Add installation to boot list? question appears, type Y or Yes, and press Enter. 
  6. Once you see The operation completed successfully. Restart your computer and check if you can boot normally.

4. Reinstall Windows

  1. Create the recovery drive by following methods in the 2.1 method or if you have already inserted the recovery drive. Restart your computer
  2. When the PC restarts, click Install on the installation wizard.Install now Total Identified Windows Installations: 0
  3. Enter the license key or click I don’t have a product key to skip the step
  4. Select the operating system and click Next.
  5. On the next page, accept the license terms and click Next.
  6. Follow the onscreen instructions to complete the process.

So, these are the methods you can follow to fix Total Identified Windows Installations: 0 issue on Windows. If you have any questions about the issue, please feel free to mention them in the comments section below. We will be happy to help!

Epson Printer Error 1131: What Is It & How to Fix it

Epson printers are very good, but some of our readers reported the Epson printer error 1131 or Epson printer utility setup error 1131 out of the blue. It’s needless to say that the printer is unusable at this point but in this article, we will help you fix the problem immediately.

Why do I get the Epson printer error 1131?

It’s essential to understand why is the Epson printer returning the error 1131, and here are the main causes for this problem:

  • Corrupted or incompatible driver – Sometimes, due to crashes or other unfortunate events, the printer driver may get corrupted. An incompatible driver can also cause the Epson printer error 1131.
  • Installation problem – Ensure you follow the exact instructions from Epson when installing the printer. Otherwise, these kinds of problems may occur.
  • Corrupt files – If some system files or those from the Epson printer software are missing or corrupted, this is most likely causing an Epson printer error 1131.
  • Incorrect configuration – If the printer is not set up correctly, it can cause a number of errors like this one.
  • Malware or virus infection – A PC infection can mess up everything on your PC, including the printer software. Use one of the best antiviruses to run a full scan on your machine.

Now that we know what we’re dealing with, let’s go to the actual solutions to fix the problem.

How can I fix the Epson printer error 1131?

Before going into more complicated tasks, let’s run a few quick solutions that might fix the problem quickly:

  • Install all Windows pending updates.
  • Turn off your printer and your PC, disconnect the power and data cables, and wait for 30 seconds. Power your PC, reconnect the cables, and power your printer to see if the error still occurs.
  • Restart your PC. Although it seems futile, it might help.

1. Run the Printer troubleshooter

  1. Click the Start button and select Settings.
  2. Select Update & Security.
  3. Now, choose Troubleshoot from the left pane and click on Additional troubleshooters from the right.
  4. Select the Printer option and click on Run the troubleshooter button.
  5. Follow the on-screen instructions to carry out the troubleshooting process.

If Windows cannot connect to the printer, this guide will help you solve this problem as well.

2. Update the printer driver

  1. Right-click the Start button and select Device Manager.
  2. Click on the Printers section to expand it, right-click your Epson printer, and select Update driver.
  3. Click on Search automatically for drivers.
  4. The system will look for a driver update and install a new one if it finds it.
  5. If this doesn’t work, repeat step 1 and choose Uninstall device in step 2 to uninstall the driver.
  6. Restart your PC and the system will automatically detect the printer and install a driver for it.

Most printers, including the ones from Epson, usually come with media that contains software and drivers for the device.

Installing the latest version of the driver can prevent issues like Failed to install Port Handler service error code 1073; read this guide to learn more.

You may also try to use the media to reinstall the printer software right after you uninstall the device in step 5.

If you don’t have the media anymore, you can visit the Epson Support page, specify the model of your printer, and get the correct driver and software for your OS.

In case you want to rely on an automated method, you can use third-party software because it will find the latest update for your printer driver immediately.

⇒ Get IObit Driver Booster

3. Run SFC and DISM scans

  1. Click the Windows button, type cmd, and select Run as administrator to start Command Prompt with full privileges.
  2. Type or paste the following command and press Enter to run it: sfc /scannow
  3. System File Checker will scan your system files and repair them.
  4. After completing the scan, type or paste the following command and press Enter: DISM.exe /Online /Cleanup-Image /Restorehealth
  5. Wait for the DISM tool to complete the scan, then close the window and restart your PC.

If the Epson printer error 1131 is caused by file corruption, the SFC and DISM scans should repair them, and the situation should return to normal.

We also have a complete guide on what to do if System File Checker is not working if you stumbled on that problem.

4. Uninstall all other printer software

  1. Click the Start button and select Settings.
  2. Now, choose Apps.
  3. Look for any previous printer software, click on it, and select Uninstall.
  4. After you uninstall all printer software, reinstall your printer again, according to the indications from the Epson printer manual.

If you previously had a different printer from Epson or any other brand, its software might be conflicting with the new one.

Uninstalling all other printer software may fix the Epson printer utility setup error 1131 immediately, so try it out.

Here we conclude our article hoping that our solutions helped you fix the Epson printer error 1131, and now it’s working fine.

We also recommend consulting our guide on what to do if the Epson printer is not printing because it might bring additional information.

If you have any questions or possible working solutions, please write them down in the comments section below.

SystemSettings.exe Error: What Is It & How to Fix It

SystemSettings.exe is an executable file containing machine code in a non-readable form. This file runs as a background service on your Windows PC to ensure that Windows apps function properly. 

What is the SystemSettings.exe error?

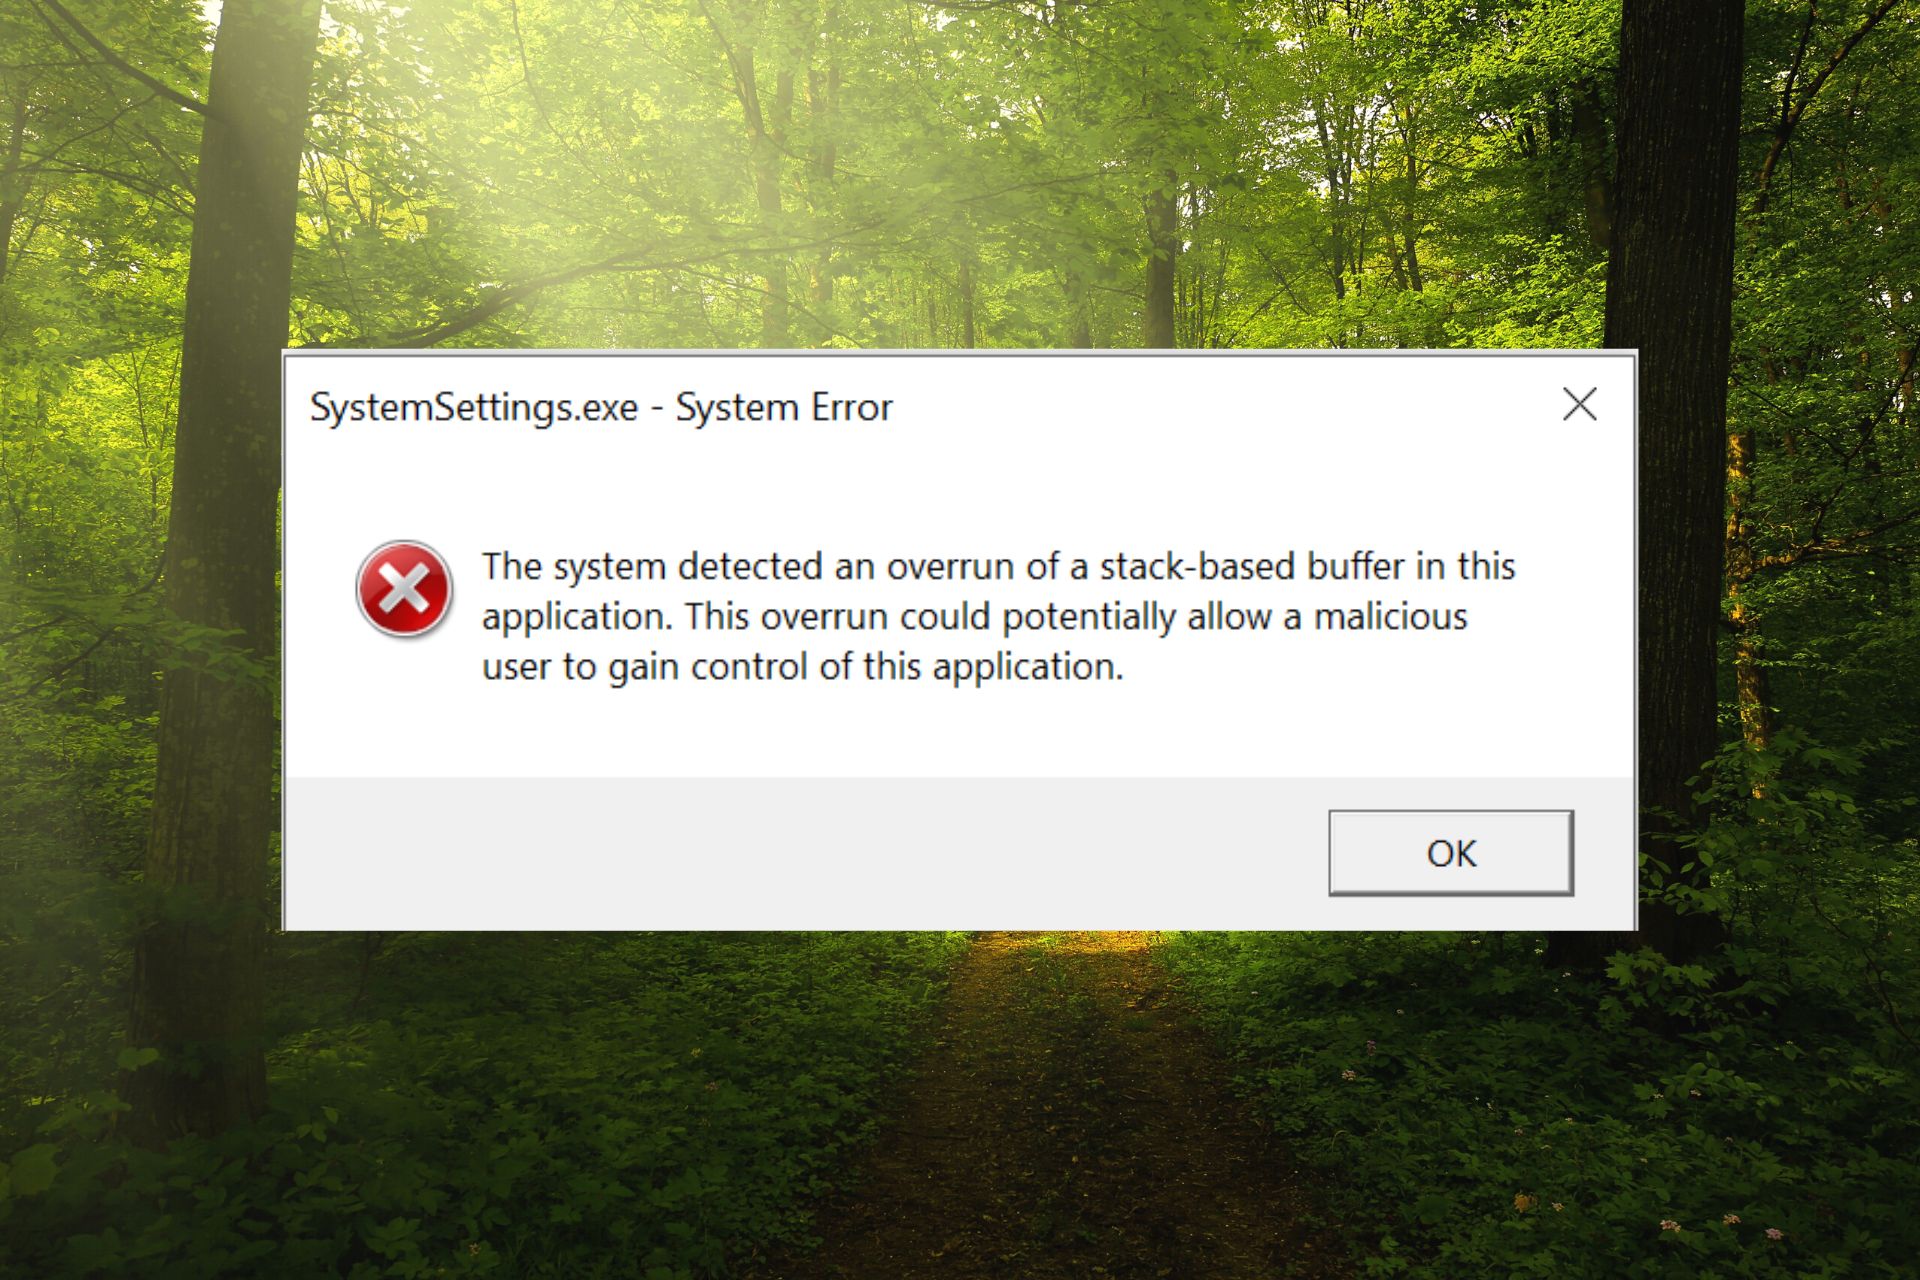
When the SystemSettings.exe runtime error occurs, a System Error prompt appears on the screen with a message: The system detected an overrun of a stack-based buffer in this application. This overrun could potentially allow a malicious user to gain control of this application.

Along with this, some of our readers have also encountered the Unknown Software Exception error 0x40000015. The error mostly happens when the process requires the executable to run but fails to launch the EXE. 

What causes the SystemSettings.exe error?

Some of the other reasons for the SystemSettings.exe error are as follows:

  • Virus or malware attack – Malware infections are the most probable causes behind such application errors. We recommend scanning your system with one of the best antiviruses.
  • Corrupt system files – If the system files get corrupt or go missing for some reason, you are bound to get such errors.
  • Obsolete system drivers – Outdated drivers on your PC can give rise to incompatibility issues.
  • Corrupt user account – You can also encounter the SystemSettings.exe error if the Windows user account has become corrupt, so you need to create a new user account.

If you also see this error message on the screen, you can implement the methods provided in the guide to fix the SystemSettings.exe crash. 

How can I fix the SystemSettings.exe system error in Windows?

1. Run SFC and DISM scans

  1. Press the Windows key to launch the Start menu, type cmd in the Search bar and choose Run as Administrator from the right section of the results.SystemSettings.exe error
  2. Choose Yes on the User Account Control pop-up to grant administrative privileges.
  3. Type or paste the following command and press the Enter key to scan your computer. SFC/scannowSystemSettings.exe error
  4. After the SFC scan, type or copy-paste the following command and press Enter key. DISM /Online /Cleanup-Image /RestoreHealthSystemSettings.exe error

The SFC scan analyzes your system for damaged files, and the DISM tool scans and repairs the faulty files of the Windows system image, resolving the SystemSettings.exe error in Windows.

2. Scan the PC using Microsoft Defender

  1. Use the Windows + I shortcut to open the Settings app.
  2. Choose Privacy & Security from the left navigation pane, followed by Windows Security from the right. SystemSettings.exe error
  3. Next, select Virus & threat protection option.
  4. Click the Scan options located on the right.SystemSettings.exe
  5. Select the Microsoft Defender Antivirus (offline scan) option and press the Scan now button at the bottom.SystemSettings.exe

The Windows Defender program will scan your PC to find and remove viruses and malware if it finds any. After completing the scan, you will no longer get the SystemSettings.exe error.

If you have a thirty-party antivirus installed, use its menus to perform a full scan of your PC.

3. Create a new user account

  1. Use the Windows + I shortcut to bring up the Settings app.
  2. Switch to the Accounts settings from the left navigation panel and select the Family & other users option.SystemSettings.exe error
  3. Press the Add account button located under the Other users section.
  4. Click I don’t have this person’s sign-in information on the new pop-up.SystemSettings.exe
  5. Next, click Add a user without a Microsoft account option.SystemSettings.exe error
  6. Provide the login credentials and other related questions on the next screen and press the Next button.

Sign into your PC using the new user account, and hopefully, you will no longer encounter this error. SystemSettings.exe error can also occur if the current user account you are logged in to becomes corrupt. So, creating a new user account can help.

4. Update drivers

  1. Right-click the Windows icon and choose Device Manager from the Quick Links menu.SystemSettings.exe
  2. Double-click the Display adapters category to view the list of devices.
  3. Right-click the graphics card and select Update driver from the context menu.SystemSettings.exe
  4. Choose the Search automatically for drivers option.SystemSettings.exe error

This will prompt your computer to find the best available driver for the graphics card on the system and will automatically download and install them.

However, if you see a message saying the best drivers are already installed, close the Update Drivers window and try other methods to update the graphics card driver on Windows PC.

You can also go for the easier way of updating any drivers from your PC, completely automatically and without any risks. Outbyte Driver Updater is the most suited tool that can scan the system and update all outdated drivers in no time.

⇒ Get Outbyte Driver Updater

5. Perform System Restore

  1. Press the Windows key, type create a restore point in the Search bar, and select the top result to access the System Properties window.SystemRestore.exe error
  2. Click the System Restore button under the System Protection tab.SystemSettings.exe error
  3. Press the Next button.
  4. Select the restore point where your PC was functioning normally and press the Next button.SystemSettings.exe error
  5. Finally, press the Finish button on the Confirm your restore point window.

Performing a system restore will roll back all the changes that could be the reason for the SystemSettings.exe error.

The solutions above will help you fix the SystemSettings.exe error when accessing Windows apps on your PC.

Do not hesitate to go through our troubleshooting guide for the solutions to resolve the 0x8007045d error if you encounter them frequently. Need any further help? Feel free to reach out to us in the comments section.

amdacpbus.sys: How to Fix This Blue Screen Error

amdacpbbus.sys is a system file that appears on Windows computers running AMD hardware and software. But it’s also sometimes the source of the Blue Screen of Death or BSoD.

As you can imagine, having a faulty AMD driver can put a hamper on gaming. Imagine your system crashing in the middle of an online match. Fortunately, there are ways to fix this problem.

What causes the amdacpbus.sys error?

Let’s go over what causes the error in the first place before going into solutions because the culprits can be seemingly benign things. And if it does happen to you, you’ll know how to fix it.

  • Something is wrong with your computer’s drivers – There could be an incompatibility issue. You’ll need to roll back the driver update to address this.
  • Your computer lacks important system updates – Conversely, the problem could be that your drivers are out of date. Be sure to download the latest Windows Updates.
  • Malware has infected your computer – File corruption can be caused by malware and faulty drivers. Be sure to install some antivirus software to clean it up.

How can I fix the amdacpbus.sys error?

Now let’s go into fixing the amdacpbus.sys error, which there are many different ways to do so. If one doesn’t work out, you can try out another method:

  • Reinstall your audio and motherboard drivers from your computer’s manufacturer. amdacbus.sys affects audio drivers, so something may be corrupt on your system.
  • Use the System Restore to revert Windows 11 to an earlier state before the errors started to occur. If you don’t know how to make a restore point, read our guide on creating one.
  • Update your system using the Windows 11 Media Creation Tool. It’s a great and free way to install a bunch of updates to your computer simultaneously.
  • And if all else fails, we recommend contacting your computer’s manufacturer, especially if your machine runs on AMD hardware.

1. Run SFC and DISM scan

  1. Bring up Windows Command Prompt on your computer’s search bar and select Run as administrator.
  2. Enter the following command into the prompt and run it: sfc /scannow
  3. Give your computer ample time to finish the process.
  4. Once done, type in these commands and press Enter on your keyboard one after the other: DISM /online /cleanup-image /checkhealth DISM /online /cleanup-image /scanhealth DISM /online /cleanup-image /restorehealth
  5. Restart your computer and see if the problem has been solved.

2. Uninstall drivers through AMD Clean Uninstall Utility

  1. Go to the AMD Cleanup Utility webpage and download the app from there.
  2. Go to where the file’s location and double-click it to run it.
  3. A new prompt will appear asking if you want to restart your computer in safe mode. For this guide, we’re going to select No although it is recommended you chose Yes for the best results.
  4. Select OK on the following window.
  5. A banner will appear as the cleanup is working. Don’t worry if the banner goes blank a few times.
  6. Once done, a new prompt will appear telling you the software has finished. Click Finish.
  7. On the next window, you have an opportunity to restart your computer to finish up the changes. You can do so now or later.

3. Update via AMD Driver Autodetect

  1. If you don’t want to install AMD drivers manually, you can do so via the AMD Driver Autodetect app. Go to the software’s webpage and download it.
  2. Run the file you just downloaded and go through its installation wizard.
  3. Next, AMD Driver Autodetect will launch automatically and proceed to install drivers for your supported GPU.

4. Perform a clean boot

  1. Launch the System Configuration app from the Windows Search bar. Once open, go to the Services tab.
  2. First, enable Hide all Microsoft services, then select the Disable all button. Afterward, click Apply.
  3. Next, go to the Startup tab and select Open Task Manager.
  4. One by one, disable each enabled item. Make sure you keep track of each one you disabled.
  5. Close Task Manager, return to the Startup tab of System Configuration, and click OK. This will restart your computer in Clean Boot mode.
  6. While in Clean Boot mode, re-enable the apps from earlier and see if they work properly. If one doesn’t, that’s the problematic app causing the BSoD. Uninstall it.

What can I do if AMDPPM.sys cause the BSoD?

AMDPPM.sys (AMD Primary Processor Module) is a driver to enable internal and external AMD hardware. If the file is corrupted, it can cause systemic problems like the Blue Screen of Death.

There are a couple of things you can do to fix a faulty AMDPPM.sys file, like running an SFC scan (as shown earlier) and resetting your computer’s BIOS.

While we have you, be sure to check out how to fix BSoD Error 777, which is an operating system failure caused by unwarranted changes made to the registry editor.

It’s recommended that you perform an automatic repair to address this issue. Just ensure you have a bootable USB drive for Windows 11 before performing it.

UiSeAgnt.exe: What Is It & Should You Disable It?

Some files on the system may camouflage as genuine system files while infecting them with viruses and malware. One such file is the uiSeAgnt.exe on Windows 11. Hence, this article will explain what uiSeAgnt.exe is and provide ways to disable it.

Since these files can also cause exe files not to open on your PC; you should check what to do here when such occurs.

What is uiSeAgnt.exe?

The uiSeAgnt.exe (User Interface for Client Session Agent) file is an extracted executable software file of Trend Micro Worry-Free Business Security by Trend Micro. It is responsible for running an endpoint application that provides real-time security services known as Session Agent.

Furthermore, uiSeAgnt.exe is not an essential Windows process. So it can be modified depending on your preference. Though the file can be attached to a specific component and threaten the system if it is corrupt or compromised by viruses or malware.

The benefit of keeping the file is:

  • It allows the Trend Micro Worry-Free Business Security software to work on your computer.

Reasons you should disable it:

  • The uiSeAgnt.exe file can be a virus or malware disguised as an executable file.
  • If you don’t use the Trend Micro Worry-Free Business Security software, the file is unnecessary.

Moreover, disabling it can’t pose any risk or danger to the system since it’s not an essential component.

How can I disable uiSeAgnt.exe?

Before anything else, you should:

After this, you can try the tweaks below.

1. End task for uiSeAgnt.exe

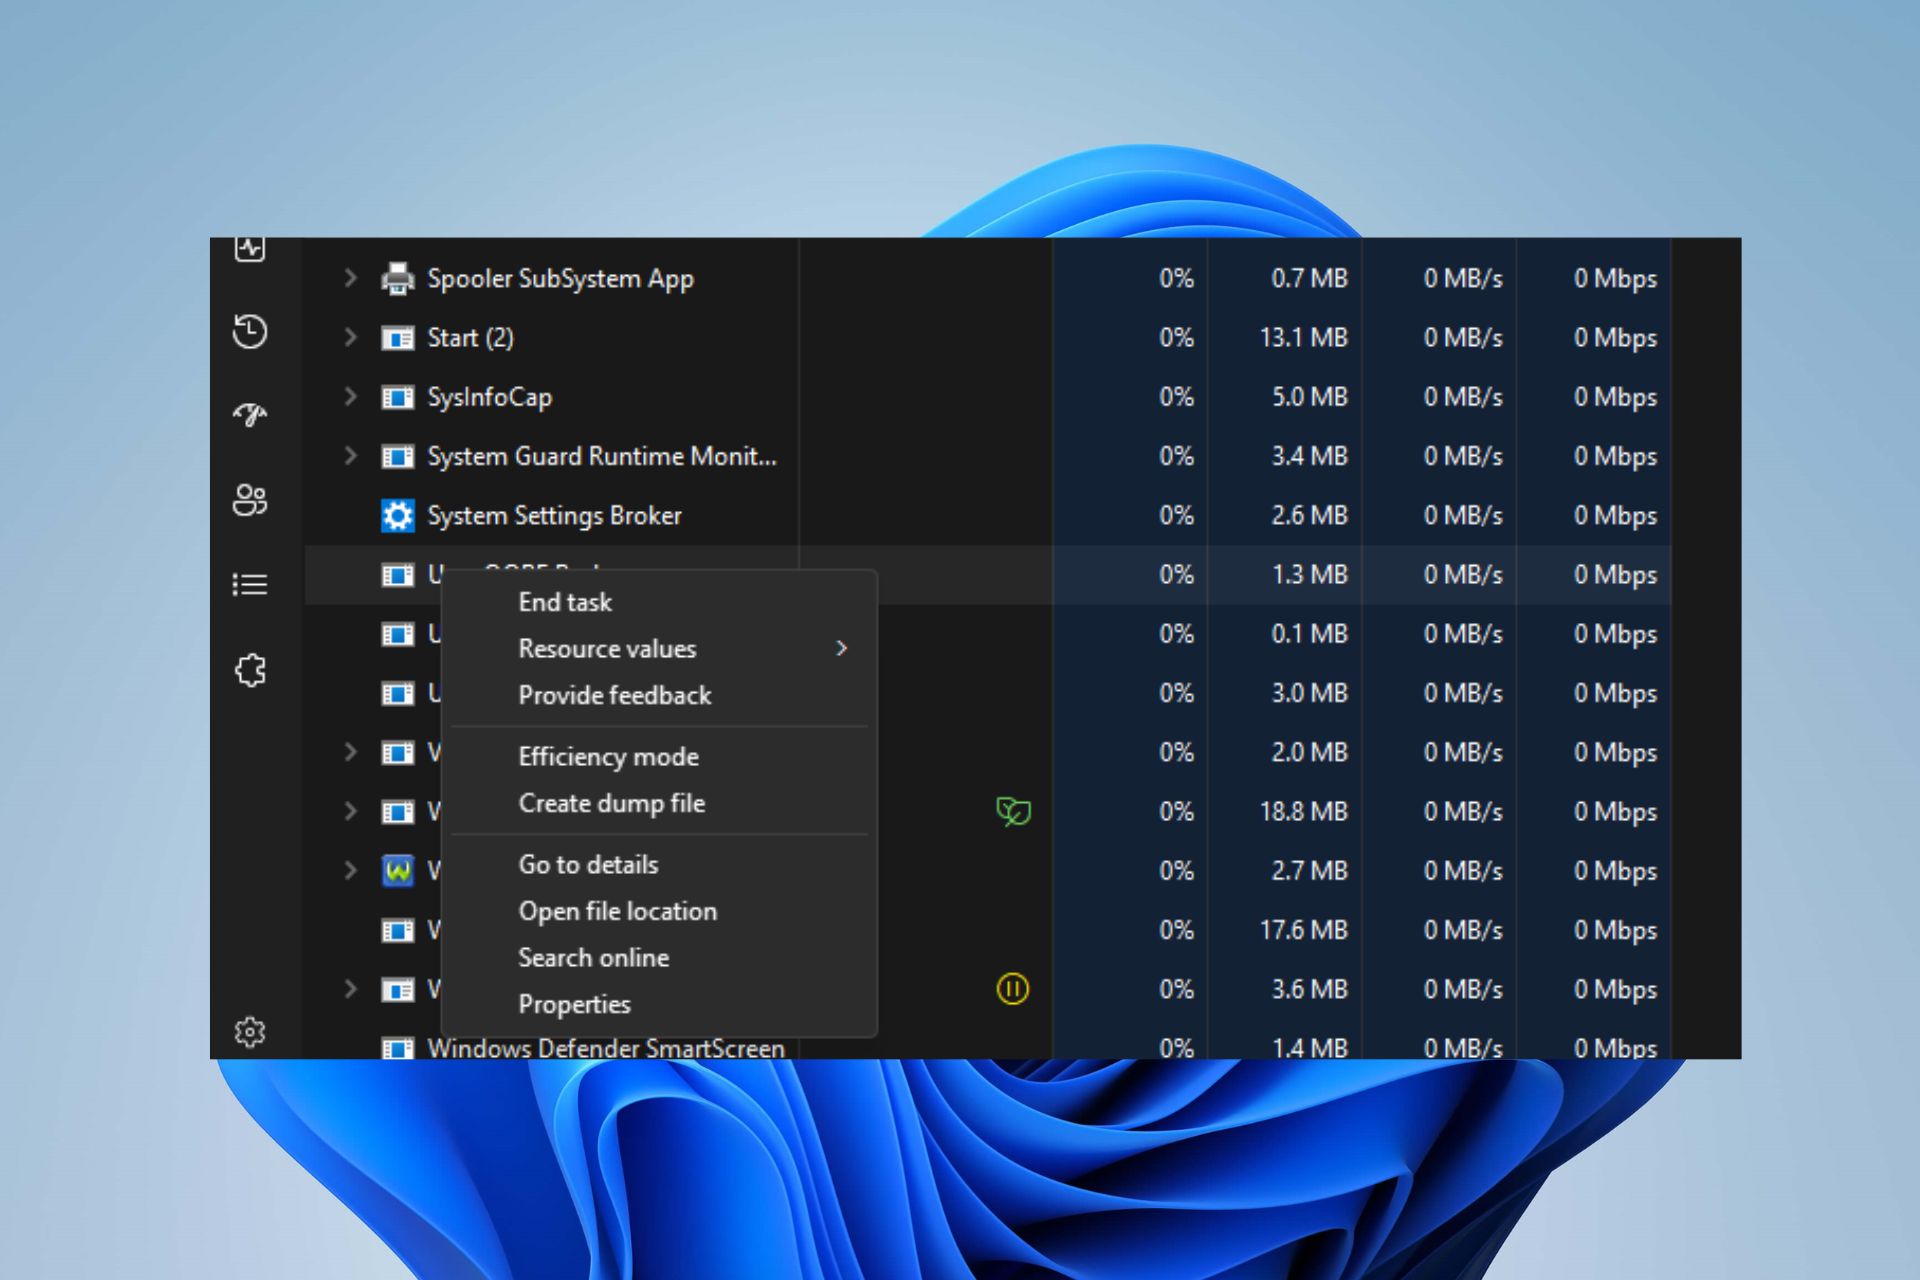
  1. Right-click the Start button and select Task Manager from the menu.
  2. Go to the Processes tab. Select the uiSeAgnt.exe from the list, right-click on it, then click End Task from the drop-down menu.
  3. Then, restart your PC.

Ending the uiSeAgnt.exe process on your PC will kill its background activities and stop it from running. Check our article for more shortcuts to open Task Manager on your PC.

2. Remove the uiSeAgnt.exe file via File Explorer

  1. Press the Windows + E key to open File Explorer.
  2. Navigate to the following directory: C:Program Files\Trend Micro\Trend Micro Client Session Agent\Client Session Agent\uiSeAgnt.exe_uninstall.exe
  3. Launch the uninstaller and click the Uninstall Program option to remove the uiSeAgnt.exe file.

Removing the uiSeAgnt.exe file in File Explorer will disable the software Trend Micro Client Session Agent program and its components.

If the file still appears on your system, proceed to the next solution.

3. Run a System File Checker (SFC) scan

  1. Left-click the Start button, type command prompt, and select Run as administrator.
  2. Click Yes on the User Account Control prompt.
  3. Type this command and press Enter: sfc /scannow
  4. Restart your PC and check if the uiSeAgnt.exe file still exists.

If the uiSeAgnt.exe file is present without the Trend Micro Worry-Free Business Security software installed, it is likely malicious. So, running the System File Checker scan will find and remove the corrupt files on your PC.

Read our article about what to do if nothing happens when you select run as administrator on Windows 10/11.

4. Uninstall Trend Micro Antivirus Plus Security (or related software)

  1. Left-click the Start button, type Control Panel, then open it.
  2. Click on Programs, then select Programs and Features.
  3. Find the Trend Micro Antivirus Plus Security, then select Uninstall from the drop-down.
  4. Follow the onscreen instructions and Restart your PC to see if the uiSeAgnt.exe file is still running on your PC.

Uninstalling the program responsible for the uiSeAgnt.exe file prevents the threats it causes the system and removes its components.

In addition, you may be interested in antivirus software blocking .exe files on your PC and ways to fix it. Also, we recommend you read a similar article on what TrustedInstaller.exe is and why you should remove it.

If you have further questions or suggestions, kindly drop them in the comments section.

Ws-44750-0 PS4 Error: What Does It Mean & How to Fix It?

Like every other console, playing games on the PS4 console can run into several errors impeding its performance. However, the PlayStation Error WS-44750-0 is one of those errors that users complain about the most. This article will discuss some basic steps to resolve it and get your PS4 working.

Also, we have a detailed guide about this content that cannot be selected at this time on PS4 and some methods to fix it.

What does the WS-44750-0 PS4 error mean?

The WS-44750-0 error code appearing on the PS4 console indicates a failure in the network connection between the console and its servers.

It can occur during a game, during the console or game startup process, or while logging into the PSN.

What are the causes of the WS-44750-0 PS4 error?

The following are the notable causes that may be responsible for the WS-44750-0 PS4 error:

  • Network connectivity issues – The PS4 console requires a stable internet connection to connect with its servers. So, issues like network congestion and a slow internet connection can cause the WS-44750-0 PS4 error when it can’t connect to the server.
  • DNS error – If the console fails to resolve the IP address from the server or requested resources can cause the error to appear.
  • Server issues – PlayStation servers undergo maintenance to help improve performance and fix bugs. Hence, the console can’t connect with the server, resulting in the WS-44750-0 PS4 error.

As we go further into this article, we’ll take you through steps to resolve the error.

How do I fix the WS-44750-0 PS4 error?

Before attempting any advanced troubleshooting steps, proceed with the following:

  • Power cycle your router or modem.
  • Turn off background apps running on your PC.
  • Temporarily disabling third-party antivirus software.
  • Restart Windows in Safe Mode and check if the WS-44750-0 PS4 error persists.
  • Check for Router Firmware updates – you can read the router manual and check for router Firmware update procedures. Also, contact your router manufacturer for guidance on ways to update it.

If you can’t resolve the error, try the solutions below:

1. Test the console’s Internet connection

  1. Select Settings from the console’s Home Menu.
  2. Click on Network from the drop-down window.
  3. Select Test Internet Connection and wait till the test completes.
  4. Follow the on-screen instructions and check if the PlayStation 4 WS-44750-0 PS4 error persists.

Testing the internet connection will resolve any glitch in the communication modules impeding connection to its servers.

2. Change PS4 console DNS Settings

  1. Launch the PlayStation Settings from the Home Menu.
  2.  Click on Network from the drop-down window.
  3. Select Setup Internet Connection and choose the connection type like LAN or Wi-Fi.
  4. Click on the Custom button and set the IP Address field to Automatic.
  5. Click on the Do Not Specify for the DHCP Host Name field and select Manual for DNS under the DNS Settings.
  6. Type in the following DNS values:
    • Google DNS
    • Primary DNS: 8.8.8.8
    • Secondary DNS: 8.8.4.4
  7. Type in the following DNS values:
    • Cloudflare
    • Primary DNS: 1.1.1.1
    • Secondary DNS: 1.0.0.1
  8. Set the MTU Settings to Automatic and Proxy Server to Do Not Use.
  9. Click on the Test Internet Connection button. Once the test is complete, check if the WS-44750-0 PS4 error is cleared.

Reconfiguring the console’s DNS servers allows it to quickly translate the web addresses of the Sony servers.

3. Factory reset your console

  1. Go to Settings from the console’s Home Menu.
  2. Tap the Initialization menu and press the X button on the controller.
  3. Select Initialize PS4, then press the X button.
  4. Choose the Full option. It will reset settings, apps, and data.
  5. Press the X button when a confirmation menu pops up to confirm the Factory Reset process.
  6. After the reset procedure is complete, reinstall your game.

Resetting the console will restore it to default settings, removing the configuration and corrupt files, causing it to malfunction.

Before you go, don’t miss our PlayStation WC-36547-5 article and wc-40383-8 ps4 error code for more useful information and more on ce-33743-0 and how to deal with network errors.

If you have further questions or suggestions concerning this guide, kindly drop them in the comments section.

0x000000BE: What is This Error Code & How to Fix It

Some of our readers have reported encountering the 0x000000BE Blue Screen error when running their PCs. The error is usually accompanied by An attempt was made to write to read-only memory error message.

Nonetheless, we’ll take you through some fixes to resolve the error. Also, you can read our detailed guide about some factors that can cause a Blue Screen of Death on your PC.

What is error code 0x000000BE?

The 0x000000BE error message appears when you try to use the Storport.sys driver to manage some storage devices in Windows PCs. Some notable causes that can prompt the error are:

  • Wrong Registry Editor configuration – The Windows Registry Editor is responsible for the directories and files for services running on the Windows operating system. So, you may run into the 0x000000BE Blue Screen of Death error when there is a corrupt Windows registry or clustered entries.
  • Outdated drivers – You may encounter the error due to outdated drivers on your computer. It prevents you from accessing the updates for resolving driver bugs.
  • Corrupt or missing system files – Having corrupt system files on your computer can cause an Attempt to was made to write to read only memory to occur if the files responsible for the task are corrupted or missing.

Regardless of the causes, try the fixes below to fix them.

How can I fix the error code 0x000000BE?

Before trying anything, apply the following:

If you can’t fix the problem, try the solutions below:

1. Run the SFC and DISM to repair damaged system files

  1. Left-click the Start button, type Command Prompt, then click Run as administrator.
  2. Click Yes on the User Account Control (UAC) prompt.
  3. Type this command line and press Enter:  sfc /scannow
  4. Type the following commands and press Enter after each: DISM /Online /Cleanup-Image /RestoreHealth
  5. Restart your PC and check if the 0x000000BE Blue Screen error persists.

Running SFC and DISM scans will find and repair corrupted Windows system files causing the error on your PC. Read ways to fix the run-as-administrator option if it’s not working on Windows 11.

2. Update device drivers via Windows Update

  1. Press the Windows + I key to open the Settings app.
  2. Select the Windows Update tab and select the Advanced options.
  3. Tap on Optional Update.
  4. Click the drop-down button on the Driver Update and check the list of updates available.
  5. Click the Update and Install button and wait for the driver update to install.

Updating drivers will fix bugs affecting their functionality and improve the device’s performance. Check our guide m about ways to diagnose and fix Windows Update not loading on your computer.

3. Perform a Clean Boot

  1. Press Windows + R key to open the Run dialog box, type msconfig, and click OK.
  2. Click the Services tab, check the box for the Hide all Microsoft services option, then click the Disable all button.
  3. Go to the Startup tab and click Open Task Manager.
  4. Click the startup programs and tap the Disable button.
  5. Restart your PC and check if the error persists.

Performing a clean boot prevents startup programs liable to cause the error 0x000000BE from running when you start the system.

4. Run Blue Screen Troubleshooter

  1. Press the Windows key, select the power icon, and hold the Shift key while clicking Restart.
  2. Then select Troubleshoot.
  3. Select Startup Repair in the Advanced options.
  4. This will auto-troubleshoot the BSoD error.

Perform a Blue Screen troubleshooter finds and remove issues causing the 0x000000BE Blue Screen error.

5. Update Windows OS

  1. Press the Windows + I to open the Windows Settings app.
  2. Click the Windows Update category and click on Check for Updates on the left pane. If there are new updates, they will be prompted for downloading and installation.
  3. Restart your PC to take effect.

Updating the Windows OS will install new updates and patches for fixing bugs, adding new features, and resolving system problems.

Read about fixing Windows not connecting to update service if the error occurs on your PC.

If you have further questions or suggestions concerning this guide, kindly drop them in the comments section.

Fix: Device Has Stopped Responding or Has Been Disconnected

Encountering the error, the Device has either stopped responding or has been disconnected can be annoying. Since this error appears when you attempt to copy files from external devices like printers, scanners, or external hard drives on your PC.

Luckily, this article will proffer solutions to fixing the error. Likewise, we have a detailed guide on fixing Windows detecting a hard disk problem on your PC.

What causes the device has stopped working or has been disconnected error?

Some notable causes are:

  • Faulty hardware – If the error appears during a file transfer, it means there’s an issue with the external hard drive or other devices involved. It may be a physical fault or configuration settings that impede its functionality.
  • Issues with the USB Controller – USB Controllers help the devices connected to the PC function correctly and interact with the necessary system components. Hence, the error may occur if the Controllers aren’t intact or working correctly.
  • Corrupt system files – The system files responsible for the devices you’re trying to run may not be accessible. Also, they may be corrupted, causing them to malfunction.
  • External device connection issues – If the USB drive or other external devices are not rightly connected to the system, it may cause problems with file transfer or other activities.

Though these factors vary on different computers, you can fix them by following the steps below.

How can I fix Device has either stopped responding or has been disconnected?

Before proceeding with anything, go through the following:

If you still can’t fix the problem, try the solutions below:

1. Run the hardware troubleshooter

  1. Left-click the Start button, type Command Prompt, and click the Run as administrator option.
  2. Click Yes on the User Account Control (UAC) prompt.
  3. Type the following and press Enter: mysdt.auxiliary diagnostic device
  4. Click Next to proceed with the scan and troubleshooting process.
  5. After the troubleshooting, try to perform the task and check if it works.

Running the Hardware and Devices troubleshooter will resolve hardware connection issues that may cause the error. Should the Command Prompt stop working, kindly check our guide to fix it.

2. Run an SFC scan

  1. Left-click the Start button, type Command Prompt, and click the Run as administrator option.
  2. Click Yes on the User Account Control prompt.
  3. Type the following and press Enter: sfc /scannow
  4. Restart your PC and check if the Device not responding issue persists.

Running an SFC scan will detect and repair corrupt system files causing the device or peripheral issues. Check how to fix the run-as-administrator option if it’s not working on your PC.

3. Uninstall USB Controllers

  1. Press Windows + R key to open the Run dialog box, type hdwwiz.cpl, and click OK.
  2. Go to the Universal Serial BUS Controllers tab, right-click on the Generic and USB Root Hubs, and select Uninstall device from the drop-down to remove the Controllers.
  3. Restart your PC to automatically reinstall the Controllers, and check if the error persists.

Uninstalling the USB Controllers will allow your system to reinstall credible ones and use them for its activities.

4. Update device drivers via Windows Update

  1. Press the Windows + I key to open the Settings app.
  2. Select the Windows Update tab and select the Advanced options.
  3. Click on Optional Update.
  4. Click the drop-down button on the Driver Update and check the list of updates available.
  5. Select the Update and Install button, then wait for the drivers to install.

Installing pending driver updates will fix bugs affecting the device and improve its performance. You can read about ways to diagnose and fix Windows Update if it’s not loading on your computer.

Moreso, you may be interested in ways to fix USB devices not recognized issues in Windows 11. Likewise, knowing what to do if you are unable to format an external hard drive might also be very important.

If you have more questions or suggestions, kindly drop them in the comments section.

GeForce Experience Driver Download Failed: 5 Ways to Fix It

Nvidia GeForce Experience allows users to optimize graphics card settings, update drivers, etc. Users may encounter a GeForce Experience driver download failed error during an update. Hence, we’ll explore the causes and provide solutions to troubleshoot them.

Alternatively, you can read about how to fix the Nvidia graphics card if it’s not detected in Windows 11.

Why did the GeForce Experience driver download fail?

Some of the reasons you encounter the failed download are outlined below:

  • Network connection issue – Network connection issues can bring about failure in the driver download if it can’t communicate with its servers.
  • Outdated GeForce experience app – App developers release newer software versions to improve performance. So, an outdated GeForce Experience app can lack the tweaks to update drivers on your device.
  • Antivirus conflict – The activities of antivirus software might conflict with other software like GeForce Experiences functionality.

Fortunately, there are some fixes you can follow to resolve the problem and get tie drivers updated.

What can I do if the GeForce Experience drivers download failed?

Try the following preliminary checks before proceeding with any advanced troubleshooting methods.

If the issue is not solved, proceed with the GeForce Experience driver download failed fix discussed below.

1. Enable automatic downloads in the GeForce Experience Client

  1. Press the Windows button, type GeForce Experience, and press Enter to open it.
  2. Then, click the gear icon in the top right corner to open Settings and select the General tab on the left side pane.
  3. Check the Automatically download driver updates and let me choose when to install the box.
  4. Relaunch the GeForce app and select the Drivers tab on the home screen to see the latest update available for installation.
  5. Click the Check for update box if none is displayed.

The above method will automatically notify you about the available driver’s update and installation.

2. Download the driver manually

  1. Open the Nvidia official download page on your browser.
  2. Click the drop-down arrow in the Product type, Product series, and product fields to select your graphics card details. Also, choose your Operating System.
  3. Select Game Ready Driver (GRD) from the download type and click the Search button.
  4. Click the Download button from the search results, then click the Download button to confirm your selection.
  5. Double-click on the download file in your browser to install it.

 Manually installing the driver is an effective means to update the GPU if the automatic update fails. You can check our guide about ways to update drivers manually on Windows 11.

While manually installing the driver options from the official website can be easy for some users it is always recommended to employ the help of a professional driver updating tool as they will scan your computer and download the right drivers in just a few minutes.

3. Reinstall GPU drivers

  1. Left-click the Windows icon, type Device Manager, and press the Enter key to open it.
  2. Scroll through and click on the Display adapters, right-click the GPU, and select Uninstall device from the context menu.
  3. Then, check the Delete the driver software for this device box and select Uninstall.
  4. Close the Device manager and restart your PC.

Reinstalling GPU drivers can help fix issues that may have occurred due to corrupt or outdated drivers.

4. Reinstall the GeForce Experience app

  1. Right-click the Windows + R to open the Run window, input appwiz.cpl, and click OK.
  2. Navigate to the GeForce Experience app, select it, and click on Uninstall.
  3. Wait for the process to complete, close the Window and reboot your system.
  4. Then, go to the Nvidia Officials webpage to download the GeForce Experience app.
  5. Double-click on the downloaded file and follow the on-screen command to install the app.

Reinstalling the GeForce Experience software will fix app bug errors with the GeForce experience driver download failed in 2022. You can read about how to download the GeForce Experience app on Windows.

5. Temporarily disable Windows Defender

  1. Press the Windows button, type Settings, and press Enter to open it.
  2. Next, click the Privacy & Security category and click Windows security.
  3. Select Virus and threat protection and click Manage settings.
  4. Then, toggle off the switch under the Real-time protection option.
  5. Select Yes from the User Account Control prompt to confirm your selection and close the Window.

Turning off Real-time protection will prevent the Windows Defender interference from causing GeForce experience driver download to fail on Windows 11. Further, do not hesitate to check our more comprehensive guide on how to disable Windows Defender on your device.

In addition, if you are interested in fixing Nvidia GeForce Experience when it stops working, apply the solutions in this article.

Should you have further questions or suggestions, kindly drop them in the comments section.

FindTime Not Working on Outlook: How to Enable It

FindTime is a new add-in that helps with plowing through your Outlook calendar and finding available time for your events. Lately, some of our readers have complained about FindTime not working.

So, this article will discuss why the add-in isn’t working and some fixes for it. Also, users complain about Microsoft Outlook crashing when opening the calendar on Windows PCs.

Why is FindTime not working on Outlook?

Many factors may be responsible for the FindTime add-in not working on Microsoft Outlook. Some notable ones are:

  • Disabled FindTime add-in – The FindTime add-in may not work in Outlook if disabled by a setting in the app’s configuration.
  • Add-in incompatibility issues – The add-in only supports Outlook 2013 or later. So, the Outlook app may not work, as well as the add-in, if you installed it on an incompatible app.
  • Corrupt Outlook PST or OST files – PST and OST files store local copies of email data and work done for migration across Outlook servers. If these files become corrupt, it can affect the add-ins running on them.
  • Outdated Outlook app and corrupt installation files – Not installing recent updates on the Outlook app can cause bugs to infect the app and impede its performance. Also, you can experience the FindTime plugin not working if the Outlook installation file is corrupt.

Nonetheless, you can fix the problem by following the solutions outlined below.

What can I do if FindTime is not working on Outlook?

Before proceeding with any advanced troubleshooting steps, go through the following:

If you can’t resolve the problem, go ahead with the steps below:

1. Check if the FindTime Add-in is Inactive or Disabled

  1. Launch the MS Outlook app on your PC.
  2. Click on the File tab and select Options from the drop-down.
  3. Click Add-ins on the left pane of the screen. Check if FindTime appears in the Active, Inactive, or Disabled section.
  4. If the add-in appears under Inactive, click the Manage drop-down and ensure the COM Add-ins is selected, then click Go.
  5. Check the checkbox next to FindTime and click OK.
  6. If the add-in appears in the Disabled section, click the Manage drop-down and ensure the Disabled Items option is selected, then click Go.
  7. Select the FindTime add-in, then click Enable in the bottom-left corner of the screen.
  8. Close Outlook and wait for 5 seconds before you start it again.

The steps above will help you enable the add-in if it was disabled earlier. Also, it will activate it in case it is inactive.

2. Repair Microsoft Office

  1. Press Windows + I key to prompt Windows Settings.
  2. Click the Apps menu and select Installed apps.
  3. Locate Microsoft Office in the apps list, click the menu against it, and select Modify.
  4. Select Quick Repair from the new menu and click the Repair button.

Repairing Microsoft Office will fix issues that can cause PST file errors on Outlook and other interference from similar Microsoft apps.

3. Update the Outlook app

  1. Press Windows + R keys to open the Run dialog box, type outlook.exe/safe, then click the OK to start Outlook in Safe Mode.
  2. Select Yes on the Microsoft confirm prompt.
  3. Click on File, select Office account, and click the Office updates menu.
  4. Click the Update Options button, then click Update Now from the drop-down to install pending updates on Outlook.
  5. Restart your PC and check if FindTime works.

Installing updates can fix Outlook disconnected errors and resolve issues affecting its add-ins’ performance.

4. Clear Outlook cache

  1. Press Windows + R keys to open the Run dialog box, type %LOCALAPPDATA%\Microsoft\Outlook\, then click OK.
  2. Right-click the RoamCache folder, select Copy from the drop-down, then paste it into another folder.
  3. Double-click the real RoamCache folder, select all the items in the folder, or press Ctrl + A, then press the Delete key.
  4. Restart your PC and check if the problem persists.

Clearing the cache will delete corrupt files causing issues with the FindTime plugin on Outlook.

Alternatively, we have a guide on what to do if Outlook crashes after Windows Update on your PC. Also, if you want to fix Outlook error 0x80070021 on Windows 11, do not hesitate to check out this article.

For more questions or suggestions related to this guide, kindly drop them in the comments section.

Hardware Problems Were Detected [Memory Diagnostic Fix]

Windows Memory Diagnostic is an excellent tool to test your memory modules. However, some of our readers reported the Windows Memory Diagnostic Tool Hardware problems were detected message. In this article, we will tackle and fix this problem.

Why do I get the Hardware problems were detected message?

The main cause of this error is that one or more RAM modules are malfunctioning. However, there are also other reasons, such as:

  • Corrupted drivers or files – The Memory Diagnostic Tool might misread the issue due to incompatible or corrupt drivers or system files.
  • Overclocking – If you’re using overclocking tools that strain the memory to its limits, it may cause the Hardware problems were detected error.
  • Hardware issues – There might be other hardware problems with the motherboard or PSU that may cause this error. A more thorough inspection of your PC is required.

These are the main possible causes, so let’s go to the actual solutions to fix this error.

How do I fix the Memory Diagnostic hardware problems error?

Before getting to more complicated troubleshooting, let’s cross-check some quick steps that may solve the problem quicker:

  • Stop the overclocking tool if you’re using one.
  • Install the latest OS updates for your PC.
  • Restart your PC and run the Windows Memory Diagnostic Tool again to see if the results are consistent.

If these quick measures didn’t restore things to normal, perform the solutions below.

1. Run the Hardware and Devices troubleshooter

  1. Press the Windows + R key combination to start the Run console.
  2. Type the following command and press Enter to run it: msdt.exe -id DeviceDiagnostic
  3. Click on Next to start the troubleshooting.
  4. The Hardware and Devices troubleshooter will detect and automatically fix any problems or warn you if there are any malfunctions it cannot resolve. Click on Apply this fix if any solutions are found.
  5. Restart your PC and see if the error still occurs.

Running the Hardware and Devices troubleshooter will help you detect any other driver or hardware-related problems that might be connected with the Windows Memory Diagnostic Tool Hardware problems were detected error.

2. Use a third-party tool to scan your hardware

  1. Launch your preferred browser and go to the MemTest86 download page.
  2. Click the download button to get the tool.
  3. The software comes compressed in a ZIP file. Right-click on it and extract it to a folder of your choice.
  4. Connect an empty USB drive to the computer and run the imageUSB.exe file from the MemTest86 folder.
  5. Click on the Write button.
  6. Once done, click the Exit button to close the ImageUSB tool.
  7. Next, shut down your computer. Insert the USB flash and restart the system. The MemTest86 app will start.
  8. You will be able to use the arrow keys, the F keys, and Enter to select the tests you want to perform.

As with any health problem, it’s better to have a second opinion and MemTest86 has a free version that can perform hardware tests on the components of your PC, including memory and CPU.

Of course, there are a lot of hardware diagnostic tools that you may use in order to pinpoint the issue.

If the software finds a hardware malfunction, you should take it seriously and ask for the services of a computer technician to repair or replace the faulty component.

3. Boot your computer in Safe Mode

  1. Click the Start button, then select the Power option, hold the Shift key, and select Restart.
  2. The PC will restart in Recovery Mode. Click on Troubleshoot.
  3. Now, choose Advanced options.
  4. Select Startup Settings.
  5. Now, press the F5 key to start the computer in Save Mode with networking.
  6. Check if the error persists.

4. Use a restore point

  1. Press the Windows key, type system restore, and select Create a restore point.
  2. Click on the System Restore option, then click Next.
  3. Now, select a restore point prior to this error and click Next.
  4. Wait for the restoration to end. Check to see if the problem still occurs after the restart.

The system will be restored to the point of creating the restore point. There is possible to get an error with the message System Restore did not complete successfully, but this guide will help you fix that problem.

Also, you may consult our article on what to do if System Restore cannot find a restore point.

If none of these solutions worked, you might also try to factory reset Windows.

We hope our solutions helped you fix the Windows Memory Diagnostic Tool Hardware problems were detected errors, and everything returned to normal.

There are also reports that Windows Memory Diagnostic Tool results are not showing, but this guide will help you fix the issue.

If you have any questions or suggestions, don’t hesitate to let us know in the comments section below.

Asus Laptop Black Screen: 3 Quick Ways to Fix It

If your laptop’s screen goes black, it’s not necessarily a sign of trouble. If you’re using a Windows PC, your computer has likely gone to sleep mode. However, Asus users have denoted that their screen goes black and won’t turn on even after some time.

Usually, black screen errors indicate an underlying issue with your hardware. It could be a warning that your laptop is failing, so you need to take this sign seriously. As for today, this article explores how to get rid of the black screen and get your display working again.

What does it mean when my Asus laptop screen goes black?

There are several reasons why your Asus vivobook screen might go black in Windows 11.

The following are some of the common causes:

  • Loose connection – The power cord may not be plugged in properly, or the cables have gotten damaged. 
  • Low battery – The battery may have run out or won’t charge. This makes the laptop automatically go into hibernation mode.
  • Overheating – If the Asus laptop overheats, it will shut down to cool down by itself. This can happen if you’re playing games or performing intensive tasks for long periods.
  • Incompatible/corrupted/outdated driver – If you have just installed a new video card or updated the drivers, they may be outdated. This can cause the screen to flicker and eventually go black.
  • Hardware failure – A hardware component in your laptop may have failed or stopped working properly. 
  • BIOS error – This happens when there is something wrong with your computer’s firmware.

How do I fix a black screen on my Asus laptop?

Try the following first before moving on to the slightly advanced solutions:

  • Check to make sure your computer’s power cord is plugged in. 
  • Remove the AC adapter and plug it in. Also, check for any damages and replace it if necessary.
  • Disconnect all peripherals, USB devices, printers, and HDMI cables, then replace them after a few moments.
  • Remove the battery and let it sit for a few minutes before replacing it. You may also want to install battery calibration software for optimization.
  • Disconnect secondary monitors if connected. Your second monitor could be lagging and affect your main display.
  • Check your GPU temperature if it exceeds the recommended limits.
  • Attempt to refresh the video driver using the Win + CTRL + Shift + B shortcut.
  • Try with a second display if available. If this works, you’ll know your laptop’s display has an issue.
  • Finally, try restarting your PC and see if the display powers up.

1. Update your graphic drivers

  1. For this step, you can connect to an external display if it works or start your Asus laptop in Safe Mode.
  2. Click on the Windows button, type Device Manager in the search bar, and click Open.device manager w11
  3. Navigate to Display adapters to expand, right-click on your graphics card and select Update driver.Graphic Driver Update
  4. Select Search automatically for drivers.

2. Run a virus scan

  1. For this step, you can connect to an external display if it works or start your Asus laptop in Safe Mode.
  2. Press the Windows key, search Windows Security, and click Open.
  3. Select Virus & threat protection.
  4. Next, press Quick scan under Current threats.
  5. If you don’t find any threats, proceed to perform a full scan by clicking on Scan options just below Quick scan.Scan options
  6. Click on Full scan, then Scan now to perform a deep scan of your PC.Full Scan Scan Now
  7. Wait for the process to finish and restart your system.

3. Update your BIOS

  1. For this step, you will need a secondary PC to download the BIOS files and load it to a USB drive. 
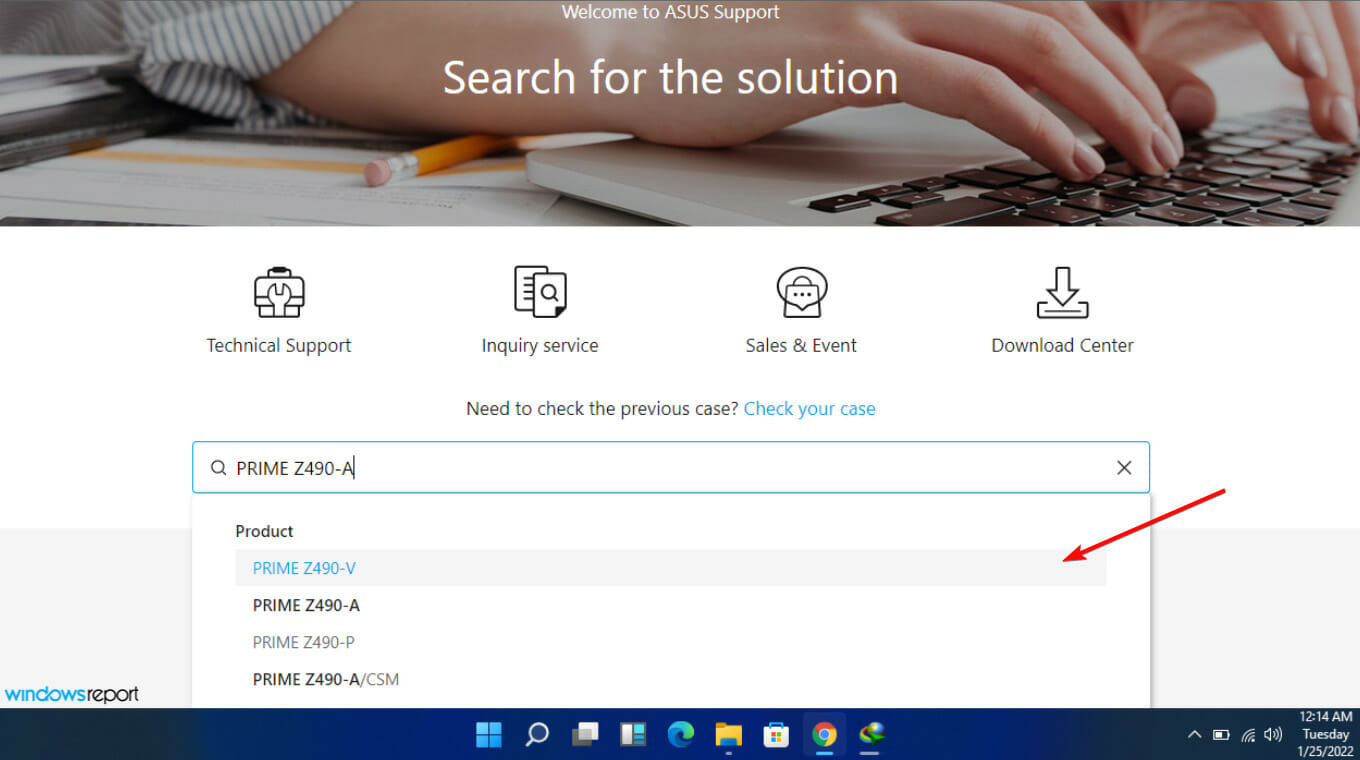
  2. Navigate to your browser and go to the ASUS support site to download the BIOS file. You’ll have to enter your laptop model to get the exact download file.ASUS how to update BIOS Windows 11
  3. Wait for the file to finish downloading, locate the zip folder and extract files.
  4. Locate the extension file and rename it with a .bin file at the end, then copy it to your USB drive. Ensure that your flash drive is the FAT32 file system.
  5. Connect the USB drive to the Asus laptop with a black screen and power it on. Simultaneously press the CTRL + R keys until your laptop restarts.
  6. Your laptop will enter the EZ utility, and the BIOS menu will appear. Proceed to click Yes to update your BIOS.

If, for some reason, your Asus laptop shows a black screen with no BIOS, feel free to check out our recommended fixes.

Other black screen issues include an Asus laptop with a black screen with cursor so visit our article to find out how to resolve this error.

Don’t hesitate to leave a comment down below for any additional thoughts.

Intel SpeedStep: Should You Turn It On or Off?

Intel SpeedStep is a technology that allows Intel processors to dynamically adjust their clock speed and voltage based on the workload. However, there are questions on whether Intel SpeedStep should be on or off. Therefore, we will guide you on when you might enable or disable it.

Alternatively, you can read how to fix Intel System report’s high CPU usage on your PCs.

Why should I turn Intel SpeedStep on or off?

  • Performance –  computer usage varies based on the task you want it to run. These tasks need faster processing. You can turn off the Intel SpeedStep for maximum performance from your CPU. It ensures that the CPU runs at maximum clock frequency and voltage all the time, regardless of the workload. However, this can also lead to higher power consumption and heat output that can damage laptops or small form factor PCs.
  • Power consumption – the computer is an electric power device, although the power consumption of each computer differs. Therefore, using a laptop or other portable device that relies on battery power, enabling Intel SpeedStep can help extend your battery life by reducing power consumption when the system is idle or running low-demand tasks.
  • Heat output – disabling the SpeedStep on your device gives it a higher performance. However, high-performance computing can generate a lot of heat, leading to thermal throttling and decreased performance. Enabling Intel SpeedStep can help manage the heat output of the processor by reducing CPU clock speed during periods of low usage, which can help prevent overheating.

Intel SpeedStep can be useful for balancing performance and power consumption. Therefore, we will take you through steps to enable and disable SpeedStep.

How can I turn Intel SpeedStep on or off?

  1. Turn on or restart your system and press the F2, F4, F8, F10, or F12 keys to open the BIOS menu. ( the function key depends on the PC’s manufacturer)
  2. Navigate to the CPU Configuration or Advanced CPU Options tab. Note that the BIOS interface is different on various devices.
  3. Navigate to the Intel SpeedStep Technology or EIST (Enhanced Intel SpeedStep Technology) based on your device brand. Click on Enabled to Disable it and vice versa.
  4. Save the Changes and exit the BIOS settings.

The Intel SpeedStep BIOS turns on or off in the BIOS, and the operating system will automatically adjust the CPU’s clock speed and voltage based on the system’s demand.

You can read about how to access BIOS on your computer.

In conclusion, you can read about the safest ways to overclock the CPU without BIOS on Windows. Also, you can check our guide about the minimum and maximum processor states in Windows.

If you have further questions or suggestions, kindly drop them in the comments section.

Hulu Error Code P-dev310 & P-dev320: How to Fix Them

There have been reports of Hulu error code p-dev310 and p-dev320 while using the streaming service. Hulu error code P-DEV310 can occur due to network connection issues, including problems with the Hulu’s servers being down or under maintenance. There might also be due to an outdated app or account-related issues. Here’s what we did to fix it!

What can I do to fix the Hulu error code p-dev310?

1. Reset your Hulu app

  1. Right-click on the Windows icon and select the Installed apps option.
  2. Scroll to the Hulu app, click on the More button, and click on the Advance options link.
  3. Select the Repair button, wait for the process to complete, and reopen the Hulu app.

Resetting the software will troubleshoot issues with its performance. Check our guide about ways to fix Windows Settings not opening if you have difficulty accessing it.

2. Clear browser cache and cookies

  1. Launch the browser app on your device. Click on the three dots on the top right side and select Settings.
  2. Select the Privacy and Security option and click the Clear browsing data.
  3. Then, choose All Time from the Time range at the top, check the boxes next to Cookies and other site data, and the Cached images and files option. Then click on Clear now.

Clearing the browser cache and cookies will remove all pre-store data and refresh the Hulu website if you are using a browser. Check our guide about how to fix Hulu not working on chrome in Windows.

3. Reinstall Hulu app

  1. Press the Windows + X and select the Installed apps option.
  2. Scroll to the Hulu app, select the More button, and click the Uninstall option.
  3. Then, select Uninstall to confirm your choice.
  4. Close the Settings Window and open the Microsoft Store on your computer.
  5. Click on the Search field, type Hulu, and press Enter.
  6. Select Hulu from the search result and click Get to download and install it.
  7. Wait for the process to complete, open the app and sign in with your credentials.

Reinstalling Hulu will fix bugs and corrupt setup files that can affect the app’s functionality. You can read about how to solve Microsoft Store not working on Windows.

Alternatively, you can read about how to fix Hulu not working on your Xbox console. Also, you can check our guide about fixing Hulu errors p-dev313 & p-dev322 on your PC.

Also, you should read our guide in addressing a similar Hulu Error Code P-dev320, P-DEV340 on Windows as well as Hulu error code P-DEV336 since the two errors are rather similar.

We also have a new guide on Hulu error P-DEV318, so don’t miss it for more information.

If you have further questions or suggestions, kindly drop them in the comments section.

Fix: We’re Having Trouble Showing the Details of This Perk

Game Pass Perks are free content Microsoft gives away to Game Pass subscribers. However, you may encounter an error saying Sorry, we’re having trouble showing the details of this perk when trying to see it. Fortunately, there are some easy steps you can follow to fix it.

Likewise, you may be interested in what to do to if you can’t install Game Pass games on your PC.

Why can’t I get my Xbox Game Pass perks?

You might get Sorry, we’re having trouble showing the details of this perk error for some of the following reasons:

  • Outdated Xbox app – If the Xbox app on your PC is outdated, it can cause compatibility issues with the system and impede the app’s communication with its servers.
  • Xbox app and Microsoft Store corrupt installation files – If the installation files for Microsoft Store are corrupted, it will likely affect the services running under it. Likewise, the Xbox app performance may be interfered with due to the corrupt installation, resulting in trouble showing the details of the perk you’re trying to access.
  • Microsoft Account issues – For any Microsoft account user that is less than 18 years or whose location is in a country where the game’s perks are not supported, perks issue in the Game Pass may pop up.
  • Issues with Xbox servers – The error may also appear if the Xbox app can’t exchange data with Xbox servers, causing the services in the app to malfunction or crash.

Having discussed what the trouble showing the details of this perk error means, we’ll take you through some fixes for the problem.

What can I do if there’s trouble showing the details of this perk?

Before proceeding with any advanced troubleshooting steps, apply the following:

If you can’t fix the problem, try the solutions below:

1. Update the Xbox app

  1. Right-click the Start button and select the Microsoft store from the list of programs.
  2. Click on Library in the bottom-left corner, then select Get Updates.
  3. Check if there is any update available, then download and install the update.
  4. Restart the Xbox app on your PC to check if your Perks details are showing or not.

Updating the Xbox app will install the updates needed to fix bugs affecting its performance and improve its functionality.

2. Update Windows Operating System

  1. Press Windows + I key to open the Windows Settings app.
  2. Click on the Windows Update option and click on Check for updates. If there are any updates available, it will search for and install them.

Updating Windows OS will fix the bugs in your PC and add new features to improve its performance. Read about fixing Windows not connecting to update service if the error occurs on your PC.

3. Change your Account information

  1. Launch your web browser and go to the Microsoft Account page.
  2. Click on Your info button on the top bar.
  3. On the Profile info tab, click Edit profile info.
  4. Verify you are the owner of the account.
  5. Change your date of birth and country/region, then click the Save button.
  6. Close the browser and launch the Xbox app to see if the issue persists.

Changing the location and age of your Microsoft account will fix account requirement issues that may pop the error, Sorry, we’re having trouble showing the details of this perk.

4. Repair the Microsoft Store app

  1. Press Windows + R keys to open the Run dialogue box, type ms-settings:appsfeatures, then press Enter.
  2. Select the Microsoft Store, then click on the Advanced options.
  3. Go to the Reset tab and click the Repair button.
  4. Restart your PC after the repair process and check if the perk issue is resolved.

Repairing the Microsoft Store app will fix any configuration issues and corrupt app files, causing your perks details not to show.

Alternatively, do not hesitate to check our guide about Xbox Live Networking Service missing and how to fix it.

Likewise, you can read our article if you’re unable to sign in to the Xbox account on your PC.

Should you have further questions or suggestions, kindly drop them in the comments section.

Fix: Microsoft PowerPoint Failed to Load Hlink.dll

Sometimes when you try to open a PowerPoint presentation, you might an error message stating something along the lines of PowerPoint ‘hlink.dll’ can’t be loaded.

This happens due to one of three things; either the PowerPoint presentation file is missing, damaged in some way, or the wrong version. Luckily, it’s possible to fix this error.

What causes Hlink.dll files to not load?

There are only a handful of reasons why hlink.dll files would not work, and we’re going to cover every single one in the list below;

  • Corrupt files weigh down your computer – Corrupted files can cause all sorts of compatibility problems. You can clean up the corruption by running a DISM scan.
  • Microsoft Office 365 is out of date – Be sure to download the latest Windows and Office 365 updates from Microsoft. They typically bring all manner of patches and bug fixes.
  • One of the Office 365 apps is faulty – Even if PowerPoint runs fine, malfunctioning apps can negatively affect each other. It’s recommended that you reinstall the problematic app.

How can I fix a malfunctioning Hlink.dll file?

Luckily for everyone, there are multiple ways to fix malfunctioning Hlink.dll files. You have your fair share of simple-to-do solutions to more complex ones if the easy ones don’t work:

  • Run a PC repair tool to seek out and repair missing or corrupt files. Windows 11 has a native app that does this, but it’s not very good. It’s better to use a third-party app.
  • If you previously created a restore point, run it to bring your Windows 11 computer back to an earlier state. Be sure to check out our guide on how to create a restore point if you don’t have one.
  • Also, be mindful of websites online claiming to have a new DLL for you to download. More often than not, this is malware, so be wary of these pages.
  • You can delete the file from your hard drive. See if it’s possible to replace the file. Otherwise, you’ll have to recreate your PowerPoint presentation from scratch.

1. Re-register the DLL file

  1. Bring up the Command Prompt on the Windows Search bar and select Run as administrator.
  2. If a User Account Control window appears asking if you want to make changes, click Yes.
  3. Type in the following command: regsvr32 Hlink.dll
  4. Hit Enter on your keyboard. Wait for the Command Prompt to finish its process.
  5. Restart your computer. Upon reboot, check the .dll file and see if it works.

2. Run PowerPoint in Clean Boot Mode

  1. Launch System Configuration from the Windows Search.
  2. On the General tab, choose Selective startup.
  3. Make sure the Load system services option is checked off.
  4. Now go to the Services tab. Check off Hide all Microsoft services.
  5. Click the Disable all button. Afterward, select Apply, then OK.
  6. Restart your computer.
  7. After rebooting, see if the problem persists. Check to see if PowerPoint works fine or if it’s another app.
  8. Once you’ve discovered the problematic software, uninstall it, then restart your computer again to return to normal.

3. Repair Microsoft Office

  1. Launch the Control Panel and select Programs and Features. If you don’t see that entry, make sure View By is set to Large Icons.
  2. Right-click Microsoft Office, and in the context menu, select Change.
  3. If a User Access Control window appears, select Yes.
  4. If your computer is connected to the internet, choose Online Repair. If not, click Quick Repair instead.
  5. Select Repair.
  6. Click Repair again on the new window that appears. The whole process may take some time.

4. Repair Windows via installation media

  1. Go to Microsoft’s Windows 11 page and use the Media Creation Tool to create installation media For Windows 11.
  2. Follow the steps as they appear. Once done, run setup.exe.
  3. Go through the installation wizard by clicking next. Accept the license terms as well.
  4. Give Windows 11 Setup enough time to finish.
  5. Once it finishes, select Install to repair the operating system. If you select Change what to keep, you can choose which apps and files are saved from deletion.
  6. You can choose to keep personal files and apps, for example.

What can I do if PowerPoint won’t insert videos from a chosen file?

Some users have experienced an error with PowerPoint where the software will refuse to insert certain videos. This may be because the file is corrupted, the format isn’t supported, or it’s too big.

There are a number of things that you can do to fix this, like going to an online video converter to change the video format to enable Windows Media Player controls on PowerPoint.

In the same vein, you should also learn what to do if PowerPoint is unable to play media on Windows 11. Make sure the file format is supported first. Then check the codecs and see if you have the right ones.

Feel free to comment below if you have questions about other PowerPoint errors. Also, leave comments about reviews you’d like to see or information on other Microsoft Office apps.

Dynamic Mirror Showing Failed: How to Fix It in 4 Steps

The Dynamic Mirror setup offers a certain level of protection for the data available on the disks. However, it is common for users to run into the Dynamic Mirror showing failed, making it impossible to use its features.

So, we will explore the general steps to fix this issue if you encounter it. Alternatively, you should check our guide on the best Mirror backup software.

Why is the Dynamic Mirror showing failed?

When Dynamic Mirror shows failed on your PC, the following are the probable causes:

  • The Dynamic disk is offline – Dynamic disks allow volumes to have noncontiguous extents on one or more physical disks. If these disks are offline, they will be inaccessible.
  • Corrupted system files – System files are responsible for the services and processes running on the computer. Hence, your system’s performance can easily be affected if the system files are corrupted.
  • Damaged or compromised Dynamic disks – The dynamic disks becoming damaged can affect the volumes it operates and manages. So, you may encounter the Dynamic Mirror showing failed if the disk is damaged, preventing it from functioning correctly.
  • Power outage issues – Abrupt system shutdowns, power failure, or unexpected shutdowns during the mirroring process can cause the dynamic disk status to show failure.

These factors may vary on different computers. Nonetheless, we’ll discuss some basic steps to fix the issue and get the dynamic disk to work correctly.

What can I do if the Dynamic Mirror showing failed?

Proceed with the following preliminary checks before trying any advanced troubleshooting steps:

If you can’t fix the problem, try the solutions below:

1. Run the SFC and DISM scans

  1. Left-click the Start button, type Command Prompt, then click Run as administrator.
  2. Click Yes on the User Account Control (UAC) prompt.
  3. Next, type the following and press Enter to start the scanning process: sfc /scannow
  4. Type the following commands and press Enter after each: DISM /Online /Cleanup-Image /RestoreHealth
  5. Restart your PC and check if the failed disk status still appears.

Running SFC and DISM scan on your PC can find and repair corrupted Windows system files causing the Dynamic Mirror showing Failed.

Read how to fix the run-as administrator option if it’s not working on Windows 11.

2. Switch the Mirrored Dynamic volume to an online status

  1. Press Windows + R key to open the Run dialog box, type diskmgmt.msc, and click OK to open Disk Management.
  2. Right-click on the Disk and select Online from the drop-down.
  3. Restart your PC and check if the Dynamic Mirror issues persist.

Changing the disk status to online will allow it to rebuild the volume and return to a healthy state.

3. Run the CHKDSK command

  1. Left-click the Start button, type Command Prompt, and click the Run as administrator option.
  2. Click Yes on the User Account Control prompt.
  3. Type the following commands and press Enter: chkdsk C: /r
  4. Restart your PC.

Running the chkdsk command examines your disk volume and disk use. Also, it provides a status report specific to each partition and shows the errors found in the system file.

Check our guide on what to do if Command Prompt keeps crashing on your PC.

4. Run Windows Defender scan

  1. Left-click the Start button, type Windows Security and click Enter.
  2. Click on Virus & Threat Protection from the menu and select Scan options.
  3. Then click the Full scan button and click the Scan now button.

Running Windows Defender scan will find and remove any malware and viruses causing the damaged disk issue. Read how to fix the Windows virus and threat protection not working on Windows 11.

In addition, if you get the Windows detected hard disk problem error message, please read our article to get the fixes.

Also, do not hesitate to check our article on fixing any Windows 11 disk errors on your PC.

Should you have further questions or suggestions, kindly drop them in the comments section.

Fix: The Cloud Operation Was Unsuccessful on OneDrive

Some of our readers have complained that they encountered the cloud operation was unsuccessful error when trying to access or upload files on OneDrive. Hence, we will address this by exploring the potential causes of the error and providing solutions to fix it.

Moreso, you may need to force OneDrive to sync on Windows on rare occasions when it fails to.

What causes cloud operation to be unsuccessful on OneDrive?

There could be various reasons for cloud operation on OneDrive to be unsuccessful. Most of them are:

  • Network connection issues – When your computer cannot connect to a network, it results in errors such as network connection timeout or unstable network. Hence, leading to interruptions or timeouts during the file upload.
  • Firewall interference – Windows Firewall is a network security system that monitors and controls incoming and outgoing network traffic based on predetermined security rules. However, the Windows firewall can mistakenly block OneDrive’s network activities.
  • Windows Registry issue – Windows operating system has a centralized database system that stores software configuration settings and user preferences known as the Windows Registry. If there is a corrupt registry issue, it can cause Outlook to malfunction.

Irrespective of the causes, we will take you through the steps to fix them below.

How can I fix the Cloud operation that was unsuccessful in OneDrive?

Apply the following preliminary checks:

If the error persists after trying the preliminary checks, try the fixes below:

1. Relog in your account

  1. Right-click the OneDrive app icon and select the Help & Settings gear icon.
  2. Click on Settings and select the Account tab.
  3. Click the Unlink this PC option and select the Unlink account to sign out.
  4. Input your OneDrive email and click the sign-in button.
  5. Type in your password and select the sign-in button.
  6. Follow the on-screen instructions till you get to the last setup and select the Open my OneDrive folder option.

Re-linking your account will fix any login credentials issues causing the error and refresh the account setup.

2. Reset the OneDrive app

  1. Press Windows + R key to open the Run dialog box. Copy and paste the following into the box %localappdata%\Microsoft\OneDrive\OneDrive.exe /reset and press Enter.
  2. The OneDrive icon will reappear when the process is complete.
  3. If the icon doesn’t reappear, open the Run dialog box, copy and paste the following strings: %localappdata%\Microsoft\OneDrive\OneDrive.exe, and press Enter.

Resetting the app will fix corrupt cache data that can cause OneDrive not to sync to the Cloud. Also, it creates a new data factory for the app.

You can read about how to reset an app in Windows 11 if you have issues with the above steps.

3. Enable the Always keep on this device option

  1. Press the Windows + E key to open Windows Explorer.
  2. Find the OneDrive folder and click on the drop-down button before the folder.
  3. Right-click the affected file and select Always keep on this device from the context menu.
  4. Right-click the affected file again and select Free up space.

Enabling the Always keep on this device option allows you to access your data while offline.

4. Disable Windows Defenders firewall

  1. Press the Windows button, type Windows security, and launch it.
  2. Select Virus and threat protection and click Manage settings.
  3. Toggle off the switch under the Real-time protection option.

Turning off Windows Defender’s real-time protection will fix issues with the antivirus conflict with OneDrive.

Should this fail, you can check out other methods for disabling Windows Defender on your device.

5. Reinstall the OneDrive app

  1. Press the Windows + X key and click on Installed apps.
  2. Then, navigate to Microsoft OneDrive, click on it, and select Uninstall.
  3. Open the OneDrive page in Microsoft Store on your computer and click the Get button to reinstall the app.

Reinstalling the OneDrive app troubleshoots issues with bugs and corrupt installation files that can affect the app’s functionality. For a more comprehensive approach to reinstalling OneDrive on Windows, kindly follow the steps in this guide.

In addition, you can read about ways to fix OneDrive missing from File Explorer in Windows 11. Likewise, do not hesitate to check out our detailed guide about changing OneDrive sync settings.

If you have further questions or suggestions, kindly drop them in the comments section below.

How to Undo Diskpart Clean: 2 Easy Methods

Diskpart is a command-line utility that allows you to manage your computer’s storage devices. However, people may accidentally execute the Diskpart clean command erasing all data on the selected disk. If you are in this situation, we will explore how to undo Diskpart clean and recover your partition.

Alternatively, you can read about how to fix there is no fixed disk to show in Diskpart on Windows.

Can you recover files after a Diskpart clean?

It is possible to recover files after a Diskpart clean, but it depends on the extent of the damage done to the disk. When you run the clean command in Diskpart, it removes all partition and volume information from the selected disk, wiping it clean.

However, some data recovery tools help you recover lost files. Additionally, if you had previously created a backup of the disk, you may be able to restore your lost files via the backup.

Furthermore, it’s worth noting that the chances of successfully recovering data after a Diskpart clean are not guaranteed and will depend on factors such as the severity of the damage and how soon you attempt to recover the data.

How can I undo a Diskpart clean?

Apply the following before proceeding with advanced troubleshooting:

The following check will aid in undoing the erased partition.

1. Undo Diskpart clean via Command Prompt

  1. Right-click the Start icon, and click on Run. Type diskmgmt.msc and press Enter.
  2. Locate your deleted partition and remember its size. The deleted partition will be an unallocated space.
  3. Press the Windows key, type cmd, and select Run as Administrator from the right pane.
  4. Type the following in the Command Prompt and press Enter: diskpart
  5. Then, input the next command and press Enter to show the disk partition: list disk
  6. Input the next command and press Enter: select disk X
  7. Type the following in the Command Prompt and press Enter: list volume
  8. Next, input the line and press Enter (Y signifies the number of the lost partition): select volume Y
  9. Lastly, type the following and press Enter (H signifies the drive letter that is unallocated): assign letter H

The steps will undo the Diskpart clean command on Windows 11 PC and restore the deleted data. Check our guide on how to fix Command Prompt not working on your PC.

2. Via the third-party app

You can recover Diskpart clean using a third-party partition tool. Most third-party software tools available in the market are free, although you can get paid ones as well for more efficiency.

We have a recommended list of the best file recovery software for Windows 11 here. Do not hesitate to check it out.

In addition, you can read how to recover unallocated partitions with simple steps. Also, our guide about the best partition manager software on Windows devices has proven helpful for some of our readers who encountered the issue.

For further questions and suggestions, kindly drop them in the comments section.

How to Clear Recent Files in Windows 11 [6 Ways]

If you want to know how to clear or remove the recent files in Windows 11, you’re in the right place.

Normally, this feature enables quick access to your files, but if you’re sharing your PC with someone else and don’t want to expose recent activities, keep reading.

How can I clear recent files in Windows 11?

1. Clear File Explorer history

  1. Left-click the Start button, type File Explorer Options, and select the first result that appears.
  2. Click on the General tab, go to the Privacy menu, and click the Clear button.
  3. Close the File Explorer Options window and check if your recent files are still available.

The recently opened files list in File Explorer will delete when you clear File Explorer history. Read about some fixes for Windows Explorer running slowly on your computer.

2. Delete search history

  1. Left-click the Start button and click the gear-shaped icon to open the Settings app.
  2. Select the Privacy & security tab on the left pane and click on Search permissions.
  3. Under the History tab, click on the Clear device search history button.

Deleting your search history clears the list of apps and files you recently searched about, preventing intruders from knowing. You can also clear the search history from your browser.

3. Delete activity history for your account

  1. Press Windows + I key to launch the Windows Settings app.
  2. Select the Privacy & security tab on the left pane and click on Activity history.
  3. Click the Clear history button to delete your activity history from all your devices.
  4. To prevent the further storage of activity history for your account, toggle off the switch for the Activity history option.

The activity history for your account can also store lists of recent activities and files you’ve engaged on your system. So, cleaning it will remove the list of recent files on Windows 11.

4. Via the Registry Editor

  1. Press Windows + R key to open the Run dialog box, type Regedit, and press OK to launch the Registry Editor.
  2. Navigate to the following path: HKEY_CURRENT_USER\Software\Microsoft\Windows\CurrentVersion\Explorer\TypedPaths
  3. Right-click the url1, url2, url3 files and select the Delete option from the drop-down menu.

Deleting the following keys will clear any recent files listed on the PC. Read about how to fix a corrupt Registry Editor on Windows 11 if you encounter a problem.

5. Delete File Explorer’s Address bar history

  1. Press the Windows + E key to open File Explorer.
  2. Right-click on the Explorer address bar and select the Delete History option from the drop-down menu.
  3. Click OK to confirm it.

The address bar history contains the files you searched for recently depending on how long it stores. So, clearing it will remove any information about recent files in Windows 11.

Check our guide for fixing File Explorer preview pane not working on Windows PCs.

6. Delete recent file history for a specific app

  1. Press the Windows + S key to prompt the Search bar, and type the app’s name.
  2. On the right pane, go to the Recent tab to see the list of recently opened items,
  3. Right-click on a file and select the Remove from this list option from the drop-down.

How to find recent files in Windows 11?

  1. Press the Windows + E key to open File Explorer.
  2. Check your recently opened files under the Recent section in Quick Access.
  3. If your recent files don’t show in the Recent section, left-click the Start button, type File Explorer options, and select the first result that appears.
  4. Go to the General tab, check the box next to the Show recently used files option, and click Apply.
  5. Open some files and repeat steps 1-2 to see if you can find your recent files.

Deleting recent file history for a specific app will clear the details of recent activities and the files you used.

In addition, you may be interested in our article about how to fix File Explorer freezing or not responding on Windows 11.

Likewise, do not hesitate to check methods for extracting files from multiple folders in File Explorer.

If you have further questions or suggestions on this guide, kindly drop the in the comments section.

Device Manager Has Multiple Processors? Here’s What to Do

Device Manager is a powerful inbuilt tool with Windows operating system that enables users to manage hardware devices connected to their computer.

Modern processors have multiple cores and threads; if a processor has 8 cores with 2 threads per core, that means 16 threads. You will see 16 processors in Device Manager, as Windows treats every thread on the processor as a separate small processor.

If you see a list of processors on Device Manager and want to see if these are legit, then this guide can help! We will also mention how to fix the problem if processors are not working properly and have compatibility issues. Let’s get started! 

Why does my Device Manager have multiple processors? 

There could be various reasons for multiple processors showing in Device Manager; some of the common ones are: 

  • Multi-core processors – Modern processors come with multiple cores, which are individual processing units within a single physical processor. Hence you see multiple processors.
  • Hyperthreading – If your processors use hyperthreading, which enables a single physical processor core to act as two virtual cores, the operating system sees two processors instead of one. 
  • Multiple physical processors – If you have a high-end system, it could have multiple physical processors installed. Hence you will see multiple processors in Device Manager.  
  • Virtualization – If your computer has virtual machines, you can see multiple processors in Device Manager, and each reflects the virtual processors allocated to each virtual machine. 

What can I do if Device Manager has multiple processors? 

Before moving to the actual steps, you should go through the preliminary checks: 

  • Restart your computer.
  • Check your PC for overheating.

1. Check if the processors are legit 

1.1 Use the Boot menu 

  1. Press Windows + R to open the Run box.MS CONFIG RUN COMMAND
  2. Type msconfig and click OK to open System Configuration.
  3. On the System Configuration page, go to Boot.
  4. Click Advanced options.Advanced options Ms config
  5. Remove the checkmark next to the Number of processors.
  6. Click OK.Number of processors device manager has multiple processors
  7. Click Apply and OK to confirm the changes.

1.2 Check cores are enabled, and the CPU uses Hyperthreading

  1. Press Windows + I to open Settings.
  2. Go to System, then click Recovery.System - Recovery Windows 11 device manager has multiple processors
  3. Under Advanced options, click Restart now.Recovery Advanced Startup
  4. Now under Choose an option page, click Troubleshoot.Choose an option - Troubleshoot device manager has multiple processors
  5. Select Advanced options.Advanced options
  6. On the Advanced options page, select UEFI Firmware Settings.UEFI 2
  7. Click Restart.UEFI Restart
  8. Select the appropriate option to reach BIOS.
  9. Locate and click System Configuration, then select BIOS Configuration.
  10. Click Processor options, and select Enabled Cores per Processor. Enter the number of cores to enable. To enable all cores, enter 0 and save it.
  11. Now go to Intel (R) Hyperthreading Options, click Enabled and press F10.

2. Fix issues with the processor if any

2.1 Scan for malware

  1. Press the Windows key, type Windows Security, and click Open.Windows Security open device manager has multiple processors
  2. Go to Virus & threat protection and click Scan options.V& T
  3. Select Full scan and Scan now.Full scan -
  4. It will scan your computer, look for infections and delete them if prompted.

2.2 Update your drivers

  1. Press Windows + R to open the Run box.Device Manager RUN COMMAND
  2. Type devmgmt.msc and click OK to open Device Manager.
  3. Go to Processors and expand it. Select the processor and click Update driver.Processor driver update device manager has multiple processors
  4. Click Search automatically for drivers.Search automatically for drivers device manager has multiple processors
  5. Follow the on-screen instructions to complete the process.

If you don’t get the best results by updating your drivers manually, you can try automatic assistants like Outbyte Driver Updater, specially created to locate the latest versions for peak PC performance.

⇒ Get Outbyte Driver Updater

2.3 Modify power settings

  1. Press Windows + I to open Settings.
  2. Go to System, and click Power.Settings power device manager has multiple processors
  3. Under Power, next to Power mode, select Balanced.Power
  4. Restart your computer.

3. Repair Windows OS

  1. Press Windows + I to open Settings.
  2. Go to System, then click Recovery.System - Recovery Windows 11  device manager has multiple processors
  3. Under Recovery options, go to Reset this PC, and click Reset PC.RESET
  4. On the Choose an option screen, select Keep my files.Keep my files
  5. Now, click Cloud download and click Next.Cloud download
  6. the Additional settings page, click Next.additonal settings
  7. On the Ready to reset this PC screen, click Reset.Reset
  8. The repairing process will start, and your PC will be rebooted several times.

So, this is how you can check why you see multiple processors on your Device Manager and if they are legit. If you have any questions or concerns, please let us know what worked in the comments section below.

PC Slow After Windows Update? Here Are 8 Ways to Fix That

Windows updates bring new features along with several bug fixes. However, they are often known to bring new bugs that could slow down your PC. Several users have reported that the latest Windows update has slowed down their PCs.

If you are also experiencing the same issue and are looking for ways to fix the slowdown of your PC after the Windows update, then you are in the right place. This guide will show you how to do that in some simple steps. Let us get right into it.

Why has the Windows update slowed down my PC?

Well, there are several reasons your PC could slow down after installing the latest Windows update. Some of them are listed below.

  • The update is problematic: As mentioned above, often Windows update themselves could be problematic, causing your PC to slow down.
  • System files are missing: If some important system files are missing, they could trigger multiple issues on our PC.
  • Background apps are conflicting: Multiple background apps can also slow down your PC as they eat up resources in the background.
  • Fragmented hard drive: If the disk drive containing the OS is corrupt or fragmented, this could slow down your PC.
  • Overheating: Your PC might be overheating because some apps might consume too many resources.
  • Virus or malware: The presence of viruses or malware can not only be harmful to your data, but it could also slow down your PC by injecting multiple infected files.
  • Old PC or laptop: The time has come for your PC or laptop to be replaced as they might be running too old hardware.

How can I fix my PC if the Windows update has slowed it down?

1. Uninstall the update

  1. Press the Win + I keys to open the Settings menu.
  2. Click on Windows update on the left pane.
  3. Select Update history on the right.
  4. Under Related settings, select Uninstall updates.
  5. Choose the recently installed update and hit the Uninstall button.
  6. Follow the on-screen prompts.
  7. Restart your PC and see if it helps.

Uninstalling the problematic update is your best option if your PC has slowed down after installing it. You can easily do that by following the above steps.

2. Repair corrupt system files

  1. Open the Start menu by pressing the Win key.
  2. Open Command Prompt as an admin.
  3. Type the below command and press Enter. sfc /scannowSFCSCANNOW CMD
  4. Wait for the process to complete.
  5. Restart your PC.

With the SFC Scan tool, you can quickly fix all the corrupt or missing system files on your PC that might have been affected by the latest Windows update.

Of course, this process can be greatly simplified when using a specialized dedicated tool that scans your system, identifies any broken files, and replaces them with healthy files from a significant database.

3. Clear Windows Update cache

  1. Press the Win + R keys to open the Run dialogue.
  2. Type services.msc and press Enter.
  3. Open Windows Update.
  4. Select Stop.
  5. Click Apply and OK.
  6. Press Win + R keys to open the Run dialogue.
  7. Type C:\Windows\SoftwareDistribution and hit OK.
  8. Delete all the files inside the folder.
  9. Restart your PC.

The Windows update cache files might have gone corrupt, because of which you are facing a slow down of your PC after the Windows update. Clear it and check if this fixes the issue or not.

4. Optimize disk drives

  1. Open the Start menu by pressing the Win key.
  2. Type Optimize drives and open the appropriate app.
  3. Select your system disk.
  4. Click Optimize.

The Disk Optimizer helps improve the computer speed by optimizing the disk to some extent. Therefore, you can try using it to speed up your PC.

5. Disable background apps

  1. Press Ctrl + Shift + Del to open the Task Manager.
  2. Go to the Startup apps tab.
  3. Locate all the apps that you wish to disable, and hit the Disable button.

If you have multiple background apps running on your PC, then your PC will slow down irrespective of the Windows update installed. Disable all the unnecessary apps and check whether this fixes the issue.

6. Turn off visual effects and transparency

  1. Press Win + I keys to open Settings.
  2. Click on Personalization.
  3. Click on Colors.
  4. Turn off the Transparency effect.
  5. Restart your PC.

Several users have reported that after the Windows update, they turned off the transparency effect, eliminating the PC slow-down issue.

7. Scan for virus

  1. Open the Start menu by pressing the Win key.
  2. Open Windows Security.
  3. Click on Virus & threat protection.
  4. Click on Quick Scan.
  5. Wait for the scan to complete.
  6. Apply the prompted fixes.
  7. You can also click on Scan options and select Full scan for an in-depth scan.

If you are looking for a dedicated antivirus tool, look no further. We have listed some of the best antivirus tools you can have on your PC and protect your PC from viruses or malware.

8. Reset your PC

  1. Press the Win + I keys to open Settings.
  2. Click on Recovery on the right side.
  3. Under Recovery options, select Reset PC.
  4. Choose the Keep my files option.
  5. Hit Next.
  6. Let your system reset.

If nothing works, then you should resort to resetting your PC. This will eliminate all the viruses or malware, infected files, or corrupt system files that may be causing the issue of slowing down your PC after the Windows update.

That is it from us in this guide. If your Windows 10 PC is running slow, you can check out our guide and fix the problem among the 12 solutions mentioned.

Did you know that you can defrag your PC and improve the PC performance? This is especially true when your laptop becomes slow after formatting.

If your Windows 11 is slowly booting, you can fix it with the solutions mentioned in our guide.

Feel free to let us know in the comments below which one of the above solutions fixed the slow PC after the Windows update.

You can now disable rounded corners on web pages in the Edge browser

As we’re sure you know, a few weeks ago, the Redmond tech company revealed a significant redesign idea for its browser.

This idea features reworked tabs, a large Bing Chat button, rounded corners for web pages, and other changes.

However, the redesigned Edge browser turned out to be a bit controversial, as users quickly jumped on Microsoft for enforcing questionable design choices with no options to disable them.

Thus, after dealing with huge amounts of customer feedback, Microsoft has decided to do something and is now fixing the situation.

Remember you are in the right place to get help with problems like Edge cookies getting deleted after restarting, or if you need help with renaming web apps on Edge.

Not everyone enjoys this cosmetic change on Edge

Note that the tech giant has already addressed the problem around the Bing button, since one of the recent Edge Canary updates brought the option to disable it with a single click.

Now, Microsoft is making another move to show it listens to consumer feedback. Edge Canary 113.0.1743.0 lets you toggle off rounded corners for web pages.

Thus, you can toggle on or off rounded corners for browser windows in the Appearance settings section. Simply access the Settings app, then go to the Appearance section. 

It is there that you’ll find the Use rounded corners for browser window option, and restart your browser to apply the changes.

Exactly like with other new features in Edge, you can help Microsoft better understand what users think about changes in the browser by giving the option a thumbs up or down.

You might even think that it’s safe to say that the rounded corners for websites, or browser windows, as Microsoft calls them, are the most hated part of the redesign.

Many think that this design robs you of screen space and creates visual confusion since most computer screens are still perfectly squared, not rounded.

That being said, some people have no problem with spicing things up a bit, so Microsoft has decided to do the only right thing and let users decide for themselves.

What is your opinion on this design choice for the Edge browser? Share your thoughts and opinions with us in the comments section below

World of Warships Error Connecting to Server: 6 Ways to Fix

World of Warships has its dedicated fan base, with forums dedicated to the game, but some users have reported an Error connecting server message.

This error message ruins their gaming experience due to frequent stoppage. If you also face this problem, this guide will show you quick ways to resolve it.

Why does the World of Warships error connecting to the server appear?

Below are some of the causes of the World of Warships error connecting to the server message:

  • Corrupt game files: Sometimes, World of Warships can’t connect to the server because your game file is corrupt. You need to verify the integrity of the files on Steam to solve this problem.
  • Outdated network driver: If your network driver is outdated or faulty, you might experience this issue. You need to update your driver to the latest version to solve this problem.
  • Issues with location server: In some cases, this issue might occur because the World of Warships server is temporarily unavailable in your region. This has happened to some EU servers and might be the case for you too. The solution to this is to try another game server.

How do you change servers in World of Warships?

Know that you can always change the region on the log-in screen. So, once you have logged out of your account, click the little arrow in the top left corner.

Next, click on the currently selected region, which will give you the option to switch from one server to another.

Creators have also recently offered India-based players on the Asia server an opportunity to transfer to the EU server, making the game even more diverse.

How can I fix the World of Warships Error connecting server message?

1. Reinstall your game

  1. Press Windows + I to access Settings.
  2. Select the Apps category, then Installed Apps.settings apps
  3. Locate World of Warships, click on the three dots next to it, and select Uninstall.

Now you have to download the game again, and the issue should be resolved.

2. Verify the integrity of the game files

  1. Launch Steam.
  2. From your Library section, right-click on the game and select Properties from the menu.steam game properties
  3. Select the Local files tab and click Verify integrity of game files.verify game files
  4. Steam will now verify your game‘s files.
  5. Once it’s done, launch World of Warships.

If you’re using the Steam client to access your game, this error might be related to corrupted files in your Steam library. To do the check-up, follow the above steps.

3. Allow some apps through your firewall

  1. Open your Start Menu.
  2. Now select Control Panel.
  3. Then click on Windows Defender Firewall.control panel
  4. Now, click on Allow an app or feature through Windows Firewall.firewall allow app
  5. Click on the Change Settings.
  6. Check the boxes next to the applications you want to allow to access the Internet.
  7. Click OK to save your new settings.

Error connecting server message can appear due to problems with your firewall. To fix it, add World of Warships to the list of exceptions.

4. Try another game server alternative

If World of Warships does not connect with the server, maybe you want to try another game server alternative that can help you provide the best game experience.

We suggest you try Host Havoc, a high-performance server with excellent 24/7 technical support that helps you fix the issues quickly and fast.

 Host Havoc has a custom control panel that is very easy to use to change maps and install further modifications to your server.

Here are some of its main features:

  • 24/7 Customer Support
  • Daily Backups Available
  • Complete Control of Your Server
  • Full FTP Access
  • Instant Server Setup
  • Easy Configuration
  • Switch Games Any Time
  • Steam Workshop Availability
  • Free DDoS Protection

With a powerful control suite and unique features and installers, this server hosting is quite simple for novice and advanced users.

Host Havoc

High-performance hosting services with DDoS-protected networks and 24/7 support.
Check price Visit Website

5. Register your DNS

  1. Type cmd in your Start Menu to open Command Prompt.
  2. Type this command and then press Enter: ipconfig /registerdnscmd dns
  3. After completing the operation, type in exit in Command Prompt, and then restart your machine.

This is a simple solution to solve your network-related issues, including the Error connecting server messages.

6. Update or reinstall your network drivers

  1. In the search box on the taskbar, select Device Manager.
  2. Select a category to see the names of devices, then right-click on the one you’d like to update.
  3. Select Update driver.update network driver
  4. Now, click on Search automatically for drivers.
  5. Once it’s done updating, you’re all set.

If all else failed and you’re still getting an Error connecting the server in World of Warships, you can try updating/reinstalling your network drivers.

To reinstall your network drivers, follow these steps:

  1. Open the Device Manager.
  2. Right-click on the name of the device and select Uninstall.uninstal network driver
  3. Now restart your machine.
  4. Windows will attempt to reinstall the driver at start-up.

This guide will help with issues such as World of Warships can’t connect to a server, Code 1021 World of Warships, or Wargaming being unable to connect to the content service.

It is also helpful in situations like World of Warships code 526 and other types of World of Warships connection issues.

Not only PC players have trouble playing this game, as World of Warships Legends errors connecting to a server on PS4 and World of Warships legends errors connecting to a server on Xbox One have also been reported.

That being said, the most common error code you could get for this title is a World of Warships error connecting server update client. But now you know how to deal with it, so it’s already looking better.

We hope you managed to fix the Error connecting server error using our solutions. If you found our solutions helpful, let us know in the comments section below.

How to Use Google Photos in Windows 10 & 11? [Answered]

Microsoft promotes its in-house Photos app as the best possible solution for storing your photos in Windows. While Microsoft is a solid option, some users might want an alternative photo app. And this is where Google Photos for Windows 10 comes into the picture.

Google Photos natively works the best on Android devices, where it’s also most used. But not many users know that you can use Google’s photo-storing service on Windows desktops, too. So, here we are with all the information you need

Can I get Google Photos on my PC?

Yes, you can easily get a Google Photos download for PC running Windows 10 or other recent iterations. Remember, it’s not the Google Photos standalone app but the Google Drive that allows users to have automatic Google Photos backup to save all their photos.

Though the download link is not difficult to find, many users had trouble locating it and were, as a result, unable to experience the Google Photos app on Windows 10.

How can I download Google Photos on Windows 10?

  1. To download the Google Photos app, simply head to the official website, and click on the Download button.
    google photos
  2. Once the setup is downloaded, run it, and follow the on-screen instructions to complete the installation.
    google drive
  3. Now, run the tool, complete the Google Photos login, and things should be all set.

How do I use Google Photos in Windows 10?

Tip icon Tip
Google Photos doesn’t yet have a desktop app for viewing and downloading images, but the official website works just as well.

1. View images on Google Photos

  1. Open a reliable web browser, head to the Google Photos website, and sign in.
    google photos
  2. You will now have all the previously uploaded photos, whether manually or automatically across devices, appear here.
    view google photos windows 10
  3. To find a photo, simply use the text field at the top, or select a recognized face from the list to perform a dedicated search.
    search google photos

That’s how you can view and perform images and perform a Google Photos search on the website.

2. Create an album

  1. Open Google Photos, and navigate to the Albums tab from the left.
    album
  2. Click on the Create album button.
    create album google photos windows 10
  3. Now, add a title and choose a method to upload photos to the album from the following two:
    • Select people and pets: Google will list out the faces it has identified from the images already uploaded to Google Photos. The one(s) you select will be automatically added to the album. Also, if new images uploaded to Google Photos contain the same face, these two will be included in the album.
    • Select photos: You will have to manually select and upload photos to the album.
      album title

That’s how you can create a Google Photos album and add photos to it. Besides, the process is much more seamless on Google Photos, given the automatic detection of faces.

3. Upload images to Google Photos

  1. Open the Google Photos website, sign in, and then click on the Import button near the top-right.
    upload
  2. You will now have two options, either to upload photos from the Computer or Google Drive.
    upload photos

3.1 From computer

  1. When you select the Computer option, navigate to the folder/path the photo is stored, select it, and click Open.
    upload google photos windows 10
  2. The upload status will now be listed at the bottom left.
    upload status

3.2 From Google Drive

  1. After you select Google Drive from the upload options, choose the desired photo(s), and then click Upload.
    add images to Google Photos
  2. It will now list the upload status in a small box in the center.
    upload status

Since it serves as a great backup tool, many prefer uploading images to Google Photos, and syncing them across devices for enhanced accessibility.

4. Download images from Google Photos

  1. Select the image you want to download in Google Photos.
    select image in google photos windows 10
  2. Click on the ellipsis near the top-right.
    ellipsis
  3. Now, select Download from the flyout menu.
    download
  4. Alternatively, you can select an image and press Shift + D to download images from Google Photos.

That’s how you can easily download images saved on Google Photos to any of the devices.

What is the alternative to Google Photos in Windows 10?

While Google Photos is a great way to save and access photos across devices, you may want to check the other options. Apple users have iCloud as an option, and even for Windows PC users, there is a bunch of reliable photo backup software.

These may not provide as simple an interface as Google Photos, but they are just as effective and used by people worldwide. The benefit of third-party backup software is that it allows you to save much more than simply photos and comes in handy when your PC won’t turn on.

We will keep adding information as new features are added to Google Photos to help users access it seamlessly in Windows 10. You can also learn how to add Google Photos to Windows 11 Photos app to manage your cloud images alongside your local library.

Before you leave, find out what to do when Google Photos is not processing videos, a common issue encountered by many.

If you have any queries or want us to explore and explain a specific feature on Google Photos, drop a comment below.

The Installer Has Insufficient Privileges to Access

Installing new applications on Windows 10 is pretty simple, and the installation process usually goes without any problems.

However, our readers reported The installer has insufficient privileges to access this directory error that occurs while installing certain applications, so let’s see how to fix this error.

What causes The installer has insufficient privileges to access this directory error?

The error is caused by a lack of privileges for the installer to modify certain resources. However, there are some other reasons to take into account:

  • App interference – Other software competing for the same resources can cause this issue. Identifying and disabling them can fix the problem quickly.
  • Certain services are not running – If the Windows Installer service can’t be accessed or fails to start, it will trigger Error 1303. The installer has insufficient privileges to access this directory.
  • A required file is read-only – Installer has insufficient privileges to modify this file is a variation of this error that a read-only file may cause that the installer can’t edit.

Now that we know what we’re facing, let’s follow the solutions below to fix it for good.

How can I fix The installer has insufficient privileges to access this directory error?

1. Check your permissions

  1. Press the Windows key + E to start File Explorer and locate the installation directory of the software you are trying to install.
  2. Right-click it and choose Properties. Keep in mind that sometimes you might have to change the security permissions for the parent folder as well to fix this problem.
  3. Go to the Security tab and click Edit.
  4. In Group or user names section, select SYSTEM or Everyone and click the Full control in the Allow column.
  5. If you don’t have SYSTEM or Everyone available, you’ll need to add it. To do that, click the Add button.
  6. In the Enter the object names to select field enter Everyone or SYSTEM and click the Check Names button. If your input is valid, click the OK button.
  7. The SYSTEM or Everyone group will now be added. Select it and check Full control in the Allow column.
  8. Click Apply and OK to save the changes.

Sometimes this error can be caused if you don’t have the necessary permissions over the installation directory. According to Microsoft, to install certain software, the SYSTEM group or Everyone group needs full control over the installation directory.

For instance, if you’re trying to install an application to Program Files/My_Application directory, you might have to change the permissions for Program Files directory.

After making the necessary changes, try to install the application again and check if the problem is resolved.

2. Disable or remove third-party software

Third-party applications can sometimes interfere with your setup process, but you can fix this problem simply by closing them. One common cause for this error can be your security software, therefore, we advise you to disable it and check if that solves the issue temporarily.

Users reported that tools such as MyWinLocker can also interfere with the setup process and cause this error to appear. Therefore, if you have this tool installed, remove it.

Now you can do this the old-fashioned way or by using specialized uninstaller software to ensure no software traces are left behind to tamper with your activity.

To find the most reliable services for uninstalling stubborn applications, you only have to select the best uninstaller software for your Windows 10 PC.

3. Change the owner of the parent directory

  1. Press the Windows + E key combination to start File Explorer and locate the parent folder of the application, right-click it, and choose Properties.
  2. Go to the Security tab and click Advanced.
  3. Next to the owner’s name click the Change link.
  4. In the Enter the object names to select field enter Administrators, and click Check Names. If your input is valid, click OK.
  5. The owner should now be changed to Administrators. Check Replace owner on subcontainers and objects and click Apply and OK to save changes.
  6. You’ll get a message to close the current window and open it again. Be sure to do that.
  7. Once the window opens again, check if Administrators and SYSTEM group have full control over this folder. If these groups aren’t available, you’ll have to add them.
  8. Click Select a principal.
  9. In the Enter the object name to select field enter Administrators or SYSTEM and click Check Names. If your input is correct, click OK to save changes. You might have to repeat this step to add both Administrators and SYSTEM group.
  10. Select Full control and click Apply and OK.
  11. Check Replace all child object permissions entries with inheritable permission entries from this object and click Apply and OK.

If you’re getting The installer has insufficient privileges to access this directory error, you might be able to fix it simply by changing the owner of the parent directory.

For example, if you’re getting this error while trying to install a certain application in your Program Files directory, you need to take ownership of the Program Files directory.

Remember that you might have to take ownership of a different directory depending on where you want to install the desired application.

Keep in mind that changing ownership over certain folders, such as Program Files, can be potentially dangerous, therefore create a backup and System Restore point before starting this process.

4. Run the setup as an administrator

  1. Press the Windows + E key combination to start File Explorer and locate the installer file.
  2. Right-click on it and select Run as administrator.
  3. Click Yes in the UAC prompt.

Our readers reported that The installer has insufficient privileges to access this directory error appears if you don’t have administrator privileges while installing certain software.

By choosing the Run as administrator option, you should be able to install the application without any problems.

5. Check if Windows Install Service is running

  1. Press Windows key + R and enter services.msc. Press Enter or click OK.
  2. When the Services window opens, locate Windows Installer, right-click it and choose Start.

After starting this service, you should be able to install all applications without any problems.

6. Uninstall all previous versions of Cisco AnyConnect VPN

  1. Click the Start button and select Settings.
  2. Choose Apps.
  3. Look for Cisco AnyConnect VPN within the app list, click on it, and select Uninstall.
  4. Perform the action for all the older iterations of the app if there are any others.

According to some of our readers, this error can sometimes appear if you’re trying to install a newer version of the Cisco AnyConnect VPN software. To fix this problem, you need to completely remove all previous versions of this software.

After doing that, you should be able to install this application without any further errors.

7. Stop the TSVNCache.exe process

  1. Right-click the Start button and select Task Manager.
  2. In the Details tab locate TSVNCache.exe, right-click it, and choose End task option.
    installer-has-insufficient-privileges-to-access-directory-task-1
  3. After the process stops, try to perform the installation again.

Sometimes the installation process will try to replace certain files even if they are still running, and that will cause The installer has insufficient privileges to access this directory error to appear.

Some readers reported this error while installing TortoiseSVN. According to them, the installation was trying to replace TSVNCache.exe file with a newer version, but it couldn’t complete the process because the TSVNCache.exe was still running in the background.

Keep in mind that this problem can occur with any application, and any file related to that application can cause this problem to appear.

TSVNCache.exe affects only TortoiseSVN, but if you’re installing a different application you need to find out on your own which file is preventing the installation process.

8. Perform a level-three uninstall

  1. Press Windows key + R, enter %temp% and press Enter.
    installer-has-insufficient-privileges-to-access-directory-temp-1
  2. When Temp folder opens, open the 7zXXX.tmp folder. XXX will be replaced by a number that represents the driver version.
  3. Navigate to Util and open the ccc directory.
  4. Run Uninstall_L3.bat or Uninstall_L3_64.bat.
  5. Click OK and follow the instructions on the screen to complete the uninstall.

This problem can occur when you try to install HP printer software, and to fix it you need to perform the full uninstall of your HP software by following the steps above.

After the uninstall is completed, try to install the software again.

9. Use the MSfixit tool

The installer has insufficient privileges to access this directory error can prevent you from installing applications on your Windows 10 PC, but you can fix this problem by running MSfixit tool.

This tool is designed to automatically fix problems with corrupted registry keys and many other installation problems with just a single click. Download and run this tool, which should fix this problem.

10. Delete all Autodesk folders

  1. Click the Start button and select Settings.
  2. Navigate to Apps.
  3. Look for any Autodesk software in the list of apps, select it, and choose Uninstall.
  4. Press the Windows key + E to launch File Explorer.
  5. Navigate to the following folders, one by one, select all the contents, and delete them:
    • C:\Program Files\Autodesk
      C:\Users\All Users
      C:\Users\YOUR USER\IDAppData\Roaming\Autodesk
      C:\Users\YOUR USER\IDAppData\Local\Autodesk
  6. Now, install the Autodesk software.

This problem can occur if you’re trying to install Autodesk software, but you still have Autodesk folders on your PC.

11. Turn off User Account Control

11.1 Never notify about changes

  1. Press Windows key + S, type user accounts, and select Change User Account Control settings.
  2. Lower the slider all the way down to Never notify and hit OK to save the changes.
  3. After that, restart your PC.

11.2 Edit the Group policy

  1. Press Windows key + S and type group policy, then select Edit group policy from the menu.
  2. In the left pane navigate to the following path: Computer Configuration\Windows Settings\Security Settings\Local Policies\Security Options
  3. In the right pane locate all User Account Control settings and Disable them. To do that, you’ll have to double-click each User Account Control setting and select Disabled option if available.

User Account Control is a useful feature designed to alert you whenever you perform an action that requires administrator privileges.

This feature can protect you from malicious software, but it can also interfere with the installation process and cause certain errors, therefore, you might want to disable it. After turning this feature off, try to install the same application again.

Other known solutions for iTunes and Skype

Some of our readers also encountered The installer has insufficient privileges to access this directory iTunes error. The solution is to right-click the installer file and select Properties. Then, click Unblock, Apply, and OK to save the changes.

In addition, you may also apply Solution 11 and run the installer as an administrator as we described in Solution 4. Some of our readers also fixed the problem by changing the installation directory during the installation process.

If you’re getting The installer has insufficient privileges to access this directory error while installing Skype, it might be because certain services or processes are using the Skype folder.

To see which services are using this directory, simply use procexp tool from Sysinternals, that will show you exactly which processes are accessing the Skype folder. After that, simply disable those processes and check if that solves the error.

Of course, you may also use the portable version of Skype as a workaround. After downloading it, double-click it in order to run it.

We also recommend reading other guides related to this error like an error occured while attempting to create a directory or how to fix installation privileges problems.

Let us know if any of these solutions worked by reaching for the comments section below.

Can’t Sign Into iCloud on Windows: 6 Solutions to Use

Many readers reported that they can’t sign into iCloud on Windows. Some received the message Cannot sign in to iCloud. You cannot sign in to iCloud because there was a problem verifying the identity of this Mac. Try restarting your Mac and signing in again. Nevertheless, we have the right solutions to fix it!

Why can’t I sign in to iCloud on Windows?

Undisputably, the main reason why you can’t sign into iCloud is that you have entered the incorrect credentials, but there are a few other causes:

  • Inconsistent connection – iCloud needs to connect with a server online; if your internet connection is limited, you won’t be able to sign in.
  • The service is down – The iCloud service may be down, or under maintenance, so you might try to wait a few minutes and try to connect later.
  • The account is not set up – To sign in to iCloud on Windows, you must first set up your account on a Mac or an iOS device, otherwise, you won’t be able to use it on Windows.
  • Software interference – Some apps like antiviruses and firewalls may be blocking iCloud’s access to the server, thus blocking you from signing in.
  • App bugs – Any app can be bugged, especially after a Windows update, but we have a solution for this situation below.

Now that we know the main causes of this issue, let’s fix it with the solutions below.

What can I do if I can’t sign into iCloud on Windows?

Before getting to more complicated solutions, let’s perform some quick fixes to tackle this issue:

  • Check your internet connection by trying to log in to your Apple account on your browser.
  • Check the System Status page for any known issues
  • Disable your antivirus and try signing in again. If it helps, you should think about switching to a better antivirus that won’t interfere with your apps.
  • Check if your PC meets the requirements to run iCloud.

If none of these methods worked, let’s apply the solutions below to fix the problem.

1. Check your Apple ID

  1. Launch your preferred browser and navigate to the Apple ID login page.
  2. Click the Sign in button from the top right of the page.
  3. Enter your Apple ID in the form, then input the password.
  4. Now, if you entered the correct Apple ID and password, you will have to enter the 6-digit code sent to the device you have set up.
  5. If all is correct, you will see your Apple ID account page, where you will be able to make any changes to the password, the two-factor authentication, and more.
  6. If you can’t remember your Apple ID or password and you can’t log in, click on the Forgot Apple ID or Password? option from the sign-in window to retrieve the data.
  7. Here, you will be able to reset your password or find your correct Apple ID.

This account is used to sign in, so if you forgot it, you can reset your password to regain access or see if you’re already signed in on other devices.

If you can’t log into your Apple ID, most likely you have lost the password or entered the wrong ID, and that’s why you can’t sign into iCloud for Windows as well.

Contact the Apple support team for further details if you can’t retrieve your credentials.

2. End all iCloud processes

  1. Right-click the Start button and select Task Manager.
  2. Find all items indicating Apple or iTunes, or iCloud, right-click on them, and select End task.
  3. Go back to iCloud for Windows and try opening and signing in again.

One of the iCloud processes might be stuck and it is running in the background without you seeing it. That’s why ending all the iCloud tasks and restarting the app may help you sign in again.

3. Restart the Bonjour service

  1. Press the Windows key + R to open the Run console, type services.msc, and press Enter or click OK.
  2. Look for Bonjour Service, right-click on it, then select Restart.
  3. Sign into iCloud and see if it helps.

4. Use iCloud Drive in your browser

  1. Launch your preferred browser and go to the official iCloud Drive website.
  2. Log into your account using your Apple ID and the interface should open within the browser.
  3. You should be able to see the same contents as on your iCloud app on Windows and manage the files.

This is a workaround since you can’t use the desktop app. Nevertheless, you have the same features and functions as you do on the desktop app.

5. Use an iCloud alternative

If you continue to have issues repairing or using iCloud, it may be time to consider an alternative software solution.

One such service that can quickly fill in iCloud’s shoes is Sync.com. It makes it easy to store, share, and access your files from just about anywhere, and it also protects your privacy with end-to-end encryption, thus ensuring that your data in the cloud is safe, secure, and fully private.

The service comes in several pricing plans, but you can benefit from this service at a discount for a limited time only.

Sync

Try this amazing cloud storage service that can easily replace iCloud if it becomes unavailable.
Check price Visit Website

6. Repair or reset iCloud

  1. Click the Start button and select Settings.
  2. Choose Apps.
  3. Look for iCloud, click on it, and select Advanced options.
  4. Scroll down and click on the Repair button. After the process is finished, try to open iCloud again and sign in.
  5. If that doesn’t work out, repeat steps 1 to 3 and click the Reset button but keep in mind that it will also reset your credentials.

7. Reinstall iCloud

  1. Click the Windows button and select Settings.
  2. Choose Apps.
  3. Find iCloud in the app list, click on it, then select Uninstall.
  4. Go to the iCloud for Windows download page and click the Get in Store app.
  5. You will be prompted to open Microsoft Store, where you have to hit the Get button to download and install the app.

So, if you can’t sign into iCloud on Windows 10, the solutions above should have helped you fix the issue.

If you decide to upgrade your OS, here’s how to download and install iCloud on Windows 11. In case you run into any errors, our iCloud encountered an error on Windows 11 guide should be able to help.

Any luck after using these solutions? Let us know in the comments section below.

All Files on PC are Read Only: 4 Easy Ways to Change Them

A read-only document can’t be edited, but what if all your documents are set to read-only? This can be a problem we will tackle in today’s article.

This is how one user described the issue on Superuser forums:

Restarting my computer one day, most of my files in my folders were switched to read-only. I’ve changed the permissions to allow everyone full control, as well as going through each user.

While read-only files can be helpful, sometimes your documents can become read-only, which can be an issue. In this article, we’ll try to show you how to fix this problem.

Why are all of my files read-only?

Here are a few reasons why all of your files might be marked as read-only. A few possible reasons could be the following:

  • File settings – Your files were set to read-only mode by mistake or third-party software, especially antivirus.
  • PC settings – Your computer’s operating system or security settings prevent you from modifying or deleting the files.
  • Device type – Your files are stored on a read-only device, such as a CD or DVD.
  • File damage – The file system on your hard drive may have become corrupt or damaged, causing all files to be marked as read-only.
  • Permission issues – Your user account may not have the necessary permissions to modify or delete the files.

What can I do if all files are read-only?

1. Change the file properties

  1. First, go to your Documents and find the file you want to change.
  2. Right-click the file and pick the Properties option from the menu.
    document properties all documents are read only
  3. Go to the Attributes tab below the Properties tab and disable the Read-only option.
  4. Click on the Apply option.
    disable read only properties window  all documents are read only
  5. Then, click OK.
  6. Now, try to edit the file and check if the problem remains.

2. Change permissions

  1. Locate the folder that holds the read-only files and right-click it.
  2. Select Properties.
  3. Navigate to the Security tab and then click on the Advanced button.
    security tab advanced all documents are read only
  4. Click on Change permissions.
    change permissions all documents are read only
  5. Highlight your user name and then click on Edit.
    all files are read only
  6. Under Applies to, select This folder, subfolders, and files.
  7. Under Basic Permissions, select Full Control.
    all files are read only
  8. Press OK.

3. Delete recently added software

  1. Press Windows + R, type appwiz.cpl, and hit Enter.
    all files are read only
  2. Under the list of applications, click on your recently added app, and select Uninstall.
    all files are read only
  3. Follow the prompt to complete the uninstallation.
  4. You may have to repeat this step if you have many recently added applications.

Since a non-compatible application may trigger this problem, uninstalling your recently added apps may resolve it.

4. Scan for virus

  1. Type Windows Security in the Search bar, and click on the relevant search result.
    all files are read only
  2. Now, click on Virus & threat protection.
  3. Click on Scan options.
  4. Select Full scan and click the Scan now button at the bottom.
    all files are read only

There you go, four quick and easy solutions that should help you if all your files are read-only.

Note that we have not written these solutions in any particular order and expect you to try what seems the most applicable in your case.

We are, however, curious to know what worked for you. So please leave us a comment below.

Best KaiOS Browser for Your Phone: 5 Safest Picks to Download

The best KaiOS browser must be the safest one around but it should also focus on cutting back on battery and data consumption. So, agility is key and that’s what we’re going to deliver.

So, does KaiOS have a web browser? If you’re already familiar with this Linux-generated mobile OS, you probably know KaiOS comes with its browser, known as the KaiOS browser.

You can use the search bar just like any other browser while the top sites show you the commonly visited websites. History shows your browsing history, of course, sorted by time.

What’s more, KaiOS is based on a Firefox OS open-source project, which implies that the KaiOS web browser is based on the Firefox browser. Without surprise, KaiOS supports Firefox.

However, there are a few other great web browsers options you mustn’t miss:

  • Opera Mini for KaiOS – Best personal browser (part of the well-established Opera Browser branch)
  • KaiOS Browser – Great features included
  • K-Pocket Browser – Best for offline use
  • UC Browser – First third-party browser for KaiOS
  • Firefox – Best for older devices

↪️ Can you install apps on KaiOS?

The KaiOS operating system runs web-based applications only, aka programs written in CSS, JavaScript, HTML5, and other web technologies. 

This means that there are no binary or native applications that can be installed by the cell phone user. Access to the system is done exclusively through web APIs (Applications Programming Interfaces).

So, one might wonder what can you do with KaiOS. The truth is there still is a lot to be done with this smartphone OS catering to low to mid-range keypad feature devices that lack touchscreen capabilities.

What apps work on KaiOS? ?

While it does not support Android apps, it supports VoLTE, over-the-air updates, and HTML5-based apps.

The OS comes with a KaiStore where you can download popular applications such as Google Maps, YouTube, Google Assistant, YouTube, WhatsApp, Facebook, and Google Duo, among others.

Some of the best KaiOS apps include games, messaging, social, entertainment, or shopping applications (among others), and of course, browsers.

What is the best web browser for KaiOS?

1. Opera Mini for KaiOS – Best personal browser

Opera Mini is part of the well-established Opera Browser branch. Without surprise, it is one of the best personal browsers for millions of people across the globe.

It is also fast and comes with less processing capacity compared to other browsers.

With Opera, you get a free integrated VPN and a built-in ad blocker to help you load your pages faster. This is one of the best browsers for KaiOS.

⇒ Get Opera Mini

2. KaiOS Browser – Great features included

KaiOS also comes with its own browser known as the KaiOS Browser. As discussed above, the homepage of this browser resembles some of the most popular browsers we have for mobile phones.

In addition, it comes with other features such as the ability to zoom in or out, scroll mode and cursor mode, go to the top/end, and pin apps on the menu.

However, this browser comes pre-installed on the KaiOS device.

⇒ Get KaiOS

3. K-Pocket Browser – Best for offline use

best browser for kaios k-pocket

The K-Pocket browser provides you with a reader view mode. It parses HTML text and returns the main text as well as titles.

This means that you do not get footers, ads, navigation bars, and anything else that does not make up the main body of your text. You can also save content for offline usage without internet access.

⇒ Get K-Pocket Browser

4. UC Browser – First third-party browser for KaiOS

UC Browser was the first third-party mobile browser to be released for KaiOS. The browser has been running on other operating systems for years and is developed by UCWeb from Alibaba.

Due to its downloader feature, UC Browser is also a great browser to handle videos.

You can easily download UC Browser from the KaiOS store. The installation process is easy and straightforward. It only takes a few seconds.

⇒ Get UC Browser

5. Firefox – Best for older devices

Mozilla Firefox comes last on our list here because you have to look for the older versions of this browser for it to work on your KaiOS device.

If you have issues with any of the options discussed above – which is highly unlikely – then look for the older versions from 48 and before for KaiOS.

⇒ Get Firefox

Does KaiOS have a future?

KaiOS is clearly an interesting alternative to mainstream phone OS such as Android and iOS. It’s also one of the most secure OSs out there thanks to its API-based infrastructure that makes it pretty much impossible to get hacked.

So, is KaiOS a good operating system? When combined with the fact that it caters to some budget and legacy phone brands such as Alcatel, Energizer, CAT, and Nokia, among others, KaiOS might be on to something.

It’s too soon to tell if it would be better than Android in time, but for now, it makes an interesting niche choice and it seems that it might truly have a future especially after Mozilla started endorsing it in 2020.

Mozilla is officially supporting the operating system, and its updates have already started rolling out to KaiOS.

However, Google, which is one of the biggest tech giants when it comes to mobile applications, has stopped supporting some of its applications such as Voice typing on Google Assistant.

This might end up affecting KaiOS not to mention that other operating systems are doing everything they can to outshine each other.

All in all, KaiOS is seen as one of the operating systems to give Android a run for its money. This is because it targeted and still targets cheaper cell phones that can be afforded by the majority of people in the world.

What are your thoughts on this topic? Feel Free to share with us via the comments section below.

Windows Panther: What Is It & Should You Delete It?

Windows Panther is a folder that houses all the log files for Windows 11 installation, setup, and updates. You can delete it without any adverse effects. These are temporary files, so there’s no problem.

However, there is one instance in which you shouldn’t delete the folder, and that’s if you plan on rolling back to a previous Windows build. Without the Panther folder, the rollback will not work.

Why I should delete temporary files on my Windows computer?

Apart from that scenario, deleting the folder is a perfectly okay thing to do. There are several benefits to getting rid of those temporary files.

  • It can free up a ton of space on your hard drive – Deleting unnecessary files is a great way to free up space. It’s recommended that you do this frequently.
  • Deleting files can improve system performance – By getting rid of the extra fluff, you may start to experience your computer running much faster and smoother than before.
  • Reduces the chances of errors and crashes from happening – An overburdened computer can have multiple performance problems, including constant crashing. Deleting temporary files can solve this.
  • Reduces the length of load times – Being able to shorten load times should be music to the ears of gamers who want to get their favorite game as soon as possible.

How can I delete the Windows Panther folder?

There’s only one way to do it when deleting the Windows Panther folder. In addition to showing that method, we’re also going to show you alternate ways to delete temporary files on Windows.

  • First, you can use a third-party cleanup tool like CleanMyPC. Software like this will go through your hard drive, find temporary files, and delete them automatically.
  • If you want to take things a step further, you can use memory cleaner software like Ashampoo WinOptimizer to free up memory and boost system performance.
  • It’s also recommended that you turn on Storage Sense on your Windows 11 computer. It’s a feature that will automatically delete temporary files.

1. Delete the folder via File Explorer

  1. Launch the File Explorer and go to your computer’s main drive. It’s usually the C: Drive.
  2. Scroll down until you locate the Windows folder. Double-click it to open.
  3. In this new window, scroll down until you locate Panther. Delete it.

2. Clean up files via Disk Cleanup

  1. Search for Disk Cleanup in the Windows Search bar. Click the first entry you see.
  2. Select the drive that has the Windows Panther folder. Click OK.
  3. In the new window that appears, make sure the box next to Temporary Internet Files is checked off. Click OK to delete them. This will include Windows Panther.

3. Delete Panther in $Windows folder

  1. First, you will need to make the $Windows folder appear. Start by expanding View at the top of File Explorer, then hover over Show, and select Hidden items.
  2. Click the three dots at the top of the File Explorer. Select Options.
  3. Go to the View tab. Scroll down and check off Show hidden files, folders, and drives.
  4. Scroll down even further and uncheck the box next to Hide protected operating system files. If a warning message appears, select Yes.
  5. Now go to your C: Drive, as shown earlier. Double-click $WINDOWS.~BT.
  6. Double-click Sources. Delete the Panther folder.

What can I do if Windows Manager is taking up a lot of GPU resources?

Windows Manager is a system manager that is the main force behind rendering a computer’s user interface by using your machine’s graphics card onto the monitor.

There is an issue with this function in that it’ll suddenly take up a lot of resources bringing computer performance down to a crawl. It’s recommended that you turn off visual effects on Windows 11.

Additionally, we recommend installing some PC performance monitoring software to help you see which areas your computer may be weak in. You can also use the app to keep an eye out for damaged parts.

Feel free to comment below if you have questions about other ways to improve performance. Also, leave comments about reviews you’d like to see or information on other Windows 11 functions.

Fix: Windows Doesn’t Have Network Profile for Epson Printer

The Epson printer error, Windows doesn’t have a network profile for this device, is a wireless connection issue that can arise for some users.

Some users have stated that error messages pop up when connecting new wireless devices, such as Epson printers, to Windows desktops or laptops.

This guide shows you the best steps to resolve this error.

Why do I see the Windows doesn’t have a network profile for this device Epson printer message?

There are varying reasons why you may experience this error. However, from interactions with users, we gather that the top triggers include the following:

  • Missing or outdated printer drivers – If the necessary drivers are not installed, or if the installed drivers are outdated, Windows may be unable to recognize the printer and create a network profile for it. 
  • Network connectivity issues – If the printer’s connection to the network is bad, or if there are issues with the network itself, Windows may be unable to detect the printer.
  • Firewall or security software – Sometimes, firewall or security software can interfere with Windows’ ability to detect and install printer drivers, especially if the printer is connected to a network. 
  • Incorrect printer settings – If the printer configuration is incorrect, Windows may be unable to install the necessary drivers and create a network profile. 
  • Network discovery settings – Windows relies on network discovery settings to locate and install printers on the network. So, if network discovery is disabled or not correctly configured, the OS may be unable to detect the printer.

There are a couple of ways to resolve the issue. Let us take you through the most efficient.

What can I do if Windows doesn’t have a network profile for this device Epson printer?

Before going into any solutions, double-check the printer’s Windows compatibility. Users can enter their printer model in the Enter Product Name search box on Epson’s website. Then click Search on the printer’s page to check its platform compatibility.

Windows doesn't have network profile for this device Epson printers

1. Update your printer drivers

  1. Go to Windows Settings by pressing Windows + I.
  2. Select Update & Security and go to the Windows Update section.
    windows doesn't have a network profile for this device epson printer
  3. Click on Check for updates.
    windows doesn't have a network profile for this device epson printer
  4. Select the printer drivers you want to install.

Outdated or damaged drivers stop devices from functioning adequately, so it’s essential to ensure your printer benefits from the latest driver and its correct version.

We recommend using reliable third-party software that performs this action automatically and securely.

2. Select the Private network option

  1. Open Cortana’s search by pressing the Windows key + S hotkey.
  2. Enter wifi in the search box, then select WiFi Settings to open the below window.
    windows doesn't have a network profile for this device epson printer
  3. Click the network listed and select the Private button.windows doesn't have a network profile for this device epson printer

This fix is often effective for Windows doesn’t have a network profile for this device on an Epson printer.

3. Open the Network Adapter troubleshooter

  1. Open Cortana’s search box.
  2. Enter troubleshoot as the search keyword and select Troubleshoot settings.
    windows doesn't have a network profile for this device epson printer
  3. Under Additional troubleshooter, select Network Adapter and click Run the troubleshooter.
  4. Select the required network adapter option, and press the Next button.Windows doesn't have network profile for this device Epson printers
  5. Then users can go through the Network Adapter troubleshooter’s fixes.

4. Configure the Printer’s Port

  1. Launch Run by pressing the Windows key and R.
  2. Input control in Run’s text box, and hit Enter.
    https://i.imgur.com/u1SShSa.png
  3. Next, enter printer in the Control Panel’s search box and click View devices and printers.
  4. Right-click the grayed-out Epson printer that the Windows doesn’t have a network profile for this device error arises for and select Printer properties.
  5. Next, select the Ports tab, then select the Configure Port option.windows doesn't have a network profile for this device epson printer
  6. Then deselect the SNMP Status Enabled option on the Port Settings tab.
  7. Press the OK button.

5. Check the SNMP Service is enabled

  1. Press Windows + R, type service.msc, and hit Enter.
  2. Double-click on the SNMP Service option.
  3. Select Automatic on the Startup type drop-down menu, and click the Start button.
    windows doesn't have a network profile for this device epson printer
  4. Then press the Apply button, and click OK to exit the window.

The SNMP Service must also run for users to connect wireless Epson printers. Thus, some users might need to enable that service.

While Windows doesn’t have a network profile for this device, Epson printer errors may be persistent; the solutions we offered here should suffice.

However, we have not written these in any particular order, and the fix you adopt must be the most appropriate for your situation.

Lastly, comment below, and let us know what worked for you.

Speakers not Working on Windows 10: 12 Ways to get Sound Back

You must have found this guide because your speakers are not working on Windows 10. This can be a big problem since you won’t be able to hear anything.

Not everyone likes to listen to audio files, whether music, audiobooks, or podcasts, from earphones or headsets. Some prefer speakers.

There is a wide array of speakers that you can choose from; however, sometimes you’ll encounter speaker issues on your PC or laptop, so you’ll need quick fixes to resolve the issue and get back to enjoying your audio listening.

Why is my computer not detecting my speakers?

Users have experienced this problem for varying reasons. We not that the most common triggers include the following:

  • Speakers not correctly plugged – This is one of the most common causes why a computer is not detecting speakers. If the speakers are not plugged in or turned on, the computer cannot detect them.
  • Damaged speaker cables – If the speaker cables are damaged or not correctly connected, the computer may be unable to detect the speakers. This can happen if the cables are frayed or plugged in incorrectly.
  • Sound settings – If the sound settings on the computer are not configured correctly, the computer may not be able to detect the speakers. This can happen if the volume is turned down, the speakers are muted, or the sound is directed to another output device.
  • Outdated or corrupted drivers – If the sound drivers on the computer are outdated or corrupted, the computer may not be able to detect the speakers. This can happen if the drivers are not updated or become corrupted due to malware or other issues.
  • Playback device settings – The error is often triggered by the Playback device settings. Another device may be the default playback device, such as headphones or a different set of speakers.
  • Faulty hardware – If the computer’s hardware is defective, such as the sound card or audio chipset, you may expect the error. 

We will now explore some solutions which would work regardless of the cause of the problem.

What can I do if speakers are not working on Windows 10?

Before going through these fixes, restart the PC. Also, check your cables to make sure they cause no connection problems. Finally, ensure they are correctly fitted.

  1. Update drivers
  2. Uninstall drivers
  3. Run audio troubleshooter
  4. Reinstall the driver
  5. Set the default speaker device
  6. Turn off audio enhancements
  7. Try different audio formats
  8. Install Windows Updates
  9. Install drivers in compatibility mode
  10. Perform System Maintenance troubleshooting
  11. Run System File Checker
  12. Perform a clean boot

1. Update drivers

  1. Press Win + X and select Device Manager.
    speakers not working windows 10
  2. Expand Audio inputs and outputs, right-click your audio device, and select Update Driver.
    speakers not working windows 10
  3. Click Search automatically for drivers.
    speakers not working windows 10
  4. Restart your computer to check if the problem has gone away.
  5. Repeat the same process for the Sound card drivers.

You can also update your drivers by using third-party tools such as Outbyte Driver Updater.

This tool will scan your system for outdated drivers and update them automatically with just a few clicks, so it’s helpful if you don’t want to search for drivers manually.

This is portable software with an intuitive and easy-to-use interface. After you run it, Outbyte Driver Updater will scan your system, identify all broken or missing drivers, and replace or fix them accordingly.

Moreover, it will compare the found drivers with the ones from its built-in database, so you can rest assured that they will be updated with the latest versions.

Outbyte Driver Updater

Let Outbyte Driver Updater update your drivers with the best versions and see instant results.
Free Trial Download now

Once your drivers are up to date, check if the problem is still there.

2. Uninstall drivers

If the above method doesn’t fix the speaker’s stop working Windows 10 issue, try uninstalling the driver.

  1. Press Windows + S to launch the search menu.
  2. Type Device Manager and go to Sound, video, and game controllers.
  1. Right-click on High Definition Audio Device driver and select Uninstall device.
  1. After uninstalling the driver, restart your computer.

The system will install the driver automatically upon restarting your machine.

If uninstalling and rebooting didn’t work, try using the generic audio driver in Windows by doing the following:

  1. Press Win + X and select Device Manager.
    speakers not working windows 10
  2. Expand Audio inputs and outputs, right-click your audio device, and select Update Driver.speakers not working windows 10
  3. Select Browse my computer for drivers.
  4. Click Let me pick from a list of device drivers on my computer.
    speakers not working windows 10
  5. Select High definition audio device, and click Next.

Follow the instructions to install the generic audio driver.

3. Run the audio troubleshooter

  1. Launch Run by pressing the Windows key and R.
  2. Input control in Run’s text box, and hit Enter.
    speakers not working windows 10
  3. Go to the View by option in the top right corner and select Large icons.
  4. Click the drop-down arrow and select Large icons, then click Troubleshooting.
    speakers not working windows 10
  5. Click the View all option on the left pane.
  6. Locate Playing Audio, then click Next to run the Playing Audio troubleshooter.

4. Reinstall the driver

  1. Press Win + X and select Device Manager.
    speakers not working windows 10
  2. Expand Sound, Video and game controllers, right-click your audio device, and select Uninstall device.
  3. Confirm your choice, then restart the computer.

5. Set the default speaker device

  1. Click Start, type Sound in the search box, and select Sound in the search results.
  2. Go to the Playback tab, right-click on the device, and select Properties.
    speakers not working windows 10
  3. Go to Device Usage and select Use this device.

6. Turn off audio enhancements

  1. Click Start, type Sound in the search box, and select Sound in the search results.
  2. Go to the Playback tab, right-click on the default device, and select Properties. speakers not working windows 10
  3. Under the Enhancements tab, select Disable all enhancements box. Alternatively, under the Advanced tab, uncheck Enable audio enhancements.
  4. Try playing the audio device. If this doesn’t work, select Cancel.
  5. Go to the Playback tab, and select another default device if available.
  6. Select Disable all enhancements.
  7. Try playing the audio device again.

7. Try different audio formats

  1. Click Start, type Sound in the search box, and select Sound in the search results.
  2. Go to the Playback tab, right-click on the default device, and select Properties. speakers not working windows 10
  3. Go to the Advanced tab, and under Default format, change the setting.
    speakers not working windows 10
  4. Test your audio device again.

8. Install Windows Updates

  1. Press Windows + I and click Update & Security.
  2. Click Check for updates.speakers not working windows 10
  3. Install the latest Windows Updates.

Confirm that the problem of the speakers not working in Windows 10 is resolved.

9. Install drivers in compatibility mode

  1. Go to the manufacturer’s website.
  2. Download the updated driver.
  3. Right-click on the downloaded driver installation file.
  4. Select Properties and click the Compatibility tab.
    speakers not working windows 10
  5. Check the Run this program in compatibility mode box, then click the drop-down box and choose a previous operating system version.
  6. Click OK.
  7. Install the sound driver.

10. Perform System Maintenance troubleshooting

  1. Launch Run by pressing the Windows key and R.
  2. Input control in Run’s text box, and hit Enter.
    speakers not working windows 10
  3. Go to the View by option in the top right corner and select Large icons.
  4. Click the drop-down arrow and select Large icons, then click Troubleshooting.speakers not working windows 10
  5. Select the View all option on the left pane.
  6. Click on System Maintenance, then click Next.
  7. Follow the instructions to run the system maintenance troubleshooter.

11. Run System File Checker

  1. Press Windows + R, type cmd, and hit Ctrl + Shift + Enter.
    speakers not working windows 10
  2. Type the script below and hit Enter.
    sfc/scannow
  3. Wait for the command to execute.

12. Perform a clean boot

  1. Press Windows + R, type msconfig, and hit Enter.
    speakers not working windows 10
  2. Find the Services tab, select the Hide all Microsoft services box, and click Disable all.
  3. Go to the Startup tab, and click Open Task Manager.
  4. Right-click on the Startup processes and disable them.
  5. Reboot your computer.

Performing a clean boot for your computer reduces software-related conflicts that can bring up the root causes of the speakers stop working Windows 10 issue.

These conflicts can be caused by applications and services that start running in the background when you start Windows normally.

You will have a clean boot environment after all these steps are carefully followed, after which you can try and check if the speakers stop working Windows 10 problem is still there.

Let us know if these solutions worked by commenting in the section below.

Fix: World of Warcraft was Unable to Start 3D Acceleration

Some World of Warcraft players have posted on Microsoft, and Blizzard forums about a World of Warcraft was unable to start up 3D acceleration issue. Have you also received this error message?

Users can’t start World of Warcraft when that error message pops up. Do you need to fix that error? If so, check out these potential resolutions for it.

Why is my 3D accelerator not supported by WoW?

There could be several reasons why World of Warcraft (WoW) does not support your 3D accelerator:

  • Incompatibility – Your 3D accelerator may not be compatible with WoW. WoW requires a certain level of graphics capability to run smoothly, and if your 3D accelerator doesn’t meet these requirements, it may not be able to handle the game’s graphics.
  • Outdated drivers – If your 3D accelerator has outdated drivers, it may need to be able to support WoW. Updating your drivers can help resolve this issue.
  • Insufficient system resources – If your computer needs more RAM or processing power, your 3D accelerator may be unable to support WoW. Upgrading your computer’s hardware can help improve performance.
  • Unsupported hardware – WoW may not support your 3D accelerator because it is an older or less common model. In this case, you should upgrade your hardware to a more widely supported 3D accelerator.

Below, we discuss some of the most reliable fixes for this issue.

What can I do if World of Warcraft is unable to start up 3D acceleration?

1. Update your graphics card driver

In World of Warcraft, 3D acceleration issues are often related to outdated drivers. That is why we recommend ruling out this option from the start.

To verify if your graphics card driver needs to be updated, don’t hesitate to take advantage of a dedicated tool such as Outbyte Driver Updater.

To make the next step in overall hardware performance, install it immediately and have patience while it completes a full scan.

Don’t worry, as Outbyte Driver Updater quickly discovers missing drivers in seconds. Unfortunately, things are not much different for outdated ones, so feel free to install all of your out-of-date drivers or simply the graphics card driver.

You’ll have your computer running like new, and you’ll be able to get back to enjoying World of Warcraft.

Outbyte Driver Updater

Outbyte will help you update your graphics card driver and get back to your favorite game.
Free Trial Download now

2. Turn off full-screen optimization and run the game as administrator

  1. First of all, press the Windows + E hotkey.
  2. Then, open your World of Warcraft game folder in File Explorer. It is usually found in the path below:
    C:\Program Files\World of Warcraft\
  3. Right-click the Wow-64.exe or WoW.exe in the World of Warcraft folder to select Properties.
  4. Select the Compatibility tab, uncheck the Disable full-screen optimizations, and select the Run this program as administrator option.
    world of warcraft was unable to start up 3d acceleration
  5. Click Apply to save the settings.
  6. Click OK to exit the window.

Numerous players have confirmed that turning off full-screen optimization for World of Warcraft fixes this error.

3. Reset World of Warcraft to default

  1. First, open your Blizzard Battle.net software.
  2. Click Blizzard at the top left of the software’s window.
  3. Click Options on the menu.
  4. Then select Game Settings for further options, and click Reset In-Game Options for World of Warcraft.
  5. Press the Reset button.
  6. After that, click the Done button.

Resetting World of Warcraft via the Blizzard software to default might resolve incompatible game settings. Therefore, complete the above procedure in that regard. 

4. Select the Scan and Repair option

  1. Open the Blizzard Battle.net software.
  2. Select World of Warcraft on the left of the Blizzard window, click Options to open that menu, and select Scan and Repair on the Options menu.
    world of warcraft was unable to start up 3d acceleration
  3. Select the Begin Scan option to confirm.

Blizzard Battle.net’s Scan and Repair option might fix the World of Warcraft was unable to startup error for some users. However, make sure to follow the above steps as well.

5. Turn off SLI for NVIDIA GPUs

  1. First, right-click the desktop and select NVIDIA Control Panel.
  2. Expand the 3D Settings category.
  3. Click Set PhysX configuration on the left of the window.
    world of warcraft was unable to start up 3d acceleration
  4. Then select the Do not use SLI radio button.

Turning off SLI (Scaleable Link Interface) for NVIDIA GPUs might fix the World of Warcraft was unable to startup error. To see if it also works for you, apply the above steps. 

6. Select the High-performance graphics option for World of Warcraft

  1. Right-click the desktop and select NVIDIA Control Panel on the open context menu
    .
  2. Click 3D Settings, then Manage 3D Settings on the NVIDIA Control Panel.
  3. Select the Program Settings tab, then click the Add button.
    world of warcraft was unable to start up 3d acceleration
  4. Click Browse to open an Add folder window. Next, select the Wow.exe on that window, and click the Open button.
  5. With World of Warcraft, the selected program, select High-performance NVIDIA processor on the Select the preferred graphics processor drop-down menu.

Users with dual graphics laptops should ensure that World of Warcraft is assigned to a dedicated NVIDIA GPU. If that’s your case, too, refer to the above steps.

Those are some potential fixes for the World of Warcraft was unable to start up 3D acceleration error.

In addition, make sure that your Windows 10 is fully updated by clicking Check for Windows updates on that platform’s update page.

Have the above fixes proved to be helpful? Let us know in the comments area below.