Xbox Free Play Days returns this week with three more games for Xbox Live Gold and Xbox Game Pass Ultimate subscribers to try out. This week’s Xbox Free Play Days will run from Thursday, February 9th through Sunday, February 12th.
Here is the Xbox Free Play Days lineup for this week.
In the far distant future, a psionic hormone was discovered in the human brain, granting people extra-sensory powers and changed the world as we knew it. As humanity entered this new era, deranged mutants known as Others began to descend from the sky with a hunger for human brains. Highly resistant to conventional attack methods, extreme measures needed to be taken to battle the overwhelming threat and preserve humanity. Those with acute extra-sensory abilities, known as psionics, were our only chance to fight the onslaught from above. Since then, psionics have been scouted for their talents and recruited to the Other Suppression Force (OSF), humanity’s last line of defense.
Featuring a dual story, begin your adventure with either Yuito Sumeragi, an energetic recruit from a prestigious political family or Kasane Randall, the mysterious scout whose power and skill has gained great notoriety among the OSF. As their different experiences interweave with each other, it is only then that you will reveal the full story and unlock all the mysteries of a Brain Punk future caught between technology and psychic abilities in SCARLET NEXUS.
The Ascent is a solo and co-op Action-shooter RPG, set on Veles, a packed cyberpunk world.
Welcome to The Ascent Group arcology, a corporate-run metropolis stretching high into the sky and filled with creatures from all over the galaxy. You play as a worker, enslaved by the company that owns you and everyone else in your district. One day, you are suddenly caught in a vortex of catastrophic events: The Ascent Group shuts down for unknown reasons and the survival of your district is threatened. You must take up arms and embark on a new mission to find out what started it all.
Without a shadow of a doubt it is one of the most dangerous motorbike races in the world. In TT Isle of Man – Ride On the Edge 2, you prove your worth in different championships before setting out to conquer the Snaefell Mountain Course, a 60 km-long track with both winding and straight sections that will push your riding skills to the limit. TT 2 features 17 additional tracks, 18 different motorbikes including classic models, and the official riders. And now it’s more realistic than ever, thanks to entirely revamped physics and faithfully reproduced rider movements. Fine-tune your motorbike, upgrade its performance and monitor its data in real time so you can stay competitive. TT2 also offers a brand-new open world, a biker’s paradise where you can test your bike settings and gain the experience you’ll need to win the TT Isle of Man title!
Wrap up
Also, these games will be discounted throughout the Xbox Free Play Days event. If you want to learn more about the program, head over to the Xbox Free Play Days FAQ page.
Microsoft Surface is a premium line of PCs to deliver the best user experience. But many users reported that their Microsoft Surface is overheating.
Since the underlying cause varies, a single solution won’t fix overheating. That’s why we bring you the most effective ways to reduce overheating in Microsoft Surface devices. Read the following sections to find out.
Why is my Microsoft Surface getting so hot?
Here are a few reasons why your Microsoft Surface is overheating:
Too many processes running: When several processes run in the background, it puts more load on the system resources and leads to overheating.
Dust buildup: Dust buildup is often said to be one of the worst enemies of the PC and is usually the reason you might be facing overheating issues on Microsoft Surface.
Problems with the hardware: The computer fan, if not running optimally, can lead to an increase in temperature, and controlling the CPU fan manually might do the trick. Similarly, issues with other components, too, could be a reason behind this.
Outdated drivers or the OS: Running an outdated driver or not updating the OS are just as likely to affect the PC’s performance and cause overheating.
Plugged into charging for long: Many users reported that Microsoft Surface was overheating while charging for extended periods, so it could be an issue with the charger or the battery.
How do I cool down my Surface?
Before we ask you to make major changes, here are a few quick tricks to try:
Turn off the Surface computer and wait for it to cool down before turning it on again.
If Microsoft Surface is overheating when charging, make sure to charge it when turned on but don’t run any resource-intensive tasks during the period.
While using Microsoft Surface, ensure its bottom surface does not rest on a pillow or something similar that blocks air release.
Make sure you are running the latest version of Windows. If there are any pending updates, install them right away.
If none helped fix overheating on Microsoft Surface, move to the solutions listed next.
1. Use a professional repair solution
The Surface overheating issue is sometimes caused by many programs and applications. When they run in the background simultaneously, they will overheat your laptop.
A complete system solution that manages your programs and applications is necessary. It will prevent your computer from running lots of apps simultaneously.
This type of software is based on innovative technology that will secure and safely repair your computer. Once the program has scanned your device, it will leave your PC in an optimized state.
Use this software to eliminate malware threats, detect dangerous websites, and bring your computer to its maximum performance.
Your Microsoft Surface Pro will not be overheating anymore, and it will function just like new.
2. Terminate unwanted apps
There might be a clutch of apps that could be clogging the performance by keeping the CPU engaged, without you knowing any of it, and lead to Microsoft Surface overheating.
Press Ctrl + Shift + Esc to open the Task Manager.
2. Check for apps that are consuming high resources, select them individually, and click on End task.
3. Disable Search Indexing
Press Windows + R to open Run, type services.msc, and hit Enter.
Locate and double-click on Windows Search to open its Properties.
Select Disable from the Startup type dropdown menu, click on Stop, and once the service is not running anymore, click OK to save the changes.
After disabling Search Indexing or the Windows Search service, you should notice a boost in performance and reduced overheating in Microsoft Surface.
4. Modify the power settings
Press Windows + S to open Search, type Control Panel in the text field, and click on the relevant search result.
Click on System and Security.
Click on Power Options.
Now, choose Change plan settings.
Click on Change advanced power settings.
Expand Processor power management, double-click on Maximum processor state, choose 95% for both On battery and Plugged in, and click OK to save the changes.
After making the changes, verify whether Microsoft Surface overheating problem is resolved. Also, remember that this method will slightly affect the performance but is known to fix the problem for good.
5. Change USB power options
Press Windows + X to open the Power User menu, and choose Device Manager.
Expand the Universal Serial Bus controllers entry, right-click on the USB Root Hub (USB 3.0), and choose Properties.
Now, head to the Power Management tab, untick the checkbox for Allow the computer to turn off this device to save power, and click OK to save the changes.
Similarly, modify the power settings for other USB 3.0 entries here.
One of the users shared this solution to disable Windows from controlling the device to fix Microsoft Surface overheating. And it seemed to work for many.
Tip
Microsoft Surface devices are known to overheat from time to time, and with no sure shot fix in sight, you can purchase a few additional accessories. Get a cooling pad with built-in fans for the Surface laptop, or purchase a USB fan. Also, many users who had their devices within the warranty period usually went for a replacement.
That’s all for now! If and when we find more possible solutions to Microsoft Surface overheating, the guide will be updated to include them. So make sure to bookmark it and keep checking.
Also, find out how to boost Windows 11 performance and get the best out of your PC without overclocking the hardware.
Tell us which fix worked for you in the comments section below. Also, if you happen to know other solutions that we may have missed, do not forget to drop them here.
Type gpedit.msc and press Enter to open Group Policy Editor.
Follow this path: Computer Configuration\Administrative Templates\ Windows Components\Windows Game Recording\Broadcasting
Locate Enables or disables Windows Game Recording and Broadcasting and double-click it.
Select Disabled, click Apply, and OK.
4. Use the PowerShell
Press the Windows key, type PowerShell, and click Run as administrator.
Copy and paste the following command to see the packages and press Enter: dism /Online /Get-ProvisionedAppxPackages | Select-String PackageName | Select-String xbox
Type the following command to uninstall Xbox Game Bar and press Enter: dism /Online /Get-ProvisionedAppxPackages | ` Select-String PackageName | ` Select-String xbox | ` ForEach-Object {$_.Line.Split(':')[1].Trim()} | ` ForEach-Object { dism /Online /Remove-ProvisionedAppxPackage /PackageName:$_}
To remove packages of Xbox packages, copy and paste the following command and press Enter: Get-ProvisionedAppxPackage -Online | ` Where-Object { $_.PackageName -match "xbox" } | ` ForEach-Object { Remove-ProvisionedAppxPackage -Online -AllUsers -PackageName $_.PackageName }
So, these are ways to disable the Game Bar on Windows 10. For more questions or concerns, please feel free to mention them in the comments section below.
The Xbox Game Bar is a helpful app for gamers as it contains a set of widgets that allow users to record videos and capture gameplay screenshots. However, if you have no use for the application, you can disable it to free system resources.
This guide will cover all the methods that enable you to disable the Xbox Game bar on Windows 11.
How can I disable the Xbox Game Bar on Windows 11?
1. Use the Settings
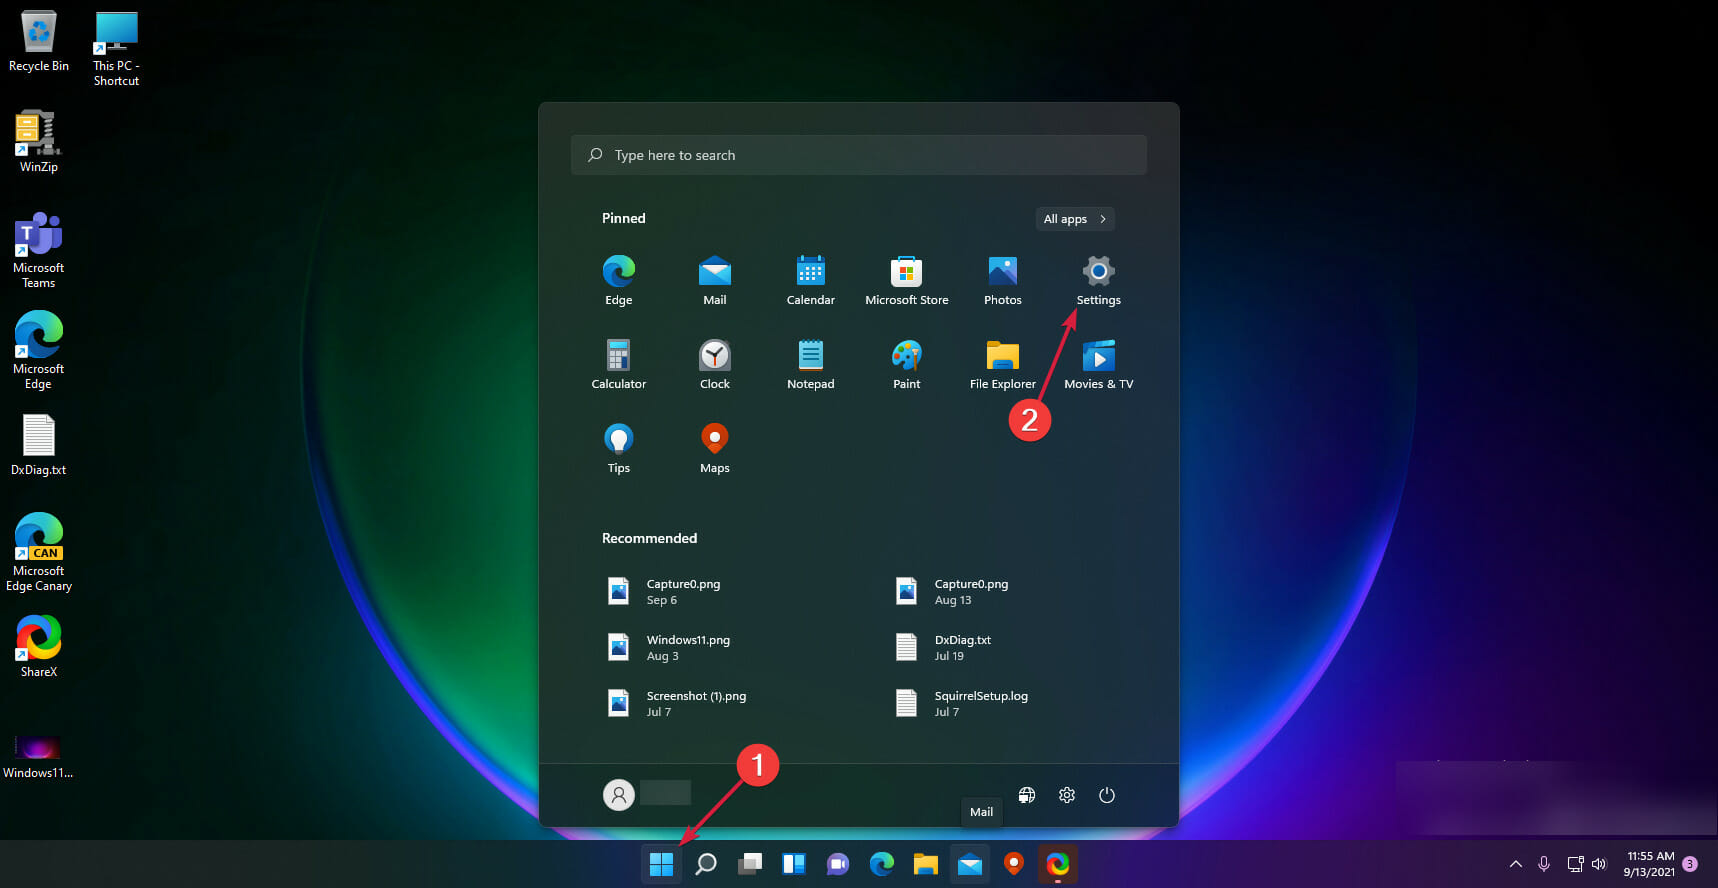
Press Windows + I to open Settings.
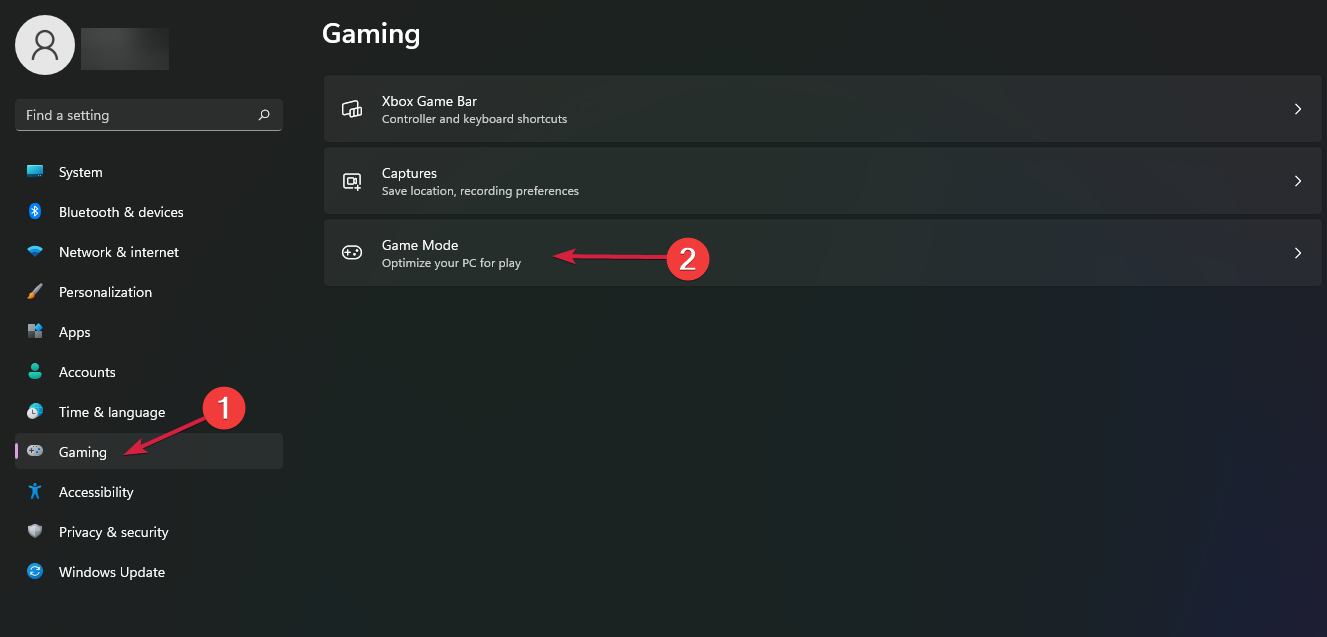
From the left pane, click Gaming.
Next, click the Xbox Game Bar option.
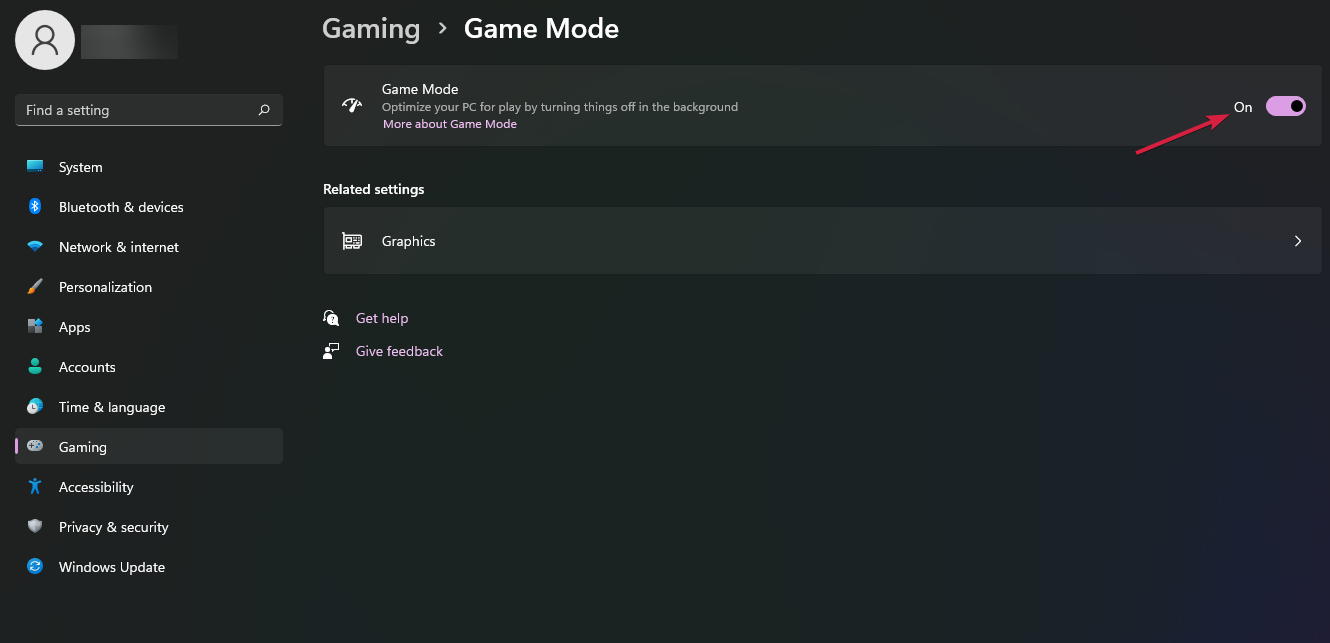
Toggle off the switch next to Open Xbox Game Bar using this button on a controller.
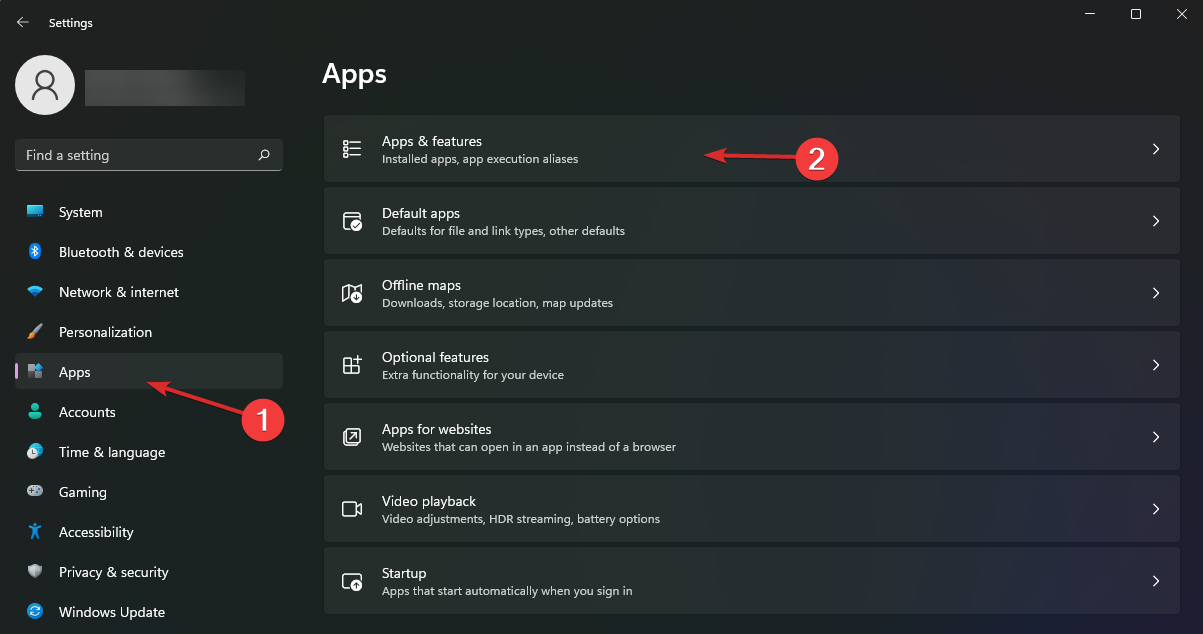
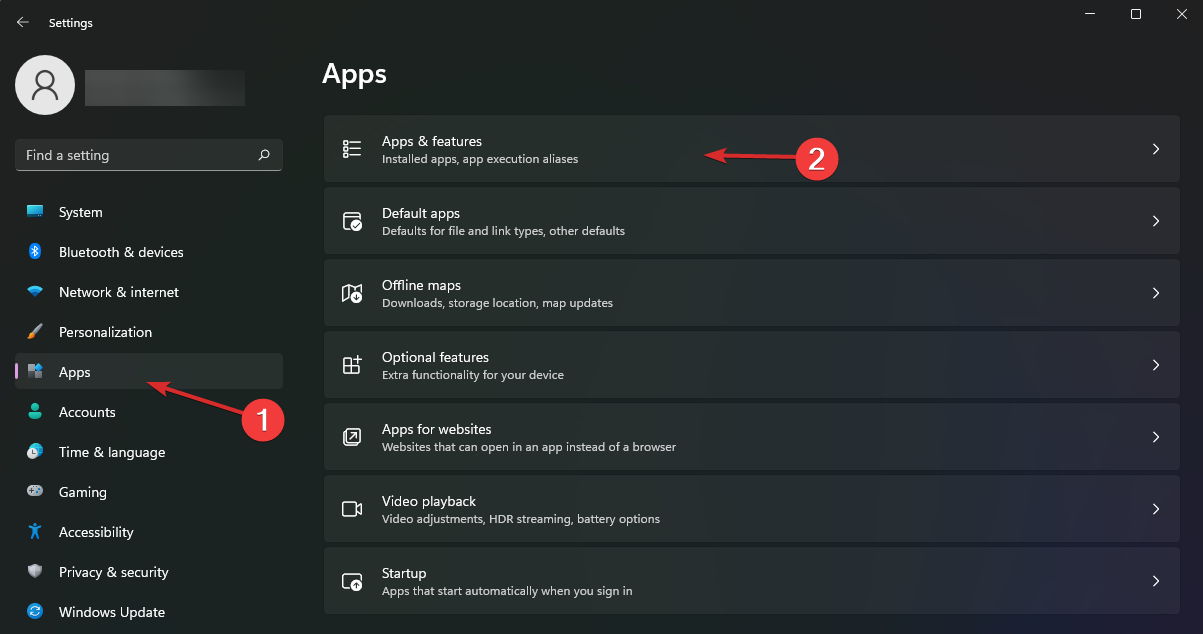
Go back to the main page of Settings. Click Apps, then select Installed apps.
Now under Installed apps, in the search bar, type Xbox.
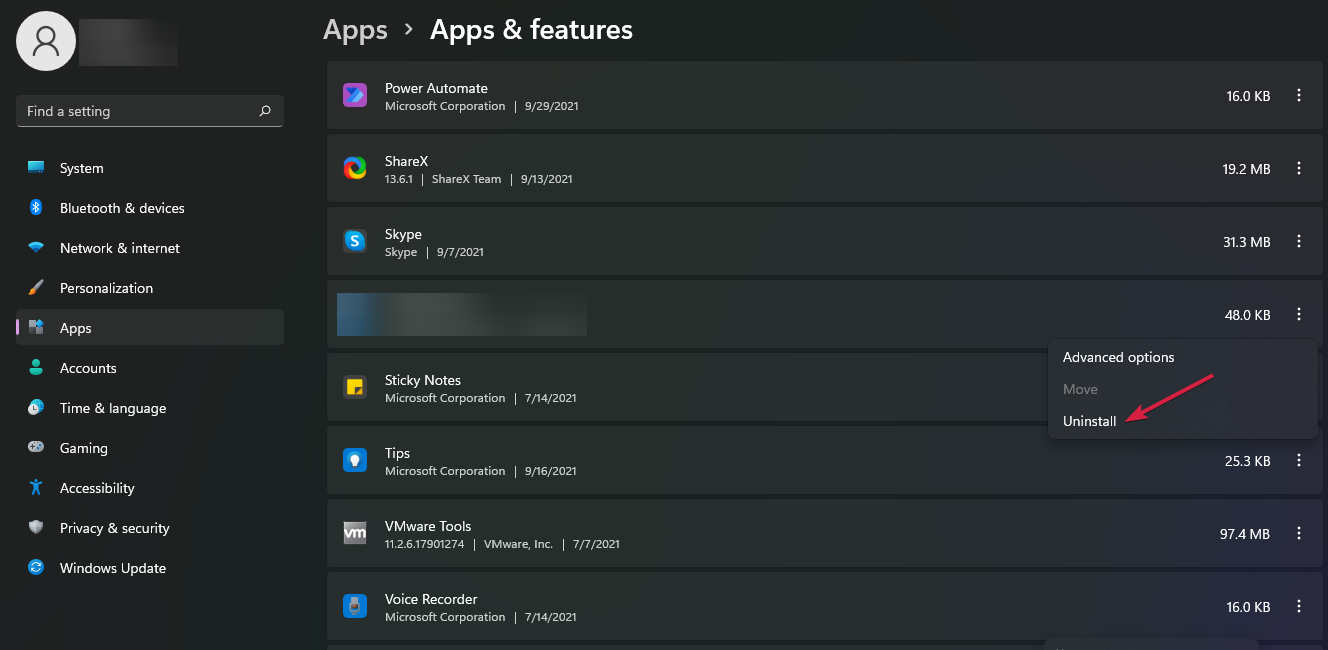
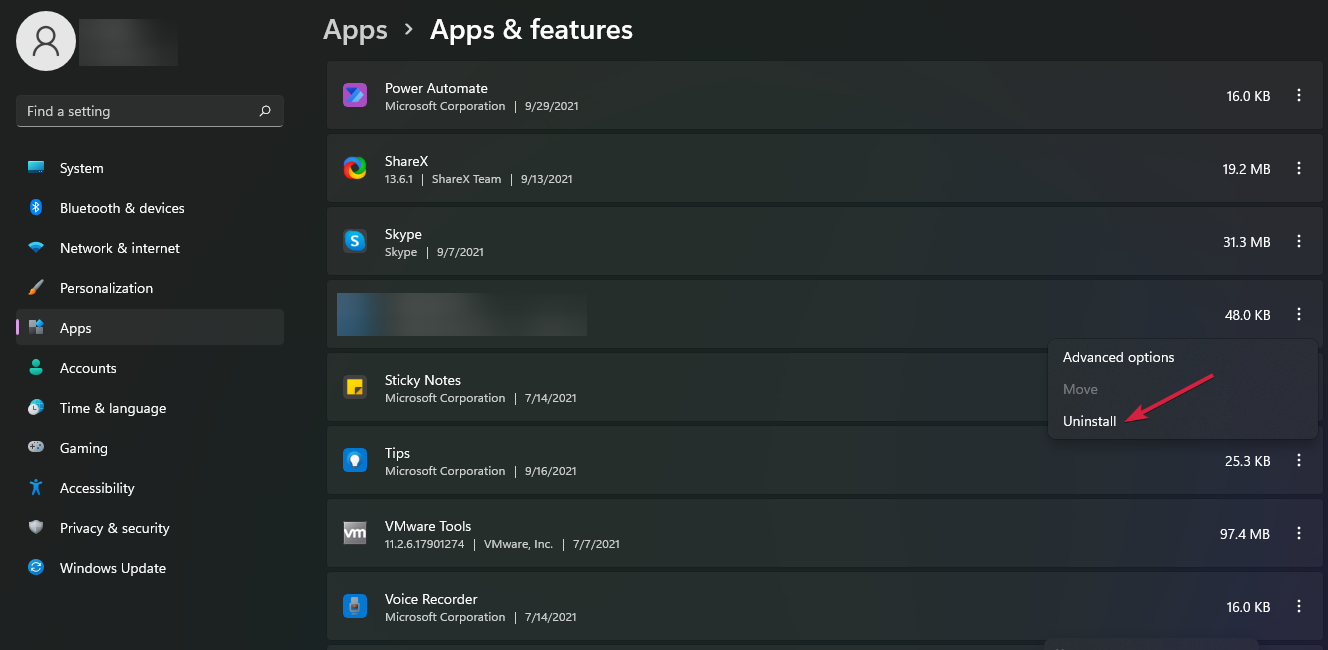
Click the three dots next to the Xbox Game Bar, and select Advanced options.
Scroll down to the Background apps permissions section and select Never from the drop-down.
Now scroll a bit more, and click the Terminate button.
Press the Windows key, type PowerShell, and click Run as administrator.
Type the following command to check the packages on your computer and press Enter: dism /Online /Get-ProvisionedAppxPackages | Select-String PackageName | Select-String xbox
Copy and paste the following command to uninstall and press Enter: Get-ProvisionedAppxPackage -Online | ` Where-Object { $_.PackageName -match "xbox" } | ` ForEach-Object { Remove-ProvisionedAppxPackage -Online -PackageName $_.PackageName }
Type the following command to check if the Xbox packages are deleted and hit Enter: dism /Online /Get-ProvisionedAppxPackages | Select-String PackageName | Select-String xbox
There are many instances when you would want to stream content on your TV from your computer. For example, this usually comes in handy when you want to show photos or videos to a large group. In such a case, a question might arise in your mind how to get sound from computer to TV?
If you are looking for answers, then in this guide, we will give you a bunch of different ways to help you answer your query on how to get sound from computer to TV. So let us get right into it.
Why am I not getting any sound on my TV when connected to a laptop?
Here are a few reasons why your TV isn’t producing any sound when you have connected it to a laptop.
The wrong playback device is selected: Chances are that while the connection is correct, the correct playback device isn’t set on your PC.
The volume is mute: You should ensure that the volume levels aren’t set to mute.
Check the cord: Ensure that the cable you are using to connect your laptop to the TV is not damaged.
How can I get sound from a computer to a TV?
1. Using HDMI cable
Connect one end of the HDMI cable to the output port on your laptop.
Connect the other end of the HDMI cable to the HDMI input on your TV.
Use the Source or Input selection button on your TV remote to select the correct input for viewing.
That is when you are using an HDMI cable to get audio sound from your computer to your TV. However, note several instances when this easy way of connecting a laptop to a TV doesn’t get the desired output.
So, if you have connected your laptop to a TV with an HDMI cable and get no sound, then you should check out our guide to help you resolve the problem. We also have a guide to help you fix the HDMI audio not working in Windows 11.
2. Use a 3.5mm audio cable
Connect one end of the 3.5mm audio jack to the laptop’s lineout or mic port.
Connect the other end of the 3.5mm audio jack to the TV’s audio port.
Select the correct source on your TV, and you should get audio from your laptop on your TV.
Connect the Bluetooth audio adapter to the correct port on your TV.
Set the Bluetooth audio adapter to discoverable inside the Bluetooth settings.
On your laptop, press Win + I keys to open Settings.
Select Bluetooth & device from the left pane.
Click on Add device.
Select the Bluetooth option.
Pair with the Bluetooth audio adapter connected to your TV.
If available, select the Audio source as Bluetooth on your TV.
Bluetooth audio adapter acts as a Bluetooth receiver that can easily route your laptop’s audio to your TV. Unfortunately, some Bluetooth adapters generally come with a 3.5mm jack with them, and you need to plug it into the audio port on your TV while the actual adapter gets plugged into the USB port.
4. Mirror your laptop to the TV
Press Win + I keys to open Settings.
Select Bluetooth & device from the left pane.
Click on Add device.
Select the Wireless display or dock option.
Select your TV from the options that appear on your laptop.
Open the Start menu by pressing the Win key.
Open Control Panel.
Select Sound.
Under the Playback tab, right-click on your TV and select Set as default device.
Click Apply and OK.
You can also use the in-built Miracast technology that most smart TVs offer nowadays. Also, select your TV as the default device to get the sound directly from your TV, not your PC.
Under the Playback tab, right-click on your TV and select Set as default device.
Click Apply and OK.
This is the proper way to select your TV as the default audio device. Several users get confused about why they are not getting sound from their TV, even after connecting their devices using HDMI cable or wirelessly. You need to select your TV as the default device to get the desired output.
That is it from us in this guide. These are the different ways you can connect your computer to a TV and get audio from the TV.
Feel free to let us know in the comments section below which one of the above methods you used to connect your laptop to the PC and get sound from the computer to the TV.
Installing new software on Windows 10 is relatively simple; however, users reported the Error opening file for writing error while installing specific applications.
It seems that this problem can affect almost any application, thus preventing you from installing it.
Since this issue prevents you from installing additional software, it might seem severe, but you can quickly fix it by following one of the recommended solutions.
What does the Error opening file for writing mean?
The error opening file for writing typically means that a program tries to save a file but cannot do so due to some issues. For example, the following elements often cause it:
Permission issues – The user doesn’t have the necessary permissions to write to the file or the file’s directory.
Disk space issues – The disk may be full or the file may be too large to save in the available space.
Incorrect file path – The program may be trying to write to an incorrect file path or a file that doesn’t exist.
Outdated or conflicting software – The software may be outdated or have conflicting versions, causing it to fail when trying to save a file.
Error opening file for writing can be a big problem since you won’t be able to run specific files on your PC. Speaking of this error, users reported the following issues:
Error opening file for writing MSI Afterburner, Kodi, Steam, VLC, Wireshark, CCleaner, BSPlayer, Hotspot Shield – This problem can affect many applications. If you’re having this issue, you might be able to fix the issue simply by reinstalling the affected applications.
Error opening file for writing qt5core.dll, vcredist_x86.exe, npf.sys, msvcr110.dll – Many users reported this error caused by specific files on your PC. You might have to reinstall the components in charge of these files to fix the issue and check if that solves the problem.
If you are faced with the error, read on to see some of the best fixes.
How can I fix the Error opening file for writing?
1. Run the Compatibility troubleshooter
Right-click the setup file of the problematic application and choose Properties from the menu.
Navigate to the Compatibility tab, and click Run compatibility troubleshooter.
Select Try the recommended settings.
Follow the instructions, and your problem should be fixed.
In addition to using a Compatibility troubleshooter, you can just set the program to run in compatibility mode to fix this problem.
2. Run the program as an administrator
Right-click the setup file and select Run as administrator from the menu.
If running the application as an administrator fixes the problem, you’ll have to repeat this workaround every time you want to start this application.
If you want a more permanent solution, you can set the application to always run with administrative privileges. To do that, follow these steps:
Right-click the application giving you this problem and choose Properties from the menu.
Now navigate to the Compatibility tab and check Run this program as an administrator.
Click on Apply and OK to save changes.
After doing that, the application will always run with administrative privileges, and you won’t experience this issue anymore.
Sometimes, you’ll get the Error opening file for writing messages if your user account lacks certain privileges. The simplest solution for this problem is to install the problematic application as an administrator.
3. Check and disable your antivirus
Click on the hidden access arrow in the Taskbar.
Click on your antivirus icon, hover over Avast shields Control and select Disable for 10 minutes (This step varies for different antivirus software).
According to some users, your antivirus can cause the Error opening file for writing messages to appear.
Even though your antivirus is crucial to protecting your safety online, sometimes the antivirus can interfere with your files and cause this error to appear.
To fix the problem, users suggest changing their antivirus settings and checking if that solves the issue. In addition, you can start by disabling certain features and see if that helps.
If you don’t know which feature to disable, you can permanently disable your antivirus and check if that solves the issue.
If that doesn’t help, you might have to remove your antivirus and check if that solves the issue. Since your old antivirus was causing this issue, it might be a good idea to switch to new antivirus software.
There are many great antivirus tools available, and if you need to resolve this writing error file quickly, it’s probably the best idea to find one that doesn’t cause any errors.
4. Reinstall the problematic application
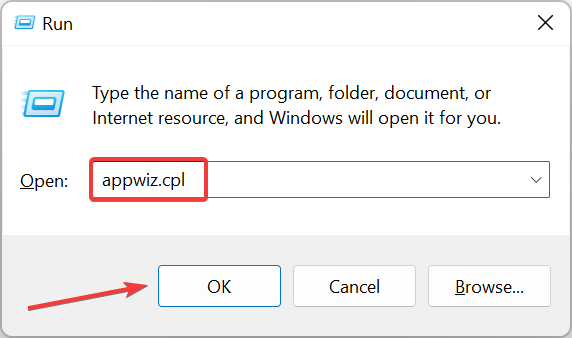
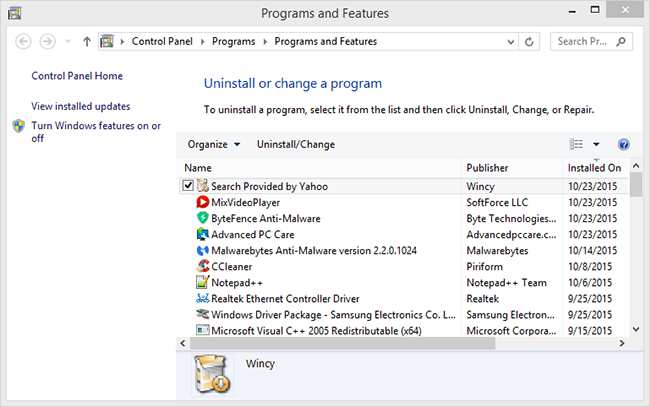
Press Windows + R, type appwiz.cpl, and hit Enter.
Click on the program to be uninstalled from the programs list, then select Uninstall.
Download a new application version, double-click to run it, and follow the wizard until it is fully installed.
According to users, sometimes this error can occur if you’re trying to run a specific application.
If this happens, it means that your installation is probably corrupted, and to fix the problem; you need to reinstall the application.
5. Create a new administrator account
Open the Settings app by pressing Windows + I.
Navigate to the Family & other users tab and click the Add someone else to this PC button.
Select I don’t have this person’s sign-in information.
Now click on Add a user without a Microsoft account.
Add a username and password for this account and click Next.
You should see the newly created account available in the Other users section. Please select it and click on the Change account type button.
From the Account type menu, select Administrator and click OK.
Lastly, switch to the newly created administrator account and try installing the application again.
If the Error opening file for writing message persists, you might have to create a new administrator account and install the application on that account.
Alternatively, you can enable the hidden administrator account using the Command Prompt. To do that, follow these steps:
Press Windows Key + X shortcut and select Command Prompt (Admin) from the menu.
When Command Prompt starts, type the code below and press Enter to run it. This will enable a new administrator account that you can switch to install the problematic software. net user administrator /active:yes
If you wish to disable this administrator account, switch back to your old account, open Command Prompt as administrator, and enter the script below: net user administrator /active:no
6. Change the security permissions
Locate the folder in which you’re trying to install the problematic application. For example, it could be the path below: C:\Program Files (x86)\Steam
Once you’ve located the directory, right-click it and choose Properties.
Navigate to the Security tab and click the Edit button.
Select Users from the Group or user names and check the write property under the Permissions for Users section.
Finally, click OK and Apply.
After you’ve changed security permissions, you should be able to install applications to that specific folder.
By default, regular users aren’t allowed to install applications, and if you try to do that, you’ll probably encounter this error message.
Suppose you can’t install a particular application as a regular user. In that case, we strongly advise you to create an administrator account or try to install the application as an administrator to avoid this issue.
If you don’t want to use an administrator account, you might want to change security permissions.
7. Disable User Account Control
Press Windows Key + S and enter User Account. Next, select Change User Account control settings.
Move the slider down until it says Never notify.
Lastly, click OK to save the changes.
After you’ve disabled User Account Control, the Error opening file for writing error message shouldn’t appear.
In addition to turning off User Account Control, users reported that turning off Windows Defender fixes this problem.
Suppose you have any third-party antivirus software installed. In that case, Windows Defender should be turned off by default, but if you don’t use any third-party antivirus software, try disabling Windows Defender.
User Account Control will notify you whenever a system-related change requires administrator privileges.
This feature is designed to protect you, but it can sometimes interfere with other software and cause the Error opening file for writing error message.
Locate the folder in which you’re trying to install the problematic application. For example, it could be the path below: C:\Program Files (x86)\Steam
Next, right-click the folder and choose Properties.
Navigate to the Security tab and click the Advanced button.
Now, click the Add button.
Click on Select a principal.
In the Enter the object name to select section, type Everyone and click Check Names and OK.
In the Basic permissions section, select Full control and click OK.
From the Permissions open file for writing entries list, select Everyone and check the Replace all child object permission entries at the bottom.
Finally, click Apply and OK to save changes.
After changing the security permissions, you’ll be able to install the application to that folder without any issues.
Changing security permissions isn’t always the best option, and we strongly advise that you try installing the problematic application by running its setup file as an administrator or by using an administrator account.
If both options aren’t working, you might want to try changing advanced security permissions.
9. Use registry cleaner software to clean up your registry
Sometimes, the Error opening file for writing message appears due to problems in the registry. The simplest solution is to download and run any registry cleaner to fix this.
Error opening file for writing error message will prevent you from installing specific software; however, this problem can be easily fixed by switching to the administrator account or by using any other solution from this article.
Lastly, let us know which solutions have proved most effective for you in the comments.
There can be various reasons for bypassing admin on Chromebook, including blocking things on the Chromebook bought from an online platform.
This guide will discuss methods to bypass admin on your machine. Let’s start!
What can I do to bypass admin on Chromebook?
1. Use the Developer mode
1.1 Enter Developer mode
To enter developer mode, press the Esc + Refresh + Power buttons together.
Once you get the message, press Ctrl + D simultaneously.
On the next to turn OS verification OFF, press Enter or the Spacebar key as per your instructions on the screen. This will take you to the Chrome OS developer mode.
1.2 Powerwash Chromebook
NOTE
If Ctrl + D is not working for you, you should not try it repeatedly, as it could crash your BIOS or harm UEFI settings. Also, Powerwash will set your device to its default settings, which means it will remove all the user accounts and reset the device.
Press Ctrl + D keys to reset your Chromebook and remove admin passwords, data, and custom settings.
Next, enable System data.
Reboot your computer. Once it starts up, you can set up your device.
Once your Chromebook restarts after Powerwash, you can set it up again from scratch. At this stage, it helps to know the basics, such as how to copy and paste on Chromebook for faster navigation.
2. Without enabling the Developer mode
Remove the back panel of the Chromebook and take out the battery.
Now remove the power cord connecting the motherboard and battery.
Open Chromebook and hold the power button for 30 seconds to bypass admin rights.
Put the battery back in, connect the power cord, and put the back panel back on.
Restart your Chromebook, and press Esc + Refresh + Power buttons together. The machine might take approx 15 mins or more to boot, depending on your model.
If you see Chrome OS is damaged or missing once the machine restarts, then press Ctrl + D.
Next, on the Sign in to your Chromebook, you need to enter the email address and click Next.
Once you are logged in, go to the right-hand side menu at the bottom, and click Settings.
Scroll the Settings page under Person, and click Advanced.
Go to Reset Settings,and under Powerwash, click Reset.
On Restart your device window, select Restart.
Your device will boot up and give you Reset this device prompt; click Powerwash.
Next, click Continue.
Now, you will have the option to set up your Chromebook just as when it was new.
On the next page, input the information, and choose the relevant settings to finish the setup.
4. Remove the Administrator
Navigate to the System shelf and locate Clock; click on it. Next, select Settings from the menu that appears.
From the left pane, click People.
Under People, select your profile.
Now, Manage other people.
Go to the user you want to remove, and click on the Cross icon to remove the user.
In the next window, select Remove this user.
Close all the windows on Chromebook and restart it.
So, these are steps that you need to follow to bypass admin on Chromebook. If you have any questions or concerns, feel free to let us know in the comments below.
For users with multiple devices, the USB port is one of the essential parts of any computer or laptop. However, some users are complaining that the HP Envy x360 USB C port is not working.
This prevents users from using most of their modern external devices. This guide will show you quick ways to fix the issue.
Why did my USB-C port stop working?
Below are some of the factors that can cause your HP Envy x360 USB-C port to stop working:
Outdated or faulty driver: Faulty or obsolete USB controller drivers are the leading cause of this issue. The quickest solution to this is to uninstall or update your drivers.
Issues with the USB port: Some users have found this problem to be due to power issues with the port. This causes the USB-C ports to stop working temporarily. The solution to this is to power cycle your PC.
What can I do if the HP Envy x360 USB C port is not working?
1. Power cycle your PC
Unplug all USB devices from your laptop and shut your PC down.
Press and hold the power button for about 30 seconds.
Now, restart your PC and plug back your peripherals.
Sometimes, a power refresh for your laptop can do miracles. For example, many users have found it helpful in fixing the HP Envy x360 USB C port that is not working.
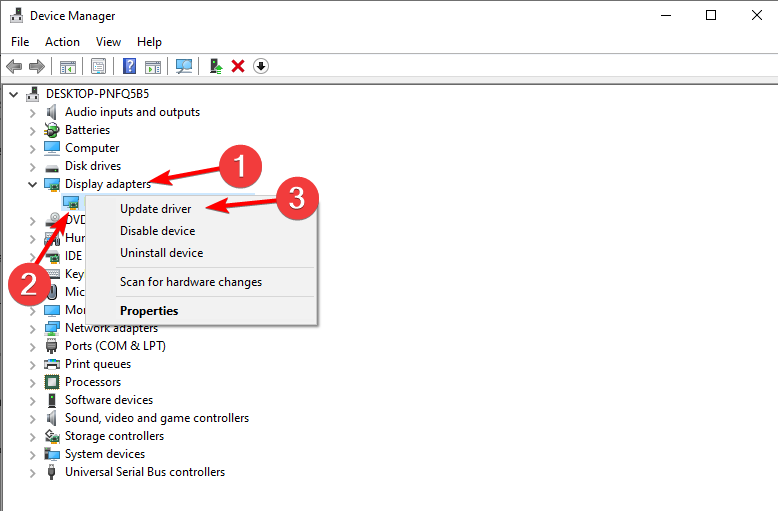
Right-click on the Start button and select Device Manager.
Click on the arrow next to the Universal Serial Bus controllers option to expand it.
Check for devices with a yellow exclamation mark/ question mark/ down-arrow mark/ error notification.
Next, right-click the faulty driver and select Update driver.
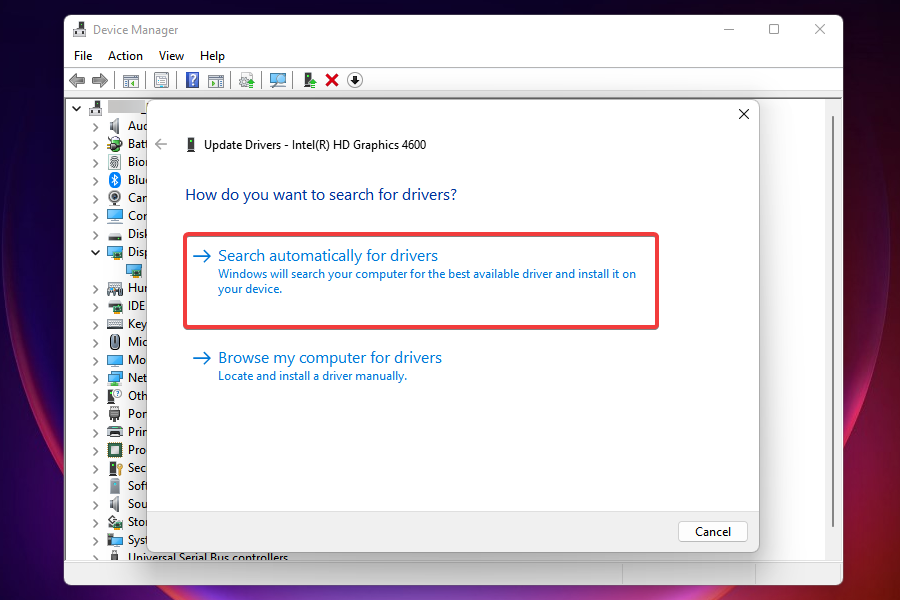
Finally, choose the Search automatically for drivers option and install any available updates.
Outdated drivers can cause problems with your hardware and can be the cause of the HP Envy x360 USB C port not working issue as well.
Since updating drivers manually can be long, we recommend a specialized driver updater that automatically updates them for you.
The program scans your hardware and offers to re-download or update all drivers. It only takes a few clicks to start refreshing all drivers, while this tool does the hard work.
3. Uninstall all items listed on the USB controllers list
Remove any external device plugged into your PC.
Right-click on the Start button and select Device Manager.
Click on Universal Serial Bus Controllers to expand the list.
Now, right-click all the devices there and select Uninstall device.
Click the Uninstall button and restart your PC.
Finally, insert your USB devices again and check if it is now working.
If updating your drivers does not work, you might need to uninstall them. Unfortunately, this will force your PC to install the default drivers to keep the devices working.
This should fix the HP Envy x360 USB C port not working issue.
That should do it. We believe you have everything to fix the HP Envy x360 USB C port not working issue with the information in this guide.
Setting up a signature is very significant in the world of professional communication. A well-designed signature makes a big difference in how recipients perceive your emails.
You can create different signatures for different mailboxes on Outlook, which can help you segregate your work or personal emails.
In this guide, we will walk you through the steps to create a signature for an email and choose it as the default setting for an email address. Let’s start!
How can I set different signatures for different mailboxes on Outlook?
1. Set up the signature
Launch the Outlook app.
Go to File.
Click Options.
On the Outlook Options page, click Mail.
Now on the right pane, click Signatures.
Switch to the E-mail Signature tab.
Click New. On the next window, select the name of the signature and click OK.
It will now appear under Select signature to edit. Select it and under Edit signature, type the signature or get help from Get signature templates.
Once you have finalized the signature, click OK.
You can add more signatures to the list by repeating the same process.
2. Choosing the default signature for an email account
Go to File, then click Options.
On the Outlook Options page, select Mail, then click Signatures.
Under Choose default signature, select the Email account you want to use from the drop-down.
Next, select the signature from the New messages drop-down that you can use when composing New messages.
Also, select the signature for Replies/forwards from the drop-down next to it.
You can repeat the same process by changing the Email account from the drop-down to save the work in the future.
Click OK when done. Restart the Outlook app.
So, this is how you can add different signatures for different mailboxes on Outlook. If you have any questions or concerns, feel free to mention them in the comments section below.
Let us explore all you should know about Chroma Visualizer not working, how to sort it out, and what implications these actions might have.
The Razer Audio Visualizer software enables dazzling audio-lighting effects for Chroma keyboards and other compatible devices.
However, some users have said on the Razer forum that Audio Visualizer’s lighting effects don’t work for them. These fixes might get Audio Visualizer’s light effects working.
Why is my Razer Visualiser not working?
There could be multiple reasons why your Razer Visualizer is not working; here are some common reasons:
Incorrect settings – If the Visualizer is not enabled and configured correctly in your device settings, it may lead to this problem.
Unsupported platform – Ensure your device and operating system are compatible with the Razer Visualizer.
USB connection issues – Also, if the USB port is not working or the device is not connected correctly, it could be a trigger.
Hardware issues– A hardware problem with your device may need to be addressed.
It is good to ascertain the cause of the problem so that you know which solutions we recommend below will work.
How can I fix the Razer Chroma visualizer if it’s not working?
Before venturing into the solutions below, check your device compatibility.
Audio Visualizer only works with supported Chroma hardware devices. So, none of the fixes here will work if Audio Visualizer doesn’t support your peripherals.
Hence, open the Audio Visualizer download page, including a list of supported devices that work with the visualization software.
1. Uninstall and reinstall Chroma SDK
You can uninstall the Chroma SDK software with the default Windows uninstaller, but many third-party uninstaller utilities have better features. IObit Uninstaller is among the more highly-rated uninstaller tools that can remove Chroma SDK and all its leftover residual files and registry entries.
Furthermore, you can uninstall almost anything with IObit Uninstaller. That utility enables users to uninstall browser extensions and plugs, UWP apps, and Windows updates. You can also utilize IObit Uninstaller to identify and uninstall unwanted bundleware.
Other useful IObit Uninstaller features
It includes a File Shredder utility for deleting files
The Software Updater feature in IObit Uninstaller enables users to update software
Users can uninstall software with IObit Uninstaller’s Force Uninstall tool
IObit Uninstaller’s Install Monitor logs system changes for software installation
IObit Uninstaller
Fix the Razer Audio Visualizer not working issue with just a few clicks of your mouse and this amazing software.
2. Install Visual C++ Redistributable for Visual Studio 2015
If Visual C++ Redistributable for Visual Studio 2015 isn’t installed on your PC, open the Visual C++ Redistributable page in a browser.
Click the Download button on that webpage.
Select either vc_redist.x64.exe (64-bit) or vc_redist.x86.exe (32-bit), depending on your PC’s architecture. Then click Next to download the package.
After that, open the folder you downloaded the Visual Studio package to.
Lastly, click the Visual C++ installer to install the package.
4. Make sure you have Chroma apps enabled
Open your Razer Synapse software.
Select the Connect tab in Razer Synapse.
Then click Apps, and toggle on the Chroma Apps or Enable this app option.
5. Enable Razer Chroma SDK services
Press the Windows key and R simultaneously, type MSConfig, and hit Enter.
Click the Services tab, then tick the checkboxes for Razer Chrome SDK Server and Razer Chrome SDK Service.
Press the Apply and the OK buttons to save the service settings, and finally, Restart on the System Configuration prompt that opens.
6. Raise the Amplitude setting
Some users have also said they needed to raise the Amplitude setting in the Audio Visualizer software to fix the lighting.
Open the Keyboard Visualizer window, and enter a higher value (like 7,000) in the Amplitude box.
Then press the Save Settings button.
Those are some of the resolutions users have confirmed to fix the Razer Audio Visualizer. So, with Audio Visualizer fixed, you’ll witness its unique Razer Chroma keyboard visualizations rocking your beats.
Finally, we are curious to know what has worked for you. Please tell us in the comments section below.
Many times, Windows users complain of getting several errors accompanied by the Blue Screen of Death (BSOD).
These errors may occur when launching programs on your PC, during an internet connection session, etc. However, the Netwtw06.sys failed BSOD error is one of the most common errors users report.
The Netwtw06.sys failed BSOD error mainly indicates issues with your network properties. It can occur for many reasons that may vary on different computers. Some common causes are:
Outdated or faulty Wireless Network Driver – You may run into the Netwtw06.sys failed BSOD error on your computer if the Wireless network driver is not updated. It can be due to the bugs affecting it, preventing it from functioning. Also, installing a faulty driver update or the version is incompatible with your PC can affect how it works.
Corrupt System files – When the essential system files are corrupt or not intact on your PC, you may run into issues with your drivers and other software. Hence, corrupt system files can prompt the Netwtw06.sys failed error to appear when working on your system.
Corrupt Windows Installation – A corrupt Windows installation can also cause the Netwtw06.sys failed BSOD error on your computer. In addition, it creates faults in how your system interacts with your drivers, resulting in errors.
Misconfigured device drivers – Device drivers help programs and devices on your system work as expected. So, when there’s an irregularity in the configuration of these device drivers, it causes errors on the computer.
Other factors not highlighted above may cause the error. Nevertheless, we’ll discuss how to fix the issue and get the BSOD error to disappear from your system.
How can I fix netwtw06.sys properly?
We recommend you go through the following preliminary checks before trying any advanced solutions:
Close background programs running on your computer.
Disconnect external devices and peripherals from your PC.
Proceed with the solutions below if you can’t fix the error:
1. Fix the Netwtw06.sys page fault
1.1 Run the SFC and DISM to repair damaged system files
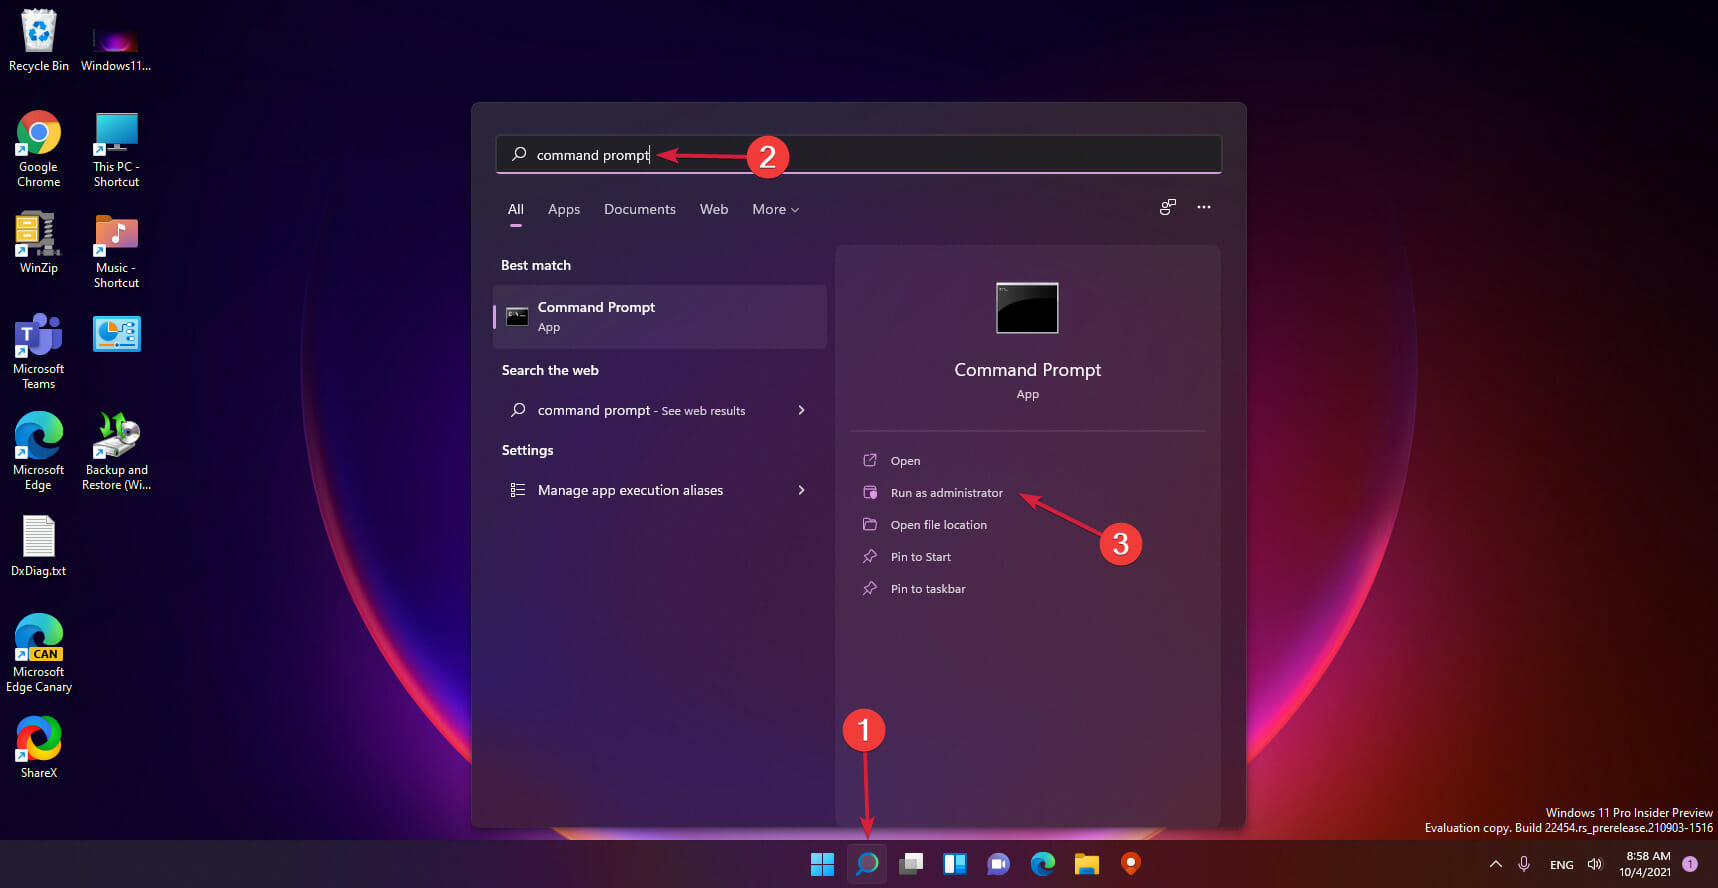
Left-click the Start button, type Command Prompt, then select Run as administrator.
Click Yes on the User Account Control (UAC) prompt.
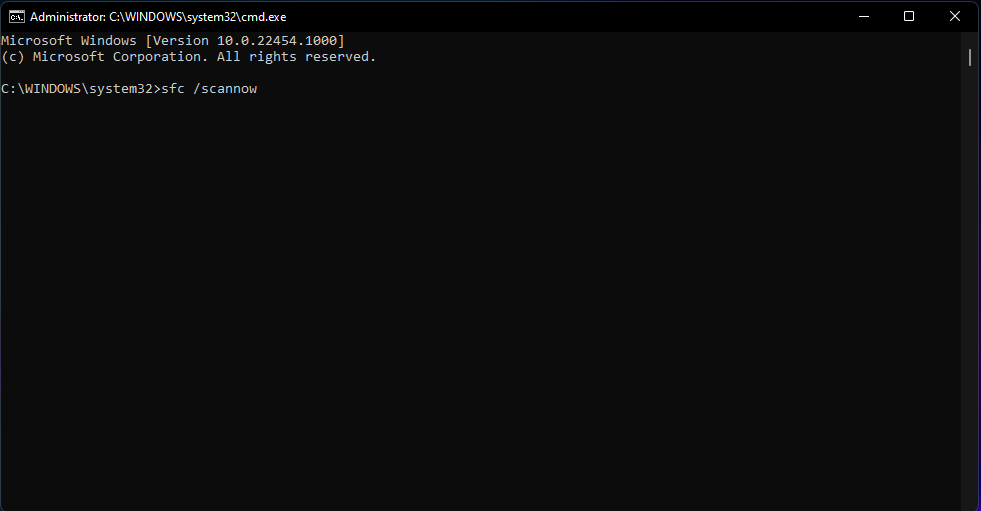
Type the following and press Enter: sfc /scannow
Type the following commands and press Enter: DISM /Online /Cleanup-Image /RestoreHealth
Restart your PC and check if the Netwtw06.sys failed BSOD error persists.
Running SFC and DISM scans will find and repair corrupt system files causing network driver issues on your PC. Also, it can fix page fault errors that occur when a program attempts to access data in its address space but is not currently in the system RAM.
On the other hand, you can try a specialized repair tool that can save you some time and effort by scanning your PC and automatically replacing any corrupt or malfunctioning system files with new ones from its repository.
Press Windows + R keys to prompt the Run window, type devmgmt.msc, and click OK.
Expand the Network adapters, right-click on the Wireless device, then select Update driver from the drop-down.
Select the Search automatically for drivers option and wait till the update finishes.
Restart your PC and check if the error persists.
Updating the network driver will fix bugs and install the latest features to improve your device driver performance. Check other steps for updating drivers on Windows 11 if you have any issues.
3. Netwtw06.sys blue screen on HP
3.1 Run System Restore
Left-click the Start button, type Restore, and click Create a Restore Point.
Go to the System Protection tab, and click System Restore.
Choose a different system restore and click Next to select a specific Restore Point.
Select the last time you were able to install updates on your PC, and click Next.
Click the Finish button.
System Restore backdates your PC to the select restore point and fixes issues causing the error. Check how to fix Restore Point if it’s not working and if you have any problems running it.
Raspberry Pi is a handy little lightweight computer, and many are looking for a lightweight browser for Raspberry Pi.
If you’re not familiar, Raspberry Pi uses its operating system, and we have a great guide on how to install Raspbian on Raspberry Pi.
After installing the operating system, you need to go ahead and download the right browser, and this guide will show you the best ones.
Is Raspberry Pi good for web browsing?
While Raspberry Pi let’s you browse the web, there are few things to keep in mind:
Hardware power – Many websites are pretty demanding, and Raspberry Pi can’t compare to a modern PC, so if you’re doing heavy multitasking, Raspberry Pi might not be able to handle it.
Browser support – Not all browsers work well on Raspberry Pi due to its ARM architecture, so you might not be able to enjoy all the features you’re used to.
Overall, Raspberry Pi is fine for web browsing, especially if you’re not a demanding user and you’re using the latest model. However, you will have to be careful with what browser you install on it.
Users of Raspberry Pi will find that Chromium is one of the online browsers that offer the most comprehensive set of features.
It is a product of Google’s development and was included in the update released for the Raspberry Pi in September 2016.
Chromium is an open-source browser that provides a working, dependable, quick performance. It is already pre-installed in the operating system for the Raspberry Pi.
Most significantly, it has been optimized for users after considering the additional processing power that the Raspberry Pi has.
Midori Browser is a lightweight browser for Raspberry Pi, with some excellent privacy features. It is a WebKit-based web browser for the Linux platform using fewer system resources than other browsers.
Midori comes with a built-in K-LamarVPN to make your connections more secure. The built-in ad blocker will prevent the browser from taking up system resources by blocking the ads from loading.
Key features of the Midori Browser:
Lightweight browser for Linux platform with built-in privacy features
Built-in adblocker that helps save CPU and RAM resources
Offers built-in VPN, customization options, and extension support
The RSS feed integration provided by the browser is excellent
Based on the popular WebKit engine, GNOME Web codenamed Epiphany is a web browser for the GNOME desktop and elementary OS.
One of the unique features of the Web is its ability to make any website a first-class citizen of your GENOME desktop to be used as an app.
In a lightweight package, the browser offers all the essential and extra features, such as bookmark sync, password manager, and more. The ARM port makes it possible to use the browser on any Raspberry Pi device.
Key features of GENOME Web:
Enables users to import bookmarks, history, and passwords from their Firefox profile
Built-in adblocker to block web trackers and annoying pop-ups
Clean user interface with minimal impact on system performance
Can create apps for the website that don’t have official desktop apps
The fact that every module, from the user interface down to the numerous blockers, can be customized is Luakit’s defining characteristic.
Luakit, according to its inventor, is “mainly geared at power users, developers, and anybody who wants to have fine-grained control over the behavior and interface of their web browser.”
It is possible to utilize the basic version of the browser even if you have no prior experience with programming, even though this may seem scary. Although not everyone may find it appealing, it balances high performance and ease of use.
Moreover, it is reasonable to assume that one of the web browsers everyone wants to have installed on their computer is this one due to its lightweight form.
The Lua programming language and the open-source Webkit engine are the foundations for the Luakit web browser. They are both incredibly lightweight (it has just 9,000 lines of code) and minimalistic.
If you were a fan of Opera One in the past, you probably still remember its look. This is exactly what the team behind Otter Browser is trying to replicate.
The browser is made using Qt5, and it has most features that regular browsers have. Regarding availability, you can get this browser for almost any operating system, including Raspberry Pi.
We must mention that the browser is in active development, and some features are probably missing. This includes tab grouping, extensions, and autofill completion, but we should see them added soon.
Overall, it’s a great browser for Raspberry Pi, especially if you need a lightweight solution, so be sure to give it a try.
Readiris is OCR software with which you can edit the text in images. However, that software might throw up a Readiris has stopped working error message for some users.
Users have stated that they get error messages that usually say a problem caused the program to stop working correctly. If you are also facing this issue, this guide will show you how to fix it.
Tip
If you face these issues regularly, try a different portable document software that offers full OCR support. Soda PDF stands out in this regard as it allows you to read, convert and edit handwritten and printed text from image sources and save it to the digital format of your choice.
Why has Readiris stopped working?
A series of factors can cause the Readiris to stop working. Below are some of them:
Outdated driver: An outdated driver is one of the prominent causes of this issue. You can quickly fix this by updating your drivers to the latest version.
Interference from third-party apps: If you have a third-party app running a counter-program to Readiris, you can encounter this error. The solution to this is to perform a clean boot.
Lack of privilege: Sometimes, Readiris can stop working if you don’t have administrative privileges. Running the app as an admin should get rid of this issue.
How can I fix the Readiris has stopped working error?
Before proceeding to the fixes in this section, try the following preliminary troubleshooting steps:
If this does not work, you can now proceed to the solutions below:
1. Update device drivers
1.1. Perform a manual update
Press the Windows key + X and select the Device Manager option.
Double-click the option you want to upload drivers for and right-click the device there.
Now, select the Update driver option.
Choose the Search automatically for drivers option.
Finally, install any available updates.
If Readiris stops working, a manual update can be a very efficient method to solve the problem. Just open the Device Manager and follow the easy steps mentioned above.
1.2. Use a dedicated tool
The Readiris has stopped working error might also be due to antiquated or incompatible drivers. For example, a computer cannot handle video cards, computer programs, sound cards, or other hardware; a driver must manage them.
You can manually update drivers if you thoroughly understand your PC’s requirements. The driver updater utility is the best alternative. Updating your drivers with a professional solution is a realistic choice for resolving Raediris issues on Windows.
Outbyte Driver Updater uses easy, quick, and safe technology, all wrapped up in one performant program that will also optimize your computer hardware. In addition, this solution has a sizeable daily-updated driver database, so it will provide the most recent drivers available after scanning your system.
Now, try to rerun the app. If this fixes the issue, right-click the Readiris shortcut and select Properties.
Click the Compatibility tab at the top.
Finally, check the Run as administrator box and click the Apply button, followed by OK.
One of the quick ways to fix the Readiris app stopped working issue is to run it as an administrator.
3. Use a different portable document software
While Readiris offers users a comprehensive set of valuable features, you can try a different software if this one frequently crashes on you.
SodaPDF is a reliable and simple alternative with a powerful optical character recognition feature that can be used directly from your browser without any installation required.
You can then edit and merge your newly created documents and save them to multiple formats, including PDF, DOCX, and XLSX.
The tool has strong encryption and only stores the files you upload for 24 hours. It also allows you to download dedicated applications for multiple platforms if that is what you prefer.
SodaPDF is very resourceful, providing the tools to edit documents and e-sign, split, compress, and even password-secure them.
The tool also lets you create and fill forms, add annotations such as comments and sticker notes, and batch convert a more extensive set of files to the format of your choice.
4. Select the Run this program in Compatibility Mode for: Option
Right-click a Readiris program icon
Select the Properties option.
Select the Compatibility tab at the top.
Click the Run this program in compatibility mode setting.
Select an earlier Windows platform from the drop-down menu.
Select the Apply option on the Compatibility tab, and press the OK button.
If you’re utilizing an earlier version of Readiris (such as Readiris 10 or 11) that predates your Windows platform, you might need to run the software in compatibility mode.
Stopped working error can often be about software incompatibility with Windows.
Press the Windows key + R, type msconfig, and click the OK button.
Click the Services tab at the top.
Now, check the Hide all Microsoft box and click the Disable all button.
Click the Startup tab at the top and select Open Task Manager.
Right-click each of the apps there and select the Disable option.
Finally, go back to the System Configuration window, click the Apply button, followed by OK, and restart your PC.
The Stopped working error message windows can often pop up because of conflicting software.
For example, Norton Antivirus and EVGA Precision are two programs that users have discovered to be responsible for them. As such, clean booting Windows might fix the Readiris has stopped working error message. However, that will disable third-party startup software and services.
If Readiris runs after the clean boot, one of the programs included on Task Manager’s Startup tab is probably conflicting software.
You can undo the options above to restore Windows to the average startup. Then manually disable programs listed on Task Manager’s Startup tab one at a time to find which is the conflicting software.
6. Turn off Data Execution Prevention
Press the Windows key + S, type cmd, and select Run as administrator under Command Prompt.
Type the command below and hit Enter to run it: bcdedit.exe /set {current} nx AlwaysOff
Close the Command Prompt window, and then open the Readiris software.
Finally, run the command below to turn DEP back on: bcdedit.exe /set {current} nx AlwaysOn
Data Execution Protection (DEP) can also block programs from starting. So, turning DEP off could also be a potential fix for the Readiris has stopped working error message.
7. Check the Windows Image Acquisition (WIA) Service
Press the Windows key + R, type services.msc, and click the OK button.
Double-click Windows Image Acquisition (WIA) to open its properties.
Select Automatic from the Startup type drop-down menu if that option isn’t already selected.
Now, click the Recovery tab shown directly below.
Select the Restart the Service option from the First Failure drop-down menu.
Then select the Apply and OK options.
Those are some of the fixes that might get Readiris up and running. In addition, running a System File Checker scan and restoring Windows to a restore point might also fix the Readiris has stopped working error.
The Windowed Mode feature in Steam allows users to run some legacy games on their computer, which otherwise won’t launch. It is also helpful in playing certain games with high system requirements on a low-end PC.
Besides, it helps eliminate a range of errors. But not all Steam games can be opened as easily in Windowed Mode. Each may require a unique method, so you must know them all. Let’s find out!
Why should I run Steam games in Windowed Mode?
Here are a few reasons why many prefer playing games in Windowed Mode:
Seamlessly switch between apps: The primary benefit of Windowed Mode is the ability to switch between apps or check notifications and other elements while gaming.
Eliminates problems with resolution: Some older games tend to run better when in Windowed Mode. Otherwise, the display quality is affected.
Best for multi-monitor setup: Gamers with a multi-monitor setup prefer Windowed Mode for games since it allows them to check things easily on the secondary monitor.
How do I launch Steam games in Windowed Mode?
Tip
Before making changes to the game settings, try using the Alt + Enter keyboard shortcut. Though not a universal thing and applicable in every game, it might work for some. Also, some other solutions, too, won’t work for every game. So make sure to try them all and identify the one that does.
1. Modify game settings
Launch Steam, navigate to the Library, right-click on the concerned game, and select Play.
Now, head to the Display (or similar) settings in the game.
If there’s an option for it, turn on Window Mode.
If the Steam game doesn’t switch to Windowed Mode immediately, restart it for the changes to come into effect. Remember, not every game offers a built-in option to switch between display modes, so you may have to try the next method.
2. Change Steam launch parameters
Open Steam, go to the Library from the top, right-click on the game, and choose Properties.
In the General tab, enter the following under Launch Options:-windowed
Once done, launch the game and check if it opens in Windowed Mode.
If that doesn’t work, try entering the following instead to set the display resolution:-windowed -w 1024
If the Steam game doesn’t have a built-in setting to enable Windowed Mode, you can modify the launch options. Though, this, too, has been found to fail at times.
Tell us which method worked for you and the game you were trying to play in Windowed Mode. In case none worked, it’s likely that the developers didn’t add the functionality, and the game can’t run that way.
The amifldrv64.sys is a system file created by the American Megatrends, Inc for strangers. Users can find the amifldrv64.sys file in the C:\Windows\Temp\ folder.
Also, amifldrv64.sys is one of the various blue screen of death (BSOD) errors encountered by users while updating the BIOS version on their PC. Therefore, this guide will put you through the causes and how to fix amifldrv64.sys.
The amifldrv64.sys error can occur due to several reasons, such as:
BIOS update conflict – amifldrv64.sys error occurs when a user tries to update the BIOS with Windows OS; there is a conflict between the update and OS.
Virus or malware attacks – a virus attack on the user’s PC can corrupt the C:\Windows\Temp\ folder, causing an amifldrv64.sys error.
Driver verifier error– the Driver Verifier can be a threat to the system when it can not verify some third-party driver utility on your PC while updating BIOS prompts the error.
Systems interrupted during update – an interruption in the machine hardware while trying to update the BIOS can trigger an amifldrv64.sys error.
How can I fix the amifldrv64.sys?
Here are some preliminary checks you can try to fix amifldrv64.sys before any advanced troubleshooting steps.
In case your driver didn’t update accordingly by manually performing this, you can try a dedicated tool to update it automatically with the latest version from its repository.
One of the best ways to protect your data is to encrypt it, and many users use BitLocker. You may, however, run into problems with the Bitlocker password prompt screen.
Even though BitLocker is a great feature, we have had a few users who have reported issues.
We will explore some causes and recommend our top solutions to this problem.
Why does the BitLocker screen appear?
BitLocker is a security feature that encrypts the data on the hard drive and requires a password or a smart card to unlock it. The Bitlocker screen may appear for the following reasons:
Configuration type – The device is configured to use BitLocker Drive Encryption to protect the stored data.
Status level – A user has enabled BitLocker on their device, and the encryption process is ongoing or has completed.
Unlock requirement – The device has restarted or been turned off and requests the BitLocker key or recovery password to unlock the drive.
BitLocker is a great feature if you want to encrypt your hard drive and protect it, but sometimes issues can occur. Speaking of issues, here are some common problems that users reported:
Windows 10 BitLocker black screen – This is a relatively common problem, and to fix it, you need to enter your password, even if the prompt screen isn’t visible.
BitLocker isasking for a recovery key instead of a password – To fix this issue, you can try using the Command Prompt to enter your recovery key and then encrypt your hard drive again.
BitLocker blue screen – This is a common problem, and outdated BIOS might cause it. Update your BIOS and check if that solves the issue.
BitLocker does not prompt for a password – If you encounter this issue, try switching to LegacyBoot and check if that solves your problem.
The BitLocker password prompt is not working – This problem can occur due to the Fast Startup feature, but once you disable it, you should be able to use the password prompt again.
How do I get past the BitLocker password prompt screen?
1. Enter your PIN blindly
Users reported that instead of BitLocker prompt screen, they are getting a solid blue screen with no input field to enter their PIN. This can be a bit daunting, but you should know that you can still enter your PIN on the solid screen even if you don’t see the password field.
Enter your PIN blindly, and you should log in to Windows 10 without problems.
2. Remove the problematic update and reinstall it
2.1 Remove updates
Hold down the Power button for about ten seconds, then press the Power button to start the computer.
On any indication that the computer has started, repeat step one.
Once again, repeat step one a third time when the computer is about to start.
The computer will enter winRE, and in the Choose an option windows select Troubleshoot.
Now navigate to Advanced options.
Click Startup Settings.
Then click the Restart button.
Press 5or F5for Safe Mode with Networking.
Open the Settings app by pressing Windows + I and go to Update & security.
Now click on View your update history.
You’ll see all installed updates in the Update history section. Click on Uninstall updates.
Find the problematic update and double-click it to uninstall it. Users reported that the KB3172985 update caused the issue for them; therefore, be sure to remove it.
Restart your computer.
After removing the update, you need to suspend BitLocker temporarily.
2.1 Suspend bitlocker
Press Windows Key + S and enter BitLocker. Next, select Manage BitLocker from the list of results.
You should now see your encrypted drives. Select the Suspend protection option.
After suspending BitLocker protection, you need to reinstall the update. First, go to the Windows Update section in the Settings app and check for updates to download the missing update automatically. After reinstalling the update, the issue should be resolved, and you can turn on BitLocker protection.
3. Use Command Prompt
Hold down the Power button for about ten seconds, then press the Power button to start the computer.
On any indication that the computer has started, repeat step one.
Once again, repeat step one a third time when the computer is about to start.
The computer will enter winRE, and in the Choose an option windows select Troubleshoot.
Now navigate to Advanced options.
Select Command Prompt. If you have access to the Windows login, jump to step 7 to access your Command Prompt.
Start Command Prompt as administrator. You can do that by pressing Windows Key + X and selecting Command Prompt (Admin) from the menu.
Once the Command Prompt opens, enter the script below and press Enter to run it. bfsvc.exe %windir%boot /v
After you execute the command, the issue with the BitLocker password prompt screen should be fixed completely.
4. Use legacy boot
Press the Windows Key + X and select Command Prompt (Admin) from the menu.
When Command Prompt starts, type the script below and hit Enter. bcdedit /set {default} bootmenupolicy legacy
After enabling legacy boot, your boot screen might not look as pretty, but you should have no problems with the BitLocker password screen.
Windows 10 uses a new graphical boot menu, and sometimes that boot menu can lead to specific issues, such as problems with BitLocker password prompt screen. However, according to users, if you switch back to legacy boot, there are no problems with the BitLocker password screen.
5. Disable the Fast Startup feature
Press Windows Key + S, enter power settings, and then choose Power & sleep settings from the results list.
Click on Additional power settings in the Related settings section.
The Power Options window will now open. Select Choose what the power button does option from the left pane.
Click on Change settings that are currently unavailable.
Uncheck Turn on fast startup (recommended) option and click Save changes.
Afterward, go to BIOS and look for the Fast Startup option there. After you disable Fast Startup in BIOS and Windows, the problem should be resolved entirely.
Fast Startup can be pretty valuable since it will allow your PC to boot faster, but this feature can sometimes cause problems with BitLocker password prompt screen despite its usefulness. Users recommend disabling Fast Startup on their PC and BIOS to fix this issue.
6. Update your BIOS
Press the Windows Key + X and select Command Prompt (Admin) from the menu.
When Command Prompt starts, type the script below and hit Enter. wmic bios get serialnumber
Go to your manufacturer’s website and use the serial number to download your BIOS. This step will be different for brands.
If you’re having Bitlocker password prompt screen problems, the problem might be your BIOS. Several users reported fixing this issue simply by updating their BIOS to the latest version.
We also wrote a short guide on how to flash your BIOS, so you might want to check it out for some general instructions. Once you update BIOS, disable BitLocker and enable it again, and the issue will be resolved.
7. Use a Command Prompt outside of Windows 10
Hold down the Power button for about ten seconds, then press the Power button to start the computer.
On any indication that the computer has started, repeat step one.
Once again, repeat step one a third time when the computer is about to start.
The computer will enter winRE, and in the Choose an option windows select Troubleshoot.
Now navigate to Advanced options.
Select Command Prompt. If you have access to the Windows login, jump to step 7 to access your Command Prompt.
Start Command Prompt as administrator. You can do that by pressing Windows Key + X and selecting Command Prompt (Admin) from the menu.
When Command Prompt opens, type the script below and hit Enter. manage-bde – status
You should now see the list of volumes. Type the script below and hit Enter, replacing C with the letter of the encrypted drive. manage-bde -protectors - disable C:
Now run the command below as well. wpeutil reboot
After executing all commands, close Command Prompt, restart your PC and check if the problem is resolved.
Alternatively, you can use the following commands:
Remember that these commands might not fix the problem but will allow you to reaccess Windows 10.
According to users, if you have problems with BitLocker password prompt screen, you might be able to fix it simply by running a couple of commands outside of Windows. This is pretty simple, and you can do it by following these steps:
8. Disable Secure Boot
Power on your device, and once it starts, press F10 (this works for HP and may be different in other brands).
Use the Arrow key to navigate to the Boot option.
Navigate to Secure boot, and change it to Disabled.
If you’re having problems with BitLocker password prompt screen, you might be able to fix the issue by disabling the Secure Boot feature in BIOS.
To see how to access BIOS and disable this feature, we strongly advise you to check your motherboard or laptop manual for detailed instructions.
9. Run a bcedit command
Start Command Prompt outside of Windows 10 as outlined in solution 7.
When Command Prompt starts, run the script below and hit Enter. bcdedit /set {bootmgr} bootshutdowndisabled 1
After running this command, your PC won’t shut down during the password prompt screen.
According to users, their PC shuts down on BitLocker password prompt screen. This is somewhat normal and automatic, but you can fix the issue by running a single command.
10. Remove the hard drive and decrypt it on another PC
According to users, they fixed issues with BitLocker password prompt screen on their PC by removing their hard drive and decrypting it on another PC. To do that, you must turn off your PC, disconnect it from the power outlet, open the case, and remove your hard drive carefully.
Now connect your hard drive to a different PC and decrypt it. Once that is finished, insert the hard drive back into your PC. If everything works properly, it’s advised to update your system before you encrypt the hard drive again.
If any updates are available, they will be downloaded in the background and installed as soon as you restart your PC. Once your system is updated, you encrypt your hard drive again.
BitLocker is one of the simplest ways to encrypt and protect your hard drive, and if you’re having problems with BitLocker password prompt screen, be sure to try some of our solutions.
The search engine world is dominated by Google, and Microsoft Bing is in a distant second place holding just a fraction of a user base.
Microsoft plans to change that with the introduction of ChatGPT integration to Bing. In case you’re not familiar with it, read our guide on ChatGPT Professional to learn more.
Speaking of which, this feature is now available in a limited preview form to all users, so join us for a new Bing review to learn what it can offer.
How can I use the new Bing with ChatGPT?
Using the new Bing is simple, and you just have to visit the Bing homepage and you should see ChatGPT suggested queries available right below the search bar.
In our initial testing, these features weren’t available, but after changing the Bing region settings to the United States, the problem was resolved.
What can Bing with ChatGPT do?
Once you open Bing, you need to choose one of several available queries. At the moment, it’s not possible to input your queries, due to the nature of the limited preview.
Once your query has been processed by the AI, you’ll get the results in the right pane right next to regular search results.
If you want, you can check the source for each piece of information generated by ChatGPT simply by clicking the highlighted text in the response or picking the source from the list of sources at the bottom.
Of course, it’s possible to copy the entire response if you wish to save it or share it. However, we have to inform you that one of the most important features of ChatGPT isn’t currently available.
You can’t chat with the ChatGPT even though Bing gives you a list of potential responses you can use. This is because this is just a limited preview, and if you want to utilize ChatGPT to the fullest, you have to join the waitlist.
Currently, there are only four queries available from the main page and about 12 more from the Learn more page.
It’s worth mentioning that certain queries use a different layout and they will display the ChatGPT results before the actual search results.
If you use this layout, you’ll notice extra prompts available at your left, and you can use them to generate your story, tweet, summary, code, letter, or joke.
Do keep in mind that you’ll always get the same results, but it’s exciting to see what this feature will be able to do in the future.
Issues with Bing and ChatGPT
We have noticed several issues with this feature, most notably that text isn’t showing properly if it exceeds a certain length. Since there’s no scroll bar available, you can’t see it in its entirety.
The share feature is sometimes available, but it doesn’t work. However, we didn’t find this to be a dealbreaker. In a few instances, we got errors saying that there was a problem with the service, but that’s likely due to a high number of requests.
Conclusion
Bing with ChatGPT sounds like a revolutionary idea, especially if you’re a frequent ChatGPT user. However, since this is an early preview, you can only use predetermined queries.
Chatting features and custom queries aren’t available, and if you want to test them, you’ll have to join the waitlist.
It’s exciting to see that Microsoft is utilizing ChatGPT to enhance its search results, and we can’t wait to get access to all the features.
If you want to learn more about this feature, we suggest reading our ChatGPT vs Google guide and see how it compares to the world’s biggest search engine.
And with that, we conclude our new Bing review. Have you tried this feature yet, and are you excited about it? Let us know in the comments below.
Windows 10 uses many different components and drivers in order to work properly. As expected, one of those components is none other than the Microsoft RRAS Root Enumerator.
This is a driver, and it’s used to ensure that certain legacy devices are working properly on your PC, especially while booting.
Many users aren’t familiar with this component, so in today’s article, we’re going to take a closer look at the Microsoft RRAS Root Enumerator and see what it does.
How does Microsoft RRAS Root Enumerator work?
Microsoft RRAS Root Enumerator driver works alongside your system, and it helps boot certain devices that are connected to your PC.
For example, if a device is trying to install drivers or software, and the device uses rooted software, the Root Enumerator will assign a specific value to this device.
By using Root Enumerator, the newly installed device can start automatically during the boot. In case the Enumerator isn’t working properly, your device might have issues starting.
Keep in mind that this isn’t an essential component, and few users reported issues with it, especially while gaming.
It is also important not to confuse it with the Microsoft Device Association Root Enumerator which is used to run old devices such as serial ports, TWAIN devices, and MIDI devices.
The easiest way to remedy those issues is to disable the driver, and in the next section, we’ll show you the proper way to do that. The process is simple, and it will take you only a couple of seconds to do it.
How can I disable Microsoft RRAS Root Enumerator?
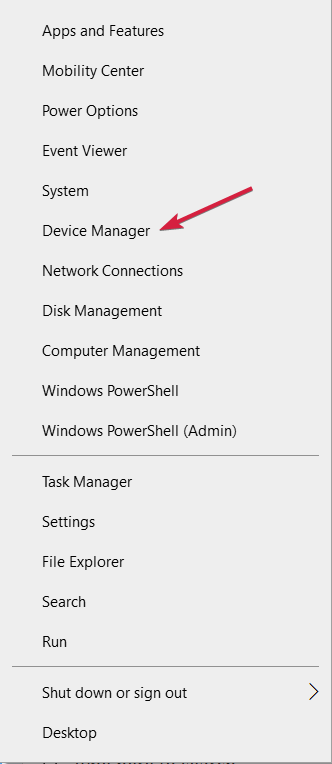
Press Windows key + X to open the administrative menu.
Select Device Manager from the list of options.
Expand the Software devices section.
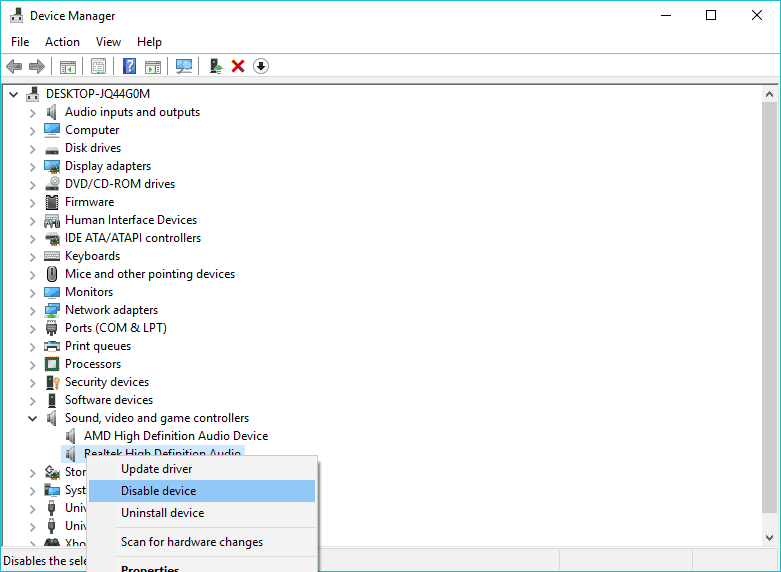
Locate Microsoft RRAS Root Enumerator and right-click it, then choose Disable device from the menu.
When the confirmation dialog appears, click on Yes.
After doing that, your Microsoft RRAS Root Enumerator will be disabled. Many users reported fps issues in games such as Tekken 7, Dark Souls 3, and Sekiro, and the issue was caused by the Microsoft RRAS Root Enumerator driver.
After disabling this device, the problem should be resolved, and the frame rate will return to normal.
You can also use a dedicated driver updater software like Outbyte Driver Updater to perform this task a lot quicker and safer.
Disabling Microsoft Device Association Root Enumerator usually doesn’t have any negative consequences, but if you’re using MIDI devices, TWAIN devices, or serial ports, those devices might not work with the Root Enumerator disabled.
To fix this problem, simply enable Root Enumerator by following the similar steps that we described here and then restart your PC to fix this issue.
How to disable the Microsoft Device Association Root Enumerator?
Some of our readers had problems while playing Elden Ring caused by another component called Microsoft Device Association Root Enumerator.
Uninstalling that device solved the issue with the game so you might want to try that also.
Fortunately, the previous solution works seamlessly to remove the Microsoft Device Association Root Enumerator.
These solutions also work for Windows 11 so if you’ve switched to the new OS and have the same problem, the guide will come in handy.
The Microsoft RRAS Root Enumerator and Microsoft Device Association Root Enumerator drivers have a certain purpose on your PC, but they are not essential in any way, and you can disable it if you want without any worries.
We hope that you learned a thing or two after reading this guide and that you have a better understanding of what is the Microsoft RRAS Root Enumerator and how it works.
Drivers play important roles in the connection between your printer and PC. However, some users are complaining of a printer driver is unavailable error on Windows 10 for some reason.
This can be frustrating, as it renders your hardware useless. Fortunately, it is an issue that can be fixed easily by following the solutions in this guide.
How to fix printer driver is unavailable error?
General fixes
1. Update PC
Press the Windows key + I to open the Settings app and select the Update & Security option.
Click the Check for updates button.
Now, download and install any available updates.
In most cases, the printer driver is unavailable issue can be caused by an outdated PC. Windows updates are important for keeping your PC running smoothly and can sometimes include driver updates.
Hence, the first thing you need to do to fix this issue is to update your PC to the latest version.
2. Update the driver manually
Go to your printer manufacturer’s website to download the latest driver. Below are the links you can use:
Press the Windows key + X and select the Device Manager option.
Now, double-click the Print queues option to expand it and right-click your driver.
Select the Update driver option.
Next, choose Browser my computer for drivers.
Now, click the Browse button.
Finally, select the driver in Step 2 and follow the onscreen instructions to complete the process.
Another effective method of fixing this printer driver unavailable issue is installing the required drivers from the manufacturer’s website. This is because the generic drivers on Windows are sometimes not enough.
Downloading and installing drivers manually may be a big problem, especially when the wrong driver version is installed. This may lead to serious malfunctions.
We strongly suggest you update your driver automatically with a dedicated tool. All you need to do is to install it and let it scan your PC for missing and out-of-date device drivers. The best part is yet to come. You can choose to download all of your faulty device drivers at once.
Fix Canon printer driver is unavailable
Press the Windows key + R, type devmgmt.msc, and click OK.
Expand the Print queues option and right-click your printer.
Now, select the Update driver option.
Next, select Browser my computer for drivers.
Choose Let me pick from a list of available drivers on my computer.
Finally, select the Generic software device and click the Next button.
If the Canon printer driver is unavailable, you might need to downgrade to the default Windows driver. This has fixed this issue for many users, and you can also use it for Brother and HP printers.
Fix the HP printer driver is unavailable
1. Uninstall and reinstall the printer using the Windows driver
Press the Windows key + R, type control, and select the Control Panel option.
Click the View devices and Printers option under Hardware and Sound.
Now, right-click your printer and select Remove device.
Next, go back to the Control Panel window and choose to Uninstall a program under the Programs option.
Right-click all the HP printer options, select the Uninstall option and follow the onscreen instructions to complete the process.
Now, press the Windows key + X and choose Device Manager.
Expand the Print queue options and right-click your printer.
Select the Uninstall device option.
Check the box for Delete the driver software for this device if it is available, and click the Uninstall button.
Next, disconnect your PC and printer from the internet and restart them both.
Now, repeat Steps 1 and 2 above and click the Add a printer option.
Choose Windows update when prompted for drivers.
Fill in the Manufacturer’s name appropriately and choose your printer in the Printers pane.
Now, power your printer and connect to the network via a cable.
Finally, follow the onscreen instruction to complete the process.
If your HP printer driver is unavailable on your PC, you need to uninstall the device completely and start the connection all over. This should clear any roadblock causing the issue.
2. Run the HP Printer Scan Doctor app
Another excellent option to try if you are getting the printer driver unavailable error on your HP printer is to use the official diagnosis app.
The HP Printer Scan Doctor app helps to troubleshoot and fix a series of issues and should be useful in this case too.
Right-click the Start icon and select the Device Manager option.
Expand the Print queue option and right-click your driver.
Now, select the Update driver option.
Lastly, choose the Search automatically for drivers option and install any available update.
If the printer driver is unavailable is troubling you on your Brother printer, it might be because of an outdated driver. You can update it using the Windows update feature or via the manufacturer’s website, as shown earlier in this guide.
2. Run the printer troubleshooter
Press the Windows key + I and select the Update & Security option.
Click Troubleshoot in the left pane and select Additional troubleshooters.
Now, select the Printer option and click Run the troubleshooter.
Another effective method for fixing this issue on the Brother printer is to run the built-in troubleshooter. This should help diagnose the potential causes of the problem and suggest possible solutions.
With this, we can conclude this guide on the printer driver is unavailable error. It should be noted that the solutions in this guide can be used interchangeably for all the products listed.
Are you split between a Windows 11 clean install vs. an upgrade? This guide should make a choice easier.
Windows 11 has been out for some time, and users are eager to switch and give it a try. Microsoft has streamlined this process so you can upgrade with just a few clicks.
However, many are worried about potential compatibility issues, so they prefer to do a clean install instead.
Today’s guide will look at Windows 11 upgrade and a clean install. Then, we will see which is a better method to use if you want to upgrade to the latest version.
Should I go for a Windows 11 upgrade or a clean install?
What does Windows upgrade do?
In essence, a Windows 11 upgrade may do the following:
Add features – Introduce new features and improvements to the operating system. This includes an updated user interface, improved performance, and enhanced security features.
File preservation – Preserves existing files, settings, and installed applications, allowing you to keep your current configuration. Also, you minimize the time spent reconfiguring your system after the upgrade.
The upgrade process is designed to be straightforward, and it allows you to upgrade to Windows 11 with ease. This makes upgrading to the latest version as simple as installing a system update.
Head to the Update & Security Settings section, where you can download and install the latest version. Then, click the button and follow the instructions on the screen.
The disadvantages of upgrading to Windows 11 as opposed to performing a clean install are:
Potential compatibility issues – Upgrading may not resolve all compatibility issues with older applications and hardware. So, some may still experience performance issues or become inoperable.
Risk of data loss or corruption – Upgrading carries a risk of data loss or corruption. This is more likely if there are issues with the upgrade process. However, the risk is lower with a clean install, but you’ll need to back up all your data beforehand.
Slower performance – The upgrade process can be resource-intensive and slow down your computer. However, a clean install often improves performance since it starts with a clean slate.
Storage – A main disadvantage of the upgrade is that it utilizes more of your storage space during the initial installation.
Although these issues aren’t common, some users reported them, so you should keep them in mind.
What should you perform before you do an upgrade installation?
If you are planning on an upgrade, you must do the following before trying the process:
Check hardware requirements – It’s advised to check the hardware requirements for Windows 11 using the PC Health Check app. If your hardware is supported, you can move to the next step. If not, there’s no need to worry since there are ways to install Windows 11 on unsupported hardware.
Free up the drive – If possible, clean up your system drive and leave as much free space as possible. You’ll need at least 64GB, but it won’t hurt to have more available.
Back-up files – It’s highly advised that you back up your files. You can move them to an external drive, a different partition on your PC, or even to the cloud. To do this, we suggest using backup software since it will speed up and automate the entire process.
Backing up your files isn’t mandatory. However, if anything goes wrong, it’s always a good idea to have your essential files in a safe location.
What does a clean install do?
A clean install is a bit more complex. It requires you to download Windows 11 ISO from Microsoft’s website and create an installation media with third-party tools.
You can also use Media Creation Tool for Windows 11 to download and create installation media from a single application. However, this method is more straightforward, so we recommend using it instead.
Once installation media is created, you need to change your boot configuration and boot from it to start the Windows 11 setup.
By using this method, you’ll get the following:
An option to clean your system drive and install the new operating system from scratch without any performance or compatibility issues.
An option to circumvent specific requirements, such as TPM and Secure Boot, is helpful for users using older hardware.
Before performing a clean install, you should be aware of the following downsides:
Process complication – Clean install requires you to create a bootable media and use a USB flash drive to start the installation. If you have never done this, it might feel a bit complicated.
File loss – A clean install will also remove all your files and apps from the system drive, so you’ll need to back up important files beforehand.
Time-consuming process – If you do a clean install, you need to install all your applications again, which can take a while, depending on the number of apps you use.
It’s worth mentioning that you can accidentally format a wrong partition and install Windows on it by mistake if you’re not careful, so this is why this method is recommended for more advanced users.
What should you perform before you do a clean installation?
If you are planning on a clean installation, you must do the following before trying the process:
Backup your data – This is the most crucial step, as a clean installation will erase all your data and settings. Ensure to back up all your important files, documents, photos, music, etc., to an external hard drive or cloud storage.
Make a list of installed applications – Write down the list of all the applications installed on your PC so you can easily reinstall them after the clean installation.
Check for Windows 11 compatibility – Ensure your computer meets Windows 11 minimum system requirements and that all your hardware and software are compatible with the new operating system.
Obtain the Windows 11 installation media – You can purchase Windows 11 from the Microsoft Store or create a bootable installation media using a Windows 11 ISO file.
Disable antivirus software – Temporarily disable any antivirus software you have installed, as it may interfere with the installation process.
Disconnect any unnecessary peripherals – During installation, disconnect any unnecessary peripherals such as external hard drives, printers, or other devices.
Transfer your settings – With a clean install, moving all your necessary settings to a different drive on your PC or, better yet, an external one is crucial. This is especially important because drives during the setup phase aren’t labeled, so you might accidentally select the wrong drive.
What is the difference between an upgrade installation vs. a clean installation?
The upgrade process is designed to be straightforward, so even if you’re not tech-savvy, you’ll be able to install Windows 11.
All your files will be there, so you can continue exactly where you left off. Plus, the upgrade is free for a limited time, so there’s no reason not to perform it.
The clean installation is a bit more complex, requiring you to create a bootable media and boot from it. This isn’t too complicated, but it does come with a learning curve.
The main benefit of the clean installation is that it will format your system drive, thus removing the previous installation and all your files and applications.
If you’re not tech-savvy and want to give Windows 11 a try without any file loss, the upgrade is the right choice for you.
On the other hand, if you’re an advanced user and you know what you’re doing, and you want a fresh start, you can use the clean install instead.
Is it better to upgrade or clean install Windows 11?
This depends entirely on your needs, but we suggest an upgrade for less experienced and advanced users.
By doing the upgrade, you’ll transfer the license to Windows 11, so you don’t have to deal with activation later.
Plus, the free upgrade process won’t last forever, and according to Microsoft, the free upgrade process should last at least until October 5th, 2022.
However, Panos Panay, chief product officer at Microsoft, stated that the upgrade offer to Windows 11 is reaching its final phase of availability, and many are speculating that the free upgrade period is quickly coming to an end.
If this turns out to be accurate, it might be a good idea to upgrade, save yourself the trouble, and use the free upgrade offer.
The main problem with the upgrade is that you’ll keep all your files, even those you don’t need, along with all apps and registry entries, which might negatively affect your performance.
However, we would go for an upgrade, and if any performance issues appear, you can always perform a clean install to fix them.
This is everything you need to know about the differences between Windows 11 setup and upgrade, and we hope this guide will help you make the right choice.
0x80070666 is a Microsoft Visual C++ installation error. When trying to install Visual C++ Redistributables on Windows, the issue arises for some users. The full error message states this:
One or more issues caused the setup to fail… 0x80070666 – Another version of this product is already installed. Installation of this version cannot continue. To configure or remove an existing version of the product, use the Add/Remove Programs.
Users can’t install the required Microsoft Visual C++ package when this happens. The error message, however, does provide a subtle hint of how to fix the issue.
This error may occur for any of the following reasons:
Conflicting installations – If you have multiple versions of the same Microsoft Visual C++ Redistributable installed on your system, it can cause a conflict and result in the installation failing with error code 0x80070666.
Corrupted installation files – The error can also occur if the installation files for the Microsoft Visual C++ Redistributable package are corrupted or damaged.
System compatibility – If your system does not meet the minimum requirements for the Microsoft Visual C++ Redistributable package, the installation may fail with error code 0x80070666.
Registry issues – The error can also occur if there are issues with the registry settings or system files related to the Microsoft Visual C++ Redistributable package.
Antivirus software – The installation may also be blocked by antivirus software that is installed on your system.
Should I install all Visual C++ redistributable?
Whether or not you should install all Visual C++ Redistributable packages depends on your specific needs and computer usage. However, here are a few reasons why installing them may be the right choice:
Required by some programs – Some programs, such as games or other applications, may require a specific version of the Microsoft Visual C++ Redistributable to be installed on your system to run correctly.
Ensure compatibility – Installing the latest versions of the Microsoft Visual C++ Redistributable can ensure compatibility with the newest software and prevent compatibility issues.
Fix errors – Installing the Microsoft Visual C++ Redistributable can help resolve error messages related to missing or outdated components.
Improving performance – Installing the latest versions of the Microsoft Visual C++ Redistributable can sometimes enhance the performance of programs that use these components.
Future-proofing – Installing the latest versions of the Microsoft Visual C++ Redistributable can help future-proof your system and ensure compatibility with future software releases.
However, keep in mind that installing multiple versions of the Microsoft Visual C++ Redistributable can take up considerable space on a PC. Therefore, you should only install the versions required by your programs.
If you are still determining which version to install, it is best to check the system requirements for the software you are using or consult a professional.
How can I fix error 0x80070666?
1. Uninstall Visual C++ packages already installed
Press the Windows key + R hotkey.
Type appwiz.cpl in the Open text box and click OK.
Select a Microsoft Visual C++ package to uninstall, then click Uninstall.
Then go through the uninstall guidelines to remove the software.
Repeat steps three to five to uninstall all Visual C++ packages.
After doing that, restart your PC and try to install the desired package again.
2. Check for Windows updates
Press the Windows key + S keyboard shortcut to check for Windows updates.
Type the keyword updates in the search box. Click Check for updates.
Then press the Check for updates button. Windows 10 will download pending updates.
After that, you’ll need to restart Windows.
3. Repair the Visual C++ installer
Press Windows key + R and enter appwiz.cpl. Press Enter.
Select the version of Visual C++ Redistributable that you want to repair and click Change.
Select Repair.
Follow the instructions on the screen to complete the process.
Do this for all other versions of Visual C++ Redistritubatbles.
Open the troubleshooter’s window, and click Advanced.
Select Apply repairs automatically and click Next.
Now select the Installing option.
Select the Visual C++ package where error 0x80070666 arises, and press the Next button.
Wait for the process to finish.
Those are a few more widely confirmed resolutions with fixed error 0x80070666 for users. So, they’ll probably resolve the issue so you can install the required Visual C++ package.
You must listen to a microphone when you buy one to test its quality. That way, you can discover and, subsequently, troubleshoot any audio problem you may come across.
For example, you may hear a high-pitched noise coming from your speakers. This can be the result of an improperly placed microphone. Maintaining your mic is a great way to ensure its longevity.
What may cause microphone problems?
Before learning to listen to your microphone, it’s essential to understand why you should do it. As stated, this can help you zero in on issues or malfunctions.
Below is a list of the most common mic problems, but it is by no means an exhaustive list:
Your computer has low volume, or your mic is muted – It may seem obvious here, but having little to no volume from your source means you can’t properly test the devices.
The mic has not been properly set up – Without a proper set up, your device will not work. Fortunately, it’s easy to do as you mainly have to tweak a few things in Settings.
There’s too much background noise – Background noise can interfere with the recording process. You should download some noise canceling software to stop this problem.
Devices are poorly connected – Bad connections can cause audio to become distorted. Double-check the cables and make sure everything’s plugged in all the way.
You can listen to your microphone on Windows 11 to test it properly in two main ways. But before you do, it’s recommended that you do the following to ensure the mic will work correctly.
As alluded to earlier, make sure you increase the volume on your computer to the proper levels. This is a really common mistake that people often overlook when testing audio devices.
Update your microphone’s drivers to ensure good device performance. And to that extent, install any missing Windows 11 updates you may have lingering in the back.
Double-check if the mic is selected as the main audio input. You can do the latter by going into the Sound section of the Settings menu. See if it’s enabled.
Run the audio troubleshooter if you experience any trouble with the mic. Microsoft’s website provides instructions on how to find and locate the troubleshooter.
And if all else fails, you might need a new microphone. The only reason why a mic wouldn’t work after performing all these steps is due to malfunctioning parts.
1. Test via the Settings menu
First, make sure your microphone is connected to your PC’s port.
Next, launch the Settings menu and click Sound in the System tab.
In the Input section, select the microphone you want to test.
Under Input Settings, click the Start Test button at the bottom and speak into your microphone. You should see a bar moving as you speak.
See if your computer is picking up the audio. You must plug in your headphones to hear the microphone much better. If that doesn’t work, you can try out the following solution.
2. Listen through a playback device
Right-click the Windows logo in the bottom-left corner and select Run.
Enter mmsys.cpl, then click OK to open the Sound menu.
Click the Recording tab, and double-click the microphone that you’re using.
In this new window, go to the Listen tab.
Enable Listen to this device.
Expand the menu under Playback through this device and select an output for your microphone’s audio.
Click Apply, then OK.
Additionally, it’s recommended that you turn off audio enhancements which you can do by going to the Advanced tab.
Under Signal Enhancement, select the box next to Enable audio enhancement to disable the feature.
Click Apply, then OK.
When you’re done testing, be sure to turn this feature off. If you don’t, you may cause a feedback loop with another device. This can also occur if the settings aren’t correctly configured.
In the Windows Search bar, type in Recorder and select the native Sound Recorder app.
Plug in your microphone and hit the red Record button to begin recording your voice. If the app asks you for permission to access the mic, select Yes.
Once you’re done recording, you can listen to the audio and hear how you sound.
Are there ways to improve my audio quality?
After you finish testing, you may begin wondering how you can improve the audio quality on your Windows 11 machine. Well, there are two main ways to do it.
You can download proper recording software, giving you better control over your audio and how it sounds. Some can professionally record, edit, and mix audio files like Adobe Audition.
Feel free to comment below if you have questions about other microphone problems. And please tell us if there’s a specific guide for a Windows 11 error that you’d like to see.
In recent years, Apple added various productivity tweaks to its iOS operating system for mobile devices.
Among these tweaks is Files, a native file system that allows users to interact with documents and images without using third-party tools. This also means that OneDrive can be accessed through the Files app.
With these changes ongoing, it is possible that you’d have OneDrive files not syncing on iPad or iPhone. So let’s find out why you face the problem and the solutions that actually work.
Why are OneDrive files not syncing?
Here are a few reasons OneDrive files are syncing on iPad and iPhone:
Issues with the Internet connection: A stable Internet connection is a must for syncing. So your primary approach should be to check for that.
Running out of storage: If the OneDrive is full or low on storage, it will not be syncing files on iPad, or any other device, for that matter.
Misconfigured settings: Certain settings need to be enabled for syncing to work, as illustrated in the solutions below.
Outdated version: If you are running an outdated version of the OneDrive or iOS, chances are, you will encounter issues with syncing on OneDrive.
What can I do if OneDrive files are not syncing on iPad?
Before we head to the slightly complex fixes, here are a few quick ones to try first:
If you are using mobile data, switch to Wi-Fi, and verify if OneDrive is still not syncing files on iPad.
Check if there’s enough free storage on OneDrive for files to sync. If that’s not the case, delete some files or add storage to OneDrive.
Update both the iPad software and the OneDrive application on it.
Check if the file name contains any restricted characters and remove them. These include, /, <, >, :, *, “, ?, |, or periods at the start or end of the file name.
If you are facing issues accessing files on iPad that were synced on another device, make sure they were not deleted.
If none of these work, head to the solutions listed next.
1. Enable Background App Refresh
Open iPhone Settings, and tap on OneDrive from the list of apps here.
Now, enable the toggle for Background App Refresh.
If the toggle is greyed out, head to Background App Refresh under General settings, and enable it from there.
2. Clear account settings for OneDrive
Open the Settings app on your iPad or iPhone, locate OneDrive, and tap on it.
Now, enable the toggle for Clear Account Settings.
Once done, press the Home button twice or scroll upwards from the bottom, as the case may be, and terminate the OneDrive application.
Next, restart the device, log into OneDrive with your credentials, and it should now work fine.
A quick fix shared by Microsoft support with one of the affected users when OneDrive files were not syncing on the iPad was to clear the account settings and re-login to the app. If that doesn’t work, head to the next solution.
3. Reset iPad settings
Open Settings on your iPad, choose the General tab from the left, and tap on Transfer or Reset iPad.
Tap on Reset.
Choose the Reset All Settings option here and wait for the process to complete.
Several users reported that resetting the iPad settings to their default state helped fix things when OneDrive was not syncing files on iPad. Remember, this also works on iPhones.
4. Reinstall OneDrive
Locate the OneDrive app on the home screen, tap and hold it, and then choose Remove App.
Now, tap on Delete App.
After it’s deleted, restart the device, then open the App Store, and download OneDrive all over again.
Sign in with your credentials, and you shouldn’t face issues with syncing anymore.
That’s all for now! One of these solutions should have helped you get things up and running if OneDrive is not syncing files on your iPad or iPhone. Make sure to try all the solutions and not miss any.
In case the problem persists, we recommend you switch to another, more reliable cloud storage service and get rid of such errors once and for all.
If you have any queries or know of another solution not listed here, drop a comment below.
Windows updates are essential not only for the smooth running of your system but also to protect you from potential risks. However, users have, in several instances, been unable to complete their updates. Whenever you try to download a feature update, an error message appears.
The error is related to Windows Update and is accompanied by a code 0x80d02002. This message usually appears when the update has not been fully downloaded and installed. A restart of your system should ideally resolve the issue, but if not, below, we have more solutions you can try.
What is Microsoft download error 0x80d02002?
The error 0x80d02002, also called the Windows update error, can be caused by various factors. Some of these reasons are the following:
Corrupted Windows update components – The 0x80d02002 sccm error may occur when the update is incompatible with your operating system, or there are some missing update files.
Contradicting software – It is possible that one or more applications on your computer may be incompatible with each other. This could cause problems when they both try to install an update simultaneously.
Damaged/missing drivers – A driver is a piece of software required to run your device. If your drivers are not working properly, they may not communicate with the hardware properly.
Unstable internet – An unstable internet connection can affect the update process and cause the 0x80d02002 wsus error. You need to boost your internet speed if possible.
How do I fix error code 0x80d02002?
We recommend you check the following preliminary steps first before the main troubleshooting options:
Make sure you have enough disk space available for downloading updates from Microsoft’s servers.
Scan your system for any viruses/malware.
Reboot your PC.
1. Run the Windows Update troubleshooter
Hit the Windows key and click on Settings.
Click on System on the left pane then Troubleshoot on the right pane.
Select Other troubleshooters.
Scroll down, locate Windows Update, and click the Run button.
Windows Update troubleshooter is used to troubleshoot problems with the Windows Update client in Windows 11. Using the troubleshooter, you can fix any issues that may prevent your computer from downloading updates or installing them.
Some users, they may find that the Windows Update is not working. Feel free to check out our article to resolve this issue.
2. Update Regional and language settings
Hit the Windows key and click on Settings.
Select Time & language then click on Language & region.
Under Windows display language, set it to English (United Kingdom).
Next, under Preferred language, select a language of your choosing.
Scroll to Region and enter the details of your country, then under Regional format, select English (United Kingdom).
Restart your PC and check if the error persists.
According to Microsoft, the Region settings play a significant role in Windows updates. Windows may not allow you to install an update if the region settings do not approve it.
The region settings determine which updates your computer can receive and are controlled by the Microsoft Windows Update service. These regional settings can affect how Windows will download and install updates.
Hit the Windows key, type cmd in the search bar, and click Run as administrator.
Type in the following commands and press Enter after each one: net stop wuauservnet stop cryptsvcnet stop bitsnet stop msiserverren %systemroot%\softwaredistribution softwaredistribution.bakren %systemroot%\system32\catroot2 catroot2.baknet start wuauservnet start cryptSvcnet start bitsnet start msiserver
Most people are aware that Windows updates are a good thing. They keep your computer running reliably, protect it from malware, and help keep you secure. As such, you should always ensure that your PC is up-to-date.
High ping and lag besides other Call of Duty bugs are some of the few glitches of online gaming that irritate gamers the most.
You can fix it by closing memory and bandwidth-intensive tasks running simultaneously with the game. Restarting your router and changing your DNS server can also help.
What causes high ping and lag in Call of Duty Vanguard?
The causes of lag and pings in firing games are the same everywhere. Some reasons you are seeing it in Call of Duty Vanguard include:
Using a VPN –Playing AAA games like CoD Vanguard with your VPN may cause connectivity issues like high latency, which ultimately leads to lagging. We have a dedicated guide on how to fix high ping when using a gaming VPN.
Network connection – According to many gamers, using a wireless network for Call of Duty Vanguard online results in high ping and lag.
Bandwidth competition – Several programs and applications consuming and competing for bandwidth on the same device may cause network congestion. Hence, high ping and lag in CoD Vanguard.
CoD Vanguard server issue – If the game server is down, high ping and lag are bound to happen. Then this is affecting not only you but all players.
System resources allocation – Multiple apps and programs sharing system resources with the game can also cause high ping and packet loss in Call of Duty Vanguard.
Irrespective of the reason, one or a combination of the fixes below should solve the problem for you.
How can I fix high ping and lag in Call of Duty Vanguard?
Before you proceed to the advanced solution in this article, try out the quick fixes below:
Check the game server status by visiting the Activision server page. If the game server is down, you need to wait till the server goes live again.
This improves performance as more system resources are committed to running the game. You can check out how to set task priority on Windows here.
Wireless networks are prone to interference and Wi-Fi packet loss. A wired network is more stable and can be all you need to eliminate all irritating pings and lags.
Do not connect multiple devices if you are keen on using a wireless network for gaming. This help avoids bandwidth competition.
If, in case, none of the above works for you, then try the following advanced troubleshooting methods to fix the problem.
1. Update the graphics driver
Press Windows + R key to launch the Run window, type the following command in the text space, and click OK: devmgmt.msc
Expand Display adapters to see the driver you want to update, right-click on it and select Update driver.
Select Search automatically for drivers and follow the on-screen prompt to complete the process.
Restart your device and check if the high ping and lag have disappeared. If you want to know more methods to update the graphics driver, read this post about how to update graphics drivers on Windows 11.
2. Change your DNS server address
Open the Windows Start menu and select Settings.
Click on Network & internet on the left pane and select Ethernet.
Navigate to DNS server assignment and click Edit.
Switch to Manual and toggle On the button under IPv4.
For Preferred DNS, input 8.8.8.8, for Alternate DNS, use 8.8.4.4, and click the Save button.
For these changes to be effective, you may need to clear the DNS cache. This guide on how to clear DNS server cache can be of help.
Open SETTINGS on Call of Duty Vanguard and switch to the GRAPHICS tab.
Next, click on the Display sub menu and scroll down to select ON-DEMAND TEXTURE STREAMING.
Toggle off ON-DEMAND TEXTURE STREAMING and restart the game.
You might discover that your settings are not saved upon restarting the game. Call of Duty not saving settings is a common problem. Everything you need to correct is in our guide.
4. Disable VBS on Windows 11
Click the Start menu on your taskbar and select Settings.
Scroll down to Privacy & security and click on Windows Security.
Next, select Device security.
Under Core isolation, click on Core isolation details.
Toggle Off the radio button under Memory integrity.
5. Disable Windows Security for Call of Duty Vanguard
Click the Search button, type Windows Security in the search box and click the Best match result.
Select Virus & threat protection and then choose Manage settings.
Scroll down to Exclusions, then click on Add or remove exclusions.
Select +Add an exclusion and add Vanguard Launcher.exe file.
Relaunch the game.
These are the best fixes for high ping and lag in Call of Duty Vanguard. If you follow the steps above, you should be able to fix the problem.
Call of Duty Vanguard Dev error is another issue you will likely encounter during your gaming journey. Ensure you read our linked guide to fix it.
USB flash drives are portable memory devices you can easily plug in and use with any computer. You can use them to transfer files between computers, store documents, music, and photos, and install the software.
When you insert a USB drive into your computer, it will often automatically detect it if you plug it in correctly. If it does not detect the drive properly, you cannot access its files. Find out why this happens and how to resolve it.
Why is my USB drive detected but not accessible?
USB drives are not always recognized by your computer, especially if they do not meet the device’s specifications. This can be due to several reasons, such as:
USB drive has been formatted – The drive may have been formatted with another operating system and doesn’t work with your computer.
Faulty USB drive – The USB drive may be damaged and therefore fail to be recognized by the computer.
Unsupported USB port – The device may be plugged into a non-standard port. You may get an error that says the USB drive is not accessible, and access is denied altogether.
Wrongful removal – You should always ensure that when ejecting a USB device from your PC, you do so carefully to avoid damaging it.
Damaged USB port – Your computer may not recognize the USB device if the port is damaged or defective.
Outdated drivers – If your USB drive is not being detected, you may want to check if you’re experiencing any driver errors on your system. The most common reason for this problem is that updated drivers are needed.
Missing updates – If your USB drive is not detected, it is because there are some missing updates that need to be installed.
Virus infection – If you are using a computer that has been infected with a virus, the virus may prevent the computer from recognizing your USB drive. You need to install antivirus for USB drives to protect them from potential risks.
Unreadable file system – If your USB drive has an unreadable file system, it will not be able to be read by anything on your computer. This is usually caused by a bad partition table or a corrupt MBR.
How do I fix a USB drive that is not accessible?
We recommend you try out the following first before jumping to the slightly technical solutions:
Try cleaning out any dust from inside your PC’s ports. Your USB may not be recognized if the ports have been dusty for a while.
Check to make sure that the device has been properly inserted.
Try with another USB port, as the one you’re using may be damaged.
Hit the Windows button, type Device Manager in the search bar, and click Open.
Navigate to Universal Serial Bus controllers and click to expand, right-click on your USB drive and select Uninstall device.
Restart your PC and the drivers will automatically be reinstalled.
2. Update USB drivers
Hit the Windows button, type Device Manager in the search bar, and click Open.
Navigate to Universal Serial Bus controllers and click to expand, right-click on your USB drive and select Update driver.
Select Search automatically for drivers.
Another potential method that is way faster would be to use a third-party driver updater tool. Outbyte Driver Updater is a tool that makes it easy to update your drivers.
The software scans your computer in a matter of seconds and checks whether there are any issues with your USB drivers.
Outbyte Driver Updater
Use Outbyte Driver Updater to find the latest updates for your outdated or damaged drivers.
Hit the Windows key, type cmd in the search bar, and click Run as administrator.
Type the following command, replace the C letter with your drive’s letter, and press Enter: chkdsk C: /f
Restart your PC.
5. Rename the USB drive letter
Right-click on the Windows key and select Disk Management.
Locate your USB drive in the list, right-click on it, and select Change Drive Letter and Paths.
Click on Change, then select a new letter.
6. Disable USB selective suspend settings
Hit the Windows key, type Edit power plan in the search box, and click Open.
Click on Change advanced power settings.
Select Change plan settings.
In the Power Options dialog box that opens, click on USB settings to expand.
Click on USB selective suspend setting, and in the drop-down menu, select Disabled.
7. Format the drive
If you’ve tried all the above, but your USB drive is still not accessible, it means that the file system on your drive is not recognized. This could be because the USB driver is corrupt or the disk has been damaged.
To make your data accessible again, you must format the drive to another file system, such as FAT32 or NTFS. If you lose your files, there is a way to recover deleted files from your USB.
Microsoft Edge is a pretty reliable and easy-to-use browser but not one without one or two glitches. One of such problems is the Edge error code STATUS_BREAKPOINT.
The error can sometimes be caused by a weak internet connection or how the website you are trying to visit handles the webpage request. However, it isn’t easy to pinpoint its cause in some cases.
This article contains fixes that will solve the problem irrespective of the cause. All you need is to follow the instructions to the letter, and you should have Edge working again.
How can I fix the STATUS_BREAKPOINT Edge error code?
1. Update Edge
Click the menu button (the three horizontal dots).
Select the Settings option.
Scroll down to the About this app section. You will find updates here if they are available.
The STATUS_BREAKPOINT edge error code is associated with the functionality of your browser. And an outdated browser is sure to function sub-optimally.
You should close Edge and relaunch it after the update.
2. Rename Microsoft Edge’s .exe file
Open File Explorer and click the Local Disk (C:).
Select the Program Files (x86) folder, followed by the Microsoft folder.
Select Edge from the options displayed.
In the Edge folder, choose Application.
Now, right-click the msedge option and rename it to any other name.
Finally, close the File Explorer and relaunch Edge to see if the problem has been solved.
Select the Settings option followed by Privacy & Security on the left plane.
Click the Choose what to clear button.
Check Browsing history, Cookies and saved website data, Cached data and files, Tabs I’ve set aside or recently closed checkboxes.
Finally, click the Clear button and restart Edge.
Browser data helps to improve user experience. It saves you time and stress, especially when you need to access a site or information you have used before.
However, this data can get corrupted. Corrupted browser data leads to all sorts of issues, among which is the Edge error code STATUS_BREAKPOINT problem.
Clearing your browser data will automatically eliminate the corrupt data and overwrite the changes it might have made to your browser.
5. Try an alternative browser
If you still can’t fix the Edge error code STATUS_BREAKPOINT problem after exhausting the fixes above, you can disable Microsoft Edge and try an alternative in Opera One.
Opera One is a high-performance browser that is endowed with stunning features. Starting from the free built-in VPN to Ads blocker and Crypto Wallets, it houses diverse integrations that will more than meet your browsing demands.
Whether speed or privacy, Opera One more than makes up for what other browsers do without the error troubles.
The Edge error code STATUS_BREAKPOINT can be frustrating. But it is not the most difficult problem to solve, as proven in this article. Also, you can go for a better alternative if the problem persists after trying so many fixes.
If you were able to solve the issue successfully, you can check our list of Microsoft Edge tips and tricks for full optimization of your browser.
Feel free to share your experience with the error and the fix that helped you solve it in the comments section below.
This file came from another computer and might be blocked to help protect this computer message can appear while you’re trying to run a potentially dangerous file.
Since this can be a problem, today’s guide will show you how to fix it properly on your PC.
How can I fix This file came from another computer and might be blocked?
1. Use Registry Editor
Press Windows key + R to open the Run dialog box.
In the box, key in regedit and click OK. This will open the Registry Editor.
In the next window (Registry Editor), go to the Policies path: Computer\HKEY_CURRENT_USER\Software\Microsoft\Windows\CurrentVersion\Policies
Right-click on the Policies menu, select New and then click on Key. Name the new key Attachments.
On the right-hand side, navigate to an unoccupied area and right-click.
Select New and click on DWORD (32-bit) Value.
Rename and save the new key as SaveZoneInformation.
Double-click on it and set its value to 1.
Exit the program and restart the PC.
Once this is done, check if the problem is resolved. If it persists, you can try the next fix.
NOTE
This only ensures that subsequent transfers/downloads are not affected or blocked. As such, previously saved files remain unfixed. The same applies to the next solution.
2. Change Group Policy
Open the Run dialog box by pressing Windows key + R.
In the popup dialog box, enter gpedit.msc and press Enter. This will take you to the Group Policy Editor.
On the display window, expand User Configuration. Next, go to Administrative Templates. Lastly, select Windows Components.
Select Attachment Manager in the left pane. Next, double-click Do not preserve zone information in file attachments option.
Select Enabled and click Apply and OK to save changes.
Exit the program and restart your PC.
Once your PC reboots, check if the issue is resolved. If it’s not, you can try the next solution.
In the next window, click on Browse and navigate to the affected folder or file directory.
Click on the Scan.
After the scan, locate and select all files with the tag: Zone:Identifier:$Data$.
Right-click on the selection and select Delete Selected Streams from the list of options.
Close the program and restart the PC.
This, if properly executed, should fix the error. Consequently, all affected files would be unblocked. If the issue remains unsolved, try the next solution.
4. Use PowerShell
Launch Windows Powershell as an Administrator. To do that, press Windows key + X and choose PowerShell (Admin).
Enter the following command and press Enter: dir C:\Downloads -Recurse|Unblock-File
Close the program and restart your PC.
There you go; these are four simple solutions that should fix This file came from another computer and might be blocked to help protect this computer error on your PC, so be sure to try them all.
Windows 11 was touted as an excellent system for playing games, and although most users enjoy their titles, some of our readers complained about their games crashing.
There are numerous representations for this issue, and a few of them even reported the 0x80000003 error when trying to play a game. In this guide, we will explain some solutions that will help you resolve the problem.
Why my games keep crashing on Windows 11?
If your game is freezing or just not loading at all, the first thing you need to check is if your PC has the correct configuration to play the game.
Ensure you have the required programs: Many games require additional software to run. For instance, DirectX is a must for the huge majority of games.
Check the required configuration: You will be able to check the game requirements on the developer’s website or even on the ones from the resellers.
Verify if you have the latest drivers: If you don’t have the correct drivers or if you didn’t update them in a while, that can cause a lot of problems, and the game might not even run at all.
What can I do if games keep crashing on Windows 11?
1. Update the graphics card driver
1.1 Use Windows Update
Click the Start button and choose Settings.
Select the Windows Update option from the left.
Click on the Check for updates button.
If there are any new updates, the system will download and install them.
Restart your PC.
Click on the Advanced options to get to the optional updates.
Select the Optional updates section.
Select the available update and install it.
That’s the easiest method to update the drivers and especially the one for the graphics card, because usually, the manufacturers provide them for a system update.
However, it can be the case that it’s not published yet for your system, so you will need to navigate to the manufacturer’s website and get it yourself.
1.2 Install the driver manually from the manufacturer’s website
Go to the dedicated driver’s download page of the graphics card manufacturer. In our example, we went to NVIDIA’s webpage.
Enter all the data about your graphics card and specify the Windows 11 OS in the list.
Hit the Search button.
Click the Download button.
Select the Download button again.
Run the EXE file you just downloaded.
1.3 Install the driver with a specialized tool
Sometimes, updating your drivers using Windows Update or installing them from the manufacturer’s website can be tedious.
You can opt for the quickest alternative which is dedicated software such as Fortect Driver Updater which is created to provide you with a complete list of outdated or missing drivers and then locate the latest updates from its database.
Check the Turn on DEP for all programs except those I select option.
Click the Add button and select the game EXE file that you have problems running.
This procedure will prevent the system from applying Data Execution Prevention to your game, and this basically adds an exclusion for it.
4. Uninstall Sonic Studio 3
Click the Start button and select Settings.
Choose Apps from the left pane, then click on Apps & features.
Look for Sonic Studio 3 in the list of apps.
Click the vertical dots and select Uninstall.
Some of our readers fixed this problem by uninstalling the Sonic Studio 3 app, so if you have that software installed, try removing it at least temporarily and see if the game runs well.
Also, if the game was working fine until you installed third-party software, try uninstalling it and try running the game again to see if it crashes again.
5. Uninstall and reinstall your game
Select the Start button and choose Settings.
Click on Apps from the left pane.
Select Apps & features.
Click on three vertical dots from the right and select Uninstall.
Press Windows + E to open File Explorer.
Delete the game’s installation folder.
Install the game using the setup file you have stored on your drive.
Repeated game crashes and freezes may be caused by a problem with the initial installation or if you reinstalled it on top of an older version. You’ll likely get a libvorbisfile.dll error so, make sure you completely uninstall the game this time and delete its folders before installing it again.
Select Graphics under the Related settings section.
Click on Change default graphics settings.
Toggle off Hardware-acceleration GPU scheduling.
Restart your PC to apply the changes.
This solution was suggested by one of our readers, and it’s confirmed to work.
7. Turn off the Game Mode
Click the Start button and select Settings.
Choose Gaming from the left pane.
Click the Game Mode option.
Toggle off Game Mode.
Often aggressive game settings can cause multiple issues with the game. The Game Mode is there to help boost gaming performance, but this could also be the culprit for this error. You can turn it off and check if this resolves the issue or not.
If you bought the game from Microsoft Store, this problem may be also caused by the app crashing during the download, although it says that it downloaded the game. In this case, we have a guide to deal with Microsoft Store crashing on Windows 11 that might help.
Also, you may face problems with titles downloaded from specific clients, say Steam games crashing on Windows 11, and it’s just as easy to fix. Besides, if the crash leads to a blue screen error, it’s likely the graphics driver, memory management, or hardware at fault.
We hope that our steps helped you fix the game issues you were experiencing, and now you can enjoy it without interruptions.
For any questions or suggestions, leave your comment in the dedicated section below, and we will get back to you as soon as possible.
Some users utilize drive mapping to access remotely hosted disk drives. While ideally, the process should be seamless, several reported getting The local device name is already in use error in Windows 10.
The complete error message reads An error occurred while reconnecting <drive letter> to <file path> Microsoft Windows Network: The local device name is already in use. So let’s find out all about it and the solutions that worked for others.
Why do I get The local device name is already in use error?
Here are a few reasons you might be getting The local device name is already in use error in Windows 10:
Misconfigured firewall settings: You need to have File and Printer sharing enabled on the Firewall. Otherwise, there is a good chance that the error might appear.
Drive letter not assigned: In case a drive letter is not assigned to the network drive, you might get the error.
Lack of storage space: Lack of storage is one of the most common reasons users encounter the error, and in this case, the usual solutions fail to work. So, you will have to verify this first.
How do I fix the device name already in use error?
Before heading to the slightly complex fixes, try these quick ones:
Restart the computer since, in most cases, a simple reboot helped users fix this problem.
Make sure you are not using a VPN. If that’s the case, disable it.
Verify that there’s sufficient free storage on the shared drive. If not, you will have to clear some files.
Check whether you are using the correct user account the drive was mapped to initially.
In case none worked, move to the solutions listed next.
1. Remap the drive
Press Windows + R to open Run, type cmd, and hit Ctrl + Shift + Enter.
Click Yes in the UAC prompt.
Now, paste the following command while replacing X with the actual drive letter, and hit Enter:net use X /delete
Next, execute this command while replacing X, the username, and the password with the actual ones:net use X: \server\share /user:username password
A quick fix and one recommended by Microsoft, when you get The local device name is already in use error in Windows 10 is to remap the drive. Often issues come up with the previous remapping, and simply doing it again should get things running.
2. Assign a drive letter
Press Windows + X to open the Power User menu, and choose Disk Management.
If you find that the shared drive does not have a drive letter, right-click on it, and choose Change Drive Letter and Paths.
Now, click on Add.
Select Assign the following drive letter, choose one from the dropdown menu which is not already assigned, and click OK.
Again, click OK to save the changes.
Once done, verify whether The local device name is already in use error in Windows 10 is fixed. If not, head to the next solution.
3. Enable File and Printer Sharing
Press Windows + R to open Run, type control panel, and click OK.
Click on System and Security.
Next, choose Allow an app through Windows Firewall under Windows Defender Firewall.
Click on the Change settings button.
Locate File and Printer Sharing, make sure the checkboxes under both Private and Public are ticked, and click OK to save the changes.
Several users reported issues with network drives, and even The local device name is already in use error in Windows 10 when File and Printer Sharing was disabled in Firewall.
If you happen to use a third-party antivirus with a built-in firewall, make sure to verify the same there as well.
4. Modify the Registry
Press Windows + R to open Run, type regedit, and press Enter.
Click Yes in the prompt.
Paste the following path in the address bar and hit Enter: HKEY_CURRENT_USER\Software\Microsoft\Windows\CurrentVersion\Explorer
Locate the MountPoints2 key in the navigation pane, right-click on it, and choose Delete.
Finally, click Yes in the confirmation box.
Once done, restart the computer, and it shouldn’t throw an error when accessing the shared drive.
5. Restart the Computer Browser service
Press Windows + S to open Search, type Command Prompt in the text field, and click on Run as administrator.
Click Yes in the prompt that pops up.
Now, paste the following command and hit Enter to stop the Computer Browser service:net stop "Computer Browser"
Next, execute the following command to start the service:net start "Computer Browser"
Issues with the Computer Browser service have often been linked to The local device name is already in use error in Windows 10, and restarting it should do the trick.
One of the solutions here should have helped you fix the error. And while you are at it, also find out what to do if the mapped network drive is missing in Windows.
If you know of another method of fixing this issue, let us and everyone else know by leaving us a message in the comments section below.
Microsoft rolled out Teams Premium, and with this, the current free version of Teams for small businesses is set to hit its end of support date on April 12, this year. Before then, users can transition to Microsoft Teams (free), but there’s a catch.
Besides the name change and access to a different set of features, users won’t be able to make the transition from the current free version of Teams to the new free version with their data. To avoid this, you’ll need to upgrade to the paid tier if you want to keep the chats, files, teams, and meetings that are currently stored on Microsoft Teams Free (classic).
You’ll either have to upgrade to the Microsoft 365 Business Basic tier which will cost you $6/month or opt for the Teams Essentials plan at $4/month. You can choose to simply transition to Microsoft Teams (free) if you don’t want to make the payment or don’t have important data you’d want to make the transition with.
Alternatively, you can save your files manually within the new free version of Teams which can be quite tedious especially if you have a lot of data stored thus making the paid tier more attractive and efficient.
You should consider making the transition to the new free version or upgrading to either of the paid tiers if you want to retain the data stored. It should be noted that you will no longer be able to access the legacy free version of Teams once it reaches its end of support date.
Sometimes Yahoo search acts like a browser hijacker and forces itself as the default search engine in Chrome. In this piece, we’ll explain why it happens and how to fix it.
This usually happens when malware infects your computer or when a program or browser extension changes your default search engine without your knowledge.
More details about common causes, below. But first, let’s fix it:
How do I stop Yahoo from hijacking my browser?
1. How to get rid of Yahoo search using Settings
The easiest method to get rid of Yahoo search from your Chrome browser is to manually remove it from your Search Engines Settings.
Through Settings, you can configure which engines you want to set as default and which to delete.
1. Launch Google Chrome on your PC.
2. Paste the following path in the address bar:chrome://settings/searchEngines
3. Hit Enter to open the Settings menu.
4. Now, click on the ellipsis next to Yahoo, and select Delete from the menu.
5. A confirmation prompt will appear. Select Delete again.
6. Relaunch the browser and check if Yahoo keeps replacing Google as the search engine.
2. Run a malware scan to remove Yahoo Search from Chrome
This problem may be caused by the Search.yahoo.com redirect virus or the Yahoo redirect virus for short.
It is a browser hijacker that will change the search engine to Yahoo Search every time you look for a keyword in the address bar.
We recommend you install an antivirus for reliable security against hijackers.
For this task, ESET HOME Security Essential is an excellent choice. This is a robust security solution, it comes with a deeper and more comprehensive scan feature compared to the Windows default software.
Plus, with this tool, you will also have access to more advanced features, like real-time scanning, a powerful firewall, a ransomware shield, and many more.
ESET HOME Security Essential
Protect your computer and stay safe while browsing the internet with this complete security solution.
If Yahoo keeps replacing Google, paste the following path in Chrome’s address bar and hit Enter:chrome://settings/reset
Then click the Restore settings to their original defaults option.
Click the Reset settings button to confirm.
Some users have confirmed that turning extensions off fixes browsers that redirect to Yahoo search. Users can manually turn off their installed extensions.
However, resetting browsers will either disable or uninstall all extensions and restore their original settings. Therefore, that’s probably a better way to fix browser search redirects.
4. Uninstall recently added programs
Press Windows + R to launch Run, enter appwiz.cpl, and clickOK.
Select Search Provided by Yahoo, and press the Uninstall/Change button.
Click Yes to provide further confirmation.
If the uninstaller window doesn’t include Search Provided by Yahoo, look through the programs to check if there’s anything that looks a little dodgy.
If so, uninstall the dodgy software as it might be a browser hijacker.
Once done, the problem should be resolved, and Yahoo would no more become the search engine. Also, you may use an effective uninstaller tool to completely remove the software causing the trouble since these delete all associated files.
One user also suggested checking if you have the Google Legacy Browser Support installed and then removing it. That will also solve the problem, so try it out.
Open the browser, choose Safari, then select Preferences.
Go to the General tab and check the Homepage field.
If the homepage has been altered, change it and save the changes.
You can also reset the browser by navigating to the Safari menu and selecting Reset Safari.
Select all the available options and click on Reset.
This solution applies to Safari, the default Mac browser but if you’re using a different browser, you may change the homepage by following similar steps.
Why does Yahoo keep opening in Chrome?
If you haven’t set Yahoo search, your computer is likely infected with malware that’s changing the default search engine. It could be a program or an extension installed on the browser.
Generally, the malware doesn’t cause much harm but changing the default search engine every time can be frustrating. Also, the malware might collect critical data, which would invade privacy.
So, it’s best that you get rid of the malware and Yahoo Search using the methods listed in the next section.
What are the common iterations of Yahoo Search replacing Google?
Many of our readers are asking some questions about Yahoo Search replacing Google Search in Windows 10, 11, and Mac on their browsers.
So, don’t worry, we have answers and solutions in our guide if you are having one of these issues:
Why is Yahoo my default search engine? – You have probably installed a program that performed this change but one of the solutions below will fix this problem
How do I stop Yahoo from hijacking my browser? – In this case, scan and clean your computer and then change the settings; they will stick for good this time
Why does Yahoo keep opening in Google? – Malware issues and browser hijackers listed within Windows’ uninstaller may cause this
Why is Yahoo my default browser? – Some software that you installed might have made these changes, you can revert the settings and get things back to normal
How to get rid of Yahoo Search on Firefox? – Similarly to Chrome, open Preferences, go to Search, and there you can select a Default Search Engine
Wrapping up
If you were wondering how to get rid of Yahoo Search in Chrome The resolutions above will probably eliminate most Yahoo hijackers from your browser.
Then users can browse with the default search engines they originally selected. Also, find out how to remove Bing from Chrome.
If the above solutions helped or if you have any other suggestions we should add to our article, please comment below.
Windows 10 is a very gamer-friendly operating system, but many reported that GPU crashes when playing games.
Sometimes, things may not be as smooth as they should be, as there’s a chance that you could encounter game crashes in Windows 10.
Some gamers recently reported that their GPU crashes when playing games. And since this is a serious and annoying issue, we’ll discuss all the troubleshooting steps you can try.
Some users have reported that their monitor crashes when playing games. This occurs if the GPU can’t meet the game’s requirements.
In other situations, users encountered the same issue without the system overheating. This is usually an in-depth issue with the driver or GPU connectivity. This same principle applies if the computer crashes after a few minutes in the game.
Why do my games keep crashing on Windows 10?
Having your games crash is one of the worst feelings you can have as a gamer, especially if you have been waiting for the release of a game title for a long time.
It is worth noting that these types of errors occur no matter what kind of system you’re using, with many users mentioning that their PC freezes while gaming on AMD platforms.
In other situations, it seems that the problem appears as a game crash after updating a driver.
Here are the common causes of GPU crashes when playing games:
Using outdated GPU drivers
Installed the wrong GPU drivers
Outdated Windows version
Outdated DirectX
PC overheating
GPU not powerful enough
Other possible situations in which you might find yourself are caused by installing new hardware on your PC.
Some users have experienced games crashing after installing new RAM, which can be caused either because the motherboard is not properly recognizing the new hardware or if the RAM connectors are not properly cleaned before the installation process starts.
The same principle also applies if you’ve recently installed a new GPU. If there’s any issue with the hardware, it will affect your performance.
As you can see, there are plenty of reasons for which your GPU might be having issues while playing games on a Windows PC, and while most of them will be covered in this guide, if your GPU is not powerful enough to run the game, then there are only a couple of options available for you.
You can either invest in a powerful eGPU or connect it externally to your system, thus improving your PC’s GPU processing capabilities considerably.
If you haven’t already and don’t mind spending some time setting up your new GPU, you could also invest in an internal GPU that is powerful enough, and go through the process of installing it on your motherboard.
The exact method for fixing game crashes in Windows 10 and 11 will depend on your specific situation, but some general solutions could prove helpful.
Why does my GPU keep crashing?
If the GPU crashes when playing games, check your drivers. Outdated or corrupted drivers will cause your system to crash when playing games.
In addition, overclocking can put extra stress on your graphics card and cause it to generate more heat. As a result, it will overheat and crash.
These are some of the common causes, but there are other ones as well.
How do I stop my GPU from crashing?
1. Install the latest drivers
1. Press Win key+X and choose Device Manager.
2. Scroll through the list and toggle the Display Adapters option.
3. Right-click the entry or entries found in the list and choose Update Driver (Our system has two GPUs).
4. Choose either Search automatically for drivers (if you don’t have the driver downloaded), or Browse my computer for drivers (if you do).
5. Wait for the driver to be installed, then close the window and check whether the issue persists.
Windows 10 had problems with drivers compatibility since day one, and those problems are not resolved yet. So, there’s a chance your current graphics card driver isn’t compatible with Windows 10. This might be why your PC is crashing while gaming.
Many reported games crashing on Windows 10 with Nvidia GPU, but other brands also have this issue. As such, a driver update is mandatory.
2. Install the necessary software
Most of today’s games require some additional software to work properly and the best example is DirectX.
If GPU crashes when playing games, ensure you have the latest version on your PC.
If you’re unsure which programs you need to install to play your desired game, try searching for the information by exploring the game developer’s website or reading the game’s documentation.
Some games will not install if you don’t also have these specific programs. Most often than not, they will ask you to install them during the setup process.
If your PC crashes when playing games not overheating, check if you have all components installed.
3. Make sure the PC doesn’t overheat
Overheating is one of the most common instigators of sudden crashes on PCs. If games keep crashing on a high-end PC, it’s possible that your PC temperature is too high.
Your PC automatically shuts down if the CPU or GPU temperature hits critical levels. That way, it protects itself from major hardware failures.
These situations are quite common after extended exposure to the heat. So, you’ll need to check the cooling system, clean all fans, remove all dust and debris, and use a PC temperature monitoring tool.
Also, applying the thermal paste to the CPU is a must. It’ll reduce the overheating substantially. Moreover, you should also add some additional coolers if there’s free space to do it.
Just make sure that your power supply isn’t overwhelmed. If you need some software to follow the temperature changes, you can download SpeedFan and check the readings or even control the rotation of the main fans.
4. Disable background programs
Right-click on the Taskbar and open Task Manager.
Select the Startup tab.
Disable all unimportant and resource-heavy applications.
Restart your PC and look for changes.
In case GPU crashes when playing games, other apps are possibly interfering with it. Disable them and check if that helps.
Furthermore, you can also try using RAM optimizer software to ensure that all elements are checked and ready for gaming.
5. Disable the onboard sound device
Press Win key + X, and open the Device Manager.
Navigate to Sound, video, and Game controllers.
Expand this section, right-click on the onboard sound device and Disable it.
Close Device Manager and restart your PC.
The generic sound driver provided by Windows 10 Update for onboard sound devices occasionally collides with other devices, especially the one from the GPU.
That might lead to GPU failure, which will eventually cause it to crash and stop you from enjoying your games.
6. Scan for malware
Click on the search button in your taskbar, type Defender, and open Windows Security.
Choose Virus & threat protection.
Select Quick scan.
If you want a more thorough scan, select Scan options instead.
Then, select Windows Defender Offline scan.
Click Scan now.
There are only a few chances that malware would cause critical issues on your system, but because of the number of people doing crypto-mining lately, a wide range of crypto-related malware has been released.
For that purpose, we advise you to perform a thorough scan with either Windows Defender or any third-party antivirus you have at your disposal.
7. Check your hardware
Maybe the problem isn’t related to the system at all, maybe it’s on your hardware. If games are crashing without error, it’s possible that there’s a hardware issue.
Namely, the power supply was not strong enough for his graphics card, and that caused him a lot of problems.
So, keep in mind to check if your computer is assembled correctly, and if you find out something’s wrong, just change your current components with the proper ones.
The special emphasis goes to RAM and HDD. Sometimes, the HDD gets corrupted, or the RAM stick gets broken.
So, make sure everything works fine to exclude the hardware as the possible reason for the crashes while gaming.
Useful tips to improve your system’s gaming performance
Ensure your Internet connection is stable – Internet speed is all about today’s games. Even if you have the best rig in the neighborhood, ensure a great Internet plan and connection.
Match the game’s system requirements – Every game has minimum system requirements, but barely meeting them sometimes doesn’t cut it. Sometimes, you must invest in a proper gaming rig to ensure no problems.
Switch to Performance mode – If you’re gaming on a laptop, always switch the Power Management settings to High performance to spare no resources for your gaming endeavor.
Adjust the game settings – Everybody wants to play with all the features tuned to maximum, but sometimes you have to be a little modest and cut down the quality of the game’s graphics settings to speed it up.
Invest in an SSD – All the game’s resources are on your hard drive, and an SSD is faster. Investing in an SSD will be a great solution to speed up your game.
We also have to mention the compatibility problems with the games themselves. Some older games (10+ years old) are simply incompatible with Windows 10. Therefore, there’s nothing you can do to play them on your PC.
Windows 10 and 11 share many similarities as well as issues. Game crashes have been detected on both systems, and causes are usually related to the drivers or hardware issues.
Since both systems work similarly, almost all solutions are universal and will work on both operating systems.
We covered games crashing on Windows 11 in a separate guide, so if your PC crashes while gaming, we suggest you read that guide for more in-depth information.
Can a power supply cause games to crash?
A bad power supply can’t handle intensive tasks such as gaming, so it may cause your system to crash. This is especially true if the power supply doesn’t have enough power to handle other hardware.
Using an old power supply can also lead to stability issues, so if you’re having problems, perhaps you should consider replacing your power supply.
How to prevent game crashes in the future
1. Uninstall unwanted and unused apps
Press Winkey + X and choose Apps and features.
Scroll down the list of installed applications and identify the ones that you don’t need.
Select the applications which you want to remove and click the Uninstall button.
Repeat these steps for uninstalling all the apps you don’t need anymore.
Bloatware is the biggest enemy when it comes to the performance of your PC. This can sometimes lead to computer crashes when playing games.
Therefore, try to uninstall as many programs as you don’t need or use. You will be surprised by how many of those you will find in the list of apps installed on your computer.
2. Close as many unnecessary processes
Right-click your taskbar and choose Task Manager.
Click View and choose Group by type.
Inside the Processes tab, click the application you want to close.
Click End Task to close it.
Repeat these steps for all unnecessary processes, without closing any system applications.
3. Clean your disk
Click on the search button in the taskbar.
Type Cleanup and choose the Disk Cleanup option from the results.
Tick the boxes to choose which files you want to delete and press OK to initiate the process.
After performing this step, your PC will be in an optimal state to run games without any issues.
4. Set your antivirus to game mode
Right-click the antivirus icon found next to your Windows clock, and click the Open TotalAV.
Choose Setup from the software’s menu.
Click Computer protection.
Toggle the Gamer mode option.
Many antiviruses nowadays have a built-in Game mode specially created to ensure the software doesn’t start crunching your drive for viruses during your game and eliminate other distractions.
It’s usually straightforward to activate from the main menu of the antivirus, and it’s worth switching that feature on for your peace of mind.
Even though the specific steps will depend on the antivirus software you’re using, above is how you can do it with TotalAV.
As you can see, it’s not hard to cover all the possible causes of your gaming session being interrupted by system crashes.
If you follow the steps described in this guide carefully, you will surely be one step closer to solving this issue and avoiding encountering it at a future date.
The best way to avoid this issue is to ensure that your PC runs optimally, that no unnecessary applications are running in the background, and that your antivirus software is not causing issues.
Game crashes can also be avoided by using one of the game booster software options, which can optimize your computer’s resources and make the most out of them.
We hope this article helped you solve the problems with games crashing on your Windows 10/11 PC.
If you have any comments or questions, use the comment section below this guide.
Despite being a leading OS for video games, Windows is no short of errors and bugs. A quite common issue people face across different games is they keep cashing without displaying errors.
Not only does the game crash, but it’s also leaving you in darkness when it comes to troubleshooting. However, we got a few tricks up our sleeves and managed to identify a few common culprits.
Follow the steps below to get rid of this error fast.
1. Right-click the Start icon then select Device Manager.
2. Expand theDisplay adapters folder, right-click your AMD graphics card, and choose Update driver.
3. Click Search automatically for drivers to let Windows select and install the best available GPU driver on the system.
4. Wait for the drivers to be installed.
5. Once the installation is done, reboot your PC and check whether the games are still crashing.
Depending on what type of graphics card you’re using, it’s always good to keep your drivers updated.
You can automatically install the latest drivers via Device Manager. This is likely to prevent your games from crashing on your Windows 10 device, without you having to perform more complicated solutions.
Right-click on the game you need to repair and choose Properties.
Navigate to the Installed Files tab.
Click Verify integrity of game files.
Steam will check your game files and replace any that are missing or corrupted.
Epic Games Store
Open the Epic Games Launcher.
Go to your Library.
Click on the three dots (…) next to the game you need to repair.
Choose Manage.
Click Verify under the Verify Files section.
The launcher will scan for any issues and download the necessary files.
EA App
Open the EA App.
Go to My Library.
Right-click on the game that needs repairing.
Select Repair.
The app will automatically scan and fix any issues with the game files.
Battle.net
Open the Battle.net launcher.
Select the game that needs repairing from the left-hand menu.
Right-click on it.
Choose Scan and Repair from the dropdown menu.
Click Begin Scan to start the process. Battle.net will check the files and repair them if necessary.
3. Run your games in window mode
If you experience crashes with your games on Windows 10 it doesn’t hurt to try running them in windowed mode.
To do this, you need to go to video settings in your game and find the option to run it in window mode.
4. Check your antivirus
Try enabling Gaming Mode in your antivirus settings to minimize interference. If that doesn’t work, temporarily disable or uninstall your antivirus to test if it resolves the issue.
If problems persist, consider switching to a different antivirus that better supports gaming.
5. Check your Windows Defender settings
Open the Settings app. You can do that quickly by pressing Windows Key + I. When the Settings app opens, navigate to Update & Security section.
Select Windows Security from the left panel. From the right panel, choose Open Windows Security.
Navigate to Virus & threat protection.
Now navigate to Virus & threat protection settings.
Click Add or remove exclusions.
Click Add an exclusion, select Folder, and select the game’s directory.
Now check if the problem is resolved. If the issue still persists, you might want to consider disabling Windows Defender. To do that, just follow steps 1-4 from above then disable Real-time protection.
Although Windows Defender is a solid application in terms of security, sometimes it can interfere with your games.
Keep in mind that disabling Windows Defender will leave your system vulnerable, so you might want to consider getting a new antivirus solution or a highly reliable VPN.
6. Remove overclock settings or underclock your graphics card
Many users tend to overclock their hardware in order to achieve better performance in games. However, sometimes your system can become unstable due to overclocking.
If your games are crashing, it could be due to overclocking. Try removing any overclock settings or underclocking your GPU to see if that helps. Be cautious, as overclocking and underclocking can cause system instability or hardware damage.
7. Update your operating system
Click the Start menu and select Settings (the gear icon).
In the Settings window, choose Update & Security.
Click on Check for updates to see if there are any available updates.
If updates are found, click Install now to start the update process.
Wrapping up
If the solutions above proved to be unsuccessful in your case, make sure to check out the official Microsoft Support page and try out their solutions.
That would be all if you have any comments, or suggestions, just leave your thoughts in the comments section, below.
Big Fish Games is the world’s largest producer of casual games, which claims to give you a new playable game every day.
You can play Big Fish Games on any device or web browser. While it works without any issues, there are several instances where users have reported Big Fish Games not working on Windows 11.
If you are an avid gamer and love playing Big Fish Games but are facing the Big Fish Games not working on Windows 11, then you have come to the right place. Here, in this guide, we will give you a bunch of solutions to help you resolve the problem.
Why is Big Fish Games not working on Windows 11?
After some research on the internet, we have created a list of the most common errors that could trigger the Big Fish Games not working on the Windows 11 issue.
There is some issue with the game: If you are running an outdated version of the game, then you will come across multiple issues.
Your graphics driver is outdated: You should make sure that all drivers, in our case, the GPU driver is running the latest version to avoid any gameplay issues.
You don’t have necessary permissions: Often, Big Fish Games require access to important files, and you might be running it with limited permissions.
Some important files are missing: Chances are that the game installation did not go as planned, and it skipped a few of the important files because of third-party interference.
How can I fix Big Fish Games not working on Windows 11?
1. Clear browser cache
1.1 Google Chrome
Launch Google Chrome.
Click on the 3-dot menu icon at the top.
Choose Settings.
Click on Privacy and Security.
Choose Clear browsing data.
Check the boxes for Cookies and other site data and Cached images and files options.
Click on the Clear data button.
1.2 Mozilla Firefox
Click on the 3-line menu icon.
Select Settings.
Click on the Privacy & Security.
Under the Cookies and Site Data section, hit the Clear Data button.
Check the boxes for Cookies, Site Data, and Cached Web Content options.
Hit the Clear button.
Cache files keep all your personalized settings for the websites or the web apps you use on a browser. If these cache files go corrupt, they can cause the browser to misbehave and trigger issues such as Big Fish Games not working on Windows 11.
We suggest you clear the browser cache often to avoid such petty problems. Also, you can switch to a different browser, as the problem could be because of the browser itself. And for that, we have created a list of some of the best browsers you can try.
Right-click on your graphics card and select Update driver.
Choose Search automatically for drivers.
Follow the on-screen prompts to install the latest graphics driver on your PC.
Restart your PC.
You can update your drivers by following the above steps on the Device Manager. However, it could be cumbersome when you have to update many drivers.
In such a case, we recommend using a third-party tool called Outbyte Driver Updater. This software can help you schedule driver scans, create driver backups, an efficient download manager, etc.
Outbyte Driver Updater
You must always keep your drivers updated, and Outbyte Driver Updater will also make your PC faster!
Install the program and see if this resolves the Big Fish Games not working on Windows 11.
You should uninstall the game from your PC. Next, restart it, reinstall the Big Fish Games launcher app, and hopefully fix the issue.
4. Disable Firewall
Open the Start menu by pressing the Win key.
Open Windows Defender Firewall.
Select the Turn Windows Defender Firewall on or off option from the left pane.
Check the boxes for the Turn off Windows Defender Firewall (not recommended) option for both Private and Public networks.
Click OK.
Run the Big Fish Games app and see if this fixes the issue or not.
Chances are that the Windows Firewall is blocking the application from running. But, of course, it could also happen with any of your third-party antivirus software.
In this case, disable the Firewall and check if this resolves the issue. If this doesn’t work, we recommend you turn on the Windows Defender Firewall, as leaving it off could expose your PC to threats.
5. Run the game as an administrator
Right-click on the Big Fish Games Game Manager app.
Select Properties.
Switch to the Compatibility tab.
Check the box for Run this program as an administrator.
Click on Apply and OK.
When you run the program as an administrator, it gives the program access to all the critical system files it might need to run correctly.
Here’s all you need for playing DVDs on your laptop. From compatible software (built-in or third party -you pick), to what you can do if it’s not working on the first try.
How do I play DVDs on Windows 11?
First, make sure your computer’s codecs to decode DVD video and audio streams are installed. Next:
1. Use the Windows Media Player Legacy
1.1 Install Windows Media Player Legacy on Windows 11
Press Windows + I to open Settings.
Click Apps, then Optional features.
Now, next to Add an optional feature, click View features.
On the Add an optional feature window, type Windows Media Player Legacy, select the appropriate option and click Next.
Click Install.
1.2 Play the DVD
Insert the DVD in your computer DVD’s slot.
Launch the Windows Media Player. To do that, press Windows key + S and enter media player. Select Windows Media Player Legacy from the list of results.
Go to the left pane, click the DVD option, and select your DVD drive
Click the Play button to play the media.
If you can’t install Windows Media Player Legacy, it’s probably already available on your PC. If not, you can go ahead to the next solution.
Double-click the installer to run the installation file.
On the UAC prompt, click Yes.
On the installer wizard, click Next.
Follow the onscreen instructions, and on the last window, click Finish.
Launch the VLC media player and click Media. From the options, click Open Disc.
On the Open Media window, switch to the Disc tab, go to Disc device, and select your DVD from the drop-down.
Click Play.
Why is my DVD not showing up in Windows 11?
Your registry isn’t configured properly.
Issues with DVD drive drivers.
The drive is faulty or not connected properly.
To learn how to fix this issue, we suggest reading our DVD drive is not detected guide for step-by-step instructions. This isn’t the only issue, and many reported that PC won’t read DVDs.
If you want to play DVD on Windows 11, you can use the built-in software as the default player, or you can use one of many DVD player apps. If you tend to play a lot of movies, perhaps you want to configure DVD autorun so that DVDs can play automatically.
So, these are methods that you can follow to play DVDs on your Windows 11 computer. Try them and let us know what worked for you in the comments section below.







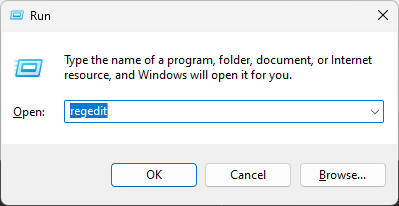


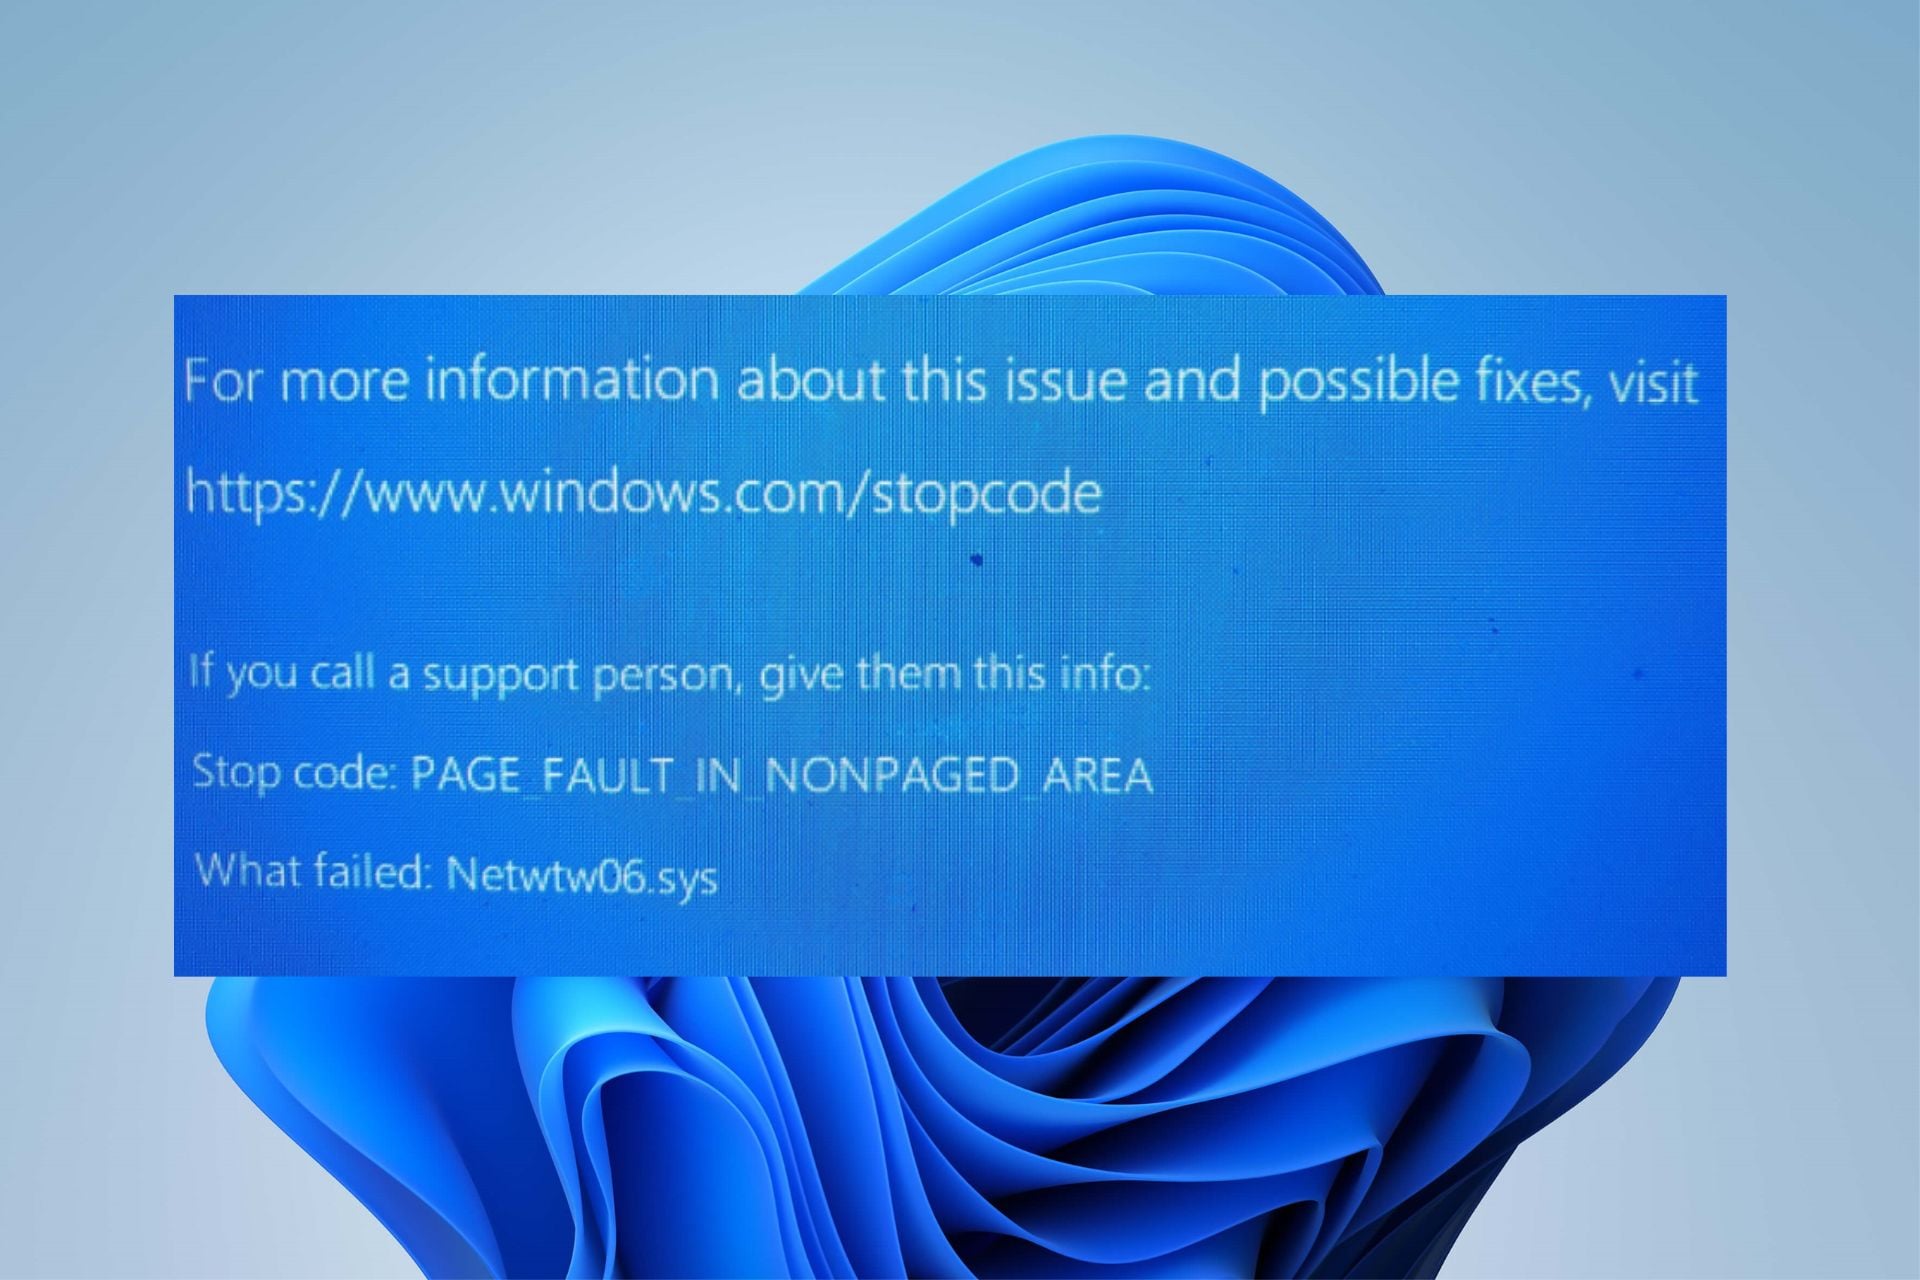
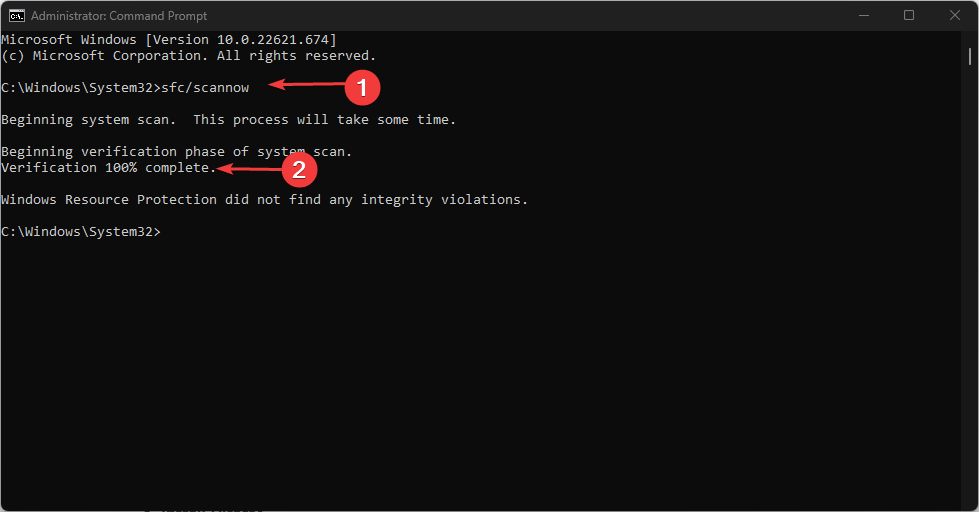
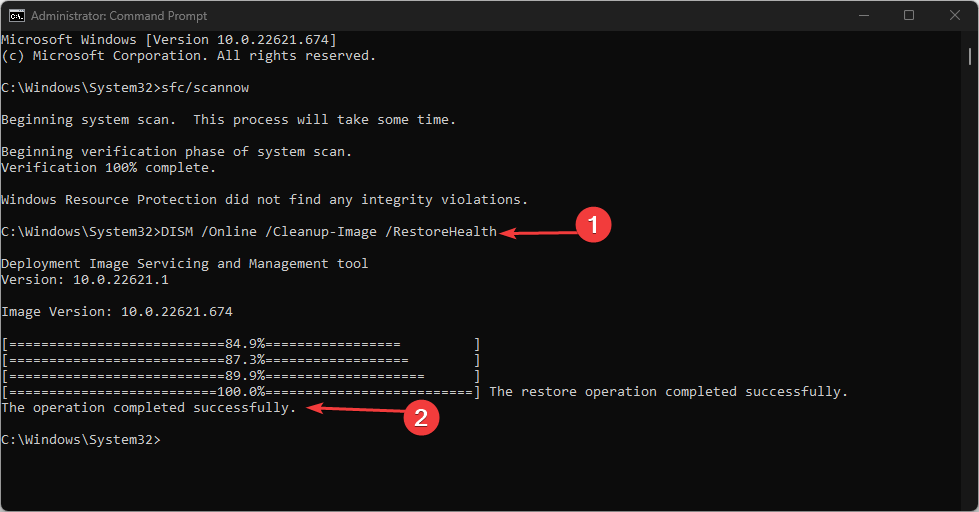
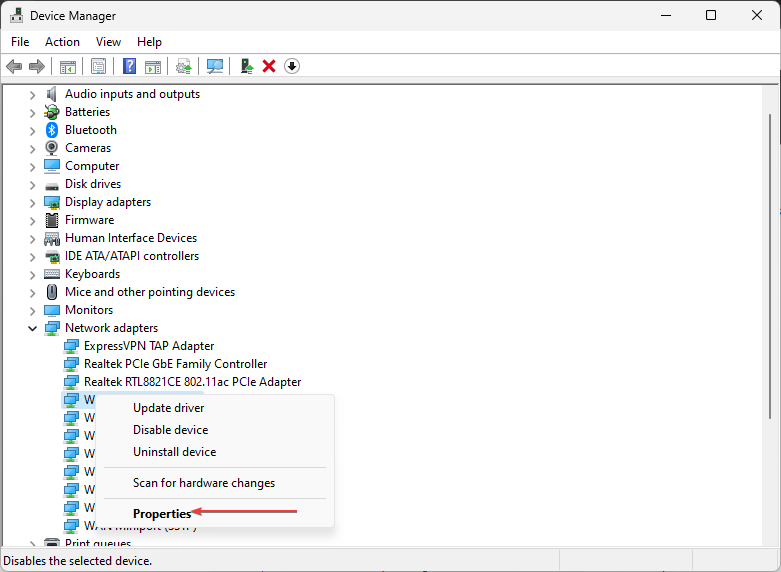
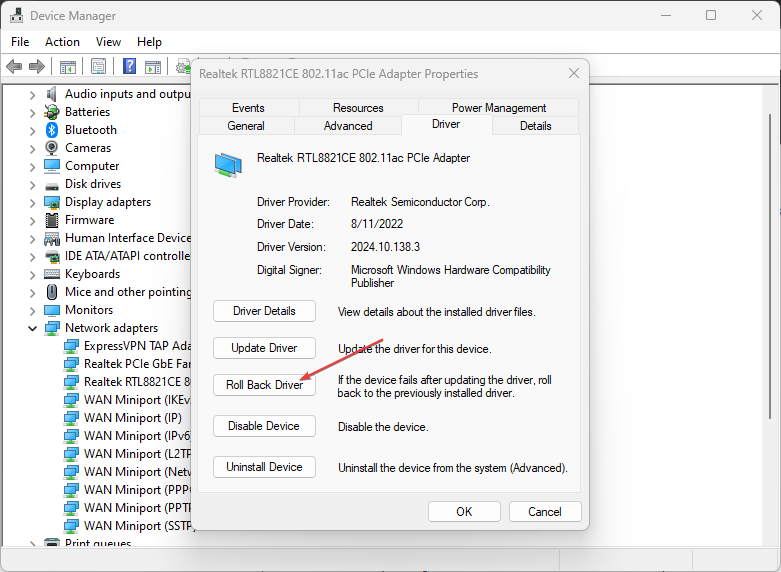
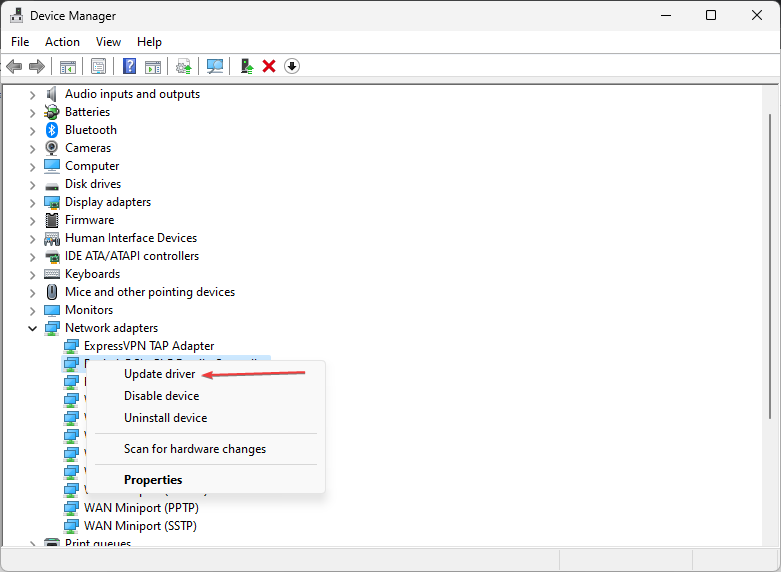
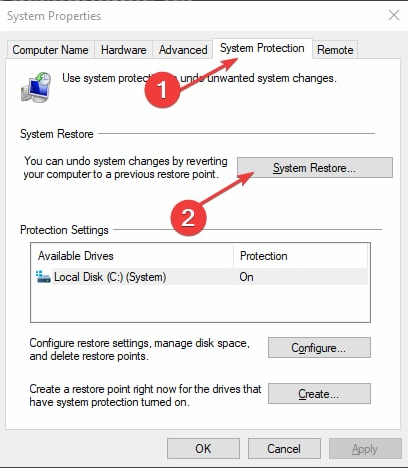
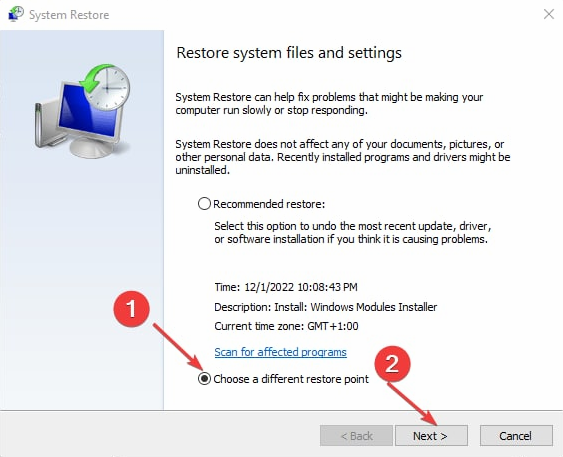
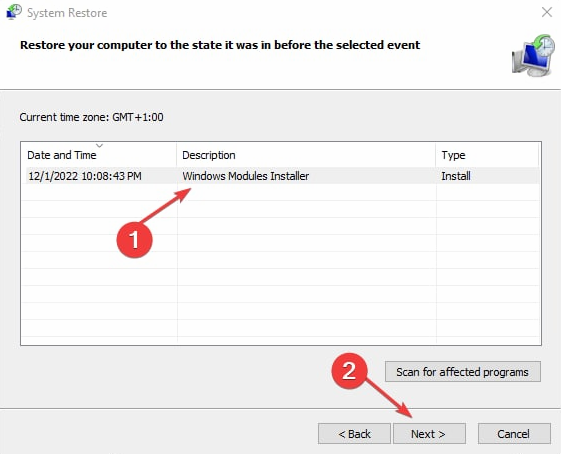

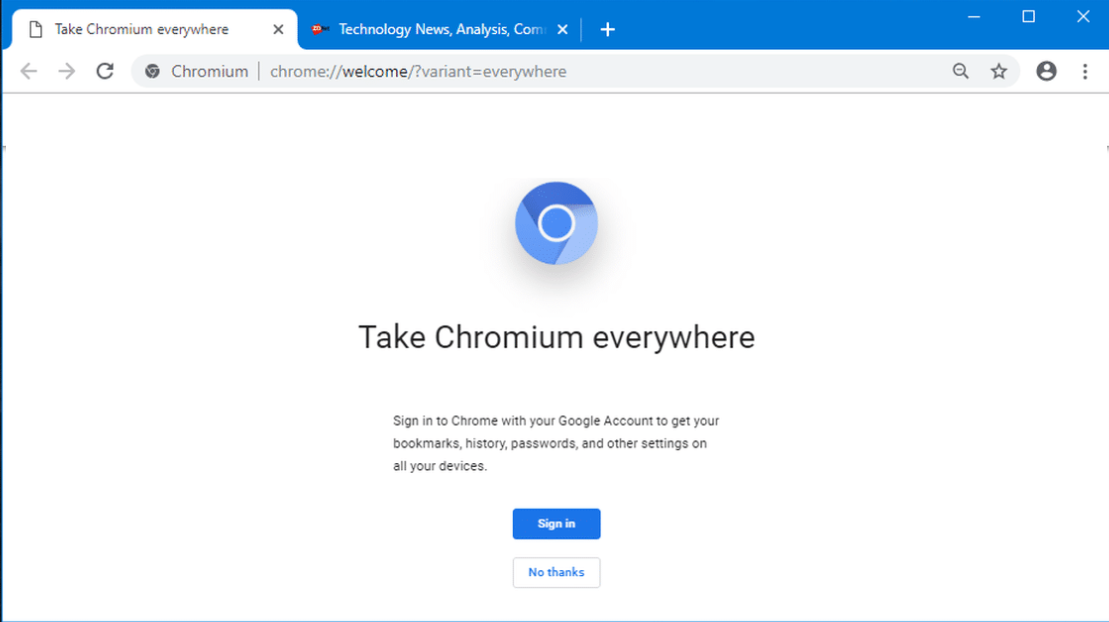
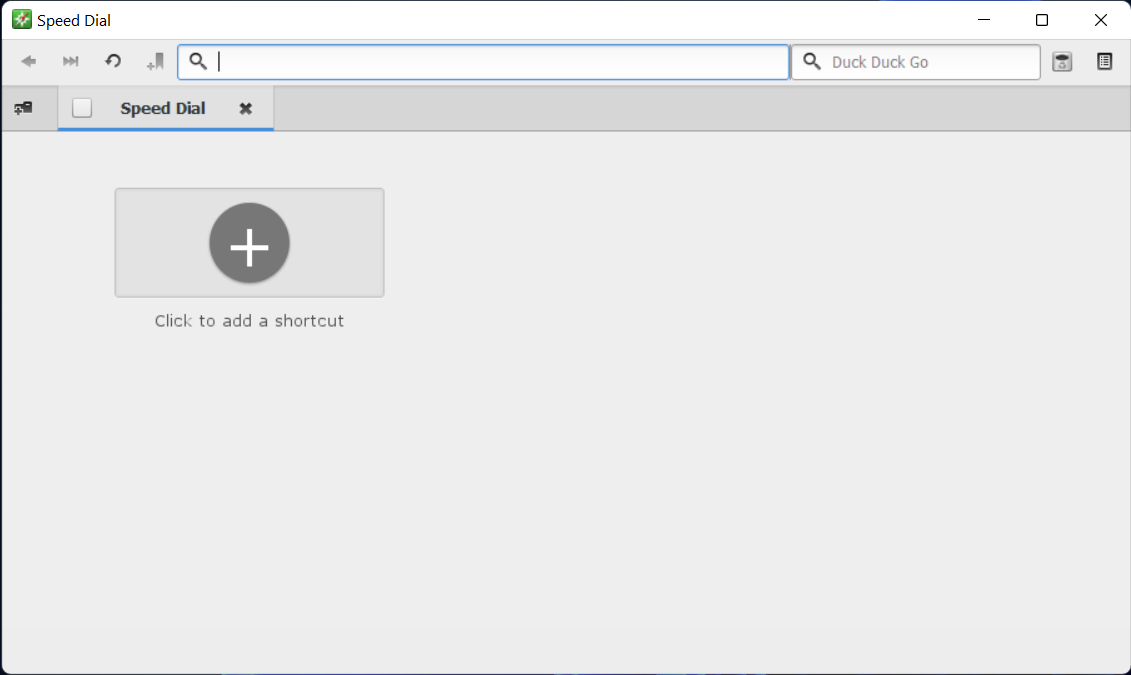
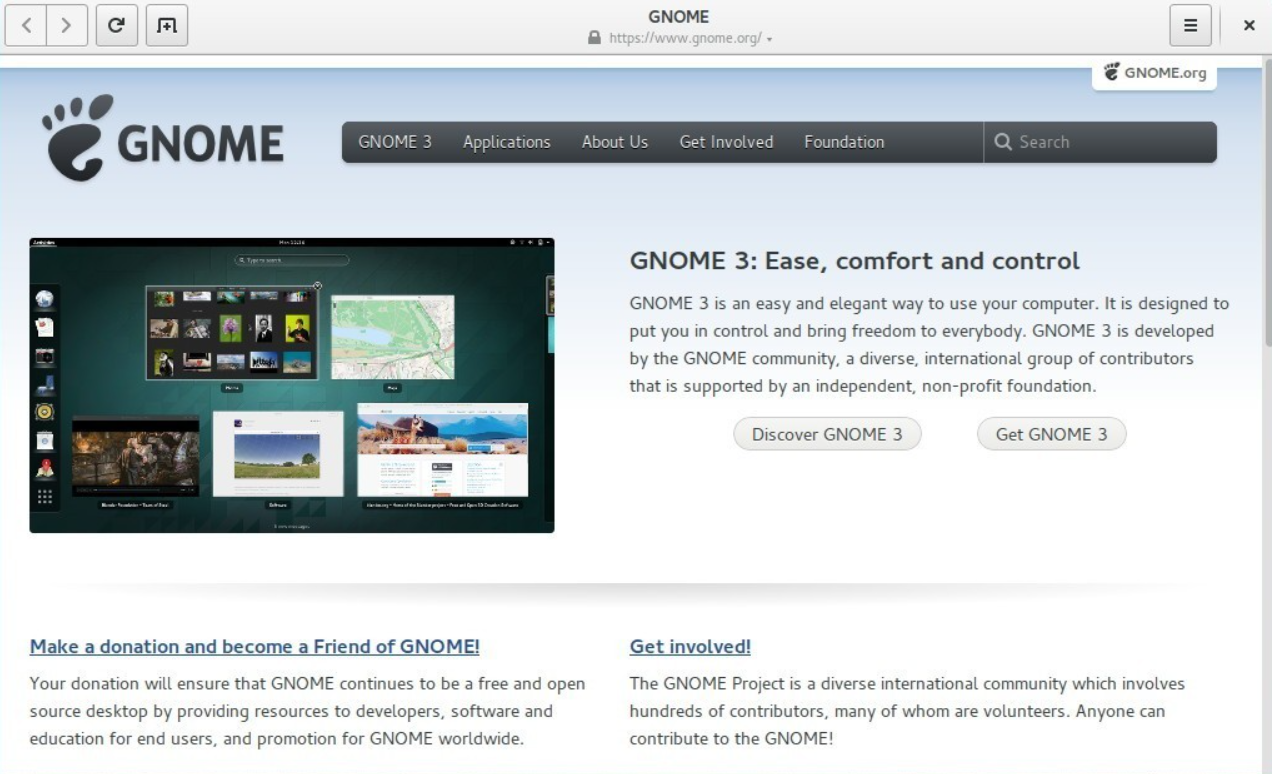
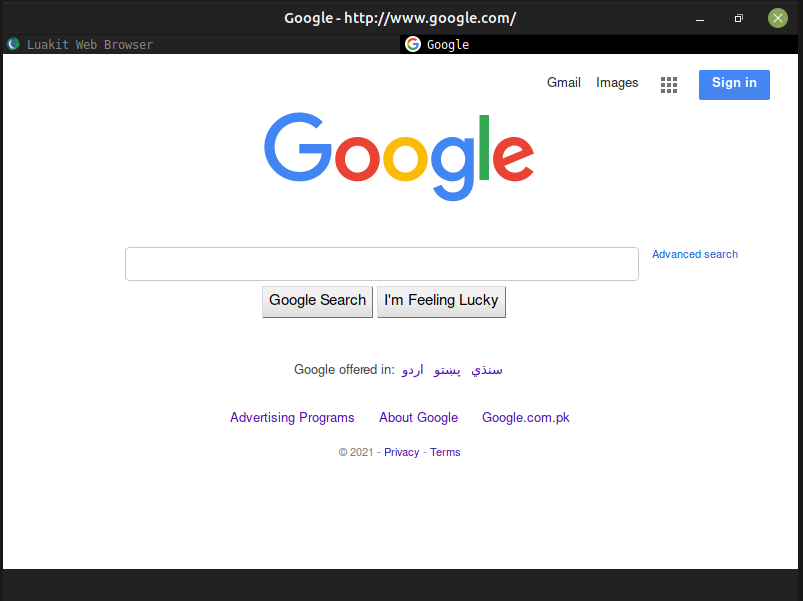
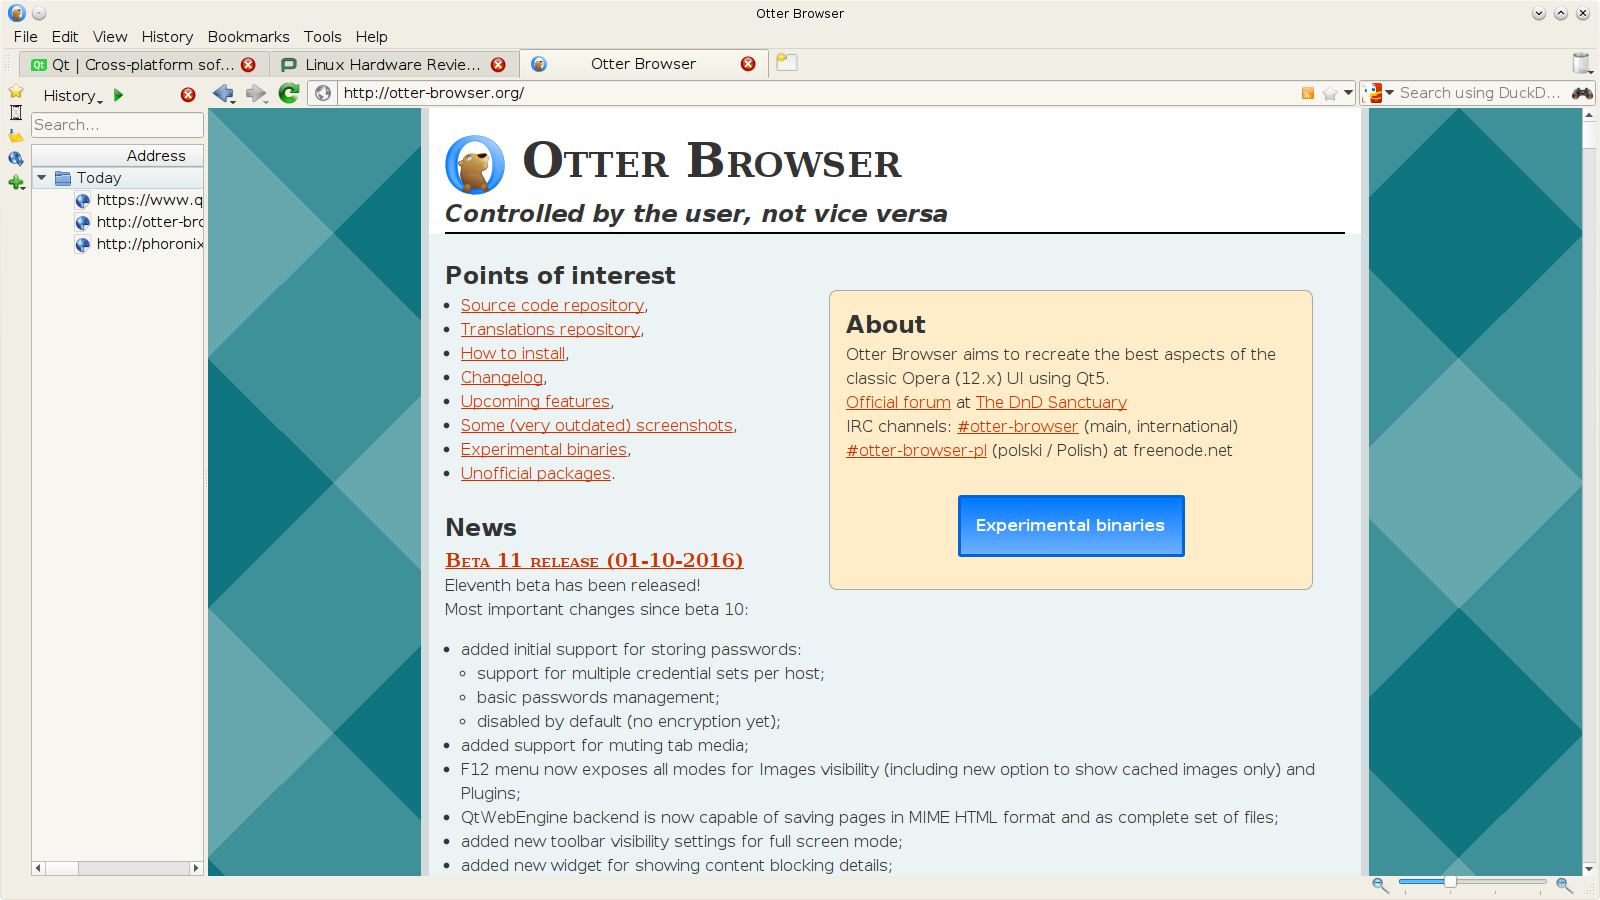

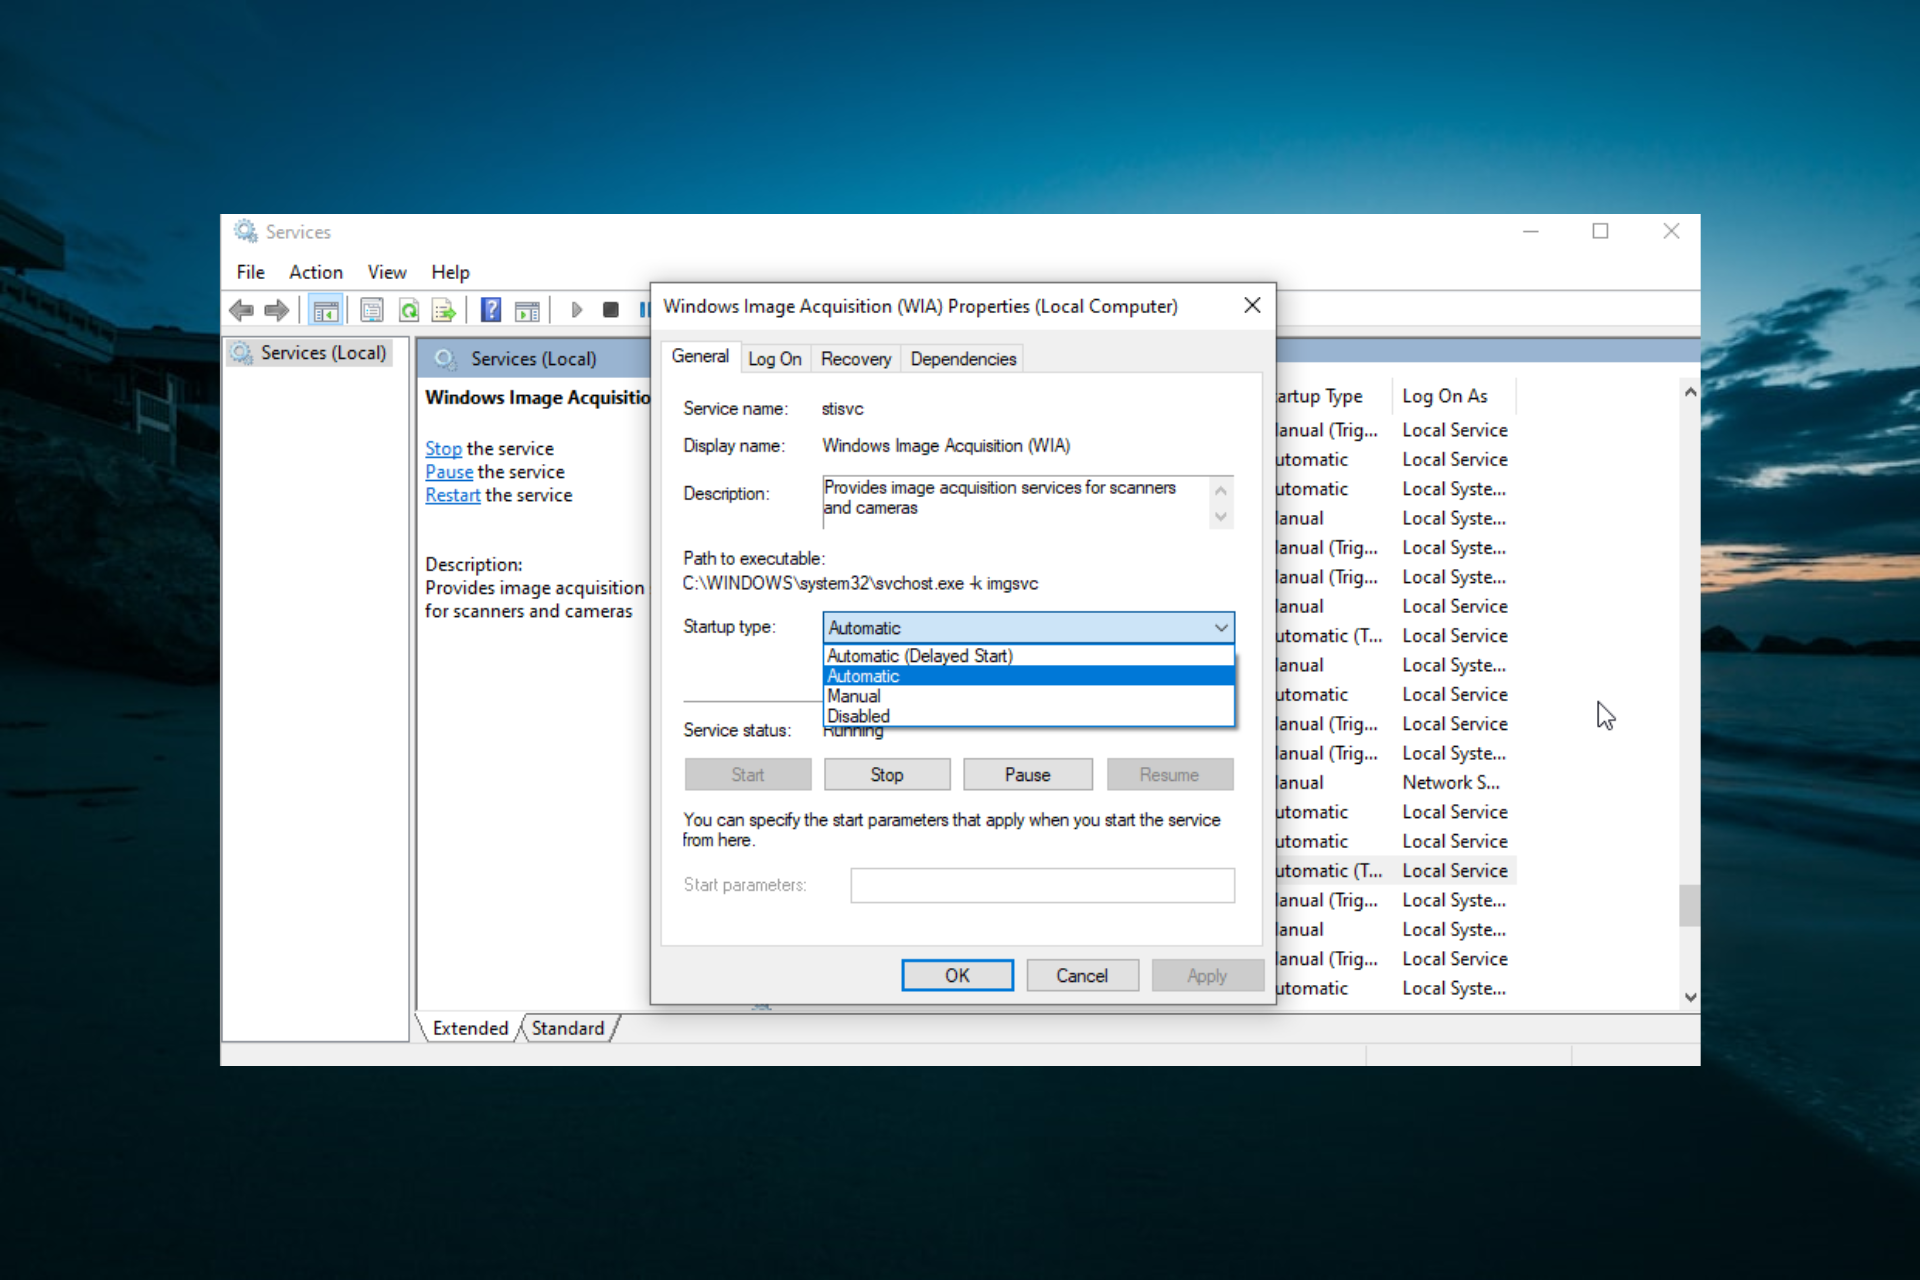









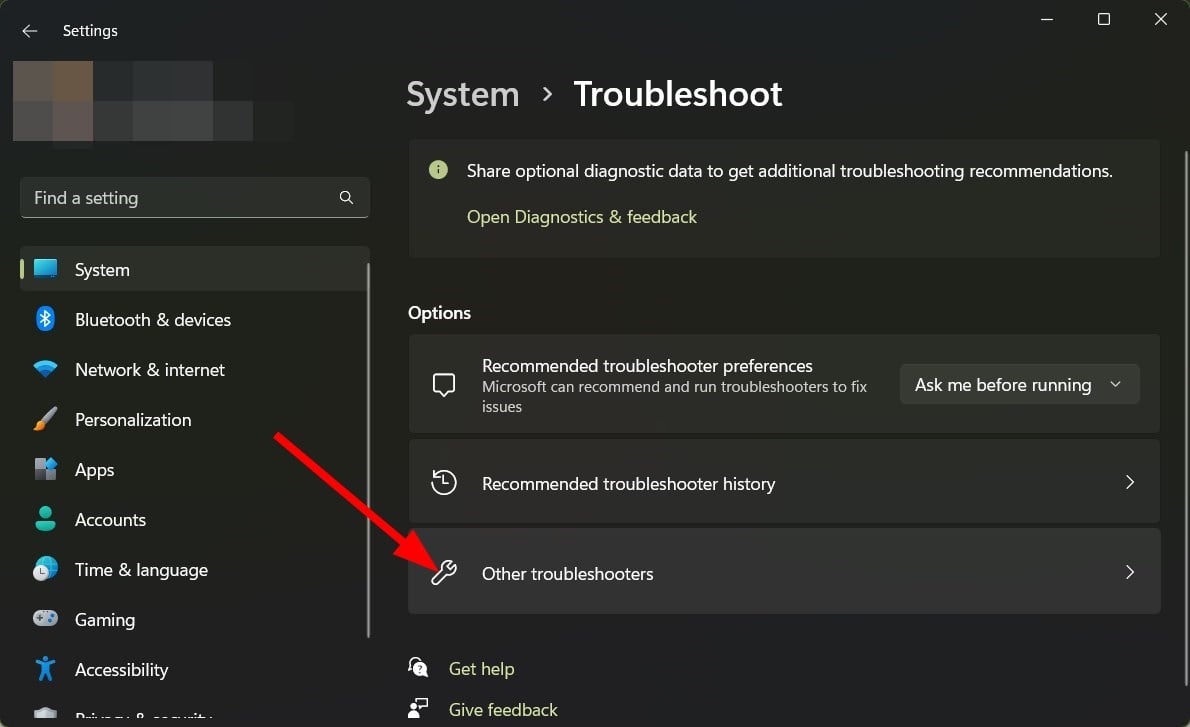

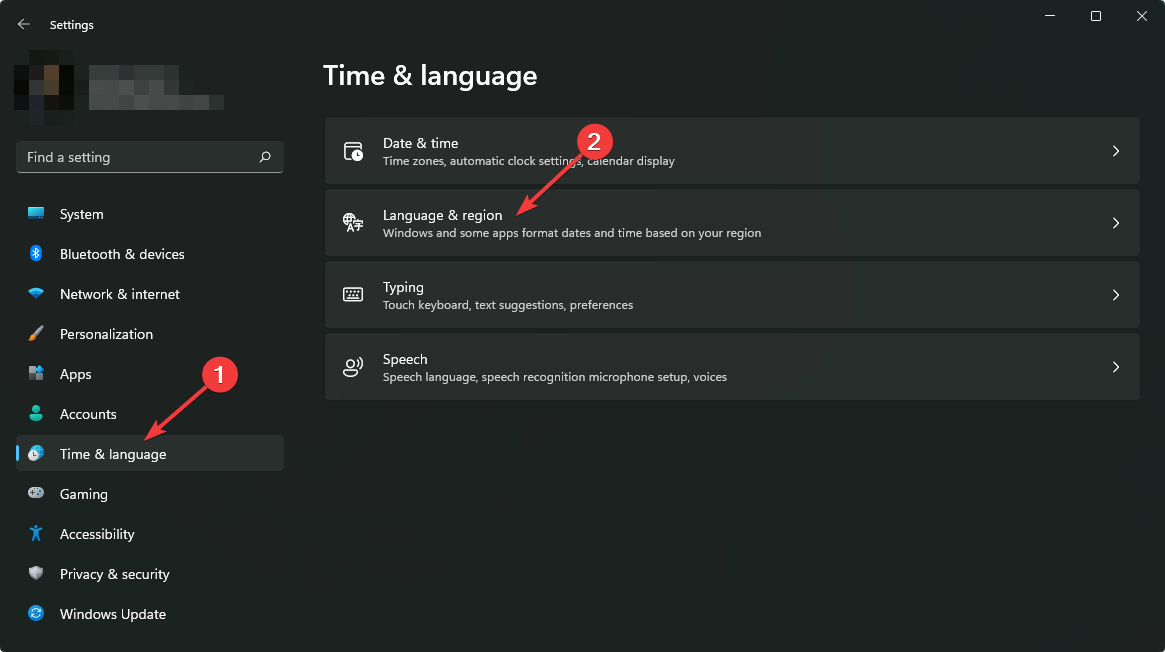





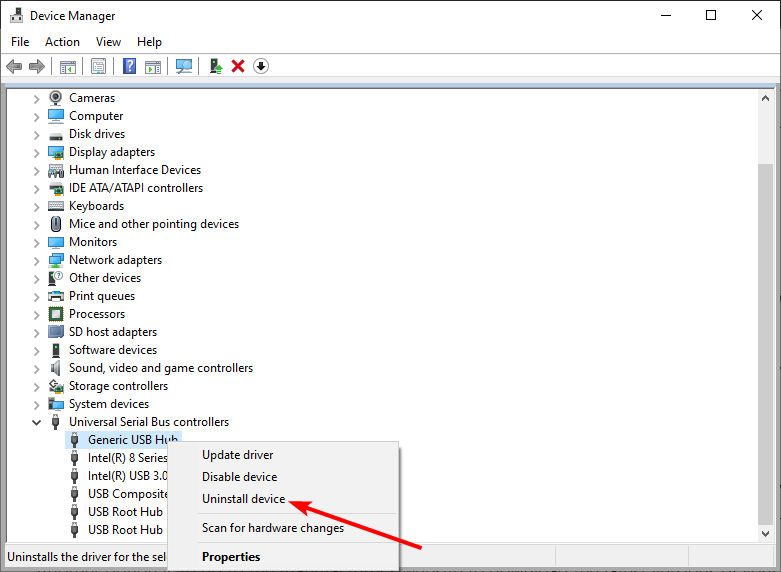



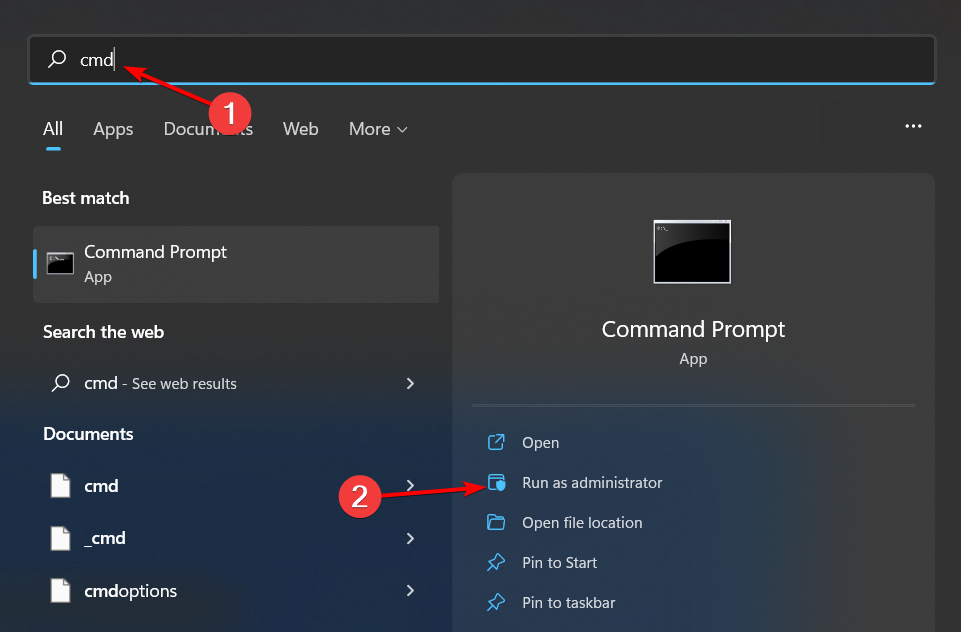

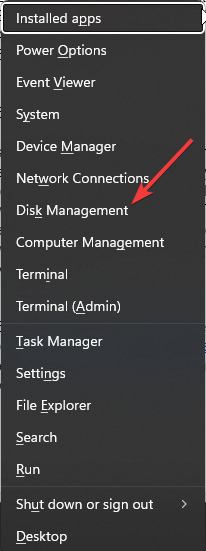

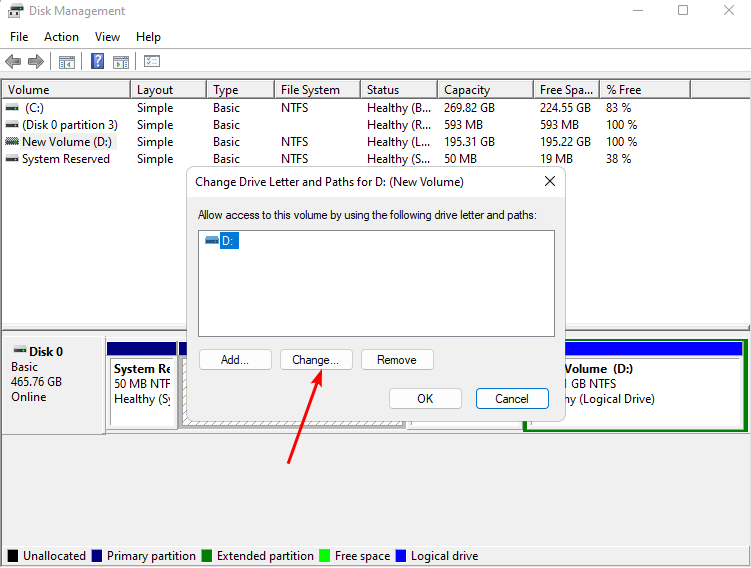

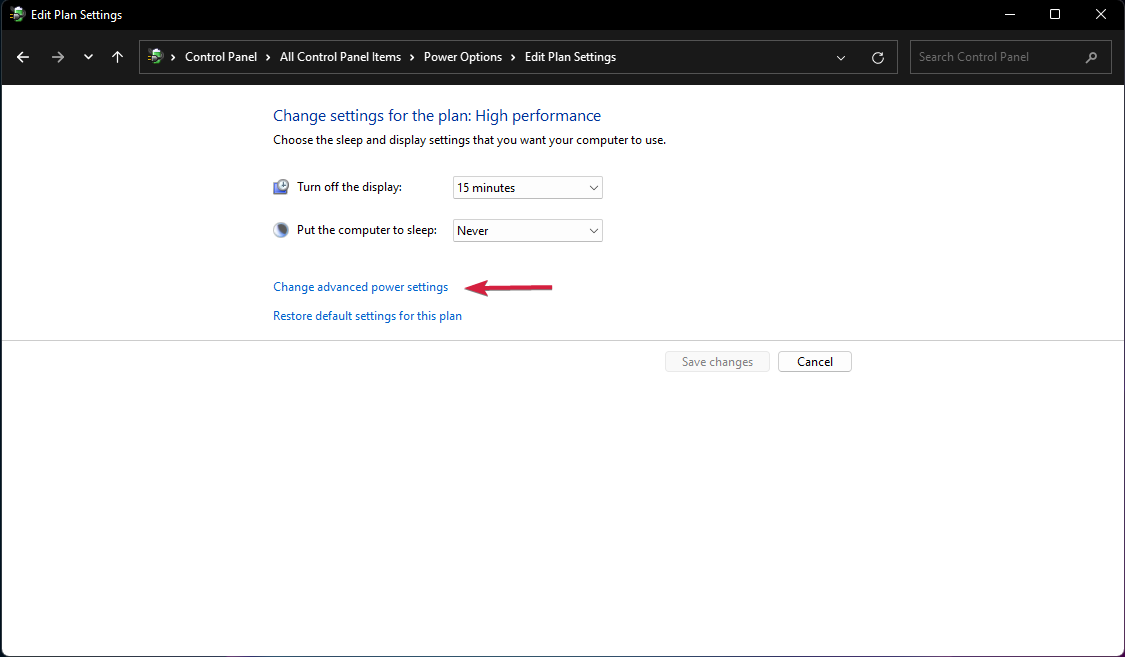


 Update drivers manually