6 Ways to Fix Pixelated Screen After a Windows 10/11 Update

Some users have reported pixelated screens after applying specific Windows updates. The icons appear to be bigger and the text is blurry and pixelated. Fortunately, this is not a big issue; you can solve it quickly, with just a few steps.

Follow along as we will respond to some of your most asked questions about the pixelated issue in Windows 10/11, then present six effective solutions for you to apply.

Why is my screen pixelated on Windows 10?

The most typical reason is a Windows upgrade that went wrong and resulted in a reasonably undesirable outcome. However, the reasons might be rather diverse.

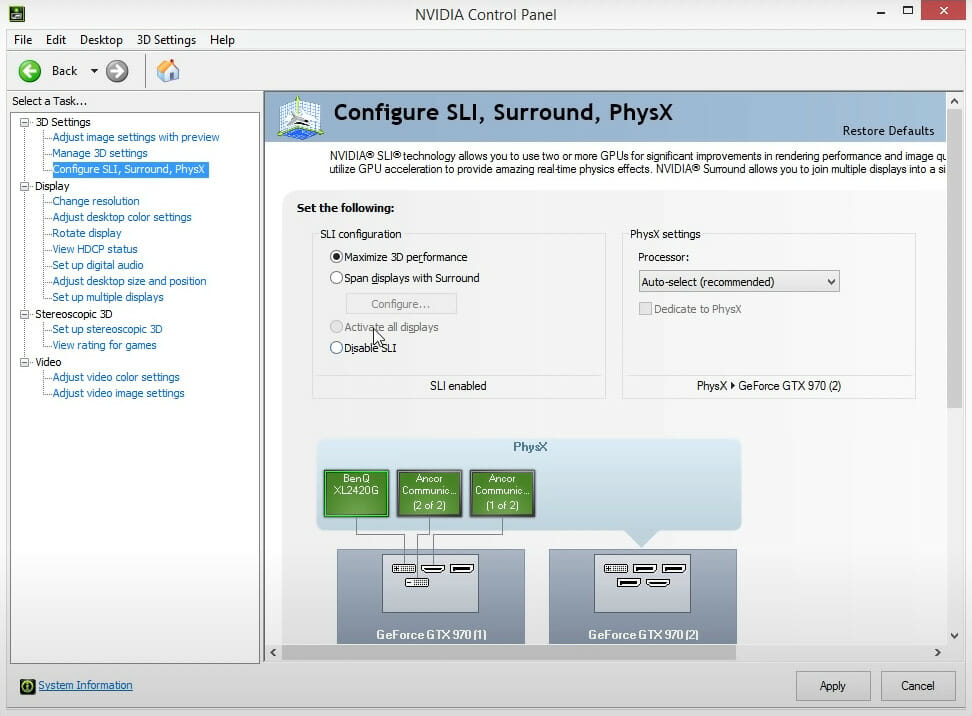
Suppose you have more than one display attached to the computer (such as a standard monitor and a projector, for example). In that case, the displays may each have a unique ideal resolution, also known as a native resolution.

Since both displays utilize the exact resolution—which may not be the same as either screen’s native resolution—the sharpness of the image may be affected on both displays.

Here are some more variations of this issue that will also be covered in today’s article:

  • Windows 10 pixelated video – This problem usually occurs after installing Windows 10 updates.
  • Computer/ laptop screen is pixelated and freezes – In some cases, it can also happen that your screen freezes, besides being pixelated.
  • Pixelated screen on Windows 7 – This problem is common in Windows 7, as well.
  • Computer screen pixelated virus – Pixelated screen can easily be caused by malware.
  • 1080p monitor looks pixelated Windows 10 – Check your graphics card drivers in order to make sure they are up to date.
  • Computer screen pixelated then crashes Windows 10 – Changing your refresh rate can be solution in this case.
  • Laptop screen pixelated then freezes – You can update your OS once again to apply a newer patch that will fix the issue.

Can a virus make my computer screen pixelated?

The performance of the desktop or laptop device, regardless of the operating system, is negatively impacted after the virus successfully infiltrates it.

During the initial phase of the virus’s impact, the look of the screen and Display, as well as the functionality of the drive and the keyboard, are severely impaired.

So the answer is yes, a virus can make your computer screen pixelated. But it’s not always the case. You can try to run a system scan using your antivirus to find out whether you are infected or not.

How do I fix a pixelated screen after a Windows update?

1. Change screen resolution

  1. Press Windows + I to open Settings, then go to Display on the left.display-settings pixelated screen windows 10
  2. Click Display resolution and choose your resolution. The laptop screen is pixelated issue will be fixed afterward.display-res pixelated screen windows 10

2. Check if your drivers are compatible

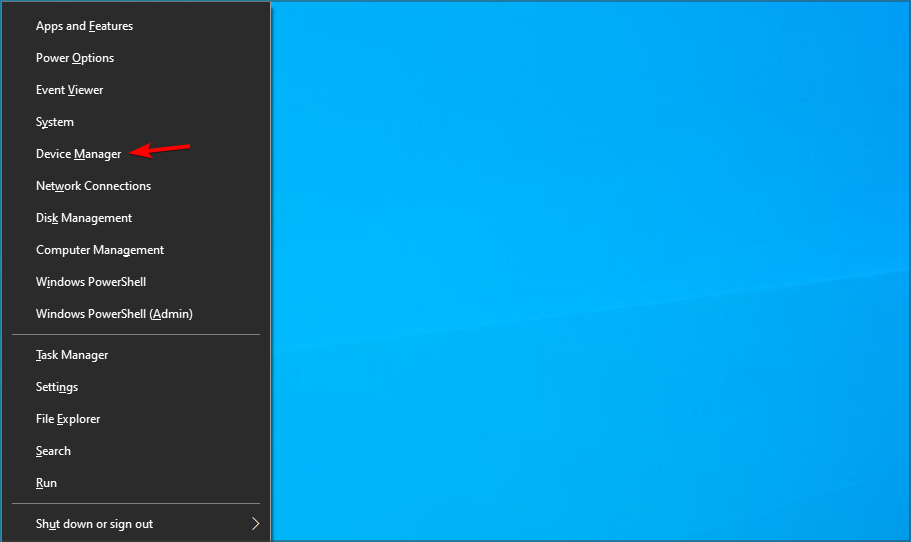
  1. Right-click the Start icon, then select Device Manager.device-manager-w10 amd driver install problems
  2. Expand the Display adapters section, right-click your adapter and then select Uninstall device.uninstall-device-graphics pixelated screen windows 10
  3. Restart the computer, let Windows 10/11 detect the driver, install it by itself, and check if it fixes the issue.

If updating your drivers doesn’t help, you probably have some issues with your DPI(dots per inch) settings. The following solution will show you how to solve all DPI issues.

3. Update monitor drivers

  1. Right-click the Start icon, then click Device Manager.device-manager-w10 amd driver install problems
  2. Expand the Monitors section then right-click your monitor and select Update driver.update-driver-monitor pixelated screen windows 10
  3. Let your computer find new drivers for your monitor.
  4. If there are any new drivers available, let the wizard install them.
  5. Restart your computer.

Although monitoring drivers cause issues less often, it’s still possible. Especially if you recently got a new monitor, or installed a new version of Windows 10.

While manual updating your drivers is the most popular solution, the recommended way is to update them automatically using a dedicated tool such as Outbyte Driver Updater.

The best thing about choosing this method is the time saved in looking for the right software. After scanning your device and it offers a list of compatible fresh drivers.

You can then update not just the monitor driver, but all outdated drivers, either one by one, or in bulk.

⇒ Get Outbyte Driver Updater

4. Set DPI Size

  1. Press Windows + I to open Settings, then go to Display on the left side.display-settings pixelated screen windows 10
  2. Now, choose one of the three options under Change the size of text, apps, and other items: Smaller – 100% = 96 DPI (Pixels/Dots Per Inch); Medium – 125% = 120 DPI (Pixels/Dots Per Inch); Larger – 150% = 144 DPI (Pixels/Dots Per Inch)size-100 pixelated screen windows 10

Setting the DPI size to a smaller percentage will decrease all items’ sizes on the Display, which will definitely help you if your screen is pixelated. If your monitor’s resolution changes suddenly on its own, you’ll want to know how to fix it.

5. Change monitor refresh rate

  1. Press Windows + I to open Settings, then go to Display.display-settings pixelated screen windows 10
  2. Go to Advanced display settings.advanced-display-sett pixelated screen windows 10
  3. Next, click Display adapter properties for Display 1.disp-prop pixelated screen windows 10
  4. Go to the Monitor tab and select another refresh rate from Screen refresh rate.monitor-refresh pixelated screen windows 10
  5. Save the changes made then reboot your computer.

6. Update Windows

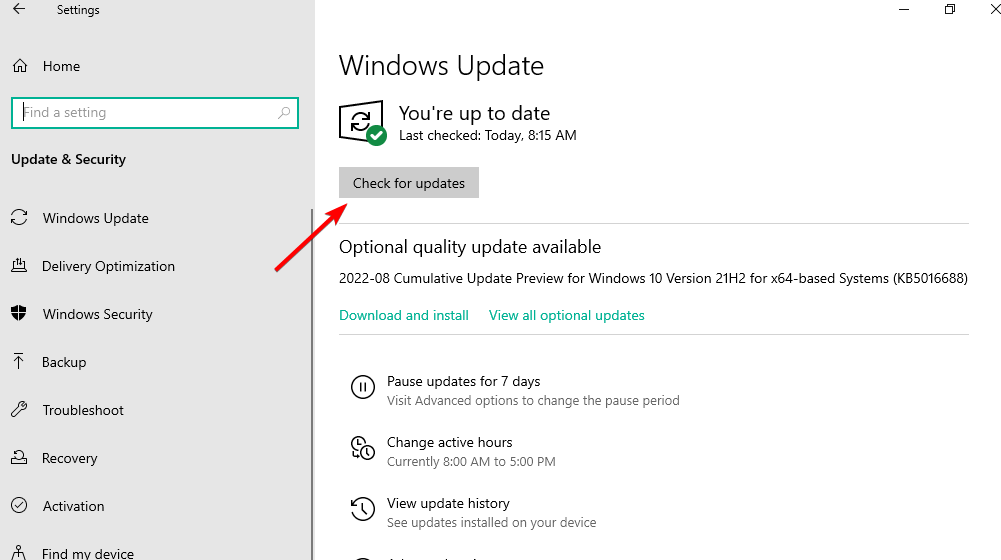
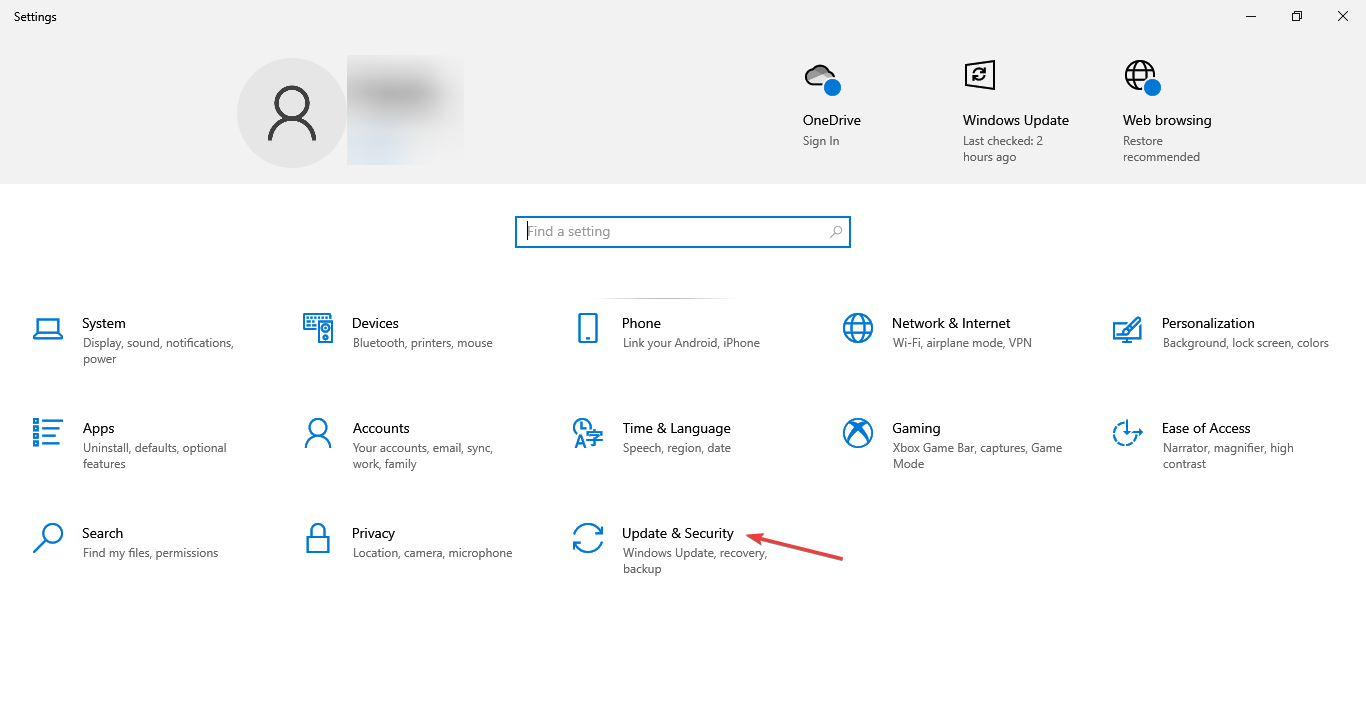
  1. Press Windows + I then when the Settings app opens, select Update & security.update-security nmi hardware failure windows 10
  2. Finally, tap the Check for updates button.check-updates searchui windows 10

Needless to say,  your Windows 10 computer should be up to date.

Updating your computer brings many benefits, and possibly resolves some issues. So, check for updates, and it’s likely that this is the solution to your problem.

How can I fix a pixelated screen on Windows 11?

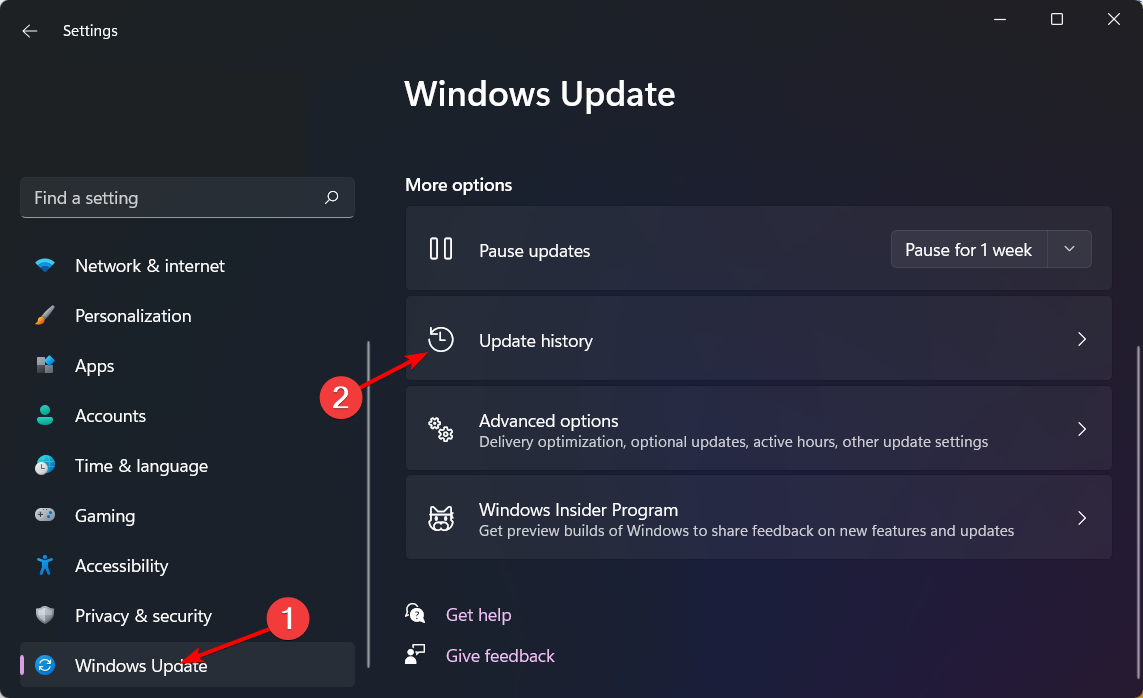
  1. Press Windows + I then navigate to Windows Update followed by Update history in order to see all the Windows updates installed on your PC up til now.windows-update-history logitehc unifying not working
  2. Click Uninstall updates.uninstall-updates-w11 computer-recognize-logitech-unifying-receiver
  3. Click the latest Windows update then select Uninstall. uninstall-update-latest computer-recognize-logitech-unifying-receiver

Why is my monitor suddenly pixelated?

Speaking about Windows updates, such files are usually behind a screen that suddenly gets pixelated. Don’t worry, we will explain everything.

Now, a grainy display in Windows 10 is generally triggered when using a non-native resolution to display images on your PC or laptop.

Your device struggles to fill the screen and adds more pixels to keep the image uniform. By rendering at such a large size, individual pixels become distinguishable and make the whole Display look grainy or fuzzy.

Now, this is a general definition, but there are particular cases to mention and such is the Windows 10 Update pixelated screen.

If the monitor was working just fine, but suddenly becomes pixelated after installing a Windows update, it’s clearly an indication of software conflict or incompatibility triggered by the recent changes.

You might want to revert them and check if the Display works fine in order to narrow down the list of potential culprits or update your drivers and graphics card adequately. Moreover, if the selection rectangle isn’t working properly, we can help out.

Why is my laptop screen going fuzzy?

There are two potential causes for a distorted and fuzzy image on the screen of a laptop computer: software faults or hardware problems. A virus or faulty graphics program would be examples of problems caused by software.

A problem with the hardware is a far more serious issue since it indicates that the actual monitor itself has to be replaced.

That’s about it, we hope at least one of these solutions helped you reset the pixelated Display back to normal. If you have any comments, questions, or suggestions, just let us know in the comments below.

HP Envy x360 Keyboard & Mouse Not Working: 5 Easy Fixes

HP Envy x360 is a premier laptop with 2-in-1 functionality and has been loved by users worldwide. But, some have been reporting issues with it. The most common is that the HP Envy x360 keyboard and mouse are not working.

In most cases, when a device stops working, we instantly believe that it’s the hardware at fault. Based on research, we found that it’s generally outdated drivers, misconfigured settings, or conflicting devices that affect the functioning of the keyboard and mouse, as is the case here.

So before you take your HP Envy laptop to a repair shop, try the methods listed here to fix the keyboard and mouse not working issue.

What can I do if the keyboard and mouse are not working in HP Envy x360?

1. Some basic checks

First, restart the laptop, and check if the problem is fixed. This particular method eliminates any trivial bug or conflicting process and has been a lifesaver for many.

If that doesn’t work, it’s time to identify whether the problem lies with the device or the system. One of the simplest ways to do that is to enter the system BIOS. In case the keyboard and mouse work there, they are most likely fine and need not be replaced.

In case both these methods don’t work, try the following solutions before taking your laptop to a repair shop.

Note icon NOTE
Before you move forward, boot Windows into Safe Mode to get the keyboard and mouse to work. In case these work for a while when you boot the OS, execute these methods within that time frame.

2. Disable the Intel (R) Integrated Sensor Solution device

  1. Press Windows + S to launch the Search menu, enter Device Manager in the text field, and click on the relevant search result.Device manager to fix hp envy keyboard and mouse not working
  2. Double-click on the System devices entry.System devices
  3. Now, right-click on Intel (R) Integrated Sensor Solution, and select Disable device from the context menu.Disable device to fix hp envy keyboard and mouse not working
  4. Click Yes in the warning box that pops up.Click Yes

The Intel (R) Integrated Sensor Solution driver has been found to conflict with a bunch of processes, and disabling it has fixed the HP Envy keyboard and mouse not working issue for many.

Remember to create a restore point before making the change. This will ensure that you can revert to the original settings, in case things don’t go as planned.

3. Update the keyboard and mouse drivers

  1. Press Windows + R to launch the Run command, type devmgmt.msc in the text field, and either click on OK or hit Enter to launch the Device Manager.Device Manager
  2. Now, double-click on the Keyboards entry.Keyboard to fix hp envy keyboard and mouse not working
  3. Right-click on the keyboard that’s not working, and select Update driver from the context menu.Update driver to fix hp envy keyboard and mouse not working
  4. Next, select Search automatically for drivers.Search automatically for drivers
  5. Windows will now scan through all the relevant drivers on the system and install the best one.

Drivers play a critical role in the effective functioning of a device, and if they are outdated or corrupt, the device may stop working. If Device Manager couldn’t find an update, try the other methods to manually install the latest driver version in Windows.

Similarly, update the mice drivers, and check if the HP Envy keyboard and touchpad not working problem is fixed.

If you want to speed up the process, you can use a dedicated tool like Outbyte Driver Updater to update and fix corrupt drivers in bulk. You can set it up to regularly scan your drivers and automatically install updated versions whenever they become available.

Outbyte Driver Updater

Make your system run smoothly with no errors by using Outbyte Driver Updater to update all your drivers.
Free Trial Download Now

4. Turn off fast startup

  1. Press Windows + S to open the Search menu, type Control Panel, and click on the relevant search result. control panel
  2. Click on System and Security.system and security
  3. Now, click on Change what the power buttons do under Power options.change what the power buttons do to fix hp envy keyboard and mouse not working
  4. Next, click on Change settings that are currently unavailable.change settings that are currently unavailable
  5. Uncheck the box for Turn on fast startup (recommended) and click on Save changes.disable fast startup to fix hp envy keyboard and mouse not working
  6. Now, restart the computer, and check if the problem is resolved.

Fast Startup, though beneficial, has often been found to affect the functionality of connected devices and, in extreme cases, cause them to stop working. Disabling it has worked for some users, so try that.

5. Disable tablet mode

Another underlying cause, though it doesn’t make much sense, is the Tablet Mode in Windows 11. When it is enabled, the keyboard and mouse stop functioning for many. This method may not work for all, but there’s no harm in trying it out.

The process to disable Tablet Mode in Windows 10 and the latest iteration is different. While in the former, you could do it from the settings, in Windows 11, the screen has to be rotated to the normal position. Once the mode is disabled, spacing between the Taskbar icons will reduce.

If none of the methods listed here have worked, you can always reset Windows to its factory settings. Though that would not be the case for most.

Also, find out what to do if the USB ports are not working in HP Envy laptops, another common issue with the series.

Tell us which fix worked, or if you know of one that’s not listed here, drop it in the comments section below.

How to Fix the Bluetooth Mouse if it’s not Working in Windows 10/11

Some users have reported problems with their Bluetooth mouse after a Windows upgrade, so we’re here to offer a couple of solutions for this problem. A Bluetooth mouse can cease responding when using the computer and that typically happens when it goes to sleep and is woken up by pressing a key or the power button, or if more than one Bluetooth mouse is attached to the same computer.

The Bluetooth host can occasionally lose contact with the mouse. As a result, the host rejects subsequent attempts to reconnect or changes the adaptive frequency hopping to a new frequency, losing device acknowledgment. While polling other devices, the Bluetooth host stops the flow control.

How can I fix Bluetooth mouse problems in Windows 10?

1. Update the Bluetooth Driver

  1. Go to Search, type device manager, and open Device Manager.
    bluetooth mouse not working
  2. Find your Bluetooth mouse, right-click on it, and select Update driver.
  3. Click on Search automatically for drivers.
  4. Restart your computer and try to connect your Bluetooth mouse again.

Installing the wrong driver versions can cause permanent damage to your system. Thus,  we suggest updating drivers automatically by using a dedicated tool.

⇒ Get Fortect Driver Updater

2. Change the Power and Sleep settings

  1. Click on the Start menu and select the Settings app.
    bluetooth mouse not working
  2. Open the Settings app and click on System.
  3. Navigate to the Power & Sleep tab, then uncheck both On battery power, stay connected to WiFi while asleep and When plugged-in, stay connected to WiFi while asleep options.

3. Check if the Bluetooth service is running

  1. Press the Windows key + R to open the elevated Run command line.
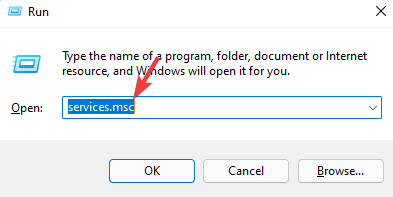
  2. In the command line, type services.msc and press Enter.
  3. Navigate to Bluetooth support service; if it’s set to Started, it is okay. If not, right-click and choose Start.
    bluetooth mouse not working

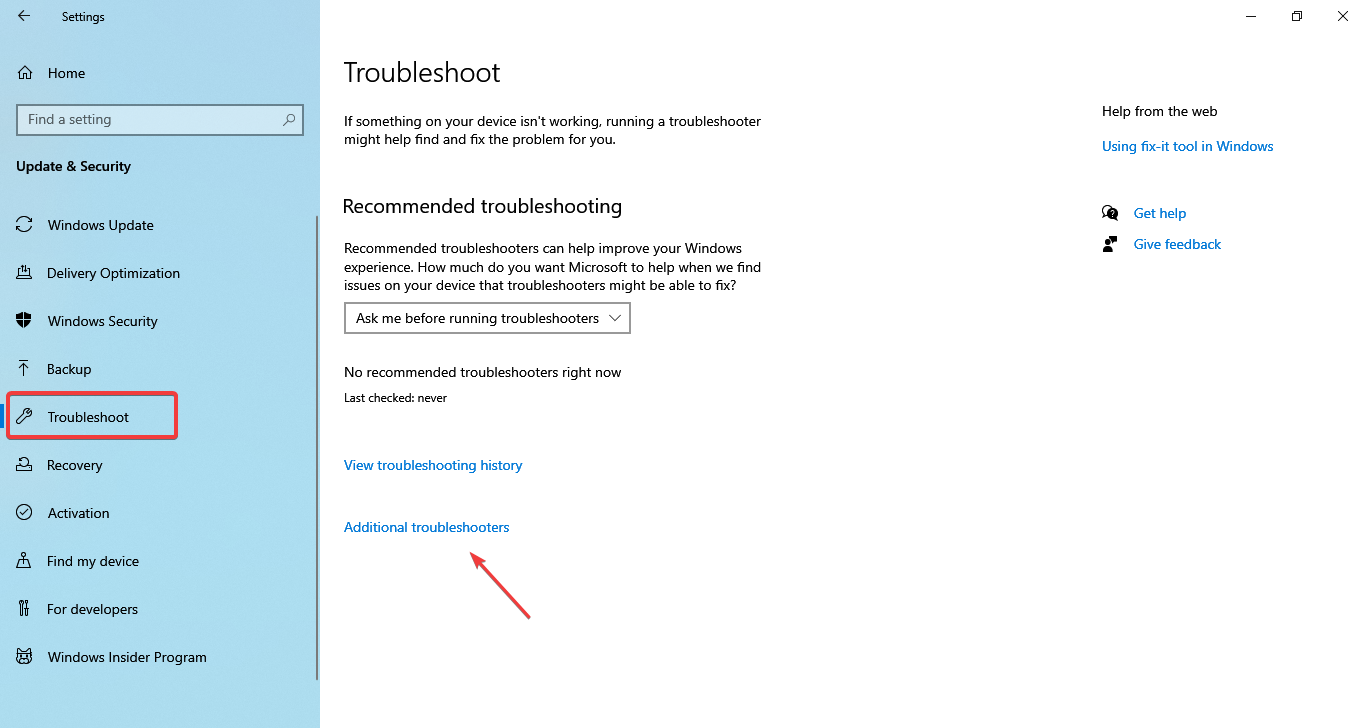
4. Run the system troubleshooter

  1. Click on the Start menu and select the Settings app.
    bluetooth mouse not working
  2. Click on Update & security.
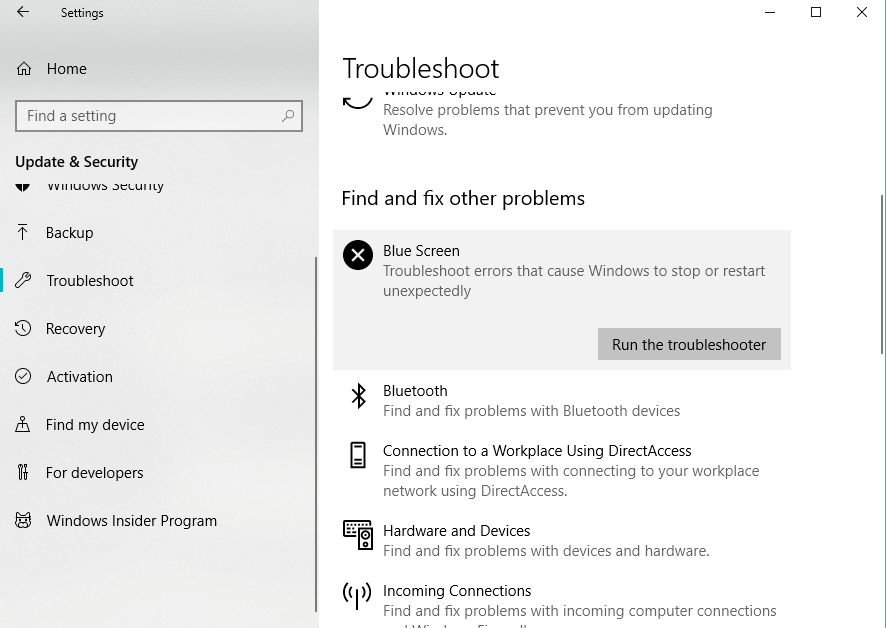
  3. Choose Troubleshoot from the left pane, and click on Run the troubleshooter under the Bluetooth icon.
  4. Follow the instructions.

5. Reconnect the Bluetooth mouse

  1. Open the Control Panel, then go to Hardware and Sound.
    bluetooth mouse not working
  2. Click Add a device.
  3. Select your Bluetooth mouse, then hit Enter. To complete the procedure, adhere to the on-screen directions.

Note: Ensure the device is turned on and the batteries don’t need to be replaced.

Also, make sure your device is discoverable. Check if you installed the device using the correct program; if not, reinstall it and install it correctly.

6. Change your mouse frequency

Wireless mice are prone to frequency disruptions. And that’s exactly what can happen to your mouse, as well.

To change your mouse frequency, you’ll need to open your mouse utility software, look for the option for changing mouse frequency, and set the mouse frequency from 500 Hz to 250Hz.

7. Roll back your drivers

  1. Go to Search, type device manager, and open Device Manager.
    bluetooth mouse not working
  2. Look for your Bluetooth mouse, right-click and choose Properties.
    bluetooth mouse not working
  3. Under the Driver tab, choose to Roll back driver.
  4. Follow further on-screen instructions.
  5. Restart your computer.

For users experiencing problems specifically with Logitech devices, this step-by-step guide on Logitech mouse not working offers targeted solutions that complement standard Bluetooth troubleshooting methods.

8. Change the Power management options

  1. Go to Search, type device manager, and open Device Manager.
    bluetooth mouse not working
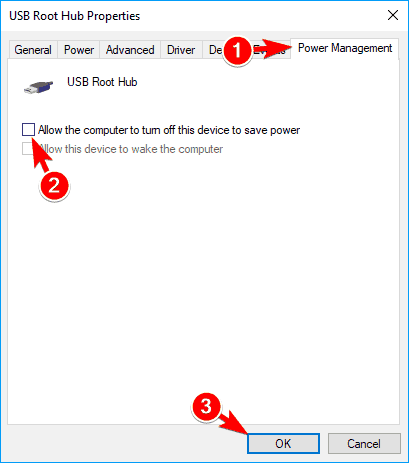
  2. Double-click the USB Hub device in the Device Manager to open its properties.
    bluetooth mouse not moving
  3. Navigate to the Power Management tab and uncheck Allow the computer to turn off this device to save power. Click OK to save changes.
    Windows 10 bluetooth mouse not working

Note: Remember that you need to repeat these steps for all devices connected to the USB Hub.

9. Optimize the Bluetooth signal

Maybe your issue is technical, and nothing’s wrong with your configuration or software.

So, ensure nothing is blocking your Bluetooth signal if none of the solutions from the above work. Here are a few things to keep in mind:

  • First, place your wireless mouse closer to the wireless transceiver.
  • If your keyboard is also wireless, place both the keyboard and mouse at an equal distance from the transceiver.
  • Finally, turn the transceiver on its side or upside down.

10. Check for Windows Updates

  1. Click on the Start menu and select the Settings app.
    bluetooth mouse not working
  2. Click on Update & security.
  3. On the left pane, click on Windows Update, and you may also click the Check for updates button on the right.

Besides regular system updates, Microsoft usually delivers various drivers through Windows Update. So, there’s a chance a new driver for your Bluetooth devices (mouse) is ready.

If you can’t install it through the Device Manager, you’ll probably want to try it through Windows Update.

Another benefit of installing the latest Windows 10 updates is system stability.

If a bug in your system causes your Bluetooth mouse to stop working, there’s a chance Microsoft will release a fix as part of some update.

Additionally, here are some more problems with your Bluetooth device that you can encounter along the way:

How do I fix the Bluetooth mouse if it’s not working on Windows 11?

On Windows 11, the steps to fix this error are very similar.

You must note that both operating systems have so much in common, and except for occasional UI differences, there will be few visually noticeable differences.

So we recommend you choose a solution and apply it to any of your Windows 11 devices, and it should be compelling enough.

How do I resync my wireless mouse?

This will vary from manufacturer. But generally, the USB receiver has a Connect button located someplace on it. Once you press it, the receiver’s light should begin to flash. The USB receiver flashing light should stop after pressing the Connect button on the keyboard or mouse.

And there you go. This article will come in helpful if your Bluetooth mouse is not working on Logitech, a laptop, a Lenovo or Dell device, or if it is not working but connected.

Users sometimes complain that the Bluetooth mouse is not working after a restart. Our guide should also help you fix this.

That would be all; I hope at least one of these solutions helped you to solve the problem with the Bluetooth mouse in Windows 10.

Lastly, if you have any questions or comments, write them down in the comment section below.

5 Ways to Fix High Ping & Stuttering in Age of Empires 4

Games like Age of Empires 4 perform best when you have a good network connection and a stable computer performance. However, users complain about the Age of Empires 4 high ping issues that cause the game to lag and stutter.

The Age of Empires 4 is one of the series of historical real-time strategy video games. However, users report that the game suffers from high ping, which affects many parts of the game.

Furthermore, pings mean the time it takes for your device to communicate with the server. It measures how long it takes for a small amount of data to be transmitted from your device to an online server and back again. An outrageous rise in the ping rate can result in stuttering or lag in your device.

Fortunately, there are some ways to fix the high ping & stuttering in Age of Empires 4. As we go further into this article, we’ll discuss the causes and fixes for high ping in your game.

Why am I suddenly getting high ping?

  • Issues with your network connection: Sending a certain amount of data from your device to the online game server requires a fast, smooth, and reliable network connection. However, you can experience a rise in ping if the network connection is slow or unstable. It can cause the Age of Empires 4 account sign-in to fail and lag.
  • Firewall interference: The firewall checks the data packets transacted between your device and servers (sent and received), so it takes a lot of time to do so. Hence, you may experience high ping in your game if your game is not allowed through Windows Firewall.
  • Not enough bandwidth: When many apps are running on your device concurrently, the bandwidth allocated for the game won’t be enough to keep it stable. So, low bandwidth can cause the Age of Empires 4 game pass to be disconnected.

You may be interested in how to fix network congestion on your computer for better performance.

How can I fix high ping issues in Age of Empires 4?

1. End process for apps using more bandwidth

  1. Press Windows + R keys simultaneously to open the Run window.
  2. Type resmon in the text space and press Enter to prompt the Resource Monitor.
  3. Click the Network option in the Resource Monitor window.
  4. Check the Total volume to know the programs occupying most of your network resources.
  5. Right-click on the program using much bandwidth, then select the End Process option from the function menu.
  6. Click on End Process to confirm the action.

Restart your PC and check if the high ping issue persists. It will fix the AOE 4 disconnecting issue on your PC.

2. Check your network connection

An easy way to fix network issues is by power cycling your router. Restarting it allows it to load faster and smoother.

Likewise, we recommend you switch to another network connection and see if the high ping issue persists.

3. Update Network drivers

  1. Press Windows + I keys to open Windows Settings.
  2. Navigate to the Windows Update tab and click on the Advanced options.
  3. Select Additional options and click on Options updates.
  4. Expand the Drivers updates section, then check the box.
  5. Click the Download & install button.

Updating network drivers helps your PC connect faster with your network and fix issues like AOE 4 being unable to find or join matches and AOE 4 being offline.

Another option is to update all drivers using specialized software. Outbyte Driver Updater is ​​a smart tool that automatically and safely detects and updates all outdated drivers on your system.

Outbyte Driver Updater

Solve most issues by updating your system drivers to their latest versions.
Free trial Download Now

4. Allow Age of Empires 4 through Windows Firewall

  1. Press the Windows + I keys simultaneously to open the Settings app.
  2. Click on Update & Security, then select the Windows Security option from the left pane of the screen.
  3. Click the Virus & threat protection option.
  4. Scroll down and click on Manage ransomware protection.
  5. Toggle on to allow app through Controlled folder access, then click the + Add an allowed app button and Browse all apps.
  6. Go to the game’s installation folder, select the RelicCardinal executable file and launch it.

Close the Settings app and restart your device.

5. Reboot the computer in Safe Mode

  1. On the sign-in screen, press Shift while clicking the Power button.
  2. Hold the shift key to open the Advanced Recovery Options.
  3. Click on Troubleshoot and select the Advanced options.
  4. Click on Startup Settings and select Restart.
  5. Press 4 to Enable Safe Mode. 

The computer will restart safely, and all underlying causes of the high ping in Age of Empire 4 will be fixed.

Is 100ms ping good?

A 100ms ping is good for gaming as it is a stable and good ping time. So, 50ms – 100ms is a good ping.

Conclusively, we hope you’ve been able to fix the high ping issue in AOE 4. Read the best VPNs to solve Paladin’s high ping and stuttering on your PC. Also, you can check our article about how to fix Arma 3 ping issues in a few quick steps. 

Posted in PC

Microsoft IPP Class Driver Missing on Windows 11 [Download & Install]

Windows 11 came with exciting changes, but some inherent issues that can affect your printer have surfaced.

One of these problems is that some of our readers discovered that the Microsoft IPP class driver is missing.

This means that the system cannot communicate with the printer correctly, and some of its features are not working.

First, let’s clear out what is an IPP driver and what it does in the printer-PC relationship, and then we will provide some solutions for this issue.

What is the Microsoft IPP class driver?

An IPP driver is an Internet Printing Protocol that allows the communication between a client device like a computer, a mobile device, etc., and the printer or print server.

It helps you send one or more print jobs and perform other tasks, such as monitoring the printer and the print job status or canceling a print.

It’s also a secure protocol used by a vast majority of printers, so it’s essential to install it for your printer to work correctly.

So, all the printer drivers have this protocol embedded nowadays, and if you can’t use the printer with all its features, it’s a problem with the existing driver.

If the Microsoft IPP class driver is not installed, let’s see how we can solve this problem with one of the solutions below.

What is the difference between IPP and HTTP?

IPP, or Internet Printing Protocol, is an internet protocol that establishes communication between the client device and a printer. It allows for tasks such as querying the status of a printer, getting the status of print jobs or canceling individual print jobs.

IPP can run over the internet or without it, and thanks to access control, authentication, and encryption, it is a more secure printing mechanism than others.

HTTP is another secure way of transferring or sending data between a web server and a web browser. For example, IPP makes use of HTTPS as its transport protocol.

How can I fix the missing Microsoft IPP class driver?

1. Run the printer troubleshooter

  1. Click the Start button and select Settings.
  2. Choose System from the left menu and click on Troubleshoot from the right.
  3. Select Other troubleshooters.
  4. Click the Run button to the right of the Printer section.
  5. The system will identify if there is any problem with your printer and will suggest any further actions.

2. Remove and reinstall the printer

2.1 Remove the printer

  1. Click the Start button and choose Settings.
  2. Select the Bluetooth & devices from the left pane and click on Printers & scanners from the right.
  3. Select your printer and select Remove.

2.2 Reinstall the printer

  1. Click the Start button and choose Settings.
  2. Select Bluetooth & devices from the left menu and pick Printers & scanners from the right.
  3. Click on the Add a device button.
  4. If the printer is connected correctly, it should be detected. Click on it and select Install. If not, you can click the Add manually button.
  5. You have a lot of options to choose from. For example, if you have a local printer, select the first option and if it’s a network printer, select the fourth option. We went through with the first one because it’s more common.
  6. The system will search through the available printer. If it gets detected, select the printer and click Next to install it. If it doesn’t, go back to the previous step, select the last option, and click Next.
  7. Select the port your printer is connected to from the drop-down menu, then choose Next.
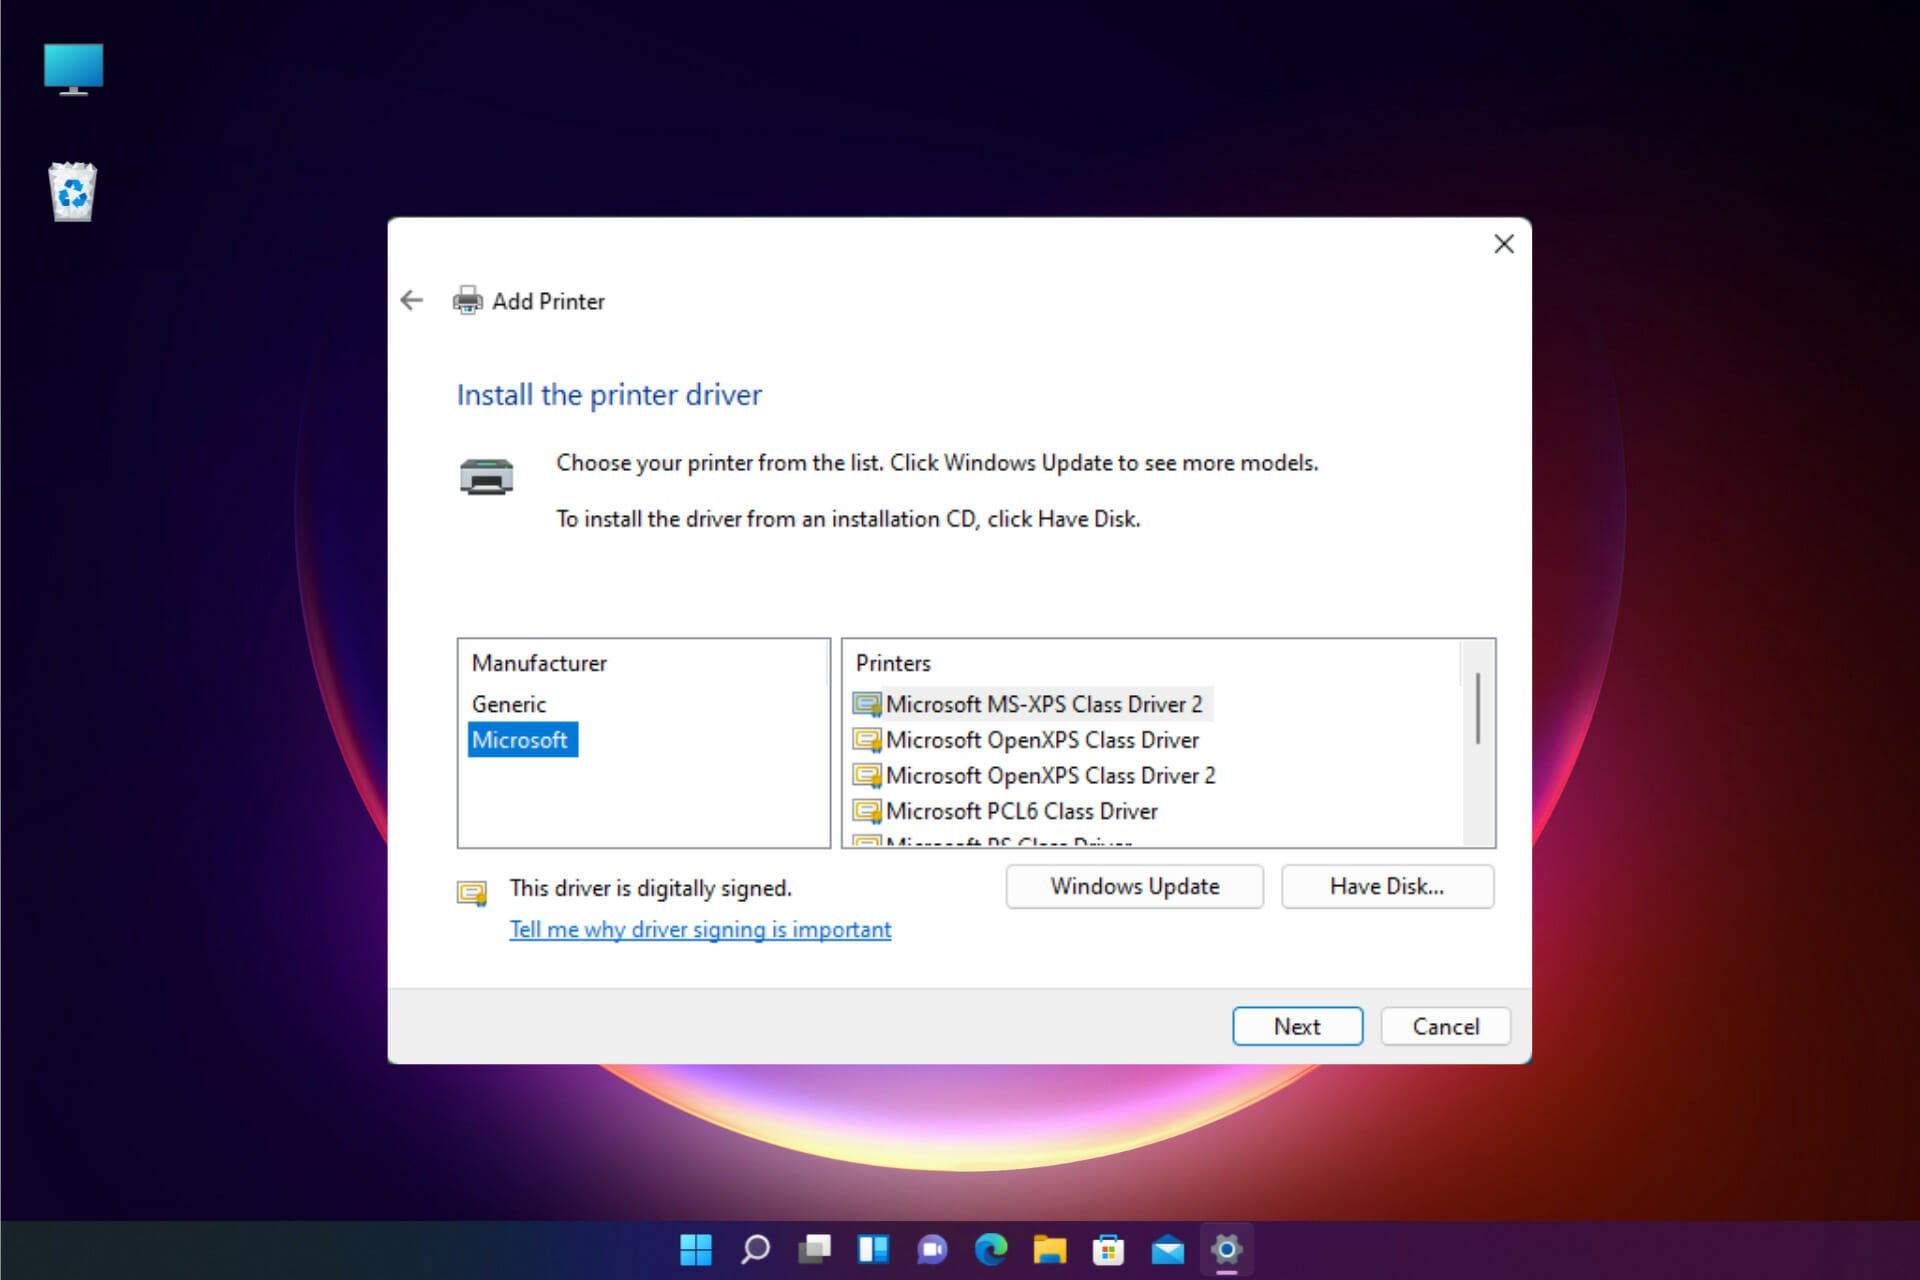
  8. Select the printer brand and model, then hit Next. If you can’t find it, click the Windows Update button, and in a few minutes, the list will be populated with many other printer brands and models. If you already have the driver, select the Have Disk button.
  9. Click the Finish button after installing the driver.

3. Get the latest driver from the printer manufacturer’s website

  1. Visit the printer’s manufacturer support website. In our example, we navigated to the HP printers support website and entered the model and number of the device.
  2. Download the needed software.
  3. The downloaded file is self-installing, so running it will also install the printer automatically.

If installing the printer using the usual method, you should try getting the correct driver from the manufacturer’s website support page.

The process described above is just an example of how to do that, and it’s different for each manufacturer, so adapt your technique to find the correct one for your printer.

Moreover, if you’re not tech-savvy, we recommend using a dedicated driver updating tool. This software solution is ideal for those who want to keep their computer in tip-top condition and avoid any printer-related issues.

4. Enable the Internet Printing Client

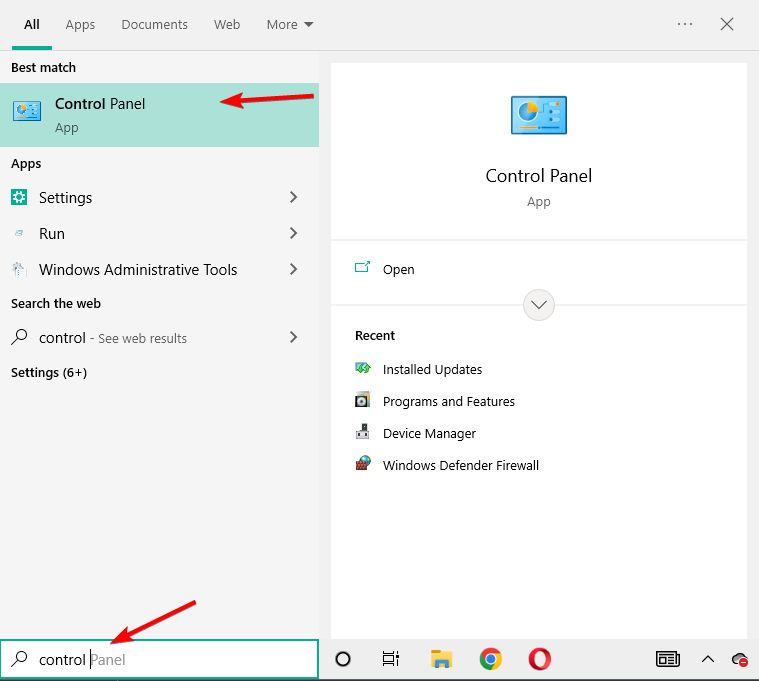
  1. Open the Start menu, type control panel, and open it.
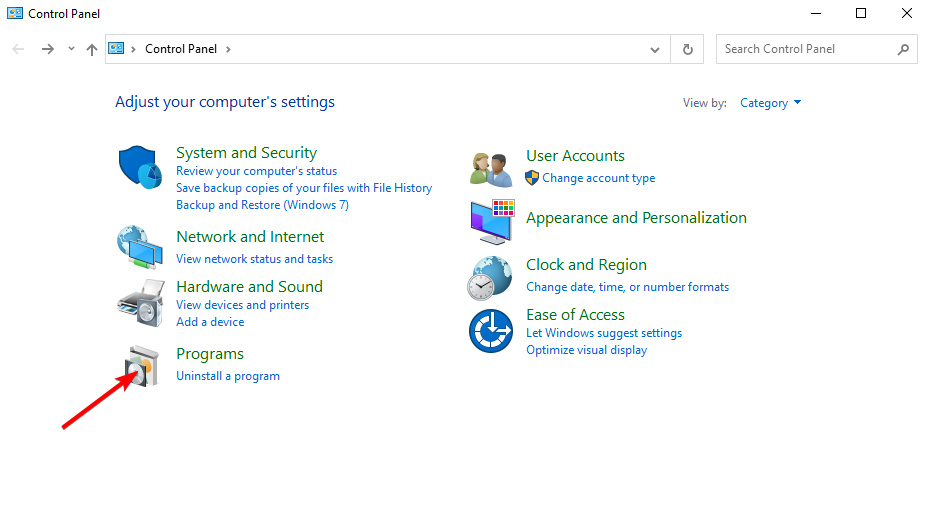
  2. Choose Programs.
  3. Click on Turn Windows features on or off.
  4. Please scroll down and find Print and Document Services, click on it to expand, then check the Internet Printing Client box.

5. Clear the spooler and restart the service

5.1 Stop the Print Spooler service

  1. Click Start, type services, and open it.
  2. Under Services, double-click Print Spooler.
  3. Select Stop, then OK.

5.2 Empty the Spool folder and restart the Print Spooler service

  1. Press the Windows + E to start File Explorer.
  2. Navigate to the following path (administrative privileges are needed to access the folder): C:\\Windows\System32\spool\PRINTERS
  3. Delete all contents in the folders if there are any.
  4. Open the Start menu, type services, and open it.
  5. Double-click the Print Spooler service again.
  6. Click Start.
  7. Go to the Startup type list and select the Automatic box.
  8. Click Apply, then click OK.

How do I enable IPP on my printer?

  1. Open Control Panel.
  2. Choose Programs.
  3. Click on Turn Windows features on or off.
  4. Please scroll down and find Print and Document Services, click on it to expand, then check the Internet Printing Client box.
  5. Go to View Devices and Printers in Control Panel.
  6. Hit the Add a Printer option.
  7. Click on The printer that I want isn’t listed link.
  8. Select the Select a shared printer by name option.
  9. Type in the address of your printer.
  10. Click Next.

How to set your printer as the default in Windows 11?

  1. Click the Search icon from the Taskbar, type control panel, and select the app from the results.
  2. Find the Hardware and Sound section and click on View devices and printers.
  3. Right-click on your device and select Set as default printer.

We hope our guide helped you fix the Microsoft IPP class driver missing on Windows 11, and now your printer runs with all the features.

If you’re still stuck, here’s how to install the latest printer driver on Windows 11. Just as always, let us remind you to ensure you get the correct driver for your product when using the manual procedure.

For any suggestions or questions, use the comments section below, and we will get back to you as soon as possible.

9 Ways to Fix Windows Installer Service Can’t be Accessed

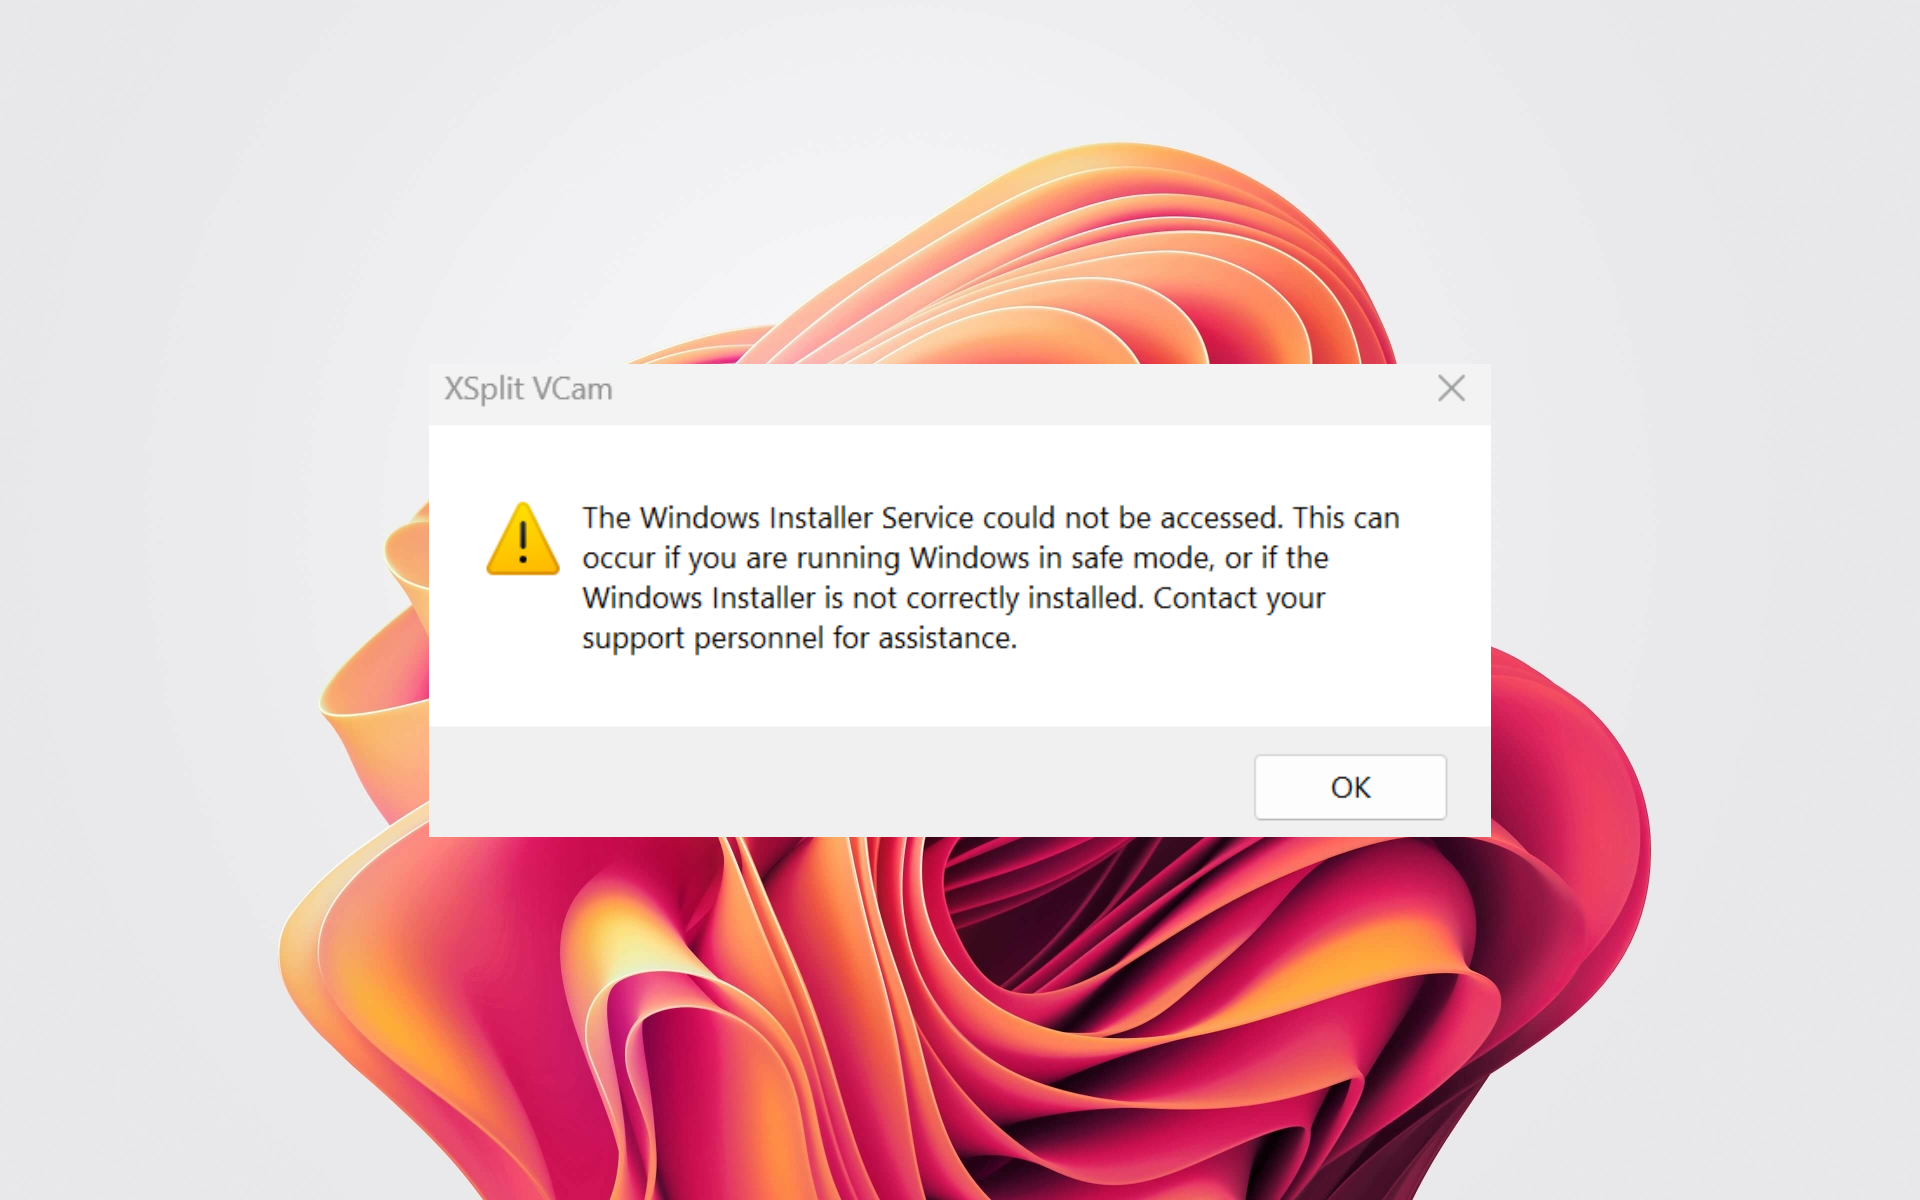
We all have all sorts of applications that we use daily installed on our Windows 10 PCs. Unfortunately, a few users reported Windows Installer Service could not be accessed error while trying to install new applications.

This sounds rather serious, but always a way to fix this error. This guide will give you a bunch of solutions to help you resolve the problem.

Why is Windows Installer not working?

Here are some of the common reasons for Windows Installer not working issue.

  • The Windows Installer Engine is corrupted.
  • There is a virus or malware on your PC.
  • The Windows Installer service is missing some important files.
  • Some of the system files are missing or corrupt.
  • There is already an earlier version of the program installed on your PC.

How can I fix Windows Installer Service could not be accessed error on Windows 10?

1. Reset the Windows Installer Service registry

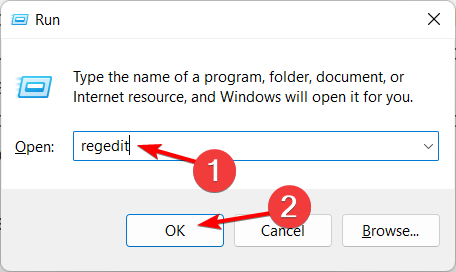
  1. Press Win + R and type regedit, and click OK.
    regedit Windows Installer Service could not be accessed Safe Mode
  2. Click on File and select Export.
    export registry Windows Installer not working Windows 10
  3. Select All as Export range, enter the name of the file and click Save. In case anything goes wrong, you can just run this file and restore your registry.
    save as settings Windows could not start the Windows Installer Service on local computer
  4. Once you’ve created your backup, close Registry Editor.

With registry backup created, you need to create a .reg file and add it to the registry. To do that, follow these steps:

  1. Open Notepad.
  2. Paste the following text into Notepad. Windows Registry Editor Version 5.00 [HKLM\SYSTEM\CurrentControlSet\services\MSIServer] "DisplayName"="@%SystemRoot%system32msimsg.dll,-27" "ImagePath"=hex(2):25,00,73,00,79,00,73,00,74,00,65,00,6d,00,72,00,6f,00,6f,00, 74,00,25,00,5c,00,73,00,79,00,73,00,74,00,65,00,6d,00,33,00,32,00,5c,00,6d, 00,73,00,69,00,65,00,78,00,65,00,63,00,20,00,2f,00,56,00,00,00 "Description"="@%SystemRoot%system32msimsg.dll,-32" "ObjectName"="LocalSystem" "ErrorControl"=dword:00000001 "Start"=dword:00000003 "Type"=dword:00000010 "DependOnService"=hex(7):72,00,70,00,63,00,73,00,73,00,00,00,00,00 "ServiceSidType"=dword:00000001 "RequiredPrivileges"=hex(7):53,00,65,00,54,00,63,00,62,00,50,00,72,00,69,00,76, 00,69,00,6c,00,65,00,67,00,65,00,00,00,53,00,65,00,43,00,72,00,65,00,61,00, 74,00,65,00,50,00,61,00,67,00,65,00,66,00,69,00,6c,00,65,00,50,00,72,00,69, 00,76,00,69,00,6c,00,65,00,67,00,65,00,00,00,53,00,65,00,4c,00,6f,00,63,00, 6b,00,4d,00,65,00,6d,00,6f,00,72,00,79,00,50,00,72,00,69,00,76,00,69,00,6c, 00,65,00,67,00,65,00,00,00,53,00,65,00,49,00,6e,00,63,00,72,00,65,00,61,00, 73,00,65,00,42,00,61,00,73,00,65,00,50,00,72,00,69,00,6f,00,72,00,69,00,74, 00,79,00,50,00,72,00,69,00,76,00,69,00,6c,00,65,00,67,00,65,00,00,00,53,00, 65,00,43,00,72,00,65,00,61,00,74,00,65,00,50,00,65,00,72,00,6d,00,61,00,6e, 00,65,00,6e,00,74,00,50,00,72,00,69,00,76,00,69,00,6c,00,65,00,67,00,65,00, 00,00,53,00,65,00,41,00,75,00,64,00,69,00,74,00,50,00,72,00,69,00,76,00,69, 00,6c,00,65,00,67,00,65,00,00,00,53,00,65,00,53,00,65,00,63,00,75,00,72,00, 69,00,74,00,79,00,50,00,72,00,69,00,76,00,69,00,6c,00,65,00,67,00,65,00,00, 00,53,00,65,00,43,00,68,00,61,00,6e,00,67,00,65,00,4e,00,6f,00,74,00,69,00, 66,00,79,00,50,00,72,00,69,00,76,00,69,00,6c,00,65,00,67,00,65,00,00,00,53, 00,65,00,50,00,72,00,6f,00,66,00,69,00,6c,00,65,00,53,00,69,00,6e,00,67,00, 6c,00,65,00,50,00,72,00,6f,00,63,00,65,00,73,00,73,00,50,00,72,00,69,00,76, 00,69,00,6c,00,65,00,67,00,65,00,00,00,53,00,65,00,49,00,6d,00,70,00,65,00, 72,00,73,00,6f,00,6e,00,61,00,74,00,65,00,50,00,72,00,69,00,76,00,69,00,6c, 00,65,00,67,00,65,00,00,00,53,00,65,00,43,00,72,00,65,00,61,00,74,00,65,00, 47,00,6c,00,6f,00,62,00,61,00,6c,00,50,00,72,00,69,00,76,00,69,00,6c,00,65, 00,67,00,65,00,00,00,53,00,65,00,41,00,73,00,73,00,69,00,67,00,6e,00,50,00, 72,00,69,00,6d,00,61,00,72,00,79,00,54,00,6f,00,6b,00,65,00,6e,00,50,00,72, 00,69,00,76,00,69,00,6c,00,65,00,67,00,65,00,00,00,53,00,65,00,52,00,65,00, 73,00,74,00,6f,00,72,00,65,00,50,00,72,00,69,00,76,00,69,00,6c,00,65,00,67, 00,65,00,00,00,53,00,65,00,49,00,6e,00,63,00,72,00,65,00,61,00,73,00,65,00, 51,00,75,00,6f,00,74,00,61,00,50,00,72,00,69,00,76,00,69,00,6c,00,65,00,67, 00,65,00,00,00,53,00,65,00,53,00,68,00,75,00,74,00,64,00,6f,00,77,00,6e,00, 50,00,72,00,69,00,76,00,69,00,6c,00,65,00,67,00,65,00,00,00,53,00,65,00,54, 00,61,00,6b,00,65,00,4f,00,77,00,6e,00,65,00,72,00,73,00,68,00,69,00,70,00, 50,00,72,00,69,00,76,00,69,00,6c,00,65,00,67,00,65,00,00,00,53,00,65,00,4c, 00,6f,00,61,00,64,00,44,00,72,00,69,00,76,00,65,00,72,00,50,00,72,00,69,00, 76,00,69,00,6c,00,65,00,67,00,65,00,00,00,00,00 "FailureActions"=hex:84,03,00,00,00,00,00,00,00,00,00,00,03,00,00,00,14,00,00, 00,01,00,00,00,c0,d4,01,00,01,00,00,00,e0,93,04,00,00,00,00,00,00,00,00,00[HKEY_LOCAL_MACHINESYSTEMCurrentControlSetServicesmsiserverEnum] "0"="RootLEGACY_MSISERVER000" "Count"=dword:00000001 "NextInstance"=dword:00000001
  3. Click File.
  4. Select Save as. Type the file name as repair.reg and set Save as type to All Files and click Save.
    save settings Windows Installer Service could not be accessed error message when installing application
  5. Close Notepad.
  6. Locate the repair.reg file, right-click it, and choose Run as administrator.
  7. If prompted, click Yes.

After you’ve added repair.reg to the registry, try to install the problematic application again and check if the Windows Installer Service could not be accessed error appears.

2. Start the Windows Installer Service manually

  1. Right-click on the Start menu and choose Command Prompt (Admin) from the menu.
  2. Type net start MSIServer and press Enter to run it.
    cmd start msiserver Windows Installer Service could not be accessed

To check if the Windows Installer Service is running, you need to do the following:

  1. Open the Start menu, type Services, and open it.
  2. Open Windows Installer service.
  3. Check the Service Status to see if the Windows Installer service is running.
  4. If the service isn’t running, click the Start button to start it.

You can also follow this detailed guide on how to enable Windows Installer Service when the service refuses to start or keeps stopping.

3. Re-register Microsoft Installer Service

  1. Right-click on the Start menu and select Command Prompt from the menu.
  2. If you own a 64-bit version of Windows, enter the following lines and press Enter after each line:
    • %windir%system32msiexec.exe /unregister
    • %windir%system32msiexec.exe /regserver
    • %windir%syswow64msiexec.exe /unregister
    • %windir%syswow64msiexec.exe /regserver
  3. After you’ve entered all the lines, close Command Prompt and restart your computer.
  4. If you own a 32-bit version of Windows 10, you need to enter the following commands:
    • msiexec /unregister
    • msiexec /regserver
  5. Close Command Prompt.
  6. Restart your computer. Now check if the Windows Installer Service could not be accessed error still appears.

4. Use regsvr32 command

  1. Start Command Prompt as an administrator.
  2. Type the below command and press Enter to run it. regsvr32 c:windowssystem32msi
  3. Close the Command Prompt and try to install the problematic application again.

5. Use SFC and DISM commands

  1. Right-click on the Start menu and choose Command Prompt (Admin).
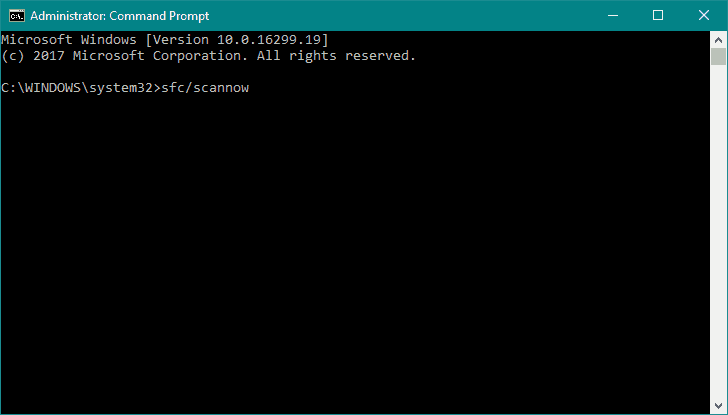
  2. Type the below command and press Enter to run it: sfc /scannow
    sfc /scannowWindows Installer Service could not be accessed error message when installing application
  3. SFC scan will now start. Remember that this can take about 15 minutes, so don’t interrupt it.

Once the scan is finished, check if the problem persists. If the issue is still present, or if you could not run an SFC scan, you might have to use a DISM scan instead. To do that, follow these steps:

  1. Start Command Prompt as administrator.
  2. Run the below command: DISM /Online /Cleanup-Image /RestoreHealth
    cmd dism Windows could not start the Windows Installer Service on local computer
  3. The scanning process will now start. Remember that this process can take about 20 minutes or more, so don’t interfere with it.

Once the scan is done, check if the issue persists. If you were unable to run the SFC scan before, or if the SFC scan was unable to fix the problem, repeat it and check if Windows Installer Service could not be accessed error is still there.

Third-party software that can do this process automatically might be an easier and more reliable solution.

6. Uninstall the older version of the program you wish to install

If you already have the older version of the program you want to install on your computer, we advise you to remove that version from your PC before trying to install the newer version.

This is a simple solution, but it might work for you, so be sure to try it out.

If you can’t remove a particular application due to Windows Installer Service could not be accessed error message, you might be able to solve the problem simply by using an uninstaller software.

In case you’re not familiar, uninstaller software is an application that can remove any application from your PC.

In addition to removing applications, these tools will also remove all files and registry entries associated with the application you want to remove.

There are many options available, you can certainly find the best uninstaller software that fits your budget and specific needs.

7. Install Windows Installer Redistributable

  1. Download Windows Installer Redistributable.
  2. After the file is downloaded, double-click it to start the installation.
  3. Follow the instructions on the screen.

8. Delete the duplicated msiexec file

  1. Go to C:\Windows\System32 directory.
  2. Look for msiexec.exe. Now look for another msiexec file. This file will be 0KB in size and it won’t have a .exe extension.
  3. Rename the duplicated msiexec file to msiexec.old.

After doing that, you just need to go to the Services window and restart the Windows Installer service.

9. Change Remote Procedure Call service settings

  1. Open the Start menu, type Services, and open it.
  2. Double click Remote Procedure Call (RPC) service.
    remote procedure call service Windows Installer Service could not be accessed error 1719
  3. Now navigate to the Log on tab and select Log on as Local System Account and check to Allow this service to interact with the desktop checkbox.
  4. Save changes and restart your PC.

How can I fix Windows Installer Service could not be accessed on Windows 11?

  • Reset Windows Installer service.
  • Check if the Windows Installer service is enabled or not.
  • Delete the old version of the software.
  • Reset your Windows PC.
  • Perform a clean install.
  • Install the latest Windows Installer Redistributable.

Can I disable Windows Installer?

  1. Open the Start menu.
  2. Type services and open the app.Start Services - party encountered an error
  3. Locate the Windows Installer service and open it.
  4. Under the Startup type drop-down menu, select Automatic.
  5. Select Stop button for the Service status section.
  6. Press Apply and OK.

Windows Installer Service could not be accessed error messages can create a lot of problems, but we hope that some of our solutions were helpful to you.

See our guide on Windows Installer Service missing for additional causes and recovery methods on Windows 10 and 11.

If you have any more questions or suggestions, feel free to leave them in the comments section below.

HP Recovery Manager Restoration Incomplete: Fix It in 5 Steps

When trying to restore or recover your crashed HP computer, you may run into an HP Recovery Manager Restoration issue where it doesn’t complete. This is a problem that happens all the time, and there are some simple solutions to fix it.

Many HP users experienced a Blue Screen of Death, where the computer screen simply turns blue with an error message. You can’t access anything without restoring or recovering the machine.

For those stuck in this loop, this is a detailed look at some quick fixes you can handle on your own. Read this to the end to find out more.

What can I do if my HP Recovery Manager restoration is incomplete?

1. Check your HP Recovery Manager settings

  1. Open the HP Recovery Manager. HP Recovery Manager
  2. This will take you to another screen with different options. Click the Advanced options button.
  3. Select the Startup Settings option. Ensure that the Enable backup logging and Enable system restore options are activated.Advanced Options
  4. If you’re having trouble restoring your system, try selecting the Create a recovery disk option and following the instructions.
  5. Click OK to save your changes and close the window.

2. Use the Windows System Restore tool

  1. Press Windows + R to open the Run command, type rstrui in the text field, and click OK.rstrui
  2. Select the Choose a different restore point option, and click Next.choose a different restore point
  3. Now, select a restore point from the list and click Next.restore point
  4. Verify the restore details, and click on Finish to start the process.finish

After doing so, your computer should boot up normally, and the HP Recovery Manager restoration incomplete problem should be resolved.

3. Use HP System Recovery to reinstall your operating system

3.1. Back up your data

  1. Open the Control Panel and select System and Security.Control Panel
  2. Go to Backup and Restore.
  3. If this is your first time using Windows Backup, then choose Set up backup and follow the setup prompts.Creating a backup
  4. If you’ve created a backup before, select Back up now to update it.
  5. Wait for the backup process to complete.

3.2. Use the Boot Device Options

Note icon NOTE
The steps listed here may be different for your computer model, though the concept remains the same. If the keys listed here don’t work as intended, look for the correct ones on the manufacturer’s website or in the computer manual.
  1. Shut down the computer. Disconnect all peripheral devices and remove all USB devices and media cards.
  2. Turn on the computer and immediately press Esc repeatedly until the Startup Menu opens. Press F9 to open Boot Device Options.HP Startup Menu
  3. Under Legacy Boot Sources, select ATAPI CD/DVD Drive or Removable Device, and press EnterBoot Device Options
  4. The computer will restart, and then the Windows loading screen should appear.
  5. Press any key when prompted, and then follow the on-screen instructions to restore the system from the recovery partition on your hard drive using HP System Recovery.
  6. After the recovery process is complete, reconnect all the devices that were removed earlier.
  7. Turn off the computer, then wait for 5 to 10 seconds to turn on the computer again, and verify that Windows starts correctly.
  8. If prompted to sign in, enter your username and password, and then click OK.
  9. After your computer restarts, select an account type and follow the instructions on the screen to set up Windows.

Now, check if the HP Recovery Manager restoration incomplete problem is resolved. If not, head to the next method.

4. Run the HP Hardware Diagnostics tool

  1. Download the HP Hardware Diagnostics tool from the HP website.
  2. Open the file and follow the on-screen instructions to install the tool.
  3. Launch the tool and click on the System Tests button.Hardware Diagnostics tool
  4. The test will start running. Let it finish until it reaches 100%.
  5. Restart your computer once the test is complete.

Now, try using the HP Recovery Manager again, and verify if the restoration incomplete problem is resolved.

5. Contact HP Support for further assistance

If you’re struggling with the HP Recovery Manager Restoration incomplete error, don’t worry! You can always contact HP Support for help.

First, visit the HP Support website. You can enter your product number or search for your product manually. Look for the Contact HP Support link and click it. This will take you to a page with various support options.

Furthermore, if you want to speak to someone on the phone, select the Call HP support option. Alternatively, you can use the Get chat support option to chat with an HP representative online.

Whichever method you choose, someone from HP Support will be more than happy to assist you further with your HP Recovery Manager issue. So don’t hesitate to reach out for help.

We hope this article has helped you resolve the HP Recovery Manager Restoration Incomplete error.

Also, find out the exact steps to use the HP Recovery Manager.

If you have any other queries regarding the problem or know of a solution that’s not listed here, drop it in the comments section below.

Bad Sector Repair Tool for Windows 10 & 11 [2026 Guide]

The role of a hard disk in a computer system is extremely important because it holds all your valuable information and keeps the operating system working properly. And when the data on it is lost, a bad sector repair tool comes into the picture.

The data on the bad sectors may be temporarily or permanently lost depending on the cause of the problem.

Hardware errors are impossible to fix with software and can only be rectified by creating a backup and replacing the hardware itself. If the damage is caused by software errors then you can fix them by using bad sector repair software.

A hard drive contains millions of sectors that, over time, can get damaged or become inaccessible for a variety of reasons – logical corruption, physical damage to the disk, etc.

When a section of the hard drive is inaccessible, in the worst-case scenario, it can cause the operating system to crash. This is one of the most frequent root causes for Blue Screen of Death errors, aka BSoD errors.

So, let’s find out all about the issue and the best bad sector repair tools with a free download to fix things.

How to fix bad sectors permanently?

Bad sectors are the part of the hard drive which have been rendered unreadable. And over time, several of these may come up due to various reasons, for instance, improper shutdown, overheating, malware, or physical damage.

Frankly speaking, the possibility of fixing bad sectors is usually bleak, and this is where advanced third-party bad sector repair tools may come to your aid.

check disk as a bad sector repair tool
Check Disk

Though Windows offers a built-in utility, Check Disk, to automatically identify and eliminate issues with the hard drive. Also, you may defragment the hard drive, but that wouldn’t work for an SSD.

What is the best HDD bad sector repair tool?

Stellar Data Recovery: Simply the best

Stellar Data Recovery software allows you to recover lost or deleted files, folders, photos, documents, videos, and other files, even if your hard drive was severely corrupted or due to accidental deletion or formatting.

It has been perfecting its software for more than 25 years. During this time, this company has received more than 100 awards for its top-of-the-line products.

This is one of the leading names on the market in regards to the recovery of files a hard drive failure or formatting and offers you 3 great options that cover users’ needs from basic users to the most advanced.

Stellar Data Recovery

Recover any file format on any storage device with the most powerful tool available on the market!
Free trial Visit website

1. Stellar Data Recovery – Standard

The Standard version of this software is designed for the average PC user that needs help in recuperating lost or corrupted files like Office documents, emails, spreadsheets, presentations, photos, videos, audio files, and others.

Stellar Data Recovery-Windows Standard is limited to recovering data up to 1GB which is more than enough for the average PC user.

It can also recover data from external storage devices such as external hard drives, SD cards, USB flash drives, Cameras, Camcorders, etc.

Stellar Data Recovery Standard offers an easy-to-use and very user-friendly interface in order to make it as easy as possible for you to quickly undo any data loss issues encountered. And it does so while preserving the original structure of the data.

All you need to do is connect the affected storage media (internal or external), launch the software and run a scan.

Stellar Data Recovery V8’s very performant search feature will help you to easily locate specific files by searching by custom filters like file name, size, file type, and even by last modified date and created date.

In order for you to dig even deeper inside the affected hard drive, Stellar Data Recovery Standard has a Deep Scan feature specifically designed to tackle damaged and formatted devices.

Sometimes we find that an entire partition of our hard drive is missing. This powerful software has a built-in option called Cannot Find Drive that can recover an entire partition at once and even allows you to preview the data before you recover it.

⇒ Get Stellar Data Recovery Standard edition

2. Stellar Data Recovery – Professional

The professional version of this amazing software holds all the capabilities mentioned above in the Standard version with a few key added options:

  • It recovers data that was deleted/lost from unbootable systems
  • NTFS, exFAT, and FAT (FAT16/FAT32) support for formatted drives
  • Selective file recovery with over 300 pre-listed files types or recover files with a particular file extension
  • You can save and load scan information in order to save time

You can find a step-by-step guide to using this tool on the Stellar knowledge base page.

⇒ Get Data Recovery – Professional edition

3. Stellar Data Recovery –  Technician

This version of the software is the ultimate bad sector repair tool, and includes all the options covered in the first two versions with a plethora of additional features:

  • Safe and risk-free data recovery from logically corrupt or inaccessible RAID 0, RAID 5, and RAID 6 servers
  • Data recovery for formatted or deleted volumes
  • Remote recovery – recovers data remotely over a network
  • It can create Virtual RAID when probable RAID construction fails
  • The tool can recover data from lost/deleted FAT, exFAT, and NTFS partitions
  • RAW recovery – of the entire RAID array
  • It can create images of your hard drive containing bad sectors
  • It facilitates recovery from hard disks with 2 TB or more storage capacity
  • Track hard-disk performance with SMART attributes (display data in real-time)
  • Set out threshold and Critical limits to monitor and analyze temperature, performance statistics, and health of hard disks

⇒ Get Stellar Data Recovery Technician

All the versions of the software have multiple languages support: English, German, French, Italian, Spanish, Japanese, and Chinese. You can easily change it either in pre-installation or post-installation from the Advanced Settings.

AOMEI Partition Assistant: Offers several repair options

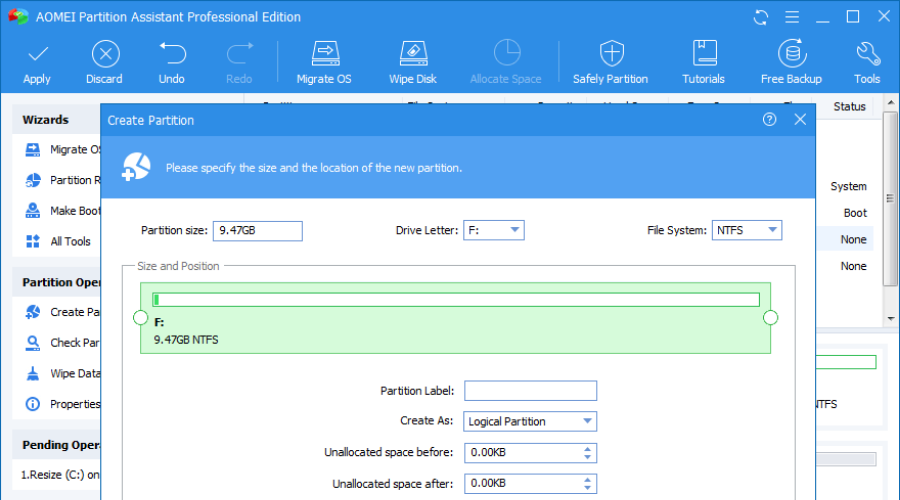
AOMEI Partition Assistant has a variety of very efficient tools, all tied up by a very user-friendly interface that simplifies your PC disk partition management and offers a safe environment for you to work.

It allows you to create, resize, move, merge, and split partitions without losing any data and even repairs MBR (Master Boot Record) with ease.

AOMEI Partition Assistant supported devices include:

  • Traditional hard disk drives (HDD), solid-state drives (SSD) and SSHD
  • External hard drive (USB 1.0/2.0/3.0), PC card, all-flash drives, Thumb Drives, and other removable media
  • All storage devices recognized by Windows – IDE, SATA, iSCSI, SCSI disk, IEEE1394 (FireWire), etc
  • Hardware RAID, including RAID 0, RAID 1, RAID 5, RAID 10, etc.
  • Up to 128 disks in one system
  • Hard disk with 4096, 2048, 1024, 512 bytes sector size
  • Supports TFS, FAT32/FAT16/FAT12, exFAT/ReFS, Ext2/Ext3/Ext4

If your computer doesn’t boot and you see an error information message like operating system not found, missing operating system, or invalid partition table that shows you that there is something wrong with the MBR.

MBR problems can be caused by partitions being infected by a trojan horse virus that your antivirus didn’t remove completely or loading a corrupted backup image for your OS. This problem also occurs on some external hard disks.

You can go to the AOMEI website to see a step-by-step guide on how to repair corrupted MBR on Windows PCs.

AOMEI Partition Assistant

The best tool to manage your disk partitions with great ease and high efficiency!
Check price Visit website

Disk Genius: One of the most trusted repair tool

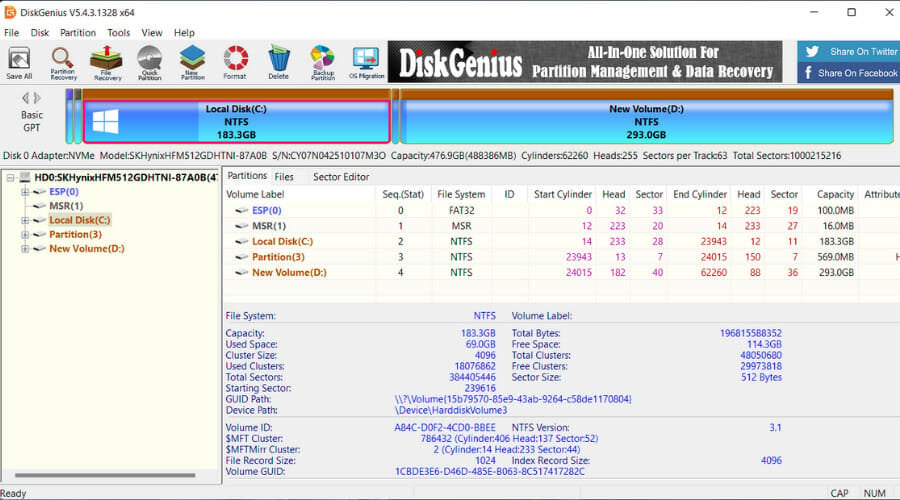
Disk Genius is one of the oldest software on the market with a great reputation for repairing computers.

Disk Genius is not only a great utility to take care of your PC and system but also to run tests and apply fixes to your hardware. The Disk Utilities feature from Disk Genius is a great dedicated tool for repairing bad sectors on your HDD.

Another important feature of this tool is the backup & restore option, which allows you to save your system configurations before taking any disk repair actions.

Here is a quick overview of the most important processes that it can perform:

  • Check and repair bad sectors in Windows 10 on HDD, SSD, external HDD, and other storage devices
  • Disk and partition management: format, resize, split, clone, hide, extend
  • Create a WinPE bootable disk so you can access your disk when the system crashes or the PC has no OS
  • Backup and restore partition
  • Recover lost data from your disk and storage devices

These are only some of its key features, but they’re the most important if you want to keep your disk healthy.

From repairing the bad sectors to recovering lost files – Disk Genius is your disk guardian. You can get a free version from the official website.

Disk Genius

Reliable data disk utilities and data backup and recovery for Windows that you cannot get enough of!
Check price Visit website

Will formatting HDD fix bad sectors?

No, formatting the HDD, or even an SSD, for that matter, won’t fix the bad sectors on it. Though it is beneficial as the bad sectors will be marked, and data will not be stored on it any further. This will minimize the loss of data stored in the bad sectors in the long run.

When you find a bad sector on the drive, the ideal approach is to repair it using a third-party tool or create a backup of the data and transfer it to a new hard drive.

And if faced with the problem, you now know the best bad sector repair tools to employ and get your hard drive to work seamlessly again. Some of the tools also support USB bad sector repair.

If you have any questions or suggestions, feel free to comment below.

This is How You Can Link Slack to Trello In No Time

One of the most important aspects of a company is communication. That is why modern times require modern solutions, and instant messaging apps are a common sight in office environments.

One such app is Slack, and it has pretty much everything you may need to make collaboration as efficient as possible.

One very helpful feature is its ability to allow communities, groups, or teams to join workspaces via a specific URL.

Trello is also a collaboration platform, albeit it is more visually inclined, which gives teams perspective on projects. In a somewhat similar fashion to Slack, Trello tells you what’s being worked on, who’s working on what, and where something is in a process.

Can Slack and Trello be linked?

Given how the two services can be of such great use for companies and coordinative work, it is only natural that you’d think about connecting the two services in one way or another.

One of the few ways you can link Trello and Slack together is via the Trello for Slack app.

The Trello app for Slack makes it easier for you to manage cards on your boards, change due dates, and attach conversations to cards straight from the Slack interface.

Are Trello and Slack the same?

Although both of these apps are used to manage workflow or projects, they do not provide the same duties in this regard.

Trello is a project management tool that makes it simple for teams to organize their work, while Slack is primarily an instant messaging platform that also includes some task management capabilities.

How can I connect Slack and Trello?

1. Install the Trello app for Slack

  1. Go to the Trello page in the Slack App Directory and click Add to Slack. Remember that you first need to log into your account and workspace in order to install any Slack apps.add-to-slack link slack trello
  2. Next click Add to Slack.  add-slack slack to trello
  3. Choose a Trello team to link to Slack then click Install to finish the linking process.
  1. Launch Slack select Trello from the Apps section.
  2. Type /trello in the message field press Enter or click Send.trello-slack-search slack to trello
  3. Click Link Trello account and select Allow.

3. Add a Trello bot to Slack channels

  1. Select a channel then type /invite @trello into the message field
  2. Hit Enter or click Send to add the Trello bot to the channel.
  1. Type /trello link and your board’s name or URL into the message field.
  2. Hit Enter or click Send and select Link to Channel.

By following these steps, you should be able to make use of the entirety of Trello’s features straight from within the Slack app.

You can now better manage who you are talking to, and project assignment and management will also become a breeze.

Does Slack have a Kanban board?

Kanban boards are a tool for agile project management that is supposed to assist visualize work, restrict the amount of work that is now in progress, and increase productivity.

It can assist in the establishment of order in the day-to-day work of agile as well as DevOps teams. Kanban boards are helpful for technology and service teams because they help teams commit to the appropriate amount of work, in the right time period.

Your Kanban board is going to be built immediately into Slack, giving you a quick visual overview of all the tasks that are currently being worked on.

If you want to use other services, we also have a great guide on how to connect Google Calendar to Slack, so don’t miss it.

Do you think connecting your Trello and Slack accounts will result in increased work productivity? Let us know your opinions in the comment section below.

Windows Failed to Apply Printer Connections Settings [Fix]

Group Policy is a powerful tool for managing Windows computers. But there are times when it just doesn’t work as you expect. Perhaps you have an existing policy that has been working fine, but now it doesn’t seem to be applying some settings or adding new printers. 

If you’re trying to import printers using GPOs on your domain controllers and they’re not working, then there might be something blocking outbound connections such as your firewall. 

Most of the time, you’ll find that you don’t have permission to perform this operation. In such a case, you may need to set the account to an administrator account to enable you to make any changes.

Why can’t I add a shared printer? 

If you are wondering why you are unable to add a shared printer, below are some common causes:

  • The printer is offline – The printer you are trying to add may not be on the network. If the printer is offline, it will not appear as a shared printer in the list.
  • You are not on the same network – To use Group Policy to add shared printers, you must be able to connect to the print server. If your client computer is not connected to a domain, or if the printer is not on the same subnet as the client computer, you will not be able to add shared printers through Group Policy.
  • The policy admin is not an administrator – It is possible that the policy admin is not an administrator on the computer. If this is the case, they will not be able to install printers or add printer drivers. To fix this, you need to make sure that the policy admin has admin privileges on the computer.

Now that you are aware of why you are unsuccessful in adding a printer, below are some easy troubleshooting solutions.

How can I fix a Group Policy that is not adding printers

1. Ensure you have permissions 

The first thing to do is to ensure that you have permissions on the GPO. If the Group Policy printer access is denied, it’s probably because you are using a standard account. You can change this can be done by running GPMC as an Administrator. If you start the Group Policy Editor with elevated permissions, then it will automatically use those permissions when you open it up.

When adding a network printer to your computer and it isn’t working, ensure that you have the correct permissions. If your account is a part of the Administrators group, you should be able to add printers from any computer on your network.

2. Restart Group Policy Service

  1. Press the Windows + R keys simultaneously to open the Run command.
  2. Type in services.msc, then press Enter.Open service manager
  3. Navigate to the Group Policy Client and right-click on Services.Group Policy Client Properties
  4. Select Properties and change the Startup type to Automatic.
  5. Click on Start, then Apply.
  6. Hit OK to save the changes.

3. Remove the default printers 

If you have added a printer before and it was not added correctly, then there are chances that the policy is still referring to that printer. 

The solution is to remove that printer from all of your client computers and then try adding it again. This will make sure that only the correct printers are being added by Group Policy. If Windows failed to apply the deployed printer connections settings, you can refresh your connection.

Another thing you should do is test if any of your printers have gone offline. To test if this is the case, try printing something from one of your computers using one of these offline printers. If it prints successfully then there must be another issue.

4. Refresh policy settings

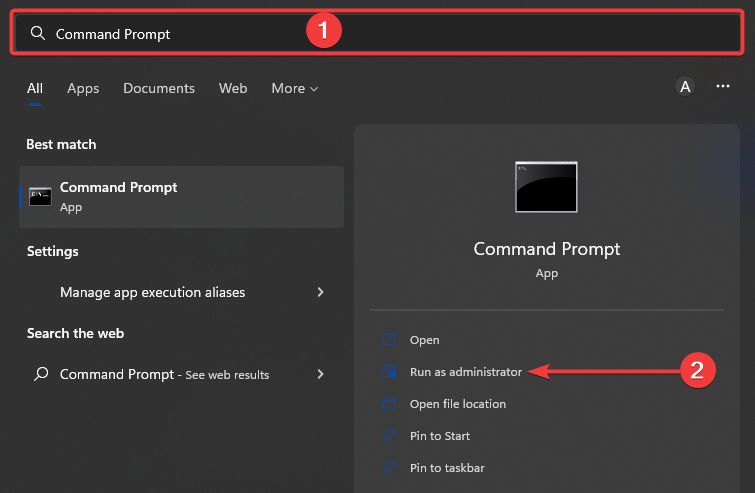
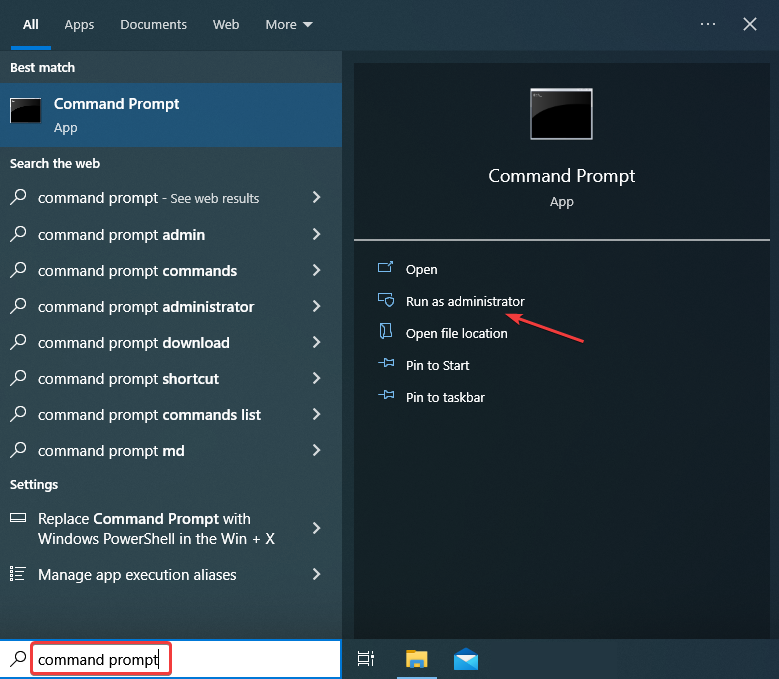
  1. Hit the Windows key, type cmd and select Run as administrator.windows 10 slow after system restore
  2. Type in the following command and press Enter: GPupdate/force

The Group Policy refresh process happens automatically every 90 minutes. However, you can update it manually. This will refresh all the policies on that computer, including any printer policies.

5. Reset Group Policy Editor

  1. Hit the Windows key, type cmd and select Run as administrator.windows 10 slow after system restore
  2. Type in the following commands and press Enter after each one: RD /S /Q "%WinDir%\System32\GroupPolicyUsers" && RD /S /Q "%WinDir%\System32\GroupPolicy" gpupdate /force
  3. Restart your PC.

This can be useful if you’ve changed a setting and then realize that it wasn’t what you wanted. You can use this option to undo an incorrect setting before applying it to other computers.

If none of these solutions works for you, try restarting your PC in Safe Mode or reinstalling Windows.

You may also encounter an issue where Windows is stuck at applying Group Policy so check out our article on how to approach this situation.

As always, we appreciate your feedback so feel free to share any additional thoughts you may have on this topic down below.

Windows 11 2022 rollout blocked for some over printer driver issues

Last week, Microsoft announced that it’s beginning to roll out the Windows 11 2022 Update which features a ton of improvements. But it seems that some users have encountered some bugs with the update, more specifically printer drivers.

This is not the first time Microsoft has encountered printer-related issues, as is the case with the Windows 10 update rolled out in July which caused users to see duplicate copies of printers on a device after installing it. In this particular instance, if you upgraded your device to run on the Windows 11 2022 Update, then you may not be able to detect all the features in printers especially those using either the Microsoft IPP Class Driver or Universal Print Class Driver.

According to the statement issued by Microsoft:

Windows needs connectivity to the printer to identify all the features of the printer. Without connectivity, the printer is set up with default settings and in some scenarios might not get updated once connectivity to the printer is restored. You might be affected by this issue if your printer is unable to use printer specific features such as color, two-sided/duplex printing, paper size or type settings, or resolutions higher than 300x300dpi.

Consequently, Microsoft has now placed a compatibility hold on all Windows devices with the affected printer drivers, thus preventing them from upgrading to the Windows 11 2022 Update. However, if you are currently facing this issue Microsoft has provided a workaround for it.

You will need to uninstall any installed printers using Microsoft IPP Class Driver or Universal Print Class Driver from your device. In turn, you will be able to install the Windows 11 2022 Update. However, it may take up to 48hrs before you can make the update on your device. Restarting your device as well as checking for updates can expedite the process.

Microsoft has indicated that it is currently working on a fix for this and we should expect it as an update in an upcoming release. Let us know if you have encountered this issue in the comment section below.

How to install and set up Microsoft Teams on Android

As unexpected and uncertain as the Covid-19 pandemic was, it brought along many changes to our work culture with it. One such shift was the rise of online communication tools in the midst of the work-from-home phenomenon. This has resulted in a massive uptick in new subscriptions for Teams, Microsoft’s flagship online communications app. For the stats nerds, the app now boasts 270 million regular users, up from the 22 million users it had in 2019.

With this huge rise in demand, the app naturally tries to be cross-compatibility, and therefore, is available on various operating systems. In this article, we focus our effort on how you can install and set up the Teams app on your Android device. So, let’s get started.

How to install and set up the Teams app on Android

Like most apps on Android, you can find the android version of the Teams app on the Google PlayStore. Here’s how:

  1. Head to the PlayStore, type in ‘teams’ in the search bar above, and select the search option on your keyboard.
  2. You’ll get taken to a new page. From here, click on Install to begin the download. The app will be downloaded and installed in a few seconds.
  3. As soon as the download gets finished, click on Open. The app will start booting up; give it a few minutes to complete the installation.

installing teams app

teams app

You’ll then have to type in your login credentials—your Teams email and password, basically. After that, you might have to wait a few seconds while the app signs you in.

teams log in

From the next screen, click on Next after you’re signed in. The app will then try to confirm some privacy settings; click on Got it to finalize. Do this, and you’ll be finally taken to the main menu of your Teams app, set to the Activity tab by default.

From here, switch the tab, and you’ll be able to do everything you can on a Teams account on your PC—be it chatting with a team member or glossing over the different channels.

However, if you don’t have a Teams account, the Android app will let you create one from there. Let’s see how.


Creating a new account on the Teams Android app

First, click on the No account? Create one for free button. Then select the type of account you’d like to create: Personal or Business.

On the next screen, type in your Microsoft email address, or create an account using your phone number by clicking on Use a phone number instead. Click on Next.

Type in the relevant phone number, enter the four-digit confirmation code sent to your phone and follow the instructions onscreen. Your new account will be created.

Click on Get Started to go ahead with the Teams app, and you’ll be able to use it on your Android device from here on.

getting started with Teams

Installing the Teams app on an Android smartphone

As the Teams app has slowly gained popularity, more and more users will need the ease of access that an Android app provides. If you’re one such user, this short guide is all you need to install the Teams Android app on your device. Of course, as we’ve said above, the Teams app is available for multiple operating systems; for instance, we’ve also covered how you can install it on Linux. Moreover, Microsoft keeps adding new features and functionalities to the app regularly.

Puffin Browser Not Connecting to Network [2 Safe Fixes]

The Puffin browser is a secure and fast browser with minimal data consumption. It protects you against malicious links and hackers with its high-level security features.

However, like most modern browsers, it is not free from errors, and an example is the Puffin browser not connecting to the network. This issue is pretty common because the browser renders your web pages in the cloud to make loading and content rendering faster.

With all these processes, it is expected that a network issue will arise at some point. In this guide, we will take you through three effective fixes to solve the problem.

Why is my Puffin browser not connecting to the network?

With the complexity of the routing process of the Puffin browser, the causes of its network problems can sometimes be difficult to trace. But below are the popular ones:

  • Unstable network connection – A weak or unstable network connection happens when the router is too far away or another source jams it.
  • Corrupt browser data – When you get corrupted browser data, you must delete those files as they cause miscommunication across the browser.
  • Outdated app – An outdated app won’t communicate with the other software correctly, as its protocols aren’t updated.
  • Presence of bugs in the app – Bugs can cause a plethora of issues within an app, including not being able to connect to the network.

Without further ado, let’s jump into the list of solutions to fix the Puffin browser not connecting to the network issue.

What can I do if the Puffin browser is not connecting to the network?

Before we head to the slightly complex solutions, try these quick ones first:

  • Ensure you are connected to a network and have a high Internet speed. This is usually a common reason users face the problem.
  • Check for any pending browser updates and install them.
  • Try opening other websites in case the problem is limited to just one. This way, you will be able to verify that.

If none work, head to the fixes listed next.

1. Clear cache

  1. Click the menu button (three horizontal lines) in the top right corner. Select the Settings option.
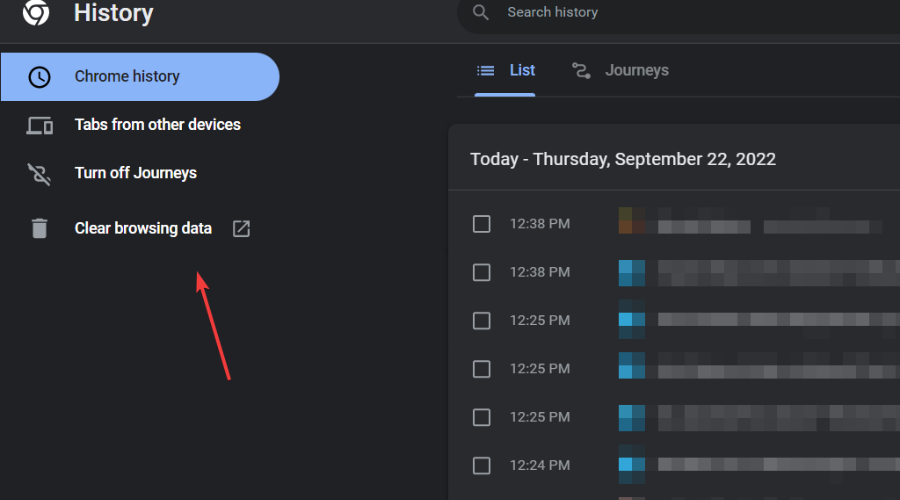
  2. Choose Clear browsing data on the left pane.
    clear-browsing-puffin puffin-browser-not-connecting-to-network
  3. Check the checkbox for Cached images and files and click the clear button.
    cache-puffin puffin-browser-not-connecting-to-network

The cache is an important browser data that helps to improve your browsing experience. But they cause a lot of problems when corrupt.

The Puffin browser gathers many cache files with its mode of operation. So, there is a high chance that they can get corrupt. And this causes the Puffin browser not connecting to the network issue.

After clearing your cache, relaunch the app, and try to visit another website.

2. Uninstall and reinstall the Puffin browser

  1. Press the Windows key and select Settings.
  2. Select the Apps option.apps-w10 puffin-browser-not-connecting-to-network
  3. Scroll down to the Puffin Secure Browser app and click on it.puffin-search puffin-browser-not-connecting-to-network
  4. Select the Uninstall option and follow the simple onscreen instructions to complete the process.
    uninstall-puffin puffin-browser-not-connecting-to-network
  5. Go to Puffin’s official website.
  6. Click on Download Windows Installer and wait for the download to complete.
    windows-puffin puffin-browser-not-connecting-to-network
  7. Click the downloaded file and follow the onscreen instructions to complete the installation.

This is the last resort if all the fixes above do not solve the Puffin browser not connecting to the network issue. Some bugs might be affecting the Puffin browser’s performance, causing it not to connect to a network. Uninstalling and reinstalling the app should remove all the bugs disturbing it.

It is also worth noting that this fix has proved to solve the Puffin browser not working issue on Firestick, Android TV, and Nvidia Shield. So you can consider it a general fix to fall back on if nothing works.

Does Puffin browser Pro still work?

The Puffin browser Pro and free version still work on Windows 7 (SP1) and 10, macOS 10, 14, and newer, and all Android OS.

However, the developers announced that the browser would be discontinued on iOS devices in 2022 due to the Apple store’s policies. But it will work till the beginning of 2023 before it stops working totally.

Is there a replacement for the Puffin browser?

Thankfully, there are lots of effective alternatives. The major selling point of the Puffin browser is security. And this is just one of the many features of the renowned Opera One browser.

Opera One is a top-notch browser that assures your online security. It has a free built-in VPN that ensures you surf the web unnoticed. There is also the ad blocker that protects you against malicious links disguised as ads online.

Add its anti-tracking feature, and you know you’re 100% safe with Opera One. But that is not all you get from this browser. It also comes with a built-in AI and a modular AI-ready design.

It is pretty simple to use and intuitive. Regarding browsing speed, it is up there with the very best in the industry. It just combines so many features without errors, like the network not connecting on the Puffin browser.

⇒ Get Opera One

The Puffin browser not connecting to the network issue can be exasperating, especially if you don’t have any other secure browser. Fortunately, it is quite easy to solve.

Do you want to know more about how safe the Puffin browser is? Check our detailed guide that touches on everything its privacy and security features.

Feel free to let us know the fix that worked for you in the comments section below.

5 Ways to Fix Group Policy if It’s Slow to Generate Reports

Group Policy is one of the most important tools you have for managing and configuring your network. The problem is that it can be slow to generate reports and sometimes even hangs for minutes at a time. This can be frustrating when you’re trying to get something done quickly.

The reason Group Policy can be slow to generate reports is that it requires several steps. If it is taking too long to generate reports, you might be able to fix it by changing some settings or disabling certain features in Group Policy Management Console (GPMC). 

In some instances, Group Policy Editor may be greyed out meaning you can’t access some options. Luckily, our detailed article explains how to quickly fix this issue.

How long does it take for Group Policy to update?

The time it takes Group Policy to update depends on the number and complexity of the Group Policy Objects (GPOs) that are in the environment and the speed of the network.

Other factors include:

  • Speed of your network – The faster the network, the faster the Group Policy will be applied.
  • Amount of data being pushed out through Group Policy – If you’re applying hundreds or thousands of policies at once, it can take longer than if you’re applying only a handful of policies.
  • Number of computers that will receive these policies – The more computers receive them, the longer it will take.
  • Speed of your computer’s processor and memory – The faster these two things are, the more efficiently Group Policy will be able to apply itself and therefore the faster it will complete its job.

Why is GPO so buggy?

If you find that your GPO is buggy, there is a possibility that you have a corrupt user profile. This can happen for a number of reasons: malware infection, user error or faulty third-party software. The easiest way to check if this is the issue is to simply log out and back in again.

If everything goes back to normal after logging out and logging back in, then you know that your local profile has been corrupted and needs to be repaired. You can also switch users and check whether you experience the same problems.

Also, editing system policies unnecessarily can cause the GPO to be buggy. Don’t edit registry keys unless absolutely necessary. Registry keys are used by various parts of Windows for storing configuration information, such as application settings or browser settings.

If you change these keys without knowing what they do, you could break some aspect of the operating system or other software. 

How do I speed up Group Policy processing? 

1. Decrease the number of GPOs that are processed at once

Group Policy processing is done in parallel, but there are limits to how many GPOs can be processed simultaneously. If you have too many GPOs applied at once, then you will experience delays when applying them. 

Sometimes, the server may get stuck at applying Group Policy. To solve this problem, consider applying fewer policy settings or using Security Filtering to only apply certain policies to certain groups.

2. Use a faster network

If your network isn’t fast enough to support the number of users on it, consider upgrading your hardware or adding more bandwidth. A fast network will allow for better response times from the clients themselves and make Group Policy processing more efficient.

If you have older hardware or slow links between your domain controllers, this will help tremendously. By using faster hardware and faster links between domain controllers, you’re able to process Group Policy faster because the travel time between servers and clients is lessened.

3. Disable or uninstall unnecessary software

Some programs use up more memory than they need to perform their tasks, which can cause the Group Policy slow in generating reports. If you don’t need a program, disable it or uninstall it entirely.

Uninstall programs that were installed with other programs. Many programs come bundled with other software that you might not need, such as toolbars and browser extensions. You can remove these extras from your system through the Control Panel.

In this case, we recommend you use a dedicated tool to make sure it’s done properly. CCleaner can help you in this case by managing all your programs in one list and allowing you which app, even if it’s built-in, you want to uninstall.

⇒ Get CCleaner

4. Refresh policy settings

  1. Hit the Windows key, type cmd and select Run as administrator.windows 10 slow after system restore
  2. Type in the following command and press Enter: GPupdate/force

5. Reset Group Policy Editor

  1. Hit the Windows key, type cmd and select Run as administrator.windows 10 slow after system restore
  2. Type in the following commands and press Enter after each one: RD /S /Q "%WinDir%\System32\GroupPolicyUsers" && RD /S /Q "%WinDir%\System32\GroupPolicy" gpupdate /force
  3. Restart your PC.

And that’s how you speed up your Group Policy if it is slow at generating reports. If you would like to address more issues, we recommend you install the Group Policy Management Console.

You might also want to enable GPedit.exe on Windows 11 to use it alongside the GPMC. Sometimes, however, Windows may not find GPedit.msc but we have covered various ways to fix this issue.

Let us know of any other solution you have tried in the comments section below.

How to pin shortcuts to your taskbar on Windows

The Windows taskbar is the central hub for all kinds of apps and files on your Windows desktop. It comes with a bunch of apps set up there by default. However, you don’t have to stick with preset apps or icons. Among a host of things that Windows lets you tweak about it—be it hiding your taskbar or even centering it in Windows 10—you can also pin new taskbar shortcuts within it.

In what follows, we’ll look at the different ways to pin new app shortcuts on your taskbar on Windows PC. Let’s get started. 

How to pin shortcuts to your Windows taskbar  

So, there’s no one way to go about this. But don’t panic, as we’ll cover all of the methods one by one. So let’s start with the desktop shortcuts first.

1. Pin shortcuts by dragging and dropping from desktop

When you’re on your PC’s desktop, you can simply drag the app icon you’d like to add to the taskbar and then drop it there. That’s it. Do this, and your taskbar will have a new shortcut. 

2. Through the Start menu 

Alternatively, if the app you’d like to add to the taskbar is not on the desktop, then using the Start menu is your best bet. Here’s how you can get started:

Press the Windows key and click on All apps to see a complete list of all the apps on your Windows. Then right-click on the app you’d like to add, select More, and click on Pin to taskbar.     

windows start menu

Your taskbar will get a new shortcut as soon as you do this.

3. Through File Explorer  

File Explorer is the default GUI application used for accessing and managing files on Windows. All you’ve to do is open the File Explorer, locate the file you’d like to pin to the taskbar, right-click on it and select Pin to taskbar.

That’s it — your app will be pinned to the taskbar.

4. How to pin programs that are running

In some cases, you might already be running the processes you’d like to pin in the background. In cases like that, it’ll be best to right-click on the app icon from the taskbar and select Pin to taskbar from the list of available options. The new shortcut will be pinned to the taskbar. 

pinning new programs

5. Pin websites to your taskbar 

Apart from the methods discussed above, Windows also lets you add entire websites as a shortcut to your taskbar settings. While the specifics may be different for different browsers, the general structure and process of carrying out the tasks are pretty similar. Here’s an example of using Microsoft Edge:

Microsoft Edge

If you’re on Microsoft Edge, follow the steps below:

  1. Click on the Settings menu (three dots) from the top-right corner, and select Apps > Install this site as an app.
  2. Click on Install to confirm the installation.
  3. Then check the radio box for Pin to the taskbar, and click on Allow.

installing a web app

pinning app to taskbar

That’s it; your new Progressive Web App (PWA) will now have an icon on the taskbar. You can follow a similar method for other browsers. 

Pinning shortcuts to the taskbar on Windows  

These are all the different ways to add new shortcuts to your taskbar on Windows. Microsoft has made tons of improvements in the taskbar over the years, so you can expect them to follow a similar trend and keep improving the taskbar settings. Meanwhile, you can make sure you’re managing your taskbar settings like a pro.

Group Policy Not Applying? 5 Simple Ways to Force it

Group Policy applies settings to users and computers in Active Directory domains. A domain is a collection of objects that belong to one another — users, groups, computers and so on. 

You can use Group Policy to configure settings and preferences for these objects at the domain level. Once configured, all the members of the domain will receive those settings as soon as they’re applied.

This makes Group Policy ideal for managing large networks. It saves you from having to set up individual configurations for each computer or user. 

Group Policy should apply almost instantaneously depending on a number of factors. However, if you wait several minutes or longer and the policy isn’t applied, then something is wrong.

Although it is a core Windows feature, it is not available on each version. Nonetheless, no need to worry as we have covered ways how to install the Group Policy Editor using the Group Policy Management Console.

How long does it take for Group Policy to apply? 

Applying a Group Policy is not an instantaneous process. The answer depends on a number of factors. The size of your Active Directory domain, the number of GPOs linked to the domain, and how many policies are being applied at once all play a role.

If you have a small number of GPOs that targets a few computers, it will take a relatively short time for them to apply. On the other hand, if you have many GPOs that target many computers, it will take much longer to apply.

How often is Group Policy applied?

Group Policy objects are applied every 90 minutes by default. However, this interval can be changed using the Gpupdate command.

Group Policy is applied in two phases:

  • Background refresh – This phase occurs every 90 minutes by default and forces a refresh of Group Policy in the background. It does not require a user logon or computer restart and results in a new version of the GPO. The background refresh operation continues even if there are no changes to GPOs in a domain.
  • User logon – This phase occurs when a user logs on to a system and applies any changes made since the last logon or reboot occurred. It always applies policies from all domains in that forest, regardless of whether they have been updated since the last logon or reboot occurred.

What can I do if Group Policy is not applying? 

1. Ensure you are signed in to the administrator account

If you’re logged in as a standard user, you won’t have access to the resources needed to fix the problem. You’ll need to log off and sign back in again before making any changes. An administrator account has administrative privileges that can modify settings. Unless of course CMD has been disabled.

You will need to set the account as an administrator. Alternatively, you can create another user account and then assign yourself the administrator privileges.

2. Create another user account

If you’re struggling to get Group Policy to apply, it might be worth checking your user account. If the account is corrupt, it can cause problems with Group Policy.

To check whether your account is corrupt, try logging on with another account. If this works fine, then there’s a problem with your user account. You may need to fix it by deleting and recreating it.

3. Uninstall recently added programs

If you’ve been using some third-party software or custom scripts to configure your system’s registry, then there’s a chance that these tools could have corrupted some of your registry settings. 

This can cause problems with the GPO application. Some GPOs require certain registry values to be present in order for them to be applied successfully. You’ll need to find out if any changes were made in this area and restore them if necessary.

You can quickly uninstall these programs with CCleaner. This tool helps you manage your apps more easily because it lists all of them in one place and lets you uninstall any program you prefer. It can also remove junk and build-up files that can cause issues to your PC.

⇒ Get CCleaner

4. Refresh policy settings

  1. Hit the Windows key, type cmd and select Run as administrator.windows 10 slow after system restore
  2. Type in the following command and press Enter: GPupdate/force

If you have recently made changes to your policies and want them immediately applied, running this command will force them to be refreshed immediately even if they haven’t been refreshed since your last logon.

You don’t need to restart the computer after running this command because it doesn’t change anything in memory but rather refreshes policy settings from the server.

5. Reset Group Policy Editor

  1. Hit the Windows key, type cmd and select Run as administrator.windows 10 slow after system restore
  2. Type in the following commands and press Enter after each one: RD /S /Q "%WinDir%\System32\GroupPolicyUsers" && RD /S /Q "%WinDir%\System32\GroupPolicy" gpupdate /force
  3. Restart your PC.

If the group policy update is not working, you may have to reinstall your Windows version and see if this resolves the problem.

How do you check if Group Policy is applied or not?

To check if Group Policy is applied to a computer, you can use the Gpresult command-line tool. The Gpresult command accepts a number of parameters that allow you to view different parts of the Group Policy settings that are applied to a computer.

To check, follow the steps below:

  1. Hit the Windows key, type cmd and select Run as administrator.windows 10 slow after system restore
  2. Type the following commands and press Enter after each one: gpresult.exe gpresult /r /scope:user gpresult /r /scope:computer

The two commands specify different policies applied. Computer-based policies affect only computers and not users. User-based policies affect only users.

You may also run into a problem where Group Policy is greyed out but we have adequately covered various ways to address this issue.

If you find out that your version of Windows doesn’t have Group Policy installed, we also have a guide to help you get around it.

Let us know whether you have been able to solve this issue in the comments section below.

How to Update BIOS on Windows 10 [Check Version & Upgrade]

BIOS is a crucial component of every PC that allows you to change your hardware settings without starting Windows.

Your BIOS has many features available, but some advanced users tend to update theirs in order to get access to new features.

Updating BIOS can be a somewhat complicated procedure, so today we’re going to show you how to flash your BIOS on Windows 10.

How do I update my BIOS in Windows 10? The easiest way to update your BIOS is directly from its settings. Before you start the process, check your BIOS version and the model of your motherboard.

Another way to update it is to create a DOS USB drive or use a Windows-based program. If you want to know how to do that, check the steps below.

How can I flash the BIOS on Windows 10?

1. Do I need to update my BIOS for Windows 10?

bios logo

Flashing your BIOS is an advanced procedure, and if you don’t perform it properly you can cause major damage to your PC.

The main problem with BIOS is that it’s located on a chip on your motherboard, and if the update process goes wrong, you won’t be able to start Windows at all.

In most cases, you don’t even have to update your BIOS unless there’s a major problem with your hardware.

How do I know if my BIOS needs updating? If you have a hardware problem and the only way to fix it is to update BIOS, then you might have to update it.

To perform a BIOS update successfully, you need to be sure that the update process isn’t interrupted by a power loss or unexpected shutdown.

If that happens, the BIOS update process will fail, and you’ll most likely cause damage to your motherboard.

To prevent any problems, be sure to connect your laptop directly to the power outlet or use a UPS for your desktop PC.

Although updating the BIOS can be potentially dangerous, there are certain benefits after updating it. Sometimes, the BIOS update brings support for new hardware, such as support for new CPUs.

Another benefit of BIOS updates is improved stability and potentially new features such as overclocking.

2. How do I check my BIOS version?

check bios version windows 10

Before you update your BIOS, you need to find out which version are you currently using. The easiest way to do that is to use Command Prompt or System Information tool.

Here are more ways to check the BIOS version on Windows 10

  • Use Command Prompt
  • Use System Information tool
  • Try the Registry Editor
  • Use DXDiag
  • Use PowerShell

We already covered each method extensively, so make sure you take a look at our full guide on how to check your BIOS version on Windows 10.

In addition to the BIOS version, you also need to know the model of your motherboard. If you don’t have the data readily available you can use our guide to check your motherboard model.

You can see the model of your motherboard by using any hardware information tool such as Speccy or CPU-Z. Here’s a full list of tools to check your system configuration.

  1. After finding the version of BIOS that you’re using, you need to download the new version from your motherboard manufacturer’s website.
  2. Go to the Support or Download section and select your motherboard model. Be sure to download the BIOS update for the exact model of the motherboard that you’re using.
  3. When you download a new version of BIOS, it will be stored in an archive so you’ll need to extract it first.
  4. After that, check the available readme file for instructions and any additional information.
Note icon NOTE
Installing the wrong version of BIOS on your motherboard can cause damage, so be extra cautious.
Almost all versions of BIOS have update notes available on the download page so you can easily see what issues the update fix.

3. Update BIOS through Windows

  1. 1. Download the newest BIOS version from your motherboard manufacturer’s website and copy it onto an USB flash drive.

  2. 2. Open the Start Menu and click the Power button.

  3. 3. Hold the Shift key and choose the Restart option.

  4. 4. You should see several options available. Choose Troubleshoot.

    windows 10 troubleshoot power options
  5. 5. Now select Advanced options and select UEFI Firmware Settings.

    uefi firmware settings windows 10
  6. 6. Click the Restart button and your computer should now boot to BIOS.

  7. 7. Once you enter BIOS, look for BIOS update option and select it.

  8. 8. Now you need to choose the BIOS update file from your USB flash drive and wait while your BIOS updates.

  9. Some motherboard manufacturers allow you to flash your Windows 10 BIOS simply by accessing it and choosing the update option.

    This is relatively simple and in order to do that you need to move the downloaded BIOS update to a USB flash drive. Manufacturers offer tools that will create a USB flash drive with all the necessary files, so you won’t have to transfer them manually.

    Before moving the update to the USB drive, be sure that there aren’t any other files available on the drive.

    You can access BIOS during the boot sequence by pressing the appropriate key. In most cases that’s Del or some other F key, so keep an eye for a message that tells you to press a certain key to enter SETUP.

    In addition, you can always check your motherboard manual to see which key you need to press in order to access BIOS.

    Keep in mind that the update process is a bit different for each motherboard model, so be sure to check the instruction manual for details on how to update your BIOS.

4. Create a DOS USB drive

This DOS solution is an older method of flashing BIOS and is probably the most complicated. This process requires you to create a bootable USB flash drive and to copy the new version of BIOS to the drive as well.

In addition, you’ll need a script that will flash the BIOS. This file will usually be available in the archive with your BIOS update, and it will have .exe or .bat extension.

In some cases, this script will have to be downloaded separately. To create a bootable USB drive with a DOS system, you need to use third-party tools such as Rufus.

Simply format the drive using this tool and be sure to check the Create a bootable disk using the FreeDOS option.

After doing that, transfer the BIOS update file and an installation script to the USB drive and restart your PC. Boot your PC from the USB drive and run the setup script using DOS.

This is an advanced procedure, so we highly recommend that you check your motherboard manual for detailed instructions on how to do that.

5. Use Windows-based programs

If using DOS seems too complicated for you, you might want to consider using a Windows-based application in order to update Windows 10’s BIOS.

Many motherboard manufacturers have BIOS update applications available that allow you to update BIOS by using a simple graphic interface.

Although this is the simplest way to do it, there are certain issues with it. Installed software can sometimes interfere with this process and cause BIOS updates to fail.

Security programs can often interfere with BIOS update process and cause all sorts of problems to appear, so it might be best that you disable them completely while flashing your BIOS.

Any system crash or freeze could also affect the update process, so it might be better that you use some different method to update BIOS.

Motherboard manufacturers will often recommend the best method to update your BIOS, so be sure to use that method.

Updating BIOS isn’t a hard process, but it might be potentially dangerous, so be cautious if you decide to update your BIOS.

In addition, be sure to double-check everything before starting. Many BIOS update tools will give you the option to save or back up your current BIOS, so be sure to use this feature.

It’s not necessary that you update your BIOS, especially because you can cause irreversible damage to your motherboard if you don’t do it properly.

However, if you’re having a hardware issue and the only solution is to update your BIOS, be sure to carefully read your motherboard’s instruction manual to see how to update your BIOS properly.

Some computer manufacturers like Asus, Dell, or Lenovo offer a built-in tool to update your BIOS. You can always check your PC’s manual to see if it offers such a tool to make things a little bit easier.

6. Can I perform a BIOS update on Windows 10 without a battery?

Sometimes, you might find yourself in a situation where your laptop battery is not charging. Performing a BIOS update can help you recover a stubborn battery that refuses to charge. But there is a catch.

As you probably know, updating your BIOS requires an AC adapter plugged in or at least 10% of battery autonomy. So how to break this loop and force the Windows 10 BIOS to update?

Here’s how to bypass the BIOS battery requirements:

Download the latest BIOS update file from your manufacturer’s home page and store it at hand.

  1. Next, open the CMD with administrative privileges. (Don’t worry if it does not work from the first attempt, we will show you what to do if you can’t run Command Prompt as admin).
  2. Enable UAC if prompted.
  3. Once you reached the root directory in the C:\Windows\system32> area, type the following: biosfilename.exe/forceit
  4. Note that you must replace the biosfilename value with the exact name of the file you previously downloaded from the manufacturer’s site.
  5. Press Enter and proceed with the reboot in order to complete the BIOS flashing.

Not sure how to access BIOS in Windows 10? Don’t worry, we will guide you from the very beginning. And if you are wondering: What are the best BIOS settings?, rest assured that we have the right answer for you.

In case you’re having additional problems, we have a great guide on what to do if the PC keeps booting to BIOS, so make sure you check it out.

If you have any more questions or concerns with the Windows 10 BIOS update process, please leave them in the comments section below.

9 Easy Ways to Fix Dxgkrnl.sys BSOD Error in Windows 10

Blue Screen of Death errors can cause many problems, and users have reported that file DXGKRNL.sys causes these issues on Windows 10.

They’re unpleasant and unlikely to get solved out of the blue. If you experience such an error,  let’s see how to fix it quickly.

Here are some more examples of this problem:

  • dxgkrnl.sys failed – When facing this issue, check if there is any hardware failure that requires your attention.
  • dxgkrnl.sys dpc latency Windows 10 – Is this your problem as well? Then, make sure to keep your Windows 10 and graphics card drivers updated.
  • dxgkrnl.sys Windows 10 won’t boot – In this case, don’t hesitate to run the SFC scan and get further answers.
  • driver_irql_not_less_or_equal dxgkrnl sys – When bothered by this error, the first thing you should do is turn off Nvidia Surround.

What causes the DXGKRNL.sys BSOD?

The DXGKRNL.sys BSOD is usually encountered when running an outdated version of DirectX. And to update DirectX, you need to update the graphics driver installed on the PC.

Besides, other underlying causes for the error include corrupt system files, problematic drivers, or connecting incompatible hardware to the PC. But these are unlikely scenarios, and the error usually involves the graphics driver.

How can I fix the BSOD error caused by DXGKRNL.sys?

1. Use a third-party BSoD fixer

The easiest and least consuming way to fix the blue screen DXGKRNL.sys in Windows 10 is by installing a third-party repair app that will do it for you.

The software can automatically scan your device for problematic files and restore or replace them with healthy ones, thus keeping your system up and going.

2. Disable SLI

  1. Open the Nvidia Control Panel.
  2. Go to 3D Settings from the navigation pane, and click on Configure SLI, Surround, PhysX.
  3. Make sure the Disable SLI option is selected, and click Apply to save the changes.

Many gamers use two Nvidia graphics cards in SLI mode for better performance. Although this sounds great, it has been reported that SLI can cause the system_service_exception DXGKRNL.sys error.

There’s a memory leak in VRAM when you use SLI on Windows 10, so to fix this issue, it’s advised that you disable SLI.

After disabling SLI on your computer, verify if the DXGKRNL.sys fatal error is fixed.

3. Turn off Nvidia Surround

Nvidia Surround is a feature on Nvidia GPUs that lets you enjoy a 3D experience on multiple monitors.

Although this sounds like a fantastic feature for gamers, this feature has led to issues on Windows 10 and the System_Service_Exception DXGKRNL.sys BSOD error.

So far, the only solution is to turn off Nvidia Surround to fix this error. However, we also have to mention that sometimes Nvidia Surround can’t be turned off easily, and users have suggested using the CTRL + ALT + S or CTRL + ALT + R shortcut to turn it off.

If the shortcut isn’t working for you, try unplugging other monitors and booting with only one monitor plugged in. When you do that, the Nvidia Surround should be turned off automatically.

4. Keep your Windows 10 and GPU drivers updated

It has been reported that the graphics card driver causes this issue. Do you happen to you use the Nvidia graphic card? You should make sure you’re using the latest GPU driver available.

If you want to download any driver easily, you should install a third-party driver updater that will scan your PC for compatible hardware and software and then install the latest drivers.

All you have to do is choose whether to update all of the drivers at once or individually if you have reasons not to install specific ones.

5. Change graphics memory size in BIOS

  1. Restart your computer and keep pressing Del, F2, or F10 while your computer boots. The specific key may be different on your computer and should be listed during boot, or you can verify the same from the system manufacturer’s website.
  2. The Advanced, Advanced Chipset, or Advanced Features menu must be found.
  3. Locate Graphics Settings or Video Settings and change the memory size to 128 MB or more.

If you’re using integrated graphics, you might be able to fix this BSOD error by changing the graphics memory size in BIOS.

Users have reported successfully fixing errors caused by DXGKRNL.sys on ASUS laptops with integrated Intel HD 4400 graphics.

This solution should work for any other laptop or integrated graphic card, including DXGKRNL.sys latency AMD.

We must mention that changing the memory size for the integrated graphic card isn’t the same for all computers, and the process might be different depending on the BIOS you’re using.

6. Check for hardware malfunctions

There have been a few cases where a faulty RAM module or motherboard caused this issue. If your PC is under warranty, you might want to take it to the repair shop and have it checked for hardware malfunctions.

Since any installed hardware might be the underlying cause, the repair shop can quickly identify the one and make the necessary repairs to fix it or replace it with a functional component.

7. Run the SFC scan

  1. Type Command Prompt in the Search bar, and click on Run as administrator.command prompt
  2. Click Yes in the UAC prompt.
  3. Type in the following command, and press Enter: sfc/scannow dxgkrnl.sys Windows 10 not loaded 
  4. Wait for the process to finish.
  5. Restart your computer.

If none of the solutions from above managed to fix the DXGKRNL.sys not loaded error, it could be the corrupt system files to blame. And in this case, the SFC (System File Checker) scan will come to your aid.

8. Run the Blue Screen Troubleshooter

Note icon NOTE
If you can’t find the Blue Screen troubleshooter on the computer, head to the following method.
  1. Press Windows + I to open the Settings app, and click on Update & Security.update & security to fix dxgkrnl.sys
  2. Select Troubleshoot from the navigation pane, and click on Addition troubleshooters.troubleshoot
  3. Now, select Blue Screen, and click on the Run the troubleshooter button.dxgkrnl.sys Windows 10 latency 
  4. Follow further instructions, and let the wizard finish the process.
  5. Restart your computer.

The following troubleshooting tool we’re going to try is Blue Screen, a built-in troubleshooter in Windows 10. After you are done with it, verify if the problem is resolved. If not, head to the final solution.

9. Run DISM

  1. Press Windows + R to open Run, type cmd, and hit Ctrl + Shift + Enter.cmd
  2. Click Yes in the UAC prompt.
  3. In the command line, copy-paste these lines one by one and press Enter after each: DISM/online/Cleanup-Image/ScanHealth DISM/Online/Cleanup-Image/RestoreHealthdriver_irql_not_less_or_equal dxgkrnl sys 

Lastly, run the DISM (Deployment Image Servicing and Management) tool. It has been found to fix many BSOD errors and might help in the case of DXGKRNL.sys.

How do I replace Dxgkrnl sys?

DXGKRNL.sys is a DirectX Kernel File with a .sys (system) extension. It’s a critical file, which, when it goes missing or is corrupt, you are bound to encounter issues.

Now, if you plan to replace it, several websites claim to offer DXGKRNL.sys for download. However, proceed at your own risk after verifying the authenticity and reliability of the source.

A simple solution in case you are getting the DXGKRNL.sys error would be to perform a System Restore, and it would get the file back to its normal state, given you choose a restore point created before the error was first encountered. Another option is to factory reset Windows.

And that’s about it! We hope one of our solutions helped you eliminate the DXGKRNL.sys BSOD error on Windows 10.

Also, please find out the location of the BSOD log file since it will help identify the underlying cause and fix things.

If you have any other questions or suggestions, feel free to leave them in the comments section below, and we will certainly check them out.

7 Best Vpns To Unblock Amazon Prime Anywhere [2026 Tested]

Anyone intending to watch restricted content probably already has a VPN that protects their identity and sensitive data online, while letting them access such content on platforms like Netflix, Hulu, BBC iPlayer, or Amazon Prime.

For users of Amazon Prime, those with a FireTV stick (a USB-like tool that connects to HDTVs and is your gateway to the best content).

A VPN will come in handy as you avoid the geo-restrictions that make it difficult to watch your favorite shows in the first place.

Those who want to maximize their Amazon Prime subscriptions as they travel will find a VPN very useful, for unlimited access to shows and movies.

Amazon Prime is quickly becoming a close rival to Netflix which leads the pack, but both have a stellar selection when it comes to shows, series, and movies – and they both lock content geographically.

If you’d like the best VPN for Amazon Prime, we’ve got your back. Check out our top picks for those that actually work to protect your identity but still grant access to the best of Amazon Prime content.

Why is the Amazon Prime region locked?

The central reason for content restrictions to happen on Amazon Prime is the licensing rights for specific countries where Amazon content is available.

More exactly, the streaming platforms can broadcast their content only in the areas where they own the licensing rights.

Which are the best VPN servers for Amazon Prime?

In order to bypass Amazon Prime region restrictions, you need to connect to server countries where the platform is available.

For now, Amazon Prime streaming is available in more than 200 countries around the world, so you can connect to your VPN in territories like the US, Canada, Italy, Greece, Germany, Africa, Asia, and so on.

How do you unblock Amazon Prime with a VPN?

If you made up your mind about Amazon Prime and want to unblock its content with a VPN, the method to do that goes like this:

  1. Sign up for a VPN subscription (we used ExpressVPN).
  2. Install the VPN software on your PC.
  3. Launch the interface after the download.
  4. Connect to servers where Amazon Prime is available.
  5. Go to your Amazon account to start watching your shows.

Therefore, after applying this short guide and setting up your VPN, you should be able to have access to Amazon Prime and watch its content instantly.

What are the best VPNs for Amazon Prime?

Private Internet Access – High-quality streaming results

PIA vpn user dashboard for gameloop

Private Internet Access is your best choice for streaming Amazon Prime content (among others). Kape’s VPN will undoubtedly unblock any software applications which your ISP generally restricts.

Cleverly bypassing even the strictest censorship, PIA VPN will allow you to enjoy unrestricted and complete access to the internet via a US-based IP address.

Moreover, you can maintain the highest levels of privacy without ever fearing that your identity or location will be exposed.

You will be able to browse anonymously and keep your data safe from tracking or monitoring.

Speaking about data protection, PIA also offers a top-notch encryption system so that you can enjoy all the perks of Amazon Prime without compromising on security.

Let’s quickly look at its key features:

  • IP masking (to block unauthorized exposure and data leaks)
  • Supports OpenVPN PPTP IPSEC/L2TP SOCKS5 technologies
  • Compatibility with all major operating systems (Windows, macOS, Linux, Android, iPhone, and more)
  • Multiple VPN gateways (3278 + servers spread across 45 countries)
  • Complex encryption algorithms
  • Additional testing tools included (DNS Leak Test, IPv6 Leak Test, and Email Leak Test)
  • Integrated Firewall
  • Optimized for streaming

Private Internet Access

Unblock geo-restricted content on Amazon Prime while keeping your IP Address hidden.
Check price Visit Website

NordVPN – Biggest server coverage

Amazon Prime lets you stream live programs and catch up on what you missed. You can also download preferred titles to watch later, but with geo-restrictions, some content may not be accessible to you.

This is why NordVPN offers security for your internet connection with powerful encryption so that no one can snoop on or monitor your activity online.

Features include a zero-logs policy, tough 256-bit AES encryption, multi-hop VPN tunneling, and connection of up to six devices on servers in 47 countries.

However, the speeds aren’t as blazing fast as the top three – this one has medium speeds.

In addition to that, you can benefit from a password manager that stores all your accounts in one place. So, all your streaming platform accounts are secured with safe passwords and high data encryption.

NordVPN

NordVPN is an excellent VPN tool that can unblock Amazon Prime in unsupported countries.
Check price Visit Website

ExpressVPN – Optimized servers for streaming

ExpressVPN running on the background

Apparently, with Amazon Prime, you get over 300 percent more titles than Netflix, so why throw that away because of restrictions?

One of the best VPNs for Amazon Prime is Express VPN, which has been ranked highly for its blazing fast speeds and excellent encryption.

This user-friendly VPN has servers in 94 countries, provides excellent encryption for your data, and has 24/7 customer support in case you need assistance.

You’re almost guaranteed that you’ll get to watch Amazon Prime in one of these countries.

With ExpressVPN, you can access any content and unblock the sites and apps you love, plus avoid hacking or tracking.

It also has a vast network of over 3,000 VPN servers, unlimited bandwidth, and easy-to-use VPN service for Windows and other operating systems.

Plus, there are zero restrictions on streaming, and downloading from anywhere while your IP is hidden, plus offshore privacy protection with no activity or connection logs.

Other features include DNS/IPv6 leak protection, kill switch, and split tunneling.

However pricey this VPN is, the quality it provides is more than what you pay for – it’s totally worth every dollar.

ExpressVPN

Is Amazon Prime not available in your country? This VPN could help you bypass this geo-restriction.
Check price Visit Website

Surfshark – Affordable premium privacy

Surfshark is one of the few VPN providers to offer unlimited access to all types of devices. Besides, it is perfectly optimized for online streaming, and therefore perfect for Amazon Prime.

This VPN has multiple features to support your online privacy and secure you from geo-blocking on streaming platforms.

You can use protocols like IKEv2 or OpenVPN that help you increase the Internet speed and unblock content easily.

More so, there are effective encryption tools like AES-256 that protect your data while browsing different websites.

In addition to that, the NoBorders mode gives you total online freedom and unblocks streaming content from Amazon Prime.

Let’s quickly look at its key features:

  • An extensive network of over 800 servers in over 50 countries
  • Total masking of your local IP address
  • 256bits AES encryption
  • Zero logs policy which ensures that your Internet activity is known only by you
  • Automatic Kill Switch protects you in case of disconnection from the service
  • High-speed streaming
  • 24/7 support if you have any issues

Surfshark

Surfshark can help you bypass unfair geo-restrictions and watch Amazon Prime from anywhere in the world.
Check price Visit Website

CyberGhost VPN – Best anonymization tools

This is a top choice VPN for Amazon Prime that works perfectly well with Windows.

With CyberGhost, you get many advantages that come with using a good VPN such as bypassing censorship, unblocking content from different parts of the world, high-security features, and strong encryption.

It is easy to use and installs seamlessly, plus it comes with the CyberGhost free anonymous proxy that helps you browse anonymously so no one will know who you are online.

Features include permissions for P2P torrenting, military-grade encryption, privacy policy, guaranteed IP change, plus an anonymization server connection for increased protection so you’re anonymous when online.

It has over 5600+ servers in 90 or more countries, superfast connections for streaming online, and it is user-friendly and reliable.

This VPN recently ramped up its unblocking efforts by including Amazon Prime on its roster. You can also select a server based on which streaming service it can unblock, so you don’t have to get tech support or DIY guesswork on what works.

CyberGhost VPN

Eager to stream the latest shows on Amazon Prime but can’t because of geoblocking? CyberGhost VPN can fix that.
Check price Visit Website

VyprVPN – Unlimited content for streaming

Another valuable software is VyprVPN which will greatly help you to catch your favorite content from Amazon Prime.

Firstly, using this solution you can escape government regulations and have unrestricted access to your favorite content online regardless of location.

In relation to that, you can benefit from worldwide content from local streaming or media platforms with increased encryption for your internet traffic.

Moreover, the utility of this VPN implies permanent security even for unsecured public Wi-Fi, in case you’re traveling or working away.

Talking about privacy, with Vypr you have no log information procedure for your private data to keep everything secured. Plus, it also provides AES 256-bit encryption and DNS protection.

In conclusion, this solution is the perfect fit for unlimited streaming content globally, so grab the offer and safely watch Amazon Prime, Netflix, or other popular platforms.

VyprVPN

Eliminate geo-restriction rules and securely watch your favorite shows from different regions wherever you are.
Check price Visit Website

PrivateVPN – Reliable tunneling for streaming

PrivateVPN represents a trustworthy VPN that unlocks any media content like streaming or live TV shows from Amazon Prime.

Using this VPN software, you can benefit from streaming advantages such as unlimited bandwidth with fast servers in 63 locations.

More than this, you have guaranteed access to unlimited content online because of the VPN encrypted tunnel with servers worldwide.

You have 200+ servers globally which can be used to reroute your traffic and change your IP address and thus offer access to Amazon Prime movies immediately.

In addition, this VPN offers support for 10 devices with only one account. You also get reliable security with AES-256 encryption, a server connection that bypasses geo-blocking, port forwarding, and in-house developer support.

PrivateVPN

Get through geo-restrictions issues on Amazon Prime with dedicated VPN servers for streaming.
Check price Visit Website

Ready to try one of these VPNs for Amazon Prime? Let us know which one meets your needs by leaving a comment in the section below.

Which free VPN can bypass Amazon Prime?

You can surely find VPN alternatives that are free, but it’s not recommended to use them for unblocking Amazon Prime if you want high video quality.

However, you can still use a free VPN such as HotSpot Shield VPN to get access to Amazon Prime content, but it may not offer great quality as a premium VPN software.

What is an FBX File & How to Open it on Windows 10

FBX file extensions are a type of files representing 3D files and video-related content. Originally created by Kaydara and owned by Autodesk since 2006, the FBX abbreviation stands for Filmbox.

Many Windows 10 users struggle to find the best program to open and edit the FBX files, but we managed to come up with 4 software solutions we found to be really efficient in running the FBX files.

What are the best tools to open FBX files?

Microsoft Paint 3D

Paint 3D is Microsoft’s 2D-3D hybrid graphics editor, and it’s been released with Windows 10 as an alternative to the existing graphics editors on the market.

In 2016, Microsoft Paint 3D was announced and released as part of the Windows 10 Creators Update. The Windows app is popular among the less experienced editors, offering basic 3D models available for editing.

Most tools offered by Paint were kept from its precedent versions and included:

  • Marker
  • Pencil
  • Oil brush
  • Watercolor brush
  • Calligraphy Pen
  • Crayon
  • Eraser
  • Pixel pen
  • Spray can
  • Fill tool

Microsoft also added a special tool allowing users to transform 2D objects into 3D objects. Standard 3D features such as rotating and changing the object’s location on the 3D axis are also available.

Looking for a tool to create 2D digital pixel art on PC? Check out our dedicated guide.

There’s also an online service available, that allows users to upload their 2D/3D creations onto their Xbox Live profiles. MS Paint 3D also has an option that allows its users to record the entire process of editing.

If you haven’t tried Paint 3D yet, be sure to do so, since it’s completely free.

⇒ Get Paint 3D

Blender

Blender_best game animation software

Blender is a free open-source software used for creating the entire 3D pipeline. The software is used to create animated films, visual effects, 3D printed models, 3D applications, video games, and art.

    How to open a FBX file in Blender?

    Blender is a great tool to use to open FBX files with. Given the fact that it’s one of the most popular dedicated 3D editing software, it is very easy to use.

    All you need to do is import the file into Blender, as you would with any other file format, and it will open on the screen within seconds.

  1. 1. Download Blender from the official website, and then install it on your PC. If you already have it, skip to step 2.

    download and install blender to open a fbx file
  2. 2. Launch the Blender app.

  3. 3. Go to File.

    blender go to the file tab menu
  4. 4. Select Import. A drop-down menu will open with multiple file formats to choose from.

  5. 5. Select FBX (.fbx) from the list.

  6. 6. In the Blender File View window, browse your PC for the FBX file and select it.

  7. 7. Finally, click on Import FBX. The file should now be opened in Blender, ready to be edited.

⇒ Get Blender

Looking for super simple animation software? Check out our top picks.

Autodesk MotionBuilder

Autodesk MotionBuilder

Autodesk MotionBuilder is a 3D graphics editor mostly used for games, film, and television production. This 3D editing software has a Cleanup Scene tool that removes empty or unused assets from the scenes, thus reducing the file size.

Camera controlling has been made easier for MotionBuilder users. The cameras have their own separate pane and the CTRL+select camera option was created in order to make camera switching faster and easier.

In MotionBuilder, every scene can have many different and separate animation tracks. This feature is useful because the user won’t have to save each animation as an independent file.

Autodesk MotionBuilder offers its users a Story tool that allows them to add together a series of clips in order to generate a new animation. Using this tool you can also trim clips, align a clip to another and blend between clips.

⇒ Get MotionBuilder

Mudbox

Mudbox is a digital sculpting program allowing its users to create and edit all kinds of 3D models. It is a very complex software offering a wide range of tools and features.

Some of the most commonly used features include:

  • Size and Strength
  • Falloff Curve
  • Keyboard Shortcuts
  • Invert Function
  • Buildup and Flood
  • Mirroring Geometry
  • Steady Stroke
  • Stamp Image and Stamp Spacing
  • Update Plane and Whole Stroke
  • Sculpting Tools

Mudbox is quite a user-friendly program. Its interface has been very well thought out, quickly accommodating new users. The software developers implemented painting and texturing features, making users able to paint their models directly in 3D.

Dynamic Tessellation is Mudbox’s tool designed to make the user’s work much easier. It predicts the form of the model users wants to detail. The sculpting tools are able to tessellate the user’s mesh while he is sculpting.

⇒ Get Mudbox

We hope that our list could provide you with software to fit your needs and managed to find out everything you wanted to know about FBX files. If this article was of help to you, please leave a comment in the comment section below.

How to Reinstall a Device in Device Manager Windows 10/11

Using Device Manager to reinstall a device after uninstalling it is very common. Although in most cases, you may not need to at all.

Device Manager is a component of the Windows operating system that controls the hardware attached to the computer. Hence, it enables users to tweak or modify the hardware.

However, there are some cases where users have accidentally deleted devices from Device Manager. This can cause panic in the users.

In such cases, knowing how to reinstall the device might come handy. Thus, the reason we will provide the solutions in this guide.

What happens when you uninstall a device in Device Manager?

After uninstalling a device from the Device Manager, it will stop functioning on your computer.

However, they will be restored if the remaining files are not removed from the system before you restart your PC. Since the Device Manager scans the Computer and automatically loads all drivers available.

How do I reinstall a device after uninstalling it in Device Manager?

1. From Device Manager

  1. 1. Press the Windows key, input Device Manager, and click on the result to launch it.

    launch device manager
  2. 2. Right-click the name of the device and select Uninstall device.

    uninstall device in device manager
  3. 3. Press the Alt + F4 keys together to launch the Windows Shut Down box.

  4. 4. In the options box, locate the Restart and click on it.

    restart windows 10
  5. 5. Click OK or press Enter key to restart the PC.

  6. If you want to reinstall a device after you uninstalled it via Device Manager on your Windows 10 device, you need to restart your PC.

    A restart will automatically enable the Device Manager to load all drivers available on the PC. Hence, uninstalled devices that are not removed will be reinstalled.

However, if the PC fails to load the device, you can use Fortect Driver Updater to download and install the latest drivers for the device.

⇒ Get Fortect Driver Updater

2. Via Devices & Printers

  1. Press the Windows key, input Device Manager, and launch it.
  2. Click the arrow symbol beside the device you want to remove.
  3. Select Action in the menu bar.device manager action tab
  4. Right-click on the device you want to remove and select Uninstall.
  5. Restart your PC.

These are ways to use Device Manager to reinstall devices on your PC. However, you can also view hidden devices in Device Manager.

Also, if your Device Manager is missing COM ports, you can check out our guide to fix it. For further readings on Device Manager, check out our various articles and guides on this page.

Leave your questions and suggestions below in the comments section, and we’d like to hear from you.

How to Create a Windows 11 Bootable USB on Mac [3 Ways]

Windows 11 introduces a wealth of new features along with an overhauled appearance that places a greater emphasis on uniformity and efficiency. Thus, today’s topic is how to create a Windows 11 bootable USB on Mac.

Instead of upgrading, performing a clean installation of Windows 11 is the method that yields the finest results when obtaining the operating system. Using a drive that is bootable in Windows 11, you may do this task.

If you’re working with a Windows PC, making a bootable CD for Windows 11 is a pretty straightforward procedure. On the other hand, if you’re working with a Mac, the process will be a little more complicated.

This post will describe how to accomplish this task without making use of a Windows-based PC or virtual machine (VM), as well as without making use of BootCamp help. Keep on reading!

Can you install Windows 11 on Mac?

Because Windows 11 requires a physical TPM module, only Parallels allows users to install Windows 11 on a Mac at the moment.

This functionality is available on both Intel and the most recent Apple Macs with Silicon M1 chips, as well as the most recent version of macOS Monterey.

Can Windows 11 run on M1 Mac?

You are now able to run Windows 11 on your M1 Mac, which was not previously possible. Furthermore, and probably most impressively, you are able to run Windows 11 on a virtual machine on your M1 Mac.

Parallels operate brilliantly on an M1 Mac in tests, therefore Windows on ARM would be installed into a Parallels Desktop virtual machine on an M1 Mac.

This version of the operating system runs many popular Windows apps designed for Intel-based computers using its own emulation software.

⇒ Get Parallels Desktop 17

Can I install Windows 11 in Mac VirtualBox?

Yes, you may use a virtual machine to install Windows 11 on your Mac if you are a user of the Mac operating system who is interested in trying out the latest version of Windows 11. Even if it is just a free one like VirtualBox.

On the other hand, you should be aware that VirtualBox will only function properly on Intel-based Macs. In order to install Windows 11 on an M1 Mac, you will require Parallels Desktop.

You may make use of a fascinating feature known as virtualization if you are using Windows 11 Pro or a later version (or Hyper-V on Windows). Virtualization makes the creation and usage of virtual computers inside the context of the host operating system possible.

Will Windows 11 be a free upgrade?

It is at no cost. However, the upgrade will only be available to Windows 10 personal computers that are running the most recent version of Windows 10. And that has hardware that satisfies the minimum requirements.

In the Windows 10 settings, under Windows Update, you may check to see if you have the most recent updates available. Take note that in locations where Internet usage is measured, fees from your Internet service provider may be necessary.

Is Windows 11 worth installing?

The upgrade to Windows 11 comes with a number of benefits. Some of these include a slicker new interface, improved security, updated applications, and information widgets.

PC users no longer have an excuse to feel inferior when confronted with the sophisticated user interfaces of their friends’ macOS and Chrome OS devices.

Windows 11 is every bit as polished as its predecessor. With the exception of the occasional appearance of an archaic Control Panel dialog box. The design is pleasant to look at thanks to the rounded window edges, the tiny Taskbar, and the touch-friendly layout.

The OS is safer than before and a significant portion of this may be attributed to the fact that it calls for the utilization of a trustworthy processor known as a Trusted Platform Module.

Despite the greater security, this new requirement caused many Windows commentators to raise their hackles. Because certain older PCs would not be able to run the new operating system.


This being said, let’s see how you can create a Windows 11 installation media from Mac in three straightforward ways. Keep on reading!

How can I create a Windows 11 installation media from Mac?

1. Use the Terminal

  1. 1. Connect your USB stick to your Mac.

  2. 2. Open the Terminal app by clicking on the launchpad icon in the Dock. Type Terminal in the search field then select the result with its name.

  3. 3. Install HomeBrew on your Mac by pasting the following command and pressing Enter: curl -fsSL -o install.sh https://raw.githubusercontent.com/Homebrew/install/HEAD/install.sh

    curlhomwbrew windows 11 usb installer on mac
  4. 4. Enter the following command to finish the HomeBrew installation:/bin/bash install.sh

  5. 5. Next, install wimlib by using the following command: brew install wimlib

    Wimlib library support the Windows Imaging File Format (WIM). Which allows users to create, alter, extract, and mount WIM files:

    brew windows 11 usb installer on mac
  6. 6. Type diskutil list and press Enter to bring up a list of all drives on your Mac. Note down the USB stick’s disk identifier that will either be: disk2, disk3, disk4 etc…

  7. 7. Use the following command to format your USB stick and make sure to replace diskname with your disk’s name: diskutil eraseDisk MS-DOS WINDOWS11 GPT /dev/diskname

    diskutil windows 11 usb installer on mac
  8. 8. Head to Microsoft’s page for the Windows 11 download and select Windows 11 multi-edition under the Disk Image(ISO) section.

    windows11-ed windows 11 usb installer on mac
  9. 9. Select the language you want for your OS then click on the 64-bit download button.

    64-bit-down windows 11 usb installer on mac
  10. 10. Mount the ISO file from your Downloads folder by using the following command and press Enter:hdiutil mount ~/Downloads/filename.iso

    hdutil windows 11 usb installer on mac
  11. 11. Next, copy the ISO file into your USB stick with the following command:rsync -vha --exclude=sources/install.wim /Volumes/CCCOMA_X64FRE_EN-US_DV9/* /Volumes/WINDOWS11

    Keep in mind that the name of the file must exactly match the one that is shown (CCCOMA_X64FRE_EN-US_DV9). If it is different (due to a different choice in language), be careful to alter it in accordance with the difference.

  12. 12. Split and copy the install.wim file since it is larger than 4 GB with this command:wimlib-imagex split /Volumes/CCCOMA_X64FRE_EN-US_DV9/sources/install.wim /Volumes/WINDOWS11/sources/install.swm 3000

  13. 13. That’s it! Now you have a Windows 11 USB installer on Mac. You can use it to install Windows 11 on any device you want.

  14. You can easily create a Windows 11 bootable USB on Mac using the built-in Terminal. After you finish installing a few needed tools, you need to download the Windows 11 installation media from the official Microsoft page and copy it to your USB.

    The process is not very complicated. Nevertheless, one of the drawbacks of using this technique is that the installation takes up 5.2 gigabytes of space on your computer.

    It is not possible to burn a file that is larger than 4 gigabytes on a device that is formatted in FAT32. As this is the only format that is compatible with both Windows and macOS.

    In order to get around this issue, you may break the installer down into several smaller files. To do this, you will need to install a package manager called wimlib, which can be done using Homebrew. During the process of making the bootable CD, the Windows installation file will be divided.

2. Use Boot Camp

  1. Access Boot Camp on your Mac by going to Applications followed by Utilities inside Finder.
  2. Inside the Boot Camp utility, check the box next to Create a Windows 10 or later install disk.create-w10 windows 11 usb installer on mac
  3. Make sure to check the second box if it isn’t greyed out and uncheck the third one. Click on Continue when you are done.contunue windows 11 usb installer on mac
  4. Navigate to Microsoft’s page and download the Windows 11 ISO. By selecting the Windows 11 multi-edition OS, the language that you want to use, then click on the 64-bit download button to start the download process64-bit-down windows 11 usb installer on mac
  5. Back to Boot Camp, select the ISO file that you have just downloaded. Then under the Destination Disk select your USB drive.
  6. Boot Camp will format your USB and will mount Windows 11 on it. A new window will pop up saying that the Windows support software has been saved. That’s it! This is the second way to create a Windows 11 USB installer on Mac.

There is no need for any long Terminal instructions or third-party software. Because Boot Camp Assistant can be used to install Windows on a Mac and build a bootable USB installation drive.

However, on M1 Macs, this approach does not appear to be accessible. Therefore, for them, you need to use the first method to create a Windows 11 bootable USB on Mac.

3. Use a third-party app

The UUByte ISO Editor is a robust application for Windows and Mac that can be used to manipulate ISO files. Because of the burning function, creating a bootable USB or DVD from an ISO image of Windows is quick and simple.

You are able to decompress the ISO image and extract its contents to a local disk thanks to the extracting capability. In addition to that, it contains tools for the generation and manipulation of ISO images, that are easy to use.

uubyte iso editor logo

Both of the approaches outlined above are free to use and are compatible with Intel and M1 Macs. If, on the other hand, you would rather not use Terminal and instead have an experience based on a graphical user interface (GUI), you may use UUByte ISO Editor, which costs $29.95 but offers a free trial.

The application offers comprehensive compatibility for a variety of Mac models and releases of macOS, and it makes it simple to produce a Windows 11 installation USB flash drive.

Is Windows really better than Mac?

When it comes to hardware, you receive a lot more for your money if you purchase a personal computer (PC), whether it be a desktop or laptop.

There is a large amount of price disparity due to the fact that there are thousands of different PC systems and thousands of different stores selling them. On the other hand, Macs have a price that is virtually always the same, which means it is less likely that you will get a bargain.

windows 11 gaming section

The video game business is a massive one. Computer games are getting increasingly complex, and in order to play them, you need a significant quantity of storage space and a graphics card that is at the top of its class.

A PC computer that has the necessary hardware to run contemporary games may be purchased for the same price as a Macbook, which is not capable of running any of the most recent video game titles. Additionally, the Mac OS is not compatible with a large number of video games.

The efficiency of the virtual memory in Windows is significantly higher than that of Mac. A computer with insufficient memory will operate more slowly, but it won’t crash entirely.

A Mac that is running out of memory is in danger of crashing significantly more frequently. This indicates that a Windows PC may function reliably with a lower amount of RAM than before.

We recommend that you do not miss out on our performance and security-wise comparison between Windows 11 and Mac in order to decide which one fits you better.

Why can’t I upgrade to Windows 11?

In addition to the usual requirements for your CPU, GPU, and RAM, Windows 11 demands that you have TPM 2.0 and Secure Boot installed on your system to provide the highest possible level of security.

windows 11 system requirements
Source: Microsoft


If you do not fulfill these requirements, the upgrade process will be a tad more complex. Check out our post on how to install Windows 11 without TPM 2.0 and Secure Boot.

The user interfaces of Windows 11 and macOS share a lot of similarities, and with the new design that has rounded edges, the user interface of Windows 11 looks more like macOS than it ever has before.

However, that is not all. The Dock-like Taskbar that was formerly located at the bottom of the screen has been moved to the middle of the screen in Windows 11, making it appear as though Microsoft is modeling its design after that of Apple.

Was this guide useful to you? Did you manage to create a Windows 11 bootable USB on Mac? Let us know by leaving a comment in the section below and sharing your thoughts with us. Thanks for reading!

3 Ways to Fix Netflix when It’s Not Playing HDR Video

Streaming video content on platforms like Netflix is most enjoyable when you have a premium picture quality mode of viewing. It offers a real-life viewing experience that allows you to stream videos in the best way possible.

However, many streamers complain about Netflix not playing HDR when streaming. It indicates that the feature is either unavailable or not working.

The HDR (High Dynamic Range) offers a higher range than the average range. The highlight gives a higher contrast with more prominent colors and light intensities for a high-quality visual effect.

However, users may experience Netflix HDR not working on Windows 11 for many reasons, including outdated video card drivers, device HDR support, etc.

Why is my Netflix not showing HDR?

  • Outdated video card driver on Windows: Users may encounter issues with Netflix HDR on Windows 11 if the video card driver on the PC is outdated. Windows drivers help the computer function at its best and may malfunction if these drivers are not updated.
  • TV or Monitor does not support HDR stream: Not all TVs or monitors can work with HDR streaming. Some devices cannot work with HDR stream displays, so you can access the Netflix HDR unless it’s on supported devices. So, Netflix HDR may not work on Android smart TVs if they don’t have 4K resolution or HDR formats.
  • Your Netflix plan does not support the video display format: Playing videos in various resolutions on Netflix depends on your subscription plan. Not all packages can access high-resolution videos.

How can I watch Netflix videos in HDR?

1. Update your video card drivers

  1. Press Windows + R keys to prompt the Run command.
  2. Input devmgmt.msc and press Enter to open the Device Manager.
  3. Click on Display adapters and select the Graphics card from the drop-down.
  4. Click the Update driver option and select Search automatically for updated driver software.

Updating the video card driver on your PC will resolve the issue.

If you want a faster and more efficient approach, Outbyte Driver Updater is the tool for you. With this automatic software, you will be able to update not only the video card driver, but also any other outdated driver on your computer.

⇒ Get Outbyte Driver Updater

2. Ensure that your TV or monitor supports HDR

If you’re struggling with Netflix HDR on unsupported devices, switching to a device that supports 4K resolution or HDR formats videos is best.

We recommend you check the features of the smart TV, monitor, or Android devices you want to purchase to ensure that it supports HDR streaming.

3. Upgrade to a Netflix plan that supports HDR format streaming

Because not all subscription plans on Netflix can play HDR format videos, you need to upgrade to a higher plan to access them.

However, you can check the Netflix plan page for more information.

Is HDR the same as 4K?

Many users mistake the HDR for a 4K display because they seem similar. However, HDR has more visual impact and effects on the display.

It offers a higher contrast or wider color and brightness range than other display ranges. Also, 4K provides a more defined image quality and makes your display sharper.

Nevertheless, you can run into some other problems on Netflix, which can be annoying. The audio out-of-sync error on Netflix is an issue you can encounter.

Likewise, you can read about ways to fix HDR video streaming not supported errors on your PC.

9 Ways to Fix Logitech Unifying Receiver not Working

The Logitech Unifying Receiver is a wireless USB receiver that allows you to connect a keyboard, mouse, and other devices to your computer.

Users complained that their device doesn’t recognize the Logitech Unifying Receiver.

Suddenly, after a round of Windows 10 updates, my Windows 10 Home PC no longer recognizes my Logitech Unifying USB Receiver, which links my wireless mouse/keyboard. So I can’t use my mouse and keyboard.

You must fix this problem, or else your peripherals remain unusable. So, in this article, we’ll show you what to do if the Logitech Unifying receiver is not detected.

Why is my Unifying receiver not working?

The failure to recognize the Logitech Unifying Receiver may be caused by an erroneous setup, a Windows update, the Unifying program, or applications that conflict with one another.

Check to see if the driver file for the Logitech Unifying Receiver is stored on your computer if you are experiencing issues with the device not functioning properly.

Don’t worry; we have covered all the possible causes in the list of solutions below. Follow each solution to see which one fits your case. Keep on reading!

How do I fix the Logitech Unifying Receiver if it won’t pair?

1. Update the Logitech Receiver drivers

  1. Right-click the Start icon, then select Device Manager.device-manager-w10 amd driver install problems
  2. Expand the Mice and other devices section. Now, find the HID-compliant mouse and disable it by right-clicking on it and choosing the Disable option.disable-mouse-device logitech unifying receiver not working
  3. Download the Logitech Unifying Receiver software by going to their website and hitting the download button.download logitech unifying receiver not working
  4. Once you have downloaded it, right-click on it and then run it as administrator.

Additionally, you can use third-party tools such as Fortect Driver Updater to update all your drivers with just a few clicks automatically.

The main benefits of using Fortect Driver Updater are a safer and quicker updating process. In addition, you won’t have to spend time choosing the right driver, as this tool will do it for you.

Besides, installing and setting up the program is extremely easy. As you’ll see, the tool is connected to an extensive online database of the latest drivers, so you will only get the most recent recommendations.

2. Uninstall the MotionInJoy GamePad Tool

  1. Press Windows, input control, and select Control Panel, which should be the first result.control-panel-serarch-w10 opera not responding
  2. Select Programs followed by Programs and Features.programs-w10 0x80070002 windows update
  3. In the Programs and Features tab, look for MotionInJoy GamePad Tool.
    uninstall applications computer doesn't recognize Logitech unifying receiver
  4. Right-click on it and select Uninstall.
  5. Now, restart your system and confirm that the problem is solved.
  6. Log in and connect the USB device again to recognize Logitech Unifying Receiver. The Logitech unifying receiver not working issue will be solved.

MotioninJoy is a small program that enables you to utilize the Playstation 3 controller, which many users consider to be among the most comfortable gaming controllers ever created, with all the games played on your computer.

You will be able to use the software in a matter of moments after installing the application and connecting the controller to the computer with the USB connection. Then, all you have to do is follow the program’s official website instructions, and you will be good to go.

3. Delete the DS3 files

  1. Right-click the Start icon from your taskbar, then click the Device Manager option.device-manager-w10 amd driver install problems
  2. Find all the MotionInJoy GamePad drivers, right-click them one by one, then choose to Uninstall them.
  3. Press Windows + R and enter regedit. Press Enter or click OK to open the Registry Editor.regedit-ok how to clean registry windows 10
  4. Go to the menu bar and choose Edit, then Find.
    registry editor find computer doesn't recognize Logitech unifying receiver
  5. Type DS3 in the search box that appears.
  6. Right-click on all the DS3 files and delete each one of them.
  7. Unplug the Logitech Unifying Receiver device and then restart your computer.
  8. Plug in the receiver then finds the right Logitech Unifying Receiver driver.

4. Check that the device files exist

  1. Go to the following directory inside File Explorer that you can open with Windows + E: C:/Windows/INF
    windows inf computer doesn't recognize Logitech unifying receiver
  2. You should now see the usb.inf and USB.PNF files. (The file names might differ, but you can check by right-clicking on the files and selecting the Properties option to see the file names.)

Note: If you don’t find the files, copy them from another computer using Logitech Unifying Receiver, then paste them to the directory mentioned above.

Once you are sure the file exists, check if the Unifying receiver is fixed.

How can I fix Unifying Receiver if it’s not working with the keyboard?

1. Install the Logitech Unifying software

  1. Go to the official Logitech Unifying software page and click the Download Now button.download logitech unifying receiver not working
  2. After downloading the file, run it and install it on your PC.
  3. Restart your PC, right-click the shortcut on your desktop, and select Run as administrator from the menu.
  4. Try to connect your Logitech keyboard and see if the problem has been solved.

2. Check if your keyboard is powered

The unifying receiver only works with Logitech keyboards, so ensure that the keyboard you are trying to pair is from Logitech and, more importantly, the keyboard is powered.

If the keyboard is rechargeable, ensure it’s charged before pairing. If batteries power it, check them or swap them with a new set before pairing.

Also, if the keyboard has an ON/ OFF switch, ensure it’s turned ON.

3. Install the Logitech SetPoint software

  1. Go to the official Logitech support website and click the Download Now button to download the SetPoint software.download-setpoint logitech unifying receiver not working
  2. Install the software on your PC and restart it afterward.
  3. Usually, the software will automatically detect your keyboard, and you will be fine.

Sometimes, older keyboards will work better with the Logitech SetPoint software, so you should try this solution.

If none of these solutions worked, go through the solutions from the first chapter of this article as they also apply to any Logitech device you are trying to pair with the Unifying receiver.

How can I fix Unifying Receiver not working with a mouse?

There is no difference between a keyboard and a mouse when connecting and pairing, so all the solutions above will apply.

However, some mice and keyboards come with their firmware CD, which might contain older software versions and drivers and can trigger conflicts.

So ensure you have the latest drivers and software as indicated in our solutions above.

How do I fix Unifying Receiver not working with Mac?

1. Check the battery of the device

The leading cause of the Unifying receiver not pairing with a Logitech wireless device is the low battery of that device, so make sure that the gadget is fully charged and turned on.

If batteries power the device, exchange them with a fresh batch before pairing.

2. Install the Logitech Unifying software

  1. Head to the Logitech support site and click the Download now button to download the Unifying software.download logitech unifying receiver not working
  2. Install the software on your Mac and restart it.
  3. It should be detected if the Unifying receiver is connected and the peripheral is powered.
  4. Follow the on-screen instructions to carry on with the pairing process.

If these solutions don’t work, try to connect the Unifying receiver to another port. If available, bypass any other port replicator or USB hub and try a USB 2.0 port instead of a USB 3.0 one.

How do I fix Logitech Unifying Receiver not working in Windows 11?

  1. Press Windows + I then go to Windows Update followed by Update history to see all the Windows updates installed on your PC.windows-update-history logitehc unifying not working
  2. Scroll down and click Uninstall updates.uninstall-updates-w11 computer-recognize-logitech-unifying-receiver
  3. Select the latest Windows update, then click Uninstall. Next, check if the Logitech Unifying Receiver is working now.uninstall-update-latest computer-recognize-logitech-unifying-receiver

Suppose none of the above solutions fixed the Logitech Unifying receiver driver is unavailable issue. In that case, you should also consider connecting the Unifying receiver to another computer and see if it works. If it doesn’t, you should think of replacing the receiver because it is probably damaged.

To learn more about Logitech keyboards, we have a great guide on how to pair Logitech keyboard, so be sure not to miss it.

So these are a few quick and easy solutions that can help if your computer can’t recognize the Logitech Unifying Receiver. We truly hope that at least one of them proved helpful for you.

4 Simple Ways to Fix Doom Eternal Can’t Connect to Bethesda

Are you having trouble connecting Doom Eternal to Bethesda? It is a common issue for Doom Eternal players once in a while. 

Bethesda Softworks is the publisher of Doom Eternal and as such, you have to sign in to Bethesda.net before you can access the game and its extra features. 

But the problem starts when you cannot connect to Bethesda.net and this would mean a no-gaming session for you.

Some players even have trouble creating an account on Bethesda.net or linking an existent account to steam.

We understood how infuriating this could be and we decided to put together this simple guide for you.

In this article, you will be exposed to more than one way to fix Doom Eternal not connecting to Bethesda.

Why can’t I connect Doom Eternal to Bethesda servers?

Usually, when you are denied access to Bethesda servers, you will get an error message that reads, Could not log in into the Bethesda.net servers or something similar.

There are a couple of reasons why this happens and internet connection is the most common factor.

So, you can’t connect Doom Eternal to Bethesda servers because of,

➡️ Internet connection: When you experience a poor internet connection, it will be difficult to connect to a Bethesda server. This is because Bethesda servers do not run offline.

➡️ Servers Downtime: If Bethesda Softworks is working on their servers at any point in time, then you just have to be patient until the maintenance process is completed.

➡️ Old Game Versions: When a new version of Doom Eternal is released, and you are still playing an old version without updating it. Bugs that exist in an old version will interfere with your gaming sessions.

➡️ Wrong Login Credentials: Double-check your login details as this could be the cause of your predicament.

You should know that you are not alone in this situation because every day one or two gamers face the same issue. It can be frustrating, but it is not impossible to fix.

How to fix Doom Eternal Can’t Connect to Bethesda?

1. Improve your internet connection

Since network connection is the first suspect when you cannot access the Bethesda server, it is only wise that you confirm the strength of your connection.

If you are using Windows OS:

  1. On the start menu, type settings and open the Settings panel.
  2. Select the Network & Internet category.doom eternal can't connect to bethesda
  3. You will see your Network status at the top of the window.
  4. If it says Connected and you have access to the Internet, open your web browser. If not, contact your ISP because your network isn’t working at all.
  5. Head to an online speed test such as Speedtest by Ookla and let it scan your connection.doom eternal can't connect to bethesda

⚡ According to user experience, for gaming, it’s recommended you have an Internet speed that’s at least 20 Mbps.

If it is not as strong as you want, then you may want to move to a different area of your house with stronger reception.

Rebooting your network devices can also help.

  1. Unplug your router/ modem.
  2. Turn them off.
  3. Wait for 30 seconds to 1 hour.
  4. Plug them back and turn them on.
  5. Turn on your device and reconnect to your router.

Even though it’s very intuitive, performing a reboot can get rid of bugs and errors as well as unnecessary processes that run in the background for no reason.

2. Use a gaming-optimized VPN

  1. Decide on a good VPN. For Doom Eternal, ExpressVPN is a great choice thanks to its gaming-optimized servers and a huge network.
  2. Get an ExpressVPN subscription plan and download the app to your device.
  3. Follow the installation wizard to install the VPN on your device.
  4. Launch and log in with the correct credentials.
  5. Connect to a server close to you.
  6. Launch Doom Eternal, connect to Bethesda server and play.

If your problem arises because your network connection isn’t strong enough, you can connect to VPN.

A reliable and good VPN for Doom Eternal will automatically assign you the best and fastest server for your configuration.

The VPN can stop your ISP from throttling bandwidth. It assigns you a virtual IP address and encrypts all your traffic information, so you can’t be monitored and/or restricted.

In addition to this, it can help you access geo-restricted games and gaming servers from all around the world and prevent DDoS attacks, which are common in the gaming industry.

ExpressVPN

Connect to ExpressVPN’s trustworthy servers to get rid of connectivity issues and enjoy Doom Eternal to the fullest.
Free trial Visit website

3. Update Doom Eternal

  1. Launch Steam.
  2. Go to Steam Library.
  3. Find the Doom Eternal steam page.
  4. Select it and select Manage.
  5. Pick Properties.
  6. Go to Updates. Install the updates, if any are available.
  7. Enable the Auto-Updates option to make sure the game is always running its latest version without you having to manually install it.
Note icon NOTE
Doom Eternal is available on multiple devices. Not only that, but you can get it from different places, including Steam or Microsoft store. In this guide, we show you how to update the game on a PC, using Steam, but the process is pretty similar across all devices and platforms.

If you are using an older version of an operating system, this could be the reason for the Bethesda connection problem.

4. Check the Bethesda server’s status

Bethesda has a live status page where it shows the latest updates about its games and informs users if any of them have problems.

You can head there and see if Doom Eternal has recently been listed to have issues. If that’s the case, your only option is to just wait it out.

You can also confirm if this is true by going to the @BethesdaSupport page on Twitter. This Twitter handle updates users on server downtime and maintenance periods. 

All these may contribute to having a server timeout on Bethesda. So to avoid that, try to eliminate any possible cause by following the recommendations in this guide.

How do I link my Bethesda account to Doom Eternal?

To link your Bethesda account to Doom Eternal,

  1. Log in to your Bethesda.net account.
  1. Click the user icon in the top right corner.
  2. Select Linked Accounts.
  3. Click on the + sign in the box with the words Add a Platform, Social Media, or Game Account.
  4. Add any platform you want to play from, e.g. Steam, PlayStation, Nintendo ,etc.

It is successful when the platform you have chosen displays on your linked accounts. Play Doom Eternal from the platform.

Why is the Bethesda website not working?

The Bethesda website may not be working or you may have Doom Eternal login issues from your end due to a built-up cache and cookies or a slow internet connection.

So clear up your browser’s cache and cookies or try accessing the website from a different browser.

It also could be that the website is under maintenance, so you can just try again or reach out to @BethesdaSupport on Twitter if it still doesn’t work.

Does Doom Eternal still require a Bethesda account?

If you are playing the single-player campaign (offline), then you don’t need a Bethesda account.

You only need a Bethesda account to access the multiplayer and all the benefits that come with it.

A Bethesda account also allows you to download updates and patches.

How to play Doom Eternal without a Bethesda account

Long story short, you can’t play Doom Eternal if you don’t create a Bethesda account. Through Bethesda, you get access to the gaming servers that host Doom Eternal.

That being said, there is a trick you can do to skip the Bethesda authentication. However, it only works if you are okay with playing the game offline.

To play Doom Eternal offline without the Bethesda account,

  1. In your start menu, type “Windows Defender” in the search bar and click on Windows Defender Firewall.
  2. Select Advanced Settings.
  3. On the left panel, right-click on Outbound Rules and select New Rule.
    • For Rule type: Select Program.
    • Click on Next.
    • Program: Select, This Program Path and navigate to where Doom Eternal is installed.
    • Action: Select Block connection
    • Profile: tick all boxes.
    • Name: Choose any name of your choice.
  4. Click Finish 
  5. Launch the game and play.

The Block Connection option stops Doom Eternal from connecting to the Internet. This means that you’ll automatically be in offline mode and the game won’t be able to connect to the Bethesda servers.

A Bethesda account is needed to attain extra milestones and features on Doom Eternal but it can be pretty annoying when you can’t connect to its servers.

However, with a good internet connection and a stable VPN, you can get over this situation as soon as possible.

Fix: Seagate External Hard Drive not Showing on Windows 10/11

Seagate is a famous hard drive manufacturer, but despite the quality of their devices, there might be some issues. For example, many reported that the Seagate external hard drive is not showing up in Windows 10.

The problem arises due to several issues, but most of these are usually trivial and can quickly be dealt with. Though in some cases, you would have to try complex solutions.

So, let’s understand why you are encountering issues with Seagate hard drive and the fixes to get things up and running.

Why is the Seagate external hard drive not showing up on Windows 10?

More often than not, when the Seagate external hard drive is not showing up in Disk Management, it’s the connections to blame. So first, check whether the cable is properly plugged in at both ends and that the connected port is active.

If it’s showing up in Disk Management but remains absent in Windows Explorer, likely, space on it has not been allocated. Also, it would be the same in case the drive has not been assigned a letter yet. In this case, all you have to do is format the Seagate external hard drive.

Also, issues with the drivers, conflicts from third-party apps, and certain features on Windows are responsible for the problem.

What can I do if Seagate hard drive light is on, but the drive is not detected?

There are multiple reasons why the USB 3.0 external drive isn’t recognized, and in most cases, it’s just a glitch in Windows that causes it.

In some instances, your external hard drive keeps disconnecting because there’s an issue with the connection, and it can include both your port and the cable.

Drivers are a possible cause for this issue, and if your USB isn’t recognized in Windows, you may have problems with the USB drivers.

Seagate hard drives offer high quality, but they can also experience specific issues once in a while. For example, many Seagate owners reported the following problems on their PC:

  • Seagate hard drive quit working – Several users reported that their Seagate hard drive suddenly stop working. If you encounter this problem, be sure to try some of our solutions.
  • Seagate hard drive won’t turn on, show up, work, or mount – Various issues with Seagate drives can occur, and many users reported that their drive wouldn’t show up, work, or mount. This can be a big problem since you won’t be able to access your files.
  • Seagate hard drive Error code 43 – Error code 43 is relatively common, and it will prevent you from accessing your files. However, you might be able to fix it by using one of our solutions.
  • Seagate hard drive you can only read – In some cases, you won’t be able to write any files to your Seagate drive. If that’s the case, be sure to check if your drive isn’t write-protected.
  • Seagate hard drive undetectable, unable to read – Many users reported that they are unable to read their drive. In fact, several users reported that their drive is undetectable. This might be caused by your setting or by a faulty hard drive.
  • Seagate hard drive Access denied – Another problem that can occur with Seagate drives is Access denied message. The lack of security permissions usually causes this.
  • Seagate hard drive keeps disconnecting, beeping, freezing, blinking, ejecting, disappearing, clicking, shutting down – There is a wide array of issues that can occur with Seagate drives, and you should be able to solve most of them by using one of our solutions.

How do I fix the Seagate hard drive issues on Windows 10 and 11?

1. Fix the Seagate Manager Windows 10 issues

1.1. Remove the Seagate programs from your computer and reinstall them

  1. Open Settings by pressing Windows + I, and then choose Apps.
    Seagate hard drive undetectable
  2. In the list on the left, click on Apps & Features.
  3. When the list appears, locate and select the Seagate software and click the Uninstall button.Seagate hard drive you can only read
  4. Follow the on-screen instructions to uninstall the application.
  5. Now go to Seagate’s official website, download the software, and install it again on your computer.

Troubles with Seagate Manager are relatively common, and if you’re having issues with it, you might want to reinstall your Seagate software.

Updating drivers manually is very annoying, so we recommend you use a dedicated tool to do it automatically. Thus, you will prevent file loss and even permanent damage to your computer.

1.2. Disable Microsoft OneDrive

  1. Press Ctrl + Shift + Esc to open the Task Manager.
  2. Go to the Startup tab, find OneDrive, right-click on it, and then choose Disable from the menu.
    Seagate hard drive Access denied
  3. Once you disable OneDrive, check if the problem is resolved.

It has been reported that Microsoft OneDrive can cause issues with Seagate Manager and Seagate hard drives, so it’s advised that you disable OneDrive.

Also, find out how to add or remove startup apps on Windows 10.

2. Fix the Seagate driver Windows 10 problems

2.1. Remove Paragon driver software and reinstall it

  1. Find the Paragon driver setup file, right-click on it, and select Properties from the context menu.
    Seagate hard drive undetectable
  2. Go to the Compatibility tab.
  3. Check Run this program in compatibility mode for and then select an older version of Windows from the dropdown menu.
  4. Click on Apply and then OK to save the changes.
    Seagate hard drive you can only read
  5. After doing that, try running the setup file again. You might have to experiment with different versions until you fix this issue.

The Paragon driver can often cause issues with Seagate Backup Plus, and to fix these issues, you will have to reinstall the Paragon driver. In addition, some users advise installing Paragon driver using Compatibility mode.

3. Fix the Seagate external harddrive problems on Windows 10

3.1. Disable Fast Startup

  1. Press Windows + S, type Control Panel, and then click on the relevant search result.
    Seagate hard drive you can only read
  2. Select Hardware and Sound from the options here.
  3. Next, click on Power Options.
    Seagate hard drive Error code 43
  4. In the left pane, click Choose what the power button does.
    Seagate hard drive show up
  5. Click Change settings that are currently unavailable.
    Seagate hard drive quit working
  6. Now, uncheck Turn off fast startup (recommended), and click on Save changes.
    Seagate hard drive keeps disconnecting

If you’re using Seagate external hard drive, it might not be recognized when Fast Startup is enabled. Fast Startup is turned on by default in Windows 10, and you need to turn it off.

Once done, restart the computer; the Seagate external hard drive is not working, and no light problem should be fixed.

3.2. Plug your external hard drive into a different USB port

  1. When your computer boots into Windows 10, unplug a USB device that is working, for example, your USB mouse.
  2. Connect your USB mouse to a different USB port.
  3. Connect Seagate external hard drive to the USB port that your USB mouse used before you unplugged it.

This is a simple workaround if your Seagate external hard drive isn’t recognized by Windows 10. You’ll need your USB device connected to your computer to do this.

We used a USB mouse in our example, but any other device would also work. So now your Seagate external hard drive should start working again.

We must mention that this solution works with Seagate hard drives such as Seagate GoFlex, so if you own a GoFlex device, make sure you try this solution.

Although this is a simple solution, the only downside is that you’ll have to perform it every time you start your computer.

Also, if your USB port is not working in Windows 10, you can count on us to solve the problem.

4. Fix the Seagate Central issues on Windows 10

4.1. Switch to a local account

  1. Press Windows + I to open the Settings app, and then go to Accounts.
    Seagate hard drive Error code 43
  2. In Your info section, click on Sign in with a local account instead.
    Seagate hard drive won't turn on
  3. Enter your Microsoft account password, and click Next.
    Seagate hard drive Access denied
  4. Now you need to enter a new username and password that you want to use.
    Seagate hard drive keeps freezing
  5. Once done, click Sign out and finish.
  6. Now, log in to your local account.

Users have reported that they are unable to connect to Seagate Central network drive on Windows 10, and if you have this issue, you can try switching to a local account.

After switching to the local account, check if the issue still appears.

Also, if Windows 10 won’t let allow a new user account, check out our simple guide and create or add how many accounts you want in no time.

4.2. Check your antivirus and firewall software

Sometimes your antivirus software can cause issues with Seagate Central on Windows 10, and to fix it, it’s advised that you check the program’s settings.

Users report that McAfee antivirus can cause this issue, and you need to navigate to the Ports and System Services section in McAfee antivirus and check the Homegroup option.

If this doesn’t help, you’ll have to disable your antivirus or firewall temporarily, or in the worst-case scenario, you might have to remove it from your PC and switch to another one.

You can find out how to completely remove Norton antivirus from the PC. Also, learn to uninstall McAfee when the removal tool doesn’t work.

You might consider switching to another antivirus software that doesn’t cause issues and is friendly to other programs.

⇒ Get TotalAV

4.3. Make sure that you partition the hard drive

  1. In the Search bar, type Computer Management, and select it from the list.
    Seagate hard drive keeps beeping
  2. When Computer Management opens, find and click on Disk Management.
    Seagate hard drive Access denied
  3. Find your Seagate Central drive, right-click on it and choose Delete Volume. This will delete all files from your Seagate hard drive.
    Seagate hard drive unable to read
  4. Now you should see Disk1 available. Right-click it, and choose Convert to GPT.
  5. Right-click it again, and choose New simple volume. After doing that, you’ll be able to use your Seagate external hard drive without any problems.

Before you can use any Seagate hard drive, you need to partition it. After partitioning your hard drive as a GPT drive, the problem should be resolved.

Also, discover how to convert MBR to GPT disks without data loss.

5. Fix the Seagate GoFlex Windows 10 issues

5.1. Make sure that Seagate GoFlex has been assigned a drive letter

  1. Press Windows + R to open Run, type diskmgmt.msc in the text field, and then click OK.disk management
  2. If you see a drive without a letter, check its size and verify that this is your Seagate GoFlex drive.
  3. Right-click it, and choose Change Drive Letter and Paths.
    Seagate hard drive quit working
  4. If this drive doesn’t have an assigned letter, follow the on-screen instructions to assign one.
  5. Save the changes, and try to reaccess your Seagate GoFlex hard drive.

Before you can use Seagate GoFlex hard drive, you need to make sure that this drive has a letter assigned to it. Once you assign a drive letter to your Seagate drive, it should start working again.

5.2. Uninstall External Hard drive drivers

  1. Press Windows + X, and from the menu, choose Device Manager.
    Seagate hard drive Error code 43
  2. Now, locate your external hard drive, right-click it, and select Uninstall device.
    Seagate hard drive won't work
  3. Make sure to check Attempt to delete the driver for this device option if it’s available, then click on Uninstall.
  4. After the driver has been uninstalled, restart your PC.

If you have problems accessing Seagate GoFlex on Windows 10, you may try using the default drivers. Then, when your PC restarts, Windows will install the default drivers, and the problem should be fixed.

6. Fix the Seagate NAS Windows 10 issues

6.1. Install Seagate Discovery version 1.40.1041.002

  1. Head to Seagate’s website and download Seagate Discovery version 1.40.1041.002 or newer.
  2. Right-click, the Seagate Discovery setup, file and choose Properties.
  3. Go to the Compatibility tab, tick Run this app in compatibility mode for, and select Windows 10 from the dropdown menu.
  4. Now right-click the setup file, and choose Run as administrator.
    Seagate hard drive Access denied
  5. Follow the on-screen instructions to complete the installation process.

Many users have reported that they cannot access Seagate NAS (Network-attached Storage) on Windows 10. If you have this problem, you should try installing Seagate Discovery version 1.40.1041.002 or higher.

After doing that, your Seagate NAS should start working again. However, if the issue persists, try running Seagate Discovery as administrator.

How do I fix the Seagate external hard drive not showing up on Windows 11 issue?

As with the previous iteration, if the Seagate external hard drive is not showing up in Windows 11, you should first check the connections and ensure everything is in order.

Next, verify if the drive has been initialized. Also, update the drivers for the Seagate hard drive. If nothing else works, you may format the drive and set it up from scratch to get things up and to run.

By now, you would have fixed the issues with Seagate hard driver. Besides, the solutions would also work if the Seagate external hard drive is not showing up and beeping in Windows.

Also, find out how to fix fatal errors on external hard drives. Speaking of Seagate issues, many reported that Seagate Dashboard isn’t working, but we have covered this issue in a separate guide, so don’t miss it.

If you have any other questions or suggestions, feel free to leave them in the comments section below.

Remote Desktop Not Resizing? 5 Ways to Fix Scaling Issues

Scaling or resizing issues is one of the multiple annoying problems you can experience while using the Remote Desktop on your computer. Most users have complained of Remote Desktop not resizing during sessions.

Remote Desktop software is favored among most organizations these days in line with the growing work-from-home culture. However, this translates to more users encountering Remote Desktop related issues frequently.

Also, the error is often traceable to misconfiguration settings or connection issues. However, connection issues may also make the Remote Desktop application not visible. You can further read why your computer can’t connect to the remote PC.

Hence, this article will examine why Remote Desktop is not resizing and the various ways to fix the problem.

Why won’t Remote Desktop resize or allow scaling?

  • Changes in display settings: Every Remote Desktop on the network has a default setting that enables smooth operations. Once a user tampers with the display settings by changing it to another, Remote Desktop resizing to the full screen becomes an issue.
  • RDP display settings have bugs: Bugs are usually a residue of a badly updated Windows. Microsoft Remote Desktop may encounter issues such as resizing if the OS is outdated. Hence, there may be a need to update the OS or backtrack to the previous one, which was working fine.
  • Connection issues: It is paramount to ensure your device has a stable internet connection when using RDP. When there is an issue with this, the Remote Desktop may not load properly. Hence, it can lead to a Remote Desktop screen too small for Windows 10/11 issue.

Checking out our article on Remote Desktop Gateway Server’s temporarily unavailable might be another option leading to this problem.

How can I resize/scale the Remote Desktop?

1. Adjust display settings in Remote Desktop Connection

  1. Click the Start button, search for Remote Desktop Connection, and Run as Administrator.
  2. Select Show Options in the Remote Desktop Connection.
  3. Choose the Display tab and drag the Display configuration slider to Large.
  4. Maintain all other settings and click Connect.

By manually adjusting the setting, Remote Desktop not resizing should be fixed immediately on your next session.

2. Use an RDP saved file

  1. Click the Start button, search for Remote Desktop Connection, and Run as Administrator.
  2. Select Show Options in the Remote Desktop Connection.
  3. In the General tab, click on Save As to create a .rdp file that can store the connection settings.
  4. Input the name and the location to save the .rdp file settings, then click Save.
  5. Click the X button to close the Remote Desktop window.
  6. Then locate the .rdp file and launch it in Notepad.
  7. Include the following codes at the end and click Enter: smart sizing:i:1
  8. Launch the Remote Desktop Connection by double-clicking this .rdp file.

3. Restart your PC

  1. Click the Start button and select the Power button.
  2. Choose Restart from the options and click OK.

Although it seems easy, it is a good troubleshooting hack that works for most Remote Desktop resizing or smart sizing issues.

4. Update Windows

  1. Click the Start button and select the Settings option.
  2. Choose Windows update and select Check for updates.check for update windows 11 meraki vpn

If there’s an update, Windows will automatically download them. Hence, you can install the updates to fix any compatibility issues that could cause bugs in the Remote Desktop Connection.

5. Change DPI settings from properties

  1. Open the file location of Remote Desktop.
  2. Right-click on the RDCMan.exe and select Properties.
  3. Choose the Compatibility tab and uncheck the Disable display scaling on high CPI settings.
  4. Select Apply and click OK.

Adjusting DPI settings might seem unusual, but it can help balance the RDP back. Hence, the Remote Desktop not resizing or scaling issue should be fixed after this.

Can I adjust the font display during Remote Desktop sessions?

Yes, you can. It is a known fact that Remote desktops often use small fonts. However, you can adjust it to suit your needs.

Also, modifying the Remote Desktop display can help to enlarge the font of your text.

These are the best ways to fix the Remote Desktop not resizing problem. Ensure to follow all the steps for optimal results.

Check out our guide on enabling and using the Remote Desktop Connection on Windows 10/11 might be helpful if you encounter the issue.

If your Windows server is 2019, this guide on enabling Remote Desktop on Windows server 2019 might suit you.

Kindly leave your comments in the section if this article has been of help to you. We’d love to hear feedback from you.

High Packet Loss on Xbox Series X, S, One: How to Fix

Xbox is a popular gaming console from Microsoft that brings a lot of joy to millions of users. It enables you to play a broad collection of games, solo, or with your friends.

Game servers have grown to accommodate the increasing number of players who prefer teaming up and enjoying titles collectively.

As enjoyable as this may sound, there are downsides to this, as well. Every online service (no exception) is subject to a series of challenges. These include high ping, packet loss, crashes, and even connection timeouts.

Of these unwanted problems, leaking packets is by far the nastiest one. And you’ll get to see why in just a few.

What is high packet loss?

For starters, packet loss is when data bundles (packets) you send or receive never make it to their destination.

This in turn can cause other problems that might impede you from enjoying your gaming session. Namely:

  • High ping
  • Jitter
  • Rubberbanding
  • Crashes
  • Connection timeouts

So we know what packet loss is. High packet loss is, simply put, when the packet leak percentage is high. Thus, the trouble you may encounter in your online Xbox session can get more severe.

? What does packet loss mean on Xbox?

Essentially, you can have packet loss on multiple devices, including Xbox One or other versions. This connection issue arises when data sets fail to reach their target.

? What’s high packet loss on Xbox?

As you can imagine, high packet loss on Xbox involves the same process but with serious connection issues due to packet loss.

The reason for this problem might be the Microsoft servers and connection issues between your device and the Xbox.

Quick tip:

To avoid issues such as packet loss, bandwidth throttling, or network congestion, you can use a tool like ExpressVPN that will also help you boost your privacy online and secure your connection.

So, this top-secured VPN can help you solve the 100 packet loss Xbox One issue with its optimized servers and fast connection.

ExpressVPN

Struggling with packet loss? Pair your Xbox with this VPN and take your gameplay to the next level.
Check price Visit Website

How do I get rid of packet loss on my Xbox?

If you are encountering packet loss on your Xbox console, there are multiple possible solutions available to fix the problem.

For some, restarting your router does the trick. Using a VPN or replacing Wi-Fi with a wired connection can also help. You need to try them all in order to see which one works best for you.

1. Restart your router

  1. 1. Turn off the internet router.

  2. 2. Unplug the router from power outlet.

  3. 3. Plug in the router.

  4. 4. Wait for 2 minutes.

  5. 5. Turn on your router from the Power button.

  6. 6. Check if your Xbox is working properly now.

  7. The first thing you need to try out if you encounter high packet loss on your Xbox is reset your internet router. A reset is likely to fix the problem without you having to implement more advanced solutions.

2. Use a reliable VPN

We recommend using ExpressVPN because it delivers great network connectivity with high-speed server connection across 94 different countries.

  1. Download ExpressVPN and install it on your PC.
  2. Launch Express and log into your account.
  3. Connect to a server of your choice.ExpressVPN servers
  4. Link your Xbox One to route traffic through your PC.
  5. Check if the packet loss issue still persists.

3. Restart your router

  1. Turn off the router.
  2. Unplug the router from the power outlet.
  3. Plug in the router.
  4. Wait for 2 minutes.
  5. Turn on your router from the Power button.

4. Go Offline on your console and then reset it

Go to Profile and System > Settings > System > Console info. From there, all that is left to do is Select Reset your console.

After you do this, check if the issue persists. If it does, try out the next solution.

5. Close all games and/or apps that are running on the console

Hover on the apps or games in the window on the Home screen and press the Menu button on your controller. Press Quit to close the app.

Repeat this process for all other games that are currently running, and then see if the issue is gone.

6. Clear your MAC address

It’s possible to remove the MAC address from your port security and configure the port to permit packets to add or pass the port to VLAN.

This is likely to fix the high packet loss of your Xbox.

7. Try using a wired connection instead of wireless

Use your Ethernet cable to access the network in order to reduce packet loss when you navigate online.

8. Avoid peak times

It’s possible to avoid peak times regarding your network packet loss using an efficient VPN with a strong server connection.

9. Change your DNS settings to public ones (Google Public DNS, Cloudflare)

  1. Go to Control Panel.
  2. Access  Network and Sharing Center > Change adapter settings.
  3. Go to the Networking tab.
  4. Click on the Advanced and DNS tab.
  5. Select Use the following DNS server addresses and type Google DNS address. 

10. Enable/disable your router’s QoS feature

  1. Under Advanced Network settings, select QoS Settings. 
  2. Press the Set up QoS rule button. 
  3. Add Networks to prioritize.
  4. Click Apply and reboot your router.

11. Apply a hard reset to your Xbox console

Hold the power button until the Xbox console shut down > Unplug the power cable and wait 10 more seconds > Power the cable on and start your console again.

However, note that if there’s something wrong with your home network or if the Xbox servers are having issues, using a VPN won’t help. This method only works if packet loss occurs on your ISP’s side.

What causes packet loss on Xbox?

xbox one logo

You may be wondering, why do I have high packet loss? Well, the main cause of packet loss is network congestion.

This means that the network can’t accommodate the number of users that are connected at the same time, and starts cutting its losses.

However, there can be other causes for high packet loss, such as server-side leaks (improper configuration), bad cables (on either side), or even Wi-Fi packet loss (interference, bad channel signal, and such).

In most cases, high packet loss occurs suddenly and disappears just as quickly. That’s the good news and also the bad news since it means there might be nothing much to do about it other than waiting.

How to check for packet loss on Xbox One?

  1. Power up your Xbox One.
    xbox one controller drivers windows
  2. Launch the Settings app.
  3. Head to the Network section.
  4. Open the Network settings option.
  5. Choose Detailed network statistics from the right-hand menu.
  6. Wait for the test to complete.

This test will display your download and upload speed values, latency, and packet loss.

PCs offer a lot of tests that can determine packet loss. Even the Speedtest by Ookla has a packet loss test. However, checking for packet loss on a console can be more tricky.

Follow these steps above if you want to perform a packet loss test on your Xbox One.

Why does my Xbox have 100 packet loss?

If you’re experiencing packet leaks on your Xbox One, it might have something to do with overcrowded servers (network congestion). In this case, there’s little you can do to alleviate the issue.

However, sometimes you might improve the situation by trying a bunch of fixes. Using a VPN is among the most popular choices here, but remember it doesn’t work every time.

You’ll need to make sure that your ISP is the cause of your high packet loss before trying a VPN. Otherwise, you might get disappointed when you’ll realise it doesn’t work at all.

You can also try using different DNS settings on Xbox if you’re having packet loss problems, so don’t hesitate to give them a try.

Canva Won’t Let Me Edit Text Error: How to Fix It Now

Canva is a freemium online graphic design tool you can use to create posters, presentations, and social media posts. Individuals and teams can use Canva. But sometimes, users find it annoying that Canva won’t let them edit text.

Aside from not being able to edit the text in Canva, they have challenges with the background remover not working correctly.

This post will discuss why you can’t edit the text in Canva and how to unlock text in this app.

Why can’t I edit my Canva design?

There are multiple reasons for this, but the most common one is the lack of permissions. If you’re trying to edit a shared design, check with the author if you have the sharing rights.

Another possible reason is locked elements. Sometimes you may lock certain elements by accident or while designing, and if you forget to unlock them, you won’t be able to edit anything.

Now that you know what causes this issue, let’s see how to fix it.

What can I do if Canva won’t let me edit the text?

1. Change Design permissions

  1. Go to Canva in the web browser.
  2. Open the design you want to share.
  3. Select Share from the menu bar above the editor.canva won't let me edit text
  4. Click on the dropdown arrow to choose who you want to share with; select Only people added can access or Anyone with the link.canva won't let me edit text
  5. On the dropdown menu on the right, choose the permission you want to give, and you can set it to view, edit, or comment.canva won't let me edit text
  6. Select the Copy link.canva won't let me edit text

If you can’t edit a text in a Canva design, perhaps the owner of the designer didn’t give you edit access.

When you work in a team, the team leader or the design owner can choose who can edit or view a design. So if you can’t edit, it means you don’t have that permission.

First, you can ask the owner to re-share the design and give you edit access permission. After doing that, check if Canva text is still not working.

2. Unlock the design to unlock the text box

  1. Open the design you want to unlock.
  2. Click the element with the text box you want to unlock. You can also hold Shift on your keyboard and click on multiple elements to select them.canva won't let me edit text
  3. Click the padlock icon on the editor toolbar. If you can’t find the padlock there, click on the three horizontal dots first.

The design owner gives you access to a design in Canva, but you can’t edit the text box. This happens when the text box is locked with the design. You can select the group element and follow the procedure.

3. Share the design to the correct team

  1. Select your profile icon from the homepage or the Menu.click on profile icon
  2. A checkmark will appear next to the team you’re currently on.
  3. If you’re not logged into the right team’s account, switch teams by selecting the team name. When you choose the correct team name, you’ll be redirected to the team’s homepage.

You can’t edit the text in Canva because the design owner shared it with a team and not a personal account.

4. Change the fonts within the design

  1. Create and share a copy of the design and replace the custom font with a standard Canva font.
  2. Add you to the Canva for Pro team so that you can have access to the custom font.
  3. Temporarily change the custom font to a standard Canva font on the original design.

Sometimes, you can’t edit a text in a Canva design because some of the font settings are unavailable. This happens when Canva tries to create an editable version of a pdf or a JPEG you’ve uploaded.

Canva greyed out specific fonts on the shared design because they may not be available for your subscription plan.

You can request the design owner to do any of the above solutions for you to be able to edit the text in the design.

Why is text not working on Canva?

If text isn’t showing properly in Canva, it means that there’s a conflict between your selected language and the font. This means that the font can’t render certain characters properly.

Changing the font to a different one usually solves this issue. It’s also possible that the design is using custom fonts and that you don’t have access to them.

If these methods are not working, you recommend installing or reinstalling the desktop version using a new user name.

If you’ve been experiencing an error code 500 while loading Canva, we’ve put together an in-depth guide to help you resolve the error. Did you know that you can convert Canva to a Word file? That’s right, and we have a guide that shows you how to do it.

To learn more, we have a great guide on how to blur the background in Canva, so don’t miss it.

Which of the above solutions helped you fix the issue? Let us know in the comments below.

How to Enable Print Background Colors and Images on Browser

Because printer ink isn’t exactly the cheapest office material to come by, it goes without saying that you’d want to be very careful about how you actually use it.

Because of this, many programs, and even the printers themselves are set by default to save ink whenever given the chance.

For example, most of the time when you try to print a web page, you’re probably interested more in the text and other elements such as icons or images.

As such, the printing of background colors and images is disabled by default in some web browser applications.

This guide is here to help you figure out how to disable this function, depending on the browser you are using.

How can I print background colors in Internet Explorer?

1. Internet Explorer 10

  1. Launch IE.
  2. Navigate to the File tab.
  3. Select Page Setup.
  4. Check the Background Colors and Images box.

2. Internet Explorer 11

  1. Launch Internet Explorer.
  2. Click the gear icon on the top-right part of the screen.
  3. hover the mouse cursor above the Print button.
  4. Select Page Setup.
  5. Check the Background Colors and Images box.
    Print background IE colors

Keep in mind that IE is a pretty old browser. The only IE version currently supported by Microsoft is Internet Explorer 11.

For this reason, if you’re still using IE, we strongly recommend installing a newer browser.

Opera One Browser can be more helpful. It has a Print extension where you can place a print button inside your web browser. This way, you can easily print a page with just one click. You can choose from printing a web page, photo, or even a business card.

This extension is a lightweight and useful add-in designed to get a print fast. On top of that, you can choose the style and the Print button design. This browser also has a built-in AI.

Opera One

Multiple great features created for users’ needs to improve the browsing experience.
Free Download Visit website

How can I enable the printing of background colors in Edge?

  1. Launch Microsoft Edge.
  2. Click on the three dots menu button and select Print.
  3. Scroll down and click on More settings on the left pane.
  4. Now, scroll down again and check the Background graphics box under Options, and hit Print.

How can I enable the printing of background colors in Firefox?

  1. Launch Mozilla Firefox.
  2. Click File.
  3. Go to the Setup tab.
  4. Select the Format & Options tab from the Setup tab’s dialog box.
  5. Right under Options, check Print Background (colors & images).
    print background colors firefox
  6. Refresh the web page and try printing again.

How to enable print background colors and images in Chrome?

  1. 1. Launch Google Chrome.

  2. 2. Click on the three-dotted button in the top right corner of Chrome’s window.

    chrome settings click
  3. 3. Select the Print… option.

    chrome settings
  4. 4. Navigate to the Colors section from the menu that opened.

    navigate to colors section chrome
  5. 5. Click on it to open a drop-down menu with two options: Black and White and Color.

    how to enable print background colors and images in chrome settings
  6. 6. Select Color.

  7. 7. Now, navigate to the Options section and click on it to open another drop-down menu with: Headers and footers and Background graphics.

    how to enable print background colors and images in chrome drop down
  8. 8. Check the box next to Background graphics.

    toggle print background colors and images in chrome on
  9. The process of enabling the printing of colors on an image opened in Chrome is simple and very similar to those for Internet Explorer and Mozilla Firefox.

    What you need to do is navigate to the Print menu and select the Color option, then enable printing background graphics, prior to proceeding with the printing process.

Google Chrome used to be incapable of printing background colors and images, even with the help of third-party browser extensions. However, things have changed ever since, and you can print in color on it as well nowadays.

You should also check our list of the best browsers for printing web pages fast & effortlessly because it may provide you with extra information.

If there are currently any other lesser-known browsers that allow the printing of background images, please do not hesitate to share them with the community in the comments section below.

How to Fix Netflix if It’s Not Keeping You Logged In

Nowadays, a lot of us choose to spend our precious free time binging our favorite shows, or watching the latest movies.

We are past the days when this could only be done on the TV, and we can enjoy everything that the Internet has to offer.

Today, we can enjoy the comforts brought by streaming platforms such as Hulu, HBO Max, Amazon Prime, Disney Plus, Netflix, and many others.

However, if you chose Netflix and you get the Title not Available to Watch Instantly error, we can help you do something about it.

Another common, yet annoying Netflix situation is when ExpressVPN is not working with Netflix, but we have a guide for that as well, so don’t worry.

That being said, if what you are struggling with is the fact that Netflix doesn’t keep you logged in, even though you requested it, follow the guide below.

Why won’t Netflix keep me logged in?

You have to keep in mind that, if the account information on your device is outdated, Netflix will keep logging you out.

Even when you update the Netflix app, if you are using it, Netflix will log you out. If your PC already has the latest operating system, Netflix will keep logging you out for these additional reasons:

  • Netflix network issue
  • Incorrect credentials
  • Corrupted cache files
  • Too many account users

Taking all these factors into consideration, you can see why some errors might occur and, when you run the app, you are longer signed in.

However, there is no need for concern, because if Netflix won’t keep you logged in on Windows 10/11, we have the solutions right here.

How do I make Netflix keep me logged in?

Just as is the case with every other video game, or any other type of platforms that require an authentication process, you will have an option to do so when you enter your credentials.

There is always a tiny box that you can check, where it says Keep me logged in/Remember me, so it shouldn’t be hard to miss at all.

Once the box is ticked, the platform will automatically log you in whenever you access it. But, since we are here, there are obviously some tiny exceptions.

How can I fix Netflix if it’s not keeping me logged in?

1. Check the Netflix server

One of the first steps you should turn to when your Netflix just won’t keep you logged in is checking to see if the Netflix server is down.

When doing so, if this page confirms that there are problems on their end, you won’t be able to troubleshoot your device to fix this problem.

However, if the server is up and running, it means that we are going to need to solve this issue as quickly as possible.

2. Log out/Login to Netflix

  1. Click on the profile button in the top right corner.
  2. Click on Sign out of Netflix.sign out of netflix
  3. Enter your credentials, check the Remember me box, then click the Sign in button.netflix login

3. Clear browser’s Cache & Cookies

  1. Click on the Customize and control Google Chrome button. customize and control google chrome
  2. Select History, then click on History again.history chrome
  3. Click on the Clear browsing data button.clear browsing data chrome
  4. Select Cookies and other site data and Cached images and files, then select All time and click on Clear data.clear cookies and cache chrome

You can opt for a reliable maintenance software like CCleaner as well. It lets you scan your system and clear all the junk files, caches, and unnecessary build-up files that can deteriorate your PC performance. It also has a straightforward interface so you can easily use this program.

⇒ Get CCleaner

4. Update your Netflix app

  1. Open the Microsoft Store.microsoft store
  2. Search for the Netflix app.microsoft store
  3. Press the Update button if an update is available.netflix

How many users can I have on my Netflix account?

It really depends on the type of subscription you bought from Netflix. This fact alone will influence both the image quality you get and how many users can be on the same account.

So, with the basic plan, you can watch Netflix on one screen only. With the standard subscription plan, you can binge your favorite shows on two screens at the same time.

And, users that have opted for the premium Netflix plan, are able to watch Netflix on four screens at once and get the best image quality.

Keep this in mind when trying to update your subscription plan or subscribe to Netflix for the first time. Leave a comment below if this guide was helpful to you.

7 Ways to Permanently Fix Gmail if You Can’t Print Anything

Some users have stated on Google forums that they can’t print emails from Gmail when they select the Print option.

Even though their printers print most documents just fine, the problem is limited to Chrome, which makes things all the more complicated.

So, if you can print from Gmail, these are a few potential fixes and workarounds for printing them. But, before we head to the problem, let’s find out more about the issue.

Why can’t I print from Gmail?

When you can’t print from Gmail, a popup blocker could be installed on the browser. In this case, you should receive an error message informing you of the same. Also, other conflicting extensions too can lead to this error.

Besides, misconfigured settings or an outdated browser version can be behind printing from Gmail problems. And make sure to check that the printer you are trying to use is connected and is not malfunctioning.

Quick Tip:

We suggest you use a stable and secure browser such as Opera One, which has a straightforward interface that allows you to quickly access and print your emails.

Moreover, you can protect and secure your online activity thanks to its built-in VPN and other advanced features.

Opera One

The printing option is quickly accessible directly from emails or via shortcuts.

How do I print from Gmail?

  1. Go to Gmail on your browser.
  2. Open the email you want to print.
  3. Click the menu button (three vertical dots) in the top right corner.
  4. Select the Print option.
  5. Now, make the necessary changes and click the Print button.

With the above steps, you can print almost any email on your Gmail. If you can’t find the print option in Gmail, you can use the Ctrl + P shortcut.

Where are the print settings in my browser?

You can use the Ctrl + P keyboard shortcut to access the print settings on the browsers. The shortcut works on all major browsers, including Google Chrome, Opera One, Firefox, and Edge.

Print settings in Chrome

So, head to the page you want to print, use the keyboard shortcut to access the settings, and make the desired changes if required.

What do I do if I can’t print from Gmail?

Note icon NOTE
The solutions listed here use Google Chrome as an example, but the same would also work on other browsers.

1. Update the browser

  1. First, click the ellipsis near the top-right corner, and select Help.
  2. Choose About Google Chrome from the options.
    About Google Chrome
  3. The browser will be installed automatically if an update is available.
    Update Chrome to fix can't print from gmail
  4. Make sure to relaunch the browser for the changes to come into effect.

Once done, check if you still can’t print attachments from Gmail. Suppose that’s the case, head to the following method.

2. Reset the browser

  1. Paste the following path in Chrome’s address bar and hit Enter:chrome://settings/reset
  2. Click on Restore settings to their original defaults.
    Restore settings to their original defaults
  3. Now, click on the Reset settings button to confirm the change.
    Reset settings to fix can't print from gmail

Resetting browsers can often resolve numerous browser issues. This will delete all third-party extensions, themes, cookies, and site data and restore the browser to its default settings. So, with this, you should be able to fix the can’t print PDF from Gmail issue.

3. Check if you’ve selected the correct printer destination

  1. Click on the Destination dropdown in the preview window, and choose See more.
    See more
  2. Now, select the desired printer from the list of options here.
    correct printer to fix can't print from gmail
  3. Once done, click on Print.
    Print

If you can’t print attachments from Gmail, you might not have selected the correct destination printer. So first, make sure you’ve chosen to print from the proper destination printer.

If you don’t find the desired printer listed here, learn how to add a printer in Windows.

4. Clear the browser’s cache

  1. Go to CCleaner’s official website, and download the software.
    Download CCleaner to fix can't print from gmail
  2. Open CCleaner’s setup wizard to install the software on Windows.
  3. Then launch the CCleaner software.
  4. Select Custom Clean from the left, tick the checkboxes for Cache, Cookies, and History for the browser you are facing problems with, and click on Analyze. Remember, the Windows tab includes the browsers that come pre-installed, while others are found in the Applications tab.
    Analyze to fix can't print from gmail
  5. Once done, click the Run Cleaner button.
    Run Cleaner
  6. Click OK to confirm and clear the cache.
    Continue

If you cannot print from Gmail in Chrome, clearing the browsing data using an effective software like CCleaner should do the trick.

5. Save the Email as a PDF

  1. First, open the email you need to print in Chrome, and select the Print option to open the Preview window.
  2. Click the Destination dropdown menu, and select Save as PDF.
    Save as PDF to fix can't print from gmail
  3. Click on Save at the bottom.
    Save
  4. Select a folder to save your email, and again click Save.
    Save to fix can't print from gmail
  5. Now open the email that you just downloaded in a reliable PDF viewer.
  6. Then you can select to print the email with your PDF software’s print option.

If Gmail doesn’t print your email, you can save it as a PDF file and print it with another application.

6. Print emails from an email client software

  1. Click the gear icon near the top-right corner, and select See all settings in Gmail.
    See all settings
  2. Navigate to the Forwarding and POP/IMAP tab, and select the Enable IMAP radio button.
    Enable IMAP to fix can't print from gmail
  3. Click the Save Changes button.
    Save changes
  4. Then, click Free Download on the Thunderbird homepage.
    Free download
  5. Open the software’s setup and install Thunderbird to Windows.
    Install
  6. Launch the software, enter the credentials for your email address, and click Continue.
    Continue to fix can't print from gmail
  7. Verify the available configurations here, and click Done. If you want to change these, go with the Configure manually option.
    Done
  8. Once done, re-enter the login credentials to sign in.
    Sign in
  9. You can simply select an email, hit Ctrl + P, verify the settings, and click Print.
    Ctrp + P to fix can't print from gmail

7. Consider a different email client instead

Replacing a tool is much faster than fixing it, and with so many email clients to choose from, it would be a shame to lose time sticking to Gmail.

That being said, we recommend trying Mailbird, an email client suited for personal and business use.

This service is available as both a downloadable desktop and web client.

More so, the UI is customizable in terms of structuring, theme, and coloring, so managing the emails from multiple accounts will not just be easy; it will also be enjoyable.

Both the downloadable and web clients are very stable and lightweight, and the frequent updates minimize the occurrence of bugs for too long.

How do I print Gmail to PDF?

Printing Gmail to PDF is pretty straightforward. The easiest way is to disconnect your printer from your PC, and Chrome will automatically bring the print to PDF option.

You can also do it with your printer connected. You only need to tweak some of the settings. We have shown how to do this in detail in this guide.

How do I change the print settings in Gmail?

After you press Ctrl + P to launch the Print Preview window, all the settings are listed here. You can modify these from the dropdown menus.

Change the number of pages to be printed

For instance, use the Destination dropdown menu to choose a different printer. If you want to select the number of pages to print manually, the Custom option in the Pages menu would aid. Similarly, you can change the other settings as well.

Those are a few resolutions that should fix things if you can’t print from Gmail. And in most cases, the first few would do the trick.

Also, find out what to do if you can’t print from Edge in Windows 11.

If you have any other queries or know of a method not listed here, drop a comment below.

3 Simple Ways to Fix How Do You Want to Open This File

The message How do you want to open this file pops up either when you just installed a new copy of Windows 10 or reset the Windows settings, or in case you’ve never used that specific file type.

This message is Windows 10’s attempt to set a default application to be used when trying to launch different types of files.

In this article, we will explore the best ways to deal with this message and discuss how to make it go away for good if you want to. Read on to find out more.

Why does the How do you want to open this file message appear?

This error occurs if you open a specific file type for the first time. It can also appear if you need to select a default app to launch your files. So, this is a perfectly normal prompt on your PC.

What can I do when getting How do you want to open this file message?

1. Choose a default program

  1. Double-click on the file icon you want to open to get the prompt.
  2. Select any of the compatible programs from the list.
  3. Click on More Apps to search for another software inside the Microsoft Store.
  4. If you already know which app works for the file, then you can also click on the Always use this app to open file to set that application as default.
    always use this app How do you want to open this file

This solution works great if you don’t mind going through the same process whenever you encounter this error.

Even more, rest assured that using WordPad, Microsoft Word, or Notepad is also ideal to easily open ADOC files.

2. Change the Default app settings

  1. Click on the Search bar and type default.
  2. Select the Default apps option.
    default how do you want to open this file
  3. You can click on each section for the main file types and choose a preferred default program for that type.
    choose
  4. Now, Windows will automatically open up photos using the Photos built-in app (or any application you choose).

The software available on the list will vary depending on the file for which you want to set the default app. This should fix how you want to open this file issue by selecting apps like Excel, Python, Java, and VS Code for the relevant file types.

How do I fix How do you want to open this file on Windows 11?

  1. Press the Windows key + R, type msconfig, and click OK.
    msconfig
  2. Uncheck the box for Load startup items.
    load how do you want to open this file
  3. Now, click the Services tab at the top.
    services
  4. From here, uncheck the box for Hide all Microsoft services.
  5. Click the Disable all button.
    hide all
  6. Now, click the Startup tab at the top.
    startup
  7. Click Open Task Manager.
    open how do you want to open this file
  8. Right-click each of the apps there and select Disable.
    disable
  9. Now, go back to the System Configuration window and click the Apply button followed by OK.
    apply ok
  10. Finally, click Restart when prompted.

Restarting your PC in safe mode should help fix how you want to open this file on startup issues on Windows 11, especially if the popup appears randomly. Also, you can use the other solutions listed in the earlier section of this article.

How do I reset the default file format?

  1. Press the Windows key + I to launch Settings.
  2. Select the Apps option.
    apps
  3. Choose Default apps in the left pane.
    default apps
  4. Scroll down and click the Reset button under Reset to the Microsoft recommended defaults.
    reset

With this, you have reset all file associations to the default.

In this article, we explored two methods that will take care of the How do you want to open this file message on Windows 10 and another one for Windows 11. However, you can use the solutions interchangeably for the two operating systems.

If you are facing other issues, like the file is open in another program error, check our detailed guide to fix it quickly.

The solutions offered in this list will indeed resolve any problems relating to this issue. Please let us know how this worked for you using the comment below.

7 Ways to Fix Number Pad Not Working Even With Num Lock On

If your number pad isn’t working even with NumLock on, don’t worry. There are a few simple fixes you can try.

Whether it’s a stuck key, settings issue, or outdated drivers, we’ll show you how to fix it by enabling NumLock on startup, using an on-screen keyboard, or disabling mouse keys.

Let’s get started.

How do I fix the keyboard number pad if it isn’t working?

1. Use an on-screen keyboard

  1. Press the Windows key + S to open Search.
  2. Now type on screen keyboard. Select the On-Screen Keyboard from the list of results.
  3. Use the virtual keyboard to enter the desired numbers.

If you need more features or just don’t like the Windows screen keyboard, you can install a third-party option on your PC. They work in similar ways.

2. Make sure that the Num Lock is pressed

  1. On your keyboard, locate the Num Lock key. You can find it in the top left corner of your number pad.
  2. Press the key. The light next to it should turn on.
  3. Try using your Numpad.

3. Turn off Mouse Keys

  1. Press the Windows key + S to open Search.
  2. Type Ease of Access and select Ease of Access keyboard settings.
  3. Go to the Find a setting field.
  4. Type mouse keys and select Turn Mouse Keys on or off.
  5. Make sure that Control your mouse with keypad is set to off.

4. Update/reinstall your keyboard driver

  1. Press Windows key + X and select Device Manager from the list.
  2. Expand the Keyboards section, right-click your keyboard, and select Update driver.
  3. Now, select Search automatically for drivers.
  4. Wait while the process is finished.

In some instances, reinstalling the driver might help solve the number pad not working on the laptop issue, and you can do that by following these steps:

  1. First, press the Windows key + X and select Device Manager.
  2. Locate the keyboard driver.
  3. Right-click it and choose Uninstall device.
  4. Now click on Uninstall once again to confirm.
  5. Restart your PC.

The driver will be automatically reinstalled after restarting your PC.

A driver updater app can help you solve these issues and install new or updated drivers with just a few clicks.

5. Run the keyboard troubleshooter

  1. Open Windows Settings.
  2. Go to System and select Troubleshoot.troubleshoot settings section
  3. Scroll down to Other troubleshooters.other troubleshooters settings
  4. Select Keyboard and click Run.

6. Change registry values

  1. Launch Registry Editor with admin privileges.run registry editor as administrator
  2. Navigate to HKEY_CURRENT_USER > Control Panel > Keyboard.hkey current user control panel keyboard
  3. Find and double-click on InitialKeyboardIndicators.initial keyboard indicators
  4. Change the Value data to 2.set value
  5. Press OK to confirm the changes.
  6. Restart your computer and see if the number pad is now working.

7. Use a different keyboard

If the problem persists, it might be a hardware issue. Repairing a damaged keyboard can be costly, so replacing it is often more practical.

Fortunately, some of the best keyboards on the market aren’t even expensive. Besides being affordable, a new keyboard can offer improved functionality, better-typing comfort, and enhanced durability.

Have you found other ways to fix this issue on your PC? If so, please let us know in the comments.

You can apply any emoji as a reaction to chat or channels messages in Teams

Earlier this year, we saw Microsoft add 3D Fluent design emojis to Teams. And now, it is rolling an update tagged 88080 in the Microsoft 365 Roadmap to Microsoft Teams that will allow users to react to both chat and channel messages with any emoji they want.

Currently, users only react to messages with a finite number of emojis. But now, with the expanded reactions they will be able to use any one of the over 800 existing Teams emojis to communicate. You can either browse or use the search bar to find the emoji you want to use to express yourself.

This update will also feature a new reactions user experience, which will help support the expanded reactions in Teams. According to the Microsoft 365 Roadmap, “The reaction hover bar will now feature a reduced number of quick hover options to make space for an expanded reaction button. The reaction summary will also be moved from the top right of the message to the bottom of the message bubble to make space for the wide range of options that can now be added.”

The update’s release time has also been changed and is expected to start rolling out for Teams desktop apps (Windows and Mac), Teams mobile (Android and iOS), and Teams on the web in mid-November and reach general availability towards the end of December.

Thunderbolt Is Not Showing Attached Devices: 5 Ways to Fix It

High transfer rates might make Thunderbolts an excellent option for transferring data, but setting one up can present challenges, like the Thunderbolt not showing attached devices.

Although this issue is irritating, there are several quick fixes that people who have previously dealt with it have proven to work.

In this post, we’ll examine all the potential fixes that can let your PC detect the devices connected to it by a Thunderbolt cable.

How do I approve the attached Thunderbolt devices?

You may notice a popup asking you to verify the recently connected device when you connect a Thunderbolt device for the first time to a Windows PC that supports Thunderbolt: New Thunderbolt devices have been attached, reads a dialog window.

  1. In the dialog box, click OK.thuderbolt approval pop up
  2. On the Windows User Account Control pop-up, select Yes.
  3. Another dialog box displays the device’s name and offers the choices of Do Not Connect, Connect Only Once, or Always Connect. Click OK after selecting the preferred choice.

What can I do if Thunderbolt is not showing attached devices?

1. Check the device

Verify that the device is on and that the cords are attached. Ensure the power cable is plugged in if the device needs one.

Then, check that the Thunderbolt port has been thoroughly cleaned and is not damaged.

2. Enable Thunderbolt’s new connection configuration

  1. To access BIOS Setup at boot, press F12 or the BIOS button.
  2. Access Onboard Devices options under Advanced and Devices.Onboard Devices
  3. Verify that the setup for the Thunderbolt new connection or the Thunderbolt Controller is enabled.
  4. To save and leave BIOS Setup, press F10 or Save.

Suppose the Thunderbolt new configuration option is not enabled. In that case, BIOS won’t let any new connections through the Thunderbolt cable since BIOS is in charge of identifying any newly connected device or gadget to the motherboard or PC.

3. Update Windows

  1. From the Start menu, choose the Settings option.settings icon in start menu
  1. Select Update & Security to open the Windows Update tab.
  2. Select Download and Install when a Windows feature update becomes available.download and install option in the settings
  1. If you cannot upgrade your version of Windows, choose to Check for Updates to download and install any available patch updates.check for updates button in settings

Windows may block Thunderbolt connections because of security concerns.

To protect your computer from threats, you must install security updates. However, it’s also essential to fix any bugs in the Windows security software that prevent safe transfers.

4. Update Thunderbolt firmware

The Thunderbolt ports on your computer might require updates to work correctly. A firmware update is all your device needs to do for effective data transfers.

For further information, click the website link for the computer manufacturer above. Please contact your computer’s manufacturer directly if they are not mentioned to acquire the most recent information.

5. Update your motherboard BIOS or UEFI

  1. Visit your computer motherboard manufacturer’s official site to download the latest BIOS or UEFI.
  2. Copy it to another USB flash drive after unzipping.
  3. Turn on your computer again and go into the BIOS or UEFI.
  4. Update the BIOS and/or UEFI using the menus.Updating BIOS

In certain cases, updating the BIOS is required to fix bugs, enhance stability or performance, or allow the motherboard to support a Thunderbolt cable or other equipment.

Your computer can become useless if the BIOS upgrade encounters a problem. It may not be able to boot at all if there is a power outage or if the computer shuts down while upgrading. Although unlikely, it is nonetheless possible.

Does Thunderbolt need software?

Although you had to install a software program for Thunderbolt to work correctly in the early days, practically all devices now come with it preinstalled.

However, you still won’t be able to utilize a Thunderbolt device without this program. Even though this necessary software is preinstalled, you may need to update it frequently to keep Thunderbolt’s data transfer rates stable.

The maximum data transmission speed of a Thunderbolt 3 connection is 40 gigabytes per second, which is double the speed of a USB-C cable.

However, you must use a Thunderbolt cable with a Thunderbolt connector and not a USB-C connection to get these data transfer speeds.

Most current laptops and motherboards feature a thunderbolt connector, although certain models can still not support Thunderbolt.

It is worth noting that these modern laptops may experience problems like Thunderbolt not showing associated devices, which may be resolved using the solutions mentioned above.

In the comment section below, let us know if you were able to fix Thunderbolt not showing attached devices issue.