How to Show Date and Time in the Windows Taskbar

If you want to know how to show date and time on your Windows taskbar, you’re in the right place.

Maybe you’ve been making changes to your computer, like installing a clean copy of your OS, and now you want your taskbar organized. With a few tweaks, you can show essentials like date, time, and system icons in a compact view.

How to display date and time on the taskbar in Windows 10?

  1. Right-click on an empty spot in the Windows taskbar and choose Taskbar settings.taskbar settings
  2. Under Notification area, click the Turn system icons on or off option.change settings
  3. Now, look for Clock in the list and make sure you toggle the switch to On.On to get windows 10 show date and time in taskbar with small icons
  4. If this is already the case, try toggling the option to Off and then On again.

Now, when it comes to preferences, different users want different options – some like a cleaner desktop, and others want everything handy.

And while you can hide or make the taskbar not transparent in Windows 10, the topic of modifying the taskbar width and the size of the icons or displayed details is still a very hot one.

How can I show the date in the taskbar with small icons?

Note icon NOTE
The method may work for PCs that support higher resolutions. Users reported that both the date and time are visible when set to small icons for resolution at 1920×1080 and DPI set to 100%. For others, the date won’t be visible.
    1. Right-click anywhere on the taskbar, and chose Taskbar settings.
  1. 2. In the settings windows, look for Use small taskbar buttons and enable the toggle for it.

  2. 4. Once done, the taskbar icons will automatically change to small ones.

  3. This action can, of course, be undone, and you can always choose to make the taskbar icons bigger. While you’re in the taskbar settings menu, you can also look around and adjust other features as you like.

Now that you can show the date and time in the taskbar with small icons in Windows 10, you may back up the taskbar in Windows 10 at any time.

We hope this guide has proven useful and that you can customize Windows 10 the way you wanted.

Should you have any useful recommendations on customizing the taskbar, feel free to use the comments section below.

Microsoft Store 0x80070005 Error: 7 Quick Ways to Fix It

More and more apps are added to the Microsoft Store daily, along with regular updates to keep them running efficiently. But, several users reported Microsoft Store errors, including 0x80070005.

The error is encountered when you try to update apps already on the PC or install new ones from the Microsoft Store. And the list of people affected by it is growing each day.

So, let’s find out what the Microsoft Store 0x80070005 error is and the solutions that would fix things for you.

What is the Microsoft Store error 0x80070005?

The error usually appears when a DLL file is denied permission, so it is most likely a result of an update that messed up your Microsoft Store files. One other cause could be a lack of file or registry permission.

Users also mention these connected issues:

  • Microsoft Store download error 0x80070005 – This happens mainly when downloading games and these apps are the most likely to be impacted.
  • Forza Horizon 4 0x80070005/Sea of Thieves 0x80070005/Forza Motorsport 7 is currently not available in your account make sure you are signed in to the Microsoft Store and try again – The text of this error points towards the fix for it, which is to sign into your Microsoft Store account.
  • Xbox app error code 0x80070005 – This means that there could be a problem with the Xbox Live service, or that the item you’re trying to launch might be faulty
  • 0x80070005 GamePass – As in the case of the previous error variation, this is also a clear issue with the Xbox Live service, or your ISP might have encountered issues.
  • App installation failed with error message: error 0x80070005: opening the package from location microsoft.windows.pchealthcheck_x64.msix failed. (0x80070005) – In this case, the installer can not reach the online resource it needs in order to download and install the service, so it might be an issue with the internet connection.
  • This drive has apps from another device 0x80070005 – This can be caused by issues encountered during the Windows Update process, and the moving or renaming of documents.
  • Microsoft Store 0x80070005 error after reset/update – If you try to download apps from the Store during a Windows update installation, you can trigger further Microsoft Store errors such as stop code 0x80D03805).

How do I fix error code 0x80070005 in Microsoft Store?

Before we head down the complex solutions to fix Microsoft Store 0x80070005 error, here are a few quick workarounds that may do the trick for you:

  • Restart the computer.
  • Make sure you have the correct date and time set on the computer.
  • Access Microsoft Store through another Microsoft Account if you are currently using a local one.
  • Disable third-party antivirus or other security/privacy apps. If that works, we recommend you switch to another effective third-party antivirus that doesn’t conflict with the OS.

If these don’t work, check the next section for more solutions.

1. Gain complete control over the Packages folder

    One of the solutions that worked for people who faced Microsoft Store 0x80070005 error before was gaining complete control over the Packages folder in AppData.

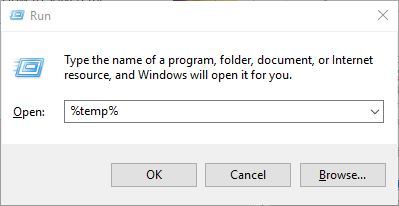
  1. 1. Press Windows + R to open Run, type %localappdata%, and press Enter.

    windows-10-store-error-0x80070005
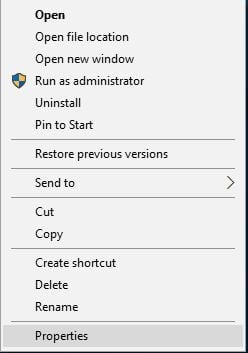
  2. 2. Now, find the Packages folder, right-click on it, and go to Properties.

    properties to fix microsoft store 0x80070005
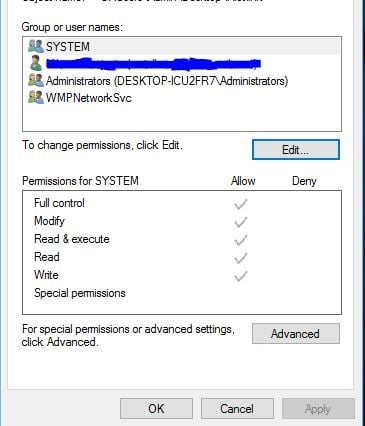
  3. 3. Go to the Security tab, and click on Advanced.

    windows-10-store-error-0x80070005
  4. 4. Now, click on Add.

    windows-10-store-error-0x80070005
  5. 5. Click Select a principal.

    select a principal to fix microsoft store 0x80070005
  6. 6. Next, enter PC Name/Users in the text field while replacing PC Name with the one for your computer, and then click on Check Names.

    windows-10-store-error-0x80070005
  7. 7. Now, click on OK.

    save changes to fix microsoft store 0x80070005
  8. 8. Tick the checkbox for Full control and then click OK at the bottom.

    full control to fix microsoft store 0x80070005
  9. 9. Save changes on all the previous windows for these to apply.

  10. 10. Once done, reboot your computer.

2. Restart critical services

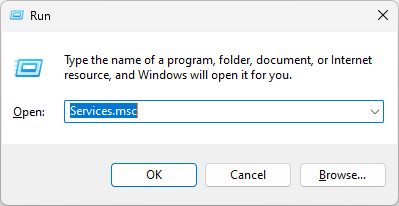
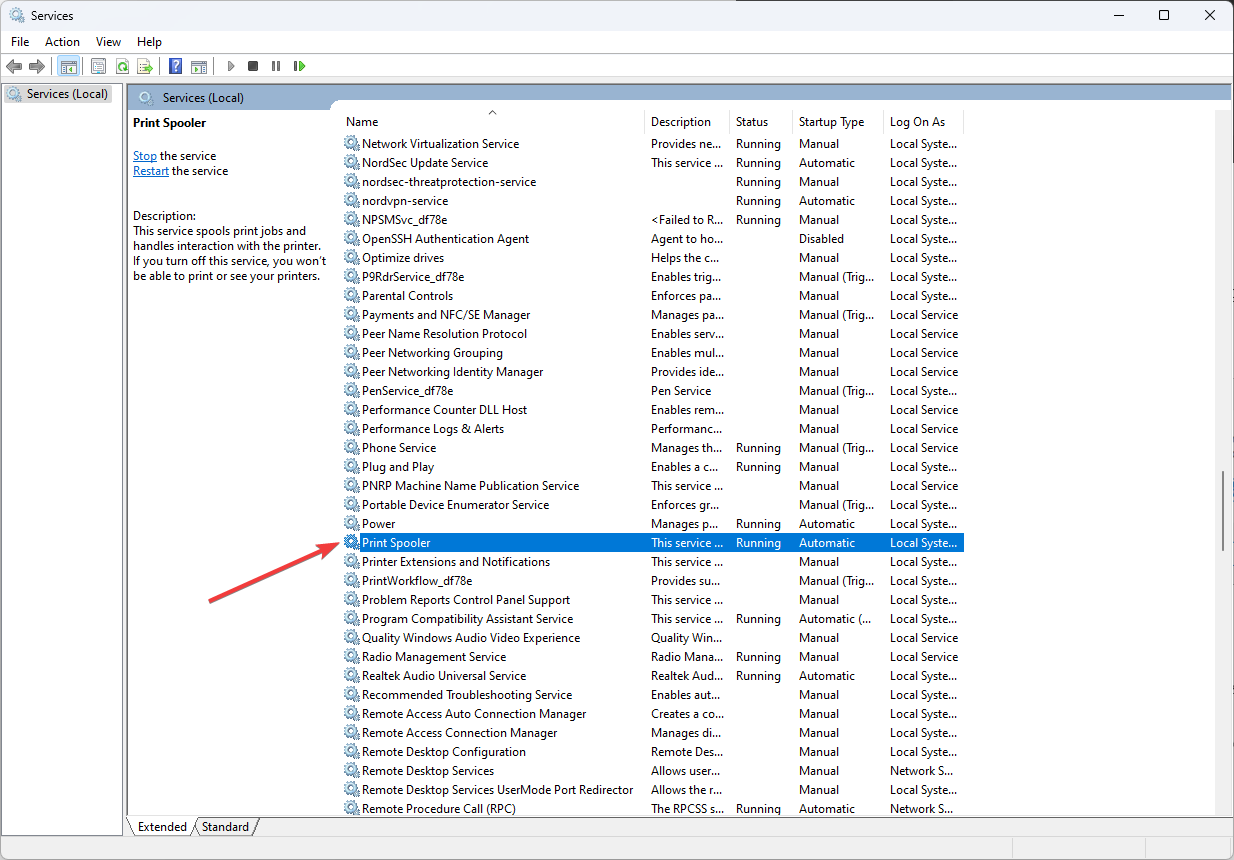
  1. Press Windows + R to open Run, type services.msc in the text field, and click OK.services.msc
  2. Locate the Background Intelligent Transfer Service, right-click on it and select Stop.stop services to fix microsoft store 0x80070005
  3. Similarly, stop the Sysmain and Windows Update service if these two are running.
  4. Next, press Windows + E to open File Explorer, paste the following path in the address bar, and hit Enter: C:\Windows\SoftwareDistribution\Downloadfile explorer
  5. Now, press Ctrl + A to select all the files and hit Del.delete files to fix microsoft store 0x80070005
  6. Once done, head back to the Services window, right-click individually on the services you disabled earlier, and select Start. Make sure to enable all three:
    • Background Intelligent Transfer Service
    • Sysmain
    • Windows Updatestart services
  7. Finally, reboot the computer.

This is a proven solution for the Microsoft Store 0x80070005 error and has helped many fix the problem. So, we recommend you try it early and see if things improve.

3. Reset the Microsoft Store cache

  1. Press Windows + R to open Run, type wsreset.exe in the text field, and hit Enter.wsreset.exe to fix microsoft store 0x80070005
  2. Now, wait for the process to complete. Microsoft Store will automatically launch after the reset.

4. Reset the Microsoft Store app

  1. Press Windows + I to open Settings and select Apps from the left.apps
  2. Click on Installed apps on the right.installed apps
  3. Locate Microsoft Store, click on the ellipsis next to it, and select Advanced options.advanced options to fix microsoft store 0x80070005
  4. Scroll down and click on the Reset button.reset to fix microsoft store 0x80070005
  5. Again, click Reset in the confirmation prompt.Reset

If resetting the cache doesn’t work, you can revert everything to default by resetting the Microsoft Store app. Once done, verify if the Microsoft Store 0x80070005 error is resolved, which it should, in all likelihood, by now.

5. Run the built-in Windows Troubleshooter

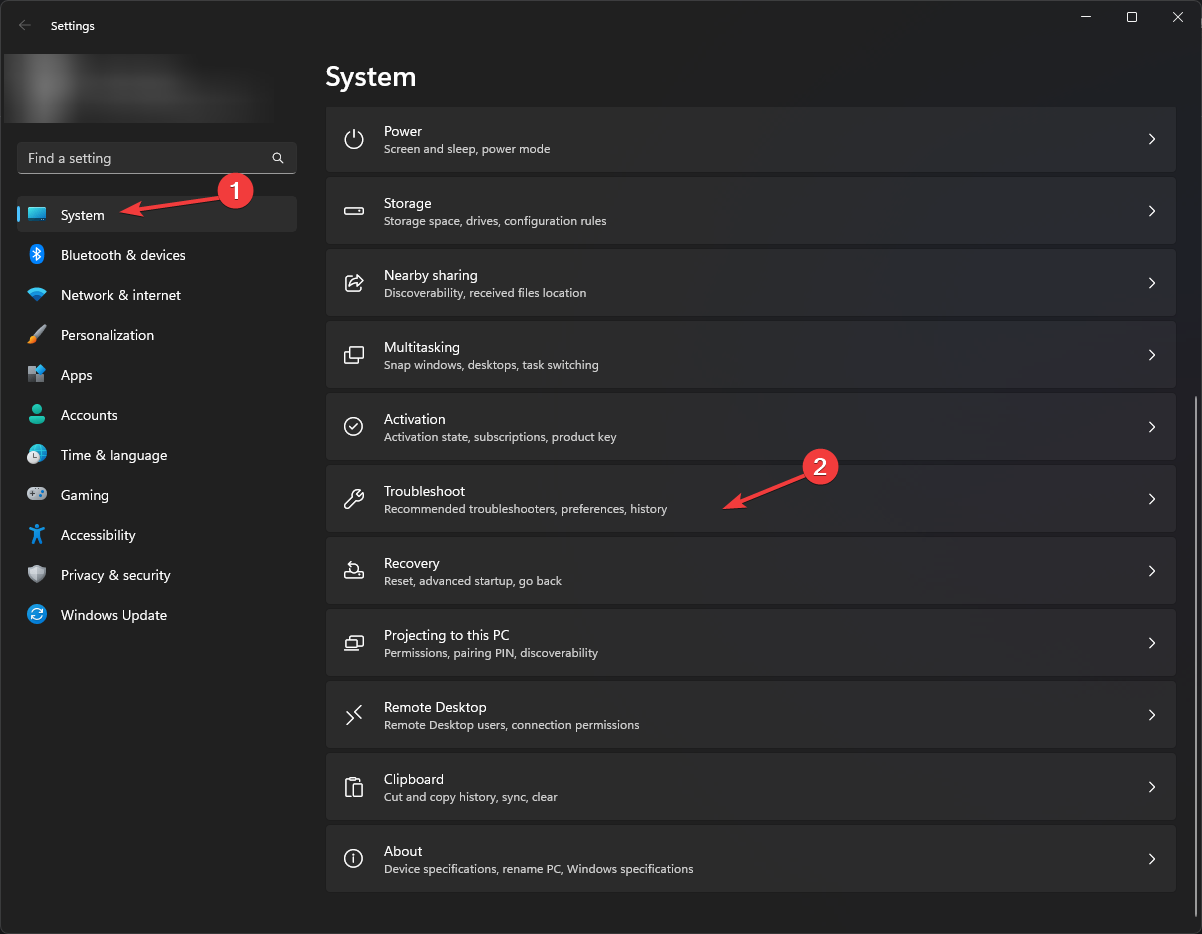
  1. Press Windows + I to open Settings, and click on Troubleshoot on the right.troubleshoot to fix microsoft store 0x80070005
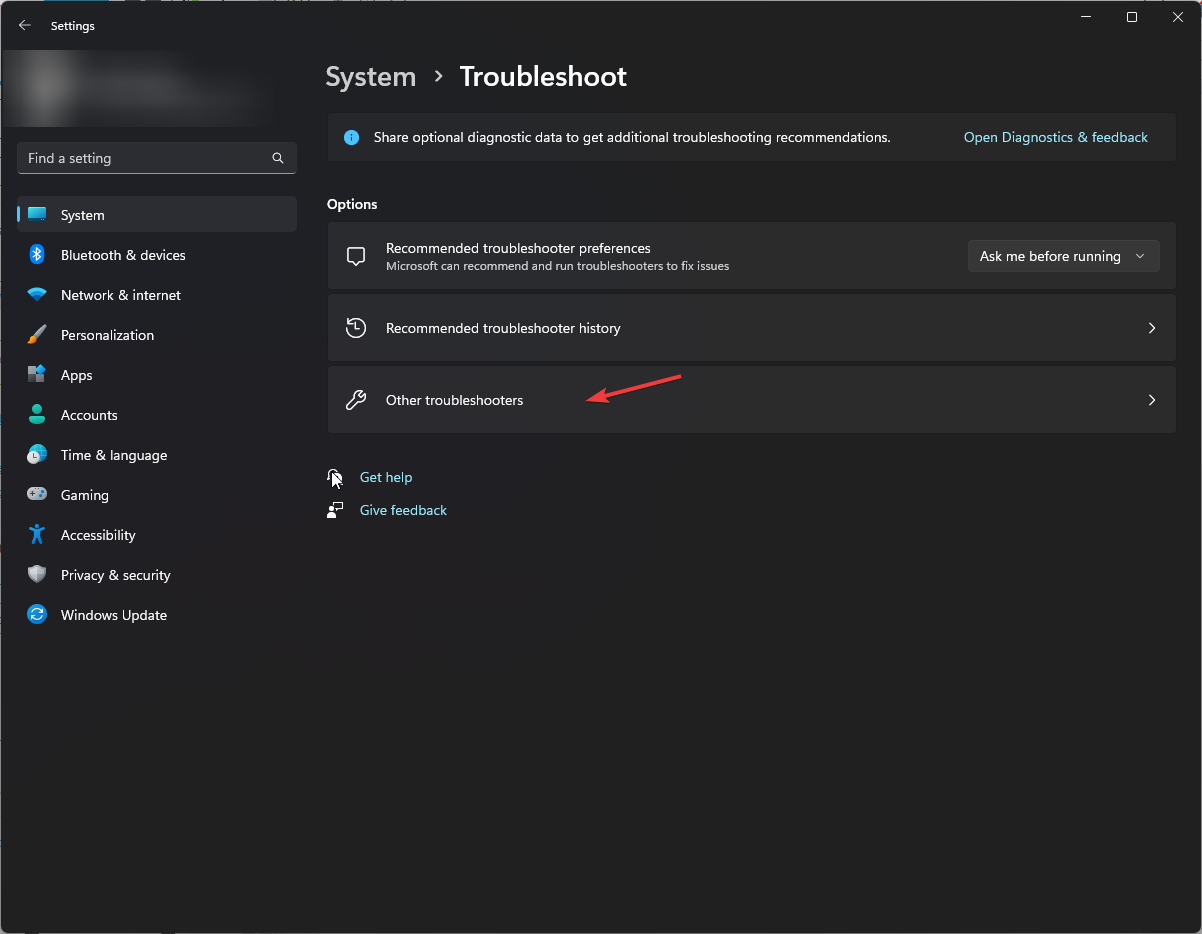
  2. Select Other troubleshooters.additional troubleshooters
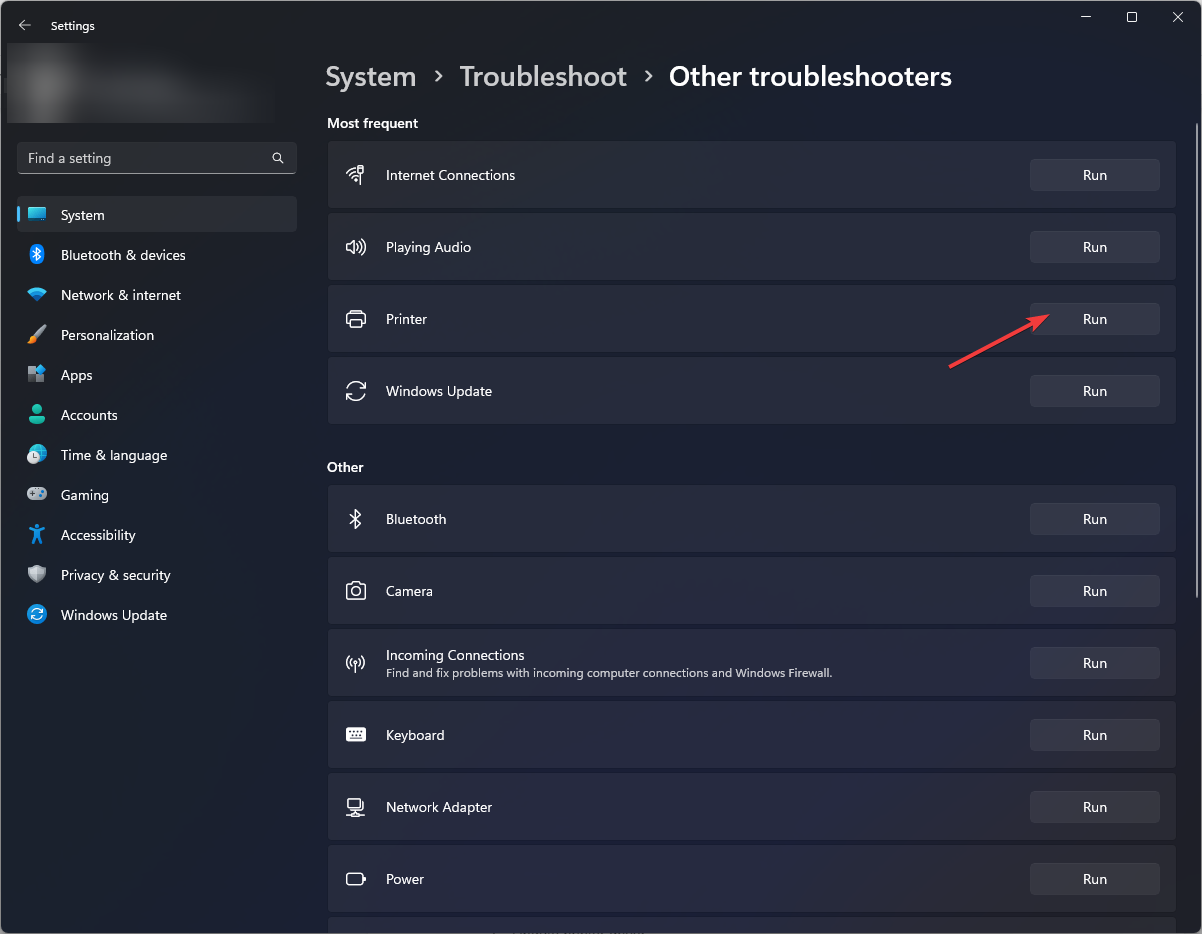
  3. Now, locate the Windows Store Apps troubleshooter and click on the Run button next to it.run troubleshooter to fix microsoft store 0x80070005
  4. Follow the on-screen instructions and choose the necessary response when prompted to complete the process.

6. Use a third-party repair app

Being plagued by errors while using your device can be pretty irritating, so you need a program that keeps your system healthy.

A third-party repair app will keep your computer files in pristine condition and stop malware from ruining your system.

7. Update Windows

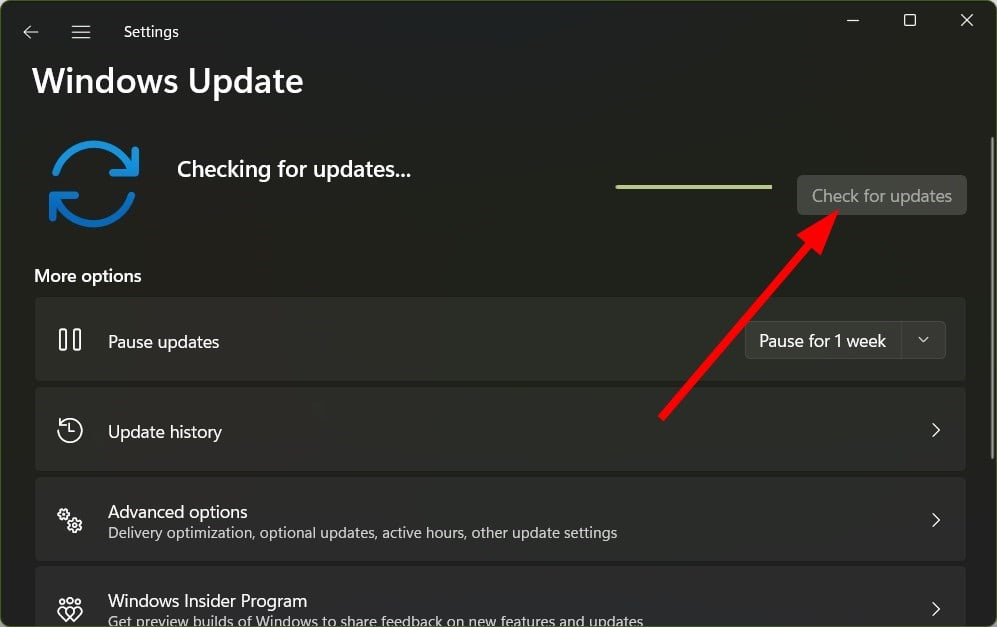
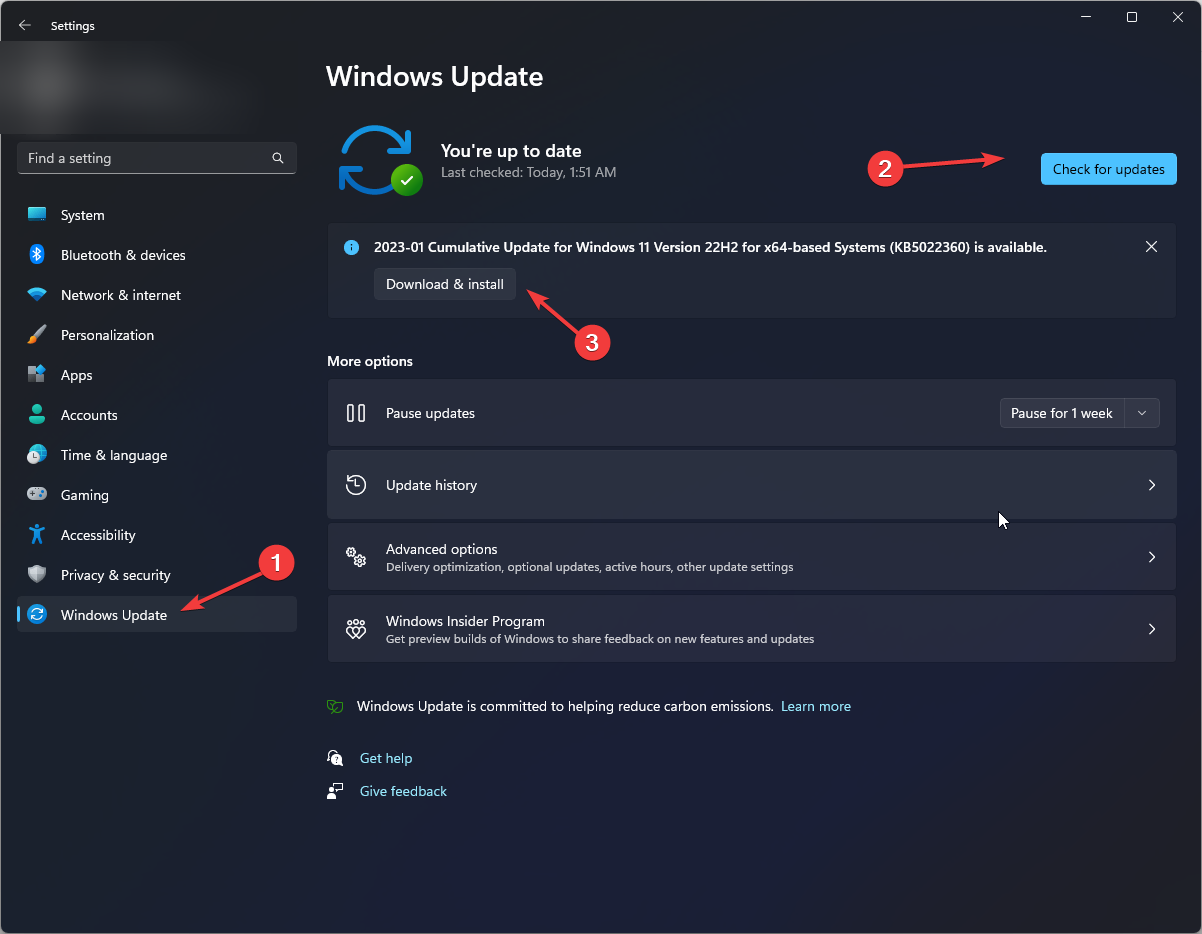
  1. Press Windows + I to launch Settings and select Windows Update from the navigation pane.windows update
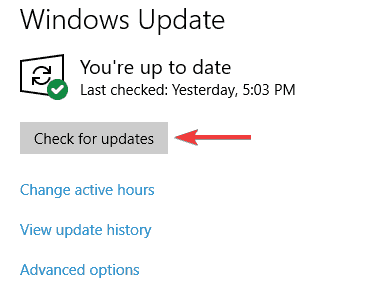
  2. Now, click on Check for updates on the right.check for updates
  3. If any updates are listed after the scan, click on Download & install to get them.download & install to fix microsoft store 0x80070005
  4. Once done, restart the computer for the new version to complete the installation, then check whether the Microsoft Store error 0x80070005 is gone.

How do I open Microsoft Store as an administrator?

You cannot open Microsoft Store, or any UWP (Universal Windows Platform) app for that matter, as an administrator.

This is a part of a security feature to ensure that your data or other critical parts of the OS are not compromised.

Can I reinstall Microsoft Store?

Yes, you can reinstall Microsoft Store and the seamless process. All you have to do is run an elevated Windows PowerShell and execute the following command: Get-AppxPackage -allusers Microsoft.WindowsStore | Foreach {Add-AppxPackage -DisableDevelopmentMode -Register "$($_.InstallLocation)\AppXManifest.xml"}

But remember, you cannot uninstall Microsoft Store in Windows. So even if you find a third-party tool that does the job, Microsoft recommends against it since the only way to get back the application would be to reinstall the OS.

If you’re running an outdated Windows version, this may explain why you’re getting the Microsoft Store 0x80070005 error. First, update the OS and then check if the problem persists.

Microsoft regularly rolls out updates to improve the operating system’s stability and fix the bugs reported by users.

Perhaps the latest Windows updates feature dedicated Microsoft Store improvements and patches that could help you fix the Microsoft Store 0x80070005 error.

That’s about it for this article. We hope all of these solutions helped you solve the error message. Also, find out the best offline games on Microsoft Store to play today!

Feel free to share any feedback regarding the subject in the comment section below.

Error 0x80004005: 8 Expert Tips to Fix the Unspecified Error

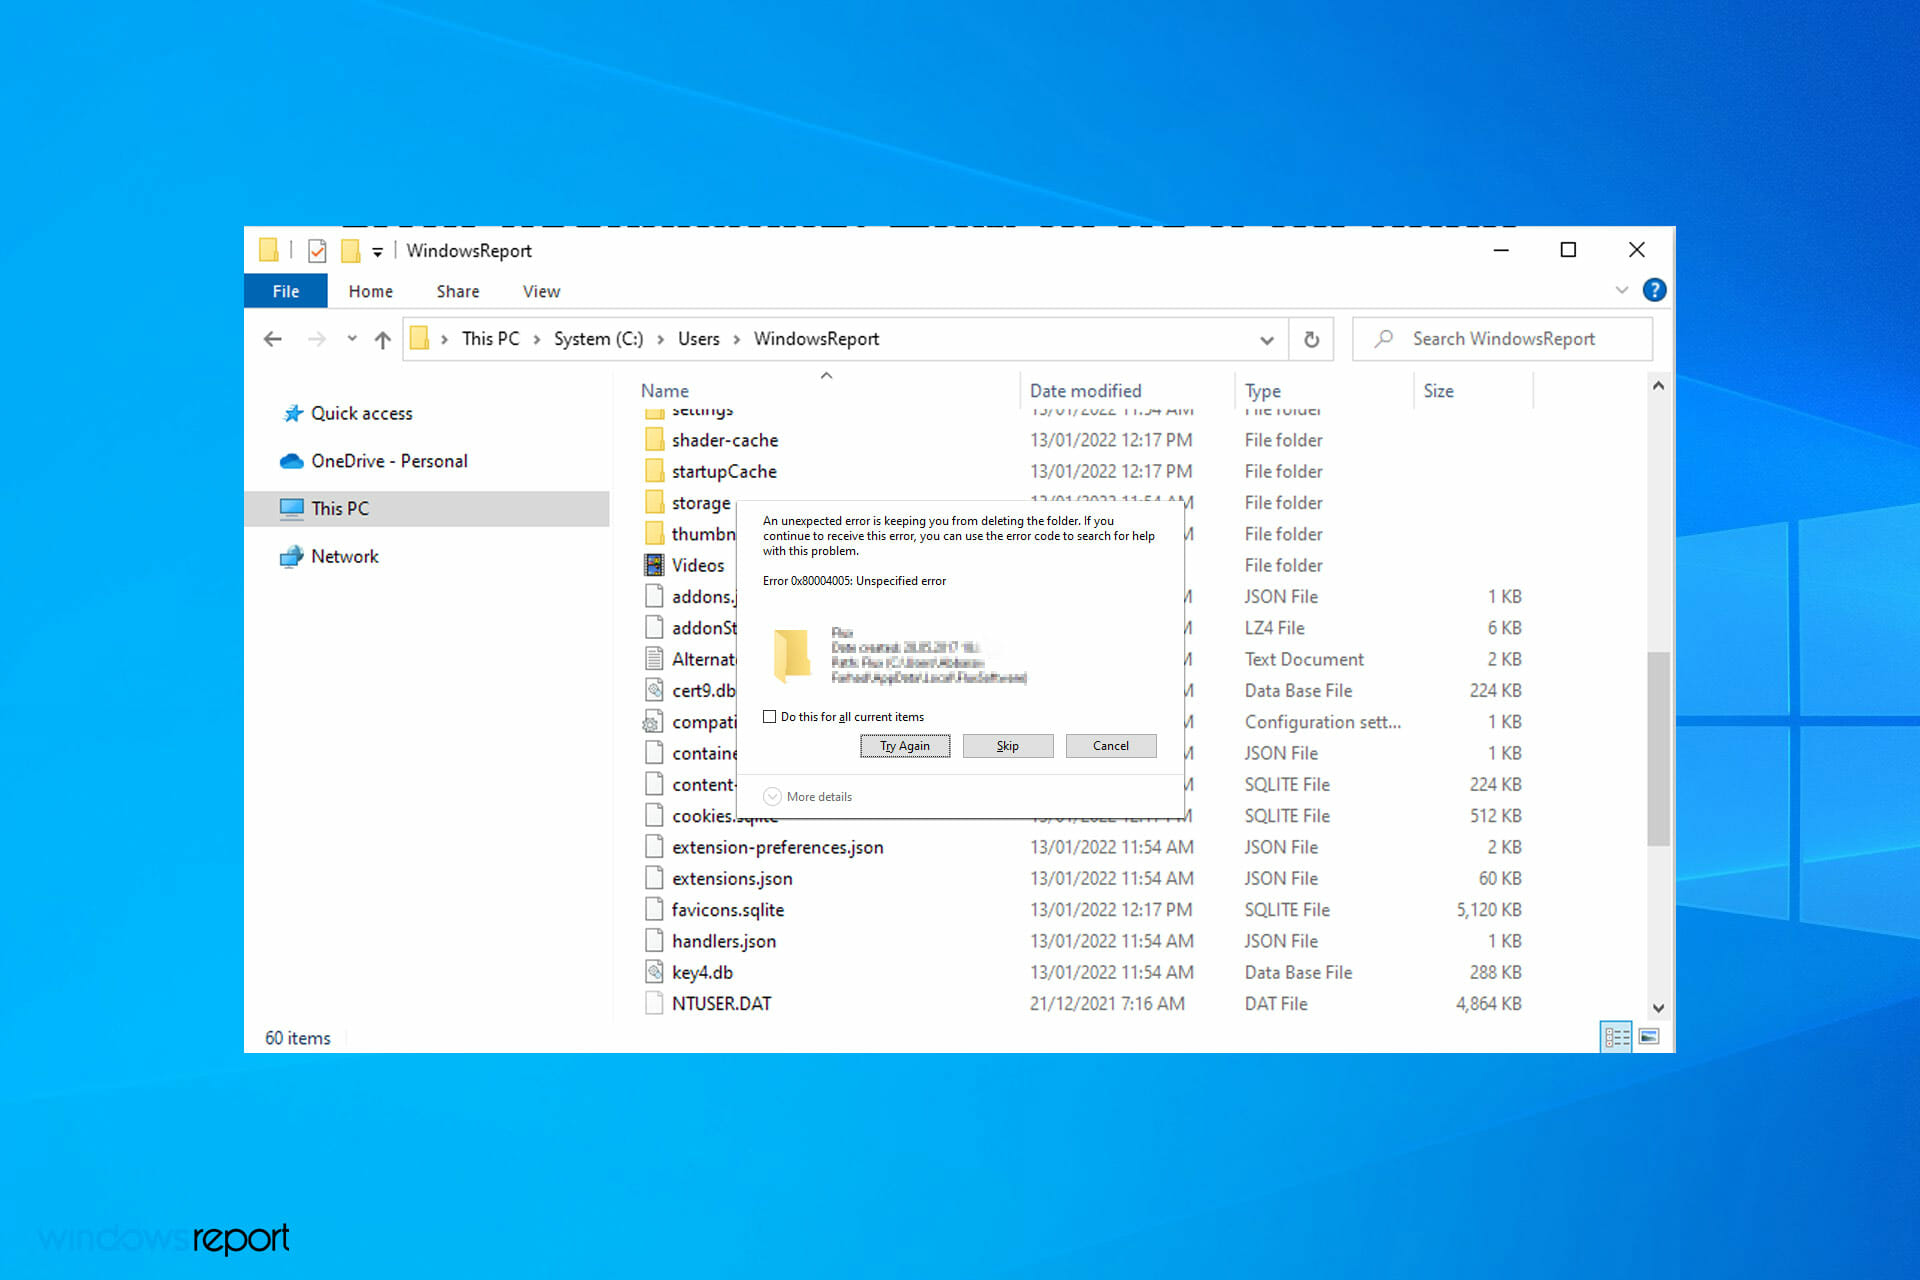
When the Error 0x80004005: Unspecified occurs, a dialog box window pops up stating: An unexpected error is keeping you from renaming (or copying or deleting) the folder.

If you’re getting this error, keep reading. Our team figured out exactly what you need to know to fix it in no time.

How do I fix error 0x80004005?

1. Run the Windows Update troubleshooter

  1. Press the Windows key + I and select the Update & Security option.
    update and error 0x80004005
  2. Click Troubleshoot in the left pane and select Additional troubleshooters.
    troubleshoot
  3. Now, select the Windows Update option and click Run the troubleshooter.
    run the

If you face the error code 0x80004005 while trying to update your PC, the first thing to do is run the built-in troubleshooter. This will clear up the possible cause of the problem and restart the required services.

2. Install the Windows update manually

  1. Go to the Microsoft Catalog website and search for the problematic update.
    search error 0x80004005
  2. Click the Download button before the update and wait for the process to complete.
    download
  3. Finally, double-click the downloaded update and follow the onscreen instructions to complete the installation.

Another way around the error code 0x80004005 while trying to update your PC is to do it manually.

3. Open the File and Folder Troubleshooter

  1. Download Windows file and folder troubleshooter.
  2. Then open the File and Folder Troubleshooter from the folder you saved it to.
  3. Click Advanced and select the Apply repairs automatically option.
  4. Then press the Next button.
  5. Select one of the options shown in the snapshot below, and then press the Next button.

4. Run a System File Checker scan

    This next solution gives you a practical tool to identify and repair system errors like the error 0x80004005 only by using the built-in tool PowerShell.

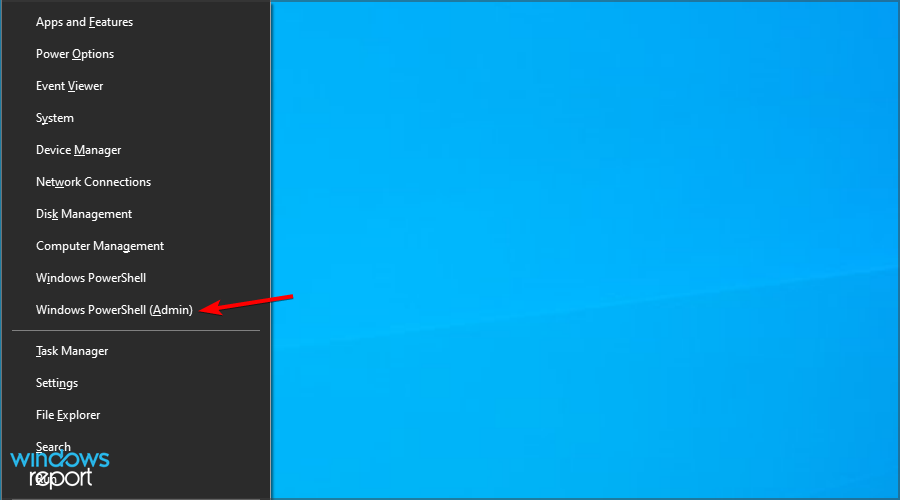
  1. 1.Press the Windows key + X and choose Windows PowerShell (Admin).

  2. 2. Run the following command:DISM.exe /Online /Cleanup-image /Restorehealth


    dism scan health
  3. 3. Now run this command:sfc /scannow


  4. 4. The SFC scan might take about 20-30 minutes to complete. Restart your desktop or laptop if the scan does repair a file.

If you’re having issues completing this process, check our guide on what to do if DISM fails on your PC.

You can use a dedicated repair program to scan your PC extensively for any issues and try to fix or replace each broken element.

5. Take ownership of the folder

  1. Locate the directory that is giving you this error. Right-click it and choose Properties.
  2. Navigate to the Security section and click on Advanced.
  3. Click on Change next to the Owner name.
  4. In the Enter the object name to select enter the name of your user account. Click on Check names and OK.
  5. Now check Replace owner on subcontainers and objects and click on Apply and OK.

If you failed to open a file due to the 0x80004005 unspecified error, it might be because you have the required privileges. In this case, taking ownership of the files should solve the issue.

6. Clean boot Windows

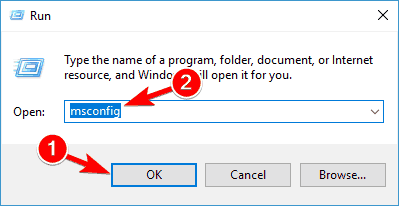
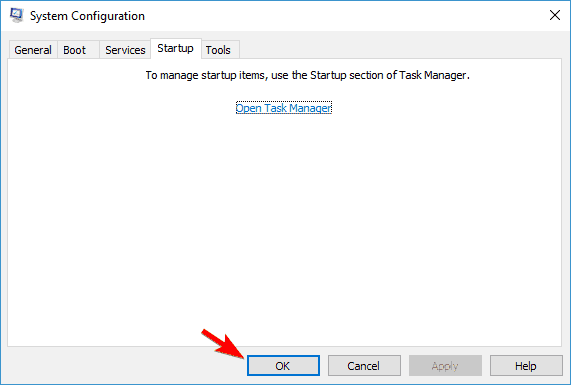
  1. First, open the Run accessory with the Windows key + R hotkey and enter msconfig.
  2. Select the Selective startup option on the General tab. Deselect the Load startup items checkbox.
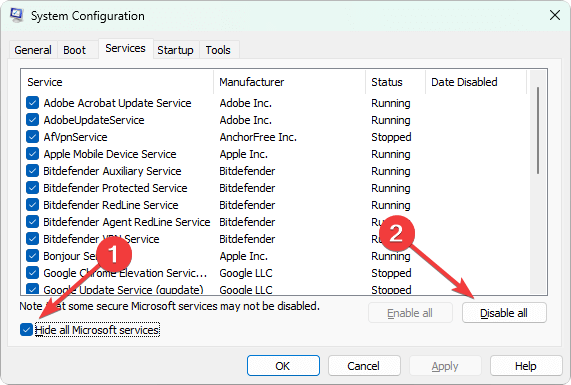
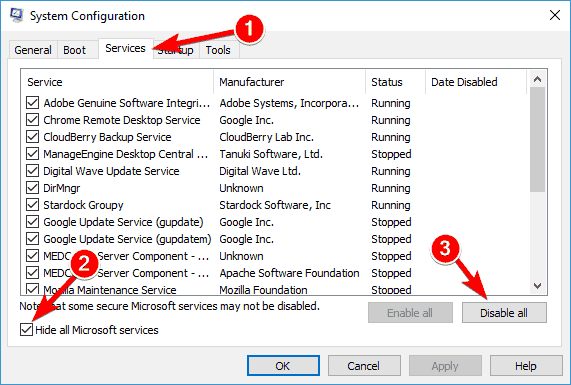
  3. Navigate to the Services tab and click the Hide all Microsoft services checkbox. Press the Disable all button. Now click Apply and OK.
  4. Press the Restart button on the System Configuration dialog box that opens.

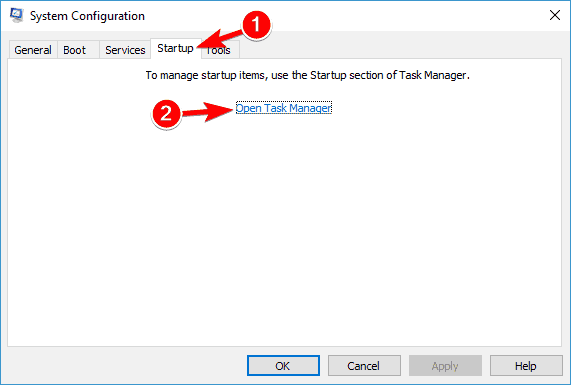
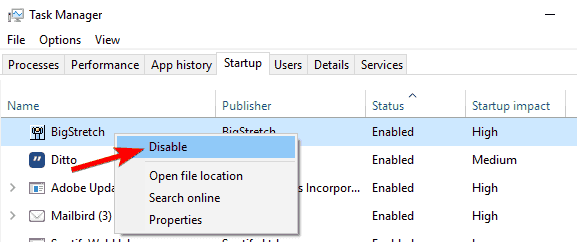
After doing that, check if you still get the 0x80004005 unspecified error when logging in on Windows 10. If you want, you can enable services one by one until you manage to find the cause of the problem.

For more information on this subject, check our guide on how to remove startup apps.

7. Edit the folder’s name via PowerShell

  1. Press the Windows key + X and choose Windows PowerShell (Admin).
  2. Navigate to the folder by using the cd command. In our example we used this command:
    cd C:\Users\WindowsReport\Music\
  3. Now use the ren command like this: ren WindowsReport WindowsReport_new
  4. After renaming the directory, check if the problem is resolved.

8. Use a different user account

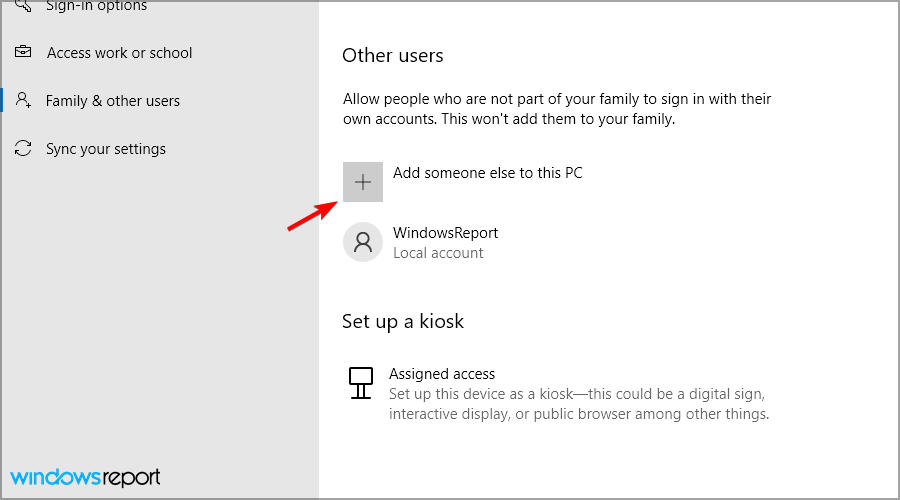
  1. Press the Windows key + S and enter users. Select Add, edit, or remove other users.
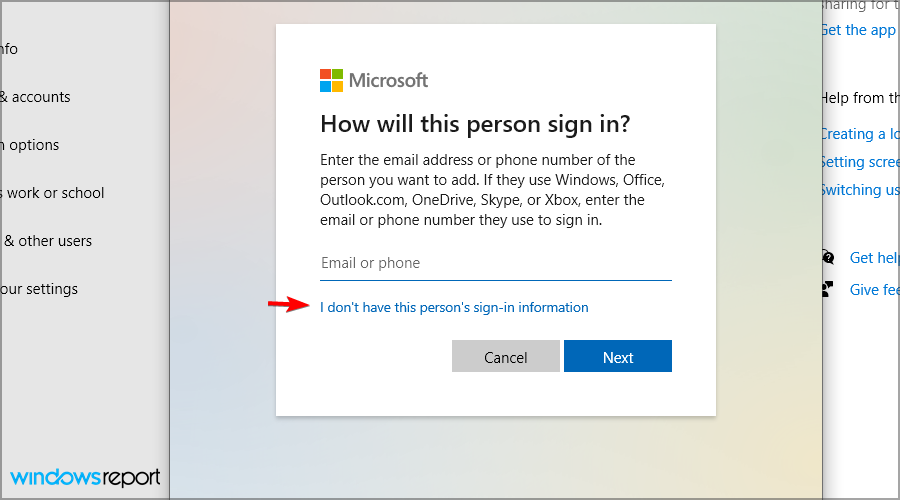
  2. Choose Add someone else to this PC.
  3. Select I don’t have this person’s sign-in information.
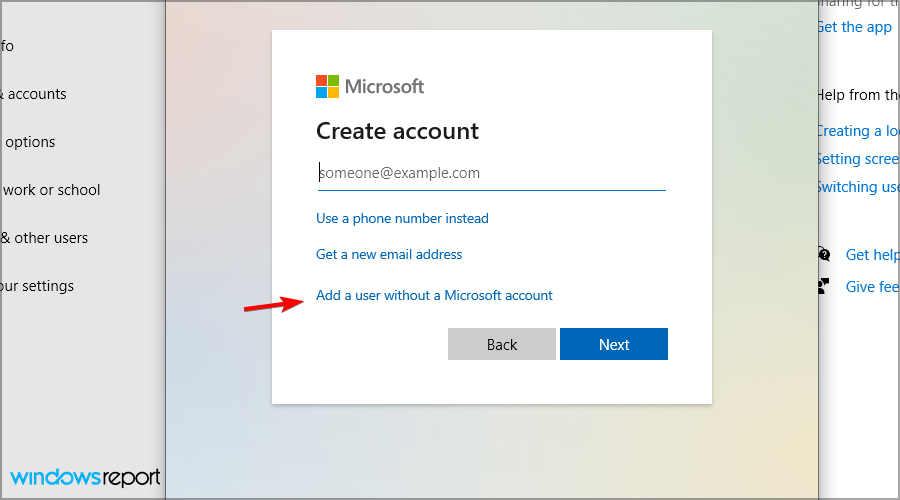
  4. Select Add a user without a Microsoft account.
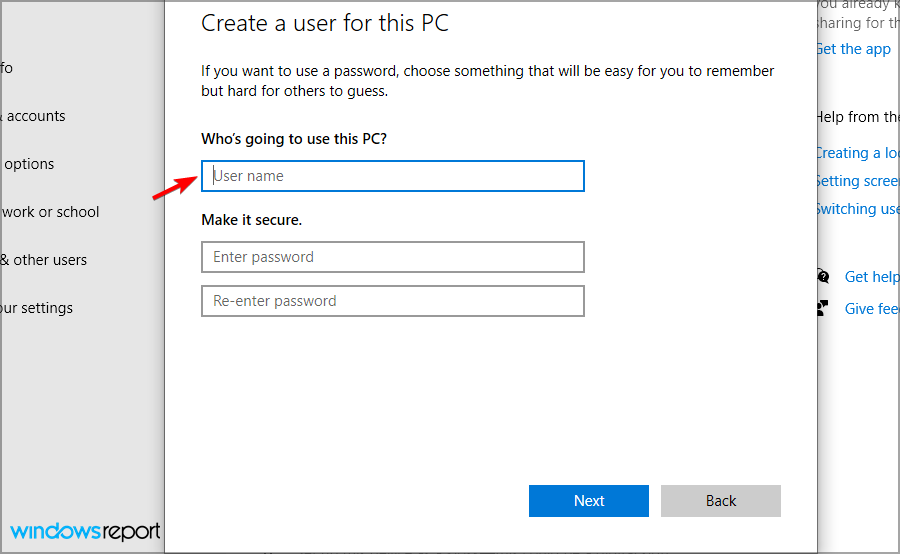
  5. Enter the desired user name for the new account.
  6. Switch to the new account and check if the problem is resolved.

What is 0x80004005 unspecified error?

An Unspecified Error usually means that the underlying cause of the error is unknown or cannot be identified by the computer. In some cases, you may get an Unspecified Error, while Windows lists the problem in others.

Below are some of the causes of this issue:

  • Corrupt system files – When you get the 0x80004005 unspecified error while trying to copy files or at login, it might be down to broken or corrupt system files. You must restore and repair these system files to get past this issue.
  • Lack of ownership – To open or edit some files and folders, you need ownership. In this case, you need to take ownership of this file to fix the issue.
  • Interference from third-party apps – Sometimes, it might be a third-party app, like an antivirus, preventing you from opening a file, leading to the 0x80004005 error. The best way to circumvent this is to perform a clean boot.
  • Issues with the user account – Glitches with your user account might be the cause of this issue at times. To know for sure, create a new account and repeat the task that brought about this error code.

Also, it is important to mention that there are different variations of this issue, as shown below:

  • 0x80004005 Ethernet – This has to do with your network settings and connection. A quick way around this is to run the network troubleshooter.
  • Parser returned error 0x80004005 – This is a variation of the issue that shows up on Startup. You can fix it by performing a clean boot.
  • 0x80004005 SQL – This issue has been reported to show up when users try to install a custom instance of an SQL server.
  • Visual Studio error code 0x80004005 – In this case, a system file is broken or missing.
  • Error 2147500037 0x80004005 and 0x80004005 SCCM are also reported by users, yet the below solutions are just what you need.
  • […] has failed with the error code 0x80004005 in the task sequence step, unspecified error Windows 10 login – Run the SFC scan in order to solve any system file conflicts or corruption.
  • Error 0x80004005 unzip – Take ownership of the folder, or run this command as an administrator.
  • Error 0x80004005 while sharing a folder – Clean boot Windows in order to fix this.
  • Error 0x80004005 ZIP file – Many times, this error appears when you’re trying to unarchive a ZIP file, and it requires a password.
  • Error 0x80004005 Outlook – This error might appear out of nowhere when using the Outlook email client, but one of the solutions below will help you fix it as well.

Now that we know about all causes and variations of this error, let’s fix it using the solutions below.

How can I fix error code 0x80004005: Unspecified error in Windows 11?

Disable your antivirus

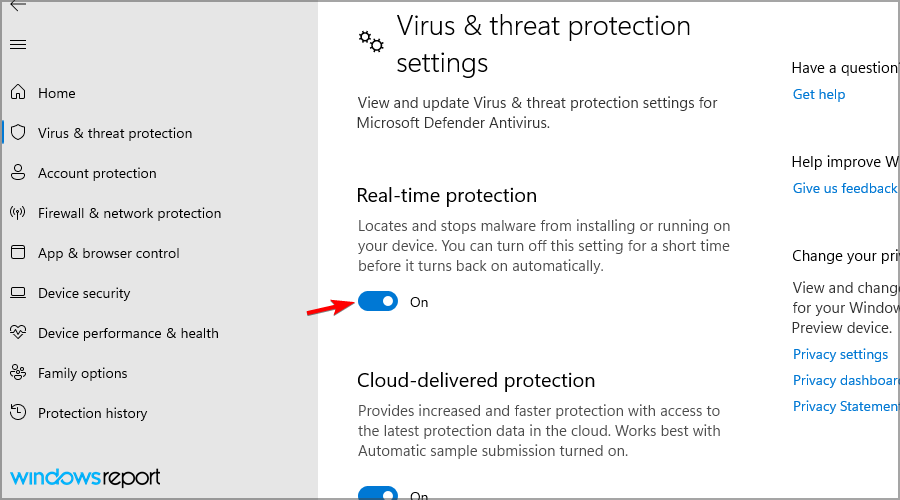
  1. Press Windows key + S and type defender. Select Windows Security from the list of results.
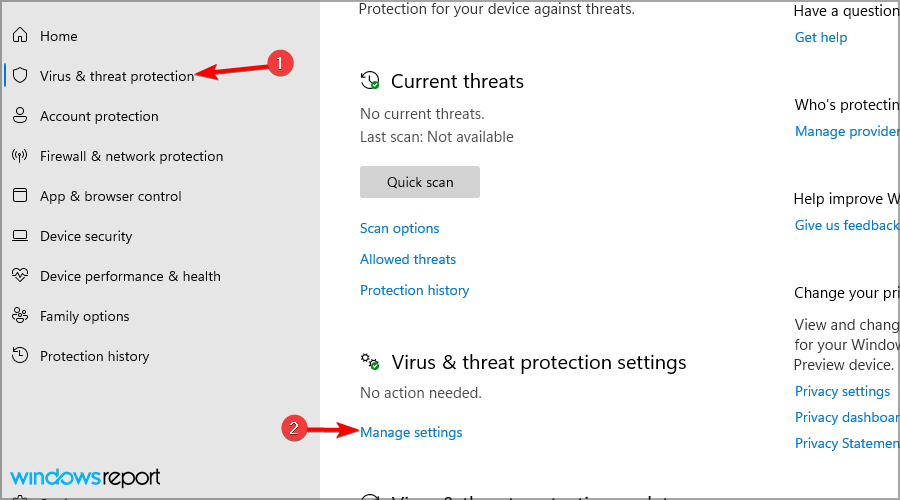
  2. Navigate to Virus & threat protection and click on Manage settings.
  3. Disable Real-time protection.

Keep in mind that the steps mentioned in this solution apply only to Windows Defender. If you’re using a different antivirus, you’ll have to use different methods to disable it.

Note icon NOTE
Disabling your antivirus isn’t advised as a long-term solution, so be sure to turn it back on.

Some of those resolutions will probably fix the 0x80004005 Unspecified error that pops up when users delete, rename, copy, or extract folders and files within File Explorer.

If the issue is still there, be sure to visit our guide on what to do if Windows won’t let you access your files.

If you have any other questions, please leave them in the comments section below.

PowerToys’ new Mouse Jump utility will improve navigation across big screens

Microsoft is working toward incorporating a neat utility tool dubbed Mouse Jump to PowerToys which is based on FancyMouse. The feature will enhance navigation for users as mouse movements across large and high-resolution screens will be swift rather than having to scroll down several times thus helping you stay on track.

Michael Clayton, the developer further explained that:

On a modern laptop that uses an Ultra-Wide external monitor you could easily have a desktop in the region of 8000+ pixels wide, and that’s a lot of ground for your mouse to cover.

What tends to happen is you end up swiping the physical mouse as far as it will go, then lifting, moving back to the start and swiping again – sometimes half a dozen times just to get to the other side of the screen. During this process you quite often lose track of where the mouse is and spend precious seconds trying to find it again.

The developer further indicated that the utility is “functional and ready” for its first design review, however, there are certain aspects of the tool that still require a bit of refinement before it is released.

To access this feature “a hotkey or spare mouse button can be configured to activate the FancyMouse popup, and the pointer only needs to be moved a tiny amount on the preview thumbnail. A single mouse click then teleports the pointer to that location on the full-size desktop. The visual cue tells you exactly where the pointer will end up so you can find it easily without needing to search for it.”

This feature will probably hit broad availability in the future via an update. Be sure to also check out Microsoft Powertoys’ January update that shipped with self-contained .NET 7 in case you missed it.

via: Neowin

How to Fix Windows Cannot Find Uninstall.exe File Error

Just encountered the Windows cannot find uninstall.exe file? The .EXE file type allows you to run (execute) a program or to install a new app on your PC If you cannot find uninstall.exe on your Windows PC, it’s likely due to a corrupted installation, accidental deletion, or hidden files. Here’s how to locate or recreate it and safely remove the program.

Why can’t I uninstall a program on my computer?

Some of them reported that the error occurs when trying to uninstall almost any kind of program. The most commonly received message opens in a dialogue pop-up window with the message Windows couldn’t uninstall the app because we couldn’t locate the file filename.exe.

There are a few reasons you might not be able to uninstall a program on your computer. Here are some causes you should keep in mind:

  • Permissions issues – If you are not the computer administrator, you may not have the required permissions to uninstall the program.
  • Uninstaller compatibility issues – Try using the built-in uninstaller for the program. Most programs have their uninstaller that can be accessed through the Control Panel.
  • Corrupt system or app files – The program you try to uninstall may get corrupted or stuck.

These are the most common triggers, but you should find some success using the solutions we recommend.

How do you uninstall if there is no uninstall exe?

Before you go into any complex fixes:

  • We recommend restarting the device. A reboot will force some difficult processes to end and may be the best way of solving an uninstallation problem.

1. Use Programs and features

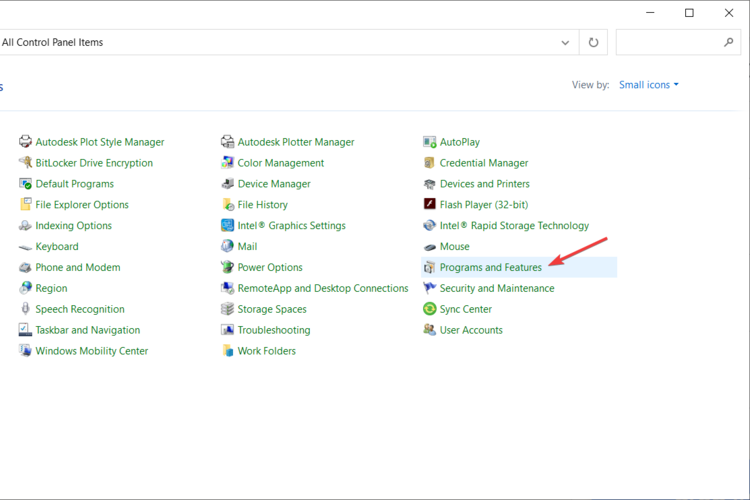
  1. Click on Search, type Control Panel, and select the application.
  2. Click on the Programs and Features option.
  3. Search for the app you want to remove.
  4. Right-click on it and go to Uninstall.

2. Uninstall from Apps and features

  1. Click on Start and select the Settings icon.
  2. Click on the Apps button.
  3. On the left pane, click on Apps and features.
    windows cannot find uninstall.exe file
  4. Search for the program you want to remove from the list, click on it and select Uninstall.

3. Use third-party software

  1. Open Revo Uninstaller; you may do this by searching for revo and selecting the app’s Open option.
  2. Go to the Uninstaller button.

  3. Double-click on the program you want to remove, and after the window opens, click Continue.
  4. Click on the Scan (notice you can select the scanning mode level).

One more efficient way that allows you to uninstall your programs is using third-party software instead of wasting time with other programs and features.

This time, we recommend Revo Uninstaller as a saver for our issue.

Revo Uninstaller Pro

If you need an efficient alternative for when your built-in uninstaller fails, we strongly recommend Revo Uninstaller Pro.
Free trial Visit website

4. Use the SFC scan

  1. Press the Windows key to open the Windows Search box.
  2. Type cmd in the search box and click on Run as Administrator to open an elevated Command Prompt window.
    windows cannot find uninstall.exe file
  3. Input the following command and hit Enter:
    sfc /scannow

Those are just a few recommended solutions to help you fix Windows that cannot find uninstall.exe file error.

We have not written the solutions in any particular order and suggest you try what seems the most appropriate to your case.

You might also be interested in checking our selection of the best uninstaller software for your PC.

If you have any additional questions or need additional information, please don’t hesitate to contact us using the comments below.

Microsoft Edge will let you launch PWAs directly from the address bar

Microsoft is currently testing a new feature in its browser Edge. The feature will allow users to open PWAs directly from the address bar as first spotted by Leopeva64-2 on Reddit.

If you have a website installed as an app on your device, Edge’s suggestion dropdown list in the address bar will now feature an option that will let you open the site in the app. Here’s an illustration of how this neat feature works:

Microsoft Edge will allow you to launch web applications directly from the address bar

The feature is currently available to users using the Canary version of the browser. Aside from the new capability, Canary users also have access to a new “Install app” button in the address bar which is in place to facilitate quick installation of web apps.

In related news, Microsoft is also working on a new version of Edge dubbed Phoenix as well as a new capability that will allow users to split one tab into two windows. Share your thoughts with us below.


How to Set Opera GX as Default Browser on Your PC

Opera GX is one of the best gaming and all-purpose browser. Here’s how to set Opera GX the default browser on your Windows machine.

How can I set Opera GX as default browser?

1. Click Opera’s Make Default option

  1. Launch Opera.
  2. Click the O at the top left of Opera and select the Settings option.settings opera menu
  3. Scroll down to the Make opera the default browser option and click the Make default button.make default opera settings
  1. First, press the Windows key + I hotkey, which will open Settings.
  2. Next, select Apps, then choose Default apps.
  3. Scroll down and click on Choose default apps by link type.
  4. Then click the HTTP and HTTPS protocols there, and select Opera GX as default.

After you change the default settings, any HTTP or HTTPS link will be opened by default with the Opera GX browser. You may also do that by choosing Choose defaults by file type and find http and https on the list.

3. Reinstall Opera

  1. Click the Start button and go to Settings.
  2. Select Apps, and click on Installed apps.
  3. Look for all the Opera versions installed, click on them, and select Uninstall.
  4. Go to the Opera GX dedicated webpage and hit the Download Opera GX button.
  5. Run the installer and install the correct version for your system. Also, install the browser for all users of the Windows device and select the option to make it default.

Many users reported that they can’t set Opera as the default browser on Windows 11, and this isn’t uncommon since Windows 11 works differently than 10.

To see how to overcome this, we have a great guide on how to change the default browser on Windows 11, so don’t miss it.

Feel free to use the comments section below for any other questions or suggestions.

How to Fix Win32kfull.sys BSOD Errors: 9 Guaranteed Methods

The dreaded Blue Screen of Death is one of the most annoying Windows errors. Some BSOD error messages reference the win32kfull.sys file, which is a kernel-mode device driver file. Win32kfull.sys issues can arise when users try to utilize certain hardware devices or software.

This guide is for users affected by the win32kfull.sys BSOD error as here, we have listed some effective solutions that will help you fix the win32kfull.sys error. Let us check out the potential resolutions below.

What causes the win32kfull.sys BSOD error?

Here are a few reasons why you would come across the win32kfull.sys BSOD error on your Windows PC;

  • Outdated drivers: If you don’t have updated drivers installed on your PC, then your system will have a hard time communicating with the hardware, ultimately throwing the Driver Verifier Detected Violation win32kfull BSOD error.
  • Corrupt system files: Any system file that is missing, corrupt, or replaced will result in issues such as the BSOD error.
  • Compromised RAM: The win32kfull.sys BSOD error is also known to be triggered your RAM is compromised or corrupt.
  • Pending Windows Updates: Your PC should always be kept updated to fix the errors because of the previous version and resolve bugs that would trigger multiple issues, including the Windows blue screen win32kfull.sys error.

Note that the solutions below will also fix the win32kfull.sys system_service_exception, win32kfull.sys kernel data in page error, and the win32kfull.sys bsod page_fault_in_nonpaged_area issues.

How can I fix Windows 10’s win32kfull.sys BSOD error?

1. Update drivers

  1. Open the Start menu.
  2. Type Device Manager and open it.
  3. Expand any component, right-click on it, and select Update driver.
  4. Select the Search automatically for updated driver software.
  5. If a driver update is available, your PC will prompt you to install it.

You can follow the above steps to update each of your drivers. This will take time and requires a good chunk of manual input.

Alternatively, you can use a third-party tool called Outbyte Driver Updater, which will update your drivers in just a few clicks. Apart from updating drivers, it can help you create driver backups and also perform scheduled scans.

⇒ Get Outbyte Driver Updater

2. Run a system file scan

  1. Open the Start menu.
  2. Run Command Prompt as an admin.
  3. Type the below command and press Enter: sfc /scannow
  4. Once the process completes, type the following command and press Enter: DISM /Online /Cleanup-Image /RestoreHealth

Windows comes with built-in SFC Scan and DISM tools that will help you to scan corrupt system files or replace the missing ones. You can run a simple command to execute both the system tools and fix corrupt or missing system files.

3. Use a dedicated BSoD repair tool

BSoD causes can be hard to identify and fix, a specialized BSoD repair tool will greatly simplify this whole process. These tools allow you to scan, identify, and replace problematic files with just a few clicks.

Hence, this third-party repair utility will help you fix system errors, BSOD errors, DLL-related issues, and much more. They are easy-to-use programs and will surely help you fix the win32kfull.sys BSOD error.

4. Update Windows 10

  1. Press the Win + I keys to open Settings.
  2. Select Update & Security.
  3. Select Windows Update from the left pane.
  4. Click Check for updates to scan for available updates.
  5. Hit Download and install if there is any available update.
  6. To check out optional updates, click View optional updates.
    Optional updates win32kfull.sys
  7. Select all optional updates listed, and click Download and install.
  8. If there’s a Windows 10 build version you can install, click the Download and install option for it.

5. Check your PC’s RAM

  1. Open the Start menu.
  2. Type memory diagnostic and open the app.Windows Memory Diagnostic win32kfull.sys
  3. Select Restart now and check for problems option.
  4. Windows will boot in the Windows Memory Diagnostics environment, and the tests will start in Standard mode.
  5. After the PC restarts, the win32kfull.sys BSOD error should be fixed.
Note icon NOTE
If the WMD utility detects RAM issues, you’ll probably need to replace RAM modules within your PC to fix the BSOD error.

6. Verify the hard drive with a Chkdsk scan

  1. Open the Start menu.
  2. Run Command Prompt as an admin.
  3. Type the below command and press Enter: chkdsk /r c:The chkdsk command win32kfull.sys
  4. After the process completes, restart your PC.

7. Uninstall the Windows 10 KB5000802 update

  1. Press the Win + I keys to open Settings.
  2. Select Update & Security.
  3. Click the View Update history option.
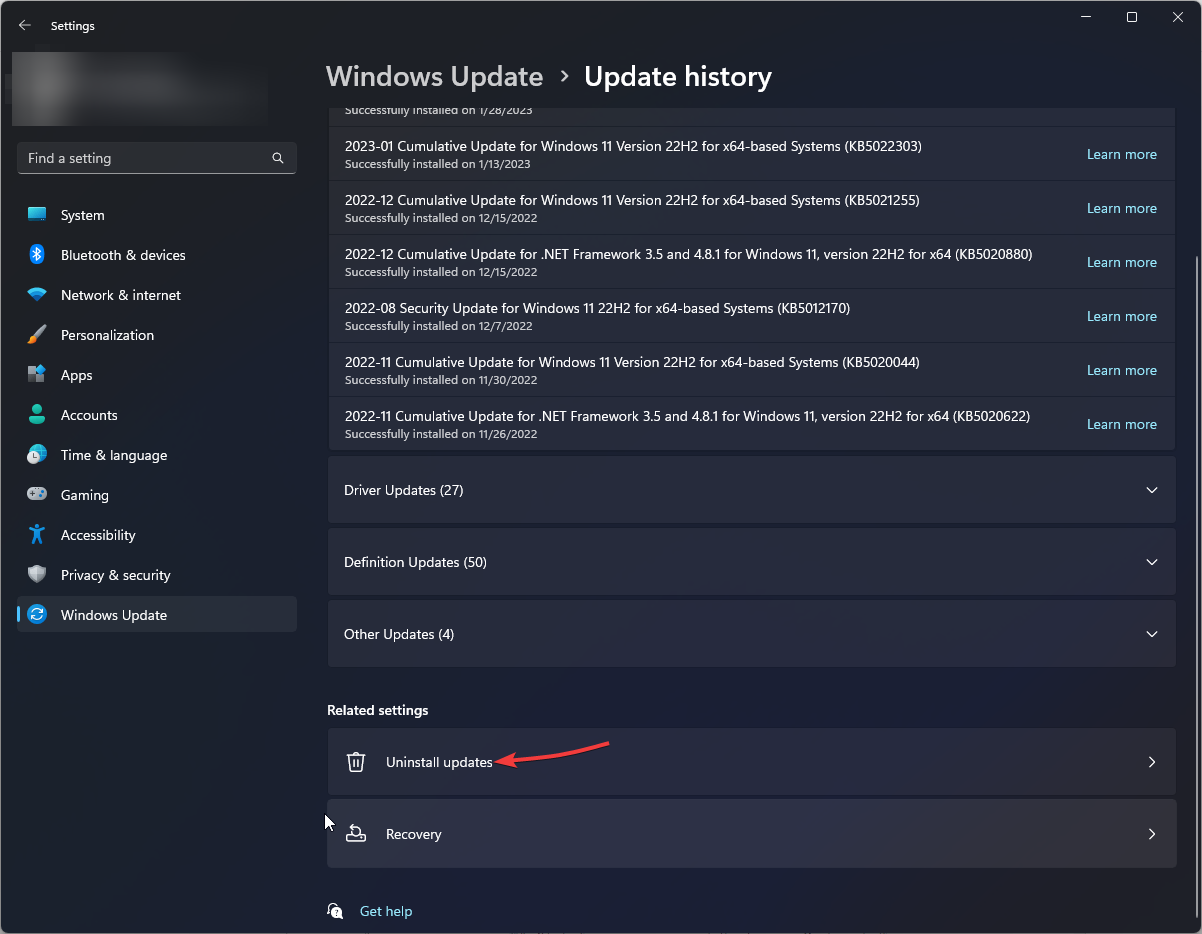
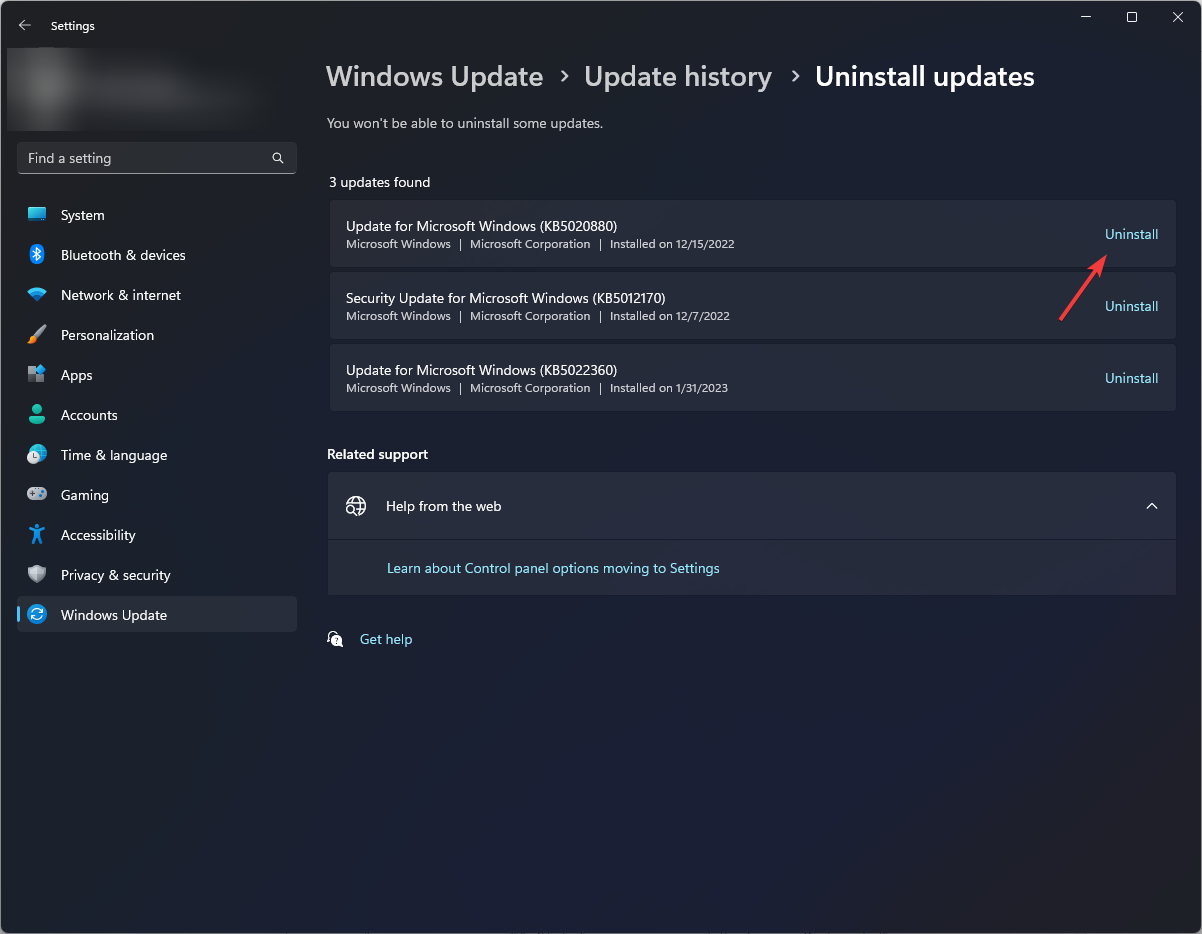
  4. Then click Uninstall updates to open the window in the screenshot directly below.
  5. Select KB5000802, KB5000809, KB5000808, or KB5000822 update if you find any of those patches listed.
  6. Press the Uninstall button.
Note icon NOTE
This resolution is more specifically for fixing an APC_INDEX_MISMATCH win32kfull.sys error caused by the aforementioned Windows 10 2021 updates. Microsoft also rolled out optional hotfix Windows 10 updates to resolve that issue.

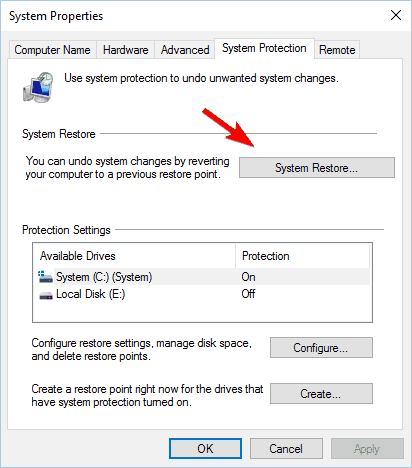
8. Roll back Windows 10

  1. Press the Win + R keys to open the Run dialogue.
  2. Type rstrui and click OK.
  3. Select Choose a different restore point.
  4. Click the Next button.
  5. Select a restore point.
    System Restore window win32kfull.sys
  6. Press the Next button.
  7. Click Finish to initiate the system restoration.

Restoring Windows 10 to a previous time will uninstall software installed after a selected restore point date. You can select a restore point and click Scan for affected programs to see what programs get removed for it.

9. Reset Windows 10

  1. Open the Start menu.
  2. Type recovery and open Recovery options.
  3. Click Get started.
  4. Choose the Keep my files option to only remove apps and settings but save all your personal files.
  5. Follow the onscreen prompts till your PC is reset.

Resetting Windows 10 will uninstall software that wasn’t preinstalled on your PC. Therefore, this resolution is recommended as a last resort only.

As BSOD errors are Windows system issues, it’s best to contact Microsoft support for further guidance. You can select to chat with a Microsoft support agent at the Contact Microsoft Support webpage.

If you decide to contact MS support about the issue, note down some details from the BSOD error message. Note down the file referenced, in this case, win32kfull.sys, and the stop code for the BSOD error. Then you can give those details to a customer support agent. 

The potential resolutions above will probably fix win32kfull.sys BSOD for most users.

Kernel Auto Boost Invalid Lock Release: 5 Methods to Use

BSOD errors are some of the worst since these not just crash the OS but also point to a critical underlying cause. One such is the KERNEL AUTO BOOST INVALID LOCK RELEASE error.

In technical terms, the error arises when a lock tracked by AutoBoost gets released by a thread without its ownership. So, let’s find out all about MSDN bug check KERNEL_AUTO_BOOST_INVALID_LOCK_RELEASE!

What is KERNEL AUTO BOOST INVALID LOCK RELEASE?

The KERNEL AUTO BOOST INVALID LOCK RELEASE is a BSoD error that arises when a kernel thread (might that be an interrupt handler or process) is trying to release a lock that is not owned by it.

But more importantly, it is not what the error is but why it occurs on your PC.

What causes the Kernel Auto Boost Invalid Lock Release error?

Here are a few reasons you might be encountering the error:

  • Overclocking – One of the primary reasons behind the KERNEL AUTO BOOST INVALID LOCK RELEASE is overclocked PC, so refer to our below solutions.
  • Incompatible or outdated drivers – In many cases, it was incompatible or outdated drivers that triggered the error, and checking the log files should provide insights.
  • Bug in Windows update – Several users had the error after updating Windows, which points to a bug in the installed version.
  • Connected hardware creating conflicts – Hardware devices can, too, conflict with the functioning of the OS and lead to KERNEL AUTO BOOST INVALID LOCK RELEASE in Dell PCs.

Now that we know why this happens, let’s go through with the solutions to fix it.

How to fix KERNEL_AUTO_BOOST_INVALID_LOCK_RELEASE?

Before we head to the slightly tricky solutions, here are a few quick ones you should try first:

  • Restart the computer. If your Windows PC or laptop is stuck on restarting, don’t hesitate to take immediate action.
  • Disconnect all non-critical peripherals, including printer, phone, speaker, and headphones, amongst others.
  • Check for Windows updates and install the latest available version.
  • Remove any overclocking which may be in place and uninstall programs meant for the same since these could create issues. Many had the KERNEL AUTO BOOST INVALID LOCK RELEASE due to ThrottleStop.

In case these don’t work, head to the solutions listed next.

1. Update the drivers

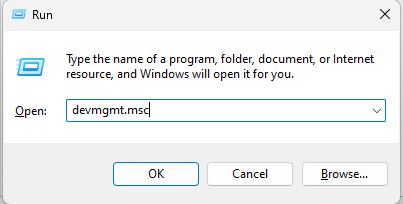
  1. Press Windows + R to open Run, type devmgmt.msc in the text field, and hit Enter.device manager
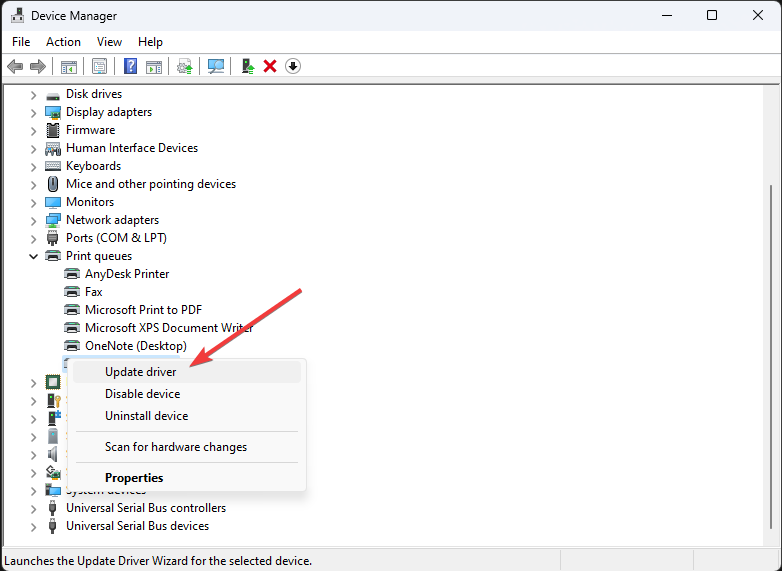
  2. Expand the Display adapters entry, right-click on the graphics adapter, and select Update driver.update driver to fix kernel auto boost invalid lock release
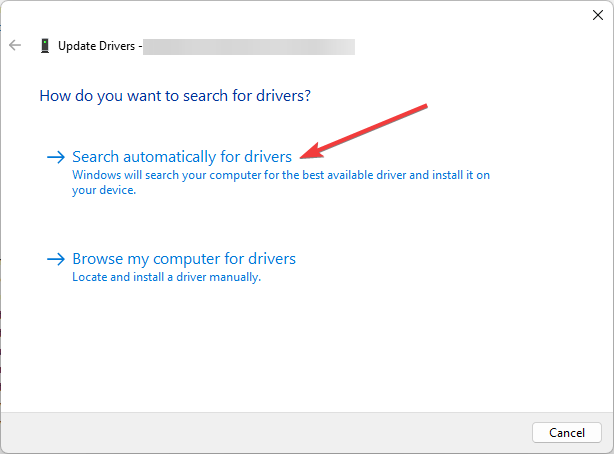
  3. Now, select Search automatically for drivers and wait for Windows to install the best ones.search automatically for drivers
  4. Similarly, update the other critical drivers, such as those for network adapters, Bluetooth, and storage devices.

Updating the driver fixes both issues due to running an older version or using an incompatible driver. It should get things running in the case of KERNEL AUTO BOOST INVALID LOCK RELEASE in Ryzen 3600.

Also, in some cases, Windows wouldn’t be able to find a better version, so you will have to locate and manually install the driver.

To better perform this process and save time, you can try using a dedicated tool to scan your computer for outdated drivers and automatically update them with brand-new versions.

⇒ Get Outbyte Driver Updater

2. Uninstall Bluetooth software

  1. Press Windows + R to open Run, type appwiz.cpl, and click OK.appwiz.cpl
  2. Now, locate any Bluetooth software (not the driver) here, select it, and then click on Uninstall.uninstall to fix kernel auto boost invalid lock release
  3. Follow the on-screen instructions to complete the process.

Many users claimed that it was a conflict between a third-party Bluetooth software and a built-in one that caused the error. And the easiest way to fix things would be to remove the third-party option. It’s usually Broadcom, so if you find it, remove the application.

3. Uninstall Windows updates

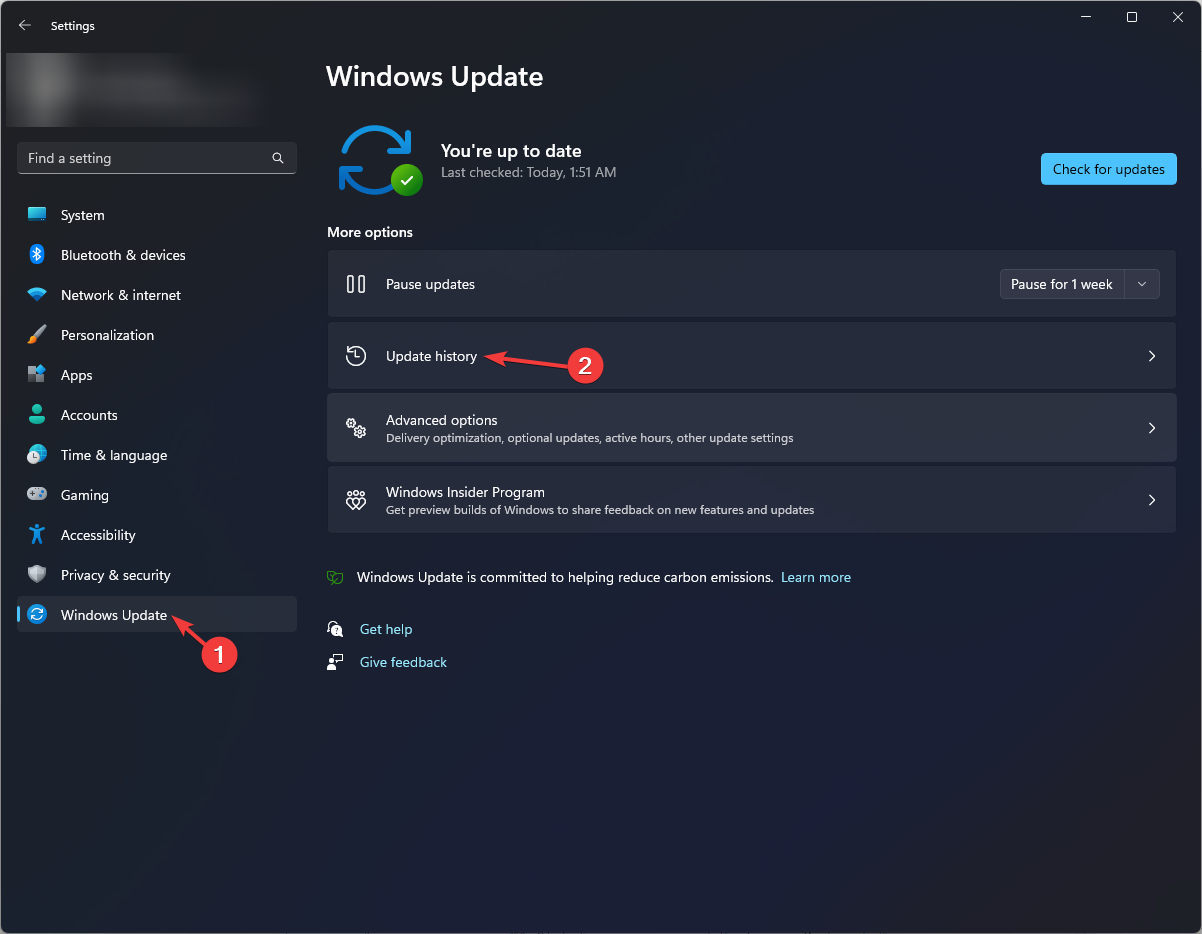
  1. Press Windows + I to open Settings, choose Windows Update from the left, and then click on Update history.update history
  2. Now, scroll to the bottom and choose Uninstall updates.uninstall updates to fix kernel auto boost invalid lock release
  3. Click on Uninstall next to the update after installing when the error first appeared.uninstall to fix kernel auto boost invalid lock release
  4. Again, click Uninstall to confirm the change.confirm

Another effective solution to fix the KERNEL AUTO BOOST INVALID LOCK RELEASE when it started after updating Windows is to revert to the previous stable version.

4. Run tests on RAM

BSOD errors often arise due to issues with RAM, and running a few tests will help identify if that’s the case. But before you do that, make sure the RAM modules are properly seated in the slots.

Now, run the built-in Windows Memory Diagnostics and let it scan for issues and eliminate them. The tool does a few quick tests and should fix trivial issues.

If the built-in option doesn’t work, we recommend using MemTest86+, a free, open-source RAM testing tool that does a wide range of extensive tests and eliminates most issues. Though remember that it would take a few hours to run completely.

5. Get the hardware inspected

If nothing previously worked, it’s most likely the hardware to blame for the BSOD error. It could be the motherboard or the CPU since we already had the results on RAM modules in the previous solution.

With these two, it’s best that you let a hardware expert test them, and check for issues, say with the voltage and connections. Many got KERNEL AUTO BOOST INVALID LOCK RELEASE due to undervolt. So get that verified as well.

You might have to replace the problematic hardware component depending on its problem.

That’s it! With the KERNEL AUTO BOOST INVALID LOCK RELEASE error fixed, you can continue using the PC, and it shouldn’t crash again.

Also, find out how to make Windows 11 faster than ever and get operations done quicker.

For any queries or to share a solution that’s not listed here, drop a comment below.

Fix: Cannot Access Shared Folder on Windows 10 [5 Ways]

Many Windows 10 users reported that they could not access the shared folder. This can be a real issue, as it prevents sharing of valuable information.

While there are various factors that can cause this issue, we have prepared detailed solutions that can help you fix things when the shared folder can’t be accessed.

Why is the shared folder not accessible?

Below are some of the factors that can cause the shared folder not to be accessible:

  • Wrong network settings: If the network discovery feature is disabled on your PC, you will not be able to access a shared folder. You only need to enable the feature, and the issue will be resolved.
  • Unavailability of folder sharing setup: Sometimes, you might be experiencing this issue because you don’t have the setup to access the shared folder on your PC. This feature should be available on your PC by default, but you can install it if it is not.

What to do if the shared folder is not accessible on Windows 10?

1. Check the availability of the folder-sharing setup on your PC

  1. Press the Windows key + I to open the Settings app and select Network & Internet.
    network  windows 10 cannot access shared folder
  2. Now, click on Change adapter options.
    change adapter
  3. Locate your network connection, right-click on it, and select Properties.
    properties windows 10 cannot access shared folder
  4. Navigate to the This connection uses the following items area and then locate the File and Printer Sharing for Microsoft Networks.
  5. If the option is available, simply check the box next to it; otherwise, proceed.
    file
  6. Click on the Install.
  7. Afterward, click OK.
  8. Exit the window and restart your PC.

If you cannot access a shared folder on Windows 10, the first thing to do is check your system to ascertain if the File Sharing setup is available. Normally, this setup is built-in on Windows; thus, it is usually present.

2. Enable network discovery

  1. Press Windows + I to open the Settings app and select Network & Internet.
    network windows 10 cannot access shared folder
  2. In the left panel, click either Wi-Fi or Ethernet (depending on your connection type) in the left pane.
  3. Under the Related Settings menu, click on Change advanced sharing options.
    wifi
  4. Tick the radio button for both the Turn on network discovery and Turn on file and printer sharing options, and then click on Save changes.turn on file and printer sharing

If you are experiencing the Windows 10 unable to access shared folder error, it is recommended you check if your PC’s network is discoverable by other computers.

3. Check your PC’s credentials

  1. Press the Windows key, type control, and select the Control Panel.
    control panel windows 10 cannot access shared folder
  2. Select the User Accounts option.
    user accounts
  3. Now, choose Credential Manager.
    credential manager
  4. Locate and click on Windows Credentials.
  5. Select Add a Windows credential.
    windows credentials windows 10 cannot access shared folder
  6. Add the relevant details like username, password, and hosting PC‘s IP, and then click OK to save the changes.
    enter

If you cannot access the shared folder on your PC, you may have issues with credentials.

4. Enable all Network services

If you cannot access the shared folder on your PC, ensure that you enable all relevant network services on your PC. So, check the Services app and verify that there are running.

Services

Below is a list of relevant services that should be enabled and run automatically for file sharing to work:

  • IPv6
  • SSDP Discovery
  • Publication
  • Function Discovery Provider
  • DNS Client
  • Peer Networking Group
  • Host
  • Function Discovery Result
  • UPnP Device Host
  • Home Group Provider
  • Home Group Listener

5. Run the Shared Folder Troubleshooter

  1. Press the Windows key + I and select Update & Security.
    update windows 10 cannot access shared folder
  2. Select Troubleshoot in the left pane and click Additional troubleshooters.
    additional trouble
  3. Now, choose the Shared Folders option and click Run the troubleshooter.
    run the

A designated troubleshooter on Windows 10 is specially designed for fixing errors such as this. If you’re still unable to access shared folders, running the troubleshooter might be helpful.

There you go. These are a couple of solutions that might help you fix things when unable to access a shared folder in Windows 10. The solutions are as detailed as possible, and you only need to follow the steps carefully.

If you are facing other issues, like your folder can’t be shared on Windows 10, check our detailed guide to fix it convincingly.

Feel free to let us know in the comments section if these solutions helped you fix the problem.

Skype Is Not Making Notification Sounds: 5 Ways to Fix It

Skype is a nice video calling and messaging application that many use to accomplish work-related tasks or for casual chatting. Since receiving notifications is one of the most important functions of Skype, one could understand the frustration if Skype is not making notification sounds.

You will find multiple user reports about the same Skype not making notification sounds problem. If you are also experiencing the same issue, this guide is exactly for you.

Why is Skype not making notification sounds on my PC?

After some research, we have found a bunch of common reasons that are particularly responsible for Skype not making notification sounds error:

  • You are not signed in: If you are not live or not signed in to your Skype account, then you will not receive notification for new messages.
  • Focus assist is turned on: Windows 10 or 11 users might have left the Focus Assist turned ON, because of which you aren’t receiving notifications for new messages.
  • Check notification settings: You might have disabled the notification settings on your PC, which is why you aren’t getting notification sounds.
  • The Skype notification sound is turned off: Often, we, by mistake, tweak the in-app settings, which could result in such a petty issue.

Now that we know the possible causes of this issue, let’s fix it with the solutions below.

What can I do if Skype is not making notification sounds on my Windows PC?

Before going ahead with the advanced troubleshooting methods, here are a few quick fixes that you can apply:

  • In case you have set Do not disturb as your Skype status, then Skype will not disturb you and will not send any notifications your way. While anyone can message you, you won’t be alerted. Click on your profile picture and set your status as Active and check if you can receive notification sounds.
  • Try restarting your PC, as this could resolve many temporary glitches or bugs that might be causing the issue. Here’s what to do if the computer keeps restarting randomly.
  • You can also try turning the volume up to check if the sound wasn’t muted.
  • Relaunch the Skype app. Often, the previous session might have failed to load all the important files.
  • Sign in to the Skype application and check if you are getting notifications or not.

Let us check out the advanced troubleshooting method that will help you resolve the issue.

1. Allow Skype to run in the background

  1. Press the Win + I buttons to open Settings.
  2. Click on Apps on the left.
  3. Click on Installed Apps from the right.
  4. Locate Skype, click on the 3-dot icon and select Advanced options.
  5. Under the Background apps permissions drop-down, select Always.
  6. Close the Settings menu and see if this resolves the issue or not.

If you have not allowed the Skype app to run in the background, then this could prevent you from not only getting messages from your contacts, but Skype will not make any notification sounds.

2. Check notification settings

  1. Press the Win + I buttons to open Settings.
  2. Select Notifications from the right side.
  3. Turn on the Notifications toggle.
  4. Click on the down arrow next to the toggle for Notifications.
  5. Check the box for Allow notifications to play sound option.

3. Turn off Focus Assist

  1. Press the Win + I buttons to open the Settings menu.
  2. Click on Focus on the right side.
  3. Click on the Stop focus session button to turn off Focus Assist.

Focus assist helps you curb the distractions such as notifications, etc. from disturbing you while you are working on something important.

There are chances that you have left the Focus Assist on, which is why Skype is not making notification sounds.

4. Check Skype settings

  1. Launch Skype.
  2. Click on the 3-dot icon next to your profile name.
  3. Select Settings.
  4. Click on Notifications.
  5. Check if the Notifications sound toggle is turned on or not. If not, then turn it on.
  6. Close the Settings page, and check if Skype is making notifications sounds or not.

If you’re asking how do I turn on Skype for business notification sounds, the solution above answers that question.

5. Reinstall Skype

  1. Open the Start menu.
  2. Type Skype and select Uninstall.
  3. Hit Uninstall to confirm the process.
  4. Go to the Microsoft Store.
  5. Install Skype.
  6. Log in with your credentials and check if this resolves the issue or not.

Reinstalling will help you install the program from scratch. This works when some important files were missing during the previous session.

That is it from us in this guide. You can refer to our guide, which gives you a bunch of solutions to resolve the Skype is not working on Windows 11.

We also have a guide that lists solutions to resolve the Skype video not working. For users who aren’t able to send images on Skype, they can check out our guide on how to fix Skype can’t send images.

Let us know in the comments below which one of the above solutions resolved the Skype not making notification sounds error.

Zoom Install Update Error Code 10004: How to Fix It

You can run into errors for many reasons when using the Zoom client on your computer. These errors can make the Zoom client inaccessible, preventing you from joining meetings. The Zoom install error code 10004 is one of such that users report.

Another error users report is Zoom Error Code 100000502 when joining a meeting.

What is Zoom update error code 10004?

The Zoom update error code 10004 is related to update issues with the Zoom client. The error appears while users are on Zoom calls, causing difficulties accessing Zoom meetings. It is due to the Zoom client having trouble connecting with the Zoom servers.

Furthermore, the error can occur on various operating systems, including Windows and macOS. Factors that can cause the error are:

  • Zoom client auto-update failure – When Zoom cannot update to the latest version, it can prompt an error.
  • Network connection issues – When there is network congestion or a poor network connection, it can cause an error on Zoom.
  • Third-party app on your device – Apps like antivirus software can impede the connection between the Zoom client and its servers.
  • Zoom server issues – The error may occur if Zoom servers are down or under maintenance. It can make the platform inaccessible.

These causes may vary depending on the instance. However, there are some fixes to help get the Zoom client working.

How do I fix the Zoom install error code 10004?

Try the following preliminary checks:

  • Fix network congestion on your PC.
  • Turn off background apps running on your computer.
  • Restart Windows in Safe Mode and check if the error is resolved.
  • Zoom may not be able to connect to its servers if maintenance is in progress or if the servers are down. So, you should check Zoom’s social platforms for updates about the issue.
  • you can contact Zoom Support for help with the inability to install updates, error code 10004.

If the error persists, proceed with the solutions below. They will also address the Zoom error code 10004 Ventura, and Zoom update install error code 10004 issues.

1. Update the Zoom client on your PC

  1. Left-click the Start button, type zoom, and click Open from the options to launch it.
  2. Click on the Profile icon in the top-right corner and select Check for Updates.

If there’s any update available, follow all on-screen prompts to install it. Updating the Zoom client on your PC will fix any bugs that may stop it from connecting to its servers.

2. Allow Zoom through Windows Firewall

  1. Press the Windows key, type windows security, and click Open.
  2. Tap the Virus & threat protection option, scroll down, and click on Manage ransomware protection.
  3. Click on the Allow an app or feature through Firewall option.
  4. Click on Change settings, check the box for Private and Public beside Zoom, and click OK.
  5. Restart your computer and check if the error persists.

Allowing Zoom through the Firewall will fix Windows Firewall blocking the app features or any interference from the antivirus program. This fix is exclusive to Windows.

3. Reinstall the Zoom app on MacOS

  1. On your Mac, click the Finder icon to launch the app.
  2. Click on Applications from the left pane and select Zoom from the list of installed apps.
  3. Press the menu button at the top bar, then click on Move to Bin to uninstall the Zoom app on your Mac.
  4. Click on the Bin icon on your taskbar, click on the deleted Zoom app, press the Menu button at the top bar, then click Empty Bin to delete the Zoom app permanently.
  5. Restart your Mac, download the latest Zoom app, and check if the error persists.

The error should be fixed, and Zoom should be able to connect to its servers on Windows and even Mac.

Alternatively, check our guide on fixing error code 5003 on Zoom and get it working. Likewise, read about Zoom error code 1001 if you encounter it while using the app.

For more questions or suggestions, kindly use the comments section below.

Microsoft will notify you when a new widget is available

A widget helps users interact with apps better since they can access certain information from them without necessarily having to launch the app thus enhancing efficiency and effectiveness. Last year, Microsoft added the capability to install third-party widgets via the Microsoft Store as well as a plethora of nifty features designed to enhance its user experience, such as notifications in widgets.

Microsoft is now testing a new feature that will help you do more with widgets. As spotted by PhantomOfEarth on Twitter, users will get a notification when a new widget is available via the Widget Panel in form of a small banner. It should be noted that this applies to the apps installed on your Windows 11 device.

You are likely to get a notification highlighting the availability of a new widget for an app after updating it. The feature is currently available to Windows Insiders, perhaps, Microsoft will roll it out to general availability via an update in the future.

Microsoft seems to be laying more emphasis on this front as it released an Insider build for the Dev Channel featuring a new widget for Messenger. However, if you don’t fancy widgets, we invite you to check out our expert guide which will help you disable widgets in Windows 11.

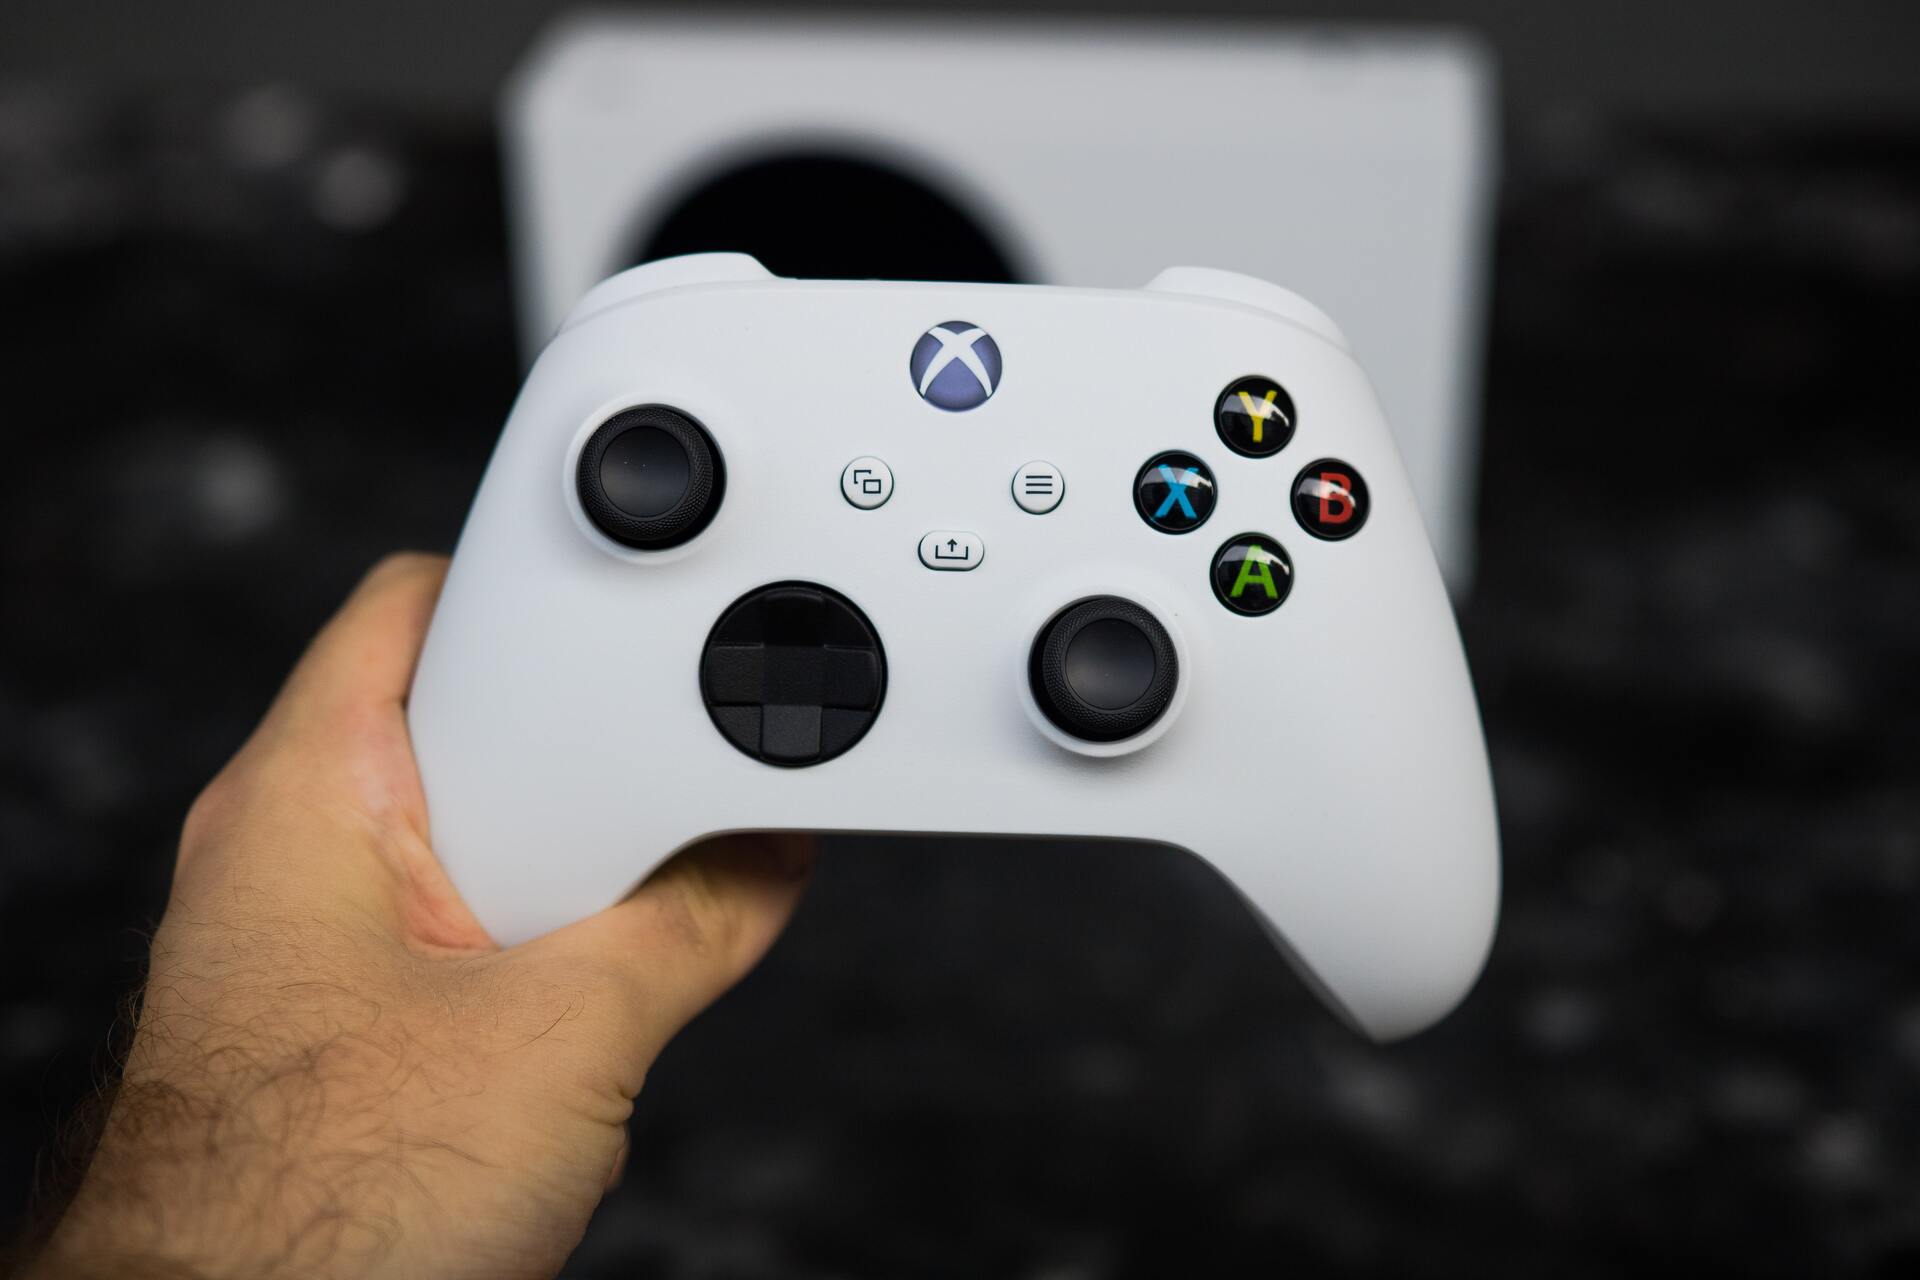
Xbox One Graphics Card: How Does It Compare to a PC GPU?

While the first Xbox console came equipped with a 233MHz Custom NVIDIA NV2A GPU, the latest Xbox Series X has a custom-designed GPU based on AMD’s latest RDNA 2 architecture. You might be interested in knowing what the PC equivalent of the GPU used on the Xbox One is to build you one gaming PC.

If that is the case, then in this guide, we will share with you all the information that you need to know about what graphics card is in the Xbox one. As GPUs are the heart and soul of a gaming PC, if you wish to build a PC equivalent to the Xbox One, then this guide is very important for you.

What are the GPUs used in different versions of Xbox consoles?

To understand it better and also to know about how the GPUs have evolved in Xbox consoles, let us take a look at a comparison table below:

Xbox versionsGPU
XBOX233MHz Custom NVIDIA NV2A
XBOX 360500MHz custom ATi design
XBOX OneAMD Graphics Core Next (GCN) GPU
XBOX One XAMD Scorpio graphics processor
XBOX One SDurango 2 graphics processor
XBOX Series SLockhart GPU based on TSMC’s 7nm process node
XBOX Series XCustom-designed based on AMD’s latest RDNA 2 architecture

What graphics card is in the Xbox One?

Since the Xbox gaming console was introduced by Microsoft, it has been using AMD’s GPU for most of its generations. On the Xbox One, there was an AMD Graphics Core Next (GCN) GPU.

The latest and the most powerful Xbox gaming console that you can purchase as of now is the Xbox Series X. The Xbox Series X console makes use of the custom-designed based on AMD’s latest RDNA 2 architecture, a significant Xbox One graphics card upgrade.

Speaking of the specifications, it can deliver up to 12 Tera Flops or TFLOP of peak performance and is considered to be the most powerful console GPU to be ever created.

To understand, TFLOP is a mathematical measurement of a computer’s performance which is expressed as the ability to perform 12 trillion floating point operations in one second.

Apart from such an impressive GPU performance core, the Xbox Series X also features advanced AMD Radeon Rays tracing acceleration technology. This ensures real-time lighting and shadowing in supported games.

On the other hand, the cheaper Xbox Series S features a Lockhart GPU based on TSMC’s 7nm process node. Its PC equivalent is the NVIDIA GTX 1060 3GB GPU or the AMD Radeon RX 5500 XT.

For those wondering about the Xbox Series S’s TFLOP numbers, it can output up to 8.013 TFLOPS, making it slightly slower than the NVIDIA GTX 1660. However, it features ray tracing, which is absent on the PC equivalent.

What graphics card is comparable to Xbox One X?

Microsoft has replaced the Xbox One X with the Xbox Series X console. To build a PC with Xbox One X equivalent GPU, you must install NVIDIA RTX 2060 Super.

You can play games on 4K with ease, as it can give you an output of up to 30FPS on certain native 4K games. Xbox One X has 6 Teraflops, while the NVIDIA RTX 2060 Super has 7.2. For AMD users, you can opt for the AMD RX580.

If the Xbox One graphics card is going bad, you should consult our guide on how to detect GPU failure.

Nevertheless, you can find the Xbox One graphics card on PC, minus the Ray Tracing feature, so you need to know what to do.

What graphics card is comparable to Xbox Series X?

As mentioned in the table above, the Xbox Series X comes with a Custom-designed based on AMD’s latest RDNA 2 architecture. Since it is the most powerful Xbox console, you will get unprecedented performance from this gaming console.

If you wish to build a PC equivalent to the GPU inside the Xbox Series X, then install the NVIDIA RTX 3060 Super. The NVIDIA GPU is at par with the Xbox Series X performance as it can output 13 TFLOPS.

Speaking of the AMD equivalent, you need to install AMD Radeon RX 6700 XT also has a similar performance output of 12.4 Teraflops. The performance of NVIDIA RTX 3060 may seem similar to Xbox Series X on paper, but in reality, you may feel a lot of differences.

It would be better if you would go for the AMD Radeon RX 6700 XT for 1440p gaming, as both the Xbox One X and Radeon RX 6700 XT are based on the same RDNA 2 architecture.

But in the real world, the NVIDIA RTX 3060 and AMD Radeon RX 6700 XT aren’t a match for the Xbox Series X GPU, as they cannot handle modern 4K titles in 60FPS unless the in-game settings are tweaked significantly. The difference is that individual games are optimized for consoles since it is easier compared to differently-spec PCs.

For optimal 4K gaming, we recommend you use the NVIDIA RTX 3080 and 3080 Ti that come with 10GB and 12GB of RAM, with a throughput of 29.77 TFLOPS. In the AMD, you can opt for the Radeon RX 6800 XT, which comes with 16GB of GDDR6 RAM.

So, now that you have a clear mind of what is the PC equivalent of the Xbox Series X GPU, if you are facing an Xbox error update, worry no more as you can check out our guide and resolve the issue.

We also have a guide to help you with the Xbox ventilation error for smooth gameplay. You can have a look at our guide to fixing the Xbox cloud gaming controller not working problem.

How to Rotate and Save PDFs In Windows [Edge, Acrobat & More]

If you want to rotate PDF on Windows, there are several options you can use. The obvious choice is the software synonym with PDFs.

One way to do that is using PDF reader apps, but what if your software doesn’t support rotation? Well, there are other methods you can use, and we’re going to explore them in this guide.

So join us while we take a closer look at the best ways to rotate PDF documents on your PC.

How do I rotate a PDF and save it permanently?

1. Use Adobe Acrobat Reader

  1. To rotate the PDF in Adobe, first, open the program on your PC. After that, choose the PDF file you want to open.
  2. Go to Tools. After that, select Organize Pages.
  3. Select the pages you want to rotate.
  4. Now use the rotate buttons to rotate the desired pages.
  5. Lastly, save the changes.

This is how you rotate a PDF in Windows 10 and save it permanently. Of course, the same works if you want to rotate the PDF in Windows 11. In Edge or Chrome, you can only rotate it in the view mode, it won’t be saved how you rotate it.

Tip icon Tip
u003cstrongu003eRotate PDF shortcut:u003cbru003eu003c/strongu003eu003cbru003eIf we were to compare, working with PDFs in Edge is horrendous compared to using the tool developed specifically for PDFs. You can even use shortcuts to rotate PDFs on Windows easily.u003cbru003eu003cbru003eHow do I rotate a PDF X degrees clockwise? – Use the u003ckbdu003eShiftu003c/kbdu003e+u003ckbdu003eCtrlu003c/kbdu003e+u003ckbdu003ePlusu003c/kbdu003e shortcut on your keyboard.u003cbru003eHow do I rotate a PDF X degrees counterclockwise? – Use the u003ckbdu003eShiftu003c/kbdu003e+u003ckbdu003eCtrlu003c/kbdu003e+u003ckbdu003eMinusu003c/kbdu003e shortcut on your keyboard.

Adobe Reader has come a long way since its inception nearly 30 years ago. Nowadays, it is a complete package that lets you edit PDF documents and even convert them to other formats.

Adobe Acrobat Reader

Probably the best PDF reader because you can also make changes, rotate, edit, and save PDF documents.
Free trial Visit Website

2. Use Microsoft Edge

  1. u003colu003ern tu003cliu003eTo u003cstrongu003eRotate a PDFu003c/strongu003e, click on the document and click u003cemu003eRotate right u003c/emu003eor press u003ckbdu003eCTRL+]u003c/kbdu003e.u003c/liu003ernu003c/olu003e

    microsoft edge rotate pdf
  2. 2. The u003cstrongu003eChange Layout featureu003c/strongu003e helps you to switch between the One Page and Two Page layouts. Click on the document and click u003cemu003eLayoutu003c/emu003e.

    microsoft edge rotate pdf
  3. 3. u003cstrongu003eRead Aloud u003c/strongu003eis another new feature that let one of the 3 narrators read aloud the content of the document. You can choose between the 3 voices and regulate reading speed.

    microsoft edge rotate pdf
  4. 4. u003cstrongu003eShare PDFu003c/strongu003e is a great feature for fast and simple sharing of documents via Mail, Twitter, Skype, and others. Also, you can cast it to OneDrive or OneNote in one click.

    microsoft edge rotate pdf
  5. 5. With the u003cstrongu003eAdd Notes u003c/strongu003eoptions, you can use the physical pen on the touchscreen or add notes with your mouse. The choice is yours.

    microsoft edge rotate pdf

This is another simple method to rotate PDF on Windows, so don’t hesitate to try it out.

3. Use online services

  1. Visit RotatePDF website, a service that will allow you to rotate your PDF in Windows for free.
  2. Choose Select the PDF to rotate or just drag and drop the desired file.
  3. Rotate the file to the desired position and click Rotate PDF.
  4. Lastly, click on Download rotated PDF.

If you’re not a fan of third-party tools, you can always use Acrobat online rotate PDF tool.

Any of them will work, and all you have to do is add your file, then download it locally on your PC and save it.

Since you no longer wonder if you can permanently rotate PDF Files and if you plan to work more with PDF files, we suggest using PDF to Word convertors since they might offer similar functionality.

In case you have additional questions or suggestions concerning PDF viewing, rotating, and editing, make sure to tell us in the comments section below.

Everything new in Microsoft Excel for the month of January 2023

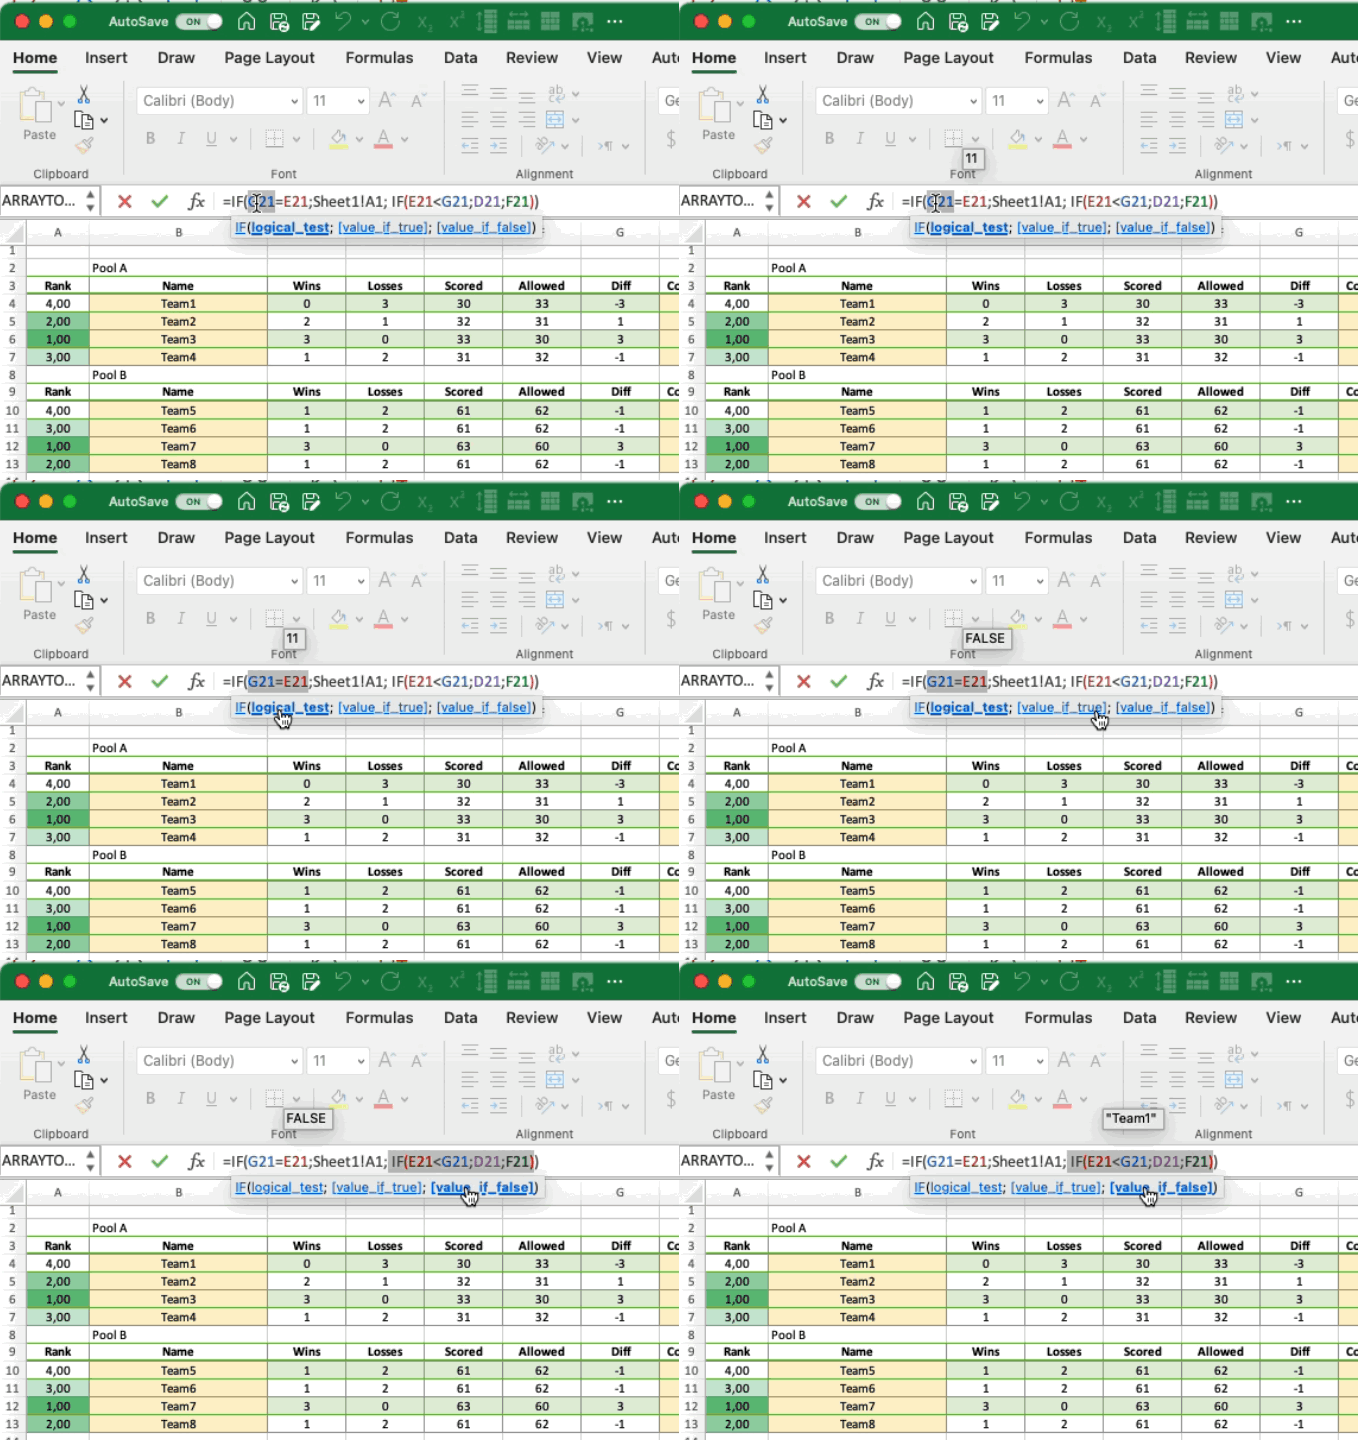
Microsoft has released a list highlighting all the new features that made it to Microsoft Excel in January. We’ve already seen a couple of these features like the new tooltips designed to help users check their formulas directly in the formula bar as well as the Action Recorder that lets users record repetitive spreadsheet tasks.

This post will highlight key features that made it to Excel this past month. Here’s everything you need to know:

Excel for the web

First up is the added capability that allows users to check the source data for a PivotTable value cell thus allowing them to better understand how values in the table were calculated.

To access this feature, simply “Double-click or right-click and choose Show Details from a value cell in your PivotTable to create a new sheet with the detailed rows for that cell”. Microsoft has also incorporated a new button that lets you achieve the same from the PivotTable tab of the ribbon.

Excel for Windows

Microsoft has added a new capability that allows users to automate their tasks using the Power Automate tab. This feature lets users create and modify scripts that will in turn automate repetitive tasks using Office Scripts. What’s more, you can link apps like Microsoft Teams or SharePoint to build workflows with Power Automate.

Next up, is the Action Recorder which lets you automate repetitive worksheet tasks. Previously, users were heavily dependent on the Office Scripts Code Editor to create and modify automation using JavaScript and TypeScript.

thumbnail image 1 captioned Record worksheet actions using Office Scripts

And finally, you can check your formula with the new value preview tooltips by selecting any part of the formula that you want to review. Excel will automatically show you a tooltip that features the current value of the specific section you selected.

thumbnail image 2 captioned Check your formula with value preview

Excel for Mac

The Mac client is also getting the same features as the Windows client, that is, the Action Recorder feature, the capability to automate tasks using the Power Automate tab as well as the new value preview tooltips for formulas.

To get information on which features are available to you or find which version of Microsoft Excel you’re on, you can visit the Excel Features Flyer site. That’s it for the month of January folks! Be sure to also check out December’s recap post in case you missed it.

How to Crop & Resize Videos in Windows 11

Since its release, Windows 11 has been praised for its functionality and innovative new features. There are many editing options available that help you create your perfect video.

One popular editing option available is cropping a video. Cropping a video allows you to zoom in on the section of the frame you want, or remove sections you don’t want to be included anymore.

What can I use to crop videos?

There is a multitude of available video editing software on the internet that you can choose from. Some come with Windows 11 built-in, such as Photos and Clipchamp.

Whether you work as a content creator or want to crop your home videos, you need to know your options. We will show you in this article the best methods for cropping a video in Windows 11.

How can I crop a video in Windows 11?

1. Use the built-in Video Editor

  1. 1. Press the Windows button on your taskbar to open the Start menu, then type in Video Editor.

    search for video editor app
  2. 2. When the app opens, click on New video project. You’ll be prompted to enter a name for the project. You can do this now or later.

    new project video editor app
  3. 3. Press on Add to import the videos you want to crop. You will be able to choose where to import them from this PC, from my collection, and from the web. You can choose one or more videos at once.

    add media to video editor
  4. 4. Drag the imported files to the Storyboard at the bottom of the App’s screen.

    place media in storyboard
  5. 5. Now you can crop the video. To remove the black bars from it, you need to click on the frame-shaped icon.

    If you want to change the video’s aspect ratio, you need to click on the three-dot icon in the top right corner of the screen and change it from 16:9 to 4:3.

    crop video in app
  6. 6. Export the video to your computer or your preferred cloud service and save it.

  7. If you simply need to crop out black bars from a video or change its aspect ratio, then the built-in Video Editor is the best choice.

    It is a native video editor that comes along with the Windows 11 OS and is included in the Photos App. Windows Video Editor is free and easy to use, and you can create beautiful cropped videos within a few clicks using it.

For more advanced cropping, such as video frame cropping, you should check out the solutions below.

2. Through VLC Media Player

2.1. Crop a video for viewing

  1. Open the Start menu and type VLC. In the preview for the official VLC Media Player page, click on the button Download now.
  2. Install the App.
  3. Launch VLC and click on Media, then on Open File. You will be able to choose the video clip you want to crop from your PC.open file vlc guide
  4. Click on Tools, then select Effects and Filters.file edit vlc crop
  5. In the Adjustment and Effects box, select Video Effects and then Crop.crop video vlc how
  6. Input in the text boxes how many pixels you want to remove from the screen’s top, bottom, left, and right sides.
  7. Preview the results.

If you wish to save the results, move on to the next guide.

2.2. Crop a video permanently

  1. Launch VLC and click on Tools, then select Preferences.
  2. Check the box All under Show Settings in the lower left corner of the screen to access Advanced Preferences.
  3. Select Video, then Filters.
  4. Click on Croppadd to access the cropping settings for the video.
  5. Input the desired values for pixels you wish to crop out of the video in the input text boxes.
  6. Save the file to your PC.

Another great free app that allows you to crop a video on Windows 11 is VLC Media Player. Although it is better known as a media player that can play videos, it has video editing features as well.

Moreover, VLC has two options: you can crop a video for viewing or you can crop it permanently.

3. Crop the video using Clipchamp

  1. Open the Start menu and type Microsoft Store to search for the app. Click on the result. microsoft store searchbar
  2. Type clipchamp in the search box and press Enter. You will be directed to the Clipchamp app page.microsoft store download clipchamp
  3. Click on Get to download Clipchamp to your computer and open an account.
  4. Log into the account with your credentials. You need to be logged in to use the app.clipchamp login app
  5. Click on Create a Video. The button is at the top right corner of the screen.clipchamp create new video windows 11
  6. Press the + button on the left side of the screen. You will be able to select a video to load into the project from your computer or cloud services such as Google Drive.clipchamp new video
  7. Drag and drop the loaded video into the project’s timeline. It is situated on the right side of the screen.
  8. Click the Crop icon and choose your desired setting. You can tweak the video’s aspect ratio or you can crop out a video frame. The aspect ratios you can choose from are 16:9, 9:16, 1:1, 4:5, 2:3, and 21:9.clipchamp how to crop a video windows 11
  9. After you are finished cropping the video, click on Export in the top right corner of the screen. You will need to select the desired video quality and display resolution.clipchamp how to export video
  10. Save the file to your computer or a cloud service after the exporting process is finished.

An excellent editing tool is Clipchamp, which will soon be available as an inbox App for Windows 11 users. Although it is not free to use all of its features, the free version comes in handy when it comes to cropping.

Clipchamp is a user-friendly platform that offers you a wide selection of editing options to choose from and is the most recommended for advanced editing.

The drawback when using Clipchamp to crop a video in Windows 11 is that the free basic subscription has limitations. You cannot export videos under a large resolution, for example.

Check out our dedicated article to find out how to trim videos using Clipchamp on Windows 11.

What is the difference between trimming and cropping a video?

When it comes to editing a video, you can adjust multiple different things according to your desires. The terms trim and crop often come up and can sound similar, but they have different meanings and accomplish different goals.

Trimming a video means editing sections from it. For example, you can remove the last seconds of it and make it shorter.

On the other hand, cropping a video refers to focusing on a particular video frame by zooming in on it.

Another editing term is split. When you split a video, you divide it into two separate videos, which you can then edit separately.

You can opt out of complicated editing tools if you simply need to split or trim a video. The Photos App is your best choice in this matter. Aside from videos, you can crop images in Windows 11 using built-in tools or the apps mentioned in this article.

We hope the solutions in this article helped you edit your videos according to your needs and preferences.

To take editing to another level, check out our video on the best screen recorder software for Windows 10/11.

Which is your favorite App for cropping a video on Windows 11? Let us know your thoughts and questions in the comments section below.

Fix: Program Is Running but Not Showing on Screen

You may have noticed that a specific program is running but not showing on the screen in Windows. This article has the solution for this issue and other relevant information.

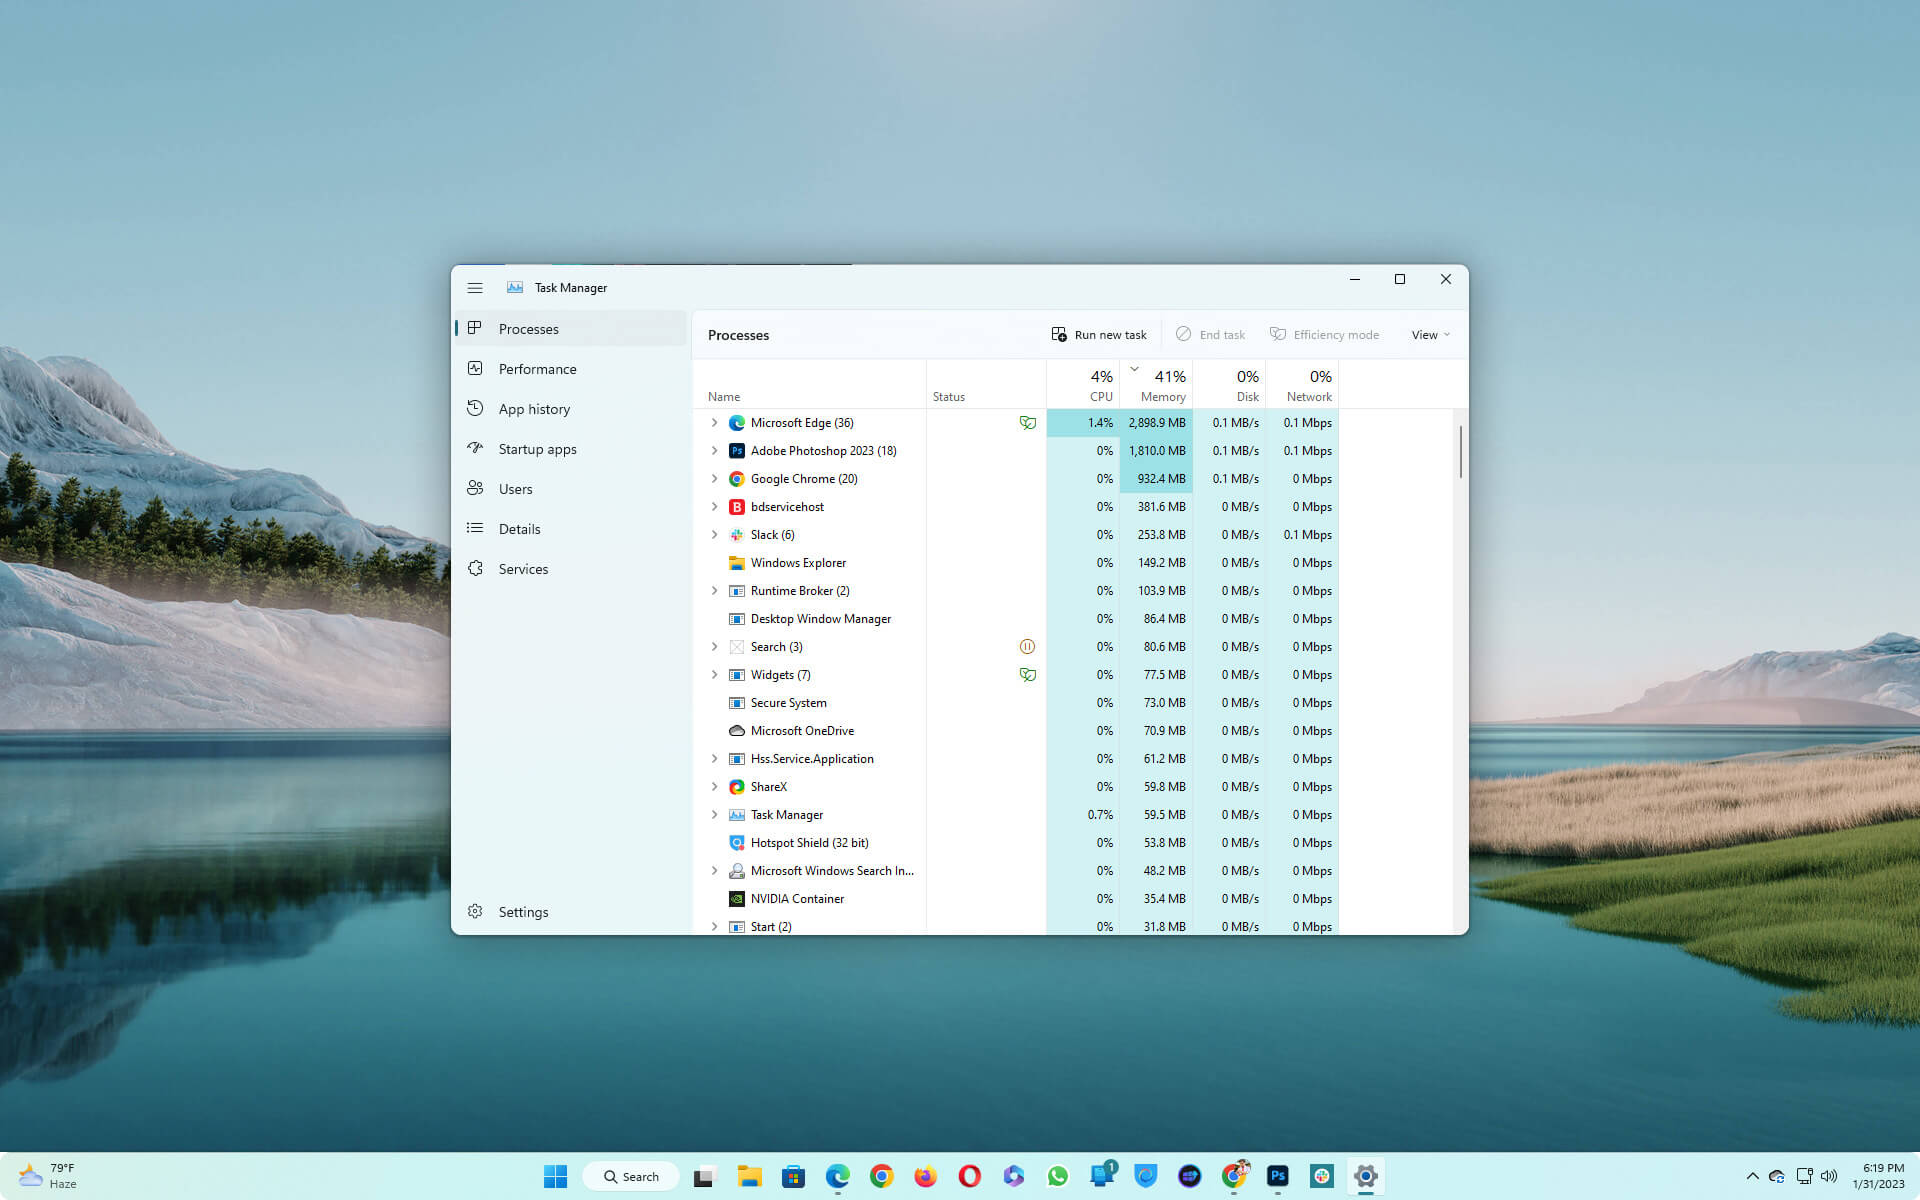
It instantly becomes visible when you open an application on Windows 11 or any other version. However, sometimes, it may appear in the taskbar and the Task Manager but not on the screen. 

If you are getting precisely the same problem, keep in mind that you are not alone. A lot of users have already been reporting this problem on various forums. 

Why is a program running in the background but not appearing on screen?

If you see that the program is active in the taskbar as well as the task manager but is not visible on screen, it may be because of the following things:

  • Corrupted installation files: If the installation files of an app become corrupted, that app may not show up on the screen.
  • Windows problem: Some internal Windows bugs also may trigger this issue.
  • Incompatible app: An outdated and incompatible program may go through this type of issue.
  • Display issue: Incorrect display settings or other problems related to the display can cause this problem.
  • Third-party services: Third-party services are also responsible for this type of problem.
  • Registry problem: If some specific registry entries become corrupted, it may trigger the app visibility issue on Windows.

How can I fix the program running but not showing on the screen?

We have found the most accurate solutions to get rid of this problem. But, before that, we like to do the following things:

If you still encounter the same problem after doing the above things, go through these below-mentioned troubleshooting methods to fix the program running but not showing on the screen:

1. Restart Windows Explorer

  1. Right-click on the taskbar and choose Task Manager.
  2. Go to the Processes tab if its window is not there by default.
  3. Right-click on Windows Explorer and choose Restart.restarting windows explorer windows 11 task manager

Now, try to open the problematic app and see if it helps.

2. Maximize from the taskbar

  1. Press and hold Shift on the keyboard and right-click on the problematic program icon on the taskbar.
  2. Choose Maximize.maximizing app window from taskbar icon

It should bring the problematic app window to the screen. This method works great when a program opens in the taskbar but not on the screen of Windows 11.

3. Move the program manually

  1. Press and hold the Shift button again and right-click on the problematic app on the taskbar like before.
  2. Click on Move.choosing move by right-clicking on app icon taskbar
  3. Use the arrow keys on the keyboard to move the app until it is visible to your screen.

One thing to remember is that the app icon must represent that the app is active but not appearing. Otherwise, the options mentioned above will not appear.

Don’t get confused with any other pinned app icons. If necessary, you also can learn how to fix pinned apps not showing in Windows 11.

4. Tweak display settings

  1. Press Win + I on the keyboard to open Windows Settings.
  2. Go to System and click on Display.going display settings windows 11 settings
  3. Expand Multiple displays.
  4. Uncheck Rember window locations based on monitor connection.uncheck Rember window locations based on monitor connection
  5. If it is a multimonitor setup, change the display to Show only on 1 or 2 or so on.showing only on display 1 windows 11 display settings
  6. Restart your PC.
  7. Verify if the problem has been solved or not.
  8. Now, change back to your monitor settings.

Users who have multiple displays or have recently disconnected the second display may get this problem. They may see a program running but not visible in Windows 11.

It is because Windows may have remembered the X and Y coordinates of the app window, which is not accurate with the current situation. This method will help you in this type of situation.

5. Re-install the program

  1. Go to Windows 11 Settings.
  2. Go to Apps and click on Installed apps.going installed apps windows 11 settings
  3. Click on the three vertical dots next to the problematic app and choose Uninstall.uninstalling smart game booster win11 settings
  4. Restart your PC.
  5. Download the app from the official source.
  6. Install it on your PC again.

6. Clean boot

  1. Press Win + R on the keyboard to open Run.
  2. Type the following command and Enter: msconfig
  3. Go to the Services tab.
  4. Click on Hide all Microsoft Services and click on Disable all.disabling non microsoft background items system config windows
  5. Click on OK.
  6. Restart your PC.

If a clean boot solves the problem, there is a problematic third-party service. Identify it and keep it disabled or remove the related software.

7. Fix the registry

From now, you should no longer face Windows 11 apps open but not visible on the screen. However, if the problem persists, you can consider resetting Windows or doing a clean installation.

This problem can be related to another issue. So, if necessary, learn how to solve Windows 11 apps not opening.

This article has explained what you should do when you face a program running but not showing on-screen or similar problems. If you have any questions or opinions, write them in the comment box.

How to Download & Enable RSAT on Windows 10

Remote Server Administration (RSAT) is a tool that IT admins use to manage servers remotely. In order to access a domain server remotely, you’ll need to install Remote Server Administration Tools on Windows 10.

You’ll, of course, need Windows 10 Professional or Enterprise to utilize this set of tools. Since there was a huge demand for the RSAT, Microsoft added it to Windows 10 with the Windows 10 October Update.

And that’s why, depending on the iteration of Windows 10 you are running, you should either install it or enable it.

How do I install Remote Server Administrator Tools on Windows 10?

1. Download Remote Server Administrator Tools (before Windows 10 October Update)

  1. Navigate to the official Microsoft Download page.install remote server administration tools windows 10
  2. Download the version that fits your system version and architecture. You can either save it locally and run it from there or directly.
  3. Run the installer and accept the License terms.
  4. Reboot your PC, and you should be good to go.

2. Enable Remote Server Administrator Tools (on Windows 10 October Update and later)

  1. Press the Windows key + I to open the Settings app and choose Apps.
  2. Click Apps & features.
  3. Open Optional features.install remote server administration tools windows 10
  4. Click on the Add a feature button.install remote server administration tools windows 10
  5. Find RSAT tools you want to add and add them to your Windows 10.

If you want to disable Remote Server Administrator Tools, follow the steps below:

  1. In the Windows Search bar, type Windows features, and open Turn Windows features on or off.
  2. Locate the Remote Server Administrator Tools and expand that section.
  3. Uncheck the boxes next to features you don’t need anymore.
  4. Click OK to confirm changes.

Hopefully, these instructions helped you install the Remote Server Administrator Tools on Windows 10 without issues.

If RSAT crashes on Windows 10, check our detailed guide to fix it quickly. If you have anything to add or take, tell us in the comments section below.

Fix: Windows Cannot Find AMD Software Installer

A wide range of laptops and PCs come equipped with AMD graphics drivers. You can even install them externally on your PC.

While the graphics card is top-notch, an error has been troubling users for quite some time. The issue reportedly throws an error message like this:

Windows cannot find ‘C:\AMD\AMD_Software_Installer_22.10.3\Setup.exe’. Type correctly, try again.

The issue has plagued both Windows 10 and Windows 11 users. This guide will show you a bunch of methods to help you fix the problem. So let us get right into it.

What causes Windows Cannot Find AMD Software Installer error?

We did some digging and have created a list of the most common reasons you will come across Windows that cannot find AMD software installer error.

  • The registry keys are damaged: Chances are the registry key is corrupt or damaged because the AMD software installer isn’t working.
  • Crucial Windows update isn’t installed: For the drivers to work with no issues, they should be compatible with the version of Windows you have on your PC. Unfortunately, this issue can pop up if you haven’t installed the latest Windows update.
  • Your Antivirus is blocking the software installer: If you have set aggressive antivirus settings, it could raise a false alarm and block certain programs.
  • Important driver files are missing: You should do a clean install of the AMD drivers on your PC because some files might have gone missing when you downloaded them.
  • System files are corrupt: Some important system files on your PC might be missing or corrupt, then it could cause trouble with the programs on your PC.

How can I fix What causes Windows Cannot Find AMD Software Installer error?

1. Temporarily turn off Controlled Folder Access

  1. Open the Start menu by pressing the Win key.
  2. Type Windows Security and open it.
  3. Click on Virus & threat protection.
  4. Under Virus & threat protection settings, click on Manage settings.
  5. Click on Manage Controlled folder access.
  6. Toggle off Controlled folder access option.

A user reported that turning off the Controlled folder access in the Windows Security tool helped resolve the problem.

This solution can also be applied to users who cannot update the AMD graphics card on their PCs.

2. Tweak the registry using SFC and DISM commands

  1. Open the Start menu by pressing the Win key.
  2. Open the command prompt as an admin.
  3. Type the below command and press Enter. sfc /scannow
  4. After the process completes, type the below command and press Enter. DISM /Online /Cleanup-Image /ScanHealth
  5. Restart your PC after the scan completes.

3. Clean install AMD drivers

  1. Visit the official AMD website.
  2. Select the appropriate driver by selecting from the drop-down.
  3. Choose the operating system.
  4. Hit the Download button.
  5. Install the program from the EXE files.

Often the downloaded files get corrupted and could trigger the Windows cannot find AMD software installer error. This could be easily fixed if you re-download the appropriate driver from the official website.

4. Check for Windows update

  1. Press the Win + I keys to open the Settings menu.
  2. Click on Windows Update from the left pane.
  3. Select the Check for updates button.
  4. If there is a pending update available, hit the Download & install button.
  5. Restart your PC.

You should ensure that the latest Windows update is installed on your PC for all the programs to work without any issues and not run into compatibility issues.

5. Reset your PC

  1. Press the Win + I keys to open the Settings menu.
  2. Click on Recovery.
  3. Click on Reset this PC option.
  4. Select the Keep my files option.
  5. Follow the on-screen prompts and reset your PC.

You should reset your PC only if none of the above solutions helped you resolve the Windows cannot find AMD software installer error.

When you reset your PC, it will help replace the corrupt or missing system files that could not be fixed via the in-built commands or a dedicated tool.

That is it from us in this guide. However, if the AMD drivers are not installing, then you should check out our guide that lists down 7 of the most effective solutions to resolve the problem.

High CPU usage issue with Radeon Host Service has been a troubling problem for many users. Finally, we have a guide that will help you with that.

If you want to know how you can stop AMD drivers from automatically updating, then you can refer to our guide. You can also refer to our dedicated guide to help you with the AMD software installer stuck problem.

We cover all our bases. So, we have a dedicated guide that gives you proper instructions on downloading and updating AMD drivers and how you can roll back AMD drivers via four ways methods. Also, you can check out our guide, which will help you resolve the AMD driver crashing issue reported by Windows 11 users.

Feel free to let us know in the comments below which one of the above solutions helped you resolve the Windows cannot find AMD software installer problem.

How to Fix Windows 10 Restarting Instead of Shutting Down

Windows PC has different power options for different supposes. However, some users are reporting a mix-up, as Windows 10 restarts instead of shutting down.

This causes their battery to drain quickly as they are unable to turn off the PCs. If you are also facing this issue, this detailed guide will show you the steps to follow to fix it.

Windows 10 restarts instead of shutting down

1. Clean boot your computer

  1. Press the Windows key + R, type msconfig, and click OK.
    msconfig windows 10 restarts instead of shutting down
  2. Click on the Services tab.
  3. Now, check the Hide all Microsoft services box and click the Disable all button.
    hide all
  4. Go to the Startup tab and select Open Task Manager.
    open
  5. Next, right-click each startup item and select Disable.
    disable  windows 10 restarts instead of shutting down
  6. Go back to the System Configuration window and click the Apply button, followed by OK.
    apply ok
  7. Finally, restart your PC.

One of the things that can cause Windows 10 to restart instead of shutting down is the activities of third-party apps. The easy way to curb this is to perform a clean boot.

This will disable all third-party apps and processes and only start your PC with the required services and processes.

2. Enable Safe Mode

  1. Press the Windows key + I to open the Settings app and select Update & Security.
    update and
  2. Click Recovery in the left pane and click the Restart now button under Advanced startup.
    restart now windows 10 restarts instead of shutting down
  3. When your PC restarts, choose Troubleshoot > Advanced options.
    restart now
  4. Now, select the Startup Settings option.
    startup settings
  5. Click the Restart button.
    restart windows 10 restarts instead of shutting down
  6. Finally, press 4 or F4 to Enable Safe Mode.
    enable safe

Safe Mode allows you to start your PC with only the necessary drivers enabled. This should eliminate the hindrances that can cause Windows 10 to restart instead of shutting down.

3. Turn off Fast Startup

  1. Press the Windows key, type power plan, and select the Choose a power plan option.
    choose a
  2. Select Choose what the power buttons do in the left pane.
    choose what windows 10 restarts instead of shutting down
  3. Now, click Change settings that are currently unavailable.
    change settings
  4. Finally, uncheck Turn on fast startup and click the Save the changes button.
    turn off

The fast startup feature ensures your PC does not shut down completely in a bid to improve the startup time. However, it can be why Windows 10 restarts instead of shutting down.

Hence, you need to disable it and check if the issue persists.

4. Repair your Registry

Corrupted Registry keys may cause your computer to behave erratically and do the exact opposite of what you’re telling it to do.

So, try to clean your Registry if your computer restarts instead of shutting down. The quickest solution is to install a Registry cleaner and let it scan your system.

Alternatively, you can use another effective tool to repair Windows errors, including more complex registry issues. You should thus consider this kind of software to repair most of your system errors using efficient automated support.

These are the methods you can use to fix the Windows 10 restarts instead of shutting down issue. We believe if you follow them carefully, you should be able to fix the issue.

If your Windows 10 PC randomly shuts down, check our detailed guide to fix it quickly. We also have a new guide on what to do if Windows shuts down instead of restarting, so don’t miss it.

Feel free to let us know the solution that helped you solve this problem in the comments below.

Save as Window Keeps Popping Up: How to Get Rid of It

If the Save as window keeps popping up on Windows, don’t worry, as there are some practical ways to solve this problem.

A significant number of Microsoft 365 app users have reported a peculiar problem that triggers the Save as window repeatedly for an endless time. It happens on apps like Excel, Word, Outlook, etc. For example, users cancel or save; no matter what, the window may keep appearing. It is like an endless loop.

You may encounter other problems like Word Document not saving. But that has nothing to do with our current situation.

Why does the Save as window appear repeatedly?

It is hard to mention the exact reason which one is causing the problem on your end. But it may be any of the following reasons:

  • A third-party plugin: If you use a plugin or add-in on an app, that may be causing endless savings as a loop.
  • A third-party service: Any third-party background service also can cause this issue by interfering with a specific app’s operation.
  • Keyboard issues: Sometimes, your keyboard’s key may trigger automatically due to physical damage or hardware fault, which may cause the Save as window pop-up issue.
  • Configuration problem: Bad configuration in an app may be another reason.
  • Incompatible app: Outdated or incompatible apps may not operate correctly with a newer version of Windows, which can be the root of your problem.

How do I fix the Save as Window keeps popping up?

Fortunately, there are ways to eliminate the infinite Save as window loop problem. But, before that, we suggest you do the following things:

  • First, update Windows to the latest version.
  • Make sure that the keyboard buttons are working fine. Then, check out these best keyboards for Windows 11 PC, if necessary.
  • Disable the antivirus temporarily and see what happens.
  • Optionally, you can update the drivers of your PC.

If you have already finished the above things, go through these methods to solve the problem:

1. Open the Office app in safe mode

  1. Press Win + R on the keyboard to open Run.
  2. Type any of these commands based on what you want to open: word /safe powerpoint /safe excel /safe outlook /safe
  3. Click on OK.opening excel safe mode with run command

Now, see if the problem still exists or not.

2. Disable add-ins

  1. Open the problematic app and go to Options.
  2. Go to the Add-ins tab.
  3. Select COM Add-ins next to Manage and click on Go.choosing com add-ins and clicking go Microsoft Excel.png
  4. Uncheck all the Add-ins and click on OK.disabling excel add-ins and clicking ok
  5. Relaunch the app.

You should follow the above steps for any problematic Office applications. For example, if it is Microsoft Excel, it will solve the save as window keeps popping up in Excel.

3. Update the Office apps

  1. Open the Office apps like Word, PowerPoint, Outlook, Excel, or whatever is relevant.
  2. Go to Account.
  3. Click on Update options and then on Update now.updating microsoft powerpoint

If Receive updates for other Microsoft products are enabled, the Office apps will be updated via Windows update. So you won’t have to follow the above steps.

4. Repair the app

  1. Press Win + I on the keyboard to open Windows settings.
  2. Navigate to Apps and click on Installed apps.going installed apps windows 11 settings
  3. Click on the three horizontal dots next to Microsoft Office and choose Modify.clicking modify windows 11 settings microsoft office
  4. Select your preferred option and click on Repair.repairing Microsoft Office quick repair

It may take a while if you choose Online Repair. However, we recommend this over Quick Repair to solve a critical problems like endless Save as window loop.

Repairing will solve the save as window keeps popping up issues in all Office apps like Word, PowerPoint, Outlook, Excel, etc.

5. Perform a clean boot

  1. Open the Start Menu, type MSconfig, and press Enter.
  2. Go to the Services tab.
  3. Click on Hide all Microsoft Services and click on Disable all.disabling non microsoft background items system config windows
  4. Click on OK.
  5. Restart your PC.

A clean boot will ensure that no third-party services are active. If you find that you don’t face the problem anymore, then start enabling the services one by one until you encounter the main culprit. Then, uninstall the related software or keep that service enabled.

If the clean boot doesn’t work, undo the changes and follow the next methods.

6. Re-install the Office app

6.1 Uninstall Microsoft Office

  1. Navigate to the Installed apps on the Settings like before.
  2. Click on the three vertical dots for Microsoft Office and choose Uninstall.uninstalling microsoft office 365 windows 11
  3. Follow the on-screen steps to complete the process.
  4. After that, restart your PC.

To uninstall, we suggest you use a tool like Revo or IObit Uninstaller. These tools can obliterate any application and don’t leave any leftovers. It is handy to troubleshoot various problems.

6.2 Install again

  1. Go to the Microsoft account site and sign in.
  2. Navigate to your subscription page.
  3. Click on Manage next to the Microsoft Office or Microsoft 365 subscription.
  4. Then, click on Install office, as shown in the screenshot.clicking install office Microsoft website
  5. Download the installer file.
  6. After downloading, Install it on your PC.

Users who don’t have a Microsoft 365 subscription may need to follow slightly different steps to download Office apps.

If the save as window keeps popping up, it means the version of the office application is ancient. For example, Office 2010 users may have this problem in Windows 11. If this is the case, we suggest you consider upgrading to the latest office app or getting a Microsoft 365 subscription.

Alternatively, you can consider using one of the MS Office alternatives.

This article has explained how you can fix Save as window keeps popping up. If you have any better solution, feel free to input it in the comment box.

Updates are Underway Windows 11: How to Bypass It

Some of our readers have reported that their Windows 11 updates get stuck. For some users, updates may get stuck at 100% 70%, or at a different value with the updates are underway Windows 11 error message.

If you have been experiencing this similar issue during Windows 11 update, you don’t have to worry as we have gathered some possible tweaks on how to bypass the persistent error in this article.

What causes updates are underway on Windows 11?

Before proceeding to explore the possible solutions for this error, it would interest you to take note of the reasons why you are experiencing this issue. What’s more, this may help you to prevent such from repeating itself next time:

  • Poor internet connection – One of the major reasons behind this error is due to poor internet connection. When your device is not properly connected to a stable internet connection, it can get stuck while downloading and installing updates.
  • Faulty system files – In some cases, this error can be triggered by broken system files. However, you can use Windows built-in tools to repair these corrupt files or a corrupted system file fixer.
  • Interrupted power supply – An interrupted power supply can also cause the updates are underway error with Windows 11. When this happens, it can interfere with the build cycle and cause Windows 11 updates to stop at a certain level.
  • Conflicting third-party programs – It may be due to incompatible or problematic applications if the Windows 11 upgrade is taking too long on your PC. Utilizing an uninstaller software should fix the problem.
  • Insufficient storage space – The ISO for Windows 11 is almost 4.5GB in size, and Windows updates are generally pretty huge. Check to see if your system disk has adequate space to install Windows 11.
  • Disabled services – For your PC to function properly, some system services are necessary. To make the process successful, you must enable these services.

Now that you know some of the potential reasons for the updates are underway on Windows 11 errors, you can explore the solutions provided below to help you fix the issue.

How can I bypass the error updates are underway?

Before engaging in advanced troubleshooting steps, you should consider performing the following preliminary checks which can help you prevent the error next time:

  • Make sure you are properly connected to the Internet.
  • Ensure that you are connected to an uninterrupted power supply.
  • Disconnect all unnecessary peripheral devices.
  • Make sure there is enough storage space on your PC.
  • Download the latest BIOS for Windows 11 from the manufacturer’s website.
  • Ensure that you enable the system services that are necessary for downloading and installing updates.

Having confirmed the above checks and you still require further assistance, you can explore the dedicated fixes on how to bypass the updates are underway Windows 11 error.

1. Press Ctrl + Alt + Del

If the update appears to be stuck during the installation process in some cases, you can try pressing Ctrl + Alt + Del to see if the Windows login screen appears.

In such a case, log into Windows, as usual, to see if the update procedure can proceed without problems. However, if nothing happens after the operation, move to other troubleshooting tips.

2. Restart Windows 11 in Safe Mode

  1. Press the Windows + I keys and select Recovery.
  2. Then, click the Restart now button before Advanced Startup.
  3. Once the computer restarts, click on Troubleshoot and select Advanced Options.
  4. Next, select Startup Settings.
  5. From there, click the Restart button.
  6. Finally, press F5 to Enable Safe Mode with Networking.

At other times, if you’re stuck on the Update screen, you can enter Windows Recovery Environment by using a bootable drive or force restarting the computer a few times. But if restarting Windows in Safe mode does not fix the issue, try the next fix.

3. Run the SFC Scan to Repair System Files

  1. Press the Windows key, type cmd in the Search box, and click Run as administrator.
  2. In the CMD window, type the following command in the text field and press Enter: sfc /scannow
  3. The scanning process may take up to 15 minutes, so wait till the verification reaches 100%.

If some system files necessary for the update to Windows 11 are missing, the procedure may occasionally become stuck. However, an SFC scan ought to assist you in swiftly resolving this problem.

Alternatively, you can try a dedicated tool because it scans your PC for corrupt or missing files and automatically finds healthy replacements from its repository.

In the case where CMD is not working in Windows 11, here is an easy fix to apply.

And that’s it on how to bypass updates are underway Windows 11 error message.

If you have any questions or suggestions, do not hesitate to use the comments section below.

Hulu Error Code P-DEV313: How to Fix it [Quick Guide]

Many reported Hulu error code P-DEV313 while trying to stream online. This can be a problem and prevent you from viewing any content.

Luckily, there are a few solutions that can help you fix this issue.

How do I fix the Hulu error code P-DEV313?

Before we try to fix this error, try waiting for a bit. Hulu may be having server problems. Alternatively, you can use the Disney+ app to access all Hulu content as a workaround.

1. Reset your account password

  1. Go to your Hulu Account page and log in with your current password.
  2. Look for the Account section.
    account hulu error code p-dev313
  3. Click on CHANGE PASSWORD.
    change password
  4. Enter your current password for verification.
  5. Enter your new password twice to make sure the password is correct.
  6. Check the Log me out of other computers box. This will log you out from all the devices you are signed in to.
  7. Click Save changes to complete the process.
  8. Sign in with your newly created password on the device that shows the p-dev313 error.
  9. Try streaming any content to see if changing the password resolved error.

2. Restart your router

  1. Press the Power button on your router. If you have a modem, do that on the modem as well.
  2. Wait for a few minutes.
  3. Now turn the modem/router again.
  4. Wait for it to boot and check if the problem is gone.

This isn’t the only problem, and we have a great guide on Hulu error P-DEV317.

If you are facing other issues like Hulu error codes 301, and 95, or Hulu webpage is not available, check our detailed guide to fix it quickly.

Lastly, you might also want to check our guide on Hulu error codes 3, 503, and 504. Some users reported that the Hulu app is not working at all, but we addressed that issue in another guide.

Before you go, you might want to check our latest guide on Hulu error P-DEV336 for more useful information. We also have a guide on Hulu error P-DEV318, so don’t miss it.

Feel free to let us know the fix that helped you solve this problem in the comments below.

10 Easy Fixes to Apply if You Cannot Start BlueStacks (5)

BlueStacks is a fast Android emulator for PC, allowing users to enjoy thousands of apps on their computers. Whilst the platform is fairly solid, sometimes users cannot start Bluestacks.

For instance, the BlueStacks engine won’t start on certain systems.

If you have encountered errors with starting BlueStacks on your Windows PC, then the fixes below will help you get it up and running in no time. But first, let’s see what triggers the issues, to begin with.

Why BlueStacks cannot start?

This issue can occur if BlueStacks failed to install properly on your PC. A damaged installation can’t run properly, so you might have to reinstall the software.

In case the installation is damaged, BlueStacks won’t open on your PC, so it’s recommended to repair the Bluestacks installation.

If there’s a driver problem, you might even get Blue Screen of Death errors in BlueStacks, but there are ways to fix that.

Speaking of problems, here are some similar issues that users reported:

  • Bluestacks stuck on initializing screen Windows 10 – This problem can appear on almost any OS, see BlueStacks not starting Windows 10, cannot start BlueStacks Windows 11, Mac
  • Cannot start bluestacks unable to initialize graphics
  • Bluestacks stuck on starting engine – BlueStacks stuck on starting, also BlueStacks infinite loading, or loading forever. To fix the problem, simply end those processes and check if that helps.
  • Bluestacks 5 stuck on loading screen/ welcome screen – cannot start Bluestacks 5, cannot start Bluestacks X – To fix the problem, make sure that your antivirus isn’t interfering with Bluestacks.
  • Cannot start BlueStacks error code 1, needs minor repair
  • Bluestacks stuck on just a sec –To fix it, disable all startup applications and run Bluestacks again.
  • Cannot start BlueStacks Hyper-V

How to fix Cannot start BlueStacks please send a problem report?

Before we dig in, here are a few quick prerequisites for you to verify:

  • Ensure that your PC fulfills the minimum system requirements
  • Change Graphics Mode to DirectX
  • Consider upgrading to an SSD and adding more memory

1. Close any additional applications

  1. Press Windows Key + R and enter msconfig. Now press Enter or click OK.
    Bluestacks stuck on welcome screen
  2. The System Configuration window will now open.
  3. Navigate to the Services tab and check Hide all Microsoft services. Now click Disable all button.
    Bluestacks stuck on just a sec
  4. Proceed to the Startup tab and click Open Task Manager.
    Bluestacks stuck on initializing screen Windows 8
  5. A list of startup applications will now appear in Task Manager.
  6. Right-click the first entry on the list and choose Disable from the menu. Repeat this step for all startup applications on the list.
    Bluestacks stuck on starting engine
  7. Close Task Manager. Now go back to the System Configuration window.
  8. Click Apply and OK to save changes. Restart your PC to apply the changes.
    Bluestacks stuck on welcome screen

Third-party applications can sometimes interfere with Bluestacks and cause Bluestacks to get stuck on initializing.

Since many of these applications start automatically with Windows, it’s advised that you perform a Clean boot and disable all startup applications and services.

Once your PC restarts, check if the problem with Bluestacks still appears. If not, it means that one of the startup applications was causing it.

To find the cause, you need to enable startup applications and services until you find the problematic application. Once you find it, remove it from your PC and check if that helps.

2. Install the latest version of Bluestacks

  1. Uninstall Bluestacks. You can do that by going to Settings app > System > Apps & features. Locate Bluestacks and click the Uninstall button.
  2. Locate and remove the following folders:
    • C:\Program\Files(x86)\BlueStacks or C:\Program\Files\BlueStacks
    • C:\Program\Data\BlueStacks
    • C:\Program\Data\BlueStacks\Setup
  3. Press Windows Key + R, enter %temp% and press Enter or click OK.
    Bluestacks stuck on starting engine
  4. Delete all BST files and folders. You can search for BST files using the search bar at the top right corner.
  5. Download the removal tool and use it to remove Bluestacks.

Sometimes older and outdated versions of Bluestacks engine won’t start, and to fix this problem, we advise you to reinstall the Bluestacks application.

In addition to downloading the latest version, be sure that you have the necessary .NET framework installed. You can download all the necessary components from Microsoft’s download page.

Note that you’ll need to completely remove all files, folders, and registry keys associated with Bluestacks.

If this process seems a bit complicated, you can also remove Bluestacks using an uninstaller tool.

By using a professional uninstaller tool you’ll ensure that the software is completely removed from your system along with all of its files and registry entries.

Once you remove it using this kind of tool, download BlueStacks and check if the issue is resolved.

3. Use a different software

Although BlueStacks is a great Android emulator, it’s not the only one on the market, and there are many others that can do the same job, and one of them is LDPlayer.

This software delivers great performance, so you’ll experience maximum framerate when playing games. Custom keyboard and mouse controls are supported, allowing you to play Android games the same way as PC games.

Lastly, the software supports multiple instances, synchronization, and macros, allowing you to automate tedious tasks with ease.

⇒ Get LDPlayer

4. Change the security properties

Users reported that Bluestacks initialization problems can occur due to your security settings.

Sometimes you might not have the necessary privileges to run this application, but you can fix that problem by following these steps:

  1. Go to the Bluestacks installation directory. By default, it should be C:\Program Files\BlueStacks
  2. Locate HD-StartLauncher, right-click it, and choose Properties.
    Bluestacks stuck on welcome screen
  3. Go to the Security tab and click Edit.
    Bluestacks stuck on just a sec
  4. In the Group or user names section, select your user name, and under the Permissions section, check Full control in Allow column.
    Bluestacks stuck on initializing screen Windows 10
  5. After you’re done, click Apply and OK to save changes.

5. Run Bluestacks in Compatibility mode

A few users reported that you can fix problems with Bluestacks not starting by running it in Compatibility mode. To do that, follow these steps:

  1. Right-click the Bluestacks shortcut and choose Properties from the menu.
  2. Go to the Compatibility tab, check Run this program in compatibility mode for, and select a previous version of Windows from the dropdown menu.
    Bluestacks stuck on starting engine
  3. After you’re done, click Apply and OK to save changes.

6. End all Bluestack processes

If Bluestacks gets stuck on initializing on your PC, you might be able to fix the problem by disabling all running Bluestacks processes. This is quite simple to do, and you can do it by following these steps:

  1. Turn on Airplane mode. If you don’t have a laptop, you can just disable your Internet connection.
  2. Press Ctrl + Shift + Esc to open Task Manager.
  3. Locate all Bluestacks processes and terminate them.
  4. You can do that by right-clicking the Bluestacks process and choosing End Task from the menu.
    Bluestacks stuck on initializing screen Windows 7
  5. Once you disabled all Bluestacks processes, close Task Manager.
  6. Navigate to the Bluestacks installation directory and run HD-Quit, HD-QuitMultiInstance, and HD-Restart.
  7. After doing that, try to run Bluestacks again.

Bluestacks should now start. Disable Airplane Mode or enable your Internet connection and you’re good to go.

7. Try an older version of Bluestacks

According to users, sometimes Bluestacks won’t start due to issues in the latest version. To fix this problem, users are suggesting switching back to the older version and check if that helps.

To do that, first, you need to completely delete your current installation of Bluestacks. After doing that, install the older version and check if that helps.

8. Check your antivirus

Your antivirus software can cause Bluestacks not to start. However, you can fix this problem simply by disabling certain features in your antivirus.

If that doesn’t work, be sure to add Bluestacks to the list of exceptions in both your antivirus and firewall. If the issue is still there, you need to disable your antivirus altogether.

In the worst-case scenario, your only option might be to completely remove your antivirus.

If uninstalling the antivirus solves the problem, you might want to consider switching to a different antivirus solution.

There are many antivirus applications on the market, and some of them offer great protection without interfering with your system.

9. Install the latest updates

  1. Press Windows Key + I to open the Settings app.
  2. When the Settings app opens, go to Update & Security section.
    Bluestacks stuck on just a sec
  3. Now click Check for updates button.
    Bluestacks stuck on initializing screen Windows 10

Another cause for problems with Bluestacks can be missing updates.

There may be certain incompatibility issues between Bluestacks and your version of Windows. To ensure that everything is running smoothly, we strongly encourage you to keep your OS up to date.

For the most part, Windows installs the missing updates automatically, but sometimes certain glitches can occur causing you to skip updates.

If any updates are available, they will be downloaded automatically in the background. Once the updates are installed, check if the problem with Bluestacks is resolved.

10. Make sure virtualization is enabled on your device

If you cannot start Bluestacks, you may need to take a closer look at your Hyper-V settings (or similar). So, first of all, you need to make sure that your CPU supports virtualization, and then enable it on your PC.

  1. To do so, you can type Run in the search zone and open the Run menu.
  2. Next, type in msinfo32. The System Information window should open.
  3. Under System Summary, your Hyper-V mentions should have the value Yes.
  1. Alternatively, you can use the shortcut Ctrl + Shift + Esc to open the Task Manager.
  2. Go to the Performance tab and look for CPU.
  3. The Virtualization field should say Enabled.

If that’s not the case, but you’re certain that your CPU supports this feature, you’ll need to enable virtualization in BIOS.

Bluestacks is one quite useful tool, and if Bluestacks is stuck on initializing on your Windows 10 PC, be sure to try some of our solutions.

YouTube TV Playback Error Licensing Video on Roku: Why & Fix

YouTube TV comes in a monthly paid membership available on most streaming players, Roku devices included. However, it is not free from issues, with some users reporting a YouTube TV playback error licensing video on Roku.

If you are experiencing this issue, you don’t need to worry, as this guide contains the solutions to it.

Why does YouTube TV have a playback error on Roku?

1. A flaw with the app or with your Roku

  1. In your Roku home screen, search for YouTube TV.
  2. Press the asterisk * key on your remote.
    asterik youtube tv error licensing video roku
  3. Now, select the Remove Channel option.
    remove channel
  4. Go to your Roku’s Settings.
    settings
  5. Next, select System > System restart.
  6. From the home screen of your Roku and select Streaming Channels.
    streaming youtube tv error licensing video roku
  7. Find YouTubeTV app > Add Channel.

2. Network connectivity glitch

Connectivity glitches are possible when starting either your device or your YouTube app. In this case, you have to unplug both the Roku device and the router/modem, plug them back in, then switch on everything.

This should fix if something goes wrong when opening the app or powering up your Roku.

3. Change display settings

  1. Go to Settings on your Roku device.
    settings
  2. Select the Display type option.
    display type
  3. Finally, choose 4K 30Hz TV, 4K 60Hz TV, or 4K HDR 60Hz.
    display options youtube tv error licensing video roku

This applies only if your playback error refers to an uneven video display. What you should do here is change the display settings.

With this, we can conclude this guide on the YouTube TV error licensing video on Roku. Just make sure you follow the instructions carefully, and you should be able to fix this issue.

If you are facing a similar issue in error licensing this video on YouTube TV, check our detailed guide to fix it quickly.

Feel free to let us know the solution that helped you fix this issue in the comments below.

Error Code 0x8007042c: Use These 3 Simple Methods to Fix it

Error Code 0x8007042c is a common problem many computer users face while updating their Windows operating system or installing software.

An error message appears on the screen, indicating that the process cannot be completed due to a problem with the computer. But do not worry. Several simple methods can help you resolve this issue.

What does 0x8007042C mean?

Error Code 0x8007042C is a Windows Update error that appears when updating the operating system or installing software. This error shows a computer problem preventing the process from completing.

Possible causes of Error Code 0x8007042C include:

  • Corrupted system files – Corrupted or damaged system files can cause the update process to fail and trigger Error Code 0x8007042C.
  • Firewall interference – Firewall settings or third-party security software can block the update process, causing the error code to appear.
  • Antivirus interference – Antivirus software can also interfere with the update process and trigger Error Code 0x8007042C.
  • Insufficient disk space – Lack of sufficient disk space on the computer can cause the update process to fail and result in the error code.
  • Network connectivity issues – Network connectivity problems such as slow or unstable internet connection can also result in Error Code 0x8007042C.

The solutions we explore below will help you resolve the error.

How can I fix error code 0x8007042c?

Before going into the solutions below, we recommend you change your internet connection since a bad network may cause the problem.

1. Turn Windows Firewall on manually

  1. Press Windows + R, type services.msc, and hit Enter.
    0x8007042c
  2. Scroll down to Windows Defender Firewall.
  3. Right-click on this service and select Start if it is not running.
    0x8007042c
  4. Double-click on the Windows Defender Firewall service and set the Startup type to Automatic.
  5. Now repeat steps 2 and 3 for the Base Filtering Engine service.

2. Scan and remove malware from the PC

  1. Download Microsoft Safety Scanner from the official Microsoft website,
  2. If prompted, save the file to your desktop; open the setup file and follow the on-screen instructions to install Windows Safety Scanner,
  3. Once installation is complete, open Windows Safety Scanner (it could be listed as msert),
  4. You will be asked to accept specific terms regarding the license agreement; do it, and then hit the Next button.
  5. Select Quick Scan, then hit Next.
  6. Microsoft Safety Scanner will now scan your computer for any lingering malware.
  7. Once the process is complete, please close the Window, press the Start key, and type Windows in the search box; click on Windows Firewall.
    0x8007042c
  8. On the navigation panel on the left, select Turn Windows Firewall on or off.
    0x8007042c
  9. Select Turn on Windows Firewall for each available network location.
  10. Click OK to complete the process.

If the 0x8007042c error persists, move on to the next step.

3. Start associative services

If both steps 1 & 2 failed to resolve the issue, you could try to stop and restart these services using a batch file. It isn’t as complicated as it sounds. Follow these steps:

  1. Press the Start key, and in the search box, type Notepad, then open the Notepad application.
  2. Now copy and paste the script below on Notepad.
    sc config MpsSvc start= auto
    sc config KeyIso start= auto
    sc config BFE start= auto
    sc config FwcAgent start= auto
    net stop MpsSvc
    net start MpsSvc
    net stop KeyIso
    net start KeyIso
    net start Wlansvc
    net start dot3svc
    net start EapHostnet
    net stop BFE
    net start BFE
    net start PolicyAgent
    net start MpsSvc
    net start IKEEXT
    net start DcaSvcnet
    net stop FwcAgent
    net start FwcAgent
  3. Click File and select Save As.
  4. Set the destination as your Desktop, then name the file Repair.bat, and select All Files on the Save as type box (*.*). Next, click Save, then close Notepad.
  5. On your desktop, find the Repair.bat file you just saved; Right-click on it and select Run as administrator.
  6. Once the process is complete, try starting Windows Firewall again, and if it starts successfully, delete the Repair.bat file.

If none helped resolve the error, you should contact Microsoft Support Center for further assistance.

In conclusion, Error Code 0x8007042c is a frustrating problem, but it can be quickly resolved using the methods outlined in this article.

Whether a software conflict or a Windows update problem, the above solutions should help you get back on track and get your computer working correctly.

Always back up important data before making any changes to your system; if all else fails, consult a professional for assistance.

HP Printer Blinking Orange Light: 3 Confirmed Solutions

Depending on the type of error and seriousness of the issue, the led lights on your printer will start flashing. One of the most common is the HP printer blinking orange light.

When this happens, the printer stops working in Windows. The worst part, you can’t quickly identify the underlying cause since the orange light indicates a range of issues. So, let’s find all the reasons and solutions that work.

Why is my printer blinking orange?

Here are a few reasons the HP printer is blinking orange light:

  • Paper is stuck: One of the most common reasons you are encountering the problem is that a piece of paper is stuck/jammed in the printer.
  • Issues with the firmware or driver: Another likely reason is running an outdated driver or firmware for the printer.
  • Problem with the ink cartridge: In case you recently installed a new ink cartridge and are, ever since, encountering the problem, it’s likely that the cartridge is faulty.
  • Trouble establishing a connection: Though rare, several users reported that the orange light keeps blinking when the HP printer has trouble connecting wirelessly.

Below are some of the fixes that we love to recommend. Note that these fixes will come in handy if your HP printer is flashing an orange or pink light or if the HP LaserJet M110we, DeskJet 2710, or HP LaserJet m140we is blinking an orange light.

How do I fix the orange blinking light on my HP printer?

Before we walk you through the comprehensive solutions, here are a few quick tricks and workarounds to try:

  • If it’s a solid orange light, connect the HP cartridges you initially received with the printer, and it should disappear immediately.
  • Ensure you are not using a surge protector and have directly plugged the printer into the socket.
  • Check if the paper in the tray is not placed correctly and rectify that. Also, ensure that the cover on the printer is closed.
  • Verify whether the cartridge is correctly placed in the printer and that the cover was removed. If you have a spare cartridge, try installing it to check if the problem lies with it or the printer itself.

If these don’t work, head to the solutions listed next.

1. Perform a Power Reset

  1. Remove the installed cartridges from your printer.
  2. Now, disconnect the printer while it’s turned on by unplugging the power cord from its rear end and outlet.
  3. Remove any USB cable that connects the printer to another device, including the computer.
  4. Leave the printer off-state for a few minutes, and hold the Power button for 30 seconds.
  5. Next, plug the printer back directly into the power source without using a surge protector or an extension. Finally, make sure to plug the other end of the cable into the printer.
  6. Connect the cartridge(s) that you removed earlier.
  7. Finally, turn on the printer, and wait until the warm-up period is over.

That’s it! For most users, performing a power reset should fix things when the HP printer keeps blinking orange light. So, we recommend you try this before opening up the device or making significant changes.

2. Reconnect to the printer

  1. Press Windows + I to open Settings, head to the Bluetooth & devices tab from the navigation pane, and click on Printers & scanners.printers & scanners
  2. Now, choose the HP printer blinking orange light from the list here.printer
  3. Click on the Remove button.remove to fix hp printer blinking orange light
  4. Click Yes to confirm the change.remove printer
  5. Next, go back to Printers & scanners, and click on the Add device button.add device
  6. After the printer is listed, select it, and follow the on-screen instructions to complete the process.

Once it is readded, you shouldn’t face issues, and the orange light on your HP printer should stop blinking. Also, if you are facing trouble this way, try adding the printer via IP in Windows. Besides, you could set up the printer using dedicated HP software.

3. Reinstall the printer drivers

  1. Press Windows + R to open Run, type devmgmt.msc in the text field, and hit Enter.device manager
  2. Expand the Printers section, right-click on the problematic printer, and select Uninstall device.uninstall device to fix hp printer blinking orange light
  3. Tick the checkbox for Attempt to remove the driver for this device, and click on Uninstall.attempt to remove the driver for this device
  4. Once done, restart the computer for the changes to come into effect.

In case the problem was with the drivers, reinstalling them should do the trick when the orange light keeps blinking on the HP printer. Alternatively, you can update the printer driver if the current one is outdated.

If nothing works, contact HP support and take help from their professional executives to identify and eliminate the underlying cause.

They usually handle such problems quickly and should help you get things up and running quickly.

If the printer is old and beyond repair, check the best printers in the market and get a new one today!

We hope that our solutions helped your problem with your HP printer. If you have any other suggestions, or your HP printer is blinking orange light still, leave them in our comments section below.

SrtTrail.txt BSoD Error in Windows 10: How to Fix & Causes

Users try using this tool in an attempt to repair certain system failures and the Windows 10 Automatic Repair tool is seemingly unable to launch.

Upon trying to access the Automatic Repair, users receive an error message regarding the SrtTrail.txt file. The BSoD log files can be usually found in log file c: /windows/system32/logfiles/srt/srttrail.txt

One user shared his experience with the error on the official forum.

 …all of sudden when I started the computer it says auto repair tool, then can’t fix or repair,  then blue screen that says D:windowssystem32logfilesSrtSrtTrail.txt…

In order to fix this issue, we came up with a list of solutions that you should try, so continue reading our guide.

How do I fix the Windows 10 SrtTrail.txt error?

1. Perform a System Restore

  1. Press the Windows key + X, and select the Power option.
  2. Hold the Shift button, and select Restart.
  3. Choose Troubleshoot, and select Advanced options.

  4. Click System Restore, and go to Next or Choose a different restore point, if it’s the first time you’re doing a system restore.
  5. Select Next, and choose the desired system restore point, then Close.
  6. Press Next in order to proceed with the process.

2. Use a third-party BSoD fixer

Tracing the cause of BSoD errors can be quite difficult, especially for inexperienced users. Therefore, we suggest using specialized software that will greatly help with diagnosing your computer.

Once successfully installed, the program will scan your PC for harmful data and corrupted files, then it will attempt to restore or replace them with unaffected versions.


3. Repair the error using the Command Prompt

  1. Press the Windows key + S, and type cmd.
  2. In the Command Prompt, type the following commands hitting the Enter button after each:
    bootrec.exe /rebuildbcdbootrec.exe /fixmbrbootrec.exe /fixboot
  3. Then perform a check to each partition you have installed on your PC, like the below example shows: chkdsk /r c:chkdsk /r c: cmd windows 10 srttrail.txt error fix
  4. Hit Enter after inputting the command, then proceed to check the next drive by changing the letter c to d, e, and so on.
  5. Close the Command Prompt, and restart your PC to see if it fixed the issue.

4. Verify device partition

  1. Press the Windows key, and type cmd.
  2. In Command Prompt type the following command and press Enter: bcdeditbcedit cmd windows 10 srttrail.txt error fix
  3. If the displayed value is not partition=C: then you need to perform some changes.
  4. Input the following commands and hit Enter after each one:
    bcdedit /set {default} device partition=c: bcdedit /set {default} osdevice partition=c:
  5. Restart your PC, and see if it fixed the issue.

5. Check the system boot device through the BIOS

how to fix ACPI_BIOS_ERROR on Windows 10
  1. Restart your PC, and open the BIOS.
  2. Find the Boot section in your specific BIOS version.
  3. Make sure to have your Primary Boot Device set to your hard drive.
  4. If you have more than one hard drive, make sure to select the one containing Windows.
  5. Save changes, and restart your PC to see if it fixed the issue.

Keep in mind that different motherboards have different BIOS interfaces, so yours might be different then the one in our demonstration. Make sure you use your motherboard’s manual to find all the information you need.


6. Reset the PC

  1. Type Reset this PC in the Search bar.
  2. Choose between the two options: Keep my files or Remove everything.keep or remove files windows 10 srttrail.txt error fix
  3. Enter your password, or select Continue.
  4. Click Reset, wait for the process to take place, and restart your PC.

Ultimately, you should contact a PC specialist if you suspect having damaged hardware.


We hope that you could find at least one solution from our list to fix your issue. If you know any other working solutions, please share them in the comment section below.


Windows 11 Can’t Find Printer: How to Get It Detected

One such error is that Windows 11 can’t find the printer. Many users have complained that they face this problem after installing the KB5006746 update on their computers.

In this guide, we will cover some expert-recommended methods to get rid of the issue. Just follow the step-by-step instructions below:

What can I do if my Windows 11 computer can’t find a printer?

Before diving into actual troubleshooting steps, make sure you go through these quick fixes: 

1. Check for Windows updates

  1. Press Windows + I to open Settings. 
  2. Go to Windows Update, and click Check for updates. Settings check Updates -windows 11 can't find printer
  3. If there is an update available, click Download & install. 
  4. Reboot your computer once done. 

2. Run the Windows troubleshooter

  1. Press Windows + I to open Settings. 
  2. Go to System, then click Troubleshoot.System - Troubleshooter -windows 11 can't find printer
  3. On the next page, click Other troubleshooters. Troublesshooter 2
  4. Now, locate the Printer and click Run. System Troubleshooter - Printer - Run
  5. Choose the printer from the list and click Next.Printer Troubleshoot
  6. Follow the onscreen instructions if prompted and wait till it’s done. 

3. Update the printer driver 

  1. Press Windows + R to open the Run window. Device Manager RUN COMMAND
  2. Type devmgmt.msc and press Enter to open Device Manager. 
  3. Go to Print queues and expand it. Then, select the driver, right-click it and select Update driver. Update driver Printer -windows 11 can't find printer
  4. Now, click on Search automatically for drivers. Printer queues
  5. If available, Windows will download the suitable driver. 
  6. Restart your PC once the work is done. 

4. Rollback to the previous version 

  1. Press Windows +  I to open Settings. 
  2. Go to Windows Update, and click Update history.Windows Update 2
  3. Click Uninstall updates.Uninstall Updates -windows 11 can't find printer
  4. Go to the update you want to uninstall, and click Uninstall.Uninstall Windows

5. Reset the Printer Spooler 

  1. Press Windows + R to open the Run console. Services Run Command - System recovery -windows 11 can't find printer
  2. Type services.msc and press Enter to open Services. 
  3. Locate and double-click Printer Spooler.Printer Spooler -windows 11 can't find printer
  4. Under the Service status, click the Stop button. Stop Running
  5. Now on your computer, navigate to this path: C:\Windows\system32\spoolsv.exespool
  6. Open the Spool folder, and delete everything inside. 
  7. Go to Services and click the Start button on Printer Spooler Properties. START
  8. Reboot your computer to let the changes take effect. 

6. Make changes to Printer properties

6.1 Set default printer

  1. Press Windows + I to open Settings.
  2. Go to Bluetooth & devices, click Printers & scanners.Bluetooth & drivers -windows 11 can't find printer
  3. Under Printer preferences, toggle off Let Windows manage my default printer option.Printer preferences
  4. Navigate to your printer, right-click it, and choose Set as default. Set as default

6.2 Configure Port

  1. Go to the printer again, right-click it and select Properties. 
  2. Switch to the Ports tab on the properties window. Port tab windows 11 can't find printer
  3. Look for a port compatible with your printer, select it, and click Configure port. 
  4. Click Apply and OK. 

7. Add printer manually

  1. Press Win + I to Go to Settings:
  2. Click on Bluetooth & devices.bluetooth and devices in settings
  3. Select Printers & scanners.printers and scanners
  4. Click the Add device button next to Add a printer or scanner.add printer device
  5. Select the Add manually option next to The printer that I want isn’t listed. add printer manually
  6. Follow the on-screen instructions to add the printer manually.adding printer manually options

What causes the Windows 11 can’t find printer error? 

There could be several reasons for Windows not being able to identify your printer, some of the popular ones: 

  • Outdated printer driver – If you have not updated your printer driver in a while, it could be the reason for the issue. To get rid of this, update the drivers. 
  • Windows update – If the Windows update on your computer is pending, or you have installed a bad update, you may get this problem. Check for updates if available or remove the previous update to fix it. 
  • Security software interference  – If your antivirus is conflicting, then your printer might not be able to get detected. Try to disable the antivirus temporarily and check if it fixes the issue.
  • Printer not connected to the network – If your printer is not connected to your computer or network, you may find it difficult to connect. To fix this, check the cables and network settings. 
  • Network connectivity issues – If you have a weak internet connection, you might face this problem. To resolve this, you need to reset the network or contact your ISP. 

So, the steps you need to follow to fix Windows 11 can’t find printer issue. Please, let us know in the comments section below if you have any questions or concerns.

Action Center not Opening in Windows 10: Why & How to Fix

Action Center allows you to see and open important notifications in Windows 10. However, some users report that this important feature is not opening on their PCs.

This takes away the ease of accessing your notifications. Fortunately, there are surefire fixes that can help you solve this problem, and we will show them to you in this guide.

Why can’t I open Action Center in Windows 10?

Below are some of the factors that can cause the Action Center not to open on Windows 10:

  • Corrupt system files: Sometimes, this issue might be because your system files are faulty or missing. The solution to this is to repair and restore these corrupt files.
  • Outdated PC: If your PC is outdated, the Action Center might not open. The only way around this is to update your operating system to the latest version.
  • Excessive junk files: In some cases, this issue can be caused by too many junk files on your hard disk. You need to run the Disk Clean-up feature to clear them.
  • Interference from third-party apps: Some third-party apps might be running programs blocking the Action Center. You need to disable these apps from starting up with your PC to fix this.

What to do if Action Center won’t open in Windows 10

1. Use ShellExView

  1. Download and run ShellExView.
  2. When the application starts, locate Security & Maintenance.cpl and Windows Management Instrumentation.cpl. Disable these options.
  3. Wait for a few seconds and enable them again. Save changes and close ShellExView. If you can’t find these options, uncheck the Hide all Microsoft services checkbox.
  4. Now restart your PC.

According to users, sometimes the Action Center not opening issue can be caused by context menu items. To fix this problem, you need to use ShellExView or any other similar application that can edit context menu items.

2. Turn off your computer

You can fix this problem simply by turning off your PC. By default Windows 10 uses the Fast Startup option that doesn’t fully turn off your PC.

Therefore you need to turn off your PC by holding the power button for several seconds. Turn your PC on again and check if the Action Center is now opening on Windows 10.

Some users also suggest simply logging off and logging back in to fix this problem. To do that, follow these steps:

  1. Open the Start Menu.
  2. Click the User icon and choose the Sign Out option from the menu.
    sign out
  3. Now log back again to Windows 10.

After doing that, check if the problem is resolved.

3. Delete Arial Narrow font

  1. Press Windows key + S and enter fonts. Choose Fonts from the menu.
  2. Fonts window will now appear with the list of all installed fonts. Navigate to Arial.
  3. Finally, locate Arial Narrow, right-click it, and choose Delete from the menu.

Several users reported that the Action Center not opening on Windows 10 issue was caused by the Arial Narrow font. The font file can become corrupted, and that can cause certain Windows components, such as Action Center, to stop working.

To fix the problem, you need to remove the Arial Narrow font.

After deleting the font Action Center should start working again without issues. If you need the font, you might have to get it from a working PC and install it again.

4. Use PowerShell

  1. Press the Windows key + S and type powershell.
  2. Locate Windows PowerShell, right-click it and choose Run as administrator.
  3. Now, paste the following line into PowerShell: Get-AppXPackage -AllUsers |Where-Object {$_.InstallLocation -like "*SystemApps*"} | Foreach {Add-AppxPackage -DisableDevelopmentMode -Register "$($_.InstallLocation)AppXManifest.xml"}
  4. Finally, press Enter to run the command.

A few users managed to get the Action Center to open on Windows 10 by reinstalling the feature using PowerShell.

This is a powerful and advanced command line tool. Therefore, we strongly advise that you create a System Restore point and backup in case anything goes wrong.

5. Download the latest Windows update

  1. Press the Windows key + I to open the Settings app.
  2. Go to Update & security section.
  3. Now, click the Check for updates button. If any updates are available, Windows 10 will download and install them automatically.
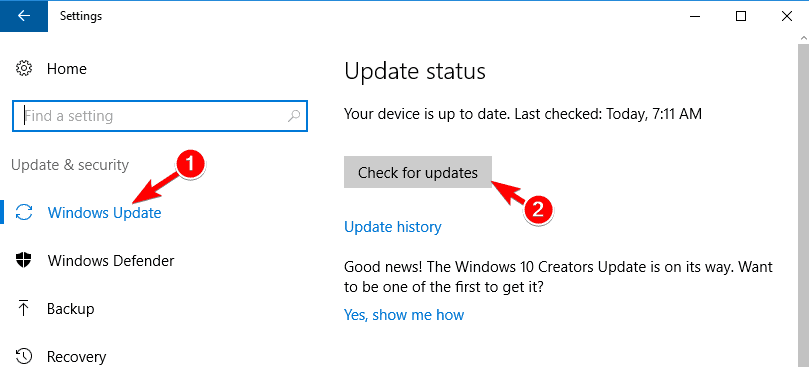
You can fix the Action Center not opening on Windows 10 issue by installing the latest Windows updates. Microsoft frequently releases new updates to improve stability and fix certain issues.

In most cases, Windows 10 will automatically install all updates, but you can also check for updates manually.

6. Disable Outlook 2016 notifications

According to users, the issue with Action Center is caused by Outlook 2016. It seems that Outlook notifications are responsible for this problem.

The Outlook notifications will stop appearing after a while and eventually prevent Action Center from opening on Windows 10. To fix the issue, you need to disable Outlook 2016 notifications.

7. Scan your C drive

  1. Press the Windows key + X and choose Command Prompt (Admin) or Windows PowerShell (Admin).
  2. Now, type the command below and hit Enter: chkdsk c: /f /rchkdsk action center not opening windows 10
  3. Finally, press Y when prompted and restart your PC.

Sometimes, Action Center might stop opening on Windows 10 if your files are corrupted. If that’s the case, the best choice of action would be to scan your C drive.

After the scan is completed, check if the problem is resolved.

8. Start Windows 10 in Safe Mode

  1. Press the Windows key and click the Power button.
  2. Now, press and hold the Shift key and choose Restart from the menu.
  3. After your PC restarts, choose Troubleshoot > Advanced options.
    advanced options
  4. Now, select Startup Settings.
    startup settings
  5. Click the Restart button.
    restart action center not opening windows 10
  6. After your PC restarts, press the corresponding button to Enable Safe Mode.
    enable safe mode action center not opening windows 10

A few users reported that they managed to fix the Action Center not opening on Windows 10 problem simply by starting Windows 10 in Safe Mode.

9. Restart Windows Explorer

  1. Press Ctrl + Shift + Esc to start Task Manager.
  2. When Task Manager starts, locate the Windows Explorer process.
  3. Now, right-click it and choose Restart from the menu.

Alternatively, you can close Windows Explorer and restart it manually. To do that, follow these steps:

  1. Open Task Manager.
  2. Locate the Windows Explorer process and right-click it.
  3. Now, choose End Task from the menu.
  4. After closing Windows Explorer in Task Manager, click on File > Run new task.
  5. Finally, type explorer and click OK to start Windows Explorer again.

Another possible solution to the Action Center not opening on Windows 10 issue is to restart Windows Explorer.

After doing this, check if the problem is resolved. This might not be the permanent solution, so you’ll have to repeat it every time the issue occurs.

10. Use Group Policy Editor

  1. Press Windows key + R and enter gpedit.msc. Press Enter or click OK.
  2. In the left pane, navigate to Local Computer Policy > User Configuration > Administrative Templates > Start Menu and Taskbar.
  3. In the right pane, double-click on the Remove Notifications and Action Center option.
  4. Select the Not Configured or Disabled option and click Apply and OK to save changes.
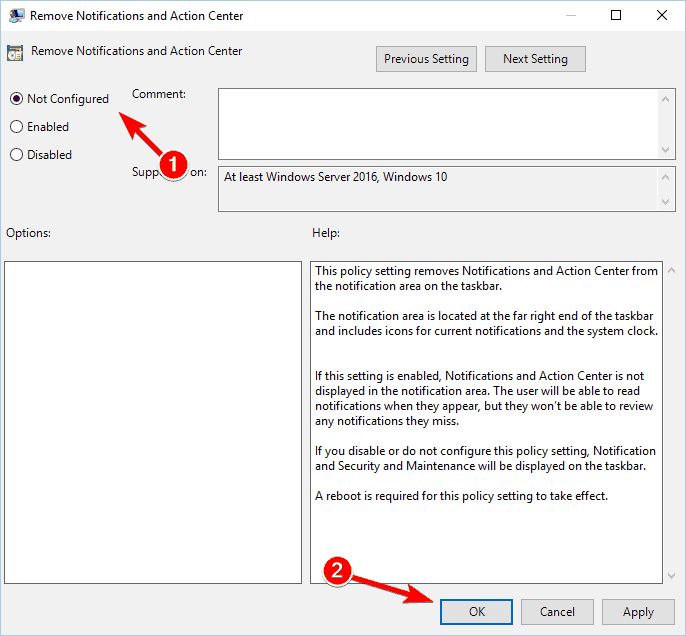
According to a few users, you can fix this issue simply by changing the few options in Group Policy Editor. After that, check if the Action Center is opening on Windows 10.

There’s also another solution that involves Group Policy Editor. This solution requires changing two values, and you can perform it by following these steps:

  1. Open Group Policy Editor.
  2. In the left pane, navigate to the path below: Local Computer Policy > User Configuration > Administrative Templates > Start Menu and Taskbar
  3. In the right pane, locate and double-click Force classic Start Menu.
  4. Select the Enabled option and click on OK.
  5. Now, locate the Start Layout option and double-click it.
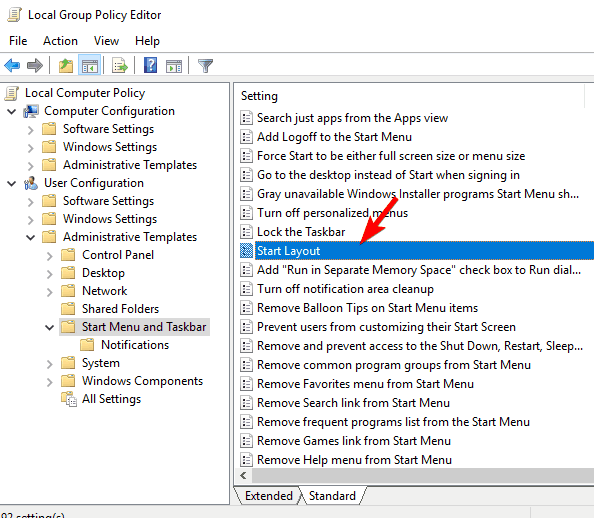
  6. Next, select Disabled and click Apply and OK to save changes.
  7. Finally, close everything and restart your PC.

After your PC restarts, check if the problem is resolved.

11. Edit your registry

  1. Press the Windows key + R, type regedit, and click the OK button.
  2. After Registry Editor opens, go to the path below in the left pane: HKEY_CURRENT_USER\SOFTWARE\Policies\Microsoft\Windows
  3. Now, expand the Windows key and look for the Explorer key. If you don’t have this key available, you need to create it.
    • To do that, right-click the Windows key and choose New > Key.
    • Enter Explorer as the name of the new key.
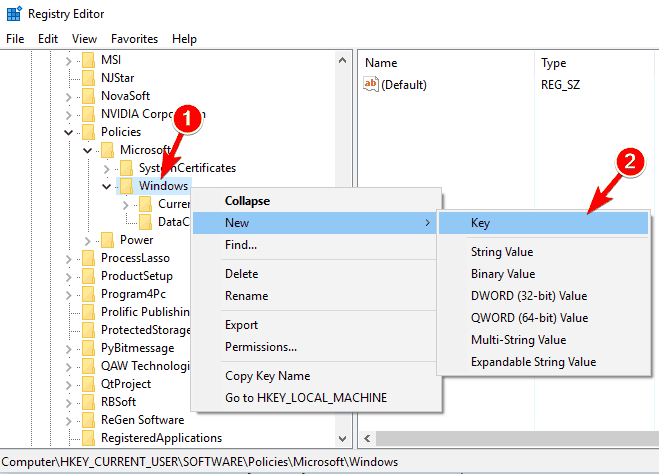
  4. Now, select the Explorer key. Right-click the space in the right pane and choose New > DWORD (32-bit) Value.
  5. Enter DisableNotificationCenter as the name of the new DWORD.
  6. Double-click DisableNotificationCenter DWORD and set the Value data to 0.
  7. Finally, click OK to save changes and restart your PC.

If you can’t open Action Center on Windows 10, you might have to make a few changes to your registry. Modifying the registry can lead to stability issues. Therefore, we advise you to create a backup of your registry, just in case anything goes wrong.

There’s also another registry edit that might help you with this problem. According to users, you need to disable the new Action Center from Registry Editor: To do that, follow these steps:

  1. Open Registry Editor.
  2. In the left pane, navigate to: HKEY_LOCAL_MACHINE\Software\Microsoft\Windows\CurrentVersion\ImmersiveShell
  3. Create a new DWORD and name it UseActionCenterExperience.
  4. Now, open the new DWORD and set the Value data to 0.
  5. Click OK to save changes.
  6. Finally, close the Registry Editor and restart your PC.

After making the changes, Action Center should now open on Windows 10. Users reported that Outlook notifications caused this issue, so be sure to remove them from Action Center.

After doing that, disable Outlook notifications and remove UseActionCenterExperience DWORD from the registry.

12. Run Disk Cleanup

  1. Press the Windows key + S and enter cleanup.
  2. Select Disk Cleanup from the menu.
  3. Now, select your System drive; by default, it should be C, and click the OK button.
  4. Disk Cleanup will now analyze your drive. Wait for the process to finish.
  5. Select the files that you want to remove. In most cases, you can select all files. Now click the OK button.
  6. Finally, wait while Disk Cleanup removes the selected files.

Sometimes temporary or leftover files can cause issues with Windows 10. A few users reported that they solved the issue by removing old and temporary files.

After the process, try to open Action Center on Windows 10 and check if the problem is resolved.

13. Use the Advanced SystemCare tool

Some users managed to fix the Action Center not opening on Windows 10 issue simply by using the Advanced SystemCare tool. This application has a small tool called Smart Defrag that can optimize applications.

A few users reported that using the Smart Defrag feature in the Advanced SystemCare tool fixed the problem for them, so you might want to try using this application.

14. Remove problematic applications

  1. Press the Windows key + I to open the Settings app and select the System option.
  2. Select the Apps & features tab.
  3. List of all installed applications will now appear. Locate Akami NetSession, select it, and click the Uninstall button.
  4. Finally, follow the onscreen instructions to complete the process.

Sometimes third-party applications can cause problems with Action Center. Users reported that Akami NetSession caused this problem on their PC. If you have this application installed, we strongly suggest you remove it.

Keep in mind that other applications can also cause this problem to occur. You might have to remove additional applications to fix this problem.

Several users reported that removing Dropbox and Apple applications fixed the issue for them, so be sure to try that as well.

15. Use SFC and DISM scan

  1. Open Command Prompt as administrator.
  2. When Command Prompt starts, enter the command below and hit Enter: sfc /scannowsfc
  3. Finally, wait for the scan to complete and restart your PC.

If the issue persists, you might need to run a DISM scan. To do that, follow these steps:

  1. Open Command Prompt as administrator.
  2. Now, type the following commands and hit Enter after each: DISM.exe /Online /Cleanup-image /Scanhealthdism scan DISM.exe /Online /Cleanup-image /Restorehealthdism restore
  3. Wait for the commands to finish. The DISM process can take 15 or more minutes, so be sure not to interrupt it.

If Action Center is not opening on your Windows 10 PC, that might be because core Windows components are corrupted or damaged. If that’s the case, you might have to use an SFC scan to fix the problem.

16. Switch to High Contrast theme

  1. Press Windows key + S and type theme. Select the Change the theme option.
  2. Scroll down and select one of the available High Contrast Themes.
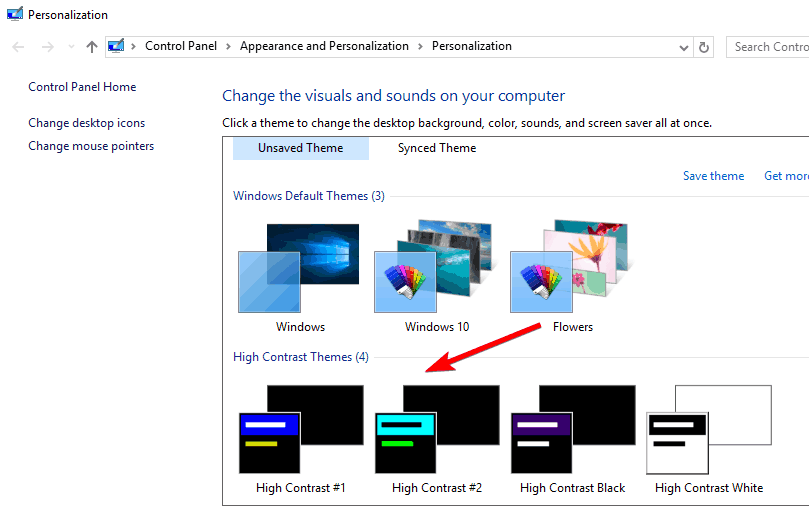
  3. After doing that, check if Action Center is working properly. If so, revert back to the original theme.

A few users reported that you could fix the Action Center problem by switching to the High Contrast theme. This is a simple solution, but it might work for some users, so try it out.

17. Rename the Usrclass file

  1. Go to the Settings app and click on Accounts.
  2. Go to the Family & other people section.
  3. In the Other people section, click on Add someone else to this PC.
  4. Click on I don’t have this person’s sign-in information.
  5. Now, choose Add a user without a Microsoft account.
  6. Enter the username for your new account and click Next to finish the creation process.
  7. Log out of your current account and switch to the new one.

According to a few users, you might be able to fix the problem with Action Center simply by renaming the Usrclass file. Keep in mind that this solution will remove all tiles from Start Menu.

In addition, this solution will change your theme to a High Contrast theme, so you’ll have to revert it to the original. To change the Usrclass file, you need to create a new administrator account, as shown above.

After switching to a new account, you need to find the Usrclass file on your old account. To do that, follow these steps:

  1. Navigate to: C\:User\sYour_old_user_account_name\AppData\Local\Microsoft\Windows
  2. If this folder isn’t available, you’ll have to reveal hidden files in order to access it. To do that, click the View menu and check Hidden items.
  3. Now, rename the file from Usrclass.dat to Usrclass.dat.old.
  4. Finally, sign off of your account and log back into the old account.

After doing that, the issue should be completely resolved, and everything should start working again. If that doesn’t work, you might want to move all your files and switch to the new account.

18. Set Taskbar to the auto-hide mode

  1. Right-click the Taskbar and choose Settings from the menu.
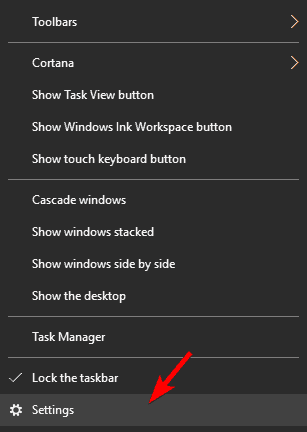
  2. Turn on the Automatically hide the taskbar in desktop mode and Automatically hide the taskbar in tablet mode options.
  3. Now, check if Action Center is working properly.

If Action Center is not opening on Windows 10, you might be able to fix it simply by enabling auto-hide mode. Should this restore normalcy, you can disable auto-hide options and check if the Action Center still works.

19. Disable and enable Action Center

  1. Open the Settings app and go to the Personalization section.
  2. Select the Taskbar tab and choose Turn system icons on or off.
  3. Now, locate Action Center on the list and turn it off.
  4. After doing that, restart your PC.
  5. Finally, repeat the same steps and turn on Action Center again.

According to users, disabling and enabling Action Center from the Settings app can sometimes fix this problem.

20. Disable certain startup items

  1. Open Task Manager.
  2. Navigate to the Startup tab.
  3. Now, look for startup items that have High startup impact.
  4. Right-click them and choose Disable from the menu.

According to users, sometimes demanding startup items can prevent Action Center from opening on Windows 10. To fix the problem, you might want to try disabling those items.

If the issue persists after doing this, you might want to disable all startup applications and check if that solves the problem.

21. Perform System Restore

  1. Press the Windows key + S and enter system restore.
  2. Select Create a restore point from the menu.
  3. Now, click the System Restore button.
  4. When the System Restore window opens, select Choose a different restore point option.
  5. Now, click the Next button.
  6. Check the Show more restore points option.
  7. Select the desired restore point and click Next.
  8. Finally, follow the instructions on the screen to complete the process.

According to users, you might be able to fix this problem simply by performing a System Restore.

22. Perform an in-place upgrade

If you still have issues with Action Center, you might have to perform an in-place upgrade. You need to download Windows 10 ISO file from Microsoft’s website to do that. After doing that, mount the ISO file and run setup.exe.

Follow the instructions on the screen to perform an upgrade. Keep in mind that performing in-place upgrades can remove some of your files. Therefore, we advise you to create a backup.

The in-place upgrade also allows you to keep your files, so be sure to select this option during the installation.

Action Center is a major part of Windows 10, but if it’s not opening on your PC, try some of our solutions.

If you are facing other issues, like the Action Center shortcut missing on Windows 10, check our detailed guide to fix it.

Feel free to let us know the solution that helped you fix this issue in the comments below.

4 Easy Ways to Disable the Windows 10 Mail App

The Mail and Calendar is one of the default apps pre-installed with Windows 10, however, some users might prefer to disable the Mail background app to free up system resources or turn off its notifications.

Some users might want to remove the Mail App altogether so that it can’t conflict with their preferred email client software, such as Outlook, in any way.

This guide will be beneficial if you belong to any of these categories.

What happens if I Uninstall email in Windows 10?

If you uninstall the email app in Windows 10, you will no longer be able to access and manage your email accounts through the app.

However, your email accounts and messages will still exist on the email servers and can be accessed through web browsers or other email clients. Additionally, any settings or preferences associated with the app will be lost.

Let us now explore the best options to disable Windows 10 mail app.

How can I disable the Mail App in Windows 10?

1. Turn off the Mail App’s notifications

Users who need to disable Mail’s notifications can do that by adjusting the app’s notification settings.

  1. First, click Mail on the Start menu.
  2. Then click the Settings button.
    disable mail app Windows 10
  3. Click Notifications.
    disable mail app Windows 10
  4. Select the Apply to all accounts option.
    disable mail app Windows 10
  5. Then turn off the Show notifications in the Action Center setting.

2. Disable the Mail App from running in the background

  1. Users can disable Mail running as a background app via Settings. To do that, press the Windows key + S hotkey, enter the keyword background app in the search box and open the app.
  2. Then turn off the Mail and Calendar app setting.
    disable mail app Windows 10

3. Uninstall the Windows Mail App

  1. 1. Press the Windows Key.

  2. 2. Type apps in the search bar.

  3. 3. Select Apps & features from the list to open the window shown directly below.

    how to disable mail app windows 10 apps and features
  4. 4. Scroll down to the Mail and Calendar app.

  5. 5. Press the Uninstall button. This will complete the uninstallation. However, if you are using an older Windows 10 build, jump to the next step.

  6. 6. In older build versions, some users might need to remove Mail and Calendar with PowerShell. Enter PowerShell in Windows 10’s search box.

  7. 7. Right-click PowerShell and select the Run as administrator option.

  8. 8. Then input the following command: Get-AppxPackage Microsoft.windowscommunicationsapps | Remove-AppxPackage

    powershell uninstall apps command line
  9. 9. Press the Enter key to run the command. This will uninstall the Mail App.

  10. Users who don’t need Mail can completely uninstall the app to disable it. This ensures that the app is completely gone from your Windows 10 PC.

4. Terminate Mail

  1. Press the Windows key, type add or remove programs and click the app.
  2. Search for Mail and Calendar on the right pane and click Advanced options.
  3. Scroll down and click Terminate.

So, that’s how users can disable Mail. In addition, users who need to utilize that app can disable the Mail background app and turn off its notifications.

Those who utilize Outlook can uninstall Mail to disable the app and ensure no email client conflicts.

If you stumble across the email error code 0x80040b0b, the highlighted guide will provide the necessary solutions to fix it.

We hope this article helped you turn off the Windows Mail app on your device. If you have any issues trying our solutions, let us know in the comments below.

4 Best Laptop Battery Management Software to Limit Charging

In this article, we’ll explore the best third-party battery limiter software. These tools will help you set charging thresholds, reduce battery wear, and optimize battery longevity.

While some laptops, like those from Lenovo and Asus, come with built-in battery management tools, not all devices offer this feature. Let’s take a look at the best options available on the market.

What is the best laptop battery management software?

1. Reviversoft Battery Optimizer – Great for PC diagnostics

battery optimizer reviversoft

Battery Optimizer scans your laptop for power-hungry apps and provides real-time suggestions to extend battery life.

It runs diagnostics, tracks battery wear, and helps optimize usage. After trying it, we found it simple to install and easy to use, with clear alerts when your battery needs attention.

If you want detailed insights into your laptop’s power consumption, Battery Optimizer is a solid choice.

Pros:

  • Easy installation
  • Provides battery health insights
  • Real-time usage alerts

Cons:

  • Limited features in the free version
  • Some options may be too technical for beginners
Battery Optimizer

Battery Optimizer

With today’s focus on mobility, no battery sign on your laptop is not an option. Instead, use Battery Optimizer to extend battery life now.

2. Battery Limiter – Great free option

Battery Limiter lets you set a specific charge threshold (from 30% to 96%) to prevent overcharging.

It alerts you when the battery reaches the set level, so you can unplug it manually. In our experience, the software is lightweight and doesn’t slow down the system.

It’s great for anyone who wants a simple, no-fuss solution for battery protection without complex setups.

Pros:

  • Free and lightweight
  • Simple, easy-to-use interface
  • Customizable charging alerts

Cons:

  • Requires manual unplugging
  • No automatic charging control

⇒ Get Battery Limiter

3. Asus Battery Health Charging – Best choice for Asus users

Asus Battery Health Charging offers three modes: Full Capacity, Balanced, and Maximum Lifespan.

Each mode helps you control the battery’s charge level, aiming to improve longevity. We’ve found that this tool is excellent for extending the lifespan of Asus batteries, especially when used in Maximum Lifespan mode.

It’s straightforward but limited to Asus devices only.

Pros:

  • Easy to switch between profiles
  • Perfect for preserving battery health on Asus laptops
  • No additional software needed

Cons:

  • Exclusively for Asus laptops
  • Lacks advanced customization

⇒ Get Asus Battery Health Charging

4. Smarter Battery

microsys smart battery

Smarter Battery tracks charge cycles and battery health, offering detailed reports on wear and capacity. It allows users to set custom thresholds for charging, helping avoid overcharging.

After testing it, we appreciated the thorough battery analysis, though the interface feels a bit outdated.

If you want to keep track of every detail about your battery, Smarter Battery does a great job.

Pros:

  • Tracks battery cycles and health
  • Customizable charging thresholds
  • Provides detailed battery insights

Cons:

  • Interface feels outdated
  • Some features may be overwhelming for casual users

⇒ Get Smarter Battery

Another option, however, is using a Chargie device. They can expand the battery life span of your device, even though they are physical devices, as opposed to the software options discussed in this guide.

The life cycle of a battery depends on usage and heat management. Unlike your smartphone, laptop batteries run out of juice much faster and require replacement after a year or two.

This is primarily the case with low-cost laptops or high-performance-oriented devices like gaming laptops.

However, with the help of battery limiting software, you can help the battery last longer than your average laptop batteries that charge up to their full capacity all the time.

Movie App for PC: 7 Best Free We Tested [2026 List]

If you want to watch free movies on your Windows 10 tablet or PC, you need to check out these apps. Read below to find out more about them.

Everybody loves movies. Some prefer comedy, and some prefer horror or thriller. Nevertheless, we all like those quiet family nights when we gather around the screen with a bowl of popcorn and enjoy a good flick.

Movie lovers who own a Windows 10 device have an extra reason to be happy – they can enjoy some amazing free movie apps for PC, allowing them to watch their favorite movies and TV shows.

This list is updated with the apps that allow you to watch movies during a trial version or old movies and shows.

You must pay a subscription fee for some of them if you want to access a larger movie database or the newest films.

While the online movie industry is growing, there are many regulations and fees, but we will try to give you a list of the programs that will let you watch movies for free on your Windows 10 PC.

Get a VPN for unlimited content

Before starting, you must know that many of these services work better if you have a VPN and change your geo-location: it allows you to watch movies that are not free or available in your country or when issues like TeaTV not working arise.

We recommend Private Internet Access for watching movies because it’s reliable and fast. Besides changing your geo-location, it allows you to access foreign game servers.

It hides your IP from attackers and persons who need your data and secures you against cyberattacks while surfing the Internet.

⇒ Get Private Internet Access

What are the best free movie apps for computers?

fuboTV – best free movie app for PC

Sports fans rejoice! fuboTV is a great streaming platform for sports and not only.

If you’re interested in all American sports league transmissions from NBA, NFL, NHL, MLB, NCAA, and even college football, this will become your best friend. fuboTV even covers European and MLS soccer!

You will have over 100 live channels to stream from, and more than 30 of them broadcast live sports.

If you’re looking for great coverage, look at this list of channels:

CBS and the CBS Sports Networks, FOX, TNT, NBC, regional sports networks, FS1, NBCSN, NFL Network, NFL RedZone, NBA TV, beIN Sports networks, Golf Channel, Pac-12 Networks, Big Ten Network, Olympic Channel, and more.

Of course, they are adding new content and channels all the time.

fuboTV is not free but has a free trial period and a subscription fee that won’t break the bank.

fuboTV

fuboTV must be the best streaming platform for American sports lovers. Over 100 live channels of sports!
Free trial Visit Website

Tubi – Free Movies and TV – wide range of content

We’re going through tough times, but movies and shows are our best friends. We start our list with Tubi – Free Movies and TV, a free app for free and unlimited streaming.

However, this service bought by FOX in early 2020 is ad-supported, so you will be interrupted occasionally, not as frequently as on TV.

Other than that, Tubi is a complex app that lets you select your content and set the moment when you want to watch it, and there is something for every taste.

Cheer yourself up with a great comedy, try your feelings with an award-winning drama, find a nice program for the kids, or enjoy a famous classic; you will find all that on Tubi.

You will even find more niche content like anime, Korean dramas, or European shows, everything for free.

You will find new movies and shows every week, so you will always have fresh content to watch whenever you open the app.

Tubi even has a category called Not On Netflix that speaks for itself. You will find series and movies that you will not find on the Famos platform but are highly rated on IMDb.

If you’re an anime fan, you will have your beloved series, Yu-gi-oh, Cowboy Bebop, Naruto, and many more.

When you first access Tubi, you will probably be overwhelmed by the quantity of content that you will want to watch but that’s OK, you don’t need to take notes.

You can search your queue and bookmark any interesting movies you want to watch next.

And if you want to know what’s coming next, you can access the featured section and get the most anticipated titles.

Tubi also has Chromecast support, Airplay View for Android devices, and TV integration. through Apple TV, Roky, Xbox, Playstation, Amazon Fire TV, and Samsung TV.

⇒ Get Tubi

Popcorn Time – great alternative for Neftlix

Popcorn Time is a great alternative to Netflix for all users not in countries that allow streaming services. Almost every movie can be found on this app.

Its main page is always full of the best blockbusters, and if you love everything new in the cinema world, you are at the right address.

However, you can still access some of the old good movies on this multi-platform.

It is a very popular service because it is free. It uses a BitTorrent protocol for free streaming, which raises several questions about its legality.

You need to know that this app uses sequential streaming and does not download unauthorized copies using the P2P protocol.

Is it legal and safe to use Popcorn Time? It all depends on your location. Some countries have surveys on persons and organizations that use P2P protocol, so you should be careful.

Even more, you can always stay safe with a good VPN or a proxy service. Basically, it is your choice, so do a deep research on your country’s politics on this question if you want to use Popcorn Time.

If you need a great VPN for Popcorn Time, here are the best ones available right now.

If Popcorn Time has any problems with the VPN, take a look at this guide to solve them quickly.

⇒ Get Popcorn Time

PopcornFlix – great horror content

PopcornFlix will be a great surprise if you’re a horror or cult movie fan. That is because even if it doesn’t have the quantity of content that you can find on Netflix or HBO Go, you will find a great selection in the two categories mentioned above.

PopcornFlix is a completely free streaming service, but it’s ad-supported, so you’re still paying in a way for the content. The service is completely legal and doesn’t require any subscription.

As for the content, it features some interesting movies and series from all over the world.

You will find all sorts of content, including movies from big studios, independent films, and documentaries.

Actually, PopcornFlix is a pretty big source for independent movies because Screen Media Ventures, an independent film distribution company from New York, runs it.

The company states that it has the largest independently owned film libraries in the industry, so you’ve got a big reason to start with this one if you’re looking for independent entertainment.

⇒ Get PopcornFlix

Movies & TV – simple app

This great app from Microsoft is one of the best ways of watching the latest movies and TV shows that you can rent in the Microsoft Store.

It’s a fast, straightforward, and elegant app in its simplicity, but it works like a charm.

The Movies & TV app will help you go through your movies and shows, including the ones you recorded with your family and friends, so you can’t get better than that.

Technically, it’s not a streaming platform and you have to go the extra step in renting the titles.

However, all the content is also supported in the Movies Anywhere platform, which has access to a huge quantity of content from all the major Hollywood studios like 20th Century Studios, Fox, Sony Picture, Disney, and Warner Bros.

With Movies & TV, you can access 3 source destinations, including your Video folders, Removable storage, and even Media servers.

In the Video folders section, you can organize your movies and shows as you please by adding new folders to have everything neatly arranged.

With the Removable storage, your PC will automatically detect if you have any such device attache and you will be able to browse its contents.

In the Media server section, you obviously have to set up an external storage device as a media server first.

Although the Movies & TV app is completely free, you will have to rent the content.

⇒ Get Movies & TV

Movies Anywhere – easy to use

As we were saying in the Movies & TV app, that also supports the Movies Anywhere platform.

It’s technically a free platform that actually brings together organized all your movie purchases from Microsoft, iTunes, Amazon, Google Play Movies and TV, Vudu, and Comcast Xfinity TV.

So, for instance, if you bought a movie from Microsoft Movies & TV, and you link your account to Movies Anywhere, you will see it in all the other earlier mentioned platforms, but most importantly, in the Movies Anywhere app.

As we’ve mentioned before, this platform is supported by major studios, including Disney, Sony, and Warner Bros so that means that any movie you buy or rent from one of the studios will automatically show up on your Movies Anywhere account.

⇒ Get Movies Anywhere

Offline Video Player – drag and drop feature

You’ve got the movies on your drive but they are all over the place? Then you need a good movie-organizing app and that must be Offline Video Player.

It’s completely free to download and use, and it’s extremely easy to work with. once you download and install it, at its first run, it will scan all your internal or external drives, including SD cards or USB sticks, and detect all your movies.

Then, the app goes online to pick up the movie posters and even their descriptions and then organizes them into groups. After that, of course, you can drag and drop movies everywhere to make your selections.

Done! You are ready to watch your quality movies on your Windows 10 device.

⇒ Get Offline Video Player

What are the best paid apps to watch movies?

And now let’s see what are the best premium paid apps to watch movies on Windows 10. These tools bring additional features and options compared to the free software listed above.

Netflix – most popular choice

Netflix is the world’s most popular subscription service for watching TV episodes and movies so it’s really hard to think that someone doesn’t know about it.

It runs on extended supported devices including mobile, PC and TV, and it has its own rating system so you can have a clearer picture of the title before starting to watch it.

Also, in time, Netflix learns your preferences and it provides suggestions according to them.

Another huge advantage of Netflix is that you can start watching a movie or a show on a device and finish watching it on another device.

You can get the app for free as part of your Netflix membership. If you are not a Netflix member, you can still benefit from a one-month free trial period.

What to do if Netflix is not available in my country? If that’s what bothers you, be sure that we’ve got a solution.

VPN is our ALL nowadays, so use one and try to change your location to a country where Netflix‘s trial is available. Be sure that you choose a Netflix-reliable VPN.

If your Netflix audio is getting out of sync, check out this step-by-step guide to solve the problem in no time.

⇒ Get Netflix

Hulu – great design

Hulu offers unlimited access to the best TV shows, original series, all-time favorites, and hit movies.

As far as commercials are concerned, two options are available: the Limited Commercials plan and the No Commercials one.

Once you download and install the Hulu app, you will be able to search your movies even with the help of Cortana.

Like with Netflix, Hulu allows you to resume your movie from where you left it on all your supported devices. You can also add your favorite movies to the queue for instant access.

Unfortunately, you don’t get any free content from Hulu, you will need a subscription but you can use the 30-day free trial period available if you are new to Hulu.

What to do if Hulu is not available in my country? Try to use a reliable VPN service for Hulu and enjoy your favorite TV shows!

If the Hulu app isn’t working on Windows 10, take a look at this awesome guide to solve the issue easily.

⇒ Get Hulu

EPIX – over 3000 Hollywood content options

This app allows you to stream over 3,000 Hollywood hit movies, concerts, comedies, and documentaries.

You also get unlimited access to uncut movie versions and commercial-free content.

The app is free with your EPIX subscription through your TV service provider. If you don’t have an EPIX subscription, log on to EPIX.com for a 14-day free trial period.

⇒ Get EPIX

So what are you waiting for? Grab the popcorn and hit the play button! And should you encounter playback errors, we got you!

If you have any other suggestions or questions, don’t hesitate to leave them in the comments section below and we’ll be sure to check them out.

HDD Issues After A Power Outage: Symptoms & How to Fix Them?

Hard drives are one of a computer’s most essential and fragile components, as they are responsible for storing data on the computer. A power outage is, unfortunately, one of the most common ways hard drives are damaged.

In this guide, we will discuss the symptoms of HDD issues after a power outage and the ways to deal with them. 

What are the symptoms of HDD issues after a power outage?

There are several signs to look for if your hard drive is not being detected after a power outage, and some of the most common ones are:

  • The computer will not start – If the hard drive in question is the primary storage for your computer and is damaged due to a power outage, then the computer will not boot up.
  • Disk boot failure – If upon starting the computer, you see a disk boot failure error message on your screen, your hard disk may be damaged. 
  • Data corrupted – If you can’t access your files and folders on your computer after a power outage, then it is possible that your hard drive is not working correctly. 
  • Slow performance – One of the reasons for the slow performance and frequent crashes is a damaged hard drive.
  • Clicking sound – If you hear a grinding or clicking noise when your computer starts, then it could be a sign of hard drive damage. 
  • S.M.A.R.T error – If the hard drive is damaged, you will get an error when running a diagnostic tool or CHSDSK command.

What can I do to fix hard drive issues after a power outage?

Before moving to other troubleshooting steps, please go through these preliminary checks: 

  • Check the power supply, power cable, and voltage. 
  • Shut down the computer, remove the case and check all the connections. Unplug the hard drive and plug it back again. 

1. Run the SMART diagnostic tool 

  1. Press Windows + E to open File Explorer.
  2. Go to This PC. Right-click on the drive you want to scan and select Properties. Disk Properties -hdd issues after power outage
  3. Switch to the Tools tab, locate the Error checking section, and click Check. 
  4. On the next screen, you will be asked to schedule a disk check the next time you restart your computer. Click Yes. 
  5. Restart your computer for the disk check. 

2. Run the CHKDSK command 

  1. Press the Windows key, type CMD, and click Run as administrator. DOS COmmand Prompt - hdd ISSUES AFTER POWER OUTAGES
  2. Type the following command, replace C with the drive you want to scan, and press Enter: chkdsk C: /fcmd chkdsk
  3. When prompted, type Y to start the disk check. 

3. Check the BIOS Settings 

  1. Press Windows + I to open Settings.
  2. Go to System, then click Recovery. System - Recovery Windows 11
  3. Now next to the Advanced startup option, click Restart now. Advanced Startup -hdd issues after power outage
  4. From the Choose an option, click Troubleshoot.Choose an option - Troubleshoot
  5. On the next window, select Advanced options.Advanced options
  6. Next, on the Advanced options window, select UEFI Firmware Settings. UEFI 2
  7. Now click Restart. 
  8. On the next screen, choose the appropriate option to enter BIOS utility. 
  9. Check the hard drive settings and ensure the drive is the primary boot option.

4. Check it on another computer 

If nothing has worked for you, pull out the hard drive and try to use it on another computer. If the other computer detects the hard drive, the issue might be with the computer you are using. 

5. Replace the hard drive 

If the hard disk is not detected on another computer, you need to replace the hard drive as the hard drive is damaged. 

It would be best to use reliable third-party recovery software to recover data from the corrupted drive. Once recovered, you can transfer that data to the new drive. 

As hard disks are sensitive to damage by power outages, it is critical to understand the level of damage and fix the problem accordingly. 

If you have any questions or concerns about the HDD issues, feel free to mention them in the comments below.