Fix OneDrive Upload Slow Issues (Step-by-Step Guide)

Is OneDrive uploading at 0.0 KB/s or just taking forever to upload your files? Whether you’re syncing gigabytes of media or a simple folder, slow OneDrive upload speeds can be frustrating. Here’s how to fix it and improve performance.

Common Causes of Slow OneDrive Upload Speed

Before applying fixes, here are key reasons why OneDrive might be uploading slow:

  • Poor internet upload bandwidth
  • Background throttling by Windows or OneDrive
  • Too many large files uploading at once
  • Antivirus or firewall interference
  • File syncing conflicts or app bugs

How to Speed Up OneDrive Uploads

First of all:

  • Check your internet speed
  • Close other apps that might be using your network.

If these troubleshooting steps do not increase your upload speed, you can now delve into the fixes below:

1. Disable network limit

  1. Right-click the Cloud icon on the Taskbar and click the Gear icon in the top right corner.
  2. Select the Settings option.
    setttings onedrive upload slow
  3. Now, click the Network tab at the top and tick the button for Don’t limit under the Upload rate section.
  4. Finally, click the OK button to save the changes.
    dont limit

If the OneDrive uploading is slow and stuck at around 0.0 kb/s, it might be because you have limited the app’s network usage. You can quickly disable the feature and restart the upload.

2. Pause and resume sync

  1. Right-click the OneDrive icon on the Taskbar and click the Gear icon.
  2. Click the Pause syncing option and choose the duration to pause it.
    pause
  3. Now, wait a few minutes, repeat Step 1, and choose Resume syncing.
    resume onedrive upload slow

In some cases, the slow OneDrive upload issue is down to problems encountered by the app during the upload process. Pausing and resuming the process should fix this quickly.

3. Unlink the account

  1. Click the Cloud icon on the notification area of your Taskbar and click the Gear icon in the top right corner.
  2. Choose the Settings option.
    setttings onedrive upload slow
  3. Now, click Unlink this PC.
    unlink
  4. From here, click the Unlink account button to confirm the action.
    unlink account
  5. Finally, restart OneDrive from the Start Menu and follow the onscreen instructions to complete the account setup process.
    option  onedrive upload slow

Some users have found the slow upload issue on OneDrive to be with their account setup. Unfortunately, the reason for this can be challenging to pinpoint. Thus, it is better to unlink your account and relink it.

4. Restart OneDrive

  1. Press Windows + X and choose the Task Manager option.
    task manager
  2. Right-click the Microsoft OneDrive option and select End task.
    end task
  3. Now, click the Start icon and search for OneDrive to restart the app.
    option onedrive upload slow

5. Scan for File Conflicts or Unsupported Files

Problematic files can block or stall the upload queue:

  1. Open your OneDrive folder and sort by size
sort onedrive files by size
  1. Avoid syncing files over 15 GB
  2. Remove temp, system, or shortcut files like .tmp or .lnk

This often resolves cases where OneDrive is stuck uploading at 0.0 KB/s without an error.


6. Move Files in Smaller Chunks

Uploading a massive folder at once can overload OneDrive:

  • Split files into smaller batches (2–3 GB max)
  • Add each group to the OneDrive folder in stages

This helps OneDrive process uploads more efficiently and avoid timeouts or hangs.


7. Allow Through Firewall

Security tools may scan or block syncing activity:

  • Open your antivirus app and add OneDrive to its list of allowed or trusted apps
  • In Windows, go to Start > Settings > Privacy & security > Windows Security > Firewall & network protection > Allow an app through firewall
  • Find and check Microsoft OneDrive on both Private and Public networks

Especially useful if your OneDrive upload speed is far below your internet upload.


8. Reset the OneDrive Application

If all else fails and OneDrive uploads stay extremely slow, try a soft app reset (non-destructive):

  • Press Win + R, then run this:
    t%localappdata%\Microsoft\OneDrive\onedrive.exe /reset
  • Wait a few seconds — OneDrive will relaunch on its own

This clears any hidden app-level issues without affecting your files.


9. Keep Windows & OneDrive Updated

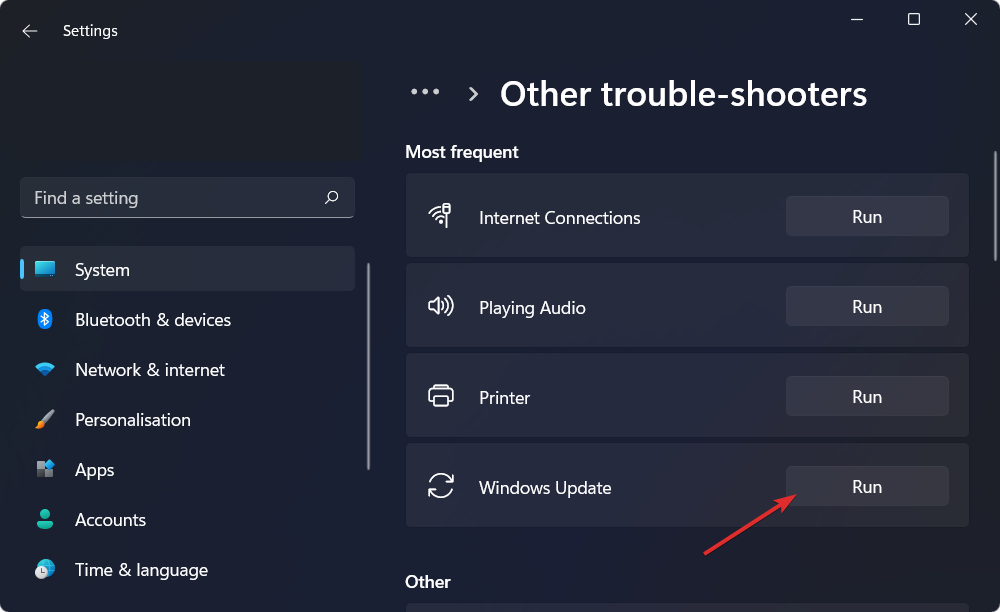
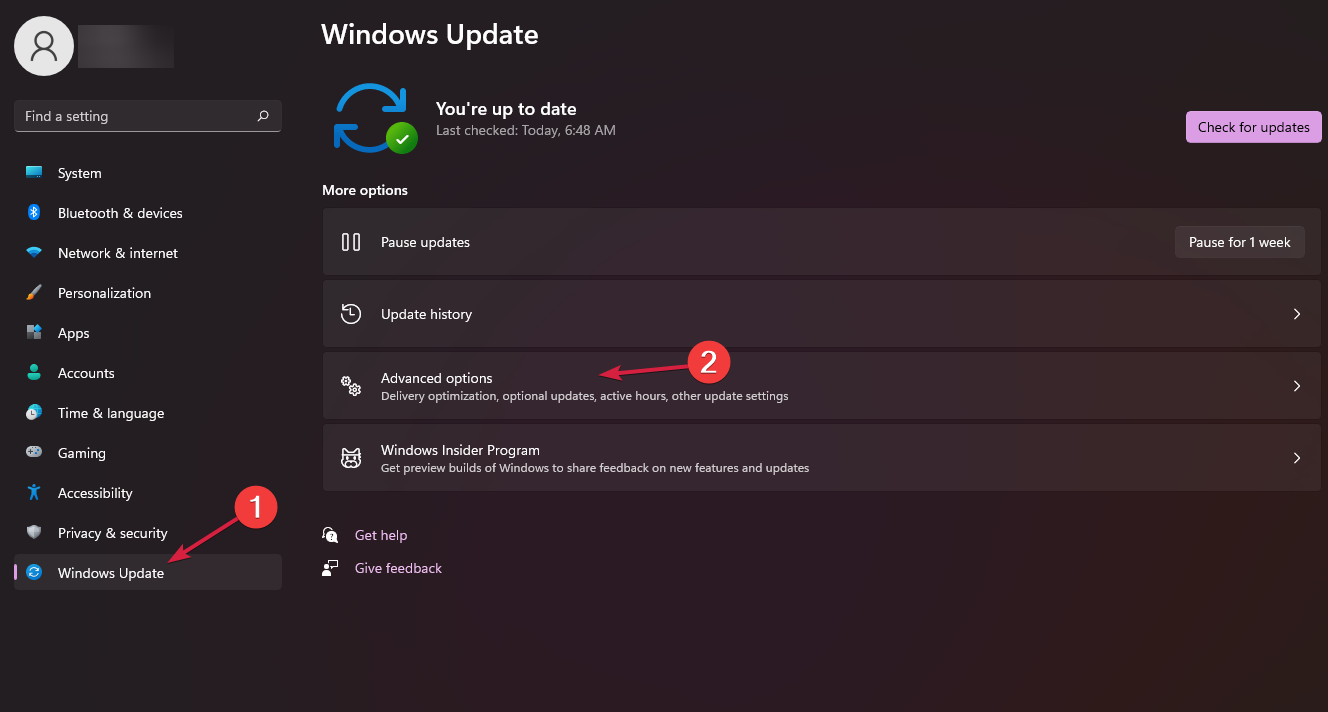
  • Go to Settings > Windows Update and install any pending updates
  • Download the latest OneDrive version from the official site

Older builds may contain bugs or compatibility issues that affect upload stability.

Summary

We have come to the end of this guide on how to fix the OneDrive slow upload issue. However, with solutions here, we believe you are well-equipped to solve the problem.

However, if the issue persists, you might consider switching to one of the best cloud storage apps for Windows PC. While OneDrive has the advantage of integration with the OS, these storage options are known to be faster.

Feel free to let us know in the comments below if any of our solutions helped you fix the issue.

FAQs

Why is OneDrive uploading at 0.0 KB/s even with good internet?

Likely due to stalled files, antivirus scanning, or sync queue overload. Try smaller batches and whitelist OneDrive.

How long does it take to upload to OneDrive?

It depends on your upload bandwidth. Uploading 1 GB on a 10 Mbps line takes ~15 minutes.

Does syncing with OneDrive slow down your computer?

Yes, especially if you’re syncing many files. Background syncing may affect CPU and disk usage.

Event ID 1108: How to Fix This Windows Security Error

Many users report the Windows security error appearing on their screen when using their computers. When the Event ID 1108: The event logging service encounters an error pops up, it can make your system unusable.

Likewise, others complain about a similar Event ID 1001 error in Windows 11.

What is Event ID 1108?

The Event ID 1108 indicates that the logging service encountered an error while processing an incoming event from the publisher. It comes from Microsoft Windows Security Auditing, showing that the logging service can’t correctly write the event log.

Furthermore, event ID 1108 comes after a defective or compromised event. So, when logging parameters are not passed correctly to the logging service, it won’t be able to log the event, resulting in an error.

Why do I encounter this error?

There are a few reasons why the event ID 1108 appears on your PC. The most common one is the Log service being disabled. When the service is disabled, it won’t be able to process any log or event, resulting in errors.

Other factors that may be responsible for the error are:

  • Incorrect security settings in the log directory – The Log service may run into errors if the security settings configured in the log files are wrong. They can affect how it interacts with the events.
  • Missing parameters in the logging service – When parameters essential for the logging service are missing, it won’t be able to process the incoming event. It may result in errors like event ID 1108 and event ID 41 on Windows 11.
  • Too many log files – Running into these errors can sometimes mean that your device has too many log files that it can’t handle. So, it prompts the event error to tell you it’s stuck.

These causes may vary in different log instances, but you can fix them by troubleshooting your system.

How do I fix the Event ID 1108 Windows security error?

Before trying any advanced troubleshooting steps, proceed with the following:

If the error persists, try the solutions provided below.

1. Restart Windows Event Log Service

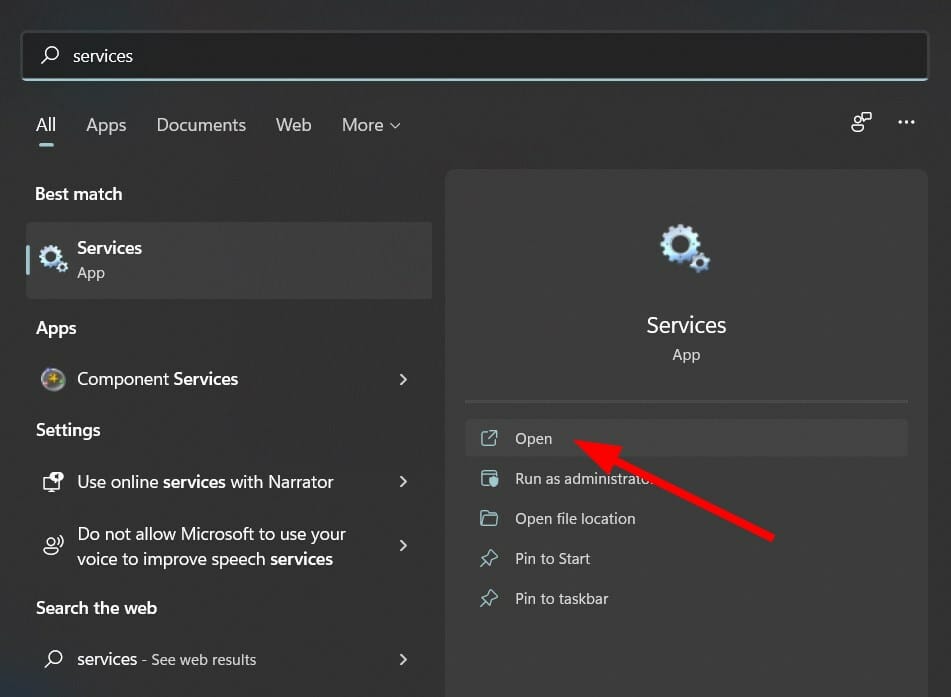
  1. Press Windows + R key to open the Run dialog box, type services.msc, and press Enter.
  2. Find the Windows Event Log service in the services list, right-click on it and select Restart from the drop-down.
  3. Restart your PC and check if you can fix the Event ID 1108 error.

Restart Windows Event Log service will help refresh its log and clear off event logs that are not correctly logged, causing it to run into errors.

2. Modify the Registry Editor

  1. Press Windows + R key to open the Run dialog box, type Regedit, and press Enter to open the Registry Editor.
  2. Navigate to the following path: HKEY_LOCAL_MACHINE\SYSTEM\CurrentControlSet\Services\EventLog
  3. Right-click on Start on the right pane, then click on Modify from the drop-down.
  4. Set the Value Data as 1 and click OK to save the changes.

Modifying the registry value can fix any problems with the EventLog that is causing the error. You may be interested in how to customize the Registry Editor on Windows 11.

3. Use a third-party tool

One method that could really work here is using a third-party repair tool that will scan and find any issues on your computer.

4. Run System Restore

  1. Left-click the Start button, type restore, and click on Create a Restore Point.
  2. Go to the System Protection tab, then click System Restore.
  3. Select the Choose a different system restore option and click Next to choose a specific Restore Point.
  4. Select the last time the system worked correctly, then click Next.
  5. Click the Finish button.

A system restore will backdate your computer, removing the compromised items on it. If you can’t get around the above steps, check how to fix Restore Point if it’s not working on your PC.

5. Overwrite redundant Log files

  1. Press Windows + X key to open the Quick Access Menu and click the Event Viewer.
  2. Select Windows Logs from the drop-down, choose the System option, and click on Properties.
  3. Navigate to the General tab and check the box for Overwrite events as needed (oldest events first).
  4. Click OK, then Apply.

Overwriting the redundant Log files will clear any events not correctly logged that are causing issues with the system.

Alternatively, you can read how to fix the Event Viewer reboot event ID error in Windows 11. Also, we have a detailed guide on the best event log viewers.

If you have further questions or suggestions, do not hesitate to use the comments section.

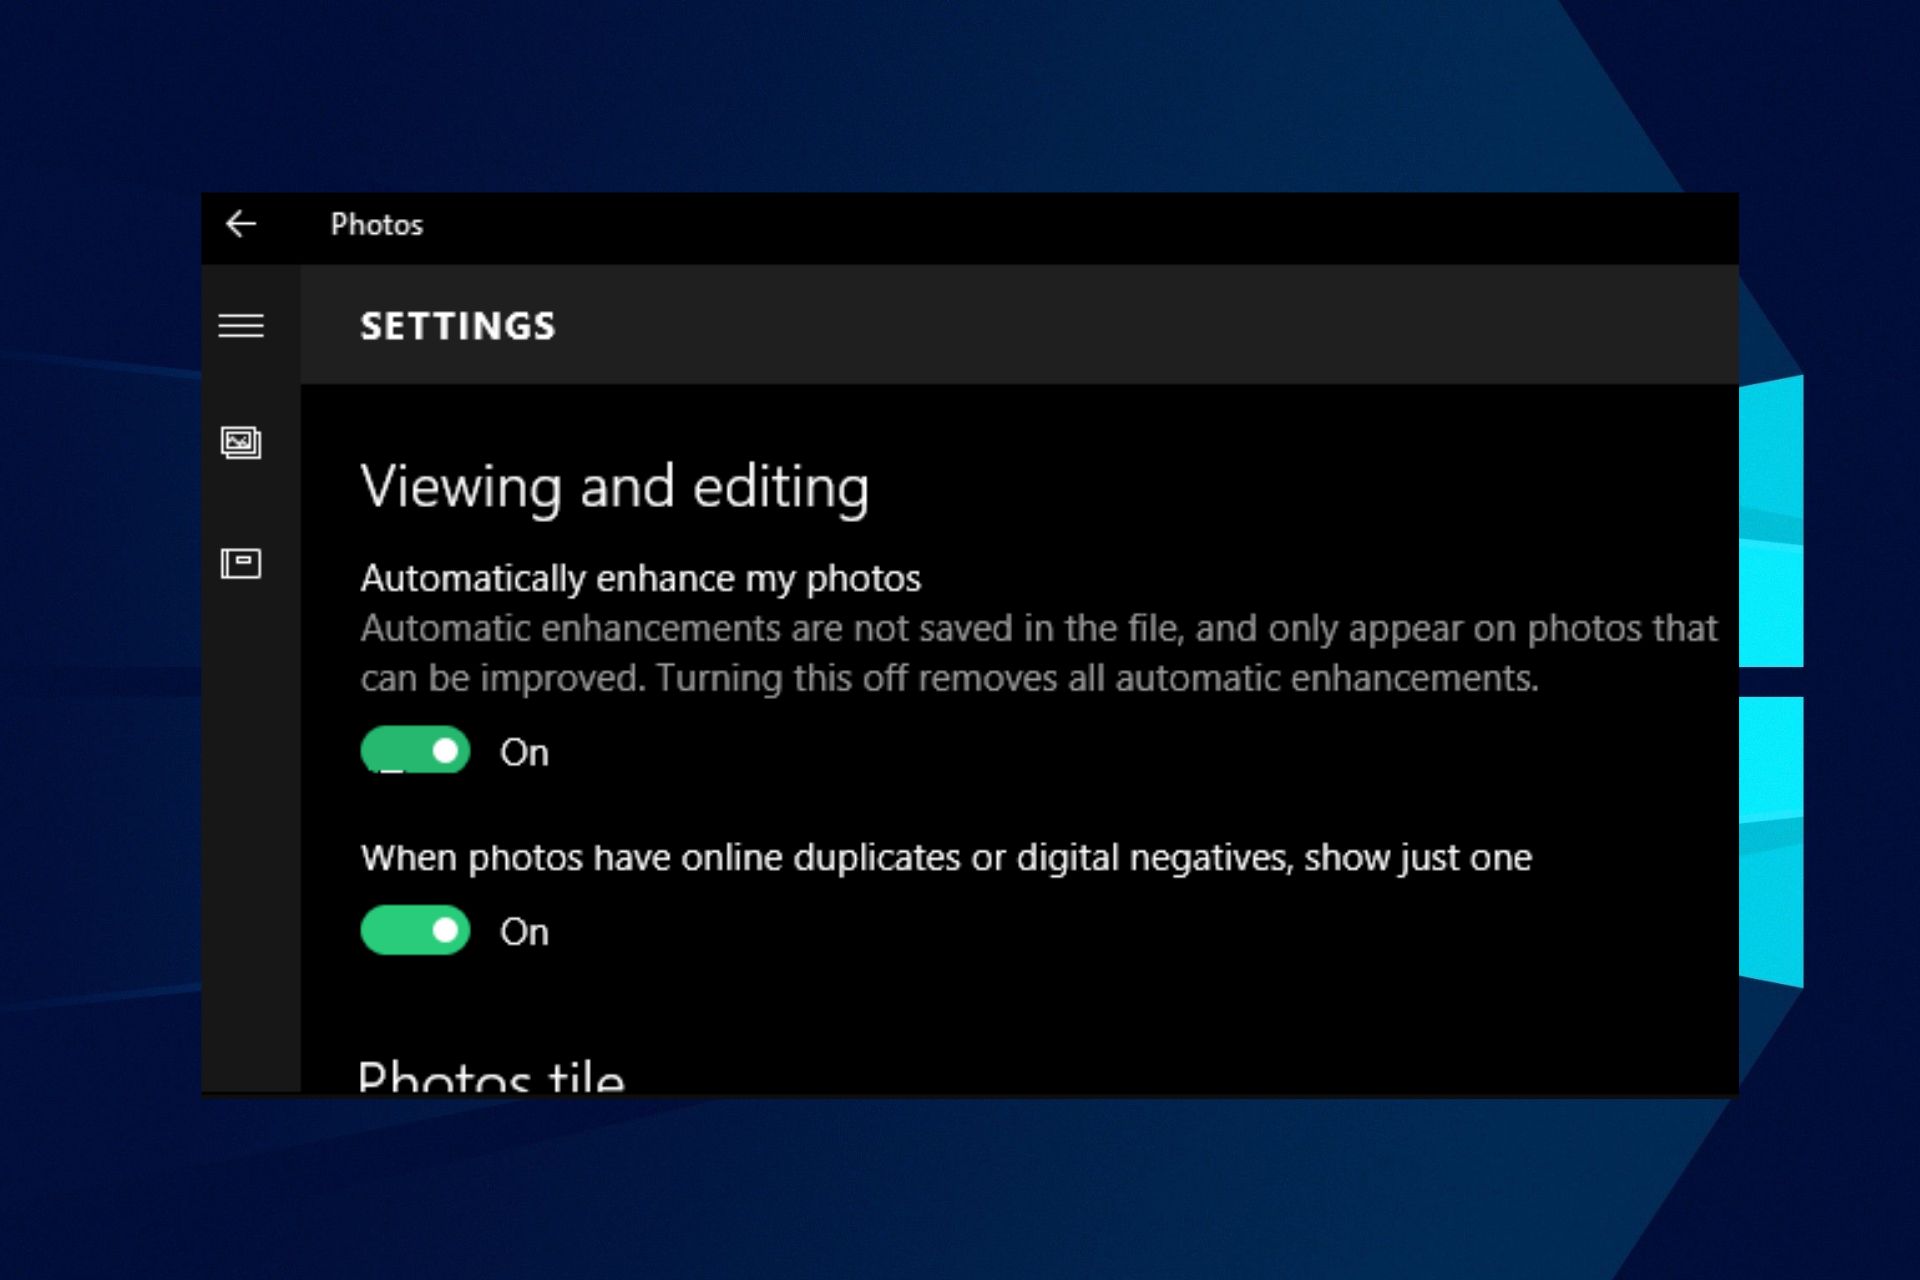
Windows 10 Photos Auto Enhance Missing: Solved

The Enhance your photo feature in Windows 10’s Photos app allows users to edit and create different pictures. Lately, some report that auto enhance is missing in Photos.

Others also complain that the adjust brightness option doesn’t work in the Photos app on Windows 11.

Why is auto enhance missing in Windows Photos?

Many users report that they experience issues with the Windows Photos app started after updating their Windows operating system. The update has a bug that makes it unstable on your PC or a compatibility problem.

Furthermore, you can encounter Photos auto enhance missing on your device for other reasons:

  • Photos Media Engine add-on not installed – Users can sometimes experience issues with the auto enhance feature in Photos if the Photos Media Engine add-on does not exist by default. It helps add new features and capabilities to the app.
  • Corrupt files or obsolete Photos app – If there is any error with the Photos app and its files, it can affect performance, and core functionality may disappear. Also, when there’s a problem with the Photos app’s settings, it can cause issues.
  • Outdated Windows – Some users may experience the auto enhance feature missing in Windows Photos if their Windows operating system is outdated. Check the possible fixes if the Windows update is not working.

The cause of Windows 10 Photos auto enhance missing may vary for different users. Nonetheless, fixing the problem is simple.

How can I fix the Windows 10 Photos auto enhance missing issue?

Don’t hesitate to go through the following preliminary checks:

If the issue persists, proceed with the solutions below.

1. Install Photos Media Engine Add-on

Go to Microsoft Store and click the get button to install Photos Media Engine Add-on. The installation process will go through if the Add-on is not installed on your PC.

We recommend you restart your PC for the newly installed Add-on to sync with other Windows programs.

2. Restore Libraries to Default

  1. Press Windows + E to launch File Explorer, then left-click on any space in the left corner of the screen.
  2. Select the Show Libraries option, right-click on Libraries from the list and click Restore Default Libraries.
  3. Restart your PC and check if the auto enhance feature in Windows 10 Photos is still missing.

3. Reset the Photos app

  1. Press Windows + I key to open the Windows Settings app.
  2. Select Apps and go to Apps & features.
  3. Click the Photos app and select Advanced options from the options under it.
  4. Scroll for Reset and click the Reset button.

4. Run Windows Store Apps troubleshooter

  1. Right-click the Start button and select Settings.
  2. Select Update & Security.
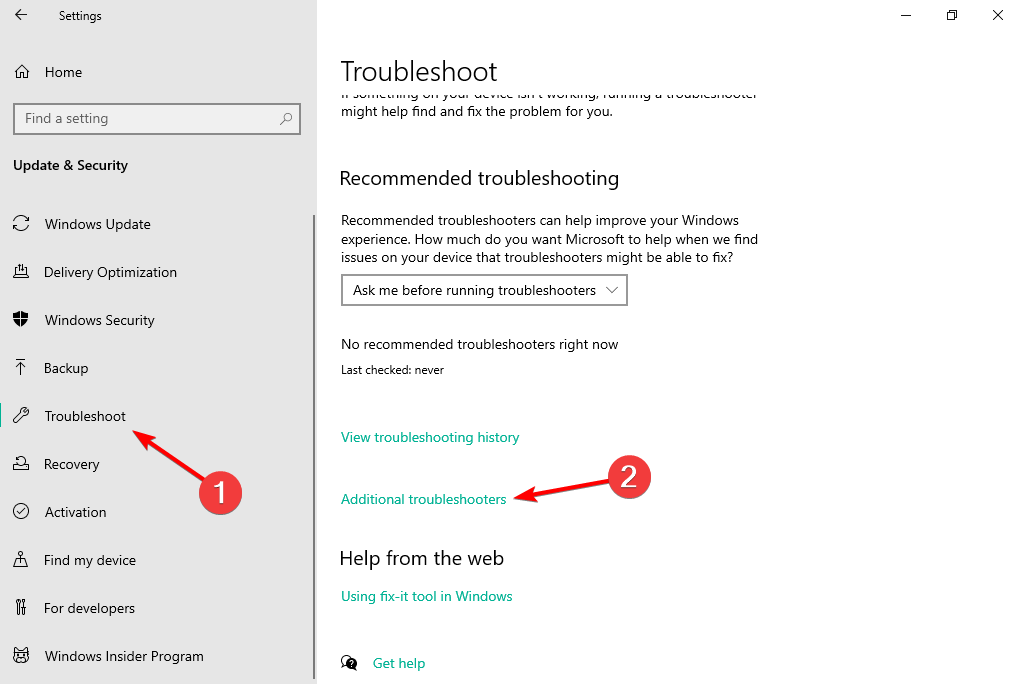
  3. Click on Troubleshoot from the left pane and select Additional troubleshooter.
  4. Scroll to the bottom of the list and click on the Run the troubleshooter button against the Windows Store Apps.

The Windows Store Apps troubleshooter will find and fix any irregularities affecting its activity. If the Windows troubleshooter stops working on your computer, check some quick ways to fix it.

5. Reinstall the Windows Photos app package

  1. Right-click the Start button, select the Windows PowerShell folder, then click on Windows PowerShell to run the program.
  2. Type the following command lines and press Enter: get-appxpackage *Microsoft.Windows.Photos* | remove-appxpackage
  3. Wait until the app package is reinstalled, restart your PC, and check if the auto enhance feature appears.

Though the Windows Photos app can be reinstalled, its package can be invoked to restore the app to its default settings. It will clear any corrupt files and fix any issues with the app. Check our guide if PowerShell is not working on your PC.

Alternatively, check how to turn On and Off Auto Enhance on Windows 11 to use the feature on your PC.

Conclusively, we have a comprehensive guide to help you fix Photo Enhancer not working on your PC.

For further queries, use the comments section. Also, kindly tell us which of the solutions worked best for you in fixing the Windows 10 Photos auto enhance missing issue.

How to Upgrade 32-Bit to 64-Bit Windows 7 Without Formatting

If you find yourself using a 32-bit version of Windows 7, 8, or even an older Windows version, you might have noticed that your memory is getting used up faster than you’d like. Due to how most software is created nowadays, upgrading to a 64-bit system will help you with these issues.

A 64-bit operating system is a more advanced version that can access more than 4GB of RAM on your computer, offering improved performance and efficiency. Before diving into the upgrade process, it’s crucial to verify whether your current OS is 32-bit or 64-bit to ensure a seamless transition.

I know what you might think, such a change most certainly would require a wipeout of your entire system, let me assure you that you can upgrade from 32-bit to 64-bit without formatting.

I’ll walk you through the steps to make this transition smooth, so you can enjoy the benefits of a 64-bit OS without the hassle of reformatting your machine. Let’s get started on enhancing your system’s capabilities without the headache of a full reinstall.

Can I upgrade from 32-bit to 64-bit?

To upgrade from 32-bit to 64-bit, you need to make sure that your system meets the minimum requirements for the 64-bit version of Windows. According to the official Microsoft support website, these are:

  • 1 gigahertz (GHz) or faster 64-bit processor
  • 2 gigabyte (GB) RAM
  • 20 GB available hard disk space
  • DirectX 9 graphics device with WDDM 1.0 or higher driver

Among other questions you should ask yourself include:

  • Do I have more than 4GB of RAM and do I use more than 4GB of RAM?
  • Am I using high-resolution monitors or virtual machines?
  • Do I use applications that make use of multiple cores?

To check for compatibility, follow the steps below:

  1. Click on the Start menu and search for System Information.
  2. Locate System Type and if it reads x64-based PC, you can upgrade to 64-bit.

You also need to ensure that your CPU and drivers are compatible with the 64-bit. For drivers, check your manufacturer’s website and look for the 64-bit driver versions.

To check CPU compatibility:

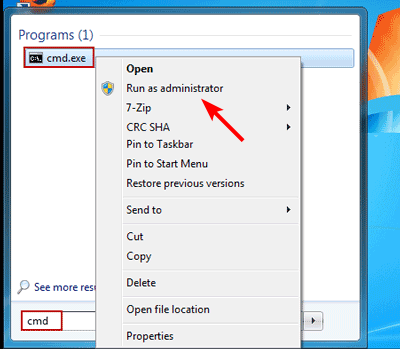
  1. Hit the Start icon, type cmd, and select Run as administrator.
  2. Type in set pro and click Enter.
  3. You should now be able to tell whether your processor is compatible.

If everything checks out, proceed to the guide below.

How can I upgrade Windows 7 from 32-bit to 64-bit?

  1. You can either download Windows 7 ISO files or insert the 64-bit windows installation disk in the DVD ROM then Restart the PC.
  2. Press any key to boot from the DVD.
  3. Windows 7 installation files will load. Click to select your preferred language and other preferences then click Install Now in the next window.
  4. Accept the license terms and click Next.
  5. Select Upgrade installation.
  6. Choose a Disk partition where you want to install Windows and click Next.
  7. Wait for Windows to finish installing.

You can also follow the same steps only this time perform a clean install and reuse the same Product Key you used for the 32-bit version to upgrade to the 64-bit.

Can I install 64-bit Windows on 32-bit?

Yes, you can install 64-bit Windows on a 32-bit system but you shouldn’t. While it’s possible to install a 64-bit version of Windows on a 32-bit machine, it’s not recommended because of compatibility issues with some software and hardware.

This isn’t a supported configuration and may cause problems down the line. 64-bit software can’t run in 32-bit mode, so if you try to run 64-bit apps on your computer, they’ll crash.

There are also some important limitations to keep in mind:

  • You can’t run 32-bit applications on the 64-bit version of Windows. It’s easy to differentiate a 32-bit app from a 64 bit.
  • Some drivers will only work with the 32-bit version of Windows.
  • The 64-bit version of Windows may not support all hardware components of your computer’s hardware configuration such as video cards or network adapters.

And that’s how to easily upgrade from a 32-bit version to a 64-bit in Windows 7. We also have a trick up our sleeves on how you can continue using Windows 7 forever if you are not a fan of the latest iterations from Microsoft.

If you’re still on the fence, we have a comprehensive comparison of Windows 11 vs Windows 7 to help you make an informed decision.

We also have a great guide on how to download the Windows 7 KB4474419 update. This update is crucial for security, so don’t miss it.

Why should I upgrade from 32-bit to 64-bit?

There are good reasons to upgrade from 32-bit to 64-bit Windows. For example;

  • More memory – A 64-bit operating system is capable of addressing much more memory than a 32-bit system, thus allowing you to work with large files without having to worry about running out of memory. 
  • Faster processing – With the 32-bit version, you are limited to 4GB of RAM, but with the 64-bit version, you can use up to 16 exabytes of RAM. This means that your computer will be able to run programs faster and more efficiently.
  • Greater stability – Upgrading from 32-bit to 64-bit actually makes your system more stable because it uses less memory than before. 
  • Improved compatibility – Most modern hardware is designed for 64-bit platforms, so upgrading from 32-bit to 64-bit will allow your system to take full advantage of the newer technology available today.
  • More security – Because a 64-bit operating system can use more than 4GB of RAM, it is less vulnerable to attacks from malware that exploits memory holes or other vulnerabilities.
  • Better performance – You’ll see an overall improvement in how quickly your computer responds to your input because programs will run faster and use less CPU capacity while they’re running.

Let us know of any problems you may have encountered during the upgrade in the comment section below.

6 Quick Fixes for Unhandled Exception Error Code 0xe06d7363

Are you getting exception error 0xe06d7363 when attempting to launch a few programs or apps in Windows? That is a Windows application error that shows up when a program or process doesn’t start.

Then you might get an error message along the lines of The exception unknown software exception (0xe06d7363) occurred in the application.

There are myriad factors for 0xe06d7363 errors. This error can arise from conflicting third-party software scripts, malware, pending software updates, file conflicts, etc. As such, there are also numerous potential fixes for the 0xe06d7363 issue.

How to fix error 0xe06d7363 on PC?

1. Scan for Malware

As Windows system errors are often due to malware, an anti-virus scan might fix exception error 0xe06d7363.

Check out our list of the most effective anti-virus utilities for Windows, so you can install one of them and scan your PC for malware activity.

For example, a proven and reliable security software is TotalAV, as it runs in-depth scans of your system and brings its own powerful firewall, a ransomware shield, a password manager, and many more.

⇒ Get TotalAV

2. Erase Temporary Junk Files

Junk files waste hard drive space and might even generate file conflicts. As such, deleting temporary junk files might help resolve the 0xe06d7363 error.

Even if erasing temporary files doesn’t make much difference, it’s still good system maintenance. You can delete junk files with the freeware CCleaner as follows.

  1. First, click Download now to save CCleaner’s installer to a hard drive folder.
  2. Open CCleaner’s setup wizard to add the software to Windows.
  3. Open CCleaner and click Cleaner on the left of its window.
  4. Select the Temporary Files check box on the Windows tab.
  5. Pressing the Analyze button will give you an overview of how much disk space CCleaner will free up when it deletes the files.
  6. Press the Run Cleaner button and click OK to erase the files. The 0xe06d7363 error in Forza Horizon 5 will be solved afterward.

3. Strip Third-Party Services From the Windows Startup

The 0xe06d7363 exception errors are often due to conflicting third-party software scripts undermining programs. Consequently, booting Windows without any third-party services can be among the more effective remedies for error 0xe06d7363.

Removing third-party services from the Windows startup will minimize potential software conflicts. This is how you can disable non-Microsoft services for a clean boot.

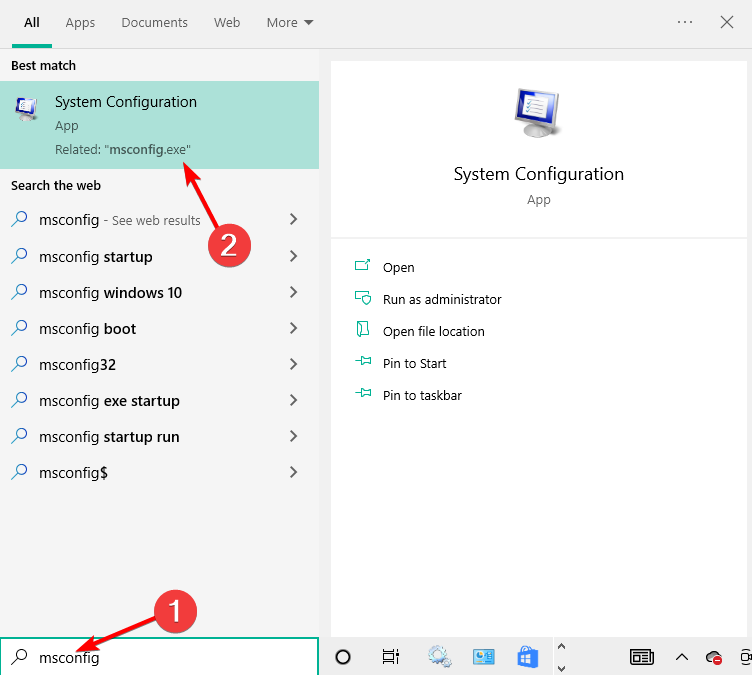
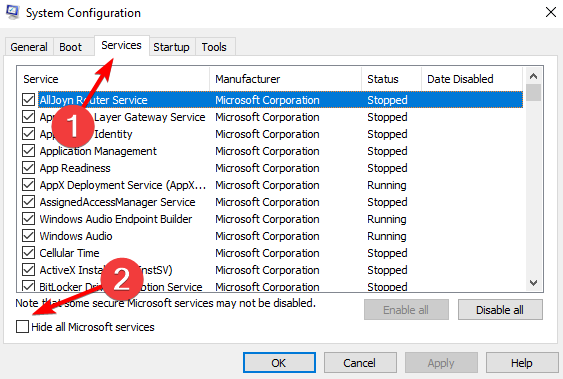
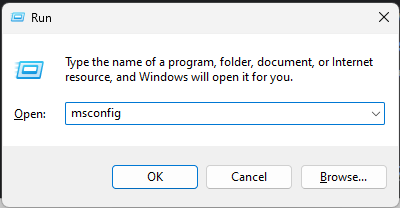
  1. Type msconfig in the Windows search box and press Enter.msconfig-w10 vertical lines on monitor
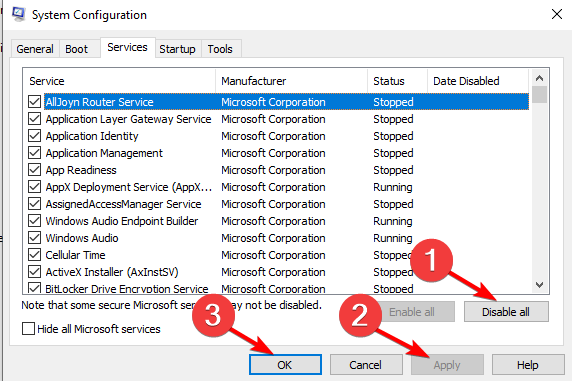
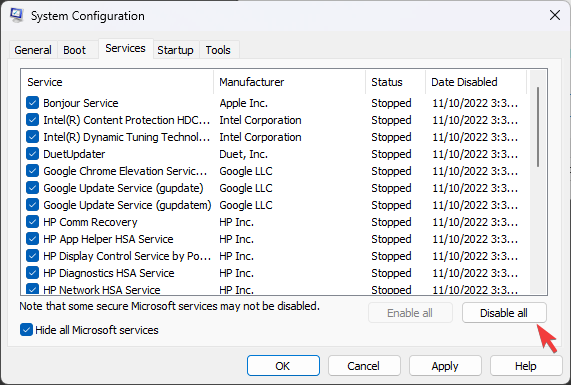
  2. Click Services to open the tab. Select the Hide all Microsoft services option to remove the more essential services from the list. Press the Disable all button to deselect all the third-party service checkboxes.hide-disable vertical lines on monitor
  3. Click the Startup tab then click Open Task Manager.startup-open vertical lines on monitor
  4. Select any startup program that might be interfering then choose Disable.disable-process  high cpu low gpu
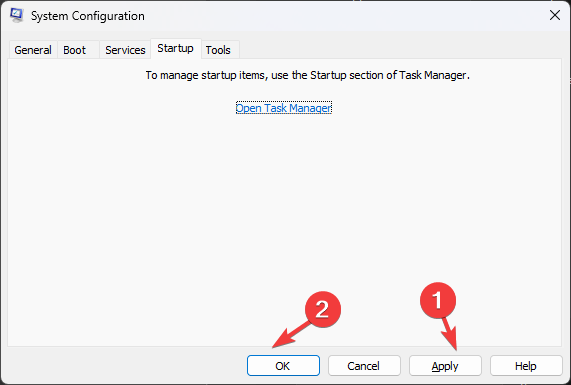
  5. Close Task Manager, press Apply then OK to close MSconfig then restart your PC.
  6. Restart your desktop or laptop. Note that this will fix 0xe06d7363 in Windows 11 and 10.

4. Open the Application in Safe Mode

  1. To start Windows 10 in Safe Mode, press Windows then click the Power icon. Hold the Shift key and click Restart.
  2. You computer will restart and show the Advanced options screen. Here, select Troubleshoot.
  3. Click the Advanced options option.
  4. Choose Startup Settings.
  5. Press the Restart button to reboot Windows.
  6. After the system reboots, press the F4 key to select Safe Mode.
  7. Open the same software that was previously crashing. The 0xe06d7363 kernelbase.dll error will be fixed.

5. Undo System Changes with System Restore

If a recently installed third-party program is responsible for exception error 0xe06d7363, the System Restore tool might resolve the issue.

System Restore will remove all the software you added to Windows after a restore point and undo system changes. You can probably restore Windows to a date when you weren’t getting any 0xe06d7363 software errors.

  1. Open System Restore by entering restore point in the Cortana search box. Click Create a restore point to open the System Protection Control Panel tab, which includes a System Restore button.
  2. Click System Restore to open the System Restore utility.system-restore 0xe06d7363 WINDOWS 11
  3. You can open a list of restore points by selecting the Choose a different restore option and clicking the Next button. 
  4. Select the Show more recent restore points option to expand the list.
  5. Choose a suitable restore point to revert Windows to, and press the Next button.
  6. Click Finish to restart and restore Windows to the selected date. The 0xe06d7363 C++ error will be solved.

6. Reinstall the Program

If the 0xe06d7363 error occurs when launching one specific program, consider reinstalling the software. Reinstalled software will always have a new configuration. You can uninstall the program via the Programs and Features Control Panel tab.

Reinstalling can also help other application errors. To learn more, read our Solving the Pbid.exe Application Error with straightforward steps guide.

However, third-party uninstaller utilities remove software more thoroughly and erase leftover registry entries.

Was this guide useful to you? Let us know in the comments section below, and thanks for reading!

Microsoft Forms gets “long expected feature”

Microsoft has announced that starting from December, it will begin rolling out “a long expected feature” to Microsoft Forms. The new feature, inserting image as choices will be available for both forms and quizzes users.

According to Microsoft:

We understand that visualization is critically important in teaching and learning to assist students digest context easier and create connection with knowledge faster, especially for young kids when they are still growing language skills.

You can insert images in forms or quizzes as choices by bulk importing, dragging and dropping, or copying and pasting. For the bulk import option, the upload size is limited to 5MB per image. “Images from OneDrive, local or Bing search are all accessible,” Microsoft added. What’s more, users can only bulk select 5 images per batch. Bulk import is supported on both desktop and mobile.

screenshot displaying bulk import on the Microsoft Forms platform

The new feature also supports image customization, whereby you can resize the image or drag the images to change focus using the image editor. However, any image uploaded images in forms or quizzes as choices is auto center-cropped fitting to the predefine border by default.

And finally, “images will be displayed when users create & preview the survey in design time, when responders fill the survey or when the owner wants to check details in individual result page. The rest of other cases (such as analysis view in response tab or data in Excel worksheet), there is only text showing up as representations of these choices,” says Microsoft.

You can visit Microsoft’s blog post to learn how to make use of the feature. Be sure to also share your thoughts with us in the comment section below.

FIX: Failure Configuring Windows Updates, Reverting Changes

In this troubleshooting guide, we will show you how you can fix the Failure configuring Windows updates, reverting changes loop error on your Windows 7/8/10 PC.

Disabling Secure boot during the update procedure and enabling it after the process is finished solves this issue and you can get back to your everyday work on your computer. For more solutions, check out the list of methods below!

How do I get past Failure configuring Windows updates?

  1. Disable Secure boot
  2. Hard reset your laptop
  3. Disable your antivirus
  4. Run the Update Troubleshooter
  5. Clean boot your computer
  6. Restart the Windows Update Service

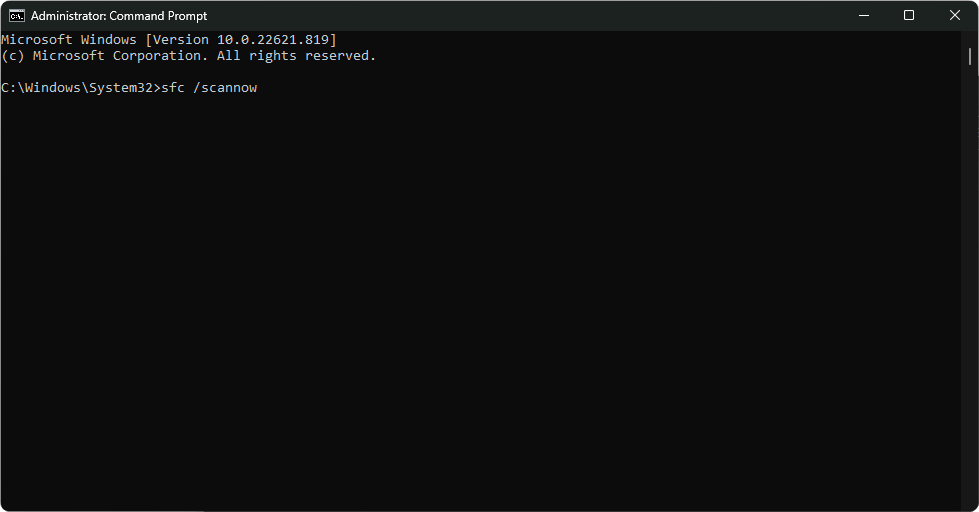
Before diving into the troubleshooting steps below, it might be a good idea to run a quick SFC scan. Update errors are often triggered by corrupted or missing system files.

1. Disable Secure boot

  1. Reboot your Windows 10 system. When the system starts up you will need to continuously press the ESC button on the keyboard.
  2. You should have in front of you the Startup menu on a black background.
  3. Move to the System Configuration tab using the right arrow on the keyboard.
  4. In the System Configuration menu, you will need to select Boot options by pressing the Down arrow on the keyboard.
  5. Press the Enter button on the keyboard.
  6. Press the arrows on the keyboard down to the Secure boot feature.disable Secure boot
  7. Press the Enter button on the keyboard.
  8. Select the Disable option on this feature and press the Enter button.
  9. Press the F10 button on the keyboard to save your changes and exit the menu.
  10. Press the Enter button to confirm the saved changes.
  11. Your Windows 10 device should reboot now.
  12. Check and see if you still have the same Failure configuring Windows updates stuck error. If you don’t you will need to let your system finish the updates and enable the Secure boot feature after it is done.

2. Hard reset your laptop and remove all peripherals

  1. Shut down your Windows 10 device.
  2. Remove any external USB peripherals from the laptop.
  3. Remove any other additional wires from your external devices to the laptop.
  4. Unplug the power adapter from your Windows10 device.
  5. Press and hold the power button on the laptop for about twenty seconds.
  6. Plug only the power adapter into the laptop.
  7. Press the power button to open your device.
  8. You should get to a black background screen where you have to select the Start Windows normally feature.
  9. Press the Enter button on the keyboard.
  10. Run Windows Update again.
  11. After the update process is finished, connect all your peripherals to the laptop.
  12. Reboot your Windows 10 device.
  13. Check and see if you still have the same issue.

3. Disable your antivirus/ firewall

Use an uninstaller software in order to completely remove your antivirus since it can interfere with the Windows Update.

Alternatively, we recommend using a flexible antivirus program that offers you the option to disable it for a limited amount of time or add programs, apps, websites, and files to an exclusion list.

⇒ Get TotalAV

4. Run the Update Troubleshooter

  1. Press Windows + I then when the Settings app opens go to Update & security.update-security nmi hardware failure windows 10
  2. Select Troubleshoot from the menu on the left, followed by Additional troubleshooters on the right panel.troubleshoot-aditional can't remove bluetooth device windows 10
  3. Next, click the Windows Update troubleshooter and select Run.

5. Clean boot your computer

  1. Press Windows then enter msconfig and select System Configuration.msconfig 0x80070002 windows update
  2. Go to the Services tab and select Hide all Microsoft services.hide-services 0x80070002 windows update
  3. Tap Disable all followed by Apply and OK then reboot your PC.disable-ok 0x80070002 windows update

6. Refresh/ restart the Windows Update Service

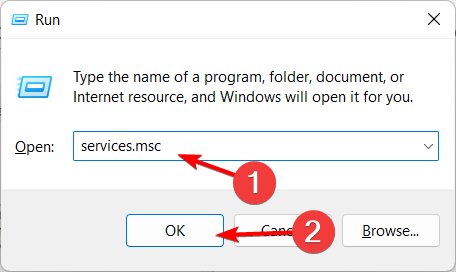
  1. Launch a new Run window then enter services.msc and hit Enter.services-ok error printing windows 10
  2. Locate the Windows Update Service then right-click on it and select Refresh and then Restartrestart windows update service
  3. Check for updates again, since the Failure configuring Windows updates reverting changes server 2008,2012 r2 error will be solved.

That’s it, there are a few simple steps on how to solve your Windows configuring updates issue and get your system up and running again.

For more solutions, check out our guide on what to do to fix Windows Update something went wrong.

Let us know if these solutions were helpful. If you have any questions about this post, write them in the comments below.

Event ID 15: How can I Fix This TPM BSOD Error?

When your Trusted Platform Module hardware fails to execute a TPM command, you might see Event ID 15 in the Event Viewer app. 

This guide will discuss all the available fixes for the problem right after examining the causes. Let’s begin!

What causes the Event ID 15 TPM error? 

Generally, the error appears if you have a problem with the TPM device. Some of the reasons for the error are: 

  • TPM fails to respond:  When Windows is trying to communicate or use the TPM device for functionalities that respond on TPM, including Bit Locker and Next Generation Credentials, and it fails to respond, it could cause the Event ID error.
  • TPM performing self-test – When TPM resumes from sleep, it performs a self-test before processing any commands. During self-testing, if Windows tries to retrieve a random number, but the command fails, then Windows will receive this error. If the command fails three consecutive times, the OS logs the event. Hence we see the error.

How can I fix the Event ID 15 TPM module error on Windows 10? 

Before diving into serious troubleshooting, let us try these simple fixes first: 

If nothing from the above worked for you, it is time to move on to these troubleshooting steps: 

1. Uninstall and reinstall the TPM driver

1.1 Use Device Manager

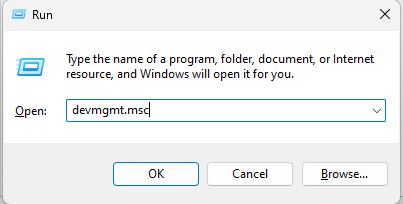
  1. Press Windows + R to get the Run window.
  2. Type devmgmt.msc and hit Enter.Device Manager RUN COMMAND
  3. Now click on Security devices to expand, right-click on Trusted Platform Module, and select Uninstall driver.Uninstall TPM
  4. Reboot your computer. When your PC starts up, it will install the driver again.

1.2 Use a third-party tool

With driver updater utility like Outbyte Driver Updater, you can update drivers without hassles. It downloads the best compatible drivers for your device and installs them in a few clicks.

  1. Download and install Outbyte Driver Updater.
  2. Launch the app, and it will scan your computer for outdated drivers.
  3. Once the scan is complete, you will get a list of drivers.
  4. Select the drivers and click Update.
  5. The tool will download the latest and compatible drivers.
  6. Click Next, follow the on-screen prompts, then restart your computer.

Using automated tools has its advantages such as safely finding and updating outdated drivers and automatically installing new updates, saving time in all these processes.

⇒ Get Outbyte Driver Updater

2. Clear TPM

  1. Press the Windows key, type Windows Security, and click Open.Windows Security
  2. Now navigate to Device Security. Click Security processor details.Windows Security Security processor
  3. Click Security processor troubleshooting.Security processor
  4. Now click Clear TPM.Clear TPM
  5. Choose the positive response for the on-screen prompts to finish.

3. Disable Windows Credential Manager

  1. Press Windows + R to get the Run window.
  2. Type gpedit.msc and press Enter.GPEDIT RUN COMMAND
  3. Follow this path and double-click on Turn on Virtualization Based Security: Computer Configuration\Administrative Templates\System\ Device Guard\Turn on Virtualization Based SecurityTurn on Virtualization
  4. Now under Credential Guard Configuration, select Disabled from the drop-down.credguard-gp-disabled
  5. Restart your PC.

4. Check if Core isolation is enabled

  1. Press the Windows key, type Windows Security and click Open.Windows Security
  2. Now navigate to Device Security. Click Core isolation details.Device Security - Core isolation
  3. Make sure the toggle switch for Memory integrity is On.Memory Integrity ON

5. In-place upgrade

  1. Go to Microsoft’s software download page, and choose the Windows version you want to install.
  2. Download Windows 11 ISO and select Windows 11 (multi-edition ISO).Inplace upgrade 1
  3. On Select, the product language option, choose English or your preferred language and click Confirm, and then Download.Inplace upgrade 2
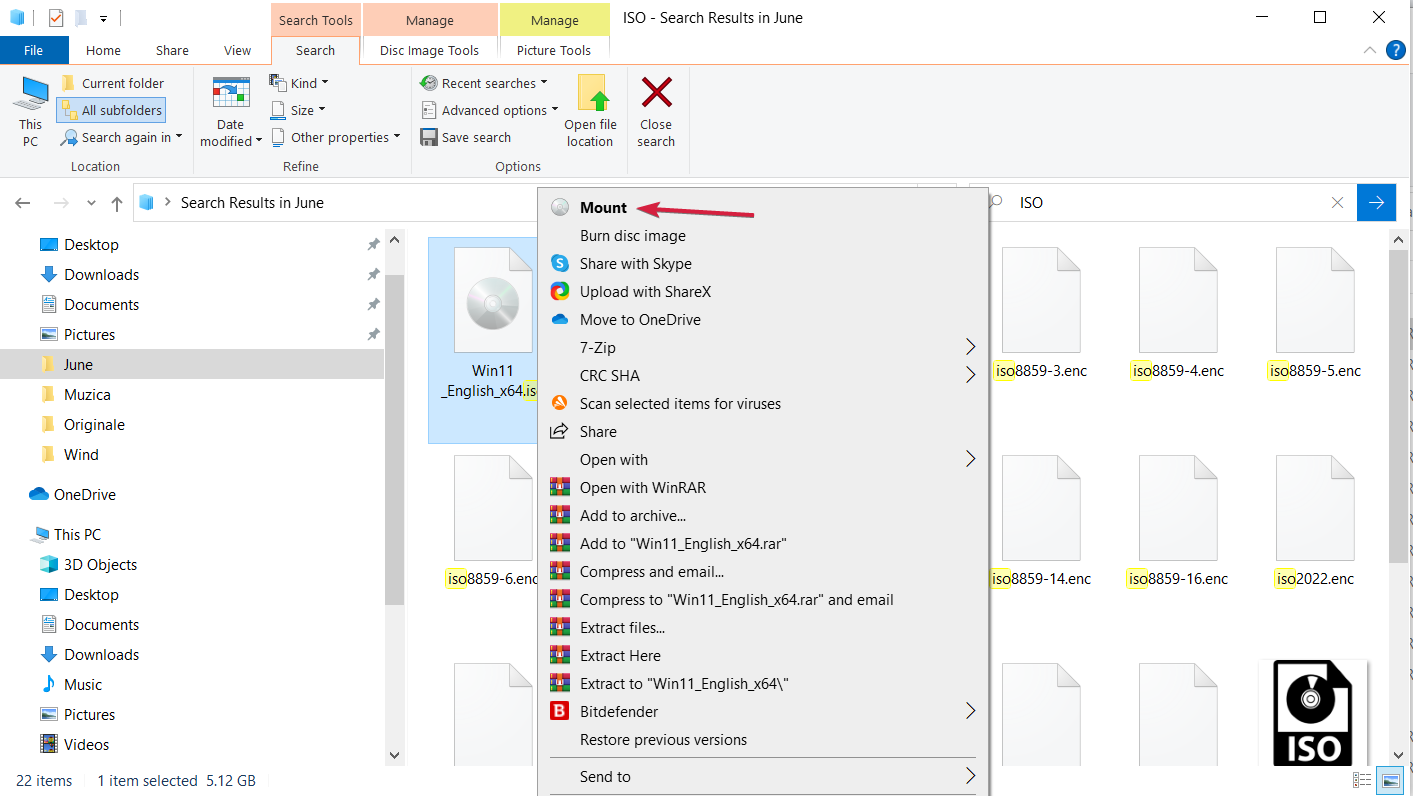
  4. Right-click on ISO and select Mount. Now click Setup.exe.Windows-11-ISO-mount
  5. On Install Windows 11 dialog box, select Next.
  6. On the next screen, click Accept to agree to the license terms.
  7. Follow the on-screen prompts to complete the process.
Tip icon Tip
Select Keep personal files and apps on the Ready to Install page to save your files from getting deleted.

We covered a similar error in our TPM-WMI 1796 error guide, so don’t miss it.

So, these steps can be used to resolve the Event ID 15 source TPM error. If we have missed out on any method that worked for you, please let us know in the comments section below.

How to Format an External Hard Drive That is Not Visible

There are multiple user queries where users have asked how to format an external hard drive if it is not visible on their PCs. Here is one user query:

How can format WD 500GB External Hard disd drive that is not visible at my computer. The disk simply shows at the task bar, it cannot be read, the green light also shows on the disk. I need to format the drive…….how do I do that since it’s not visible.

If you also have a similar question regarding how to format an external hard drive that is not visible, then this guide is here to help you. We will show you some solutions to help you format the external hard drive when it’s not visible. So, let us get right into it.

Why is the external hard drive not showing up?

Here are a few reasons that could cause the external hard drive to not show up on your Windows PC.

  • Problematic port: Chances are that the port is problematic where you have connected your external hard drive.
  • System drive problem: If the external hard drive is corrupt or there are some issues with it, then it could trigger multiple problems.
  • It is not powered on: Some hard drives come with their own power chord which is required to be connected to the power outlet. In case that is not connected, your HDD won’t show up on your PC.
  • Outdated drivers: Windows may be having some device driver issues with your hard drive because they are not up to date.

How can I format an external hard drive if that is not visible on my PC?

Before applying advanced troubleshooting methods, here are some quick fixes to help you resolve the error.

  • Restart your PC and reconnect your external hard drive. There might be some temporary glitch or something that is preventing the hard drive from being detected.
  • Try a different port. You can connect your hard drive to a different USB port or to a different computer altogether and check whether this resolves the issue.
  • Chances are that the hard drive driver version isn’t compatible with your PC and is causing the issue. You can try updating the drivers.

Let us move on to advanced solutions.

1. Update the driver

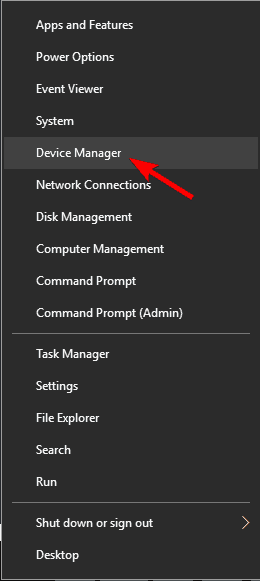
  1. Press Windows key + X and select Device Manager from the list.
  2. Locate the Disk drives section and expand it.
  3. Check if any of the listed devices have a yellow exclamation mark next to them. If there is an exclamation mark next to your device this means that there might be a driver issue.
  4. Right-click the device and choose Update Driver.
  5. Select Search automatically for driver software.
  6. Your system will check if a new update is available for the drive and prompt you to install it if it finds one.

In addition, you might want to check the manufacturer’s website for the latest drivers. After updating the driver, try formatting the external hard drive and see if this resolves the issue. Getting the latest drivers also helps when an exFAT drive is not showing up.

Alternatively, to ease manually updating drivers on your PC, you can use third-party software. The driver updating apps are reliable solutions that contain libraries of millions of up-to-date drivers, and you can install them with a few clicks.

⇒ Get Outbyte Driver Updater

2. Run the troubleshooter

  1. Press Windows + R to open the Run dialogue.
  2. Type the following command and press Enter to open the Hardware and Devices troubleshooter: msdt.exe -id DeviceDiagnostic
  3. Hit Next to start the troubleshooting.
  4. Follow the instructions on the screen to complete the troubleshooting.

Once the troubleshooting process is finished, check whether you can format the external hard drive.

3. Use AOMEI Partition Assistant

  1. Download the AOMEI Partition Assistant.
  2. Install it on your PC.
  3. Launch the program.
  4. Locate the problematic external hard drive.
  5. Right-click on your hard drive and select Format.
  6. Select the file system type and you can also add the Partition Label.
  7. Click Apply at the top-left to confirm the operation.

Several users have reported that their undetectable external hard drive was detected using a third-party partition tool AOMEI Partition Tool.

You can also try using the tool, format it within it, and see if this resolves the error.

4. Check if your hard drive shows in BIOS

  1. Turn off your PC.
  2. Restart it and while it boots, keep pressing F2, F8, F11, or Del to enter the BIOS menu. It might be a different keyboard key for your brand’s laptop. So, check your motherboard’s manual.
  3. Once you enter BIOS, look for your hard drive.
  4. If your hard drive appears in BIOS, it’s connected and working.
  5. If the hard drive doesn’t show in BIOS, it’s rather likely that it’s not properly connected or there is some problem with your external hard drive.

You can look closer at our dedicated guide that will teach you how to easily access the BIOS menu if you are finding it hard to do.

For users facing issues with their new hard drives, refer to our guide, which gives you some important steps to troubleshoot the new hard drive not showing up in Windows 10/11.

If the second hard drive is causing a similar issue, then we have a bunch of solutions that will help you fix the problem.

You might also be interested in reading our guide on how to format an NVMe SSD on Windows 11.

That is it from us in this guide. Let us know in the comments below which one of the above solutions helped you with how to format an external hard drive that is not visible problem.

How to Remove Windows 11 Unsupported Hardware Watermark

Every version of the Windows OS has system requirements that determine the devices that can run them. So, you can encounter the Windows 11 unsupported hardware watermark if there’s a system requirement issue.

For instance, users can check Windows 11 space requirements before installing it on their PCs.

Why did I get Windows unsupported hardware watermark?

The Windows unsupported hardware watermark is a warning feature introduced to test and warn users that their hardware isn’t compatible with Windows 11. It indicates that the System requirements are not met by the device installing the new Operating System.

So, users don’t adhere to the requirements when they get the unsupported hardware watermark on their Windows PC.

Nevertheless, some users with devices that meet the requirements complain about the Windows 11 unsupported hardware watermark appearing. Hence, some factors that can cause this problem are:

  • Corrupt system files – Having corrupt system files on your computer can cause numerous issues with how it works. It can affect many components of the PC, prompting errors like the Windows 11 unsupported hardware watermark.
  • Windows update issues – Sometimes, users may experience problems after updating their Windows operating system if the update is not stable, or it was installed incorrectly. Also, not installing a credible version of Windows on your PC can be an issue.

Apart from the requirement issues that cause the Windows 11 unsupported hardware watermark, other factors may cause it. Fortunately, you can easily remove and fix the watermark on your computer.

How do I fix Windows unsupported hardware watermark?

Before trying any steps for fixing Windows unsupported hardware watermark, observe the following preliminary checks:

Proceed with the following steps if the issue persists:

1. Remove the unsupported hardware watermark via the Registry Editor

  1. Press Windows + R key to open the Run dialog box, and type Regedit to open Registry Editor.
  2. Navigate using this path and click Enter: HKEY_CURRENT_USER
  3. Double-click on the Control Panel, then click on UnsupportedHardwareNotificationCache.
  4. Right-click on the SV2, click on modify, change the DWORD value from 1 to 0, then click OK to save the changes.
  5. Close the Registry and restart your computer.

Changing the SV2 value should make the watermark disappear on your computer. However, if you don’t have the UnsupportedHardwareNotificationCache key in your Control Panel, you must create one.

Should you have issues accessing the Registry, then follow these fixes.

2. Rollback Windows 11 to the previous version

  1. Left-click on the Start button and open Settings.
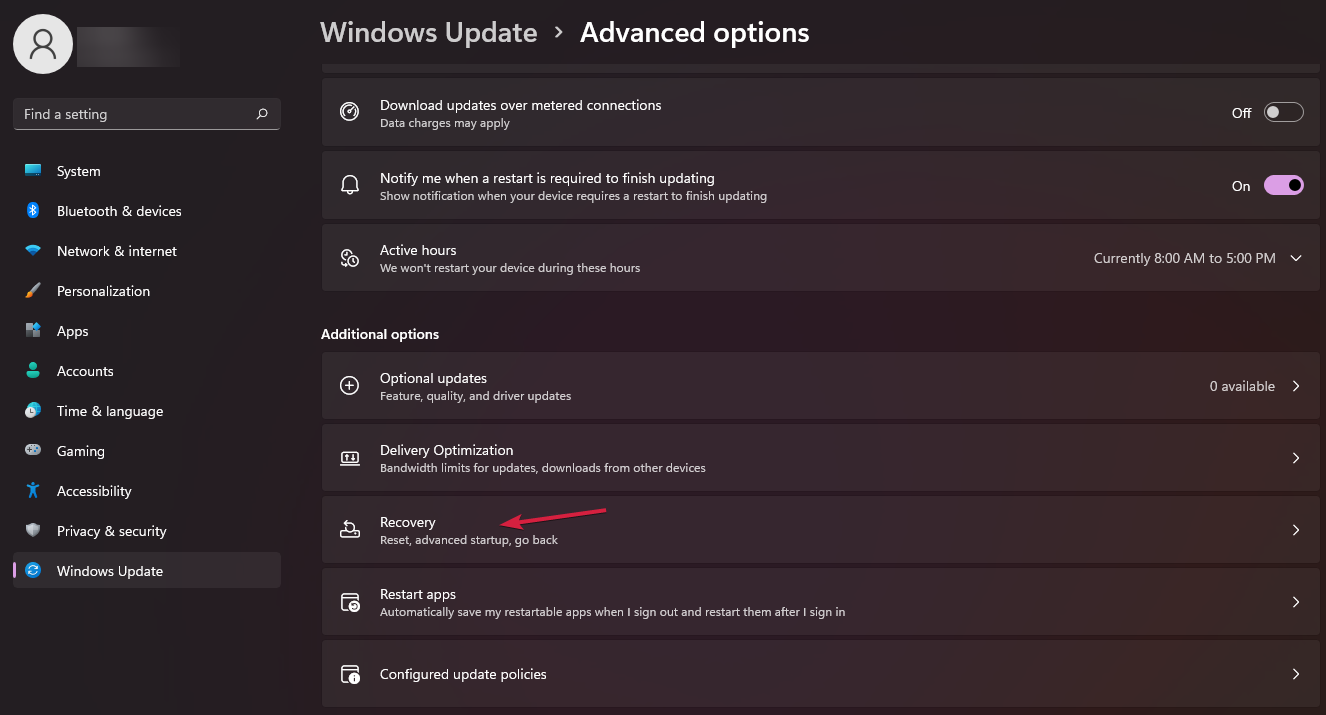
  2. Choose Windows Update, then click on Advanced options.
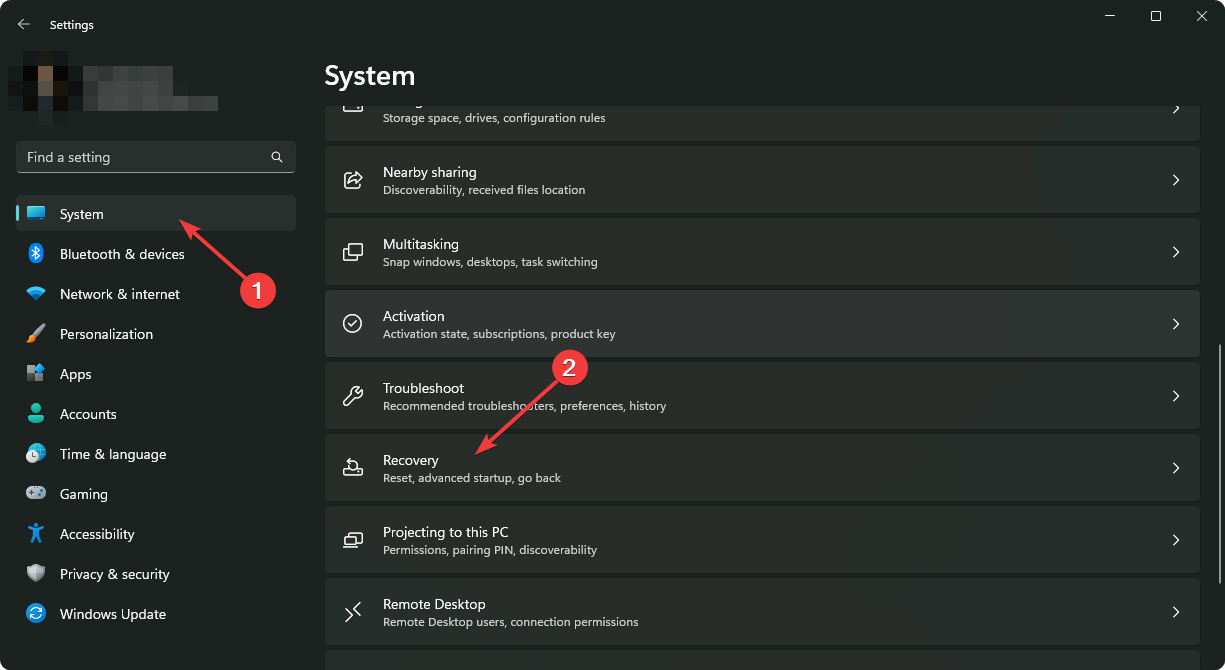
  3. Scroll down the list and choose Recovery.
  4. Click on the Go Back button under the Recovery options menu.
  5. Microsoft will ask why you must go back to Windows 10. Choose an answer and then click Next.
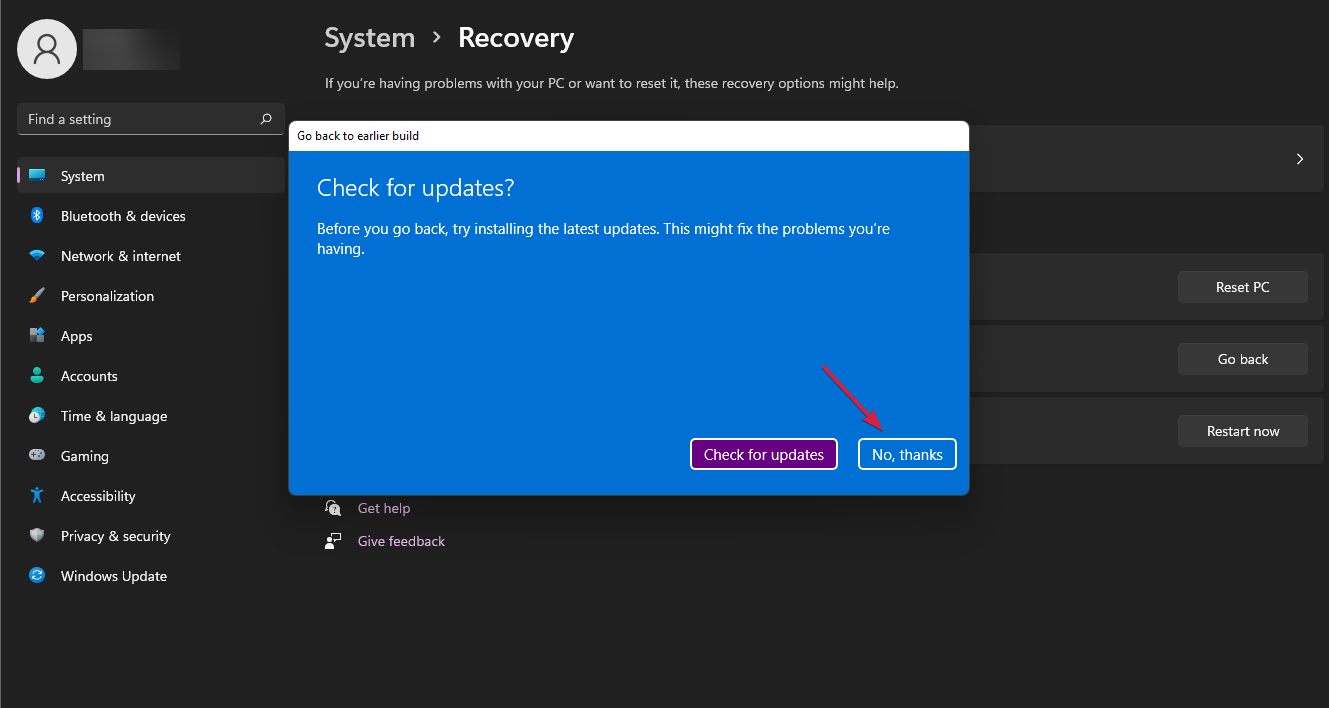
  6. Select the No, thanks button.
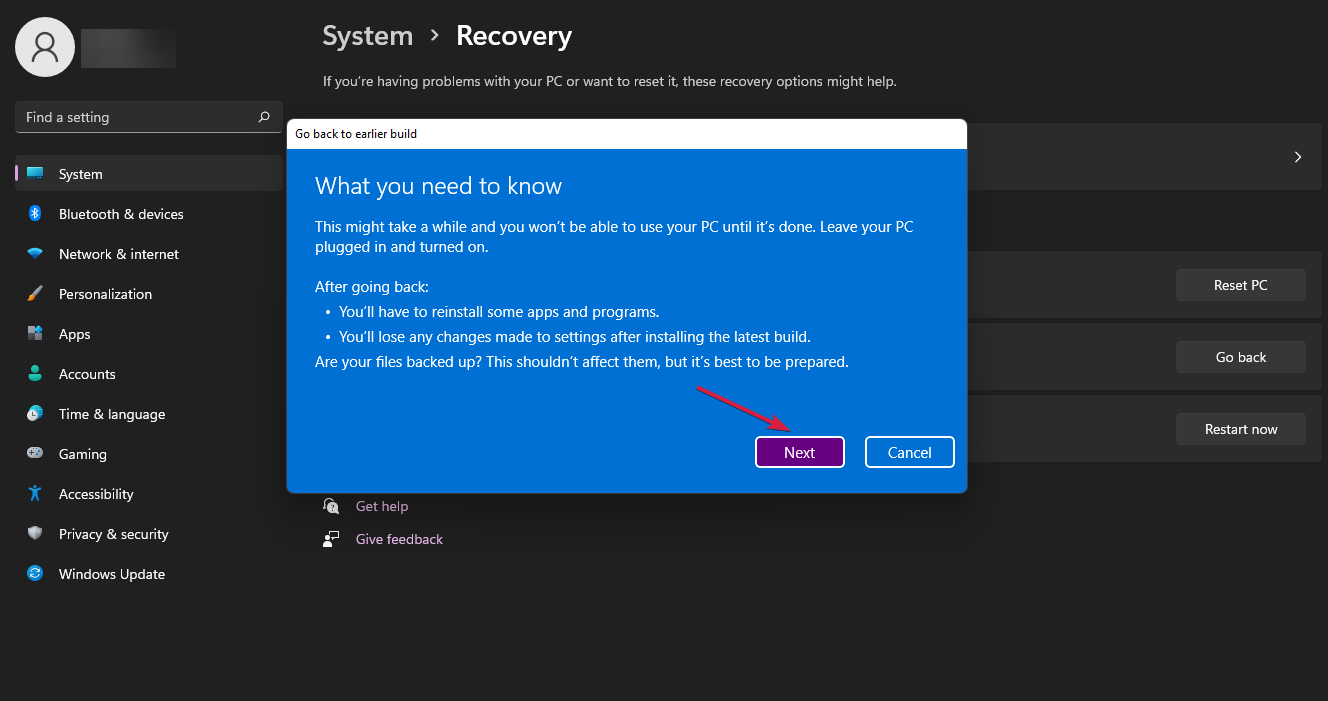
  7. Click Next to confirm.
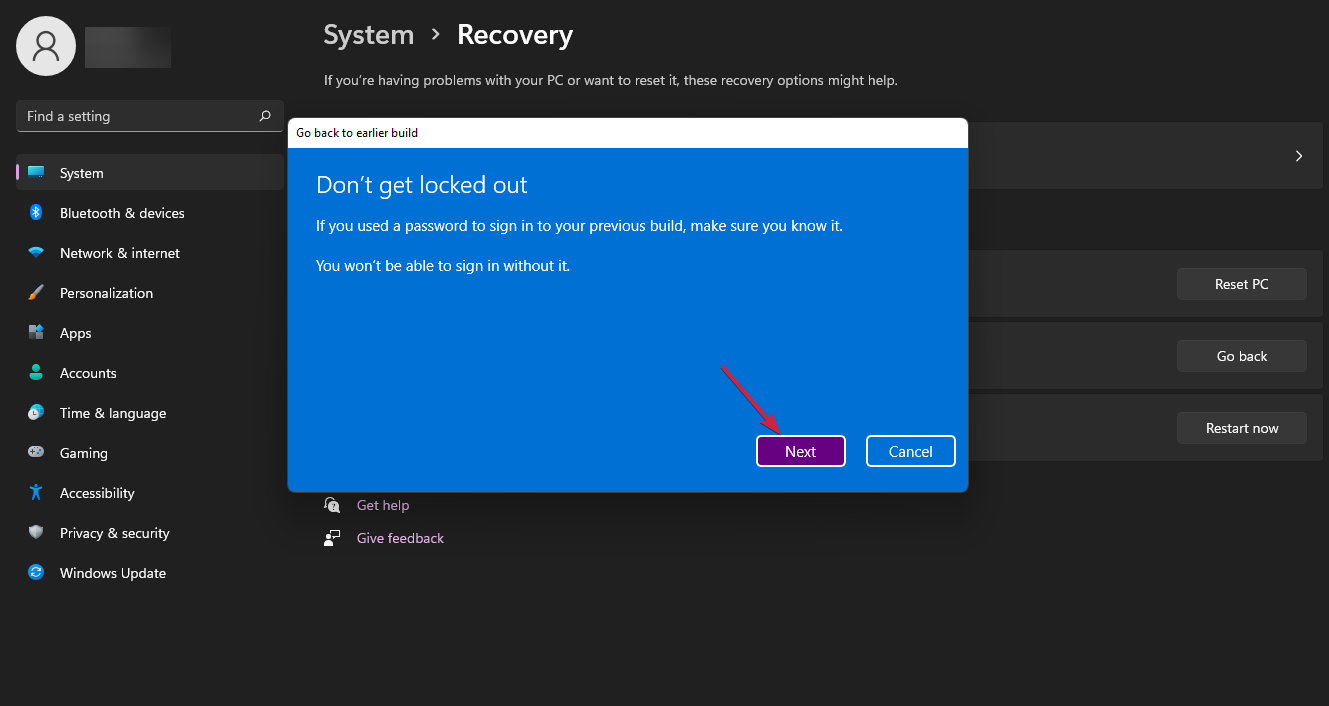
  8. Make sure you don’t forget your PIN and password because you’ll need them later. Click Next.
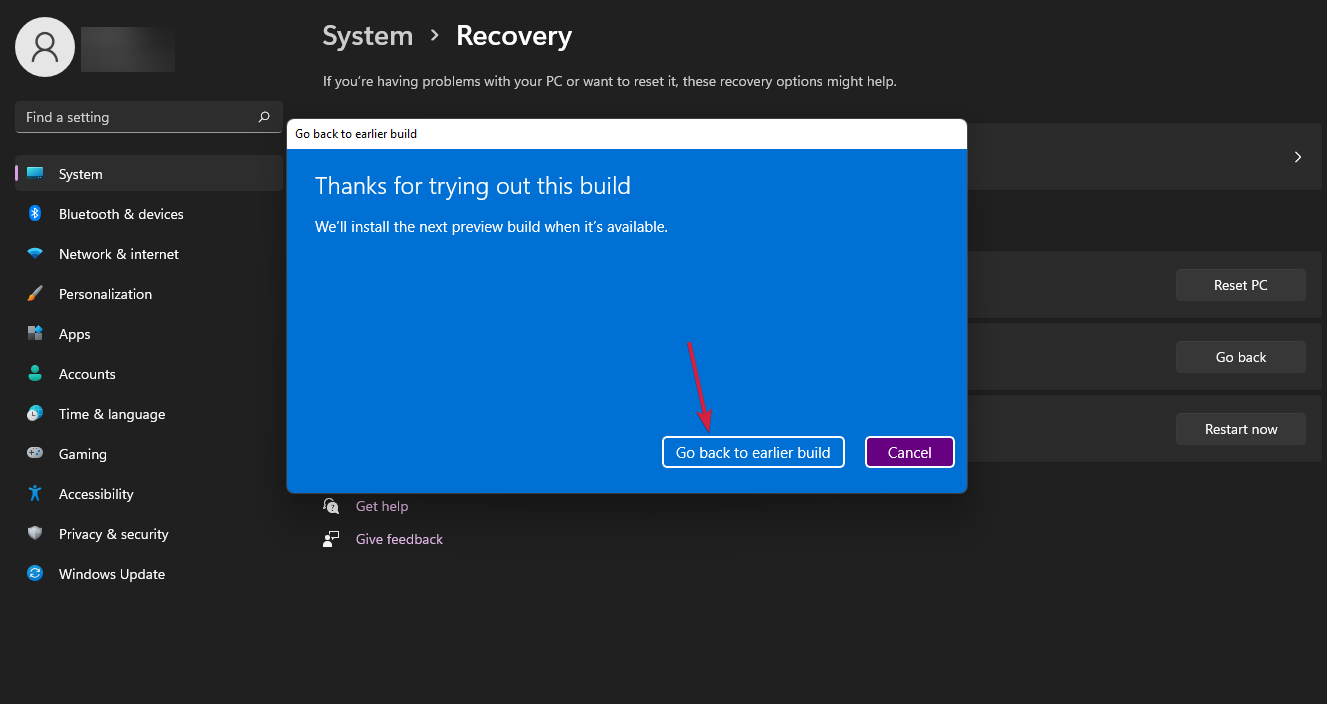
  9. Click the Go back to earlier build button.

For users who upgraded to Windows 11 from Windows 10, reverting to the previous version is another option to get rid of the watermarks.

Rolling back will allow you to use the supported Windows version for your PC. Nonetheless, you can read about fixing the rollback option missing on Windows 10/11 and revert to a supported Windows.

3. Use Windows 11 on an unsupported device

For users who’d love to stick with using Windows 11 on their unsupported devices they can try the following steps:

3.1 Disable Windows 11 Automatic Update

  1. Press Windows + R key to launch the Run dialog box and type services.msc, then click OK.
  2. Locate Windows Update, then click Stop.
  3. Click the drop-down button next to Startup type, select Disabled and click OK to save the option.

You can check our guide for more help disabling Windows automatic updates on your device.

3.2 Turn on Windows Firewall

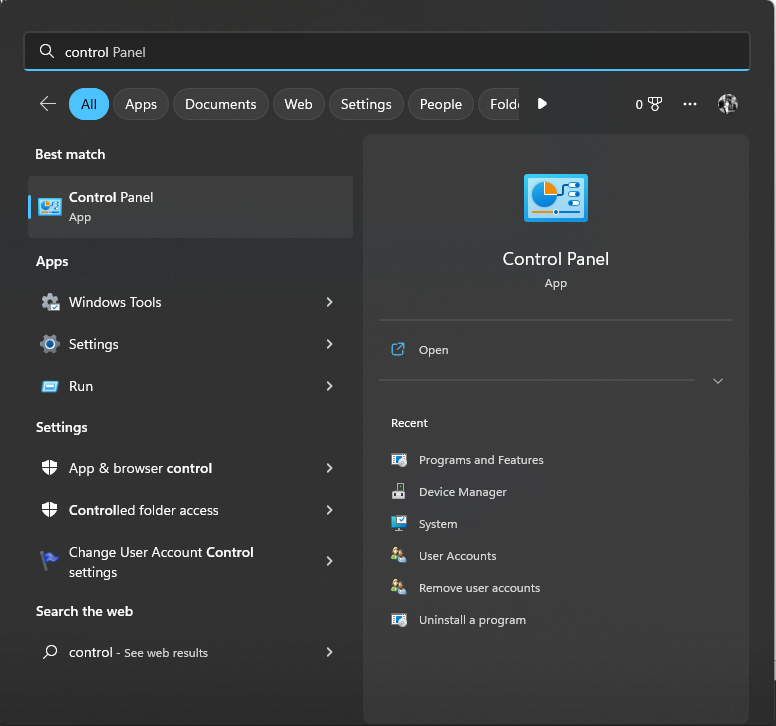
  1. Left-click the Start button and type control panel, then open it.
  2. Select the Windows Defender Firewall option.
  3. Next, click on Turn Windows Defender Firewall on or off.
  4. Go to the Private network settings and Public network settings, then click the radio buttons for the Turn on Windows Defender Firewall option.
  5. Close the Control Panel and restart your computer.

Enabling the Windows Defender Firewall will help your device run Windows 11 without the risk of virus attacks.

Check for fixes if you can’t activate Windows Defender Firewall on your PC.

Alternatively, you can read about bypassing Windows 11 installation without TPM on your device.

If you have more questions or other queries, kindly drop them in the comments section.

Hiberfil.sys: What is It & How to Clear or Delete The File

Many users don’t understand what the hiberfil.sys file on their PC does. It is a system file containing the activities of the Hibernate Mode power option on the computer. However, you can encounter some issues with the files.

Hence, it is essential to know about Hibernation Mode in Windows 11 to understand how it works.

What is Hiberfil.sys?

Hiberfil.sys is a system file that houses the files created by the Windows operating system during hibernation. It contains the memory content of your system before the time it goes to Sleep Mode or Hibernation.

Furthermore, the hiberfil.sys system file helps restore the user session that was previously running before hibernating or sleeping the PC. Hence, the system can shut down without losing the session before the state.

Why do I need to clear it?

The hiberfil.sys files are in large volumes that can take about 3 to 5 gigabytes of disk space. Also, the file size can increase depending on the content used on the PC.

Some benefits of clearing the hiberfil.sys files are:

However, deleting the hiberfil.sys files alone don’t guarantee that your Windows will not recreate them.

Though, it is safe to delete the hiberfil.sys files, it is essential to disable the Hibernate Mode on your PC. It ensures that the deleted session files are not recovered.

How do I clear or delete the Hiberfil.sys file?

There are a couple of ways to delete the hiberfil.sys files, but we recommend you observe the following preliminary checks first:

The above steps will help prepare your PC for the upcoming processes. However, you’ll need to disable the Hibernation power option before deleting the hiberfil.sys file.

1. Disable hiberfil.sys using the Command Prompt

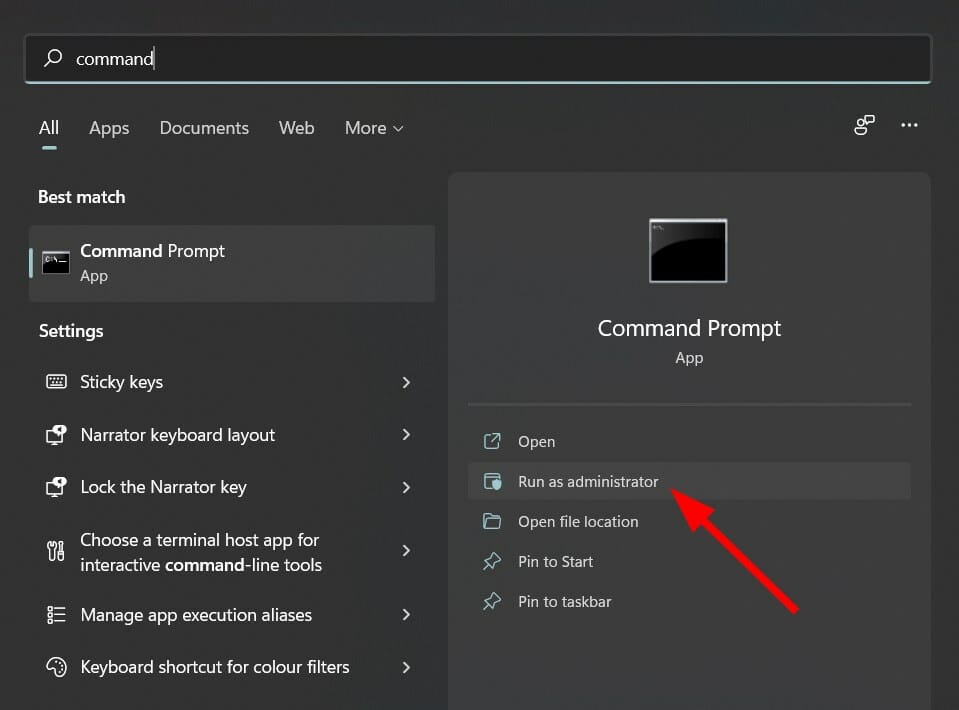
  1. Left-click the Start button, type cmd in the search space and select Run as Administrator.
  2. Type the following command, then press Enter: powercfg -h off
  3. Close the Command Prompt.

The above command will stop your computer from using the Hibernation power option, then automatically delete the hiberfil.sys file. Check what to do if you can’t run Command Prompt as an admin on Windows 10/11.

2. Disable hiberfil.sys using Windows Settings

  1. Type control panel in the text bar on your taskbar and select Power options.
  2. Go to Related settings and click on Additional power settings.
  3. Click on the Choose what the power buttons do option and select Change settings currently unavailable.
  4. Uncheck the box for Hibernate and click the Save changes button.

Unchecking the Hibernation box will disable it from being a part of your system’s power options.

3. Delete hyberfil.sys files

  1. Press Windows + E to launch File Explorer.
  2. Click on the View tab, click Options, and then go to the View tab.
  3. Check the box for Show hidden files, folders, and drives, then uncheck the box for Hide-protected operating system files.
  4. Click OK, then Apply.

Deleting the hiberfil.sys files and disabling Hibernation will completely clear the file and free up disk space. Check how to fix File Explorer if it crashes on your computer.

4. Delete hiberfil.sys via the registry

  1. Press Windows + R key to open the Run window, type Regedit, and then press Enter to open the Registry Editor.
  2. Navigate to the following locations: HKEY_LOCAL_MACHINE\SYSTEM\CurrentControlSet\Control\Power
  3. Double-click the HibernateEnabled entry and set the Value data field to 0.

It will disable Hibernate mode on your computer and delete the hiberfil.sys file.

Alternatively, our reader can check ways to fix the sleep power option missing on Windows 10/11.

Likewise, you can read about how to fix the power plans missing on Windows 10/11. To learn more about hibernation, we have a new guide on how to disable hibernation on Windows 10, so don’t miss it.

For further queries or questions, kindly drop them in the comments section. Also, if you have more suggestions on this guide, drop a comment.

Uplay is Not Launching Games: 5 Ways to Fix It

Uplay is the official launcher for Ubisoft games and is well known in the gaming world. However, Uplay has its share of problems that users encounter. A common one is that Uplay won’t launch games.

More so, gamers complain about Uplay avatars not updating their profiles.

Why is Uplay not launching games?

Users may encounter issues running Ubisoft games on their PC due to some errors affecting Uplay’s performance. The most common cause for the Uplay not launching games is missing DLL files. When the DLL files are not intact, it can prevent Uplay from working correctly.

Other factors that may be responsible for Uplay not being able to launch games are:

  • Interference from third-party apps – Third-party apps such as antivirus software and others can impede the activities of the Ubisoft launcher on your PC. Likewise, they can use the system resources and bandwidth available to run other applications.
  • Corrupt Uplay cache –  The local cache files for the Uplay client on your computer can become old and corrupt. Hence, it blocks the ability to run games on the Uplay app.
  • Issues with Windows update – Some users can encounter issues with their Uplay app after updating their OS to a specific build. It is.m because some Windows updates come with bugs that affect apps running on the computer.
  • Outdated graphics driver – It is common to encounter issues with your game launcher if your graphics driver is not up-to-date.

These causes can vary for different users. Nevertheless, you can fix the above causes by troubleshooting your PC.

What can I do if Uplay is not launching games?

Go through the following preliminary checks before trying any advanced troubleshooting steps:

  • Turn off background apps running on your PC.
  • Disable antivirus software services.
  • Restart your PC and check if Uplay can launch games.

If the problem persists, proceed with the solutions provided below:

1. Update your graphics drivers

  1. Press Windows + R key to open the Run window, type devmgmt.msc, and click OK.
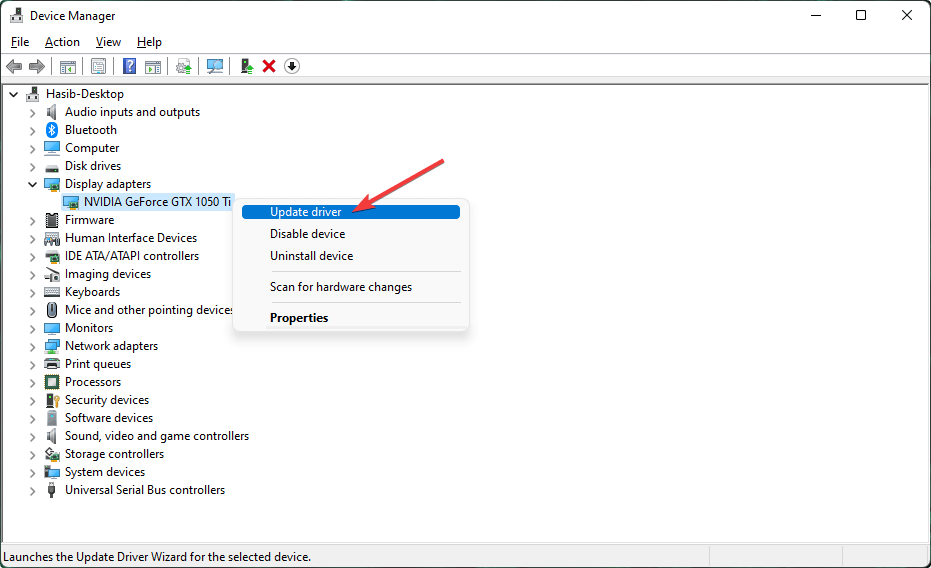
  2. Expand the Display adapters, right-click the graphics driver, then click Update driver.
  3. Select Search automatically for drivers.

Check our guide on how to update drivers on Windows 11 for other methods you can use.

If you aren’t sure about updating your drivers manually, we also recommend you use an automated method to keep things simple and fast.

⇒ Get Fortect Driver Updater

2. Run Uplay Client as an Administrator

  1. Right-click on the Uplay client icon on your desktop, then select Properties from the drop-down.
  2. Go to Compatibility and check the box for Run this program as an administrator, then click OK.
  3. Restart your PC and launch Uplay to check if the problem persists.

Running Uplay as an administrator can fix any permissions issues impeding its performance. If you have problems with the steps above, read about what to do if you can’t run apps as administrators on your PC.

3. Run in Compatibility mode

  1. Press Windows + E to open File Explorer.
  2. Go to the Uplay installation directory, right-click on the game’s executable file, and select Properties from the drop-down.
  3. Navigate to the Compatibility tab and check the box for Run this program in compatibility mode, then choose the operating system.
  4. Click OK to save the changes, then Apply.

Running the Uplay client in compatibility mode will fix any barriers from the game version and update errors.

If you run an old version of the app on your PC, check the ways to play old games on Windows 10/11.

4. Clear Uplay’s cache

  1. Press Windows + E to open File Explorer.
  2. Navigate to the following location: C:\Program Files (x86)\Ubisoft\Ubisoft Game Launcher\cache
  3. Press Ctrl + A to highlight all, then delete to clear the content of the cache folder.
  4. Restart your PC and launch Uplay to check if the issue persists.

Clearing the cache file on your PC will delete the corrupt files affecting the Uplay client.

5. Disable Windows Defender

  1. Left-click the Start button, type WindowsSecurity, and launch it.
  2. Select the Virus & threat protection option and click Manage settings.
  3. Toggle off the Real-time protection option to disable the Windows Defender Antivirus.

Disabling the Windows Defender service on your PC can fix any interference it is causing to the Uplay client. This also helps with uplay_r164.dll errors.

You can read our article on what to do if Windows Firewall blocks a port or program on your computer.

Our readers may also be interested in fixing the Uplay not installed error on your PC and get it working again. Likewise, you can check how to update Uplay games on your device.

Do not hesitate to leave your questions or suggestions in the comments section if you have any.

Kernel PNP Event ID 411: How to Fix It

If you keep getting Kernel PNP error 411 in the Event Viewer and are concerned about what to do, then you are in the right place. 

This guide will discuss what Kernel PNP is and how to deal with Kernel PNP errors. Let’s start!

What is Kernel PNP?

Kernel PNP

Kernel mode PNP manager is a part of Plug and Play manager. It interacts with OS drivers and components to manage, configure and maintain devices. PnP drivers support a machine’s physical, logical, and virtual devices.

What is the Kernel PNP error?

A Kernel PNP error usually comes up on Windows if you have malfunctioning hardware or outdated device drivers. Therefore, for PNP mode to work, all the drivers installed must work properly.

How do I fix Kernel PNP Error 411?

Before moving to the detailed troubleshooting, let us try some quick fixes that can help us with the error: 

1. Clean Boot your PC

  1. Press the Windows + R key to get the  Run console.CLEAN BOOT 1
  2. Type msconfig and press Enter.
  3. On the Services tab, place a checkmark beside Hide all Microsoft Services and then click Disable all.Clean BOOT 2
  4. Go to the Startup tab, and click Open Task Manager.CLEAN BOOT 3
  5. Locate each Enabled item, right-click on it, and select Disable.Clean BOOT 4
  6. Close Task Manager. Click Apply and OK on the System Configuration window.CLEAN BOOT 5
  7. Restart your computer when prompted.

2. Use Command Prompt

  1. Press the Windows key, type CMD, and click Run as administrator.CMD
  2. Type the following command and press Enter: sfc/scannow
  3. Copy and paste the following commands and press Enter after every command: Dism /Online /Cleanup-Image /CheckHealth Dism /Online /Cleanup-Image /ScanHealth  DISM /Online /Cleanup-Image /RestoreHealth CMD DISM & SFC
  4. Restart your computer.

 3. Install/ Update Drivers 

3.1 Install Drivers Manually

  1. Press Windows + R to get the Run window.
  2. Type devmgmt.msc and hit Enter.Device Manager RUN COMMAND
  3. Click on Display drivers to expand, right-click on the Graphics Driver, and click Update driver.Update driver Kernel PNP error 411
  4. Now go to System devices, expand it, and follow the same process to update the chipset drivers.
  5. Reboot your computer.

3.2 Use a third-party tool

  1. Download and install Fortect Driver Updater.
  2. Launch the app to scan your computer for obsolete drivers.
  3. Once the scan is complete, select the drivers and click Update.
  4. The tool will start downloading the latest drivers for your PC.
  5. Now click Next and follow the on-screen instructions, then restart your computer.

Keeping your device drivers updated with a reliable driver updater tool such as Fortect Driver Updater is easy and less time-consuming. This driver updater downloads and installs the best drivers for your device in a few clicks.

Using Fortect Driver Updater will make sure that all drivers are updated safely and your PC will automatically receive any other future updates.

⇒ Get Fortect Driver Updater

4. Disable Fast Startup

  1. Press the Windows key, type Control Panel, and click Open.Control Panel
  2. Go to the right side of the panel and select Large icons from View by drop-down menu.
  3. Click Power Options. Power options
  4. Now select Choose what the power buttons do.Power options 2
  5. Click Change settings that are currently available.Power options 3
  6. Remove the checkmark beside Turn on fast startup.Power options 4
  7. Click Save changes.

5. Perform in-place upgrade

  1. Go to Microsoft’s software download page, and select the Windows version to install.
  2. Download Windows 11 ISO and select Windows 11 (multi-edition ISO).Inplace upgrade 1
  3. Select the product language, select English, click Confirm, and then Download.Inplace upgrade 2
  4. Right-click on ISO and choose Mount. Now click Setup.exe.Windows-11-ISO-mount
  5. On the Install Windows 11 dialog box, select Next.
  6. Now, click Accept to agree to the license terms.
  7. Follow the on-screen prompts to complete.
Tip icon Tip
When you get to the Ready to Install page, select Keep personal files and apps to ensure your files are not deleted during the process.

So, these are steps to fix Kernel PNP error 411 on Windows. Try these steps and let us know which method worked for you in the comments section below.

Before you go, you might be interested in our latest guide that covers Error Invalid Plugplay Device Path.

How to Use Headphones With an Inline Mic on PC

Apart from a high-specification PC, it would be best to have good headphones to communicate with your friends or colleagues when setting up a workstation or gaming setup. There is a bunch of great pair of headphones with a built-in microphone. However, if the headphones do not respond, it could be pretty frustrating.

If you are looking for a guide that will help you to use headphones with an inline mic on your Windows 10 PC, then you are in the right place. Because in this post, we will give you a bunch of solutions to use the in-built mic in your headphones. Let us get right into it.

How to set up and test a mic on Windows PC?

1. Set up a mic on the PC

  1. Connect your microphone to the appropriate jack on your PC.
  2. Press the Win + I keys to open the Settings menu.
  3. Select the System tab and click on Sound on the left side.
  4. Choose the microphone under the Choose your input device drop-down menu.

2. Test a microphone

  1. Connect your microphone to the appropriate jack on your PC.
  2. Press the Win + I keys to open the Settings menu.
  3. Select the System tab and click on Sound on the left side.
  4. Select the correct device as the microphone under the Choose your input device drop-down menu.
  5. Under the Test your microphone heading, you will see the sound levels if your mic is connected correctly.

How can I use the inline mic on my Windows 10 PC?

  1. Connect your microphone to the appropriate jack on your PC.
  2. Press the Win + I keys to open the Settings menu.
  3. Select the System tab and click on Sound on the left side.
  4. Select the correct device as the microphone under the Choose your input device drop-down menu.

How to enable or disable the microphone on a PC

  1. Press the Win + I keys to open the Settings menu.
  2. Select the System tab and click on Sound on the left side.
  3. Select your microphone under the Choose your input device drop-down menu.
  4. Click on Device properties.
  5. The microphone will be enabled by default.
  6. You can hit the Disable button to disable the mic.
  7. Also, there is a Volume slider that you can use to adjust the volume of the microphone.

How to adjust headphone mic levels on a PC

  1. Connect the headphone with the mic on the correct port on your PC if there are three ports, plug in the Mic port.
  2. You will receive a pop-up on your PC. Click on OK.
  3. RighPress the Win + I keys to open the Settings menu.
  4. Select the System tab and click on Sound on the left side.
  5. Click on the Sound control panel.
  6. Switch to the Recording tab.
  7. Right-click on your microphone and select Properties.
  8. Click on the Levels tab.
  9. Drag the slider for Microphone and Microphone Boost to the max limit.
  10. Click on Apply and OK.

The headphone’s mic is often not of that excellent quality, especially when you are using headphones bundled with mobile phones.

So, you can enhance the levels by boosting the microphone volumes following the above steps.

You can check out our guide that lists some practical ways to turn on the mic on your Windows 10 PC. If your microphone isn’t working, you can refer to our guide, which lists some solutions to resolve the issue.

In case the headphones connected to your PC aren’t working, you can check out our guide to resolve the problem.

That is it from us in this guide. Let us know in the comments below if you could use your headphones’ inline mic on your Windows 10 PC by following the abovementioned steps.

Isaac-ng.exe Has Stopped Working: 5 Ways to Fix It

Binding of Isaac is an RPG shooter game with many features. Unfortunately, even though it has been around for some time, the Isaac-ng.exe has stopped working error still appears when playing the game on Windows 10.

The issue is also with other games alongside games running slow on PC.

Why did Isaac-ng.exe stop working in Windows 10?

Playing the Binding of Isaac can result in issues due to missing or corrupt game files. These broken game files can block the ability of the game to run its components and prompt it to display the Isaac-ng.exe has stopped working on Windows 10.

Other factors that can cause the Isaac-ng.exe has stopped working on Windows 10 are:

  • Outdated graphics cards – Games like Binding of Isaac use much graphics content to run their gaming interfaces. So, if the graphics driver on your PC is not updated, it can cause issues with the game, resulting in the Isaac-ng.exe not working error.
  • Third-party app interference – Other apps running on your computer can impede the performance of the Bindings of Isaac game on your PC. Apps like antivirus software can block the path of the game.
  • Outdated Windows OS – It is common for users to run into errors with their games if their operating system is not updated. It causes compatibility issues. Also, Windows won’t be able to fix the bugs affecting it. So, it can impact the programs running on your computer.

Users may encounter the Isaac-ng.exe has stopped working error message on Windows 10 for various reasons. Hence, we’ll show you some fixes for the error.

What can I do if Isaac-ng.exe stops working on my Windows 10?

Before proceeding with any troubleshooting steps, try the following preliminary checks:

Proceed with the solutions below if you still can’t fix the error:

1. Update your graphics driver

  1. Press Windows + R key to open the Run dialog box, type devmgmt.msc, and click OK
  2. Expand the Display adapters, right-click on your graphics driver, and click Update driver.
  3. Choose the Search automatically for drivers option.
  4. 6. Restart your PC and check if the error persists.

Updating your graphics driver will help the game run smoothly. Check our guide on how to update drivers on Windows 11 for other methods you can use.

One of our recommended methods is using a specialized tool that can help you proceed with this process automatically.

2. Enable the Steam Overlay

  1. Double-click the Steam client on your desktop to open it.
  2. Select the Steam tab and select Settings.
  3. Click on In-Game, then uncheck the box for the Enable the Steam Overlay while in-game option, and click OK to save your changes.
  4. Restart the game client and check if the issue persists.

If the error persists, read about fixing Steam Overlay if it’s not working on your PC.

3. Change Steamcloud value

  1. Press Windows + E keys to launch File Explorer.
  2. Navigate to the following path to find the My Games folder: C:\Program Files (x86)\Steam\userdata
  3. Right-click the Binding of Isaac folder and select the Open with notepad option, then change the Steamcloud value from 1 to 0.
  4. Restart the game client.

Tweaking the Steamcloud value will resolve issues with the settings that can cause the game not to work,

4. Delete the binding of Isaac folder

  1. Press Windows + E keys to launch File Explorer.
  2. Go to the following path: This PC\Username\Documents\My Games
  3. Right-click the Binding of Isaac folder and click on Delete.
  4. Then, restart the game and check if the problem appears.

Deleting the game file will help it recreate a new one, clearing the corrupt files. Read about fixing File Explorer if it crashes on your computer.

5. Reinstall the game

  1. Press Windows + R to open the Run window, type appwiz.cpl, and click the OK button.
  2. Right-click The Binding of Isaac from the list and select Uninstall.
  3. Open File Explorer and go to the following path and delete the game folder: This PC\C drive\Program Files (x86)\Steam\Steamapps\Common\The Binding of Isaac
  4. Then, reinstall the game on your Steam client.

Reinstalling the game will fix any installation file issues that may impede its performance.

In conclusion, our readers can check our guide on fixing Steam running slow or Steam game lag on their PC.

Also, you can check how to fix Steam if your computer’s download limit is not working.

Finally, if you have more questions or suggestions, do not hesitate to use the comments section below.

Can’t Turn on The Firewall in Avast: 5 Ways to Fix It

Avast is one of the most popular antivirus software. It has many features that set it above other antivirus software. Nonetheless, it has its share of issues. The common problem is that Avast can’t turn on the firewall.

Users also complain about Avast using high CPU on the computer.

Why can’t Avast turn on the firewall?

The Avast firewall is not working or turning on for several reasons. However, conflict with Windows Firewall is the most common cause of the problem. So, Avast may run into issues if Windows Firewall is enabled.

Other factors that can be responsible for the Avast firewall not turning on are:

  • Outdated Avast client – Users can encounter issues with the Avast client on their computers if it is outdated. Also, there may be bugs impeding its performance, causing it not to work as it should. So, the Avast firewall may not turn on if the app is outdated.
  • Corrupt system files – The Avast firewall can run into issues if there are malicious or corrupt files on your system. These files can block the activities of the Avast antivirus and other programs running on your computer.
  • Issues with Avast installation files – The Avast client on your PC may encounter difficulties if its installation files are missing or corrupt.

These are some common causes of Avast antivirus not turning on. Fortunately, users can fix the problem by troubleshooting their apps and computers.

What can I do if Avast cannot turn on Firewall?

We recommend you go through the following preliminary checks before proceeding with any advanced solution:

If it doesn’t, try the solutions below:

1. Disable Windows Firewall

  1. Click the Start button and type control panel, then open it.
  2. Hit the Windows Defender Firewall option.
  3. Click on the Turn Windows Defender Firewall on or off option from the left side.
  4. Go to the Private network settings and Public network settings, then check the box to Turn off Windows Defender Firewall (not recommended) option.
  5. Close the Control Panel and restart your computer.

Disabling the Windows Defender Firewall can fix any conflicts with the service and Avast, allowing Avast Firewall to work.

2. Scan your PC and run the Repair Tool

  1. Double-click the Avast client on your desktop to launch it.
  2. Click the Full Virus Scan option to scan the entire system for malware or viruses.
  3. After the scan, you’ll see the results. If there’s any threat on your PC, remove it.

Performing a Full Virus Scan will find and remove any threats that may cause problems with your computer and Avast.

3. Uninstall and reinstall the Avast antivirus with Utility

  1. Go to Avast’s official website and download the avastclear.exe file.
  2. Press Windows + R to open the Run window, type msconfig, and then press Enter.
  3. Go to the Boot tab and check the box for Safe boot, then click Apply and OK.
  4. Restart your PC to boot into Safe Mode.
  5. Right-click on the downloaded file and select the Run as administrator option.
  6. Run the avastclear.exe utility tool, and fill in the prompts that follow.
  7. Click Uninstall at the bottom of the screen to uninstall Avast and clear all files. 
  8. Download the latest version of Avast and check if the problem persists.

The uninstall tool will uninstall the Avast app and clear every residue it can leave on your PC.

4. Update Windows OS

  1. Click Start and Select the Windows Settings app.
  2. Click on Windows Update and click Check for updates. (If there are any updates available, Windows will search for and install them)

Windows updates will fix bugs on your PC that can cause issues with the Avast antivirus client. Also, read about how to fix Windows not connecting to update services on your PC.

5. Perform a Clean boot

  1. Press Windows + R key to open the Run dialog box, type msconfig in the text bar, and click OK.
  2. Navigate to the Services tab and check the box for the Hide all Microsoft services option, then click Disable all.
  3. Go to the Startup tab and click Open Task Manager.
  4. Select the unnecessary startup programs and click the Disable button.
  5. Restart your PC and check if the error appears.

A clean boot will prevent any third-party app from launching from the start, blocking any interference from the apps. Also, it’ll disable startup apps that may prompt the error.

Conclusively, you can check what to do if Avast is not updating the virus definitions for some reason.

Leave your questions and suggestions in the comments section.

How to Opt in or Out of Steam Client Beta [Easiest Ways]

Some new features for the Steam client are available in the beta version, allowing users to access them before release. However, many users don’t know how to opt-in or out of the Steam client beta.

Also, users report that the download demo button is not working on Steam when they press it.

What is the Steam beta client?

Updating your Steam client to the beta version allows you to access the latest features yet released for the Steam client before its official release. It is like a version of the next update that users can test before its deployment.

Furthermore, there are many benefits of using the Steam beta client before downloading the updates. Some benefits are:

  • Firsthand experience of latest features – Opting for the Steam beta client exposes you to the latest Steam updates before they release them. It helps you decide whether the update is worth being installed or not.
  • Easy bug detection – Making the beta available for users makes it easy to detect bugs deep-rooted into the update. When users test the features and they malfunction, it’ll be easier to curb the damage before its official deployment.
  • Direct user feedback and reviews – Allowing players to use the feature by opting in for the Steam beta client, they will be able to give feedback on their experiences with the updates. It will help the developers to improve the features and work on the reported flaws.

As much as the Steam beta client has benefits, it has some drawbacks. Some are:

  • Risk of bug attacks – Using the Steam beta client can expose your Steam client or device to bug attacks because the updates you’re testing are not stable or secure. So, you may be at risk of bug infection if the beta client is not clean.
  • Lag and stuttering – Some users complain about experiencing lag and stuttering when using the Steam beta client. So, the beta client can cause the app to work slowly.

However, you can use the Steam beta client on your PC to enjoy the latest features before their official release.

How long do games stay in beta?

The time frame for a game to stay in the beta can differ depending on how much improvement the developers need to make. However, games can stay in beta for about 5 months – 2 years.

Furthermore, the game staying longer in beta gives the owners time to add more novel stories and fix the flaws. On the contrary, games spending too long in the beta can mean the project is not progressing.

How do I opt-in or out of the Steam client beta?

You can opt-in or out of the Steam client beta by tweaking your Steam client, but we recommend you check these preliminary steps first:

Proceed with the steps below to opt in or out of the Steam client beta:

1. Via Steam settings

➡ Opting in:

  1. Double-click on the Steam client on your desktop.
  2. Click on Steam in the upper-left corner, then select the Settings option.
  3. Click on the Account tab, the Beta Participation option, and the Change button.
  4. Select the Steam Beta Update from the drop-down, then click OK.
  5. Click the Restart Steam button on the prompt asking you to restart the Steam app on your PC.

Restarting the Steam client will launch the app into the Steam beta client.

➡ Opting out:

  1. Double-click on the Steam client on your desktop.
  2. Click on Steam in the upper-left corner, then select the Settings option.
  3. Click on the Account tab, go to the Beta Participation option, and then the Change button.
  4. Choose NONE – opt out of all Beta programs from the drop-down and click OK.
  5. Restart the Steam app.

Choosing NONE for the Beta Participation option means you don’t want to run any beta service. Hence, it opts you out of the Steam beta client.

2. Via the Big Picture Mode

➡ Opting in:

  1. Launch the Steam client and select Settings.
  2. Click on System and check the box for Participate in client beta.
  3. Click the Restart Steam button on the new prompt.

➡ Opting out

  1. Launch the Steam client and select Settings.
  2. Click on System and uncheck the box for Participate in client beta.
  3. Restart the Steam client.

Alternatively, you can check some fixes for Steam download stuck at 100 percent on your PC.

Likewise, we have a guide on downloading multiple games on Steam at once without having any issues.

If you have further questions, kindly drop them in the comments section below.

Invisible Box on Desktop: Why is It There & How to Fix It

Many users have complained about an invisible box on their desktop, which is one way or another problem. Unfortunately, the invisible box on the desktop only appears when the cursor drapes above it.

However, numerous other display issues, like the Windows 11 theme keeps changing, causing problems with the PC.

Why is the invisible box on the desktop?

The invisible box on the desktop can be there for many reasons. The most common cause is an outdated Windows operating system. Windows 11 is in its early phase, and new builds occasionally come in. So, you won’t be able to fix the bugs that cause this problem if you don’t install these updates.

Other factors that may be responsible for the invisible box on the desktop are:

  • Transparency effect – The Windows transparency effect on your PC adds more display aesthetics to the screen. However, it can result in some problems if it can’t work with a menu item, resulting in an invisible box.
  • Faulty MiniSearchHost Process – The MiniSearchHost Process is responsible for the quick search option in the taskbar. So, if the process is faulty or runs abruptly, it can cause the translucent box right above the search box on your desktop.
  • Outdated or corrupt graphics driver – If the graphics driver running on your computer is corrupt or outdated, it can cause many problems with your display processes.

There are other causes not mentioned above, but regardless, you can fix the problem with some fixes.

How do I get rid of the invisible box on the desktop in Windows 10/11?

Before proceeding with any fixes, check the following preliminary steps:

If the problem persists, try the following solutions:

1. Update your graphics driver

  1. Press Windows + R key to launch the Run window, and type devmgmt.msc, then click OK.
  2. Expand the Display adapters folder, right-click the graphics driver, then click Update driver.
  3. Select the Search automatically for drivers option and restart your PC.

Read our article on how to update drivers on Windows 11 for other methods you can use if the above doesn’t work for you.

2. Update Windows Operating System

  1. Click on the Start button and select Settings.
  2. Choose Windows Update and select Check for updates. (If there are any updates available, Windows will search for and install them)

Updating the Windows operating system can fix bugs affecting your PC and causing the invisible box to appear.

In case you run into issues with the Windows update, we recommend you check our guide on fixing Windows updates & security issues on your PC.

3. End the MiniSearchHost process in the Task Manager

  1. Right-click the Start button and select Task Manager.
  2. Find the MiniSearchHost file, right-click on it, and select End Task. (If the MiniSearchHost file is not in your directory, check it under the Search folder)
  3. Close File Manager and check if the invisible box has disappeared from the desktop.

Ending tasks for the MiniSearchHost will close any background search process that causes the problem.

4. Restart Windows Explorer

  1. Press Ctrl + Shift + Esc keys to open Task Manager.
  2. Click on the Processes tab.
  3. Navigate through the processes, select Windows Explorer, then right-click on it and select Restart from the drop-down.

The Windows Explorer processes may be active in the background, so ending tasks for it will completely close the program and fix the problem. Read what to do if Windows Explorer keeps crashing on your computer.

5. Disable the Search function

  1. Right-click the Taskbar icon and select the Taskbar Settings from the drop-down.
  2. Expand the Taskbar items and click the Search switch to toggle it off.

The invisible box should disappear from your desktop.

It is our last recommendation, as it’ll prevent you from accessing the Search widget, but it will fix the problem.

Nevertheless, there are many other issues users complain about regarding Windows display that you may encounter. Hence, we recommend you check the fixes for the yellow tint display issue on Windows 10/11.

Also, you can check how to fix the red tint on screen issues on Windows 10/11.

Do not hesitate to drop your suggestions and questions in the comments section.

KB5019959 is Not Installing: How to Fix It in 5 Steps

Microsoft releases updates consistently to fix the bugs affecting Windows and improve its performance. Sadly, some updates can be hard to get around, like the KB5019959 not installing on a PC.

Also, some users complain about Windows update not working on Windows 10/11.

Why is KB5019959 not installed?

Getting an error when installing the KB5019959 update can be due to many problems affecting your computer. The common culprit for this error is a corrupt system file. It impedes the ability of the system to execute new updates and blocks its activities.

Other factors that can cause the KB5019959 not to install are:

  • Third-party app interference – Users may encounter issues with the KB5019959 update because of third-party app interference. For example, apps like antivirus software can prevent Windows updates from working.
  • Issues with Windows update service – Windows update services must be intact for you to download an update or stacks of updates on your PC. So, it is possible to encounter errors when Windows services are not functioning properly.
  • Corrupt Windows update files – Initiating new updates can be impossible if the Windows update files are corrupt or broken. They prevent the activities of new updates trying to install on the computer, resulting in errors.

These causes can vary on different PCs, but you can resolve them by troubleshooting your PC. Hence, we’ll take you through some fixes for the error.

How do I fix KB5019959 if it’s not installing?

We recommend you go through the following preliminary checks before proceeding with any troubleshooting process:

  • Make sure to fix network congestion on your PC.
  • Disable other download processes.
  • Disconnect external devices plugged into the PC.
  • Restart Windows in Safe Mode and see if the error occurs.

Try the following solutions if you’re not able to get around the KB5019959 update:

1. Run the SFC and DISM to repair damaged system files

  1. Left-click the Start button, type Command Prompt and Run as administrator.
  2. Click Yes if the User Account Control prompts.
  3. Type the following and press Enter: sfc /scannow
  4. Type the following commands and press Enter: DISM /Online /Cleanup-Image /RestoreHealth
  5. Restart your PC.

Running the SFC and DISM scan will detect and restore corrupt system files. You can check how to fix the run as administrator option if it’s not working on your PC.

2. Run Windows Update Troubleshooter

  1. Press Windows + I key to open the Settings app.
  2. Click System and select Troubleshoot.
  3. Click Other troubleshooters.
  4. Select Windows Update and click Run the troubleshooter to initiate the Windows Update troubleshooter.
  5. Follow the on-screen prompts.

Follow the on-screen instructions to complete the process. Windows update troubleshooter will detect and repair errors prompting the Windows update not to work on your computer.

3. Clear Windows Update cache via File Explorer

  1. Click the File Explorer icon on your taskbar to launch the app, right-click the Local Disk (C), and select Properties.
  2. Click on Disk Clean-up, then click the Cleanup system files button.
  3. Check the boxes for Windows upgrade log files and Temporary Windows Installation files, then click OK.

Read what to do if File Explorer keeps crashing on your PC.

4. Perform a clean boot

  1. Press Windows + R key to open the Run dialog box, type msconfig, and click OK.
  2. Navigate to the Services tab and check the box for the Hide all Microsoft services option, then click Disable all.
  3. Go to the Startup tab and click Open Task Manager.
  4. Select the startup programs and click the Disable button.
  5. Restart your PC and check if the error appears.

Performing a clean boot will stop third-party apps from running from the start and prevent any interference from the apps.

5. Install the update manually

  1. Go to the Microsoft Update Catalog page, type KB5019959, and click the Search button.
  2. Select an updated version compatible with your operating system, then click the Download link.
  3. Follow the on-screen instructions to download the update.
  4. Restart your PC and check if the KB5019959 update installs.

Manually installing the update will help get past issues with other updates that can prevent it from installing.

Disabling automatic updates on your PC may be beneficial to prevent update errors.

Alternatively, read our tips for fixing the 0x800f0900 update/install error on your PC.

In conclusion, we have a detailed guide on fixing the 0x800f0988 Windows update error on your PC.

Likewise, you can check what to do if the KB4038782 update won’t install on Windows 10/11.

For further questions and suggestions, kindly drop them in the comments section. We’d like a response from you.

White Search Bar in Windows: How to Fix It for Good

Are you having a white search bar issue on Windows 10? If yes, this article will help you to fix it.

Usually, when you search for something on Windows, you may use the Start Menu. But Windows 10 has a dedicated search bar. It is also known as the Cortana search bar. Unfortunately, it may become solid white for some users even when dark mode is active. It is an annoying problem many Windows users are encountering.

Why does the Windows search bar become white?

If the search box on the taskbar is white when it should not be like that, these may be the reasons:

  • A bug: If you are an Insider preview user or have installed a new update on Windows 10, it may have a bug that is causing the white search bar issue.
  • Misconfiguration: If there is something wrong with your settings, it might be the reason you are getting this problem.
  • Something has interfered: Some software or services may interfere with something, which may prevent Windows from rendering the search bar correctly.
  • Registry issues: If registry entries become corrupted, that can bring many unwanted errors like white search bar issues.

How do I solve Windows 10 white search bar issue?

We suggest you do the following things before going through the troubleshooting methods. It may save you time.

Doing the above things may solve the problem if it is nothing serious. If not, follow the ones mentioned below to fix Windows 10 white search bar problem.

1. Restart Windows Explorer

  1. Press CTRL + ALT + Del on the keyboard and click on Task Manager.
  2. Right-click on Windows Explorer and click on Restart.restarting windows explorer windows 10 taskbar

Restarting Windows Explorer refreshes the UI components. It fixes any temporary glitches. However, if it doesn’t solve the white search bar issue, follow the next methods.

2. Tweak location

  1. Press Win + I on the keyboard to open Windows 10 Settings.
  2. Click on Time & Language.going time and language windows 10 settings
  3. Go to Region.going region windows 10 settings
  4. Now, change the Country or region where Cortana is not available.changing country or region Windows 10 settings
  5. Change back to your original location.

There are certain countries where Cortana is not available. Bangladesh, North Korea, Iran, etc., are two of them. Changing to any of these countries and reverting may solve the light search bar in dark mode issue for Windows 10 users.

3. Tweak default app color settings

  1. Go to Windows Settings like before.
  2. Go to Personalization.going personalization windows 10 settings
  3. Click on Colors.going colors windows 10 settings
  4. Choose your color to Custom.
  5. Choose Light under Choose your default app mode.
  6. Change it back to Dark.choose your default app mode color windows 10 settings

Now, see if it has helped or not. Usually, it should work, as many users have found this method helpful.

4. Change in the registry

  1. In the Start Menu, type regedit and hit Enter to open Windows Registry Editor.
  2. Navigate to the following location:
    HKEY_CURRENT_USER\Software\Microsoft\Windows\CurrentVersion\Search\Flighting\0\WhiteSearchBox
  3. Double-click on Value and set its value to 0 instead of 1.setting whitesearchbox registry value 0
  4. Save it and restart your PC.

5. Uninstall problematic update

  1. Open the Start Menu, type control panel, and press Enter.
  2. Click on Uninstall a program.going uninstall program control panel
  3. Click on View installed updates.clicking view installed updates uninstall or change a program control panel
  4. Now, uninstall the most recent update.
  5. Restart your PC.

If the update is the culprit, this method will be the one that solves your problem. It also can help solve the issue when you can’t type in the Windows search bar.

6. Repair corrupted system files

  1. Search for the Command Prompt on the Start Menu.
  2. Right-click on it and choose Run as Administrator.
  3. Type the following command and press Enter to run it: sfc /scannowsfc scannow command
  4. Please wait until it finishes the process.
  5. Restart your PC.

We also suggest you take additional steps to repair corrupted system files. It may help to solve the white taskbar search box issue on Windows.

Additionally, you can consider doing a system restore to see if it helps. If you are an Insider Preview user and cannot solve the problem, install a stable version of Windows 10.

This article has shown you how to fix Windows 10 white search bar bug. If you have any relevant questions or know any better methods, feel free to let us know in the comment box.

Hardware Accelerated GPU Scheduling Not Showing [Fix]

Is hardware-accelerated GPU scheduling not showing on your Windows PC? Usually, you should find this option on Display Settings on Windows 11 and 10.

It is not a big concern whether you should turn on GPU scheduling or not. But, it is critical if you don’t find the option. For some users, this feature may go missing for unknown reasons, even with a decent graphics card. The good thing is you can quickly solve this problem.

Why is hardware-accelerated GPU scheduling missing on my PC?

If you don’t find this option on your computer, it might be due to the following reasons:

  • Outdated GPU driver: If your graphics driver is extremely outdated, many modern Windows features may stop working.
  • Incompatible GPU: Not all graphics cards work with GPU scheduling. For example, most AMD graphics cards got GPU scheduling support not very long ago.
  • Outdated Windows: If you are using a very old version of Windows, some features may go missing or may not work at all.
  • Problematic system files: Corrupted system files also can be a reason you do not see the option in settings.

How do I fix hardware accelerated GPU scheduling not showing?

Before trying the main methods, you should check the following things:

  • Make sure you use one of the graphics cards compatible with your current operating system’s WDDM version. For example, Windows 11 requires WDDM 3 or later versions.
  • Update Windows to the latest version.

After ensuring the above things, follow these methods to solve the hardware-accelerated GPU scheduling missing issue.

1. Update graphics card driver

  1. Open the Start Menu, type Device Manager, and press Enter to open Windows Device Manager.opening device manager windows 11
  2. Expand Display adapters.
  3. Right-click on the Display Driver and choose Update.choose update driver for NVIDIA graphics card device manager
  4. Choose the preferred method to update.
  5. After updating, restart your computer.

Now, go back to the Windows Display Settings and see if the hardware-accelerated GPU scheduling is showing or not.

Please note that the device manager may not find the latest driver for your GPU. So, we highly recommend you use a specialized driver updating tool. With a single click, this tool can find the latest drivers and update the GPU to the most recent version.

2. Re-install the graphics card driver

2.1 Uninstall graphics driver

  1. Open the Device Manager like before.
  2. Find the graphics driver, right-click on it and choose Uninstall device.uninstalling graphics card device manager
  3. Check Attempt to remove the driver for this device and click on Uninstall.
  4. Restart your PC.

2.2 Install the driver again

  1. Go to the NVIDIA or AMD, or Intel driver download page.nvidia download page
  2. Download the appropriate item and install it on your PC.
  3. Restart Windows if necessary.

It should solve hardware-accelerated GPU scheduling not showing errors.

3. Enable using the registry

  1. Open the Start Menu.
  2. Type regedit and press Enter to open the Windows Registry Editor.
  3. Navigate to the following location:
    HKEY_LOCAL_MACHINE\SYSTEM\CurrentControlSet\Control\GraphicsDrivers
  4. Double-click on the HwSchMode from the right pane.
  5. Set the value to 2 and click on OK.setting hwschmode value 2 regedit

If you don’t see the GPU scheduling feature after changing the value, restart your PC. It should appear in your Display Settings.

4. Repair corrupted system files

  1. In the Start Menu.
  2. Search CMD and right-click on the Command Prompt and choose Run as Administrator.
  3. Type the following command and press Enter to execute it: sfc /scannowsfc scannow command
  4. It may take a while to finish the process.

You also can learn more about how to repair & restore corrupted system files. It will help to get back any missing Windows features due to problematic or missing required system files.

5. Upgrade to a compatible graphics card

If you are using an old graphics card, or you do not have a dedicated GPU, and the built-in one doesn’t support the latest WDDM, it can be the only reason behind the problem. So, to get the hardware-accelerated GPU scheduling feature, you must upgrade to a compatible graphics card.

You can consider these best graphics cards if gaming is your primary concern.

You have learned the best ways to get back the hardware-accelerated GPU scheduling feature on Windows if it is not showing in the display settings. If you know of other better methods, let us know in the comment box.

3 Best Seasonal All-In-One Computer Deals

All-in-One computers are very practical: there’s no need to buy separate hardware components as these devices pack everything you need in a single case. However, AIO PCs tend to be a tad more expensive than regular laptops.

Well, the best time of the year to grab an All-in-One PC is today. This year brings you many awesome AIO computer deals but there’s a catch. The offer is valid today only. So, if you really want to get one of these computers, hurry up.

Scroll down to check out the hottest All-in-One computer deals.

Note icon NOTE
Deals are subject to change. Sometimes, some of the deals listed in our guides may no longer be available by the time you hit the buy button. So, hurry up and grab them while they’re hot.

What are the best AIO PC deals to get in 2022?

2020 HP 24 Inch All-in-One Desktop PC

  • Ryzen 5 CPU
  • Comes with Windows 11 home
  • 23.8″ screen
  • Wired Keyboard included
  • 8GB RAM
  • Clicky keyboard

This computer is equipped with a powerful  AMD Ryzen 5 5500U CPU.

This modern desktop setup offers you everything you need in a home computer. With a good amount of memory (8GB RAM) , it supports streaming, gaming, and pretty much any type of demanding activity.

On top of that, the Full HD monitor offers amazing visual quality, which paired with the immersive speakers

HP 14-inch All-in-One Computer

  • AMD Ryzen 3 Processor (up to 3.5 GHz)
  • 8 GB DD4 Memory
  • 256 GB SSD
  • Touchscreen
  • The keyboard isn’t backlist

If you need an All-in-One computer that’s a bit cheaper, you can purchase this HP laptop. It has a really nice design that blends into any environment.

This AIO PC is driven by an Intel Core i3-8130U processor. You will have 8GB of RAM and plenty of storage space with the 256GB SSD. Windows 10 Home is preinstalled so that’s another big plus.


Acer Aspire Vero AV15-51-7617 Green PC

  • 15.6-inch display, Full HD resolution
  • Intel Core i7-1195G7
  • 16GB DDR4
  • 512GB NVMe SSD
  • Intel Iris Xe Graphics
  • Noisy fans

This is a 27-inch device with full HD resolution, and its intel core CPU goes up to 3.6GHz.

Regarding the storage, there’s 16GB DDR4 memory and a 512GB NVMe M.2 SSD. That is plenty both for storage and for supporting demanding tasks.

Speaking of demanding tasks, the Intel Iris graphics card should be able to support pretty much any video game without much effort.

This a great device, with a sleek edge-to-edge display and great performance, so be sure to check it out.


So, which of these PCs have you bought? Let us know in the comments below.

CHKDSK Cannot Run Due to Recently Installed Software [Fix]

The error CHKDSK cannot run due to recently installed software can be a nightmare for a Windows user. This article will help you to get rid of such errors.

Usually, when you encounter BSOD, install the update or do a normal restart, your PC should start without any problem. Sometimes, it may run some recovery processes, including disk repair or checking, etc. In this type of situation, the above error may occur.

chkdsk cannot run due to recently installed software

Fortunately, you can solve this error. However, before knowing the solutions, let’s learn about the causes.

Why is CHKDSK not running due to a recently installed software error occurring?

There are some common reasons why you are encountering this CHKDSK error. It includes the followings:

  • Recently installed update or software: If you have updated Windows recently or installed software, that may be the reason you are getting this CHKDSK error.
  • Recently changed settings: Have you changed any configuration or settings? That may have a direct effect on your disk drive.
  • Excessive bad sectors on HDD: If your HDD has too many bad sectors, it may be another reason.
  • Physical damage on your hard drive: If your SSD or HDD has physical damage or it is very old and needs a replacement, such a CHKDSK cannot run error may appear.
  • Driver problem: Some users reported that some specific drivers could be responsible for this problem.
  • Corrupted system files: If the core components of the Windows system have been corrupted, you may get this type of error.

How do I solve CHKDSK cannot run due to recently installed software?

Before you go through the actual troubleshooting methods, we suggest you ensure the following things:

  • Back up your data to an external disk or cloud, if possible, using safe mode.
  • Have a Windows bootable media/recovery disk or flash drive.
  • Ensure your HDD/SSD is connected to the motherboard properly.
  • Make sure all of the drivers on your PC are up to date. If necessary, use Outbyte Driver Updater to update them.

These are not strict requirements. But, it may be essential in some situations. After ensuring the above things, proceed to the actual methods.

1. Run chkdsk in Safe Mode or in the Recovery environment

  1. Boot Windows in safe mode or go to Recovery mode if you cannot access Windows usually.
  2. Open the Start Menu, type CMD and click on Command Prompt there.
  3. Run the following command and press Enter: chkdsk /f /rrunning chkdsk f r command
  4. Wait until the process is finished.

It should not show the CHKDSK error due to recently installed software anymore. If you still get the error, follow the next methods.

2. Uninstall recently installed updates

  1. Press Win + I on the keyboard to open Windows Settings.
  2. Go to Windows Update and click on Update history.going update history windows 11
  3. Click on Uninstall updates.going uninstall updates windows 11 settings
  4. Click on Uninstall next to the update you want to remove.uninstalling update windows 11
  5. Restart your PC after completing the process.

Then try to run the CHKDSK command and see what happens. However, if you cannot access your PC usually, use the recovery mode technique as suggested in method 1.

3. Uninstall recently installed software

  1. Go to Windows Settings like before.
  2. Go to Apps and click on Installed apps.going installed apps windows 11 settings
  3. Click on the three horizontal dots next to the software you want to uninstall and click on Uninstall.uninstalling smart game booster win11 settings

Alternatively, and for a better experience, you should use a tool like IObit Uninstaller or Revo Uninstaller. These can obliterate any software without leaving any leftovers, unlike Windows built-in uninstaller.

4. Do the system restore

  1. Open the Start Menu, search for Create a restore point, and open System Properties.
  2. Click on System Restore.
    clicking system restore
  3. Click on Choose a different restore point.clicking choose a different restore point
  4. Select the restore point and click on Next.choosing system restore point clicking next
  5. Click on Finish.
  6. Follow the onscreen steps to complete the process.

If any misconfiguration or changes made recently is causing the problem, the system restore should solve the inability to run the CHKDSK command due to a newly installed software issue.

5. Reset or clean install Windows

  1. Go to Windows Settings.
  2. From the System tab, go to Recovery.going recovery win11 settings
  3. Click on Reset PC.clicking reset PC win11 settings
  4. Follow the onscreen steps to finish the process.

If resetting doesn’t solve the issue, consider a clean installation of Windows. If you are interested, learn the differences between Windows 11 reset vs. clean install.

6. Ensure the HDD/SSD is healthy enough

  1. Open the Start Menu, type CMD and hit Enter.
  2. Type the following command and hit Enter to execute it: wmic diskdrive get statusrunning wmic diskdrive get status command cmd

It will give you an idea about the current status of your disk drive. However, we suggest you depend on any HDD health check tools for more in-depth analysis.

If it is a hard disk damage, you must replace it. Otherwise, the CHKDSK cannot run due to errors will appear repeatedly, and at a time, you won’t be able to use your PC anymore before installing a new disk drive. If necessary, learn about the best SSDs for Windows 11.

This article has shown how you can fix CHKDSK cannot run due to recently installed software. If you know of other better methods, let us know in the comment box.

Aio Cooler: Deals You Can’T Miss This Year

With the holiday season soon approaching, a bunch of people in one room will definitely have the temperatures at an all-time high. 

High temperatures while making merry can dampen the mood but this doesn’t have to be your reality if you can get your hands on one or more of the AIO coolers on the Black Friday sale.

So why an AIO cooler? You may be wondering. For starters, if you are looking for durability, this should be your go-to cooler. Some of the AIO coolers consist of three-phase motors just at the core of the pump that generates minimal but strong enough vibrations.

Coolers generally wear and tear after being overworked and spoil quickly. The three-phase motor technology ensures the cooler will serve you for years to come – and what better time to get it than when there are such great discounts?

Noise management is another major concern when selecting a cooler. You either choose noise and cool air or extremely high temperatures in tranquility. Well, you won’t have to make that choice with the AIO coolers. 

They have been engineered to perform at reduced noise levels while giving you the ability to control their performance via your mobile app or desktop.

What are some of the coolers available this Black Friday?

All these items have special Black Friday prices.

While making your decision, pay particular attention to the features of each model. If you are into tech, you may want to go for the app-controlled cooler that gives you the chance to adjust the lighting settings and performance precision just how you like it.

There are quite a number of offers and varieties on coolers so be sure to have a look at the Amazon site and get a cooler for your home.

Have you found a cooler that you are willing to settle on so far from the list above? Let us know in the comment section below.

DirectPlay Windows 10 Issues: Fix Them With These 4 Methods

Let us consider DirectPlay in Windows 10.

But first, what is DirectPlay? DirectPlay is an antiquated API library component of earlier DirectX versions. However, Microsoft sidelined DirectPlay in favor of Games for Windows Live. As DirectPlay is obsolete, it’s no longer required to update Windows games.

However, DirectPlay is still essential to run games that predate 2008 in Windows 10. Consequently, some older games don’t run without DirectPlay.

If a game or app needs DirectPlay, a window opens stating An app on your PC needs the following Windows feature DirectPlay.

Are you getting that DirectPlay error in Windows 10? If so, this is how you can enable DirectPlay.

What causes DirectPlay issues?

Like many other computer-related issues, this problem may be caused by varying elements. At the top of this list, we have the following:

  • OS update problems – A major cause is failed Windows Updates for many users.
  • Windows component issues – Users who have something corrupting the Windows Component Store can expect this error or other errors.
  • Antivirus software – Sometimes, the error will be triggered because of compatibility issues with the antivirus software you use.

With these triggers in mind, we will introduce you to some good solutions.

How can I fix DirectPlay problems on Windows 10?

  1. Installing DirectPlay
  2. Adjust your antivirus software
  3. Run the game in Compatibility Mode
  4. Use the Program Compatibility Troubleshooter

1. Installing DirectPlay

  1. To enable DirectPlay, press the Win key + R keyboard shortcut to open Run, enter Control Panel in Run, and click the OK button.
    directplay windows 10
  2. Click Uninstall a Programs to open the uninstaller utility.
    directplay windows 10
  3. Click Turn Windows features on or off.open programs and features
  4. Double-click Legacy Components to expand it, then select the DirectPlay checkbox.
    directplay windows 10
  5. Reboot your desktop or laptop after installing DirectPlay.

2. Adjust your antivirus software

  1. Click on the hidden access arrow in the Taskbar.
    directplay windows 10
  2. Click on your antivirus icon, hover over Avast shields Control and select Disable for 10 minutes (This step varies for different antivirus software).

Some users have stated that they get an error code 0x80073701 when attempting to install DirectPlay. Thus, they can’t install DirectPlay as outlined above.

If that’s the case, antivirus software might be blocking DirectPlay. First, try temporarily switching your antivirus software off, which you can usually do via antivirus utilities’ system tray icon context menus.

However, keep in mind that antivirus developers have strived to comply with the requirements of various activity modes users might need in the past years. Consequently, a lot of antivirus tools nowadays come with gaming compatibility modes.

So if you need to change your antivirus for more valuable gaming modes, we recommend the most effective antivirus for Windows 10 now that will adjust your gameplay.

3. Run the game in Compatibility Mode

  1. First, press Windows + E.
  2. Open the folder that includes the game .exe file.
  3. Right-click the game’s .exe file, select Properties on the context menu, then select the Compatibility tab.
  4. Click the Run this program in Compatibility mode for checkbox, then select an earlier Windows platform from the drop-down menu. Next, select the Windows OS that was the latest platform when the game launched.
    directplay windows 10
  5. In addition, select the Run this program as an administrator option.

The Compatibility mode setting can come in handy for running older games in Windows. It will enable the game to utilize settings from a previous Windows OS.

4. Use the Program Compatibility Troubleshooter

  1. Click the Start button, type Troubleshooting, and select the app.
    directplay windows 10
  2. Click on the View all button on the left pane.
    directplay windows 10
  3. Scroll down and click on Program Compatibility Troubleshooter.
  4. Click Advanced.
  5. Click Run as administrator.
    directplay windows 10
  6. Press the Next button.
  7. Then select a game from the list, or if it is not listed, select the Not Listed option, and click Next.
    directplay windows 10
  8. Wait for the troubleshooter’s resolution.

So that’s how you can enable DirectPlay in Windows 10 and select the Compatibility mode setting to kick-start games that predate the more recent Windows platforms.

You might also need to enable DirectPlay for some retro game emulators.

If you have any more questions, feel free to leave them in the comments section below, and we’ll be sure to take a look.

Windows Update Something Went Wrong [SOLVED]

Some users have posted about a Windows Update: Something went wrong error on support forums. When that error occurs, the Windows Update Settings tab displays a Something went wrong error. One user’s forum post said this:

I found an issue in my Windows Update setting that says “Something went wrong. Try to reopen Settings later.” Fyi, I’ve tried to fix this problem by watching certain videos that are supposed to help me. However, things getting worse… I still can’t update my Windows to the latest version.

Consequently, users can’t download and install Windows updates via Settings because of that error. This issue can occur on Windows 11 and 10. If you need to fix the Windows Update Something went wrong Windows 11/10 error, check out the potential resolutions below.

Why is my Windows Update saying something went wrong?

The Windows Update: Something went wrong error can often occur because the Update Orchestrator Service needed for updates isn’t configured right. That service should be enabled and running with an automatic startup type. So, you might need to check that service to fix this error.

However, this error can also be due to a corrupted Windows Update database. In this case, you would need to reset Windows Update components.

Aside from that, you might need to repair corrupted system files or even a user profile to resolve this issue. System File Checker, System Restore, or even Reset this PC are some of the built-in Windows tools you might then need to fix the Something went wrong error.

How do I fix Windows Update something went wrong?

1. Run the Windows Updater troubleshooter

  1. To launch Settings, press the Windows and I keys at the same time. Click the Troubleshoot option, and then on Other trouble-shooters.
    Other trouble-shooters navigation option Windows Update Something went wrong Windows 11
  2. Select the Run option for opening Windows Update.
    The Run button Windows Update Something went wrong Windows 11
  3. Apply any potential resolutions the troubleshooter suggests.

2. Check if the Update Orchestrator Service is enabled

  1. 1. Launch Run by pressing the Windows + R hotkey.

  2. 2. To open Services, enter services.msc in Run’s text box and click OK.

    launch services in run
  3. 3. Double-click Update Orchestrator Service to open the properties window for it.

    click on orchestrator service
  4. 4. Select the Automatic option on the Startup type drop-down menu.

    click on automatic
  5. 5. Click Start if the service isn’t running.

    start
  6. 6. Press the Apply and OK buttons to save the new service settings.

    click apply
  7. 7. Open the Start menu and click Power, followed by Restart. The Something went wrong try to reopen settings later error in Windows 10/11 will be fixed.

    click on restart
  8. Another quick fix for this error is to manually enable the Update Orchestrator Service. It is responsible for keeping the Windows Update tool working and it’s possible that it was accidentally disabled at some point.

3. Run an SFC scan

  1. Open the Windows search box by pressing the Windows + S hotkey. Enter Command Prompt in the search text box then click the Run as administrator option shown directly below.
    The Run as administrator option Windows Update Something went wrong Windows 11
  2. Then type in this command and hit Enter: DISM.exe /Online /Cleanup-image /Restorehealth
    The deployment image command Windows Update Something went wrong Windows 11
  3. To initiate a system file scan, input the following command and press Enter: sfc /scannow
    The sfc commandWindows Update Something went wrong Windows 11
  4. Wait until the SFC displays an outcome in the Command Prompt window.

You can also try a specialized system repair tool that automatically scans your PC and repairs any error related to corrupted files, missing DLLs, or BSoDs.

4. Run a Chkdsk scan

  1. Open the Command Prompt as outlined in the preceding resolution. 
  2. Enter this disk command, and press the Return key: chkdsk /f C:Chkdsk command Windows Update Something went wrong Windows 11
  3. Press the Y keyboard key to confirm.
    Chkdsk confirmation message Windows Update Something went wrong Windows 11
  4. Restart Windows to initiate the chkdsk scan.

5. Rename the SoftwareDistribution and Catroot2 Folder

  1. Open the Command Prompt with elevated rights as covered in the first three steps of resolution three.
  2. Input these four different commands pressing Enter after each:
    Net Stop bits
    Net Stop wuauserv
    Net Stop appidsvc
    Net Stop cryptsvc
  3. Rename the SoftwareDistribution folder by inputting this command and pressing Enter: Ren %systemroot%SoftwareDistribution SoftwareDistribution.bak
    The Ren SoftwareDistribution.bak command Windows Update Something went wrong Windows 11
  4. To rename catrook2, enter this Ren command and press Enter: Ren %systemroot%system32catroot2 catroot2.bak
    The Ren catroot2.bak command Windows Update Something went wrong Windows 11
  5. Input and execute these four separate Command Prompt commands:
    Net Start bits
    Net Start wuauserv
    Net Start appidsvc
    Net Start cryptsvc
  6. Restart Windows from the Start menu.

6. Edit the Registry

  1. Press the Windows + X hotkey, and select Run on the menu.
    The Run option Windows Update Something went wrong Windows 11
  2. Type this text into Run’s Open box and click OK: regedit
    The regedit command Windows Update Something went wrong Windows 11
  3. Then go to the UsoSvc key at this registry location: Computer\HKEY_LOCAL_MACHINE\SYSTEM\CurrentControlSet\Services\UsoSvc
  4. Double-click the Start DWORD shown directly below.
    Start DWORD Windows Update Something went wrong Windows 11
  5. Delete the current value, and enter 2 in the data box.
  6. Then press OK to exit the window.
    The OK option Windows Update Something went wrong Windows 11
  7. Repeat steps four to six for the Start DWORD at these registry key locations:

HKEY_LOCAL_MACHINE\SYSTEM\CurrentControlSet\Services\WaaSMedicSvc
HKEY_LOCAL_MACHINE\SYSTEM\CurrentControlSet\Services\wuauserv

7. Roll back Windows to a restore point

  1. Bring up the Run tool. Type this command in the search box and click OK: rstrui
  2. Select Choose a different restore point if that option is available, and click the Next button.
    Choose a different restore point option Windows Update Something went wrong Windows 11
  3. Then select a restore point that predates the Something went wrong error on your PC if you can. Alternatively, select the oldest date available.
    The Next button Windows Update Something went wrong Windows 11
  4. Select the Next and Finish options to roll back Windows.
    The Finish button Windows Update Something went wrong Windows 11

8. Reset Windows

  1. Press the Windows + I key combination. Click Recovery on the Settings app that opens.
    The Recovery option Windows Update Something went wrong Windows 11
  2. Press the Reset PC button.
    Reset PC button Windows Update Something went wrong Windows 11
  3. Select Keep my files in the Reset this PC window.
    Keep my files option Windows Update Something went wrong Windows 11
  4. Click the Cloud download or Local reinstall option you prefer.
    Reinstall options
  5. Press the Next button, and select Reset to finish.
    Reset button Windows Update Something went wrong Windows 11
Note icon NOTE
You’ll need to reinstall any software that didn’t come pre-installed with Windows 11/10 after resetting the platform. Therefore, this is the last resort resolution if none of the other potential fixes resolve the Something went wrong error.

Can I manually install Windows updates?

You can manually download Windows patch updates from the Microsoft Update Catalog and install them. Doing so, however, probably won’t resolve the Windows Update: Something went wrong error. Nevertheless, you can manually update Windows 11 or 10 in that way like this.

  1. Open the Microsoft Update Catalog homepage.
  2. Enter a KB Windows update code in the search box, and click the Search button.
    The search button Windows Update Something went wrong Windows 11
  3. Click the Download option for an update.
    The Download option Windows Update Something went wrong Windows 11
  4. Right-click the download link and select Save link as on the context menu.
    Save link as option Windows Update Something went wrong Windows 11
  5. Choose the folder to download to, and select the Save option. Click File Explorer’s taskbar button shown below, and open the folder you saved the update package in.
    The magnifying glass button Windows Update Something went wrong Windows 11
  6. Double-click the update’s MSU file to install.

Note that you can only download and install patches, not build, updates via the Microsoft Update Catalog. You can, however, still, update Windows 11/10 to the latest version without Settings with the Media Creation Tool. Our Media Creation Tool review provides further details for that utility.

Can I fix the Something went wrong error with third-party repair software?

Possibly, but much depends on the repair software you’re utilizing. As Windows’ built-in repair tools can feasibly resolve this issue, you might not need third-party system repair software. Our Windows 10/11 repair software guide provides the full low-down on the best third-party repair utilities.

There’s a good chance you’ll be able to fix the Windows Update: Something went wrong error by applying the potential resolutions above. The second resolution for checking the Update Orchestrator Service settings is especially widely confirmed to fix that error.

Yet, we can’t promise those resolutions will fix the Something went wrong error for all users. You can get further troubleshooting guidance from Microsoft’s Windows support service if needed. Enter a description for the error on the Contact Microsoft Support page and click Get Help to do so.

Sometimes, Windows Update errors with codes starting with 0x can be tricky. For more detailed steps, check out this article about Windows Update error 0xxxxxxxxxx.

You can chat about the Windows Update: Something went wrong error in the comments section below. If you’ve found any other fix for that error not mentioned above, let us know about it there.

How to Reactivate Windows After a Hardware Change [2 Steps]

If you have recently bought a new computer or made other significant changes to your system configuration, for example, you’ve replaced the motherboard; You may need to reactivate your copy of Windows.

We’ve all been there; your processor has served you for years, but it has reached its end days, and it’s time to upgrade to a new CPU. When you do so, Windows may not recognize it as part of your PC hence the need to reactivate.

Why does my PC need a hardware change?

So, your PC is struggling to run the programs you need. It’s working harder than it should be and slowing down. You’ve got a choice: either get a new PC or upgrade your current one. 

If you’re down on your luck and can’t afford a new device, a few hardware changes are your best bet. Other reasons include the following:

  • Hardware failure – The most common reason for a hardware upgrade is the failure of the existing hardware to keep up with the demands of today’s computing environment. For example, if your computer is slow, a new processor, memory, or graphics card could bring about significant performance improvements.
  • Expandability – Another reason to upgrade your PC’s hardware is if you want to add new components such as additional memory or hard drives. If you are running out of memory on your current system, an upgrade can solve this problem for good.
  • Upgrading outdated components – Upgrading hardware is a great way to improve the performance of your computer without having to buy a new one. For instance, you may need to upgrade your graphics card to be able to run modern games at acceptable frame rates and resolutions. 
  • Compatibility – As new operating systems continue to upgrade, they may no longer be compatible with your computer. This can happen if you try to run a newer operating system on a computer that is too old. For instance, most old PCs can’t run Windows 11 because of the stringent system requirements.
  • Damaged components –  If a part is damaged, then it may not be able to perform the tasks that it was designed to do. You’ll need to replace it to continue using your device typically.

How can I reactivate Windows after a hardware change?

1. Use the Activation troubleshooter

  1. First, you must link your digital license to your Microsoft account. The Microsoft account linked should also be an administrator account.
  2. Hit the Windows key and select Settings.settings windows 11
  3. Click on System and scroll down to Activation.
  4. Select Troubleshoot, and you should see the following message: Windows can’t be activated on your device.
  5. Click on I changed hardware on this device recently, then select Next.
  6. Type and enter the credentials associated with your Microsoft account.
  7. Mark the This is the device I’m using right now checkbox and click Activate. 

This method will only work if you link your Microsoft account before the hardware change.

2. Use the Product key

  1. Hit the Windows key and select Settings.settings windows 11
  2. Click on System and scroll down to Activation.
  3. Select Change Product Key, then enter your Product Key.

If you don’t have the digital license and the Product Key, you must purchase them from Microsoft.

Is the Windows key tied to the motherboard?

Windows product keys are, in most cases, tied to the computer’s motherboard. Unfortunately, this changes the motherboard on your PC; you’ll need to purchase a new Windows activation key.

It’s important to note that this rule doesn’t apply to all versions of Windows. With newer versions, you can easily reactivate Windows after a hardware change if you have a digital license linked to your Microsoft account.

If you are still experiencing problems after trying both methods, you should contact Microsoft support.

It is also important to note that not all hardware changes warrant a Windows reactivation. So the question: Do I need to reinstall Windows when changing the motherboard? May not always be a definite yes.

You may also encounter another issue where you can’t reactivate Windows because the servers aren’t available. If so, don’t hesitate to refer to our detailed guide on how to fix this problem.

Also, check out other common Windows activation errors and their solutions, so you never struggle with such issues.

Please let us know if you have been able to reactivate Windows again if you are facing this issue in the comment section below.

Error 0x8024a206 (Windows Update): Fixed

Updating Windows is key to good computer performance and ensuring security. But many users reported getting Windows Update errors in Windows 11, the 0x8024a206 error being the most common.

The download error – 0x8024a206 in Windows 11, also present on the previous iterations, can be encountered with any update and is usually due to corrupt update components, issues with the Internet, or even antivirus.

So, let’s find out how to fix it on Windows 10 and Windows 11 devices. The steps to fix error 0x8024a206 are very similar, regardless of what OS you are using.

How can I fix the Windows Update download error 0x8024a206?

Before we head to the slightly complex solutions, here are a few quick things you can try:

  • Run the Windows Update troubleshooter, a built-in utility, which will automatically identify and eliminate the underlying cause triggering the error.
  • If you have any third-party antivirus or security software installed, disable them all, and verify whether the error is fixed. If so, we recommend you switch to a more reliable antivirus to eliminate the 0x8024a206 error and other conflicts.

If none work, move to the fixes listed next.

1. Retry the update

  1. Restart the computer.
  2. Now, head back to Windows Update in Settings, and click on Retry (Retry all in case there is more than one).retry to fix 0x8024a206 windows 11
  3. Once the updates are downloaded, restart the computer for the installation to complete.restart

That’s it! This is the simplest way to fix things when you get the 0x8024a206 error in Windows 11 or 10. But it won’t always work, in which case, you can try the solutions listed next.

2. Reset Windows Update components

  1. Open the Notepad, and paste the following code into it.

@ECHO OFF
echo Simple Script to Reset / Clear Windows Update
echo.
PAUSE
echo.
attrib -h -r -s %windir%\system32\catroot2
attrib -h -r -s %windir%\system32\catroot2.
net stop wuauserv
net stop CryptSvc
net stop BITS
ren %windir%\system32\catroot2 catroot2.old
ren %windir%\SoftwareDistribution sold.old
ren "%ALLUSERSPROFILE%\Application Data\Microsoft\Network\Downloader" downloader.old
net Start BITS
net start CryptSvc
net start wuauserv
echo.
echo Task completed successfully…
echo.
PAUSE

2. Now, click on the File menu, and select Save.save file

3. Enter Reset.bat (or any other name with a .bat extension) in the File name field, and click on Save.save

4. Next, close the file, head to the location where it’s stored, right-click on it, and select Run as administrator.batch files to fix 0x8024a206 windows 11

The commands would be automatically run, and the Windows Update components would reset. Once done, check if the 0x8024a206 error in Windows 11 is fixed.

3. Manually download the update

  1. Head to Windows Update in Settings, and copy the KB (Knowledge Base) number for the update throwing the error.kb number
  2. Go to Microsoft Update Catalog, paste the KB number in the search field, and hit Enter.search
  3. Click on the Download button next to the one that matches the architecture.download to fix 0x8024a206 windows 11
  4. Next, click on the link that appears in the new window.link
  5. Finally, run the downloaded setup, and follow the on-screen instructions to complete the process.

When faced with an update error, you can always manually install updates from the Microsoft/Windows Update Catalog. This also works in the case of Windows 10 error 0x8024a206.

If the update doesn’t download manually and the 0x8024a206 error persists in Windows 11, follow our last solution.

4. Perform an in-place upgrade

  1. Go to Microsoft’s official website, and download the ISO file for Windows 11.download ISO
  2. Now, run the ISO, and click on Open in the prompt.open
  3. Locate and launch the setup.exe file.setup.exe
  4. Click Yes in the UAC prompt.
  5. Click Next in the Windows 11 setup.next to fix 0x8024a206 windows 11
  6. Next, click Accept to agree to the Applicable notices and license terms.accept
  7. Finally, verify that the setup window lists Keep personal files and apps, click on Install, and wait for the repair process to complete.install to fix 0x8024a206 windows 11

If nothing else worked, an in-place upgrade should fix the Windows 11 error 0x8024a206 and get Windows Update running.

Solutions to the 0x80073701 update/install error, a similar issue, may also work in this case. So make sure to go through them.

We hope you managed to fix the error 0x8024a206 on your Windows 10 or 11 device. Do not forget to tell us which fix worked in the comments below.

Panda Security up to 30% For This Black Friday Sale

This year has had its fair share of cyberattacks and malware reports which has necessitated users and organizations to take it a notch higher to protect themselves.

With most users having purchased new devices and upgraded to the latest OS, they are more vulnerable to malware. Well, you don’t have to be part of this group because here comes Panda Security bearing gifts.

Panda is a 100% reputable company that offers the latest technology in managing cyberattacks and blocking malware, spyware, viruses, and others in real-time.

If you have been eyeing good antivirus software, Panda Security is the best in the market and what’s even better is that now, you can get it with up to 30% discount.

What are the best available Panda Security plans?

Good question. Panda Security has your needs covered this Black Friday. 

Four package plans are currently discounted; Essential, Advanced, Complete, and Premium. The Premium package is an all-in-one package with at least 14 features. The other three plans all have the basic offers such as;

  • Real-time protection for Mac and Android
  • Free VPN (150MB/day). Secure and private Internet browsing
  • Wi-Fi protection against hackers
  • Scanning of external devices for infection prevention
  • For the Essential package, you will be saving up to $47.99  as it is now going for $19.20 annually.
  • The Advanced package is now going for $22.80 annually down from $56.99.
  • The Complete package is now at $34.40 down from $85.99.
  • The Premium package has dropped from $133.99 to $53.60.

All packages come with a free one-month trial if this will be your first time trying out the Panda Security software.

Remember Panda Security is compatible with Windows devices, iOS, Android, and many more. It also offers additional firewall protection for Windows devices so hurry up and take advantage of this offer with only a few hours left until the end of the sale.

Needless to say, you will be making great savings with these never-been-seen-before prices.

Panda Antivirus

Protect your PC against all types of malware threats with Panda Antivirus software.

Which Panda Security package will you be purchasing? Let us know in the comment section below.

GoPro not Showing Up on PC: 3 Simple Ways to Fix it

What happens if your GoPro is not showing up on your PC? This is all you need to know.

GoPro cameras are great for action photography. They are versatile cameras with various mounts that users can attach to things.

GoPro users often utilize GoPro App to transfer recorded videos from their cameras to Windows 10 desktops.

However, Windows 10’s GoPro App for Desktop doesn’t always recognize a connected GoPro camera. Then the camera doesn’t appear in the app, and an error message might even pop up.

These resolutions might fix GoPro App for Desktop when it doesn’t recognize a connected camera.

Why is my GoPro not showing up on my computer?

From the experience of different users, we gather that a range of factors will inhibit the camera from showing on your PC. On top of this list, we have the following elements.

  • Cable problems – This is more common than you think. It could be a faulty cable or a cable that is not properly attached.
  • USB port issues – You should try a different port, as the one you currently use may be faulty.
  • Driver issues – In some cases, problems with your USB drivers may be responsible. Outdated or bad drivers always tend to trigger PC errors.

While other minor issues may trigger this problem, those mentioned above are the most dominant. The solutions below will come in handy, especially if GoPro files, pictures, or videos are not showing up on the computer.

How can I fix GoPro if it’s not showing up on PC?

Before going into the solutions, you must do the following as a control check.

  • Check that the camera is on and contains an SD card. If you connect a switched-off camera, you should not expect it to be detected.
  • Also, try connecting the camera with an alternative USB cable if you have one. You should see a GoPro logo on the camera display when it’s plugged into a laptop or desktop and turned on.
  • Try an alternative USB port to rule out the possibility of a wrong port.

1. Run the Hardware and Devices Troubleshooter
2. Reinstall USB Controller Drivers
3. Check the Camera’s Card Folder Title

1. Run the Hardware and Devices Troubleshooter

  1. Connect the GoPro camera to a PC.
  2. Press Windows + I to open the Settings app.
  3. Click on Updates & Security.
  4. Click on Troubleshoot in the left pane, then click Hardware and Devices on the left and choose Run the troubleshooter.
    gopro not showing up on pc

If GoPro is not showing up on your PC, running the troubleshooter is often effective.

2. Reinstall USB Controller Drivers

  1. Right-click on the Start menu and select Device Manager.
    gopro not showing up on pc
  2. Expand Universal Serial Bus controllers, right-click on the affected USB driver, and select Uninstall device.
    gopro not showing up on pc
  3. Click Uninstall to confirm your choice.
    gopro not showing up on pc
  4. Click on the Scan for hardware changes icon and restart your computer.

3. Check the Camera’s Card Folder Title

GoPro users can’t transfer photos with GoPro App for Desktop when they’ve edited the folder title on the camera’s SD storage card. The folder name for the camera’s SD storage card should be 100GOPRO. Users should change the folder name to 100GOPRO with a micro SD card adapter if it isn’t.

These three solutions should be your best bet if GoPro is not showing up on your PC. However, remember to go through the controls before you try these solutions.

Also, as a great alternative, you may transfer photos to a PC with a micro SD card adapter. Additionally, a USB hub is another alternative device for sharing photos. Users can connect numerous USB-C card reader devices to laptops or desktops.

One, or more, of the above resolutions will probably ensure that GoPro App for Desktop recognizes your camera once more.

How to Fix the Windows 10 & 11 Activation Error 0xc0020036

Numerous users have posted on the Microsoft forum about activation error 0xc0020036. That’s an activation error that can arise for some users after installing new Windows 10 build updates or during game installations.

When that issue arises, you might need to reactivate Windows 10 after a new build version has been installed. And while doing that, the 0xc0020036 error will pop up.

How can I fix Microsoft Store error code 0xc0020036?

1. Re-enter the product key

  1. Click the Type here to search button to open that utility.
  2. Enter cmd in the Type here to search box.
  3. Right-click the Command Prompt to select a Run as administrator option, which will open an elevated Prompt window.
  4. Type this command into the Command Prompt, then press the Enter key: wmic path softwarelicensingservice get OA3xOriginalProductKey
wmic path command Windows 10 Activation Error 0xc0020036
  1. Note down that key, or you can copy it to the clipboard with the Ctrl + C hotkey.
  2. Next, press the Windows key + R keyboard shortcut.
  3. Enter ms-settings:activation in Run, and press the OK button.
  4. Click the Change product key option.
  5. Thereafter, input your product key.

2. Clear the product key

  1. To do so, open an elevated Command Prompt window.
  2. Input this command and press Enter: slmgr /upk
    slmgr /upk command Windows 10 Activation Error 0xc0020036
  3. Then input the following and press Enter: slmgr /cpky
  4. Close the Command Prompt, and restart Windows.
  5. Re-enter the product key as outlined in the previous solution.

3. Scan system files

  1. Open the Command Prompt’s window as an administrator.
  2. Then input the following and hit Enter: DISM.exe /Online /Cleanup-image /Restorehealth
  3. Next, initiate a System File Checker scan: sfc /scannow sfc /scannow command Windows 10 Activation Error 0xc0020036
  4. Once done, restart Windows if the scan repairs files.

Error 0xc0020036 can also be due to corrupted system files, which the System File Checker can resolve.

4. Edit the registry

  1. Open the Run accessory.
  2. Input regedit and click OK to open the Registry Editor.
  3. Open this key in the Registry Editor:
    Computer > HKEY_LOCAL_MACHINESYSTEM > CurrentControlSet > Services > sppsvc.
    The sppsvc key Windows 10 Activation Error 0xc0020036
  4. Double-click the Start DWORD for the sppsvc key.
  5. Select Hexadecimal as the Base format.
  6. Then enter 2 in the Value Data box to replace any other value there.
    The Edit DWORD window Windows 10 Activation Error 0xc0020036
  7. Click the OK button to exit the window.
  8. Close the Registry Editor.
  9. Click Restart on your Start menu.
  10. Then try reactivating Windows 10.

5. Run an in-place upgrade

Note icon NOTE
Note: We recommend creating a restore point before initiating the upgrade.
  1. Look for the official Windows 10 Download tool.
  2. Select Run. You need to be an administrator to run this tool.
  3. On the License terms page, if you accept the license terms, select Accept.
  4. On the What do you want to do? page, select Upgrade this PC now, and then select Next.
  5. The process should fix the issue.

Your files and apps will not be affected by this upgrade.

Those are some of the resolutions that might fix error 0xc0020036. They’re not guaranteed fixes for all users, however, so you might still need to get in touch with Microsoft support to reactivate Windows 10.

Microsoft’s Global Customer Service page provides a full list of regional numbers for the big M’s support service.

Before you leave, we also have a guide on a 0x803fa067 error on Windows 11, which is pretty similar, so don’t miss it.

Let us know which of the methods worked for you in solving this activation error by leaving us a message in the comments section below.

Microsoft Store Special Offers [Xbox, Laptops, Pc Games]

Christmas is over but Microsoft still has many of its deals and sales, so you can check them out, with deals from both the Microsoft Store and Microsoft’s partners.

The Redmond giant is especially emphasizing Xbox and Surface deals along with lower subscription fees for Xbox Live and discounted mixed reality hardware. In addition, Windows 10-powered PCs and notebooks are also up for grabs at substantially lower prices.

Below are the best deals we’ve selected by category. In case you want additional insight on all available deals by Microsoft, make sure to check out the Microsoft Store.

⇒ Check the latest deals from Microsoft

Best Microsoft Store deals in 2022

Laptop deals

If you want to buy a new Windows 10 laptop this year, waste no time and get one now from Microsoft. The company is offering many nice discounts on laptops.

You can save up to $350.00 on laptops. Here are just a few deals:

  • HP Laptop 15 Intel Core i5 10th Gen, $399
  • HP Laptop 15 Intel Core i3 10th Gen, $299
  • HP Laptop 15 Intel Core i7 10th Gen, $499

Surface deals

There are nice discounts available for Surface devices as well. Check out this buying guide for more information.

Xbox Christmas deals

If you’re an avid gamer, now it’s time to upgrade your gaming gear and grab some new titles to play in 2020. You can now save up to $100.00 on all Xbox consoles and bundles.

Go to Microsoft’s Xbox page to learn more.

Microsoft Store accessories

The Redmond giant is also offering a plethora of interesting deals on portable speakers, earbuds, headphones, mesh Wi-Fi routers, and other items. For more information, go to Microsoft’s deal page.

Keep in mind that deals are subject to change. Sometimes, some of the deals listed in our guides may no longer be available by the time you hit the buy button. So, hurry up and grab them while they’re hot.

You can read the original report below.

Xbox deals and discounts

  • Save $60 on Xbox One S 500GB Console – Starter Bundle + 2 Free Select Games of Choice.
  • Save $60 Xbox One S 500GB Console + Free Game and 1-Month Game Pass
  • Xbox Game Pass for $1
  • Get $10 off 3-month and 6-month Xbox Live Gold memberships.
  • Up to 50% off games

Microsoft Surface deals and discounts

  • Save $329 on Surface Pro + Black Type Cover Bundle (256GB SSD, 8GB RAM).
  • Save $229 on Surface Pro + Black Type Cover Bundle (128GB SSD, 4GB RAM).
  • Save $199 on Surface Laptop + Harman Kardon Invoke Speaker Bundle.

PC Deals

  • HP laptop only $299 (15.6-inch HD touchscreen, Intel Core i3-7100U, 8GB memory/1TB HDD, up to 8 hours battery life).
  • Dell Inspiron 13 for $399 (13.3-inch Full HD touchscreen, Intel Core i3-7100U, up to 4GB memory/1 TB HDD).
  • $150 off Dell gaming laptop (15.6-inch Full HD display, Intel Core i5-7300HQ, 8GB memory/1TB HDD, NVIDIA GeForce GTX 1050 graphics).
  • Save $500 on Dell XPS 13 (13.3-inch Full HD touchscreen, Intel Core i5-7200U, 8GB memory/128GB SSD, Thunderbolt 3 port).

Windows Mixed Reality

  • Save up to $100 on Windows Mixed Reality Headsets.
  • Save $100 on Lenovo Explorer Windows Mixed Reality Headset with Motion Controllers.
  • Save $100 on Acer Aspire Nitro 5 AN515-51-5594 Gaming Laptop + Acer Windows Mixed Reality Headset with Motion Controllers

These are just some of the deals you can expect from Microsoft on this holiday promotion, but there are so much more. The only thing left is to compare the prices with alternative retailers, save enough money, and wait!

Meanwhile, tell us what deal caught your eyes in the comments section below!

0x8024a203 Windows Update (We Couldn’t Install This Update): Fix

Are you trying to install a new update for your Windows 10 or Windows 11 PC and getting the Windows Update error 0x8024a203? Unfortunately, you aren’t alone, as several users running Windows on their PC are encountering this issue.

Thankfully, in this guide, we have curated a list of solutions that will fix this update error. So, with that said, let us jump right in.

What is the error 0x8024a203?

The Windows Update error 0x8024a203 occurs when users try to install the latest version of the OS. The full error message reads: We couldn’t install this update but you can try again (0x8024a203).

Because of this error, after a full 100% download of Windows 11, the installation goes back to 41% and ultimately shows you a blue screen of error.

Below are some of the causes of this issue:

  • Faulty system files: The major cause of the we couldn’t install this update 0x8024a203 error is broken system files. These files are important for the installation of your updates. You need to repair the corrupt system files with a dedicated tool or the built-in file repairers to get past this error.
  • Disable Windows components: Some services and components are important for installing updates. You need to restart these components to fix this issue.
  • Minor system glitches: Sometimes, the Windows Update error code 0x80204a203 on Windows 11 21H1 can be down to some minor issues on your PC. Running the Windows update troubleshooter should fix this.

How can I fix the Windows Update error 0x8024a203?

1. Use a specialized tool

When handling system files, it is always a good idea to employ the help of specialized repair tools. This type of software will streamline the repair process by automatically scanning and replacing any broken files they encounter.

2. Run the troubleshooter

    The first thing you should do when you come across a Windows update error such as the error code 0x8024a203 is to make use of the in-built Windows troubleshooter program.

    It is pretty easy to use, and by following the mentioned steps, you will be able to not only detect the issue with the Windows 11 update but fix it as well.

  1. 1. Open the Start menu.

  2. 2. Search for Troubleshoot other problems and open it.

    troubleshoot other settings
  3. 3. Hit the Run button next to Windows update.

    windows-update-troubleshooter windows 11 not updating after restart
  4. 4. The troubleshooter will begin the diagnosis.

  5. 5. Apply the recommended fixes.

  6. 6. Restart your PC.

3. Use the Reset Windows Update Tool

  1. Download the Reset Windows Update Tool.
  2. Install it on your PC.
  3. Right-click on the app icon and select Run as administrator.
  4. Select your preferred language by entering the number and pressing Enter.select language reset tool
  5. Press Y to accept the terms and conditions of the tool.agree terms
  6. Press 2 to select the Reset the Windows Update Components option and hit Enter.reset window update components

Using the Reset Windows Update tool, you can fix the underlying problems that prevent your Windows 11 PC from installing the latest updates.

In our case, you can use the above steps to reset Windows update components and resolve issues such as Windows 11 update error 0x8024a203 that isn’t letting you update your system.

4. Run the System File Checker tool

  1. Open the Start menu.
  2. Search for Command Prompt and run it as an administrator.cmd admin
  3. Type the below command and hit Enter:sfc /scannowsfc-scannow
  4. Your PC will start scanning and, in the process, will try to fix the issue.

If a corrupt system file is present in your system, it can prevent Windows 11 from installing the latest updates.

So, run the System File Checker tool and let it fix the issue triggering the Windows 11 update error 0x8024a203.

5. Restart essential services

  1. Press the Start menu.
  2. Search for Services and open it.windows services
  3. Locate Background Intelligent Transfer Service (BITS) and double-click on it.background intelligent transfer services
  4. Under the Startup type, from the drop-down menu, select Automatic.startup type automatic
  5. Click Start, Apply, and OK.
  6. Perform the same steps for Windows Update services.

For Windows Updates to perform their operations, they rely on several Windows services. These services must run in the background for the updates to get installed.

Following the above steps, you can tweak the critical Windows update services options and possibly fix the issue.

6. Clear the temporary folder

  1. Press the Windows key + R buttons to open the Run command.
  2. Type %temp% and hit Enter.
    temporary command on run
  3. Press Ctrl + A to select all files.
  4. Press the Delete button on your keyboard or right-click and select Delete.delete temporary files

We hope this guide helped you fix the Windows 11 or Windows 10 update error 0x8024a203 and that you can install the latest Windows updates on your PC.

Are you facing the update error 0x80073701 on Windows 11? Then, check our detailed guide to fix it quickly and effectively.

Feel free to let us know which solutions worked for you in the comments below.

Posted in Fix

Windows 10 has Lost Activation: 3 Methods to Get It Back

At times, your PC will report that Windows has lost activation and needs to be activated again despite it is already activated.

This happens across the various versions of Windows 10 regardless of whether Windows was pre-installed or obtained through an upgrade. In this guide, we will show you the best ways to regain your activation.

Why is Windows 10 asking me to activate it again?

Below are some of the reasons Windows 10 might have lost activation:

  • An incorrect activation key: Your PC will suddenly seem to invalidate your Windows license if you have been using an invalid key. For example, volume license keys are meant specifically for corporate systems and may work temporarily and then fail in personal machines.
  • Hardware changes: A major hardware upgrade, like replacing your gaming motherboard, might cause this issue.
  • Windows reinstallation: Your PC may forget its licensing after reinstalling Windows.
  • An update: If Windows 10 lost activation after an update, there might be issues with the update.

What can I do if Windows 10 has lost activation?

1. Reactivate your Windows

  1. Press the Windows key, type cmd, and choose Run as administrator under Command Prompt.
    cmd admin windows 10 lost activation
  2. Type the command below and hit Enter: wmic path SoftwareLicensingService get OA3xOriginalProductKeywmic
  3. This will reveal the original product key. Copy it.
  4. Now, press the Windows key + I and select Update & Security.
    update and
  5. Next, click Activation in the left pane.
  6. Select Change the product key, and type the previously copied product key.
    change product windows 10 lost activation
  7. Finally, click on Next to activate.

If a Windows 10 update caused Windows to lose activation, you need to reactivate it from the settings app.

2. Run the Activation Troubleshooting Utility

  1. Press the Windows key + I and select Update & Security.
    update and
  2. Click Activation in the left pane.
  3. Finally, click the Troubleshoot link.
    troubleshoot

If you are getting an activate Windows 10 error message, but it’s already activated, you should run the Activation troubleshooter. This will diagnose the issue and show you how to proceed.

3. Sign in to your Microsoft account and activate Windows 10

  1. Sign in to the admin account linked with your Microsoft account
  2. Press the Windows key + I and select Update & Security.
    update and
  3. Now, click Activation in the left pane and select Troubleshoot.
    troubleshoot
  4. Next, click I changed hardware on this device recently.
    i changed
  5. Finally, choose Next if the troubleshooter returns the error Windows can’t be activated on your device.

If your Windows 10 license is linked to the digital license/digital entitlement on your device, you will have to sign in to your Microsoft account and then reactivate Windows using the troubleshooter.

This is for situations where the problem arises after a considerable hardware change, such as changing the CPU or motherboard.

If your PC still claims that Windows needs activation again after trying all the above solutions, contact Microsoft’s official support team, and explain your situation to them.

They are usually very helpful and will verify if your product key is genuine and allocate you an ID to help you reactivate Windows 10.

There you go. These are a couple of solutions that you can try if Windows 10 lost its activation.

Similarly, if Windows 10 won’t activate after reinstalling, check our detailed guide to fix it quickly.

Feel free to let us know the solution that helped you fix this issue in the comments below.

4 Amazing Mini PC Deals Waiting For You

In case you missed the dozens of Black Friday Mini PC offers, you still have one more chance in the name of today’s seasonal Mini PC deals.

Now, to save your time, we have analyzed the market, and here are the best 4 seasonal Mini PC deals. Here they are.

4 Mini PC Deals to catch this 2022

Mini PC AMD Ryzen

  • Ryzen CPU 4 cores, 8 threads
  • Vega Graphics 8
  • 16GB RAM
  • 512GB SATA SSD
  • Capable of 4K at 60fps
  • Issues with DisplayPort

This model comes with Ryzen CPU and Radeon Vega 8 graphics so it’s more than capable for all multitasking purposes and multimedia.

Regarding memory, there’s 16GB of DDR4 RAM and 512GB M.2 SSD. As for ports, you can find USB-C, USB 3.1, USB 3.0, HDMI, DisplayPort, and a 2Gbps Ethernet port.

Despite its small size, this mini PC can handle 4K resolution at 60Hz on three displays simultaneously, so it’s the perfect option for all types of users.


Beelink Mini PC SEi8

  • i5-8279U up to 4.1GHz
  • 16GB RAM
  • 512GB NVMe M.2 SSD
  • 4K support
  • Two HDMI ports
  • Minor issues with freezing

Beelink Mini PC SEi8 offers Intel i5-8279U 8th generation CPU, and it can achieve speeds up to 4.1GHz As for the storage, you can find 512GB SSD which should be enough for basic needs.

The PC has 16GB DDR4 RAM at 2400MHz, so it can handle multitasking with ease. There’s an Intel Iris Plus Graphics 655 available, meaning that the device can handle 4K content with ease.

As for connectivity, there are two HDMI ports, four USB 3.0 ports, a Type-C port, and a 1Gbps Ethernet port.


Beelink U59

  • 11th generation Intel CPU up to 2.9GHz
  • 16GB RAM
  • 512GB SSD
  • 4K at 60Hz
  • Dual HDMI ports
  • Loud fan

If you’re looking for a powerful mini PC, this model might be what you need since it comes with 11th Gen Intel processor up to 2.9GHz.

Regarding the memory, you can find 16GB RAM which is more than enough for all multitasking purposes. The storage is set at 512GB, so it should be enough for most users.

Connectivity options include dual HDMI ports, Type-C port, two USB 3.0 ports, an Ethernet port, and an audio jack.


Beelink Mini PC SER3

  • Ryzen 7 3750H 4GHz CPU
  • Radeon Vega 10 graphics
  • 16GB DDR4 memory
  • 512GB NVMe M.2
  • 4K support on 3 displays
  • No major cons

Beelink Mini PC SER3 comes with an AMD Ryzen 7 3750H 4.0GHz processor, and Radeon Vega 10 graphics, so it’s more than capable of handling multimedia.

There’s 16GB DDR4 memory that can be expanded and a 512GB NVMe M.2 for storage. The device is fully capable of handling 4K video on three displays simultaneously.

Connectivity options include dual HDMI ports, a Type-C port, two USB 3.0 ports, an Ethernet port, and an audio jack. As for ports, there’s four USB 3.0 ports, two HDMI ports, and an Ethernet port.

How to Fix The Connection to My KMS Server Failed

​​Sometimes when you are installing Office on your Windows machine your work is interrupted by a failed connection to the KMS server. The exact error message is The connection to my KMS server failed! trying to connect to another one… please wait….Here are some solutions for when this happens.

How do I fix connection to KMS server failed?

1. Check your Internet connection

  1. Open the Start Menu.
  2. Type in cmd.
  3. Double click on Command Prompt.
  4. In Command Prompt window, type ping google.com -n 25 and hit Enter.
kms server connection failure

​​Sometimes the error shows only because the internet connection is spotty. If everything looks good, you can proceed with the next steps.

If you’re having trouble accessing Command Prompt as an admin, take a look at this guide.

2. Upgrade your Windows OS

Oftentimes, functional problems arise with the KMS server when your Windows OS isn’t correctly licensed.

Having an original license not only ensures that your product is legit, fully functional, and reliable, but you also get regular updates that prevent bugs.

Besides, upgrading to the latest Windows version is one-time only, so your investment will pay off in the long run. We have a complete guide on how to upgrade to Windows 11 and it only needs a couple of minutes.

3. Check if the computer is activated

windows activated message in system
  1. On the KMS client, open the System control panel.
  2. Search for Windows is activated message.

If it is not activated, you need to do this first and then proceed to activate your Office copy. Still, having issues? Then see how to fix Windows activation errors.

Before activating your Office copy, we need to make sure that on the client computer, Windows is activated.

4. Check if you have more than 25 clients

  1. Open Command Prompt window as admin.
  2. Run slmgr.vbs /dli command to check if the threshold is met. Currently, the threshold is 5 for Server editions and 25 for everything else.

5. Check the client communicated with the host

​​On the KMS host computer, look in the Application event log for event ID 12290. Check this log for requests made by the client’s computer.

If there are no requests, it means that the client could not communicate with the host.

6. Open the right port

command prompt kms server activation error
  1. Run as administrator the Command Prompt.
  2. In the cmd window, enter slmgr.vb /dlv command.
  3. Look for Listening on Port.

Make sure that there are no firewall rules that block TCP traffic on the KMS port. The default port value is 1688. If you don’t know the port you can find that out on your host computer.

7. Configure DNS properly for multiple KMS hosts

  1. ​​Make sure the all the computers are on the same Active Directory Domain Services domain.
  2. ​​In the Active Directory Domain Service create a global security group.
  3. ​​Add each computer running KMS in the newly created global security group.
  4. ​Set permissions to enable updates by members of this new group on the DNS server.

When using KMS, the host computer must be discoverable in your local network. The first host computer automatically publishes its existence when it creates a SRV record on the DNS server.

The rest of the hosts cannot change or update SRC if the DNS server is not configured properly.

8. Newly added computers don’t increase the KMS count

  1. On the client computer, open the search bar.
  2. Type cmd.
  3. Right-click on Command Prompt and select Run as administrator.
  4. In the Command Prompt window type sysprep /generalize to reset the client computer ID. If that doesn’t work, try slmgr /rearm.

Sometimes client computers look identical to the host and therefore it doesn’t count them as separate.

Finally, if you are still having issues, you can switch to an AD-based activation by following the official documentation.

Can you have 2 KMS servers?

It is not recommended to have more than one KMS server for Windows and Office as it puts additional work into implementing and managing it properly.

If you have any other questions or suggestions, don’t hesitate to reach out in the comments section below.