Brightness Button not Working? 4 Ways to Fix

In every computer, the brightness button allows you to control the intensity of the lighting, which is an integral part of the system. Sadly, many users complain about the brightness button not working and being unable to adjust their brightness.

However, this issue has left many users questioning how to fix the brightness button. Or what to do if the brightness control is not working on their computer. Hence, this article will discuss the potential fixes for resolving the issue.

How do I fix the brightness button if it’s not working?

Pre checks: Try restarting, updating Windows, disconnecting peripherals, checking brightness settings, testing an external keyboard, and removing third-party brightness software first.

1. Update your graphics and keyboard driver

  1. Press the Windows + R keys to prompt the Run window, type devmgmt.msc, and click OK.
  2. Click on Display Adapters, select the Generic PnP monitor driver from the drop-down menu, and select Update driver.
  3. Then, select the Search automatically for drivers.
  4. Open the Keyboards entry, right-click your keyboard device, and click Update driver.
  5. Restart your PC and check if you can use the brightness button to control it.

When you install an update for the graphics driver, it fixes the bugs impeding display functions. Similarly, the keyboard update is also effective.

Check other steps for a graphics driver update on Windows 11 if you have any issues.

Sometimes, faulty drivers can cause various system errors, and updating or reinstalling them manually can be tricky. To simplify the process and ensure your drivers are always up to date, we recommend using a reliable tool like Fortect Driver Updater.

2. Reinstall the Monitor driver

  1. Press the Windows + R keys to prompt the Run window, type devmgmt.msc, and click OK.
  2. Expand the Monitor entry, right-click on the driver, and select Uninstall device from the drop-down menu.
  3. After the uninstall, select Monitor, and click the Scan for new hardware button on the toolbar.
  4. Restart your PC and check if the brightness control button works as expected.

Uninstalling the problematic drivers will remove the monitor device and other display hardware, causing issues with the system’s brightness adjustments.

3. Install an old version of your graphics driver

  1. Press the Windows + R keys to prompt the Run window, type devmgmt.msc, and click OK.
  2. Expand the Display Adapter, right-click on the driver, then select Update driver from the drop-down menu.
  3. Then select browse my computer for drivers.
  4. Click Let me pick from a list of available drivers on my computer.
  5. Check the box for the Show compatible hardware. Select an older driver version from the list and click Next.
  6. Restart your PC and check if you’re able to adjust the brightness.

It has been confirmed that backdating the graphics driver worked for some users. This is so because it resolves incompatibility and faulty update issues responsible for the brightness button not working.

4. Run the keyboard troubleshooter

  1. Press the Windows + I key to open the Settings app.
  2. Select the System, click the Troubleshoot, then select other troubleshooters on the right pane.
  3. Click on the Keyboard and Run button to initiate the troubleshooting process.
  4. Follow the on-screen instructions, then restart your PC to save these changes.

The Keyboard Troubleshooter will find and repair underlying issues affecting the keyboard device. You can read more on how to trouble mouse and keyboard issues on Windows 11 for more steps.

How do I adjust brightness without the Fn key?

1. Change brightness via Settings

  1. Press Windows + I keys to open the Settings app.
  2. Go to System and select Display.
  3. Under Brightness and color, use the Brightness slider to dim or make it brighter.

The slider will control the brightness settings rather than using the brightness function keys.

Speaking of which, we have a great guide on how to lock and unlock the function key, so you might want to check it out.

2. Use Adaptive Brightness

  1. Press Windows + I keys to open the Settings app.
  2. Go to System and select Display.
  3. Select Brightness and toggle on the Change brightness automatically when lighting changes.

Note that the Adaptive brightness feature relies solely on a lighting sensor not present in all computers. However, it allows your computer to adjust to the surrounding light, reducing eye strain and excess battery usage.

Why is my brightness button not working?

Several factors can cause the brightness button not to work on your computer. Below are some common ones:

  • Outdated or corrupted display drivers can cause the brightness buttons, keys, or controls not to work.
  • Hardware malfunctions, like a connection issue between the brightness button and the display, can cause problems.
  • The button might not work if the brightness control is mapped to different keys or has a specific combination of keys on your keyboard.
  • The power-saving mode may limit the brightness options and affect the buttons’ functionality.
  • Malware or viruses can interfere with the functioning of various hardware components, including the brightness controls.
  • The brightness keys not working can be due to incorrect BIOS or firmware settings impacting key controls.
  • Operating system bugs or glitches from the outdated version can cause brightness issues.

Why is my brightness bar disabled?

  • Some devices disable the brightness controls when they are in a power-saving mode or when the battery is critically low.
  • The brightness bar can be disabled if the Adaptive Brightness feature is enabled.
  • Hardware issues with your display or related components could cause the brightness controls to be disabled.

Alternatively, we have a comprehensive guide on what to do if brightness is not working on Windows 11.

Likewise, you may be interested in our article about the brightness slider not working and how to fix it on your PC.

Other common brightness issues include the brightness option missing in Windows 10 and monitors that keep changing brightness automatically.

If you have further questions or suggestions regarding this guide, please drop them in the comments section.

Middle Mouse Button not Working? 3 Quick Ways to Fix it

Many users complain about the middle mouse button not working or performing any functions when clicked. It prevents the advanced tasks assigned to the button from working and can make it hard to use.

Hence, it is essential to check the potential fixes for the problem to address it and get the mouse button working correctly. Thus, this article will discuss how to fix the middle mouse button not working.

Why is my middle mouse button not working?

  • Over time, the middle mouse button can become faulty due to constant use, worn-out switch, or debris accumulation, causing the button to stop working.
  • It could be due to software configuration issues, such as conflicting mouse settings.
  • Outdated mouse drivers can result in the middle mouse button not functioning as expected.
  • Interference from some apps overrides the default functionality of the middle mouse button, causing it to appear non-functional.
  • Issues with the USB wireless adapter not working can affect the device connection.
  • Physical damage or hardware defects due to drops, impacts, liquid spills on the mouse, or broken internal components can prevent the button from registering clicks.
  • Outdated Windows OS can cause the middle mouse button to not work due to compatibility issues between the mouse hardware.
  • If you use a wireless mouse, the middle mouse button may not work if the batteries are low or depleted.

Fortunately, we have put together some steps to fix the issue and get your middle mouse button not working.

How can I fix my middle mouse button?

Try these preliminary checks before using any advanced troubleshooting steps:

  • Clean the mouse to remove any dust particles or debris causing hardware issues.
  • Reboot the computer and reconnect the mouse to resolve temporary issues impeding the middle button.
  • If you’re using a wireless mouse, replace the batteries and check if the scroll wheel starts functioning correctly.
  • Perform a mouse driver update to fix the problem.
  • Get a donor mouse and use it to replace the spring in the faulty mouse.
  • Remap the middle button to another button to see if it works.
  • Visit the manufacturer’s website and check if any firmware updates are available for your mouse model to update its firmware.
  • Get a new mouse and dispose of the problematic one.

If the above steps still can’t fix the middle mouse button not working, you can go ahead with the following solutions:

1. Reinstall your mouse drivers

  1. Press Windows + R keys to prompt the Run window, type devmgmt.msc, and click OK to open the Device Manager.
  2. Select the Mice and Other Pointing devices entry, right-click on your mouse device, and then select Uninstall device from the drop-down menu.
  3. Click Uninstall in the confirmation box and wait for the process to complete.
  4. Restart your PC, and it will automatically install the missing driver.

Reinstalling the mouse driver will refresh the software component allowing the computer to communicate with the mouse hardware. 

This can also help if your mouse click is not working properly.

2. Run the Hardware and Devices troubleshooter

  1. Left-click the Start button, type Command Prompt, and click the Run as administrator option.
  2. Click Yes on the User Account Control (UAC) prompt.
  3. Type the following and press Enter to open the Windows Hardware and Device Troubleshooter: msdt.exe -id DeviceDiagnostic
  4. Click Next to proceed with the scan and troubleshooting process.
  5. After the troubleshooting, try to perform the task and check if it works.

Running the Hardware and Devices troubleshooter will help find and resolve hardware connection issues that may cause the problem.

This is a simple solution, and it can be used for other issues, such as when the mouse right click is not working.

3. Modify Registry settings

  1. Press Windows + R to open the Run dialog box, type regedit in the search bar, then press Enter to open the Registry Editor.
  2. In the Registry Editor, navigate to the key: HKEY_CURRENT_USER\Control Panel\Desktop
  3. Go to the right pane, and double-click on the WheelScrollLines entry to open its Properties.
  4. Change the Value Data to 3 and save the changes.
  5. Restart your computer and reconnect the mouse device to check if the middle button works.

The above steps will fix the WheelScrollLine registry keys that might have been affected due to recent Windows.

Is there an alternative key to the middle mouse button?

If your mouse doesn’t have a middle button or isn’t functioning correctly, you can achieve a middle click by simultaneously pressing the left and right mouse buttons together.

Additionally, tapping three fingers will trigger a middle-click action for touchpads equipped with multi-finger tap support.

Moreover, we have a detailed article on how to efficiently fix the mouse lag in Windows PCs and other mouse-related issues, such as the left mouse button drag not working.

Likewise, you can go through our list of the best mouse for multitasking that you can use.

Alternatively, read our comprehensive guide about how to fix the mouse and keyboard not working on Windows 11.

If you have further questions or suggestions regarding this guide, kindly drop them in the comments section.

MEP.exe: Comprehensive Guide to Fix Application Errors

The mep.exe is an executable file associated with the MyEpson Portal process. It is software used to run the Epson printer, record keyboard, and mouse inputs, and monitor applications.

But, since this executable file is not a Windows file, you may want to be careful of running unknown processes like this. Hence, this article will take you through simplified steps to safely verify the file, fix its application errors, and disable it if it’s flagged as a threat.

What is MEP.exe?

The mep.exe is an executable file also known as MyEpson Portal. Below are some of the important facts about mep.exe:

  • The application is produced and digitally signed by SEIKO EPSON CORP.
  • The original file is located in this file path: C:\Program Files\epson\myepson portal
  • The file software is used for Epson printers.
  • Records keyboard and mouse inputs and monitors applications.

It is worth noting that the mep.exe file can cause problems for your computer if it is defective. Some of these can be system instability, application malfunction, data loss, security vulnerabilities, or error messages such as the following: Mep.exe has encountered a problem and needs to close. We are sorry for the inconvenience, Mep.exe is not a valid Win32 application, Start-up error in application: mep.exe, MyEpson Portal has stopped working.

They are similar to rundll. exe errors, but now, let’s explore various ways to fix these application errors.

How do I fix MEP.exe application errors?

1. Run the SFC scan

  1. Press the Windows key, type cmd in the Search box, and click Run as administrator.
  2. Type the following in the text field and press Enter: sfc /scannow
  3. The scanning process may take up to 15 minutes, so wait till the verification reaches 100%.

One of the major reasons behind the mep.exe application error is due to system file corruption. However, several users have been able to repair corrupted system files using the built-in System File Checker tool.

[adinserter block=”72″

2. Disable the Epson processes in Startup

  1. Right-click the Start menu and click on Task Manager.
  2. Locate the Startup tab, find Epson processes, right-click, and disable them.
  3. Press Windows + R keys, type msconfig, and click OK to launch the system configuration.
  4. On the Services tab, uncheck the box for Hide all Microsoft services, uncheck all Epson services, and click Apply.
  5. Then, restart your PC to check if the issue is fixed.

Several users have claimed this process is effective in troubleshooting application errors. Since the services will be dormant, it won’t interfere with any app’s performance.

How do I remove MEP.exe?

There are a few instances where some virus or malware would disguise itself as mep.exe, causing performance problems, consuming system resources, and affecting other installed programs. For this reason, you can confirm the following checks to decide when it’s best to disable mep.exe:

  • If the file is in the autostart entries, it might be malware.
  • If SEIKO EPSON Corporation does not sign the digital signature.
  • Verify that the file size on your PC is significantly bigger than the original file, which will confirm its illegitimacy.
  • If the file is in another path that differs from the original location, you can remove it due to a registry error.
  • Weigh the file’s security risk rating to see if it disrupts memory or CPU usage in the Task Manager.

Having confirmed the above checks, follow the instructions below to remove it.

1. End task the mep.exe process and delete the file in File Explorer

  1. Right-click on the Start button and select Task Manager from the options.
  2. Navigate to the Processes or Details tab. Locate mep.exe from the list, right-click, and select End task.
  3. Repeat step 2 and click on the open file location.
  4. Right-click on the file and select Delete from the context menu.
  5. Then, empty your Recycle bin to permanently remove it.

If your Task Manager is not responding or opening, you can explore our detailed guide on how to fix the issue.

2. Uninstall MyEpson portal

  1. Left-click the Start menu, type the control panel, and launch the app.
  2. Locate Uninstall a program under the Programs category.
  3. Find MyEpson portal, select it, and click on Uninstall.
  4. It should prompt the uninstaller tool. Then, follow the prompts to remove the app.

Since the mep.exe is directly related to this app, uninstalling it will disable the process and remove the file.

And that’s it on how to fix the mep.exe application error. It is worth noting that executable files such as mep.exe, osk.exe, repux.exe, and so forth are important to the OS. However, you must confirm that the file is original and not a virus.

You may also be interested in reading our guide on how to fix the explorer.exe application errors.

If this guide has helped you, make sure to share it for others to benefit from it. Also, don’t hesitate to use the comments section below if you have any questions or suggestions.

What is QcomWlanSrvx64.exe & What Does it Do?

There are several processes that run in the background on a Windows PC to keep your system running smoothly. But a few may lead to increased CPU or RAM usage. One such is the QcomWlanSrvx64.exe process.

Sometimes, malware can infiltrate your system by pretending to be a real system file, potentially causing harm to your data.

So, if you come across an unknown file like QcomWlanSrvx64.exe running in the background, it is always a good idea to check if the file is genuine to keep your computer safe.

What is QcomWlanSrvx64.exe?

The QcomWlanSrvx64.exe file is an executable that belongs to the Qualcomm Atheros Universal WLAN driver on Windows systems. This driver, developed by Qualcomm Technologies, Inc., is specifically designed for Qualcomm Atheros wireless network adapters.

What does QcomWlanSrvx64.exe file do?

The file provides communication between the operating system and the Qualcomm Atheros wireless hardware.

The QcomWlanSrvx64.exe file is responsible for connecting to Wi-Fi networks, managing network settings, monitoring signal strength, and ensuring proper data transfer between the computer and wireless networks.

Is the QcomWlanSrvx64.exe file harmful?

QcomWlanSrvx64.exe is not harmful. It is a legitimate file that belongs to Qualcomm Atheros Wireless drivers. Most of the time, QcomWlanSrvx64.exe won’t harm your system. But be cautious, as malware could use this file to cause damage, just like with any other executable file.

Just to be safe, you can check the file signature and file location.

  1. To open the Task Manager, press the Ctrl + Shift + Esc keys.
  2. Find the QcomWlanSrvx64.exe file in the Details tab, right-click on it, and select Properties.Properties
  3. Switch to the Digital Signatures tab, and check the entry under Name of signer.
  4. If it says anything other than Qualcomm Atheros or Qualcomm Technologies then it is malware.Device Signature
  5. After that, right-click the file once again in the Task Manager and select Open file location
  6. The QcomWlanSrvx64.exe file should be located in one of the following locations: C:\Program Files (x86)\Qualcomm\drivers\ C:\Windows\System32\drivers\File location

If you find the file in any other location, it could be a trojan pretending to be a system file.

To safely remove the infected file or virus, boot your computer in Safe Mode, and then run a reliable antivirus or anti-malware program to scan your entire system for any infected files.

How do I fix QcomWlanSrvx64.exe file-related issues?

1. Install the Windows updates

  1. Press the Win + I keys to open the Settings menu.
  2. Click on Windows Update on the left and select the Check for updates option on the right.Windows update
  3. If there is a pending update, get it by clicking the Download & Install button.
  4. Then, restart your computer.

2. Update the Wi-Fi driver

  1. Open Windows + R, type devmgmt.msc, and press Enter.devmgmt.msc
  2. Expand the Network adapters category, find and right-click Qualcomm Atheros Wireless Network Adapter, then select Update driver.Update driver
  3. Select Search automatically for drivers.search update
  4. If the Device Manager fails to update the driver, you can manually download and install Qualcomm Atheros Wireless LAN Driver from the manufacturer’s website.
  5. Then, restart your computer.

Before you leave, find out what to do when the exe files delete themselves on Windows 11.

If you have any further questions or suggestions regarding this file, kindly drop them in the comments section below.

Fix: Operator Refused the Request Error in Windows Task Scheduler

To automate tasks and manage multiple systems, task scheduling software are a valuable tool in your arsenal, especially for system administrators. The Windows Task Scheduler does the job perfectly, but many of late have reported the Operator refused the request error.

The problem is present in all iterations of the OS, and even though it has been reported and covered extensively, there are no effective solutions in sight. Keep reading to find what indeed worked for others!

What is the Operator or administrator has refused the request in Task Scheduler 0x800710e0?

Task Scheduler allows automating various tasks and apps without user input. You can use it to schedule and organize specific apps, configure automatic notifications, help with message delivery, etc.

There’s little it can’t do, so it might be useful to browse some Task Scheduler tips, which will help you learn how to manage it better. However, like any other Windows app, it can cause specific issues, so it’s important to know how to fix them.

The Operator refused the request is just one of the Windows Task Scheduler errors you may encounter while trying to modify or execute a task. Let’s see what causes it.

What causes the Operator refused the request error?

A variety of issues might trigger the error. Let’s explore the most likely reasons:

  • Wrong settings trigger conflicts: If you try to run a task with incorrect settings (e.g., power options, scheduling conflicts with other tasks or triggers), you’ll most probably come across this error.
  • Insufficient permissions: Wrong user or folder permissions set during creating the task (e.g., a task created with the admin account will require admin privileges to execute) could prevent the instance from running.
  • A Task Scheduler bug: Sometimes, a bug or a temporary error with the app itself could cause the issue.
  • Corrupted task: If the scheduled task gets damaged, this could lead to faulty execution.
  • Software conflicts: Antivirus or firewall software can sometimes block the task you’re trying to run, which, in turn, will result in the error displayed on your screen.

How do I fix the Operator refused the request error?

Before going into advanced troubleshooting, consider the following workarounds:

  • Restart the app and your computer: Sometimes, the simplest solution, such as a PC reboot, manages to resolve even a more complex issue.
  • Temporarily disable your antivirus program: Windows Defender or third-party software can occasionally hinder task execution. Disable your security software to see if that’s causing the error.
  • Check the task’s path: Double-check if you’ve entered the right path for your task in the app settings, as it can commonly lead to such a mistake.

If the error persists, move on to the following solutions to resolve your issue:

1. Ensure you have administrative privileges

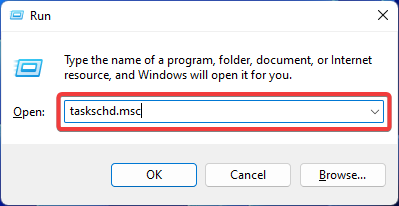
  1. Hold Windows + R key. Type the following command in the search box and press Enter: taskschd.msctask-scheduler-run
  2. Right-click on the affected task and go to its Properties.task-scheduler-settings
  3. Make sure you’ve checked the Run with highest privileges box. Choose Change User or Group.operator-refused-the-request-windows-task-scheduler
  4. Type Administrator and click OK.operator-refused-the-request-administator
  5. Restart the app and see if the error is resolved.

Insufficient user and/or folder permissions are the most common reasons behind the Operator refused the request error. To address this, you have to ensure you’re trying to run the task with full access and administrative privileges.

2. Check if the service is running

  1. Press Windows + R to open the Run dialog. Type the following command and click OK: services.mscenable-task-scheduler
  2. Locate the Task Scheduler service. Right-click on it and choose Properties.operator-refused-the-request-run
  3. Check if the service is running. If not, click on the Start button and choose Automatic as its startup type. Confirm by clicking on Apply and then OK.task-scheduler-running
  4. Restart your PC to save the changes.

If Task Scheduler isn’t functioning correctly or isn’t running at all, this could trigger the Operator refused the request error.

3. Repair system files

  1. Press Windows and type Command Prompt. Choose Run as administrator to open the app.cmd-task-scheduler
  2. Type the following command and press Enter: sfc /scannowrepair-system-files-task-scheduler
  3. Wait for the tool to repair your corrupted system files (if there are any) and restart your computer.

Corrupted system files can cause various errors, including the Operator refused the request error in Task Scheduler. You can easily repair those with the help of Windows’ built-in System File Checker tool.

4. Tweak the task’s settings

  1. Press the Windows key, type Task Scheduler, and open the app.open-task-scheduler
  2. Right-click on the task at hand and open Properties.task-scheduler-error-operator
  3. Go to the Conditions tab. Remove the checkmark next to the Start the task only if the computer is on AC Power.power-settings-task-scheduler
  4. Now switch to the Settings tab. Check the following boxes: Allow task to be run on demand, Run task as soon as possible after a scheduled start is missed, and If the running task does not end when requested, force it to stop.operator-refused-the-request-edit-settings
  5. Select Stop the existing instance from the drop-down menu under the If the task is already running, then the following rule applies option. .stop-task-scheduler
  6. Once done, click OK and reboot your PC.

In most cases, insufficient user privileges or incorrect task settings are the culprits of this Task Scheduler error. And if nothing else works, you can delete the task and then create it again to eradicate the issue.

So, that’s how you fix the Operator refused the request error in Windows Task Scheduler.

Besides, many reported that the Task Scheduler is not running, and things are usually easy to fix.

If you need further assistance, as always, you can leave your comment below, and we’ll make sure to get back to you in no time.

What is Ngen.exe & How to Fix Its High CPU Usage?

When determining the number of processes you should be running on your PC, how powerful your CPU is is a key component. If you have an old processor, you should limit the number of processes to avoid performance degradation.

Ngen.exe is one of the processes that has been found to consume a lot of system resources, but the real question is: Is it a critical process that should be running? Find out here how to fix its high CPU consumption.

What is a native image .NET?

The .NET Framework is popular among developers as it helps build apps for Windows. Native images are a feature of the .NET Framework. The purpose of a native image is to optimize the deployment and execution of your application.

That’s where Windows ngen.exe comes in. It is particularly important in creating .NET applications because it allows you to create executable images that contain only your native code and machine-specific libraries. 

This makes them smaller and faster than traditional managed executables, which include the entire framework on top of which they are built.

In less technical jargon, this means that when you run these applications, the startup time will be significantly reduced. The applications’ performance will also receive a major boost.

Another win for your system will be a reduced memory footprint. You’ll notice that when you free up memory on your PC, you can run apps more efficiently, and their response time improves.

With all these benefits lined up, it can be hard to imagine that the ngen.exe can cause problems for your PC. Well, it does. 

Unfortunately, creating a native image takes much longer than creating a regular .NET assembly. This is because it takes additional time to compile the source code into instructions for native code execution.

The situation gets worse when you have a large data set. The native image optimization process will take a toll on your system resources; your CPU is almost always the victim.

A snippet from a user on the Microsft community platform reveals it’s a huge system resource hog.

NGEN.EXE keeps running on my system and hogging system resources.

Luckily, we have a few tricks up our sleeves to help you mitigate this issue, as you shall see below.

How can I fix ngen.exe high CPU usage?

A few preliminary steps to perform before any advanced troubleshooting include:

1. Update .NET Framework

The .NET Framework is the backbone of most applications on Windows. Being an integral part of developing apps, updating it to the latest version ensures you have the latest security features and any new improvements.

You’ll also get access to any new APIs that make it easier to develop your app and resolve compatibility issues with your operating system.

Microsoft regularly releases updates, so you can check its website to check if there’s a newer version than the one you’re currently using and download it.

2. Allocate more CPU to the process

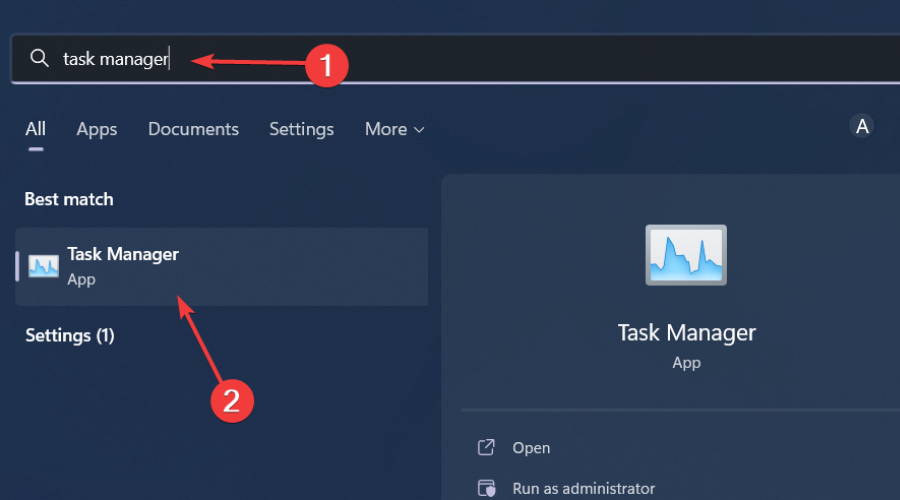
  1. Hit the Windows key, type Task Manager in the search bar, and click Open.task manager search
  2. Navigate to the Details tab and right-click on the program you wish to allocate more CPU. (In this case, ngen.exe). Next, click on the Set Affinity option from the pop-up menu.
  3. Next, select the cores you want to assign to this process from the options listed as CPU 0, CPU 1, CPU 2, and CPU 3 (for quad-core chipsets).
  4. Click on OK to apply the changes.

You can also limit the CPU usage of other non-essential processes if you want to optimize your system’s performance.

3. Scan for viruses

  1. Press the Windows key, search Windows Security, and click Open.
  2. Select Virus & threat protection.
  3. Next, press Quick scan under Current threats.
  4. If you don’t find any threats, proceed to perform a full scan by clicking on Scan options just below Quick scan.Scan options
  5. Click on Full scan, then Scan now to perform a deep scan of your PC.Full Scan Scan Now
  6. Wait for the process to finish and restart your system.

In the absence of a comprehensive antivirus, malware can find its way to your PC. A similar file masquerading as the ngen.exe file may be behind the high CPU usage. That’s why it is important to run a virus scan, especially to use an antivirus solution because of its high detection rate and powerful deletion of all types of cyber threats.

⇒ Check the Best Antivirus Software

4. Disable .NET tasks

  1. Hit the Windows key, type Task Scheduler in the search bar, and click Open.Task Scheduler 0x800710e0
  2. Navigate to the following location: Task Scheduler Library/Microsoft/Windows/.NET Framework
  3. Locate all tasks labeled .NET Framework NGEN, right-click on them, and select Disable/Delete.

Ensure you’re not using the .NET Framework; otherwise, disabling these tasks could cause application problems.

To sum up, the ngen.exe process is safe and part of the Microsoft .NET framework. It helps speed up the application setup process, which means that you don’t have to wait too long before being able to use an application.

If your PC experiences high CPU usage when the ngen.exe process runs, the above fixes are sufficient to solve the issue.

However, they are in no way exhaustive, so if you have any other that we have not mentioned, let us know in the comment section below.

How to Remove Encryption From Excel [Quickest Ways]

Excel allows you to safeguard sensitive data, such as financial or personal information, by encrypting the data and preventing unauthorized access without the correct password. However, there are instances where knowing how to remove encryption from Excel will be useful.

So, in this guide, we will show you our most recommended solutions. If you are curious about encryption, you may also read our guide on file encryption software for Windows.

Why do I need to remove encryption from Excel?

While encryption serves very important uses, you may need to remove it for any of the following reasons:

  • You have forgotten the password to your worksheet. 
  • Someone that does not have your password needs access to the worksheet.
  • You need to apply specific changes to a file. 

If you have forgotten your credentials, we recommend using any robust software to recover Microsoft Excel passwords.

How do I unlock an encrypted Excel File?

How do I remove encryption from Excel with a password?

1. Use Unprotect VBA script

  1. Launch the Excel sheet and press Alt + F11.
  2. Click the Insert menu and select Module.
    how to remove encryption from excel
  3. Type in the script below replacing your_password_here with the password used to encrypt the sheet:
    Sub RemoveEncryption()
    Dim password As String
    password = "your_password_here" ' Replace "your_password_here" with the actual password

    On Error Resume Next
    ActiveSheet.Unprotect password
    On Error GoTo 0

    If ActiveSheet.ProtectContents = False Then
    MsgBox "Encryption removed successfully!"
    Else
    MsgBox "Failed to remove encryption. Please check the password."
    End If
    End Sub
  4. Click the Run icon.
    how to remove encryption from excel
  5. You should get a message saying Encryption removed succesfully.

2. Use the Protect Workbook option

  1. Launch the Excel sheet, input the password when prompted, and hit OK.
    how to remove encryption from excel
  2. Click on File, then Info.
    how to remove encryption from excel
  3. Expand Protect Workbook and click on Encrypt with Password.
    how to remove encryption from excel
  4. Finally, delete the password.
    how to remove encryption from excel
  5. Click OK, and you should have successfully removed encryption.

How do I remove encryption from Excel without a password?

Use a VBA script

  1. Launch the Excel sheet and press Alt + F11.
  2. Click the Insert menu and select Module.how to remove encryption from excel
  3. Type in the script below and hit the Run icon.
    Sub PasswordBreaker()
    Dim i As Integer, j As Integer, k As Integer
    Dim l As Integer, m As Integer, n As Integer
    Dim i1 As Integer, i2 As Integer, i3 As Integer
    Dim i4 As Integer, i5 As Integer, i6 As Integer
    On Error Resume Next
    For i = 65 To 66: For j = 65 To 66: For k = 65 To 66
    For l = 65 To 66: For m = 65 To 66: For i1 = 65 To 66
    For i2 = 65 To 66: For i3 = 65 To 66: For i4 = 65 To 66
    For i5 = 65 To 66: For i6 = 65 To 66: For n = 32 To 126
    ActiveSheet.Unprotect Chr(i) & Chr(j) & Chr(k) & _
    Chr(l) & Chr(m) & Chr(i1) & Chr(i2) & Chr(i3) & _
    Chr(i4) & Chr(i5) & Chr(i6) & Chr(n)
    If ActiveSheet.ProtectContents = False Then
    MsgBox "One usable password is " & Chr(i) & Chr(j) & _
    Chr(k) & Chr(l) & Chr(m) & Chr(i1) & Chr(i2) & _
    Chr(i3) & Chr(i4) & Chr(i5) & Chr(i6) & Chr(n)
    Exit Sub
    End If
    Next: Next: Next: Next: Next: Next
    Next: Next: Next: Next: Next: Next
    End Sub

    how to remove encryption from excel
  4. Click OK to find that you have successfully removed encryption from the Excel sheet.

We have now comprehensively covered how to remove encryption from Excel. To remove a password from Excel, feel free to check out our detailed article. The solutions in this guide should be easy to follow if you do not skip any steps.

We love to bring you a lot of help with this tool, so you may check out our other guide on fixing Excel’s sharing violation error.

To learn more about Excel, we also have a guide on how to apply formula to entire column in Excel, so don’t miss it.

Finally, please do not hesitate to tell us what solutions you love the most in the comment section.

How to Fix the Trust Relationship Broken Error

But when domain users encounter an error message indicating a broken or failed trust relationship, it signifies that the computer is either offline or has lost its membership with the Active Directory domain, resulting in network access issues.

A trust relationship between a workstation and the primary domain is a secure link allowing a computer to access resources across Windows-based network environments. Hence, this guide will provide you with a detailed guide on fixing the issue.

What is Broken Trust Relationship error?

The trust relationship between a workstation and the primary domain error can occur when a workstation joins an Active Directory (AD) domain if there are issues with the computer’s domain membership.

Possible reasons for the error include any of the following:

When any of these issues arise, the workstation may fail to establish a secure trust relationship with the primary domain, leading to authentication and access problems.

What are the common scenarios for the error?

IT professionals report a few common scenarios about where this error can occur. Below are a few instances:

Above are some of the common scenarios for the occurrence of the trust relationship between a workstation and the primary domain failed error.

What are the potential causes of Trust Relationship error?

While we have covered common causes of trust relationship errors, it could be valuable to elaborate on less common triggers, such as:

  • System clock discrepancies – If the system clocks of the involved devices (workstation and domain controller) don’t match, it can lead to authentication failures and trust issues.
  • Overcrowded secure channel – When an excessive number of open sessions and unused SIDs accumulate, it can overwhelm the secure channel, leading to trust relationship issues due to resource exhaustion and authentication problems.

Now that you know some of the possible reasons behind the trust relationship broken error, let’s proceed to how to fix the issue.

How do I fix the Broken Trust Relationship error?

1. Checking the Trust Relationship

  1. Press the Windows key, type powershell in the search bar, and click Run as administrator.
  2. Type the following command and press Enter: Test-ComputerSecureChannel -verbose
  3. The command will check the secure channel status and provide the following outcomes: True or False.

Running this command in PowerShell helps users assess the trust relationship’s health and determine if any actions are needed.

2. Reset the Machine Account Password

2.1 Using Netdom

  1. Open PowerShell with admin privileges.
  2. Run the following command: netdom resetpwd /s:<domain_controller> /ud:<domain>\<username> /pd:*
  3. Type the password for the specified user account and press Enter.

2.2 Using Reset-ComputerMachinePassword cmdlet

  1. Open PowerShell with admin privileges.
  2. Run the following command: Reset-ComputerMachinePassword -Server <domain_controller> -Credential (Get-Credential)
  3. Enter the username and password of an account with sufficient permissions, and press Enter.

2.3 Using Active Directory Users and Computers

  1. Log in to a computer with Active Directory administrative tools installed.
  2. Open Active Directory Users and Computers.
  3. Locate the computer account in the Organizational Unit, right-click on it, and choose Reset Account.
  4. Confirm the reset. Restart the workstation for changes to take effect.

Whichever method you choose to use from the 3 above, the computer account password will be reset, resolving potential trust relationship issues.

3. Rejoin your Machine to the Active Directory Domain

3.1 Using PowerShell cmdlets (Remove-Computer and Add-Computer)

  1. Open PowerShell as administrator.
  2. Remove the computer from the domain using the command below: Remove-Computer -UnjoinDomainCredential (Get-Credential) -Force
  3. Input the username and password, then click OK to restart it when prompted.
  4. Now, add the computer back to the domain using the command below: Add-Computer -DomainName "YourDomainName" -Credential (Get-Credential) -Restart
  5. Replace “YourDomainName” with the name of your Active Directory domain and enter the credentials of a Domain Administrator when prompted.
  6. The computer will join the domain and restart once again.

3.2 Using GUI (Windows Settings) with a Domain Administrator account

  1. Press the Windows + I keys to open the Settings app.
  2. Navigate through the following: System\About\Advanced system settings\Computer Name tab\Change
  3. Choose Workgroup, provide a name, and restart your PC.
  4. Repeat steps 1 and 2 and select Domain instead.
  5. Enter the domain name, click OK, and provide the credentials of a Domain Administrator when prompted.
  6. Restart your PC.

By following any of the above steps, you can successfully rejoin the maximum machine to the Active Directory domain and resolve trust relationship issues.

4. Use the NLTest utility

  1. Launch Command Prompt with administrator privileges.
  2. Run the following command: nltest /sc_query:<domain_name>
  3. Replace <domain_name> with the name of your Active Directory domain.
  4. The result will indicate whether the secure channel is valid (successful or trusted) or not (failed).
  5. If it fails, run the command below to reset the computer account password: nltest /sc_reset:<domain_name>
  6. Restart the workstation to apply the changes.
  7. Now run the first command in step 2 above again.

The NLTest utility is a command-line tool used in Windows to test and troubleshoot healthy relationship issues between a workstation and a domain.

5. Restoring an old system state

Restoring an old system state can resolve issues in situations such as the following: Software installations, configuration errors, malware infections, driver conflicts, registry corruption, data loss, and performance problems.

However, caution is advised, as compatibility, recent changes, and data backup should be considered before proceeding with the restoration.

What are the implications of Broken Trust Relationships?

  • The impact on user productivity and business operations – Unresolved trust relationship issues can lead to user authentication failures, access restrictions, and network resource inaccessibility, disrupting domain user productivity and hindering smooth business operations.
  • Also, untrusted workstations may pose security risks, allowing unauthorized access to sensitive data and compromising the entire network’s security.
  • Unresolved trust relationship issues can hinder productivity and network functionality. Mitigating costs involves timely troubleshooting, proper system monitoring, regular backups, and ensuring efficient IT support to address issues promptly.

How do I preventing Trust Relationship errors?

Try the following options to prevent the error altogether:

  • Regularly monitoring and maintaining Active Directory health will help you proactively identify and address issues.
  • Regularly reviewing and managing system clocks will prevent time discrepancies that can cause trust relationship issues.
  • Implementing Group Policies to manage computer account passwords – enables automatic and regular password updates, reducing the risk of trust relationship issues due to password mismatches and expirations.
  • Reset the registry DWORD RefusePasswordChange to value data 1.

And that’s it on how to fix the trust relationship issues. You can also explore our similar guide on fixing the trust relationship between this workstation and the primary domain failed for further information.

If you have any questions or suggestions, do not hesitate to use the comments section below.

How to Delay Actions in Windows Task Scheduler

The Windows Task Scheduler is an important Windows tool that helps automate certain tasks to run during startup. Unfortunately, this can delay or the startup increasing the startup time of your PC.

Interestingly, it is possible to optimize your PC’s startup time without disabling the startup items. To achieve this, you need to schedule some of the startup actions after a bit of delay. If you want to know how to delay the actions using Windows Task Scheduler to improve the overall PC performance, we’ve got you covered.

How does task delay impact the system resources?

Delaying the startup tasks or actions in the task scheduler prevents them from booting at the exact time when the system boots up. This eliminates the need to delete some essential startup tasks and prevents system resource overutilization.

Using the task scheduler to set up a calculated delay in the execution of advanced tasks and actions during startup significantly reduces the time Windows takes to boot, thereby preventing the system from freezing or crashing abruptly. This significantly refines the overall system performance, especially for configurations of PCs.

How do I delay tasks using Task Scheduler?

1. Launch Task Scheduler

  1. Press the Windows key to launch the Start menu, and type task scheduler in the top search bar.
  2. Right-click Task Scheduler in the search results and choose Run as administrator from the context menu.
  3. Press Yes on the User Action Control popup to launch Task Scheduler with administrative privileges.

2. Task Creation

  1. Click the Task Scheduler Library option located on the left sidebar to view the list of tasks in Task Scheduler window. 
  2. Next, choose Create Task option from the right sidebar to access the Create Task window.
  3. Now provide a name and description of the task in the relevant sections.
  4. Enable the checkbox next to Run with the highest privileges if you need to prioritize this task over others as several other tasks are dependent on it.

3. Assign a trigger

  1. Next, switch to the Triggers tab and press the New button located on the bottom left.
  2. Expand the Begin the task drop-down menu and select the At Startup option from the list of triggers.
  3. Proceed to the Advanced settings section and enable the checkbox preceding the Delay task for up to (random delay) option and assign the suitable period of time (ranging from 30 seconds to 1 day) using the drop-down menu.
  4. Press the OK button to save the changes and close the window.

Now that you have created a new task trigger and assigned the delay time for the startup task using the Task Scheduler, you need to set the action using the steps mentioned below. 

4. Choose an action

  1. Next, switch to the Actions tab of the New Task window and press the New button at the bottom.
  2. Expand the Action dropdown in the New Action window and choose Start a program from the list of options.
  3. Now press the Browse button and choose the executable file for the program that you want to delay at startup.
  4. Press the OK button to save the changes and exit the New Task window.

5. Test the task

  1. Now right-click the newly created task in the Task Scheduler and choose the Run option from the context menu to test the task execution process. 
  2. If the newly created task was successfully configured, it will execute immediately without any errors.
  3. Finally, exit the Task Scheduler and restart your PC to view the results.

In case the new task scheduled using Task Scheduler does not run on your Windows PC, you can refer to this guide for help.

Common mistakes to avoid in delaying tasks using Task Scheduler

Now that you know the step-by-step procedure to configure a task or action to run with delay after the system starts up, let’s look at some important mistakes you should avoid when delaying actions using the Task Scheduler:

  • Incorrect delay timings – Assigning an incorrect delay period might prevent the task from running at the scheduled time.
  • Task dependencies – You must analyze the tasks scheduled in the task scheduler to determine the task dependencies and ensure that the essential tasks on which others are dependent are executed first.
  • Task priority – You must always prioritize the valuable tasks using the Task Scheduler and delay tasks with low priority and fewer task dependencies.

That’s all about this guide! We hope that you can easily delay actions and tasks using the advanced settings of the Windows Task Scheduler program to improve the startup time and optimize your system’s performance.

Before you leave, you might be interested in some of the essential Task Scheduler tips and tricks to improve your task management skills on a Windows PC or how to open a website automatically using Task Scheduler.

If you have any suggestions or feedback, do let us know in the comments section.

Bookmark Not Defined Error on Microsoft Word [Fix]

In a Microsoft Word document, bookmarks are a type of hyperlink that refer to some specific text locations and sections which can be accessed easily by using the hyperlink. 

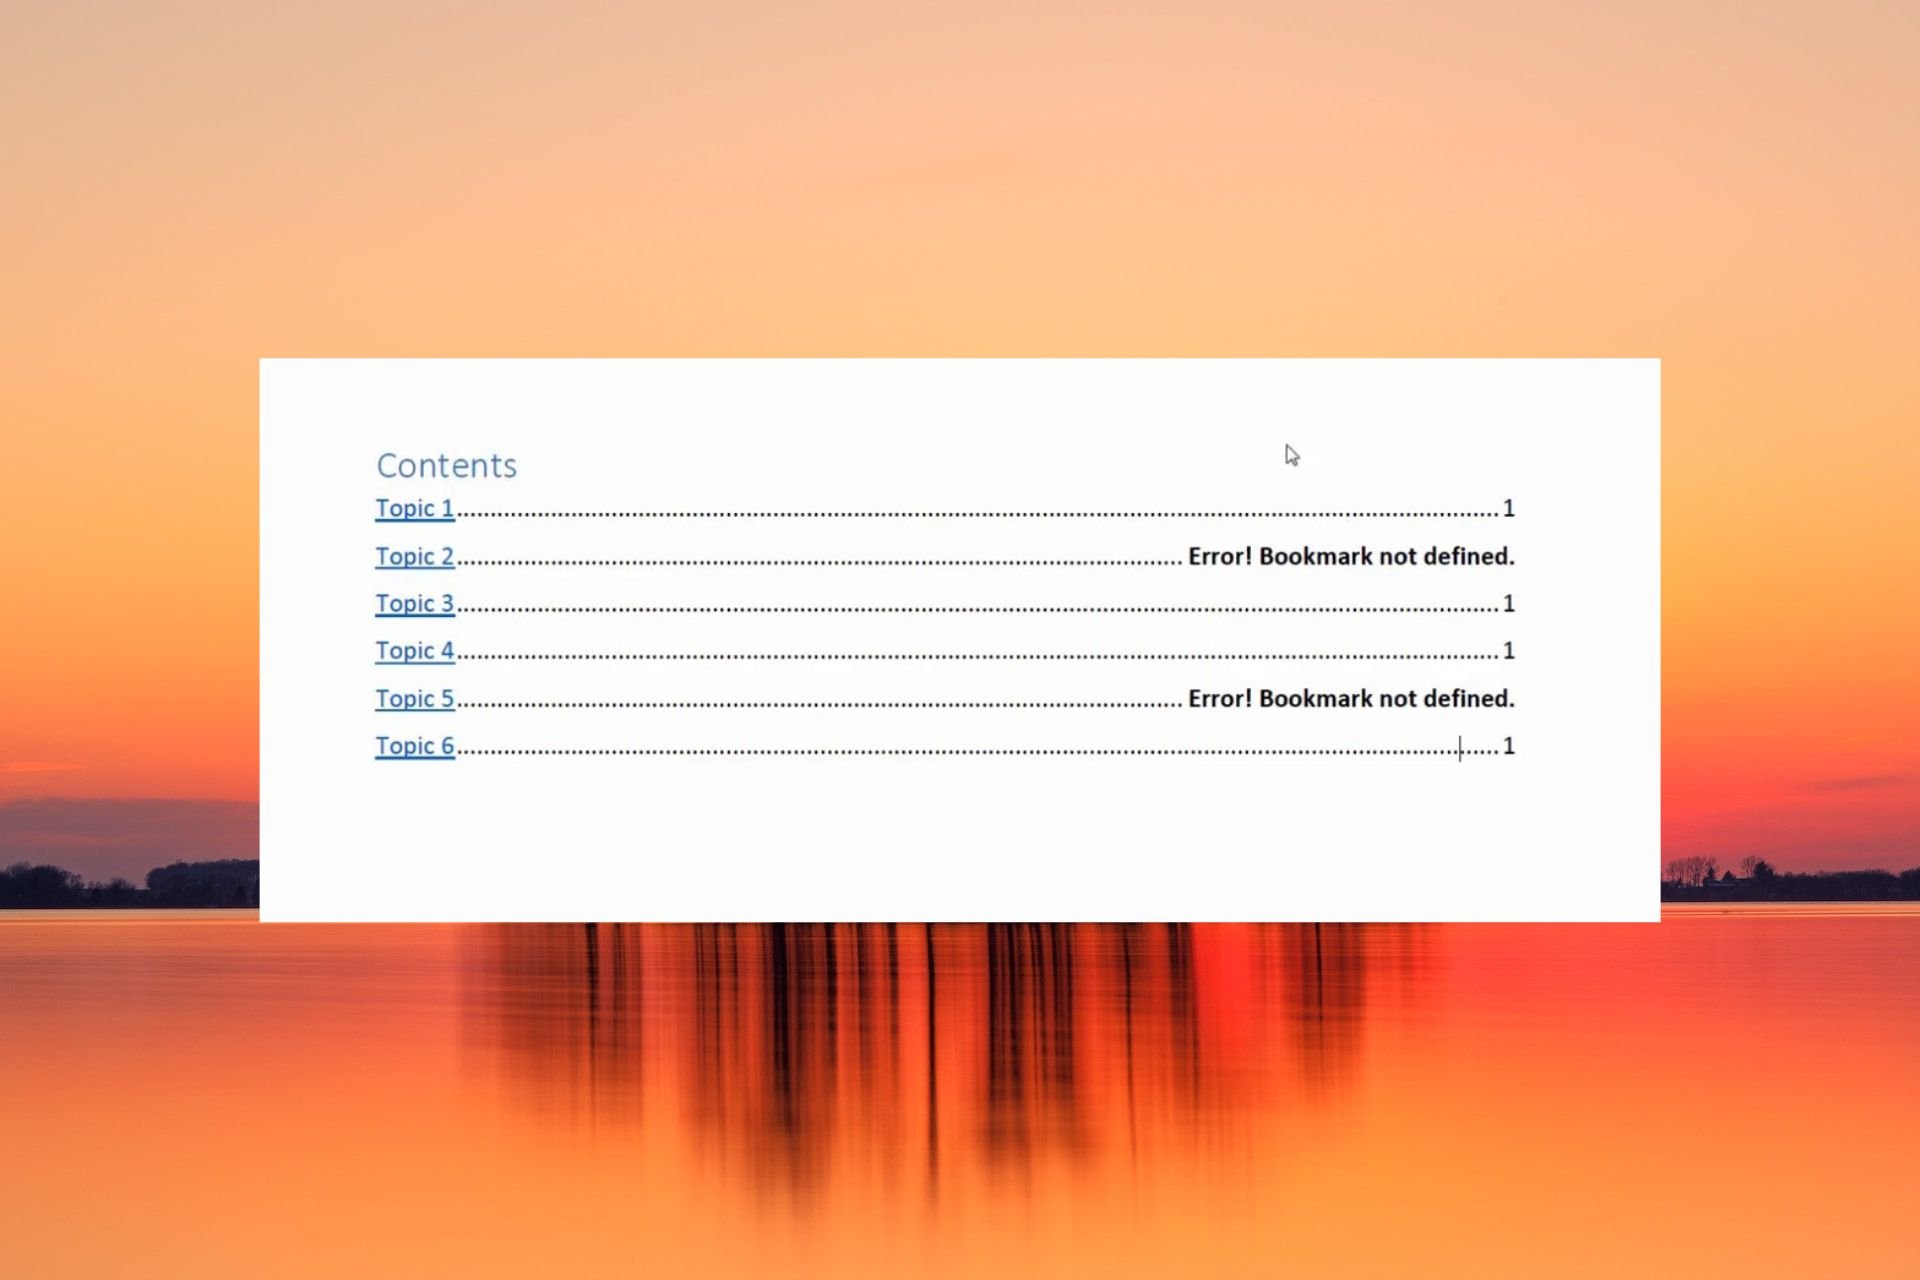
Bookmarks indeed serve a useful purpose, but many Windows users often encounter several error messages like Error! Bookmark not defined in the Word document using an automated table of contents. 

If you are also facing the same problem, try the solutions listed in this guide to get around the issue. 

Why do I get the Bookmark not defined error in MS Word? 

Based on the research we conducted, these are the most common reasons why the bookmark not defined error shows up in MS Word.

  • Bookmarks are missing or corrupt – If one or multiple bookmarks in an automatic bookmarking system linking to the topics are missing or corrupt, this error message will appear. 
  • Bookmarks are outdated – In the semi-manual TOC, the automatic updating feature does not exist in the table of contents entries and you need to press the F9 key for manual updation.  
  • Bookmark entries are broken – Several broken links in the Word file also trigger the bookmark not defined error in the TOC of the Microsoft Word file. 

Now that you have a fair idea of why the bookmark not defined error shows up in your Windows file, let’s take a look at the different solutions to fix the Bookmark not defined error. 

How do I fix the Bookmark not defined error in Word? 

1. Enable the Show Bookmarks option

Note icon NOTE
Microsoft Word doesn’t display bookmarks by default so, before anything, here’s how to turn on this feature.
  1. Launch the MS Word app on your Windows PC. 
  2. Choose Options from the left sidebar of the MS Word app. microsoft word error bookmark not defined
  3. Select Advanced from the left panel of the Word Options window. 
  4. Scroll down until you reach the Show document section and enable the checkbox preceding the Show bookmarks option. 
  5. Press the OK button to save the changes. 

Having performed these steps, let’s proceed to the solutions listed below. 

2. Use the Undo shortcut

This is more of a simple workaround to quickly revert the changes in the automated Table of Contents (ToC) containing a broken bookmark link. 

If the bookmark not defined error shows up right after the TOC is generated, use the Ctrl + Z shortcut combination to go back to the original text. However, you should be aware that you can only circumvent the error only if you haven’t saved the document after TOC generation. 

3. Replace the missing bookmarks

  1. Scroll down to the table of contents section in the Word document, right-click the erroneous entries, and select the Toggle Field Codes option from the context menu. 
  2. You will now see the Field Codes behind the bookmark. Copy the bookmark listed in the HYPERLINK (or PAGEREF) section of the Field Code. 
  3. Now switch to the Insert section from the top ribbon menu and select Links followed by Bookmark from the sub-menu. 
  4. Type or paste the bookmark link you just copied in the bookmark name section to create a new bookmark.  

Now that you have created a new bookmark entry to override the old broken or corrupt ones, the bookmark not defined error should now be resolved. 

Note: The Bookmark with the PAGEREF/HYPERLINK Bookmark Name format means that the bookmark was inserted manually. Likewise, the format PAGEREF/HYPERLINK Ref364868613 indicates a hidden bookmark by a cross-reference dialog process.

4. Force Update the Table of Contents

If the bookmark not defined error persists even after replacing the broken bookmark links, you need to forcefully update the table of contents to replace the cached instance. To force update the table of contents, you need to use the F9 key. 

Using this shortcut key is the alternate way of right-clicking the table of content entries and choosing the Update Field option. 

5. Convert the table of contents to static text

  1. Select all the text along with links present in the table of contents of your Word document. 
  2. Press the Ctrl, Shift, and F9 keys at the same time to convert the links to static text. 

Converting the table of contents to the static text format should fix the bookmark not defined error message if it occurred due to the broken links in the document. 

That’s all about it! We hope you were able to fix the bookmark not defined entries in the table of contents section of the Word document.

While you are here, you might also want to fix the margins if they are not working in your Microsoft Word document.

Which of the methods listed in the article worked in your case? Do let us know in the comments. 

File System Error (-805305975): How to Fix It

On a Windows device, the file system error (-805305975) may occur when computer file system issues occur. This error may mean you can no longer access your files, and your computer may crash and freeze.

You should be able to successfully troubleshoot this file system error with our guide’s solutions.

Why am I getting the file system error (-805305975)?

You may encounter this error for any of the following reasons:

  • Your computer may have a corrupted file system.
  • Virus or malware infection on your device.
  • A hardware failure or drive failure.
  • Wrong file formats, especially for images.
  • Software conflicts, especially with third-party tools.

We have written a guide on some of the best software for Windows 11. Most of the tools in the guide are reliable and may help you avoid conflict that may trigger this file system error.

How do I fix file system error (-805305975)?

We recommend you start with the following workarounds:

  • Restart your computer.
  • Scan the device for viruses.

If the problem persists, you may proceed to the solutions below.

1. Run vital system health repairs and scans

  1. Press Windows + R to open the Run dialog.
  2. Type cmd and hit Ctrl + Shift + Enter.
    File System Error (-805305975)
  3. Type the commands below and hit Enter after each one to run.
    dism.exe /online /cleanup-image /scanhealth
    dism.exe /online /cleanup-image /restorehealth
    File System Error (-805305975)
    dism.exe /online /cleanup-image /startcomponentcleanup
    File System Error (-805305975)
  4. Input the script below and hit Enter to scan for and repair damaged files:
    sfc /scannow
    File System Error (-805305975)
  5. Lastly, restart the computer and verify it fixes file system error (-805305975).

To ensure everything goes smoothly, you can try dedicated third-party repair programs to help you proceed with this process even easier and faster.

2. Reset the app where the error is triggered

  1. Press Windows + I to open the Settings app.
  2. On the left pane, click Apps, then on the right, click Installed Apps.
    File System Error (-805305975)
  3. Click the ellipses or three dots in front of the app that triggered the error and select Advanced options.
  4. Under the Reset category, click the Reset button.
    File System Error (-805305975)
  5. Finally, restart the operation and verify that file system error (-805305975) is fixed.

3. Update the computer

  1. Press Windows + I to open the Settings app.
  2. Click Windows Update on the left pane, then on the right, press Check for updates.
  3. If there are any updates Download & Install them, then restart your computer and see if it fixes the problem.

4. Run a chkdsk utility

  1. Press Windows + R to open the Run dialog.
  2. Type cmd and hit Ctrl + Shift + Enter.
    File System Error (-805305975)
  3. Type the command below and hit Enter (substitute C for your driver letters).
    chkdsk /f
  4. Input Y when prompted, then restart your computer.

That will be as much as we discuss in this guide. We hope the file system error (-805305975) is resolved successfully. In extreme cases, you may consider a system restore or reinstallation; however, this may be overkill.

By following these steps, you can prevent other system file corruption issues like 2147163901 on your Windows.

Please contact us in the comments section and let us know the most effective solution. We also want to hear if you have new solutions that work.

How to Change Your Xbox Gamertag

In the vibrant gaming community, an Xbox gamertag is important as it represents a player’s online identity and persona. It is a unique username or handle that players use to connect and interact with fellow gamers on the Xbox Live network.

However, if you wish to change your gamertag to make a fresh start or personalize your online identity further, this guide can help!

We will explore how to change a gamertag on different Xbox consoles to help you transform your identity.

How to Change Xbox gamertag?

Note icon NOTE
There are various ways and platforms wherein you can change the gamertag. You can either use your console or do it online. Here, we have mentioned methods for all the platforms.

How do I change my Xbox gamertag on Xbox Series X/S & Xbox One?

  1. Turn the console On, and press the Guide control pad button.Change Your Xbox Gamertag Xbox one
  2. Select your profile picture at the top left, and press A on the control pad.
  3. Now go to My profile, right under the profile icon, then click Customise profile. My profile
  4. Now choose the current gamertag, under Choose your new gamertag, locate Your new gamertag, input the new one you want to set, and select Check availability.Change the gamertag
  5. If the desired name is available, you can proceed. If not, you can try again until it is accepted.
  6. Once done, review how it will look on Xbox services. If you are OK with these things, select Change gamertag.

If you’re using the Xbox app on mobile, we have a great guide on how to change Xbox name on mobile app, so don’t miss it.

How can I change my Xbox gamertag on Xbox 360?

  1. On your Xbox 360 console, go to Social, then select Sign In or Out. Choose the profile to sign in.
  2. Locate Settings, then Profile.
  3. Select Edit Profile. Change Your Xbox Gamertag Xbox 360
  4. Click Gamertag.Gamertag
  5. Select Enter New Gamertag, type in the new one of up to 15 characters, and choose Done. If it is already taken, try another one until accepted.Enter the name
  6. Once you are ok with it, select Yes, use this gamertag to save the changes.Yes use this gamertag

How can I change my Xbox gamertag on PC/Web?

  1. Visit the Xbox official website.
  2. Sign in using your Microsoft account credentials associated with your Xbox profile. Check if you have logged in to the correct account by checking the current gamer tag.
  3. Next to Your new gamertag, enter the new one and click Check availability. If it is available, you can proceed. If not, keep trying until it is accepted.Change Your Xbox Gamertag
  4. Now review it will look across Xbox services. If you are ok with everything, click Change gamertag.Claim it

The process might take a few minutes; wait for it to complete, then close the window once the change is confirmed.

How much does it cost to change the Xbox gamertag?

The cost of changing an Xbox gamertag varies depending on certain factors. Formerly, Xbox Live Gold members were charged a fee for changing it, while the first change was free for Xbox Game Pass Ultimate subscribers.

However, in June 2021, Microsoft introduced a new policy for all Xbox players to change their names for free for the first time.

Players with an active subscription to Xbox Game Pass Ultimate and Xbox Live Gold are offered a discounted price for subsequent changes.

The discounted cost for changing it varies depending on the region and currency, Microsoft policies, and offers, but it is generally lower than the standard price.

Therefore, to get the latest information regarding the cost of changing an Xbox gamertag, you must visit the official Xbox website or consult the Xbox support team.

What should I consider when changing your Xbox gamertag?

There are several things to keep in mind to ensure a smooth transition and choose an appropriate gamertag; some of them are:

  • There is a character limit of up to 15 characters; ensure the gamertag fits within the limit and is easy to read & remember.
  • Your new name should adhere to community guidelines, avoiding offensive, explicit, or inappropriate language, symbols, or references.
  • It must start with a letter, while numbers and special characters can be included.
  • Avoid excessive numbers, special characters, or ambiguous spellings that could make it challenging to pronounce or recall.
  • Please don’t choose one that may become outdated or lose significance over time.
  • Consider informing your gaming community or updating your profile with the new gamertag to ensure a seamless transition in your social interactions. 

Does changing the gamertag affect anything?

Changing your gamertag does not affect your game progress or achievements, as they are tied to your Xbox Live account.

However, some games may show your previous name in their leaderboards. If maintaining consistency in game history and recognition is essential to you, remember that.

It may also temporarily confuse or surprise your friends and gaming connections. To avoid chaos, you must inform your gaming community.

How can changing gamertag affect your privacy?

Changing a gamertag can provide an added layer of privacy & anonymity and establish a separate online identity that helps shield your personal information.

Using a gamertag instead of a real name reduces the risk of unwanted attention, potential harassment, or identity theft, as it creates a barrier between a player’s gaming persona and their real-life identity.

In addition to privacy considerations, it plays a significant role in shaping a gamer’s online identity and reflects their personality or gaming style. It enhances the social aspect of gaming, promoting camaraderie and shared experiences.

What to do if a gamertag you want is taken?

Suppose the gamertag you want to opt for has already been taken. In that case, you can use different letter combinations, add prefixes or suffixes, or incorporate numbers creatively while maintaining readability and memorability.

However, if you want to get the one you desire, keep checking the website or console periodically, as sometimes it may become available if not used for an extended period.

So, this is how you can change the Xbox gamertag and choose a new name that reflects your identity and enhances your gaming experience.

If you want to search for a player using a gamertag, we recommend you check out this guide for easy methods.
Please feel free to share any information, tips, or your experience with the subject in the comments section below.

Windows Task Scheduler Failed to Launch The Action

From running important scripts to launching critical programs, the Task Scheduler is essential for maintaining productivity and efficiency.

However, encountering an error message where the Windows Task Scheduler fails to launch an action can be frustrating and disruptive. This usually happens due to misconfigured task settings.

In this guide, we present you with a comprehensive troubleshooting guide to address the issue and regain control over your scheduled tasks.

What is Task Scheduler launch failure?

The error message Windows Task Scheduler failed to launch action indicates that the Task Scheduler in Windows could not initiate or execute the specified action as intended.

It typically occurs when the Task Scheduler encounters an issue while trying to launch a scheduled task or execute a programmed action.

The Task Scheduler launcher failure disrupts the intended workflow. It may lead to delays in critical operations, hampering the system’s health and productivity.

To understand the issue, you must investigate further and use the troubleshooting methods accordingly.

Why is Task Scheduler failing to launch an action?

There can be several possible reasons for this error; some of the common ones are mentioned here: 

  • Missing or invalid program/file  – If the task references a program or file that has been moved, deleted, or renamed, it may trigger this error.
  • Account status – If the user account associated with the task is locked, deactivated, or expired, the Task Scheduler won’t be able to launch the action.
  • User Right Assignment policy – If the user account associated with the task lacks the necessary permissions, the Task Scheduler won’t be able to initiate the action.
  • Change in password – If the password for the user account associated with the task has been changed, & the Task Scheduler task was configured with the old password, you get this message.
  • Command-line arguments or parameters – Incorrect command-line parameters within the action can lead to this error. Try reviewing & correcting any inaccuracies in the task’s configuration.

Now that you know the causes of the problem, let us move to the troubleshooting methods for fixing the Task Scheduler launcher failure.

How to fix the Windows Task Scheduler launch failure issue?

Before engaging in advanced troubleshooting steps, you should consider performing the following checks:

  • Ensure you have administrative access to the Windows computer where the error is reported.
  • Verify the credentials associated with the task for user account.
  • Ensure your Windows is up to date.
  • Check if the action relies on specific programs, files, or command-line arguments.

Once done, check out the solutions to fix the problem.

1. Check the account status

  1. Press the Windows key, type control panel, and click Open.Control Panel start menu Windows Task Scheduler Failed to Launch The Action
  2. Select View by as Category and click User Accounts. User account
  3. Again, click User Accounts.Select user accounts
  4. You will get the list of user accounts; check if the associated user account to task is deactivated.
  5. If it is disabled, press the Windows key, type cmd, and click Run as administrator.CMD elevated Windows Task Scheduler Failed to Launch The Action
  6. Type the following command to enable the account after replacing accountname with the username for the account and hit Enter: net user accountname /active:yesEnable user account
  7. This will activate your account with ease.

2. Assigning user rights assignment

2.1 Use Local Policy Editor

  1. Press Windows + R to open the Run window.secpol.msc Windows Task Scheduler Failed to Launch The Action
  2. Type secpol.msc and click OK to open the Security Policy window.
  3.  Locate and click User Rights Assignment to expand it.Logon as a batch job.
  4. From the right pane, double-click Logon as a batch job.
  5. Next, click the Add User or Group button in the Properties window.Add User or Group
  6. Add the account name, click Check names, then OK to save the changes.Change username

2.2 Use the Task Scheduler

  1. Press the Windows key, type task scheduler, and click Open.Task Scheduler Windows Task Scheduler Failed to Launch The Action
  2. Go to the task creating the issue, right-click it, and choose Properties from the context menu.Task properties
  3. On the Properties window, switch to the Security tab.
  4. Click Change User or Group button.Add user or group
  5. On the next window, in Enter the object name to select field, type Users, and click Check Names. It will now be replaced with the correct word or address.Enter user name
  6. Click OK to confirm the changes. You might get a prompt to input your admin account password to proceed.

 Once done, run the task to check if the issue persists.

3. Configuring Task Scheduler:

  1. Press Windows + R to open the Run window.Task scheduler run command
  2. Type taskschd.msc and click OK to open Task Scheduler.
  3. Locate the task causing issues, right-click it, and select Properties from the context menu.task properties Windows Task Scheduler Failed to Launch The Action
  4. Go to the Settings tab at the bottom of the window, and locate. If the task is already running, the following rule applies, select Stop the existing instance from the drop-down menu.Stop the existing instance
  5. Click OK.

4. Check the Task Scheduler service

  1. Press Windows + R to open the Run window.Services RUn command Windows Task Scheduler Failed to Launch The Action
  2. Type services.msc and click OK to open Services.
  3. Locate Task Scheduler, double-click it, and choose Properties.Windows Task Scheduler Failed to Launch The Action
  4. Make sure the Startup type is Automatic, and the service is running.Set to automatic

You must also check the task conditions, trigger settings, and review Event logs to understand the issue. If nothing works, you must create a new task to start afresh.

How can I prevent this Task Scheduler error from happening?

To prevent the occurrence of launch failure issues on the Task Scheduler in the future, follow these measures:

  • When creating or modifying a task, review all the task settings, including the action, triggers, conditions, and user account credentials.
  • If the task relies on specific programs or batch files, regularly check their availability and accessibility.
  • Regularly update the account’s password in the task’s properties to match the current password.
  • Add proper error-handling mechanisms within the action itself.
  • Periodically review the Windows Event Viewer and check for any Task Scheduler-related error codes or warnings.
  • You must enable Task Scheduler history via Task Scheduler Library to keep an eye on the tasks created.

So, by following the solutions and tips provided, you can effectively resolve the Windows Task Scheduler failed to launch action error and ensure the successful execution of scheduled actions.

In conclusion, we explored various causes of the error and outlined practical steps to address them. From verifying user rights assignments and updating user account passwords to checking account statuses and reviewing program/file dependencies, each solution is designed to help restore the Task Scheduler’s ability to launch actions.

Furthermore, we emphasized the significance of regularly testing and monitoring scheduled tasks, keeping the system updated, and maintaining a reliable system environment. 

If you are facing other issues, like Task Scheduler error 0x40010004, we recommend you check out this informative guide to find solutions.

Please feel free to give us any information, tips, and your experience with the subject in the comments section below.

Microsoft Word Won’t Spell Check? 4 Ways to Turn it Back on

The spell checker is a useful feature in Office 365 apps; it allows you to spot and correct wrongly spelled words without using external grammar or spelling software. Further, if this feature stops working, errors in your document won’t be highlighted.

This article briefly discusses the common causes of Microsoft spell-check errors and provides four ways to help you fix the error.

Why is Microsoft Word not checking the spelling?

Some of the causes of this issue are:

  • Incorrect language settings – If you’re typing in English and the language settings are set to French, Spanish, etc., the spell check won’t work.
  • Manually disabled spell check – Spell check is enabled by default, but the feature will stop working if you accidentally turn it off.
  • Document exception – If you enabled document exception for the file you’re working on, spell check won’t function once that document is opened.
  • Microsoft Word add-Ins – Sometimes, the add-ins you add to your Word app can conflict with its functionality, leading to errors like spell check not working.

Regardless of the cause, try to follow the steps below to troubleshoot.

How do I fix Windows Spelling checker in Word?

Before proceeding with more advanced solutions, here are a couple of quick fixes you should try:

  • Close and relaunch Microsoft Word.
  • Restart your PC.
  • Repair Office 365 to fix bugs affecting the spell check.

If the error remains unfixed, the following are advanced troubleshooting steps to help you fix the Word spell check error:

1. Make sure the correct language is selected

  1. Firstly, press the Windows key, type Microsoft Word, and hit Enter to launch the application.
  2. In Word, click File, and then click on Options.
  3. In the Options window, click Language.
  4. Then, under the Choose editing language section, ensure that the language displayed is your preferred language.
  5. If there are no installed languages, click Add additional editing language, and click on your preferred option from the list.
  6. Click OK to finalize your changes and restart Word to check if the spell check error is fixed.

If your Word document contains multiple languages, you have to select your preferred language to be used by the spell check; this will help you fix the spell check not working in Word.

Also you can also check out how to change the language settings in Windows.

2. Enable the Spell check feature

  1. In Word, click File, and then click Options.
  2. Then, click on Proofing in the Options window.
  3. In the next window, locate the When correcting spelling and grammar section, and ensure Check spelling as you type and Mark grammar errors as you type are both checked.
  4. Click OK to save your changes, and restart Word to check if the error persists.

If you’re sure the correct language is set in Word, you’ll have to check if spell check is enabled. By default, the feature is automatically turned on, but sometimes, it can be disabled manually by you or other users.

If you want to turn on the spell check feature on Outlook, check out the quick guide.

3. Disable the spelling exceptions

  1. Launch Word, click File, and then click on Options on the left pane.
  2. In the Options window, click Proofing and scroll to the bottom to locate the Exceptions for section.
  3. Then, ensure that the check boxes next to Hide spelling errors in this document only and Hide grammar errors in this document are not enabled.
  4. Click OK, and restart Word to check if the error is fixed.

Microsoft Word allows users to set proofing exceptions for selected documents; spell check won’t function on that page if your current document belongs to that exception list. 

4. Disable the add-ins

  1. While in Microsoft Word, click File, and then click on Options.
  2. In the Options window, click Add-ins.
  3. Then, select any suspicious add-ins, click on it, and then click Go.
  4. Click the add-in, and click on Remove.
  5. Then, repeat this step till you turn off all the add-ins you wish to remove, and check if it’ll fix the spell check error.

If you have third-party tools like Grammarly installed in Word, it can prevent the Word spell check from functioning correctly.

Here is a guide showing you how to fix Office 365 unable to acquire add-ins.

Spell check is a cool feature of Microsoft Word that improves productivity by reducing the time spent editing documents. To further improve your workflow, you can turn on autocorrect in Windows too.

If the feature is not working, we hope the steps listed in this article will get it up and running quickly.

Should you have further suggestions, feel free to drop them in the comments section.

How to Remove Empty Rows in Excel [Mass Delete]

Some of our readers have recently requested to know how to remove empty rows in Excel most especially while working on a large dataset. Sometimes empty rows are generated due to glitches in the Excel software or while sharing the file.

Having to remove empty rows one after the other can be quite exhausting and time-consuming. Hence, we have gathered simple methods to fast track the process.

Can I delete empty rows in Excel?

Yes, it is possible to delete empty rows in Excel. Microsoft Excel provides various methods to do that, allowing users to choose the one that best suits their needs.

Deleting them can be helpful in cleaning up your data and organizing it more efficiently.

How do I delete blank rows in sheets?

Before attempting any of the advanced methods on how to delete blank rows in sheets, you should take note of the following instructions:

  • Create a backup of your spreadsheet before removing blank rows.
  • Make sure to review your selection before confirming the deletion.

Not to worry, below are safe and simple ways to delete blank rows in sheets.

 1. Remove blank rows in Excel using the Filter tool

  1. Launch Excel and create a data sheet.
  2. Press Ctrl + Home and then Ctrl + Shift + End to select the whole table, from the first to the last row.
  3. Navigate to the Data tab and click the Filter button.
  4. Next, click on any Autofilter drop-down arrow in the column header, then uncheck the Select All checkbox. Scroll down to the end of the list and check the Blanks checkbox at the bottom.
  5. Click OK.
  6. Now, select all the filtered rows by pressing Ctrl + Home, press the down-arrow key to go to the first data row, then press Ctrl + Shift + End.
  7. Right-click on any selected cell and choose the Delete option.
  8. Finally, go to the Data tab and press the Clear button.

If the blank rows are scattered in your sheet, using the Excel filter tool can help you identify whether a row is empty. Using this method is relatively safe, simple, and fast, it only requires more steps.

2. Use the Sort feature in Excel to remove blank rows

  1. Select the range of data with the empty rows.
  2. Navigate to the Data tab in the Excel ribbon.
  3. In the Sort & Filter group, click the Sort A to Z or Sort Z to A button. Either way, it will place the blank rows at the bottom of the selected range.
  4. Now, Delete the empty rows using the method mentioned above.

The Excel Sort feature functions relatively like the filter tool. The blank range of data will be placed below the selected range, with this, you should be able to delete the empty rows before reverting the arrangement.

3. Use the Go to Special

  1. Press the Ctrl + Shift + End to select the whole table.
  2. Then press Ctrl + G to open the Go To dialog box appears.
  3. Click Special button to display the Go To Special dialog box. 
  4. Select Blanks in the box and click OK. Excel will select all of the blank cells within the selected range.
  5. Right-click one of the cells and click Delete.
  6. Then, select Entire Row, and click OK.

4. Use special keys to delete blank rows

  1. Left-click on the number (e.g. 58) of the last row (the first empty row) after your data.
  2. Press the Ctrl + Shift + Down keys altogether to highlight all the rows.
  3. Now, right-click on any cell and click on Delete from the context menu.
  4. Press Ctrl + S to save your workbook.

This method automatically deletes all rows and columns after your data. What’s more, this process will also help reduce the spreadsheet’s file size.

And that’s it on how to delete blank rows in sheets. Hopefully, one of the methods provided in this guide has met your needs.

Further, utilizing the method in this guide will delete the entire rows in Excel if that’s what you would like to tryout.

In case your Excel app is not opening, you can explore our detailed guide to learn how to fix the issue.

We have also provided proven fixes to troubleshoot the Excel can’t insert new cells error for our readers. You can check it out too.

Before you go, don’t miss our guide on what to do if you can’t insert a row in Excel.

If you have any questions or suggestions, do not hesitate to use the comments section below.

0x80072F17 Microsoft Store Error: How to Fix it

Microsoft Store serves as a one-stop destination for most users when it comes to downloading apps. But the source itself doesn’t always deliver the best performance. Many users have reported error code 0x80072F17 in Microsoft Store.

The issue can be encountered when signing in or launching the store, and the message accompanying the error reads, Something went wrong. Please try again later. If you, too, are facing the problem, keep reading to find out what worked for others!

What does error code 0x80072F17 mean?

The 0x80072F17 error indicates Microsoft Store’s inability to interact with its server; subsequently, the requested operation fails. It’s a common error and has affected all iterations of Windows.

Here are the reasons you encounter it:

  • Unstable Internet connection: An unstable or slow Internet connection can cause issues when Microsoft Store tries to connect to its servers.
  • Issues with the Microsoft Store cache: A corrupt cache can trigger a wide range of errors with the Store and even apps downloaded from it.
  • Incorrect date and time set on the PC: Several Microsoft Store and Windows errors appear when you have set the incorrect date and time on the PC.
  • The server is facing an outage: We can’t altogether negate the possibility of it being a server issue and must verify this aspect as well.

How do I fix error code 0x80072F17 in Microsoft Store?

Before we head to the slightly tricky solutions, try these quick ones first:

  • Restart the computer.
  • Make sure there isn’t intermittent loss of network connectivity. Switch to Ethernet if that’s the case.
  • Use a service like Downdetector to verify if others too are facing a server outage.
  • Create a Microsoft account on the Windows PC and access Microsoft Store through it.
  • Check for pending Windows updates and install them all.
  • Disable any third-party antivirus, firewall, or VPN installed on the PC.

If none work, move to the fixes listed next.

1. Clear the Microsoft Store cache

  1. Press Windows + R to open Run, type wsreset.exe in the text field, and hit Enter.wsreset.exe to fix 0x80072F17
  2. Wait for the process to complete. It shouldn’t take more than a few seconds.

When the Microsoft Store cache is corrupt, clearing it should eliminate error code 0x80072F17 in no time!

2. Set the correct date and time

  1. Press Windows + I to open Settings, select Time & language from the navigation pane, and click on Date & time on the right. date & time
  2. Enable the toggle for Set time automatically and make sure the correct Time zone is selected from the dropdown menu.set time automatically to fix 0x80072F17
  3. Alternatively, you can manually set the date and time if Windows doesn’t show the correct results when set things are set to automatic.set manually

Such issues are bound to appear when the incorrect date and time are set because it affects how the PC interacts with the server. So, set the right date and time, and you should be ready!

3. Repair the corrupt system files

  1. Press Windows + R to open Run, type cmd, and hit Ctrl + Shift + Enter.cmd
  2. Click Yes in the UAC prompt.
  3. Now, paste the following commands individually and hit Enter after each:DISM /Online /Cleanup-Image /CheckHealth DISM /Online /Cleanup-Image /ScanHealth DISM /Online /Cleanup-Image /RestoreHealth
  4. Once done, run this command for the SFC scan: sfc /scannowsfc scan to fix 0x80072F17
  5. Finally, restart the computer for the change to come into effect.

We have seen cases where corrupt system files led to errors in Microsoft Store, including 0x80072F17. Here, running the DISM tool and the SFC scan will replace all such files with the cached copy stored on the PC.

4. Reset the Microsoft Store app

  1. Press Windows + I to open Settings, navigate to the Apps tab, and click on Installed apps.installed apps
  2. Locate Microsoft Store, click on the ellipsis next to it, and select Advanced options.advanced options
  3. Scroll down and click on Reset.reset to fix 0x80072F17
  4. Again, click Reset in the confirmation prompt.

When we reset an app, all its cache and other app data are cleared. You will even be logged out of any ongoing sessions. But this has been found effective against Microsoft Store error code 0x80072F17, given that all these aspects are likely to trigger the error.

5. Perform an in-place upgrade

Tip icon Tip
The steps listed here are for Windows 11. In case you are running the previous iteration, it’s just as simple to perform an in-place upgrade on Windows 10.
  1. Go to Microsoft’s official website, select the desired OS edition and product language, then download the Windows 11 ISO.
  2. Open the ISO and run the setupe.exe file.setup.exe
  3. Click Yes in the prompt that appears.
  4. Click on Next to proceed.next
  5. Now, click Accept to agree to Microsoft’s license terms.
  6. Finally, verify that the setup reads Keep personal files and apps, and click on Install to start the process.in-place upgrade to fix 0x80072F17

If the previous solutions didn’t work, an in-place upgrade would help eliminate error code 0x80072F17. Besides, you won’t lose any apps or files stored on the PC. Remember, the process may take up to a few hours and is completely normal. Just sit back and relax!

Meanwhile, check the best Windows apps and download them after the error is fixed.

For any queries or to share more solutions with us, drop a comment below.

How to Sort Photos by Face on Windows 10 & 11

Sorting photos by the faces they contain has become a game-changer for managing large collections.

Whether you’re using Windows Photos or other software, face recognition technology helps automatically group and identify people in your pictures. In this article, we’ll show you how to sort your photos by face, making it easier to find memories with friends and family without endless scrolling.

How can I sort photos by face on Windows 11?

1. Activate facial grouping

1.1. Using the People tab

  1. Launch the Photos app.
  2. If you have not uploaded your pictures on the app, click the Import icon at the top. If your pictures are in the photos app already, proceed to Step 6.
  3. Select whether to upload the pictures from a folder on your PC or via a connected device.
    import windows sort photos by face
  4. Now, select the folders where you have your photos and click the Import items from this folder button.
    import items from windows sort photos by face
  5. Select the date at the top of the photos and click the Import items button.
    import items
  6. Next, click the People tab at the top.
  7. In the Welcome screen asking to turn the People setting on, click the Yes button. This will help keep your determined facial groupings.
    turn on people

1.2. Use Settings

  1. Launch the Photos app and click the People tab at the top.
  2. Now, click the More button (three horizontal dots) in the top left corner.
  3. Select the Settings option.
     Windows sort photos by face people settings
  4. Finally, scroll down to the Viewing and editing section and toggle the switch under the People option forward to edit it.
    turn on settings

With this, you have enabled facial recognition. Windows should now sort your photos by face under the People tab. You will see different picture groupings with a face representing each of the groups.

Note that facial grouping is only available on Windows 10 (2019.19061.17310.0, the July 2019 Photos app version, or later) and Windows 11 (some versions of Windows 11 if you have the Photos Legacy app).

If you do not meet the above requirements, you might not be able to use the feature.

2. Name and link your facial groupings to contacts

  1. After enabling the People feature, as shown above, click the Start tagging button under the People tab.
    start tagging
  2. Now, click the Yes button when asked to grant permission to access your Contact.
    yes access Windows sort photos by face
  3. If you can’t find the button, it means your photos are likely grouped and tagged. You can move to step 7 instead.
  4. Click the Open Privacy Settings option.
  5. Now, toggle the switch before the Contacts access forward to turn it on.
  6. Toggle the Let apps access your contacts switch forward.
  7. Next, close the Photos app and relaunch it, and your photos should now be grouped by faces.
  8. From here, click the Add name option under each group to name it.
    add name
  9. Select a Contact from the options available.
    select contact
  10. Finally, if there is no contact for the name yet, you can quickly create one for it.
    add person

By doing this, you can now sort your Photos by face on Windows 11 and link them to your contacts. Also, you now find your friends using the names assigned, contact info, or any other tags used for grouping. 

What’s the best free face recognition organizer?

While the built-in Windows 11 app is solid, if you want extra features such as automatic face grouping and more advanced organization tools, try Google Photos for easy face recognition across devices.

digiKam is also a reliable option that offers powerful open-source face tagging and management for Windows and other platforms.

Wrapping up

This is the end of this detailed guide on how to sort your photos by face on Windows 10 and 11. We have covered everything you need to know, with no stone left unturned.

Also, the steps are the same on Windows 10 and 11. So, just open your Photos app and follow the instructions above. Similarly, if you need a list of the best photo management apps to complement the photos app, check our guide on the topic.

For tips on other ways to organize your collection, see our guides on sorting photos by favorites and sorting photos by date.

Feel free to let us know in the comments below if you encounter any problems performing the steps above.

0x8007012b Error When Trying to Launch a Game [Fix]

Windows has, of late, emerged as the preferred destination for gamers. They get a bunch of customizations, better performance, and, most importantly, can run a wide variety of games. But some reported Error code: 0x8007012b when trying to run a game.

The message reads, Something went wrong launching your game followed by the code. It affects several popular titles that are included in the Xbox Game Pass. A few include Minecraft, Halo Infinite, Atomic Heart, Back 4 Blood, and Flight Stimulator, amongst others.

Keep reading to find out all about it!

What is error code 0x8007012b?

The error code indicates the game’s inability to access the critical files or services; subsequently, it fails to launch. The 0x8007012b error affects all iterations of the OS, including Windows 10 and Windows 11.

Here are a few reasons users encounter the 0x8007012b error:

  • Game files are corrupt: The most common reason behind the error is corrupt game files, and though there are ways to prevent this, it happens to the best of us.
  • Critical services are not running: Several games, especially those that are a part of the Xbox Game Pass, require certain services to be running. And in their absence, an error would appear.
  • Missing permissions: Oftentimes, it’s the missing administrative privileges that trigger the 0x8007012b error when launching Minecraft and other games.
  • Issues with the disk: A few users identified disk errors, including a bad sector, to be the underlying cause.

How do I fix error 0x8007012b when launching games?

Before we head to the slightly complex solutions, try these quick ones first:

  • Restart the computer.
  • Disconnect any non-critical peripherals, especially the controller, then launch the game. After it starts running, you can plug the controller back in.
  • Log out and then sign back into Game Pass.
  • Make sure the Game Pass subscription is active.
  • Check for pending Windows updates and install them.
  • Disable any third-party antivirus, firewall, or VPN installed on the PC. A user who had Sophos installed fixed 0x8007012b by whitelisting the game. If that sounds too much trouble, get rid of the program and try Windows-friendly antivirus software.

If none work, move to the fixes listed next.

1. Run the game as an administrator

  1. Right-click on the game’s launcher, and select Properties.
  2. Now, head to the Compatibility tab, tick the checkbox for Run this app as an administrator, and click OK to save the changes.run as administrator to fix 0x8007012b

When it’s the missing permissions behind Error code: 0x8007012b while launching a game, providing the administrative privilege should do the trick!

2. Use a dedicated tool

Sometimes, manually repairing your Windows errors is not a great idea, as you won’t get rid of all issues, or even worse, further errors may appear after this process. Thus, we suggest a comprehensive repair tool to handle the situation automatically.

3. Reset the Microsoft Store cache

  1. Press Windows + R to open Run, type wsreset.exe in the text field, and hit Enter.wsreset.exe
  2. A DOS window will appear for a few seconds and will vanish as soon as the reset is complete.

Often a corrupt Microsoft Store cache triggers issues with the Xbox games, including the 0x8007012b error, when trying to run games. If the same game works fine on Steam, resetting the cache would do!

4. Repair the disk issues

  1. Press Windows + R to open Run, type cmd, and hit Ctrl + Shift + Enter.
  2. Click Yes in the UAC prompt.
  3. Paste the following command and hit Enter to run Check Disk:chkdsk /rcheck disk to fix 0x8007012b
  4. If asked to schedule the scan the next time the PC reboots, press Y and hit Enter.
  5. Now, restart the computer and wait for the Check Disk utility to kick in.

The Check Disk is a built-in utility in Windows that runs an extensive scan, repairs the drive, and fixes any bad sectors or trivial issues triggering errors, such as Error code: 0x8007012b.

5. Reinstall the gaming services

  1. Press Windows + S to open Search, type Windows PowerShell in the text field, and click on Run as administrator.
  2. Click Yes in the prompt that appears.
  3. Now, paste the following command and hit Enter:Get-AppxPackage *gamingservices* -allusers | remove-appxpackage -alluserscommand to fix 0x8007012b
  4. Once done, restart the computer and check whether the error code has disappeared.

6. Run the critical services

  1. Press Windows + S to open Search, type Services in the text field, and click on the relevant search result.services
  2. Right-click on the IP Helper service, and select Properties.properties
  3. Select Automatic from the Startup type dropdown menu, click the Start button to run the service, and then OK.run service to fix 0x8007012b
  4. Similarly, run the following services:
    • Xbox Live Auth Manager
    • Gaming Services
    • Xbox Live Game Save
    • Xbox Live Networking Service

Amongst the many services needed for the optimal performance or even basic functioning of Xbox games, these five play a vital role. So, ensure the critical ones are configured to run automatically at startup.

7. Repair and reset the game

  1. Press Windows + I to open Settings, navigate to the Apps tab, and click on Installed apps.installed apps
  2. Locate the game throwing the error, click on the ellipsis next to it, and select Advanced options.advanced options
  3. Click on Repair and verify whether the problem is fixed.repair
  4. If not, click on Reset.reset to fix 0x8007012b
  5. Again, click Reset in the confirmation prompt.

If the previous solutions didn’t work, you can always make use of the built-in Repair and Reset feature. While the former takes care of minor issues, the latter will clear all data and log out any active accounts. But it’s found effective against Error code: 0x8007012b.

8. Reinstall the game

  1. Press Windows + R to open Run, type appwiz.cpl in the text field, and hit Enter.
  2. Locate the affected game from the list, select it, and click Uninstall.uninstall game
  3. Follow the on-screen instructions to complete the process.

As a last resort, reinstall the game. In case it doesn’t work out on the first attempt, we recommend using a reliable uninstaller tool to remove any leftover files and registry entries since these can continue causing problems even after an app is uninstalled.

That’s it! One of these solutions should have helped eliminate Error code: 0x8007012b for good when launching games. If the problem persists, check if other platforms offer the title and play the game there.

Before you leave, check some quick tips to improve the gaming performance in Windows.

For any queries or to share what worked for you, comment below.

How to Easily Use Your Phone As a Keyboard For Steam Deck

With the advent of the Steam Deck, a revolutionary handheld gaming device that brings the power of a PC to the palm of your hand, the gaming community is poised for a new level of immersive gameplay.

In this guide, we will walk you through the step-by-step process of easily configuring and utilizing your smartphone (Android or iOS) as a keyboard for the Steam Deck.

How do I use my phone as a keyboard for Steam Deck?

Before diving into the process of using your phone as a keyboard for the Steam Deck, there are a few prerequisites you need to fulfill to ensure a smooth and seamless experience:

  • A smartphone (Android or iOS) with Bluetooth and Wi-Fi connectivity.
  • Ensure that your Steam Deck and smartphone are connected to a stable internet connection.
  • Verify that your smartphone’s OS is compatible with the applications and methods used.

Once you have fulfilled these prerequisites, move forward and explore the various methods and steps involved in this process, allowing you to unlock a new level of convenience and efficiency while gaming.

1. Inbuilt app (KDE Connect)

Note icon NOTE
The app is available for Android and iOS. However, the Remote Input feature for iOS is limited to mouse movements. So, if you are an iOS user, move to the next option.
  1. On your phone, go to Google Play Store, search for KDE Connect, and click Install to get it.
  2. Now on Steam Deck, search for KDE Connect and click it to open it.KDE Connect  Use Your Phone As a Keyboard For Steam Deck
  3. Click Find Devices.Add available devices
  4. Next, on your phone, go to the KDE Connect app and click Allow.
  5. Under the Available devices, locate and tap steamdeck.
  6. Tap on Request Pairing.
  7. On Steam Deck, click Accept the pairing request, and it is done!KDE Connect  Pair Use Your Phone As a Keyboard For Steam Deck
  8. Now, on your phone, click the Keyboard icon and start typing. You can also use it as a mouse.

By downloading this app, you can use your phone as a keyboard and mouse, send files, and control your Steam Deck better than ever.

2. Use a third-party app

  1. Go to Google Play Store, search Bluetouch Keyboard and Mouse, and click Install or Get in the Apple Appstore.Bluetouch app
  2. Launch the app on your phone and click Allow on all the permissions.Click OK to allow Use Your Phone As a Keyboard For Steam Deck
  3. On Steam Deck, go to Settings.
  4. Navigate to Bluetooth, ensure it is on and available for pairing.Enabled bluetooth
  5. From the list of Available Devices, select your phone.
  6. Click Yes on any prompts on your phone as well to pair.
  7. The connection will be established, and now you can use your phone as a keyboard or mouse.Keyboard
  8. On Steam Deck, go to Power, then click Switch to Desktop.Switch to desktop
  9. Your Bluetooth connection might now be disconnected. You need to go to Settings, then Bluetooth, to enable it and pair the device like before.
  10. Once set up, click Configure and select On login, Enable Bluetooth. This will always keep the Bluetooth on whether in gaming or Desktop mode

You can also use this app in Dark Mode and add shortcuts to navigate your way around your Steam Deck easily.

So, this is how, by harnessing the Power of your smartphone, you can transform it into a versatile keyboard that seamlessly connects to your Steam Deck, simplifying text input, chat, and navigation.

Also, if you want, consider installing Windows on Steam Deck.

If you are looking for ways to run Android apps on your Steam Deck, we recommend you check out this detailed guide to find the institutions.

In case you don’t want to use your phone, you can always use Steam Deck’s keyboard in Desktop mode without any extra configuration.

If you’re on PC, you might be interested in using your iPhone as a webcam on Windows 11. This is pretty simple and takes a few minutes to set up. You can also use your phone as a keyboard for PC.

Please feel free to give us any information, tips, and your experience with the subject in the comments section below.

Install Failed Error Code: II-E1003 [Epic Games Fix]

From the list of error codes you may encounter in Epic Games, Install Failed error code II-E1003 is one of the most annoying because it occurs when downloading the game files.

We‘ve diligently researched and analyzed the root causes of the error and expert-recommended solutions to fix the issue.

What is Install Failed Error Code: II-E1003?

Error II-E10003 appears when Epic Games fails to download the game files from the server. A firewall or weak internet connection could prevent the launcher from downloading the files.

Usually, the issue could happen if something went wrong in Epic Games due to the corrupted cache files of the launcher.

What are the common causes of Error Code: II-E1003?

The Install Failed error Code: II-E10003 could occur due to several reasons; some of the common ones are mentioned here:

  • Antivirus or firewall interference – If your PC has strict firewall rules, it could interfere with the functioning of some apps, like Epic Games. Try turning off the firewall temporarily.
  • Corrupted game cache – If the Epic Games launcher files are corrupted, you might face this error. Try clearing the cache and downloading the files again.
  • Weak Internet connection – To download game files, you need a stable internet connection; if your internet is weak, you may see this error. Check your internet connection.
  • Sign-in issue – You need to sign in to use the Epic Games launcher app to the fullest. If you have not signed in on the app, you get this error trying to download game files.
  • Outdated Epic Games Launcher – The Epic Games launcher app is outdated or corrupted; you might get all kinds of errors, including this one. Update the app to fix it.

So, these are the causes of the error; move to the expert-recommended solutions to get rid of it.

How to Fix Install Failed Error Code: II-E1003 on Epic Games?

Before we go to the advanced fixes, here are a few preliminary checks you should do:

Once you are through these steps, check the methods to resolve the problem.

1. Run the launcher as an administrator

  1. Right-click the Epic Games launcher and select Properties.Properties Epic Games  Install Failed Error Code: II-E1003
  2. Go to the Compatibility tab, locate Settings.
  3. Now place a checkmark next to Run this program as an administrator.Run the app as an administrator
  4. Click Apply, then OK to confirm the changes.

Running a program as an administrator can help you prevent issues like error codes 2502 & 2503 on Windows 11.

2. Clear the game cache

  1. Press Windows + R to open the Run dialog box.Local AppData
  2. Type %localappdata% and click OK to open the Local AppData folder.
  3. Go to the EpicGamesLauncher folder, then go to the Saved folder.Epic Games launcher
  4. Locate webcache, webcache_4430 & webcache_4147, select them, and click the Delete button to remove these files.
  5. Now locate the Epic Games folder, and select the Delete button to remove it.Install Failed Error Code: II-E1003
  6. Relaunch the Epic Games Launcher and check if the issue persists.

3. Verify the game files

  1. Press the Windows key, type epic games, and click Open.Epic games launcher Install Failed Error Code: II-E1003
  2. Now click Library from the left pane.
  3. Go to the game causing the error, click three dots, and select Manage.Manage game
  4. Locate Verify files and click Verify to verify game files.EpicGamesLauncher_Verify files
  5. Wait for the process to complete.

Once done, try installing the game files to check if the error persists.

4. Reset the network connection

  1. Press Windows + I to open the Settings app.
  2. Go to Network & Internet, and click Advanced network settings.Network & Internet Install Failed Error Code: II-E1003
  3. Select Network reset.Network Reset 1
  4. Locate Network reset and click Reset now.Network Reset now

Now launch the game launcher, try to download game files, and check if the issue is resolved.

What should I do if I still can’t fix Error Code: II-E1003?

If nothing has worked for you so far and Epic Games Launcher still throws the error, you need to reinstall the Epic Games Launcher. To do so, follow these steps:

  1. Press the Windows key, type control panel, and click Open.Control Panel start menu
  2. Select View by as Category, and choose Uninstall a program.CP Uninstall Install Failed Error Code: II-E1003
  3. On the Programs and Features window, locate Epic Games Launcher and select Uninstall. Follow the onscreen prompts to complete the action.Epic Game launcher Uninstall
  4. Go to Epic Games Launcher’s website and click Download Epic Games Launcher.chrome_Download
  5. Double-click the downloaded file and click Install.Install
  6. Follow the instructions to complete the installation, and the issue will be resolved.

So, these are the methods to fix the Install Failed Error code: II-E1003 and get on with your gaming adventure on Epic Games.

If you are facing other issues like Epic Games stuck on loading your order, then we recommend you check out this quick guide for solutions. Our latest article covers error code 2738 in Epic Installer, a common installation error, so don’t miss it.

Please feel free to give us any information, tips, and your experience with the subject in the comments section below.

How to Fix GlobalProtect Not Working on Hotspot: 5 Ways

GlobalProtect users may encounter challenges on a hotspot connection. They are limiting their ability to connect to their organization’s network or access critical resources.

The most common reasons GlobalProtect won’t work on a hotspot are network restrictions, incorrect VPN settings (like invalid server or certificate), firewall blocks, data limits causing slow connections, and device restrictions. For more on slow VPN issues, see slow corporate VPN performance.

This guide addresses the issue of GlobalProtect not working on a hotspot connection, exploring the possible causes behind this problem and providing effective solutions to help resolve it.

How to fix GlobalProtect not working on the hotspot?

1. Refresh the connection

  1. Press the Windows key, type globalprotect, and click Open.
    Global Protect isn't working on hotspot
  2. Go to the three horizontal lines on the top right corner to open Settings and click on Refresh Connection.
    Refresh connection
  3. Click OK in the next window that pops up to confirm.
    Click OK

Now try to connect to the VPN to check if it works.

2. Disable Private DNS

  1. Go to the Settings app.
    Settings Globalprotect  isn't working on Hotspot
  2. Click Network or Connection & sharing, depending on your device.
  3. Tap More Connections settings.
    Connection and Sharing
  4. Locate and click Private DNS.
    Private DNS
  5. Click on Off to deactivate it.
    Private DNS off

This issue usually occurs when you try to connect using a mobile hotspot. Therefore, disabling Private DNS on your smartphone could work.

Once done, connect your computer via hotspot and try to use GlobalProtect.

3. Re-enable SIM on hotspot device

  1. Go to Settings on your hotspot device.
    Settings Globalprotect  isn't working on Hotspot
  2. Locate the Mobile network.
    Mobile network Globalprotect isn't working on hotspot
  3. Select the SIM which you are using for the hotspot.
    Click SIM
  4. Tap Enable to turn off, wait for some time, and tap it again to enable it.
    Disable SIM

Now close the Settings app and check if the VPN works now.

4. Change the MTU value

Note icon NOTE
Make sure you have a user account with admin privileges to perform the steps mentioned.
  1. Connect to the VPN, press the Windows key, type cmd, and click Run as administrator.
    CMD elevated GlobalProtect isn't working on hotspot

  2. Type the following to verify your virtual ethernet adapter interface and hit Enter: netsh interface ipv4 show subinterfaces
    cmd
  3. Copy & paste the following command to change Windows MTU size after replacing Ethernet 2 with whatever name your computer uses for the GlobalProtect virtual interface in ipconfig, and hit Enter: netsh int ipv4 set subinterface “Ethernet 2” mtu=1300 store=persistent
  4. Now restart the VPN connection, then check out some sites while connected to VPN.

5. Disable IPv6

  1. Press the Windows key, type powershell, and click Run as administrator.
    Powershell 2 Global Protect isn't working on hotspot
  2. Type the following to see the current state of IPv6 of your adapters, and hit Enter: get-netadapterbinding -componentid ms_tcpip6
  3. To turn off IPv6 on your hotspot device, copy & paste the following command by replacing Wi-Fi with your hotspot name and press Enter: disable-netadapterbinding -Name “Wi-Fi” -ComponentID ms_tcpip6
    powershell_
  4. Once you are done with the VPN, you can enable IPv6 if you want by typing the following command and replacing Wi-Fi with the hotspot name, then hit Enter: enable-netadapterbinding -Name “Wi-Fi” -ComponentID ms_tcpip6

Disabling IPv6 can help if your device hotspot connection doesn’t support IPv6. You might not be able to connect to the VPN.

So, these are the methods you can follow to fix GlobalProtect not working on hotspot. If nothing worked for you, we suggest you contact GlobalProtect customer support.

If you face other issues like GlobalProtect not connecting, we recommend you check out this guide to find the solutions.

If you’re having trouble with GlobalProtect not prompting for credentials or facing issues with it not updating properly, these problems are common but usually fixable. Check out our guides on GlobalProtect not prompting for credentials and GlobalProtect not updating for step-by-step solutions.

Please feel free to give us any information, tips, and your experience with the subject in the comments section below.

How to Convert M4A to MP3 [3 Different Ways]

If you have both Apple and Windows devices and constantly juggle between different audio formats, such as M4A and MP3 (Audio Layer III), while listening to music, this guide can help!

We will explore three simple methods with step-by-step instructions to convert your audio tracks into the desired format.

What is the M4A file format?

M4A (MPEG-4 format) is an audio file format by Apple and popularly used on iPhone, iPad, and Mac.

These audio files are similar to MP3 files but come with a digital audio stream encoded with advanced audio coding (AAC) for compression, meaning better sound quality at the high bitrate and smaller file sizes.

Also, they are compatible with several devices & media players, making them an excellent choice for streaming, music distribution, and storage.

Can I use any Windows tools to Convert M4A to MP3?

You can convert M4A to MP3 using Windows Media Player on Windows 7 and 8. For Windows 10 and 11, you must enable Windows Media Player Legacy optional feature using the Settings app.

Be informed this Windows inbuilt player doesn’t have direct audio conversion capabilities, and you need to burn M4A to CD, then rip the CD to MP3 format, which can be overwhelming.

If you don’t want to use this indirect method, you can use a VLC media player, iTunes, or other popular online platforms like FreeConvert or VEED.IO to get the job done.

How can I convert M4A to MP3?

1. Use Windows Media Player Legacy

Note icon NOTE
Windows Media Player is no longer a part of a newer version of Windows. However, you can add it as an optional feature. Also, before moving to the steps, keep a CD handy. If you don’t have one, skip this method.

1.1 Enable it as an optional feature

  1. Press Windows + I to open the Settings app.
  2. Go to Apps, then click the Optional features.Apps - Optional features - convert M4A to MP3
  3. Locate Add an optional feature and click the View features button.View features
  4. On Add an optional feature window, search for Windows Media Player.
  5. Select Windows Media Player Legacy and click Next.Select Windows Media Player Legacy
  6. Click Install.Install Windows Media Player

1.2 Burn M4A to CD

  1. Press the Windows key, type windows media player, and click Open.Launch Windows Media Palyer Convert M4A to MP3 Click Start burn
  2. Insert the blank CD, and click the Burn tab.Select Burn
  3. Go to the drop-down menu under Burn, and choose Audio CD.Burn Audio CD
  4. Add the M4A file to the Burn list by dragging it to the right pane of the media tool.drag and down the song to burn list
  5. Click Start burn to initiate the process and wait for it to complete.

1.3 Rip music from CD

  1. First, insert the audio CD you burned, then click the Rip CD button. Rip CD button
  2. Go to Rip settings, then More options.Rip settings, then More options
  3. On the Rip Music tab, locate Format, and select MP3 from the drop-down menu.
  4. You can also click Change to select a destination for the audio. Once done, click OK.Rip Music tab, locate Format, and select MP3
  5. Now click the Rip CD button and wait for the process to complete.

If you encountered Windows Media Player can’t play this file error, we advise you to check out this guide for solutions.

2. Use iTunes

  1. Press the Windows key, type itunes, and click Open.Windows key, type itunes, and click Open
  2. Locate and click Edit in the menu bar, and select Preferences.Edit in the menu bar, then click Preferences
  3. On the General tab, click Import Settings.General tab, click Import Settings.
  4. On the Import Settings window, for the Import Using option, select MP3 Encoder from the drop-down, then click OK.Import Settings
  5. Again click OK to close the Preferences tab.
  6. Now select the M4A audio file, go to File, then choose Convert, then select Create MP3 Version.Create MP3 Version

Once done, new song files with the desired audio format will appear in your iTunes library.

3. Use the VLC media player

  1. Press the Windows key, type vlc, and click Open.VLC media player open
  2. From the menu bar, choose Media, then select Convert/Save.Convert/Save option
  3. Go to File, click Add and choose the audio file you want to convert.
  4. Click the Convert/Save button to open Convert settings.File -click Add, then convert
  5. Under Settings, select Convert, then for Profile, choose Video -H.264 + MP3 (MP4) from the drop-down.Convert, then for Profile, choose Video -H.264 + MP3 (MP4)
  6. Now under Destination, click Browse to select the location to save the converted file, then select Start to initiate the process.

Once converted, you will be notified; you can play the file to check the quality of the file.

You can also use online M4A converters such as Veed.io or FreeConvert to get this done; all you need to do is drag the audio file, select the format, and click Convert.

Does the audio lose quality when converting?

Losing quality while converting an audio file depends upon the method you choose. There are three different ways, including Encoding, decoding, and transcoding.

For this particular scenario, you can either opt for Transcoding or Encoding. Transcoding is generally not preferred because the conversion includes double compression and data loss.

Encoding is a conversion process to convert lossless format to lossy format, such as M4A to MP3. This one is useful if you want to reduce the original file size and increase the compatibility of audio files, compromising the quality and data in the process.

Is M4A better than MP3?

M4A is a lossless format and is better than MP3 as it has better audio quality due to its high bitrate. This also means that they have a relatively large file size.

However, it is difficult to stream as it is restricted to some devices and platforms wherein MP3 (Audio Layer III) can be easily played on almost all popular devices and media players.

So, these are the methods you can use to convert M4A files to MP3 on your Windows computer without breaking a sweat.

If you are looking for options to convert MP4 to MP3, we recommend you check out this guide to find free and paid solutions.

If you want to learn more about MP3 files, don’t miss our guide on how to trim MP3 files on Windows 10.

Please feel free to give us any information, tips, and your experience with the subject in the comments section below.

ERR_UNKNOWN_URL_SCHEME: 7 Ways to Fix it

Some Android app developers have reported that when they try to render their app in the browser, they come across the net::err_unknown_url_scheme error.

This web browsing error is a common problem, mainly a Chromium bug that first popped up in Google Chrome 40 and has remained since then.

In this guide, we will give you some effective solutions that will help you resolve the net::err_unknown_url_scheme error. Let us get right into it.

What is the ERR_UNKNOWN_URL_SCHEME error?

The net::err_unknown_url_scheme error is usually triggered because of some underlying web browsing error. It can also occur if the user tries to open multiple pages of the interface.

This error shows up if the requested website’s URL scheme is not recognized by the mobile device. Notably, because of this web browsing error, the browser rendering of the app fails.

What are the causes of ERR_UNKNOWN_URL_SCHEME?

We did some extensive research and after going through multiple forums, we have created a list of the most common causes that could trigger the ERR_UNKNOWN_URL_SCHEME error.

  • The URL scheme is unrecognizable – In case the app’s requested URL scheme contains mailto://, WhatsApp://, file://, telnet://, intent://, market://, app://, mail://, buy://, etc. you will get this error.
  • Opening a redirected URL – This error of net::err_unknown_url_scheme also pops up when the user tries to open a redirected URL.
  • Chrome extensions are conflicting – Chances are some of the recently installed Chrome extensions are conflicting with the program.
  • Hardware acceleration is unsupported – There is a better chance that if you have Hardware acceleration enabled, it is unsupported with the app’s WebView.
  • Corrupt browser cache – If the browser cache is corrupt then this could cause multiple issues such as the ERR_UNKNOWN_URL_SCHEME error.

Let us now take a look at the different solutions that will help you resolve the net::err_unknown_url_scheme error.

How can I fix ERR_UNKNOWN_URL_SCHEME?

1. Disable the Chrome extensions

  1. Launch Google Chrome.
  2. Click on the 3-dot icon on the top-right.
  3. Select Extensions and choose Manage extensions.
  4. Disable all the extensions one-by-one.
  5. Relaunch Chrome and check if this fixes the ERR_UNKNOWN_URL_SCHEME error or not.

You should disable the Chrome extensions and check if this fixes the problem of ERR_UNKNOWN_URL_SCHEME or not.

In case you are interested, we have a guide that lists down some of the best security and privacy extensions for Google Chrome.

2. Clear Chrome cookies and cache

  1. Open Google Chrome.
  2. Click on the 3-dot menu button and select Settings.
  3. From the left pane, select Privacy, and Security.
  4. Choose Clear browsing data on the right side.
  5. Check the boxes next to Cached images and files, and Cookies and other site data.
    ERR_HTTP2_INADEQUATE_TRANSPORT_SECURITY
  6. Hit the Clear data button.

Cache and cookies save the personalized settings of websites on your PC. If they go corrupt, they can hamper the smooth functioning of the browser.

Simply try clearing the Chrome cookies and cache files and check if this resolves the web browsing error.

3. Disable Firewall

  1. Open the Start menu.
  2. Search for Windows Defender Firewall and open it.
  3. From the left side, select the option Turn Windows Defender Firewall on or off.
  4. For both Public and Private network setting select the Turn off Windows Defender Firewall option.
  5. Click on OK.

Windows Firewall can often conflict and block certain apps from running as it may find it problematic for your PC. In such a case, when you are testing an app, it is advisable to disable the firewall and check if this resolves the issue or not.

4. Turn off Hardware Acceleration

  1. Open Google Chrome.
  2. Click on the 3-dot menu button and select Settings.
  3. Click on System.
  4. Toggle off the Use hardware acceleration when available option.

5. Switch to a different browser

You should switch to a different browser if none of the above solutions are working in resolving the ERR_UNKNOWN_URL_SCHEME error.

Chances are that the Chrome version that you are using is problematic and you are running the latest version. You will have to wait for a new version to fix the bug, but till then you can opt for a different browser.

Do not worry, as we have a guide that lists down some of the best browsers that you should check out. 

6. Disable Non-standard URL schemes

Speaking of a technical solution, we would suggest that you disable any or every non-standard URL scheme apart from the HTTP:// and HTTPS://.

In doing this, you will bypass any of the errors associated with net ERR_UNKNOWN_URL_SCHEME. However, do note that disabling all other custom schemes will restrict you from using any special scheme mentioned earlier in this guide.

You will be alerted by the Error: Unknown Link type error message if the browser cannot proceed with the custom scheme.

7. Add a new intent

You can also consider adding a new intent to load the contents in an external app. For example, you might want to use the maps:// scheme to open the map content in the default maps application.

Alternatively, you can use the mailto:// to open the email link in the mail app. To add the new intent, you need to use the IF statement. This will tell the device to open the special schemes in the dedicated or relevant app.

Is ERR_UNKNOWN_URL_SCHEME linked to any security threats?

Generally, the ERR_UNKNOWN_URL_SCHEME error isn’t linked to any security threats. However, when troubleshooting this error, you may have to disable the firewall.

If you leave the firewall disabled for an extended time, then your PC is exposed to the risk of getting infected by viruses or malware.

That is it from us in this guide. Multiple users have also reported facing the Err SSL Version or Cipher Mismatch issues, which can be resolved by applying the solutions mentioned in our guide.

If you’re encountering issues like ERR_ADDRESS_UNREACHABLE, check out our guide for solutions.

We have also listed down solutions in respective guides to resolve the err_connection_reset in Windows 11 and err connection aborted errors.

Fix: Zsh: Permissions Denied in Mac Terminal in 4 Quick Steps

The Zsh: Permissions Denied error is one of the common issues users encounter on Mac. The error occurs when you are trying to access a locked file or run a command without sufficient permission.

Fortunately, you can eliminate the Zsh: Permissions Denied error effortlessly with the right information. In this guide, we will provide you with everything you need to fix this error once and for all.

What is the ZSH: Permissions Denied error on Mac?

Terminal is the powerful command line interface that offers users a UNIX environment to run commands and create scripts. You can use this interface to access just about any file part on Mac with the right command.

However, if you start getting the Zsh: Permissions Denied error, it means the original command you are trying to use on Terminal to open a file is wrong, or the file or folder is locked.

In some cases, this can be a good thing, as file permission helps to protect your documents from unauthorized access. Nonetheless, we will show you how to get past the error message on your device in the next section of this guide.

How do I fix ZSH: Permissions Denied in Terminal Mac?

1. Checking file permissions

  1. Launch Terminal through Utilities or the Mac Dock.
    terminal zsh permission denied
  2. Type the command below without pressing the Return key: ls -lis 1
  3. Add a space after the command.
  4. Now, go to Finder and navigate to the file whose permission you want to check.
  5. Next, drag and drop the file in the Terminal window and press the Enter key.
  6. Wait for the command to finish running and check the result.
  7. Finally, if there is RWXR beside your username, it means you have the required permission.

The first thing to do if you are dealing with the ZSH: Permissions Denied error is to check if you have the appropriate permissions to make changes to the file you are working on.

If you have full control, you will find RWXR next to your username.

2. Allow Terminal full disk access

  1. Click the Apple logo on your home screen and select System Preferences.
  2. Now, select the Security & Privacy option.
    security
  3. Click the Privacy tab at the top.
  4. Next, click the Lock icon in the bottom left corner.
    lock zsh permission denied
  5. Enter your admin password and click the Unlock button.
    unlock
  6. Finally, mark the box next to the Terminal option to grant full disk permission.
    full terminal permission denied

If you are getting the Zsh: Permissions Denied error while trying to access a file from Terminal, it might be because Terminal does not have full disk permissions.

The solution to this is to grant it full access to your disk after typing your user password.

3. Change the directory ownership

  1. Launch Terminal and type the command (change <username> to your account username and <directorypath> to the path of the directory ) below: -R <username>:<username> <directorypath>
  2. Press the Return key.
  3. Finally, wait for the command to finish running and try to make the change again.

Sometimes, this permission error can be due to a lack of directory ownership for a user account. Following the steps above should help you change ownership easily.

4. Using SUDO commands

  1. Launch Terminal, type the following commands, and hit Return after each: sudo chmod 755 ~/Themes/ObsidianCode.xccolorthemesudo sudo chmod 755 /dvtcolorconvert.rb 
  2. If you are using the command for the first time, you will need to provide your user account password.
  3. Finally, wait for the command to finish running.

The SUDO command, which is also known as Super User do, grants your super privilege to access your account and other user accounts. So, if the Zsh Permissions Denied error is due to a privilege issue, this command help you fix it.

How do I open permission denied on Mac?

To open a file or folder giving the permission denied error on Mac, you need to change the ownership directory, as shown above.

Another option is to change file permissions using Finder, as shown below:

  1. Right-click the folder or file giving the error and choose Get Info.
    get info
  2. Click the arrow next to the Sharing & permission option to open its drop-down menu. 
  3. Now, select the user you want to grant permission in the Name column. 
  4. Finally, select Read & Write in the menu that pops up.
    read and

With this, the permission denied error should be fixed for good.

Why is my Zshrc file locked?

Your Zshrc file might be locked because you used chmod to lock it. This helps to provide protection against unauthorized access, which is why you might get the permission denied error while trying to open the file.

The Zsh: Permissions Denied error on Mac is basically down to the lack of permission to open the folder or file giving the error.

This can be easily fixed by giving Terminal full access to your disk and changing the directory’s ownership, among other solutions in this guide.

Provided you follow the steps above carefully, the error message should be gone for good. Lastly, if you want to know how to unzip files or folders using Terminal, check our detailed guide to do it easily.

Resolve Offspon.exe Errors and Virus Alerts Efficiently

OffSpon.exe is one of the many processes that run in the background to ensure the smooth operation of the parent software. This executable file is one of the lesser-known processes, which makes you wonder what it does.

In this guide, we discuss everything you need to know about this process, from its legitimacy to the ways you can fix its related errors.

What is OffSpon.exe, and what is its function?

The OffSpon.exe process is an integral part of the Microsoft Office 2010 Starter Edition. This executable file is the one that displays the rotating advertisements you see while using the starter edition Microsoft Word and Excel.

 Being a legitimate Office file, you can rest assured that OffSpon.exe is completely safe. 

What do I need to know about OffSpon.exe?

The EXE extension at the end of OffSpon.EXE means that it is an executable file that runs on the Windows operating system.

This EXE process, like other normal files, is located within your program files. Below is the path you need to follow to get to it: C:\140066.enu\Office14\OffSpon.exe

Depending on the location, you saved the Microsoft Office 2010 starter edition, you might find it in the location below: C:\Program Files\140066.enu\Office14\OffSpon.exe

Also, its average file size is about 1.6 MB. Lastly, with this process constantly trying and asking you to connect to the internet, it can cause a series of system errors like high CPU usage and system crashes.

Is OffSpon.exe Safe or a Virus?

The OffSpon.exe process is completely safe and does not pose any threat to your PC. As mentioned earlier, it is a legitimate Microsoft Office-related process that runs in the background.

However, your antivirus software might flag this process as malware because it is solely focused on advertisement. While it is indeed adware, it is still safe, and you can ignore any alert from your security software regarding the executable file.

Lastly, it must be mentioned that viruses can take over or disguise as the OffSpon.exe file just like they do with other processes.

What are the common OffSpon.exe errors?

After the safety of the OffSpon.exe process has been established, it is important to note that you can experience some errors related to it. Below are a couple of common error messages users reported:

  • OffSpon.exe stopped working
  • OffSpon.exe preventing shutdown

Aside from the two error messages above, this process might also cause high CPU/GPU usage on your PC due to its constant display of rotating advertisements and request to connect to the internet.

To check and confirm this, press Ctrl + Shift + Esc keys to open the Task Manager. You will get the info you need in the Processes tab.

How can I fix OffSpon.exe issues?

1. End the process

  1. Press the Windows key + X and select Task Manager.
    task manager offspon.exe
  2. Locate the OffSpon.exe process and right-click it.
  3. Now, select the End task option.
    end task

If the OffSpon.exe process is causing high CPU or GPU usage on your system, you can fix it quickly by performing ending the process or its software program in Task Manager.

2. Enter Safe Mode

  1. Press the Windows key + I and select Recovery in the right pane.
    recovery
  2. Click the Restart now button before Advanced startup.
    restart now offspon.exe
  3. After your PC restarts, select Troubleshoot.
  4. Next, select Advanced options.
    advanced options offspon.exe
  5. Now, choose Startup Settings.
    startup settings
  6. Click the Restart button.
    restart button
  7. Finally, press the corresponding to Enable Safe Mode or Safe Mode with Networking after your PC restarts.
    enable safe offspon.exe

The Safe Mode starts your PC with minimal drivers needed to keep it running. If the OffSpon.exe issue does not occur here, you can proceed to the next solution to perform a clean boot.

3. Perform a clean boot

  1. Press the Windows key + R, type msconfig, and click OK.
    msconfig
  2. Choose Services at the top, check the Hide all Microsoft services box, and click the Disable all button.
    hide all
  3. Now, click the Startup tab and select Open Task Manager.
    startup
  4. Right-click each of the apps there and select Disable.
    disable
  5. Next, go back to the System Configuration window and click Apply, followed by OK.
    apply ok offspon.exe
  6. Finally, restart your PC.

OffSpon.exe might stop working because of conflicting programs running in the background. Performing a clean boot disables these apps and allows your PC to run with only the basic processes and services.

4. Uninstall OffSpon.exe

  1. Press the Windows key + R, type appwiz.cpl, and click the OK button.
    appwiz
  2. Right-click the Microsoft Office Starter 2010 and select Uninstall.
    uninstall offpon.exe
  3. Now, click the Yes button when asked for confirmation and wait for the process to complete.

If you still can’t fix the issues with OffSpon.exe, you need to uninstall it. You can only achieve this remove its parent software.

With this, we can now conclude this detailed guide on the OffSpon.exe file. While your security software might flag the process as being dangerous, just about every user review has shown it to be safe.

This is why it is important to understand what the process does before quarantining or removing it.

Aside from this OffSpon.exe, it is equally important to know about other processes running on your PC. On that note, if you want to know about the winword.exe process, check our detailed guide.

Feel free to comment in the section below if you have any questions or suggestions.

Fix: Fatal Error Coordinator Returned-1 [Complete Guide]

The Fatal Error Coordinator Returned-1 error occurs when there is a problem with an app on your PC. Most users, especially, started experiencing this issue after installing Zoom.

What makes the error more worrying is that it can lead to more serious issues if left unattended. Fortunately, there are tested and proven ways to fix it, and we will show you how to go about it in this guide.

Why am I getting the Fatal Error Coordinator Returned-1?

There are various factors that can cause this fatal error on Windows. Listed below are some of them:

  • Issues with the Zoom app – Some users have reported getting the Fatal Error Coordinator Returned-1 message after installing the Zoom app. This might be due to errors during installation or other program bugs.
  • General issue – Sometimes, this problem might be a generic issue due to a troublesome bug on your system. You need to perform a system restore to reverse the changes made to your PC that are causing the problem.

Now that we know where the Fatal Error Coordinator Returned-1 comes from, let’s fix it using the solutions below.

How can I fix the Fatal Error Coordinator Returned -1 error?

1. Run the Windows Store Apps troubleshooter

  1. Press the Windows key + I and select the Troubleshoot option in the right pane.
    troubleshoot
  2. Click the Other troubleshooters option.
    other Fatal Error Coordinator Returned-1
  3. Finally, click the Run button before Windows Store Apps, wait for the scan to complete, and apply the recommended fixes.
    run store

In some cases, the Fatal Error Coordinator Returned-1 error message might not be due to problems with the Zoom application. Instead, it might just be generic corruption errors with your UWP apps.

In this case, you need to run the Windows Store Apps troubleshooter to fix the problems.

2. Disable launch.bat in Task Manager

  1. Press the Windows key + X and choose the Task Manager option.
    task manager Fatal Error Coordinator Returned-1
  2. Click the Startup tab at the top.
  3. Now, right-click the Launch.bat file in the app.
  4. Finally, select the Disable option from the context menu.
    disable

If you are getting a dialog box with the Fatal Error Coordinator Returned-1 error on reboot, it might be because of the launch.bat file, which is the startup file of the Zoom app.

The solution to this is to disable it from the list of startup applications on Task Manager.

3. Reinstall Zoom

  1. Press the Windows key + R, type control panel, and click the OK button.
    control
  2. Click Uninstall a program under the Programs option.
    uninstall a Fatal Error Coordinator Returned-1
  3. Now, right-click the Zoom application.
  4. Select the Uninstall option and wait for the process to complete.
    uninstall zoom
  5. Finally, visit the official website to download and install the Zoom app.

If disabling the unnecessary background program for Zoom in the startup application does not rectify the Fatal Error Coordinator Returned-1 error, you might need to uninstall the Zoom app.

This is because your version of the app might be troubled by some program bugs. You can reinstall an updated version of Zoom from the official website after.

4. Perform System Restore

  1. Press the Windows key + R, type rstrui.exe, and click the OK button.
    rstrui
  2. Click the Next button on the page that pops up.
    next Fatal Error Coordinator Returned-1
  3. Now, select your preferred restore point and click the Next button.
    restore point
  4. Finally, click the Finish button to confirm your selection and follow the onscreen instructions to complete the process.
    finish

In a case where you can’t fix this Fatal Error – Coordinator Returned -1 Zoom error after trying the solutions above, you might need to perform a system restore.

This is especially important if you fear that it can lead to issues like the Blue Screen error.

Performing a system restore to a later point when everything was working well will help you reverse the changes made to your PC that might be causing the problem.

 We have reached the end of this guide on how to fix the Fatal Error Coordinator Returned-1 message. According to reports by users, this issue usually starts after installing Zoom on their PC.

This might be because they have not installed the compatible version of the app on their PC. Once the error message shows up, the program you are currently running stops immediately. 

Fortunately, you should be able to fix it with the solutions in this detailed guide. Finally, if you want to know how to fix a similar issue in Fatal error c0000022, check our detailed guide.

Feel free to let us know the solution that helped you fix this issue in the comments below.

What is vds.exe & How to Start or Stop it?

You may have encountered a vds.exe process running in the Task Manager, and unlike other processes, it may not disclose what it is or what program it belongs to. It may have prompted you to go online and learn more about it and whether you should keep it running. Hence, here you are.

This article will discuss the meaning of vds.exe and whether you should stop or start it if it’s not running.

Moreover, antivirus software is sometimes known to block harmless .exe files like vds.exe. So, find out what to do when an antivirus is blocking .exe files.

What is vds.exe?

The vds.exe, for Virtual Disk Service, is an executable file part of the Virtual Disk Service (VDS) process in the Microsoft Windows Operating System.

The Virtual Disk Service (VDS) is a Windows service that provides a framework for managing virtual disks, such as software-based RAID arrays, dynamic disks, and other storage solutions.

It allows you to create and manage volumes, extend or shrink partitions, initialize disks, and perform other disk-related operations.

Should I stop or disable vds.exe?

No, you don’t need to stop the vds.exe process, as it is necessary to function certain disk-related operations in Windows properly. It provides a framework for organizing and managing storage spaces on your computer.

Stopping or disabling the process could prevent you from performing certain disk-related tasks, such as creating, resizing, or formatting disks.

If you’re not actively performing disk-related tasks or using features that depend on the Virtual Disk Service (VDS), the VDS process might not be running actively and could remain idle.

If you are worried about the file’s legitimacy, you can verify its location. The vds.exe file is typically found in the following directory on a Windows system: C:\Windows\System32

File location

How do I start vds.exe?

1. Enable Virtual Disk Services Manually

  1. Press Windows + R, type services.msc into the Run dialog box and press Enter.services.msc
  2. Scroll down and then double-click on Virtual Disk.Select Virtual Disk
  3. Select Automatic from the Startup type menu. Automatic
  4. Click on Start to manually start the service. Start
  5. Go to the Log On tab, and then check the Allow service to interact with desktop checkbox under Log on as section. check 'Allow service to interact with desktop'
  6. Click Apply to save the settings, and then click OK.click Apply and OK
  7. Restart the computer and check if it works.

You can easily start the vds.exe process by configuring the properties from the underlying service through the Services console. Besides, if you want to stop the process, disabling the service will do the trick.

2. Start the Virtual Disk service from Command Prompt

  1. Press the Windows key, type cmd in Windows Search, and select Run as administrator.cmd
  2. Type the following command and press Enter: net start vds net start vds
  3. To stop the service, run the following command: net stop vds

Another way to start vds.exe is via the Command Prompt, a built-in utility that allows users to make complex changes within seconds.

Here are some top disk management tools for Windows that can help you in tasks such as creating, resizing, renaming, and deleting partitions, as well as optimizing your PC.

Please feel free to share any information, tips, or personal experiences about the file in the comments section below.

Parsec for Windows: How to Download & Install

Parsec is a powerful software that enables you to play games and access your PC remotely from various devices, such as laptops, desktops, smartphones, and tablets. It is a low-latency, high-performance gaming software that provides access to remote systems and applications, especially games.

With Parsec, you can stream games from your gaming PC to another device, allowing you to play games even on less powerful hardware as long as you have a stable Internet connection.

Is Parsec a remote desktop?

While Parsec is primarily designed for gaming, it can also be used for other applications that require remote access to a computer or virtual machine.

Parsec is one of the reliable remote desktop applications available for Windows. It enables you to connect to your computer remotely, access files, run applications, and perform tasks as if you were physically present on your PC.

Can I install Parsec on my Windows PC?

Parsec is a versatile software that supports various devices and platforms, including Windows, Linux, macOS, Android, and Chromium-based browsers like Google Chrome.

However, to host or connect to another computer using Parsec on a Windows system, it must meet the minimum requirements:

  • Operating System: It requires a 64-bit version of Windows 10 or later.
  • Processor: The Parsec software requires at least Intel Core i5 3rd Generation processor or processors that AVX, SSE 4.1, and AES-NI instructions.
  • Memory: It requires a minimum of 4 GB of RAM, with 8 GB of RAM recommended for optimal performance.
  • Graphics: The minimum GPU requirements are Intel HD 4000, NVIDIA 600 series, or AMD Radeon X1000 that supports DirectX 10 or higher, OpenGL 3.2 or higher, or Vulkan.
  • Network: Stable and reliable Internet connection with at least 10 Mbps of download speed and 1 Mbps of Upload speed for 720p 60 FPS streaming. Higher resolutions and frame rates may require faster Internet connections.
  • Storage: The Parsec software will need at least 1 GB of free disk space.

How do I download Parsec on Windows?

1. Download and install Parsec

  1. Visit the Parsec download page and click on Download for Windows 64 Bit.Download for Windows
  2. After the download is complete, double-click on the parsec-windows.exe file to run the installer.
  3. Virtual Display Driver is not required, but you can enable it if needed and click Next >.Parsec install
  4. Next, choose between two options: Per User and Shared, and click Next >. If you want to use different Parsec accounts for each user on the computer, choose Per User or select Shared to use the same Parsec accounts for all users on the computer.Installation type
  5. The installation will take a few seconds to complete.
  6. You now have downloaded and installed Parsec on your Windows system.

2. Set up a Parsec account

  1. After the installation is complete, launch the Parsec app from the desktop shortcut or through the Start menu.
  2. If you don’t have a Parsec account, click on the Sign Up button to create a new one.Sign Up
  3. It will open the Parsec sign-up page on your default browser. Here, enter your email and username and click Next.Next
  4. Enter and confirm your password. Check the I agree box and click Create Account.Create Account
  5. To enable two-factor authentication on parsec, install an authenticator app such as Authy or 1Password on your phone (if you don’t have one).
  6. Then, scan the QR code with the authenticator app,
  7. After that, enter the 6-digit code provided by your authenticator app, enter the parsec password you just set, as well as a recovery email address, and then click Enable 2FA.2FA
  8. Parsec will provide you with a list of backup codes that you can use to recover your account in case you forget your password and lose access to the two-factor authentication method.
  9. You can either note it down or download the codes in a TXT file by clicking the Download button and storing it someplace safe. Download
  10. After creating the account, close the browser and then launch the Parsec app.
  11. Enter your login credentials and click Log In.Log In

Once logged, you can configure app settings according to your preferences and start using the software for game streaming or remote desktop access.

If you’re not happy with Parsec, there are other remote desktop softwares available for gaming that offer high frame rates and low latency.

If you want to know more about the Parsec app, feel free to let us know in the comments section below.

Your Call Of Duty Account Got Hacked? How to Get it Back

Over time, players have complained about their Call Of Duty game accounts being compromised or hacked by an intruder. The cases may be different depending on how the hijacking happened. However, this article will discuss details about Call Of Duty accounts hacked and how to recover them.

Likewise, check our article about players’ complaints regarding issues like Call Of Duty: Modern Warfare not saving settings after adjusting it.

How many COD accounts get hacked?

  • According to reports, the breach has affected at least 500 thousand Activision users, specifically those associated with Call of Duty.
  • Consequently, hackers have gained usernames and passwords linked to these compromised accounts.
  • This enables the attackers to log in and modify passwords, effectively blocking legitimate users from accessing their accounts.

Alternatively, you can check our guide on ways to fix the error connecting to Activision account issues on your device.

How do I know if my Call of Duty account is being hacked?

  • If you can log into your COD account despite entering the correct credentials could indicate that someone else has gained access and changed the password.
  • You should notice unusual or suspicious activity within your account, unfamiliar purchases or transactions, alterations to your in-game progress, load-outs, or unknown settings changes.
  • If you receive any email regarding password resets or changes to your COD account which you did not initiate, it may indicate that your account has been compromised.
  • If you notice that your COD account is connected to unfamiliar gaming platforms, consoles, or devices, it could suggest that someone else has gained unauthorized access.
  • Suspicious activities associated with your account include unusual in-game behavior or messages sent without your knowledge.

Taking swift action is essential if you suspect your account has been hijacked to prevent further damage and protect your personal information.

How do I get my Call of Duty account back?

1. Contact Activision support for recovery

  1. Contact Activision Support immediately.
  2. Then, provide them with the necessary details and evidence of the hack.
  3. Follow the account recovery process guide by Activision Support.
  4. Change your passwords associated with the compromised account.
  5. Enable two-factor authentication (2FA) for enhanced security.
  6. Monitor your account for any suspicious activity or changes.
  7. Stay in touch with Activision Support for further assistance and updates.

Many players complain about these steps not being practical as it doesn’t unlink the hacker’s activities on the account. The account recovery process will be rejected if your email is still on the hacked Activision account.

2. Use a different email to recover your account

  1. Create a new Gmail account aside from the one associated with the hacked account.
  2. Also, create a separate Gmail account for the temporary account you must create during the account recovery process.
  3. Sign up for a VPN service (preferably Nord VPN) and use a country that is not where you live.
  4. Log into your real Activision account over the VPN in a browser and unlink all accounts that you can.
  5. Change the email on the Activision account to the new email address you created in Step 1.
  6. Change the basic info (Password /Name/Address/Phone/remove 2FA) to something else.
  7. Then verify if you can log in via the new email address and password you changed in the previous step.
  8. Open a new account recovery ticket using the new Activision account you created in Step 2.
  9. Set the incident date to your current date and attach other details.
  10. You should get a mail in Gmail address 2 saying Activision has recovered your account.

After submitting the account recovery ticket, you will receive a confirmation or reference number. Activision Support will review your ticket and provide further instructions on recovering the account.

In context, the above steps will allow you to re-hack yourself and file another account recovery form, overriding any linked account.

How do I recover my Activision account with 2FA?

  1. Go to the Activision account recovery page using a web browser.
  2. On the Account Recovery page, select the option you have set up for your 2FA (Email or Text message).
  3. Depending on the option you selected, enter the email address or phone number associated with your Activision account.
  4. You will receive a verification code. Then, enter the verification code in the provided field on the Account Recovery page and click Activate.
  5. Follow the on-screen instructions and provide any required information to verify your account ownership.

With these steps, you can recover your Activision account even if you have two-factor authentication enabled.

In addition, you may be interested in our article about Call Of Duty Modern Warfare Warzone dev error 5523 and ways to fix it.

Also, we have a comprehensive post on what to do if you encounter Call of Duty error code Pilum when playing Modern Warfare and Warzone.

Should you have further questions or suggestions, kindly drop them in the comments section.

How to Fix Backspace Key When It’s Not Working + Alternatives

If your backspace key is not working, it could be due to physical damage, incorrect keyboard settings, or even out-of-date drivers.

In some other cases, software conflicts or system glitches may contribute too. That said, in this guide, we’ll walk you through the steps to get it working again.

How do I fix my backspace key if it’s not working?

Before we start, make sure your keyboard is clean. Use compressed air or a soft brush to remove dirt. Also, check your keyboard cable/batteries and make sure your OS is up to date.

If the above preliminary checks can’t fix the backspace key not working, go ahead with the solutions below:

1. Disable Sticky keys and Filter key options

  1. Press Windows + I keys to open the Settings app.
  2. Click on Accessibility and click on Keyboard in the left-hand menu.
  3. Find the Sticky keys option, and toggle off the Press one key at a time for keyboard shortcuts.
  4. Click the Filter Keys link, toggle off the Ignore brief or repeated keystrokes.
  5. Close the Settings app and restart the PC to effect the changes.

2. Run the keyboard troubleshooter

  1. Press Windows + I key to open the Settings app.
  2. Click on System, then select Troubleshoot from the right pane and click on Other Troubleshooters.
  3. Then, click the Run button against the Keyboard.
  4. Wait for the Troubleshooter to find and fix the Keyboard issues on your computer.

Running the keyboard troubleshooter will find and fix the problems causing the backspace key to malfunction on your laptop.

We also have a guide on Spacebar not working that you might be interested in.

3. Update your keyboard drivers

  1. Press Windows + R keys to prompt the Run window, type devmgmt.msc, and click OK to open the Device Manager.
  2. Expand the Keyboards entry, right-click on the Keyboard devices, then select Update driver from the drop-down menu.
  3. Click on Search automatically for updated driver software.
  4. Restart your computer and check if the issue persists.

Updating the keyboard driver will fix bugs affecting the device and install the latest features to improve its performance. Also, it resolves compatibility issues causing the problem:

You can read our guide for other steps for updating drivers on Windows PCs if you have any issues. Also, you can choose to update any drivers on your PC automatically with a tailored solution.

4. Reinstall the keyboard device

  1. Press Windows + R keys to prompt the Run window, type devmgmt.msc, and click OK to open the Device Manager.
  2. Expand the Keyboards entry, right-click on the Keyboard devices, then select Uninstall device from the drop-down menu.
  3. Click Uninstall in the confirmation box and wait for the process to complete.
  4. Restart your PC, and it will automatically install the missing driver.

Reinstalling the keyboard device will resolve corrupt device files, settings issues, and other keyboard-felted issues preventing the backspace key from working.

Backspace alternatives

The Delete Key can be an alternative to Backspace in some contexts. To delete characters to the left of the cursor using the Delete key, you can follow these steps:

  1. Position the cursor after the character you want to delete (to the character’s right).
  2. Press the Delete key on your keyboard.

You can also use keyboard mapping software to assign any other key to work as Backspace, but that is just a software workaround.

In conclusion, following the steps above should help backspace not working. It might also fix related issues like keyboard typing the wrong letters on your computer.

Also, you may be interested in our article about how to fix the keyboard not allowing double letters when typing on Windows 11.

This isn’t the only problem you can encounter, some users reported that keyboard is not working on Windows 11 at all.

Should you have any questions or suggestions regarding this guide, kindly drop them in the comments section.

CTRL Key not Working? How to Enable it & Alternatives

The Ctrl key not working on your computer is a recurring keyboard issue affecting some Windows users. This problem is particularly outrageous because of the Ctrl key’s significance to using the keyboard shortcuts since most of them depend on its pairing with other keys.

Consequently, this makes users curious about the potential fixes for getting the Ctrl key to work or if it requires using an external keyboard. Thus, this article will provide a detailed guide on how to fix it.

Why is my Ctrl key not working?

  • If the left Ctrl is not working, it can be because internal components or mechanisms are damaged. This is one of the reasons why your keyboard is not working properly.
  • Outdated or corrupted keyboard drivers can lead to malfunctioning keys, including the Ctrl key, and can cause Ctrl + any key not to work. This is one of the reasons keyboard shortcuts are not working in Word.
  • Some software applications or utilities running on your computer might interfere with the functioning of the Ctrl key due to incompatible or poorly programmed software.
  • The Ctrl key might be disabled or modified through accessibility settings.
  • System-wide settings or keyboard shortcuts configured on your computer can affect the behavior of the Ctrl key, causing the Ctrl key to appear non-functional.
  • Hardware problems with the keyboard or the computer can result in non-working keys.
  • Bugs or glitches in the operating system can cause specific keys, including the Ctrl key, to stop working.

These potential causes are general, and the reason for each user can vary depending on the instance of occurrence. Hence, we’ll take you through some detailed steps for resolving the Ctrl key not working.

What can cause a key to stop working?

  • The internal components or mechanisms of the key may become damaged or dislodged, preventing it from registering keystrokes.
  • If the keyboard is connected to the computer via a cable, a loose or damaged connection can cause its keys to stop working.
  • The keycap or the underlying switch mechanism can become damaged or worn out, preventing it from engaging the switch and resulting in the key not working.
  • Electromagnetic solid fields or interference from nearby electronic devices can disrupt the keyboard and computer signals.
  • A key may stop working due to a manufacturing defect, including faulty components or assembly issues that prevent the key from functioning as intended.

It’s important to note that the specific cause of a non-functioning key can vary depending on the keyboard model, its design, and individual circumstances.

How do I fix/unlock my Ctrl key?

Before attempting any troubleshooting steps, we recommend you apply the following:

  • Inspect and clean the entire keyboard or the left panel to remove any debris or dirt affecting its functionality.
  • Restart your computer to resolve temporary software issues or conflicts impeding the Ctrl key’s functionality.
  • Turn off background apps and temporarily disable any recently installed software or utilities to identify if they are causing conflicts with the Ctrl key.
  • Connect a different USB keyboard to your computer and check if the Ctrl key works with the new keyboard. If it does, the issue might be with the original keyboard.
  • Open the on-screen keyboard to see if it’s a hardware issue.
  • Perform a Windows update to troubleshoot the bugs affecting keyboard performance.

Proceed with the solutions outlined below if the above preliminary checks can’t fix the issue:

1. Update your keyboard drivers

  1. Press Windows + R keys to prompt the Run window, type devmgmt.msc, and click OK to open the Device Manager.
  2. Expand the Keyboards entry, right-click on the keyboard devices, then select Update driver from the drop-down menu.
  3. Click on Search Automatically for updated driver software.
  4. Restart your PC and check if the issue persists.

Updating the keyboard driver will fix compatibility issues, causing the Ctrl key not to function as expected. It resolves bugs such as Ctrl C and Ctrl V not working on your PC.

Read our guide for other steps for updating drivers on Windows PCs if you have any issues.

Once your keyboard drivers are updated and the Ctrl key starts working, you can boost your efficiency by learning how to search text or files using Ctrl + F on Windows. It is one of the most reliable shortcuts for finding anything instantly on your computer.

2. Run the hardware troubleshooter

  1. Left-click the Start button, type Command Prompt, and click the Run as administrator option.
  2. Click Yes on the User Account Control (UAC) prompt.
  3. Type the following and press Enter to open the Windows Hardware and Device Troubleshooter: msdt.exe -id DeviceDiagnostic
  4. Click Next to proceed with the scan and troubleshooting process.
  5. After the troubleshooting, try to perform the task and check if it works.

Running the Hardware and Devices troubleshooter will resolve hardware connection issues that may cause the error.

Read our guide on how to fix Command Prompt not working on your PC. Keep in mind that other keys can stop working, and we covered such an issue in our Spacebar not working guide.

3. Disable Sticky keys and Filter key options

  1. Press Windows + I keys to open the Settings app.
  2. Click on Accessibility and click on Keyboard in the left-hand menu.
  3. Find the Sticky keys option, and toggle off the switch.
  4. Select the Filter Keys, and toggle off the option.
  5. Close the Settings app and restart the PC to effect the changes.

Toggling off the Sticky and Filter keys will terminate their respective features and resolve button combinations that may affect the Ctrl key functionality and similar issues like Space bar, Enter, and Backspace keys not working on Windows 11.

Is there an alternative key to Ctrl?

No, and Yes. In some situations, you can use the Shift or the Alt key to replace the Ctrl key, e.g., when selecting files, highlighting contents, etc.

This isn’t the most reliable workaround, especially if the Shift key is not working.

However, the Ctrl key is essential to the PC shortcuts. The alternative keys are only functional in deputizing it in minor cases. Hence, the hack for most users is the on-screen keyboard to select the key.

Moreover, the above fixes cover several angles of potential causes for the Ctrl key not working and are helpful regardless of the cause. We also have a detailed article about the Windows key not working and ways to fix the problem.

You may be interested in what to do if the left Shift key is not working on your computer.

Feel free to leave your questions and suggestions in the comments section below.

Quickest Way to Convert RAW to NTFS Without Formatting

When you boot up your PC and you come across a RAW partition, then you should understand that all the files inside are corrupt, or the system fails to recognize it. 

This RAW drive or RAW files present inside a particular drive letter can be fixed if you convert the RAW to NTFS. In this guide, we will show you exactly how you can convert RAW to NTFS without losing data and without formatting.

What is the Raw File System?

You might have heard about the NTFS, exFAT, FAT32, RAW, etc., file systems. File systems basically mean how the system manages or handles the files, basically how it stores and retrieves them.

If your drive letter, partition, or external drive isn’t formatted to any of the file systems, then you won’t be able to access the storage device.

Such a selected disk is known as a RAW drive or RAW drives, depending on the number of drives you have. The storage device could be anything, like a USB flash drive, memory card, or others.

In case the partition becomes RAW, you will come across issues such as bad sectors, file system errors, or you won’t be able to perform RAW partition recovery.

Why should I convert from Raw drive to NTFS file system?

The RAW drives or RAW disk can get bad sectors because of the below reasons:

  • Wrong disk management.
  • File system corruption.
  • The RAW disk’s drive table is corrupt.
  • The RAW drive is unusable.

In such a case, it becomes necessary to convert the RAW drive to the NTFS file system. Below, we have shown different methods to format the RAW drive to NTFS without losing data and also convert RAW to NTFS without formatting.

How to convert a Raw disk to NTFS without formatting & without losing data?

Before you go ahead and convert a RAW drive to NTFS file format, we would strongly advise you to create a backup of your data or recover the data using data recovery software.

For your convenience, we have a guide that lists some of the best backup tools that you can use to create a backup of the RAW format drive.

Moreover, you can also check out our guide which gives you a list of the best partition recovery tools you can use.

Let us now check out the steps to convert the RAW disk to NTFS.

1. Use Disk Management

  1. Press the Win key to open the Start menu.
  2. Type Disk Management and open the top result.
  3. Select the disk by right-clicking on the RAW partition and selecting Format.
  4. Enter the name of the RAW partition.
  5. Under the File system drop-down, select NTFS and click OK when ready.
  6. In the prompt that appears, click on OK to confirm your actions.

Using the Disk Management tool, you do not have to rely on any third-party software to perform a quick format of your RAW drive to NTFS without losing data. Of course, this is unless your drive suffered physical damages that led to permanent loss of data.

In case you are having issues with the Disk Management where the Disk Management isn’t loading, then you should read our guide and apply the solutions to resolve the problem.

Also, we would suggest you check out our guide that will help you resolve the problem in case all options are greyed out in Disk Management. Now, let us check out another method to convert RAW drive to NTFS without formatting.

2. Use Command Prompt

  1. Press the Win key to open the Start menu.
  2. Type command prompt into the search box and run it as an administrator.
  3. Type the below command and press Enter. Diskpart
  4. Execute the below command to list all the disks on your computer. list disk
  5. Type the below command to select the partition and press Enter. select disk 1 (Replace the number with the number for the RAW drive)
  6.  Execute the below command to wipe the disk and prepare it to accept a new partition. clean
  7. Type the below command and press Enter. create partition primary
  8. Run the below command to format the drive with the NTFS file system. format fs=ntfs
  9. Type the below command and press Enter to assign a drive letter to the partition. assign

Usually, when you convert the RAW drive to NTFS using the command prompt, it will fix the RAW partition without formatting. However, at times, this method is known to fail. In that case, learn the other method below.

We have a guide that explains in detail, what is CMD or Command Prompt. You will get all information you need to know about CMD along with some important functions.

 3. Use File Explorer

  1. Press the Win + E keys to open the File Explorer.
  2. Right-click on the RAW drive and select Format from the context menu.
  3. Assign a volume label (optional).
  4. Select NTFS from the File System drop-down.
  5. Check the Quick Format option and hit the Start button when ready.
  6. Click OK on the warning prompt that appears.

You can also make use of File Explorer to convert the RAW to NTFS without losing data. This method is easy to use and works faster.

Are there any risks when converting RAW to NTFS?

Notably, yes, there are some risks when converting RAW to NTFS, especially when you are converting a RAW disk to NTFS without formatting.

Data loss is a possibility. If you format the disk without backing up the data, then there are high chances of the drive getting corrupt or wiping the internal data to accept the new file system during the conversion.

What precautions should I take when converting RAW to NTFS?

Some of the most important precautions that we would suggest before you go ahead and convert your RAW disk to an NTFS file system are listed below:

  • Make sure that the NTFS file format is supported in the device that you will be using the external drive or USB flash drive, etc.
  • Ensure that you have taken a backup of the data before converting RAW to NTFS because there is a very high chance of the data getting wiped out.
  • For data recovery from the RAW drive, do not hesitate to use a high-efficiency data recovery tool, as normal ones won’t produce the result you would expect.

That is it from us in this guide. We would suggest you check out some of the best disk management tools that you can use on your Windows PC.

Feel free to let us know in the comments below, which one of the above solutions you used to convert RAW to NTFS without losing data or without formatting.

Disable Local Account Security Questions on Windows

Local account security questions are a form of authentication commonly used to enhance the security of user accounts on various platforms, applications, or systems. Nevertheless, some of our readers disable local account security questions because they prefer other security methods.

This is so because of the lapses in this security method. Hence, should you prefer to disable the questions too, this article will guide you through simplified steps easily.

Why disable local account security questions? One of the strong advantages of the security questions is how easy they are to set. Further, they are low-cost and require next-to-nothing to store and use them.

Despite these, the cons seem to outweigh its pros as outlined below:

  • Answers to the questions can be easily guessed or found through public records (e.g., mother’s maiden name, childhood nickname).
  • Limited and predefined questions with password hints.
  • You can easily forget the answer or, make slight spelling mistakes.

With the factors highlighted above, using security questions poses a high level of security risks such as unauthorized access to user accounts, information & privacy leaks, account lockouts (in the case where the answer is forgotten), and so forth.

Hence, alternative authentication methods like two-factor authentication (2FA) are preferred by several of our readers because it adds a second layer of security to verify user identity. 

How do I disable local account security questions on Windows 11?

1. Using Group Policy Editor

  1. Press the Windows + R keys to open the Run command dialog box. Type gpedit.msc in the text box and press Enter to open the Local Group Policy Editor.
  2. From the left navigation pane, go to the following path: Computer Configuration\Administrative Templates\Credential User Interface
  3. On the right pane, double-click on the Prevent the use of security questions for local accounts policy setting.
  4. In the Properties window, select the Enabled radio button.
  5. Finally, click on Apply, and then OK to save the changes.

This will immediately disable the security questions for the account you are currently logged into. However, make sure to create a backup before making any changes in Group Policy Editor.

2. Using Registry Editor

  1. Press the Windows key, type regedit in the search box and press Enter to open the Registry Editor window.
  2. From the left navigation pane, navigate to the following registry key: Computer\HKEY_LOCAL_MACHINE\SOFTWARE\Policies\Microsoft\Windows\System
  3. Locate and right-click the System key. Then, select New, and click DWORD (32-bit) Value.
  4. Name the DWORD NoLocalPasswordResetQuestions and double-click on it.
  5. In the pop-up window, set the Value data to 1 and select the Hexadecimal radio button.
  6. Click OK to save the changes.

Once you’re done, close the Registry Editor and restart your PC. This will disable the local account security questions feature on your sign-in option page.

3. Using a Reg file

  1. Press the Windows + R keys to open the Run command, type Notepad in the text field and press Enter to open it.
  2. Type the following code in your Notepad: <code>Windows Registry Editor Version 5.00 [HKEY_LOCAL_MACHINE\SOFTWARE\Policies\Microsoft\Windows\System] "NoLocalPasswordResetQuestions"=-
  3. Click on File and select Save as.
  4. Select All Files from the Save as type drop-down menu. Name the file DisableSecurityQuestions.reg and save it to your desktop.
  5. Now double-click on the reg file to run it.

Using a reg file will create a new registry value in the System key and instantly disable local account security questions in Windows 11.

How do I disable local account security questions on Windows 10?

  • Discuss two ways: using Local Group Policy Editor and Registry Editor.
  • Provide step-by-step instructions for each method, including screenshots if possible.

1. Using Local Group Policy Editor

  1. Open the Run dialog, type gpedit.msc in the text field and press Enter to open the Local Group Policy Editor.
  2. Navigate to the following path: Computer Configuration\Administrative Templates\Windows Components\Credential User Interface
  3. On the right pane, double-click on the Prevent the use of security questions for local accounts policy.
  4. In the new window, select the Enabled radio button.
  5. Now, click on Apply, and then OK to save the changes.

Following the steps above will help to disable the security questions for the account.

2. Using the Registry Editor

  1. Open the Run dialog, type regedit in it, and press Enter to open the Registry Editor.
  2. Choose Yes for the UAC prompt.
  3. On the left pane, navigate to the following key: HKEY_LOCAL_MACHINE\Software\Policies\Microsoft\Windows\System
  4. Next, right-click on the System Key, select New, and click on DWORD (32-bit) Value.
  5. Name the value NoLocalPasswordResetQuestions, double-click on it, and set the value data as 1.
  6. Save the changes and restart your PC.

Following the above steps, the security questions for your account will be disabled instantly.

How do I re-enable security questions?

1. Using the Group Policy Editor

  1. Follow steps 1-5 in method 1 above.
  2. Select the Disabled or Not Configured radio button in the Properties window.

The same process applies to both Windows 10 and 11 Operating Systems.

2. Using the Registry Editor

  1. Open the Registry Editor window.
  2. Locate the NoLocalPasswordResetQuestions registry, right-click, and delete it.

This will now re-enable the local account security questions in your Windows 10 & 11 PC.

What are the alternatives to security questions?

In the case where you do not want to use security questions any longer due to their security risks, there are a few alternatives to consider which include:

  • Two-factor authentication (2FA) – 2FA authentication is a reliable alternative that adds an extra layer of protection to verify a user’s identity after the sign-in screen.
  • Use strong passwords – Passwords have not lost their touch in securing an account. However, creating strong passwords with a combination of uppercase and lowercase letters, numbers, and special characters will enhance your security.

And that’s it on how to disable local account security questions in Windows 10 and 11. If your Windows Security is not opening, you can explore our detailed guide to fix the issue.

Disabling security questions will help to prevent security breaches and protect user’s privacy. However, make sure you backup any important files and data before using any of the methods provided for disabling security questions.

If you have any questions or suggestions, do not hesitate to use the comments section below.

Microsoft Teams Stuck on Offline Status? Fix it in 5 Steps

Microsoft Teams is a popular collaboration platform for employees working remotely. However, some of the Teams users often complain that their status is stuck in offline mode despite their being online on the Teams app.  

The issue is indeed annoying and disrupts communication as your colleagues are unable to view your status in real time. 

Why is Microsoft Teams stuck on offline status? 

Microsoft Teams usually update your status from offline to online automatically under normal circumstances. However, its inability to do so can be because of the following reasons: 

  • Using VPN – A VPN service slows down the communication between Microsoft Teams and the service causing delays in the status update. 
  • Server Outage – If the remote server for the Teams app is down due to maintenance, problems like the one at hand are unavoidable. 
  • Outdated Teams app – Microsoft Teams can also get stuck on the offline status if you are using an outdated version of the app.
  • Corrupt cache files – The cache folder of Microsoft Teams cab get corrupted if not reset periodically, preventing the app from promptly updating your current status. 
  • Slow internet connection – Unstable internet connection can also be the reason why Microsoft Teams is taking longer to update your status to online. 

If you are wondering how to fix the Microsoft Teams stuck on an offline status to get things right, scroll down below to check out the effective solutions.

How do I fix the Microsoft Teams stuck on offline status? 

Before you jump to the solutions listed below, we recommend you perform these simple actions. 

  • As recommended by Microsoft, wait for at least three minutes for Teams to detect and update your current status instead of offline.
  • Visit the official Microsoft Service Status webpage to ensure that the Microsoft Teams server is up and running and not experiencing some downtime. 
  • Update Microsoft Teams to the latest version available. 
  • Log out of Teams and then re-login on all the devices, including the one you are using currently.
  • Temporarily disable the VPN services on your Windows PC. 

If the methods listed above are of no help, try the solutions listed below. 

1. Restart the Microsoft Teams app

  1. Right-click the Windows icon on the taskbar and choose Task Manager from the quick links menu. Microsoft Teams Stuck On Offline
  2. Look for Microsoft Teams in the Processes tab, right-click it and choose the End task option from the context menu. 
  3. Now press the Windows key to launch the Start menu, type microsoft teams and choose the relevant result to relaunch the app.

Force quitting and then restarting the Microsoft Teams app will get rid of the temporary glitch, which might be the reason Microsoft Teams is not updating your current status. 

2. Reset your status 

  1. Launch the Microsoft Teams app on your Windows PC and click the profile picture icon located in the top right corner. 
  2. Click your current status (Appear offline) visible under your email address and select the Reset status option from the drop-down menu. Microsoft Teams Stuck On Offline

If you are unable to change your offline status because of a prevalent bug in the Teams app, using the reset status feature should fix the problem like a charm. 

You can also perform the same steps on the web version of Microsoft Teams to reset your current status if you prefer it over the desktop version. 

3. Clear the Microsoft Teams cache

  1. Close the Microsoft Teams app on your Windows device. 
  2. Use the Windows + R shortcut to bring up the Run dialog box. 
  3. Type the following command in the text box and press OK to execute it. %appdata%\Microsoft\Teams
  4. Use the Ctrl + A shortcut to select all the files in the given location and hit the Delete key. 

Now relaunch the Teams app and try changing your status. Hopefully, you will succeed this time.

A corrupt Teams cache often leads to status conflict on the app. Hence, you should delete the cache files which will force Microsoft Teams to rebuild cache and get rid of the underlying issues or bugs.

4. Reconfigure Coexistence Mode

Note icon NOTE
You need to have administrative privileges to perform these actions. 
  1. Visit Microsoft Teams Admin Center and log in using the administrator username and password.
  2. Navigate to the Teams module and select the Teams upgrade option. Microsoft Teams Stuck On Offline
  3. Locate the Coexistence mode and choose Teams only in the drop-down next to it. Microsoft Teams Stuck On Offline

The coexistence mode is set to Islands by default when organizations migrate from Skype for Business to Microsoft Teams which allows you to use both these apps simultaneously.

While this is useful, it often interferes with certain features of the Teams, such as preventing status updates. Switching the coexistence mode to the Teams-only option from Islands should fix the Microsoft Teams stuck on offline mode.

That’s pretty much it! We are positive that you were able to fix Microsoft Teams such that it is reflecting your current status and is no longer stuck on offline status. 

If the issue persists despite trying everything, you should consider reinstalling Microsoft Teams on your Windows PC as the last resort.

For sharing your feedback or asking queries, feel free to connect in the comments section below. 

Windows Update Error 0x8024a21e Fixed Within 5 Minutes

0x8024a21e is one of the many update error codes users encounter on their PCs. This error is made all the more frustrating as it prevents you from installing the affected update.

Disabled Windows Update services or a corrupt cache usually causes the error 0x8024a21e. Fortunately, it is pretty easy to fix, and we will show you how to go about it, just like we have done with other error codes.

How can I fix Windows Update error 0x8024a21e?

1. Use the Windows Update Assistant tool

  1. Visit the Windows 11 download page to download the Assistant tool.
    download now  0x8024a21e
  2. Click the Accept button on the license page.
  3. Tick the button for the Upgrade this PC now and click the Next button.
  4. Now, follow the onscreen instructions to complete the upgrade.

The Windows Update Assistant tool can force through your Windows update and eliminate the causes of the 0x8024a21e. It bypasses some of the glitches that might be causing the error and updates your PC automatically.

2. Restart some services

  1. Press the Windows key + R, type services.msc, and click OK.
    services
  2. Double-click the Background Intelligent Transfer Service to open its properties page.
    background
  3. Now, set its Startup type to Automatic and click the Start button if it is disabled.
    automatic 0x8024a21e
  4. Next, click Apply, followed by OK.
    apply ok
  5. Finally, repeat Steps 2 to 4 for the Windows Update service and restart your PC.

The Windows Update and Background Intelligence Transfer Service (BITS) are among the crucial services for effortlessly updating your system. So, you must ensure these services are enabled to prevent and fix the 0x8024a21e update error.

3. Run the Windows Update troubleshooter

  1. Press the Windows key + I and choose Troubleshoot in the right pane.
    troubleshoot 0x8024a21e
  2. Click the Other troubleshooters option on the new page.
    other trouble
  3. Finally, click the Run button before the Windows Update option and follow the onscreen instruction.
    run update

The Windows PC has a built-in troubleshooter for fixing update errors. This tool will help diagnose the potential cause of the error 0x8024a21e and offer a potential solution.

You can use additional troubleshooters but the built-in tool is extremely efficient.

4. Clear the Software Distribution folder

  1. Press the Windows key + E to open File Explorer and follow the path below: C:\Windows\SoftwareDistributionsoftware distribute  0x8024a21e
  2. Select everything in the SoftwareDistribution folder by pressing the Windows key + A.
  3. Finally, select the Delete icon at the top and try to install the updates.

Sometimes, the error 0x8024a21e can be due to the accumulation of corrupt update files. You need to clear these files and restart the automatic update services to get past the error.

5. Reset Windows update components

  1. Press the Windows key, type cmd, and choose Run as administrator to open an elevated Command Prompt.
    cmd admin
  2. Type the commands below and press Enter after each: Net stop bits Net stop wuauserv Net stop appidsvc Net stop cryptsvc Del %ALLUSERSPROFILE%\Microsoft\Network\Downloader\qmgr*.dat /Q Del "%HOMEDRIVE%\Users\All Users\Microsoft\Network\Downloader\qmgr*.dat" /Q Del %WINDIR%\SoftwareDistribution\*.* /s /Q Net start bits Net start wuauserv Net start appidsvc Net start cryptsvc
  3. Finally, wait for the commands to finish running and restart your PC.

In some cases, you might be experiencing the Windows update error 0x8024a21e while trying to install a cumulative update because of issues with some update components. Resetting all the related components and processes should fix the issue quickly.

Another similar error is the 0x8024d001, but this guide will help you fix it quickly.

While it is true that the Windows Update error 0x8024a21e does not cause any lasting damage to your PC, you still need to fix it to get the latest features on your device.

Doing this should now be easy with the detailed solutions provided in this guide. To prevent a future occurrence, always keep the Windows Update Services running.

However, if you still can’t eliminate the error after applying all the solutions above, you might need to perform an in-place upgrade. This will help you bypass the error and force your PC to update.

On a final note, it is important to note that you can’t just apply the same solution to all Windows Update errors. This is because the potential causes differ. So, if you are facing other issues like error 0x8024001e, check our guide on the topic to fix it.

Does the Xbox Ambassadors program give you free games?

The last couple of months have been very exciting for gamers everywhere, but especially for those who play on Xbox. Diablo IV arrived on Xbox, and it was well received by the gaming community. Starfield, one of the most anticipated games of the year, will be released in September on Windows and Xbox. And you can get it for free if you know your way around Microsoft Rewards.

Over 1000 new games are in development for the Xbox console, and Game Pass will come to GeForce Now, which will allow you to play your Xbox games from everywhere, on any device available.

Xbox also has the Xbox Ambassadors program, which is a sort of program that you can join, especially if you’re an Xbox gamer. Once you’re there, you can guide others on how to play in Xbox, while providing a safe space for them to do so.

And it seems the program also rewards those who join the Xbox community. For example, this user received a message from the Xbox Ambassador program letting them that a Diablo IV ultimate edition is waiting for them.

But does the Xbox Ambassadors program give you free games? Let’s take a deep dive and see what’s going on.

Free games with the Xbox Ambassador program

Officially, the program doesn’t say anywhere that it’s giving away free games, especially unique editions of games. The user received an Ultimate Edition of Diablo IV for free through the Xbox Ambassador Program, and they actually verified its legitimacy with Xbox support.xbox ambassadors free games

Xbox validated it, and the program said that indeed, they have been the ones who sent the gift. However, they also somehow said that a friend might just sent a Diablo IV gift through the Xbox Ambassador program to the user.

I did I went back and forth with support just to check its legitimacy and they said it was legit! I’m installing it right now. I asked support why they’re sending out free ambassador gifts and they just gave me the generic spiel about how “Xbox is always trying to hold up their gamers and support them for all they do for the community” but they also mentioned that it could have been a anonymous gift from a friend as well so I don’t know for sure but it’s legit!

Here’s what the Xbox users are saying about it

However, others on the Reddit thread reported that you can get free access to games on the program. Some of them even said that if you, as an Xbox gamer, write reviews for games, the program might suddenly reward you with free games.

They seem to be revamping the Ambassador programme. I noticed you can opt in to essentialy provide more legit reviews of titles and updates, guessing it’s randomly sending out codes to people at the moment.

If it came from.the official Xbox account, then you don’t need to worry, its not a scam. They do stuff like this a lot, giving away free stuff to people.

I did a survey for Xbox once and after I was asked a question. “If you were to be compensated for this survey, what game would you choose?” I don’t remember what all of the choices were but I know about a month Ryse Son of Rome showed up on my doorstep. It was awesome.

So, as you can see, depending on your activity on the Xbox platform, you can actually end up with free games from the Xbox Ambassador program. But it seems that it’s a game of luck, sometimes. However, next time you play something on Xbox, and you like it, write a review for the game. You might find yourself lucky enough to get a gift from Xbox.

What do you think about this? Let us know in the comments section below.