10 Best ChatGPT Browser Extensions to Use Today

Since the launch of AI-powered tools, people have begun to look for the best ChatGPT browser extension for their needs.

If you’ve been searching for the best ChatGPT browser, you’re in the right place, as we’ve gathered some of the ChatGPT browser extensions that have earned some reputation among users.

What are the best ChatGPT browser extensions to use?

ChatGPT for Google – Quick and easy to add
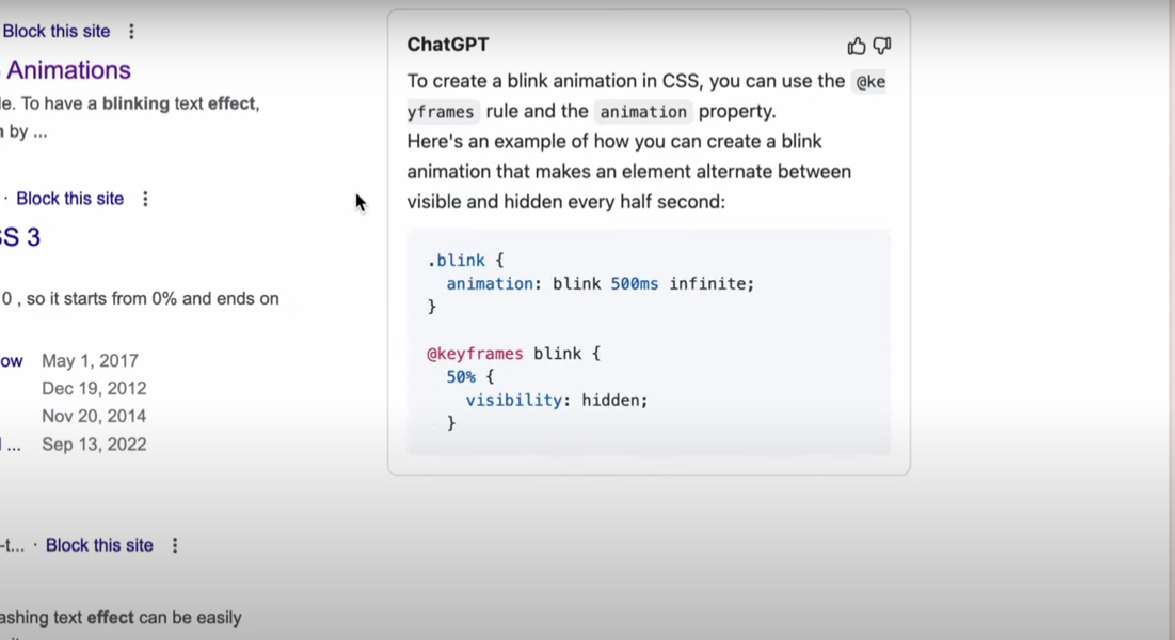
ChatGPT for Google

ChatGPT for Google, as its name implies, is a browser extension that displays ChatGPT’s responses alongside Google search results.

Unlike the normal AI ChatGPT, which is restricted to a single browser tab that must be left open at all times, ChatGPT for Google solves this problem by enabling users to use the bot across multiple tabs.

To set up ChatGPT for Google, you only need to log in to OpenAI using the extension, and it’ll be ready for use.

Below are some of the features attributed to this browser extension:

  • Displays ChatGPT responses with Google search results
  • Makes ChatGPT accessible across multiple tabs
  • Does not require any particular prompts to launch
  • Provides swift responses
  • Can write code

⇒ Get ChatGPT for Google 

Merlin – OpenAI ChatGPT Powered Assistant – For any webpage
Merlin - OpenAI ChatGPT Powered Assistant

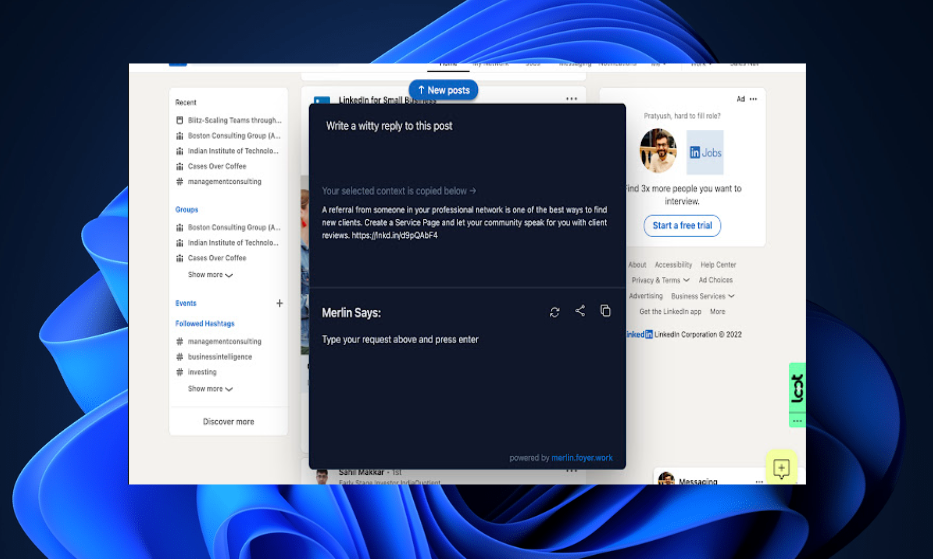
Similar to the ChatGPT for Google extension, but better, is Merlin – OpenAI ChatGPT Powered Assistant which works across the entire browser on any webpage instead of just the search engine.

Merlin is also known for its rapid and instant response to any query. Once you enter a query like you would on ChatGPT, Merlin will give a reply within seconds. Hence, Merlin is up to the task if you need a quick reply to a work email or a quick HTML code.

Moreover, the Merlin browser extension can be enabled by pressing the CTRL (CMD on Mac) + M keyboard shortcut in the browser. Below are some of the features attributed to this browser extension:

  • Works across the entire browser
  • Quick response to work
  • Merlin ChatGPT browser extension can be opened through CMD

⇒ Get Merlin – OpenAI ChatGPT Powered Assistant

WebChatGPT – Better responses

WebChatGPT

The WebChatGPT extension allows users to augment their ChatGPT prompts with relevant web results. After entering a prompt, the extension lets ChatGPT search the web for appropriate links.

Since ChatGPT does not have access to the most recent information available on the Internet beyond 2021 data, the answers for anything that occurred after that date are out of date. WebChatGPT helps to overcome this limitation.

Additionally, there are a variety of filters available, including time, region, and the number of results. You can even deactivate the extension using the toggle to get native ChatGPT functionality back.

Features include:

  • Access to the latest information on the Internet
  • Adds relevant web results
  • Availability of a variety of filters, and so forth

⇒ Get WebChatGPT

ChatGPT for Search Engines – Great for all search engines
ChatGPT for Search Engines

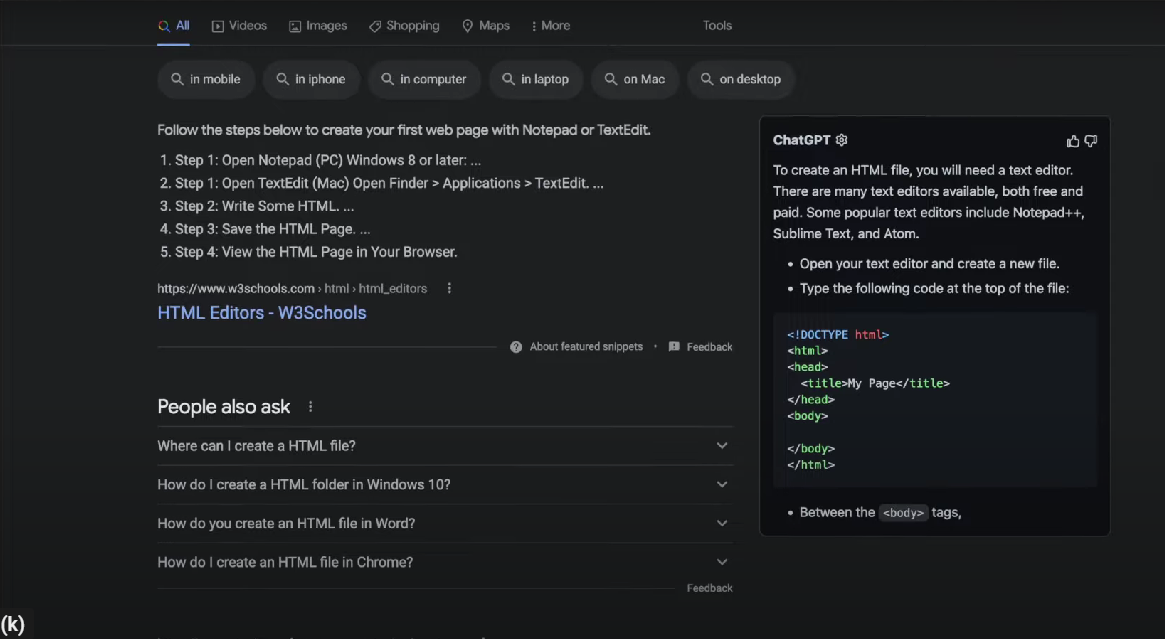
ChatGPT for Search Engines lets users view ChatGPT responses on popular search engines like Bing, Google, and DuckDuckGo.

As a Bing user, instead of using either of the two extensions above (ChatGPT for Google or WebChatGPT), you’ll prefer this one. It will enable you to get direct results from ChatGPT using multiple search engines for the query you entered in the search bar in a small window on the right.  

Additionally, you may use a context menu item to highlight any text on a website and submit it immediately to ChatGPT as a question. Alternatively, you can access ChatGPT on any website using the extension pop-up menu.  

Features include:

  • Get direct results from popular search engines
  • Directly search any highlighted text
  • Launch ChatGPT by ending a query with a question mark (?)

⇒ Get ChatGPT for Search Engines

ChatGPT Everywhere – Universal features
ChatGPT Everywhere

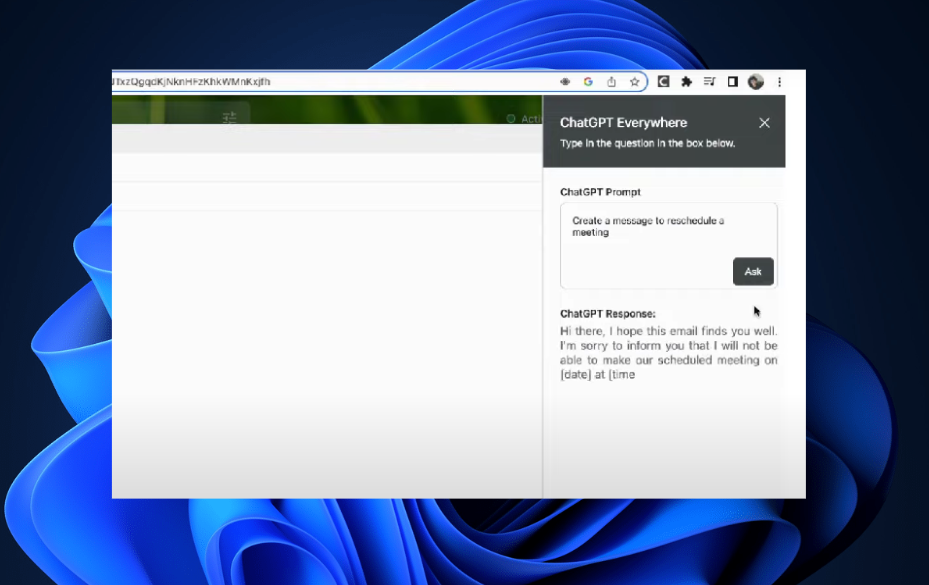
Unlike ChatGPT, which can only be used in a separate browser tab, or you’ll have to navigate to the AI address of anything you want before you can interact with it, ChatGPT Everywhere is unique.

With this extension, you can access the AI bot (almost) everywhere, as its name implies, on all the websites and even during Google Search.

However, unlike ChatGPT’s user interface, previous inquiries and responses are not saved while using it in the extension window; instead, asking a new question will erase the previous one.

Features include:

  • Access to AI bot on all websites and during Google Search
  • Does not keep records of previous queries

⇒ Get ChatGPT Everywhere

YouTube Summary with ChatGPT – Perfect for YouTube
YouTube Summary with ChatGPT

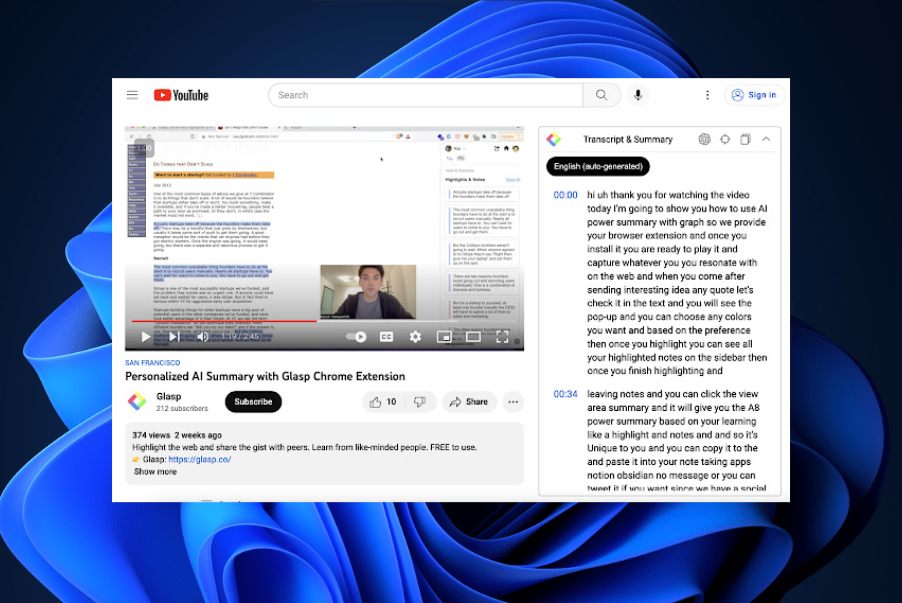
With the YouTube Summary, you no longer have to sit through incredibly long YouTube films that can bore you. Once the extension is installed you’ll see a transcript box on the right, which contains the video’s transcript summary.

But here’s the catch: Simply clicking the View AI Summary button will launch ChatGPT in a new tab without requiring any further action on your part. Then, the extension will paste the entire video transcript, which will load automatically in the chatbot and provide a quick summary of the entire video.

The AI chatbot’s level of accuracy varies, but this extension generally works well for videos as long as the audio is clear. Due to its ability to save time, YouTube Summary may be one of the top ChatGPT Chrome extensions.

Features include:

  • Provides a quick summary of videos of any length
  • Time-saving

⇒ Get YouTube Summary

ChatGPT Writer – Ideal for composing messages
This extension brings ChatGPT’s wordsmithing skills to your browser. The primary goal of ChatGPT Writer is to compose emails and messages for all websites.

Simply log into OpenAI to use the extension, which operates independently. It’ll then request a context-filled input that specifies the subject of the email or message.

The extension responds almost instantly after receiving the prompt. Although the extension is designed for emails and texts, you may also use it to converse with ChatGPT.

Features include:

  • Composes emails and messages on all websites
  • The ChatGPT utilizes a context-filled input to compose emails and texts
  • Provides swift responses

⇒ Get ChatGPT Writer 

tweetGPT – Great for automatic answering
tweetGPT 

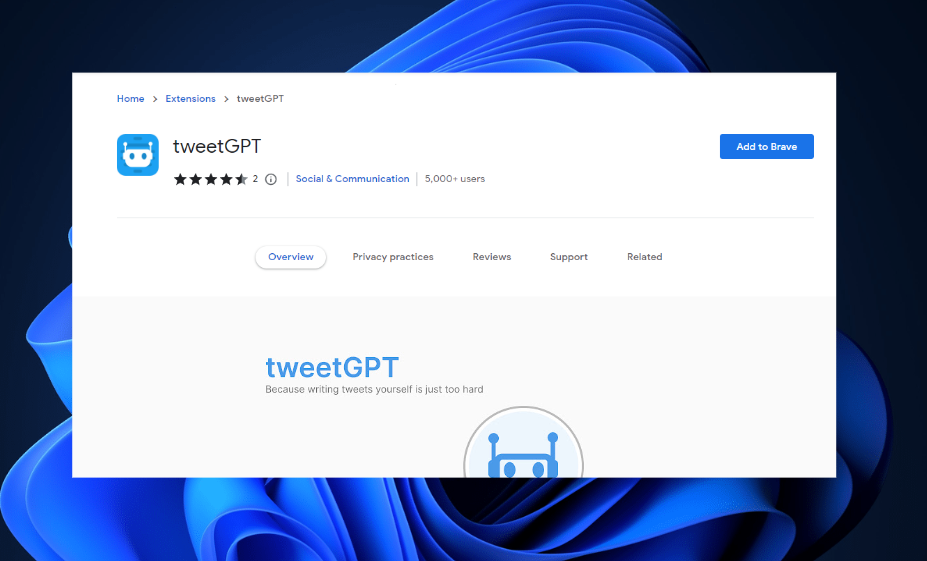
An AI chatbot called tweetGPT can be used to tweet anything or to respond to other people’s questions intelligibly. But this extension eliminates the need to enter ChatGPT, copy the tweet text, and paste the reply.

Twitter users can use ChatGPT directly with the tweetGPT Chrome extension.

tweetGPT can be used in various moods, including humorous, sarcastic, optimistic, smart, and even hillbilly. You can have ChatGPT create the tweet for you by clicking on any of these.

Features include:

  • Chrome extension integrates ChatGPT right into Twitter
  • tweetGPT supports a variety of moods
  • Autogenerate tweets fit each of the available moods

⇒ Get tweetGPT Chrome Extension 

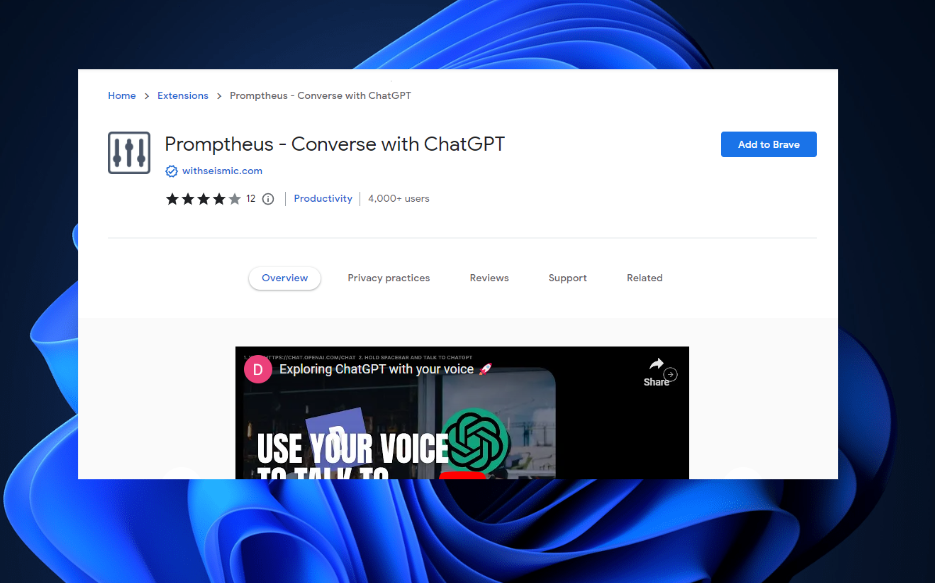
Promptheus – Added voice input

Promptheus is a ChatGPT Chrome extension that adds a useful feature to the AI chatbot.

This Chrome extension enables ChatGPT to receive mic input. Promptheus successfully turns the chatbot into a useful voice assistant like Siri.

The Promptheus extension floats on the right side of the ChatGPT conversation window, out of the way.

Features include:

  • Ability to receive mic input to ChatGPT
  • Effectively converts the chatbot to a voice assistant

⇒ Get Promptheus 

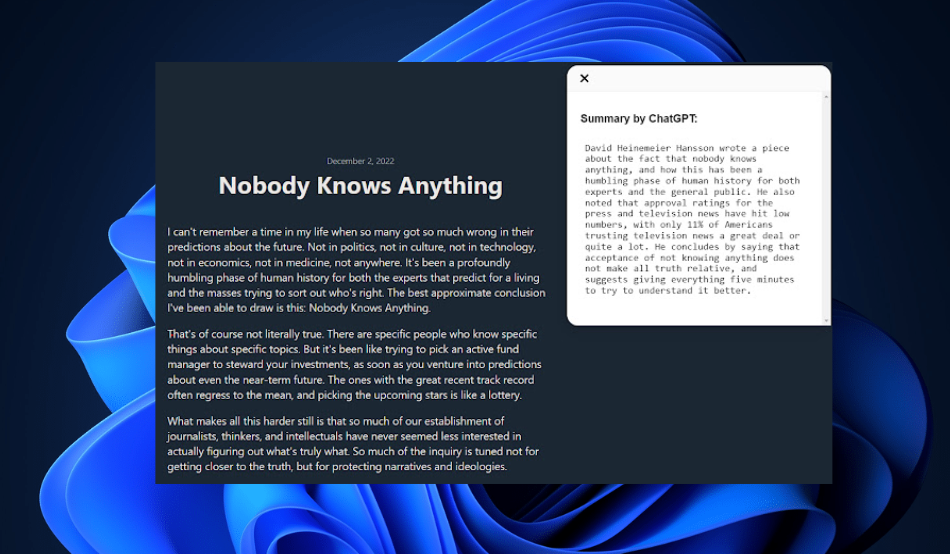
Summarize – Simplifies copy/paste

Besides the YouTube extension for getting the transcript summary of videos, Summarize makes it easy to quickly generate summaries for lengthy content without having to leave the website or deal with tedious copy/paste work.

Moreover, you don’t have to go to the ChatGPT website to use the extension since it is already built into Chrome.

Features include:

  • Can provide a summary of lengthy texts
  • The extension is integrated into Chrome

⇒ Get Summarize 

What is ChatGPT?

ChatGPT (Chat Generative Pre-trained Transformer) is a sophisticated machine learning model that can accurately perform natural language generation (NLG) tasks.

In simple terms, the website is a simple online artificial intelligence chatbot created by OpenAI in December 2022. It can provide users with fact-based answers to questions or requests.

The following are some of the potential features to look out for in ChatGPT:

  • Provides answers to questions
  • Completes a given text or a phrase
  • Writes fiction and non-fiction content from prompts
  • Generates computer code
  • Translates text from one language to another, and so forth

You should also know that there are many ChatGPT alternatives out there that you may try.

After the advent of ChatGPT alternatives, ChatGPT has widened its tentacles to do much more than respond to your queries on a web browser. Now, several ChatGPT browser extensions have surfaced to benefit users.

And that’s it on the best ChatGPT browser extension for use today. If you want to know what ChatGPT Professional is and why you need it, you can explore our article to learn about it. It comes in handy when ChatGPT has an internal server error.

Also, for users anxiously asking why is my ChatGPT not working, we have provided some fixes for this error in our guide. You can check it out.

If you have any questions or suggestions, please use the comments section below.

Raspberry pi 3 not Booting Red Light: Fix in 4 Steps

If you are reading this article, you are most likely experiencing Raspberry Pi boot issues. Your Raspberry Pi can stop booting or refuse to turn on due to several reasons. The device may be experiencing power issues, SD card issues. the operating system is not properly installed and other hardware issues.

In this article, we explore a few troubleshooting steps to help you fix the Raspberry Pi not booting issues. Follow the steps one by one to get your device up and running.


What to do if Raspberry Pi 3 or 4 is not booting?

1. Check for power issues

Raspberry Pi not booting

  1. The newer version of Raspberry Pi, like the Pi 4, comes with a USB Type C connection, unlike the older version RPis that use smaller capacity power adapters.
  2. Make sure the device is getting adequate power supply through the official 5.1V 3A PSU.
  3. You can check the requirements section of your device’s instruction manual to find a PSU that can supply adequate power.
  4. Avoid using your smartphone or tablet charger with the newer version of Raspberry Pi.
  5. You may also want to check your power cable. Sometimes, the power cable may not work with a Pi.

Check if the OS is installed.

  1. Needless to say, the Raspberry Pi won’t boot unless an operating system is installed on the SD card that is connected to the device.
  2. You can install Ubuntu on the SD card to boot up your device.
  3. You can also install Raspbian to get the Pi up and running and then choose Ubuntu or other distros of your choice to install.

2. Check for SD card issues

Raspberry Pi not booting
Most of the time (If not all), the Raspberry Pi booting issues are associated with a faulty or corrupt SD card. When the expensive cards are not necessarily better than the cheap SD cards as they tend to fail as well but are usually considered more reliable.

Eject the SD card and insert it into your Windows computer to see if the computer detects the card. Windows will prompt to scan and fix the card if it detects any issues with it. Click on Scan and fix the error option to repair the card.

If Windows fails to repair the card, use the dosfsck tool using a Ubuntu running computer to repair the card. If the issue persists, you may have to format the card and reinstall the OS to make it work. In case the formatting fails, you may need to replace the SD card.

Check the Raspberry Pi’s LED indicators. 

Raspberry Pi not booting
If you are still not sure of the card being corrupt, your Raspberry Pi can help. The device comes with a built-in Red and Green LEDs. While the Red LED indicates the PWR status, which is the power status,  the Green LED indicates ACT that is the activity status of your SD card.

If the SD card is not faulty, the green LED will flash without any issues. However, if the Green LED is not on, it means there is an issue with your SD card. The SD card again may require repair, reformatting, or replacement, depending on the situation.

You can try the SD card formatting utility to reformat the storage. Also, consider reading our how to fix a corrupted SD card on Raspberry Pi for detailed troubleshooting steps.


Raspberry Pi kits for RetroPie and gaming [2020 Guide]


3. Check for issues with the HDMI cable

Raspberry Pi not booting
The Raspberry Pi comes with an HDMI port that is used to connect the computer to a display like a TV or a monitor. If Red and Green indicators are working on the Pi, make sure the HDMI cable is working as well.

If the HDMI cable is working, try forcing the HDMI detection by editing the config file. Here’s how to do it.

  1. Insert the SD card into your computer and navigate to the following location:
    /boot/ partition
  2. Open the config.txt file.
  3. Add the following line to the end of the file:
    hdmi_force_hotplug=1
  4. Save the file and eject the SD card.
  5. Reinsert the SD card and try booting your Raspberry Pi again to see if the issue is resolved.

4. Check if your Raspberry Pi is DoA

Remove term: Raspberry Pi errors Raspberry Pi errors

  1. Disconnect all the cables and other accessories connected to the faulty Pi.
  2. Connect the cable and insert the SD card into a different Raspberry Pi device that you own.
  3. Try to power on the device.
  4. Should the device work without any issues, your Raspberry Pi device can be faulty and may require replacement.
  5. If the issue occurs on the secondary Pi as well, try replacing the HDMI or Power cable or the SD card to see if that resolves the issue.

If you are using a Raspberry Pi A, A+, and Zero device, you can connect it to your Windows computer and open the device to manage to see if Windows detects the connected device. You can connect the Pi to your Windows computer using a USB cable.

Unfortunately, there isn’t much you can do other than ask for a replacement if the Pi has hardware issues. So, follow the steps in the article to diagnose the Raspberry Pi not booting issue and hope it is the usual suspect (SD card) that is causing the issue.

How to Improve Sound Quality on Windows 11: 6 Must-try Tips

Some of our readers have recently complained about some Windows 11 audio issues of which how to improve sound quality on Windows 11 PC is one of the major concerns.

If you’re experiencing similar problems, you don’t have to worry as this article will provide you with simplified steps on how to improve sound quality on Windows 11.

What is the best audio format for sound quality on Windows 11?

If you’re looking for the best digital audio format for audio listening, that would be the WAVE or WAV format.

It is an uncompressed format that captures all the sound frequencies and allows high bit rates, but one song can occupy tens to hundreds of megabytes.

In contrast, MP3, for instance, is a highly compressed format designed for portability and low space allocation and doesn’t preserve all the frequencies.

If you’re asking for sound technologies, at present, two popular sound formats also allow the spatiality of sound: Dolby Access and DTS Sound Unbound.

We highlighted the two apps so you can download them from Microsoft Store. However, you should keep in mind that the quality of the sound depends on the output quality of your sound card and the performance of the onboard or connected speakers.

How can I improve sound quality on Windows 11?

Before engaging in any troubleshooting or settings tweaks, users should ensure they perform the following:

  • Check to make sure that your sound devices are properly connected. Make sure its cable connection isn’t loose.
  • Try plugging USB sound devices into alternative USB ports on your desktop or laptop.
  • You can also run Windows audio troubleshooter to scan and repair your audio devices.
  • You should also check and test your microphone to ensure it is working.

Having confirmed the above checks, if the problem persists, you can explore the advanced solutions provided in this article as suit:

1. Enable the Audio Enhancement feature

  1. Press Windows key + I to open Settings.
  2. Go to Sound from the System tab.
  3. In the Output section, click on your audio device (speaker or headphones).
  4. In the drop-down menu, scroll down to the Output settings section, then toggle the switch for Enhance audio and set it to On.

You should be able to notice some immediate changes in the quality of your audio if you are currently playing one.

Learn how to improve sound clarity on Windows 11 by enabling the Enhance audio feature and reviewing a complete breakdown of the setting in this detailed Enhance audio guide.

2. Configure the Audio Quality of your Input Device (Mic)

  1. Press Windows key + I to open Settings.
  2. Go to Sound under the System tab.
  3. Scroll down to the Input section, and click on your input device (here, you can adjust the input volume, change format quality, and test your microphone). 
  4. Click on Start test and then talk at your normal volume for a few seconds.
  5. Click on Stop test to view the result.
  6. Next, click on your Microphone to open its properties.
  7. Scroll down and toggle the switch for Enhance audio and set it to On.

Now that you can hear the playback through your headphones, you can chat normally. Uncheck Listen to this device if you’re okay with the outcome, then click Apply to save the changes.

3. Use third-party audio boosters

As we mentioned at the start of this article, the sound quality is limited by the sound equipment you’re using.

However, we have a list of sound-enhancing software that can boost the quality of sound on your devices. You can take a look at our selection and test the apps.

On the other hand, there is a sleek program you can try to get a skyrocket sound improvement and change the sound quality on your Windows 11 device.

Boom3D is an audio 3D surround software used by professionals or regular users that needs to boost their sound regardless of the device, headphones, or any equipment you use.

It comes with 31-band equalizer presets, volume booster, or cinematic full sound that can immerse you into the movies or songs you love the most.

Boom3D

Consider this refined sound enhancement tool to finally get that stunning sound experience.
Check price Visit website

4. Restart Windows Audio services

  1. Right-click the Start button in the bottom left corner of the screen and select Run. Type services.msc and then hit Enter on your keyboard.
  2. Locate the Windows Audio entry by scrolling down. Then, right-click it and choose Restart.
  3. Right-click it again and choose Properties from the drop-down menu.
  4. Next, click the Startup Type menu and change the entry to Automatic.
  5. To finish, click Apply and then OK.
  6. Now, go to Windows Audio Endpoint Builder and repeat the process.

Restarting your Windows Audio Services should help to improve the quality of your audio. But if the problem persists, try the next fix.

5. Tweak the Audio Settings in Control Panel

  1. Open the Windows Control Panel and click on Sound. (Make sure you select Large icons as the View By option.)
  2. Right-click the Speakers selection in the Playback tab and click on Enable.
  3. Right-click it again and select Set as Communications Device.
  4. Select Properties by right-clicking on Speakers one more time.
  5. Drag the slider to the highest value on the Levels tab.
  6. Next, go to Advanced and check off the box next to Allow applications to take exclusive control of this device.
  7. You can now restart your computer and check if your audio works.

Your PC’s sound quality should be improved on Windows 11 after following the above steps. However, you can explore our detailed guide on how to fix your PC sound volume if it is too low for additional information on how to improve sound quality on Windows 11.

6. Reinstall your Audio Drivers

  1. Press the Windows + X keys to open a shortcut menu and select Device Manager from the menu.
  2. Expand the controllers for Sound, video, and game. Right-click your PC’s audio drivers and click on Properties.
  3. In the new window, select Driver and click on Uninstall Device to uninstall the drivers.
  4. Restart your computer, and Windows 11 will automatically reinstall the driver.

The outdated sound drivers may be the reason behind the poor sound quality on Windows 11. Whether you use the Intel High Definition Driver or other audio drivers, keeping them in check is key.

If you want an easier and more efficient method, you can try dedicated software to proceed with this action automatically.

And that’s how to improve sound quality on Windows 11 PC. You can also explore our detailed solutions provided on how to improve sound quality on Windows 10 PC, hopefully, you’ll find additional information which may be useful for you.

If you have further questions or suggestions on improving sound quality on Windows 11 PC, please do not hesitate to use the comments section below.

Fix: Our Servers Cannot Process Madden

Our servers cannot process your request at this time. Please try again later error may appear when trying to play specific modes in Madden 23. However, it is a standard error and can be fixed in no time.

This guide will walk you through some simple workarounds to fix this error right after explaining the reasons for its occurrence.

Why does Madden 22 keep saying Our servers cannot process your request at this time?

There could be several reasons why Maden 22 is coming up with this error message. We have listed some of the popular ones here:

  • Server maintenance or outages – If the servers are down for maintenance or have any outages, you might receive this error. Please wait until the servers are up and running again.
  • Internet connectivity issues – You need a sturdy internet connection to play this NFL game; however, if your internet is slow or you have some connectivity issue, you can get this error.
  • Outdated app or missing updates – If your console or the Madden 22 app has pending updates, it might cause this issue. Check for updates for both the console and the app.
  • Conflicting programs – Uninstall the recently installed software on your computer or console, as they might have been interfering and causing the error.
  • Cache – If you haven’t cleared the cache on your console or for the game, it could also cause issues like these. Clear the cache and try again.

How do I fix the our servers cannot process your request at this time error in Madden 23?

Before moving to troubleshooting steps, let us go through these easy fixes to resolve the error: 

  • Restart your router.
  • Restart your computer.
  • Switch from Wi-Fi to Ethernet.
  • Check for pending updates for Windows/Console and Madden 23 app.
  • Make sure you have 1 Xbox Gamertag/1 PSN ID.

If these resolutions didn’t work for you, then try the below-mentioned methods to fix the issue: 

1. Check if the server is down

  1. Go to EA Help: Official Support.
  2. Click on Games.
  3. Type Madden 23 and press Enter in the search box.Madden 23 -our servers cannot process
  4. On the top right corner, you will see Server Status. If it is green, that means it is up and running.Server status

2. Refresh your lineup

  1. Go to your Roster within Madden Ultimate Team.Lineup -our servers cannot process madden 23
  2. Now locate the Lineup Tools, then click Generate Best Lineup.Generate lineupTool
  3. On Normal Lineup, select Create New.CreateNewBESTOVR
  4. For Generate Best Lineup, select Best Team Overall.BESTTEAMOVR4
  5. Go to Defense and select the Superstar player from the lineup.Superstars
  6. Click Deactivate.Superstar Deactivate
  7. Now try to play the Solo Challenge game before making more changes.
  8. If this didn’t work, try removing/swapping out your Team Visuals and Strategy Items, then try again.

3. Restart your console

Tip icon Tip
The steps to restart your console, whether PlayStation or Xbox, are similar. Here we are explaining the steps to restart Xbox.
  1. Press and hold the Xbox or PlayStation button for approximately 10 seconds. The console will turn off.
  2. Now restart it by pressing the button again. 
  3. Connect the controller and press the Xbox or PlayStation button on it.

4. Change DNS to Google Public DNS

4.1 PlayStation

  1. Open the PS menu, and go to Settings.
  2. Select Network and click Set Up Internet Connection.
  3. Select Wi-Fi or LAN cable.
  4. Click Custom, then select IP Address Settings (automatic).
  5. Select DHCP Host Name, click DNS Settings, and choose Manual.ps4-manual-dns-settings-768x432
  6. Enter the Primary DNS: 8.8.8.8 and Secondary DNS: 8.8.4.4DNS-options-our servers cannot process madden 23

 4.2 Xbox One

  1. On the Xbox home screen, click Settings.the-settings-option-in-xbox-Our Servers Cannot Process Error on Madden 23
  2. Go to Network, and then click Advanced settings.network-options-on-xbox
  3. Select DNS settings, then click Manual.
  4. For Primary DNS, enter 8.8.8.8 Primary-DNS-settings-768x470
  5. Now for Secondary DNS, enter 8.8.4.4Secondary-DNS-settings-768x434

4.3 Computer

  1. Press Windows + R to open the Run console.NCPA run command
  2. Type ncpa.cpl and press Enter.
  3. Go to active connection, right-click on it, and select Properties.network settings PC
  4. From This connection uses the following items box, locate and double-click on Internet Protocol Version 4 (TCP/IPv4).Ethernet properties -our servers cannot process madden 23
  5. Click on Use the following DNS server addresses radio button. 
  6. Now for the Preferred DNS server, use 8.8.8.8, and for the Alternate DNS server, use 8.8.4.4.IPv4
  7. Click OK, then again OK.

5. Hard Reset Xbox/PlayStation

  1. Press and hold the Power button on the console for 10 seconds or more until the console shuts down.Console-700x224 -our servers cannot process madden 23
  2. Remove the power cord from the console. Wait for three minutes, then plug it in.
  3. Press the button on the controller to restart your console and controller.

6. Contact EA support

If nothing has worked for you, it is advised that you reach out to EA support. Explain the issue along with the troubleshooting steps you have tried so far. This way, they will be able to assist you better. 

So, these are the methods to fix our servers cannot process your request at this time while playing Madden 23. Try them and let us know which worked for you in the comments below.

Fix: File Explorer Icon Missing in Windows 10 Start Menu

In Windows 10, the File Explorer icon is available by default in the taskbar. File Explorer icon missing from Start Menu is an issue that you may encounter out of nowhere, though.

Some Windows 10 users have reported that File Explorer is missing from the Start menu. This isn’t the only issue as many reported that File Explorer is slow on their PC.

What can I do if the File Explorer icon is missing in Windows 10 Start menu?

1. Verify Settings App

  1. Click on the Start button and then click on the Settings icon available in the Start menu. Alternatively, you can simply press Windows + I keyboard shortcuts, to quickly launch the Settings app. 
    camera not showing in device manager
  2. Click on Personalization and then Start. On the left pane, scroll down to the bottom and click on the link, which reads Choose which folders appear on Start.
  3. Now verify that the File Explorer option is On. If it is disabled, enable it by moving the toggle, and File Explorer will definitely appear in the Start menu. 

But for some reason, if you cannot change the setting for File Explorer or if the toggle is grayed out, then check out the next solution.

2. Manually add File Explorer in the Start menu

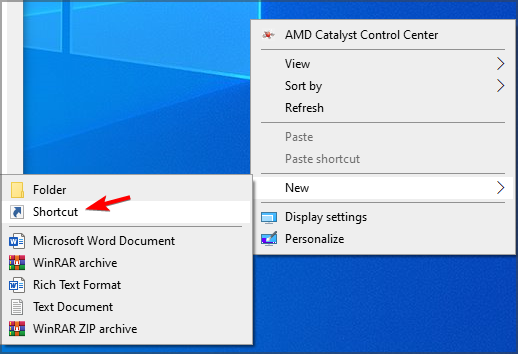
  1. Right-click your Desktop, next choose New, and then Shortcut.
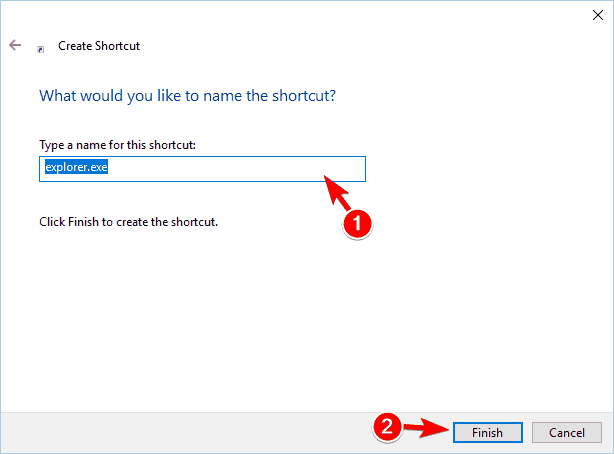
  2. Type explorer.exe and follow the instructions on the screen.
  3. Press Windows + R keyboard shortcuts and type the following path in it and press OK. C:\ProgramData\Microsoft\Windows\Start Menu\Programs
  4. Move the newly explorer.exe shortcut to the Programs directory.
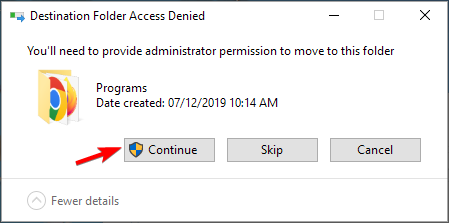
  5. Click on Continue to proceed.

3. Change File Explorer properties

  1. Launch the Run dialog box by pressing Windows + R keyboard shortcut.
  2. In the Run dialog box type the following: C:\ProgramData\Microsoft\Windows\Programs
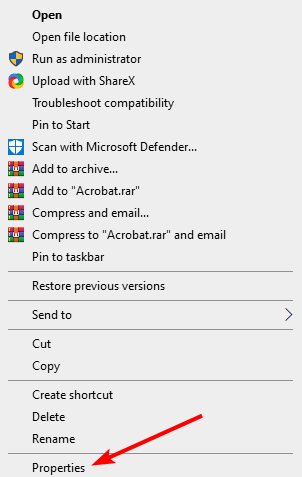
  3. In the folder, make right-click on the empty area of the folder and from the context menu select Properties.
    properties
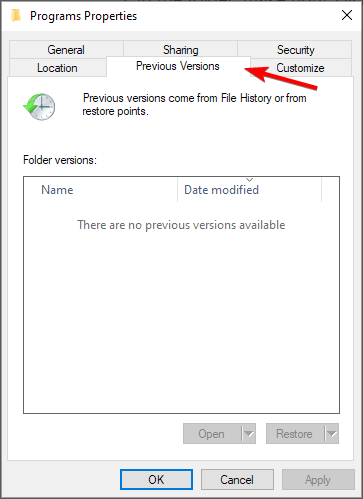
  4. Switch to the Previous Versions tab.
  5. Choose the earlier data, and then click on the Restore button.

Now doing this, the File Explorer shortcut will start appearing in the Start menu places folder. If it appears in the folder, you can enable the File Explorer toggle in the settings app.

Why are my icons missing from the Start menu in Windows 10?

When you have icons missing from the Start menu in Windows 10, it’s usually the corrupt system files to blame. Or it could be a trivial bug in the explorer.exe process, restarting, which should get things up and running.

Besides, do make sure that you didn’t inadvertently remove the icons that are missing. If so, you can always manually pin programs to the Start menu.

That’s all! We are confident this method will resolve the File Explorer Icon Missing in Windows 10 Start Menu issue.

If you have more issues, visit our File Explorer issues guide for more solutions.

Why not give these methods a shot and let us know which one you used to resolve the missing File Explorer bug?

LDAC on Windows 11: How to Enable It

In today’s guide, we will look closer and show you how to enable this feature on your computer. Windows 11 doesn’t have native LDAC support. However, you can enable it in just a few easy steps:

LDAC codec has many advantages, and users wonder if they can or should use LDAC on Windows 11. This codec allows users to experience music in the highest possible quality.

How do I enable LDAC on Windows 11?

There are a few Bluetooth adapters or codecs that offer LDAC support. The offer is severely limited, so do thorough research before buying one.

Use third-party codec

  1. Visit the Alternative A2DP Driver page.
    a2dp driver-download
  2. Once the software is downloaded, run the setup file.
  3. Configure the software to use the LDAC codec and save changes.
    codec settings
Note icon NOTE
Remember that this application requires a license to work, but you can test it for free during the trial period.

Is LDAC supported on PC?

Yes, but the support varies depending on the operating system. Windows 11 doesn’t have native support, while some Linux distributions support LDAC out of the box.

Is LDAC better than aptX?

In theory, yes, since it has better bitrate. However, at 330kbps, aptX outperforms LDAC. However, if your device can handle a higher bitrate, LDAC might be a better choice.

Is LDAC actually lossless?

While it uses 990kpbs and offers amazing quality, LDAC is still not lossless but provides better quality than other codecs.

How does LDAC compare to SBC and AAC codecs?

LDAC offers better audio quality if you compare it to SBC and AAC. That’s because it supports bitrates up to 990 kbps, making it perfect for high-resolution audio.

On the other hand, SBC is pretty basic and maxes out at around 328 kbps. AAC has better audio quality than SBC, it still doesn’t match LDAC’s clarity

And that’s everything you need to know about LDAC support in Windows 11. Even though it’s not natively supported, there are third-party codecs that allow you to use it.

To learn more about Bluetooth, we have a great guide on Bluetooth codecs Windows 11 supports, so you shouldn’t miss it.

You may be interested in video codecs, so check out our extensive article. Besides, find out what to do if facing issues with Windows Bluetooth.

In the comments section below, let us know what audio codecs you use and your reasons for using them.

LDPlayer vs BlueStacks: Which Android Emulator Reigns Supreme?

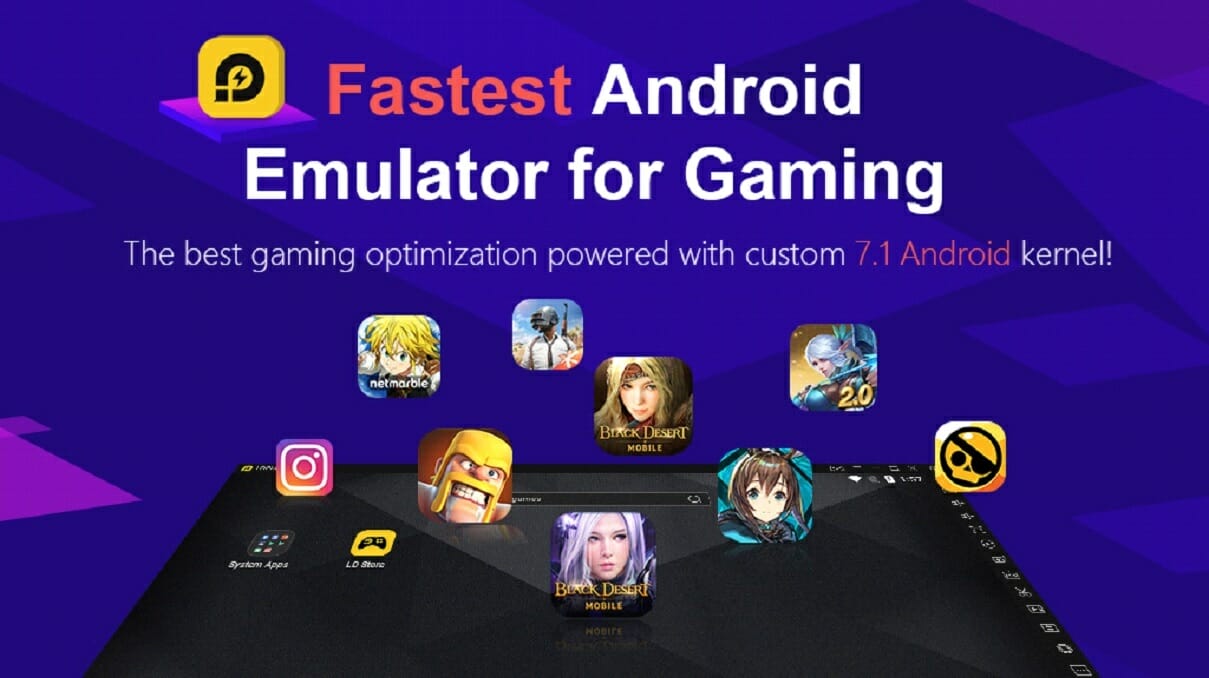
Emulators like LDPlayer and BlueStacks let you run mobile games on your computer. With so many free options available, these two really stand out for their performance and features.

LDPlayer is often praised for its speed and smooth gameplay. It’s a great choice even for lower-end PCs. Meanwhile, BlueStacks is a veteran, known for its user-friendly interface and customization options.

Let’s take a look at the pros and cons of each emulator, focusing on performance, ease of use, features, and compatibility to help you decide which one is right for your gaming needs.

LDPlayer vs Bluestacks – which one is the best choice?

Let’s take a quick look at how they compare:

CriteriaLDPlayerBlueStacks
Work SpeedFast on all PC typesSlower on low-end PCs
Number of AdsMinimal ads, clean interfaceFrequent ads and shortcuts
Preset Control SettingsGood presets for popular gamesGood presets for popular games
Convenience of InterfaceSimple and user-friendlyOverloaded with features
LocalizationGood, some occasional errorsHigh-quality, no errors
Gaming PerformanceExcellent, regular updatesResource-heavy, slower load

Now we dig deeper:

1. Work Speed

The speed of work is the most critical criterion.

BlueStacks cannot be called light – and we are talking here about the time of the emulator launch and the speed of its work on low-end PCs in general.

You might be surprised if you turn to LDPlayer after a long time of using Bluestacks because the program works much faster!

At the same time, the emulator can run heavy applications like Epic Seven, Black Desert Mobile, and Garena Free Fire.

LDPlayer proves its capabilities in providing fast performance, whether using beast or weak PCs. Thus, LDPlayer wins in this indicator.

⚡ LDPlayer vs. Bluestacks – 1:0

2. Number of ads

Bluestacks was originally a commercial project. Old users may remember the days when this emulator was paid for. This is no longer the case – but many ads are shown not only on the loading screen.

On Bluestacks desktop, you will constantly have virtual shortcuts leading to the download pages of certain games advertised by Bluestacks. You can delete these shortcuts, but soon they will reappear.

In LDPlayer, this is so far much simpler. There are ads in the App Store developed by LDPlayer. But on the home screen, LDPlayer keeps everything clean, and the program won’t pop up ads during your usage.

At the launch of LDPlayer, the emulator also advertises itself. Of course, this program may be more advertising as it grows. But so far, LDPlayer wins in this parameter as well.

? LDPlayer vs. Bluestacks – 2:0

3. Preset Control Settings

ldplayer vs bluestacks

For the most popular games, emulator developers try to create ready-made control settings. You can download a new game and be surprised that you don’t have to configure anything. All the keys are already in their places.

This situation can happen both with Bluestacks and LDPlayer. At the same time, LDPlayer is a Chinese program. Settings for popular games in China can appear very quickly.

In that case, many control settings are tested before the global release. Nevertheless, we recognize the equality of both emulators in this parameter. Therefore, the developers of both emulators are doing their job well.

? LDPlayer vs. Bluestacks – 3:1

4. Convenience of the interface

ldplayer vs bluestacks

BlueStacks is overloaded with unnecessary functions, while the user only needs it as a convenient launcher for launching mobile games.

At the same time, LDPlayer does not add anything extra to the interface. Instead, there is just a standard desktop of an android device and the necessary set of settings on the right side of the program window.

In our opinion, this is much more convenient.

? LDPlayer vs. Bluestacks – 4:1

5. Localization

Since Bluestacks is created and maintained by an American company, there is no problem with localization here. But Chinese developers have also recently learned how to do high-quality translations.

Of course, errors in the interface do happen, but these cases are rare and not critical. Nevertheless, we must admit that there are no mistakes at all in Bluestacks, and that’s why the American program wins here.

? LDPlayer vs. Bluestacks – 4:2

6. Gaming Performance

ldplayer vs bluestacks

Starting with version 4, Bluestacks became an extremely productive emulator, which owners of weak PCs noticed.

However, the emulator also consumes a lot of resources at the expense of the interface or something else, so it takes a long time to load.

LDPlayer also works well with heavy games but makes it easier and faster. And the developers of LDPlayer keep regular updates to improve the compatibility. Thus, the Chinese emulator wins this category.

? LDPlayer vs. Bluestacks – 5:2

Is LDPlayer better than Bluestacks?

So, we compared emulators according to the five most important criteria. According to the results of the comparison, LDPlayer won a convincing victory!

Bluestacks won only in one category – localization. We can not call Bluestacks a lousy emulator, but in some key elements, most users will rather have LDplayer.

So we will say that the victory remains with LDPlayer, and our primary consideration is performance.

If you also want to test these two emulators, please download them from the links below.

⇒ Get LDPlayer

⇒ Get Bluestacks

That is as much as we have for you in this Bluestacks vs LDPlayer comparison.

While we have done detailed and educated research to bring you this guide, we always like to leave the final choice to your preferences. So, if performance is not your primary criterion, you may choose Bluestacks over LDplayer.

What do you think of these emulators? Do you agree with the comparison results? Write your thoughts in the comments section below!

Fix {“errors”:{“code”:101000,”message”:”internal exception”}} in NordVPN

The error message Something went wrong when trying to buy a license inside NordVPN has been showing up on quite a few systems lately.

This issue can be extremely annoying, as, besides the fact that you can’t make the purchase, your account will not be activated either.

This is extremely important, especially if you’re using NordVPN to hide important information about yourself from third-party entities online, or you’re bypassing some server location limitations.

Even though an official release for this issue has not been released by the developers at NordVPN, we found some important steps you need to be aware of.

These steps are not actually a solution to the problem, but a series of checks that you need to perform in order to make sure that your payment goes through.

What’s Nord Account?

The Nord Account is the unified account that can be used to connect to all Nord products, not only NordVPN.

NordVPN’s developer (Nord Security) offers more than just the VPN, it has two more products: NordPass (password manager) and NordLocker (encrypted cloud).

That’s why, before accessing any of these platforms, you’ll have to log in to your Nord Account. You can use it to manage your subscriptions, and change your settings, and account info (billing, passwords, etc).

Is Nord Account the same as NordVPN?

No. While Nord Account is the way you get access to NordVPN, having a Nord Account doesn’t give you access to all the products. You need to get each of the Nord services separetely.

So for those of you that are confused and wondering if Nord Account is safe, the answer is yes, it’s safe and legit, owned by the NordVPN company.

Why will my NordVPN not connect?

If your connection is up and running and other applications work fine, then it’s possible that either your Nord Account or NordVPN app have some issues:

  • Outdated/corrupt app – out-of-date NordVPN apps don’t display all the servers and often fail to connect at all
  • Your plan expired – it’s possible that your subscription info expired or was disabled because you did not pay for it – check your account and transactions
  • Your firewall is blocking NordVPN– sometimes security software may flag secure apps like NordVPN, check your firewall and add NordVPN as an exception, if necessary

The most common errors related to NordVPN not working include:

  • {“errors”:{“code”:101000,”message”:”internal exception”}}
  • NordVPN error code: 905308
  • NordPasss: something went wrong
  • Nord Account 500 error – 500 internal server error
  • NordVPN Chrome extension something went wrong
  • NordVPN sign-in failed/ something went wrong
  • NordVPN connecting is taking too long

If NordVPN displays the Something went wrong message, or the above-mentioned errors, follow the steps below to troubleshoot and fix the issue.

How can I fix Something went wrong error in NordVPN?

1. Reinstall NordVPN from an official source

  1. Head to Start Menu > Control Panel.
  2. Up next, click on Uninstall a Program under the Programs section.
  3. Search for NordVPN inside the programs list and select it.
  4. Press Uninstall.
  5. Confirm your want to uninstall NordVPN.
  6. Follow the on-screen instructions to complete the removal process.
  7. After the VPN is removed, download the official NordVPN software.

Cracked VPN versions never work properly. If that’s your case too, make sure you grab the official Tefincom & Co., S.A. VPN solution this time.

After applying the above steps, try to activate it once more and confirm getting rid of the error. You’ll be able to enjoy online freedom anywhere in the world without any data limits.

If your wish is to speed up NordVPN, use a peer-to-peer server, change the server you are using, and use the confirmed tips from this detailed guide.

NordVPN

Reinstall NordVPN right away when getting the Something went wrong error!
Check price Visit website

2. Make sure your card has enough funds available

Even though this idea seems like a no-brainer, some users have had this issue because they didn’t have enough funds on the card they chose to make the payment with.

Check your Nord Account to see which card is linked to them, then check if you have enough funds available to complete the payment.

3. Check the information you entered while setting up the payment

  1. Make sure that the data found on your card is exactly typed into the payment system inside NordVPN.
  2. Not having an exact match of the data there will cause the payment to not go through.

4. Check the expiration date of your card

  1. In case you see the error message Something went wrong when trying to pay your NordVPN subscription, you will need to make sure that your card is not expired.
  2. If you see that the date written on your card has passed, you will need to contact your card issuer (bank) and get an updated card.

5. Fraud detection

  1. Another reason for this error message and the inability to pay your subscription to NordVPN could be that you’re trying to perform the payment with a VPN service active or while using a proxy server.
  2. In the case that your IP address is not belonging to the country in which your card is opened in, it will cause the NordVPN software to decline the payment for security reasons.
  3. Disable your VPN or proxy and try to make the purchase again.

6. The transaction might have been declined by your bank

  1. Even though this issue doesn’t happen very often, there were cases in which the bank refused the payment for security reasons.
  2. To fix this, you will need to contact your bank and ask them to allow future payments to NordVPN.

In this article, we explored the most common reasons for encountering the Something went wrong NordVPN error message.

Please feel free to let us know if this guide helped you solve your issue by using the comments section found below.

Raspberry pi not Connecting to WiFi/Ethernet

If your Raspberry Pi is not connecting to Ethernet or WiFi, you need to check your WiFi router if the internet is working or not.

If the internet is not working, try resetting the WiFi router or the modem to resolve the issue. In case the issue persists, the problem is most likely with your Raspberry Pi.

Several users have reported similar issues in the official Raspberry Pi forum:

My RPi 3 B+, which I’ve had for a couple years now, has recently refused to connect to the internet. I have it connected to ethernet because the wifi connection is weak in this part of the house. I cannot successfully ping its hostname or IP from any other computer in the house.

In this article, we have listed a couple of troubleshooting tips to help you fix the Raspberry Pi Ethernet not working issue.


How do I fix Raspberry Pi Ethernet not working?

1. Check for issues with SSID

Raspberry Pi is not connecting to WiFi
  1. If the Raspberry Pi has an issue connecting to your WiFi network, check the SSID for invalid characters.
  2. Make sure your network name (SSID) does not have an underscore in it.
  3. Remove the underscore, and then try to connect your Raspberry Pi to the WiFi network.
  4. Removing the underscore has helped several users resolve the issue.

Additionally, if your router supports both 2.4GHz and 5GHz wireless network, try using the 2.4GHz network. Try connecting the device to the network again and check for any improvements.


2. Check your home network for issues

Reboot the router 

  1. Turn off the router and unplug the power from the wall outlet.
  2. Turn off your WiFi router if you are using one.
  3. Disconnect the Ethernet cable connected to your modem.
  4. Leave the router idle for a minute.
  5. Reconnect the power and turn on the modem and your WiFi router.
  6. Once all the lights stop blinking, connect Raspberry Pi, and check for any improvements.

Check the Ethernet port and cable 

Raspberry Pi is not connecting to WiFi
  1. Make sure the Ethernet cable is working by connecting directly to your PC.
  2. If the Ethernet cable is not working, consider replacing the cable.
  3. Try using a different Ethernet port on your router to check for issues with the port.

If the Raspberry Pi not connecting to Ethernet or WiFi issue persists, consider updating your WiFi router’s firmware. Restoring the router settings to factory default and then reconfiguring the network device can also help if the issue is due to your home network and not Raspberry pi.


3. Reinstall Raspbian image

Raspberry Pi is not connecting to Ethernet
  1. Download the latest version Raspberry Pi imager to your computer.
  2. Run the installer to install the Raspberry Pi imager.
  3. Connect an SD card reader with an SD card inside to your computer.
  4. Open Raspberry Pi imager, and make sure the SD card is detected.
  5. Choose the required OS from the list presented.
  6. Choose the SD card you wish to install the OS on.
  7. Click Write to begin the installation.
  8. Once installed, reconnect the SD card to your Raspberry Pi and check for any improvements.

If reinstalling the latest version of Raspbian did not help, try downgrading to an older version to see if that works.

Check for hardware issues

  1. If the issue persists, check your Raspberry Pi Ethernet port for hardware issues.
  2. Connect an external Ethernet adapter to the device and check if the internet works.
  3. In case the internet works, the Ethernet port on your Raspberry Pi is faulty.

Why won’t my Raspberry Pi connect to Ethernet?

Your Raspberry Pi device may stop connecting to the WiFi if it detects issues with the SSID or other network configuration.

However, when the issue is with your Ethernet connection, it is usually a dead Ethernet port that is causing the issue.

We hope you managed to fix the Raspberry Pi Ethernet not working problem and that you can easily use the internet right now. Let us know your thoughts on the topic in the comments section below.

There are no More Endpoints Available Endpoint Mapper [Fixed]

Computer errors are somewhat common, and while some errors can be generated by Windows 10, some can be caused by third-party applications.

Users reported There are no more endpoints available from the endpoint mapper error, and this error can appear in all sorts of different situations.

Since this error can be rather annoying, today we’re going to show you how to fix it.

How can I fix the No more endpoints available error?

How do I fix the no more endpoints available error?

1. Reset the credentials for Enterprise Single Sign On service

  1. Open the Services window.
  2. Locate the Enterprise Single Sign On service and make sure that it’s running.
  3. Specify which user will run this service by double click the service to open its properties.
  4. Go to the Log on tab and select This account. Enter your account username and password and click Apply and OK to save changes. Alternatively, you can click the Browse button and search for your account.
    no-more-endpoints-available-from-endpoint-mapper-log-on-1
  5. Restart the service and check if the problem is resolved.

2. Restart the byProcessManager and RPC Server services

  1. Open the Services window.
  2. Locate byProcessManager and RPC Server services. Right-click each of these services and choose the Restart option.

How do I fix the no more endpoints available printer error?

1. Turn on the Firewall

  1. Press Windows Key + R, enter services.msc and press Enter.
    no-more-endpoints-available-from-endpoint-mapper-services-1
  2. Locate the Windows Firewall service, right-click it, and choose Start from the menu.
    no-more-endpoints-available-from-endpoint-mapper-services-2
  3. Close the Services window.

Note: For some unknown reason it seems that the printer installation process is related to the status of the Windows Firewall, and in order to successfully install a printer, you’ll have to turn this service on.

After starting the Windows Firewall service, the error should be fixed and you’ll be able to install your printer without any problems.

If your default printer keeps changing in Windows 10, check out this step-by-step guide to fix the issue.

2. Update the printer driver

This error can also be caused by a malfunctioning or old printer driver so you need to make sure that you have the latest drivers installed.

You can do that manually by using Device Manager or using the media included by the manufacturer in the box. Another option is to go to the manufacturer’s website and download it.

All these solutions are fine, but they don’t guarantee to provide the correct driver.

The easiest and safest way of making sure that you end up with a perfect running driver is to use specialized software like Outbyte Driver Updater.

If you’re not familiar with it, it’s an excellent tool that updates your drivers in just a few seconds automatically.

First, you need to download and install Outbyte Driver Updater. The app will start automatically after the installation and will begin searching for driver issues on your PC.

When the process ends, you receive a list of drivers recommended for installation.

The only thing left to do is to decide whether you install all of them of just a few. For the first option, you just need to click the Update All button from the top.

If you want to install them separately, you need to check their corresponding boxes from their left and then hit the Update button from their right.

⇒ Get Outbyte Driver Updater

3. Make sure the Print Spooler service is running

  1. Make sure that your printer is connected and turned on.
  2. Open the Services window and locate Print Spooler service.
  3. Check the status of the service. If the service isn’t running, right-click it and choose Start from the menu.
  4. Close the Services window and check if the problem is resolved.

4. Check the Print Spooler dependencies

  1. Open the Services window, locate the PrintSpooler service , and double click it.
  2. When Print Spooler properties window opens, navigate to the Dependencies tab.
  3. In the This service depends on the following… expand all services.
  4. Go back to the Services window and a look for the services that you got in the previous step. In our case, those were DCOM Server Process Launcher and RPC Endpoint Mapper services (you might get different results on your PC).
  5. Locate those services, double click them, and set their Startup type to Automatic. If any of the services isn’t running, click the Start button to start it.
    no-more-endpoints-available-from-endpoint-mapper-automatic-service-1

5. Run the Print Troubleshooter

  1. Open Control Panel.
  2. Navigate to the Hardware and Sound, and then to the Device and Printers section.
  3. Right-click your printer and choose Troubleshoot from the menu.
  4. Follow the instructions and wait for the Troubleshoot to fix your problem.

6. Change the Print Spooler recovery options

  1. Open the Services window and double click the Print Spooler service to open its properties.
  2. Go to the Recovery tab.
  3. Set First failure, Second failure, and Subsequent failures to Restart the Service. Set Reset fail count after and Restart service after to 1.
  4. Click Apply and OK to save the changes.

Note: By changing these options, the Print Spooler service will automatically start whenever it crashes or if it suddenly stops for any reason.

If the Print Spooler service keeps stopping on Windows 10, follow the steps in this comprehensive guide, and solve the problem in no time.

How do I fix the no more endpoints available sharing error?

1. Add the registry keys to your registry and change the permissions

  1. Download the MpsSvc.reg and BFE.reg files and add them to your registry simply by double-clicking both files.
  2. Restart your PC.
  3. Press Windows Key + R, type regedit and press Enter or click OK.
    no-more-endpoints-available-from-endpoint-mapper-regedit-1
  4. Go to the following key from the left pane: HKEY_LOCAL_MACHINESYSTEMCurrentControlSetServicesBFE
  5. Right-click the BFE key and choose Permissions from the menu.
    no-more-endpoints-available-from-endpoint-mapper-regedit-2
  6. Click the Add button.
    no-more-endpoints-available-from-endpoint-mapper-regedit-3
  7. In the Enter the object names to select field enter Everyone. Click Check Names and OK.
    no-more-endpoints-available-from-endpoint-mapper-regedit-4
  8. Everyone should be now added to the Group or user names section.
    no-more-endpoints-available-from-endpoint-mapper-regedit-5
  9. Select Everyone from the list and check the Full Control option in the Allow column. Click Apply and OK to save changes.

Note: This solution is a bit advanced and it involves changing your registry.

Before making any changes, we strongly suggest that you create a backup so you can easily restore it if anything goes wrong.

Disclaimer: This is an unofficial download mirror for the MpsSvc.reg and BFE.reg files. WindowsReport is not responsible for the download or the installer package.

Restart the Base Filtering Engine and Windows Firewall services

  1. Open the Services window.
  2. Locate the Base Filtering Engine and Windows Firewall services and enable them both.
    no-more-endpoints-available-from-endpoint-mapper-regedit-6

2. Run the SFC and DISM scans

  1. Search for cmd and click on Run as administrator to start Command Prompt.
  2. Enter sfc /scannow and press Enter.
  3. After the scan is completed, enter the following command and press Enter to run it: Dism /Online /Cleanup-Image /RestoreHealth
  4. After the DISM scan is completed, close Command Prompt.
  5. Restart your PC and check if the problem is resolved.

If the DISM scan fails, check out this quick guide and get rid of the worries. Also, if the SFC scan has stopped before the process finished, check out this easy fix.

How do I fix the no more endpoints available Avast error?

1. Download the latest update file for Avast

You can fix this problem simply by downloading the latest update file for your version of Avast.

To do that, simply go to Avast’s download section and download the necessary files. Install the download files and restart your computer.

When your computer restarts, open Avast and click on Fix Now button. The software will attempt to fix the problem.

2. Repair the Avast installation

  1. Search for control panel and click on Control Panel from the results.
  2. Select the Uninstall a program option.
    no-more-endpoints-available-from-endpoint-mapper-control-2
  3. Select Avast and choose the Repair or Change options from the menu (you can also right-click the application from the list and choose the desired option).
    no-more-endpoints-available-from-endpoint-mapper-control-3
  4. Follow the instructions on the screen to complete the repair process.
  5. After you complete the repair, restart your computer and check if that fixes the problem.

3. Reinstall Avast

If this problem still persists, you might want to try reinstalling Avast. To do that, first, you need to uninstall Avast. Uninstalling Avast isn’t usually enough, and you’ll have to remove all files and registry entries associated with it.

You can easily do that by downloading and running Avast Uninstall Utility. After you remove all Avast files from your PC, restart your computer. When your PC restarts, download the latest version of Avast and install it.

After you install Avast again, the problem should be resolved.

How do I fix the no more endpoints available Exchange error? 

1. Make sure that firewall service is running

Users reported that one of the simplest ways to fix this problem is to enable the Microsoft Firewall service.

We already explained how to enable Microsoft Firewall service in one of our previous solutions, so be sure to check it out.

2. Delete the Watermark and Action keys

  1. Open Registry Editor.
  2. Navigate to the following key and expand it: HKEY_LOCAL_MACHINESOFTWAREMicrosoftExchangeServerv14HubTransportRole
  3. You should see the Watermark and Action keys available. Delete them both.
  4. Close Registry Editor and check if the problem is resolved.

Note: Deleting registry keys can lead to system instability, therefore we recommend creating a backup of your registry before proceeding. To delete the problematic keys, do the following:

If you can’t edit your Windows 10’s registry, read this handy guide and find the quickest solutions to the issue.

3. Make sure that necessary services are running

  1. Open Services window.
  2. Locate Microsoft Exchange Search Indexer, Microsoft Exchange RPC Client Access server, and Microsoft Exchange System Attendant services and make sure that all are running.
  3. After starting them, close the Services window and check if the problem is resolved.

There are no more endpoints available from the endpoint mapper error can interfere with file sharing, printer setup, or with your antivirus tool, and in most cases, you can fix this problem by checking your services and changing your settings.

In case that none of our solutions work for you, you might want to consider performing a clean install of Windows 10.

If you have any other questions, don’t hesitate to leave them in the comments section below and we’ll be sure to check them out.

This Document Contains Links that may Refer to other Files [Fixed]

Trying to open a Word document and getting the This document contains links that may refer to other files error? Don’t panic.

There is a workaround that can help you suppress this message and fix/update all the links that are causing the message in the first place.

So, during the following lines, we will learn how to address the persistent Word error message saying that your document is containing external links that can modify the structure and the overall template that was previously set.

  1. From Word, click on File and navigate towards Options.
  2. Choose Quick Access Toolbar.
  3. Find the Choose commands from field and then change its dropdown into All Commands.
  4. Scroll down and click on Edit Links to Files and then select the Add button.microsoft word edit links to files
  5. Save your changes.
  6. Now, the page with a chain icon should have been added to your Quick Access Toolbar.
  7. Click on this icon and a list of links will be displayed.
  8. Select these links and set to Manual Update, or break all links.
  9. That should fix your problem.

First of all, you can try to rename your Word document and check if the problem persists. If not needed, you can also break links as that can suppress this document contains links that may refer to other files message.

You can also check the following options in Word for fixing the ‘links’ issues:

  • Go to File, choose Options and access Display; under Printing Options check the Update linked data before printing feature.
  • Go to File, access Options and go to Advanced; then from General, check ‘update automatic links at open’.

Don’t forget to review your links before choosing to apply any certain modifications or updates to the existing document.

3. Run the Automatic troubleshooter

Also, if the error is still there after applying the steps from above, try to run the Microsoft Office automatic troubleshooter: go to File, pick Info and initiate the troubleshooter listed under Check for issues.

4. Use a Repair tool

Another fast way to fix any Word document-related issue is to simply use a third-party repair tool just like Stellar Repair for Word.

Stellar repairs text, font, hyperlinks, header, footer, bookmarks, comments, and pretty much all aspects of your Word document, bringing it back into a perfectly functioning state.

⇒ Get Stellar Repair for Word

If you know other similar solutions that can fix this malfunction don’t hesitate and share everything with us so that we can update this tutorial accordingly – don’t worry, you will receive the credits for the shared solutions.

Need more help with Microsoft Office products? You can find it in our dedicated Office Hub.

For more articles that can help you solve common PC issues, visit our Fix section.

5 Ways to Run File Explorer as Administrator in Windows 11

Have you been looking for ways to run File Explorer as an administrator in Windows 11, but you do not yet know how to configure the File Explorer settings?

In this article, you will find simplified steps to run File Explorer as an administrator in Windows 11. You can apply any of the steps that you feel comfortable with.

Can I configure File Explorer settings?

For some of our readers asking if they can configure the File Explorer settings, yes, it is possible, and there are several ways to access the File Explorer settings on Windows 11.

The following are some of the ways to tweak File Explorer settings:

  • Change folder and search options through the File menu.
  • By using the Search box in File Explorer.
  • Using the Command Prompt (control.exe folders).
  • By opening the Run command dialog box.

By using any of the above methods, Windows users can change their default File Explorer settings and options.

How can I run File Explorer as an administrator in Windows 11?

1. Use Task Manager

  1. Right-click on the Start button on your Taskbar. From the context menu, select Task Manager.
  2. Next, choose File from the menu bar, and then click on Run new task from the options.
  3. Type explorer.exe in the Create new task window.
  4. Now, check the Create this task with administrative privileges box and then click OK.

Windows should now open File Explorer with administrator access.

2. Use the Run console

  1. Press the Windows + R keys to open the Run console.
  2. Type the following command line in the text field and press Ctrl + Shift + Enter on your keyboard to start File Explorer as administrator: C:\Windows\explorer.exe

And that’s it with using the Run dialog box to run File Explorer with administrator. The next method talks about how to use PowerShell to run File Explorer as an administrator.

3. Use PowerShell

  1. Left-click on the Start button and type Windows PowerShell in the Search box and click on Run as Administrator from the options.
  2. Type or paste the following command and press Enter: C:\windows\explorer.exe /nouaccheck

In case you’re experiencing Windows PowerShell errors, check out this article to know how to fix the issue.

  1. Press the Windows key on your keyboard, and type explorer.exe.
  2. Then, select Run as administrator from the menu.

5. Run as admin from File Explorer

  1. Press the Windows key + E to start File Explorer.
  2. Then, navigate to the following location on your drive: C:\Windows
  3. Scroll down to locate Explorer, right-click on it, and select Run as administrator.
  4. A new elevated File Explorer window will open after you click on the UAC prompt.

With the above steps, you can now access any program or file through File Explorer. However, ensure that the file or program you seek is not hidden.

In case of necessity, you can easily fix your file explorer in 7 ways if it won’t open in Windows 11 by exploring this guide.

Alternatively, if you choose to opt for other file managers that offer more features than File Explorer, you can explore our dedicated guide for that.

It may also pique your interest to find out, through our article, how to enable the dark theme on File Explorer giving you a different look from the usual light theme and reducing your eye strain.

To learn more about administrator privileges, we also have a guide on how to run Task Manager as admin, so don’t miss it.

If you have any additional information or questions on this topic, do not hesitate to use the comments section below.

PxHIpa64.sys Memory Integrity: How to Fix Incompatible Drivers

Turning on the Memory Integrity helps prevent malicious code from accessing high-security components in the event of an attack. However, enabling Core isolation on Windows 11 can be challenging due to the PxHIpa64.sys Memory Integrity error users encounter.

Hence, we will outline various ways to fix this in this guide. Also, we have a similar article about Wdcsam64.sys Memory Integrity error and how to fix it on Windows 11.

What causes the PxHIpa64.sys Memory Integrity?

There could be various causes of the PxHIpa64.sys incompatible driver error on Windows 11. Some popular ones are:

  • Interference from programs using PxHlpa64.sys driver – Software like Roxio and others use the PxHlpa64.sys driver to run their processes on the system. These programs can interfere with Windows security, preventing the Memory Integrity feature from working.
  • Outdated drivers – Different drivers on your computer are responsible for various components and devices, including the security system. So, the PxHIpa64.sys Memory Integrity error may appear when enabling the Core isolation feature if your system drivers are not updated.
  • Corrupt system files – Corrupt system files on your PC can be due to viruses and malware infection. Hence, they can infect other files, including the PxHIpa64.sys location, resulting in the Memory Integrity error whenever invoked.
  • Faulty Windows Update – Installing a Windows build that is not stable can prompt a problem with the driver and the Core isolation system.

Other factors not mentioned here can also be responsible for the PxHIpa64.sys Memory Integrity error. Nevertheless, we shall discuss some effective fixes to resolve the error.

How can I fix the PxHIpa64.sys Memory Integrity?

Before attempting any advanced troubleshooting steps, apply the following checks:

If you can’t resolve the error, proceed with the following solutions:

1. Disable PxHlpa64.sys via Registry Editor

  1. Press the Windows + R button to open the Run dialog box, type in regedit, and press Ctrl + Shift + Enter to open the Registry Editor with admin access.
  2. Click Yes when the User Account Control (UAC) is prompted.
  3. Navigate to the following location: HKLM\SYSTEM\CurrentControlSet\Services\PxHlpa64.sys
  4. On the right side of the screen, double-click on the Start REG_DWORD. Set the base of Start to Hexadecimal, change the Value Data to 4, then click OK to save the changes.
  5. Restart your PC and check if the error persists.

Tweaking the Registry Editor allows you to access data you can use to modify and stop the activities of the PxHIpa64.sys file on your computer. Check how to fix a corrupt registry if you encounter issues with it.

2. Run DISM and PNPUtil tools in CMD

  1. Left-click the Start button, type Command Prompt, and click the Run as administrator option.
  2. Click Yes on the User Account Control (UAC) prompt.
  3. Copy this command and paste, then press Enter after each one: dism /online /get-drivers /format:table
  4. Under the Provider Name table, find the line containing the PxHIpa64.sys, then take note of the Published name.
  5. Type in the following command, replacing the Published name with the driver name, then press Enter: pnputil /delete-driver oem5.inf /uninstall /force
  6. Restart your PC and check if the error persists.

Uninstalling the driver will remove any form of interference it is causing the Memory Integrity feature on your computer.

Meanwhile, if the Command Prompt is not working on your PC, do not hesitate to check for fixes in this guide.

3. Update Windows drives

  1. Press the Windows + I key to open the Windows Settings.
  2. Navigate to the Windows Update tab and select the Advanced options.
  3. Select Optional Update.
  4. Click the drop-down button on the Driver Update and checkmark the list of updates available.
  5. Click the Update and Install button and wait for the drivers to install.

Installing driver updates will fix compatibility issues caused by outdated drivers. Further, you can read more on how to update system driver packs on Windows here.

If you want to act fast and get the latest Windows drivers, you can quickly perform this with Fortect Driver Updater, dedicated software that can scan your PC and update drivers on short notice.

⇒ Get Fortect Driver Updater

4. Uninstall recent Windows updates

  1. Press Windows + I key to open the Settings app.
  2. Click Windows Update and select Update history.
  3. Tap the Uninstall updates button and select the most recent update.
  4. Click on Uninstall.

Uninstalling the recent Windows update will delete the recently installed build causing the PxHIpa64.sys Memory Integrity error.

Read our guide on how to uninstall updates on Windows 11 for more steps.

In addition, do not hesitate to check our detailed guide about the Brusbsib.sys incompatible driver error and how to fix it. Also, you can read about fixing Win32kfull.sys BSOD errors on Windows 11.

If you have more questions or suggestions, kindly drop them in the comments section.

How to Uninstall Edge Extensions: 4 Ways to Pick From

Some of our readers complain that they can’t remove Edge extensions. This could be a big issue if the extension in question interferes with the browser’s performance. But we have good news.

We found a few ways to remove stubborn extensions and built a quick step by step guide that you can follow along. So if you want to get rid of unwanted addons in Edge, keep reading.

How can I uninstall Edge extensions?

Before we start, try shutting down and restarting Edge, update it, and close all tabs before trying to uninstall the extension.

If these tricks won’t do, apply the steps below:

1. Remove Edge extensions from within the browser

  1. Launch the Microsoft Edge browser, click the three dots in the top right corner, and click on Extensions.
  2. Select from the list of extensions and click on Manage Extensions.
  3. Toggle off the extension to disable it and check if the error persists.
  4. Repeat this process for all extensions to find the Extensions causing the error.
  5. Select Remove to remove the extensions causing the error.

For a quick refresher on managing add-ons, see our Extensions Microsoft Edge guide.

2. Delete via the Registry Editor

  1. Press the Windows + R key to open the Run dialog box, type regedit, and press Enter to open the Registry Editor.
  2. Copy the following path and press Enter: Computer\HKEY_LOCAL_MACHINE\SOFTWARE\Microsoft\Edge 
  3. Highlight all the folders in the directory and press the Delete button.
  4. Close the Registry Editor, restart your PC, and check if the issue persists.

Using the Registry Editor, you can gain access to detailed information about the Edge extensions, modify, and remove them with ease.

3. Uninstall Edge Extensions using PowerShell

  1. Left-click the Start button, type PowerShell, and click Run as administrator.
  2. Select Yes on the User Account Control prompt.
  3. Type the following command on the new screen and press Enter: Get-AppxPackage * input your extension name*
  4. Input the following command and press Enter to remove the extension: Get-AppxPackage *input your extension name* | Remove-AppxPackage
  5. Restart your PC and check if you can uninstall Microsoft Edge.

Using PowerShell to remove Edge extensions will clean everything relating to the extension. Read our detailed guide about PowerShell not showing the full output on Windows 11.

4. Scan your PC

  1. Press the Windows key + i to open Settings.
  2. Go to Privacy and Security.
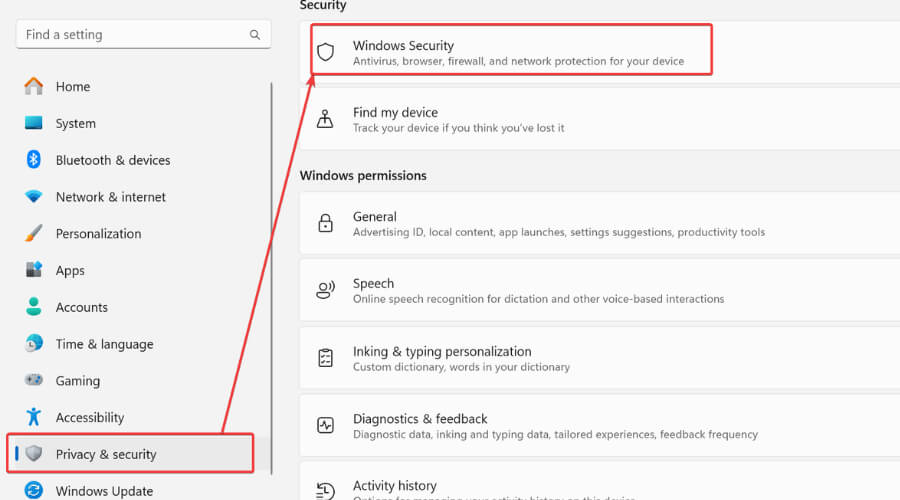
  3. Select Windows Security and confirm you want to openwindows security
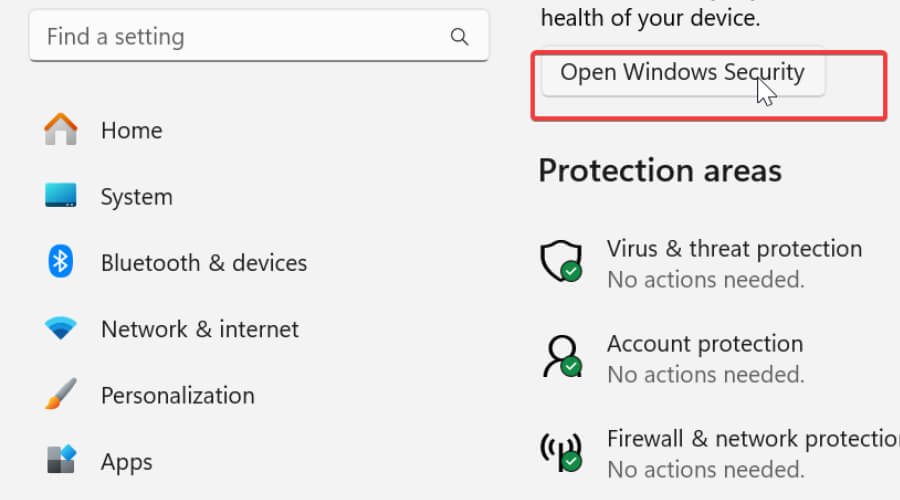
  4. Click Open Windows Security.open windows security
  5. Select Quick Scan. Wait for the process to complete and remove all threats found.quick scan windows defender

Sometimes malware and viruses could stop you from uninstalling extensions from Edge. Make sure your PC is not infected and then try removing unwanted extensions again.

Why can’t I remove Edge extensions?

Some factors responsible for this are:

  • Malware and viruses – The performance of the Microsoft Edge browser may be impeded due to malware and virus infection on your PC. This causes browser malfunction, making the extension inaccessible or unresponsive.
  • Issues with Microsoft Edge client – Some Edge browser settings may affect its functionality and how it interacts with the programs installed on it. So, you may find it hard to uninstall extensions if the Edge browser isn’t functioning correctly.

In addition, you may check our article about ways to troubleshoot the Microsoft Edge browser on your PC.

For further questions and suggestions, kindly drop them in the comments below.

0x80072f8f: How to Fix This Windows Activation Error

The Activation process verifies the copy of Windows you have on your PC, confirming that it is genuine and adheres to the Microsoft Software License Terms. Sadly, users report the Windows Activation error 0x80072f8f, which prevents the verification process.

Also, we have a detailed article about Windows Activation error 0xc004f063 that occurs on Windows 7.

What causes the Windows Activation error 0x80072f8f?

Running into the 0x80072f8f during a Windows Activation session on your Windows 7, 10, or 11 copy indicates a security error. Some other notable causes are:

  • Network connection issues – Connecting to a network that is insecure or has high traffic can interfere with the signal. Hence, network congestion and other network-related factors can cause the error.
  • Incorrect date and time settings – This causes issues with the Activation process because it can’t access the correct details for the region. Also, it can affect network communication between the Windows Activation service and the computer.
  • Corrupt DLL files – The Dynamic link library (DLL) files on your system can become corrupt due to the activities of viruses and spyware. Also, other corrupt system files can cause the error 0x800728f during Windows 7 Activation.

The above factors may vary on different PCs. Nevertheless, we’ll discuss basic fixes to resolve the error and activate Windows.

How can I fix the Windows Activation error 0x80072f8f?

Before proceeding with any advanced troubleshooting steps, go through the following quick checks:

If the error 0x800728f persists, try the solutions below:

1. Check your date and time settings

  1. Right-click the date and time on the Taskbar, then click Adjust date and time settings.
  2. Click the Change button beside Set date and time manually.
  3. Set the time and date to current and click Change to save.
  4. Click Additional clock, select Internet time, and click Change Settings.
  5. Select the Synchronize with an Internet time server option and click OK to save.
  6. Restart your PC and try to see if the Windows Activation process works.

Setting the correct time and date on your PC will allow it to use a valid region and connect faster with Windows servers.

2. Change the MediaBootInstall registry key

  1. Press the Windows + R button to open the Run dialog box, type in regedit, and press Enter to open the Registry Editor.
  2. Go to the following path: HKEY_LOCAL_MACHINE/Software/Microsoft/Windows/CurrentVersion/Setup/OOBE
  3. On the right pane, double-click MediaBootInstall REG_DWORD value and change the value data from 1 to 0.
  4. Close the Registry Editor.
  5. Left-click the Start button, type Command Prompt, and click Run as administrator.
  6. Type the following and press Enter: slmgr /rearm 
  7. Restart your PC and check if the 0×80072f8f Windows 7 Activation error persists.

Editing the MediaBootInstall registry key in the Registry Editor gives you access to data you can modify to fix the Windows Activation issue. In addition, you can read about how to fix a corrupt registry if you encounter problems with it.

3. Run Windows Activation Troubleshooter

  1. Press Window + I to open the Windows Settings app.
  2. Click the System option and click on the Activation button.
  3. Then tap on the Troubleshoot link.

The Windows Activation troubleshooter will find and fix issues affecting the Windows Activation process.

4. Activate Windows through Chat support

  1. Press Windows + R key to open a Run Window, type slui 4, and press Enter to open the Installation ID window.
  2. Choose your country or region, then click Next.
  3. When prompted to call the numbers on the screen, press the Start button, search for get help and launch the Get Help app.
  4. Reply test and click No on every prompt until the Talk to a person link appears.
  5. Select Services & Apps, Windows, Setting up, then select Chat online with a Microsoft Answer Tech. Wait while the call processes.
  6. Follow the Tech’s instructions and provide the information needed for the process. Then, you’ll be given a Confirmation ID.
  7. Go to the Installation ID page, click Enter confirmation ID, and input it.
  8. Click Activate Windows and wait for the license to be reactivated.

The above steps will allow you to get direct help from a Microsoft technician to fix the 0x80072f8f Windows Activation error.

Check what to do if you encounter we can’t activate your copy of Windows error on your PC.

5. Re-Register DLL Files

  1. Left-click the Start button, type Command Prompt, and click Run as administrator.
  2. Click Yes on the User Account Control prompt.
  3. Run the following commands: regsvr32 softpub.dll /s  regsvr32 wintrust.dll /s  regsvr32 initpki.dll /s   regsvr32 mssip32.dll /s
  4. Restart your PC and check if the error persists.

Re-registering the DLL files will rewrite them and allow them to work effectively when invoked.

In addition, you can check our detailed guide about 0x80072f8f Microsoft Store Error and some fixes to resolve it.

Likewise, knowing what to do if Windows 11 won’t activate after reinstalling your PC might be essential knowledge should you encounter such.

Should you have further questions or suggestions, kindly drop them in the comments section below.

Xbox has a catching up to do in the console market share

Microsoft boss claims that Xbox is losing in the console market share against Sony’s PlayStation, but things may be changing soon. Boss Brad Smith spoke to the media amidst the recent fuss of the tech giant’s attempt to acquire Activision Blizzard.

According to him, Sony’s PlayStation outsold Xbox by 69/31 globally towards the end of 2022—seemingly forgetting to bring Nintendo’s numbers into the equation.

“Think about the market in Europe. It is a market where Sony has an 80% share. Globally, it’s about 70/30. In Japan, it’s 96 to 4. And while there are some fluctuations over time, these numbers have been remarkably steady for two decades. Even last year, when Sony suffered constraints in its supply chain and it saw its numbers dip, they came back strong in the fourth quarter as their supply chain recovered.”

In fact, as research by an analytics firm Ampere Analysis confirms, Xbox flagship Series X/S has only sold 18.5 million. Compared to Sony PlayStation 5’s 30 million, Microsoft still has a lot of catching up to do.

Activision’s Call of Duty franchise is such an important title that a console couldn’t succeed without it, so it’s understandable why Sony has been trying to hijack the deal out of fears that many of its players may migrate to Xbox.

However, Microsoft reassured that will keep COD with content parity of PlayStation consoles (plus Nintendo) for another ten years.

What’s going on between Microsoft’s Xbox and Sony’s PlayStation?

Microsoft tried to acquire Activision Blizzard, home to Call of Duty, Sekiro, and many beloved, for almost $69 billion, but the deal went sideways.

Regulators worldwide have been approving the deal, but currently, the US, Europe, and the UK are on the opposition team. They fear that it could prevent innovation and slow down market competition due to Microsoft’s stature.

Microsoft execs, along with representatives from Activision, Sony, and Nvidia were present at an EU hearing earlier. The Redmond-based company tried to convince the regulators that the deal is not non-competitive.

Their counterargument is that they’d keep Call of Duty on PlayStation for 10 years. Plus, they’ve signed a lucrative expansive deal with Nintendo and Nvidia to bring Xbox titles to the console and the GeForce NOW could gaming service.

What are your thoughts on this deal? Let us know in the comments!

Fix: The Requested Operation Requires Elevation

Being the PC owner, you should be able to access information, files, or data without issues. However, the reverse is the case. Many users complain that running into the requested operation requires elevation error when opening files or performing other tasks on their PCs.

Also, you can read our detailed guide about ways to set permissions in Active Directory for users in Windows 11.

What is error elevation required?

Required elevation means your computer needs higher privileges to run a specific task or program. So, Whenever you see the requested operation requires elevation error on your computer, it indicates the user account does not have enough permissions.

Consequently, Windows prompts you to gain elevated permission from a local administrator to access and delete folders.

Some notable causes of this error in Windows 11 are:

  • Corrupt Windows account – The administrator privileges on the user account might not be efficient or helpful if the account is corrupt. So, you can run into the requested operation requires elevation error message on Windows 11.
  • Strict User Account Control (UAC) Settings – User Account Control is a security feature in Windows PC that prevents unauthorized access or changes to the operating system. So, if there are rigid settings in the UAC, it can render the account incapacitated to perform some tasks.
  • Security hindrances – Antivirus software running on the system can hinder the task you’re trying to perform.

These causes may vary on different computers. Fortunately, you can follow some basic steps to resolve the error.

How can I fix the requested operation requires elevation error?

Before trying any advanced fix, go through the following preliminary checks:

If you can’t operate your system still, proceed with the solutions below:

1. Disable User Account Control (UAC)

  1. Press Windows + R key to open the Run dialog box, type control, then press Enter to open the Control Panel.
  2. Click Security and Maintenance and Change User Account Control Settings from the left panel.
  3. Drag the slider control from Always notify to Never notify and click OK to save the changes.
  4. Click Yes if prompted and restart your PC to disable UAC.

Disabling the User Account Control allows programs and services to run in the administrative mode without requiring permission.

2. Allow the concerned program to run as an administrator

  1. Left-click the Start button, type the app name and click the Open file location option.
  2. Right-click on the app and select Properties.
  3. On the Properties page, click the Shortcut tab and select the Advanced option.
  4. Tick the checkbox for the Run as administrator option and click on OK
  5. Restart your PC and check if the error persists.

Running the concerned program as an administrator will trump the elevation request.

However, if you have issues assigning administrator privileges to the program, read about what to do if you can’t run apps as administrators on your PC.

3. Take ownership of the file prompting the error

  1. Press the Windows + E key to open the File Manager.
  2. Navigate to the concerned file, right-click on it, and select Properties from the drop-down.
  3. Go to Security and Advanced securing.
  4. Then set yourself as the owner of the file.
  5. Exit the page and check if the request message persists.

Making you the owner will fix issues with accessing your files without permission problems.

4. Run the SFC and DISM to repair damaged system files

  1. Left-click the Start button, type Command Prompt, and click the Run as administrator option.
  2. Click Yes on the User Account Control (UAC) prompt.
  3. Type the following and press Enter: sfc /scannow

Running an SFC scan on your PC will detect and repair corrupt system files causing the error. Check how to fix the Run as administrator option if it’s not working on your PC.

In addition, we have a detailed guide to help switch accounts from standard users to an administrator or vice versa. Also, it may interest you to check ways to fix folder access denied error in Windows 11.

Should you have further questions or suggestions, kindly drop them in the comments section.

Fix: Error Connecting to the Apple ID Server on Windows 10

iTunes is a popular application, and it’s used by both Windows and Mac users alike. Sadly, sometimes you might get There was an error connecting to the Apple ID server message while using it in Windows 10.

The issue is widespread, with users across the globe reporting their inability to access the Apple servers and getting iTunes There was an error connecting to the server message instead. So let’s find out all about the problem.

What does There was an error connecting to the Apple ID server on Windows 10 mean?

The Verification failed There was an error connecting to the Apple ID server message in Windows 10 indicates that a connection could not be established between the app and the servers. It could be encountered while signing in or performing an operation in iTunes and iCloud.

Here are a few reasons you are getting the error:

  • Apple’s services are down: One of the most common reasons users get the error is when the Apple servers are down, and there’s nothing you can do other than wait for it things to be up and running.
  • Misconfigured network settings: Certain network settings have also been found to trigger this error with iCloud and iTunes.
  • Third-party apps blocking the connection: Several third-party antiviruses and firewalls can erroneously identify the connection as a threat and block it.
  • Unstable Internet: If the Internet keeps disconnecting or the speed is slow, there’s a likelihood that you’ll encounter this error.

How can I fix There was an error connecting to the Apple ID server on Windows 10?

Before we head to the slightly complex solutions, here are a few quick things to try first:

If none of these work, head to the solutions listed next.

1. Disable proxy

  1. Press Windows + I to open Settings, and click on Network & Internet.network & internet
  2. Navigate to the Proxy tab, and turn off all the toggles on the right.disable to fix there was an error connecting to the apple id server windows 10

2. Uninstall conflicting apps

  1. Press Windows + R to open Run, type appwiz.cpl in the text field, and hit Enter.appwiz.cpl
  2. Choose the app installed or updated around the same time the error first appeared, and click Uninstall.uninstall to fix there was an error connecting to the apple id server windows 10
  3. Follow the on-screen instructions to complete the process.

Several third-party antiviruses, firewalls, and other security software are the underlying cause in the case of the There was an error connecting to the Apple ID server issue in Windows 10.

People reported ESET HOME Security Essential and AdFender to be responsible. Remember, you don’t need to uninstall the app. Even disabling it when accessing iTunes or reconfiguring the settings should do the trick.

3. Set the correct date and time

  1. Press Windows + I to open Settings, and then click on Time & Language.time & language
  2. In the Date & time tab, enable the toggle for Set time automatically.set time automatically to fix there was an error connecting to the apple id server windows 10

4. Whitelist iTunes in Firewall

  1. Press Windows + S to open Search, type Allow an app through Windows Firewall, and click on the relevant search result.allow an app
  2. Click on Change settings.change settings
  3. Check whether iTunes and iCloud are listed here. If yes, directly head to step 10. Otherwise, proceed to the next one.
  4. Now, click on Allow another app.allow another app to fix there was an error connecting to the apple id server windows 10
  5. Click on Browse.browse
  6. Navigate the following path:C:\Program Files\iTunes
  7. Select iTunes.exe and then click Open.itunes
  8. Now, click on Add.itunes to fix there was an error connecting to the apple id server windows 10
  9. Similarly, add iCloud if the problem appears with it as well.
  10. Finally, make sure both the Private and Public checkboxes are ticked for iTunes and iCloud, and then click on OK.whitelist itunes to fix there was an error connecting to the apple id server windows 10

If it’s the firewall blocking the connection, you can always whitelist iTunes to fix the There was an error connecting to the Apple ID server issue in Windows 10. If you use a third-party firewall, there must also be a similar option.

5. Change the Wi-Fi network profile from Public to Private

  1. Open the Settings by pressing Windows + I and click Network & Internet.
  2. Click on Wi-Fi on the left pane, select the Wi-Fi network you want to change the profile for, and click the Properties button.
  3. Under Network profile, select Private.
  4. Lastly, click on Save.

6. Create a new user account

  1. Press Windows + I to open Settings, and then click on Accounts.accounts
  2. Go to Family & other users, and click on Add someone else to this PC on the right.create new account to fix there was an error connecting to the apple id server windows 10
  3. Choose I don’t have this person’s sign-in information.don't have
  4. Click on Add a user without a Microsoft account.add user without microsoft account
  5. Enter the username and password in the required fields, choose the security questions, and then click Next.create account to fix there was an error connecting to the apple id server windows 10
  6. Once done, select the account, and click Change account type.change account type
  7. Finally, select Administrator from the dropdown menu, and click OK.set administrator to fix there was an error connecting to the apple id server windows 10
  8. Now, log into the account you just created, download iTunes, and you shouldn’t get the error anymore.

That’s it! If the problem persisted until now, creating a new user account should get things running in case you come across the There was an error connecting to the Apple ID server issue in Windows 10.

A similar problem is present on Windows 11, and we wrote about iCloud encountered an error on Windows 11 in a separate guide. Also, if you are looking for one, check the best iTunes alternatives for Windows.

Use the comments section below for any queries or to share a solution with us.

Port Forwarding Not Working: 4 Ways to Unblock It

Port forwarding allows the creation of a public service on your network, allowing remote devices on the server to access the shared resources on your computer. Without it, devices not part of the internal network can’t access each other.

However, some users complain that port forwarding is not working on their network. Also, we have a similar article on fixing Asus router port forwarding if it’s not working.

Why is port forwarding not working?

Some common factors are:

  • ISP not allowing public addresses – Without having a public domain setup, external devices won’t be able to connect and use the devices on the network. So, it results in routers like TP-link and Xfinity port forwarding not working.
  • Misconfiguration in the router settings – You might make mistakes when configuring the port forwarding settings. Hence, it may lead to port forwarding not working on Spectrum, hindering external devices from accessing it.
  • Outdated router firmware – Outdated firmware can cause compatibility issues with the router, resulting in products like MikroTik port forwarding not working. Also, network congestion on the PC may prevent the forwarding process.
  • Firewall protection blocking external access – Windows Firewall secures the system from whatever connection is coming in and scrutinizes them before allowing access. Sometimes, Google Wi-Fi port forwarding won’t work because Windows Firewall blocks the port from external access.

Other factors, such as IP address and FQDN issues, or a wrong port number, can cause wired network connection problems. Nevertheless, we’ll take you through some basic steps to get port forwarding working on your router and device.

What can I do if port forwarding is not working?

Before trying any advanced troubleshooting steps, go through these quick checks:

  • Restart your Wi-Fi or router.
  • Fix network connection issues on the device.
  • Restart the host and the recipient devices and see if they can access the network.
  • Check for Router Firmware updates – you can read the router manual and check for router firmware update procedures. Users can also contact their manufacturer for guidance on updating their routers.

If you can fix the port forwarding problem, proceed with the fixes below:

1. Manage the Internet Information Services settings

Note icon NOTE
Steps 1-6 will help install Internet Information Services Manager from the Windows features.
  1. Press Windows + R key to open the Run dialog box, type control, then press Enter to open the Control Panel.
  2. Click Programs, then click Turn Windows features on or off.
  3. In the Windows Features dialog box, select Internet Information Services to install the default features.
  4. Click the Application Development Features drop-down, and select ASP.NET 4.5 to add the features that support ASP.NET.
  5. Click the OK button to exit the Windows Features dialog box.
  6. To verify that IIS is installed successfully, go to localhost. The default IIS Welcome page should appear.
  7. Right-click the Start button and launch the Internet Information Services Manager.
  8. Under the Connections tab, select Add Website…
  9. Input the site name and correct location, then choose the right IP Address and Port.
  10. To check your IP address, launch the Command Prompt, type ipconfig, then check your ipV4 address.
  11. Save the settings to create an FTP site.

2. Check errors in Router Configuration

  1. Launch your browser and go to the router’s IP address to open the Router’s Config.
  2. Log in using your administrator username and password.
  3. Find and go to Port Forwarding/Mapping Configuration.
  4. Input the same IP address generated in Solution 1, and choose the same port number.
  5. Click the Apply button to save and initiate the changes.

Adjusting your router’s configuration will resolve wrong settings, and fix Port forwarding issues.

3. Disable Windows Firewall

  1. Press Windows + R key to open the Run dialog box, type control, then press Enter.
  2. Click on the Windows Defender Firewall option.
  3. Click the Turn Windows Defender Firewall on or off option.
  4. Go to the Private and Public network settings, then click the radio buttons for the Turn off Windows Defender Firewall (not recommended) option.
  5. Restart your PC.

Disabling the Windows Defender Firewall resolves any interference it’s causing your computer from connecting to the Port forward network.

You can read about how to disable windows defender if you encounter issues with it.

4. Reset TCP/IP Stack

  1. Left-click the Start button, type Command Prompt, and click the Run as administrator option.
  2. Click Yes on the User Account Control (UAC) prompt.
  3. Type the following in the command bar and press Enter: netsh int ip reset c:\resetlog.txt
  4. Restart your PC.

Resetting the TCP/IP stack will restore it to default settings and fix any configuration issues that may cause port forwarding not to work. Check our guide on how to fix Command Prompt not working on your PC.

In addition, you may be interested in setting up and changing your static IP address on a Windows 11 PC.

Low Virtual Memory on Windows 10: 5 Easy Ways to Increase it

Virtual Memory or Page File, often used interchangeably, play a vital role in Windows and allows the PC to run multiple applications without terminating any. But many reported low Virtual Memory on Windows 10, which affects the system’s performance.

Virtual Memory is a certain space on a storage drive, be it an HDD or SSD, used as RAM. This way, when your computer is running low on RAM, it moves the dormant programs to the Virtual Memory and effectively allocates the system resources to the active ones.

The problem begins when Virtual Memory runs low in Windows 10, and the OS can’t move programs to it. Let’s take a closer look at the issue and find out solutions that work for all.

Why is my Virtual Memory low?

Here are a few reasons you have come across a low Virtual Memory condition in Windows 10:

  • The page file size is small: If the size of the page file or Virtual Memory is too small, it will fill up as soon as a few programs are moved to it.
  • Running too many programs: When you run several resource-intensive programs at once, the OS moves some to the Virtual Memory, and thus it might run low. This is why many get the This computer can’t connect to the remote computer. The problem might be due to low virtual memory error.
  • Issues with the disk: Since Virtual Memory is created on the storage disk, problems with the latter can lead to this issue.
  • Malfunctioning RAM: A malfunctioning RAM module wouldn’t store files. Thus, more programs will be moved to the Virtual Memory, and, as a result, it may run low in Windows 10.

Should I increase Virtual Memory on Windows 10?

Ideally, it’s not recommended that you increase the Virtual Memory. Instead, let Windows handle it, as is the case by default. But when there are issues or the Virtual Memory is low in Windows 10, increasing it manually should help.

Here’s the recommended Virtual Memory in Windows 10:

  • Initial size: 1.5 x Available RAM (in MB)
  • Maximum size: 3 x Available RAM (in MB)

Say, your PC has 4 GB RAM. So, the Initial and Maximum size of the recommended Virtual Memory is 6144 MB (1.5 x x 1024) and 12,288 (3 x 5 x 1024), respectively.

How can I fix low Virtual Memory on Windows 10?

Before we start making major changes, here are a few tips and tricks you can try:

  • Restart the computer, as this will terminate the other processes consuming RAM, lowering the Virtual Memory usage.
  • Scan the PC for malware and virus using a reliable third-party antivirus since these too can lead to the problem.
  • If you notice low Virtual Memory on running specific applications in Windows 10, update or reinstall the program.
  • Check for any pending Windows Updates and install them.

If these don’t work, move to the fixes listed next.

1. Disable non-critical startup apps

  1. Press Ctrl + Shift + Esc to open Task Manager, and head to the Startup tab.startup tab
  2. Now, select the non-critical apps one at a time, and click Disable.disable to fix low virtual memory windows 10
  3. Similarly, disable the other ones as well.

One of the quickest ways to fix low Virtual Memory without increasing it is to reduce the RAM consumption. And an effective method for it is to disable startup apps. Also you can do so by accessing the Startup folder.

2. Increase the Virtual Memory

  1. Press Windows + S to open Search, type View advanced system settings, and click on the relevant search result.view advanced system settings
  2. Click on Settings under Performance.settings
  3. Navigate to the Advanced tab, and click on Change under Virtual Memory.change
  4. Untick the checkbox for Automatically manage paging file size for all drives, select No paging file, and click on Set.no paging file
  5. Click Yes in the prompt.yes
  6. Once done, select the C: drive from the list, and choose Custom size.custom size
  7. Now, fill out the fields for Initial size and Maximum size based on the recommended Virtual Memory formula shared earlier, and click on OK to save the changes.increase to fix low virtual memory windows 10

Restart the computer for the changes to come into effect, and, in all likelihood, you shouldn’t come across the low Virtual Memory error again in Windows 10.

3. Scan for corrupt system files

  1. Press Windows + R to open Run, type cmd, and hit Ctrl + Shift + Enter.cmd
  2. Click Yes in the UAC prompt.
  3. Now, paste the following commands individually and hit Enter after each:DISM /Online /Cleanup-Image /CheckHealth DISM /Online /Cleanup-Image /ScanHealth DISM /Online /Cleanup-Image /RestoreHealth
  4. Once done, execute the following command to run the SFC scan:sfc /scannowsfc scan to fix low virtual memory windows 10

4. Check the disk for errors

  1. Press Windows + S to open Search, type Command Prompt, and click on Run as administrator.command prompt
  2. Click Yes in the prompt.
  3. Now, paste the following command and hit Enter:chkdsk /rcheck disk to fix low virtual memory windows 10
  4. If asked to schedule a scan, press Y and then Enter.confirm

The pagefile.sys or the Virtual Memory in Windows resides on the disk. So, unreadable, corrupt, or bad sectors can trigger various problems.

This is where the Check Disk utility comes into the picture and helps fix low virtual memory in Windows 10 by eliminating disk issues.

5. Add more RAM

If nothing else worked, the last option is to increase the installed RAM on the PC. Remember, no matter how much you increase the Virtual Memory, it wouldn’t provide the same results as the RAM due to the slower read/write time.

Virtual Memory was popular when RAM modules were costly, but over the years, their prices have dropped tremendously, and thus, installing a few additional GBs of RAM should be the preferred approach.

That’s all for now! One of the solutions here should have helped fix the low Virtual Memory problem in Windows 10.

Also, before you leave, do not forget to check some quick tips to improve the performance of Windows.

If you have any queries or want to share feedback, drop a comment below.

Tab feature arrives on your Windows 11’s Notepad

Do you often use Notepad on Windows 11? If so, you’re in for a treat.

Just like what they did by introducing the Bing AI chatbot to Windows 11 taskbar, the Redmond-based tech giant also brought a new feature to Notepad. From now on, you can open a new tab from the same window to write a new text without having to open a new Notepad window.

The new tabs in Notepad will work exactly like how they function in Files Explorer and web browsers, meaning you will not have to open multiple windows for multiple folders and directories.

Previously, rumors of this feature have been circulating around for months, at least since December 2022 almost a year after Microsoft fully redesigned the app for Insiders, so just imagine how happy some people actually are.

What other features are coming with Moment 2 update?

Other than the well-revamped Notepad, Microsoft came with a bunch of good news.

Many people were wondering why the search bar on the taskbar got bigger all of the sudden, so Microsoft slapped it with a nice Bing AI chatbot technology in it. From now on, once you’re enrolled in the waitlist, you can perform complex searches on the chat mode.

Plus, iPhone and Windows 11 users are in for a treat, too, as the latest update brings a nice addition to Phone Link companion app. From now on, you can connect your iPhone devices to your Windows 11 PC so you don’t miss any call, message, or notifications from your mobile.

What do you think about this nice addition? Let us know in the comments!

Fix: The Driver Being Installed Is Not Validated

While attempting to update drivers in a system, Windows users often experience the error the driver being installed is not validated for this computer.

Luckily, you can easily resolve this error. In this article, we’ll provide the necessary steps.

What causes this driver validation error?

There is only one primary reason you’re getting the error message that the driver being installed is not validated for this computer: you’re attempting to install a driver on your PC that the manufacturer doesn’t officially license.

Further, you can get many driver-related problems if you don’t address this error. Often, the causes are intentional by the manufacturers who prevent new driver installation that has not been endorsed.

Drivers released by Intel are rigorously tested against prototype machines to ensure they function optimally. So, even if there’s a new update for your driver, if Intel hasn’t officially tested it, you’d trigger the error The driver being installed is not validated for this computer.

What can I do if the driver being installed is not validated?

There aren’t any quick fixes to help you resolve this error. Here is a workaround you can attempt to circumvent your driver manufacturer’s restriction.

For this step, you must download the drivers from the manufacturer’s website and install them manually using the Device Manager.

Note icon NOTE
It’ll be better if you check the name of the missing drivers so that you can type it out in the search bar. For example, if you want to update an i3 7100u driver, type i3 7100u drivers in the search bar.
  1. Navigate to the Intel Official Downloads page to locate your preferred driver.
  2. Select the drivers you wish to download and click the Download button.
  3. Press the Windows key + R, type devmgmt.msc in the dialog box, and hit Enter.
  4. Then, click on the Display Adapters tab in the Device Manager window to expand the selection. Locate your hardware driver, right-click on it, and select Update driver.
  5. Click on the Browse my Computer for Driver Software option.
  6. Select the Let me pick from a list of available drivers on my computer option.
  7. On the bottom right corner of the window, click on Have Disk.
  8. Then, you can click on Browse in the next window to locate the driver you just downloaded.
  9. Navigate to the folder where you downloaded the driver (usually the Downloads Folder), select it, and click Open.
  10. Wait for the installation process, then close the Device Manager window.

Once you’ve completed these steps, you should be able to manually update your PC’s drivers without triggering the error the driver being installed is not validated for this computer.

By simply following our guide, you should be able to update your system’s drivers in no time.

Furthermore, if you’re facing challenges with driver validation, particularly the error An exception occurred in the driver: Could not find driver (Symfony, Windows), our in-depth guide can provide additional insights.

How to Connect Wireless Keyboard Without USB Receiver

Wireless keyboards always come with a receiver to connect them to the computer. However, most people have complained about misplacing their receivers, preventing them from connecting their wireless keyboard devices.

Thus, we will discuss connecting a wireless keyboard without a USB receiver. Alternatively, you can read our guide on fixing the mouse and keyboard not working in Windows 11.

Can a wireless keyboard and mouse work without a receiver? There are 2 types of wireless keyboards. Some of them work with a dedicated dongle, and some Bluetooth keyboards can be connected directly to a compatible laptop or PC without any dongle.

However, products like the Logitech wireless keyboard allow connection without a USB receiver. Instead, the keyboard uses a USB Unifying receiver that can connect more than one peripheral device to your computer at a go.

Alternatively, you can research the best Bluetooth keyboard without a dongle before buying one.

How can I connect a wireless keyboard without a USB receiver?

Apply the following preliminary checks:

You can proceed with the following detailed procedures to connect your wireless keyboard if the above tricks did not work.

1. Via Bluetooth

  1. Switch on the keyboard with the power switch or button.
  2. Set the keyboard to pair the keyboard to pairing mode.
  3. Left-click on the Windows icon, type Settings, and press Enter to it.
  4. Select the Bluetooth & devices category. Turn on the Bluetooth option and click on Add devices.
  5. Select Bluetooth and click on the Keyboard device name from the search options to pair it with the PC.
  6. Try using the keyboard if it works.

Pairing the wireless keyboard with this process is for devices that use both receiver and Bluetooth.

For any problems with the Microsoft Designer Keyboard not pairing, click the highlighted guide to read about our solutions to fix it.

2. Use a Logitech unifying receiver

  1. Connect the unifying receiver to your system.
  2. Go to Logitech’s official webpage and download the Logitech unifying app.
  3. Wait for the download process to complete and install the app.
  4. Once the program has been opened, select I accept the terms of the license agreement and click on Install.
  5. Run the app after the installation and click on the Next button.
  6. Turn on your keyboard, and the unifier should detect your keyboard automatically.

Running the Unifier software allows you to detect and connect with wireless keyboards without having their receivers in place.

Check our guide about how to download Logitech Uifying Software for connecting Logitech devices on Windows 11.

Also, you can read about ways to fix Logitech Unifying Receiver not Working on Windows.

3. Use wire connectivity

Specific Microsoft wireless keyboard devices that support Bluetooth connections can also use wired connections. Thus, check if your keyboard device has a micro USB or type C USB. Connect the device to the micro USB, then plug the other end into your computer’s USB port and check if it works.

In conclusion, you can read about how to fix the Bluetooth keyboard connected to the device but not working on Windows. Also, learn to use a phone as a keyboard for your PC.

And for Ubotie users, we have a dedicated guide as well, so rest assured that connecting and configuring your Ubotie keyboard will work flawlessly.

If you have further questions or suggestions, kindly drop them below.

FIXED: No Driver Was Found That Can Be Installed on the Current Device

If an error reading No driver was found that can be installed on the current device exit code 8 sounds familiar, stick around. We’ll show you how to fix it.

Installing a PCI graphics card, incompatible or outdated drivers, malware, or a recent Windows update can trigger this error. See the steps below to make it go away fast.

How can I fix no driver was found exit code 8?

Before we move on with more advanced troubleshooting solutions, restart your PC. If you can’t use the Intel GPU, try to remove the PCI Express graphics card from your system.

1. Uninstall the external PCI Express card

  1. Remove the external PCI Express card from your system.
  2. Type in Device Manager in the Windows Search bar and hit Enter.
  3. Then, expand the Display adapters section, locate the drivers for the PCI express card, right-click on the selection, and select Uninstall device.
  4. In the next Windows prompt, select Uninstall to confirm the process.
  5. Restart your PC and check if the error persists.

2. Reset the BIOS settings

  1. Select the Start menu and click on the Power icon. Then while pressing the Shift key, click on Restart. Your PC will boot to the Advanced Startup screen.
  2. Then click on Troubleshoot and click on Advanced Options.
  3. After that, click on UEFI Firmware Settings.
  4. Click Restart and your PC will boot to the BIOS menu.
  5. Now go to the Exit tab via the arrow keys.
  6. Select Load Setup Defaults and hit Enter.
  7. Finally, select Yes in the confirmation dialog box.

It is always advisable not to tamper with the BIOS settings except in rare situations like this. Hence, If the PC won’t boot after BIOS update or reset, kindly follow the fixes in this guide.

3. Install drivers from the USB

  1. For this step, you’ll need to download the latest SATA or AHCI drivers from the Manufacturer’s website.
  2. Plug any USB stick into your PC and copy the downloaded offline driver installer file from your computer to the USB.
  3. Right-click the Start button and select Device Manager.
  4. Then, locate the Integrated Drivers tab, click on it to expand it, and select Update driver.
  5. Then, select the option of Browse my Computer for drivers.
  6. Click on the Browse button and navigate to the directory on the USB stick where you’ve copied the driver file.
  7. Click the Next button and wait for the PC to complete the installation.

In some cases, downloading and installing drivers from the Internet might be problematic. Alternatively, you can try installing the drivers from a USB stick.

Depending on the drivers, the installer will usually be a setup or an exe file. If the drivers are compressed in a zip file, you’ll need to decompress or extract the folder.

4. Adjust Integrated Graphics settings in Device Manager

  1. Right-click the Windows Start button and select Device Manager.
  2. Navigate to the Actions tab, select the Add Legacy Hardware option, and click Next on Add Hardware Wizard.
  3. Further, select Recommended Option, and click Next.
  4. Click on Display Adapters and select Intel Corporation from the manufacturer’s list.
  5. Select the appropriate Intel Graphics Controllers based on your GPU graphics.
  6. Click Next and follow the instructions to complete the process.

5. Perform a clean boot

  1. Press Windows + R keys to launch the Run window, type msconfig, and launch it.
  2. Select the Services tab, click to Hide all Microsoft services, then click on Disable all and click OK.
  3. Select the Startup tab and select Open Task Manager.
  4. Then, locate the startup programs, right-click them, and select End task.
  5. Close this and restart your PC to effect the changes.

A clean boot could help troubleshoot the no driver was found exit code 8 error. Also, you can check other ways to perform a clean boot on your Windows here.

If you’ve any alternative ways to resolve exit code error 8 on your PC, please let us know in the comments below.

What Is Shared GPU Memory and How to Manage It

Shared GPU memory is a portion of your computer’s RAM temporarily used by the GPU when dedicated graphics memory runs out. This typically happens on systems with integrated graphics, like Intel UHD or AMD Radeon Vega, where no dedicated VRAM is available.

Shared vs Dedicated GPU Memory

Dedicated GPU memory is a fixed amount of VRAM built into your graphics card. Shared GPU memory, by contrast, is borrowed from your system RAM. Windows 10 and Windows 11 automatically allocate it when needed, especially for graphic-intensive tasks like games or video rendering.

If you’re unsure about your configuration, you can follow this guide on how to check how much VRAM you have in Windows 10, which shows both dedicated and shared memory.

How to Disable Shared GPU Memory

There’s no direct option in Windows settings to disable shared GPU memory. However, you can try limiting or disabling it through your PC’s BIOS or UEFI firmware:

  • Reboot your PC and enter the BIOS or UEFI (usually by pressing F2, Del, or Esc during startup).
  • Look for settings like “Integrated Graphics,” “iGPU Memory,” or “UMA Frame Buffer Size.”
  • If available, reduce the memory assigned or disable integrated graphics.

Keep in mind that disabling shared GPU memory can lead to performance issues if your GPU runs out of available memory. In some cases, misallocation could even indicate that your GPU memory is full, which affects game and app performance.

How to Increase Shared GPU Memory in Windows 11

To increase shared GPU memory manually, your best option is through the BIOS:

  • Open your BIOS settings.
  • Navigate to the video or chipset section.
  • Adjust the UMA Frame Buffer Size or similar option to allocate more RAM to the GPU.

You can also follow this walkthrough on how to increase VRAM in Windows 11, which includes registry tweaks and useful checks.

On Windows 10, the process is slightly different. Here’s how to increase dedicated video RAM in Windows 10 if your GPU allows it.

Can You Decrease Shared GPU Memory?

Decreasing shared GPU memory may help free up RAM for general use. You’ll need to access the BIOS to reduce the pre-allocated memory amount.

If you notice system memory not being used effectively, consider addressing the issue by checking why Windows 10 isn’t using all RAM, which might interfere with how much is available for graphics tasks.

Managing Shared GPU Memory Settings

There’s no toggle in Windows settings for shared GPU memory. However, you can monitor current usage:

  • Right-click the taskbar and select Task Manager.
  • Go to the “Performance” tab.
  • Click on “GPU” to view dedicated and shared memory stats.

If memory levels appear unusually high or unstable, it could point to a GPU memory leak that needs troubleshooting or driver-level fixes.

Shared GPU Memory on NVIDIA Systems

If your system uses an NVIDIA GPU, shared memory still plays a role in hybrid graphics. In most cases, the dedicated VRAM takes priority, but you can fine-tune app-specific behavior using the NVIDIA Control Panel.


FAQs

What is shared GPU memory used for?

It supplements GPU memory by borrowing RAM when your graphics card runs out of dedicated VRAM.

Can I turn off shared GPU memory?

Only some BIOS setups allow this. Windows itself does not offer a native toggle.

How do I check how much shared GPU memory I have?

Open Task Manager → Performance tab → GPU section to view current usage.

Does shared GPU memory slow down performance?

Yes. RAM is slower than VRAM, so relying on shared memory can affect performance.

How to Block Potentially Unwanted Apps on Windows 11

Have you been wondering about how to block apps on Windows 11 PC? Some of our readers have also recently shown interest in knowing how to block some apps as part of the new features in Windows 11 PC.

Hence, this article will highlight some reasons and the simplified steps to block potentially unwanted apps on Windows 11 PC.

Why do I need to block apps on my PC?

Potentially unwanted applications (PUA) are a class of software that can cause several issues for your computer. Hence, the following are some of the reasons why you need to block some apps on Windows 11 PC:

  • PUAs cause your PC to run slowly – Potentially unwanted apps can pose serious issues like making your computer lag or run slowly, hence the need to detect and block the apps.
  • Display Unexpected Ads – Some users have also reported some applications as PUAs because they display unexpected ads, which can sometimes be very malicious.
  • Install other harmful software and malicious files – You can easily determine whether downloaded apps or app installers are safe or possibly dangerous by comparing them to a list of websites and programs known to be unsafe.

The above are some of the several reasons why you need to block potentially unwanted applications on your PC. Below are simplified steps on how to block them on Windows 11.

How can I block potentially unwanted apps on Windows 11?

1. Block Potentially Unwanted Applications in Windows Microsoft Defender

  1. Left-click the Start button, type Windows Security in the search box, and launch it.
  2. Select App & browser control from the search results. Now, click on the Reputation-based protection settings. 
  3. If UAC prompts you, select Yes to continue.
  4. You can now find a control that lets you toggle On or Off potential unwanted app blocking.
  5. Now, click on the button to turn On the Potentially unwanted app-blocking setting.

You can manage the setting to protect your PC from malicious or potentially unwanted apps, files, and websites. However, if your Windows Microsoft Defender is missing or is not opening, you can explore our dedicated guide here to help you fix the issue.

Moreover, it is recommended that you leave the feature on and also enable both block apps and block downloads.

2. Enable PUA Blocking by using PowerShell

  1. Click on the Start button, type PowerShell in the search box, then click on Run as Administrator.
  2. Click Yes when the UAC prompts.
  3. Type the command below and press Enter to install this package: PowerShellGet –: WindowsDefender_InternalEvaluationSettings

In case you are experiencing Windows PowerShell errors, check out this article to know how to fix PowerShell if it’s not working or opening.

3. Use a dedicated PUP removal tool

PUPs are dangerous because sometimes you don’t even know you installed them. They sneak in with other software or disguise themselves as friendly apps.

However, we have a list of dedicated software that have specialized tools to detect and remove PUPs from your PC automatically.

Also, the best antiviruses for Windows 11 recognize and block such PUPs, but the best barrier against them is your vigilance.

Be careful not to install apps from untrusted sources, and pay attention to the installation process of any new app. If it suggests installing additional components or software, ensure not to allow them.

Windows is also known for installing tome tools it considers useful. We recommend reading our guide on how to block Windows from installing apps without your permission. The guide is for Windows 10, but all the solutions work for Windows 11 as well.

You may also decide to disable background apps in Windows 11 to avoid unwanted errors.

And that’s how to block potentially unwanted apps on Windows 11 PC. If you have any questions or suggestions, please let us know using the comments section below.

Two RAMs Not Working Together: How to Fix This

RAM (Random Access Memory) stores the operating system (OS), and there are four slots on the motherboard, allowing it to accommodate more than one stick. However, users have reported that two RAMs are not working together on their PC.

Alternatively, you can check our detailed guide on the PC not using all RAM, which is a common problem with most PCs.

Why are two RAM sticks not working together on my computer?

The issue with RAMs working individually but not working together indicates only one RAM stick will work at a time. The problem can be due to various factors affecting the system or hardware problems. Some notable causes are:

  • The two RAM sticks are incompatible – The RAM sticks you are trying to use together may not be compatible. Hence, check your system’s motherboard maker and motherboard information that determines usable hardware.
  • RAM stick not adequately fitted on the motherboard – One of the two RAM sticks you want to use may not be detected if it’s not appropriately plugged into the motherboard. Its pins can be bent, preventing the RAM stick from sitting in the slot. It is also possible to place the RAM stick into the wrong slot.
  • Motherboard issues – The two RAM sticks may not work after motherboard replacement or because of damages to the motherboard. Also, the RAM slots on your motherboards may be faulty, causing it not to detect the second RAM.

Fortunately, there are some basic steps you can follow to fix it.

What can I do if two RAMs are not working together on my computer?

Before proceeding with any advanced fixes, go through the following:

  • First, unplug external devices connected to your PC.
  • Restart your PC to check if the RAMs are working.
  • Check for compatibility issues – Look at how to check the RAMs for compatibility with your motherboard if two different RAMs are not working together.
  • Check if you are running Dual-Channel – you can consult your manufacturer for guidance on how to check if your motherboard supports dual-channel mode.

If the issue persists, go ahead with the steps below:

1. Test each RAM with Windows Memory Diagnostic Tool

  1. Left-click the Start button, type for Windows Memory Diagnostic, then double-click on the first search result to run the application.
  2. Select Restart now and check for problems. Windows will automatically reboot and run the diagnostic tests.
  3. After Windows has restarted, check the diagnostic results to see if any RAM issues are detected.

Windows Memory Diagnostic (WMD) tool will detect issues that may be causing issues with the RAM sticks. Trying this on the two RAMs can expose the problem.

Check what to do if Windows Memory Diagnostics shows no results on your PC.

2. Switch ports for both RAM sticks

  1. Press and hold the Power button to shut down the system completely.
  2. Remove your PC’s back casing by following the user manual instructions.
  3. Find the RAM sticks on the motherboard and switch the ports for the two sticks.
  4. Follow the appropriate procedure and assemble the PC.
  5. Turn on the system and check if the two RAM slots work.

Switching ports for the RAM sticks will help you detect which RAM is faulty or the slot is not working.

Check our guide on what to do if your PC is not using all RAM on Windows 11. In addition, you can read our article about PC not booting after the RAM upgrade and ways to fix the problem. Likewise, check our pick of the best motherboards for Windows.

If you have further questions or suggestions, kindly drop them in the comments section.

Best Browser for Duckduckgo: 6 Privacy Picks to Choose From

DuckDuckGo is popular among people who take their privacy seriously and don’t want giants like Google or even Bing to track their search history.

A DuckDuckGo browser is equally important. And if you’re just scratching the surface when it comes to this topic, you may be wondering what is DuckDuckGo?

Others may have more of a dilemma and ponder on things like: is DuckDuckGo a browser or a search engine? We’re hoping that our explanations below will help to answer all of these questions.

Does DuckDuckGo make a web browser?

To start with, DuckDuckGo is a search engine that takes user privacy very seriously. While all search engines claim they respect user privacy, it is a well-known fact that collected data is what keeps these search giants running.

DuckDuckGo, on the other hand, does not track user data, thus being one among the few fully private search engines.

So how to use DuckDuckGo? It’s simple, just like you would with any other search engine such as Google, for instance.

It is recommended to use a DuckDuckGo browser, though. Using a DuckDuckGo desktop browser with better privacy features can empower users to take control of their personal information online without any tradeoffs.

By teaming up with a DuckDuckGo browser for Windows, you can enhance the impact of the private search engine even more.

What is the downside of DuckDuckGo?

➡ Fewer services – DuckDuckGo can’t compare to a search engine like Google when it comes to services

➡ Less customization – You can’t sync all your accounts and services with it

➡ No personalization or autosuggestions – This is a pro and con at the same time because the personalization and the suggestions within the search come from tracking your information as Google does

That being said, let’s go and see what are the best privacy-focused browsers for DuckDuckGO. DuckDuckGo’s desktop browser compatibility is very wide but we have picked the very best of them for you.

What browser should I use with DuckDuckGo?

Opera One – Best privacy-oriented navigation

Opera One Browser is a popular web browser for the Windows platform. Recently, it received a complete design overhaul along with some fancy features that make it the best privacy browser for DuckDuckGo.

The latest version comes with a free VPN, a fast ad blocker, Web 3 support, and a lot more control over your browsing experience.

After installation, you can customize the browser by importing your bookmarks and history.

You can select a dark or light theme, use Messenger and WhatsApp without leaving the browser as well as store and use Cryptocurrency in the built-in Crypto wallet.

Opera One also comes with extension support, a built-in screenshot tool, and other security features such as HTTP redirection, etc.

Opera One

Enhance your privacy with the ultimate DuckDuckGo browser with a built-in free VPN.

UR Browser – Light and privacy-oriented browser

UR Browser comes with a well-polished UI and a ton of privacy and security features. Chromium-based UR offers similar functionalities to Google Chrome and some additional features on top, we dare say.

Its privacy features include an inbuilt VPN with different servers for you to choose from when launching a private connexion.

UR can also block trackers, annoying ads, and cookies, redirect unsecured websites through an HTTPS connection when available, and even offers an anti-fingerprinting feature.

UR Browser

It’s like having your own digital bodyguard and security assistant.

AVG Secure Browser – Stealth mode

Are you wondering what is the match for DuckDuckGo to get more privacy? AVG browser is a straight fit for boosting online privacy.

This popular browser is used by many for complete web security, as it can offer you browsing fingerprint masking and a VPN shield to stop any trackers.

Not only that, you can use helpful functionalities such as the Privacy Cleaner to remove history data, forced HTTPS encryption, adware defense, or antivirus shield.

It’s essential to know that you have zero tracking scripts or cookies that gather personal data while you access web pages.

AVG

Don’t allow any tracking or data collecting with this browser and DuckDuckGo engine.

Mozilla Firefox – Fast and reliable

Firefox Browser for DuckDuckGo

After Google Chrome, Mozilla Firefox is probably the most popular browser available for Windows computers. Similar to Opera One, Firefox also received a major overhaul to its design in the recent update along with enhanced speed and resource management.

Firefox allows you to sync your browsing data across devices by creating an account. The popular add-on/extension support has now improved with a more strict approach to applicable add-ons.

The Private browsing mode now blocks contents and online trackers that follow you around the web. Then there is the Screenshots feature with scrolling support that allows for a quick snap and share session.

Firefox can be customized according to the user’s preference by changing the search bar tool, themes, and default search engine from the settings.

⇒ Get Firefox

Google Chrome – Most popular browser

Google Chrome is the most popular web browser among Windows users. However, it is also known to collect user data when allowed, which is why it only landed the last position in our list.

Chrome also comes with all the standard security features such as automatic URL redirect from HTTP to HTTPS, VPN, and ad-blocker support through extensions and a familiar user interface across the devices.

The latest version of Google Chrome includes DuckDuckGo as a recommended search engine, making it a DuckDuckGo browser choice.

Note that there is even a DuckDuckGo extension for Chrome that you can use to shorten the process.

⇒ Get Google Chrome

All the browsers in this article allow you to change the default engine and set it to DuckDuckGo. Also, consider checking our list of browsers that don’t save your history and personal data.

With the constantly increasing rate of cyber security breaches, you may even consider using one of the best browsers without cookies to protect your online privacy.

Do you use DuckDuckGo as your default search engine? Let us know in the comments below.

You Can Record Your Screen through Snipping Tool

Do you often use Windows 11’s built-in Snipping Tool to capture your PC screen? If so, you’re in for a treat.

Microsoft rolled out a bunch of new features within the Windows 11 Moment 2 update for general availability. Besides the hotly-anticipated Bing AI chatbot on the taskbar, the operating system also welcomes a nice addition of a screen record feature in the Snipping Tool and its autosave feature.

From now onward, you can use it to record and store your screen. As a matter of fact, you can free-form whichever part of your screen you want to record.

If you’re still curious about how it works, here’s how to record your screen through the Snipping Tool.

How to record screen through Snipping Tool?

1. Make sure you have the latest Windows 11 update installed. Check on Settings ➜ Windows Update to find out. If not, click on Download & update.

2. Open your Snipping Tool app.

3. Click on the camcorder icon, then click New.

4. Select the area you want to record, then click Start.

5. Once you’re finished, click the Save button. Pictures

If you’re also interested in using Snipping Tool to extract text from your screenshots, you can check out this guide on using the Snipping Tool for text extraction.

However, upon our testing, the feature hasn’t really worked smoothly. There is no option to pick up sound from the device and it immediately shows an error screen once capturing a constantly moving object (eg.: YouTube video).

You can check out our article on what to do when the screen record video feature is not working and see if you have better luck.

What do you think about this nice addition? Let us know in the comments!

Allow Files on This Drive to Have Contents Indexed [Explained]

There are many things Windows as an OS platform does good. One of those is the manipulation of files and directories. The user interface is similar for ages, and it’s hard to argue about its intuitive nature.

Another thing which is rather useful is system search. Thanks to file indexing, the searches for obscure files in your local drives are not dull and lengthy.

If you ever wondered how it works and how to, if the need arises, disable it, make sure to check to continue reading and find out.

What does Allow files on this drive to have contents indexed.. mean?

Even though Windows 10 is the new star for a couple of years, this trick is part of Windows for ages.

File’s contents indexing is an old feature that is resourcefully implemented in order to speed up the search process of local files.

However, nowadays, we can question whether it’s useful or it’s really just slowing down your system due to not-perfect indexing times.

Here, we’re referring to everyday users and not the enterprises. Windows 10 focuses on files you frequently use and access.

So, it shouldn’t be an issue to let it be since it’s enabled by default and strictly focuses on certain directories and not every given file within the given partition.

How does it work?

It basically scans all accessed folders and subfolders contained within the partition. Then, it indexes them and, the next time you search for a file or a folder, the searching process is vastly faster.

The more files you commonly use and look for, the greater value of this nifty feature. The idea is to index files while the PC is idle, however, this isn’t the case for some users.

Namely, some of them reported frequent HDD usage spikes during the startup or while using some demanding applications.

This will, of course, affect the overall system performance. On the other hand, looking up for that one file in the directory with tens of thousands can be a slow-death experience, so have that in mind.

How can I enable or disable file indexing on the given partition?

1. Turn off indexing for a specific partition

allow files on this drive to have contents indexed in addition to file properties
  1. Open This PC or File Explorer.
  2. Right-click on the partition you want to relieve of indexing and open Properties.
  3. Uncheck the Allow files on this drive to have contents indexed in addition to file properties box.
  4. Restart your PC.

This feature is, by default, enabled on all your various partitions or drives. Including the external partitions connected to Windows 10 PC. Disabling it is as simple as possible.

Just navigate to This PC or File Explorer, right-click on the partition at hand and open Properties. What you want to do next is uncheck the Allow files on this drive to have contents indexed in addition to file properties box, as above mentioned.

2. Change indexing options

allow files on this drive to have contents indexed in addition to file properties
  1. In the Windows Search bar, type index and open Indexing Options.
  2. Click Modify to choose the directories you commonly access.
  3. Click Advanced and choose the File Types tab.
  4. Select file types you want to be indexed (or uncheck the ones you don’t see necessary) by checking the boxes.
  5. Confirm changes and restart your PC.

Another good thing you can do is make selective indexing. Meaning, the indexing will focus on directories you choose and it won’t take a toll on your HDD or processing power.

You can choose a certain file type to be indexed (this can come in handy if you have lots of photos), too. Also, you can exclude subdirectories or file extensions if you deem them redundant.

3. Use a dedicated tool

Copernic Desktop Search is a free search tool for file search on your own PC. The program searches MS Office, HTML, PDF, text and OpenOffice files.

Using categories it can distinguish between file categories such as music, photos, videos, or e-mails from Outlook or Mozilla programs.

Copernic Desktop Search currently supports over 119 different file types for indexing and previewing. This search file tool indexes better and finds more files than a regular Windows 10 search.

⇒ Get Copernic Desktop Search

In case you have something interesting to add, we encourage you to do so in the comments section below.

7 Best Nvidia Shield Browser Apps & How to Install [TV, Pro]

First things first: can the Nvidia Shield browse the Internet? Definitely. And now that we got that out of the way, let us show you how to get an Internet browser on Nvidia Shield.

Can you install apps on Nvidia Shield? It all comes down to the firmware and what OS Nvidia Shield runs. And it’s essentially an Android TV-based media player device.

You may not be able to install any app on Nvidia Shield but it can definitely run both standard Android and Android TV apps. We suppose there is another question that’s worth answering.

Does Nvidia shield have a web browser?

Interestingly, unlike many other devices, there is no pre-installed Internet browser on the Shield TV. However, this is not a deal-breaker since you can easily sideload and install one on the device.

You can view your locally stored media, stream from a PC, and use any desktop browser thanks to the device’s GameStream feature or cast your screen.

However, you may access the web on your Nvidia Shield TV as well. You just need to set up a suitable browser to accomplish this and we gathered the very best options right here:

  • Puffin TV – Best browser for Nvidia Shield (most compatible)
  • Opera – Fine-tuned browsing options for all devices
  • Chrome – Best for increased functionality
  • TVWeb Browser – Most compatible with Androids
  • Firefox – Best for Addons
  • TV Bro – Best for Android TV remote
  • Edge – Best for checking out mode

How do I browse the Internet with Nvidia?

1. Use Puffin TV Browser – Most compatible for Shield TV

Puffin TV Browser stands out among the competition because, unlike many alternatives, it is compatible with the standard remote that comes with the Nvidia Shield Android TV.

It’s not just a mobile Android app that has been repurposed; the Puffin TV Browser features a version specifically made for Android TV boxes. So, is Puffin TV browser free? Luckily so.

Puffin’s custom-designed UI makes it speedy and lightweight.

Additional features:

  • Chatbot
  • Remote phone control
  • Suit of browser options

⇒ Get Puffin TV browser

2. Use Opera – Fine-tuned options for all devices

Smooth browsing and a powerhouse of modern features tailored to adapt to each and every device from PC to mobile, Macs, TVs, and Chromebooks – that’s what you can expect from Opera.

This is not only an excellent Nvidia Shield browser, but also a great browser to use on Chromebooks or to install on Roku TV and that’s just to name a few.

It’s innovative and versatile and you can sideload the Opera apk with ease to browse the Internet on your Shield TV in a perfectly safe and customized environment that reflects your own habits, style, and needs.

Additional features:

  • Cross-device file sharing
  • Video pop-out and other media enhancements {integrated players, etc.)
  • Highly customizable (generous extensions store with Opera and Chrome addons available)

⇒ Get Opera

3. Use Chrome – Best for increased functionality

Does Nvidia work on Chrome? Perfectly even. But strangely, the Android TV OS doesn’t include Chrome by default. Don’t worry, we’ll show you exactly how to sideload Chrome on Nvidia Shield later on (in a step-by-step, detailed guide).

There are benefits and drawbacks to using this browser on Shield TV. On the plus side, if you already use Chrome, you can access all of your synchronized browsing history, bookmarks, and other material.

Chrome’s potential incompatibility with your current Android TV remote is one of its drawbacks, making it a bit more challenging to use than a few other solutions.

Additional features:

  • Organized tabs
  • Media controls
  • Profiles

⇒ Get Chrome

4. Use TVWeb Browser – Most compatible with Androids

The TVWeb Browser is a browser created especially for the Android TV OS.

The navigation is easy. You can access your bookmarks, preferred search engines, and the settings menu on the left pane of your screen.

TVWeb Browser features include bookmarking, an integrated voice search, your browser history, and an on-screen mouse pointer operatable with your standard Android TV remote.

Additional features:

  • User Agent switching
  • Customizable search engines

⇒ Get TVWeb Browser

5. Use Firefox – Best for Addons

best browser for Shield TV

Just like Chrome, you may sideload Firefox onto your Nvidia Shield. The best thing about it is that it’s one of those great browsers with AV1 video decoding support that will truly enhance your viewing experience.

But also, Firefox does not have a specific Nvidia Shield version.

Due to Google’s strict criteria for what constitutes a TV app, it is not available on the Shield. If you want to know how to install Firefox on Nvidia Shield, you can follow the same steps provided in our Chrome guide.

All you need is the APK file. That being said, Firefox users on Nvidia Shield cite the app’s addons as one of its key benefits.

Additional features:

  • Shields up for privacy
  • Dark mode
  • Collections

⇒ Get Firefox

6. Use TV Bro – Best for Android TV remote

best browser for Shield TV

The Android TV browser is created to integrate perfectly with the Android TV remote.

Additionally, there is access to your browser history, a simple download manager, and shortcut support.

TV Bro utilizes the rendering engine from Android and lets you change user agents.

Most significantly, TV Bro is an open-source application. That implies you may examine the app’s source code to see how it functions, confirm its security, and discover what information it gathers.

Additional features:

  • Support for bookmarks
  • Voice search support
  • Tabs

⇒ Get TV Bro

7. Use Edge – Best for checking out mode

best browser for Shield TV

We’ve put the Edge Browser on our list since it is widely renowned for its checking-out feature. Because Edge is built on Chromium, you can anticipate a comparable level of performance with more functionality.

Everything is accessible from one place; we love it because it has excellent sync features.

Additional features:

  • Bookmarks
  • Reading lists
  • Browser history

⇒ Get Edge

⭐ How do I install browser on Shield TV?

  1. Launch Google Play Store and search for Downloader.
  2. Click Install to install the Downloader by AFTVNews app.
    best browser for Shield TV
  3. Launch the Nvidia Shield downloader (Downloader by AFTVNews).
  4. Paste the link for the APK downloader plugin, and click Go.
  5. When prompted, click Install.
    best browser for Shield TV
  6. Again, launch the Downloader by AFTVNews.
  7. Paste the Chrome APK link (or the Opera apk link), then click Go.
  8. When prompted, click Install.

You should have Nvidia Shield browser Chrome adequately installed on your TV now.

Also, remember you can use ad-blocker apps to get the best viewing experience.

There you have it – the best Nvidia Shield browser options for Shield TV. We expect that your preferences should govern your decision.

Browsers that you have used in the past, like Edge or Chrome, may have an advantage because you can simply transfer your history and sync them across all devices.

How to Install Bluetooth Drivers on Windows 10

Can’t find Bluetooth on your Windows 10 PC or having trouble connecting a device? You might be missing the correct Bluetooth driver. In this guide, we’ll show you how to install Bluetooth drivers on Windows 10 using four easy methods. These include Device Manager, Windows Update, downloading drivers manually, and using automatic driver installer software.

Whether your Bluetooth is not showing up in Device Manager or it suddenly disappeared from settings, these steps will help you fix it. No matter which method you choose, you’ll be able to restore Bluetooth functionality and connect your devices again in no time.

How can I install a Bluetooth driver on Windows 10?

Before you install any drivers on your PC, ensure you meet the following requirements:

1. Use Device Manager

  1. In the Search bar type Device Manager and select it from the list.
  2. Next, locate Bluetooth and expand the list.
  3. Right-click on the audio device listed and select Update driver.
  4. Click on Search automatically for updated driver software.
  5. Follow the on-screen instructions and restart your device at the end.

2. Update your OS

  1. Press Windows + I key simultaneously to open Settings.
  2. Here locate and click on Update & Security at the bottom of the list.
  3. Next, in the Windows Update tab click on Check for Updates.
  4. If a new update is found click on Install.
  5. Once the process finishes make sure to restart your device.

3. Download and install the driver

  1. Go to your manufacturer’s website and download the latest driver. (In this case Intel).
  2. Save the downloaded file on your device.
  3. Follow the on-screen installation instructions.
  4. Make sure to Restart your computer after the installation process is complete.

4. Use a dedicated software

The safest way of installing a missing driver without having to do much is using a third-party driver updater.

Tools of this sort have the ability to check the drivers installed on your device and detect whether you have any missing, outdated or corrupt drivers.

Then, with your approval, they’ll install all of those automatically. If you’re someone who doesn’t like keeping tabs on PC maintenance, using this type of software could save a lot of time and hassle.

Why are my Bluetooth drivers missing?

Most Windows devices come pre-installed with Bluetooth devices, but if for some reason they are not present in your PC, it could be one of the reasons below:

  • Outdated OS – If you’re running an old Windows device, it is possible that it is not optimized for the latest drivers. You can upgrade your OS or check for new updates.
  • Incompatible device – Not all devices will connect to your PC, or you may have downloaded the wrong driver.
  • Viruses/malware – Viruses and malware alter some critical functions of your device so ensure you have reliable antivirus installed.
  • Corrupt system files – If you have edited your registry wrongly, you may have some corrupt system files that prevent your drivers from functioning.

How to reinstall Bluetooth drivers on PC?

Just remove your drivers and re-install them picking one of the solutions above. For more details, check out this quick video:

Summary

There you have it. These are the recommended ways of installing a missing Bluetooth driver on your Windows 10 device.

We also share a step-by-step guide on how to uninstall your Bluetooth driver especially if it is corrupted. Also, here’s what to do if your Bluetooth is not detecting devices.

If you’re on Windows 11, we also have a guide on how to download Bluetooth driver for Windows 11, so don’t miss it.

If you’re still facing issues, check out our full guides on how to reinstall Bluetooth drivers on Windows 10 and Windows 11, or see how to fix the Bluetooth driver error code 28. You might also want to look into the latest Intel Bluetooth driver updates and news on Intel’s driver releases to stay up to date.

As always, if you have additional suggestions, don’t hesitate to leave us a comment in the dedicated section below.

SM Bus Controller Driver for Windows 11: 64 Bit Download

You may face any SM Bus Controller error. However, when the driver is missing, it is a different issue. The device, SM Bus, is a small chipset that monitors the temperature, voltage, and other specific things of the Motherboard. You need a driver for this device to get accurate readings on your PC components and work properly with overclocking software.

How do I download the SM Bus Controller driver for Windows 11?

1. Download from Intel

  1. Download the Intel Chipset Software Installation Utility.
  2. Install it on your PC.
    installing intel chipset software installation utility.
  3. Open it.
  4. Now, it will detect the SM Bus Controller and let you install the proper driver.

After installing, restart your PC. You should also be able to download SM Bus Controller driver in Windows 7 32-bit with this method.

2. Download the driver using Device Manager

  1. Open the Start Menu, type device manager, and hit Enter.opening device manager windows 11
  2. Find and right-click on the SM Bus Controller and click on Update.updating sm bus controller device manager
  3. Choose the preferred way to update.
  4. Follow the onscreen steps to finish the process.

The built-in Device Manager method works fine when installing the SM Bus Controller driver for Windows 10 64-bit.

3. Use a third-party driver updater

The best way to download the SM Bus Controller driver for Windows 11 is by using third-party driver updating tools like Fortect Driver Updater. This tool can automatically detect any missing or outdated versions of drivers.

It has a huge database. As a result, you can download and install all of the drivers on your PC with just a single click. Otherwise, this tool can run scheduled scans and execute the driver update process automatically, which saves you time.

⇒ Get Fortect Driver Updater

The System Management Bus is a device developed by Intel that controls low-speed system management communication. Remember, you require an SM Bus Controller driver on Windows 7 64-bit as well. Though if you have a system with an AMD processor, you may not need this driver.

This article has featured how to download and install SM Bus Controller on Windows 11. Feel free to let us know in the comment box if you have any suggestions or opinions.

Laprxy.dll: How to Fix or Download It if It’s Missing

Laprxy.dll is a Windows Dynamic Link Library file that contains information on how to manage the performance of your computer and how to interact with other programs, so this file must be kept up-to-date and functioning properly on your computer.

Unfortunately, sometimes these files can become corrupted or deleted due to several different reasons. This can cause issues in your operating system and make things difficult for you to use. If you encounter the laprxy.dll is missing error, we show you how to fix it.

Why is my laptop missing DLL files?

There can be various reasons why your laptop is missing some DLL files. These include:

  • Your computer has been infected with malware – Malware may have caused various problems, such as missing DLL files. This can stop you from running applications and software that you need to run.
  • You have installed an upgrade or new version of Windows – A new Windows version can change your system’s layout, meaning some old files may have been moved or deleted.
  • File modification – It is possible that the file was modified by an external party to make it incompatible with your operating system. This can happen if someone makes an unsupported change to the original DLL file.
  • Incompatibility – Apps tend to receive new updates and may no longer be compatible with the associated DLL files.

How can I fix Laprxy.dll if it is missing?

A few workarounds that may resolve the issue before you move to the slightly technical solutions include:

  • Ensure that your Windows is up-to-date.
  • Reinstall the app causing the issue if specified.
  • Try restarting your PC.

1. Run a DLL-fixer

If you have no idea how to repair files or commands to run to attempt to recover the missing DLL file, a DLL fixer tool should suffice. These tools are great for replacing and repairing any corrupt files.

Usually, they have a huge database which is a plus when it comes to finding replacements for the missing files, so you can rest assured that your DLL file will be repaired without you having to lift a finger.

2. Run DISM and SFC scans 

  1. Hit the Start Menu icon, type cmd in the search bar, and click Run as administrator.cmd-run-admin-w11 unexpected kernel mode trap windows 11
  2. Type the following commands and press Enter after each one: DISM.exe /Online /Cleanup-Image /Restorehealth sfc /scannow
  3. Restart your PC.

3. Run a virus scan

  1. Press the Windows key, search Windows Security, and click Open.
  2. Select Virus & threat protection.
  3. Next, press Quick scan under Current threats.
  4. If you don’t find any threats, proceed to perform a full scan by clicking on Scan options just below Quick scan.Scan options
  5. Click on Full scan and Scan now to perform a deep scan of your PC.Full Scan Scan Now
  6. Wait for the process to finish and restart your system.

4. Download the DLL file manually 

If you’re good at deciphering the right DLL file that is missing and can find the right version for your OS online, then downloading manually may be an option. If you choose this option, you must be careful with the site you download from.

Some sites, such as DLL-Files.com, have legitimate DLL files, while others cannot be trusted and can install malicious code in your system masquerading as the real thing. For this reason, you need a comprehensive antivirus solution that can detect such from a mile away.

5. Perform a System Restore

  1. Click the Search icon, type create restore point and click Open.
  2. Select the drive you wish to enable system restore for and click on Configure.
  3. Now select Turn on system protection. Set the Max Usage value and click on Apply and OK to save changes.
  4. Go back and repeat step 1.
  5. When the System Properties window opens, click on Create.system properties create restore point windows 11
  6. Enter the desired name for the restore point and then click the Create button.create a restore point windows 11 name
  7. Wait while Windows creates the restore point.
  8. Press the Windows + R keys, type rstui and hit Enter.
  9. Select the restore point you wish to revert to and click on Next.
  10. Now click on Finish.

6. Reset Windows

  1. Hit the Windows key and select Settings.settings windows 11
  2. In the left window pane, select System, then click on Recovery on the right pane.
  3. Click on Reset PC from the right side.clicking reset PC win11 settings
  4. Choose the type of factory reset you need. You can keep your files or completely delete all the files, apps, and settings on the PC.
  5. Select the option you want to reinstall Windows: Cloud download or Local reinstall.
  6. Click on Next.
  7. Finally, press the Reset button.

The steps above apply to both laprxy.dll missing in Windows 10 and 11. Also, check out our detailed article in case your DDraw.dll file is missing, as we have covered various ways to restore it.

Let us know which method you tried and successfully solved this issue.

Steam Achievement Manager: How To Download & Use It in 2026

If you are a gamer, chances are that you buy and play games via Steam. In such a case, you would get several achievements to complete within the game, awarded by Steam.

Today, we’re going to show you a tool that will help you keep track of all your achievements, so let’s dive in.

What does Steam Achievement Manager do?

Steam Achievement Manager is a free application that gives you a one-stop shop to maintain all of your achievements in the game.

You can easily monitor and check all the achievements of the game and select them, play the game and unlock the achievements.

Hardcore Steam players can play the game and track every reward they have attached to their respective accounts.

The Steam Achievements Manager is an open-source program that lets you dive directly into an unlockable achievements mission. Do note that Steam did not endorse officially this manager. However, it is used by thousands across the globe since 2008.

Will Steam ban you for using the Achievement Manager tool?

There are several users skeptical about using this tool to manage their achievements. The good thing is that there have been no reports of a Steam player getting banned because of using the Steam Achievements Manager tool.

But you might still be a bit confused about whether to use this tool since it is not an official software coming from the house of Steam.

We would advise you to use this software with some caution and prevent being the first one to get banned from Steam.

If you are using the Achievements Manager tool to just display an achievement on your profile, that is fine. Now, if you think that the achievement unlocks an in-game item, that is tricky.

How do I download the Steam Achievement Manager?

  1. Visit this website. This is the official Steam Achievement Manager page on GitHub.
  2. Hit the Download latest release button.
  3. Under the Assets section, click on the SteamAchievementManager ZIP file.
  4. After the download finishes, you need to extract the files using unzip tools such as 7Zip, or WinRAR.
  5. Launch the SAM.Picker file. Do note that you need to run Steam before you launch this file.
  6. The manager will open and populate the home screen with all the tiles currently showing up on the Steam app.

Now that you have downloaded the Steam Achievement Manager tool on your PC, let us take a look at how you can use it to manage all of your achievements.

How do I use the Steam Achievement Manager?

  1. Launch the Steam application on your PC.
  2. Log in with your credentials to the Steam app.
  3. Launch the SAM tool on your computer.
  4. All the games connected to your Steam account will now get populated on the SAM tool.
  5. Double-click on the game that you want to get the achievement. You can also find the game using the game’s Steam ID.
  6. SAM will list all the achievements of the game.
  7. Click the box next to the achievement that you wish to unlock. You can select just one, or all just by a simple click.
  8. Once you have selected all of your achievements, click on the Commit Changes button at the top.
  9. You will see the achievement pop-up trigger on your Steam profile. If the Steam profile doesn’t show the achievements, you can go back and open the page back again, to see that it reflects the changes.
  10. SAM tool also lets you invert your choices, meaning you can lock your achievements using the same method, i.e., by deselecting the achievements from the list and hitting the Commit Changes button.

Why are my Steam Achievements not working?

Several users have reported that for them their achievements aren’t showing up on their profiles. If you are one of such users, then you can check out the few tips below to fix the problem.

  • Disable Steam offline mode: Head to Steam > Go Online from the top toolbar.
  • Check the achievement guide: Have you followed all the requirements to unlock an achievement? Chances are that you might have missed a few points, which is the reason, the achievements aren’t showing up on Steam. You can check out websites such as TrueSteamAchievements to know about the requirements to unlock achievements for Steam games.
  • Restart Steam: Well check if re-launching Steam makes any difference or not.
  • Disable third-party apps: If you are using a mod or third-party app, such as Steam Achievement Manager, then you should close them and check if this makes any difference.

If your Steam achievements aren’t appearing, you can find solutions for Steam achievements not showing up in-game in our dedicated guide.

FAQ

What is Steam Achievement Manager?

It’s a tool that allows users to unlock, modify, and manage Steam achievements without playing the game.

Is it safe to use Steam Achievement Manager?

It’s not officially supported by Steam and can lead to penalties or account suspension.

How do I use Steam Achievement Manager?

Download and launch SAM, log into your Steam account, then unlock achievements from the game list.

Can I unlock achievements for any Steam game using SAM?

Most games work, but some with anti-cheat systems or Steamworks integration may not.

We have a guide that will help you verify the integrity of game files not working on Steam. Also, you can check out our dedicated guide on the Steam error joining multiplayer session that lists 5 effective solutions to fix the problem.

Let us know in the comments if you like our Steam Achievement Manager guide that gives you a proper explanation of how you can download and use it in 2022.

JNLP File Not Opening? Here’s How to Fix It!

JNLP file not opening? You’re not alone. The issue usually stems from Java errors, file associations, or other settings. Bellow, we’ll help you address all those problems. Let’s dive in.

How do I open a JNLP file?

1. Manually with Java WS

  1. Download JRE, run the setup, and follow the on-screen instructions to complete the process.
  2. Once done, restart the computer for the changes to come into effect.
  3. Now, right-click on the JNLP file, and select Properties.properties
  4. Click on the Change button.change file association to fix JNLP file not opening
  5. Click Choose an app on your PC.choose an app on the PC
  6. Navigate the following path (the JRE version may be different in your case):C:\Program Files (x86)\Java\jre1.8.0_361\bin
  7. Select jawaws, and then click Open.jawaws when JNLP file not opening
  8. Now, with the jawaws entry selected, click on Set default.set default
  9. Finally, click on Apply and then OK to save the changes.apply

So if you were wondering how to run a JNLP file in Java, this should do. Also, if the JNLP file was not opening with JavaWS earlier, reconfiguring the file association as we did earlier should do the trick.

2. With a text editor

  1. Right-click on the file, hover the cursor over Open with, and select Notepad.notepad when JNLP file not opening
  2. If the option isn’t available right away, you can click on Choose another app earlier, and then select Notepad or Notepad++.notepad

For those wondering how to open JNLP file without Java, you can always use Notepad. Though remember, here, you can only view the content. Also, you can use Notepad++, an open-source software that allows tabbed editing for enhanced workability.

3. Via Command Prompt

  1. Select a link on the page that refers to a .jnlp file. If your browser does not have the correct association to run Web Start applications, select the install_dir/jre/bin/javas command from the Open/Save window to start the Web Start application.
  2. Now, press Windows + R to open Run, type cmd, and hit Ctrl + Shift + Enter.cmd
  3. Next, in the command prompt, type the following command and hit Enter while replacing <path> with the location of the .jnlp file:Javaws <path>command

How to automatically open Java Web Start Application JNLP files?

  1. Press Windows + I to open Settings, select Apps from the navigation pane, and click on Default apps.default apps
  2. Search for .jnlp in the text field, and click on the relevant result.file association to fix JNLP file not opening
  3. Now, select Java Web Start Launcher, and click on Set Default.java web start launcher

This way, you can set the default file association for JNLP files, and they will automatically launch using Jawa Web Start Launcher the next time. Also, if the JNLP file is not opening in the browser, you can always download it and use Java WS to access it.

Java errors, such as error code 1618 or issues with outdated Java, and JNLP files not opening are common. But with the fixes above, you can address these problems and get things running smoothly again.

For any other queries or to share other methods, use the comments section below.