Windows Terminal Not Working: 6 Ways to Enable or Reset It

Windows Terminal not working on your device is one of the most annoying issues you can encounter. It will prevent your access to the Command Prompt, PowerShell, Azure Cloud Shell, and other command-line tools. Hence, this article will discuss some easy fixes to resolve the problem.

Also, you may be interested in our article about the best Windows 11 Terminal emulators to install on your PC.

Why is the Windows Terminal not working?

Since Windows Terminal is a pre-installed program on Windows, the causes may vary. Some of the notable ones are:

  • Corrupt system files – Every service and program running on the computer are attributed to system files that help them function properly. So, the Windows Terminal may not work if the system files are corrupted or missing.
  • Malware and virus attacks – If you have virus or malware attacks on your computer, it can infect and block the communication between Windows Terminal and the system, resulting in the issue.
  • Issues with Windows Terminal installation files – The problem can occur if the system cannot read or run Windows Terminal from its installation directory, making it inaccessible.
  • Windows Terminal is disabled – The Windows Terminal might be available on the PC, but still won’t work because the app is disabled in Settings.

Fortunately, you can resolve the Windows Terminal not opening on Windows 11 by following the steps outlined below.

What can I do if the Windows Terminal is not working?

Before anything, go through the following:

If you can’t fix the problem, try the solutions below:

1. Ensure Windows Terminal is enabled

  1. Press Windows + I key to open the Settings app.
  2. Click on Apps and select Advanced app settings.
  3. Select App execution aliases.
  4. Find Terminal from the list of apps and toggle it On.
  5. Try to access the Windows Terminal on your PC to see if it works.

Toggling Off and On the switch for Windows Terminal in App execution aliases performs a mini reset and refreshes its processes.

2. Run an SFC scan

  1. Left-click the Start button, type Command Prompt, and click the Run as administrator option.
  2. Click Yes on the User Account Control prompt.
  3. Type the following and press Enter: sfc /scannow 
  4. Restart your PC to see if the Windows Terminal works.

Performing an SFC scan will verify the integrity of your system files and repair the corrupt ones causing the issue.

Read our guide on how to fix the run as administrator option if it’s not working on your PC.

3. Repair and reset Windows Terminal via the Settings app

  1. Press Windows + I key to open the Settings app.
  2. Click on Apps, then select Installed apps.
  3. Locate the Terminal app, click on the three dots, and click on Advanced options.
  4. Click on the Repair button and wait until it’s complete.
  5. Then, click on the Reset button to complete the process.
  6. Try to open Windows Terminal and check if it works.

The Repair and Resetting option of the Windows Terminal will fix the corrupt installation files affecting it and restore it to the default healthy state.

4. Reset Windows Terminal via Command Prompt

  1. Left-click the Start button, type Command Prompt, and click the Run as administrator option.
  2. Click Yes on the User Account Control prompt.
  3. Copy and paste the following into the command bar, and press Enter: del /f /s /q /a "%LocalAppData%\Packages\Microsoft.WindowsTerminal_8wekyb3d8bbwe\LocalState\settings.json"
  4. Close the Command Prompt and check if you encounter the same issue when opening the Windows Terminal.

The above command line will reset Windows Terminal to the default settings and resolve configurations causing the problem.

If you encounter issues running the Command Prompt as an administrator on Windows 11, read our guide for quick fixes.

5. Uninstall and reinstall Windows Terminal from the Microsoft Store

  1. Press Windows + I key to open the Settings app.
  2. Click on Apps, then select Installed apps.
  3. Find the Terminal app, click on the three dots, and click on Uninstall.
  4. Close the Settings app.
  5. Left-click the Start button, type Microsoft Store, and launch it.
  6. Click on the search bar in the top-right corner, search for Windows Terminal, and click on the Get button in the top-left corner to install the app.
  7. After the process is complete, check if the Windows Terminal works.

Reinstalling Windows Terminal will fix faulty app issues affecting the program and install a verified version to improve performance.

You can read about how to resolve Microsoft Store not working in Windows 11.

6. Run System Restore

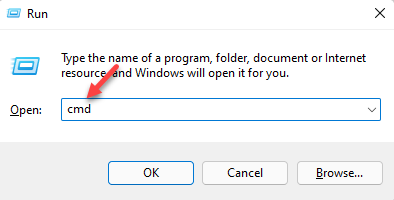
  1. Press Windows + R key to open the run dialog box, type control, then press Enter to open the Control Panel.
  2. Type recovery in the search bar and click on it to open.
  3. Then click Open System Restore.
  4. Click Next in the Restore system files and settings window.
  5. Choose the restore point and click Scan for affected programs.

System Restore will return the system to an earlier point, removing recent files, apps, drivers, and updates which may cause the Windows Terminal issue. Read our article on fixing Restore Point if it’s not working on your PC.

Alternatively, you can read how to download and install HyperTerminal for Windows 11. Also, we have a detailed guide on what to do if Command Prompt keeps crashing on your PC.

If you have further questions or suggestions, kindly drop them in the comments section.

0x8007041d: What Does It Mean & How to Fix This Error Code

Running into the error code 0x8007041d during a Windows Update process prevents your system from downloading or installing updates. It is accompanied by the service did not respond to the start or check request in a timely fashion message. Hence, we will provide the possible solutions in this guide.

Meanwhile, we have a similar article on fixing the 0xc190011f Windows Update error.

What is the error code 0x8007041d?

Error code 0x8007041d: The service did not respond to the start or check request in a timely fashion indicates a malfunction in your system operation. It is a runtime error that occurs during the Windows update process.

Furthermore, the error is usually preceded by Windows running slowly and unresponsive to mouse or keyboard input. Also, it can crash any active windows on the screen.

What causes the error code 0×8007041d?

The 0x8007041d error message often appears as a result of some issues affecting the system, such as:

  • Issues with software installation or uninstallation – Alterations to the software running on your computer leave files and data residues stored on the system. These files may cause issues with the system’s functionality.
  • Incorrectly configured system settings – Some system configurations can impede the Windows updates process, resulting in delay and the time check error.
  • Corrupt system files – Windows error code 0x8007041d can occur due to the system files being corrupted. Hence, the ongoing process can’t access them.

Irrespective of the causes, the solutions outlined below should fix the error.

How can I fix the error code 0x8007041d?

Before proceeding with any advanced troubleshooting steps, try the following:

If you can’t resolve the error, proceed with the steps below:

1. Run a System File Checker (SFC) scan

  1. Left-click the Start button, type Command Prompt, and click the Run as administrator option.
  2. Click Yes on the User Account Control prompt.
  3. Type the following and press Enter: sfc /scannow
  4. Restart your PC and check if the 0x8007041d appears.

An SFC scan will detect and repair corrupt system files on your PC that may be causing the error. Check our guide on how to fix the run as administrator option if it’s not working on your PC.

2. Reset the time and date on your PC

  1. Press Windows + I key to open the Windows Settings app.
  2. Click on the Time & Language and select Date and time.
  3. Click on Change beside Set the date and time manually.
  4. Set the time correctly, then click Change to save and initiate the changes.
  5. Restart your PC and check if the Windows update error 0x8007041d persists.

Setting the correct time and date can fix the error and help the update process to use the appropriate region.

3. Reset the Windows Update process

  1. Left-click the Start button, type Command Prompt, and click the Run as administrator option.
  2. Click Yes on the User Account Control prompt.
  3. Type the following commands and press Enter after each one: net stop wuauserv  net stop cryptSvc  net stop bits  net stop msiserver
  4. Run the following command one after the other: ren C:\Windows\SoftwareDistribution SoftwareDistribution.old   ren C:\Windows\System32\catroot2 Catroot2.old
  5. Type the following commands and press Enter after each one: net start wuauserv  net start cryptSvc  net start bits  net start msiserver
  6. Exit the Command Prompt and restart your PC to see if you can resolve the problem.

The above steps will repair the Windows Update process and fix the problems.

4. Run System Restore

  1. Press Windows + R key to open the run dialog box, type control, then press Enter to open the Control Panel.
  2. Type recovery and select it from the options.
  3. Then click Open System Restore.
  4. Click Next in the Restore system files and settings window.
  5. Choose the restore point, then click Scan for affected programs.

Initiating this removes recent activities after the restore point, recovering the system to the previous point. Do not hesitate to read our guide on how to fix the restore point if it’s not working on your PC.

As an automatic alternative, you can try third-party software to replace all corrupt and damaged files with clean parts from its extensive database.

Conclusively, check how to fix the update error code 0x80070070 on Windows 11. Also, we have an article on fixing slow Windows updates.

For more questions or suggestions, kindly drop them in the comments section.

Gamepad Recognized But Not Working in Games? Try This!

If your gamepad is recognized by Windows but doesn’t work in games, it’s usually caused by USB port issues, outdated drivers, or XInput compatibility problems. Fortunately, these are easy to fix. Follow the steps below to get back to gaming.

What do I do if my PC controller is detected but not working?

1. Run Windows Troubleshooter

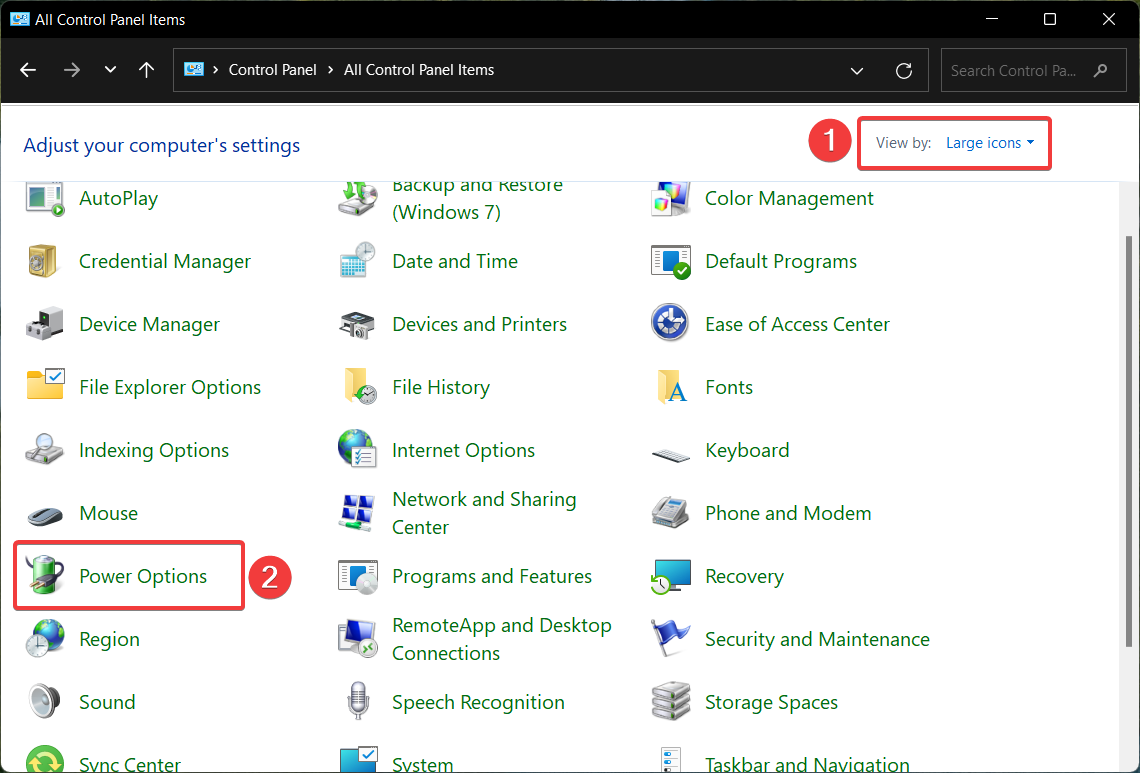
  1. Go to the Windows Search Bar, type Control Panel, and click on the relevant search result.
  2. Go to View by the option on the top right corner, and select Large icons.large icon to fix gamepad recognized but not working in games
  3. Select Troubleshooting.troubleshooting to fix gamepad recognized but not working in games
  4. Click the View all option on the left pane.view all to fix gamepad recognized but not working in games
  5. Chose Hardware and Devices, right-click on it, and select Run as Administrator.
  6. Follow the on-screen instructions to complete the troubleshooting process.

Running the Hardware and Devices troubleshooter should resolve the issue if you’re experiencing problems with a recently installed device or hardware on your computer.

2. Reinstall USB drivers

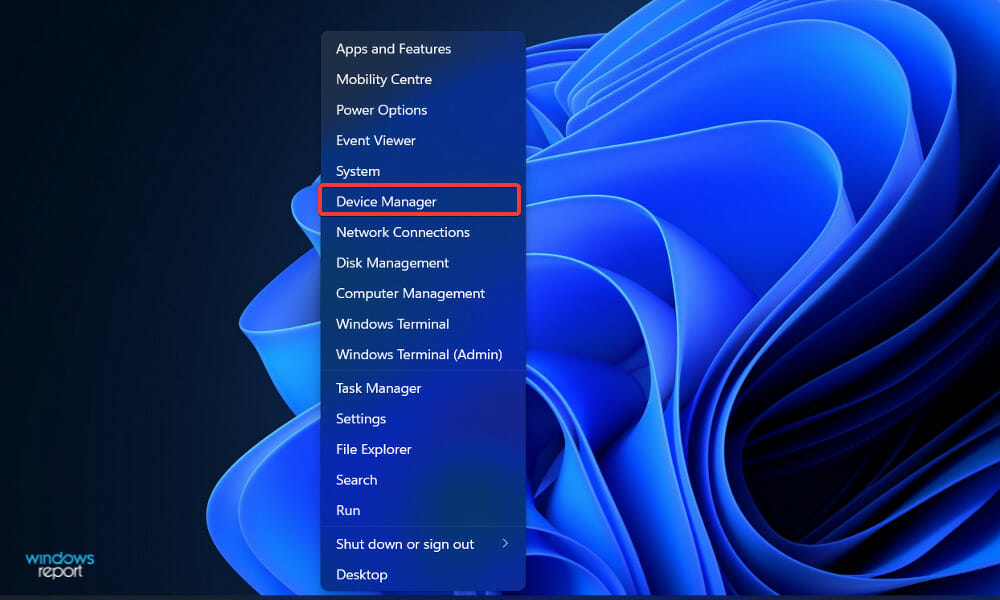
  1. Right-click the Start button and select Device Manager.device manager to fix gamepad recognized but not working in games
  2. Find Universal Serial Bus controllers and double-click on them to expand the section.Universal serial bus controllers
  3. Right-click on the USB Composite device and Mass Storage device and select Uninstall device.uninstall to fix gamepad recognized but not working in games
  4. Click Uninstall in the confirmation prompt.uninstall
  5. Repeat for all other problematic devices.
  6. Reboot your computer.

Once you restart the computer, Windows will automatically reinstall USB controllers on your PC and run the devices properly.

Alternatively, if Windows cannot accurately identify the device, you can use a third-party driver updater such as Fortect Driver Updater.

3. Remove ghost devices

  1. Press Windows + S to open the Search menu, enter Device Manager in the text field, and click on the relevant search result.device manager
  2. Click on the View menu, and enable the Show hidden devices setting.show hidden devices to fix gamepad recognized but not working in games
  3. Now, expand Human Interface Devices, Sound, video and game controllers, and Universal Serial Bus controllers list, and look for lighter and more transparent devices.sections
  4. If any are found, right-click on them and select Uninstall device.uninstall device to fix gamepad recognized but not working in games
  5. Next, click on Uninstall in the confirmation box that pops up.uninstall
  6. Close Device Manager and reboot the computer.

Ghost devices are devices that are no longer attached to your PC. Windows kept a record of these devices, but the information was not removed when the device was unattached. And this often leads to conflicts.

4. Restart the PC in Safe Mode

  1. Press the Windows key + R.
  2. Type msconfig and press Enter.run msconfig
  3. Select the Boot tab.
  4. Under Boot options, check the Safe boot option.system configurations safe boot

When you boot Windows into Safe Mode, it will load with limited files, services, and drivers if the gamepad problem isn’t there while in Safe Mode, then your default settings and primary drivers are not contributing to the issue.

5. Remove duplicate devices

Note icon NOTE
Before executing the steps listed here, boot your computer into Safe Mode.
  1. Press Windows + R to open the Run command, enter devmgmt.msc, and click OK.devmgmt.msc
  2. Again, double-click on Human Interface Devices, Sound, video and game controllers, and Universal Serial Bus controllers to expand them.
  3. Now, locate all duplicate entries, right-click on them individually, and select Uninstall device.uninstall
  4. Confirm the same by clicking on Uninstall in the prompt.uninstall
  5. Close Device Manager and boot your computer normally (not Safe Mode).

While deleting the entries in the Device Manager, remove only the duplicate ones and not both. Once done, verify if the gamepad is recognized but not working in the problem of the game is resolved. If it’s still there, head to the last method.

6. Contact your gamepad device’s manufacturer

As a final resort, you can contact the gamepad’s manufacturer for more on how to resolve the issue. Any device manufacturer has a website where you can find contact options.

Usually, you can also find FAQs and knowledge base articles on the manufacturer’s website that may address the problem. If that doesn’t help, look for a live chat option or drop the support team an email.

How do I test my gamepad on Windows

  1. Press Windows + R to open the Run command and enter joy.CPL in the text field, and click OK.joy.cpl
  2. Select the connected gamepad, and click on Properties.properties
  3. Head to the Test tab, and you can now follow the on-screen instructions to test the gamepad.test to fix gamepad recognized but not working in games

Windows offers a simple and effective built-in tool to test the gamepad in Windows 10 and 11. Besides, you could also use a website like Gamepad Tester for the purpose.

And, of course, if nothing else works, there’s always the option to perform a system restore, or reset Windows 11 to its factory settings.

Why Is My Gamepad Detected but Not Working?

If your controller shows up in Device Manager or the “Set up USB Game Controllers” panel but won’t work in games, common causes include:

  • A bad USB connection
  • XInput/DInput compatibility issues
  • Outdated or missing drivers
  • Ghost or duplicate devices in Device Manager
  • System misconfigurations or corrupted drivers

These are all the ways to solve gamepad issues on Windows and enjoy your gaming session without the OS or the controller throwing any errors. Besides, if you find that the controller only works in Steam and not other games, disable Steam input!

Also, check the best controllers compatible with Windows, and enjoy the gameplay like it’s supposed to. For a more detailed walkthrough, see our full guide on how to fix gamepad issues on Windows.

Let us know in the comments section whether these steps and solutions worked for you.

How to Move Windows to SSD: Migrate the OS Without File Loss

Windows 10 already has improved booting time compared to previous versions of Windows, but moving it from a regular HDD to a new SDD will enhance the system’s booting time and overall performance even more. However, many users wonder if they can move the OS to an SSD without losing data. 

There are a couple of ways to transfer your system data from your current HDD to a new SDD, and we will discuss them all in this article.

The simplest solution is probably performing a clean install on the SSD drive, but you will lose all your data and have to install all your programs again.

And it could take even more time than moving an already-installed operating system. But you might choose this path if you don’t like to experiment.

Installing a fresh copy of Windows 10 on an SSD drive is no different than installing it on an HDD. First, you have to format your current system partition and then just install the fresh copy of Windows 10 on an SSD.

Can I move Windows to my SSD? Yes, you can move Windows to your SSD, and it can provide several benefits, such as improved boot and load times, faster application launch, and improved overall system responsiveness.

The benefits of moving Windows to an SSD include the following:

  • Faster boot times – SSDs have significantly faster write and read speeds than traditional hard drives, which means your computer will boot up more quickly.
  • Faster application launch – Since applications are stored on your SSD, they’ll load faster than on a traditional hard drive.
  • Improved system responsiveness – With an SSD, your computer will feel more responsive overall. Applications will launch faster, and you can navigate your files and folders more quickly.
  • Increased durability and reliability – SSDs don’t have any moving parts; hence they’re less likely to fail due to physical damage. This makes them more durable and reliable than traditional hard drives.

You can move your OS with the techniques we highlight below.

How do I move Windows to SSD?

Before you go into the solutions we offer, you must back up your data because if something goes wrong, you might lose it forever, and it will be required for the process.

When you back up your drive, it’s time to get rid of the additional disk space because SSDs have much less space than regular hard disks, so we want your system partition to fit on the SSD drive.

    Use a dedicated tool to move Windows from HDD to SSD

    You can transfer your system data from your HDD to a SSD using a dedicated tool. We recommend Laplink PCMover, a small desktop application that can help you to easily move all your files, settings, and user profiles to your SSD.

    With Laplink PCMover, the whole process is hassle-free, extremely user-friendly, and intuitive. The programs are installed and ready to use right away. You don’t need OS images, DVDs, download links, OS keys, or similar. You just need to configure the transfer and the tool will do the rest for you!

  1. 1. First, click on Get Laplink PCMover to download the app on both your computer and your SSD. (Make sure the SSD is connected to your computer at all stages of the process.)

  2. 2. Install Laplink PCMover.

  3. 3. Then, open the tool on both your PC and SSD.

  4. 4. Choose which network method you will use to connect your systems for the transfer. Laplink recommends using WiFi.

  5. 5. Then follow the on-screen prompts to allow the tool to discover the SSD (seen as New PC).

    use laplink pcmover to transfer OS
  6. 6. Once the two are connected, open Laplink PCMover on the SSD.

  7. 7. Click on Analyze PC, then follow the prompts to customize what you want to be transferred.

    transfer OS with laplink
  8. 8. After the transfer is complete, your OS will have been moved from your HDD to your SSD. It will take a few hours for the process to finish.

2. Use a specialized tool

  1. First, you must download and install the AOMEI Backupper on your machine.
  2. Then, you need to connect your hard drive to your computer.
  3. Now, go to the Clone option on the right one and select System Clone to launch the process. AOMEI backupper system clone
  4. Your machine should now display a new window asking you where you want to move the OS files. Select your SSD and confirm your choice.windows 10 move SSD
  5. Hit Next and follow the on-screen instructions to complete the process. It’s as simple as that.

If Windows doesn’t activate after the cloning process is complete, follow this guide to solve the problem.

And that’s about that; your Windows 10 is now successfully moved to the SSD drive, and it will perform much faster.

How to move only Windows 10 to an SSD?

  1. Connect your SSD to the PC and ensure Windows recognize it.
  2. Open the Disk Management utility by pressing the Windows key + X and selecting Disk Management.
    how to move windows to ssd
  3. Right-click on the partition containing Windows and choose Shrink Volume.
    how to move windows to ssd
  4. Shrink the volume to a size smaller than the SSD’s capacity.
  5. Create a new partition on the SSD by right-clicking on the unallocated space and selecting New Simple Volume.
    how to move windows to ssd
  6. On your new partition, assign a drive letter.
  7. Download and install cloning software such as EaseUS Todo Backup.
  8. Launch the software and select the System Clone option to clone your hard drive.
    how to move windows to ssd
  9. Select the source partition containing Windows and the destination partition on the SSD.
  10. Start the cloning process and wait for it to complete.
  11. Shut down your computer and disconnect the HDD.
  12. Restart your PC and go into the BIOS by pressing the corresponding Function key for your device.
  13. Set the SSD as the primary boot device.
  14. Start your computer and ensure that everything works correctly.

If you want to reinstall your Windows 10 apps on the new drive, check out this guide for a seamless transition.

That would be all; we presented you with a complete guide on moving your Windows 10 system from your old HDD partition to the SSD and getting everything to work.

If you followed our instructions and successfully moved your system to the SSD, please tell us your impressions in the comments section below, and we’ll be sure to take a look.

Edit Group Policy in Windows 10: Everything You Need to Know

You may need to edit Group Policy in Windows 10. So, in this guide, we will explore the best options to go about this.

What is group policy in Windows 10? Group Policy is a feature of MS Windows operating systems that allows administrators to centrally manage and configure settings for users and computers within an Active Directory environment.

In addition, it provides a way for administrators to define and enforce policies and settings for groups of users or computers.

In Windows 10, Group Policy manages various settings, including security, network, application, and many other system settings. For example, with Group Policy, administrators can configure password policies, user rights and permissions, software installation and updates, and more.

Group Policy settings are in Group Policy Objects (GPOs) and apply to users or computers based on their membership in Active Directory groups.

You may apply them at the local, domain, or organizational unit (OU) levels, allowing administrators to target specific groups of users or computers with different policies. The utility is a powerful tool for managing and configuring Windows 10 environments consistently and efficiently.

How can I edit the Group Policy in Windows 10?

1. Use Local Security Policy

    Normally, the use of the Group Policy could be accessed via the Gpedit option but in Windows 10 Enterprise and Windows 10 Pro we have something similar to this option, called Local Security Policy, or Secpol.

    This tool controls the security of the local Group Policy. Therefore, you can edit the Group Policy through Secpol.

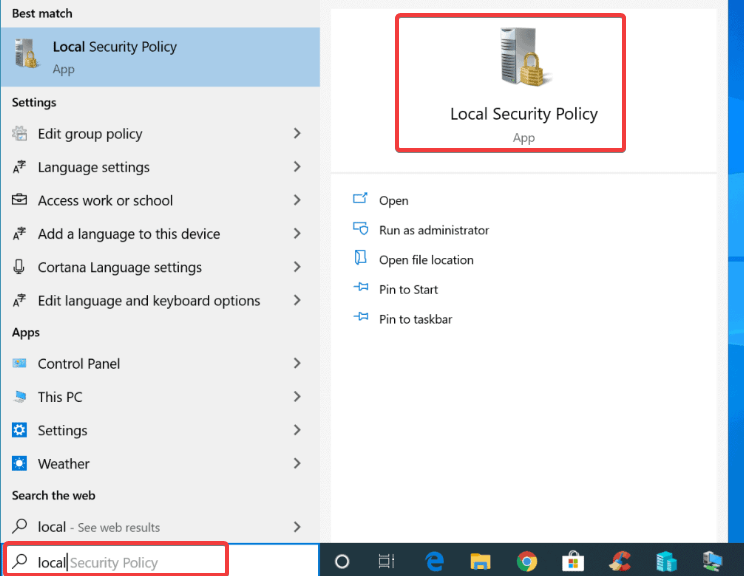
  1. 1. Press the Windows key on your keyboard. This will open the search box.

  2. 2. Type secpol.msc or Local in the search box.

  3. 3. Now left click on the Local Security Policy result to open the app.

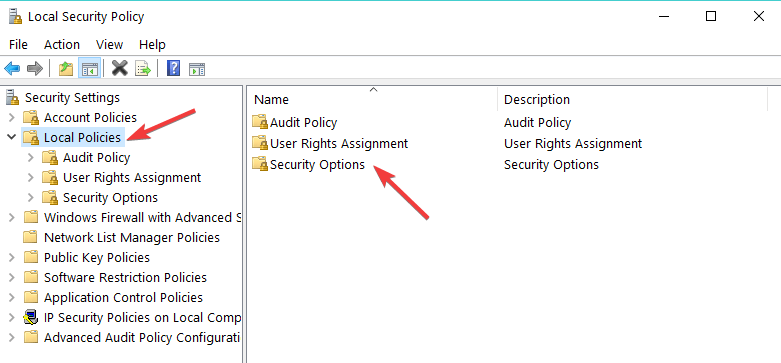
  4. 4. In the Security settings folder you will find Local Policies. Double click on it.

    edit local group policy windows 10
  5. 5. Select one of the categories you wish to edit by double-clicking on it. For example, you can edit Security options.

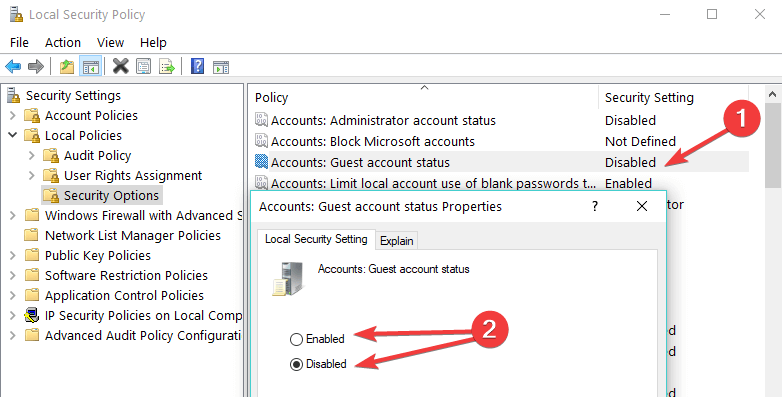
  6. 6. On the right side of the window you will have there two tabs: Policy and Security settings.

  7. 7. In order to disable or enable the group policies, you just need to double click in the box next to the policy under the Security setting tab and select from there the option you want.

    For example you can choose Disable or Enable.

    local security policy edit

In the basic edition, you can edit the Group Policy via Gpedit.msc by following the steps above and replacing secpol.msc with Gpedit.msc.

Also, note that in the basic edition of Windows, you do not have the Secpol tool.

2. Use Group Policy Editor

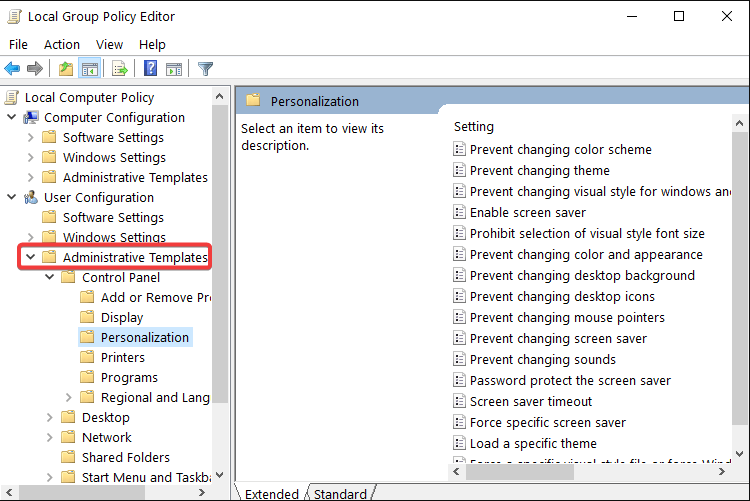
  1. To limit other users’ access to particular Windows components, go to Administrative Templates under the User Configuration section.
  2. Select the feature you want to edit, and enable or disable access to the respective feature.
    edit group policy windows 10

There you have a few short steps to edit the group policies in Windows 10.

You will succeed using any of the methods covered in this guide. However, note that you will not have access to Group Policy on the Home edition of the OS.

Lastly, if you have anything to add to this article or if you find it useful, let us know below.

How to Change DNS Settings on Windows 11

Your ISP configuration provides a default Domain Name System (DNS) when setting up your internet connection. This poses all sorts of security threats and slows the internet speed making it necessary to manually assign the DNS servers.

Go through this detailed guide to learn how to change DNS settings on Windows 11 computers and secure your online presence.  

How can I change the DNS settings on Windows 11? 

1. Use the Settings app

  1. Head over to the Settings app using the Windows + I shortcut.
  2. Select Network & internet from the left sidebar and choose Wi-Fi or Ethernet from the right section, depending on your internet connection.Change DNS Settings on Windows 11
  3. Scroll down and select Hardware properties.Change DNS Settings on Windows 11
  4. Locate the DNS server assignment setting and click the Edit button next to it.Change DNS Settings on Windows 11
  5. This will open the Edit DNS settings popup. Here, expand the drop-down on the top and choose Manual instead of Automatic (DHCP).
  6. Next, enable the toggle for either IPv4 or IPv6, based on the IP connection type. Change DNS Settings on Windows 11
  7. Now provide the primary DNS server address in the Preferred DNS field followed by a secondary DNS server address in the Alternate DNS field. (For instance, 8.8.8.8 is the preferred DNS address, and 8.8.4.4 alternative DNS address for Google’s DNS server)Change DNS Settings on Windows 11
  8. If you wish to enable the DNS over HTTPS feature to encrypt DNS requests, choose Encrypted only (DNS over HTTPS) for both Preferred DNS Encryption and Alternate DNS Encryption dropdowns.Change DNS Settings on Windows 11
  9. Press the Save button once you are done with the changes. 

You can easily change DNS settings on Windows 11 via the Settings app to speed up the browsing and avoid security issues. Enabling Encryption and defining the DNS with IPv4 and IPv6 protocols ensures that the network communication is much more secure. 

You can improve both speed and security by switching to a trusted resolver, and OpenDNS is a reliable option for safer browsing. Learn more in this guide on OpenDNS free DNS.

Note icon NOTE
Before you change the DNS settings on Windows 11 PC, ensure that your ISP supports manual DNS servers and is not configured by default to use the ISP’s DNS servers only.

2. Use Control Panel 

  1. Use the Windows + R shortcut to launch the Run command window, type the following command and press OK. This will directly open the Network Connections in Control Panel. ncpa.cplChange DNS Settings on Windows 11
  2. Right-click the Wi-Fi or Ethernet connection, depending on your connection type, and choose Properties from the context menu.Change DNS Settings on Windows 11
  3. This will open the Wi-Fi Properties window. Double-click the Internet Protocol Version 4 (TCP/IPv4) located under the This connection uses the following items section.Change DNS Settings on Windows 11
  4. On the new popup, enable Use the following DNS server addresses option and provide the Preferred DNS server and Alternative DNS server addresses in their respective fields. (For instance, to use Cloudflare DNS servers, assign 1.1.1.1 as Preferred DNS and 1.0.0.1 as Alternative DNS).Change DNS Settings on Windows 11 
  5. Press the OK button to save the changes. 

Many of our readers prefer Control Panel to change the DNS settings of their Windows 11 PC. Though it is one of the oldest ways to configure DNS settings, it does not allow you to enable DNS encryption for the servers.

3. Use Command Prompt

  1. Press the Windows key, type cmd in the search bar, and choose Run as administrator, located on the right pane.Change DNS Settings on Windows 11
  2. Click the Yes button on the User Access Control popup.
  3. In the Command Prompt window, type or copy-paste the following command and press the Enter key. Replace Preferred DNS with the primary DNS address of your preferred server. netsh interface ipv4 set dnsservers Wi-Fi Static Preferred DNS primaryChange DNS Settings on Windows 11
  4. Next, type or copy-paste the below command to assign an alternate DNS server and press the Enter key. Replace Alternate DNS with the secondary DNS server address.  netsh interface ipv4 add dnsservers Wi-Fi Alternate DNS index=2Change DNS Settings on Windows 11
  5. To reset the Manual DNS settings to Automatic (DHCP), type the following command and press the Enter key. netsh interface ip set dns "Local Area Connection" dhcpChange DNS Settings on Windows 11

If you use a wired ethernet connection, replace Wi-Fi with Ethernet in the above commands.

We also recommend reading our guide to diagnose & fix the most common DNS issues hogging your Windows computer.

4. Use Windows PowerShell

  1. Press the Windows key, type powershell, and select Run as administrator from the right section.
  2. Type and copy-paste the following command and press the Enter key to find out the InterfaceIndex of your current network configuration. Get-NetAdapter | Select-Object InterfaceAlias , InterfaceIndexChange DNS Settings on Windows 11
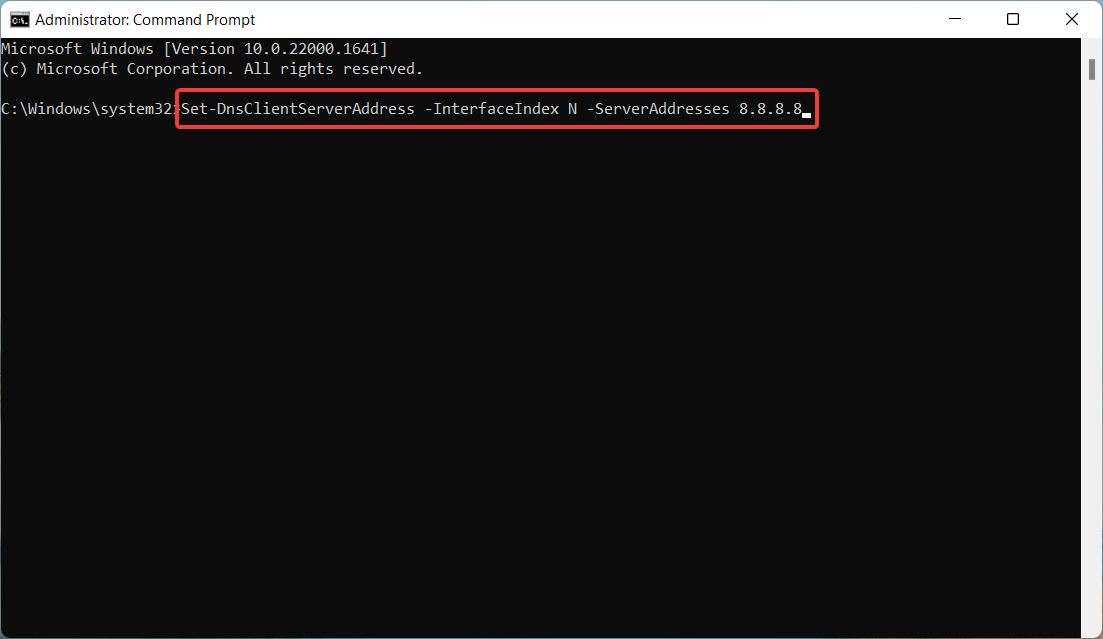
  3. Now, type or copy-paste the following command and hit Enter to assign the Primary DNS server address. Replace N with InterfaceIndex of your current network: Set-DnsClientServerAddress -InterfaceIndex N -ServerAddresses 8.8.8.8Change DNS Settings on Windows 11
  4. If you also want to assign an Alternate DNS address, you need type the address after adding a comma: Set-DnsClientServerAddress -InterfaceIndex N -ServerAddresses 8.8.8.8, 8.8.4.4Change DNS Settings on Windows 11

The NetTCPIP module allows you to change the DNS server settings using Windows PowerShell on Windows 11.

So, these are all the possible ways to modify DNS settings on your Windows 11 system. 

You may also be looking for ways to resolve the can’t connect to this network error if it frequents your Windows PC. 

Now that you know how to change the DNS, be sure to check our guide on how to find the fastest DNS servers near you.

If you face any issues when changing the DNS settings, contact us in the comments section for guidance. 

0x8007045d: What Does This Error Mean & How to Fix It

0x8007045d is a common error code that you might get when you try to install an update through Windows Update or from the Microsoft site. When you see this error message, it means that Windows Update cannot continue because it has difficulties reading files from your system.

Usually, the error is accompanied by the request could not be performed because of an i/o device error message. Sometimes, restarting your PC could resolve most of the Windows update errors, but if you’re stuck, here are more troubleshooting steps.

What is error code 0x8007045d? 

Error code 0x8007045d is a Windows update error. It occurs when Windows Update has difficulties reading files from the Microsoft servers. This can happen due to any one of the following reasons:

  • Firewall blocking – The update may be blocked by an antivirus or firewall program installed on your computer.
  • Insufficient storage – Windows updates usually occupy a significant amount of space in your hard drive. It may fail if you don’t have enough free space to install the update.
  • Corrupt update – The update itself may be corrupt or damaged. 
  • Bad registry files – If your Registry has been modified, some entries may end up broken or corrupted and interfere with the update.
  • Incomplete download – If the update did not finish downloading successfully, most of its files will be incomplete, probably because some update files are missing, and the error 0x8007045d may appear.
  • Damaged hard drive – If your hard drive has been damaged, it will be impossible for update files to read any files as their integrity has already been compromised.

How can I fix error code 0x8007045d?

Check off the basics before any advanced troubleshooting:

1. Run the Windows update troubleshooter

  1. Hit the Windows key and click on Settings.settings windows 11
  2. Click on System, then Troubleshoot.Open system troubleshooter
  3. Select Other troubleshooters.other troubleshooters
  4. Locate Windows Update and click the Run button next to it.windows-update-run-troubleshooter runtimebroker.exe error

2. Run the Hardware and Devices troubleshooter

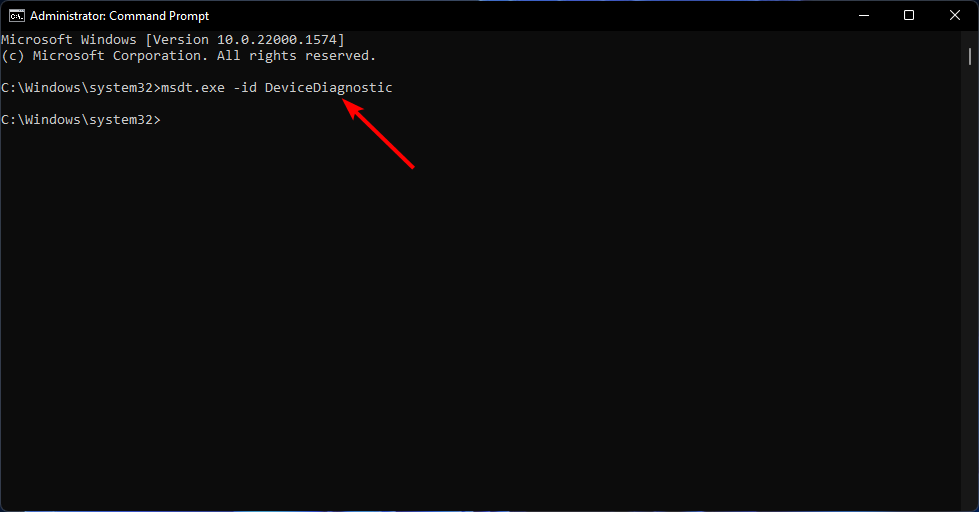
  1. Hit the Windows key, type cmd, and select Run as administrator.cmd-run-admin-w11 unexpected kernel mode trap windows 11
  2. Type the following command and hit Enter: msdt.exe -id DeviceDiagnostic
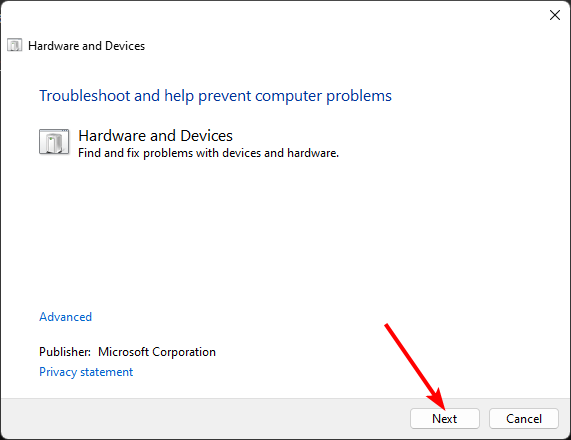
  3. In the Hardware and Devices dialog that appears, click Next.
  4. The tool will start scanning for any problems with your hardware and recommend a fix. After it is done, try again with Windows update and check if the error persists.

3. Run the DISM and SFC commands

  1. Hit the Windows key, type cmd, and select Run as administrator.cmd-run-admin-w11 unexpected kernel mode trap windows 11
  2. Type the following commands and press Enter after each one: dism /online /cleanup-image /restorehealth sfc /scannow
  3. Now restart your PC.

4. Reset the Windows Update components 

  1. Hit the Windows key, type cmd in the search bar, and click Run as administrator.cmd-run-admin-w11 unexpected kernel mode trap windows 11
  2. Type in the following commands and press Enter after each one: net stop wuauserv net stop cryptsvc net stop bits net stop msiserver ren %systemroot%\softwaredistribution softwaredistribution.bak ren %systemroot%\system32\catroot2 catroot2.bak net start wuauserv net start cryptSvc net start bits net start msiserver 

5. Perform a Clean boot 

  1. Hit the Windows + R keys to open the Run command.
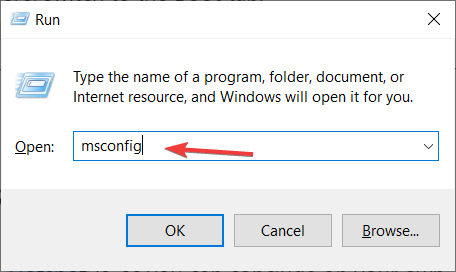
  2. Type in msconfig and hit Enter.
  3. In the System Configuration window that opens, navigate to the Services tab and check Hide all Microsoft services option.
  4. Click on Disable all.
  5. Restart your PC normally.

6. Perform a System Restore

  1. Click the Search icon, type create restore point and click Open.
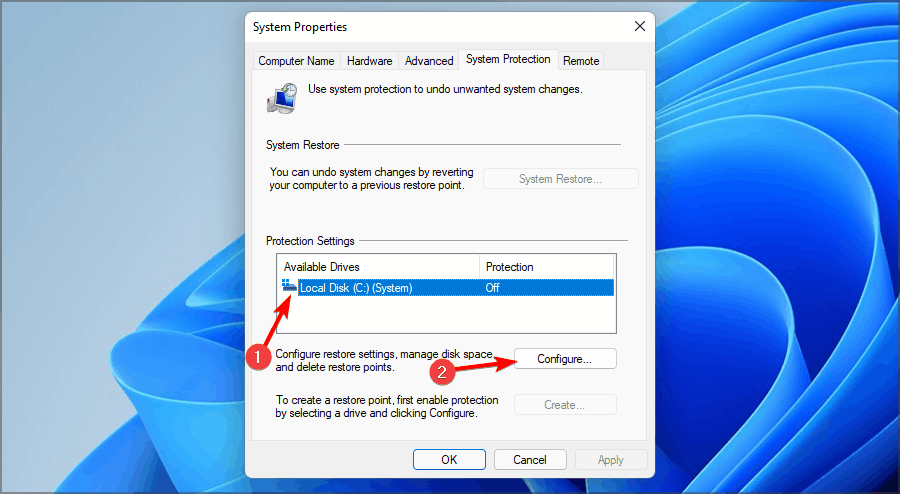
  2. Select the drive you wish to enable system restore for and click on Configure.
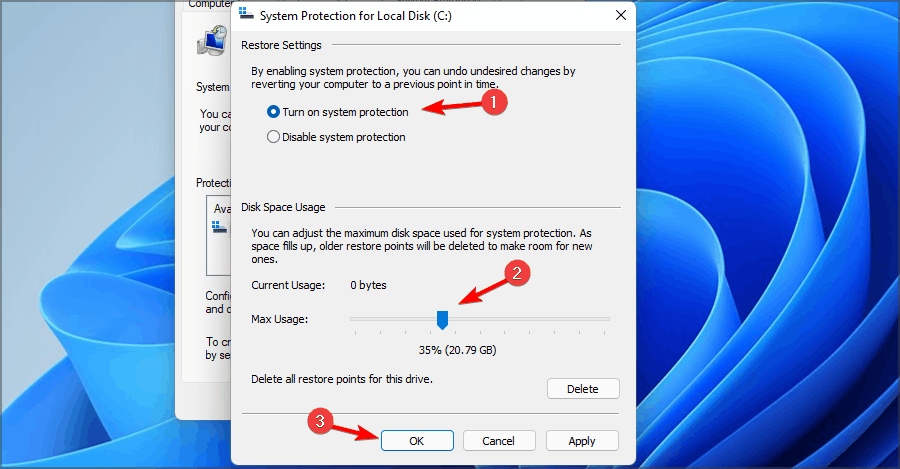
  3. Now select Turn on system protection. Set the Max Usage value and click on Apply and OK to save changes.
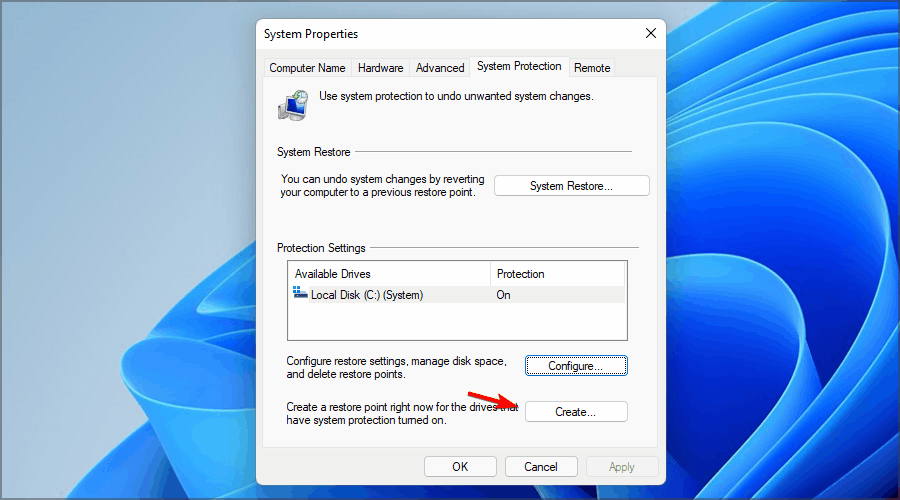
  4. Go back and repeat step 1.
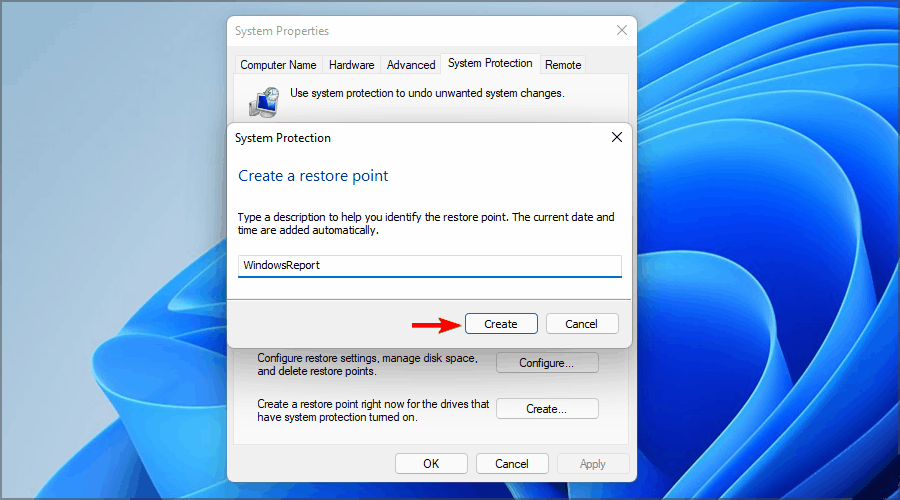
  5. When the System Properties window opens, click on Create.system properties create restore point windows 11
  6. Enter the desired name for the restore point and then click the Create button.create a restore point windows 11 name
  7. Wait while Windows creates the restore point.
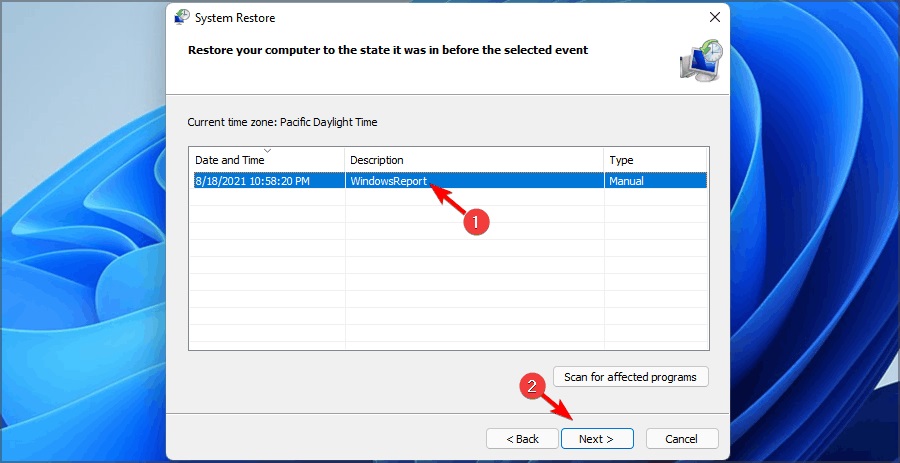
  8. Press the Windows + R keys, type rstui, and hit Enter.
  9. Select the restore point you wish to revert to and click on Next.
  10. Now click on Finish.

You may also encounter problems when installing updates, so don’t hesitate to check out our detailed article for solutions.

Given how frequently Windows update errors occur, it would be best to consider installing Windows update repair tools to help you easily navigate these issues.

Let us know of any additional thoughts you may have on this update error in the comment section below.

8 Best Call Management Software for Windows PCs [2026 Guide]

There are various call management tools on the market these days, but not all of them come packed with the best features you might need.

Depending on what business you run, you need a tool that provides you with all the necessary features to make call managing become a walk in the park.

Why do I need call management software?

If you run a call center or require call support for your business, you must have a call management tool. With these tools, you can reduce call waiting time almost to zero and keep the data smartly organized.

These tools let you automate small calls and record all kinds of information. Here, we have mentioned the best options for call manager software with their salient features to make your choice easier.

Which are the best call manager software for Windows 10?

RingCentral – Great call management features

Call Management Software for Windows - RingCentral

If you are in a position where you need to conduct business in communications outside the office and you frequently use your phone for communication, you surely understand the struggle between professionalism and communication from afar.

The best solution in this situation is to have Cloud-based phone systems technology integrated into your business management, like RingCentral.  

That being stated, RingCentral tools can assist you in conducting business on the move while keeping the appropriate degree of professionalism when conducting business outside the office.

Features like the RingCentral ones provide you the flexibility and control you need to feel at peace even when you’re not at work. Keep your company at a click’s distance. 

Because of their extensive feature sets and ability to allow communication from anywhere, cloud-based phone systems are quickly becoming the new norm for organizations.

Check out RingCentral’s key features:

  • Customizable call routing to ensure calls go to the right individual
  • Integrates with other business tools, including Microsoft Outlook, Google Workspace, and Salesforce
  • Call Logs to read and edit reports on all incalls, outcalls, and faxes effortlessly
  • Comes with an Advanced Call Forwarding feature.
  • Includes collaboration tools, including screen sharing and messaging.

RingCentral

Improve your business communication and try this Cloud-based phone system technology tool.
Check price Visit Website

Nextiva – Best for call quality and data storage

Nextiva

Nextiva, the award winner for first place in business phone software in 2021, is the next-generation call management software.

Instead of dealing with strategic mistakes at the moment, you may avoid them with a focused and documented call center plan.

Nextiva is powerful due to their devoted work for phone business management, which includes a wealth of beneficial recommendations on how to really enhance team efficiency on their blog.

Nextiva has a fantastic pricing range, and the free calls throughout the United States and Canada are very good for your financial resources, and we can’t unsee they have a far more helpful impact.

You also receive a free local or toll-free number, free number porting, and all of the regular features like caller ID, call forwarding, routing, unique greetings, and more.

Nextiva also provides Live Chat, online surveys, call analytics, and other tools that integrate well with the phone service as a platform.

These are the characteristics that have propelled Nextiva to the top of the rankings:

  • Reduces distracting static sound for better and clear discussions
  • Send and receive limitless faxes swiftly
  • Comes with a voicemail feature
  • Provides integrations with popular CRMs
  • Lets you integrate your existing calender into your workspace

Nextiva

A brilliant VoIP phone service cloud-based platform that businesses can adopt.
Check Price Visit Website

CloudTalk – Best for virtual call centers

CloudTalk - Call Management Software for Windows

CloudTalk is an excellent virtual call management platform for companies activating customer service or sales.

This solution allows you to build a virtual call center with very little equipment. You no longer need to develop complex call networks and buy countless pieces of hardware. Use CloudTalk and upgrade your business to the latest technology standards.

If you already use particular CRM solutions, you don’t have to replace them. CloudTalk supports native integration and syncing with some of the most popular business tools, such as Salesforce, Zendesk, Hubspot, and more.

CloudTalk offers real-time analytics tools that allow business owners to track the performance of their call center agents in real-time. In this manner, supervisors can step in and improve communication quality when need be.

Check other key features of CloudTalk:

  • Real-time call monitoring
  • Number porting
  • Business hours for status availability
  • Includes IVR system for call routing
  • Allows you to integrate with CRMs and Helpdesk software

CloudTalk

Call centers worldwide use CloudTalk to manage their analytics, so you know that it is well worth a try.
Check Price Visit Website

TalkRoute – Best for session recording

Talkroute

TalkRoute is an outstanding call management software with various useful and advanced features to help you call, text, and start meeting sessions more easily.

This program allows you to fully customize every detail of your virtual phone service, including your call routing, greetings, schedules, and many others.

With TalkRoute, you have the potential of an enterprise-level phone system, and you can make and receive calls from any desktop, browser, or smartphone without buying special equipment.

Moreover, you have the ability to video conference up to 100 team colleagues and partners and record the meeting sessions effortlessly.

You can share your screen with your meeting participants, chat, collaborate by applying the whiteboard feature, and share files.

Other key features include:

  • Forward or route the business calls
  • Manage business voicemail
  • Records incoming and outgoing calls
  • Easy-to-use transfer codes
  • Make & receive calls from different platforms

TalkRoute

Communicate better and receive multiple calls at once with this amazing app.
Free Trial Visit Website

LiveAgent – Best for customer relationship maintaining

LiveAgent - Best Call Management Software for Windows

All your favorite cloud call center features are now built into your very own LiveAgent helpdesk. You will be able to receive unlimited inbound calls from customers. This program will provide follow-up or proactive support with outbound calls.

LiveAgent provides you with endless possibilities to provide a seamless customer experience over chat, email, and phone.

You will be able to receive calls from your website, and all you have to do is place a Call Us button on your website and start receiving calls immediately.

Take a look at more interesting features of LiveAgent below:

  • Connect to your VoIP provider, and choose from pre-made integrations
  • Allows you to make unlimited internal calls
  • Lets you connect with your customers with outbound or follow-up calls
  • Can transfer calls to specific extensions and wait for their pick-up
  • Allows you to set active hours

LiveAgent

Improve your company’s relationship with your customers with this brilliant call management service.
Check Price Visit Website

Bitrix24 – Best for call distribution with ICR

Bitrix24

Bitrix24 is a free call management software that gives you the option for even call distribution. This means that incoming calls are distributed evenly between your employees according to set order.

You can also have a simultaneous call distribution when all available agents hear the ring, and the first one to respond will carry on with the conversation.

On the official website of this tool, you will also find the Bitrix24 CRM manual, and if you are interested in buying self-hosted editions of Bitrix24 that come with API, CMS, and a source code, you can also download the trial version.

Check out more impressive features of this software:

  • Provides you with Intelligent Call Routing (ICR)
  • lets you set up your active hours
  • Provides internal employee extension numbers
  • Automatically log and record phone calls
  • Can work with your existing phone number

⇒ Get Bitrix24

Bonrix Voice Call Manager – Best for simplest features

Bonrix Voice Call Manager - Best Call Management software for Windows

Bonrix Voice Call Manager is free software that can be used on your PC. It was developed for Windows 7, 32-bit version. The software’s installer file is known as VoiceCallManager.exe.

It’s important to note that this program is the intellectual property of Bonrix Voice Call Manager. The antivirus check showed that the program’s download is safe, so you don’t have to worry about anything safety-related.

You should know that this communication technique of bulk voice calls comes with a significant advantage. We are referring to the fact that it results in the most penetrative reach and personalized messages that will turn out to be really useful.

Take a look at the best features that are packed into this software:

  • Customize their call routing based on time, location, and language
  • Includes SMS/Text messaging
  • Allows you to integrate a variety of business tools, including CRMs
  • Records call and provide options to store them.
  • Includes IVR system

⇒ Get Bonrix Voice Call Manager

PhoneView – Best for endpoint management

PhoneView

PhoneView is a Cisco Phone endpoint management solution that allows advanced manipulation of one or more phones.

The tool is a certified Cisco-compatible product that completed the full inter-operability verification testing, and this means that you can be confident of its performance.

PhoneView is one of the leading Cisco phone remote control solutions that are available these days, and it will provide unique user interface features. This tool comes with an extended set of features for phone management for PC.

You can visit the UnifiedFX official website to find out more about PhoneView and to get it yourself. PhoneView is a client app that installs on Windows PCs. It allows you to visualize all phones, and you can also zoom in and out of phone screens.

With remote phone interaction, you can experience nearly real-time communication and have the ability to see exactly what the user is seeing.

Check out the most important features that come with PhoneView:

  • Quick and simple filtering
  • Historical logs of interactions with all phones
  • Extensive List of Phone Commands
  • Allows you to migrate users to extension mobility
  • Bulk management of the login state

⇒ Get PhoneView

This guide is part of our Business Software Hub. Do check it out for more ideas on how you can boost your business. For more amazing lists like this one, check out our website’s Software section.

These are some of the best call manager programs that you’ll be able to find on the market these days, and they’re all packed with unique and useful features.

We recommend you head over to their official website and check out more details on these programs.

If you need more help in choosing the call management software, feel free to let us know in the comments below. We will be happy to help!

Fix: Path of Exile Login Error There has Been a Patch

Just like a few users, you may have encountered the Path of Exile login error there has been a patch while playing the game.

This is a known error affecting the Path of Exile player base for a while now. Players have often attempted to log in or switch servers, but that did not work.

While you can try to run the game as an administrator to see if it helps, you can also report this error to the game developer. However, you may have to wait longer till they fix it.

If you instead bump into PoE failed to connect to the instance, we also have a detailed post on that.

Why does the Path of Exile There has been a patch error message appear?

From user experience, a few things may lead to the Path of Exile login error. At the top of the list are the following:

  • Recent game update – The most likely cause of this error message is that the game has recently received an update, which requires all players to download and install the new patch before being able to log in again. 
  • Internet connection issues – If your connection is slow or unreliable, you may be unable to download the patch or connect to the game servers to authenticate your account. 
  • Firewall or antivirus software blocking access – Sometimes, your computer’s firewall or antivirus software may block access to the game or its servers. 
  • Corrupted files – If some game files have become corrupted or damaged, you may experience login errors or other issues when launching the game. 
  • Outdated game client or drivers – It’s also possible that the game client or your graphics card drivers are outdated, which can cause compatibility issues or prevent the game from running correctly.

While Path of Exile is a top-rated game, it often throws errors as you try to log in. Below is a few most common Path of Exile login errors:

  • Login error: Operation timed out – You may see this error message when there’s a problem with the POE servers.
  • Unable to log in after the patch – Even after you have updated the patch, it will repeatedly re-download the patch.

Now that we have some information on the different types of POE login errors, below are a few methods you can try to fix the problem.

How can I fix the Path of Exile login error there has been a patch?

Before going through the recommended solutions, check if your device meets the system requirements, as shown in the table below. Ensure you have enough RAM to run Path of Exile based on the minimum system requirements.

PropertiesMinimum RequirementsRecommended Requirements
Memory4GB8GB
Graphics CardNVIDIA GeForce GTX 650NVIDIA GeForce GTX 1050
CPUIntel Core 2 Duo E8400Intel Core i7-960
File Size20GB20GB
OSWindows XP SP3/Windows 7 SP1/Windows 8Windows 7 SP1/Windows 10

1. Fix outdated drivers using third-party tools

  1. Download the Outbyte Driver Updater from the official website.
  2. Install the app and launch it.
  3. After installation, click the Update All Drivers Now button.
  4. Wait for the update to complete.

Using this tool makes automatic driver updates a breeze. You will also be able to fix all outdated and corrupted drivers simultaneously.

2. Adjust the game parameters

2.1 Add no patch parameter

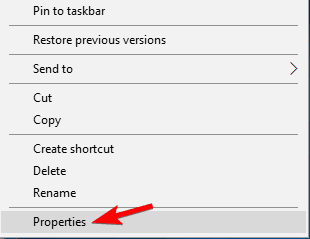
  1. Go to the POE shortcut, right-click, and select Properties. Right-click on POE and select Properties
  2. In the Properties dialogue box, under the Shortcut tab, go to Target.
  3. Now, copy and paste the below path in the Target field: "C:\Program Files\Grinding Gear Games\Path of Exile\PathOfExile.exe" --nopatchCopy and paste no patch path in Shortcut
  4. Press Apply and OK to save the changes.

2.2 Turn the texture quality down

  1. Press the Win + E shortcut keys to open the File Explorer window.
  2. Next, navigate to the below path replacing afamo with your username: C:\Users\afamo\Documents\My Games\Path of Exile\production_Config.ini
    Change texture quality for POE
  3. To reduce the texture quality further, change the quality to 2 from 1 in texture_quality under Display.

2.3 Try deleting the HashCache.dat file

  1. Press the Win + E keys simultaneously to open the File Explorer window.
  2. Navigate to the POE folder. The path should look something like this: C:\Program Files (x86)\Grinding Gear Games\Path of Exiledelete HashCache.dat file
  3. Locate the HashCache.dat file, select it, and hit Delete.

You can now try running the game as an administrator and check if you can play POE without any errors.

3. Verify the game file’s integrity using Command Prompt

  1. Press Windows + R to open the Run dialog.
  2. Type cmd in the search bar and press the CTRL + Shift + Enter keys to open the elevated Command Prompt. open elevated command prompt by pressing Ctrl + Shift + Enter together
  3. Copy and paste the below path in the Command Prompt (admin) window and hit Enter: cd /d "C:\Program Files (x86)\Grinding Gear Games\Path of Exile"
    run command to open POE folder
  4. Once you see the Path of Exile folder location, execute the below command and press Enter: runas /user:Administrator PackCheck.exerun command to run POE as administrator
  5. You may need to enter the Administrator password.

Then, try to run the game, and Path of Exile should not keep kicking you out anymore.

Moreover, you can also run the pack check, add POE to the antivirus/firewall whitelist, or update the graphics card to fix the issue. To know more, refer to our detailed guide on Path of Exile issues.

If you are still facing a problem while playing the Path of Exile game, or if you found a way to fix it, leave a comment in the comments box below.

State of Decay 2 Session Error Code 10: 4 Permanent Fixes

More recently, players are experiencing the State of Decay 2 session error. You probably fall in this category, so that we will be helping you through it.

There are a lot of games trying to ride a trend of survival-zombie-apocalyptic scenery. And we can say that State of Decay 2 has something to offer to this genre. Mainly because it provides a tremendous multiplayer co-op experience (up to 4 players in a team) and RPG elements.

So, let us get you through this fix, so you return to enjoying one of your favorites.

Why does the State of Decay 2 session error appear on PC?

State of Decay 2 is a survival game that can be played on PC, among other platforms. One of the issues that players may encounter while playing the game is a session error. Session errors can happen for various reasons, and some possible causes include the following:

  • Internet connectivity issues – If your internet connection is unstable or slow, you may experience session errors while playing State of Decay 2. 
  • Firewall or antivirus software – If you have a firewall or antivirus software installed on your PC, it may block the game’s network traffic, causing session errors. 
  • Outdated game or drivers – If you play the game with outdated game files or drivers, you may experience session errors. 
  • Server issues – Sometimes, session errors may occur due to server issues on the game’s end. 

Regardless of the cause, it would be best if you succeeded using some of the solutions we suggest below.

How can I fix the State of Decay 2 session error?

Before going through these solutions, try changing your internet connection. We recommend detailed connection troubleshooting to ensure you’re (or your PC, instead) not the one to blame for the issue. You may do any of the following:

  1. Check the Firewall
  2. Update Windows
  3. Run the Troubleshooter
  4. Fix the Teredo adapter

1. Check the Firewall

  1. Type cmd in the Windows Search bar and click Run as administrator.
  2. In the command line, type the following command and press Enter: netsh advfirewall show currentprofilestate of decay 2 error code 10
  3. The inbound policy should be allowed, and the outbound not. Otherwise, copy-paste this command and press Enter to reset the rules: netsh advfirewall set currentprofile firewallpolicy blockinbound,allowoutboundstate of decay 2 error code 10
  4. Finally, reboot the PC and start the game or run the troubleshooter below.

Allowing the game to communicate freely through Windows Firewall is paramount. That should be automatically administered after the game’s installed.

However, due to the Peer-2-Peer nature of the game, there are some additional tweaks you’ll need to follow through. Namely, this game requires a common inbound/outbound set of rules.

We say common, but there’s a chance that, for some reason, your machine is configured differently.

We recommend resetting Firewall privacy to default values to connect to a co-op multiplayer mode with other players.

There’s a great chance that even your antivirus is causing this issue, so try to disable it temporarily, or if the issue persists, uninstall it completely.

If you removed any traces of the old antivirus, try to rerun the game. If the problem was fixed, that means we found the culprit.

It’s unsafe to keep your PC unprotected, although after uninstalling the antivirus, you will still have protection from Windows Defender.

Besides, you might consider changing to another antivirus that offers more security and game-boosting support. For that, you can use the best antivirus software for gaming.

2. Update Windows

  1. Type Check in the Windows Search bar and click Check for updates.
  2. Click on the Check for updates button under Windows Update.
  3. Install all updates and restart your PC.
  4. Try running State of Decay 2 again.

The issues for some users started after a specific Windows Update. When something like this occurs, you can do two things. Firstly, you can uninstall the latest update and move from there.

An alternative in this scenario is to update Windows 10; hopefully, a patch will address the game issues.

We all know how much Windows Updates affect Microsoft Store and its respective games, especially lately. Many crashes and errors are related to Windows 10’s latest releases.

As always, we’re keener to recommend the second scenario, but you can do as you wish.

3. Run the Troubleshooter

  1. Press the Windows key + I to open Settings.
  2. Choose Gaming.state of decay 2 error code 10
  3. Select Xbox Networking from the left pane.state of decay 2 error code 10
  4. The troubleshooter will scan for network compatibility.
  5. Click Fix it if there are problems found.state of decay 2 error code 10

Besides the usual troubleshooting tools, Windows 10 offers a specific troubleshooting tool for Microsoft games. And luckily, the State of Decay 2 is in this category.

This tool will check on your latency, compatibility, and connectivity. Furthermore, if there’s any problem, it should resolve as long as it concerns the multiplayer segment.

Since the error code 10 prevents players from joining a multiplayer campaign; this built-in troubleshooter might be helpful.

4. Fix the Teredo adapter

  1. Type cmd in the Windows Search bar and click Run as administrator.
  2. In the command line, type the following commands one by one and press Enter after each:
    • netsh
    • int ipv6
    • set teredo client
      state of decay 2 error code 10
  3. The Teredo Tunneling adapter should appear in the Device Manager under the Network adapters section.
  4. Restart your PC and update Windows 10 again.

Most of the users won’t need a Teredo Tunneling adapter. However, you must install it to communicate on Xbox Live and play Microsoft’s multiplayer games.

Or, instead, enable it, as it’s already part of the legacy driver suite that comes with the system. If you want to play the State of Decay 2 or similar games, you’ll need a Teredo adapter up and running.

Now, seemingly, it’s not as simple to install it as we initially thought. You can use Device Manager and add a Legacy driver, but, more times than not, it won’t work.

To get this matter straight, you must run the above commands in the elevated Command Prompt.

With that, we can conclude this article. Hopefully, you could fix the error code 10 in State of Decay 2 with one of the steps above.

And if that’s not the case, make sure to post the ticket and wait for the resolution, as the issue is likely, on the other side.

Either way, feel free to share your experience with us. You can do so in the comments section below.

Posted in PC

BARD: What’s new in Google’s AI war against Microsoft?

Remember when we told you that Microsoft is gearing up to launch the new open AI ChatGPT chatbot for its Bing search engine?

Back then, we also shared that, according to Statcounter, Google has a 92.21% share of the market as of December 2022, while Bing only has about 3.42%.

It appears that Google didn’t want to take any changes, which is why it introduced BARD to the world, its very own chatbot.

We’re going to take a closer look at this situation and see how these two AI chatbots compare to each other since the competition is so steep.

Google’s BARD chatbot is currently being tested

In case you weren’t up to speed, conversational AI services such as ChatGPT are becoming an absolute must-have these days.

Its users, whether they want answers to a medical question or a serviceable 800-word essay on existentialism, this new type of AI service will find the information on the internet and bring back remarkable content.

What makes it stand out the most is the way it relays the content back to users, which is a very human-ish way, some would say.

Now, over two months since the official launch of the ChatGPT chatbot, Google is announcing its own promising competitor.

According to the most recent company blog post, Google’s CEO Sunder Pichai announced BARD, a new conversational chatbot that will incorporate Google’s Language Model for Dialogue Applications (LaMDA) to power its answers to questions and inquiries.

When the online demo of Bard offered incorrect information on the James Webb Space Telescope, many felt that Google was trying to rush out a product in order to compete with OpenAI’s ChatGPT service.

That opinion was even shared by many Google employees. Now a new CNBC story claims the leader of the team developing Bard is trying to pivot away from the chatbot as a replacement for Google Search.

Reports that Google held an all-hands meeting earlier this week, where it mentioned that the big first application should be Search, which at its heart is about finding true information.

Google’s Jack Krawczyk reportedly answered by saying Bard is not a search engine. He said that Bard is supposed to be used as a creative companion.

While the Google development team is working to improve answers when Bard is used to finding information, he added Google is already a search engine.

Google’s CEO Sundar Pichai was also reportedly at the all-hands meeting, where he responded to a question from its forum with the unnamed employee saying it felt that Bard was a knee-jerk reaction without a strategy.

The Google official stated that Bard will not only be able to handle answers to simple questions, like Google’s current search engine can do already.

It can also handle more complex inquiries, such as asking how to give information on the discoveries of the James Webb Space Telescope to a nine-year-old, for example.

Bard also comes with thumbs-up and thumbs-down logos, so you can rank the answer that is given to you, apparently.

Furthermore, you can also apparently go deeper into that answer by clicking on the Check it option, if you need a bit more info.

You should know that the first public version of Bard will launch with, what people over at Google called a lightweight model version of LaMDA (Language Model for Dialogue Applications).

Apparently, this will reportedly use less computer power so that Google can get more feedback from a wide range of users.

We won’t get it right away, however, since Bard is currently in testing now and will go live to the general public sometime in the coming weeks.

Now, people are asking themselves if Bard will immediately replace ChatGPT as the main conversational AI service.

For the time being, Google is being a bit sensitive to criticisms that ChatGPT could be used as a vehicle for plagiarism, or even that its replies may not be accurate.

Moreover, the leading search engine giant also announced that they’re one step closer to developing a state-of-the-art speech AI model that could recognize 1.000 most spoken languages in the world. Dubbed the Universal Speech Model (USM), 12 million hours of speech and 28 billion sentences across over 300 languages are used to train the model.

The development of USM is a critical effort towards realizing Google’s mission to organize the world’s information and make it universally accessible. We believe USM’s base model architecture and training pipeline comprise a foundation on which we can build to expand speech modeling to the next 1,000 languages.

If you are already using ChatGPT and it’s not working, we can show you exactly what you need to do in order to fix the situation.

We’ll just have to wait and see what will happen with these two rival chatbots. Make sure to share your opinion on the matter with us in the comments section below.

Breakpoint Error on Windows 11: 10 Ways to Fix the Exception

With Windows 11 still relatively new and much improvement still expected, users are bound to deal with one or two errors. One such error is the breaking point reached error message on Windows 11.

This error can be due to many factors, some known and others hard to pinpoint. Thankfully, the solutions are not usually far-fetched, only requiring a system update in some cases.

Irrespective of the cause and the complexity, we have gathered surefire ways to solve the error in this fully packed guide. You only need to follow the instructions, and you will be fine.

What does the error message A breakpoint has been reached mean?

A breakpoint that has been reached is a common error message that Windows 11 users may encounter. This error message typically appears when a program or application crashes and various factors can cause it. 

Some of the common causes of this error message are:

  • Outdated or incompatible drivers – Outdated or incompatible drivers can cause the error message to appear. This can be due to an issue with a specific driver or a conflict between drivers.
  • Corrupted system files – Corrupted system files can also cause an error message to appear. This can happen due to malware infections, disk errors, or other issues.
  • Memory issues – Memory issues such as faulty RAM, incorrect memory settings in the BIOS, or other problems can cause the error message to appear. This also leads to Exception_Illegal_Instruction.
  • Overclocking – Overclocking can cause the error message to appear if the system is unstable or the settings are not configured correctly.
  • Software issues – Bugs in the code, corrupted files, or other software issues can cause the error message to appear. This can be due to issues with the operating system, a specific application, or a third-party program.
  • User error – Finally, the error message may appear due to user error, such as improperly configuring system settings, installing incompatible software, or performing incorrect system modifications.
  • Registry issues – Faulty registries from programs that have been uninstalled wrongly

These elements will affect your system differently; some can even stop you from using your PC entirely, so following the steps below will help.

How can I fix the breakpoint error on Windows 11?

1. Perform a system update

  1. Press the Windows key and select the Settings app.start-windows-11-update-breakpoint-been-reached
  2. Click on Windows Update.update windows 11 breakpoint has been reached
  3. Follow the onscreen instruction to complete the update.

2. Update drivers

  1. Right-click on the Start menu and select Device Manager.
    breakpoint error windows 11
  2. Outdated drivers may bear a yellow badge. Expand the category, right-click on the driver, and select Update driver.
    breakpoint error windows 11
  3. Select Search automatically for drivers.
    breakpoint error windows 11
  4. Wait for the process to complete.

Drivers play an important role in the effortless running of your PC. They serve as the connecting medium between hardware components and the Operating System.

Also, drivers establish a connection between some third-party applications and system devices. These connections can be severed with a broken, missing, or outdated driver.

Hence, faulty drivers lead to all sorts of errors on Windows 11, including the breakpoint that has been reached error.

We recommend the ever-reliable Outbyte Driver Updater driver updater to update your drivers. It is a dependable updater that automatically scans, recommends, and installs drivers.

Moreover, it only recommends and installs original drivers from trusted manufacturers.

With a database of over 18 million drivers, it contains all the drivers needed to restore your PC drivers to top shape.

⇒ Get Outbyte Driver Updater

3. Run the System File Checker (SFC) scan

  1. Press the Windows key + R to open the Run utility.
  2. Type cmd and click the OK button.cmd windows 11 breakpoint reached
  3. Click the Yes button to allow Command Prompt to make changes to your computer.allow command prompt windows 11 breakpoint reached
  4. Type the script below and hit Enter:
    DISM.exe/Online/Cleanup-image/Restorehealthsfc windows 11 breakpoint reached
  5. Wait till it shows The operation is completed successfully. Then type the following script and hit Enter:
    sfc /scannowsfc scannow windows 11 breakpoint reached

Executable files must interact with the operating system services and files to run successfully.

However, when the system file required to run an executable file is corrupt or missing, it causes the breakpoint has been reached error, among others.

But with this scan, you can find and fix such a system file.

4. Run CHKDSK Utility

  1. Press the Windows key + R to open the Run utility.
  2. Type cmd and click the OK button.
  3. Click the Yes button to allow Command Prompt to change your computer.
    allow command prompt windows 11 breakpoint reached
  4. Type the script below and hit Enter. Note that the C in the command is the letter of your hard disk drive and should be replaced with the corresponding letter on your PC.
    chkdsk C: /f/r/b
    chkdsk windows 11 breakpoint has been reached

The breakpoint has been reached error on Windows 11 can be caused when the file or program you are trying to execute is located in a faulty hard disk sector.

With this utility, your system will scan the hard drive for faulty sectors. The program will also stop the operating system from writing to the defective sector and try to recover any readable file.

5. Perform a clean boot

  1. Press the Windows key + R to open the Run utility. Now, type msconfig and hit Enter.msconfig windows 11 breakpoint has been reached
  2. Go to the Services tab in the System Configuration window. Check the Hide all Microsoft services checkbox at the bottom of the page and click the Disable all button. This will disable all startup services.
    breakpoint error windows 11
  3. Click the Startup tab and select Open Task Manager.
    breakpoint error windows 11
  4. Right-click all the apps in the Task Manager window and click the Disable option.
    breakpoint error windows 11
  5. From here, go back to the System Configuration window. Click the Apply button, followed by the OK button.
  6. Finally, restart your PC to effect the changes.

Some apps and services automatically start running in the background when you turn on your PC.

One of these apps might be the counter program preventing the file you want to open from running properly. This eventually leads to the breakpoint reached message.

After applying this fix, try opening the file again and see if the problem persists. If it opens without the breakpoint prompt, one of the apps is certainly the cause of the problem.

To know which app or service is causing the problem, you only need to start activating the apps and services in batches and recheck the file until you encounter the issue.

Note that for every activation, you need to restart your PC.

6. Perform a system restore

  1. Press the Windows key, type system restore, and select the Create a restore point option.
  2. Click the System Restore button.
  3. Choose the Next button.
  4. Choose your restore point from the options available and click the Next button.restore point windows 11 breakpoint reached
  5. From here, follow the simple onscreen instructions to complete the process.

If you start noticing the breakpoint has been reached in Windows 11 after installing a new update, carrying out a system restore might do the trick.

7. Scan PC for malware

  1. Press the Windows key + S and type virus in the search box, then select the Virus & threat protection option.
    breakpoint error windows 11
  2. Click Scan options.restore option malware windows 11 breakpoint reached
  3. Now, select the Full scan option and click the Scan now button.malware full scan windows 11 breakpoint reached
  4. Lastly, restart your computer.

Malware does unpredictable damage to the computer. This error could be due to the presence of a virus. A simple scan could help dig out the virus and restore normal service on your system.

Instead of going through the steps above, you can easily employ the reliable TotalAV for complete security. This software performs a deep scan, removing even the most hidden and stubborn malware.

What’s more, it detects viruses before they manifest at all. Lastly, it does not just protect your PC but your online activities as well as offers data encryption. It is just everything you need for your data and PC security.

⇒ Get TotalAV

8. Run Windows Memory Diagnostic tool

  1. Press the Windows key + R, type mdsched.exe, and hit Enter.run mdsched windows 11 breakpoint reached
  2. Select Restart now and check for problems (recommended).memory diagnostic windows 11 breakpoint reached
  3. This will take over access to your system till it completes its test. When the test is complete, the program will automatically restart your PC and show the test results.

However, if it does not show the test result, you can view it following the steps below:

  1. Press the Windows key + X and select the Event Viewer option.
  2. Expand Windows Logs and select the System option in the Event Viewer window.
    breakpoint error windows 11
  3. Now, choose the Find option on the right pane and type MemoryDiagnostics-Results in the find box.
  4. This will show the test results in the General section in the middle pane.general event windows 11 breakpoint has been reached

The breakpoint has been reached error can occur on Windows 11 due to memory leaks. This is a situation where the RAM does not release unallocated spaces for new programs, leading to many errors. If the tool shows that your RAM is faulty after the scan, you have to replace it for optimal performance.

9. Disable overclocking

  1. Restart your PC and press the F2 or Delete key when the manufacturer’s logo appears.
  2. Go to the Advanced tab, choose the Overclocking option, then disable it.
    breakpoint error windows 11
  3. From here, save the changes and exit the BIOS window.

If you enabled overclocking on your graphics card to improve performance, you might need to disable it to solve this problem.

While overclocking does truly improve the performance of the CPU and GPU for a better gaming experience, it sometimes leads to the breaking point reaching error.

10. Uninstall newly installed third-party apps

If you notice this error message only after installing some recent apps, you should try to uninstall those apps.

For optimal results, we recommend using effective uninstaller software for the process.

The breakpoint has been reached promptly on Windows 11, which usually occurs when you are trying to run third-party software.

While the cause can sometimes be unpredictable, we have gathered many solutions that cut across all causes. This is to make sure you are never bothered by this problem again.

If you are still using the later OSs from Windows 10 downwards, you can check our article on breakpoint has been reached Windows 10/7.

Feel free to discuss any solution you found helpful in the comments section. You can also state any fix you tried successfully that is not on this list.

Messenger Not Working on Windows 11 PC: 4 Ways To Fix It

Many reported that Facebook Messenger is not working on their PC, and this will prevent you from chatting with your friends. Luckily, there are ways to fix this issue, and this guide will show you how to do it.

Why is Messenger not working on my PC?

If Messenger is not working on Windows 11, it can be due to temporary glitches, your cache or installed extensions. Corrupted installation can also cause this issue.

How do I fix Messenger on my computer?

You can avoid the troubleshooting steps suggested in this article by opening Messenger on a different browser. We recommend the Opera One browser.

It offers a built-in ad blocker and a filter option to unblock ads from any site you want. So, if Facebook Messenger won’t load on your PC, our browser recommendation blocks intrusive ads and loads pages faster.

Additionally, this browser offers a free VPN for enhanced privacy and security, built-in messenger apps and snapshot feature, video pop-out, and battery saver feature of the box.

Opera One

Opera One

Take advantage of a built-in Messenger, allowing you to enjoy your conversations.

1. Sign in to Facebook Messenger

  1. First, you have to log out of the app.
  2. Go to the app’s bottom left corner, click on the Messenger icon, then select Log Out.
  3. Confirm that you want to log out of the app.
  4. Then you must go back to the Messenger app and log in again.

2. Clear cache and temporary data

  1. Launch your browser, and press Ctrl + Shift + Del keys.
  2. Choose the data you want to clear and click the Clear data button. facebook messenger not working on computer
  3. Don’t clear the saved password and other data; you will have to enter these details when accessing the desired websites again.

3. Disable add-ons

  1. Launch your browser (we use Chrome for this example).
  2. Paste the address below in the URL locator and hit Enter:
    chrome://extensions/
    facebook messenger not working on computer
  3. A list of all the extensions on your browser will appear. Uncheck those marked as Enabled to disable them or click the Remove button.
    facebook messenger not working on computer

4. Reinstall Messenger

  1. Press Windows + R, type appwiz.cpl, and hit Enter.
  2. Select Facebook Messenger from the list, and click the Uninstall button.
  3. Confirm that you want to uninstall the app and close the Control Panel.
  4. Visit the official Messenger website and click on the Download for Windows button.
  5. Enter your username and password, and log in to your account.

If Facebook Messenger is still not working on your computer, you can always use Facebook Messenger in your browser since it offers the same features.

We also covered the Facebook Messanger attachment unavailable error in another guide, so don’t miss it for more information.

Also, if the Facebook app is not working on Windows 10, you can look closer at our comprehensive guide and find the best solutions.

We hope our recommendations helped you fix the Facebook Messenger app, and you can now use it on your desktop.

For more suggestions or other questions, please access the comments section below.

How to Stop Firefox Battery Drains & Make It Use Less [Long Run]

To this day it’s one of the most popular browsers in the world. But does Firefox drain the battery? It can stretch this resource quite thin, yes, and if you want to reduce Firefox battery usage rates, start by removing complementary modules that add unnecessary bulk.

Now, it’s not that Firefox is solely bad at this. In fact, all browsers will drain your battery if used long enough and that’s a fact. Take, for example, Brave browser’s battery-draining case.

Even UC Browser will occasionally consume more battery than it should. So, does Firefox use a lot of battery or does it not?

Firefox battery drain accusations are not unfounded. This is especially true for Windows users, but quite a few people complained about Firefox draining their Mac battery. It’s about Firefox M1 battery consumption rates, to be more specific.

Back to Windows and here’s another interesting scenario reported by users. If you have an SSD drive on your computer and use Firefox heavily, you may notice that the browser can tax your hard drive quite a bit.

This can cause annoying slowdowns and even drain your laptop’s battery life. If such is the case, a thorough Firefox SSD optimization procedure would make a world of difference. So let’s see why is Firefox draining batteries on PCs and laptops, to begin with.

Why does Firefox use so much battery?

You may notice that your device is overheating when you use Firefox. It may also take longer than usual to charge it. All these are signs that Firefox is causing your device to use more energy than it should.

In addition, if you’re running multiple extensions, Firefox may start using more memory than usual which could potentially affect your computer’s performance overall. You need browsers that use less battery.

Since it all depends on your browsing activity, there is no singular browser that promises low battery usage no matter what.

However, Opera is a top contender given that it is a lightweight and fast browser. It has a sleeping tab feature that saves your battery when other tabs are not in use. It’s also very impressive in terms of performance.

Opera

Opera

Preserve battery life with this energy-efficient browser that integrates a power-saving mode.

How do I make Firefox use less battery?

  1. Close unused tabs/windows & start Firefox in Safe Mode
  2. Close unnecessary plugins and extensions
  3. Disable automatic updates
  4. Disable hardware acceleration
  5. Tweak Graphics value in Firefox

1. Close unused tabs/windows & start Firefox in Safe Mode

When you have a lot of tabs open and leave them running in the background, they continue to use your computer’s resources.

If you don’t plan on returning to them anytime soon, then close them so that Firefox doesn’t continue draining the battery on your PC. 

You can do this by selecting each tab individually and clicking on the X button at the top-right corner of each one. 

If that doesn’t improve energy consumption, you might want to try opening Firefox in Safe mode. Simply restart your computer until you trigger the reboot sequence, then choose to Enable Safe Mode with Networking.

Next, find and click the Firefox icon and choose to Start in Safe Mode to check if the problem is still present.

2. Close unnecessary plugins and extensions

Plugins add functionality to Firefox, but they can also consume memory and increase battery usage. If you don’t need them, disable them by going to the extensions tab and disabling them. 

You can also uninstall them permanently if it has been a long time since you last used them or you no longer need them.

3. Disable automatic updates

Firefox automatically updates itself with new features, and checks for updates while it is running in the background. This can increase battery usage significantly since the browser must check for updates regularly.

If you don’t need these features and want to save some power, you can disable automatic updates.

4. Disable hardware acceleration

Hardware acceleration is a feature that improves graphics performance by using your computer’s graphics processing unit (GPU) instead of the CPU to run certain tasks. This can cause problems if you have an older computer.

It will be forced to use more battery power than software rendering would require and may make your browser unstable. 

5. Tweak Graphics value in Firefox

  1. Launch Firefox and type the following the URL address bar: about:support
  2. Then, locate the Graphics section and check out the Compositing line.
  3. Once you identified the information there, paste the following in your browser’s address bar about:config
  4. Search for the strings associated with gfx.webrender.all and set the value to True.
  5. Restart the browser and check if you still struggle with Firefox battery drain cases.

If you experience slowed-down animations on graphic-intensive websites like games or video streaming sites like YouTube and Netflix, this change will improve your energy consumption and reduce Firefox battery usage.

? Does Firefox consume less battery than Chrome?

One last quick thing. You wanted to know how Firefox compares to the market’s most popular browser and we’re here to shed some light on the topic.

Firefox is actually very efficient. In fact, it’s one of the fastest browsers out there when it comes to using less power than other popular browsers.

However, even the best have their own shortcomings. Want to know more? Then, take a closer look at our in-depth comparison of Safari vs Chrome vs Firefox vs Brave.

If you’re getting low on battery life and don’t know why it’s worth checking to see if your browser is the culprit.

We hope you now know how to make Firefox use less battery using the above tips and your power consumption is now at a healthy balance.

If you face any other issues such as Firefox tabs keep crashing, check out our detailed article on how to resolve the problem.

How to Stop Firefox Battery Drains & Make It Use Less [Long Run]

To this day it’s one of the most popular browsers in the world. But does Firefox drain the battery? It can stretch this resource quite thin, yes, and if you want to reduce Firefox battery usage rates, start by removing complementary modules that add unnecessary bulk.

Now, it’s not that Firefox is solely bad at this. In fact, all browsers will drain your battery if used long enough and that’s a fact. Take, for example, Brave browser’s battery-draining case.

Even UC Browser will occasionally consume more battery than it should. So, does Firefox use a lot of battery or does it not?

Firefox battery drain accusations are not unfounded. This is especially true for Windows users, but quite a few people complained about Firefox draining their Mac battery. It’s about Firefox M1 battery consumption rates, to be more specific.

Back to Windows and here’s another interesting scenario reported by users. If you have an SSD drive on your computer and use Firefox heavily, you may notice that the browser can tax your hard drive quite a bit.

This can cause annoying slowdowns and even drain your laptop’s battery life. If such is the case, a thorough Firefox SSD optimization procedure would make a world of difference. So let’s see why is Firefox draining batteries on PCs and laptops, to begin with.

Why does Firefox use so much battery?

You may notice that your device is overheating when you use Firefox. It may also take longer than usual to charge it. All these are signs that Firefox is causing your device to use more energy than it should.

In addition, if you’re running multiple extensions, Firefox may start using more memory than usual which could potentially affect your computer’s performance overall. You need browsers that use less battery.

Since it all depends on your browsing activity, there is no singular browser that promises low battery usage no matter what.

However, Opera is a top contender given that it is a lightweight and fast browser. It has a sleeping tab feature that saves your battery when other tabs are not in use. It’s also very impressive in terms of performance.

Opera

Opera

Preserve battery life with this energy-efficient browser that integrates a power-saving mode.

How do I make Firefox use less battery?

  1. Close unused tabs/windows & start Firefox in Safe Mode
  2. Close unnecessary plugins and extensions
  3. Disable automatic updates
  4. Disable hardware acceleration
  5. Tweak Graphics value in Firefox

1. Close unused tabs/windows & start Firefox in Safe Mode

When you have a lot of tabs open and leave them running in the background, they continue to use your computer’s resources.

If you don’t plan on returning to them anytime soon, then close them so that Firefox doesn’t continue draining the battery on your PC. 

You can do this by selecting each tab individually and clicking on the X button at the top-right corner of each one. 

If that doesn’t improve energy consumption, you might want to try opening Firefox in Safe mode. Simply restart your computer until you trigger the reboot sequence, then choose to Enable Safe Mode with Networking.

Next, find and click the Firefox icon and choose to Start in Safe Mode to check if the problem is still present.

2. Close unnecessary plugins and extensions

Plugins add functionality to Firefox, but they can also consume memory and increase battery usage. If you don’t need them, disable them by going to the extensions tab and disabling them. 

You can also uninstall them permanently if it has been a long time since you last used them or you no longer need them.

3. Disable automatic updates

Firefox automatically updates itself with new features, and checks for updates while it is running in the background. This can increase battery usage significantly since the browser must check for updates regularly.

If you don’t need these features and want to save some power, you can disable automatic updates.

4. Disable hardware acceleration

Hardware acceleration is a feature that improves graphics performance by using your computer’s graphics processing unit (GPU) instead of the CPU to run certain tasks. This can cause problems if you have an older computer.

It will be forced to use more battery power than software rendering would require and may make your browser unstable. 

5. Tweak Graphics value in Firefox

  1. Launch Firefox and type the following the URL address bar: about:support
  2. Then, locate the Graphics section and check out the Compositing line.
  3. Once you identified the information there, paste the following in your browser’s address bar about:config
  4. Search for the strings associated with gfx.webrender.all and set the value to True.
  5. Restart the browser and check if you still struggle with Firefox battery drain cases.

If you experience slowed-down animations on graphic-intensive websites like games or video streaming sites like YouTube and Netflix, this change will improve your energy consumption and reduce Firefox battery usage.

? Does Firefox consume less battery than Chrome?

One last quick thing. You wanted to know how Firefox compares to the market’s most popular browser and we’re here to shed some light on the topic.

Firefox is actually very efficient. In fact, it’s one of the fastest browsers out there when it comes to using less power than other popular browsers.

However, even the best have their own shortcomings. Want to know more? Then, take a closer look at our in-depth comparison of Safari vs Chrome vs Firefox vs Brave.

If you’re getting low on battery life and don’t know why it’s worth checking to see if your browser is the culprit.

We hope you now know how to make Firefox use less battery using the above tips and your power consumption is now at a healthy balance.

If you face any other issues such as Firefox tabs keep crashing, check out our detailed article on how to resolve the problem.

5 Ways to Change the Screen Timeout in Windows 11

Does your Windows 11 system screen times out very quickly as you leave it idle? If so, it is possible to increase the screen timeout duration of your PC and get rid of the inconvenience. This guide explains the different ways to change the screen timeout in Windows 11.

Why does my screen turn off so quickly in Windows 11?

The most prominent reason why your Windows 11 computer screen turns off quickly is that a short duration is assigned to the screen timeout settings. Apart from this, other reasons can be:

  • The Dynamic Lock feature is turned on – The Dynamic Lock feature, when enabled, automatically locks your device whenever you are away.
  • A blank screensaver is enabled – If you have chosen a blank screensaver, the screen will appear inactive whenever the screensaver is activated.
  • The sleep timeout setting is set to a lower value – If you assign a short duration here, your PC will be put into Sleep mode quickly after it is left unattended.

Now that we know how this can happen, let’s see how to extend the screen timeout.

How can I change the screen timeout settings in Windows 11?

1. Use the Settings app

  1. Right-click the Windows icon and click Settings from the Quick Links menu.How to change screen timeout in Windows 11
  2. From the System settings, choose Power & battery from the right section.How to change screen timeout in Windows 11
  3. Click to expand the Screen and sleep option located under the Power section.
  4. Assign a time duration for When plugged in, turn off my screen after option. Likewise, if you own a laptop, assign a suitable duration for On battery power, turn off my screen after as well.change screen timeout in Windows 11

You can also use the ms-settings:powersleep command in the Run window to access the Screen and sleep settings directly.

2. Use the Control Panel

  1. Press the Windows key to launch the Start menu, type control panel in the search bar and select the relevant result.change screen timeout in Windows 11
  2. Set View by as Category and choose Hardware and Sound.change screen timeout in Windows 11
  3. Next, select Power Options to access related settings.
  4. From the Choose or customize a power plan window, click the Change plan settings option for the current power plan.change screen timeout in Windows 11
  5. Assign the time duration for the Turn off the display option for both On battery and Plugged in scenarios.change screen timeout in Windows 11
  6. After making the changes, press the Save changes button on the bottom right.

Using Control Panel is an old-school method to customize the power plan settings and change screen timeout settings in Windows 11. We also recommend that you go through our guide to check the battery health of Windows 11 laptops.

3. Use Advanced Power Options

  1. Use the Windows + R shortcut to launch the Run dialog box, type or copy-paste the following command and press OK to execute it. control.exe powercfg.cpl,,3change screen timeout in Windows 11
  2. This will directly take you to the Advanced Power Options settings. Expand the Display category and then the Turn off display after option.change screen timeout in Windows 11
  3. Specify the time duration in minutes for the On battery and Plugged in fields and press the OK button to save the settings.

4. Use a Windows PowerShell command

  1. Press the Windows key, type powershell in the search bar, and select Run as Administrator from the search result.
  2. Click Yes on the User Action Control Popup.
  3. Type or copy-paste the following command and press Enter key to assign a screen timeout when the computer is plugged in. Replace duration with the time duration in seconds. powercfg -change -monitor-timeout-ac 60change screen timeout in Windows 11
  4. To change the screen timeout duration when the computer is powered by a battery, execute the following command. Here, again replace duration with the time duration in seconds. powercfg -change -monitor-timeout-dc 60change screen timeout in Windows 11

The Powercfg command allows you to change the timeout settings in Windows 11 and specify how long the system screen should be active. This command works in both Command Prompt and Windows PowerShell, so you can choose any of the two you are comfortable with.

5. Use Registry Editor

5.1 Modify the Registry

  1. Press the Windows key to launch the Start menu, type regedit and select Run as Administrator.change screen timeout in Windows 11
  2. Choose Yes on the User Action Control prompt.
  3. In the Registry Editor, navigate to the following location. Computer\HKEY_LOCAL_MACHINE\SYSTEM\CurrentControlSet\Control\Power\PowerSettings\7516b95f-f776-4464-8c53-06167f40cc99\8EC4B3A5-6868-48c2-BE75-4F3044BE88A7change screen timeout in Windows 11
  4. Here, right-click the Attributes key and choose Modify from the context menu.
  5. Now, assign 2 in the Value data and press the OK button to save the changes.change screen timeout in Windows 11

5.2 Change Advanced Power Settings

  1. Launch Control Panel once again, select Large icons in View by dropdown, and select Power Options.change screen timeout in Windows 11
  2. Next, select Change plan settings.
  3. Click the Change advanced power settings to excess the advanced settings property window.change screen timeout in Windows 11
  4. Expand the Display category and then the Console lock display off timeout option.change screen timeout in Windows 11
  5. Replace the default time with your preferred duration in minutes and press Apply button followed by OK.

Modifying the Windows Registry unlocks the Console lock display off timeout option in Windows 11, which can be configured from the Advanced Power Options settings window.

That’s it! These are all the possible ways to change screen timeout in Windows 11 and assign a duration to your preference. You can check out our guide to stop the power plan from changing automatically if it often happens on your Windows 11 PC. For further help or to share your experience, reach out to us in the comments section.

Blue Screen After Installing Drivers? Fix It in 5 Ways

Some of our readers have recently reported that their monitor displays a blue screen after installing drivers, and they don’t seem to know what fix to apply.

Do not panic, as this error is relative to the black screen issues we fixed in one of our guides. Here, we have five simplified steps on how to fix the issue.

What causes a blue screen after installing drivers?

There can be several reasons behind the blue screen after installing drivers error. Before diving into the solutions, let us consider some of the most known triggers for this error:

  • Driver issues – The BSoD and other problems might be triggered by the installation of bad drivers (GPU, audio, or any other hardware component). Although outdated drivers might not directly cause the Blue Screen error, their interactions with your operating system certainly do.
  • Faulty Windows update – You can also have a blue screen issue after installing a problematic update on your device. In this situation, you must uninstall the most recent Windows update to fix the issue.
  • Corrupted system files – Your computer’s functionality could be significantly hampered if even one of the DLL files becomes corrupted because they hold the system’s manual. You can fix the issue by deploying the SFC and DISM scans.
  • Hardware problems – Components that are incorrectly connected to the motherboard, an abrupt disconnect caused by a power loss, or a damaged component may trigger this problem.
  • Issues with third-party applications – Compatibility issues with apps, especially antivirus, may often cause this problem. You may briefly try to uninstall conflicting apps as this and reinstall once your system begins to function normally.

Now that you know some of the potential reasons behind the blue screen after installing drivers, let’s proceed to how you can fix this problem.

What can I do if I get a blue screen after installing drivers?

It is important to observe some preliminary checks before seeking advanced solutions regarding the blue screen issues. Some of these tweaks are as follows:

  • Install pending Windows updates
  • Stop overclocking
  • Try to inspect changes to your hardware for possible issues, especially your RAM.
  • Disconnect external drivers and reboot your computer

Having confirmed the above checks, if the problem persists, you can work your way through any of the advanced solutions below.

1. Run the SFC Scan

  1. Click the Windows icon, type cmd in the Search box, and select Run as administrator.
  2. Type the following command in the text field and press Enter: sfc /scannow
  3. Close the Command Prompt and restart your PC.

The SFC scan is one of the most straightforward fixes for system file errors which can be run through the command-line tool that thoroughly checks your system for potentially damaged files that may be triggering several errors.

Besides manually scanning for broken components, you can use a dedicated repair tool to help you repair the damaged files.

2. Check for RAM issues

  1. Press the Windows key, type Windows Memory Diagnostic in the search box, and launch it.
  2. Choose Restart now and check for the problems results.

Once Windows restarts, Windows Memory Diagnostic should do a scan and then provide the results.

Alternatively, you can use the Event Viewer to check the scan result in our detailed guide on Memory Diagnostic Tool mdsched.exe.

If the software detects a problem with one or more RAM modules, you must replace them.

3. Roll back the driver

  1. Press the Windows + X keys and choose Device Manager from the list.
  2. Select the driver that you want to roll back and double-click on it.
  3. In the new window, navigate to the Driver tab and click on Roll back driver.
  4. Now follow the on-screen instructions to complete the process.

Before rolling back any driver, pay attention to the BSoD error message to know the driver’s name causing the issue.

If the Roll Back Driver option is grayed out, you have no previous driver to go back to, so perform the next solution.

4. Perform a Clean Boot

  1. Press the Windows key + R to open Run, type msconfig in the text field, and press Enter.
  2. Navigate to the Services tab and check the box with Hide all Microsoft services at the bottom-left side of the page. Now click on Disable all.
  3. Next, navigate to the Startup tab, then click on Open Task Manager.
  4. In the Task Manager window, go to the Startup tab, right-click the items therein one after the other, and choose Disable.
  5. Close Task Manager, click OK in the System Configuration window and restart your PC.

Once your PC restarts, check if the problem is fixed. If yes, enable the services and startup apps you disabled above one by one or in groups to find the culprit.

You can also learn more about starting apps with Windows by checking our guide on how to use the Startup folder on Windows 11.

5. Perform a System Restore

  1. Press the Windows key + R to open Run, type rstrui in the text field and press Enter.
  2. Select the desired restore point and click on Next.
  3. Click on Finish.
  4. Wait while your PC restores your system.

Windows usually create restore points automatically, but it is also advisable to do so manually from time to time. You can explore our article on how to create Windows 11 restore points to guide you through the process.

Alternatively, you can decide to restore your Windows 11 PC to factory settings if the error persists.

Whenever users experience Blue Screen after installing graphics drivers, the memory may be corrupted. However, this is often not a result of bad RAM modules, it is rather due to software errors in defective drivers. You may encounter the AGP_GART_CORRUPTION error.

Overheating might also lead to memory corruption (thermal issue). There’s also the possibility that the issue could have been brought on by a virus or other malware.

And that’s it on what to do to fix the blue screen issues after installing drivers. If you have any questions or suggestions, do not hesitate to use the comments section below.

Additionally, you can learn how to resolve FTDISK_INTERNAL_ERROR. We also have a guide on how to fix Error Driver Failed Sleep, so don’t miss it.

We also have a guide on Error Drivers Leaking Locked Pages error, so you might want to check it out for more solutions.

Fix: NvLddmkm Display Driver Stopped Responding

The display driver is an essential part of your GPU that controls the screen of your computer. You will see a black screen instead of your desktop when it stops working. Most cases of this error occur when you are trying to play games or watch videos on the internet.

According to users who reported that the NvLddmkm display driver stopped responding, the display kept going off, and the CPU temperature drastically rose. If this sounds like you, keep reading to find out how to resolve it.

Nvlddmkm.sys is a device driver that allows you to use your NVIDIA graphics card on your Windows computer. The Nvlddmkm error on Windows 11 will appear accompanied by a message that says display driver nvlddmkm stopped responding and has successfully recovered.

What causes Nvlddmkm failure? 

  • CPU-intensive program – A program that uses too much CPU time can cause the system to slow down and negatively affect performance.
  • Driver conflict – You may have installed an older version of the NVIDIA Graphics Driver on your computer that does not support your current hardware configuration or operating system version.
  • Outdated graphics card drivers – If you have an outdated graphics card driver, it may not support new features on your device or cause several issues. However, easily fixing the Display Driver amdwddmg stopped responding error and others is possible thanks to our dedicated guides.
  • Overheating of your GPU –  If you have been using your system for a long time or playing very demanding games, this can lead to overheating, affecting your card’s performance. 
  • Wrong graphic settings – Incorrectly configured settings can also cause this error. Ensure your PC’s graphic settings are not too high or too low.
  • Incompatible hardware – If you have recently updated your graphics card or installed new hardware, there is a chance that they are incompatible.
  • Malware infection – If your computer has been infected by malware such as viruses or spyware, this can also cause problems with the display driver and prevent it from working.

How do you fix the display driver Nvlddmkm stopped responding and has successfully recovered error?

1. Disable hardware acceleration

  1. Hit the Windows key and select Settings.settings windows 11
  2. Click on System on the left pane then Display on the right pane.Settings - System - Display High CPU usage New World
  3. Scroll down and select Graphics.graphics settings
  4. Select the Change default graphics settings option.
  5. Now, toggle on or off the Hardware Accelerated GPU Scheduling option.disable Hardware-accelerated GPU scheduling

2. Update BIOS

  1. The process of updating BIOS will differ depending on your motherboard. For this step, we shall be updating the HP motherboard.
  2. Navigate to the HP driver and software download website.
  3. Choose laptop or desktop, depending on the type of computer you’re using.
  4. Enter your exact serial number or your exact computer model.
  5. Select your OS and OS version, then click Submit.
  6. Click on All drivers and then expand BIOS to see available updates.
  7. Click the download icon.
  8. Install the .exe file, following the on-screen instructions.
  9. Restart your PC.

3. Perform a Clean boot

  1. Hit the Windows key, type msconfig, and open System Configuration.
  2. Switch to the Services tab, and select Hide all Microsoft services.
  3. Click on the Disable all button, then hit the Apply button to save the changes.
  4. Go back and click on the Startup tab and select Open Task Manager.
  5. In the Startup tab of the Task Manager, Disable all the Enabled startup items.
  6. Close Task Manager and Restart your PC.

A section of users was unlucky with all the above methods, but on the bright side, replacing their RAM seems to have resolved their issues. It appears that bad RAM can also cause display issues, so if cleaning and optimizing your RAM does not work, try replacing it with a new one.

You could also:

Problems with Nvidia are not new to users. Nvidia GPUs have been the subject of complaints from users who have noted that their graphics cards are causing computer crashes, random reboots, and system instability.

For instance, some Nvidia drivers fail to install, but we cover ways to bypass this issue. If you’re looking for the best Nvidia drivers for your GPU, we also list our top picks in our expert article.

You may have experienced an issue with your NVIDIA graphics driver, either due to a computer crash or using a new display device. To confirm whether this is the issue, follow the steps described above to pinpoint and resolve the problem.

If you still face the problem even with the above methods, it must be due to a conflict in the Nvidia driver. To resolve that, you need to reinstall your Nvidia graphics driver.

For any additional thoughts, leave us a comment down below.

The New Outlook for Windows will be available for more users in April

Last year in May, Microsoft debuted the New Outlook for Windows, though in limited preview to users that are part of the Office Insider program. The new entry has been in the testing phase for almost a year in the Beta Channel, and Microsoft is now getting ready to avail it to more users.

According to the Microsoft 365 Roadmap, more people will be able to access the new Outlook for Windows app via a toggle which will allow them to transition from the legacy version to the new app. Office Insiders part of the Beta and Preview Channel already had access to this toggle but it is shipping for users in the Current Channel as early as April.

It should be noted that the New Outlook only supports Microsoft Exchange Online and personal Microsoft accounts at the moment. Therefore, if you’re an Outlook user and you don’t meet the requirements highlighted above, you’ll not be able to access the toggle that allows you to make the transition. Of course, having a Microsoft 365 subscription is also paramount.

Microsoft has indicated that there are elaborate measures being put in place to enhance support for more accounts in the next couple of months. This move shows the company’s intent to roll out the new web-based app in the near future which is set to eventually replace the legacy app.

While the New Outlook shipped with a host of new features like loop components, message reminders for important emails, pinned items, and more, it seems to be missing important features that are part of the classic Outlook for Windows. For instance, multi-account, offline support, and more.

Microsoft is yet to announce when it plans to replace the legacy app. In related news, the company recently availed Outlook to macOS users for free.

How to get an OpenAI API key in just 5 easy steps

Artificial Intelligence (AI) is at the forefront of this revolution with tools like Bing Chat and ChatGPT. OpenAI is one such platform that is revolutionizing the way we perceive AI. If you get an OpenAI API key, you can integrate cutting-edge artificial intelligence models into your applications. In this guide, we will discuss how to get an OpenAI API key and how it can benefit you.

How to get an OpenAI API key?

To get an OpenAI API key, you need to follow these 5 simple steps:

  1. Visit the OpenAI website and sign up for an account. If you don’t want to use your email address, you can use also use an existing Google or Microsoft account to create an OpenAI account.


  2. Once you have signed up, navigate to the API section or get there by clicking your profile and selecting View API keys.
    openai api
  3. If you need to create a new OpenAI API key, click Create new secret key.
    openai api
  4. Now your new OpenAI API key will be created. Be sure to remember to save the OpenAI API key somewhere secure. You won’t be able to view it again if you forget it or misplace it. You will have to create a new one.
    openai api
  5. If you want to revoke your OpenAI API key, just click the trash can icon next to the API key you want to delete and click Revoke API to permanently disable it.
    openai api

Once you revoke an API key, you can no longer use it, you will need to create a new one.

Using the OpenAI API

Now that you know how to get ChatGPT API key, you can start using the OpenAI API to create intelligent applications. Here are some examples of how you can use the OpenAI API:

  1. Language Translation: You can use the GPT-3.5 language model to translate text from one language to another. It can even provide code you can use.
  2. Sentiment Analysis: You can use the sentiment analysis model to analyze the sentiment of a piece of text and determine whether it is positive, negative, or neutral.
  3. Chatbots: You can use the OpenAI API to create chatbots that can converse with users in a natural and intelligent way.
  4. Image Recognition: You can use the image recognition model to identify objects in images and classify them into different categories.

What is OpenAI API?

OpenAI is an artificial intelligence platform that provides developers with access to advanced AI models, such as language models, image recognition models, and predictive models. An OpenAI API key is designed to make it easy for developers to build intelligent applications that can learn from data and adapt to new situations.

FAQ

Where do I get a ChatGPT API key?

Sign in at platform.openai.com, go to the API Keys page, and select Create new secret key to generate one.

Why can’t I create an API key on my account?

Your account may need billing enabled or may have restrictions. Open Settings in the dashboard and review your Billing section.

How do I use my ChatGPT API key in apps or scripts?

Copy your key and place it in the app configuration or set it as an environment variable like OPENAI_API_KEY.

How do I keep my ChatGPT API key secure?

Store it in environment variables, rotate it regularly, avoid sharing it, and delete any exposed key immediately.

Power users who need more reliability and advanced features can also explore ChatGPT Professional to decide whether a paid plan suits their everyday AI workflows.

Getting an OpenAI API key is a simple process that can give you access to powerful artificial intelligence models. By using the OpenAI API, you can create intelligent applications that can learn from data and adapt to new situations.

Fix: Paint Shop Pro Windows 10 Compatibility Issues

Regarding photo editing, Paint Shop Pro is a well-known software. However, many are wondering about Paint Shop Pro Windows 10 compatibility issues.

In case you’re not familiar, Paint Shop Pro is a powerful photo editing software that helps you create amazing pieces of art.

Today we will focus on Paint Shop Pro, and any compatibility issues you may encounter with it.

Is PaintShop Pro compatible with Windows 10?

All newer versions of PaintShop Pro should work on Windows 10 without too many issues. However, if you’re using Paint Shop Pro 9 on Windows 10, you might expect to see a bug or two.

Luckily, there are a couple of fixes that you can try if you encounter any problems, so keep on reading to see how you can fix them.

How can I fix Paint Shop Pro Windows 10 compatibility issues?

Before we start fixing this issue, there are a few simple solutions that we suggest you perform before moving to more advanced solutions:

  • Try using a different setup file – According to users, there’s a different setup file sometimes in one of the folders. Use that file to install the software. A few users reported that using the setup.msi file instead of setup.exe worked for them.
  • Stop additional Windows Installer processes – When you start the setup, open Task Manager. If you see multiple Windows Installer processes running, stop them and check if that solves the issue.

1. Rollback your drivers

  1. Press Windows key + X and choose Device Manager.
  2. Locate your Intel graphics driver and double-click it.
  3. Choose the Roll back driver option and follow the instructions.
  4. If this option isn’t available, choose Update Driver instead.
  5. Choose Browse my computer for drivers.
  6. Next, select Let me pick from a list of available drivers.
  7. Now select an older driver and install it.

Remember that you need to block Windows from automatically updating drivers if you don’t want this issue to occur again.

Alternatively, you can download the older driver from Intel’s website and install it. Sometimes newer drivers are better, and updating them is simple and easy with specialized software such as Outbyte Driver Updater.

⇒ Get Outbyte Driver Updater

2. Run PSP9 in high-performance mode on dual graphics-cards

  1. Go to NVIDIA Control Panel and select Manage 3D Settings.
  2. Select the Program Settings tab.
  3. Check if PSP is available in the program dropdown menu. If it’s not, add it.
  4. Click on the Add button and select PSP 9 and then enable high-performance on the NVIDIA processor.
  5. Click Apply and wait until the system validates the changes
  6. Launch PSP9 to see if the issue persists.

If you’re having Jasc Paint Shop Pro 9 Windows 10 compatibility issues, be sure to try these steps.

3. Run it as administrator or use compatibility mode

  1. Right-click the setup file and choose Run as administrator.
  2. If that doesn’t work, right-click the setup file and choose Properties.
  3. Go to the Compatibility tab and check Run this program in Compatibility mode. Select an older version of Windows, such as Windows XP.
  4. Click Apply and OK and run the setup file as administrator.

4. Modify the registry

Note icon NOTE
This method requires you to change your registry, so be extra cautious and create a backup in case anything goes wrong.
  1. Press the Windows key + R to enter regedit. Click OK.
  2. Navigate to the following path: HKEY_CURRENT_USER\Software\JASC
  3. In the left pane, right-click JASC and choose Delete.
  4. When the confirmation dialog appears, click Yes.

After removing these keys, try to install the software again.

These are some of the fixes that can help you fix Paint Shop Pro Windows 10 compatibility issues. If the problem is still, maybe it’s time to try using a different photo editing software or upgrade to the latest version.

Did you find a different solution for this problem? If so, let us know in the comments section below.

Windows Temp CAB Files: What are They and How to Delete Them

Windows has a lot of different temporary files, and most of these are only used for a specific process, and once it’s completed, they don’t play any vital role. One such is the Windows temp CAB files.

Many users have reported their hard drive filling up with CAB files, sometimes up to 10-30 GB of storage. So, if you plan to clear some storage, deleting them could be an option. Before you proceed, here’s everything you should know about CAB files.

Why are CAB files in Windows temp folder?

CAB files are stored in the Windows Temp folder because these are temporary files and are not used for the everyday effective functioning of the OS, like the system files or critical Windows files.

You will also find several other files in the Temp folder, say error logs and debug log files. All these combined can take up significant storage and slow down an old PC.

Also, many CAB files can accumulate and regenerate within the Temp folder. That’s especially the case for server PCs within network environments, which generate a lot of log and security data.

The accumulation of CAB files can hog considerable hard drive space. There’s also a CAB compressor bug on Windows in which the makecab cleanup process fails to compress CBS logs. But it can be fixed using a few command lines, as illustrated in the later section.

What is a CAB file in Windows?

CAB or Windows Cabinet Files contain data used for Windows installations, usually software and drivers, when the process is undertaken directly by the OS.

To view the CAB files in Windows, head use the following path:C:\Windows\Temp

Though it shouldn’t ideally be the case, you may often find out that the Windows temp folder has huge CAB files.

If you want to explore more about .cab files and how to install them, read this guide.

Is it safe to delete CAB files from Windows Temp folder?

Yes, you can safely delete CAB files from the Windows Temporary folder. Before you do, make sure that there are no active installations going on. Otherwise, it would affect the process and trigger an error.

Also, we do not recommend deleting any CAB files other than the ones stored in the Temp folder since these are critical to apps, for instance, iTunes and Microsoft Office, both of which generate these. And deleting them will affect the functioning of the related app.

How can I remove Windows Temp CAB files?

1. Erase CAB files with a dedicated tool

For erasing masses of CAB files, look for comprehensive disk cleanup utilities for Windows.

With such tools, users can quickly clear the Temp folder and other build-ups and unnecessary files. These include numerous handy system maintenance tools, like repairing PCs’ registries with registry cleaners.

2. Manually delete CAB files

  1. Press Windows + E to open File Explorer, paste the following path in the address bar, and then hit Enter:C:\Windows\Temppath
  2. Locate the CAB file(s), right-click on it, and select Delete.delete windows temp cab files
  3. Click Yes in the confirmation prompt.delete

If you have just a handful of these, you can always manually delete the Windows temp CAB files from File Explorer in no time.

3. Set up a batch file to delete CAB and LOG files

  1. Press Windows + S to open the Search menu, type Notepad in the text field, and click on the relevant search result.notepad
  2. Now, press Ctrl + C to copy the following code, and then use Ctrl + V to paste it into Notepad.@echo off runas>nul echo Removing archives Temp... del /f C:WindowsTemp*.* echo Fixing Windows!!! del /f C:WindowsLogsCBS*.log echo Done! pausebatch file to delete windows temp cab files
  3. Once done, click on the File menu, and choose Save.save
  4. Navigate to the desired location, enter Delete CAB files.bat as the File name, select All files from the Save as type dropdown menu, and click Save.delete cab files.bat to remove windows temp cab files
  5. Finally, right-click on the newly created BAT file, select Run as administrator, and click Yes in the prompt.run as administrator
  6. It will now delete all the CAB file(s).

4. Delete via Command Prompt and fix the compressor bug

  1. Press Windows + R to open Run, type cmd, and hit Ctrl + Shift + Enter.command prompt
  2. Click Yes in the UAC prompt.
  3. Now, paste the following commands individually and hit Enter after each:
    net stop wuauserv cd %systemroot% rename SoftwareDistribution SoftwareDistribution.old rmdir /q /s c:windowstemp net stop trustedinstaller c: cd c:windowslogsCBS del *.cab del *.log rem regenerate cab files c:windowssystem32wuauclt.exe /detectnow net start wuauserv

While this is one way to delete the Windows temp CAB files, you can also manually perform the same operation to fix the compressor bug by disabling the related services, renaming the SoftwareDistribution folder, and then deleting the files.

5. Turn on Storage Sense

  1. Press Windows + I to open Settings, and click on Storage on the right in the System tab.storage
  2. Click on Storage Sense.storage sense to delete windows temp cab files
  3. Enable the toggle to turn on Storage Sense.enable to delete windows temp cab files
  4. Now, configure the feature settings and cleaning frequency. Also, you could click on the Run Storage Sense now button at the bottom to launch a scan right away.run storage sense now

Storage Sense is a built-in Windows utility that allows users to automatically run periodic scans and clear the temporary files on the PC, including the Windows temp CAB files.

6. Check out PRTG Network Monitor

PRTG Network Monitor is ideal for users who need to monitor CAB files accumulating on server PCs within network environments.

You can use this powerful software to create an alert that notifies you if a server that hosts an Additional Polling Engine slows down and sets the node warning level.

This will ensure you will always know in time if the CAB files will accumulate in the Temp Folder.

PRTG is a freely available network-monitoring software. That software incorporates VMware, printer, database, and website monitoring components.

Paessler PRTG also includes WMI Free Disk Space and Folder sensor monitors. Those components enable users to set up sensors that monitor whole disk drives or folders.

Folder sensor monitoring can come in handy for monitoring CAB file accumulation in the Temp folder and that folder’s overall size.

Other useful PRTG Network Monitor features:

  • Incorporates more than 10 built-in technologies for flexible alerting
  • Its users can utilize PRTG within browsers or with its desktop app
  • PRTG’s map designer enables users to set up real-time maps for networks
  • The PRTG remove probes enable users to monitor networks in different locations

The PRTG network monitoring software is simple to set up and manage. The Importance of Network Monitoring is essential for your business.

Its primary aim is to monitor the traffic and performance of your computer network, as well as to look for sluggish or malfunctioning systems. This solution will save a lot of money and eliminate a lot of challenges.

⇒ Get PRTG Network Monitor

So, if you were wondering earlier, can I delete CAB files in Windows temp, you now know the answer and all the ways to do it quickly and seamlessly.

Also, to clear files on the PC, you could use the built-in Disk Cleanup or an effective third-party tool.

For any queries or to add something some information to the guide which we missed, drop a comment below.

Windows 11 Slow Boot: How to Fix It & Make It Faster Again

If you are seeing this article, you are probably experiencing a Windows 11 slow boot problem which seems unusual for the new OS since it has been touted to be faster and more efficient than other Windows versions.

Fortunately, we have gathered some potential fixes you can use to make your Windows 11 run faster. Work your way through any of the steps provided in this article to fix the issue.

What causes a slow boot on Windows 11?

Although Windows 11 is known for its improved memory and hardware resource management, some users still experience a slow startup. The following are some of the factors responsible for this problem:

  • Problem with built-in or third-party startup apps – Some apps that run on startup may slow down the boot time and degrade Windows performance.
  • Corrupted system files – System file corruption can also trigger the Windows 11 slow boot. You can repair these corrupt files with Windows built-in tools or a corrupted system file fixer.
  • Insufficient RAM – Your OS may use some of the storage disks as virtual memory if it is out of RAM, which will reduce performance. RAM-optimizing applications can be used to address this issue.
  • Windows update issues – Another possibility for Windows 11 slow boot error can be due to pending updates or outdated drivers. A simple update of your drivers should fix the problem.
  • Malware infection – Viruses and malware can produce many problems, including a slow boot. Use one of the best antivirus software for Windows 11 and double-check them before using anything.
  • Slow HDD or SSD – Owners of both types of drives have encountered issues with slow boot times. However, check out our detailed guide on how to fix the HDD or SSD Windows slow boot error.

If you’re facing the Windows 11 slow boot error, below are some of the solutions to fix it.

How can I fix slow boot on Windows 11?

Before engaging in any advanced troubleshooting steps, you should consider trying to apply the following preliminary checks, which can help you prevent the error next time:

  • Try restarting your PC.
  • Install the latest Windows 11 updates.
  • Scan your PC for antiviruses and malware.
  • Ensure your PC meets the basic Windows 11 system requirements to make your computer run smoothly.

Having confirmed the above checks and if you still require further assistance on how to fix the slow boot issue on Windows 11, you can explore the solutions provided below.

1. Disable startup apps on Windows 11

1.1. Using the Settings app 

  1. Press the Windows key + I to open the Settings app.
  2. Navigate to Apps and choose Startup.
  3. Disable the toggle for the apps you don’t need to start automatically during startup.

1.2. Using Task Manager 

  1. Right-click on the Taskbar and select Task Manager.
  2. Click on the Startup tab. Right-click on any program that you don’t want to load in startup and select Disable.

Some apps will stay hidden under the startup tab, but you can access them via the Settings app. After disabling the startup apps, you can now start apps manually and you will notice a considerably faster boot time.

2. Perform a Clean Boot

  1. Press the Windows key + R to open Run, type msconfig in the text field and press Enter.
  2. Navigate to the Services tab, check the box with Hide all Microsoft services at the bottom-left side of the page, and click on Disable all.
  3. Next, navigate to the Startup tab then click on Open Task Manager.
  4. In the Task Manager window, go to the Startup tab, right-click on the apps you don’t want to open during the startup one after the other and choose Disable.
  5. Close Task Manager, click OK in the System Configuration window and restart your PC.

Once your PC restarts, check if the clean boot improves the boot time. If it does, repeat the process by enabling each app one after the other to isolate the one responsible for Windows 11 slow boot. You can also learn more about startup apps by checking our guide on how to use the Startup folder on Windows 11.

3. Enable Fast Startup

  1. Press the Windows key + R to open the Run dialog, type control in the text field, and press Enter.
  2. When Control Panel opens, select Power Options from the menu.
  3. On the left pane, click on Choose what the power buttons do.
  4. Next, click on Change settings that are currently unavailable to set administrator permissions.
  5. Check the box with the Turn on fast startup (recommended) and click on Save Changes.
  6. Restart your PC to see if the error is fixed.

Enabling the fast startup will prevent your PC from shutting down completely, which in turn helps your PC to boot faster.

4. Enable Storage Sense

  1. Press the Windows key + I to open the Settings app.
  2. Navigate to System, then select Storage.
  3. Under Storage management, toggle on the button next to Storage Sense.

By enabling Storage Sense, you can manage locally accessible cloud content, delete temporary files, and free up space automatically.

5. Defragment your drive

Note icon NOTE
Only use defragmenting if you have an HDD. Do not perform the solution for SDD.
  1. Press the Windows key + E to start File Explorer.
  2. Click on This PC, then right-click the system drive (usually C:) and select Properties.
  3. Then, click on the Tools tab and select Optimize.
  4. Select the drive you want to optimize and hit the Optimize button.

As you might have noticed, in our example, we have an SSD, not an HDD, so we didn’t go through with the defragmentation. However, if you have an HDD instead, the defragmentation might help a lot in the booting process.

Some users also claim that if the system is running too many processes, it will cause the system to run slowly, no matter how clean it is. Hence the need to limit the RAM usage for some programs.

In case you need Windows optimization programs, we have made a list of Windows 10 optimization software that also works for Windows 11.

And that’s how to fix slow boot on Windows 11 PC. If you have any questions or suggestions, do not hesitate to use the comments section below.

Emp.dll Not Found: How to Download It Again & Fix it

Emp.dll is a file that is required to operate some programs properly. If the file is missing or corrupted, you may experience problems when you try to start or launch certain programs. If you get an error message that the emp.dll file is not found or is missing, we unpack various ways to restore it in this article.

Before you proceed to any repairs, ensure that all the drivers are up-to-date on your computer. Also, try reinstalling the associated program displaying the error.

How do I fix emp.dll is missing?

1. Download the DLL file manually

If you cannot find the DLL for your application, you can manually download it from the Internet and then copy it to the appropriate folder on your computer. You may be wondering where to install the emp.dll file. Usually, it will be in the following folder: C:\Windows\System32

If replacing an existing DLL does not resolve the issue, then there may be a problem with how Windows is set up on your computer, or you may be experiencing hardware issues with your hard drive or motherboard.

2. Use a DLL-fixer tool 

A DLL fixer is an application that allows you to repair missing or corrupted DLL files on your computer. It’s extremely easy to use and can scan your computer for missing DLL files in just a few minutes.

Many tools on the market can help you find missing DLL files and fix them easily. But how do you choose one? By what it can do.

These tools are in handy DLL-fixers that can help you to fix the emp.dll that is not found or missing error. These scan your computer for all the necessary system files and replace any that are missing or damaged. They also detect problems with Windows registry keys and correct them automatically.

3. Repair corrupt System Files 

  1. Hit the Windows key, type cmd in the search bar, and click Run as administrator.cmd-run-admin-w11 unexpected kernel mode trap windows 11
  2. Type the following commands and press Enter after each one: DISM.exe /Online /Cleanup-Image /Restorehealth sfc /scannow
  3. Restart your PC.

4. Run a virus scan

  1. Press the Windows key, search Windows Security, and click Open.
  2. Select Virus & threat protection.
  3. Next, press Quick scan under Current threats.
  4. If you don’t find any threats, proceed to perform a full scan by clicking on Scan options just below Quick scan.Scan options
  5. Click on Full scan then Scan now to perform a deep scan of your PC.Full Scan Scan Now
  6. Wait for the process to finish and restart your system.

5. Perform a System Restore

  1. Press the Windows + R keys, type rstui, and hit Enter.
  2. Select the restore point you wish to revert to and click on Next.
  3. Now click on Finish.

This system restore will only work if you had created a restore point beforehand. Otherwise, you won’t have a point of return to go back to.

Is emp.dll a virus?

Emp.dll is a legitimate file that belongs to the Microsoft Windows operating system. However, it has the same name as a file that can infect your computer with viruses and spyware. In such cases, you’ll have to follow the necessary steps to remove malware from your system.

When you get the emp.dll file is not found message, some of the symptoms you’re likely to encounter include:

  • The application crashes when you try to open it
  • Launching the application takes a long time 
  • Error messages occur when running the application
  • The application no longer responds normally
  • You receive error messages when using the application, such as the code execution cannot proceed because emp.dll was not found

The file may be missing because of one or more of the following reasons:

  • Faulty app – If you are getting this error while installing any application, it might be due to an incomplete installation of that application, or there may be some other issue with your computer’s registry.
  • Virus infection – There is a good chance that your computer has been infected with malware or malicious software.
  • Accidental deletion – You may have accidentally deleted this DLL file from your computer by mistake while doing some cleaning up using a registry cleaner.
  • The file is corrupted or damaged – If the emp.dll file is not found, it may be corrupted or damaged. This can happen if you have recently installed some software that has overwritten the file with another version of itself.
  • Corrupt registry – If the registry becomes corrupt, it can be difficult to start programs or even access certain folders.

You may also come across the QT5WIDGETS.DLL missing error, so don’t hesitate to check out our helpful guide.

Let us know if you have resolved the emp.dll not found issue in the comment section below.

How to Use ChatGPT in WhatsApp With a Number

ChatGPT is a recently launched powerful language processing Artificial Intelligence (AI) trained to interact conversationally. It is a chatbot that can write essays and reply to conversations based on human knowledge.

Many wonder, can we use ChatGPT in WhatsApp? And the answer is Yes. So, let’s find out how to use ChatGPT in WhatsApp, with the detailed process in easy steps and language.

Can ChatGPT be integrated into other messenger apps?

The chatbot allows users to incorporate the model of ChatGPT into other messenger apps such as WhatsApp, Facebook, etc.

However, integrating ChatGPT into other messenger apps can be tricky. Users can integrate the Generative Pre-trained Transformer (GPT) language model into messenger apps by following the appropriate steps.

If you have trouble with the app, check out our article on what to do if ChatGPT is not working.

How can I use ChatGPT on WhatsApp?

Note icon NOTE
There are chances of WhatsApp blocking ChatGPT if it detects that the integration is not genuine.

1. Create a WhatsApp Bot and connect it to ChatGPT

  1. Register the WhatsApp Business API.
  2. Create a flow or conversation for the chat.
  3. Use a chat builder to create a language model.
  4. Test your chatbot to see if it works as intended, then put the API chatbot on your phone.
  5. Create an OpenAI account.
  6. Go to the API key page, create a new secret key, and click OK to save the changes.
  7. Then, use the OpenAI API to connect to ChatGPT WhatsApp Bot to integrate ChatGPT with WhatsApp.

If everything goes smoothly with the steps above, your ChatGPT can send responses to WhatsApp users by using WhatsApp API.

2. Set your WhatsApp number using a Python Script and launch ChatGPT at the same time

  1. Head to the Whatsapp-gpt-main code GitHub page, click on Code, and then select Download ZIP.download zip
  2. Now, head to the folder where the file is stored, right-click on it, and then choose Extract All.extract all
  3. Select the storage path for the extracted files, and click Extract.extract
  4. The extracted files should automatically open. Now, right-click on the empty portion and select Open in Terminal.open in terminal
  5. Type the following and press Enter: ls
  6. Then type in: python server.py
  7. If you get an error, open Microsoft Store, download Python, and then retry the previous commands. You might have to execute them more than once for the commands to work.python
  8. After then, your phone number will be automatically configured to the OpenAI chat page.
  9. Check the Verify I am a human box to confirm that you’re not a robot.
  10. Go to your WhatsApp account, and you will find OpenAI ChatGPT.
  11. Try to use the chatbot to see how it responds.

The above steps will allow you to integrate ChatGPT with WhatsApp by using a python script and running ChatGPT simultaneously.

3. Use the SendGPT Chrome extension to send ChatGPT conversations with WhatsApp

  1. Launch Chrome browser on your PC.
  2. Go to the Chrome web store and search for Send GPT with the WhatsApp extension.
  3. Click Add to Chrome and select Add Extension from the popup box.
  4. Click the extension on your browser to launch it and select Open WhatsApp to access your WhatsApp chats.

So, if you were wondering what the ChatGPT extension for WhatsApp is, note that it comes as a Chrome browser extension like SendGPT that allows you to send conversations easily.

Before you leave, find out all about ChatGPT Professional and identify whether you need it!

In conclusion, this guide has explained the various ways to use ChatGPT in WhatsApp. Should you have further questions or suggestions, kindly drop them in the comments section.

Laptop Fan Constantly Running? Here’s How to Stop It

If you’re not actively using your laptop, then there’s no reason for your cooling fan to be running at full speed – especially if you’re not doing anything that requires a lot of CPU or GPU power.

There’s a way to control your PC’s fan speed, but the issue comes when it’s constantly running. Is this normal? Find out more about what causes this issue and how to stop it.

Why is my laptop fan running so hard when nothing is running?

If you’re using your laptop and notice that the cooling fan is running at full speed, there could be a problem with a part of your system. It could be your hard drive or RAM causing significant heat build-up inside the case.

The most common causes of this are:

  • Power-intensive program – It could be that a software program is running that is using the CPU in a way that causes it to heat up, making the fan turn on.
  • Dust buildup – The system may have detected a problem with the cooling system and has increased the speed of the fan to compensate. This can happen if there is dust in the vents.
  • Open unused applications – Your computer runs more slowly when more programs are open at once. This makes sense because those programs are all competing for processor time. 
  • Viruses – A virus will not only slow down your computer but can also cause it to overheat.
  • Badly seated components – If the components in your system are not properly seated in their sockets, they can cause a lot of vibration and noise. The fan will spin up to try to compensate for this as well as dissipate any heat that builds up.
  • Thermal paste running out – The thermal paste is essential to keeping your PC running properly. If it isn’t applied correctly or dries out over time, it can cause overheating issues.

How do I stop my laptop fan from running constantly?

Try out a few basic workarounds first before any complex solutions:

  • Clean out your laptop. Dust and dirt can clog up the cooling vents, making them less effective.
  • Make sure you’re not running any apps or programs requiring a lot of processing power. 
  • Turn off unnecessary services and uninstall unnecessary programs.
  • Update all of your drivers (especially graphics drivers), so they are current and compatible with your operating system. Older drivers can cause issues with performance and even cause the fan to run more often than necessary.
  • Defragment your hard drive. Defragmenting can help improve performance by making sure all files are stored together on the same part of the disk so they can be accessed faster by your computer’s processor.

1. Run a virus scan 

  1. Press the Start menu icon, search Windows Security, and click Open.
  2. Select Virus & threat protection.
  3. Next, press Quick scan under Current threats.
  4. If you don’t find any threats, proceed to perform a full scan by clicking on Scan options just below Quick scan.Scan options
  5. Click on Full scan, then Scan now to perform a deep scan of your PC.Full Scan Scan Now
  6. Wait for the process to finish and restart your system.

2. Adjust power settings

  1. Hit the Windows key, type Edit power plan in the search bar, and click Open.
  2. Click on Change advanced power settings.windows-11-not-recognizing-usb
  3. In the Power Options dialog box that opens, navigate to Processor power management and click to expand.
  4. Under System cooling policy, click on the drop-down menu and change it to Passive.
  5. Click on Apply and OK to save the changes.

3. Check for Windows updates

  1. Hit the Windows key and click on Settings.settings windows 11
  2. Select Windows Update and click on Check for updates.check-updates-w11 windows 11 blue screen
  3. Download and install if available.

Is it normal for a laptop fan to run constantly?

It is normal for laptop fans to run when you use them. They are designed to run when needed, which is true of most desktop computers. If you’re playing a game, watching a movie on your laptop, or doing something else that requires a lot of processing power, it will generate heat. 

The CPU will be working harder than usual, and this will cause the fan to work harder too. This is normal; it just means your laptop needs more cooling than usual to continue running at its normal speed without overheating.

However, this is not normal if your laptop fan is running fast for no reason, and you can hear it from across the room. In most cases, if your computer is overheating, it will shut down automatically before any damage is done.

Sometimes, your PC won’t turn on after overheating. If this happens, you will need to check for other issues with your computer, such as viruses or malware, that might be slowing things down or preventing proper cooling.

You may also run into another strange issue where your fans turn on, but your PC doesn’t. Check out our detailed article on how to address this problem.

Let us know if, after trying our recommended fixes, there is an improvement in your fan’s behavior. Leave a comment down below.

ASUS Realtek HD Audio Manager: 3 Ways to Get it on Your PC

Many users are wondering how to get ASUS Realtek HD Audio Manager on their Windows 11 PC, and in this guide we’ll explain everything you need to know.

microphones, and allows you to configure them at the time of connection.

How do I get to Realtek HD Audio Manager?

Tip icon Tip
The ASUS Realtek HD Audio Manager is not available for download from the official website at the moment, though there are some third-party sources. If you go with the latter, proceed at your own risk. If and when the ASUS HD Audio Manager is available, we will update the article with the official download link.

1. Download it from Realtek’s website

  1. Right-click on the Start icon, then click on Device Manager to open it.device manager win+x menu
  2. Now expand the Sound, video, and game controllers section and right-click on the Realtek High Definition Audio, and then click on Uninstall device. Confirm the uninstall, check the Delete the driver software for this device check box, then continue.uninstall device
  3. Restart your PC after the driver has been uninstalled.
  4. After uninstalling the audio driver, you must download the Realtek HD Audio Manager in Windows 11 from ASUS Download Center. Make sure to choose the correct Windows version.realtek download page
  5. Double-click on the setup file, and install it like you install other programs on your PC. Then, follow the on-screen instructions to install the Realtek HD Audio Manager.
  6. And that’s it! Once you have completed the installation process, you can access it by typing Realtek HD Audio Manager in the search bar you can open by pressing Windows + S.realtek hd audio manager windows search
Tip icon Editor’s tip
Although Windows usually is responsible for driver updates, you can manually check for updates if you experience a problem.
For automatic scans of outdated drivers, we strongly recommend a dedicated tool such as Outbyte Driver Updater.

2. Download it directly

  1. Download ASUS Realtek HD Audio Manager.
  2. Run the setup file.
  3. Follow the instructions to install it.

3. Download it from the Microsoft Store

  1. Open the Realtek Audio Control page.
  2. Click on Download.
    realtek audio control download
  3. Wait for the installation to finish.

Should Realtek HD Audio Manager be enabled on startup?

No, unless you want to use audio enhancement features all the time, you don’t need to have Realtek HD Audio Manager in startup.

Is Realtek HD Audio Manager necessary?

No, the software itself isn’t necessary, unless you want to use its enhancement features. To learn more, visit our guide on whether Realtek HD Audio Manager is necessary.

What happens if I uninstall Realtek HD Audio Manager?

If you’ve installed it separately from your audio drivers, then nothing won’t happen. However, if it was installed along with your audio drivers, there’s a chance that removing it will affect your drivers.

Of course, you may encounter these problems occasionally, but usually, updating the Realtek Audio driver in Windows 11 64-bit does the trick.

Also, find out how to get the best Realtek audio driver in Windows 11 for AMD. We also have a guide on how to download and install the Intel High Definition Audio driver if that’s what your require on your PC.

A problem a few users have encountered is that the Realtek audio driver keeps reinstalling, but we covered it in a different guide.

Lastly, let us know if you found this guide helpful. Tell us if it was the right guide for you in the comments section below.

Windows 10 HDR Won’t Turn On: 3 Ways to Fix

On Windows 10, you can play HDR content when supported by your external or laptop display. However, several users have reported the Windows 10 HDR won’t turn on in the Microsoft forum.

If you are trying to figure out why HDR is not turning on, this issue can occur if you recently upgraded to the latest version of Windows 10. When trying to enable HDR stream settings, the HDR option fails to turn on.

In this article, we explore a few quick steps to help you resolve the Windows 10 HDR won’t turn on problem.

What can I do if Windows 10 HDR won’t turn on?

Here’s what you should first do:

  • If you connect multiple HDR-enabled displays to your PC, ensure the multi-monitor setup is not causing the issue. If you are using a monitor plus TV setup, turn on HDR Stream with only your TV connected to the PC.
  • In other instances, an incompatible HDMI cable can also cause HDR issues in Windows 10. HDR requires HDMI 2.0b cable to transmit the signal. If you are using an HDMI 1.4v cable, replace it with an HDMI 2.0b cable.

1. Enable the HDR option from Registry Editor

  1. Press the Windows + R to open Run, type regedit in the text field, and hit Enter.registry
  2. Click Yes when the UAC prompt appears.
  3. Paste the following path in the address bar and hit Enter:
    Computer\HKEY_CURRENT_USER\SOFTWARE\Microsoft\Windows\CurrentVersion\VideoSettingspath
  4. Double-click the EnableHDRForPlayback entry. If you can’t find it, right-click on the blank portion, hover the cursor over New, select DWORD (32-bit Value), name it EnableHDRForPlayback, and then open it.dword to fix Windows 10 HDR won't turn on
  5. Enter 1 in the Value data field, and click OK to save the changes.change to fix Windows 10 HDR won't turn on
  6. Once done, restart the computer for the changes to come into effect.

If HDR won’t stay on Windows 10, the registry fix usually works best for users. You should now be able to enable HDR from Settings.

2. Restore the device to the previous version

  1. Press the Windows + I to open Settings, and select Update & Security.update & security
  2. Open the Recovery tab from the left pane.
  3. Scroll down to Go back to the previous version of the Windows 10 section.
  4. Click on Get started.
  5. Follow the on-screen instructions to restore your PC to the earlier version of Windows 10.
  6. Once restored, check if you can enable the Stream HDR option in settings.

If the issue occurred after upgrading to the latest version of Windows 10, you could restore the PC to the previous version of Windows OS to fix the issue.

Note that the Go back to the previous version of the Windows 10 option will not be available after 10 days of updating the system.

Going back to the previous version will also restore all the driver updates. So, you may have to install the update again to get the latest supported drivers for the PC hardware.

With all said, if the HDR Stream option is missing from your display, it is most likely due to your monitor or TV not supporting HDR technology. The Windows 10 HDR won’t turn on problem usually occurs due to a glitchy update or incompatible HDMI connection.

Follow the steps to troubleshoot and fix the HDR disabled issue on your Windows 10 computer.

Also, find out what to do if Windows 10 HDR is washed out. Do let us know which method helped you resolve the issue in the comments.

7 Best Browsers for El Capitan That Work in 2026

Today’s article will focus on the best browser for El Capitan. A true game changer back in the day, far fewer Apple customers now use the operating system.

If you’re part of this select group, we’ll show you the best browser that are compatible with El Capitan (Mac 10.11.6) and that can work hitch-free even on older computers.

What is the best browser for Mac El Capitan?

Tip icon Tip
The latest version of some of these browsers won’t work on Mac OS X El Capitan, and you will need to download an earlier one. Also, some browsers, even though they run seamlessly on the OS, don’t receive security updates anymore, which puts your PC at high risk.

1. Opera One – Most advanced AI browser

opera browser interface on macos

Edgy, speed-focused, privacy-conscious, and highly customizable Opera One is both lightweight and modern. For El Capitan, this browser brings a new, better side to surfing the Internet.

Pages load very fast thanks to its built-in adblocker. It’s also got a free, built-in VPN and tons of customization features that’ll allow you to create the best workspace for your needs.

Other useful features:

  • AI prompts
  • Tab island improvements
  • Integrated AI in the sidebar
  • Different Workspaces

Opera One

Get your hands on the most clever browser for the Cap and let nothing stand in your way!

2. Safari – Default browser for Macs

safari browser interface

For most people, Safari is the best choice for El Capitan (Mac 10.11.6). It’s available out of the box and optimized for the Apple ecosystem. It’s got excellent performance and integration.

However, for El Capitan, Safari isn’t supported on all versions.

Safari is capped at version 11 for El Capitan. Apple interrupted the official support for the Cap in 2018, and consequently, the latest version of Safari that you could run on this OS is 11.1.2.

Other useful features:

  • Fastest JavaScript engine
  • Battery saver
  • Sync across Mac, iPad, iPhone, and Apple Watch

⇒ Get Safari

3. AVG Secure Browser – Secure Mac OS compatibility

AVG Secure Browser Mac OS

AVG comes with an effective browser compatible with Mac El Capitan OS, offering high-end privacy and flawless navigation. It has anti-tracking tools, blocks ads and integrates AVG virus prevention features.

Essential features of this solution include a password manager, which stores web passwords, webcam protection, and a privacy cleaner service to erase browsing history or cookies.

Other key features include:

  • Simple UI
  • Blocks tracking scripts
  • Fast and easy to use

AVG Secure Browser

Navigate the web using the AVG browser with cross-platform usage for Mac OS.

4. Vivaldi – Customization stands out

vivaldi browser

Another great option is Vivaldi for El Capitan. It is flexible enough to adapt to all major infrastructures from Windows to Linux, Android, and of course, Mac.

This excellent cross-platform browser comes packed with useful features to keep you safe on the web without restricting your choices.

Other useful features:

  • Web Panels
  • Quick Commands
  • Fast Forward and Rewind

⇒ Get Vivaldi

google chrome  user interface

We know that many of you would like to know for sure if this worldwide cherished browser makes a good match for the Cap and for Mac machines, in general.

So, does Chrome still support El Capitan? We’re pleased to announce it does indeed. It’s still considered a top choice, fully supporting the operating system. The only requirement is to run a 10.11 version of the OS.

Other useful features:

  • Wide range of extensions
  • Automatic translation and spell check of web pages
  • High-speed browsing

⇒ Get Google Chrome

6. Firefox – Privacy-focused browser

firefox browser interface

Last, but certainly not least, Firefox for El Capitan enters the scene, and we dare say, it’s still one of the greatest picks for macOS.

Just in case you were wondering, version 78 of Mozilla Firefox is the last one to support 10.11 El Capitan, so make sure you keep this in mind. Firefox is a strong contestant for the tile of the best browser for El Capitan, so you should try it out.

Other useful features:

  • Balanced memory usage
  • Enhanced Tracking Protection
  • A plethora of add-ons and themes

⇒ Get Firefox

7. Chromium legacy – modern option for older Macs

Chromium Legacy brings modern web compatibility to macOS El Capitan and similar older systems.

It runs smoothly on older hardware, offering a fast, lightweight browsing experience.

We’ve found it handles most tasks well, like loading modern web pages and running Chrome extensions. However, it struggles with DRM content like Netflix.

For everyday use, it’s a straightforward and reliable option without unnecessary frills.

Key Features:

  • Supports macOS 10.9 to 10.11
  • Compatible with Chrome extensions
  • Designed for low-resource systems
  • Actively maintained and open-source
  • Simple, no-clutter interface

⇒ Get Chromium Legacy

What browser should I use on an old Mac?

Speaking of versions, the latest one is 10.11.6, and browsers such as Opera One, Vivaldi, Chrome, Firefox, Brave, and Safari still support it beautifully.

So, which browser is best for an old Mac? Running an old machine has its challenges, and you definitely need a lightweight browser for Mac that can work for you rather than against you.

Among the top criteria to consider are stability and security, along with customization options. These need to be generous and versatile enough to allow you to personalize your experience to your taste and needs. Finally, you might also consider the impact on battery.

These top browsers won’t drain your Mac’s battery, so you might want to look closer. On this note, we wish you happy browsing!

There you go; these are our top picks for the best browsers that still work with El Capitan OS X on Macintosh computers. We hope you got what you came for, so don’t be shy to share your choice with us.

How to Install MSIXBundles on Windows 10 & 11

MSIXBundle is Microsoft’s own package format that allows for safer and more reliable deployment of multiple MSIX packages, each of which can support different architecture.

This means that the MSIXBundle can contain packages for both the x86 installer version and the x64 version of the installer.

It would mean better and easier distribution of MSIX Bundle for applications for each architecture. Also, by using the MSIXBundle you have to simply upload that MSIX Bundle to your distribution location, and the app installer will take care of the rest.

How to Install MSIXBundle on Windows 10 and 11?

1. On Windows 10

1.1. Use the App Installer

  1. Open the Microsoft Store on your PC.
  2. In the search bar, type App Installer.
  3. Install the App Installer.
  4. You will find the App Installer as Microsoft.DesktopAppInstaller, when you run the Appx-Package in PowerShell.
  5. To verify this, open the Start menu by pressing the Win key.
  6. Open Windows PowerShell as an admin.
  7. Type the below command and press Enter. get-appxpackage *installer*
  8. Open the MSIXBundle file, you will see the App Installer prompt.
  9. Click Install.

Using the Microsoft App Installer to install the MSIXBundle file will not only save you the hassle of running commands. It is pretty straightforward and easy to use.

1.2. Use PowerShell

  1. Open the Start menu by pressing the Win key.
  2. Open Windows PowerShell as an admin.
  3. Type the below command and press Enter. Appx-Package -Path "X:PathtoFile.Appx" (For example Add-AppxPackage -Path “D:AppxMicrosoft.VCLibs.140.00_14.0.30704.0_x86__8wekyb3d8bbwe.Appx”)

2. On Windows 11

2.1. Using App Installer

  1. Open the Microsoft Store on your PC.
  2. In the search bar, type App Installer.
  3. Install the App Installer.
  4. You will find the App Installer as Microsoft.DesktopAppInstaller, when you run the Appx-Package in PowerShell.
  5. Type the below command and press Enter. get-appxpackage *installer*
  6. Open the MSIXBundle file, you will see the App Installer prompt.
  7. Click Install.

2.2. Use PowerShell

  1. Open the Start menu by pressing the Win key.
  2. Open Windows PowerShell as an admin.
  3. Type the below command and press Enter. Appx-Package -Path "X:PathtoFile.Appx" (For example Add-AppxPackage -Path “D:AppxMicrosoft.VCLibs.140.00_14.0.30704.0_x86__8wekyb3d8bbwe.Appx”)

That is it from us in this guide. Here, we have properly explained all the steps you can follow on your Windows 10 or 11 PC to install MSIXBundle files.

Using Msixbundle, Appx, or AppxPackage, you can easily install or sideload third-party apps on your Windows 10 or 11 PC. This could come in handy for apps that aren’t available on the Microsoft Store.

Also, you can use Msixbundle, Appx, or AppxPackage to install apps from outside in case the Microsoft Store throws up errors or the server is not responding. In this guide, we will show you how to install Msixbundle on Windows 10 and 11.

Several users have reported that they are getting an error message The app package is not supported for installation error. If you are also experiencing this problem, you should refer to our guide and fix the problem.

Moreover, if you are getting the This Installation Package Could not be Opened error then you can check out the solutions mentioned in our guide to fixing the problem.

In case you have any questions, feel free to comment below.

This Application Made Too Many Requests: 5 Ways to Fix

Some of our readers have reported running into error 0x80860010 when launching downloaded apps from the Microsoft Store. The code is usually accompanied by this application made too many requests error message. Hence, we will explore its causes and proffer possible solutions here.

Also, we have a detailed guide for fixing a similar log in error 0x80860010 on Windows 11.

What causes this application made too many requests error?

There can be numerous factors causing this error with the Microsoft Store and downloaded apps. Some of them are:

  • Corrupt Microsoft Store cache – Microsoft Store cache files help it run faster and better, but they can become infected by malware or viruses if stacked for a long. As a result, it affects apps installed from the Store and may corrupt their installation files.
  • Log in errors with your Microsoft account – The error code 0x80860010 can occur if there’s an issue with your user account. It prevents Microsoft from accessing the necessary permissions to run the app. Also, a corrupt user profile on the computer can cause this issue.
  • Outdated Windows OS – If you’re running an outdated Windows operating system on your PC, it won’t be able to fix bugs affecting the current version. Hence, it can impede the app processing on the computer, resulting in an error.

Irrespective of the causes, let’s explore the troubleshooting steps below to fix it.

How can I fix This application that made too many requests error?

Before proceeding with any advanced steps, go through the following:

If the error appears again, proceed with the solutions below:

1. Run the Windows Store Apps troubleshooter

  1. Press Windows + I keys to open the Settings app.
  2. Click on the System tab and select Troubleshoot.
  3. Then, click on Other troubleshooters.
  4. Click the Run button beside the Windows Store Apps to execute the troubleshooter. Then, follow the prompts afterward.

Running the Troubleshooter will resolve issues with Windows Store apps that may interfere when opening the app.

2. Sign in and out of Microsoft Store

  1. Left-click the Start button, type Microsoft Store, then press Enter to open it.
  2. Click on the user icon in the top-right corner. Select your username, and click on the Sign-out button.
  3. Restart the Microsoft Store app and check if it’s logged out.
  4. Click on the user icon in the top-right corner of the screen and click on Sign in. Then, input the logging service credentials, then tap Next.
  5. Type your password, select the Keep me signed in option, and click Sign in.
  6. Exit Microsoft Store and restart your PC.

Re-signing into Microsoft Store can help fix account issues affecting the downloaded app. Read our guide on fixing the specified user who does not have a valid profile error on Windows 11.

3. Repair the Microsoft store app

  1. Press Windows + R keys to open the Run dialogue box, type ms-settings:appsfeatures, then press Enter.
  2. Locate and select the Microsoft Store, then click on the Advanced options.
  3. Go to the Reset tab and click the Repair button.
  4. Restart your PC after the repair process and check if the error is fixed.

Repairing the Microsoft Store app will fix any configuration issues and corrupt app files affecting its performance.

4. Re-register All Store apps

  1. Left-click the Start button, type PowerShell, and click Run as administrator.
  2. Click Yes on the User Account Control prompt.
  3. Copy and paste the following lines and press Enter:  Get-AppXPackage -AllUsers | Foreach {Add-AppxPackage -DisableDevelopmentMode -Register "$($_.InstallLocation)\AppXManifest.xml"}
  4. Restart your PC and check if the Error 0x80860010 appears while trying to log in to a Microsoft App appears.

Check our article about what to do if Windows PowerShell stops working when executing the steps above.

5. Delete the temporary folder files

  1. Press Windows + R keys to open the Run dialog box, type %temp%, and press Enter.
  2. Press Ctrl + A and right-click, then click on Delete from the drop-down.
  3. Navigate to: This PC\Local Disk (C):\Windows\Temp
  4. Press Ctrl + A, and delete all the temp files.
  5. Restart the PC and check if the error persists.

Deleting temp files will clear the corrupt files causing the Microsoft Store app error. You can check our article about how to delete Temporary files on Windows 11 for more steps.

Further, you may be interested in ways to fix the Microsoft Store 0x80070005 error on Windows 11, as it is also a rampant issue.

Likewise, it’s possible you encounter not enough space error on Microsoft Store. Hence, follow the fixes outlined in our guide to fix it.

For more questions or suggestions concerning this guide, kindly drop them in the comments section.

Microsoft news recap: Bing passes 100 million daily active users, ChatGPT-4 to launch next week, and more

Microsoft news recap is a weekly feature highlighting the top Microsoft news stories of the past week. Sit back, grab some coffee, and enjoy the read!

Microsoft to launch ChatGPT-4 next week

ChatGPT-4 is set to launch next week, igniting further waves in the AI space. With this version, multimodal models will be introduced, which can bring the possibility of video generation from textual prompts, among other possibilities.

Microsoft 365 set to get an accessibility assistant

An Accessibility Assistant has been introduced to Microsoft 365 that aims to highlight areas that may cause accessibility issues and provide suggestions on improvements.

Microsoft’s Bing crosses 100 million daily active users

With plenty of awareness over the past weeks and months with its ‘new Bing’, an AI-powered search engine, Microsoft’s Bing has surpassed 100 million daily active users, with users of its new Bing Chat helping drive usage up.

Local search ads come to Microsoft Bing

Microsoft Bing has gained Local Search Ads, helping advertisers to reach a local audience, making it easier for local businesses to reach customers in the right location.

That’s it for this week. We will be back next week with more Microsoft news.

How to Reset File Explorer: 4 Simple Ways

Microsoft allows many File Explorer customization options to change how files and folders are organized in the application.

Over time, File Explorer appears to be visually different, but you can do a File Explorer reset to restore the default settings. Go through our guide to know how to reset File Explorer on your Windows PC.

How can I reset File Explorer in Windows?

1. Reset the folder View settings

  1. Click the Search icon on your taskbar, type file explorer in the search field, and choose File Explorer from the search results.Reset file explorer
  2. In the File Explorer window, click the Menu icon (three-dots) located on the extreme right of the menu bar and choose Options from the drop-down menu that is revealed.Reset file explorer
  3. This will take you to the Folder Options window. Switch to the View tab to access the related settings and press the Reset Folders button located in the Folder views section to reset File Explorer to its default view.Reset file explorer
  4. A reset confirmation popup will open on the screen. Click Yes to confirm that you want to reset Windows 11 File Explorer to the default view.Reset file explorer
  5. Next, press the Restore Defaults button under the Advanced Settings section to revert these settings to their default value.Reset file explorer
  6. After the File Explorer is reset, press the OK button to save the changes you’ve made and exit the File Explorer Folder Options popup.

If you customized the file explorer folder view previously, you can reset File Explorer to the default view by implementing these simple steps discussed here.

2. Reset the general settings of File Explorer

  1. Use the Windows + E key shortcut to quickly launch File Explorer.
  2. Click the Menu icon (three-dots) on the File Explorer Menu bar and choose Options from the drop-down menu.Reset file explorer
  3. In the General tab of the Folder Options window and press the Restore Defaults button located at the bottom.Reset File Explorer
  4. Press the Clear button if you want to reset the File Explorer search history and press the OK button after performing the required actions.Reset file explorer

This method will roll back any changes made to the privacy and folder accessibility settings of the file explorer to restore the default values.

3. Reset the search settings

  1. Launch the Start menu by pressing the Windows key, type file explorer in the Search bar, and choose the relevant search result.Reset File Explorer
  2. Click the Menu icon (three dots) on the menu bar to view the hidden settings and select Options from the drop-down menu to access the Folder Options.
  3. Move to the Search tab in the Folder Options popup, and press the Restore Defaults button followed by OK to save the changes.Reset file explorer

This will reset any changes made to how File Explorer performs searches for indexed and non-indexed locations. We also recommend that you go through our guide on how to fix the File Explorer search if you run into trouble.

4. Reset File Explorer cache

  1. Use the Windows + S shortcut to launch the Search menu, type powershell in the search bar, and select the Run as Administrator option.Reset file explorer
  2. When the Windows PowerShell opens in front of you, type or copy-paste one of the following commands and press the Enter key to execute it. kill -n explorer Reset file explorer

These PowerShell commands will force File Explorer to wipe off the cache and restart itself if there are performance issues.

That’s all! Follow the step-by-step procedure in this article to reset the File Explorer settings to the default version on a Windows machine.

While you are here, you might be interested in our detailed guide to bring back the File Explorer icon if you use it often.

If you need further help regarding this issue, feel free to reach out in the comments section.

What is CPU Virtualization & How to Enable it in BIOS?

Virtualization is a technique that creates multiple versions of various system resources, including your CPU, server, storage, etc. For example, CPU Virtualization lets you use a single CPU like two different CPUs. This is like running two other computers on a single machine.

In this guide, we will help you understand what CPU virtualization is and how you can enable it in the BIOS settings of your PC. Virtualization can help several organizations efficiently manage their resources and other benefits, which we will discuss in this guide.

What is CPU virtualization?

The basic meaning of virtualization is to create another version of an operating system or any other resource. This could be anything from a network source, server, storage, or CPU.

When you virtualize your CPU, you give the same powers of one CPU to be used in another system virtually.

Every virtual machine runs an independent OS and acts like a separate computer. But that is not true, as it runs on just a portion of the main CPU.

Virtualization software communicates directly with the CPU, and the software handles everything else in the computer.

The software then splits the communication into different sections, as if they were being transmitted via two separate CPUs. One of the main advantages of CPU virtualization is that it allows you to run two different operating systems in one CPU.

There are two primary types of CPU virtualization:

  • Hardware-assisted virtualization: This type of virtualization relies on hardware features built into the CPU to provide isolation and performance benefits. Examples include Intel’s VT-x and AMD’s AMD-V technologies.
  • Software-based virtualization: In this approach, virtualization is achieved through software emulation. This method can have higher overhead and lower performance compared to hardware-assisted virtualization but can be used on systems without dedicated virtualization support in the CPU.

Is CPU virtualization the same as multi-tasking?

Do note that one should not confuse CPU virtualization with multitasking. Also, it would be best not to read CPU virtualization with hyperthreading along the same lines.

Multitasking lets you run two or more two applications at one time. However, the focus of operation would always be on a single application. Every modern CPU enables you to multitask.

On the other hand, hyperthreading is where compatible CPUs run a program specifically meant to carry out two actions at the same time.

Different from both multitasking and hyperthreading is CPU virtualization. In CPU virtualization, a single CPU can act as multiple separate systems.

So, you can run two operating systems in one CPU—for example, MacOS on one and Windows OS on the other. With CPU virtualization, running Windows OS on a Mac or Linus PC is also possible.

CPU Virtualization benefits

  • Saves cost: When you enable CPU virtualization, it allows you to set up multiple systems using a single CPU, thereby reducing the idle wait time.
  • Optimal utilization of resources: One powerful CPU can be used to virtualize into different systems reducing the idle compute time and enhancing the optimal utilization of resources.
  • Better in disaster recovery: When you have a virtualized environment, the recovery process would take a few minutes instead of hours on a single CPU because now you do not need to go through the hassle of setting up a new server, etc.
  • Increase efficiency: IT managers can easily install, update and maintain all the virtualized computers easily, as all they have to do is do the needful in the main CPU.
  • Eco-friendly: Setting up a virtualized environment helps reduce the number of physical servers, ultimately reducing the amount of power consumed. This will help reduce the carbon footprint.

For instance, a software development company can use virtual machines to simulate different operating environments for testing purposes. This can save costs and time, as developers can quickly switch between various operating systems and configurations without the need for multiple physical devices.

How can I enable CPU virtualization in BIOS?

  1. Press the Win + I keys to open the Settings menu.
  2. Click on Recovery.
  3. Under Advanced startup, select Restart now.
  4. Choose the Troubleshoot option.Choose an option - Troubleshoot diagnosing your pc
  5. Select Advanced options.0x80070422 firewall
  6. Select UEFI Firmware Settings.Then, navigate to Troubleshoot followed by Advanced Options: UEFI Firmware Settings | Hyper V not booting from ISO
  7. Choose Restart.
  8. Click on the button that flashes on your screen to enter BIOS. The keys could be different. It is most usually F2, F8, F10, or Del.
  9. Use the arrow keys to select Configuration.
  10. Select Virtualization Technology.
  11. Select Enable.
  12. Press F10 to save the changes and exit.

That is it from us in this guide. The above steps let you turn on CPU virtualization on your PC. If you get an error where VT-X is disabled in the BIOS for all CPU modes, you should check out our guide to fix the problem.

Also, if Hypervisor is not running on your PC, you can refer to the solutions in our guide to resolve the problem.

We also have a guide that explains the 3 efficient ways to disable Hyper-V in Windows 11. So you should check out our guide if you want that.

Feel free to know your thoughts on this guide and whether you successfully enabled CPU virtualization on your PC or not.

How to Turn Off The Keyboard Sound in 6 Easy Steps

If you are annoyed by the constant clicking sound of your keyboard, this guide can help!

We will discuss some easy ways to turn off the keyboard sound so you can enjoy a quieter typing experience on your Windows. Let’s start!

What can I do to turn off the keyboard sound?

1. Use the Settings app

  1. Press Windows + I to open the Settings app.
  2. Click Time & language, and select Typing. Typing turn off keyboard sound
  3. Go to the Touch keyboard section, locate the Play key sounds as I type, and remove the checkmark beside it to disable the sound. Play sound

2. Use the Control Panel

  1. Press the Windows key, type Control Panel, and click Open. Control Panel
  2. Select View as Category, & click Hardware and Sound. Hardware and Sound turn off keyboard sound
  3. Select Sound.Sound
  4. On the Sounds tab, click Default Beep. 
  5. Choose Default Beep, click Sounds dropdown, and choose None. Sounds
  6. Click Apply and OK. 

3. Use the Registry Editor

  1. Press Windows + R to open the Run dialog box.REGEDIT RUN COMMAND 
  2. Type regedit and click OK to open Registry Editor. 
  3. Navigate to this path: Computer\HKey_CURRENT_User\Control Panel\Sound
  4. Locate and double-click the Beep key to modify. No turn off keyboard sound
  5. Change the Value data to no and click OK to confirm the changes. 

4. Use the PowerShell

  1. Press the Windows key, type PowerShell, and click Run as administrator. Powershell 2
  2. Type the following command to disable keyboard sound and press Enter: Set-ItemProperty -Path "HKCU:\Control Panel\Sound" -Name "Beep" -Value 0
  3. Copy and paste the following command to enable keyboard sound and press Enter: Set-ItemProperty -Path "HKCU:\Control Panel\Sound" -Name "Beep" -Value 1
  4. Close PowerShell.

5. Disable the Touch keyboard and handwriting panel

  1. Press Windows + R to open the Run dialog box. Services Run Command
  2. Type services. msc and press Enter to open Services. 
  3. Locate & right-click Touch Keyboard and Handwriting Panel Service and select Properties. Services turn off keyboard sound
  4. Change the Startup type as Disabled from the dropdown and click Apply and OK.

6. Use the Device Manager

  1. Press Windows + R to open the Run console.Device Manager RUN COMMAND
  2. Type devmgmt.msc and click OK to open Device Manager. 
  3. Go to System devices, locate Beep driver, right-click, and select Disable device.Disable driver turn off keyboard sound
  4. Click Yes to confirm your action.

So, these are the easiest ways to turn off the keyboard sound on Windows. Try them and let us know what worked for you in the comment section below.