The Windows was unable to get a list of devices from Windows Update. Please try again later error message pops up for some users when trying to install printers. That error message pops up when users select the Add a local printer option on the Add Printer window.
Consequently, users can’t install their printers. Here are a few resolutions that can fix the Windows was unable to get a list of devices error. These work for both Windows 10 and Windows 11.
How can I fix the Windows was unable to get a list of devices from Windows Update error?
1. Check if There are Pending Updates
The Windows was unable to get a list of devices error might arise when there’s a pending update.
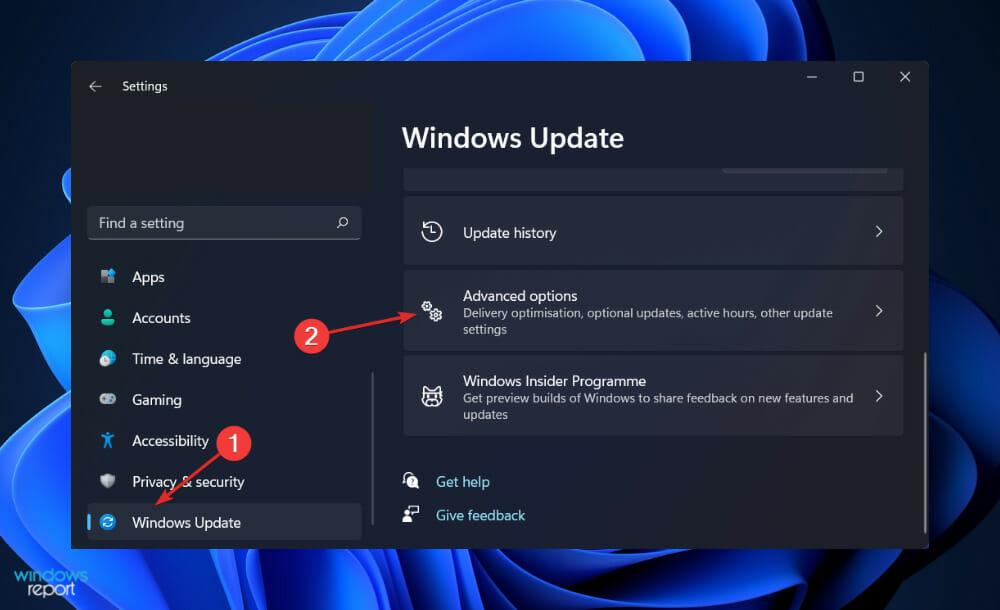
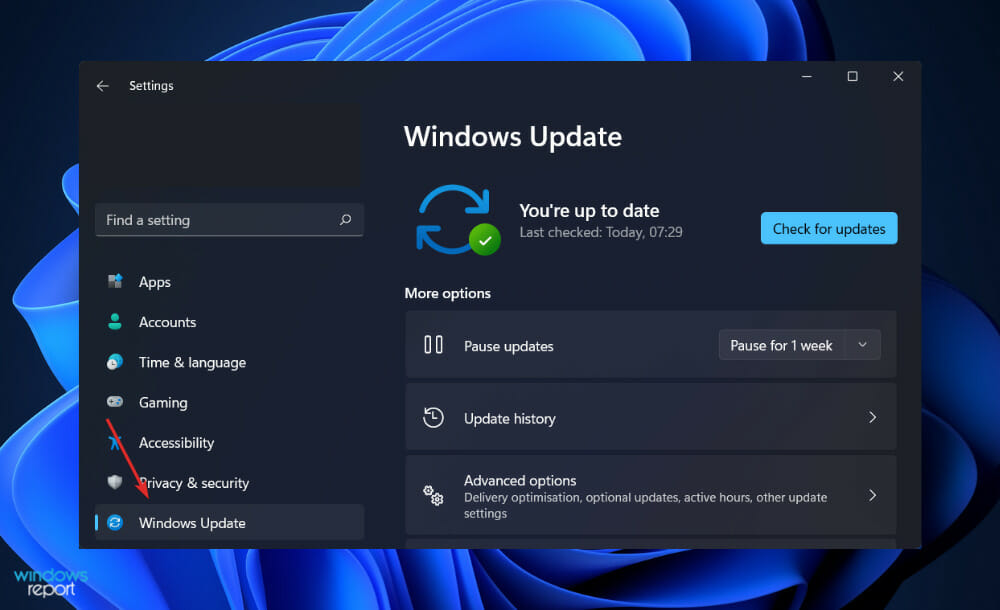
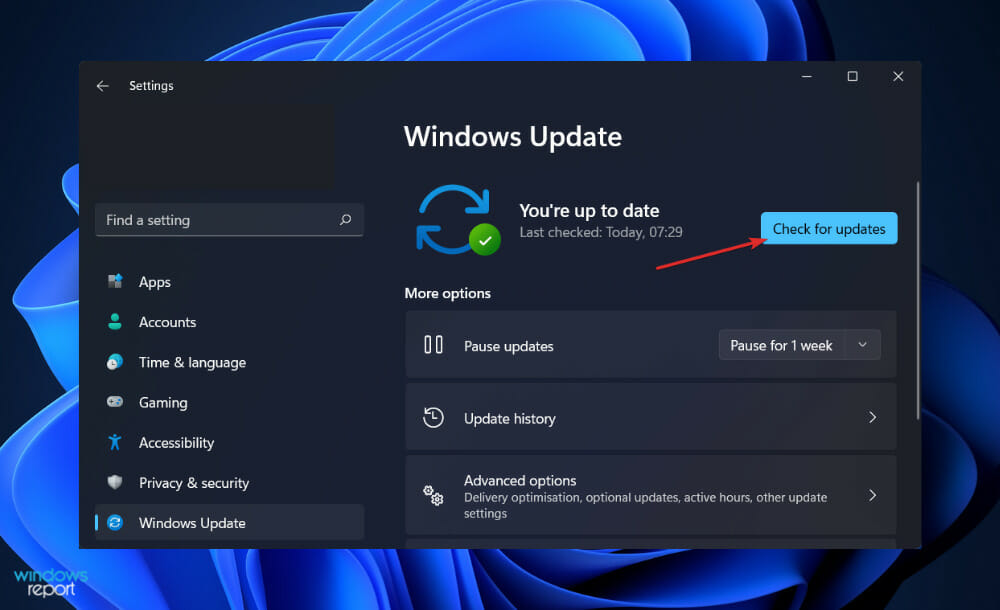
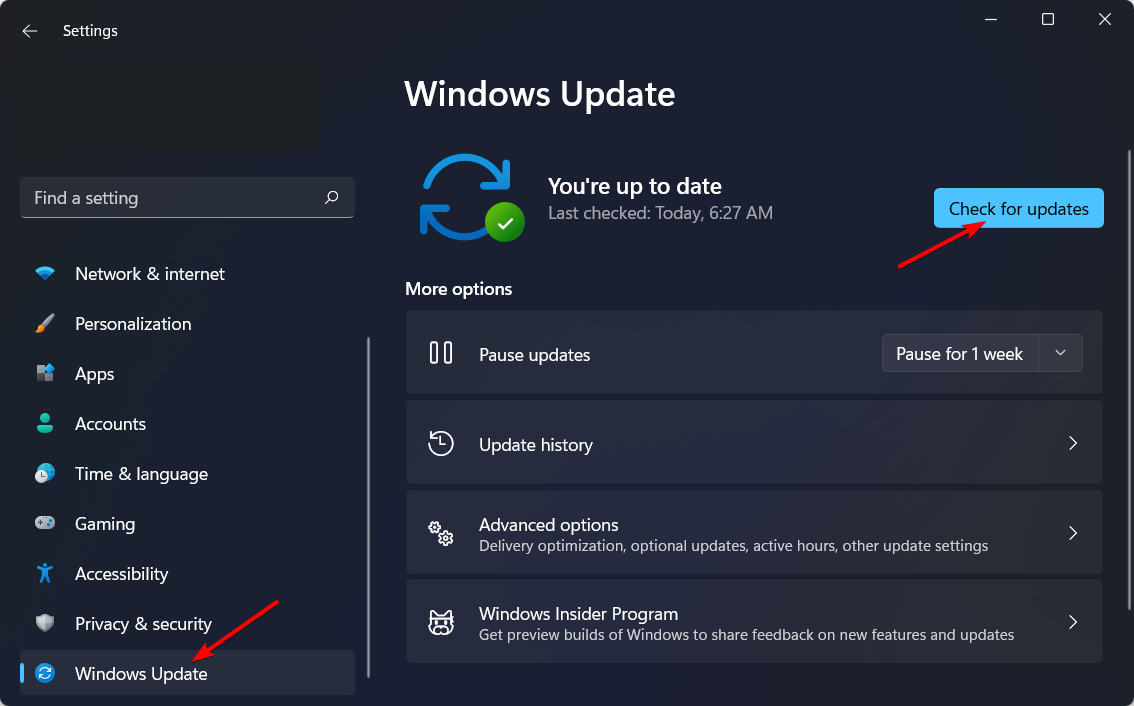
To check if that’s the case, press the Windows key + Q hotkey and enter update in Cortana.
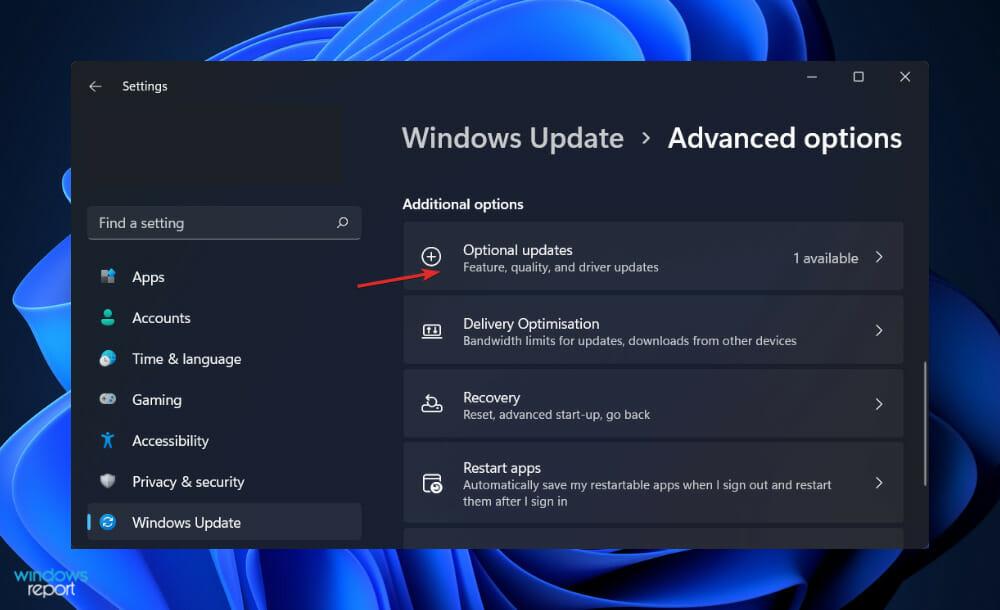
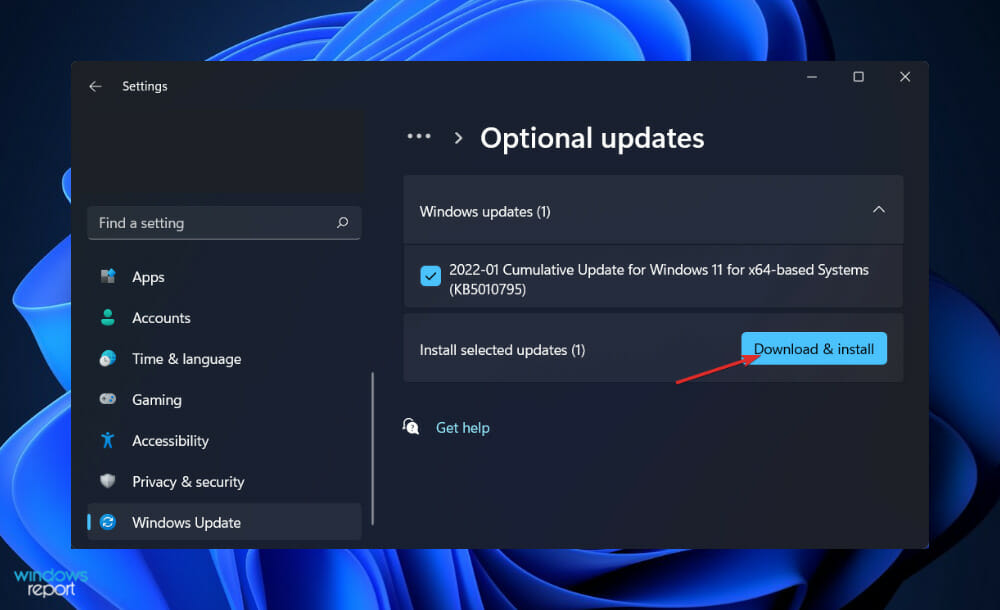
Then select Check for updates and make sure you install all of the listed updates. Restart Windows if there’s a pending update, and then try installing the printer after the update has been installed.
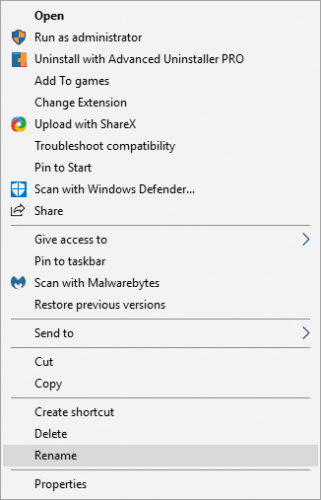
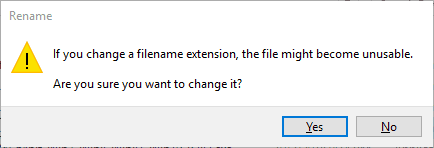
3. Edit the SoftwareDistribution Folder Title and Reset the Catroot2 Folder
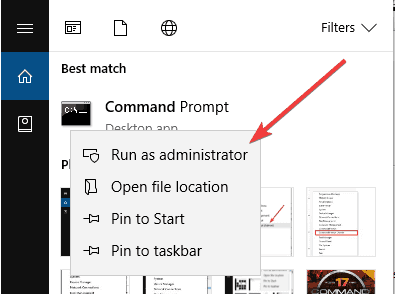
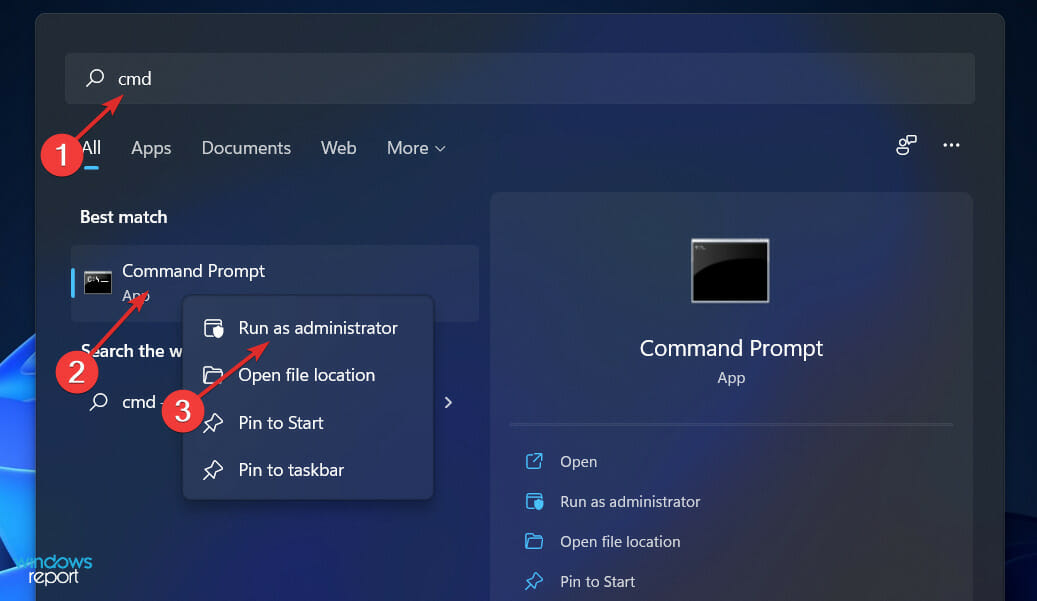
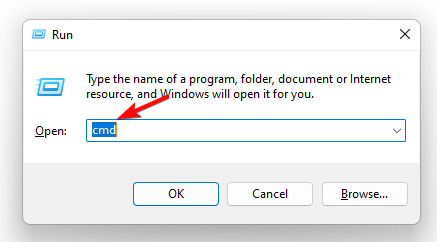
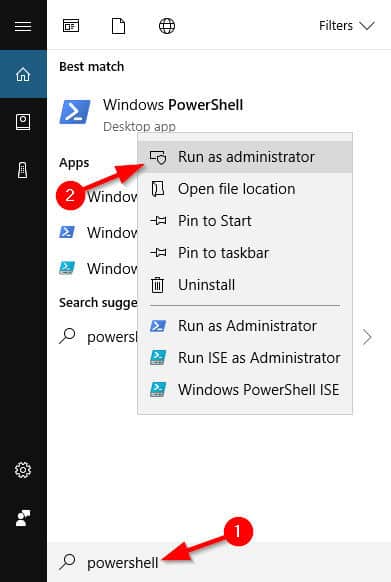
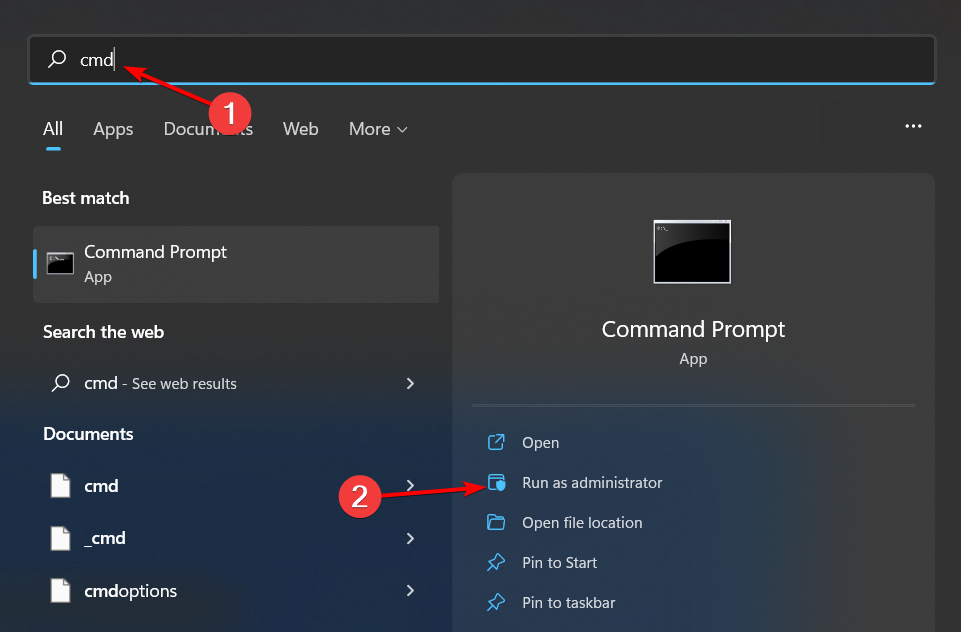
Click the Start button, type cmd, and select Run as administrator from the results.
Input the following command and press Enter to run it: net stop wuauserv
Enter the following command and press Enter: net stop bits
Then execute the following command: rename C:\Windows\SoftwareDistribution SoftwareDistribution.bak
To restart Windows Update, input the following command: net start wuauserv
Type the following command and press Enter: net start bits
Input the following command and hit Enter: net stop cryptsvc
To reset catroot2, enter the next command as shown below: md %systemroot%\system32catroot2.old
Then input this command and press Enter: xcopy %systemroot%system32catroot2 %systemroot%system32catroot2.old /s
Close the Command Prompt window.
Open File Explorer using the Win + E keys and browse to this folder path: C:\Windows\System32
Select the catroot2 folder and press the Delete button.
Then restart Windows.
The second resolution usually fixes the Windows was unable to get a list of devices issue for most users.
However, the first and third resolutions are two alternatives that might also fix the printer error.
Some users have also stated that deleting all the files in the DataStore subfolder within SoftwareDistribution can fix the issue.
We hope you managed to fix the Windows was unable to get a list of devices from Windows Update issue on your PC. And while you are at it, find out how to fix all Windows Update errors in one go.
Let us know all about it in the comments section below.
Task Manager is the app that monitors your system and keeps your other programs running in a well-organized list. Using it in Windows 11 is not so different than what you know from the previous OS.
It is very handy and allows you to view, enable, or disable any processes running on your computer and operating system.
Even more, it displays running services as well as those that were stopped, so it offers a complex perspective related to your digital activity.
There may be times when you’ll need to close certain Task Manager processes to improve your PC’s performance. Unfortunately, random bugs may appear, preventing you from being able to properly close them.
If you encounter this issue, there are some accessible options that will surely help, as you can see in this guide on how to stop all processes in your OS and as detailed in our below tips.
Why is my application not closing from Task Manager?
Some users already claimed that certain processes are not closing in Windows 11 Task Manager. Our readers have asked us why programs like Steam and Firefox do not fully close and the process is just sitting in Task Manager, doing nothing.
The most common manifestations are: crashing, freezing, or hanging your programs, and there is no doubt each of them is pretty annoying.
You should note that certain processes can not close in Windows 11 Task Manager because they come from a malicious application, such as spyware or adware.
Consider that Trojans, malware, and worms can harm your processes, then compromise the security and performance of your PC, so that’s why you should use the best antivirus software for Windows 11.
Now that you are a bit more familiar with this topic, take a closer look at some detailed procedures that should help you troubleshoot this issue efficiently.
What can I do if Task Manager is not closing a program?
1. Use the Alt + F4 command
Hit the Windows key, then type Task Manager, and open it.
In Task Manager, click on the app you want to close.
Press Alt + F4 simultaneously.
Let go of both keys at the same time.
This option is the simplest one to force certain processes to close in Task Manager, and it’s the same one used on the previous OS. However, if it doesn’t work, make sure you keep on reading.
2. Close the process from the Settings menu
Open Settings using the Start menu.
Go to Apps, then select Apps and features.
Look for the app you need to close, click on the More icon (marked as 3 vertical dots), and select Advanced options.
Scroll-down, then click on the Terminate button.
If the keyboard shortcut didn’t work for you, the Settings menu might make a difference. Also, consider that is simple and only takes a few seconds to do it.
3. Use Command Prompt
Click on the Start button. type cmd, right-click on it, then choose to Run as administrator.
Type the following command to see all the processes that are running, then press Enter: tasklist
After the list is showing completely, type the following command (notepad.exe is your type of file, consider this as a general example, you should type your exact model).taskkill /notepad.exe/taskname/F
Type the following command: (also consider notepad.exe as a general example, you should type your particular example). taskkill / IMnotepad.exe
If you don’t know your file type (needed above), just run the following command:
TASKKILL / ?
If you tried the previous options and your processes are still not closing in Windows 11 Task Manager, this method will surely work.
In these terms, Windows will automatically terminate the app and its related processes which are also running in Task Manager. Therefore, the Task Manager not closing program issue should be gone.
If you aren’t sure which processes are safe to close in Task Manager, let us remind you from the very start that this utility lets you check all running applications and processes on your PC.
Yes, that’s where you can easily find and kill processes that are misbehaving in any way. However, End Process isn’t an option to take into consideration unless you’re positive that you’re not applying it for one of those critical computer processes.
In that regard, you should be cautious when ending Windows Logon, Windows Explorer, Windows Startup applications, and system entry processes in Task Manager.
On the contrary, you may kill processes from hardware manufacturers, along with regular software processes, as well as known unused software processes.
NOTE
Besides the fact that terminating system-critical processes can crash your PC, keep in mind that you also risk losing important data. Therefore, we strongly advise you against doing so, unless you save your data before killing a process.
Does Task Manager affect performance?
There are plenty of actions you can perform on your Task Manager to improve your PC performance. In the section below, you’ll find five of the most popular, so make sure you take a closer look at each of them:
Browse your processes – By default, when opening Task Manager, the first thing you’ll see is the Apps section, but don’t hesitate to check out all the bakground processes.
Troubleshoot startup problems – If certain Task Manager processes are misbehaving, then it’s always a good idea to look for previous instances of the program.
View memory usage of your Task Manager processes – It is always effective to check the Task Manager Performance tab.
Stop runaway processes – Some Task Manager processes can consume CPU time, so looking for this kind of processes might make a difference. To improve your OS capabilities, you should kill them completely.
Identify RAM hogging-services – Also, checking which programs are using all your memory is a great idea because these can usually cause low PC performance.
Each time your OS runs into difficulties, Task Manager is supposed to be ready to step in. If none of the above methods has resolved the issue for you, don’t hesitate to take a closer look at these powerful Windows Task Manager alternatives.
Some are free of charge, so it is up to you to decide if any of them can replace the default Task Manager. Let us know your choice of solution for the Task Manager not closing program issue in the comments section below.
Windows 10 like the older version of the OS allows the users to dual boot two Windows or Linux OS for productivity and education reason. Irrespective of the reason, the dual boot options is helpful for many.
However, after the recent update, many users have reported on the Microsoft Support forum that, since an update, they are stuck with the Choose an operating system prompt every time. Thus, one or both systems in the dual boot configuration won’t boot.
Windows tried to update (version 1803) on 2018-05-18 but failed. After that, every boot it showed “Choose an operating system” boot menu where I had two Windows 10 options to choose from. One of them booted normalny and the second one restarted the computer and showed boot menu again.
Fix this with the steps below.
How do I change the default operating system on a dual boot window?
1. Set a Default OS in Windows 10
Press Windows Key + R to open Run.
Type control and press OK to open the Control Panel.
In the Control Panel, go to System Security and select System.
Click on Advanced System Settings (left panel).
In the System Properties window, click the Advanced tab.
Click on the Settings button under “Startup and Recovery” section.
In the Startup and Recovery window, click the Drop-down menu under “Default operating system”.
Choose the desired operating system.
Also, uncheck “Times to display a list of operating systems“ checkbox.
Click OK to save the changes.
Close the System Properties window and reboot the system. During the restart, Windows will load the default OS without asking the user to choose an operating system.
2. Check for Drivers Updates and Failed Featured Updates
To check the update history, go to Start > Settings. Click on Update and Security > Windows Update. Check if any update is pending. If yes, you may want to download and install the update.
If not, click on View update history.
Now check all the updates, especially the Quality Updates. If any of the updates have failed to install, you may want to reinstall the update. Clicking on the update will show you what fixes did that update bring.
If nothing seems working, you may have to install the Windows 10 OS again from scratch. Doing so will erase all the data from your C: drive, so take a backup of your personal files and then reinstall the OS using a bootable drive.
Sometimes, your network might not work properly because the DNS server cannot be reached. This can be a problem, and today we’re going to show you how to fix this issue.
DNS server isn’t responding – This message can occur due to your antivirus. To fix the problem, temporarily disable your antivirus.
DNS server unavailable – If this message occurs, try changing your DNS manually. Switch to OpenDNS or Google DNS.
Server IP address could not be found – Sometimes this problem is caused by a network glitch. You can reset your network using Command Prompt.
DNS server cannot be contacted – Caused by network problems. Try running a network troubleshooter on your PC.
What can I do if the DNS server cannot be reached?
If you’re having any network issues, the first thing that you need to check is your antivirus software.
If you’re on Windows 10, you’ll still be protected by Windows Defender even if you choose to remove your third-party antivirus, so there’s no need to worry about your safety too much.
If deleting the existing antivirus program resolves the issue, this is a good opportunity to explore upgrading to new antivirus softwarethat is most compatible with your PC.
Most antivirus solutions provide live protection against malware, Trojans, and worms, as well as Social Network Protection, Safe Online Banking, and Password Manager systems.
Furthermore, you could get a built-in VPN to safeguard your online privacy at all times by routing your traffic through secure servers.
Most importantly, a suitable antivirus solution will not interfere with your DNS server or settings.
The most common issue an AV causes is the server not responding, so make sure to check our full guide on how to fix the DNS server not responding.
2. Change your DNS
Click the network icon on your Taskbar and select your network connection from the menu.
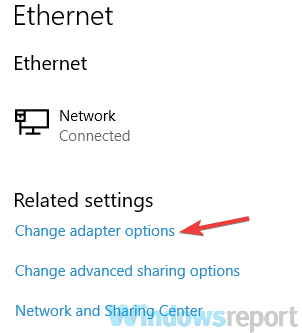
In the right pane, click Change adapter options.
Right-click your network connection and choose Properties from the menu.
Select Internet Protocol Version 4 (TCP/IPv4) and click the Properties button.
Select Use the following DNS server addresses and set the following values: Preferred DSN server: 8.8.8 and Alternate DNS server: 8.4.4
Click the OK button to save changes.
Note: You can also use the Open DNS by using the following servers: Preferred DNS server 67.222.222 and Alternate DNS server 67.220.220
According to users, if the DNS server cannot be reached, perhaps you can fix the problem by using a VPN. You will get a new IP address, and your privacy will be protected while surfing the web.
Even if you don’t have this problem, having a good VPN is a great way to protect your privacy online.
There are many services available out there, but if you’re looking for a good and reliable VPN, be sure to try out Private Internet Access.
First of all, this software will protect your privacy even from your ISP and you will be able to use public Wi-Fi networks without worrying about any threats.
Having a different IP will unlock a lot of new content from on-demand video platforms like Netflix, HBO GO, Amazon Prime Video, and others.
However, the best part is that Private Internet Access provides the highest speeds so prepare for perfect streaming and no buffering.
4. Use Command Prompt
Search for cmd and choose Run as administrator to start Command Prompt.
Run these commands:
ipconfig /flushdns
ipconfig /registerdns
ipconfig /release
ipconfig /renew
NETSH winsock reset catalog
NETSH int ipv4 reset reset.log
NETSH int ipv6 reset reset.log
Exit
5. Use the network troubleshooter
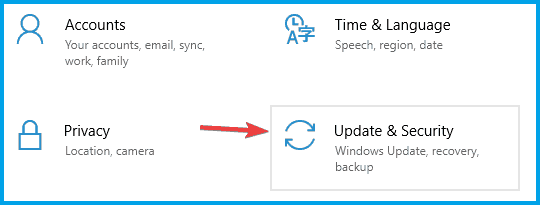
Open the Settings app and navigate to the Update & Security section.
Select Troubleshoot from the left pane. In the right pane, select Internet Connections and now click Run the troubleshooter button.
Follow the instructions to complete the troubleshooter.
Note: If the issue persists, try running the Network Adapter troubleshooter as well and check if that helps. Several users reported that a troubleshooter fixed the problem for them, so be sure to try it out.
6. Set your DNS to Obtain an IP automatically
Repeat steps 1-4 from Solution 2.
Select Obtain DNS server address automatically and click OK to save changes.
Now do the same for Internet Protocol Version 6 (TCP/IPv6).
7. Try using a different device to access the Internet
If the DNS server cannot be reached, the problem might be your PC configuration. To determine if the problem is related only to your PC, it’s advised to try other devices and see if they can access the Internet.
For the best results, it’s advised to use another Windows PC, but you can also use your phone or any other device.
If other devices can connect to the internet, then the problem is most likely related to your PC and its settings, so you can focus on it in order to solve the problem.
8. Try restarting your router
If this problem is still there, perhaps the issue is related to your router. To fix the problem, users are suggesting to restart your router/modem and check if that helps.
This is fairly simple to do and in order to do it, just press the Power button on your modem/router to turn it off.
Now wait for about 30 seconds and press the Power button again to start your modem or router. Wait while the device boots completely and check if the problem is still there.
9. Delete the files from the etc directory
Navigate to the following directory: C:WindowsSystem32driversetc
Delete all files from this directory but before that, we advise you to back them up, just in case.
Problems with DNS will prevent you from accessing the Internet, but if you’re having this problem, be sure to try some of our solutions.
For any suggestions or additions, feel free to drop us a line in the comments section below.
If you’ve ever tried to close a program in Windows only to get the dreaded ‘Not Responding’ message, you know how frustrating it can be.
When a program crashes, or even hangs/freezes, your first move is usually to kill it using the Task Manager, which is perfectly fine.
Sometimes Windows will even give you options to either close the program or End Now, or wait for it to respond. But the worst part is if it glosses over with a grayed out screen and a constantly rotating circle that shows the program isn’t going anywhere any time soon.
Moreover, there are programs that can freeze without alerting you, but, if you’d like to fix the problem when the task manager can’t end a task, read on.
What can I do if Task Manager won’t end a task?
Here you can find some preliminary fixes to try out before applying more complicated solutions:
Hit CTRL+ALT+DEL and select sign out to end the task much faster. However, it is important to note that not all processes can be stopped using Task Manager.
You can also reboot your computer if you’re not seeing any progress with Task Manager or there’s no response from Windows at all.
1. Use the Taskkill command
This involves using the Command Prompt to kill a specific process, though it is cumbersome to keep opening it each time a program freezes or stops responding. To do this:
Right click on your desktop
Select New
Select Shortcut
>Enter a location for the shortcut
Paste the command: taskkill /f /fi “status eq not responding”
Press Finish once you’re done
The Taskkill command kills a process that is not responding or is frozen, by telling the command to forcefully kill the specific task, and run only on processes that meet the filter criteria (which is the text in quotes). This way, only the process with the Not Responding status will be killed.
You can hasten this process using a keyboard shortcut. To do this:
Right click your new shortcut
Select properties
Under Shortcut tab, click Shortcut key box and set a custom shortcut
Windows will add CTRL+ALT automatically to any letter you press (you can change to CTRL+Shift if you want)
A command prompt window will be launched, set Run to Minimized so that it doesn’t flash when you press the shortcut
You can also use the steps below to kill the non-responsive process in Windows 10:
In the search bar, type CMD and right click Command Prompt then select Run as administrator
In the command prompt window, type the commandtasklist to view all tasks that are running
Type the commandtaskkill /notepad.exe/taskname/F (F means forcefully). If you want to know the type of file (in this case notepad.exe), run the commandTASKKILL / ?
Depending on the process you want to kill, type IM before the file type and press enter e.g. taskkill / IMnotepad.exe
You’ll get a message saying “Sent termination signal to the process notepad.exe with PID 4624 (PID is process ID defined by the computer system). If you know the PID of a task, you can run the taskkill command but instead of the file type, insert the PID of the process you want to kill. To kill more than two processes simultaneously, enter the process ID sequentially with the prefix PID
2. Use ALT+F4
This is a keyboard shortcut that performs the same program closing effect as tapping the X on the top right corner of a program window. To do this:
Tap on the program you want to force quit
Press and hold down the ALT key
Press F4 once while holding down ALT then let go of both keys at the same time
3. Use Task Manager to force quit
If the above solutions didn’t help solve Windows 10 won’t end task problem, try using Task Manager to force the unresponsive program to quit. To do this:
Press CTRL+SHIFT+ESC to open Task Manager
Find the program you want to force quit and Task Manager will direct you to its process under Processes tab in the Name column
Right click on it and select Go to details
Don’t press End task
Right click on the highlighted item
Select End process tree while under Details Tab
Note: If you get a warning saying “Do you want to end the process tree of [program file name], it is okay. It means the selected program will be closed and any other processes it started that froze. This should help you get rid of the end task not working in Task Manager issue.
4. Create a new admin profile
If Windows 10 won’t end tasks, it may indicate a corrupted profile. To resolve this, create a new admin profile and use it for a while. If it works, move your files to the new profile and delete the old one.
After creating a new account and login, try running Chkdsk in repair mode to check for any files that may have been damaged and correct them. To do this:
In the search bar, type CMD and right click Command Prompt then select Run as administrator
In the command prompt window, type chkdsk /f /r /x (leave spaces between the letters as shown)
Press Enter
A note that the process can’t run until you restart will display, type Y for yes and press Enter again
Chkdsk will run after you restart and take some time to complete (about two hours or so). Once it finishes, boot normally and login normally and see if the tasks are working well again.
Were you able to resolve the Task Manager won’t end task issue using the above solutions? Let us know in the comments section below.
Looking for a way to rename the Software Distribution and Catroot2 folders? We’ll show you how to do that in more than one way.
The Software Distribution folder holds all temporary Windows Updates files. But sometimes, you might have to change its name to fix specific problems. In most cases, the Catroot2 folder will have the same problem simultaneously.
Why do I need to rename the Software Distribution and Catroot2 folders?
This issue originates from the fact that Windows can’t install the updates correctly. Renaming the SoftwareDistribution to SoftwareDistribution.old will allow the system to regenerate and deal with the updates.
The problem is that some of our readers couldn’t rename the Software Distribution and Catroot2 folders.
You may get messages like The action can’t be completed because the folder or a file in it is open in another program catroot2, or Can’t rename catroot2 folder access denied
But that does not mean you won’t be able to accomplish this task at all. All it takes are some inspired tips, and that’s precisely what you will find below.
Is it OK to delete Catroot2 is a question we get often., The simple answer is yes. So let us get to it.
How do I rename the Software Distribution and Catroot2 folders in Windows 10?
1. Use Command Prompt
1. In the Windows Search box, typecmd, then select Run as administrator from the results.
3. In the cmd window, type the following commands andhit Enter after each one:
4. After the process is finished, go to C: > Windows.
5. The Software Distribution folder should now be named SoftwareDistribution.bak.
Note that in the case of the Catroot2 folder, you replace the Software Distribution rename script with the one below: rename C:\Windows\System32\catroot2 Catroot2.bak
The keyboard doesn’t just help you input alphabets, numbers, and special characters and streamlines our basic use of the PC. But what would you do if Windows 11 is not detecting the keyboard?
Several readers have reported the problem, most after resetting the OS to its factory settings. With the keyboard inaccessible, you are left with pretty much nothing to do.
In this guide, we list out the reasons behind the issue, the most effective fixes if Windows 11 doesn’t detect the keyboard, and the steps to enable the touch keyboard to use for the time being.
Why is Windows 11 not detecting the connected keyboard?
This could be due to a bunch of reasons, depending on whether you have a wired or wireless keyboard. Here are some of the most common causes:
Improper connection – If you have moved your desktop recently or if something or someone messed with the cable, it might be disconnected from the port or damaged.
Fast Startup issues – This feature is great to speed up the booting process but it can interfere with a lot of processes such as keyboard recognition. Disabling Fast Startup might fix this issue.
If you are by any chance able to identify the underlying issue, just head to the relevant fix and execute it.
In case you are unable to, fret not! Follow the steps in the next section in the same sequence as they are listed to quickly and effectively troubleshoot the error.
What can I do if Windows 11 is not detecting the keyboard?
Before getting into any of the more complicated solutions, let’s make the following checks:
Disconnect the keyboard, clean both the USB and the port, and check for any damage to cables (for wired keyboards). Then reconnect it properly to see if it works.
Try connecting the keyboard to another port on the system, just to make sure that the ports are not disabled.
Connect the keyboard to another device, and check if it works. If it does, the problem is with the computer itself and not the keyboard. In which case, head to the other fixes listed next. If the keyboard doesn’t work on another device, it’s a clear sign that it’s malfunctioning and you should replace it. Take a look at our curated list of the best keyboards available in the market.
NOTE
The solutions below can be used only if the keyboard is recognized by BIOS and not Windows. If BIOS doesn’t recognize any keyboards, you should take your PC to a repair center for specialized help.
1. Check if the USB ports are disabled (for wired keyboards)
In many cases, it was the disabled USB ports that lead to Windows 11 not detecting the keyboard problem. Here, you will have to check whether the USB ports are disabled from the BIOS.
In order to enter the BIOS, you will have to press either F2 or F12 as soon as the screen lights up when you turn on the system. To be on the safe side, hit the key multiple times.
Once in the BIOS, look for the USB Configuration Setting which is usually listed under the Advanced tab, and enable the ports. To find out the exact steps, we recommend you head to the official manufacturer’s website, and look up their FAQ or support section.
2. Update the keyboard driver
Drivers play a critical in the functioning of every device since these relay commands between the OS and the hardware. If there are problems with the driver, you are likely to encounter issues. Therefore, updating the keyboard driver is likely to solve the problem.
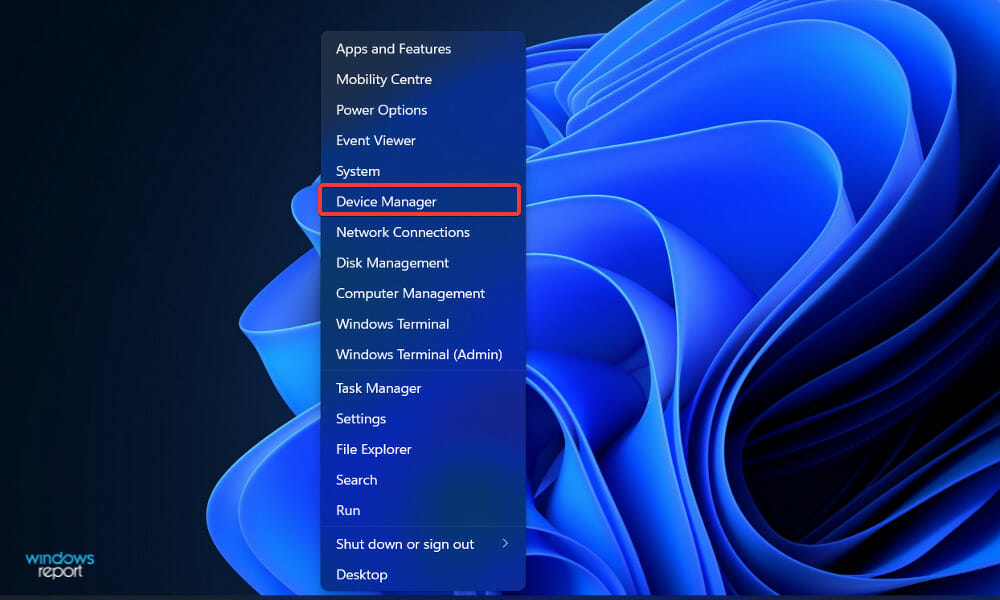
1. Right-click on the Start icon in the Taskbar and select Device Manager.
3. Double-click on the Keyboards entry to view the various devices listed under it.
4. Now, locate the problematic keyboard.
5. Right click on it and select Update driver from the context menu.
6. Next, choose Search automatically for drivers from the two options that appear in the Update Drivers window.
It’s recommended that you always have the latest driver installed for all your devices.
The Device Manager method listed above only scans for newer versions of the system and not the other available sources. So, if you haven’t downloaded one previously, Windows wouldn’t be able to find the latest version this way.
If that sounds like too much trouble, you can also go with reliable third-party software. We recommend using Outbyte Driver Updater, a dedicated tool that scans all available sources for the latest version and keeps the installed drivers up-to-date.
Outbyte Driver Updater
Just a few clicks to update all your drivers and optimize the system.
Press Windows + I to launch the Settings app, and click on Troubleshoot on the right in the System tab.
Next, click on Other troubleshooters.
Locate the Keyboard troubleshooter and click on the Run button next to it.
Choose the appropriate response when prompted, and follow the on-screen instructions to complete the troubleshooting.
Whenever facing an error with anything on Windows, you should look for a dedicated built-in troubleshooter. Microsoft offers a few of these to help users diagnose and fix problems with the system.
4. Disable fast startup
Right-click the Start button and select File Explorer.
Click on the carat icon near the top-left, and select Control Panel from the list of options in the dropdown menu.
Click on System and Security from the options that appear here.
Next, click on Change what the power buttonsdo under the Power Options entry.
Click on Change settings that are currently unavailable to disable fast startup.
Finally, untick the checkbox for Turn on fast startup (Recommended), and click on Save changes at the bottom.
5. Remove the battery (for laptops)
NOTE
Only perform this solution if your laptop has a removable battery.
Oftentimes, it’s the laptop battery that’s known to cause problems with the keyboard, since it’s placed right under it. When the battery overheats, it can affect the functioning of the keyboard and the latter might not be detected at times in Windows 11.
In this case, turn off the system, remove the battery, plug the laptop into a power source and turn it on. If the keyboard now starts working, the problem, in all likelihood, lies with the battery.
It’s best that you replace the malfunctioning battery with an original one that’s meant for your laptop. Never use batteries from a local manufacturer or ones that are not specifically for your device.
6. Reset Windows 11
If the above fixes haven’t resolved the keyboard detection problem in Windows 11, you should reinstall the OS. If you started encountering the error right after resetting it previously, doing it all over again can just as well fix it.
How do I enable the touch (virtual) keyboard in Windows 11?
If Windows 11 is not detecting the keyboard, it would certainly be challenging. Even you would face trouble executing the fixes listed above. In this case, we recommend enabling the touch keyboard.
Touch (virtual) keyboard in Windows 11
Though it’s promoted for touch-enabled devices, the keyboard will work just as fine on any other device. Instead of using the touch feature, you will have to click on the relevant key.
Also, you have the option to customize the key size and background, apart from the size and theme of the virtual keyboard.
If you enjoy high-qualitymedia streaming services, then you most probably know about the Amazon Fire TV Stick. But glitches are never far. Like so many others, you might struggle with Firestick volume low issues.
Now, that is not to say it’s not a nifty tool to use. On the contrary, you can use it to launch and control content with the Alexa Voice Remote, plus stream for free with Tubi, IMDb TV, and others.
Additionally, you can watch favorites from Netflix, YouTube, Prime Video, HBO, STARZ, SHOWTIME, and more.
However, some users aren’t all that pleased with the Fire Stick, citing a multitude of audio issues.
Anyone else have volume issues watching movies? Constantly turning up and down my volume between action scenes and conversations? Only have this issue while utilizing the stick.
Why is my Firestick so quiet?
Audio-related issues vary in nature, but one common consensus is that there is indeed a lot of them.
And speaking about that, here are more amazon fire stick sound issues reported by users worldwide:
Amazon Fire TV sound distortion – Amazon Fire Stick sound distorted
Fire Stick sound cutting out
Amazon Fire Stick crackling sound
Fire Stick no sound
Fire TV volume suddenly too low
Netflix volume low on Firestick
From weak or unstable Internet connections to improper TV settings and faulty hardware, there can be many culprits responsible for the amazon fire stick volume issues.
This article will summarize a few go-to solutions that will fix some of the most common Amazon Fire Stick audio issues.
How do I fix the sound on my Fire Stick?
1. Check your TV settings
Make sure the audio on your TV isn’t muted.
If your Fire TV device is connected to an A/V receiver, make sure the receiver is on.
If you’re using an HDMI cable to connect your Fire TV device to your TV, try unplugging and plugging it back in again.
Additionally, you may need to replace the HDMI cable altogether.
More so, a bad Amazon Fire Stick can also be an issue.
3. Check your Internet connection
The speed of your Internet can also be a problem, as most content requires about 3 Mbps to function normally.
As such, consider upgrading to a better Internet subscription if available.
4. Confirm if the power is low or if there are frequent power outages
Being low on power means that the Fire Stick will be slower than normal, and it can also cause possible reboots when it tries to do intensive processing.
This means you should consider doing a check on your home’s power grid, or at least the outlets powering your TV.
If you are facing this problem, also consider changing the screen resolution of videos to a lower one, so that the Fire Stick can handle it more easily on low power.
5. Perform a quick reboot on your Fire Stick
Simply disconnect the power cord from the back of the TV for around 60 seconds, and then plug it back in.
Select the app that’s not working and press Uninstall.
Finally, reinstall the app from the Fire Stick Home Screen.
Some people have an app issue that can only be fixed by deleting and reinstalling the particular app, so follow the steps above.
So, is your Firestick volume low? If that’s the case, this is how to fix audio on Firestick. In addition to solving Amazon Fire Stick volume issues, the solutions can also help if the Amazon Fire TV stick is not connecting properly.
So make sure you check them out! Got any other solutions? Feel free to let us know in the comments below.
Windows 10 is closely connected with Microsoft’s own Xbox One console, but many users are wondering how to use PS3 controller on Windows 10.
Xbox users have Xbox Console Companion preinstalled, that makes using Xbox controllers easier, but if you want to use PlayStation 3 controller, you can do that by following these steps.
How can I use PS3 controller on Windows 10?
1. Use DS3 driver
Unpair your PS3 controller from the console and turn the console off.
Check Install DualShock 3 driver and Install Bluetooth driver. Make sure that Install DualShock 4 driver is unchecked.
Next, expand the Choose DualShock 3 controllers to install and select your controller.
Lastly, click Install and wait for the process to finish.
If you want to use PS3 controller wirelessly, you need to check Install Bluetooth driver during the configuration process. In addition, be sure to expand Choose Bluetooth dongles to install and select your device.
After doing that, you should be able to use PS3 controller on PC without any issues.
For an error-free gaming experience is always a good idea to use dedicated software that will make sure all your drivers will be up to date. One tool that does exactly this, is Outbyte Driver Updater.
This software will keep your controller connected to the PC and will keep you away from connection/recognizing errors while playing games.
Outbyte Driver Updater is reliable, fast, efficient and your drivers will be updated in no time.
Once you download it, make sure to select Surface Pro, and from there on the software will proceed to update and fix any old, missing, or damaged drivers.
You can also check out the best controllers on the market right here. If you have any more questions, feel free to drop them in the comments section below.
You must have had issues with email access if you have several email accounts with different providers. Using a browser with multiple tabs open is not the best option, as it can slow down your computer and get quickly out of hand.
But that can change with an email client for Windows 7. An email client is a desktop software that enables you to send/receive/draft all your emails in one place. Let us explore some of the best options for you.
Does Windows 7 have email client?
Unlike its predecessors, Vista and XP, Windows 7 does not have a built-in email client. Instead, you will need to download one best email client programs, like Yahoo email for Windows 7.
After the installation, you only need to set the client as your default email, and you are good to go.
These third-party email clients come with a few benefits, including:
They are not owned by a particular email service and allow you to log in to all your accounts.
Many third-party email clients are easier to navigate as you see an overview of the activity of each account in just one main window. You can easily navigate and switch between accounts in just a few clicks.
In addition, you get features such as RSS feeds, calendars, and VOIP apps.
Some of them even double as efficient email backup software. If you are a Windows 7 user, having an email client that supports your OS and doesn’t take up too much space is essential.
This guide will help you find the very best mail app for Windows 7. So, if you are wondering whether to use Windows 7, the answer is straightforward: of course, you can use it! Check out our guide to learn how to keep using it forever.
NOTE
Although the email clients from our list still work on Windows 7, Microsoft discontinued its ASU so the OS is officially obsolete. Also, the majority of the developers stopped or will stop upgrading their products for Windows 7.
What is the best email client for Windows 7?
Mailbird – Email client with social apps integration
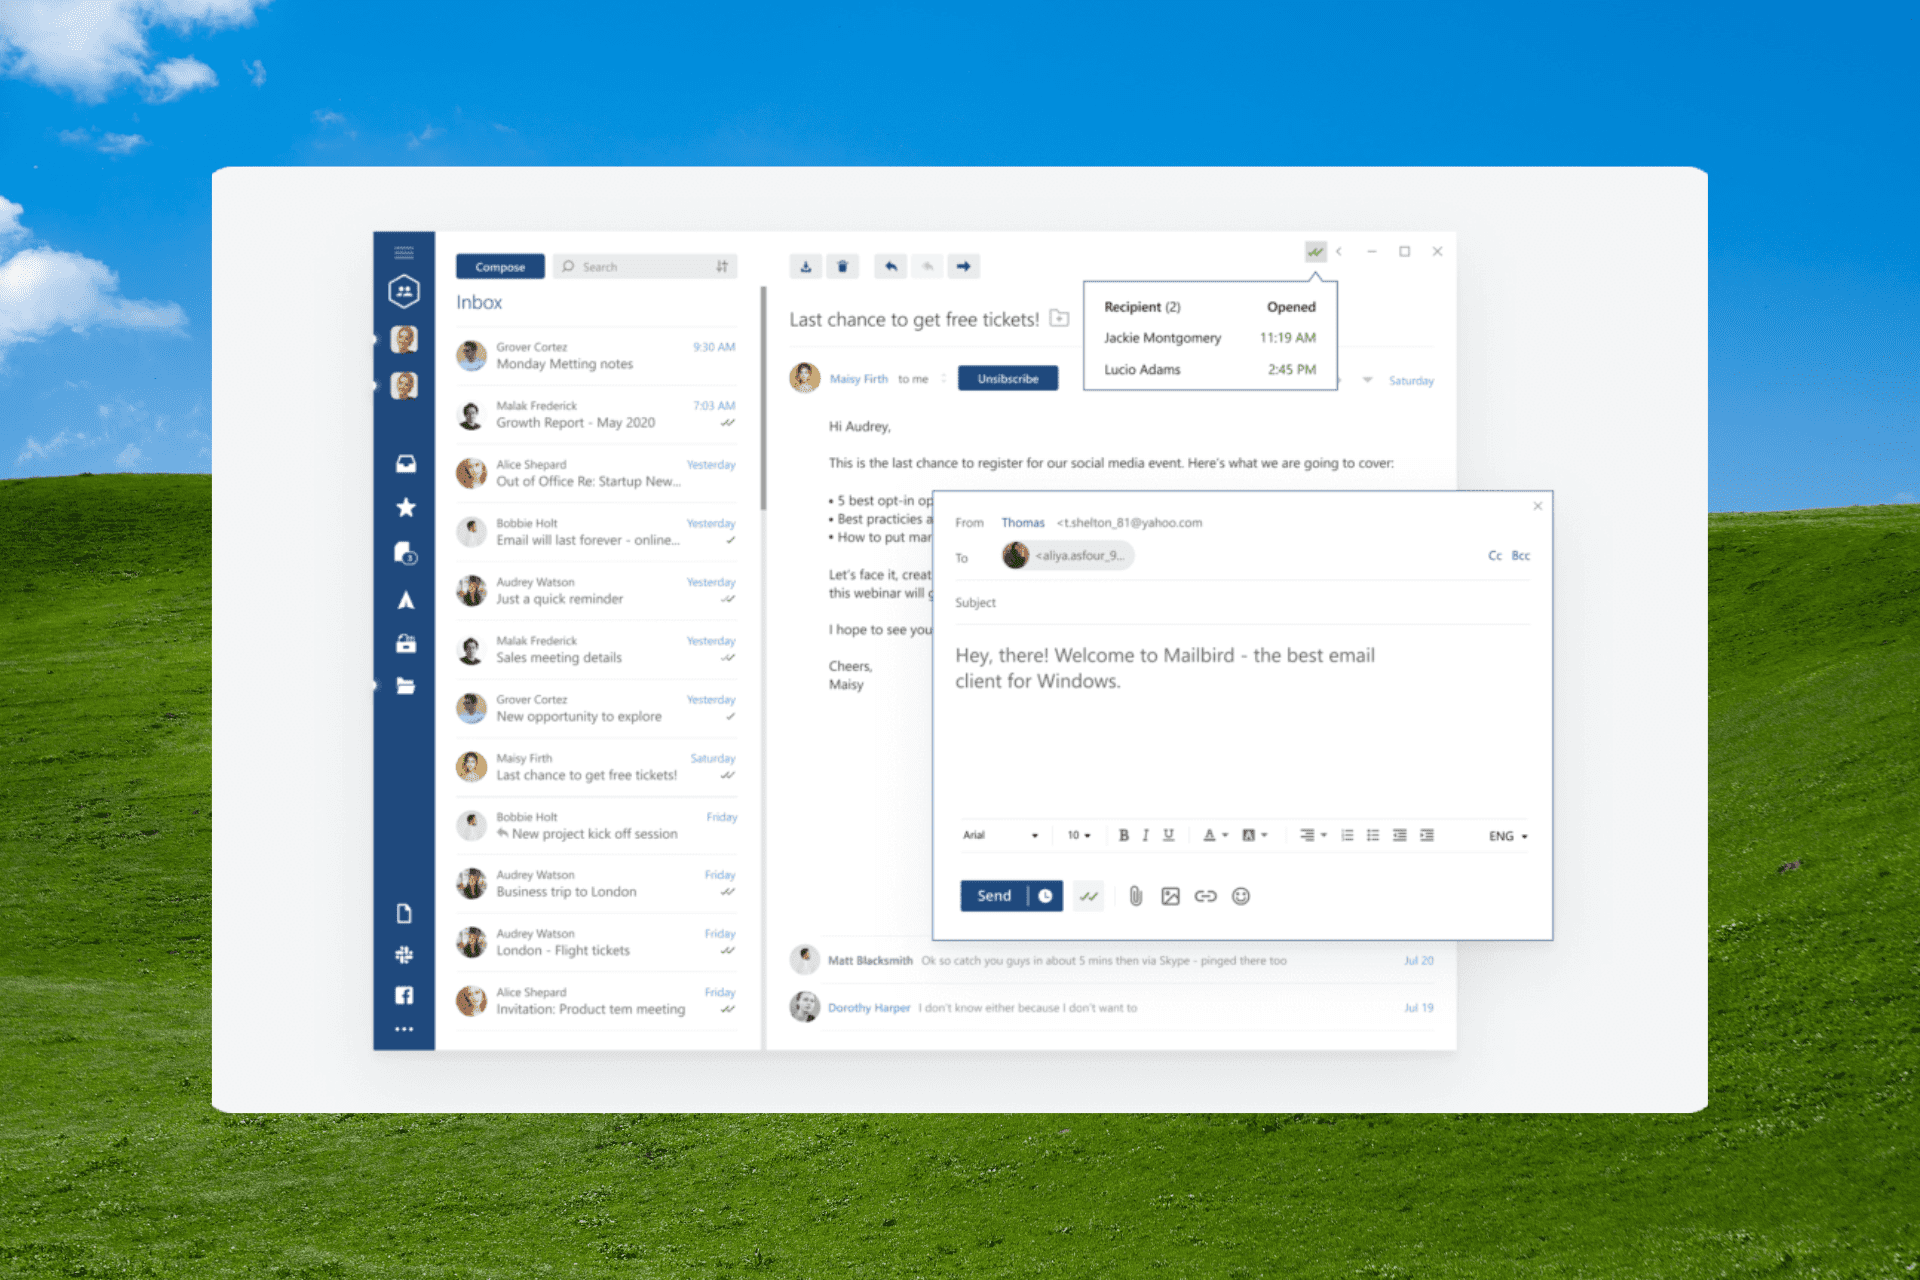
Mailbirddoes not just enable you to access your emails, but it also connects to all your social apps. As we like to say, it is the very best mail app for Windows 7.
You can easily connect with your Facebook account, Google Calendar, WhatsApp, Moo do, Asana teamwork application, and many more.
However, email snoozing, quick previews, and speed reading are only available on the Mailbird commercial version.
Considering that these features can significantly boost your productivity, it is worth investing in the commercial Mailbird version.
Mailbird allows you to create your theme with different color schemes and layouts. You can organize your email list precisely the way you want it.
You can use Mailbird in 17 different languages, and they work on integrating even more.
Mailbird also has a powerful search feature that allows you to find old attachments by entering just a few important keywords.
Mailbird is a stunning email client program compatible with Windows 7 PCs, from Professional to the Home, and comes with free and premium versions.
Let’s quickly look at its key features:
Straightforward setup
User-friendly interface
Integration with major social applications
Only supports one email account
Integrate contact’s profile photos
Mailbird
The highly versatile and uncluttered Mailbird perfectly matches your Windows 7 running device!
eM Clientis another strong contender for the best free email client software for Windows 7. This software has existed for over ten years and is widely known for supporting many email providers such as Gmail, Exchange, and Outlook.
This email app for Windows 7 is available in two versions, Free and Premium. Unlike the premium version, the free version is limited to only two email accounts.
eM Client has advanced quick search options that let you find old email messages without scrolling.
It also has advanced data encryption that secures all incoming and outgoing messages. It also has a powerful backup tool that creates automatic backups, so nothing gets lost.
This software has a translation option and an integrated spellchecker that ensures great communication in multiple languages.
You can set the eM client’s UI to display information in 20 different languages.
eM Client also allows you to create your email signature and automatically attach it at the end of your emails on all the platforms you decide to connect to the client.
eM Client has a free version and two pro plans available. Both subscription plans have 30-day free trials.
Let’s quickly look at its key features:
Easy migration tools
Smart translation
Integrated contacts and calendar menu
Integrated chat application
Support for Google Chat and Jabber
Only supports two email accounts
eM Client
Enjoy a unique combo of simple UI and powerful features for effortless emailing on Windows 7
Thunderbird was developed by Mozilla Foundation, the same organization which powers Mozilla Firefox. This email client setup process for Windows 7 is so easy that even a novice computer user can install and use it.
You can use your custom webmail or popular webmail services (Gmail, Outlook, etc.); as long as you remember the username and password.
The best part is that Thunderbird can be enhanced by installing several third-party add-ons for even more options to complete your emailing experience.
Thunderbird lets its users create address books with the contact information they receive via email. You can save the email address and the name and add other details such as a photo, birthday, address, and more.
Another feature that saves us a lot of hassle is the attachment reminder. It detects the word attachment within the text content of your email and alerts you if you forget to add the attachment before sending the email.
The software also has excellent filtering and searching tools, so you don’t have to worry about spending hours looking for old emails. Lastly, Thunderbird is available in both 32 and 64-bit for Windows 7.
As its name suggests, Opera Mail is an open-source email client developed by the Opera team.
If you have used the Opera web browser before, you would agree that this free email client for Windows 7 is expectantly good, just like the Opera browser.
The Opera Mail email client, now available as a standalone program, is ideal for Windows 7 PC.
Even though it has plenty of valuable features, Opera Mail is not the safest option. It has not been updated since 2016 and may lack some essential security features. You can, however, still download it safely from the Opera official website.
The software has an integrated spellchecker, so you can rest assured that you send impeccable emails.
Opera Mail lets you create contact lists. You can add users from multiple email providers and provide names and other valuable information that help you quickly identify the person you need.
Opera Mail also has an integrated spam filter that prevents unwanted emails from appearing in your inbox.
Opera Mail is free software that allows Windows 7 users to keep track of all their emails without too much memory.
MailSpringis a lightweight email client that lets you integrate all your email accounts into one app. You can easily navigate multiple accounts in just a few clicks without losing track of any important information. It supports every major mail provider.
The search option allows you to find specific emails using different keywords. The search options are advanced as you can use quick hints to generate a list of all emails sent to a particular email address containing attachments, unread, and more.
This software has an integrated feature that allows you to create your mail signature. Don’t forget to attach valuable contact information and keep your emails professional-looking and helpful for your recipients.
Email enables communication across the globe without much restriction, which is why the translation feature provided by this email client is vital.
There are instances when you need to communicate with people that don’t share your language. Mailspring generates AI-powered translations that can help with that.
On top of that, if you are more comfortable with using another language as your default UI language, Mailspring offers over 60 options you can choose from.
Another helpful feature that contributes to better communication is the template library. Mailspring allows you to use pre-made templates depending on the type of email you want to send. You can also create templates to automate part of the emailing task.
Mailspring is compatible with computers that run Windows 7 (and higher). It is lightweight, elegant, and easy to use. The software has an extensive set of free features, but it also provides a subscription-based plan for users that need professional-level email management.
Claws Mail – Ideal client for advanced email users
Claws Mail is a powerful mail app for Windows 7 that caters to advanced email users in particular. You must manually set up your POP3/IMAP settings to use Claws Mail.
This program is ideal for custom webmail such as[email protected]. Meanwhile, you can also use it on popular webmail services, but you have to adjust your account settings.
The inability to send HTML messages and the email settings process ranked it low on this list. Nevertheless, Claws is extremely powerful and can improve your email activity.
Claws Mail uses SSL encryption, meaning all your data is protected and completely private.
This email client lets you organize your emails with advanced features such as user-defined headers, color labels, multiple-folder support, and more.
You can also create detailed address books. Safely enter and access valuable information about your contacts.
Claws Mail has an integrated spell checker that alerts to errors before email submission.
Hexamail Flow is a free email client for Windows 7. It has an easy-to-use interface, so you’ll quickly get the hang of it if you haven’t used this tool before.
This email client for Windows 7 packs advanced email options, contacts, calendars, event links, reminders, email history, and much more. Hexamail Flow is compatible with all the major email providers and email server software available on the market.
This software lets you send large files by automatically integrating them into Google Drive.
Hexamail also doubles as a task manager with a card-based task board. You can create hierarchical to-do lists and automate some tasks from the settings provided.
The email client has an advanced search tool that lets you quickly find information in your emails, calendar, task lists, and contacts.
Let’s quickly look at its key features:
Email Scheduling
Email hiding or masking
Grouping feature by domain, sender, conversation, or subject
Automatically resizes large photos before sending them out.
This is a licensed-based service. You can select the number of users you need the product for.
XML (Extensible Markup Language) files do not do anything independently. Instead, they are just a way of storing data that can be easily read by other software.
There are a lot of programs that use XML to store information. In other words, you can open, create, and edit an XML file in any text editor.
XML files are similar to HTML files but not the same; XML is used for carrying data, while HTML is used for displaying it.
There are a few programs that can read and edit XML files, and we chose five of the best. This article will explain how to open an XML file in Windows 10.
You have multiple ways to read or edit your XML files using these handpicked tools. Hence, it’s possible to see the content files in the Tree view or Code format.
Look at their sets of features to see which is the best XML reader for Windows.
Filmora is a well-known video editor software that can’t fail to help you create captivating videos. Plus, it’s capable of text editing and kinetic typography.
This tool has multiple video editing tools like motion tracking or keyframes. So, if you need expressive videos to share with family or friends, this is a suitable place.
Besides all this, you can also do text editing creatively. There are customizable text colors, size or font, animated text, etc.
With Filmora Editor, you can manage text files and export them in various formats. Even though XML format exporting is not available with the software, you can still view and edit text files whenever you need to.
There is kinetic typography that can be done using this editing tool. You can use different styles, moving text, or creative fonts to express your ideas with artistic effect.
Hence, we trust this video editing software will greatly support you in accessing and editing text like XML files to create eye-catching text animations or videos.
Filmora Video Editor
Edit your text files in a creative manner with this big community software.
File Viewer Plus is probably the best program you can find to open different types of files. It supports over 400 file formats, including XLSX, XLTX, XLTM, and XSD.
The software can provide support to view common file types such as Office documents, image files or PDFs. Also, you can open various media player files on one platform.
The Smart File Detection feature will help you out in case you are not sure what type of file you are facing and need to detect the format first.
In addition to reading various file types, the software application lets you analyze and edit some of them. You can also convert edited files to other formats, like having a Word file and converting it to PDF.
Here are the key features of File Viewer Plus:
Edit and convert text documents, and images to different formats
Convert audio and video files to various multimedia formats
Advanced image editing: edit, resize, crop, and many other features
Converting multiple files at once
Use the Inspect feature to see what a document that you cannot open contains
These are just a few of the features that File Viewer Plus offers to its users. Download it now and give it a try, you will not be disappointed.
File Viewer Plus
Easily open XML and other over 400 file formats with this powerful software.
XML Explorer is another lightweight and fast utility that allows you to view XML files. The best thing about this software is that it can handle huge XML files.
The program has been tested even on files that are over 300 Mb.
XML Explorer allows users to enjoy the fast exploration of data, copying of formatted XML information, evaluation of XPath expression, and XSD schema validation.
The program uses a DockPanel Suite and a docking library for .NET Windows Forms development, which mimics Visual Studio .NET.
Here are the key features of XML Explorer:
XML Explorer validates XML documents using XSD schema that is specified in the document
Shows a list of validation errors, so you can navigate and select the node by double-clicking on the error
An expression library stores and manages commonly used XPath expressions (similar to Firefox Bookmarks)
It supports various document tabs, and you can also middle-click to close those tabs
There are fully-featured Visual Studio-style dockable panels
XML Explorer does not support editing for now.
Overall, this is a convenient tool, and you can find out more about its capabilities by downloading it to see how it works.
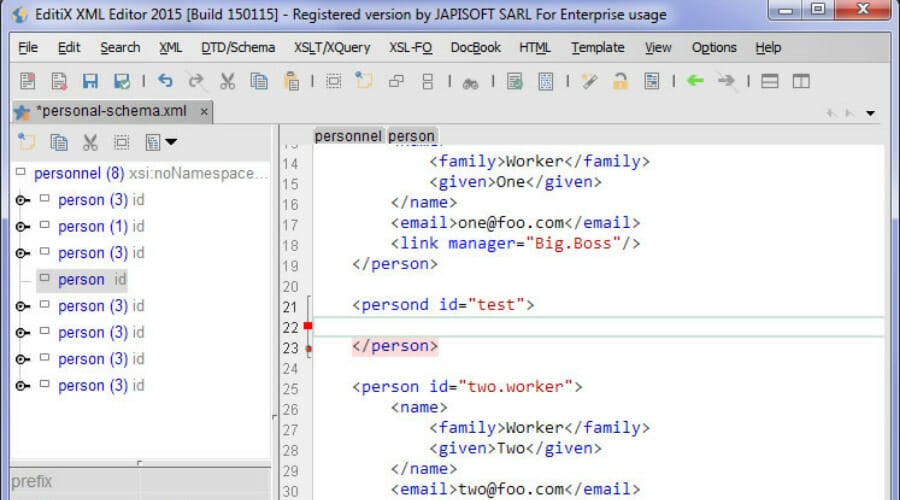
EditiX XML Editor is another high-quality XML editor and XSLT editor, compatible with Windows and other operating systems.
This tool is designed to help web authors and application programmers take advantage of the latest XML and XML-related technologies such as XSLT/FO, DocBook, and XSD Schema.
EditiX XML Editor offers users an extensive range of XML functionalities within a refined IDE that is able to guide users with intelligent entry helpers.
All the processes will be manageable via shortcuts and working locally can be managed by OASIS XML Catalogs.
In the end, you can utilize this XML software for free or modify it according to the GNU (General Public License).
Here are the key features of EditiX XML Editor:
Even beginners can easily get the hang of how this tool works
The program comes with real-time XPath location and syntax error detection
The helpers are also provided with context syntax popups supporting DTD, RelaxNG, and Schema
Comes with support for various templates and project management
You will be able to apply XSLT or FO Transformation, and the result will be shown in a dedicated view
This piece of software will turn out ideal, especially for web authors, app makers, and programmers.
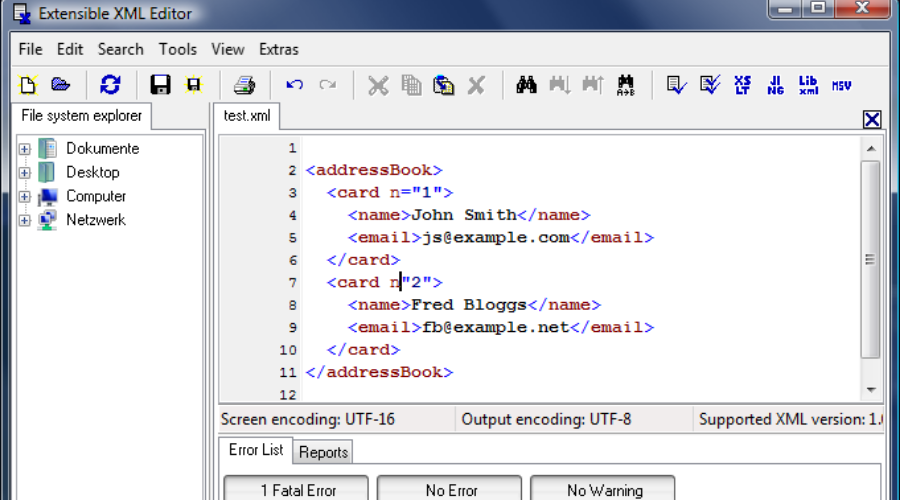
Essential XML Editor is a lightweight program for text-based XML document editing. Enough key features are included in this editor to provide users with everything they need.
Earlier versions of this editor have been released under the name Open XML Editor.
But now, it’s required to purchase an activation key to use all the features packed in this tool, and that’s why the term “open” is not considered appropriate anymore.
The Essential XML Editor also includes some more advanced features, such as plug-ins for third-party Relax NG and W3C XML Schema validators
Here are the key features of Essential XML Editor:
There is a built-in XML well-formedness tester included alongside a DTD Validator and a plug-in for the Saxon XSLT processor
Other features that are supported by this software include undo/redo, search and replace, shortcuts for every command, a built-in file system explorer, a submenu of recently opened files, and more
There is also a detailed page setup and print preview dialogs
The program also comes with an external hex editor that can be customized according to the users’ preferences
The key features of this editor can be used for free, without any time limitations. To use the advanced features, you have to pay a small fee.
XML Tree Editor from Oxygen is able to display XML files as tree views, and the software also allows essential operations including adding, editing, and even deleting text nodes along with their attributes.
The primary target of this software is to provide a user-friendly tool to create and edit XML configuration files for users who don’t know much about XML.
The commands available for XML tags include the following: Add, Edit, Delete, Rename, Move to another position on the tree, Copy to another location, Copy from a separate reference XML document.
XML Tree Editor also supports language translation; the program is the only tool necessary to make a new translation.
Here are the key features of XML Tree Editor:
The software comes with a built-in Free Pascal Lazarus that allows really easy compilations for various target platforms
The available commands for comments include adding, deleting, and editing
The text node is not separated from its container tag, and it can contain virtually anything
The program is very customizable, and it comes with two XML configuration files
The search facilities that this software has to offer include searching through text values
This program represents the ideal way to move and edit XML nodes effortlessly and without wasting time. Some users say that this tool is quite similar to Notepad++.
XML Notepad offers users a simple and intuitive interface that will allow anyone to browse and edit XML documents.
The program uses incremental search in both text and tree views, and this means that as you type, it will navigate to matching nodes
Also, it supports drag/drop, allowing easier manipulation of the tree even from the file system and across various instances of XML Notepad.
There are configurable fonts and colors via the options dialog, and a full find/replace dialog offers support for XPath and regex.
You have also included an HTML viewer that can process XML-stylesheet processing instructions.
Here are the key features of XML Notepad:
The Tree View is synchronized with Node Text View to provide quick editing of node names and values
XML Notepad supports cut/copy/paste functionalities
There is an infinite undo/redo for all edit operations
You will also get the opportunity to edit large text node values
With the help of XML Notepad, you will enjoy excellent performance even on large XML documents and this software is able to load a 3 Mb document in just a second
You will get instant XML schema validation while you are editing, and errors and warnings will be shown in the error list window
XML Notepad supports custom editors for date, dateTime and time datatypes
These are the best programs that allow you to read/edit XML files. We recommend that you head over to their official websites to check out as many details about them as possible before making your final decision.
We would like to hear from you regarding some of these specialized XML file viewers. You can reach us in the comments section and hear your experience.
The Japanese IME is not ready yet error can occur if the default input method is not set to the Japanese Microsoft IME. In some instances, the issue can occur due to a glitch in the Windows keyboard setting or the language pack itself. Follow the steps below to fix it.
How do I fix Japanese IME is not ready yet on Windows 10/11?
1. Set Japanese IME as the default input method
Click on Start and select Settings.
Click on Time and Language options.
Open the Language tab from the left pane.
Scroll down and click on Choose an Input method to always use as default.
Under override for the default input method, click the drop-down menu and select Japanese IME.
Click Save to apply the changes.
Reboot the computer and check if you can use Japanese IME as the default input method. Make sure that you have the Japanese IME language pack installed before trying to set it as a default input method in the settings.
Install the French language pack
If the issue persists, try installing the French language pack. This workaround is useful if you are unable to type a few Japanese characters when typing. Here’s how to do it.
Click on Start and select Settings.
Go to Time & Language.
Open the Language tab.
Click on Add a preferred language.
Search for the French language pack and install it on your computer.
Once installed, try typing in Japanese to see if the issue is resolved.
2. Run the keyboard troubleshooter
Click the Start button and select Settings.
Click on Update & Security.
Open the Troubleshoot tab from the left pane.
Scroll down and select Keyboard.
Click onthe Run the Troubleshooter button.
Windows will scan the system for keyboard and input-related issues and recommend fixes.
Follow on-screen instructions to apply the fixes.
Once done, close the troubleshooter.
To check if the issue is resolved, try typing in Japanese. If the issue persists, reboot your computer once and then try again.
3. Reinstall the Japanese language pack
Press the Windows key + I to open Settings.
Go to Time & Language.
Click on the Language tab from the left pane.
Scroll down and select Japanese and then click Remove.
Confirm the action to remove the language by clicking on Yes/Uninstall.
Once removed, go back to the Languagetab.
Click on Add a preferred language.
Search for Japanese and then proceed to install the language pack.
Once installed, reboot your computer.
4. Reset IME property settings
Click the language icon on the taskbar and select More keyboard settings.
Under Japanese, click the three dots and select Langage options.
Scroll down to Microsoft IME and click Options.
Select the General section.
Scroll down and click on the Restore button. Wait for your setup to revert to default and see if you’re still getting the IME error.
Windows by default supports English as the input language. However, users can download and install other language packs of their choice as well like Japanese keyboard IME.
The Japanese keyboard IME not working on Windows 10 & 11 issue can occur if the language pack is corrupted or due to incorrect input method configuration.
Follow all the steps in this article to fix the problem on your Windows 10 & 11 system.
Businesses or organizations use multiple programs and tools to get the job done. They rely on the best auditing tools and network monitoring tools to accomplish the appropriate tasks. Then they are also required to manage credentials for multiple applications and databases.
For such cases, businesses use different single sign-on tools. This guide will give you a list of some of the best single sign-on tools that you can use for your businesses, no matter the size. This will negate the need of using multiple services for authenticating access.
What is single sign-on tools and their benefits?
A single sign-on tool will help you to sign in to multiple applications with a single set of credentials. Most IT organizations link their system and personal identities with credentials.
Using the single sign-on tools or SSO, you don’t have to worry about maintaining a huge data set of credentials and it can also help simplify the identification process.
Also, organizations make use of multiple programs and have files stored in different locations. Accessing each of them would require an employee to enter multiple credentials. This could be negated by using a single sign-on tool or an SSO.
Here are some of the key features of the single sign-on tools:
They make the system more secure
You don’t have to maintain a large data set of credentials
Centralizes access to all accounts using one credential
Improves end-user experience
Saves money on investing in multiple tools for automation, integration, etc.
Let us now check out the list of the best sign-on tools that you can use for your business or organization.
What are some of the best sign-on tools for a business?
One of the best SSO or sign-on tools that you can use for your business is the ManageEngine AdSelfService Plus.
It will scan the user’s Active Directory (AD) and check the services allowed to that account. The AdSelfService Plus will then create a single login portal, allowing the login to flow through to provide access to the apps.
The user is only required to remember their Windows credentials to access all the enterprise apps. There are multiple benefits of using the ManageEngine AdSelfService Plus SSO tool.
One of the best ones is that it negates the need to ask the Help Desk for password-related issues, as you can do it all by yourself. It can also update locally cached credentials and offers 2FA secure log-on.
Here are some of the best features of the ManageEngine AdSelfService Plus:
Offers 2FA authentication.
Self-password reset mechanism.
User activity logging.
Repeated failed login activity.
Real-time push notifications.
ManageEngine AdSelfService Plus
A well-packed and self-service password management tool.
Okta – Popular identity and access management provider
Okta is a very renowned name in the single sign-on tools market. There are multiple businesses across the globe making use of this tool to have a single credential to access all their services.
It has integration with over 7,000 applications, allowing the IT managers of a company easily provide access simply and securely without much hassle.
Okta uses a cloud-based sign-on service to connect everything from cloud to ground. Here, you can view, manage and secure all user access from the dashboard.
It connects to third-party legacy SSO solutions and has over 1,400 SAML and OpenID Connect integrations. Using Okta’s advanced Insights security tool, you can also block malicious login attempts.
Some of the key features of Okta are:
Support for 7,000+ applications.
Advanced security tools.
Password vaulting.
RADIUS, and LDAP support.
Easy-to-use and manage dashboard.
Allows connection to and from any number of identity stores.
JumpCloud SSO is another popular single sign-on tool that is trusted by over 180K organizations worldwide.
It is an open directory platform that enables easy and secure access to a wide range of applications and services, from any location.
JumpCloud SSO offers full-scale, centralized identity management, all in one place. It comes with multi-factor authentication to protect identities, a native password manager to save credentials, provides security for all devices accessing company resources, and much more.
You can even enforce policies and patches to the system remotely and can develop multiple team-based divisions. The program is easy to use and comes with an automatic onboarding mechanism.
Whether you are a big or a small organization, OneLogin’s policy-driven single sign on mechanism is suitable for both.
It comes with multiple features, including multi-factor authentication, and context-aware access management, ensuring that only authorized access is provided.
OneLogin desktop keeps secure profiles of devices connected with the OneLogin Cloud Directory. Once the user is logged in with a OneLogin credential they can access all the apps using the OneLogin SSO portal.
This tool lets you create any number of logins for the same type of app, offers 6,000+ pre-integrated apps, and gives users the freedom to log in to OneLogin using services such as Facebook, Google+, LinkedIn, and Twitter.
Here are some of the best features of the OneLogin SSO tool:
Offers admin rights at a granular level.
Can log in using services such as Facebook, Google+, LinkedIn, and Twitter.
LastPass SSO – Offers SSO as a standalone or combined service
You might have definitely heard of the popular password manager LastPass. Well, it also offers SSO as a standalone feature or a combined service.
It has a large number of integrations and support of over 1,200 applications and services. You can combine LastPass SSO with enterprise password management (EPM) and its secure multi-factor authentication to bring the best possible security to every access.
The UI is pretty easy to understand, and the platform has multiple layers of protection to keep the encryption key secure. Admins can relax, as it is a feature to make onboarding automatic. It has a vast API library.
That is it from us in this guide. Apart from keeping passwords secure, you also need to have the necessary tools to make sure that you can recover them without any issues.
Many users are complaining that whenever they try updating their Windows PC, they are greeted by a message that reads: Windows could not configure one or more system components. To install windows, restart the computer and then restart the installation.
Despite the warning message advising users to restart their PC to solve the problem, this solution doesn’t work. This can be a big problem, as it prevents you from installing important updates.
Thankfully, it is a problem that can be fixed, and we will show you the way out in this guide.
How to fix Windows could not configure one or more system components?
1. Rename some folders
Press the Windows key + E to open File Explorer and navigate to the path below: c:\windows\system32\inetsrv
Rename the inetsrv folder to inetsrv.old. If you get an Access is denied error, you need to take ownership of the folder before renaming it.
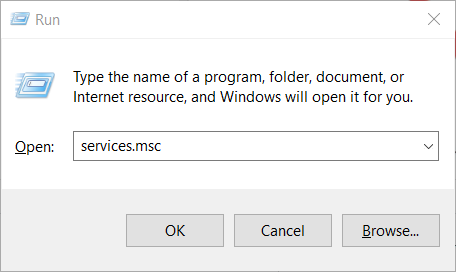
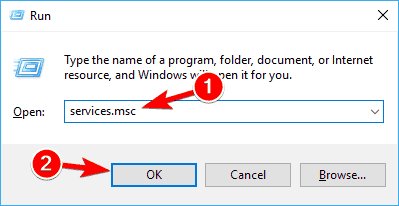
Now, press the Windows key + R, type services.msc, and click OK.
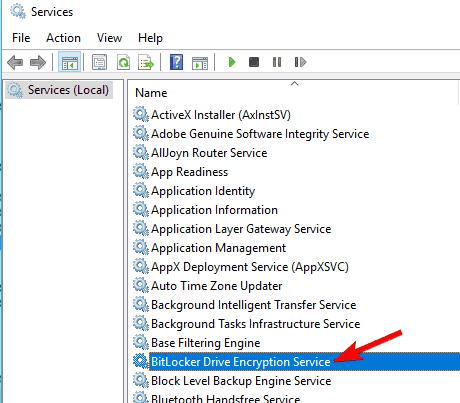
Right-click the Application Host Helper Service and select Stop.
Now, go back to File Explorer and navigate to the path below: c:\windows\winsxs
In the WinSxS folder, search for windows-iis and move all folders with the name mask windows-iis to another location.
Finally, when the update process is complete, you can delete the inetsrv.old folder.
In most cases, Internet Information Services folders have been found to cause Windows could not configure one or more system components. You can fix this by renaming some folders that are crucial to the process.
2. Disable IIS
Press the Windows key + S, type control, and select Control Panel.
Click Uninstall a program under Programs.
Now, click Turn Windows features on or off in the left pane.
Uncheck the box next to Internet Information Services in the list.
Finally, click the OK button to confirm the action.
If renaming the IIS files on your PC failed to solve the Windows could not configure one or more system components issue, you need to uninstall the Internet Information Services.
If you get a permission denied prompt, you need to log in as an admin or make your current account the admin.
3. Get rid of certain files from your PC
Launch File Explorer and navigate to the path below: C:/ProgramData/Microsoft/Crypto/RSA/MachineKeys
If the ProgramData folder is not visible, click the View tab at the top and check the box for Hidden files.
Look for these files and delete them:6de9cb26d2b98c01ec4e9e8b34824aa2_GUIDd6d986f09a1ee04e24c949879fdb506c_GUID76944fb33636aeddb9590521c2e8815a_GUID
Sometimes, the machine keys used by the IIS during the update process might be causing Windows could not configure one or more system components issue.
The solution is to delete the keys and let your PC create new ones.
4. Uninstall old Wi-Fi driver, and update other network drivers
Press the Windows key + R, type devmgmt.msc, and click OK.
Double-click the Network adapters option to expand it, and right-click your wireless device.
Now, select Uninstall device.
Click the Uninstall button to confirm the action.
Next, expand the Network adapters option again and right-click each device there.
Select the Update driver option.
Finally, choose Search automatically for drivers and install any available update.
Some users have found faulty Wi-Fi drivers to cause Windows could not configure one or more system components. This usually happens when you have not updated your drivers for long.
The solution is to uninstall the Wi-Fi driver and update other network drivers.
5. Disconnect your SD card reader
This may seem like an odd solution compared to all the others, but users reported that removing the SD card reader solved the problem for them.
Also, if you have any other external devices connected to your PC, you should remove them and check if you can update your PC without issues.
There you go. We believe you should be able to fix the Windows could not configure one or more system components issue with the solutions in this guide.
If your NVIDIA graphics card is not being deteced or recognized in Windows 11, you’re not alone. This common issue can happen after a system update, driver change, or fresh install.
It leaves your display running on basic GPU or not working at all. Luckily, it’s easy to fix.
Whether you’re trying to fix missing GPU detection, troubleshoot driver conflicts, or simply figure out why your NVIDIA card isn’t showing up, we’ll walk you thorugh all steps necessary below.
What can I do if the Nvidia graphics card is not detected?
1. Show hidden devices
Right-click on the Start icon, then click on Device Manager to open it.
Click on View from the window’s top side, then choose Show hidden devices to show the Nvidia graphics card.
Double check if the graphics card is detected now; if not, please move to the next solution.
Users stated that they had somehow managed to conceal their Nvidia graphics card. By revealing the hidden elements, they could see the GPU and other devices they had previously forgotten about being installed on their system.
If the Nvidia GPU is not detected in the Device Manager, you should try other solutions.
2. Update BIOS
In case you run into errors like Nvidia graphics card not detected Windows 11, a great reliable method would be to update your BIOS as showed below.
1. Visit your motherboard manufacturer’s website; for example, we will head to Lenovo’s website and click on PC.
2. Locate your model and enter its number in the search bar, then navigate to the Drivers & software section.
3. Look for the latest BIOS for your computer and download it.
4. Move the downloaded file to a flash drive from File Explorer by clicking on This PC followed by your flash drive, as they instruct you on their website. Make sure not to delete the flash drive by accident.
5. Restart your PC and keep pressing F2 or Del to enter BIOS.
6. Select the BIOS update option and choose the file you downloaded from the flash drive.
7. Wait for the process to finish, then continue with the bootup process. Now you should be able to see the Nvidia graphics card.
3. Update the graphics card
Press the Windows key + I to open the Settings app.
Click on Windows Update from the left pane, followed by Advanced options on the right.
Scroll down until you find the Additional options section, then click on Optional updates.
Now click on the Driver Updates option, select all the driver updates you are presented with, and click on the Download & install button.
Even though Windows is generally in charge of driver updates, if you are experiencing an issue, you can perform a manual search for updates. Therefore, we strongly advocate using a specialist program such as Fortect Driver Updater to do automatic scans for out-of-date drivers.
If the Nvidia graphics card is not detected on your laptop, you should try this OS update solution.
4. Enable the graphics card
Right-click on the Start icon, then click on Device Manager to open it.
Now expand the Display adapters section, right-click on the Nvidia graphics card option, and choose Enable device. In our case, we get the Disable device alternative since the card is already enabled.
Check if the error is now rectified.
If the Nvidia GPU is not detected in Windows 11, you should try other solutions.
5. Use CMD
Press the Windows + S key to open the Search bar, type cmd, and right-click on the most relevant result to run it as an administrator.
Now type or paste in the following command and press Enter: bcdedit /set pciexpress forcedisable
Restart the computer and see if it has been fixed.
6. Uninstall updates
Press the Windows key + I to open the Settings app.
Click on Windows Update from the left pane, followed by Update historyon the right side to open the list with your recent updates.
Now scroll until you find the Related settings section and click on Uninstall updates.
You can choose whichever update you want to uninstall from the new window. For example, you may click on the latest Windows update and uninstall it.
Later on, after you can see the graphics card, you should try updating your OS again, hoping the new installation won’t be buggy.
Uninstalling updates is a great solution for Windows 11 graphics card issues.
Press the Windows key + I to open the Settings app.
Click on Windows Update in the left panel.
If you have any new updates to download, click on the Install now button and wait for the process to finish; otherwise, click on the Check for updates button.
Using an older version of Windows could be causing the problem, which can be fixed by updating to the most recent version. However, the mistake will most likely be fixed in a later update to the software package.
Why is my NVIDIA graphics card not being detected?
Usually, your GPU is undetected when a driver is not installed correctly, or the graphics card is not compatible with one of the other components of your PC.
There are several other reasons why your laptop doesn’t detect the installed graphics card, including:
An outdated BIOS
A mismatched or outdated graphics card driver
GPU not activated on the BIOS settings
An error from the latest Windows upgrades like 0x80070103
Incorrect insertion of the graphics card into the card slot
The Windows 10 User Account Control (UAC) feature often triggers the You do not have sufficient access to uninstall error. While UAC is intended to enhance system security by restricting access to installed files and programs, it can make uninstalling certain apps a hassle.
If you’d like to disable UAC and eliminate this error, just follow the steps below.
How can I fix insufficient access to uninstall error message?
1. Try getting Administrator permissions
Navigate to the installation directory of the application you want to remove.
Locate uninstall executable, right-click it and choose Run as administrator from the menu.
Follow the instructions on the screen to complete the uninstall process.
2. Use Registry Editor
On your Windows 10 device, go to Start Screen and use Windows Key + R keyboard shortcut in order to open the Run box.
There type regedit and press OK.
From Registry Editor go to: HKEY_LOCAL_MACHINESOFTWAREMicrosoftWindowsCurrentVersionUninstall
Now if you click on each key from that path you will be able to access each program from your device, thus you will be able to uninstall the same.
Now, select the software you want to uninstall and take a look at the right panel of the Registry editor. Double click on UninstallString to open its properties.
When the Properties window opens, copy the path from the Value data field.
Up next, on your device open a command prompt window – right-click on your Start Button, or press Windows Key + X keyboard keys and select Command Prompt (Admin).
Now right-click inside the Command Prompt window to paste the path and press Enter
After doing that, the uninstall process will start and you should be able to uninstall your application.
It’s worth mentioning that this method doesn’t work for applications that use MSI installers, so keep that in mind.
3. Check if uninstall path is correct in your registry
Open Registry Editor. We showed you how to do that in our previous solution.
Once Registry Editor opens, you need to go to one of the following keys in the left pane.
For 32-bit applications go to: HKEY_LOCAL_MACHINESOFTWAREMicrosoftWindowsCurrentVersionUninstall
For 64-bit applications go to: HKEY_LOCAL_MACHINESOFTWAREWow6432NodeMicrosoftWindowsCurrentVersionUninstall
In the right pane, you should see many subkeys represented by numbers and letters. You need to click on each individual key until you find the problematic application. The easiest way to recognize an application is to look for DisplayName string in the right pane.
Once you locate the problematic application, look for the UninstallString value in the right pane. Sometimes this string might have a slash or some other character in front of its value causing the problem to appear. Double click the UninstallString.
Now be sure to remove extra characters from the Value data field and click OK to save changes. Keep in mind that your value data should remain encapsulated in quotes.
Press Windows Key + S and enter user control. Select Change User Account Control settings from the menu.
Move the slider all the way down to the Never notify. Now click on OK to save changes.
5. Delete the Safer key from your registry
Open Registry Editor.
When Registry Editor opens, in the left pane navigate to: HKEY_LOCAL_MACHINESOFTWAREPoliciesMicrosoftWindows
Expand the Windows key and navigate to safercodeidentifiers key. If you have 0 and Paths subkeys there, it’s rather likely that your registry has been altered by malware. Simply right-click Paths key and choose Delete from the menu.
When the confirmation dialog appears, click on Yes.
So, there you have it; that’s how you can remove the You don’t have sufficient access to uninstall message from Windows devices.
We all have videos from many sources and devices but often we find out that they are not compatible with every device or player. That’s why a tool such as HitPaw Video Converter can leverage all the differences as one of the best video converters on the market.
How can HitPaw Video Converter help you?
As we’ve mentioned in the title of this article, HitPaw Video Converter is not only an ultra-fast video and audio converter that can transform all your videos into any format.
Its developers updated the software with a lot of new features like video background noise removal, a Blu-Ray DVD and DVD to MP4 converters, a lossless music converter, a vocal remover, and a video/image compressor.
And that’s not even all because, with HitPaw Video Converter, you may also download videos, audio, and thumbnails from over 1000 websites including YouTube, Facebook, and Vimeo.
In fact, from our tests, the app is one of the best YouTube video downloaders software out there.
In this article, we will outline the newly released features and how they can be used on your PC.
What are the new features of HitPaw Video Converter?
1. Remove background noise from video
HitPaw added a background noise remover tool that works equally fine on video and audio as well.
You will find this separate feature in the new Toolbox menu from the software. And, as you would expect, it’s extremely easy to use.
Just drag and drop your file into the window and the noise-removing process will start automatically.
In the end, you will be able to listen to the before and after sound, together with the audio histogram below, and save the new file.
You also have the option to replace the old file with the new one to avoid any confusion afterward.
2. Wonderful Blu-Ray DVD converter
HitPaw Video Converter now has the option to convert Blu-Ray to DVD and DVD to MP4.
In fact, with this software, there are few video file types you can’t convert and we didn’t run into any such case yet.
The process is extremely simple, by dragging and dropping into the Convert window and then selecting the target format and resolution.
But the most wonderful part of the HitPaw Video Converter app is the fact that you can select the target video type by device or by usage on the social service.
For instance, you may choose to save the video for an iPhone or Samsung smartphone or prepare the clip for YouTube, TikTok, Facebook, Instagram, and more.
Now, you can download songs, albums, playlists, and podcasts from Spotify and iTunes.
Basically, you’ve got yourself a Spotify to MP3 converter and you may also convert Apple music to MP3.
And you can do so in batches with a single click. With Spotify music, you need to paste or drag the link and select the target file type (MP3, M4A, or WAV), then hit the Convert All button.
The best part is that all the audio conversions are lossless. That means you will get the exact song as it is, without any quality alteration.
4. Accurate AI vocal remover
If you want to create a unique Karaoke playlist, HitPaw has an astonishing AI vocal remover in the Toolbox of the Video Converter app.
You simply drag and drop the audio into the tool’s window, and the vocal remover will start processing the file.
In the end, you will be able to listen to the original, the music, and the vocals separately and export them with just one click.
In our tests, the app did an amazing job! We only heard a few noises where the voice used to be but only in the loudest parts of the song.
6. Highly efficient video/image compressor
We’ve all been there! We want to share a video quickly but it’s too big to fit in an email or message.
The video/image compressor from HitPaw Video Converter may shrink your video to a fraction of the original.
For instance, in the screenshot above, an MP4 clip of 546 MB can be compressed to only 82 MB with the highest compression level.
And it can get to half of that if you set the quality to Low which is incredibly efficient. In fact, you may also preview the resulting clip to see if it’s up to the standards you look for.
Moreover, you can compress videos and photos in bulk action, applying the same changes to all the files.
That means, for instance, that you will be able to compress all your library of videos or images in one go and free tons of space on your drive.
Other important features of HitPaw Video Converter
Of course, we can’t overlook the main feature of this tool, which is the conversion capability.
By using HitPaw Video Converter, you virtually convert video and audio files to any format: MP4 to MP3, MP3 to WAV, MKV to MP4, and the options are endless.
Another important feature is the built-in video editor. In fact, it’s not only an editor for cutting, merging, cropping & rotating, changing the speed, and applying watermarks to your video.
You will discover that it’s a great tool to create videos and personalize them with filters and effects to get great results.
HitPaw Video Converter comes with a Free trial version with limited functionality but it’s still great for testing the product before committing to purchase.
We hope that our article provided new and useful information about HitPaw Video Converter. We also recommend trying it for yourself and getting to your own conclusions as well.
Do you guys remember the newly redesigned Media Player that was introduced to the Windows 11 operating system?
Well, you will be pleasantly surprised to find out that Microsoft has decided to share the revamped Media Player with Windows 10 users as well.
So. if you haven’t yet upgraded to Windows 11 and decided to stick with its predecessor a little longer, this is a neat treat from Microsoft,
Windows 10 users are getting the new Media Player as well
As you remember, Microsoft began rolling out its new, redesigned Media Player to Windows 11 Insiders back in November 2021.
The Redmond tech company has since been gradually updating it with new interesting and helpful features like Audio CD Ripping, and more high-fidelity audio file formats.
And, there are also features that video watchers will like, such as video folder navigation, which was also added recently.
Meanwhile, on Windows 10, Groove Music has been the default music-playing app, but this too is about to come to an end, just like MSDT.
Why? Well, it looks like that is set to change as Microsoft is now starting to replace Groove Music on Windows 10 with the new Windows Media Player.
Keep in mind that the development is not entirely new though and it was probably coming to all users sooner or later.
That is because the Redmond firm had already begun rolling out the new Media Player to Windows 10 Release Preview channel Insiders.
Judging from user reports, the new Media Player is now starting to become available on the Microsoft Store which means all Windows 10 users should soon be able to use it.
That being said, you may not receive the new Windows Media Player right away on Windows 10 via the Microsoft Store as it is likely going to be a general rollout.
Have you started using the new Media Player on your Windows 10 device? Share your experience with us in the comments section below.
We all have those videos shot with the 4-megapixel camera of the old phone or with the 10-year-old camcorder. Those memories are precious and with a smart tool like HitPaw Video Enhancer, which uses AI upscale video technology, they can come back to life.
What is HitPaw Video Enhancer?
As its name clearly suggests, HitPaw Video Enhancer is an AI video enhancement and upscaling tool that can drastically improve the quality and resolution of your videos.
So, whether you have a blurry clip that was recorded in poor conditions or an old, low-resolution video, this video enhancer can fix it with a few clicks.
In this article, we will talk about HitPaw Video Enhancer’s key features and explain some of its perks.
What are the best features of HitPaw Video Enhancer?
1. Powerful AI video upscaling
HitPaw Video Enhancer features four types of AI enhancement: General Denoise Model, Animation Model, Face Model and Colorize.
In the screenshot above, we used the Face Model for obvious reasons. However, this is also an upscaling from a resolution of 352×198 pixels to 3840×2160 (4K).
As you may clearly see, the difference is not only remarkable, but the resulting video is also denoised and the color is not affected in any way.
We can’t tell you much about the process because this is the result of a single-click transformation.
You may only select one of the four modes, from the 4K video enhancer, set the resulting resolution (up to 8K in the Custom setting) and the format (MP4 or MOV).
2. Simple 3-step enhancement
The best part of HitPaw Video Enhancer is that you don’t need any video editing skills.
To enhance your video, you only need to follow three simple steps: upload the video, set the right AI enhancement mode, and hit the Export button.
By default, the AI video enhancer is set at the maximum resolution output but you can use the drop-down menu to select a lower setting.
Unfortunately, in the Free Trial version, you can’t export the video. You may only preview it without any watermark.
You can upload almost any video because HitPaw Video Enhancer supports more than 30 file types.
The list includes 3GP, ASF, MPG, AVI, FLV, MKV, WMV, MOV, and a lot more. It basically recognizes and converts all the mainstream formats but also some less-used ones.
4. Upscaling up to 8K
You would believe that a measly 320×180 pixels video can’t possibly get to a high resolution such as 7680×4320 pixels (8K).
Well, think again because this AI video upscaler can do that. Just change the Resolution setting to Custom and enter the numbers.
It’s that easy! Of course, the higher the output resolution, the longer will take for the software to make the upscaling.
How much do I pay for HitPaw Video Enhancer?
We remind you that with the Free Trial version, you can’t export any videos. So, if you want to get the actual result, you need to opt for one of the paid plans.
Right now, there is a 50% discount on the paid version. Therefore, you can get it for only $42.99 /month, or $99.99 if you pay for a whole year!
There is also the Lifetime license option that goes for $349.99. Of course, for all the paid plans you get free upgrades during the subscription and 24/7 text support.
HitPaw’s video enhancer app, however, can be downloaded for free and you may see 45-frame previews of the enhanced clip.
A Blocked for security reasons error message appears when Gmail users try to attach certain file formats to their emails. Then the users need to find another way to send the files.
If that’s happening to you, follow the steps below to fix it fast.
What to do if Gmail is blocking ZIP files/RAR archives?
1. Use compression software
WinZip can prove very helpful if you are looking for a smooth way to solve blocked RAR email attachment issues.
The actual compression can be done quickly using this tool. It makes working with archives is convenient and will make the transfer process a lot easier when RAR archives are involved.
2. Edit the file extensions included within the RAR archive
First, press the File Explorer button on Windows 10’s taskbar.
Select the View tab shown directly below.
Select the File name extensions checkbox on that tab.
Open the folder where you’ve saved the files you need to include in your RAR archive.
To change a file’s format, right-click it, and select Rename.
Then, change the extension at the end of the file to an alternative format, and press the Enter key (eg. change an EXE to a PNG).
A Rename dialog box will open when you press the Return key. Select the Yes button to provide further confirmation.
Change the formats of all the files in the RAR archive to acceptable ones.
Finally, simply set up your RAR archive with the files you modified.
3. Send the RAR as a Google Drive link
First, open your Google Drive storage in a browser.
Click the My Drive button to open the menu.
Select Upload files to open the Open window.
Then select your RAR file to save in Google Drive, and click the Open button.
Right-click the RAR you saved in Google Drive and select Share to open the window below.
Click the Get sharable link to turn on link sharing.
Then, you can also copy a link URL (with the Ctrl + C hotkey) to include in the email.
Press the Done button.
Open Gmail in your browser.
Click the Compose button to open Gmail’s email text editor.
Press the Insert files using Drive button.
Select the RAR file you saved in Google Drive.
Select the Drive link option if it’s now already selected.
Click the Insert button.
Then you can send the email with a Google Drive link for the RAR. The recipient can select to download the file from the URL.
One last note, you could also save the RAR to a file host, and then send a URL for the file to the recipient. This software guide provides further details for the best file-sharing applications.
4. Try another email client
If you keep getting this error, consider switching to another email client. Our top choice in this case is Mailbird.
The app is integrated with Degoo, which is another tool that saves you the time of archiving large folders or files to send via email. Using this feature, you can upload large files with one click (or drag&drop them in the app) and just send the email. Any type of file is supported.
What’s more, you don’t have to store the file locally on your device and you don’t need to download anything to perform this action. And the receivers don’t need a special account either.
System permissions are important, and if you want to keep an eye on them, you’ll need to use NTFS permission report software.
For personal users, we recommend using hard drive activity software since it has less advanced features that are more suitable for home users. Many tools can help you monitor your permissions, but today we’ll show you the best ones you can use.
What is the best software for NTFS permissions report?
If you’re looking for NTFS permissions report software, then ADManager Plus is a must-have. The software allows you to view folder permissions with ease.
In addition, you can easily set, adjust or remove permissions to prevent unauthorized access to partitions. If needed, you can easily view reports on access control and permissions.
You can also export permissions to Excel or automate permission reporting. The software is simple to use, and you can configure your permissions from the user interface with ease.
Overall, the software offers amazing features, and as such, it’s perfect for all professionals that want to see their NTFS permissions reports.
Other great features:
User provisioning in AD, Exchange, Google Workspace, Office 365, and Skype for Business
AD bulk user management
Active directory password management
Active Directory user reports
Controlled automation
ManageEngine ADManager Plus
If you want to manage access permissions in your organization, ADManager Plus is the right choice for you.
To view the NTFS permissions report you don’t need expensive software, especially if you use tools such as Cjwdev NTFS Permissions Reporter.
The software comes with a simple and minimalistic user interface that will help you find the desired settings with ease. With it, you’ll have the ability to easily view group members as well as report permissions for any directory.
You can export your reports to the HTML format for easier viewing if you choose to do so. There’s also a Standard version that comes with certain advanced features such as additional export formats for reports.
This version also has command line support, the ability to create filters, the ability to compare reports, and email notifications once the report is finished.
Overall, it’s a simple and powerful tool, so it’s a great choice if you’re on a budget.
Other great features:
Simple user interface
Fast performance
Ability to export reports in HTML and other formats
If you need a simple tool with a sleek interface to view the NTFS permissions report, then look no further. The first thing you’ll notice about this software is its easy-to-use interface that allows you to access all the features with just a few clicks.
Using this tool, you can view permissions for all folders in a table or hierarchical tree view. Permission reports and information regarding file ownership are also available and easily accessible.
The app also supports error logging as well as HTML data export, allowing you to view your reports easily. As for the Pro version, it offers export to other formats, advanced filtering, scheduler, report compression, and command-line support.
NTFS Permission Reporter offers great features even in the free version, so it’s worth checking out.
Using this software, you can ensure that all employees have proper permissions in your company. With it, you can easily see file share and Active Directory reports and review access rights for each user.
If needed, you can always revoke certain access rights for users in your company right from the software. By doing so, you can reduce the risk of security breaches and data loss in your organization.
The software is available for free, so feel free to download it and take your company’s security to a whole new level with Netwrix Effective Permissions Reporting Tool.
Another software that deserves a mention is FolderSecurityViewer, and with this tool, you can easily generate permission reports. By doing so, you can see permissions for all folders on your PC.
The software also allows you to view share reports across all servers on your network. That’s not all, you can also view owner or folder reports for all directories. If you want to save your reports, it’s possible to export them in HTML format.
Certain features aren’t available in the free version, so if you want to view user permission reports for example, you’ll need to purchase a license. The same applies to XLS or CSV report export.
Overall, this application offers decent features, and it’s a great option if you want to view the NTFS permissions report.
Manga or Manhwa? Whichever you prefer, as long as you love both manga and technology, you can combine these two hobbies of yours for a full-screen, end-to-end delectable experience.
It’s easy! All you need is a manga reader for Windows! Soon enough, you’ll be able to read and organize your favorite manga magazines using dedicated the best Manga reader for PC.
Of course, you can use the good old trial-and-error process and test all the apps from the Store, but you’ll lose precious time.
And speaking about that, here’s a quick preview of our favorite picks, in case you want to get straight to business:
Adobe Reader – The ultimate manga reader for PC offline ?
Manga Blaze – The most popular manga reader for Windows 10 & 11 ?
Manga Z – Top manga viewer for PC with 500+ views
Comics World – Cross-device data sync, bookmark & chapter preloading
Manga Tree – Manga viewer for PC with new release notifications
Manga Bird – Free manga reader with 3000 + titles to enjoy
How can I read manga full screen on my laptop?
If you’ve made it this far you’re probably keen on discovering the best way to read manga on PC. And we cannot blame you.
You should indeed be able to get your fantasy dose on a decent size screen and fully enjoy the ride, be it manga reading or anime video binging.
So, is there a manga reader app for PC? For sure, just have a look at the listings above. Now, the best part is that most of these options can act as manga readers for PC online or offline.
This means you can download your pages locally and view them in different ways, skip chapters if you need to, and more.
Some even provide browser support, allowing you to read your favorite manga magazines directly in your browser. So, if you want to know how to read manga on PC comfortably, check out our nominees.
What is the best Manga reader for PC?
Adobe Reader – The ultimate manga reader for PC offline
Adobe Reader is a popular tool that you can use to view, edit, or convert PDF files. But did you know you can also use this versatile tool to read your favorite manga series?
To set things straight from the very beginning, you need to download your manga series in a PDF format to be able to view them using Adobe Reader.
Most manga websites allow users to select the format they want to download their mangas so this should not be an issue.
Moreover, PDF is becoming more and more popular among manga fans thanks to Adobe Reader — a free and easy-to-use PDF viewer software.
Keep in mind that Adobe Reader cannot open mangas saved under various comic book formats such as CBR, CBZ, CBT, CB7, or CBA. If you prefer, you can use a dedicated comic book viewer for that.
As far as we’re concerned, this is the best way to read manga on PC. However, if you’d rather draw and create your own mangas, use Adobe Illustrator instead.
Adobe Reader
Adobe Reader is probably the most popular document reader and many mangas come in PDF format.
Manga Blaze – The most popular manga reader for Windows 10 & 11
Manga Blaze is the most popular manga reader app for Windows and for a good reason.
This app is reliable and fast, plus it is affected by very few issues. Manga Blaze allows you to read, organize, and keep track of your favorite manga titles.
A series of useful features allow you to progress tracking, quickly resume reading from where you left off, and receive notifications when new chapters are available.
You can also download your favorite chapters and enjoy reading them offline. Manga Blaze relies on multiple manga sources in six languages: English, Italian, German, Spanish, Russian, and Portuguese.
Other features include:
Browse each source by applying various filtering criteria (genre, release year, status, alphabetical)
Update all your favorites or just a part of them
Backup your data and easily restore it if you need to
Bookmark specific pages, so that you can quickly get back to them.
You can download Manga Blaze for free from the Microsoft Store. If you need to, you can also install the paid version of the app.
One of the perks of the paid version is that you will not be interrupted by ads, you will be able to disable the safe content filter and more.
Manga Z is one of the best manga reader apps for Windows. The reading experience has been specially designed for manga fans. When using this app, you’ll feel like you’re browsing a real manga magazine.
Manga Z allows you to read manga while downloading the rest of the series in the background. You can also read manga when you’re offline and keep track of your favorite manga series using the Favorites feature.
Notifications inform you when new manga chapters are available so that you never miss any chapter.
Other features include:
History to let you track manga series you have read
Unread indicators tell you where to continue from where you have left off
Search for your manga series by name, author, and genre
Comics World – Cross-device data sync, bookmark & chapter preloading
Comics World lets you read and download thousands of comics and manga titles from more than 20 popular sources for free.
The manga series offered by this app are available in 8 languages: English, Vietnamese, Spanish, French, German, Italian, Russian, and Chinese.
Comics World supports 4 reading modes: vertical single page, horizontal single page, vertical continuous page, and horizontal continuous page, and 4 reading directions: left to right, right to left, top to bottom, and bottom to top.
Other features include:
List manga by popularity or alphabetical order
Pin manga or chapters to the Start screen
Filter titles by category, status
Sync data across multiple devices running Manga Comics
Manga Tree – Manga viewer for PC with new release notifications
Manga Tree supports today’s most popular manga scanlations. You can read the latest chapters of your favorite manga titles, bookmark pages to read later, pin your favorite manga titles to the home screen, and more.
Furthermore, you can browse and search thousands of manga titles, and create a list of your favorite manga series to browse and read.
Do you like to read in portrait or landscape? Enjoy both and customize the settings so as to get both tile and push notifications when new chapters are available from your favorite and pinned manga titles.
You can also download manga chapters for offline reading.
Manga Bird – Free manga reader with 3000 + titles to enjoy
Manga Bird offers more than 3000 manga titles you can read and download for free. The app has a very well-designed interface for the best reading experience.
Just like the apps listed before, Manga Bird supports notifications of new chapter releases and allows you to bookmark your favorite manga titles.
You can also customize the reading orientation and background colors.
However, many users complain about the exaggerated ad size from the reader page, accusing the developers they using this strategy on purpose to force users to pay more for the app.
Many use two operating systems on their PC, but that results in Grub rescue error on Windows 10
This issue occurs when Windows PC users who intend to boot their computer get stuck at the boot screen and the issue is caused by a corrupt boot directory. However, there are ways to fix it.
How do I fix Windows 10 Grub Rescue errors?
1. Set the correct partition
Connect the Windows 10 bootable media to your computer (DVD or USB flash drive)
Restart your computer to enter into ‘Automatic Repair’ mode.
Go to Troubleshoot > Advanced Options > Command Prompt to launch the CMD.
Now, Type ‘diskpart’ without quotes and hit the ‘Enter’ key.
Type the following commands one after the other:
Then type the following commands one by one:
list disk: ( this list all hard drives in your computer)
select disk n: (n means the disk where the OS is installed. Here you can select disk 0 or any other disk where Windows 10 is installed.)
list volume: (this list all volumes on disk 0 is listed.)
select volume n: (the n implies the number of the system partitions.)
active: (this indicates the active system partition.)
From the list of the displayed system partition, determine the right partition which should be active.
Type the following command and hit ‘Enter’ after each command:
Hit the “F2” key repetitively until the system screen window come into view.(Note: BIOS function key may vary depending on your system. Check for the BIOS Function key when you switch on your PC).
Use the “Right Arrow” on your keyboard to navigate to the “Exit” menu tab.
Now, hit on the “Down Arrow” and navigate to the “Load Optimized Defaults” option.
Select the “Load Optimized Defaults” option, and then hit the “Enter” button.
3. Use Windows 10 Automatic Repair to restore the Boot Sector Code
Restart your PC few times during the boot sequence.
From the list of options, Select Troubleshoot > Advanced options > Startup Repair.
The repair process will now start.
After the repair process is complete, check if the problem is resolved.
In addition, you can also use a bootable Windows 10 DVD or USB flash drive to restore boot sector code.
Connect the Windows 10 bootable media to your computer (DVD or USB flash drive)
Restart your computer to enter into ‘Automatic Repair’ mode.
Go to Troubleshoot > Advanced Options > Command Prompt to launch the CMD.
In the CMD window, type the following command and hit “Enter” afterward:
diskpart
select disk 0
list volume
All volumes will be displayed. In the “Type” column, you will find the “DVD-ROM” value. (ensure you remember the drive letter of the Windows 10 bootable media you plugged to your PC). For instance letter E.
Now, type the following command and hit Enter afterward:
Exit
E:
cd boot
Dir
Check to see if you have bootsect.exe files in the list. If yes, enter the following command keys and hit ‘Enter’ afterward:
bootsect /nt60 SYS /mbr
Exit
Restart your PC and check to see if the problem is resolved.
Note: In case you do not see the bootsect.exe file from the steps above, you may proceed to the next step in order to rebuild BCD.
Before you proceed, download Windows 10 ISO file with the ‘media creation tool’ on another PC, and then create a bootable USB drive with it or burn it on a DVD.
Note: Ensure that the USB drive for the Windows 10 installation is 2.0 version instead of 3.0 or 3.1 and it’s at least 4GB.
6. Replace hard drive
Another alternative for fixing Windows 10 Grub Rescue issue is by replacing the hard drive. This is because the hard drive may be damaged hence resulting in the grub rescue startup problem.
Therefore, we recommend that you get another hard drive from your PC’s manufacturer websites or mainstream retail sites and then replace it yourself if you have the tech knowledge.
In conclusion, we do hope that you were able to fix Windows 10 grub rescue problem by using any of the highlighted solutions we mentioned above. However, if you have any questions regarding any of the solutions, feel free to drop us a comment below.
This isn’t the only Grub issue sadly, and many reported a deleted Grub when using Windows. If you’re on Windows 11, we have a great article on how to add Windows 11 to Grub, so don’t miss it.
An issue with the Windows update script – Chances are, that there is an issue with the Windows Update common ents itself and hence, you see the 0x80246002 error.
However, if the above steps fail to fix the Windows update error 0x80246002, we have some effective solutions below for you to try.
1. Clear the SoftwareDistribution folder
Press the Win + R keys together to launch the Run console. Type cmd and press the Ctrl + Shift + Enter shortcut keys to open the elevated Command prompt.
Run the below commands one after another in the Command prompt (Admin) window and hit Enter after each one:
net stop wuauserv
net stop bits
Now, press the Win + E keys to open the File Explorer window. Here, navigate to the below path: C:\Windows\SoftwareDistribution
Here, select all the files and folders in the SoftwareDistribution folder and hit Delete.
Once done, return to the Command Prompt (Admin) window and run the below command one after another, and hit Enter after each one:
net start wuauserv
net start bits
Restart your PC and check if the Windows update is successfully installed.
2. Manually download the update from Microsoft Update Catalog
Open the Run dialog by pressing the Win + R shortcut keys, typePowerShell, and press Ctrl + Shift + Enter together to launch Windows Powershell with admin rights.
Once the Windows PowerShell (Admin) window opens, run the below command and hit Enter: Update-MpSignature
Windows will automatically install any new updates for the Microsoft Defender.
Now, reboot your PC and check if the Windows update error code 0x80246002 still appears or if the issue is resolved.
If your Wi-Fi is not asking for password on Windows 10, you’re in the right place. This is quite a common problem among users, so we decided to help you out and look for some solutions.
Setting a Wi-Fi password is crucial if you want to block strangers from accessing your Internet connection whenever they want. In this manner, you can control who and when uses your bandwidth.
However, from time to time your modem/router may behave erratically and fail to ask users for a password as they try to access your Wi-Fi connection. Sometimes, your computer may be the culprit.
In other words, temporarily disable your antivirus protection, wait for a couple of minutes and then try to connect to your Wi-Fi network and see if your computer prompts you to enter any password.
Don’t forget to enable antivirus protection as soon as the test is over.
Additionally, you could also try an antivirus tool that offers maximum protection with minimum system interference.
Viruses and cyber crooks are continually emerging as online dangers. Many well-known organizations and home users have been the victims of internet assaults in recent years.
It is true that leaving your Wi-Fi connections unencrypted is not a wise decision so we strongly recommend switching to a different antivirus solution. Thus, is critical to have antivirus software that protects against assaults via Wi-Fi networks.
2. Update your computer
Make sure that your machine is running the latest Windows 10 OS version and driver updates.
Wi-Fi issues are very common when running outdated software versions. Checking for updates and installing the latest patches may fix this issue, so give it a try.
Go to Settings > Update & Security > click on the Check for updates button.
Additionally, you can do this much faster if you use Outbyte Driver Updater. All you need to do is download it, run it, and it will search for missing, broken, or outdated drivers all by itself.
The program is portable, lightweight, works fast, and has a library of pretty much all drivers that are in use today. Thus, if you have drivers that need fixing fast, this is the way to go.
Obviously, restarting your modem is the first workaround on the list. This simple action often works wonders and could quickly solve your Wi-Fi problem in less than five minutes.
Simply unplug the power cable from the electrical outlet and wait a couple of minutes. Then plug your modem back into the electrical outlet, press the power button to turn on the device, and check if the problem persists.
4. Change your Wi-Fi password
Go to Start > type ‘control panel’ > double click the first result
Go to Network and Sharing Center > Change adapter settings
Right-click on your wireless network > select Status
Go to Wireless Properties
Click on the Security tab and change the password
If you can’t change your password, go to your modem’s user interface and set the new password from there.
5. Delete your WLAN profile
Launch Command Prompt as an administrator and run the following commands:
netsh wlan show profile
netsh wlan profile
Add the profile name of the network you wish to delete.
If you want to delete all profiles, then run this command: netsh wlan delete profile *
Restart your computer and check if Windows 10 asks you to enter your Wi-Fi password.
Also, keep in mind that if you want Windows 10 to prompt you for the password every time, you need to uncheck the “Connect Automatically” option when connecting through the network.
Click on the Wi-Fi icon on the taskbar > click on Properties
Toggle off the option to connect automatically.
Now, if Windows 10 won’t prompt you for credentials for your Wi-Fi connection, it’s possible that the network profile is stored by the WLAN auto-configuration service.
To fix this issue, you need to delete the stored profile.
6. Ask your computer to forget the network
Go to Start > Settings > Network & Internet > Manage Wi-Fi settings
Scroll down to Manage known networks
Left click on your network > select Forget
Now, search for the network and enter your password.
There you go, we hope that these quick solutions helped you fix the problem. Let us know which one worked for you.
Some users have stated on forums that their monitors have a yellow screen after some Windows 10 updates. Does your VDU (Visual Display Unit) display a yellow screen?
If so, it could be a hardware issue, or you might just need to adjust some display settings in Windows. These are some Windows 10 resolutions that might fix yellow-screened VDUs.
One troublesome issue on all versions of windows is a Yellow Screen of Death, and this issue usually appears if you’re having driver or graphics card issues.
Sometimes you might get tinted screenshots on Windows, but that’s usually caused by additional apps that might be running in the background.
Numerous display issues can be fixed by updating the graphics card drivers so it might be worth checking to see if there’s a more updated graphics card driver. The quickest way to do that is to utilize driver updater software in Windows or use a dedicated third-party driver updater such as Outbyte Driver Updater.
Outbyte Driver Updater will help you update drivers automatically and prevent PC damage caused by installing the wrong driver versions.All the drivers that are being installed on your device are being tested for security and authority.
Outbyte Driver Updater scans your device really fast and once it detects an outdated driver it will update it. If you want to never worry about even getting to the point of having outdated drivers, then you can simply activate the auto driver update.
Outbyte Driver Updater has a large database of over 18 million driver files so it is almost certain that it will be able to find the right driver for all your hardware.
Your graphics card’s color settings might not be at their default configuration. If so, restoring color settings to default might fix a yellow screen. You can usually configure color settings with a graphics card’s configuration utility.
For example, to configure Intel color settings, you can right-click the desktop, and select Graphics Properties – Display and Color Enhancement to open the options shown directly below.
Look for similar options on NVIDIA and AMD control panels, and restore the color settings to default.
5. Check the VDU’s OSD color settings
Most desktop VDUs also include additional color control settings of some kind. Your desktop’s VDU might include contrast, gamma, hue, saturation, color temp, and color tint options on its OSD menu. So check how your monitor’s OSD color settings are configured and make the required adjustments.
Those are some of the resolutions that will probably get rid of the yellow screen. If you still can’t fix a monitor’s yellow screen, consider returning the VDU to the manufacturer for repairs if it’s still within a warranty period.
If you are interested in learning how to fix more Windows 10 errors, check our Troubleshooting Hub.
Today, we will be reviewing some of the best address book software for Windows and Smartphones alike. Contact management has gone beyond merely saving, retrieving, and organizing information from computers.
And with the advent of address book software, the process has been greatly enhanced. It is essential for people with a large number of friends/business partners/colleagues.
Since managing a wide array of contacts can be overwhelming, adopting a durable address book software would save you a lot of time and energy.
Here’s a quick preview of our favorite picks:
C-Organizer – Best address book software with contact sync & day planner
My Personal Address Book – Printable address book software
Efficcess – Address book software for Windows 7 & older versions
Free Address Book – Free address book for Windows 10 & Windows 11
Pobuca Connect – Address book app for PC with Zapier integrations
How do I create an address book on my computer?
An address book software is basically a digital database for storing the personal data of friends, acquaintances, team members and colleagues, family members, and so on.
If you already use the Office package, you could easily stick with programs such as Excel or even Word to create your own personal address book and manage your contacts effectively.
Both require a minimum of formatting such as setting up a few columns. Then, it’s all about data entry. You can even use preset templates to make things easier. However, there’s only so much you can do with a basic list of people.
If you need to juggle with people’s data a lot, then an address book manager is more likely to do you justice.
Essentially, a standard address book software synchronizes all the contact details and ensures every single one is accessible with no more than a few clicks.
Which software is used to create an address book?
C-Organizer – Best address book software with contact sync & day planner
C-Organizer is a popular address book software for Windows 10, designed by CSoftLab. It offers an extensive set of features for contact management. But you can also use it as a daily or weekly personal/work scheduler.
C-Organizer‘s extensive features are classified under specific categories, each performing a specific set of functions. These categories include General, Today, Calendar, Tasks, Password, Notes, and Events.
Check out some of the key features of C-Organizer address book software:
Password generator
Contact sync (with Google contact and others)
Day planner (with calendar)
Advanced search engine
Multi-format file support (HTML, TXT, XML, CSV, and more)
Multilingual support, text editor, and more
C-Organizer is available in three major variants: C-Organizer Professional, C-Organizer Lite, and Advanced Diary.
There is an initial 30-day free trial for every fresh download, as well as a 30-day money-back guarantee.
C-Organizer
Organize your life at work or at school with this awesome and feature-rich software!
My Personal Address Book is arguably the most used address book software. It is the designated address book software for Windows PCs and is officially licensed by Microsoft.
My Personal Address Book is intuitively designed, making it fairly easy to use to store contact records, keep track of addresses, manage schedules, print data, and more.
Its versatile sets of functions make it stand out as one of the best address book software for Windows computers. The software’s integration makes it simple to use. You can easily navigate across platforms to execute certain tasks.
The program will automatically launch your e-mail app (Gmail, Yahoo Mail, Outlook) and send emails to a target address. It uses Windows Map to generate directions for a target address (upon request).
My Personal Address Book is available in two licensing editions – Standard and Premium. The Standard version is available for free, while the Premium version is paid.
Notable features of My Personal Address Book include:
Unlimited address books
Simplified printing (up to 5 standard sizes)
Integration (Windows Map, OneDrive, email, and Skype)
Data encryption, ad blocking, automatic email launching, day timer, and more
My Personal Address Book
Easily manage your emails and address data with My Personal Address Book, a great app for Windows.
Efficcess – Address book software for Windows 7 & older versions
Efficcess is an all-inclusive powerful address book software, with cross-platform support for all Windows computers between Vista and Windows 10, as well as mobile iOS and Android platforms.
This software is built for versatility and its functions extend way beyond managing a contact book. It hosts a wide array of functionality, ranging from contact management to schedule/appointment management.
In fact, most of its features are automated, to help you keep track of your daily schedule.
Also, as a prominent PIM/address book software, Efficcess has a large client base that spans many countries. Hence, it offers multiple language options to its culturally diverse users.
In figures, Efficcess supports over 30 languages, including English, French, Arabic, Chinese, Portuguese, Polski, Armenian and more.
Efficcess offers a 30-day free trial to new users. And after the expiration, you can continue to enjoy the service in exchange for a one-time fee.
Some of the main features of Efficcess include:
Reminder, Password manager & Diary notes
Contact group manager & One-click contact search
Cross-platform synchronization (between PC and smartphone)
Advanced document editor, Data import/export, file printing, and more
Free Address Book is one of the best address book software for Windows, designed by GAS Software.
It is a standard address book solution that is equipped to store and synchronize innumerable contact names, addresses (street number, city, and country), phone numbers, email contacts, and so on.
Besides, Free Address Book is equipped with versatile tools, for recording and tracking contact addresses with convenience. This is made possible by its intuitive user-friendly interface, which is very simple to navigate.
Hence, tasks like recording/contact details, searching for an address, or managing a database are executed without hassle.
Some of the key features of Free Address Book include:
Free Address Book, as the name implies, is a free address book software, for both personal and business/commercial uses. There are, however, various custom-priced licensing plans on offer.
Pobuca Connect – Address book app for PC with Zapier integrations
Pobuca Connect is an advanced cloud-based contact management and addresses book software, which is specially built for business/commercial purposes. The software is supported on both Windows and mobile devices.
Pobuca Connect hosts a powerful set of features that are better suited for organizing address books & contact details at organizational levels.
It’s equipped to link customers’ or clients’ address books, and automatically send updates to them.
Also, the software can be used to streamline employees’ contact details and automatically onboard new intakes. Every contact detail is secure, and can only be accessed with permission from the admin.
Some of the key features of Pobuca Connect include:
Contact import/export, Standard fields shared contact lists, and contact merging
Cross-platform synching (desktop and smartphone)
Scan business cards, activity logs, and more
Pobuca Connect is equipped with Zapier integration for Gmail, Zoho Mail, Hubspot, MS Excel, Google Contacts, Microsoft Active Directory, PBX, Asana, Pipedrive, Google Sheets, Agile CRM, and over 1000 more.
Address book software is an essential tool for improving communication among friends, co-workers, team members, and so on.
However, selecting a durable address book software could be tricky, basically because of compatibility differences, as well as variations in durability.
Nevertheless, we have compiled 5 of the best address book software for Windows, to better inform your decision on which one is most suitable for you.
According to statistics, video marketing gained a lot of popularity. It seems that after watching a video, about 70% of consumers are more than likely to buy a particular advertised product.
Over 90% of viewers who are watching videos on mobile devices will share them with others, and 70% of professional marketers believe that videos are the most powerful software for conversion.
As a business, it’s imperative to start using videos to advertise your products and services because such a marketing strategy is the best these days.
For this reason, precisely, we picked out just the best and most efficient animation tools that you can successfully use for your business, so make sure to check out their sets of features.
How do I choose the best animation software for business?
There are various tools available to edit videos online for your business, whether it is a cartoon video creator or a free animation maker for beginners. The procedure might be easy or difficult, depending on how much time and money you choose to put into it.
You can have the same effect with a free animation creator as you can with a more costly option. Your animated video has done its job if you have the proper message and it resonates with your viewers.
Solutions that provide additional tools and alternatives, on the other hand, will enable you to generate higher-quality items. You can begin with simple tools and progress as your needs dictate.
If you’re looking for the very best animation software for professional editors and creators, then let us tell you more about Adobe Animate.
This is our top recommendation for today thanks to a large number of options it offers and its unmatched precision in designing interactive animations.
You will certainly appreciate the clean, uncluttered interface and those amazing Adobe Fresco Live Brushes that let you sketch and draw incredibly expressive characters.
When it comes to the included illustrations and video animation tools, they make creating interactive web and mobile content for ads and games as simple as ABC.
This includes WebGL, Flash/Adobe AIR, HTML5 Canvas, and SVG as others may just fall in love with your artwork too.
Let’s go next through some of its key features:
Intuitive layout, so that even the common user can easily get used to it
Incredible vector brushes in all sorts of styles
Make your work visible on desktop, mobile, and even TV to reach out to a large spectrum of audiences
Creative Cloud membership allows access to all the latest features and fixes
Step-by-step tutorials if you find using it a bit difficult
Adobe Animate
Adobe Animate is the best professional animation software so if you’re an editor or a creator you will have the optimal results.
Animaker is a great tool that lets you create high-quality animations for your business.
This program includes six popular video styles, and you can even combine them to get the desired result.
Overall, the tool allows you to create 720 different types of animated videos which is really more than enough.
Check out more great features that are included in this tool:
Versatile and easy to use
Amusing for most customers
Perfect for advertising to young teens
A vast library of premade templates
Action buttons
Here are the six tools included in this software: Animaker for 2D, Animaker for 2.5D, Animaker for Handcraft, Animaker for Infographics, Animaker for Whiteboard, and Animaker for Typography.
With this program, you will get the chance of creating funny animated videos to promote your business and attract more potential customers
This tool will offer you everything you need to create studio-like animated videos.
The website’s motto is Say NO to big studios. Instead, own one and we believe that this says it all.
Head over to Animaker’s official website to check out the whole set of great features that you will get to enjoy if you decide to try this tool.
Animaker
Online video creator for animated banners and ads, perfect for presentations.
DP Animation Maker is a simple and powerful tool to create impressive animation from still images. You can add special effects and fine-tune them so they truly enhance the features of your advertised product.
The program’s toolset includes some powerful instruments. Smart Animation Brushes to easily paint over a still image and turn a picture of water, fire, or light into real-time animation.
Morphing/Deformation Brushes allow you to create spinning, wave movements, sailing, and many other smooth movements with little effort. A library of ready-to-use animations and automatic looped video generation.
The program is great for making quick animations from pre-existing elements, saving you loads of time on promoting products efficiently, and increasing your conversions.
Here’s what you can create with DP Animation Maker:
Animated videos
Animated Backgrounds
Animated pictures for multimedia products
Animated introductions for games
Music videos
YouTube videos
DP Animation Maker
This powerful but easy-to-use animation software will help you create the best advertising animations.
With PowToon, you can create excellent presentations and videos to promote your business. The best thing about this software is that it lets you create high-quality content to captivate and engage your audience.
Take a look at the best advantages that come with PowToon:
Educational purposes
Drag-and-drop functionality
Best for advertising schools and private courses
Premade symbols and animated designs
When you’re at work and don’t want to be ignored, the best solution is to use PowToon in order to grab the whole attention of your bosses and colleagues
For your business, this tool will turn out to be your best friend as it will help you promote your products and services
You can advertise your business using simple PowToons because it has already been proven that these are the best ways to grab your audience’s attention.
You will get professional-looking results in under 30 minutes via the ready-made templates with the drag-and-drop templates designed, scripted, and ready for use.
Check out more features that are packed in this fantastic software, by visiting PowToon’s official website.
With Bannerflow, you can create HTML5 banner ads without knowing any code.
With this tool, you will be able to make banners easier and quicker than ever before: from video banners to fully-featured media ads, all that you will need to know is how to use the drag-and-drop feature.
Everything is this tool is in HTML5, and it’s fully optimized for all devices. This means that your audience will always see the best part of your work and you will be able to advertise your business in the best possible way.
Check out the key features that are included in Bannerflow:
Advanced advertising software for banner creation
Suited for all industries
Help from leading experts in marketing
Print banners
Available for all media platforms
The software comes with scaling and translation features, and this means that creating alternative versions of the same banner that are customized to various audiences will be a piece of cake
Using Bannerflow, you will get the chance to launch localized banner campaigns on an international scale really quickly. You will get the opportunity to publish your ads on more than 100 networks with only a few clicks and you will not even have to copy and paste any tags or upload any files.
If you need to change something to your ad after publishing it, you will be able to edit it without having to republish it, you can update your ads in real-time.
Of course, you will also be able to publish your ads on social media for all of your followers and audiences.
Your banners can become live and relevant ads, and it’s great that you can update them live because this way your potential customers will get to see the latest and updated ads.
The team calls this tool the Bannerflow Banner Builder because this is what it lets you do: build banners.
You can check out more relevant and exciting features that come with this tool by heading over to its official website and taking a look around.
With GoAnimate, you will be able to make professional animated videos in order to promote your business best.
With GoAnimate, you will see that you can create your very first video in less than 5 minutes which is really amazing.
Using GoAnimate, you can truly engage your audience, and you can choose from lots of editable scenes in industry, activities, occupations, and concepts.
Your characters will have a voice that will be lip-synced automatically, and you can also offer a voice track to the background of the animation which will become the voiceover narration.
The flexible workflow that you will be able to enjoy while using this tool includes scripting and storyboarding, voice recording, visual greatness, publishing, and more.
It’s best if you head over to GoAnimate’s official website where you can check out for yourself the complete set of features and functionalities that you will be able to enjoy if you decide to use this handy tool.
Just take a look at what you need to know to use this great tool and what are its best features:
Drag and drop functions
Premade assets for ads and banners
Suited for jobs and project advertising
Budget-friendly
Voice and audio recording
You can get started with GoAnimate right away, and the best thing is that you don’t even need an Internet connection or set up the software.
It’s all do-it-yourself, without needing to have a massive team or budget; all you will have to use will be the software’s effortless to manage tools.
After subscribing, you will get unlimited access to everything that this tool has to offer which is quite a lot.
You will be able to add a character or swap a background for instance with a simple click of the mouse or by dragging and dropping.
On the official website of this great tool, you are even warned: that recreating yourself and your customers with its help will become really fun and addictive and we can guarantee that this is entirely true.
Animatron Studio is another fantastic way of creating animations for your business.
You will get the chance of creating explainer videos, design HTML5 banners and animations, and make stunning presentations. There is a library of more than 500K royalty-free video clips, photos, and audio.
You will get the chance to educate your leads with various explainer videos and sell more to your clients with video catalogs and all kinds of demos for your products and services
In the end, you will be able to export and download your work to the most popular media formats effortlessly. You can share content on social media straight from the platform’s editor.
Check out the best features that are packed in this excellent animation tool:
200 pre-animated sets
Whiteboard animation style
Import and edit your own photos, graphics, audio, and videos
Annotate, slice and combine
Suited for food and drinks advertising
Animatron Studio is ideal for businesses and startups, and you will be able to grab your audience’s attention if you decide to use it.
The best benefit of using Animatron Studio is that you will get to save massive amounts of money on video production.
You will be able to make content that is worth sharing, and your audience will really appreciate this.
While using Animatron Studio, you can choose from thousands of free characters, props, and backgrounds which are all pre-animated.
Building a long-term client experience is a difficult and time-consuming endeavor that needs several meetings. You may, however, considerably accelerate this process by presenting fresh and new information about your brand and its offering.
Do this through a series of animated advertisements that are released one by one on your business website or social media accounts, like an Instagram automatically posting software.
By releasing videos on the web, you can even create a communication strategy that includes a number of phases and planned engagement with potential clients.
For example, you might begin by creating a short storyboard introducing your brand. The following stage may be a captivating and exciting new product teaser. Following that, you may post a video describing all of the product’s features and competitive advantages.
After you’re done analyzing these tools’ sets of features, we believe that you will eventually be ready to make the most informed decision that will definitely bring the best advertising results for your business. Good luck and share your thoughts!
Sometimes, while trying to host a Zoom meeting, you may come across the error code 3113 if you have not enabled either the Passcode or the Waiting Room security options.
However, there could be other underlying reasons why the app triggers the error and why you failed to host the meeting.
Why do I see the Zoom error code 3113?
A passcode or a Waiting List is not enabled – Configuring a Zoom meeting often requires activating the Passcode, and if that is not yet done, the error shows up.
Outdated Zoom application – If the application is not yet updated, that’s another important reason you may see the Zoom error code.
A glitch with the Zoom app – There could be an issue with the app itself, and hence, you encounter it.
Incompatible Zoom version with Waiting Rooms – Chances are that the version of the webinar software you are using does not match the waiting room requirements.
How do I fix the error code 3113 in Zoom?
1. Set a Passcode in Zoom
Go to Zoom on your desktop, and sign in to the app.
Next, click on Meetings, select the Upcoming tab, look for the scheduled meeting, and click on Edit.
On the next page, scroll down to the Security section. Here, select Passcode and, enter a password. Press Save.
2. Enable waiting room
Sign in to Zoom on your Windows desktop.
Now, select Meetings on the left. Go to the right and click on the Upcoming tab. Here, look for the meeting, and click on Edit.
Next, go to the right, and scroll down to the Security section. Here, select Waiting Room, and click on Save.
Now that you have activated the waiting room, try hosting the meeting and check if it still shows the Zoom error code 3113.
Press the Win + R shortcut keys to open the Run dialog, type appwiz.cpl in the search bar, and hit Enter to open the Programs and Features window in Control Panel.
In the Control Panel window, go to the Uninstall or change a program section, look for the Zoom app, right-click and select Uninstall.
Once the app is completely uninstalled, visit the Download Center page for Zoom. Here, click on the Download link in blue based on your system architecture (32-bit/64-bit version).
Open the installer and follow the on-screen instructions to complete the installation.
Keep in mind that Zoom requires either a passcode or a waiting room for the following account types:
Free Zoom accounts
Accounts with a single license
Business accounts with a minimum of 10 to a max of 100 licenses
Pro accounts with two or more licenses
Government accounts with less than 100 licenses
Updating your app can also help you fix error code 4502; read this guide to learn more about other solutions.
Moreover, you must also review if the waiting rooms support the current app version you are using. This is one common reason you may see the Zoom error code 3113.
For Windows and macOS, the supported Zoom versions are v5.1.2 or higher and v5.1.2 or higher, respectively.
But if you are a mobile user, the supported Zoom versions for Android and iOS are v5.1.28652.0706 or higher and v5.1.228642.0705 or higher.
Some users have posted on Google’s forum about Gmail emails getting stuck in the Outbox. When those users try sending emails, the messages get queued in Gmail’s Outbox. Consequently, users can’t send emails when the issue arises.
Deselect the Enable offline mode checkbox if it’s selected.
2. Check the file size of email attachments
If you’re sending emails with file attachments, check the total file size. If the file size of your attachment exceeds 25 MB, then you won’t be able to send it.
These tools are able to archive any file without loss of quality, and many of them include a split option that will create smaller archives if the size of your files is too big and requires that.
This will allow you to send files through the Gmail app without any worry about size limitations.
3. Clear Gmail’s cache
To clear Gmail’s cache in Chrome, click the Customize Google Chrome button.
Select Settings to open that tab.
Click Privacy and Security on the left of the Settings tab to open the options shown directly below.
Click Cookies and other site data to open further options.
Then click See all cookies and site data to open a list of site data.
Type mail.google in the search box.
Click the Remove button for mail.google to erase that cached data.
4. Clear the Gmail app’s data
To clear the Gmail app’s data on Android mobile devices, tap Settings to open further options.
Tap Apps & notifications to open a list of apps.
Next, select the Gmail app listed.
Select the Force Stop option if you can.
Then tap Storage to open the options shown directly below.
Select the Clear Cache option.
If the issue persists after clearing the cache, select the Clear Data option.
5. Select the Allow background data usage option
To allow background data usage on Android mobiles, open Settings.
Tap the Apps tab.
Next, select Gmail on the app list.
Tap Mobile Data to open the options shown directly below.
Toggle the Allow background data usage option if it’s off.
Also, enable the Allow app while Data saver on option.
Then tap the button with three horizontal lines on it to open a menu.
Select My Apps & Games to check for updates.
Tap the Update button for Gmail. Alternatively, you can select the Update all button.
Those are some of the resolutions users have confirmed to fix Gmail emails getting stuck in the Outbox for both the mobile and web apps. So, those potential fixes are worth a shot.
Some users have been complaining about an issue regarding BitLocker encryption on Windows 10 devices, mainly, an incompatibility between a drive encrypted on Windows 7 and later used in a Windows 10 machine.
If you are experiencing this issue, then maybe this guide will give you the solution.
If you have not heard about BitLocker by now, and you want an extra layer of security for your Windows computer, then you should definitely do some research regarding what it can do and how it can protect your files.
But even with its advantages, Microsoft’s encryption feature has some issues when moving drives from Windows 7 computers to Windows 10.
We’ll consider the following scenario: you have been using BitLocker on a Windows 7 computer and you have recently bought a new Windows 10 computer and you want to install your old hard drive into the new tower.
When you try to access the encrypted partitions, Windows 10 advises you to turn off BitLocker or does not recognize your password.
There are a few ways around this problem, some being simpler than others, and it is up to you to determine which of them can be of use in your case.
BitLocker is a great way to protect your files, and in this article, we’re going to cover the following issues:
Disable BitLocker Windows 10 – Disabling BitLocker is rather simple, and the disabling process is almost identical on Windows 10.
Disable BitLocker command line, PowerShell – If you’re an advanced user, you can disable BitLocker using the command line. You can disable BitLocker with both PowerShell and Command Prompt, and in this article we’re going to show you how to do it.
Completely remove BitLocker Windows 10 – BitLocker is a built-in feature of Windows, and while you can’t remove it, you can disable it and all its related services. By doing so you’ll permanently disable BitLocker on your PC.
Disable BitLocker external hard drive, USB encryption, removable drive, USB drive – BitLocker also works with external drive and removable storage. If you want to disable BitLocker for your USB drive you can do so using any of our solutions.
Disable BitLocker to update BIOS – Few users reported that they are unable to update their BIOS before disabling BitLocker. However, you should be able to disable BitLocker after reading this article.
Disable BitLocker Windows 10 Group Policy – If you want, you can disable BitLocker simply by modifying your group policy. This method works for Windows 10.
Here’s how you disable BitLocker on Windows 10.
How do I disable BitLocker on Windows 10?
Quick Tip:
While Bitlocker may only be able to encrypt entire drives, there are situations when you don’t need that.
That being the case, if you need a tool that can encrypt only the data that you need, then give Folder Lock a try.
The program can also create encrypted backups as well, so recovery will be made easier.
Other than that, both BitLocker and Folder Lock are very similar since they both offer high levels of encryption, thus improving the security of whatever you have on your drives.
1. Disable BitLocker from Windows 10 Control Panel
Open the Search bar and type Manage BitLocker.
Select the Manage BitLocker from the menu.
This will open the BitLocker window, where you will see all your partitions and you can either select to suspend BitLocker or completely disable it.
Select the option you want and follow the wizard.
Similarly to how you’d go about this problem in Windows 7, it might work to disable BitLocker from Control Panel, assuming you know your passkey and it still works.
After doing that, BitLocker should be permanently disabled for the selected drive.
2. Disable BitLocker from Windows 10 using the Local Group Policy Editor
Open the Search bar and type in Group Policy, then select Edit Group Policy from the menu.
From here, navigate using the left-hand side menu to Computer Configuration -> Administrative Templates -> Windows Components – > BitLocker Drive Encryption -> Fixed Data Drives and select the Deny write access to fixed drives not protected by BitLocker option and double click it.
Click Not Configured or Disabled, and click on Apply and OK to save changes.
If the first method is not a viable option for you, then using the Group Policy utility (GPO) might offer the solution.
After doing that, restart your PC and your problem should be resolved completely.
3. Use another PC to disable BitLocker
If both methods have failed, then all you’re left with is installing your encrypted hard drive back to a different computer and going through the methods once again.
In this scenario, method 1 will fix your problem and decrypt your drive, allowing you to use it in your Windows 10 PC.
4. Use Command Prompt
Open Command Prompt as administrator.
To do that quickly press Windows Key + X to open Win + X menu and choose Command Prompt (Admin) from the menu.
When Command Prompt opens, enter the following command, and run it:
manage-bde -off X:
Be sure to replace X with the actual hard drive letter.
If you’re an advanced user, you can turn off BitLocker by using Command Prompt.
The decryption process will now start. Keep in mind that this process can take a while, so don’t interrupt it.
After the process is finished, your driver will be unlocked and BitLocker will be turned off for that drive.
As you can see, this is a quick and easy way to turn off Bitlocker, and if you’re familiar with Command Prompt, feel free to try this solution.
Right-click Windows PowerShell from the list of results and choose Run as administrator.
When PowerShell opens, enter this command and press Enter to run it:
Disable-BitLocker -MountPoint "X:"
Before running the command, be sure to replace X with the letter that represents your hard drive partition.
You can also turn off BitLocker for all drives on your PC using PowerShell. To do that, follow these steps:
Open PowerShell as administrator.
Now run the following commands:
$BLV = Get-BitLockerVolume
Disable-BitLocker -MountPoint $BLV
If you prefer using command-line tools, you should know that you can turn off BitLocker for specific drive simply by using PowerShell.
By running these two commands you’ll get the list of encrypted volumes and decrypt them with a single command.
Keep in mind that the decryption process can take a while, so don’t interrupt it. Once the drive is decrypted, BitLocker will be turned off for that drive.
6. Disable BitLocker service
Press Windows Key + R and enter services.msc.
Press Enter or click on OK.
When Services window opens, locate and double-click on BitLocker Drive Encryption Service.
Set the Startup type to Disabled and click on Apply and OK to save changes.
If you want to turn off BitLocker, you can do that by disabling its service.
After disabling the BitLocker service, BitLocker should be turned off on your device.
7. Turn off device encryption from the Settings app
Open the Settings app. You can do that by pressing Windows Key + I shortcut.
When the Settings app opens, navigate to the System section.
In the left pane, select About.
Now locate Device encryption section in the right pane and click on Turn off button.
When the confirmation dialog appears, click on Turn off again.
If you want to turn off BitLocker, you’ll be pleased to hear that you can do that right from the Settings app. After doing that, BitLocker should be disabled on your PC.
BitLocker can be useful if you want to protect your files from unauthorized access, but if you don’t want to use this feature, you should be able to turn it off by using one of our solutions.
Microsoft Edge’s latest version has hit the Stable Channel for everyone to download, bumping it to version 109.0.1518.49. The release comes with several feature updates and the usual reliability fixes. Here’s everything you need to know:
First up is the added ability to link a personal Microsoft account (MSA) and Azure Active Directory (AAD) account through work or school. In turn, users will now be able to earn Microsoft Rewards points for the Bing searches they conduct using Edge.
Next up are some changes that are expected to affect TLS server certificate verification in Microsoft Edge version 110. Once this version rolls out, “the certificate trust list and the certificate verifier will be decoupled from the host operating system’s root store.” Both will now ship with the browser, what’s more, the MicrosoftRootStoreEnabled policy is now available for testing to control when the built-in root store and certificate verifier are used. Though Microsoft intends to cut support for it when releasing Edge version 111.
And finally, the browser now comes with text prediction that is designed to help the user to write faster and more articulately. “Microsoft Edge provides word and sentence predictions for long-form editable text fields on web pages,” says Microsoft. It’s worth noting that this feature is currently only available in English to users in the US, India, and Australia. However, the company plans to expand it further to other regions.
Microsoft Edge should auto-update to the latest version, but if it does not, you can trigger it manually. Just head to the browser’s menu, choose Help and Feedback then About Microsoft Edge and wait for the update to download, and then restart.
Installing Windows can be a complicated process, and sometimes errors such as Windows cannot install required files can appear and interrupt your installation.
This is a big problem, and today we’ll show you how to fix it.
How can I fix Windows cannot install required files error?
Before we start, ensure that your DVD drive is clean and that the installation disc isn’t damaged. You can also try connecting your SATA drive to a different port. Also, try to install it on a drive that has two or more paritions.
Try to use the right version of Windows, since 64-bit ones can’t work on certain processors. Lastly, make sure that your RAM is working correctly. You might want to test it with MemTest86+.
1. Remove overclock settings
Restart your PC.
While it boots, keep pressing F2 to enter BIOS.
Navigate to Advanced Settings or Tweaker.
Locate the Overclocking section and restore the value to defaults.
Windows cannot install required files message will appear if Windows won’t Install on your PC, but you should be able to fix this problem by using one of our solutions.
Windows 10 comes with a series of repair tools, with the Automatic Repair being one of the most effective. Unfortunately, many users are complaining that Windows 10 gets stuck in the Automatic Repair loop.
This can be frustrating as it prevents you from booting into your PC. Fortunately, it is not an issue that is impossible to fix, and we will show you to get past it in this guide.
What causes the automatic repair loop in Windows 10?
It is usually difficult to pinpoint the reason Windows 10 gets stuck in the Automatic Repair loop. However, when considered closely, you can trace the issue to one of the factors below:
Corrupt system files: This is the most prominent cause of this issue. You can fix it quickly by repairing the broken system files in Safe Mode.
Bad memory sectors: Sometimes, this issue might be down to faulty or corrupt memory sectors. Running the CHKDSK command should fix this quickly.
What to do if You Get Stuck on the Automatic Repair Loop on Windows 10
1. Disable Automatic Repair
Power on your PC and press and hold the power button to force it to shut down. Repeat this thrice to launch the Advanced startup options. From here, proceed to Step 4.
If you can’t boot into the Advanced startup options, insert a bootable media creation tool into your PC, enter your language and other info and click Next.
Now, click the Repair your computer option in the bottom left corner.
Select the Troubleshoot option.
Now, choose Advanced options.
Next, select the Command Prompt option.
Type the command below and hit Enter: bcdedit
Check if the identifier option is set to {default} and recoveryenabled to Yes.
Now, type the command below and press Enter: bcdedit /set {default} recoveryenabled no
Finally, if the command above does not work, type the command below and hit Enter: bcdedit /set {current} recoveryenabled no
The quickest way around this issue is to disable the Automatic Repair tool causing the problem. After running the last command on the list, close the Command Prompt window and restart your PC.
2. Repair boot files and memory sectors
Repeat Steps 1 to 6 in Solution 1.
Type the command below and press Enter: fixboot c:
When the command finishes running, type the command below and hit Enter: chkdsk c: /r
Finally, restart your PC.
Since Windows 10 usually gets stuck in the Automatic Repair loop when you boot your PC, the problem might be caused by your boot files or hard disk. The solution is to repair these two important components and restart your PC.
3. Repair system files in Safe Mode
Repeat Steps 1 to 5 in Solution 1.
Choose Startup Settings.
Now, click the Restart button.
When your PC restarts, press 5 or F5 to Enable Safe Mode with Networking.
Next, press the Windows key, type cmd, and click Run as administrator under Command Prompt.
Type the command below and hit Enter: DISM /Online /Cleanup-Image /RestoreHealth
Wait for the command to finish running, type the command below, and press Enter: sfc/scannow
Finally, wait for the command to finish running and restart your computer.
In some cases, Windows 10 gets stuck in the Automatic Repair loop because it encountered an issue and it is trying to fix itself. However, the problem worsens if the system image needed for the repair is also faulty.
This is where the DISM command comes in. It repairs and restores any faulty system image. On the other hand, the SFC command helps fix any other broken or corrupt system files.
4. Disable early launch anti-malware protection
Repeat Steps 1 to 3 in Solution 3.
Press 8 or F8 to Disable early launch anti-malware protection.
Your PC should start normally if the feature is the cause of the issue.
Windows 10 has a lot of protective features to keep your PC secure. One of them is the early launch of anti-malware protection.
But some users have found this feature to be why Windows 10 gets stuck in the Automatic Repair loop. Disabling the feature should fix this problem.
5. Restore the registry
Repeat Steps 1 to 4 in Solution 1.
Type the command below and hit Enter: C:\Windows\System32\config\\rregback* C:\Windows\System32\config\
When prompted to overwrite files, type All and hit Enter.
Lastly, close Command Prompt and restart your PC.
Another possible cause of this problem is a corrupt registry. The quickest way to make sure Windows 10 does get stuck in the Automatic Repair loop, in this case, is to restore the registry to default.
Now, select your restore point and click the Next button.
Finally, follow the onscreen instructions to complete the system restore.
If Windows 10 start getting stuck on the Automatic Repair loop after making some changes to your PC, the best thing to do is to perform a system restore. This will restore your PC to a point when it was working normally.
7. Reset your PC
Boot into the Advanced startup options by restarting your PC thrice.
Select the Troubleshoot option.
Now, click the Reset this PC option.
Choose whether to keep your files or remove them.
Finally, follow the onscreen instructions to complete the process.
If the solutions above fail to prevent Windows 10 from getting stuck in the Automatic Repair loop, you might have to reset your PC to default.
Fortunately, you have the option to keep your files. However, if you have a backup of your crucial files, it is advised to remove the files.
With this, we can conclude this article on how to fix the Windows 10 stuck in Automatic Repair loop issue. If you still can’t solve the problem after applying the fixes in this guide, you might need to perform a clean install of Windows 10.
Feel free to let us know in the comments below if you encountered any issues while applying the fixes in this guide.
The Autopilot.dll error occurs when there is a problem with the DLL file, or it gets corrupted due to other reasons, such as missing DLL files. It could also be caused by certain applications that are incompatible with Windows.
Most users who reported the Autopilot.dll error associated it mostly with the Event Viewer and said it was accompanied by the error code 0x80070491. We’ve already established that DLL files are important in the running of applications, so let’s have a look at how to bypass this error.
What is Microsoft Autopilot?
Microsoft Autopilot is a cloud-based service that helps you deploy and manage Windows devices. It’s a great way to automate the deployment of corporate-owned devices, including PCs, tablets, and phones.
Autopilot also offers a range of monitoring services that allow you to gain insight into how your application is performing in the production. It also provides best practices for creating high-availability architectures for your applications.
Why does the Autopilot.dll error occur?
If you spot the Autopilot.dll error, your system may be at risk, and you’ll experience frequent crashes or random shutdowns. Below are some reasons that may trigger the error:
Outdated OS – If you are using an older version of Windows on your computer, it might be possible that the Autopilot.dll file has become corrupted due to some error in its code. You need to upgrade to Windows 11 or the latest version.
Incompatible software – If you started experiencing this issue just after installing a new program, you might be facing some compatibility issues.
Overclocking your PC – Overclocking can get more performance out of your hardware, but it’s not without its risks, as you’re exposing yourself to potential damage to your processor.
Microsoft services – There may be an issue with Microsoft assistant service causing this error.
How can I fix the Autopilot.dll WIL error in Windows 11?
1. Check for Windows updates
Hit the Windows key and click on Settings.
Select Windows Update on the left pane, then click on Check for updates.
Click on Download & install if available.
If there are any updates, once they finish installing, restart your PC and check whether the Autopilot.dll WIL error was reported message still appears.
2. Switch off the Microsoft Account Sign-in Assistant Service
Hit the Windows key, type Services in the search box, and click Open.
Locate Microsoft Account Sign-in Assistant Service, right-click on it, and select Properties.
Click on the Startup type, and in the drop-down, select Disabled.
Under Services status, click on Stop.
Click Apply and then OK to save the changes.
Since a section of users also reported that this error was a result of logging into Microsoft services such as Office and OneDrive, disabling the service may help get rid of the Autopilot.dll WIL error was reported message.
3. Run the DISM command
Hit the Windows key, type cmd in the search bar, and click Run as administrator.
Type the following commands and press Enter after each one: DISM /Online /Cleanup-Image /CheckHealthDISM /Online /Cleanup-Image /ScanHealthDISM /Online /Cleanup-Image /RestoreHealth
Hit the Windows key, type cmd in the search bar, and click Run as administrator.
Type the following command and press Enter: sfc /scannow
Most users who went this route reported that the error was gone when they restarted their PCs. However, this birthed a new error where the computer now takes longer to boot.
Enter BIOS mode. (The specific keys are different for every manufacturer, so ensure to confirm from the official website).
Navigate to Overclocking options and locate XMP.
Disable this feature, restart your PC and check if the problem persists.
Overclocking is a process of increasing your computer’s performance by increasing its clock speed. If you use a graphics card for gaming, then overclocking might result in overheating of your system.
This, in turn, can cause software and hardware issues like the crashing of games and apps and errors in Windows 11 that make your PC unstable.
So, if you are using an overclocked graphics card, we recommend that you disable overlocking for a while until the problem is resolved completely because it might be causing this error.
6. Reinstall Windows
Sometimes, this problem is caused by corrupted files in the operating system. You may have no choice but to reinstall Windows if it is corrupted. However, before jumping ship, we recommend that you start Windows in Safe Mode and check if the issue persists.
Remember to back up all your files before reinstalling Windows to avoid losing any important files. If you come across DLL errors often, you should consider installing DLL repair tools. These come in handy as they work automatically to repair broken, corrupted, and missing DLL files.
Elsewhere, you may also come across the Vcruntime140.dll is not found error, so feel free to check out our detailed article on how to fix this issue.
In case you solved the above error with a solution not mentioned here, we’d love to hear about it in the comment section below.
As a Fed Ex customer, you can file a claim for concealed loss, visible or concealed damage, delivery or payment delays, non-delivery, or misdelivery. Obviously, you will also be able to check your FedEx claim status.
One should file a complaint within 21 calendar days. Additionally, all supporting documentation must be filed within 9 months of the delivery date.
How long do FedEx claims take?
According to FedEx, a claim will normally take no more than 7 business days to be solved. Nevertheless, the procedures are liable to take longer if additional verifications are required.
This is why we suggest you present all the necessary documents and retain the original package as well.
Submit all the necessary information: tracking number, shipment details, and personal details.
Alternatively, you can call the FedEx support number (which differs, depending on where you’re located) and ask for more information about your delivery.
If your delivery declared values were more than $100, make sure to have all the documents at hand related to your purchase/delivery.
Now, what happens after FedEx claim? After filing a complaint, you’ll receive a confirmation email, which includes a FedEx claim tracking number or as it’s widely known, a FedEx case number.
Log into your FedEx account. This is a mandatory step to view your claims, otherwise, you won’t be able to see the details.
Then go to Support > File a claim.
Click the Start a Claim button.
Select the View My Claims tab at the top. The claim FedEx claim tracking number will be necessary.
This is how you can easily request a FedEx claim status update. Again, you can call the FedEx support number and request the status of your claim, based on the claim tracking number.
FedEx settles most cases in 5 to 7 business days unless additional time for research is needed. Obviously, they will notify you if that is the case. When a claim is settled, you receive a confidential envelope with FedEx‘s official response.
If you’re checking your claim through the mobile app and it fails to load properly, see this FedEx app not working guide for quick fixes to restore access and track your claim status.
We truly hope that any claim you file with FedEx gets a satisfactory reply. If you want to share your experience with FedEx, use the comments section below.