You can now launch Xbox cloud games with Bing and Microsoft Edge

If you are a subscriber of Xbox Game Pass Ultimate, then you no doubt love the ability to take advantage of Microsoft’s cloud-streaming service for games, Xbox Cloud Gaming.

And if you are a also a fan of Microsoft’s Edge browser, then you are about to become an even bigger fan thanks to a new feature rolling out for Edge first reported by Windows Central. This new feature apparently allows users to launch Xbox cloud games directly from the browser when using the Bing search engine.

When searching a game in Bing, if that game is part of the Xbox Game Pass Ultimate catalog and has access to cloud gaming, you’ll see a entry for that game at the top of the search results, along with a big green Play button through which you can launch the game straight from the browser. Use this link to a Bing search of Fortnite to give it a try. Remember that Xbox Cloud Gaming is an exclusive service of Xbox Game Pass Ultimate.

Featured image via Windows Central. 

3 Ways to Fix Standby Memory Issues on Windows 10

A critical factor for any Windows user is the system’s performance. But that seems to take a hit sometimes. Many users report slowdowns while using the OS, mainly due to Standby Memory issues.

But what is Standby Memory, and why is it showing such a high consumption? These questions have perplexed users since the Resource Monitor doesn’t clearly state what this memory does and provides only a short description of it.

This article explores the problem and aims to provide easy-to-follow solutions for the issue.

What is Standby Memory?

Standby Memory is a cache of previously used data but has now been reserved as standby because the program or process once used has become inactive.

If the concerned program tries reaccessing the data, it can quickly be retrieved from the Standby Memory instead of repeatedly locating it. This saves time and boosts the computer’s performance.

Under an ideal scenario, Windows will automatically manage the Standby Memory allocation and remove the cache from it if needed. However, that’s not always the case. And it is when you encounter issues with this memory section.

When do standby memory issues usually occur?

Memory issues usually occur when several programs, processes, and drivers are running in the background. Because some of these may have their cache in the standby section, leading to high Standby Memory usage.

When this happens, the free memory is drastically reduced, leading to performance issues and a slowdown in Windows.

Why does Standby memory keep increasing?

As you open more and more programs, the Standby Memory allocation keeps increasing because more cached data is to be kept. Even otherwise, Windows starts specific processes, which might also have a role in increasing Standby Memory.

But, that in no way should concern you, as long as there’s still Free Memory available and the computer’s performance remains unaffected because Windows can effectively handle memory allocation.

How to check if this is a Standby memory issue?

  1. Press Ctrl + Shift + Esc to open the Task Manager, and then navigate to the Performance tab.performance
  2. Click on Open Resource Monitor.Open resource monitor
  3. Verify the Standby Memory consumption under Physical Memory, denoted by blue.standby memory

If the Standby Memory consumption is high and the Free Memory is running extremely low, you might face performance issues. And verifying Standby Memory in Resource Monitor is the simplest way.

Now you can pass from the analysis phase to action. There are two valuable tools and a quick solution that we will be discussing in the following section to free up Standby Memory and improve the computer’s performance.

How do I fix Standby Memory issues?

1. Restart the computer

Restarting the computer is the easiest solution when running low on resources, be it high CPU consumption or Standby Memory. It will give your system a fresh start and bring resource consumption to normal levels.

Once the PC restarts, verify if the issue is resolved. If it is, the Standby Memory issue was probably a one-time thing, and you need not worry about it. However, the other solutions listed below would help if the problem resurfaces.

2. Install RAMMap

  1. Go to Microsoft’s official website and click on Download RAMMap, a Microsoft-developed utility.download rammap
  2. Right-click on the downloaded file and select Extract all.extract all
  3. Choose the desired location, and click on Extract.rammap
  4. Open the extracted files, and run the RAMMap tool.rammap to clear standby memory
  5. Click Yes in the UAC prompt.yes
  6. Now, click Agree to accept the license terms.agree
  7. Click Empty in the menu and select Empty Standby List to free the Standby Memory.empty standby list to clear standby memory
  8. Next, click File and select Refresh to see how the memory allocation stands now.refresh

The RAMMap is an effective tool offered by Microsoft that allows users to clear the Standby Memory manually. The tool is often the first choice for most, given that it’s available on Microsoft’s official website.

Though if it doesn’t perform the intended task for you, we have another one that would automatically clear the Standby Memory at regular intervals.

3. Use EmptyStandbyList

  1. Go to the EmptyStandbyList page and download it. This is a command line that empties Standby Memory.empty standby list
  2. Now, right-click on the downloaded file and then select Properties. Properties to clear standby memory
  3. Go to the Compatibility tab, select Run this program as an administrator, and click OK to save the changes.run this program as an administrator
  4. Press Windows + S to open the Search menu, type Task Scheduler, and click on the relevant search result.task scheduler
  5. Click on Create Task on the right.create task to clear standby memory
  6. Enter a name for the task, and then click on Change User or Group under Security options.change user or group
  7. Click the Advanced button.advanced
  8. Click on Find Now, and then double-click on System from the list that appears.find now
  9. Now, click on OK.ok
  10. Tick the checkboxes for Run with highest privileges and Hidden, and then head to the Triggers tab.triggers tab
  11. Click on New.new
  12. Select On a schedule from Begin the task dropdown menu, tick the One time option, and then choose a start time for it.one time to clear standby memory
  13. Set Repeat task to 5 minutes, the duration to Indefinitely, and then click on OK.repeat time indefinitely to clear standby memory
  14. Next, head to the Actions tab, and click New.actions
  15. Choose Start a program from the Actions dropdown menu, and click on Browse.browse
  16. Locate the EmptyStandbyList.exe file, select it, and then click on Open.select file
  17. Finally, click OK here and on all subsequent windows to create the task.EmptyStandbyList.exe to clear standby memory

That’s it! After creating the task, Windows will automatically empty Standby Memory every 5 minutes from when you chose earlier. And you will have a large chunk of RAM as Free Memory.

While RAMMap and EmptyStandbyList are effective Standby Memory cleaners, it is advisable to search for the real source of the problem. The problem can be caused by specific software and malware.

How do I fix Standby Memory issues on Windows 11?

  1. Press Windows + S to open the Search menu, enter Windows Security in the text field, and click on the relevant search result.Windows Security
  2. Click on Virus & threat protection.virus and threat protection
  3. Next, click on Scan options.scan options
  4. Now, choose Full scan and click on Scan now at the bottom.full scan to fix standby memory

As stated earlier, malware can often lead to Standby Memory issues, and running a scan should help identify and eliminate the problem. Also, for an extensive scan that will minutely search every part of the system, you can use an effective third-party antivirus for Windows 11.

If that doesn’t work, you already know the tools to clear Standby Memory in Windows 11.

Why is my RAM usage so high when nothing is running Windows 10?

The Superfetch feature loads apps and files onto the RAM cache so they can launch more quickly, which is why the RAM utilization is high while nothing is going. You shouldn’t be concerned about it because this RAM will be made available as soon as you require it to perform any application or job.

When this is not the case, the cause could be a malware infection of your computer.

Is Standby Memory bad?

Standby Memory is helpful to a certain extent. It helps reduce loading time by keeping cached data on the RAM and allowing programs and processes to access it when required.

When it becomes excessively high, and no free memory is left, you will start to notice performance-related problems. This is because Windows will begin to move files from RAM to the Page File on the hard disk.

So, it all boils down to a straightforward question. Are you facing problems due to Standby Memory? If yes, try the tools listed here or scan of malware. But if not, don’t try to fix something that isn’t broken because that might further complicate the situation.

Also, find out how to resolve high RAM issues in Windows and boost the computer’s performance.

Use the comments below to let us know if you managed to fix the problem after using this guide.

The Lunar Shift Special Edition Xbox Wireless Controller is available today

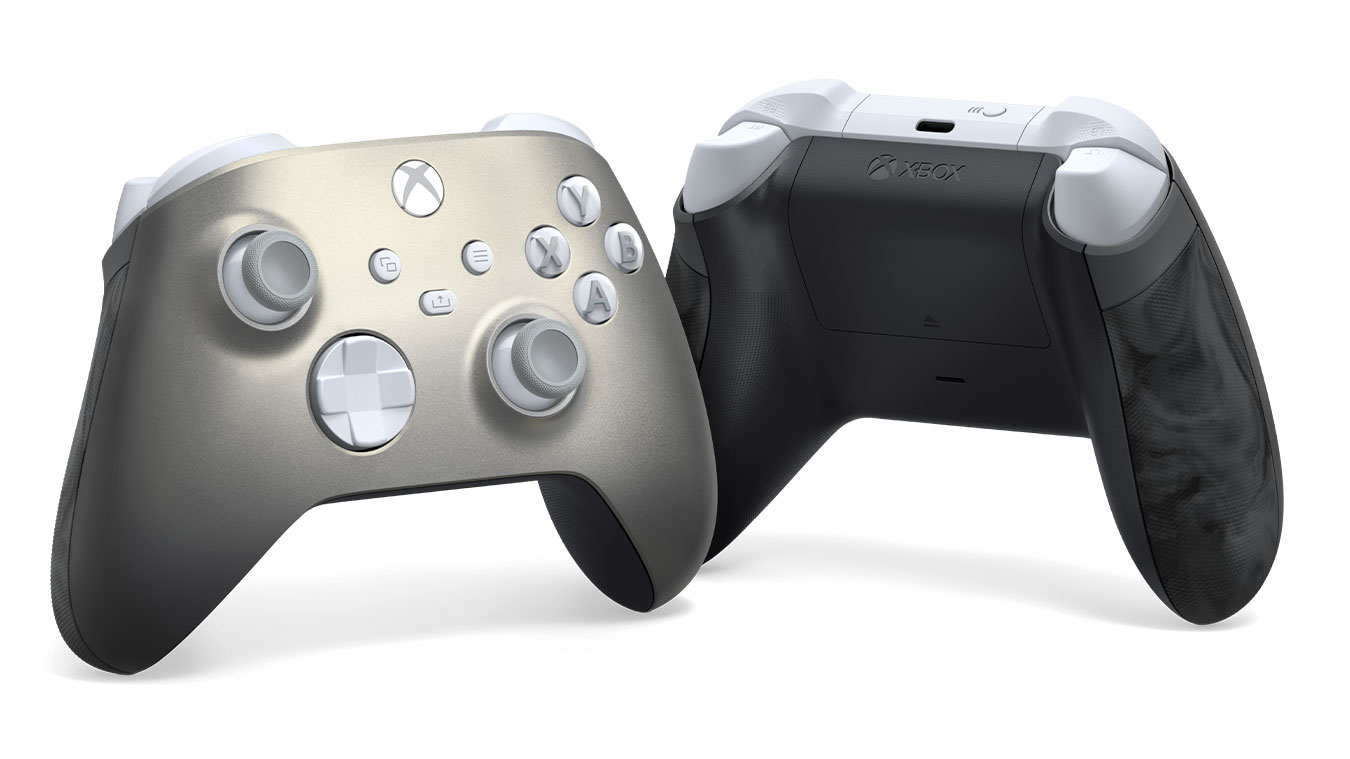
Yet another special edition wireless Xbox controller is available as of today. The latest addition to the Shift controller series, following the Aqua Shift Special Edition Controller, is the Lunar Shift Special Edition Xbox Wireless Controller.

The Lunar Shift Xbox controller is available through the Xbox Store at $69.99 USD MSRP. As you can see in the video above, the controller shifts from silver to gold depending on the angle of light.

update main gallery with image: Front and back angle of the Xbox Wireless Controller - Lunar Shift Special Edition

The Lunar Shift Xbox controller features a textured grip on the triggers, bumpers and back plate. Like other Xbox controllers, it has customizable button mapping through the Xbox Accessories App. The Lunar Shift Special Edition Xbox Wireless Controller works with Xbox One and Series X|S, Windows PCs and also with many mobile devices via Bluetooth Low Power.

Featured image via XboxWire. 


Can’t Transfer Photos From iPhone To PC? Do This!

If you can’t transfer photos from your iPhone to a PC, follow the instructions below.

Many other iOS device owners have the same problems. Copying or moving photos from their phone to a Windows computer seems impossible. But it is not.

You jus have to figure out what’s causing the issue and fix it. And that’s what we’ll help you with today.

Why can’t I import Photos from iPhone to PC?

Most commonly, you can’t import photos from your iPhone to a PC due to outdated or corrupt iTunes and Apple Mobile Device Support. A faulty USB port could also be the culprit, along with errors that may arise when you upgrade to iOS 17.

What to do when I can’t import photos from iPhone to PC?

1. Reinstall/update the iTunes driver

  1. Close iTunes and connect your iPhone to your computer.
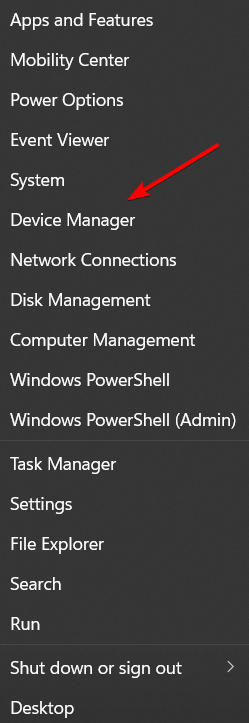
  2. Press Windows key + X and select Device Manager from the list.device manager windows
  3. Find Universal Serial Bus controller and press plus to expand the list.USB controllers windows
  4. Then, find Apple Mobile Device USB Driver on the list, and if it is marked with an exclamation sign, right-click on it and select Update driver.
    can't import photos from iphone to windows 10
  5. If that doesn’t work, you can also uninstall it and restart your PC. Then, the system will automatically install the correct driver.
Note icon NOTE
If you can’t find the Apple Mobile Device USB Driver in Device Manager, try plugging your phone’s USB into a different port and check again. The operating system should identify it automatically, so if it doesn’t, it’s most likely because of a faulty port.

If you want to automate all of this, you can get third-party driver updater software.

On top of what Device Manager does, those can schedule updates, verify drivers of corruption and provide additional PC optimization features.

2. Check if Apple Mobile Device Support is installed

  1. Press Windows Key + S, type in the control panel, and select the results.windows 10 control panel
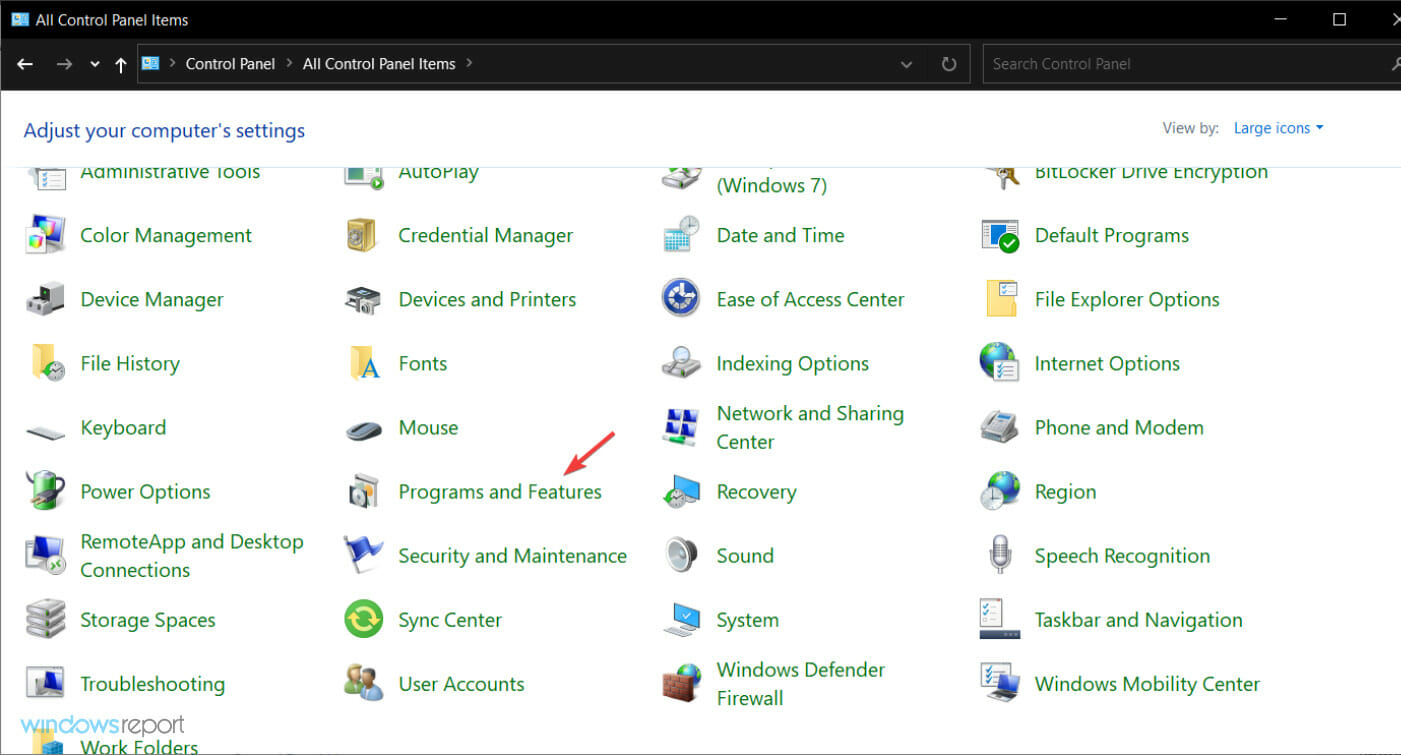
  2. Locate and click on Programs and Features.windows 10 programs and features
  3. Check the list for Apple Mobile Device Support. If it isn’t on the list of installed software, you need to remove iTunes, QuickTime, Apple Software Update, and Apple Application Support.
    can't import photos from iphone to windows 10
  4. Then, reinstall iTunes.

iOS devices require Apple Mobile Device Support to be installed on your computer. Just like the iTunes driver, it should automatically install whenever you plug your phone into the USB port.

Try using another port if this is not working. Also, if you’re having issue with AMDS, restart it:

3. Restart AMDS

  1. Close iTunes and disconnect any iOS devices that you have connected.
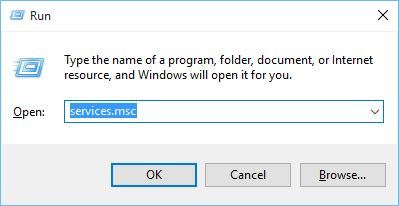
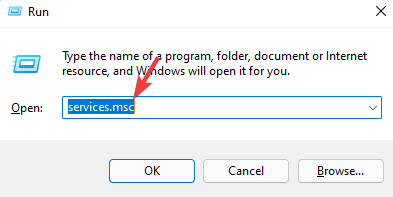
  2. Open the Run window by pressing the Windows key + R.
  3. In the input field, type the following and click OK: 
    services.msc
    can't import photos from iphone to windows 10
  4. On the list on the left, find Apple Mobile Device Service, right-click it, and choose Properties from the menu.
    can't import photos from iphone to windows 10
  5. Find Startup type and choose Automatic from the drop-down list.
    can't import photos from iphone to windows 10
  6. Click the Stop button below to stop the service.
  7. After the service has stopped, click Start to start it again, select OK and restart your computer.
    can't import photos from iphone to windows 10
  8. Open iTunes and connect your iOS device. You can import photos from your iPhone to your Windows 10 PC now.

4. Reset your iPhone’s location and privacy settings

  1. On iPhone, go to Settings, then General.ios general settings
  2. Now navigate to Reset.how to reset ios
  3. Then Reset location & privacy.reset location on ios
  4. Now connect your iPhone to the PC and select the Trust option on your phone.
  5. Open iTunes, and be sure to check the Trust option as well.

5. Change the permissions of the Pictures folder if you cannot transfer photos

5.1. Allow complete control for a user

  1. Press the Windows key + E to start File Explorer.windows 10 file explorer
  2. Open This PC, right-click the Pictures folder, and choose Properties from the menu.windows 10 picture properties
  3. Navigate to the Security tab and click on the Edit button.security edit windows 10
  4. Select your account from the list and check Full control in Allow column.windows 10 full control
  5. Now click on Apply and OK to save the changes.

According to users, the problem might be your permissions if you can’t transfer photos from iPhone to Windows 10.

Several people reported that they had missing permissions for the Pictures directory, and that caused this problem to appear.

5.2. Allow complete control to a user group

After doing that, the problem should be resolved, and you’ll be able to transfer pictures without any issues.

Should the issue persist, you might want to try transferring fewer pictures. Unfortunately, many users try to share all their photos at once, which can cause this problem.

Instead of transferring all your pictures, try to share them ten or more times and check if that works. This might be a tedious workaround, but it works for some, so be sure to try it out.

6. DIsable iCloud

  1. Tap the Settings app on your iPhone.
  2. Go to Apple ID Settings.
  3. Tap on iCloud.
    icloud settings
  4. Select Photos.
  5. Toggle off iCloud Photos

This setup makes sure the photos you take with your iPhone are saved to your device, and not to the iCloud. This way, you can access and transfer them to your PC via USB.

With the photos only in the cloud, you won’t be able to see them thorugh iTunes because they are not stored on your phone.

7. Enable Keep Originals option

  1. Tap the Settings app on your iPhone.
  2. Scroll down and tap on Photos.
  3. Under the Transfer to Mac or PC section, tap Keep Originals.

Enabling “Keep Originals” keeps your photos in their original quality. This helps avoid problems during transfer, making it easier to move photos from your iPhone to your PC

Summary

In this article, we have tackled the media transfer problem; another related issue that can be solved in a few steps is syncing data across multiple devices. By syncing data, no new device feels new or foreign.

Don’t hesitate to give us any feedback regarding the subject or tell us about solutions that we haven’t mentioned in the comment section below.

Best television shows based on video games: Resident Evil

Based on the iconic survival horror video game franchise, the Resident Evil Netflix adaptation premiered on July 14, 2022. The show alternates between two timelines in 2022 and 2036. In the former, twin sisters Billie and Jade move to New Racoon City with their father Dr. Albert Wesker when he takes on an executive position at the Umbrella Corporation. There the girls stumble onto the companies’ dark secrets as the T-virus breaks out.
In the show’s present time of 2036, the virus has reduced humanity to a scattered collection of walled havens surrounded by six billion “Zeroes” who have been turned to flesh-eating zombies by the virus. The show starred Ella Balinska, Tamara Smart, Adeline Rudolph, Siena Agudong, Paola Núñez, and Lance Reddick.
It was revealed in August that Netflix had not opted to pick up a second season for the show, ending its run. This was due to lower than expected viewership and a generally underwhelming audience reception. However, during the week of the show’s premiere it was the second most streamed on Netflix globally, and was in the top ten in 92 countries.

Resident Evil Episodes

Welcome to New Racoon City

While on a research mission, Jade crosses paths with a gang of scavengers. Years earlier, Jade and Billie try to make a fresh start in New Raccoon City.


The Devil You Know

To elude Umbrella, Jade seeks help from an unlikely source. As Albert tries to cover for his daughters, Billie begins to exhibit troubling symptoms.


The Light

Jade helps guide a small group of survivors into the Chunnel, but terror awaits. Albert warns Umbrella about Joy’s horrific side effects.


The Turn

Jade and Baxter find themselves at the mercy of the Brotherhood’s demented leader. Teenage Jade and Billie receive distressing news about their father.


Home Movies

With Simon offering tech advice, Jade and Billie break into their father’s laptop, where a chilling message leads them to a nightmarish discovery.


Someone’s Little Girl

Following a shocking reunion, Jade finds her way back to her family. Later, she and Amrita make a potentially life-altering discovery.


Parasite

Reeling from a devastating loss, Jade calculates her next move. Years earlier, Jade and Billie learn there’s more to their father than ever imagined.


Revelations

With Umbrella forces closing in, Jade encourages the use of a monstrous weapon. Teenage Jade enlists Simon on a fateful mission into Umbrella’s HQ.


While we sadly won’t be getting a second season of Resident Evil, fans of the landmark franchise can still head on over to Netflix to watch Season 1.

Featured image via collider.com. 

Media Capture Failed Event: How to Fix the 0xa00f4271 Error

The error code 0xa00f4271 issue first arose after the Windows 10 Anniversary Update in 2016.

Then users posted on Microsoft forums about Something Went Wrong… Error Code 0xA00F4271(0x80070491) error popped up when they tried to utilize their webcams.

Built-in webcams don’t work when that error message pops up. Here are a few resolutions that can fix the media capture failed event 0xa00f4271 error code.

What causes 0xa00f4271 media capture failed event error on Lenovo?

The most likely cause is your drivers, and if there’s an issue with them, you might encounter other problems such as Something went wrong camera error.

If the Lenovo camera isn’t working in Windows 10, be sure to check your settings and allow apps to access it.

There are many other issues that can occur such as 0xa00f4292 camera error, but this guide should be able to help you fix most of them. Other common ones are the following:

  • Error code 0xa00f4271(0xc00d3ea2) – The appearance of the error suggests that the camera app is not operating as it should be at this time.
  • Error code 0xa00f4271(0xc00d3704) – You have the option of editing the registry in order to resolve the problem of a media capture event that was unsuccessful.
  • 0xa00f4271(0x80070018) – It appears from the error message that you received that the camera application on your computer is unable to launch.
  • Error code 0xa00f4271(0xc00d3e82) – An outdated webcam driver is one possible cause of the 0xa00f4271 camera problem that you may encounter.
  • 0xa00f4271 Media capture failed event on Dell – You have the option in this scenario of using professional software that will offer you with an accurate assessment of what drivers require an update on your computer.

This being said, follow our step-by-step solutions below in order to address those errors and fix them once and for all.

How can I fix media capture failed event 0xa00f4271?

1. Run the Microsoft Store App Troubleshooter

    The Microsoft Store App troubleshooter might provide a resolution when the error code 0xa00f4271 pertains more specifically to UWP apps that utilize the webcam.

  1. 1. Click Type here to search to open Cortana. Enter troubleshoot in the search box, and click Troubleshoot settings.

    troubleshoot-search error code 0xa00f4271
  2. 2. Select Additional troubleshooters from the right side.

    error-code-0xa00f4271-windows-10
  3. 3. Next, select the Windows Store Apps troubleshooter within the Settings window that opens.

    run-troubleshooter-w10 error code 0xa00f4271
  4. 4. Then click the Run this troubleshooter button.

    error-code-0xa00f4271-windows-10
  5. 5. Thereafter, users can go through the resolutions provided by the troubleshooter.

  6. 6. Restart Windows after applying a suggested resolution.

In order to repair Windows 10 errors, you can also use a professional tool that can repair damaged files and restore your device to its optimum capacity.

2. Check the Camera settings

  1. Open Cortana and enter camera privacy settings in its search box.
  2. Select Camera privacy settings in search results to open the window shown directly below.privacy settings camera error code 0xa00f4271
  3. If that window states Camera access to this device is off, users will need to click Change and toggle the Camera access for this device option on.change-on error code 0xa00f4271
  4. Then turn the Allow apps to access your camera option on.apps-allow error code 0xa00f4271
  5. Check that the webcam apps you’re trying to utilize the camera with are also enabled under the Choose which apps can access your camera subheading.
  6. Restart Windows after adjusting camera settings.

Make sure that the Let apps use my camera hardware option is toggled on. Apps can’t utilize the webcam with that setting is off. Check the camera’s settings in order to fix the system error, as mentioned above.

2. Edit the registry

  1. First, open Run with the Windows key + R hotkey. Then users can open the Registry Editor by entering regedit in Run and clicking OK.
  2. Open this registry path in the Registry Editor: HKEY_LOCAL_MACHINE\SOFTWARE\WOW6432Node\Microsoft\Windows Media Foundationwindows media foundation regedit error code 0xa00f4271
  3. Double-click Windows Media Foundation on the left of the Registry Editor.
  4. Right-click a space on the right of the Registry Editor’s window and select New, then click DWORD (32-bit) Value.new-dword error code 0xa00f4271
  5. Enter EnableFrameServerMode as the title for the new DWORD.enableframeservermode dword error code 0xa00f4271
  6. Then double-click EnableFrameServerMode to open the window in the shot directly below.value data error code 0xa00f4271
  7. Input 0 in the Data value text box, and click the OK button.
  8. Restart Windows after editing the registry.

Some users have said that they’ve fixed the 0xa00f4271 media capture failed event error by editing the registry. So, this procedure can be among the best fixes and you can apply it as mentioned above.

3. Update the webcam’s driver

The 0xa00f4271 camera error can arise due to an antiquated webcam driver. In this situation, you can use professional software that will provide you with an accurate report of what drivers need to be updated.

This way you can also find out if your webcam drivers need some new patches or not. By using a dedicated tool you won’t miss any critical updates ever again and you’ll manage to avoid Windows 10 errors.

⇒ Get Fortect Driver Updater

4. Update Windows 10

  1. Open the Cortana search box with the Windows key + Q keyboard shortcut. Enter update to search for the update settings and open the top result. update-search error code 0xa00f4271
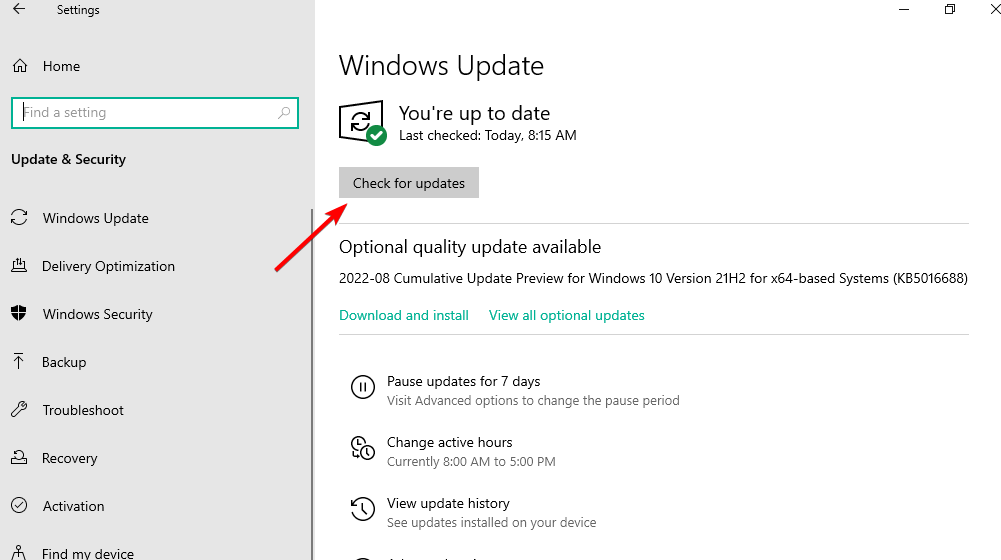
  2. Press the Check for updates button.check-updates searchui windows 10
  3. Windows will then automatically install available updates. Restart Windows if it installs new updates.

Some users have confirmed that patch updates fixed error code 0xa00f4271. Other users have fixed the issue by updating Windows 10 to the latest build version.

Users can update to the latest build version by downloading and launching the Update Assistant and selecting Update now. Follow the guidelines above to check for new patch updates.

How can I fix error code 0xa00f4271 on Windows 11?

  1. Press Windows + X then select Device Manager.device-manager bluetooth won't turn on windows 10
  2. Here, expand the Cameras section, right-click your driver and select Uninstall device.unisntall-device error code 0xa00f4271
  3. Reboot your PC to automatically reinstall the driver.

How do I reinstall my laptop camera?

  1. Visit the manufacturer’s website and download and install the camera drivers.
  2. Open the Device manager and see if the camera is listed, you can right-click on it and select Update driver.
  3. Alternatively restart the computer after installing the device driver.

How do I reset my webcam on Windows 10?

  1. Press Windows then type apps and open the top result.
  2. Here, type camera inside the search bar then click it and select Advanced options.advanced-cam error code 0xa00f4271
  3. Scroll down the page then click the Reset button.reset-cam-button error code 0xa00f4271

We are certain that one of the solutions we presented in this article will help fix the 0xa00f4271 media capture failed event error code so you can record it with your webcam again.

We’d like to hear more from you on this subject, so please drop us a comment in the comment section below.

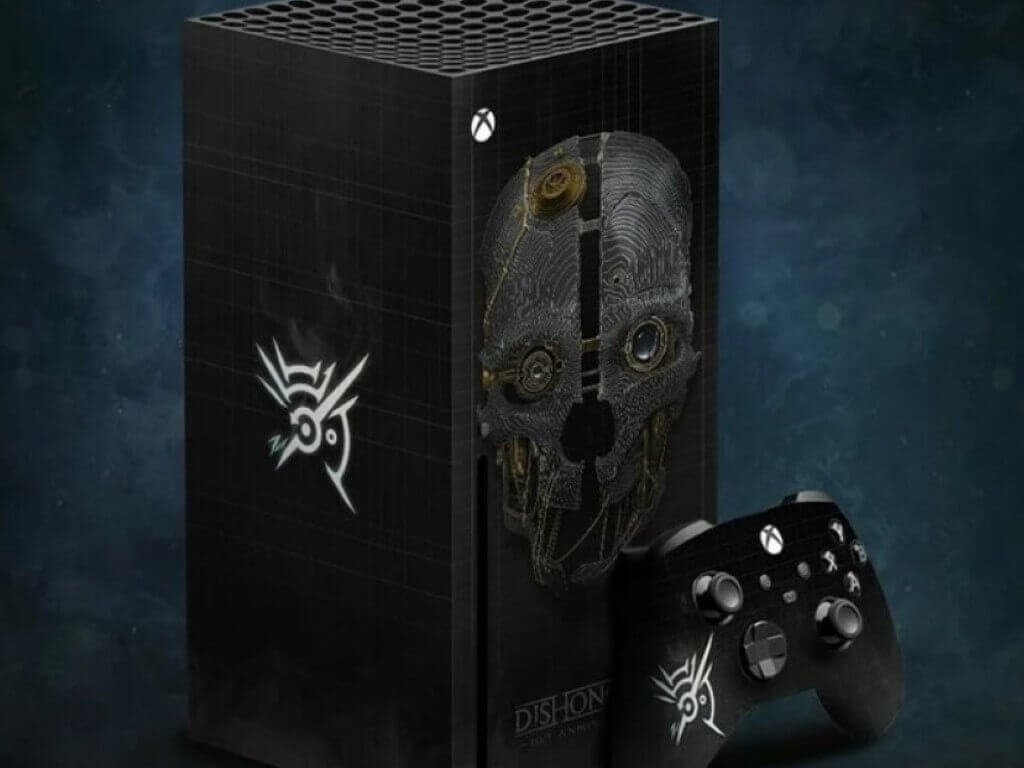
Bethesda celebrates Dishonored series’ 10th anniversary with a custom Xbox Series X giveaway

Few video game franchises have made more of an impact over the course of the last decade than Dishonored. From Bethesda and Arkane Studios, the first-person stealth action series celebrates its tenth anniversary this month. And to mark the occasion Bethesda is giving away a custom Dishonored 10th anniversary Xbox Series X.

Interested in a chance to win? See the tweet below, from Bethesda’s official Twitter account. Just follow the instructions and be entered for a chance to win the custom Dishonored Xbox Series X.

You won’t find this in stores, so the contest is your only chance to get your hands on it. The giveaway runs through October 23, when the winner will receive a DM via Twitter. The official rules can be found through the link included in the tweet.

In a bit of Dishonored side news, it has been reported that Arkane’s most recent game, Deathloop, is set within the same universe as the Dishonored games. The studio’s next effort will be the upcoming open-world shooter Redfall.

Featured image via PureXbox. 

Fix: Side by Side Configuration Incorrect on Windows 10

Windows 10 and 11 might improve compared to their predecessors, but these still suffer from some old problems. For example, one of the common problems that all Windows versions have is the Side-by-side configuration is incorrect error.

The error message reads: This application has failed to start because its side-by-side configuration is incorrect.

The cases where you generally encounter the error are as follows

  • Side by side configuration is incorrect MSI Afterburner
  • Side-by-side configuration is incorrect AutoCAD

But what does that mean exactly, and why does it happen? We will cover it in the following sections, along with the solutions that helped most users fix things on their system.

What is a side-by-side configuration error?

This error appears when you try to install or update specific software and is usually caused by a conflict between the files in the C++ runtime libraries and the software that you’re trying to update/install.

These C++ libraries are part of the Windows operating system, and often they get updated when you install Microsoft software or sometimes third-party software.

If you’re experiencing the Side-by-side configuration incorrect error too, you might want to try the solutions presented in the next section to fix it.

How can I fix side-by-side configuration error in Windows 10?

1. Run DISM and SFC scan

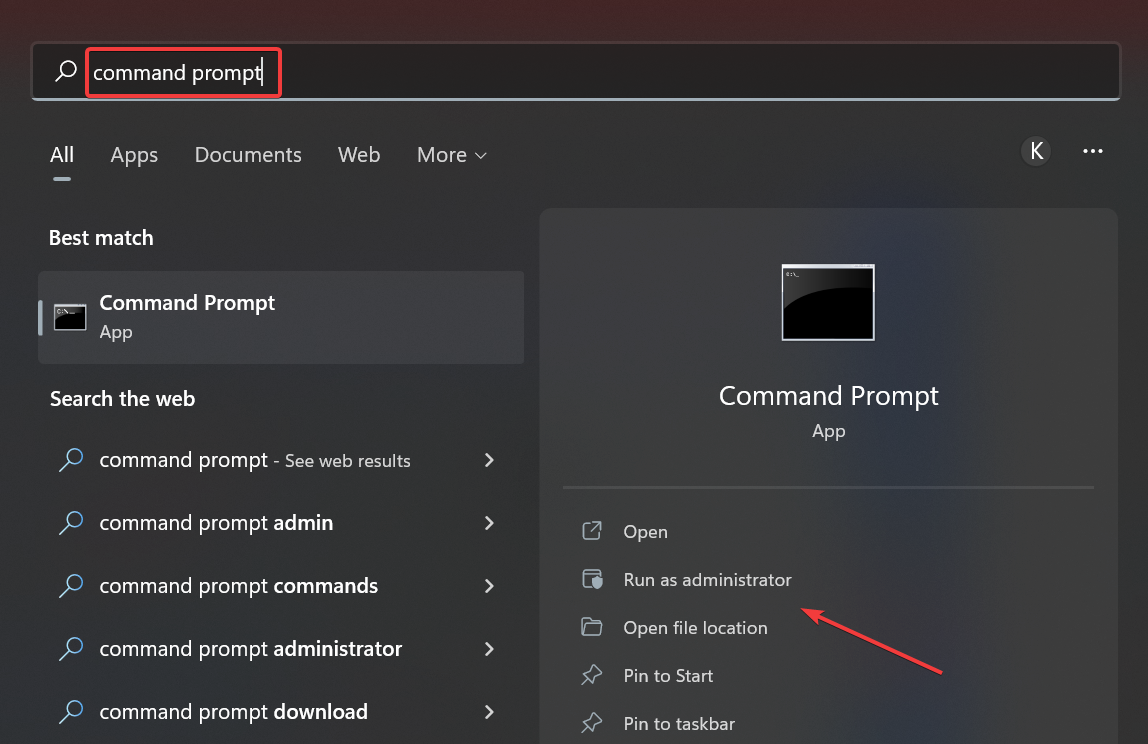
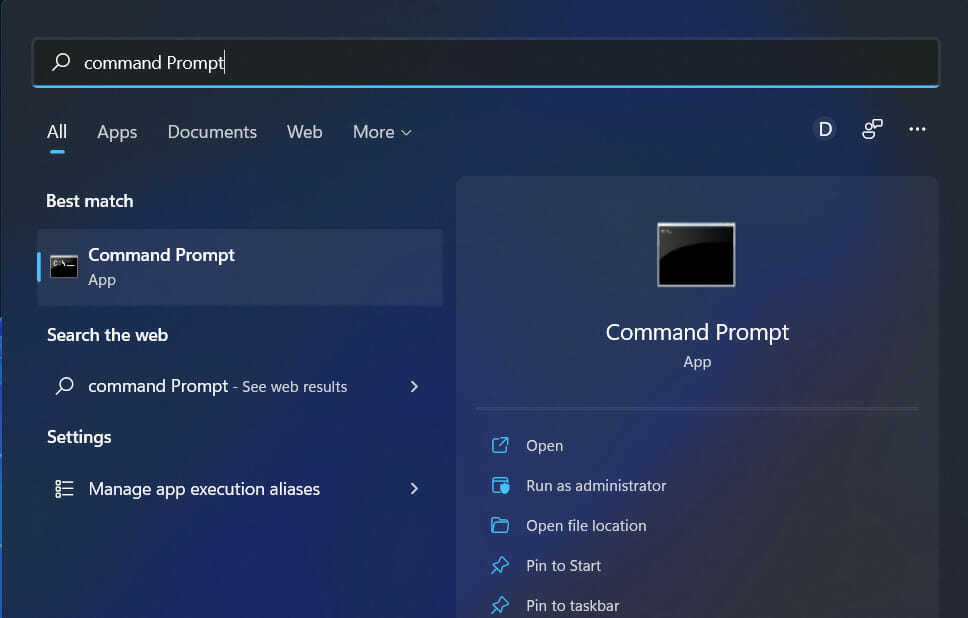
  1. Type Command Prompt in the Search bar, and click on the Run as administrator option.command prompt
  2. Click Yes in the UAC prompt.
  3. Paste the following commands individually and hit Enter after each to run the DISM tool:Dism /Online /Cleanup-Image /ScanHealth DISM /Online /Cleanup-image /Restorehealthdism scan to fix side by side configuration is incorrect
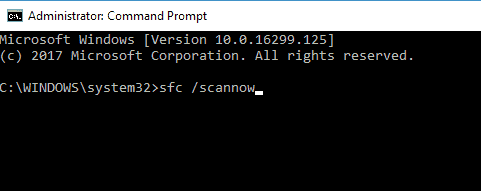
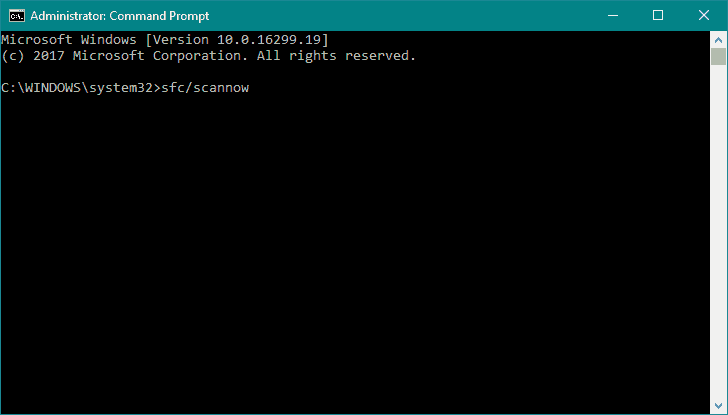
  4. Next, execute the following command to run the SFC scan:sfc /scannowsfc scan to fix side by side configuration is incorrect
  5. Once all the scans are complete, restart the computer.

After the computer restarts, verify if This application has failed to start because the application configuration is incorrect error is fixed. If not, likely, the issue doesn’t lie with corrupt system files or Windows images. So, move to the following method.

A specialized program can be very helpful to this process because it scans your entire PC and checks for errors, including this one.

2. Repair or reinstall the software

  1. Press Windows + I to open Settings and select Apps here.apps
  2. Select the program that is giving you this error and choose Uninstall.uninstall to fix side by side configuration is incorrect
  3. Again, click Uninstall in the confirmation prompt.uninstall
  4. Follow the onscreen instructions to complete the process and restart the computer.
  5. Next, reinstall the application from a trusted source, the Microsoft Store or the app’s official website.

If you are facing The application has failed to start because its side-by-side configuration is incorrect error with L A Noire, reinstalling it should do the trick. Also, try it for the other apps since it’s one of the most effective solutions.

3. Uninstall all the Microsoft Visual C++ installations and install them again

If repairing or reinstalling the application doesn’t help, try doing the same with Microsoft Visual C++ packages.

Find all Microsoft Visual C++ and uninstall all the packages one by one. Then, you need to download the Microsoft Visual C++ 2013 Redistributable packages. Make sure to get all those that you removed earlier.

If you’re still using a 32-bit version of Windows, remember that you only need to download packages with x86 in their name. Then, install all the boxes and restart your Windows 10.

If the issue isn’t resolved, it might be best for you to contact Microsoft support and ask a certified technician what the cause of this problem is.

How do I find application event log?

  1. Open up Windows search and type Even viewer, then open the app.
  2. Click on Windows log, then select Application.

How do I fix side by side configuration is incorrect in Windows 11?

The same set of solutions that fix the Side by side configuration is incorrect error in Windows 10 should work in Windows 11 as well.

Suppose it doesn’t verify that your installer is not corrupted. Get one from an official source and check if that helps. The last option available is resetting Windows 11 to factory settings. And this one should work for all but should only be used as a last resort.

Where else can this error be seen?

  • Games (LF2/Riot/Steam/GTA 4/League of Legends/ Mortal Kombat Komplete Edition/Valorant side by side configuration error)
  • Smart Notebook side by side configuration is incorrect
  • Excel side by side configuration error
  • SPSS side by side configuration is incorrect
  • MS Edge side by side configuration is incorrect
  • Chrome side by side configuration error windows
  • Krnl side by side configuration is incorrect
  • MMD side by side configuration is incorrect
  • sxstrace.exe side-by-side error in Windows 10

That’s it! These are all the ways you can fix the Side-by-side configuration error in Windows 10 and 11.

Also, find out what to do if you cannot install Visual C++ 2015 Redistributable in Windows.

Drop them in the comments section below if you know of other methods to fix the problem.

Fix MSVCR120.dll Was not Found in 5 Easy Steps

You may encounter the MSVCR120.dll was not found error on Windows 10 when trying to access a program like OBS or installing any other app.

This error indicates that the program is failing to launch due to a missing MSVCR120.dll file. MSVCR120.dll is a part of Microsoft Visual C++ Redistributable Packages.

This article explores a few troubleshooting steps to help you resolve the MSVCR120.dll missing error in Windows 10 or Windows 11 PC.

What is an MSVCR120 DLL?

As mentioned, the MSVCR120 DLL is related to Microsoft Visual C++ Redistributable Packages. It is used to extract necessary information or application resources from third-party programs.

If this file goes missing or is corrupted, then your PC won’t be able to run or handle any programs in the C, C++, or C++/CLI programming languages. This will eventually lead to the crashing of games and dependent programs.

The usual location of MSVCR120 dll is mentioned below:

  • Local Disk (C:) > Windows > System32 – 64-bit version
  • Local Disk (C:) > Windows > SysWOW64 – 32-bit version

Moreover, here are some error variations that you may encounter, but nonetheless, fix with the solutions below:

  • MCVCR120.dll was not found in Windows 11, Windows 10, Windows 7
  • MCVCR120.dll was not found SADP (Hikvision)
  • MCVCR120.dll was not found Wamp, Battlefield 4, Witcher 3
  • The code execution cannot proceed because MCVCR120.dll was not found
  • MySQL MCVCR120.dll was not found
  • MCVCR120.dll is missing from your computer

Without further ado, let’s just jump right in!

How do you fix error the code execution Cannot proceed because msvcr120 dll was not found?

1. Use third-party repair software

If msvcr120.dll is missing from your computer, you can experience various issues, but you can fix those issues using specialized repair tools.

For instance, Fortect is a powerful tool that can handle all-around system maintenance, including DLL repair or replacement. After a quick scan, the app will prompt you with all the issues it finds with the DLLs, and you can swiftly fix them with the press of a button.

⇒ Get Fortect


2. Run System File Checker

  1. Open the Start menu.
  2. Type cmd and run it as an administrator.run as administrator
  3. Execute the below command and hit Enter.
    Sfc /scannowrun command sfc /scannow
  4. The verification process may take some time, so wait till it is 100% complete.
  5. If System File Checker finds but fails to fix any error, then enter the following command and hit Enter:
    sfc /verifyonly
  6. Then, let the process run and wait for it to complete.
  7. If the error persists, run the following command and hit Enter:
    DISM /Online /Cleanup-Image /RestoreHealthdism-w10 Google Chrome not responding
  8. Windows will download and replace the corrupt system files to fix the issue.

In most cases, running the System File Checker should help if the MSVCR120.dll was not found on Windows 10.

3. Reinstall Visual C++ Redistributable Packages

  1. Visit the Visual C++ Redistributable Packages webpage.
  2. Click the Download button.
  3. Select vcredist_x64.exe or vcredist_x86.exe according to the Windows edition you are running and click Next.
    MSVCR120.dll missing
  4. Run the installer and restart your computer.

After the restart, try to install or run the program triggering the error to see if it is resolved.

In case msvcr120.dll was not found on Windows 10, you should be able to fix that by downloading and installing the missing Visual C++ Redistributables.

 4. Install all VC Redist Packages

  1. Press the Win + R to open the Run dialogue.
  2. Type appwiz.cpl and click OK.
  3. Right-click on Visual C++ Redistributable Package and Uninstall.
    dll missing error Windows 10

5. Install these packages (depending on your Windows architecture)

For x64 (64-bit System)

For x86 (32-bit System)

Note: Once installed, restart your computer and check if the issue is resolved.

Reinstalling the redistributable packages can help you if msvcr120.dll is missing from your computer, so we encourage you to try it.

If the issue persists, check for pending Windows updates and install them.

How can I fix MSVCR120.dll was not found on Windows 11?

Here are some quick solutions you can apply to resolve the MSVCR120.dll that was not found on Windows 11 error.

  • Run the System File Checker.
  • Scan your PC for viruses.
  • Install both 32-bit and 64-bit VC Redist packages.
  • Install the latest available Windows update.
  • If you are facing a problem with a specific program, reinstall it.
  • Copy the file from a trusted PC to your PC:
    • Local Disk (C:) > Windows > System32 – 64-bit version
    • Local Disk (C:) > Windows > SysWOW64 – 32-bit version

How can I install MSVCR120 dll?

There is no straightforward way to download MSVCR120.dll Windows 10 64 bit. Though there are a few websites offering the DLL file, it’s risky downloading it from an unreliable source.

However, if you are getting the MSVCR120 DLL missing error, then you need to install the Microsoft Visual C++ Redistributable on your PC.

This will automatically replace the corrupt MSVCR120 DLL file or add the file back to its original position. The same concept will help download MSVCR120.dll in Windows 11.

Now, if you are copying the DLL file from a trusted computer, then all you need to do is paste the MSVCR120 DLL file into the correct folder as mentioned above, and that’s it. After that, you can restart your PC for the changes to take effect.

The MSVCR120.dll missing error usually occurs due to the MSVCR120.dll file being missing. You can reinstall the file by reinstalling the Visual C++ Redistributable package or by running System File Checker.

The solutions here will also work if msvcr120.dll is missing in Windows 7. Before you leave, don’t miss our latest guide on how to fix the missing Msvcp120d.dll file.

Tell us which fix worked for you in the comments section below.

Fix Black Screen After Login In Window 10 With These 7 Solutions

Seeing a black screen after sign in on Windows? Whether it’s a black screen with cursor after login or your entire computer screen goes black, it’s a common issue.

Most people encounter it after OS updates or hardware changes. The good news is that it’s easy to fix. We rounded up proven ways to address thi very issue, so let’s go ahead and put an end to the black screen on login problem.

For more specific issues, check our guides on fixing black screen with cursor, black screen without cursor, and laptop screen black but still running.

How do I fix a black screen on Windows 10 after login?

1. Use a third-party repair solution

Black screen errors are less common and dangerous than blue screen errors but have similar behavior and manifestation.

You can treat and troubleshoot them with the same tools and procedures. That is why you can use a professional system repair solution to solve the black screen.

2. Try to log in blindly

  1. When you are on the black screen, wait for your mouse cursor to appear.
  2. Once you have the cursor, press Control on your keyboard – this will put the focus on the login password field.
  3. Now type your password. You can’t see it, but you must do it anyway.
  4. Once typed, hit Enter, and voila, you are logged into Windows.
  5. If your desktop does not appear after 30 seconds, try pressing Windows Key + P, press the Down Arrow key twice, and hit Enter.

After that, you should be logged in to Windows, and your screen should appear.

3. Disable Fast Boot on your PC

3.1 Enter Safe Mode

  1. Restart your PC several times during the boot sequence.
  2. Now choose Troubleshoot.
    windows 10 black screen after login
  3. Select Advanced options, click on Startup Settings, and click Restart.
  4. Once your PC restarts, you’ll be presented with options. Select any version of Safe Mode by pressing the appropriate key.

3.2 Disable Fast Boot

  1. Press Windows Key + S and type power settings.
  2. Now select Power & sleep settings from the list.
  3. Scroll down to the Related settings section and click Additional power settings.
  4. When the Power Options window appears, click Choose what the power button does option from the left pane.
    Windows 10 black screen before login
  5. Now click Change settings that are currently unavailable.
    Windows 10 black screen with cursor after update
  6. Uncheck Turn on fast startup (recommended) option and click Save changes.
    Black screen after restart

After disabling this feature, restart your PC and check if the problem is still there. Remember that disabling Fast Startup might cause your PC to boot slightly slower, but at least the issue should be resolved.

The issue might be the Fast Boot feature if you get a black screen after sign-in on Windows 10. This is a valuable feature since it will allow you to start your PC faster, but sometimes this feature can cause problems.

To fix the issue, you need to disable Fast Startup. However, since you can’t access Windows, you’ll have to do that from Safe Mode.

4. Try your hand at Startup Repair

  1. Restart your PC a couple of times during the boot sequence.
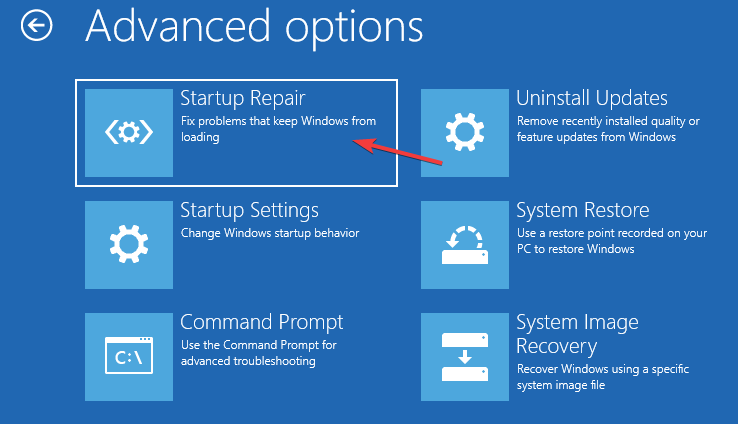
  2. Go to Troubleshoot, select Advanced options and click on Startup Repair.
  3. Follow the instructions on the screen to complete the process.

Once the process is finished, the problem should be resolved.

If you’re stuck on a black screen after sign-in in, you might be able to solve the problem simply by performing a Startup Repair, so follow the steps above.

5. Disable App Readiness service

  1. Press Windows Key + R, and enter services.msc, then press Enter, or click OK.
    Black screen after restart
  2. Locate the App Readiness service on the list and double-click it to open its properties.
    Windows black screen with cursor after login
  3. Set Startup type to Disabled and click Apply and OK to save the changes.
    Windows 10 black screen before login

After disabling this service, restart your PC and check if the problem is still there. Remember that this is just a workaround, so you’ll probably have to enable this service someday.

As you know, Windows uses various services to work correctly, but sometimes certain services can cause a black screen after sign-in.

Usually, the App Readiness service is the culprit, and to fix the problem, you need to disable it.

6. Remove your laptop battery (if possible)

  1. Disconnect your laptop from the adapter and remove the battery. Check the laptop manual if you don’t know how to remove the battery.
  2. Once the battery is removed, hold down the power button for 30-60 seconds, or even more.
  3. Now put the battery back in your laptop and start it again.

Several users reported a black screen after signing in on their laptops, but you can quickly fix this annoying issue. According to users, you must remove your laptop battery and drain the remaining power.

This is a relatively simple procedure, and several users claim it works, so try it out. But, of course, this is only if your laptop has a removable battery.

7. Remove the problematic update

  1. Use Windows Key + I shortcut to open the Settings app.
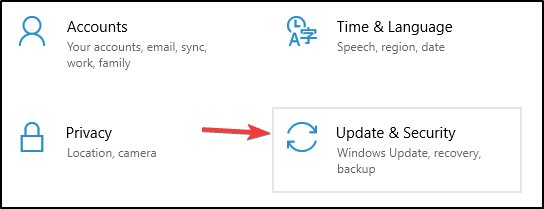
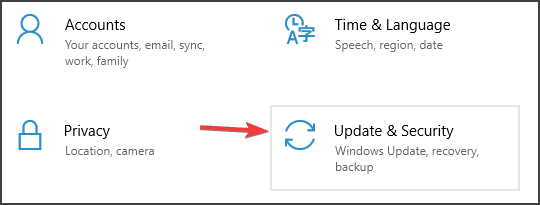
  2. Go to the Update & Security section.
  3. Now select View update history.
  4. A list of recent updates will appear. Memorize a couple of recent updates and click Uninstall updates.
    Windows 10 black screen before login
  5. Double-click the update you want to uninstall and follow the instructions on the screen to complete the process.
    Windows 10 black screen with cursor after update

After you remove the problematic update, check if the problem is still there.

If this issue started after a Windows Update, the update is likely causing a black screen after sign-in.

To fix this issue, you must go to Safe Mode and remove the problematic update.

Keep in mind that Windows tends to install the missing updates automatically, so if the update was the problem, be sure to block Windows from installing the automatic updates.

The steps above are very likely to solve black screen issues that turn into error messages like:

  • Windows 10 black screen after login no desktop show up – In this case, you will not be able to view your desktop after logging in. you should drain the battery and restart the computer.
  • Computer screen goes black but computer still running – If it does not come up after a few minutes, press the power key for about 10 seconds, then restart the computer.
  • Windows 10 black screen for 5 minutes after login – You may wait it out in this case. Then try and update all your drivers as soon as the screen turns on.
  • Windows 10 black screen with cursor after login – In case of this issue, try restarting the computer after disconnecting all non-critical peripherals and try disabling the startup apps.
  • Windows 10 black screen before login – When getting a black screen before login, booting into Safe Mode will allow you to fix things.

Still stuck or dealing with other login issues? If you’re signed in with a temporary profile, here’s how to fix it. You might also run into corrupt user profiles or sign-in options not working on Windows 11, so be sure to check out those guides too.

The black screen can be a big problem on your PC since it will prevent you from accessing Windows. However, we hope that you managed to solve this issue by using one of our solutions.

In the comments section below, let us know what worked for you (not necessarily from our list).

9 Easy Ways to Fix Pink Screen of Death on Windows 10

Similar to the Blue Screen of Death errors, your computer can display a Pink Screen of Death error when it encounters severe functioning issues. This isn’t a common error, but if you encounter it, this guide will help you fix it.

How do I fix pink screen of death on Windows 10?

1. Use dedicated software

This solution allows you to repair any damaged or broken files and replace them. This will prevent the appearance of significant error crashes in your operating system.

When you have chosen a professional solution that will repair system files and any crucial data in your computer, your computer will also be protected against malware threats.

2. Update your graphics card drivers

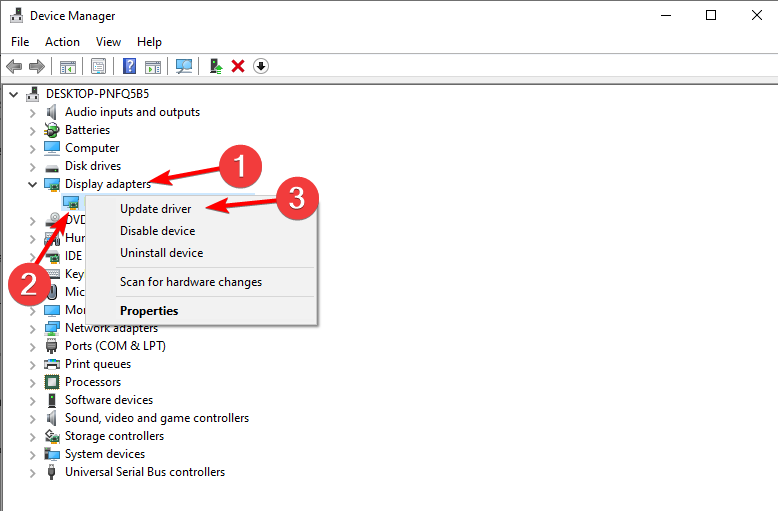
  1. Right-click the Start icon, then choose the Device Manager option.device-manager-w10 amd driver install problems
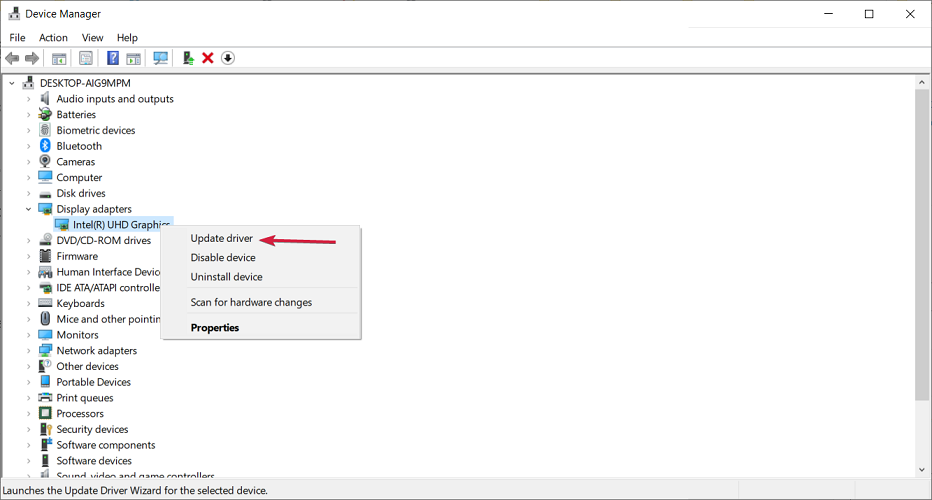
  2. Expand the Display adapters folder, right-click your graphics card, and select Update driver.update-driver-w10 amd driver install problems
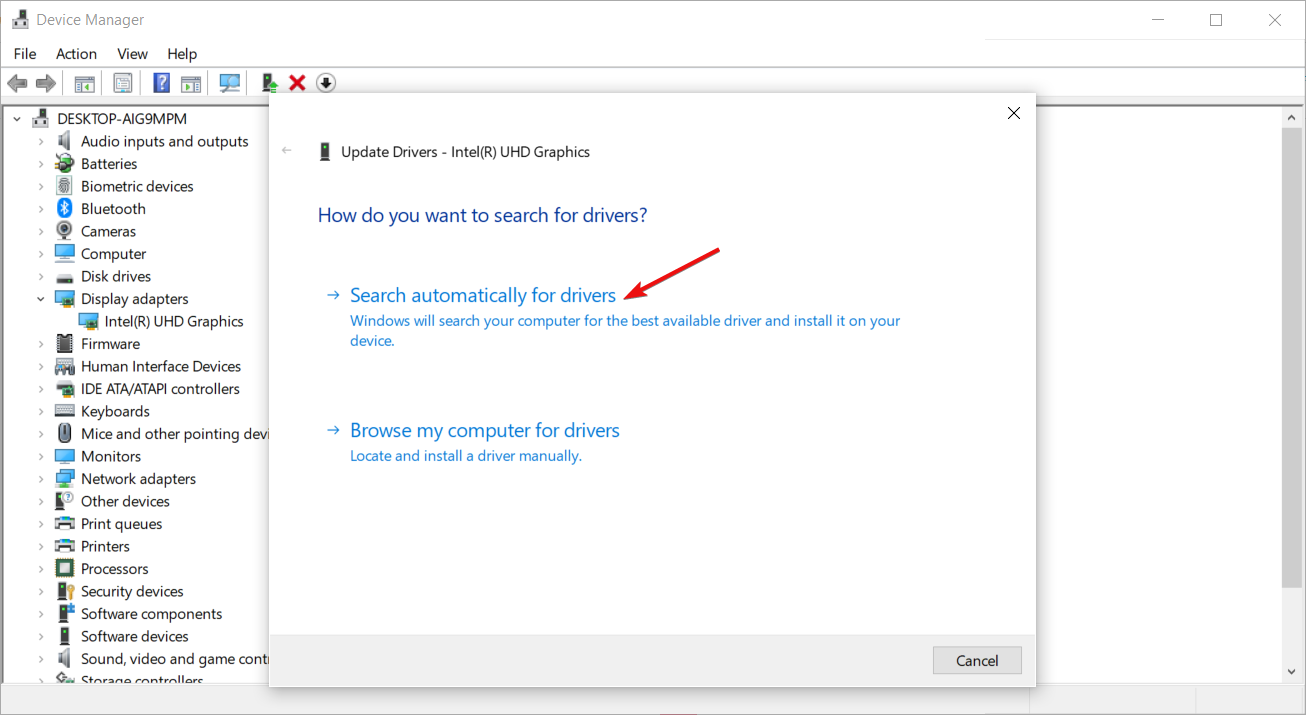
  3. Now choose Search automatically for updated driver software.
  4. Follow the instructions on the screen to install the latest driver.

Once the driver is installed, check if the problem is still there.

Though this might be the simplest method to update your drivers, it’s usually not the most effective.

3. Automatically update graphics card drivers

Another way to update your graphics card drivers is to use specialized software. These third-party tools update all your drivers automatically with just a single click.

These tools are efficient solutions that scan your operating system and detect all old and outdated drivers. The program will then notify you only about the compatible updates and safely install them.

4. Use uninstaller software

Third-party applications can lead to this error, and if you’re using screen-related or any software related to your graphics card, you might want to remove it and check if that solves the problem.

Users reported that applications such as True Colour could cause this issue.

So if you’re using this or any similar application, delete them and check if that solves the problem.

Remember that many applications can leave leftover files and registry entries that can interfere with your system and cause this issue to reappear.

To be sure that the problematic application is completely removed, we strongly recommend using efficient uninstaller software that can erase the most stubborn programs from your PC.

5. Check your GPU temperature

A pink screen can sometimes be an indication of overheating. Also, dust may affect your fans if your PC hasn’t been cleaned in a while, causing the graphics card to overheat.

Therefore, inspect if the high temperature is the cause. You’ll need special software.

This application can show you various helpful information about your PC. This will always include both CPU and GPU temperature.

It quickly assesses your hardware to offer overclocking information and system stability details.

If, during the assessment, you notice that your GPU temperature is above the recommended values, it’s advised to remove all overclock settings.

If your PC isn’t overclocked, you must open it and clean the dust with pressurized air. In addition, you might want to consider investing in better cooling.

Keep in mind that opening your computer case will void your warranty, so if your PC is still under warranty, it might be better to take it to the official repair center.

In addition, another clever way to check your PC temperature is by using specific programs that show detailed GPU and CPU data. So have temperature information quickly with the best CPU & GPU monitoring software.

6. Disconnect all peripherals

According to users, sometimes your peripherals can cause this Pink Screen of Death to appear. To fix this, you must shut down your PC and disconnect all unnecessary peripherals.

Before you turn your PC on the back again, be sure that only your monitor, mouse, and keyboard are connected.

Start your PC and check if the problem is still there. If not, your peripherals may be interfering with your PC.

7. Check your graphics card and monitor

If you keep getting a Pink Screen of Death on your PC, the issue might be a hardware failure.

We recommend testing your monitor on a different PC first and checking if the issue reappears.

You need to check your graphics card if the issue doesn’t appear on the second PC. In case it is possible, connect a different monitor to your PC or remove your graphics card and replace it with a different one.

If the problem doesn’t appear with the new graphics card, the old one is faulty.

Before replacing your hardware, you might also want to check your cables. First, of course, the cable has to be correctly connected.

It’s also advised to replace your cable and check for any physical damage before returning your monitor or graphics card.

8. Use older graphics card drivers

  1. First, right-click the Start icon, then select Device Manager.device-manager-w10 amd driver install problems
  2. Expand the Display adapters section, right-click the driver, and select Uninstall device.uninstall-graphics pink screen of death
  3. Go to your manufacturer’s website and download a couple of months old drivers.

Once you install older drivers, check if the problem is resolved. You might have to repeat this solution a couple of times before you find the older version that works for you.

We already stated how important it is to use the latest drivers. Unfortunately, several users reported that the latest Nvidia drivers caused the Pink Screen of Death.

A pink wash can be related to color calibration or GPU driver issues that also cause a red cast. If the tint skews red, follow these steps to fix it on Windows 10 in this red tint fix.

9. Reinstall problematic games

Sometimes, the Pink Screen of Death occurs only when trying to run a specific game on your PC.

This points toward a corrupted installation; therefore, we advise you to reinstall the games on your PC and check if that helps.

In addition, it’s also essential that you install the latest patches for the game and check if that solves the issue.

Why is my PC screen turning pink?

Both hardware and software problems might bring about the dreaded Pink Screen of Death on a Windows computer.

The most common problem with hardware is connections that are either loose or broken between the display and the motherboard.

High GPU temperatures result from several reasons, including dust accumulation and overclocking, and are yet another hardware-related issue.

Software difficulties might include drivers that are out of current or broken, an infection from a virus, programs that clash with one another, games that have troubles, and incorrect display settings.

Some of the most common issues reported by users are the following:

  • Pink Screen crash – The cause might be third-party applications; so simply find and remove the problematic application and check if that helps.
  • Nvidia Pink Screen of Death – The cause is the Nvidia graphics cards, so be sure to update them, or roll back to the older drivers.
  • VMware Pink Screen of Death – A diagnostic screen like this one is presented by VMware ESXi whenever the kernel discovers a fatal mistake from which it either cannot recover safely or cannot recover at all.
  • Pink Screen of Death ESXi – Every time the kernel finds a fatal error from which it either cannot recover safely or cannot recover at all, VMware ESXi displays a diagnostic screen similar to this one.
  • HP Pink Screen of Death – It might have been caused by an incorrect installation of Windows updates, excessive heating, or defective gadgets connected to the computer from the outside.
  • Samsung Pink Screen of Death – Pink screen is brought on by displaying a static image on your screen for an excessively long length of time while the brightness level is raised and the contrast level is increased.

It is also worth mentioning that the issue affects any Windows version, including older ones, and any laptop or PC brand.

How many screen of death are there?

There are many of them, the most common being the blue screen of death. However, here are others you should know about:

  • Pink screen of death
  • Black screen of death
  • Orange screen of death
  • Purple screen of death
  • Red screen of death
  • White screen of death
  • Yellow screen of death

You should note that they all are triggered by different things and are not exclusive to Windows devices.

What’s the difference between Pink Screen of Death vs. Blue Screen of Death?

The primary distinction between the two is that problems with the GPU or display typically bring on Pink Screens of Death. Such as the GPU they are becoming overheated or the VGA connector becoming loose.

BSoDs can be caused by poorly designed device drivers or malfunctioning hardware, such as defective memory, problems with the power supply, overheated components, or hardware running above the limitations specified in the manufacturer’s documentation.

Nonetheless, a PSoD is not any scarier than the latter. So using the solutions below will fix it for the time being.

How do I fix the Pink Screen of Death on Windows 11?

Each of the methods described above is also applicable to Windows 11. Therefore, you should be sure to test out each one.

A step you can try out before attempting the above solutions is to start Windows 11 in Safe Mode. To do that, make sure to check out our dedicated article.

Why has my monitor gone pink?

One of the most common GPU errors that can cause Pink displays is a temperature that is too high on the GPU.

The graphics processing unit (GPU) may be overheating for a variety of reasons, including but not limited to: overclocking, dust accumulation, defective fans, outdated thermal paste, and so on.

It would help if you were sure that the temperatures of the GPU aren’t more significant than the values advised by the manufacturer before you can even begin to look for the source of the overheating. For this, please look at our post on how to check GPU temperatures in Windows 11.

Optimal temperatures for the GPU may be found in the user manual. Nevertheless, the usual temperature range for the GPU should be 65 to 85 degrees Celsius (149 to 185 degrees Fahrenheit). You are not overclocking or performing other activities that place a heavy demand on the GPU.

FAQs

What is the pink screen of death?

It’s an unofficial term for a pink-tinted crash or freeze, usually from a display/GPU fault rather than a standard Windows stop error.

What causes a pink screen?

Common triggers include buggy or corrupt GPU drivers, overheating or overclocking, failing VRAM, bad HDMI/DP cables, and misapplied color profiles.

How do I fix it quickly?

Reboot, reseat or swap the display cable, roll back any GPU overclock/undervolt, then clean-install the graphics driver and update Windows.

What deeper troubleshooting should I try?

Boot to Safe Mode, run sfc /scannow and DISM /RestoreHealth, check temps, test RAM/VRAM, try another monitor/port, and inspect Event Viewer for display driver resets.

We hope the above solutions helped you fix the PSoD error. However, if you’ve come across other workarounds to fix this problem, you can help the community by listing the troubleshooting steps in the comment section below.

2026 Fix: ‘There was a Problem Resetting Your PC’ Error

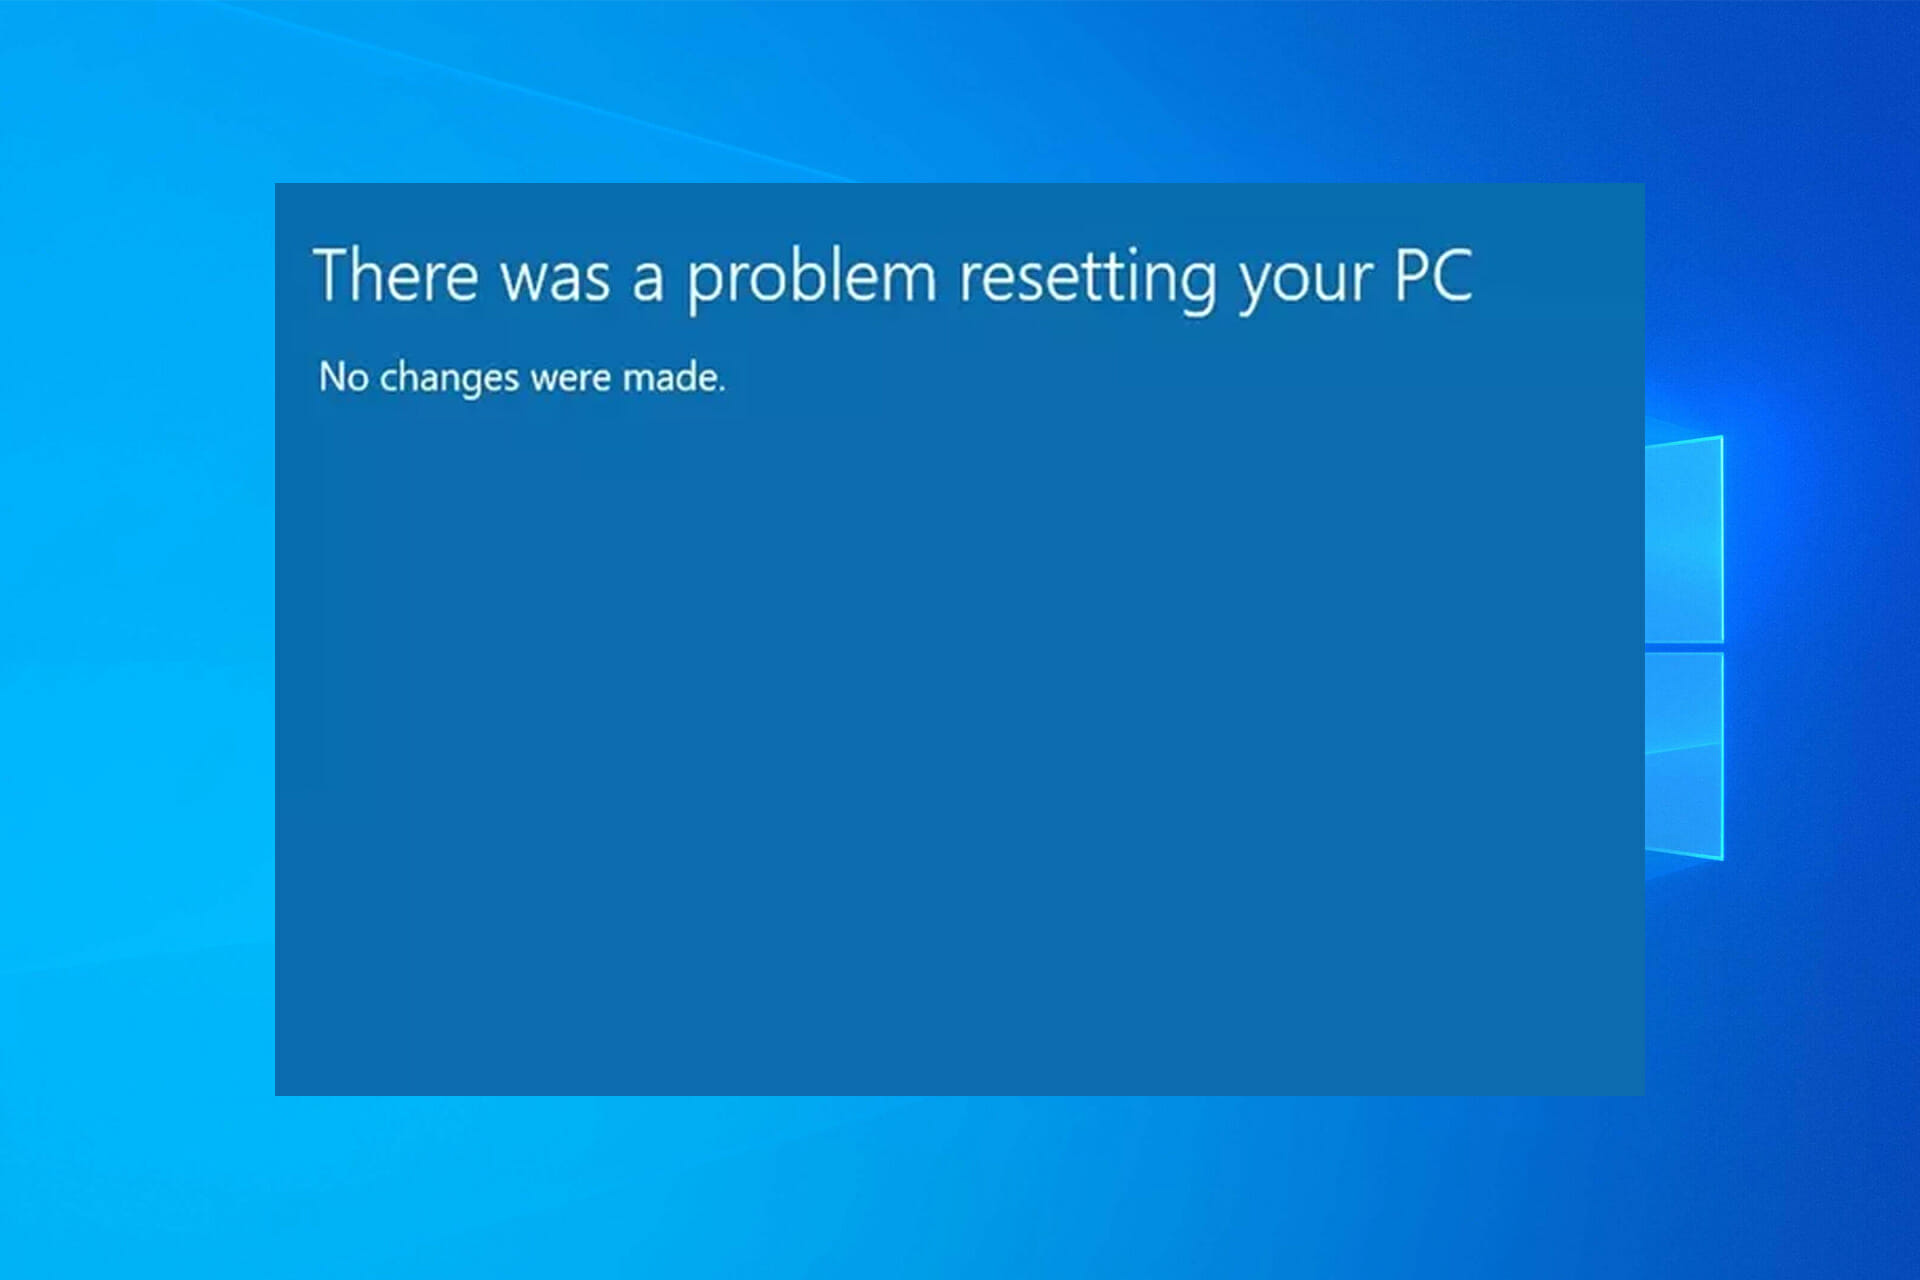
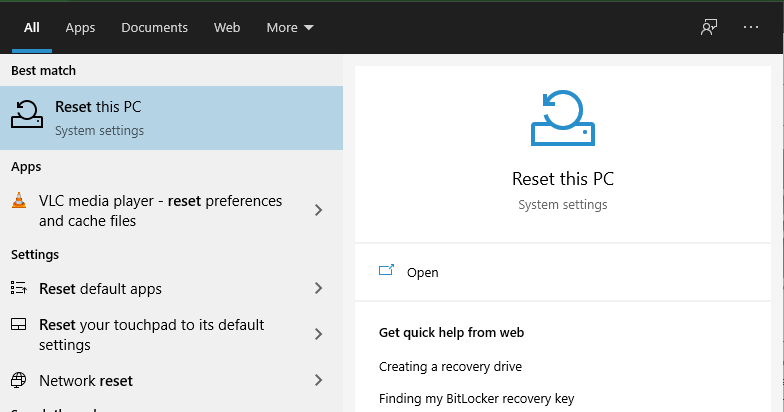
If you’re seeing the “There was a problem resetting your PC. No changes were made” error on Windows 10 or 11, don’t worry — this guide will help you fix it step by step.

This problem usually appears when trying to reset your system using Reset this PC, and it often occurs because of:

  • Damaged recovery image
  • Missing or corrupted system files
  • Incomplete Windows updates
  • Boot configuration errors

Whether you’re using a laptop (HP, Dell, Lenovo, Surface Pro) or a desktop, these methods will help you restore your PC.


⚠️ Common Variations of the Error:

  • There was a problem resetting your PC. No changes were made.
  • Can’t reset PC Windows 10 / Windows 11
  • There was a problem refreshing your PC
  • Windows reset failed cloud download
  • Stuck on blue screen reset loop

These errors may show up during a normal factory reset or while using recovery options.


✅ Quick Fix (Summary)

To fix this error, you’ll need to:

  1. Run Startup Repair
  2. Use SFC /scannow and DISM to repair system files
  3. Perform a System Restore
  4. Reset using installation media (USB/DVD)
  5. Check and rebuild BCD (Boot Configuration Data) if needed

Scroll down for detailed steps and screenshots for each fix.

Why can’t I reset my PC to factory settings?

1. Perform a system file check

1.1 Run the SFC scan

  1. Press Windows Key + X to open the Windows menu. Now select Command Prompt (Admin). You can also use PowerShell (Admin) if this option isn’t available.
    There was a problem refreshing your PC, no changes were made
  2. When Command Prompt opens, enter the script below and hit Enter.
    sfc /scannow
    There was a problem resetting your PC no changes were made Windows 8
  3. The SFC scan will now start. This process can take up to 20 minutes, so don’t interrupt it.

According to users, If you see There was a problem resetting your PC without password, it can often occur due to corrupted files, but you can fix this problem by performing a simple SFC scan.

If the SFC scan doesn’t solve the issue, or if you can’t run SFC, you might have to use the DISM scan.

1.2 Run the DISM scan

  1. Press Windows Key + X to open the Windows menu. Now select Command Prompt (Admin). You can also use PowerShell (Admin) if this option isn’t available.
    There was a problem refreshing your PC, no changes were made
  2. When Command Prompt opens, enter the script below and hit Enter.
    DISM /Online /Cleanup-Image /RestoreHealth
  3. Once the DISM scan completes, check if the problem persists. If it does, repeat the SFC scan (Remember that DISM scan can take more than 20 minutes, so don’t interrupt it.).
  4. If you still can’t reset Windows 10, type the following commands and hit Enter after each.
    cd %windir%system32config
    ren system system.001
    ren software software.001

Third-party system maintenance tools should also be used as a good measure. The process is faster and ensures that no damaged or corrupted files remain on your computer.

2. Use a boot-up CD or USB stick

  1. Get the Windows 10 install files from the Microsoft website to create a boot-up CD or USB stick.
  2. Plug the USB stick in or insert the CD and then choose Reset.
  3. Follow the instructions on the screen to complete the reset.

3. Use a system restore point

  1. Press Windows Key + S, enter system restore, and choose the Create a restore point option.There was a problem refreshing your PC, no changes were made
  2. The System Properties window will now appear; click on System Restore.
    Can't reset PC Windows 10
  3. Once the System Restore window opens, click Next.
    There was a problem resetting your PC Surface Pro 4
  4. If available, check Show more restore points options. Now select the desired restore point and click Next.
    There was a problem resetting your laptop
  5. Follow the instructions on the screen to complete the process.

After the system restoration, the issue should be resolved entirely.

If no restore points are available, go to the Control Panel, search for Recovery, select Recovery, go to Configure System Restore and then select Configure and Turn on system protection to enable this option.

4. Disable ragentc

  1. Press Windows Key + X to open the Windows menu. Now select Command Prompt (Admin). You can also use PowerShell (Admin) if this option isn’t available.
    There was a problem refreshing your PC, no changes were made
  2. Now enter the command below and hit Enter.
    reagentc /disable
  3. Finally, enter this enable script below and hit Enter.
    reagentc /enable

After running these commands, try to reset your PC again.

According to users, you might be able to fix There was a problem resetting your PC message simply by temporarily disabling reagentc.

5. Perform SFC scan outside of Windows

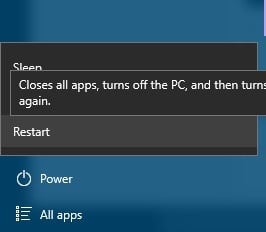
  1. Open the Start Menu and click the Power button, then press and hold the Shift key and choose Restart from the menu.
    There was a problem resetting your PC no changes were made Windows 10
  2. Navigate Troubleshoot > Advanced options > Command Prompt.
  3. Now enter the script below and hit Enter.
    wmic logicaldisk get deviceid, volumename, description
  4. A List of local drives will appear. Find your system drive. Keep in mind that this is usually D outside of Windows environment. Now enter the following command and hit Enter.
    sfc /scannow /offbootdir=d: /offwindir=d:Windows

SFC scan will now start, so be patient and let it finish. Once the scan is completed, check if the problem persists.

According to users, sometimes you might have to perform the SFC scan outside of Windows 10 to fix There was a problem resetting your PC message.

6. Run DISM scan outside of Windows

In some cases, you can fix this problem by running the DISM scan outside of Windows environment. To do that, first you need to create Windows 10 installation media.

You can do so with ease using Media Creation Tool. Once you create an installation media, connect it to your PC and follow these steps:

  1. Boot your PC from the installation media.
  2. Select the desired language.
  3. Now click Repair your computer option in the bottom left corner.
  4. Now choose Troubleshoot > Advanced options > Command Prompt.
  5. Enter the command below, then click Enter. You should now see all system images available on the installation media. If you don’t see this information, try using a different letter instead of E: to access the system image.
    dism /get-wiminf /wimfile:E:sourcesinstall.esd
  6. Now enter the script below and hit Enter.
    mkdir d:scratch
  7. Finally, run the DISM command below.
    dism /image:d /cleanup-image /restorehealth /source:esd:e:sourcesinstall.esd:2 /scratchdir:d:scratch /limitaccess

If everything is in order, the DISM scan should now start and repair your files.

Once the scan completes, check if the problem persists. Remember that this is an advanced solution, so be extra cautious and follow the instructions carefully.

7. Refresh Windows from Windows Defender

  1. Press Windows Key + I to open the Settings app.
  2. Go to the Update & Security section.
    Can't reset PC Windows 10
  3. Now choose Windows Defender, then click the Open Windows Defender Security Center button.
    There was a problem resetting your PC Surface Pro 2
  4. Now go to Device performance & health.
    There was a problem resetting your computer
  5. Click Additional info in the Fresh start section.
    There was a problem resetting your PC no changes were made Windows 10
  6. Now click the Get started button.
    There was a problem refreshing your PC, no changes were made

Follow the instructions on the screen to refresh your PC. Remember that you’ll remove most files from the system drive by restoring your PC, so be sure to back them up.

8. Perform a clean install

If you keep getting There was a problem resetting your PC error message, your only solution might be to perform a clean install. To do that, you must create an installation media with Media Creation Tool.

After that, boot your PC from the installation media and select your system drive.

Follow the instructions to complete the installation. Once the installation completes, you’ll have a clean installation of Windows 10, and the problem should be resolved.

If you need to back up your files, look for the Windows.old directory and restore the desired files.

How can I fix There was a problem resetting your PC on Windows 11?

You can adopt any of the solutions listed above.

You should, however, note that the interface on windows 11 may slightly differ from Windows 10. However, since on both OS versions, this problem is triggered for the same reasons, they share common solutions.

Also, make sure you use the command prompt to run the above command on your Windows 11 PC rather than the new Windows terminal.

How long should resetting this PC take?

An ordinary PC reset might take anything from 30 minutes to four hours. However, older computers might take longer to reset because of outdated components incompatible with current software.

There you go. If there was a problem resetting your PC, you should have successfully fixed it. We recommend you start with a simple SFC scan and only move on to other solutions if that does not work for you.

We hope one of these solutions helped you to complete the reset process. Also, these would work if you come across There was a problem resetting your PC from USB.

If you’ve encountered other workarounds, list the troubleshooting steps in the comment section below.

System Restore is Not Working in Windows 10: How to Fix it

If you run into a significant problem on Windows 10, you should use System Restore to fix the problem by restoring your computer to a specific restore point.

This not only gets your system back to the point where everything was working perfectly fine, but it also saves you time performing a clean install, if you may.

System Restore is quite a helpful feature, but users complained that the restore point is not working on Windows 10, and today we’re going to fix that.

Why is the restore point not working?

While a system restore point helps you get back to the best version of your system, it often fails to perform its job.

Here are some common reasons why the restore point is not working for you.

  • There is possibly a corrupt system file that is causing the problem.
  • Because of a power failure, the restore point failed to get created.
  • Antivirus might be blocking the system restore.
  • A program or file might be conflicting with the System Restore Point.
  • The system restore points aren’t getting created.

What to do if System Restore fails while restoring the registry?

You might encounter this error if the System Restore isn’t working on your PC. This most likely occurs if the restore point is somehow damaged or corrupted.

If that’s the case, you might get System Restore did not complete successfully message. Also, in some rare cases, your antivirus may be blocking System Restore, so you might have to disable it.

These are just a couple of issues that can occur, but hopefully, this guide will be able to help you fix them.

Here are some more examples of this problem:

  • System restore did not complete successfully Windows 10
    • If you can’t complete the process of creating a restore point in Windows 10, try some of the solutions listed below.
  • Windows 10 System restore stuck
    • There’s also a chance for System Restore to get stuck, preventing you from creating a restore point.
  • System restore not working Windows 8
    • Even though we’re talking about Windows 10 here, you can easily perform most of these solutions in Windows 8, as well.
  • System restore failed Windows 7
    • The same thing applies to Windows 7.

The solutions below will help you if your system restore is not working in Windows 7 and 10 as well, even though they are primarily written for Windows 11.

How do I get to restore points in Windows 11?

  1. Check if System Restore is enabled
  2. Try creating a restore point manually
  3. Disable your antivirus software
  4. Run System Restore from Safe Mode
  5. Check your hard drive for errors
  6. Perform SFC scan
  7. Perform the SFC scan before Windows starts
  8. Make sure at least 300MB is used for System Restore by each partition
  9. Check if services are running properly
  10. Run DISM
  11. Modify the registry
  12. Use e dedicated restore tool

1. Check if System Restore is enabled

  1. Press Win + R to open the Run dialogue.
  2. Type gpedit.msc and press OK.
    gpedit
  3. In the left pane, select Computer Configuration.
  4. Click on Administrative Templates.
  5. Select System.
  6. Click on System Restore.
    local-group-policy-editor
  7. Check the state of Turn off Configuration and Turn off System Restore settings on the right side. If they aren’t set to Not configured, double click each setting and put it to Not Configured.
    not-configured
  8. Click Apply and OK to save changes.

Before we start, make sure that System Restore is enabled on your PC.

2. Try creating a restore point manually

  1. Open the Start menu.
  2. Type Create a restore point and open it.
    create-restore-point
  3. Click the Create button and enter the name of your new restore point.
    create-restore-point-button
  4. Check if the restore point is created, and if so, use manually completed restore points in the future.

3. Disable your antivirus software

Your antivirus software can sometimes interfere with System Restore, so it’s advised that you disable your antivirus software before trying to create or restore to a specific restore point.

4. Run System Restore from Safe Mode

  1. Open the Start menu.
  2. Click on the Power button.
  3. Hold Shift on your keyboard and click on Restart.
    restart
  4. When your computer restarts, choose Troubleshoot.windows 10 black screen after login
  5. Then click on Advanced options.start windows 11 in safe mode
  6. Select Startup Settings and click Restart.
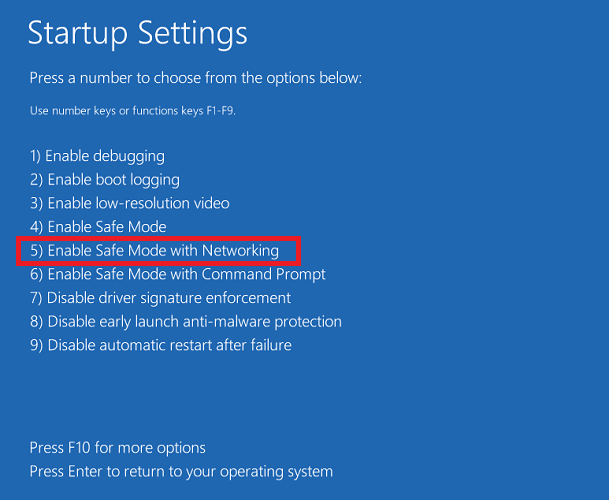
  7. Press F5 to select Safe Mode with Networking when your computer restarts again.safe-mode-with-networking-fatal-error-c0000022
  8. After you enter Safe Mode, try to perform System Restore.

Specific software can sometimes create errors while using System Restore. Therefore, it’s advised that you run System Restore from Safe Mode. 

5. Check your hard drive for errors

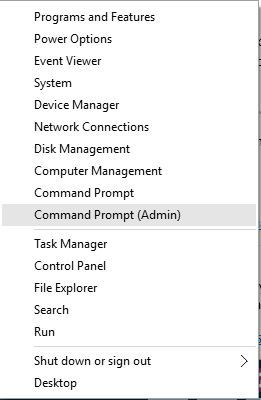
  1. Press Win + X and choose Command Prompt (Admin) from the menu.
    command-prompt-admin
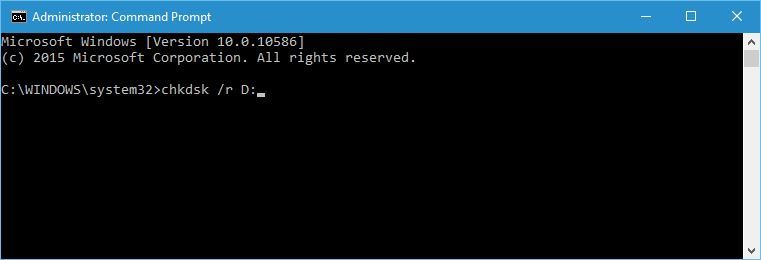
  2. When Command Prompt opens enter the following and press Enter. chkdsk /f /r X:
    chkdsk-cmd
    Remember to replace X with the correct letter representing a computer’s hard drive partition.

Sometimes restore point might not work due to corrupted files and folders on your drive, and to fix the corrupted files, you might need to check your hard drive. 

This process can take a while, so be patient. You might have to restart your computer to complete the disk-checking process.

6. Perform SFC scan

  1. Open the Start menu.
  2. Search for Command Prompt and open it as an admin.
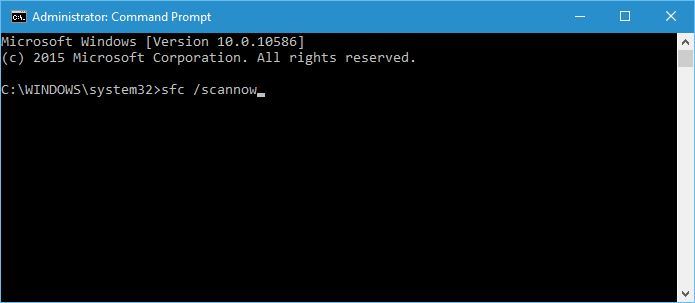
  3. Execute the below command and press Enter to run it: sfc /scannow
    sfc-scan
  4. Follow the instructions and wait for the process to complete.

If your Windows 10 is corrupted, System Restore might not work correctly, and to fix that, you’ll have to run an SFC scan. 

7. Perform the SFC scan before Windows starts

  1. Open the Start menu.
  2. Click on the Power button.
  3. Hold Shift on your keyboard and click on Restart.restart
  4. When your computer restarts, choose Troubleshoot.windows 10 black screen after login
  5. Then click on Advanced options.start windows 11 in safe mode
  6. Choose Command Prompt.
  7. When your PC restarts, you might be asked to enter your username and password, so be sure to do that.
  8. Now you need to find the letter of your Windows 10 drive. To do that, enter this command and press Enter to run it. wmic logicaldisk get deviceid, volumename, description
  9. Pay attention to Volume Name. In most cases, Windows Volume Name will be assigned to the D letter.
    • This is perfectly normal if you start Command Prompt before starting Windows, so there is no need to worry about it. In addition to checking the Windows drive, you should also check the System Reserved drive. In most cases, it should be C.
  10. Now enter this command and press Enter: sfc /scannow /offbootdir=C: /offwindir=D:Windows
    • Be sure to use the letters that you got from the previous step. In most cases, you should know what we did in our example, but if you get different letters, you should use them instead.
  11. The scanning process will now start. Wait while your system files are scanned.
  12. After the scan is completed, close Command Prompt and start Windows 10 typically.

The scanning process will now start. Wait while your system files are scanned. After the scan is completed, close Command Prompt and activate Windows 10 typically.

8. Make sure at least 300MB is used for System Restore by each partition

  1. Open the Start menu.
  2. Type Create a restore point and open it.Create a restore point to fix bad system config info windows 11
  3. Select a hard drive partition and click Configure.
  4. Move the slider to adjust the space that System Restore will use.

For System Restore to work correctly, each partition that has System Restore enabled requires at least 300MB to work. 

9. Check if services are running properly

  1. Press Win + R to open the Run dialogue.
  2. Type services.msc and open it.
    run-services
  3. When the Services window starts, locate the following services:
    • Volume Shadow Copy
    • Task Scheduler
    • Microsoft Software Shadow Copy Provider Service
    • System Restore Service.
  4. Double click each of these services and make sure that Startup type is set to Automatic and that Service status is set to Running.
    service-automatic
  5. Click Apply and OK to save changes, close the Services window, and restart your computer.

System Restore relies on specific services, and if a particular restore point isn’t working, it might be because certain services aren’t running. 

10. Run DISM

  1. Open the Start menu.
  2. Type Command Prompt and run it as an administrator.run as administrator
  3. In the command line, copy-paste these lines one by one and press Enter after each: DISM /online /Cleanup-Image / ScanHealthDISM /Online /Cleanup-Image /RestoreHealth
  4. Wait until the procedure ends (it might take up to 10 minutes).
  5. Restart your PC.

11. Modify the registry

  1. Open the Start menu.
  2. Type regedit and open Registry Editorrestore registry without backup
  3. Navigate to this registry path: HKEY_LOCAL_MACHINE/SOFTWARE/Microsoft/Windows NT/CurrentVersion/Schedule/Task/Cache
  4. First, back up the TaskCache registry key. Right-click TaskCache and select Export on its context menu.
  5. Please enter a title for the backup file, select a folder for it and press the Save button.
  6. Next, navigate to this key in the Registry Editor. HKEY_LOCAL_MACHINE/SOFTWARE/Microsoft/Windows NT/CurrentVersion/Schedule/Task/Cache/Tree/Microsoft/Windows
  7. Right-click the Windows key and click Delete on its context menu.
  8. Press the Yes button to confirm, and then close the Registry Editor.
  9. Restart your computer.

12. Use a dedicated tool

One downside to using Windows’ own Restore point is that while it creates an exact image of your PC’s files from any given moment, you may make a copy of data that may already be faulty or damaged.

Additionally, creating a restore point needs to be scheduled beforehand or done manually.

The last major downside of traditional restore points is that they are used for restoring registry hives instead of actual files. 

Given the downsides, using a reliable third-party tool becomes the better option.

What do I do if Restore Point is not working on Windows 11?

Here are a few additional tips apart from the ones mentioned above that will help you resolve if the restore point isn’t working on Windows 11.

  • Use the CHKDSK tool.
  • Enable Shadow Copy services.
  • Disable your antivirus or antimalware tool.
  • Reset your PC.
  • Perform a clean install.

Can Restore Point recover deleted files?

When you create a Restore Point on your PC, you take a snapshot of system files, system settings, installed programs, and Windows registry.

This does not include any of your files, such as documents, photos, videos, etc. So, the restore point only restores system-related changes and cannot be used to recover deleted files.

That’s about it. As you can see, System Restore might have specific issues on Windows 10, but we hope you solve these problems by following our solutions. If you have any comments, questions or suggestions, let us know in the comments below.

8 Ways to Fix Disk Defragmenter Won’t Run in Windows 10

Performing disk defragmentation is always helpful, especially in Windows 10 Technical Preview. Because you get new updates almost every day, you should use disk defragmentation to keep your disk optimized.

However, several user reports claim that disk defrag is not working for them on their Windows 10/11 PCs.

If the disk defrag does not work, it becomes hard for you to optimize your disk, and it also fills the gap in the disk by bringing all parts of a file together.

Thankfully, this guide has listed many solutions to help you fix the disk defrag not working issue on Windows 10 and 11. So let us check it out.

Why is my Disk Defragmenter not working?

Well, the first thing you should know about is the common reasons that would trigger the issue. In our case, let us check out the most common reasons responsible for the Disk Defragmenter not working in Windows 10/11.

  • The disk defrag service is disabled
  • Some third-party applications are conflicting with the service
  • The antivirus tool is blocking the service
  • Corrupt system files can also cause the service to malfunction
  • Your hard drive might have some errors

Does defragging speed up the computer?

If your PC loads from a hard drive, disk defragging will help speed up the PC. Also, you will witness a noticeable difference in speed if you haven’t performed the disk defragment process in quite a while.

However, it shouldn’t be done daily since that won’t help speed up your PC. When you defrag your hard disk, it arranges all the parts of a file in one place, thus speeding up your PC.

How do I fix a Disk Defragmenter that won’t run on Windows 10?

Many users frequently defragment their drive to achieve maximum performance; however, issues with Disk Defragmenter can sometimes occur.

Speaking of issues, these are some of the most common problems with Disk Defragmenter:

  • Disk Defragmenter service missing Windows 10 – Many users reported that the Disk Defragmenter service is missing on Windows 10. If that’s the case, try running Disk Defragmenter from Safe Mode or a different user account.
  • Windows 10 defrag optimization not available – This is another problem that can appear on Windows 10. However, you should be able to fix it using one solution.
  • Windows Disk Defragmenter is not working – Many users reported that Disk Defragmenter isn’t working. This can be due to corrupted files, but you can fix that with SFC or DISM scan.
  • Defrag won’t run in Safe Mode – Several users reported that they couldn’t defrag their drive in Safe Mode. This usually happens if your installation is corrupted. If SFC or DISM scan can fix this problem, you might have to reinstall Windows 10.
  • Defrag won’t launch, work, open – There are various problems with defrag tool that can occur on your PC, and if you’re having any of these problems, you should be able to fix them using one of our solutions.

This issue might occur because of the corrupt installation of a third-party defragmenter or because the defragmenter isn’t compatible with Windows 10. To solve this problem, try the following solutions from this article.

1. Disable your antivirus

If your Disk Defragmenter won’t run on your PC, the problem might be your antivirus. Some antivirus tools can interfere with Windows components and prevent applications such as Disk Defragmenter from running.

To fix this problem, it’s advised to check your antivirus configuration and try disabling features that might interfere with Disk Defragmenter.

If that doesn’t work, you might want to try disabling your antivirus software entirely. Finally, in the last case scenario, you can try removing your antivirus and check if that resolves the problem.

If removing the antivirus fixes the issue, you might consider switching to a different antivirus solution.

There are many options available, and some of the best antivirus software offer full-featured free trials, so you can try out a few if you are unsure what to pick.

2. Use third-party tools

If you still can’t run Disk Defragmenter on Windows 10/11, you might want to consider using a third-party tool. Disk Defragmenter is a solid application but offers limited features compared to other tools.

If you need access to advanced features, you might want to consider using a third-party solution.

One great example of such a tool is IObit Smart Defrag 6, a dedicated tool made to rearrange the memory on your PC to improve its speed and responsiveness.

It boasts a simplistic UI, familiar with Windows 10/11’s native defrag tool, but with plenty of other features.

If none of these solutions work, you could try to change your defrag tool. Maybe our list of top five defrag tools for Windows 10/11 can help you.

Over time, your PC becomes clogged with unnecessary files and folders. Get rid of them with IObit Smart Defrag 6 to speed up your PC, reduce boot times and boost gaming performance.

IObit Smart Defrag

A doctor for your PC to make it run smoother than ever.
Free Trial Visit Website

3. Perform SFC Scan

  1. Open the Start menu.
  2. Type Command Prompt and open it as an administrator.
  3. Type the below and press Enter to run it. sfc /scannow
    Windows Disk Defragmenter not working
  4. SFC scan will now start. The scan can take up to 15 minutes, sometimes more, so don’t interrupt it.

Once the SFC scan is finished, check if the issue persists. If you could not run the SFC scan or if the SFC scan didn’t fix the problem, you need to run the DISM scan.

To do that, follow these steps:

  1. Start Command Prompt as administrator.
  2. Type the below, and then press Enter to run it: DISM /Online /Cleanup-Image /RestoreHealth
    Windows 10 defrag optimization not available
  3. DISM scan will now start. Remember that this scan can take up to 20 minutes or more, so don’t cancel it.

Once the DISM scan is finished, check if the problem persists.

If the issue is still present or you could not run an SFC scan before, try re-running it. Once the SFC scan is finished, the problem should be resolved.

Several users reported that the DISM scan fixed the problem on their PC, so feel free to try it out.

4. Check if the Disk Defragmenter service is running properly

  1. Open the Start menu.
  2. Type services.msc and hit Enter.
    Disk Defragmenter service missing Windows 10
  3. Make sure that the Disk Defragmenter service is set to Manual.
  4. Also, make sure that the following services are set to Automatic:
    • Remote Procedure Call (RPC)
    • DCOM Server Process Launcher
    • RPC Endpoint Mapper

Maybe your Disk Defragmenter service is not running properly. This service is required for performing disk defragmentation; if it’s disabled, you won’t be able to run a defrag tool.

After making these changes, check if the problem is resolved.

5. Try using Safe Mode

  1. Open the Start Menu.
  2. Click the Power button, hold the Shift key and choose Restart from the menu.
    Defrag won't launch
  3. When your computer restarts, choose Troubleshoot.windows 10 black screen after login
  4. Then click on Advanced options.start windows 11 in safe mode
  5. Select Startup Settings and click Restart.
  6. Press F5 to select Safe Mode with Networking when your computer restarts again.safe-mode-with-networking-fatal-error-c0000022

If Disk Defragmenter doesn’t run on Windows 10, you might be able to fix the issue by running it from Safe Mode.

If you’re unfamiliar, Safe Mode is a segment of Windows that runs with default settings and drivers, so it’s perfect for troubleshooting.

Sometimes specific applications, such as Disk Defragmenter, won’t work because your settings or third-party applications interfere with it. You need to start Windows 10 in Safe Mode to circumvent the problem.

Once you enter the Safe Mode, start Disk Defragmenter again; it should work without any problems.

Keep in mind that this is just a workaround, and if Disk Defragmenter doesn’t work on Windows 10, you’ll always have to start it using this method.

6. Make sure that other applications aren’t running

  1. Press Ctrl + Shift + Esc to start Task Manager.
  2. Go to the Processes tab, and locate the application you want to close.
  3. Right-click it and choose End task from the menu.
    Defrag won't run in Safe Mode
  4. Repeat the previous step for all running applications.

If you cannot run Disk Defragmenter, the problem might be other applications running in the background. In addition, many applications can interfere with Disk Defragmenter causing specific issues to appear.

To prevent any potential problems, it’s advised that you disable all third-party applications that can interfere with Disk Defragmenter.

You can manually close these applications, but if you want to do it faster, you can try using Task Manager.

After that, try running Disk Defragmenter and check if it works properly.

7. Create a new user profile

  1. Press Win + I to open the Settings app.
  2. When Settings opens, navigate to the Accounts section.
    Windows 10 defrag optimization not available
  3. In the left pane, select Family & other people. In the right pane, choose to Add someone else to this PC.
    Windows 10 defrag optimization not available
  4. Select I don’t have this person’s sign-in information.
    Windows Disk Defragmenter not working
  5. Choose Add a user without a Microsoft account.
    Defrag won't run in Safe Mode
  6. Enter the desired user name and click Next.
    Defrag won't work

After creating a new user account, switch to it and check if Disk Defragmenter works. If it works on a new profile, the issue is caused by your old profile.

8. Use CHKDSK utility

  1. Open command prompt as an administrator.
  2. Type the below command and press Enter. chkdsk /f X:
    • Remember that you need to replace X with the letter representing your drive.
    • If you choose to scan the C drive, press Y to schedule a restart and restart your PC.
      Disk Defragmenter service missing Windows 10
  3. The CHKDSK scan should now start.
  4. Keep in mind that a CHKDSK scan can take 20 minutes or more, depending on your partition size.

If you can’t run Disk Defragmenter, the issue might be caused by corrupted files on your hard drive. To fix that problem, first, you need to try to repair those files.

This is relatively simple, and you can do it using the CHKDSK command. After the process is finished scanning your drive, try to defragment that drive again.

What can I do if defrag is not working on Windows 11?

There could be several reasons why the disk defrags are not working for your Windows 11 PC—however, some of the common reasons behind this issue, which are troubling users, are mentioned below.

  • Disable or close all background apps: Some third-party or background app/process is interfering with the disk defragmenter service on your PC.
  • Fix corrupt system files: There are some underlying corrupt system files on your Windows PC.
  • Disable antivirus: Your antivirus or firewall is blocking the disk defrag service.
  • Sort out hard drive issues: The presence of hard drive issues can also trigger the problem.
  • Enable the service: You haven’t enabled the disk defrag service in the first place.
  • Disable all third-party apps: A third-party program has disabled the service.

Does Windows 10 need defragging?

Every iteration of the OS, including Windows 10, needs defragging, but that isn’t what’s of concern here. The primary aspect you should identify before considering defragging is whether you are using an HDD (Hard Disk Drive) or SSD (Solid State Drive).

The HDDs require regular defragging, some recommend a minimum of once a month or if the fragmentation is higher than 10%. SSDs, on the other hand, do not require defragging. Moreover, defragging an SSD can cause unnecessary wear and tear.

How do I force defrag?

  1. Open the Start menu.
  2. Search for Command Prompt and open it as an administrator.
  3. Execute the below command and press Enter. defrag C:
  4. This will force your system to start the disk defrag process.

As you can see, there are plenty of options for solving this issue once and for all, so try them out individually.

If you have any suggestions, contact us by using the comment section below this guide.

Cant’ Extend Display In Windows 11: How to Fix

If you can’t extend the display in Windows 11, it’s usually due to incorrect settings, outdated drivers, or cable issues. Whether your second monitor isn’t extending or the screen won’t extend at all, the steps below can help.

This can interrupt your workflow, especially if you multitask. It can happen with HDMI, DisplayPort, or even display software.

The good news is it’s usually an easy fix. Just follow the steps below.

What can I do when my dual monitor is not extending?

1. Make sure Extend is selected under the Project menu

  1. Press the Windows key + P to bring up the Project menu.
  2. Select the Extend option.
    option dual monitor wont extend
  3. Now, check if the issue is fixed.

These same steps above can be used to change to duplicate if you’d change your mind later.

2. Use the graphics control center

  1. Click on the Start button, type intel graphics, and open Intel Graphics Control Center from the results.
  2. If the second monitor is not detected, ensure it’s powered, connected to the right port, and click on Detect.
  3. To extend the image on the first monitor on the second one, click the three horizontal points, select Extend, and choose Monitor 2.
  4. If this doesn’t work and the image duplicates but won’t extend, click on Display 2, then access the Scale drop-down menu.
  5. You have a few options here. You may toggle between Maintain Aspect Ratio and Mentain Display Scaling and check again if you can set the image to extend from Step 3 in this solution.

As you may have noticed, you have more options in the graphics control center than in Windows Settings, and they allow a bit more tweaking.

The problem with the image not extending to the second monitor is that it doesn’t have the same aspect ratio or it has a much lower or higher resolution than the first. By playing with these settings, you will even them for both and will be able to work together.

We chose Intel Graphics Control Center, but you will find these settings in the NVIDIA Control Panel, or AMD Catalyst Control Center.

3. Update the graphics card driver

3.1. Update drivers manually

  1. Press the Windows key + X and select Device Manager.
  2. Double-click on the Display adapters option to expand it.
    display adapters
  3. Right-click on each of the drivers there and select Update driver.
    update driver
  4. Now, choose Search automatically for drivers.
    search automatically dual monitor wont extend
  5. Wait for the scan to complete and install the updates.

More often than not, the inability of your dual monitor to extend in Windows 10 has to do with the graphics card driver. The steps in this guided walk-through should help you update it properly.

Intel, NVIDIA, and AMD frequently release new graphics drivers that significantly improve performance, so take advantage of that. Remember that you must be logged in as an administrator to perform these steps.

3.2. Update driver automatically

As good as Windows’ built-in driver updater is, it doesn’t compare to a dedicated tool. And when it comes to reliable driver update software, Fortect Driver Updater is a top choice.

It automatically scans your system for outdated, broken, or missing drivers and updates them with trusted versions from official manufacturers.

All you need to do is approve the recommended updates, and the tool handles the rest to keep your PC running smoothly.

⇒ Get Fortect Driver Updater

4. Reinstall drivers

  1. Open Device Manager and double-click the Display adapters option.
    display adapters
  2. Right-click on the drivers there and select Uninstall device.
    uninstall device
  3. Now, click the Uninstall button.
    uninstall button
  4. Restart your PC, and the driver should be installed automatically.
  5. If it does not install the driver, open Device Manager again.
  6. Finally, click the Scan for hardware changes icon in the top menu. This will help install the driver.
    scan dual monitor wont extend

If updating the drivers doesn’t work, you need to reinstall them. Apply this on the monitor that isn’t working as intended and confirm the change.

Can’t windows automatically find and download new drivers? Follow the simple steps from this guide and fix the issue in no time.

How do I set up my dual monitors to be extended?

  1. Right-click on any space on your desktop and choose Display settings.
    display settings
  2. Scroll down to the Multiple displays.
    multiple
  3. Now, select Duplicate these displays or Extend these displays.

If the second monitor isn’t detected, you might get an error message.

This can be a driver issue, but it can also appear if you have a bad cable. In that case, there would be no HDMI signal from your device, thus causing the issue to occur.

Do you want to know how to set up 3 monitors in Windows 10? Then, check our detailed guide for quick and easy ways to do it.

Also, if you have an even older OS, here’s our guide on how to fix extended desktop issues in Windows 7.

Let us know if you have any other questions or troubleshooting suggestions for when you can’t extend your display. Use the comments below.

10 Ways to Fix Pool Corruption in File Area on Windows 10

BSoD, also known as stop error or exception error, indicates a system crash and the operating system can no longer operate safely. One of the common ones is Pool Corruption in File Area.

Blue Screen of Death errors such as these can create many problems because they tend to restart your PC in order to prevent damage.

There are many causes for the Pool Corruption in File Area error, thus, troubleshooting might take some time. To save time, read the information listed in the following sections and execute the solutions in the same sequence.

What is Pool Corruption in File Area?

As the name suggests, Pool Corruption in File Area is typically caused by corrupt or outdated drivers and software. Also, running an older version of the OS is found to be an underlying cause.

Incompatible or problematic hardware is also a likely reason behind encountering the BSOD error. Many reported POOL CORRUPTION IN FILE AREA due to RAM issues.

Besides, third-party antivirus or misconfigured security settings have often been found to be the culprit, and it’s imperative that you look for these as well.

How do I fix the POOL_CORRUPTION_IN_FILE_AREA BSoD?

1. Use a 3rd party BSoD error fixer

Repairing delicate system files can be risky so it is always a good idea to employ the help of professional repair software. These tools will scan your system and replace any broken files with fresh and genuine ones from their databases.

2. Run the Hardware troubleshooter 

  1. Click on the Start Menu button and select Settings.
  2. Go to Update & Security section.
  3. Go to Troubleshoot from the menu on the left, select Blue Screen from the right pane, and then click Run the troubleshooter.
  4. Follow the instructions on the screen to complete the troubleshooting process.

This is a built-in troubleshooter on Windows 10 and can help you resolve BSOD errors, including Pool Corruption in File Area. If this troubleshooter doesn’t fix the error or is not available, try running the Hardware and Devices one.

3. Run the SFC scan

  1. Enter cmd in the text field, and then click on Run as administrator to open its window.
  2. Click Yes in the UAC prompt that appears.
  3. Enter the following line and press Enter: sfc /scannow
  4. Wait until the process is done (it may take a while).
  5. Now, close the Command Prompt and restart your computer.

SFC is a command-line tool that scans your computer for corrupt system files and, if any are found, replaces them with a cached copy stored on the drive. And since corrupt system files are a possible cause behind BSOD pool corruption, running the scan might help.

Once done, verify if the Pool Corruption in File Area error is resolved.

4. Update your drivers

Searching for drivers can be time-consuming. So, we advise you to use a tool that will do this for you automatically.

Outbyte Driver Updater will help you update drivers automatically and prevent PC damage caused by installing the wrong driver versions. After several tests, our team concluded that this is the best-automatized solution.

⇒ Get Outbyte Driver Updater

5. Run DISM

5.1 Standard way

  1. Type Command Prompt in the Search bar, and click on Run as administrator.command prompt to fix pool corruption in file area
  2. Click Yes in the UAC prompt.
  3. Paste the following two commands individually and press Enter after each:DISM /Online /Cleanup-Image /ScanHealth
    DISM /Online /Cleanup-Image /RestoreHealthDism to fix pool corruption in file area
  4. Wait until the scan is finished.
  5. Restart your computer and try updating again.

5.2 With the Windows installation media

Note icon NOTE
Go with this method only if you are unable to boot Windows due to the BSOD error. In case the OS is stable, direct run the DISM tool.
  1. Insert your Windows installation media, boot it, and during the setup, select Repair your computer.repair your computer
  2. Click on Troubleshoot and then on Advanced options.
  3. Open Command Prompt (Admin).
  4. In the command line, type the following commands and press Enter after each:
    dism /online /cleanup-image /scanhealth dism /online /cleanup-image /restorehealth
  5. Now, type the following command and press Enter while replacing X with the drive letter for the one mounted with Windows installation:
    DISM /Online /Cleanup-Image /RestoreHealth /source:WIM:X:SourcesInstall.wim:1 /LimitAccess
  6. After the procedure is finished, restart your computer.

The DISM tool deploys the system image all over again, so it might resolve the BSOD issue on the way. Also, it would help if you are encountering Pool Corruption in File Area due to the ntoskrnl.exe process.

6. Download the latest Windows 10 updates

  1. Press Windows + I to open the Settings and click on Update & Security.update & security to fix pool corruption in file area
  2. Next, click on Check for updates on the right.check for updates to fix pool corruption in file area
  3. If a newer version of the OS is available, download it.

Many operating systems have minor issues with certain hardware or software, and sometimes these issues can cause Blue Screen of Death errors to appear.

If you’re getting the POOL_CORRUPTION_IN_FILE_AREA error, we advise you to download the latest patches for the OS.

Many of these patches improve system security and fix both hardware and software compatibility issues, therefore, it’s important that you install them in order to prevent BSoD errors from appearing.

7.  Remove your antivirus/firewall

Using antivirus programs and firewalls to protect your PC is essential, but sometimes they can cause BSoD errors. If it’s the antivirus causing the Pool Corruption in File Area error, uninstall the app.

Bear in mind that Windows 10 comes with Windows Defender, which works as your default antivirus, so your computer won’t be completely vulnerable even if you remove all other third-party antivirus tools.

We should mention that uninstalling your antivirus software might not be enough, so it’s advised to use an effective uninstaller software. These tools remove all files associated with the antivirus, as well as any Registry entries created by it.

If removing your antivirus fixes the problem, you can now reinstall it or switch to a different program. In case you intend on switching, make sure to check the best antivirus solutions for Windows 10 right now.

8. Perform System Restore

  1. Press Windows + R to open the Run command, type rstrui.exe, and click OK.rstrui.exe to fix pool corruption in file area
  2. Select Choose a different restore point and click Next.
  3. Choose a restore point created before the problem first occurred, and then click on Next.
    system restore mshtml.dll not found
  4. Verify the restore details, and then click on Finish.
  5. Wait for the restore press to complete.

System Restore is an effective troubleshooting technique when it comes to BSOD errors like Pool Corruption in File Area.

When you perform a restore, the system is basically taken back in time. The changes will reflect across settings and installed apps, though the files won’t be affected.

9. Reset your PC

  1. Type Reset this PC in the Windows search box, and click on the relevant search result.reset this PC to fix pool corruption in file area
  2. Click the Get started button.get started
  3. Now choose the desired options on each scree, and follow the on-screen instructions to complete the reset process.

If System Restore didn’t fix the error, you might want to try Windows 10 reset. This process is quite similar to a clean install, therefore, we urge you to back up your files and folders.

In case the error still appears even after the reset, it means that it is caused by your hardware.

10. Check for faulty hardware

Blue Screen of Death errors are often caused by faulty hardware, so be sure to check your RAM first. Make sure it’s properly seated, and there is no carbon or dust deposit on it. Removing and then reseating the RAM might do the trick.

If your RAM is working properly, check other major components, such as the motherboard and processor. Or a better option would be to get an expert to have a look.

How do I fix Pool Corruption in File Area on Windows 11?

The Pool Corruption in File Area error has managed to find its way into Windows 11, but the fixes for it are pretty simple and quick, given you have identified the underlying cause.

In case you are getting the error on a laptop, remove all devices and peripherals connected to it, and then replug them one at a time. After replugging each device, restart the computer and check if you encounter the error. As soon as you do, the device last connected is to blame for it.

For software-related issues, uninstalling the problematic app, manually updating the installed drivers, and running the DISM and SFC scan should help get things up and running.

How do I know if I have bad RAM?

A RAM doesn’t just start throwing errors all of a sudden. There are several signs that will help you identify a bad RAM early on and take the necessary measures to fix things.

First, if you notice reduced performance, it’s an indication of issues with the RAM. In this case, the programs may not run smoothly or even crash out of the blue. In extreme cases, bad RAM can cause the OS to crash as well with a BSOD error.

Also, if system files start getting corrupt and you are unable to fully operate Windows, it’s a sign that the RAM is failing. Besides, the system may also display incorrect RAM size in case of major issues with it.

By now, you would have the Pool Corruption in File Area error fixed and can use your computer. In case it was malfunctioning or incompatible hardware, make sure to replace it to avoid issues in the future.

Also, do learn a general but highly effective approach to fix BSOD errors in Windows.

For any other queries or help with a particular method listed here, drop a comment below.

How to Download Teredo Tunnelling Adapter for Windows 10

Running into issues with the Teredo Adapter on a Windows 10 device isn’t exactly an isolated case. There have been several instances of the above, thereby hampering the Internet experience for many.

However, no matter how intimidating the term might sound, we mentioned here in easy steps how to download and install the Teredo Adapter.

What is a Teredo adapter?

To begin with, the Teredo Adapter works to redress a key shortcoming that again can be attributed to the rapid proliferation of the Internet; the shortage of IPv4 addressing scheme.

Let’s understand it in simple terms. Since the Internet has exponentially grown off late, there simply aren’t many IPv4 addresses left to assign to new users. It is here that the IPv6 protocol comes into the picture, which opens up an almost infinite number of addresses to use.

However, since most of us all over the world continue to be reliant on IPv4 technology, this opens up the need to have a system that maps between IPv4 and IPv6 protocols. And that’s precisely what the Teredo Adapter from our topic today does.

Its primary job is to provide IPv6 functionality (the host’s compatibility with IPv6 is a must) to a device currently on an IPv4 connection.

Why Teredo Tunneling Adapter is not in legacy hardware section?

This issue occurs mostly if you’re missing certain registry entries. If this happens, the Teredo Tunneling Pseudo-Interface will be missing.

Another cause can be your drivers, so it’s not uncommon to see that Microsoft Teredo Tunneling Adapter has a driver problem.

Issues such as these will lead to Teredo is unable to qualify and many other errors, but luckily, there are ways to fix them.

How do I uninstall and reinstall Teredo adapter?

  1. Click the search bar type Device manager and select the Device Manager app.
  2. Right-click the Microsoft Teredo Tunneling device under Network Adapters, and select the Uninstall device option.
  3. Reboot the computer, and the Teredo adapter will be reinstalled.

Now that you know what the Teredo Adapter is, let’s find out how to download and install the same successfully on a Windows 10 PC, and what to do if you can’t install the Teredo adapter.

How do I download Microsoft Teredo Tunneling adapter?

1. Download the Microsoft Teredo Tunneling Adapter

  1. Press Windows + R to open the Run command, type devmgmt.msc, and then click OK to open Device Manager.Device Manager
  2. On the Device Manager window, and then expand Network Adapters.network adapters
  3. Microsoft Teredo Tunnelling Adapter should have been there, and the lack of which is what this article aims to rectify. You can also check by clicking on View, and then selecting Show Hidden Devices to be doubly sure.
  4. Presuming that Teredo Adapter is missing, the next step for you will be to click on Action, and select Add legacy hardware.
  5. This will launch the Add hardware Wizard. Click on Next here. The wizard also shows quite a scary message that only the advanced users should proceed henceforth. Don’t be in awe of it, and click on Next anyway.
  6. In the next step, make sure the Search for and install the hardware automatically (Recommended) is selected, and then click on Next again.
  7. The next page confirms, If you know the specific hardware model you want to install, click Next to select it from a list. Click on the Next button to proceed.
  8. The next page will show the various hardware categories. Select Network adapters from the list and then click on Next.
  9. Here you will have to select the manufacturer and model of the hardware device. In this case, select, Microsoft from the left-hand panel, followed by selecting Microsoft Teredo Tunneling Adapter from the right panel, and then click on Next to proceed to the next page.
  10. Here you get the confirmation that the hardware is ready for installation. Click on Next.
  11. Here comes the last stage, with the page showing Completing the Add Hardware Wizard. Click on Finish.

Microsoft Teredo Tunnelling Adapter should show under Network adapter. If it doesn’t, click on Scan for hardware changes on the Device Manager window.

Also, just in case the Add legacy hardware isn’t showing in the Device Manager window, plug in the specific devices that use tunneling.

If Windows could not find a driver for your network adapter, take a closer look at our comprehensive guide and fix it in no time.

2. Check for Windows 10 updates

  1. Press Windows + I to open the Settings app, and then click on Update and Security.update & security
  2. Next, select Windows Update from the left panel, and then click on the Check for updates tab on the right.check for updates
  3. If updates are available, download and install them.

Alternately, if your issues continue to persist, or if Teredo Adapter is not showing in Device Manager, you might want to see if your PC is running the latest Windows 10 version.

Just be sure to follow the above steps to check for Windows 10 updates.

How do I download Teredo adapter on Windows 11?

Just as you did in Windows 10, the Teredo Adapter’s driver can be easily downloaded in Windows 11 through the Device Manager. The steps for it are already listed in the previous section.

Those who didn’t find the Teredo driver listed in the Device Manager during the installation process should try the tip listed next, and the driver will appear.

Useful tip for users

  1. Open Command Prompt (Admin), and then run the following line to check iphlpsvc: reg query HKLMSystemCurrentControlSetServicesiphlpsvcTeredo
  2. If Teredo is disabled, this line will show up in output: DisabledComponents REG_DWORD 0x8e
  3. Re-enable Teredo through this line: reg add HKLMSystemCurrentControlSetServicesTcpip6Parameters /v DisabledComponents /t REG_DWORD /d 0x0

If you can’t find the driver for the Teredo adapter in the Device Manager, verify if it is enabled. In case it’s not, the above method will help you.

This should let you have the all-important Teredo Tunneling Adapter on your system for a seamless Internet experience.

Is Teredo necessary?

The Teredo adapter/driver is required when both IPv4 and IPv6 come into the picture. So, Teredo is not absolutely necessary as long as none of the devices you connect with are using IPv6.

Though some games require the Teredo adapter to function effectively, and in the absence of it, these wouldn’t run. So identify these aspects, and you will then be able to find out if Teredo is necessary.

If you have a multi-device setup using both IPv4 and IPv6 and need to communicate amongst those without a hitch, the Teredo adapter is the perfect solution for you.

Also, find out how to fix the Teredo is unable to qualify error.

If you have any other suggestions or questions on this topic, feel free to leave them in the comments section below.

6 Ways to Fix Power Plan Keeps Changing on Windows 10

Have you recently upgraded your operating system to Windows 10? Then it’s not a strange thing that your power plan keeps changing randomly or whenever you try to do a device reboot.

Usually, the system will change your power plan if you don’t have the correct settings. For instance, you might set your devices to high performance, and after a while or after a reboot, it will change automatically to Power Saver.

This is just one of the glitches in your power plan settings feature. But by reading the tutorial below, you will learn what exactly you can do to fix your power plan.

Why does my power plan keep changing?

A few elements on your Windows PC may trigger power plan changes. Among these include the following:

  • Automatic updates – Windows may automatically update the power plan settings, depending on the settings configured by the user or administrator.
  • Power usage – The power plan may change automatically based on the current power usage of the device. For example, if the battery is low, the power plan may switch to a more energy-efficient setting.
  • External factors – External factors such as temperature or the presence of AC power can also affect the power plan settings.
  • Software conflicts – Some software or programs may override or change the power plan settings, resulting in unexpected changes.
  • Malware – Malware or viruses can also change power plan settings or create new power plans without the user’s knowledge.
  • User error – Accidentally clicking on the wrong power plan or changing settings without realizing it can also cause the power plan to change.

Users have encountered a few different variations of power plan problems, including power plan keeps changing to power saver, power plan keeps changing to balanced, and Windows power plan keeps changing in Ryzen

Here are the best resolutions, regardless of the triggers and variations you may experience.

How do I fix Windows 10 power plan that changes on its own?

Before trying any advanced solutions:

  • You might not have administrative privileges on the user device, so every change you make will be reset after a reboot. For a fix, you will have to try to log in with the administrator account and set up the power plan settings. After that, log in with the regular Windows username and see if you are still experiencing this issue.

1. Repair system files

  1. Open Start menu.
  2. Type Command and click Run as administrator.
  3. Write the scan below and hit Enter.
    sfc /scannow

An easier way you can rely on is to download specialized software that scans and repairs any damage automatically.

2. Run the Power Troubleshooter

  1. Press Windows + I to open the Settings app.
  2. Select Update & Security.
  3. Click on Troubleshoot and under the power option, select the Run button.
    power plan keeps changing windows 10

3. Update your graphics driver

  1. Press Windows key, right click on it and select Device Manager.
  2. Expand your Display drivers, right-click on your graphics driver, and select Update driver.
  3. Select Search automatically for drivers.
    power plan keeps changing

You may experience this issue because your drivers for the graphics card may require upgrading.

Go to the manufacturer’s website and look for a compatible version of the drivers with the new system.

While you can perform this task yourself, we highly recommend using a third-party tool like Outbyte Driver Updater to avoid downloading and installing the wrong component and damaging the system.

Such software scans the Internet for the latest compatible drivers and indicates whenever you need to take action in this sense.

You can only update the graphics or look into other essential drivers.

This is not a one-time tool; you will undoubtedly run performance scans periodically to ensure that everything is updated.

Outbyte Driver Updater

An automated method that keeps your drivers updated all the time for better PC performance.
Free Trial Download now

4. Clean boot your computer

  1. Press Windows + R, type msconfig, and hit Enter.
    power plan keeps changing windows 10
  2. Go to System Configuration and click on the Services tab, check the Hide all Microsoft services check box, and click Disable all.
  3. Go to the Startup tab and open Task Manager.
  4. Click on the Startup tab, select each startup item, and click Disable.
  5. Close the Task Manager and restart the computer.

5. Scan your system

  1. Click the Start menu type Windows Security, and select the Windows Security app.
    power plan keeps changing windows 10
  2. Click on Virus & threat protection.
  3. In the new windows, click Scan options.
  4. Select Full scan, then click the Scan now button.

If the problem persists and the power plan keeps changing to balanced, scan your system for malware. Remember that malware and viruses may cause your PC to behave abnormally, so run a complete antivirus scan.

Of course, you can use the Windows 10 built-in tool – Windows Defender- or a third-party antivirus.

If you’re not subscribed to a plan, perhaps it’s time you tried one of the many antimalware software available on the market.

6. Reset your power plan

  1. Click the Start menu, type command, and select the Run as administrator option.
  2. Type the script below and hit the Enter key.
    powercfg –restoredefaultschemes
  3. Exit the command prompt to remove all customized power plans.
  4. Now you can create an customize a new power plan.

How do I lock power settings in Windows 10?

If you were wondering why the performance is downgraded on reaching lower battery levels, the system is likely switching to Battery Saver mode.

In this case, simply head to the Battery settings, and set the Turn battery saver on automatically at the option to Never.

You should note that Windows 10 and 11 are very similar. Therefore, the solutions mentioned above will work for both OS versions. In rare cases, there may be very tiny UI differences.

However, following the steps above will be helpful since, in both Windows editions, the same factors trigger this power error.

Should I use a High-Performance power plan?

We advise switching to the High-Performance power plan if your power plan is set to Power Saver or Balanced and you’re having problems with dropouts, audio crackles, or other poor performance. 

Although it consumes more energy, it should improve CPU-intensive apps’ performance. However, you may want to remain on Balanced or Power Saver on older PCs.

There you have it. Our best solutions for problems with Power plans keep changing. We have not made these in any particular order, so skip around and try what seems the most appropriate.

We hope that these solutions restore the power plan settings to normal. However, if you’ve used other ways to fix this issue, let us know in the comments below.

How to Fix Realtek HD Audio Manager Is Missing [4 Tested Ways]

When the Realtek Audio Universal Service is missing, your sound may stop working properly because this service manages key audio functions and enhancements.

It can go missing due to corrupted or outdated drivers, incorrect installation, Windows updates, or driver conflicts. Although the service itself doesn’t show in Device Manager, a missing Realtek audio device there usually means the driver is missing or disabled.

To fix this, try reinstalling or updating Realtek audio drivers, checking Windows services, running the audio troubleshooter, scanning for hardware changes in Device Manager, and installing Windows updates. If needed, fully uninstalling and reinstalling the drivers often resolves the issue.

Here’s how you do all that:

1. Enable Realtek HD Audio Manager on the Startup tab

    DIFFICULTY

    Easy

    DURATION

    3 minutes

    WHAT YOU NEED

    Windows 10

    You have an intuitive and practical method that will surely help you enable your Realtek HD Audio Manager by using Task Manager, as described in this solution.

    1. Right-click the Start menu and select Task Manager.
    realtek-hd-audio-manager-missing/
  1. 2. Next, select the Startup tab.

    realtek-hd-audio-manager-missing/
  2. 3. Then right-click Realtek HD Audio Manager and select Enable if it’s disabled.

    realtek-hd-audio-manager-missing/
  3. 4. Close the Task Manager, and restart Windows.

2. Select the Display icon in the notification area option

  1. Press the Windows key + R hotkey.
  2. Type Control Panel in Run’s Open box and click the OK button.
  3. Click the View by menu to select Large icons.
  4. Click Realtek HD Audio Manager, then click the Information button.
  5. Next, select the Display icon in notification area option on the Information window.
    realtek hd audio manager missing
  6. Click the OK button.
  7. Check if the Realtek HD Audio Manager icon has appeared in the system tray.

3. Update the Realtek HD Audio Driver

 Realtek HD Audio Manager page realtek hd audio manager missing

A missing Realtek Audio Manager can also be a driver issue. Try updating the Realtek HD Audio driver by downloading the latest one from the Realtek website.

It sounds just right, but this solution takes time and attention. You must also pay attention to installing the correct driver, or you might be hit by the same problem again.

A much simpler and faster solution is to use a third-party solution that will update or fix all your drivers in just a few seconds with minimum effort.

4. Reinstall the Realtek HD Audio Driver

  1. Press the Windows key + X keyboard shortcut, and select Device Manager.
  2. Double-click Sound, video, and game controllers to expand that category.
  3. Right-click Realtek High Definition Audio to select Uninstall device.
  4. Select the Delete the driver software for this device option.
  5. Click the Uninstall button.
  6. Restart Windows after uninstalling the driver.
Note icon NOTE
If, for some reason, Windows doesn’t reinstall it, download the latest Realtek High Definition Audio driver from the Realtek website, and install the driver.

Why is Realtek Audio Manager missing?

If Realtek Audio Manager is missing, you may have Realtek HD Audio Driver issues on Windows 11, but most of them can be easily fixed.

It’s possible that your installation is damaged, and to fix it, you need to uninstall it and download ASUS Realtek HD Audio Manager again.

Issues with drivers can also cause this problem, and to fix it, you need to reinstall the audio driver and check if that helps.

Do you need Realtek HD Audio Manager?

The most used sound driver for Windows systems, Realtek High Definition Audio Driver helps control surround sound, Dolby, and DTS sound systems on your computer. Removing this driver would result in major audio problems because you need it for your audio device to function on the computer.

Those are some of the resolutions that might restore a missing Realtek Audio Manager in Windows 10. They will be helpful if the Realtek HD Audio Manager is missing in advanced settings or the Control Panel.

When the issue arises after a Windows 10 build update, you might also be able to roll back the build update to fix the problem.

If the manager is missing entirely, don’t worry, we’ve put together a full guide on how to download Realtek HD Audio Manager on Windows 11 with working installation options from OEMs and trusted tools.

Those fixes should help restore the missing Realtek HD Audio Manager in Windows 10 or 11.

If it’s still not showing, you might be dealing with other issues like the Realtek Audio Console not supporting your machine, Realtek HD Audio Manager not opening, or the Realtek driver error 0001.

For help configuring your speakers, microphone, and sound enhancements after you restore the driver, see this detailed guide on how to use Realtek Audio in Windows 11.

Other important resources can help you troubleshoot and update your audio drivers effectively. For a comprehensive list, check out the best audio drivers for Windows 10.

If you’re using Windows 11, here’s a handy guide on downloading the latest audio drivers. For issues with external devices, this article on the Windows USB audio driver can be useful. And if you’re facing a generic audio driver error, this generic audio driver problem guide offers practical fixes.

If you have any other suggestions or know about other possible solutions, drop us a line in the comments section below.

Fix Ndu.sys Failed Blue Screen Error in 7 Easy Steps

Have you installed the latest Windows 10 OS version to see how it goes? Unfortunately, some users have experienced some trouble with the Ndu.sys error.

This is undoubtedly one of the most common and complicated errors in Windows 10. Rest assured, after following the steps listed in this tutorial, you will fix Ndu.sys errors in Windows 10 and continue your testing of the new operating system.

The error driver irql not less or equal (Ndu.sys) comes with the traditional blue screen. In addition, you can see multiple stop code errors like KMODE EXCEPTION NOT HANDLED (Ndu.sys)  or SYSTEM SERVICE EXCEPTION.

This means that if you get it during your usage, it won’t go away unless you reboot your operating system, and even then, it might appear randomly after a few minutes.

This error message is caused by incompatible hardware drivers and, to be more specific, the Wireless adapter driver.

What does NDU SYS mean?

NDU stands for Network Data Usage, and the Ndu.sys driver is a monitoring driver file located in the C:\Windows\System32\drivers path. This service offers the capability for monitoring network data utilization.

This is a BSOD error similar to Unexpected Kernel Mode Trap, and drivers can cause it, so keep them up to date.

Specific files can also cause your PC to crash, and that’s the case with Watchdog.sys system error, so you need to investigate the file that caused the crash.

These are usually driver files, and many reported Storport.sys GSOD error on their PC as well. Below are also some of the versions of this error that users are complaining about:

  • Disable Ndu Windows 10
  • Bddci.sys blue screen
  • Kmode exception not handled
  • Kmode exception not handled ndu.sys, system thread exception not handled ndu.sys
  • Ndu.sys failed in Windows 11, 10
  • Ndu.sys Malwarebytes
  • Kmode exception not handled ndu.sys
  • System thread exception not handled ndu.sys
  • Driver_irql_not_less_or_equal ndu.sys
  • Ndu.sys keeps crashing

However, you can fix these issues by following the solutions in this guide.

 How do I fix ndu.sys blue screen error?

1. Rename the Ndu.sys folder

    It’s possible to resolve this occurring BSOD error by renaming the Ndu.sys file from your PC. You should check each of the steps below to do it accordingly.

  1. 1.Open the My Computer or This PC icon by double clicking on it or going to the Start menu and left-clicking.

    open this pc - ndu.sys error
  2. 2. Double-click to enter the C:/ partition or whichever partition you have installed your Windows 10 on.

    C partition ndu.sys error
  3. 3. Double-click on the Windows folder to open it.

    Double-click on the Windows folder
  4. 4. Now search for the System32 file inside the Windows folder and double-click it to open.

    search for the System32 file inside the Windows folder
  5. 5. Now go to the System32 folder, look for the drivers‘ folder, and double-click on it to open.

  6. 6. After you get to the drivers folder, you will have to look for the Ndu.sys file.

    Fix_-Ndu.sys-Error-in-Windows-10.
  7. 7. Right-click on the Ndu.sys file and click on the Rename feature from the menu.

    rename ndu.sys error
  8. 8. Name the Ndu.sys as Ndu.sys11 or whichever name you wish but be sure to change the name and remember it. If you cannot change the file name, you must log in with your administrator account or change your permissions on this specific file to an administrator.

  9. 9. Open again the C: partition you have Windows 10 installed.

    C partition ndu.sys error
  10. 10. Double-click the Windows.old folder this time because this should be the old Windows operating system you upgraded from.

    windows.old ndu.sys error
  11. 11. Open again the System32 folder you have in the Windows.old folder.

  12. 12. Now find and double click to open the drivers folder.

    drivers ndu.sys error
  13. 13. Search in the drivers folder for the Ndu.sys file.

  14. 14. Right-click on it and select the Copy option.

    Copy ndu.sys error
  15. 15. Now paste it into the drivers folder of the Windows 10 version.

  16. 16. Restart your computer.

  17. 17. Check if you still have the same BSOD with Ndu.sys error.

2. Install the latest network card drivers

Updating drivers by yourself can be time-consuming. Therefore, we recommend using a third-party tool to update all your drivers automatically. Doing this will spare you time for manually searching drivers.

3. Check for updates

  1. Open the Settings app.
  2. Select Updates & Security.
    ndu.sys error
  3. Click the Check for updates button.
    ndu.sys error
  4. If prompted to, restart the computer.

Updating your Windows 10 system is a good way of keeping your computer away from any BSoD errors. 

Updates from Windows usually add new features to the current version, including new security features and repair bugs from the previous OS version. 

As Ndu.sys error is a blue screen issue mostly related to your wireless adaptor or driver incompatibility, a Windows Update might address this problem.

4. Use a different Internet connection

If you are using a wired internet connection on your Windows 10 computer, try switching it to Wireless and check if you still have the same error message.

If you are using a wireless Internet connection, do the opposite and switch to a wired internet connection to see if you still get this error message.

5. Reset Windows 10

  1. Type reset this PC in the Windows search box and select the first app.
  2. Press the Get started button.
  3. Select the Keep my files option.
  4. Select the Next and Reset buttons to confirm.
  5. The reset process will now start. Follow the instructions on the screen to complete the reset.
  6. Wait for the process to complete. This may take a few minutes, depending on the number of software installed on your machine.

Note: Another method you can use to fix Ndu.sys errors is refreshing Windows 10. Once you’ve hit the Refresh button, the OS will remove all third-party software installed on your computer.

6. Run the BSOD troubleshooter

  1. Open the Settings app and go to the Update & Security section.
  2. Click on Troubleshoot from the menu on the left, choose Blue Screen from the right pane, and click Run the troubleshooter.
    ndu.sys error
  3. Follow the instructions on the screen to complete the troubleshooting.

Note: BSoD errors are pretty frequent on Windows 10. For this reason, Microsoft added a built-in BSOD troubleshooter to Windows 10’s Settings page.

7. Clean install Windows 10

If nothing worked, performing a clean reinstall of Windows 10 is the last resort method.

Starting from scratch allows you to eliminate all the elements that triggered Ndu.sys errors and fix the issue for good.

So, if you want to clean install Windows 10, you need your installation drive or DVD and a lot of patience. The whole process usually takes one hour or two.

How do I fix Ndu.sys failed on Windows 11?

On Windows 11, most of the solutions that have worked on Windows 10 are still applicable. You could try any of the following:

  • Renaming the Ndu.sys folder
  • Installing the latest network card drivers
  • Updating the OS
  • Changing your internet connection
  • Uninstall third-party programs (the Ndu.sys error has been connected to Malwarebytes)

The steps are similar to the solutions described above for Windows 10.

Should you disable NDU?

The NDU system finds peripheral devices; for instance, NDU enables the OS to interface with USB ports to identify any attached USB devices.

Although deactivating the NDU registry is not advised, it can be helpful as NDU will no longer constantly check for new devices. This reduces the use of available resources like memory and computing power.

We hope these solutions helped you get your network running until Microsoft releases a hotfix for this issue.

This is all you need to do to fix the Ndu.sys error message in Windows 10. Also, if you need further help with this issue, please let us know by posting a comment below.

7 Ways to Fix Services.msc not Opening on Windows 10

An MSC is a snap-in control panel file that the Microsoft Management Console (MMC) opens. Device Manager, Task Scheduler, Disk Defragmenter, Group Policy Editor, and Shared Folders are just a few of the MSC tools.

However, some Windows 10 users have found that they can’t always open MSC files with an error message stating that MMC cannot open the file.

When this happens, services.msc opens but is blank, and you don’t have access to its functionality.

Are you getting an error message similar to MMC cannot open the file error for a Windows utility? If so, these are a few potential fixes for MSC files that are not opening.

Why are MSC files not opening?

Here are a few common reasons you would face issues while opening MSC files on your Windows computer.

  • The system files are corrupt.
  • The latest version of the Windows update contains a bug.
  • Microsoft Management Console might have missing or corrupted DLL files.
  • There is an issue with the registry editor.
  • Your PC is infected by a virus or malware.

Now that you know the common reasons let us check out the solutions that will help you fix the problem.

How do I open MSC files?

  1. Press the Windows key + R to open the Run utility.
  2. Type the MSC file name and add the extension.
  3. Now, click the OK button or hit Enter.

How do I fix msc files if they are not opening on Windows 10?

1. Restart your device

Even though it might seem too simple to be true, in a large number of cases, simply restarting your device enables Windows to repair any possibly-corrupted or damaged files, while also refreshing all other services.

After performing the restart, check to see if the situation persists, and if it does, follow the next methods.

2. Run the system file checker

  1. Press the Win+ X.
  2. Select Command Prompt (Admin).
  3. In the cmd window, input the following and press Enter: sfc/scannow
  4. The SFC will scan for about 20-25 minutes.
  5. If SFC fixes anything, it will state that Windows Resource Protection found corrupt files and successfully repaired them.
  6. Restart Windows if the SFC does repair something.

The services.msc not opening might also be due to corrupted system files. System File Checker is a tool that scans for and fixes corrupted Windows system files, so it might help when services.msc is not working.

3. Roll Windows back to a Restore Point

  1. Enter system restore in the Windows search box.
  2. Select Create a restore point to open the System Properties window below.
  3. Press the System Restore button.
  4. Click Next and select the Show more restore points option.
  5. Select a restore point that dates back a few months.
  6. Press the Next and Finish buttons to restore Windows to the selected date.

System Restore is a handy Windows troubleshooting tool that undoes recent system changes. For example, if your MSC tools were working fine a few months back, then rolling Windows back might fix the MMC cannot open the file error.

Another thing you can do to restore your system files is to use a third-party repair app that will do the job for you.

4. Register DLL Files with Regsvr32

  1. First, press Win + R to open Run.
  2. Then type regsvr32.
  3. Press the OK button.
  4. Open this folder path in File Explorer:  C:/DocumentsAnd Settings/username/Application/Data/Microsoft/MMC.
    • You’ll need to replace the username in that path with the actual username folder title.
    • That folder contains MSC files.
  5. Look for the MSC tool that isn’t opening for you.
  6. Next, right-click the MSC tool that isn’t opening.
  7. Select the Rename option from the context menu.
  8. Enter filename_old as the new title for the MSC file.
  9. Then restart the Windows OS.

The Microsoft Management Console might have missing or corrupted DLL files that the MSC utility needs. In this case, Regsvr32 will come in handy for fixing the MSC error.

That’s a command-line utility that you can register DLLs with. This is one potential Regsvr32 fix for the MMC cannot open the file MSC error.

5. Register Msxml.dll via the Command Prompt

  1. Open the Start menu.
  2. Type cmd and open it as an admin.
  3. Enter the following command: C:Windowssystem32cd %windir%system32
  4. Press Enter.
  5. Now input the following commands in the Command Prompt, and press the Enter key after entering each one: Regsvr32 Msxml.dll Regsvr32 Msxml2.dll Regsvr32 Msxml3.dll
  6. Finally, enter Exit and press Enter to close the Command Prompt.
  7. Then you can restart Windows.

Alternatively, you can register MMC DLLs with Regsvr32 via the Command Prompt. To do it, follow the steps above.

6. Scan the Registry

MSC system errors can be due to corrupted or invalid registry entries. For example, a registry scan might help fix MSC files that aren’t opening.

Windows doesn’t have a built-in registry cleaner, but plenty of third-party utility packages include a registry scanner.

You can scan your registry files and restore them with these professional tools. The software will also protect you from other harmful or corrupted files.

7. Fix MMC DLLs With File Association Fixer v2

  1. Download the app from their website.
  2. Open the software’s Zip folder in File Explorer.
  3. Press the Extract all button to extract it.
    • You can open either a FAF x86 or x64 version of the program.
    • The x86 is for 32-bit Windows platforms, and x64 is the 64-bit version.
  4. The software suggests that you set up a restore point.
  5. Click Fix Files to open the file type list in the snapshot below.
  6. Select the DLL check box, and press the Fix Selected button.
  7. Reboot your desktop or laptop.

File Association Fixer is software that enables you to fix broken file associations when the Registry is corrupted, although the program seemingly doesn’t provide support for MSC file types.

You can feasibly fix Microsoft Management Console DLLs with File Association Fixer. So this might be a utility worth noting if an MSC file isn’t opening for you.

The issue has wider ramifications, such as when services.msc access is denied, in which case you’ll need to tweak your admin privileges.

On the other hand, even administrators can have blocked services.msc, in which case the solutions are trickier.

What can I do if services.msc is not opening on Windows 11?

Apart from the above solutions, you can try using the below solutions to fix services.msc not opening in Windows 11 problem.

  • Check if restarting your PC helps.
  • Run the SFC Scan and DISM.
  • Reset your PC.
  • Check your PC for viruses or malware.
  • Perform a clean install.

The above solutions mentioned for Windows 10 are sufficient to fix the problem on Windows 11 as well. However, you can also apply the above solutions explicitly mentioned for Windows 11 should help you resolve the issue.

How do I enable services MSC?

  1. Press Win + R to open the Run dialogue.
  2. Type services.msc and press Enter.
  3. In the service window, select any service.
  4. To Start, Stop, Pause, Resume, or Restart any Windows Service, you need to select the service, right-click on it, and select Properties.
  5. Click the drop-down menu for Startup type and select whether you wish to run the service automatically, manually, or disable it.
  6. Under Service status, you will see buttons to Start, Stop, Pause, or Resume the Service.

Those are a few potential remedies for MSC files that aren’t opening. Full malware scans and installing all Windows updates might also resolve the issue and get your MSC tool up and running again.

Posted in Fix

External Hard Drive that Keeps Disconnecting: 6 Ways to Fix

Today, we’ll show you how to fix the issue of your external hard drive frequently disconnecting.

The reason why your external hard drive keeps disconnecting can be caused by several factors, such as outdated operating systems, faulty or outdated drivers, bad USB ports, or even power issues.

Let’s go through the possible causes and fixes to get your external hard drive running smoothly again.

How do I fix my external hard drive connection?

1. Connect your hard drive to a different USB port

Many users have fixed external hard drive disconnections on Windows 10 by simply switching to a different USB port.

If your PC has both USB 3.0 and 2.0 ports, try using a USB 2.0 port. While transfer speeds may be slower, this should prevent disconnections.

2. Turn off the USB selective suspend

    The solution below describes you the method that will help you fix the disconnecting external hard drive. Follow the next steps to change your power-saving settings and disable the USB selective suspend feature.

  1. 1. Press Windows Key + S, type control panel and select Control Panel from the results list.

    External hard drive you need to format the disk
  2. 2. When Control Panel opens, go to Power Options.

    External hard drive is not accessible
  3. 3. The power Options window will now open.

  4. 4. Locate your power plan and click on Change plan settings.

    External hard drive disconnects when transferring
  5. 5. Click on Change advanced power settings.

  6. 6. Navigate to USB settings / USB selective suspend setting and set it to Disabled, then click on Apply and OK to save changes.

    Seagate external hard drive disconnects

If your external hard drive keeps disconnecting, the problem might be the power-saving feature. For example, your PC might be configured to turn off USB devices after a while to save power.

After that, your PC won’t turn off your USB devices to save power, and problems with your external hard drive will be resolved. Many users reported that this solution worked for them, so we suggest you try it out.

3. Install USB 3.0 controller drivers

You can fix this problem simply by installing new drivers for your USB 3.0 controller.

  1. Open Device Manager: Press Windows + X, then select Device Manager.power user menu
  2. Expand Universal Serial Bus Controllers: Locate the “USB 3.0” or “USB 3.1” controllers (e.g., “Intel(R) USB 3.0 eXtensible Host Controller”).update usb device
  3. Right-click on the controller: Select Update driver.
  4. Search automatically for updates: Windows will search for and install the latest driver if available.

You can also visit your motherboard manufacturer’s website and download the latest chipset drivers for your motherboard. Alternatively, you can update this driver manually.

We also strongly recommend using third-party software to download all the outdated drivers on your PC automatically. This tool will keep your system safe as you can manually download and install the wrong driver version.

4. Stop your PC from turning off Mass Storage Device

  1. Connect your external hard drive to your PC.
  2. Press Windows Key + X and choose Device Manager from the list.
  3. Navigate to Universal Serial Bus Controller section and double-click on USB Mass Storage Device (Remember that your external hard drive might have a different name on your PC).
  4. Navigate to the Power Management tab and uncheck Allow the computer to turn off this device to save power checkbox, then finally, click the OK button to save changes.
    disable allow the computer to turn off this device to save power

If your hard drive keeps disconnecting, you can fix the problem simply by preventing the PC from turning off Mass Storage Device. Instead, your PC will automatically turn off various devices to save power, and sometimes it can turn off your external hard drive.

To prevent this, you must change a few Device Manager settings. After that, your PC won’t turn off your external hard drive, and the problem won’t appear anymore.

5. Disable USB legacy support in BIOS

  1. Press Windows Key + X and choose Device Manager from the list.
  2. Navigate to Universal Serial Bus Controller section and double-click on your USB Mass Storage Device
  3. Navigate to the Policies tab and check Better performance and Enable write caching on this device options, then click OK to save changes.
    set the USB device Removal Policy to Better Performance
  4. Lastly, locate Intel USB 3.0 extension driver in Device Manager and uninstall it.

If you have USB 3.0 and USB 2.0 ports on your PC, you might be able to fix this problem by disabling USB legacy support in BIOS. To see how to do that, we strongly advise you to check your motherboard manual for detailed instructions.

Several users claim that you must perform a few extra steps to fix this problem. To fix the issue, you need to make several changes in Device Manager. After that, restart your PC, and the situation should be resolved entirely.

6. Use KeepAliveHD

Several users reported that their external hard drive keeps disconnecting due to inactivity. This is normal behavior for external hard drives, but if you want to stop this from happening, you might want to try using this tool.

KeepAliveHD is a small and freeware application that will write a small file to your external hard drive and prevent it from going to sleep. In addition, the application allows you to set a timer so it will write a small file to your hard drive periodically.

This is a simple solution, and if you don’t want to change your system’s configuration, be sure to try this tool.

That’s about it from us. So if your External hard drive keeps disconnecting, we hope you have been able to resolve this problem by now.

These solutions are not in any particular order, so you can pick and choose what works best for you. For more troubleshooting steps, check out what to do if Windows 10 external hard drive keeps disconnecting.

For more detailed steps on resolving these issues, check out how to fix a second hard drive that stops booting and solutions when Windows 10 doesn’t recognize a portable hard drive.

If you have any other questions, feel free to drop them in the comments section below, and we’ll be sure to check them out.

8 Ways to Fix the Worker Invalid Error in Windows 10

WORKER_INVALID and other Blue Screen of Death errors will restart your computer whenever they appear. This is to prevent damage to your PC.

This error can be rather serious, keeping your system from adequately booting and causing you to get stuck into a restart loop. The causes of the error vary but mainly down to faults with hardware.

Irrespective of the cause, we have gathered eight surefire fixes to help you solve the issue for good on Windows 10/11.

What does Worker Invalid mean?

The Worker Invalid error is usually caused by broken or corrupted system files. You can fix this with a dedicated BSoD fixer or the built-in system repair tools.

Also, it can be caused by outdated PC or drivers. Updating your operating system and drivers should do the job here.

What’s the BSOD meaning?

BSOD stands for Blue Screen of Death, and is an error that crashes the OS. It’s also called a Stop error because a Stop Code is listed when users encounter it.

The error usually occurs due to a fatal problem with the PC, and the underlying causes vary a great deal. From issues with the hardware to software, identifying what’s causing the problem in a specific case can itself be a tricky task.

How do I fix Worker_Invalid error on Windows 10?

1. Use a third-party BSoD fixer

You can use some of the best-known system repair tools on the market to handle the situation for you so it can prevent other errors from occurring.


2. Run the SFC scan

  1. Press Windows + S and type cmd.
  2. Choose the Run as administrator option.
    run cmd worker invalid
  3. Type the command below and hit Enter: sfc/scannow
  4. Wait until the process is done (it may take a while).

If the troubleshooter fails to resolve the problem, you need to run the SFC scan to fix the Worker Invalid error. This is one of the two built-in tools to repair broken and corrupted files on Windows.

Remember to restart your PC after the scan completes.


3. Update PC

  1. Press the Windows key + I to open the Settings app.
  2. Select Update & Security.
    update worker invalid
  3. Click the Check for updates button.
    check for
  4. Finally, click the Install now button.

To ensure that your PC is running without any problems, we strongly advise that you use Windows Update to download the latest updates.

Many of these updates bring new features and security improvements. There are also various bug fixes for issues related to hardware and software, like the Worker Invalid error, since BSoD issues are often caused by hardware or software issues.

It is essential that you restart your PC after the update to effect the changes.

4. Update drivers

4.1. Update drivers manually

  1. Press the Windows key + X and select Device Manager.
    device manager
  2. Double-click on any of the options to expand it.
  3. Right-click on each of the drivers there and select Update driver.
    update driver worker invalid
  4. Choose the Search automatically for drivers option.
    search
  5. Wait for the search to complete and install any available update.

Outdated drivers are among the major causes of the Work Invalid error. This is because Windows 10 relies heavily on drivers to work with your hardware.

Aside from using the built-in updater, you can visit your hardware manufacturer, locate your device and download the latest drivers.

Remember that you might have to update drivers for all major hardware components to fix this error.

A few users reported that the Etron USB3.0 Host Controller driver is causing this error, so if you have this device available, be sure that you update it first and then move to other hardware components.

4.2. Update drivers automatically

Searching for drivers on your own can be time-consuming. So, we advise you to use a tool that will do this for you automatically.

Using an automatic driver updater will save you from the hassle of searching for drivers manually, and it will keep your system updated with the latest drivers.

⇒ Get Outbyte Driver Updater

5. Run DISM

  1. Launch Command Prompt as admin.
  2. Paste the following command and press Enter: DISM/Online/Cleanup-Image/RestoreHealth
  3. Wait until the scan is finished.
  4. Restart your computer and try updating again.

DISM is the second built-in repair tool for fixing broken or corrupt files on Windows. This tool runs a deeper scan than SFC and can fix the tool and the Worker Invalid error.

If the command above does not work, run the DISM scan with the Windows Installation Media following the steps below:

  1. Insert your Windows installation media.
  2. Launch Command Prompt as admin.
  3. Type the following commands and press Enter after each: dism/online/cleanup-image/scanhealth
    dism scan
    dism/online/cleanup-image/restorehealth
  4. Now, type the following command and press Enter: DISM/Online/Cleanup-Image/RestoreHealth/source:WIM:X:SourcesInstall.wim:1/LimitAccess
  5. Make sure to change an X value with the letter of the mounted drive with the Windows 10 installation.
  6. After the procedure is finished, restart your computer.

6. Remove problematic applications

  1. Open the Windows key + I to open the Settings app.
  2. Choose the Apps option.
    apps option worker invalid
  3. Locate and click any third-party app causing the problem.
  4. Click the Uninstall button.
    uninstall
  5. Now, follow the onscreen instruction to complete the process.

Third-party applications can sometimes cause Blue Screen of Death errors to appear. You’ll need to find and remove the problematic applications from your PC to fix this error.

Users reported that Daemon Tools is causing this error, and if you’re using this tool, we strongly recommend removing it and installing alternative software.

It’s worth mentioning that your antivirus can also cause a WORKER_INVALID error to appear. Therefore we strongly advise that you temporarily remove all third-party antivirus programs.


7. Disable the touchpad

  1. Press the Windows key + X and choose Device Manager from the list.
    device manager
  2. When Device Manager opens, locate your touchpad, and right-click it.
  3. Choose Disable device.
    disable device
  4. Click Yes asked to confirm the action.
    yes

Your touchpad can often cause the Worker Invalid error, and to fix this problem, you’ll have to disable your touchpad. To disable your touchpad, follow the steps above.

Note: Bear in mind that this is just a workaround, and you’ll probably have to use a USB mouse until this issue gets permanently fixed.


8. Check your hardware

Your hardware can often cause these errors, so removing any recently installed hardware that might not be compatible with your PC is highly recommended.

If the recently installed hardware isn’t the problem, we advise you to check your RAM for errors. RAM is the most common cause of these types of errors.

However, if your RAM works correctly, check other major hardware components such as your hard drive, motherboard, network adapter, etc.

How can I fix Worker Invalid on Windows 11?

The causes of the Worker Invalid blue screen issue on Windows 11 are similar to Windows 10. It is usually down to hardware issues.

WORKER_INVALID error can cause particular problems on your PC, but we hope you managed to fix this error using one of our solutions.

If you are facing other BSoD issues like the Unexpected_Store_Exception error on Windows 10/11, check our guide to fix it quickly. We also have a guide on Worker Thread Returned With Non Default Workload Class, so you might want to visit it as well.

Feel free to give us any feedback regarding the subject in the comments below.

Print Spooler Keeps Stopping: Troubleshoot & Fix [Easy Tips]

You must have found this article because your Print Spooler keeps stopping; here is all you should know.

Printing documents is quite simple in Windows 10 and 11, but some users reported issues while printing.

The Print Spooler is essentially an app that manages printing jobs. Thanks to the spooler, you can send jobs from your PC to the printer machine, a print server, and other devices within a network.

Your printer relies on the Print Spooler to work; according to users, it often crashes. One particularly frustrating situation is when the Print Spooler stops after a Windows update.

Sometimes the printing queue refuses to clear, and some of the solutions we share may also be useful.

Why does Print Spooler keep stopping?

Numerous factors might cause the Print Spooler to terminate automatically. 

➡️The Print Spooler service settings – If these settings are set to manual, you can expect them to need a restart every time you need to use them.

➡️Third-party applications – A few apps can interfere with the Print Spooler. In such a situation, the print pooler may stop.

➡️Corrupt files – Obsolete or damaged system files may make the printer malfunction. You will need to delete or repair such files.

➡️Outdated drivers – Drivers should be kept updated for the functions they control to run flawlessly.

Any combination of these factors may be to blame. However, once you recognize the culprit and fix it, you should no longer have any issues with the Print Spooler.

You can follow this detailed print spooler repair guide to run through a complete set of fixes when the service keeps stopping.

Also, here are some other iterations of Windows you may come across the error on, as well as other error variations:

  • Print Spooler service keeps stopping Windows 10, 11, 7
  • Print Spooler keeps stopping Server 2016, 2019, 2012, 2008
  • Printer Spooler automatically stops Windows 10
  • Printer not printing after an update

Without further ado, let’s jump right into the list of solutions!

How do I fix the print spooler if it keeps stopping?

1. Uninstall unnecessary printers

  1. Type control in Windows search and click on Control Panel from the results.
  2. When Control Panel opens, locate Devices and Printers.
  3. In the Devices and Printers section, select the printer you want to remove and click Print server properties.
  4. Go to the Drivers tab, select the printer you want to remove, and click the Remove button.
  5. Select Remove driver and driver package and click OK to remove the printer altogether.
  6. After removing unnecessary printers, restart your PC.

Having two or more printers installed can sometimes cause issues with Print Spooler and printing.

If Print Spooler keeps stopping on your Windows 10 PC, you might be able to fix this problem by uninstalling the printers you don’t use.

Note that this might be a solution only if you have two or more printers installed on your PC. Sometimes printer drivers can cause Print Spooler service to stop working, so be sure to remove them.

2. Delete the Print Spooler files

  1. Press the Windows key + R keys.
  2. Type services.msc in the box and hit Enter.
  3. Look for Print Spooler, then right-click on it and select Stop.
  4. Minimize the Services window and go to the following folder.
    C:\Windows\System32\spool\Printers
  5. Once you open the Printer folder, delete all files within.
  6. Disconnect your printer from your PC.

Sometimes Print Spooler service can stop due to Print Spooler files, and one way to fix this problem is to remove those files.

Before removing these files, you need to disable the Print Spooler service by following the steps above.

Manually updating your drivers is very annoying and can permanently damage your PC (by downloading the wrong driver versions).

So, we recommend you use a dedicated tool to do it automatically.

Fortect Driver Updater keeps your system running smoothly by upgrading its drivers. This application also examines your system for outdated drivers, which can cause sloppiness in your system if they are not updated periodically.

⇒ Get Fortect Driver Updater

3. Check if Remote Procedure Call services are running

  1. Press the Windows key + R keys.
  2. Type services.msc in the box and hit Enter.
  3. Look for Print Spooler, then right-click on it and select Stop.
  4. Double click on Print Spooler, then set the Startup type to Automatic.
  5. Repeat steps 3 and 4 for the Remote Procedure Call (RPC) and the Remote Procedure Call (RPC) Locator services.

Users reported that Remote Procedure Call services could also cause problems with the Print Spooler; therefore, you need to ensure that these services are running correctly.

4. Copy the spool folder from a working PC

According to users, you can fix this problem simply by copying the spool folder from a working Windows 10 PC or even from a virtual machine that runs Windows 10.

Make sure that Windows 10 is the same (either 32-bit or 64-bit).

To locate the spool folder, go to the C:\Windows\System32 folder and copy it to the problematic PC.

Instead of overwriting your spool folder, we suggest you rename it or move it to a different location and then paste the new spoon folder.

In addition, users are also suggesting exporting and copying a registry key from a working PC. Export the following key: HKEY_LOCAL_MACHINE/SYSTEM/CurrentControl/SetControl/Print

Next, transfer it to the problematic PC and run it to add it to the registry. The problem should be gone now.

5. Restart Print Spooler service

  1. Press the Windows key + R keys.
  2. Type services.msc in the box and hit Enter.
  3. Look for Print Spooler, then right-click on it and select Restart.

After restarting the service, check if the problem is resolved and go to our next solution if it persists.

When you need to turn the service back on in Windows 11, follow our guide to enable Print Spooler safely and restore printing functions.

6. Modify your registry

  1. Press the Windows + R keys and enter regedit, then press Enter or click OK.
  2. When Registry Editor opens, navigate to the following key: HKEY_LOCAL_MACHINE\SYSTEM\CurrentControlSet\Control\Print\Environments\Windows NT x64\Print Processors
  3. Then, right-click and delete all keys except winprint.
  4. Close the Registry Editor.

You can fix the problem with Print Spooler by deleting a few values from your registry.

Before you modify the registry, we strongly suggest you create a backup of the registry so you can quickly restore it if anything goes wrong.

After deleting the keys, try to start the Print Spooler service again. According to users, Print Spooler should start without any problems.

7. Update Printer drivers

The most necessary hardware or software for a Windows computer’s proper operation are its drivers, and most processes cannot be completed without drivers.

An out-of-date or damaged printer driver might result in an automated shutdown of the Print Spooler service. To resolve the problem, you must update the printer drivers on your computer.

You will often have to do it from the manufacturer’s website.

8. Delete the duplicated drivers

  1. Click on the Windows key, type MMC, and open up the MMC run command.
  2. Right-click on File and select the Add/Remove Snap-in option.
    print spooler keeps stopping
  3. Search for Print Management under the Snap-in tools, click Add, and click OK.
  4. When Print Management opens, in the left pane, expand Custom Filters, and select the All Drivers option. A list of all printer drivers will appear. If you notice duplicated drivers on the list, be sure to delete them by right-clicking and choosing the Remove Driver Package option.
    print spooler keeps stopping

9. Take control of the spool folder

  1. Go to the following folder below.
    C:\Windows\System32
  2. Right-click the Spool folder and choose Properties from the menu.
  3. Go to the Security tab and click the Edit button.
    print spooler keeps stopping
  4. Click the Add button.
    print spooler keeps stopping
  5. Enter the object names to select the text field, enter your user name, and click Check Names. If your username is correct, click OK to save the changes.
    print spooler keeps stopping
  6. Select your username from the Group or user names section and check Full Control in Allow.
    print spooler keeps stopping
  7. Click Apply and OK to save the changes.

According to users, it seems that you can fix this problem by changing a few security permissions. First, you must have complete control over the spool folder.

10. Delete files from printers and drivers’ folders

  1. Open your File Explorer.
  2. Navigate to the path below, and delete all the content.
    C:\Windows\system32\spooler\printers
  3. Again, navigate to the path below, and delete all the content.
    C:\windows\system32\spooler\folders

Users reported that restarting the Print Spooler service doesn’t always fix the issue; therefore, you should also try deleting all files from the

After deleting these files, disconnect your printers from your PC and connect them again after a couple of seconds. Lastly, start the Spooler Service and check if the error is resolved.

11. Reset Internet options

  1. Press Windows Key + S and enter internet options. Next, select Internet Options from the menu.
  2. Go to the Advanced tab and click Reset.
    print spooler keeps stopping
  3. Click the Reset button again to confirm.

A few users reported that they fixed this issue simply by resetting Internet options. However, to do that, you need to follow the steps above.

After resetting your Internet settings, the problem with the Print Spooler should be fixed.

12. Use Print as Image option

Users reported that they can’t print PDF files with Adobe Reader. However, according to them, they can print all documents except PDF.

To solve this issue, you must go to the Advanced printing setup and select the Print as Image option. After using this option, you should be able to print without problems.

13. Change the DependOnService value

  1. Click the Start icon, type regedit, and open the Registry Editor.
    print spooler keeps stopping
  2. In the left pane, navigate to the following key:
    HKEY_LOCAL_MACHINE\SYSTEM\CurrentControlSet\Services\Spooler
  3. In the right pane, double-click the DependOnService.
    print spooler keeps stopping
  4. Change the value data to RPCSS and click OK to save the changes.
  5. After that, restart your PC and check if the problem is resolved.

Several users reported fixing this issue by simply changing the DependOnService value in their registry. To change this value, follow the steps above.

14. Disable Allow service to interact with desktop option

  1. Press the Windows key + R keys.
  2. Type services.msc in the box and hit Enter.
  3. Locate the Print Spooler service, and double-click it to open its properties.
  4. When the Properties window opens, go to the Log on tab, and disable the Allow service to interact with the desktop option.
  5. Click Apply and OK to save the changes.

After turning this feature off, the problem with the Print Spooler service should be fixed.

How do I fix the Printer spooler that keeps stopping on Windows 10?

The new OS is very similar to Windows 10. Except for the uncommon UI differences, you may not tell one apart from the other. Hence, you can expect that the above solutions apply to Windows 10 as well.

This is also true because the same things trigger errors with the print spool on Windows OS.

This is as much as we will cover in this article. Print Spooler service can cause many issues for Windows 10 users, but you should be able to fix them using one of these solutions.

Share your tips in the comments section below if you know other workarounds.

3 Easy Ways to Fix Corrupted Desktop Icons in Windows 10

Windows users often complain about corrupted desktop icons. Windows’s icons for your documents and programs are saved in an icon cache.

So they can be displayed quickly instead of having to load them every time slowly. If, for any reason, one or more Windows icons are corrupted, you can repair them by rebuilding the icon cache.

Windows 10 Start menu corrupted icons are an issue among some users; others in previous OS editions have also encountered this issue.

Here are the easy fixes to repair corrupted desktop icons on Windows 10/11. All you need to do is follow the instructions in the letter, and you will be fine.

Why are my icons and shortcuts corrupted?

The main reason icons and shortcuts are corrupted is faulty icon cache. If they’re corrupt, you may have trouble deleting shortcuts. You can fix this by rebuilding the icon cache.

Alternatively, you can manually delete the icon cache on your PC. We have explained these solutions in detail in the subsequent section of this guide.

How do I fix corrupted desktop icons in Windows 10?

1. Use Command Prompt

  1. Press the Windows key + S and type cmd.
  2. Select the Run as administrator option under Command Prompt.
    cmd
  3. Type the commands below and press Enter after each: ie4uinit.exe -show taskkill /IM explorer.exe /F DEL /A /Q "%localappdata%\IconCache.db" DEL /A /F /Q "%localappdata%\Microsoft\Windows\Explorer\iconcache*" shutdown /r /f /t 00
  4. Note that the last command will instantly restart your PC. So, save your work before your run it.

One of the easiest ways to fix the corrupted or blank white icons and shortcut on the desktop on Windows 10 and 11 is to run the above commands. This will clear the icon cache and return normalcy.

2. Manually delete the icon cache file

  1. Open File Explorer and click the View tab.
  2. Check the box next to Hidden items.
    view hidden windows 10 fix corrupted icons and shortcuts
  3. Now, navigate to the path below: C:Users/username/AppData/Local
  4. Scroll down in the Local folder until you locate the IconCache file.
    iconcache
  5. Right-click on the file and click Delete.
    delete fix corrupted icons and shortcuts windows 10
  6. Now, right-click on the Recycle Bin icon on the desktop and click Empty Recycle Bin.
    empty windows 10 fix corrupted icons and shortcuts
  7. Finally, restart your computer.

Another effective method to fix the corrupted icons and shortcuts on Windows 10 is manually deleting the icon cache. Note that username is your account user name on the PC, and C is the drive letter of the drive where Windows 10 is installed.

After restarting your PC, check if your icons are changed unexpectedly on Windows 10.

3. Use Disk Cleanup

  1. Open File Explorer and right-click on the C: drive.
  2. Choose the Properties option.
    properties
  3. Click the Disk Cleanup button.
    disk cleanup
  4. Check the box for Thumbnails.
  5. Finally, click the Clean up system files button and wait for the process to complete.
    thumbnails windows 10 fix corrupted icons and shortcuts

Following the steps described above, you will manually delete the icon cache file and restart your computer to let Windows 10 automatically create the new icon cache file.

How do I fix the problem with desktop shortcuts on Windows 11?

  1. Right-click on any space on your desktop and select View.
  2. Click the Show desktop icons option.
    view 11 fix corrupted icons and shortcuts in windows 10
  3. Finally, right-click on the desktop again and select Refresh.
    refresh windows 11

In most cases, the problem with desktop shortcuts on Windows 11 is due to wrong settings. The solution above should fix the issue more often than not.

Also, you can use any of the solutions for how to fix corrupted icons and shortcuts in Windows 10 to solve this issue on Windows 11.

How do I reset my icons on Windows 10?

  1. Right-click on any space on the desktop and click View.
  2. Choose Show desktop icons.
    show desktop
  3. Lastly, right-click again and select the Refresh option.
    refresh windows 10 fix corrupted icons and shortcuts

After refreshing the desktop apps, all icons and shortcuts should reset.

With the fixes above, we believe you have everything needed to fix the corrupted icons and shortcuts issue on Windows 10 and 11.

If you want to know how to fix Windows 10/11 icons that are too big, check our detailed guide to do it quickly and effectively.

Let us know if you could rebuild your icons and shortcuts with the solutions in this guide in the comments below.

5 Ways to Fix No battery is Detected on Windows 10

Batteries are a critical component of Windows laptops, as these provide the required power when not plugged into an electricity source. And when users find that no battery is detected, things may go awfully wrong.

The No battery is detected message is seen when you hover the cursor over the Battery icon in the right corner of the Taskbar. Clicking on this icon will give the message, No battery present.

The issue is has been witnessed on all iterations of the OS, including the last two, Windows 10 and 11. So, if you too came across the No battery is detected message, find out what causes the error and the solutions for it in the following sections.

What does it mean when it says no battery detected?

When you come across the No battery is detected message, it means that the computer cannot identify one and is subsequently not drawing power from the battery.

But it does in no way imply that there’s no battery connected. Most of the time, a fully functional battery is connected but isn’t detected due to software or hardware issues.

Oftentimes, it’s the outdated or corrupt drivers leading the problem. Overheating in Windows, too, has been found to be an underlying cause in this case. Besides, if you recently reconnected it, make sure the battery is properly seated.

Here are some of the cases you may encounter the error message:

  • Sony Vaio No battery is detected
  • Lenovo No battery is detected
  • Acer No battery is detected
  • Asus No battery is detected
  • HP No battery is detected

Let’s now walk you through the solutions to get things up and running.

How do I fix no battery is detected on Windows 10?

1. Run the Power troubleshooter

  1. Type Control Panel in the Search bar, and then click on the relevant search result.control panel
  2. Select Large icons from the View by dropdown menu.large icons
  3. Click on Troubleshooting.troubleshooting to fix no battery is detected
  4. Next, click on System and Security.System and Security
  5. Click on the Power troubleshooter to run it.power to fix no battery is detected
  6. Now, follow the on-screen instructions to complete the process.troubleshooter

The built-in troubleshooter is often the best way to fix the No battery is detected error message since it does so automatically with minimal effort from your end.

2. Perform a power cycle on your laptop

  1. Unplug all external devices from the laptop.
  2. Take out the battery.
  3. Press the power button of the laptop for about 10-15 seconds.power button
  4. Insert the battery and then restart the computer.
  5. Connect the AC adapter and then verify if your machine can detect the battery again.

Performing a power cycle helped most users fix the problem in no time. So, before you head to the slightly complex solutions, do make sure to try it.

3. Update your BIOS

Note icon NOTE
When you’re updating the BIOS, ensure the battery is present and the AC adapter is plugged in. Also, while the update is in progress, make sure not to unplug the computer from the power source.

If you get the No battery is detected alert on your computer, there may be a problem with the chipset board.

So, you may have to check and install the latest available BIOS update and chipset drivers for your device. Though the linked guide is for Windows 11, the concept remains the same, and it should allow you to update the BIOS in Windows 10 as well.

If the problem persists after the BIOS update, head to the next method.

4. Check the battery and ACPI settings

  1. Press Windows + R to open Run, enter devmgmt.msc in the text field, and click OK.devmgmt.msc
  2. Double-click on Batteries to expand the category.battery
  3. Now, double-click on the ACPI entry to view its Properties.ACPI to fix no battery is detected
  4. If it does not read This device is not working properly under Device status, first, update the drivers, and if that doesn’t work, check for other hardware-related issues.device status

It could be that your battery is aging and may not show up in the BIOS. Check ACPI settings first to see if the battery shows there.

Also, if you have access to another battery, replace the current one with it, and verify if the problem lies with the computer or the previously connected battery. You may also try the problematic battery on another laptop to verify the same.

In case the problem lies with the battery, replacing it is the only viable solution. Though you may get it repaired, these are usually not as effective.

5. Reinstall the battery driver

  1. Type Device Manager in the Search bar at the bottom left, and click on the relevant result.device manager
  2. Double-click on Batteries to expand and view the devices under it.batteries
  3. Right-click on Microsoft ACPI-Compliant Control Method Battery and then select Uninstall device.uninstall device to fix no battery is detected
  4. Click Uninstall in the confirmation prompt.uninstall
  5. Once done, restart the computer, and Windows will then automatically install the best available driver for the battery.

In addition, if you don’t want to proceed the manual process above, you can always manage this situation with a specialized software, such as Outbyte Driver Updater, that will perform all these steps automatically.

It easily scans your entire PC for outdated drivers and upgrades them with the latest version so it can boost your device performance.

Outbyte Driver Updater

Choose to use a more secure and safe program to keep your drivers constantly updated.
Free Trial Download now

How do I fix No battery is detected on Windows 11?

When coming across the No battery is detected message in Windows 11, your primary approach should be to reconnect the battery and restart the computer. In most cases, these two have helped fix things for users since the underlying cause was a trivial bug or improper connections.

Also, update the drivers for the battery, and install the latest version of the OS, i.e., Windows 11, if one is available.

Besides, if the computer has been running for a while and the Windows 11 device is overheating, let it rest for a while and wait for the temperature to come back to normal levels. After the laptop cools down, it should detect the battery.

Can a laptop run without a battery?

Yes, without a doubt, you can use a laptop without a battery. It just needs to be connected to a power source, i.e., the charging cable has to be plugged in and provide the required power.

When you see No battery is detected, but the laptop still works, this is because it draws power directly from the power source, just like a desktop.

Many users with old-generation laptops use it this way when the battery stops working. But remember that in this case, even the slightest fluctuation in power supply will turn off the laptop, and you will lose unsaved data.

How do I reset my battery?

  1. Save your important work and let your battery drain till it shuts down.
  2. Remove your battery and clean any dust in the connectors.
  3. Plug in your charger and press the power button.
  4. If your PC can work without a battery, allow it to boot up completely and shut it down again.
  5. If it can’t work without a battery, press and hold the power button for over 30 seconds.
  6. Finally, plug in your battery, connect the charger, and wait for it to charge for about an hour.

That’s it! You now know all there’s to about the No battery is detected issue and would have it fixed by now. In case the solutions listed here don’t work, you may have to replace the battery.

Also, find out what to do if the laptop battery is not charging when plugged in.

We’d like to hear from you. Share your comment in the section below and tell us if you were able to fix the problem. Leave there any other questions you may have, as well.

How to Fix Second Hard Drive Not Showing on Windows 10

Got a second hard drive that’s not showing up after a Windows update? It happens.

Whether it’s a connection issue, driver problem, or something else, we’ll walk you through the quick fixes to get it working again. Let’s get started.

How can I fix the secondary hard drive if it’s not showing up on Windows 10?

1. Check for the driver updates

  1. Open the Start menu.
  2. Type device manager and open it.
  3. Expand Disk drives.
  4. Find the second disk drive, right-click on it and select Update driver software.hard disk drive update windows 10
  5. If there are any updates, follow further instructions, and your hard disk drive will be updated.
  6. You can also go to Settings.
  7. Select Windows Update from the left pane, and check for updates that will allow you to see if overall updates offer something for your hard drive.Check for updates to fix rusts low fps on good pc.

If your computer could recognize the second hard disk before the Windows 10 upgrade, there’s a possibility that your current hard disk drivers are not compatible with Windows 10.

However, downloading drivers manually can be a long and tedious process that might affect your PC (if you hit the wrong button). Using specific software to keep drivers up to date is the most efficient method.

One cutting-edge solution is Fortect, which will scan your Windows PC and warn you of any device drivers that are outdated, damaged, or missing.

Outbyte Driver Updater updates are released regularly to fix errors, enhance communication, and provide new features and stability to the PC.

Fortect Driver Updater

Drivers will no longer create problems if you download and use this powerful software.
Check price Visit website

2. Change driver letter and path

  1. Right-click on This PC.
  2. Click on Manage.
  3. The Computer Management window will show up.computer management windows 10
  4. Go to Disk Management.
  5. Find your second hard disk drive, right-click on it and go to Change Drive Letter and Paths.change drive letter windows 10
  6. Go to Change and choose the letter for your partition from Assign the following drive letter:.assign drive letter wind8apps windows 10
  7. Click OK.
  8. Restart your computer.

Maybe your hard disk is connected correctly and works well, but if it doesn’t have a letter by its name, you won’t be able to access it from This PC.

So, we’ll change the drive letter, and hopefully, the hard disk will reappear.

3. Recover damaged Windows hard drive

Users often need their second hard drive to recover their data from it. If it is not detected, we recommend you use data recovery software.

Stellar Data Recovery is an advanced backup and recovery software that allows users to perform complex recovery tasks efficiently.

With cross-platform compatibility to match all storage devices, a convenient Scan & Resume Recovery option for extra flexibility, and all the features you could dream of, this tool does more than your average app.

And we mean it – the stellar recovery power spreads beyond easy file recovery. With unparalleled accuracy, it retrieves your data from the most unfortunate scenarios, including formatted, corrupted, and encrypted drives.

⇒ Get Stellar Data Recovery

Try one of these tools if you have some necessary data on your external HDD.

How do I activate my second hard drive?

  1. Right-click on the Start menu.
  2. Select Disk Management.
  3. The unactivated hard drive will show up at the bottom of the window with a black bar on top of it. Notably, a blue bar indicates that the hard drive is activated.
  4. Right-click on your hard drive and select New Simple Volume.
  5. Follow the on-screen prompts in the New Simple Volume Wizard window to activate your hard drive.
  6. You will be asked to allocate the maximum space you would like the second hard drive to use.
  7. After confirming the size, select the Drive Letter for the second hard drive.
  8. Press Next.
  9. Click Finish.
  10. The computer will format your drive.

We also have a useful guide on what to do if the ATA/SATA hard drive is not detected in BIOS.

Besides, if you can’t change the hard disk serial number, our solutions will help!

Alternatively, if your hard drive is missing after a Windows 11 update, you can follow the detailed steps in this fix for missing hard drives.

Lastly, if your external hard drive keeps disconnecting on Windows 8.1, take a look at this guide for fixing frequent disconnections.

That would be all. Feel free to reach out in the comments section below if you have any comments or suggestions.

What’s the Best Program for Magazine Design? [We Tested 8]

High-quality magazine layout software is able to help you create the most impressive digital magazines with an amazingly designed layout.

By doing this, you will also be able to flaunt your thoughts in the most logical way so that your readers can get all the necessary information faster and more accurately.

We picked out six of the best tools for creating high-quality magazines with the most impressive layout, so make sure that you check out the sets of features before you make your final decision.

How do you make a magazine design?

To make a magazine, you will definitely need to use a specialized tool. These apps can help you create and publish digital materials, including PDFs, books, posters, or any other form of content interaction.

By using a creative tool you will design, set and organize your ideal magazine. You will be able to upload your own background and photos, add shapes and colors, add whatever text you think it’s suitable, and place elements to match your pages. This way, you will convert them into engaging and interactive online magazines.

Can I make my own digital magazine?

Like with most things, starting is the most problematic part, but when you figure it out, everything begins to fall into place and gets easier. This can also be the case with making your own E-magazine.

Once you have your idea for a creative project, choose to use online tools, such as Adobe Express, Canva, and many others to make it even easier for you.

These tools offer various personalized templates from which you can pick to help you create or upload your own background and images.

Moreover, they enable you to tell stories by customizing your fonts and colors and managing and updating your brand elements in one portal.

What’s the best program for magazine design?

Adobe Express – Over 300 magazine templates

Adobe Express, known formerly as Adobe Spark, is a great program to use when you want to create beautiful digital magazines.

Not only it offers over 300 editable magazine templates but it also lets you design your own magazine covers within seconds.

The templates cover all types of categories, such as kitchen diaries, streetwear publications, fashion magazines, and many other interests.

Moreover, you can use over 2000 unique fonts and add design elements like images, backgrounds, and icons to fulfill your magazine ideas successfully.

An impressive feature of Adobe Express is that you have the ability to share your magazine cover in a printed format or just post it online for your virtual audience.

Other key features include:

  • Resize images instantly
  • Thousands of templates and design assets
  • Basic editing and photo effects
  • Both web and mobile support

Adobe Express

Explore an excellent online design platform and create your own digital magazine.

Adobe InDesign – SVG support

Adobe InDesign is your all-in-one magazine design software that helps you to create and publish other print and digital media materials, such as books, interactive eBooks, interactive PDFs, flyers, and posters.

InDesign offers plenty of preset layouts and typesetting options to create eye-gluing pages.

Adobe’s InDesign lets you insert audio, video, animations, and slideshows on the pages of your magazine to deliver a truly immersive experience.

Team collaboration is crucial both in print and online publishing.

Thanks to InDesign’s built-in collaboration tools, editors can quickly share feedback with junior writers, and all the editing history is kept safe for further analysis.

If you work on multiple projects, you can easily share fonts, graphics, and content across your projects for increased productivity and efficiency.

Other key features include:

  • SVG import support for creating interactive graphics and animations
  • Support for column rules and variable fonts
  • Free video tutorials to polish your InDesign skills
  • 7-day free trial

Adobe InDesign

If you need a software solution to create digital magazines, look no further! Adobe InDesign is your best choice!
Free trial Visit Website

Canva – Text animations

Canva is your best-suited solution when it comes to digital magazine design software. This free online tool is multi-functional and has a wide range of designs and templates that will satisfy any requirement.

Whether you need a creative presentation or a magazine cover, Canva covers it all. You can create a variety of graphic products, including videos, social media posts, resumes, certificates, and all kinds of visuals.

Imagination and freedom of expression are the words that perfectly describe this software.

There are thousands of designs and graphic elements ideal for you to express the most creative ideas, or to expose your qualitative projects at work.

Moreover, you can create eye-catching designs using personalized backgrounds or comics-related text captions, and dozens of stickers to never bore the viewers. If you’re using this you can find everything to express your thoughts.

Additionally, take advantage of embedded apps to add different icons or illustrations that will endorse your final artwork into surprising the audience.

The software includes the following features:

  • Text animations to give an extra visual impact to your pages
  • Teamwork at its best, with collaborating options from any device
  • Edit images however you want, adding text or stellar effects specific to magazines
  • Content editing features like caption texts, backgrounds, stickers and icons, and many more
  •  Choose from a multitude of grid layouts and pictures combinations to impress the audience

Check out the functionalities offered by this online tool in order to give a boost to your creations. Also, you can download Canva on your desktop for free and use it as your editing software.  

Canva

Still, browsing for the perfect tool designed for crafting? You found it, try the free version of Canva and see the results.
Try it now Visit Website

Blurb – Great solution to serial content

Blurb allows you to turn your ideas into professionally-looking magazines. The software offers users the ability to create photo books, trade books, e-books, and also magazines.

The magazine content format provides a great solution to serial content. You can then create your photo books, papers, or even books with amazing tools suited for both beginners and advanced users.

Also, you can use bookwright functionalities to improve your book designs immediately. It’s desirable to customize your pages and use any templates to begin your story strong.

Moreover, magazine projects can be completely designed with Blurb and transmit creative pages to the public, using PDF Uploader to set up your final version.

On the same note, you’re not limited to a single type of format thus you can express your ideas without creative limitations when you want. Plus, the print and publish features offer the perfect chance to make it public.

With Blurb, you will be able to put all of your fabulous ideas in print with a newsstand-quality magazine that will be just great for serial content and high-volume printing projects

Lastly, no matter of topic you choose this flexible tool provides the needed instruments to handcraft the most qualitative products by far.

Take a look at the best features and functionalities that Blurb has to offer to its users:

  • The software is packed with tools that are appropriate for every skill level
  • Adobe InDesign and the Adobe Photoshop Lightroom plugins
  • Print one copy at a time and more, according to your needs
  • Choose from two print methods in order to find the best fit for your magazine
  • You will be able to share a sneak peek of the final product with an embeddable preview on your website
  • Opportunity to sell your magazines through the Blurb Bookstore easily
  • Premium Magazines with high-end heavy covers
  • Economy Magazines with lighter weight and lower print fidelity, and more

On the official website of Blurb, you will get the chance to look at some examples of magazines, and you can also learn more about the software’s features and functionalities, along with the tool’s pricing plans.

So, don’t waste any more time and head there to check out more details about Blurb.

Blurb

Powerful design features that help you create the most beautiful digital magazine.
Check Price Visit Website

FlipHTML5 – Rich digital content

FlipHTML5 is one of the best options that are available these days online for creating the greatest magazines ever.

This practical software is your helping hand in terms of publishing digital work and transforming static PDFs into dynamic magazines that will take the stage.

First, you should know that it’s possible to design projects using various templates, plus customize them how you need them.

So there are available digital content elements that can improve your designs. For example, adding links and images, videos, annotations, or background music will assure your success.

Plus, make the best use of an online editor that helps you to add content to your books. More exactly, media elements like images, audio, and photos.

On the other hand, you have publishing options available such as HTML, ZIP, EXE, Email to, To FTP Server, Save as Plug-in, Upload Online

Just take a look at a few exciting features and functionalities that are included in this great tool:

  • Transforming your static PDFs into interactive digital magazines in just a few seconds
  • You will be able to complete the transformation on the tool’s desktop software, and you can also use the online platform as well
  • Transform your PDFs into interactive digital magazines with page-flipping effects
  • Various templates, background images, dynamic background scenes, and more
  • Rich digital content including adding links, images, videos, buttons, background music, annotation, and more
  • Supports cross-platform, and your readers will be able to read the magazine on their favorite devices

You can check out more important features that are packed in FlipHTML5 by visiting the tool’s official webpage.

⇒ Get FlipHTML5

QuarkXPress – Intuitive interface

QuarkXPress is one of the leading graphic design and page layout software for creative minds.

Thousands of people around the world are already using this tool, and they value performance and quality in their daily creation and production of magazines and more digital products as well.

The software is packed with lots of helpful features such as images, vectors, typography and text, adaptive layout conversion, text stroking and shading, various shape tools, gradients for frames, and many more.

Moreover, as a graphic publishing platform, you can create compelling visuals in digital or print versions and publish them to a wide audience.

You can likewise create Flash content such as video, sound, animation, and interactivity elements to visually attract any viewer that may become a fan.

Take a look at the key features and functionalities that this tool has to offer:

  • Alternative for Adobe InDesign and other design apps, offering users the best publishing software for their digital products
  • Remarkable update that comes with lots of practical innovations which include text shading, column clipping, text outlines, and layer mixing modes
  • Multi-user capabilities by allowing more users to edit different zones on the same page of the magazine
  • An intuitive user interface, supporting the drag-and-drop feature
  • The design grids can be assigned to pages and boxes in order to allow unlimited baseline grids

You will be able to learn more about this software and its fascinating features and tools by heading over to QuarkXPress’ official website and taking a look around.

Find there the full features list of this fantastic software for creating the most fabulous magazines and more digital products.

⇒ Get QuarkXPress

Madmagz – Wide palette of templates

Madmagz platform

Madmagz is another handy option that you have available for creating online magazines.

Such software solution can offer to users a wide palette of templates for magazines, school newspapers, catalogs, flyers, you name it.

The main idea is that anyone can create exceptional magazines using interactive features, plus publish them in various formats like print, web, or PDF files.

More so, the readers will get the option to share your magazine on social media spaces like Twitter and Facebook, or share it on their personal pages or blogs.

You will get the chance to edit pages, and you will be the only person who is entitled to publish your magazine just the way you want to

Thus web magazines will be supported on multiple devices, including tablets, PCs, and smartphones as well.

Check out the most important features that are packed in this great software below:

  • Templates created by professionals, and you can also ask for a custom template as well
  • Invite contributors to write their pages in the template that you have chosen
  • Add the table of contents, videos, links, sound, and more to make your readers enjoy their experience
  • You will be able to replace the logo with the one that you choose and customize the address of the final product to make it completely yours

All you have to do is head over to Madmagz’s official website, place your order online, and the team will take care of the rest.

Therefore, you will be delivered high-quality newsstand and environmentally friendly printed versions of your magazine.

⇒ Get Madmagz

Joomag – Team collab tools

Joomag is one of the best tools for creating interactive content, for multi-channel distribution, performance, tracking, and more.

Using this software, you will definitely be able to create the magazine that you always wanted with the most impressive layout.

You can also choose between 300 stunning templates to help save time and maintain the magazine’s design consistency.

With Joomag, you will be able to create high-quality content for your magazine and then deploy it online across multiple channels.

Moreover, you can go beyond ordinary publishing and innovate content on each one of the magazine’s pages. Plus, the Crater Editor is created with innovative technology to offer publishers complete control over their digital content.

Just take a look at the best features and advantages that you will be able to enjoy while using this tool:

  • Team collab tools, real-time editing features, content creation options, and inbuilt analytics will turn out extremely useful
  • You can craft high-impact content with interactive online tools
  • Upload a PDF file to its online platform and transform its static content into a rich interactive experience with the tool’s Crater Editor
  • You will get the chance to design your publications with a full arsenal of interactive features and functionalities to bring your vision to life on each one of your magazine’s pages

Digital publications that are created with the help of this program are automatically repurposed for various formats.

This way readers from all over the world will get the chance to enjoy your works on their favorite device.

Check out more features and editing tools that are included in this great software on Joomag’s official website.

⇒ Get Joomag

These are pout picks for the best six available tools for creating great magazines with amazing designs.

No matter which software you decide to use, we guarantee that you will be entirely satisfied with the results. Good luck and have fun!

Google Earth is Not Working or Loading: 8 Ways to Fix it

If Google Earth or Google Earth Pro is not working/loading on your device, you’re not alone. This happens to many users, particularly due to browser problems, and outdated graphics driver or file corruption.

Luckily, we figured out how to fix it. Just keep reading as we share what we found works:

How can I make Google Earth work in Windows 10 & 11?

1. Use OpenGL instead of DirectX

  1. Open Google Earth if possible, then go to Tools and select Options.
  2. Click on 3D View then check the OpenGL option instead of DirectX.
  3. Hit the Apply and OK buttons to confirm the change.

If you encounter any problems, we have a detailed article on how to fix OpenGL problems in Windows 10 that will help you solve them quickly.

2. Use the built-in Repair Tool

  1. Press the Windows key + E to launch File Explorer.
  2. Navigate to the following location on your PC: C:\Program Files\Google\Google Earth Pro\client
  3. Scroll down on the folder until you find the repair_tool.exe file and double-click it to launch the built-in troubleshooter.
  4. The tool offers six options to fix the app and you should try them all one by one, until the problem is solved. Some of the fixes we allready tackled in the solutions above, like switching from DirectX to OpenGL.

3. Update your graphics card

  1. Right-click the Start button, type device manager, and select the app from the list.
  2. Click the Display adapters section to expand it, right click on your graphics card, and select Update driver.
  3. Select Search automatically for drivers.
  4. If the system finds a new one, it will install it. If not, you can click on Search for updated drivers on Windows Update.
  5. This will bring you to the Windows Update section. Click on View optional updates.
  6. Select Driver updates to expand the section and see if you can find any graphics-related drivers, check its box and hit the Download and install button to get it.

The culprit for Google Earth hanging and crashing in Windows 10 seems to be the stereoscopic 3D that was turned on by the latest Windows 10 updates.

Should you encounter any problems, our extensive guide on how to update drivers in Windows will provide more information.

4. Enable Windows to fix the scaling

  1. Right-click on the Google Earth icon on your Desktop and select Properties.
  2. Go to the Compatibility tab and select Change High DPI settings.
  3. Now, check the first box, Use this setting to fix scaling problems…
  4. Click Apply and OK to save the changes.

If you receive the following message Your desktop resolution is set to smaller than 1024×768, Google Earth requires a resolution of at least 1024×768 to be viewed properly.

We also have a detailed guide on how to create your own custom resolutions in Windows 10 and the information might be helpful in this situation.

5. Recreate the Google Earth shortcut

  1. Press the Windows key + E to start File Explorer.
  2. Go to the following location on your PC: C:\Program Files\Google\Google Earth Pro\client
  3. Right-click on the Google Earth executable file and select Create shortcut.
  4. Now try to open the app and see if the problem has been fixed.

Some of our readers have reported that they’re even unable to install Google Earth on their Windows 10 computers.

That’s because when they try to install the program, an error 1603 appears, and the installation process is stopped.

This error tells you that Google Earth is already installed on your computer, so you can’t install it again. This case mostly occurs to Windows 10 users, because there’s a possibility that, during the update process, Google Earth shortcuts from Desktop and Start Menu have been removed.

That means you can actually create the shortcut again and that will fix the problem straight away. If you can’t find the app in Program files, you should also check in Program Files (X86).

6. Uninstall and reinstall the app

  1. Press the Start button and select Settings.
  2. Click on Apps.
  3. Select Apps and features from the left pane, then look for Google Earth in the list of apps, click on it and select Uninstall.
  4. After the process is over, install the app again. If you can’t find the installer, you can always download it again from the Google Earth website.

If Google Earth is not working on your Windows 10 PC, you might want to reinstall it. This usually fixes any corrupted files, so be sure to try it.

Should reinstalling doesn’t help, you might want to try installing an older version. Several of our readers reported that this solved their issue.

7. Install the older graphics drivers

  1. Right-click the Start button, type device manager, and choose the app from the results.
  2. When Device Manager opens, locate your graphics card, right-click it, and choose Uninstall device.
  3. When the confirmation dialog appears, check Delete the driver software for this device and click on Uninstall.

In most cases, it’s better to use the latest drivers on your PC, but sometimes the latest drivers aren’t fully compatible with certain software.

If Google Earth is not working in Windows 10, you might want to try rolling back to the older version of Nvidia drivers.

After the driver is uninstalled, you need to download the older version of the Nvidia driver.

In case the rollback works, you’ll have to prevent Windows from automatically updating the driver in the future.

8. Create a new user account

  1. Press the Start button, then select Settings.
  2. When the Settings app opens, go to the Accounts section.
  3. In the left panel, navigate to the Family & other people section. Now click on Add someone else to this PC.
  4. Click on I don’t have this person’s sign-in information.
  5. Now select Add a user without a Microsoft account.
  6. Enter the desired username and click on Next.
  7. Now, log out and log back in with the new account.

Many users reported that Google Earth is not working on their Windows 10 PC. Apparently, the issue can be your user account. Sometimes your account can become corrupted causing this issue to appear.

After switching to a new account, check if the problem still appears. If not, you’ll have to use the newly created account to run Google Earth on your PC.

Also, you might want to use your new account as your main one. Alternatively, here’s what you can’t do if Windows doesn’t allow you to create a new user account.

How do you refresh Google Earth?

By default, Google Earth refreshes automatically every 5 minutes. However, there is a way to force the refresh:

To do that, right-click the InterMapper entry in the Places sidebar, and select Refresh.

If you want to change the refresh interval, right-click on the InterMapper option, and select Properties. Then, go to the Refresh tab and set up the preferred interval.

As a last resort, if Google Earth desktop is not working, you can always use Google Earth online. If you’re going to use the same account, you will have all the settings in place.

Of course, this problem can also be from the connection. In that case, you should read about how to fix Google Earth if it cannot connect to the server.

To learn more about Google Earth, we have a great guide on how to download Google Earth on Windows 10, so don’t miss it.

Windows users often seem to struggle with these issues. If you are one of them, let us know which solution worked for you in the comments section below.

Fix: Screen Resolution Changes by Itself in Windows 10

The Windows 10 resolution setting doesn’t usually reconfigure itself. Yet, some users have said that their VDUs’ resolutions change from the default setting whenever they start Windows.

After adjusting the display resolution to a higher setting, it then dropdowns to a lower resolution after the users restart Windows. It is a somewhat baffling issue that arises for some users.

The resolution change can often be due to incompatible or corrupted graphics card drivers and the Base video option.

In addition, conflicting third-party software might adjust the resolution. In this article, we’ll show how you can fix the resolution in Windows 10 when it automatically changes.

Why does Windows 10 keep changing my screen resolution?

Here are a few reasons the resolution appears suddenly changed in Windows 10:

  • Safe Mode is enabled: When you boot Windows into Safe Mode, the resolution is automatically decreased. So check if you have inadvertently enabled it.
  • Incompatible, corrupt, or outdated driver: When the installed drivers are outdated, incompatible, or corrupt, especially an out-of-date graphics driver, the resolution may be affected.
  • Conflicting third-party apps: Several third-party apps are found to change the display settings, especially the ones meant to optimize performance.
  • Buggy Windows update: If the resolution suddenly changed in Windows 10 after an update, it could be a bug to blame. Check if others on the same version of the OS, too, are reporting the problem.

Why does screen resolution change after sleep on Windows 10?

There are many reasons for this issue, but the most common one is your drivers, however, this isn’t the only issue, and many reported that their screen became pixelated after Windows update.

Many users also reported that Windows goes to sleep too fast, which will cause your resolution to change more often than you would like.

Resolution change can also appear if your second monitor isn’t detected properly, but luckily there are ways to fix this issue, and in today’s guide, we’ll show you how to do it.

How do I stop my screen resolution from changing?

1. Update your drivers

1.1 Update the drivers manually

  1. Right-click the Start button and select Device Manager.
  2. Expand the Display adapters section, right-click the device, and select Update driver.
  3. Choose Search automatically for drivers.
  4. If the system finds a newer driver, it will install it.

You can also perform this step to update the Monitor driver. You will find the device under the Monitors section.

There is also the option to select Uninstall device instead of Update driver in step 2 of this solution.

That will trigger the system to automatically look for a new driver and install it after the restart.

1.2 Update the drivers automatically

You can update the card drivers using dedicated software. Here are the steps you need to follow:

  1. Install and Download Fortect Driver Updater and launch the tool.
  2. Wait for the automatic scan of your PC.
  3. Select the graphics card drivers from your list.
  4. Wait while it deals with your drivers.
  5. Restart your PC.

Fortect Driver Updater

Update your device graphics card drivers with this amazing tool and stop Windows 10 from changing the resolution automatically.
Free Trial Visit Website

2. Deselect the base video option

  1. Press the Windows+ X key and click Run on the menu to open that accessory.
  2. Enter msconfig in and click the OK button.
  3. Then click the Boot tab on the System Configuration window and deselect the Base video checkbox.
  4. Press the Apply button to confirm the new settings and click OK to close the window.
  5. Restart windows after closing System Configuration.

3. Clean boot Windows

  1. 1. Open Run with the Windows key + R hotkey.

  2. 2. In the text box, input msconfig, and click OK.

    run msconfig command
  3. 3. Click the Selective startup radio button on the General tab.

  4. 4. Deselect the Load startup items checkbox, then select the Load system services and Use original boot configuration options.

    configure selective startup options
  5. 5. Select the Services tab and click the Hide all Microsoft services option.

    click to hide all microsoft services
  6. 6. Press the Disable all button.

  7. 7. Select the Apply option, and then press the OK button.

  8. 8. Lastly, select the Restart option on the System Configuration window.

  9. Another great method that works for some users when encountering the screen resolution changing by itself problem is to perform a clean boot of your PC.

    You can configure one via System Configuration in just a few steps, as seen above.

4. Rollback graphics card driver update

  1. Press the Windows key + R to launch Run, then input devmgmt.msc and click OK.
  2. Double-click Display adapters, right-click your video card, and select Properties.
  3. Then press the Roll Back Driver button on the Driver tab.

This solution is especially helpful if the problem started to occur after you installed a new graphics driver.

If the Roll Back Driver option is grayed out, it means that you don’t have an older driver to go back to so move on to the next solution.

5. Restore Windows to an earlier date

  1. Open Run with the Windows key + R hotkey, input rstrui, and press Enter.
  2. Click Next when the System Restore app opens.
  3. Select a listed restore point, and press the Next button.
  4. Press the Finish button to confirm your selected restore point and roll back the OS.

What can I do if the resolution suddenly changes in Windows 11?

The new OS looks nicer and comes with new and improved features but is not so different from Windows 10 at its core.

That is why all the solutions we outlined above will also work like a charm on Windows 11.

The windows will have a slightly different design, with round corners, but the function will perform identically.

How do I reset my screen resolution in Windows 10?

  1. Right-click on a free space on your desktop and select Display settings.
  2. Now, click on the Display resolution menu and choose a different resolution. If the resolution at this moment is different than the recommended one, we suggest switching to that one.
  3. Click Yes to accept the new resolution.

Those are some of the fixes users have fixed the display resolution with. In addition to those fixes, turning off the screen saver and fast startup mode might resolve the issue.

You might also be interested in reading our guide on how to set custom resolution on Windows 10.

Let us know in the comments section below if you have additional suggestions or recommendations.

10 Best Booklet Maker Software/Programs [2026 Edition]

There is no denying that booklets are powerful marketing tools that can help you bring in more leads when done right. Booklets are usually designed and printed by printing houses.

They usually have specialized people creating graphics and layouts based on customer requirements. But, what if you could create your own booklet?

After all, these printing houses must use something to create these stunning booklets. Most printing houses use specialized tools like Adobe InDesign and Illustrator to create original booklet designs.

But, the use of these programs requires skill, and practice and involves a learning curve. There are booklets creating software tools that can help you achieve the same result for a fraction of the cost.

Whether you want to create a hard copy or create an ebook for offline or online use, keep in mind that booklet-creating software makes the job easier.

If you are looking for a simple program to create booklets, we have created this guide to help you find the best booklet-creating software that can be used by both professionals and amateurs.

How can I make my own booklet?

You’re able to create your own booklet to showcase your creative ideas first by using dedicated software.

It’s possible to design the booklet in different ways and choose 4 pages or 8 pages layouts, according to your graphic needs.

To get into it, we’re going to show you how to create booklets in Adobe InDesign:

  1. Open InDesign on your desktop.
  2. Choose the New File option.
  3. Select the needed dimensions and number of pages.
  4. Choose the size of your pages.
  5. Set up the margins of the pages.
  6. Then, select Facing Pages to have left and right hand pages.
  7. Select the number of columns and press Create to start your project.

How do I make a digital PDF booklet?

If you need to create your booklets more easily, you can use the help of digital design software that can help.

Canva is highly suitable to create expressive booklets and brochures online by following these steps:

  1. Log in to Canva’s official website.
  2. Click on the Create a Design button.
  3. Search for the booklet format and click on it.
  4. Choose from the various templates in the editor to create a booklet.
  5. On the file type, search for the PDF Print format and press Download.

How long should booklets be?

A booklet is essentially a small-size book. You should manage to complete your booklet project in 8 to 36 pages.

While there are no grounded rules for the page count of booklets in general, you should know the minimum number of a booklet, which is 8 pages.

That being said, the number of pages may vary depending on the binding method. The choice is therefore yours to make.

What is the best booklet maker software?

Adobe InDesign – Best layout designs

Adobe is the market leader in Windows graphics editing and designing software. If you have Adobe InDesign installed, you don’t need to look for booklet-creating software anywhere else.

Using this tool, you can draft a professional-looking booklet with a completely original design and themes.

No other booklet-creating software comes close to Adobe InDesign when it comes to layout designs, but involves a learning curve and costs a fortune.

Bottom line, InDesign is an excellent tool for booklet designing work and can help you with anything that is graphics related to creating brochures to publishing books.

However, it is best served by those who can invest time and money to make the most out of it.

In addition, this software guarantees high-quality results for digital publications projects, including booklets that will inspire everyone.

You can build creative graphic designs with various images, animations, or slideshow presentations within the platform.

Lastly, using professional layouts and effects, you have plenty of instruments to make an impression with descriptive flyers and posters, brochures, magazines, or books.

Adobe InDesign

As an industry-leading layout and page design software, Adobe InDesign is clearly up for the task!
Free trial Visit Website

Canva – Great interface

Canva is defined by endless templates to create impressive design projects, including booklets and many other formats.

By choosing this online platform, it’s simple to manage your graphic designs and create amazing brochures in a short time.

You can get inspired by different templates for almost any product you create. For example, your booklet can be customized with various templates or layouts so you never run out of inspiration.

The platform can help with various tools capable of improving your booklet design with the help of graphic elements, illustrations, dynamic text, etc.

Moreover, other significant features can offer support with audio and video integration so you can add it to your final brochure, background images for your page, various colors or fonts, and so on.

This being said, you might explore your creativity today and have the most inviting booklets with this trusted online tool.

Canva

Looking for easy but efficient design software? This solution has everything you require for astonishing booklets.

Adobe Illustrator – 3D effects

Adobe Illustrator

Adobe Illustrator application is a vector design software that presents highly professional tools that provide memorable brochures, or other products.

This choice is valuable for any graphic designer or regular user that needs to create a new booklet in a very authentic way.

If you need to pitch a business product to an important client or want to promote your ideas in a creative manner, this solution is your escape.

With thousands of templates or presets, you can use inspiring content to build your booklet in minutes.

It’s extremely easy to choose from thousands of templates and download them from the Adobe Stock library. It also offers you qualitative illustrations and graphics to include in your booklet.

Other worth mentioning features that come with Illustrator are in-app learning resources or inspirational content, auto-font activation, and 3D effects for your text or drawings.

In the end, using this innovative and trusted software will benefit anyone with envious booklets or other graphic designs.

Adobe Illustrator

Consider this highly trusted software to handcraft your brochures with unique design tools.
Check price Visit Website

Blurb Bookwright – Online tool version

Blurb Bookwright is a book publishing software that can be used to create booklets. It is a free-to-use tool and comes with a good number of features.

Beginning with the simple and intuitive user interface to the advanced customization features to get into the nitty-gritty details of your book, Bookwright gets most things right.

If you already have Adobe InDesign or Illustrator, Blurb does offer its plugin for the same. If you don’t want to download the software, note that Blurb has an online tool known as Bookify.

Other features offered by Bookwright include the ability to download or create your layouts, books, ebook and PDF print option, WYSIWYG print output, rich text format for text-centric books, and import option for existing book files.

However, keep in mind that using the custom layout can be a cumbersome task for beginners.

You can take advantage of this free option to create flawless book pages and booklets. With Quick editing options and designer templates, you are entirely covered.

Blurb Bookwright

With this creative studio software, your booklet project will amaze everyone with colorful designs.
Check price Visit Website

Edraw Infographic – Multi-purpose software

Edraw Infographic is multi-purpose software that can be used to create infographics, flyers, posters, banner cars, presentations, and ebooks.

It is a premium tool but comes with a 30-days free trial with some limitations.

For customization, it comes with 10000+ infographic icons and hundreds of premium templates along with drag and drops features to create artistic work with a creative style.

You can choose from a variety of free templates that can be configured with different elements to match the theme.

The final project can be exported in many formats including JPG, HTML, SVG, Word, PPT, and more.

Therefore, Edraw is a multi-purpose tool and is well served for those who can make use of the said features regularly. Download the trial version and see if this meets your requirements before making the purchase.

Edraw Infographic

If your wish is to create brochures, infographics, flyers, and not only, just try out Edraw and you’ll see how intuitive it is!
Check price Get it now

Flip PDF – Easy to use

Flip PDF as the name suggests works with PDF Files. It lets you import PDF files or PDF ebooks and create a professional-looking booklet or magazine that works on HTML5 and Adobe Flash Player.

Having HTML5 support means that all ebooks can be read on any modern web browser even from your smartphone.

It also has a batch conversion option to convert multiple PDF files, the ability to import bookmarks and ToC of original PDF that can preserve hyperlinks, and an option to add a watermark to your work.

The booklet can be created in different sizes, and it can detect landscape pages to present as a two-page spread.

The pre-designed templates let you customize the e-book by adding tips, hyperlinks, promotional offers, and changing the background color and image. One of the most impressive features of Flip PDF is its export option.

The e-books can be exported in multiple formats including HTML format for web support, EXE to run on Windows computers, in a Zip archive, as a WordPress plugin, and Burn to CD to create a CD-based book.

Even so, keep in mind that the free version is very limited, and the full version is a little expensive for booklet-creating software.

⇒ Get Flip PDF

FlipHTML5 Flipbook Maker Pro – Various pre-designed templates

For those looking for a flipbook kind of booklet-creating software, the FlipHTML5 Pro can be a good choice.

It offers a free-to-download tool with some limitations while the premium plans start at 15$ with additional features.

FlipHTML5 Pro allows you to create professional-looking ebooks without any programming skills. It comes with an animation editor to add multimedia content to the booklets.

The booklets can be created by importing static PDF files into the software. It can also convert flipbooks from MS Office, and OpenOffice to HTML and jQuery-based ebooks that can be hosted on your own website.

To customize the booklet, FlipHTML5 Pro offers pre-designed templates, and themes, add background music, and a table of content to your booklet.

There is an Auto-flipping mode feature, once enabled it auto-rotates the pages while offering a 3D page-flipping experience.

For Internet marketers, the ability to add Google Analytics tracking in booklets helps in tracking user stats.

In spite of all these, you should note that occasionally, the animation on Flipbook may not load properly on some devices.

⇒ Get FlipHTML5 Pro

Scribus – Over 200 color palettes

If you are looking for something professional yet completely free and don’t mind spending some time learning the tool, then Scribus is the perfect choice for you.

Scribus is a professional-grade open-source desktop publishing software that is completely free to download and use in any field.

The program uses XML file format to store data, comes with over 200 color palettes to choose from and the printing options support PDF/X-3 specifications.

In addition, this desktop publishing tool can also provide manufacturing tools that should help any user to create admirable artwork.

Scribus can be used by professionals and beginners alike and has a user-friendly interface that anyone can easily learn.

This software can run on a variety of operating systems like Linux, FreeBSD, MacOS, Haiku, or Windows.

⇒ Get Scribus

GIMP – Extensive set of editing tools

GIMP is a cross-platform image editor program that can also be used to create booklets and brochures.

Despite being a free program, GIMP offers an extensive set of editing tools for illustration and graphic designing.

However, the tool involves a learning curve and may not be a thing for casual users. You can edit your projects and become more familiar once you learn by yourself.

It offers excellent color management features for print and digital media and works well with shareware such as Scribus, Inkscape, and SwatchBooker.

This complete software has everything to create expressive booklets. You can use photo enhancement features to improve images, advanced photo retouching tools, and various file formats like JPG, GIFs, and PNG.

Additionally, you have extensive hardware support that allows you to connect different input devices. An example is various USB types and MIDI controllers.

⇒ Get GIMP

Microsoft Word – Simplest solution

Microsoft Word lets you create printable booklets without using any third-party software. This is a better option for beginners and for those who want to print a quick booklet for an organization or event.

However, the booklet printing options are limited with Microsoft Word, and you need to put in a little more effort to design the booklets.

The layout selection is simple and can be accessed from the Page Layout tab.

For customization, you can download free booklet templates for Microsoft Word and later customize the text and graphics to match the look of the design as per your need.

To summarize, using this solution to create and present your booklet promises efficiency and has extensive editing tools for your final product.

⇒ Get Microsoft Word

How do I turn a PDF into a booklet?

It’s possible to turn a PDF document into a booklet by printing the file. Regardless of the pages or size, you can have your booklet in minutes.

In order to successfully create a proper booklet from your multi-page PDF document, you need the practical help of Adobe Acrobat Reader.

With this PDF viewer tool, you can print any PDF files and transform them into booklets from the printing dialog box.

Within a few steps, you’re all set up and ready to make your booklets without complicated settings or processes.

Booklets are one of the most popular forms of marketing and having the right tool to create professional-looking brochures makes it much easier to customize and design them.

We hope this guide has helped you in figuring out the right booklet and creating software for your next marketing project. Do let us know your pick in the comments below.

How to Restore Print Management if It’s Missing in Windows 10

Windows Pro and Enterprise editions have a Print Management utility. However, some users have said on Microsoft’s forum that their Print Management tools are missing.

Those users can’t find Print Management in Administrative Tools and open that utility. One user forum post said this:

I just upgraded from Windows 10 Home to Windows 10 Pro and I can’t find Print Management anywhere. Also, printmanagement.msc is not available. I suspect other Windows 10 Pro administration utilities are also missing.

Print Management is a Microsoft Management Console (MMC) that allows users to view, install, access, and manage the various printers on the network through a single device running Windows Server.

It’s an effective way of modifying the various parameters and streamlines the whole process. Without the console, users would have to install and manage the printers individually through the connected computers, which takes considerable time and effort.

Why is Print Management missing?

There are various reasons why Print Management is not showing in Windows 10. It includes issues with the installed driver, corrupt system files, or problems with the relevant service. These issues can also lead to the Print action missing from context menu.

Also, remember that the Print Management Console is only available on Pro and Enterprise editions of Windows. If you are running the Home edition, upgrade or look for other similar third-party software.

Other issues with the Print Management Console in Windows 10 are as follows:

  • Windows cannot find printmanagement.msc
  • Print management console install failed
  • Print Management missing from administrative tools
  • Windows 10 Print Management not showing printers/all printers missing
  • Print Management missing Server 2012 r2/2008 r2
  • Print Management Snap In missing
  • More Windows versions can be impacted (Print Management missing in Windows 11 or 8.1, but also in Windows 10 Home/Pro 20h2/2004)
  • Printmanagement.msc missing or not found Windows 10 Home, 2004, Pro 20H2, 21H1, Windows 11
  • Print management not opening

How do I restore Print Management in Windows 10?

If printmanagement.msc is not found in Windows when you try accessing it through the Run command, the console has not yet been added.

Print Management Console is an optional feature in Windows that has to be manually downloaded and installed and does not come built in with it. So, installing Printer Management will restore it on your computer.

1. Update the printer driver

Updating the printer driver can help fix a wide range of printer-related issues. You can check if you need to update your printer’s driver with driver updater software.

Driver updater software lists all your PC’s devices with outdated drivers and lets you quickly download and install updated ones.

2. Add the Print Management tool to Windows 10

  1. Add an optional feature in the Search bar at the bottom, and click on the relevant result.add a optional feature to fix print management missing windows 10
  2. Click on the Add a feature option at the top.Add a feature
  3. Now, search for Print Management Console, tick the entry when it appears, and then click on Install at the bottom.print management console

This simple method can help if Print Management is missing in Windows 10 or 11. This solution can also help if you’re getting the print program error in Photoshop, so be sure to try it out.

3. Clean the Print Spooler

  1. Press Windows + R to open the Run command, enter services.msc in the text field, and click OK.services.msc to fix print management missing windows 10
  2. Double-click Print Spooler to open the properties window for that service.Print Spooler 
  3. Click the Stop button under Service status.stop
  4. Next, click OK at the bottom to save the changes and close the window.save changes to fix print management missing windows 10
  5. Again, press Windows + R to open Run, paste the following path, and click OK: %WINDIR%\system32\spool\printerspath
  6. Next, press Ctrl + A to select all the files, and hit the Del key.
  7. Now, head back to the Print Spooler Properties window, and click on the Start button to run the service.start to fix print management missing windows 10
  8. Select the Automatic setting on the Startup type dropdown menu.automatic
  9. Don’t forget to click on Apply and OK to save the settings.apply

This quick fix can fix all problems with printmanagement.msc in Windows 11. If Print Management is still missing in Windows, head to the following method.

4. Run a system file scan

  1. Press Windows + S to open the Search menu, enter Terminal, right-click on the relevant search result, and select Run as administrator.terminal
  2. Click Yes in the UAC prompt that appears.yes
  3. Press Ctrl + Shift + 2 to open Command Prompt in a new tab.
  4. First, paste the following command and hit Enter to run the DISM tool:DISM.exe /Online /Cleanup-image /Restorehealthdism to fix print management missing windows 10
  5. Once done, execute the following command to run the SFC scan: sfc/scannowsfc scan
  6. Wait for the scan to reach 100% verification.
  7. Then, restart your PC if the scan says Windows Resource Protection repaired corrupt files.

Corruption of system files can cause Print Management to go missing on Windows 10, but you should be able to fix it with the DISM (Deployment Image Servicing and Management) and SFC (System File Checker) scans.

5. Reset or reinstall Windows

If none of the methods listed here have worked, you have no option but to reset Windows to the factory settings. In this case, you will lose all data and installed applications, but it’s one of the most effective troubleshooting methods.

Also, many reported that reinstalling Windows from a USB drive fixed issues with Print Management and made it reappear. In case you run the previous iteration, the Windows 10 reinstall process is very similar.

What can I do if Print Management is missing on Windows 11?

In addition to the methods listed earlier, you can try performing a System Restore if Print Management is missing in Windows 11.

Besides, the problem may arise due to complex or conflicting applications. So look for similar programs or ones known to create conflicts, and uninstall these apps from the device.

Suppose none of the methods listed earlier or the ones here work, and you cannot find the Print Management Console in Optional features. In that case, you are most certainly running the Home edition of Windows 11, in which case upgrading to the Pro or Enterprise edition is the only solution.

Where is Print Manager in Windows 10?

The Print Management Console can be found at the following address in Windows 10: C:\ProgramData\Microsoft\Windows\Start Menu\Programs\Administrative Tools

However, you don’t necessarily need to navigate the path to launch it each time. Instead, simply press Windows + R to open the Run command, paste printmanagement.msc, and hit Enter.

These fixes will likely restore most users’ missing Print Management tools in Windows 10 and 11.

There might be more ways to fix the same issue, and users who have restored a missing Print Management tool with other resolutions are welcome to share their methods in the comment section.

14 Ways to Fix a Windows 10 PC that Restarts Randomly

Random restarts on your Windows PC can be a real pain. Nothing like losing your work out of nowhere.

There’s no single reason why this happens. It could be anything from hardware glitches and driver issues to software conflicts or even malware sneaking around.

But don’t stress! By the time you finish this guide, you’ll have the know-how to figure out what’s causing it and fix those annoying automatic restarts.

1. Change Advanced Power Settings

  1. Press Windows key + S and type power.
  2. From the list of results, choose Power & sleep settings.
  3. Now, click on Additional power settings.
  4. When the Power Options window opens, find your plan and click on Change plan settings.
  5. Now, click on Change advanced power settings.
  6. Scroll down and locate Processor Power Management.
  7. You should see the Minimum Processor State value set to 100%.
  8. Change Minimum Processor State to some other value, such as 0.
  9. Save the changes.

If your Windows 10 PC randomly restarts with no error or blue screen, you might want to try changing the power settings.

The problem is similar to Windows 11 restarting after sleep, and if you’ve upgraded to the latest OS, the highlighted guide will help you.

2. Make sure that the Sleep mode is enabled

  1. Go through the first steps from 1 to 4 from the first solution to get to the Edit Plan Settings window.
  2. After that, find the Put the computer to sleep option and choose any value except Never.
    power-options-sleep
  3. Click on Save changes, and your problem should be fixed.

Sometimes, a random restart on Windows 10 can be triggered if the Sleep mode timer is set to Never. To fix this issue, you must set the Sleep mode timer to any other different value.

3. Update/uninstall your graphics card drivers

3.1. Update drivers manually

  1. Press Windows key + X and choose Device Manager from the list.
  2. When Device Manager opens, locate your graphics card, right-click and choose Uninstall device.
  3. Check Delete the driver software for this device and click Uninstall.
  4. After the driver has been uninstalled, restart your computer.
  5. Download the latest driver from your graphics card manufacturer’s website and install it.

As you know, Windows 10 automatically installs its drivers. If you install graphics card drivers from your manufacturer, you can sometimes cause conflicts and random restarts with or without BSoD.

To fix this issue, you must install additional drivers after Windows 10 performs its update and installs the necessary ones first.

If you have already installed your graphics card drivers, you might need to uninstall them and install them again to fix this issue.

We also have an expert guide on updating your drivers, so if this seems too complicated, you can go for the more comprehensive one.

3.2. Update drivers automatically

If you try to install the drivers manually, you risk damaging your system by downloading and installing the wrong version.

This is a tedious process; after several tests, our team concluded doing it automatically using a dedicated driver updating tool is the best and safest solution.

4. Change your power plan to High performance

  1. Open Power Options by following the steps from the previous solutions.
  2. When the Power Options window opens, choose High performance.

If you have random restarts on Windows 10, sometimes the best solution is to change your power plan to High performance.

We must mention that changing your mode to High performance means your PC or laptop will consume more power, so keep that in mind.

This is especially important for laptop users because your battery will drain faster, and you’ll have to recharge it more often.

5. Uninstall your antivirus

If you have random restarts, this can be caused by your antivirus software.

Users have reported that Kaspersky antivirus is sometimes the cause for a random restart on Windows 10, so if you’re using Kaspersky antivirus, you might want to uninstall it or upgrade it to a newer version temporarily.

You might consider switching to a different antivirus software if that doesn’t work.

We strongly recommend the antivirus below as it’s the best option. It has many valuable features that will keep your computer safe and optimized.

⇒ Get TotalAV

6. Update your BIOS

Sometimes you can fix random restarts on Windows 10 by updating your BIOS. To update your BIOS, you need to visit your motherboard manufacturer’s website and download the latest version of BIOS.

Before you update BIOS, make sure that you check your motherboard’s manual to update BIOS properly.

If you’re not careful, you can cause permanent damage to your computer, so be cautious if you decide to update your BIOS. If you don’t know how to do it properly, please get in touch with an expert.

Updating your BIOS can be tedious and risky, but we have a great guide that will guide you all the way to do that the safest way.

7. Check for hardware issues

Random restarts on Windows 10 can occur due to hardware issues, so it’s always a good idea to inspect your hardware.

Users have reported that the issue was resolved after changing the faulty CPU or power supply.

Remember, if your computer is under warranty, it might be better to take it to the repair shop and ask them to check it for you.

8. Verify if your device is overheating

Random restarts can occur if your computer is overheating, so it’s always good to check its temperature.

You can do that by accessing BIOS or using any free third-party software. If your device is overheating, it wouldn’t be wrong to open it and use pressurized air to clean it from dust.

Of course, if you don’t want to break your warranty, you might want to take your computer to the repair shop and ask them to do it for you.

In addition, if you have overclocked your hardware, remove your overclock settings because they can sometimes cause instability issues such as random restarts and overheating.

You can also keep your computer cool with our list of the best CPU temperature monitoring tools. But if your PC still randomly restarts without overheating, try the subsequent fixes.

9. Disable automatic driver updates

  1. In the Windows Search bar and type advanced settings.
  2. Choose View advanced system settings from the list of results.
  3. Select the Hardware tab.
  4. Click on Device Installation Settings.
  5. Select No (your device might not work as expected) and click on Save changes.

Suppose you’re 100% positive that all drivers are correctly installed (hence, there are no yellow exclamation points in Device Manager). In that case, we advise you to disable the automatic update for drivers in Windows 10.

We already said that faulty GPU drivers are the probable cause of sudden restarts, but even if you install proper drivers, Windows Update tends to replace them automatically.

This will render all the hard work you invested.

10. Test your RAM for errors

  1. Press Windows key + R to start Run, type mdsched.exe, and press Enter.
  2. Choose to restart your PC, and the scan should commence after the initial BIOS screen.
  3. Wait for the procedure to end.

Back in the day, sudden restarts were the first indications of something wrong with your RAM. Of course, without the RAM inserted, your system won’t boot at all.

However, if there are some RAM errors at hand, it’ll boot and crash frequently. There are various third-party apps you can use to test your RAM for errors, but you can also use Windows resources to do so, as well.

The System Memory Diagnostics tool should be helpful for starters.

11. Disable Allow the computer to turn off this device to save power option

  1. Press Windows key + R to start Run, type regedit, and click OK.
  2. Navigate to this path: HKEY_LOCAL_MACHINE\SYSTEM\CurrentControlSet\Control\Class\{4D36E972-E325-11CE-BFC1-08002bE10318}\DeviceNumber
  3. Right-click on the subkey named PnPCapabilities and click Modify.
  4. Change the initial value to 24 and save the changes.
  5. Restart your PC and look for changes.

Most Windows 10 issues are plain and straightforward to address, but that’s not the case for critical errors like the random restart.

Some hidden power-related features can and will cause your system to shut down unexpectedly to preserve power.

Now, this feature can get over your head quite quickly if you have a faulty USB drive or something like that.

And the standard way to disable it includes hours of work in Device Manager, where you have to disable every device individually.

Luckily, there’s an alternative that concerns Registry tweaks. As we all know, the Registry is an unwelcome territory for inexperienced users.

That’s why we recommend using a more user-friendly tool. We have an excellent list of the best registry finder software for your convenience.

Meaning that you’ll need to pay attention before you apply specific changes. If misused, it can inflict fatal system damage, so act cautiously.

12. Uncheck the Automatic restart option

    A verified solution that must help you work out the random restart on Windows 10 is to uncheck the Automatic restart option like in the steps below.

  1. 1. Type Advanced settings in the Windows Search bar.

    random-restart-windows-10
  2. 2. Choose View advanced system settings from the list of results.

  3. 3. Go to Advanced and open Settings under Startup and Recovery section.

    startup and recovery settings windows
  4. 4. Uncheck the Automatically restart box and confirm the changes.

    random-restart-windows-10

You can also disable the automatic restart option, which shuts down the system in case of a critical system error to protect the system from further corruption.

This doesn’t sound like a brilliant idea, but the bug is probably in the latest update. So, if your system generally behaves with the exclusion of random restarts, it’s worth a shot to disable this option.

13. Turn to recovery options

  1. Type control in the Search bar and open Control Panel.
  2. Now, click on Recovery.
  3. Select Open System Restore.
  4. The system will suggest the latest restore point for recovery. You can either use that one or select Choose a different restore point if you know a better one. We recommend the latter so that you can choose the best option.
  5. Select the preferred restore point. Of course, it’ll help if you know when the issues started to select the appropriate restore point accordingly.
  6. Click Next and then Finish for the restoring process to commence.

Finally, the last option (besides the clean system reinstallation) is to reset your PC to default factory settings and look for changes.

In addition, you can also use System Restore to do so, but the functionality of this option depends on whether you previously enabled it or not.

Without the restore points, you can’t utilize System Restore in Windows 10 or any other system.

14. Reset your system to factory settings without losing data

  1. Press Windows key + I to open Settings.
  2. Click on the Update & Security section.
  3. Choose Recovery from the left.
  4. Click Get started under Reset this PC.
  5. Choose Keep my files and start the recovery process.

What can I do if my PC randomly restarts on Windows 11?

There are a series of reasons a Windows 11 restarts randomly. Some causes are overheating, faulty storage, corrupt system files, and wrong policy settings.

To fix this issue, you can update your drivers, run SFC and DISM scan, disable fast startup, and update your group policy. For more detailed fixes, check our guide on how to fix random restart on Windows 11.

That’s about it. We hope at least one of these solutions helped you resolve the problem with random restarts in Windows 10.

For more help with restart issues, whether your PC is stuck restarting, won’t restart properly, restarts unexpectedly, or even restarts while gaming, these guides cover all the basics and fixes you’ll need. You can also check solutions for a Dell laptop stuck on restarting.

After you solve this annoying problem, you can also look at the best tune-up utilities for Windows 10 to boost your PC performance.

If you have any comments, questions or suggestions, just let us know in the comments below.

Name Not Available in Volume Mixer: 5 Ways to Fix it

Sometimes, when you open the sound mixer to modify the volume settings, you may find a section that says Name not available. That’s exactly what we’re going to show you how to solve today.

If it’s your volume control that’s not working on Windows 11 instead, you can follow the troubleshooting methods in our detailed post here.

Why is there a Name not available section in volume mixer?

The Name not available error on the volume mixer may appear due to the following reasons:

  • Interference caused by third-party apps -These are computer programs created by a different company than the one that developed the computer’s OS. Note that such apps running in the background may cause several audio issues and not only.
  • Windows Audio Endpoint Builder service – This can happen if the Windows Audio Endpoint Builder service is not running, so make sure to double-check that.
  • Broken audio drivers – The error might appear if the audio drivers are outdated. Take a closer look at our guide on how to update drivers on Windows 11.
  • Corrupted system files – A system file plays an essential role in the operating system and when it gets damaged and cannot complete its function, it may lead to further issues. That’s why we encourage you to check out this article on how to repair and restore corrupted system files.
  • A possible virus – To improve your security and make sure that no virus can damage your PC, make sure to use the best antivirus software for Windows 11.

However, fortunately, we have a few effective workarounds to help you fix the Name not available issue.

How do I fix Name not available in volume mixer?

Before you proceed with the primary troubleshooting methods, perform the below checks:

  • Make sure that no external speakers/headphones are attached to the computer. If connected, unplug them to check if it solves the problem.

If you still encounter the problem, let’s go through the below solutions.

1. Check the playback devices

  1. Press the Win + R keys together to open the Run console.
  2. Type mmsys.cpl and hit Enter. run mmsys.cpl command
  3. Select the Playback tab, right-click on the audio device, and select either Show Disabled devices or Show Disconnected devices.enable show disabled devices - show disconnected devices
  4. This will display any previously connected devices. Reboot your PC and check if this may be causing the issue.
  5. If yes, then follow steps 1 and 2, go to the Playback tab, right-click on the device, and select Disable.disable audio device

Once done, you can now check the volume mixer and you should not see the additional section.

2. Update the audio drivers

  1. Open the Run console by pressing the Win + R keys at the same time.
  2. Type devmgmt.msc in the search bar and hit Enter. write devmgmt.msc in the run command and press enter
  3. Expand the Sound, video, and game controllers section, right-click on the audio device and select Update driver. update sound driver
  4. In the Update Drivers window, click on Search automatically for drivers, and now wait till Windows finds the latest drivers and installs them automatically.Search automatically for drivers

Now, restart your PC and check if you still see the Name not available section in the volume mixer. This method is also useful if there are no system sounds in the volume mixer.

Besides, you can also download the latest drivers from the manufacturer’s website and manually install them on your Windows 11 PC.

3. Restart the Windows Audio Endpoint Builder service

  1. Press the Win + R hotkey to launch the Run console.
  2. In the search field, type services.msc and hit Enter to open the Services window. Open service manager
  3. Go to the Names column on the right and look for the Windows Audio Endpoint Builder service.
  4. Now, right-click on it and select Restart. restart Windows Audio Endpoint Builder

As the service restarts, open the volume mixer and the Name not available section should be gone.

4. Run an SFC scan

  1. To open the Run console, press the Win + R keys simultaneously.
  2. Type cmd in the search bar and press the Ctrl + Shift + Enter keys together to launch the elevated Command Prompt window. open elevated command prompt by pressing Ctrl + Shift + Enter together
  3. Run the below command in the Command Prompt window and hit Enter: sfc / scannowrun sfc /scannow command
  4. The process takes a while and hence, wait patiently till it’s over.

Once done, restart your PC and check if the volume mixer issue is resolved.

But if the audio device is disabled on your Windows PC, you can follow the troubleshooting methods in our detailed post here.

5. Reset sound devices and volumes

  1. Press the Win + I keys together to open Windows Settings, click on System, then click on Sound. system sound settings
  2. Next, click on Volume mixer. volume mixer
  3. On the next page, navigate to Reset sound devices and volumes for all apps to the recommended defaults, and click on Reset. Reset sound devices and volumes for all apps to the recommended defaults

At the same time, make sure to check if there are any third-party apps running in the background. If yes, then close them all to check if this helps fix the problem.

But, if you are facing an issue like the volume mixer not showing all programs, you can follow our guide for some quick solutions.

If you have any other queries related to sound issues on your computer, leave a message in the comments box below.