Is Microsoft PowerPoint not opening on Windows 11? This problem is happening with many users. PowerPoint is an excellent presentation program being widely used for business, academic and other sectors.
When this app doesn’t open on the latest Windows, it can be due to the following reasons:
Problematic PowerPoint app: If you are not using the official version of the app or your MS Office application has some problems, it may crash when you try to launch it on Windows 11.
Existing background process: Some background processes may also cause PowerPoint not opening problems.
PowerPoint app: If you are using a very old version of PowerPoint, it won’t work on the latest Windows builds.
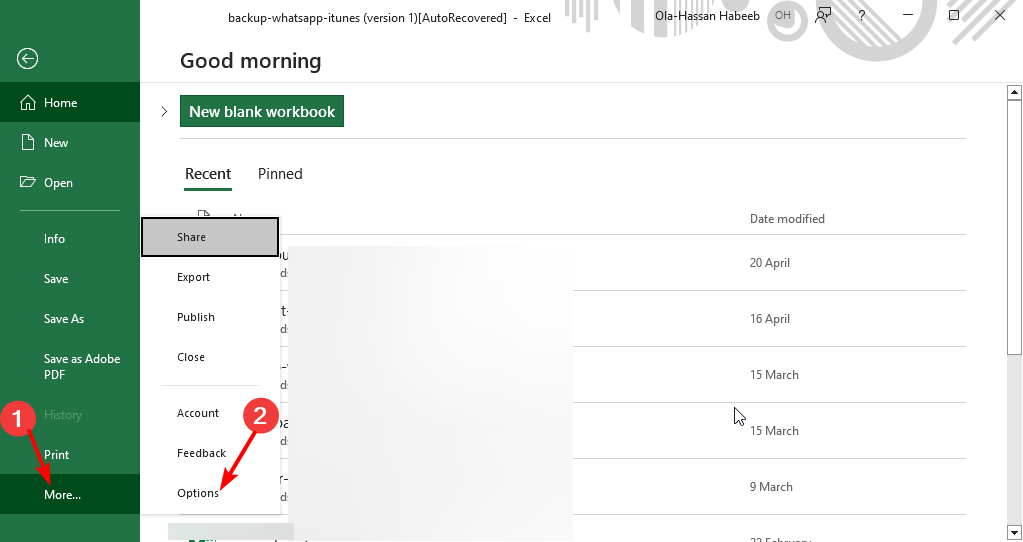
Go to the Add-ins tab, as shown in the screenshot.
Choose COM Add-ins on the Manage and click on Go.
Uncheck the add-ins you want to disable and click on OK.
4. Update PowerPoint
Open PowerPoint.
Go to Account.
Click on Update options and then on Update now.
As the outdated version of the Office app may not work on the latest Windows 11, we suggest you follow the above steps to update it to fix PowerPoint not opening problems.
5. Repair PowerPoint
Go to Windows 11 Settings.
Navigate to Apps and click on Installed apps.
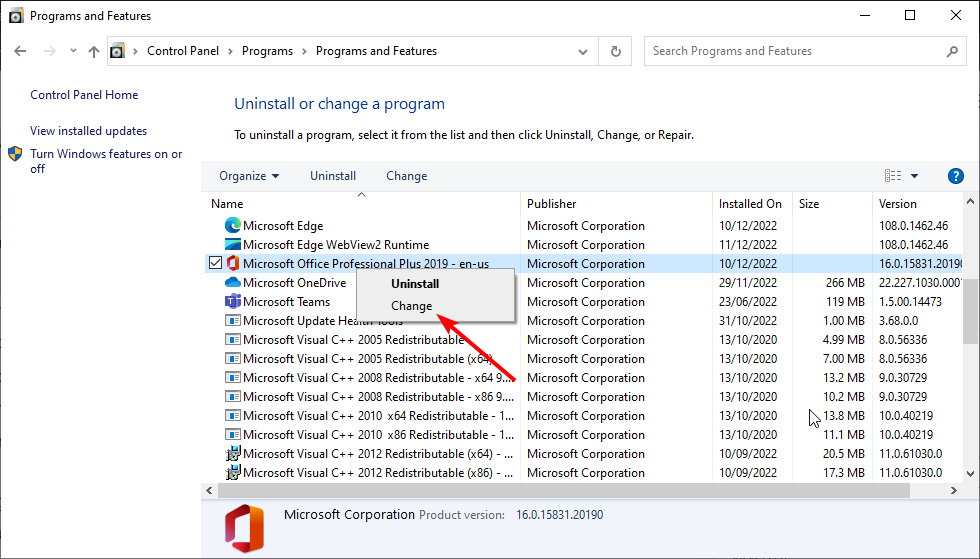
Click on the three horizontal dots next to Microsoft Office and choose Modify.
Select your preferred option and click on Repair.
Repairing PowerPoint as well as Office on Windows 11 will fix any misconfigurations and internal issues with this business solution. This is an excellent way to get rid of PowerPoint launching issues.
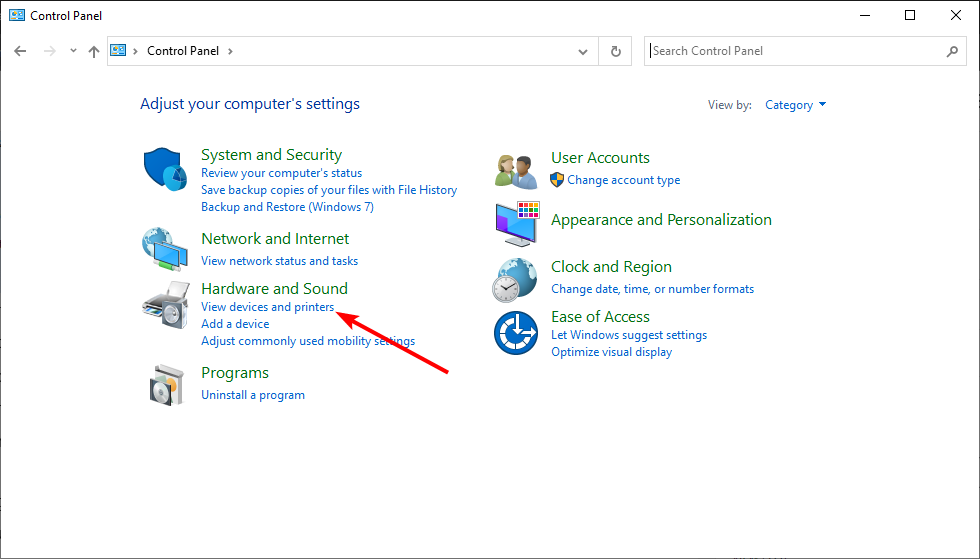
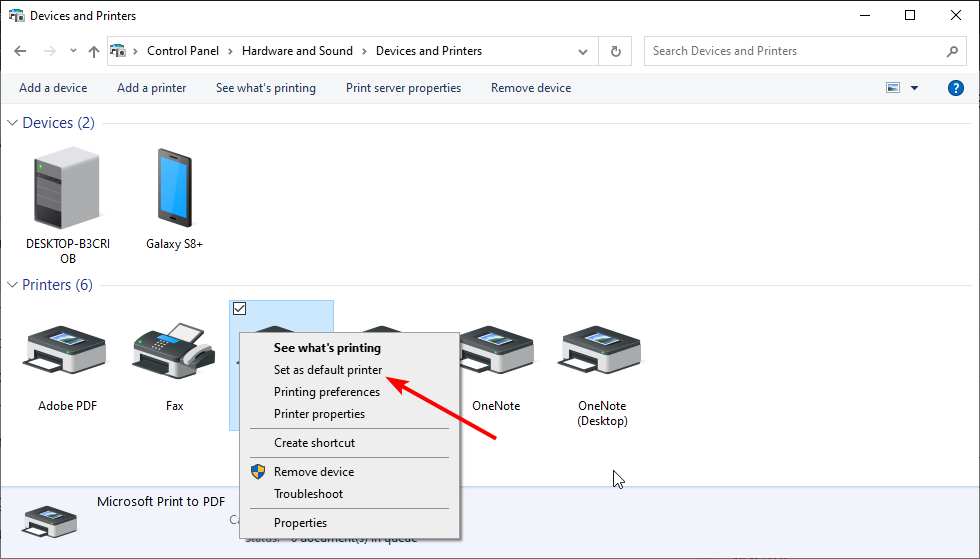
6. Changing the default printer
Press Win + I to open Windows 11 Settings.
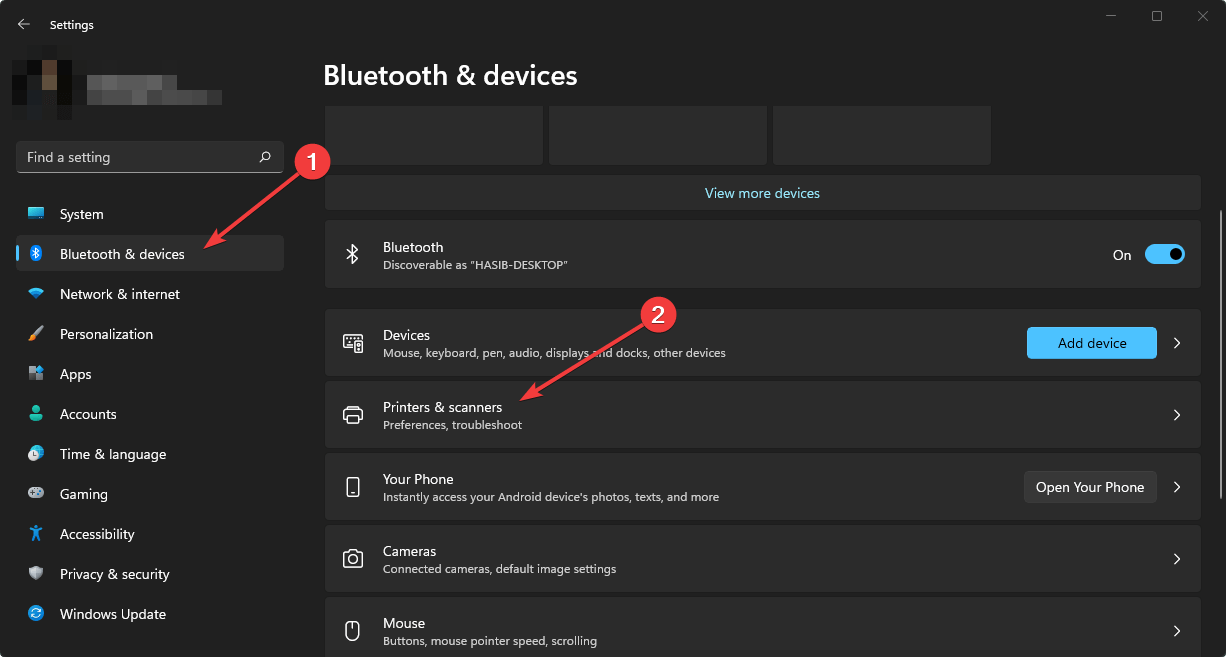
Go to Bluetooth & devices and click on Printers & scanners.
Toggle the switch off next to the Let Windows manage my default printer.
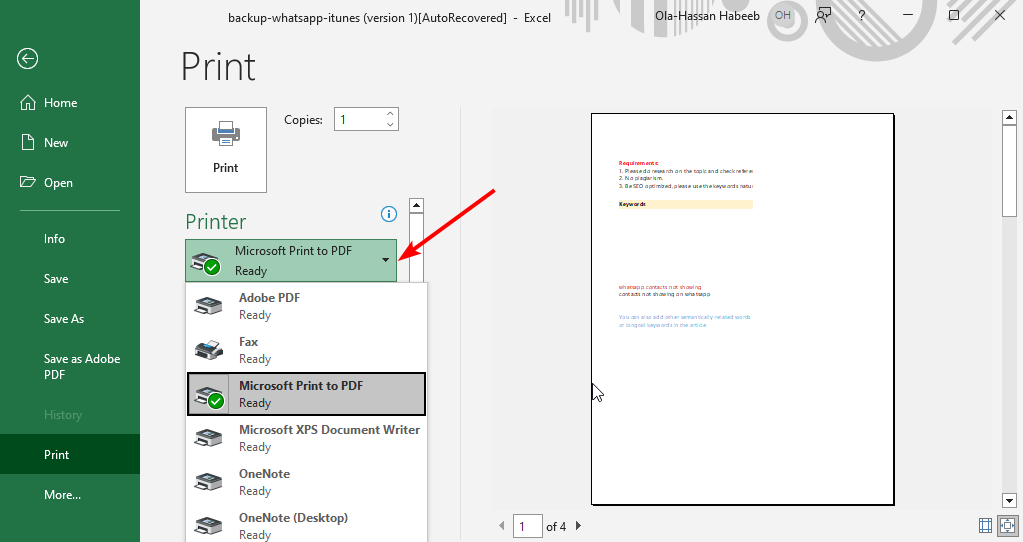
Go Microsoft Print to PDF or OneNote printer.
Click on Set as default.
Restart your PC.
7. Re-install PowerPoint
7.1 Uninstall Microsoft Office
Go to Installed apps on the Settings like the previous method.
Choose Uninstall for Microsoft Office by clicking on the three horizontal dots.
Finish the uninstallation process.
After that, restart your PC.
To uninstall any application entirely and in a better way, you can use Revo or IObit Uninstaller. Windows uninstaller always leaves some registry entries and files on your PC that may create future problems.
But, these tools delete everything related to the uninstalled app, which saves you time, speeds up the computer, and solves many unwanted issues.
7.2 Install again
Go to the Microsoft website and sign in.
Go to View all subscriptions.
Click on Manage next to the Microsoft Office or Microsoft 365 subscription.
Dependency installers help install software requirements and scripts on the host to run the software properly. However, users complain about Microsoft Store Package Dependency Installer not working, causing errors when launching apps.
Why is Microsoft Store Package Dependency Installer preventing games from launching?
Many users ask what Microsoft Store Package Dependency Installer is and why it prompts errors when they want to launch games.
As said earlier, it simply contains scripts needed to help games and apps run smoothly on the host. Unfortunately, it can run into some errors and prevent your games from launching.
However, many factors can cause the Microsoft Store Package Dependency Installer error to appear when playing games. A common one is related to issues with Microsoft store client updates. The error is liable to pop up after installing an update for an app in the store.
Other factors that may cause the Microsoft Store Package Dependency Installer to prevent games from launching are:
Permission issues – Some users may run into the error because of not having enough permissions for the Microsoft store to access the game. Also, the Dependency Installer may need to be allowed before accessing the game.
Game registration issues – The Microsoft Store Package Dependency Installer error may occur when launching a game if it can’t access the game’s registration. It doesn’t happen often, but it can be an issue.
There are no definite causes for Microsoft Store Package Dependency Installer blocking games from launching. That is, the cause may vary in different PCs.
What can I do if Microsoft Store Package Dependency Installer is not working?
Left-click the Start button, type PowerShell, and click Run as administrator.
Click Yes on the User Account Control prompt.
Copy and paste the following lines and press Enter: Get-AppXPackage -AllUsers | Foreach {Add-AppxPackage -DisableDevelopmentMode -Register "$($_.InstallLocation)\AppXManifest.xml"}
After running the command line, exit the PowerShell window, then restart your PC to check if the error appears when you launch your games.
Left-click the Start button, type PowerShell, and select Run as administrator.
Tap Yes on the User Account Control prompt.
Copy and paste the following lines and press Enter: Get-AppxPackage -allusers *WindowsStore* | Remove-AppxPackage
Copy and paste the following lines and press Enter: Get-AppxPackage -allusers *WindowsStore* | Foreach {Add-AppxPackage -DisableDevelopmentMode -Register “$($_.InstallLocation)\AppXManifest.xml”}
Restart your PC and check if the error persists.
Reinstalling the Windows Store via PowerShell will check its root installation file and install it afresh.
Having trouble with Remote Desktop not working on Windows 11? We’ll show you how to deal with it. Problems usually stem from permissions, firewalls, and sometimes faulty updates.
Below, we’ll walk you through all possible fixes no matter the underlying issue. Just follow the step-by-step instructions.
How to fix Remote Desktop not working in Windows 11?
1. Edit your registry
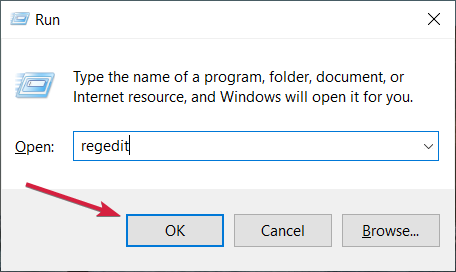
Press the Windows key + R, type regedit, and click OK.
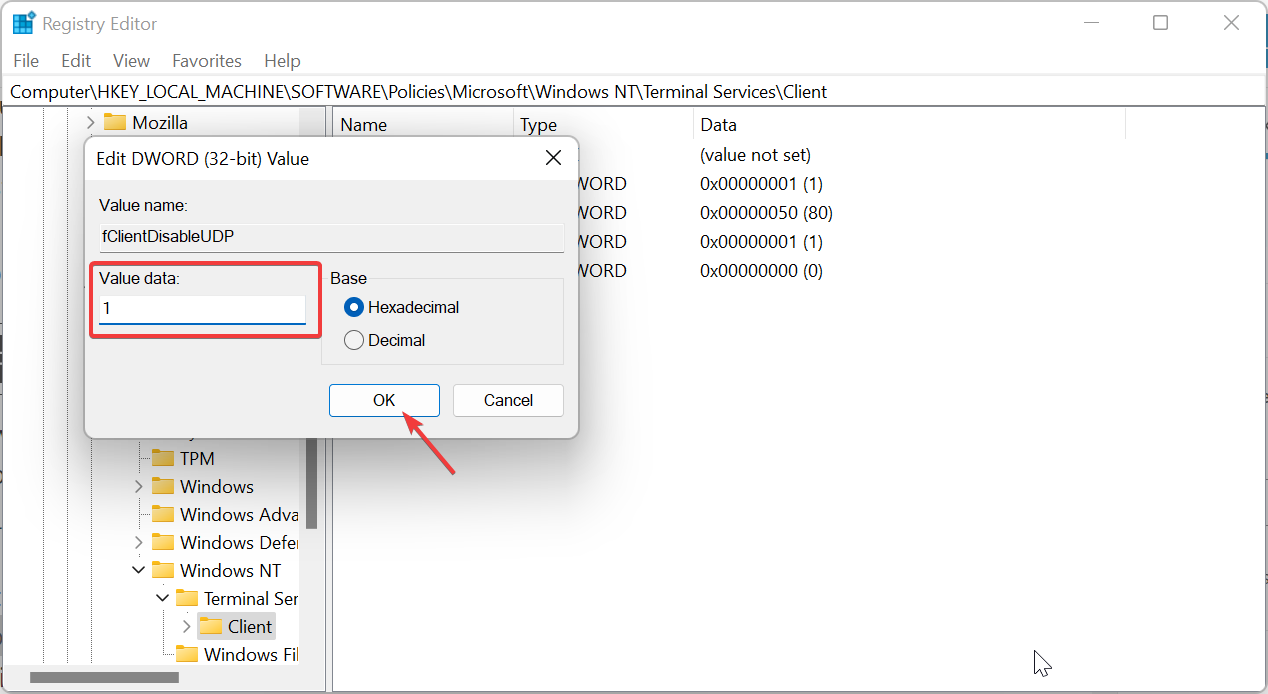
Follow the path below in the left pane: Computer\HKEY_LOCAL_MACHINE\SOFTWARE\Policies\Microsoft\Windows NT\Terminal Services\Client
Now, right-click the Client folder and choose New > DWORD (32-bit) Value.
Type fClientDisableUDP as the name of the new item.
Finally, double-click it, set its Value data to 1 and click the OK button.
If you noticed that the Windows 11 Remote Desktop is not working after installing the 22H2 update, it is because the feature is trying to connect with UDP.
The solution here is to disable UDP by creating a new registry value.
2. Turn off UDP in Group Policy
Press the Windows key + R, type gpedit.msc, and click OK.
Navigate to the path below in the left pane: Computer Configuration > Administration Templates > Windows Components > Remote Desktop Services > Remote Desktop Connection Client
Now, double-click Turn Off UDP On Client in the right pane.
Finally, tick the Enabled radio button and click OK.
This is another excellent solution if the Windows 11 Remote Desktop feature stops working after the 2022 update. With the above steps, the UDP client should be completely disabled and allow your PC to connect.
First, click Start on the Taskbar and select the Settings option.
Click Remote Desktop on the System tab.
Then, toggle the switch for Remote Desktop forward to enable it.
Select the Confirm option on the dialog box that opens.
After enabling this, you will be able to use the Remote Desktop feature, and other PCs will also be able to access your PC remotely.
3.2. Check Remote Assistance is enabled in System Properties
NOTE
Make sure Remote Desktop is enabled on both the remote PC you’re trying to connect to and on the client. Note that you can’t enable that feature via Settings in Windows 11 Home. The remote host PC you’re trying to connect with must have Windows 11 Pro.
Open the search utility by clicking the magnifying glass button on Windows 11’s taskbar.
Type Control Panel within the search tool’s box.
Next, click the View drop-down menu’ and select the Category option.
Select System and Security in the Control Panel.
Then click Allow remote access.
Select the Allow Remote Assistance connections to this computer checkbox if it’s unchecked.
Also, click the Allow remote connections to this computer setting radio button to select it.
Click Apply to save the new settings.
Then press the OK button to exit System Properties.
If the Windows 11 Remote Desktop is still not working after the first two solutions, you need to check if the feature is enabled. You might have mistakenly disabled it in the process of troubleshooting.
4. Check that Remote Desktop Services is enabled and running
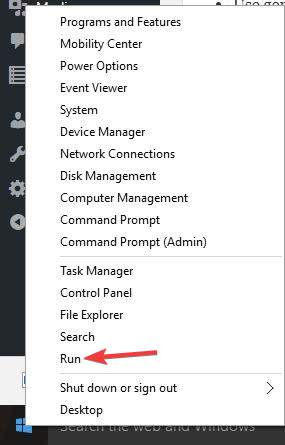
Right-click the Start menu’s taskbar button and select Run to launch that accessory.
Type this Run command within the Open text box: services.msc
Select the OK option.
Then double-click Remote Desktop Services to bring up its properties window.
Select the Automatic option on the Startup type drop-down menu if the service is disabled.
Press the Apply button.
Now, click the Start button and select OK to exit the window.
Repeat steps five to seven for the Remote Desktop Services UserMode Port Redirector service afterward.
Another factor that can stop the Windows 11 Remote Desktop from working is if it is disabled in Services. You need the service to run and startup automatically to enjoy a smooth connection.
5. Allow Remote Desktop through Windows Defender Firewall
Press the Windows key + S, type firewall, and select Windows Defender Firewall.
Then click Allow an app or feature through Windows Defender Firewall on the left side of the Control Panel.
Press the Change settings button.
Select the Private checkbox for Remote Desktop if it’s unchecked.
Thereafter, click OK to exit.
6. Turn on network discovery
Type Control Panel in the taskbar and open it.
Select Network and Internet.
Click on Network and Sharing Center.
Select Change Advanced sharing settings.
Pick toggle on the button next to Network Discovery.
For the RDP feature to work, you must let it pass through your Firewall. Hence, if the Windows 11 Remote Desktop is working or responding on your PC, check if your Windows Defender Firewall is not blocking it.
We have come to the end of this detailed guide. We believe you now have everything to connect to your computer remotely from your comfort zone.
Windows is prone to errors. The frequency of encountering these may have reduced, but some still exist. In the following guide, we will take up the Windows update error – 0x8024a205.
This is generally encountered when you try to update or upgrade Windows, though it’s generally the former. The full error message reads: We couldn’t install this update, but you can try again (0x8024a205). So, let’s find out how you can fix 0x8024a205 in Windows 11.
What causes 0x8024a205 error?
Here are a few reasons you might be getting the install error 0x8024a205:
Device not compatible – Many users reported 0x8024a205 on Surface laptops, particularly because the SSD was not compatible.
Not enough space – Updates require certain free storage to download, so you may need to check that and free up disk space on the computer.
Issues with Windows – If the Windows Update Components or the system files are corrupt, you might come across update errors from time to time.
How can I fix 0x8024a205 error?
Before we head to the slightly intricate solutions, here are a few quick ones you can try:
Restart the computer and check whether you still receive the 0x8024a205 error in Windows.
Make sure your computer has enough free space, especially the C: drive where the Windows Updates are downloaded. You can use Disk Cleanup to clear storage space.
Check if your device is compatible with the update. A quick way to do that is to search the web. In case the device is not compatible, others using it, too, would be getting the same error. To confirm the same, you can also contact Microsoft Support.
If none of the work, head to the solutions listed next.
1. Pause and unpause Windows update
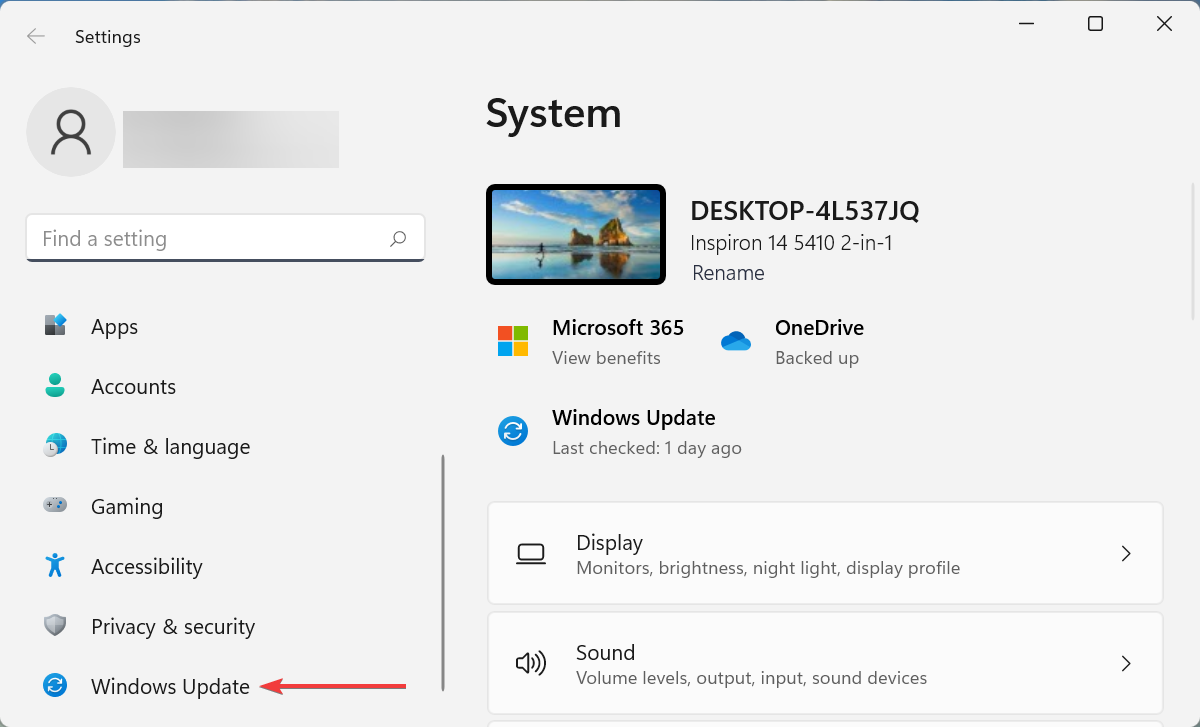
Press Windows + I to launch the Settings app, and select Windows Update from the tabs listed in the navigation pane on the left.
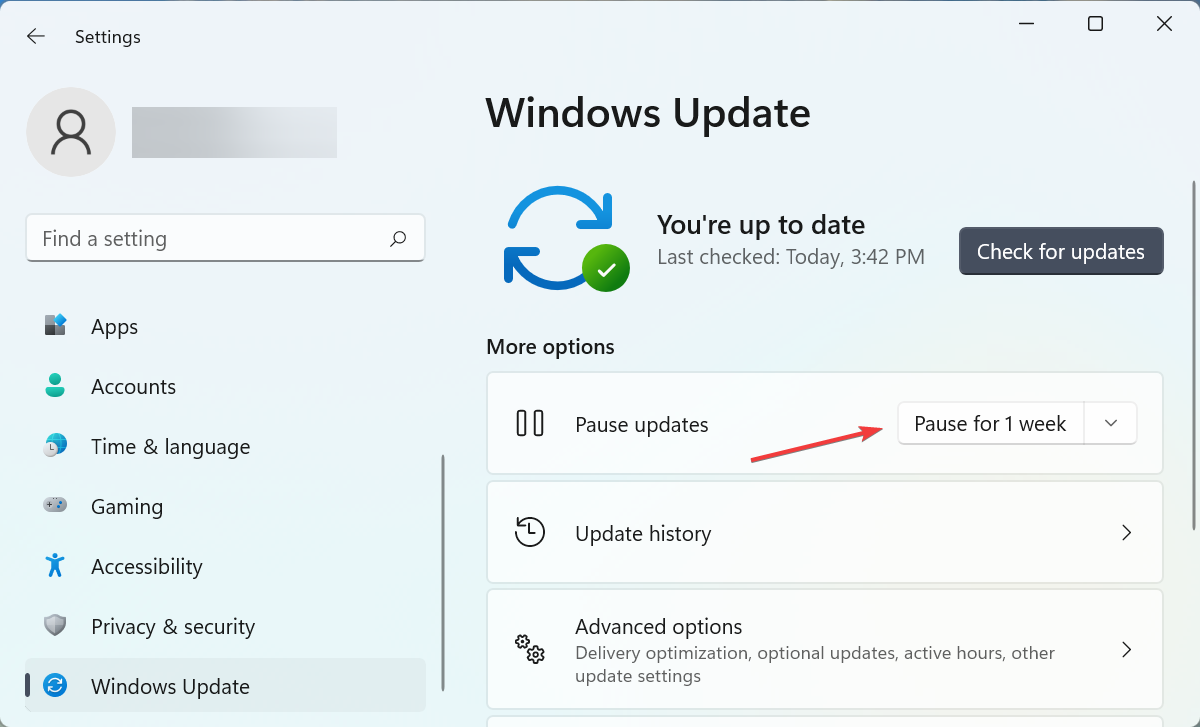
Next, click on the Pause for 1 week button.
Once done, restart the computer for the changes to come into effect.
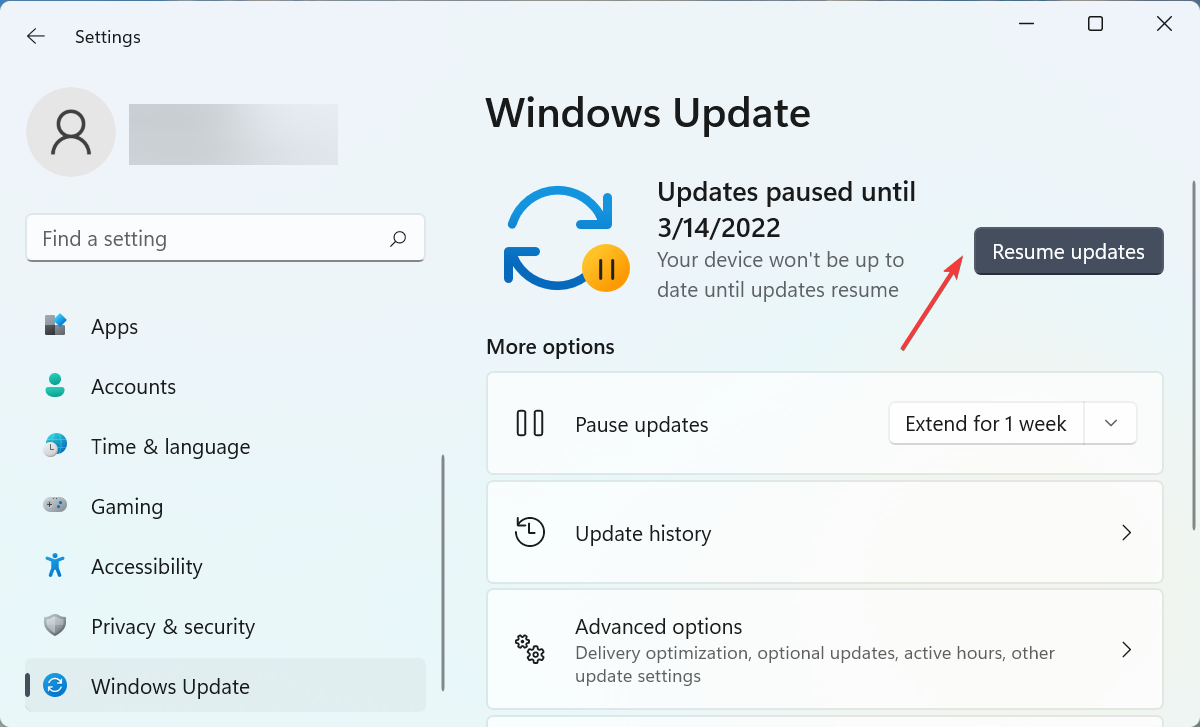
Now, again navigate to the Windows Update tab, and click on the Resume updates button.
Finally, check for updates and try installing it again.
Oftentimes, it’s a minor bug that’s causing the Windows 11 update error code 0x8024a205, and simply pausing and unpausing it should fix the problem.
2. Run the Windows Update troubleshooter
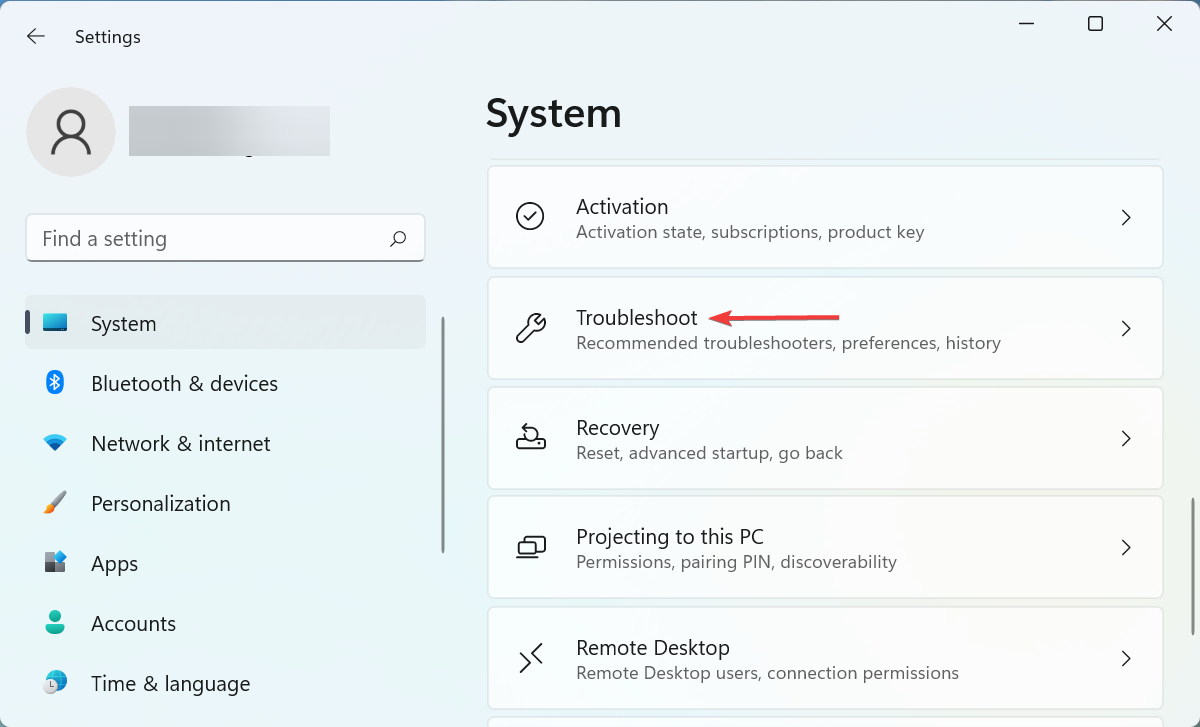
Press Windows + I to launch the Settings app, and click on Troubleshoot on the right in the System tab.
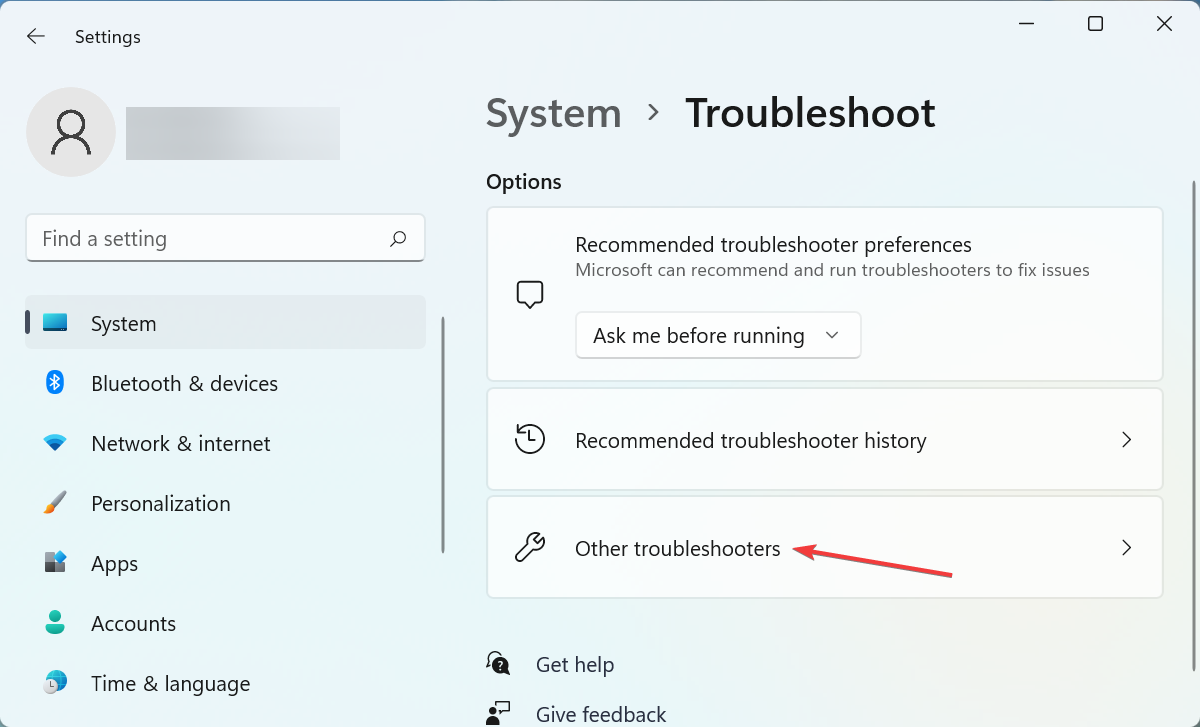
Click on Other troubleshooters from the options listed here.
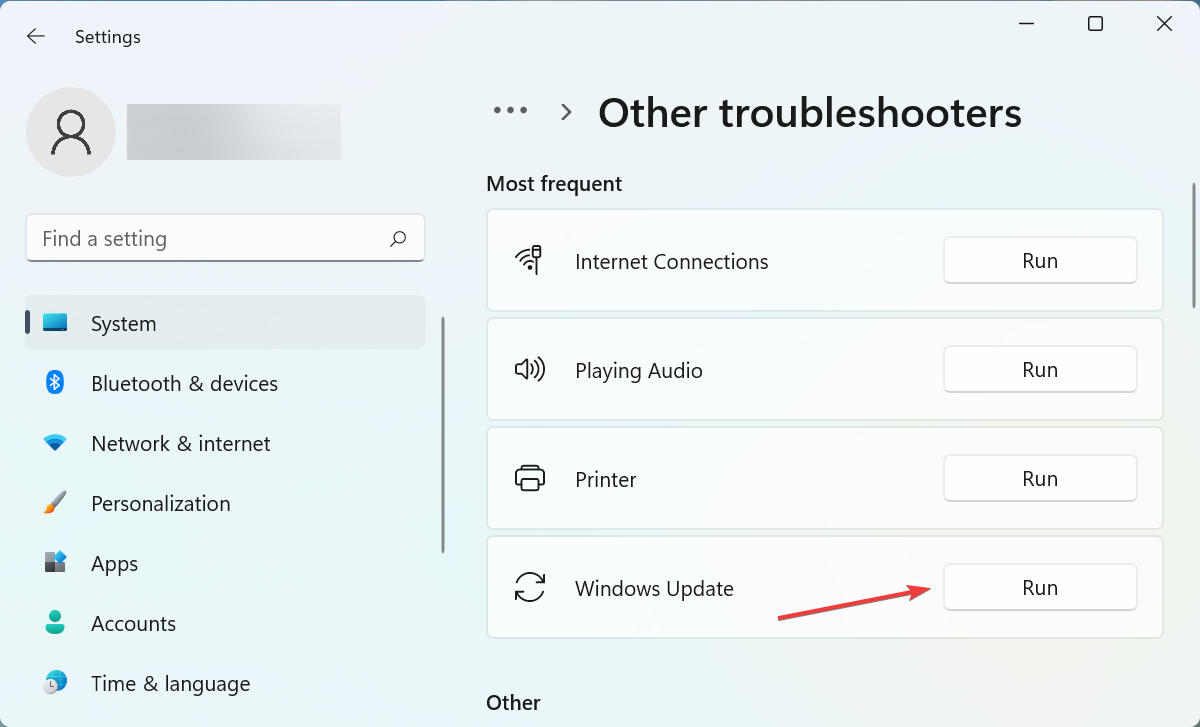
Next, locate the Windows Update troubleshooter, and click on the Run button next to it.
Now, follow the on-screen instructions and choose the necessary response when prompted to complete the troubleshooting process.
The built-in troubleshooters are one of the quickest ways to eliminate a plethora of issues. So it’s recommended that you always run the relevant troubleshooter to automatically identify and fix problems, including the Windows 11 update error 0x8024a205.
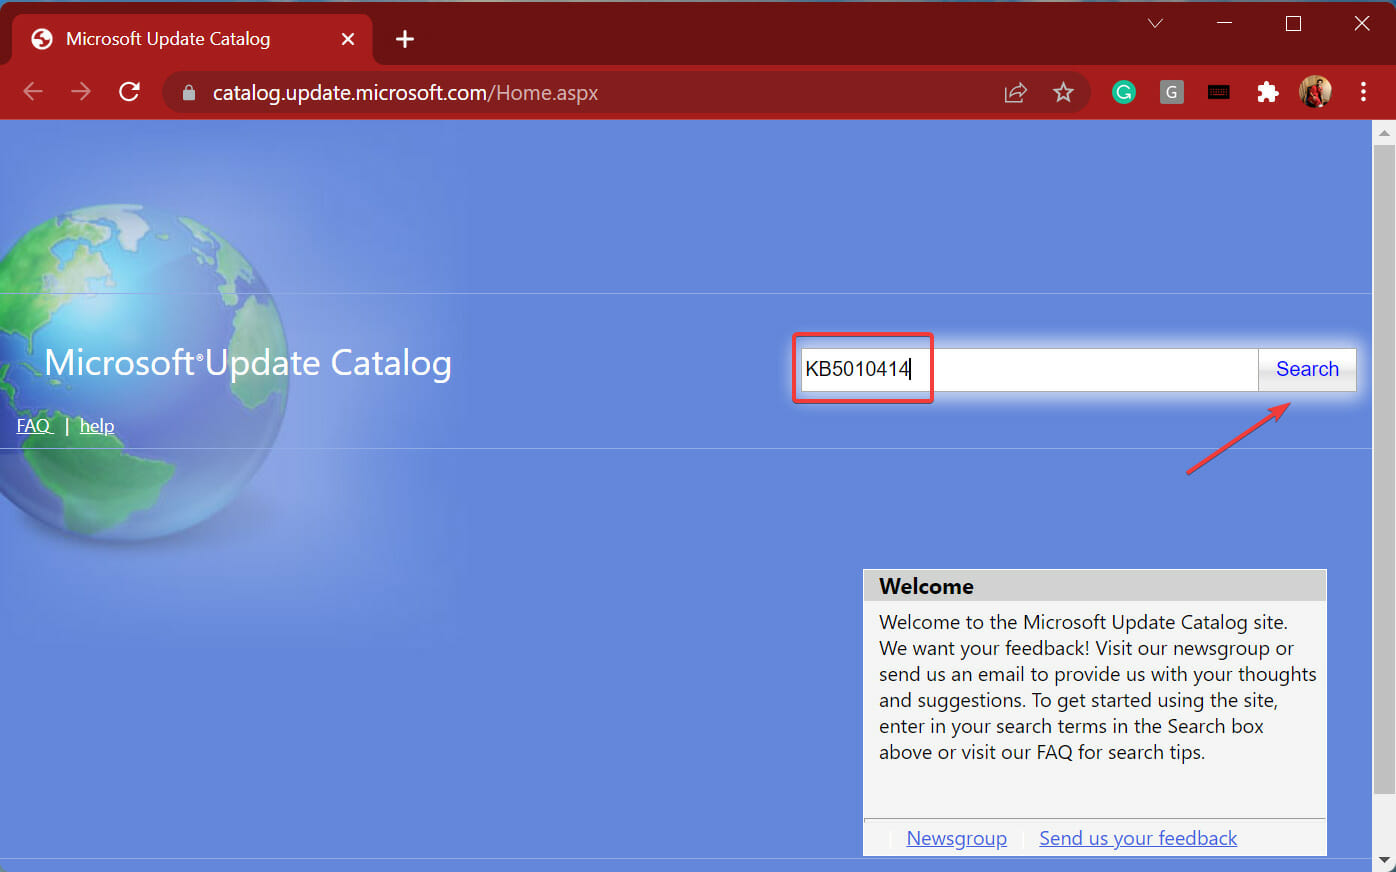
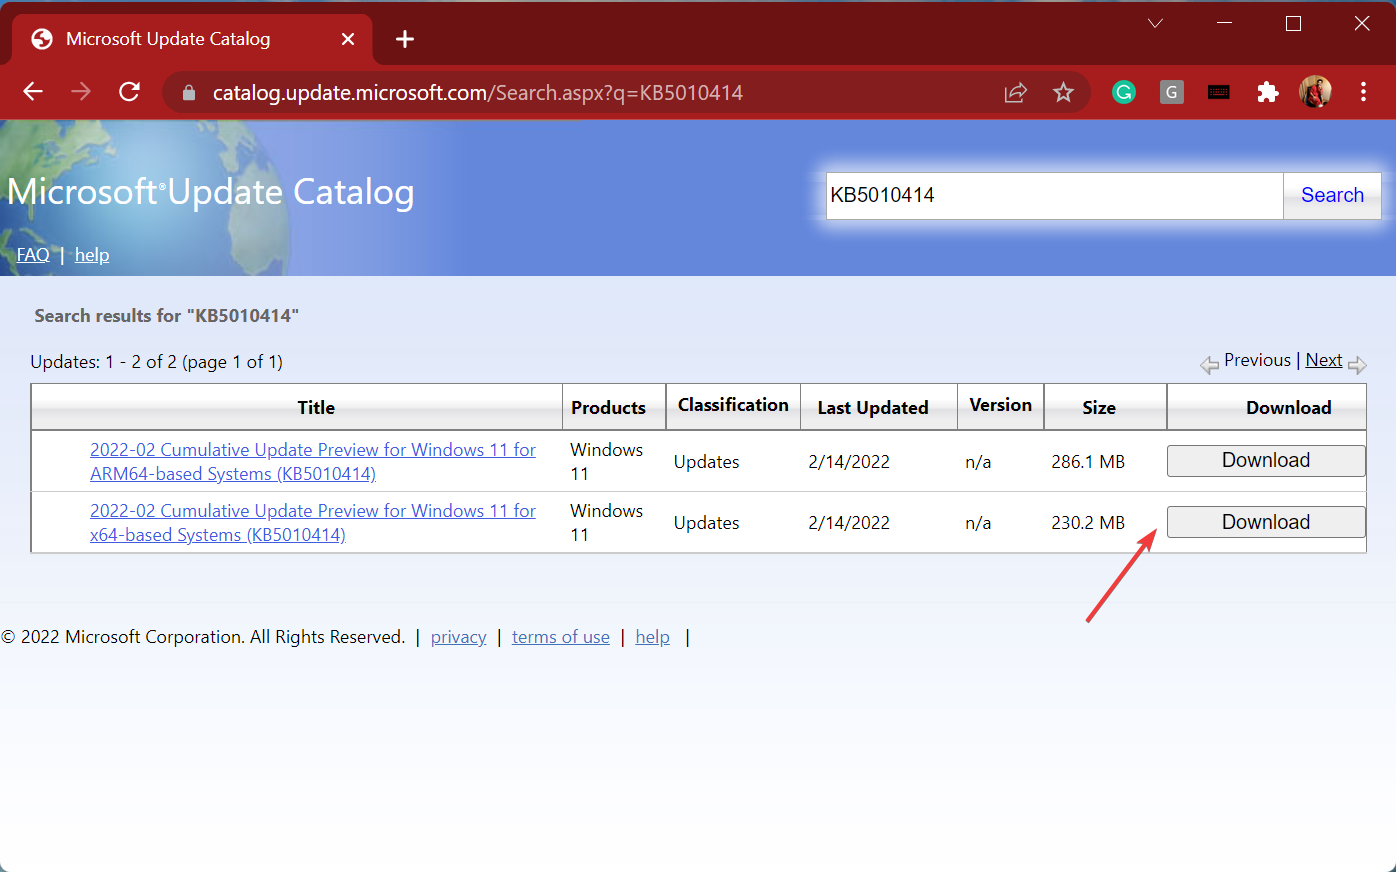
Click on the Download button next to the relevant update.
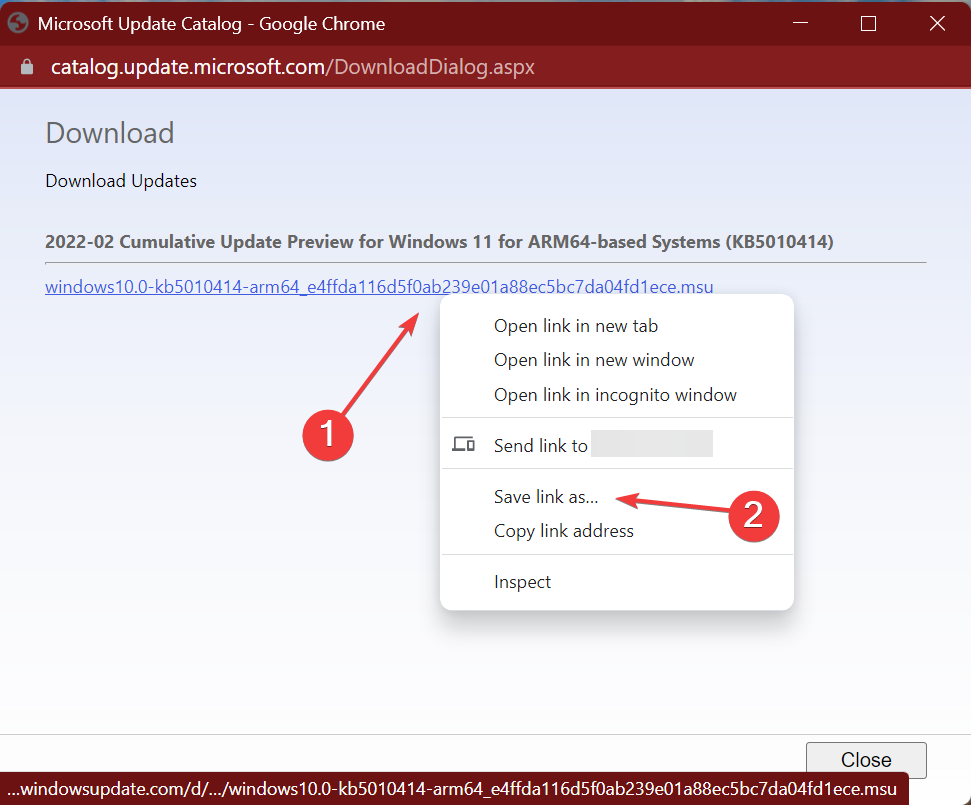
Now, right-click on the link, and select Save link as from the context menu.
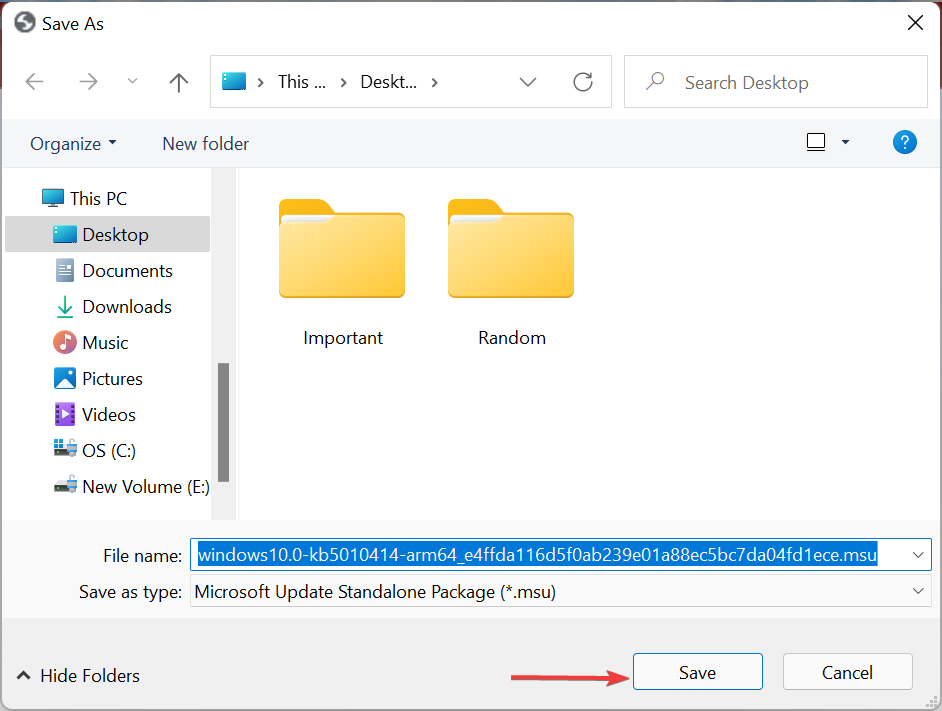
Choose the desired location for the update, and click on Save.
If required, approve the download.
Once the update is downloaded, double-click on it to launch the installer, and follow the on-screen instructions to complete the process.
If you can’t get the update to install automatically, manually download it from Microsoft Update Catalog and then install it on the system. But sometimes, this, too, can throw errors, and that’s when an in-place upgrade comes to the rescue.
4. Perform an in-place upgrade
Go to Microsoft’s official website, and download the ISO file for Windows 11. You may have to choose a few options before securing the download link. In the case of Windows 10, you can also get the tool from the official download page.
Now, launch the ISO file, and click on Open in the prompt.
Once you have the Windows files open, run setup.exe.
Click on Next to proceed.
Now, click Accept to agree to the license terms.
Finally, verify whether the setup lists Keep personal files are apps, and click on Install to continue.
When nothing works, an in-place upgrade usually does the trick and fixes the Windows update error 0x8024a205, irrespective of whether it’s encountered while updating or upgrading the OS.
In case you frequently face issues while updating Windows, use a reliable update repair tool and get rid of these errors for good.
Tell us which fix worked and the update for which you encountered the 0x8024a205 error code, in the comments section below.
With Windows 11’s official launch, most users had some important questions. What are the newest features and what will happen to the old apps that everybody used on a day-to-day basis were some of the most important?
That’s also the case with OneNote and we are here to answer those questions.
Some of the new features for Windows 11 include a complete user interface redesign with a focus on improved user experience, a centered Start menu, and better virtual desktop support.
And because Microsoft is aiming to also improve the overall gaming experience on the new OS, you’ll now find integrated Android apps in the App Store, and Xbox tech for better gaming.
If you want to check them all out, know that Microsoft has released a new OS build and we covered it all.
Now, on the opposite pole, Microsoft also shared details on features that will be removed, and OneNote for Windows 10 is one of them.
Why has Microsoft removed OneNote from Windows 11?
While there is no clear answer to this question, according to Microsoft, there will be many feature deprecations and removals when making the jump to Windows 11.
Features deprecated or removed in Windows 11, as officially revealed (Microsoft)
OneNote is just one of them alongside 3D Viewer, Paint 3D, Cortana, Internet Explorer, and Math Input Panel.
Fortunately, there are ways to enable OneNote in Windows 11 after the upgrade, you just need to follow our quick guide right here.
How can I enable OneNote in Windows 11?
1. Install it from Microsoft Store
Click on the Microsoft Store icon from the taskbar to launch the app.
Now go to the search tab, type OneNote and hit Enter.
Select OneNote from the list of results.
Click on the Freebutton to start the download.
Use your Microsoft account to log in and start using the app.
2. Download and install OneNote from the official website
Allow Microsoft to make changes to your device by selecting Yes on the pop-up.
The setup will automatically detect what version of Microsoft 365 you’re running on and match your OneNote installation to the correct version.
Wait until the installation is complete as it might take a while.
After the setup is complete, you can log in with your Microsoft account and start using OneNote.
There you have it, two simple ways to install OneNote on your device even after the upgrade to Windows 11.
What are some of OneNote’s best features?
While you can think of OneNote like a normal digital notebook, it can surprise you as it has way more options than you can imagine.
The app doesn’t expire, so you can use OneNote for as long as you like on any device as long as you have a Microsoft account.
This app is ideal for keeping all of your notes, research, plans, and information regarding your life at home, your life at work, or at school in one place.
Want to keep up with your renovations and share your ideas? Add images, comments, drawings, then easily share them and you can all view and contribute at the same time.
Another one of its best features is its ability to back up all your notes in the cloud, even if your device is not connected to the Internet.
You’ll just need to sync your notebook with OneDrive before going offline. Also, if at any time you lose your Wi-Fi connection, know that any pending changes will sync as soon as you’re back online.
OneNote also lets you create notes using just your voice. Take advantage of Dictation while signed in to your Microsoft account on a mic-enabled device and create drafts, notes, or comments.
Even though you’ll have to enable OneNote on your device once you make the switch to the new Windows 11, it is definitely worth it as this app will make your everyday life much easier.
That’s the case with many of Windows 10’s apps, but Microsoft’s newest OS brings a lot of other interesting features that aim to improve your productivity.
Feel free to use the comments section below if you have any further questions regarding OneNote or other apps you don’t know how to enable on the new OS.
Changing screen brightness on Windows 11 is one of the most common adjustments users make when trying to reduce eye strain, save battery, or enhance display visibility. No matter if you’re using a slider, shortcut, or the settings menu, this guide walks you through every method to adjust brightness effectively on your laptop screen or external monitor.
All Methods to Adjust Screen Brightness in Windows 11
Replace the number with the desired brightness level
These commands only work for internal laptop displays
FAQs
How do I reduce brightness using keyboard in Windows 11?
Press Fn + Brightness keys (usually F1–F12 with sun icons). On some laptops, it might be Fn + F2 or Fn + F3.
Why is the brightness slider missing in Windows?
It usually happens when display drivers are outdated or missing. Try updating your display adapter through Device Manager. Check out this more in-depth guide for step-by-step instructions if your brightness option is missing in Windows.
Can I adjust brightness on an external monitor?
Yes, but not through Windows settings. Use physical buttons, GPU control panels, or manufacturer software like Dell Display Manager.
Is there a brightness shortcut in Windows 11?
Yes. Press Windows + A to open Quick Settings, then move the brightness slider.
How to automatically adjust brightness based on light?
Go to Settings > System > Display > Brightness, then enable Change brightness automatically when lighting changes. This requires a light sensor.
Wrapping up
Adjusting screen brightness in Windows 11 is key to making your display easier on the eyes and saving battery life. You can change brightness using the settings menu, quick brightness slider, keyboard keys, or monitor buttons.
If the slider is missing or doesn’t work, updating display drivers or using your GPU’s control panel can fix the problem. Auto brightness settings can also be turned on or off depending on your needs. With these screen brightness control methods, you can easily find what works best for you.
Event ID 41 is a PC error reported on all recent iterations of the OS. That issue is also known as the Kernel-Power 41 error. When that error occurs, Windows randomly restarts without properly shutting down first.
Event Viewer logs the error as critical, and the description reads, The system has rebooted without cleanly shutting down first. Some users have also reported it as a Blue Screen error. So, let’s find out how you can fix Event ID 41 BugcheckCode 0 in Windows.
What is Event ID 41 Task Category 63?
The Event ID 41 Category 63 usually has to do with the power supply or a malfunctioning component and causes the screen to go either wholly black or white. For most users, this happens when running resource-intensive tasks or gaming.
Here are a few reasons you might be getting the error:
Faulty power supply – In most cases, it was the faulty power supply that triggered the error. So, you will have to check for that.
Overclocking – When the PC is overclocked, you might encounter issues, including BSOD errors and Event ID 41.
Corrupt or outdated drivers – Corrupt, incompatible, or outdated drivers are just as likely to cause the error, as reported by several users.
Issues with the RAM – Another reason you may get the error is a faulty RAM module or when it’s not connected properly.
How can I fix Event ID 41?
Before we head to the slightly complex solutions, here are a few quick ones that did the trick for some users:
Make sure you are running the latest version of Windows. Oftentimes, the error is caused by a bug, and a patch is later released for it, so it’s important that you update the OS.
Plug the computer directly into a power socket instead of a surge protector or a hub of some kind.
Although strange, users reported that the error didn’t appear when they first plugged in the cable and then turned on the laptop. Remember, this is a workaround and won’t really eliminate the underlying cause.
In case you have overclocked the PC, remove all such settings right away and uninstall the app used for overclocking, if any.
If none of the solutions work, the ones listed next should.
1. Disable Fast Startup
Press Windows + S to open Search, type Control Panel in the text field, and click on the relevant search result.
Click on System and Security.
Click on Change what the power buttons do under Power Options.
Next, click on Change settings that are currently unavailable.
Untick the checkbox for Turn on fast startup (recommended) and click on Save changes.
Also, if there’s an option for Fast Startup or Fast Boot in the BIOS, make sure to disable it as well.
Many users managed to eliminate Event ID 41 by simply disabling Fast Startup, a feature meant to quickly load the OS when the computer is turned on. So try it, and if things don’t work out, head to the next solution.
2. Update the drivers
Press Windows + R to open Run, type devmgmt.msc in the text field, and hit Enter.
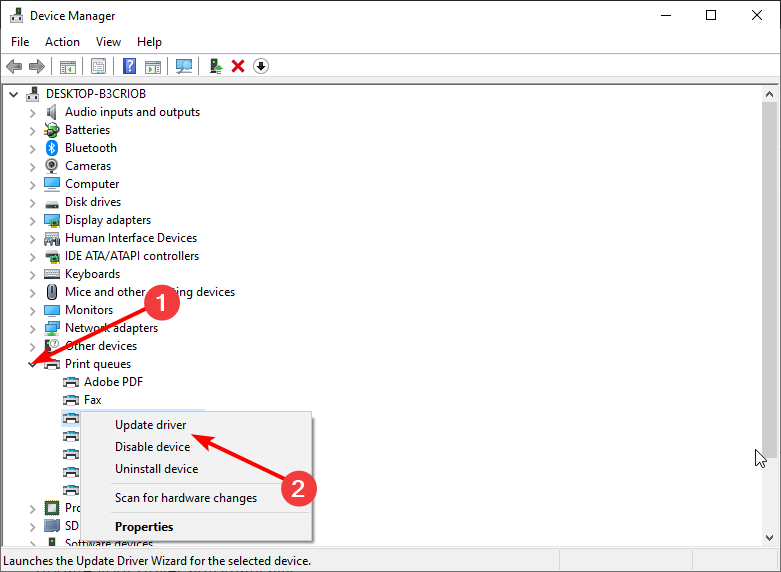
Expand Display adapters, right-click on the video card, and choose Update driver.
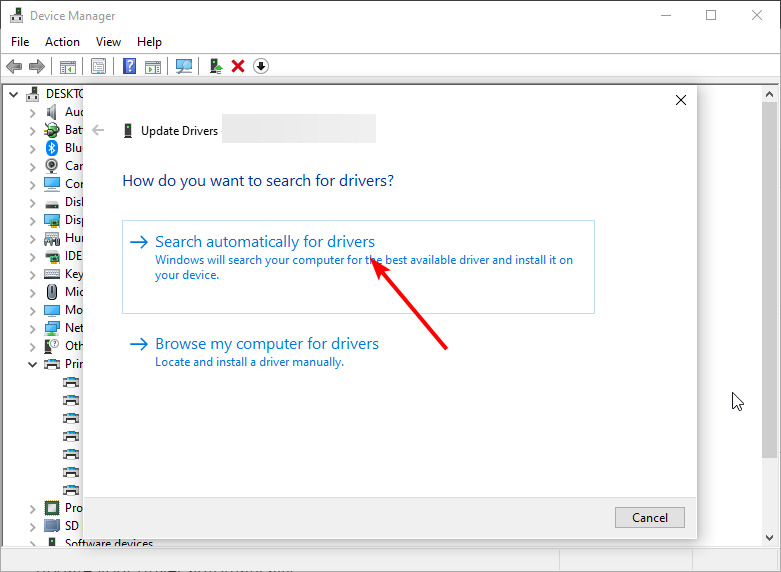
Now, select Search automatically for drivers and wait for Windows to update it.
If you want a quicker solution for updating your drivers, you can try a specialized tool that can do this automatically by scanning your PC for outdated drivers and finding the latest updates from its vault.
Press Windows + R to open Run, type control panel, and then click OK.
Click on System and Security.
Now, click on Power Options.
Select the High Performance power plan here, and restart the computer.
Switching to a performance-oriented power plan fixed Event ID 41 for many. Also, instead of High Performance, you could also enable the Ultimate Performance power plan for even better results.
If the solutions listed previously didn’t work, it’s likely hardware at fault, and we start with the RAM. First, make sure all the RAM modules are properly seated. Also, you can run the PC using one module at a time to identify the faulty one.
Besides, run the Windows Memory Diagnostic, a built-in tool that scans the RAM for issues and fixes most of these. Though, you can’t rely solely on it to get things up and running.
That’s why we recommend users go with MemTest86+, an open-source tool that runs a wide range of tests on the memory, identifies the issue, and eliminates it. If the tool comes up with a clean report, you can be certain the RAM is not triggering Event ID 41.
5. Get the hardware checked
The last option is to get the hardware checked by a professional, including the CPU, motherboard, and PSU. These three were usually found to be malfunctioning and led to Event ID 41. Do not forget to get connections and capacitors inspected as well.
If any of the items turn out to be faulty, first replace them with a spare product, and only if it works out, buy a new one.
With the Event ID 41 fixed by now, your computer won’t crash anymore or hang with a black screen in Windows for extended periods.
In this guide, let us explore the best antivirus for Windows 10.
The digital world is becoming increasingly part of our lives, but that also means that cyber threats are just as abundant.
Malware is evolving increasingly, and antivirus tools are keeping up, constantly updating their libraries to recognize as many new threats as possible.
If your computer, phone, or tablet has an operating system update that you haven’t yet installed, don’t put it off. Additionally, you should maintain any antivirus software up to date.
That being said, let us now explore some fundamental benefits.
Does Windows 10 2022 need antivirus?
Using a computer without an antivirus is not recommended because while you may get by, there is a higher probability that your computer will be compromised in no time. The dangers associated with such a compromise can not be overstated.
Here are some reasons why you must use an antivirus:
Virus protection and transmission – A significant role of antivirus software is prevention. When a virus is detected, it immediately begins working.
Prevention from data thieves and hackers – Malware and virus programs are often used by hackers to get access to their victim’s computers. Without the user’s awareness, they implant malicious software onto the compromised machine.
Prevents spam and ads – Most infections exploit pop-up advertising as well as malicious websites to infiltrate their victims’ systems. However, an antivirus will guard against this.
Protection from removable devices – Also, if you use USB drives or external storage devices, an antivirus can scan them and ensure they are free from viruses.
Firewall protection from phishing attacks and spyware– Generally speaking, a firewall keeps tabs on every data that enters and leaves your network. When used with antivirus software, firewalls perform a secondary check on any data or files you transmit over the internet.
Now let us explore the best antivirus options you should try.
Antivirus
?Key features
?Security enhancements
ESET Internet Security
Minimal power usage Lightweight antivirus
Gamer Mode Active web-browsing protection Online banking & payment protection
Total AV
Boost up the PC performance Compatibility with Mac, Android, and iOS
Data breach monitoring WebShield for browser protection
Guard.io
Lightweight Chrome extension Install with just a click right into the browser
Real-time protection against any threats Links, emails, and web pages verification before you open them
Bitdefender Antivirus Plus
Cutting-edge lightweight technology
Protection against unauthorized use of your microphone and webcam Anti-theft features for your devices’ protection Premium-class VPN (limited)
Norton Antivirus Plus
Low system impact Frequently updated
Built-in password manager Comes with a built-in VPN
Vipre
Low impact Home and Business subscription plan
Remote employees protection Real-time protection using threat intelligence Data loss prevention
Kaspersky
Light resource usage Works for PC, Mac, and mobile devices
Built-in password manager Transaction protection
Avast Free Antivirus
Limited resource footprint Frequently updated Best antivirus for Windows 10 with a free download
Works silently during gaming and movie-watching sessions Monitors the behavior of individual apps
Avira Antivirus Premium
Uses low resources Tune-up tools
Advanced web & ransomware protection Software and driver patching Built-in VPN
Which antivirus is best for Windows 10 not slowing down?
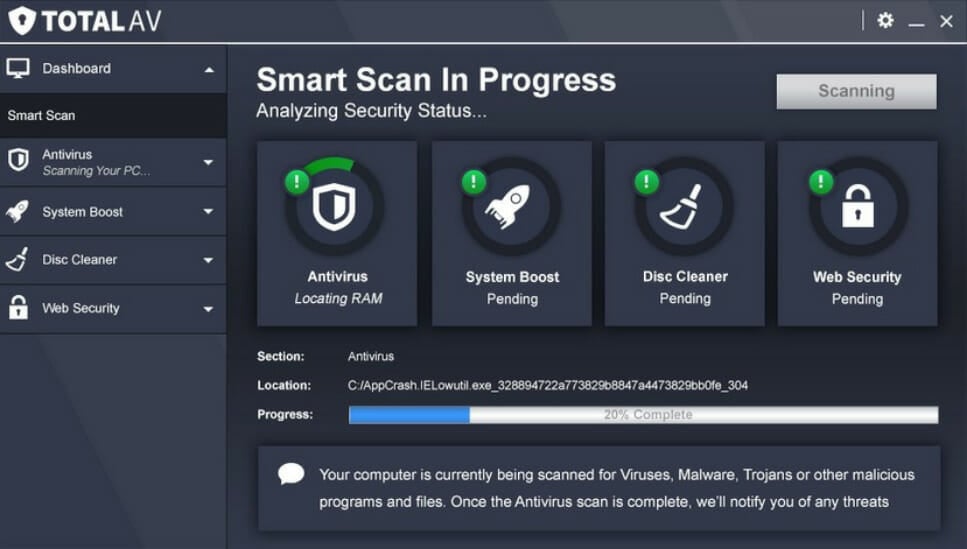
Firstly, Total AV is an award-winning antivirus and security software that protects every aspect of your PC. It offers virus protection, safe web surfing, block tracking cookies, as well as verification for breach attempts. Thus we ranked it as one of the best antivirus for a Windows 10 Home user.
Additionally, you get real-time protection from threats by checking all downloads, installs, and executables for any scripts or viruses.
Furthermore, its bright protection system keeps you safe from ransomware and phishing software that wants to lay hands on your data.
Total AV also provides WebShield in your browser to browse the web safely and securely. Hence, it is a defense against fake, scam, or phishing websites that exploit unknowing users. Also, this means that Total AV lets you take control of the browsing experience for browsers.
Lastly, with a built-in ad blocker for websites and videos, you will never see those annoying ads again.
Here are the perks of using Total AV:
Great real-time protection
WebShield for browser protection
Data breach monitoring
Compatibility with Mac, Android, and iOS
Blocking of tracking cookies
Total AV
A simple solution for a complete package of protection.
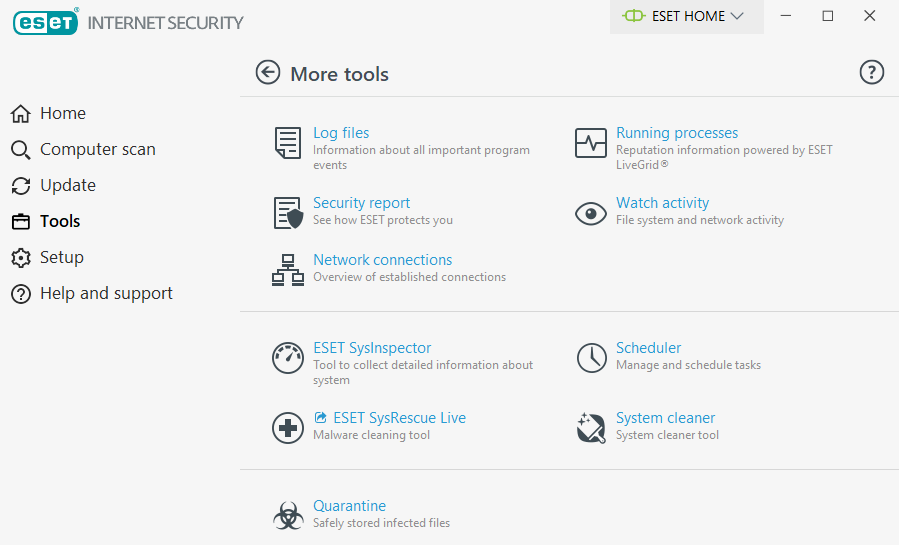
ESET is ranked as one of the best antivirus for Windows 10 in 2022. Their antivirus solutions protect against malware, including viruses, ransomware, worms, as well as spyware.
So, the most modern assaults and harmful activity on your PC are no match for LiveGuard from ESET Internet Security, which integrates well in 2022.
Additionally, ESET offers military-grade encryption for all your passcodes when your device is lost or destroyed, so nothing leaks or gets stolen.
It is critical to prevent unauthorized access and exploitation of your data and camera, as well as to secure online payments and safeguard your online experience. This is where ESET shines; therefore, your virtual identity is always shielded.
Here are the perks of using Internet Security:
Install & forget the antivirus model
Active web-browsing protection
Minimal power usage
Ransomware and spyware shield
Gamer Mode
Online banking & payment protection
Suitable for Windows, macOS, and Linux
ESET Internet Security
A lightweight antivirus that offers just the protection all your devices need against the latest malware.
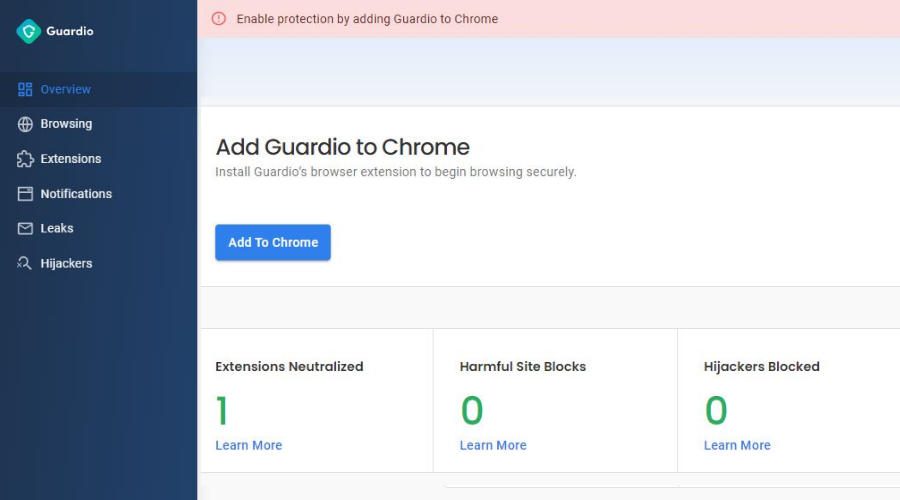
Firstly, Guard.io is a lightweight chrome extension that is one of the best antivirus for Windows 10. It’s built to create the safest way of browsing the internet.
Additionally, since it takes seconds to add to your browser, it provides immediate online security. Your browsing experience will be smoother with no annoying pop-ups and scam notifications.
Also, harmful sites will be blocked immediately, while advanced anti-phishing protection will prevent all attempts to steal your data.
Furthermore, Guardio acts as your online bodyguard. Hence, its machine learning integrations, cloud infrastructure, and security research bring state-of-the-art web browsing protection.
Lastly, you can keep your whole organization safe by having unlimited licenses within one subscription plan.
Here are the perks of using Guard.io:
Install with just a click right into the browser
Real-time protection against any threats
Malicious site blocking
Links, emails, and web pages verification before you open them
Bitdefenderhas an excellent antivirus technology approach proven to be a cutting-edge solution on Windows, even in 2022. You will soon see why we ranked it as the best antivirus for Windows 10 that doesn’t slow down your computer.
It’s an award-winning antivirus developer that has garnered wide appraisal over the years. This is thanks to its efficiency in fighting off malware balanced with a low system impact.
Also, Bitdefender antivirus products are an entire security suite filled with tools that make using your PC a worry-free experience.
Furthermore, the Bitdefender family comprises five products. These are Bitdefender Antivirus Plus, Bitdefender Internet Security, Bitdefender Total Security, Bitdefender Family Pack, and Bitdefender Premium Security.
These five entries share one common goal: they hold your PC’s security as their top priority.
Finally, those interested in Mobile security should also know that Bitdefender hasn’t forgotten about them, providing them with Bitdefender Mobile Security (Available for Android and iOS), a product just for them.
Here are the perks of using Bitdefender Antivirus Plus:
Protection against unauthorized use of your microphone and webcam
A single subscription gives you protection for multiple devices
You gain real-time protection against cyber-threats
Anti-theft features for your devices’ protection
You are provided with a premium-class VPN (limited)
Gives you anonymity on public Wi-Fi
Built-in browser protection
Built-in password manager
Bitdefender Antivirus Plus
Get the best antivirus tool of the year 2022, now available at a discount for a limited time!
Nortondoes a fantastic job updating its virus databases and is one of the best antivirus apps for Windows 10.
Also, it works silently in the background, having minimum impact on your system’s resources.
What distinguishes Norton is the multi-layered approach to protecting your device from assaults by identifying hazardous files, preventing the download, and removing viruses or malware such as worms and trojan viruses.
Email scanning is essential for protecting against malicious emails. So, Norton Antivirus checks outgoing and incoming emails to guarantee that no potentially harmful emails are sent or downloaded.
Additionally, you receive up to 2GB of cloud backup space to save and defend essential files and documents from hard disk failure and hardware theft.
The drawback of Norton is that it is pricey per device. However, it also provides excellent performance when gaming in silent mode.
Here are the perks of using Norton antivirus products:
Efficient real-time protection
Built-in password manager
Comes with a built-in VPN
Frequently updated
Low system impact
Norton AntiVirus Plus
Multi-layered, smart encryption helps safeguard your devices from arising from various malware threats.
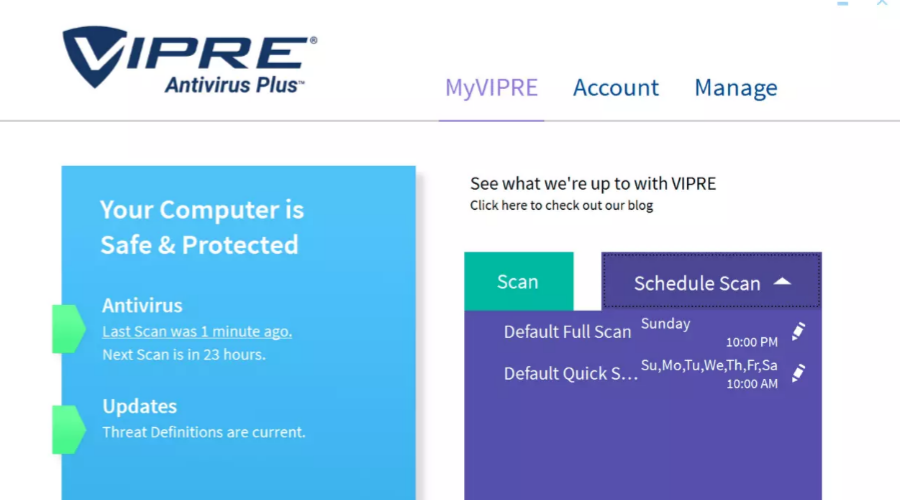
Vipre is among the best antivirus apps for Windows 10 for every aspect of your PC and online surfing. It is excellent for both home and business use.
Also, with award-winning endpoint protection, email security, and data loss prevention, Vipre is one of the industry leaders. It creates security layers from every possible angle to ensure your data is safe.
Additionally, the anti-malware, anti-phishing, and smart email verification protect all online activities from threats.
Furthermore, you will experience web browsing without ads, unnecessary notifications, and spam pop-ups for the time being. Vipre works to create the best user experience.
Also, Vipre has unparalleled engine systems for the business side that give you complete insights into your security strengths and weaknesses and deliver ways to improve them.
No matter how big your organization is, data security is critical. So, avoid data breaches with Vipre’s patch management, ransomware protection, and endpoint malware protection.
Since your employees receive hundreds of emails daily, a layer of security is essential. Hence, VIPRE Email Security solutions ensure that all inbound messages are scanned for suspicious content.
Here are the perks of usingVipre:
Data loss prevention
Email verification before opening
Prevention of sending emails to the wrong person
Malware, ransomware, phishing protection
Home and business subscription plan
Real-time protection using threat intelligence
Remote employees protection
Vipre
Keep your business protected and your email secured.
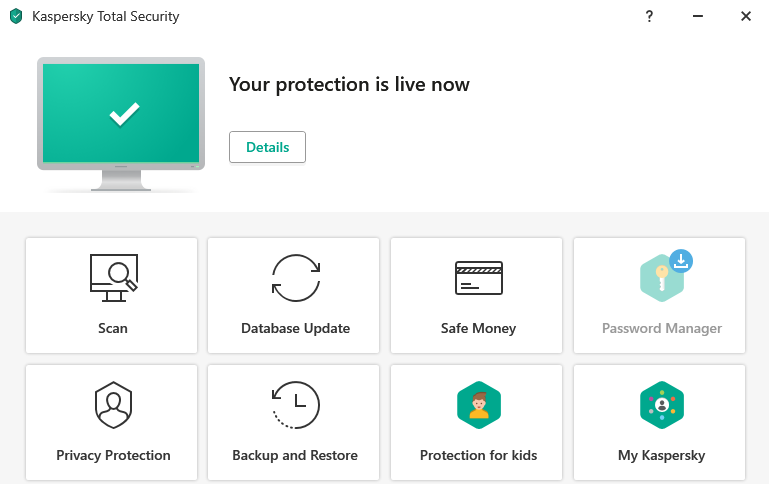
Kaspersky Antivirus is one of the best antivirus apps for Windows 10. It is an anti-malware tool with a long history in the industry.
This software tool has evolved for some time now, providing anti-malware solutions for home and much larger business environments, each tool being adapted specifically for its job.
Kaspersky’s antivirus disinfection feature may be disappointing. When a file becomes infected with a virus, most antivirus programs delete the entire file; however, Kaspersky does not.
This may be troublesome in the future because of the clutter on your PC if the corrupted file is not completely removed.
However, on the bright side, Kaspersky was once used to uncover a kind of malware called MiniDuke.
According to a Kaspersky specialist in spy gear examination, MiniDuke hails from a school of modern espionage software created for snooping.
So, it is useful if you work remotely and suspect someone is spying on you and intends to steal your work.
Get a year-long license, and you never have to worry about malware regarding your home and business.
Lastly, among all its strengths and weaknesses, Kasperky prides itself on its products’ transparency and efficiency.
Here are the perks of using Kaspersky:
Easy-to-use
Light resource usage
Transaction protection
Built-in password manager
Works for PC, Mac, and mobile devices
Kaspersky
Kaspersky uses advanced monitoring systems to detect both known and unknown harmful spyware.
Firstly, This antivirus tool is one of the best for Windows 10.
First, we love the Behavior Shield. With this function, Avast monitors the behavior of individual apps on a computer to counter anything suspicious.
Also, Avast Omni, Premium Security, and Free Antivirus have CyberCapture, which automatically detects questionable files and sends them to the cloud for review.
Additionally, the free version may assist with password management, browser cleansing, and network security. It also has a Do Not Disturb mode, preventing popups when viewing movies or playing games.
However, the downside is that it has a lousy track record for detecting and eradicating malware, spyware, and trojans.
Despite its excellent antivirus protection, we would not rely on Avast free antivirus since we require continuous protection against additional dangers.
Finally, you get what you pay for, and upgrading to the premium version will unlock this tool’s full potential.
Here are the perks of using Avast Free Antivirus:
Frequently updated
Limited resource footprint
Efficient virus removal
Works silently during gaming and movie-watching sessions
Avast Free Antivirus
Avast scores first in malware blocking and anti-phishing testing and scanning the network.
Avira is one of the best antivirus apps for Windows 10. The developer has improved the software significantly over the past year to be competitive enough.
As such, the Avira security suite now includes several products, among which three stand out.
Avira provides a free solution with the basics, a traditional antivirus, and a premium product: Free Security, Internet Security, and Prime.
Additionally, Avira Free Security can detect and prevent emerging threats and zero-day exploits.
Also, you receive several privacy and performance utilities, including a VPN and password manager, driver updates, and memory optimization.
Lastly, Avira’s disadvantage is that it consumes more resources than its competitors. As a result, this may not be ideal for you if you have a PC that quickly drains its battery.
Here are the perks of using Avira:
Advanced web & ransomware protection
Premium tune-up tools
Built-in VPN
Software and driver patching
VIP customer support
Avira Antivirus
Best free antivirus software with enticing upgrade options if you want better protection.
That concludes our list of the best antivirus tools for Windows 10. We will update the list once more information is uncovered to provide you with the most updated and relevant information.
Firefox is a popular browser for the Windows platform. If you’re using it to access your IAS (Microsft Security and Acceleration Server) or Intranet web or Sharepoint site, the browser will use the saved credentials to log the users.
However, some reported that the Firefox browser keeps asking for the password despite having the login credentials saved. This is a known behavior and can occur due to many reasons.
Here are a couple of troubleshooting tips to fix this error in Firefox.
Why does Firefox keep asking for password?
1. Try a different browser
The most straightforward solution is usually the best one: maybe the problem is in Firefox itself and an alternative browser would never run into a similar issue.
Let us introduce you to fresh blood. With an abundance of privacy and security tools, Chromium-based Opera One is definitely something you shouldn’t sleep on.
Just make sure to enable the privacy level that suits you the best, and stay anonymous online. Activate the built-in VPN to hide your IP and avoid geo-restrictions or dirty ISP’s bandwidth throttling.
To further protect your online identity and data, Opera One also delivers an integrated adblocker to keep invisible trackers at bay and prevent you from being targeted by tedious advertisers.
Needless to say that this browser is as powerful as it is versatile, offering countless customization options in terms of functions, plugin and apps integrations, and design.
Let’s quickly look at its key features:
It also comes with support for VR Players, standard security protocols
Instant search and integrated ad-blocker
New readers, battery saver mode, currency unit, and time zone converters, etc.
Built-in AI and modular AI-ready design
Speed tab to further accelerate your workflows and more
Opera One
Avoid encountering the inline PDF error in the long run by using this capable and fast browser.
In the address bar type the following and hit enter: about:config
Click on I accept the risk! button to proceed.
In the search bar, type network.negotiate.
Under Preference Name,network.negotiate-auth.allow-proxies is set to True.
To fix the error, you need to set it to false.
Double-click on network.negotiate-auth.allow-proxies to change the value to False.
Quit and relaunch Firefox.
Try to connect to the ISA server and check if it still asking for the password.
Setting network.negotiate-auth.allow-proxies from true to false may seem counterintuitive but to make it work with ISA proxy, you need to set it to False.
3. Enable AutoLogin
Launch Firefox.
In the address bar type the following and hit enter: About:config
Search for Signon.autologin.proxy.
Signon.autologin.proxy is by default set to False.
Double-click on Signon.autologin.proxy and the value will change to True.
Quit and relaunch Firefox. Try to open the website again and enter the login credentials. Once saved, Firefox should stop asking for the login details again.
Many readers reported that Chrome keeps opening new windows instead of tabs every time they click. There are multiple reasons for this: interfering extensions, hardware problems, or even malware.
Let’s take a look at what you have to do to fix this issue:
How do I stop Chrome from opening new tabs?
1. Adjust your Search settings
Type any website in the address bar and press enter. Chrome will open a list of search results.
On top of the search results, click on the Settings bar. A drop-down menu will open with a list of menu options.
Click Search settings. You will be directed to a page with search filters.
Scroll down to the setting that says Where results open, Open each selected result in a new browser window.
Uncheck the box and click Save. Chrome will now open each result in the same tab unless specified otherwise.
2. Clear cookies and cache
Click on the three dots and select Settings.
Navigate to Privacy and security and click on Clear browsing data.
Choose a time range (e.g., All time) and check the boxes for Cookies and other site data and Cached images and files.
Click Clear data.
3. Reinstall Chrome
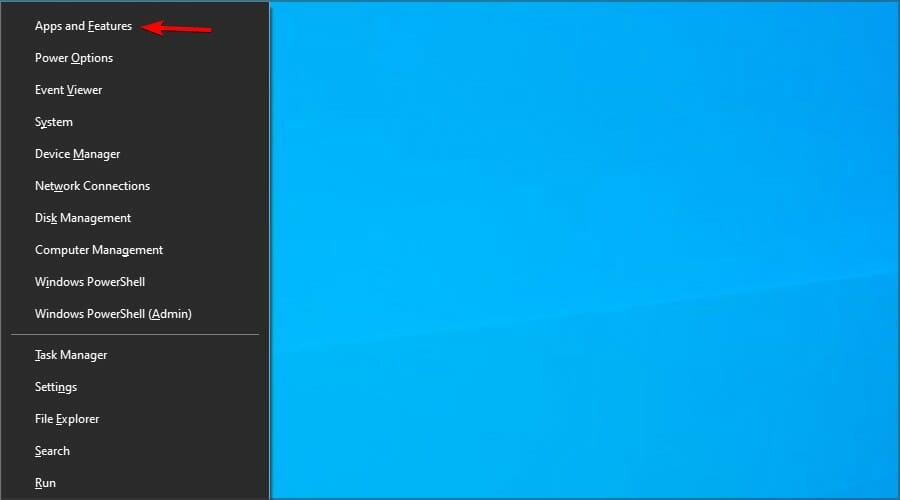
Press Windows key + X and choose Apps and features.
Select Chrome on the list.
Now click Uninstall.
Wait for the process to finish and then install Chrome again.
4. Remove PUP, malware, pop-ups, and ads from Chrome
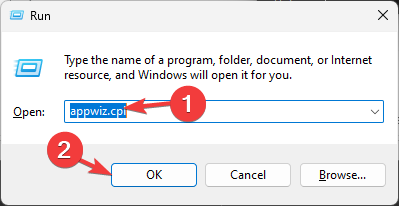
Press Windows key + R and enter appwiz.cpl.
Locate any suspicious applications that you don’t remember installing.
Double-click them to remove them.
Check if the problem is still there.
Also, it’s advised to remove all the unknown extensions in Chrome by doing the following:
Open Chrome.
Enter the following in the address bar: chrome://extensions/
Now remove or disable any extensions that you don’t recognize.
It seems like VPN extensions are the main culprit when this happens, but another extension could cause it too.
If you want to keep using a VPN, try switching to another option or install a VPN app on your device instead of a browser add-on.
5. Disable background apps
In Chrome, click the Menu icon in the top right corner and open the Settings.
Now scroll down to the System section and disable Continue running background apps when Google Chrome is closed option.
Restart your browser.
6. Cleanup Chrome malware
In Chrome, navigate to the Settings tab.
Go down to the Reset and clean up section.
Click on the Clean up computer option.
Wait for the process to finish and follow the instructions on the screen.
If new tabs keep opening in Chrome, it might be due to Chrome-specific malware. Use Chrome’s built-in Cleanup tool to to fix the issue.
Press Windows key + S and enter defender. Select Windows Security.
Go to Virus and threat protection. Next select Scan options.
Select the type of scan and click on Scan.
We recommend you look into the best antivirus software options and pick one that fits your system resources and your budget. You can find plenty of budget-friendly or even free well-performing antivirus software.
8. Create a new Chrome profile
OpenChrome Settings.
SelectYou and Google.
Click on Customize Profiles.
Create a new profile and see if the issue persists.
9. Reset Chrome to default
Open the Settings.
Go to Reset and clean up.
Now click on Restore settings to their original defaults.
Confirm that you want to reset them.
By doing so, you’ll remove all extensions, cache, and history. Of course, if you’re signed in to Chrome with your Google account, you can easily restore your files and continue where you left off.
Windows 11 has been announced, and among the Windows 11 requirements, there is also a requirement for TPM. However, many users reported that the TPM device is not detected on their PC, and they won’t be able to upgrade to Windows 11 due to this issue.
Speaking of TPM, many users reported TMP 2.0 errors while trying to install Windows 11, so it’s safe to say that this is a widespread issue at the moment.
However, there’s a way to fix this problem, and in this guide, we will show you what you can do if the TPM device is not detected on your PC.
Disabled TPM – The TPM may have been disabled in the BIOS settings.
Outdated BIOS – An outdated BIOS can sometimes cause issues with TPM detection.
TPM firmware issues – If the TPM firmware is corrupted or outdated, it can cause detection issues.
Hardware issues – A faulty or damaged TPM module can cause detection issues. If you suspect this is the case, contact your device manufacturer or a qualified technician for assistance.
Security software – Some security software can interfere with TPM detection.
Motherboard issues – In some cases, there may be issues with the motherboard that prevent the TPM from being detected. This can be difficult to diagnose and may require professional assistance.
Depending on the cause of the problem, you may try any of the solutions we recommend below.
What can I do if the TPM device is not detected?
Before going into any solutions, you should check if you have a TPM device. This way, you know whether to proceed with the solutions from the start. To find out, do the following:
Press Windows Key + R shortcut and enter tpm.msc. Press Enter.
A new window will appear, and you’ll see the status of your TPM device.
If you get a message saying that TPM cannot be found, you may not have a TPM chip, or the TPM might not be enabled.
Also, it would be best if you disconnect your PC from the power outlet. This is a pretty simple workaround. Leave the PC disconnected for a minute or two and then connect it to the power outlet and start it again.
Several users reported that this solution helped them fix the problems with TPM, so you might want to try that.
1. Enable TPM in BIOS
Press Windows + I, and select Security & Update.
Click the Recovery option on the left pane, then under Advanced options, select Restart now.
Select Troubleshoot, then Advanced options.
Pick the UEFI Firmware Settings option and click the Restart button.
Go to the Advanced or Security section, look for the TPM feature, and enable it.
Remember that each version of BIOS is different, and there’s no single and universal way to enable TPM. For detailed instructions, we advise you to check your motherboard manual.
Moreover, do not hesitate to take a closer look at this guide on how to access BIOS on a Windows PC. The procedure is quite simple, even for newbies.
2. Update TPM firmware and BIOS
Press Windows + I, and select Security & Update.
Click the Recovery option on the left pane, then under Advanced options, select Restart now.
Select Troubleshoot, then Advanced options.
Pick the UEFI Firmware Settings option and click the Restart button.
Check if you have a BIOS update option and use it. If not, we wrote a general guide on how to update your BIOS, so be sure to check it out for some basic guidelines.
If TPM is not detected on your PC, it might be due to outdated TPM and BIOS firmware; the only way to fix this problem is to update your firmware.
For detailed instructions, we highly recommend checking your motherboard manual and seeing how to upgrade TPM and BIOS firmware properly.
3. Reset your BIOS/remove the battery
Turn off your PC and unplug it from the power outlet. If you’re using a laptop, remove its battery.
Open your computer case.
Locate the computer battery on the motherboard.
Carefully remove the battery.
Leave the PC without the battery for a couple of minutes.
Optional: You can press the power button several times to drain the static electricity faster.
Put the battery back in and start the PC again.
After doing that, the problem with TPM should be gone.
If the TPM device is not detected, you won’t be able to upgrade to Windows 11; therefore, you must fix it.
If you don’t have the TPM chip, you won’t be able to fix this problem, and your only option is to buy a TMP 2.0 chip. Let us know your choice in the comments area below.
If your screen shifted to the right on Windows 10, apply the solutions below to center it back. This issue can be caused by driver problems, incorrect graphics card settings, monitor settings, or the refresh rate.
Following the steps on how to move windows from offscreen on Windows 10.
How to fix Windows 10 screen shifting to the right
1. Use the Arrow keys
Go to your Taskbar, press Shift, and right-click on any icon that is out of view.
Now use your Arrow keys to move it to the center.
Finally, click on the mouse to release control from the Arrow keys.
Alternatively, press the hotkeys Ctrl + Alt and hold the appropriate Arrow key to reposition the screen.
2. Change your resolution
If you wonder How do I move my screen back to center?, right-click your desktop and choose Display Settings.
In the Settings app, set the Resolution to the Recommended value.
If the problem is resolved, click the Keep changes button; if not, click Revert.
3. Update your drivers
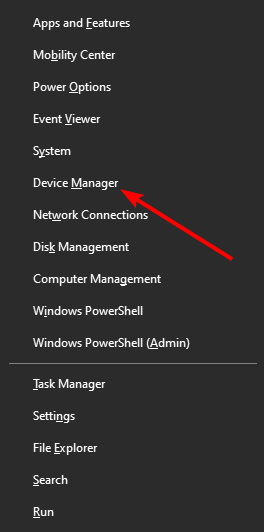
Right-click on the Start menu and click Device Manager.
Expand your Display adapters menu.
Right-click on your display adapter and select Update driver.
Finally, select Search automatically for drivers.
Downloading drivers manually can sometimes be a tedious task, especially if you don’t know the model of your graphics card and how to download the driver.
However, you can always use third-party software such as Fortect Driver Updater to update your drivers automatically with just a few clicks.
It will not only scan and show you which driver is outdated, but it will also find the correct driver version or install the missing graphic driver.
Fortect Driver Updater
Update & maintain drivers hitch-free with this professional software!
Right-click on the Desktop and select Display settings.
Scroll down and click Advanced display settings.
Now click Display adapter properties for Display 1.
Go to the Monitor tab and set the Screen refresh rate to the desired value. You may have to experiment. Many report fixing the issue bt changing to 59 Hz.
After doing that, click Apply and OK to save changes.
7. Reinstall your graphics card driver
Right-click the Start button and choose Device Manager from the list.
Locate your graphics card driver, right-click it and choose Uninstall device from the menu.
When the confirmation dialog appears, check Remove driver software for this device, and click Uninstall.
After uninstalling the driver, click Scan for hardware changes button.
Finally, check if your screen is still shifted to the right or left.
8. Check your monitor configuration
Press the Configuration button on your monitor.
Use the monitor keys to open display settings.
Adjust the screen shift or reset settings to the default.
9. Start your PC in Safe Mode
Open the Settings app by pressing Windows Key + I shortcut.
Head over to the Update & Security section.
Select Recovery from the menu on the left, then in the right pane, click the Restart now button.
Now select Troubleshoot and select Advanced options.
Next, go to the Startup Settings and click the Restart button.
Once your PC restarts, a list of options will appear.
Select the desired version of Safe Mode by pressing the corresponding keyboard key.
Once you enter Safe Mode, check if the problem is still there. If the issue doesn’t appear, it means that the issue is probably related to your settings.
We hope these steps helped you fix a screen that has shifted to the right on a Windows 10 laptop. As you can see, in most cases, this is just a driver or a settings issue, and it can be easily fixed.
Microsoft released Windows 11 officially for all users. Computer and laptop manufacturers have now started pre-installing their devices with the new Operating System.
Unfortunately, even though the new version comes with improvements and new features, some people do not like it.
If you have bought a new laptop with Windows 11 and are not ready to use it, you can downgrade it to the previous versions of the Windows OS. In this guide, we will discuss how to downgrade to Windows 10.
Some users ask themselves My laptop came with Windows 11, can I downgrade to windows 10?
Downgrading from Windows 11 is made easy by the fact that it is based on Windows 10. This means that you can use the same product key to activate either version of the Operating System.
Can a new Windows 11 laptop be downgraded to Windows 10?
Yes, it is definitely possible to downgrade to Windows 10 on a new Windows 11 PC. Regardless, you should make sure that you confirm with the vendor regarding your Windows licensing information.
In case you need technical support on how to perform the Windows 10 installation, the following steps will surely help you accomplish it.
How to Downgrade to Windows 10 on a New Computer?
1. Run a Windows 10 installation file
If you require to install Windows 10 on your new Windows 11 laptop, the safest method is by using the Windows 10 installation media file. The steps below shows you the whole process.
1. Visit the Microsoft Support website and download the Windows 10 installation media section to save it.
2. Navigate to your downloads folder and run the MediaCreationToolXXXX.exe file.
3. Confirm this action by selecting the Accept button to continue.
4. Choose the Upgrade this PC now option and then the Next button.
5. Select Change what to keep and choose between Personal files and apps, Personal files only, and Nothing.
6. Choose the Nothing option and click Next.
7. Click the Install button to begin the downgrade process.
8. After installation completes, set up Windows 10 and customize your laptop to meet your requirements.
2. Create an installation media (USB flash drive, DVD, or ISO file)
Download and run the Windows 10 media creation tool.
Select Create an installation media (USB flash drive, DVD, or ISO file) and click the Next button.
Choose your preferences – language, architecture, and the Windows 10 edition. Check the Use the recommended options for this PC box to use the preferences you have in Windows 11.
Select the media to use. You can create a bootable USB flash drive or create an ISO file. Select the USB flash drive for this process.
Click Next to start downloading Windows 10 installation file into the drive.
Reboot and install Windows 10 depending on the requirements of your firmware.
Why would you want to downgrade to Windows 10?
Windows 11 is a new Operating System. Just like any other software, using a new version of Windows is going to frustrate some users. Windows 10 was buggy in 2015 after its release. Even though it was fixed over time, initial users were regarded as beta testers.
Windows 11’s taskbar needs a lot of improvement to get to where Windows 10’s is. The latter’s taskbar comes with a lot of features and can be customized to meet different user requirements.
For example, the new taskbar cannot be moved from its central position not unless you use a third-party application. You cannot even make it taller to fit different screen sizes.
Other users have purchased new laptops to use Android applications on Windows 11, as Microsoft had promised. Unfortunately, this is only possible when using Android emulators for Windows 11. There are many reasons for downgrading, but these are just some of them.
Downgrading from a pre-installed Windows 11 to Windows 10 is pretty simple. It all depends on the method you would like to follow. Before doing a downgrade, make sure that you have a backup in case something goes wrong.
If you had upgraded your old computer to Windows 11, you can also roll back from Windows 11 to 10. However, the process used here depends on the time that has passed since upgrading to Windows 11.
TeamViewer is a popular remote desktop software for Windows and other platforms. It is available for free for personal use and pro plans for commercial use.
However, more often than not, even personal users will get the TeamViewer commercial use detected error in Windows 10.
According to TeamViewer, personal use is when helping family and friends without receiving any compensation. If you use the tool for business or profession, it is considered a commercial use.
In case of commercial use has been falsely detected on your TeamViewer, this article will help you solve the problem quickly.
We have listed a few troubleshooting steps to help you resolve the TeamViewer commercial use detected error.
How to fix the Teamviewer commercial use detected error?
1. Clean and reinstall TeamViewer
1.1 Uninstall TeamViewer
Click on the Start button and select the Settings app.
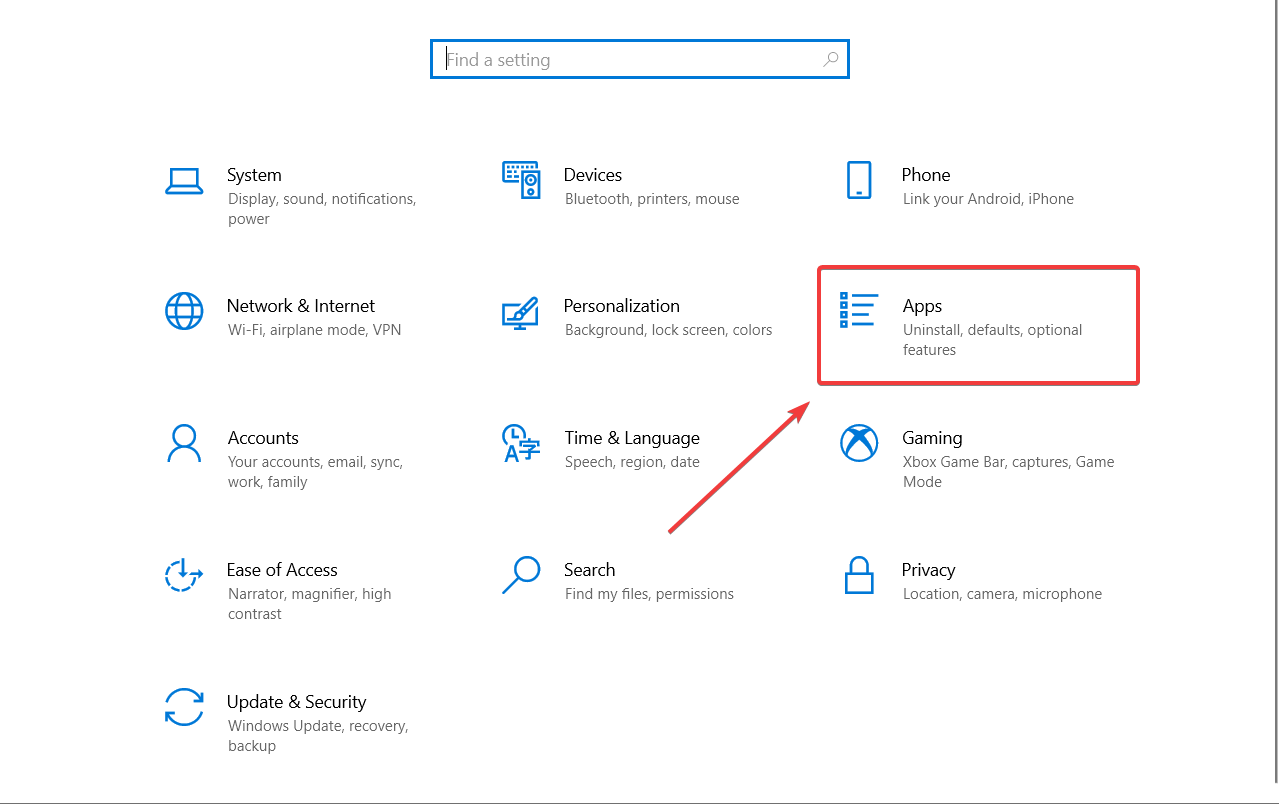
Click on the Apps option.
Locate and select TeamViewer from the list of installed apps.
Select the app and click on the Uninstall button.
Press the Windows key + R to open Run.
Type %appdata% and click OK. Locate and delete the TeamViewer folder.
Press Windows key + R and type %temp% and click OK. Find and delete the TeamViewer folder here as well.
Once you have deleted the folder, open the Registry Editor and remove the key associated with TeamViewer. Here’s how to do it.
1.2 Remove the TeamViewer registry key
Press the Windows key + R to open Run.
Type regedit and click OK to open the Registry Editor.
In Registry Editor, navigate to the following location: HKEY_CURRENT_USER\Software\TeamViewer & HKEY_LOCAL_MACHINE\SOFTWARE\TeamViewer
Right-click on the TeamViewer folder and choose Delete. If the TeamViewer folder does not exist, skip these steps.
TeamViewer uses a MAC address to identify systems that may have had installed TeamViewer and are suspected of commercial use.
To be able to reinstall TeamViewer the Mac addresses on Windows computers can be changed manually or through using the TMAC tool. We have listed both methods above.
It’s also a good idea to clean your registry once in a while. You can use this excellent guide to clean the Windows 10 Registry.
Make sure the Automatically restart network connection to apply changes and Make new MAC address persistent option is checked.
Click the Change Now button.
Once done, reboot the computer and reinstall TeamViewer and check if the TeamViewer commercial use detected error is resolved. If the error persists, reach out to TeamViewer.
We also have a great list of the best tools to change your MC address so you can choose the one that fits better for your needs.
3. Use an alternate remote desktop software
While TeamViewer is an excellent remote desktop software, the consistent false detection of commercial use can be annoying for many.
There are other companies that offer similar or better alternatives to TeamViewer, such as the ones suggested below.
You can find many remote control tools that will surely offer great functionalities of accessing certain files or sharing data with colleagues who need your support.
Hence, you can replace TeamViewer with the same or better services provided by the best remote control software.
4. Contact TeamViewer
TeamViewer on its official page acknowledges the issues or users getting the commercial use suspected or commercial use detected error.
If you think the commercial usage has been falsely detected on your TeamViewer ID, reach out to developers as they can help you get back your ID.
The Teamviewer commercial use detected error message usually occurs if the software detects commercial use. For false detection, TeamViewer can help you restore your ID.
If not, follow the steps in the article to remove and reinstall TeamViewer with a new MAC address.
Users have reported an error with Media Creation Tool while moving Windows 10 ISO to USB flash drive, and today we’ll try to fix this error.
Using the Media Creation Tool is a straightforward way to create installation media for Windows 10. However, users may encounter issues, including:
Windows Installation Media Creation Tool access denied: This can often be resolved by running the tool as an administrator.
Windows Media Creation Tool USB access denied: Commonly solved by checking or disabling your antivirus.
Media Creation Tool not working, won’t run: Various solutions may fix this issue.
Media Creation Tool error USB: Check if your USB drive is in read-only mode if you encounter this error.
Media Creation Tool does not recognize USB: Formatting the USB drive might fix this problem.
The Media Creation Tool enables you to download and transfer the Windows 10 ISO file to a USB flash drive or DVD for easy installation. An “Access denied” error may occur when moving the ISO file to a USB drive, but this foolproof guide can help you solve the Media Creation Tool access denied error.
How can I fix the Media Creation Tool Access Denied error when moving Windows 10 ISO to USB?
1. Try disabling all other applications that you don’t use
Users report that Access denied is sometimes caused by other applications that are installed on your PC. A reliable way to fix this problem is to perform a Clean boot and disable all startup applications and services.
Press Windows Key + R and enter msconfig. Press Enter or click OK.
2. System Configuration window will now appear. Go to the Services tab and check Hide all Microsoft services. Now click the Disable all button.
3. Now go to Startup tab and click on Open Task Manager.
4. A list of startup applications will now appear. Right-click the first item on the list and choose Disable from the menu. Now repeat this step for all startup applications.
5. After you disable all startup applications, close Task Manager, and go back to System Configuration window. Click on Apply and OK to save changes.
6. Now restart your PC.
This is rather simple and you can do it by following these steps:
When your PC restarts, try to create bootable media once again. If the problem doesn’t appear, it means that one of your startup applications was interfering with the Media Creation Tool.
If you want to know how to add or remove startup apps on Windows 10, check out thissimple guide.
2. Try a different USB flash drive
If you’re getting an Access denied error while moving your Windows 10 ISO file to a USB flash drive you might consider trying a different flash drive to see if it works because your flash drive might not be configured properly.
If another flash drive is giving you trouble you might want to consider burning the ISO file to a DVD and installing Windows 10 from a DVD.
Several users reported that in order to use a flash drive as bootable media, the flash drive has to be exactly 8GB in size and formatted as an NTFS drive. If your flash drive isn’t formatted as NTFS, you can format it by doing the following:
Open This PC and locate your USB flash drive. Right-click it and choose Properties from the menu.
Select NTFS as the File system and click on Start.
The format process will now start.
Once your drive is formatted as NTFS, try to use Media Creation Tool to create a bootable drive. If you need to format your flash drive, you can also use third-party tools such as Mini Tool Partition Wizard or Paragon Partition Manager.
Both of these tools allow you to format your USB flash drive, but they also offer other advanced features that you might need.
Set Partition scheme to the GPT partition scheme for UEFI.
Set the File system to FAT32.
Select your device from the Device menu on the top.
Make sure that Create a bootable disk using is checked and that the ISO image is selected.
Click on the little DVD icon next to it and find your Windows 10 ISO.
After that just click Start and wait until RUFUS creates a bootable Windows 10 USB flash drive.
Be aware of the RUFUS access to the device is denied error scenario that can appear because of the Microsoft Defender antivirus.
If you encounter the Windows needs a GPT partition error, solve it with the help of this useful guide.
4. Check if your drive is set to read-only mode
Certain drives might be ready-only and that can be a big problem if you’re trying to create a Windows 10 installation media. If your drive works in read-only mode, you’ll encounter an Access Denied message when using Media Creation Tool.
To fix this problem, you need to ensure that your drive isn’t working in read-only mode.
The first thing that you should do is check for the Lock switch. Some flash drives have a lock switch that will activate the read-only mode and prevent you from writing files to your flash drive.
If you have this switch, be sure that your drive is unlocked. If your drive doesn’t have any physical lock switches, you can check if your drive is set to work in read-only mode by doing the following:
Connect your flash drive to the PC.
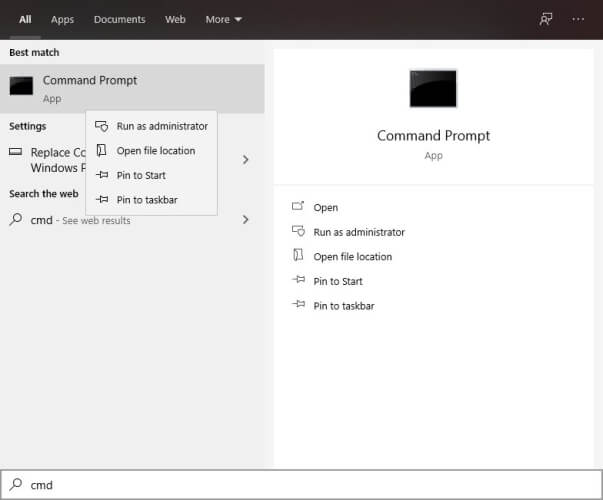
Open Command Prompt as administrator. To do that quickly, simply press Windows Key + X and choose Command Prompt (Admin) from the menu. If Command Prompt isn’t available, use PowerShell (Admin) instead.
When Command Prompt opens, enter diskpart and press Enter.
Now enter list disk command to see all available drives on your PC.
Now you should see all available drives on your PC. It’s crucial that you select the correct drive. You can easily recognize your drive by its size. To select the drive, you need to use select disk X command. Be sure to replace X with the number that represents your flash drive. In our case, that would be Disk 1, so our command will look like this: select disk 1. Keep in mind that the number on your PC will be different depending on the number of drives that you have on your computer.
Now enter attributes disk command. You’ll see a list of attributes for your drive. Check if read-only features are enabled.
To disable read-only features, just run attributes disk clear readonly command.
After doing that, your USB flash drive won’t be in read-only mode and you should be able to create bootable media without any problems.
Most users don’t know what to do when the Windows key stops working. Check out this guide and be a step ahead.
5. Check your antivirus software
If you’re getting Access Denied error message while using Media Creation Tool, it might be because your antivirus is blocking access to your USB flash drive.
Many antivirus tools will prevent you from accessing your flash drive in order to minimize the chance of malware infection.
To fix this problem, it’s advised to check your antivirus settings and disable all policies related to removable storage. If that doesn’t help, you might want to try disabling or even uninstalling your antivirus.
Many users reported issues with Avira Antivirus and Media Creation Tool, and if you’re using Avira, be sure to uninstall it from your PC.
If you’re using any antivirus solution and you want to completely remove it from your PC, you can approach the best uninstaller software you can use right now.
If you’re having problems with your antivirus and Media Creation Tool, you might want to consider switching to a different antivirus and therefore you would need qualitative antivirus software for Windows 10 PC.
6. Check your ISO file for corruption
Sometimes you might get an Access Denied error message while using the Media Creation tool if your ISO file is corrupted. Your ISO file can become corrupted during the download especially if you have any problems with your Internet connection, antivirus, or firewall.
To check if your ISO file is working properly, users are recommended to open it with the 7Zip application and try to extract the contents of the file to their hard drive.
If you don’t encounter any problems during file extraction, it means that your ISO isn’t corrupted.
Several users also reported that they fixed the problem by using 7Zip to move the contents of the ISO file directly to the USB flash drive. It’s not confirmed that this method works, but you can try it out if you want.
On the other hand, if your ISO file is damaged, you’ll have to download it again from Microsoft’s website.
According to users, you can fix the Access Denied error message with Media Creation Tool simply by formatting your flash drive with diskpart.
Diskpart is a powerful tool, and you need to be extra cautious while formatting your flash drive. To format your drive, do the following:
Connect your flash drive to the PC.
Start Command Prompt as administrator.
When Command Prompt starts, enter the following commands:
diskpart
list disk
Now you’ll see a list of all hard drives. It’s crucial that you select the correct drive or else you might accidentally format your entire hard drive. Be extra cautious with this step, and double-check to be sure that you selected the correct drive. Now enter select disk X. Replace X with the number of the drive that represents your flash drive. If you select the wrong drive, you’ll format your hard drive and lose all your files, so be extra cautious.
Now run the following commands:
clean
create partition primary
select partition 1
active
format quick fs=fat32
assign
After doing that, your drive should be formatted and ready to use, so try to create bootable media again.
That’s about it, we hope this article helped you to deal with Media Creation Tool in Windows 10. If you have any suggestions or questions, just leave them in the comments section below.
New Media Creation Tool error annoying Windows users
A new error that has been reported by our readers is Error code 0x80072f8f – 0x20000, which is affecting both Windows 7 and Windows 10 users. This error is related to the TLS 1.2 security protocol that we have explained in detail. Make sure to read our guide and solve it fast.
Nowadays, it often happens that connections are subject to various annoying events. For instance, high ping values, packet loss, and jitters are some of these phenomena that might affect the wellbeing of your connection.
If you are getting jitter on the speed test out of the blue, it’s very likely that at some point it will solve by itself. However, sometimes the cause of such events can be on your end, which means it’s in your power to solve the issues.
Let’s find out what Jitter is and how to reduce Jitter together, as well as how to perform a speed test, if needed.
What is jitter?
Jitter (network jitter) is when the delay time (ms) of data packet transmissions starts varying. It is not the same thing as latency (delay), which is the time it takes for packets to go from one point to another.
For instance, let’s say that one packet’s latency is around 2 ms. Jittering is when multiple packets have wildly different latency values. This phenomenon is unwanted in networking and telecommunications because it can disrupt the connection’s well-functioning or even cause packet loss.
What causes jitter?
Understanding the causes of these unwanted deviations can help you avoid or minimize them more effectively. So what exactly causes network jittering? The main cause of this phenomenon seems to be bad routing.
If routing varies greatly within the same network, forwarded packets are forced to change route multiple times during their transmission period, which can increase/decrease latency. This variation in latency is in fact, jittering.
Another widely accepted cause is network congestion. It goes without saying that putting a great load on a network will lead to frequent route changes, which subsequently lead to latency variations.
Let’s put it in a simpler fashion. If there are multiple routes between your network devices, packets won’t take the fastest one all of the time. Instead, they will be randomly distributed on all the routes at the same time, in an attempt to minimize transmission time.
What will happen is that the packets with the shortest route (least number of hops) will most certainly be delivered before the packets that took the longer routes (with more hops).
Thus, each packet will take a different amount of time to be delivered (e.g. one packet gets sent in 10 ms, another takes 40 ms to reach its destination). This variation in latency is jitter, and that’s how it usually appears on your network.
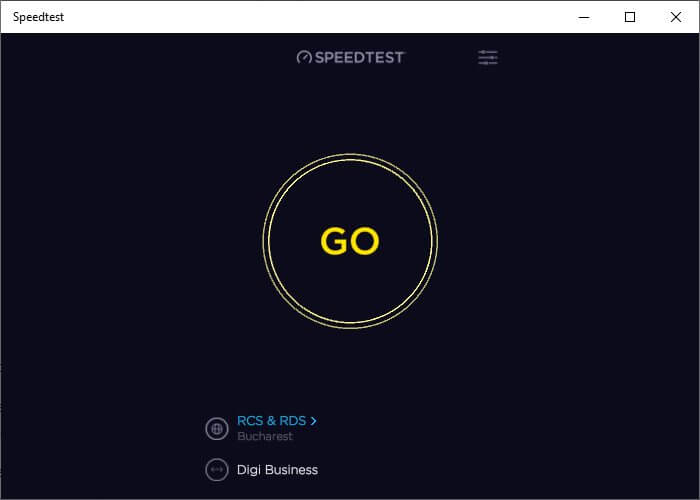
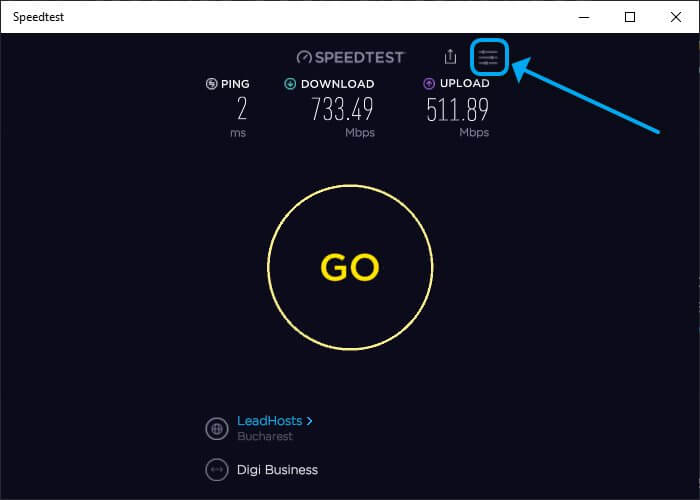
Launch it and grant it permission to use your location
Hit the GO button and wait for the speed test to end
Click the More button in the upper-right corner of the screen
Select your test from the Result History section
Check the value in the Jitter section
You can also perform jitter tests with other specialized software solutions, such as PRTG Network Monitor. Although this tool might give you more insight into your network, it will be way more difficult to use than Speedtest by Ookla.
Right-click Command Prompt and select Run as administrator
Type ping 192.168.0.1 -n 30 in the CMD window
Wait for the ping test to complete
Observe the time value for each ping
Calculate the average latency by adding all ping values and dividing them by their amount (30 in our case)
Determine the differences between samples, if there are any, and set them aside
Add them all up, and divide them by the number of samples minus 1
Example: if you have 10 different values, you calculate the difference between each distinct result (e.g. 25ms to 48ms has a difference of 23, 48ms to 57 has a difference of 9, and so on).
You add up the different values that you got earlier and divide them by the number of differences you found, or the number of different values minus one. If you compare the average latency to the jitter, the latter should never exceed 15% of the former.
All things considered, jitter is not something you’d want in your connection. However, you can take some easy measures to eliminate or keep it at a minimum, such as changing your Ethernet cable or using wired connections over Wi-Fi.
If you suspect you’re experiencing jitter, you can run a few tests to see if you’re right about it. If you do detect jitter and see no improvement after trying to fix it on your side, it might be your ISP’s fault. In this case, you might want to contact them.
We hope you managed to find out everything you wanted to know about this topic and succeeded to reduce jitter on your device. Write down in the comments section below how your experience was.
We use the Internet on daily basis, and it’s a major problem for many users if they can’t access it. Many of our readers reported Unidentified network or Unidentified network no Internet messages on their PCs, and today we’re going to show you how to fix that problem.
Whether it’s happening on your Ethernet or Wi-Fi connection, our solutions will cover all the possible issues that cause these errors on Windows 10 and Windows 11.
But first, let’s go through some preliminary methods of troubleshooting some of the main disruptions that may occur.
What causes the Unidentified Network issue?
Before getting to any solutions listed below, let’s verify some of the most common problems that may cause Internet connection errors:
➡ Check all local networking components
Several users reported that this issue occurs due to the Ethernet cable. One workaround that might help is to unplug and reconnect your Ethernet cable from your PC and router or modem.
Repeat the process several times and check if that solves the problem. In addition, be sure to check your Ethernet cable. If your Ethernet cable is damaged, you might encounter this message.
To fix the problem, you should try replacing your cable. We have a list including the best Cat6 and Cat5E cables that you can choose from.
Restarting and resetting your router and/or modem can also fix this problem quickly and you will see how you can do that in one of our solutions below.
➡ Make sure you are close to your Wi-Fi hotspot
If these errors occur while your device is connected to a Wi-Fi hotspot, make sure that you have enough signal strength.
Move your device closer to the router and eliminate all possible obstacles between the two devices.
That being said, you can start troubleshooting the problems, step by step, as shown below. It’s important to follow the exact procedures in order to fix the errors.
How do I fix the Unidentified network error in Windows 10?
1. Turn off Airplane mode
Press Windows key + A to open Action Center, then click the Airplane mode icon to disable the feature.
If this option isn’t available, press the Windows key and select Settings.
Go to Network & Internet section.
Navigate to Airplane mode tab, locate the Airplane mode option and turn it off.
Windows 10 supports Airplane mode, but if you turn on this feature, it will block your Internet connection.
You can also use a hardware switch on your device to turn off Airplane mode. Many devices have this button available, so be sure to look for it on your device.
After disabling Airplane mode using the aforementioned methods, Unidentified network message should hopefully disappear.
2. Remove your antivirus software
Open the Settings app by clicking on the Start icon and selecting it from the list.
Click on Apps from the Home menu in Settings.
The list of installed applications will appear on the right pane. Select the antivirus program from the list and click on the Uninstall button.
After the antivirus is removed, restart your PC and see if the problem has been solved.
Antivirus software is one of the most important tools that you can have on your PC and it’s paramount for system protection.
However, some antiviruses can sometimes interfere with your network connection and cause Unidentified network message to appear.
Users reported that the cause for this problem was Avast, and in order to fix the issue you need to remove it completely.
Should you have another antivirus installed, you can start by disabling first and check if the Internet connection is fixed.
If uninstalling your antivirus software fixes the problem, you need to update your antivirus software to the latest version. Alternatively, you can switch to a better antivirus tool.
3. Update network card drivers
Press the Start icon, type device manager and select the app from the results.
Locate the Network adapters section, click on it to expand, then right click on your network adapter and choose Update driver from the menu.
Click on Search automatically for updated driver software option and wait while Windows 10 downloads the suitable driver for your network adapter.
If you’re getting Unidentified network message, you might have to update your network drivers to fix this issue.
Although Device Manager allows you to update your drivers easily, sometimes it’s better to download the necessary drivers from your network adapter manufacturer.
For that, visit your network adapter manufacturer’s website or the device manufacturer website and locate the drivers section.
Select your network adapter from the list, download the suitable driver and install it. If you don’t have Internet access at all, you’ll need to use a working computer or any other device to download the drivers.
In order to prevent PC damage by installing the wrong driver versions, we suggest doing it automatically by using a specialized tool like Outbyte Driver Updater.
The software below will do all the job on your behalf by updating the correct version of drivers for your device.
4. Turn off Fast Startup
Click the Start button, type power and sleep, and select Power & sleep settings from the results.
When Power Options window opens, click on Choose what the power buttons do.
Now click on Change settings that are currently unavailable.
Uncheck Turn on fast startup, then click on Save changes.
After doing that, shut down your PC. Wait for 30 seconds and turn it back on again.
Windows 10 uses the Fast Startup feature by default that allows you to boot Windows 10 faster. It’s very useful, but it doesn’t completely shut down your PC, which can lead to certain issues.
To fix the ethernet unidentified network issue on your PC, many users are recommending to temporarily disable this feature.
Users reported that disabling Fast Startup fixed the problem for them, so be sure to try that. In fact, if this solution worked, you could enable it again and check if the issue reappears.
5. Change your DNS servers
Press Windows key + X and choose Network Connections from the menu.
Locate your network connection, right click it and choose Properties from the menu.
Select Internet Protocol Version 4 (TCP/IPv4) and click on Properties.
Select Use the following DNS server addresses option. Enter 8.8.8.8 as Preferred DNS server and 8.8.4.4 as Alternate DNS server. Click OK to save the changes.
Sometimes Unidentified network error can appear due to problems with your DNS. However, you can easily change your DNS and fix this issue.
Also, check the settings from your ISP and verify it they correspond with the ones from your IPv4 properties.
Installing a VPN software will help with any errors related to network connections and restrictions most of the time, including the Ethernet unidentified network.
A VPN will redirect the user’s data to another network which will make tracking his real location and other sensitive information impossible. This is a safety measure that can also be used to bypass annoying regional restrictions.
We suggest using a VPN that has lots of servers around the world, thus providing high internet speeds and lots of bandwidth. Access your content things from anywhere in the world, secured and bug-free.
The best VPNs for Windows 10 come with advanced features such as split tunneling, killswitch in case the connection is lost, add blocking, and anti-malware security.
7. Restart your PC
Press the Start icon, click on the Power button, then select Restart from the menu.
According to users, sometimes you can fix this problem simply by restarting your PC.
It seems that Windows 10 can sometimes hold your personal files, and that can cause Unidentified network message to appear.
8. Reset the Internet settings using Command Prompt
8.1 Use the ipconfig commands
Press the Start button, type cmd, and select Run as administrator from the results.
Type or paste the following commands and press Enter to run them:
ipconfig /release
ipconfig /renew
After the commands are executed, close Command Prompt and check if the issue is resolved.
8.2 Reset winsock
Several readers reported that they fixed the issue using different set of commands. Instead of commands that we used in Step 2, use the following commands:
netsh winsock reset
netsh int ip reset
ipconfig /flushdns
8.2 Use the netsh commands
There’s also another set of commands that might fix the issue. According to our readers, you can fix Unidentified network message simply by running these commands in Command Prompt:
netsh int tcp set heuristics disabled
netsh int tcp set global autotuninglevel=disabled
netsh int tcp set global rss=enabled
netsh int tcp show global
After the commands are executed, restart your PC and check if the issue is resolved.
9. Make sure that DHCP is enabled
Right-click the Start icon and select Network Connections.
Choose Ethernet from the left, then click on Change adapter options from the right.
Locate your network connection, right click it and choose Diagnose from the menu.
A few of our readers reported that you can fix this problem by diagnosing your network. This is rather simple, and you can do it right from Network Connections window.
However, the Unidentified network message might appear if you don’t have DHCP enabled on your router. To fix the problem you need to open your router settings and enable DHCP again.
If you don’t know how to do that, be sure to check your router’s instruction manual.
10. Disable and enable your network connection
Right-click the Start icon and select Network Connections.
Select the Ethernet option from the left pane, then click on Change adapter options from the right.
Locate your current connection, right click it and choose Disable from the menu.
After disabling the connection, wait for few seconds. Right click your connection and choose Enable from the menu.
Sometimes you can fix Unidentified error message simply by disabling and reenabling your network connection.
If that doesn’t work, you might want to try disabling and enabling your network adapter. We explained briefly how to do that in Solution 13, so be sure to check it out.
11. Set a static IP address
Right-click the Start icon and select Network Connections.
Select Ethernet from the left pane andclick on Change adapter options from the right pane menu.
Locate your network connection, right click it and choose Properties.
Select Internet Protocol Version 4 (TCP/IPv4) and click on Properties button.
Now select the Use the following IP address option and enter the desired IP address as well as additional information. If you’re not sure about other values such as Subnet mask, Default gateway and Preferred DNS server, you can find them with a simple trick. Simply check the properties of the network connection on any device that is connected to your network and copy the necessary values.
After you’re done, click OK to save the changes.
According to users, this issue can occur if your IP address isn’t set to static. To fix the problem you need to change your network connection settings and enter the desired IP address manually.
There are several cases in which users fixed the problem simply by using Obtain an IP address automatically option. If you’re using a static IP address, be sure to try this option instead.
12. Use an external adapter
Press the Start icon, type device manager and select the app from the results.
Go to the Network adapters section and locate your adapter.
Right click the adapter and choose Disable device from the menu.
Restart your PC and the system will detect the correct driver. If this doesn’t work, repeat the process to reenable the device.
If you have problems with your network adapter, you might be able to fix them simply by replacing the adapter.
Several users reported that the issue was caused by an internal adapter that isn’t fully compatible with the router.
If you have the same problem, you might want to get a USB network adapter and try using it instead.
Before you can use an external adapter, we strongly suggest that you disable your internal network adapter by following the steps above.
Right-click the Windows Start button and select Network Connections.
Select Ethernet from the left pane and click on Change adapter options from the right pane menu.
Right click on your network connection and click on Properties.
When Properties window opens, click on Configure.
Go to the Advanced tab. From the Property list select Speed / duplex settings. Now change the Value to Auto Negotiation.
After you’re done, click OK to save the changes. Depending on your network adapter and router, you might have to use different values sometimes in order to fix the problem.
Sometimes Unidentified network message can appear if your duplex isn’t properly configured. After changing the duplex speed, be sure to check if the problem is resolved.
14. Disable McAfee Network Agent
Press Windows key + R, type msconfig and press Enter or click OK.
Go to Services tab, check the box for Hide all Microsoft services. Locate McAfee Network Agent on the list and disable it.
Now click Apply and OK to save the changes. In addition to McAfee Network Agent, users are also suggesting disabling McAfee Firewall Core.
As we previously mentioned, third-party applications can sometimes interfere with your network connection and cause Unidentified network message to appear.
Several users reported that McAfee Network Agent caused this issue on their PC. In order to fix the problem, you need to disable this service.
After disabling the problematic services, the issue should be resolved completely.
15. Restart your modem and router
The Unidentified network message can prevent you from accessing the Internet, but you can fix it easily by restarting your router and modem.
You should find the Reset button in the back of your router
Sometimes your network configuration might not be correct, and a quick restart can usually solve that. To restart your modem / router, simply press its reset button and wait for 30 seconds.
After that, turn the device back on again and wait until it starts. If you have both modem and router, be sure to restart both devices.
Sometimes this error appears due to your router’s configuration. A few users reported that they successfully fixed the issue simply by resetting their router.
To do that, find and press the reset button on your router. Alternatively, you can open the router’s configuration page and reset it from there.
Keep in mind that resetting the router will revert all your settings to default, so you’ll have to set up a wireless connection and configure all your settings again.
16. Upgrade router firmware
Make sure that the router and PC are connected.
Open a browser window and enter the address of your router. The one in our screenshot is only an example. You will find that on your router manual or on the device itself.
Log into the app with the username and password provided.
Locate the firmware update option and check for updates.
If you’re getting the Unidentified network no internet access Windows 10 or Windows 11 message, you might be able to fix it by upgrading your router firmware. By updating router firmware you can fix many compatibility and security issues with your router.
We have to mention that the firmware upgrade process comes with certain risks, so if you’re not careful you can cause permanent damage to your router.
To avoid any problems be sure to check your instruction manual thoroughly before performing the upgrade.
Right-click the Windows Start icon and select Network Connections from the list.
Select Ethernet from the left pane and click on Change adapter options from the right pane.
Now select your wireless and Ethernet connection. Right click them and choose Bridge Connections from the menu.
The Unidentified network message can appear if you’re using both Ethernet and wireless connections at the same time. If that’s the case, you’ll need to disable one connection and restart your PC.
For detailed instructions on how to disable your network connection be sure to check Solution 10. After disabling Ethernet or wireless connection, restart your PC and check if that solves the issue.
If that doesn’t work, you’ll need to bridge your connections just as it’s shown in our solution above. After bridging the connections, check if the problem is resolved.
18. Check your network connection properties
Once again, right-click the Start button and select Network Connections from the list.
Select Ethernet from the left pane and choose Change adapter options from the right.
Now select your connection, right-click it and choose Properties from the menu.
Now, uninstall any options that are related to third-party applications. After you’re done, click OK to save changes.
Restart your computer and check if the problem is resolved.
Third-party applications can sometimes cause problems with your network connection.
some of our readers reported issues with the Shrewsoft applications, so if you see any Shrewsoft entries on the list, be sure to uninstall them.
It’s worth mentioning that other third-party applications can cause this problem, so you might have to remove them as well.
19. Disable virtual network adapters
Press the Start button and type device manager, then click on the app from the results.
Go to View menu and check Show hidden devices.
Now expand the Network adapters section and locate any virtual adapters associated with third-party applications. Disable those adapters and check if that solves the issue.
If you’re using any virtualization software, such as VMWare or VirtualBox, you can sometimes cause issues with your network connection.
Users reported that virtual machine software can cause the Unidentified network message by creating virtual network adapters.
To fix the problem, you need to disable virtual adapters from Device Manager. Disabling third-party virtual adapters can affect the Internet connectivity in those apps, so keep that in mind.
20. Change startup type for Bonjour service
Press Windows key + R and type services.msc, then press Enter or click OK.
When the Services window opens, locate the Bonjour service on the list and double click it.
Change the Startup type to Automatic (Delayed Start) and click Apply and OK to save the changes.
According to users, the Bonjour service can cause internet issues and the Unidentified network message to appear.
To fix this problem, you just need to change the startup type of the Bonjour service as shown above.
Several users reported that Id_String2.6844F930_1628_4223_B5CC_5BB94B87 9762 service can also cause this problem.
To fix the problem, simply locate the service, double-click it, and set its Startup Type to Disabled. After doing that, be sure to check if the issue is resolved.
21. Delete the 0.0.0.0 gateway
Click the Windows Start button, type cmd and select Run as administrator from the results to start Command Prompt with full privileges.
Now, type or paste the following command and press Enter to run it: route delete 0.0.0.0
After the command is executed, restart your PC and check if the problem is resolved.
Several users reported that the issue is caused by the 0.0.0.0 gateway courtesy of Adobe CS3 Bonjour, but you can fix the issue simply by removing the gateway.
22. Change the Power Management settings for your adapter
Open the Network Connections window by right-clicking the Start icon and selecting the option from the menu.
Click on Wi-Fi from the left, then scroll down on the right and select Change adapter options.
Locate your wireless connection, right-click it and choose Properties from the menu.
Click on the Configure button.
Now navigate to the Power Management tab and uncheck Allow the computer to turn off this device to save power. Click OK to save changes.
Right click the wireless adapter again and choose Properties.
Go to the Sharing tab and uncheck Allow other network users to connect through this computer’s Internet connection option. Click OK to save changes.
If you’re getting the Unidentified network message while using a Wi-Fi network, you might be able to solve it by using this method.
According to users, you can fix this problem with ease simply by changing Power Management settings of your adapter.
After making the aforementioned changes, the problem should be completely resolved.
23. Change your Roaming Sensitivity
Right-click the Windows Start button and choose Network Connections from the menu.
Click on Wi-Fi from the left pane, then scroll down on the right and select Change adapter options from Related settings.
Find your wireless connection, right-click it and select Properties.
Hit the Configure button.
Navigate to the Advanced tab, locate Roaming Sensitivity or Roaming Aggressiveness (depending on your system) on the list and select it, then adjust values until the problem is resolved.
A few users reported that you can fix the problem simply by disabling Roaming Sensitivity, so be sure to try that as well.
24. Change your router’s encryption
Wi-Fi networks usually use encryption in order to prevent unauthorized access. Some of our readers reported that they fixed the problem simply by changing the network encryption on their router.
Users reported issues while using WPA2 encryption, but after changing it to WPA, the issue was resolved. To see how to change the encryption type on your router, we advise you to check its instruction manual.
Usually, you will find the option in the Wi-Fi settings section under the Security section but that depends on your router brand, model, and software.
Click the Start button, type cmd and choose Run as administrator from the results to start Command Prompt with administrator privileges.
Type or paste the following command and press the Enter key to run it: ipconfig /all
Locate Physical Address of your adapter and write it down. The address will consist of six pairs of characters separated by dashes.
Now go to Network Connections window, right click your connection and choose Properties, then click the Configure button as shown in the previous solutions.
Go to the Advanced tab and select Network Address option from the list. Enter your MAC address in the Value field without any dashes. After you’re done, click OK button to save the changes.
If you’re getting the Unidentified network no Internet message, you might be able to fix it simply by entering your MAC address manually.
How do I fix Ethernet unidentified network in Windows 11?
Although it has some new features and design, Windows 11 is not all that different from Windows 10 and our readers have encountered all sorts of Internet connection problems in the new OS.
The Ethernet unidentified network and Unidentified network no Internet errors in Windows 11 are just as common because they are caused by the same problems.
Luckily, the similarities between the two systems will help you solve these problems by applying all the solutions we presented for Windows 10 above on the new OS.
In Windows 11, you can access the Advanced network settings easier
There are, of course, a few differences. For instance, in Windows 11 is a lot easier to access the Advanced network settings from the Network & internet section in Settings.
The Unidentified network message can prevent you from accessing the Internet, but you should be able to easily fix the problem by using some of our solutions listed above. We hope they helped!
If Outlook is not opening, is mainly because you use the software frequently, so let’s see how to fix it using our complete guide below.
Why is my Outlook not working on Windows 10?
Multiple factors will stop your Outlook from working on Windows 10. A few of the top reasons include:
System add-ins – They are the most likely cause, so you might have to disable them to fix the problem.
Corrupt files – File corruption can affect your profile and Outlook data files, so recreating them might be necessary.
Compatibility issues – In this case, you should ensure this application is run in compatibility mode.
Issues with the settings – The main focus should be the DPI settings. Adjust this and verify if the problem is fixed.
This guide will go through all possible solutions to this problem, so keep on reading.
How do I fix Microsoft Outlook if it won’t open?
1. Start Outlook in Safe Mode and disable add-ins
1.1. Start Outlook in Safe Mode
Press Windows key + R, enter Outlook /safe, and press Enter or click OK.
When Choose Profile window opens, click OK.
If you’re asked to enter a password, be sure to enter it and click Accept.
1.2. Disable add-ins
In Outlook, choose File and select Options. Now go to Manage Add-ins.
In View and manage Office Add-ins, make sure that the Manage box shows COM Add-ins and choose Go.
Remember the list of all enabled add-ins in the Available Add-ins section and disable all the selected add-ins by clearing the checkboxes. Click OK.
Now close Outlook.
1.3 Start Outlook and enable the add-ins
Press the Windows key + R and enter Outlook. Press Enter.
Choose File and go to Options. Now pick Manage Add-ins and enable one or more add-ins on the list.
Close Outlook and restart it.
Enable another add-in and repeat the Outlook restart cycle. Perform this step until you find the problematic add-in and keep it disabled.
Many users love using add-ins to enhance Outlook functionality, but sometimes add-ins can create specific problems and prevent Outlook from starting.
Since you cannot start Outlook normally, your only solution is to start it in Safe Mode and disable the add-ins as instructed above.
According to some users, the problem was Microsoft CRM Add-in, and the issue was resolved after disabling it.
Outlook won’t open in safe mode? A few users reported that they could not do so when using the Outlook /safe command.
If you have the same problem, enter the full path to the outlook.exe file in the Run dialog.
Instead of Outlook /safe, you should use the following command: C:\Program Files (x86)\Microsoft Officeroot\Office16\OUTLOOK.EXE /safe
Keep in mind that the path to outlook.exe might be different on your PC, so double-check before you use this command.
2. Create a new profile
Start the Outlook app from Windows 10.
Click the Show Profiles button and choose Add.
Enter the name of the new profile.
Enter your name, email address, and password, and click the Next button. This method will set up all the necessary email settings manually. If you want, you can also choose the option to set up your Outlook profile manually.
Click Finish, and the new profile should be added to the General tab in the Mail dialog. Next, select the Prompt for a profile to be used option and choose OK.
Your Outlook profile keeps all your settings, but if for some reason your profile gets corrupted, Outlook won’t open when loading your profile, so you’ll have to recreate it.
If everything works without any problems with your new Outlook profile, you can now switch back to the original Outlook profile and check if the problem is completely fixed.
Go to your Office installation folder and run scanpst.exe.
Click the Browse button and select your Outlook data file.
Click the Repair button to scan your data file.
If any errors are found, click the Repair button to repair them.
3.2. Delete the files from Microsoft Exchange
Go to Control Panel and select Mail.
When the Mail window opens, select Email Accounts.
Go to the Data Files tab, and select the Exchange account.
Now choose Open File Location.
A new Explorer window will open. Close the Mail window and switch back to the Explorer window. Then, locate the data file and delete it.
If you use Microsoft Exchange, you can delete your data file, which will be recreated again.
After deleting the file, it will be created again with Microsoft Exchange once you start Outlook.
All your Outlook email messages, contacts, tasks, and events are stored in your data file. Unfortunately, sometimes the data file can get corrupted, preventing Outlook from opening.
Speaking of the Outlook data file, there are many reasons it can’t be accessed. We have a great guide on what to do if the Outlook data file cannot be accessed.
To fix the problem quickly, you need to repair your data file by following the steps above.
4. Use the /resetnavpane command if Outlook 2010 won’t open
Make sure that Outlook is completely closed.
Press Windows key + R, enter outlook.exe /resetnavpane and press Enter to run it.
Outlook should now open.
If Outlook won’t open on your Windows 10 PC, you might be able to fix it by running /resetnavpane command.
By running this command you’ll remove all customization related to the navigation pane, and sometimes that can fix this problem with Outlook.
5. Try an alternative email client
If your Outlook won’t open emails, perhaps it’s time you changed the email client altogether since many great alternatives can replace it.
These tools are convenient because they can sync all your emails and contacts from multiple accounts in one unified Inbox.
Plus, it brings a lot of easy-to-set customizable features and options to serve the mentioned purpose.
6. Make sure that Outlook isn’t running in Compatibility mode
To do that, right-click the Outlook shortcut and choose Properties from the menu.
Go to the Compatibility tab and make sure that Run this program in compatibility mode option isn’t turned on.
Click Apply and OK to save changes.
Compatibility mode is designed to run older software on Windows 10 that usually wouldn’t run natively. Outlook is fully optimized for Windows 10. Therefore there’s no need to use Compatibility mode.
If you have Compatibility Mode turned on for Outlook, you can sometimes cause this issue to appear. Therefore it’s advised to turn Compatibility mode off for Outlook.
This tool is designed to fix common problems with Office tools, and to fix those problems; you need to download it, run it and let it fix the problem for you.
8. Change the DPI settings
Right-click your desktop and choose Display Settings.
When the Display Settings window opens, move the slider to the left until it says 100%.
After that, log out of Windows 10 and log back in. Then, try to start Outlook and check if the problem is resolved.
A few users reported that you could fix the problem with Outlook simply by changing the DPI scaling to 100%.
A few users reported that they solved this problem simply by lowering the display scaling to 200 DPI from 250 DPI, so you might want to try that as well.
9. Log out of iCloud
iCloud is a popular cloud storage service created by Apple, but unfortunately, this cloud service can cause some issues with Outlook.
If Outlook 2010 won’t open, you need to log out of iCloud and log back in, and you should be able to start Outlook without any problems.
10. Use the New Email Message option
Press Ctrl + Shift + Esc to start Task Manager.
When Task Manager starts, in the Process tab, locate the Outlook process and click the End Task button.
Close Task Manager.
Locate Outlook in Start Menu and click the right arrow next to it to open its Jump List.
You can also right-click Outlook on your Taskbar to reveal its Jump List. Select New Email Message or New Meeting or any other option. A new window will now open.
After that, right-click Outlook and choose the Run as administrator option. Outlook should now start without any problems.
Some users also suggest changing the File open on start option while using this method.
Select the New Email message from the Jump List.
When Outlook opens, go to Settings, select Advanced and change File open on start to Outbox.
Restart Outlook and change File open on start to Inbox.
Save changes, and the problem should be resolved.
If Outlook won’t open from Taskbar, this method might be helpful as a workaround, so there’s no reason not to try it.
11. Use a separate password for Outlook
Users reported that you need a separate password for your Outlook account if you use 2-step verification with your Gmail account.
To fix this problem, generate a 16-digit App password that you will use with Outlook. After using the new password with Outlook, the issue should be resolved.
Some users suggest removing your Gmail account from Outlook as a potential workaround, so you might want to try that.
12. Try using an older version of Outlook
Users reported that Outlook 2010 wouldn’t open on their PC, but one suggested workaround is using an older Outlook version with your PST file.
If you have an older version of Outlook available, you can use your PST file without problems.
All your emails will be imported, and you can continue where you left off. Of course, this isn’t a permanent solution, but it’s a helpful workaround.
If that doesn’t work, you can try using a different email client, as mentioned in the first solution. Many free alternative mail clients will do perfectly as an Outlook replacement.
This is another workaround, but users reported that it works for them. You can stop this error simply by choosing the File and then selecting the Exit option to close Outlook.
According to users, this error appears if you use the X button to close Outlook; therefore, try closing it with a different method instead of closing Outlook with the X button.
Users reported that this workaround works for them, so you might want to try it.
14. Try to send any file with Outlook
Users reported getting stuck on a Processing screen while trying to start Outlook. One suggested workaround that might work for you is to try sending any file using Outlook.
To do that, start Outlook, and you should get stuck on the Processing screen.
After that, open File Explorer, right-click on any file, and choose Send To – Mail Recipient. After doing that, a new email window will open along with Outlook.
15. Delete the Outlook App Data folder
15.1. Delete the Outlook folder
Make sure that Outlook is completely closed.
Press Windows key + R and enter %localappdata%.
Navigate to the Microsoft folder.
Locate the Outlook folder and delete it.
Try to start Outlook again.
According to users, you can fix the problem with Outlook simply by deleting the Outlook AppData folder.
If Outlook manages to start, all the deleted files will be recreated, and the problem should be resolved entirely.
This method can help if Outlook won’t open attachments, so we encourage you to try it.
15.2 Delete the outlook.xml file
Press Windows key + R and enter %appdata%. Press Enter.
Go to the Microsoft Outlook folder, locate the outlook.xml file and delete it.
Start Outlook again.
16. Check if you have permission to access your PST file
Locate your PST file, right-click it and choose Properties from the menu.
Go to the Security tab and check if your username is available in the Group or user names section. If it’s not, click the Edit button.
Now click the Add button to add a new user.
Enter the object names to select the field, enter your user name, and click Check Names.
If your user name is valid, click OK to add it.
Select your user name from the Group or user names section and click on Full Control in the Allow column.
Click Apply and OK to save the changes.
Outlook holds all your information in a PST file, but you might encounter specific errors if you don’t have the necessary permissions to access this file.
In the worst-case scenario, Outlook won’t be able to open on your PC.
Fortunately, you can fix this problem simply by changing your security permissions. This is a simple procedure; you can do it by following the steps above.
After gaining complete control over your PST file, you should be able to start Outlook without any problems.
17. Run the sfc /scannow command
Type cmd in Windows search and click on Run as administrator.
When Command Prompt opens, enter the following command and press Enter: sfc /scannow
After the scan is completed, check if the problem with Outlook is resolved.
If your files are corrupted, you might not be able to start Outlook at all, but fortunately, you fix this problem by performing an SFC scan.
This simple command will scan and repair your system, and you can perform it by following the steps above.
18. Delete the registry key
Press Windows key + R and enter regedit.
In the left pane, navigate to the following path and expand it: HKEY_CURRENT_USER\SOFTWARE\Microsoft\Windows NT\CurrentVersion\Windows Messaging Subsystem
Select the Profiles key, right-click it, and choose Delete.
After that, restart your PC and check if the problem is resolved.
You can sometimes fix the problem with Outlook simply by deleting a specific key from your registry.
Before making any changes to the registry, we strongly advise you to back up your registry in case anything goes wrong.
19. Remove the VPN software
VPN tools are helpful if you want to protect your privacy while surfing the Internet, but VPN tools can interfere with Outlook and cause many other problems.
Users suggest disabling or removing your VPN software and checking if that fixes the problem.
Another suggestion from our readers is to end the Outlook process from the Background processes section in Task Manager. It won’t hurt to try that out to fix this issue.
20. Reinstall Outlook
Press Windows key + X and select Apps and Features.
Select Microsoft Office or Outlook and click on Modify.
Now choose the Repair option.
Alternatively, you can reinstall the software and check if that solves the problem. If Outlook doesn’t open in Safe Mode, your installation may be damaged, so try this solution.
Why won’t my Outlook open on my laptop?
The first thing to look at if the Outlook app won’t open on your laptop is to check for corrupt files. Also, it might be down to your VPN software. So make sure to disable it temporarily to see if the problem persists.
Lastly, the problem can be because of your DPI settings. Whatever the cause, you should be able to fix it with our solutions.
How do I fix Outlook if it won’t open on Windows 11?
Press the Windows key + S and type windows terminal.
Right-click the Windows Terminal option and select Run as administrator.
Now, click the arrow at the top and select Command Prompt.
Type the command below and hit Enter: sfc/scannow
Wait for the scan to complete and restart your PC.
The SFC scan should detect broken or corrupt files causing this issue. Also, you should know that all solutions from this guide can be applied to the latest version of Windows.
Since the two versions of Windows are pretty similar in terms of functionality, most of our solutions will work on both.
Remember that some solutions might have to be slightly altered due to interface changes on the latest version.
Not being able to start Outlook can be a big problem, mainly if you use Outlook as your default email client, but you can quickly fix this problem by using one of our solutions.
One of the most common issues in Microsoft’s Outlook service is the problem with sending emails.
So in this article, we’re going to show you what to do if The message cannot be sent right now error message pops out when you try to send an email with Outlook.
Many users reported The message cannot be sent right now error in Outlook, but this isn’t the only problem that they encountered. As for Outlook issues, here are some similar problems reported by the users:
Your message will be sent, but we’re not quite ready in Outlook – This issue can occur due to your antivirus. To fix it, disable certain antivirus features and check if that helps.
The message cannot be sent right now (Office 365) – If this problem happens with Office 365, be sure to reinstall it or switch to a different email client.
Message cannot be sent because it has unresolved recipients – This problem can occur if you have an incorrect email address in your recipient’s field. To fix that, be sure to check your recipient’s list and edit it if needed.
Couldn’t send the following message (Outlook) – This happens due to the message sending limits of your email account.
This message can’t be sent because it no longer exists – This error might appear because of your actual browser choice. You can try another browser option and see if it still occurs.
The original message can’t be shown right now. It will be included when this message is sent – This issue can appear if you’re using the Outlook Web version or an outdated Outlook app.
What can I do if Outlook is not sending my emails?
1. Clear browsing data
Click the Menu icon in the top-right corner and select Settings from the menu.
The Settings tab should now open. Scroll down and when you reach the bottom of the page click Advanced.
Select Clear browsing data.
Set Time range to All time. Now click the Clear data button.
According to users, if you’re getting The message cannot be sent right now in Outlook, the problem can be your browser cache.
Your browser stores all sorts of temporary data on your PC, and sometimes this data can become corrupted and cause this error to occur.
However, you can fix the issue simply by clearing your cache. This is quite simple to do, and you can do it by following the above steps.
After doing that, restart your browser and check if the problem with Outlook is still there. We showed you how to clear the cache in Google Chrome, but the process is more or less the same for other browsers.
This tool not only will help you clean the cache but also the registry log and the history and cookies, thus growing your PC speed.
Sometimes you might get The message cannot be sent right now error in Outlook due to your browser.
There might be a bug in your browser that prevents it from working correctly, and the best way to see if that’s the problem is to switch to a different browser.
Windows 10 comes with Microsoft Edge, so if your browser of choice is giving you this problem, you can always try Edge. On the other hand, other browsers such as Firefox can be a good alternative amongst the most popular browsers out there.
2. Check your antivirus
If you’re getting The message cannot be sent right now in Outlook, the problem might be your antivirus.
Having a good antivirus is important if you want to protect your PC from online threats, but sometimes your antivirus can interfere with certain services and cause this problem to appear.
To fix the issue, we advise you to temporarily disable certain antivirus features and check if that solves the problem. If not, your next step would be to completely disable or remove your antivirus.
If you’re getting The message cannot be sent right now in Outlook, perhaps you might want to try using an email client as a temporary workaround or even for good.
Email clients are great since they allow you to access your mailbox right from the desktop. The most famous email client is Outlook.
Therefore, if you have Microsoft Office installed, you most likely have Outlook on your PC as well.
Of course, you’re not limited just to Outlook, and you can use the Mail app that comes built-in to Windows 10. Some users find it too simplistic, so if you want a proper email client, try Mailbird.
This app has many great features and can centralize all your email accounts. We strongly recommend it, as it is safer and more versatile for average PC users.
In addition, you will surely find other productive email clients to help you communicate efficiently with your colleagues, without getting lost in your inbox every single morning.
Mailbird
Manage your emails better and synchronize multiple accounts in one inbox with Mailbird.
Microsoft has various limitations on the number of emails sent daily through Outlook. Make sure you didn’t send too many emails in 24 hours.
Check out this quick guide to see how to increase the limit, and take a look at other possible limitations that could prevent you from sending an email.
If you’re sending an email to a group of people, you need to make sure each contact has email addresses connected to their name.
We know this sounds obvious, but Windows 10’s People app will also store contacts from your phone book, so you can easily end up sending an email to someone whose email you don’t have.
Once you make sure all contacts are eligible, try to send an email once again.
You may also follow the highlighted guide to block the no sender emails in Outlook and stay safe.
6. Make sure that your browser is up to date
Click the Menu icon in the top-right corner and choose Help > About Google Chrome.
A new tab will now appear and check for available updates.
If you’re getting The message cannot be sent right now in Outlook, it’s possible that the issue is caused by your web browser.
Sometimes your browser might suffer from certain bugs, and these bugs can interfere with various services. The best way to keep your browser bug-free is to keep it updated at all times.
Your browser usually automatically updates itself, but you can always check for updates by doing the following:
If any updates are available, they will be automatically downloaded and installed. Once the updates are installed, restart your browser and check if the problem is still there.
This method works for Chrome, but updating any other third-party browser is just as easy.
If you’re using Edge as your browser of choice, then be sure to download the latest Windows updates in order to update it.
7. Make sure you’re not using an email alias
According to users, this issue can occur if you have another account that you use as an alias. This alias account can be a problem, and it can lead to The message cannot be sent right now and other errors.
To fix this problem, open your Outlook settings and look for Send email as. Once you locate it, set this value to your main account and your problem should be completely resolved.
8. Make sure that your Microsoft account is verified
If you keep getting The message cannot be sent right now in Outlook, the problem might be your account.
Your account might not be verified, and that can cause this and many other problems with Outlook. To fix the issue, access Outlook in your browser and open the Settings page.
From there, you should find the option to verify your account. Once your account is verified, this error message should be entirely resolved, and you can send emails again.
9. Change the number of recipients
According to users, sometimes The message cannot be sent right now can appear due to the number of recipients.
This issue occurs when trying to send a group email, but the number of recipients is too big.
Before you send an email, press the + sign next to the BCC or CC field, and you should see all email addresses on the list.
If Outlook cannot show all recipients, you’ll need to remove some of them and check if that solves the problem.
Keep removing recipients until Outlook manages to show them all. Once you manage to see all recipients, you’ll be able to send your email without any issues.
A glitch in Outlook most likely causes this, but you can avoid this issue with this simple workaround.
Keep in mind that email clients might require a bit of configuration, but for the most part, this process is completely automatic so you won’t have any issues.
We know all these solutions are pretty basic, but that’s what worked for other people who encountered this issue.
Remember that you can also repair the app by using Repair Toolbox for Outlook. It’s an excellent tool that covers almost any problem with it.
If you have a solution we didn’t list in this article, please let us know in the comments, and we’ll update it.
Also, feel free to use them when encountering this error: Remote send job is in failed or quarantined state, sending email is temporarily unavailable for this acccount.
Finally, share with us if some of these workarounds were helpful to you.
If you’re seeing the “No Audio Output Device Is Installed” error on Windows 10, it usually means your system can’t detect your sound hardware.
It’s often a driver issue—but could also be a disabled device, Windows update problem, or faulty hardware. Try the fixes below in order, starting with the fastest.
How do I fix the No audio output device found?
1. Reinstall the audio driver
Press the Windows key + X and select Device Manager from the list.
Next, locate your audio driver. On our PC it was High Definition Audio Device. Right-click it and choose Uninstall device.
If available, check Delete the driver software for this device. Next, click on Uninstall.
Once the driver is removed, restart your PC.
A bad driver is a common cause of No sound devices found in Windows 10, so be sure to check your drivers.
2. Remove Avast Driver software
Press the Windows key + X and choose Apps and Features.
Select Avast Driver on the list and click on Uninstall.
Follow the instructions on the screen.
A few users reported that Avast Driver software caused No audio output device is installed in Windows 10, so remove it or disable it to fix the issue.
Third-party software – Users reported that Avast software can sometimes cause this issue. To fix it, remove the software and remove software leftovers.
Driver enforcement – In some instances, the driver signature feature can cause this error. If that happens, you need to disable Driver Signature Enforcement.
Fixing the No audio device installed error in Windows 10 is relatively simple, and we hope that you found this guide helpful.
While performing a PC upgrade, did you encounter the error this tool can’t update your PC? If you did, you should read on to see our best recommendation.
Upgrading to Windows 10 from Windows 7/8.1 is quite a simple task, thanks to a utility provided by Microsoft. With the Media Creation Tool, you can upgrade your system directly from the Windows UI or create a bootable installation media.
It usually works seamlessly, but there are some occasional hiccups along the way. For example, one common error breaks the upgrade process and informs affected users that This tool can’t update their PC.
This error can be displayed with this message We are not sure what happened but we are unable to run this tool on your PC. This error usually means that your tool doesn’t have permission to operate.
We dug deep and found a few possible solutions to your problem. Make sure to check them out and provide us with your feedback afterward.
Why am I getting This tool can’t update your PC message?
This is one message you hope to avoid, but sadly it often creeps up. From user interaction and experience, we learn that the following factors may trigger the error:
Internet connectivity issues – In many cases, you simply are not connected to the internet, or you have a faulty connection.
Malware – As you should know virus infections can ruin many processes, and may become an obstacle during an OS update or upgrade.
Antivirus software interference – If you use an antivirus that is not compatible with the OS, you may expect hitches such as this.
Insufficient disk space – For some users, this may be a factor since the update will often require free space to complete.
Corrupted system files – If system files essential to the update are bad, you may expect this error.
A few users may notice that other factors, such as unsupported system architecture, incompatible device drivers, and system hardware problems, may also trigger the problem. So, let us go straight to showing how you may resolve it.
How can I fix This tool can’t update your PC error?
Before jumping into the solutions, ensure that your device meets the minimum system requirements. These specs are not exactly demanding, just slightly above Windows 7 requirements.
Here are the Windows 10 requirements:
RAM: 1GB for 32-bit and 2GB for 64 bit
Hard disk space: 16 GB for 32-bitand 20 GB for 64 bit
CPU:1GHz or faster
Screen resolution: 800 x 600
Graphics: Microsoft DirectX 9 or later with WDDM 1.0 driver
We suggest using System File Checker and Deployment Image Servicing and Management tools to ensure there’s no system corruption.
Both utilities are built-in and run via the elevated Command Prompt. And both check for possible system corruption and fix them.
2. Run the chkdsk command
Press Windows + R, type cmd, and hit Ctrl + Shift + Enter.
In the command line, type the script below and hit Enter. chkdsk /f /r
Restart your PC when the tool scans and resolves possible HDD errors.
3. Remove content from the SoftwareDistribution folder
Open File Explorer by pressing Windows + E.
Navigate to the system partition (usually C:) and then navigate to C:\Windows\SoftwareDistribution\Download
Delete everything from the Download folder.
Restart your PC and give the Media Creation Tool another go.
The installation of Windows 10 via the direct upgrade feature is similar to the structure of any win32 application. The installation files, or a setup, are downloaded and stored on the system partition.
After that, the setup starts, and it takes some time until everything is done. The place where Windows Update stores these files is the SoftwareDistribution folder. Sometimes, they get corrupted, which makes them unusable.
You’ll need to close everything and delete all content from the SoftwareDistribution folder. After that, you can start configuring Media Creation Tool again and start with the installation.
Once the download is done, right-click on the zip file and select Extract All.
Open the file, right-click the WUReset file, and select Run as administrator.
Wait for the script to execute entirely.
The Windows Update services need to run for an update to be administered. And the main services and the associated ones tend to stop working, or they won’t start when called upon.
This can be a problem, especially if you’re upgrading from Windows 7 to Windows 10. The services we’re referring to are BITS, Cryptographic, MSI Installer, and Windows Update Services.
What you need to do is to stop all associated services and start them again. The best and fastest way is with the batch script, which runs everything for you.
If you can’t upgrade directly from the system, you can use a bootable drive to run the setup. Apply the steps below to create your bootable USB device.
1. Plug in the USB drive (6 GB or more) and restart the Media Creation Tool.
2. Click on the Create installation media(USB flash drive, DVD, or ISO file) for another PC option.
3. Pick the preferred language, architecture, and edition and click Next.
4. Choose USB flash drive and then click Next.
5. After the bootable drive is created, restart your PC.
6.2 Boot with the USB stick and upgrade to Windows 10
Plug in the bootable media drive created with the Media Creation Tool and restart your PC.
Press F12 (sometimes F11 or F9) just after the PC boots to open the Boot menu.
Boot from the USB and choose your configuration.
Click Upgrade this PC.
If you can’t upgrade directly from the system, you can use a bootable drive to run the setup. And there are two ways to do this.
The first is to run the Setup from the Windows interface, while the second requires booting with the installation drive and choosing to upgrade.
Both of those, of course, require the creation of a bootable drive.
You can also burn the ISO setup on the DVD, but we suggest going with the USB flash drive—the flash drive needs at least 6 GB of storage space.
Also, don’t forget to back up your data from the flash drive, as the creation procedure will ask you to wipe everything to add the setup.
Finally, if none of the previous steps fixed the This tool can’t update your PC Media Creation Tool error, the only remaining thing we can advise is a clean reinstallation.
Of course, it undermines the whole concept of an upgrade, as you’ll lose all your system partition data and configuration from the previous Windows iteration.
Nonetheless, this might be the only way to use Windows 10. If you’re unsure how to install Windows 10 from scratch, follow the instructions in this article.
With that said, we can wrap up this article. Please tell us in the comments section below if you have any questions, suggestions, or remarks.
If Ethernet works but not WiFi, you won’t be able to use a wireless connection, and you’ll be stuck in a single location.
This is a major problem for laptop users, so let’s see how we can fix this issue.
What can I do if Ethernet works but not WiFi?
Before we start, try using 2.4GHz frequency because it has a better range than 5GHz.
1. Check the router
Restart your PC.
Restart your router and modem. Power it off and wait for some time before you turn it on again.
Check the physical Wi-Fi switch. Every router has a dedicated Wi-Fi switch, so make sure the Wi-Fi is enabled.
Also, inspect your laptop for Wi-Fi switches. This also concerns FN button (Function button).
Hard reset router and modem. You can do so with the small physical button positioned on the bottom or within the router settings.
Update router firmware.
2. Use Windows Troubleshooter
Press Windows + I to open Settings.
Open Update & Security.
Select Troubleshoot from the left pane.
Highlight the ”Internet connections” troubleshooter and Run the troubleshooter.
Wait for the troubleshooter to finish and, hopefully, resolve the issue with the Wi-Fi connection.
You can also run the ”Incoming connections” troubleshooter.
Check whether the Ethernet works but no WiFi connection is available issue is gone from your Windows 10 device.
3. Reinstall drivers
Right-click Start and open Device Manager.
Expand Network adapters.
Right-click on Wireless Network Adapter and update it.
Restart your PC.
If that isn’t sufficient, right-click on Wireless Network Adapter again and open Properties.
Open the Details tab.
Select Hardware Ids from the drop-down menu.
Copy the first line and paste it into your browser.
Locate OEM’s official support site in the result and download the driver.
Install the driver and reboot your PC.
3.1. Update drivers automatically
To speed up the operation, and ensure a proper version is updated, we suggest you do this automatically by using a dedicated driver updating software. Thus, you will prevent file loss and even permanent damage to your computer.
The solution below it’s quite easy to use and will repair and update all your drivers in a single run with only one click so make sure you try it out.
Type cmd in the Windows Search bar, right-click Command Prompt and run it as admin.
In the command line, enter the following command and press Enter:
netsh winsock reset catalog
After that, insert these commands to reset IPv4 and IPv6 stacks and press Enter after each:
netsh int ipv4 reset reset.log
netsh int ipv6 reset reset.log
Close the elevated command line and restart your PC.
If the issue is persistent, continue with the steps below.
6. Use a different channel
In the Windows Search bar, typeControl, and openControl Panel.
OpenNetwork and Internet.
Select Network and Sharing Center.
Click on ”Change adapter settings” on the left list.
Right-click on your Wi-Fi adapter and open Properties.
Click on ”Configure”.
Select theAdvanced tab.
In the scrollable list, scroll toWZC IBSS Number Channel.
From the right drop-down menu, choose channels1, 6, or 11 and confirm changes.
7. Use IPv4 or IPv6 solely
Right-click on the Wireless icon in the taskbar’s notification area and Open Network & Internet settings.
Click on Change adapter options.
Right-click on your Wi-Fi adapter and open Properties.
Disable IPv6, confirm changes, and look for improvements.
If the problem persists,re-enable IPv6 anddisable IPv4.
That’s it. If none of the aforementioned steps helped you connect to the Internet via Wi-Fi, we advise you to contact your ISP’s tech support. The router is probably faulty and you’ll need a replacement.
We hope that the issue of WiFi not working but Ethernet does is gone by now. There are similar issues you can experience, and we wrote about the Wi-Fi adapter not working in a separate guide.
Also, don’t forget to share your questions or suggestions with us and other users in need. The comments section is just below and we’ll appreciate your opinion on the subject.
Microsoft integrated Skype, its voice and video calling service into its Outlook desktop email client, with the Skype 6.1 update for Windows. This update included the ability to call any mobile or landline in Outlook, plus a built-in online status and contact information into Outlook contact cards.
However, some users have got Outlook integration error with Skype for Business, when trying to utilize it.
Additionally, the ability to trigger instant messages from Outlook was added, but, Skype’s interface was also updated to ensure the adding of contacts was made easier with the ability to find Skype users from the list of contacts.
This Outlook integration with Skype was promised also for its Outlook.com web email client by Microsoft to support video calling.
With all technologies, however, there are problems that may arise with integration such as the Outlook integration error with Skype and not being able to sync the Skype status with Outlook.
If you’re having problems using both applications in Windows, there are a few things you need to do to get better integration between Skype and Outlook including:
Configure your account on both desktop clients for Outlook and Skype
Ensure the account is set up via Exchange. To do this, go to Outlook>File>Info>drop down Account settings>click Account setting and check that the account type is Exchange
Install the latest update for Skype and Outlook. If there is a version mismatch, ensure re-installation is performed so they are both on the same version
Ensure the sip, SMTP and UPN are the same
Once you have all these checks set up, try the solutions below to fix the Outlook integration error with Skype.
How can I fix Outlook integration error in Skype?
1. Preliminary checks
If you’re getting Outlook integration error with Skype, check for the following before trying any troubleshooting solutions:
You’re using the most up-to-date client
Microsoft Outlook is running and configured to use the correct profile
That your system time is accurate. If the time on your computer differs from that of the server you’re trying to sign in to, sign in may fail. Set your computer’s time as close to the correct local time as possible.
Make sure your firewall does not block the IP or ports Exchange online service uses.
2. Quick Outlook/ Skype fixes
Migrate the user’s mailboxes to a higher Exchange Server version 2013/2016
Disable the creation of the Skype for Business Contacts folder
Wait around 5 minutes, sign out from the client and Outlook, and try again.
Try to use another computer test if there is the same issue, also you could try to test if any other users had the same issue
If the issue only appeared on the specific computer, perform a clean boot
If you can’t see conversation history successfully, press Ctrl and right-click Skype for Business icon in the taskbar. Open configuration information, then check if EWS status and MAPI status are okay
Reinstall Skype for Business client and Outlook client
Changing the personal information manager from Microsoft exchange or Microsoft outlook to None
3. Check if the auto-discover service works properly in Office
If your Wi-Fi suddenly disappeared on Windows 11, it’s often caused by driver issues or system glitches, and luckily, you can fix it by updating drivers or resetting network settings.
Rules are handy automated actions that Outlook users can set up for emails. However, Outlook rules don’t always work, as they might appear in error pop-up messages, such as There was an error reading the rules from the server.
Often, one Outlook rule error message states One or more rules could not be uploaded to Exchange server and have been deactivated.
Here are a few resolutions that might fix Outlook rules when they stop working.
What to do if your Outlook rules stopped working?
1. Delete the rules
Click the File tab in Outlook.
Click Info > Manage Rules and Alerts to open the Rules and Alerts window.
Then select a rule to delete.
Press the Delete button, and select the Yes option to confirm.
Then click Apply the button.
To set up new rules to replace the deleted ones, press the New Rule button. Then you can go through the rule setup wizard.
One of the best ways to fix rules is to delete them. Then you can set up the same rules again to get them working. You can delete Outlook rules as described above.
2. Fix rules with professional Outlook PST recovery software
There are numerous Outlook repair utilities that might come in handy for fixing rules. None of these third-party PST utilities is more efficient than Stellar Outlook PST.
With an incredibly powerful scan engine, it can recover Outlook mailbox data, even if previously lost due to PST file corruption, and fix rules with high precision.
Other than that, you can use it to export repaired PST files directly to Office 365 and take advantage of the enhanced tree-like preview of recoverable mailbox components.
In fact, there’s so much more to it, which is why Stellar Outlook PST is trusted by countless customers worldwide.
Click Manage Rules and Alert to open the rules window, and then select a rule to edit on the E-mail Rules tab.
Press the Change Rule button.
Select the Edit Rule Settings option to adjust the rule as required.
After merging similar rules together, you can delete some rules that you don’t need.
Select the Apply option to apply changes.
The One or more rules could not be uploaded to Exchange server error message can be due to limited rule quota storage.
Exchange Server 2007 and 2003 mailboxes have 64 KB and 32 KB storage quotas for Outlook rules.
Thus, you might need to free up some rule space, which you can do by merging similar rules together as presented above.
4. Reset the SRS File
Open the File Explorer window.
Then enter C:\users\username\AppData\Roaming\Microsoft\ in File Explorer’s folder path bar, and press the Return key.
Right-click the Outlook.srs file and select Rename.
Change the Outlook.srs file title to Outlook.srs.old. Then the Outlook.srs file gets recreated automatically when you open the email software.
Outlook rule errors can be due to a corrupted send/receive setting (SRS) File. So resetting the SRS file can fix rules that don’t work automatically. This is how you can reset the SRS file.
5. Repair your Outlook data file
Open the Cortana search box by pressing the Type here to search button.
Input SCANPST.EXE in the search box, and select to open that.
Alternatively, you can usually open the Inbox Repair Tool (SCANPST.EXE) in the snapshot directly below from this folder in File Explorer: C:/Program20Files20(x86)/Microsoft20Office/
Then click the Browse button to select the Outlook.pst file.
Press the Start button to initiate a scan.
Select the Make a backup of scanned file before repairing option.
Then click the Repair button to fix the PST file.
Rule errors often occur when Outlook’s PST data storage is corrupted. You can fix data files with the Inbox Repair Tool. This is how users can fix Outlook’s PST data storage with that utility.
6. Try using a different email client
We’ve already established that you like to save a ton of time by not logging into different accounts to check your daily emails.
Using an email client becomes pointless when the rules don’t always work. You’re no stranger to this Outlook error, yet an email client app for Windows 10 could make a huge difference.
These tools generally have additional features, including easy-to-use UIs, customizing options, email layouts, translation and spellchecker utilities, and more.
On top of that, many email clients include task management features that will enable you to be more productive.
Those resolutions might fix your email rules so that they run automatically again. Also, note that rules must be assigned to the correct email account.
So, if you have multiple Outlook email accounts, check that you’ve assigned the rules to the right account.
Microsoft Store has been the official store for downloading Windows apps for your PC. Sadly, users have complained about many errors when using it, such as error code 0x80073d01.
Encountering the error message: Sorry we’re having trouble getting this Windows display language installed 0×80073d01 or other Microsoft Store errors associated with code 0x80073d01 can be for many reasons.
The error code 0×80073d01 occurs when installing or uninstalling a UWP (Universal Windows Platform) app from the Microsoft Store. Other causes are:
Other factors that can cause the Error code 0x80073D01 in the Microsoft Store are:
AppLocker’s interference – When the AppLocker program is active, it can impede Microsoft Store downloads, preventing you from installing or uninstalling the language packs.
Corrupt Microsoft Store files – When the installation files or the services responsible for the Microsoft Store are corrupt, it can affect and impede its functionality. They can prevent it from accessing the needed components to carry out tasks, resulting in errors.
Microsoft Store cache – Storing cache files for a long time can result in them becoming compromised or malicious. So, cache glitches can cause issues with the store and prevent users from installing or uninstalling apps.
If you can’t fix the error, try the solutions below.
1. Run Windows Store Apps Troubleshooter
Left-click the Start button, type Troubleshoot, then press Enter.
Click on Additional troubleshooter.
Find the Windows Store Apps entry on the right, then click Run the troubleshooter.
Apply the suggested fixes, restart your PC, and check if the error persists.
Running the troubleshooter will find and fix issues with the Microsoft Store apps that may cause the error. Check what to do if Windows Troubleshooter stops working on your computer.
2. Reset the Microsoft Store cache
Press Windows + R keys to open the Run dialogue box, type wsreset.exe, then press Ctrl + Shift + Enter keys to clear the cache as an administrator.
Wait while the process runs until it closes automatically.
Restart your PC and launch the Microsoft Store to check if the error code 0×80073d01 persists.
Clearing the cache on Windows 11 as an administrator will remove any bugs and corrupt files in the cache files and fix the Windows store error.
Left-click the Start button, type Command Prompt, and click Run as administrator.
Click Yes on the User Account Control prompt.
Type the following commands and press Enter: powershell -ExecutionPolicy Unrestricted Add-AppxPackage -DisableDevelopmentMode -Register $Env:SystemRoot\\WinStore\\AppxManifest.xml
Check if an error appears saying: Add-AppxPackage : Deployment failed with HRESULT: 0x80073D01. If it does, it implies that the error is indeed from the AppLocker policy.
Press Windows + R keys to open the Run window, type gpedit.msc, and press Enter to open the Group Policy Editor.
Navigate to this location: Computer Configuration/ Windows Settings/ Security Settings/ Application Control Policies/ AppLocker/ Packaged app Rules
Right-click on the rule entry, click Delete, then click Yes on the confirmation page.
Go to the Microsoft Store and install or uninstall the app triggering the error.
Disabling the AppLocker on your PC can fix the Windows Store error code 0×80073d01. You can read about the AppLocker bypass exploit and how to fix it.
4. Reset the Microsoft Store
Press Windows + R keys to open the Run dialogue box, type ms-settings:appsfeatures, then press Enter.
Search for Microsoft Store, then click on the Advanced options on the result.
Click the Reset button and click on Reset in the confirmation prompt.
Restart your PC and check if the error is fixed.
Resetting the Microsoft Store will fix any configuration issues affecting its performance.
It doesn’t matter if your are streaming video content from Netflix or if you’re playing an intense online game, the fact of the matter is you need good cables to connect your Xbox One to the rest of your hardware.
You need a good Ethernet cable if you want a lag-free gaming experience and good 4K content streaming, and you want a good HDMI cable if you want your content to be displayed correctly on your TV or monitor.
That is why we came up with a list of what we consider to be the best Ethernet cables for Xbox One, as well as the best HDMI cables that you can buy for your Xbox One.
Note: Deals are subject to change. Keep in mind that the price tag often varies. We recommend going on the vendor’s website to check the price. Some of the products may be out of stock by the time you’ve made your purchasing decision. So, hurry up and hit the buy button.
What are the best Ethernet cables for Xbox One?
UGREEN Ethernet cable
If you’re looking for a worry-free experience streaming the Internet or gaming for hours, then you need an efficient way of staying connected.
That is why you need a UGREEN Ethernet cable, since it will deliver Cat7 speeds of transfer with next to no interferences and user-friendly design.
Pros:
Supports bandwidth up to 600MHz
A maximum networking speed at 10Gbps
Cat7 quality
Shielded from interferences
User-friendly design
Cons:
Issues with the plug being either too tight or too loose
If you’re looking for a way to connect to the Internet, but for some reason, your router is somewhere outside, then the DbillionDa Cat8 Ethernet cable is the right choice for you.
It will deliver the same Cat8 level of speed and protection from interference, all bundled up in a solid water-resistant and UV-resistant durable form.
Pros:
Gold-plated RJ45 connectors for better corrosion resistance
Cat8 Ethernet cable is made of 4 shielded foiled twisted pair(S/FTP) and 26AWG single strand OFC wires
Supports bandwidth of up to 2000MHz and boosts the speed of data transmission up to 40Gbps.
The RJ45 Cat-7 Ethernet patch cable connects computers to network components in a wired Local Area Network (LAN) in a fast and interference-free manner, given its Cat7 nature.
The Matein Cat7 Flat Ethernet cable can transmit data at speeds up to 10,000 Mbps and are constructed of Double Shielded twisted pairs which can reduce cross-talk and aid in signal quality and data transmission
Pros:
A good Cat7 ethernet cable
Data transfer speeds of up to 10.000 MBps
Provides universal connectivity for Xbox One, Xbox 360, Switches, Routers Modems, and more
If you enjoy having easy and smooth connectivity between your Xbox One console and your TV or monitor, then you need an HDMI cable that will provide just that.
The AmazonBasics High-Speed 4K HDMI Cable is one such solution, as it comes at an incredibly affordable price, and it meets all of the latest standards of HDMI cables, such as 4K support.
Pros:
Supports Ethernet, 3D, 4K video and Audio Return Channel (ARC)
Connects Xbox one, Xbox 360, computers and other HDMI-enabled devices
Meets the latest HDMI standards (4K Video at 60 Hz, 2160p, 48 bit/px color depth)
If you’re looking for an HDMI cable that boasts quality above all else, then the Atevon 4K HDMI cable is just what you need for your Xbox One.
Not only does it support breakneck speeds, but it is also backward compatible with older HDMI versions, and the materials it is made out of making it extra durable.
Pros:
The cable supports HDMI 2.0b including 18 Gbps, Mirror & Extend mode, UltraHD 4K, and more
Designed for all devices with HDMI 2.0 standard and backward compatible with older HDMI
Final thoughts on Ethernet and HDMI cables for Xbox One
Regardless of whether you are talking about connecting your Xbox to a display device or the Internet, you will need a good cable if you want to enjoy some quality time using it.
As such, try to look for Cat7 and up Ethernet cables that support high transfer speeds, and look for HDMI cables that are compatible with a lot of devices, and that can support 4K content.
We hope you managed to choose both the best Ethernet cable for Xbox One, as well as the best HDMI cable for it as well using our guide. Let us know which product u chose in the comments section below.
If you’re a Microsoft Outlook for Web user, you may have come across the dreaded Error 500.
This Outlook 365 Web access error 500 is one of the many Outlook errors that can occur in Microsoft Outlook and it prevents the user from sending or receiving messages.
The problem is caused by a server-side issue that Microsoft may be working to resolve. It can also be caused by a problem with your Internet connection.
This issue affects other services and apps, and users reported this issue in the following apps:
Avira Antivirus error 500: Corrupted installation or registry can cause the error to emerge when using Avira.
DoorDash error code 500: Network issues or glitches with the service can cause errors such as this one to appear.
If you don’t know how to fix error 500 something went wrong in Outlook, then we’re going to show you in our guide the best ways to fix this problem.
What is 500 something went wrong error?
This error message appears usually in Outlook, and it will prevent you from accessing your emails. Outlook 500 error appears in Chrome, but you can experience it in any other web browser or email client.
In most cases, the issue is caused by your configuration, such as improperly set licenses and admin roles, but that can be easily fixed by contacting your network administrator.
What does a 500 internal server error mean?
This is a generic server error code, and it appears when the server wasn’t able to process your request. Since this is a generic error, it will appear regardless of the type of problem that you encounter.
In terms of Outlook, it can appear if your date and time aren’t correct, or if your roles aren’t properly configured, so you’ll need to adjust them with an administrator account.
Being a server-side error, you can experience Outlook 500 error on Mac, Android, and any other platform, but regardless of the platform that you use, the solutions are more or less the same.
Why is Outlook not connecting to server?
There are multiple reasons for this issue, but here are the most common ones:
Login credentials: If your credentials aren’t connected, you won’t be able to connect to the server, so be sure to double-check them.
Network connection problems: Always test your connection and make sure you can visit other Microsoft websites and services on your PC.
Firewall and antivirus: Staying protected online is important, but sometimes certain settings can prevent you from using Outlook, so be sure to adjust your security settings accordingly.
What can I do if I run into Outlook error 500?
How can I fix error 500 repeating redirects detected in Outlook 365?
These instructions are for Chrome and Chromium browsers, but all modern browsers have this feature, so the solution should work in any web browser.
3. Clear your cache
Google Chrome
Tap on the three dots near the top right corner and choose Settings.
Tap on Privacy and security from the left panel and then click on Cookies and other site data.
Go to See all cookies and site data.
Tap on the Remove All button near the top right corner.
Tap on Clear all in the pop-up window that appears to complete the process.
After that’s done the Outlook 500 error in Chrome should be gone.
Mozilla Firefox
Tap on the three lines near the top-right corner and choose Settings.
From the left panel, tap on Privacy & Security, then tap on Cookies and Site Data. Finally, click on the Clear Data button on the far right.
This will bring up a pop-up window. Ensure Cookies and Site Data and Cached Web Content are checked then tap on Clear to complete the process.
After doing that, your cache should be cleared and the issue should be resolved.
Microsoft Edge
Tap on the three dots near the top-right corner and choose Settings.
From the left panel, choose Cookies and site permissions then tap on Manage and delete cookies and site data.
Then go to See all cookies and site data.
Tap on Remove all.
A pop-up window will appear. Tap on Clear to complete the process.
4. Disable extensions
Click the menu icon and select More tools. Now pick Extensions.
Now click the switch icon next to each extension to disable it.
Check if the problem is gone.
If the issue doesn’t appear anymore, enable extensions one by one until you find the cause of the problem.
5. Update your browser or switch to a different one
Open your browser.
Click the menu icon in the top right and expand the Help section. Now select About Google Chrome.
Wait for the browser to download the latest updates.
Additionally, if you’re still getting error 500 while trying to web access Outlook, try using a different browser. Sometimes outlook works better in other browsers such as Opera One for example.
The browser has many privacy features, so it won’t track you or show you any pesky ads. Of course, there’s additional security in form of a free and unlimited VPN.
Remove all admin roles except Global Administrator. Now save changes.
Close your browser and wait for a few minutes.
Now check if the problem is resolved.
Keep in mind that you need to be the Global Administrator for this solution to work. A few users reported that removing all roles, and assigning them again fixed the problem, so you can try that as well.
Also, try assigning only the necessary roles to the affected user to fix this issue.
Now select your antivirus software and click on Uninstall.
Follow the instructions on the screen to complete the process.
Restart your PC and install your antivirus again.
Reinstalling the antivirus is a drastic solution, and before you try that, we suggest you check your antivirus settings and adjust your DNS configuration.
How can I fix Outlook error 500 protocol disabled?
The most cost-effective way to reach a targeted audience is of course via email marketing. The more subscribers you have, the more advantages you will get from your list.
If you are wondering how you will get this done, the answer is simple: using email list cleaning software tools.
Why do I need email cleaning software?
To be successful in email marketing, you really have to care about your list quality. This means that you have to check the email addresses for validity and remove bad emails.
This way, you will avoid sending emails to invalid addresses, you will protect your email server domain from getting blacklisted and you will manage to increase your email campaign performance.
The market is full of all kinds of email list cleaning software, and that’s why you need to know how to pick the ones that will best serve your goals and interests.
Most of the services meet the standard email marketing solutions, but you should remember the fact that one provider may be different from another, especially regarding their pricing plans and also their features.
What’s the best email list cleaning software to get?
ZeroBounce is an award-winning email list cleaning service that can be used to eliminate invalid addresses and reduce bounce rates considerably.
With its help, you will be able to achieve lots of benefits for your email marketing campaigns. When you sign up, you will get a free account, and you will also be able to test free 100 emails.
The service offers a vast range of great features that will make sure you will keep a strong email list of subscribers.
The service is able to detect all kinds of bad files including invalid ones, temporary and undeliverable ones, junk, and non-existent emails as well. ZeroBounce provides a clean and neat email list that will boost your campaign.
There is a real-time API available to all customers, regardless of account type. This is perfect to catch erroneous entries directly on your landing page or web form.
This service offers support for integration with various platforms such as MailChimp, CloudFlare, Zoho, Magento.
Here are some of the Zerobounce’s main features:
Email list cleaning
Real-time API
Team Accounts
Spam trap removal
Unlimited platform integration
ZeroBounce
You won’t find a better email cleaning software than ZeroBounce. Ready to reduce the bounce rates?
This email verification service provider offers list cleaning services and also free email marketing services.
The tool proved that it has more features than most vendors and it costs less than what other competitors have to offer.
The email list cleaning process is quite simple, and it will scan about 1 billion email addresses.
In 48 hours, a list of the invalid email addresses will be placed in your ReachMail Global Opt-Out list, and you can download this whenever you want.
The greatest thing about this service is the fact that its plans are very affordable for small businesses as well.
If you get the free trial package, you can send 15,000 emails every month to 5,000 contacts from your list.
After the trial period is over, you only have to pay $10 every month for continuing to enjoy the service and its features.
You should know that the free account has almost all the features of the paid account except for the following ones: priority sending, Google Analytics, custom templates, and email previews.
All paid accounts will get a custom template for free to match one’s brand. This is an original feature that lacks from the service’s competitors.
Let’s see some of ReachMail’s main features:
Free custom templates
Free accounts
Integration on other platforms
High success percentage
Email marketing and social media sharing
ReachMail
Email cleaning, email relay, and email marketing services, all in one place, for businesses of all sizes.
This software is one of the best ones when it comes to reliability. It cleans and also validates email lists for entrepreneurs.
MailGet is the best solution to email marketing that sends emails using the regular Amazon SES as an SMTP.
The program offers support for up to 5 more SMTPs such as Mailgun, Postmark, Mandrill, SendGrill, and Mailjet and it has plans for 10,000 and 6,000 emails per month.
The tool features a basic setup process, and it’s facilitated by detailed tutorials. Its interface is straightforward and intuitive.
The program will make it possible for you to segment the subscriber lists, according to the bounces and clicks among other elements.
You should know that Amazon SES is one of the cheapest and most reliable solutions for email marketing on the web.
Using it, you can send a minimum of 2,000 messages in just a single day for free, in case you use the Amazon SES from the Amazon EC2.
Once the 2,000 free message allowance is completed, all you have to do is to pay the rate of 0.10% for every 1,000 messages.
If your email marketing campaigns are suffering, DeBounce is the right tool to filter your lists and increase your reputation with a snap of the fingers.
This solution is an email list cleaning service that allows you to upload and verify all the addresses quickly and securely without sending any emails.
Here’s how it goes: after you upload your list of emails, they clean it by detecting any invalid, spammy or non-operational mailboxes.
Within the process, they make sure that no unsolicited emails are sent. After that, you will receive a clean list that you can use effectively for your campaign.
Not only that, but you can automate the process by connecting your ESP account, and this way, your lists are continuously clean.
The possible integrations include a huge list of ESPs like Hubspot, Mailchimp, ActiveCampaign, Mailjet, and a whole lot more.
You can try DeBounce for free and there’s no need for a credit card at this point so try it out!
ListWise is one of the best email list cleaning services as well. The tool is developed and maintained by the same manager of Maxmail, CyberCom.
This tool offers a large number of services that any email marketer will find very useful, and these include removing duplicates, potential bounces, and cleaning lists.
In case you own a large list of subscribers’ emails the service will help you validate each and every one of them.
The tool uses a global network that will keep track of the messages that have previously bounced. This way it is able to predict whether an email from your list will bounce or not.
This service offers lots of flexibility when it comes to choosing a pricing plan. You can get the prepaid plans or the monthly pricing plan.
Anyway, you will get a free trial before making your purchase, and it offers verification for 100 emails at no cost.
Experian Data quality is one of the few email list cleaning providers that features massive global coverage.
The service is operational in the US, the UK, New Zealand, Australia, Netherlands, France, and Singapore.
Besides the fact that it has broad geographical coverage, the service also offers more than just email verification services.
With this address cleansing and verification app, you will be able to keep the address information of the subscribers updated.
It also provides data enrichment, data matching, phone verification, and address verification.
The phone verification feature helps you enhance the list of valuable phone contacts in order to facilitate mobile marketing through SMS and more mobile campaigns.
The service is probably the only email cleaning provider that comes with more features other than the traditional ones.
This is one of the most popular email list cleaning services in the email marketing business.
It’s also one of the most trusted email list cleaning service providers by the main brands on the web including eBay, Yellow Pages, and Microsoft Game Studios.
One of the best things about EmailChecker is the fact that the email verification API is able to perform real-time email validation for all types of business without you having to get another software.
EmailChecker features a very straightforward pricing plan. This is targeted at keeping the users’ email marketing campaign as affordable as possible.
You will be offered a free trial account that lasts for seven days when you sign up. After the free trial period is over, you have the opportunity to choose the paid plan subscriptions.
Let’s go through some of EmailChecker’s main features:
The email list cleaning service providers that we have mentioned above offer different features that make the difference between them and their competitors.
It will be up to you to make the best software choice to help you clean your email and get ready for successful email marketing campaigns.
Error 0x803F8001 on Xbox One or “do you own this game or app” can be problematic and prevent you from running games and apps. However, there’s a way to deal with this issue, and today we’ll show you how to do it.
The Xbox One is perhaps the best gaming console the world has come across in ages. And while it offers a quality, immersive gaming experience, there are moments when a few hitches spring up every now and then.
One of these moments involves error code 0x803F8001. This may mean one of three things:
The game disc is not in the console
Game was bought and downloaded by someone else not signed in to the Xbox One console
The game was bought and downloaded but you are not signed in, and/or connected to Xbox Live
In case you’re experiencing Xbox One error code 0x803F8001 or the message “Do you own this game or app”, try the solutions listed below.
Why is my Xbox One saying I don’t own the game?
The main reasons why you are getting “do you own the game or app” from Xbox one is that there is a problem with the Xbox Live servers. A small check to see if any issues on the server is all you need to do.
If there is nothing wrong with the Xbox Live servers, check your internet connection. If all it’s in order, then just go and follow the solutions we provided below.
How can I fix Microsoft “do you own this game or app” error message on Xbox One?
1. Reset the console, perform a full power cycle or disconnect your console to reboot completely
Please note: this process doesn’t erase any of your games nor does it erase your data.
How to restart your Xbox One console
Press Xbox button to open the Xbox guide.
Select Settings.
Click Restart Console.
Choose Yes to confirm.
If you cannot access the guide or if the Xbox One console is frozen, press and hold the Xbox button until it turns off. Once it shuts down, tap the Xbox button again to restart.
How to physically power cycle the Xbox One console
Turn the console off by holding down the Xbox button for about 10 seconds.
Press the Xbox button again (or press the Xbox button on your controller) to turn the Xbox One on. If the green boot-up animation doesn’t display when you restart the console, repeat both steps. Ensure you hold down the Xbox power button until it shuts down completely.
Note: If your console is in Instant-On power mode, these steps will shut it off completely as the Instant-On mode is disabled until you restart the console.
How to disconnect and reconnect Xbox One console power cable
Press Xbox button to turn off the console.
Wait 10 seconds until it completely shuts down.
Unplug the power cable. Then, wait for about 10 seconds as this resets the console’s power supply.
Plug the console power cable back.
Press the Xbox button to turn on console.
2. Check Xbox Live service status
If you see any alerts when you check the Xbox Live service status, wait until the service is back up and running and then try again.
3. Designate an Xbox One console as your home box
If the game was purchased and downloaded by a different person like another family member, do the following:
Get the person who purchased and downloaded the game to sign into the Xbox One console.
Set the Xbox One as a home console for the person who purchased the game.
How to designate an Xbox One console as your home Xbox
When you first sign in to Xbox One console and save your password, the console becomes your home Xbox.
This allows you to share games and downloadable content you buy from the Store with anyone else who signs in to your Xbox One or share your Xbox Live Gold subscription with anyone else who signs in to your home console.
You can even share games downloaded as part of a subscription, play games as you travel, or even play while offline (Take note you’ll need to set it as your home Xbox before going offline).
Note: If you sign in on different consoles, designate the console you use frequently to be your home Xbox. You can only designate one console as your home Xbox.
Follow these steps to designate Xbox One console as your home Xbox:
Open the guide by pressing the Xbox button.
Choose Settings.
Click All Settings.
Select Personalization.
Choose My home Xbox then review the information displayed.
Select Make this my home Xbox to designate the console as your home Xbox. If you want to remove the designation, select This is not my home Xbox.
4. Insert the game disc into your console
In some instances, the simplest solution is the best, and many users reported that they fixed the 0x803F8001 error simply by inserting their game disc to the console.
This is a decent workaround if you have the game disc, but if you don’t, you might want to try some other solution.
5. Make sure you’re signed in to Xbox Live
If you’re getting error 0x803F8001, perhaps the issue is that you aren’t signed in to your Xbox Live account.
If you’re trying to run applications or games from Microsoft Store, you need to be signed in to Xbox Live, or else you’ll encounter this error message.
So double-check if you’re signed in properly and try to run the application again.
This should conclude it. Don’t forget to share your experience using the above solutions to fix Xbox One error code 0x803F8001 in the comment section below.
The Internet Properties feature allows the users to make modifications to their network adapter such as configuring the adapter, enabling and disabling protocols, etc.
However, some users have reported the Network connections An unexpected error occurred message while opening the Ethernet network adapter properties.
Many Windows 10 users have reported a similar error in the Microsoft community forum:
On all my 10041 machines I get an unexpected error occurred when I try to open properties in network connections. Status and disable does not give any output at all.
Why did I receive the unexpected error occurred message?
This happens most likely after a Windows build update or after you make some changes in the network adapter configuration.
Sometimes, updating the system can produce some bugs with some of the drivers, and when that happens for the network adapter, you notice immediately because you can lose connectivity.
Although it seems like a serious problem, we ensure you that the solutions below will help you fix this issue quickly.
Without further ado, here is our complete guide on how to get rid of the Anunexpected error occurred message in Windows 10.
How do I fix the Network Connections An unexpected error occurred message?
1. Uninstall and reinstall the network adapter
Press Windowskey +R to open Run.
Type devmgmt.msc and click OK to open the Device Manager.
In the Device Manager, click the Network adapters section to expand it.
Right-click on Network adapter and select Uninstall device.
When the confirmation dialogue appears, click on Uninstall.
Once uninstalled, on the Device Manager, click on Action (top menu) and select Scan for hardware changes.
Windows will now scan the system for hardware changes and add the network adapter to the list.
This should allow you to view the Ethernet properties as well as check the status and make changes to the adapter.
If the changes are not saved, try multiple times. Sometimes, the changes are not saved on the first attempt.
2. Update the Ethernet adapter driver
Press Windowskey +R to open Run.
Type devmgmt.msc and click OK to open the Device Manager.
In the Device Manager, expand the Network adapters section.
Right-click on your Ethernet adapter and select Update driver.
In the new window, click on Search for updated driver software automatically option.
Windows will scan the Internet for any pending driver update, download and install the driver.
Once installed, restart the computer and check for any improvements.
Installing the latest version of an Ethernet adapter driver can fix any compatibility issues that may occur after a system update.
Alternatively, you can opt for a faster and easier solution that doesn’t require you to manually update the Ethernet adapter drivers such as a specialized driver updating tool.
3. Disable IPv6
Press Windows key + R to open Run.
Type control and click OK to open Control Panel.
In Control Panel, select Network and Sharing Center.
On the left pane, click on Change adapter settings.
Right-click on the Ethernet adapter and select Properties.
In the Network tab, scroll down Internet Protocol Version 6 (TCP/IPv6) and uncheck the box.
Click OK to save the changes.
Close the Control Panel and restart the computer. To do that, click the Start button, select the Power icon and choose Restart.
After the restart, repeat the first 4 steps to get to the network adapter settings, right-click on Ethernet adapter and select Properties.
Check if you are able to make necessary changes without the Network Connections an unexpected error occurred issue.
Also, if you can’t open Control Panel, take action and find the best solution for this problem.
4. Check DNS server address
Press the Windows key + R to start Run, then type control and click OK or press Enter.
Select Network and Sharing Center.
On the left pane, click on Change adapter settings.
Right-click on the Ethernet network adapter and select Properties.
Double-click on Internet Protocol Version 4 (TCP/IPv4).
Select Use the following DNS server addresses: option. Enter the following DNS server address in the Prefered and Alternate DNS server field respectively: 8.8.8.8 and 8.8.4.4.
Click OK to save the changes.
Now try to access the Internet and check for any improvements.
Follow the above steps if the error is resolved, but you are unable to access the Internet. If you bump into any DNS issues on Windows 10, fix them quickly.
5. Run the dedicated troubleshooter
Click the Start button,type troubleshoot, and select Troubleshoot settings from the results.
Next, click Additional troubleshooters to open the troubleshooter list in Settings.
Select Network Adapter in Settings, and press the Run the troubleshooter button.
Then select the Ethernet option in the Network Adapter troubleshooter and click Next to go through any suggested resolutions.
You can open the Network adapter troubleshooter, and after running it, check if the error still occurs on your Windows 10 PC.
Also, changing the DNS server can help you fix the Network Connections an unexpected error occurred issue.
We’re not going to say that you need a better network adapter or that you have to change your data plan with your provider and not even that you have to get a better modem or router.
These things are obvious if you’re not happy with your present results. However, we will show you a way to increase your speed from your network adapter configuration.
Press the Windows key + R combination on your keyboard to start Run, then type control and click OK or press Enter.
Select Network and Sharing Center from the list.
Click on Change adapter settings from the left.
Right-click on the Ethernet network adapter and select Properties.
Now click on the Configure button.
Select the Advanced tab on top and select Speed & Duplex from the list.
This setting is most likely on Auto Negociation. Click on the Value field and select the highest possible speed for Full Duplex and hit OK afterwards.
This setting will ensure that your PC will always use the highest communication option of your network adapter when connecting to the Internet.
Of course, the value and type of the connection may be different on your adapter but make sure you select the highest one.
We hope that our solutions helped you solve the problem with your Ethernet adapter and now your Internet connection works fine.
You might also be interested in our guide on what to do if the Wi-Fi adapter is not working. It will help you solve wireless connection problems quickly.
Do let us know which fix helped you resolve the Network Connections an unexpected error occurred in the comments section below, and don’t forget to leave there any other questions and suggestions that you may have.
Does your Outlook calendar sharing not working in Windows 10? If you have Office 365 or any other Microsoft Exchange email service, Outlook can be used on the web to share your calendar with others in and outside of your organization.
Depending on the permissions given, others can only view your calendar, edit, or act as your delegate for meeting requests.
If you can’t share your Outlook calendar, it can happen due to configuration or permission issues. Some users have reported that removing current permissions besides the Default and Anonymous resolves the issue.
However, if you still are unable to share your calendar in Outlook, repair Office from Control Panel, and if it fails, download and run the Microsoft Office Configuration Analyzer tool 2.2, which analyzes Office programs for known configurations that can cause issues.
If you don’t have the option to share your calendar (maybe it is grayed out), it can also be because your network admin or IT support set a policy preventing calendar sharing among people in the office.
Fortunately, there are ways to fix the Outlook error when sharing calendar as listed below.
Why can’t I share my Outlook calendar?
In this case, you might encounter the error message “There was a problem connecting you to the shared calendar” which can often happen when the IT department has blocked this permission as security permission.
Other causes that interfere with your Outlook calendar sharing can be an outdated Outlook version or corrupt Outlook files that can be easily solved by following our solutions.
Update Office suite to the latest version by going to Outlook>File>Office Account>Update Options>Update Now.
Do an online repair for the Office programs.
Also, if you are using an Office 365 account in your Outlook 2016, you can try sharing the calendar in Outlook Web App (OWA).
Launch the Run command and paste exe /safe in the open box to start Outlook in Safe Mode
Uncheck Cash mode in Outlook.
Download Microsoft Support and Recovery Assistant for Office 365 and see if it helps.
2. Check Permission settings
Open Outlook and go to Calendar view.
Right-click the calendar you’re trying to share.
Click Properties.
Go to the Permissions tab and remove users who are no longer at the office or who cannot access the calendar.
Click Apply and close the window then try to share your calendar again.
3. Check for Duplicate entries
The Outlook error when sharing calendar may be related to a duplicate entry in the Permission list of your calendar. To check for this, do the following:
Right-click the user’s calendar.
Select Properties.
Click the Permissions tab.
Go through the users’ list and check for a duplicate entry.
If you find it, remove it and restart Outlook again.
Share your calendar.
Remove all entries and return them again.
Right-click the calendaryou want to share.
Select Properties.
Make a note of the entries and then remove all entries in the calendar permission list.
Add them back.
4. Use Mailbird
A good calendar app can help you save a lot of wasted time and keep your productivity on track. There are plenty of apps to choose from, but the one we think stands out is the Mailbird calendar.
If you are a Mailbird user you can integrate Google Calendar and even Kin into the app. You don’t have any limitations when it comes to importing or managing your events from the provider’s perspective.
The Mailbird settings are flexible and you have some nice features to choose from, such as adding color codes to manage specific calendars or configuring event notifications.
All in all, Mailbird is a powerful tool, with a simple and intuitive interface so that when you are looking for a specific feature you don’t end up spending a lot of time figuring out how to do it.
Some users have stated in forum posts that Excel is not printing their spreadsheets. In some cases, they can print documents on Word and other apps, but only Excel cannot print.
While this problem can be pretty frustrating, it is easy to fix, as we will show in this guide.
Why is my Excel File not printing?
There are a few reasons Excel might not be printing your documents. This can be due to your configuration or issues with the app. Below are some of the known causes in detail:
Outdated printer driver: If Excel is not printing all your document’s rows, columns, and images, it might due to issues with your printer driver. The solution to this is to update the driver to the latest version.
Issues with the file format: For some reason, Excel might have problems printing your spreadsheets in their normal format. You need to change the format to XPS before printing.
Problems with Excel: In some cases, it might be hard to pinpoint the cause of this issue, especially if the printer prints with other apps but Excel. You need to repair or uninstall the app using an uninstaller program and reinstall it later.
What can I do if Excel is not printing?
1. Check the Printer Selection
Press the Ctrl key + P to open the print menu on Excel.
Select the dropdown under Printer on Excel’s print tab.
Now, select the default printer from there before printing.
If unsure of your default printer, press the Windows key, type control, and select Control Panel.
Select View devices and printers under the Hardware and Sound option.
Now, right-click your printer and select Set as default printer.
Finally, go back to the print page and try to print again.
Sometimes, Excel is not printing texts and your files because you are not printing with the default printer. Following the steps above should rectify that quickly.
Also, if you already have your printer as the default, some users have found a way around this issue by setting other printers as the default. Now, they use their printer, a normal printer, to print on Excel with great success. So, you can try the reverse process too.
2. Save the Spreadsheet as an XPS File
Click the File tab at the top and select the Save as option.
Choose your preferred location.
Click the Save as type dropdown.
Now, select XPS Document from the options and click Save.
Finally, press the Ctrl key + P to open the print menu and try to print the document again.
Some users have reported that Excel is not printing their files because of the file type. Changing to the XPS file seems to do the trick here.
3. Update the printer driver
Press the Windows key + X and select Device Manager.
Double-click the Print queues option to expand it, and right-click your printer driver.
Now, select the Update driver option.
Finally, select the Search automatically for drivers option and install any available updates.
Drivers are important for the smooth communication between your hardware and software components. So, if Excel, Word, and PDF files are not printing on your PC, it might be because your driver is outdated.
If you can’t find the updated driver using the method above, you can go to the printer’s manufacturer’s website to download the latest version.
Alternatively, you can save yourself the stress by updating the driver using a reliable tool in Outbyte Driver Updater to update your driver automatically.
Outbyte Driver Updater
Try using Outbyte Driver Updater to locate the right driver versions for your computer in a matter of seconds.
Select More in the left pane, followed by Options.
Now, choose Trust Center.
From here, click on the Trust Center Settings button.
Select File Block Settings in the left pane.
Now, uncheck all the boxes for the options provided for different file types and click OK.
Choose the Protected View option in the left pane.
Uncheck the boxes for all the options there.
Finally, click the OK button and close Excel.
At times, Excel is not printing your document because the file type is protected. You need to undo this setting and relaunch Excel to be able to print.
Press the Windows key + S, type control, and choose Control Panel.
Click Uninstall a program under Programs.
Now, right-click the Office program and select Change.
From here, select Online Repair and click the Repair button.
Wait for the process to finish and relaunch Excel.
If the above fixes prove abortive and Excel is still not printing your documents, you might need to repair your Microsoft Office installation. This will detect any glitch causing this issue and fix it.
Printing problems on Excel can be annoying, especially if your printer works on other apps. However, it is an issue that has proven solutions, as shown in this guide.
If you still can’t print after applying the fixes above and still have the installation disk, you might need to uninstall Office and reinstall it. Hopefully, it does not come to that.
Feel free to let us know the solution that worked for you in the comments below.
Why does my Xbox Series X keeps disconnecting from Ethernet?
If the Xbox Ethernet keeps disconnecting and reconnecting, it can be for several reasons, ranging from issues with your router and your console.
The most common cause for this issue is that your router is not working as it should. Problems with the router affect your connections, causing Xbox Ethernet not to work. Other likely causes are:
Damaged or faulty cable – When the wire connecting the router and your Xbox console is damaged, it’ll cause the connection to be unstable, prompting it to disconnect and reconnect.
Xbox server issues – Users may experience problems with their Xbox connection if Xbox live server is down. The console’s performance and network connection can be affected by it.
Unstable Internet connection – It is possible to experience difficulties with the Ethernet connection on your Xbox if the Internet connection is unstable. Your Xbox may randomly disconnect from the Internet in such cases.
Now that we have identified the causes let’s explore the possible solutions below.
What can I do if Xbox Series X keeps disconnecting from Ethernet?
Fixing the Xbox Ethernet connection issue is not difficult, but we recommend you perform the following preliminary checks first:
Try disconnecting and reconnecting your Xbox to the Ethernet network.
Ensure your wireless connection is not active, as this can tamper and disrupt your wired connection.
Try to limit the number of devices connected to the Ethernet network.
Power cycle your router or modem. Therefore, hold the power button on your router for about 10 seconds and wait until the notification light goes off. Unplug the Ethernet cable connected to the router and unplug the router from its power source and wait for a few seconds to allow it to power off. Connect the necessary cables to your router and plug them into a power source, then press the power button to switch it On.
Try to check if Ethernet still keeps disconnecting from Xbox. If so, proceed to the solutions below:
1. Disable Instant-On
Press the Xbox button on your controller to open the guide menu.
Navigate through and select the Profile & system option, then click Settings.
Go to General and click on Power & startup.
Expand Power mode and select Energy-saving and confirm the changes.
Instant-on mode is quite useful, especially in speeding up the startup process. However, it could also affect the connection after a long period of background activities.
2. Restart your Xbox console
Press the Xbox button on your controller to open the guide menu.
Navigate through and select the Profile & system option, then click Settings.
Go to General and click on Power mode & startup.
Select Restart now from the power options.
Then select Restart Console.
Restarting your console is an easy way to fix any error causing it to disconnect from the Ethernet connection. Also, restarting it will help refresh its processes and help it connect to the network faster.
Just like other devices, routers can be affected by bugs and errors. So, updates and patches are released to help fix these issues on your router.
Specific steps for this process will be impossible as it differs for every device. However, you can navigate the router menu and check for the router firmware update option. Alternatively, you can contact the manufacturer for guidance on how to update your router.
4. Restore the console to factory settings
Press the Xbox button to open the panel.
Select System, choose Settings, and Console Information.
Select Reset console.
Choose Reset and keep my games & apps.
You should note that you will lose some files despite keeping your games. However, this will keep the Xbox refreshed and improve overall performance.
Is Xbox Series X better with WIFI or Ethernet?
Almost every device, including Xbox Series X, works better with Ethernet, i.e., a wired connection. A wired network connection is relatively more stable, offers better Internet speed, and optimizes gameplay where users have to minimize the latency.
Comparing the two suggests that Ethernet performs better, but people use Wi-Fi for enhanced range and mobility.
Leave your questions and suggestions related to the topic of Xbox Series X keeps disconnecting from Ethernetin the comments section below, and we will get back to you as soon as possible.
Call of Duty: Black Ops Cold War is a first-person shooter video game released by Activision in 2020. Many players have reported that Call of Duty: Black Ops Cold War not working on Xbox.
It seems this problem has become so common, and it has been a while now since gamers face an error (mostly 0x87de272b) over the last few months.
Activision is constantly adding new content and features to its games and the problem of Black Ops Cold War not working is because of one bug in Microsoft.
Keep reading to know more about this bug and learn how to fix it.
Why is Black Ops Cold War not working on Xbox?
As we said earlier, Call of Duty: Black Ops Cold War is not working on Xbox One because of a Microsoft problem or bug in which the Cross-Gen Bundle Upgrade is not automatically done.
Because of this error, COD Black Ops Cold War has not been working on Xbox Series X/S and Xbox One. Microsoft has been aware of the bug for a long time and players expect it to be repaired soon.
It has been a significant concern for Xbox Users. When a player purchases a game, he/she expects it to run smoothly and without any problem, yet this glitch prevents gamers from playing COD Black Ops Cold War.
3. Scroll down to reach add-ons and click the Cross-Gen Bundle.
4. Purchase Cross-Gen Bundle and install it.
5. Check if the problem is solved or not.
Some players have reported COD Black Ops Cold War is not working on their Xbox Series X and S. They owned the Standard Edition of the game, and the game doesn’t start.
2. Reset Xbox Network
Go to Xbox Settings and open Network Settings.
Click on Advanced Settings then find Alternate Mac Address.
Clear it, turn off the console completely and unplug all the cables from the device.
Wait for 2 to 3 minutes and plug the cables in.
Turn on your Xbox and check if the problem is solved or not.
If you are a COD player and you have the problem of Cold War not working on Xbox, you’re not alone.
Some users have reported their Cold War game launches but it stuck on the Season 3 loading page and it crashes and sends them back to the Xbox home screen.
3. Check NAT Type
First, head to the Settings, then select Network Settings.
Now, open NAT type. Check if it’s open or not.
If it’s not open, you need to open some ports using your ISP.
Check these ports to be opened for Xbox: Port 88 (UDP), Port 3074 (UDP and TCP), Port 53 (UDP and TCP), Port 80 (TCP), Port 500 (UDP), Port 3544 (UDP), and Port 4500 (UDP).
Sometimes the reason behind Call of Duty: Black Ops Cold War not working is your console’s NAT type. If it’s closed, it may interfere and prevents the game launch.
If all the above solutions didn’t solve your problem, your next step will be resetting the console. By choosing Reset and Keep my Games and Apps, you won’t lose your games and data.
But be sure that you know the email address and the password you used for your account.
5. Use the controller
Restart your Xbox console, and after that start the game.
Press the Home button on your controller and release it while your game is loading, or it is stuck on the black screen.
Press B to go back to screen.
If you do all the steps correctly, your console checks the frame rare and vibration feedback, and the game should start working.
You can shut down the screen and come back after a while and in the middle of the game. Before using this bypass, you have to check framerate drops or jittering.
Sometimes controllers miss vibrations feedbacks when you are shooting and if you notice this is happening, you can take the above steps to fix Cold War not working or crashing on Xbox.
6. Reinstall the game
From the Xbox One home screen, press the Xbox button and select My Games & Apps.
Choose the game you want to delete and press Menu on your controller.
From the pop-up menu, choose Uninstall. If you want to delete your game entirely, choose Uninstall All.
To reinstall the game, go back to My Games and Apps and select Full Library.
From the menu, choose All Owned Games.
Highlight Call of Duty: Black Ops Cold War and click Install.
Why only Call of Duty: Black Ops Cold War is not working and not any other game?
There are so many complaints about why only COD Black Ops Cold War is not working and all other COD games are working properly.
This problem is caused by poor Cross-Gen Bundle Upgrade and there’s nothing you and other gamers can do.
Microsoft confirms and insists that the problem has been solved and you can check their live update from the Xbox Twitter account.
Many other gamers were not able to play Call of Duty: Black Ops Cold War because the server was down. Microsoft investigated the reason, and they solved the problem.
Call of Duty: Black Ops Cold War not working on Xbox Series X/S and Xbox One has been a serious problem for a while.
One of the best and easiest ways to solve this issue is to buy Cross-Gen Bundle Upgrade and download and install it.
It is a 10-dollar add-on, and it supports the ray-tracing optimizations and many HD packs for Xbox Series X/S.
When you don’t install this add-on, Xbox decides to skip the base game data and installs all other files, and this will result in COD Black Ops Cold War not working.
The DNS is not resolving Xbox server names error is one that arises on the Xbox One. This is a DNS (Domain Name Server) networking issue in which the Xbox console can’t connect to the Internet.
The issue usually arises for users utilizing wireless network connectivity. If you’re wondering how to fix that error, check out the potential resolutions below.
How do I fix DNS not resolving Xbox server names?
Before we proceed, try these quick tricks first:
Several users reported fixing DNS isn’t resolving Xbox server names with a wired connection. So make sure to try it, if possible.
Connect to a mobile hotspot to fix the DNS error on Xbox.
The DNS is not resolving Xbox server names error on Series S or X might be due to your router’s settings, which you can reset. To reset the router, look for the Reset button at the back of it, and press it with a pin for 10 seconds.
If none work, move to the solutions listed next.
1. Restart the Xbox console and router
First, try restarting your Xbox One and router. Unplug your router.
Turn the Xbox console on.
Press and hold the Xbox button on the gamepad.
Select the Restartconsole and Restart options.
Wait for about five minutes. Then plug the router back in.
2. Change the DNS to Google DNS
Some users have said they’ve fixed the DNS is not resolving Xboxserver names error by changing their DNS to Google. To do that on the Xbox One:
1. Turn the console on.
2. Select Settings on the console’s menu.
3. Then select Network to open the options shown directly below.
4. Select Advanced settings >DNSsettings.
5. Select Manual to open the Primary DNS boxes shown directly below.
6. Enter8 in each one of the four Primary DNStext boxes. Thus, the full number entered across all four boxes will be 8888.
7. Press the Enter button on the input keyboard.
8. For the secondary DNS, enter 8844 as in the snapshot directly below.
9. Press B to save the changed DNSsettings. Thereafter, it will check your connection and hopefully display a Your console is connected to the internetmessage.
Press Windows + R to launch Run, type cmd, and click OK.
Type ipconfig, and press the Enter key.
Note down the Default Gateway number.
Open a browser.
Enter your Default Gateway number in the URL bar, and press the Return key.
Open the wireless settings within your router’s configuration page.
Select 20Mhz on the Channel Width drop-down menu, which is the preferred setting for the Xbox One.
Selecting the 20Mhz channel width for your router is another potential resolution for the Xbox DNS server names error if that’s not its current channel width.
Those potential fixes are worth a shot. Although not guaranteed for everybody, one or more of these resolutions might fix DNS is not resolving Xbox server names error on Xbox One and other consoles.